Blog by Steve Laug
This older C.P.F. style bulldog with an ornate rim cap and shank end cap was another pipe that my brother and I found in our pipe hunt in Montana. That hunt yielded a lot of older C.P.F. and WDC pipes from between the late 1890s and the early 1900s. This one is certainly from that time period. The briar is very worn and the finish is gone. The metal rim cap and shank cap or ferrule are brass coloured but blackened with oxidation. The top of the rim is thickly caked with the lava overflow from the heavy cake in the bowl itself. The stem is either Redmanol or Bakelite and has some cracking near the shank/stem junction but nothing that affects the fit of the stem to the shank. There is some tooth chatter and tooth marks near the button on the top and underside of the stem. My brother took the photos that follow before he did his clean up. The pipe has some faint stamping on the left side of the shank. The photo below shows the condition of the stamping. It clearly reads SUPERIOR in a diamond. There seems to be other stamping that is faint underneath SUPERIOR in the diamond but I am unable to read it. On the outside of the diamond there is stamping on either side. It is faint but to the left under the edge of the diamond is faint stamping Real and under the right edge of the diamond it reads Briar. There appears to be something underneath the diamond going across the shank but it is not clear enough for me to be able to read.
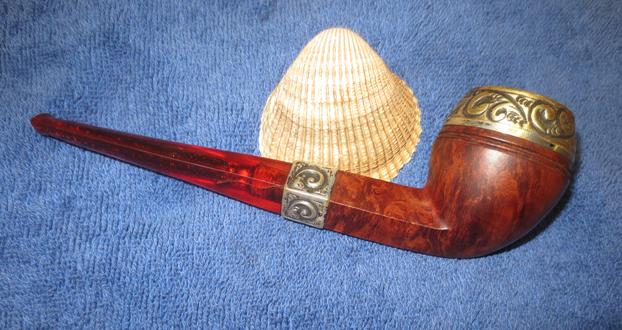
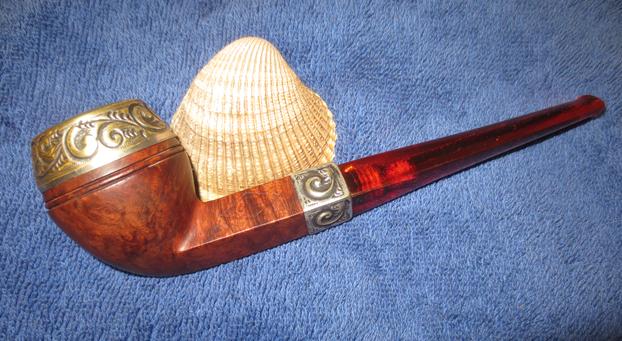
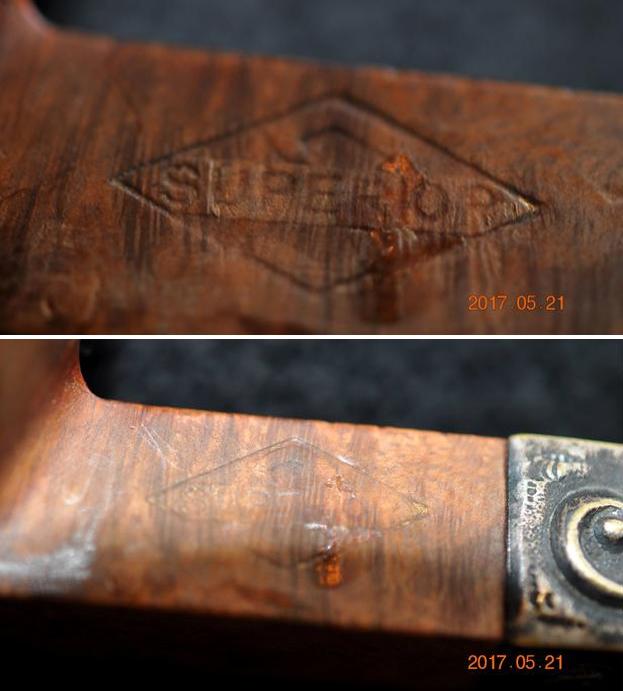 The next two photos show the pipe from two different angles to give an idea of what the pipe looked like in its entirety. There is some real promise with this old pipe.
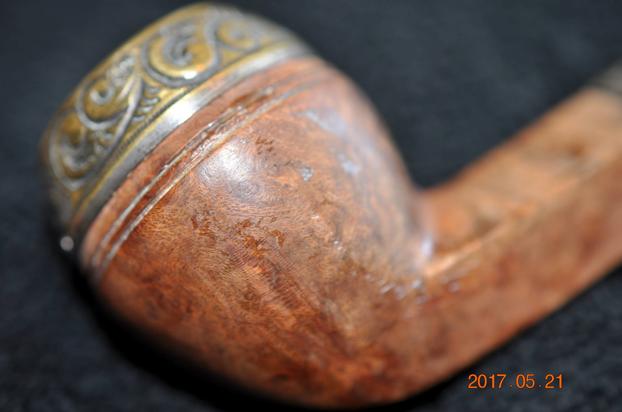
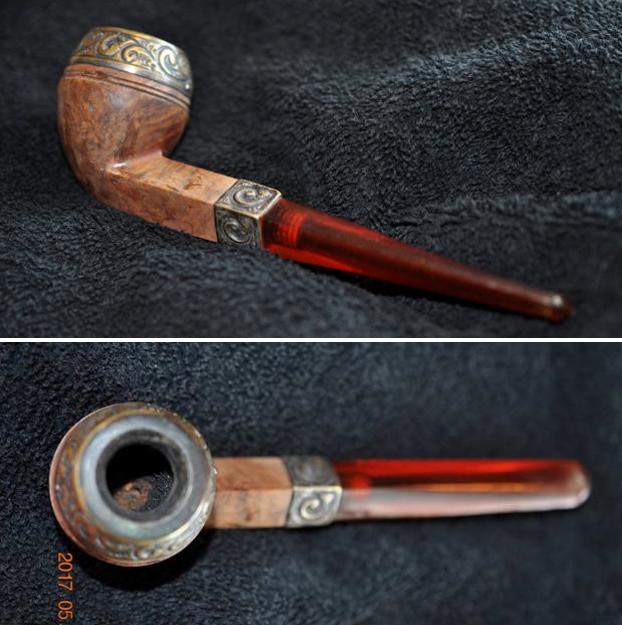 The rings around the cap on the bowl are in excellent condition. There is some debris lodged in them but there are no chips or cracks in the ring. The finish on the briar is spotty with small remnants of the original finish in place. The grain on the pipe is quite nice underneath the grime.
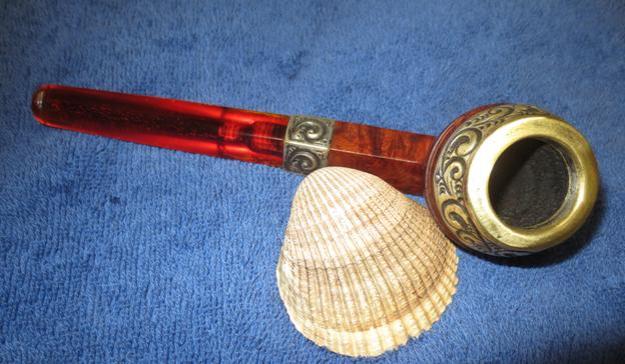
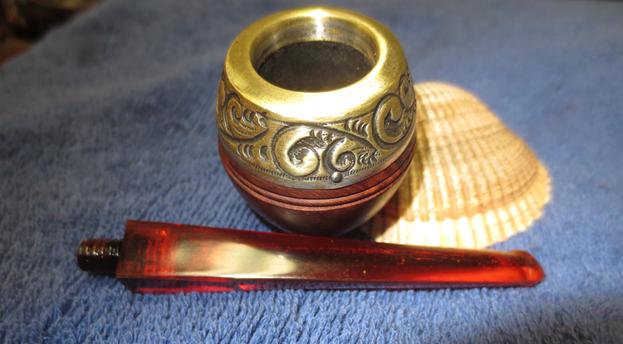
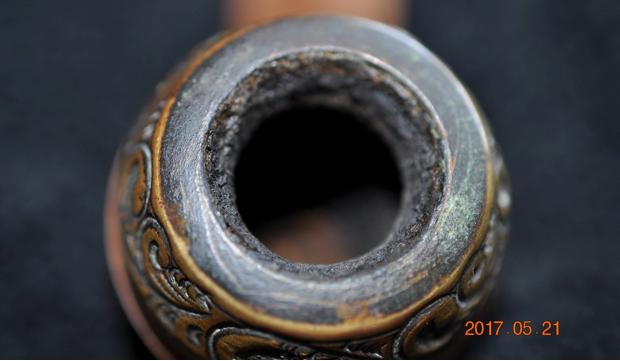
 The bowl has a thick cake in it and the lava has flowed over on top of the rim top. The metal rim top is blackened and has a thick cake of lava on it. It is hard to know what the inner edge of the rim will look like at this point because of the cake in the bowl. The carvings/castings in the metal rim cap and the shank end are dirty and have a lot of grime built up in the grooves and crannies.
 The Bakelite/Redmanol stem had tooth marks and chatter on both sides of the stem from the button forward about an inch. There were some small cracks in the shank end of the stem that would need to be addressed in the repair.
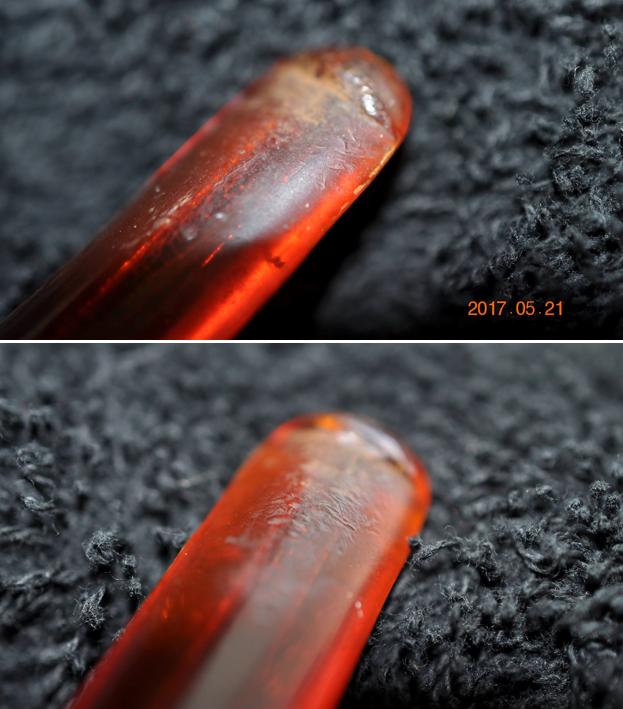 Jeff did an amazing job of reaming out the bowl on this one and revealed that the metal cap was folded over and lined the inner edge of the rim thus protecting the rim from damage. He was able to ream the bowl back to bare briar without damaging this inner rim edge. He cleaned out the internals of the pipe with pipe cleaners, cotton swabs and alcohol until they were clean. He scrubbed the exterior of the bowl and the metal with a tooth brush and Murphy’s Oil Soap. This removed the grime in the nooks and crannies of the metal work and also cleaned the briar. He was careful around the already damaged stamping so as not to damage it further. When the pipe arrived in Canada it was clean and ready for restoration. I took photos of the pipe before I began my work to show what it looked like cleaned and ready for me. I love working on clean pipes!
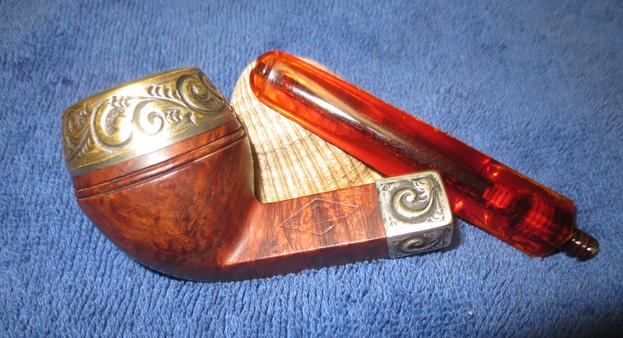
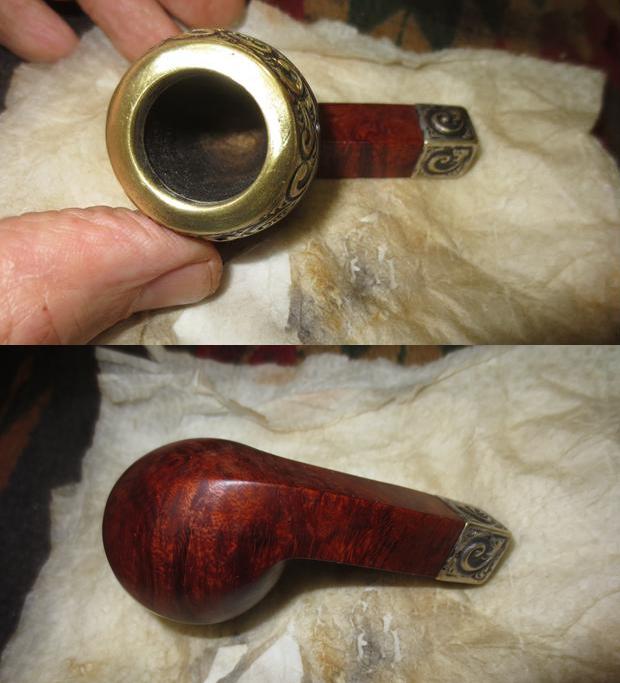
 He was able to get all of the buildup off the rim cap but the surface was pitted and worn from all of the years of grime sitting on the brass. The bowl looked really good and the brass folded over the inside edge was darkened but undamaged.
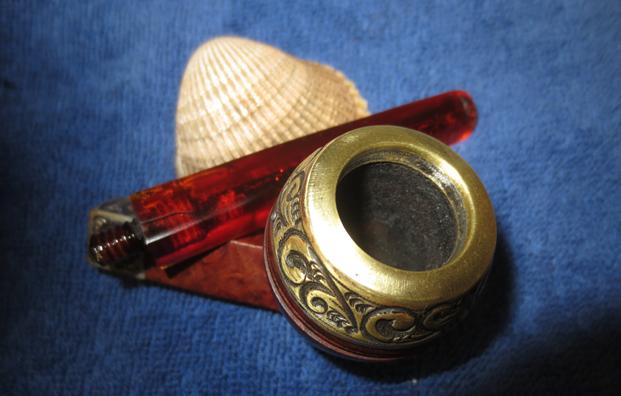
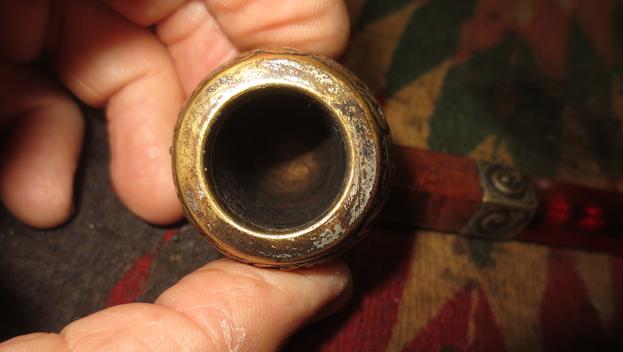 The stem was cleaned of the tars that were on the inside of the airways. The photos show the cracking at the shank end near the band. While the cracks were not rough to touch they were present. There were also many tiny little spidering cracks on the inside of the airway.
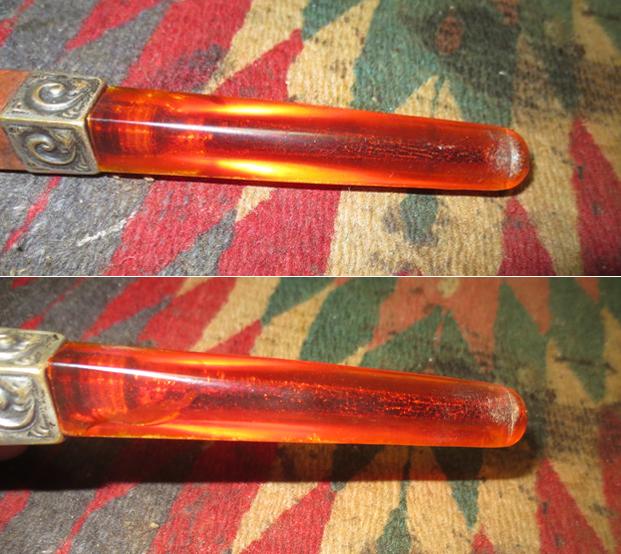 I polished the metal rim cap and inner edge with micromesh sanding pads, wet sanding it with 1500-2400 grit pads. I was able to remove much of the pitting and scratching on the surface and the blackening of the inner edge of the cap. I dry sanded it with 3200-12000 grit pads to further polish the cap and edge.
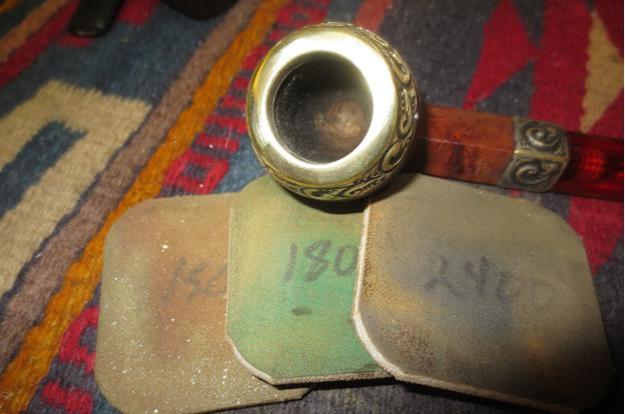 I laid the bowl aside for the time being and turned my attention to the stem repairs. I cleaned the surface of the stem around the largest and roughest feeling crack with a water dampened cotton pad. I sanded it with 1500 micromesh and wiped it another time to remove the sanding residue. I filled in the cracked surface with clear super glue and let it cure. When it dried I sanded it smooth with 220 grit sandpaper and also sanded the tooth marks and chatter on both sides of the stem at the button.
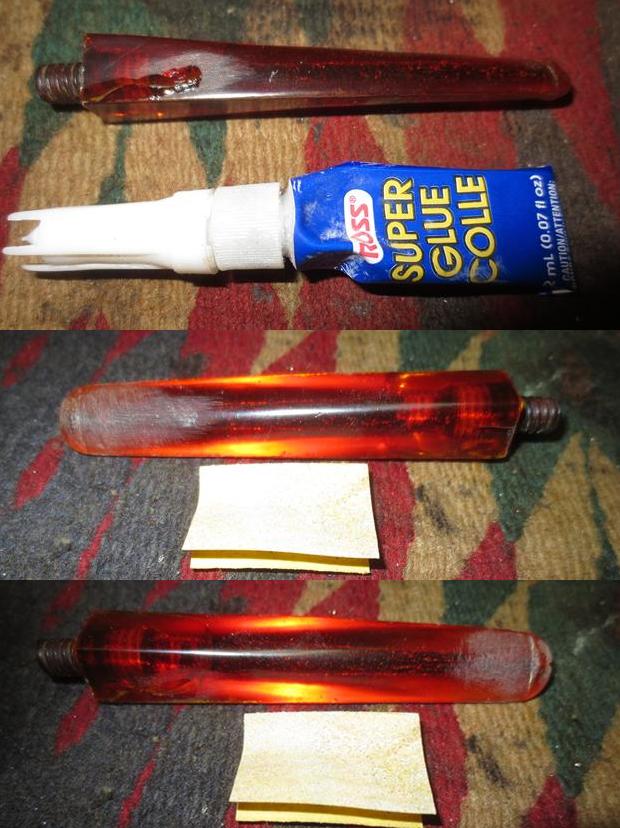 I cleaned out the interior of the stem with pipe cleaners and water to remove more of the debris from the airway.
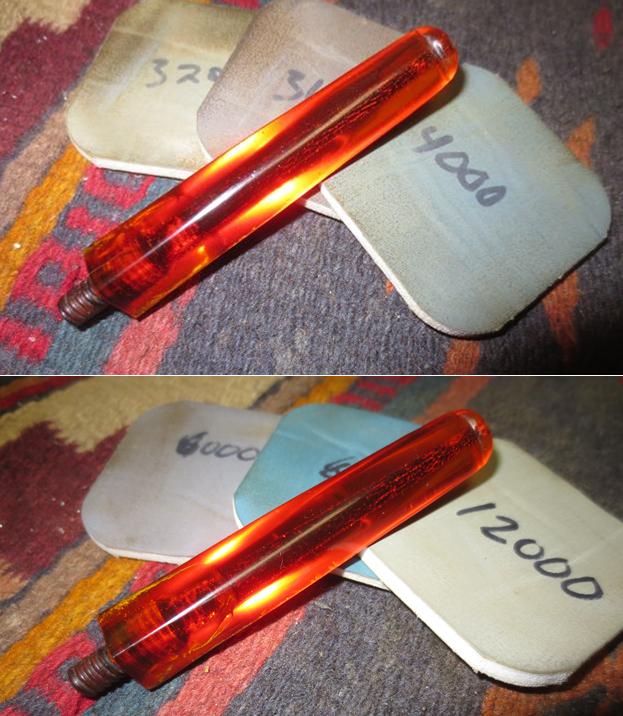
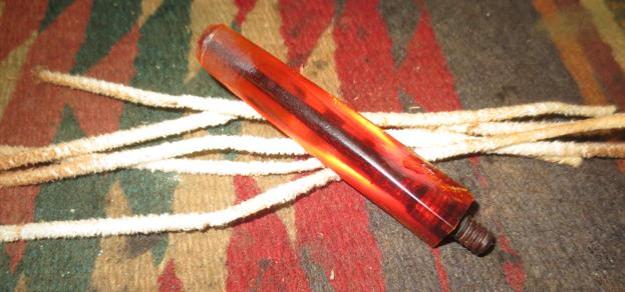 I polished the stem with micromesh sanding pads – wet sanding it with 1500-2400 grit pads and dry sanding it with 3200-12000 grit pads. I rubbed the stem down with Obsidian Oil after sanding with each micromesh sanding pad, gave it a final coat of oil and set it aside to dry.
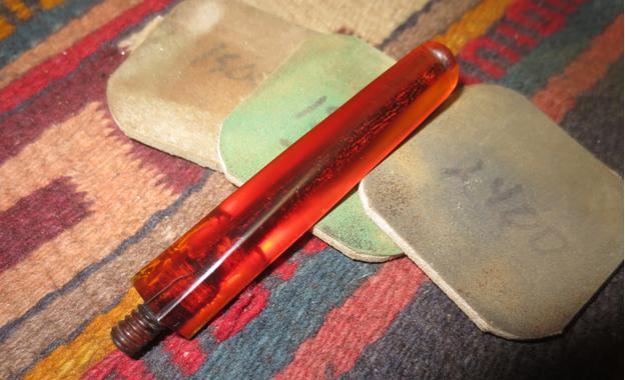
 I turned back to the bowl to finish my work on it. I wiped the briar down with a cotton pad and alcohol being careful around the faint stamping on the shank. I was hoping that when it was wet it would be more readable. Sadly it was not. The SUPERIOR stamp was all that I could read. The briar has some nice grain. I decided to leave the nicks and scratches alone as they were well earned character marks on this 100+ year old pipe.
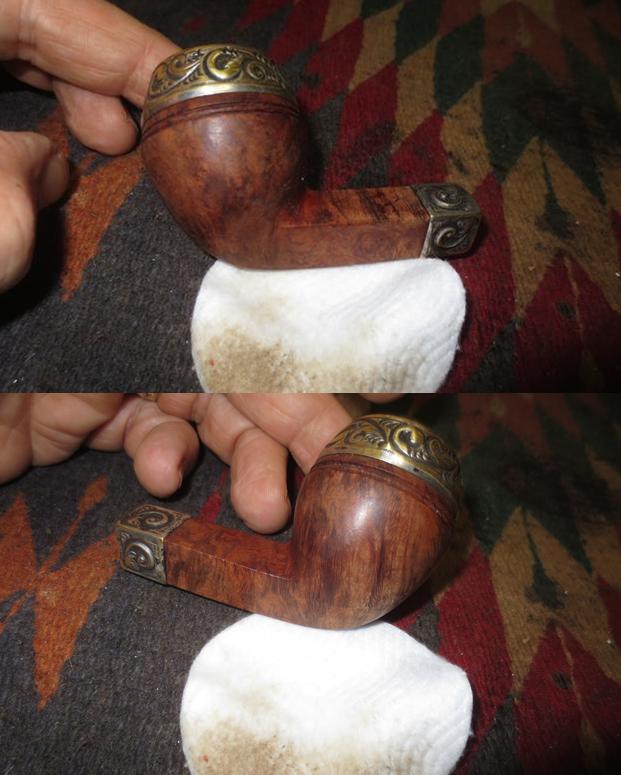
 I really like the look of the raw briar on this one so I decided to rub it down with olive oil to make the grain stand out and give the briar some life. The next photos show the grain on the oiled bowl. It looks really good to my eye.
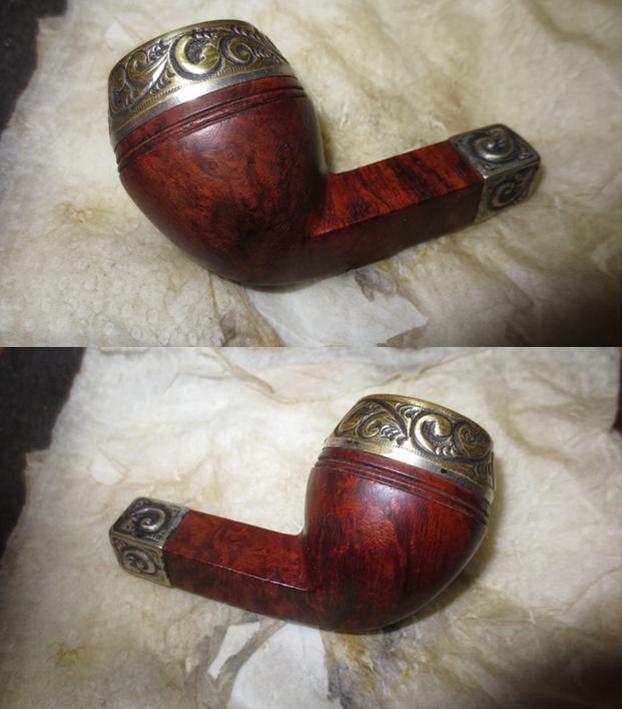
 I gave the bowl a coat of Conservator’s Wax to protect the briar and when the wax dried I buffed it with a flannel cloth to give it a shine.
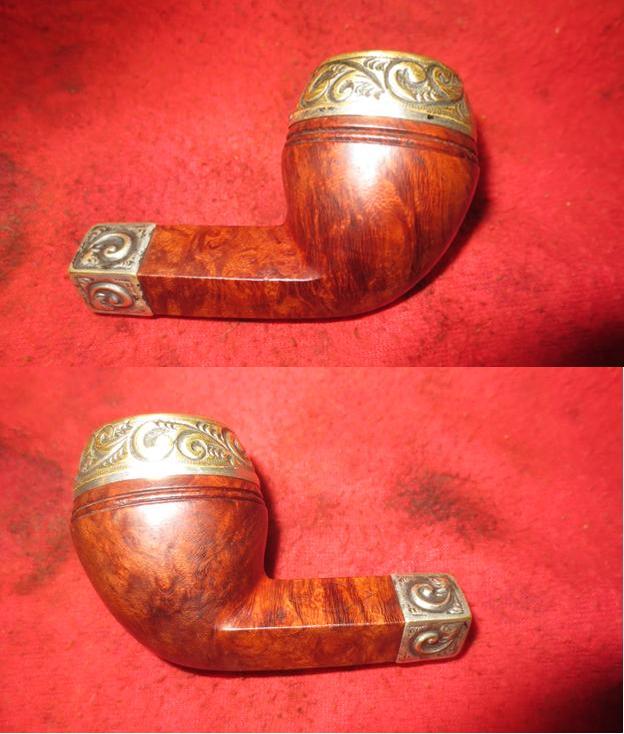
 I put the stem back on the shank and in doing so remembered that it was slightly overturned. The lines of the shank and the diamond stem did not align. I have found that on these old bone tenon and threaded mortises that they wear down slightly over time. A little trick I use to address the wear is to paint the tenon with a thin coat of clear fingernail polish that I swiped from my daughters years ago. It dries clear and just one thin coat was enough to align the stem perfectly when I screwed it into the mortise.
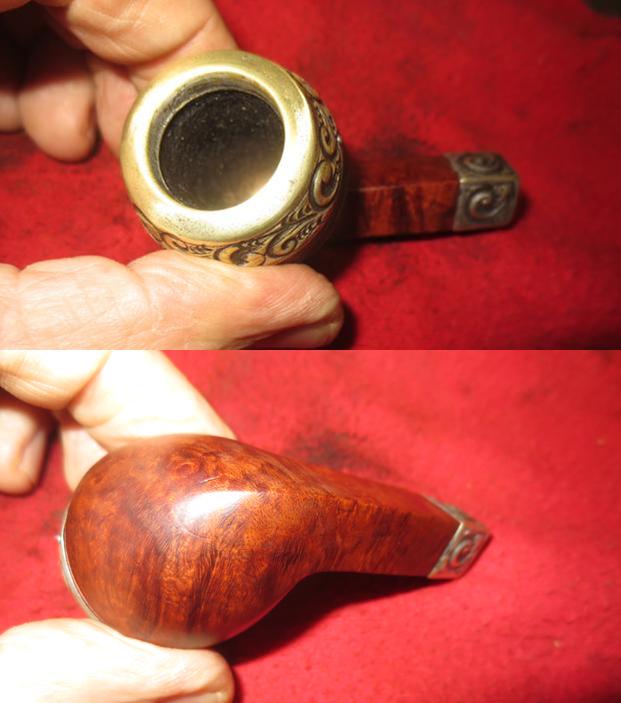
 I lightly buffed the bowl and stem with Blue Diamond on the buffing wheel to remove the tiny scratches that remained on the brass and the briar. I gave the briar portion of the bowl and the stem multiple coats of carnauba wax and polished them with a clean buffing pad to raise the shine. I polished the brass with a jeweler’s cloth and buffed it with a clean buffing pad. I hand buffed the entire pipe with a microfiber cloth to put on the finishing touches. The pipe is shown in the photos below in all of its beauty. I love the look of these older pipes with all of the bling and the Redmanol/Bakelite stems. They really look elegant and show their era well. Thanks for coming with me on this refurb.