Blog by Steve Laug
Jeff and I often purchase pipe bowl/stummels of brands that we like and want to restore. These have included a lot of different bowls. If you have followed us for long you know that some of these have included Peterson’s, Dunhill’s, and a wide range of Danish and English pipes. Awhile ago Jeff and I were sorting through the bowls in our collection and pulled out eight Peterson’s bowls that were dirty and stemless. A friend referred us to a contact named Silas Walls, of Walls Pipe Repair in Wallace, Idaho, USA as he seems to have a good supply of original Peterson’s stems. Our friend has had him fit stems for some of his Petes and was very happy with the work. We made contact with him and sent him eight bowls for restemming.
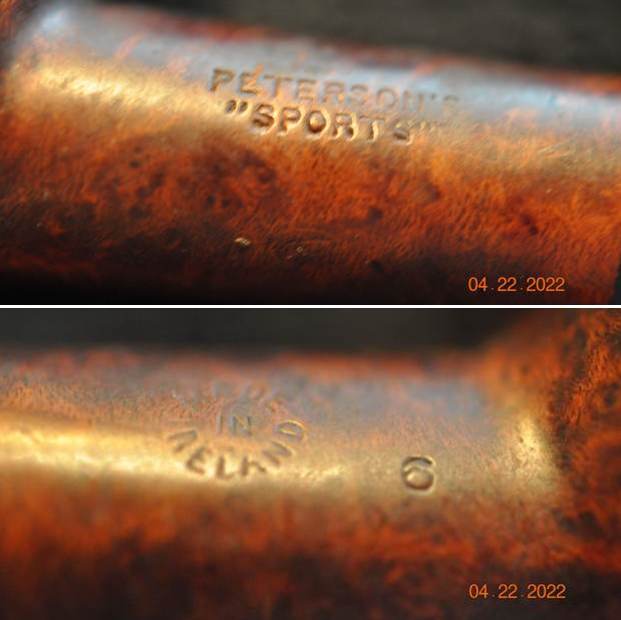
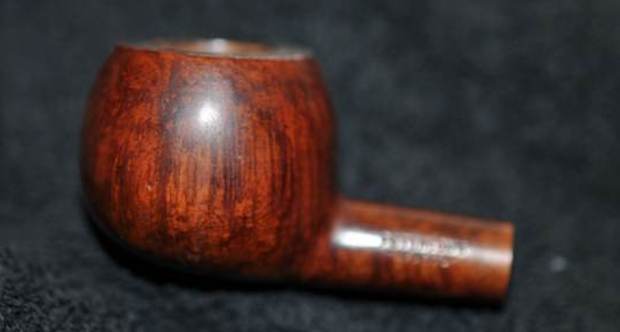
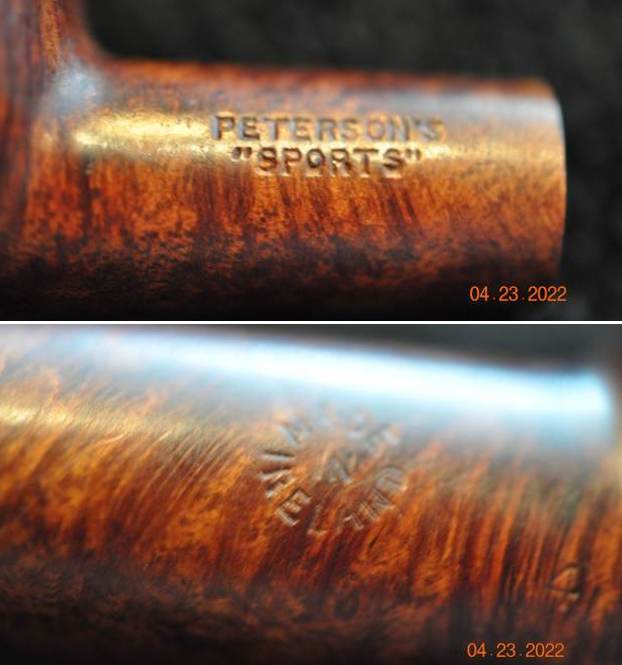
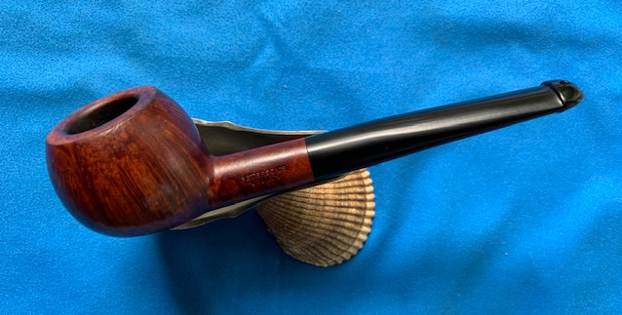
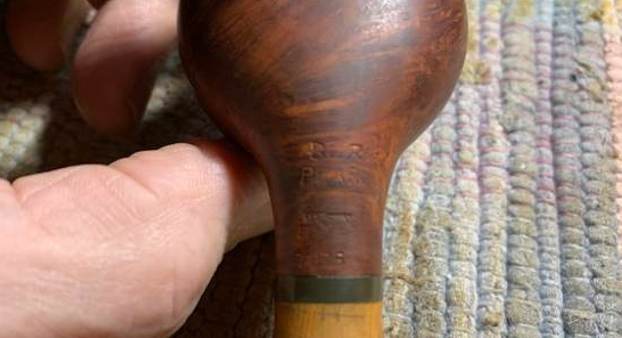
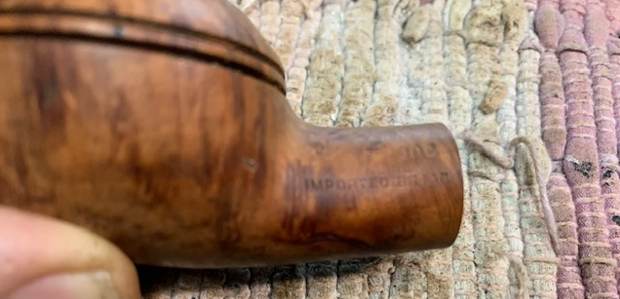
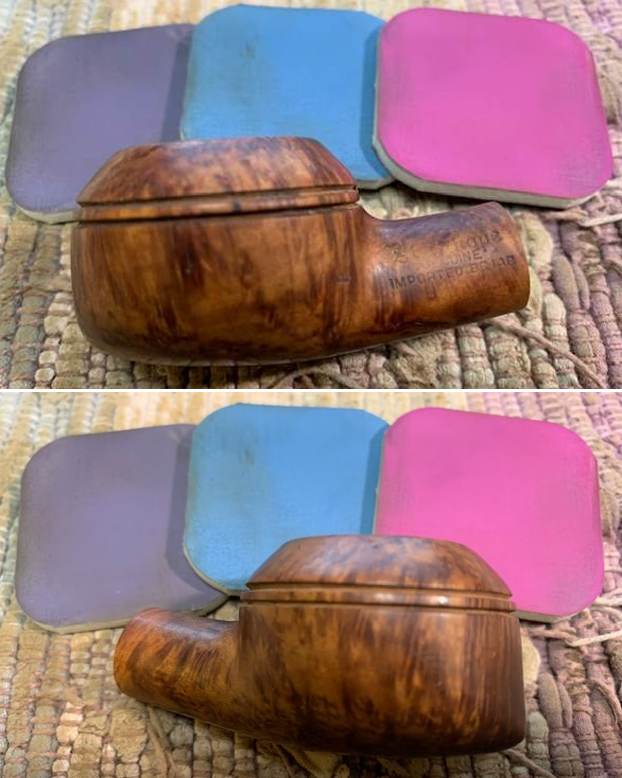
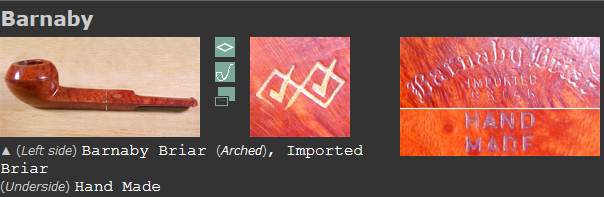
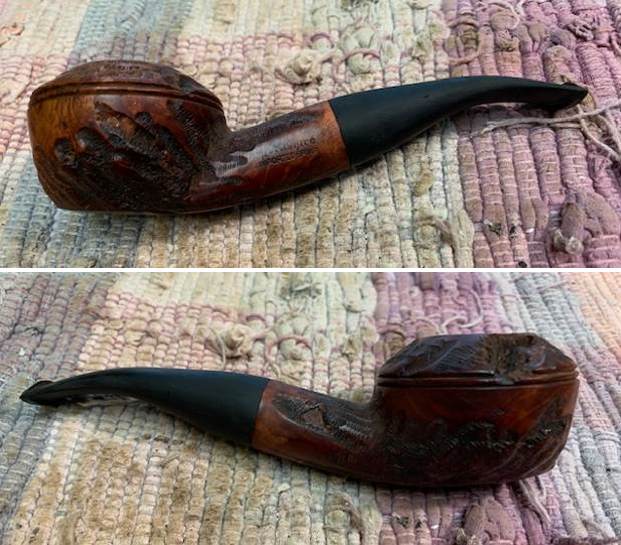
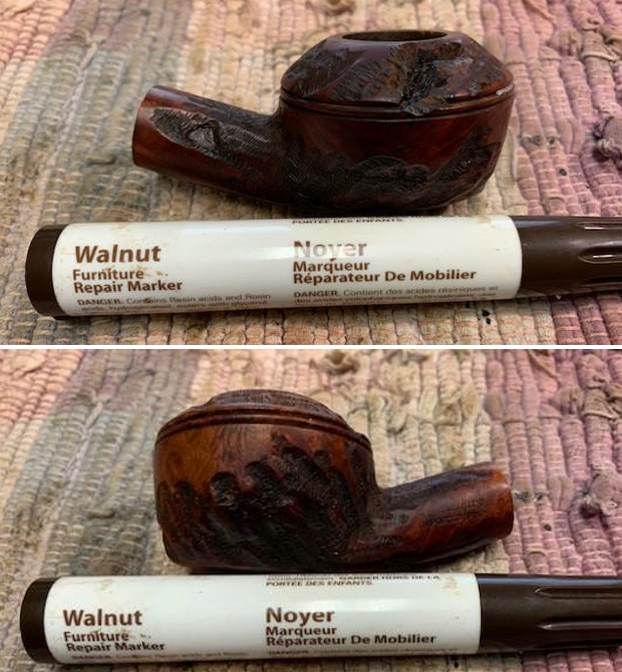
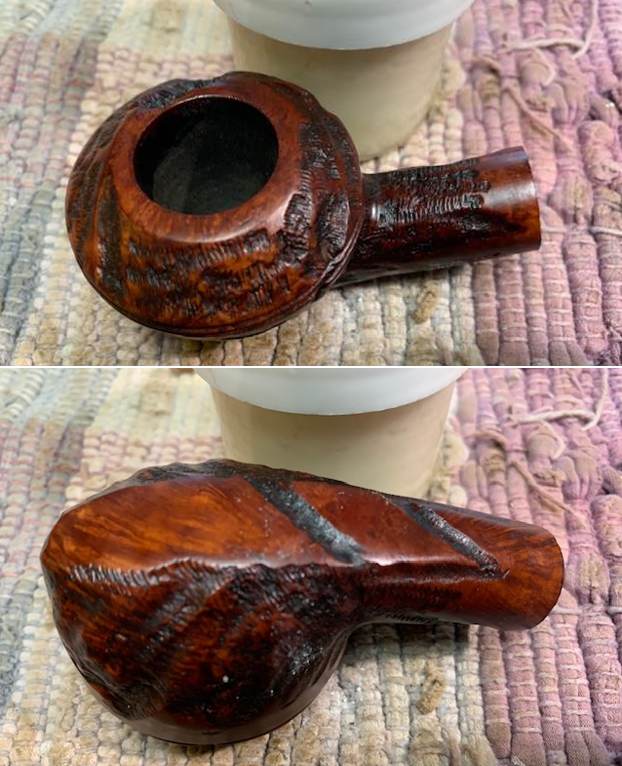
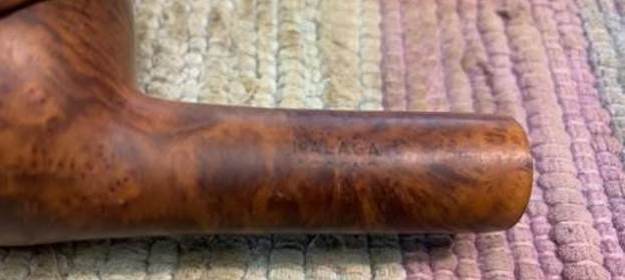
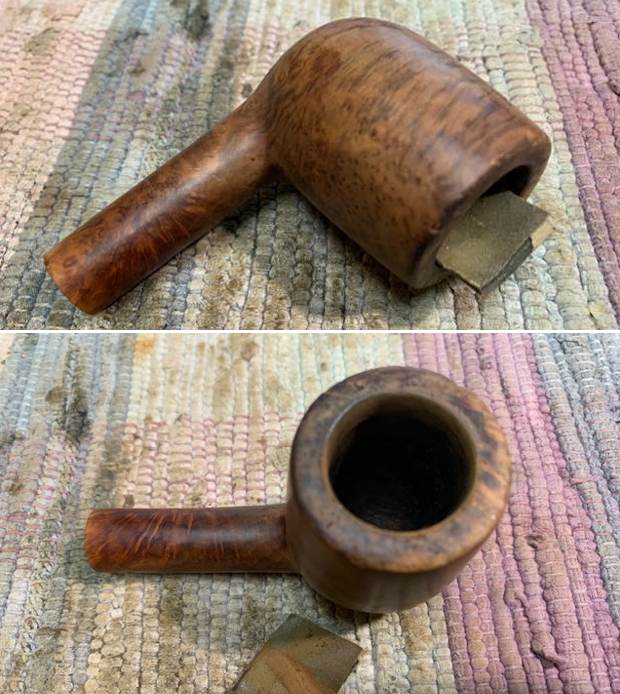
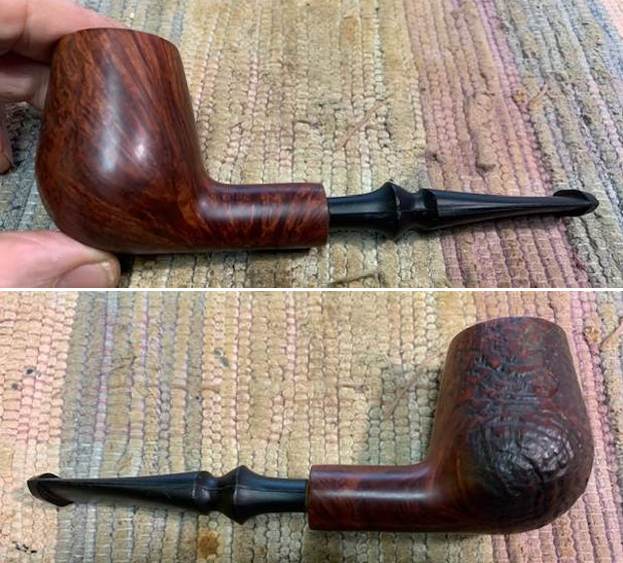
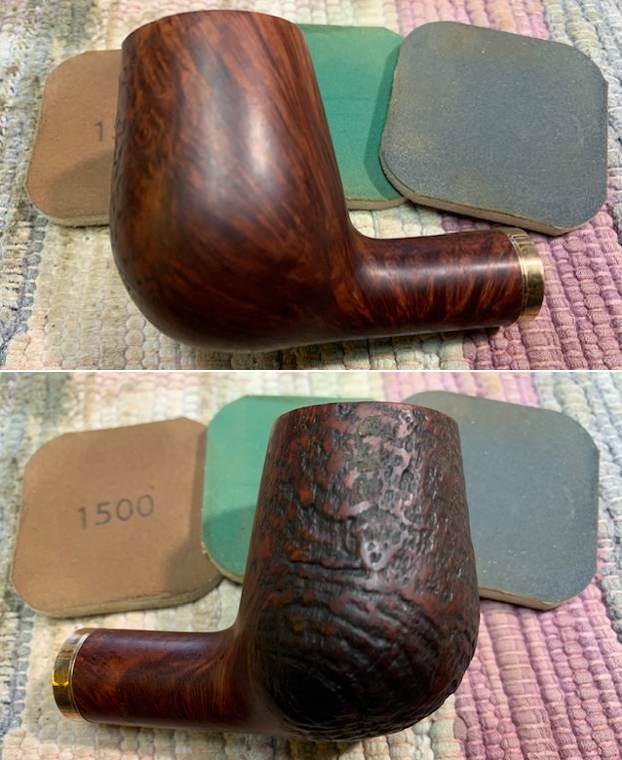
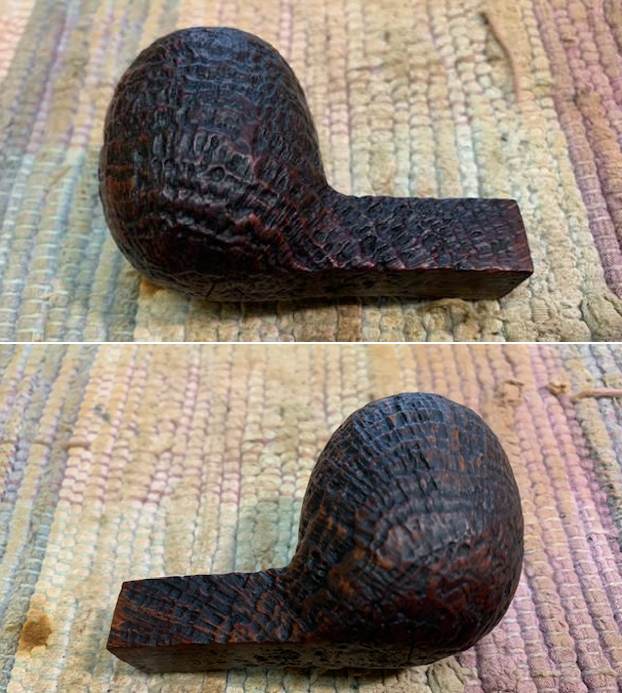
This third of those pipes that we cleaned up before mailing them out was a Petite, Pencil Shank Liverpool shaped bowl that we purchased on 05/22/21 from Facebook Marketplace. It came from Fruitland, Idaho. It is stamped on the left side of the shank and reads Peterson’s [over] Dublin & London. On the right side of the shank there is a number 36 stamped next to the bowl/shank junction followed by (faint stamp) Made in [over] Ireland stamp in two lines mid shank. The bowl was dirty with lava on the rim top and a thick cake in the bowl. There was some damage to the inner edge and top with the bowl slightly out of round. The finish had a lot of grime ground into the surface of the finish but some nice grain peeked through. Jeff took photos of the bowl before he did his cleanup work in preparation for sending them to Walls Pipe Repair for their new stem. The images were corrupted on Jeff’s camera so we have no photos of the pipe before his clean up work.
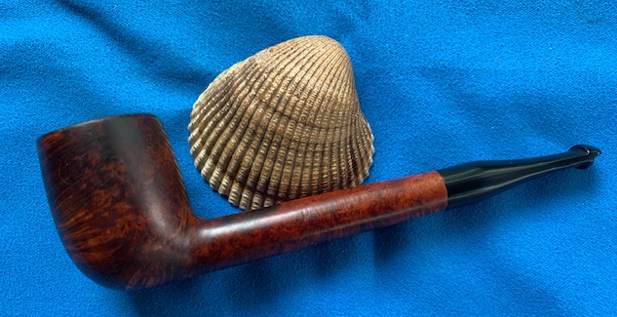
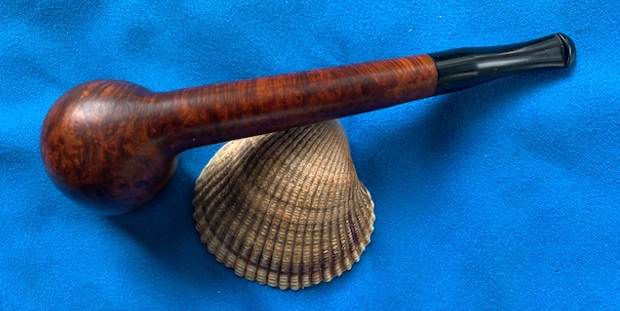
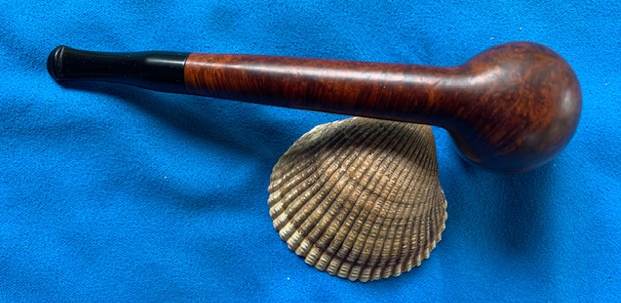
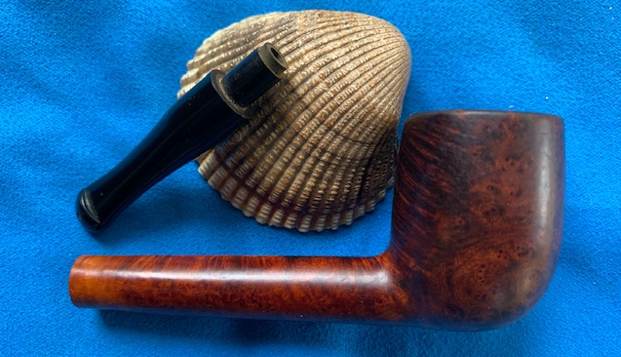
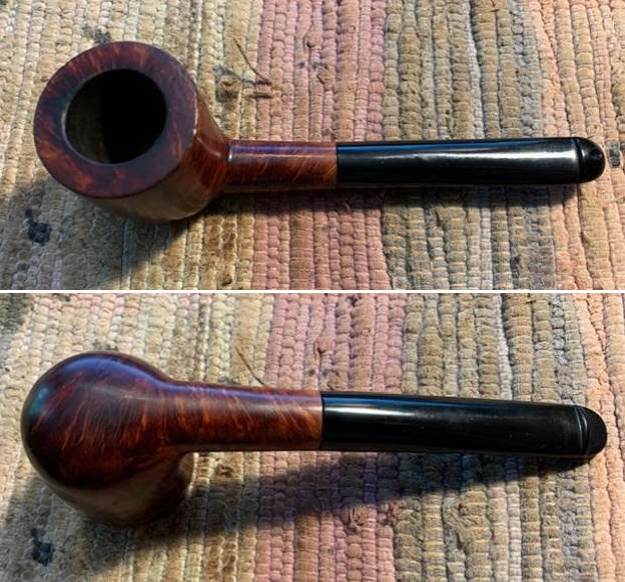
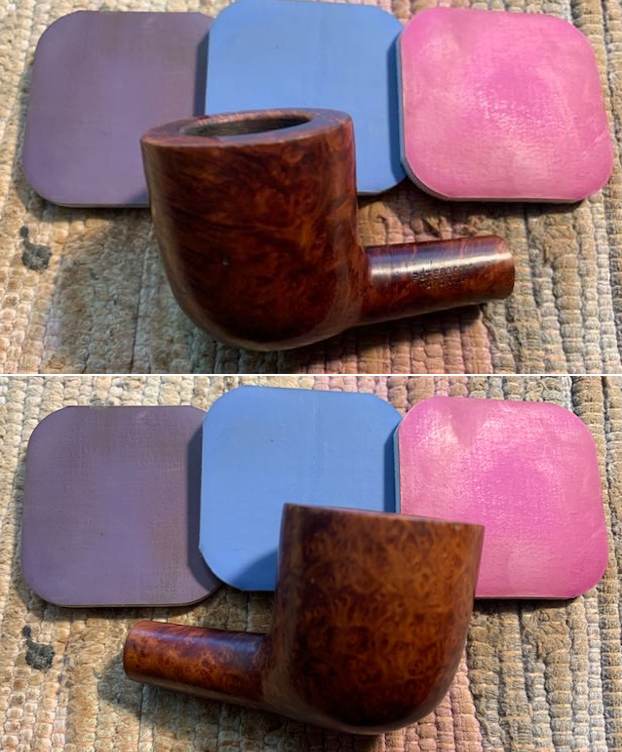
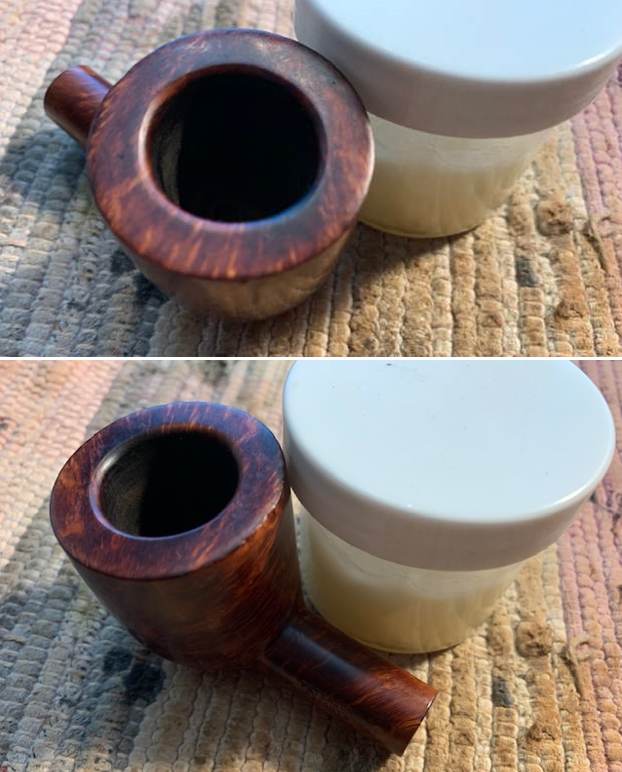
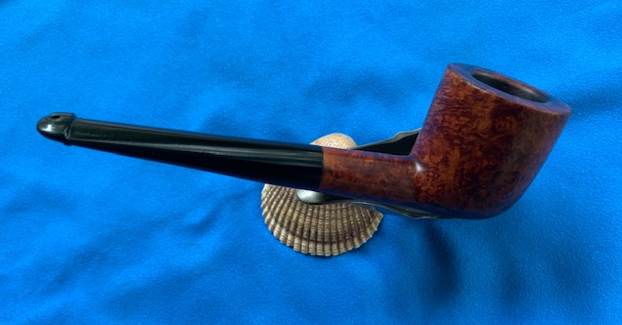
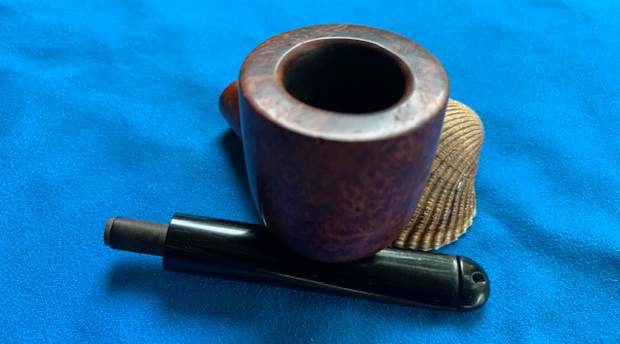
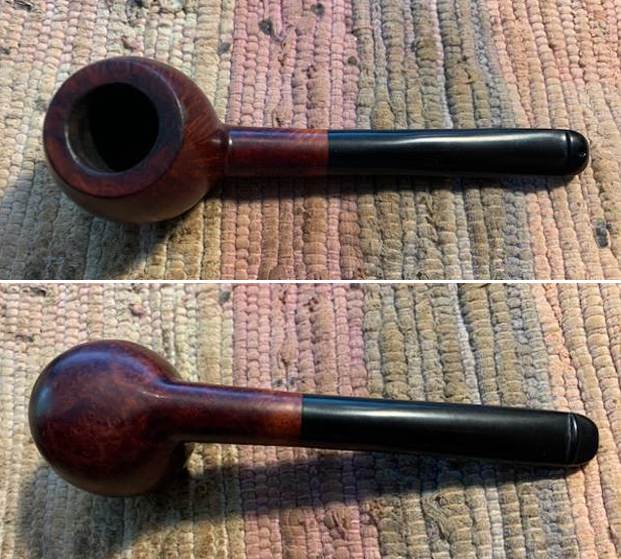
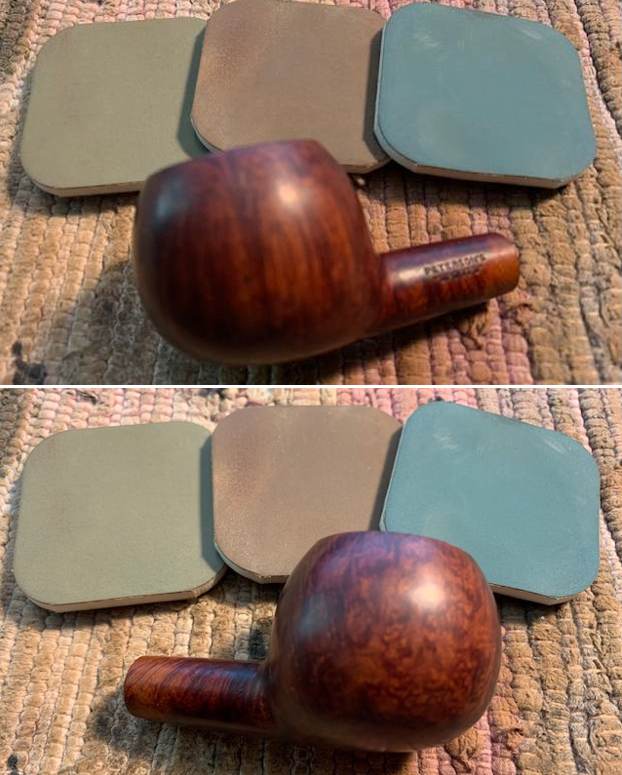
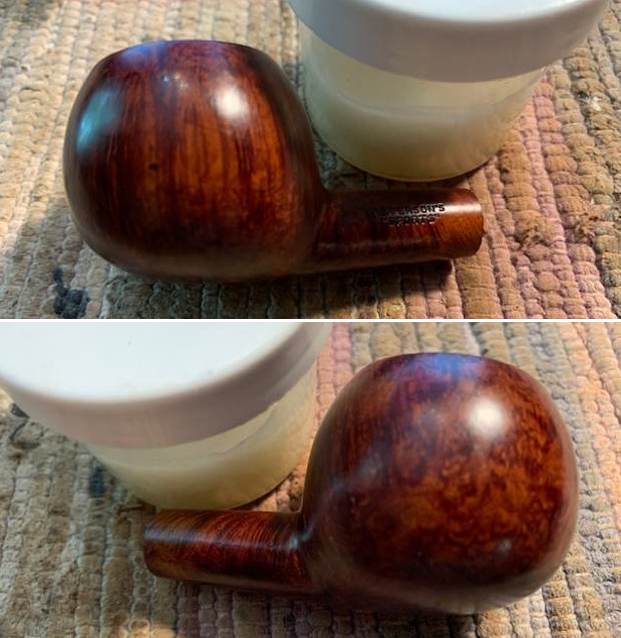
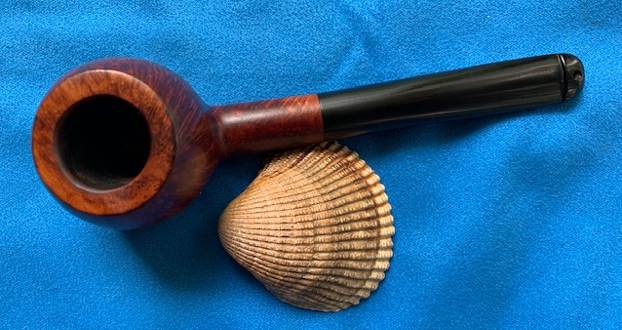
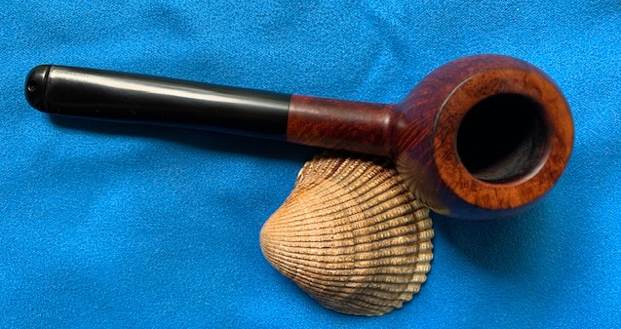
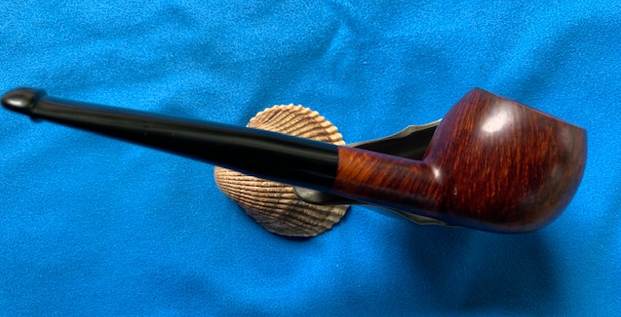
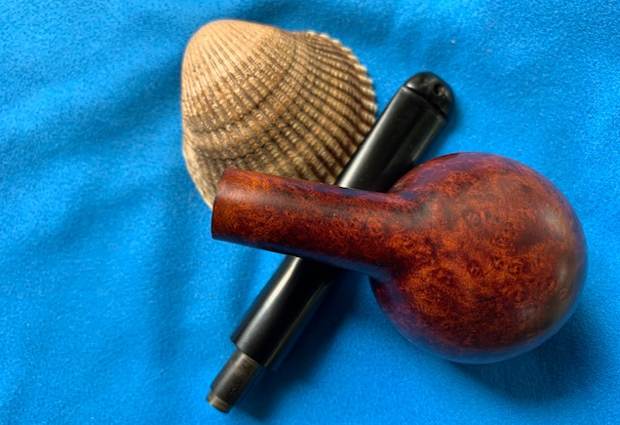
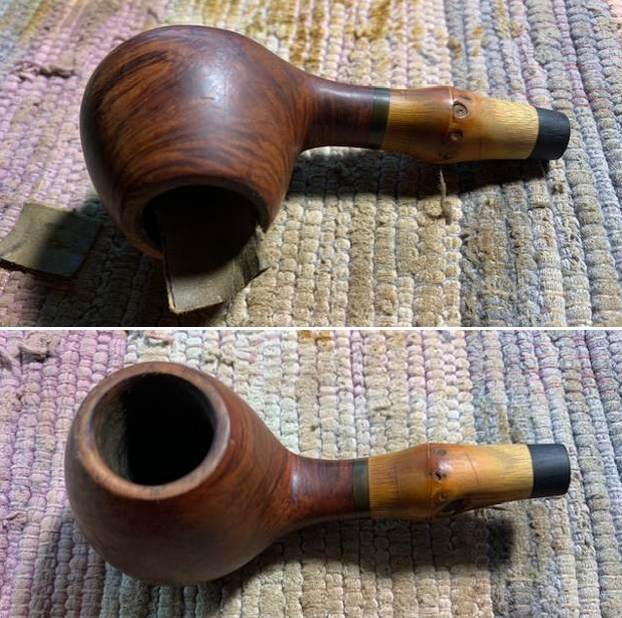
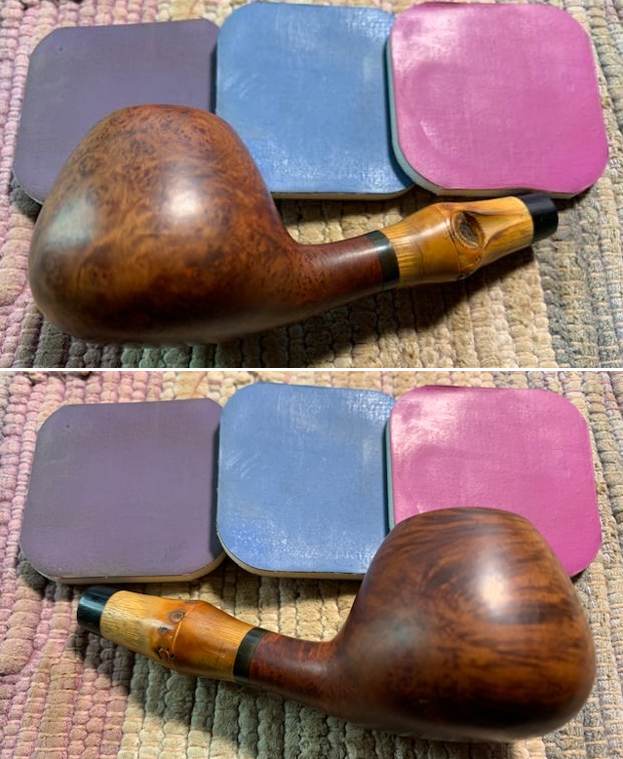
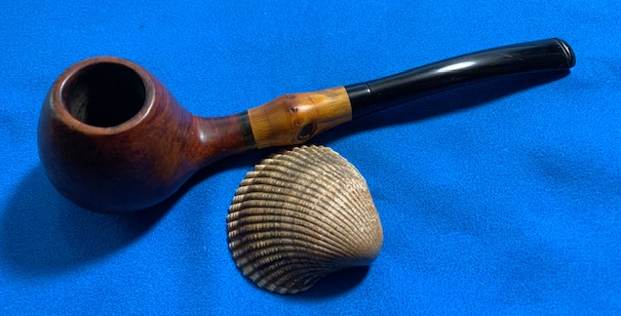
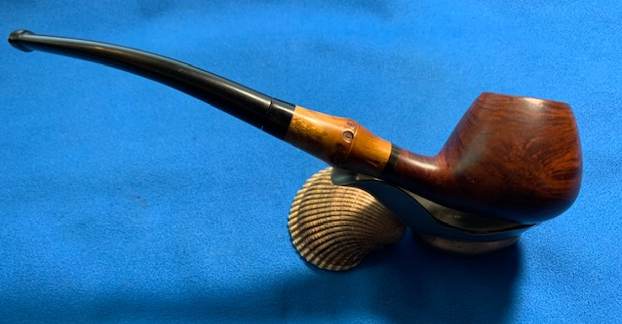
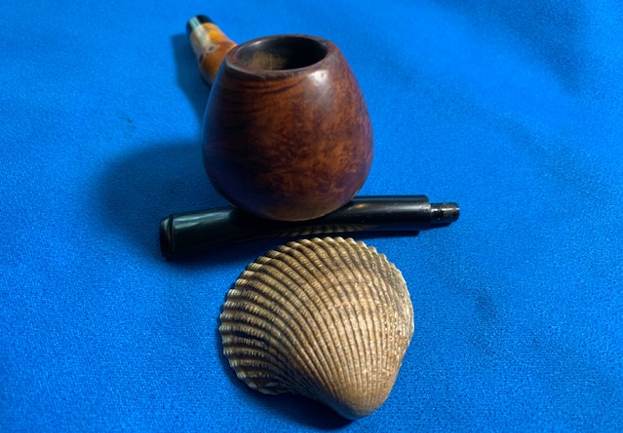
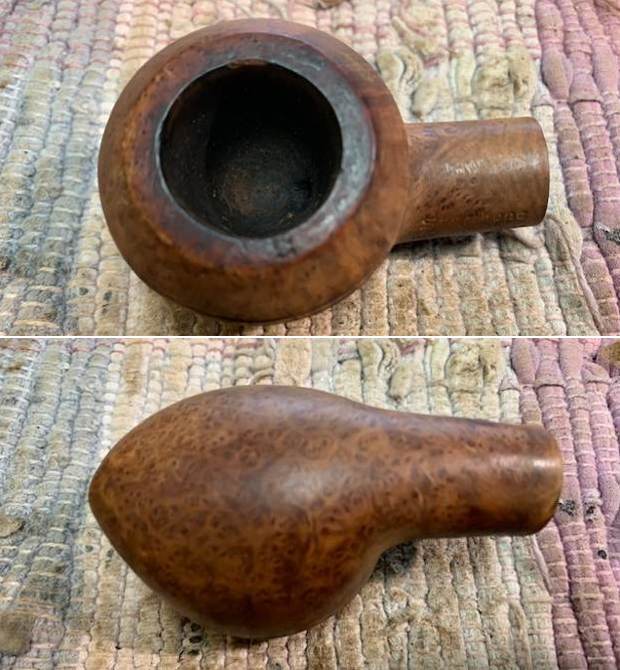
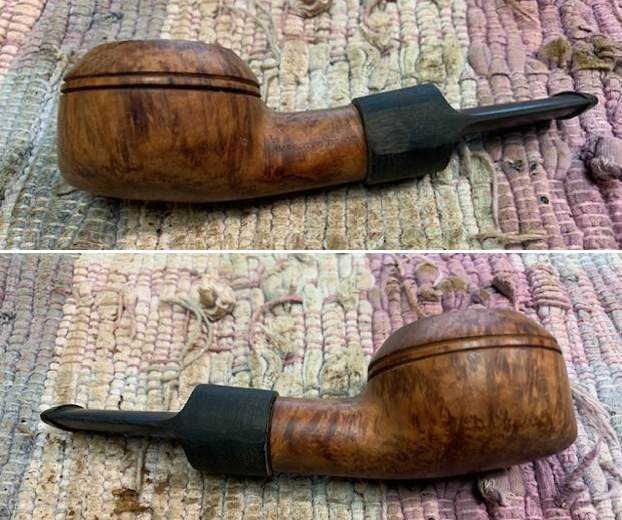
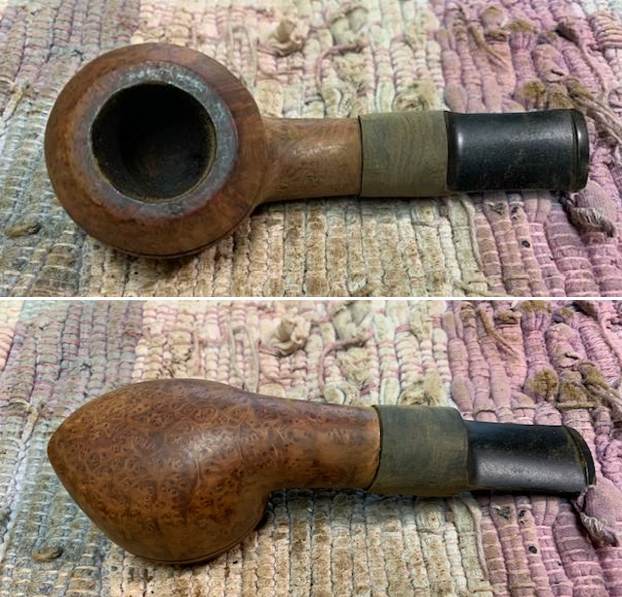
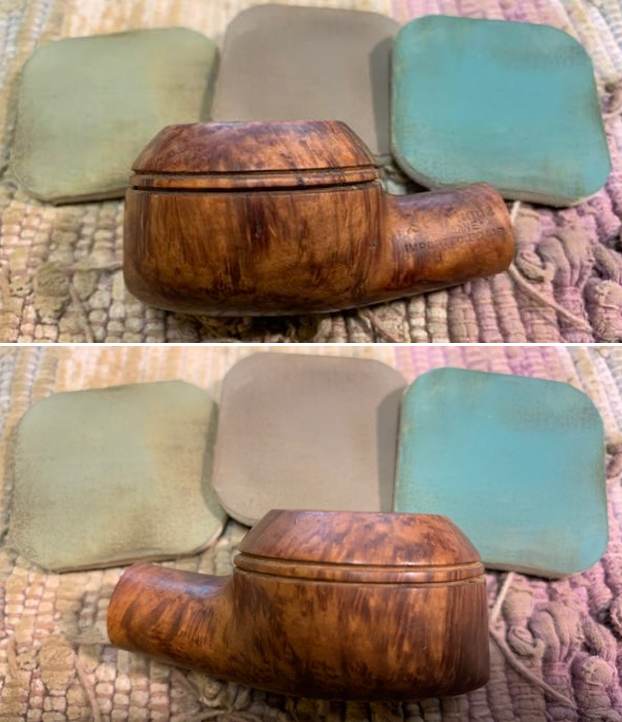
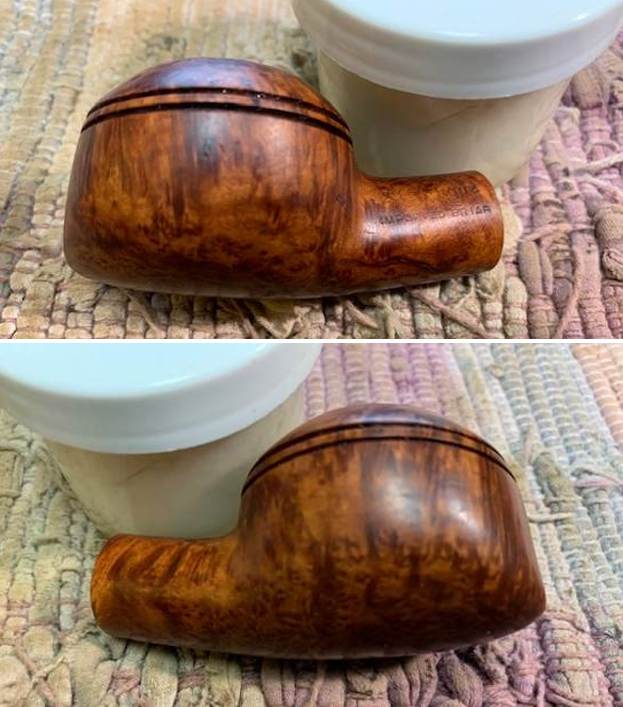
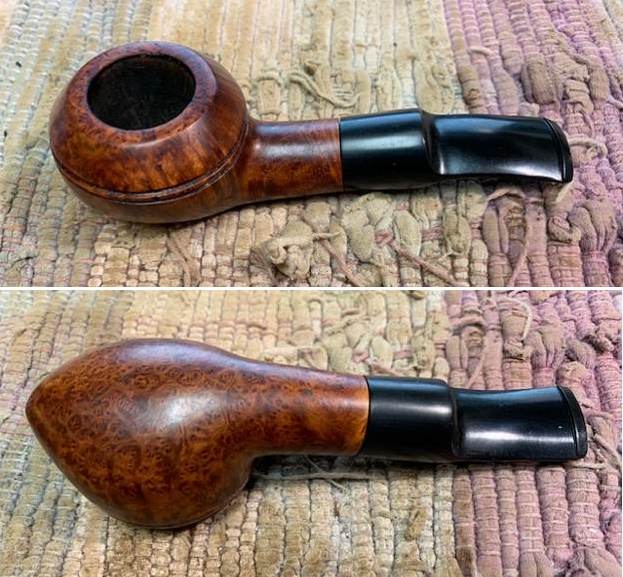
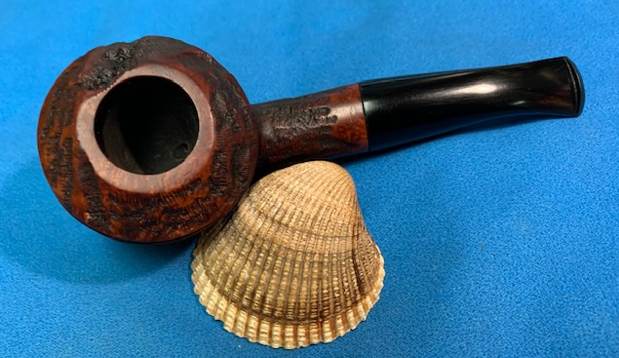
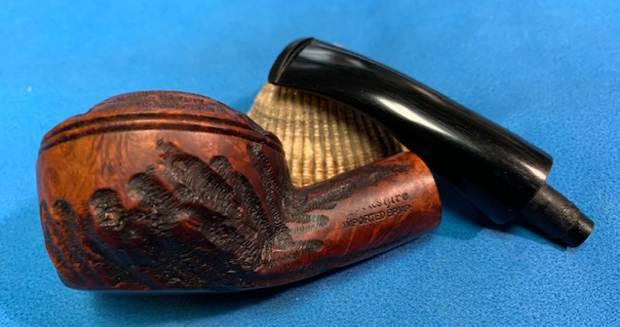
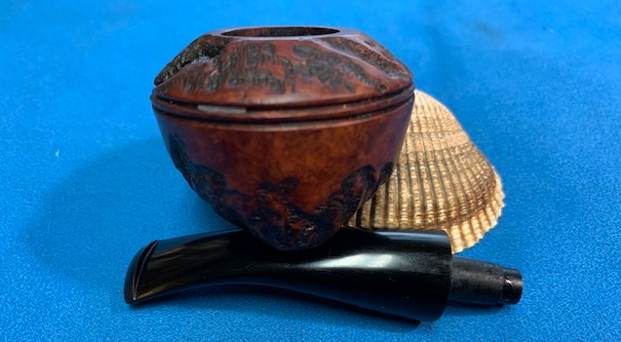
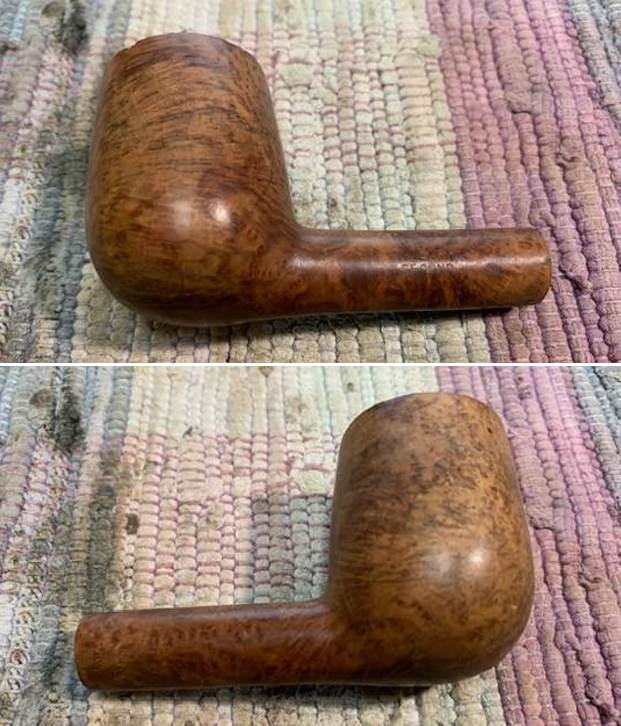
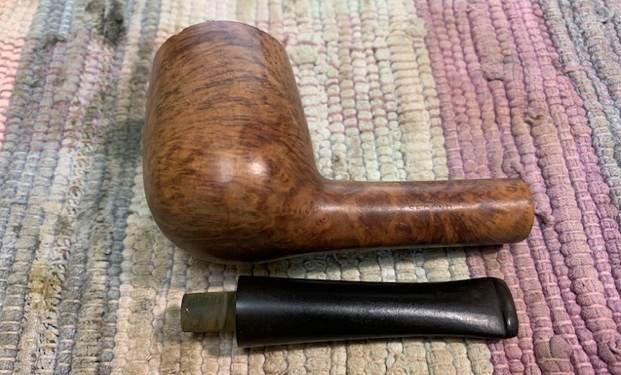
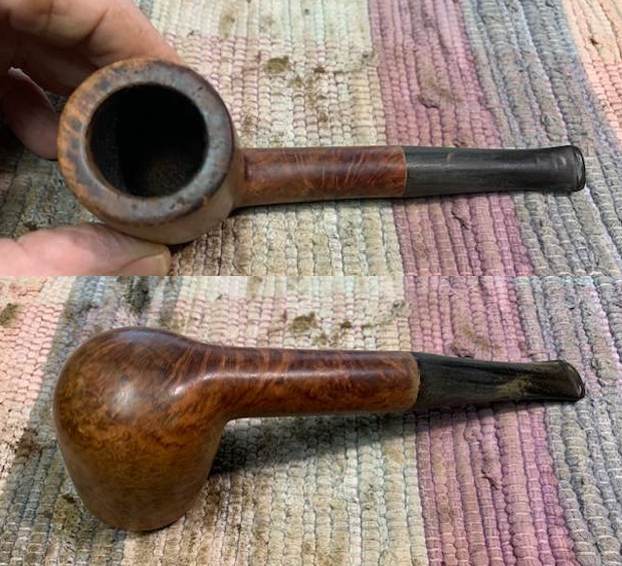
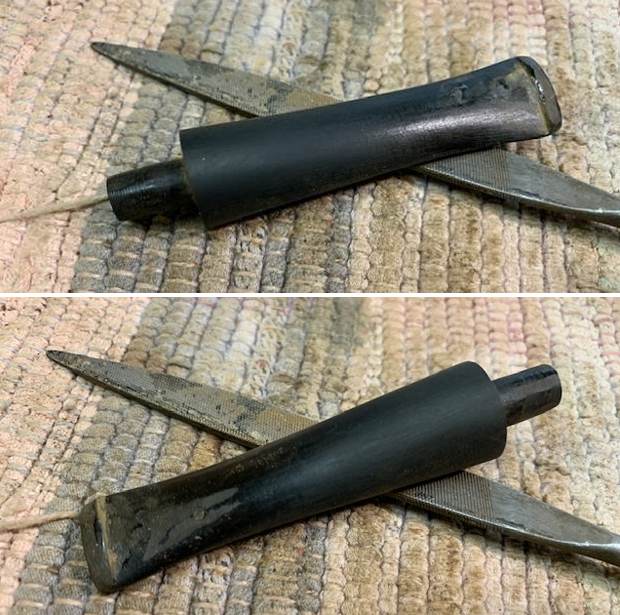
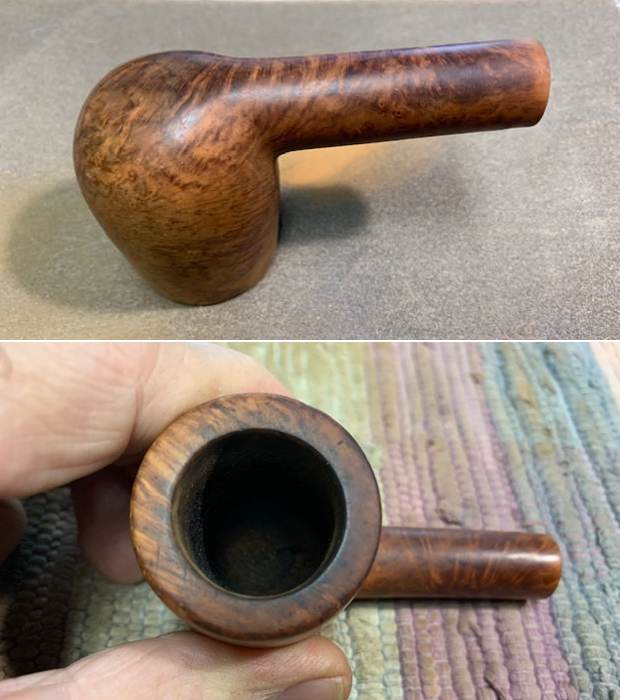
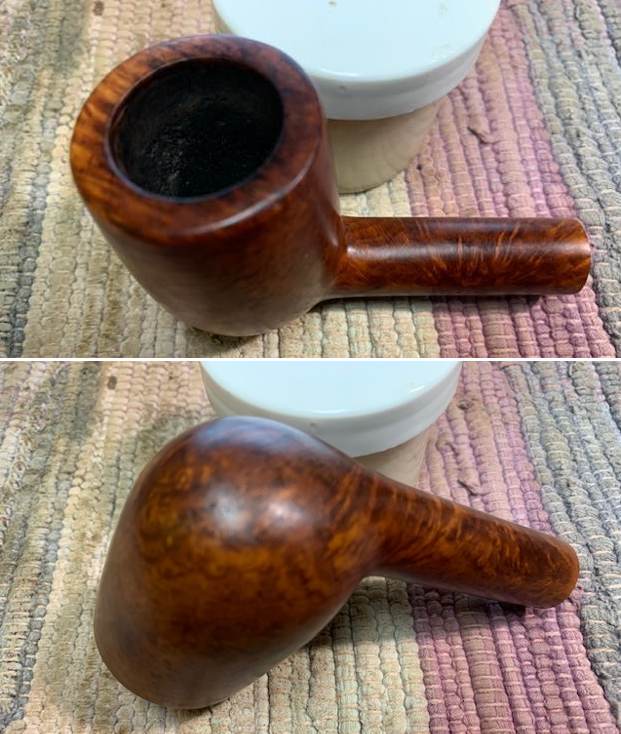
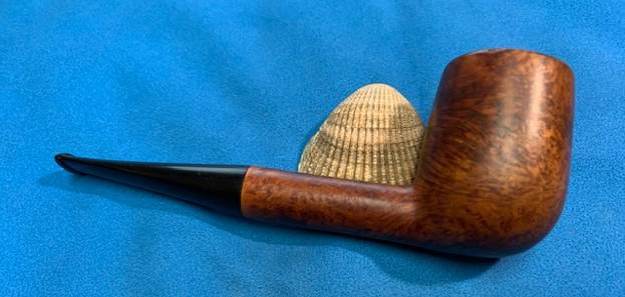
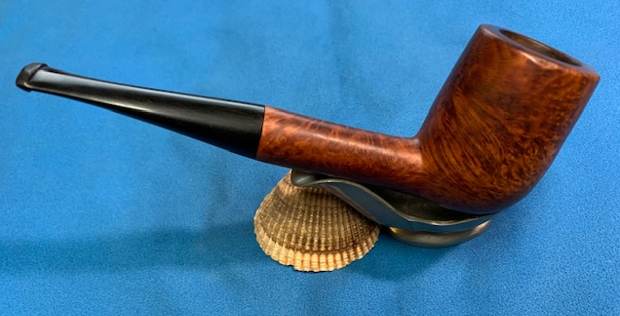
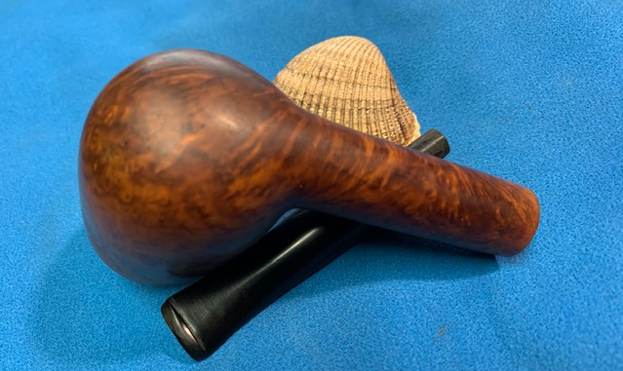
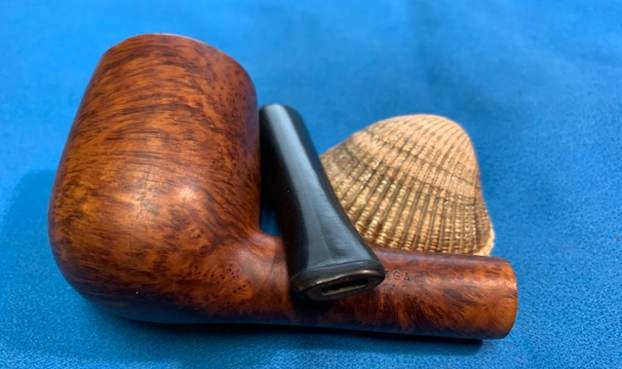
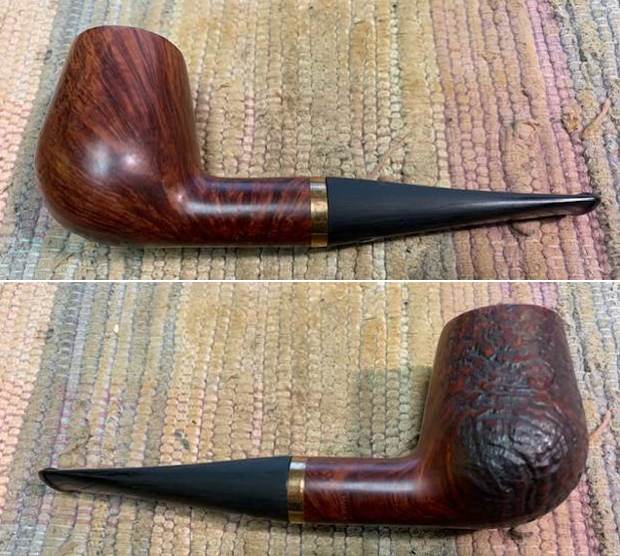
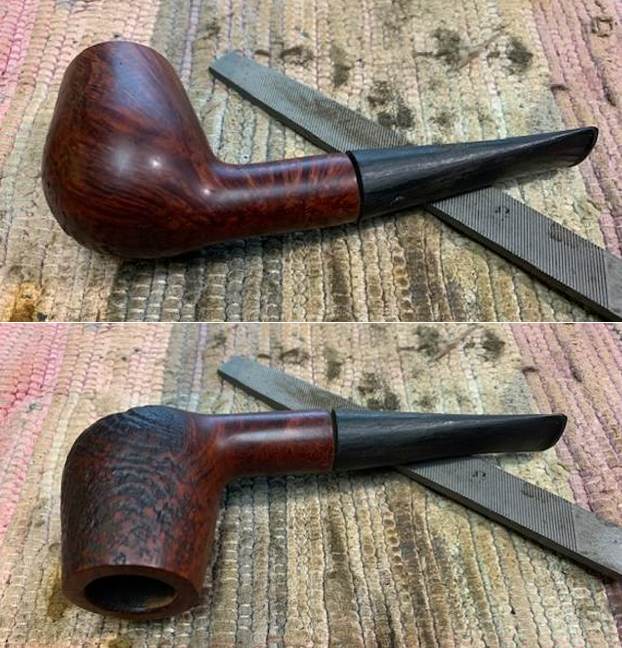
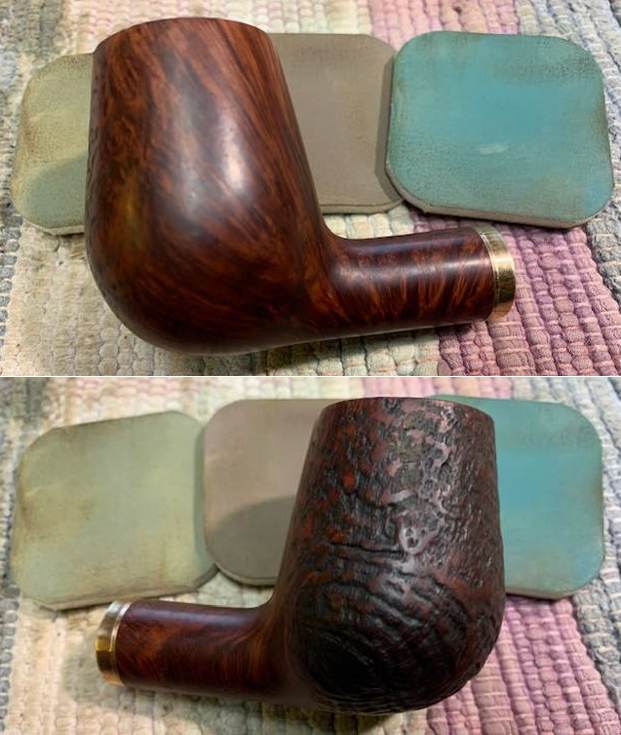
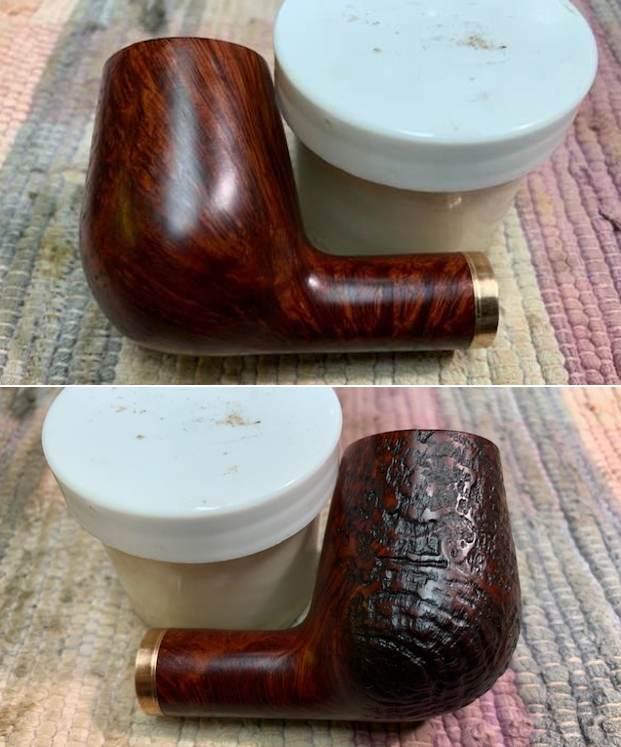
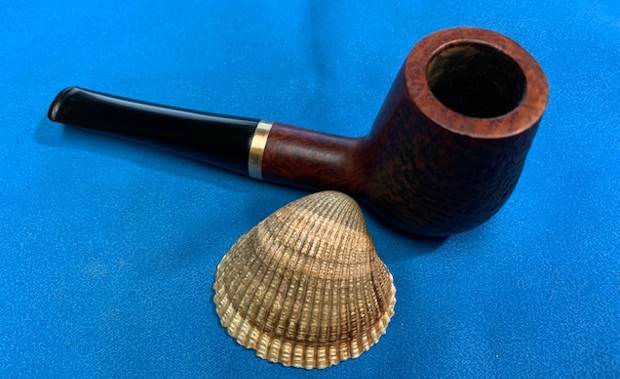
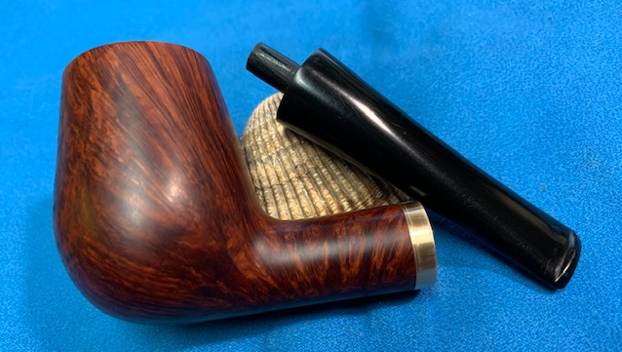
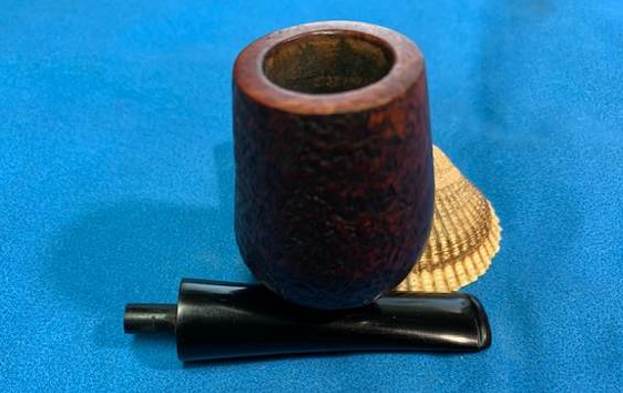
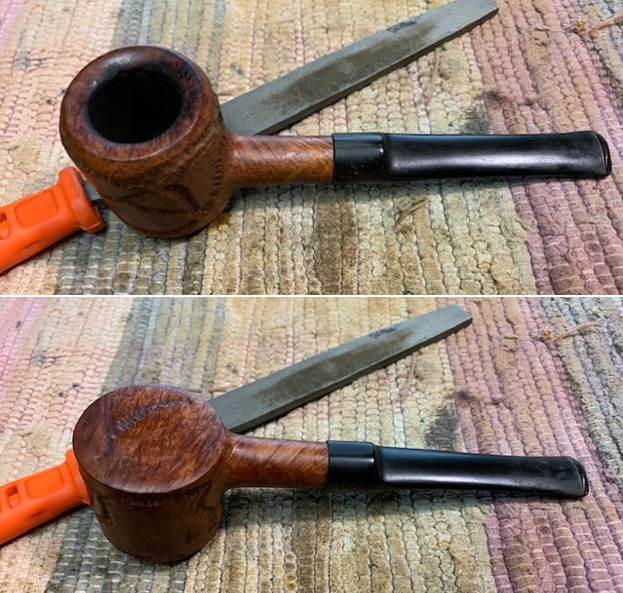
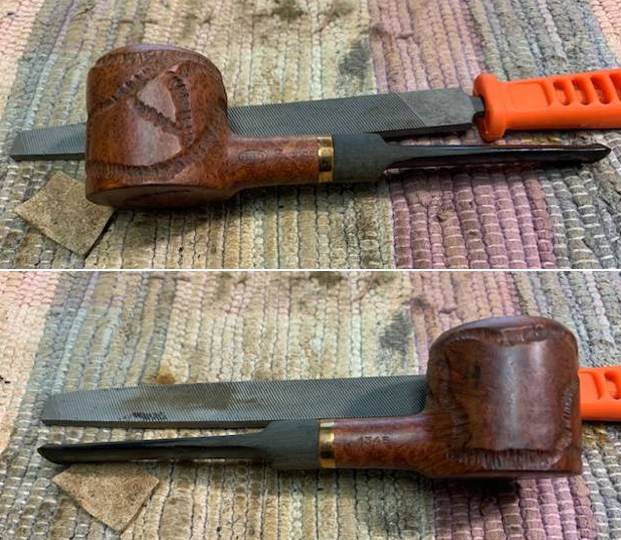
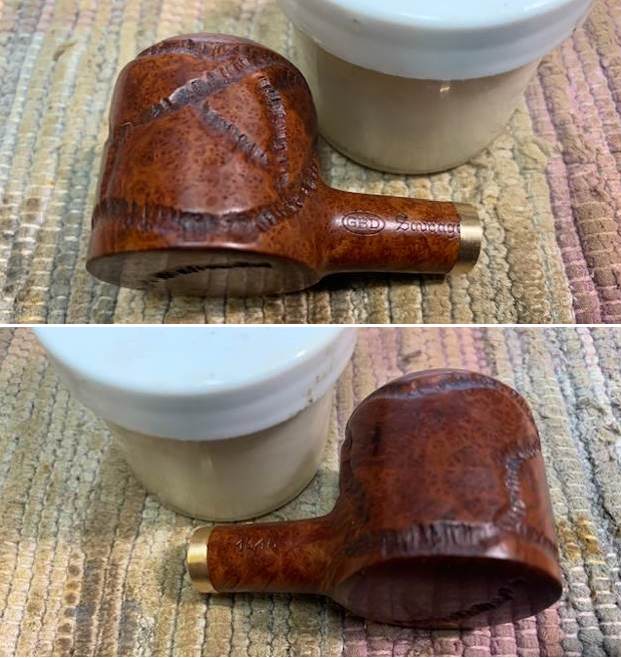
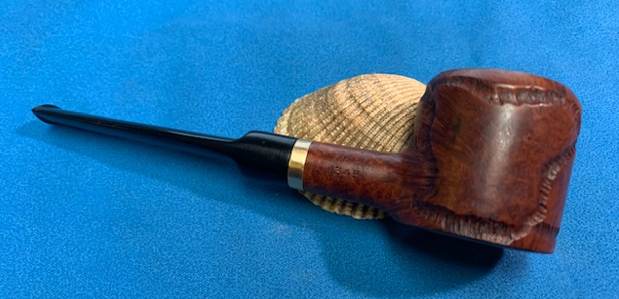
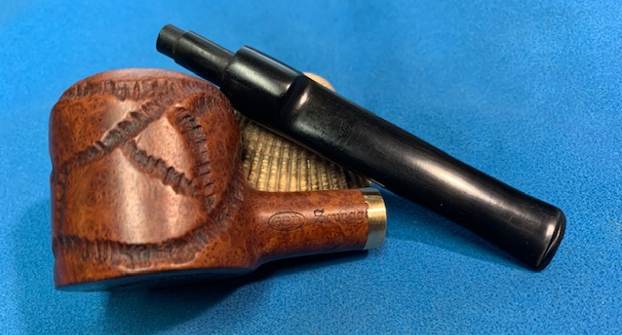
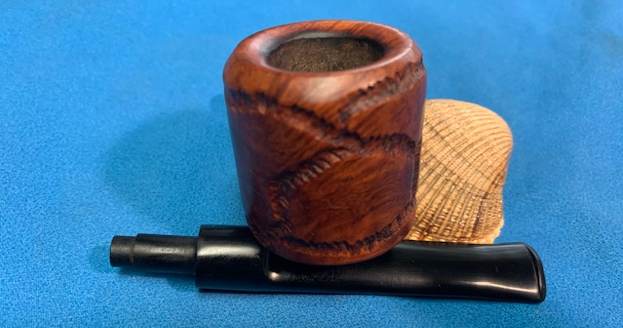
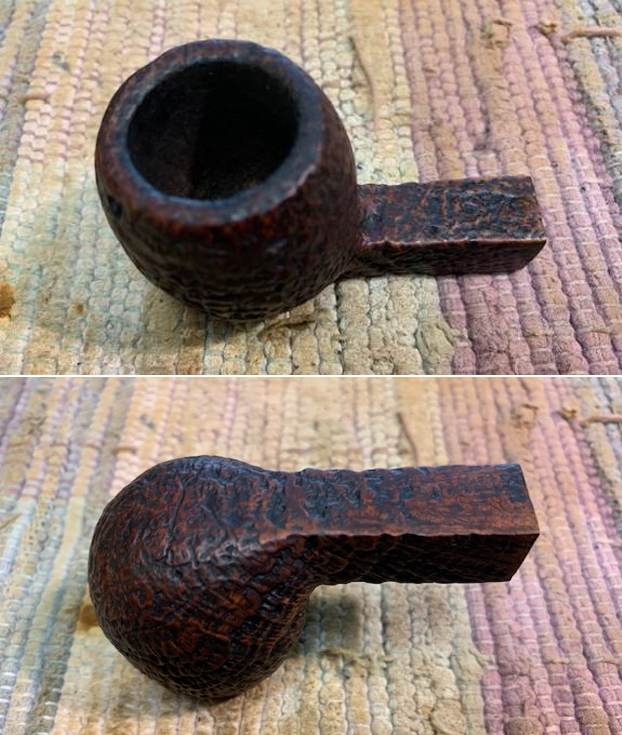
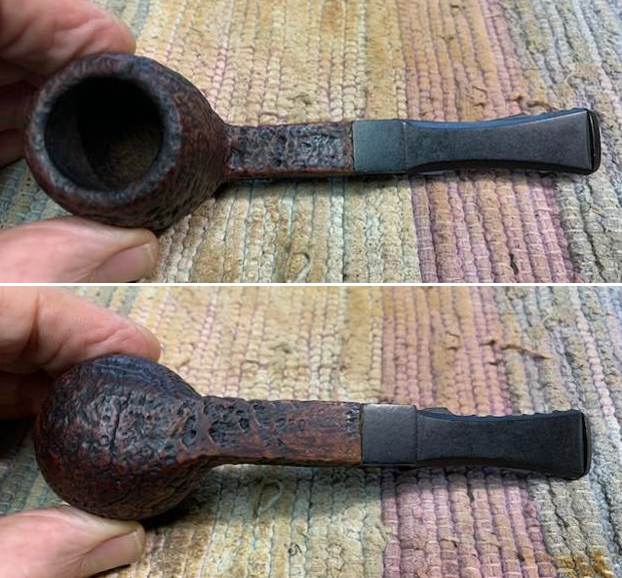
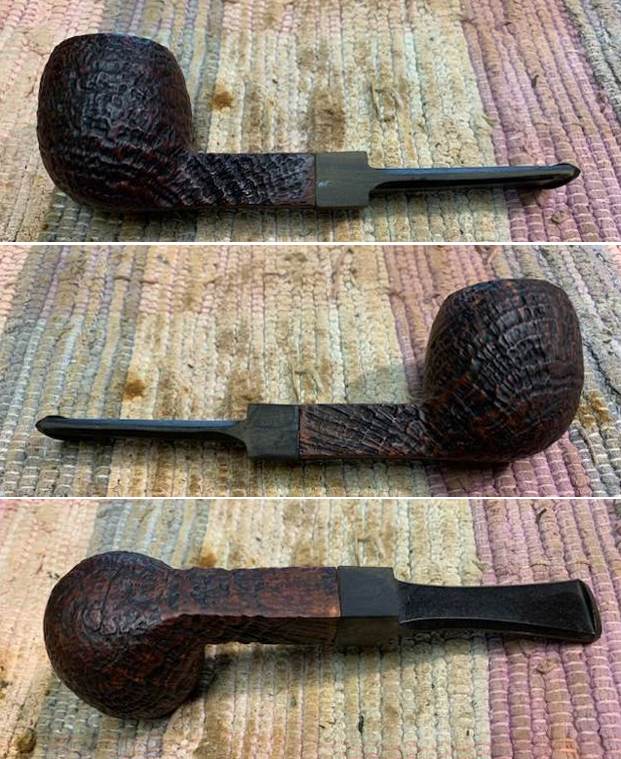
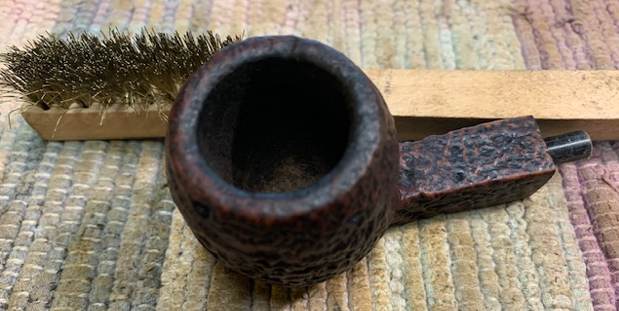
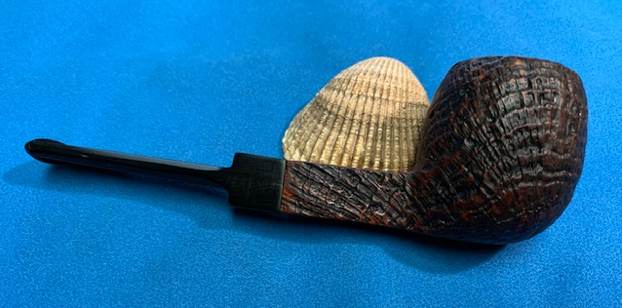
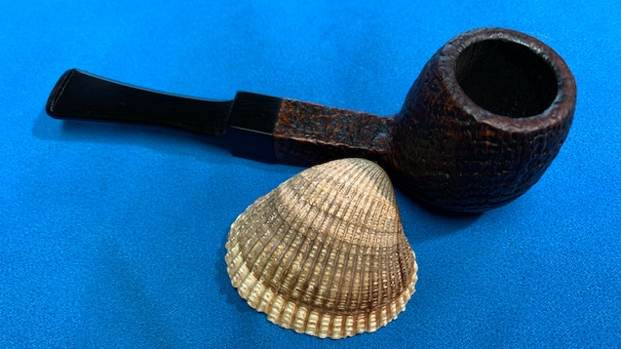
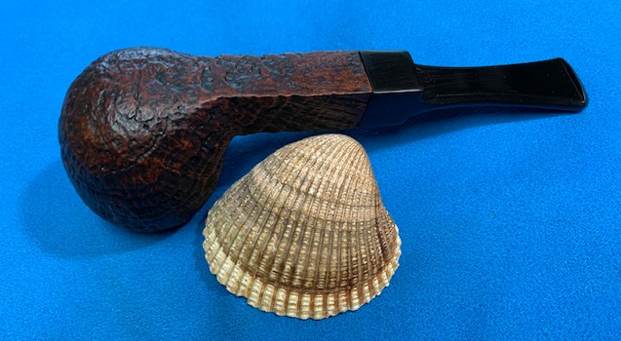
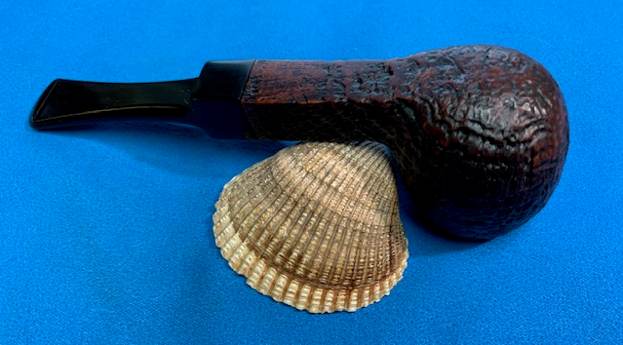
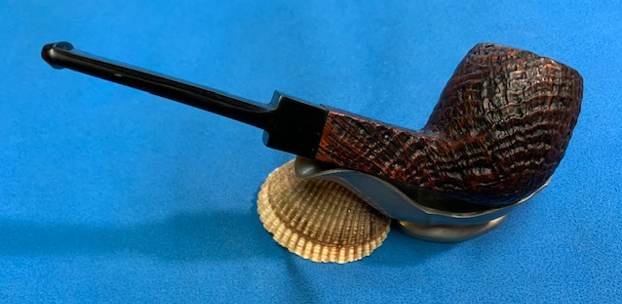
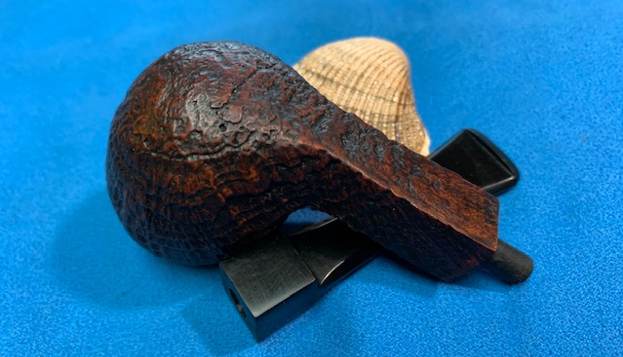
The next photos I have included below are of the pipe when it arrived in Vancouver with its new stem. Jeff had done a great job cleaning up the pipe as usual. He reamed the pipe with a PipNet reamer and cut the cake back to the bare briar. He cleaned up the walls with a Savinelli Fitsall Pipe Knife. He scrubbed the interior of the bowl and shank with pipe cleaners, cotton swabs and alcohol to remove the tars and oils. He scrubbed the exterior of the pipe with Murphy’s Oil Soap and a tooth brush to remove the grime from the finish. He worked on the rim top lava and darkening with the soap and tooth brush. When the pipes came back to Jeff with their new stems they looked great.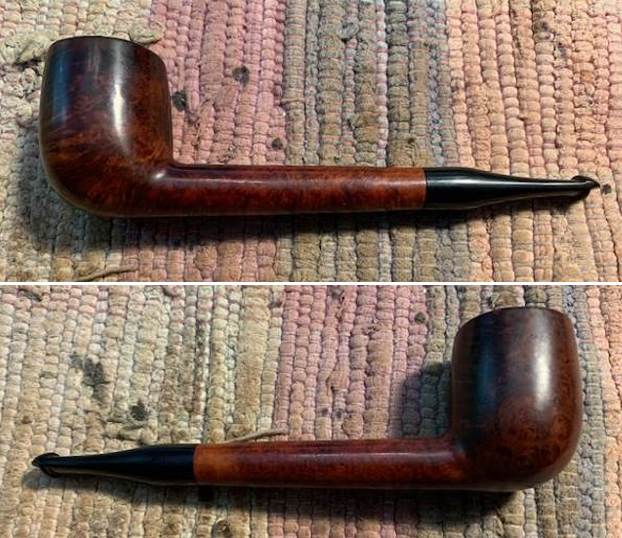
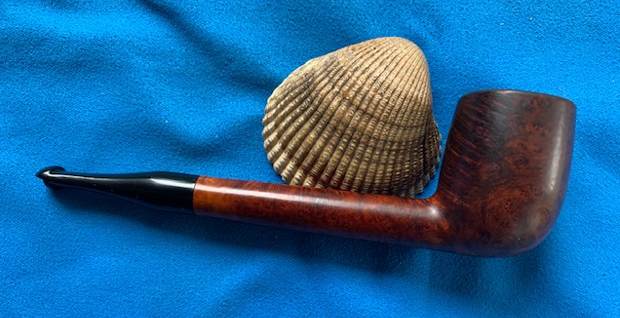
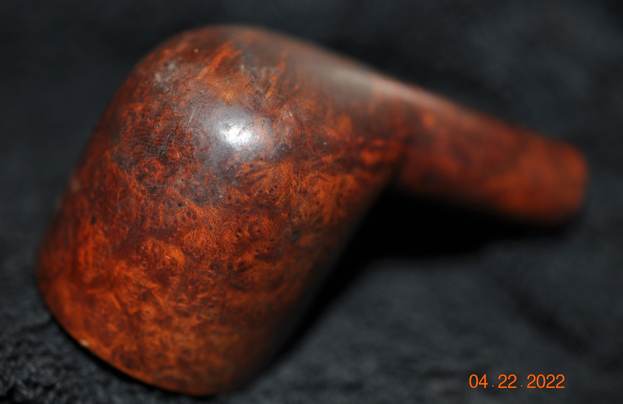
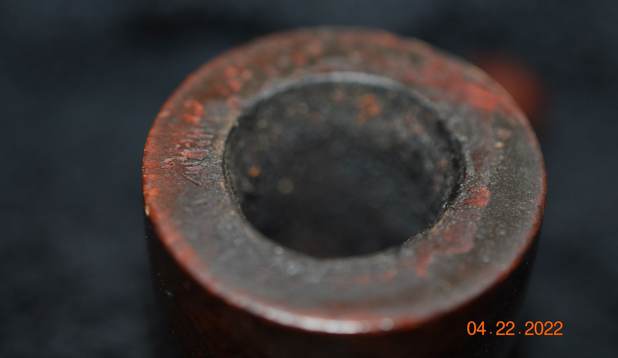
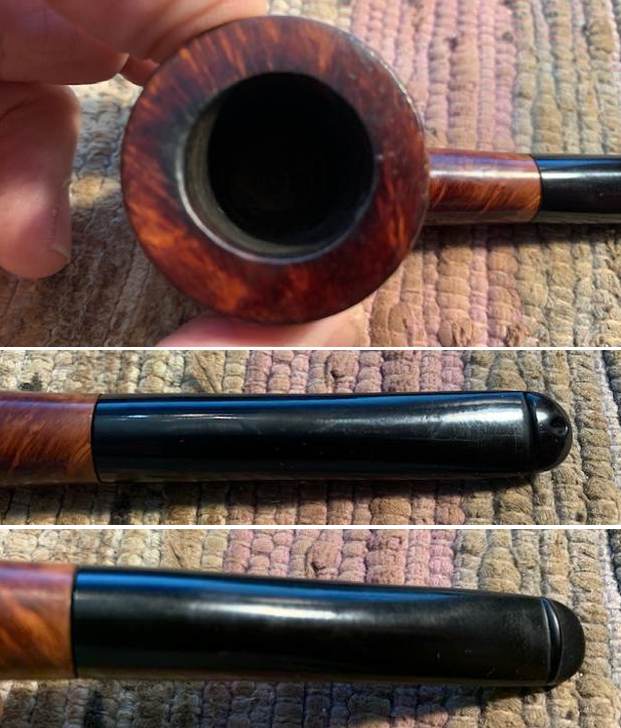
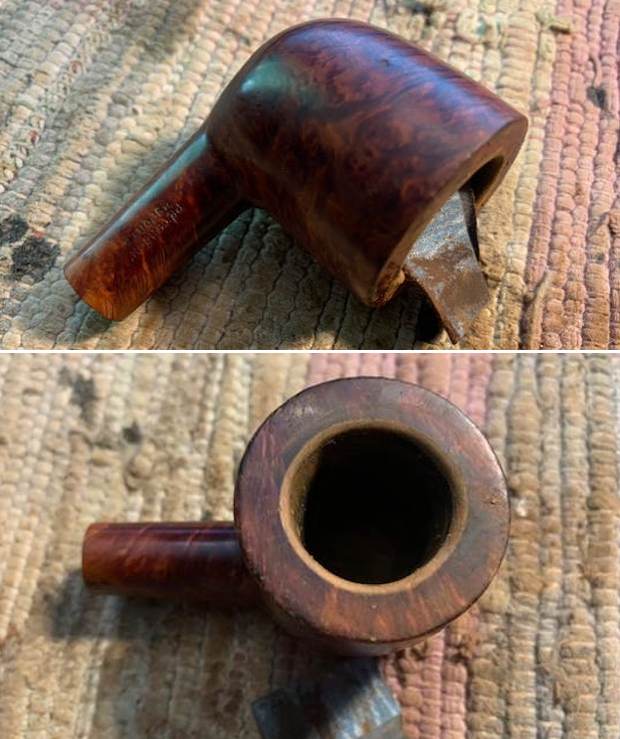
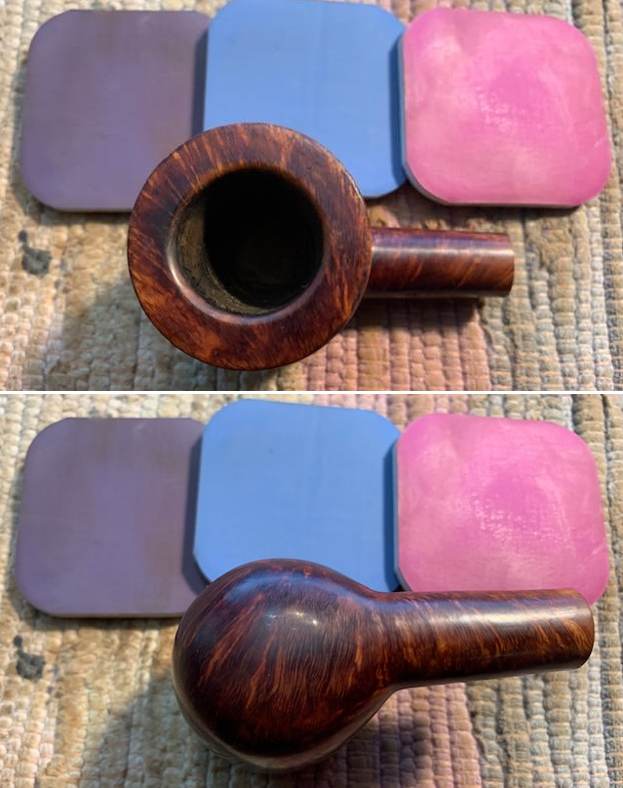
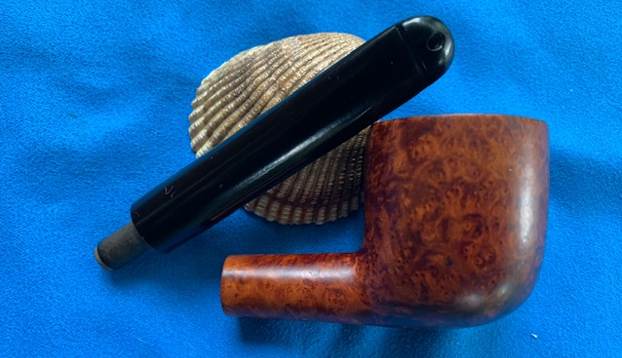
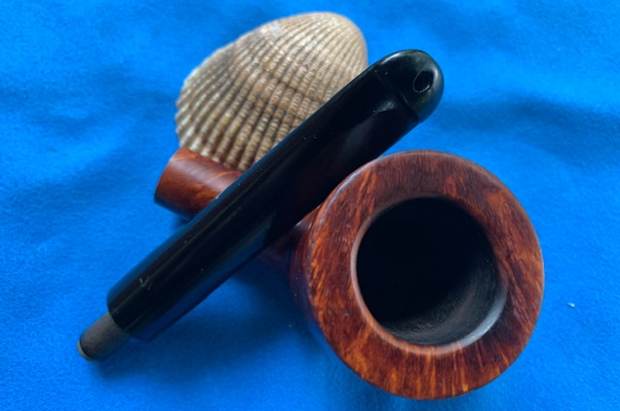
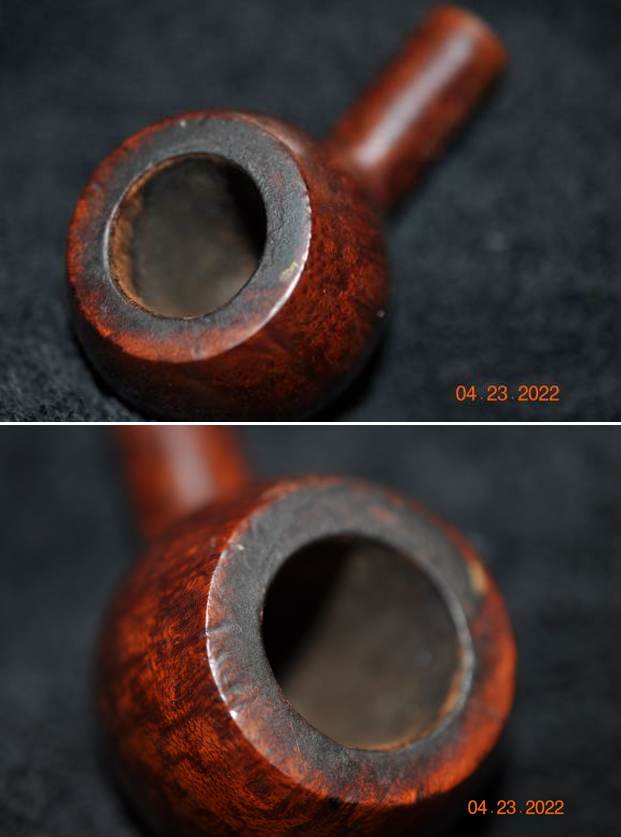
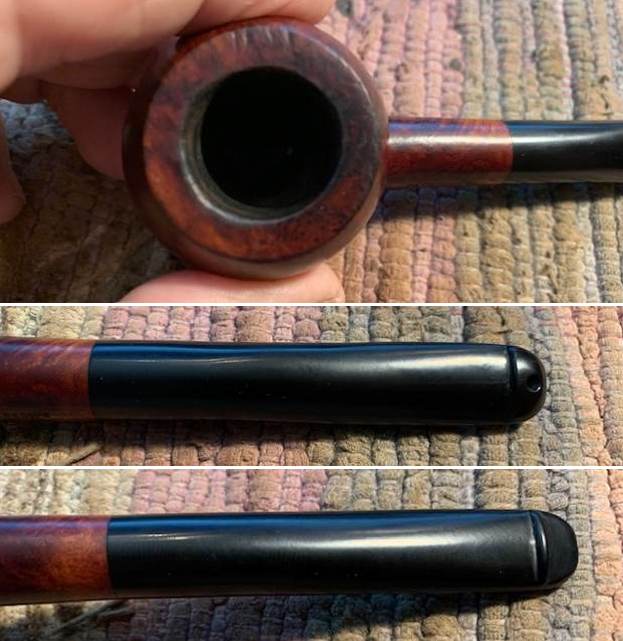
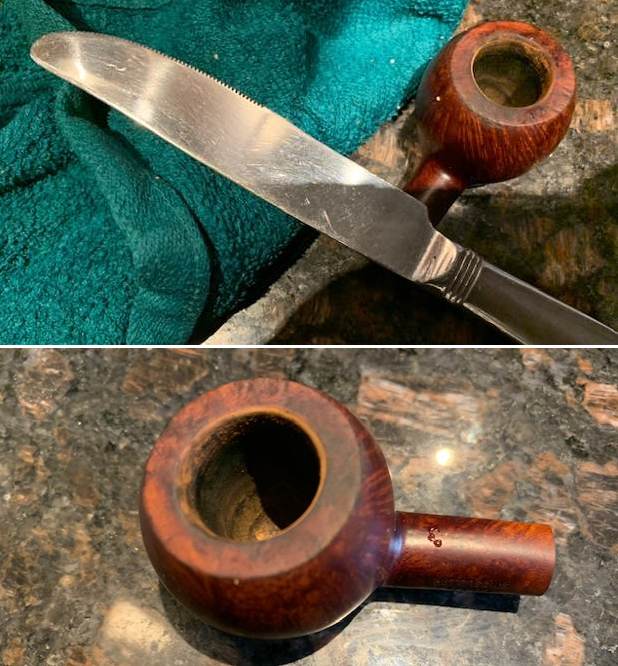
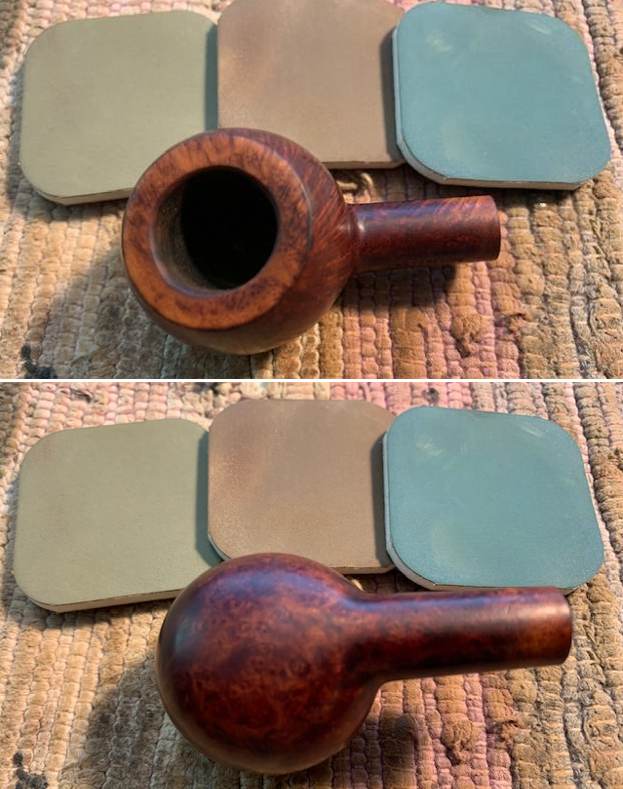
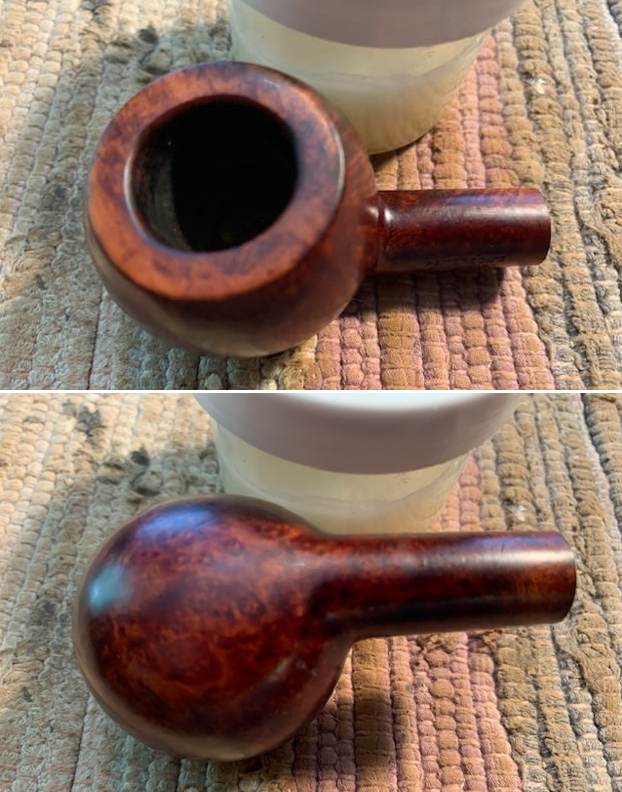
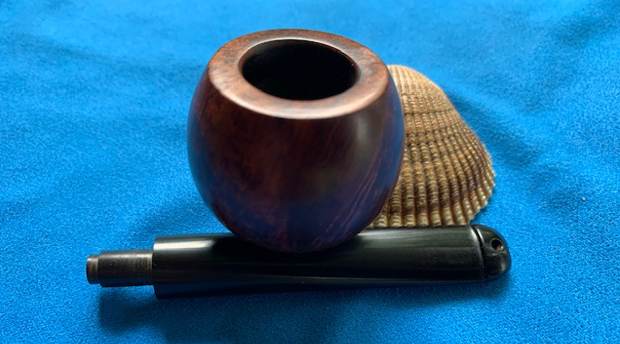
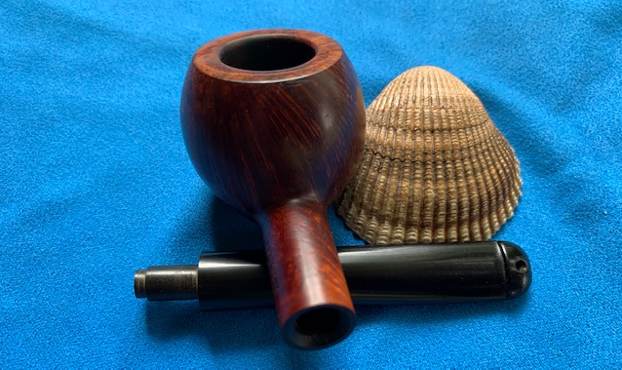
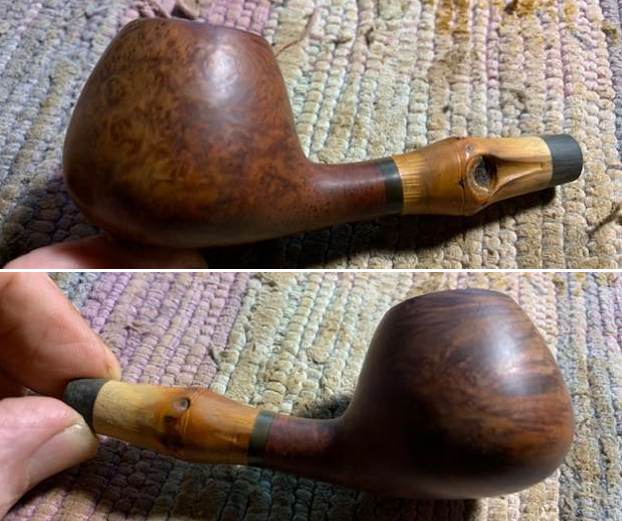
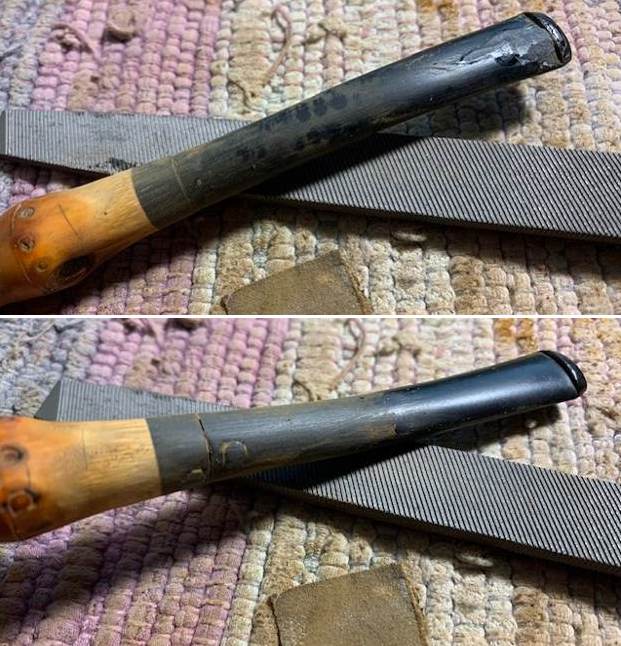
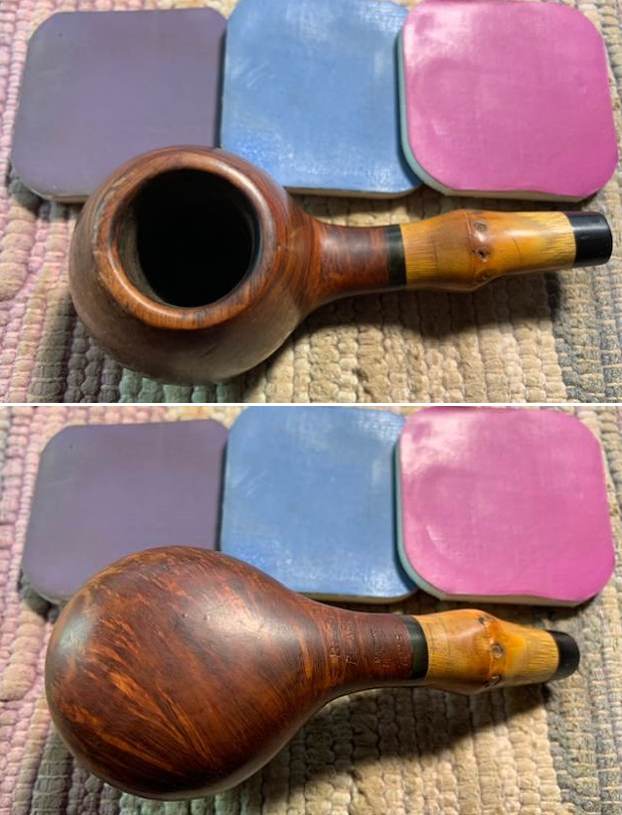
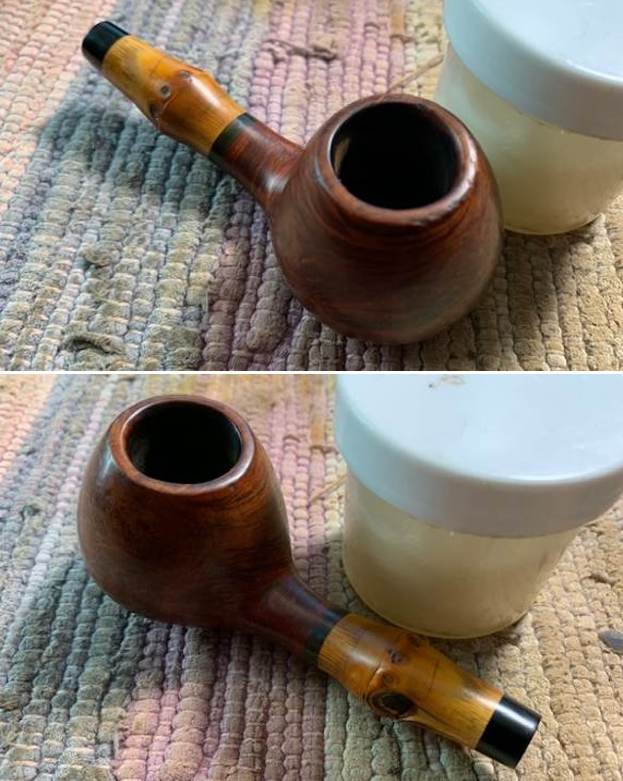
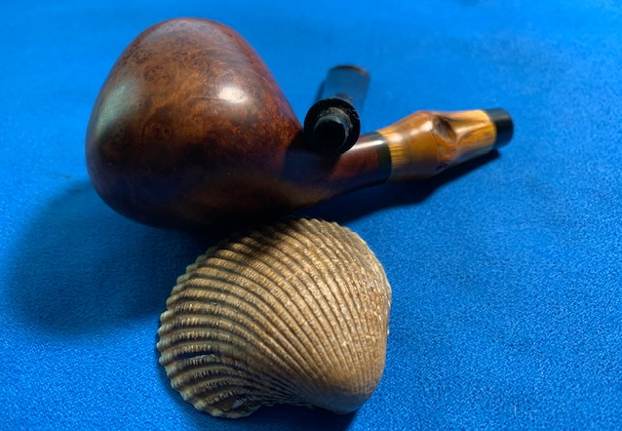
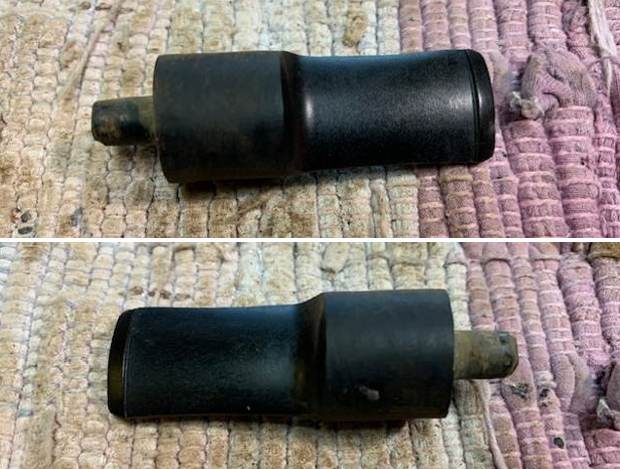
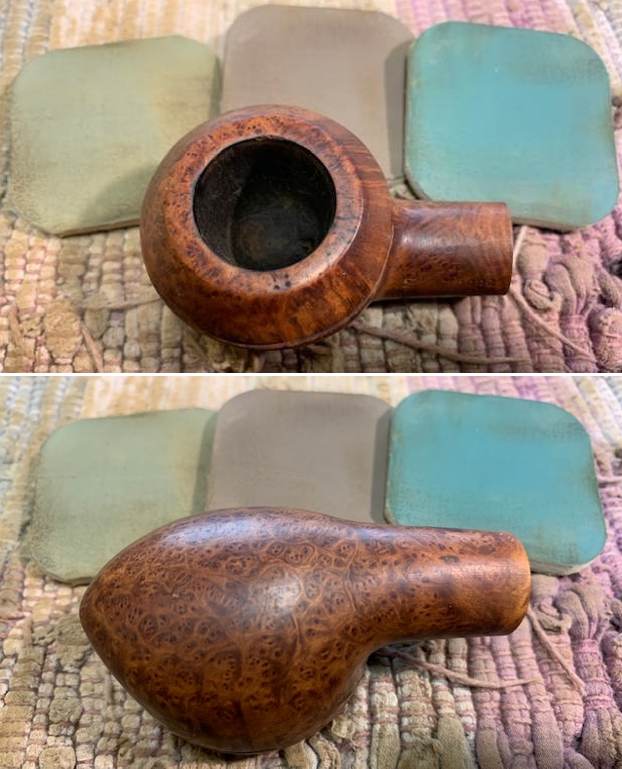
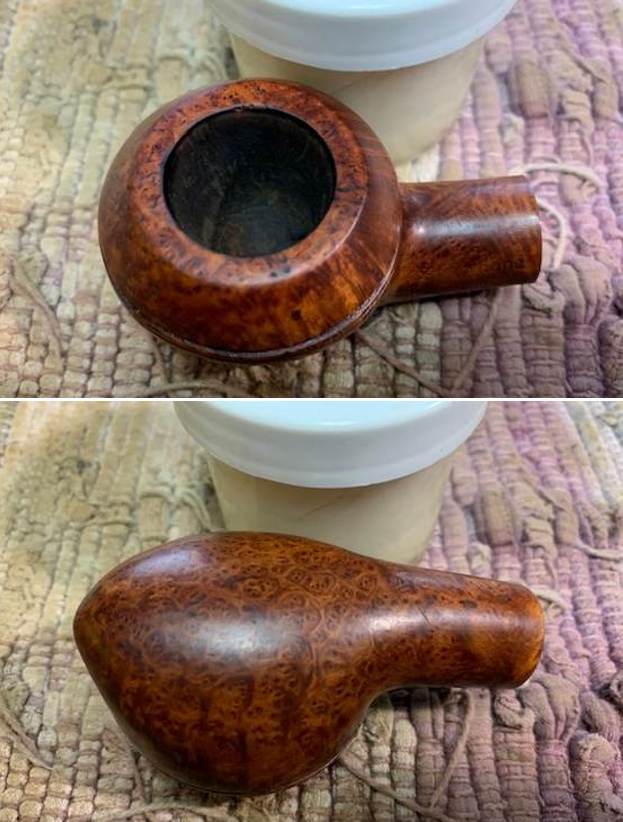
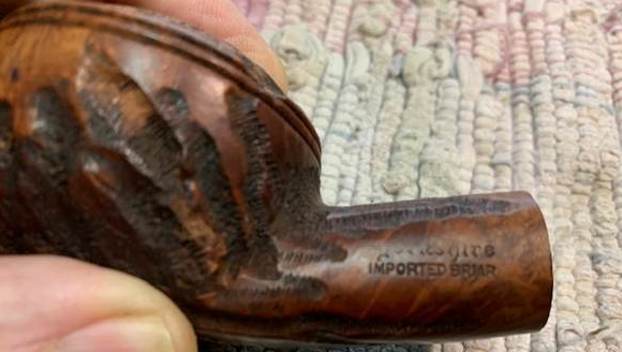
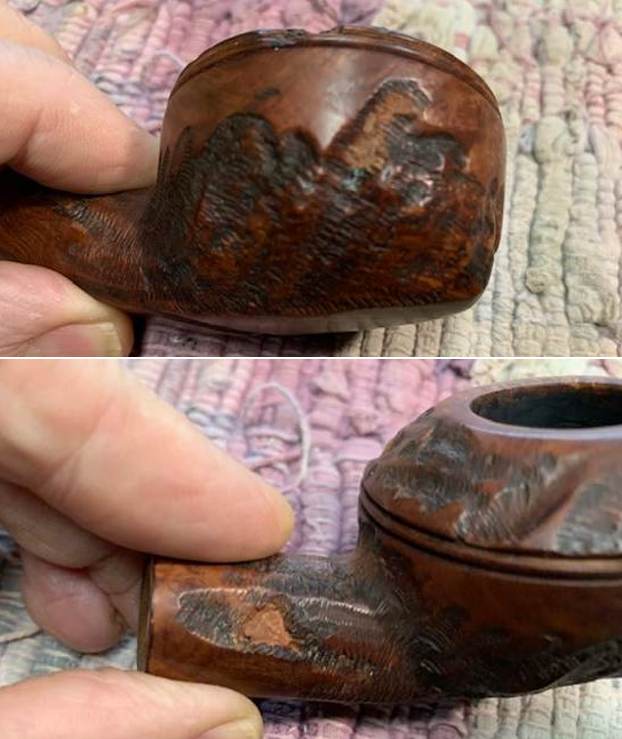
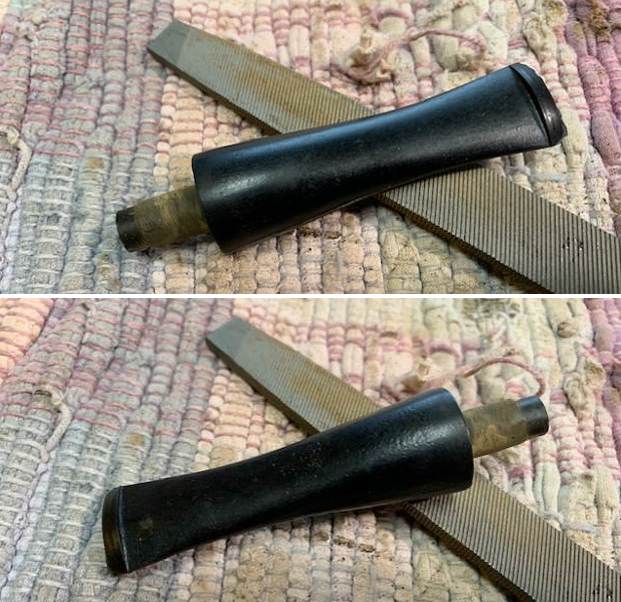
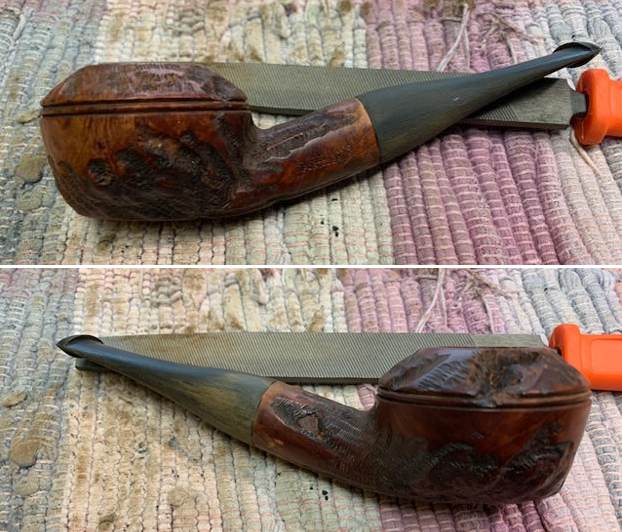
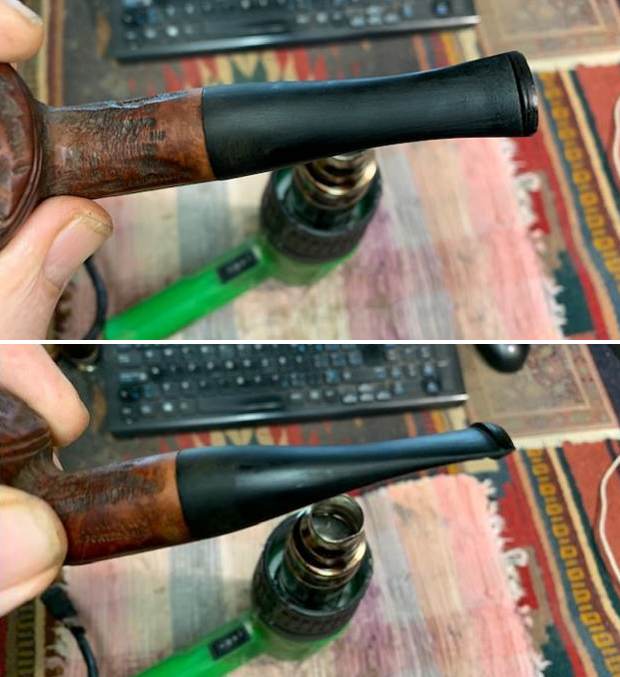
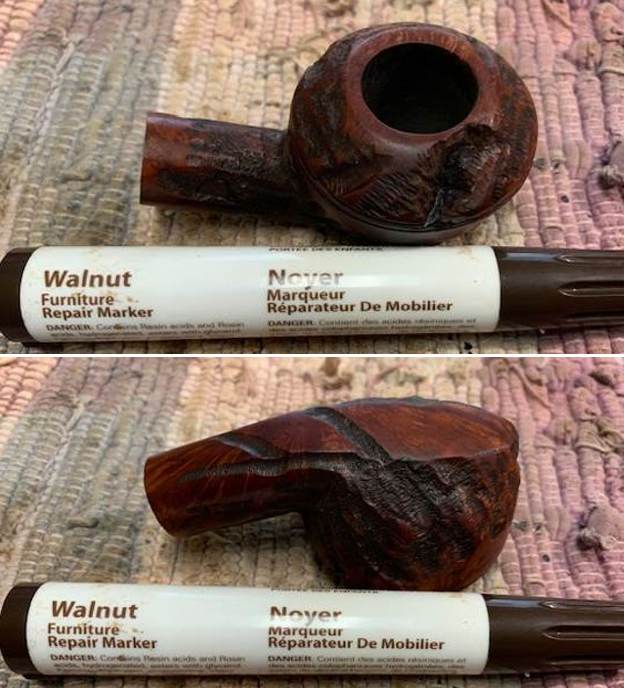
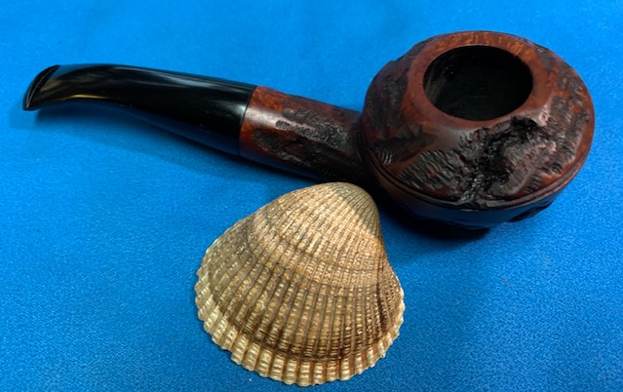
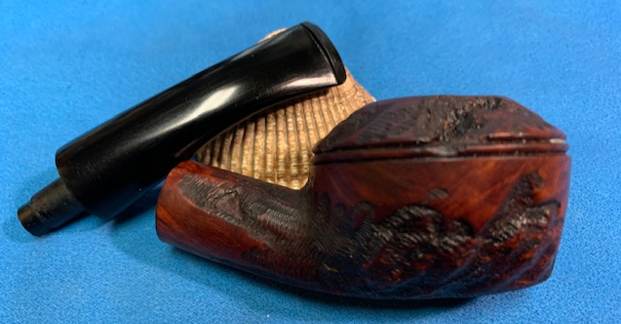
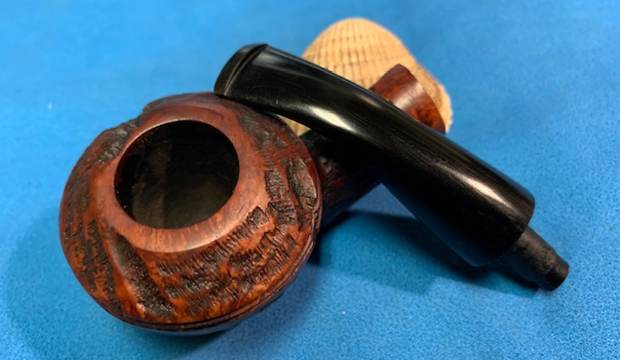
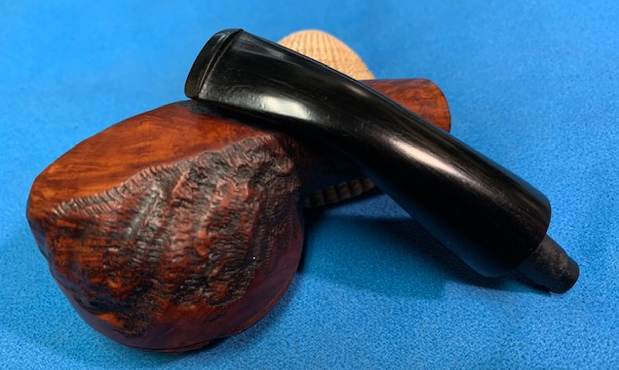
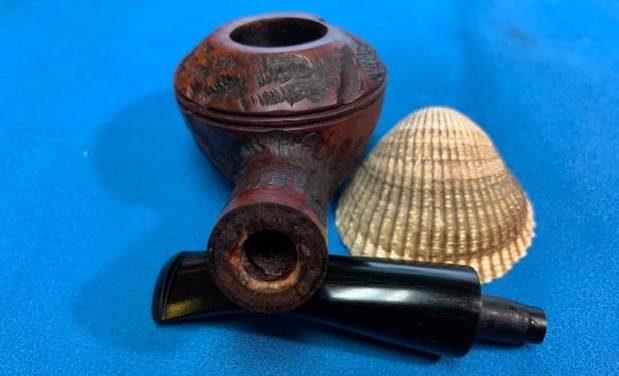
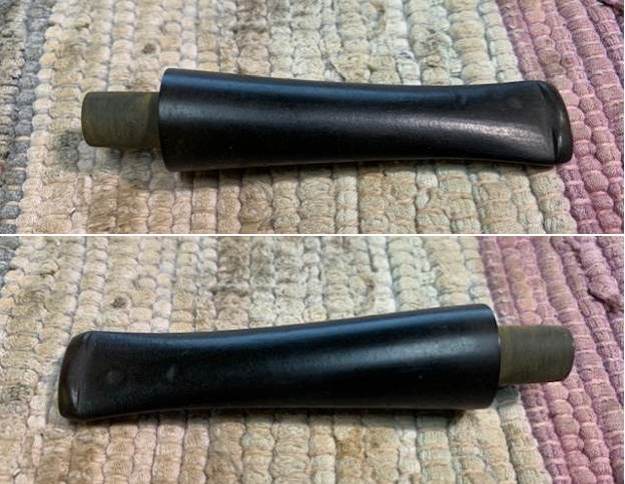
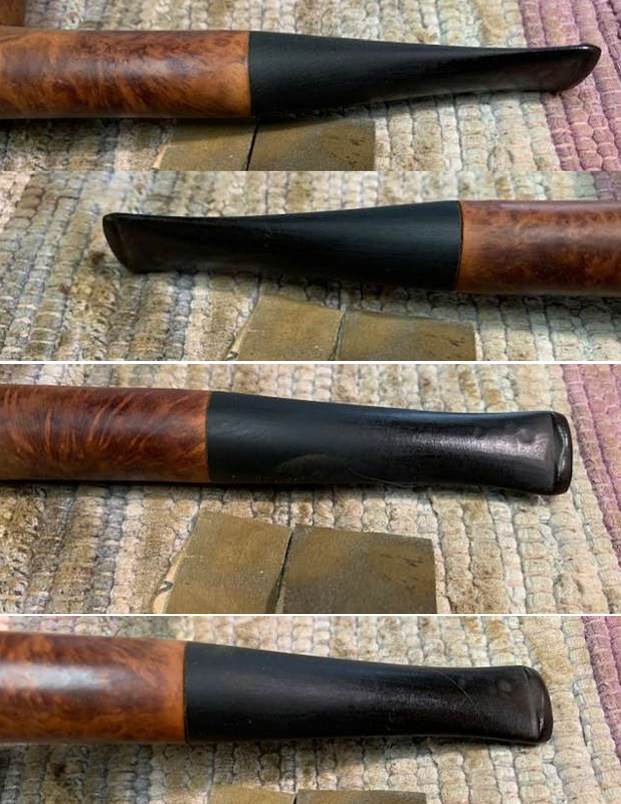
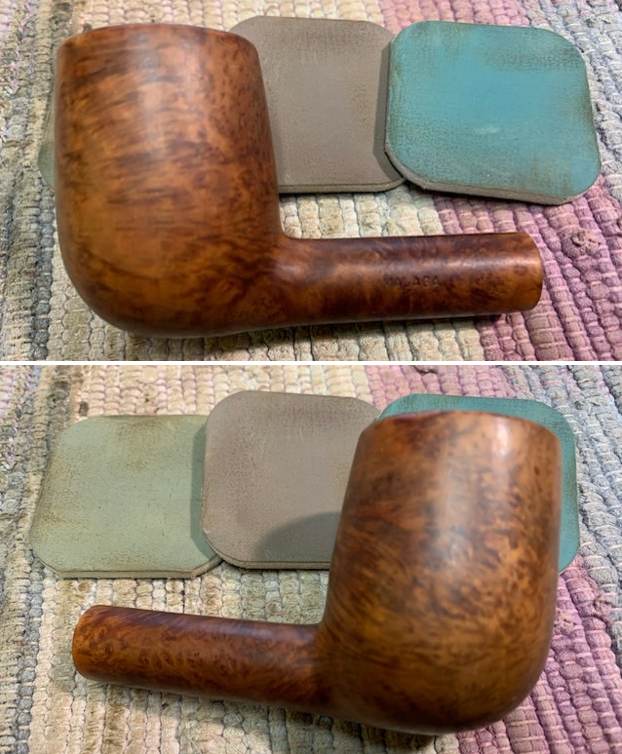
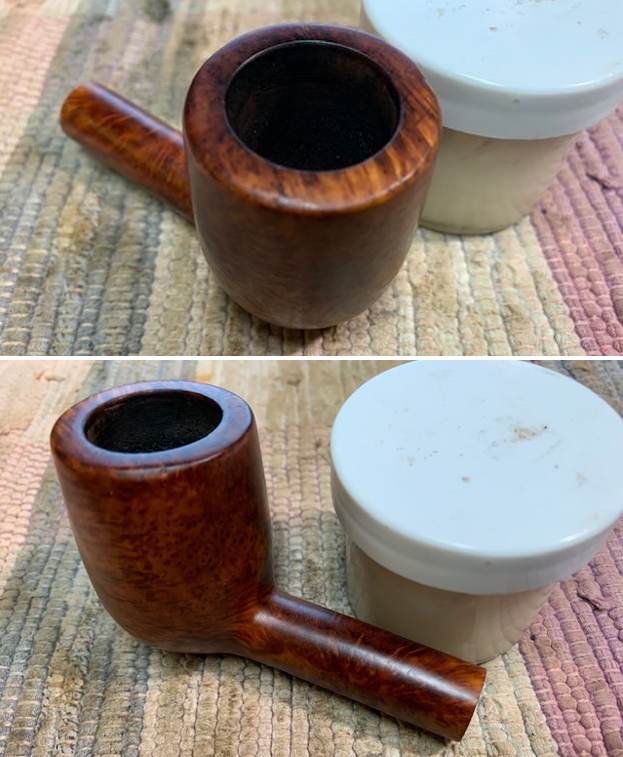
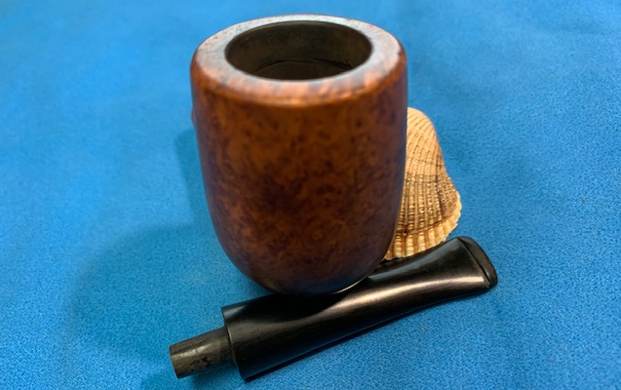
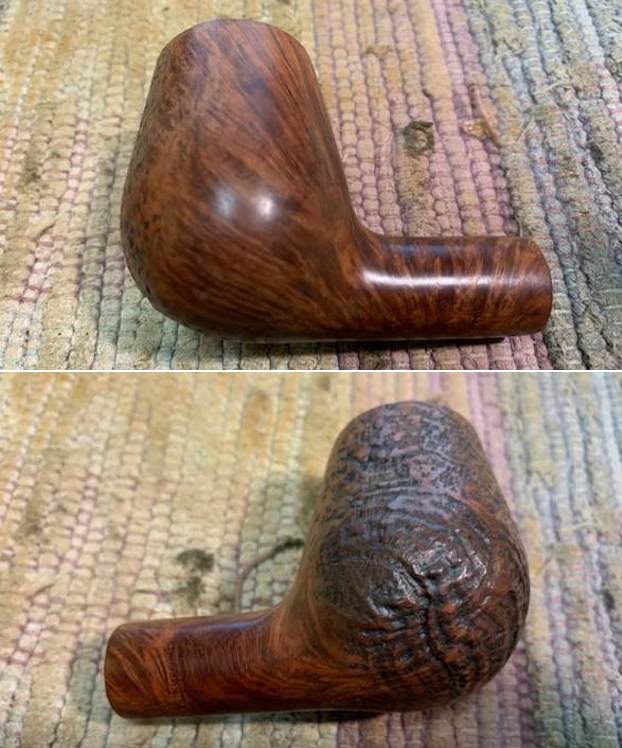
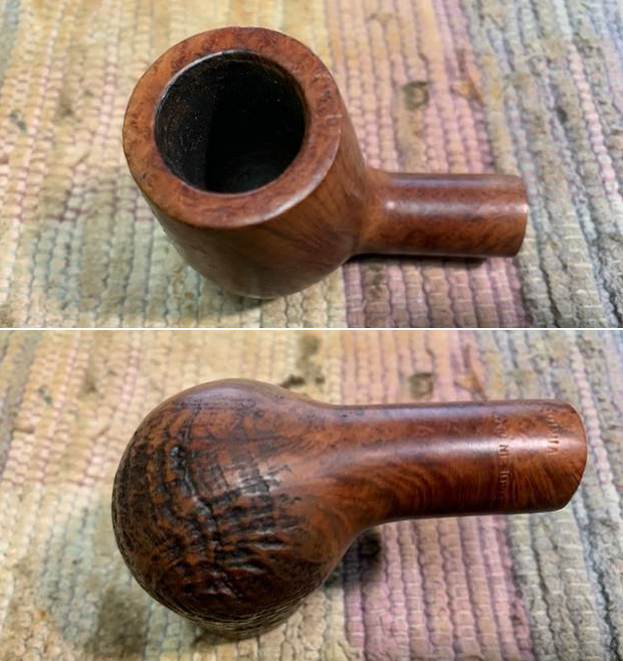
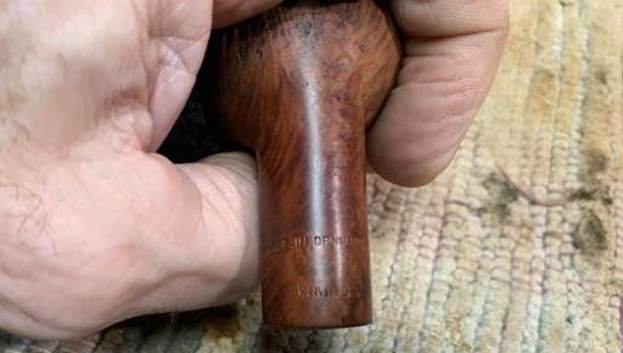
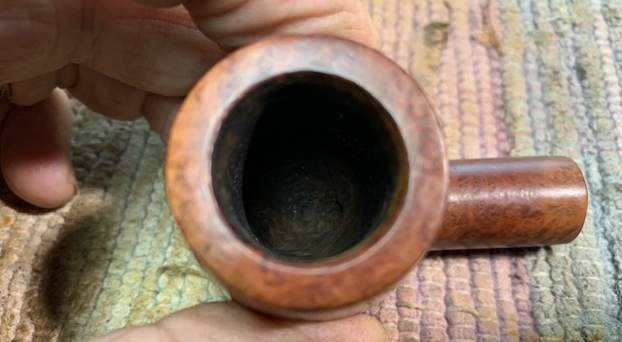
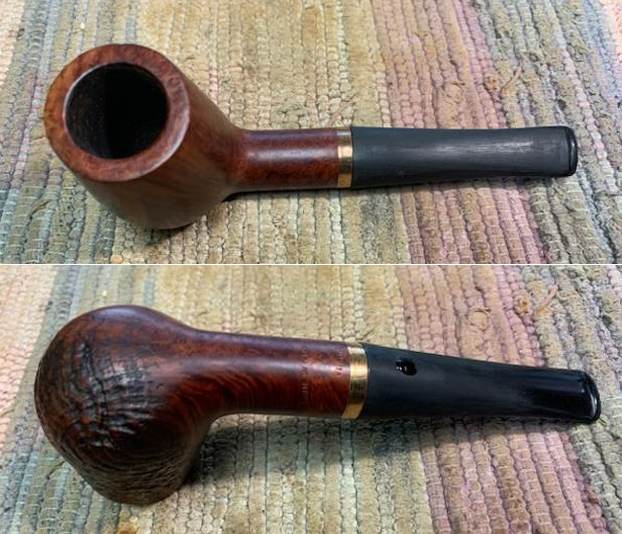
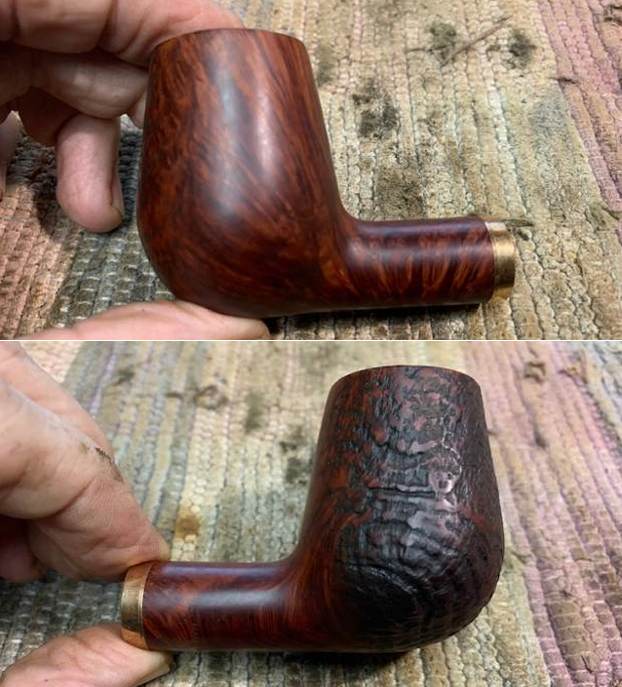
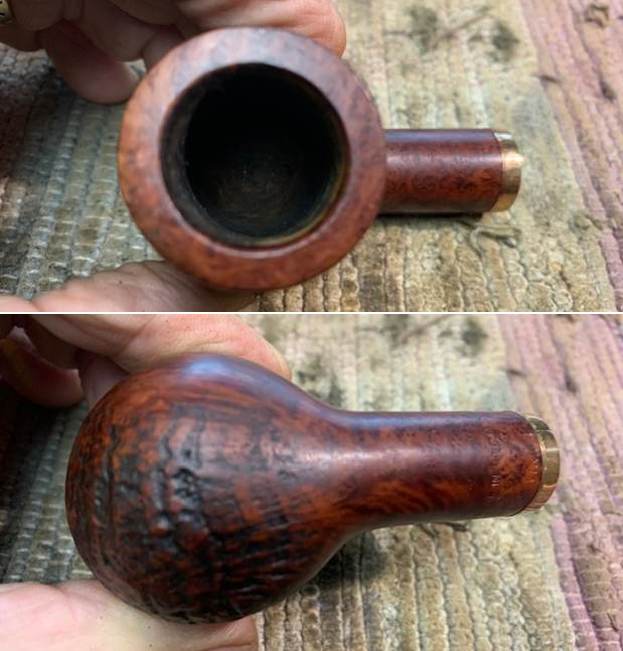
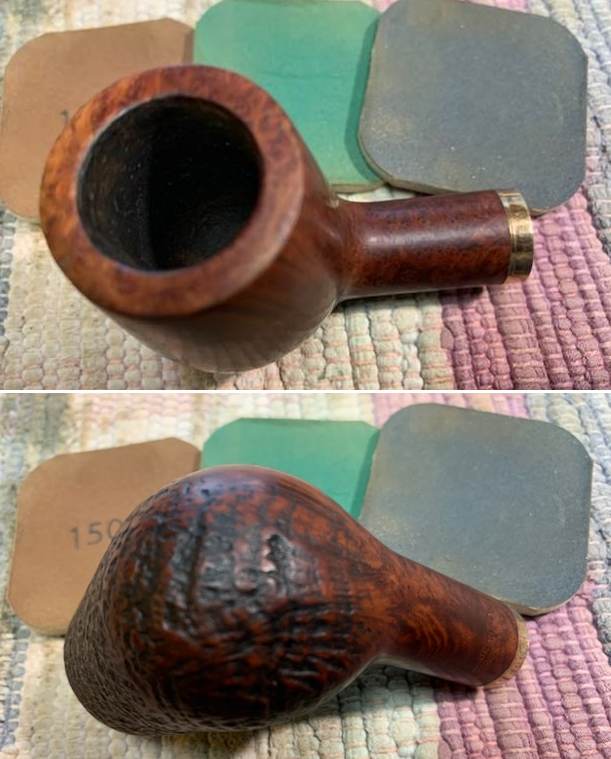
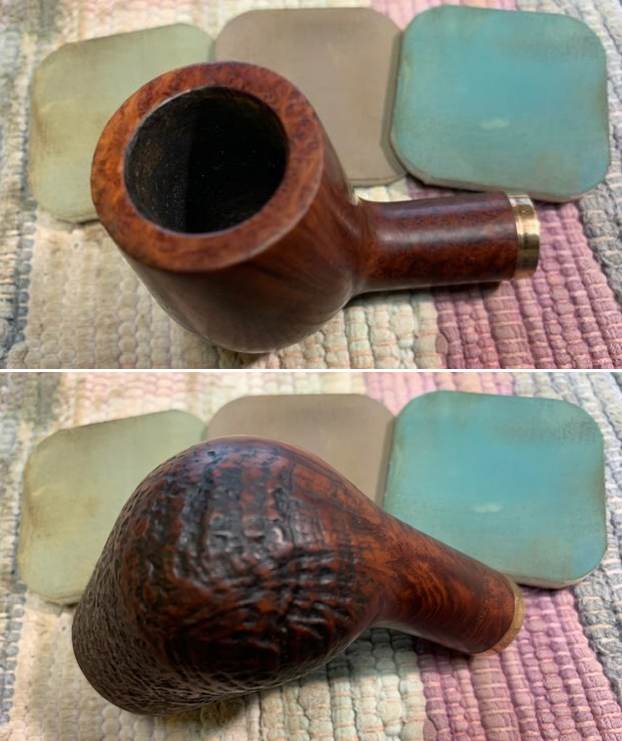
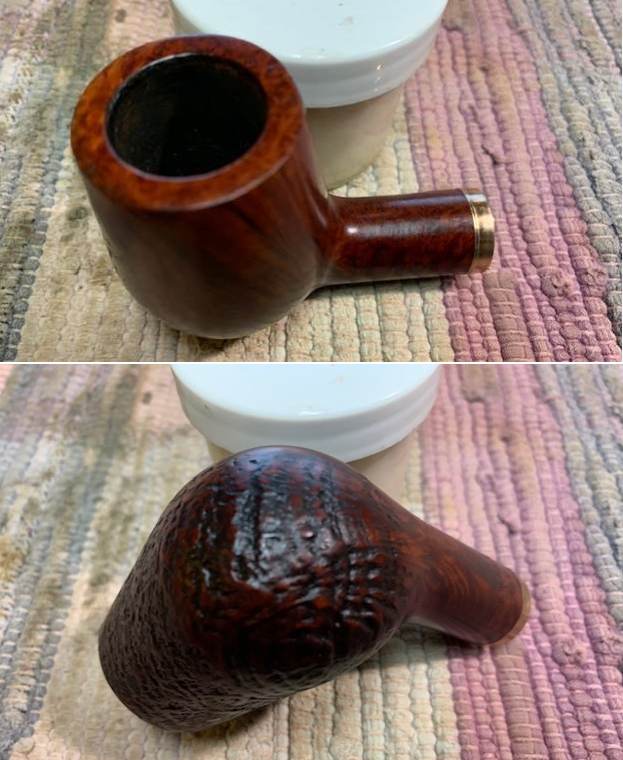
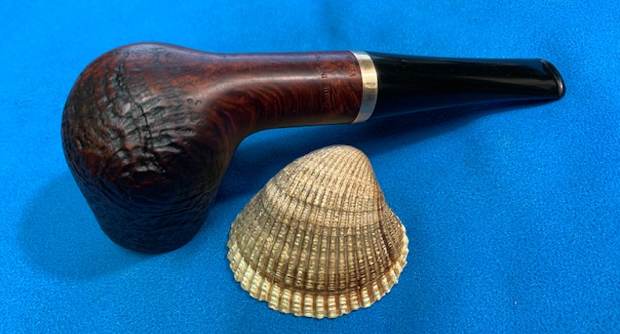
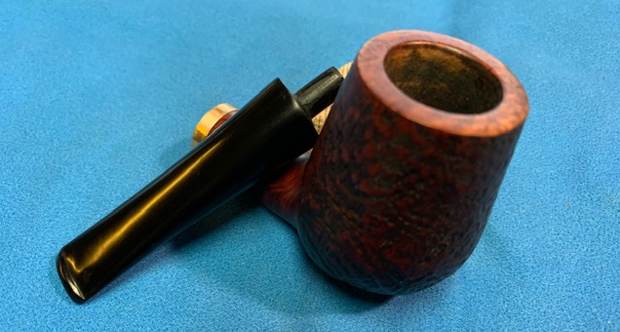
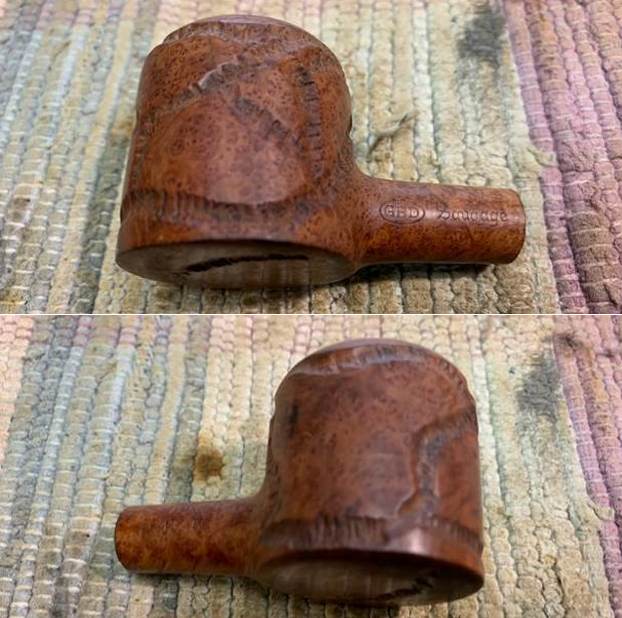
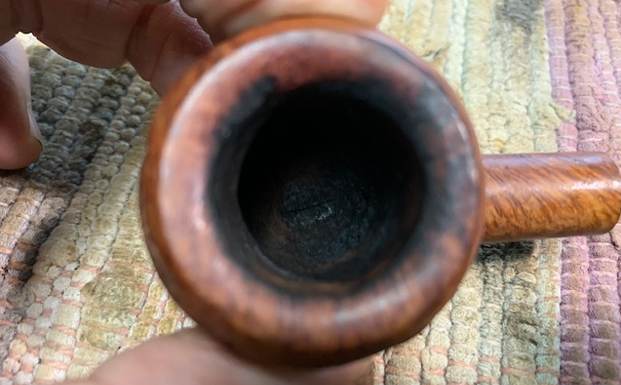
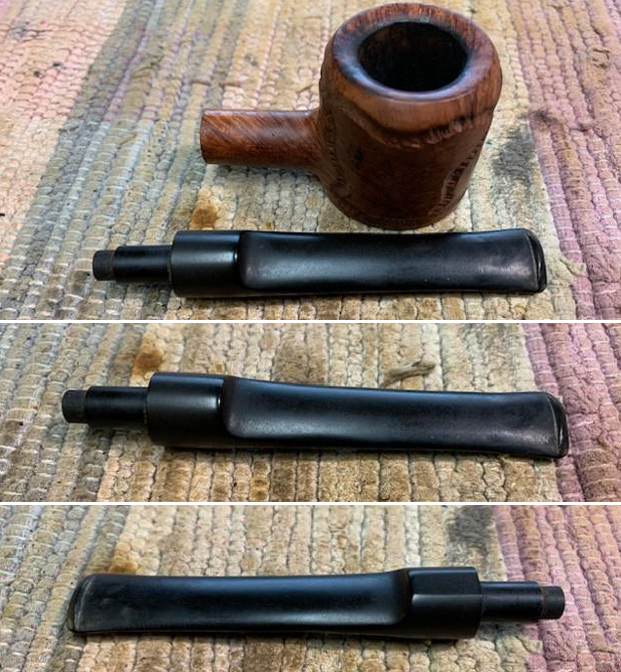
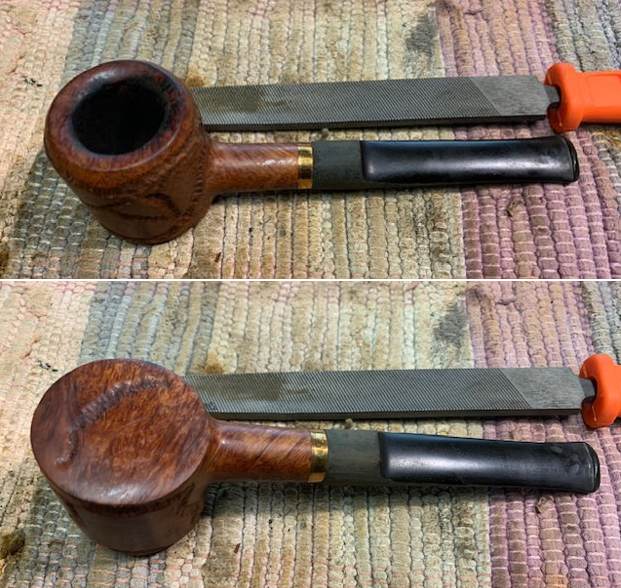
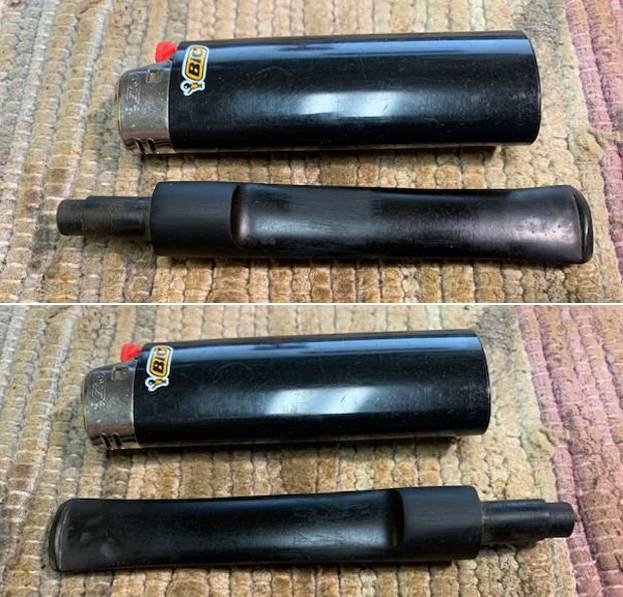
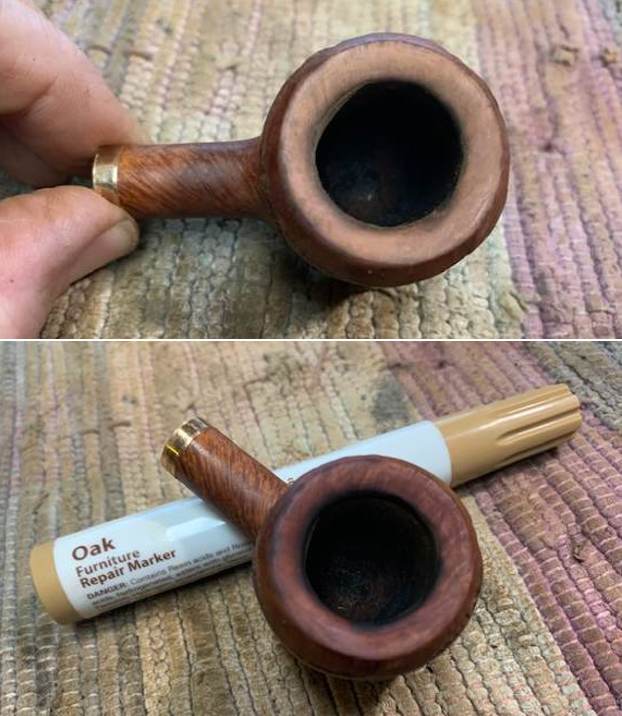
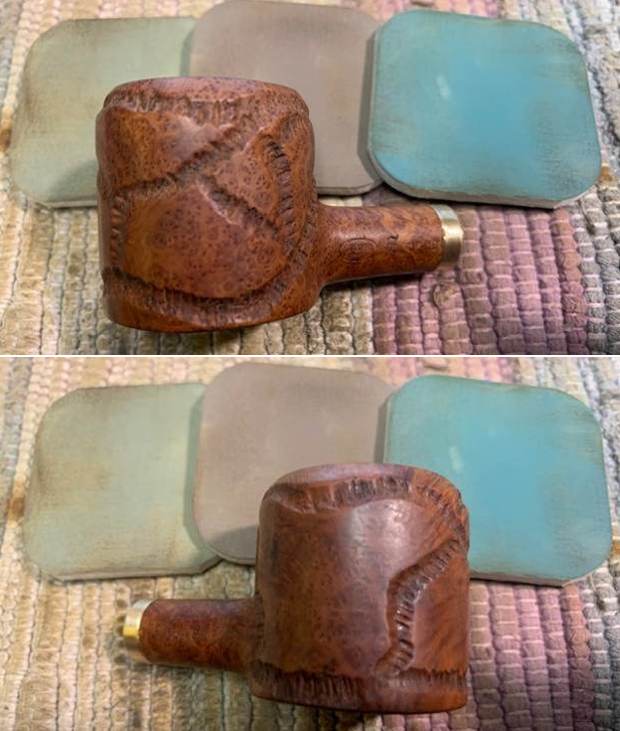
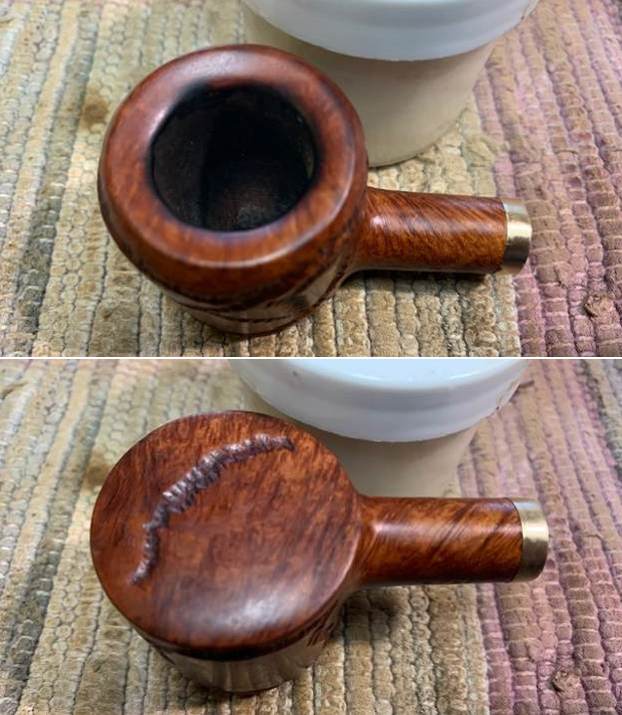
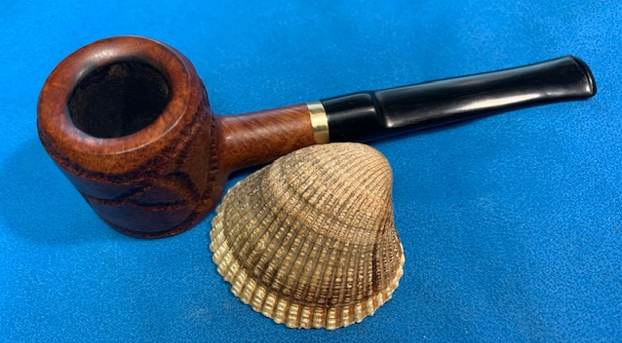
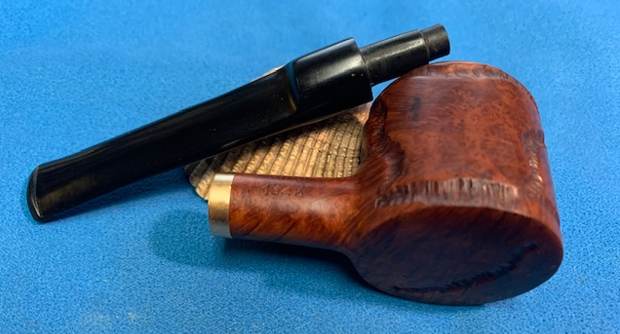
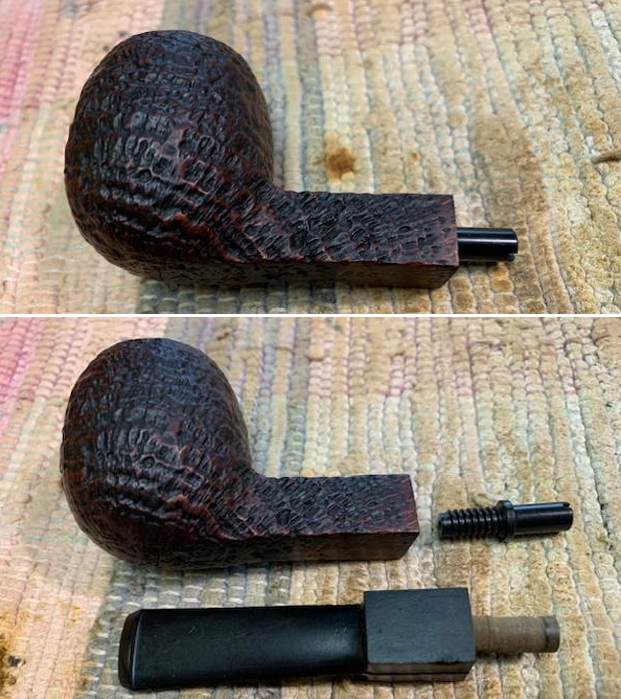
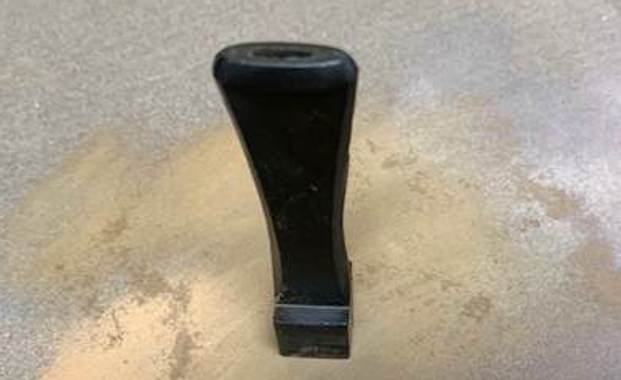
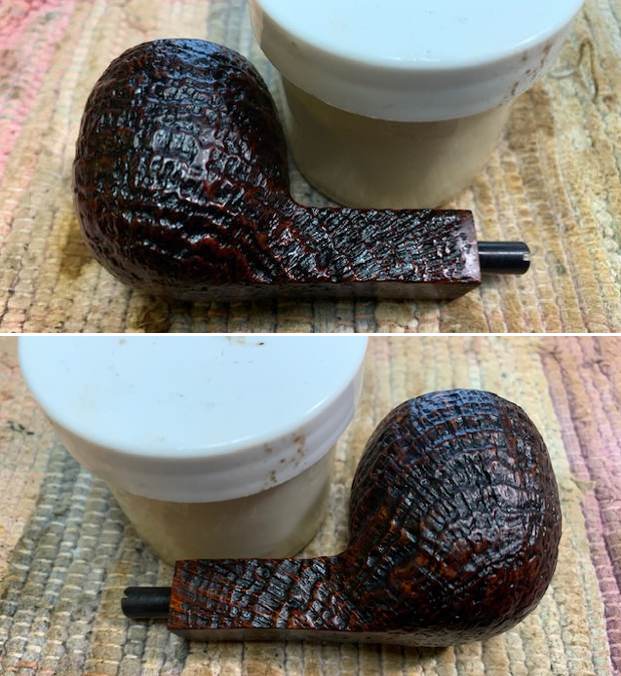
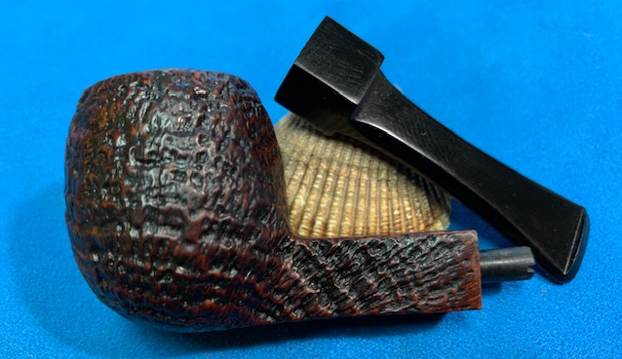
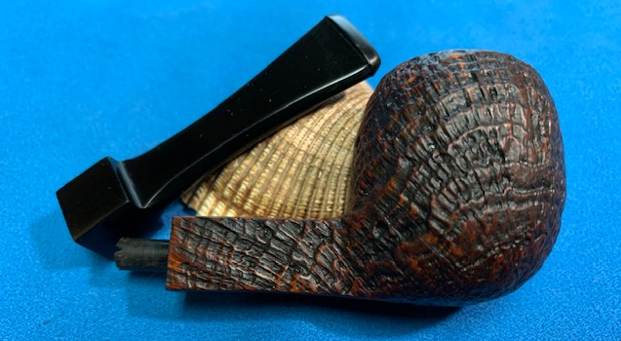
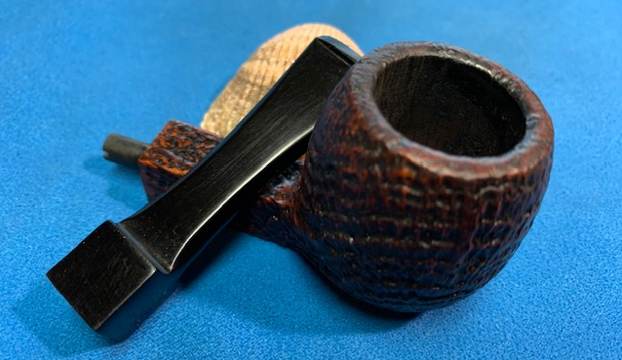
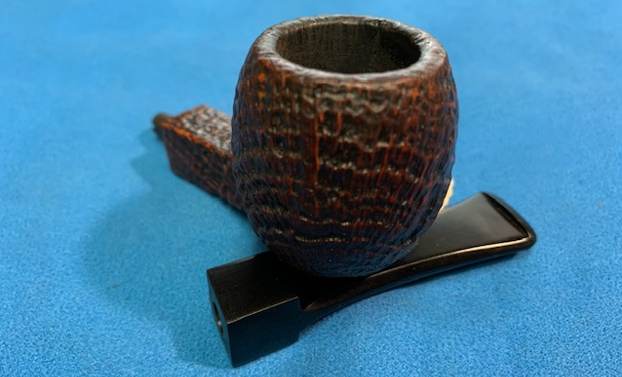
 I took some close up photos of the rim top and also of the stem surface. I wanted to show how well it had cleaned up. The rim top had some darkening and damage on the top. The inner edge was out of round and had some damage on the front and the back of the bowl. It appears that the shank is slightly tapered toward the stem end. I don’t know if this is original or from a previous repair. It should clean up really well. I also took close up photos of the new stem to show how well it was fit to the shank. It is a tiny looking stem and thin shank! Thanks to Walls Pipe Repair!!
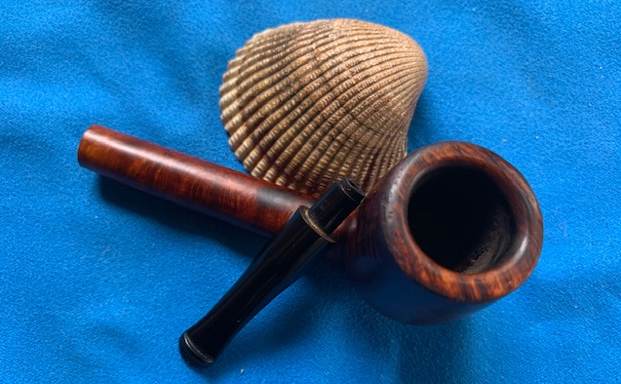
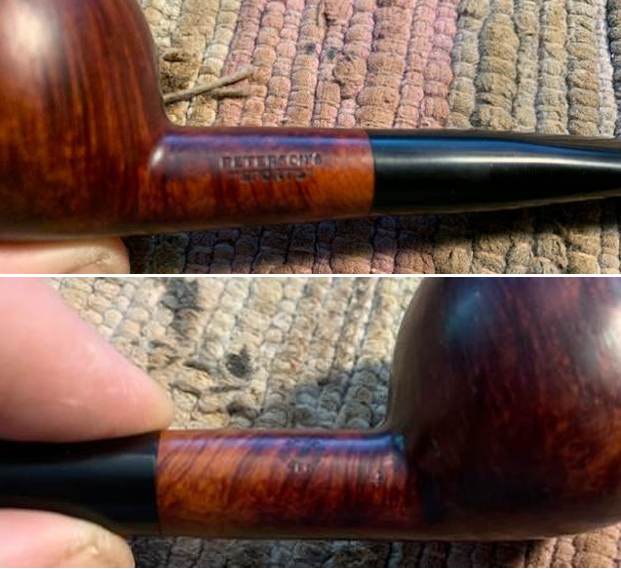
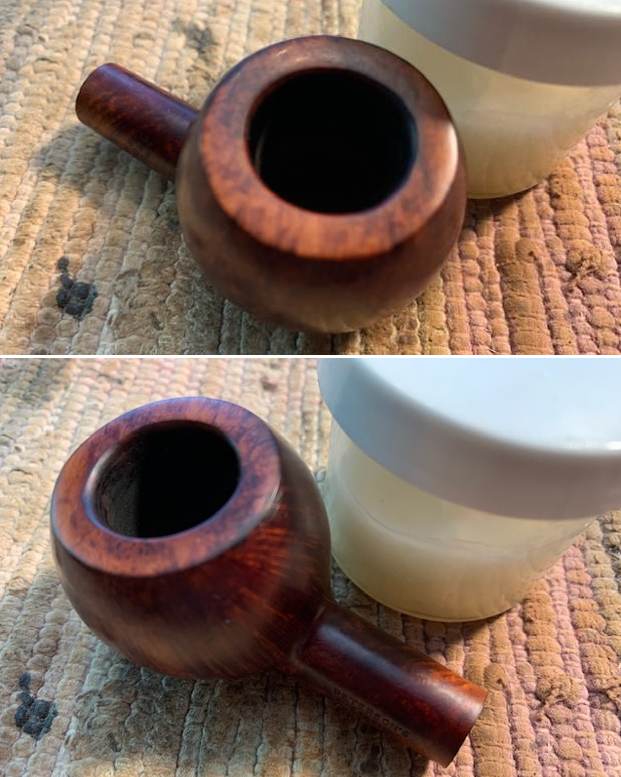
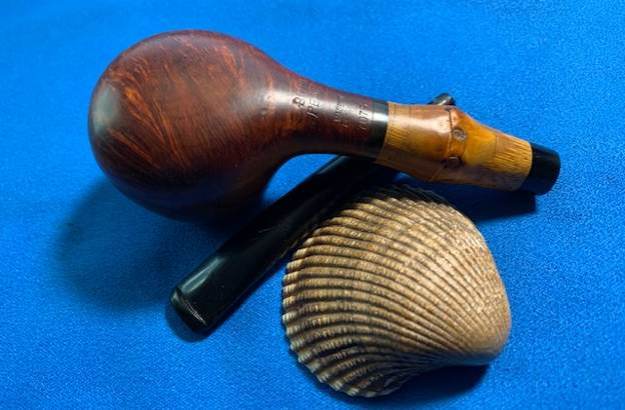
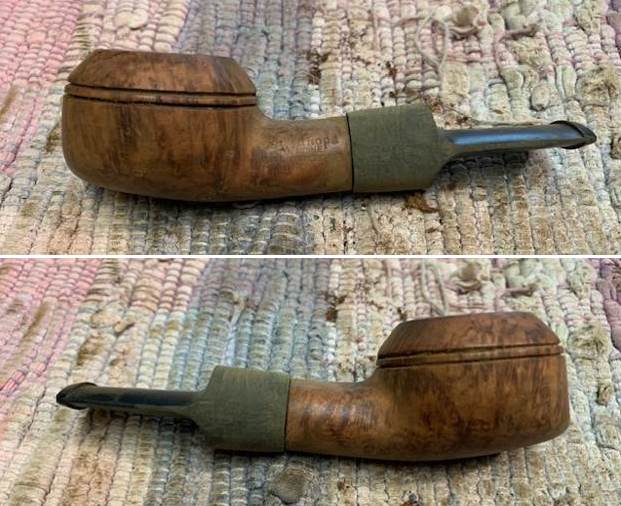
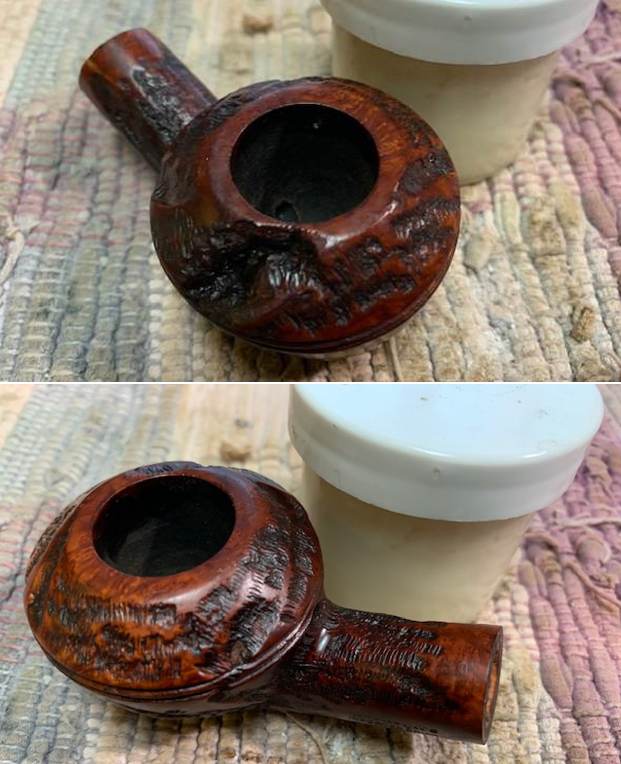
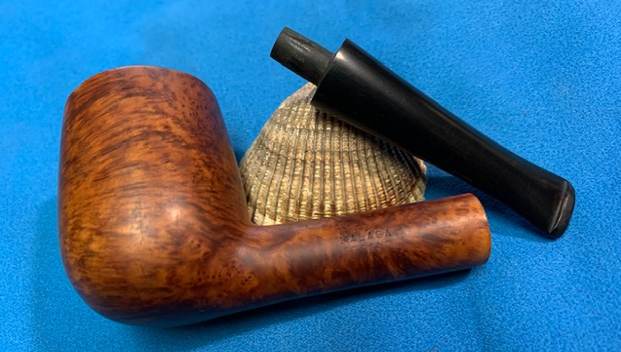
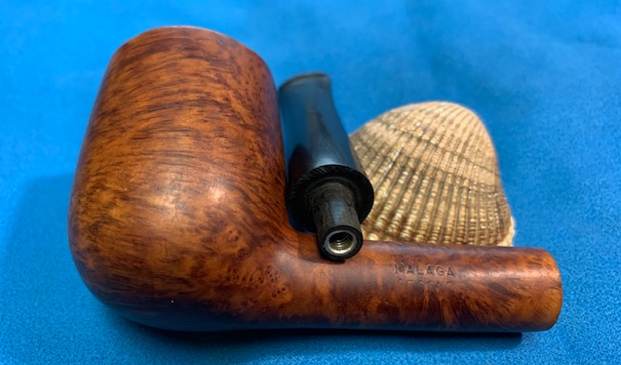
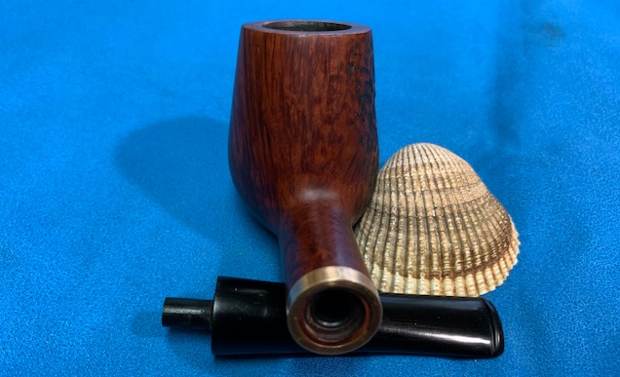
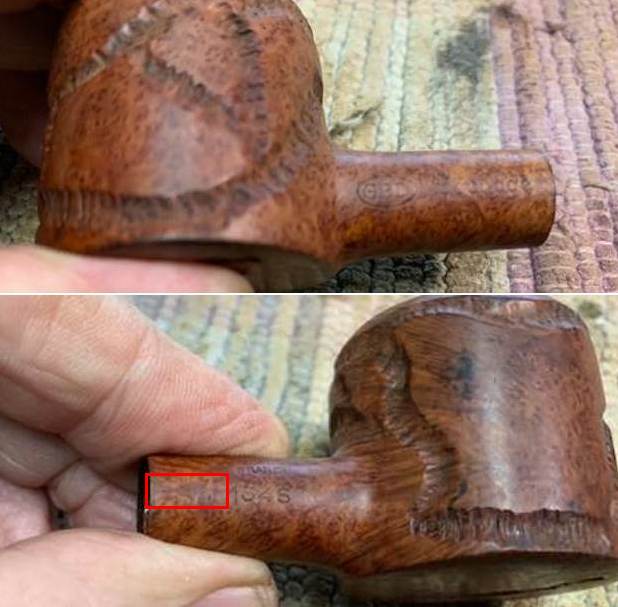
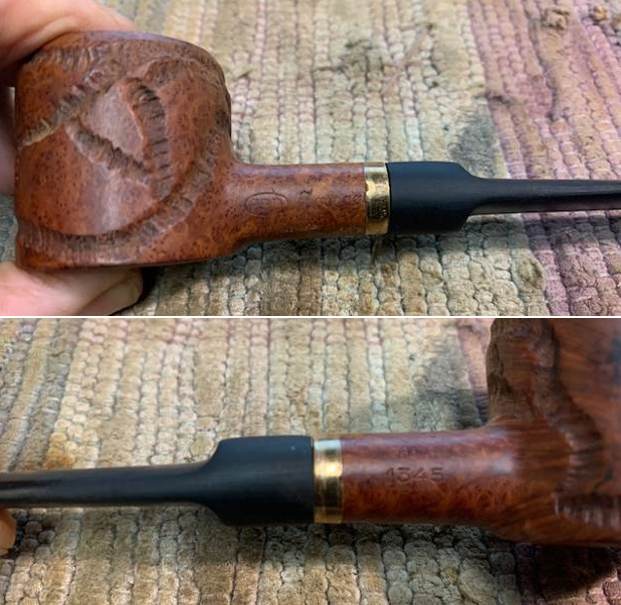
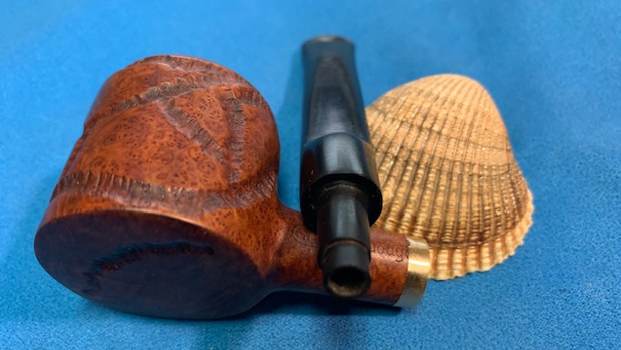
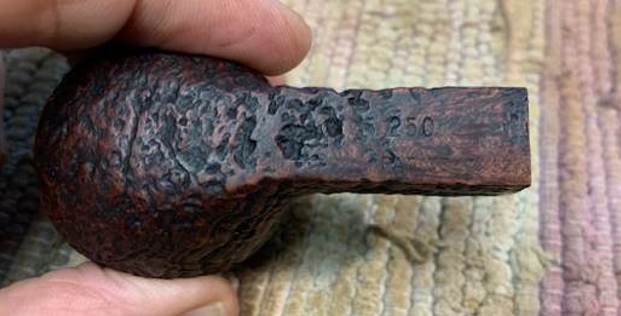
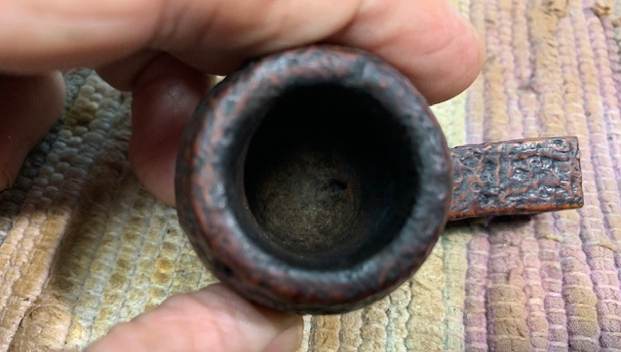
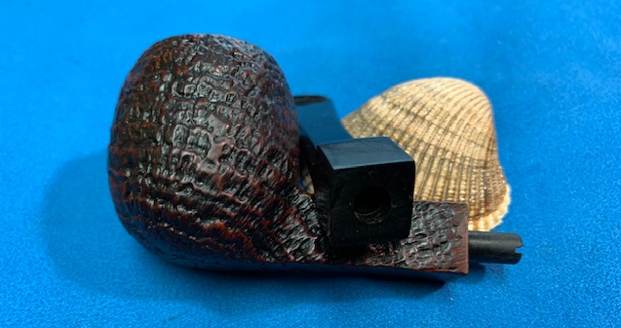
 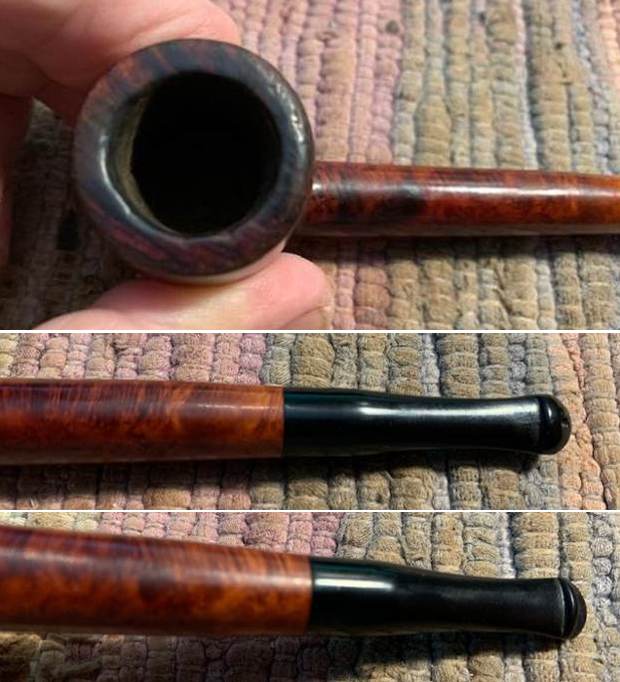 I took photos of the stamping on the sides of the shank. It is faint but readable with a light and lens you can see that it is stamped as noted above.
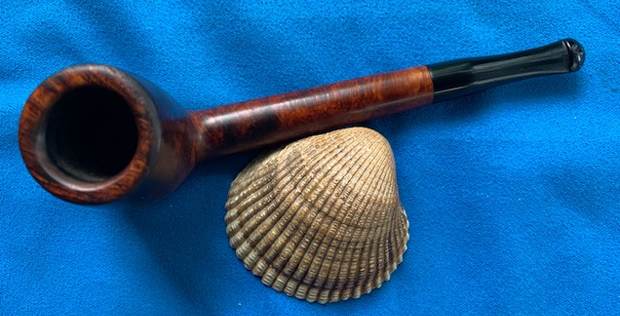
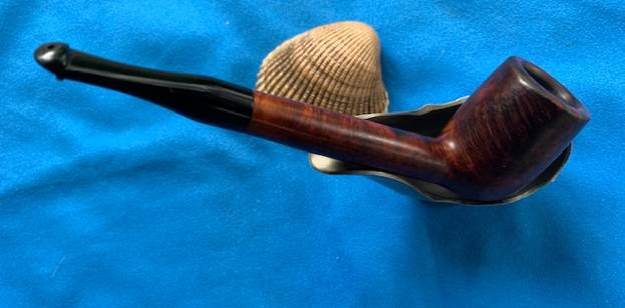
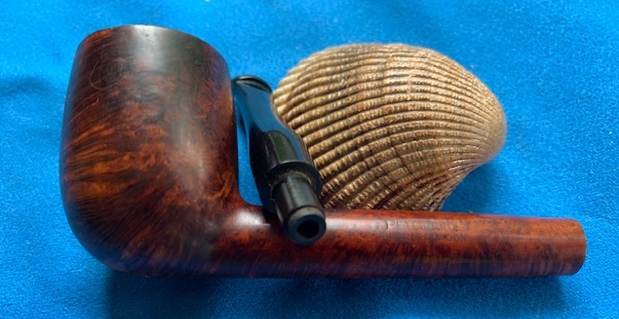
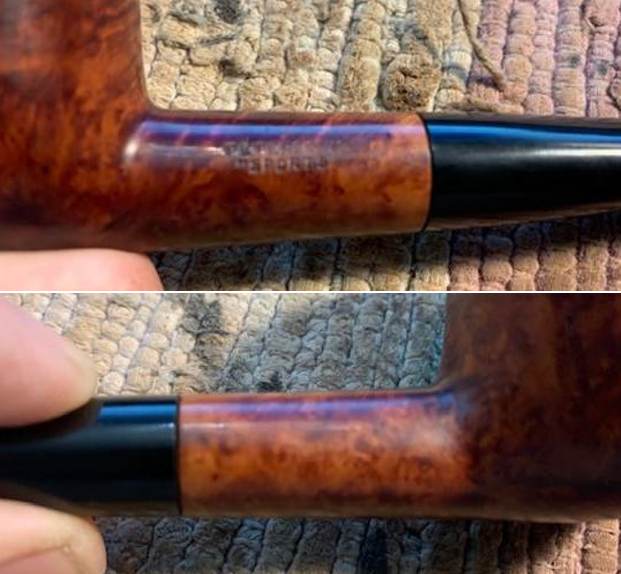
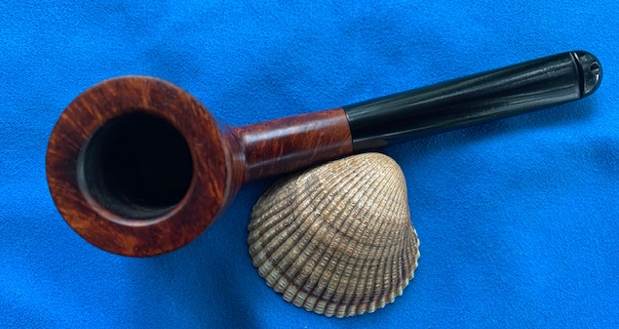
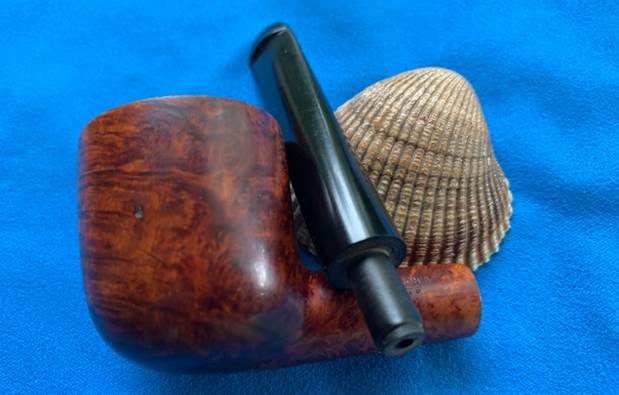
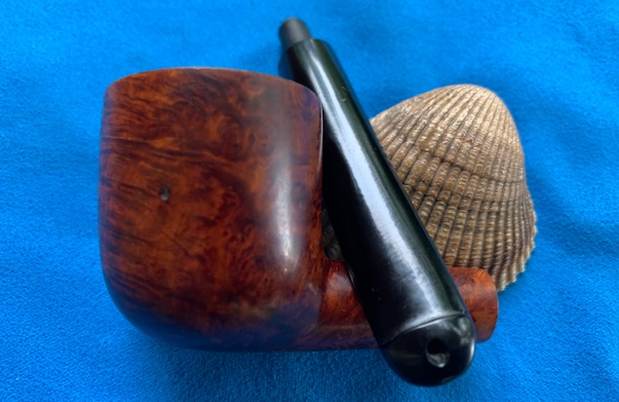
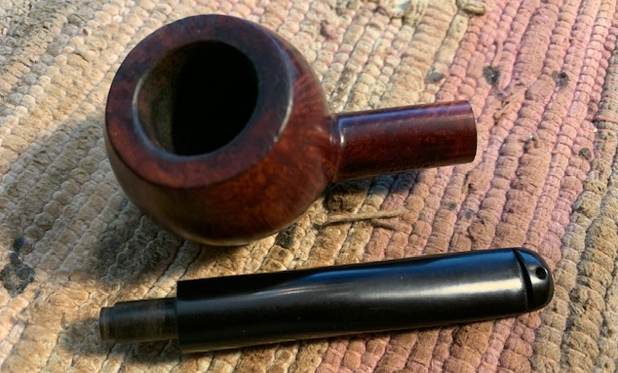
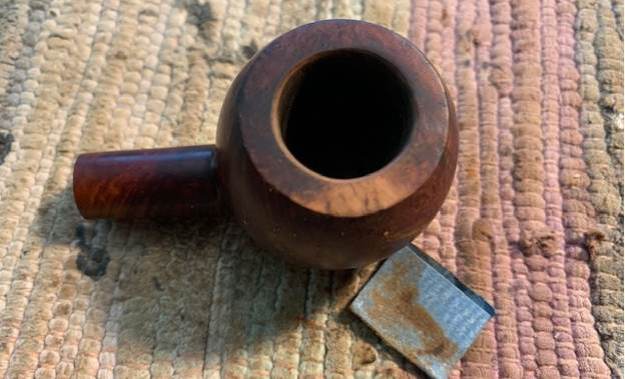
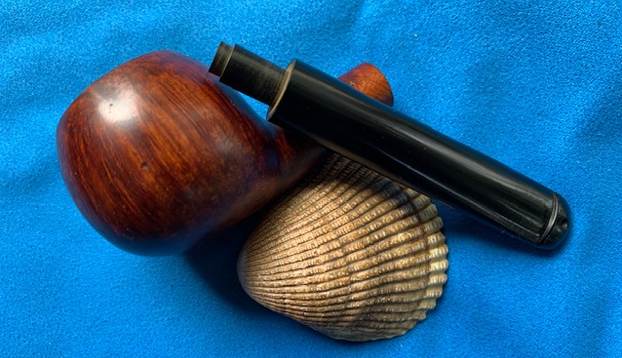
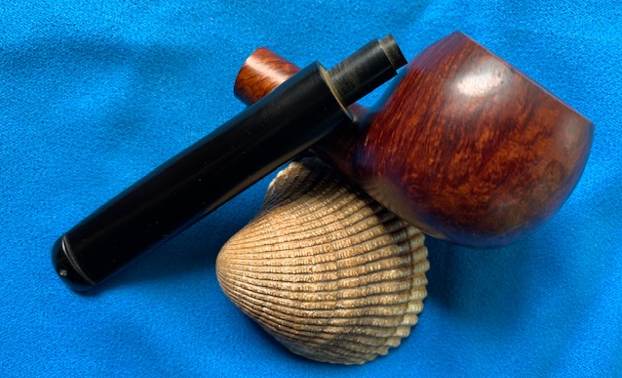
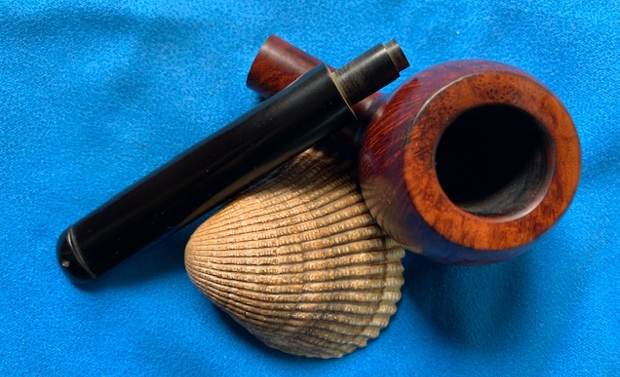
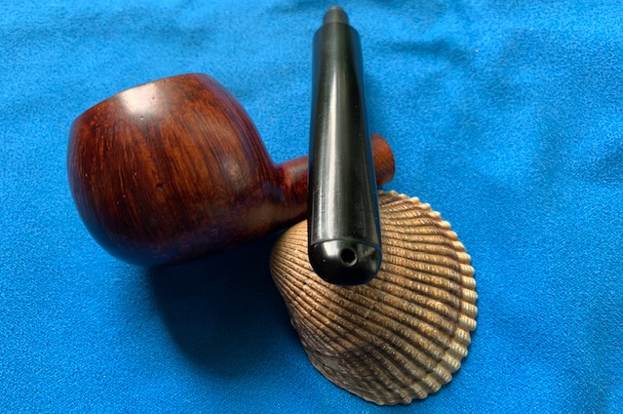
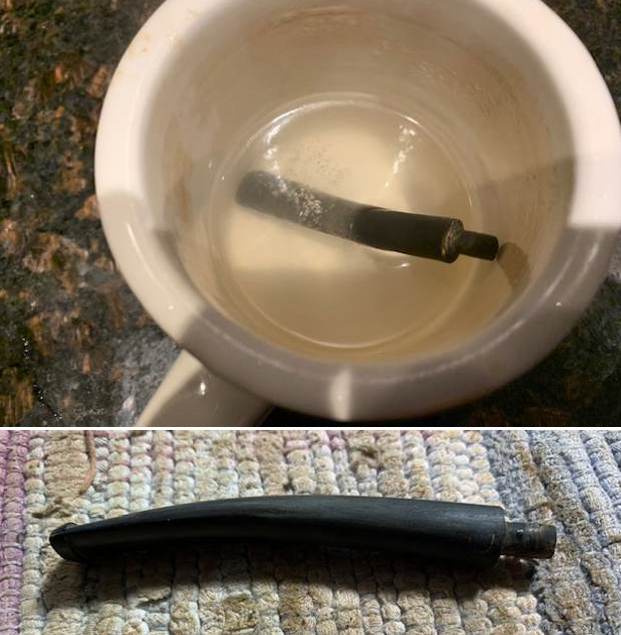
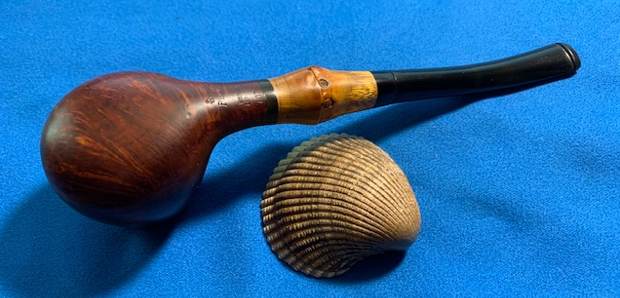
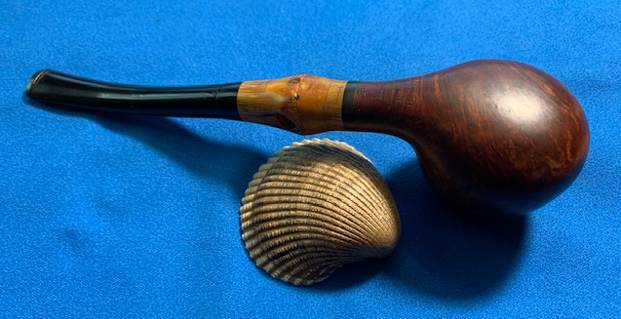
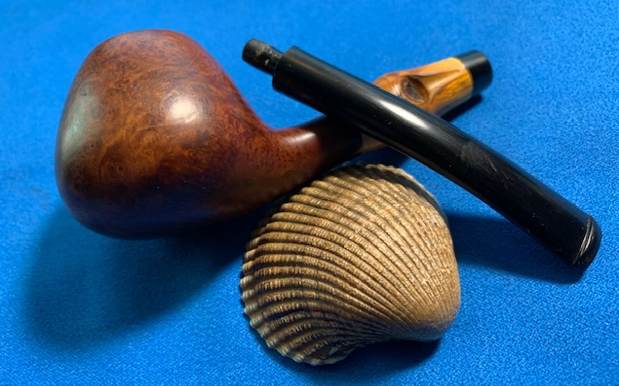
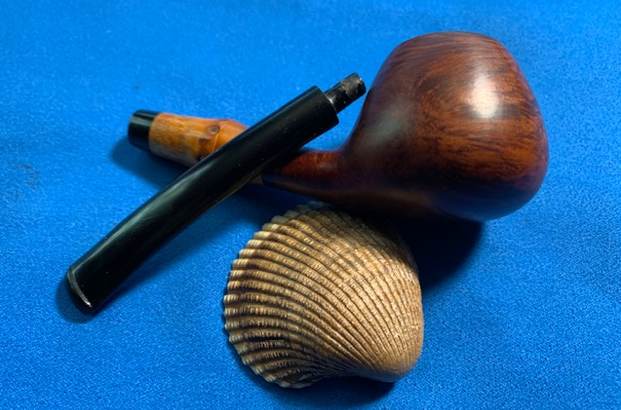
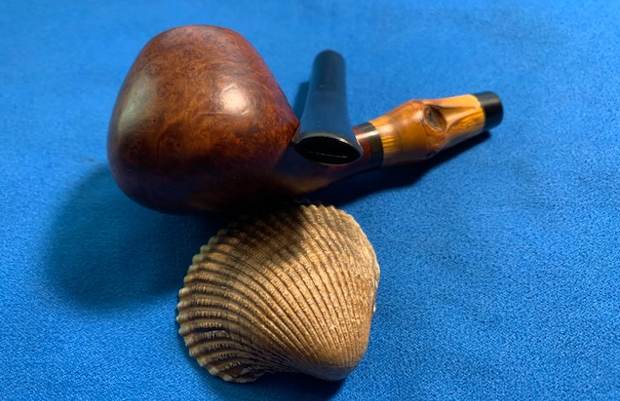
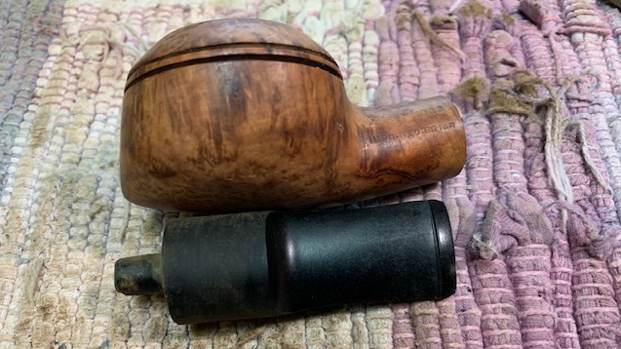
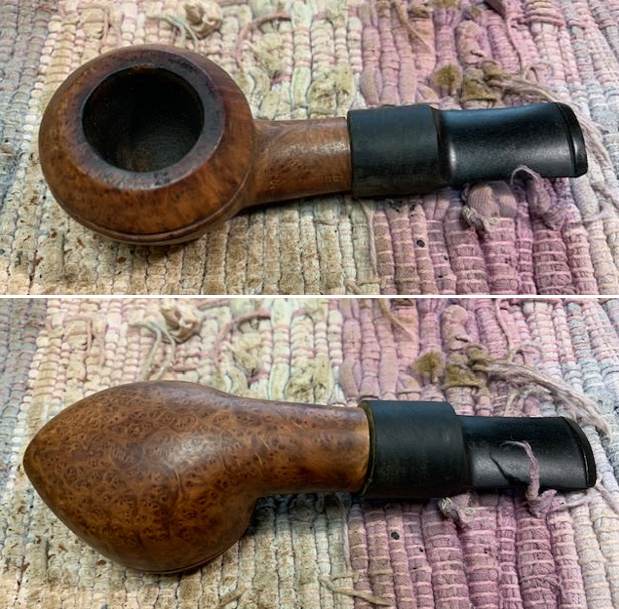
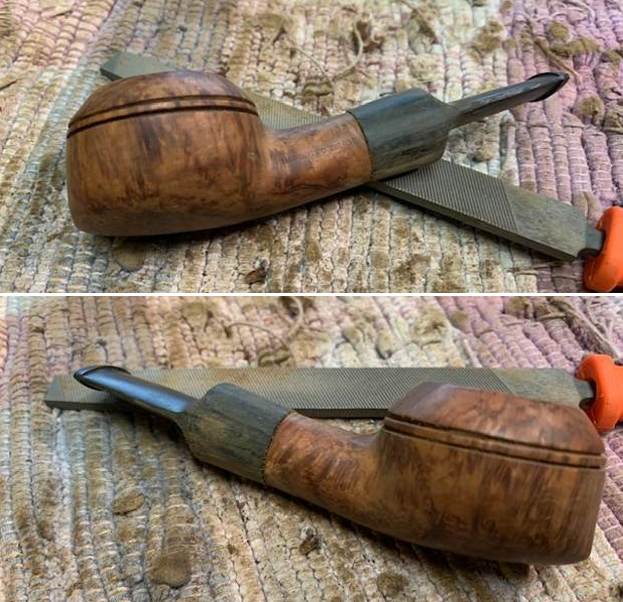
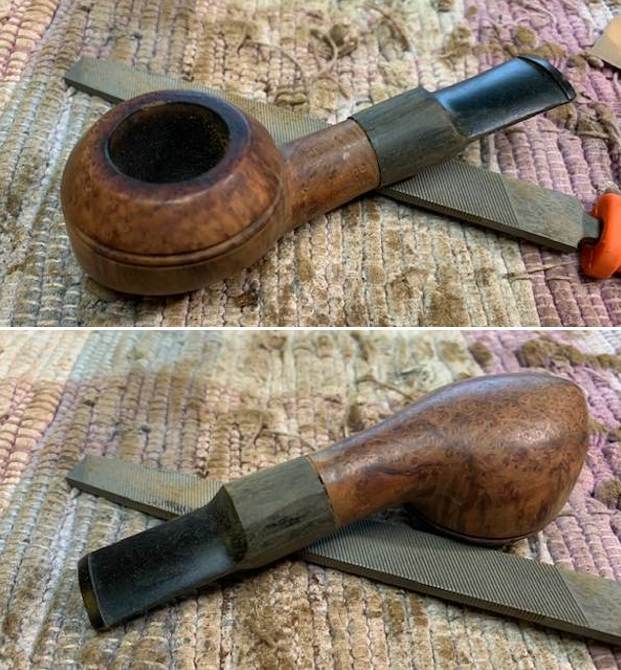
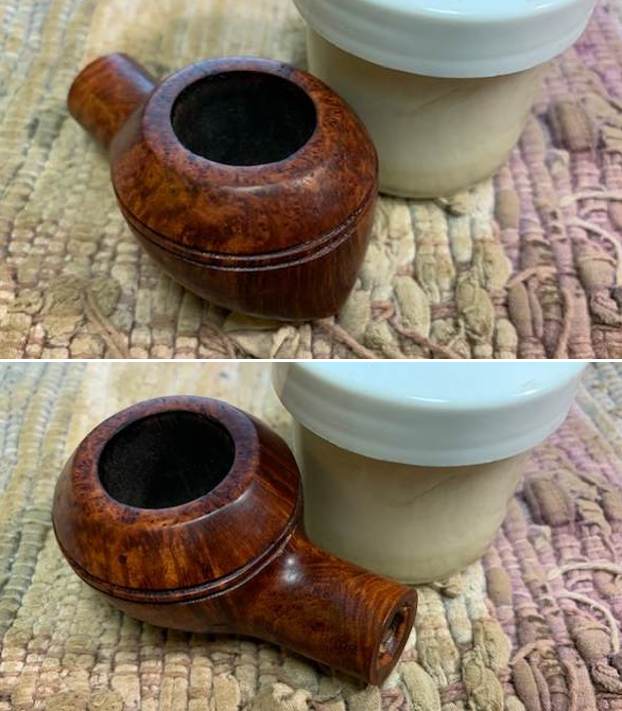
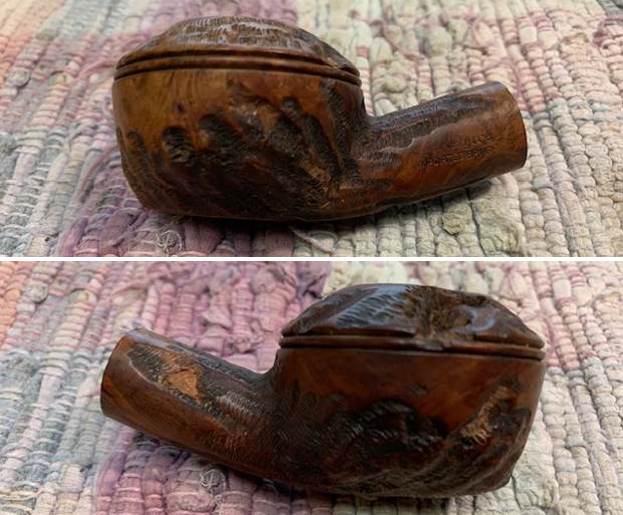
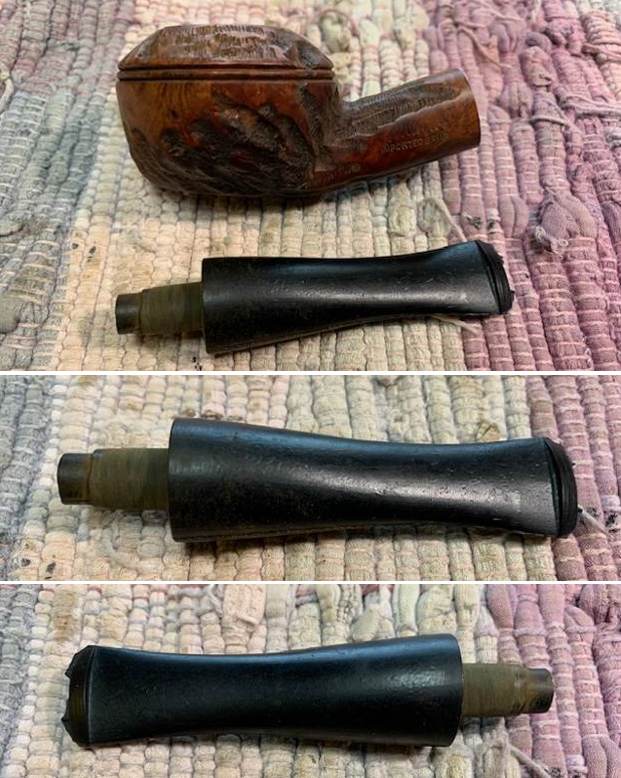
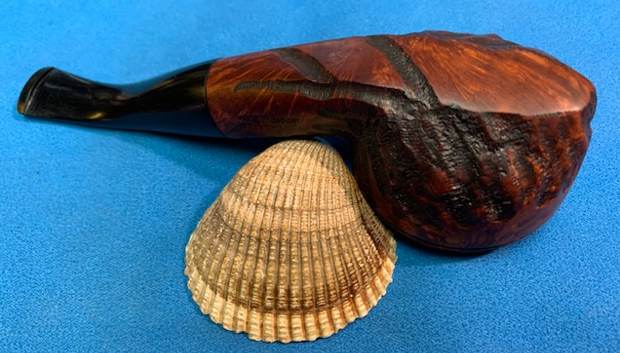
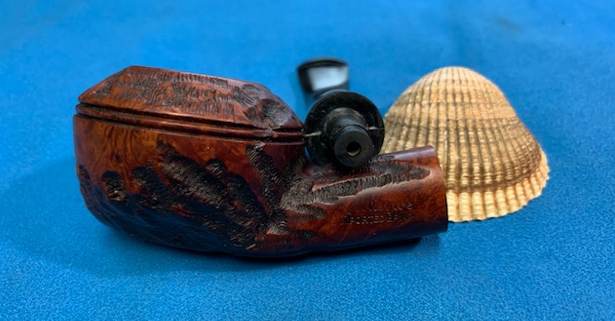
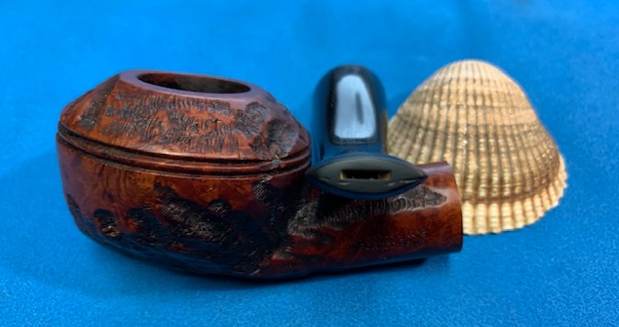
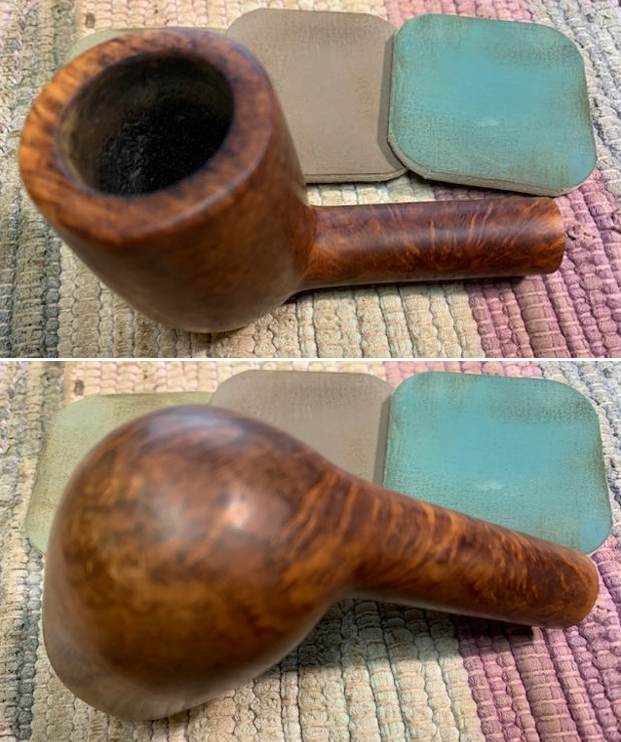
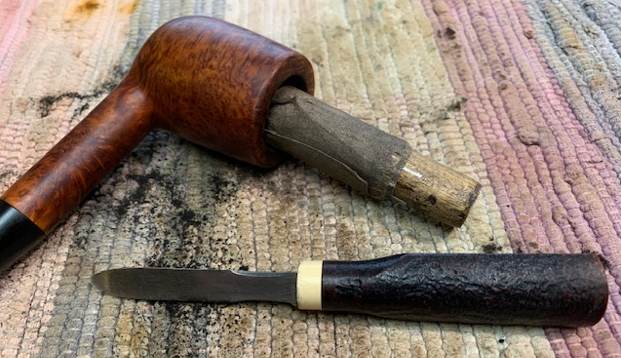
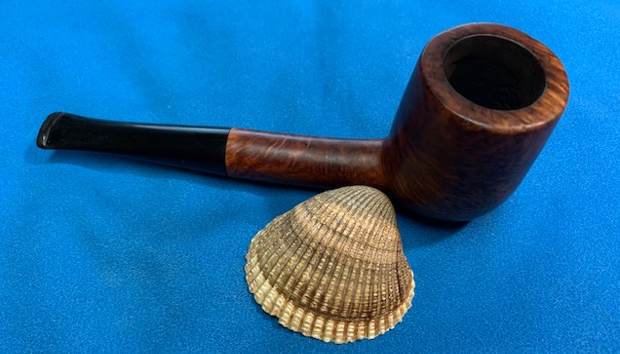
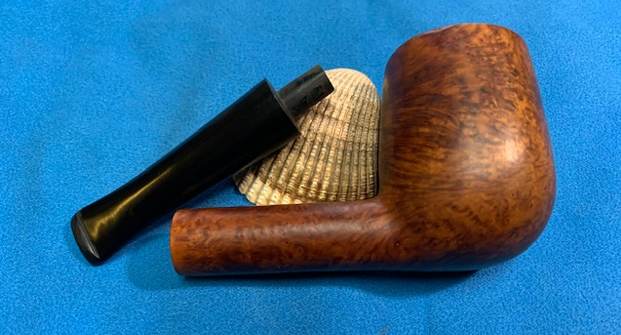
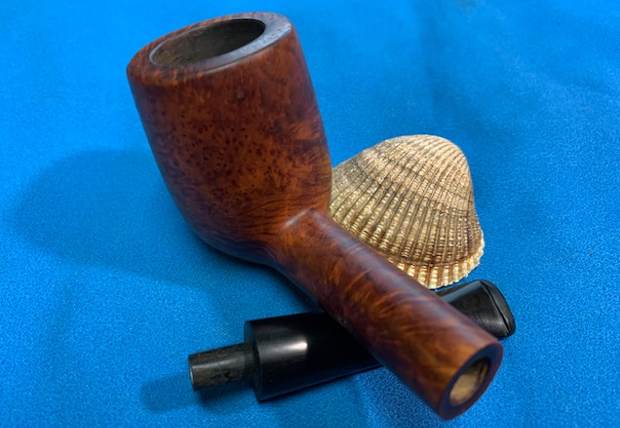
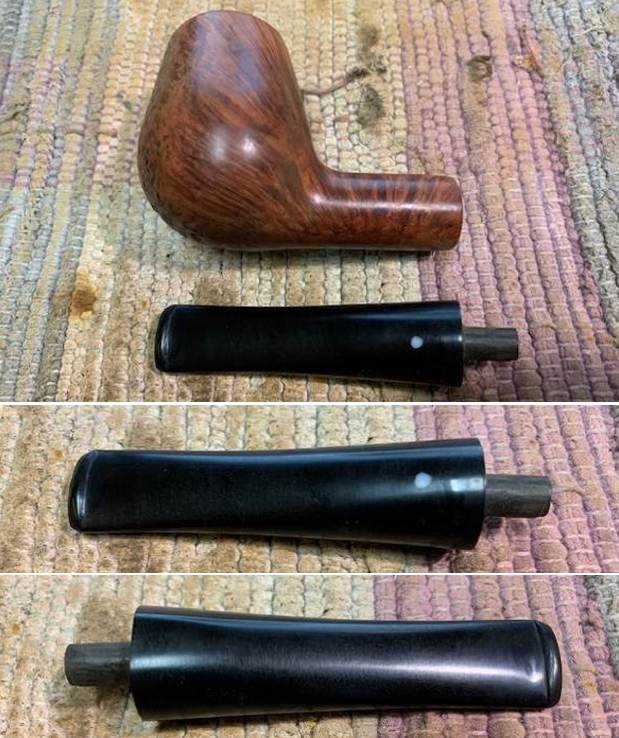
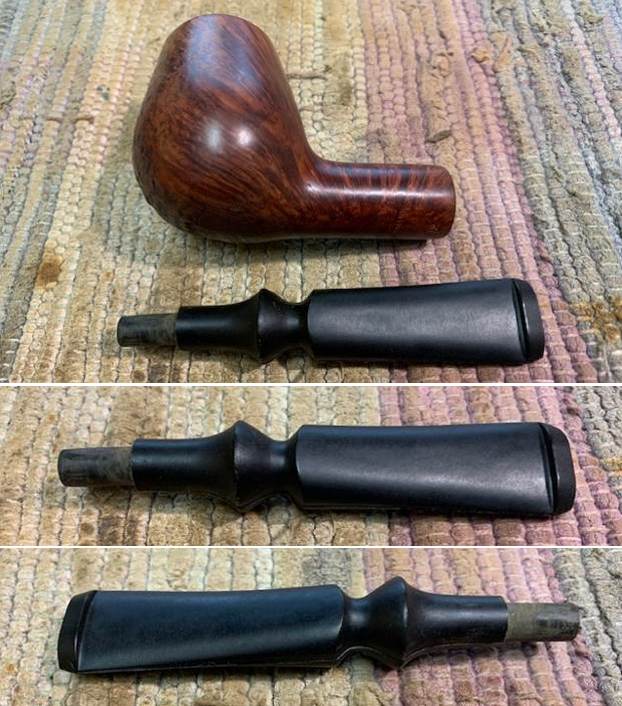
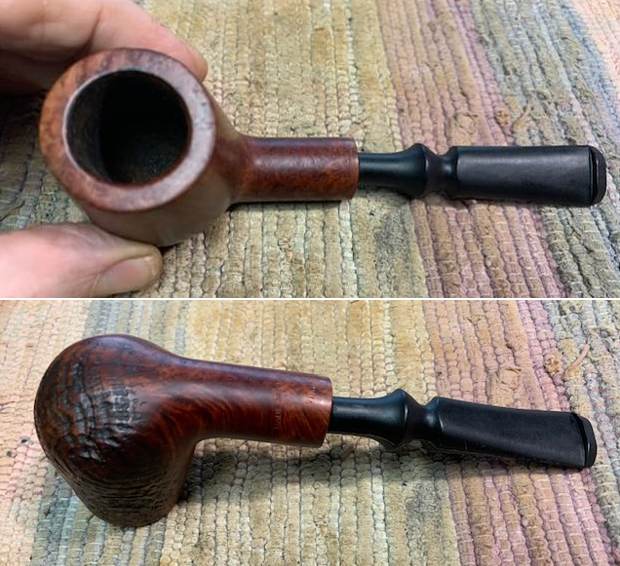
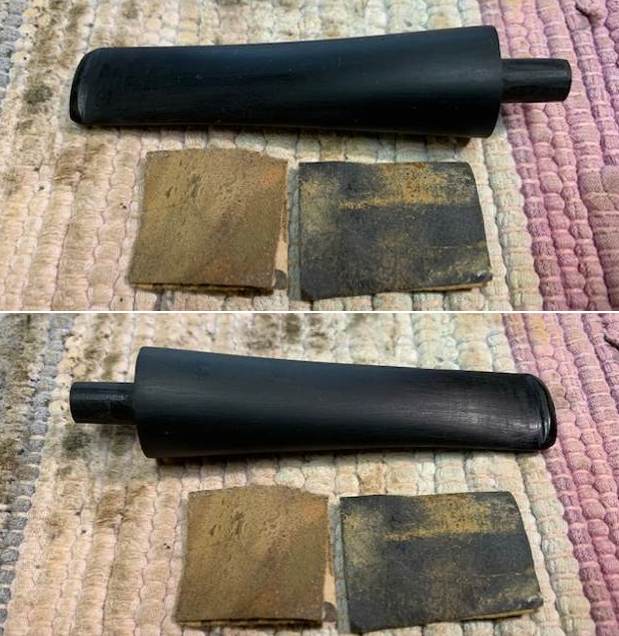
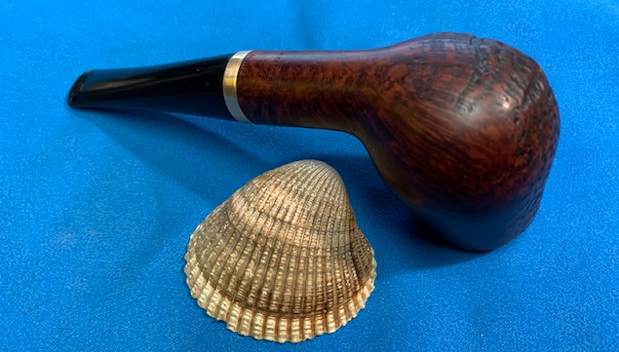
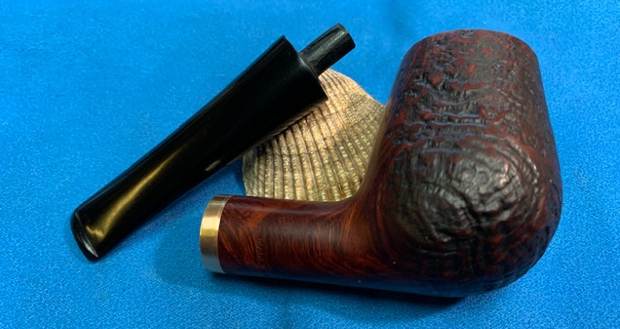
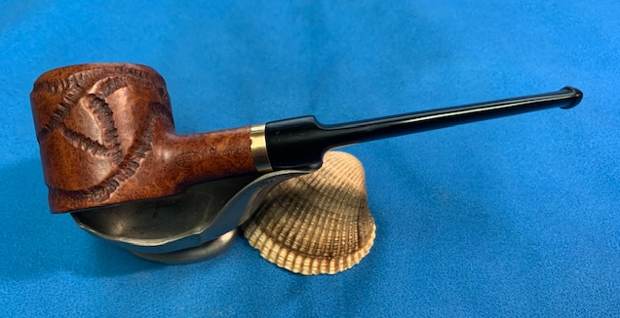
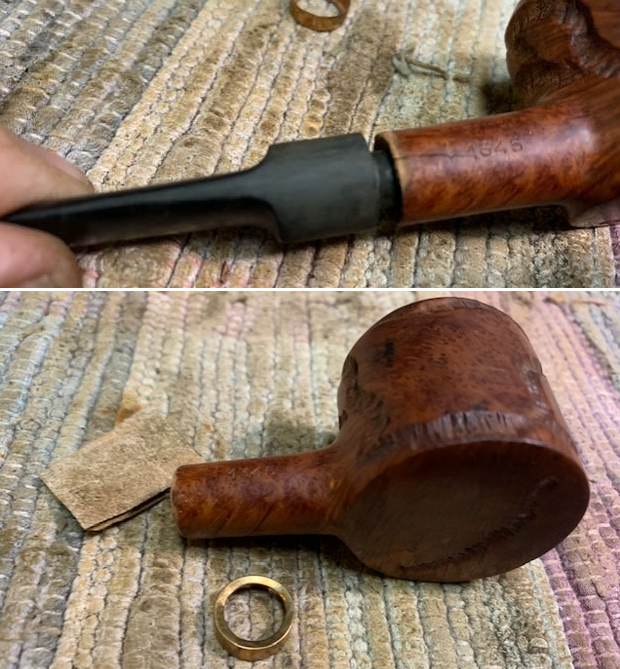
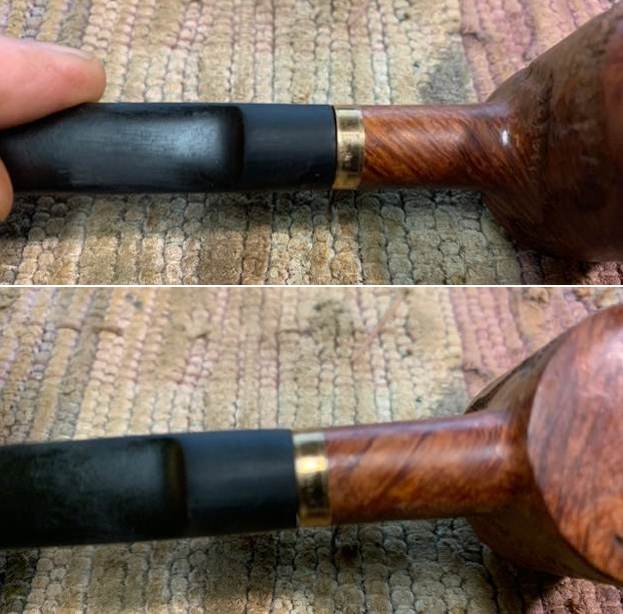
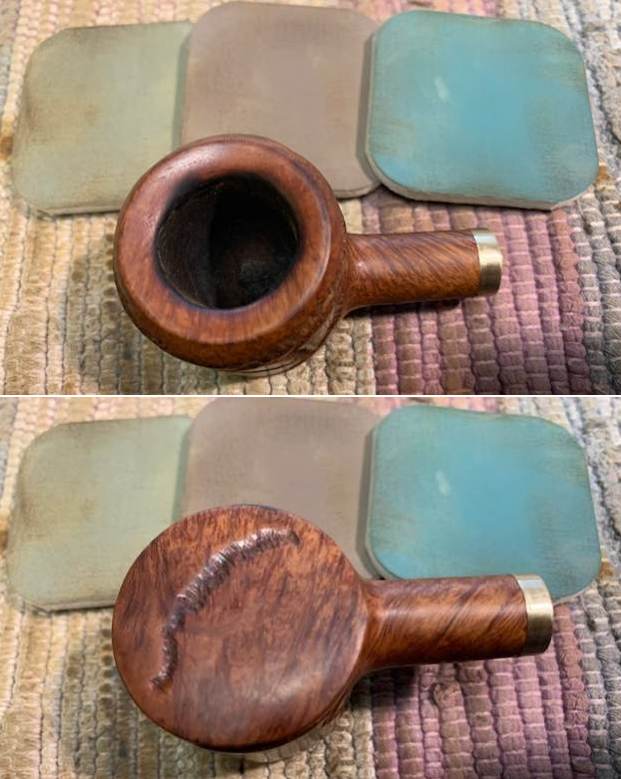
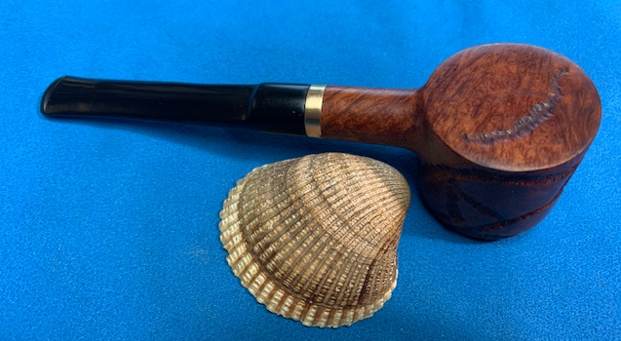
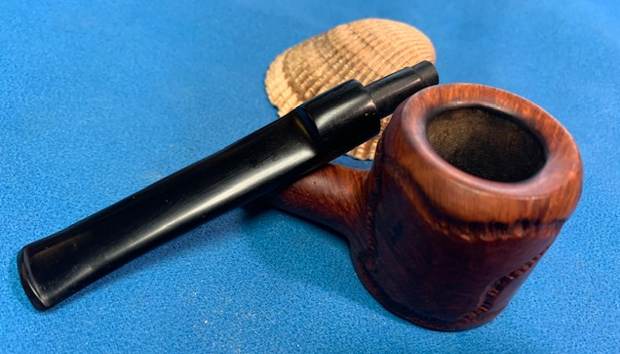
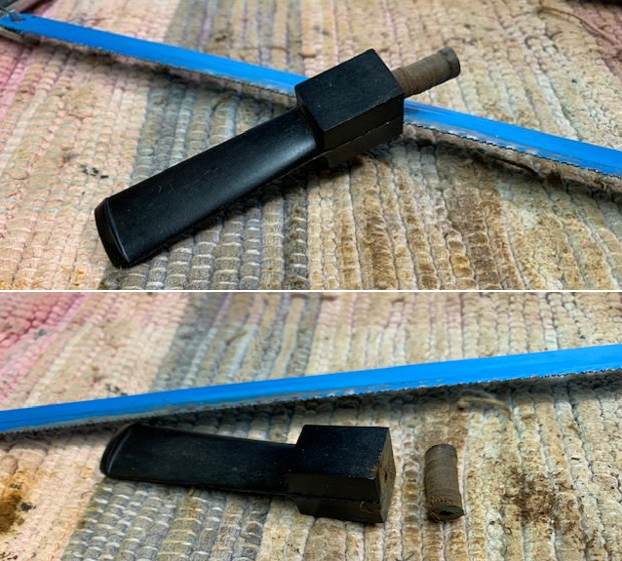
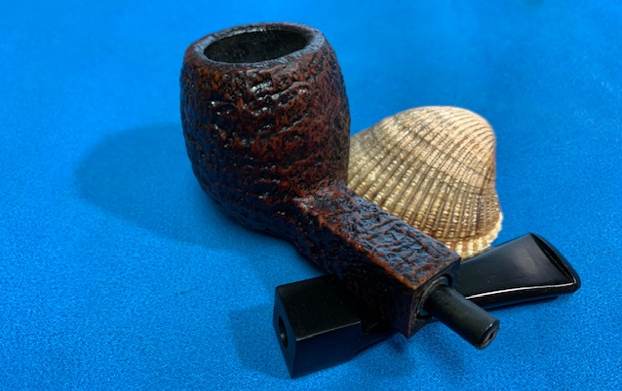
  I removed the stem and took a photo of the pipe to have a look at the parts and overall look. The new stem looked really good with the bowl. I am impressed by how the stem was shaped to fit the stem.
  I have restored a few Peterson’s Dublin & London in the past so I turned to my blog to have a look at the background information that I included in those blogs. I found the following link to a one of those pipes (https://rebornpipes.com/2021/02/24/restoring-a-made-in-ireland-petersons-dublin-london-999-rhodesian/). I also am including the background information I had gathered on the line from the previous blog. I quote:
I am including the link to the Pipedia’s article on Peterson pipes. It is a great read in terms of the history of the brand (https://pipedia.org/wiki/Peterson).
I turned to “The Peterson Pipe” by Mark Irwin and Gary Malmberg to get some background on the Peterson’s Dublin & London Pipe. On page 298 it had the following information.
Dublin & London (c1940-97, 2016-) First mentioned in a 1940 brochure, but probably not widely distributed until ’45, Dublin & London was the highest quality line (aside from the Supreme, introduced in ’53) until about ’86. P-lip or fishtail mouthpiece, polished finish, although sandblast described in ’70 Iwan Ries & Co. catalog. COMs include MADE IN over IRELAND (1940-80) and MADE IN THE over REPUBLIC over OF IRELAND (c1980-97).
Judging from the description above, the pipe I am working on is stamped with the stamp noted in red above. It reads Made in Ireland which narrows the date to between approximately 1940-1980. It was also one of the highest quality lines available by Peterson when it was made. Now it was time to work on the pipe.
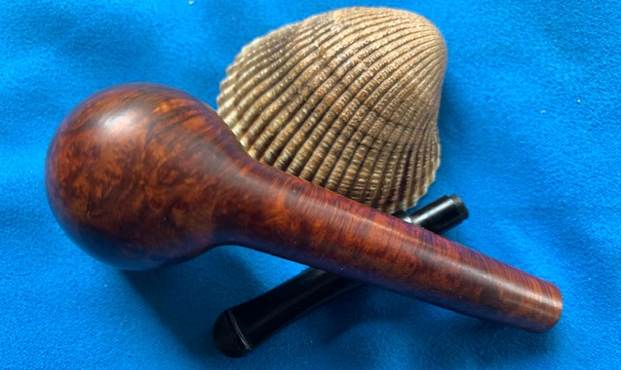
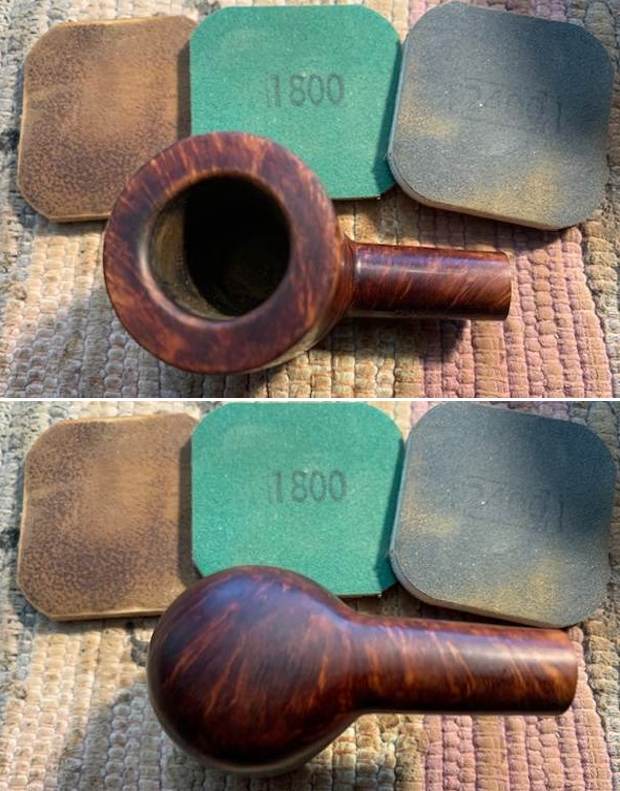
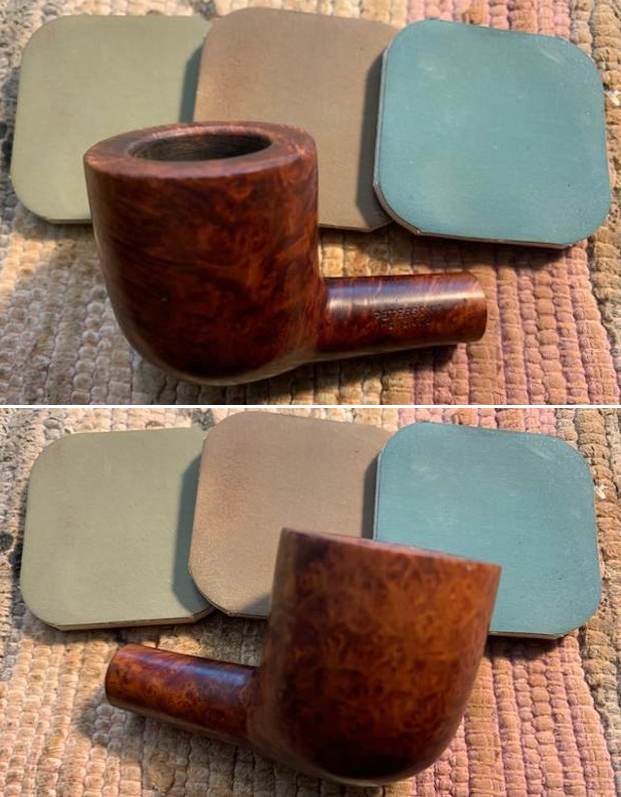
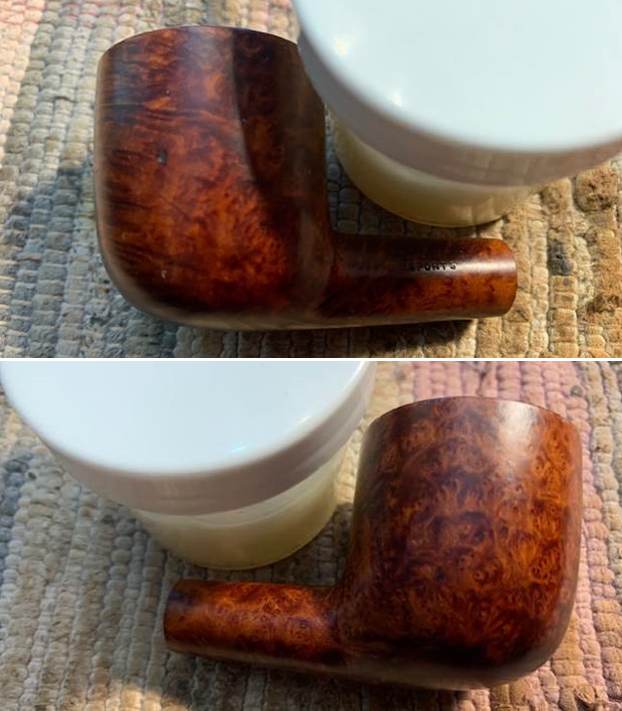
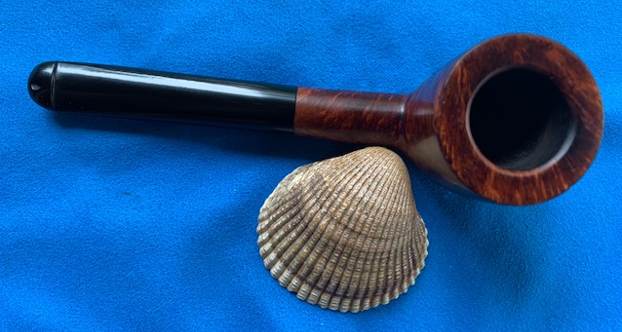
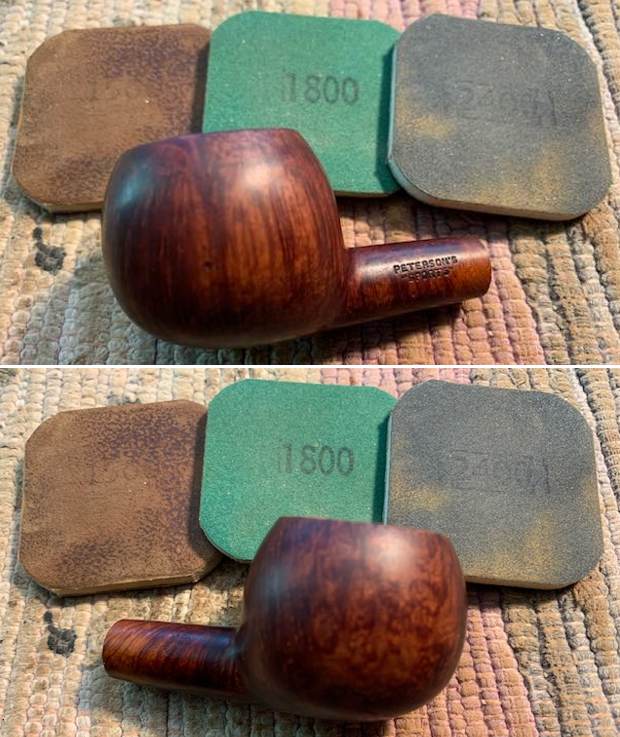
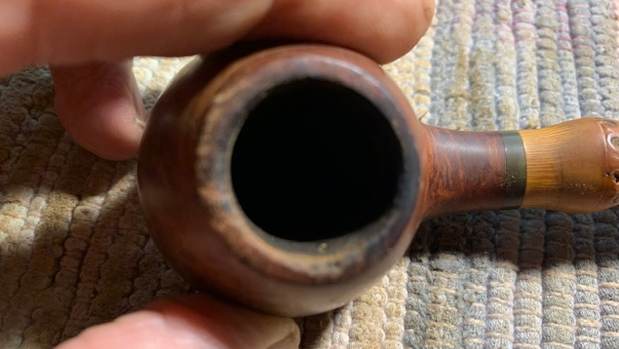
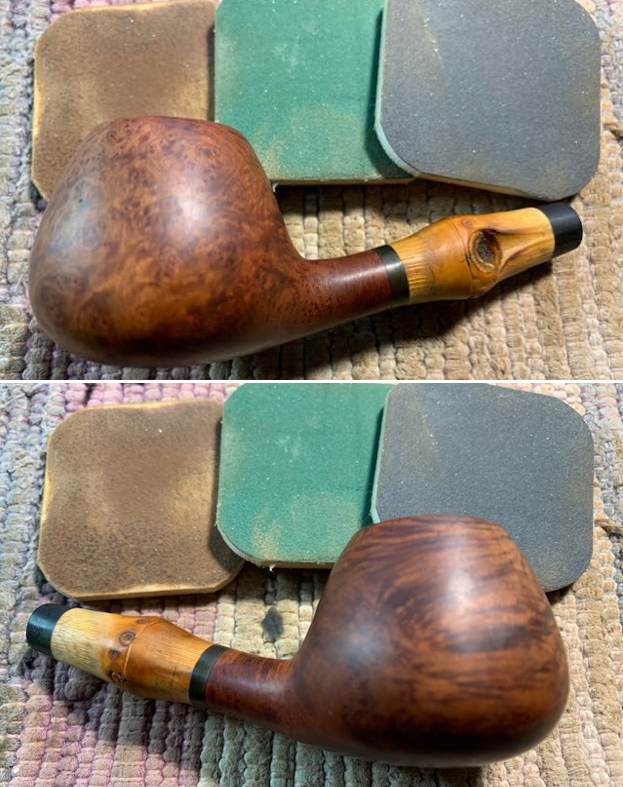
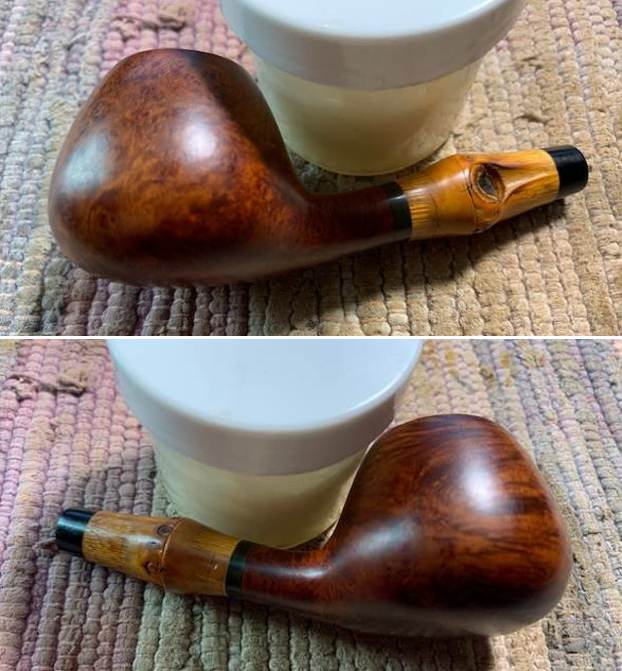
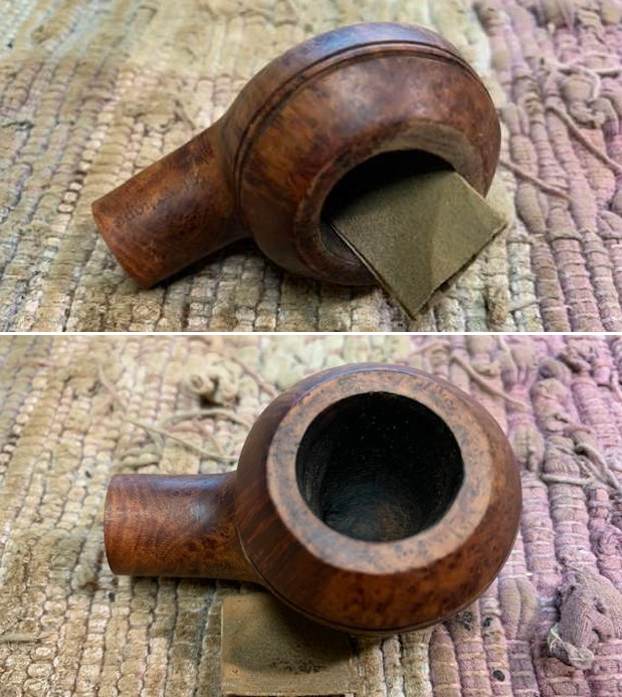
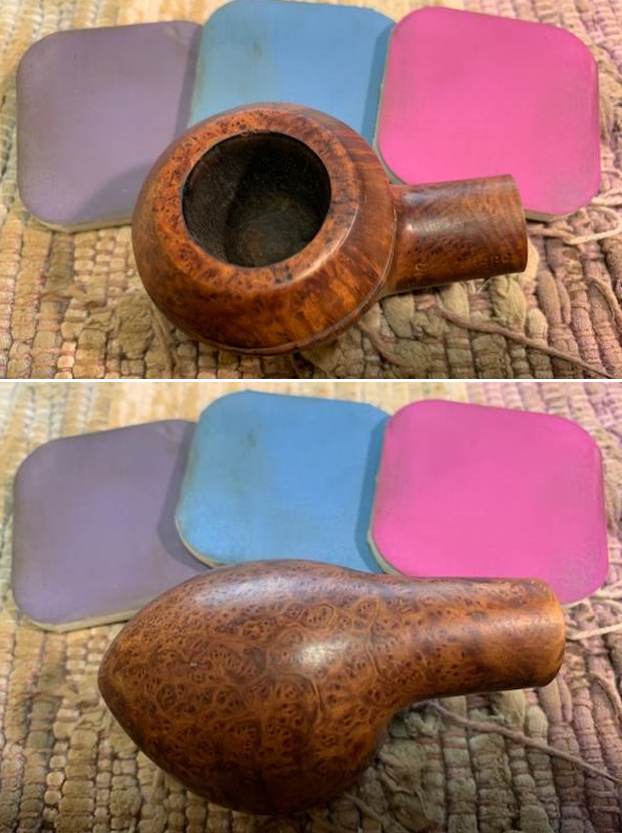
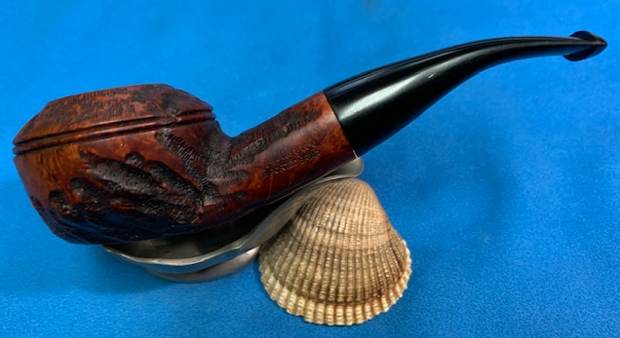
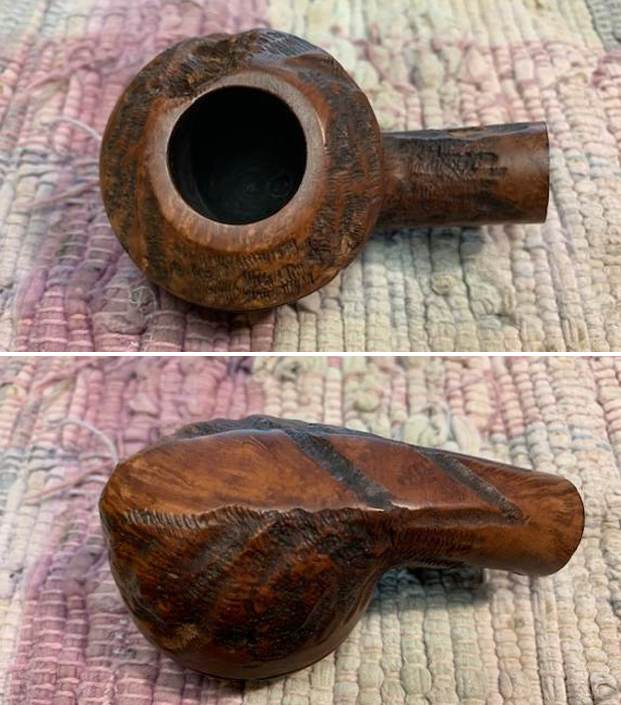
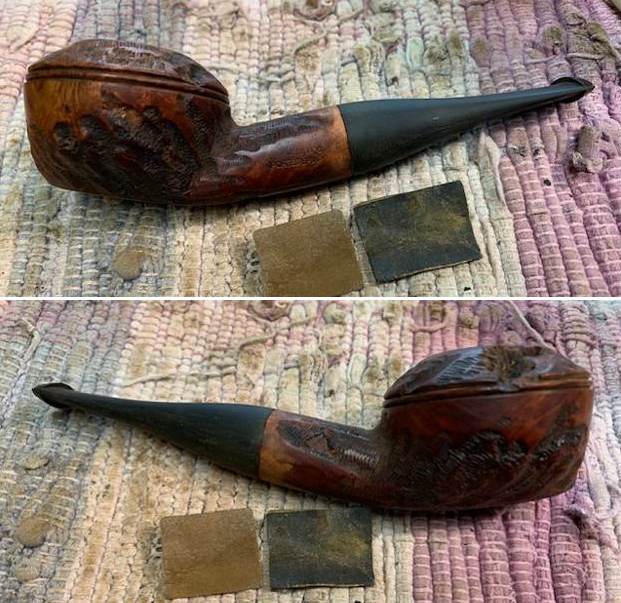
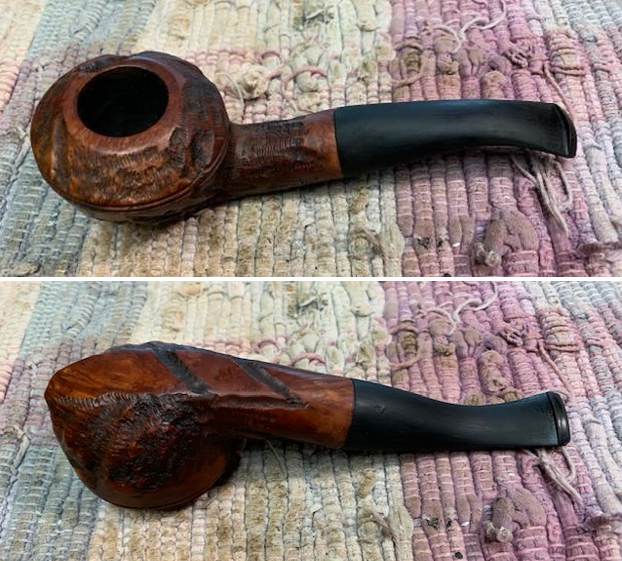
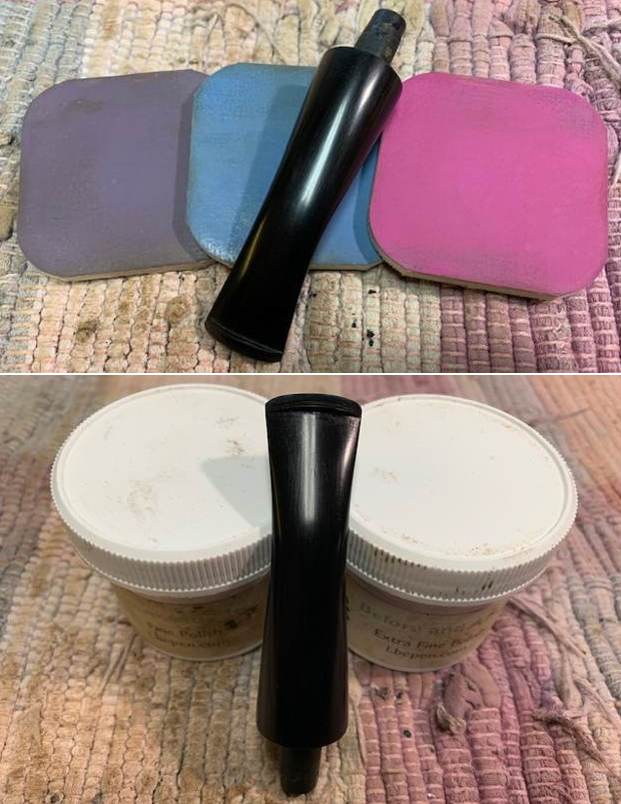
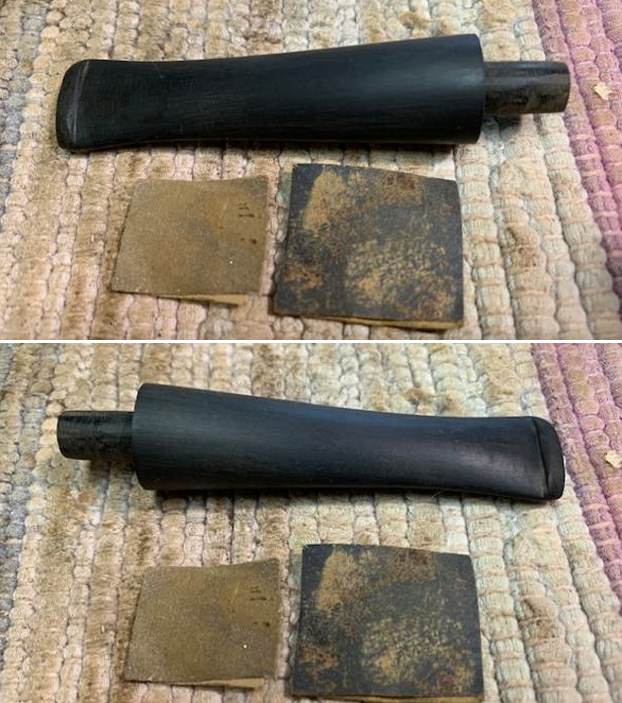
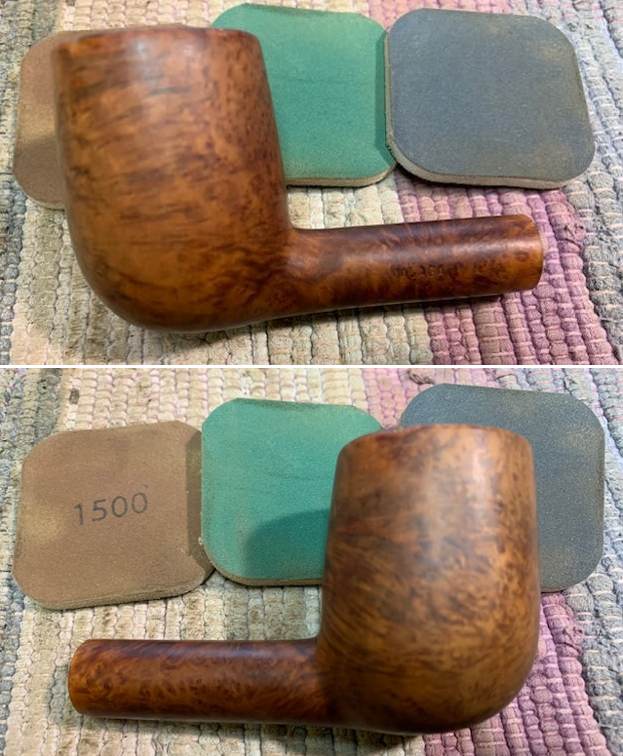
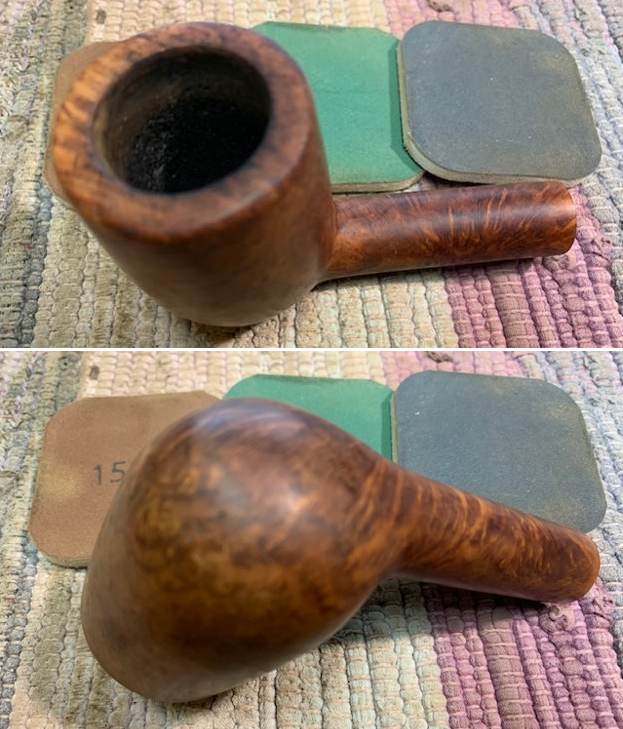
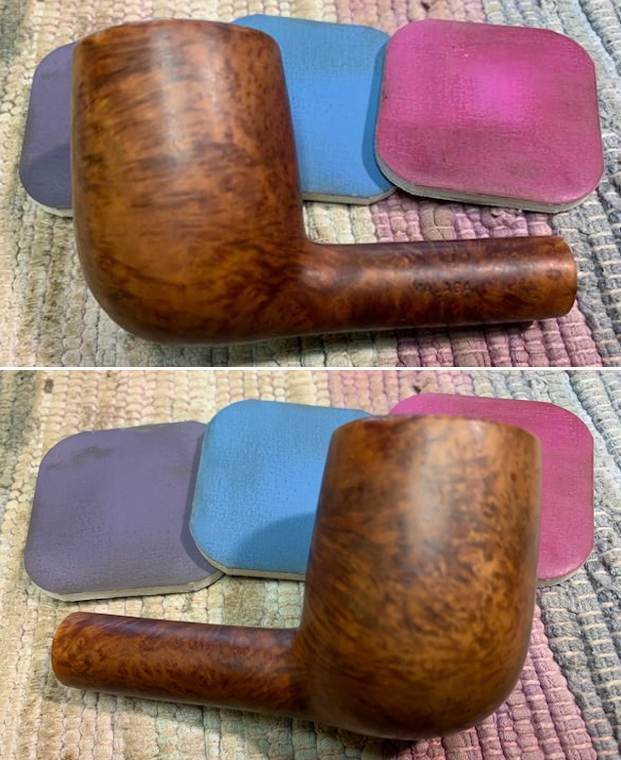
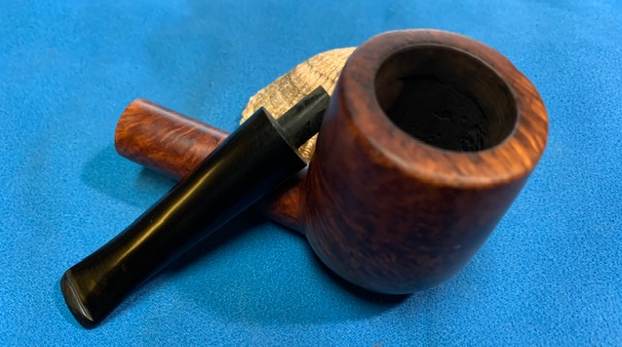
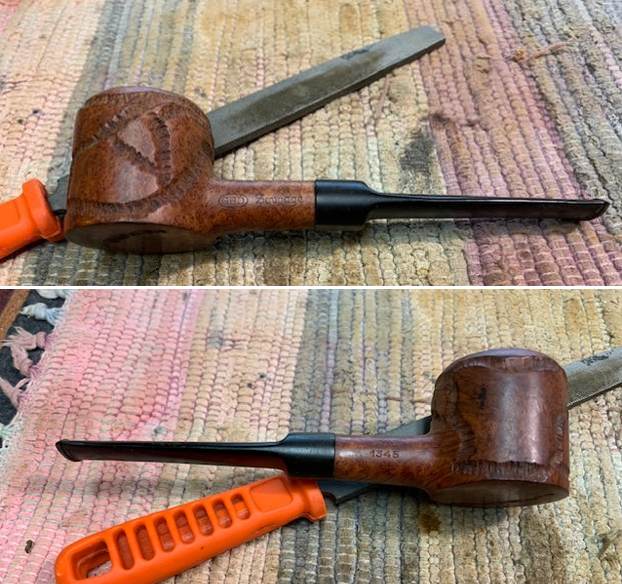
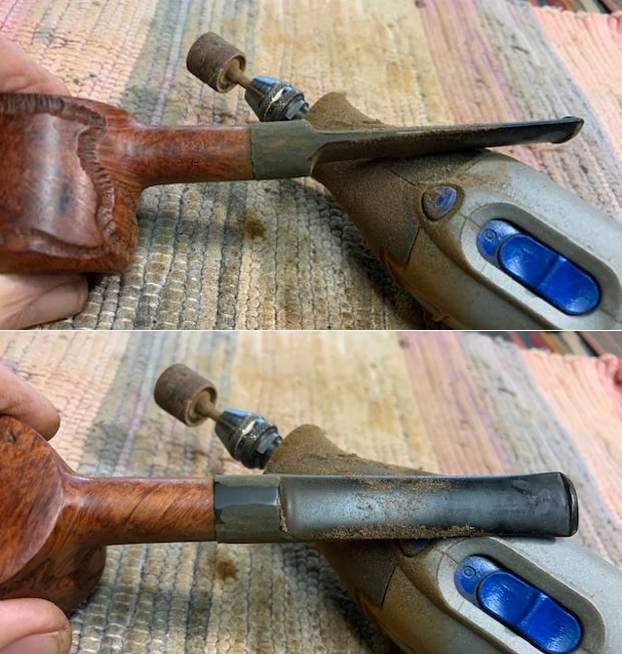
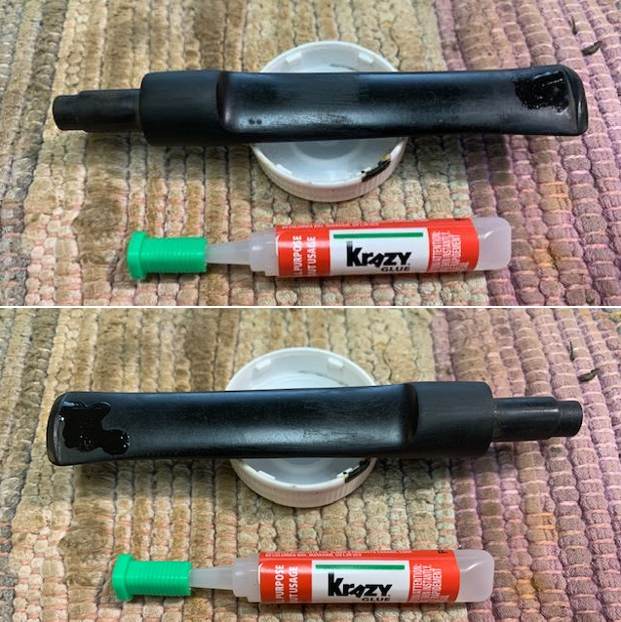
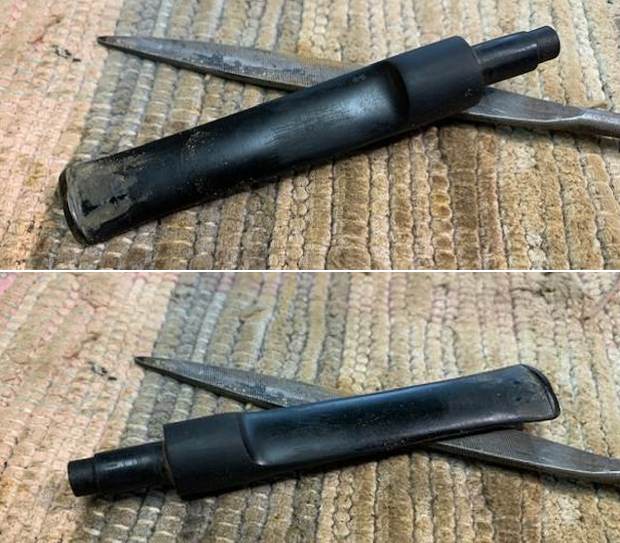
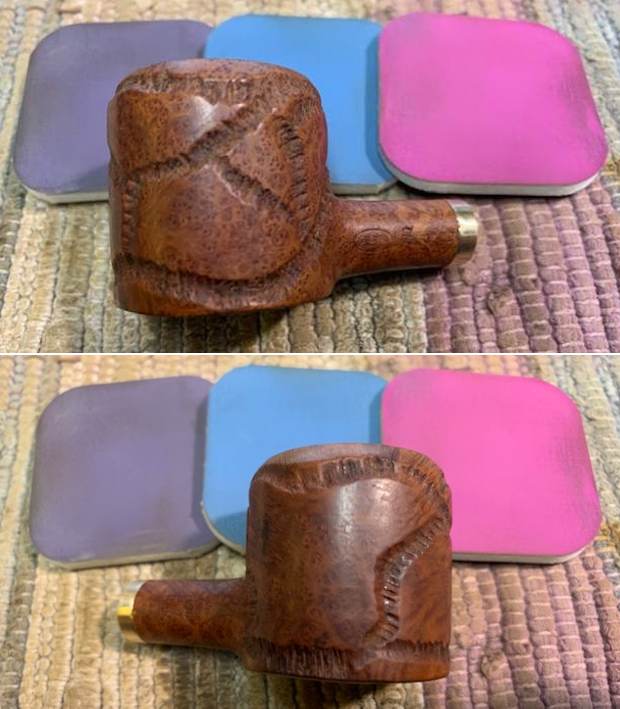
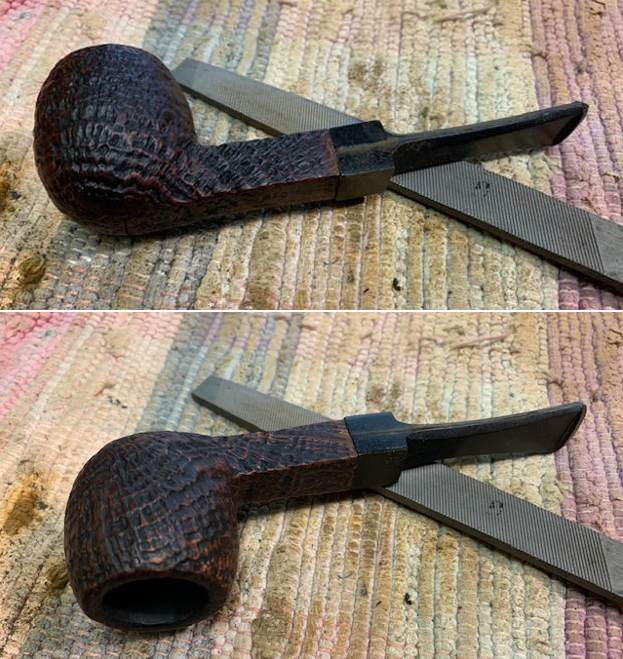
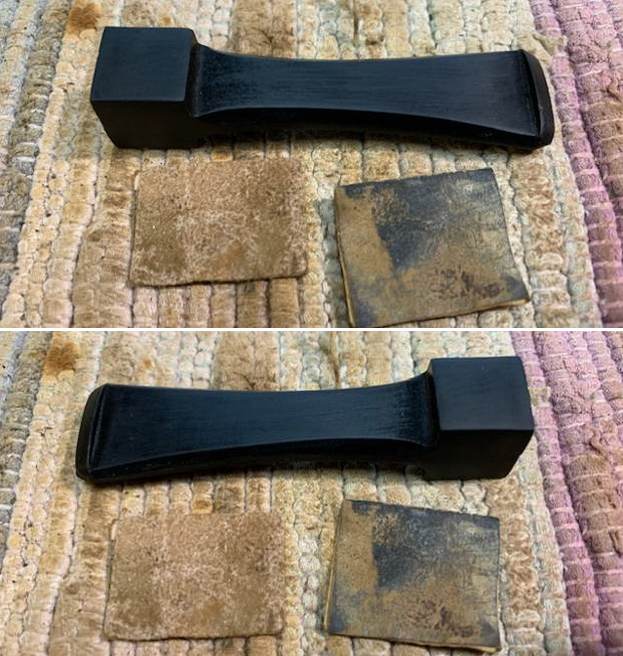
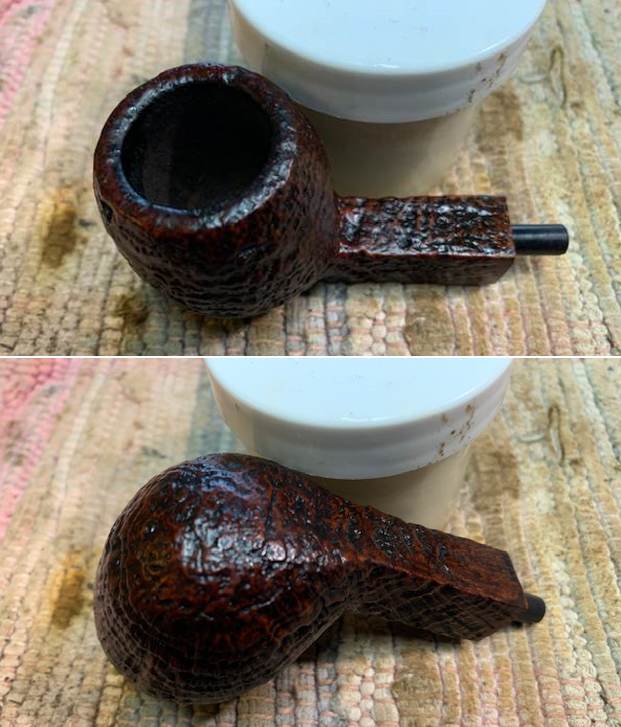
Before I started working on the pipe I took the little Dunhill Shell Briar Lovat for its inaugural smoke on the porch. I took a cup of fresh ground Honduran Medium Roast Coffee and a tin of Hearth and Home Louisiana Red with me. I loaded the bowl and sat watching the “world” walk by while I enjoyed the smoke. I finished the bowl and enjoyed a visit with Alex before getting back to the pipe. It is a great pipe and it was a great smoke.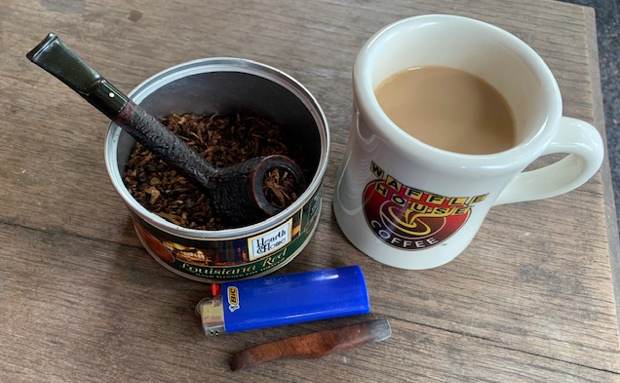 When I finally started to work on the pipe again I set the stem aside as it was in perfect condition and turned to work on the bowl. I decided to address the damage to the inner edge of the bowl and the rim top first. I used a folded piece of 220 grit sandpaper to give the inner edge of the bowl a slight bevel to minimize the darkening and damage and blend it into the surrounding briar.
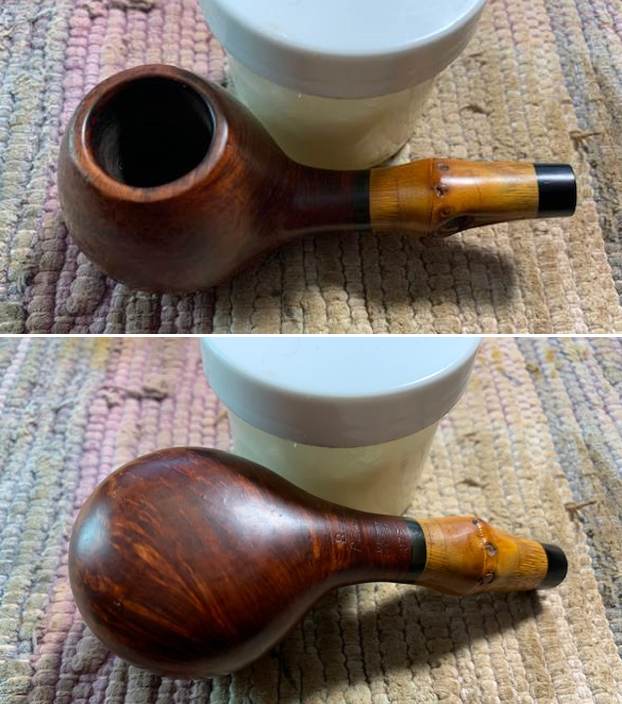
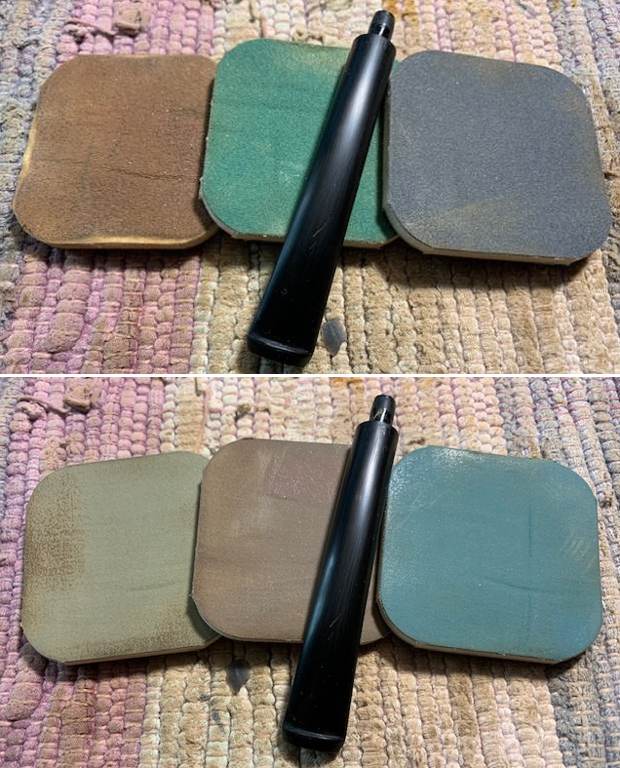
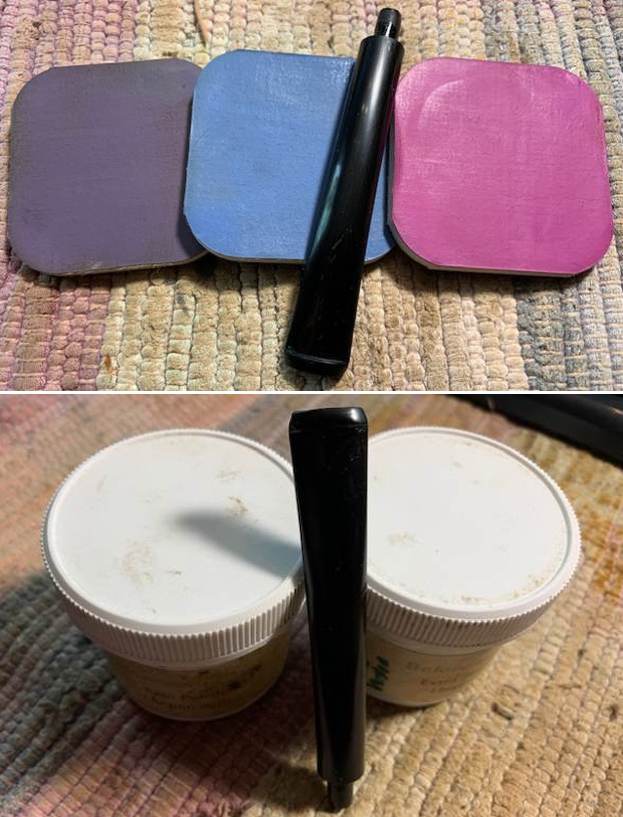
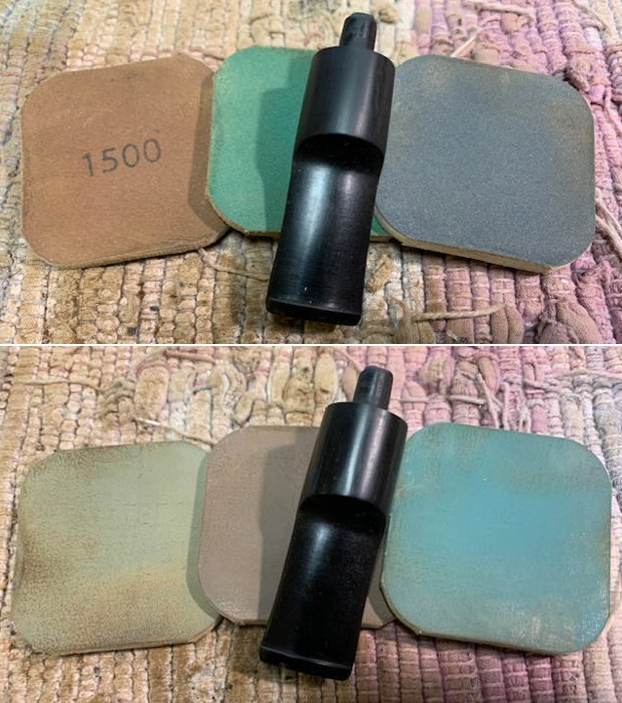
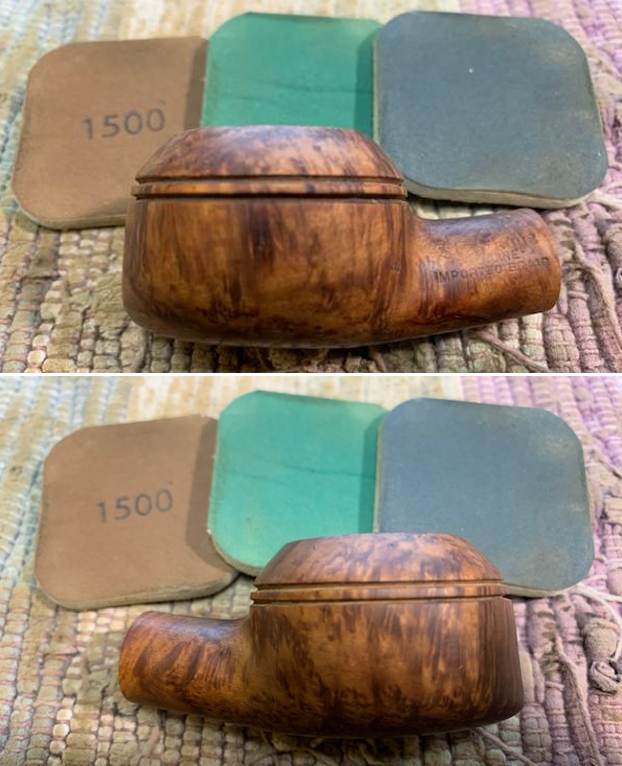
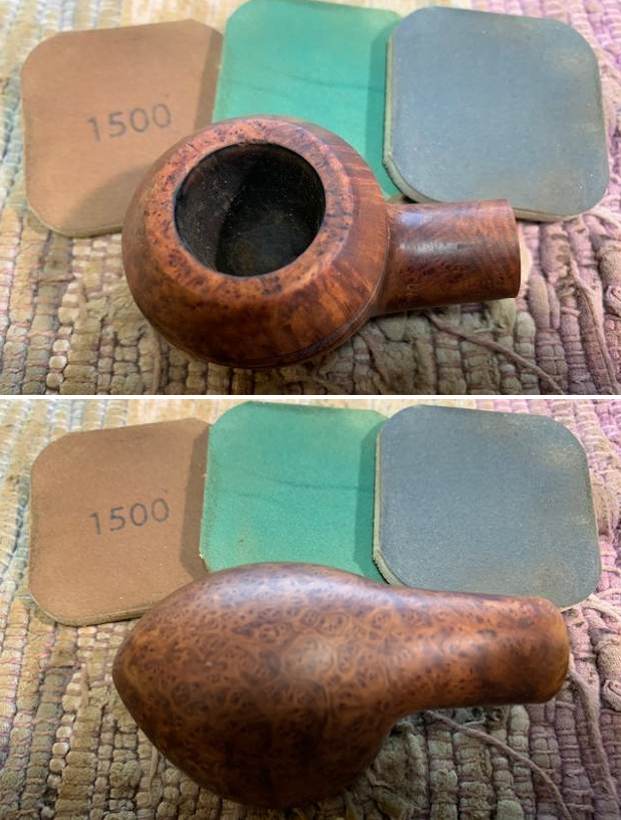
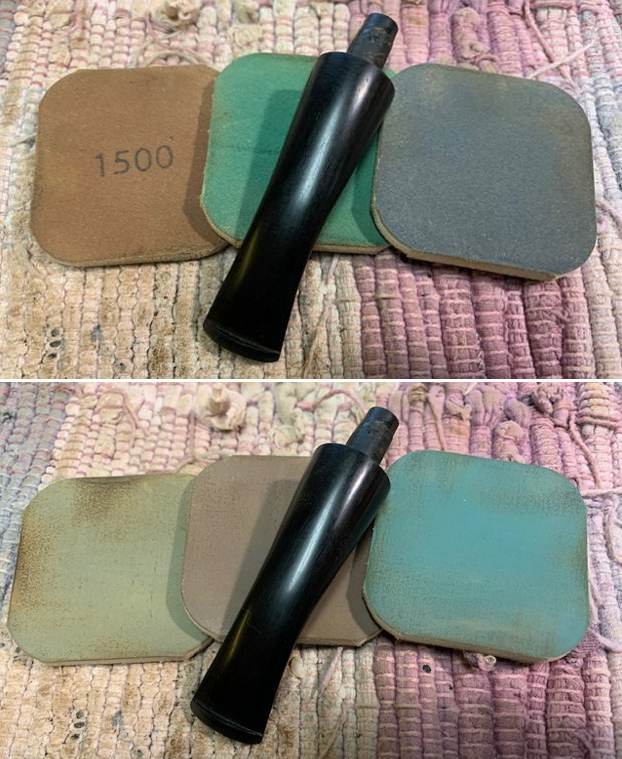
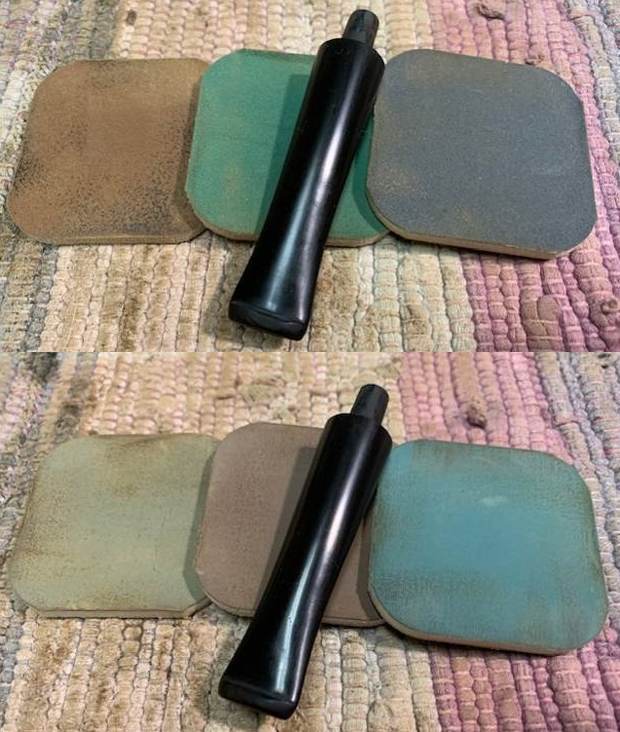
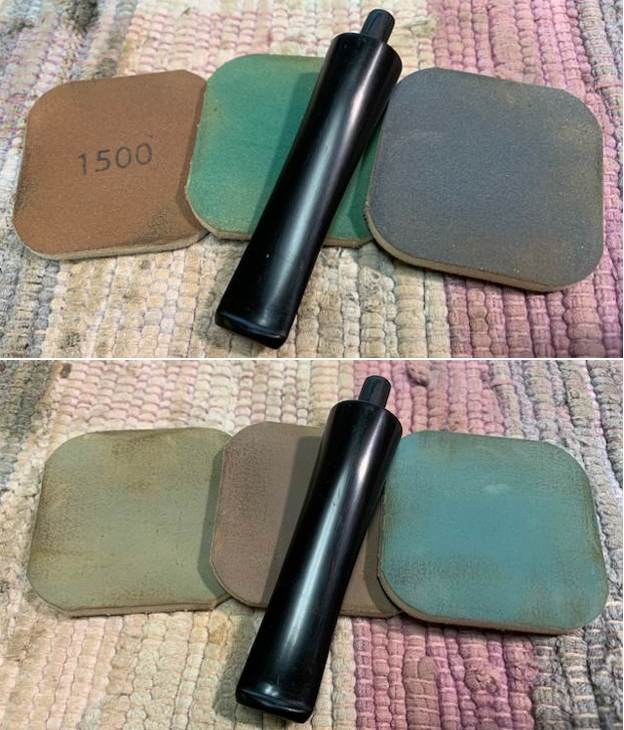
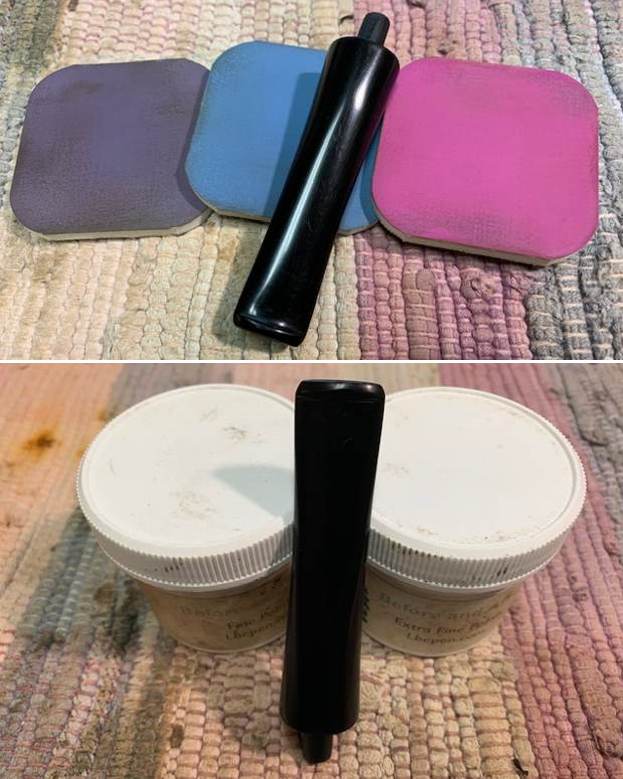
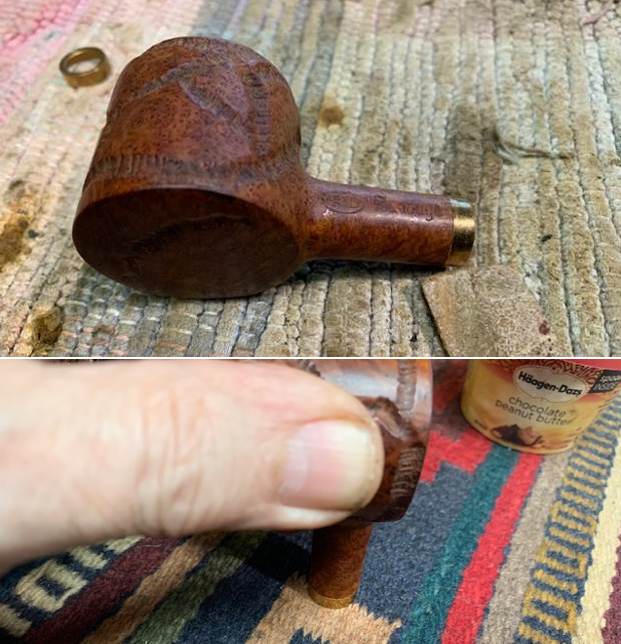
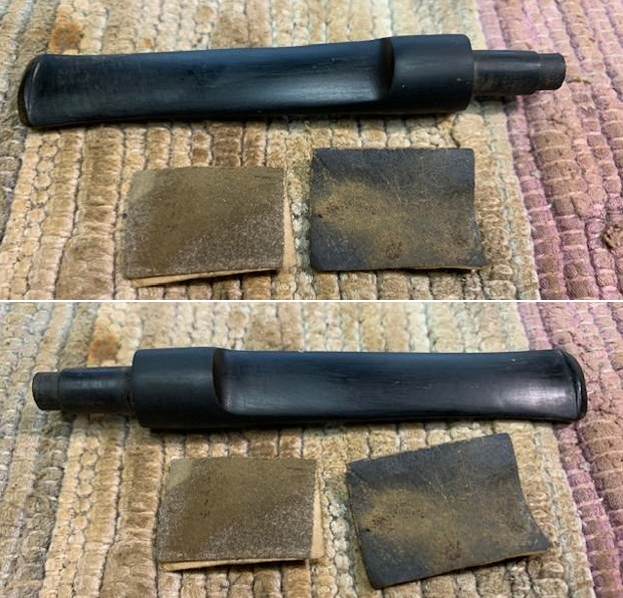
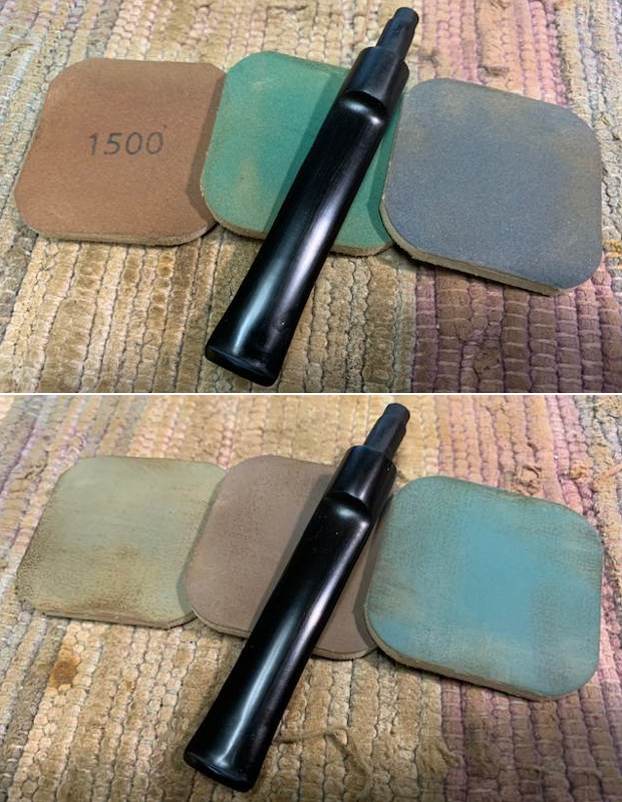
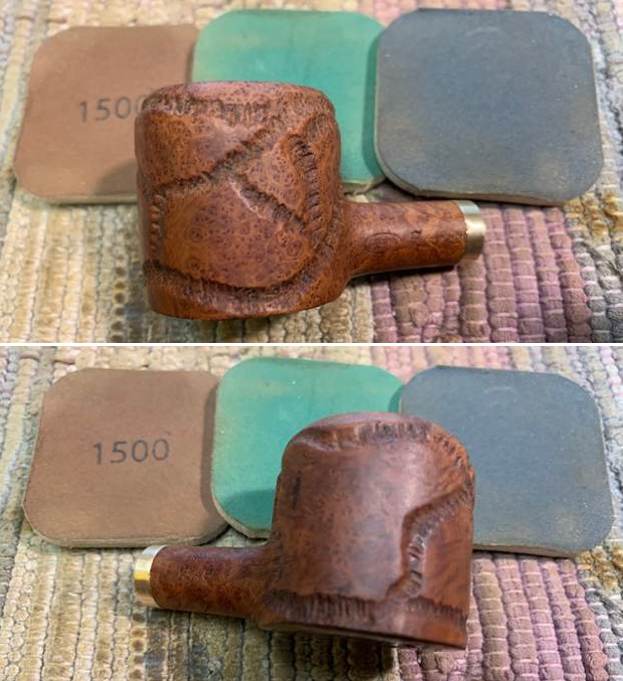
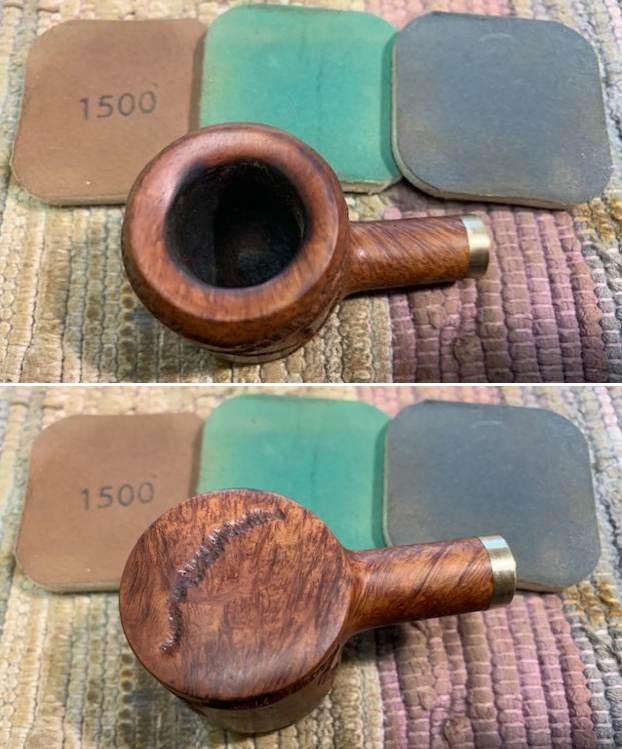
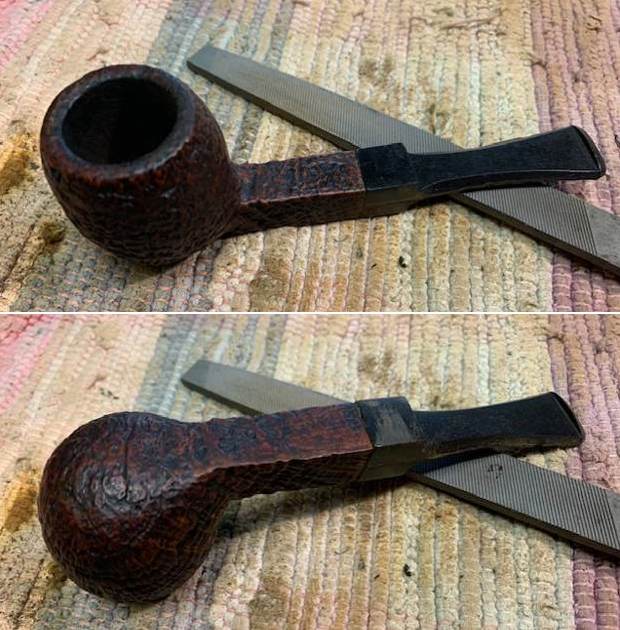
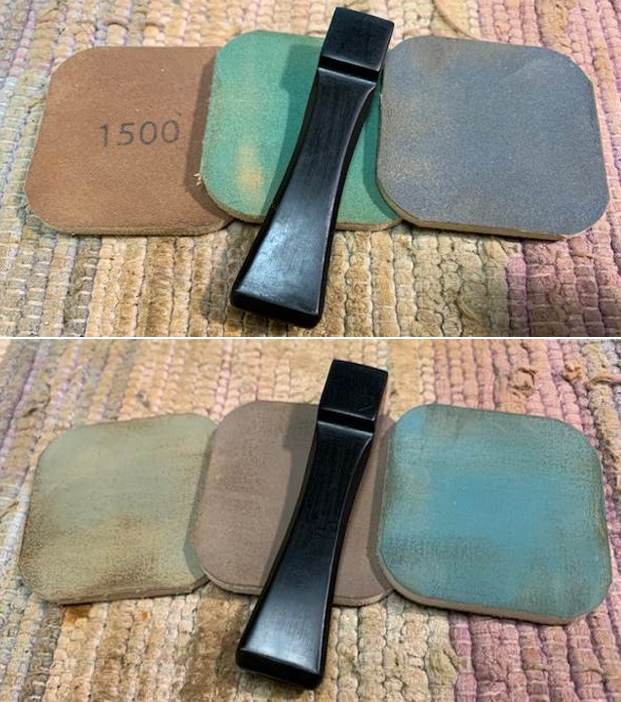
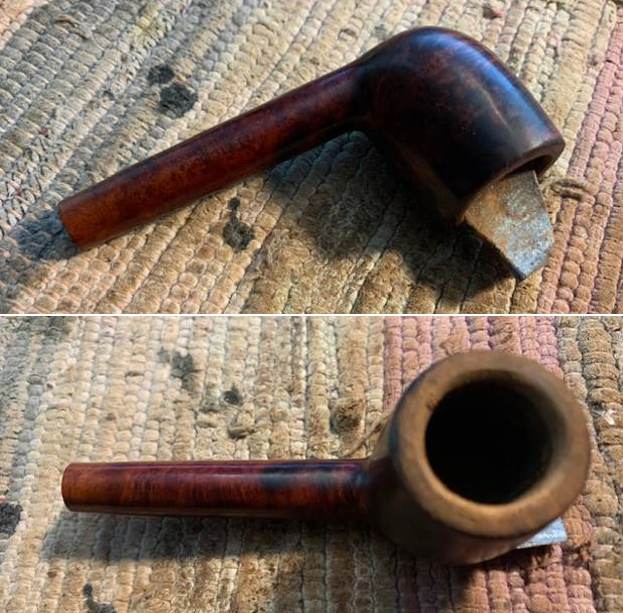 I polished the briar with micromesh sanding pads – dry sanding with 1500-12000 grit sanding pads. I wiped the bowl down with a damp cloth after each sanding pad. There was a dark spot on the top of the shank toward the bowl that appears to be a deep stain rather than a burn mark. It is solid and makes me wonder if the was just a spot on the briar that took the dark understain more deeply than the rest.
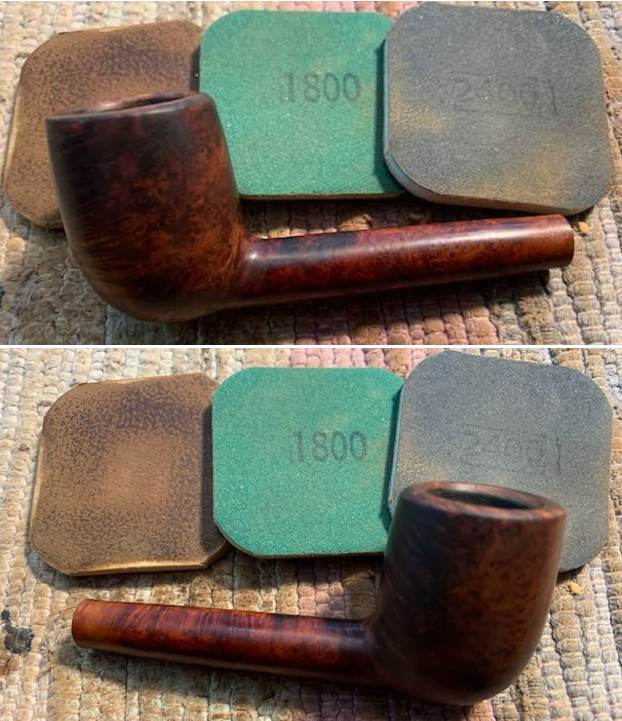

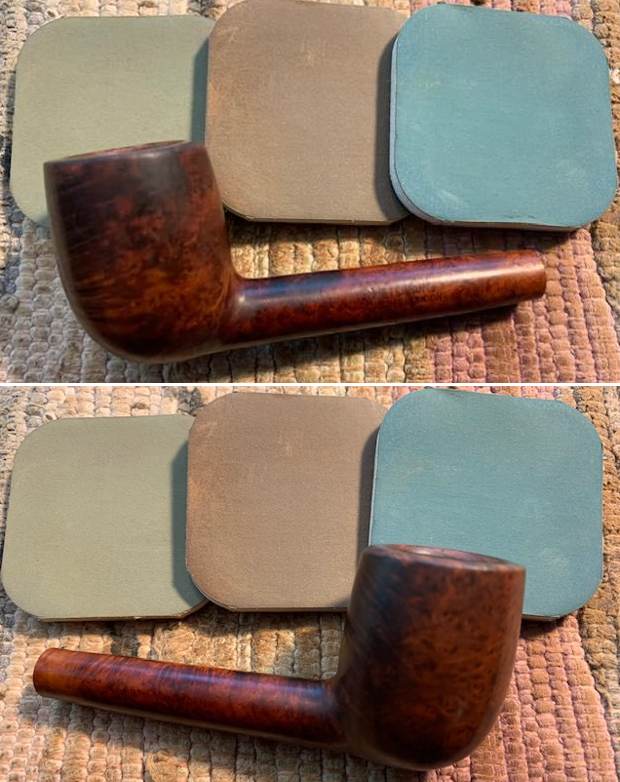
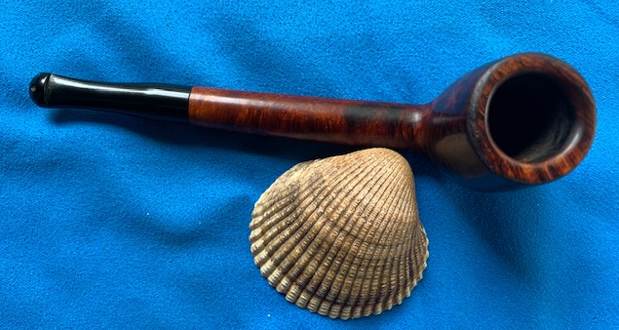
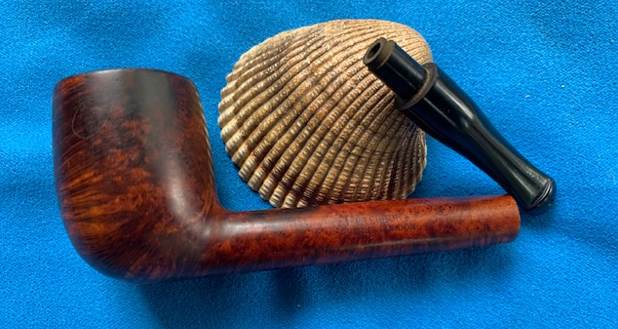
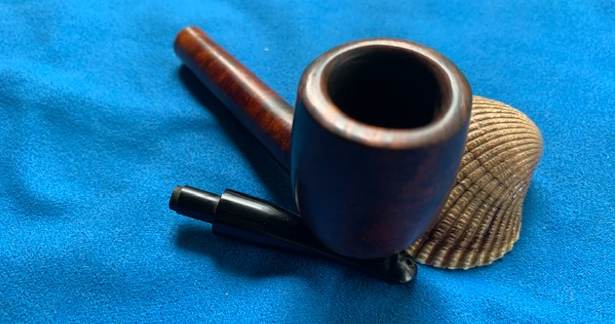
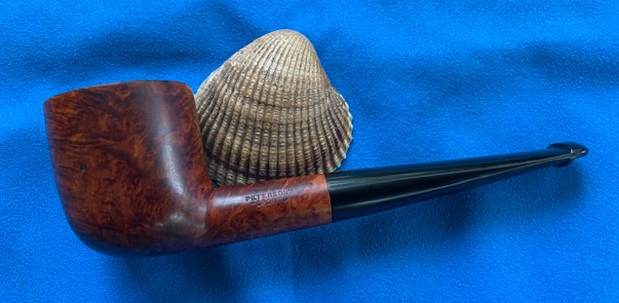
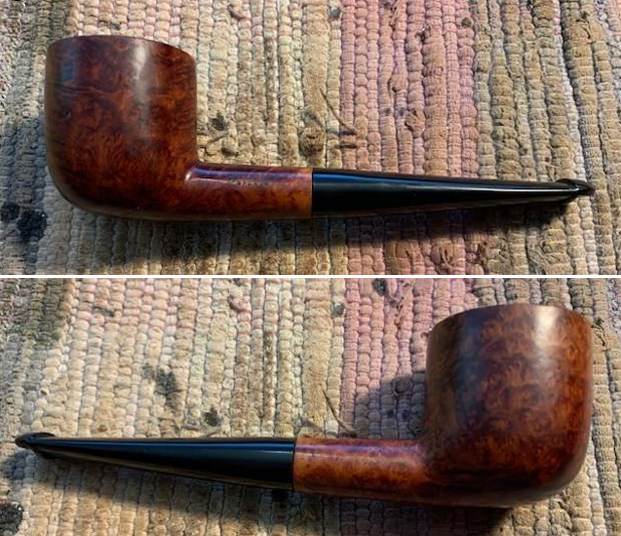
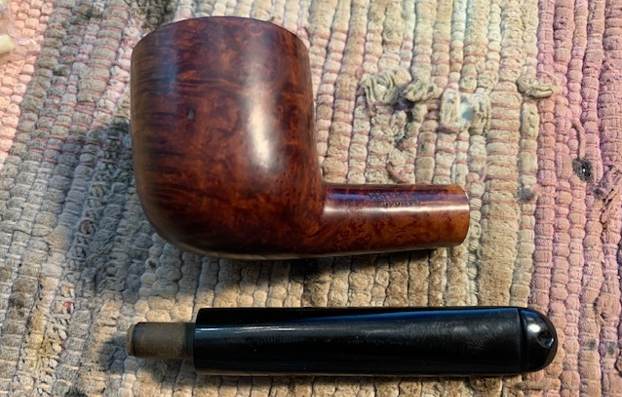
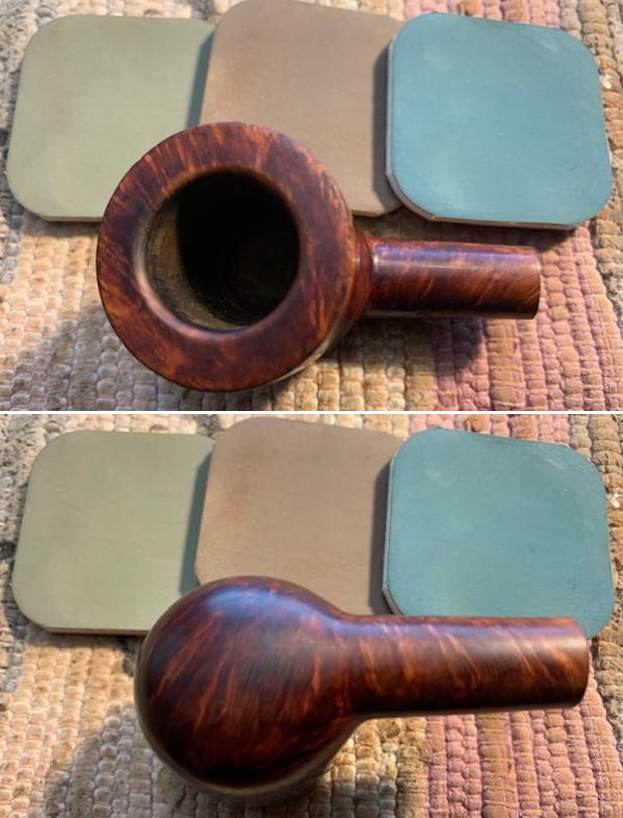
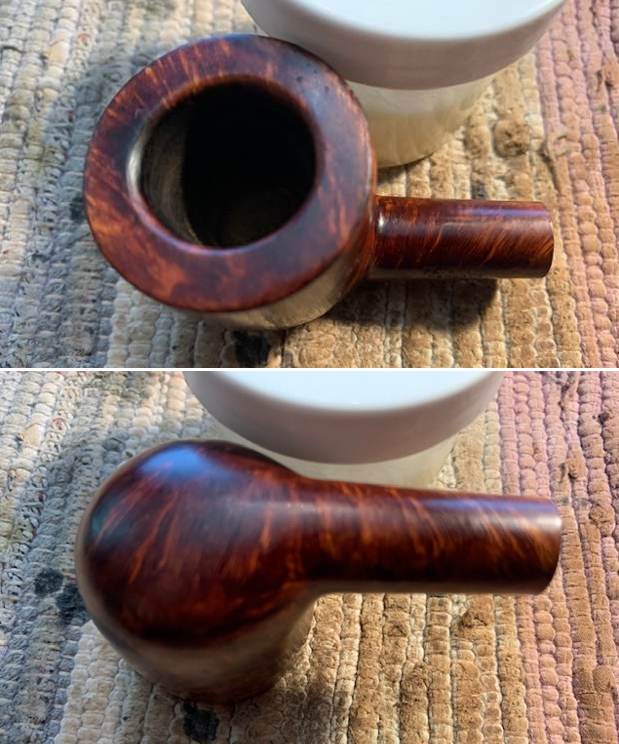
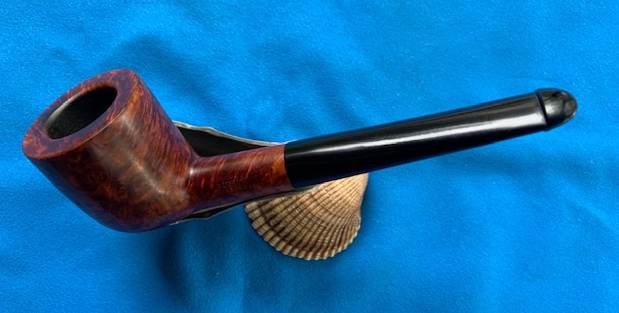
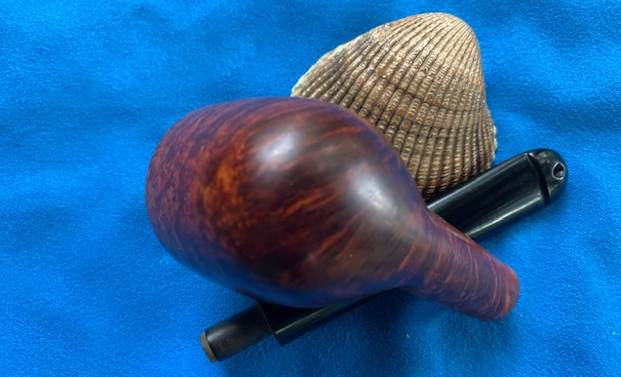
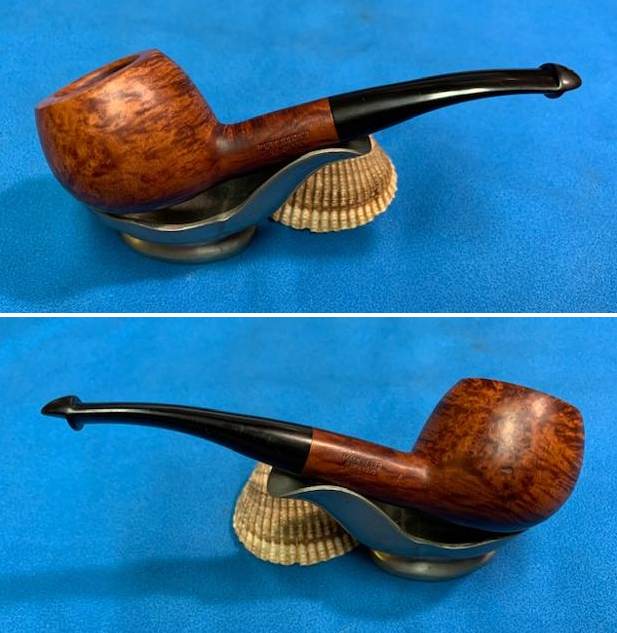
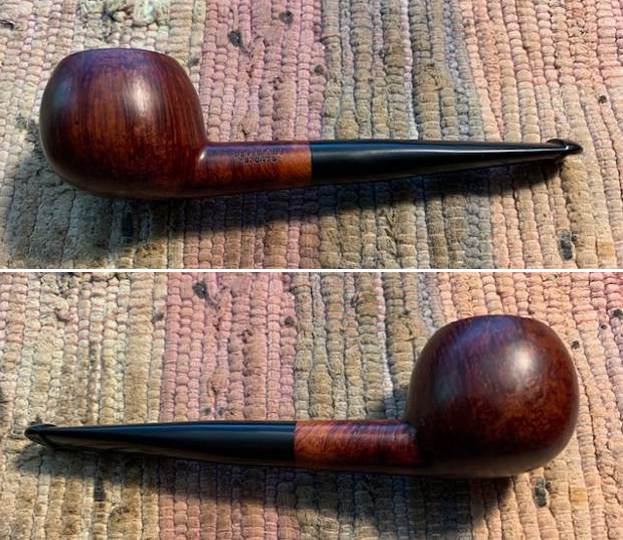
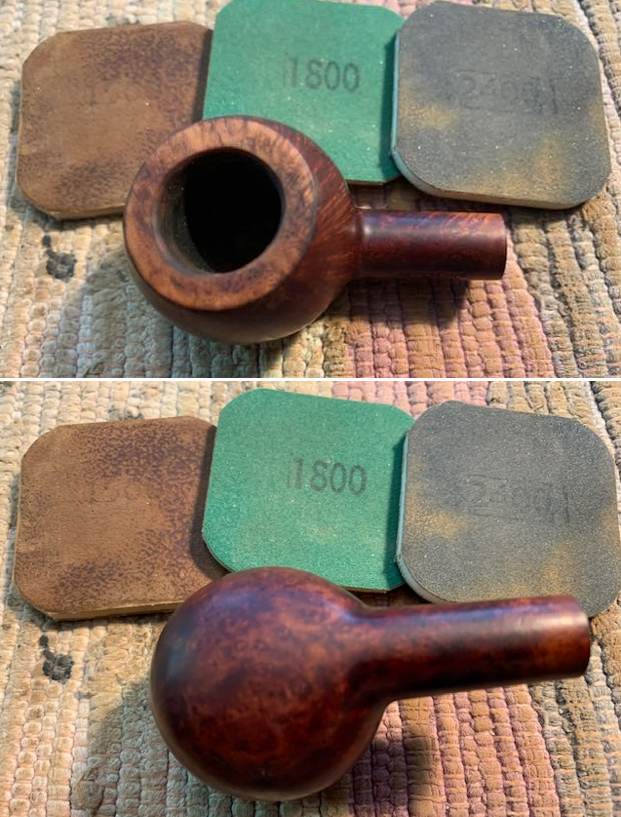
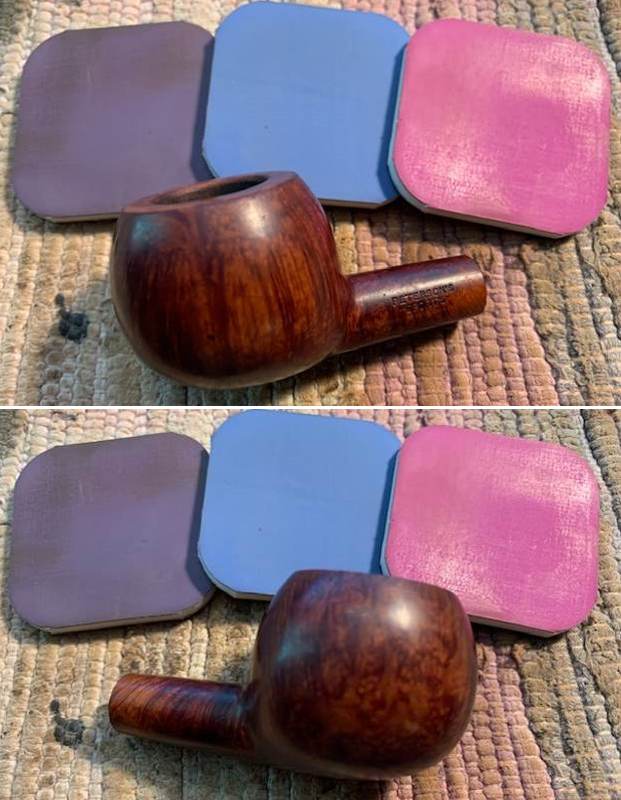
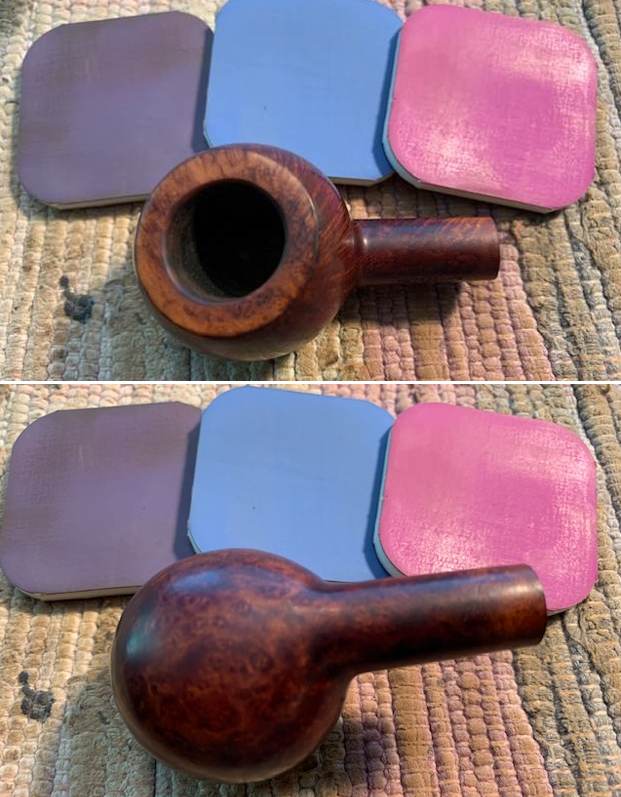
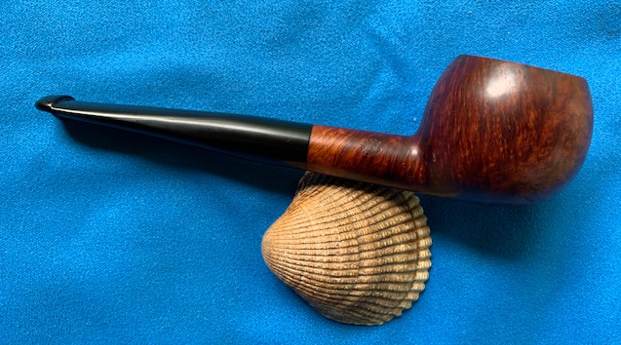
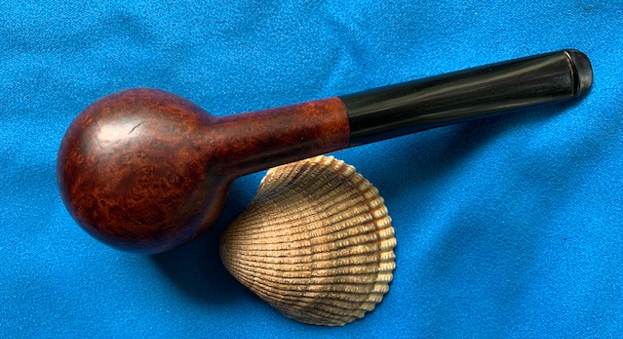
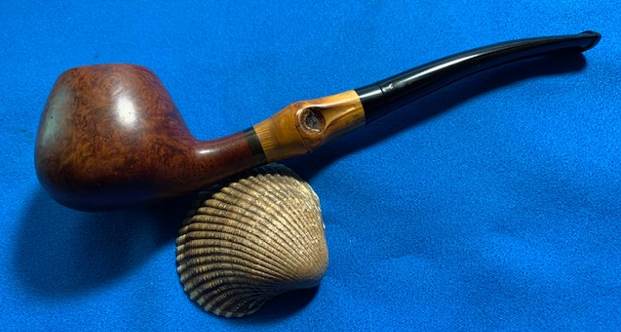
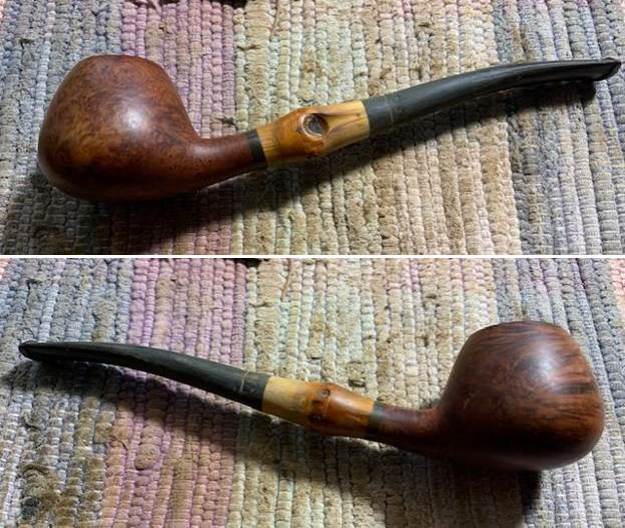
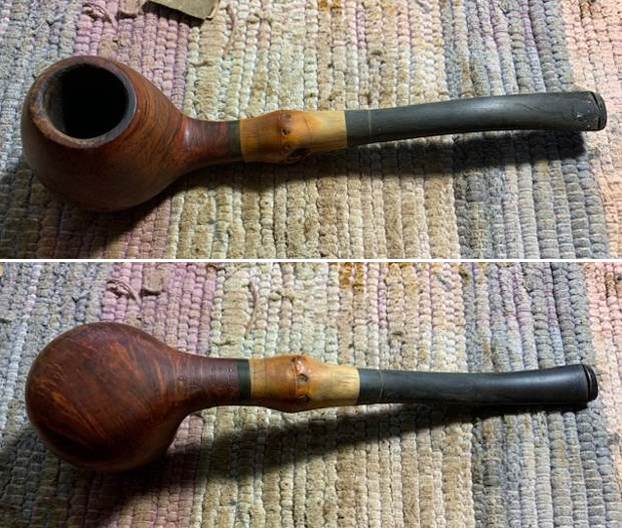
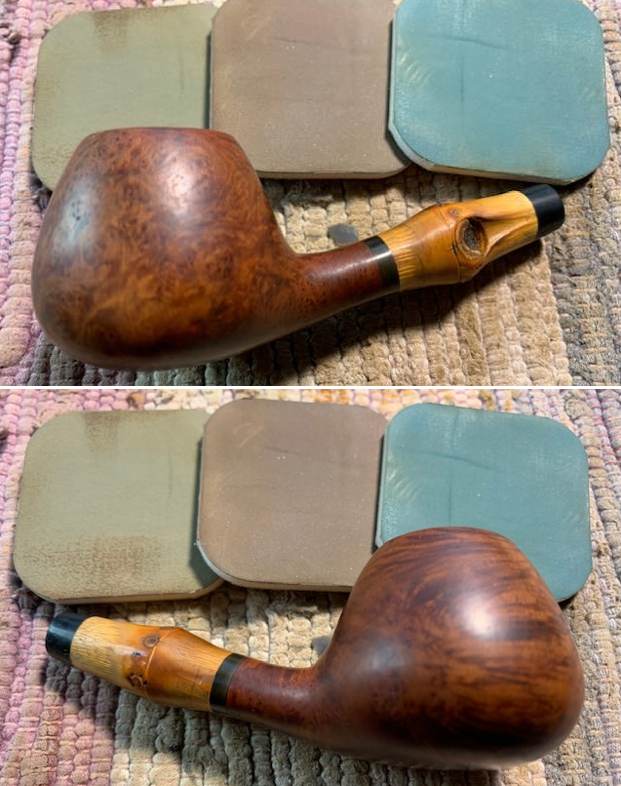
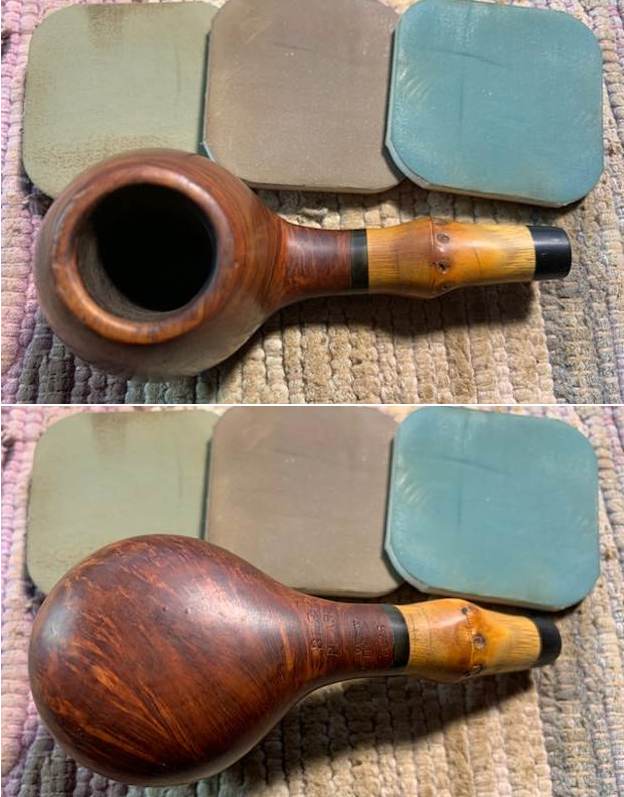
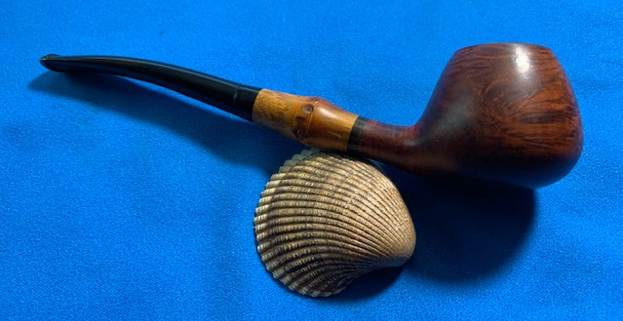
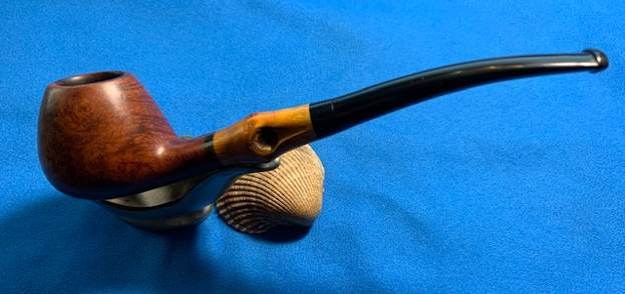
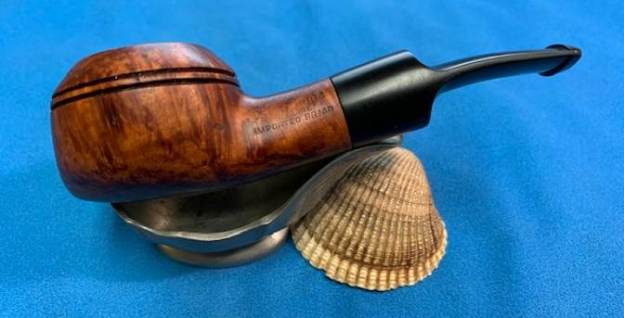
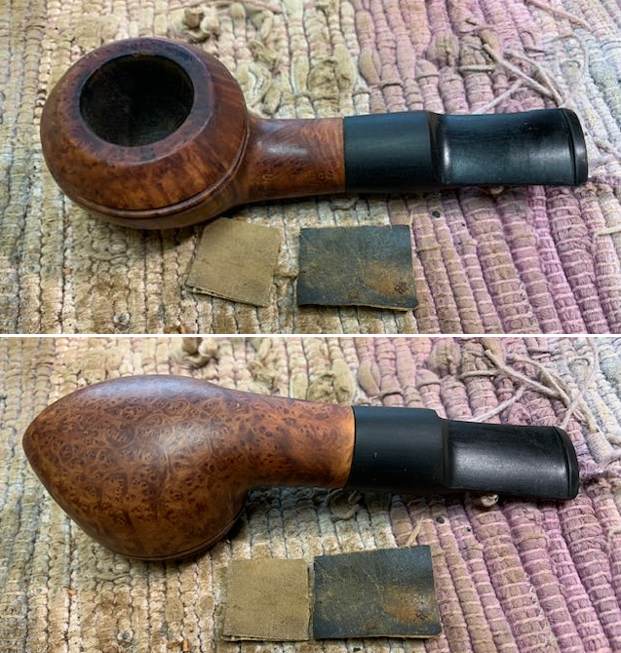
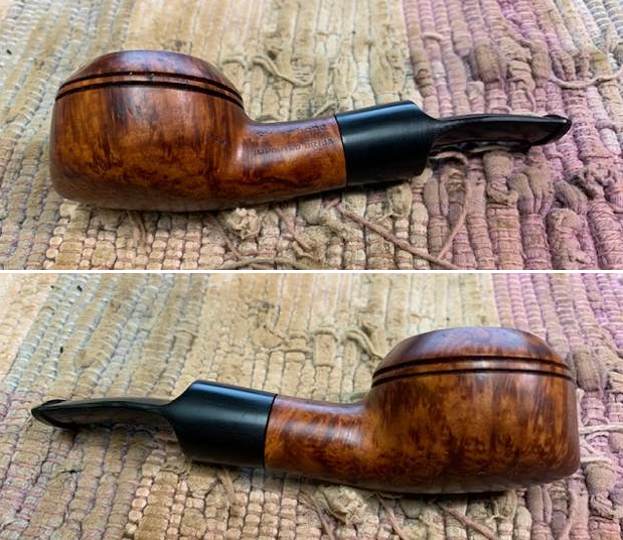
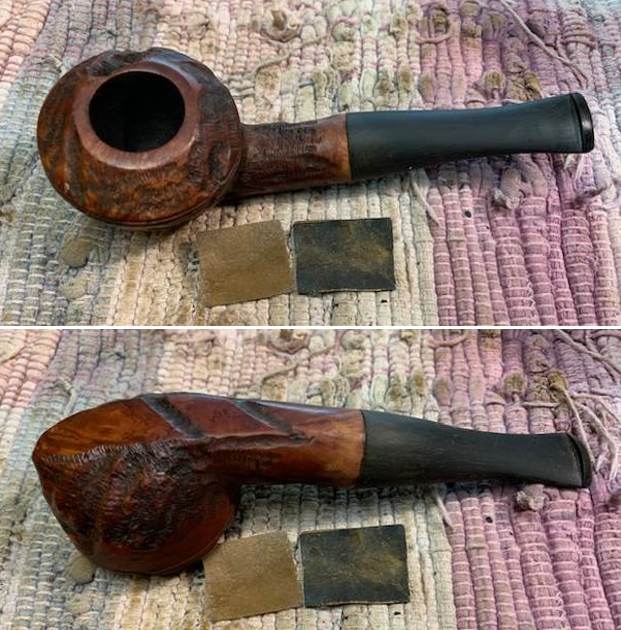
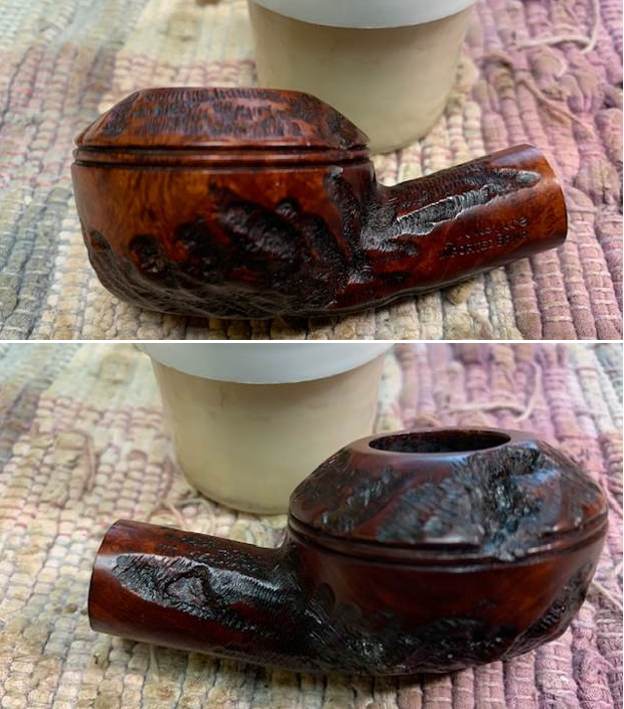
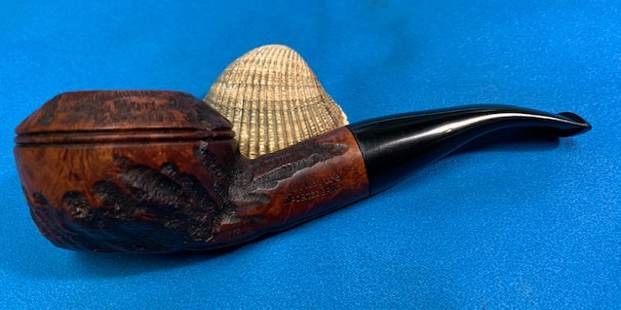
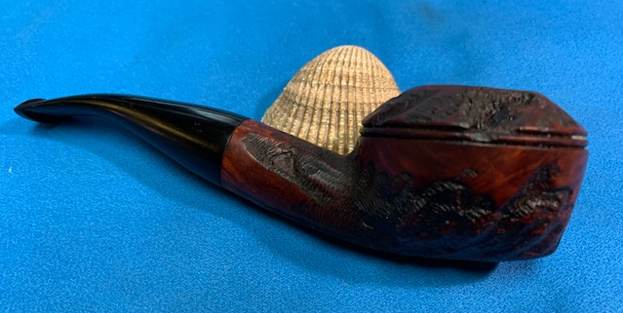
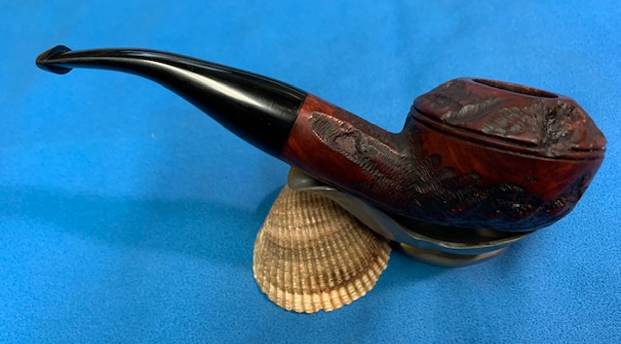
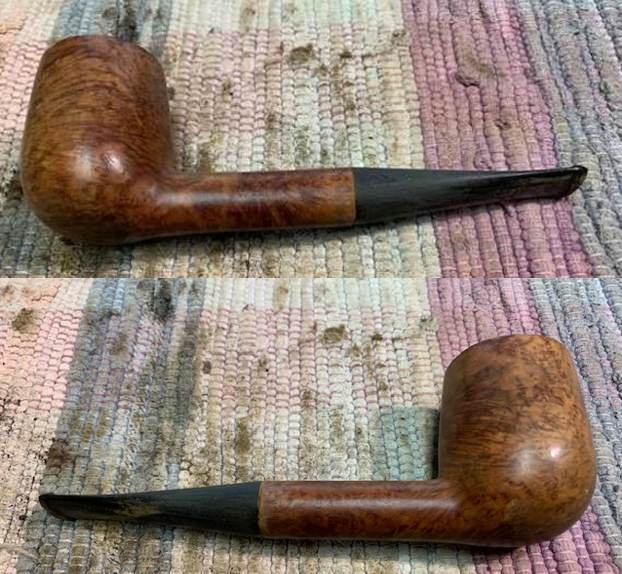
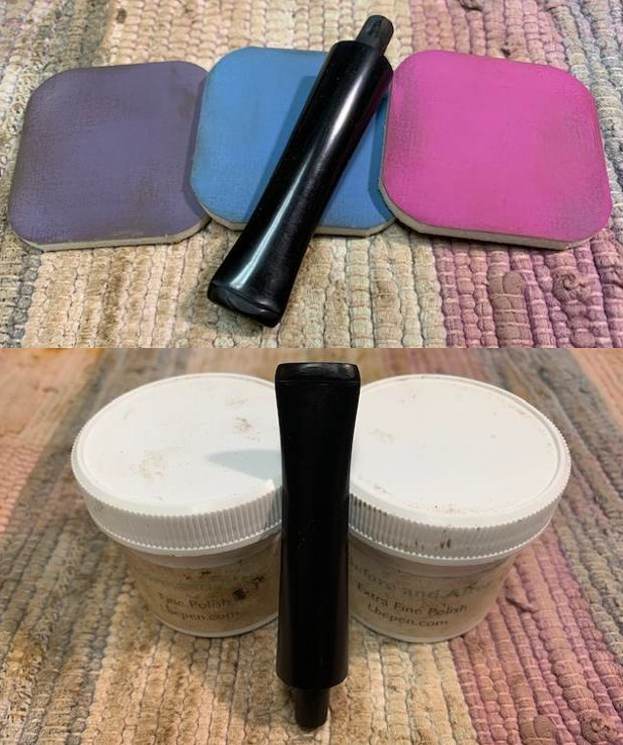
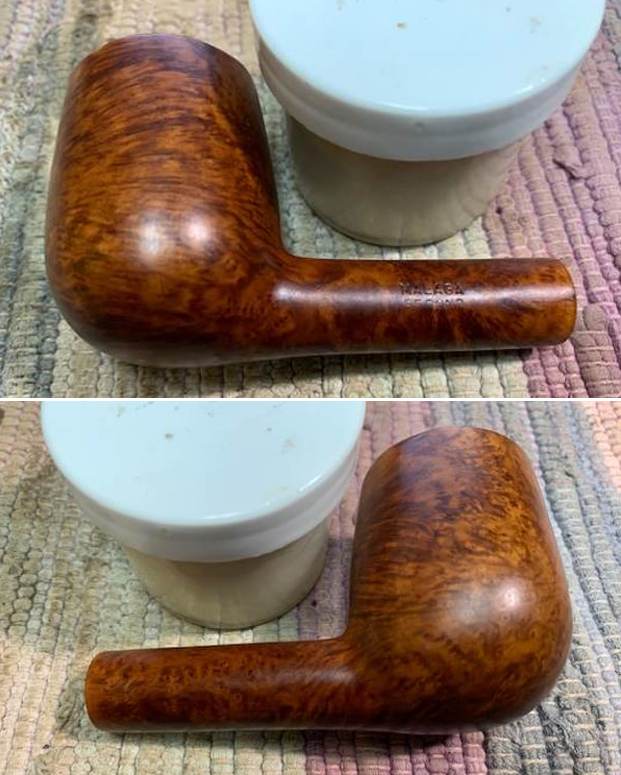
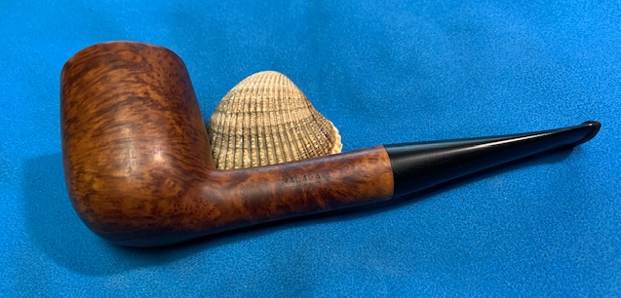
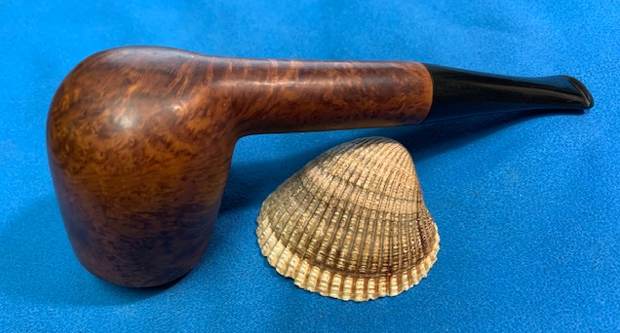
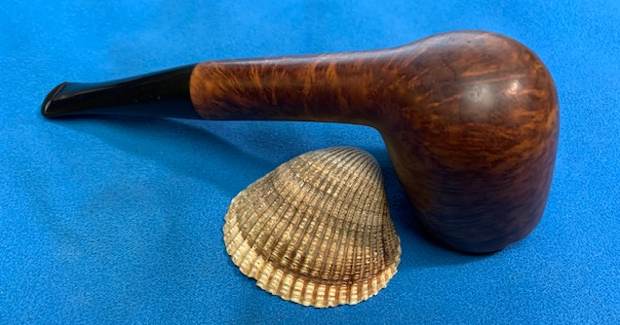
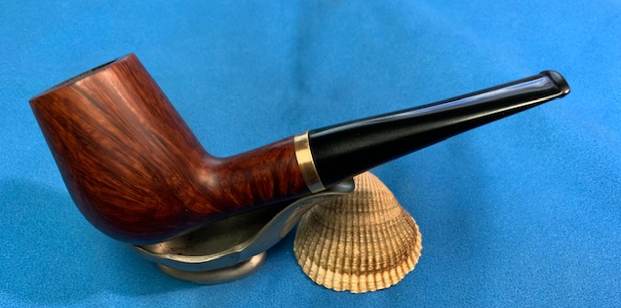
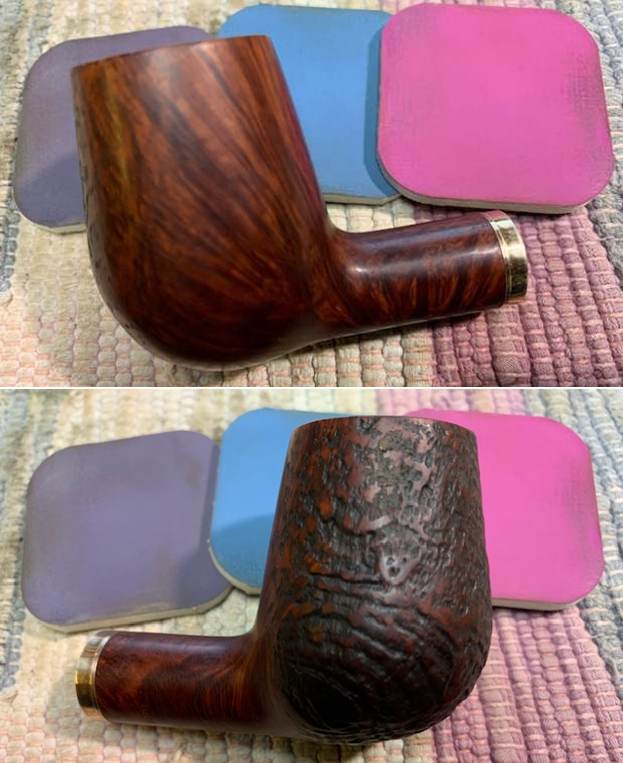
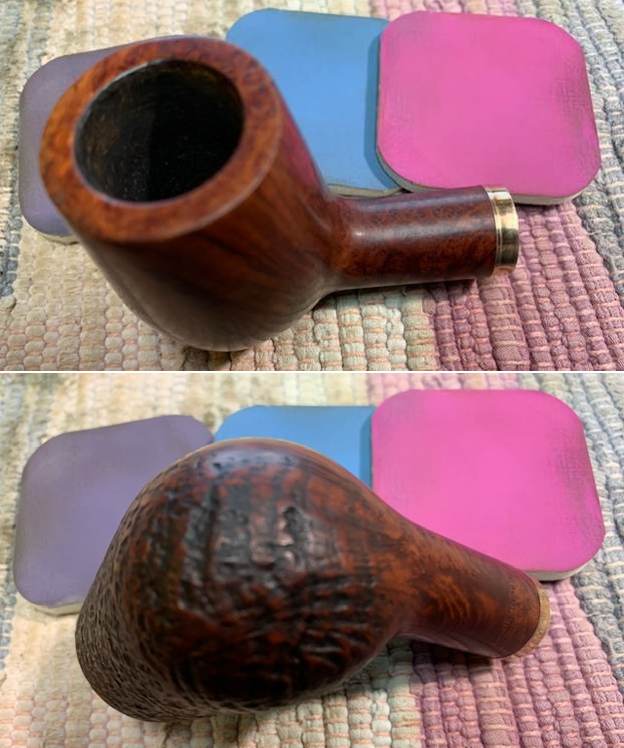
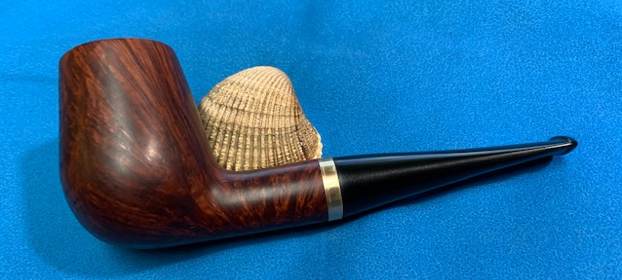
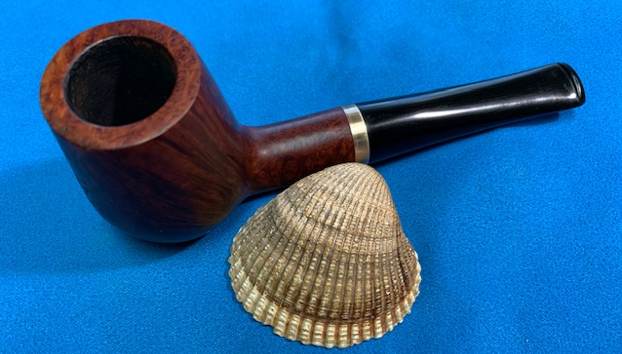
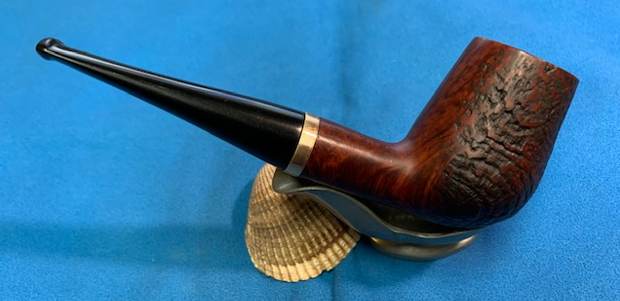
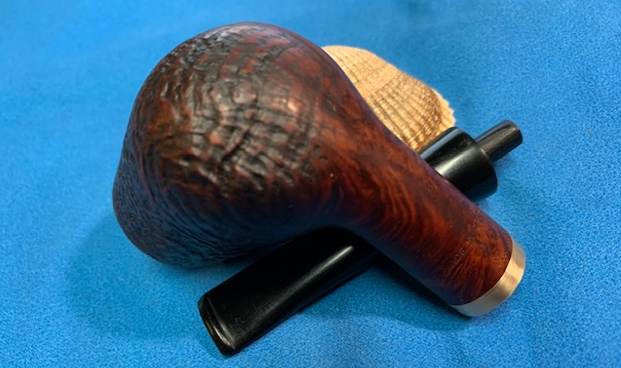
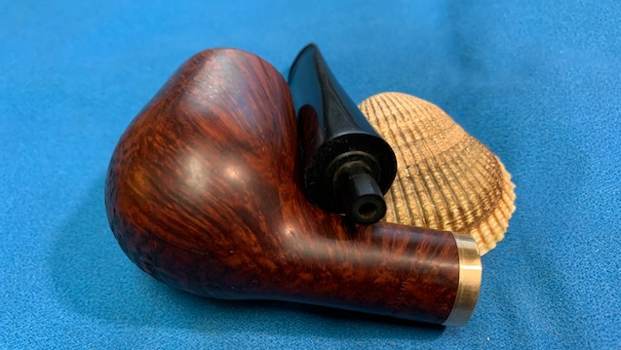
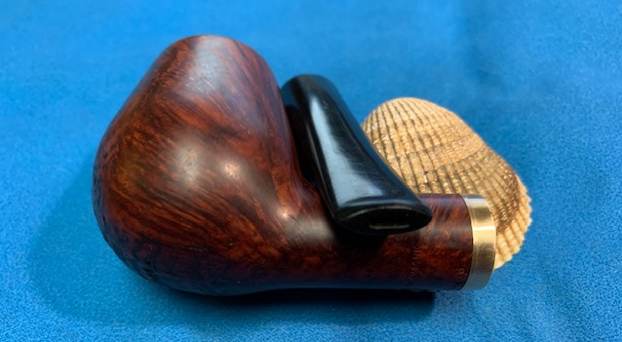
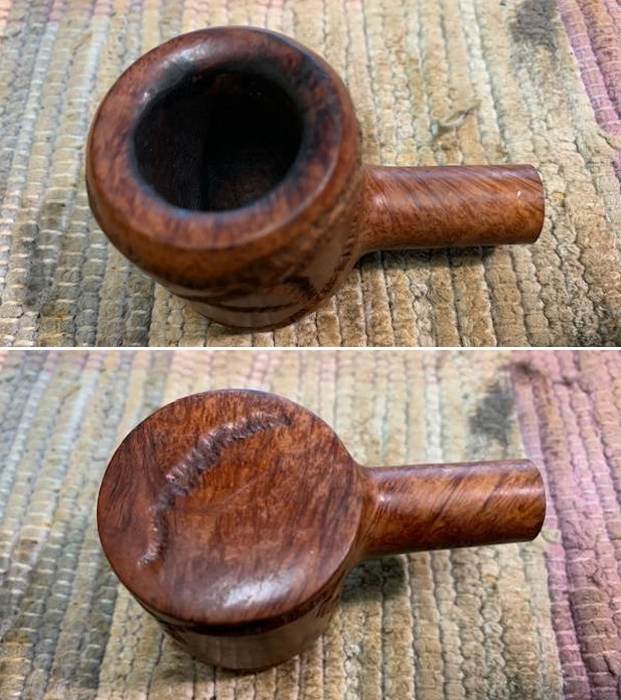
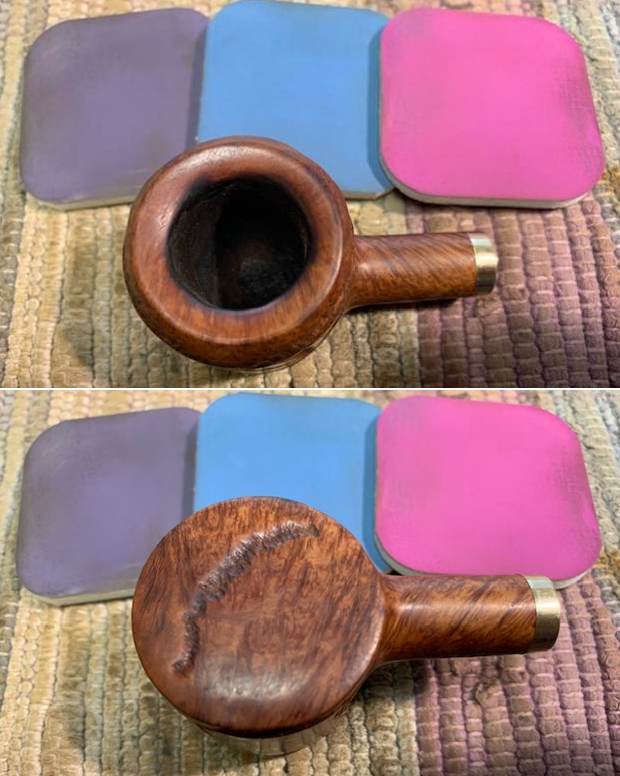
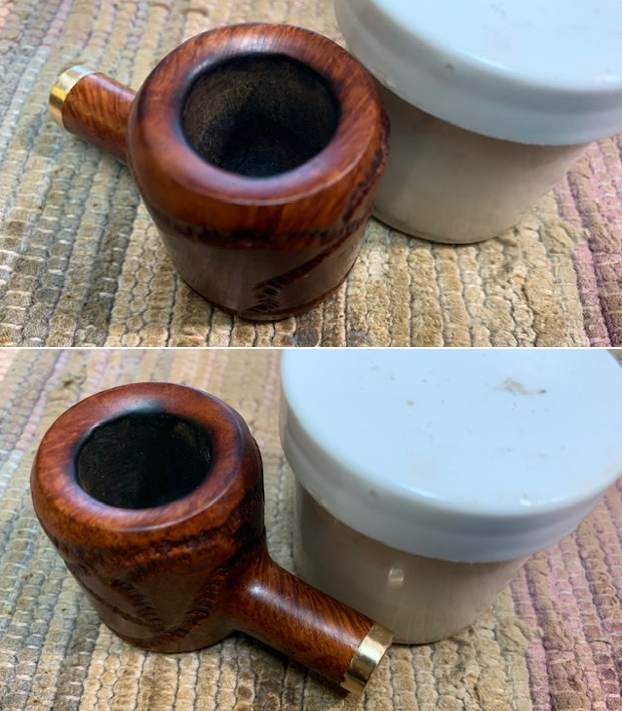
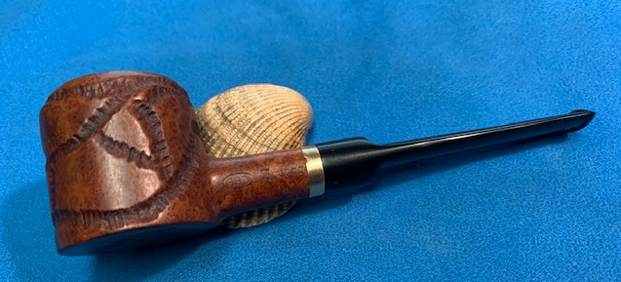
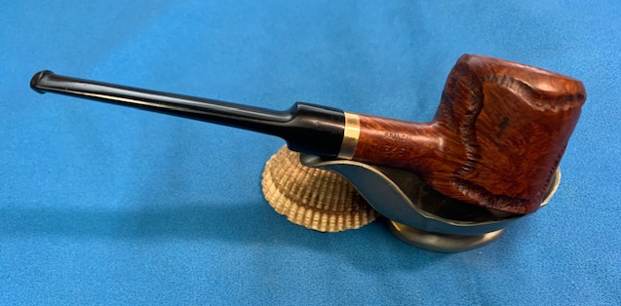
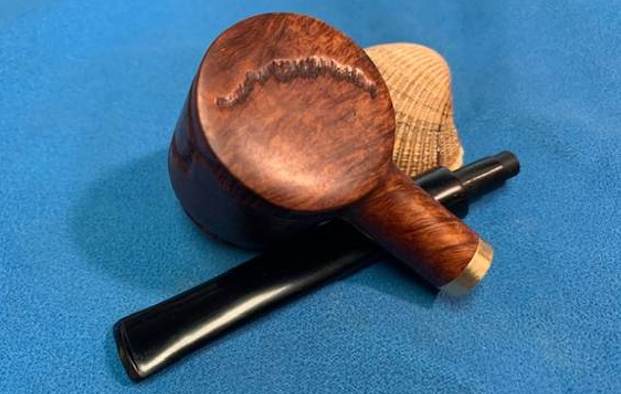
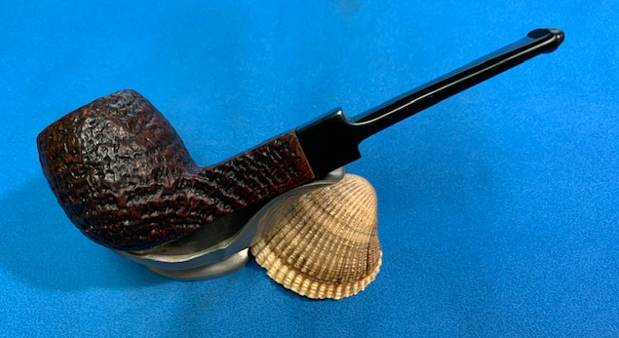
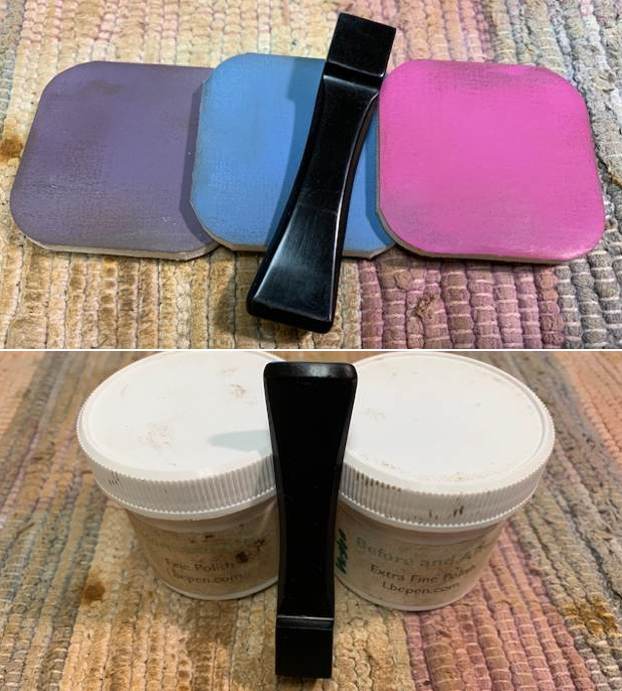
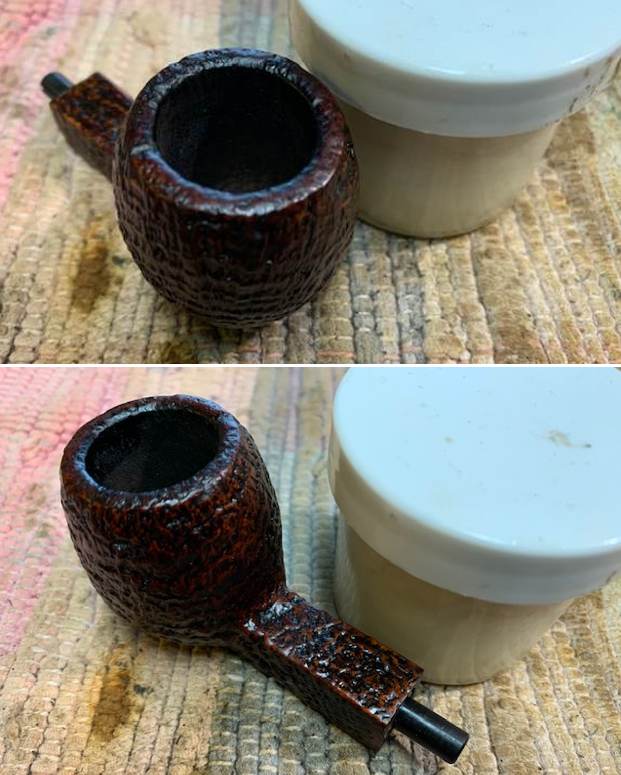
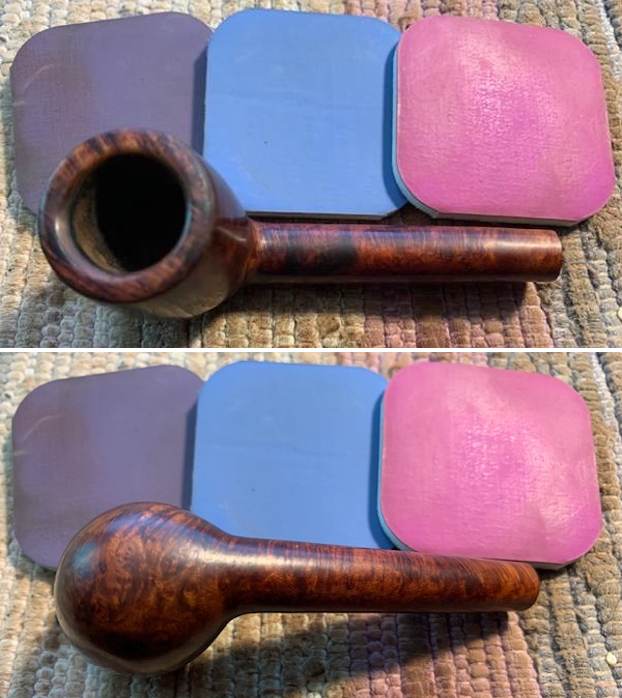 The polishing of the rim top and inner edge brought the rim top colour to match the rest of the bowl. I did not need to stain the rim at all. I worked some Before & After Restoration Balm into the surface of the briar with my fingertips to clean, enliven and protect the briar. I let the balm sit for 15 minutes and then buffed with a cotton cloth to raise the shine. The photos show the bowl at this point in the restoration process. Since the stem was new condition the pipe was basically finished. I am excited to put the final touches on this newly restemmed Made in Ireland Peterson’s Dublin & London 36 Liverpool. I put the pipe back together and buffed it with Blue Diamond on the buffing wheel. I gave the bowl and the stem multiple coats of carnauba wax. I hand buffed the pipe with a clean buffing pad to raise the shine. It is fun to see what the polished bowl looks like with beautiful mixed grain all around it. Added to that the polished black vulcanite stem combined with the bowl and made a stunning pipe. This smooth Classic Older Peterson’s Liverpool 36 is great looking and the pipe feels great in my hand. It is light and well balanced. Have a look at it with the photos below. The dimensions are Length: 5 ½ inches, Height: 1 ½ inches, Outside diameter of the bowl: 1 1/8 inches, Chamber diameter: ¾ of an inch. The weight of the pipe is 39 grams/1.38 ounces. It is a beautiful pipe that I will soon be putting on the rebornpipes store in the Irish Pipe Makers section. If you are interested in adding it to your collection send me an email or a message. Thanks for walking through the restoration with me as I worked over this pipe. Thanks to each of you who are reading this blog.