Blog by Kenneth Lieblich
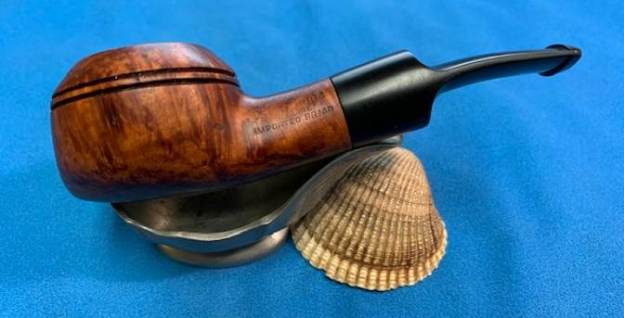
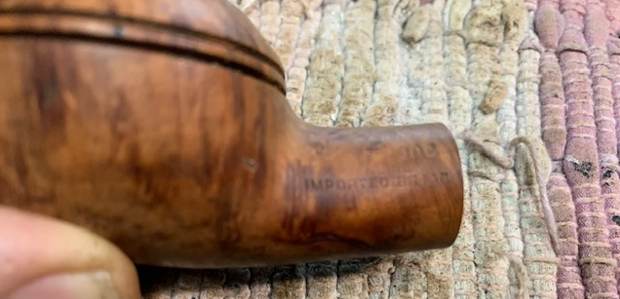
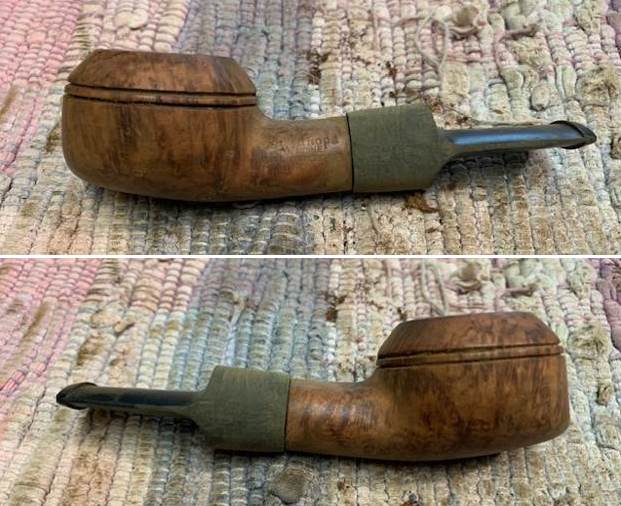
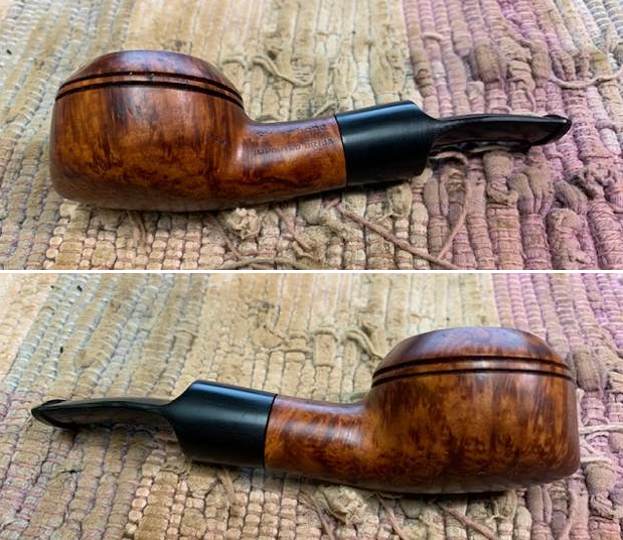
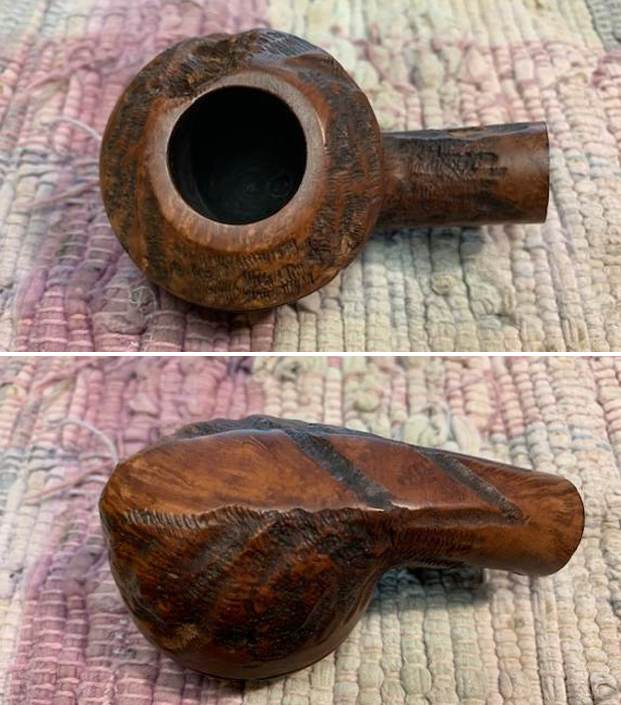
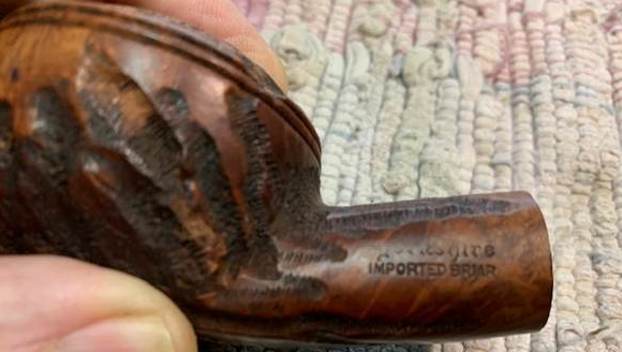
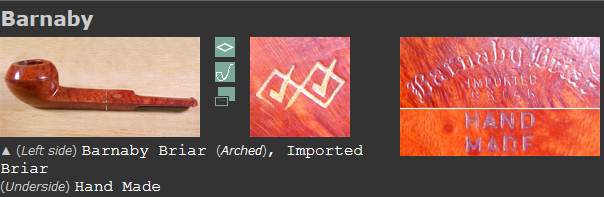
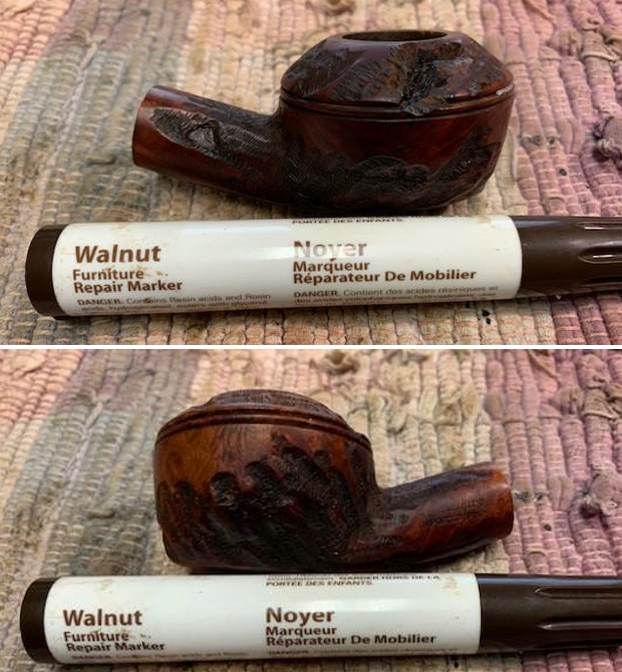
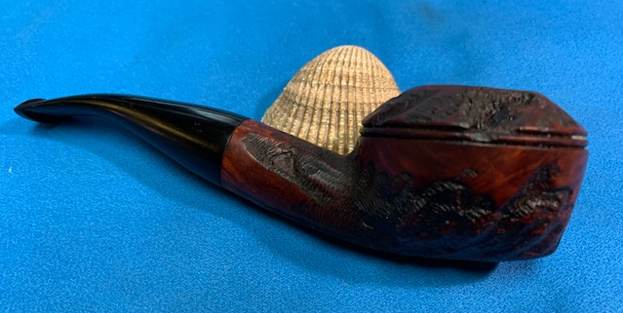
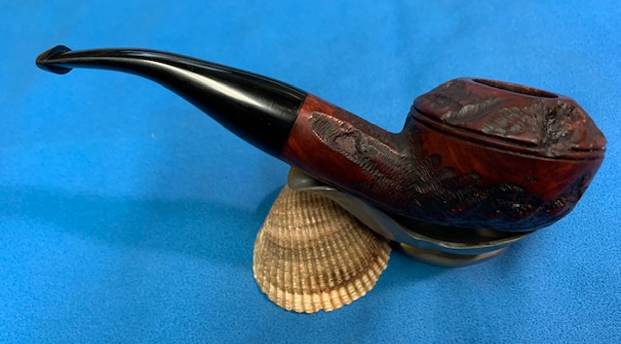
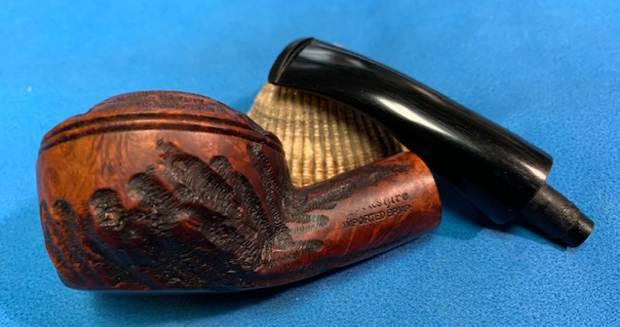
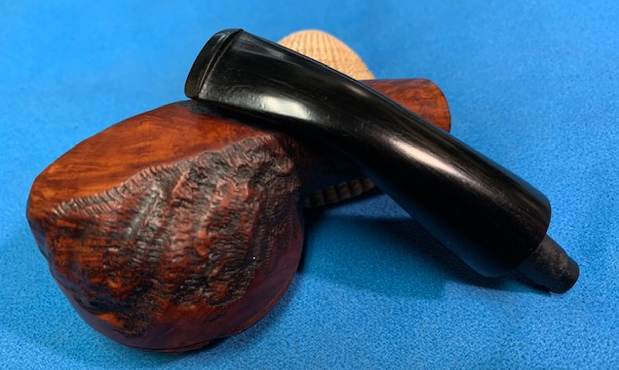
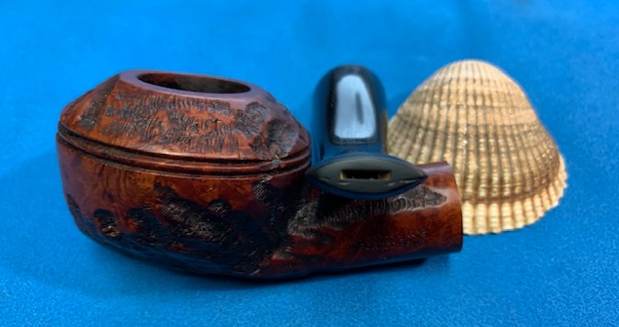
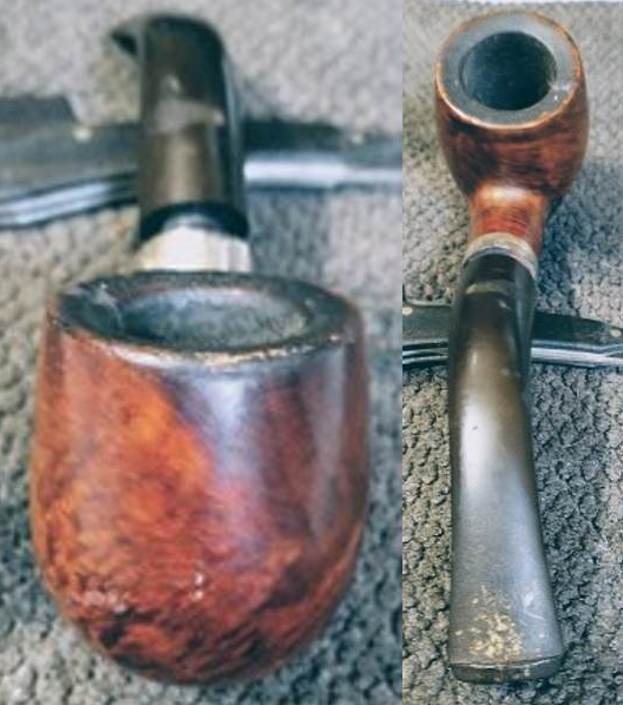
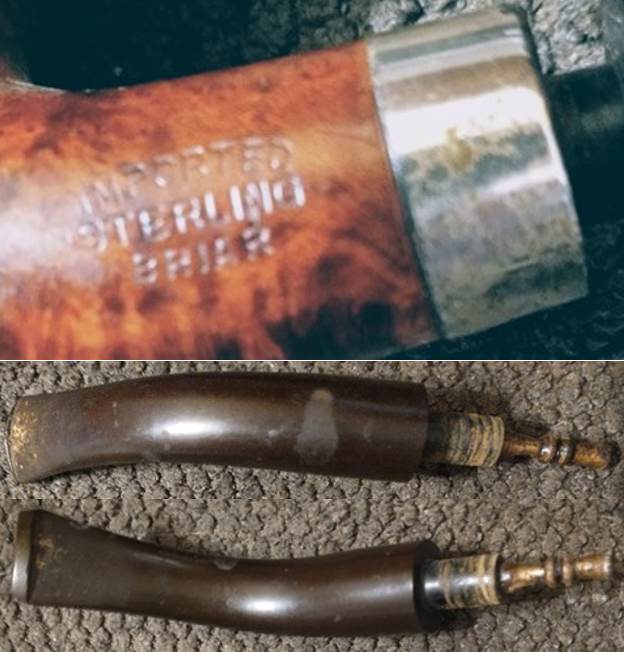
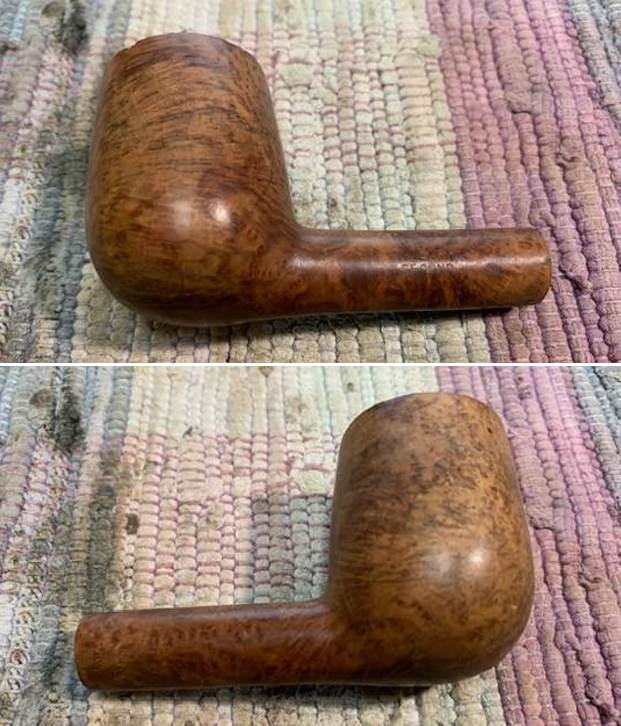
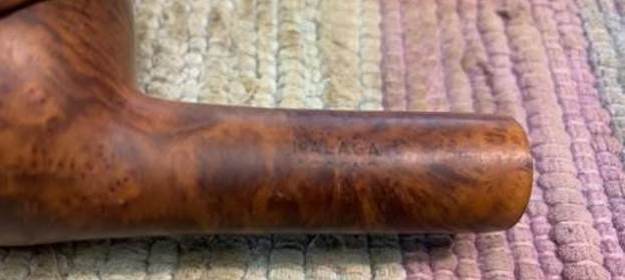
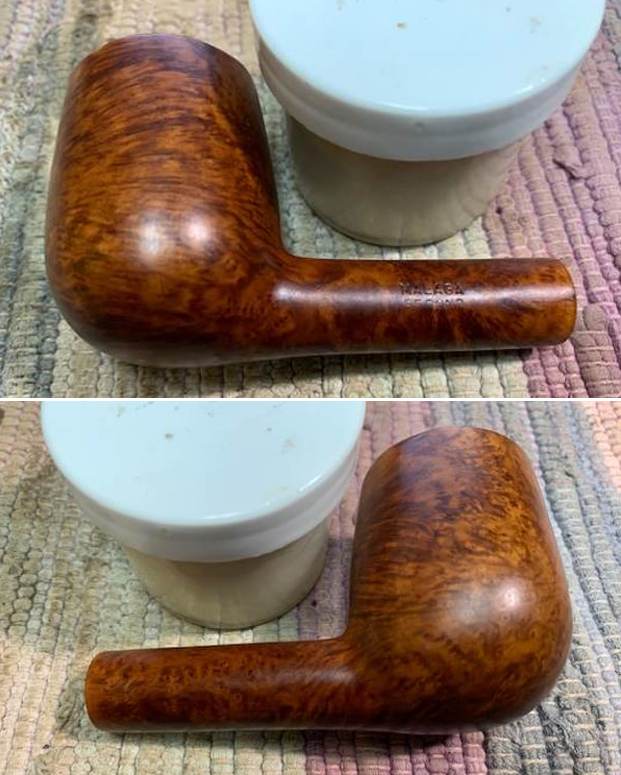
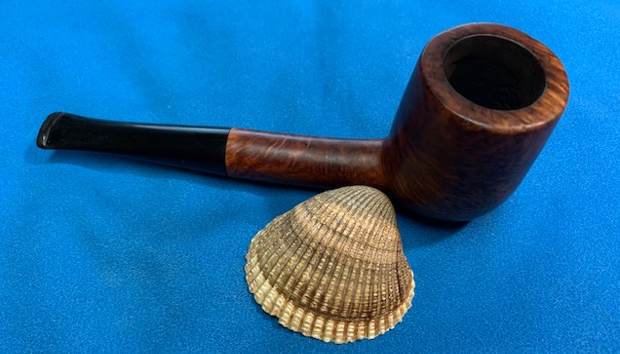
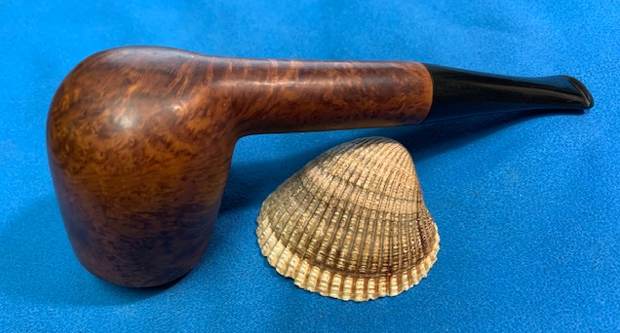
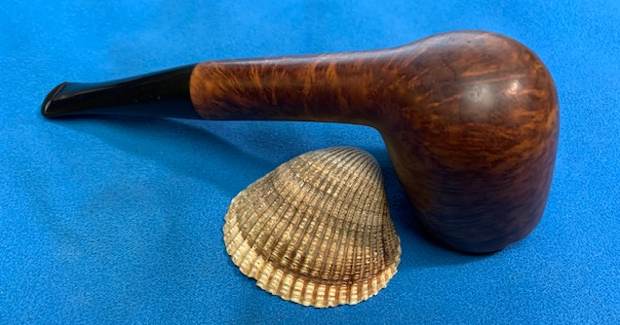
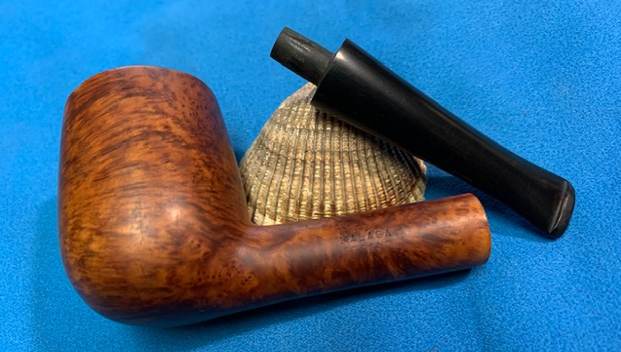
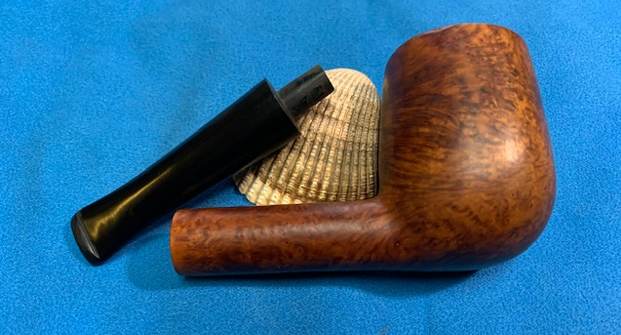
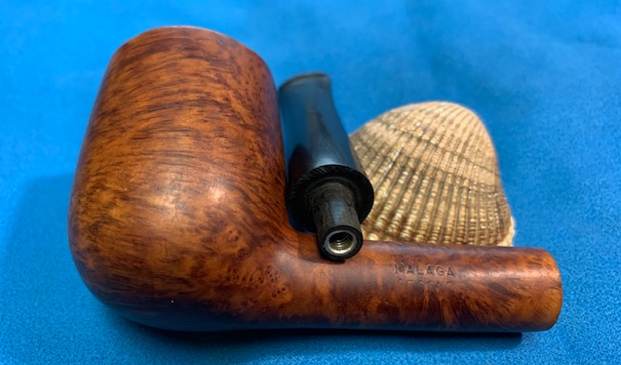
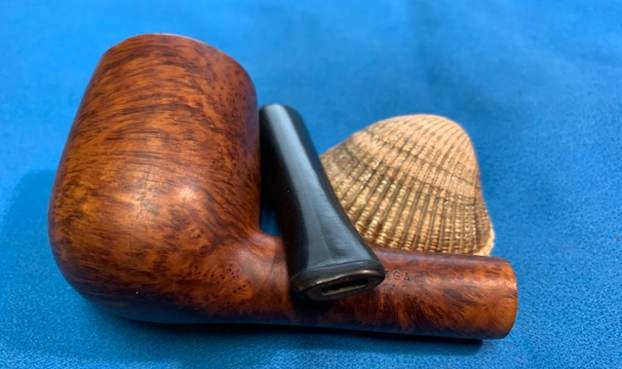
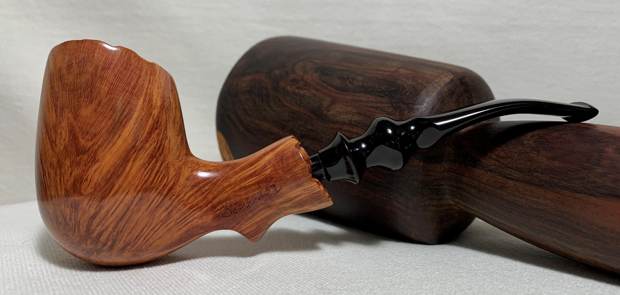
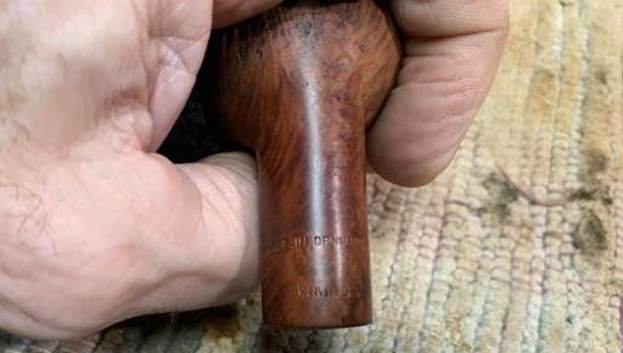
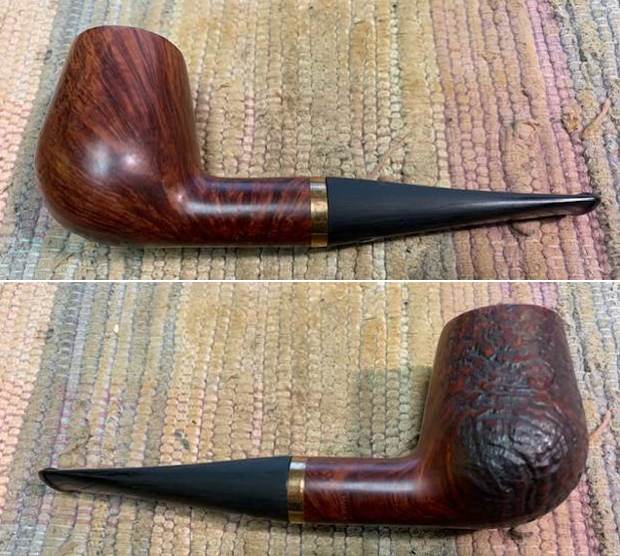
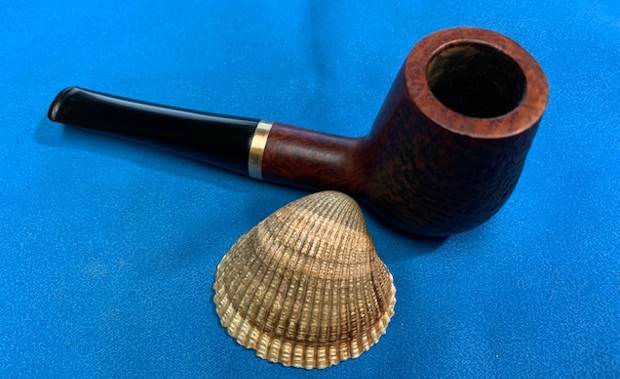
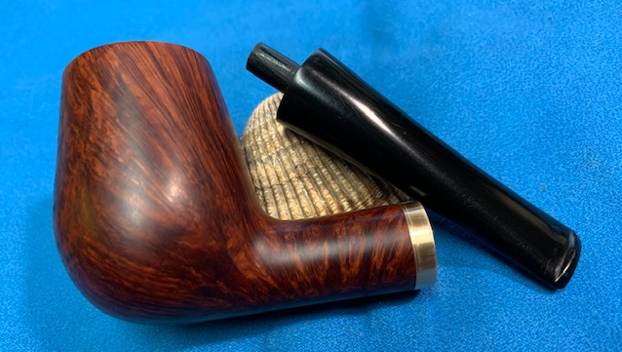
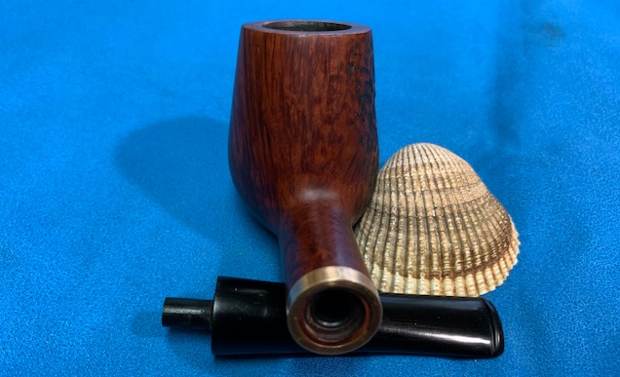
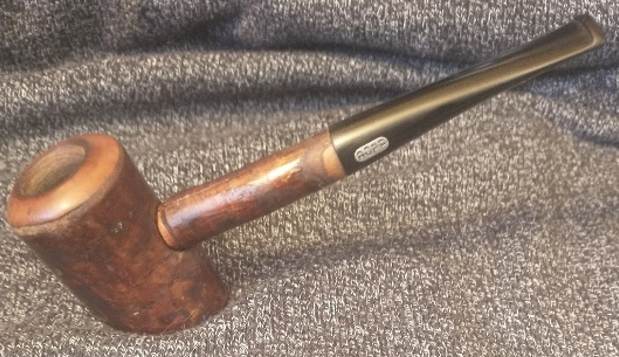
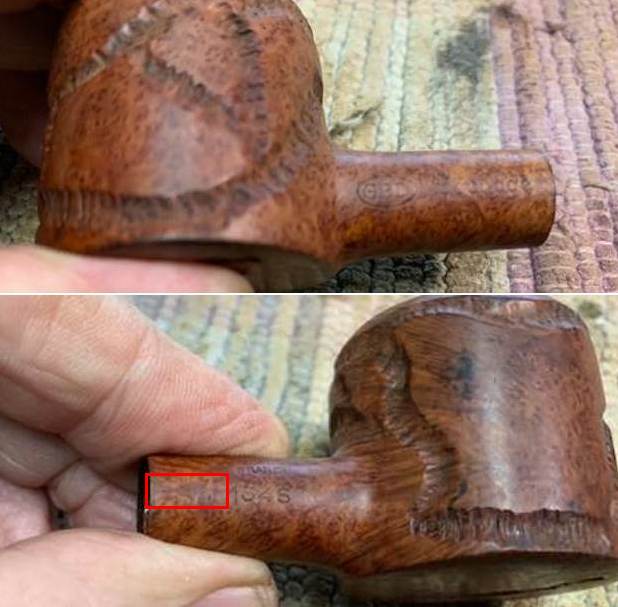
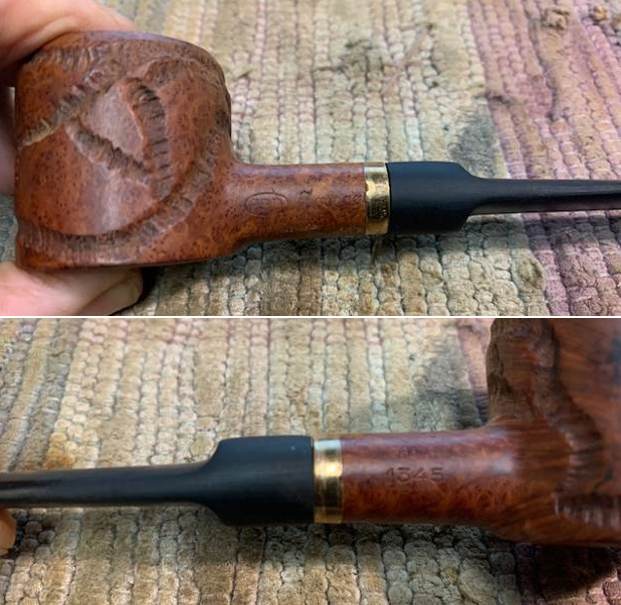
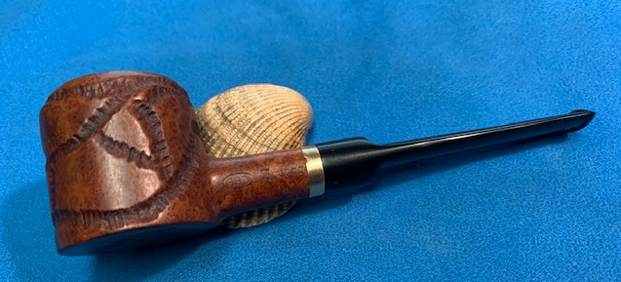
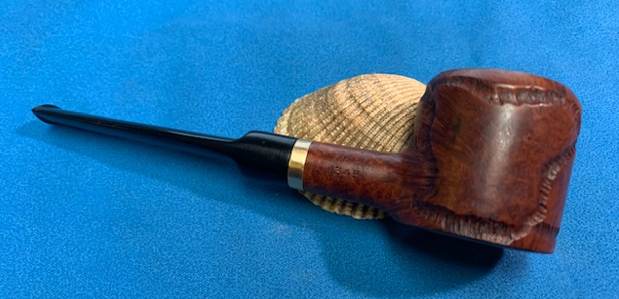
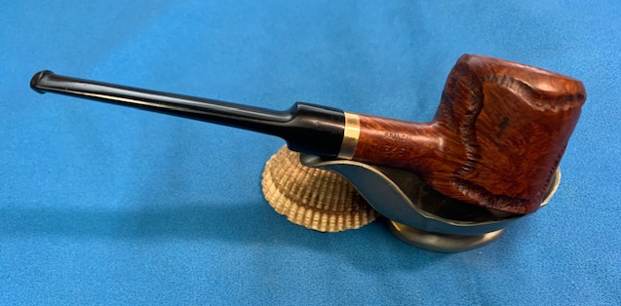
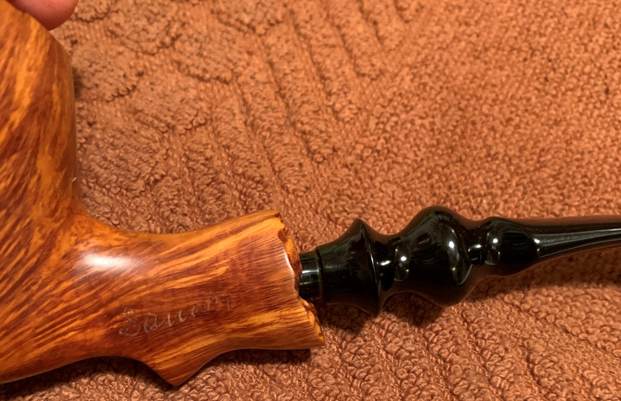
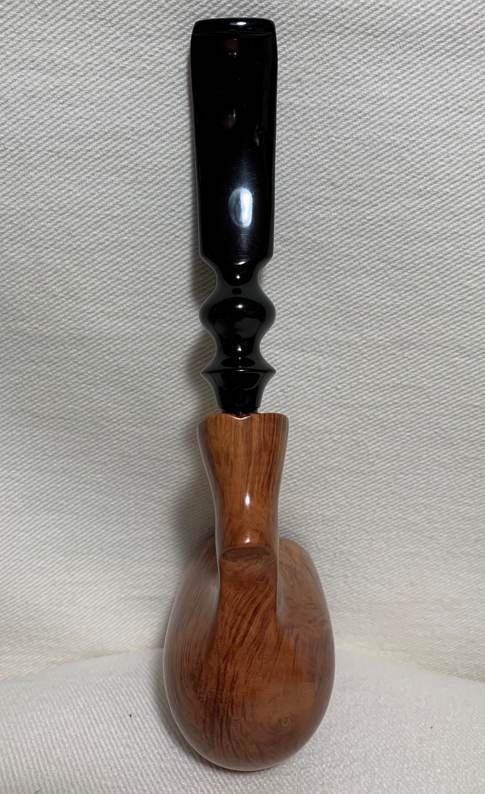
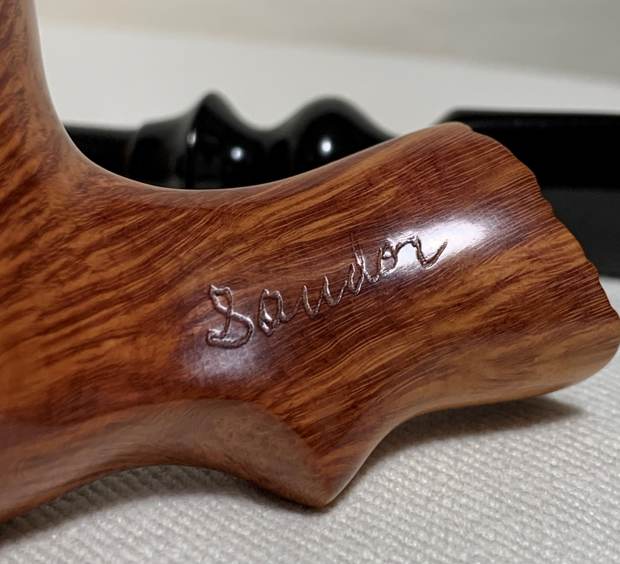
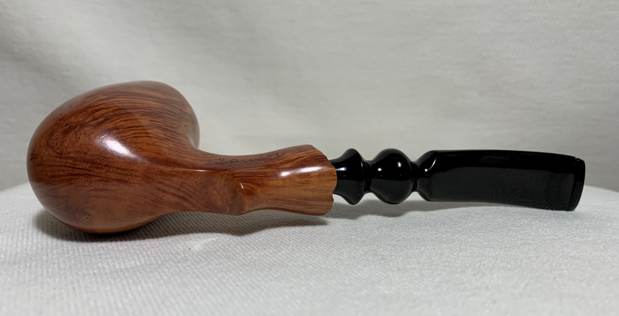
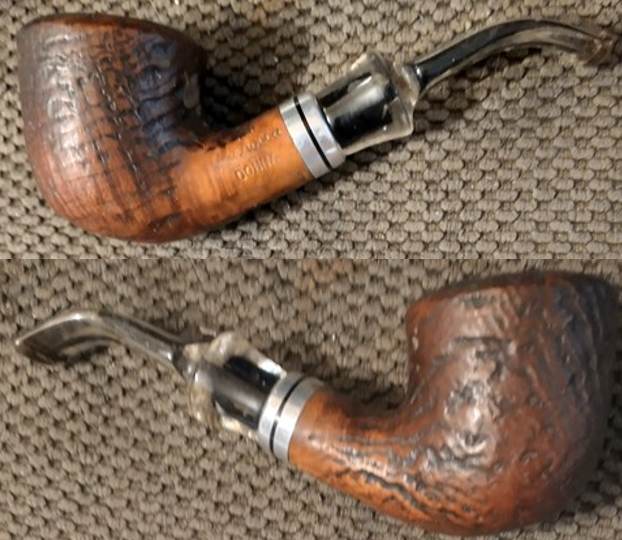
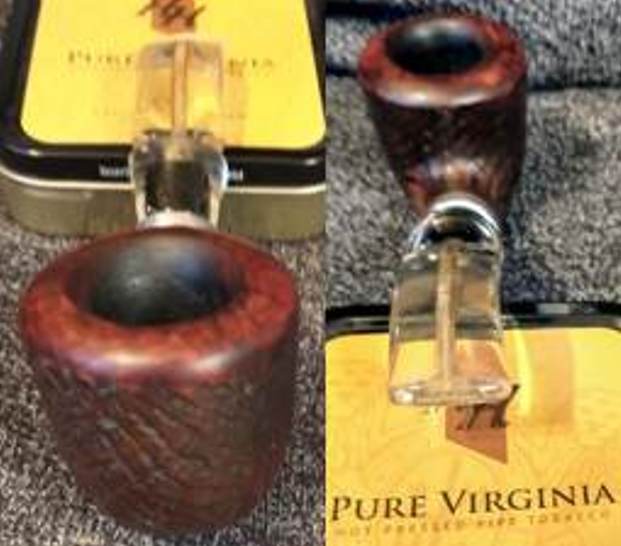
Next on the chopping block is a spectacular freehand pipe that came in a group of pipes that I bought from Chicago. Freehand pipes have been all the rage among collectors for many years, thanks to the Danes. But this one is not from Denmark – it is from the United States. The pipe is absolutely beautiful and a superb example of American pipe-making craftsmanship. I have been wanting to work on this pipe for ages, but other things always got in the way. Now is the time. Carpe diem!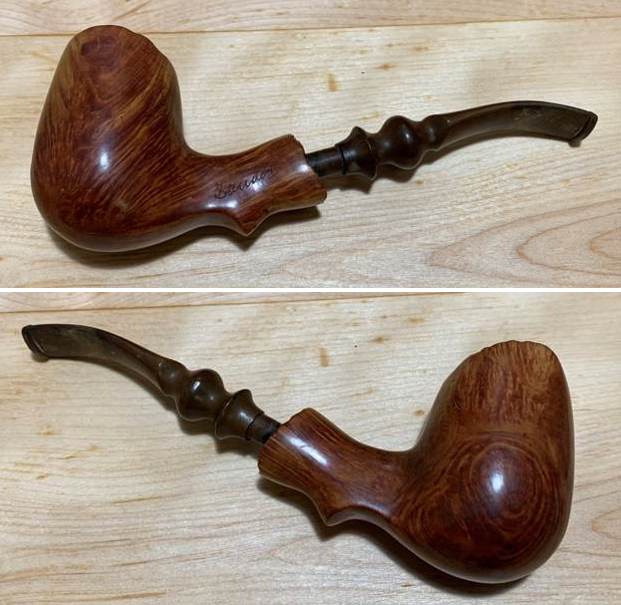 The pipe is a American freehand pipe by the esteemed pipemaker, Sandor Herskovitz. You’ve never heard of him? Do not worry – few have! Not many of his pipes are available on the secondary market. The gorgeous briar wood on this pipe really makes an impression. I am not able to date the pipe, as the photo shows all of the markings to be seen. It simply shows the word Sandor on the left-hand side of the stummel.
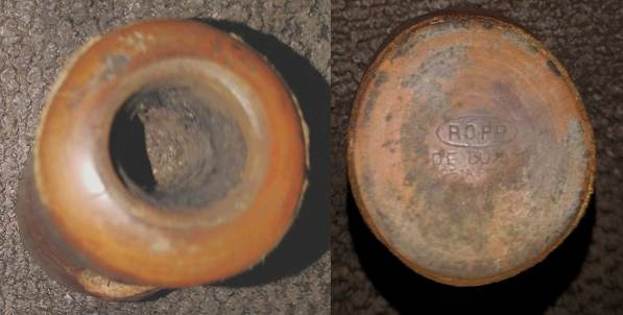
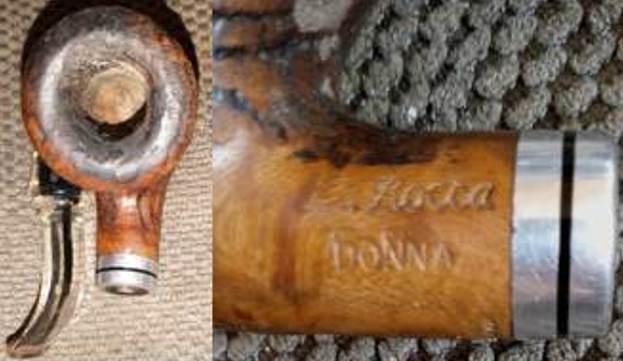
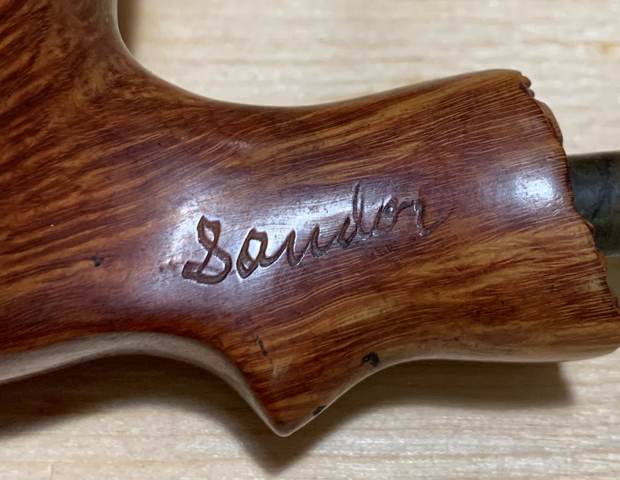 Little information exists on Pipepedia about him. What information they do have comes from the proprietor of the Red Door Consignment Gallery in Harrisburg, Pennsylvania:
Sandor Herskovitz (of Flushing, NY) used to make pipes and sell them out of a public park in Harrisburg, Pennsylvania in the late 50s and early 60s. Tom Benz had a pipe created for his wife, Hilda, that is a foot with a big toe sticking up. Sandor signed it “Made for Hilda, Sandor”. Tom Benz gave the pipe to a friend who later passed. His daughter gave it to the Red Door Consignment Gallery in Harrisburg, PA to sell. Coincidentally, my father, Leonard Berman, saw the pipe and asked me to e-mail Tom Benz to ask who the man was who used to make pipes in the park. By sheer coincidence, Tom Benz wrote back with the name Sandor Herkovitz and said the pipe was originally his! Of course, I offered it back but he declined and is allowing the public to enjoy it at our gallery. I will continue to research this pipe maker and hope others will contribute as well.
 I did my own sleuthing on Sandor Herskovitz. I do not know his life-span for certain, but US genealogical records indicate that a man named Sandor Herskovitz was born in Hungary in 1898, naturalized in Pittsburgh, Pennsylvania in 1923, and died in Erie, New York in 2002. This seems likely to be our man.
I also found two newspaper articles that mentioned Herskovitz in the 1970s. The first article comes from the Washington Post on 13 April 1978, regarding the Spring Arts and Crafts Fair in Gaithersburg, Maryland:
Finding the unusual can be an important factor in the craftsman’s success. By applying his trade to his hobby, Sandor Herskovitz of Flushing, N.Y., found a distinctive way to sculpt briar pipes. For shapes, he found inspiration in the shoes he had been selling for years for Genesco, a shoe corporation. From making pipes in the shape of Benedict Arnold’s boot and Abigail Adams’ shoe he has gone on to make a camera shape for a Nikon executive, a foot shape for a podiatrist and a vertebra shape for an osteopath. His Liberty Bell pipe sent to Washington for the Bicentennial caught the eye of pipe-smoker Gerald Ford. “Maybe I got a little ham in me, maybe that’s why I do it,” said Herskovitz. “You take a piece of wood and you never know what’s inside.”
The second article comes from the Michigan Daily on 20 July 1978, regarding the Ann Arbor Art Fair in Ann Arbor, Michigan:
The vendor of another of the more unusual Art Fair wares is New York pipe carver Sandor Herskovitz. “The things I sell, nobody else sells,” said Herskovitz, puffing on a wooden pipe in the shape of a bare foot. The artist’s array of designs ranges from an abstract, roughly-textured wooden pipe to an intricate miniature replica of Benedict Arnold’s boot. “I sell all over the country, and these are the best handmade pipes in the world, I think,” Herskowitz said. “The people seem to like our pipes in Ann Arbor.”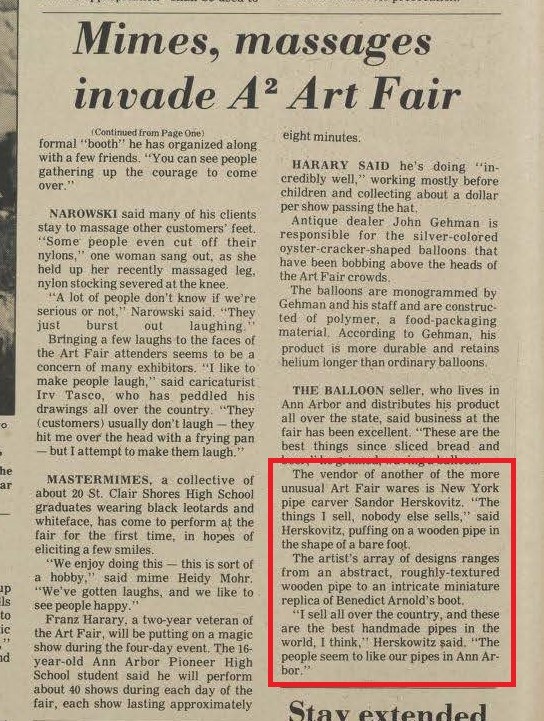 Clearly, Herskowitz was an experienced and talented pipe man. It seems likely that the pipe dates from the 1950s–1970s. I am delighted to be able to work on a pipe like this. One can not only see, but also feel, the quality of the briar and the work he put into it.
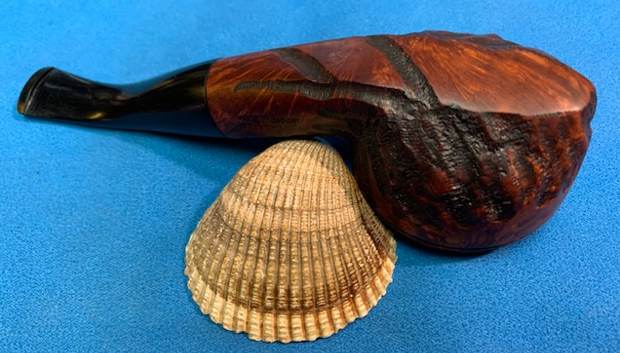
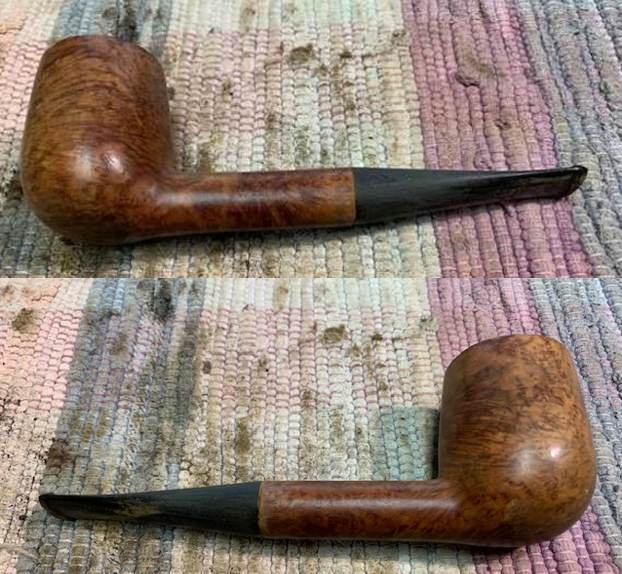
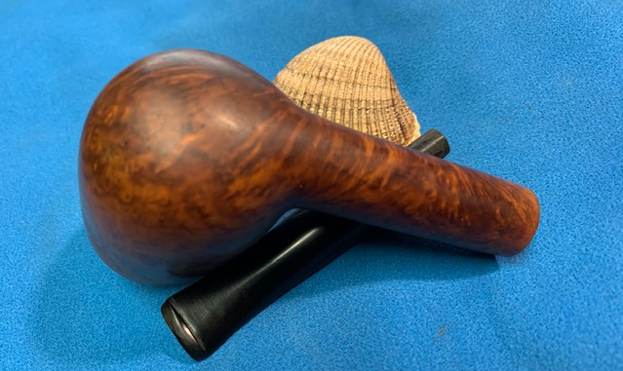
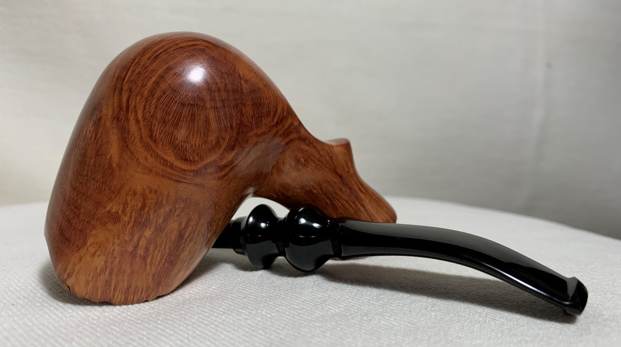
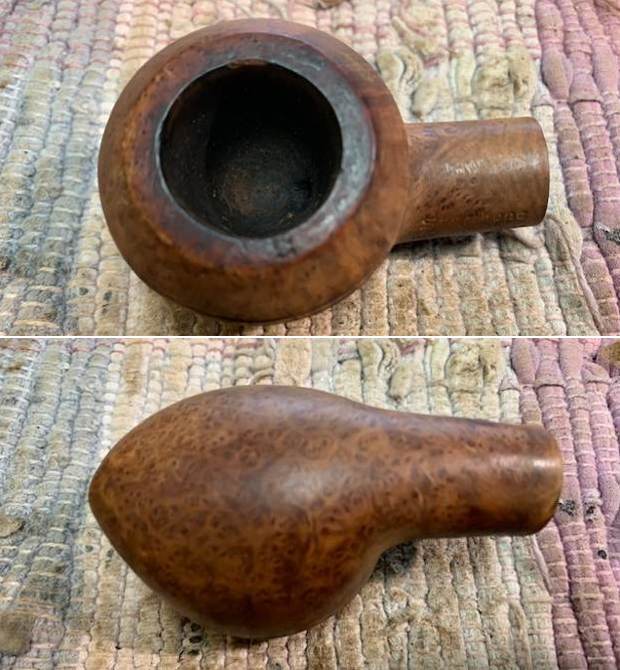
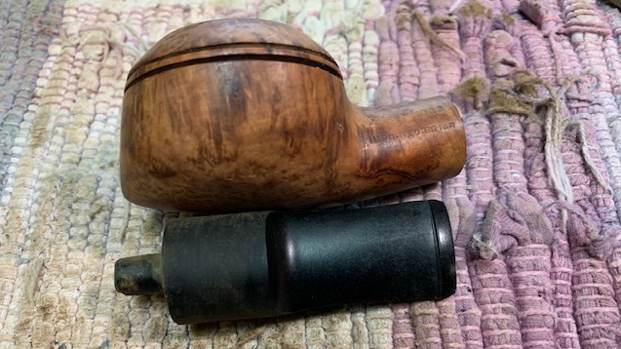
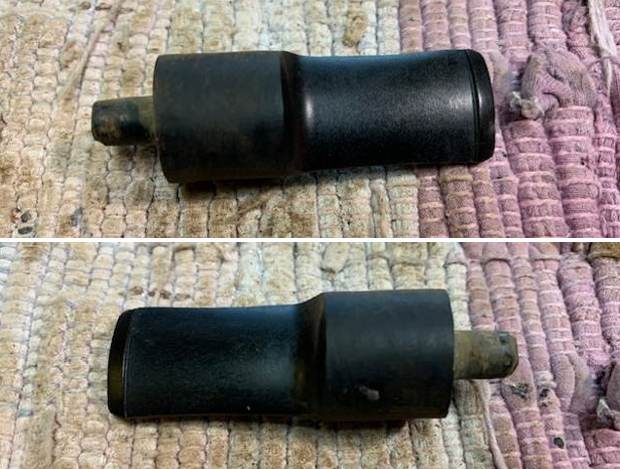
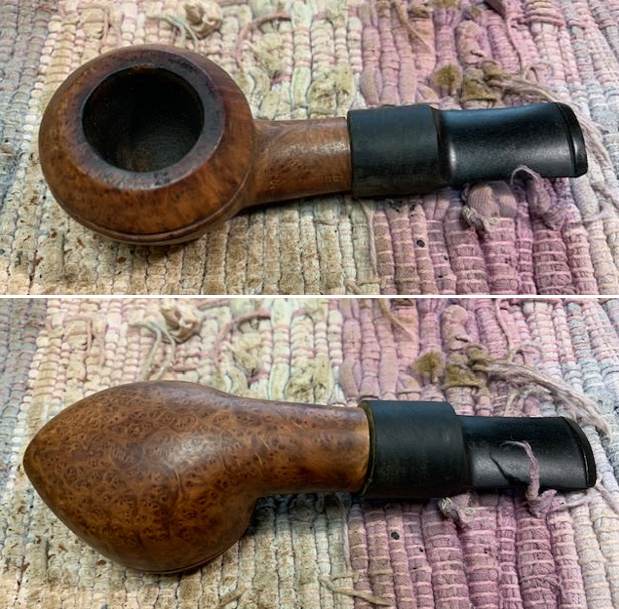
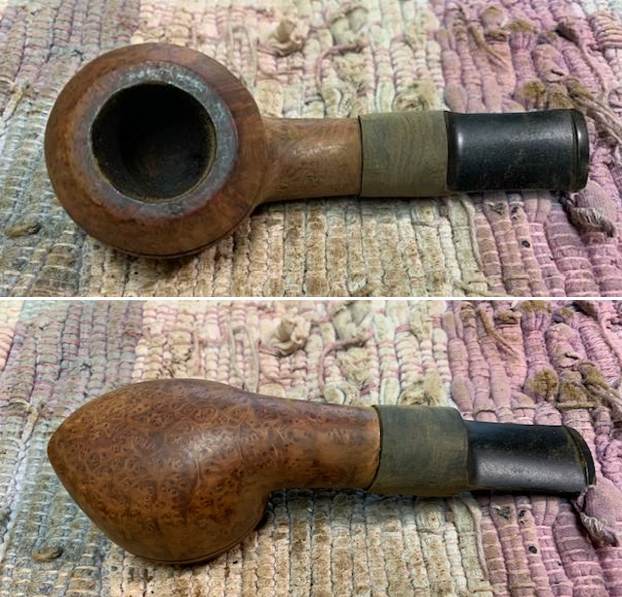
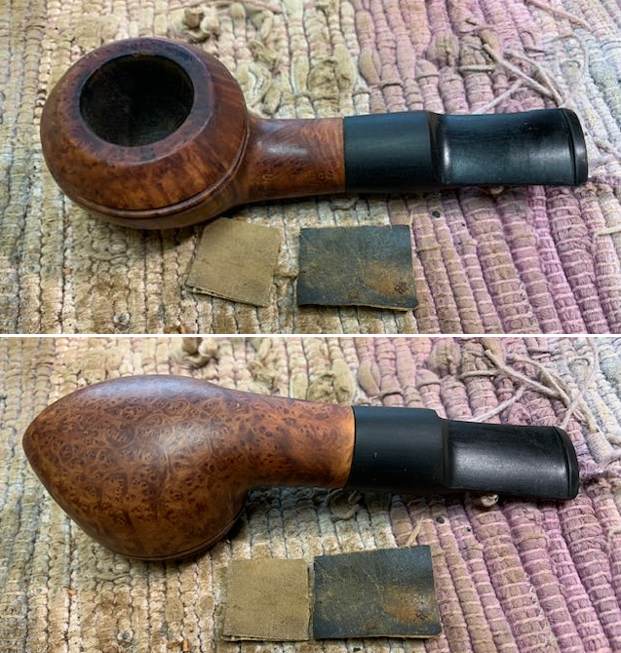
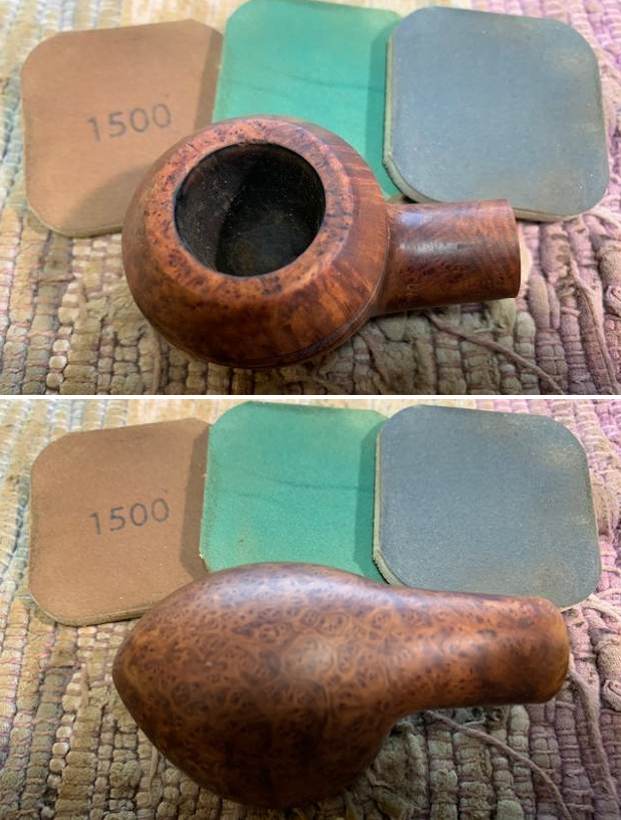
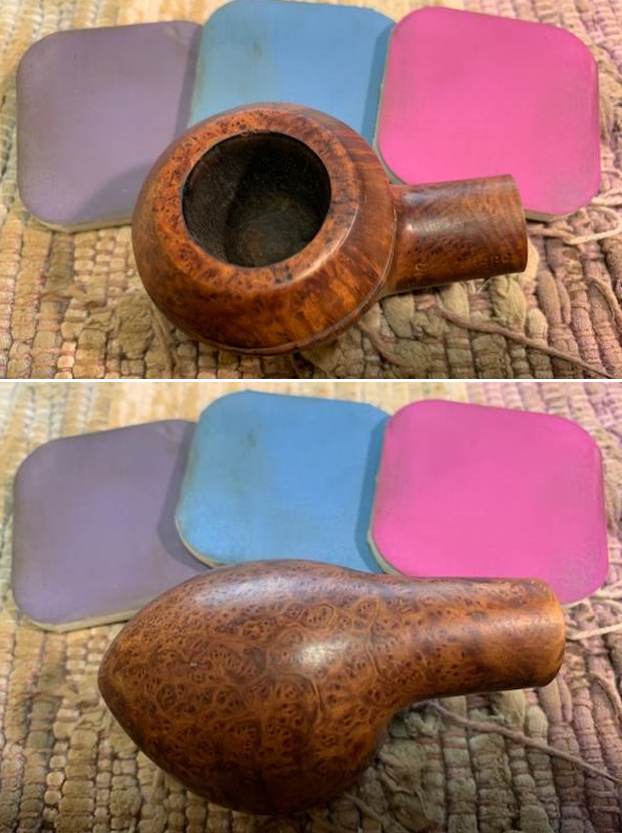
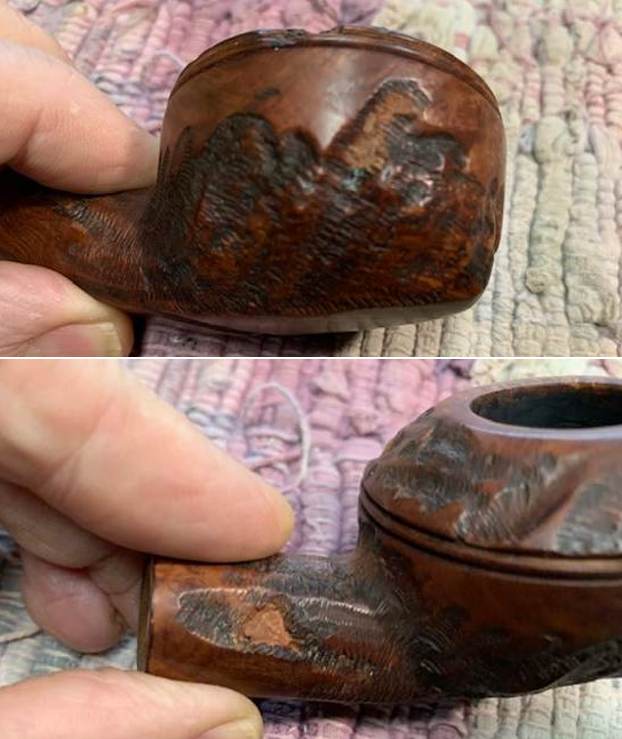
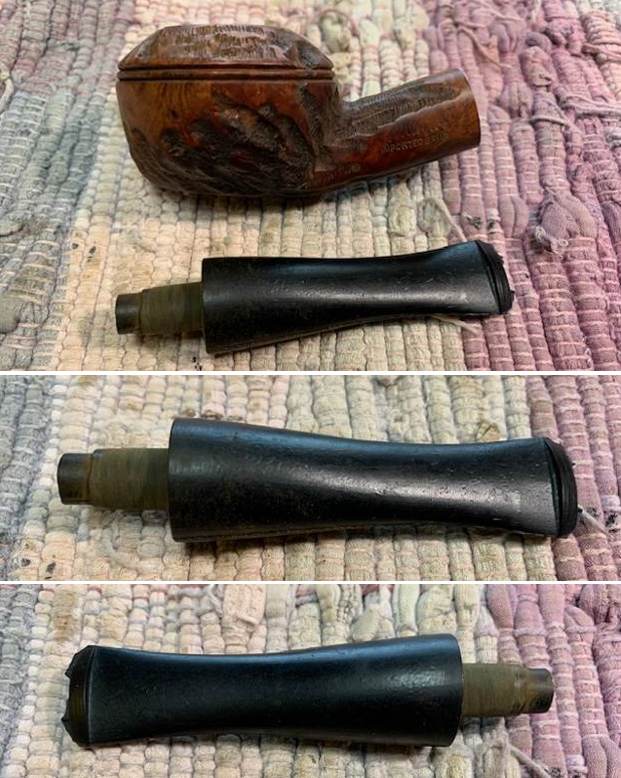
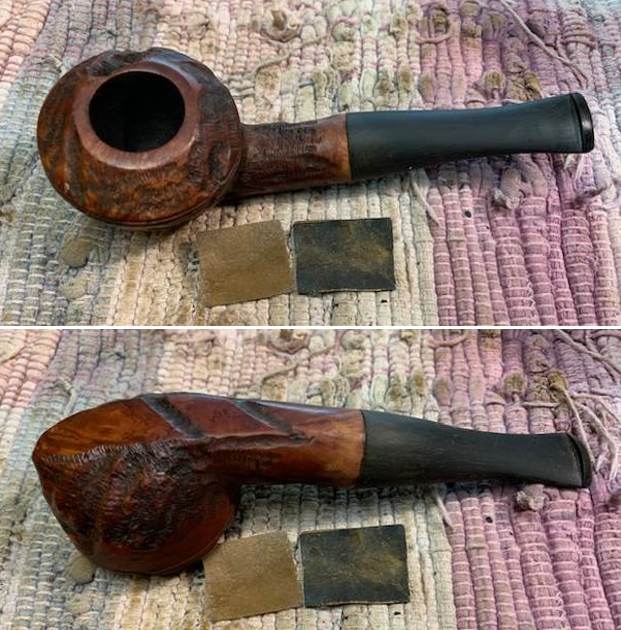
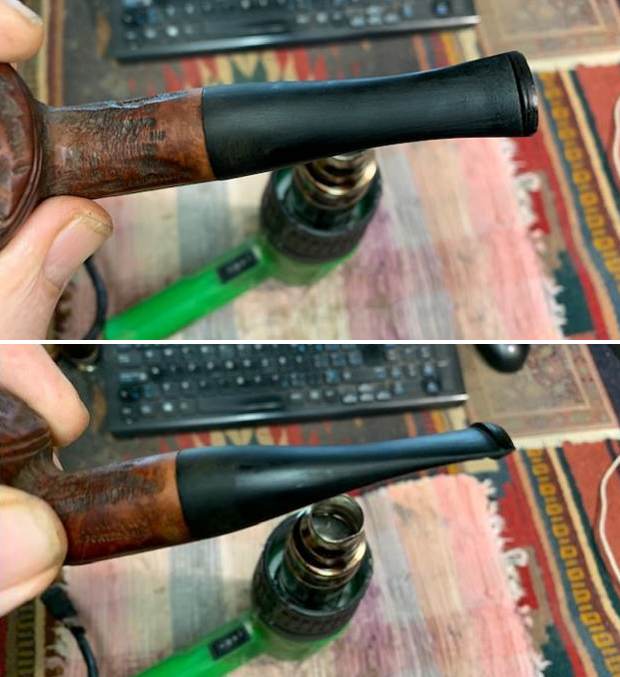
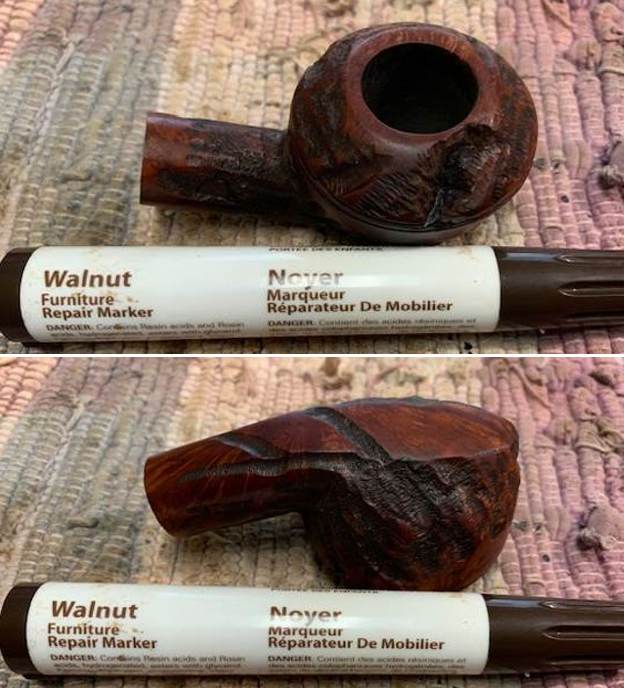
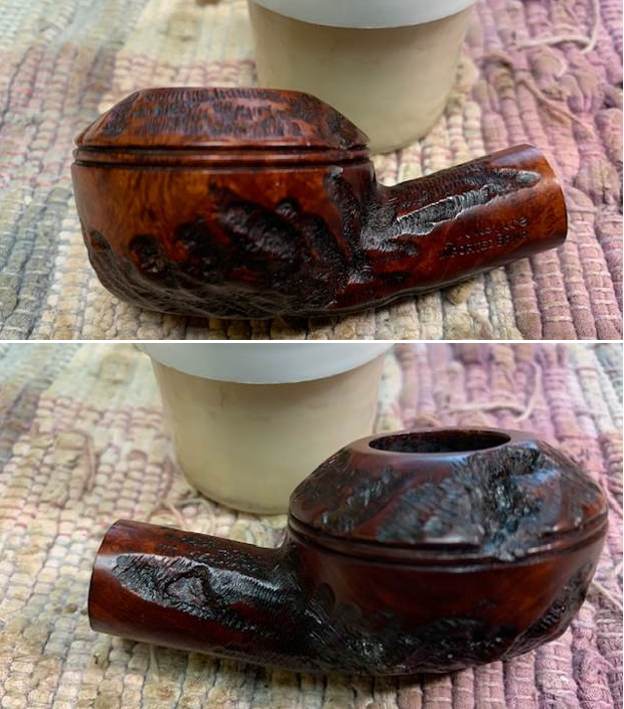
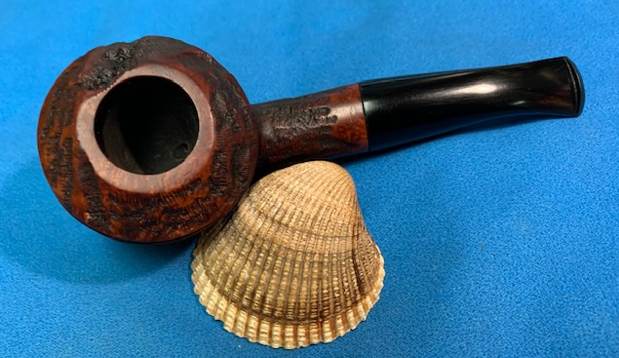
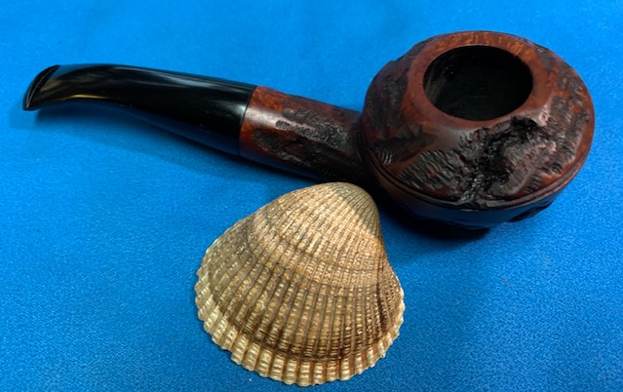
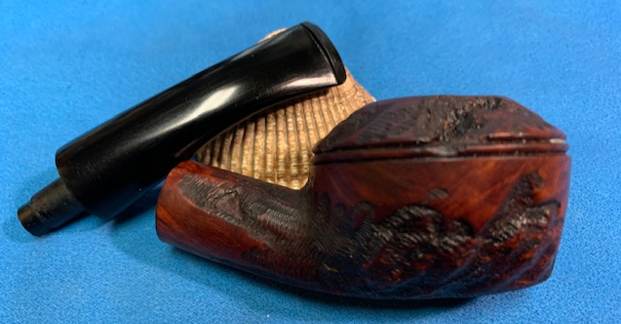
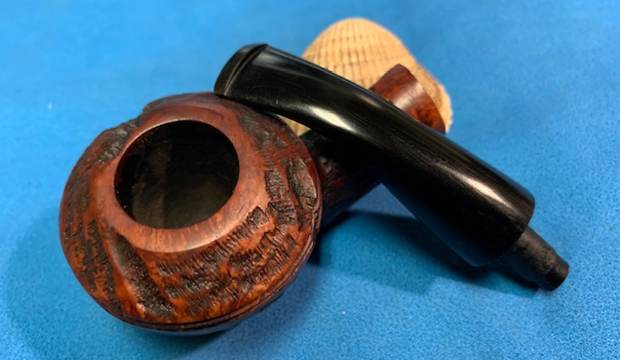
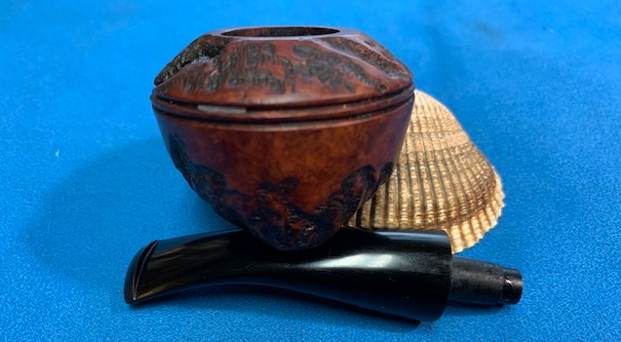
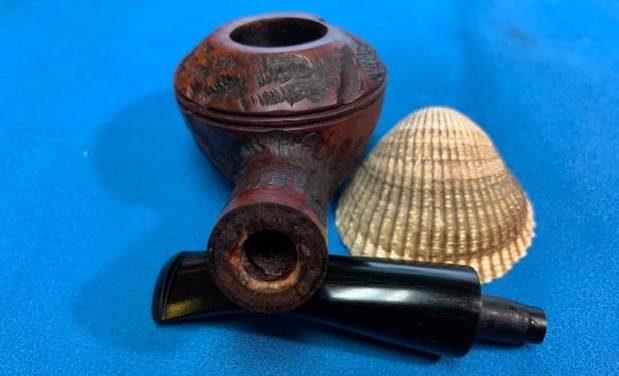
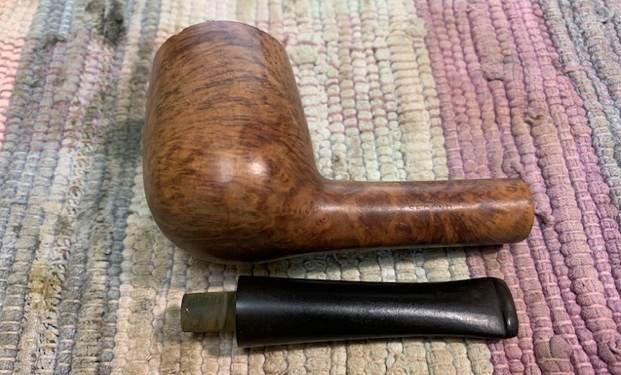
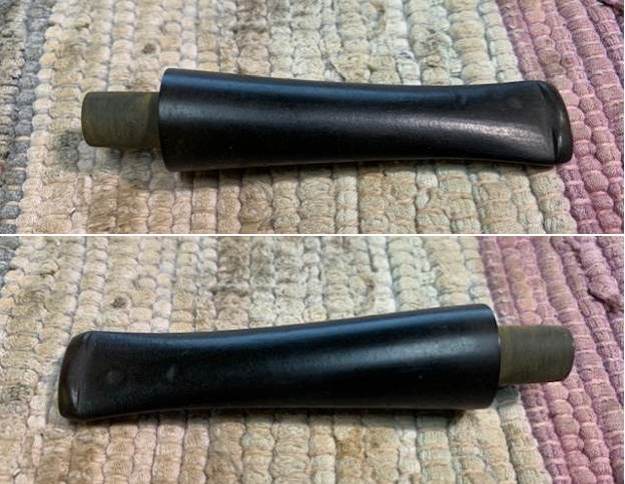
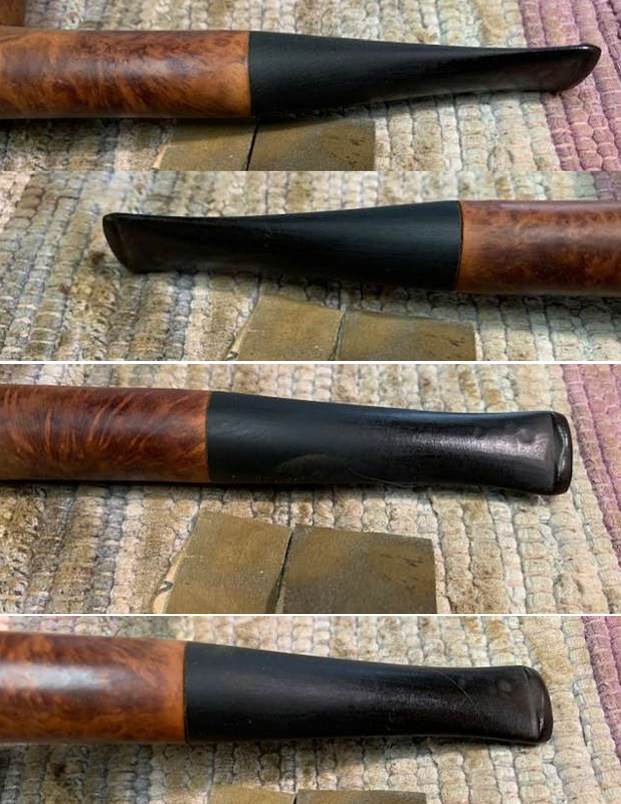
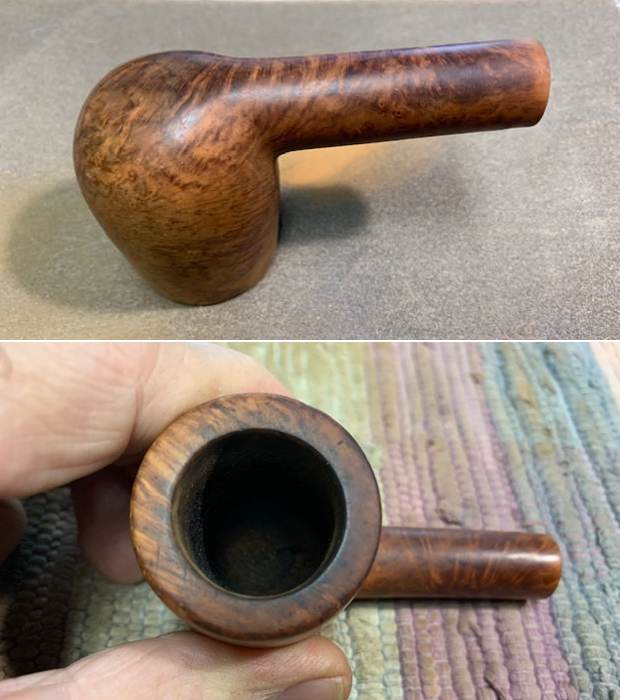
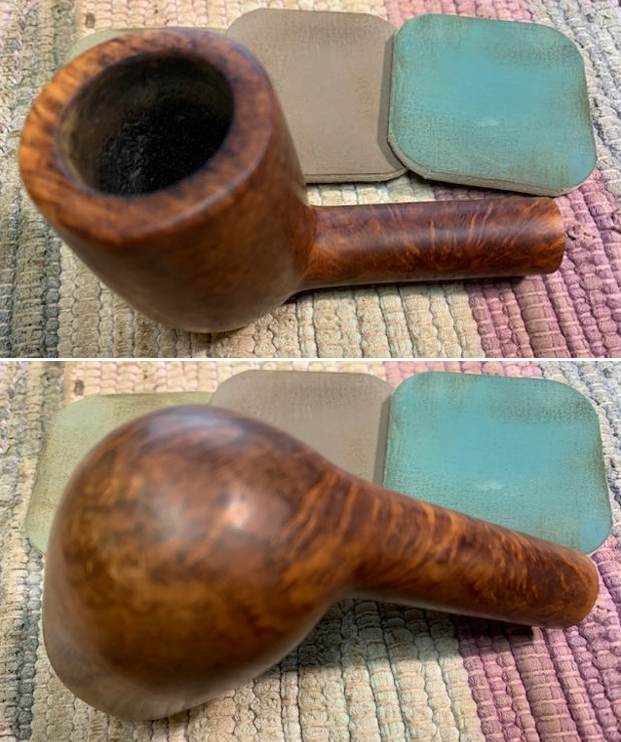
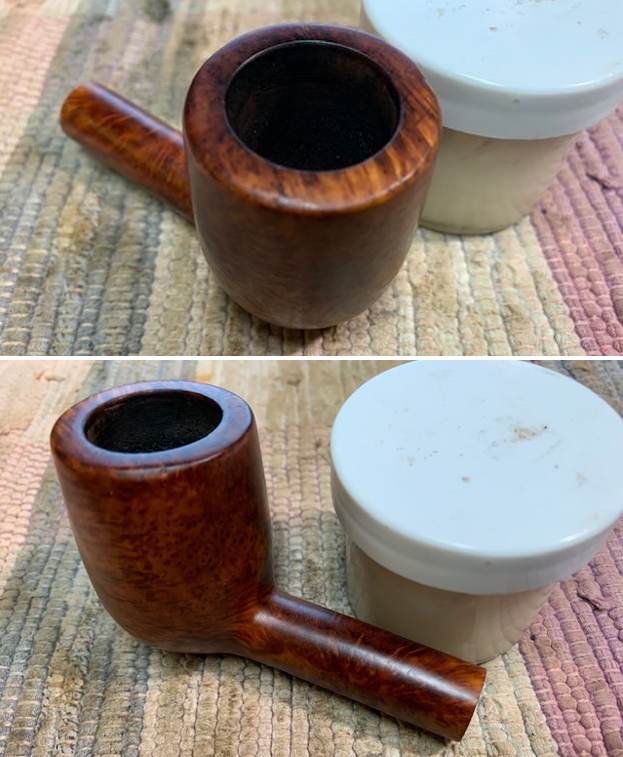
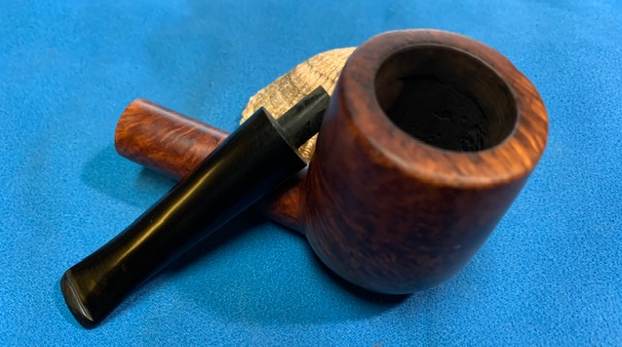
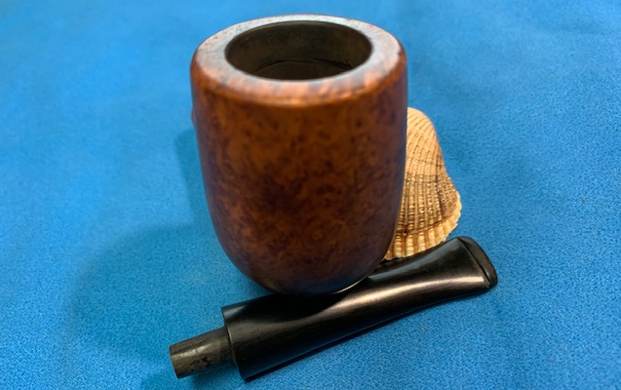
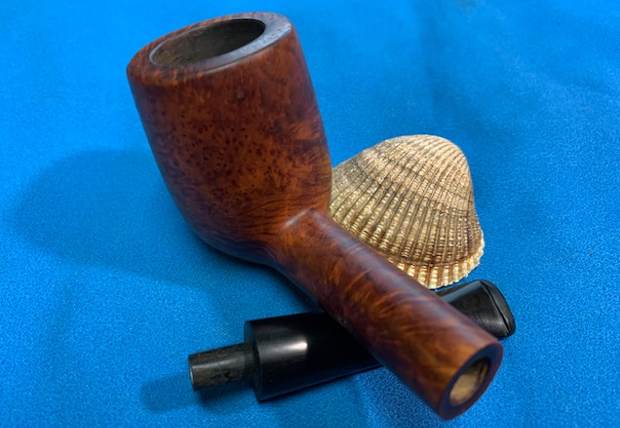
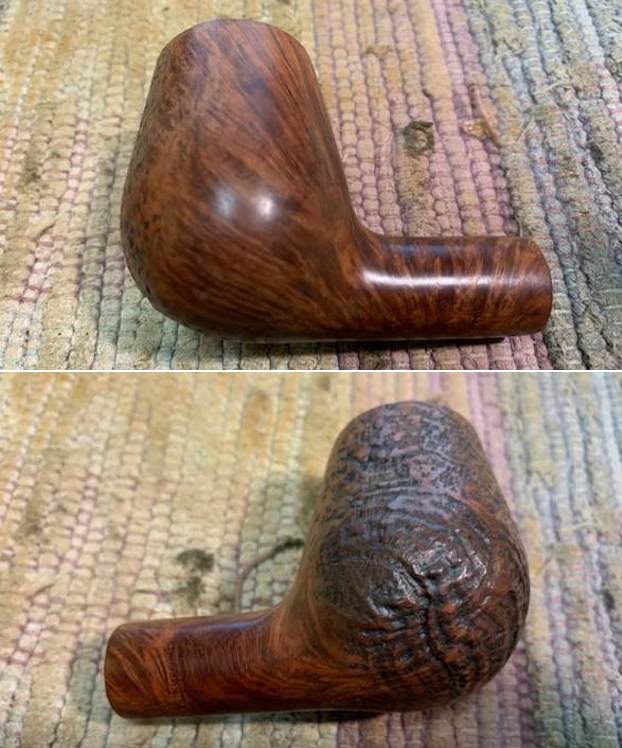
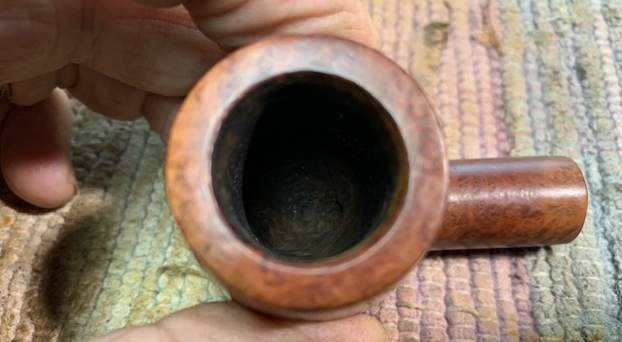
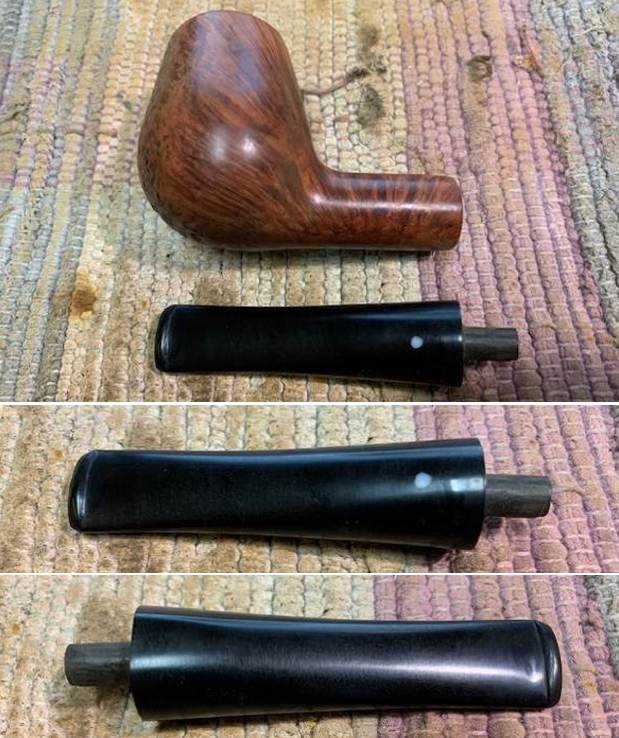
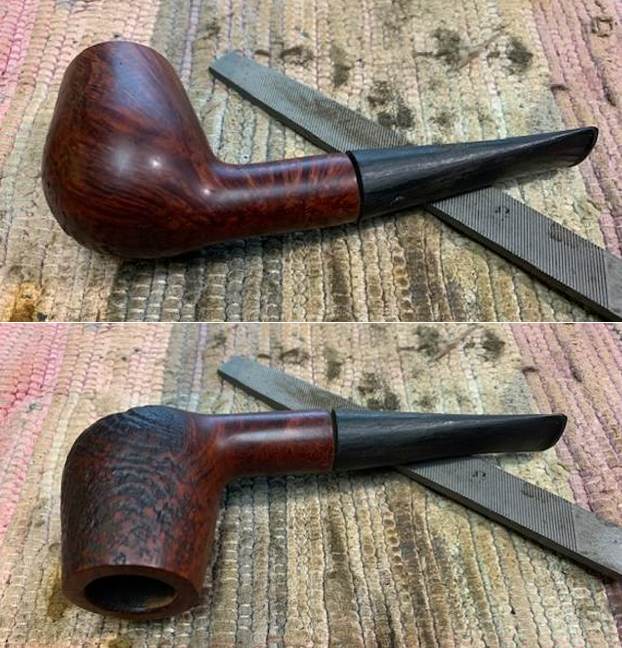
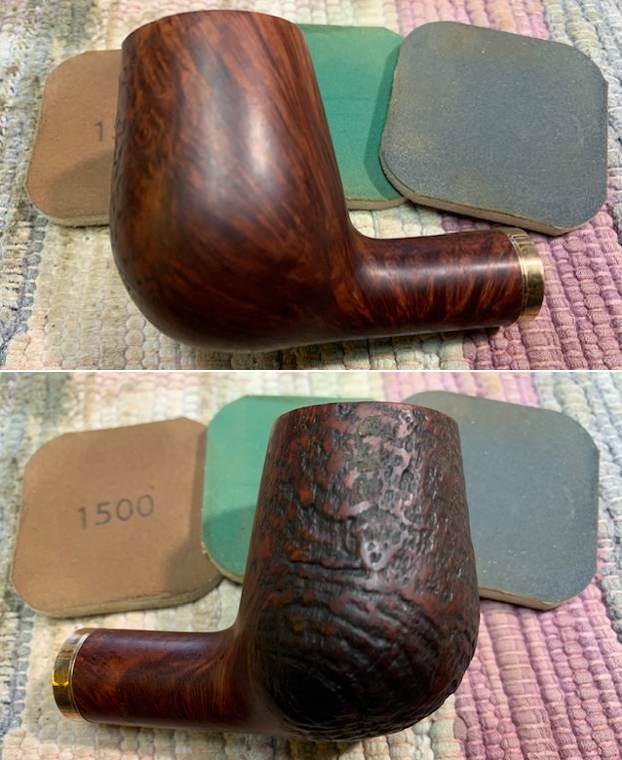
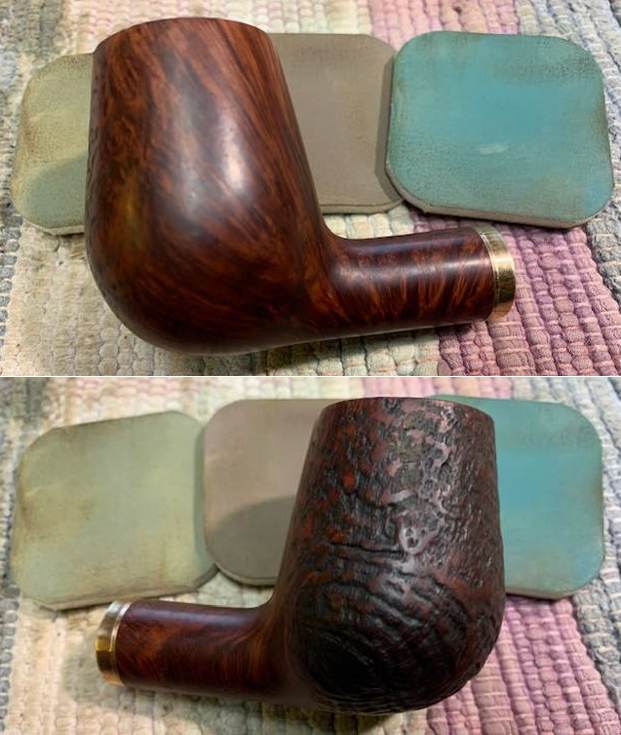
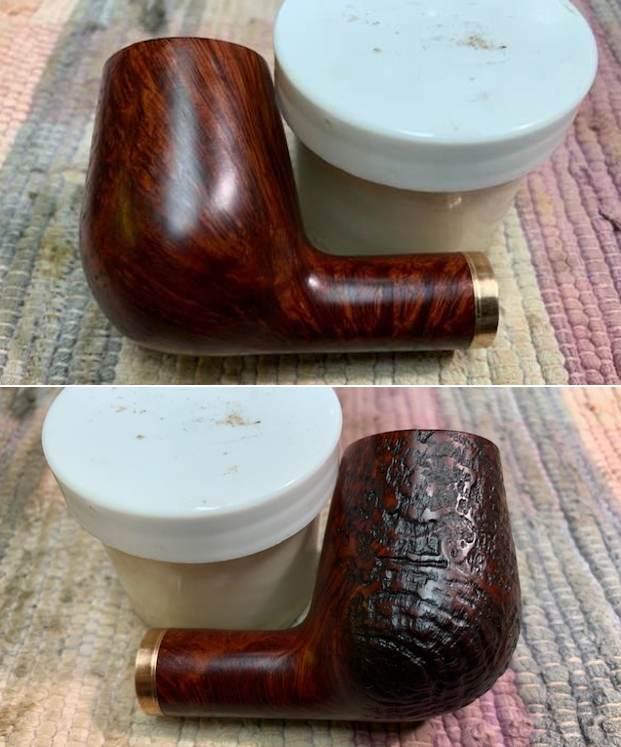
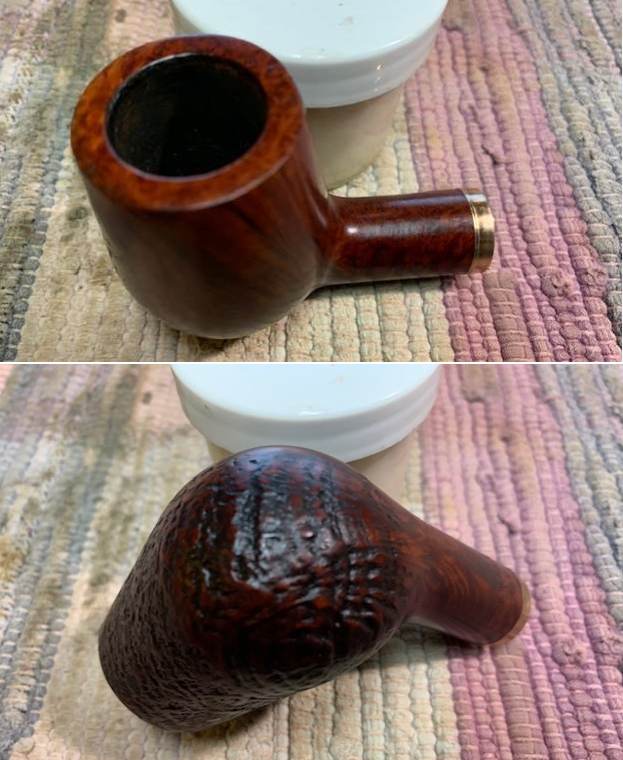
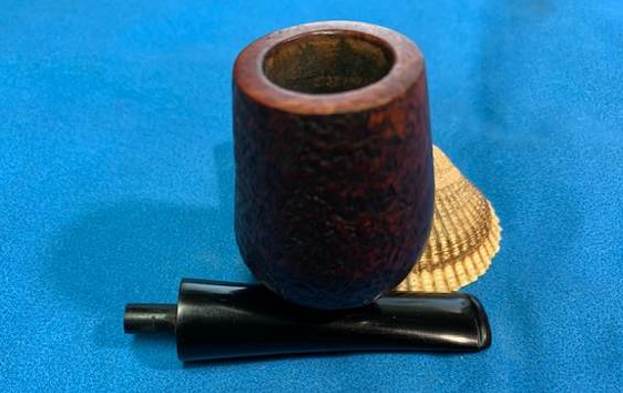
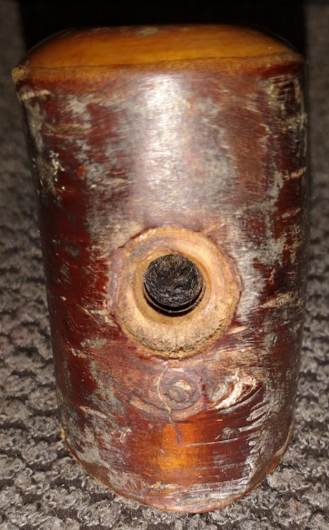
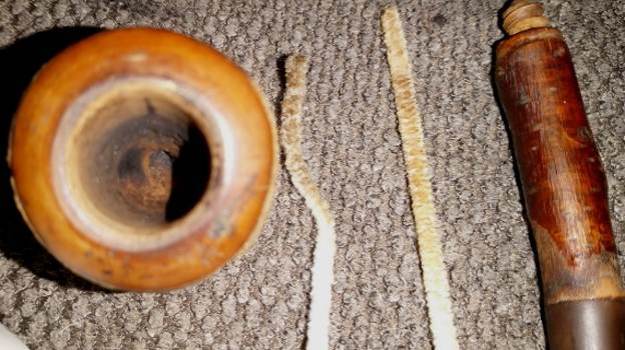
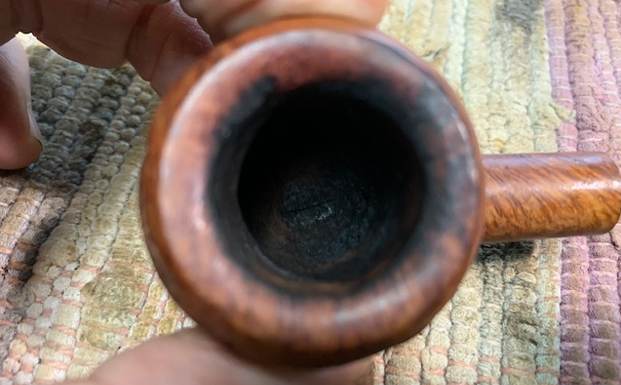
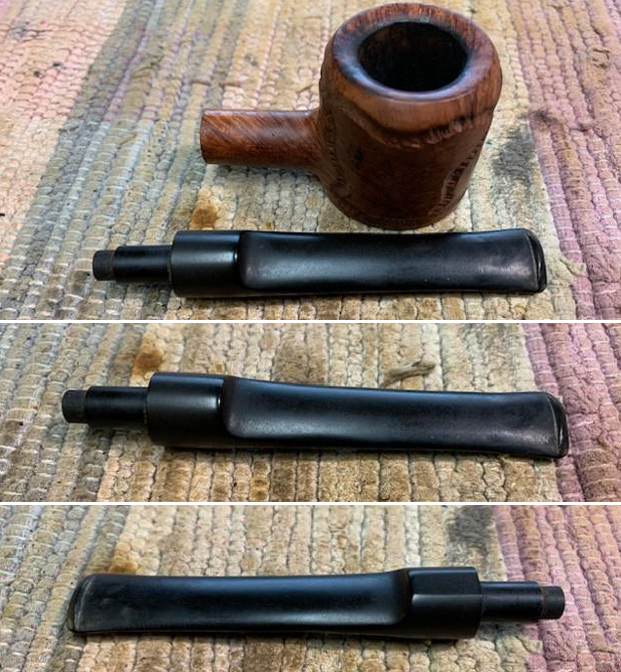
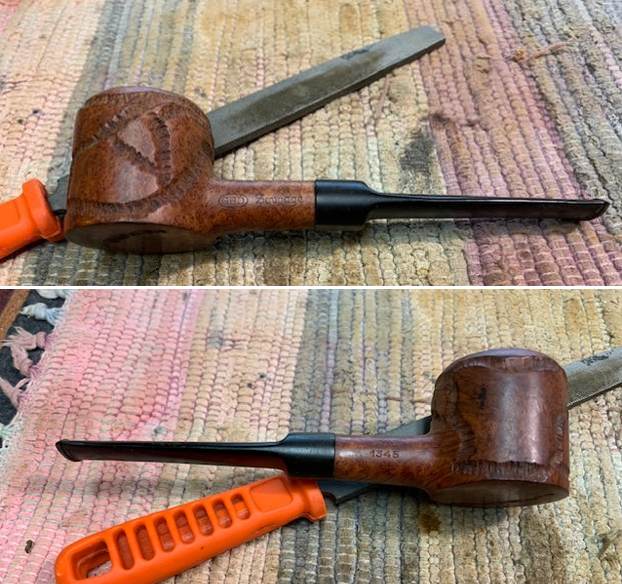
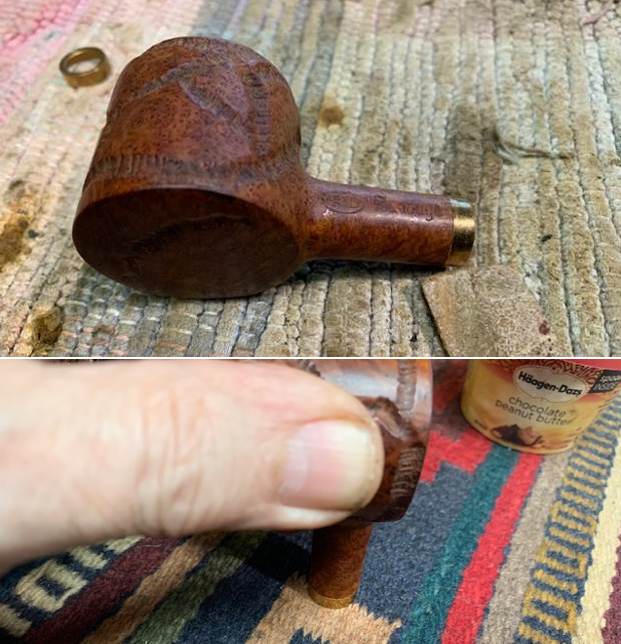
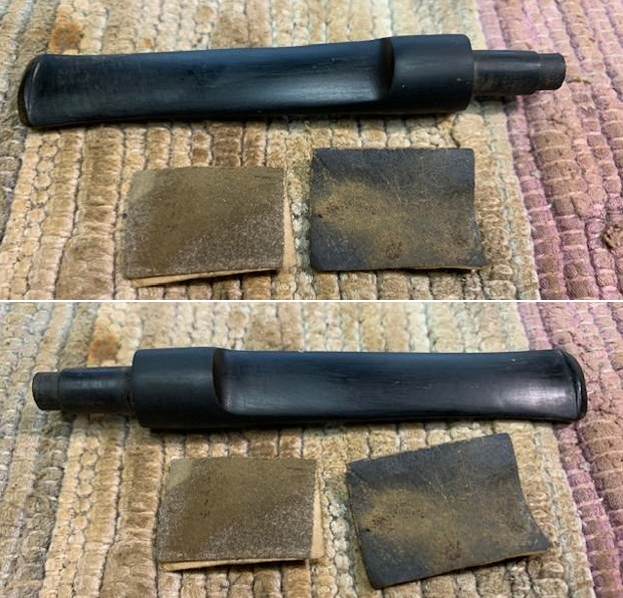
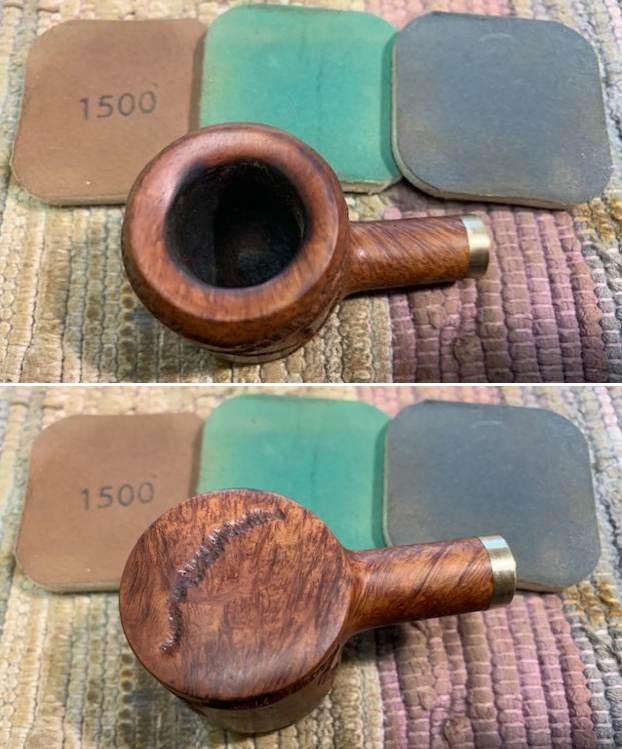
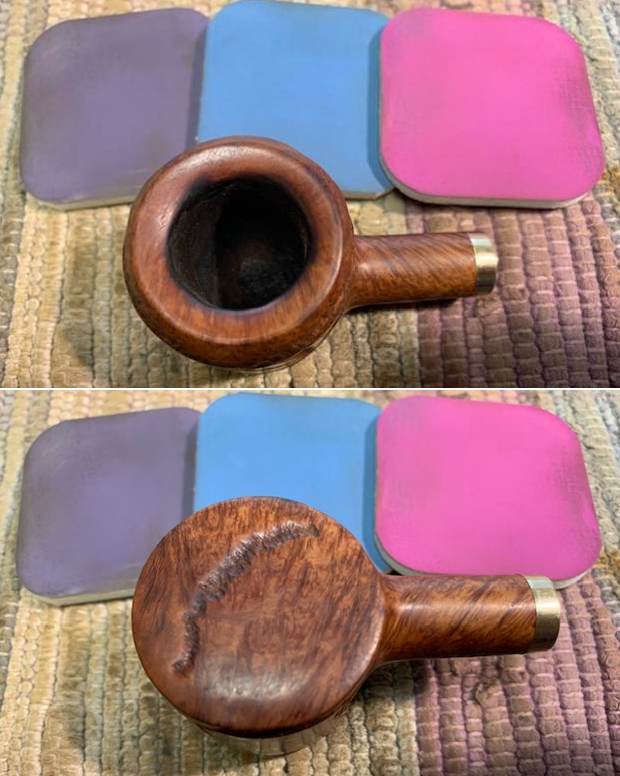
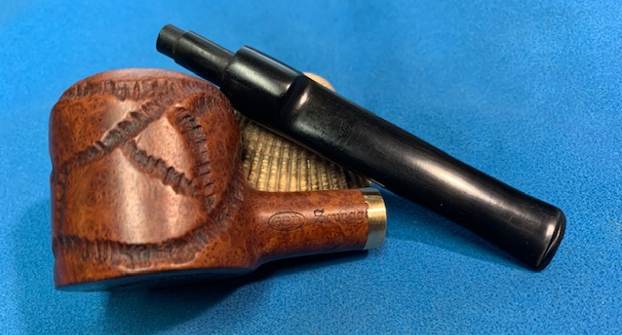
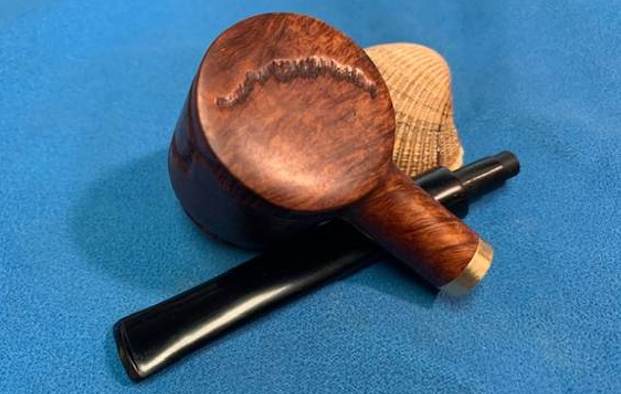
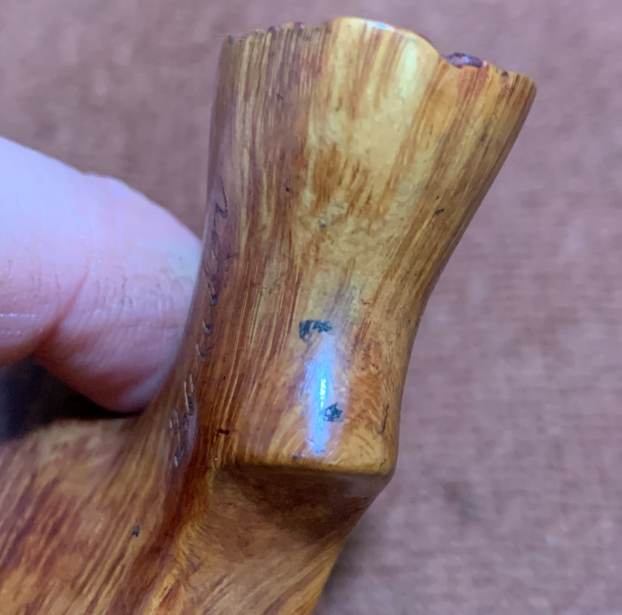
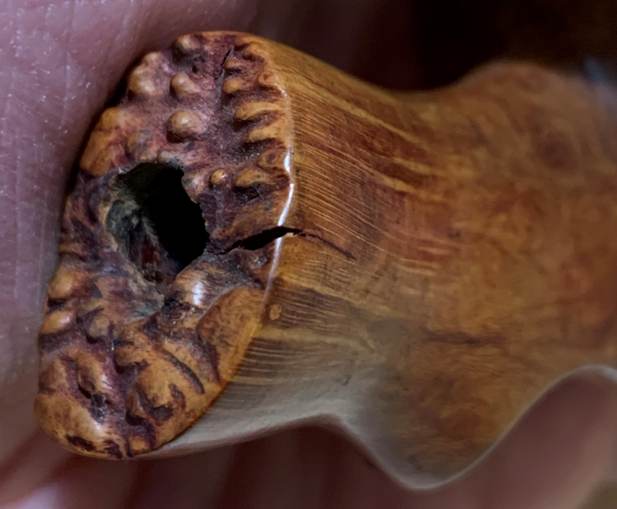
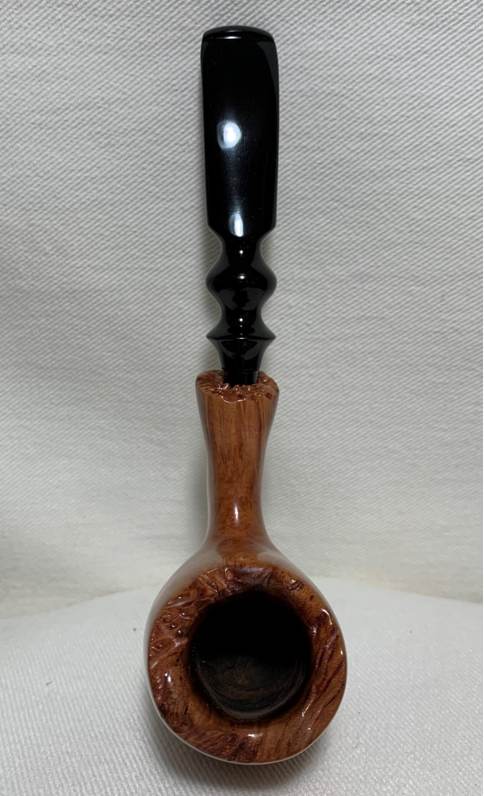
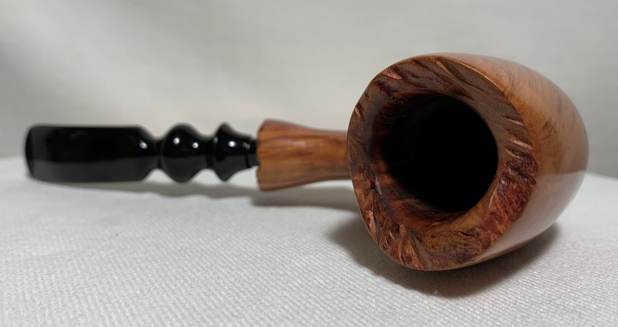
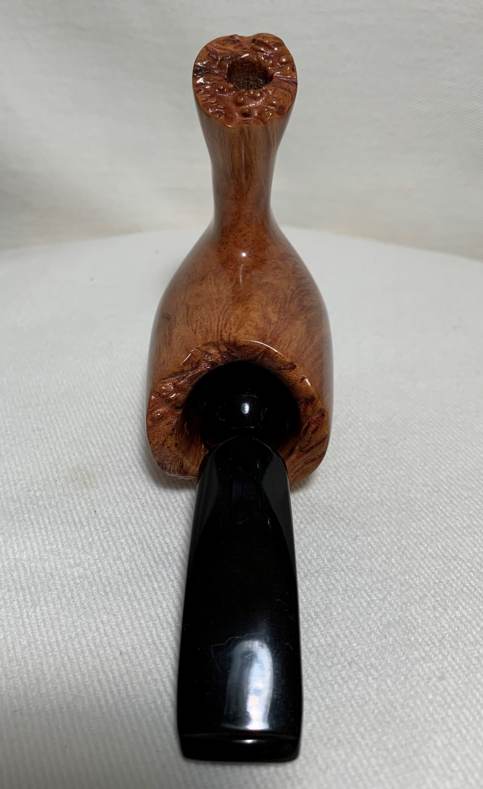
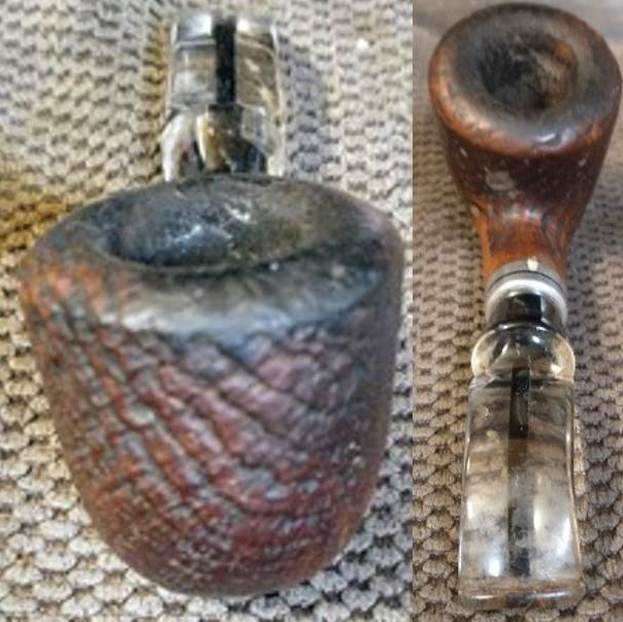
On to the pipe and, beautiful though it was, it had a few issues. The stem had some oxidation and plenty of tooth chatter and scratches. It desperately needed a polish. It also had problem with the tenon insofar as it did not fit properly in the stummel’s mortise. Meanwhile, the stummel also had some problems. There was plenty of lava on the rim (and some minor burning), lots of cake in the bowl, and the bowl was pretty darn dirty. In addition, there was a small crack in the wood of the face of the shank. It seems reasonable to deduce that the crack may have been as a result of the misfitting tenon on the stem. This pipe was going to require some work, but it was definitely worth it for such a beauty.

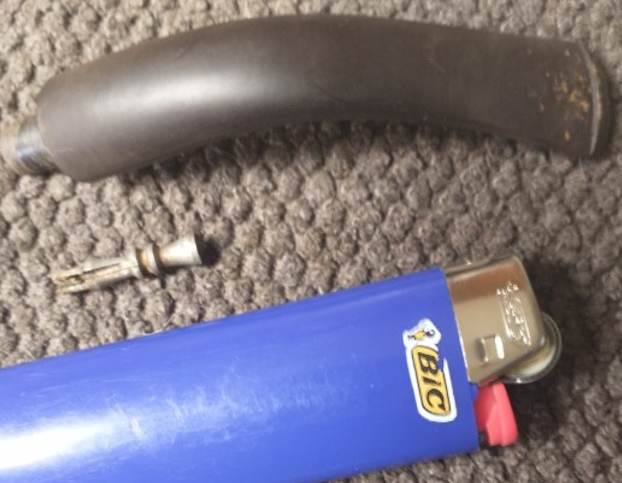
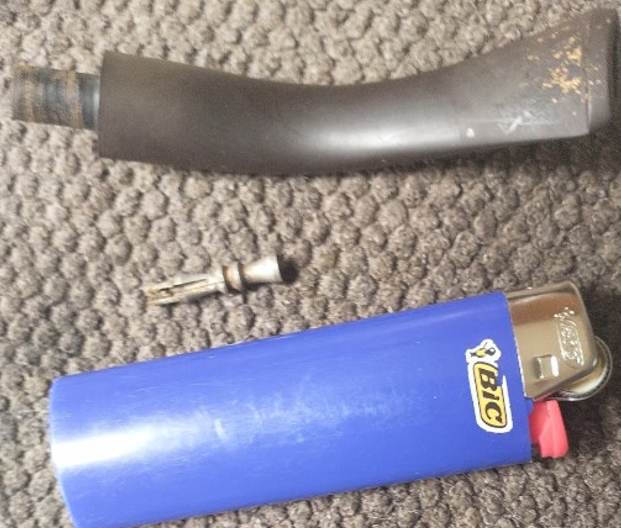
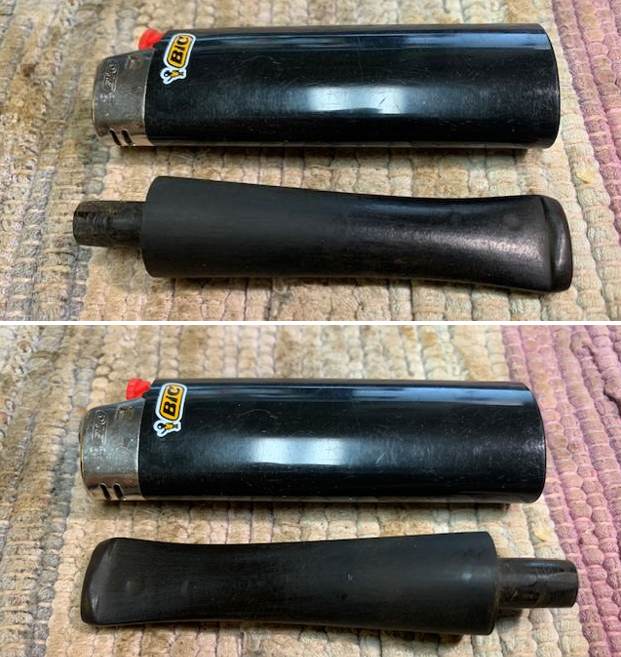
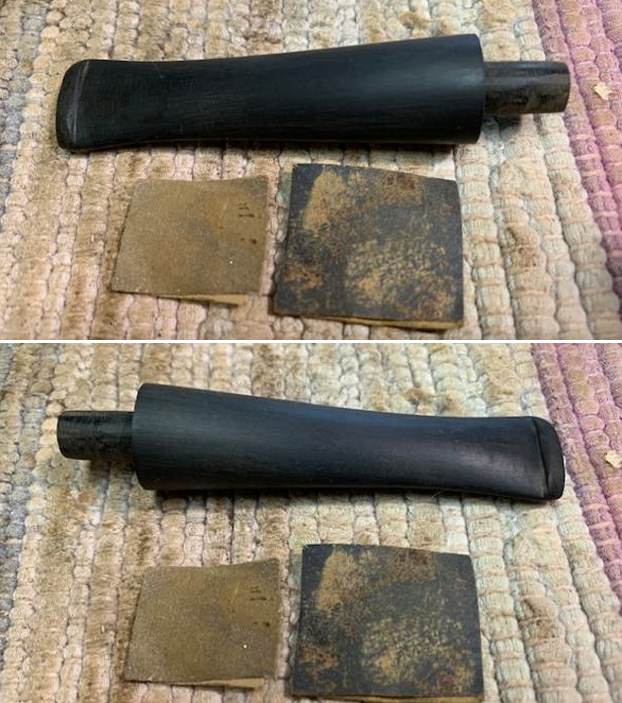
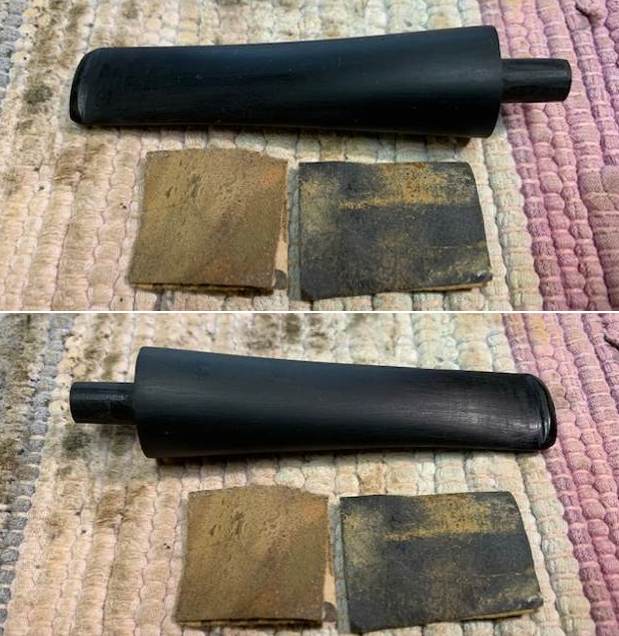
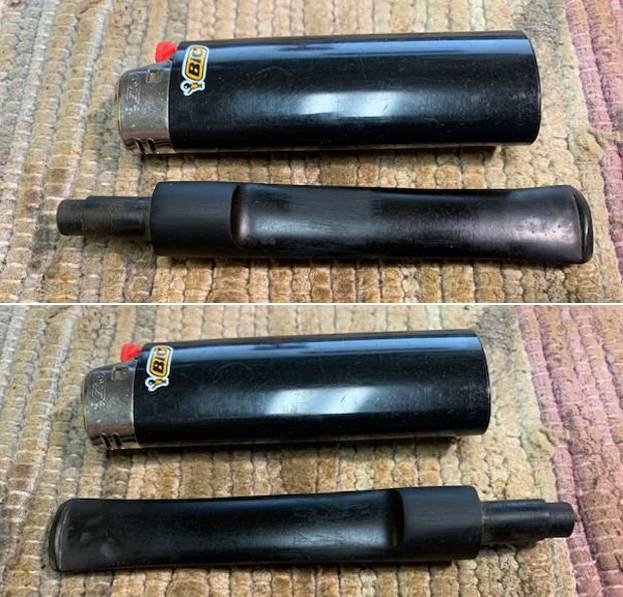
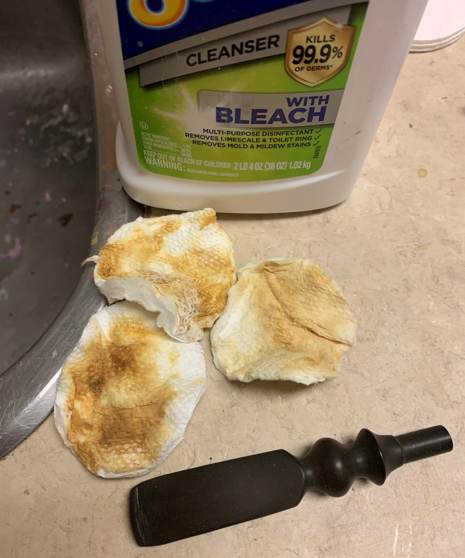
 The stem was first on my list. I took a BIC lighter and ‘painted’ the stem with its flame in order to lift the tooth marks. This was fairly successful in raising the dents. Then, I cleaned out the insides of the stem with pipe cleaners and isopropyl alcohol. Once this process was done, the stem went for an overnight soak in the Pipe Stem Oxidation Remover. The following day, I cleaned all of the de-oxidizing mess off with alcohol, pipe cleaners, et cetera. The oxidation had migrated to the surface and would be fairly straightforward to remove. I scrubbed vigorously with SoftScrub on some cotton pads to remove the leftover oxidation.
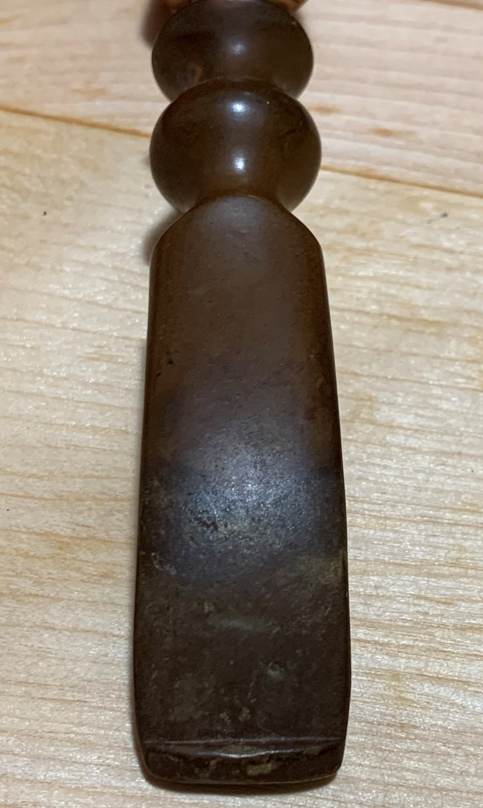

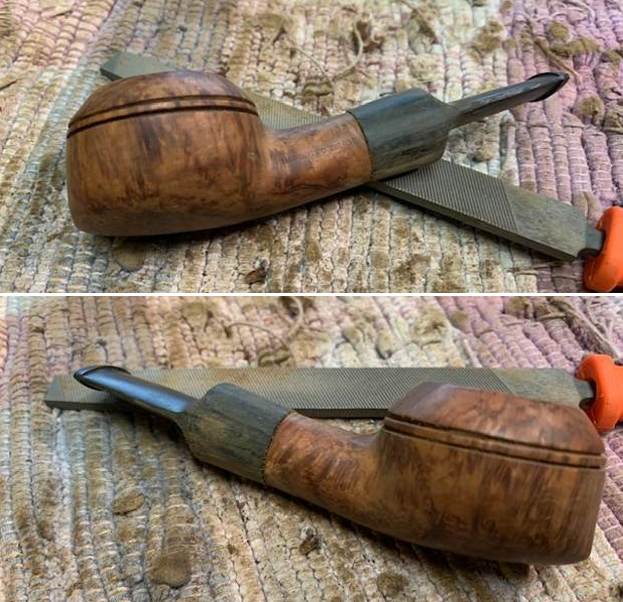
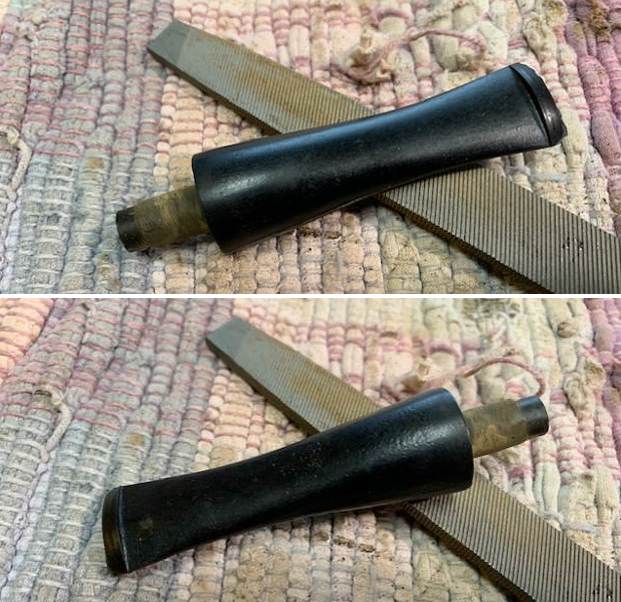
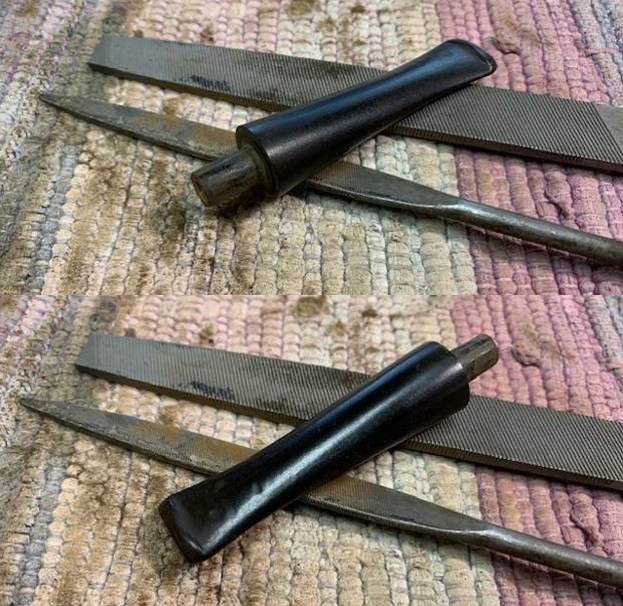
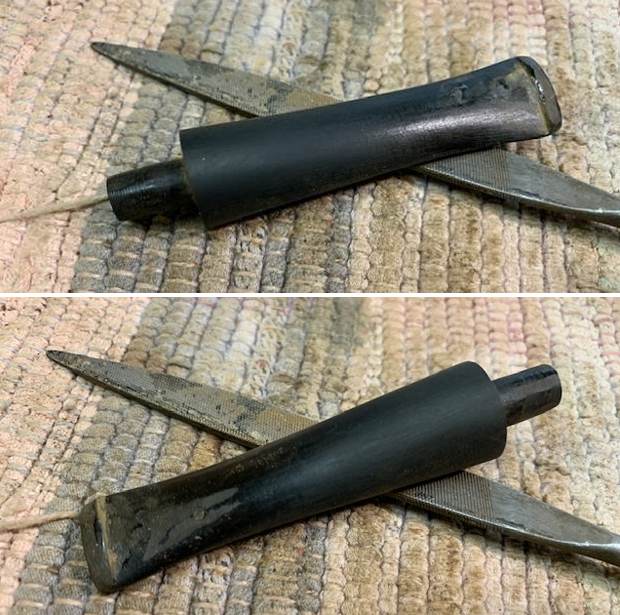
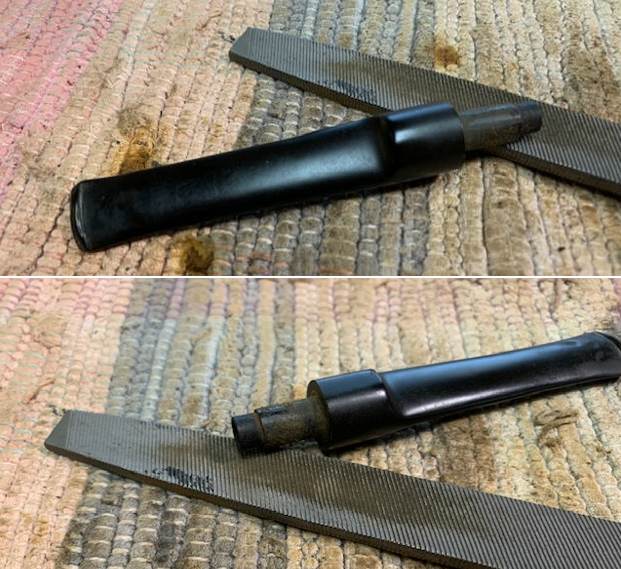
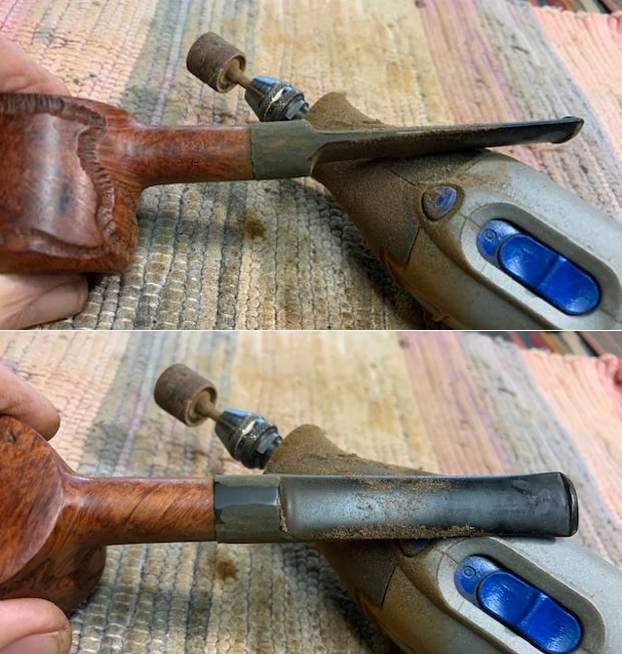
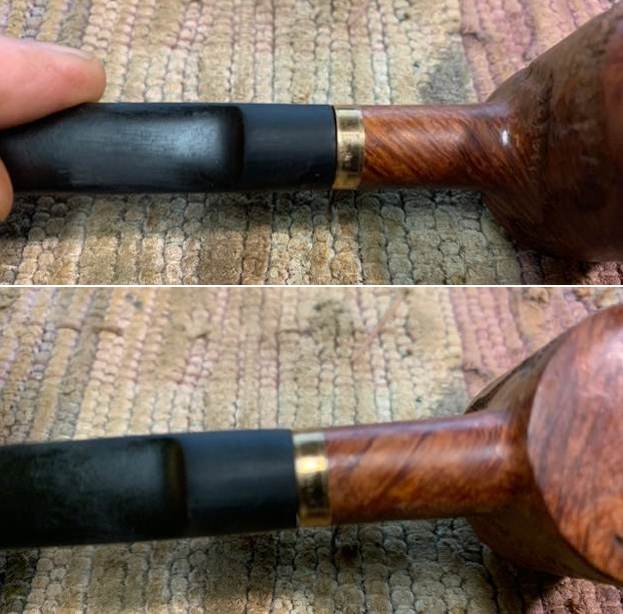
 Next, I had to carefully remove some of the bulk from the stem’s tenon. Since I do not have a tenon-turning tool, I used my Dremel Rotary Tool. This was a bit scary, since the Dremel tends to have a mind of its own. I had to work precisely and gingerly. In the end, I managed to remove just enough and the stem now fits perfectly in the stummel.
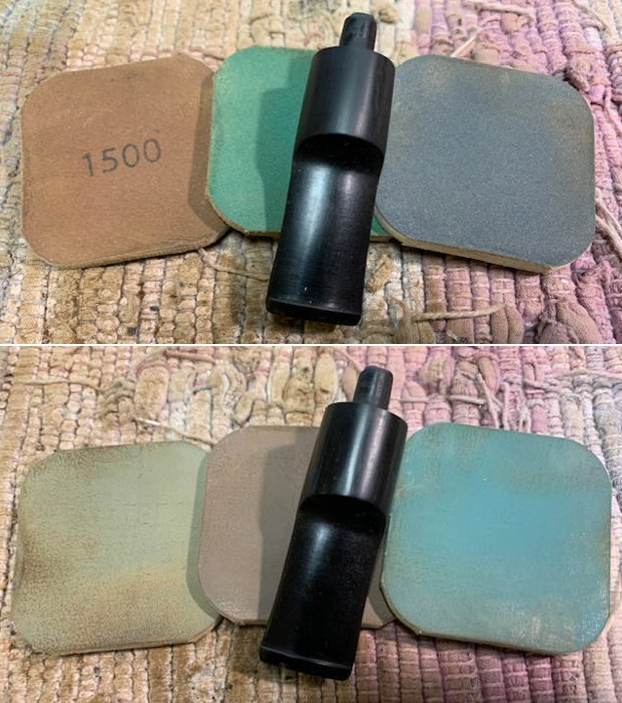
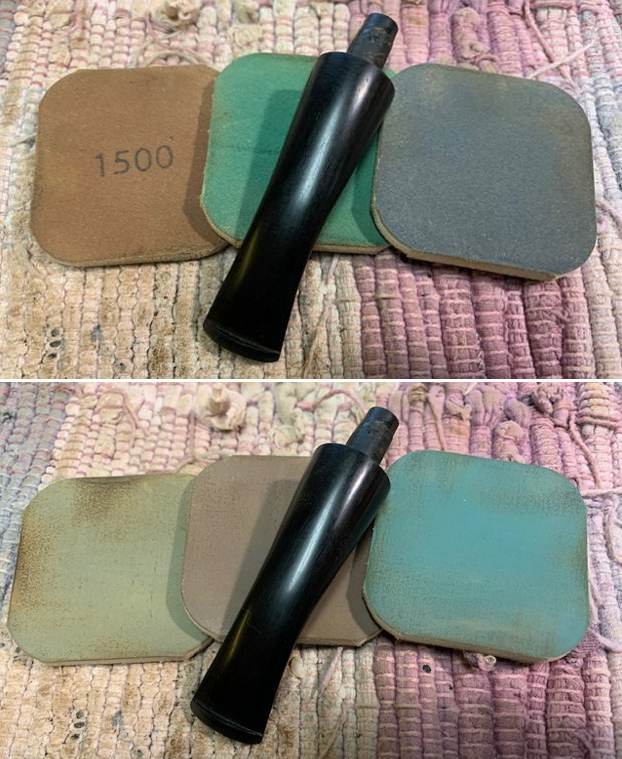
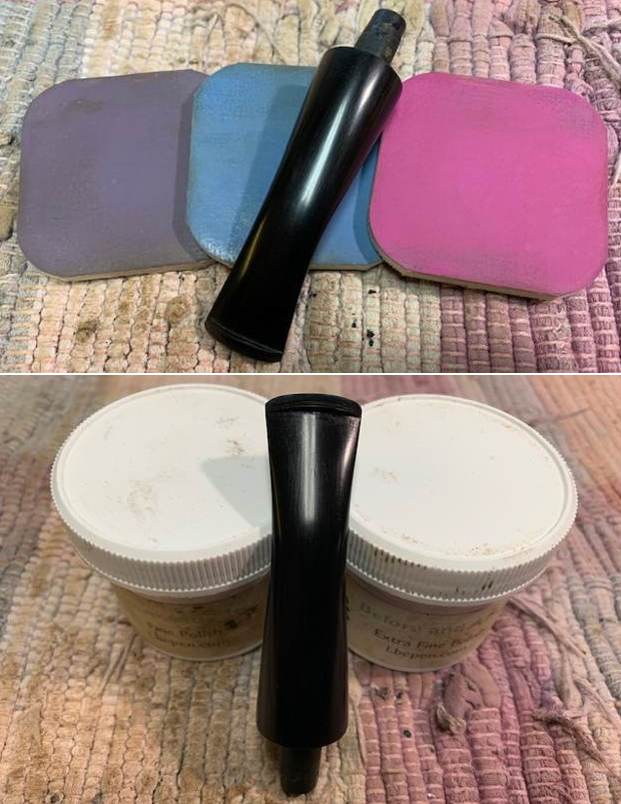
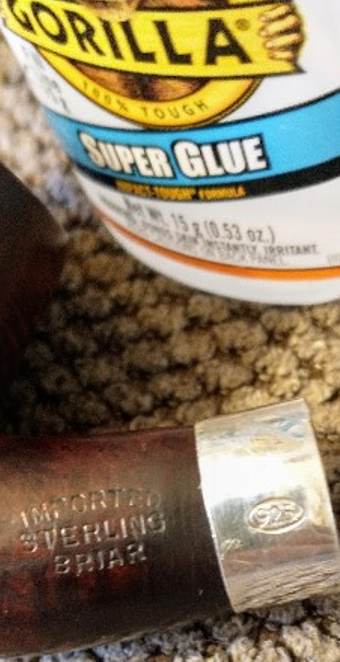
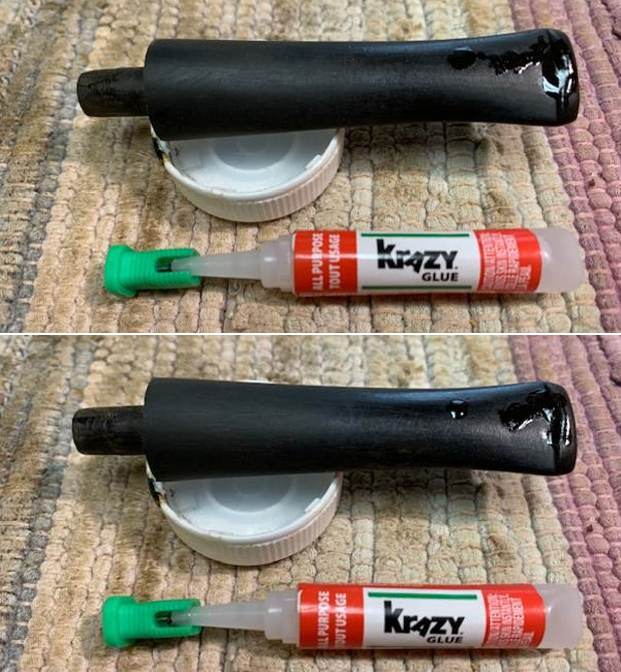
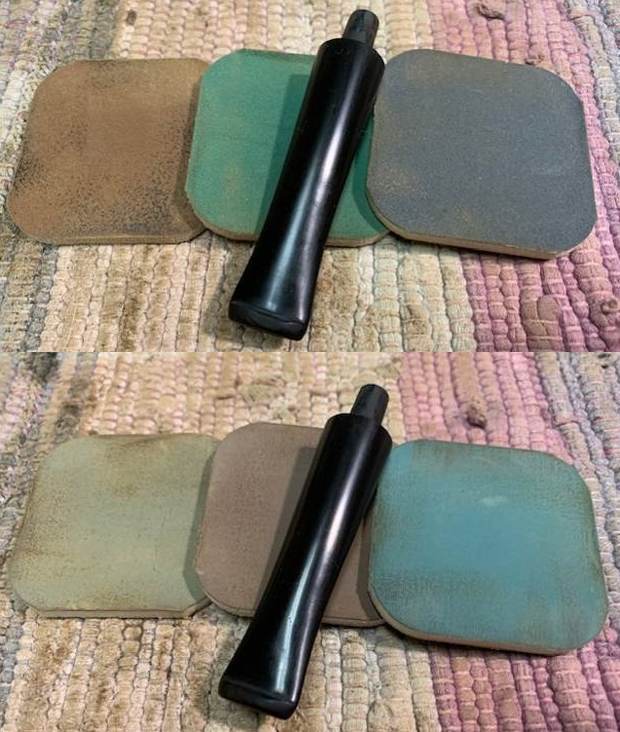
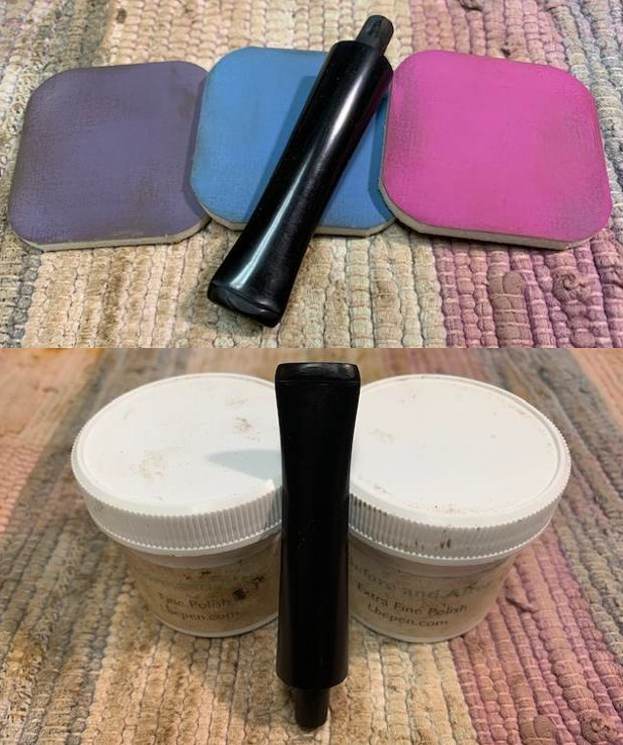
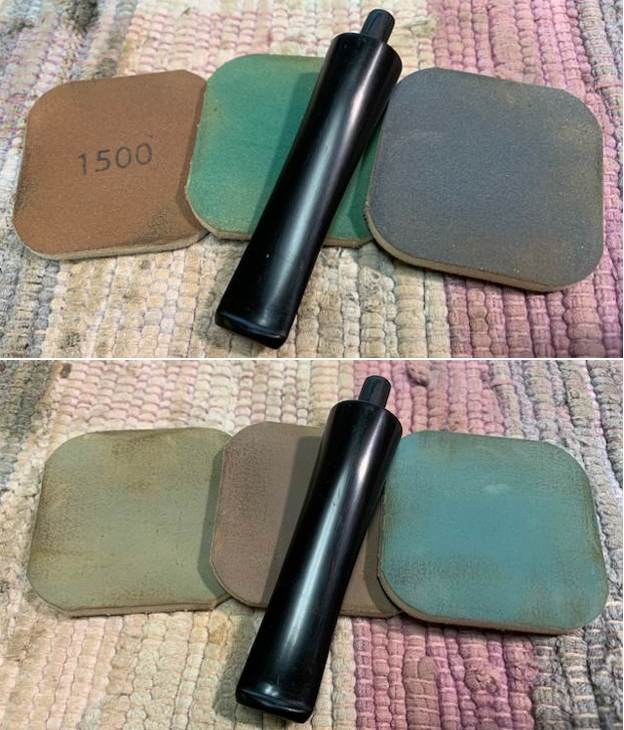
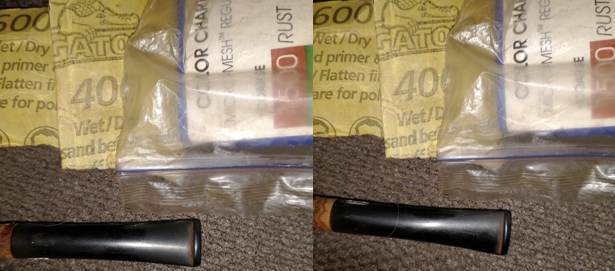
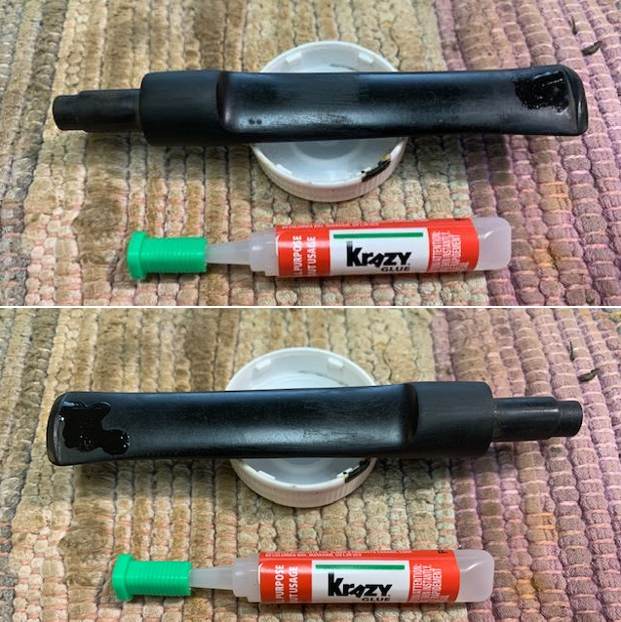
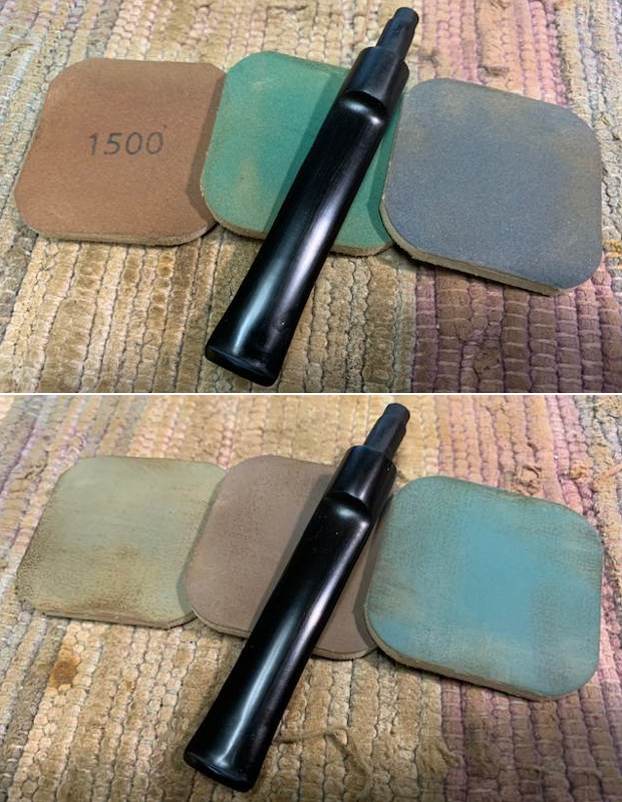
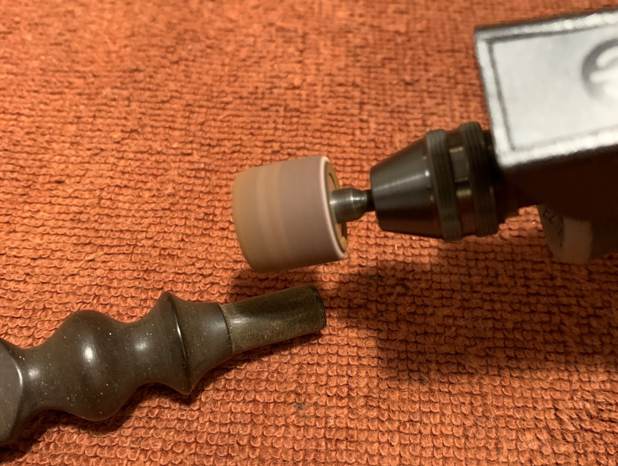 Before I moved on to the Micromesh pads, I built up the dents and the button on the stem with cyanoacrylate adhesive and let them fully cure. I then sanded the adhesive down with 220-, 400-, and 600-grit sandpapers to meld seamlessly into the stem. I did the same to the remaining tooth marks. I then used all nine Micromesh pads (1,500 through 12,000 grit) to bring out the lovely black lustre on the stem. I also used Obsidian Pipe Stem Oil in between each pad scrubbing.
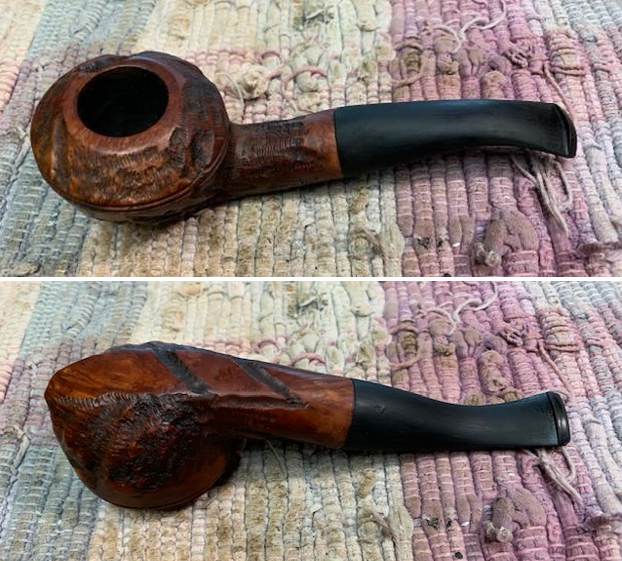
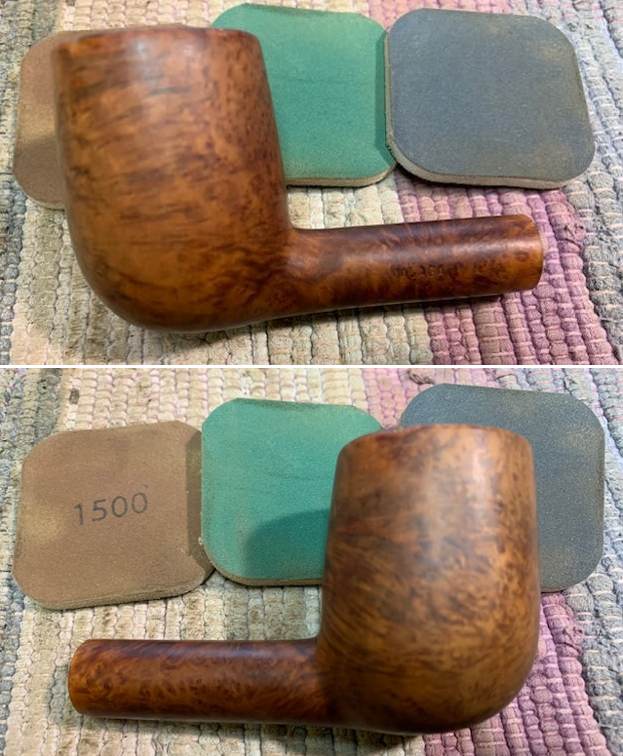
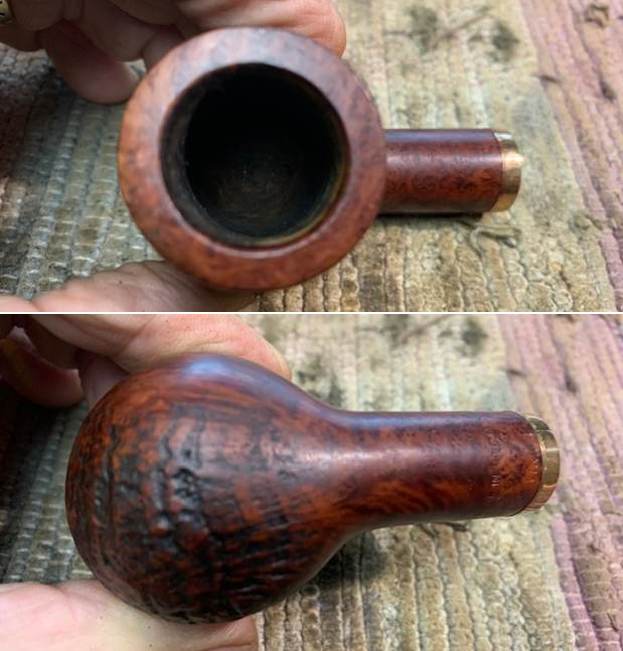
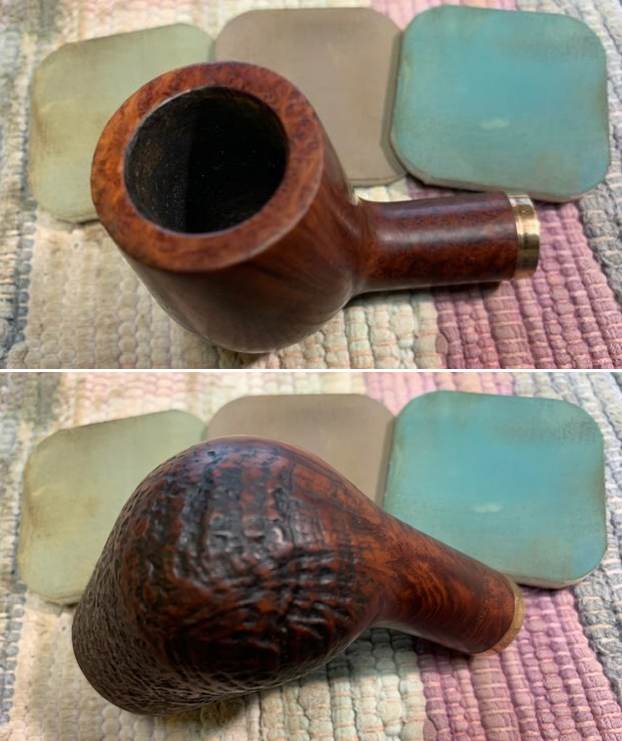
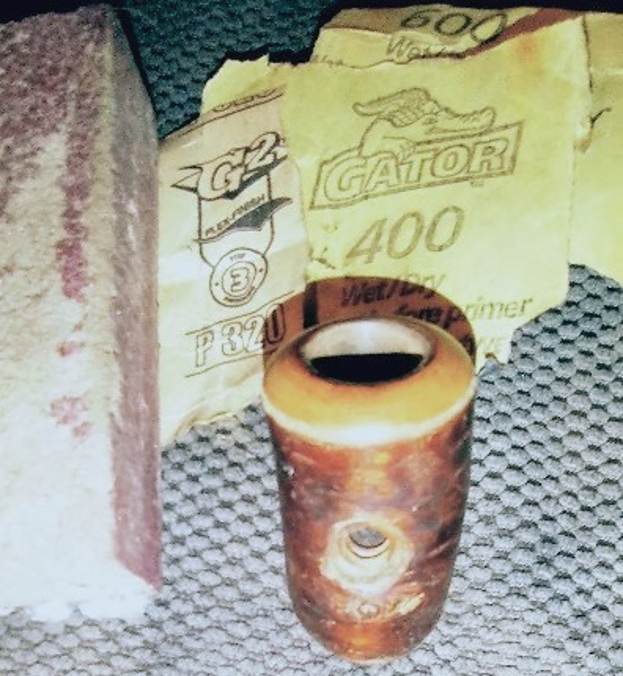
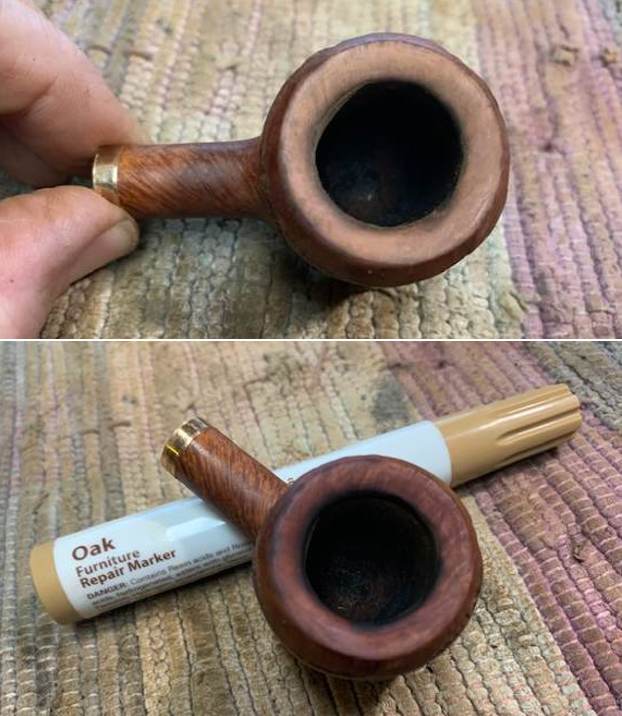
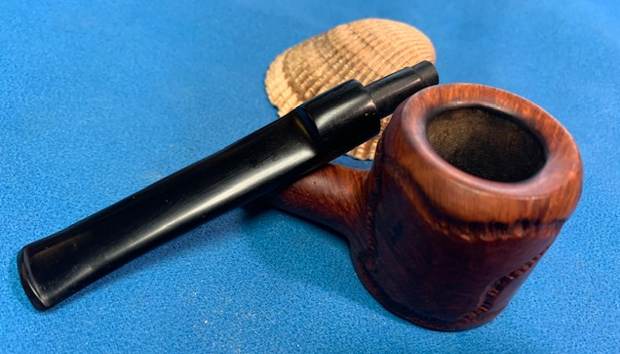
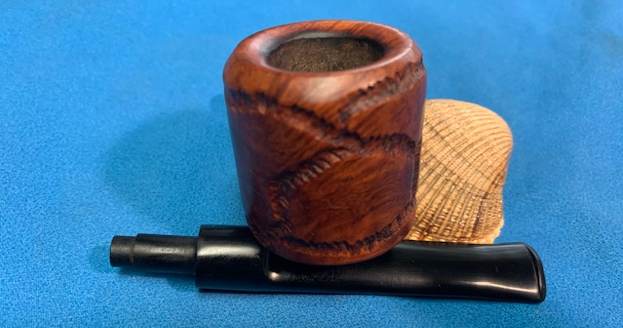
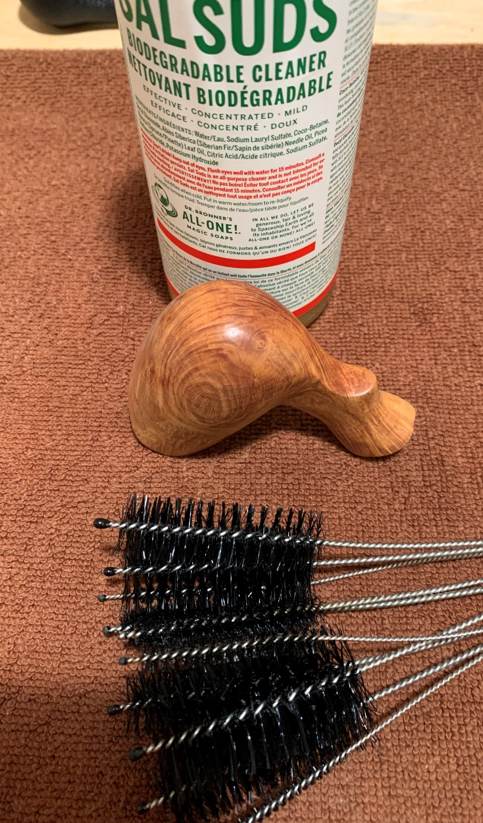
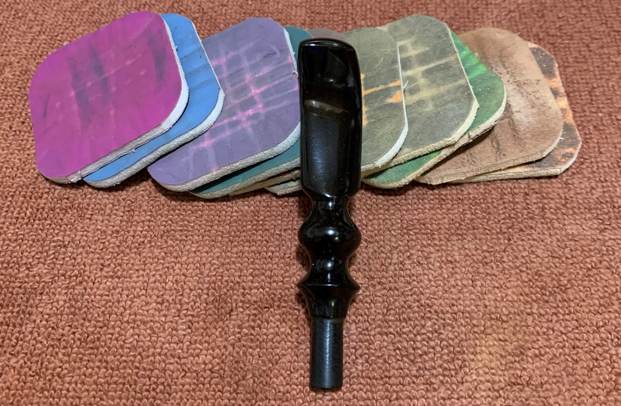 On to the stummel, and the usual cleaning procedures were in order for this pipe. I used both the PipNet Reamer and the KleenReem to remove the built-up cake and followed that with 220-grit sandpaper to eliminate as much as I could. I took the bowl down to bare briar, as I wanted to ensure there were no hidden flaws in the walls of the bowl. Fortunately, there were none. I then proceeded to clean out the insides of the shank with Q-tips, pipe cleaners, and isopropyl alcohol. There was some nastiness inside this stummel, but fortunately not too much – it only took a handful of pipe cleaners etc. to sort that out. I followed that up by cleaning the insides with some dish soap and tube brushes. I then moved on to cleaning the outside of the stummel with Murphy’s Oil Soap and some cotton pads. That removed any latent dirt and the miserable stains that blighted the wood.
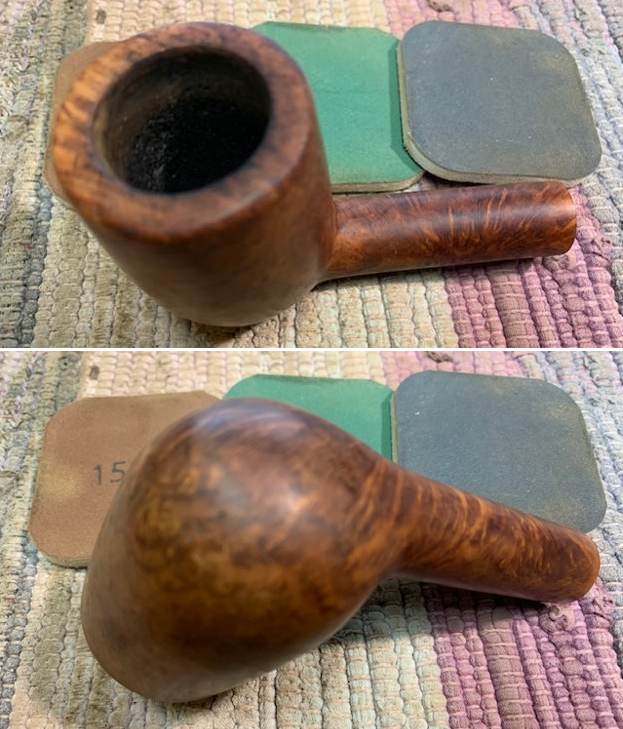
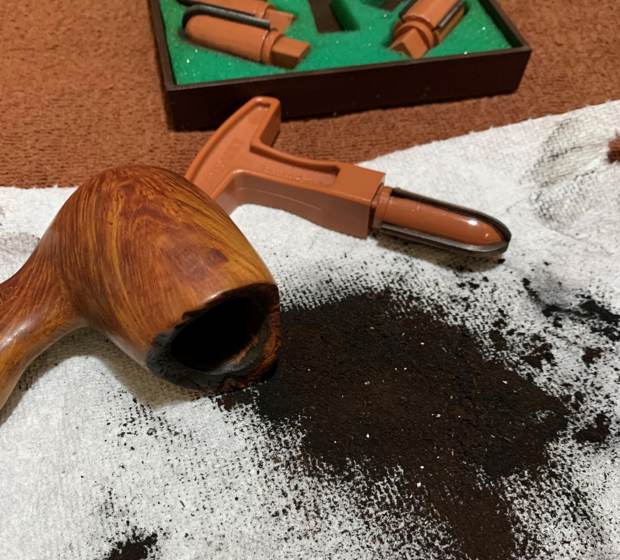

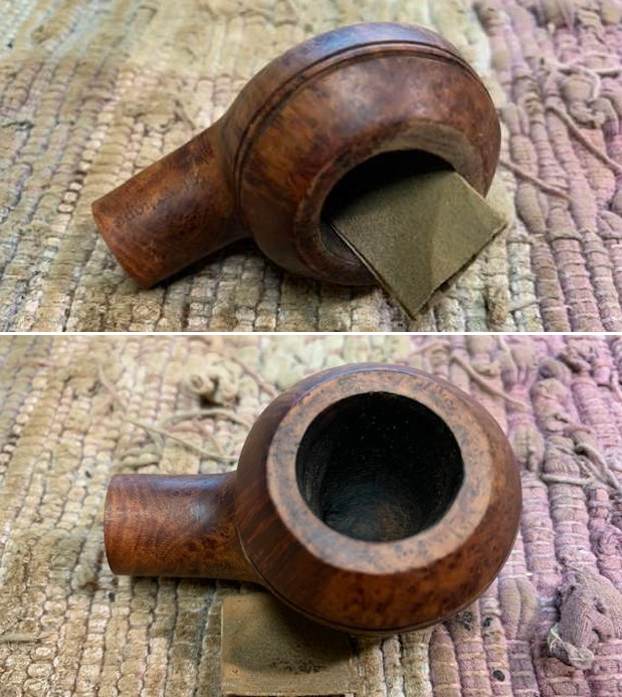
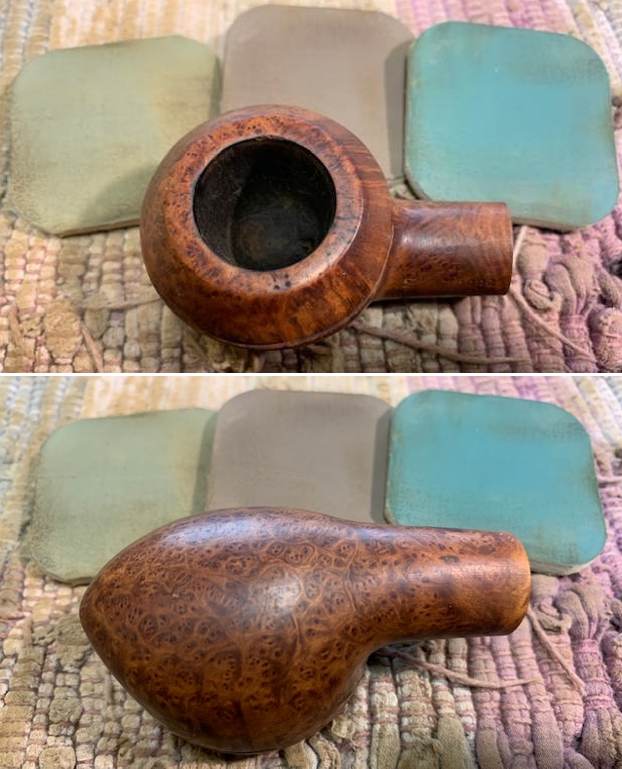
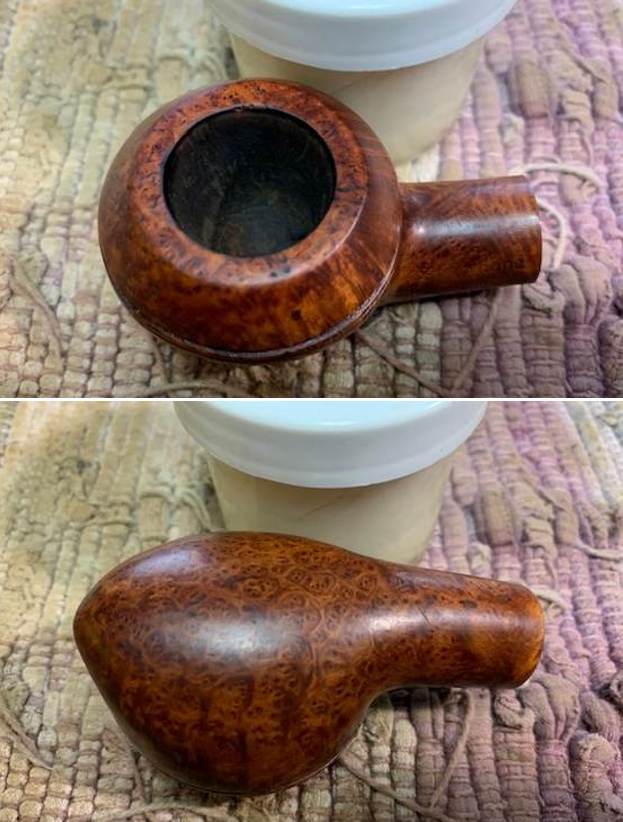
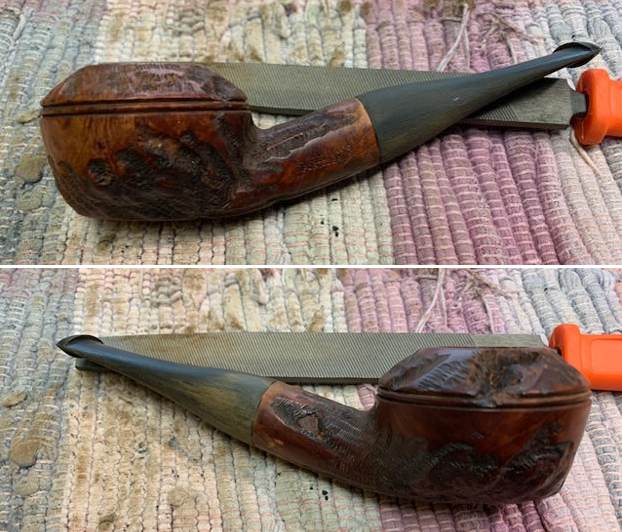
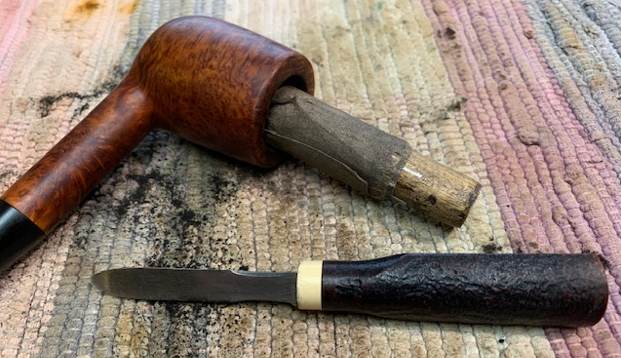
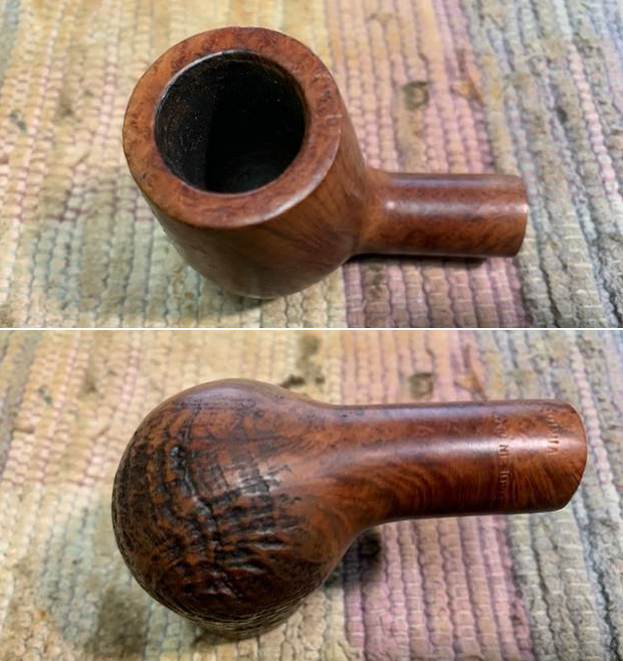
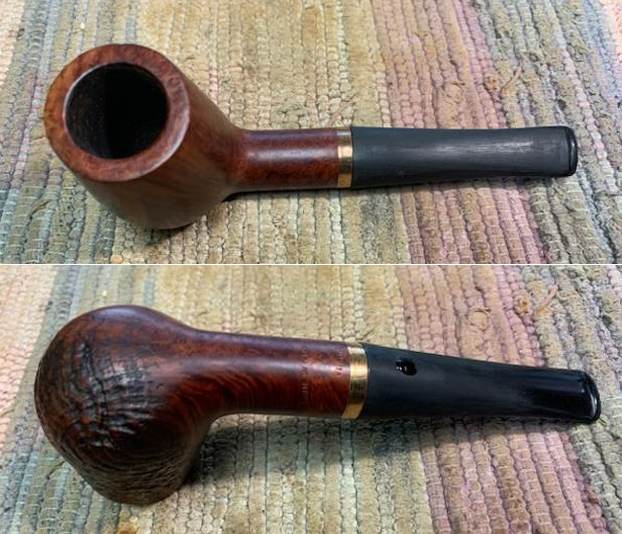
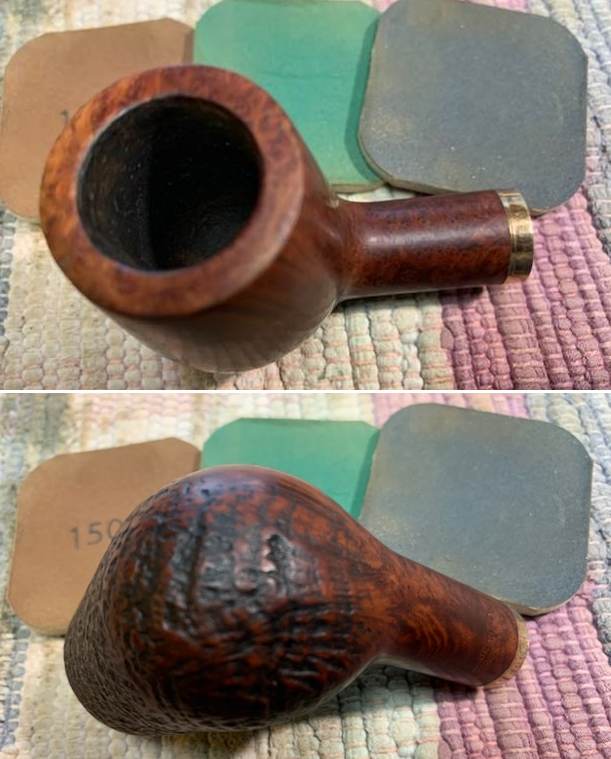
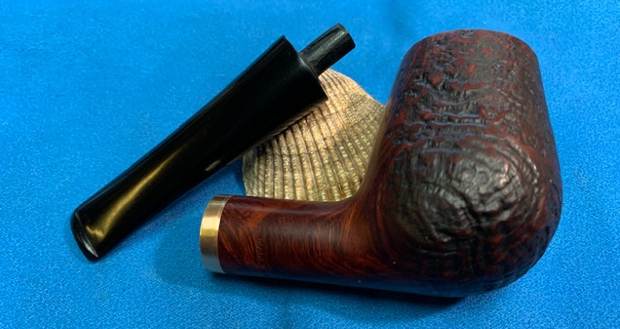
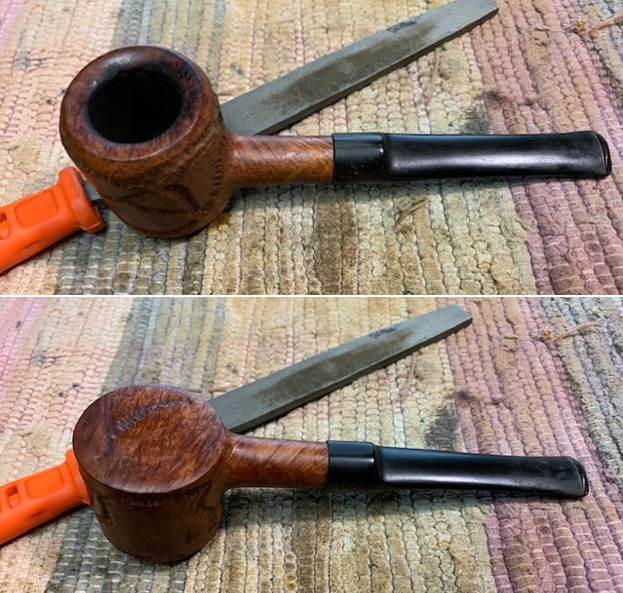
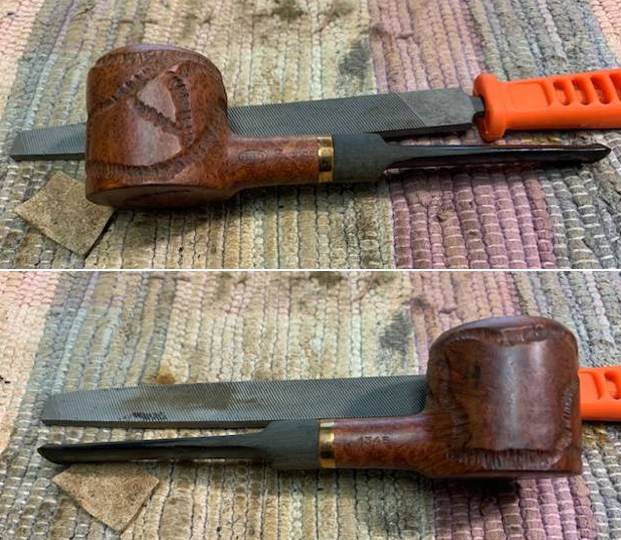
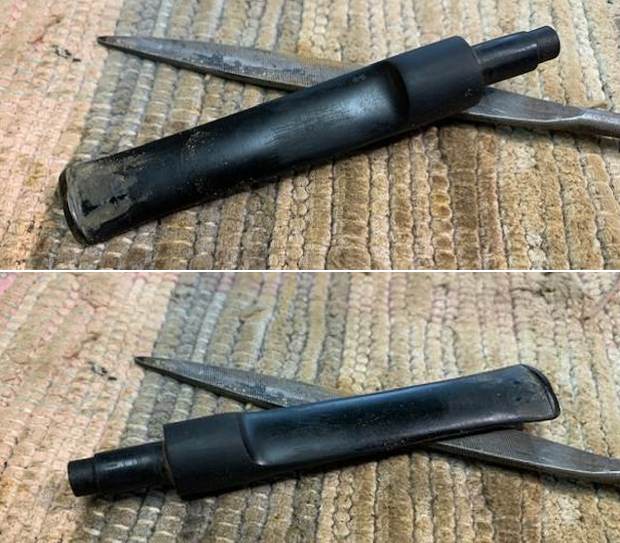
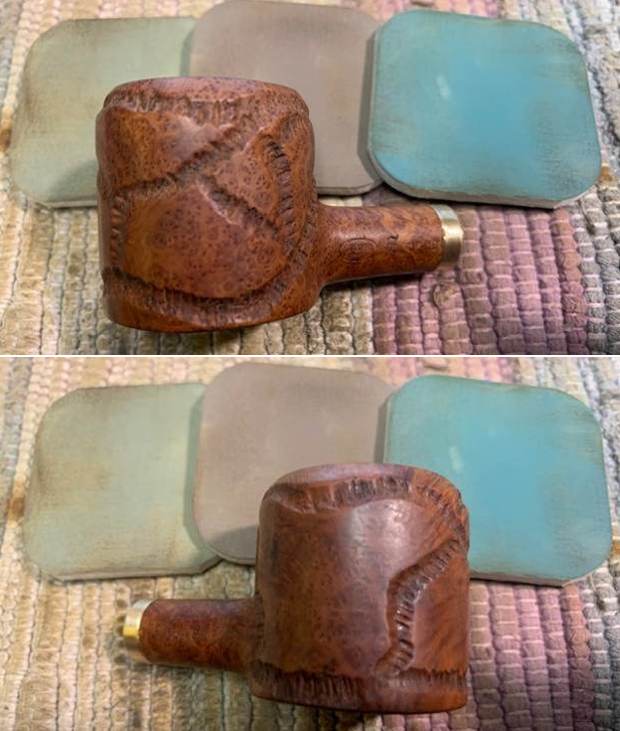
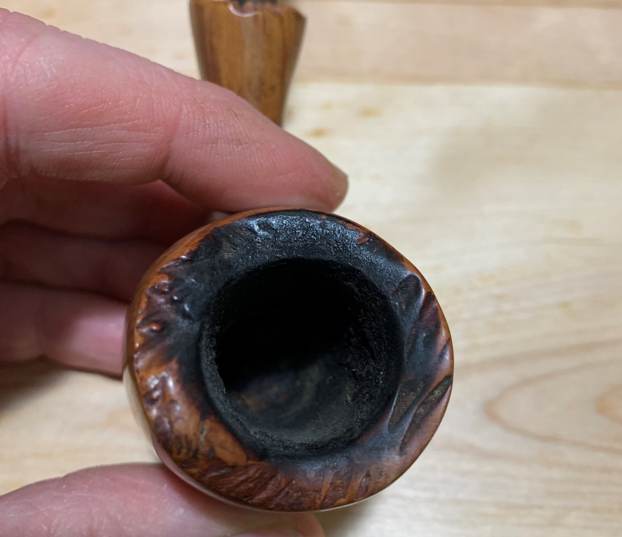
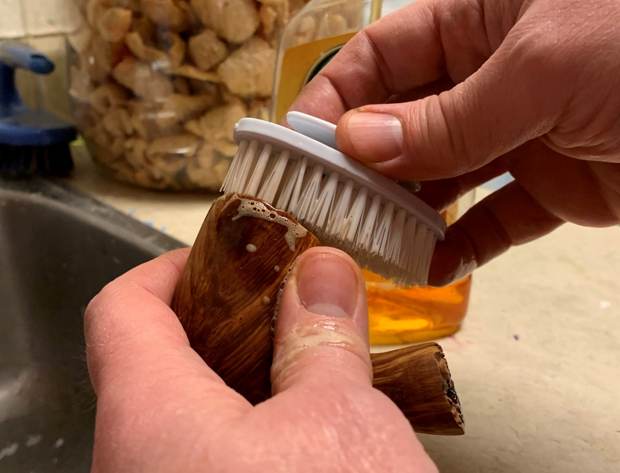
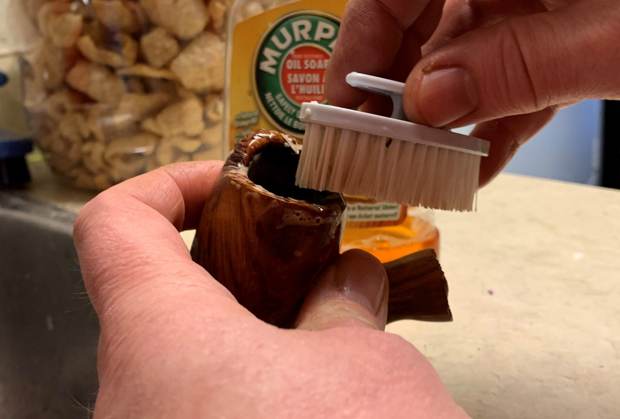
 I had to work especially hard on the rim of the pipe. Obviously, this is a freehand (with a freehand sort of rim) and, as a result, I do not have the luxury of using a topping board to remove some of the lava. I used a small butter knife to gently chip away at the lava. I then used more Murphy’s with a scrub brush to get into the crevasses. This actually worked quite well.
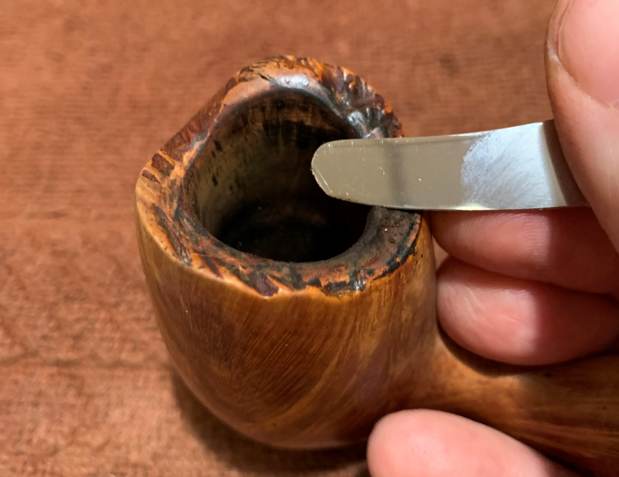
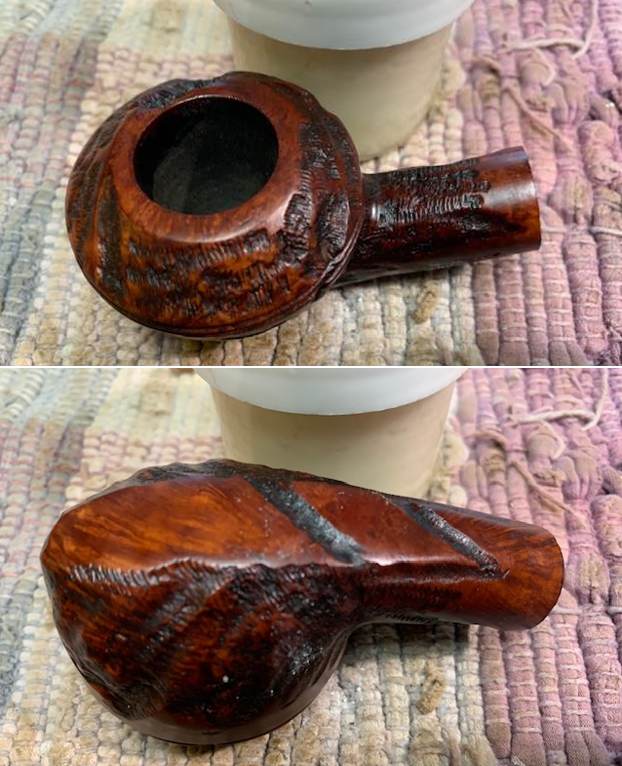
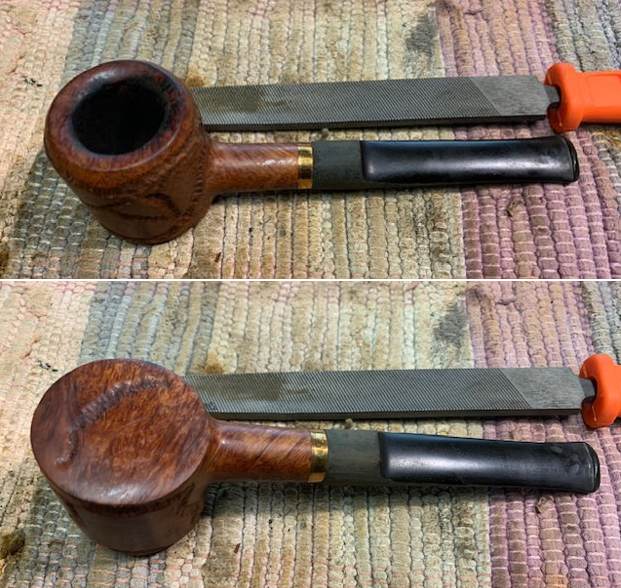
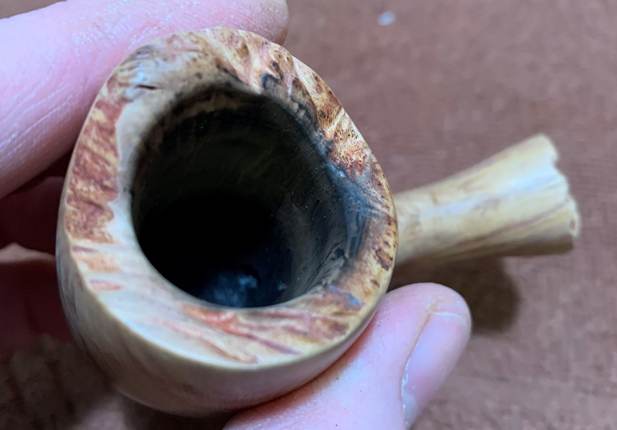 As I mentioned earlier, there were some small burn marks on the rim of the stummel that also needed to be addressed. A lot of this was removed by the Murphy’s. For the burns that remained, I took some oxalic acid on a Q-tip and rubbed and rubbed and rubbed! As you will see, the treatment worked very well and the rim is much improved.
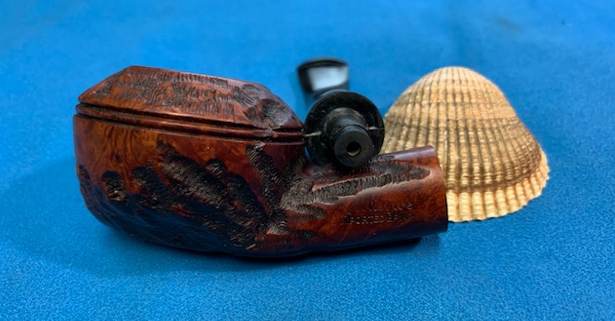
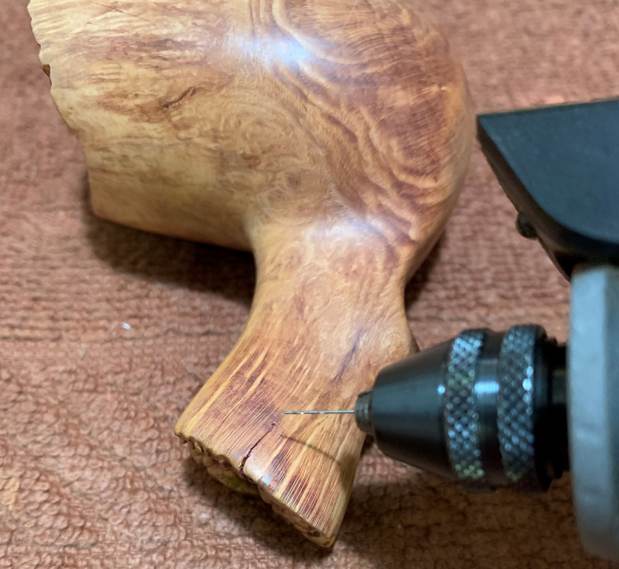
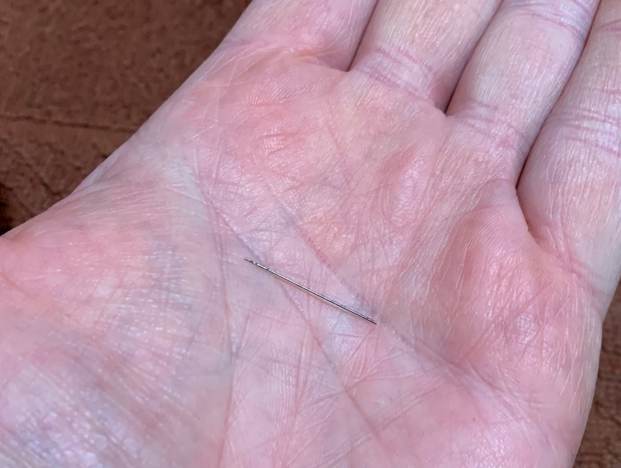
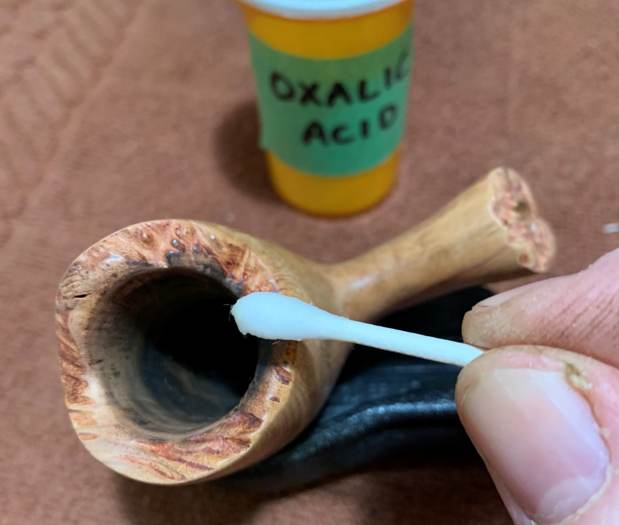 On to another issue with this pipe: the crack in the shank. My first step was to ensure that the crack would not continue to creep after I had repaired it. To that end, I took a micro-drill bit, inserted it in my Dremel, and very carefully drilled a hole right through the wall of the shank. This was quite nerve-wracking, but it worked perfectly. Look how thin that drill bit is!
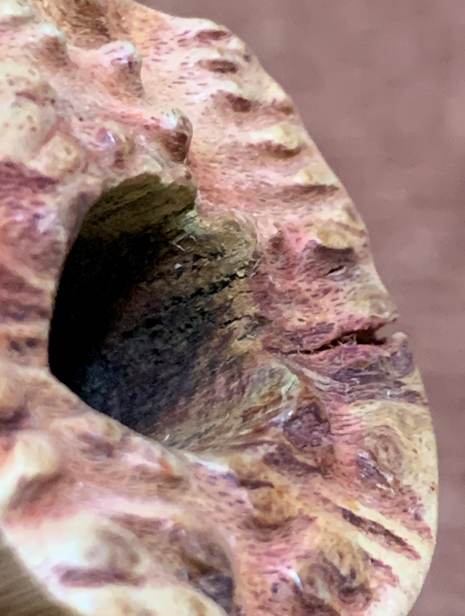
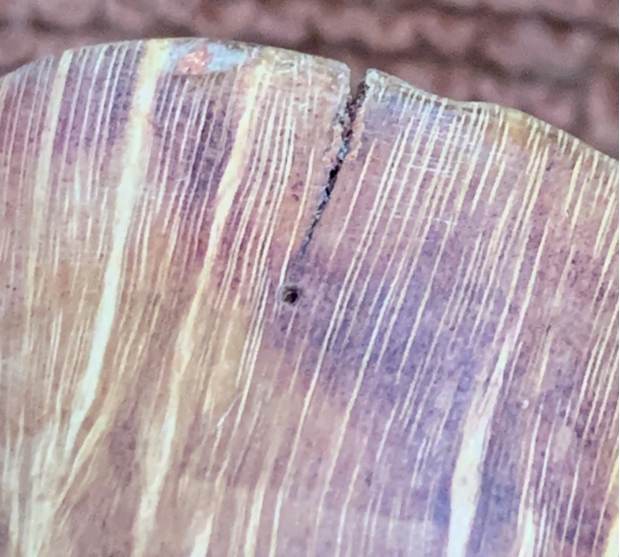
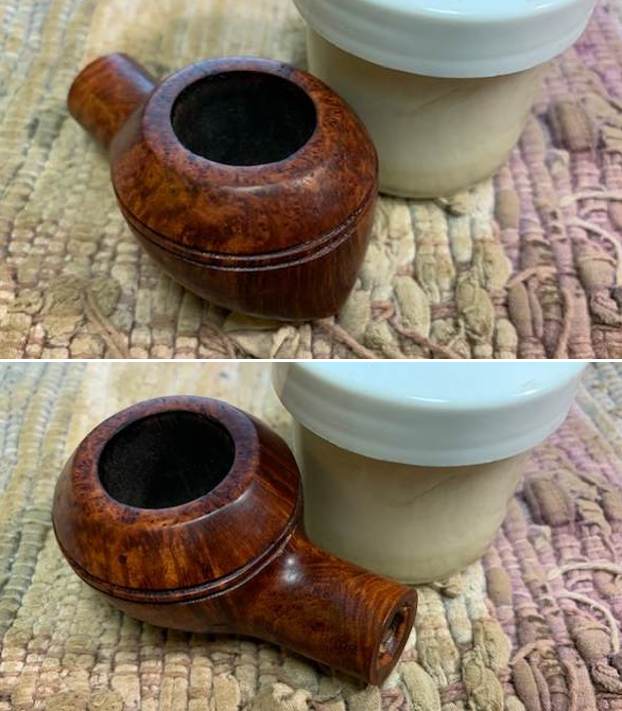
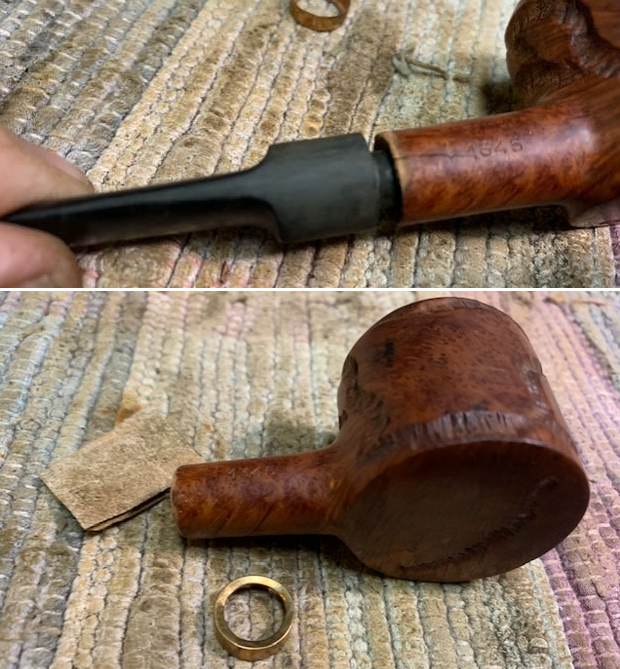
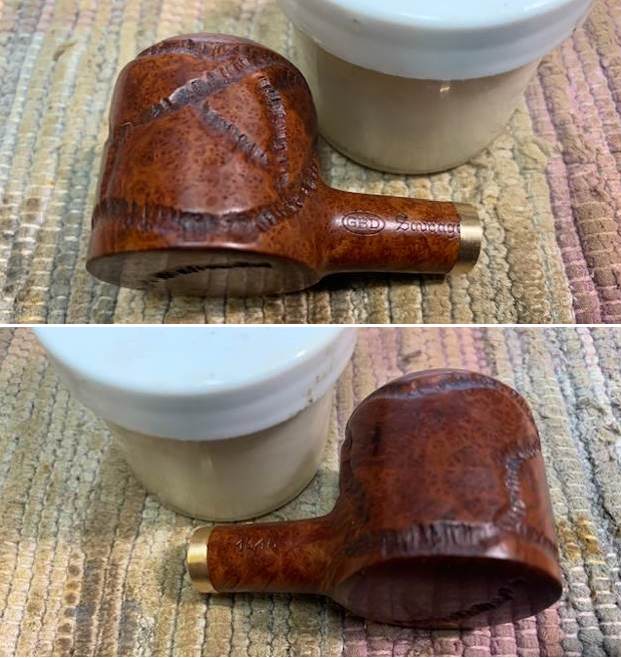
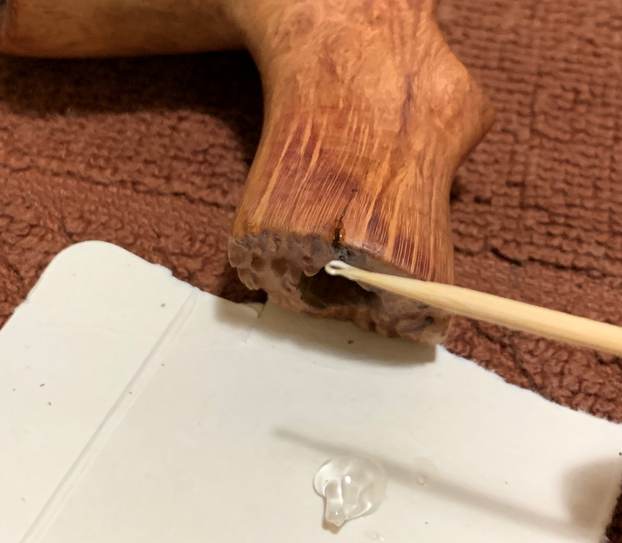
 I then needed to apply cyanoacrylate adhesive to the crack in order to seal and repair it. I covered the end of the shank with painters’ tape. That done, I carefully applied some adhesive to the tiny hole and the length of the crack. Finally, I clamped it shut and let it sit overnight to cure. This was a great success – obviously, the crack would always be visible, but I was really pleased with how the repair looked.
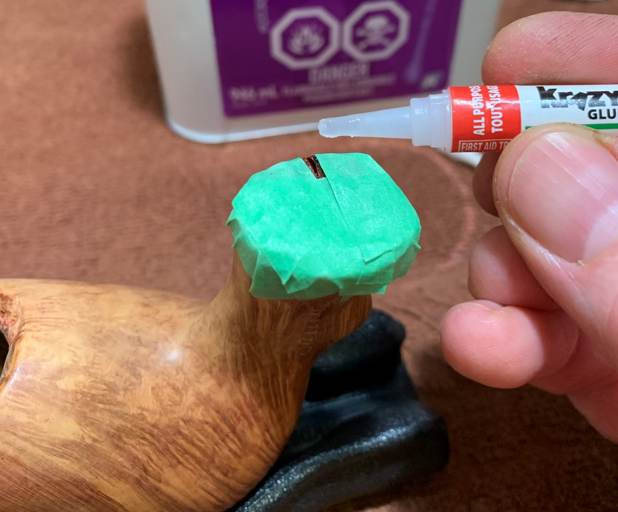
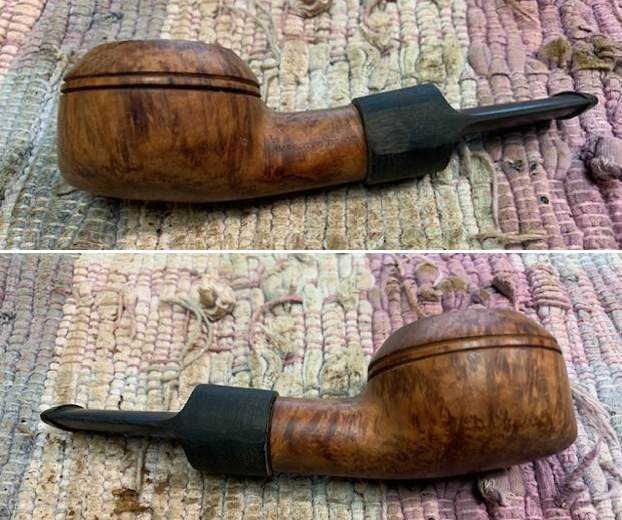
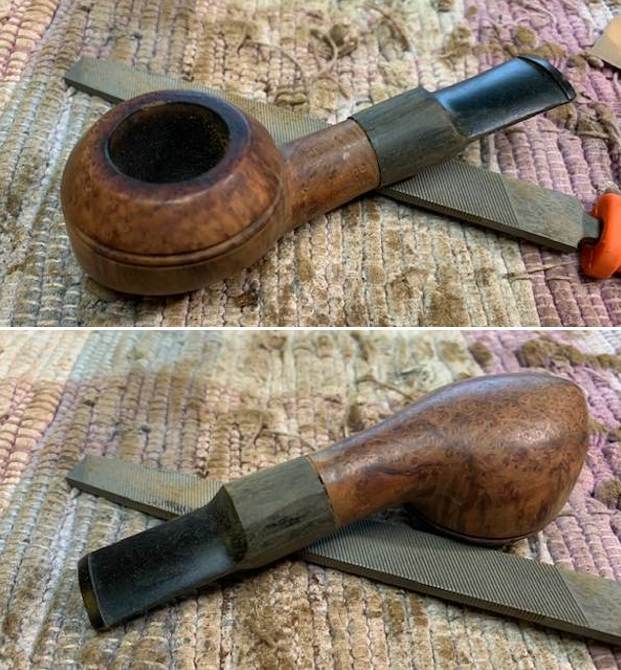
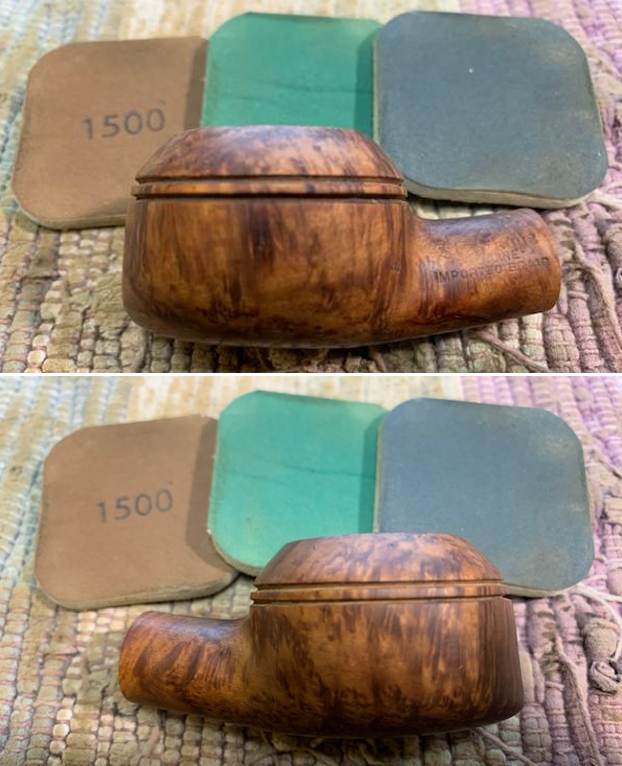
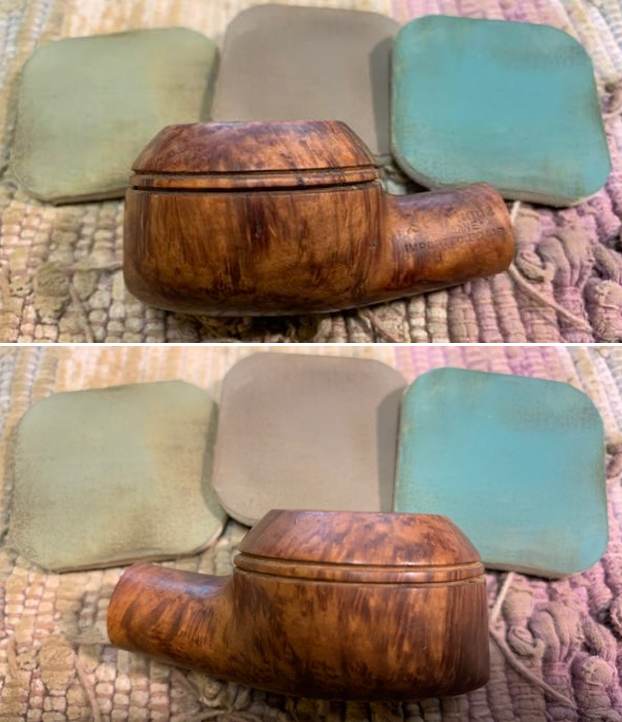
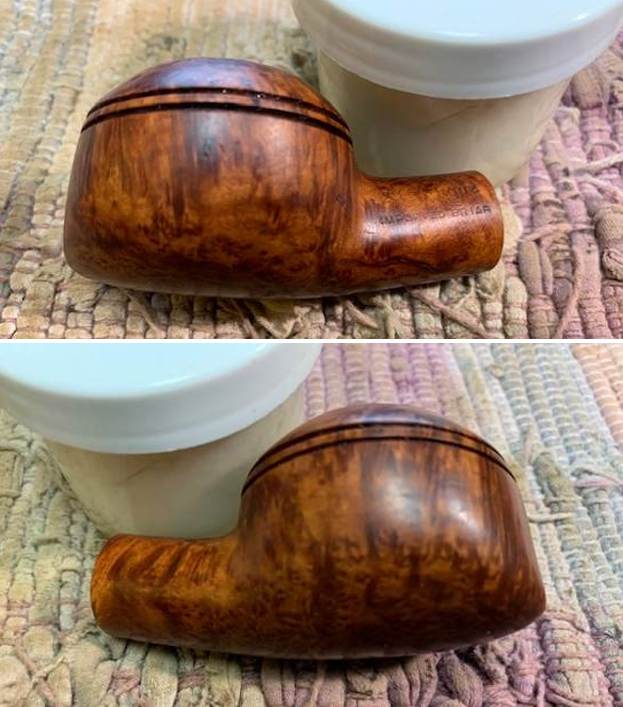
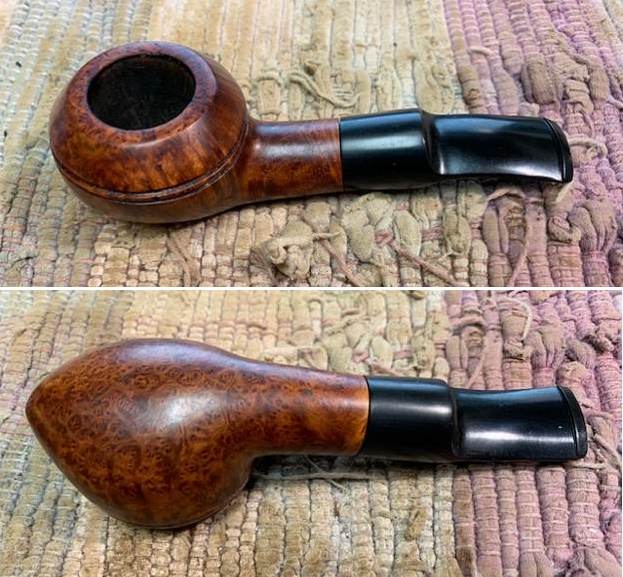
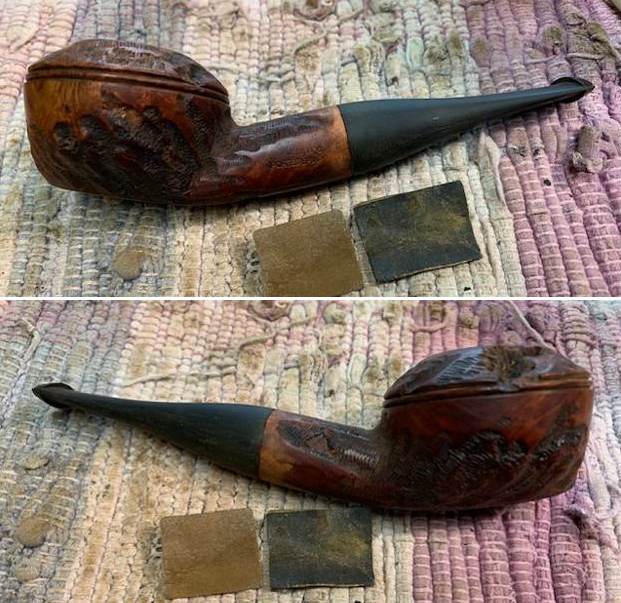
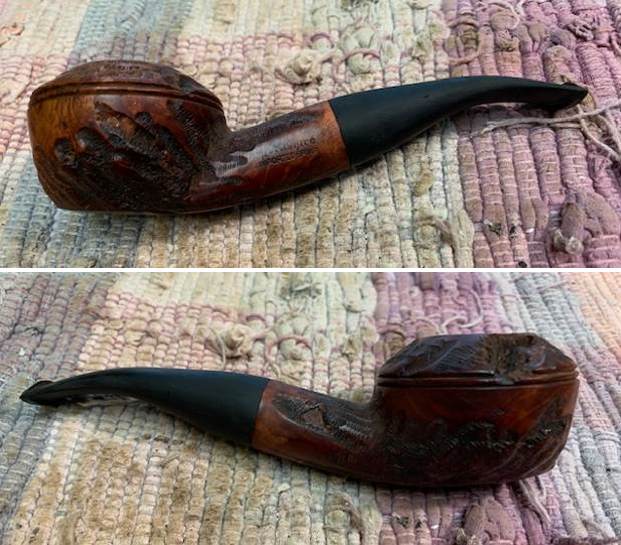
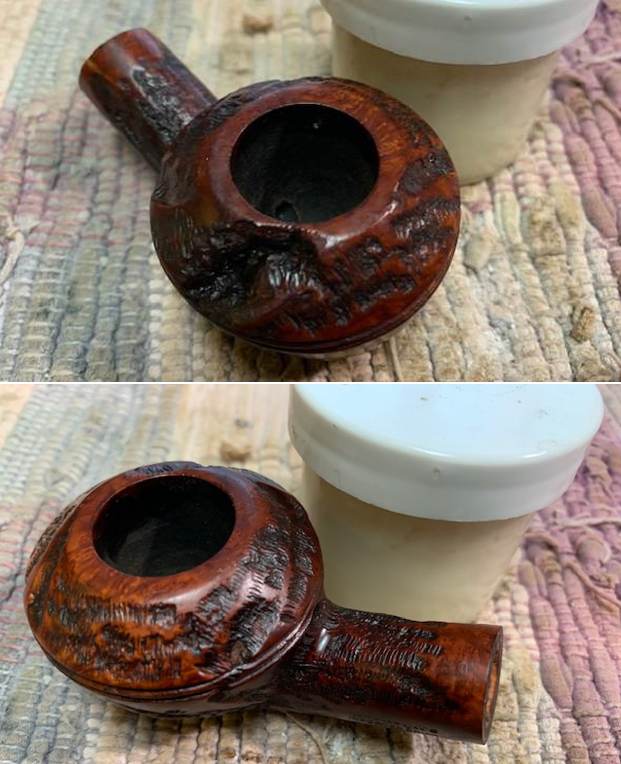
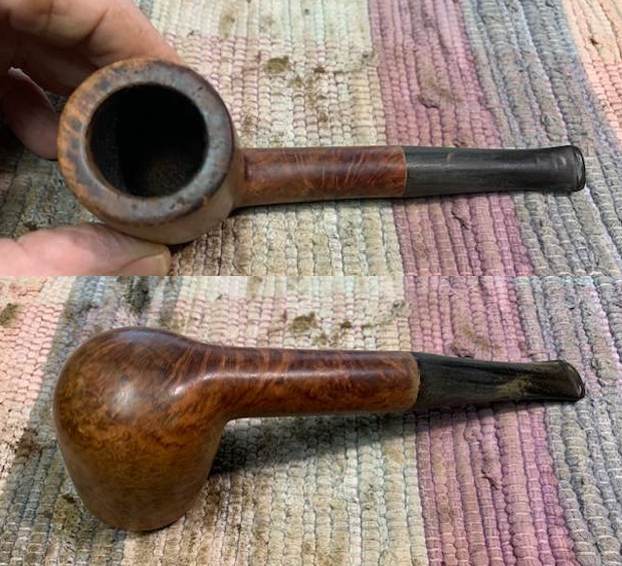
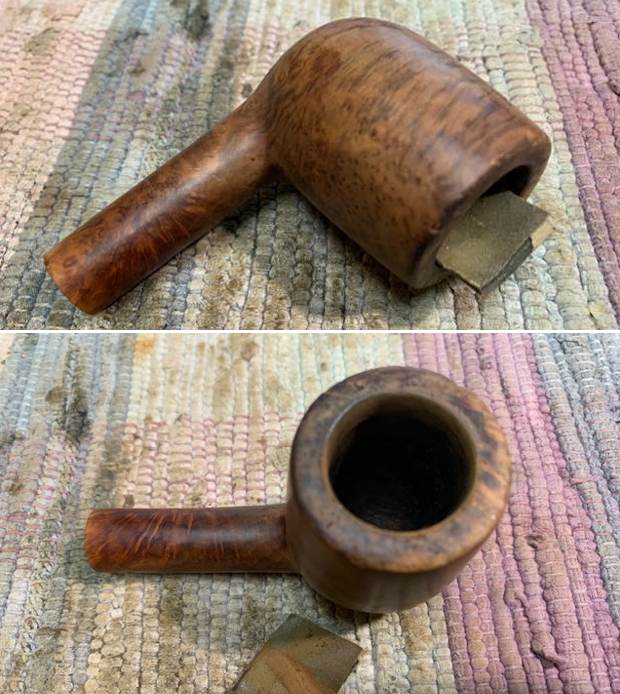
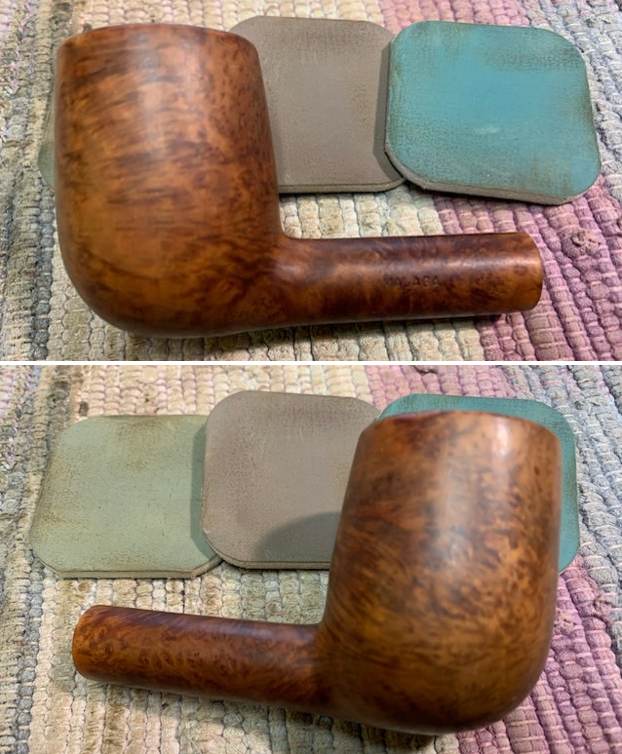
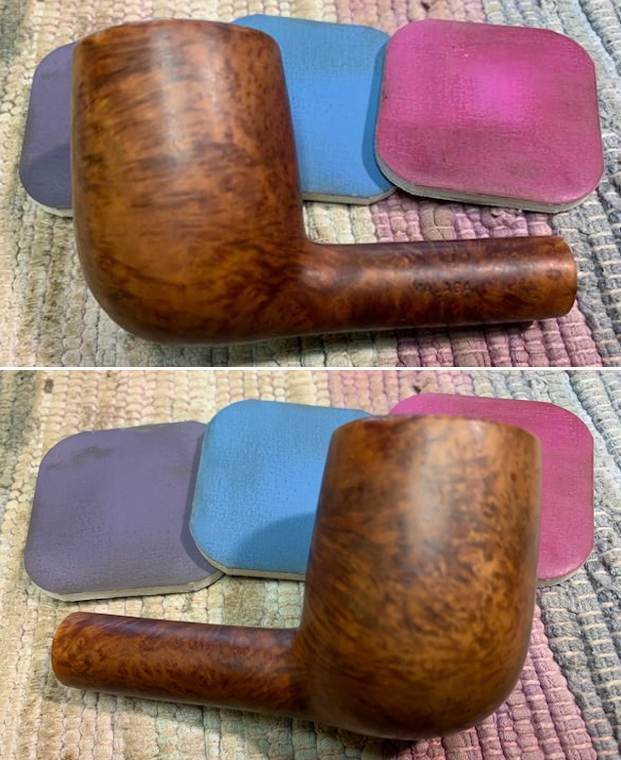
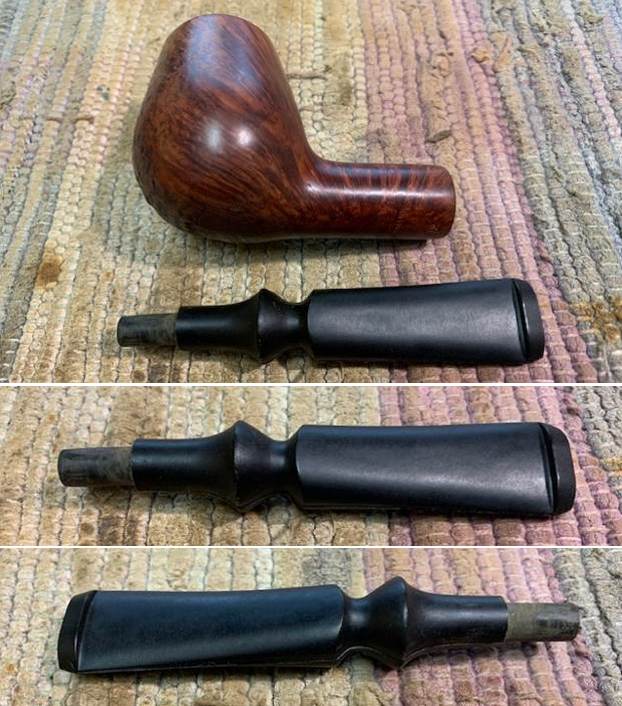
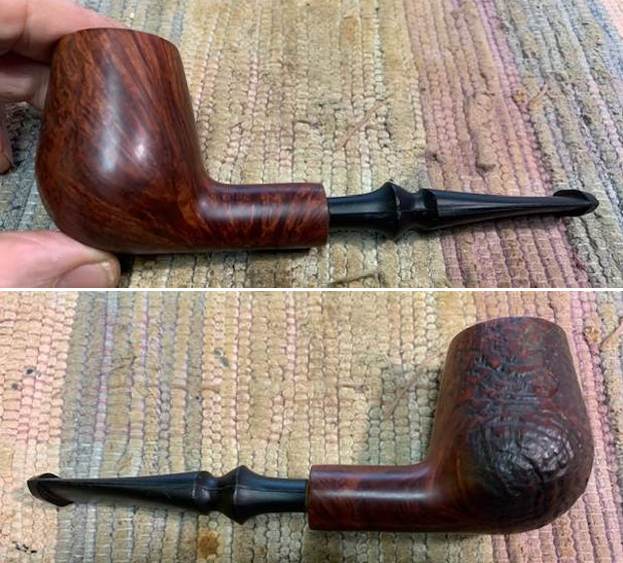
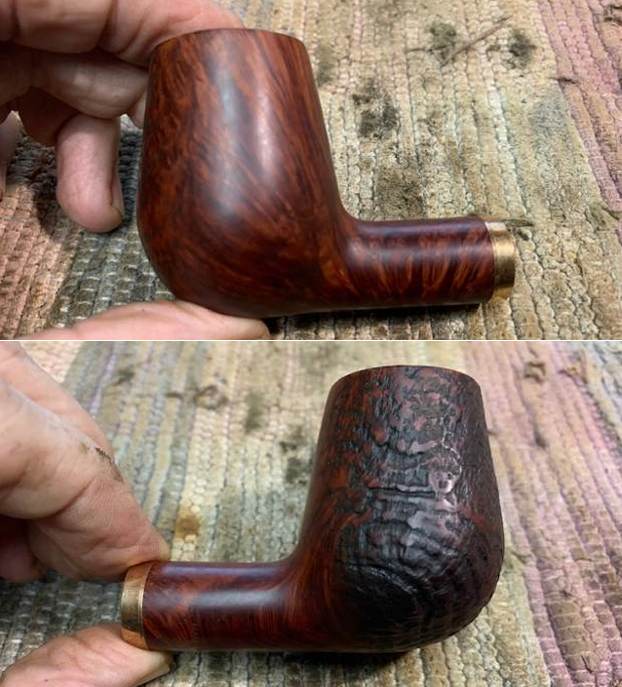
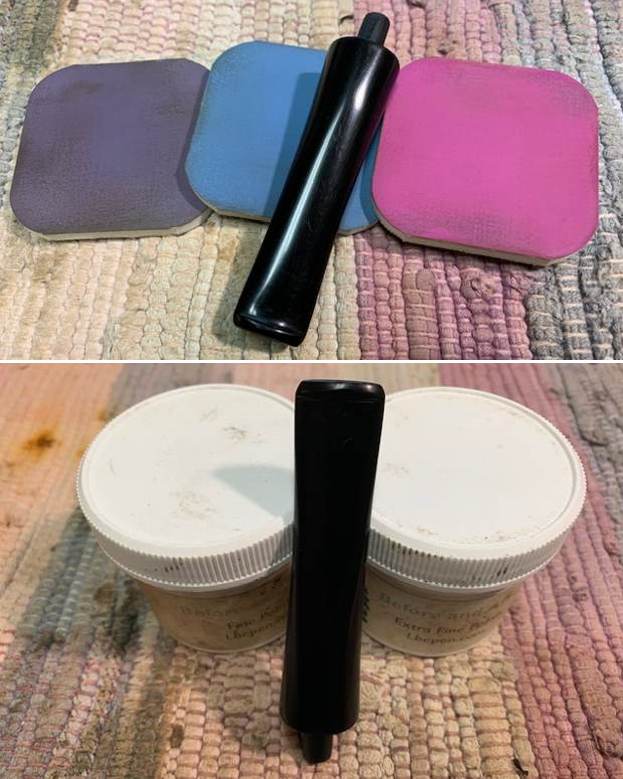
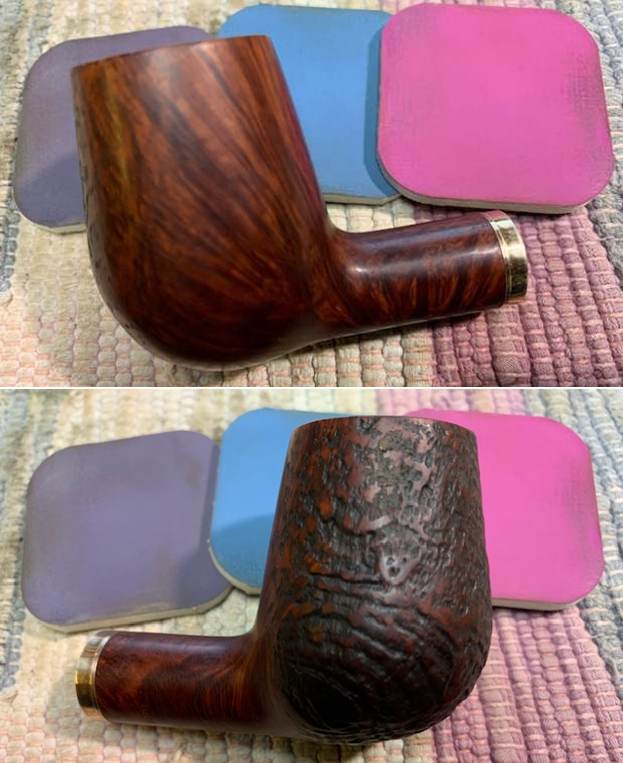
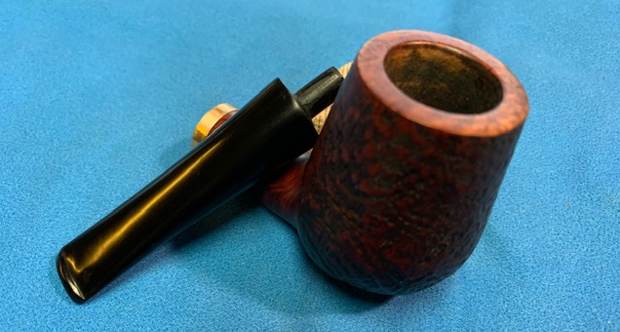
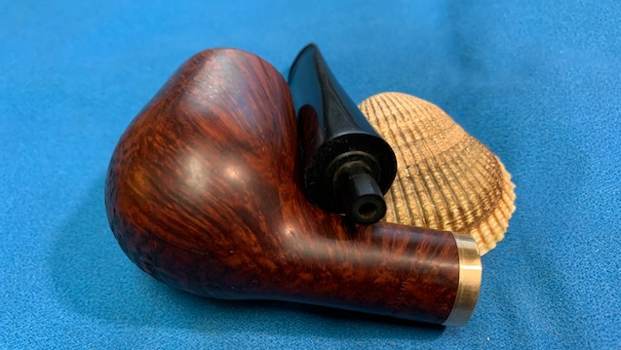
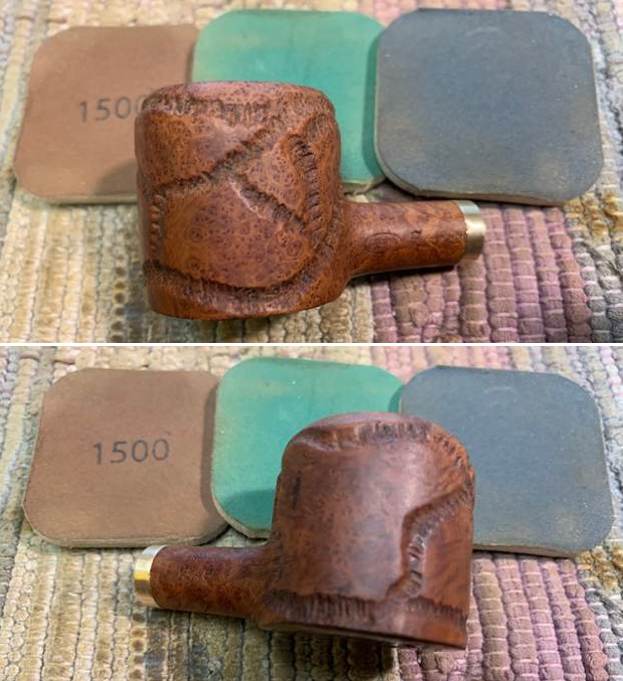
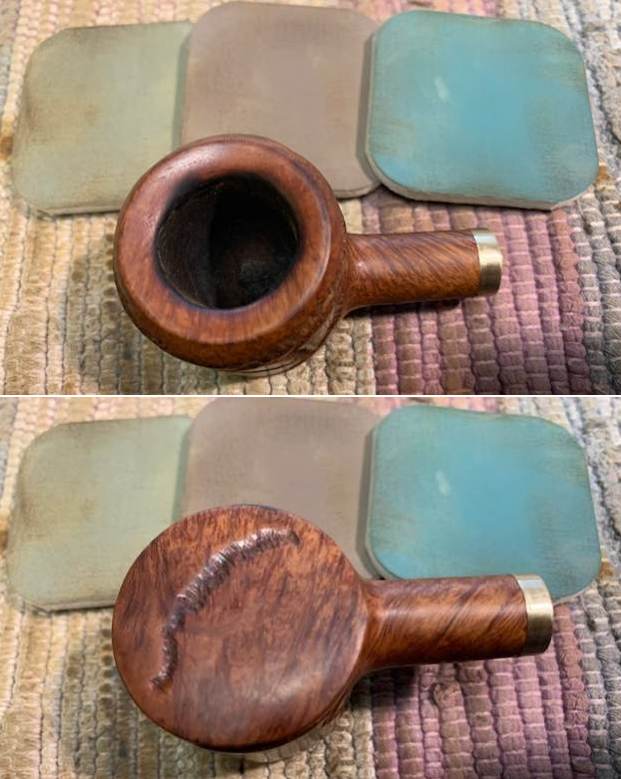
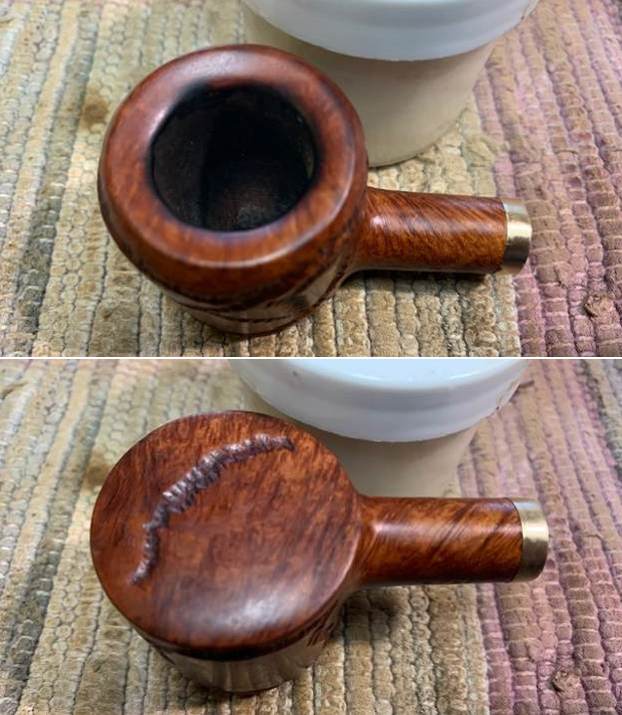
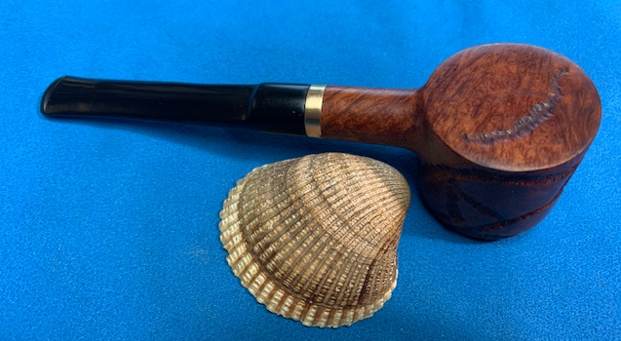
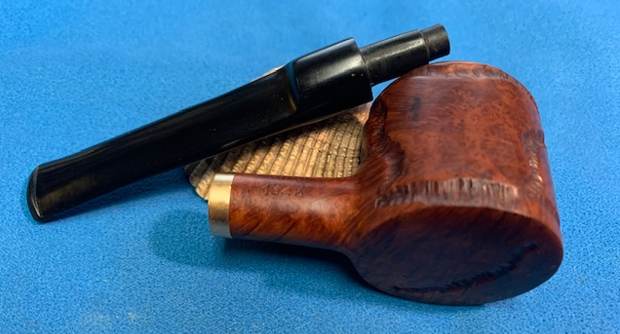
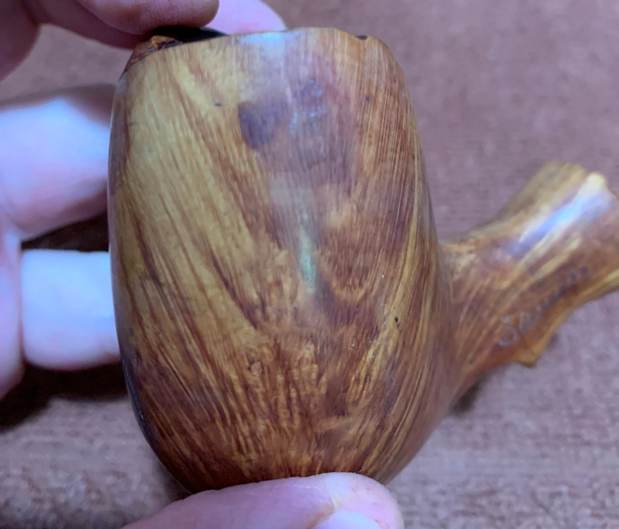
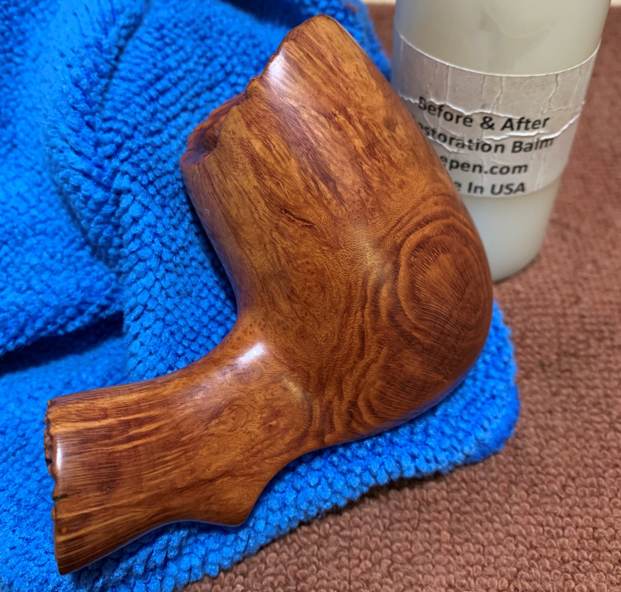
 After this, the entire stummel was treated to a scrubbing with all nine Micromesh pads (1,500 through 12,000 grit) and some distilled water. A light application of Before & After Restoration Balm brought out the best in the stummel’s grain. The wood on this pipe is stunning!
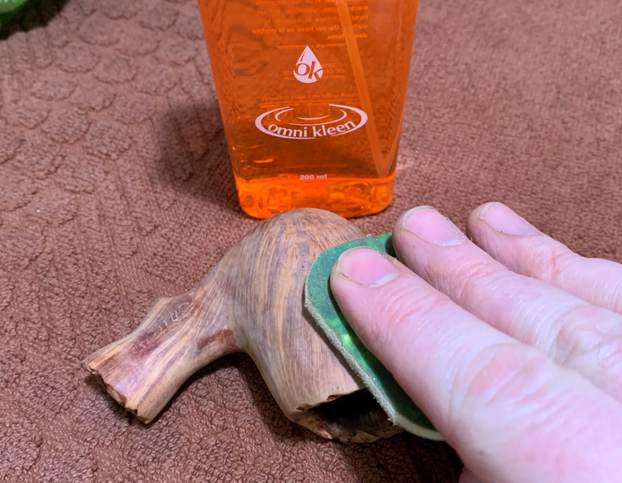


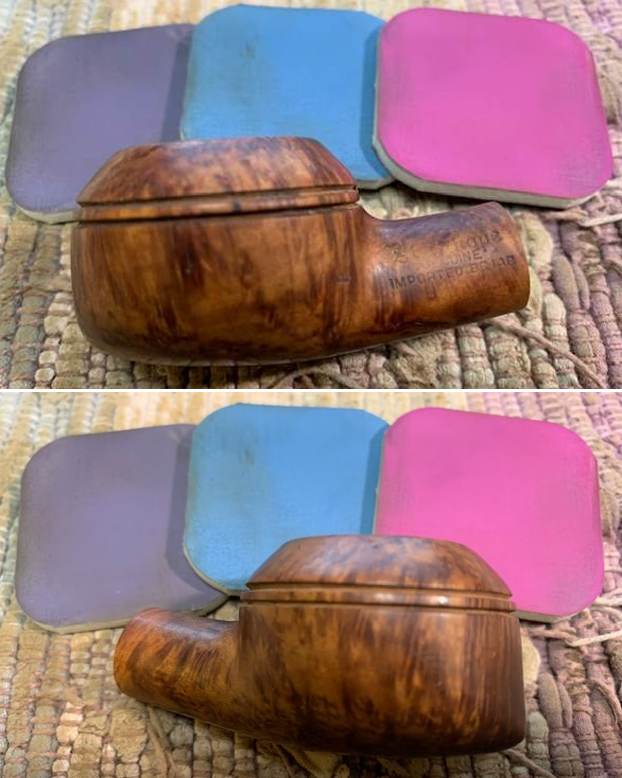
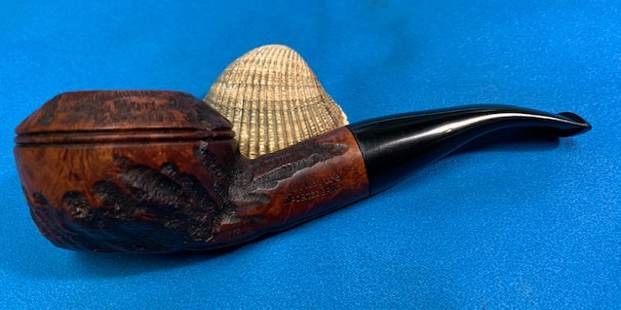
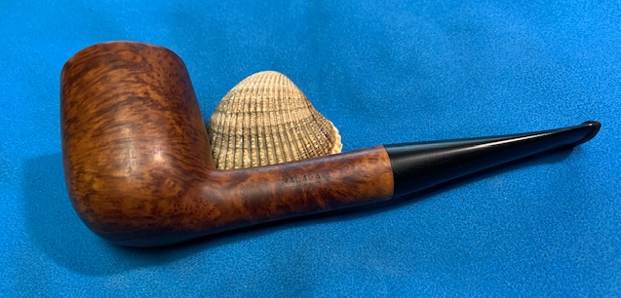
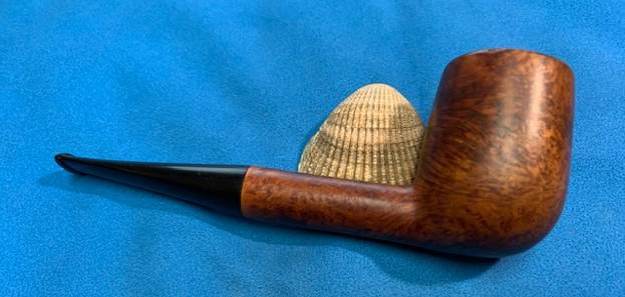
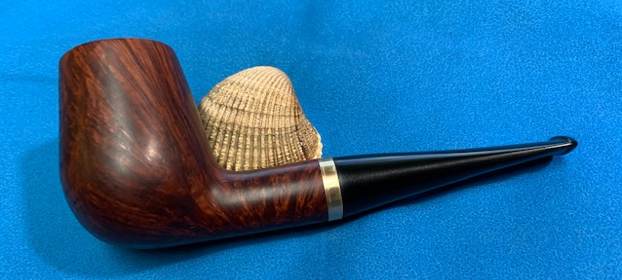
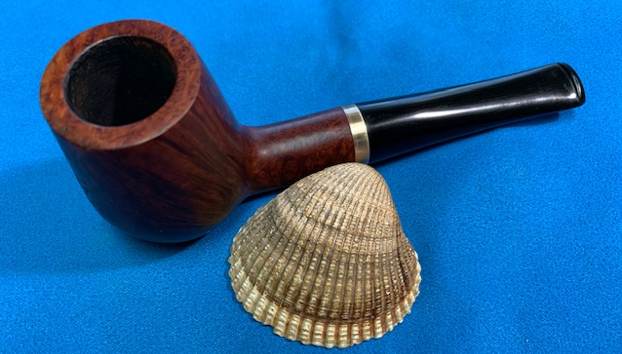
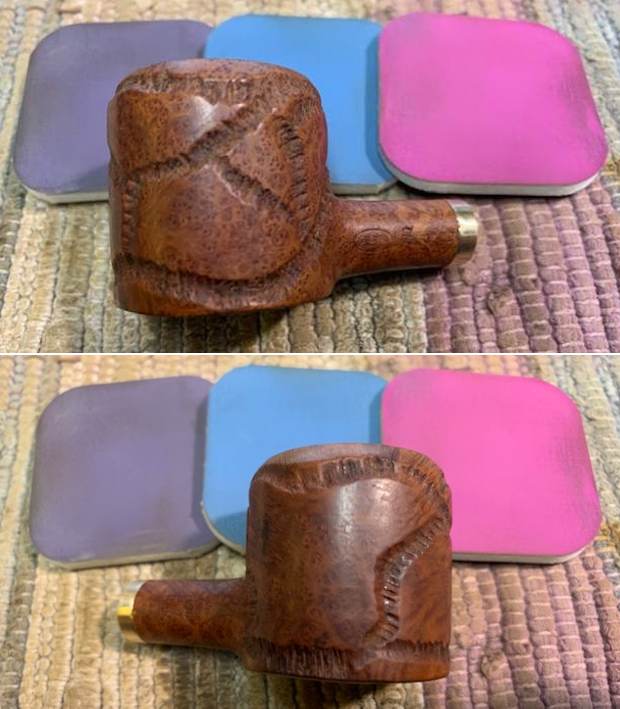
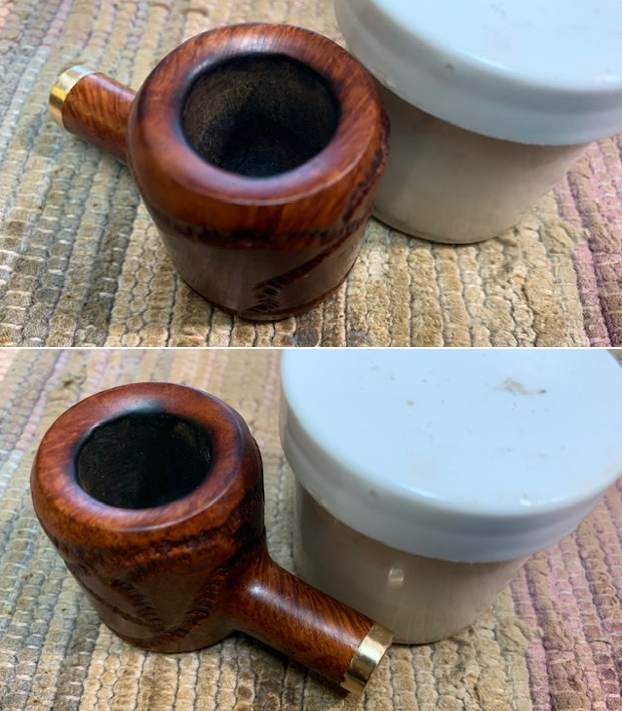
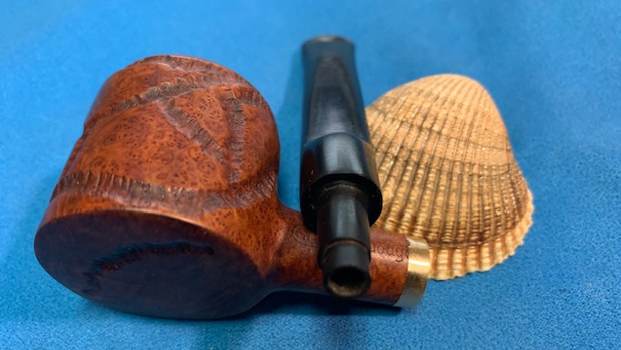
 Now it was off for a trip to the buffer. A dose of White Diamond and a few coats of carnauba wax were just what this pipe needed. I had to be especially careful with the bench polisher on the stummel, since the edges have a tendency to catch on the buffing wheels. I have to admit, this did put my heart in my throat a few times!
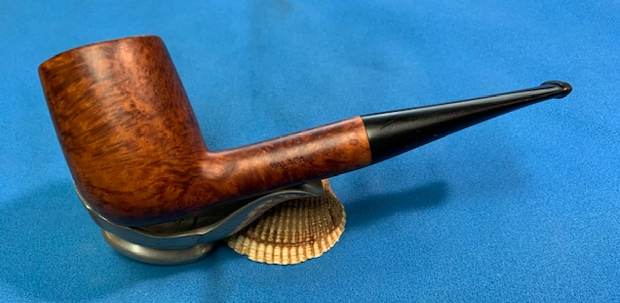
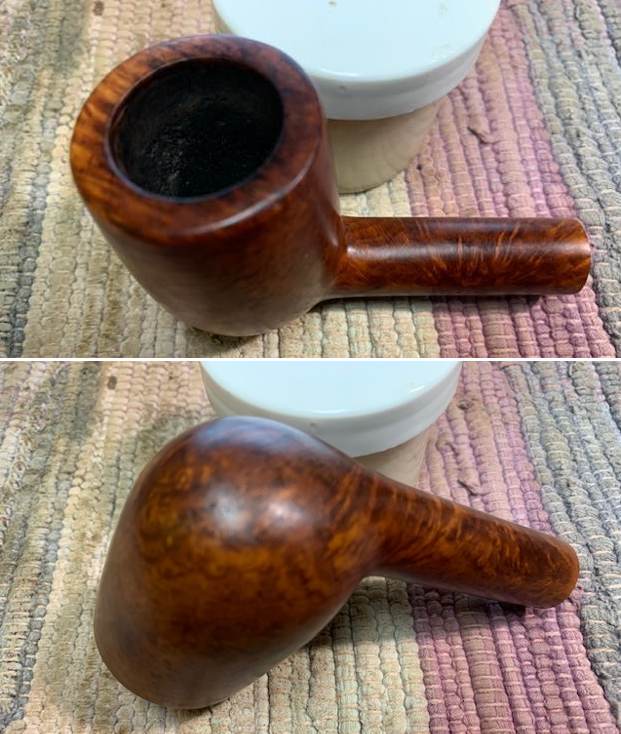
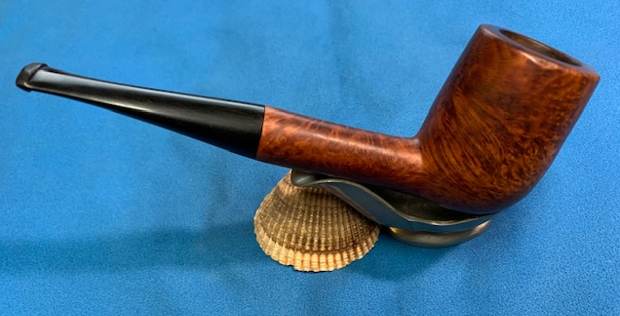
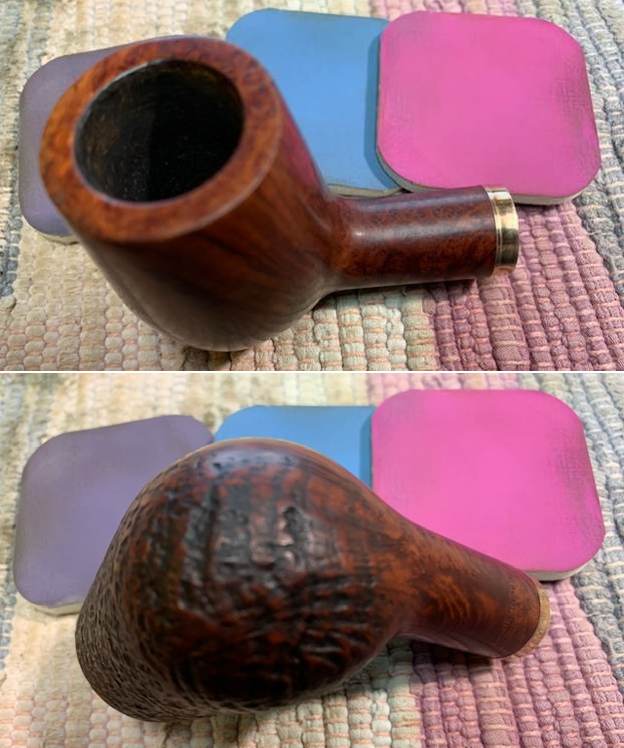
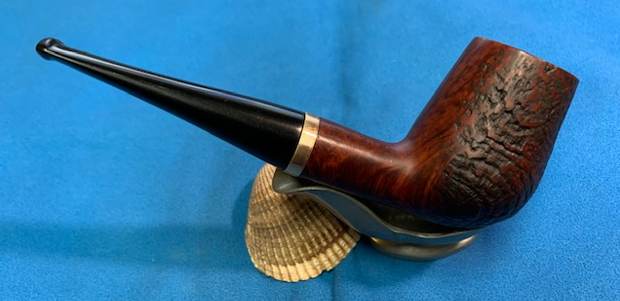
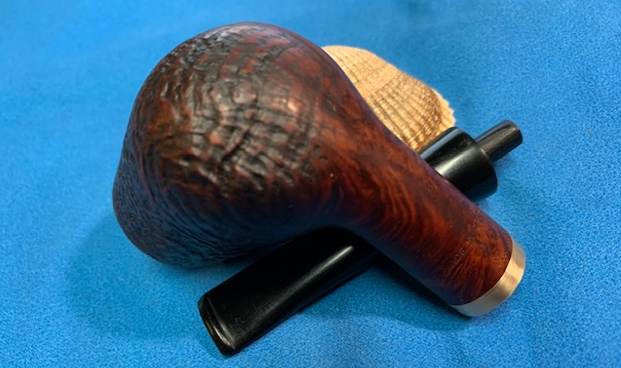
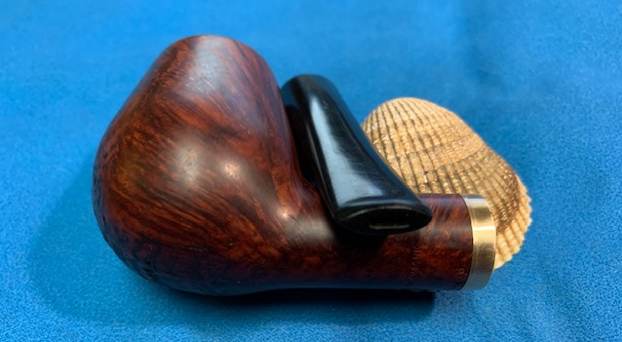
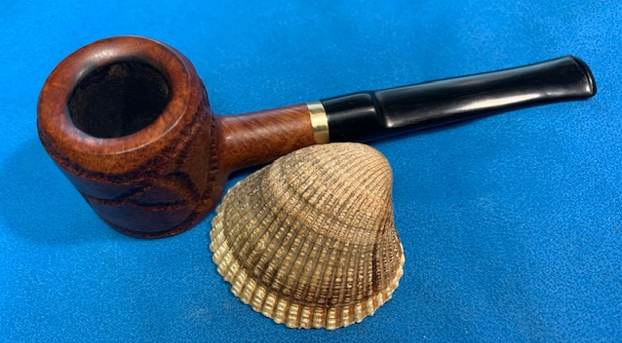
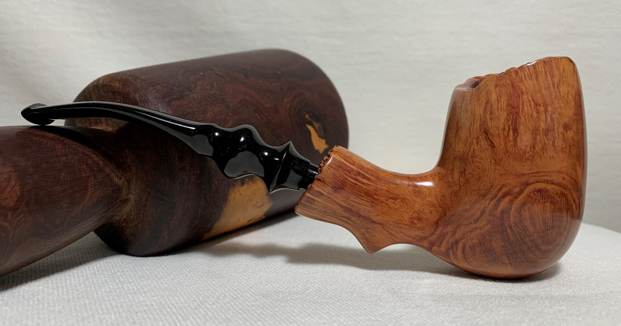
This pipe was a delight from start to finish and its beauty only increased through the restoration process. I am pleased to announce that this pipe is for sale! If you are interested in acquiring it for your collection, please have a look in the ‘American’ pipe section of the store here on Steve’s website. You can also email me directly at kenneth@knightsofthepipe.com. The approximate dimensions of the pipe are as follows: length 6¼ in. (160 mm); height 2½ in. (60 mm); bowl diameter 1½ in. (40 mm); chamber diameter ¾ in. (20 mm). The weight of the pipe is 2 oz. (60 g). I hope you enjoyed reading the story of this pipe’s restoration as much I as I did restoring it. If you are interested in more of my work, please follow me here on Steve’s website or send me an email. Thank you very much for reading and, as always, I welcome and encourage your comments.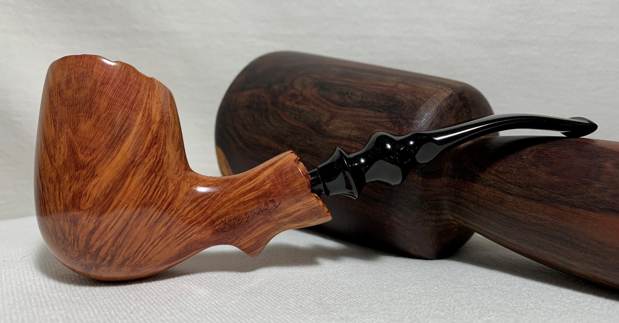

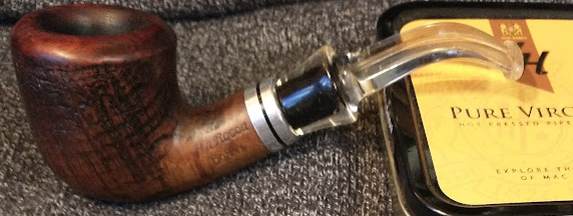

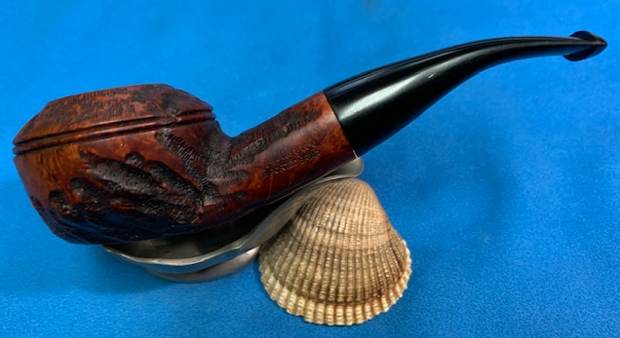
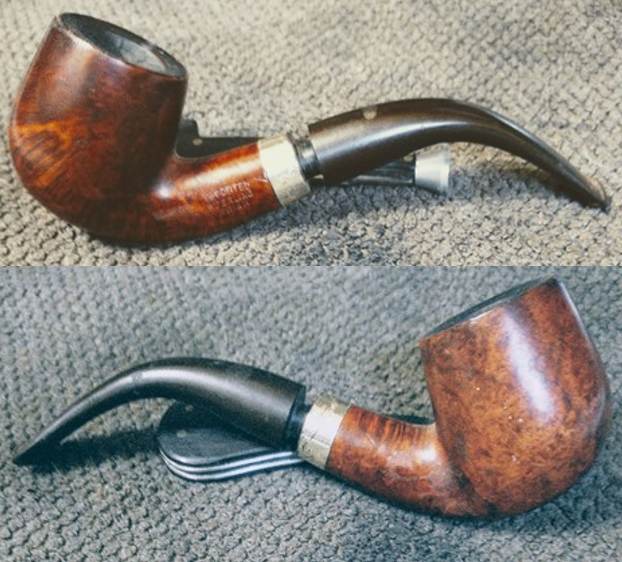
 This time, I’ll begin with the stem, to be done with the bad part – not that it didn’t turn out okay.
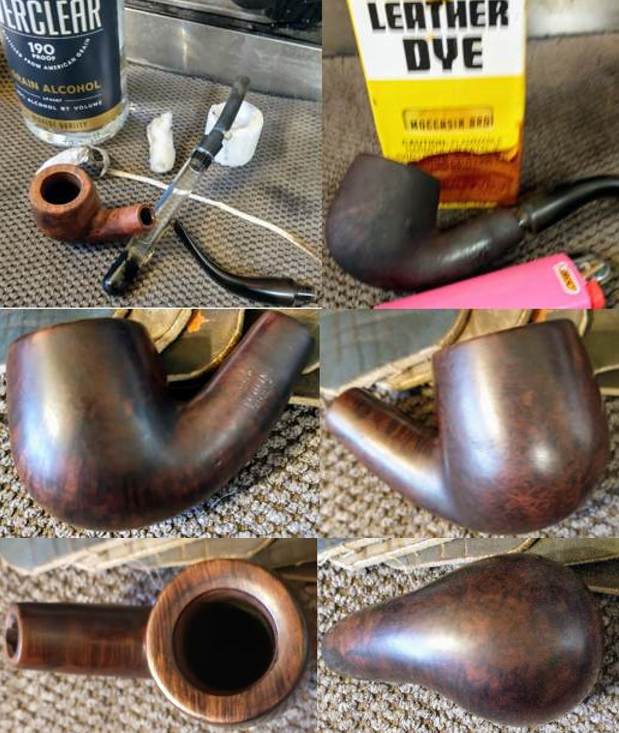
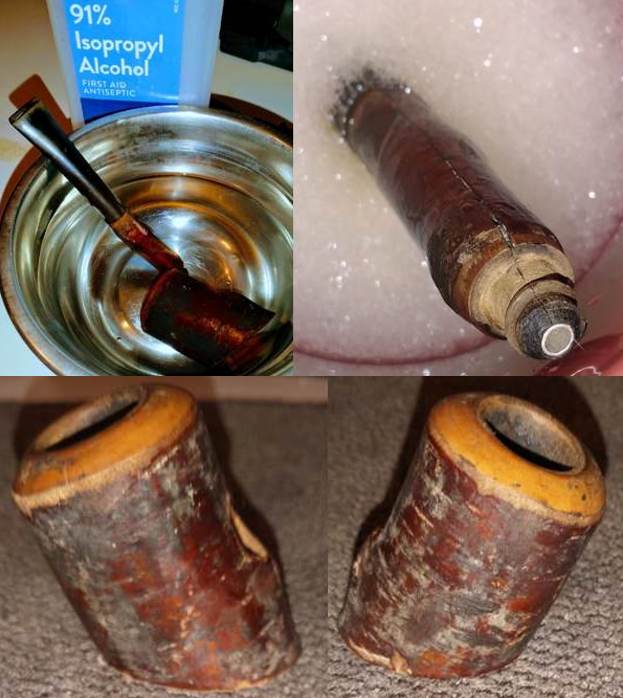
  The first thing I did was pour some Everclear – not just Isopropyl – into a dish, the quicker to soak cleaners and run them through. In the words of a former co-worker who always kept me laughing, “In the name of all that’s sacred, what was I thinking?” And I was so pleased by the great progress I made!
 I must turn to the stummel now in order to show the natural progression of my folly, although it all went fine for the briar.
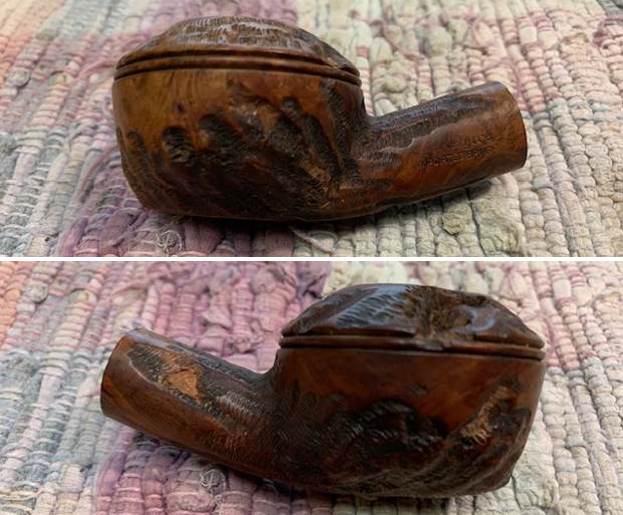
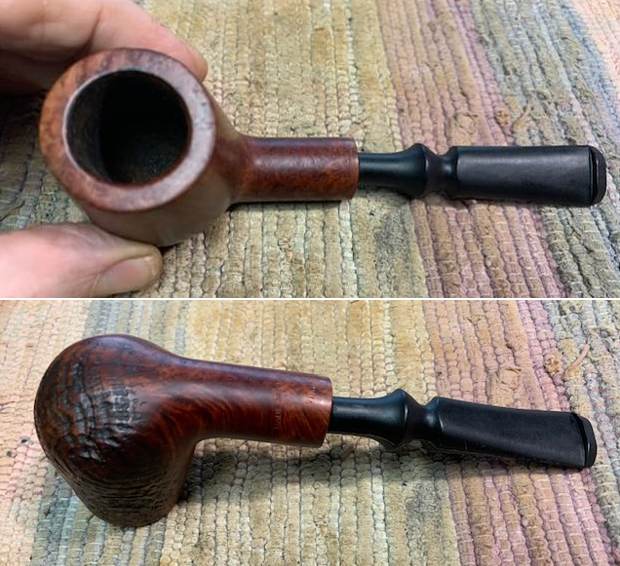
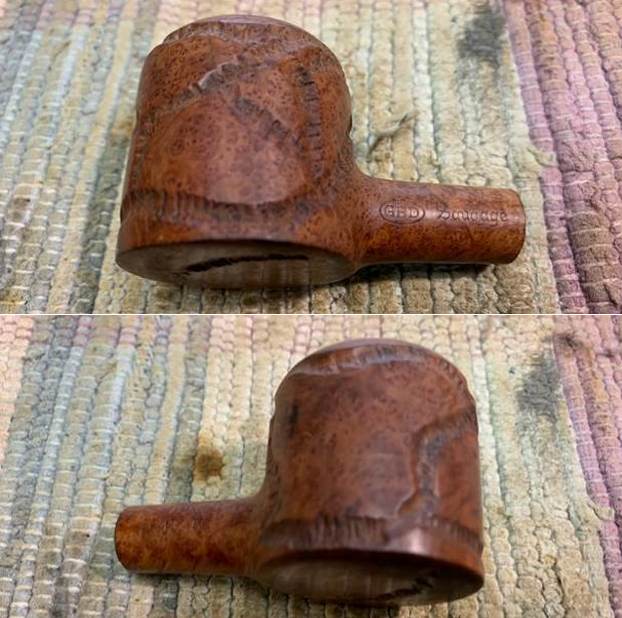
 I reamed and scraped the chamber, then sanded with 60-grit paper and scrubbed it and the shank with more Everclear.
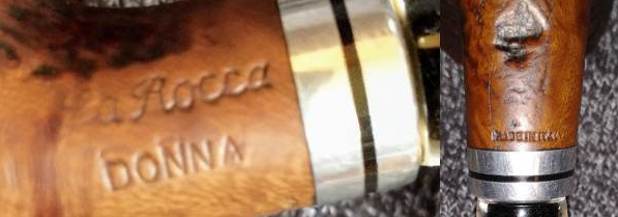
 Using 400-grit paper on the rim made it clear that, once again, my roommate’s propensity for inflicting violence on helpless, loyal pipes had ruined it, short of an ad lib sandblast effect. I did that once on a pipe that had nothing to lose and even surprised my old mentor. He had the audacity to look as if he doubted me! At any rate I liberated Donna here for someone more loving. Deciding on a smooth finish for the rim, I went down to 60-grit followed by a 120/180 pad, 220, 320, 400, 600 and 1000.
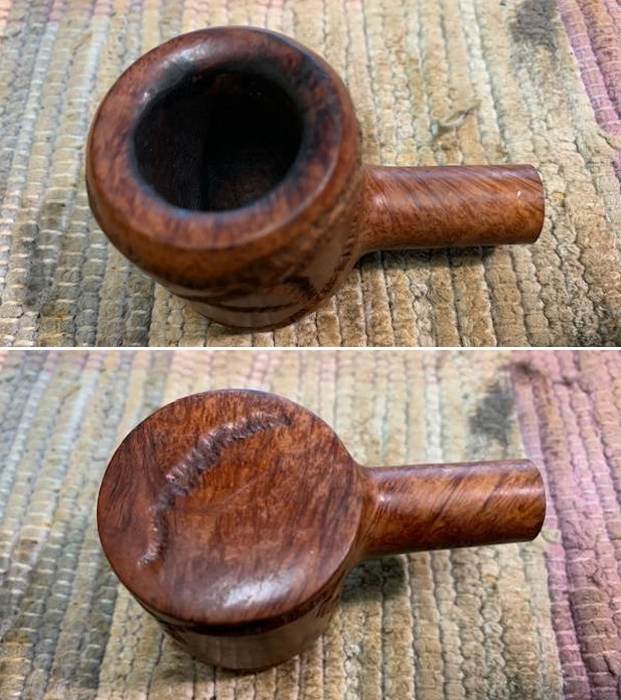
  Now, to add injury to insult to the stem, I boiled more Everclear through the pipe in a retort.
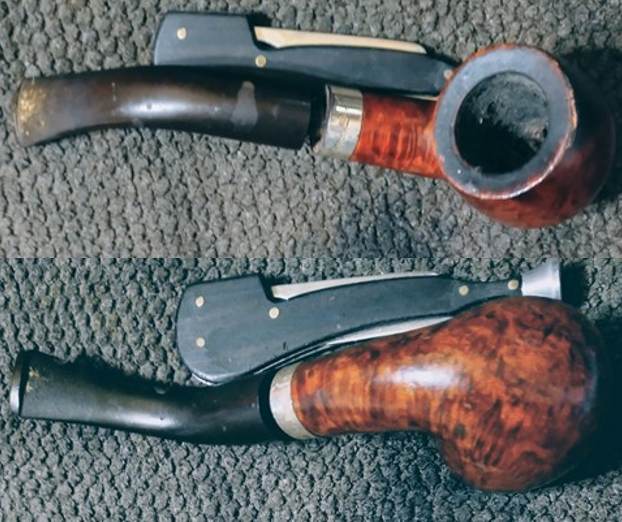
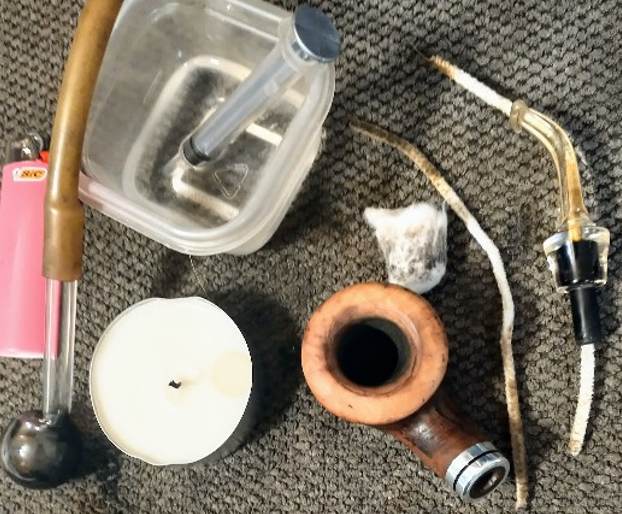 Afterward, I found Steve’s blog and cringed as I read it. I micro meshed the rim, stained it with Fiebing’s British Tan leather dye and buffed off the char with 3600 and 4000 micro mesh.
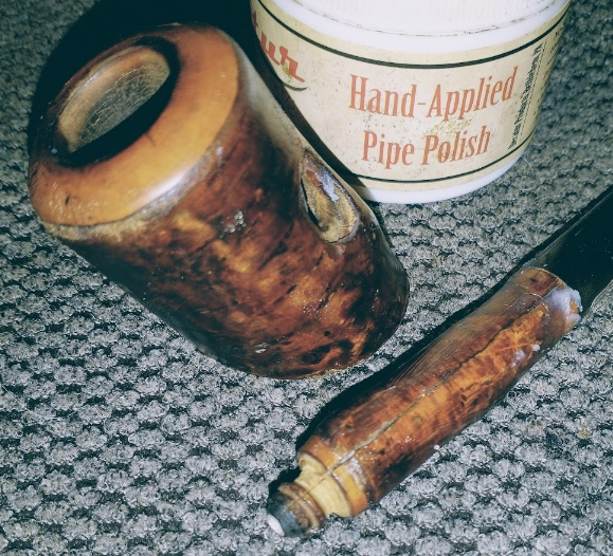
 I applied Decatur Pipe Shield.
 I found a close equivalent to soft scrub for the stem with some generic gloopy stain remover. It did no harm and even helped a tiny bit, and it did a remarkable job of making the outside of the Perspex sparkle with no other effort.
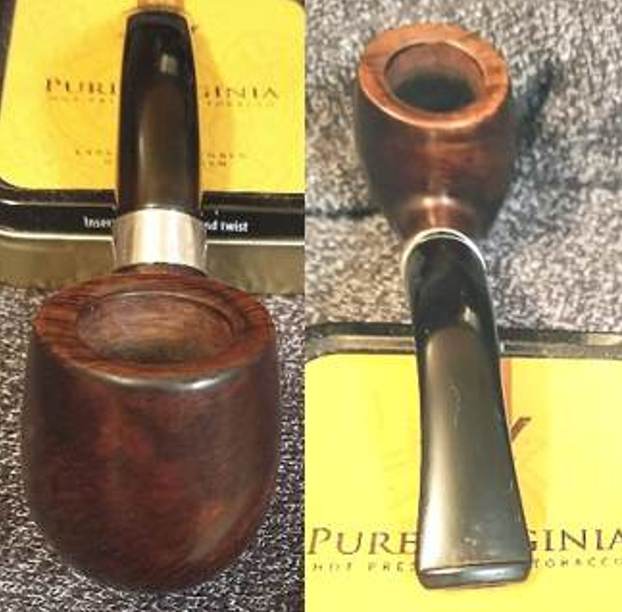
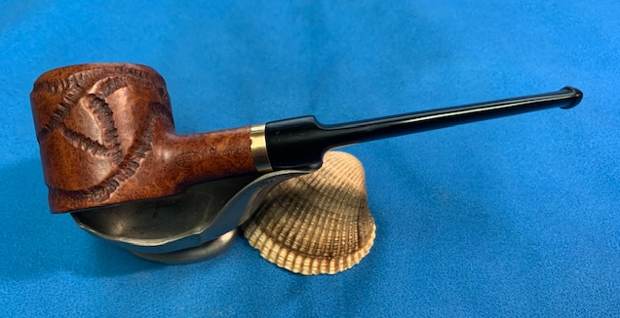
  In the end, this La Rocca turned out nicely. But now my Donna will surely leave me.


 SOURCE