Tag Archives: cleaning a perspex stem

Oh, Donna, I Wish I Read the Instructions First


Blog by Robert M. Boughton

https://www.facebook.com/roadrunnerpipes

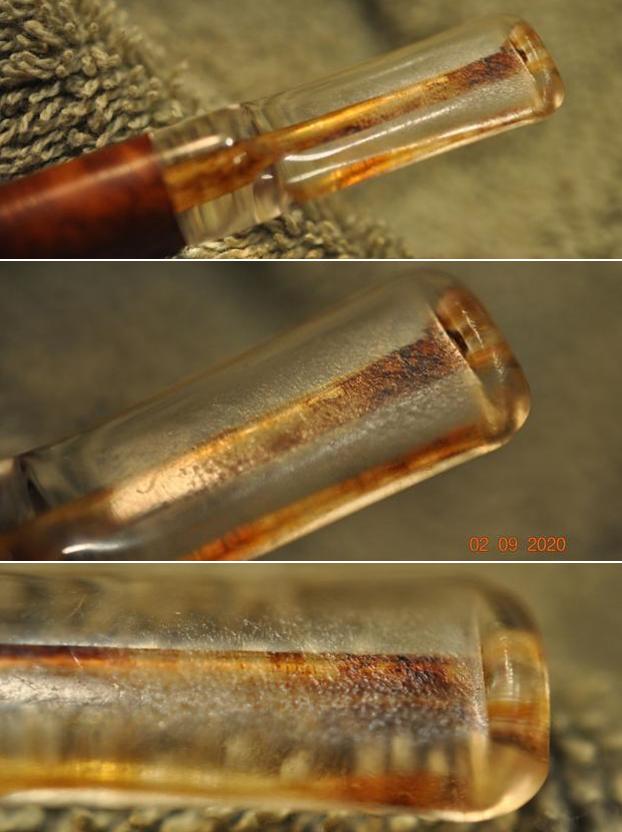
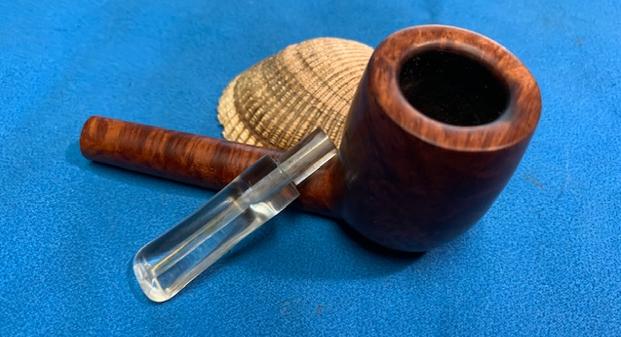
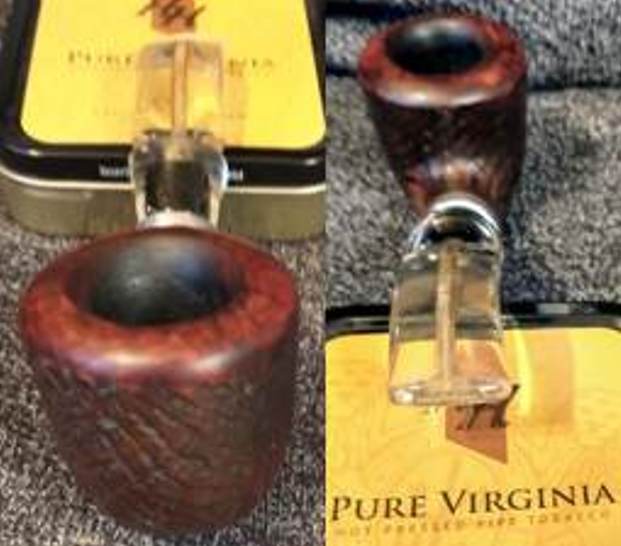
I remembered glancing at a blog Steve wrote about various methods for cleaning Perspex stems, but if I ever got to the most important lesson his years of work with the less forgiving form of acrylic taught him, I forgot it: “that you are never to use alcohol on Perspex!”  I’m not going to flagellate myself for waiting to revisit the blog until it was too late for my La Rocca Donna, but cripes, I wish I had not!  There are kinder, gentler ways to clean up the type of impenetrable brown mess that only long accretion of tobacco, nicotine and saliva can wreak on the airway of a stem that was once uncorrupted in its clarity, other than the standard approach I took.  Oh, well.  Lesson learned.  At least I seem to have avoided the tiny cracks in the stem that can result from contact with alcohol, but I suspect that some of the discoloration may have been fixed into the Perspex.

RESTORATION 
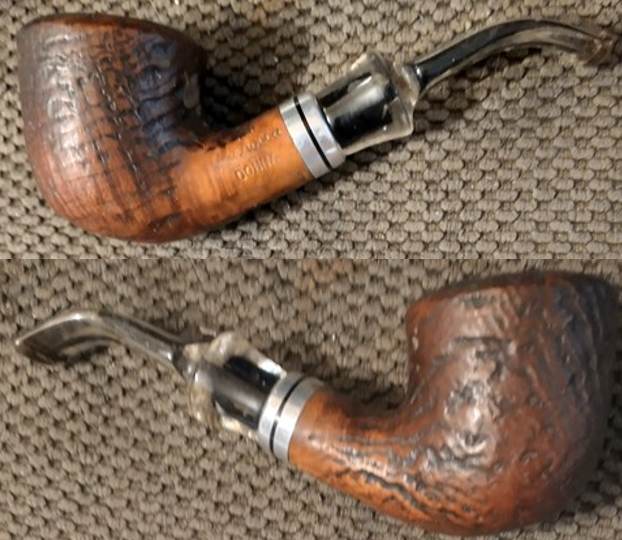
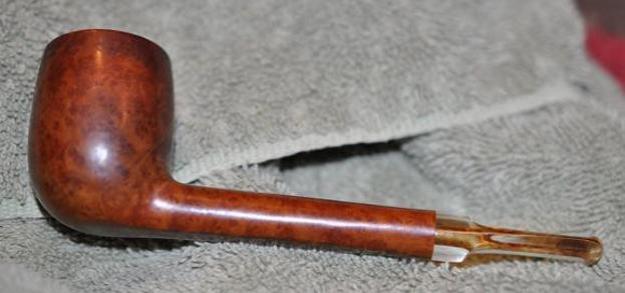
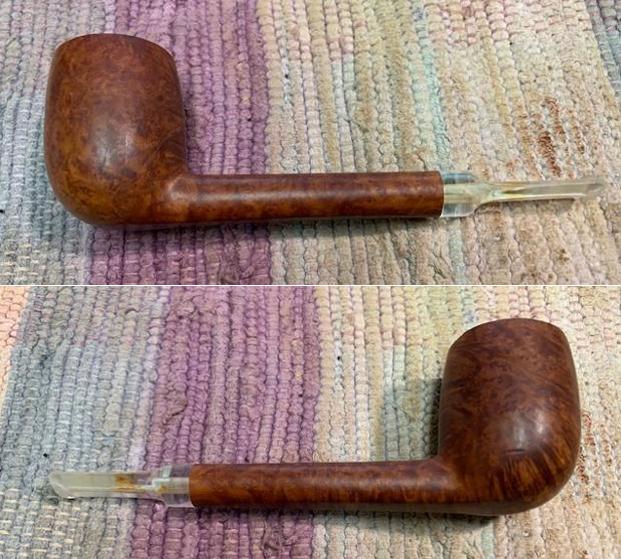
This time, I’ll begin with the stem, to be done with the bad part – not that it didn’t turn out okay. 
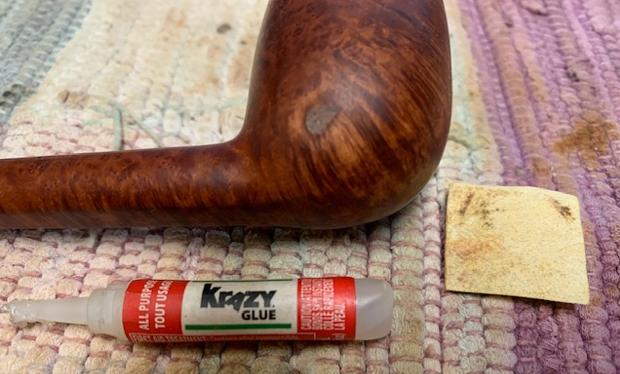
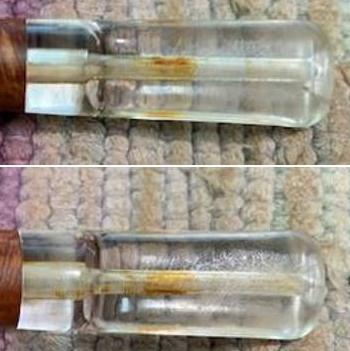
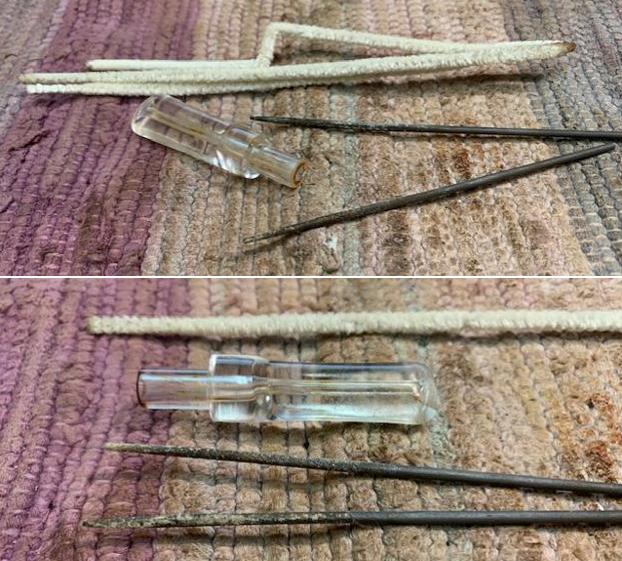
The first thing I did was pour some Everclear – not just Isopropyl – into a dish, the quicker to soak cleaners and run them through.  In the words of a former co-worker who always kept me laughing, “In the name of all that’s sacred, what was I thinking?”  And I was so pleased by the great progress I made!
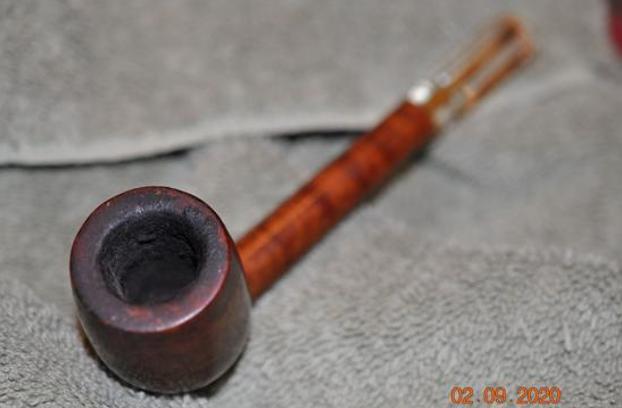
I must turn to the stummel now in order to show the natural progression of my folly, although it all went fine for the briar.
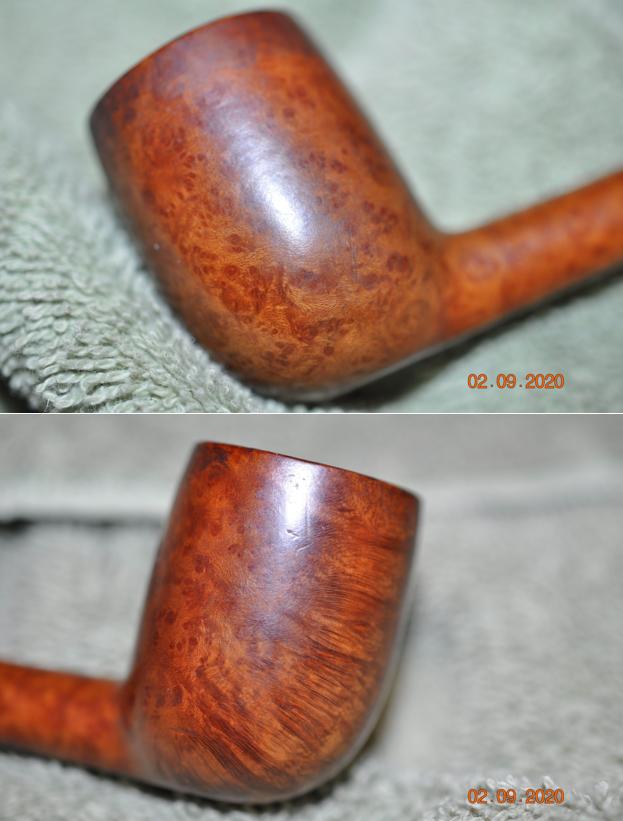
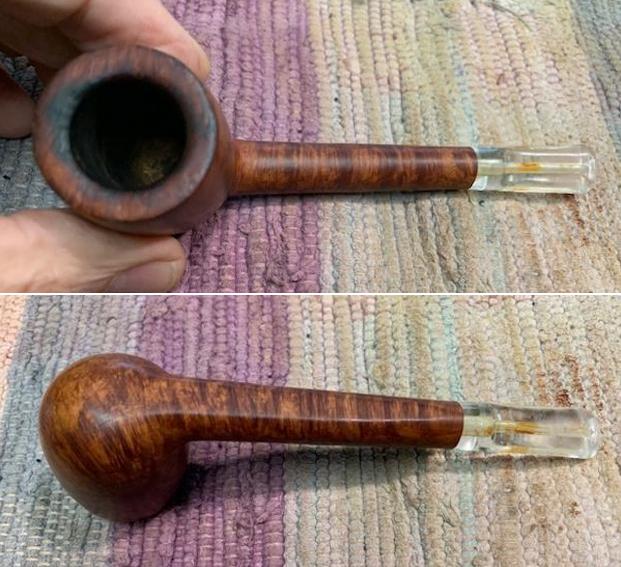
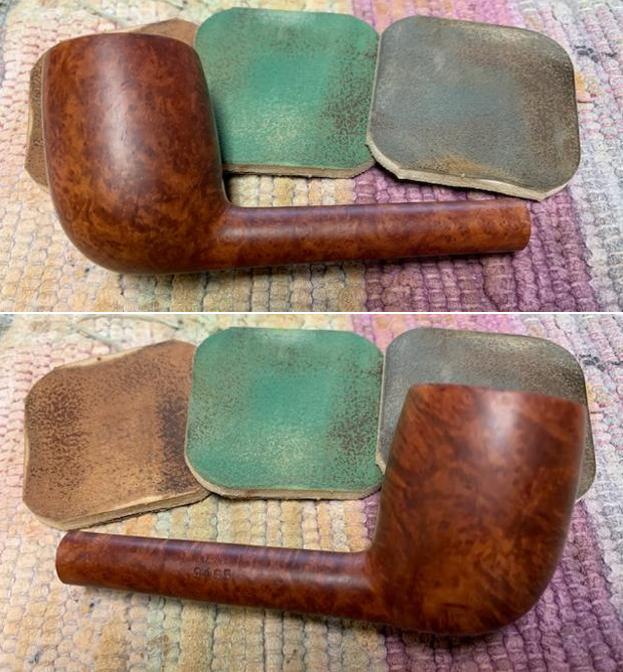
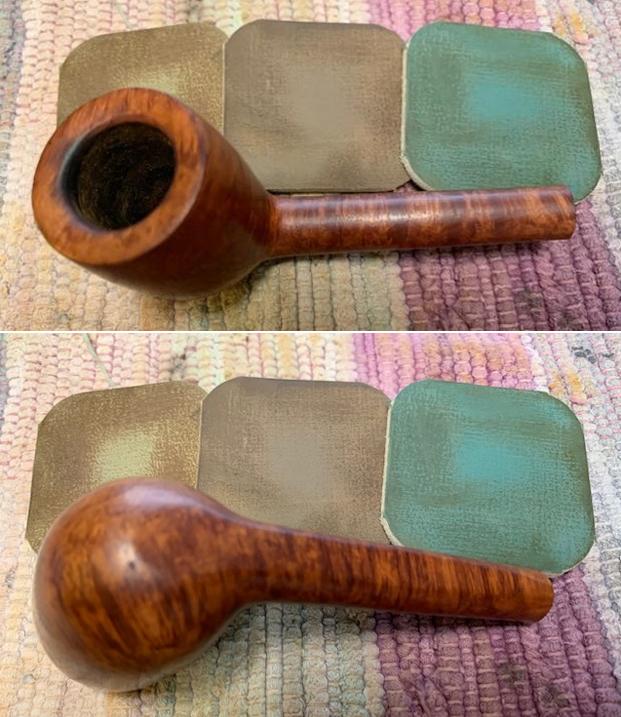
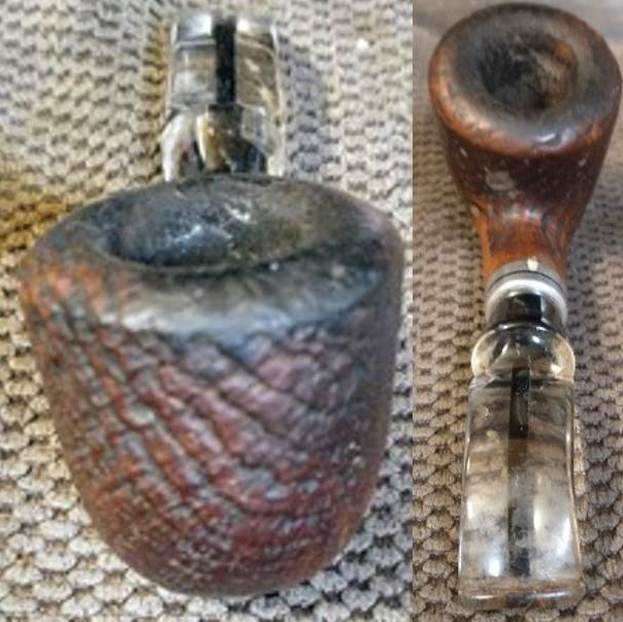
I reamed and scraped the chamber, then sanded with 60-grit paper and scrubbed it and the shank with more Everclear.
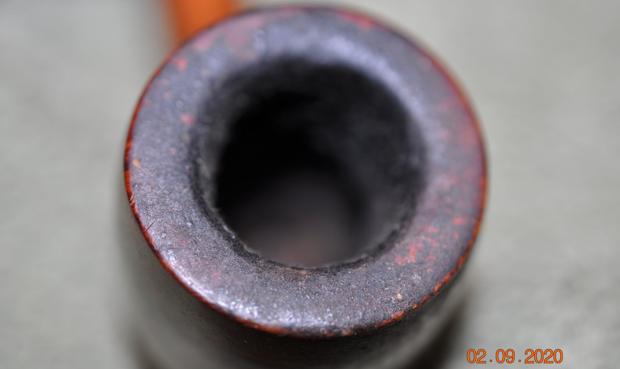
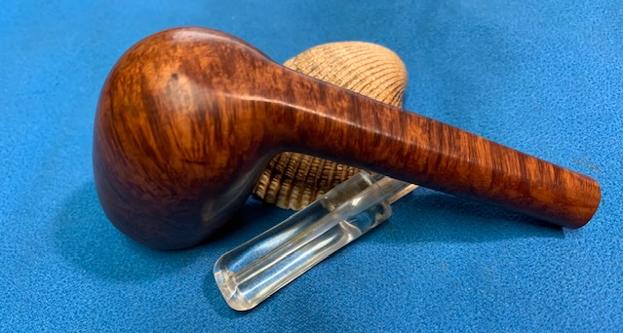
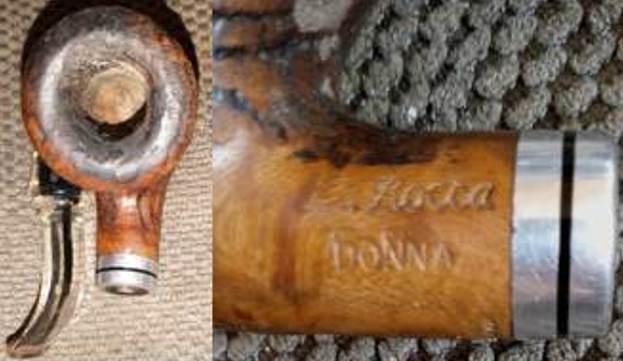
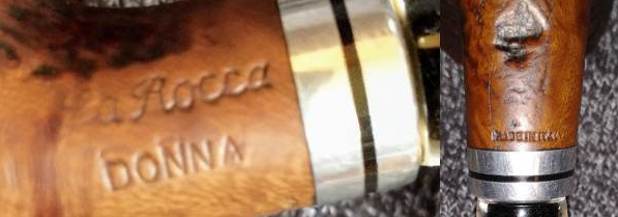
Using 400-grit paper on the rim made it clear that, once again, my roommate’s propensity for inflicting violence on helpless, loyal pipes had ruined it, short of an ad lib sandblast effect. I did that once on a pipe that had nothing to lose and even surprised my old mentor. He had the audacity to look as if he doubted me! At any rate I liberated Donna here for someone more loving. Deciding on a smooth finish for the rim, I went down to 60-grit followed by a 120/180 pad, 220, 320, 400, 600 and 1000. 
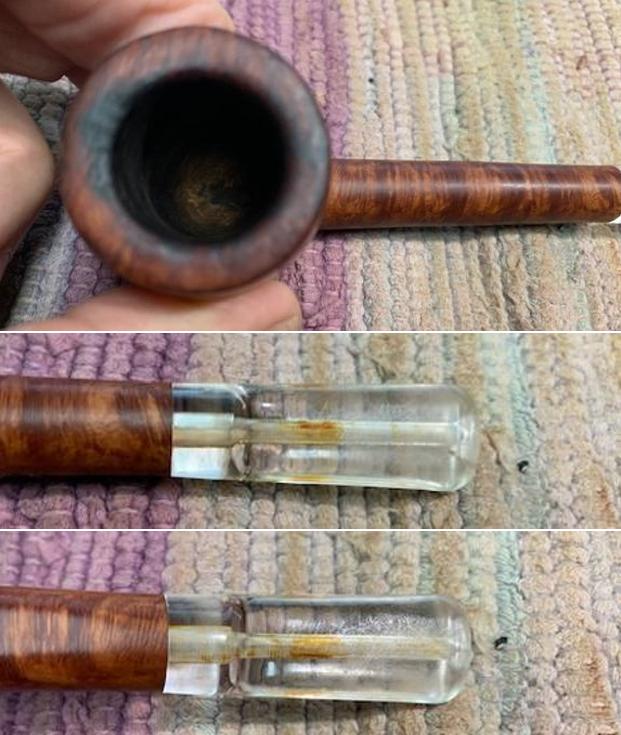
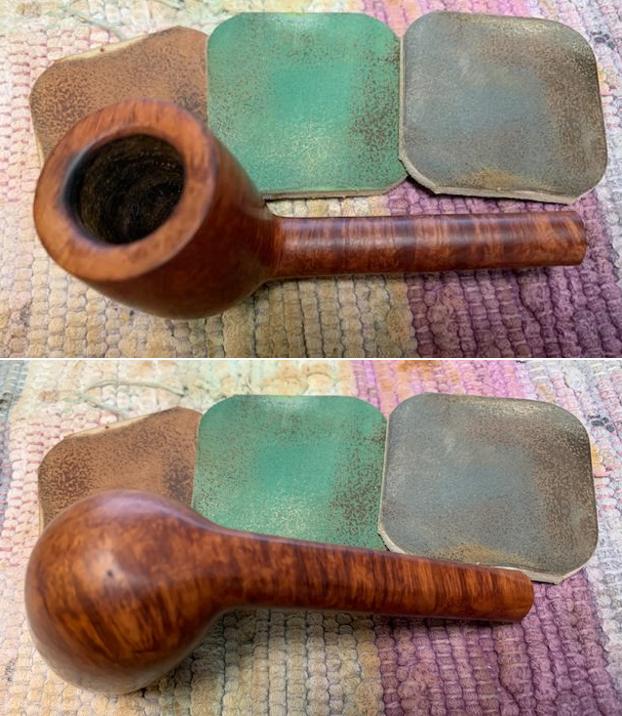
Now, to add injury to insult to the stem, I boiled more Everclear through the pipe in a retort.
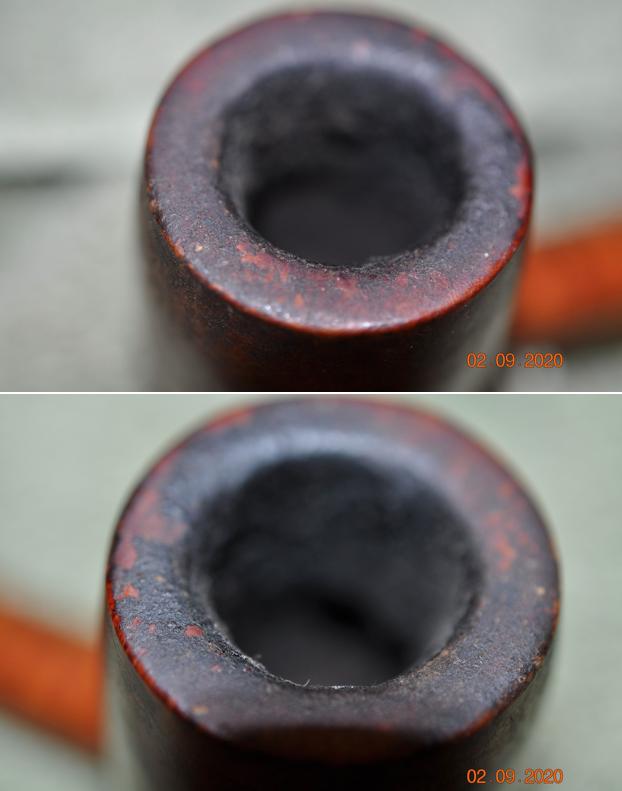
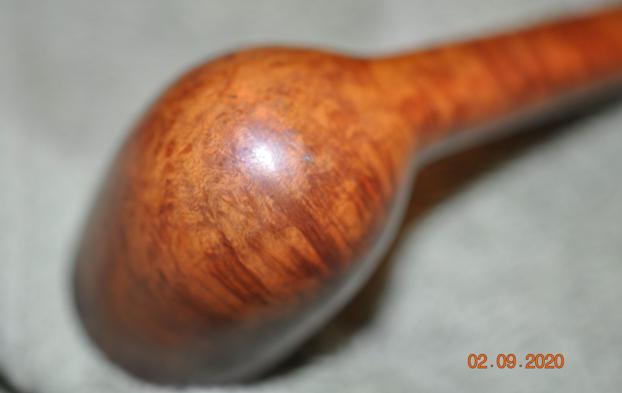
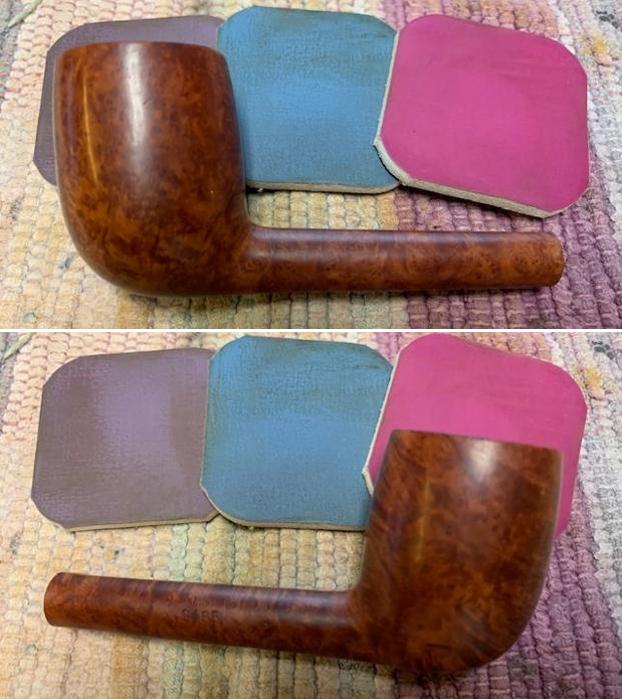
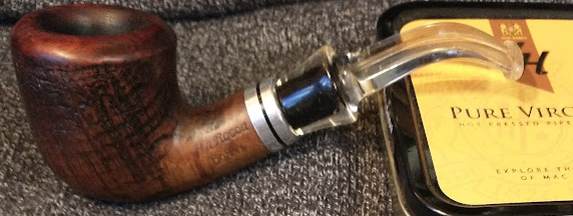
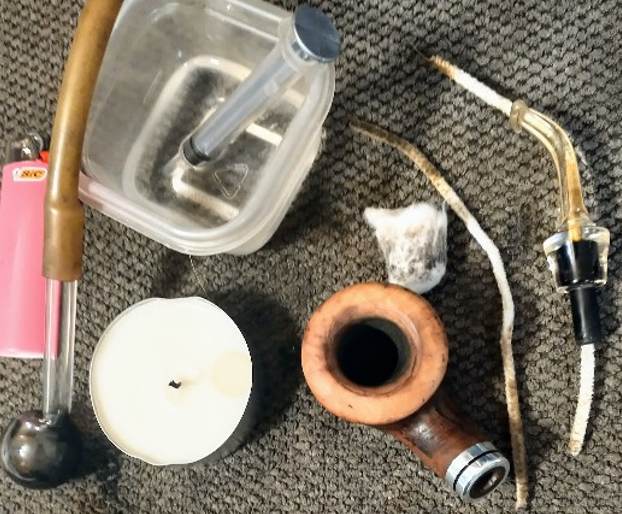
Afterward, I found Steve’s blog and cringed as I read it.  I micro meshed the rim, stained it with Fiebing’s British Tan leather dye and buffed off the char with 3600 and 4000 micro mesh. 
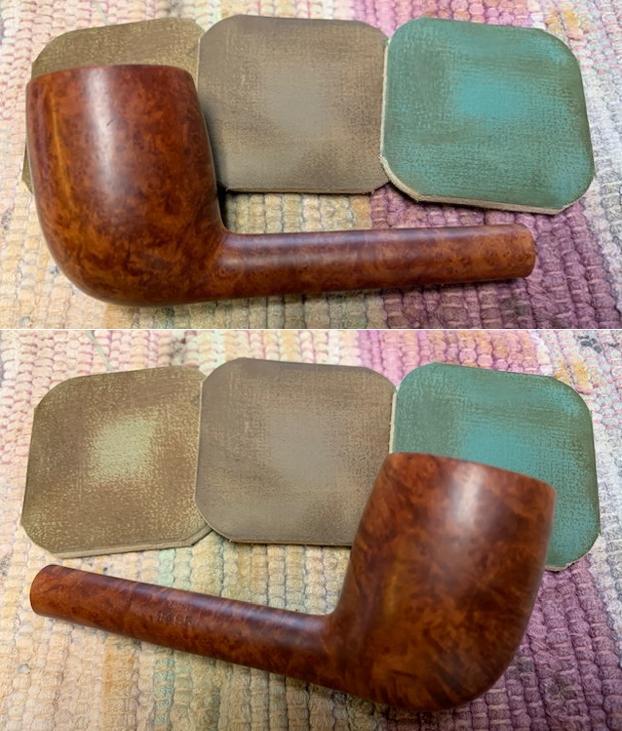
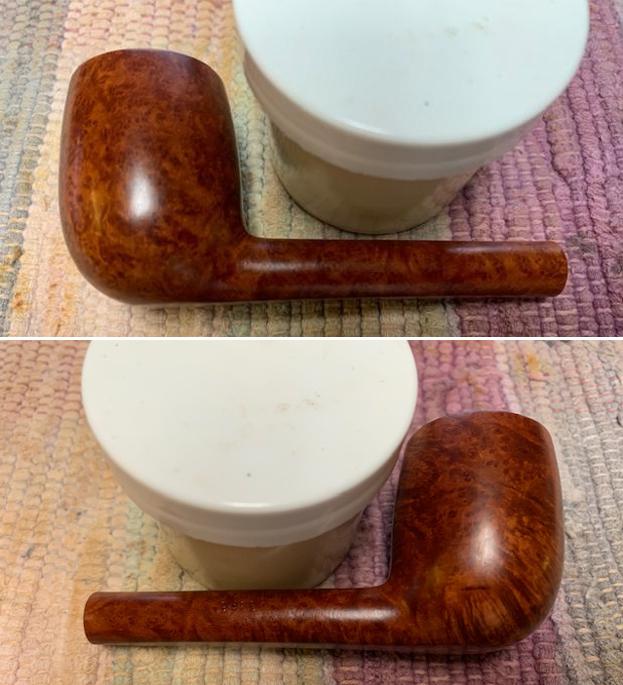
I applied Decatur Pipe Shield.
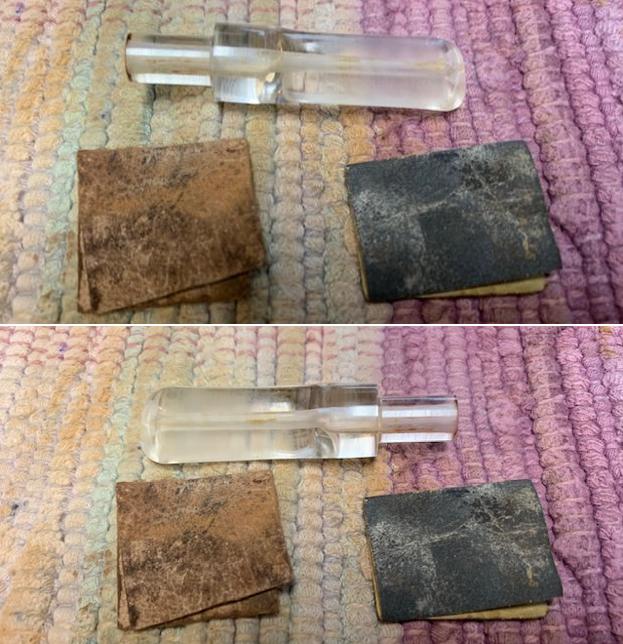
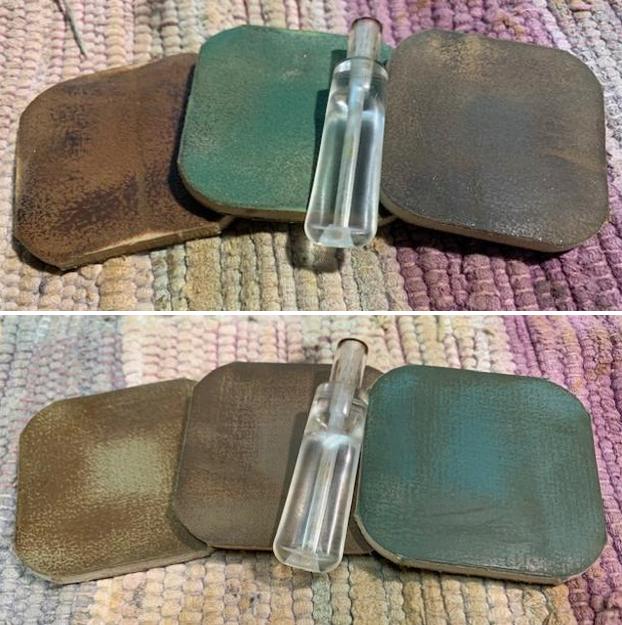
I found a close equivalent to soft scrub for the stem with some generic gloopy stain remover. It did no harm and even helped a tiny bit, and it did a remarkable job of making the outside of the Perspex sparkle with no other effort. 
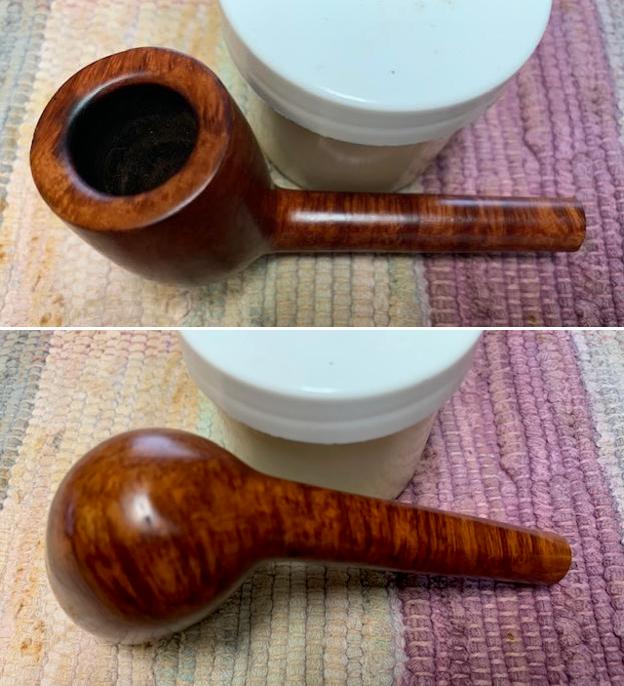
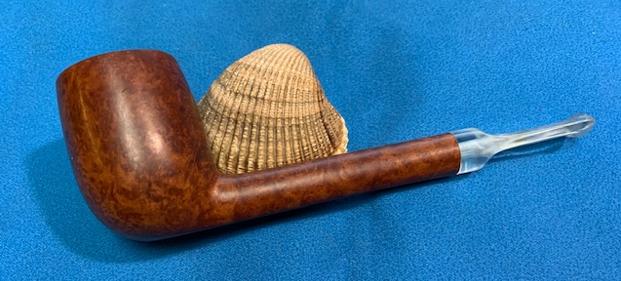
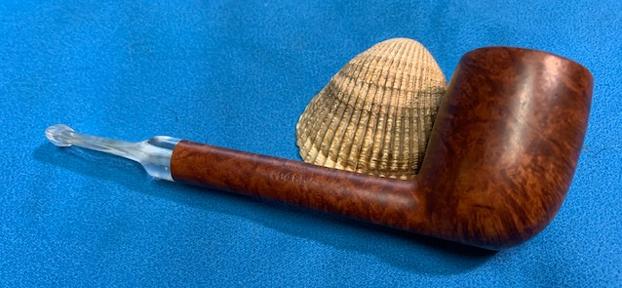
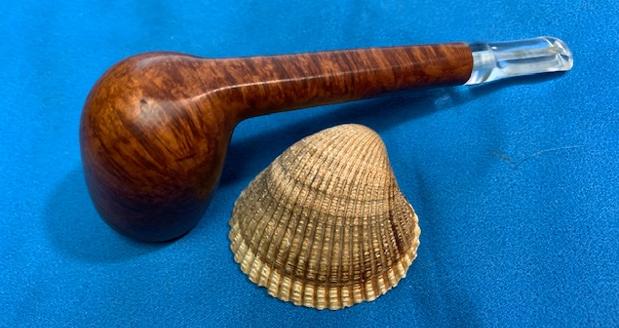
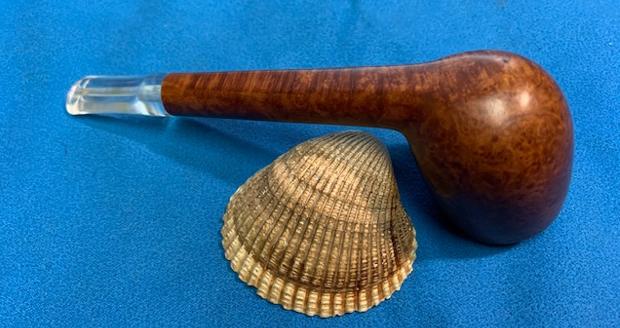
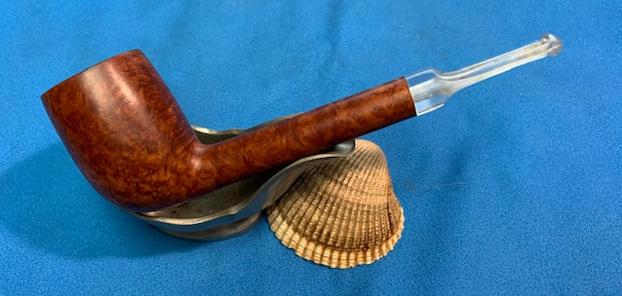
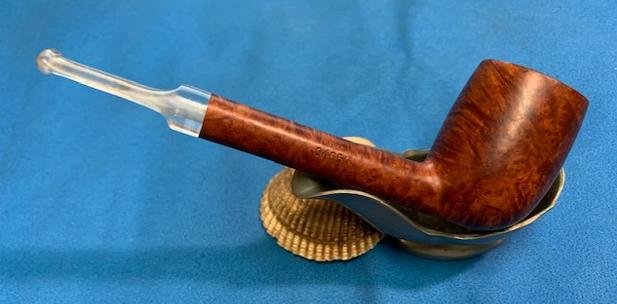
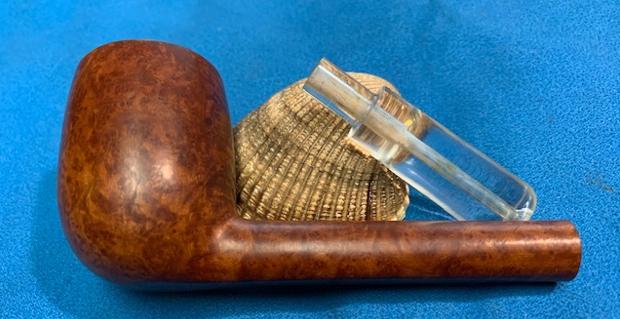
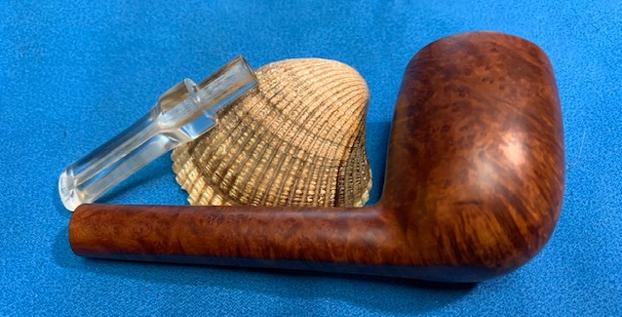
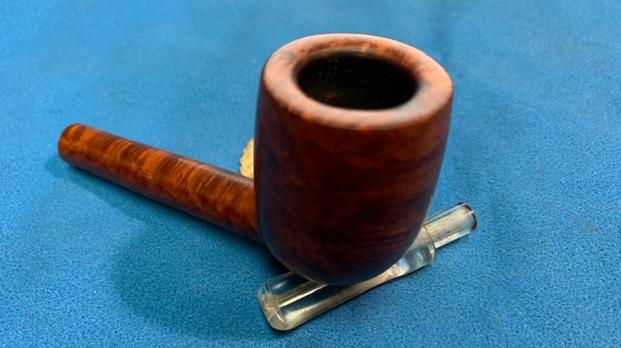
In the end, this La Rocca turned out nicely.  But now my Donna will surely leave me. SOURCE
https://rebornpipes.com/2016/07/08/a-collection-of-methods-for-cleaning-clear-perspex-stems/comment-page-1/#comment-35918

There is something about this French Made 9465 Liverpool that just grabs me


Blog by Steve Laug

Sometimes when you are pipe hunting there is one that just grabs you. That was the case with this pipe as well as several of the previous pipes. It is a classic Liverpool shaped pipe with a clear Perspex stem. We have picked up a lot of pipes over the years, whether GBD or others that have had either the clear Perspex stem or a clear acrylic stem we obviously are attracted to the unique look of them. We picked this little pipe up from a fellow in Brazil, Indiana, USA early in 2020 and are finally getting around to working on it. The pipe was stamped on the right side of the shank and reads France [over] the shape number 9465. The shape number points to a French Made GBD pipe as does the stem but there is no GBD logo on either the stem of the shank of the pipe. It was in filthy condition. The bowl was thickly caked and there was a thick lava overflow in the rim top. It was easy to assume there was some darkening and burn damage under the grime but the cleaning would reveal the full story. The briar was very dirty with grit and grime ground into the surface. The clear Perspex stem was dirty and had darkening from tobacco stains in the airway from the tenon to the button. There were light deep tooth marks and chatter on the top and the underside of the stem near the button. Jeff took photos of the pipe before he did his clean up on it. Jeff took photos of the rim top and the stem to show the condition of the pipe when we received it. You can see the cake in the bowl and the lava on the rim top. It is hard to know the condition of the rim edges with certainty until the pipe is clean. The stem is Perspex and has staining from the tobacco in the airway in the tenon and stem. There is chatter and light tooth marks on both sides near the button. He took photos of the sides of the bowl and the heel to give an idea of the shape and the condition of the briar around the bowl. It really is a nicely shaped pipe that has classic charm and elegance.The pipe is stamped solely on the right hand side of the shank and does not appear to have any buffed out or partial stamping anywhere else on the pipe. It clearly reads France [over] 9465 as noted above. I am still thinking it is a French GBD but the research that follows will tell.I turned first to Pipedia to read about the time frame when GBD moved from Paris/St. Claude France to England (https://pipedia.org/wiki/GBD). That would help to narrow down the date the pipe was made. I quote the pertinent information from the article below.

There is a very simple explanation for GBD’s program to turn more “British”: GBD became a British company soon after the turn of the century! In 1902 Marechal and Ruchon sold GBD to A. Oppenheimer & Co. in London. Charles Oppenheimer had founded this successful trade business in 1860 as an import-/export house. His brothers David and Adolphe and brother-in-law Louis Adler soon joined him. Adolphe took over when Charles went to Germany as British ambassador. Briar pipes were among the first products traded. The business relation to GBD in Paris began as early as 1870. Being the most important customer in the English speaking world, Oppenheimer & Co. were designated as sole distributor for Great Britain, the USA and Canada in 1897. Especially Adolphe Oppenheimer had a burning interest in the pipe business, and Louis’ son James Adler shared that. He should play the most important role in the amicable merger of GBD. A. Marechal, Ruchon and Cie. in Paris was now Marechal, Ruchon & Co. Ltd. (see Marechal Ruchon & Cie. page) – a British firm with four directors: Adolphe Oppenheimer and James Adler had their seat in the head office in London while Auguste Marechal and Ferdinand Ruchon went on leading the GBD factory in the Rue des Balkan in Paris, which was considerably extended and modernised. Ruchon acted as CEO.

At the same time when the negotiatios with GBD started Oppenheimer also acquired two pipe factories in Saint-Claude: Sina & Cie. and C.J. Verguet Freres. Merging them a huge plant came into being that was thoroughly reconstructed and reorganized. The management was headed by Lucien Verguet. This new Saint-Claude factory was ready to operate in 1906. Beside it’s very own commercial activities in pipe production it’s main task was to supply prefabricated bowls.

Simultaneously Oppenheimer started to build a pipe factory in London. It was opened in 1903, but the forecasts had been over-optimistic for it’s capacity could not be utilized to the full until World War I. Things changed as the French pipe factories lacked more and more workers who were called to the front. In 1916 the ledgers registered that 18,000 of 27,000 dozens bowls manufactured in Saint-Claude were determined via GBD Paris for GBD London. Wherewith London had become the more important location.

After the war, GBD continued production both in London and in Paris. London GBDs mainly went into the national trade and as well into the British Empire and the USA. Paris on the other hand served the French and the other European markets. The location of the factories influenced the GBD history furthermore in the future although later on the products of both countries occasionally were marketed side to side to match special market requests.

Now I knew that it probably came post WWI when the French side of the company served the European Markets. There is no indication of the pipe being made in St. Claude so my thinking it is a French made pipe that at least entered the market through Paris.

I followed the links on the article to the GBD shape numbers article to link the shape stamp to GBD (https://pipedia.org/wiki/GBD_Shapes/Numbers). Sure enough the 9465 was a GBD shape number and it matches the pipe I am working on. I have included a screen capture of the section on the shape chart below.I have to say that once again I was looking forward to what Jeff had done to this French Made GBD Liverpool pipe when I took it out of the box. It had shown such beauty through the grime so I was quite sure it would be stunning. He reamed the bowl with a PipNet pipe reamer and cleaned the remnants of cake back with a Savinelli Fitsall Pipe Knife.  He scrubbed the bowl with Murphy’s Oil Soap and a tooth brush to remove the grime and oils. He cleaned the internals of the shank with pipe cleaners, cotton swabs and alcohol to remove all of the tars and oils there. He scrubbed the interior and the exterior of the stem with Soft Scrub. He was able to remove much of the tobacco darkening on the inside of the stem. There is still some on the tenon and the middle of the airway that I will need to work on. He rinsed off the cleaner with warm water and wiped the bowl and stem down with a light coat of olive oil to rehydrate both. The pipe really was quite stunning. You can see the burn mark/charring on the front top and inner edge of the bowl but it does not lessen the beauty of the pipe. I took close up photos of the stem and the rim top to show both how clean they were and what needed to be addressed with both. The bowl had some burn damage on the front top and inner edge. The stem looked better but the tobacco staining in the airway and tenon were bothersome to me. The tooth chatter on both sides was still present. I would need to work on those issues with the stem to bring it back.I took another photo of the stamping on the shank side. You can see how clear and readable it is.I decided to addressing the burn damage to the front inner edge and rim top. I used a folded piece of 180 grit sandpaper to smooth out the damage and work on the inner edge bevel to minimize the burn damage.There was a deep gouge on the right side of the bowl. I filled it in with some clear CA glue and when the repair cured I sanded it smooth with 220 grit sandpaper to blend it into the surface. I polished the repair and the rest of the briar with micromesh sanding pads – wet sanding with 1500-12000 grit pads. I wiped the briar down after each pad. The grain began to really come alive through the polishing. I worked some Before & After Restoration Balm into the surface of the briar of the bowl with my finger tips. The product is incredible and the way it brings the grain to the fore is unique. It works to clean, protect and invigorate the wood. I set the bowl aside and turned my attention to the stem. The stem had quite a bit of residual stain in the airway and on the tenon interior. The picture to the left shows the remainder in the airway. I forgot to take a photo of the tenon before I started working on it.
I used small round and oval needle files to work over the inside of the airway. I entered from the tenon end and worked the back and forth and around to remove the remnant and smooth out the walls of the airway. I have found that often the drilling on the stem is rough on the inside and it collects this debris and even if it looks clean there is tar trapped in the valleys of the drilling. The files smoothed it out very well. I followed that with pipe cleaners and warm water to remove the dust from the filing. The photos below show the files and the stem as I worked on it.I sanded out the tooth marks and chatter on the stem surface with 220 grit sandpaper and started the polishing with 400 grit wet dry sandpaper.As I sanded the stem I found a tooth mark mid stem on the underside. I filled it in with clear CA glue and when it cured sanded it smooth with 220 and 400 grit sandpaper. Once it was polished it would blend in perfectly.I polished the stem with micromesh sanding pads – wet sanding it 1500-12000 pads. I wiped it down with Obsidian Oil after each pad to protect it and preserve it. I polished it with Before After Pipe Polish – both Fine and Extra Fine. I finished the polishing with a final coat of Obsidian Oil. I am really happy with the way that this GBD French Made Liverpool 9465 turned out. It really is a great looking pipe with character. The Perspex mouthpiece is a unique feature of this pipe and I was able to remove much of the staining on the inside of the airway. The grain really came alive with the buffing. The rich brown stains of the finish gave the grain a sense of depth with the polishing and waxing. The grain really popped. I put the stem back on the bowl and carefully buffed the pipe with Blue Diamond on the buffing wheel using a light touch. I gave the bowl and the stem multiple coats of carnauba wax on the buffing wheel. I buffed the pipe with a clean buffing pad to raise the shine. I hand buffed the pipe with a microfiber cloth to deepen the shine. The finished GBD Made Liverpool really is a beauty and feels great in the hand and looks very good. Give the finished pipe a look in the photos below. The dimensions of the pipe are Length: 5 ¼ inches, Height: 1 ¾ inches, Outside diameter of the bowl: 1 ¼ inches, Chamber diameter: ¾ of an inch. The weight of the pipe is 33 grams/1.16 oz. The pipe will be going on the rebornpipes store soon. It will be in the section on French Pipe Makers if you would like to add it to your collection.Thanks for reading this blog and my reflections on the pipe while I worked on it. It was a fun one to work on!

Starting Again from Golden, Colorado – A GBD Meerschaum Lined 9437 Blasted Pot


Blog by Dal Stanton

Leaving life in Sofia, Bulgaria, and setting up a new life in Golden, Colorado, has not been without its challenges.  After living in Europe for over a quarter of a century, adjusting to life in the US has been every bit as difficult as when my wife and I left for Ukraine many years ago with 5 children in tow.  All those children are now married and have added 6 grandchildren for us to dote on!  When I packed up The Pipe Steward worktable in May and shipped it along with all our earthly belongings to Colorado USA, in an ocean-going and railroading 40’ container, I would not have guessed it would be November before I restored my next pipe.  The container arrived the end of August and the unpacking and reestablishing of a new home-base began.  I am thankful to God that through all our travels – airplanes and airports, we have remained well during uncertain times with pandemic on everyone’s minds.  My first ‘for USA’ pipe purchase came from Steve’s rebornpipes worktable.  A beautiful Butz Choquin Maitre-Pipier Deluxe that Steve had restored caught my eye and from Vancouver and it was waiting in Golden when we arrived from Bulgaria to begin our 14-day quarantine in June.  I enjoyed good fellowship with this classy BC during those initial days in Golden – Thanks Steve! After our container arrived, it has taken some time to unpack and settle – we’re still unpacking and organizing!  It was also a bit of a challenge to set up the worktable area. In Sofia, in our compact 10th floor flat, everything was arranged so the work process flowed.  The challenge was to recapture the ‘magic’ of that workspace here in Golden.  Even though I could theoretically have expanded my workspace adding larger, more powerful tools, I’m used to the Dremel being my main tool for polishing and buffing because of the former smaller workspace in Sofia.  So, staying with the familiar compact space works for me!  I decided to take a picture of my Golden workspace and include my first project, the GBD Meer Lined, that is on the same Bulgarian design work cloth which will continue to provide the background for The Pipe Steward restorations 😊.When pipe men and women commission pipes from my online For “Pipe Dreamers” Only! collection, I ask them to be patient in waiting for their chosen pipes to work through the queue to reach the worktable.  Daniel has been more than patient!  He had commissioned 7 pipes (!) when we were still in Bulgaria and they reached the top of the queue when it was time for me to pack up in May.  Daniel shared with me that he’s from the Green Bay area of Wisconsin and follows rebornpipes.com and the Pipe Restorers Facebook group.  After finally getting setup in Golden and ready to pull the trigger, I emailed Daniel to make sure he was still a “go” with the pipes he had commissioned.  His response came quickly, and he was still good to go!  Here are his 7 – a nice selection of pipes all benefitting the work we continue to support in Bulgaria, the Daughters of Bulgaria – helping women and girls who have been trafficked and sexually exploited. Looking more closely at the GBD, I took more pictures of the first of Daniel’s commissions:  The nomenclature is stamped on the underside panel.  On the left side is the GBD incased in an oval [over] MEERSCHAUM LINED.  To the right of this is stamped, LONDON ENGLAND [over] 9437, the shape number which points to the designation of a Pot shape (Jerry Hanna’s GBD Shapes list on Pipedia).  The straight stamping of the COM, LONDON ENGLAND points to a pre-Cadogan era GBD which would be pipes made up to 1981.  This dating is also confirmed by the brass inlaid rondel which were discontinued after 1981 after the Comoy’s merger.  GBD’s history is involved and I enjoy a refresher with Jerry Hanna’s, “A Brief History of GBD” reprinted on Pipedia:

The company was founded in Paris France in the 19th century by Ganeval, Boundier and Donninger who were no longer associated with the company by the turn of the century. By the time they left the GBD name was well established and thus retained. In 1903 an additional factory was built in England and ran by Oppenheimer. The Paris factory moved to Saint-Claude in 1952. Since 1981 the majority of GBD pipes come from the English factory. At about that same time GBD merged with Comoys, since then all production for both GBD and Comoy comes from a single factory.  (I wasn’t kidding when I said it was brief! )

The GBD Meerschaum Lined Pot is an attractive pipe.  The only real issues that I see are addressed in cleaning at this point.  The blasted finish is in great shape and is set off very nicely with the Perspex – acrylic stem.  GBD used an early patented acrylic called Perspex before the merger in 1982 which is attractive except for the stained airway.  The sad reality of Perspex is that it is a bear and a half to clean the stain that builds up in the stem’s airway.  I learned from Steve’s tutelage some time ago that if one uses alcohol to clean this early GBD acrylic, it can result in small cracking or crazing.  I did a quick search on google to show an example of crazing.The alternative to cleaning Perspex and is a safer approach is to use lemon juice or a soft scrub product.  This will be the approach.  The other challenging part of this GBD restoration is to refresh the Meer lining which is totally covered with a thick cake which needs careful removal.

To begin this first restoration from my new worktable in Golden, Colorado, I focus on the Perspex stem which will take some patience to clean.  To take a conservative approach, I pour lemon juice into a plastic container and put the entire stem in for a long soak.  I’m hopeful that the natural acidic of lemon will begin the process of breaking down the staining in the airway without crazing.   With the stem soaking, I turn to cleaning the stummel.  I take a few pictures to show the Meer lined chamber. Using the Savinelli Fitsall Tool, I gently scrape the chamber removing the rough clusters of carbon buildup on the chamber surface.  I also – again, gently, scrape the canted Meer rim. Using 240 grade sanding paper, I sand the Meer rim further to clear the blackened carbon buildup.  Using a Sharpie Pen wrapped with 240 paper, the chamber is also lightly sanded to remove the carbon.  The aim of sanding the Meerschaum is not to remove the Meerschaum, but to cosmetically clean the surface. Next, using cotton buds and pipe cleaners dipped in isopropyl 99%, the internals of the stummel are cleaned.  A dental spoon is also used to scrape the mortise walls. Switching now to the externals, using Murphy’s Oil Soap at full strength with a cotton pad, cleans up the blasted surface.  After scrubbing well, the stummel is rinsed with tap water.  I’m careful to keep the water out of the chamber and the mortise, keeping the Meerschaum dry.To condition the stummel, I apply Mark Hoover’s, Before & After Restoration Balm, to the blasted surface.  I like this product which teases out the deeper tones of the briar.  After squeezing a bit on my fingers, I rub the Balm into the surface thoroughly.  It begins with a cream-like consistency then thickens into a waxy substance.  After applying the Balm over the stummel, I put the stummel aside for 15 or so minutes for the Balm to do its thing. Then, using a microfiber cloth, the excess Balm is removed, and the surface is buffed up with the cloth.Turning again to the GBD clear Perspex stem, the process of cleaning the airway took a lot of effort.  I began the process by soaking the stem in 100% lemon juice.  To use alcohol on Perspex can result in crazing – fine spider web-like cracking running the length of the stem.  Using lemon juice employs natural acids which helps in the cleaning.  After soaking overnight, bristled pipe cleaners were employed.  I wasn’t satisfied with the results.  Next, I drop the stem in a soak of vinegar – another natural acidic which is not pictured.  Again, overnight in the vinegar bath.The vinegar soak made some headway, but real progress waited for the next step.  Using Soft Scrub with some bleach additive did the trick, but not without much scrubbing with bristled and smooth pipe cleaners.  I believe the lemon and vinegar soaks helped breakdown the residue.  The Soft Scrub finished the work.I’m pleased with the results of a giant labor-intensive cleaning process!  Before and after pictures show the transformation. There is still some residual staining in the tenon’s airway, but overall, I’m pleased.  The bit has no tooth chatter that I can see.  I forego sanding with 240 sanding paper and jump to wet sanding the stem with 600 grade paper to smooth the acrylic and bring it back to a pristine state.  Following the 600 grade sanding paper, 0000 grade steel wool continues the cleaning and smoothing.  This also shines the brass rondel nicely.Next, the full regimen of 9 micromesh pads are used: starting with wet sanding with pads 1500 to 2400 followed by dry sanding with pads 3200 to 4000 and 6000 to 12000. Between each set of three pads, Obsidian was applied to the Perspex to condition it.  After reuniting the GBD stem and stummel, I take a picture to see the progress.  My oh my!  I’m liking what I see, and I think Daniel will as well.  Now on the home stretch, a cotton cloth buffing wheel is mounted on the Dremel and Blue Diamond compound is applied to stem and stummel at about 40% power.  After applying the Blue Diamond compound using a felt cloth, I buff the pipe to remove the compound dust before the application of the wax.After mounting another cotton cloth buffing wheel and increasing the Dremel speed to about 60% power, a light application of carnauba wax is applied to stem and stummel.  I increase the speed on the Dremel to aid the carnauba wax to heat and to be absorbed into the blasted briar surface.  Wax can collect on the rough blasted surface if this is not done.After application of the wax, a microfiber cloth is used to give the pipe a rigorous hand buffing to remove excess wax and to raise the shine.

I’m pleased to inaugurate my first restoration in Golden, Colorado, benefiting the Daughters of Bulgaria – women and girls who have been trafficked and sexually exploited.  The GBD blasted stummel is a rich burgundy and the clear, glass-like Perspex stem is a classy touch to this Meerschaum lined Pot.  As the commissioner of the GBD Meerschaum Lined, Daniel has the first opportunity to claim the pipe from The Pipe Steward Store.  Thanks for joining me!

Ben Wade’s in the House, Part 1


Blog by Joe Gibson

Not Ben Wade the U.S. politician or Ben Wade the baseball player and scout, but Ben Wade pipes. Specifically, a Ben Wade Martinique and a Ben Wade Royal Grain produced by Preben Holm in Denmark.

I first saw the Martinique and the bowl for the Royal Grain at Penny’s Little Flea Market just outside of Marion, MS two weeks ago. They were tempting targets, but I passed on them for a Preben Holm Delight. I kept thinking about the Ben Wades. Finally, the wife told me to call and see if I could buy them. They arrived two days later.

Pre-cleaning Preparation

Honestly, my first thought was, “What did I get into here?” The bowls were covered in dirt and grime.

Before Cleaning. (left) Royal Grain, (right) Martinique

The bowls had scratches and I couldn’t tell how deep they were. The good news? No heavy cake and funky, sour smells. Still, I decided that best course was a 24-hour soak in isopropyl alcohol.

The Perspex stem on the Martinique had very minor tooth chatter near the bit and was dirty. It was also stuck and took a few minutes to loosen enough to pull out. Since I planned on doing an alcohol bath, I dipped the pipe and stem in the alcohol for a few minutes and allowed me to separate the two.

The Royal Grain had its own issue which I didn’t remember seeing. The mortise still had the broken tenon of a vulcanite stem still stuck in it. I resolved this issue by twisting a drill bit into the airway BY HAND. The bit dug just enough into the vulcanite that I was able to pull the tenon out. My guess is the pipe was dropped and the stem broke off because the tenon really came out easy. Finding a new stem would be a later problem.

Both pipes have some of the plateau around the rim. The Royal Grain looked like more worn down of the two, almost like the previous owner hammered the rim on his ashtray.

As I decided earlier, I dropped both pipes into containers of isopropyl alcohol and left them alone for 24 hours.

Bowl and Airway Cleaning

After the soak, I cleaned the airway and draught hole first.  My reasoning behind working on the airway, draught hole and bowl first is simple. The cake and any residue is still saturated and soft. I think this makes any reaming I have to do easier.

Using bristle pipe cleaner dipped in the same alcohol, made relatively quick work of removing cake and residue from the airway. It also opened up the draught hole. Ten pipe cleaners later and I was satisfied with the cleanliness of the airway.

Tip #1:  I use bristle pipe cleaners for deep cleaning. Be careful on Perspex or acrylic stems as the bristles can cause some scratching in the stem airway.

After sanding with 300 and 600 Grit SandpaperFor the bowl I started with my homemade pipe knife. The biggest mistake some beginning home restorers/pipe smokers make is using a pocket knife to ream the bowl. You risk damaging the briar by using a sharp knife.  In my case, I made a pipe knife from a small folding pocket knife with about a 2-inch blade. Using my bench grinder, I rounded off the point and ground down the edge until it was almost as flat as the spine. It won’t cut paper or butter.

I should point out that I don’t ream down to bare wood but ream until the cake is thin and even all the way around. I generally finish the bowl work with 320 grit sandpaper wrapped around my index finger. This smooths out the cake even more and removes even more of the cake without damage to the briar.

Pipe Surface and Finish

One of the reasons I decided on the alcohol bath was what looked like white paint specks on the Martinique. I was hoping the alcohol would dissolve the white specks. It didn’t.  After the pipes had air dried for a couple of hours, I started working over them with 320-grit dry sandpaper.

Tip #2: Protect the stamping on the briar with painter’s masking tape before starting the sanding process.

The Martinique (top) and the Royal Grain (bottom). The Royal Grain is coated with Butcher Block Conditioner

It took a little longer on the Martinique because of the white specks and the curved areas. After wiping off the sanding residue with an alcohol wipe, a second sanding of the Martinique removed all the specks and the surface scratches.  The Royal Grain, being a more smooth, flatter surface was easier to sand.

After the initial dry sanding, I started wet sanding with 600-grit sandpaper. Let me point out something here. I make the decision to wet or dry sand a pipe based on how I see the pipe at the time. Sometimes my first step is wet sanding, sometimes I don’t wet sand until I get into the finer grits of finishing sandpaper or micro-mesh pad. The theory behind the wet sanding is that it provides a smoother, glossier finish to the wood. Whether others will agree with me or not, it works for me.

By the time I worked my way up to the 12,000 grit micro-mesh pad, I had a semi-glossy appearance and both pipes felt as smooth as glass. Normally, this is where I apply caranuba wax and buff. I went one step further and applied Howard Butcher Block Conditioner to the Royal Grain. The condition contains a food grade mineral oil, beeswax and caranuba wax. Instructions were to apply with a soft cloth and let dry for 15 minutes before wiping off the excess. I used a cotton ball for the application and let it set for probably 20 minutes. I really like the color and the way the grain popped out. I resisted the temptation to do the same to the Martinique.

Next: Which Stem for Which Pipe?

© J. Gibson Creative Services. September 5, 2018