by Steve Laug
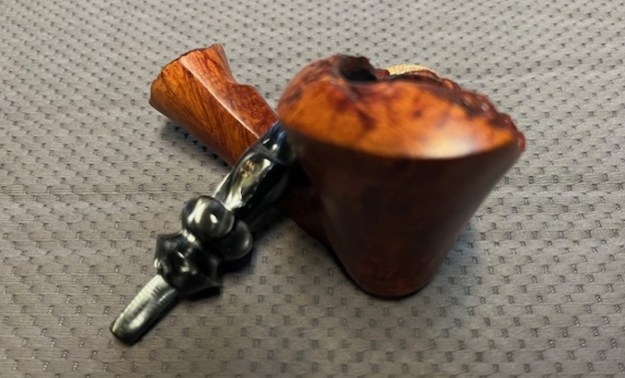
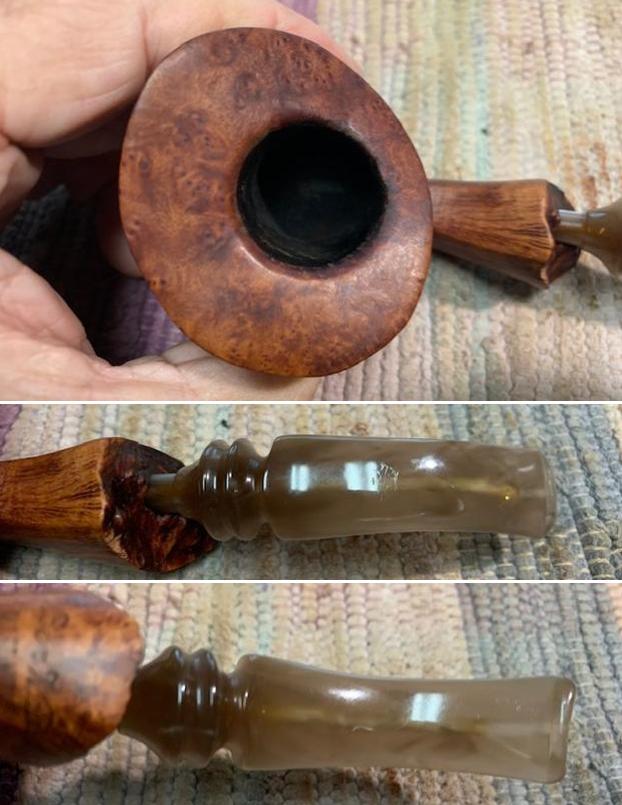
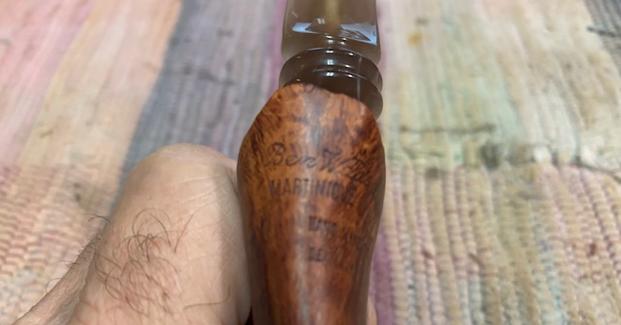
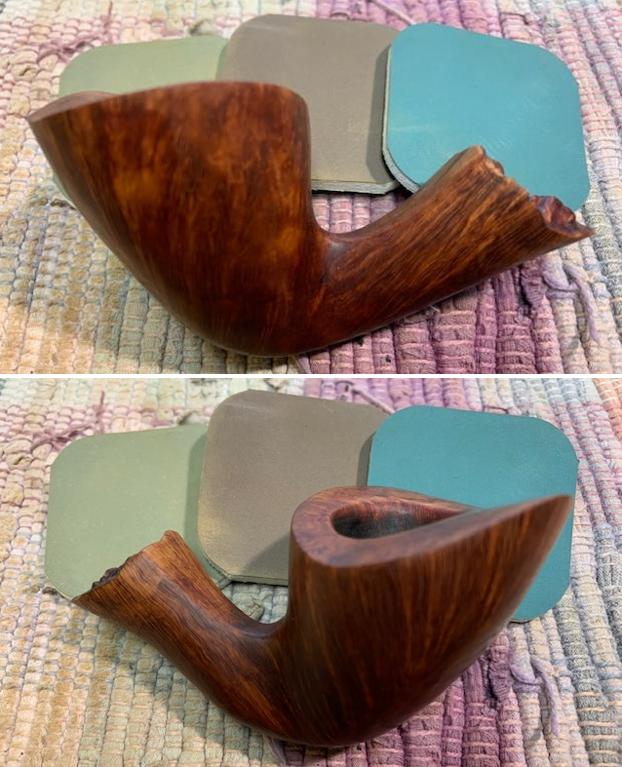
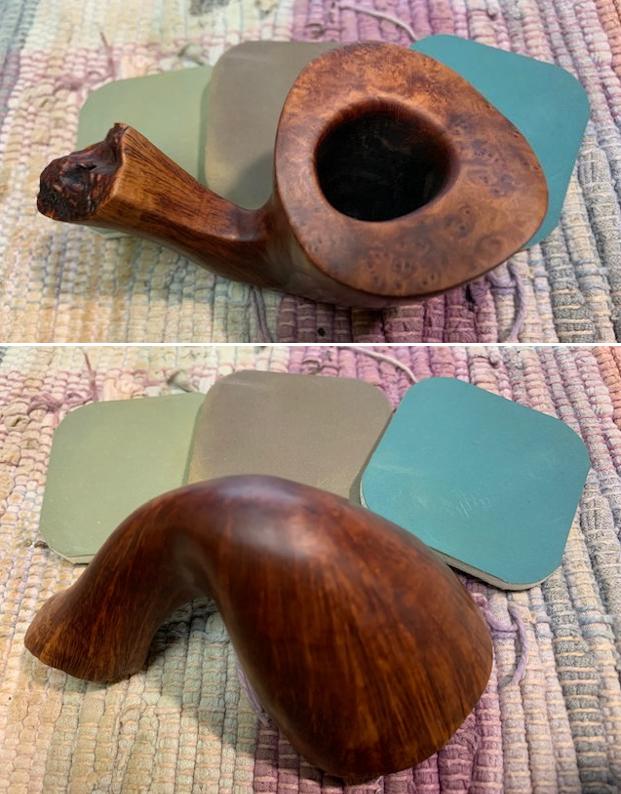
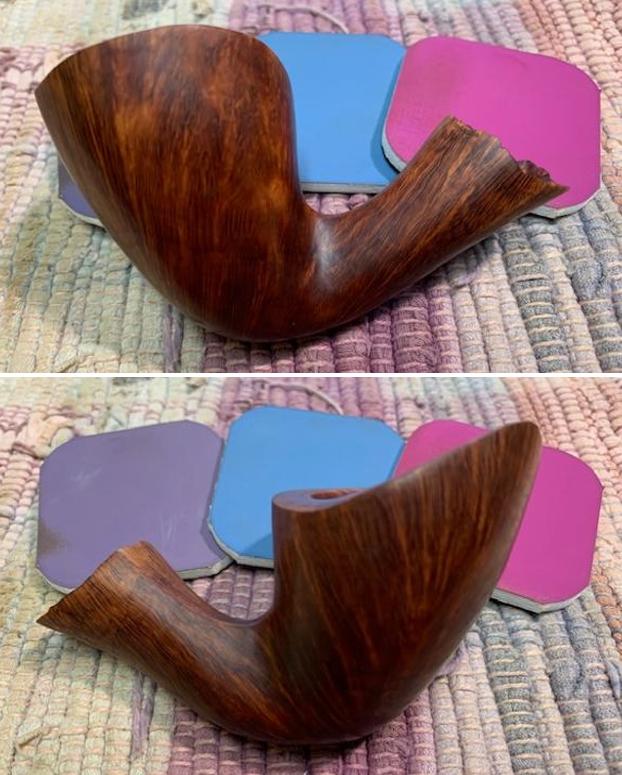
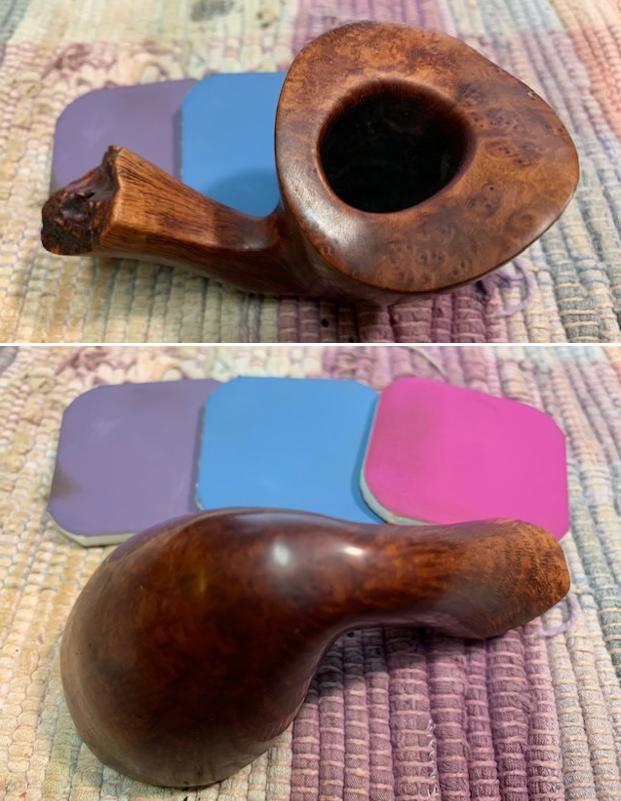
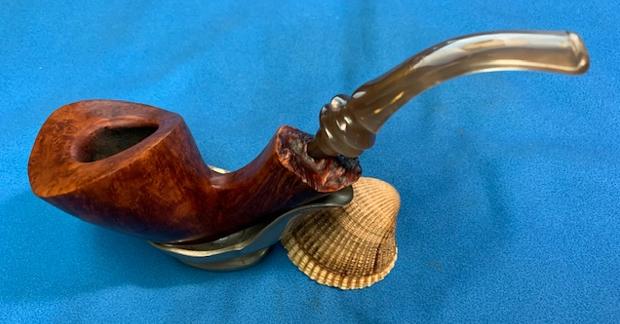
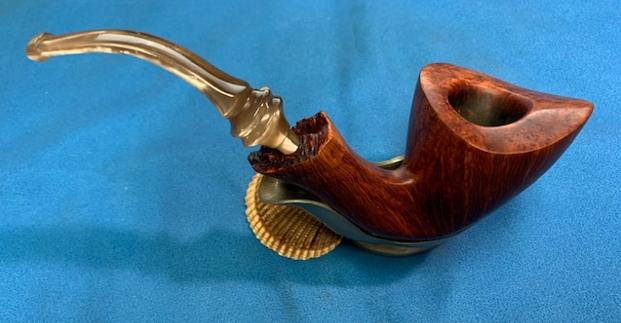
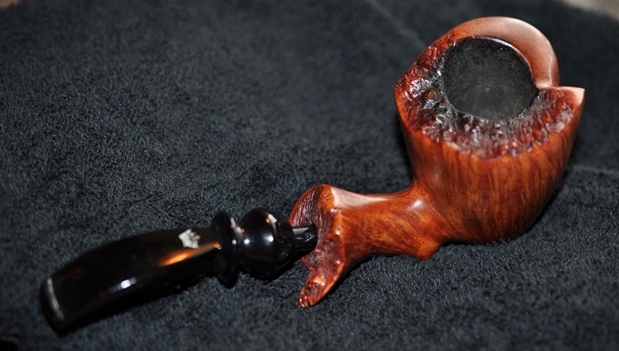
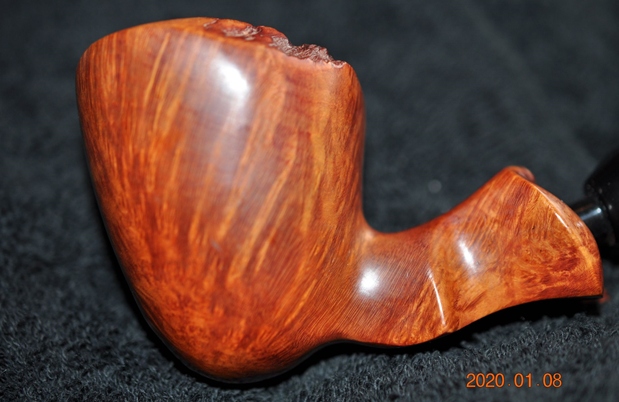
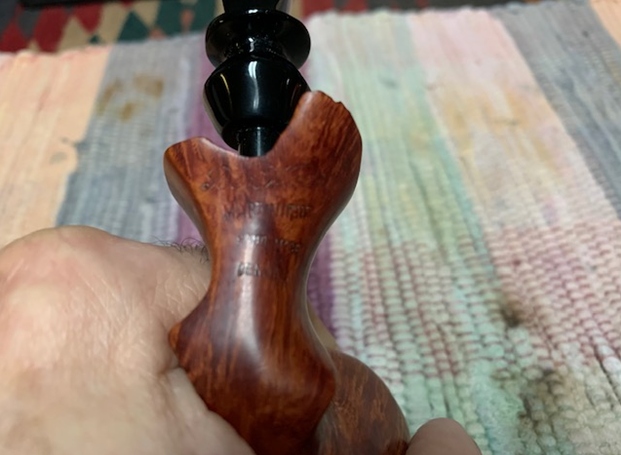
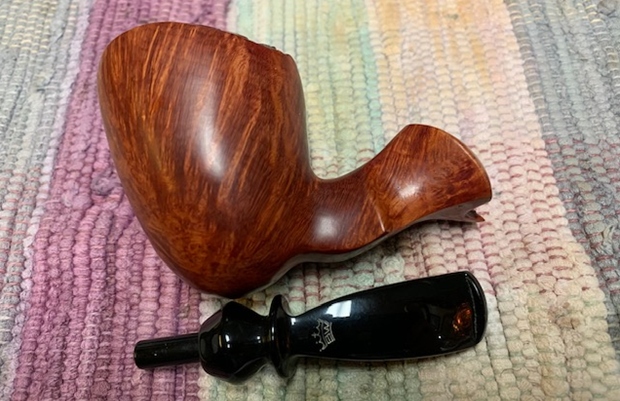
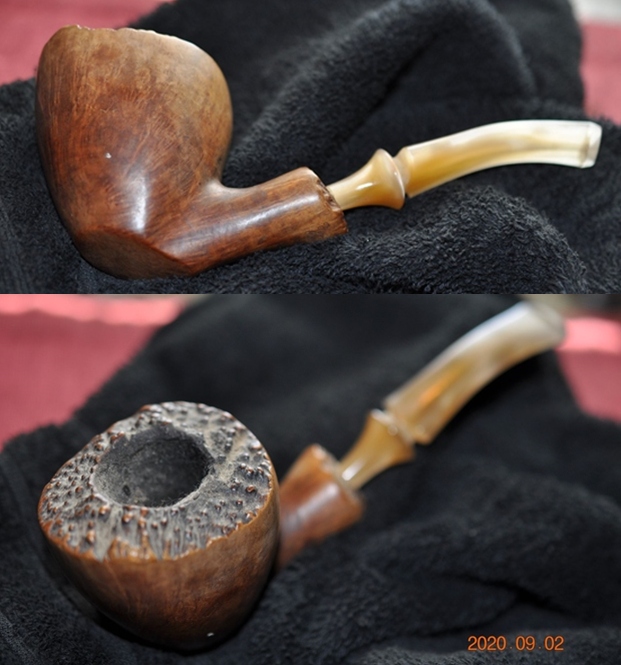
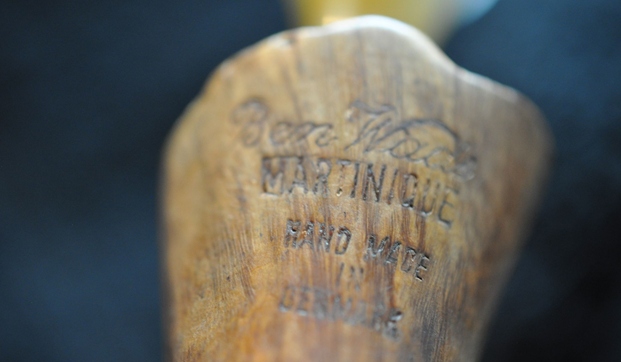
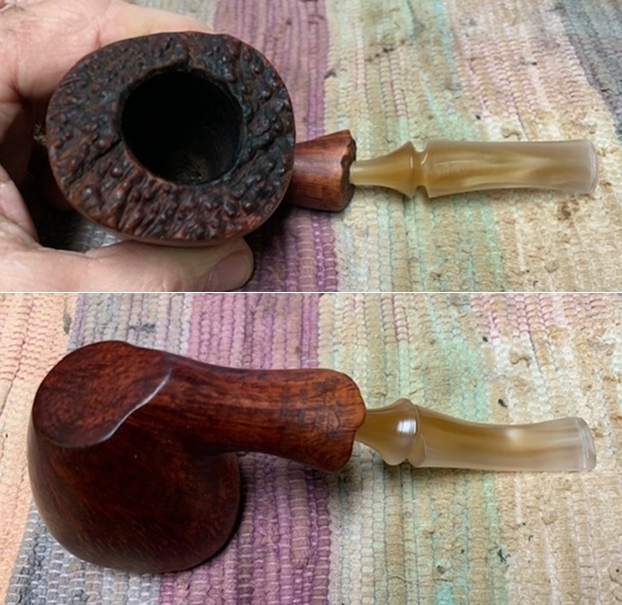
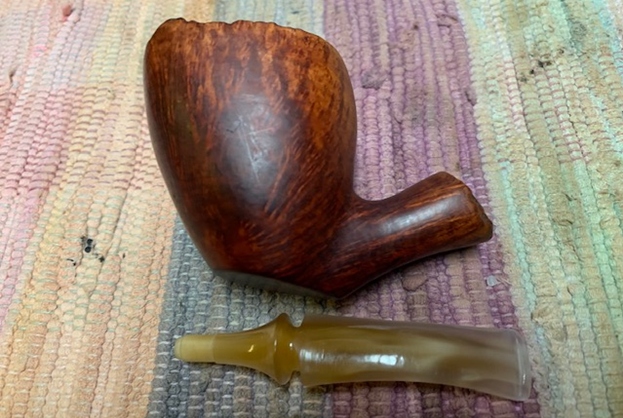
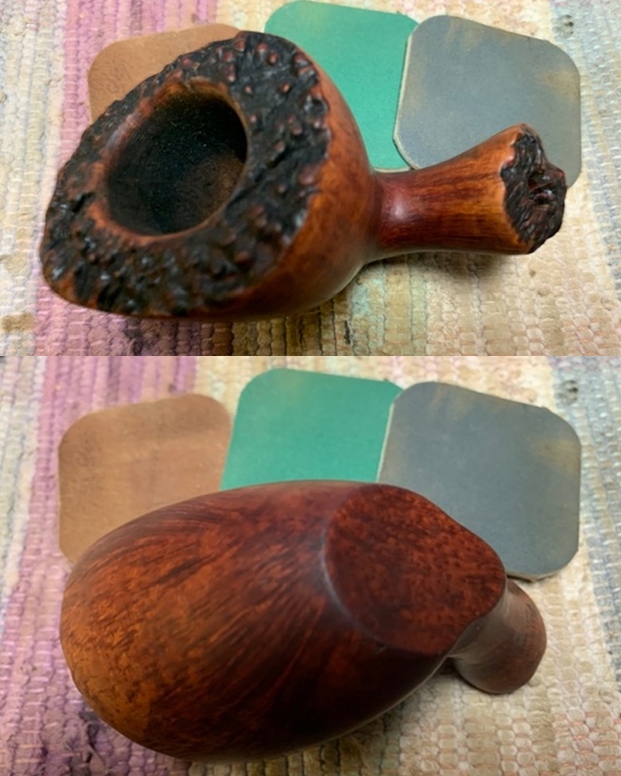
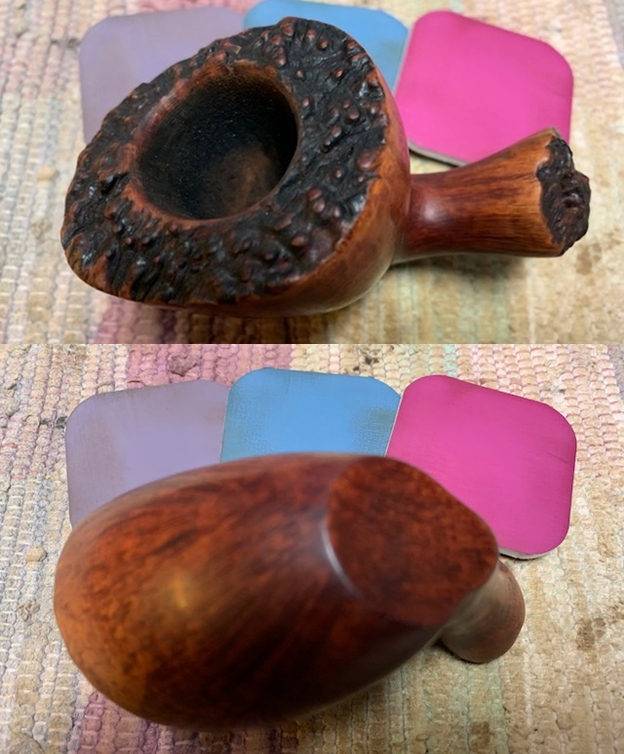
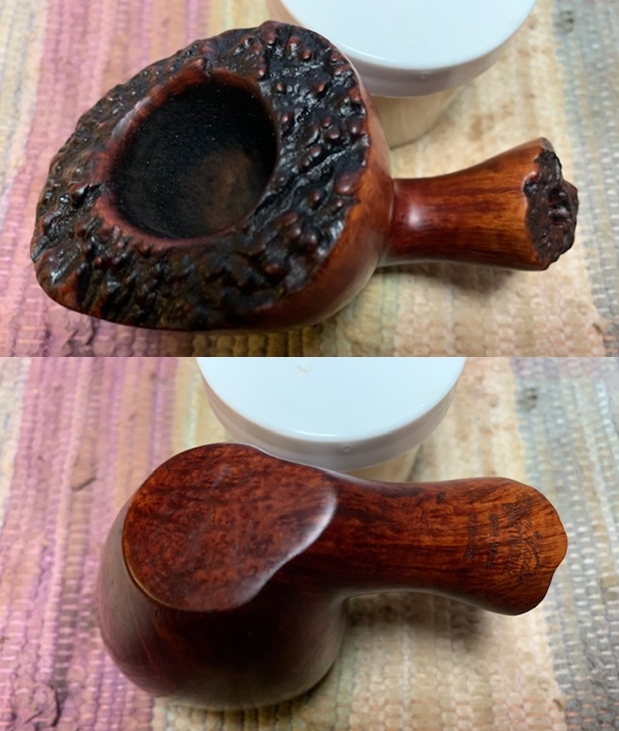
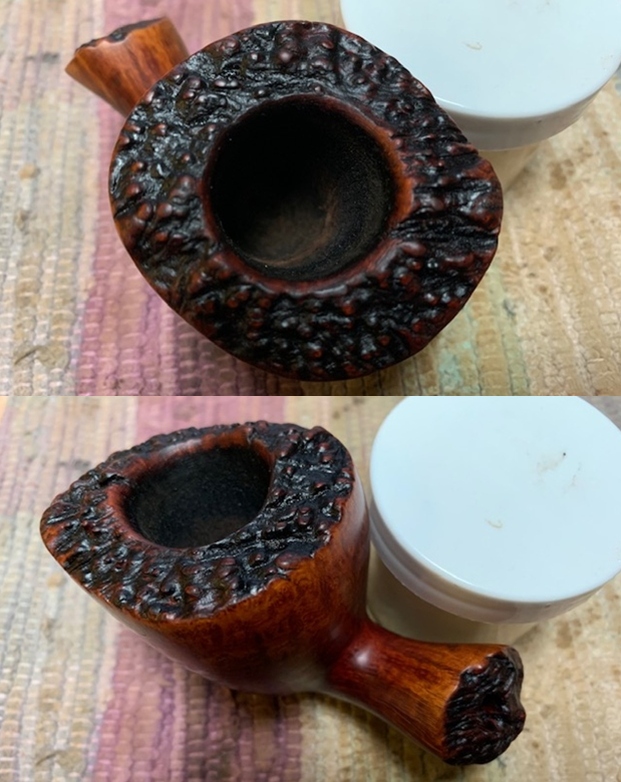
Today I am working on a Ben Wade Martinique Handmade in Denmark Freehand with silver/grey acrylic stem. Jeff and I picked it up in an estate we purchased from a seller in Santa Cruz, California, USA on 05/28/2024. It is very nice looking piece of briar and has fancy saddle stem. The pipe is stamped on the underside of the shank. It was clear and readable. It reads Ben Wade [over] Martinique [over] Hand Made [over] in [over] Denmark. The medium brown stained finish was very dirty with grime ground in the finish all over the whole bowl and shank. The mix of smooth and plateau rim top and plateau shank end are dirty with lava and darkening in the grooves of the plateau. The bowl had a thick cake and the rim top/inner edge had thick lava flowing up from the bowl. It was hard to know its full condition of the inner edge with certainty until it was cleaned. The acrylic saddle stem is was dirty and had light tooth marks and chatter on both sides ahead of the button. There was a BW Crown logo on the top of the stem. Jeff took photos of the pipe before he started his clean up work on it.
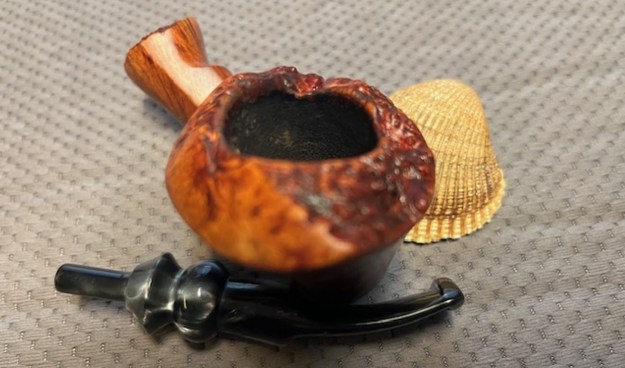
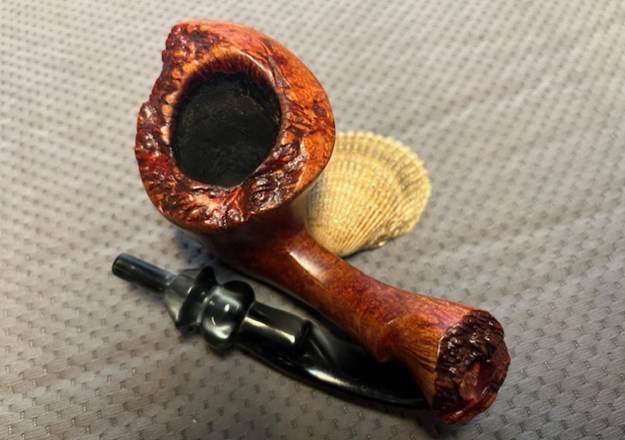
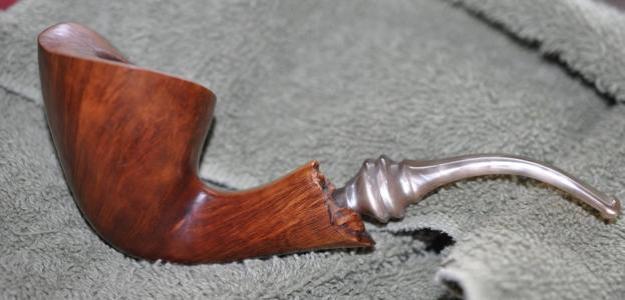
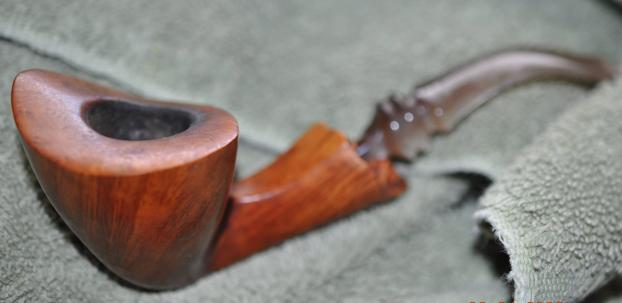
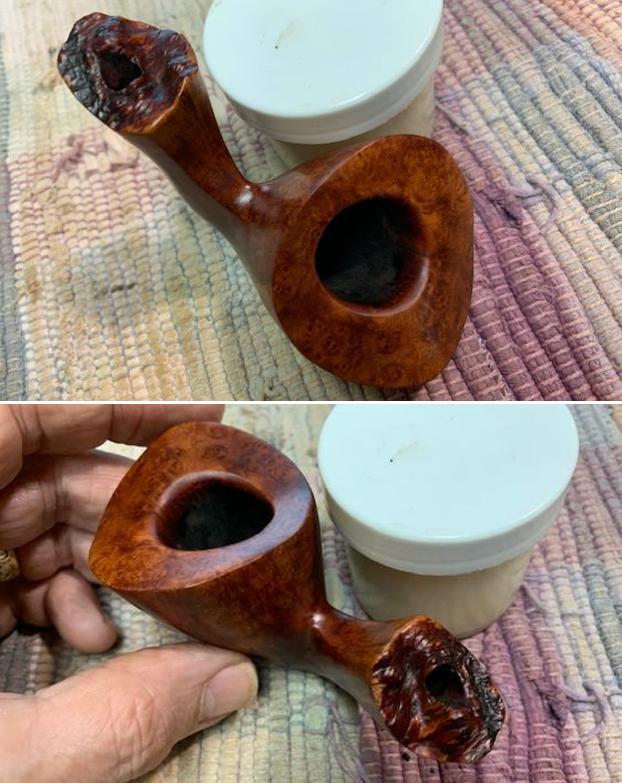
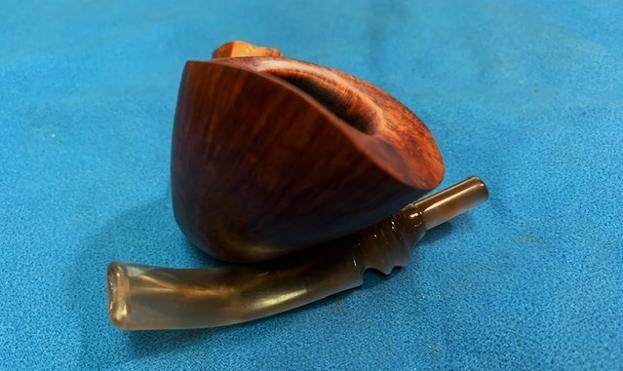
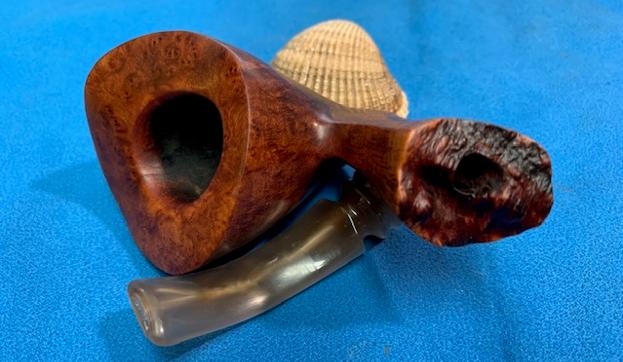
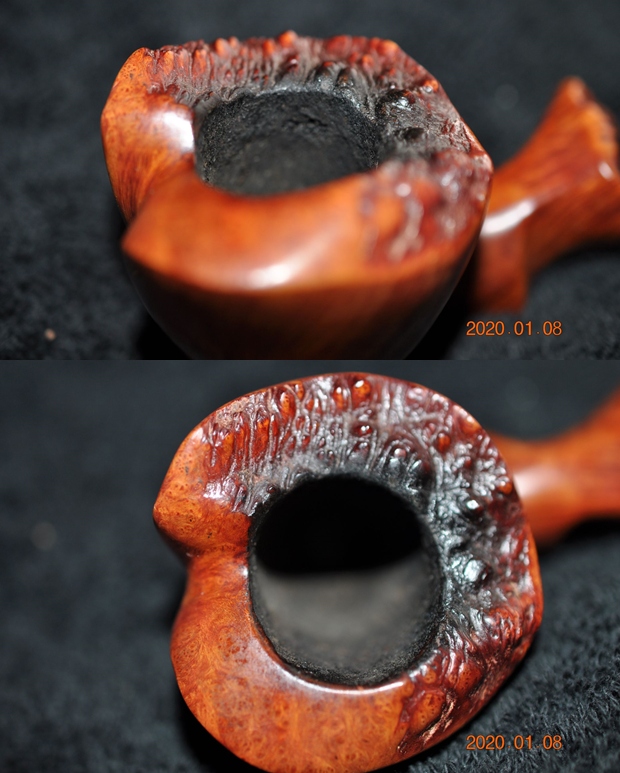
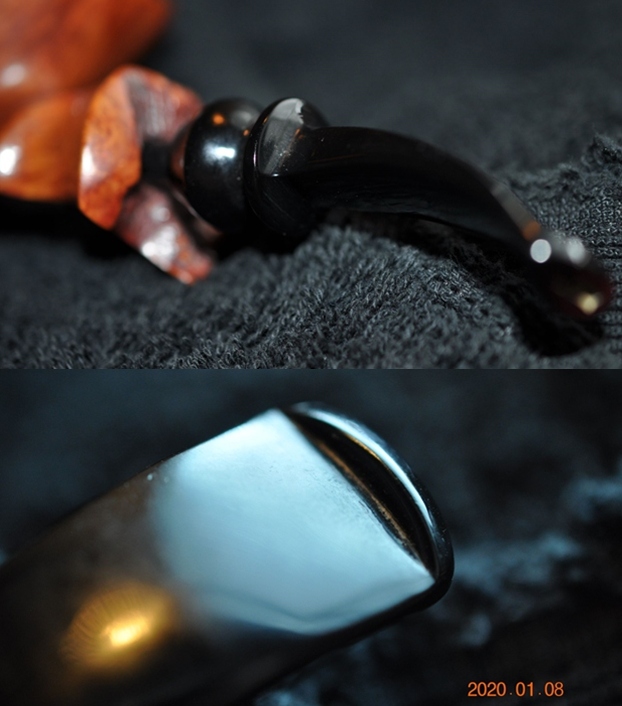
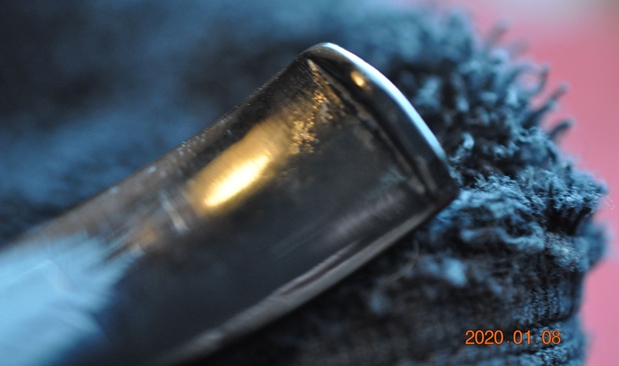
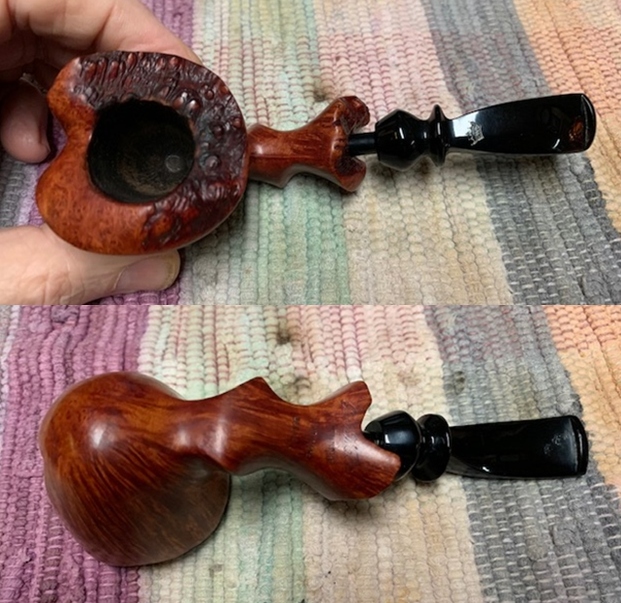
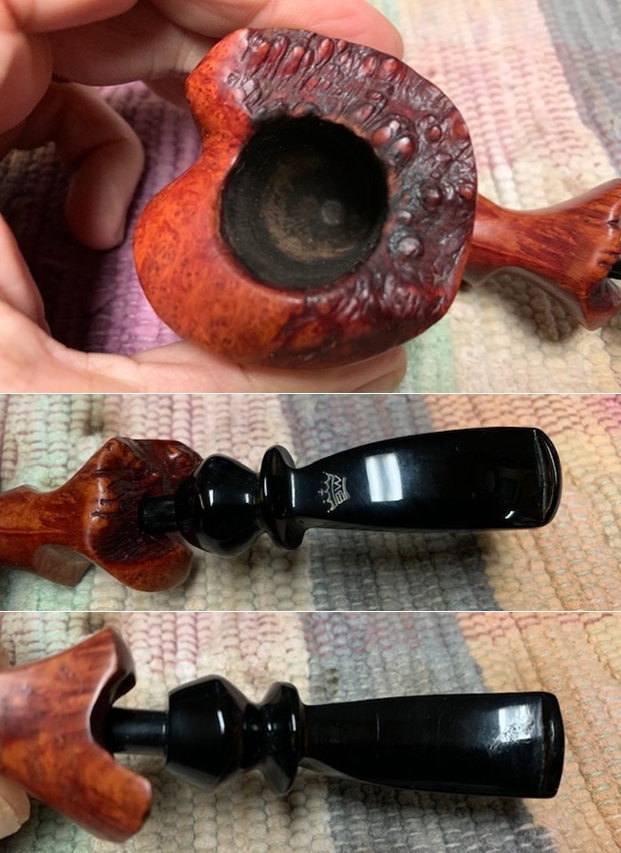
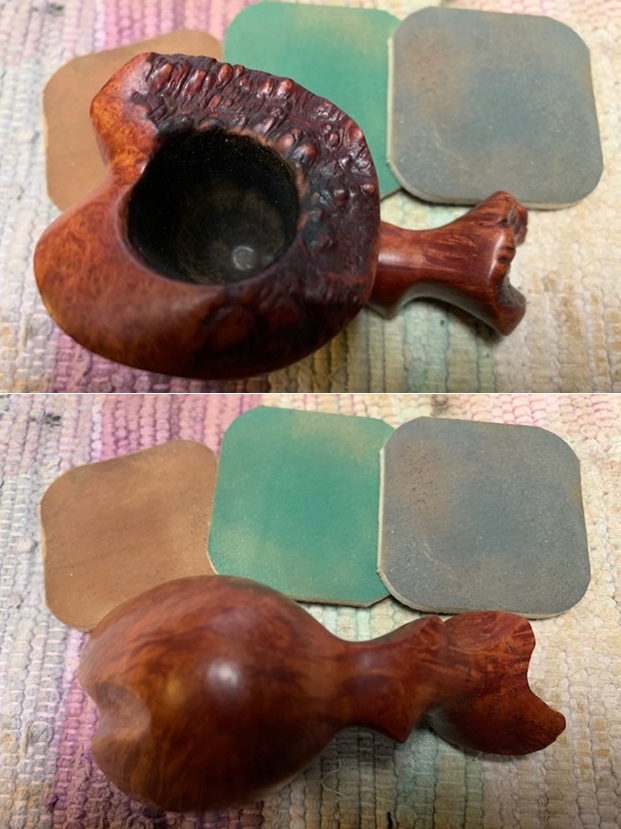
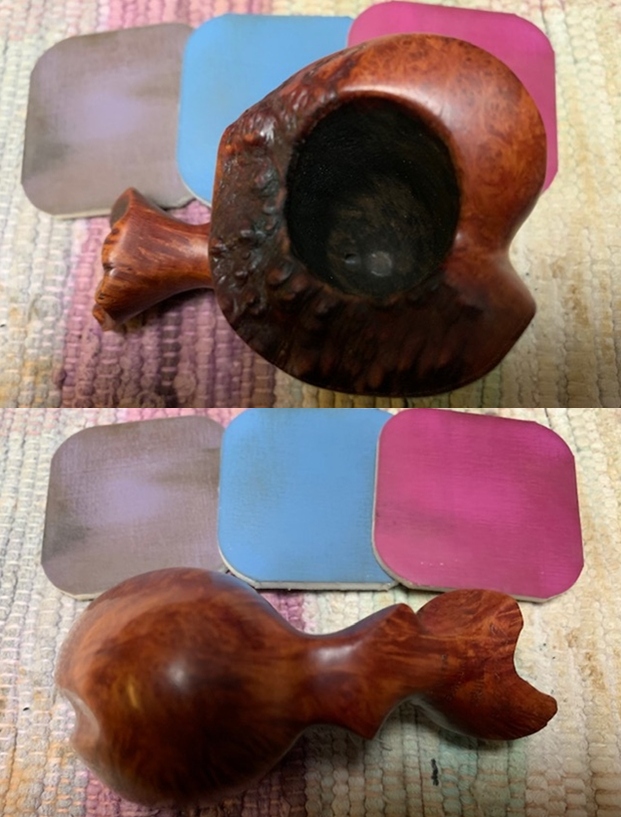
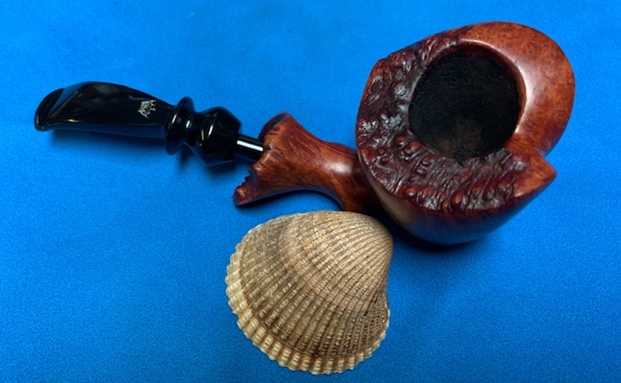
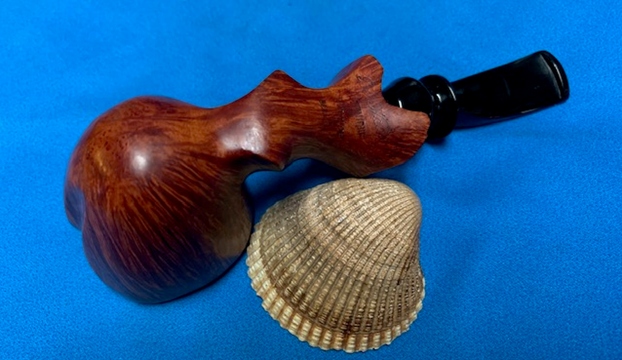
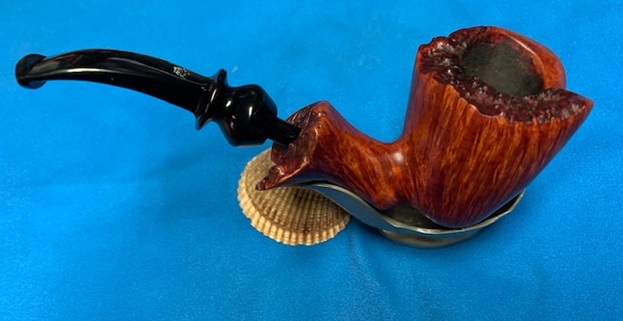
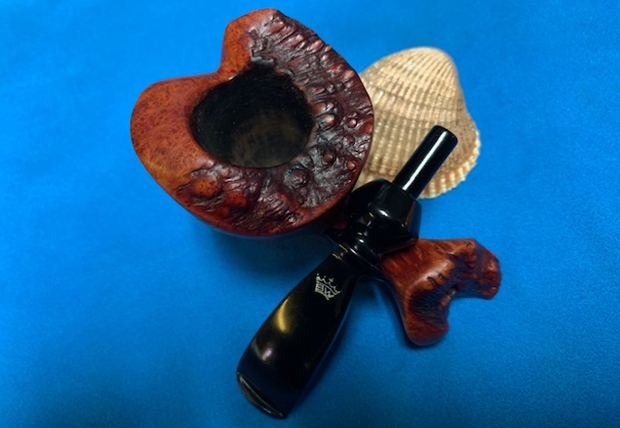
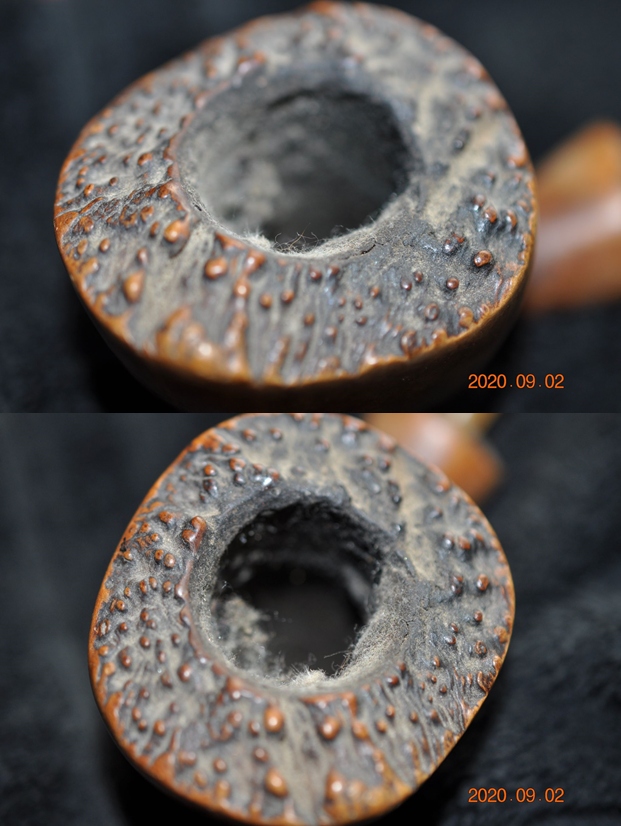
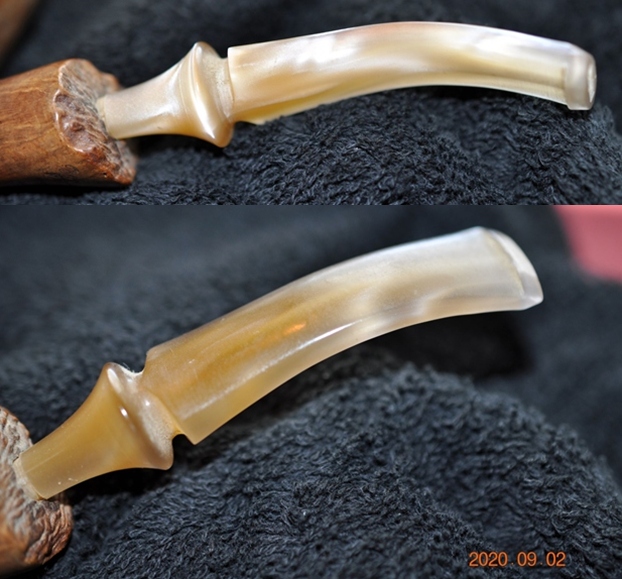
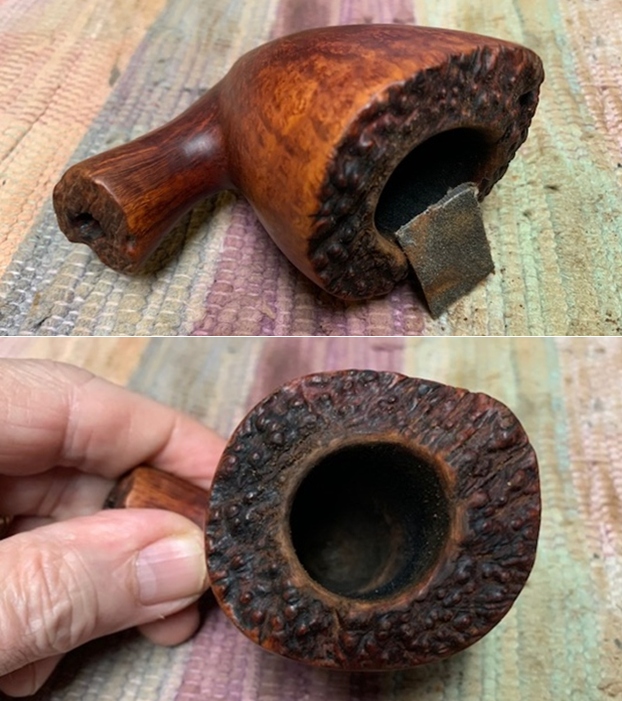
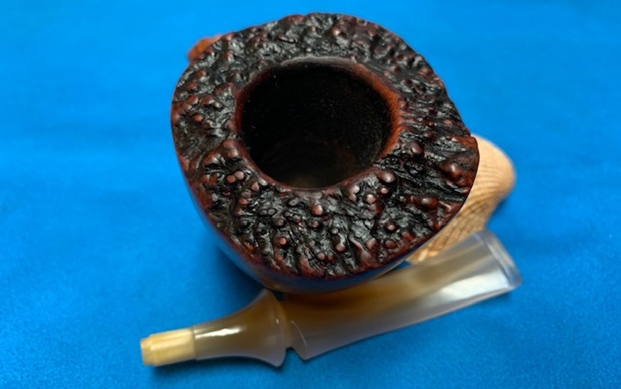
 He took photos of the bowl and rim top to show the thickness of the cake and the darkening and lava overflow in the plateau rim top. The photos of the stem show the dirty condition of the stem and the tooth marks on both sides ahead of the button.

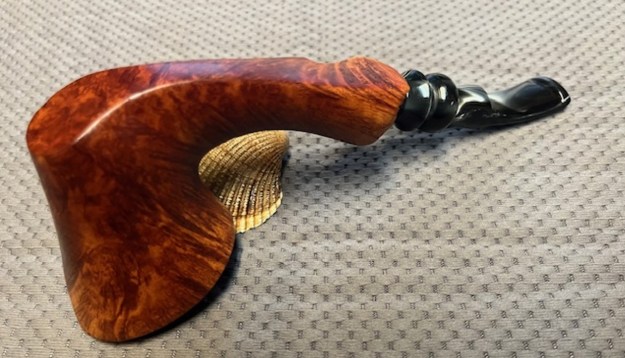
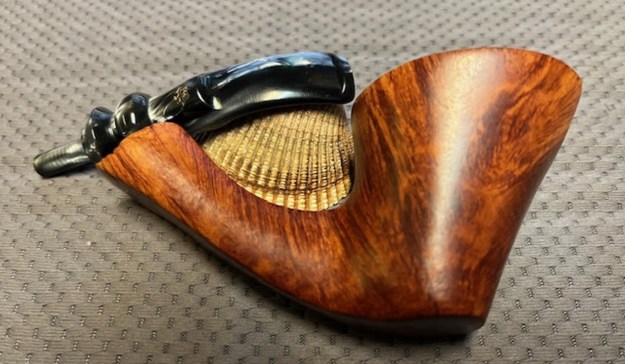
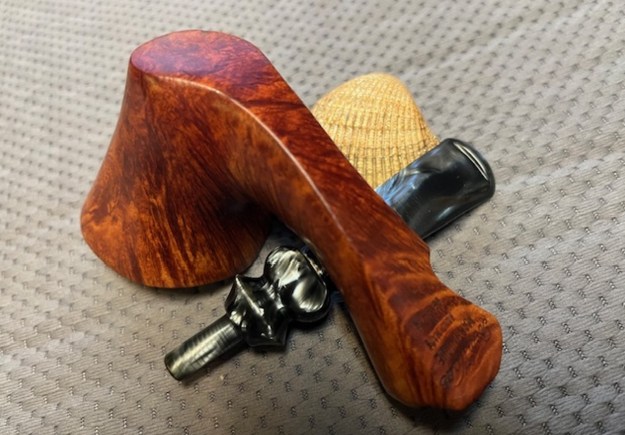
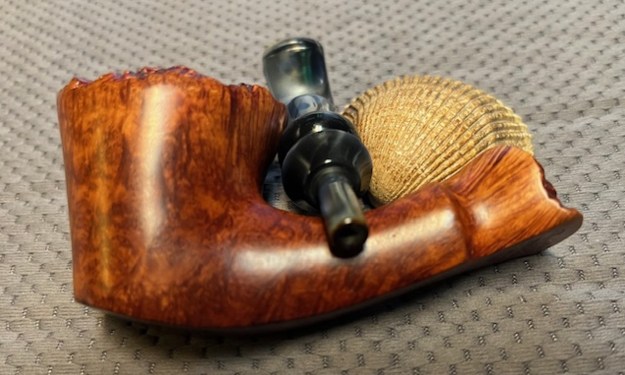
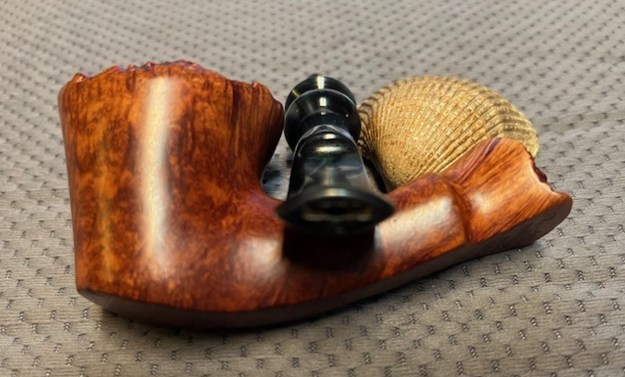
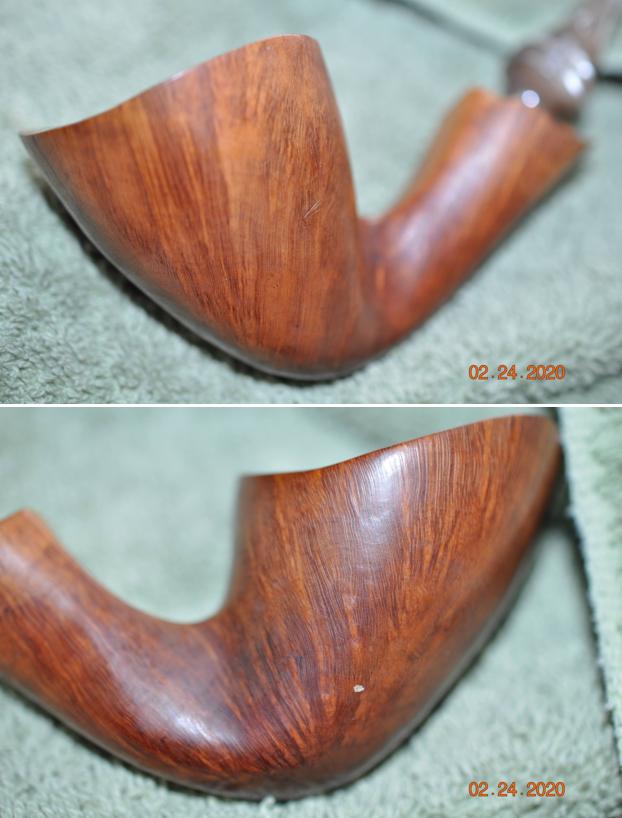
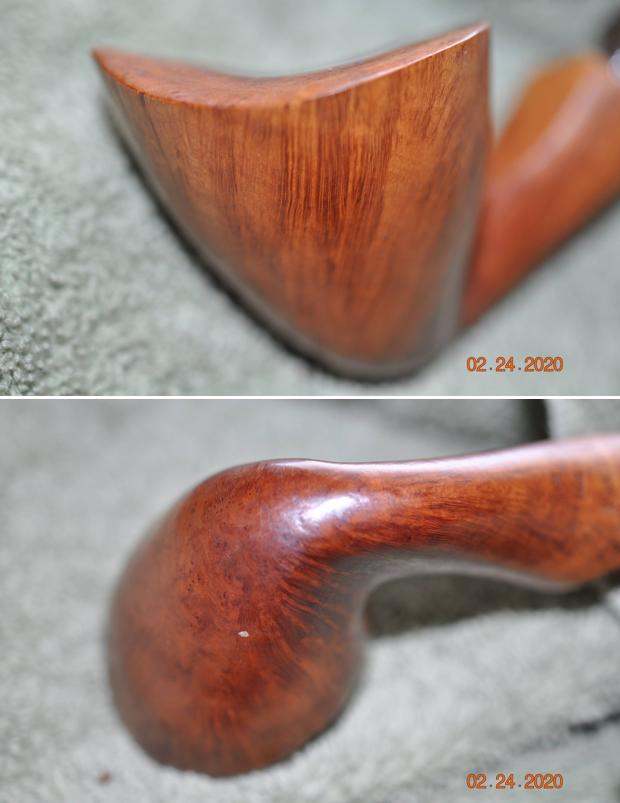
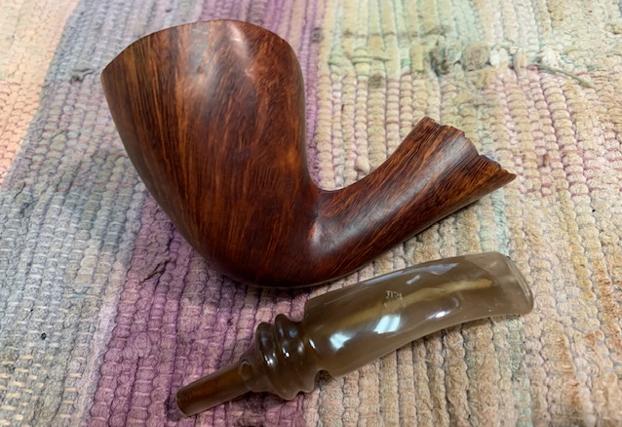
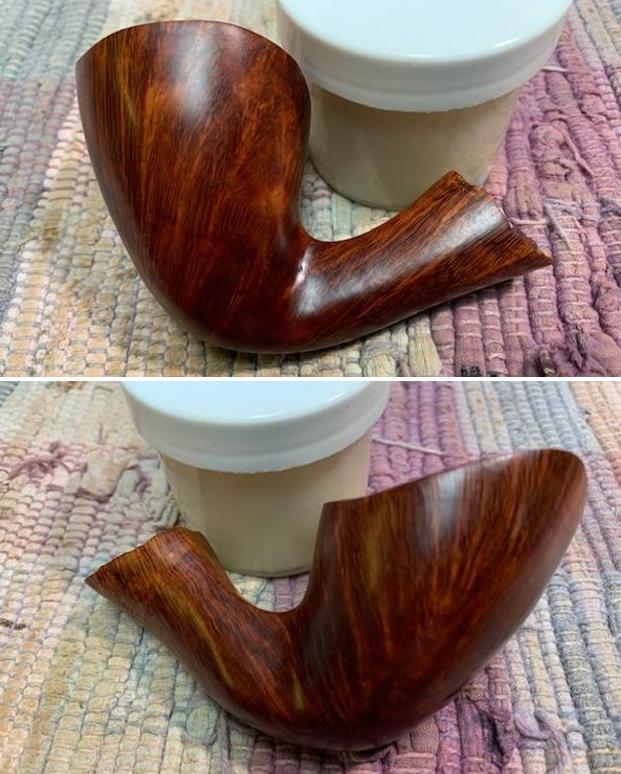
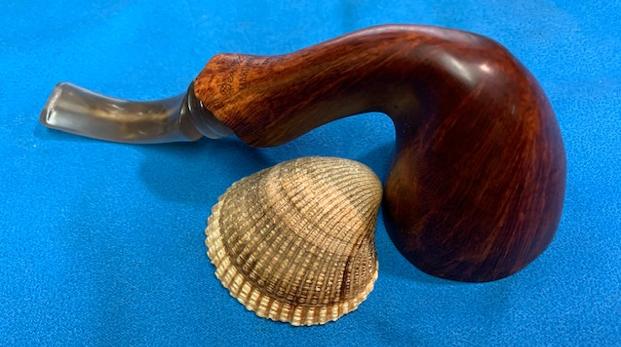
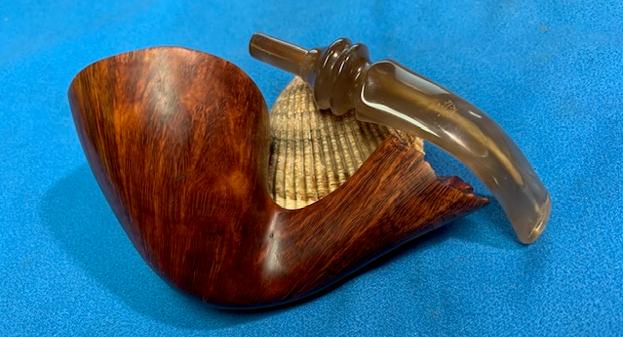
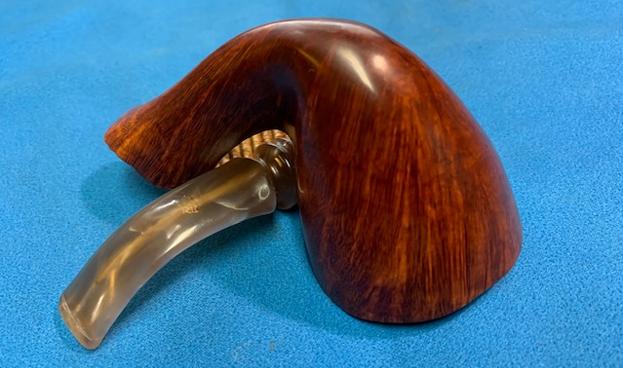
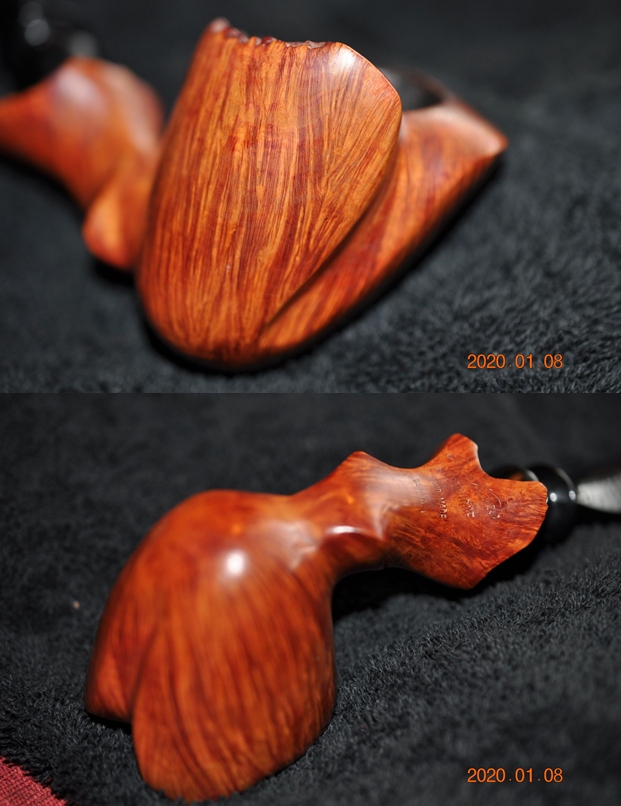
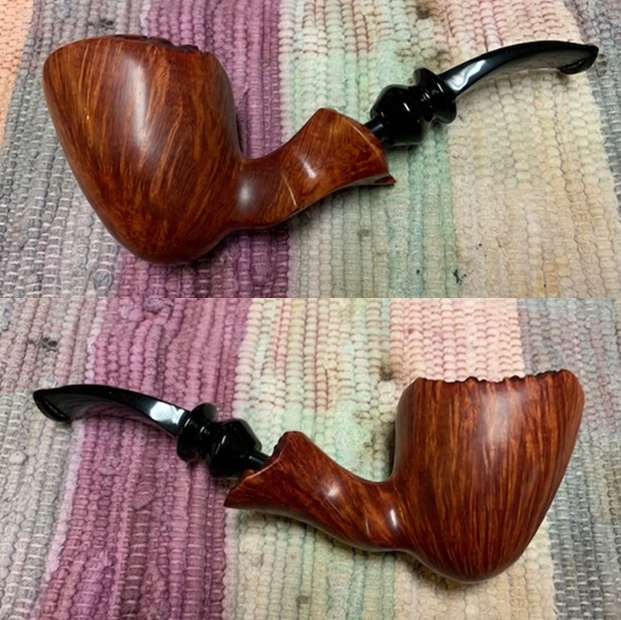
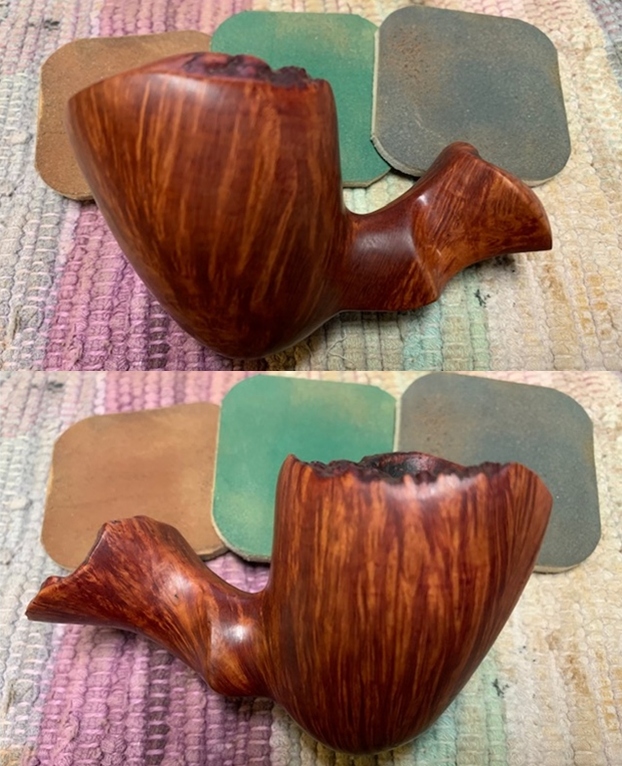
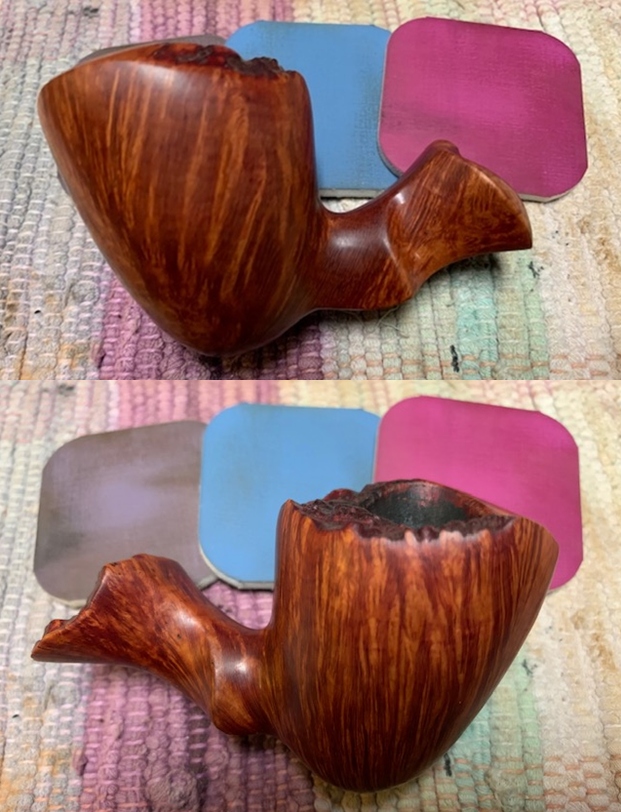
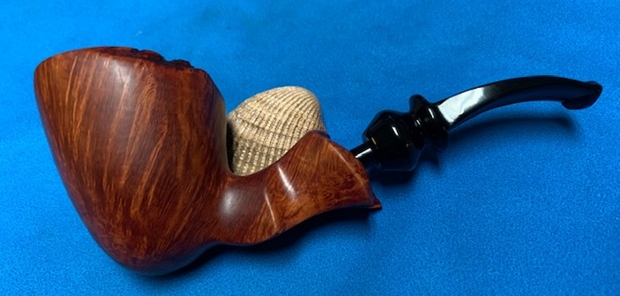
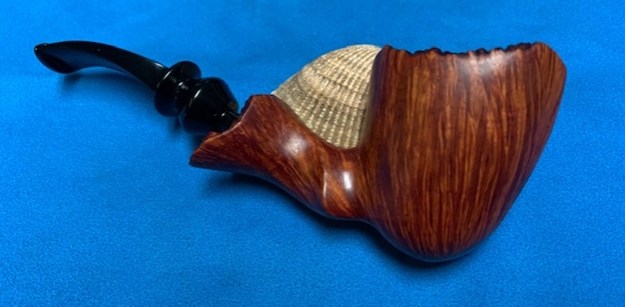
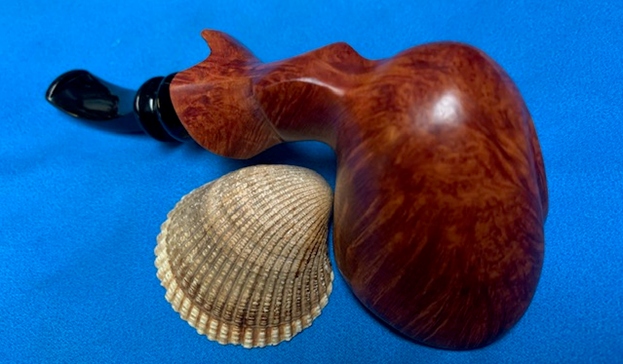
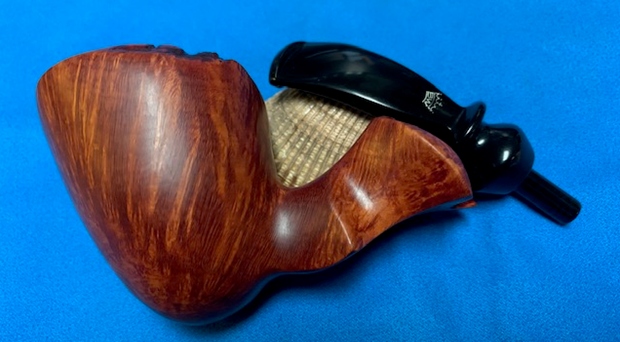
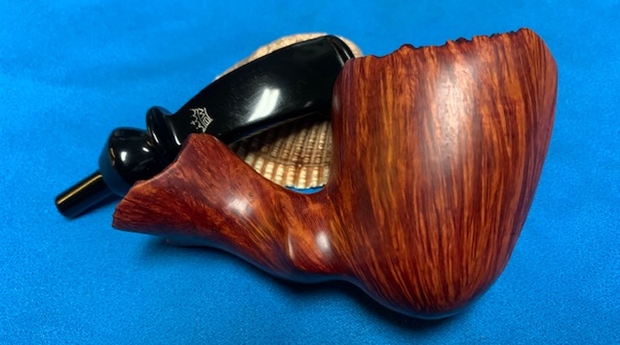
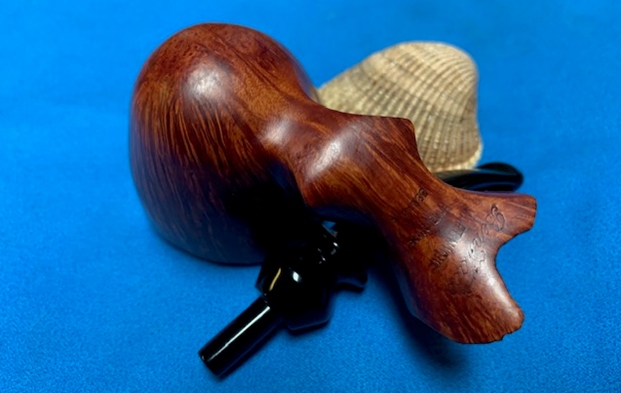
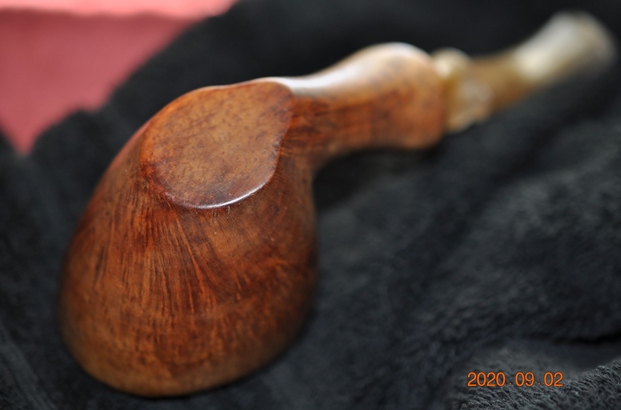
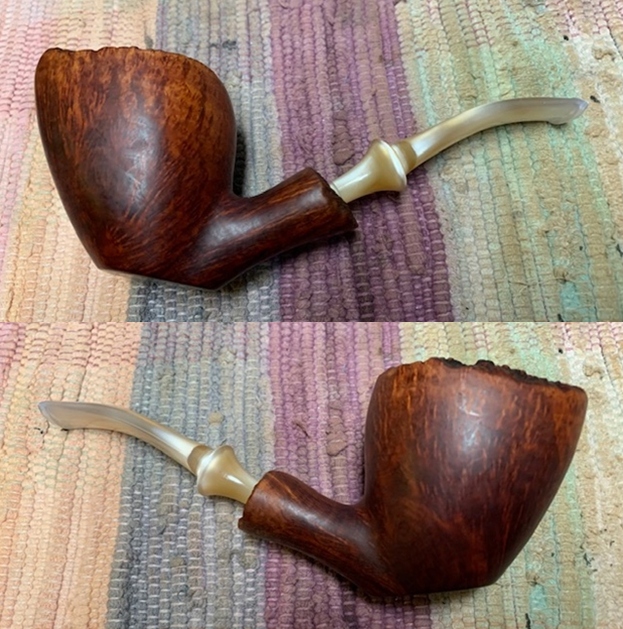
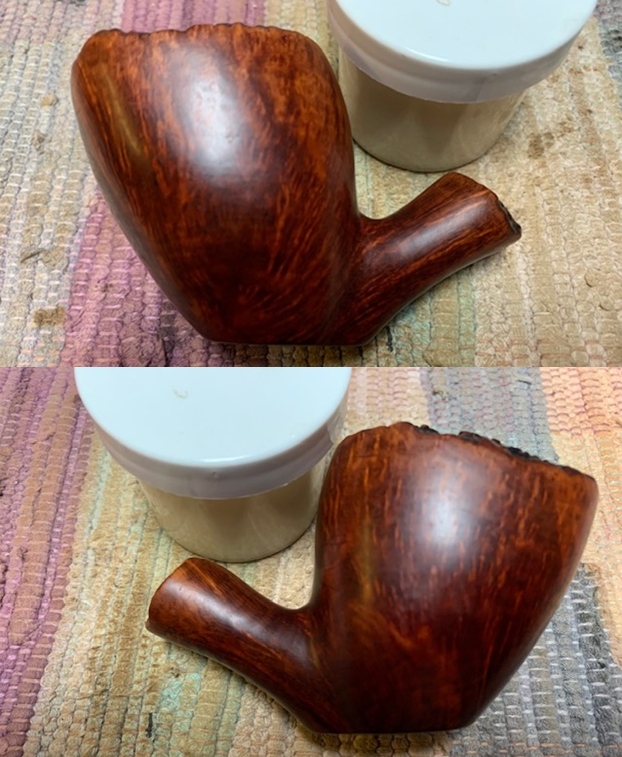
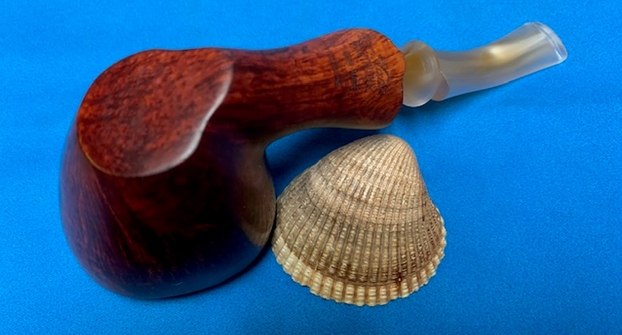
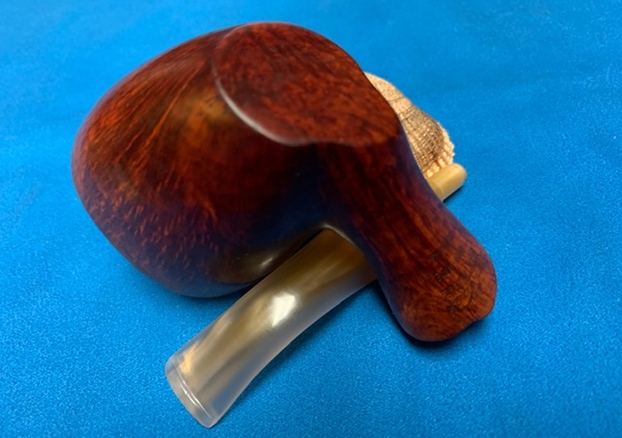
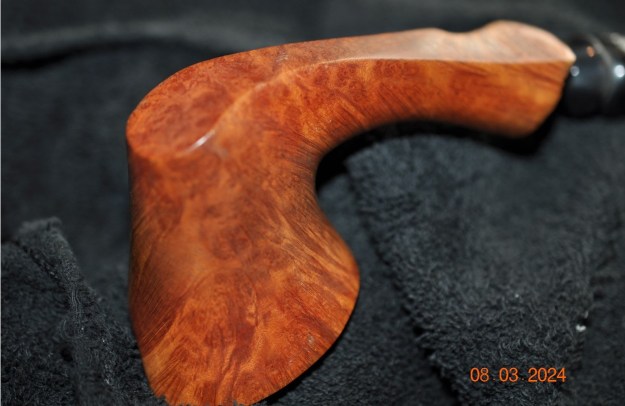
 The photos of the sides and heel of the bowl show the great grain on the pipe. It is a beauty under the grime and dust.
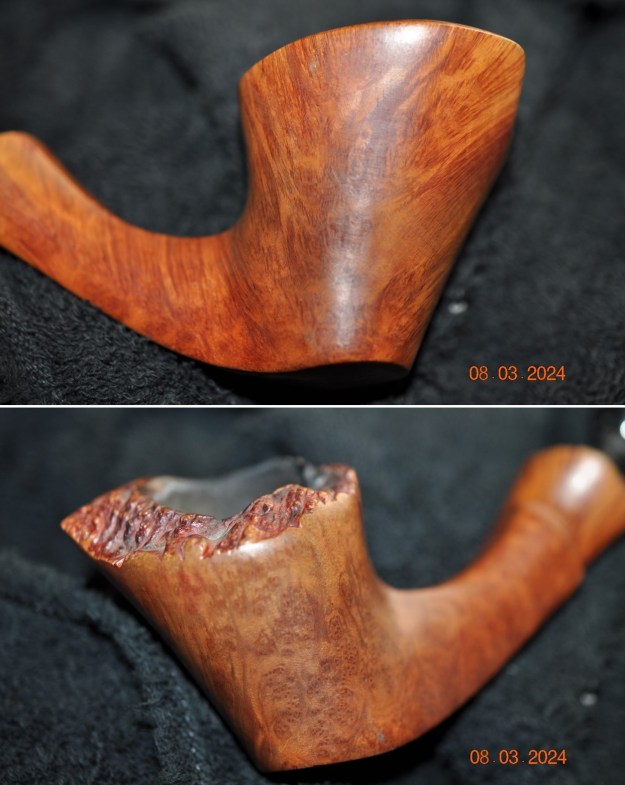
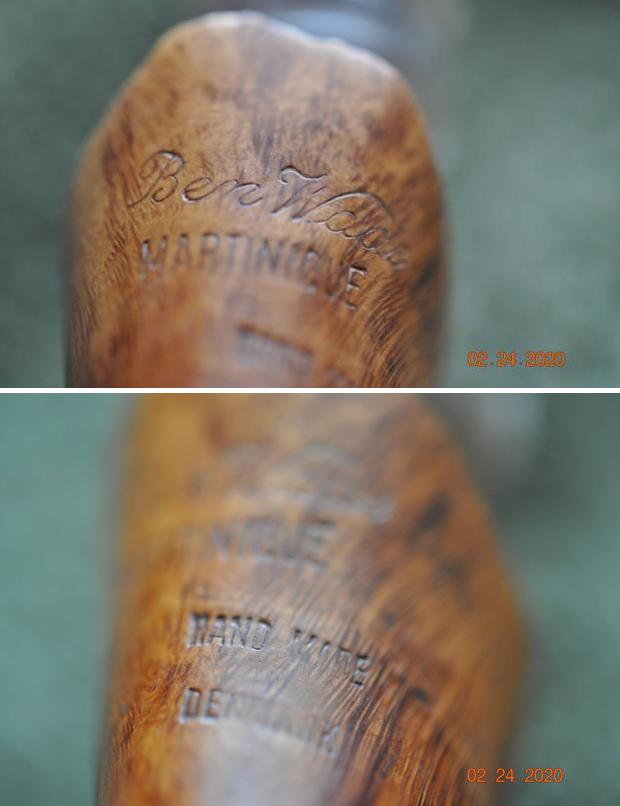
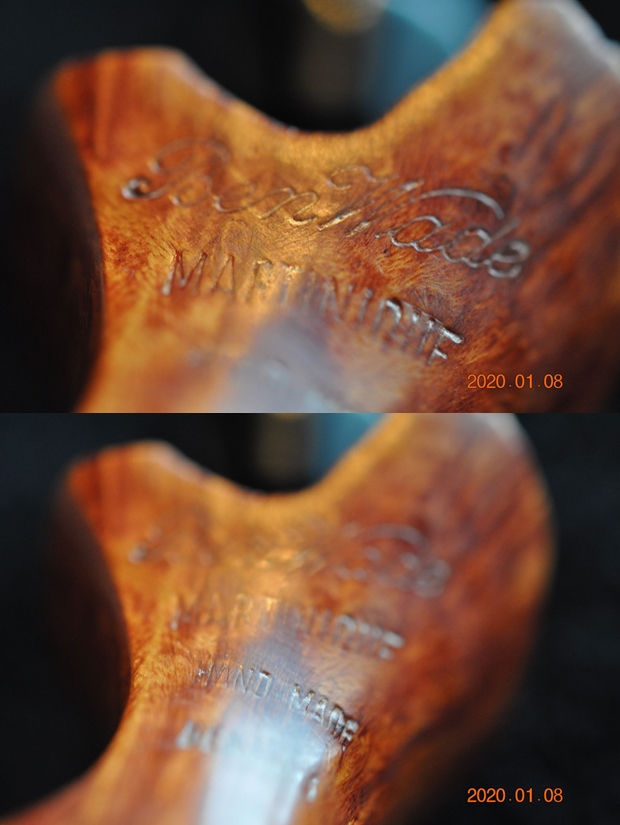
 The stamping on the underside of the shank is shown in the photos below. It is clear and readable as noted above.
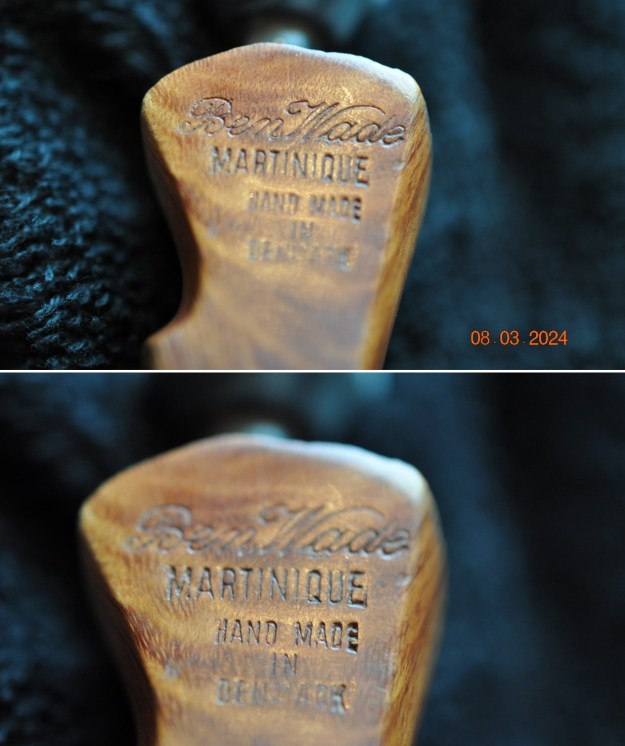 I remembered a bit of history on the brand that Preben Holm pipes were marketed under the Ben Wade label in the US and imported through Lane Ltd. I turned to Pipedia and read the listing on the brand to refresh my memory and flesh out the knowledge of the brand and would encourage you to do the same (https://pipedia.org/wiki/Ben_Wade). I have included a photo from that site that was taken from a Tinderbox advertisement. (Ben Wade Ad in a Tinder Box catalog, courtesy Doug Valitchka.)
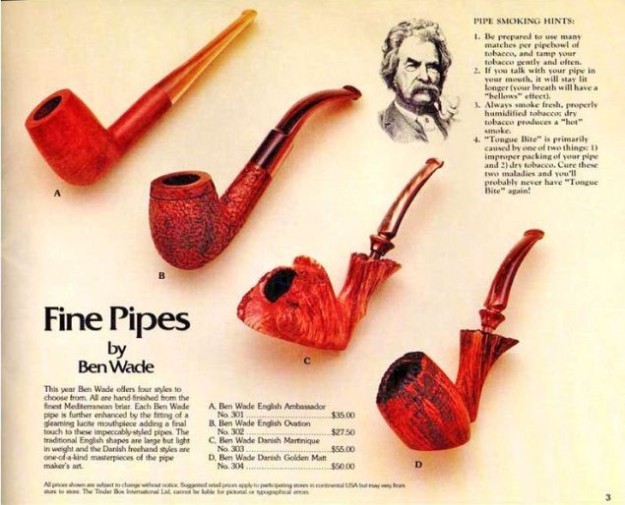 I quote the portion of the article that summarizes the Danish period of the history of the brand:
Young Copenhagen master pipemaker Preben Holm had made a meteoric career heading a pipe manufacture employing 45 people at the age of 22! But around the turn of 1970/71 he was in major financial difficulties. His US distributor, Snug Harbour Ltd. in New York City, left him in the lurch. Holm had three unpaid invoices on his desk and another large shipment was ready for the USA, when Snug Harbour’s manager told him on the phone that there was no money at all on the account to pay him.
So the Dane went to New York for an almost desperate search for a new distribution partner. He made contacts with Lane Ltd. and met Herman G. Lane in February 1971. Lane Ltd. had no interest in Holm’s serial pipes produced at that time but so much the more in the hand-carved freehands because the hype for Danish freehands and fancies in the States was still on its way to the climax then. The meeting resulted in an agreement to start a cooperation. Lane insisted to improve the quality considerably and in return he assured to be able to sell essentially larger quantities.
Holm went back home to work on new samples with all-new designs and altered finishes for Lane. Both, Lane and Holm, agreed that it would be unwise to sell the pipes under Preben Holm’s name as long as Snug Harbour had a considerable stock of Preben Holm pipes and might sell them pipes at very low prices just to bring in some money.
So on Mr. Lane’s proposal it was determined to use the name Ben Wade belonging to Lane Ltd. Lane spent considerable amounts of money for advertising the new brand in the big magazines– the centerpiece being whole-page ads showing a very exclusive Seven Day’s Set.
The cooperation with Lane Ltd. proved to be an eminent business success for both partners. Within a very short time Ben Wade Handmade Denmark sold in much larger quantities and at higher prices than they had ever dreamed of. And the hype these freehands and fancy pipes caused went on unbroken long after Herman G. Lane deceased. Preben Holm – obviously much more brilliant in pipe making than in pipe business – was in major troubles again in 1986 and had to sack most of his staff. The Ben Wade production was significantly lowered but continued until his untimely death in June of 1989.
Up to now Preben Holm made Ben Wade pipes are cult and highly sought for on the estate markets.
With that information my initial thoughts were confirmed. This pipe was a Preben Holm made Freehand distributed in the US by Lane Ltd under the name Ben Wade. The freehand rage occurred in the late 70s and the pipes were made until Preben’s death in 1989. My guess would be that this pipe was made sometime during that time period and potentially in the late 70s.
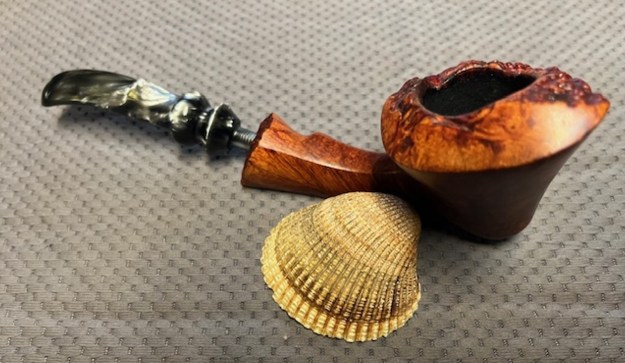
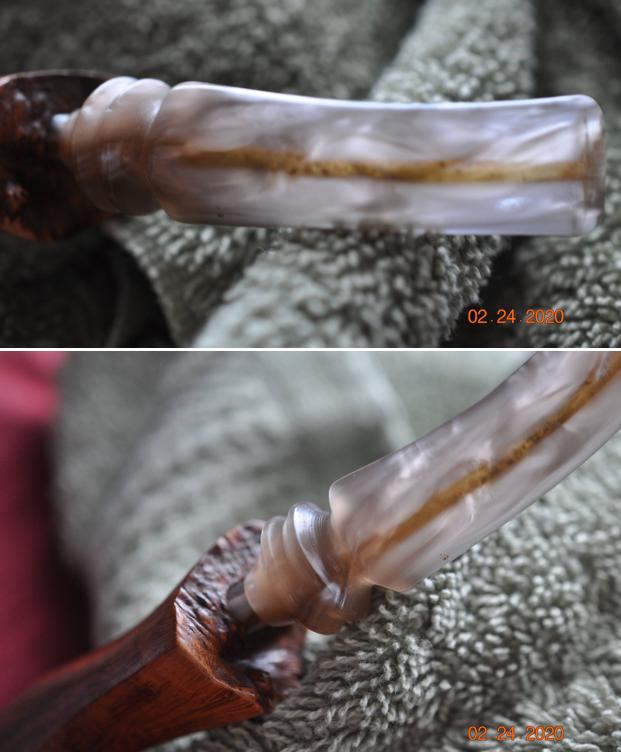
Jeff had cleaned up the pipe with his usual penchant for thoroughness. He reamed the pipe with a PipNet Pipe Reamer and cleaned up the remnants with a Savinelli Fitsall Pipe Knife. He scrubbed the bowl with undiluted Murphy’s Oil Soap with a tooth brush. He rinsed it under running warm water to remove the soap and grime. He cleaned out the inside of the shank and the airway in the stem with alcohol, cotton swabs and pipe cleaners. He scrubbed the stem with Soft Scrub and cotton pads to remove the debris and oils on the stem. He rinsed it with warm water and dried it off. I took photos of the pipe once I received it. 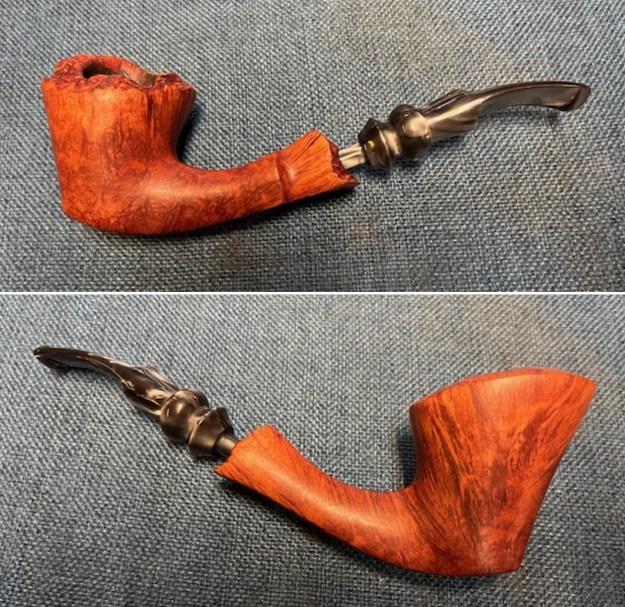
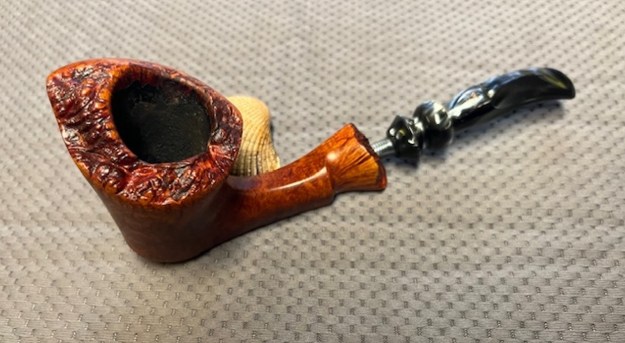
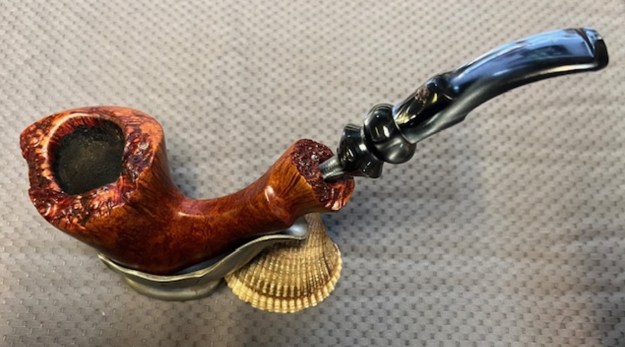
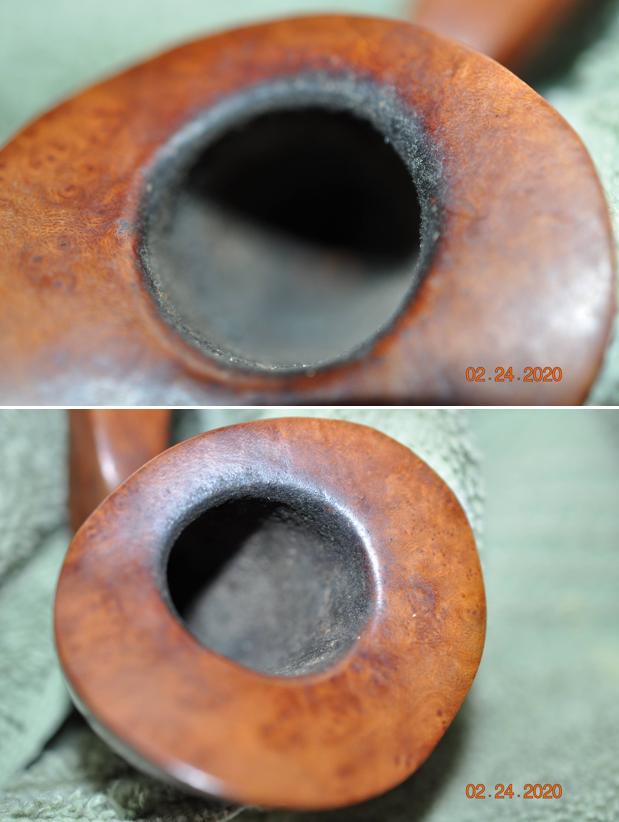
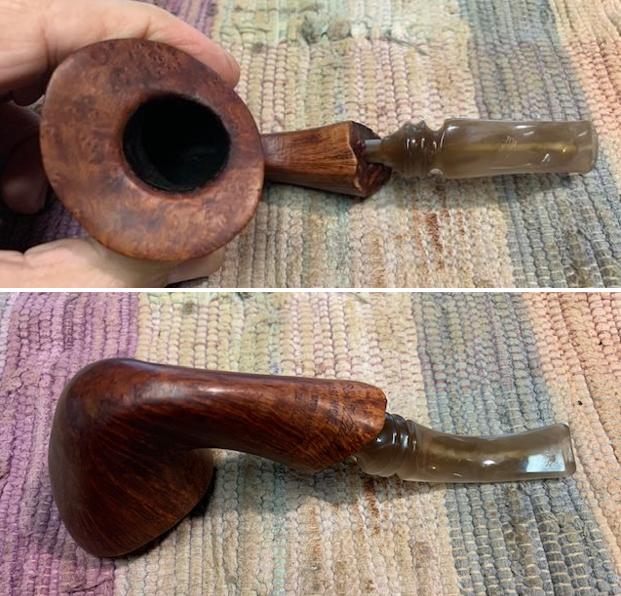
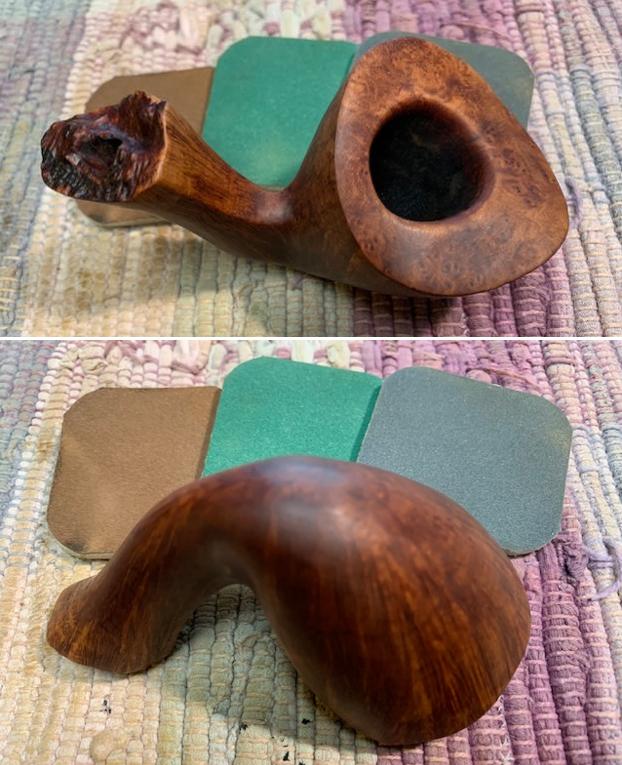
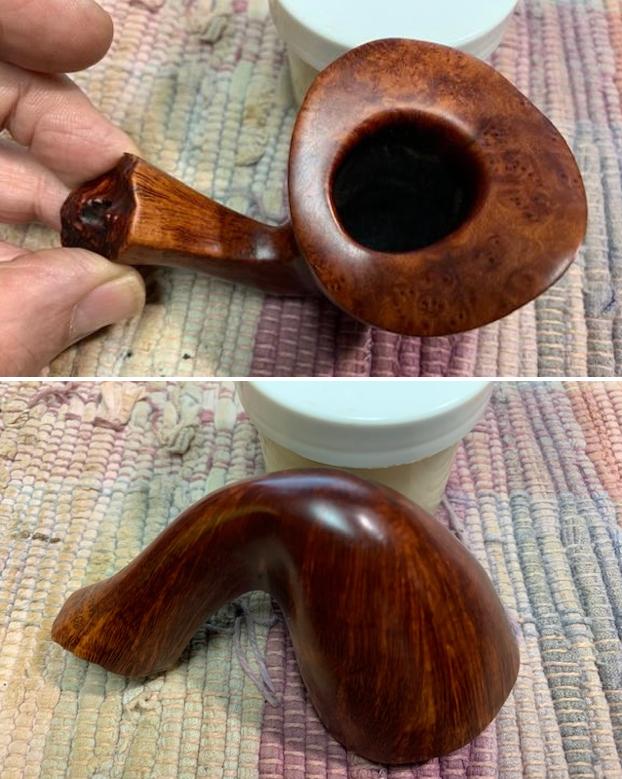
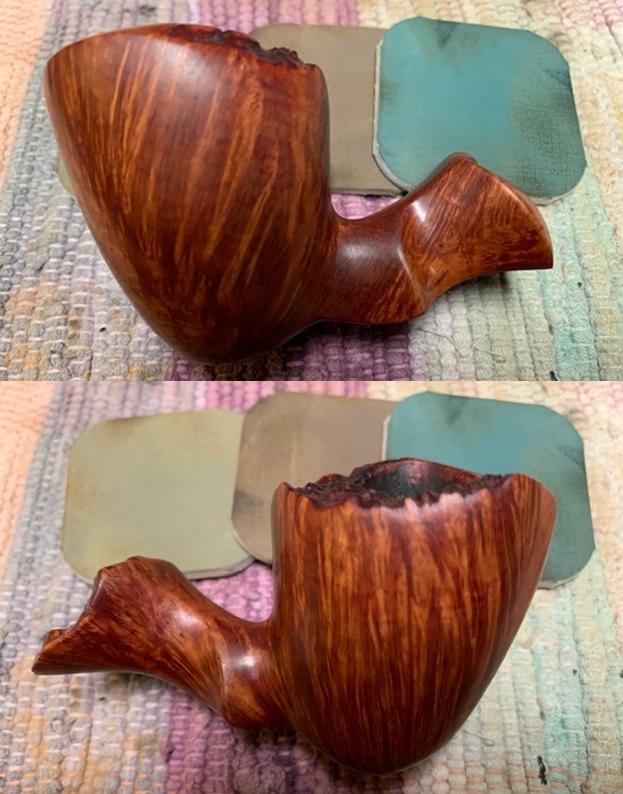
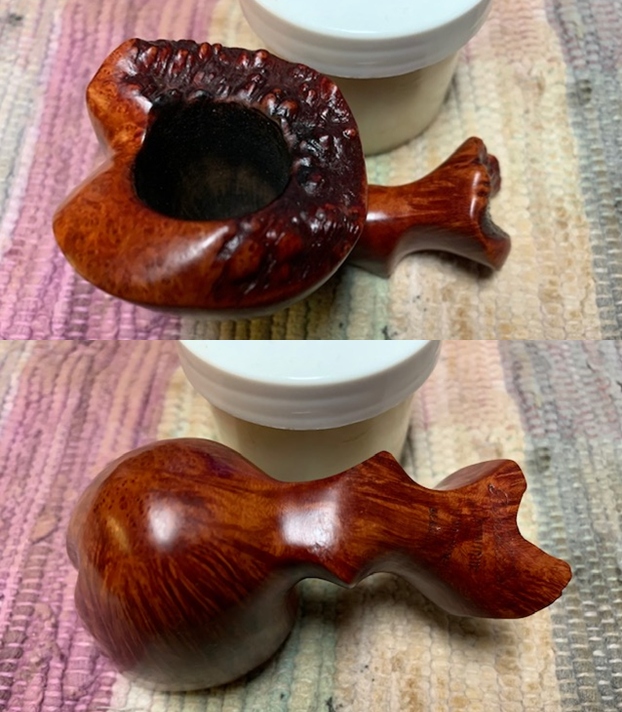
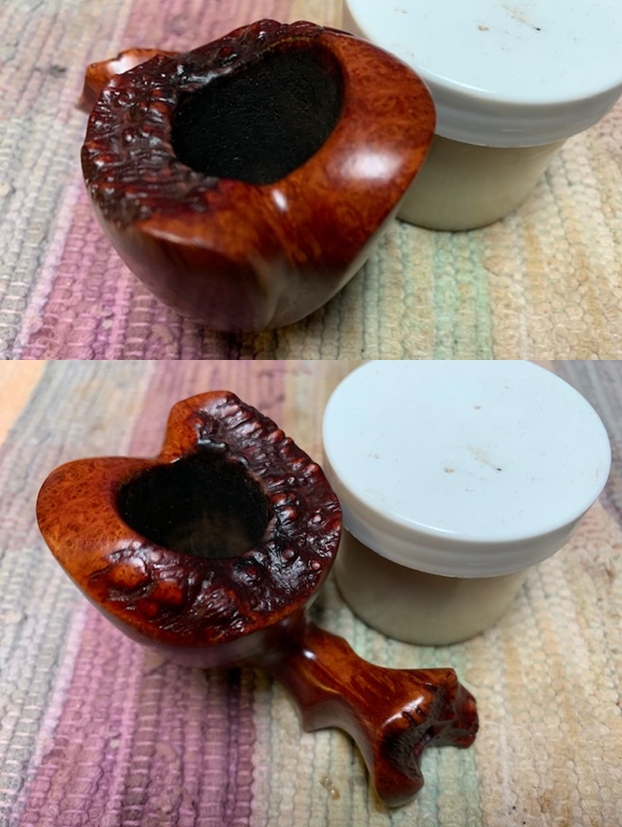
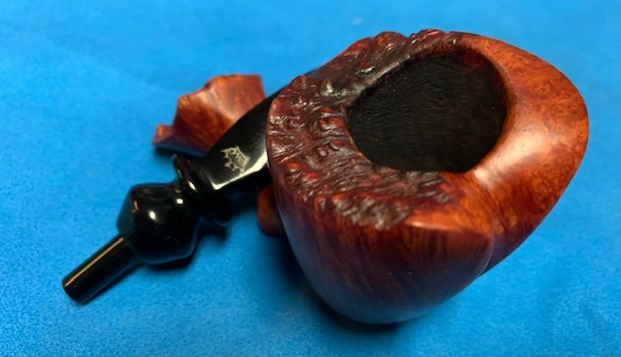
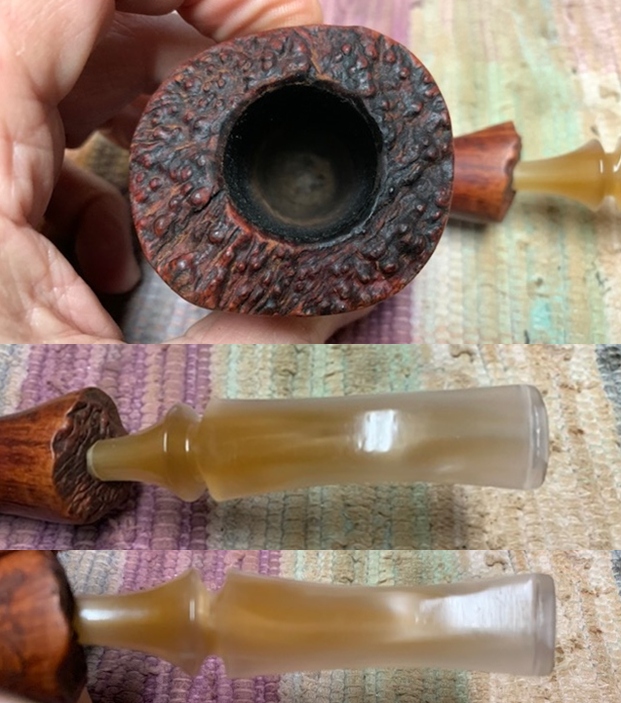
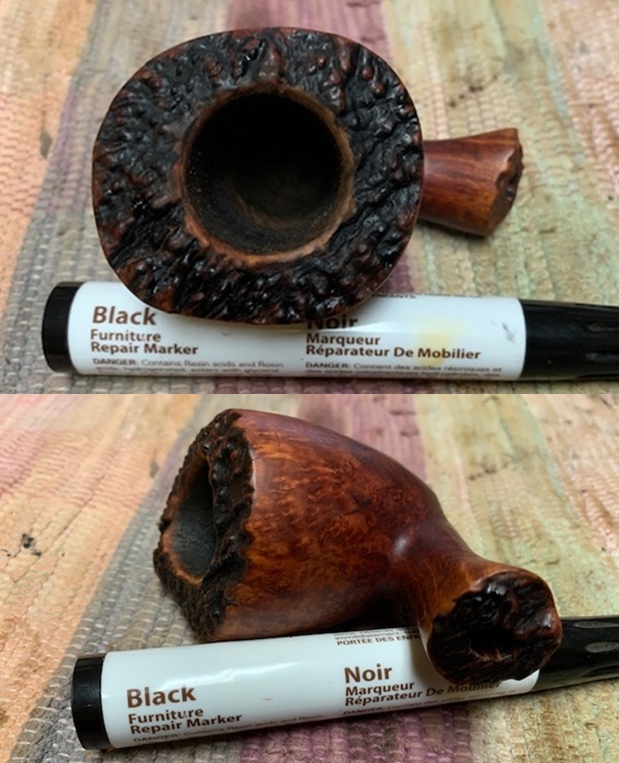
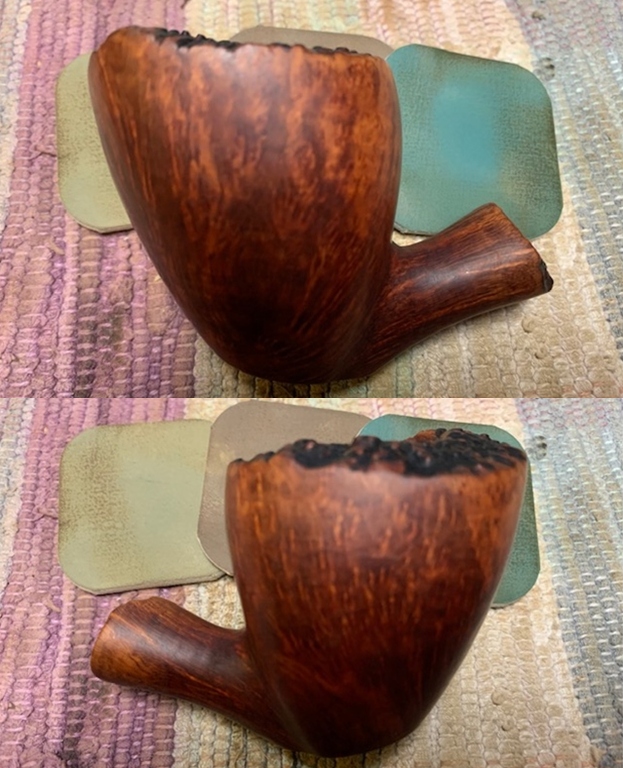
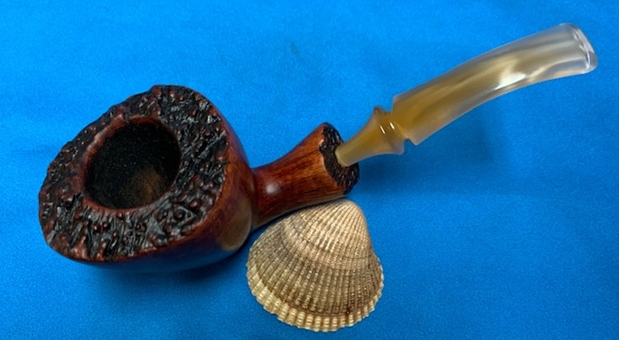
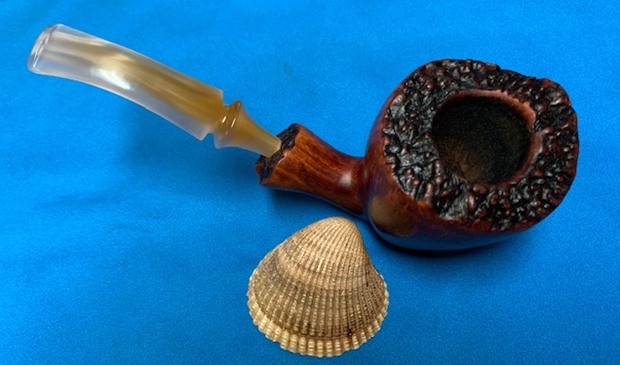
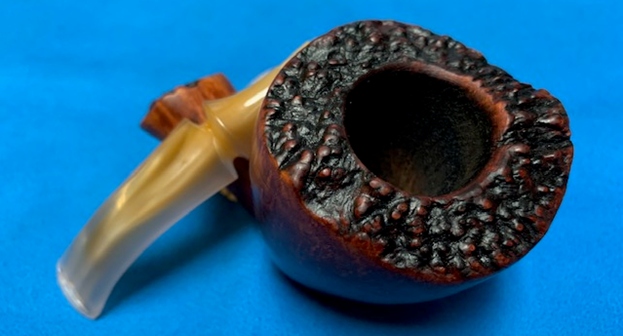
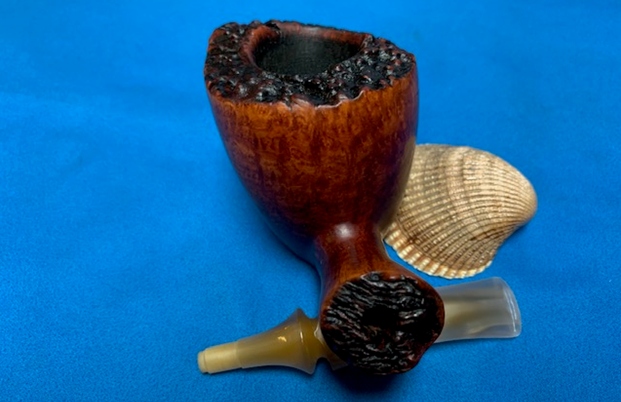
 I took a photo of the rim top. Jeff had been able to remove the thick lava coat from the plateau rim top and inner edge. It looks very good at this point. A work over with a brass bristle wire brush will remove the remaining darkening in the grooves. The plateau on the shank end is clean and looks very good. The stem is clean but has some the tooth marks on both sides.
 I took photos of the stamping on the underside of the shank. It is faint but still readable as noted above. I took a photo of the pipe with the stem removed to get a sense of what the pipe looked like.
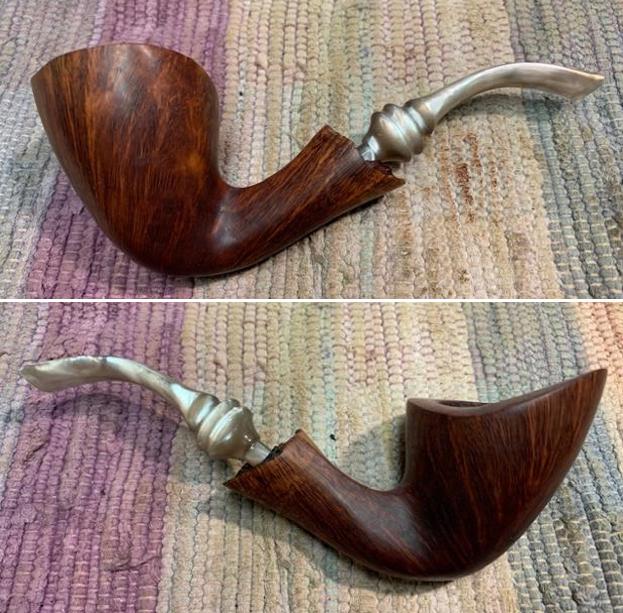
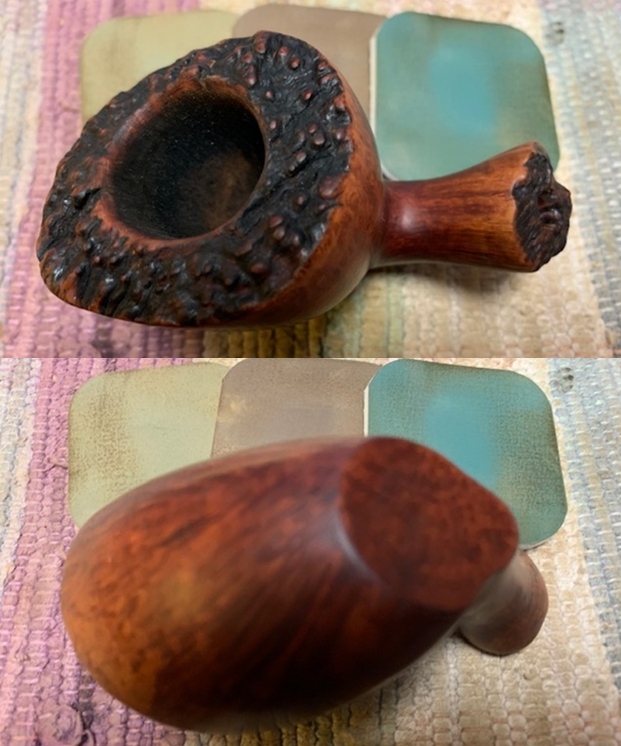
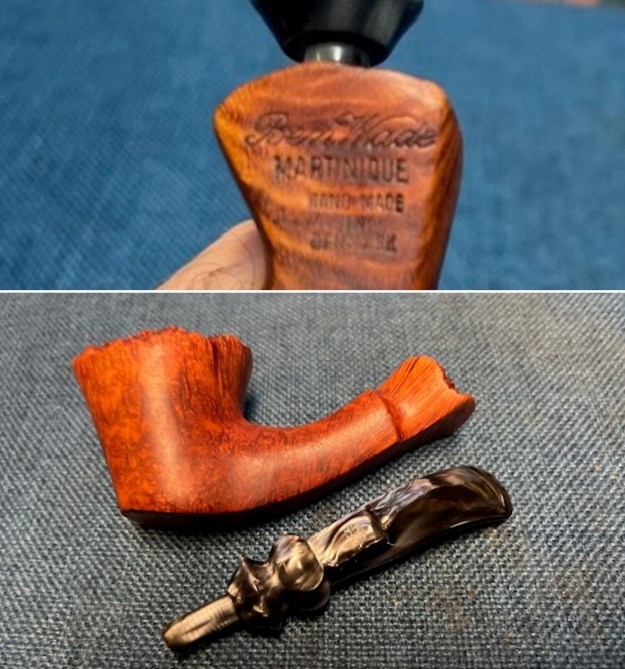 I started my work on the pipe by addressing the debris still in the plateau rim top. I used a brass bristle wire brush to clean up the plateau on the top and shank end. It worked very well and the plateau looked significantly better once finished.
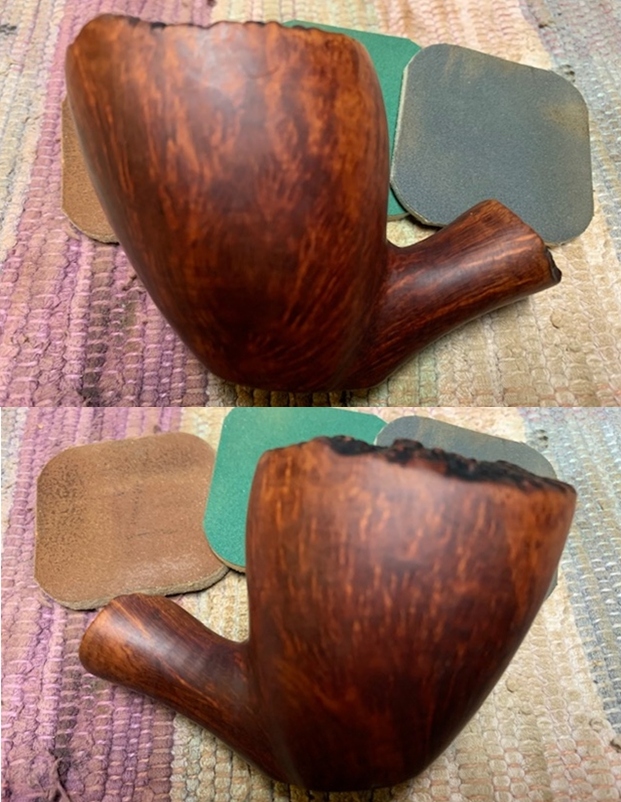
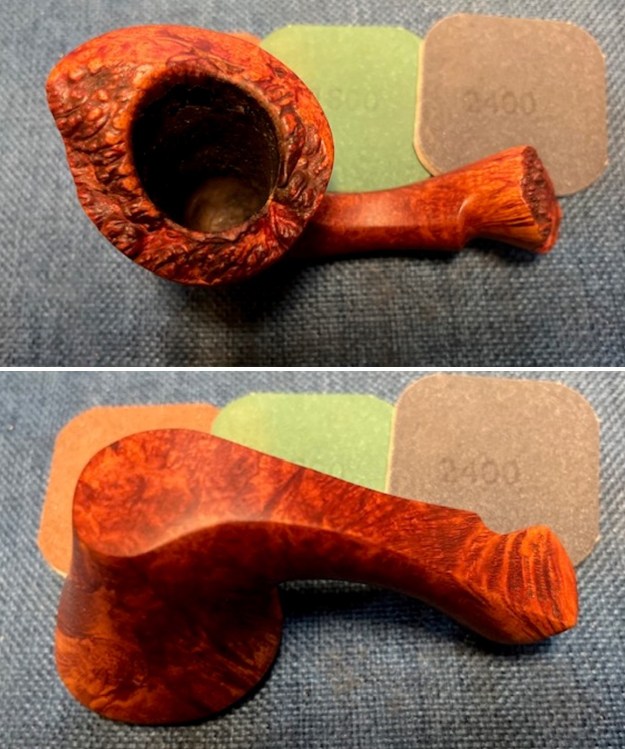
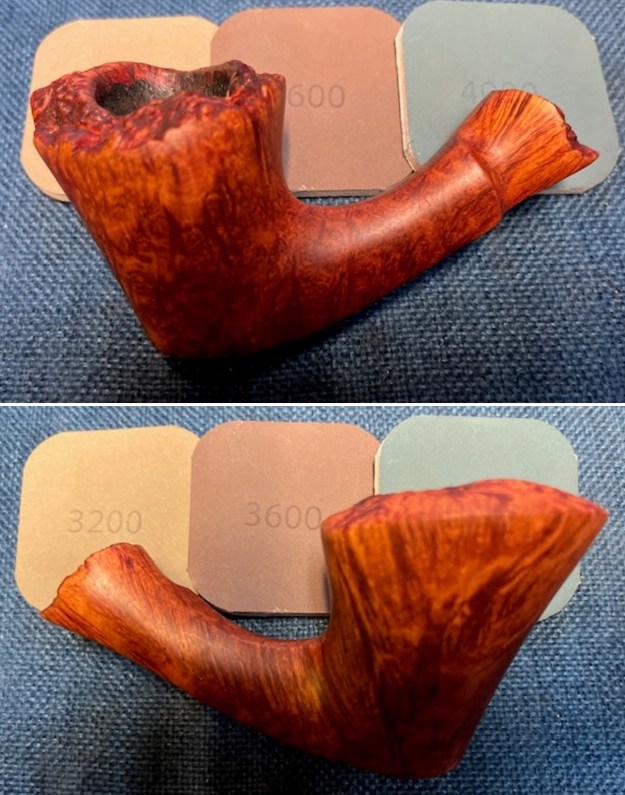
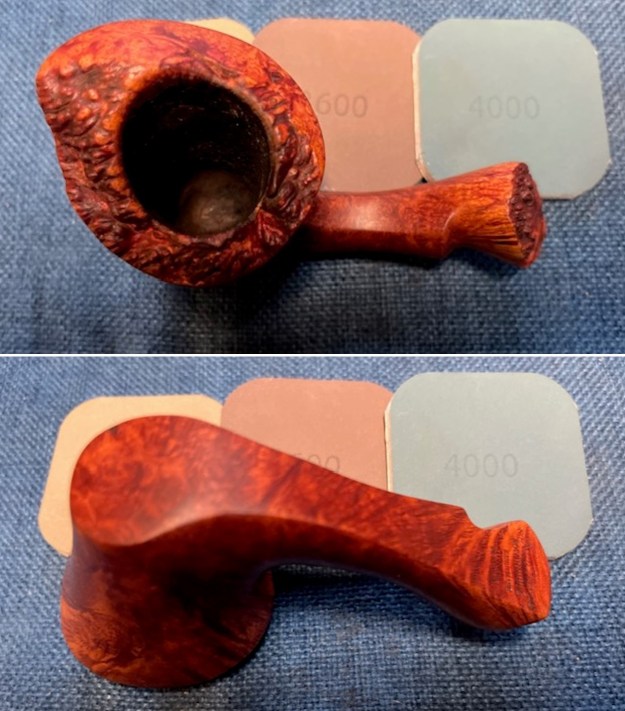
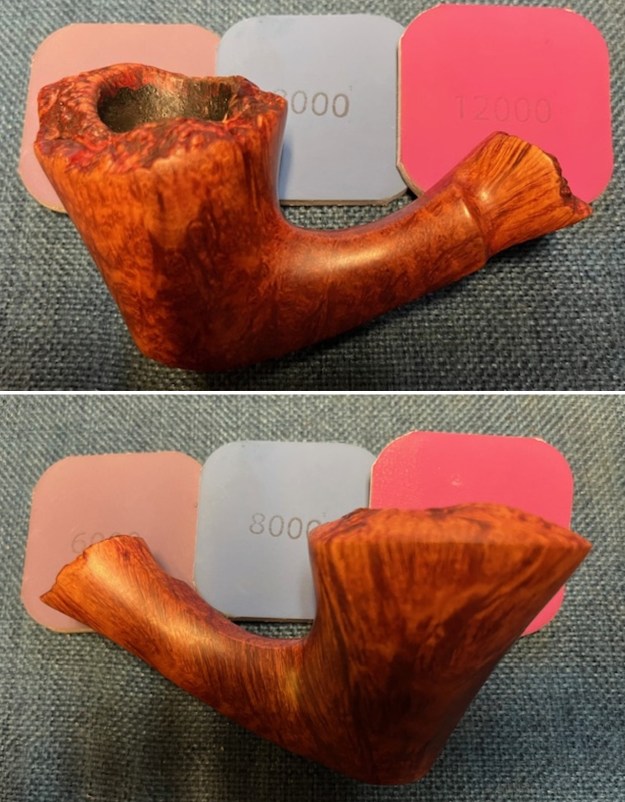
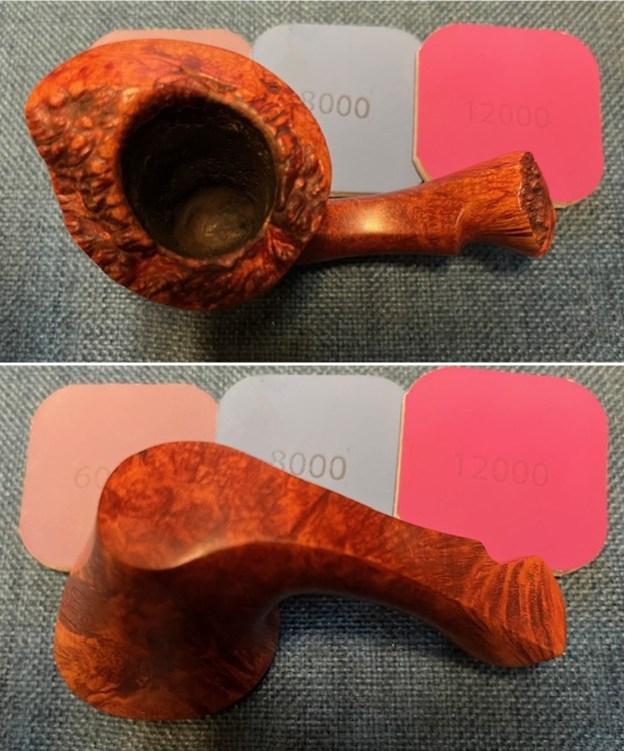
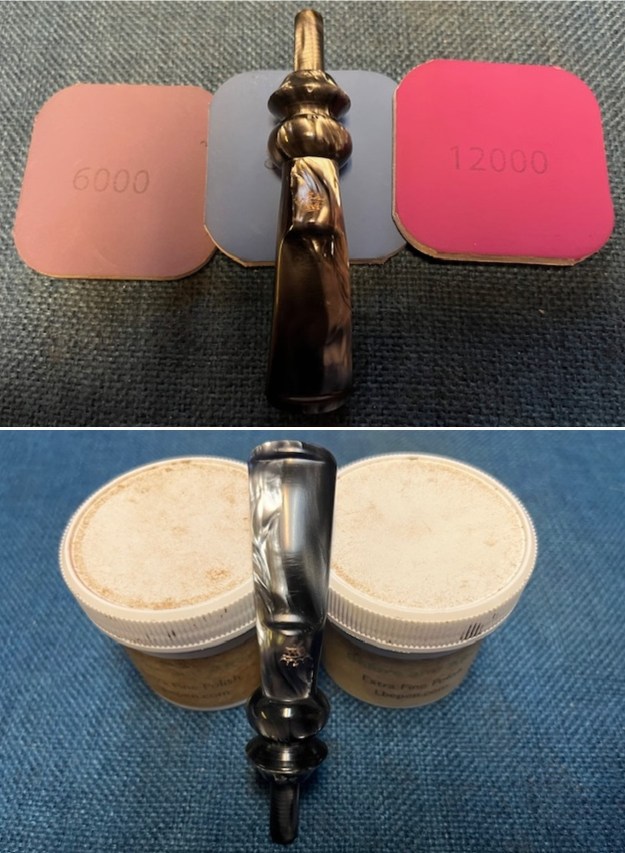
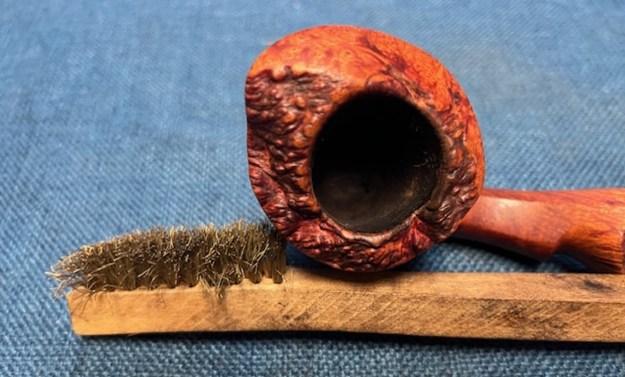 I polished the briar with micromesh sanding pads – dry sanding it with 1500-12000 grit pads. I wiped the bowl down after each sanding pad with a damp cloth to remove the dust and debris from the surface of the briar.
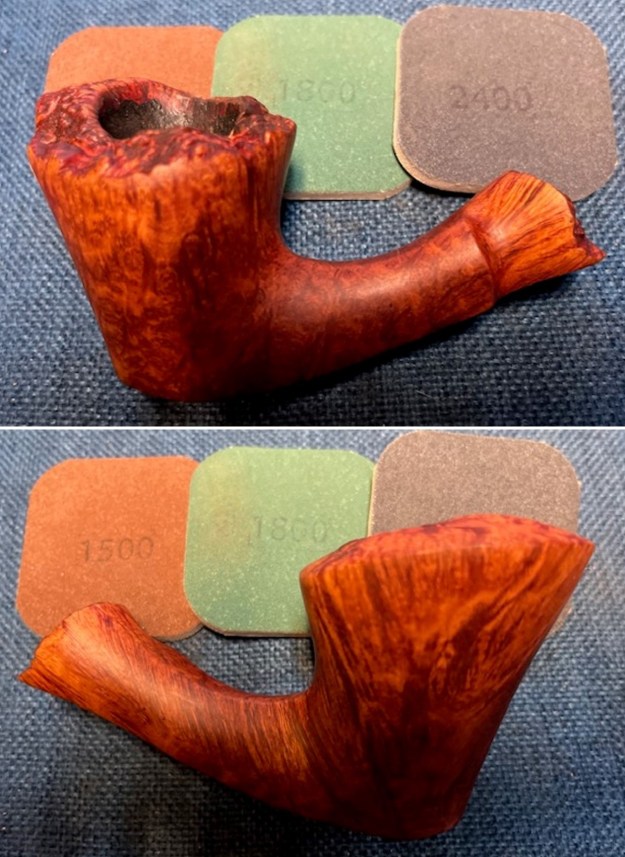
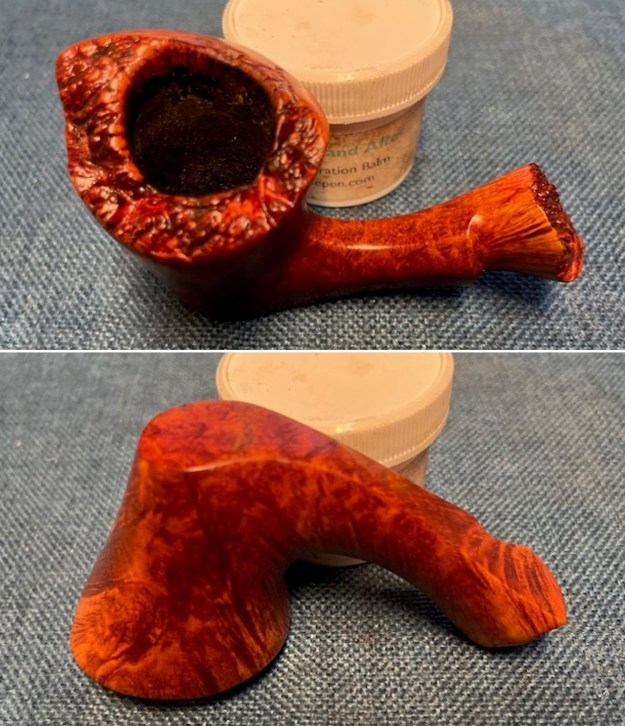
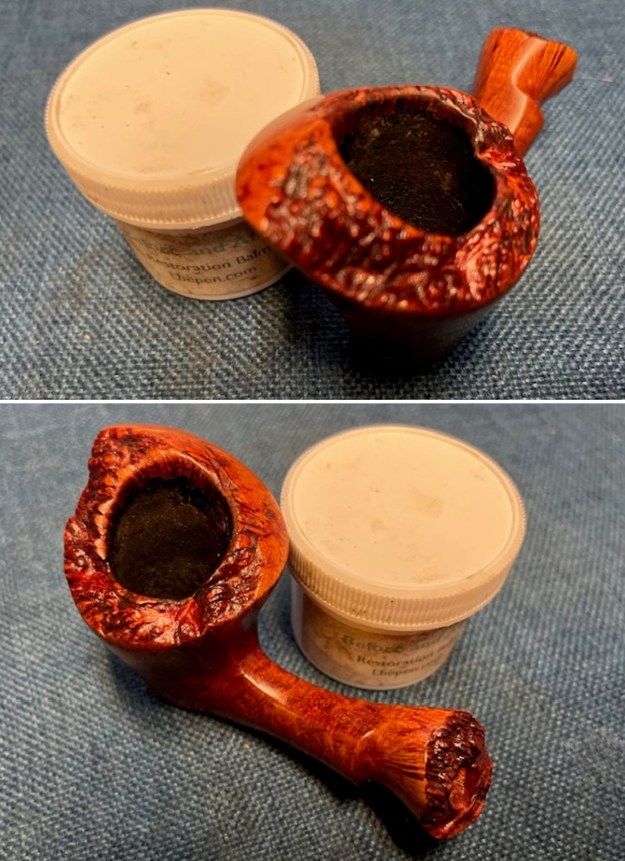
 I worked some Before & After Restoration Balm into the surface of the briar with my fingertips and into the plateau with a shoe brush. The product works to clean, preserve and protect the briar. I let it sit and work into the briar for 10 minutes then wiped it off with a cotton cloth. I buffed the briar with a clean cloth. The bowl is starting to look beautiful and there is a shine developing.
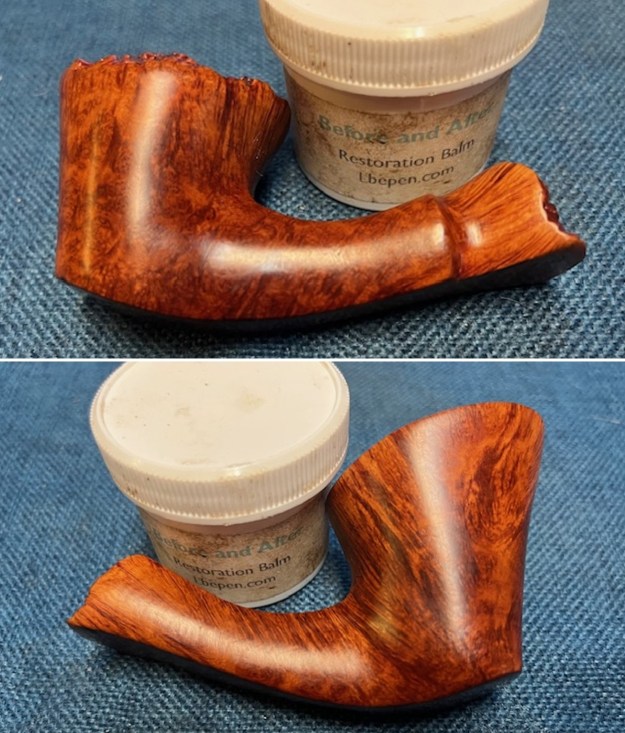
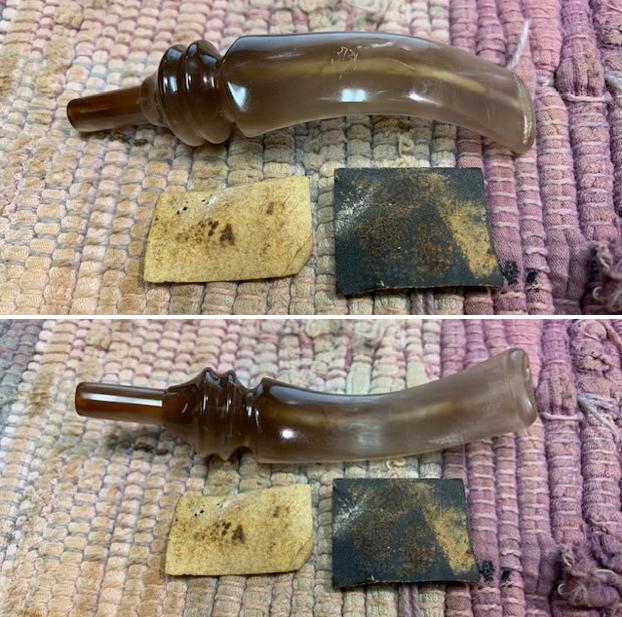
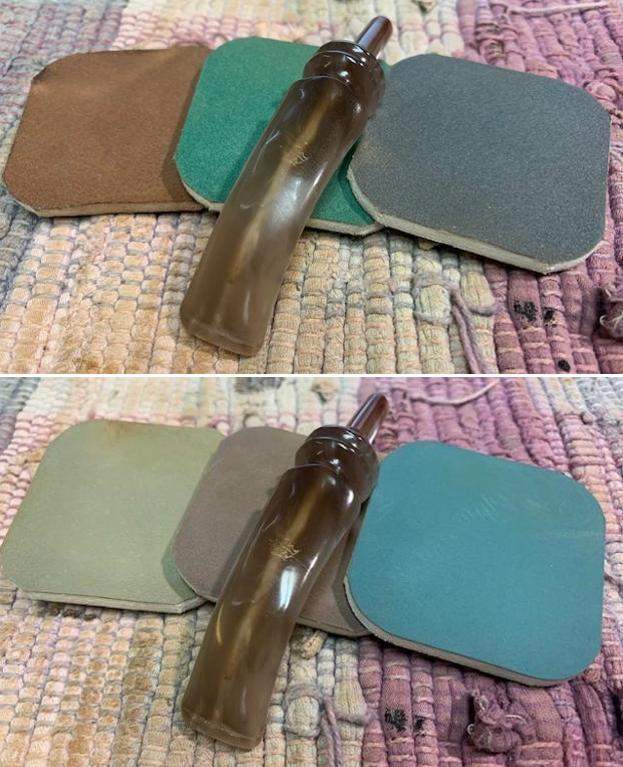
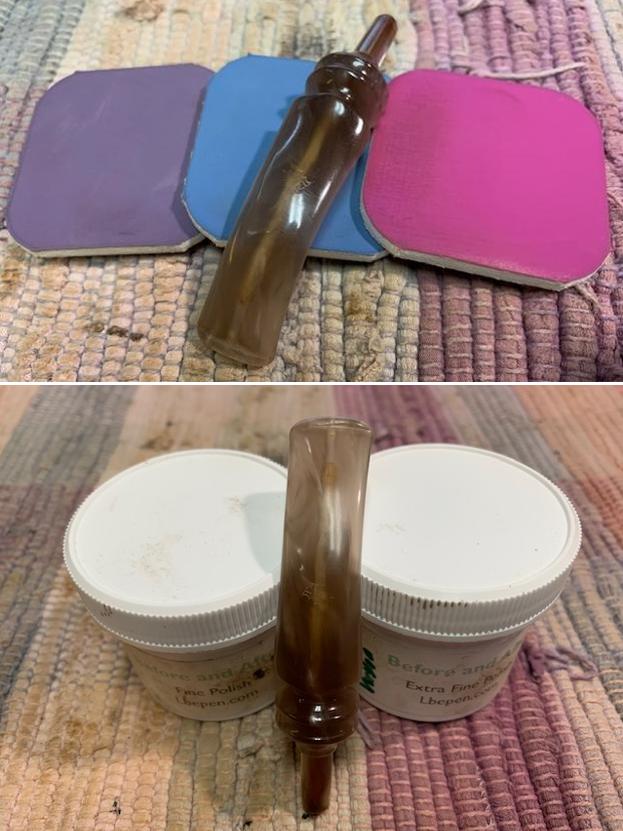
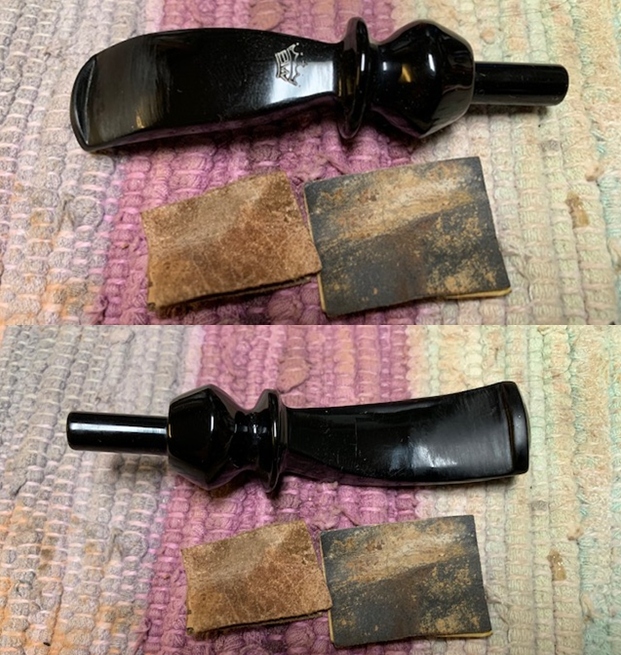
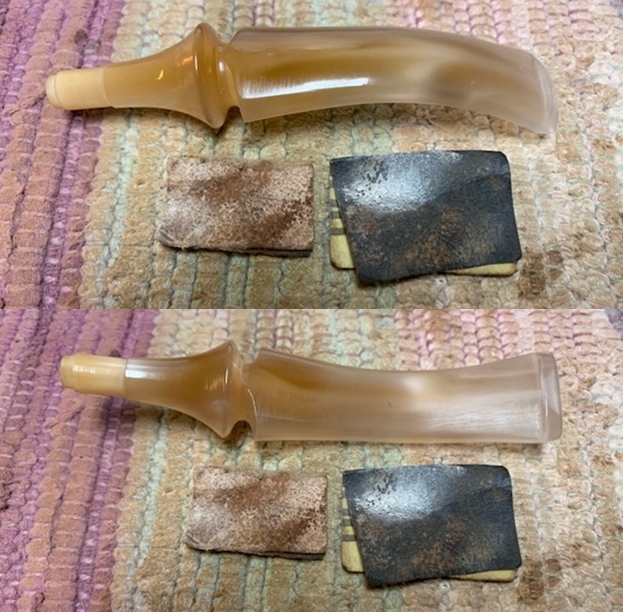
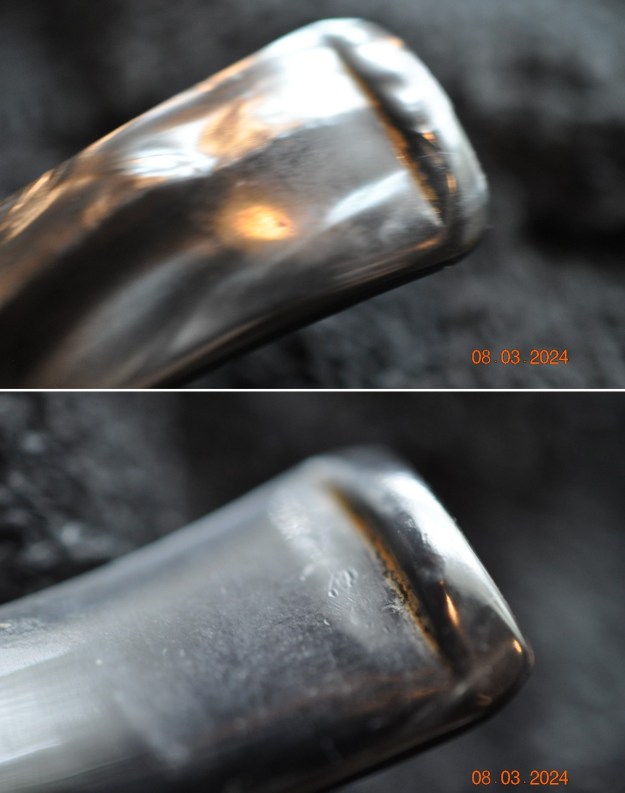
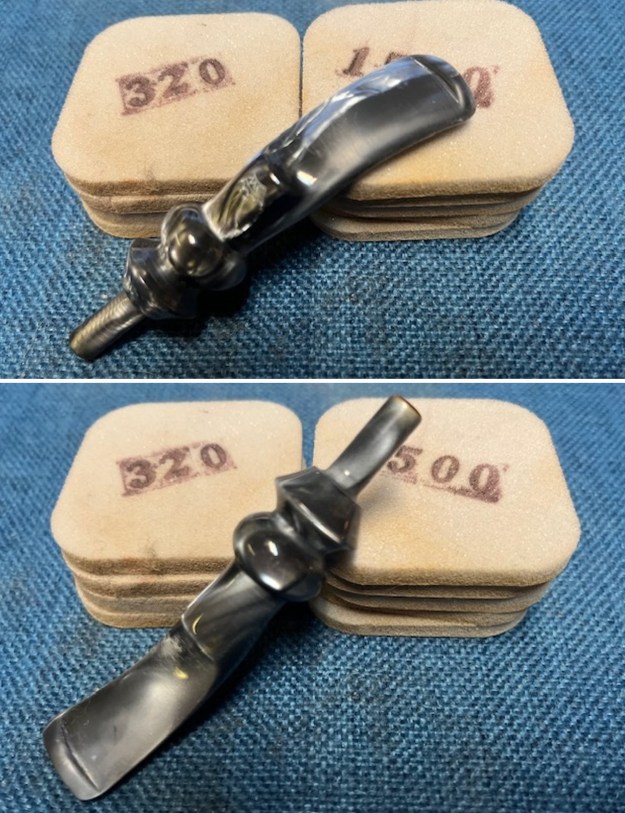
 I set the bowl aside and turned my attention to the stem. I sanded out the tooth marks with 220 grit sandpaper and started polishing the stem with 320-3500 grit sanding pads. I wiped it down after each pad a damp cloth to remove the sanding debris.
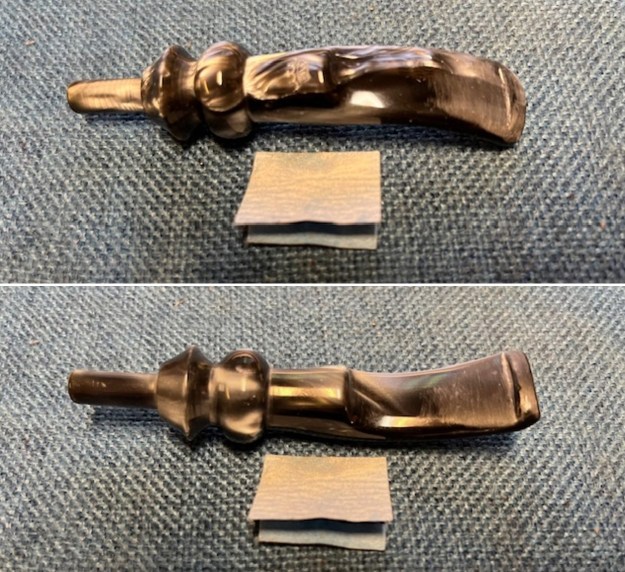
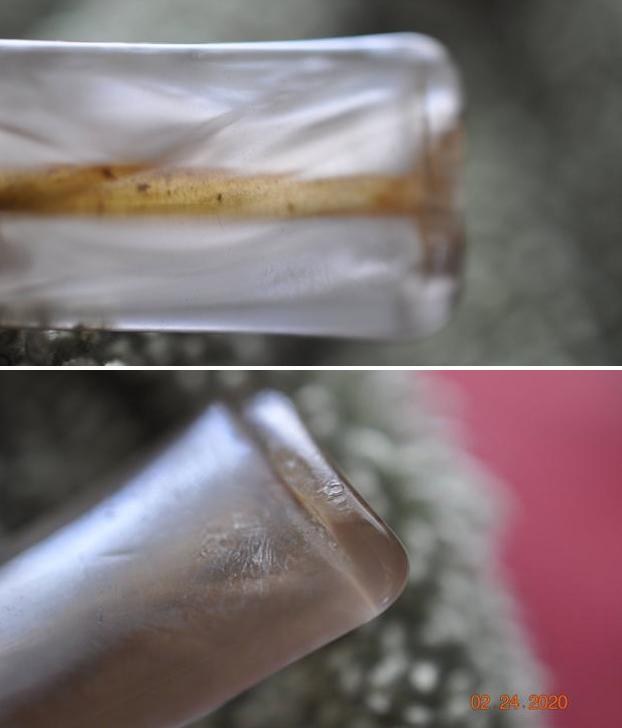
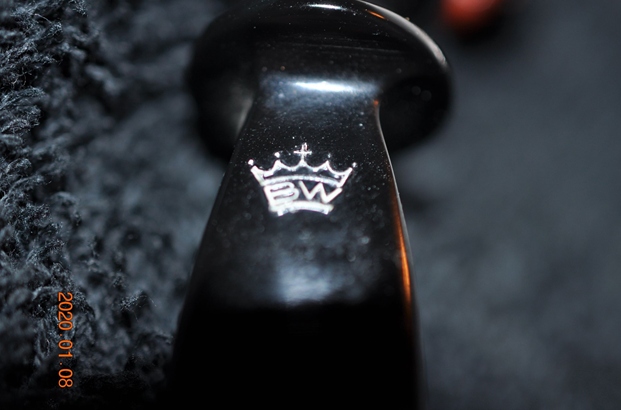
 I touched up the Crown BW logo on the top of the stem with Antique Gold Rub’n Buff. I worked it into the stamp with a tooth pick. I buffed it off with a soft cloth and rubbed the stem down with some Obsidian Oil.
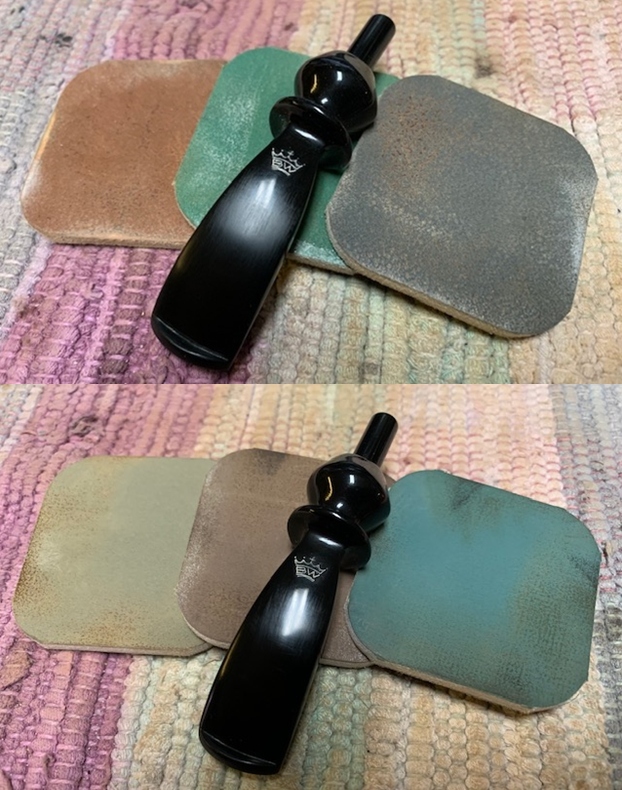
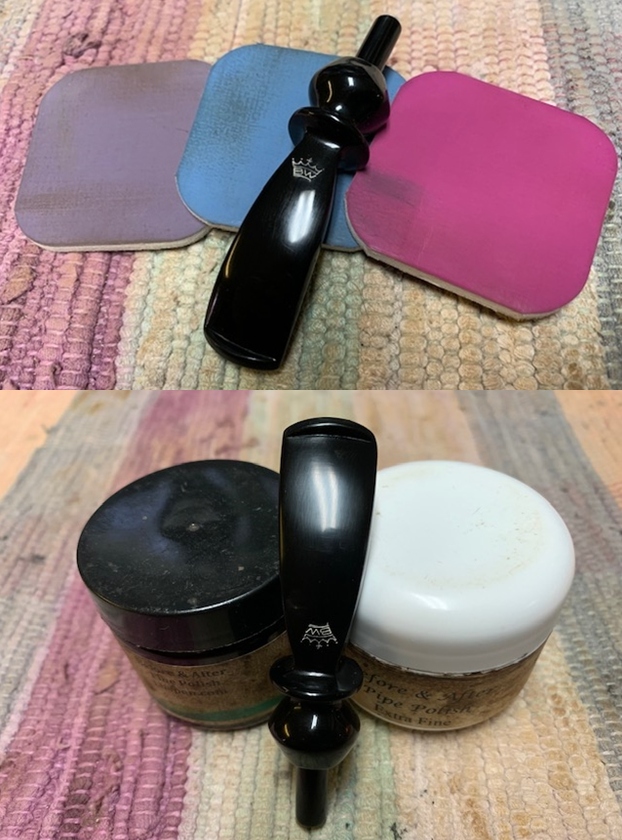
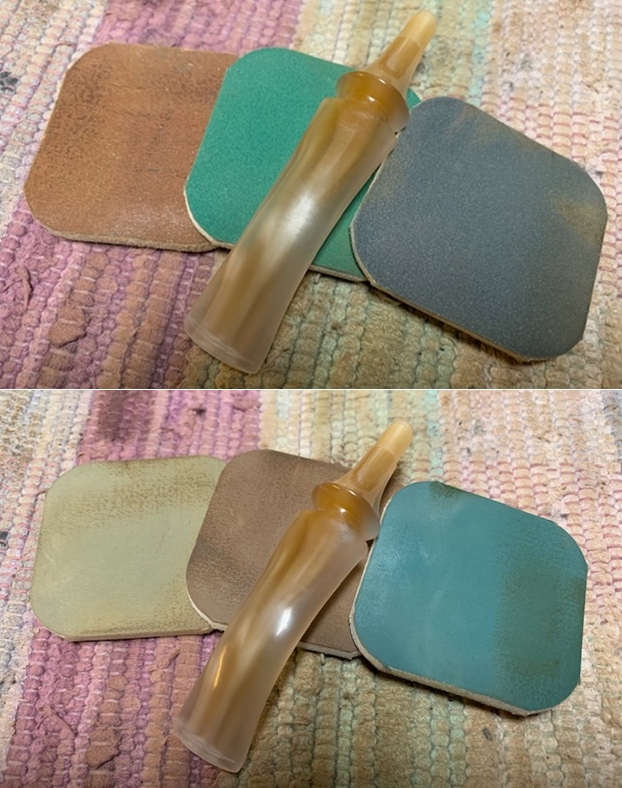
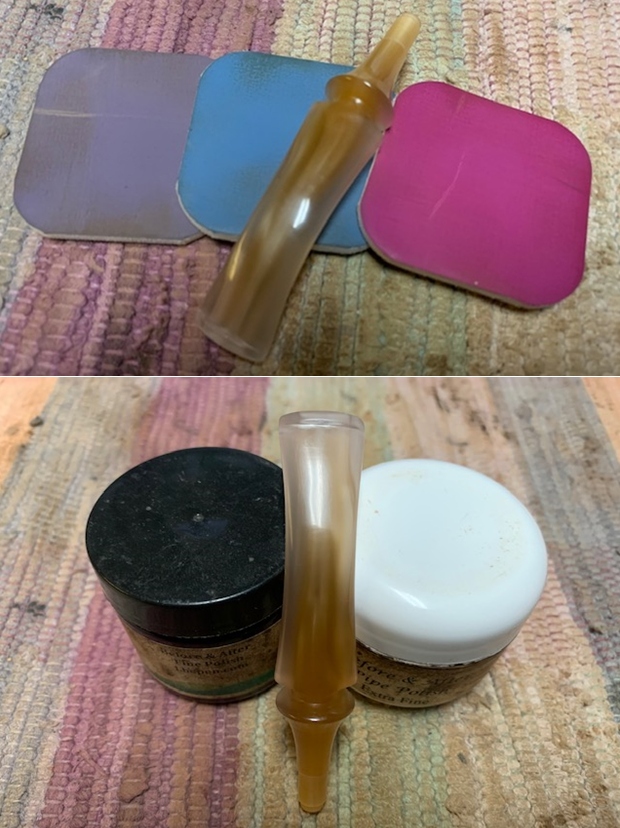
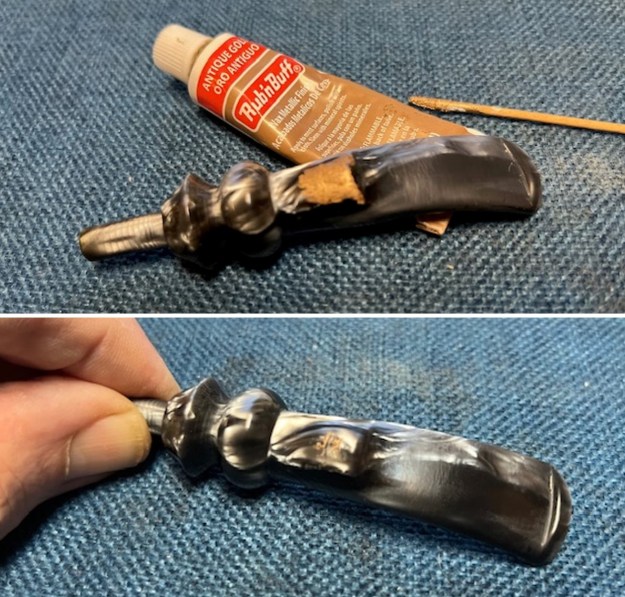 I polished the stem surface 1500-12000 grit micromesh sanding pads. I dry sanded the stem with each pad and then wiped the stem down with some Obsidian Oil. I finished the hand polishing of the stem with Before & After Pipe Polish – both the Fine and Extra Fine polishes. I gave it a final coat of oil and set it aside to dry.
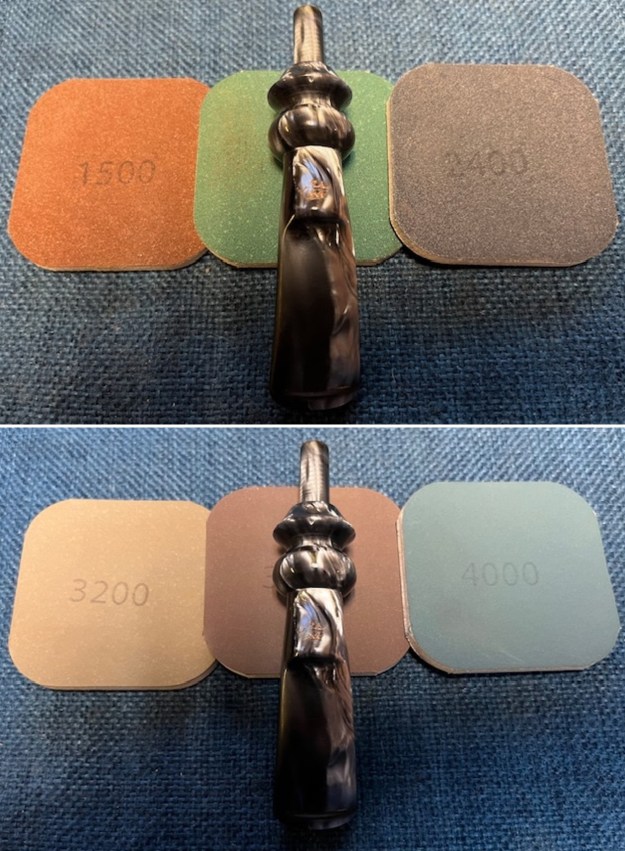
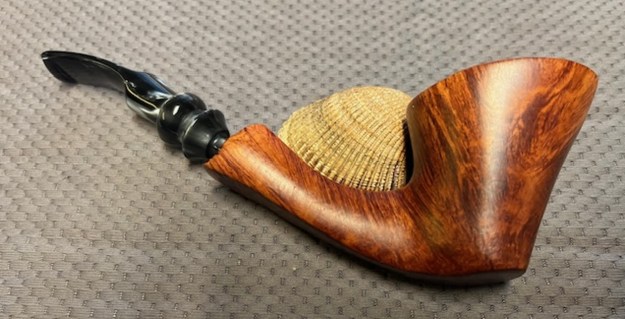
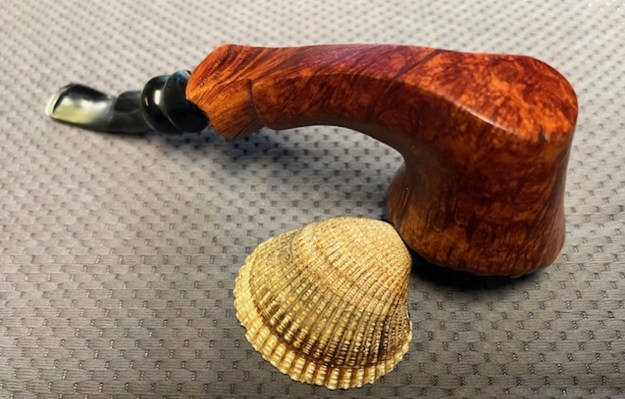
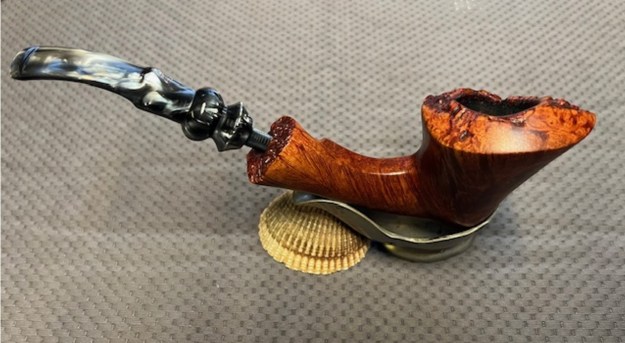
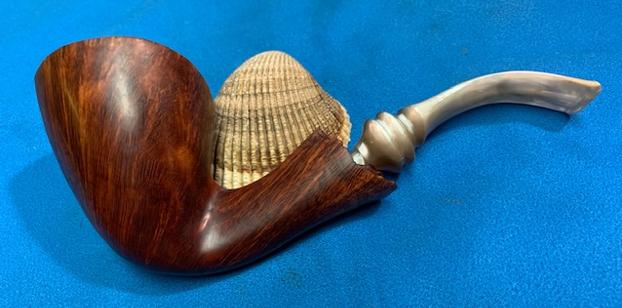
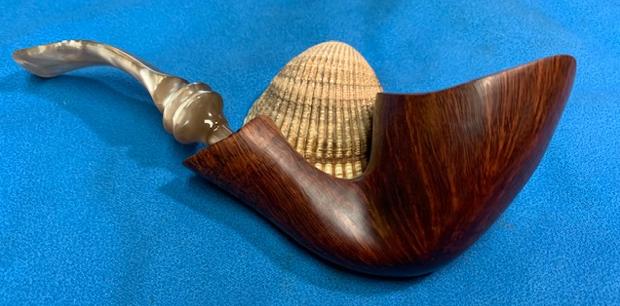
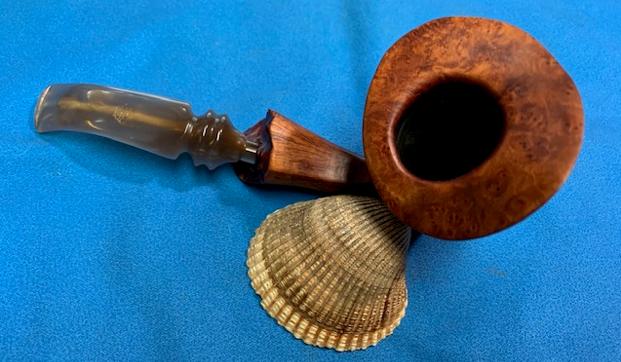
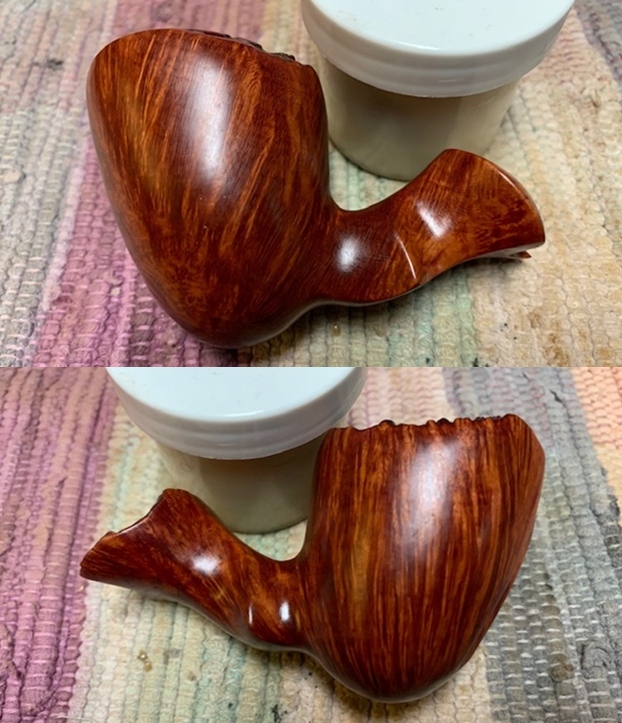
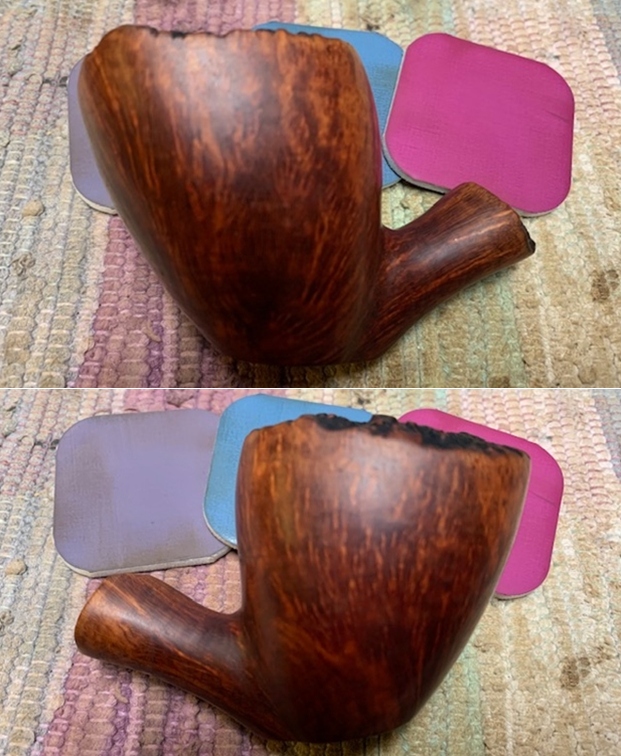
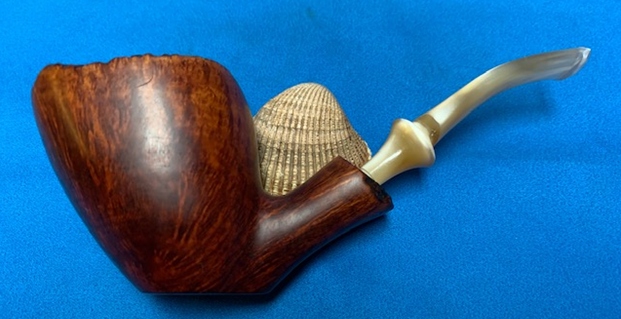
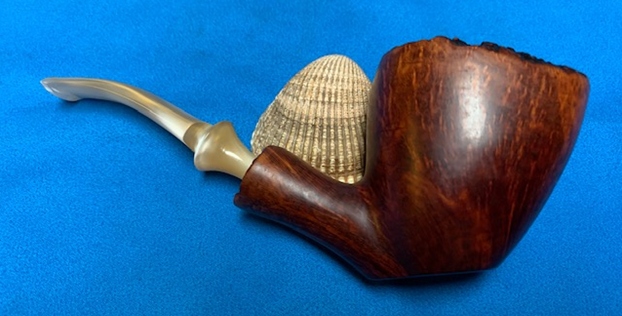
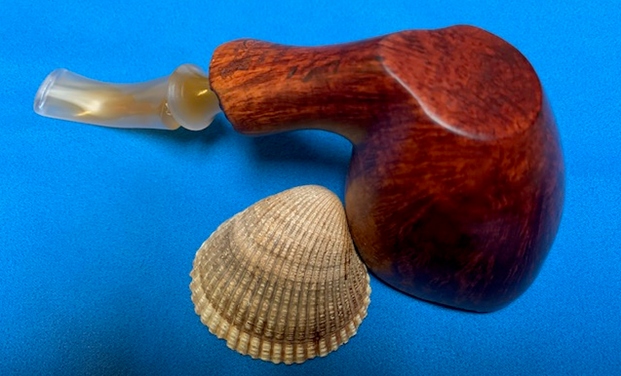
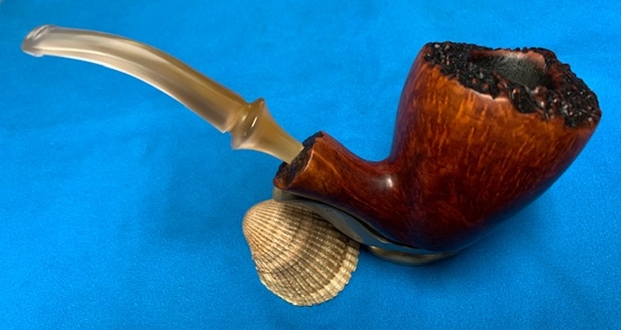
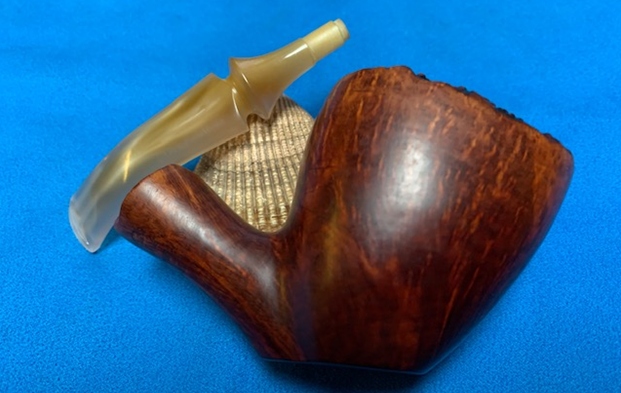
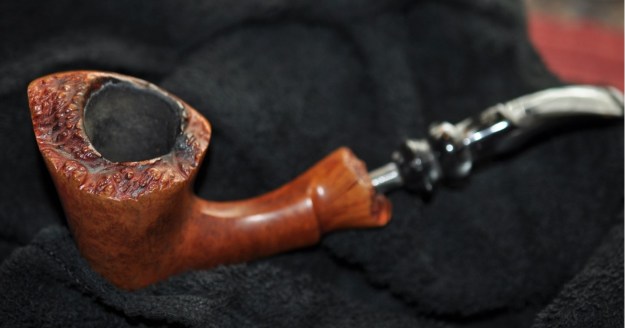
 I am really happy with the way that this Preben Holm made Ben Wade Martinique Danish Made Freehand turned out. It really is a beautiful looking pipe with a great shape and smooth finished bowl and plateau on the rim top and shank end. The fancy original acrylic saddle stem is really nice. The polished black/silver of the stem works well with the briar and the plateau portions. The briar really came alive with the buffing. The rich brown stains of the finish gave the pipe a sense of depth with the polishing and waxing. I put the stem back on the bowl and carefully buffed the pipe with Blue Diamond on the buffing wheel using a light touch on the briar. I gave the bowl and the stem multiple coats of carnauba wax on the buffing wheel. I buffed the pipe with a clean buffing pad to raise the shine. I hand buffed the pipe with a microfiber cloth to deepen the shine. The finished Ben Wade Martinique really is a beauty and feels great in the hand and looks very good. Give the finished pipe a look in the photos below. The dimensions of the pipe are Length: 7 inches, Height: 2 inches, Outside diameter of the bowl: 2 inches long x 2 inches wide, Chamber diameter: 1 inch. The weight of the pipe is 59 grams/2.08 oz. The pipe will be going on the rebornpipes store soon. It will be in the section on Danish Pipe Makers Section if you would like to add it to your collection. Thanks for reading this blog and my reflections on the pipe while I worked on it. It was a fun one to work on!
As always, I encourage your questions and comments as you read the blog. Thanks to each of you who are reading this blog. Remember we are not pipe owners; we are pipe men and women who hold our pipes in trust until they pass on into the trust of those who follow us.