Blog by Dal Stanton
I acquired this interestingly shaped pipe in an eBay Lot acquisition from France which has contained several very collectible pipes. The challenge with this French Lot has been that several names stamped on the pipes are unfamiliar to me and require more research to uncover the origins. This pipe continues that trend as its origins aren’t clear. My good friend and former colleague working in Ukraine, a pipe man and restorer himself (see: https://www.thepipery.com), saw this Robinson Paneled Tomato in the For “Pipe Dreamers” Only! collection and reached out to me about commissioning it which I was more than happy to do!
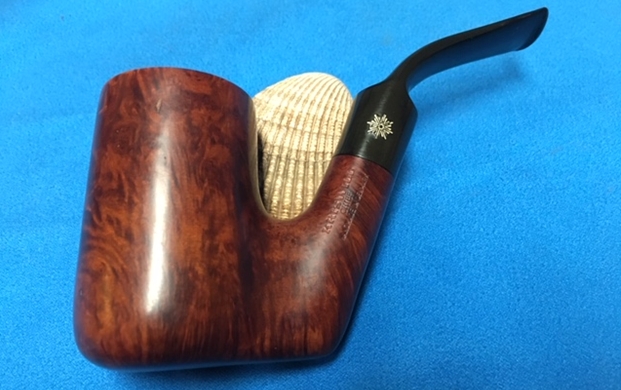
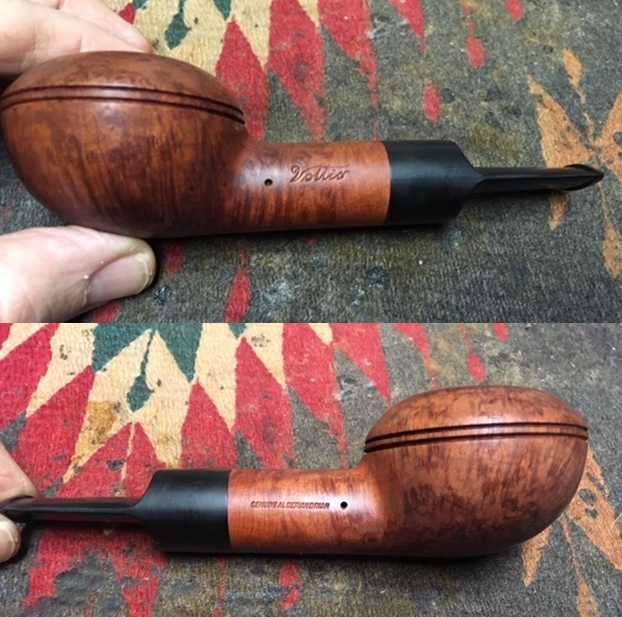
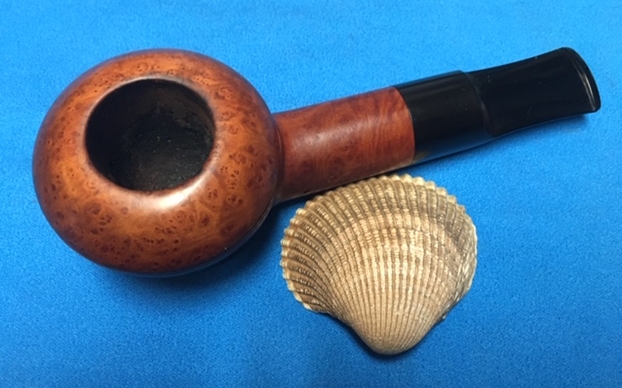
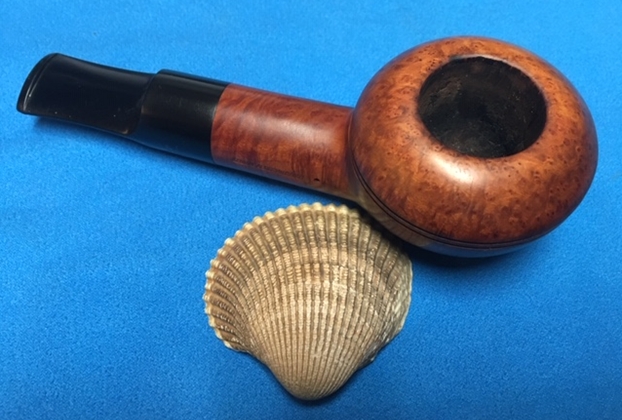
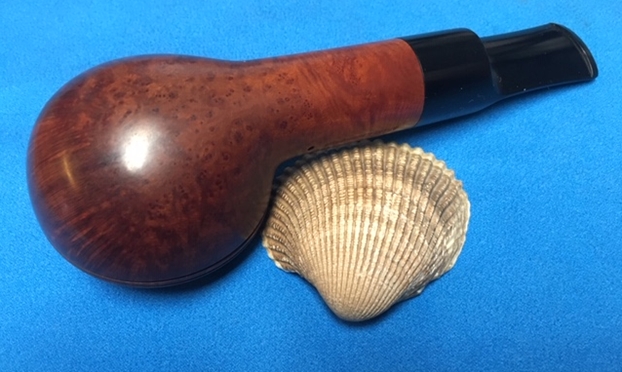
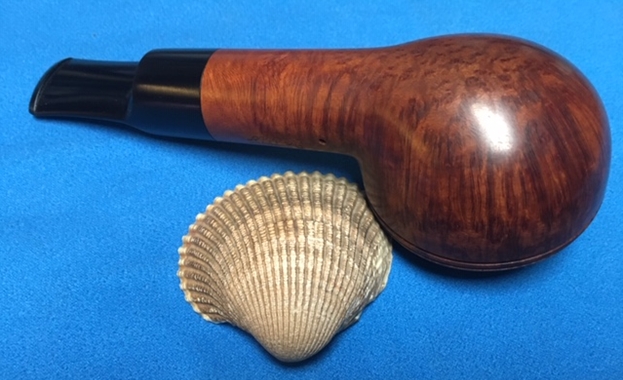
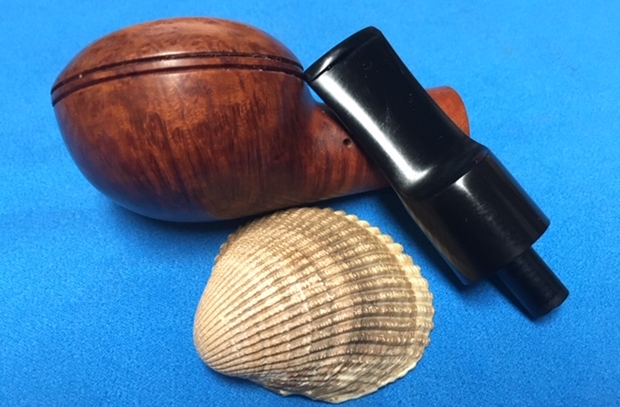
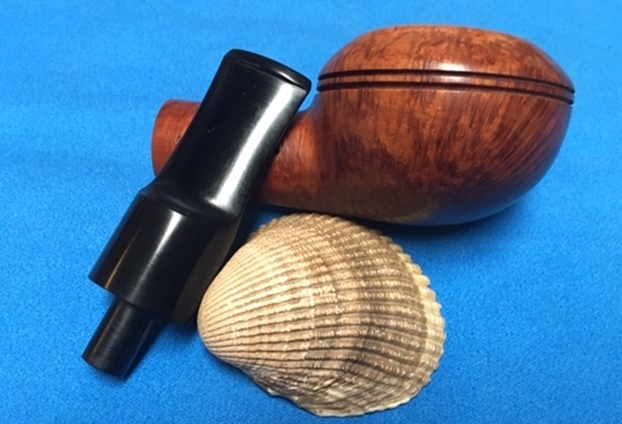
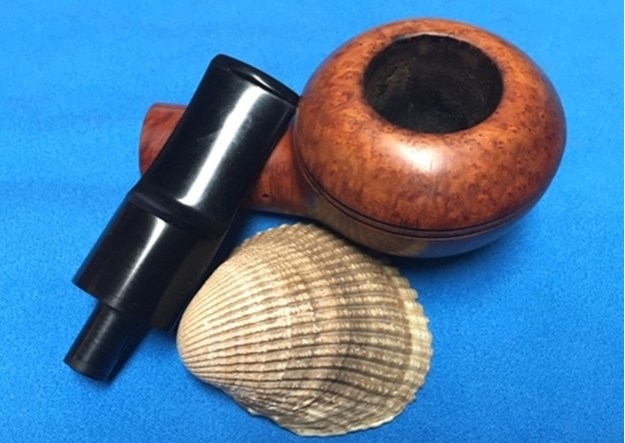
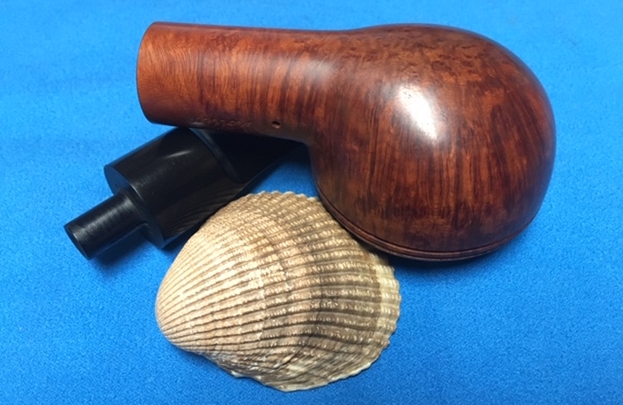
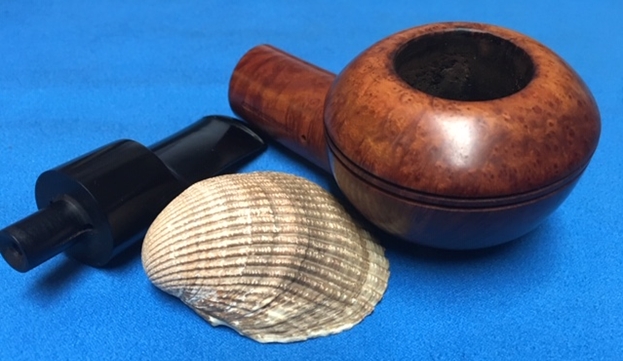
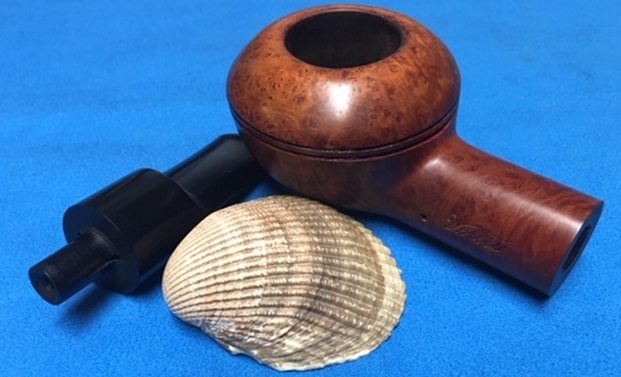
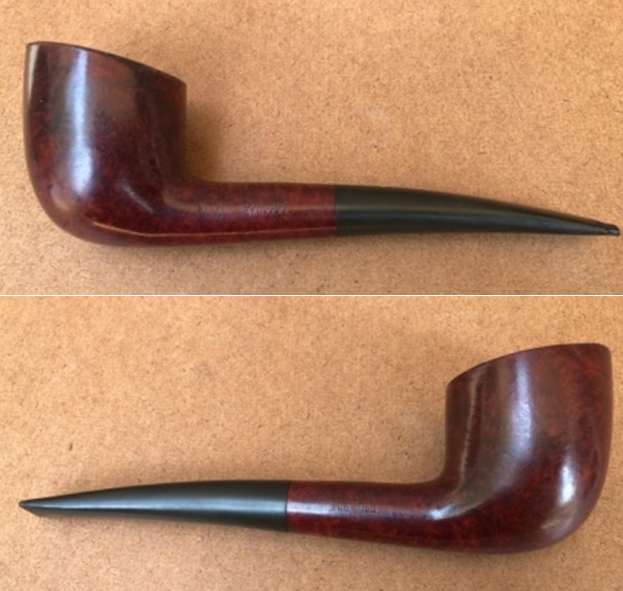
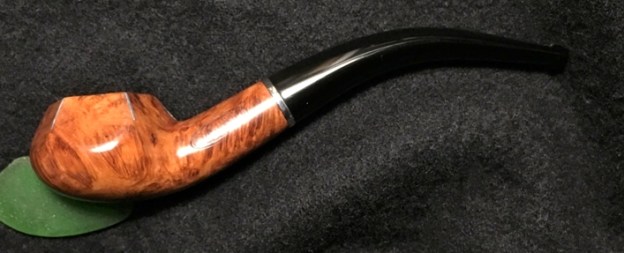
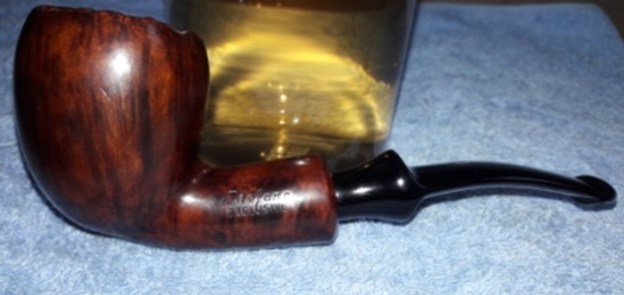
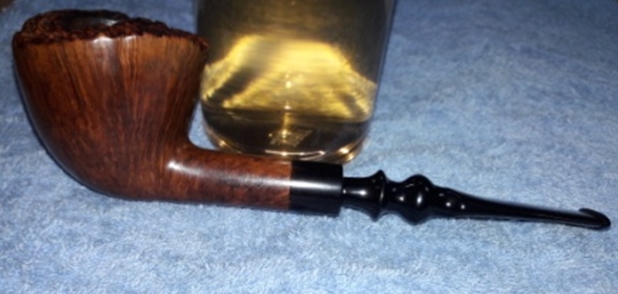
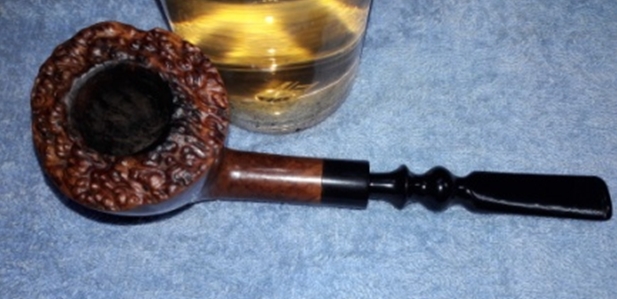
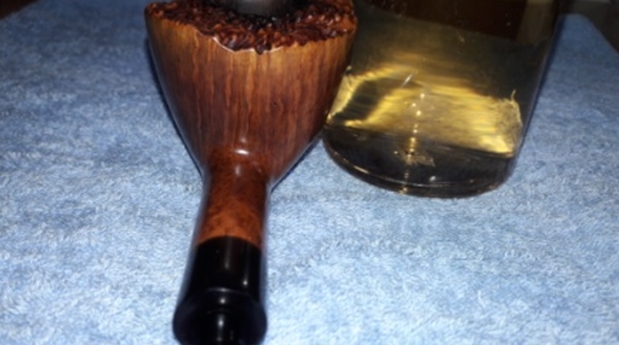
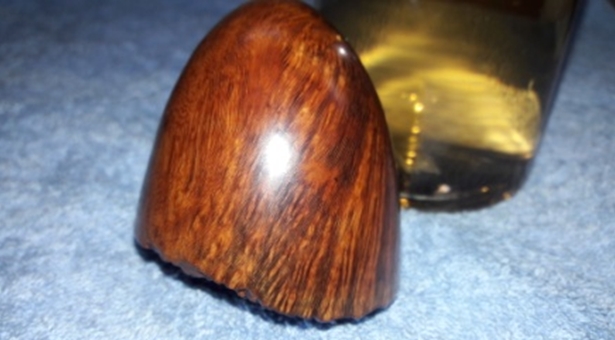
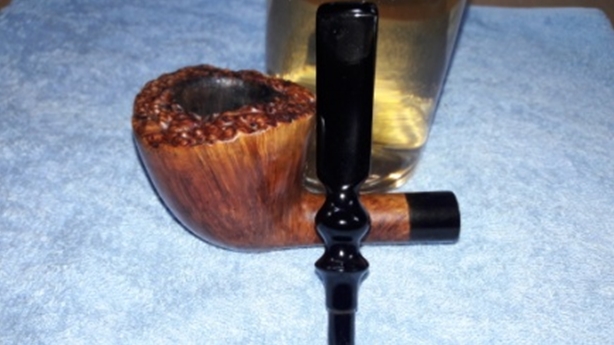
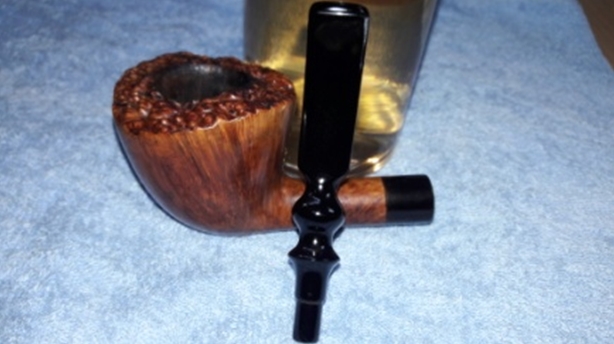
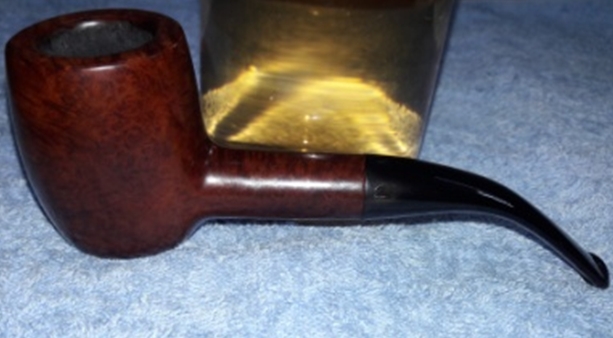
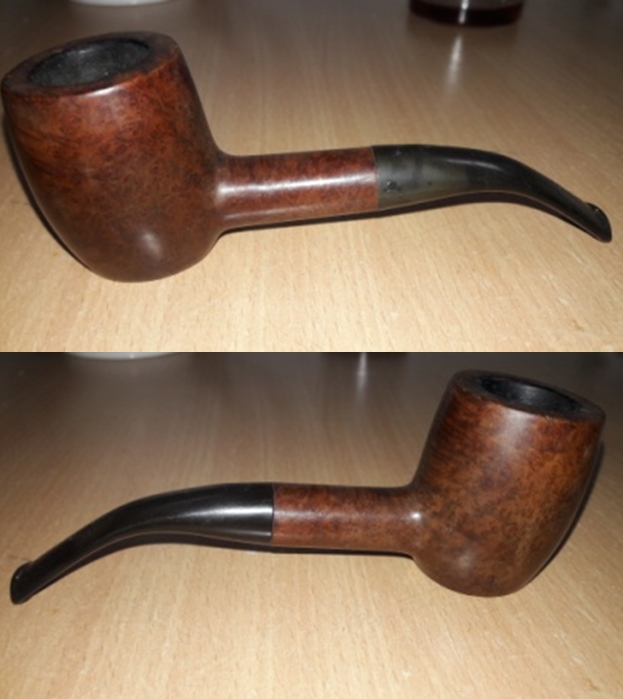
I’m categorizing this Paneled Tomato (though a case could be made that this is a Prince shape, but the shank is a bit too broad I think) pipe as a petite as its dimensions are: Length: 5 ¾ inches, Height: 1 inch, Tomato bowl width: 1 1/2 inches, Chamber width: 5/8 inches, and Chamber depth: 7/8 inches. It has a very attractive and sleek shape with the 1/4 bent stem, but what I haven’t seen before are the painted panel boarders setting off the upper dome of the Tomato along with sculpted rim notches. Here are pictures of the pipe now on my worktable:


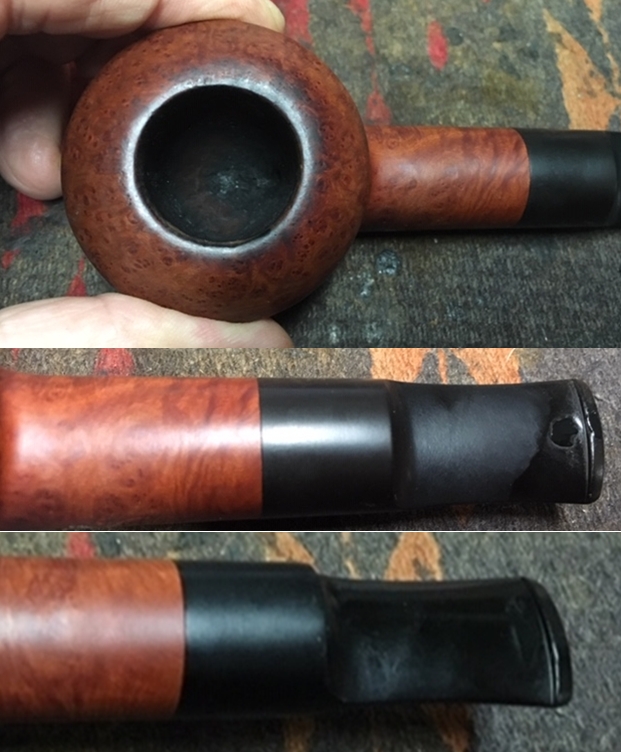
 What I thought at first was a stinger that had been cut off, might be a slotted insert of some sort. I’ll work on removing it later.
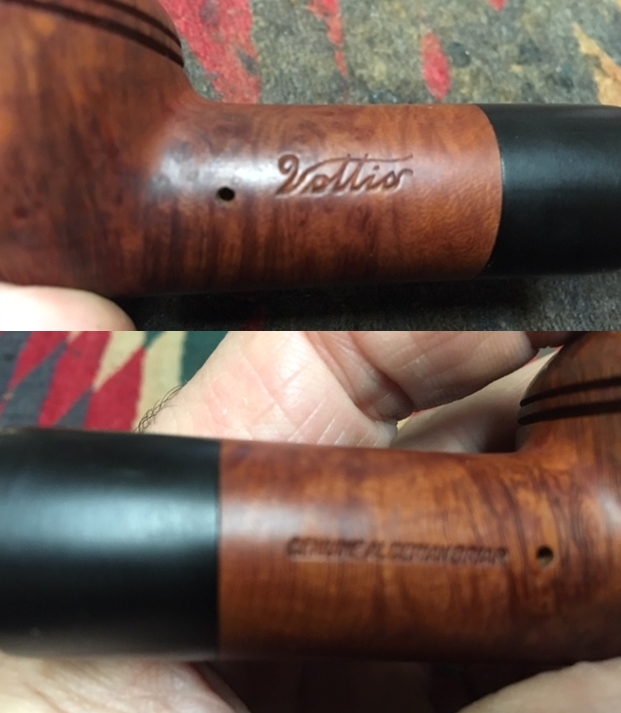
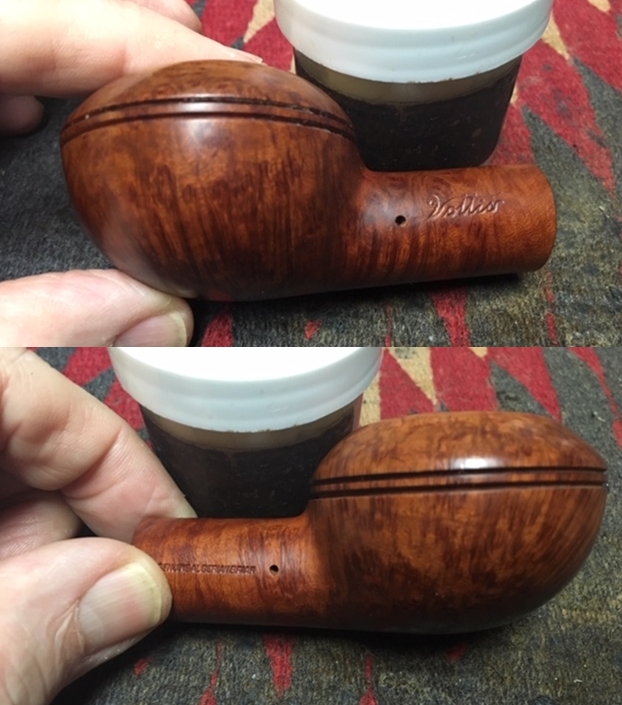
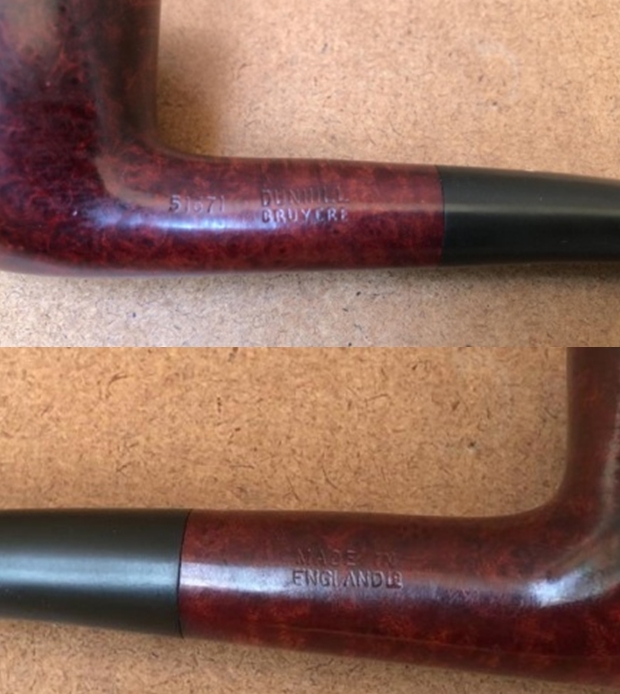
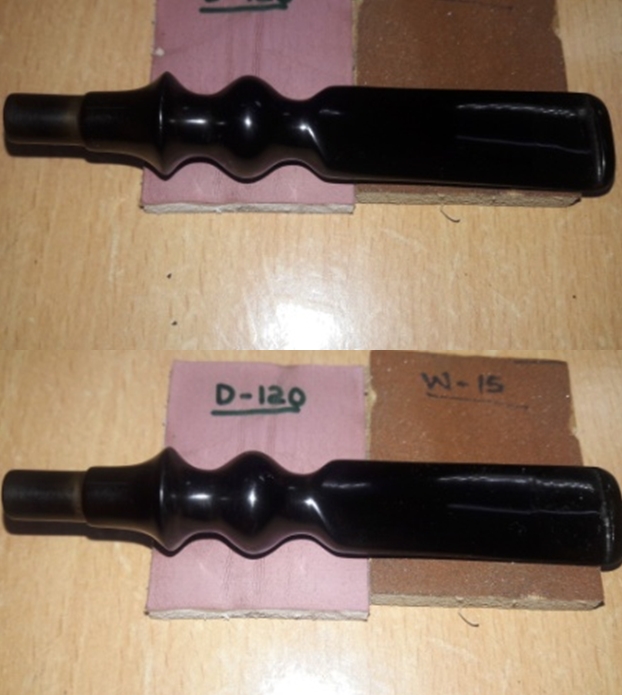
 The left side of the shank bears the ornate, oval with ‘ROBINSON’ stamped. The right side of the shank bears what I believe is a shape number ‘8494’. I looked in my autographed copy of Herb Wilczak & Tom Colwell 3/3/97 – ‘Who Made That Pipe?’ and found only one entry for ‘Robinson’ belonging to a ‘John J. Robinson’ with the COM listed as USA. I found no reference to a ‘John J. Robinson’ in Pipedia’s listings or Pipephil.eu, my regular first stops for information. I’m dubious of the COM of USA because, and I know this is subjective, the pipe has a European feel. Its diminutive size reflects more the English and French values of the last century and the pipe has a sense of some age to it in spite of the painted panel edges and rim notches that may have been added later. Also, the shape number of ‘8494’ doesn’t lend itself to a COM of USA. I decide to do a quick survey of English/French pipe shape charts to find this shape number that corresponds to the Paneled Tomato I’m looking at. Often established pipe manufacturers will put out lines of pipes for a 3rd party company with the party’s name stamped on it but the shape will emulate the shapes that the mother manufacturer already produces. I investigate BBB and GBD specifically as the most likely possibilities but found no match that might make this Robinson 8494 a positive second or sub-brand of these well-known English/French sources. Next, I go back to Pipephil.eu and instead of searching John J. Robinson, the Wilczak & Colwell clue, I simply search more broadly, ‘Robinson’ and find an interesting listing.
 Robinson & Co. Ltd, is a retail company in Singapore and Malaysia with obvious historic English connections. Wishing to know more about this company, I found this lengthy article in Wikipedia, Robinsons & Co. that gave much information.
Robinsons & Co. Pte Ltd is a retail company which has department stores in Singapore and Malaysia. The company owns the Robinsons department store, John Little in Singapore and has franchise outlets of Marks and Spencer in both countries. The company has grown into one of the country’s most renowned department stores. Robinsons celebrates their 160th anniversary in 2018.
Robin sons & Co. Limited is currently part of the UAE-based Al-Futtaim Group.
The article outlines the formation of the company in 1858 by Phillip Robinson of England when the British Empire had a colonial presence in Singapore. With partnership changes the exclusive, high end department store became known as Robinson and Co., in 1859. Through the remainder of the 1800s and into the 1900s it became a landmark in the downtown Singapore store and catered mainly to expatriates and higher end customers among the local population – royalty, business, and political spheres. During WWII, the store was bombed by the Japanese and was finally closed during Japanese occupation. After WWII it reopened when the British returned to Singapore in 1946 and the business flourished. During the 1970s, the business was less profitable due to international and local conditions and finally, the publicly traded Robinson & Co. Limited was acquired by Dubai based Al Futtaim Group in 2008.
From Pipephil.eu information, I’m able to establish two facts – the Robinson Department Store in Singapore DID market pipes with ‘Robinson Co. LTS’ which, secondly, have a COM of ‘Made in England’.
The 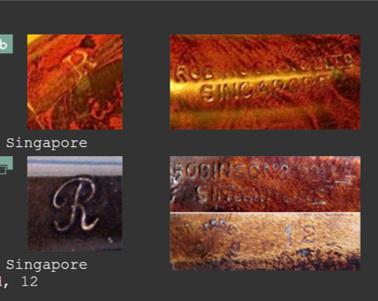 theory takes shape in my mind, with the absence of any other corroborating information, that it is possible that the ‘Robinson’ on my table is indeed connected to the ‘Robinson & Co.’ of Singapore. The Robinson on my table lacks stampings that confirm this as with the pipes shown on Pipephil.eu. But it is conceivable, yet I cannot substantiate this, that the Robinson I have is an older version before what appears to be the newer and more developed marketing applied to the later Robinson store pipe. This is obviously a guess, which I could not substantiate even after searching for older catalogues and any other ‘Robinson’ pipes out there on the internet! So, armed with a theory which I will continue to mull over, I move on!
 I begin the restoration of this possibly English made for Singapore, Robinson Quarter Bent Paneled Tomato, by addressing the moderate oxidation in the stem. After cleaning the airway with pipe cleaners dipped in isopropyl 95%, I then include the stem in a bath of Before & After Deoxidizer along with other stems of pipes that have already been restored and sent on to join new stewards. The Robinson is the last stem in this Before & After Deoxidizer batch.
 Several hours later I fish out the Robinson stem and wipe it down with cotton pads wetted with isopropyl 95% to remove the raised oxidation. The texture of the vulcanite stem is rougher than usual it seems. After cleaning the stem surface, I run a few more pipe cleaners through the airway to assure that the Before & After Deoxidizer is gone. The stem looks good after the treatment.
 To start the revitalization of the vulcanite, I then apply paraffin oil – a mineral oil, to the stem and then put it aside to absorb the oil and dry.
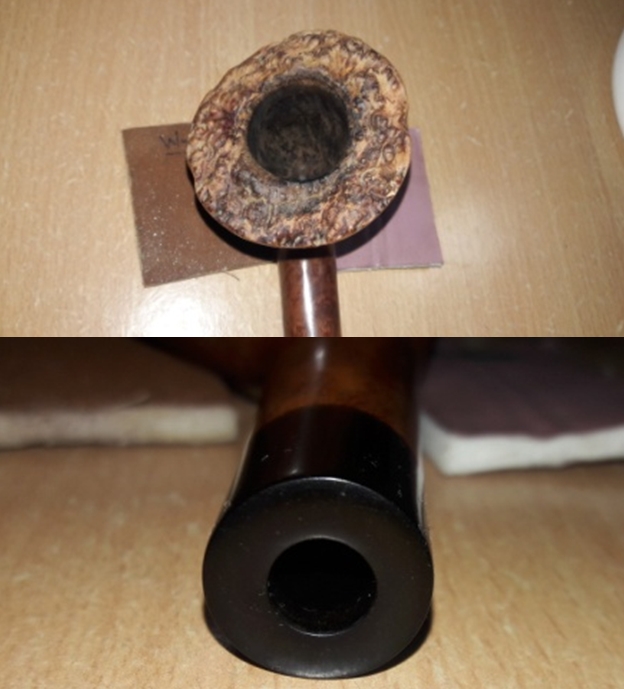
 Now, turning to the waiting stummel, I first address the moderate carbon cake by using the smallest blade head of the Pipnet Reaming Kit. This blade head fits the chamber perfectly. I follow by using the Savinelli Fitsall Tool to scrape the chamber wall further revealing fresher briar. Finally, I sand the chamber with 240 grit paper wrapped around a Sharpie Pen and then wipe the chamber clear of carbon dust with a cotton pad wetted with isopropyl 95%.
 After clearing the carbon cake, I inspect the chamber and it looks good.
 I then move directly to the internal cleaning of the mortise and airway. I start using cotton buds and pipe cleaners dipped in isopropyl 95% and…. The text describing the cleaning process is much shorter than the cleaning process. I had noticed earlier that this stummel was a bit of a stinker, so I was anxious to begin addressing this olfactory offense to my nose and adjoining rooms in our 10th floor apartment in a formerly Communist Bloc apartment building. In addition to pipe cleaners and cotton buds, I use a dental spatula to scrape the mortise walls, as well as a drill bit inserted into the airway and hand turned to excavate the tars and oils. I also use a long wire shank brush to scrub the internals. The picture shows the weapons brought to bear….
 I’m still not seeing cleaner cotton buds and pipe cleaners that would reveal progress, so I decide to move on to giving the stummel a kosher salt and alcohol soak with hopes that this will loosen the grunge and clean the internals. After stretching and twisting a cotton ball to serve as a wick to help draw out the tars and oils, I insert it into the mortise and the airway with the help of a straight stiff wire. I then fill the bowl with kosher salt and place it in the egg crate to keep it steady. Using a large eye dropper, I add isopropyl 95% to fill the bowl until is surfaces over the salt. After it absorbs in a few minutes, I refill the bowl with alcohol and put it aside to soak.
 The next day, the salt and wick are heavily soiled and hopefully the condition of the internals is improved.
  Using a pipe cleaner and cotton buds, I soon find out that the condition is much the same. I put on surgical gloves a long time ago during this cleanup process! I continue to dig and excavate using all the tools listed above.
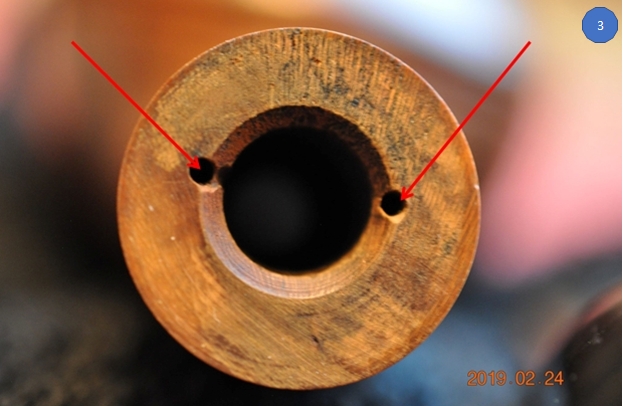
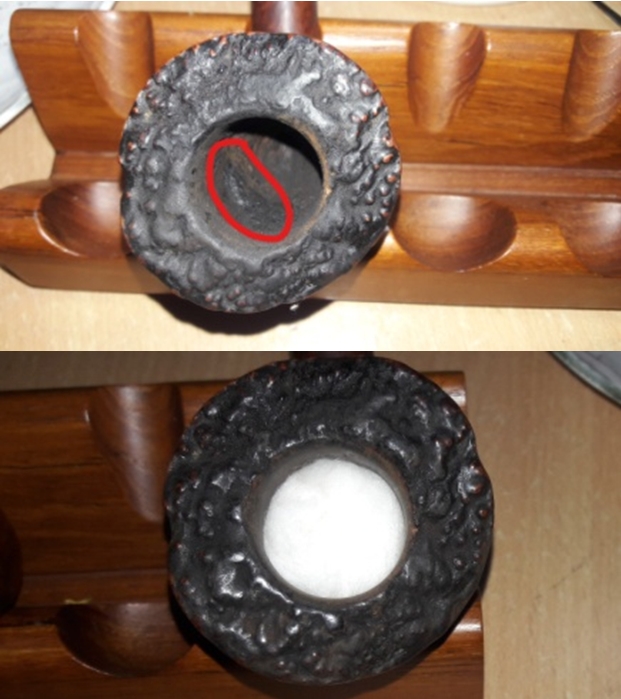
 With a glimmer of hope beginning to dawn with cotton buds and pipe cleaners starting to lighten, I again provide a kosher salt and alcohol soak with the hope that the tide is turning. What I discover as I became intimately familiar with the internal layout of the mortise as I inserted spatulas and dental probes to clean, was that the drilling of this stummel was in two phases. A larger drill bit was used to open the mortise. Then a smaller drill bit was used to drill the short airway and exiting into the chamber forming the draft hole. The slight up-tick in the angle of the second drilling created a small trap of sorts that collected much tar and oils over the years. It would be difficult to clean with normal pipe cleaners as they would go over to the top of the trap on their cleaning mission. To intentionally clean this small angled trap, it needs to be intentionally and regularly scraped with a probe – something stiff enough to dislodge anything collecting.
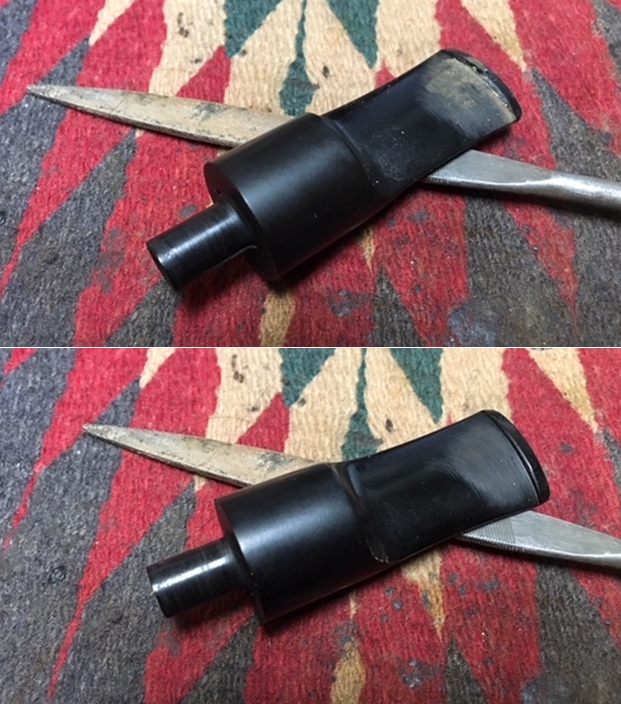
  With the kosher salt and alcohol soak cooking a second time, I pick up the stem and take another look at the slotted insert in the tenon. It doesn’t appear to be a snipped stinger, but perhaps an air restrictor insert of sorts with a slotted opening – I’m not sure if its threaded but I doubt it. I don’t have much sympathy for stingers and restrictors as they simply create more angles for the airflow – this creates condensation and more moisture…. I heat the metal insert and tenon with a Bic lighter to loosen the grip and using a pair of needle nose pliers I do not pull the insert out but accomplish snapping the top of the insert off! I hand screw a drill bit into the shaft of the metal insert remaining in the tenon and after reheating the tenon and drill bit, and a few retries, I succeed in extracting the remainder of the inserted air restrictor. It will be much easier to clean now as well.
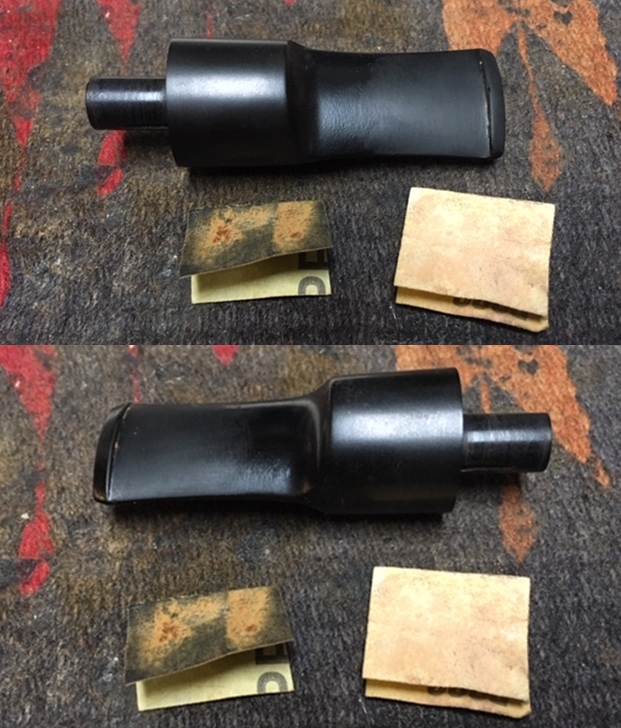
 Looking now at the stem, the bit area on the upper and lower has some bite compressions, but not significant. The lower button lip has also been chewed a little. I’m thinking that sanding and a little filing should rectify the situation.
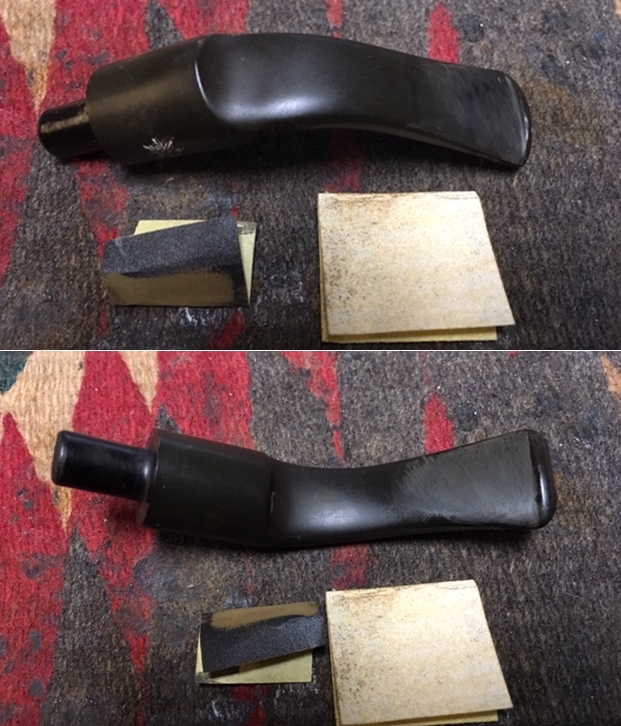
 I use a flat needle file to freshen the button and 240 grit paper to sand out the compressions. This works well.
 I also sand the entire stem with 240 grit paper to remove the rough, goose skin surface of the vulcanite. I employ a disc I fashioned to guard again shouldering the shank face of the stem.
 I then wet sand the entire stem using 600 grade paper followed by 0000 steel wool.
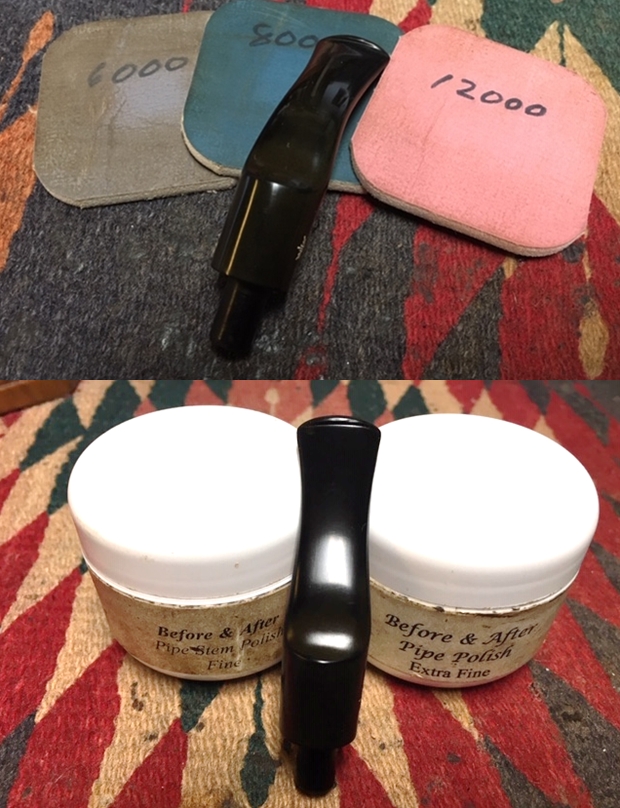
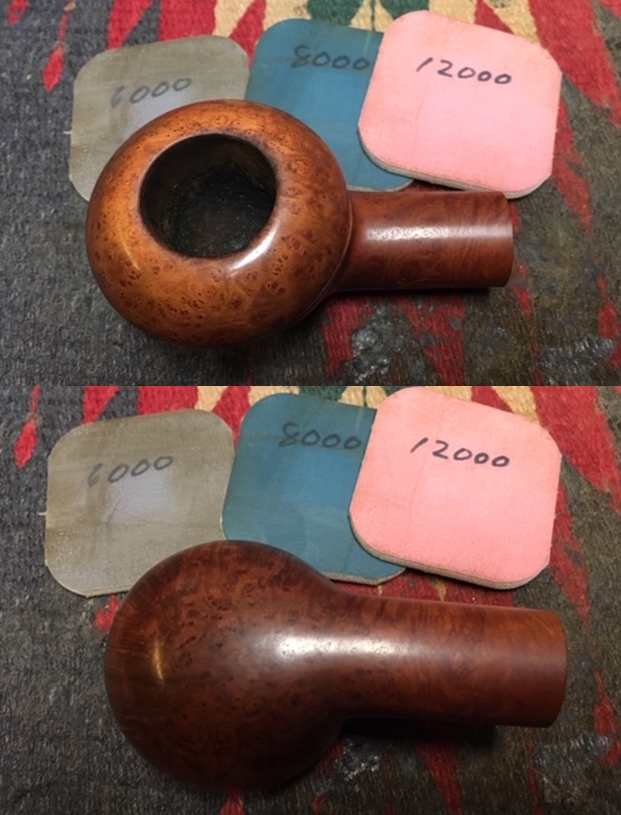
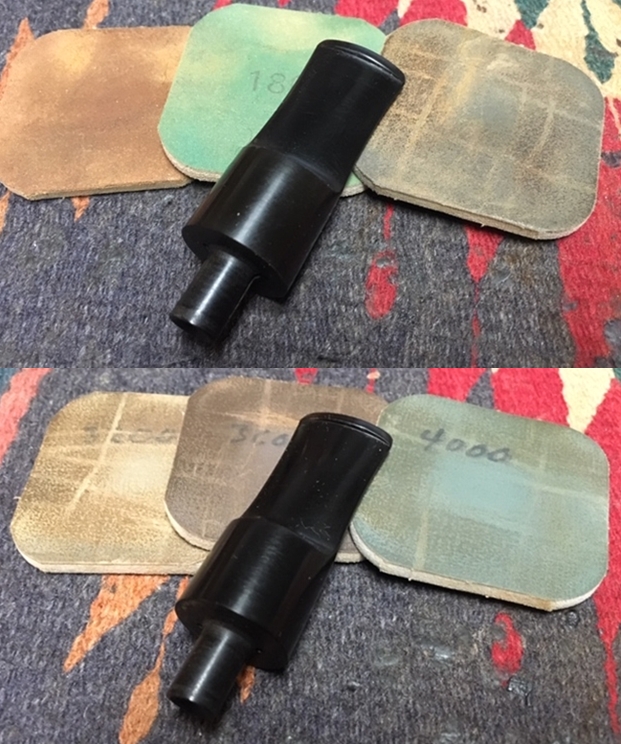
 Without pause I move to the micromesh regimen using pads 1500 to 12000. First, I wet sand using pads 1500 to 2400 followed by dry sanding with pads 3200 to 4000 and 6000 to 12000. Between each set of three I apply Obsidian Oil to the stem to revitalize the vulcanite – and it is coming to life! The rough surface smoothed and polished up well.
 The next morning (again), with something akin to Handel’s Hallelujah Chorus in the backdrop of my mind joyfully reverberating and echoing, I see that the second kosher/alcohol soak has furthered the cleanup effort significantly. After dumping the soiled salt and cleaning the stummel of salt crystals, I run a few more buds and pipe cleaners through the internals and the cleaning is now complete! The bowl is also freshened from the stink odor that dominated its presence before. This cleaning was a bear – and it’s not finished!
 Turning now to the external briar surface, I wonder what the cleaning will do to the paint job this stummel has received. If it’s acrylic paint, the cleaning should remove it. If not, well, it’s something else, probably oil based. I have a very difficult time conceiving of any scenario where paint was part of the original motif of this Paneled Tomato – I believe the rim notches were a later addition as well, but perhaps not! I’ll clean and see what happens.
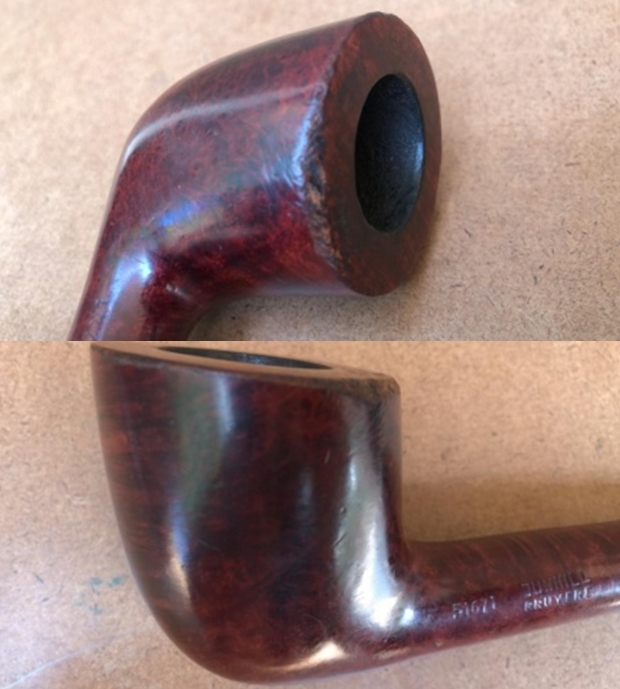
 I use undiluted Murphy’s Oil Soap with cotton pads to clean the stummel. There’s lava overflow covering the rim which I also deal with using a brass bristle brush.
 The cleaning removes the grime and I discover the panel boarder painted strips firmly intact, hmm. On the left flank of the stummel is the loan fill that I detect after seeing more of the stummel. After the cleaning, the old fill material is soft, and I remove it easily with a dental probe to be replaced later with CA and briar dust putty.
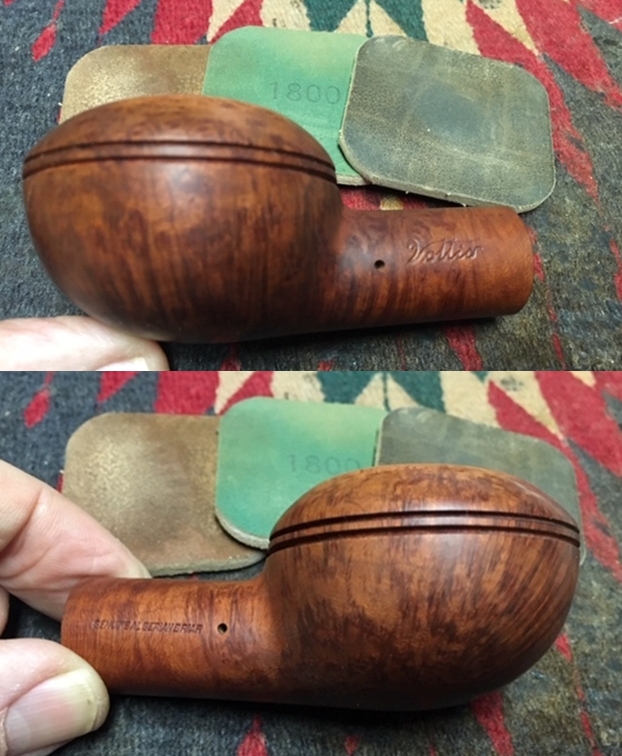
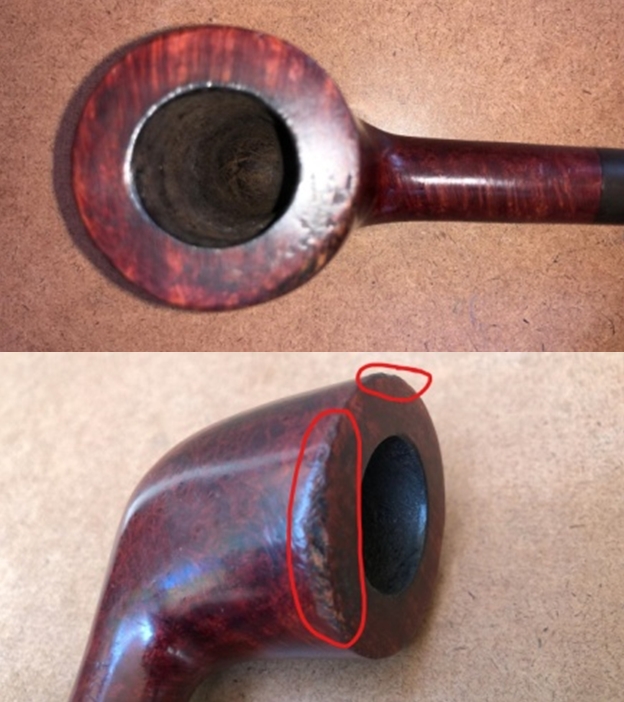
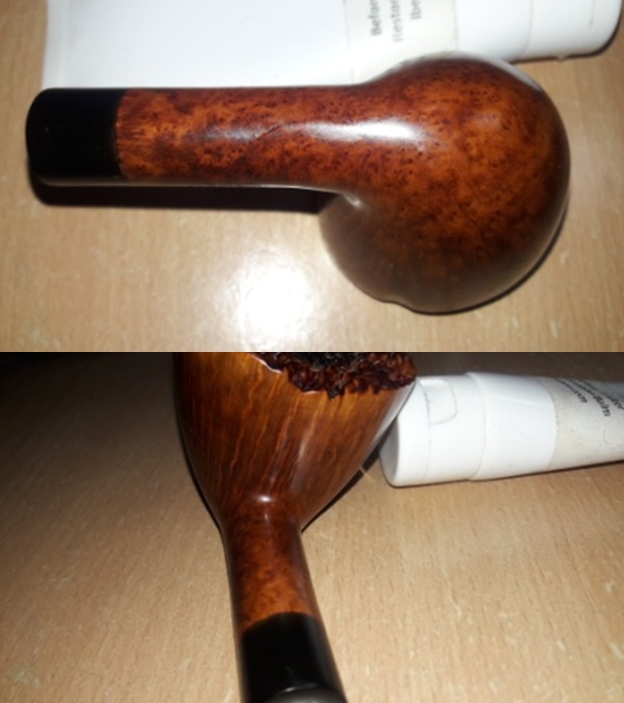
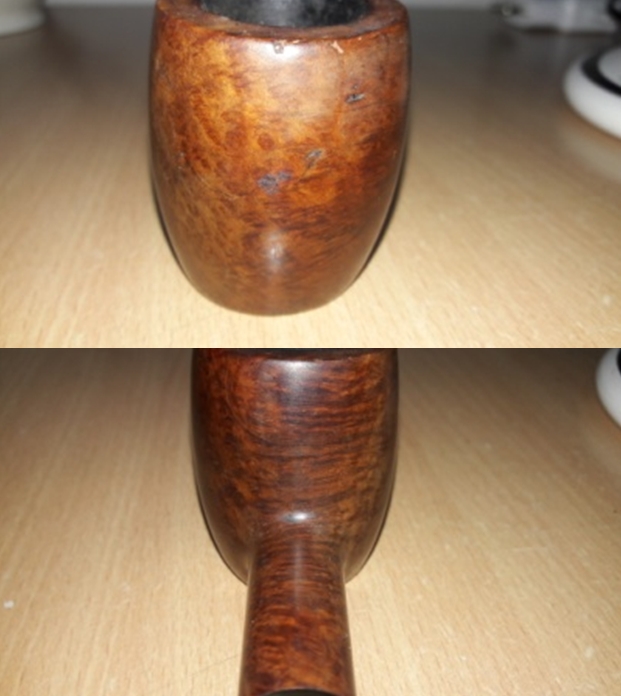
 The stummel cleans up well and has lightened considerably revealing some nice grain patterns on the diminutive bowl, but it also shows the nicks, wear and tear of normal usage. After the cleaning and scrubbing, the rim is still showing some burn areas.
 Not much consideration was needed to bring out the chopping board that serves as my topping board. I use 240 grade paper to refresh the paneled rim. I would like the six sides and corners to be sharper and more distinct. The shank extends beyond or above the rim plane, so I hang the shank over the edge and begin the topping like that. I also utilize a small sanding block that is very useful for fine-tuning a topping project by allowing me to focus on an area. The pictures show the progression using 240 grade paper.

 When satisfied with the progress, I change the board to 600 grade paper to smooth the rim from the 240 grit scratches.
 Next, before working on the stummel proper, I repair the small pit on the left side of the stummel by refilling it with a putty created from mixing briar dust and CA glue. It doesn’t take much to fill. I use an accelerator after mixing and applying the putty with a tooth pick. This quickens the curing process so that I can quickly file and sand it and continue the project.
 Thankfully, Bulgaria is beginning to experience some intermittent spring-like weather. I take advantage of the mild weather and move out to the Man Cave, my 10th floor balcony, where I file and sand the patch mound and enjoy Red’s Cherry blend in my Gasparini MGM Rock 1912. A wonderful time filing and sanding!

 To erase as much of the inner rim scorching damage that darkens the briar, I introduce a bevel. I first tightly roll a piece of coarser 120 grit paper to do the initial clearing. I then follow with 240 grit paper also tightly rolled.
 After applying the bevel, I return to the topping board and turn a few rotations to refresh the rim.
 Oh my! At this point in the restoration, I discover that I’m not restoring a mangled pipe that was painted and rim notched for fun! After re-topping the rim, I see that what I thought was paint framing the panels is not paint at all. It’s metal – a metal inlay of some sort. An inlay?! That takes time and skill! I examine the rim where the top of the ‘paint’ met the rim and I see that it has depth. I take a few more close ups to show the dimensions from differing angles.
 Not sure what I’m looking at, I show my discovery to my wife, and she asks me if I have a magnet? I didn’t, but she took a magnet off the freezer holding up a photograph and she says to test the magnetic pull of the metal. It has no magnetic pull at all. Her conclusion is, “It’s probably silver.” After a quick search on Google for, ‘Silver inlay in wood’, I found these pictures on Pinterest.
 I am suddenly more firmly convinced of my theory about the origin of this ‘Robinson’ – from a high-end store in Singapore. Who would pay for such a pipe as this? Who would be drawn to a pipe with silver inlay? Now that I know what it is, the pipe itself is transformed from a discarded pipe that someone painted and notched trying to be cleaver to a pipe that was the recipient of a fine jeweler’s careful process of silver inlay in wood – and not just wood but situated perfectly and uniformly framing the panels of this pipe. Looking at some videos and pictures I see online, the process was probably done using a silver wire that was tapped into place as the first picture above. The next urgent question coming to mind was not how to remove it but how to protect it!? The inlay has stayed intact this long, I don’t want to change the status quo! I decide to use sanding sponges to work on the scratches and nicks that are prevalent on the stummel. The sponges shouldn’t be too invasive if inadvertently moving over the silver. Before starting with the sponges, I see that the left side of the stummel, just under the panel, has significant pitting. I apply a small amount of CA glue here to fill the pits and apply an accelerator to quicken the curing time.
 I use 240 grit paper, then 600, to sand out the patches until flush with the briar surface and smooth.
 I then use sanding sponges, starting with coarse, medium, then light, to work out the blemishes throughout the stummel. I avoid as much as possible direct movement over the silver inlay but work around it on each panel.
 I then utilize the full regimen of micromesh pads, 1500 to 12000. I first wet sand using pads 1500 to 2400, then dry sand with 3200 to 4000 and 6000 to 12000. As with the sanding sponges, I do not intentionally focus the pads over the silver inlay but work around it.
 With the assumption now that the twin rim notches on the forward panels are part of the original motif, I freshen two of them using a carpenter’s blade.
 During the initial cleaning of the stummel, the shank cap had popped off and I put it aside for safe keeping. Now that I’ve discovered the silver inlay, I’m wondering if this cap is more than the nickel plating that I originally suspected. To clean, I take it to the sink and wash it with warm water and mild soap, using my fingernail as well as a brass brush to help in the cleaning. After cleaned I rinse it and dry it thoroughly.
 I then apply Tarn-X to the ring with a cotton pad and wipe thoroughly then take it to the sink and again rinse and dry.
 This time with a magnifying glass, I check the band and my original assumption seems to be correct that it is nickel. I find no stamping on the metal to indicate that it is silver. Next, I apply the magnet to the ring, and it is not magnetic at all. After a quick search in Google to check the magnetic composition of nickel, I discover that it is indeed magnetic. The band, shank cap before me is not. It is becoming clearer now that I am not working on a maligned basket pipe. If this band is indeed silver, it is rawer and unmarked. Again, my theory of an English, Singapore, connection is encouraged.
  Before reattaching the cap to the shank, I mount a cotton cloth buffing wheel to the Dremel dedicated to applying White Diamond compound on silver. I have wheels dedicated for several different compounds and metals. I carefully hold the band and buff it with White Diamond compound and then buff it with a microfiber cloth.
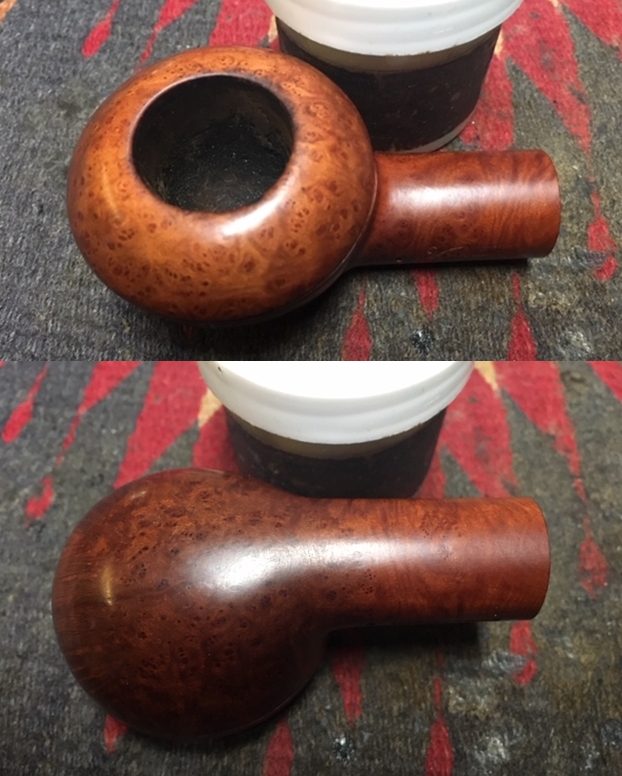
 To bring out the depth of the grain that has emerged, I apply Before & After Restoration Balm to my fingers then work it into the surface of the briar. The Balm begins with a thinner oil consistency then thickens as I work it into the surface. At the end it’s like a wax. I allow it to sit for several minutes then I wipe it off with a clean cloth and buff it up until the stummel is clear of excess Balm. The Balm does a great job bringing out the nuanced tones of the briar.
 After applying the Restoration Balm and without remounting the silver shank cap, I reunite the stem and stummel setting the speed at 40% full power and apply Blue Diamond compound to the entire pipe. I don’t remount the silver shank cap so that I can apply the compound without worry of impacting the band. As well, during the buffing, I stay clear of the silver inlay to avoid the chemical reaction that can stain the wood with black.
  After the application of Blue Diamond compound is finished, I apply two small dots of CA glue to the inner side of the silver shank cap and remount it on the end of the shank. It looks great!
 Now in the homestretch, I remount the stem to the stummel and apply coats of carnauba wax to the entire pipe, still avoiding the silver inlay and band. After completing the application of wax, I give the pipe a rigorous hand-buffing to raise the shine of the briar and the luster of the silver.
My final theory for the origins of this silver laden Robinson Quarter Bent Paneled Tomato is that it was produced in England in the years immediately following the close of WWII after the British returned in 1946 after Japanese occupation and the Robinson department stores in Singapore and Malaya soared in sales – reaching 1 million US for the first time in its history (LINK) and saw expansion well into the 1950s with the acquisition of the John Little Co., the largest and older competitor to the Robinson presence in Singapore. This is only a guess as to the period, but with what appears to be an older Robinson stamping from the examples I found online, I’m thinking that this guess is pretty good but still a guess! How I viewed the pipe morphed from being a marginal basket pipe that had been maligned to a very nice pipe with a touch of opulent class. The briar grain itself is beautifully presented on the heel of the stummel and is showcased in each of the six silver-framed panels. The diminutive size puts this pipe squarely in English tradition and the gently bent stem is elegant with the striking silver band providing the bowl/stem transition. The absence of formal markings on the silver band is still a question, but it might be explained in that it was destined as a store pipe. My friend, Dave, commissioned this Robinson Paneled Tomato and he will have the first opportunity to claim it from The Pipe Steward Store. This pipe, as with others, benefits our work here in Bulgaria with the Daughters of Bulgaria – women and girls who have been trafficked and sexually exploited. Thanks for looking!


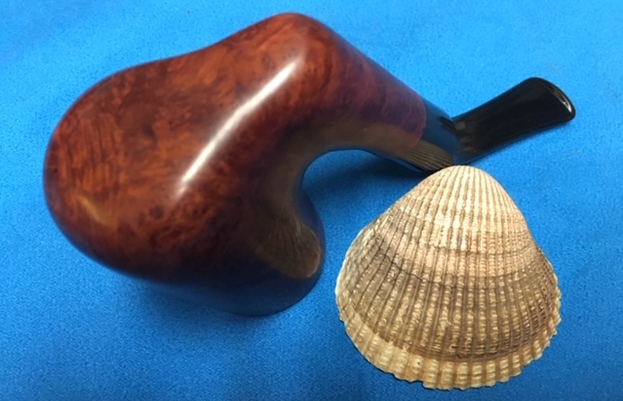
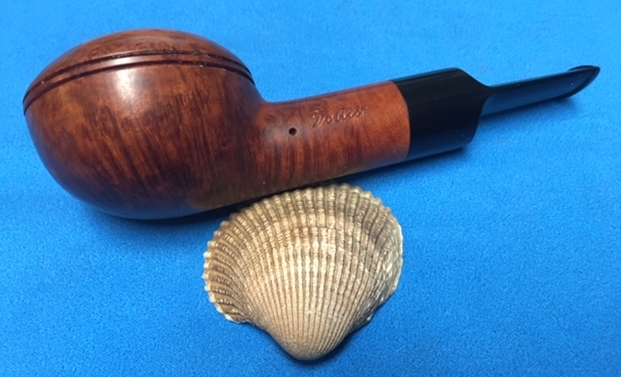
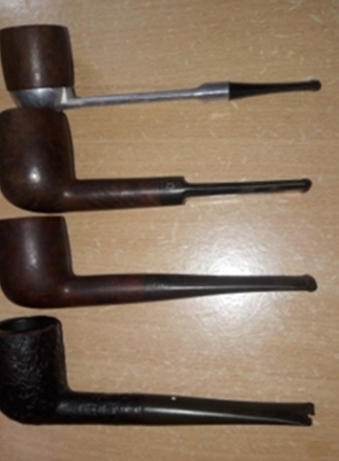
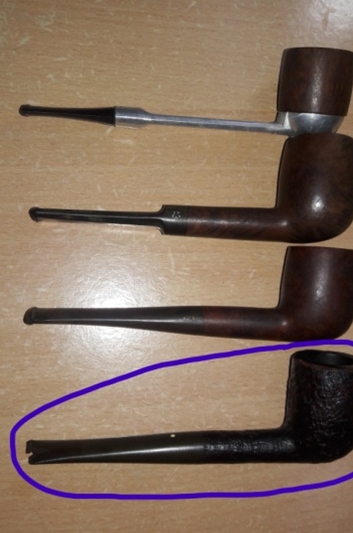
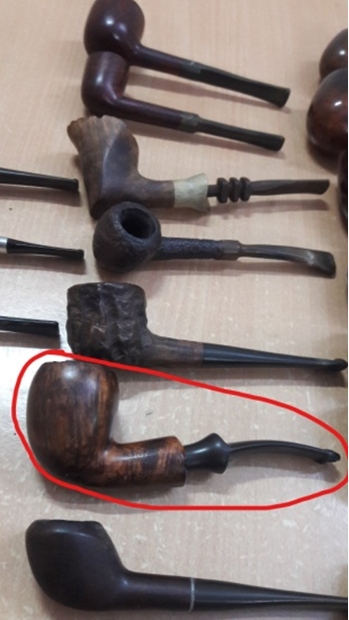
 This was included in the pipes that I sent off to my brother for cleaning. This is probably the 24/25 pipe that I have brought to the work table from the lot of about 50 to rework. I can’t say enough how much I appreciate his willingness to clean and ream the pipes for me. It allows me to move through the repairs much more quickly. When he received the pipe he took a series of photos of it to show its condition.
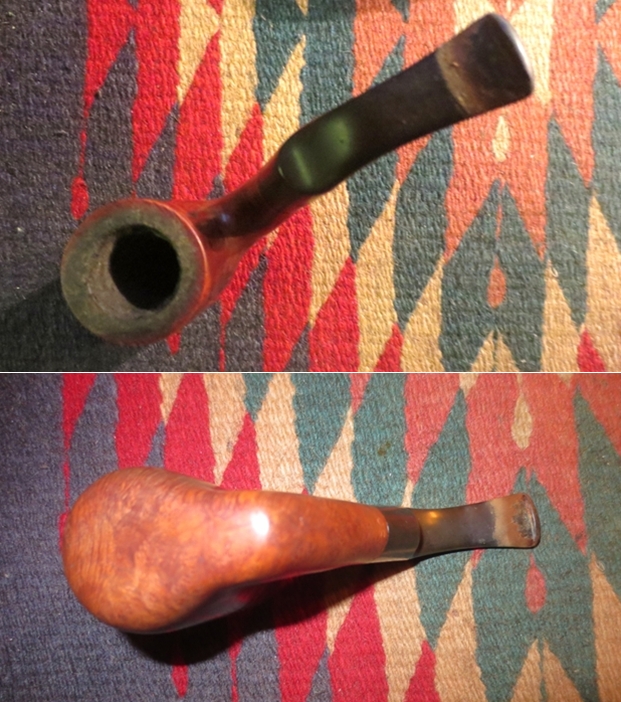
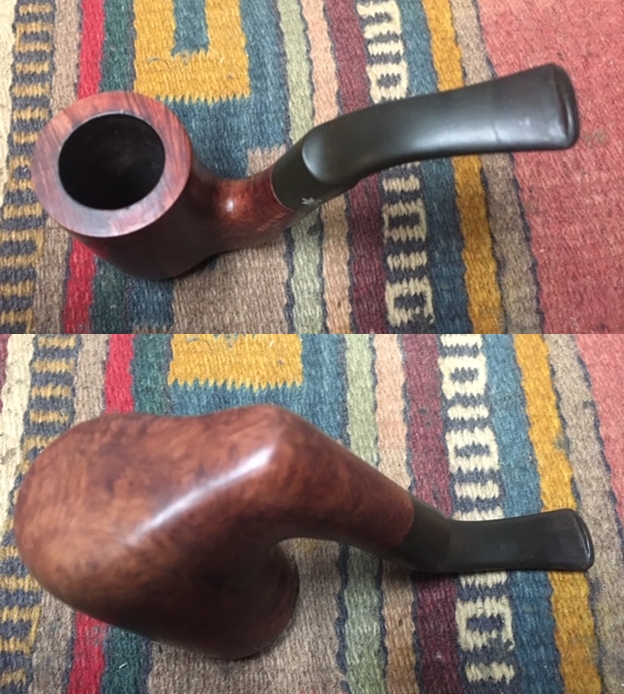
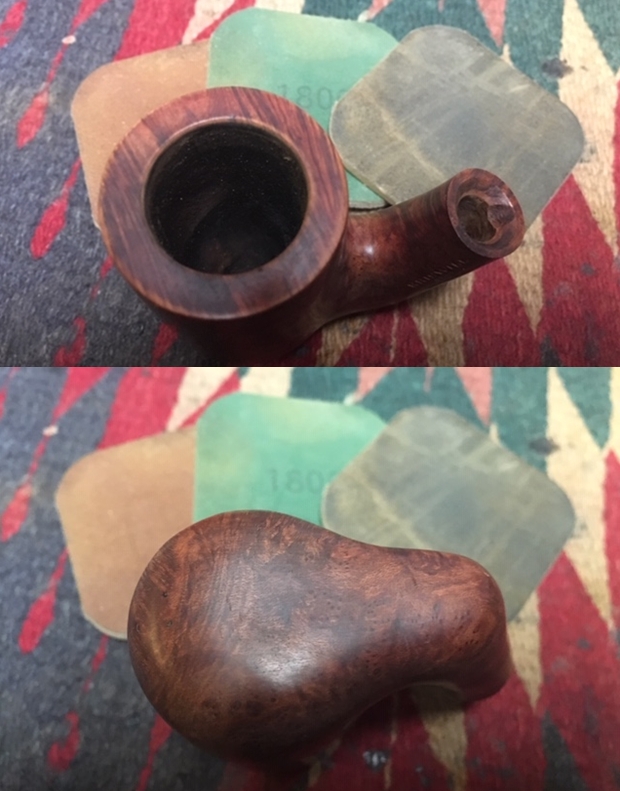
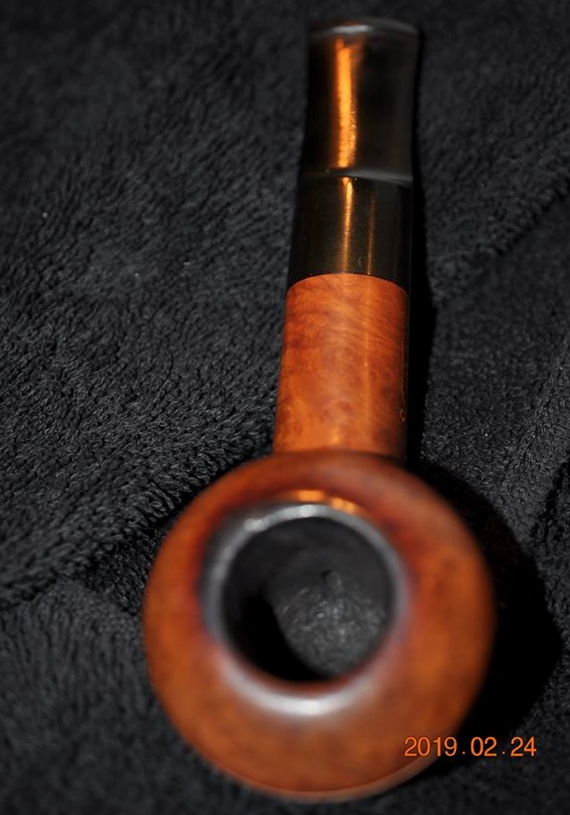
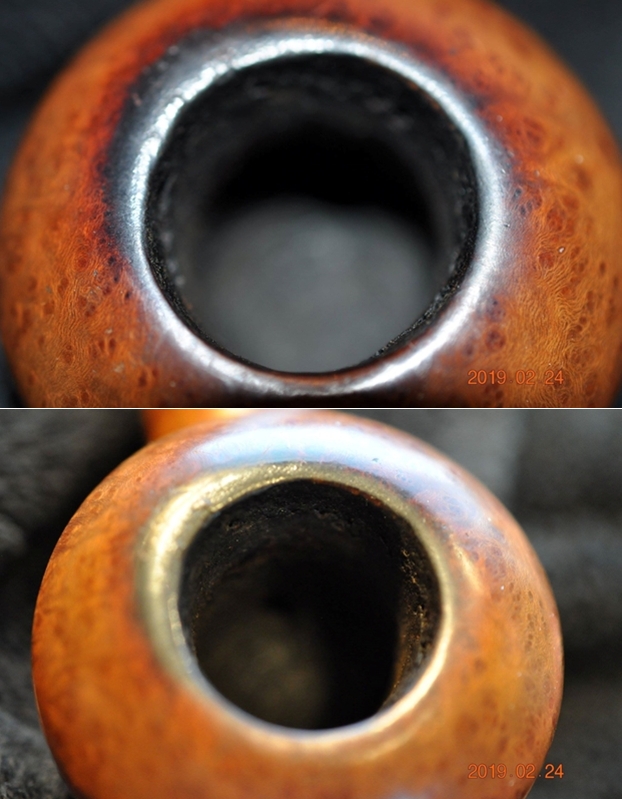
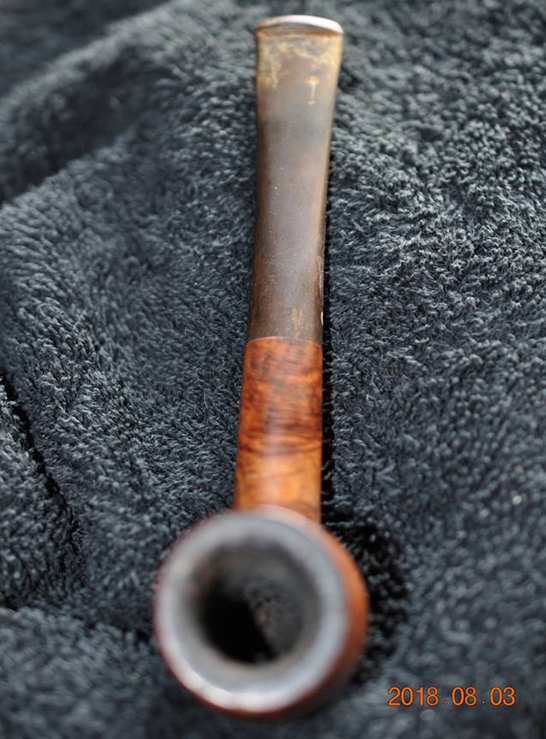
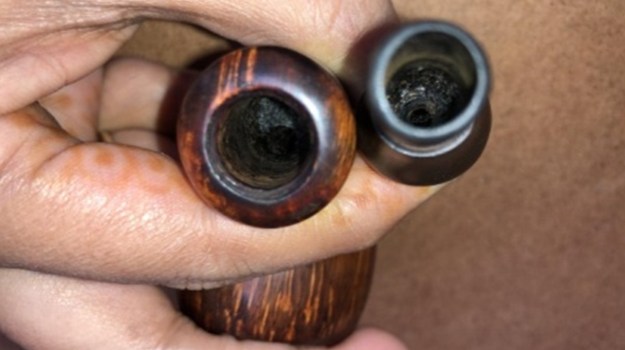
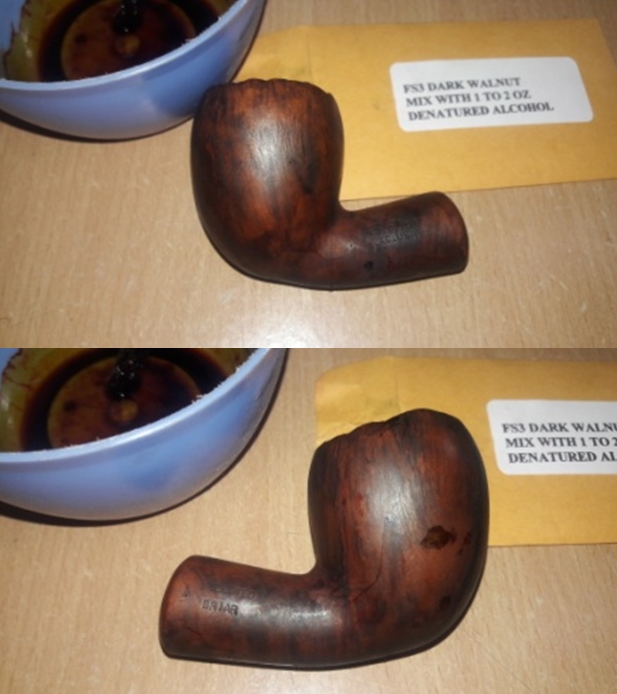
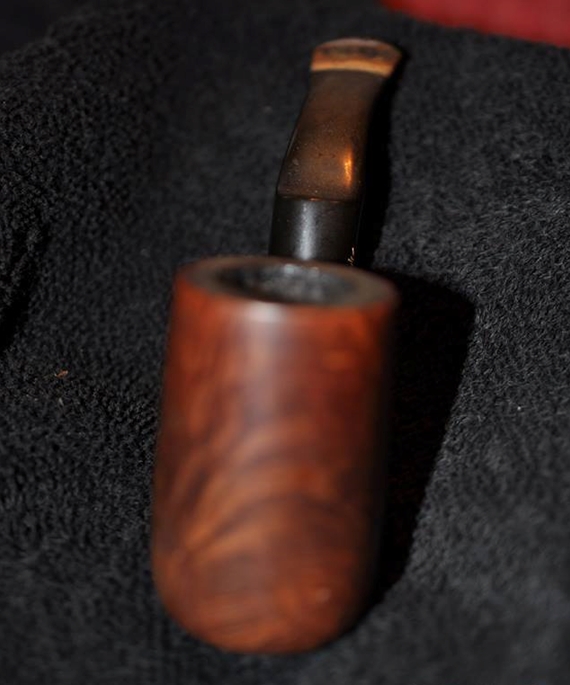 He took photos of the rim top to show the thick cake in the bowl and the overflow of lava on the rim top.
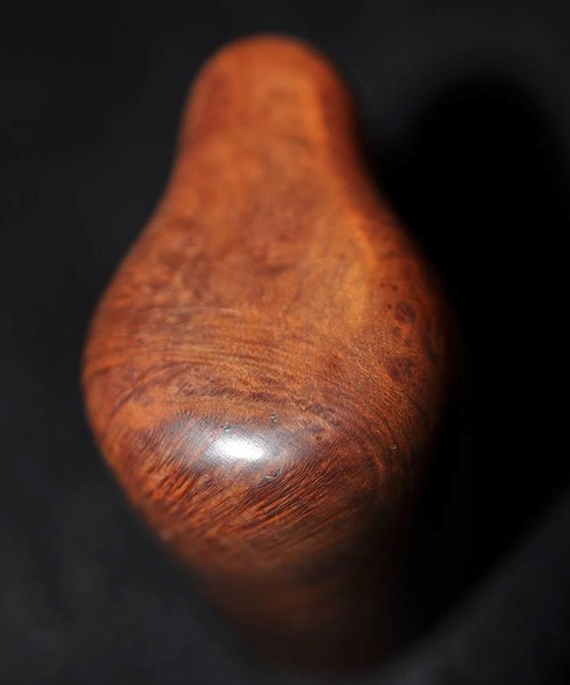
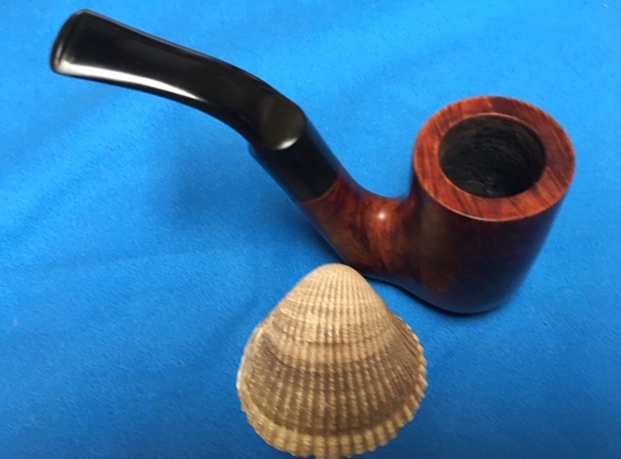
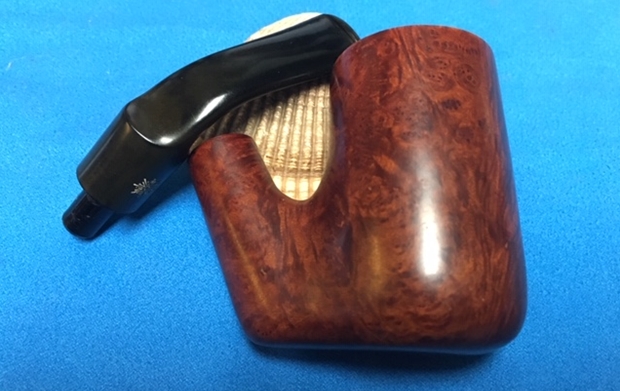
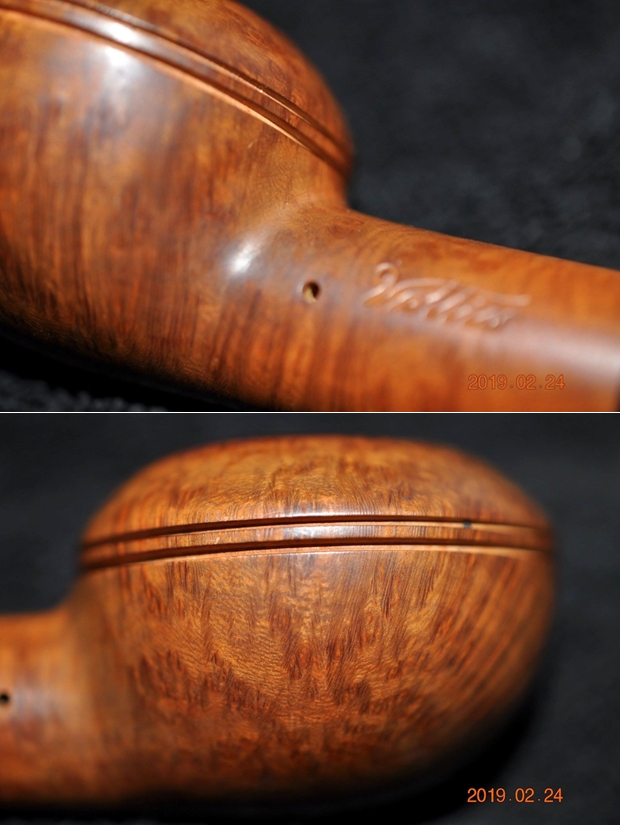
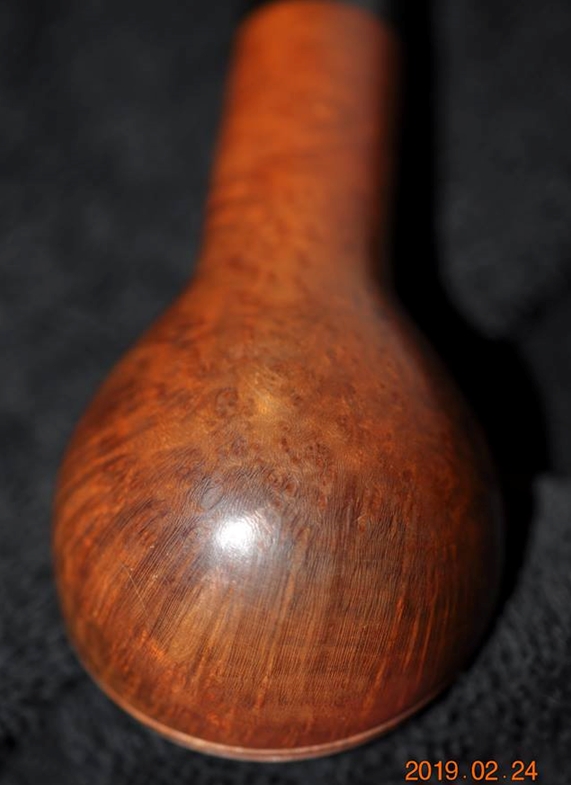
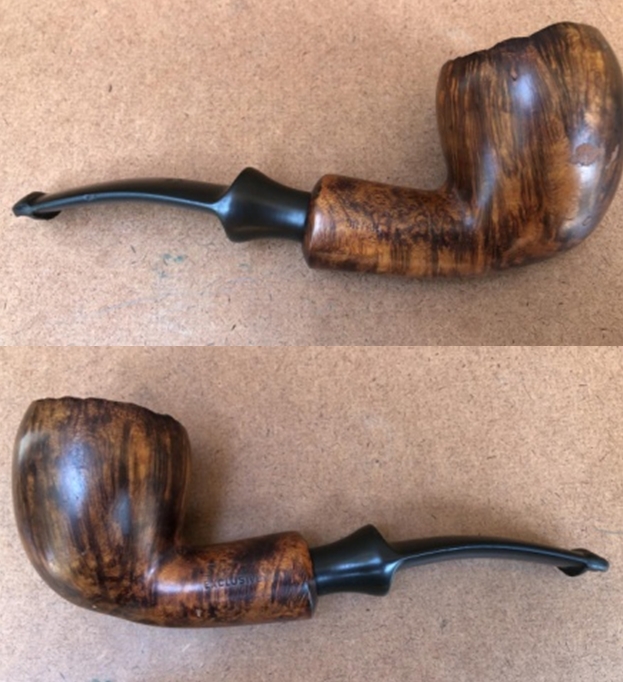
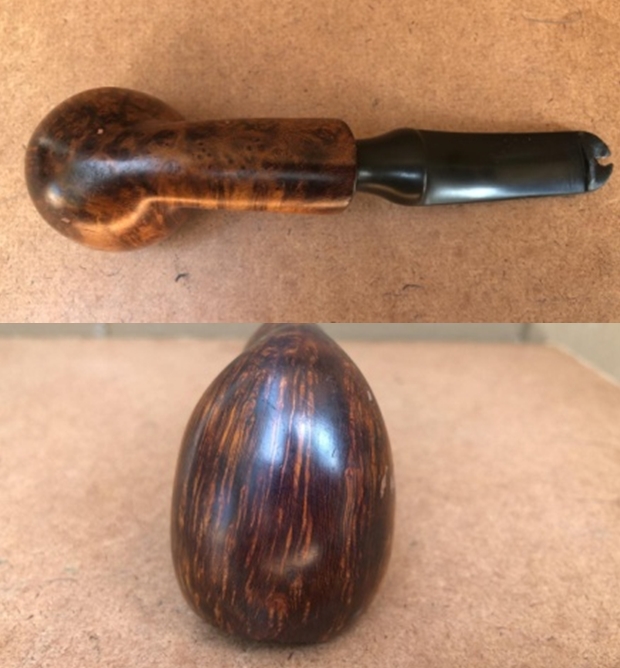
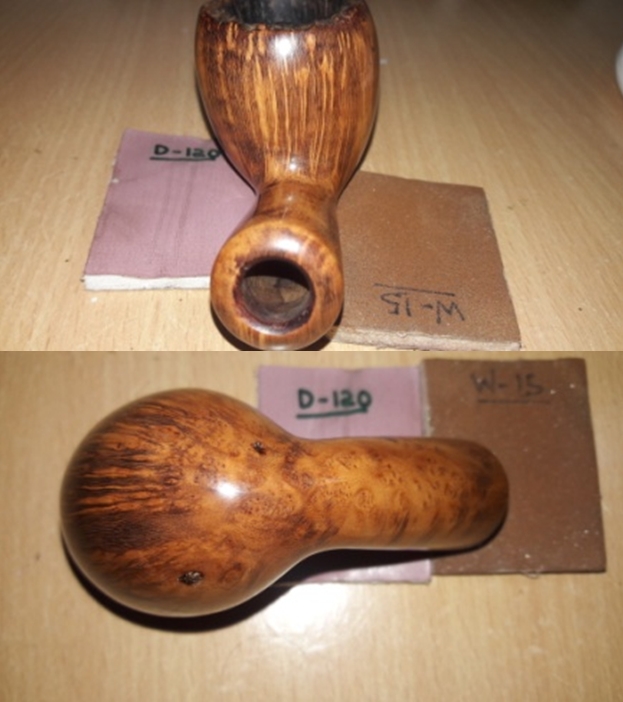
 He took photos of the sides and bottom of the bowl to give a clear picture of the beauty of the grain on this old pipe. Under the grime there is some great grain peeking through.
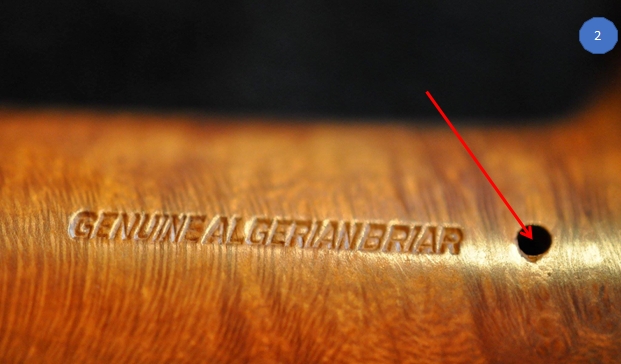
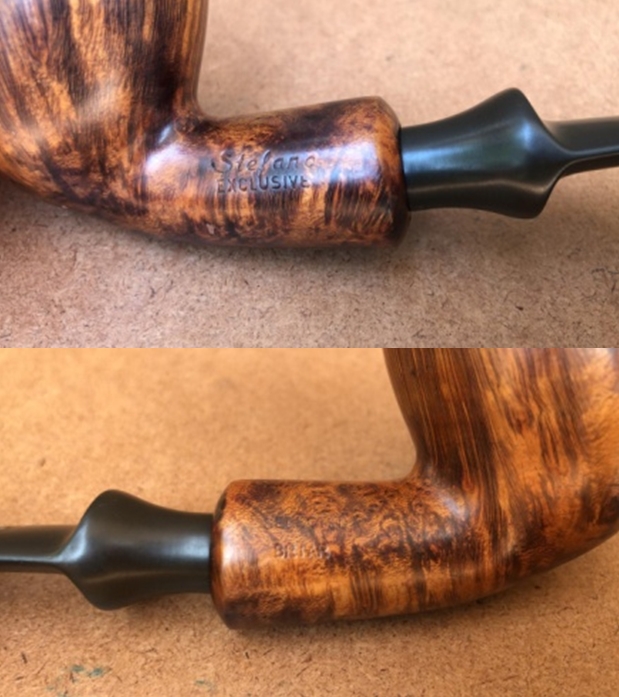
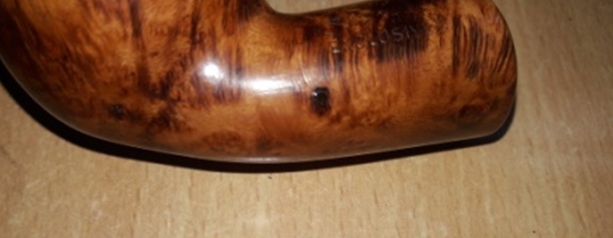
 Jeff took a photo of the stamping to capture the clarity of it even under the grime.
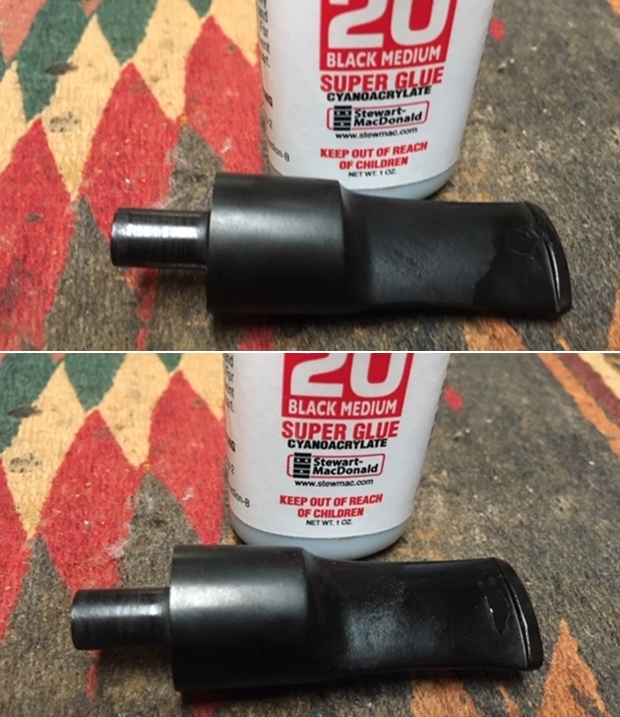
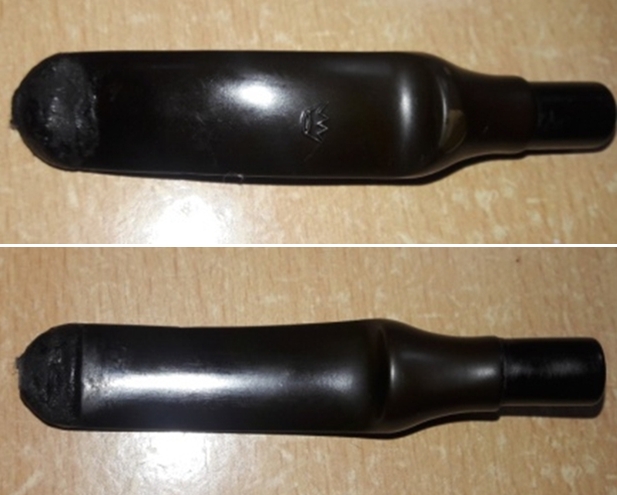
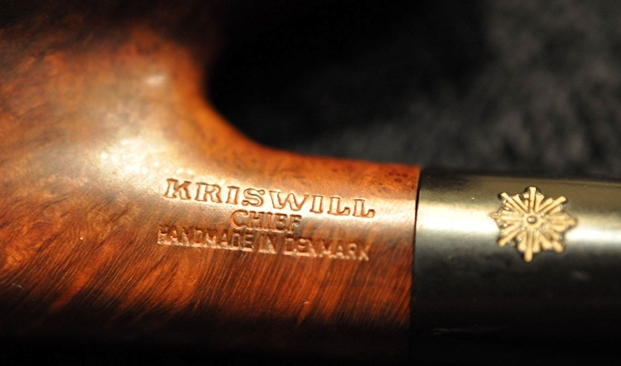 The stem looked dirty and oxidized with the calcification left behind by a pipe Softee bit. The edges of the button had bite marks and there was some tooth damage to the surface of the stem next to the button on both sides.
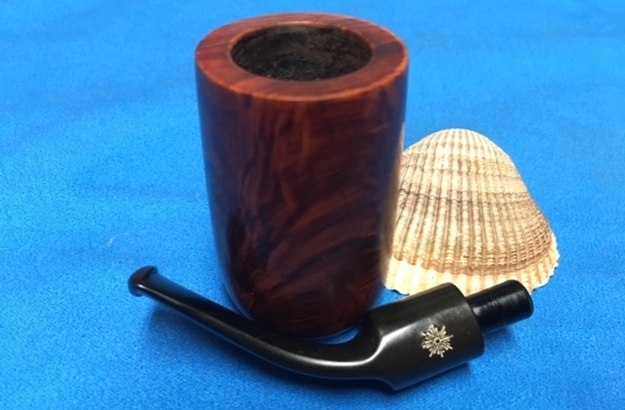
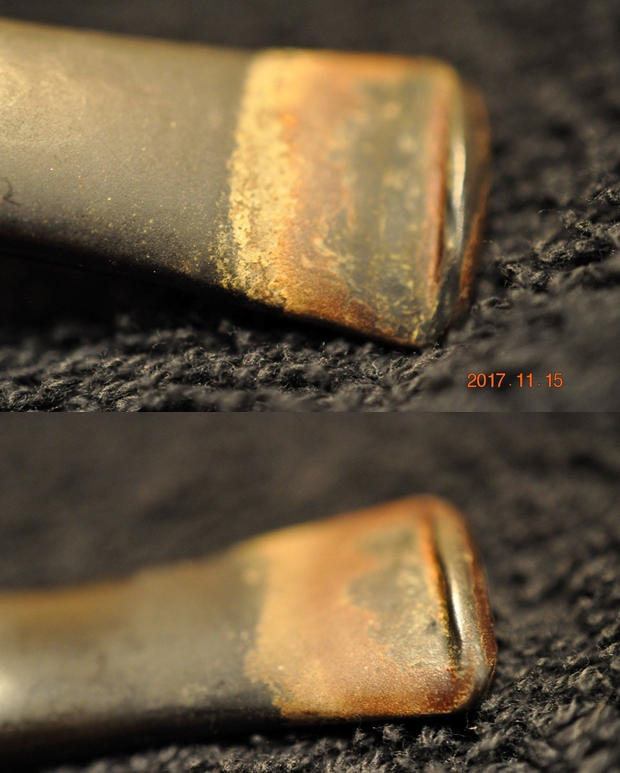 I have worked on quite a few Kriswill pipes over the years and have always enjoyed the shapes and the craftsmanship on each of them. This one is no different. It is well made and well-shaped. I reviewed the information I had on Kriswill and have included some of that here.
 Kriswill was one of the large pipe manufacturers in Denmark during the 1960s and 1970s, and closed around 20 years ago. Their catalog cover read “By Appointment to the Royal Danish Court, KRISWILL, Kriswork Briar Trading, Briar Pipes Hand Made in Denmark.” After the Danish Kriswill enterprise ended, pipes were made in Norway and in France under the Kriswill label. In the 1970s Kriswill was bought by Lillehammer, and in the 1980s the pipes were made for a while at the Catalan factory, Iberica de Pipas (https://pipedia.org/wiki/File:Kriswill_Factory.jpg).
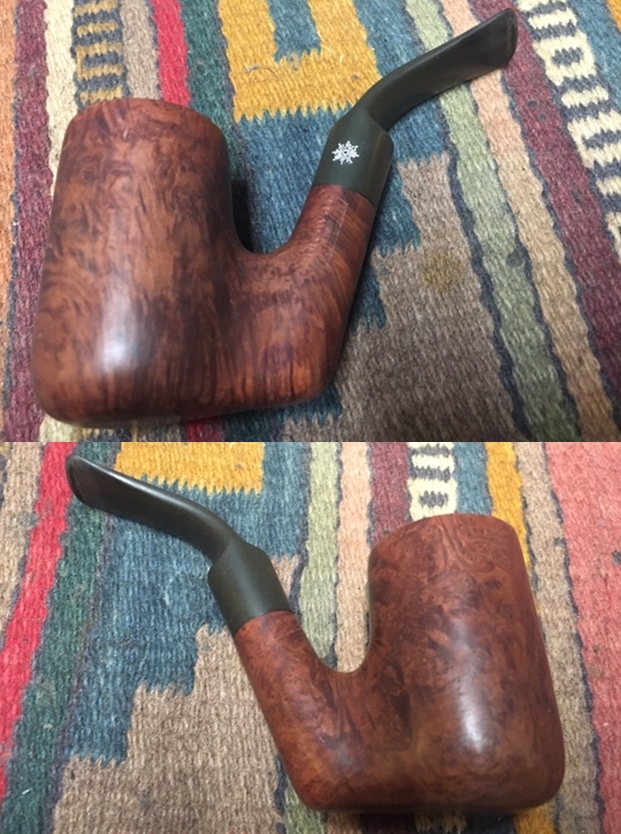
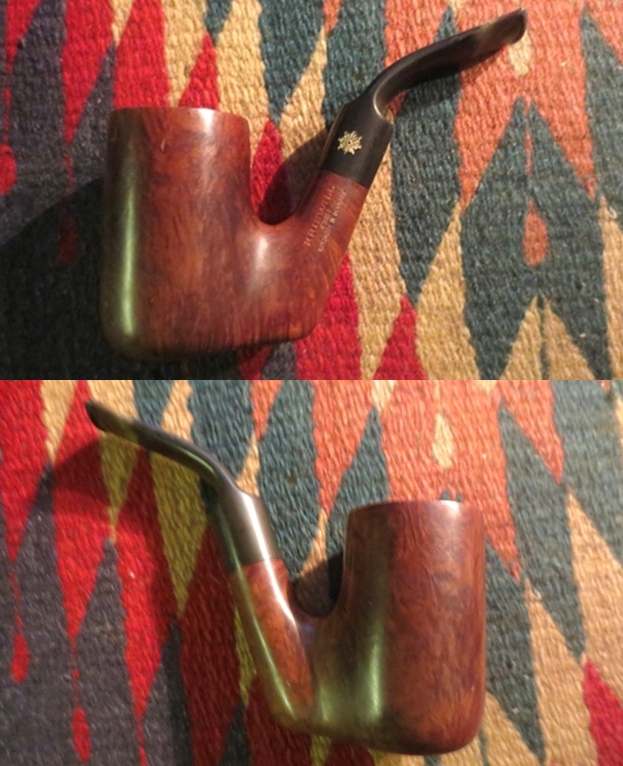
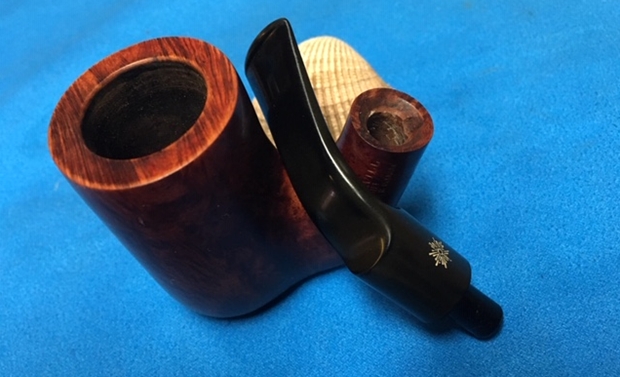
 I took photos of the rim top and the stem to show their condition. Jeff was able to clean up the grime and darkening on the rim top. The inner edge of the bowl looked pretty good. The stem had light tooth chatter and some deeper tooth marks on both sides near the button.
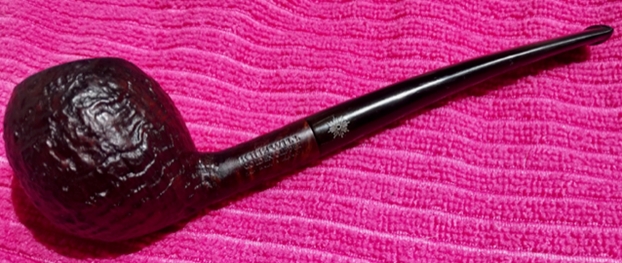
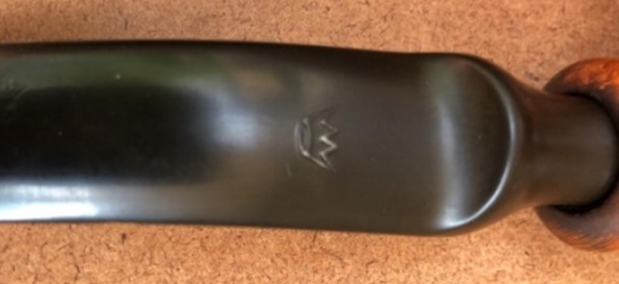
 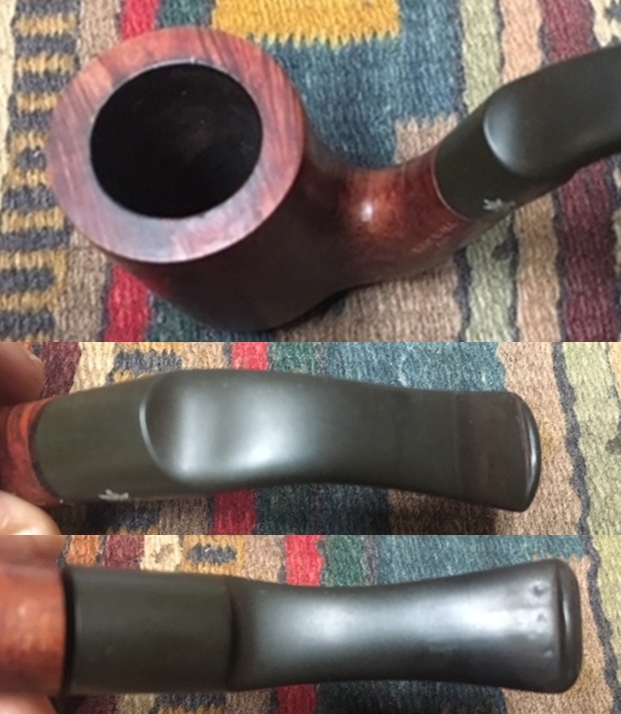 I took a photo of the stamping on the shank and the Kriswill Snowflake Logo on the left side of the saddle stem.
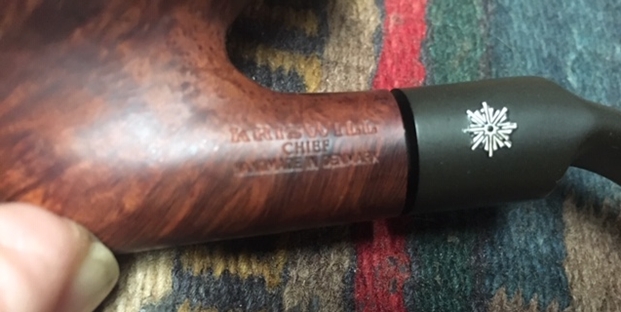 I worked over the inner edge of the rim with a folded piece of 220 grit sandpaper to remove the damaged portions of the inside edge of the rim. It did not take a lot of sanding to smooth out the damaged areas.
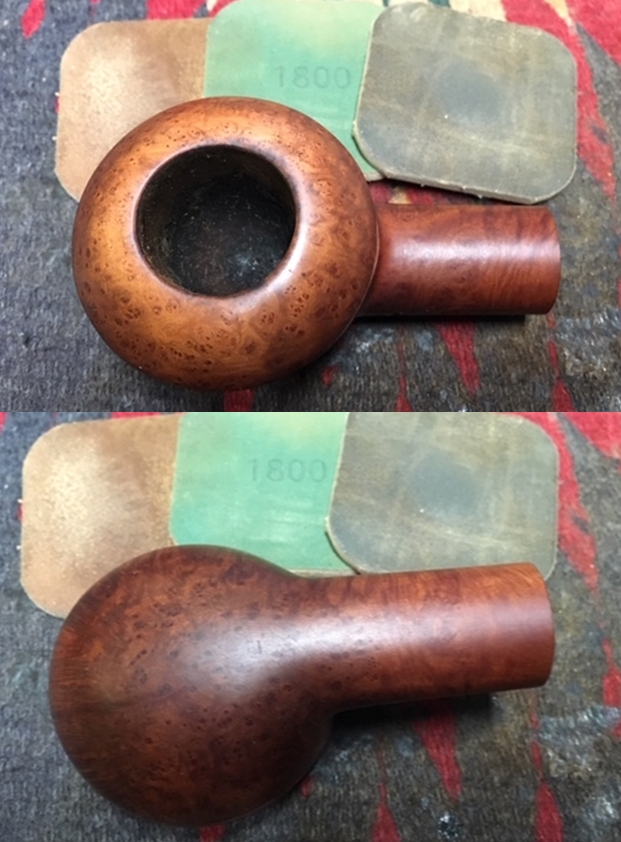
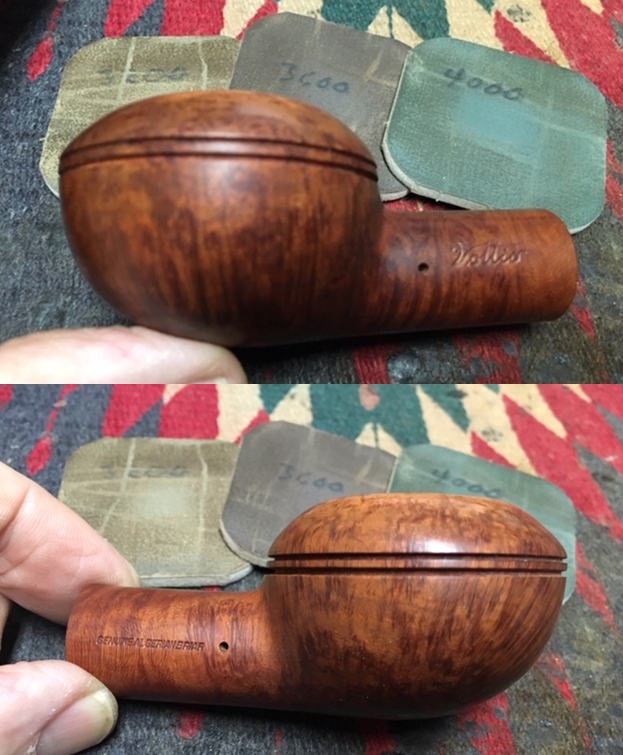
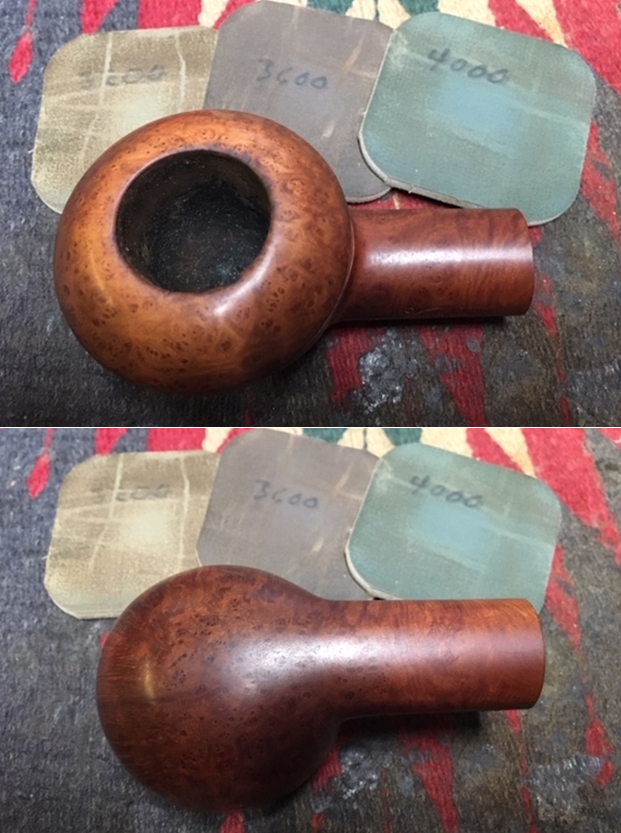
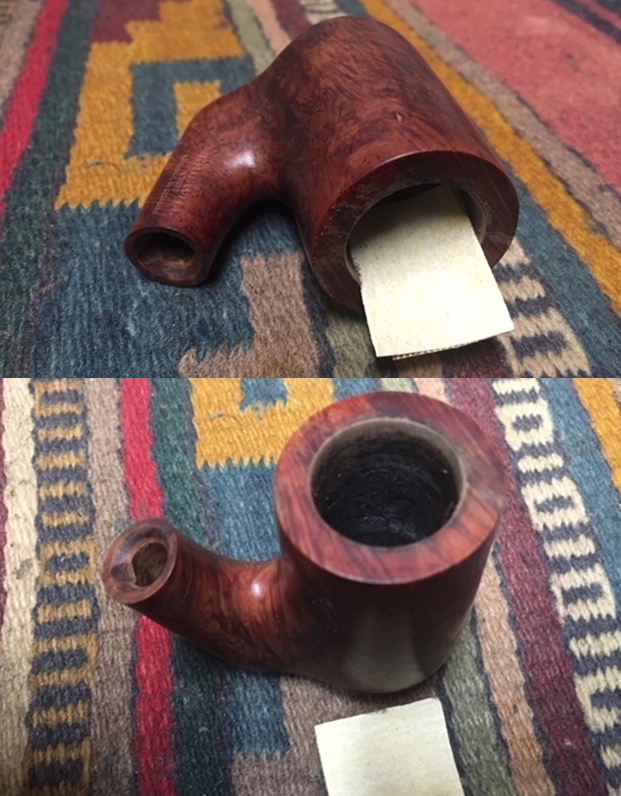 I polished the rim top and the rest of the bowl and shank with micromesh sanding pads – wet sanding with 1500-2400 grit pads and dry sanding with 3200-12000 grit pads. I wiped the bowl down after each pad with a damp cloth. The photos tell the story.
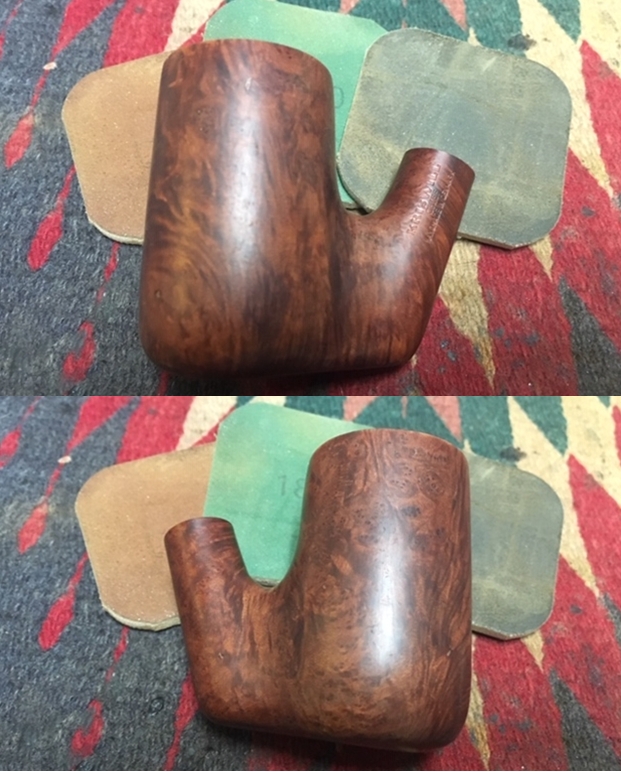
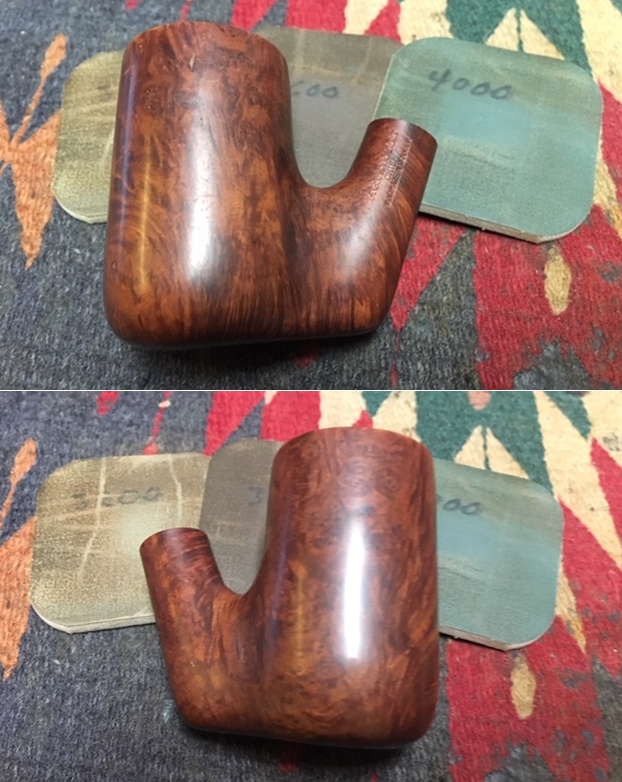


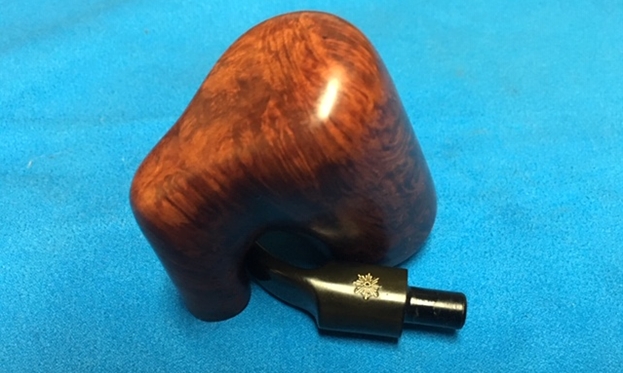
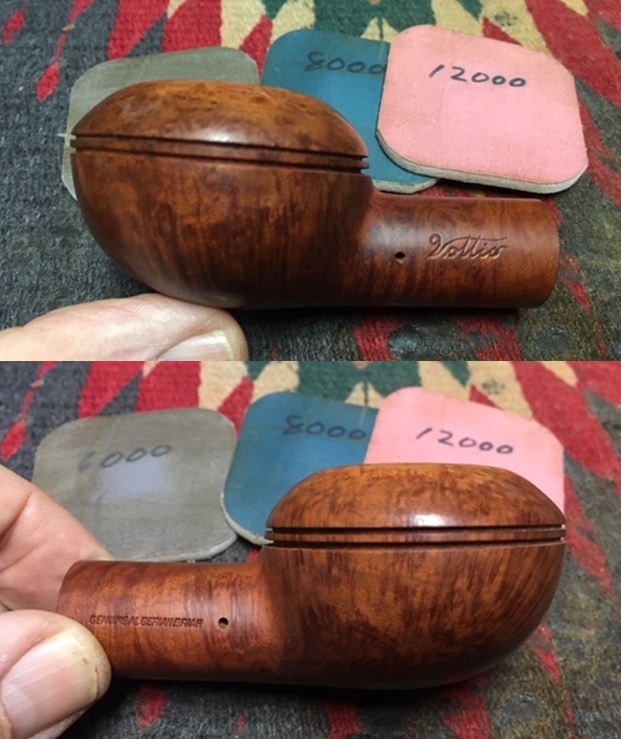
 I rubbed the bowl down with Before & After Restoration Balm to deep clean the briar on the bowl and rim. The product works to clean, enliven and protect the briar. I hand rubbed it with my fingers and worked it into the briar. I wiped it off with a soft cloth. I buffed the bowl with a horsehair shoe brush to polish it. The briar really began to have a rich shine. I took some photos of the bowl at this point to mark the progress in the restoration.
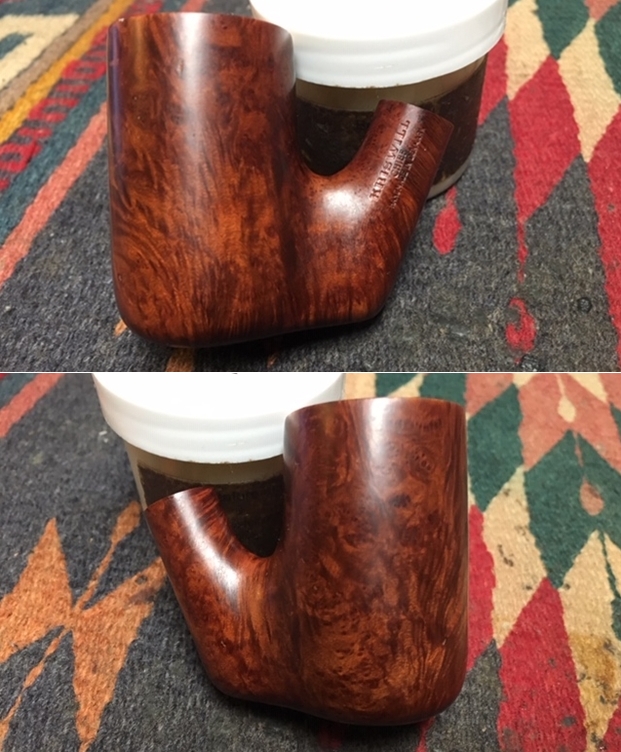

 I set the bowl aside and worked on the stem. I repaired the tooth marks with clear super glue. I set the stem aside to let the repairs cure. Once the glue cured I cleaned up the edge of the button and the repaired areas with folded pieces of 220 and 400 grit sandpaper until the repairs were blended into surface of the stem.
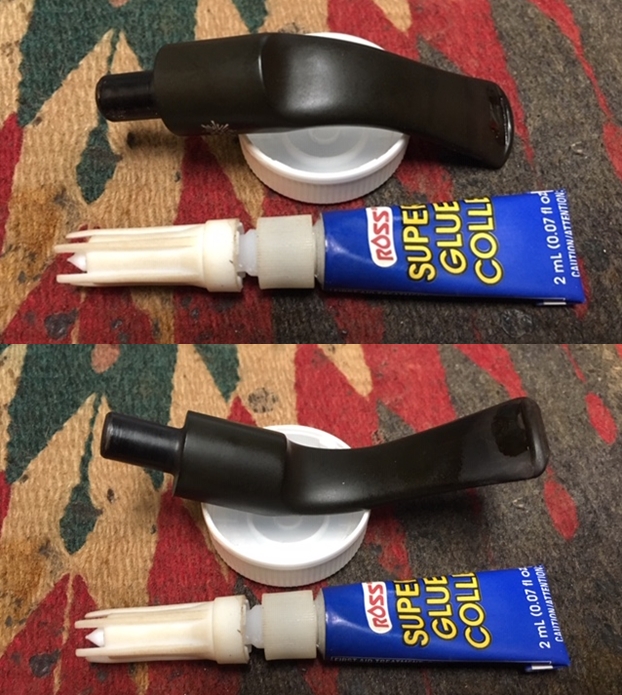
 I polished the stem with micromesh sanding pads – wet sanding with 1500-2400 grit pads and dry sanding with 3200-12000 grit pads. I wiped the stem down after each pad with a damp cloth to remove the sanding dust. I used the Before & After Pipe Polish to remove the small minute scratches left in the vulcanite. I finished by wiping the stem down with a final coat of Obsidian Oil and set it aside to dry.
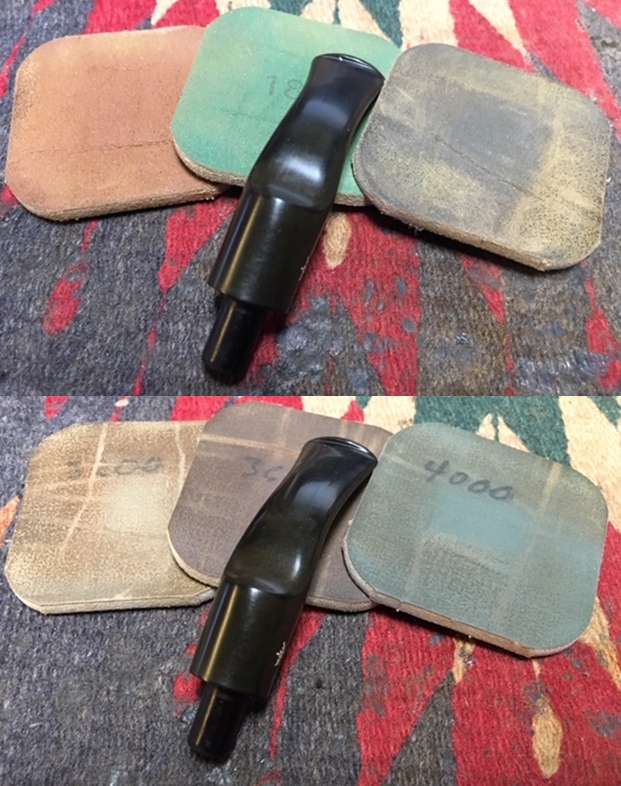
 The pipe has been sitting in the queue since late in 2017 so the stem was loose in the shank. I know from experience that once the pipe is smoked it will be good and snug. To take care of the interim period I gave the tenon a light coat of clear nail polish. Once it dries the stem will fit snugly in the mortise.
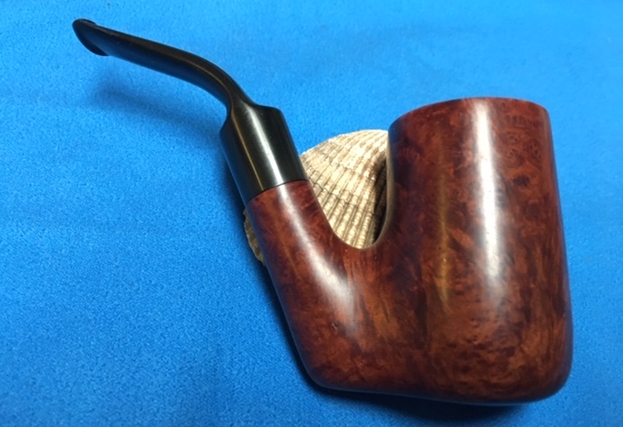
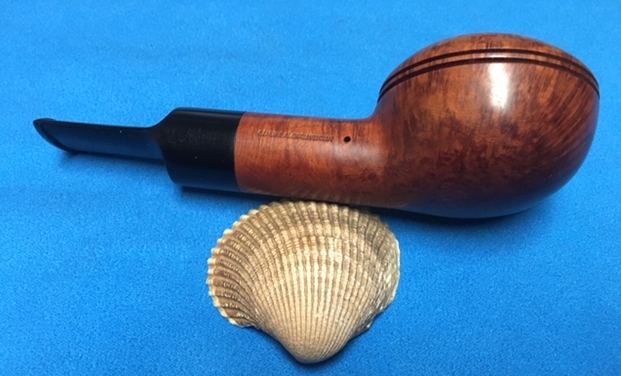
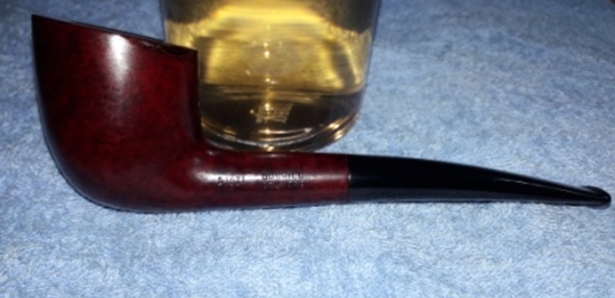
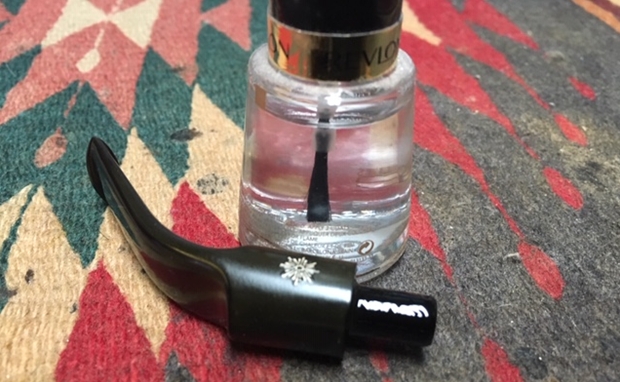 I put the stem back on the pipe and worked it over with Blue Diamond to polish out the remaining small scratches. I gave the bowl and the stem several coats of carnauba wax and buffed the pipe with a clean buffing pad to raise the shine. I hand buffed it with a microfiber cloth to deepen the shine. The pipe polished up pretty nicely. The finished pipe is shown in the photos below. Though the briar has some fills on the left side of the bowl it is nonetheless a beautiful piece of briar. The shape is a Danish version of a classic Oom Paul pipe and with the restoration has been brought back to life. The dimensions of the pipe are Length: 5 inches, Height: 2 1/4 inches, Outside diameter of the bowl: 1 3/8 inches, Chamber diameter: 3/4 inch. I will be putting it on the rebornpipes online store shortly, if you are interested in adding it to your collection. Thanks for walking through the restoration with me as I worked over this interesting Kriswill Chief 50 Oom Paul.


