
by Steve Laug
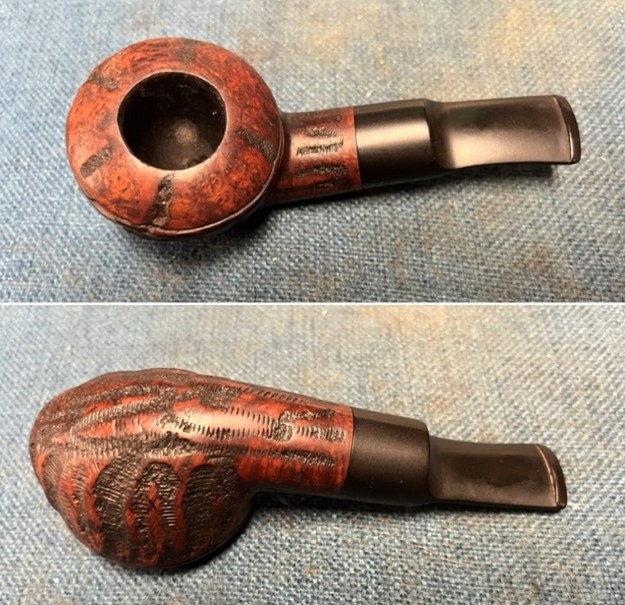
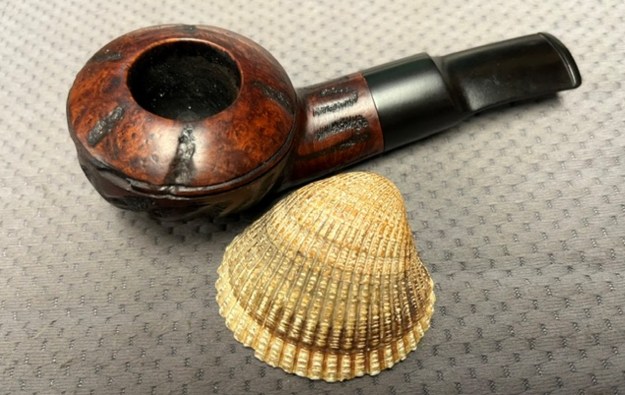
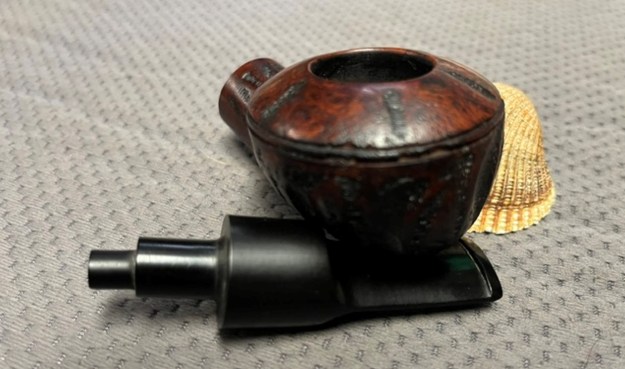
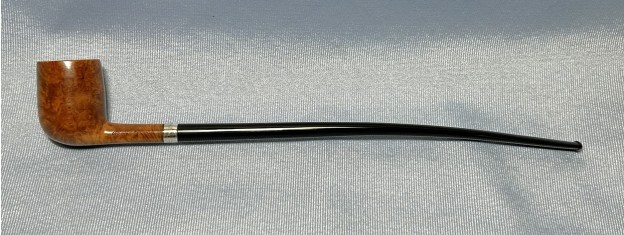
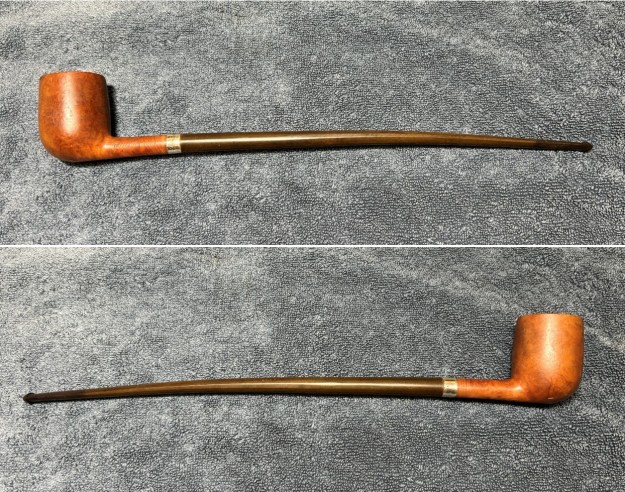
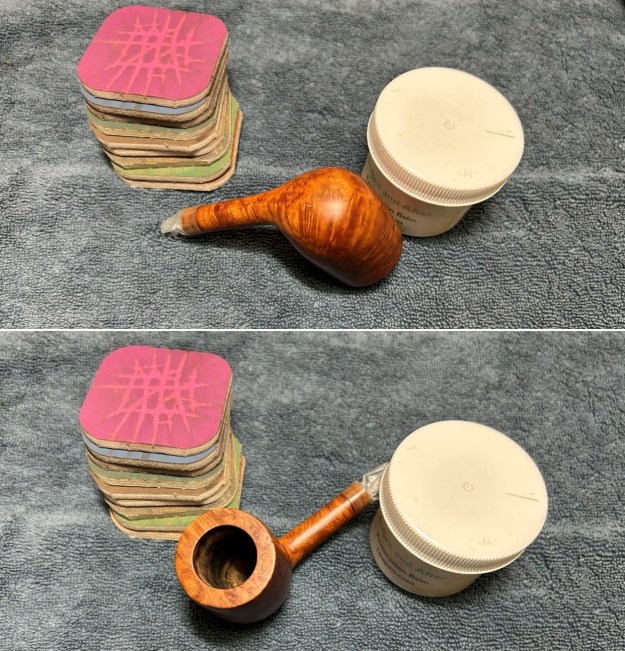
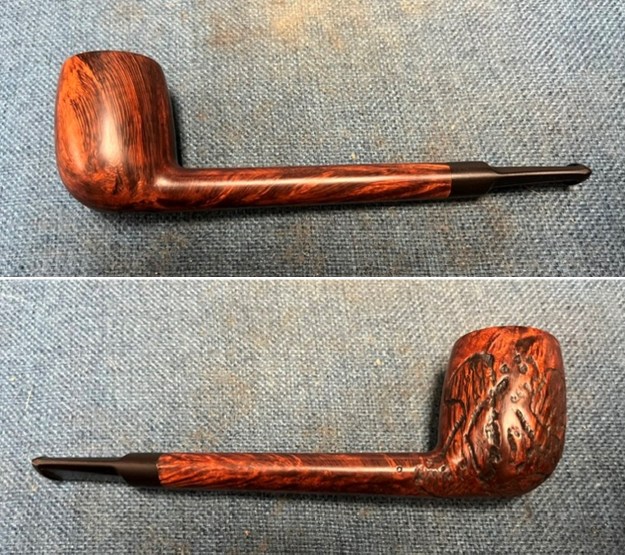
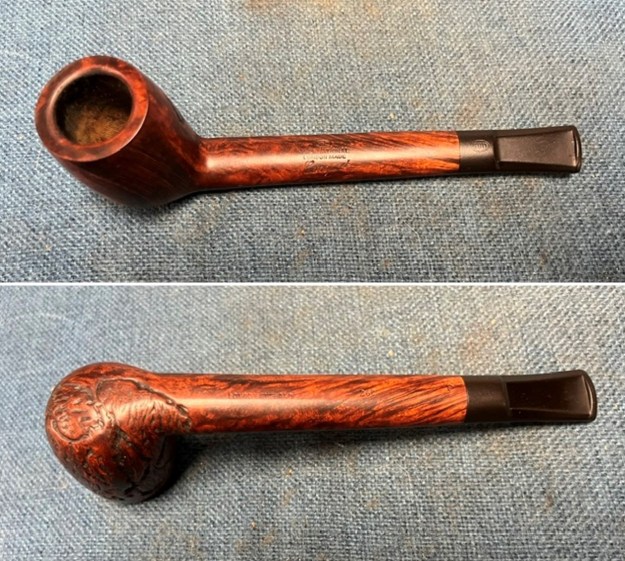
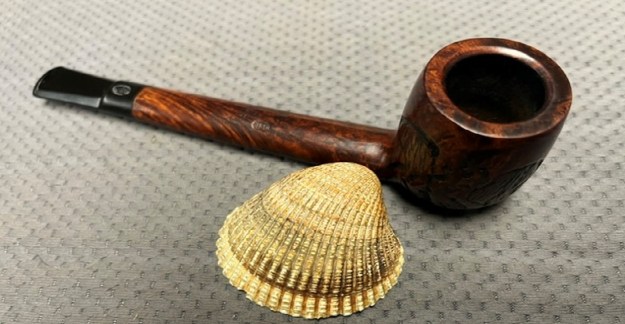
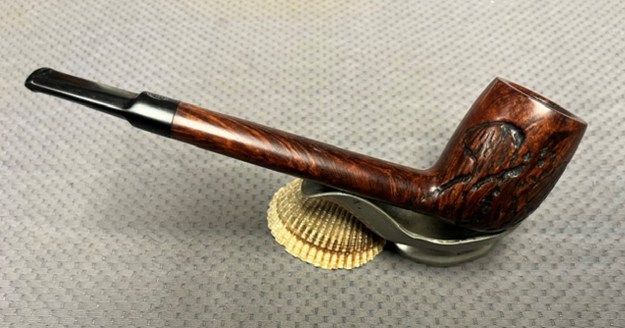
The next pipe on the table was purchased on 01/28/2026 from a seller in Delafield, Wisconsin, USA. It is a rusticated squat Bullmoose Rhodesian that is in fair condition. It is stamped on the sides of the shank. On the left side it is stamped Tom Howard. On the right side it is stamped Imported Briar. The stamping is clear and readable. I have worked on quite a few of Tom Howard’s pipes in the past and later in the blog will give a bit of the history (thanks to Dal or Pipesteward.com). At this point I have to say that the pipe is well made and actually has a similar rugged beauty and finesse to a Tracy Mincer Custom-Bilt in my opinion. The age of the pipe and the oils in the finish has given the pipe a rich reddish brown finish. There is also some nice grain that the shape follows well. The finish was dirty with dust around the nooks and crannies of the worm trail rustication. There were some spots between the twin rings around the bowl cap that were chipped but it stilled looked good. There was a thick cake in the bowl and the rim top showed darkening and some lava. The inner edge appeared to be in good condition. The vulcanite saddle stem was oxidized, calcified and had tooth marks and chatter ahead of the button on both sides. Jeff took photos of the pipe to show what it looked like before he started working on it.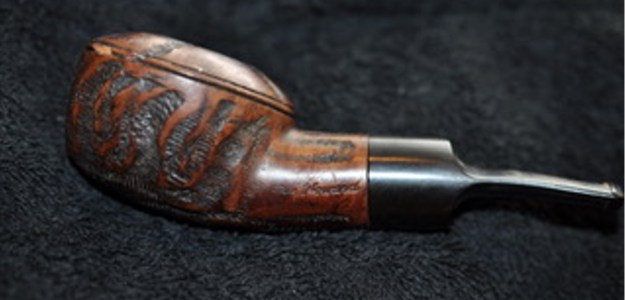
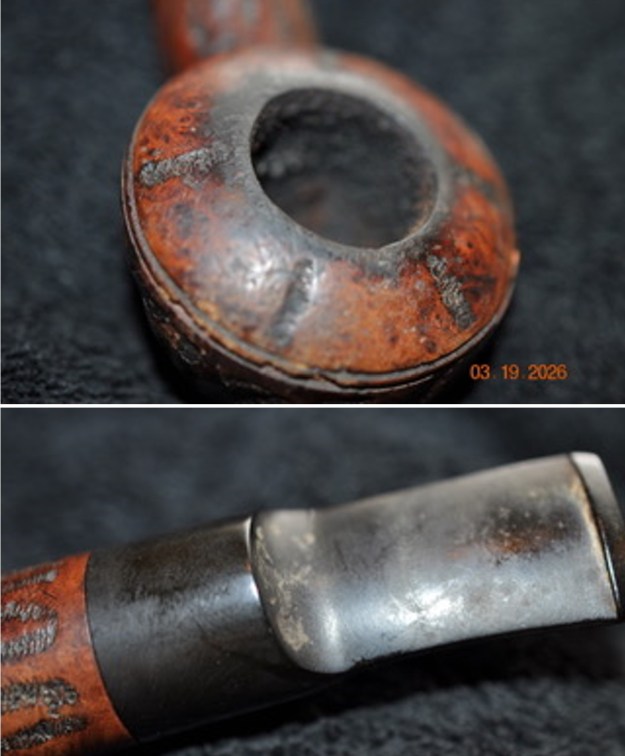
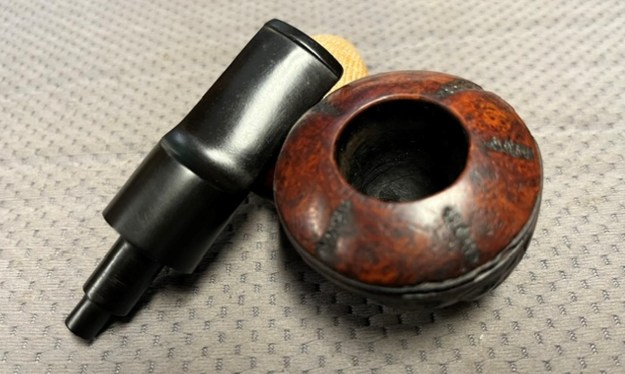
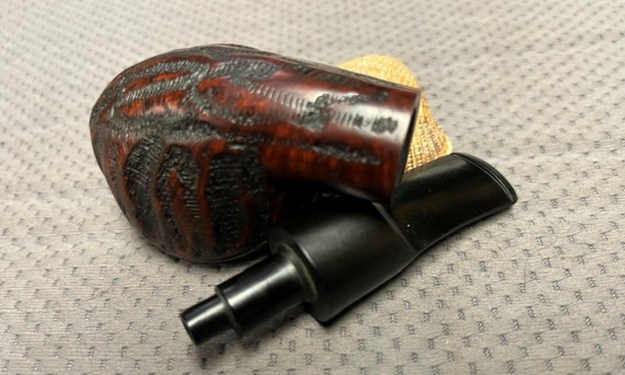
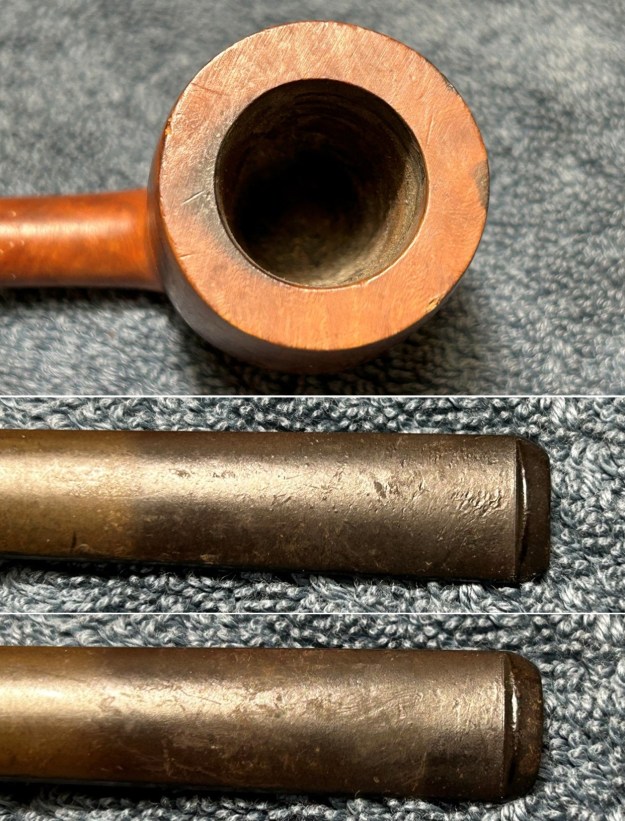
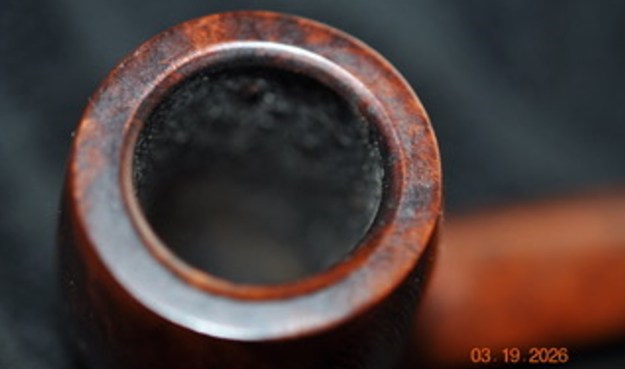
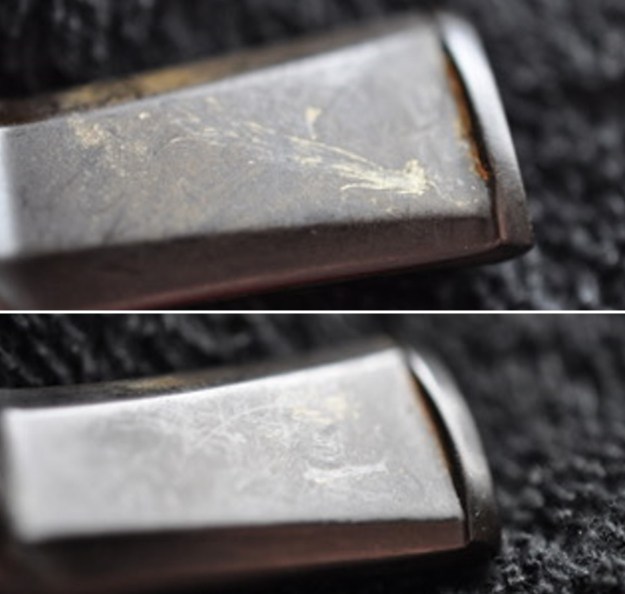
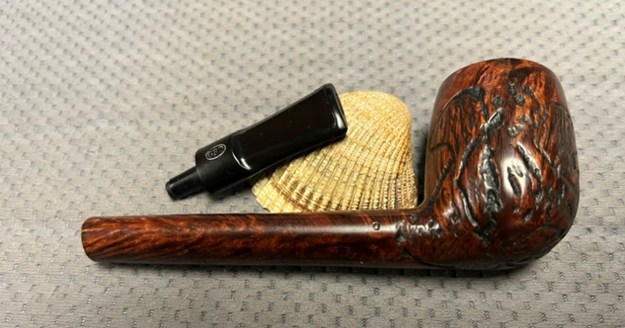
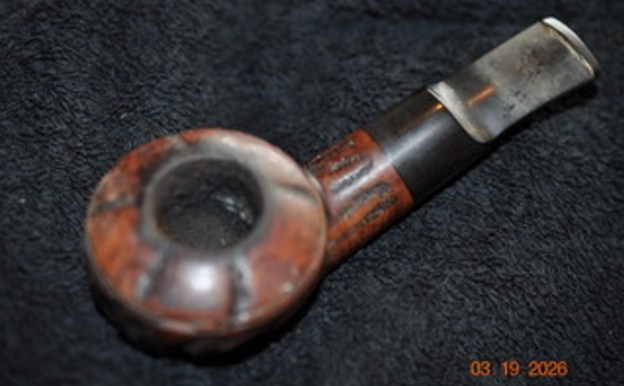 He took photos of the bowl and rim top to show the thickness of the cake and the darkening and lava overflow on the rim top. The photos of the stem show the oxidation, calcification and tooth marks and chatter on the surface and on the button on both sides.
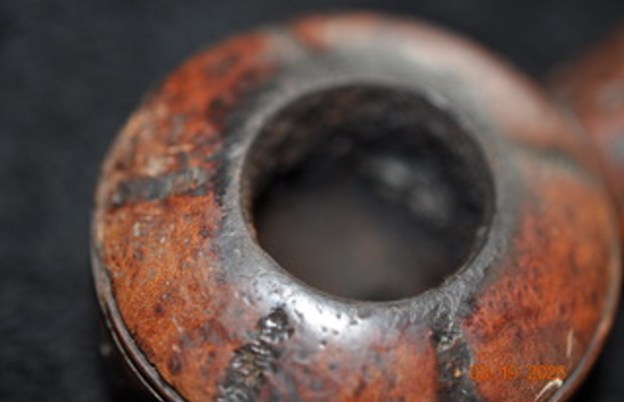
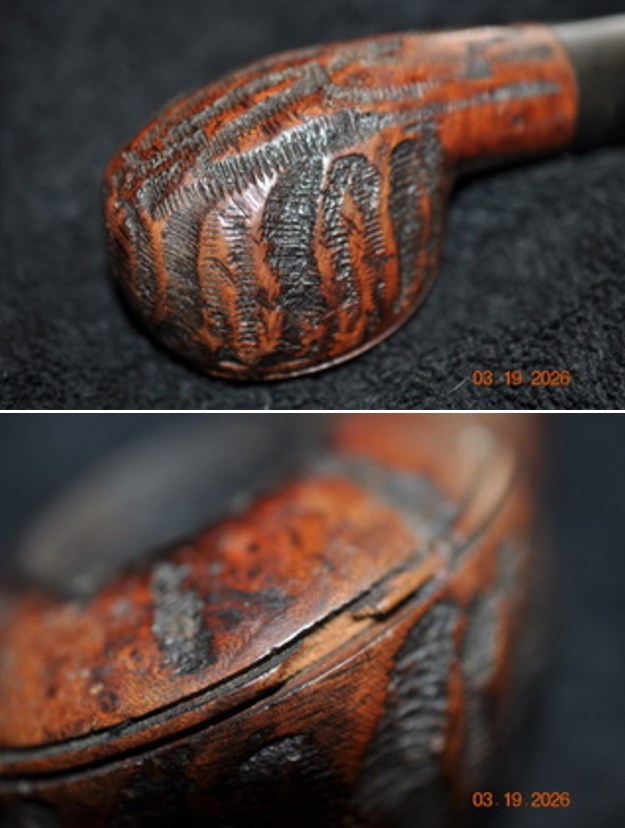
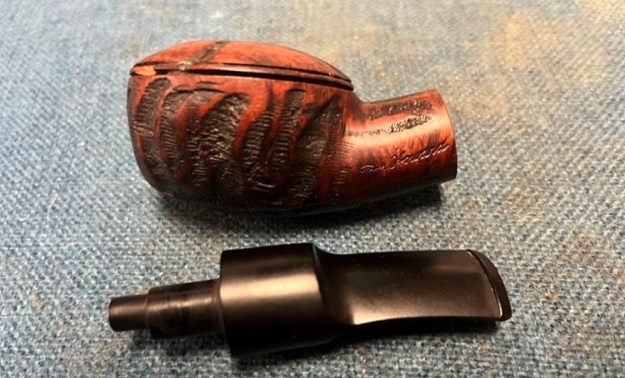
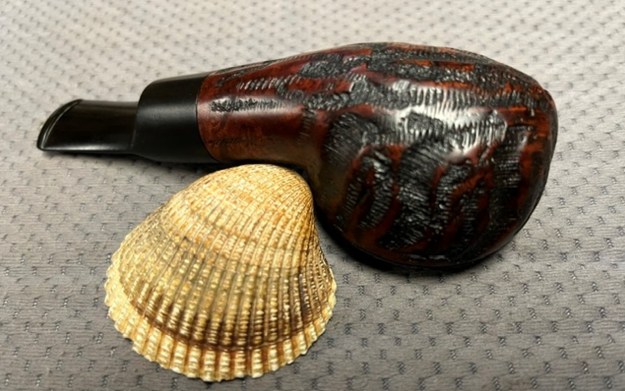
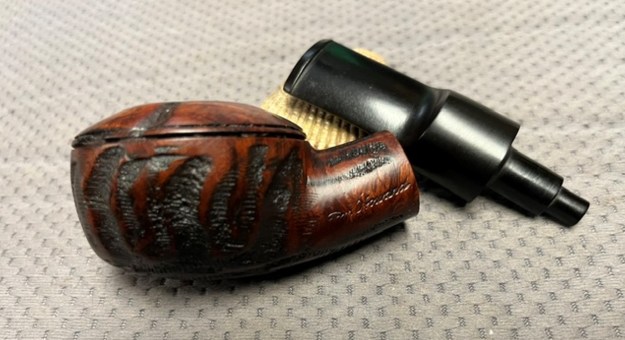
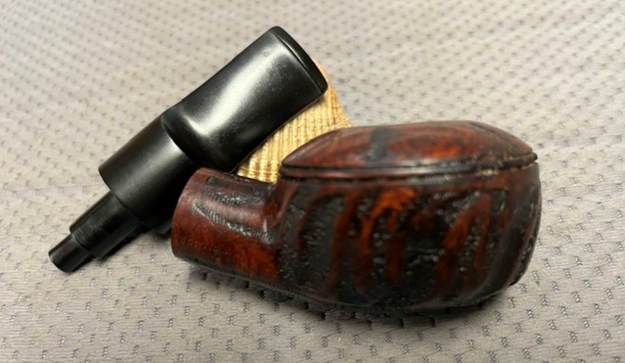
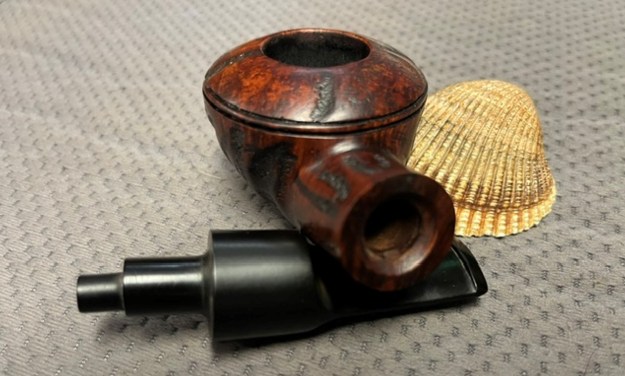
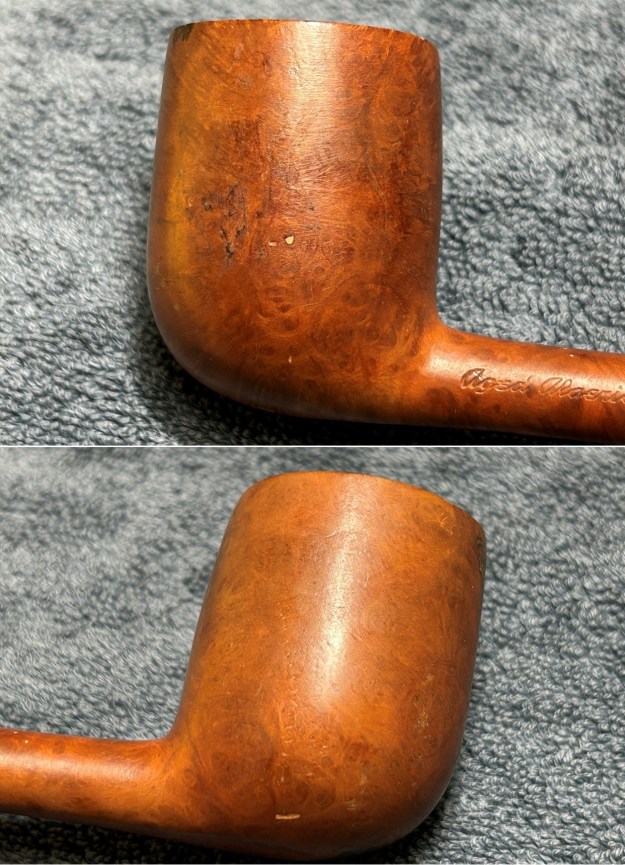
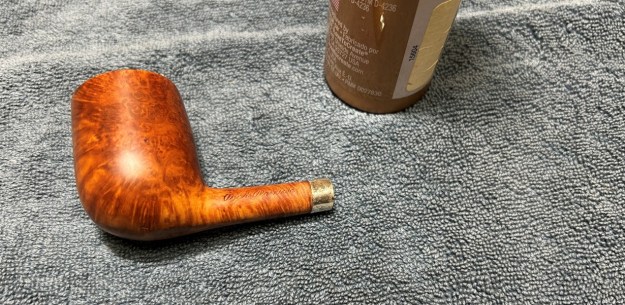
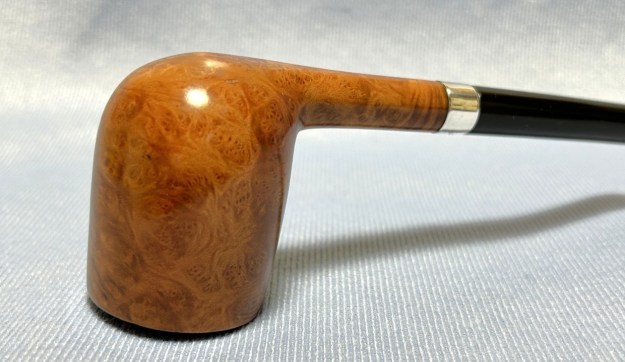
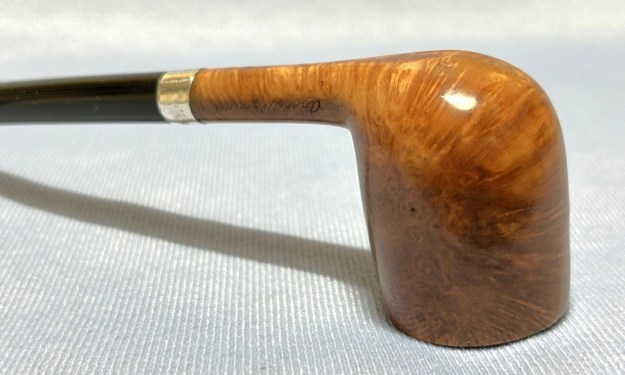
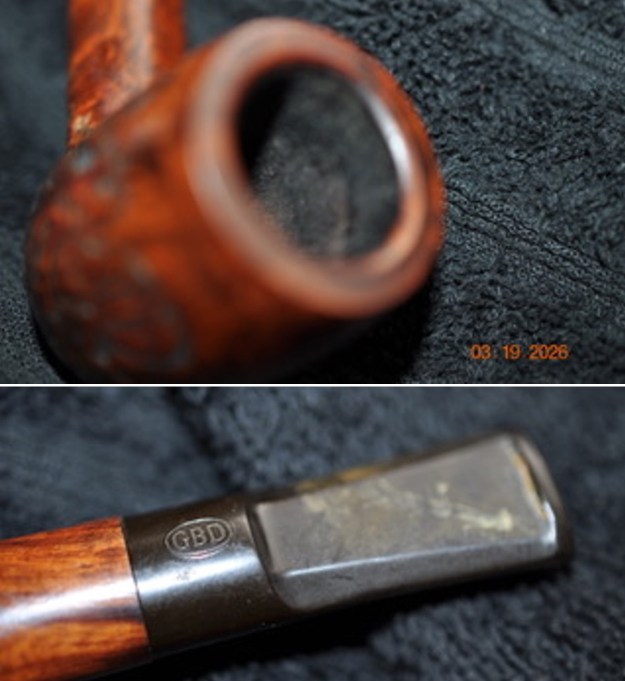
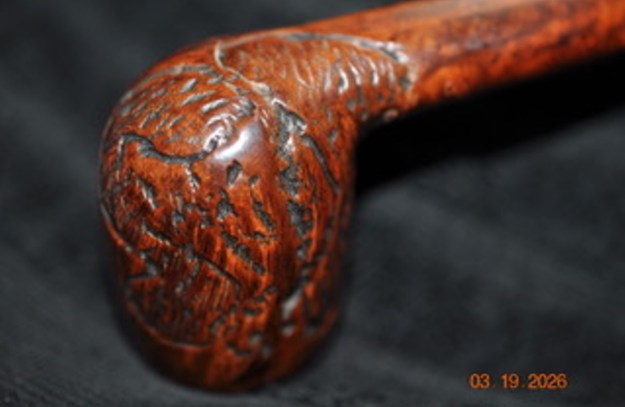
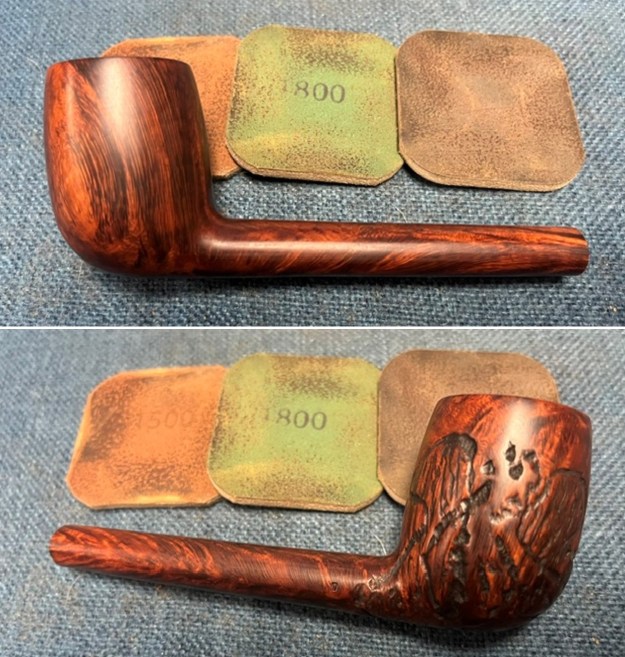
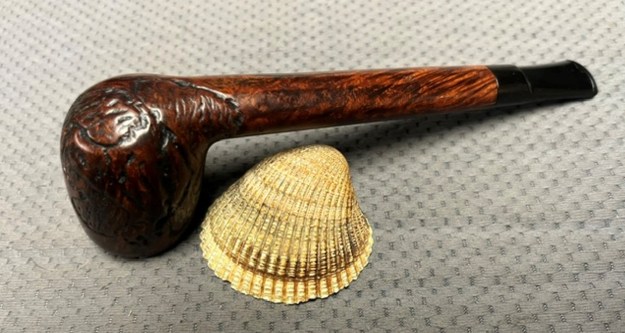
 The photo of the side and heel of the bowl shows the carved worm trail rustication and the grain on the smooth portions of the pipe. You can also see the nicks in between the twin rings around the bowl cap. It looks quite nice under the grime and dust.
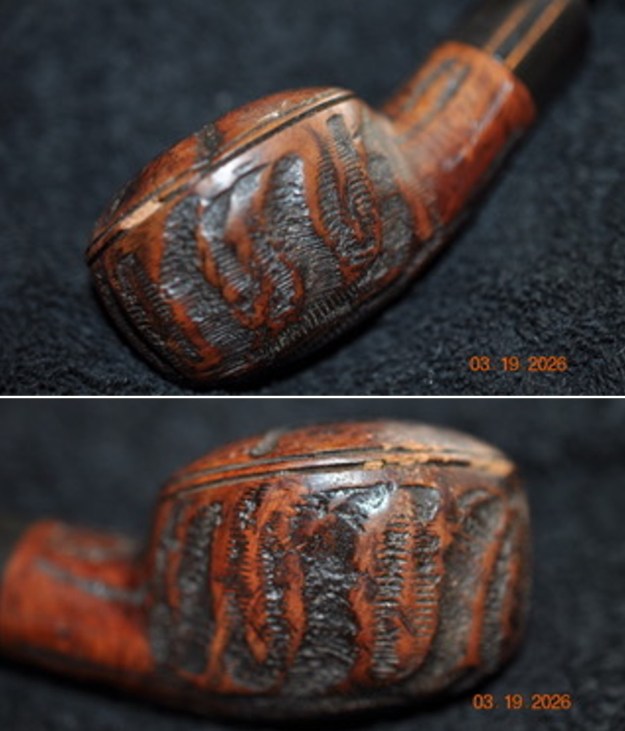
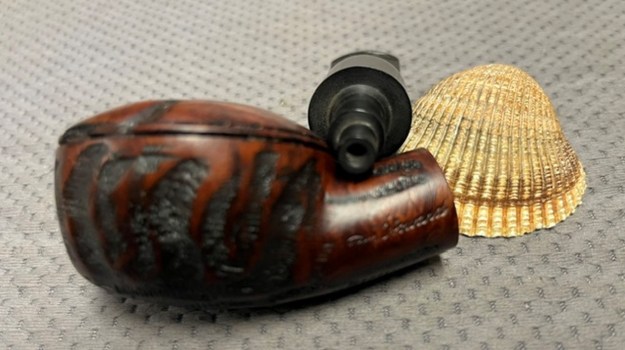
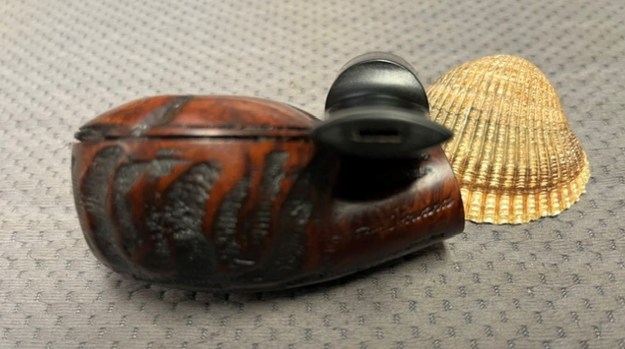
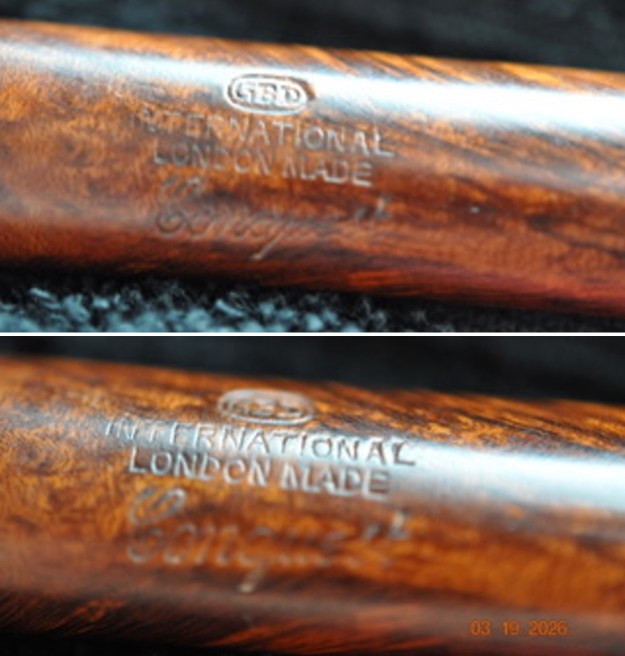
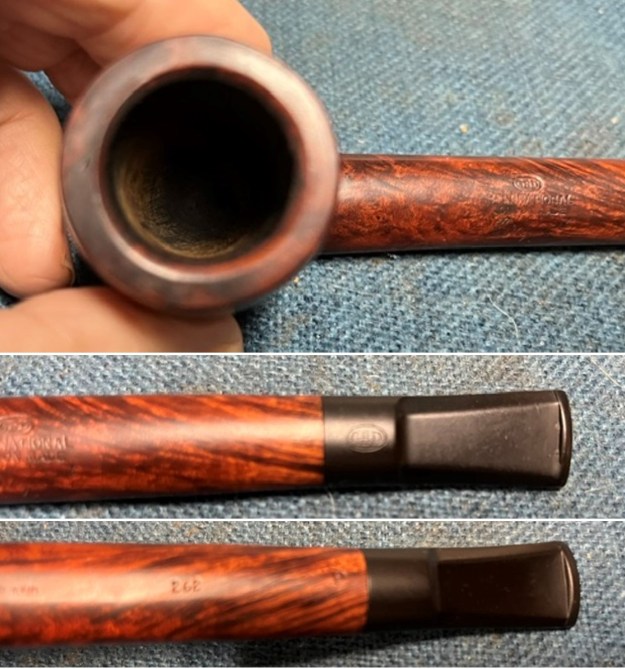
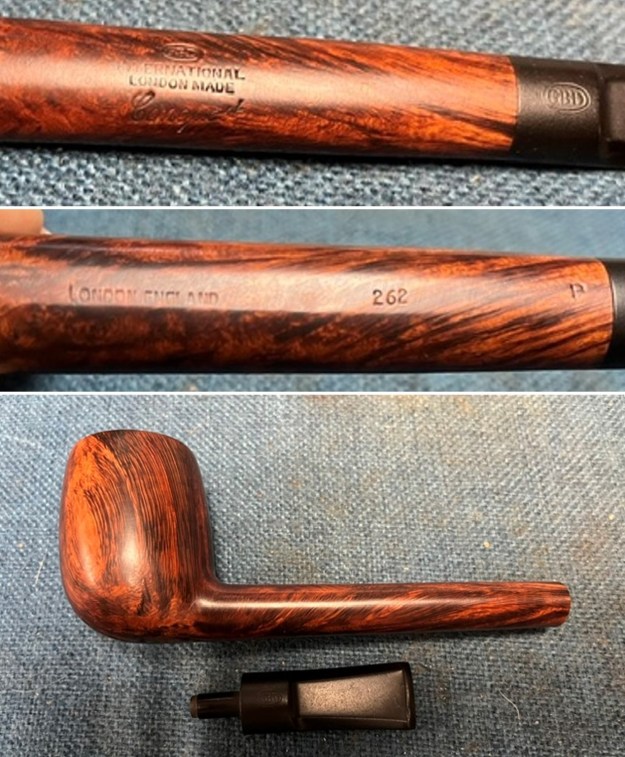
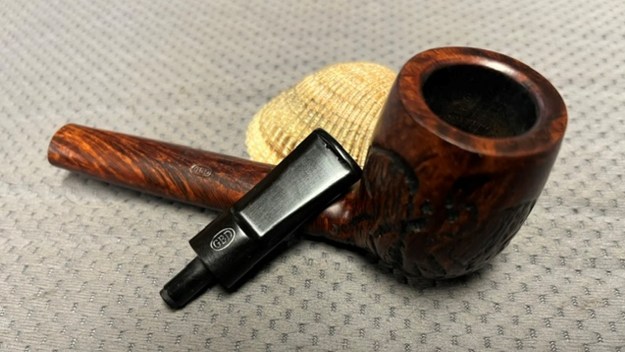
 The stamping on the sides of the shank is shown in the photos below. It looks very good and readable. It reads as noted and explained above.
 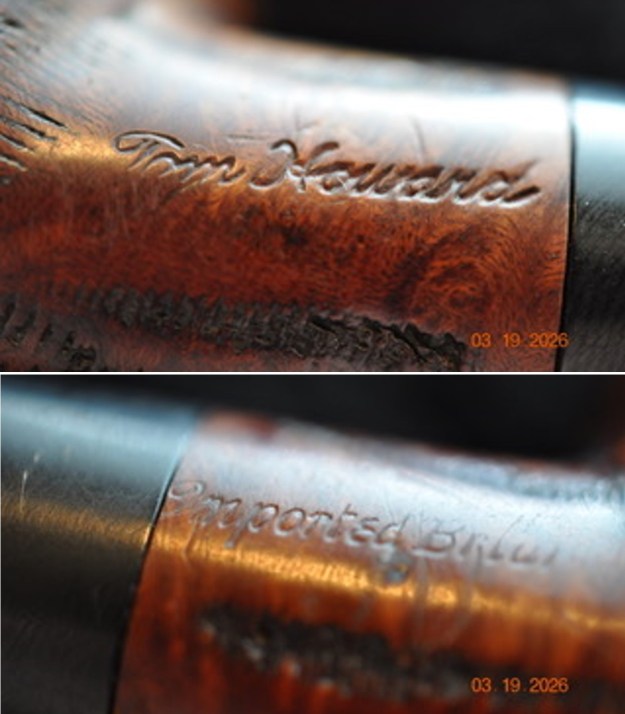 Before I started my work on the pipe I wanted to refresh my memory of the brand. I remembered that Tom Howard was a notable figure beyond pipe making. I also remembered that Dal Stanton had worked on one and done a great job ferreting out the history of the brand and the maker. I turned to his blog on the brand and read what he had written during his restoration of one of the Howard pipes (https://rebornpipes.com/2018/09/16/the-vintage-notoriety-of-tom-howard-and-his-jumbo-squat-rustified-tomato/). I have included the portion of the blog on the history below for ease of reference. (Thanks Dal!)
 I had never heard of a Tom Howard stamp on a pipe and after I put the name in search tool on Pipedia I was surprised to find what I found. Tom Howard was a vintage celebrity in America during the 1940s and 50s. Here’s what Pipedia said about Tom Howard the man:
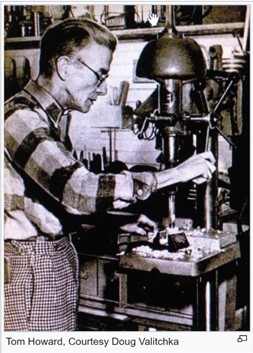
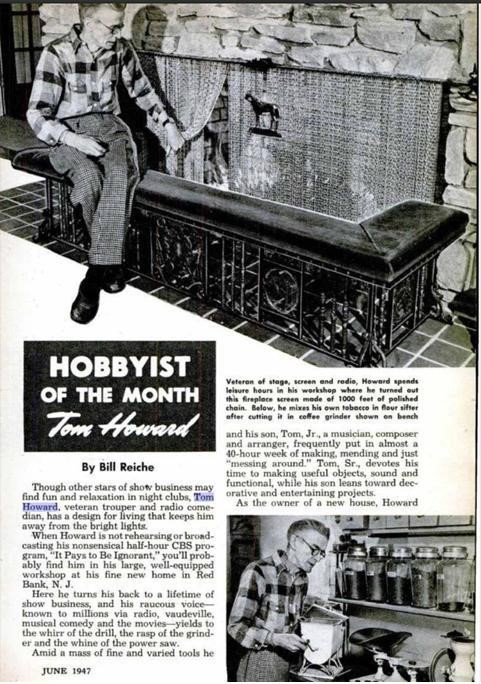
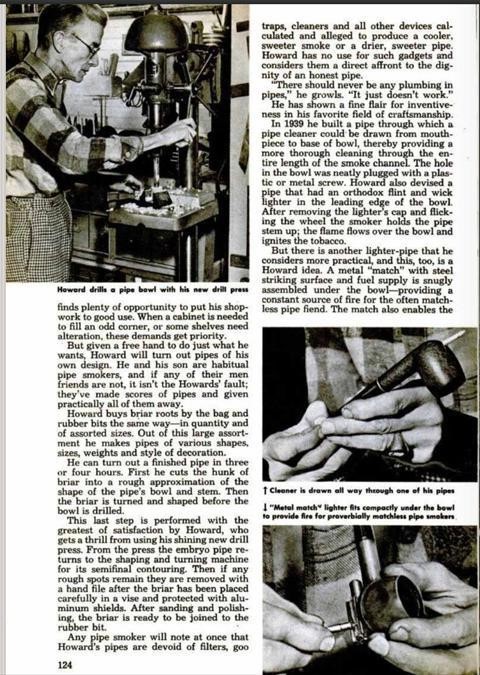
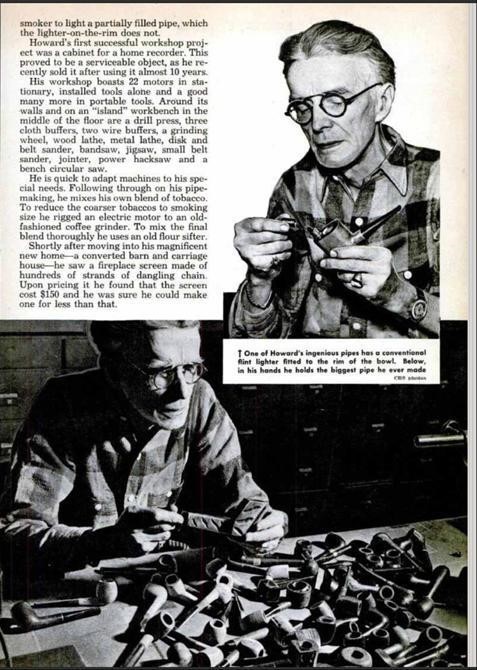
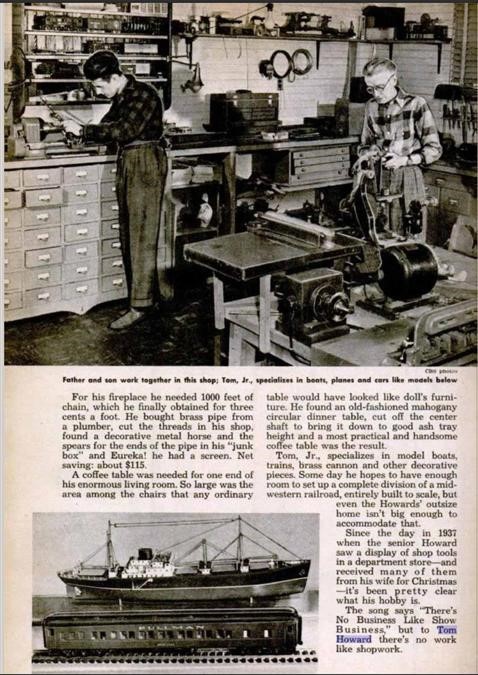
Tom Howard was a popular comedian and personality in the 1940s/50s, known for vaudeville stage and radio work. But he also was a skilled pipe maker. In a Popular Mechanic article from 1947 he is written up as the “Hobbyist of the Month, Tom Howard.” He made pipes in his workshop outside his home in Red Bank, NJ. Starting about 1939 and looks like into the late 1940’s or later. He purchased briar blocks by the bag as well as stem blanks, and in his well-equipped shop he handcrafted his pipes, in about three hours on average. He was a true craftsman, also specializing is intricate model boats, trains and brass canons, all built to scale.
 I was intrigued – this vaudeville and stage comedian made pipes and this pipe came from his workshop made by his hands. How cool is that? Desiring to find out more about Tom Howard the man, I searched Wikipedia and found a fun and informative article about his professional life and how he hosted a I was intrigued – this vaudeville and stage comedian made pipes and this pipe came from his workshop made by his hands. How cool is that? Desiring to find out more about Tom Howard the man, I searched Wikipedia and found a fun and informative article about his professional life and how he hosted a zany Q&A game show that was spoofing the ‘serious’ Q&A game shows. It was called “It Pays to Be Ignorant”. Here is what the Wikipedia article said:
It Pays to Be Ignorant was a radio comedy show which maintained its popularity during a nine-year run on three networks for such sponsors as Philip Morris, Chrysler, and DeSoto. The series was a spoof on the authoritative, academic discourse evident on such authoritative panel series as Quiz Kids and Information Please, while the beginning of the program parodied the popular quiz show, Doctor I.Q. With announcers Ken Roberts and Dick Stark, the program was broadcast on Mutual from June 25, 1942 to February 28, 1944, on CBS from February 25, 1944 to September 27, 1950 and finally on NBC from July 4, 1951 to September 26, 1951. The series typically aired as a summer replacement.
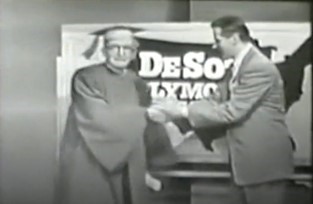 Snooping a bit more, I found an online site that had the July 5, 1951 episode of ‘It pays to Be Ignorant’ available for viewing. I watched it and it was like I was in a time machine! The video also included period advertising for cars and tobacco and Tom Howard in form, dawning a professorial gown and a gravelly 1950s vaudeville tin can voice. It’s great! I clipped a picture of the episode. If you want to see it yourself, here’s the link: The Internet Archive.
The Pipedia article I included above, referenced one more source to learn a bit more about Tom Howard. In a 1947 Popular Mechanics edition he was named ‘Hobbyist of the Month’ – but it didn’t say which month! With a little bit of help from Google, I found Archive.org that housed old editions of many periodicals including Popular Mechanics. I started in January and started searching – thankfully they had a search tool I utilized for each month. Finally, I found the article in the Popular Mechanic 1947 June’s edition. For the absolute nostalgia of it, and for the interesting information it adds about Tom Howard and especially his pipe production, I’m including the pages here for you to read – including the cover page! I couldn’t pass it.
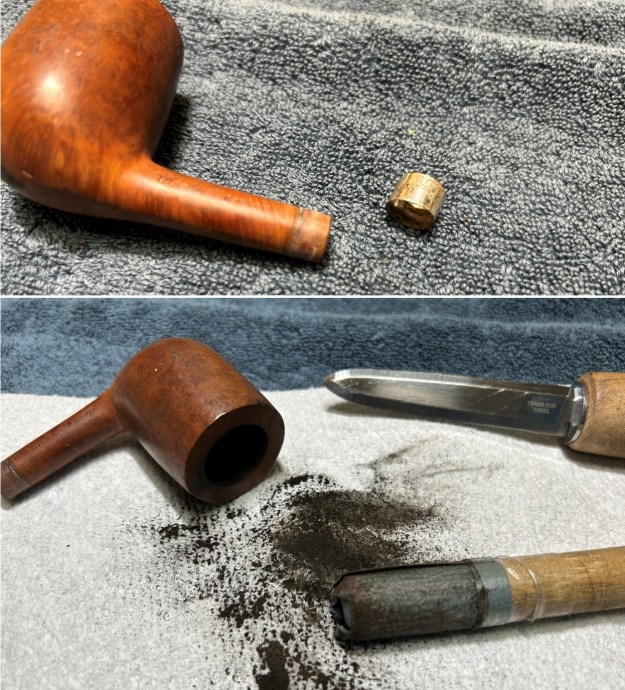
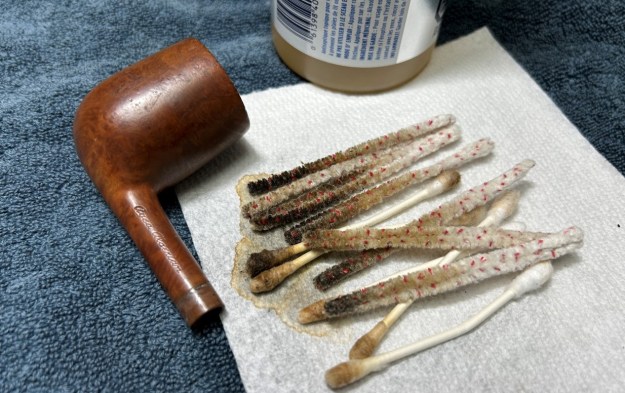
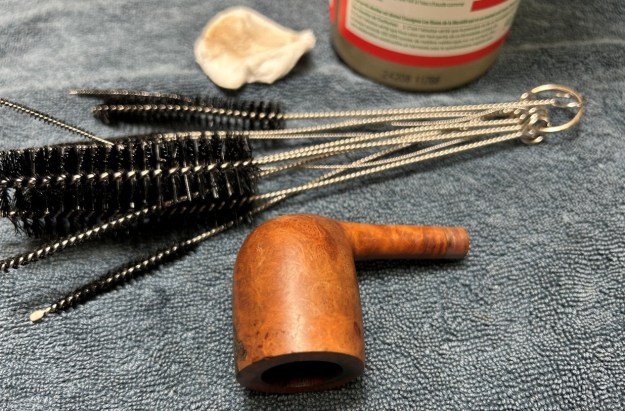
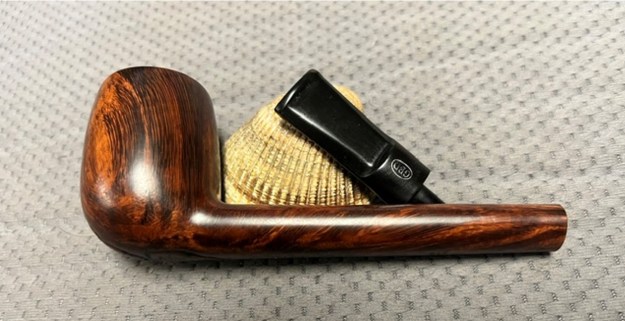
 Armed with the great information Dal had provided it was time to work on the pipe. Jeff had carried out his thorough cleanup of the pipe. He had reamed it with a PipNet reamer to remove the cake and cleaned the reaming up with a Savinelli Fitsall Pipe Knife. He scrubbed the internals of the bowl and stem with alcohol, cotton swabs, shank brushes and pipe cleaners. He scrubbed the externals with undiluted Murphy’s Oil Soap and rinsed the bowl off with running water. He soaked the stem in Briarville’s Pipe Stem Deoxidizer and once it had soaked rinsed it off with warm water to remove the residual solution. He dried it off and rubbed it down to remove any oxidation that was still on the stem. The pipe looked much better when I received it.
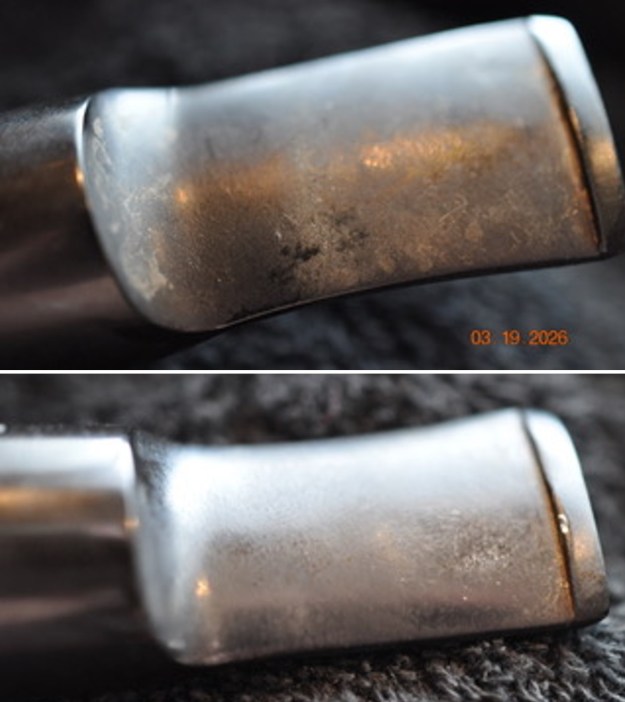
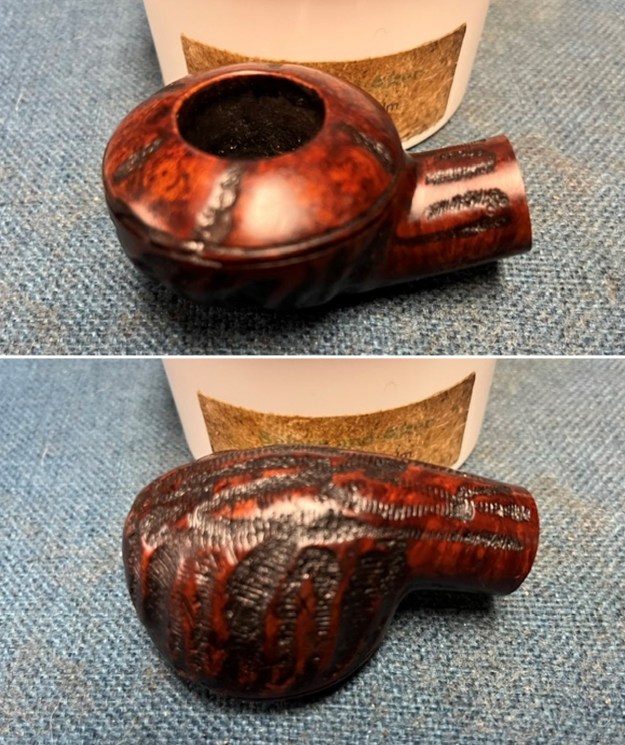
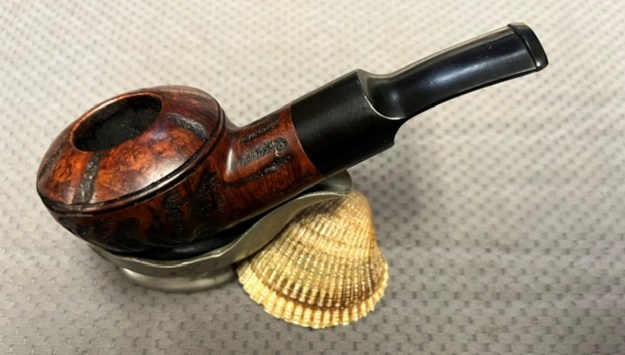
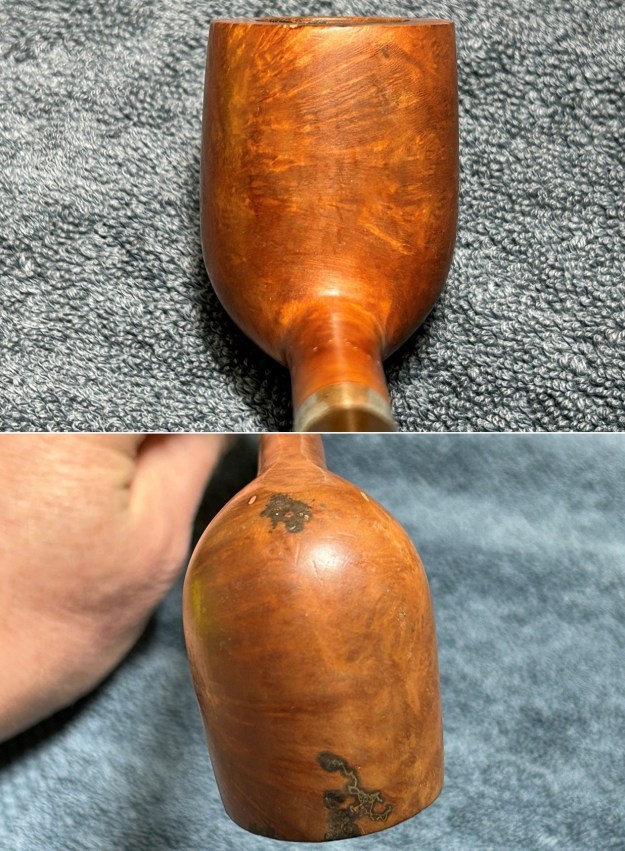
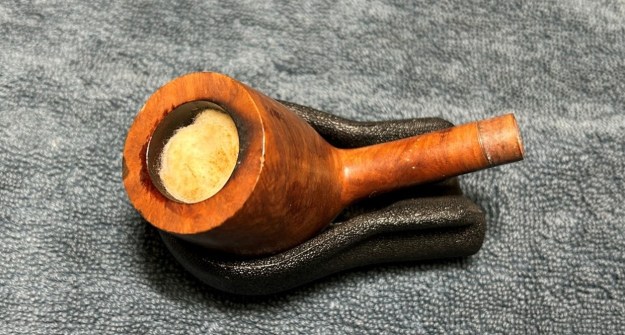
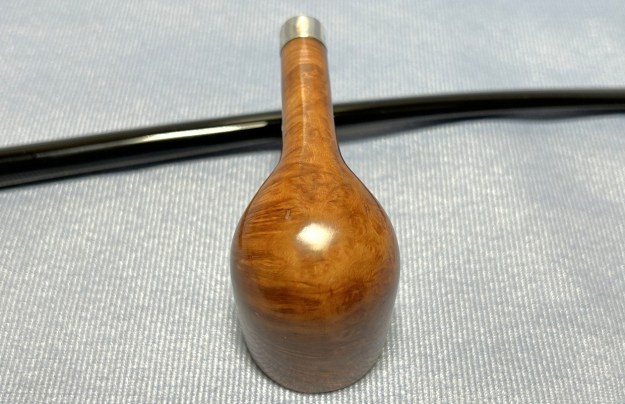
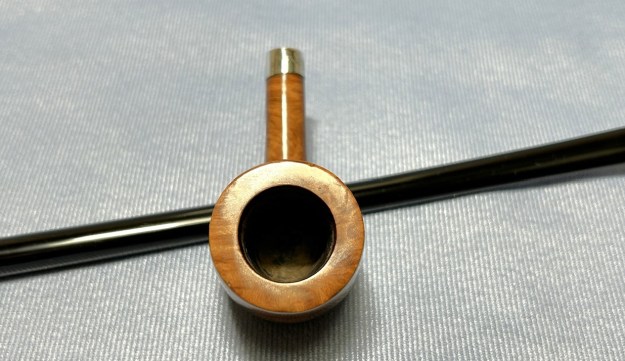
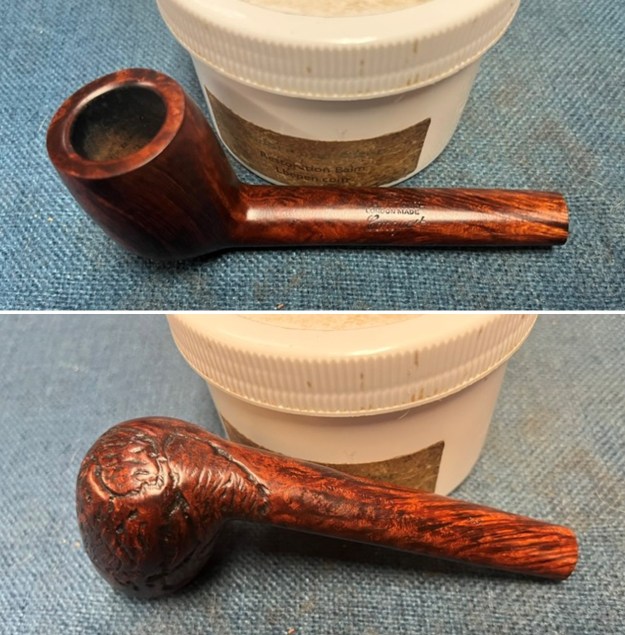
 I took a photo of the rim top to show the condition. It looks good with the tars and oils removed from the rim top. The condition of the bowl and rim top were very good. The vulcanite stem looked much better with some light chatter on the top and underside ahead of the button.
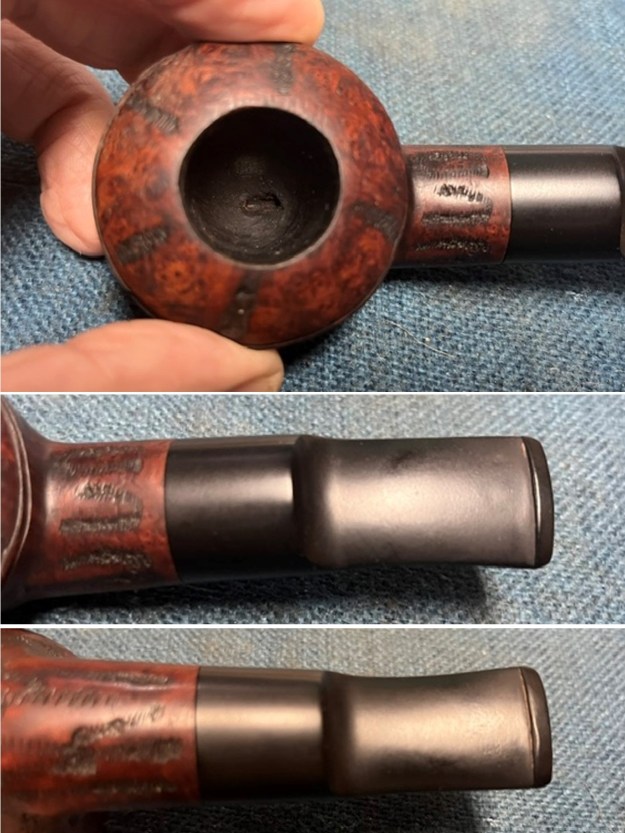 I took photos of the top and underside of the shank to show the stamping. The stamping is clear and reads as noted above. It was hard to capture in the photos. I removed the stem from the shank and took photo to show the overall look of the pipe.
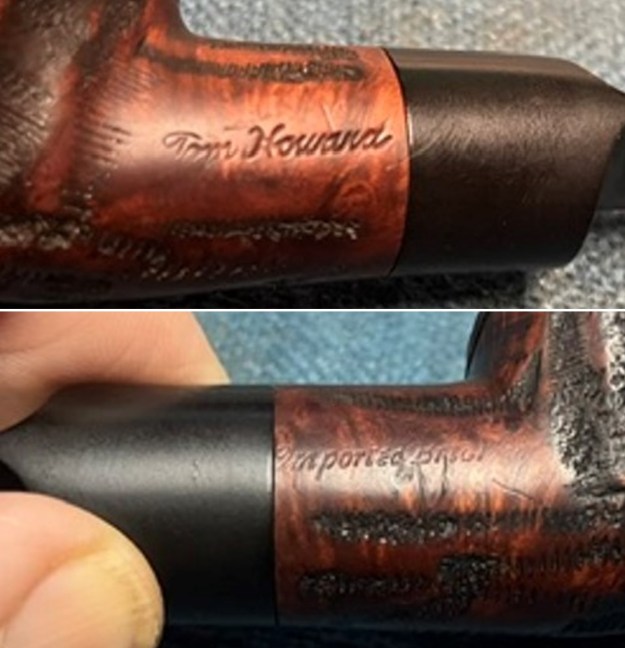
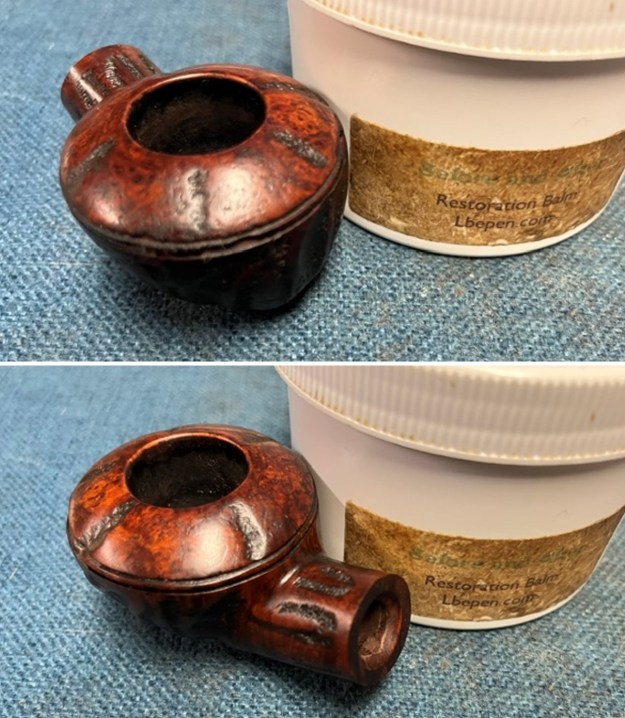
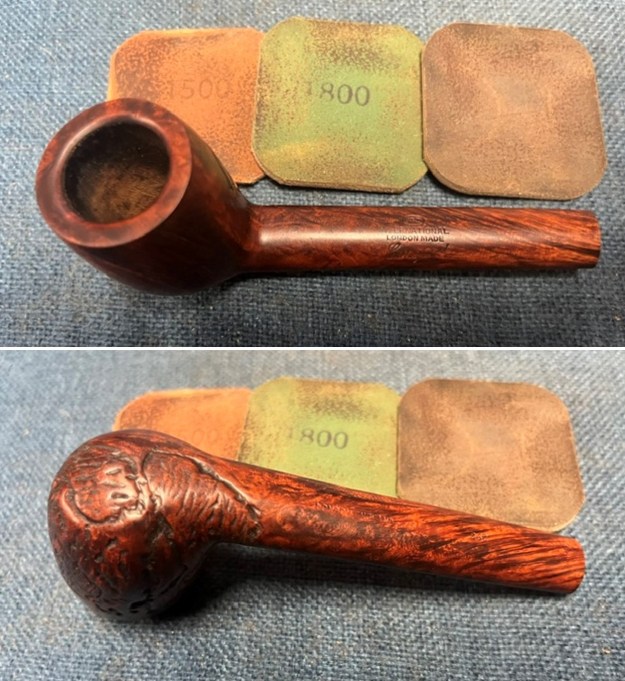
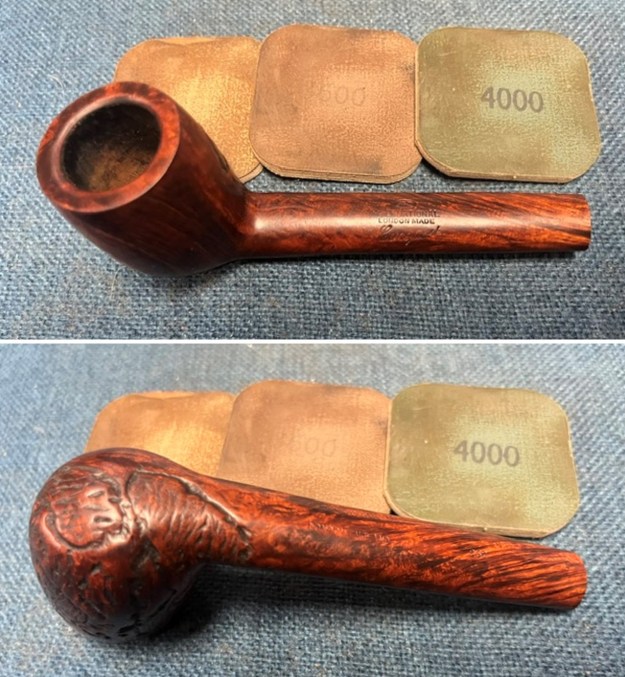
 I decided to start the restoration on this one by working on the damage and darkening on the inner edge and the rim top. I sanded them with 220 grit sandpaper and gave the inner edge of the bowl a slight bevel to remove the damage and blend it into the rest of the rim edge.
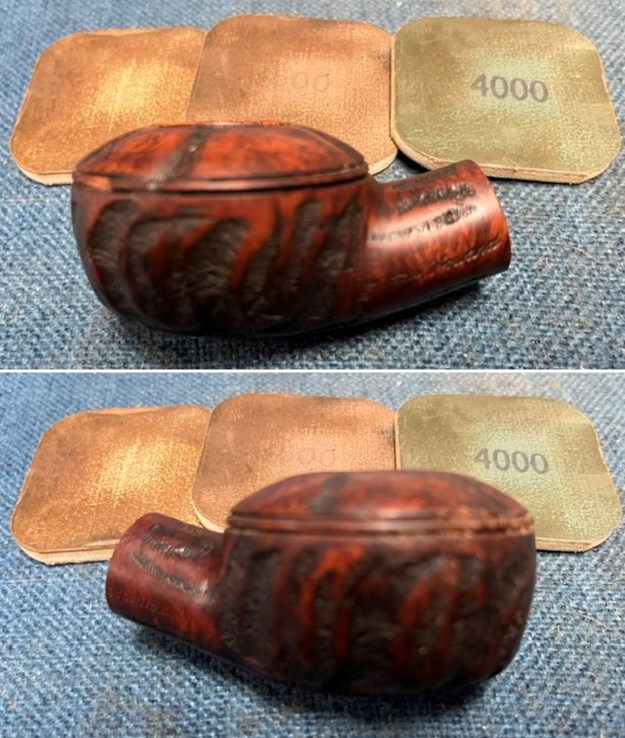
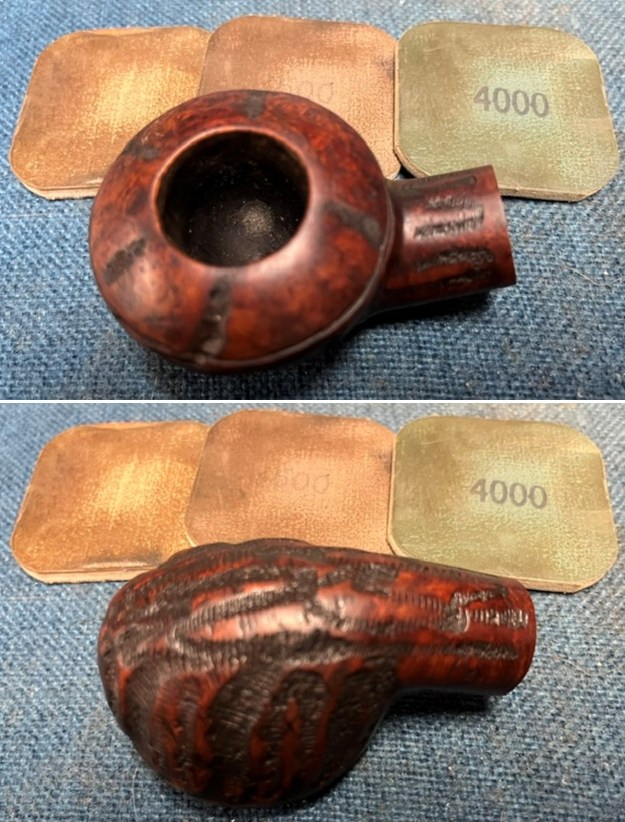
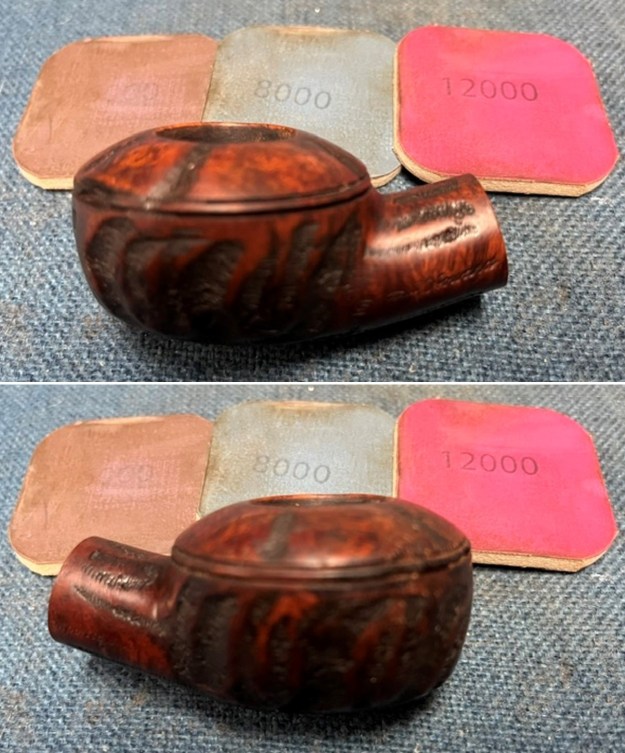
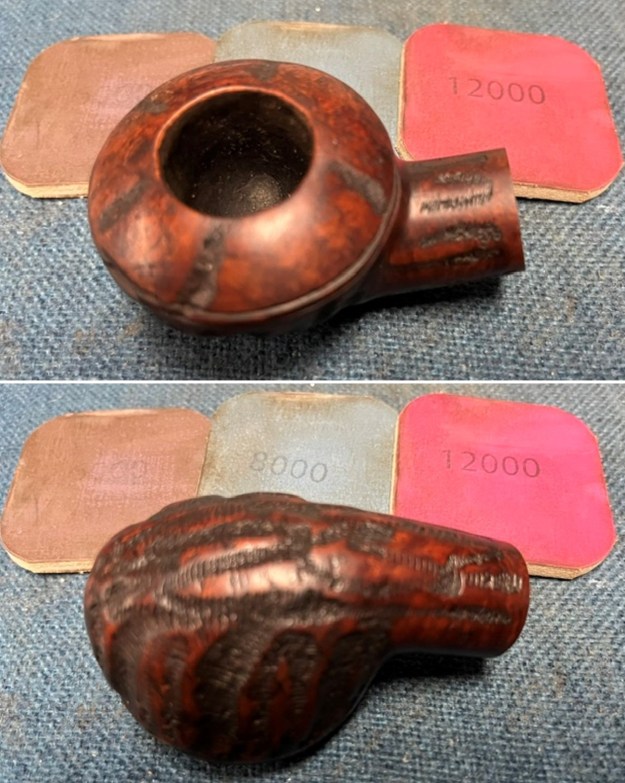
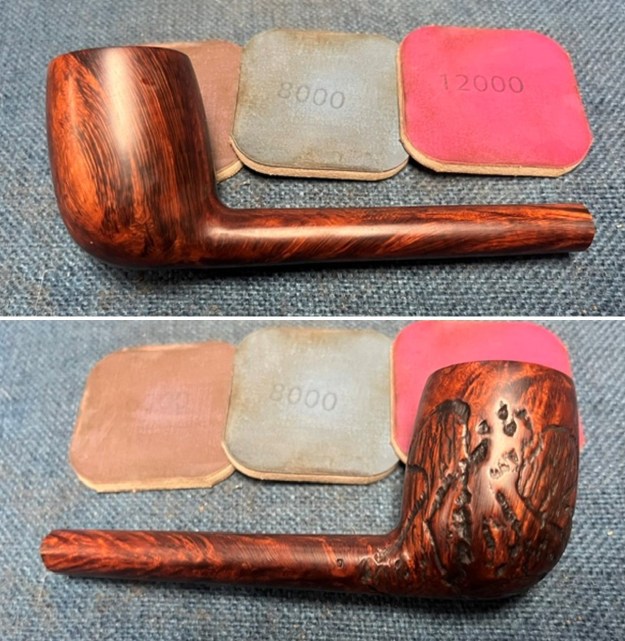
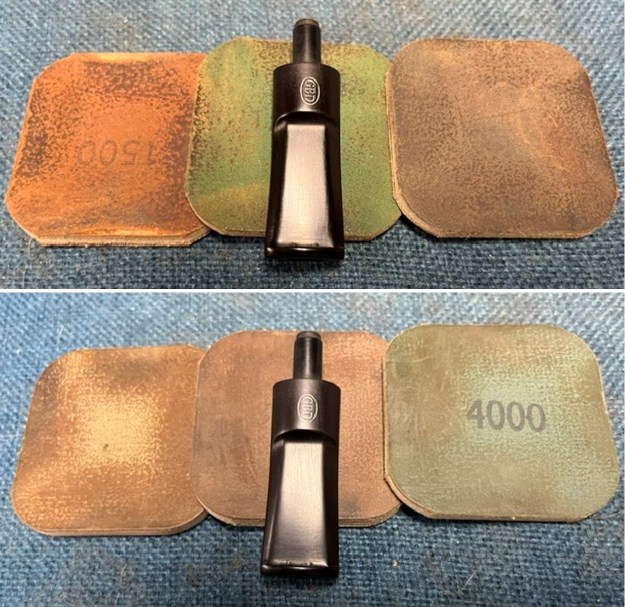
 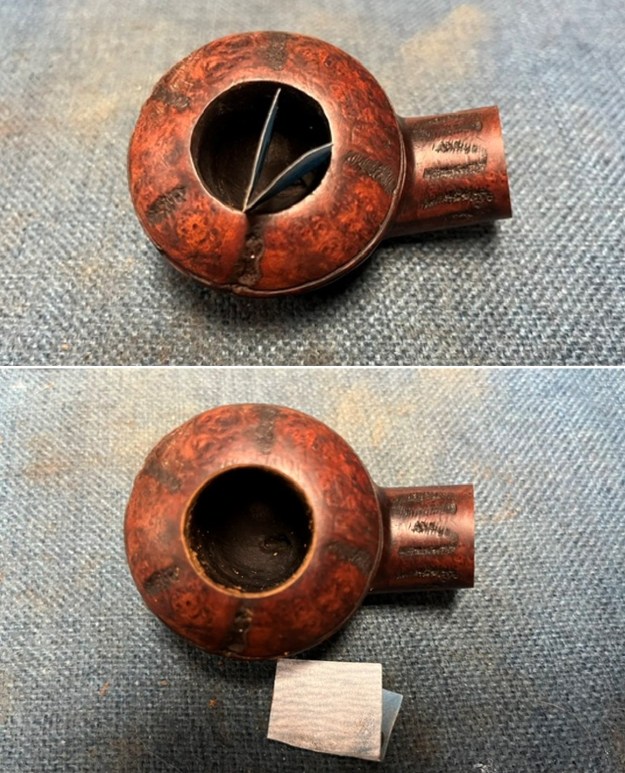 I polished the smooth parts of the briar with micromesh sanding pads – dry sanding with 1500-12000 grit pads. I wiped the bowl down with a damp cloth after each sanding pad.
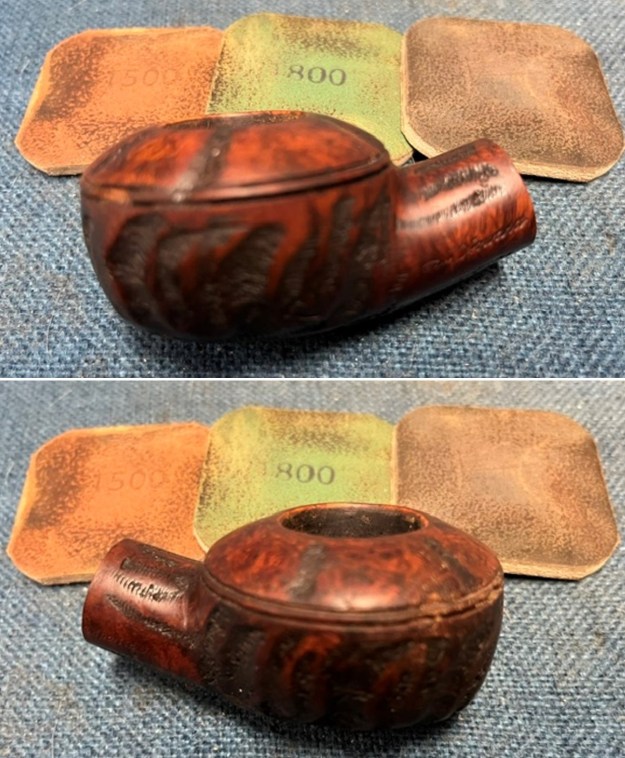

 I used a Walnut stain pen and a black Sharpie pen to restain the chipped areas between the twin rings. Once they were stained they looked significantly better.
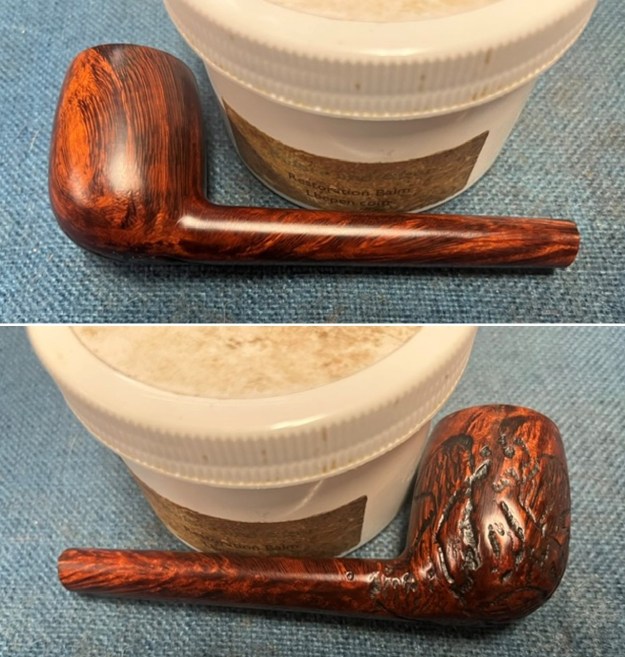
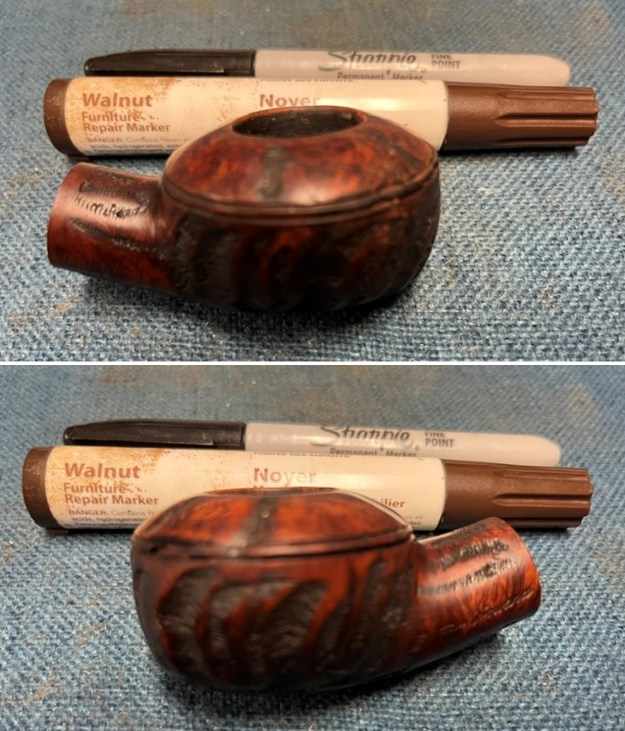 I rubbed the briar down with Before & After Restoration Balm. I worked it into the briar with my fingertips and a horsehair shoe brush to work it into the nooks and crannies of the rusticated finish. The product works to clean, enliven and preserve the briar. I let it sit for 10 minutes while I worked on the stem. After the time passed I buffed it with a cotton cloth to deepen the shine. The briar really comes alive with the balm.
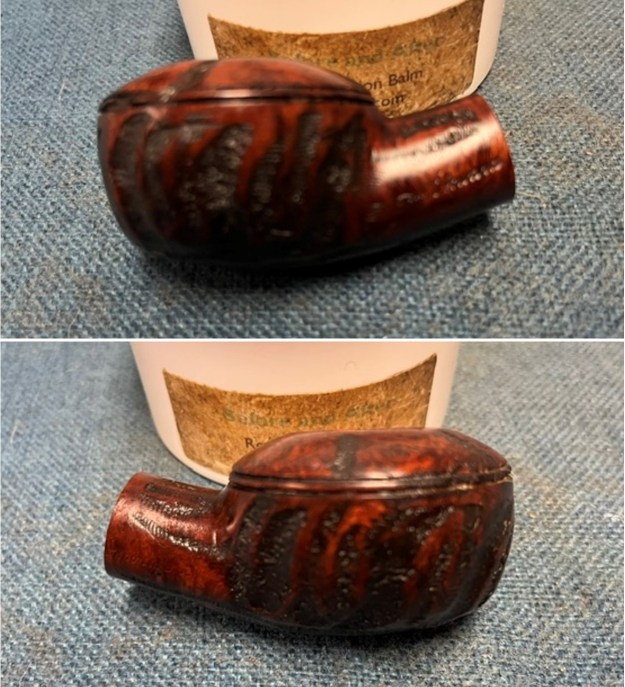
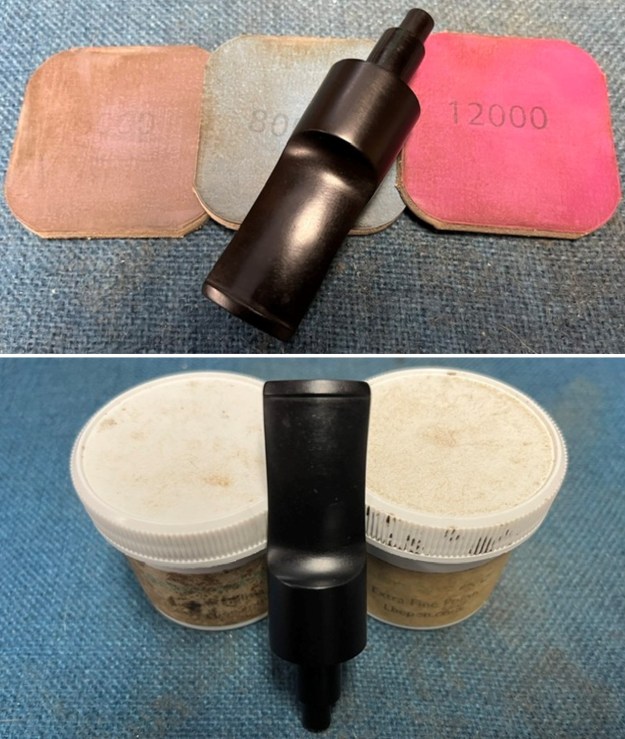
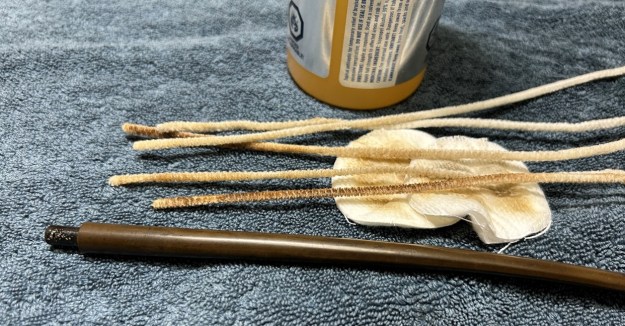
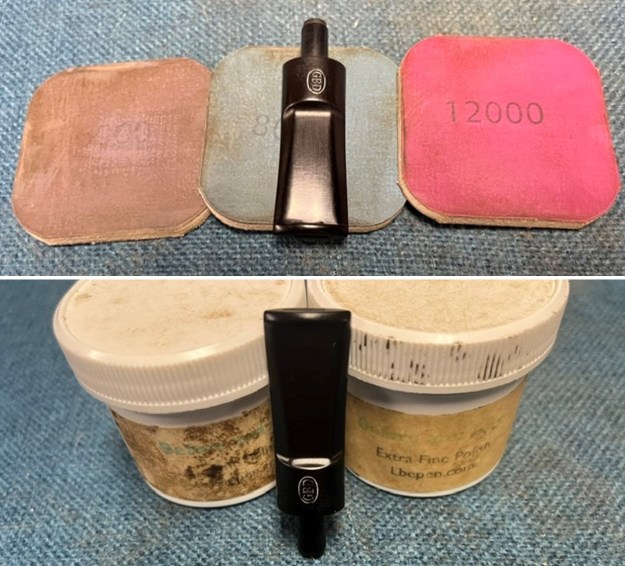
 I set the bowl aside and turned to the sten. I polished the vulcanite with micromesh sanding pads – 1500-12000 grit pads. I wiped it down with Obsidian Oil after each sanding pad. I used Before & After Pipe Polish – both Fine and Extra Fine to further polish the stem.
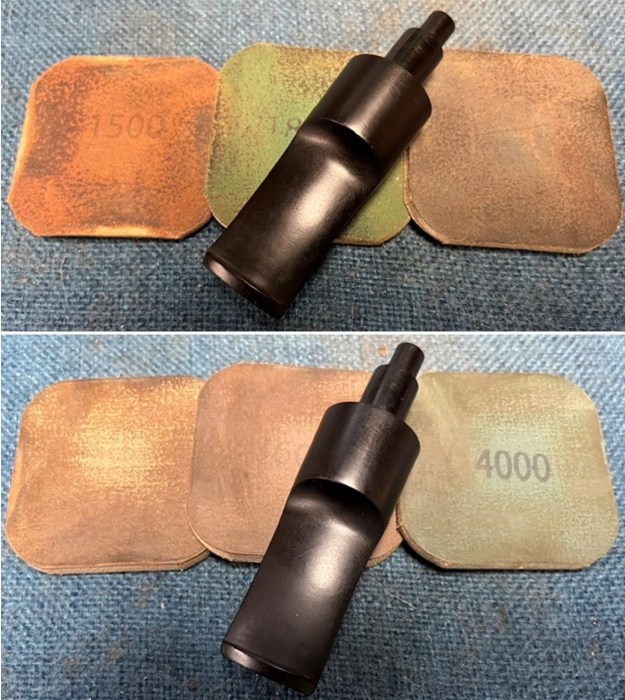
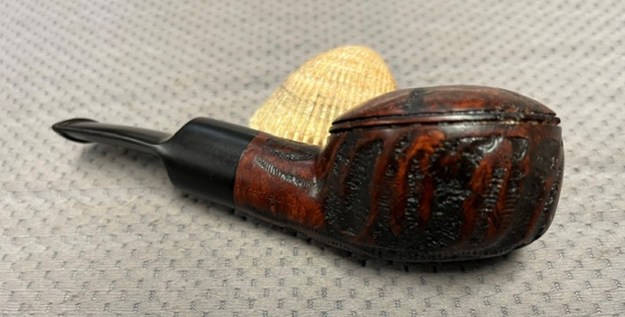
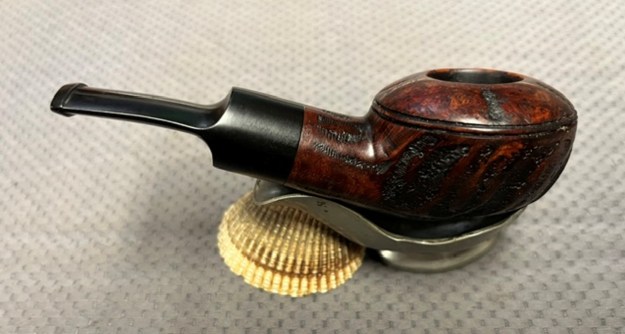
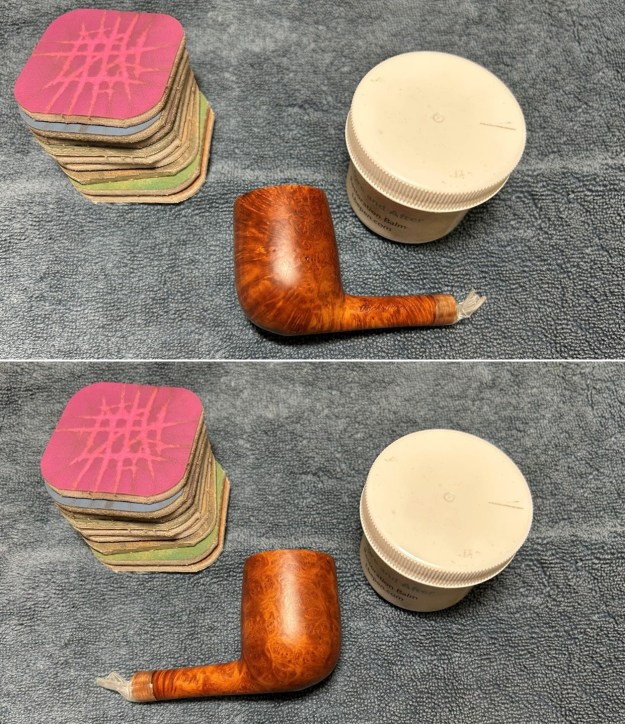
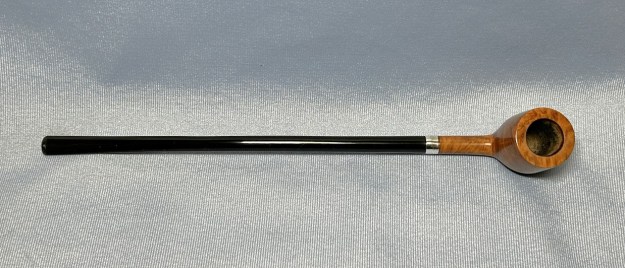
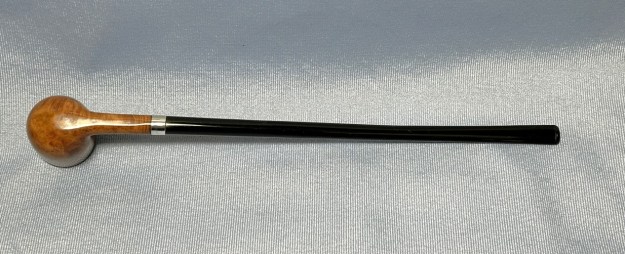
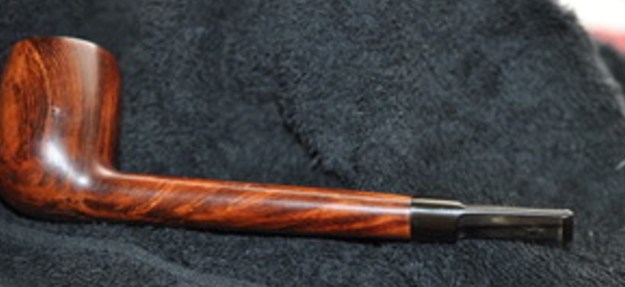
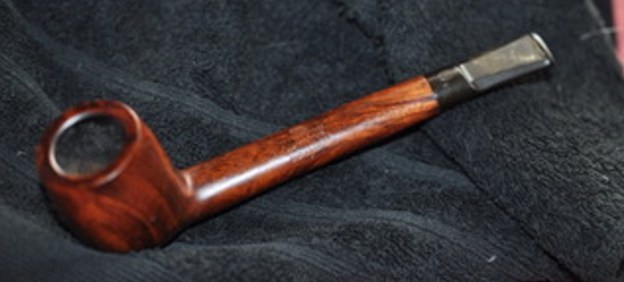
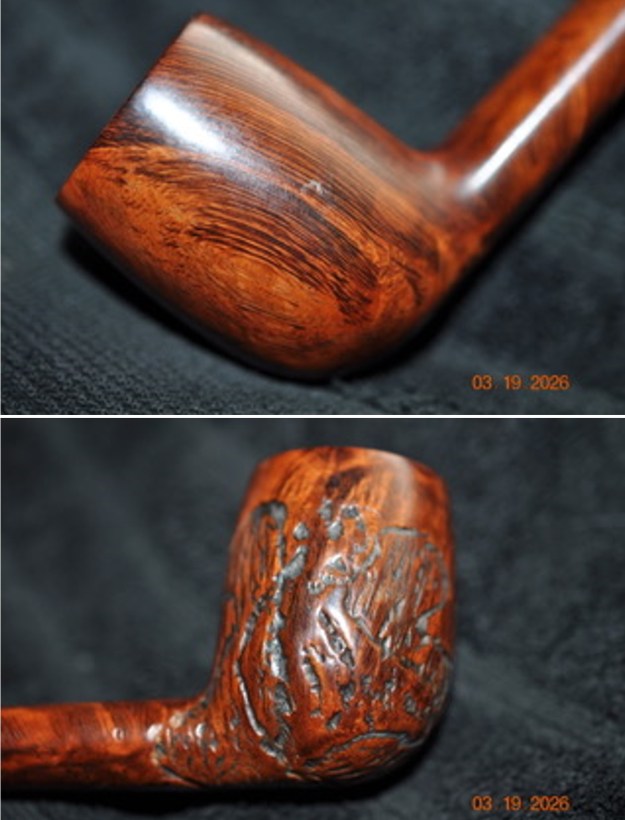
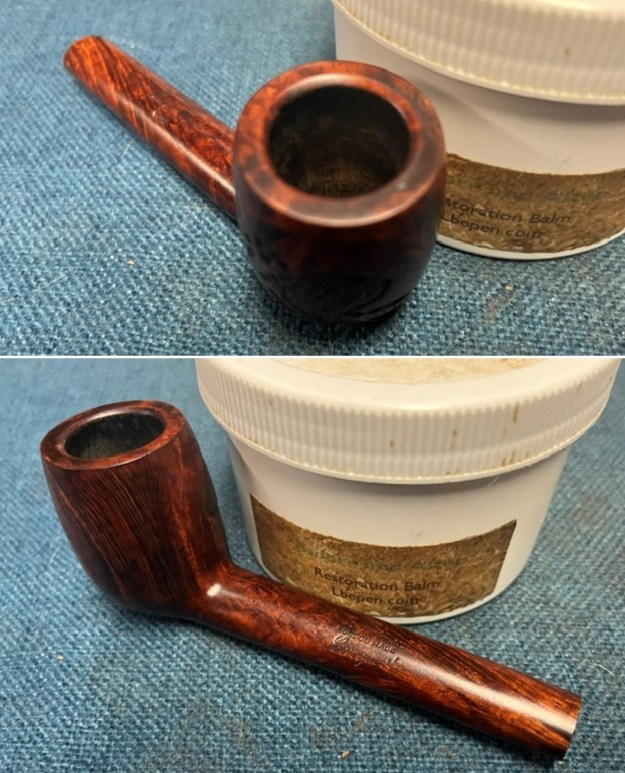
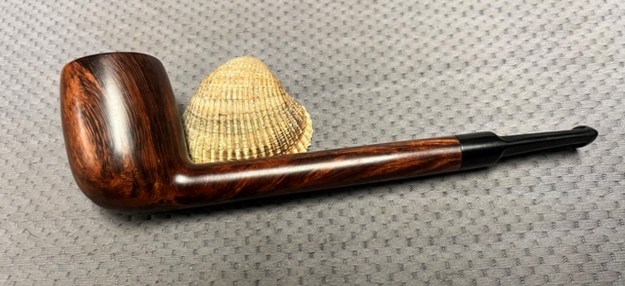
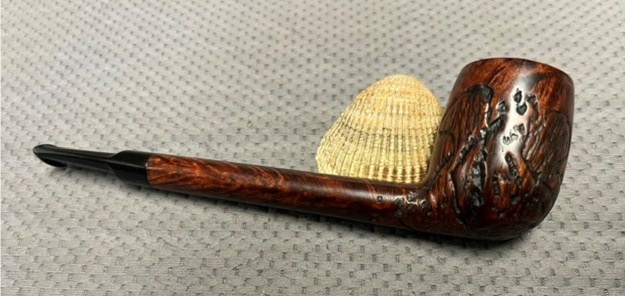
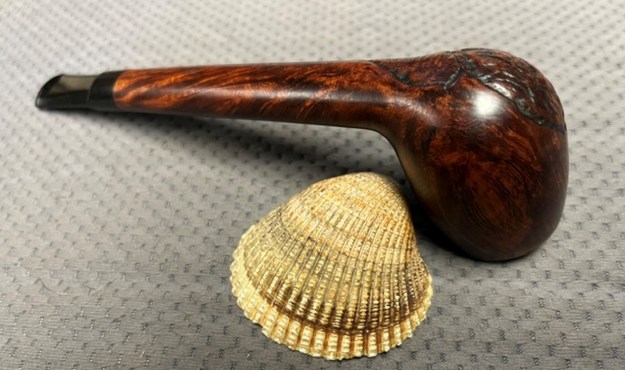
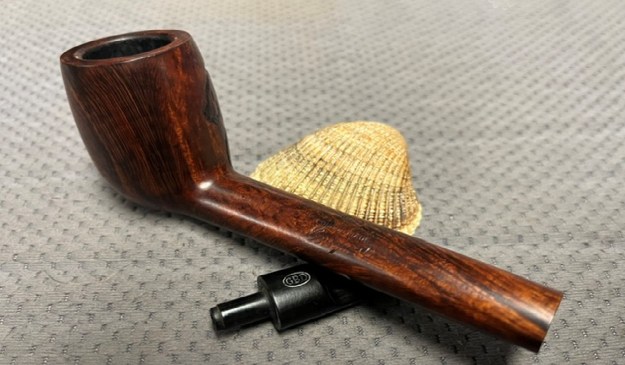
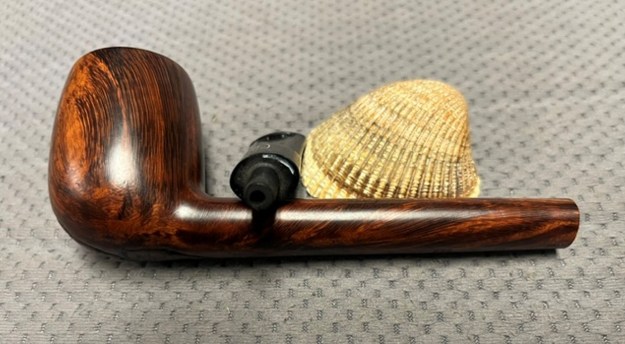
 This Tom Howard Imported Briar Bullmoose Rhodesian turned out to be a great looking pipe. The rusticated finish looks quite good while not obscuring the grain around the bowl. The stain used on the bowl served to highlight the grain on the bowl. The polished black vulcanite saddle stem adds to the mix. With the dust gone from the finish and the bowl it was a beauty and is eye-catching. I put the stem back on the bowl and buffed the pipe with Blue Diamond on the buffing wheel being careful to not buff the stamping. I gave the bowl and the stem multiple coats of carnauba wax on the buffing wheel and followed that by buffing it with a clean buffing pad. I hand buffed the pipe with a microfiber cloth to deepen the shine. The finished Tom Howard Rhodesian is a large pipe and feels great in the hand. Give the finished pipe a look in the photos below. I can only tell you that like the other pipes I am working that it is much prettier in person than the photos capture. The dimensions of the pipe are Length: 5 inches, Height: 1 ½ inches, Outside diameter of the bowl: 2 inches, Chamber diameter: 7/8 of an inch. The weight of the pipe is 63 grams/2.22 ounces. I will be adding it to the American Pipe Makers Section soon if you would like to add it to your collection. Thanks for walking through the restoration with me as I worked over another beautiful pipe.
Remember we are not pipe owners; we are pipemen and women who hold our pipes in trust until they pass on into the trust of the next generation.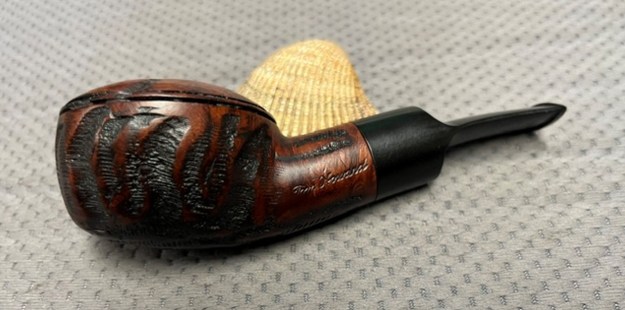


