Tag Archives: shaping a stem

Another Of My Inherited BBB Restored…And What A Mess It Was


Blog by Paresh Deshpande

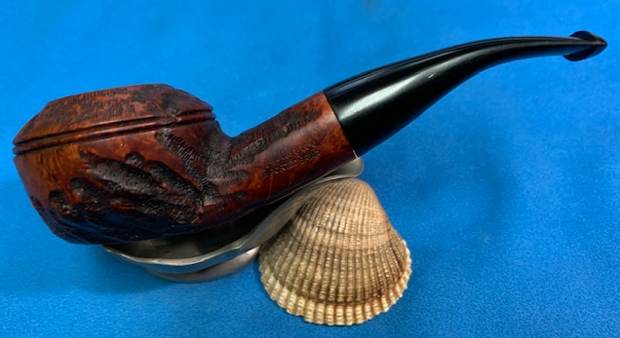
The next pipe that had moved up the queue of pipes for restoration is also a BBB, but from a newer era as compared to the c.1916 pipe that I had just restored. The aim of selecting this pipe was to show the general condition of the pipes that I had inherited. All or most of them were very well loved and thus extensively smoked without any signs of ever having being cleaned and maintained. The philosophy was simple, select one favorite pipe, smoke the pipe till it fouls up then chuck it, buy a new pipe and repeat the process… It was an era when Barling family still owned the brand and Loewe pipes were still made in the Haymarket area! Ah….. That bygone era of beautiful and superb quality English pipes.

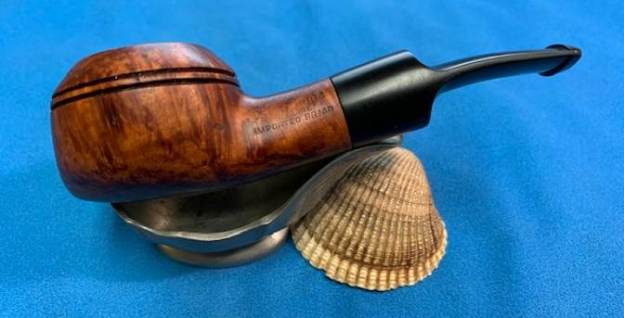
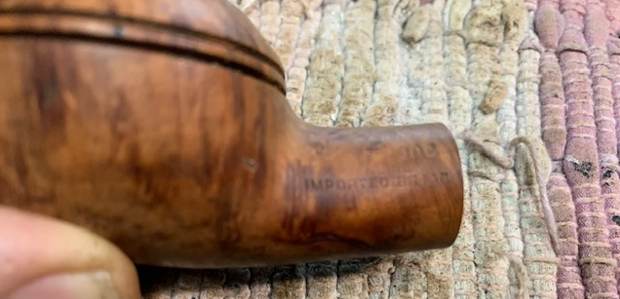
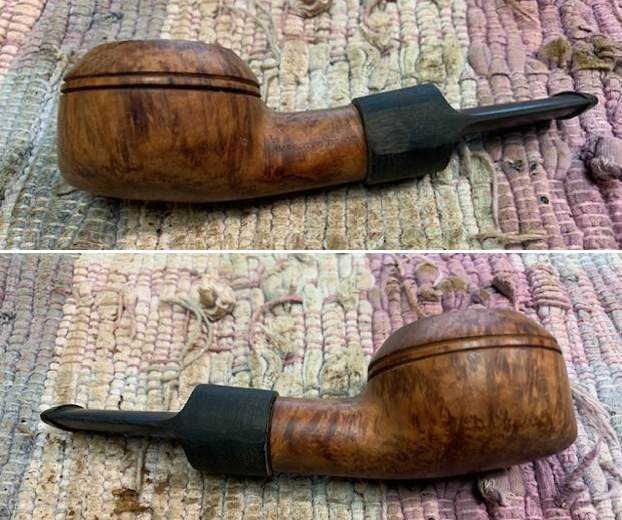
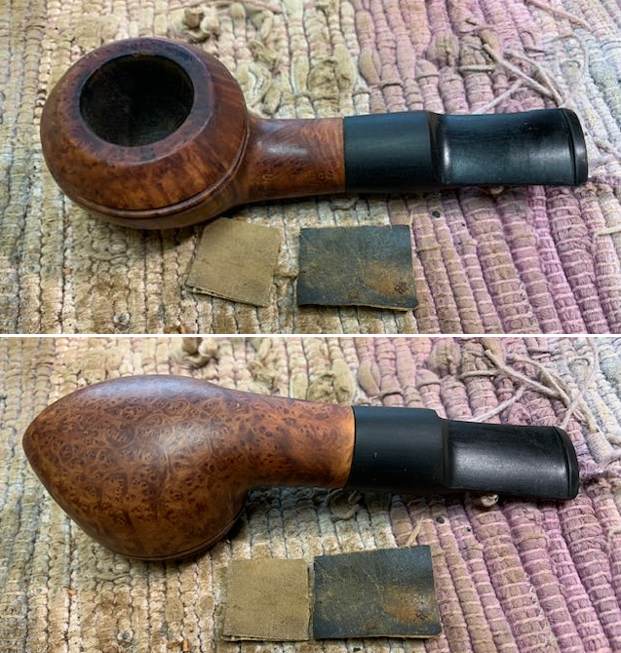
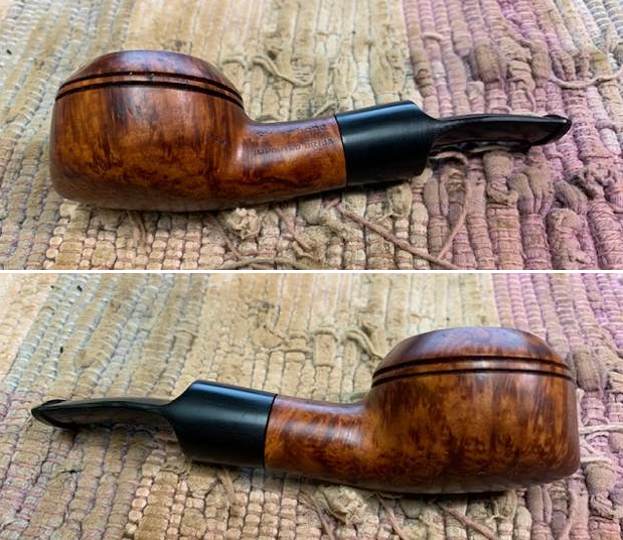
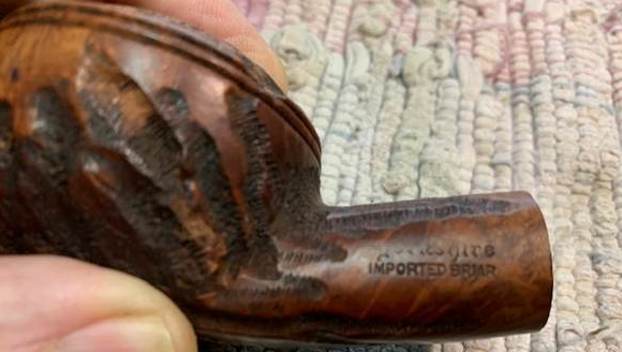
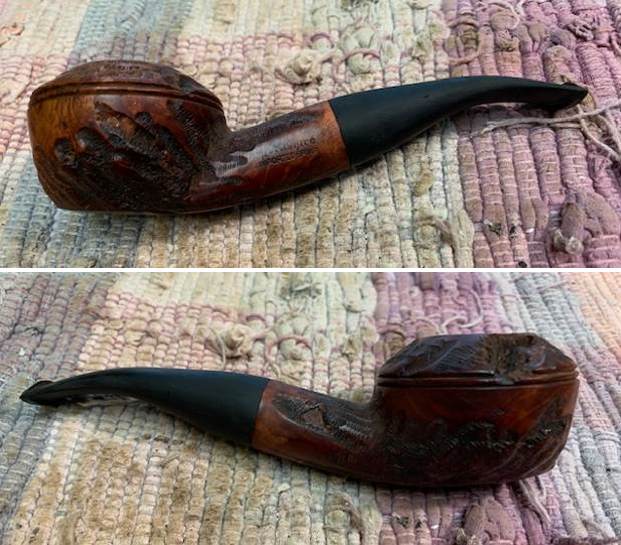
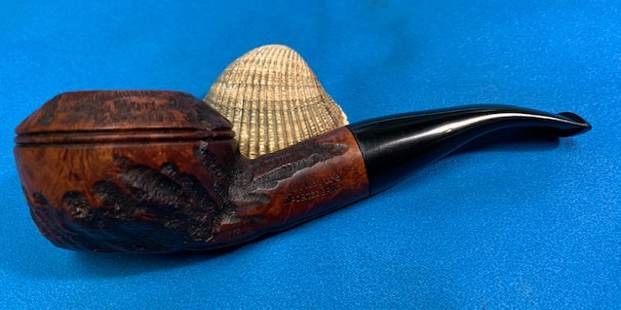
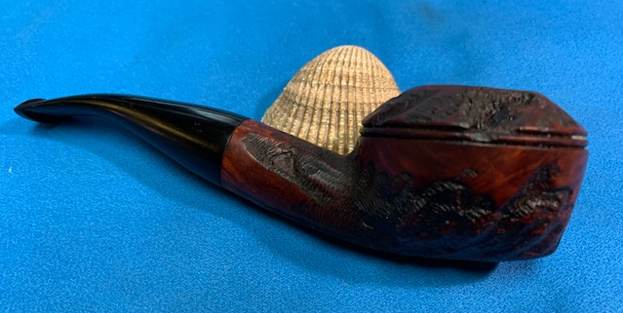
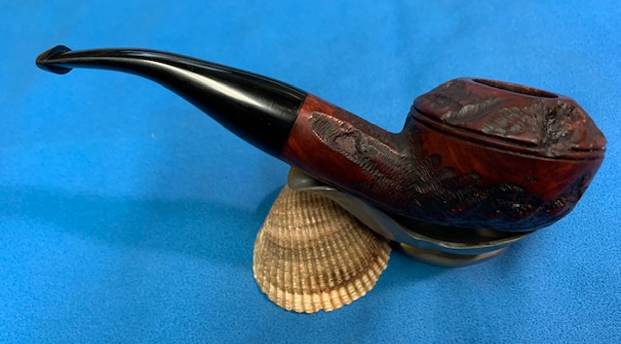
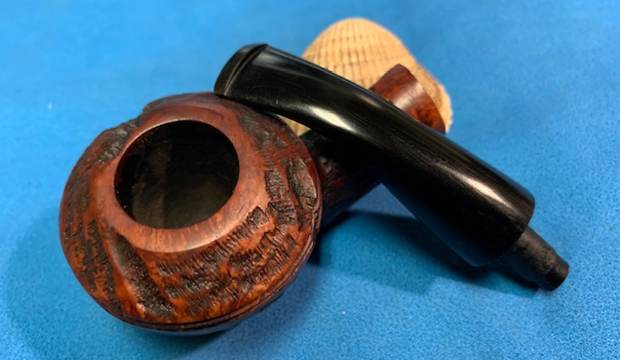
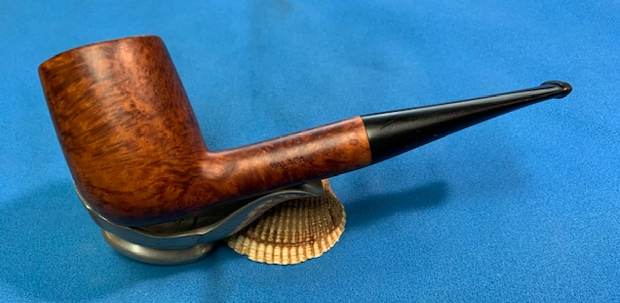
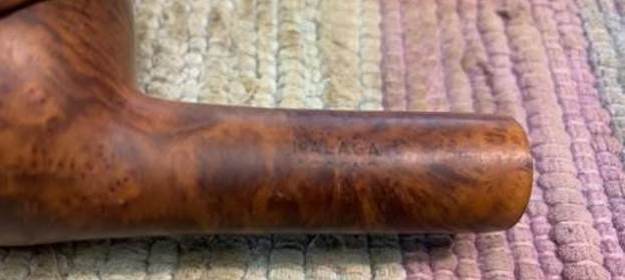
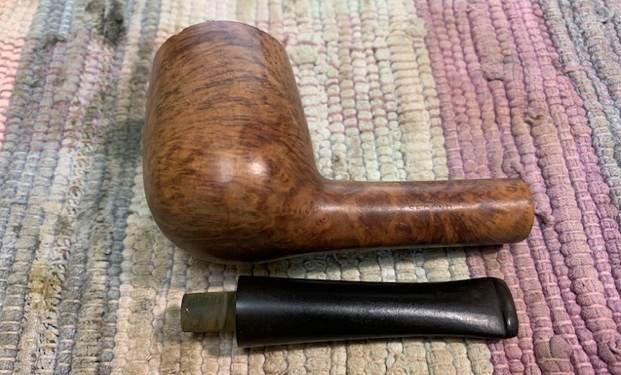
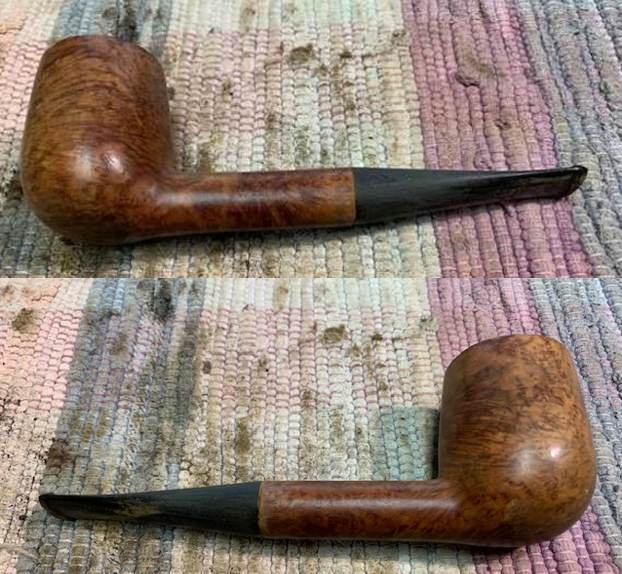
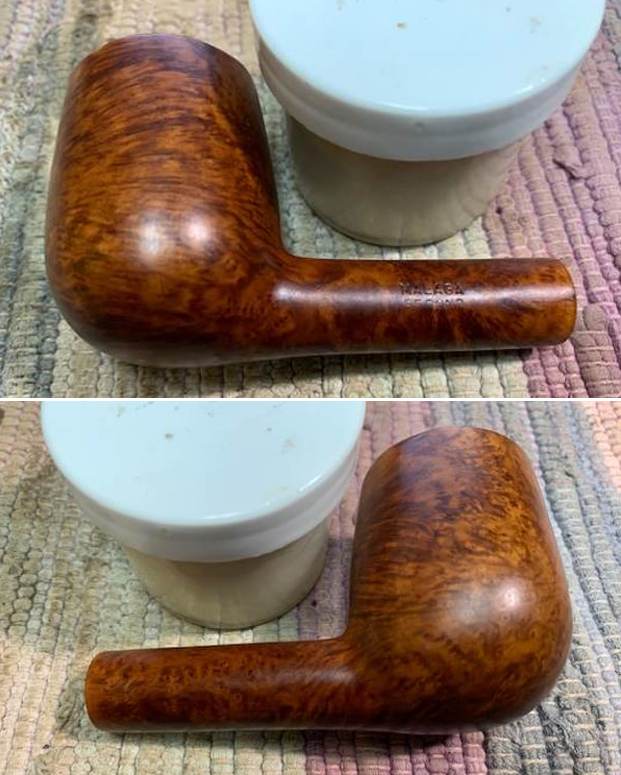
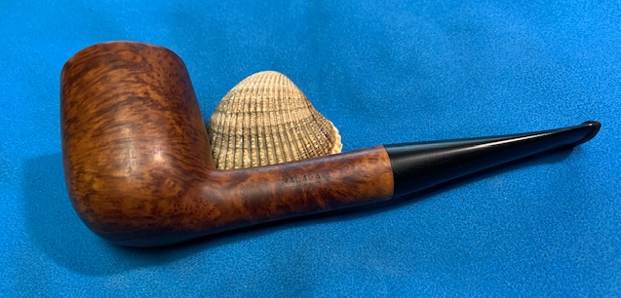
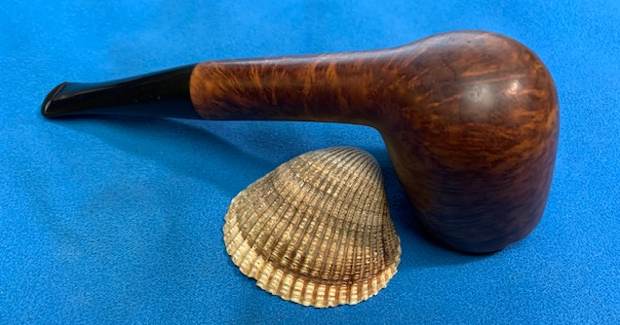
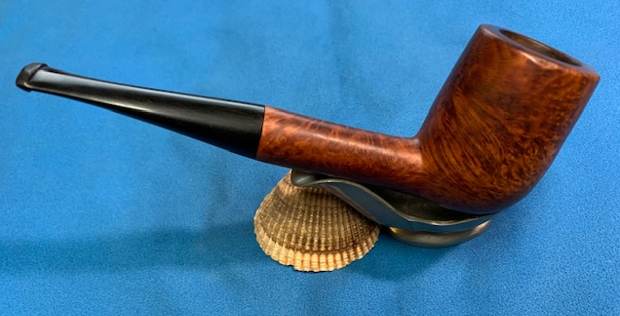
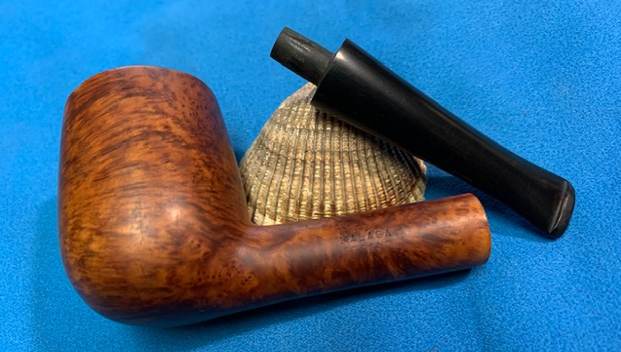
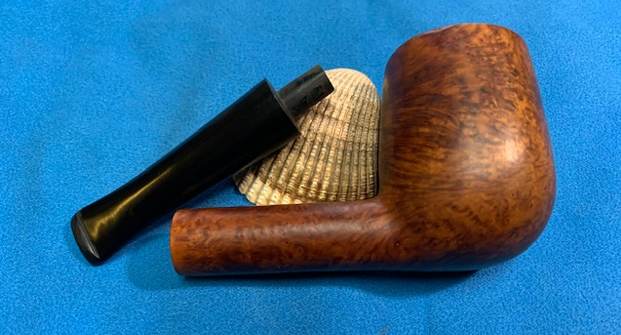
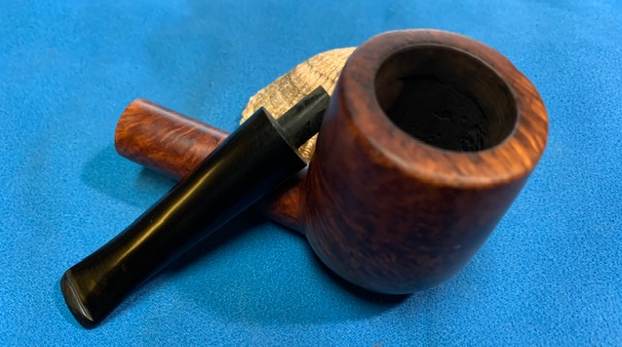
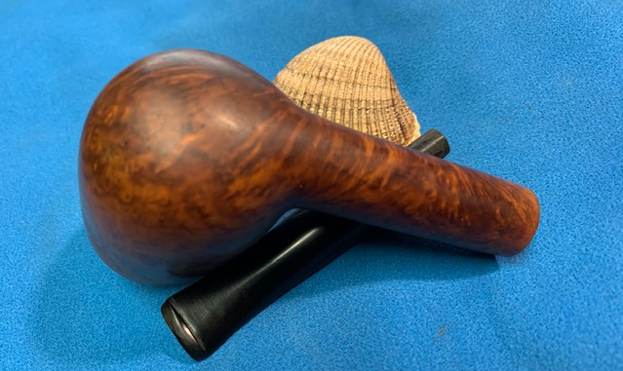
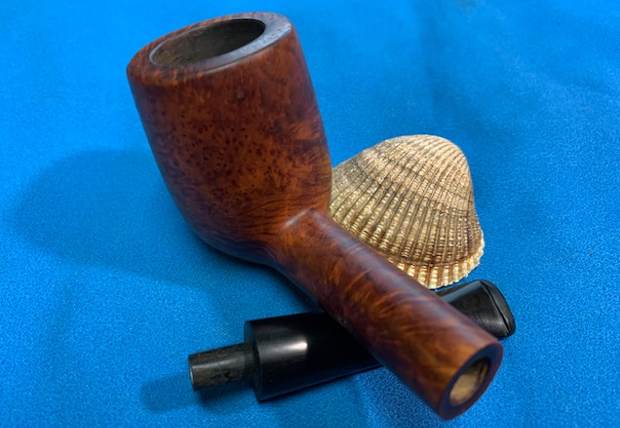
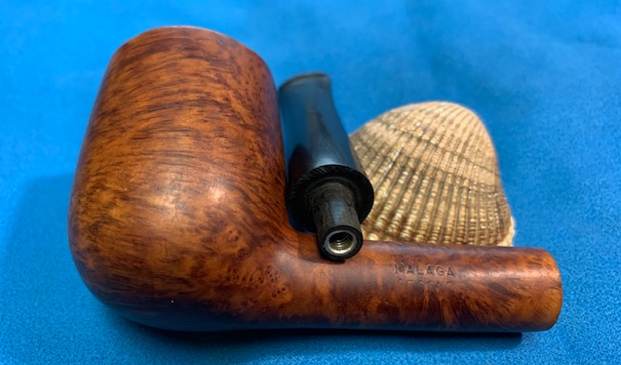
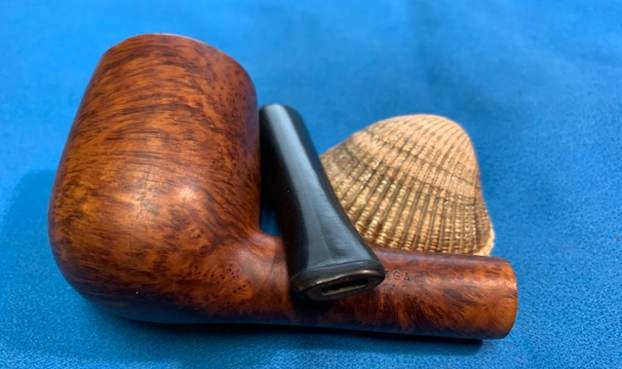
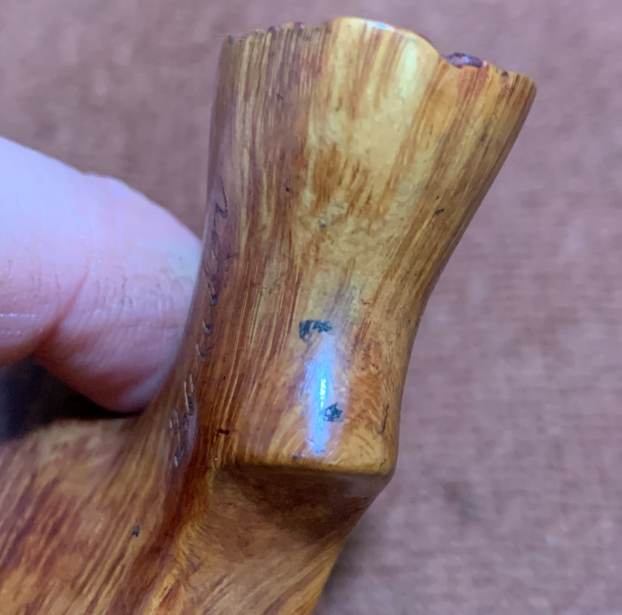
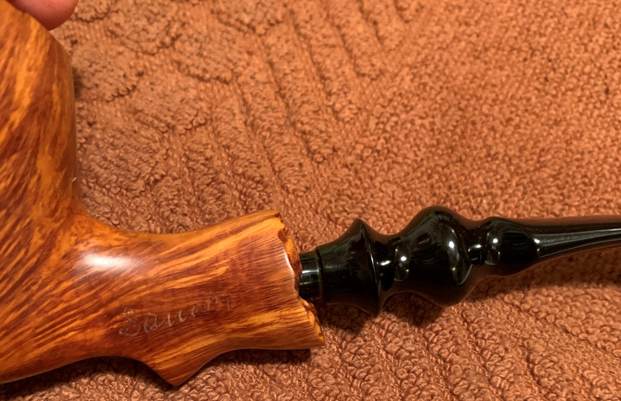
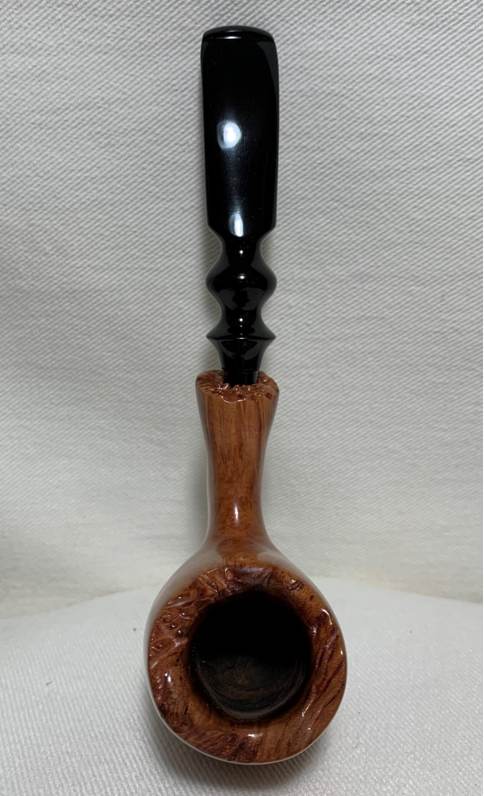
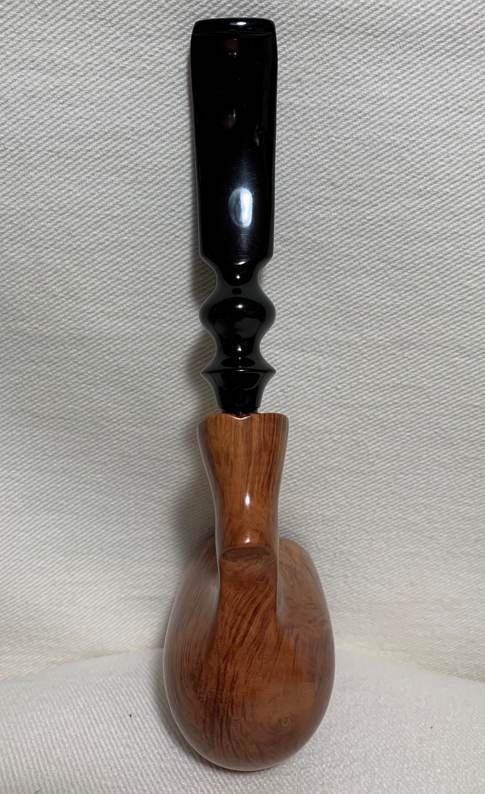
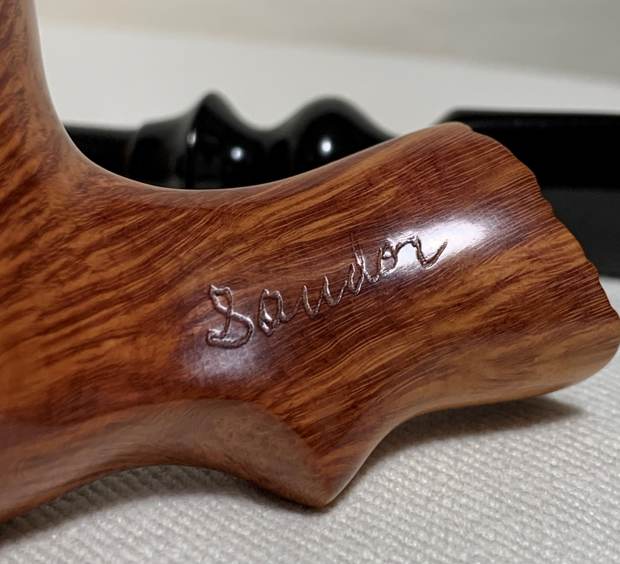
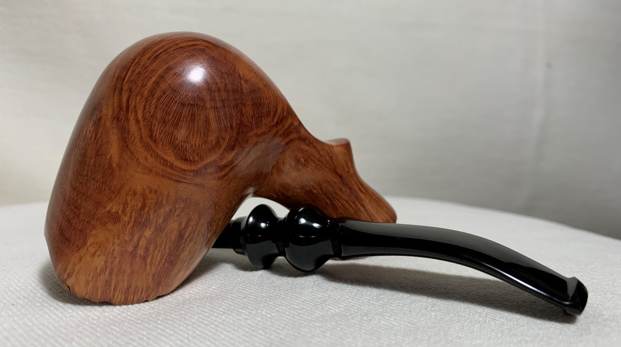
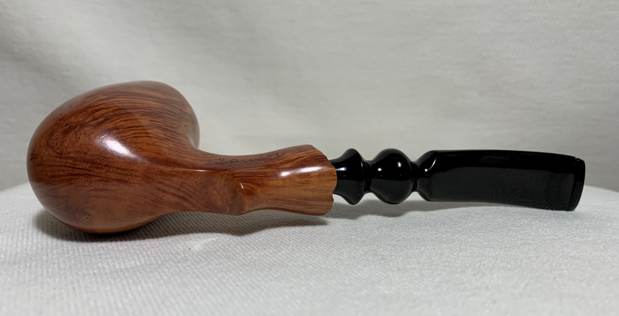
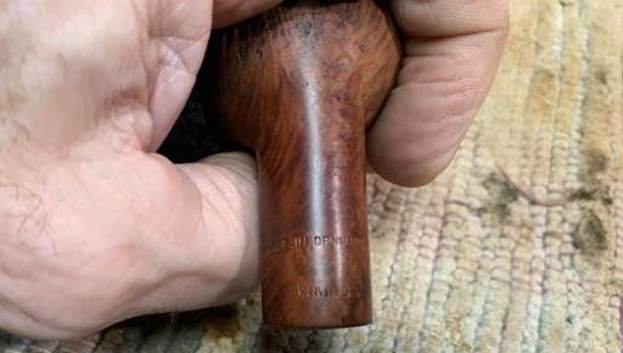
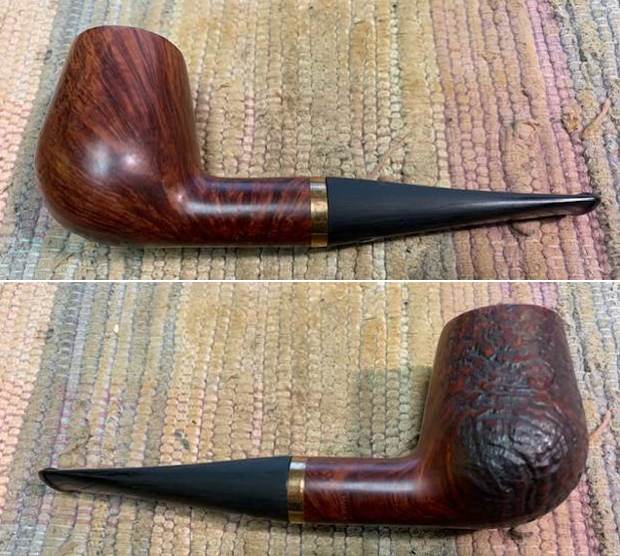
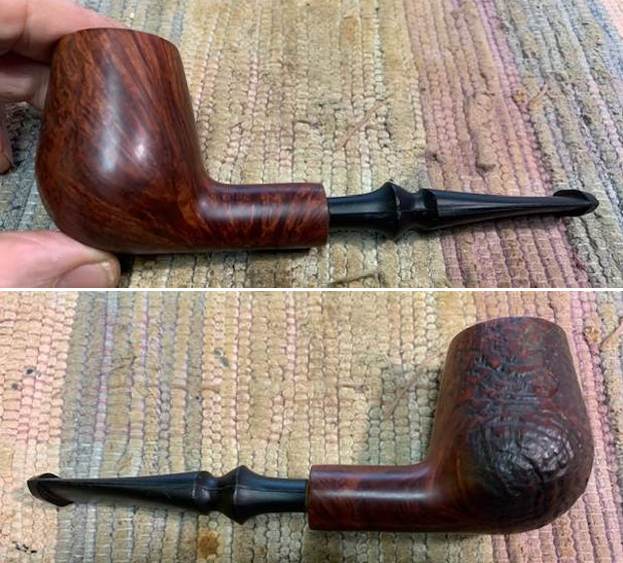
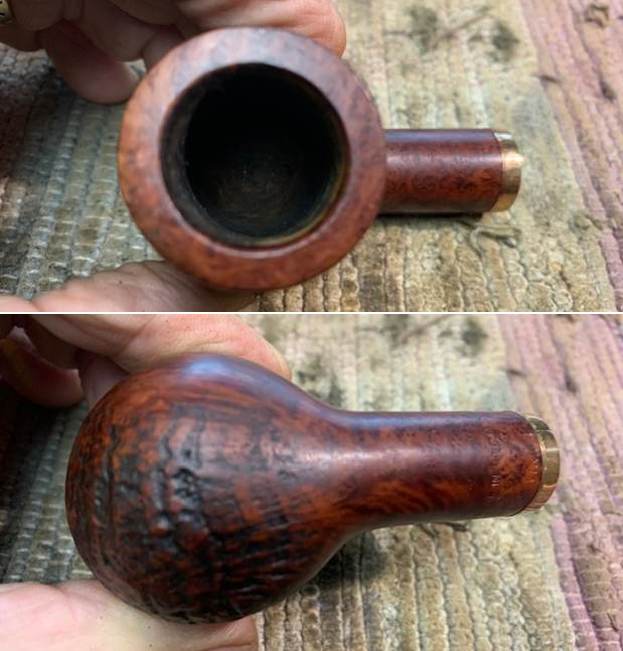
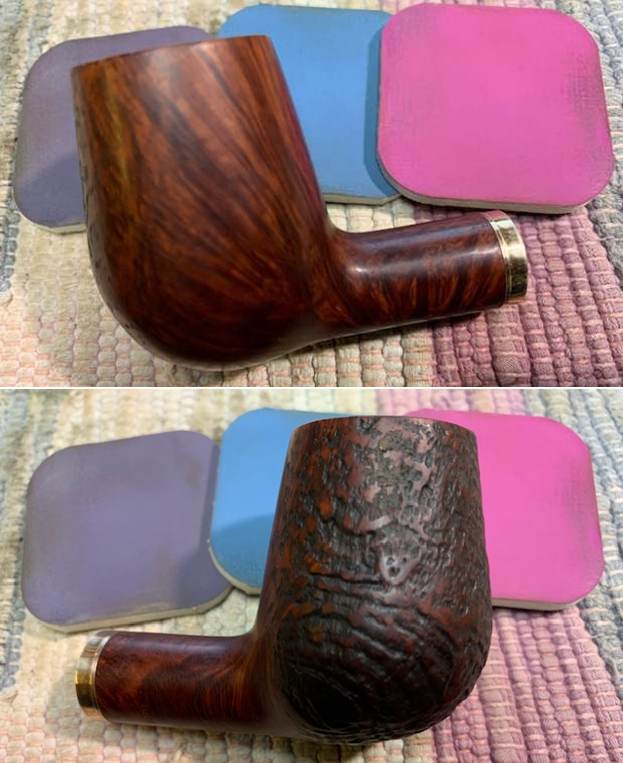
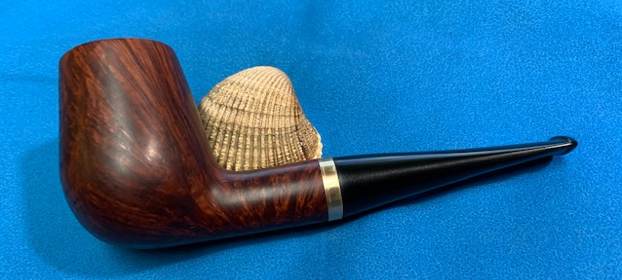
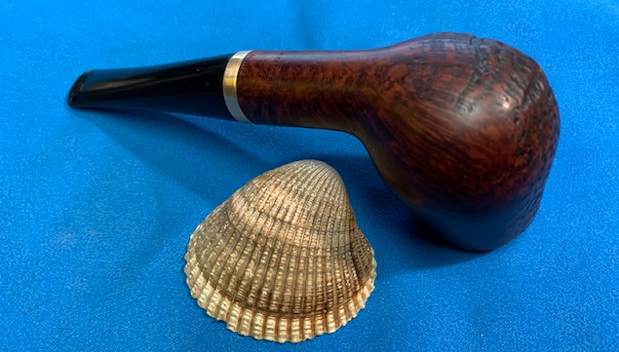
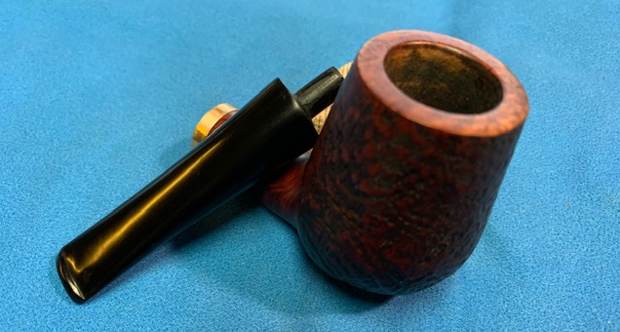
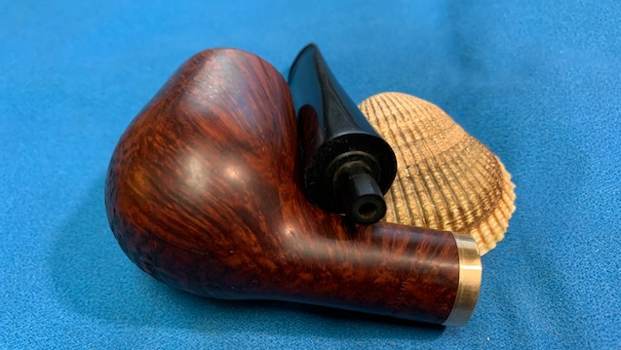
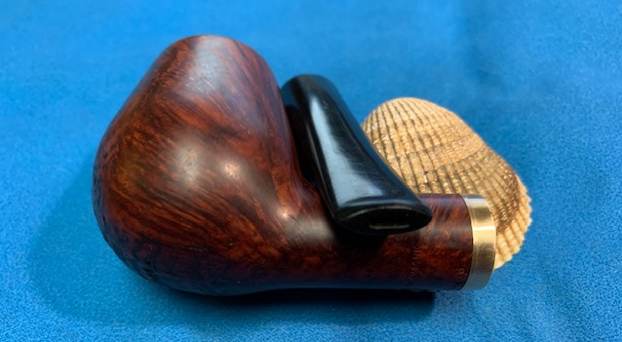
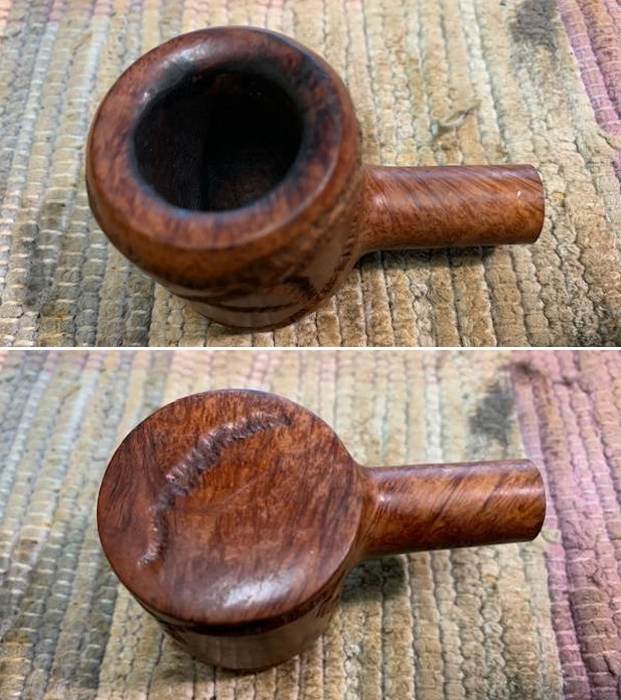
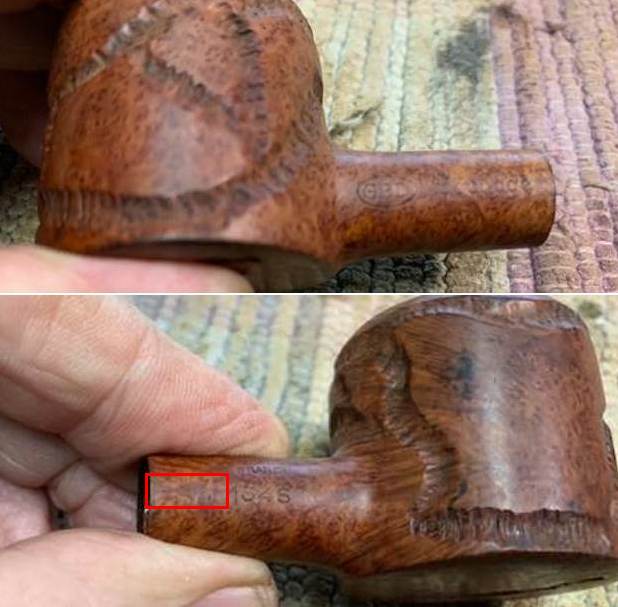
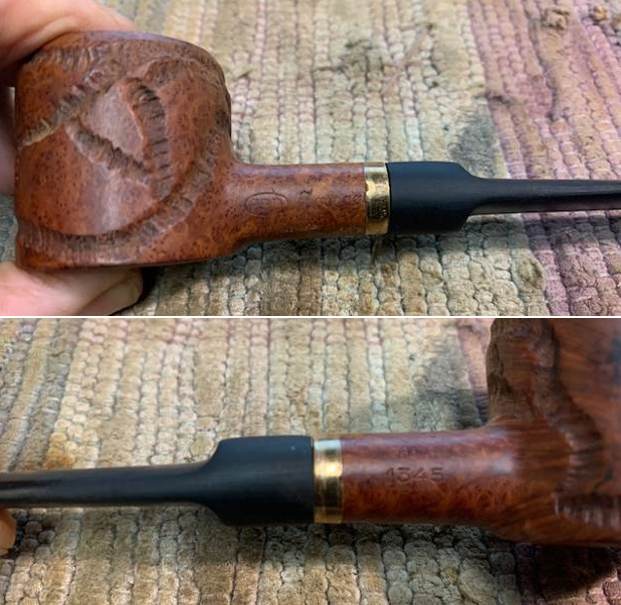
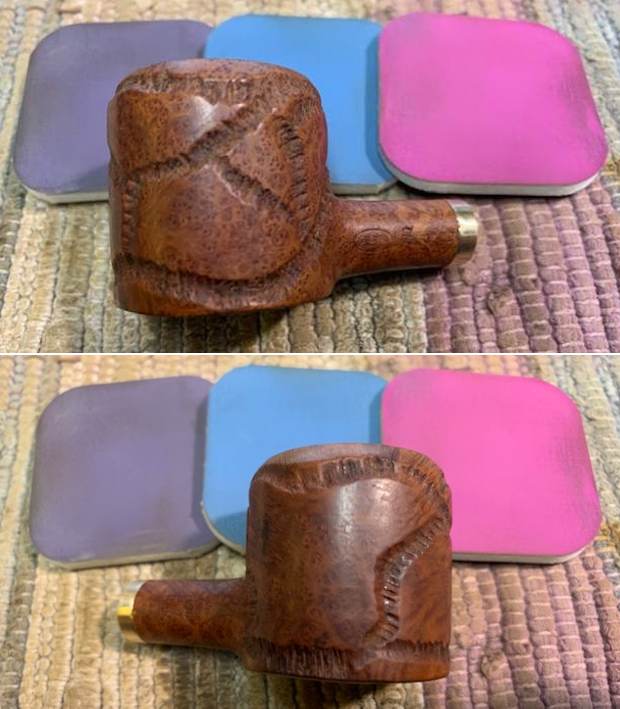
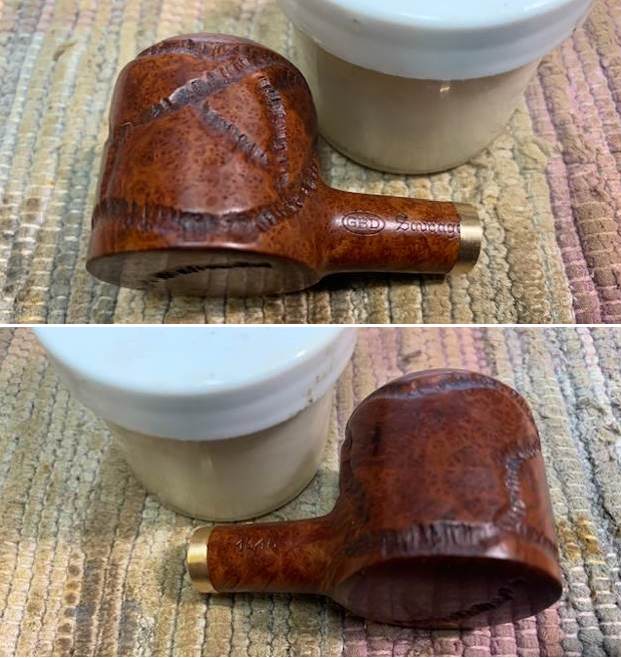
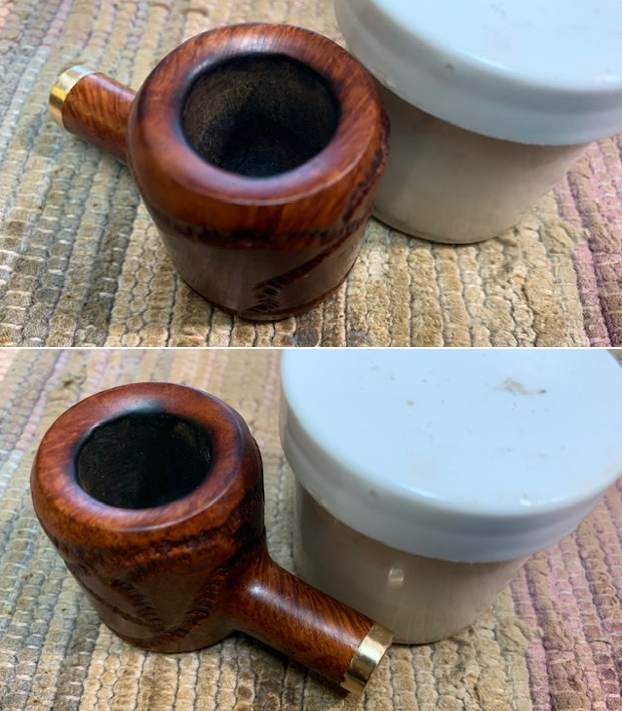
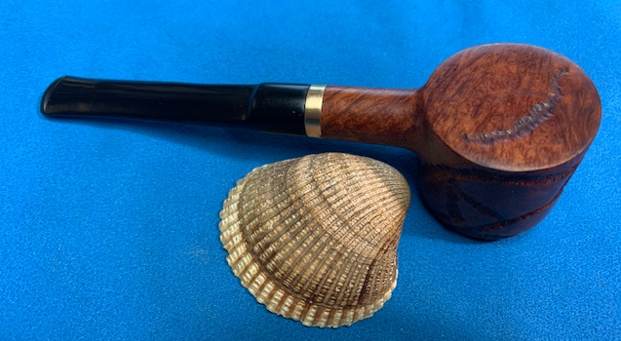
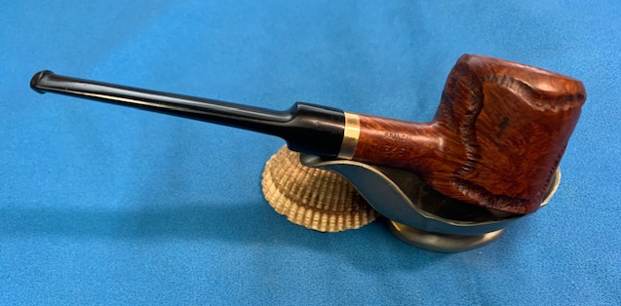
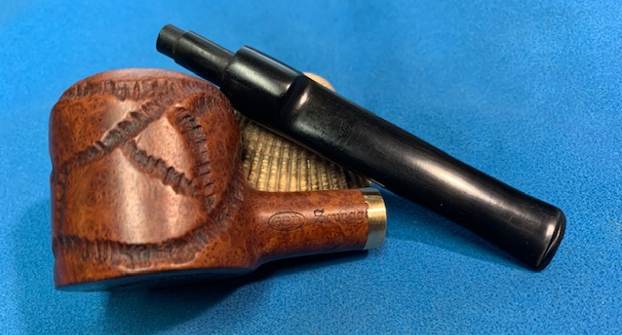
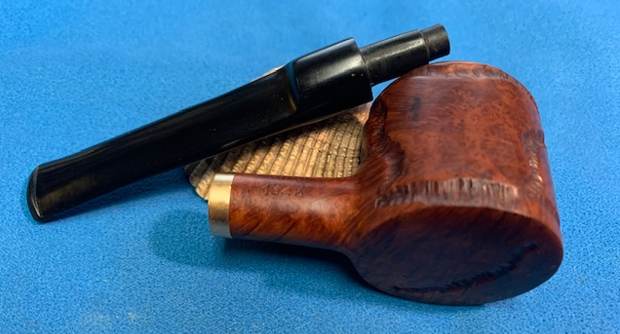
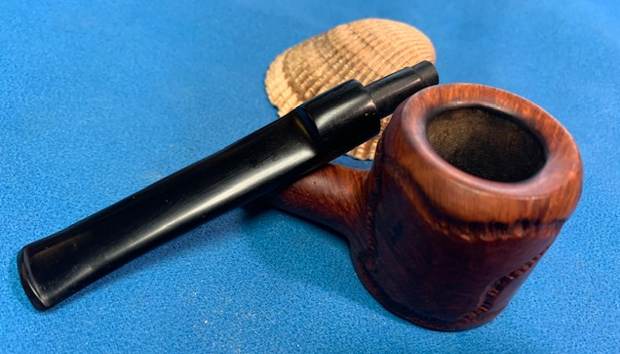
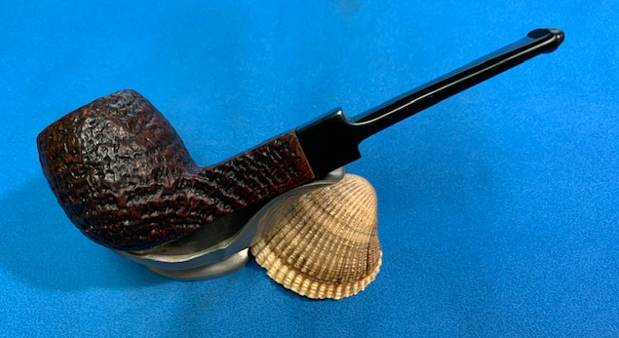
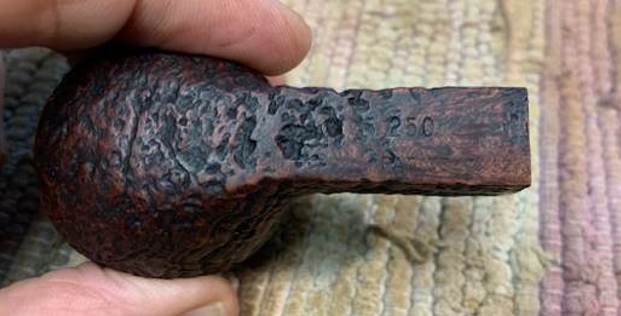
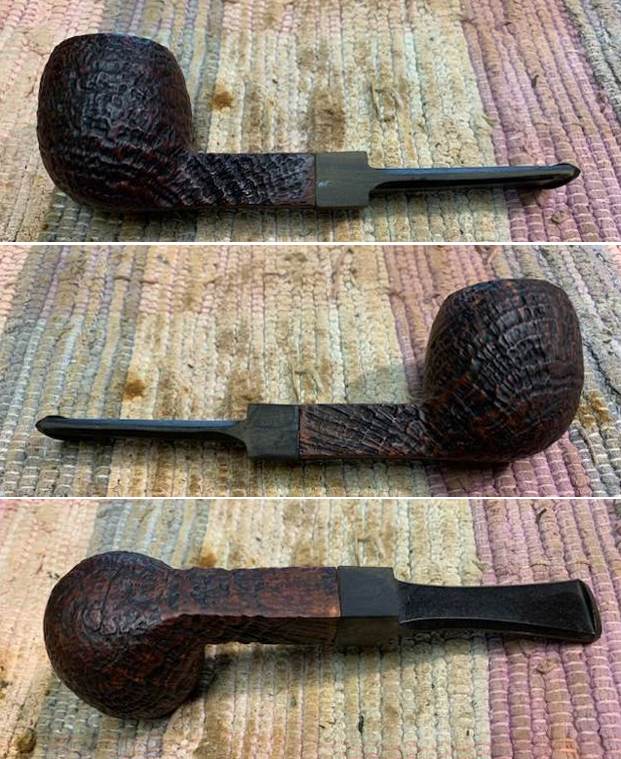
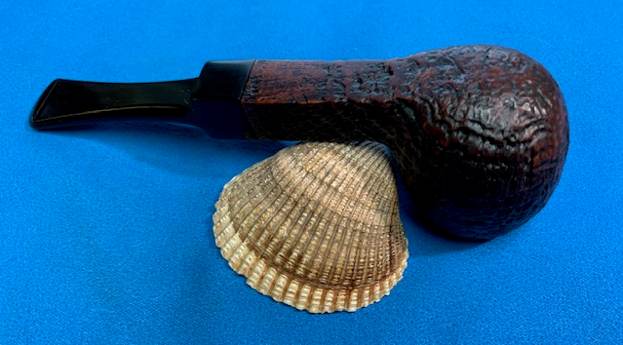
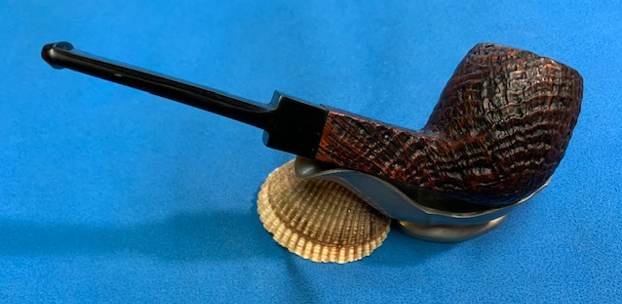
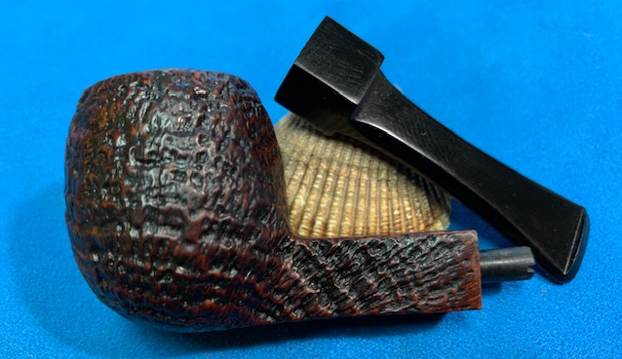
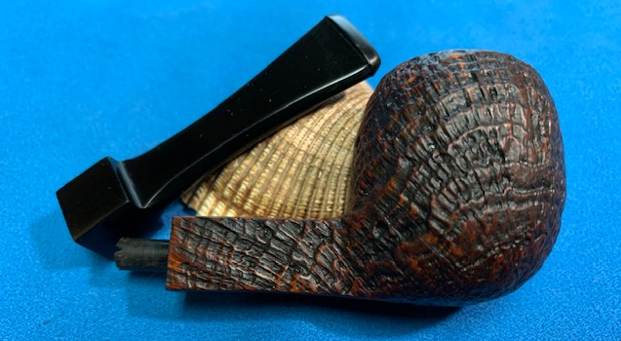
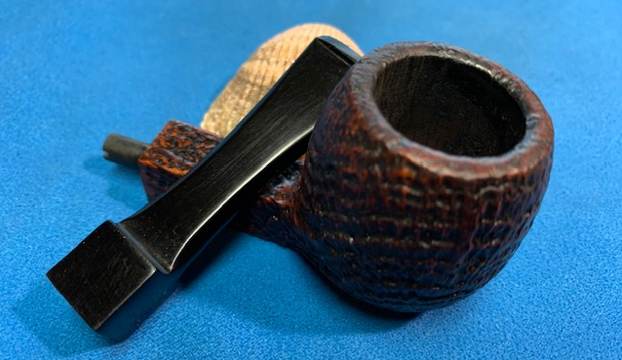
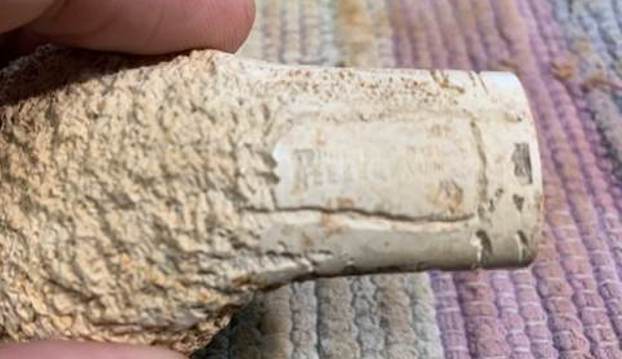
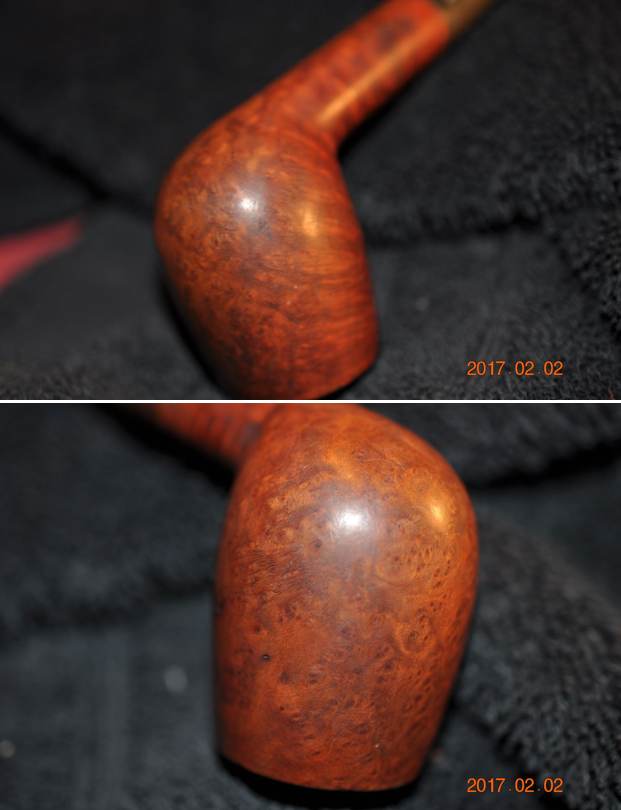
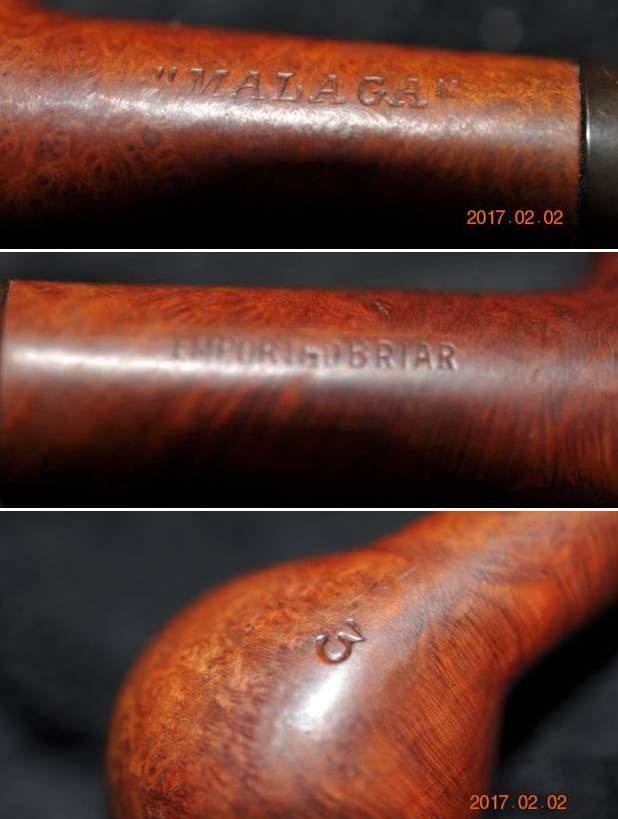
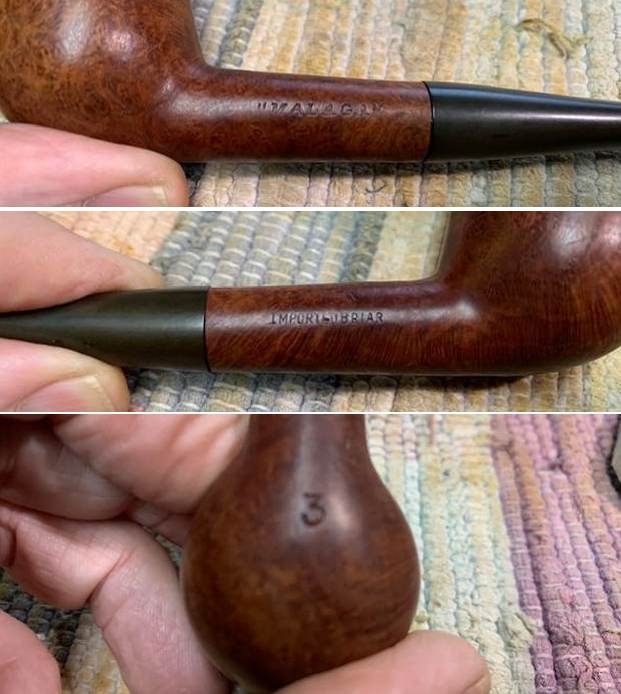
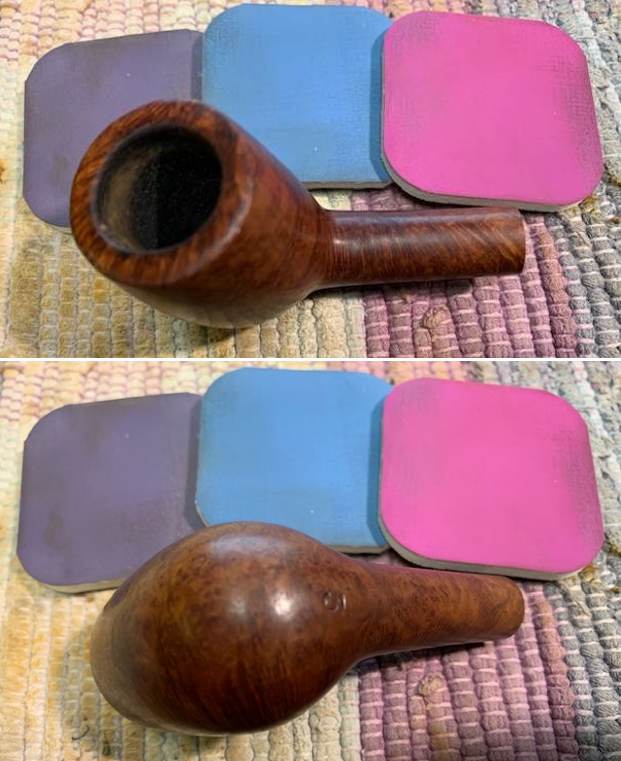
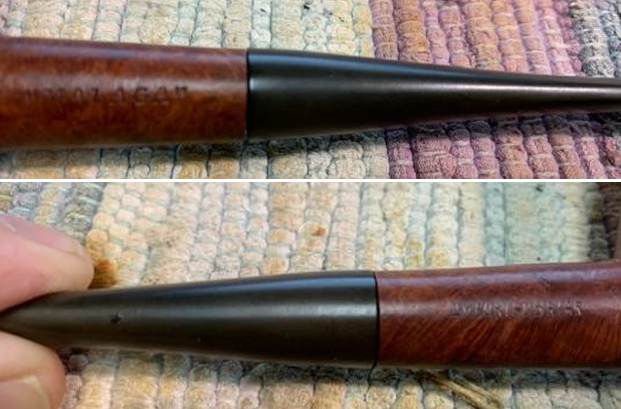
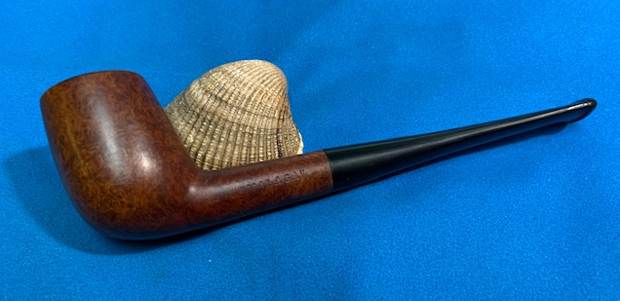
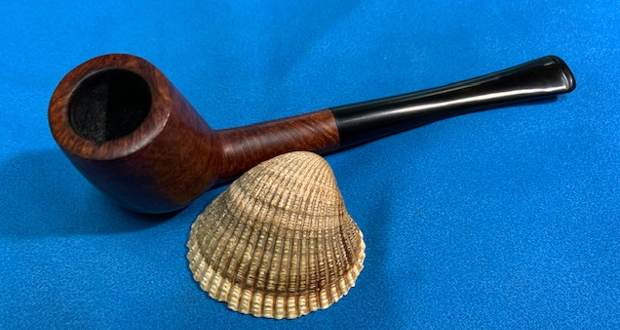
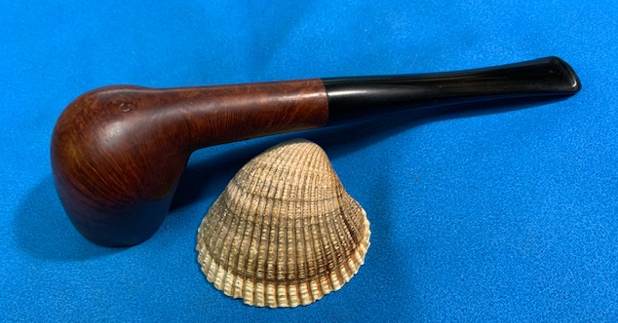
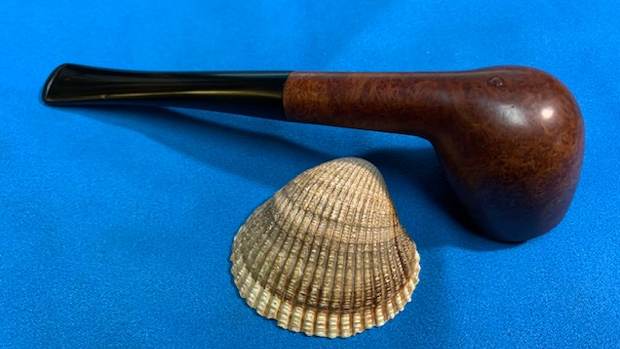
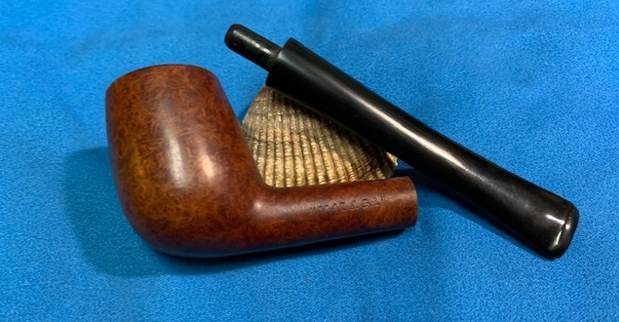
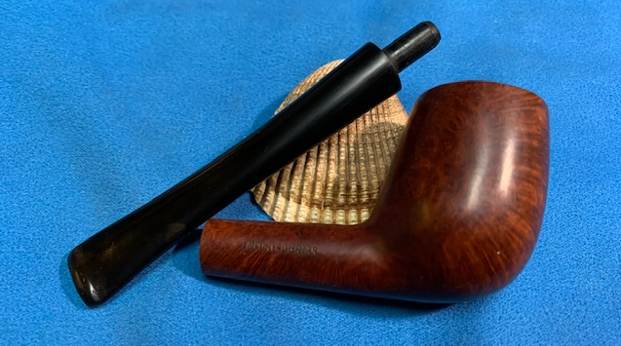
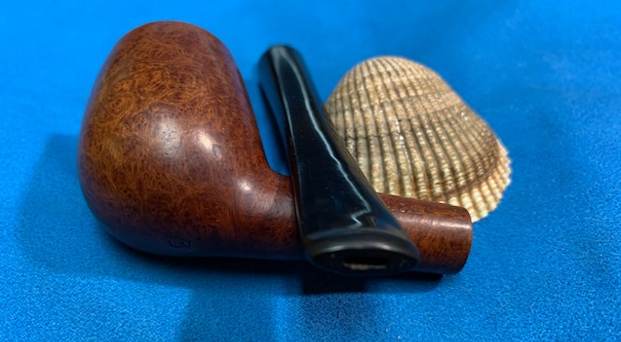
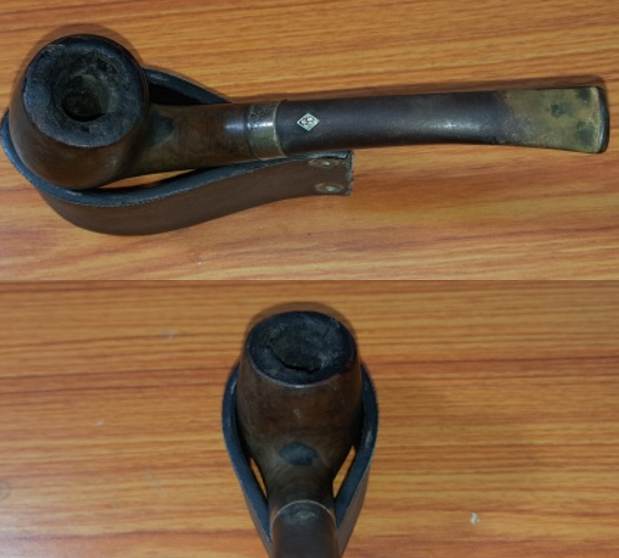
This is a beautiful well grained bent billiards with a nice hand feel, is perfectly proportioned and the quality just oozes out of every inch of the pipe. The sterling silver ferrule at the shank end bears the stamp of “BBB” enclosed in trademark rhombus over “STERLING” over “SILVER”. The stamping on the right side is greatly faded and only “MAKE” is visible under magnification and bright lights. The left side of the shank bears the slightly worn out shape code “304”. The high quality vulcanite stem has the trademark metal rhombus stamped “BBB”. 
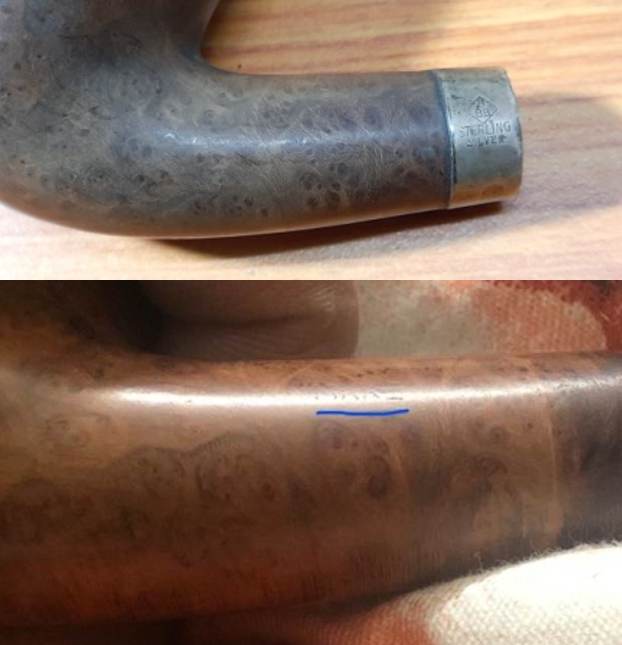
I have worked on quite a few BBB pipes in the past and read a ton of material from various sources on BBB and to save time of our esteemed readers, I shall not reproduce the article but have provided a link for the most reliable and concise information on pipedia.org, https://pipedia.org/wiki/BBB

What were of interest to me, however, were the BBB catalogs that Doug Valitchka has contributed on pipedia.org. I reproduce a picture of the Sterling Silver line of pipes from BBB that gives out a brief introduction to the line and also the cost of the Sterling Silver line of pipes prevalent at that time. This and the subsequent link that I shall be providing, is a strongly recommended read for all those interested in old flyers and promotional endeavors from BBB.
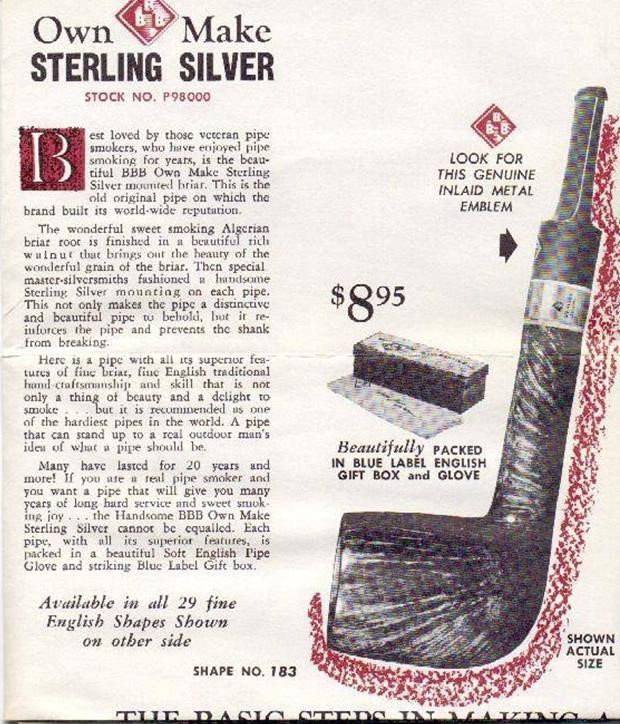
Pipedia.org also has a link to a PDF copy of 1960 brochure which is a very strong recommendation either for referencing or as a general read (https://pipedia.org/images/e/e8/BBB_1960.pdf). The pipe currently on my table has a shape number 304 which has been described in the brochure as a Bent Billiard.

Thus from the above, this pipe must have been with my grandfather from somewhere since late 1950s or very early 1960s making it 60 year old, give or take a few.

Initial Visual Inspection
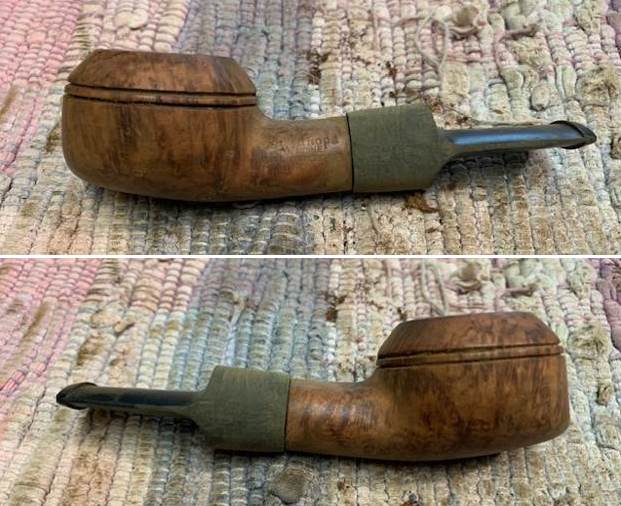
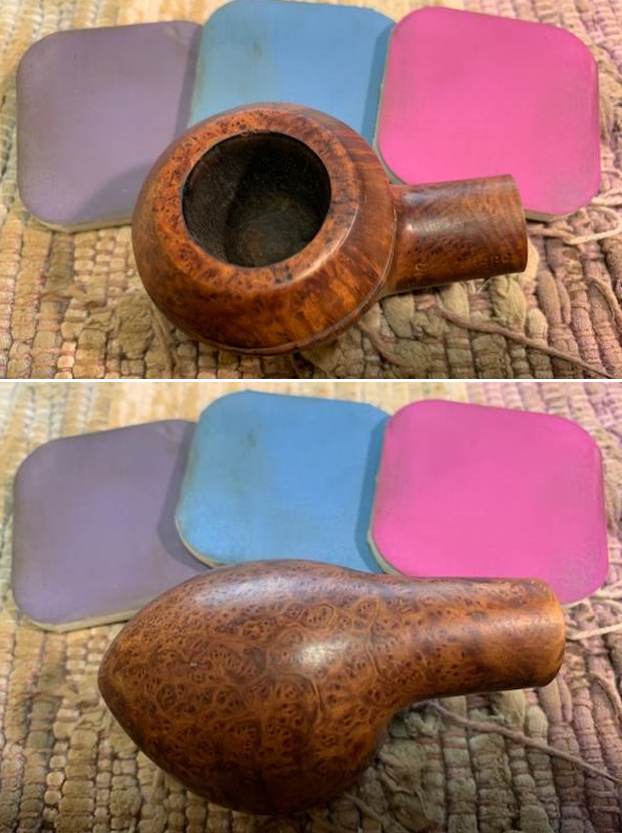
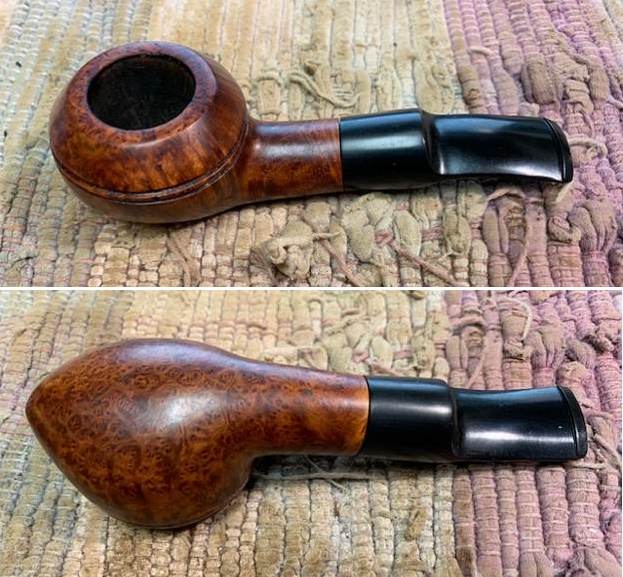
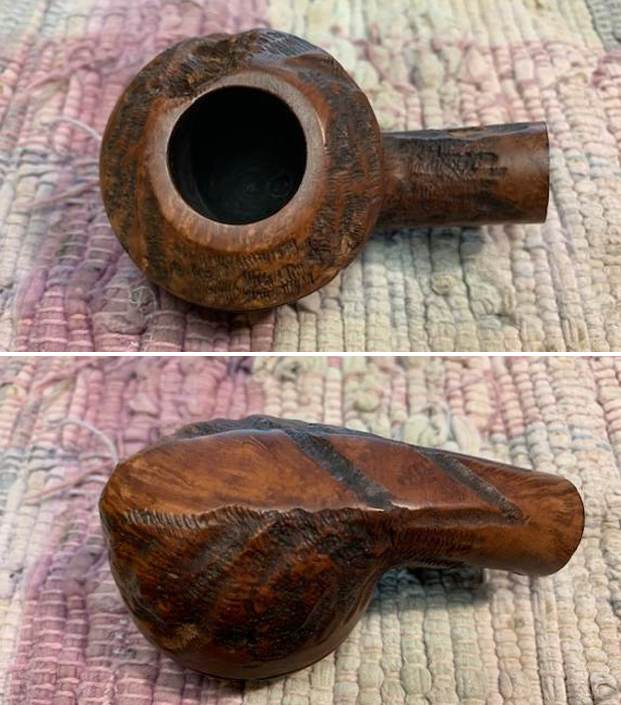
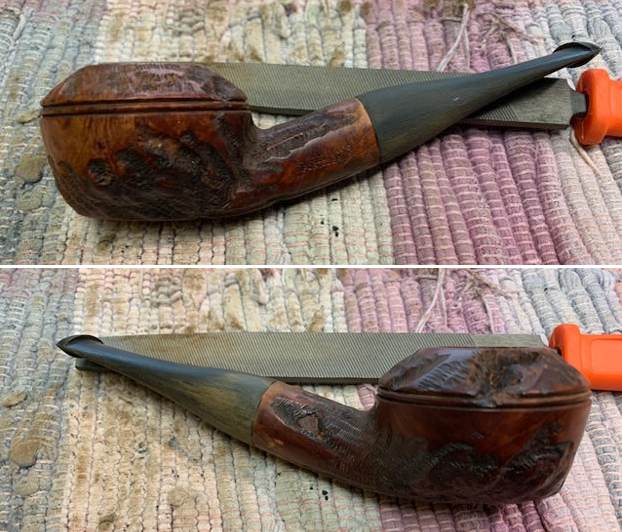
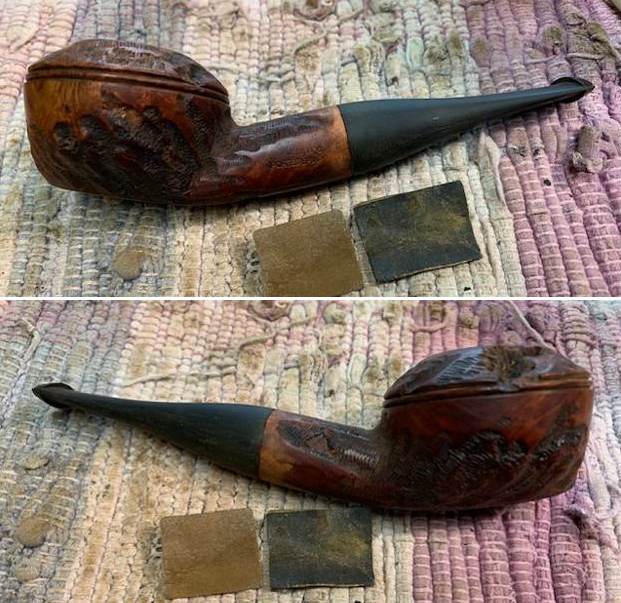
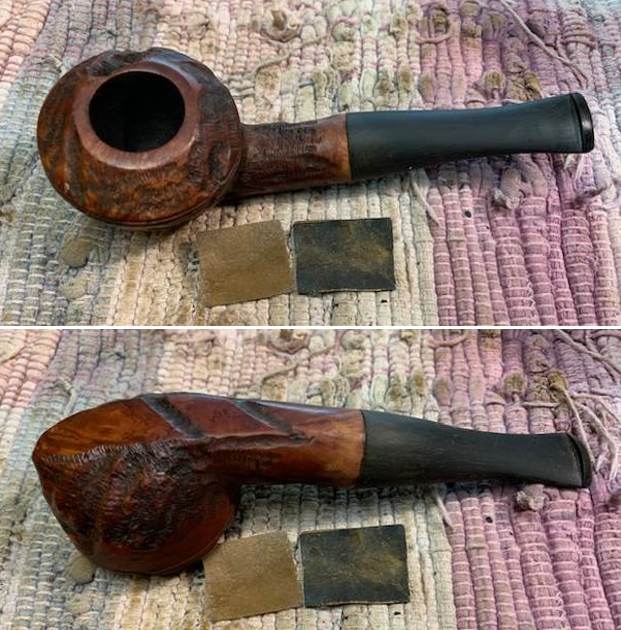
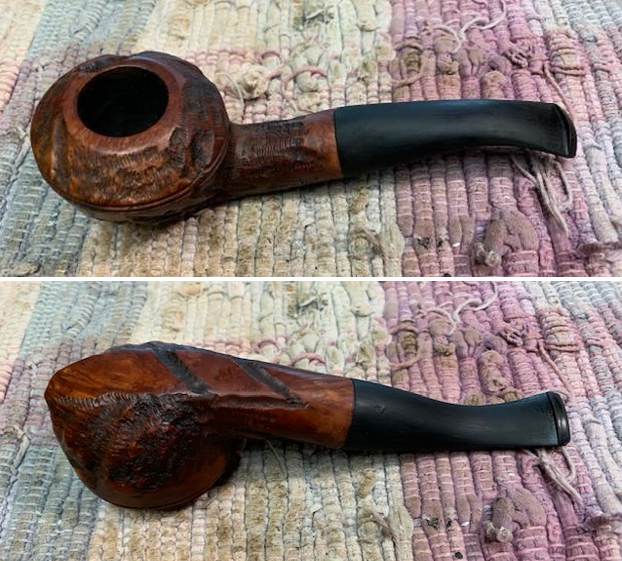
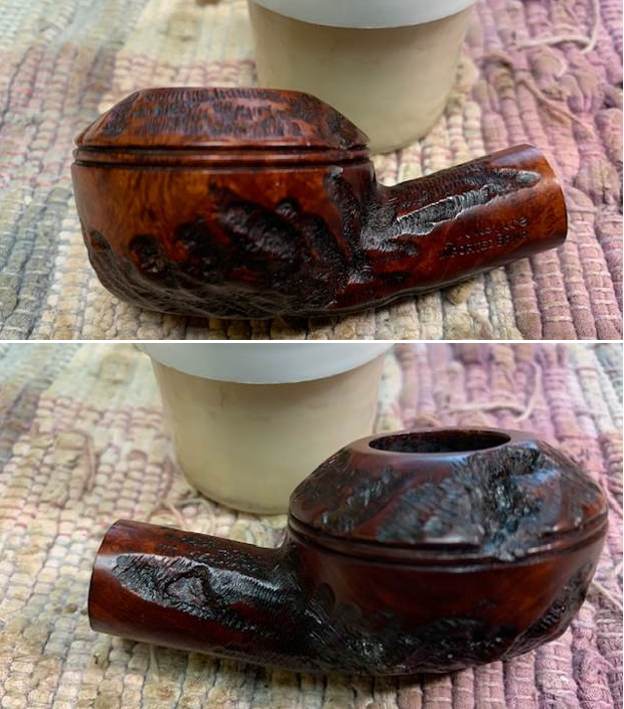
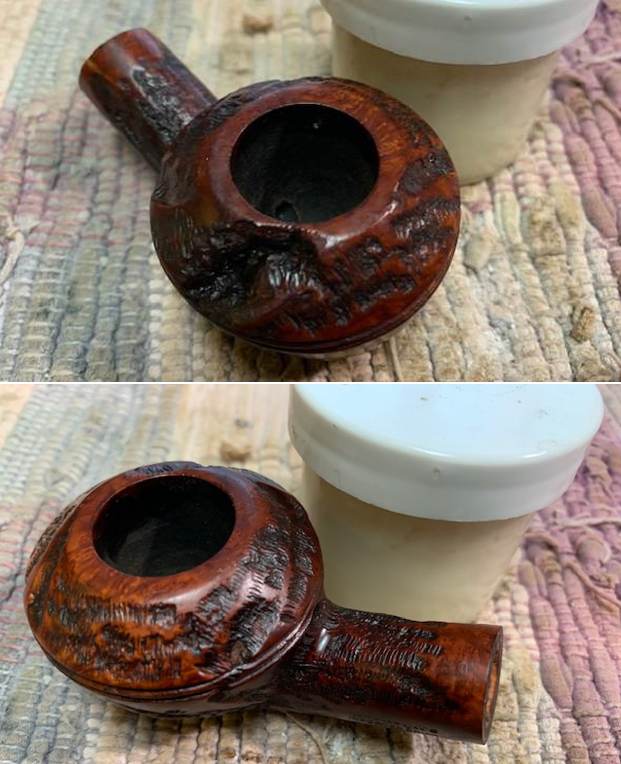
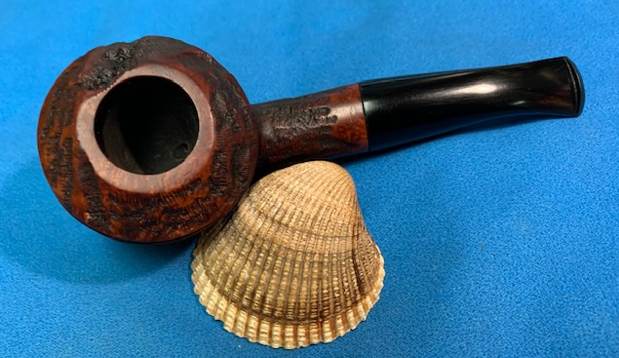
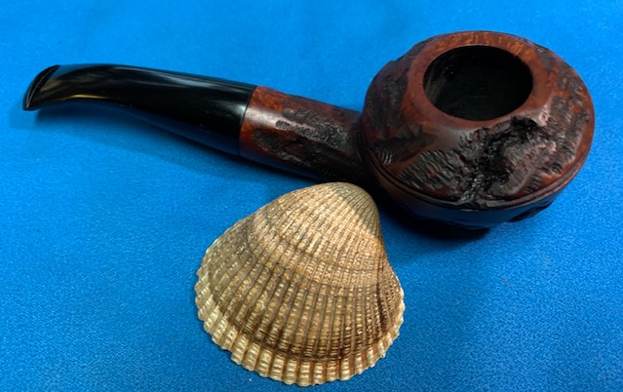
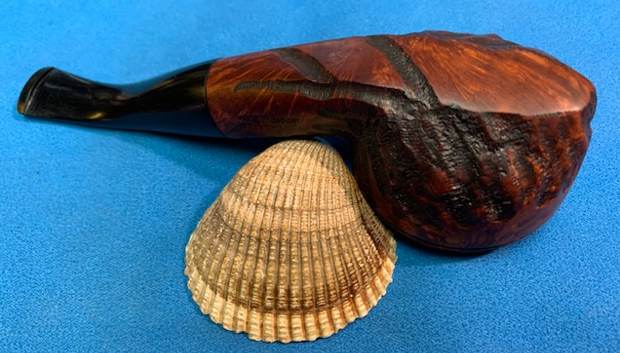
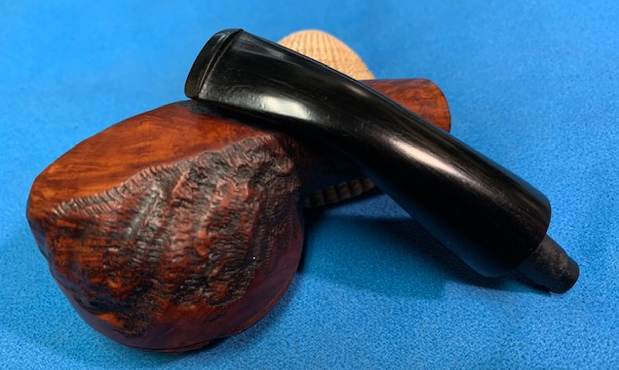
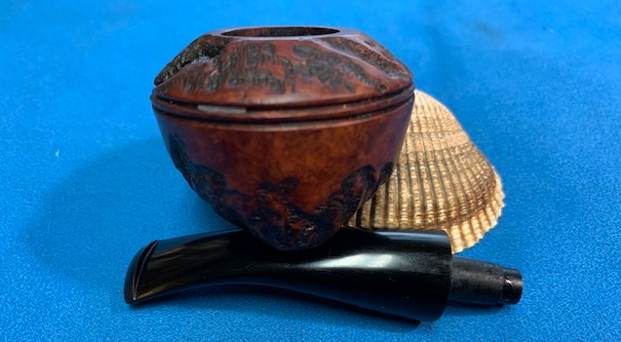
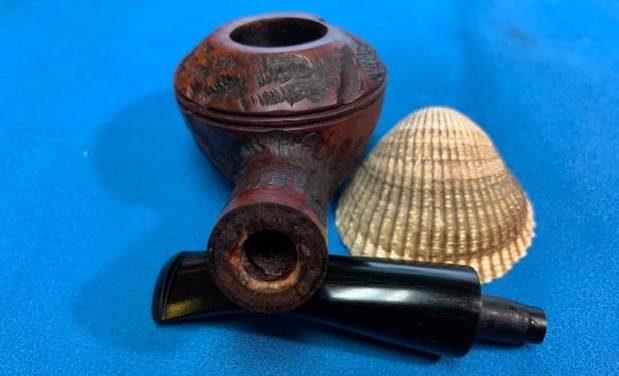
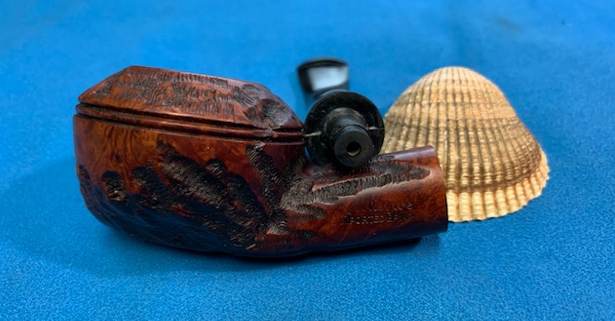
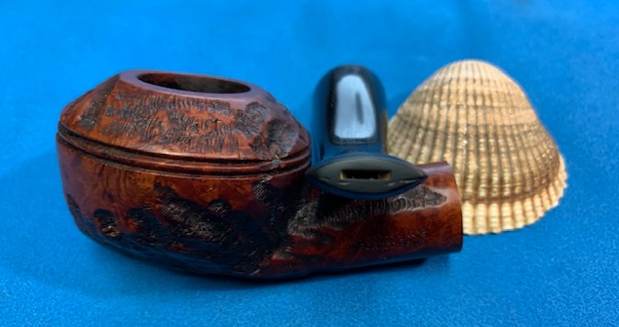
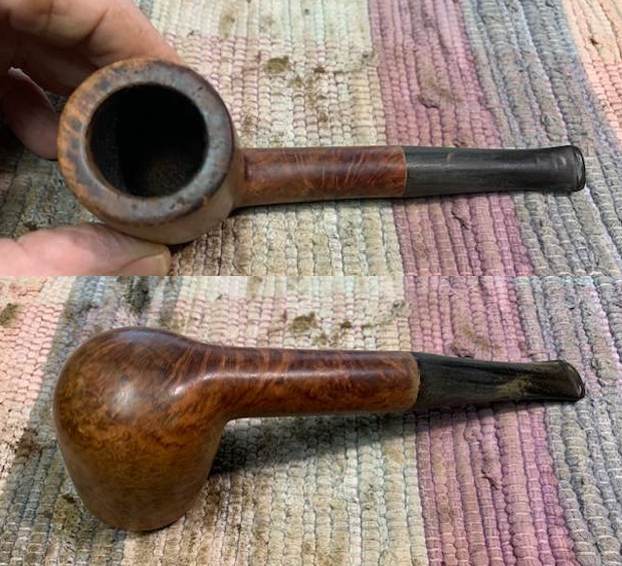
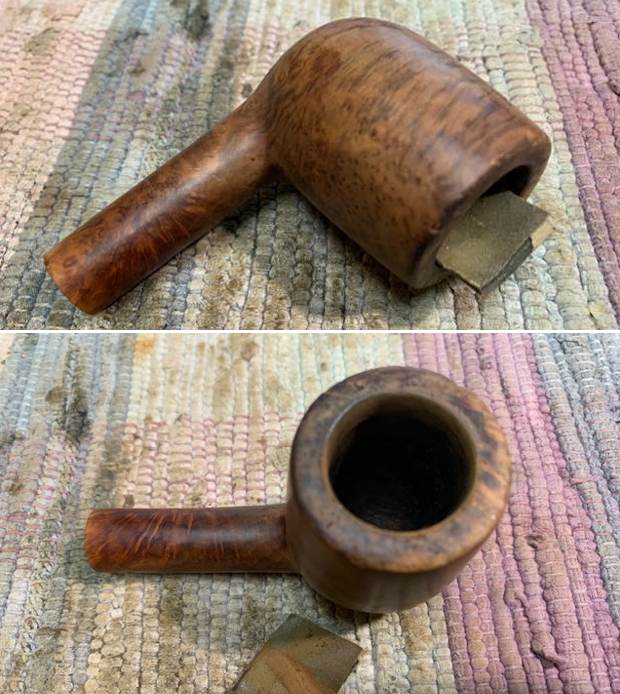
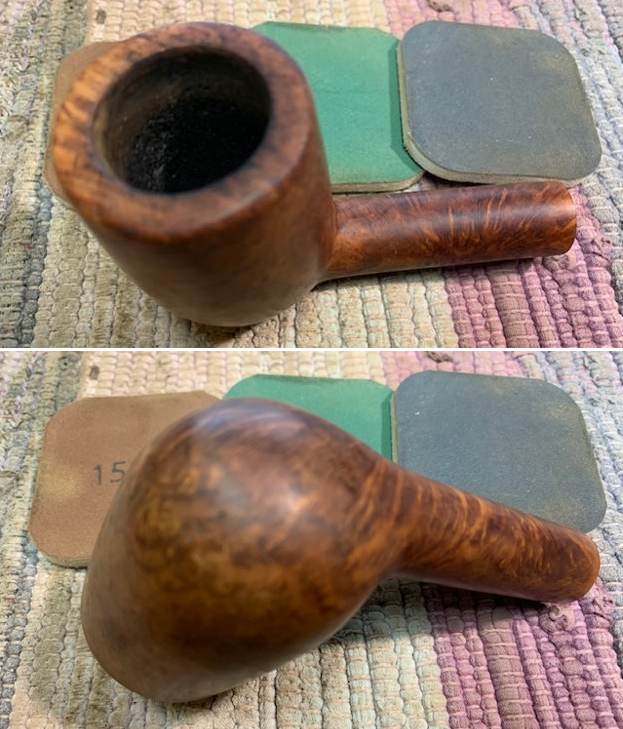
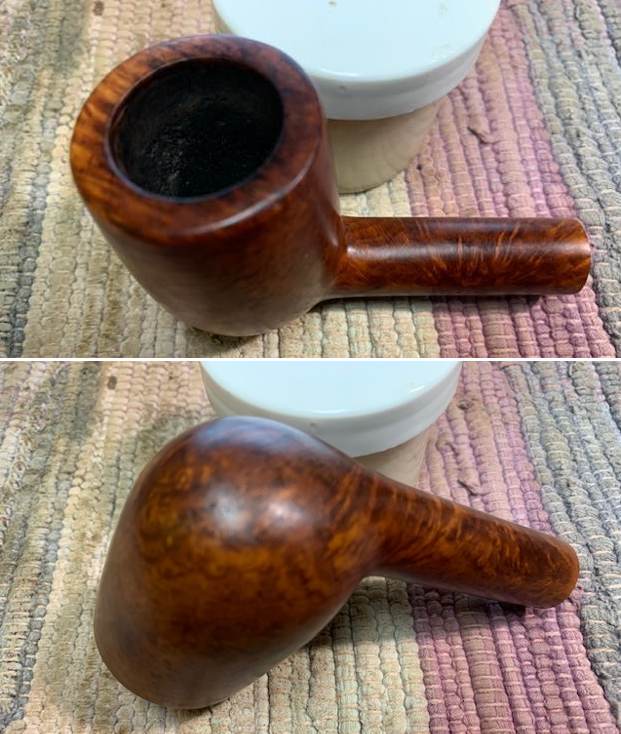
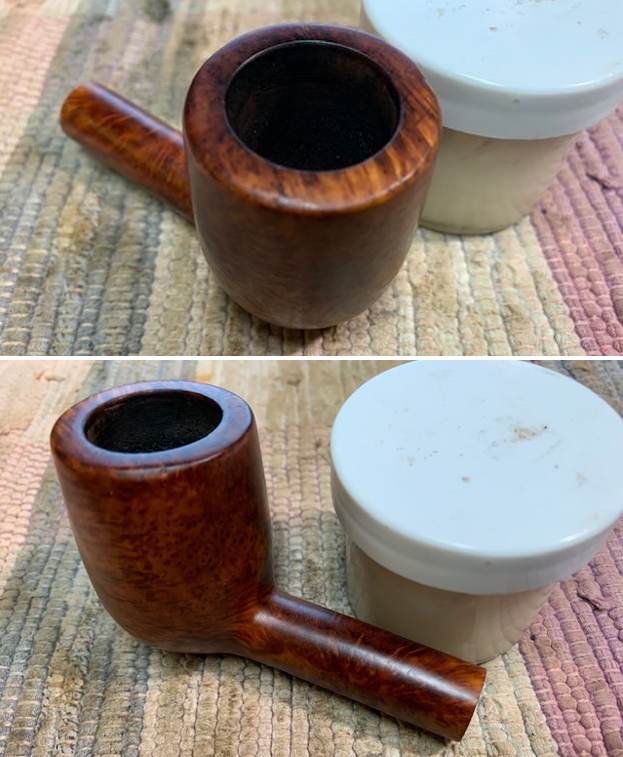
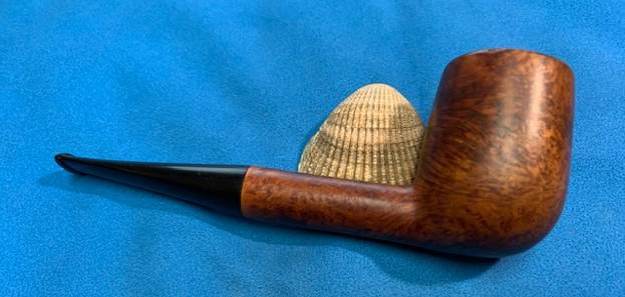
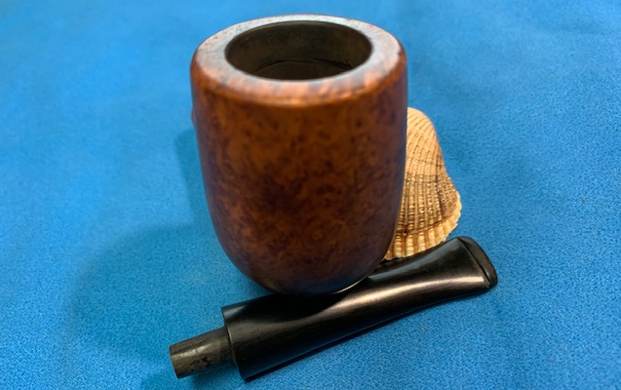
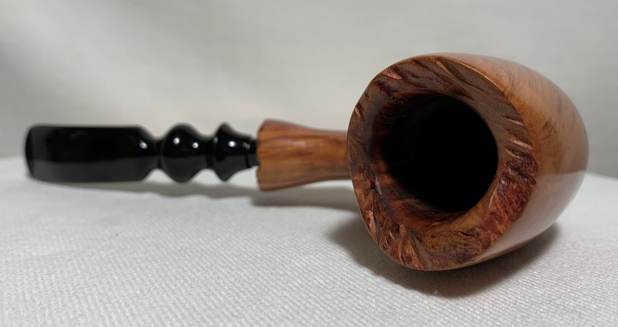
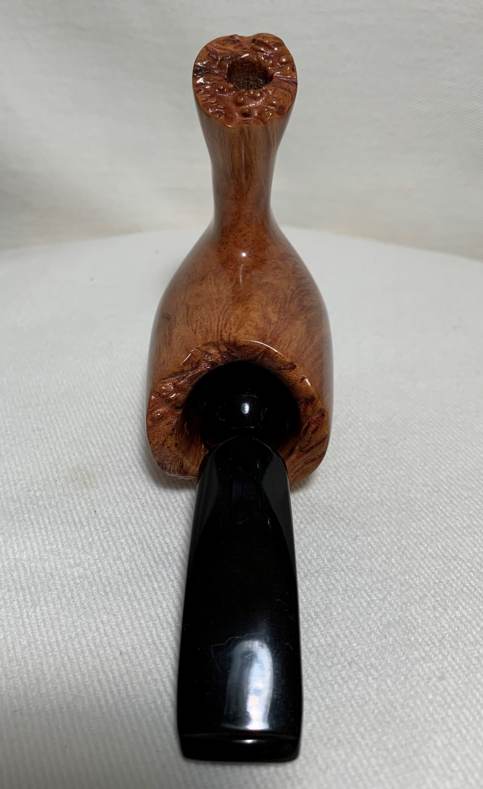
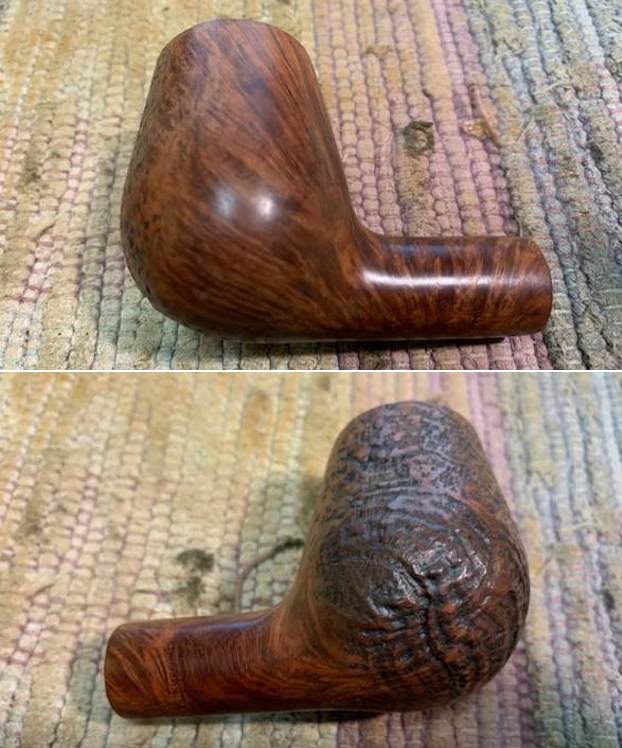
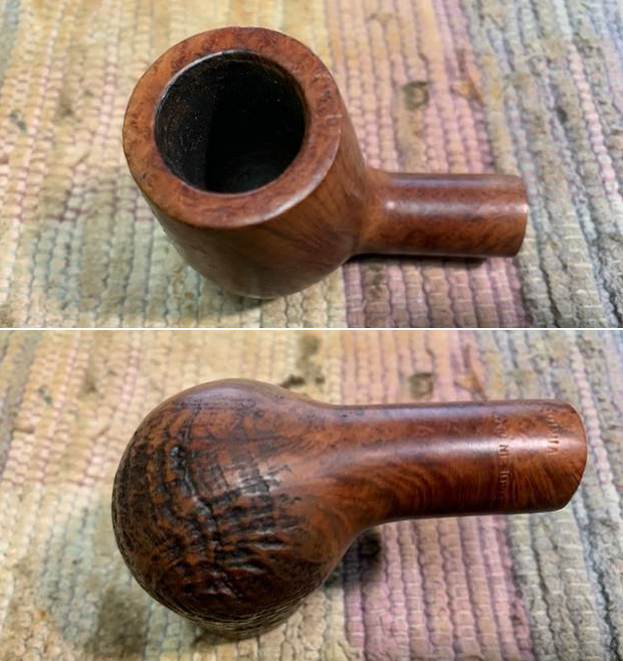
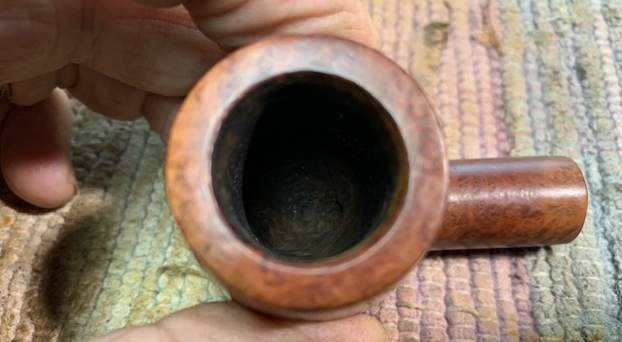
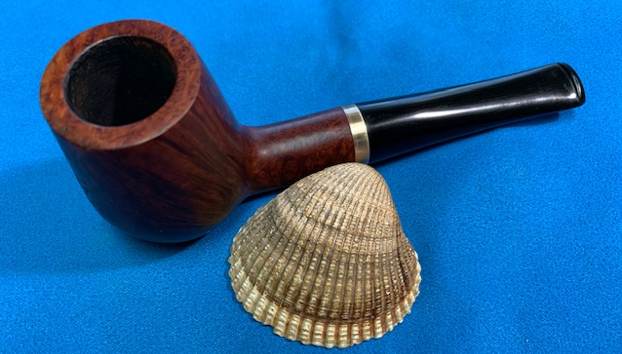
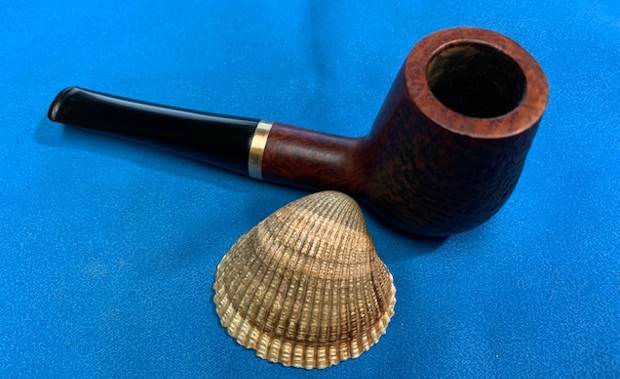
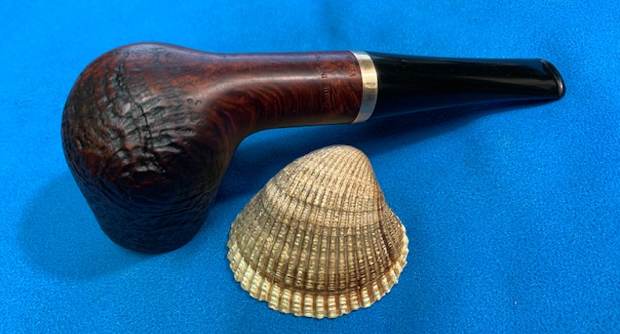
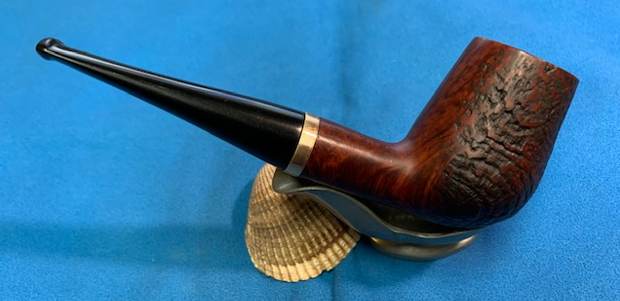
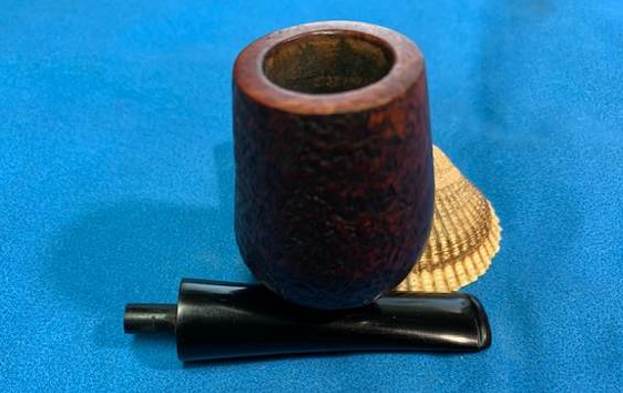
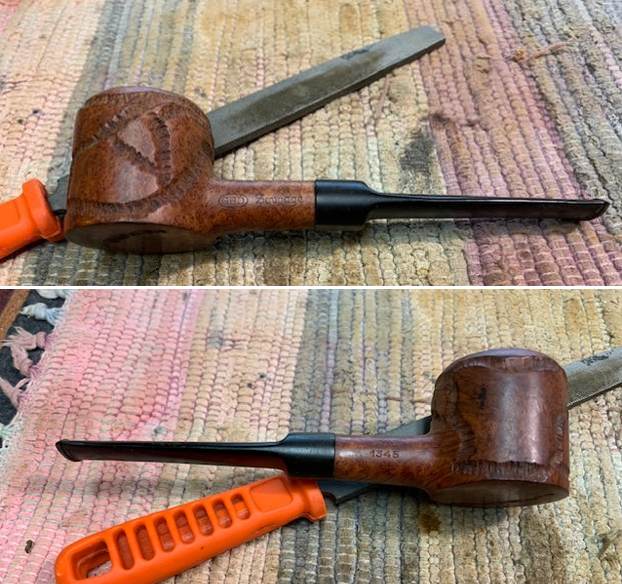
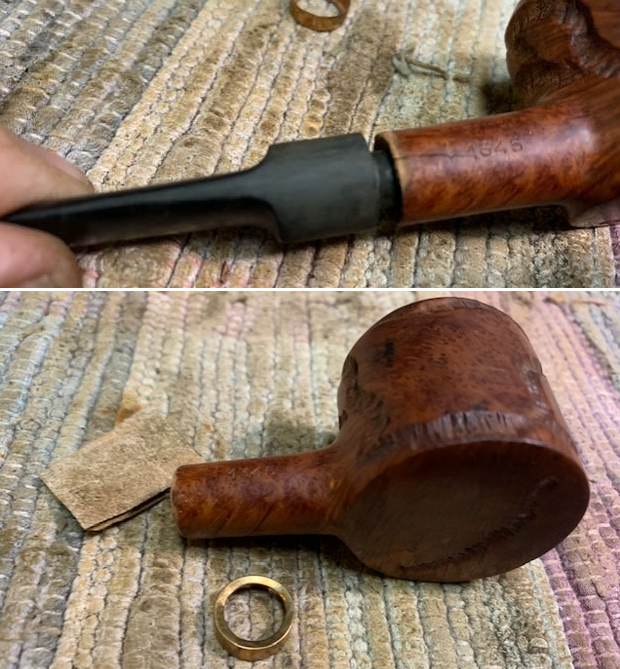
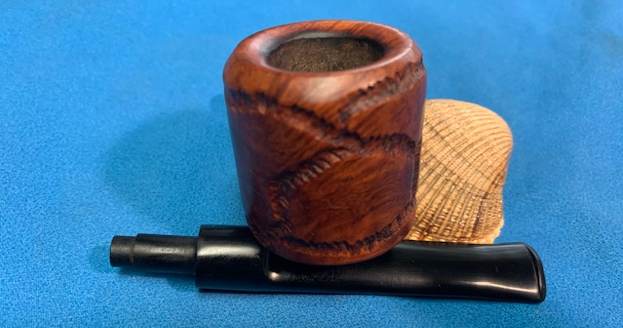
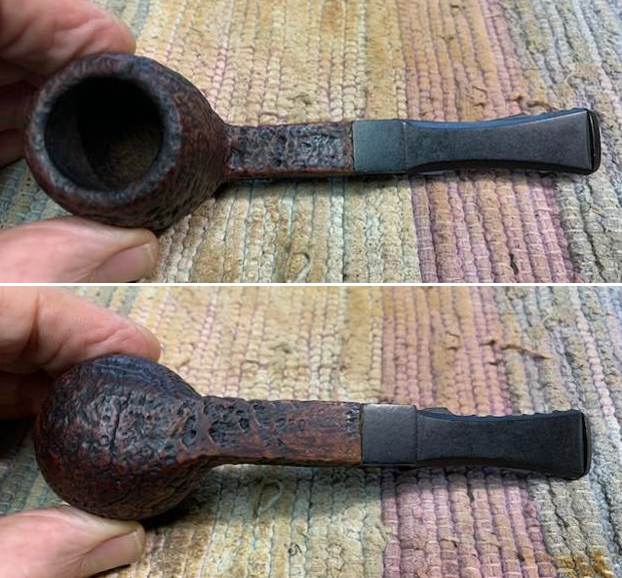
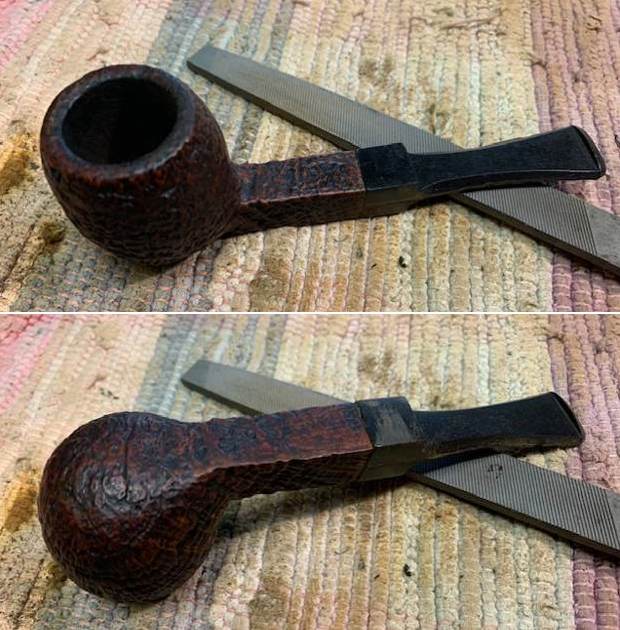
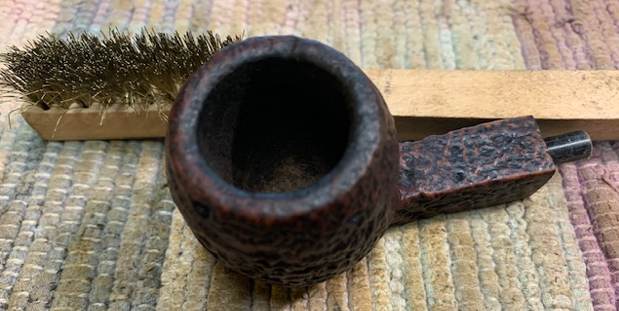
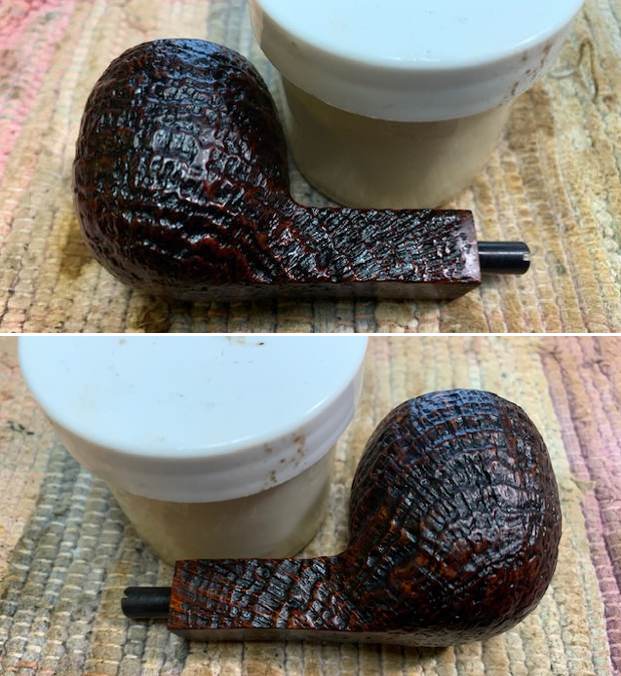
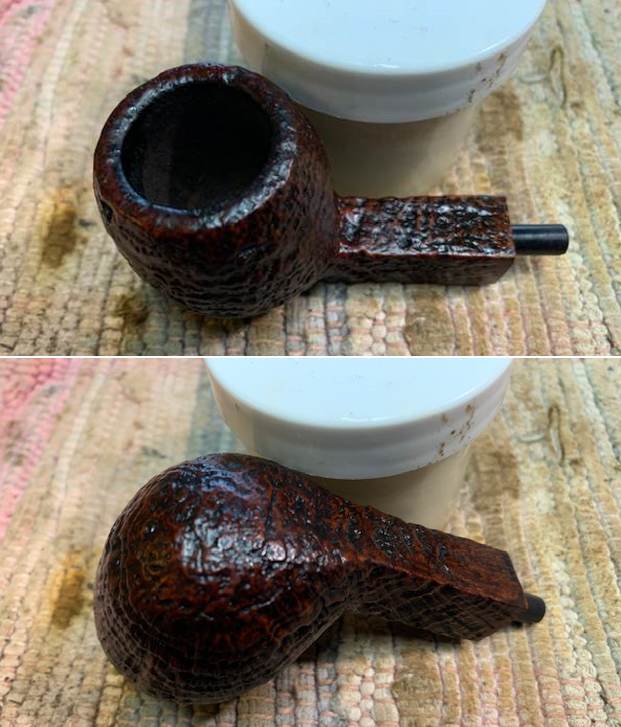
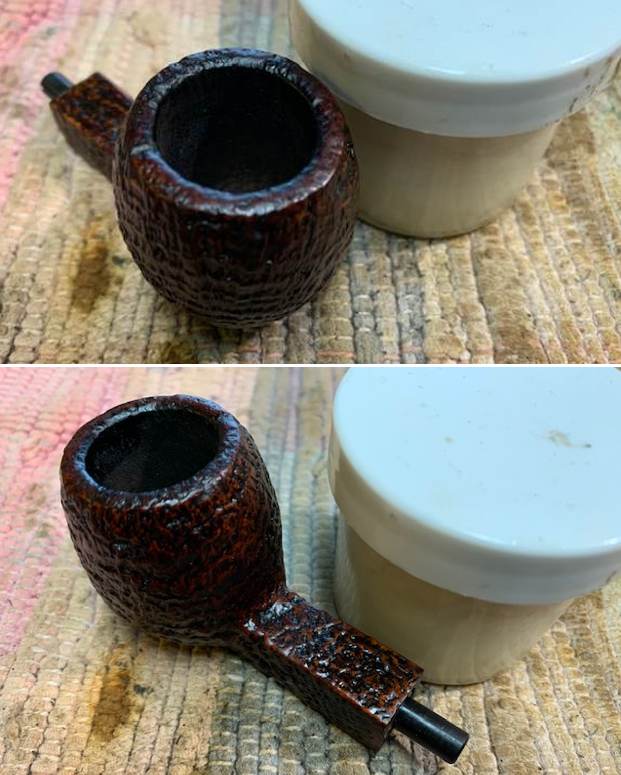
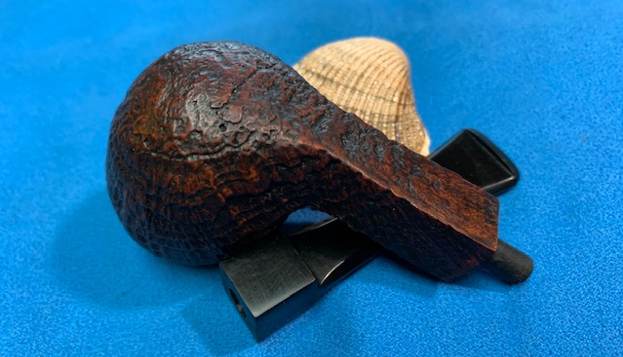
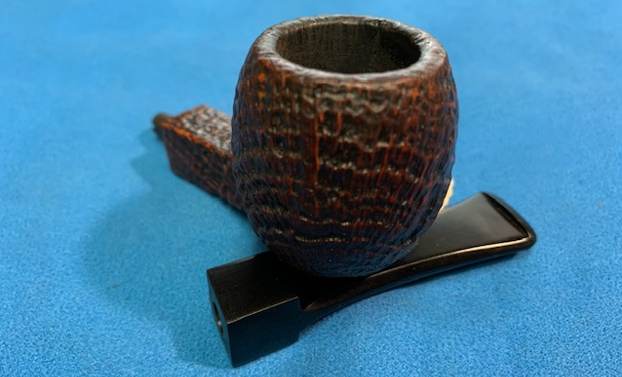
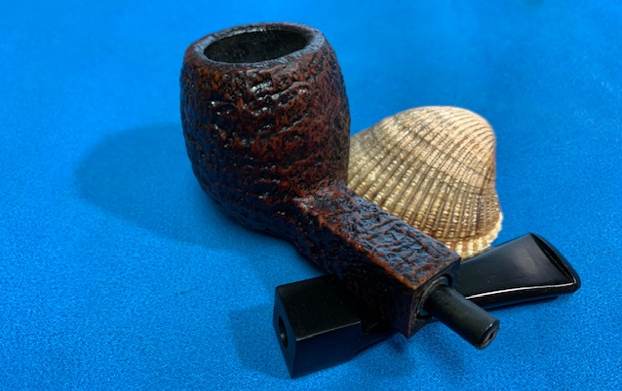
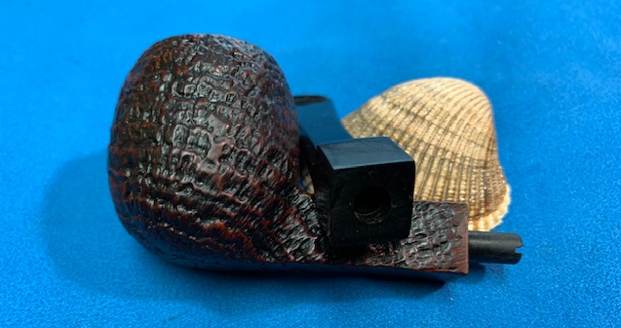
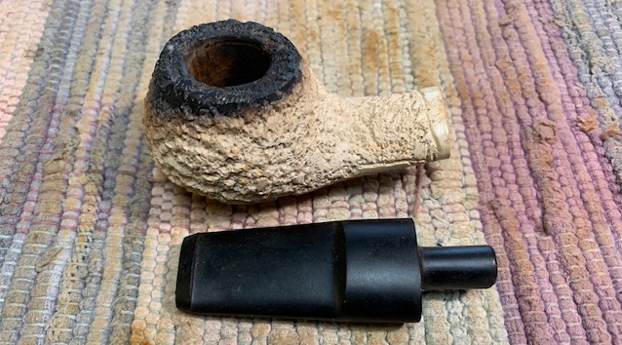
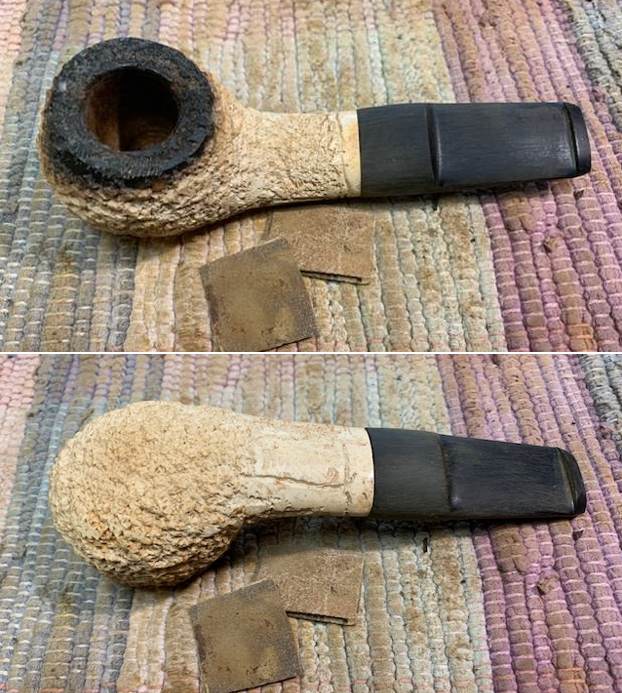
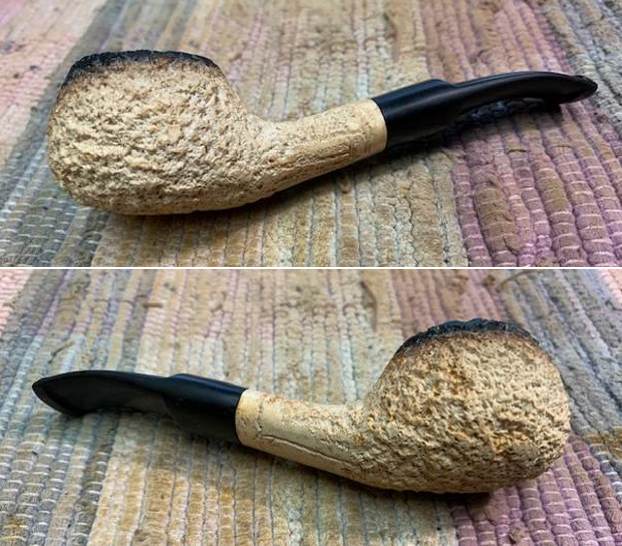
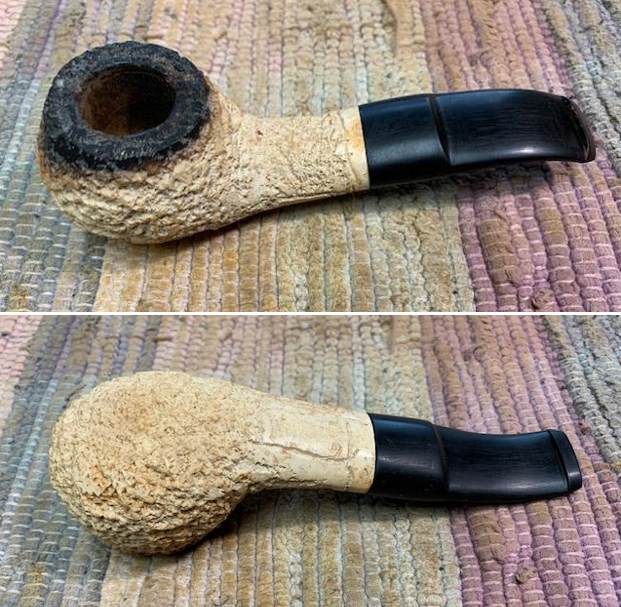
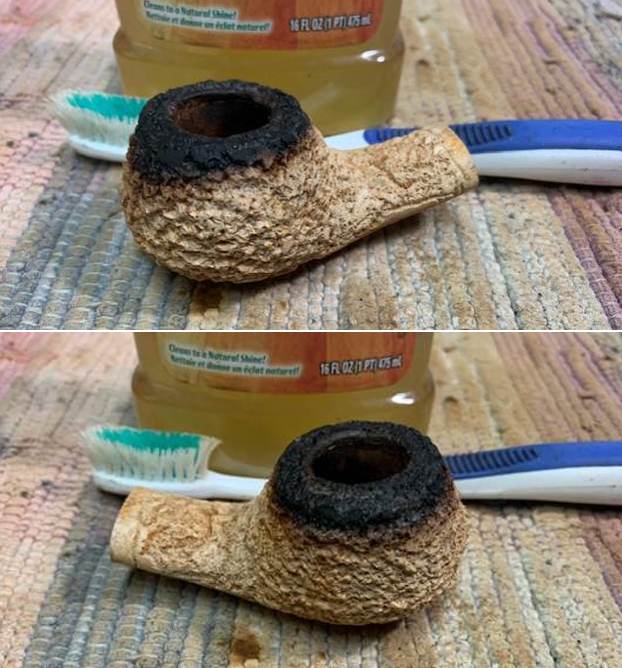
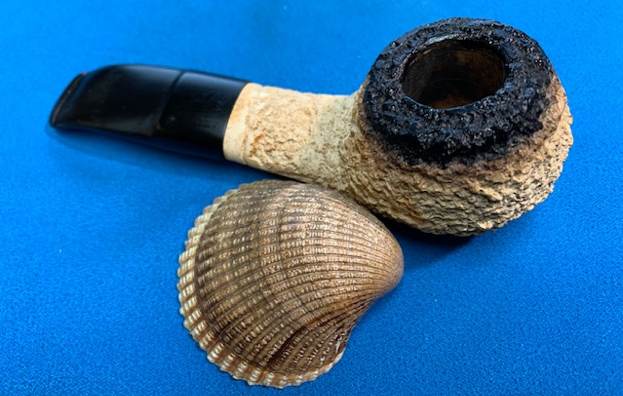
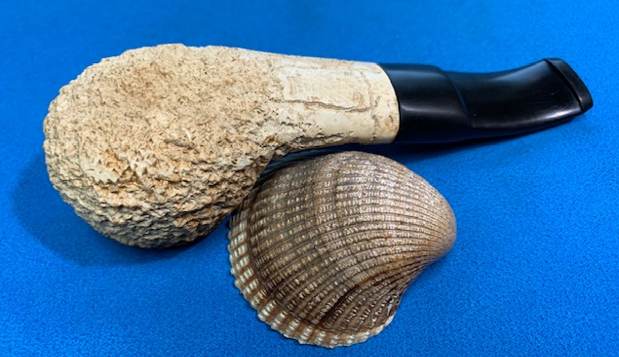
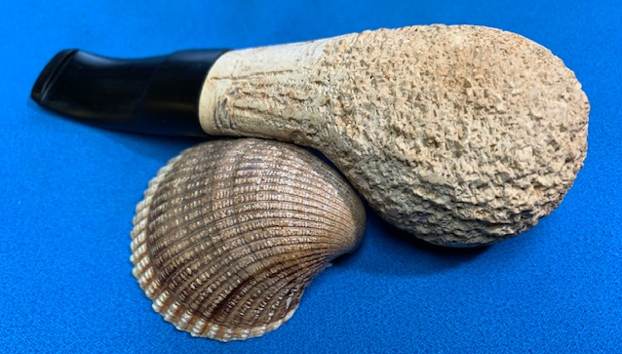
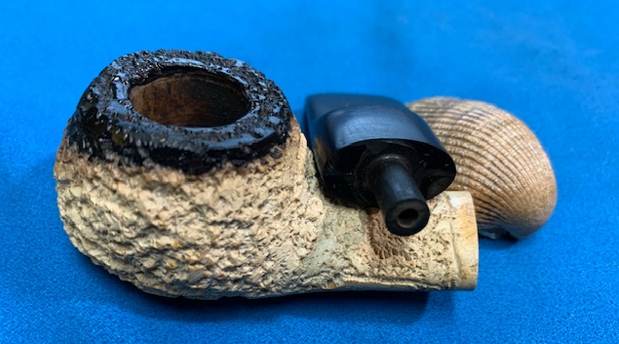
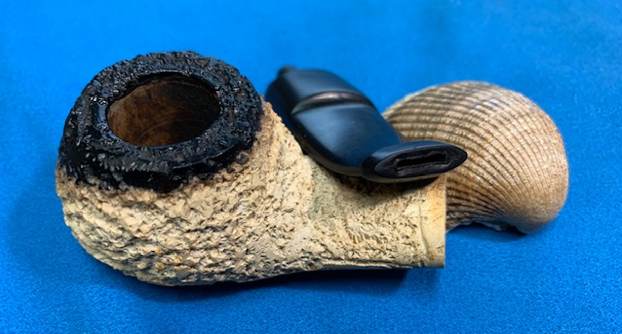
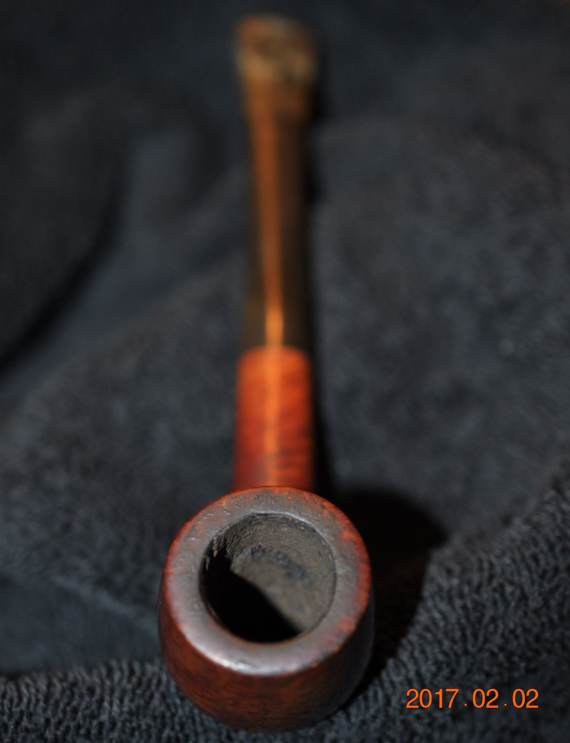
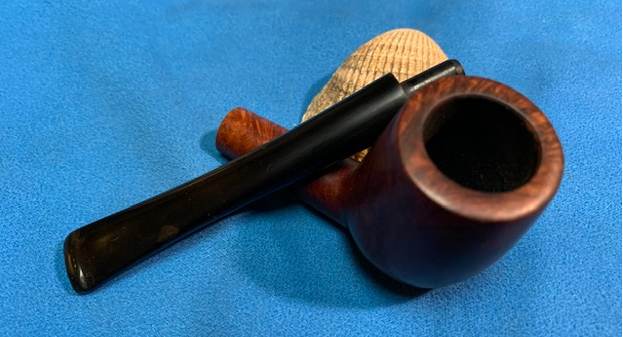
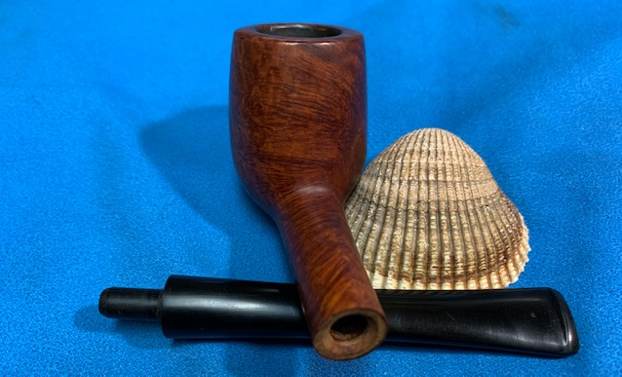
The chamber has a thick layer of cake, so thick that I am unable to see the heel of the chamber. There is a heavy overflow of lava over the rim surface. The stummel appears dull and lackluster from all the heavy use and overflowing oils and tars which has attracted a ton of dust and grime from years of storage. However beneath all the dirt and grime some beautiful bird’s eye and cross grain over the stummel awaits revelation. There are a few dents, dings and chipped surface in the stummel. The sterling Silver band has turned black due to oxidation. The vulcanite stem is heavily oxidized with deep tooth chatter/ bite marks and calcification in the bite zone. The airway is clogged with dried oils and crud. Shown below is the pipe as it presents itself on my worktable. 
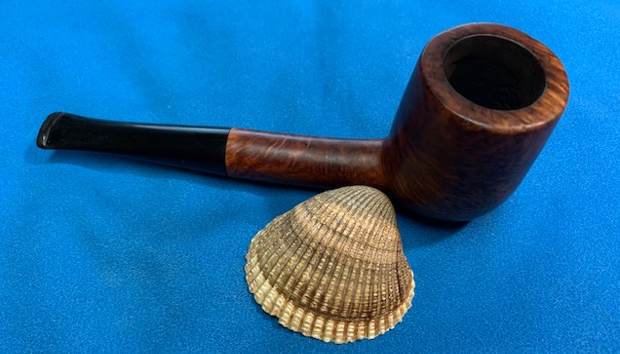
Dimensions Of The Pipe
(a) Overall length of the pipe:          5.2 inches.

(b) Bowl height:                                  1.7 inches.

(c) Inner diameter of chamber:        0.8 inches.

(d) Outer diameter of chamber:      1.2 inches.

Detailed Inspection
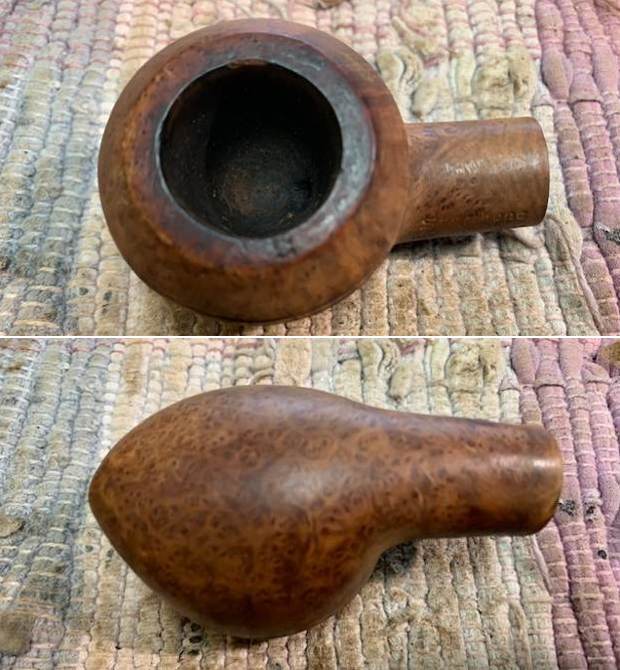
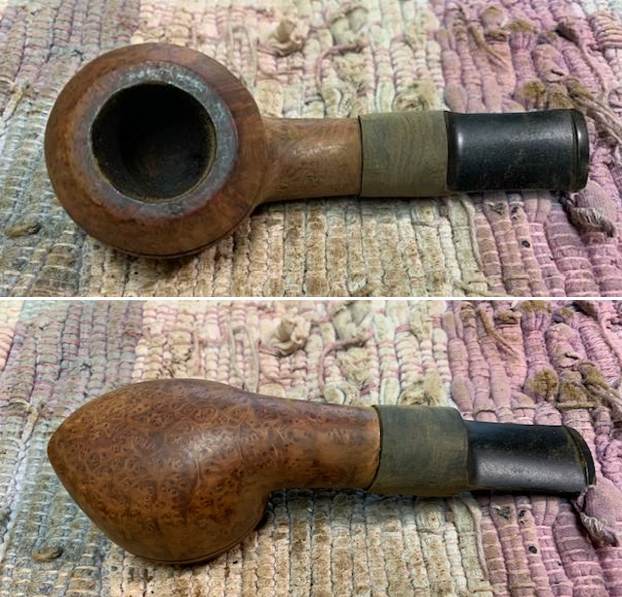
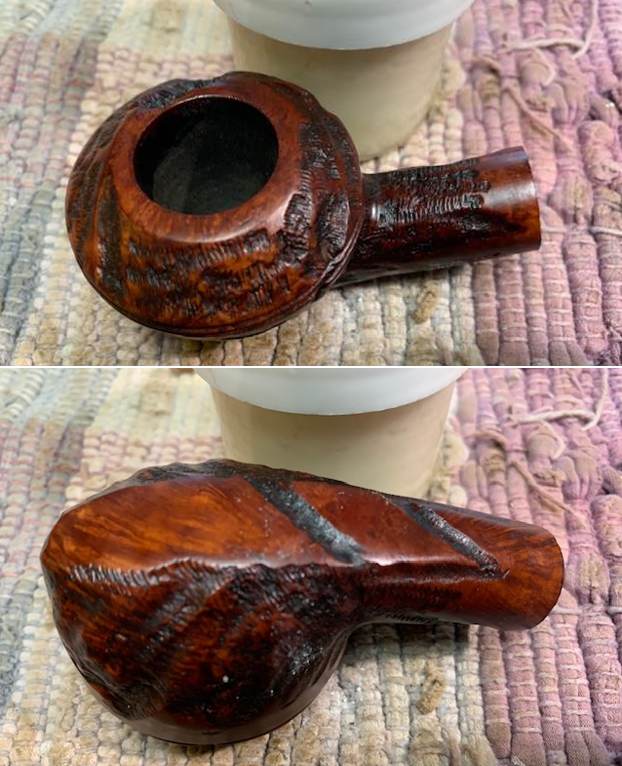
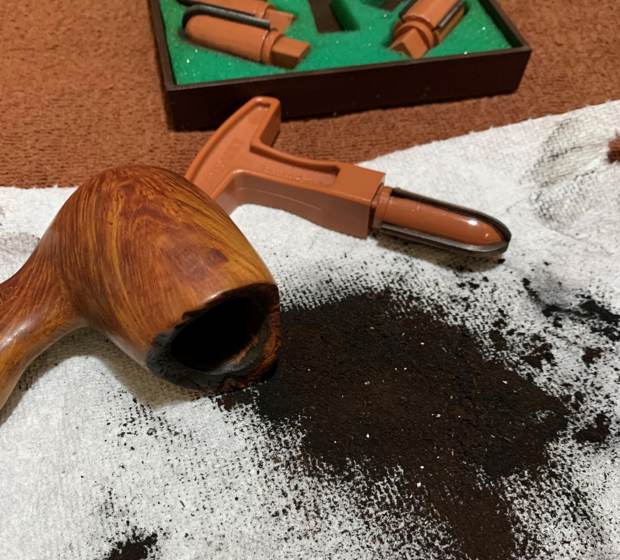
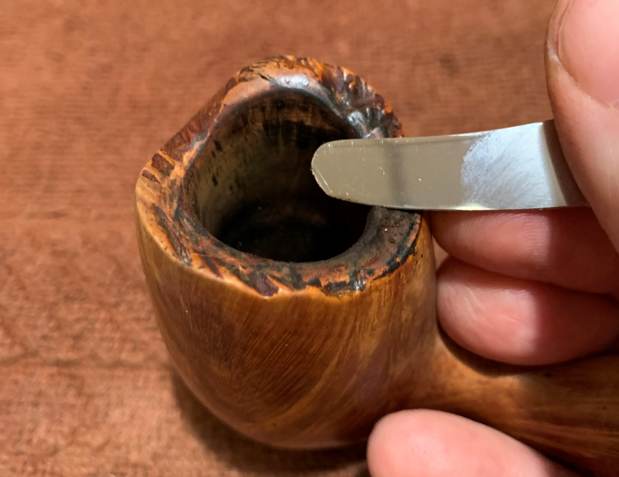
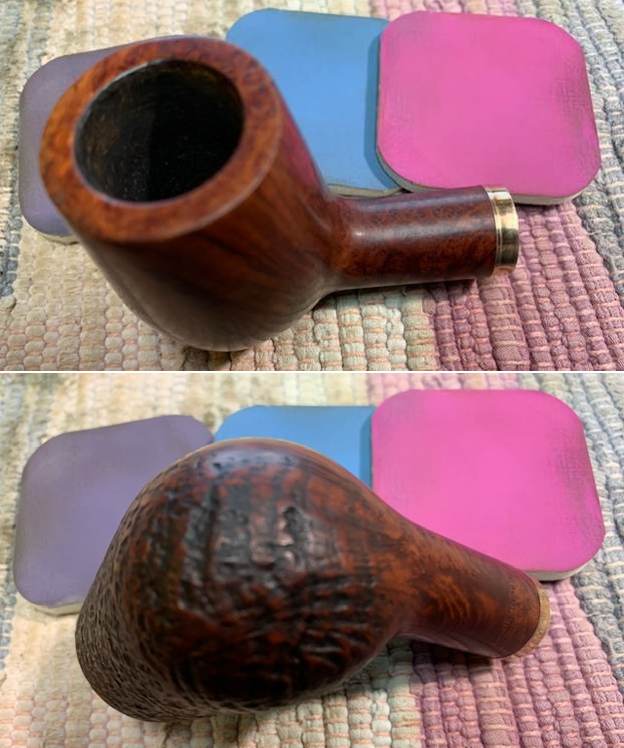
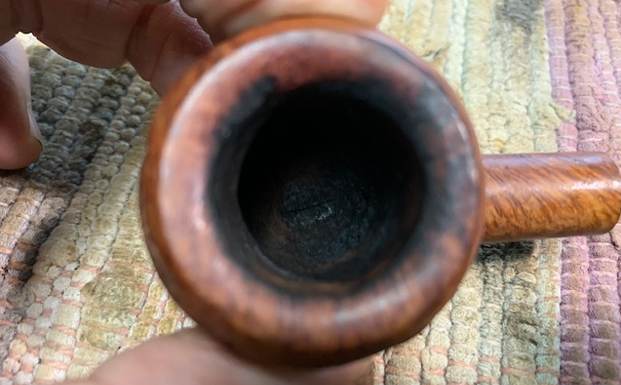
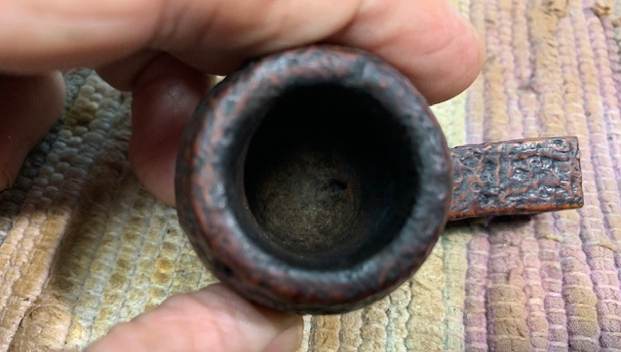
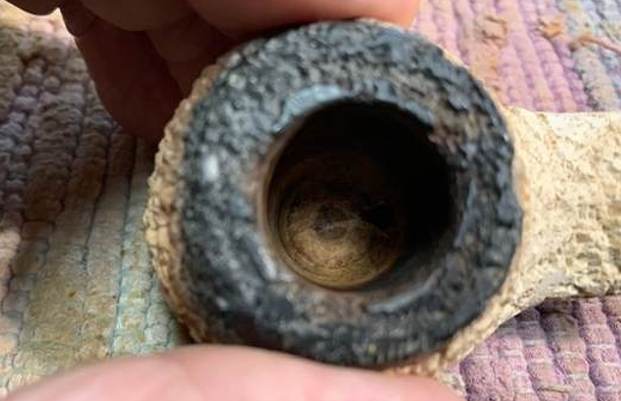
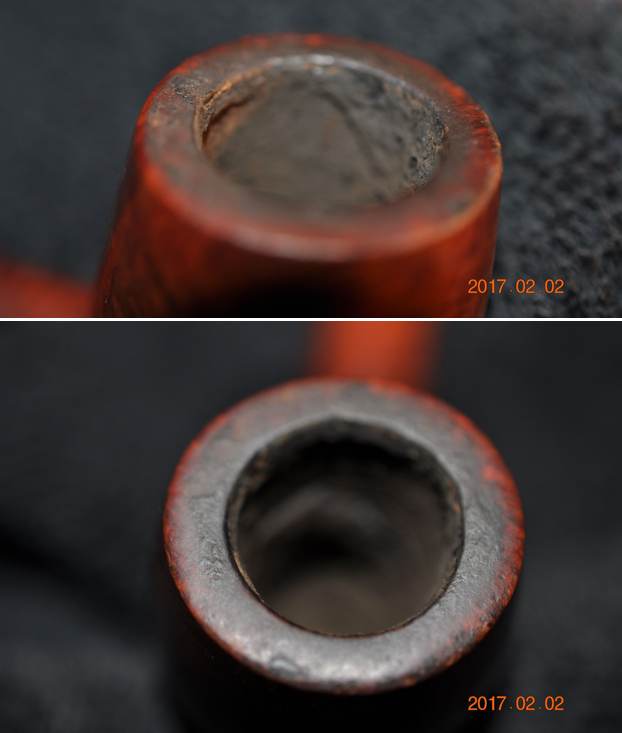
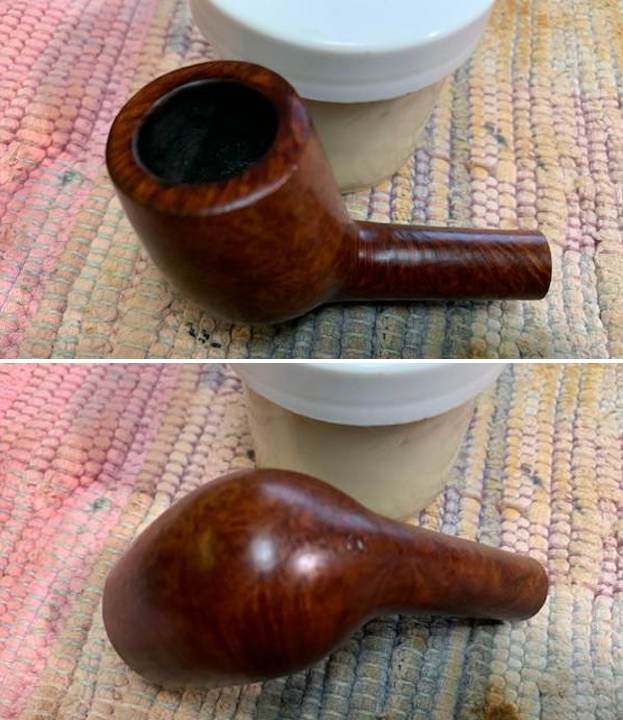
Apparently this chamber has never ever seen a pipe reamer nor has ever experienced the luxury of having a cake of the thickness of a dime. There is a thick layer of cake in the chamber which restricts reaching to the bottom of the chamber. The cake is very hard and dry and it was with some difficulty that I could pry out a couple of chips of cake from the rim surface with my knife. This is going to be one bugger to clean, I say. The thick lava overflow over the rim top surface obscures the condition of the rim surface and will be ascertained only after the crud is removed. Ditto as regards the condition of the chamber wall. I shall deliberate in detail on these issues once the cake has been rid of. The ghost smells are very strong, in fact so strong that the entire room reeked of the smell of rancid tobacco. 
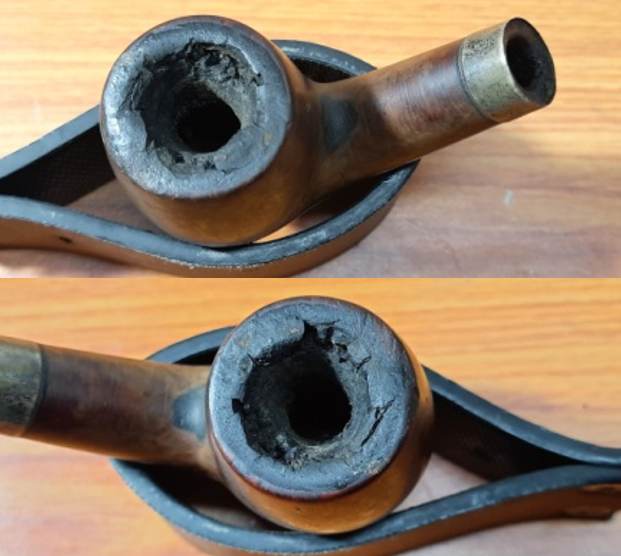
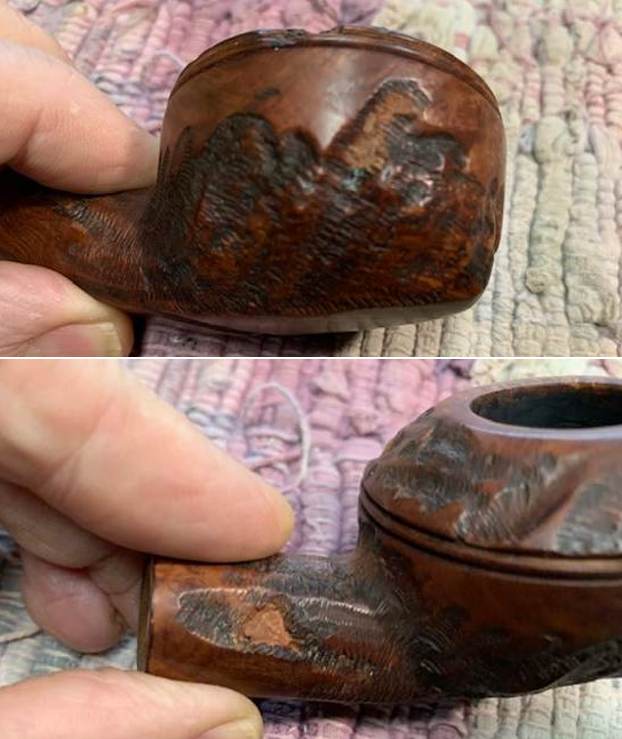
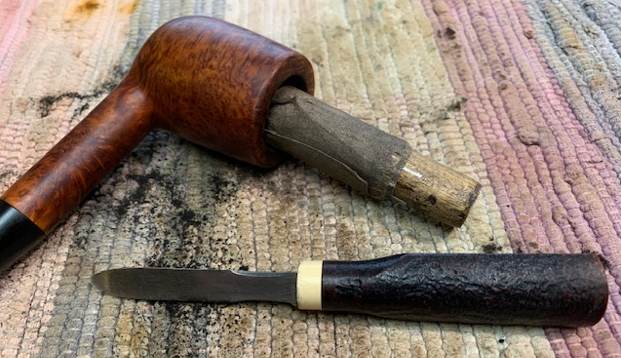
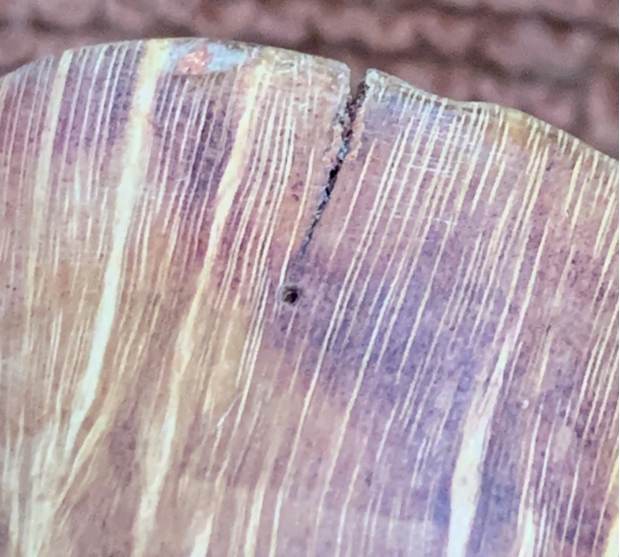
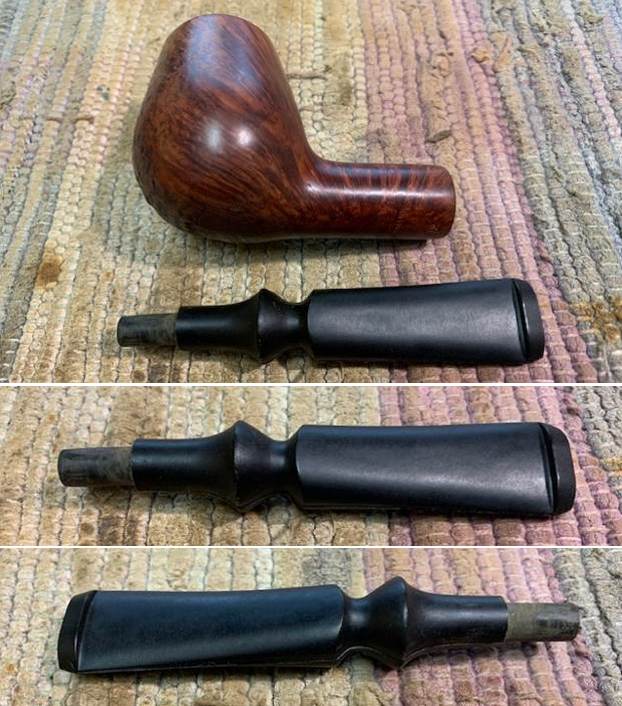
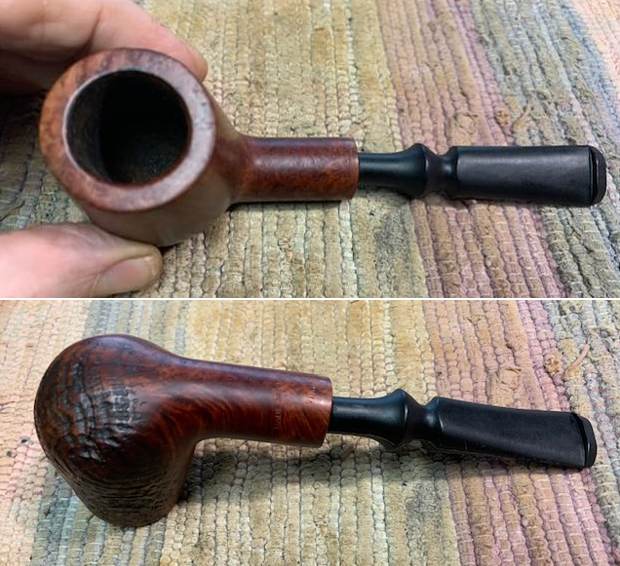
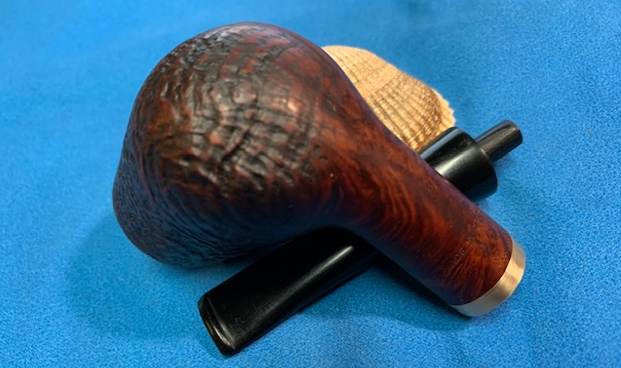
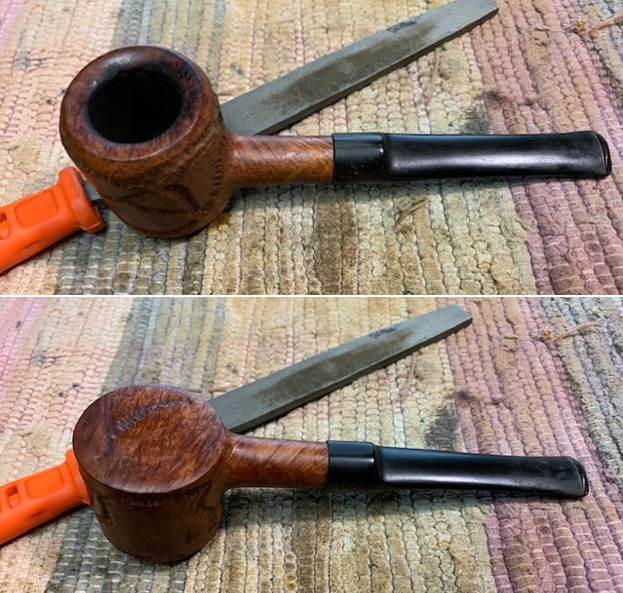
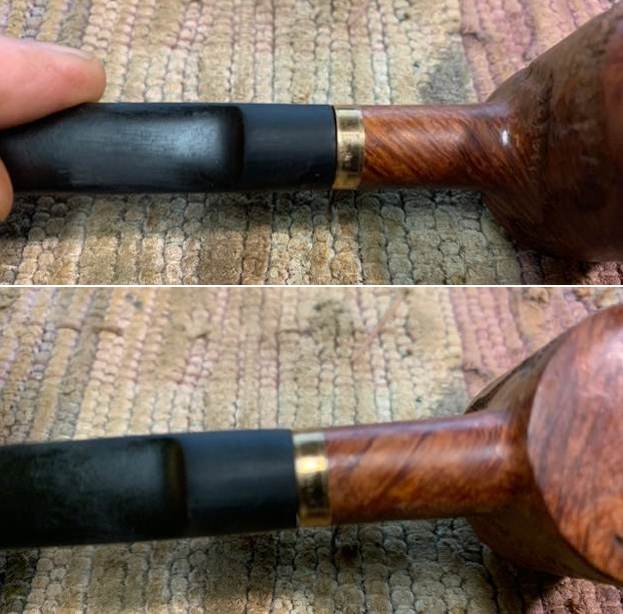
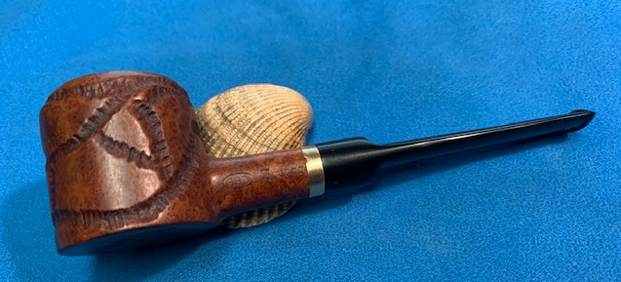
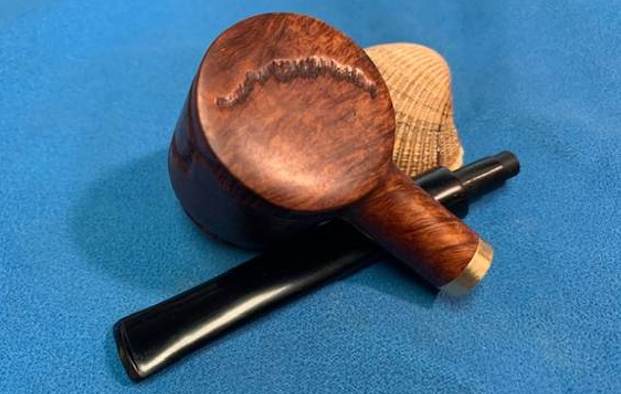
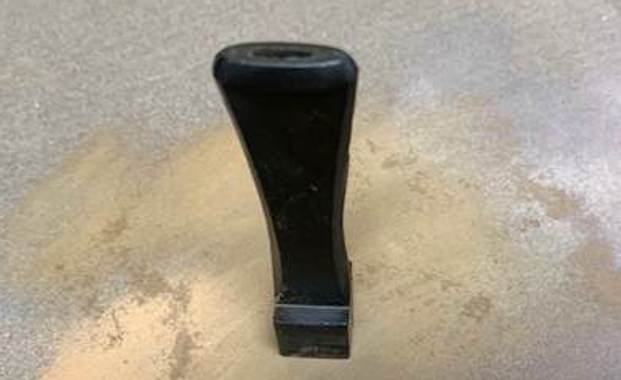
The stummel is covered in overflowing carbon, oils and ash. Add to this grime, the many years of dust and dirt due to uncared for storage ground into the surface and you have a filthy, dull and dirty looking briar. There are some tightly packed Bird’s eye grains peeking from either sides of the stummel while beautiful cross grains adorn the fore and aft of the bowl. There are a few scratches, dents and dings over the stummel surface (enclosed in pastel blue), nothing severe that would need to be filled. However, to the front of the bowl just below and along the outer edge of the rim, there are a couple of spots that are missing briar (green circle). I may have to rebuild it using briar dust and superglue. The mortise is chock-a-block with old oils, tars and gunk to the extent that I couldn’t see the light in the chamber. The Sterling Silver ferrule is deeply oxidized but without any damage. Cleaning this pipe will be a long haul. 
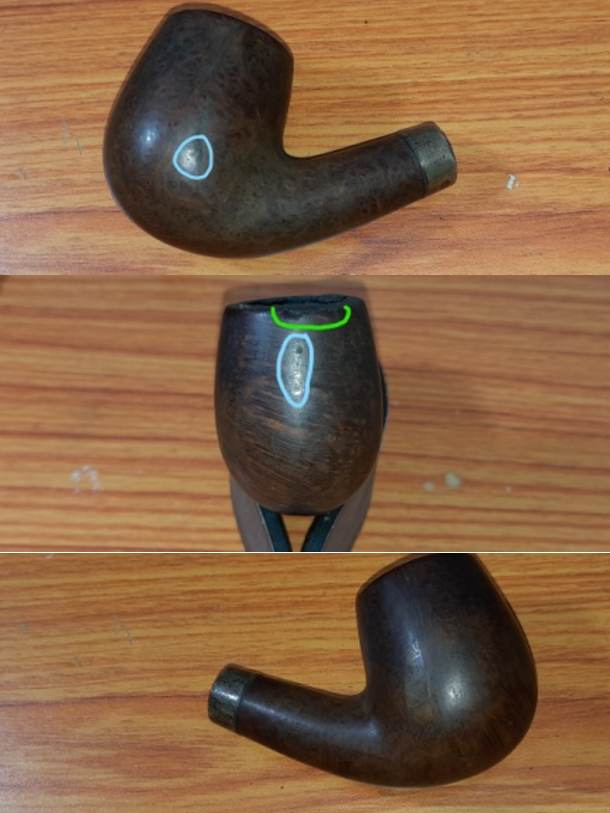
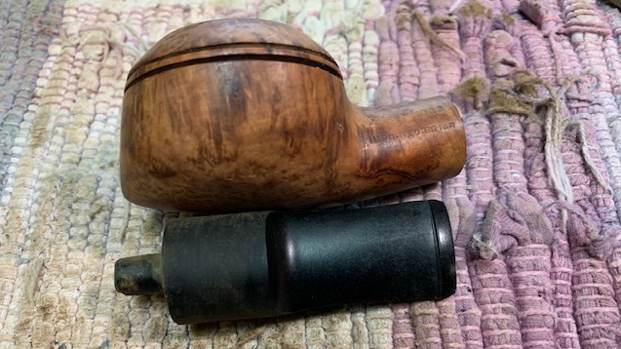
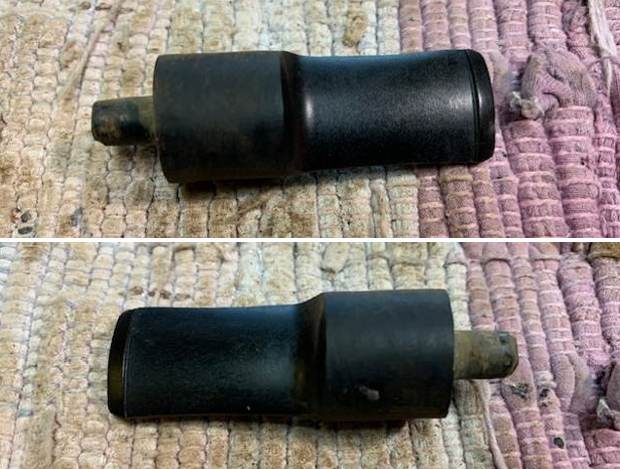
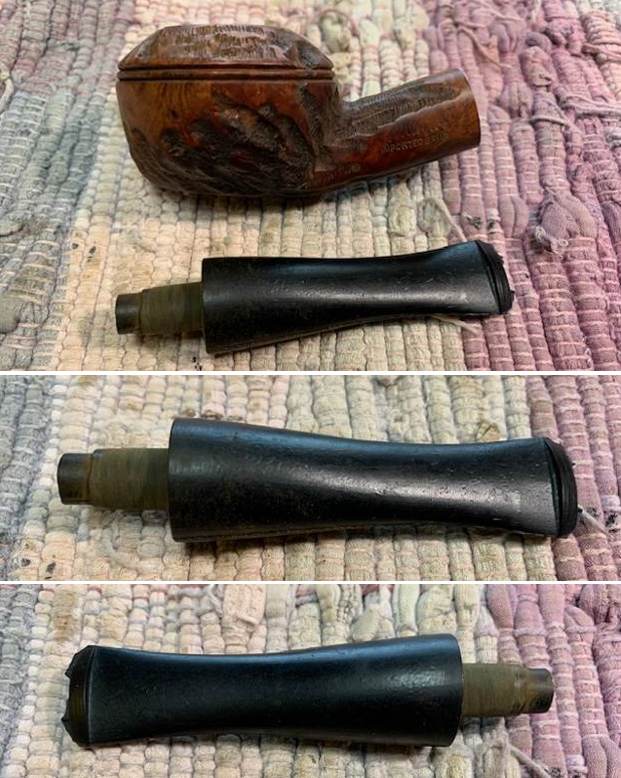
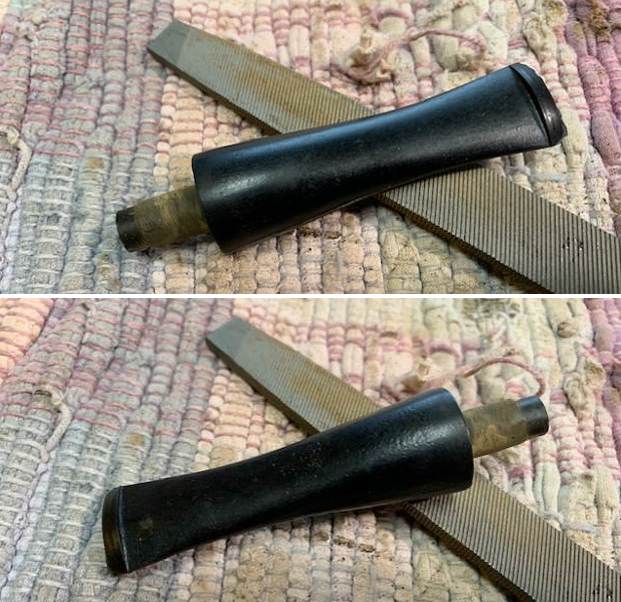
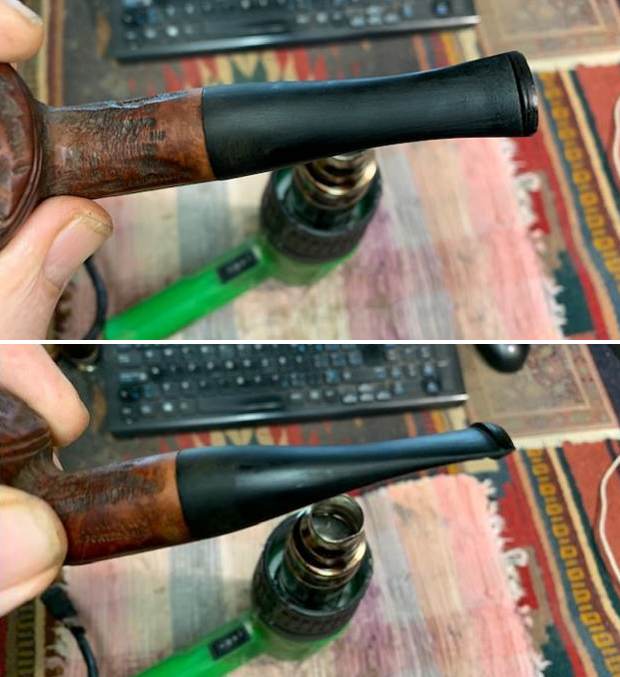
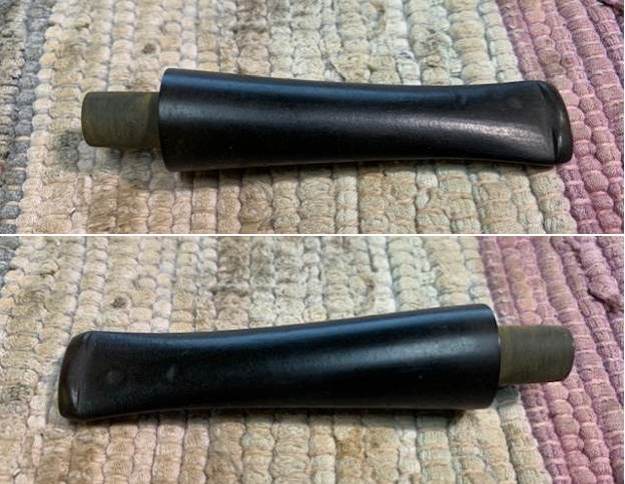
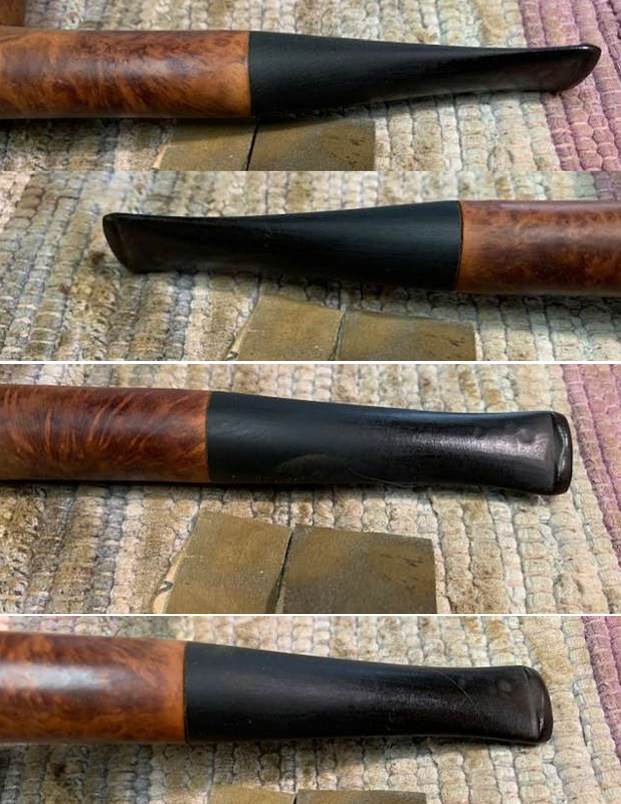
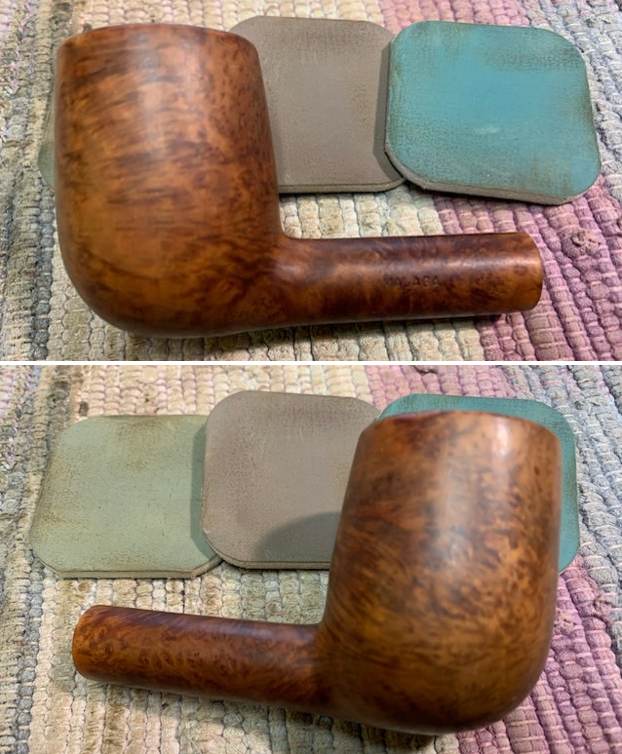
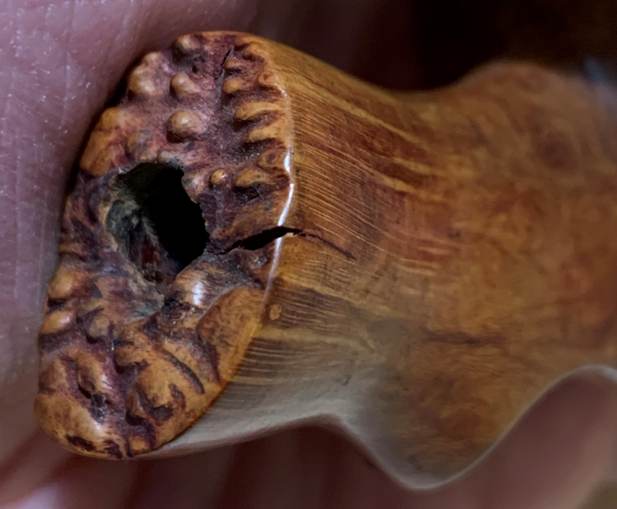
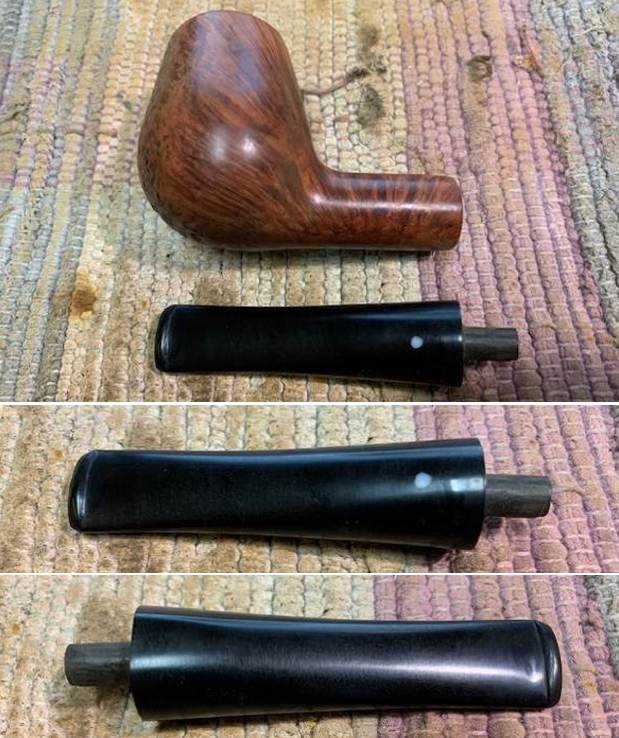
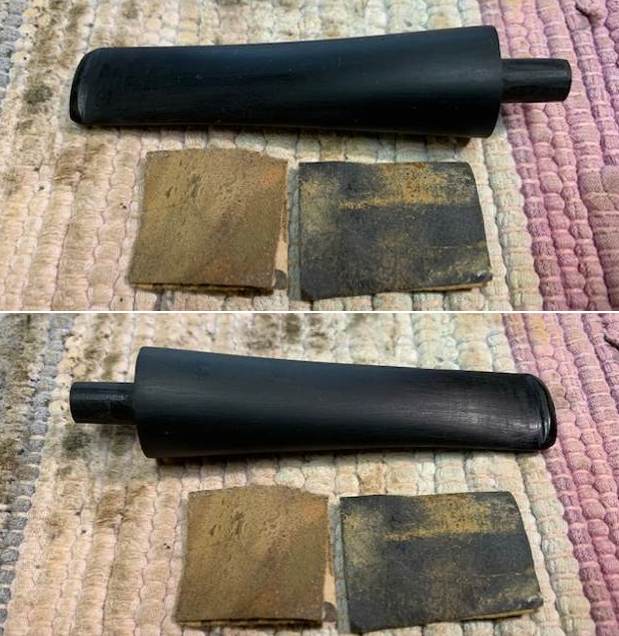
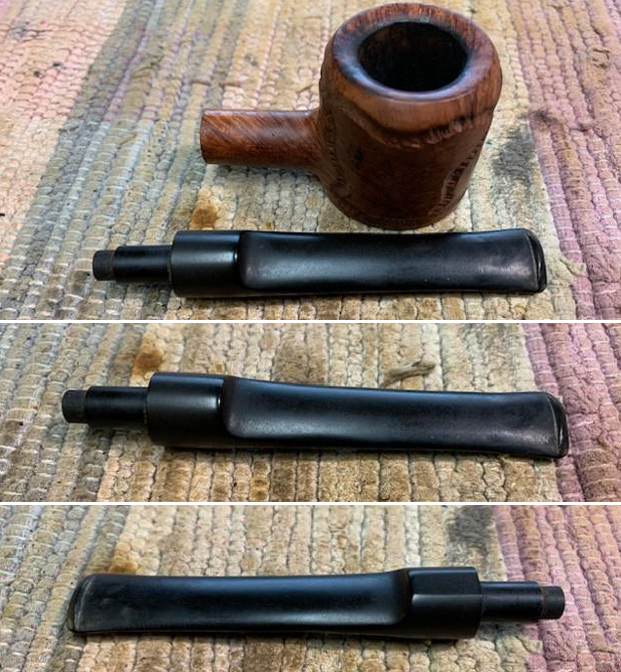
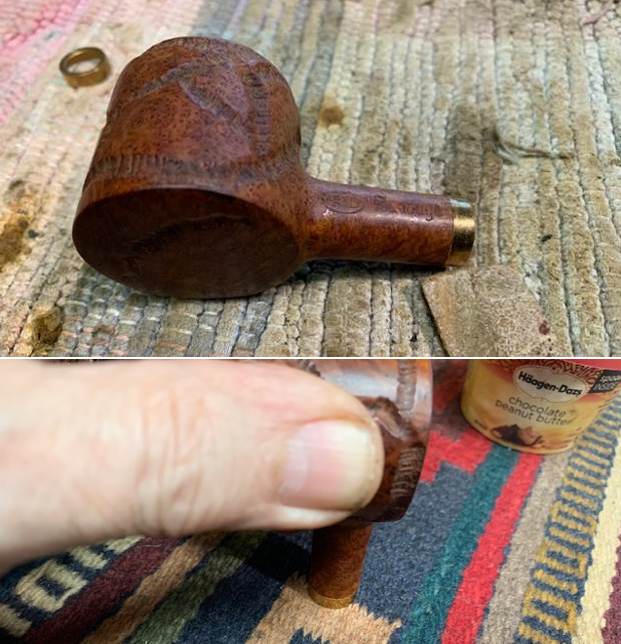
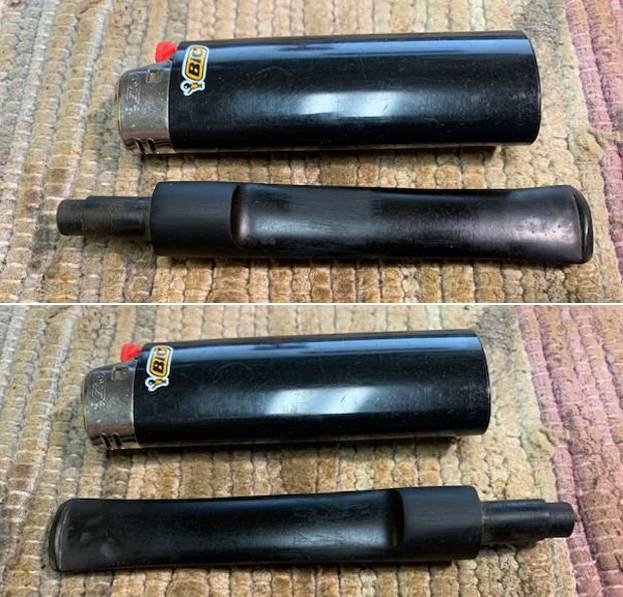
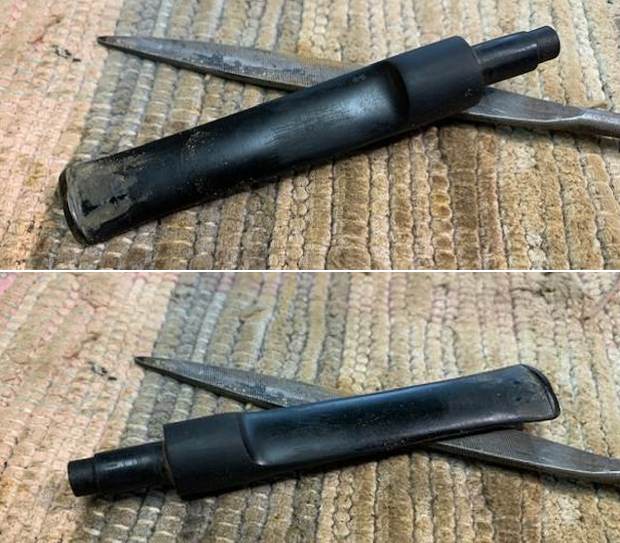
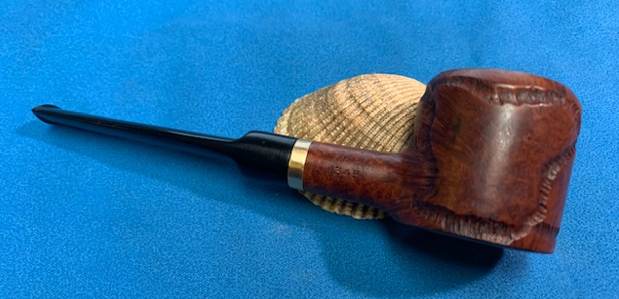
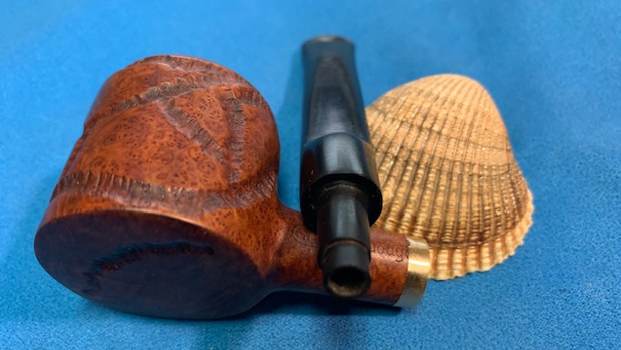
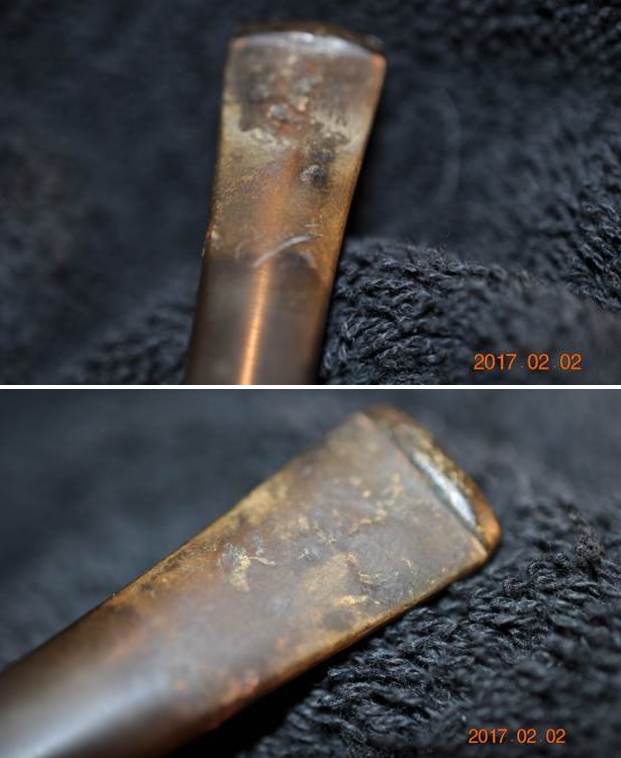
The vulcanite stem is deeply oxidized but thankfully without any major damage. There are few tooth indentations and tooth chatter on either surfaces of the stem along with calcification in the bite zone. The button edges on either side have been chewed and would benefit from a rebuild/ reshaping. The step tenon opening is completely clogged and remnants of oils and tars and gunk can be easily observed on the sides and on the inside of the opening. The horizontal slot face is brutally oxidized and filled with gunk. The smells emanating from the stem are quite strong and repulsive. The brass logo is crisp and intact and would benefit from a nice polish.The Process…
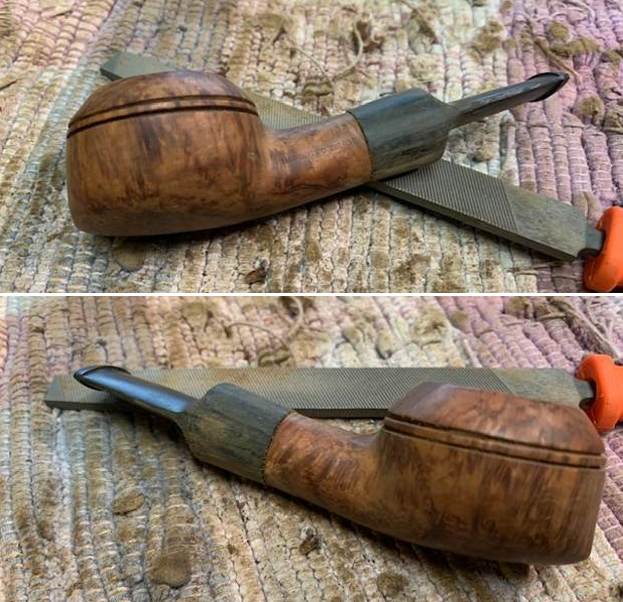
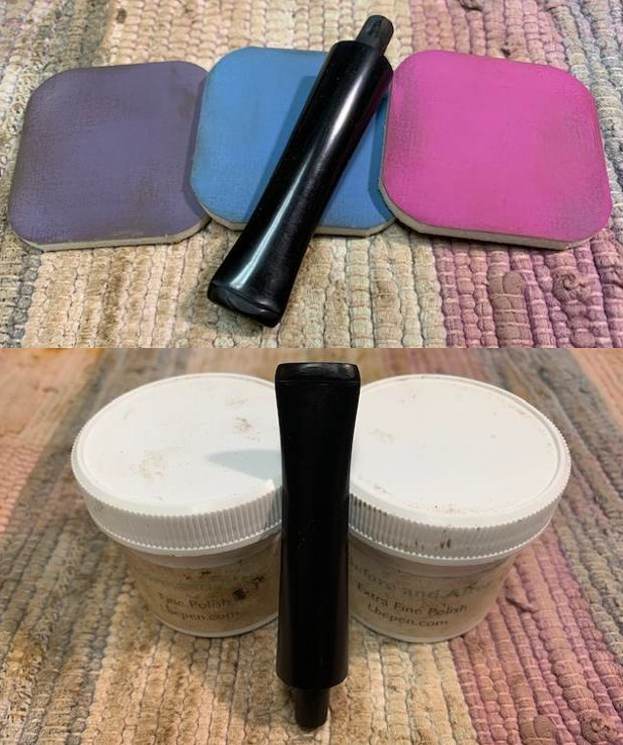
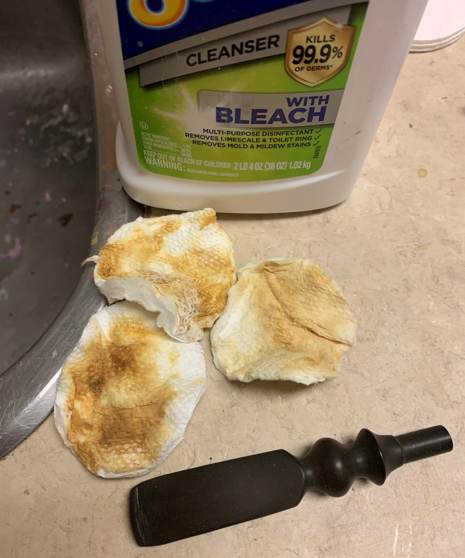
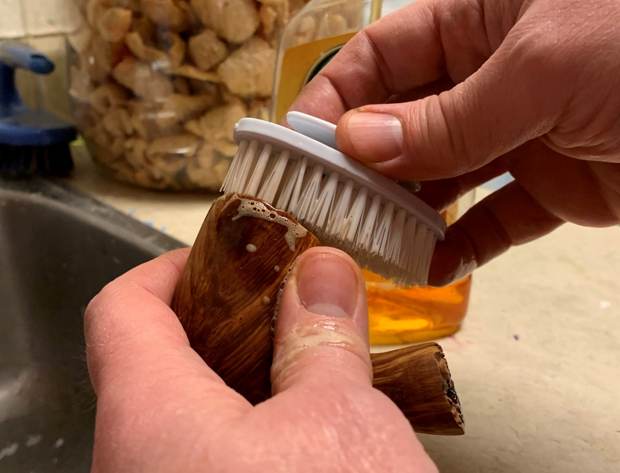
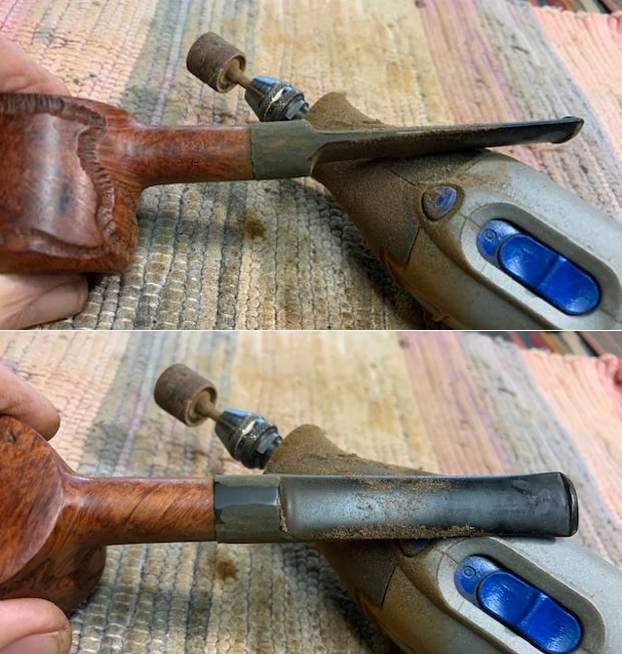
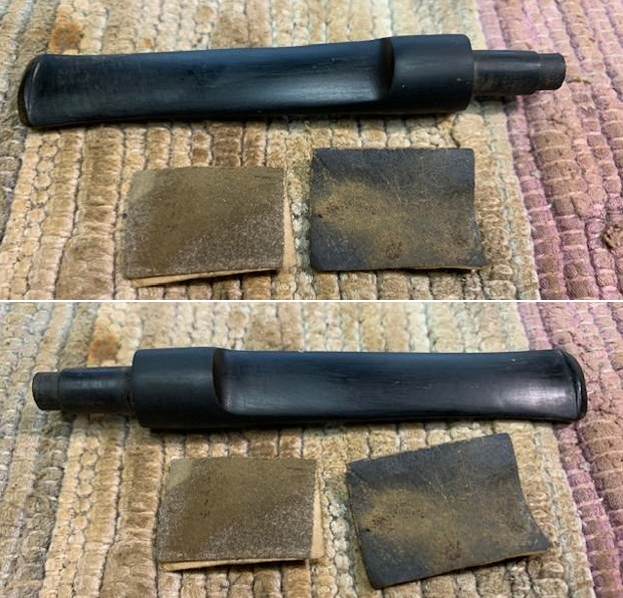
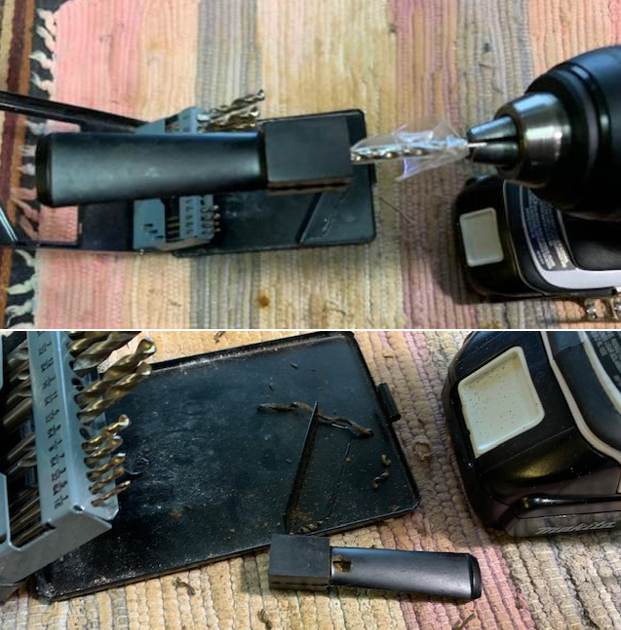
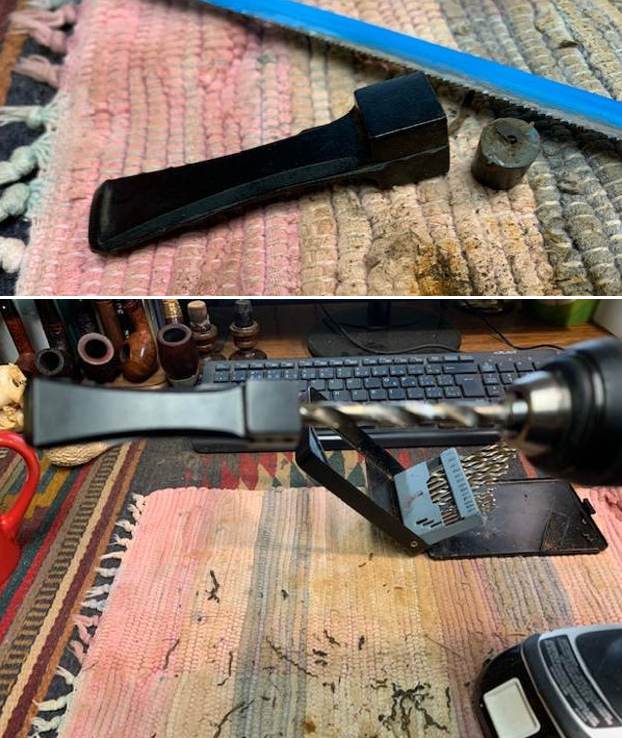
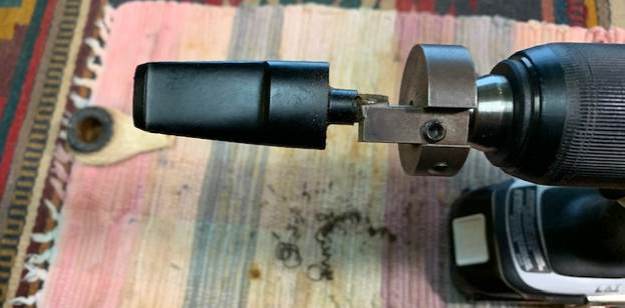
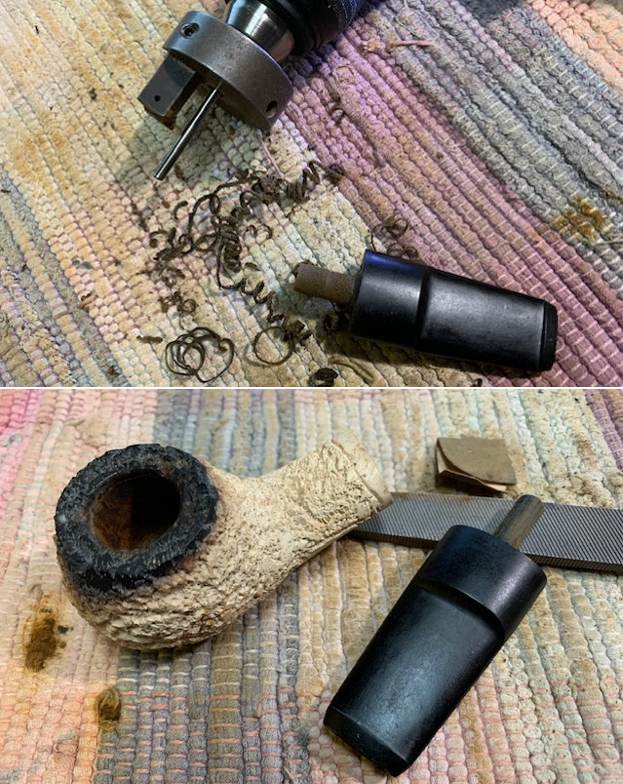
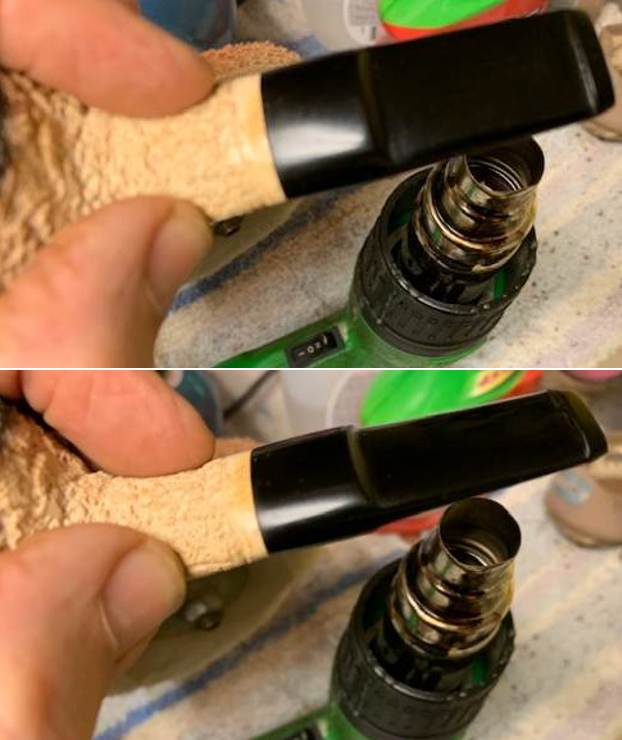
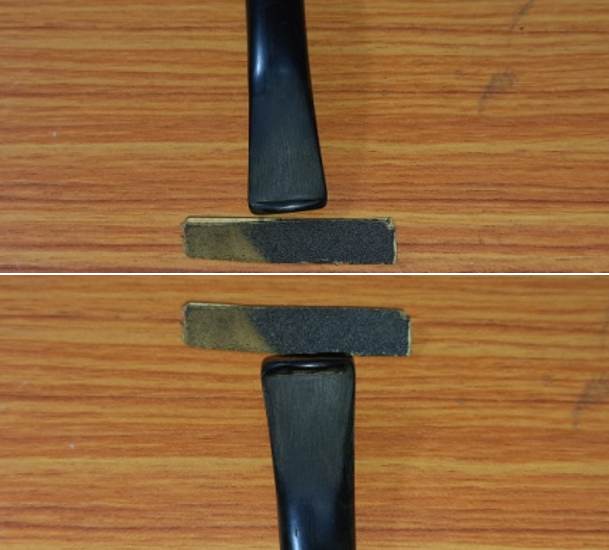
Since there were other stems that were ready to be put into the stem deoxidizer solution, I decided to clean the internals of this stem first so that it could be put in the solution with other stems. I cleaned the stem airway with a thin shank brush and anti oil soap. The amount of gunk that was cleaned can be judged from the pictures below. It took considerable time and elbow grease to get the stem airway clean. In spite of my best efforts, I could not get the brush to completely pass through the stem. Closer inspection of the slot end confirmed my worst fears and I could see that the slot was blocked with the crud from the stem airway. I used a sharp dental tool to pry out the block and further cleaned the internals with regular and bristled pipe cleaners dipped in alcohol.This internal cleaning was followed by sanding the stem external surface with a folded piece of 220 grit sandpaper to loosen up and remove superficial oxidation. It has been our experience that such sanding yields the best end results after the deoxidizer solution has completed its assigned task. Before dunking the stem in the deoxidizer solution, it was cleaned up with Murphy’s Oil Soap and a cotton swab.
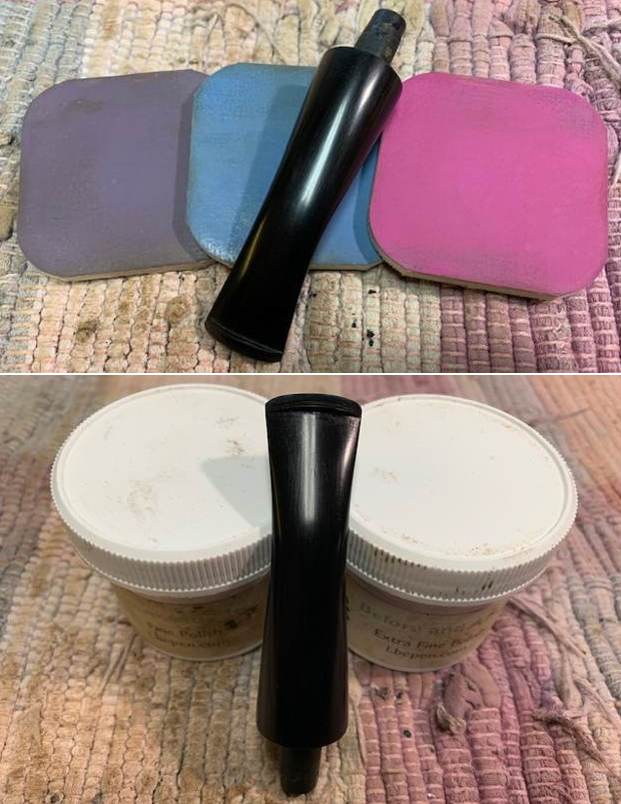
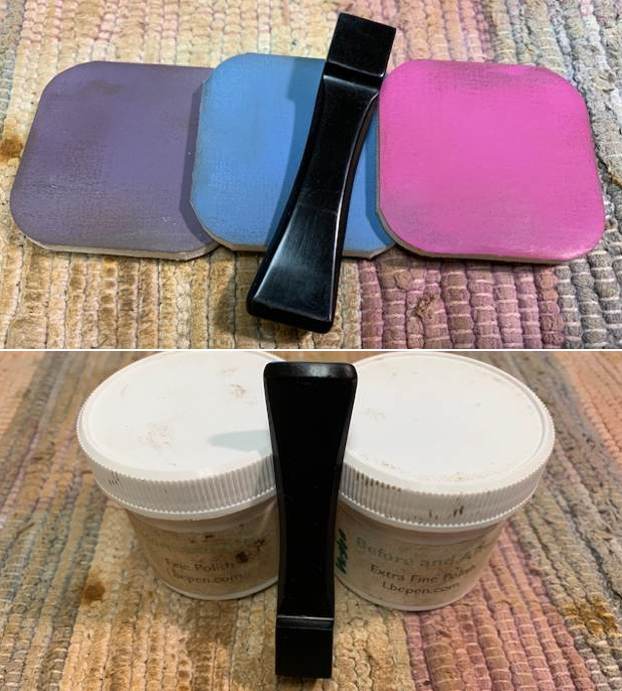
The stem was immersed in the Before and After Deoxidizer solution, a product that has been developed by Mark Hoover. This solution raises the oxidation to the stem surface and helps in easy removal and imparting a nice shine to the stem after polishing. The pipe is indicated with an orange arrow indicator. The stem is allowed to soak into this solution overnight.The next morning, Abha took the stem out from the solution. She cleaned the stem under running warm water and scrubbed the raised oxidation from the stem surface using a Scotch Brite pad and cleaned the airway with a thin shank brush. She further removed the oxidation by scrubbing the stem with 0000 grade steel wool and applied a little EVO to rehydrate the stem. She ran a couple of pipe cleaners through the stem airway to clean the airway of the deoxidizer solution and water. There is a need to further sand the stem to completely remove the oxidation.
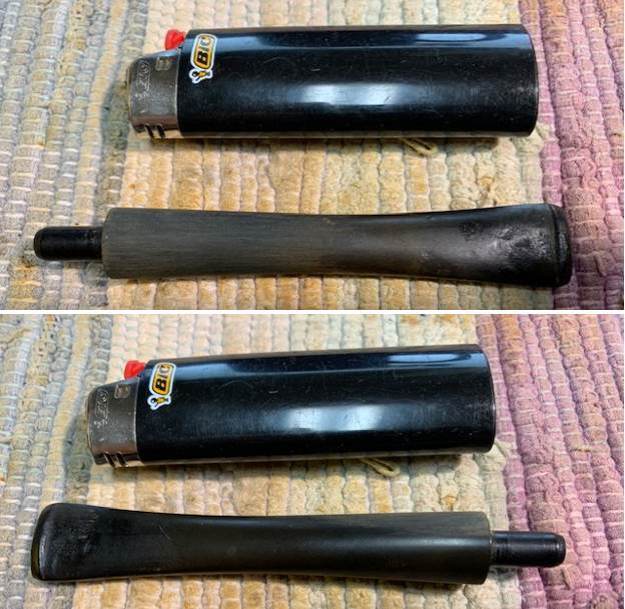
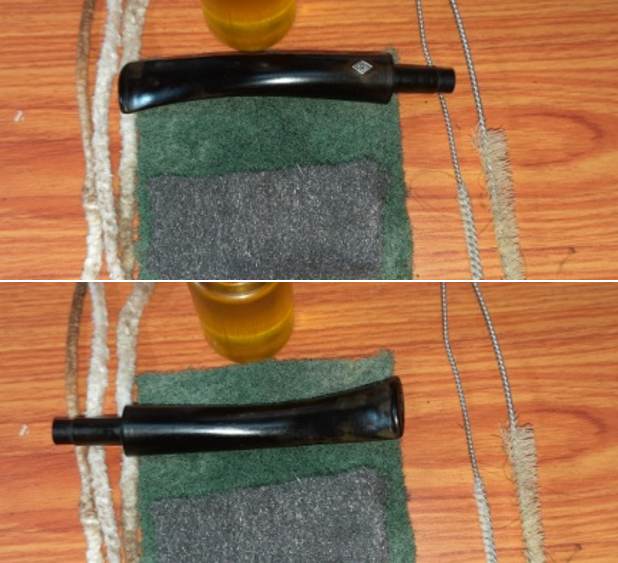
Continuing with the stem repairs, to address the deeper tooth indentations/ bite marks, I warmed up the bite zone with the flame of a lighter. The heat helps to expand the vulcanite and retain its original shape. This method may not always completely raise the depressions to the surface, but most of the times, to a great extent. In this case the tooth indentations were raised to a great extent, but the damage to the button edge would require a rebuild. I followed up the heating of the stem surface with sanding the bite zone with a worn out piece of 180 grit sandpaper to even out the surface. 
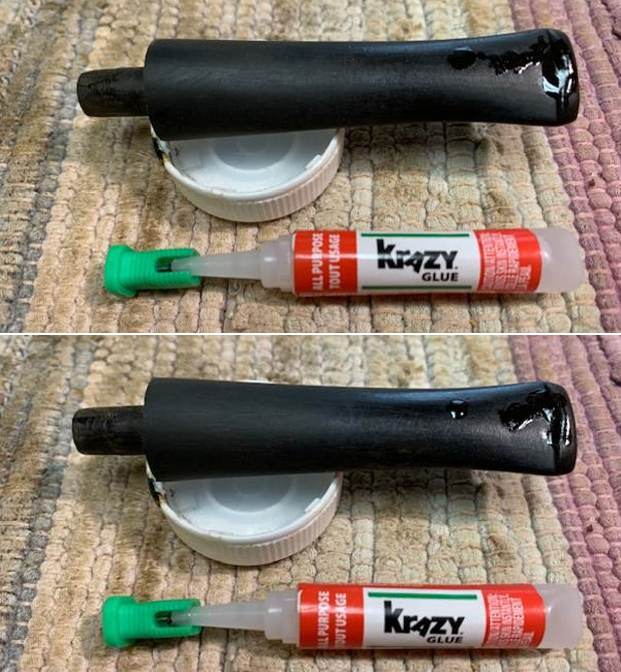
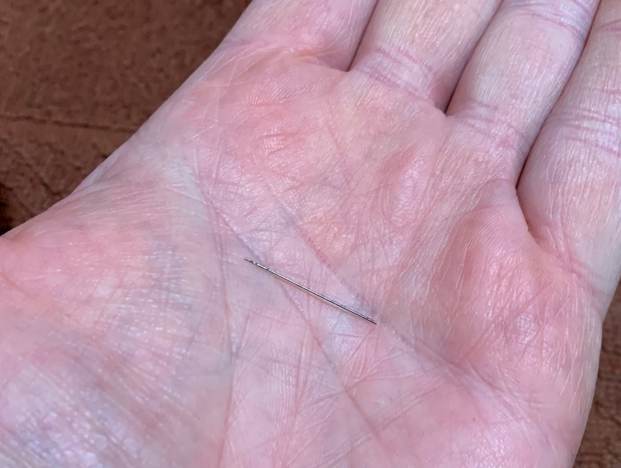
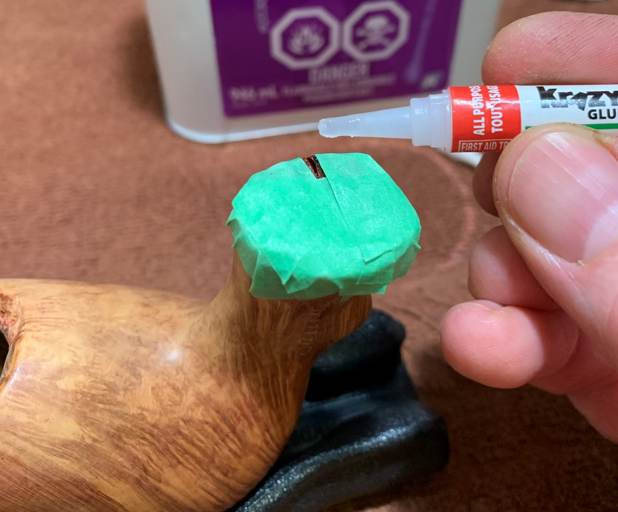
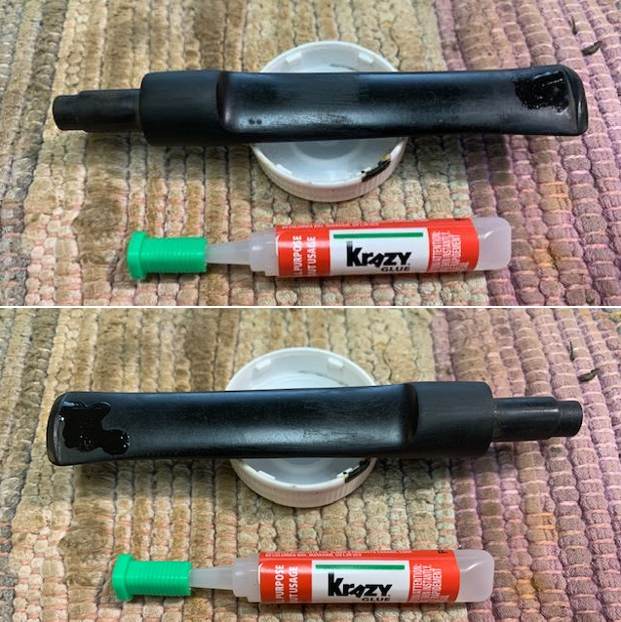
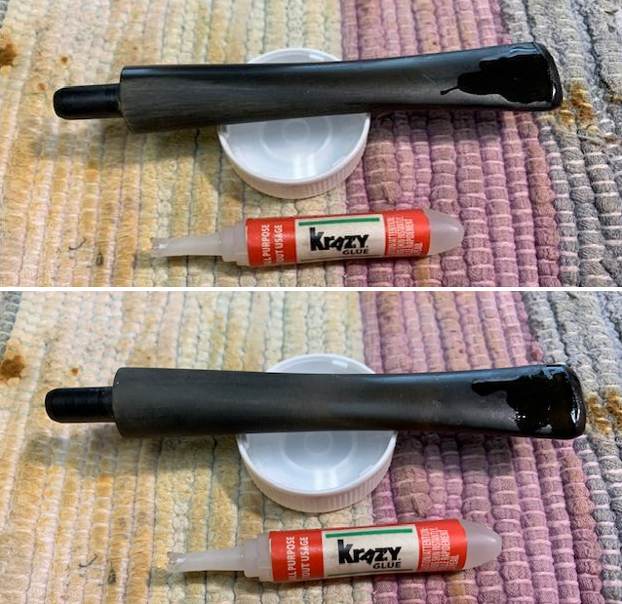
Next I rebuilt the button edge with a mix of activated charcoal and superglue. I applied it over the buttons on either sides of the stem and set it aside for the mix to cure.
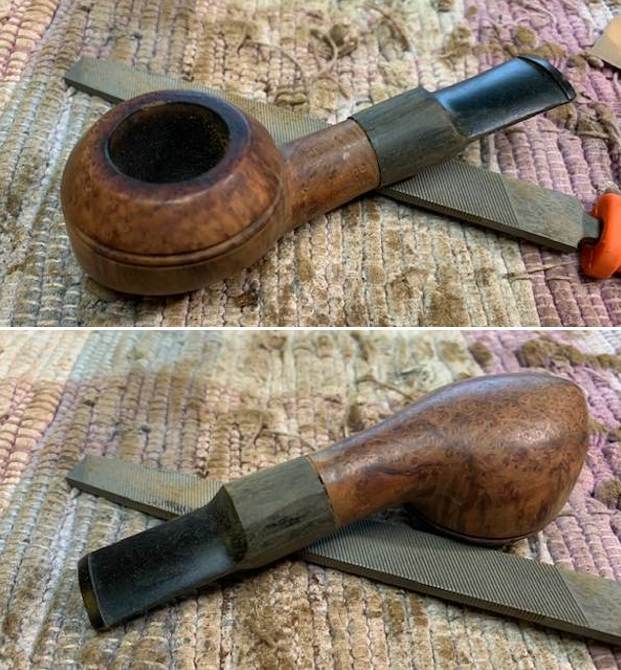
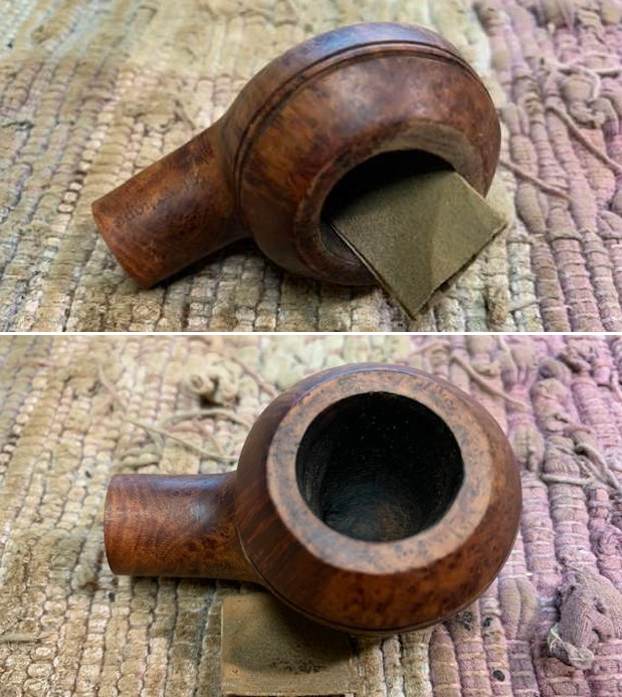
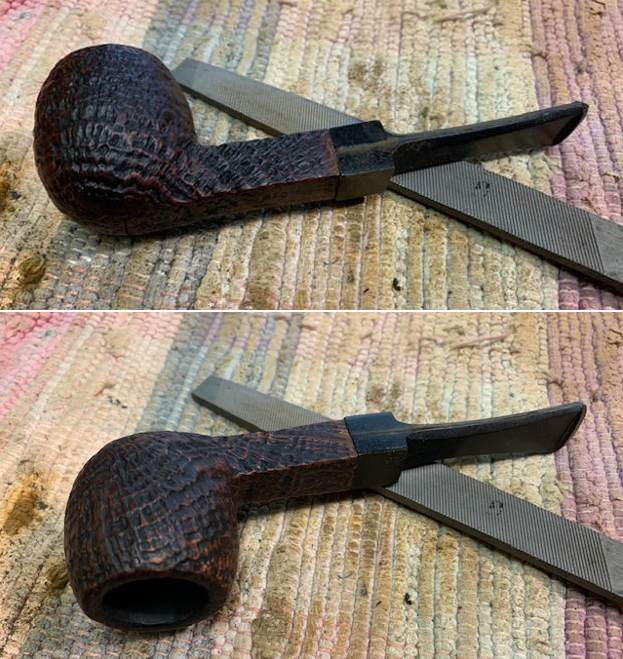
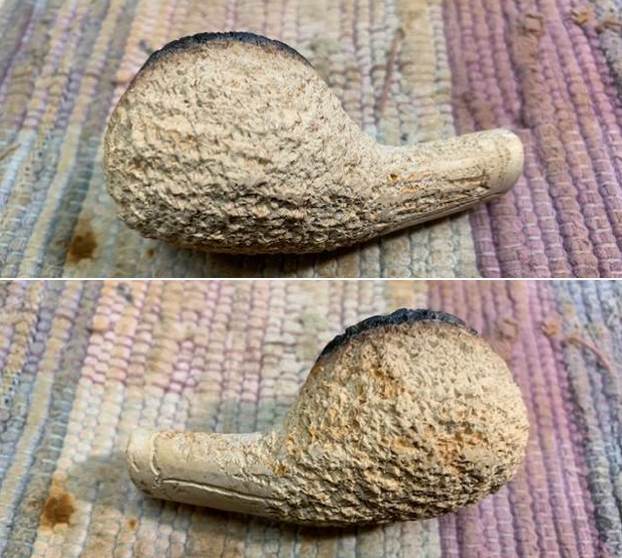
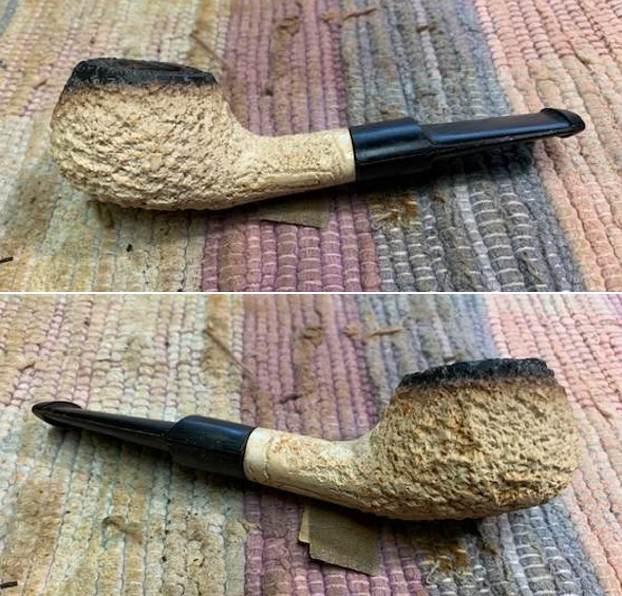
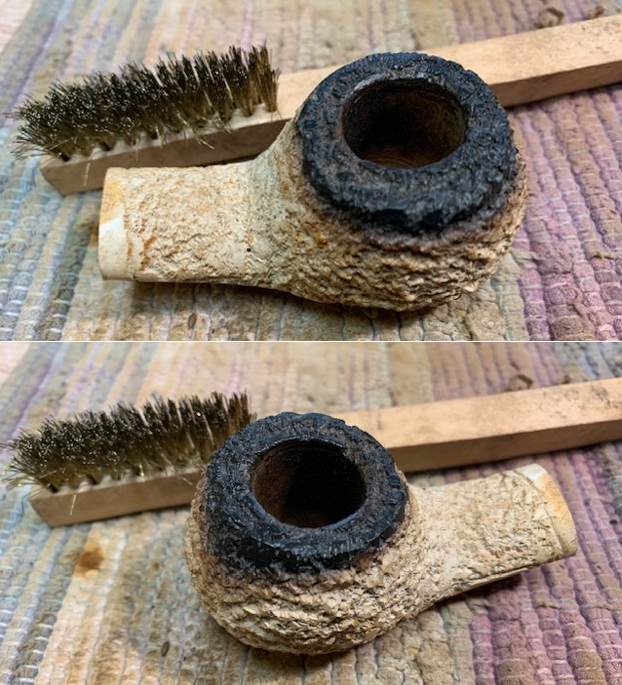
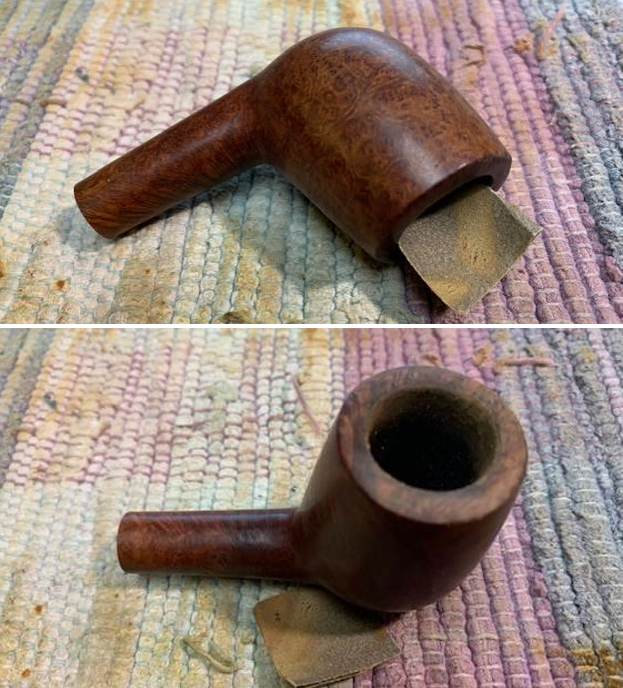
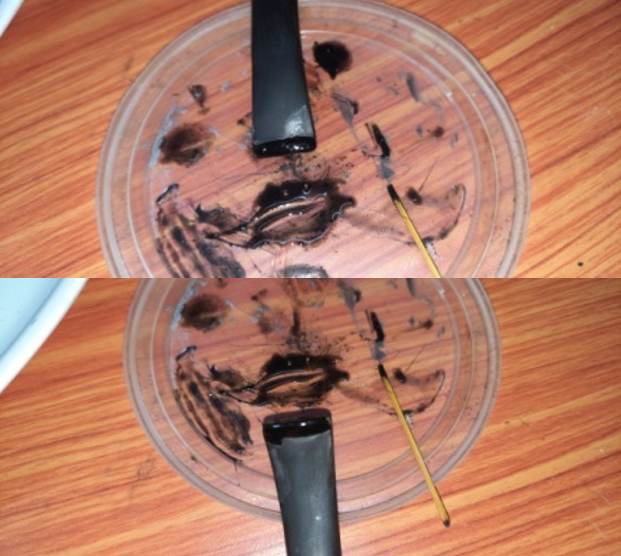
Now it was time for me to work on the stummel. I did this by first reaming the chamber with size 1 followed by size 2 PipNet reamer head. I further scraped the chamber walls with my fabricated knife to remove the remaining carbon deposits where the reamer head could not reach. I scraped out the lava overflow from the rim top surface. Once the cake was reamed back to the bare briar, I used a 150 grit sand paper followed by 220 grit sand paper to remove all the traces of remaining cake and also to smooth out the inner walls of the chamber surface. Finally, to remove the residual carbon dust, I wiped the chamber with a cotton pad wetted with 99.9% pure isopropyl alcohol. The huge pile of carbon dust that was reamed out is an indication enough to the amount of carbon that had accumulated in the chamber.
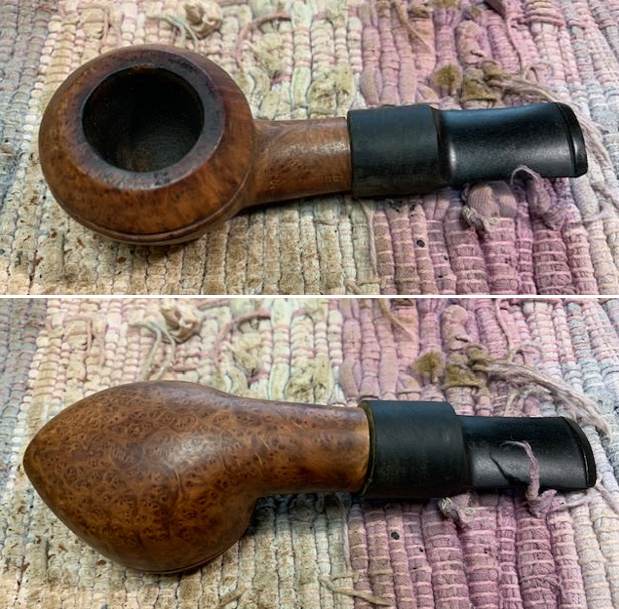
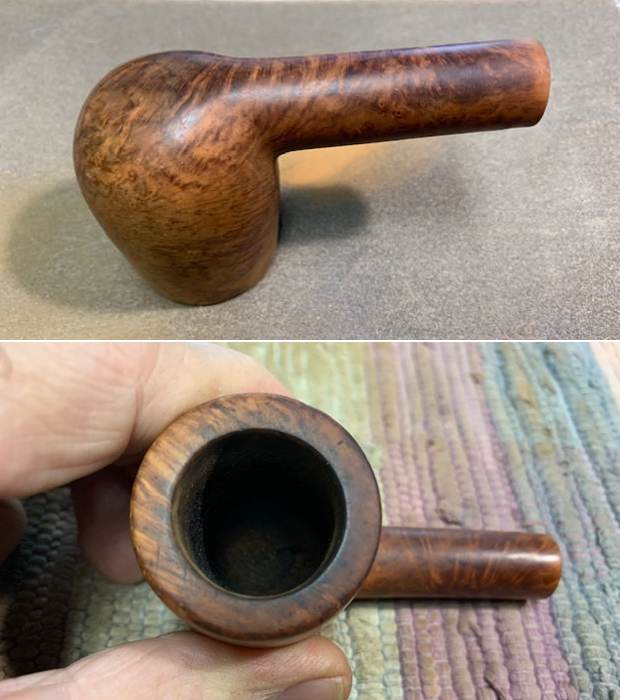
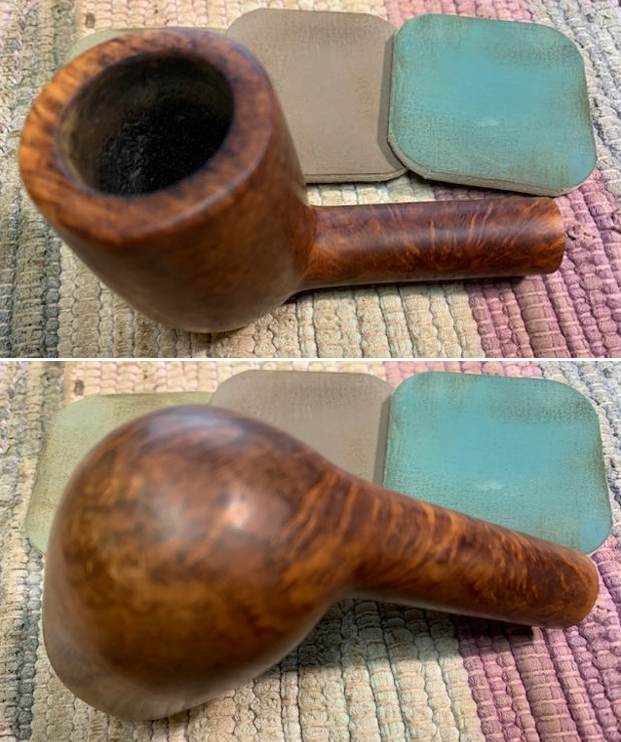
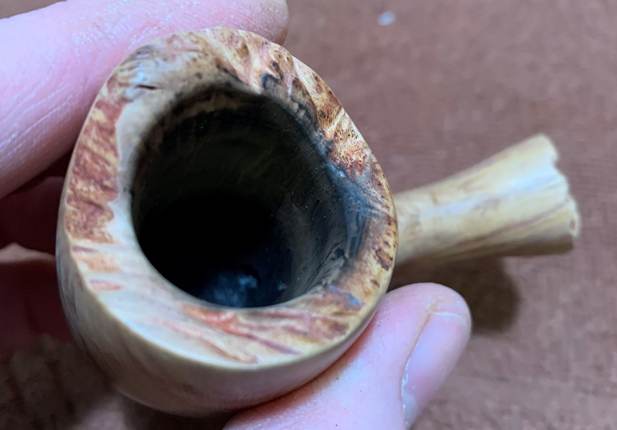
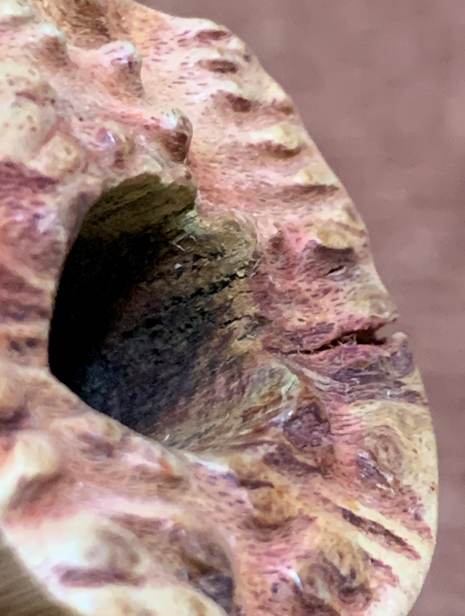
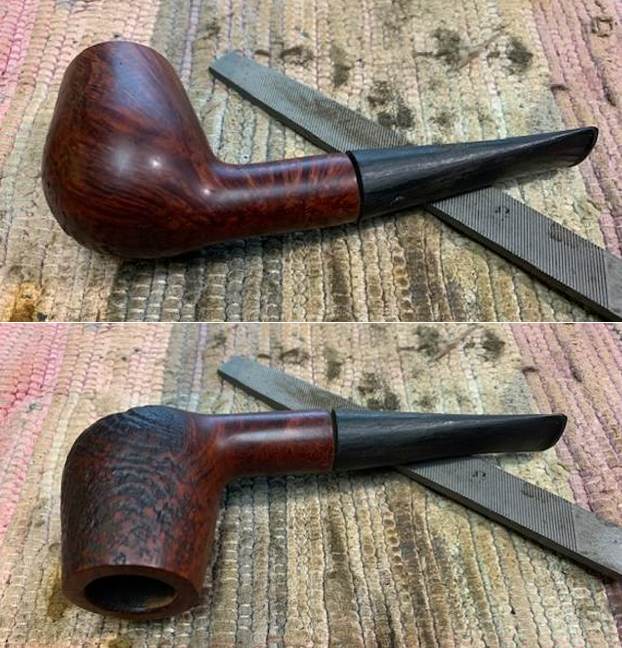
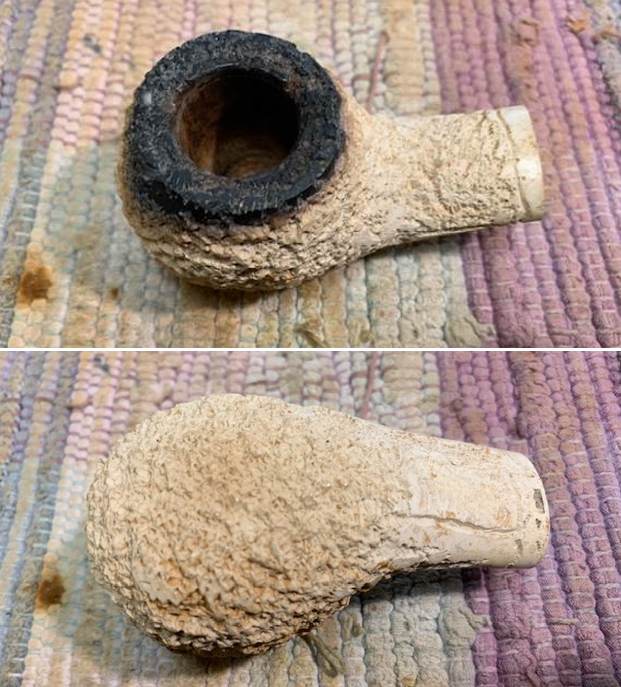
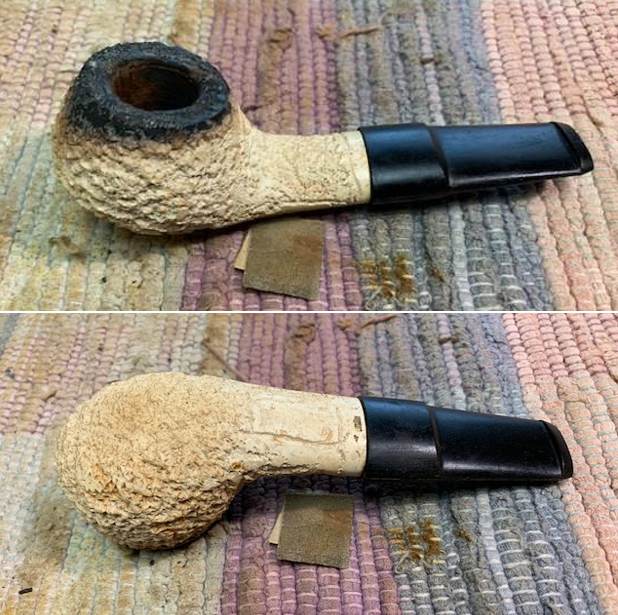
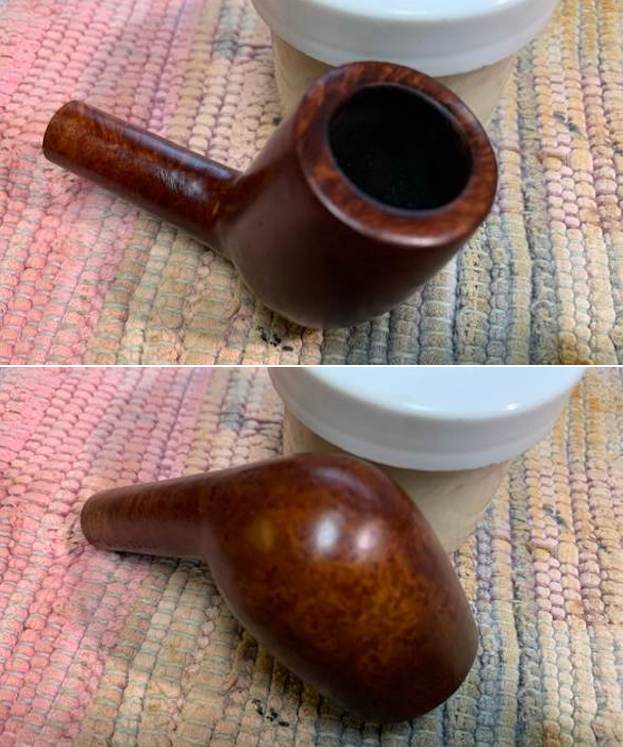
With the chamber and rim top surface free of all the cake and overflowing oils and tars, I took a closer look at the chamber and rim top surface. The rim top has a number of dents and is undulated, probably a result of striking against a hard surface to remove dottle. Also a result of these strikes is that the outer rim edge is chipped and damaged on the left side between 9 and 12 o’clock direction (encircled in pastel blue). The inner rim appears to have had a bevel and there seem to be signs of charring on the right side (encircled in yellow). There are webbings of thin superficial heat lines along the wall of the chamber (indicated by green arrows); however these are to be expected in a pipe that has been so heavily smoked. These heat lines are very minor and superficial and do not detract from the smoke worthiness of this pipe for the next 60 years.
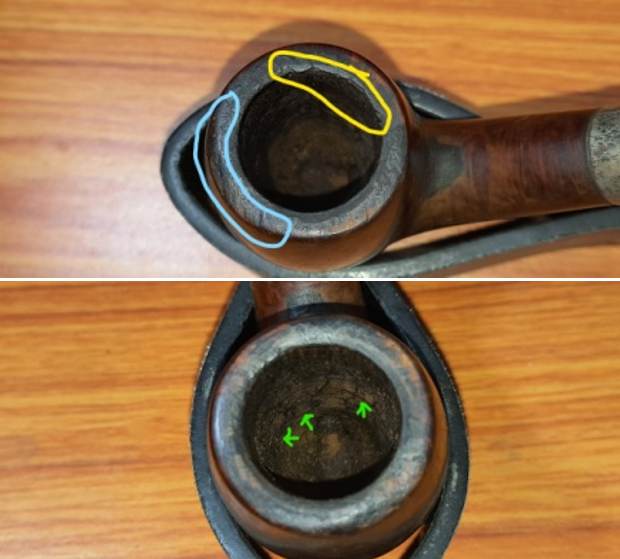
During the handling of the stummel, the Sterling silver band came off allowing me to check for damage underneath the band. Thankfully other than being filthy, there was none. I cleaned the mortise with hard bristled pipe cleaners and alcohol. Using a fabricated tool, I scraped the dried accumulated gunk from the mortise to the extent possible. The mortise would be further cleaned during the stummel cleaning. 
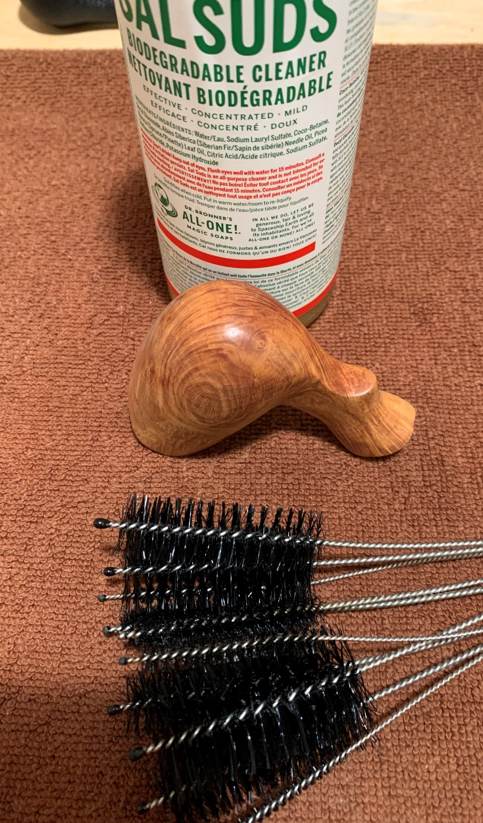
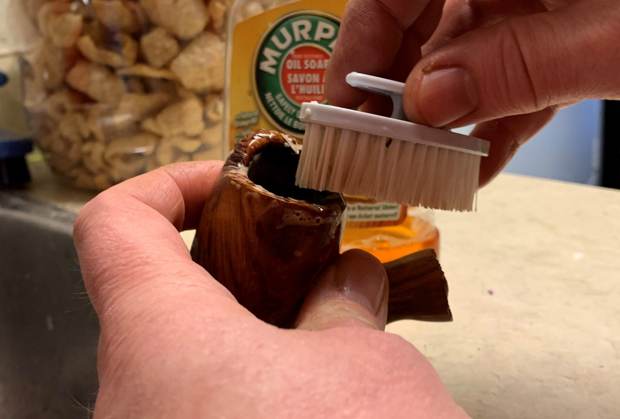
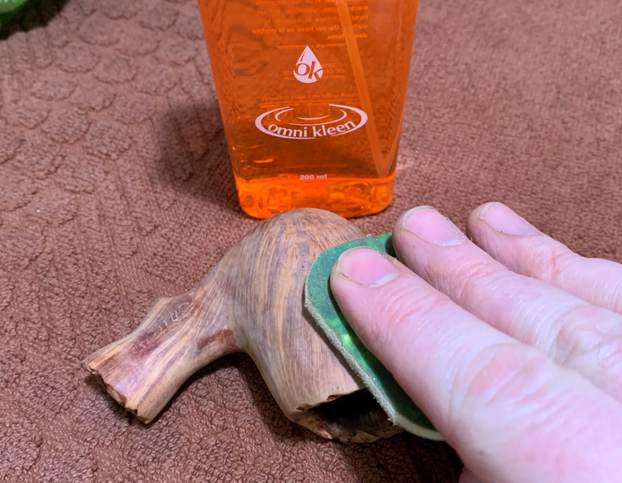
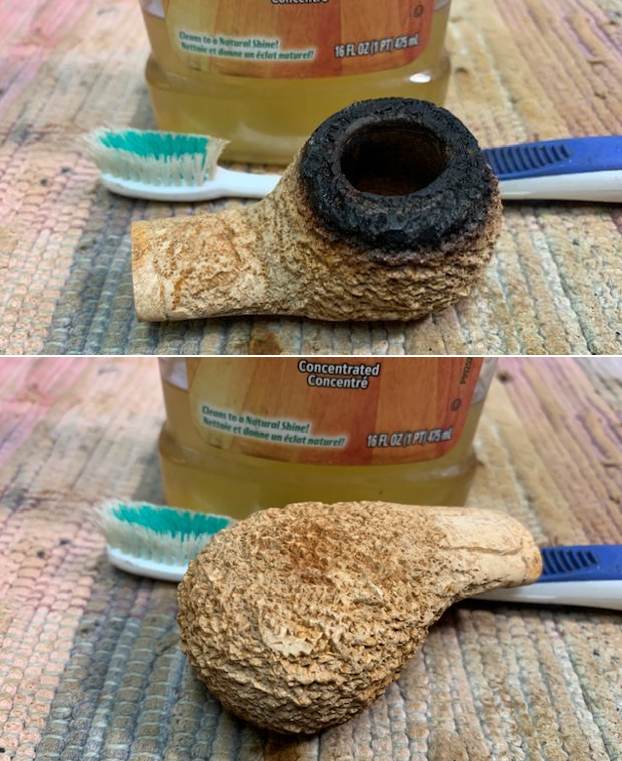
With the internal cleaning done, it was time for the external cleaning of the stummel surface. I used a hard bristled tooth brush and Murphy’s Oil Soap, to scrub the stummel and rim top. The hardened and stubborn cake was dislodged from the rim surface and shank end using Scotch Brite pad and with a brass wired brush. I washed the stummel under running warm water with anti oil dish washing detergent till the stummel surface was clean and dried it using paper towels and soft cotton cloth. I simultaneously cleaned the shank internals with the detergent and hard bristled shank brush and set the stummel aside to dry out naturally. It is pertinent to mention here that even after all this cleaning of the chamber and shank internals, the ghost smells are still very invasive. This would require adoption of more invasive methods to get rid of these old smells.
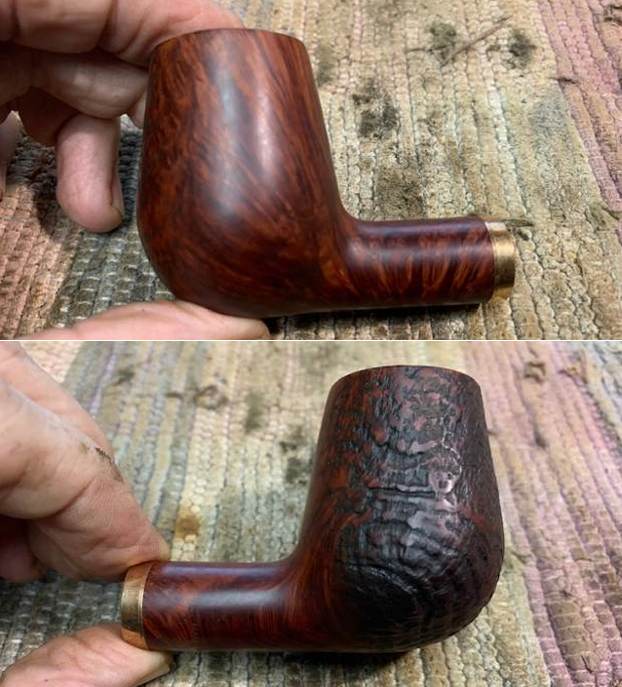
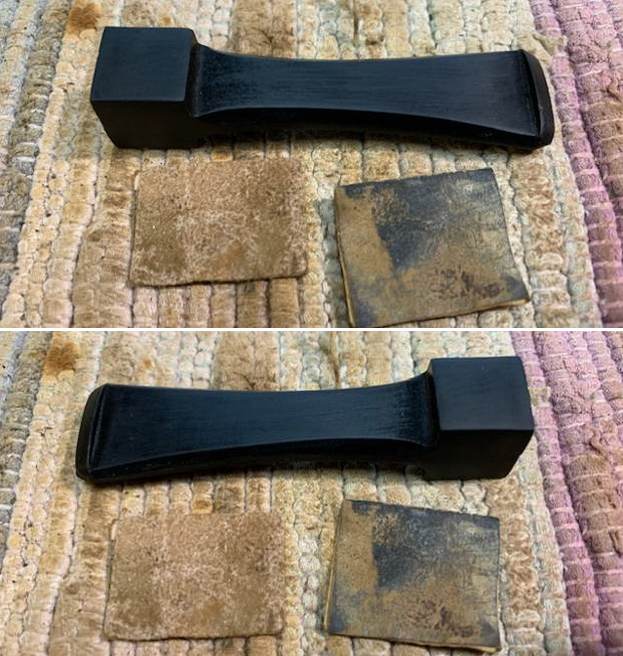
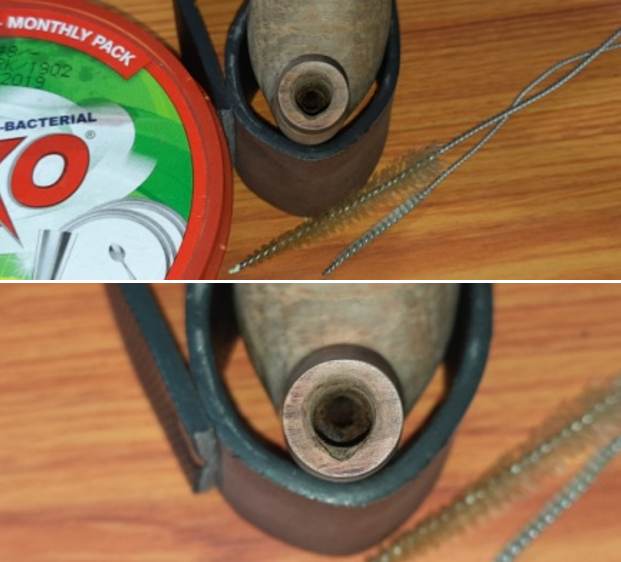
Since the stummel and stem were drying and curing respectively, I completed one of the mundane but equally important tasks of polishing the Sterling silver band. I used a local product that is available in India only to polish the band. The liquid polish was applied to the band and wiped it out after a few seconds. The polish completely removed the oxidation and gave a nice shine to the band.To address the rim top damage, I topped the rim top on 220 grit sandpaper till the surface was nice and even. I hate losing any briar and restrict it to the barest minimum that is required. The damage to the outer rim edge, though greatly eliminated, can still be seen to the front side (encircled in green). This would need to be reconstructed subsequently. The charring to the inner rim edge is still visible (encircled in orange). These issues could be completely addressed by the process of topping but the extent of topping that would be required to do so would alter the bowl height and also the entire pipe profile. 
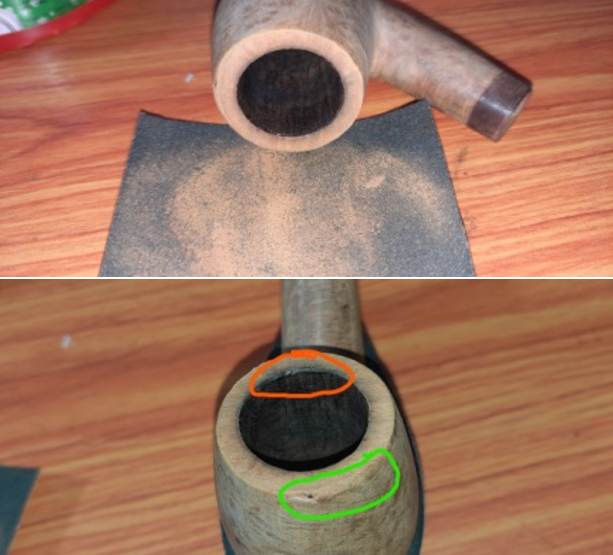
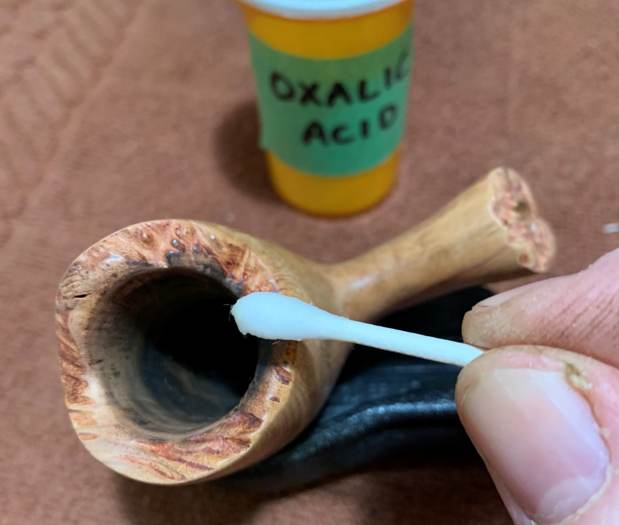
I decided subject the stummel to an alcohol bath to address the strong smells from the stummel before moving ahead with repairs to the inner and outer rim edges. I used cotton balls which is an at par substitute to Kosher salt as I have realized over the years. I drew out a wick from the cotton and along with a folded regular pipe cleaner; inserted it into the mortise and through the draught hole into the chamber. Thereafter, I packed the chamber with cotton balls to about quarter of an inch below the inner rim edge and soaked the cotton balls with isopropyl alcohol up to the brim. About half an hour later, the level of alcohol had gone down, having being absorbed by the cotton. I topped it up once again and set it aside overnight. By next morning, the cotton and alcohol had drawn out all the remaining oils and tars from the chamber and mortise, fulfilling its intended task. I removed the cotton balls and ran pipe cleaners through the mortise to clean out all the loosened tars and gunk and further cleaned it with alcohol and q-tips. The chamber now smells clean and fresh. I set the stummel aside to dry out naturally. 
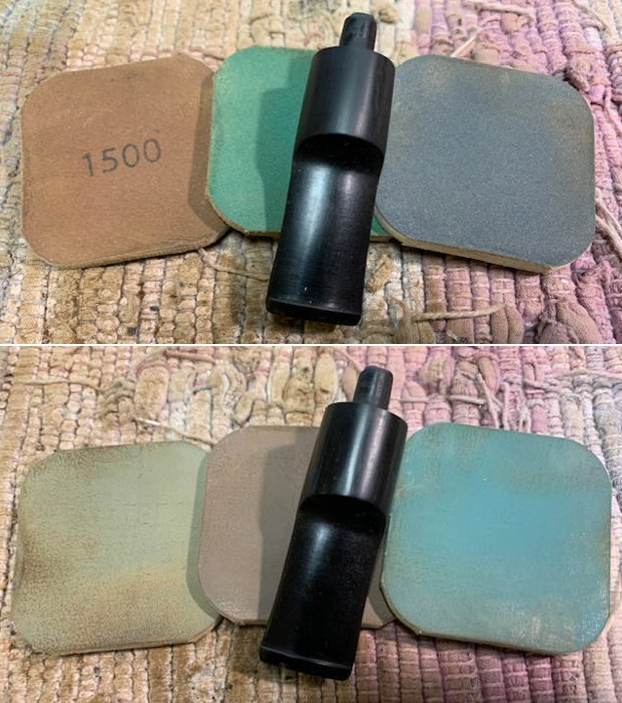
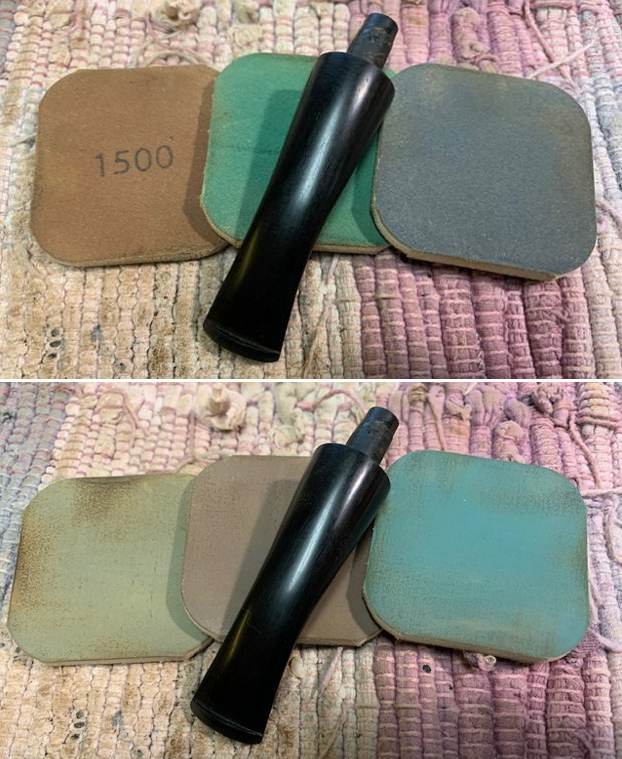
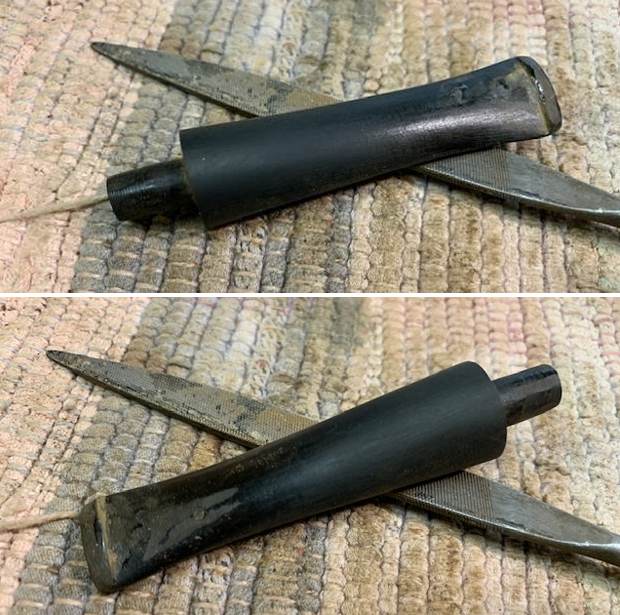
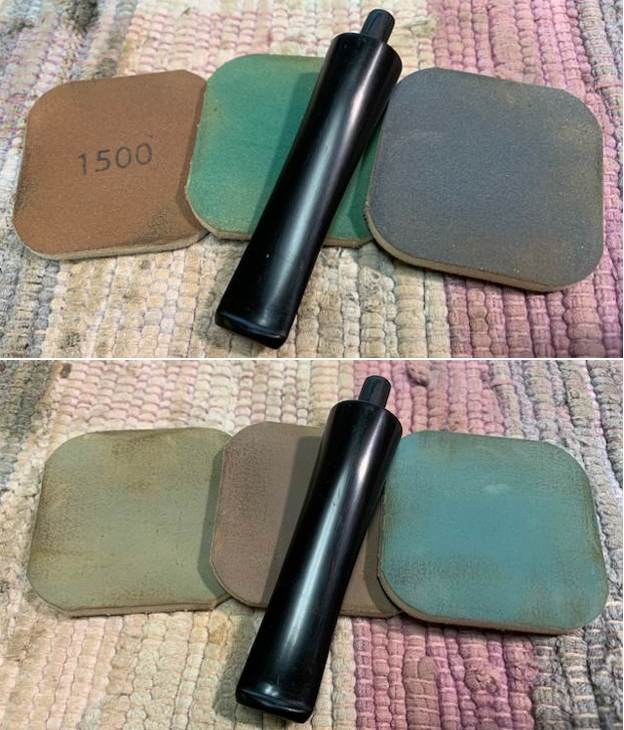
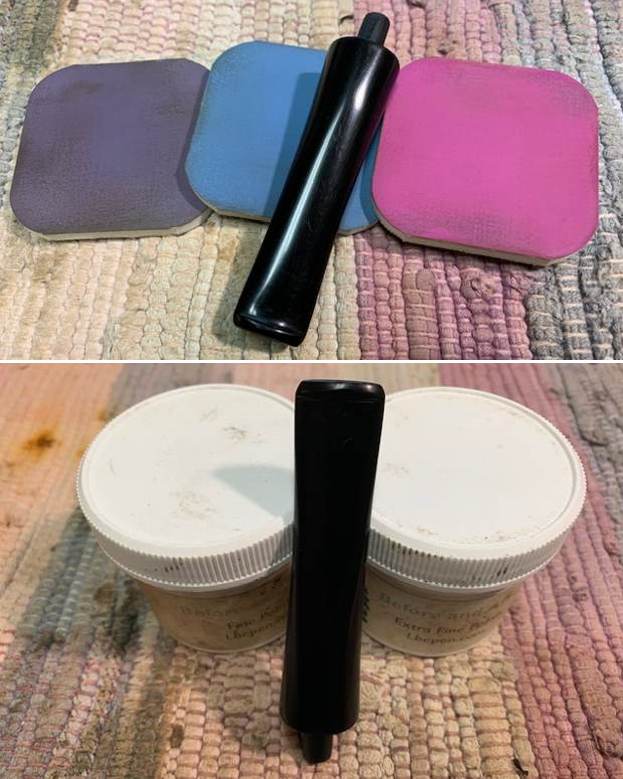
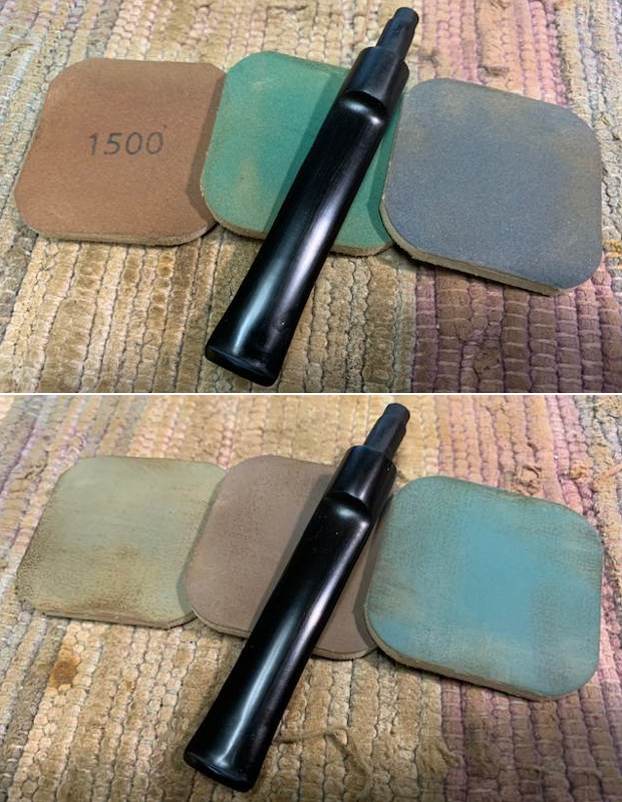
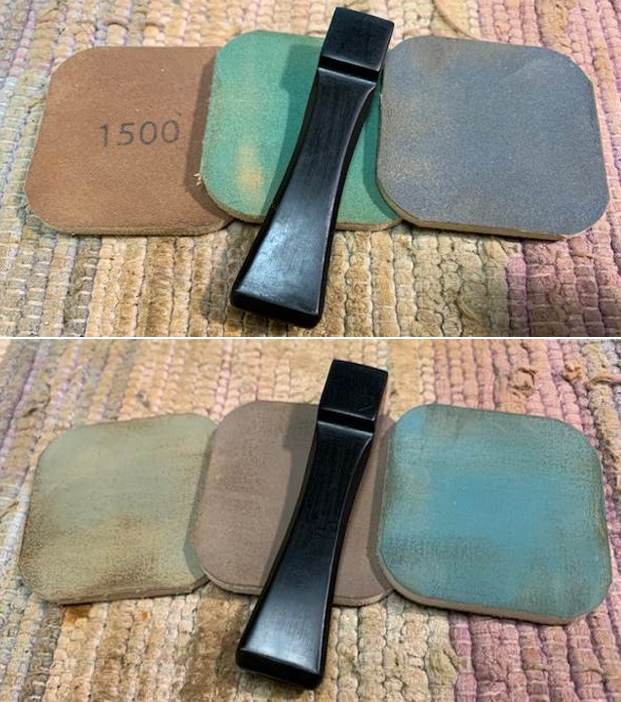
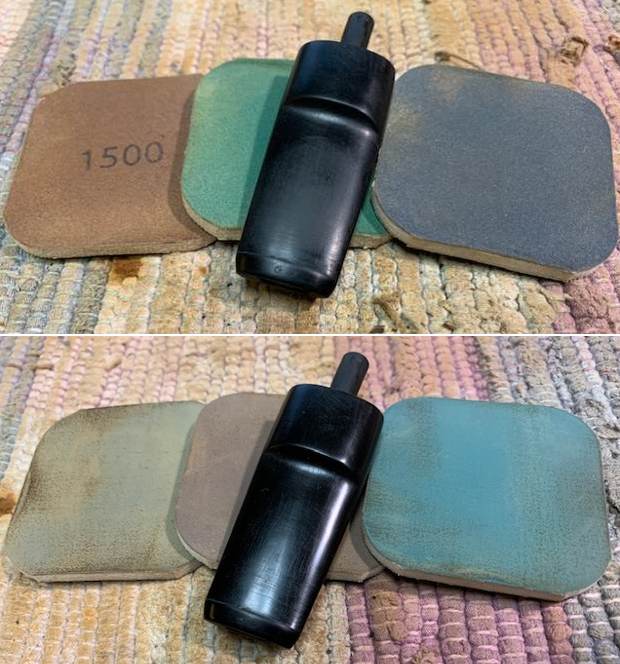
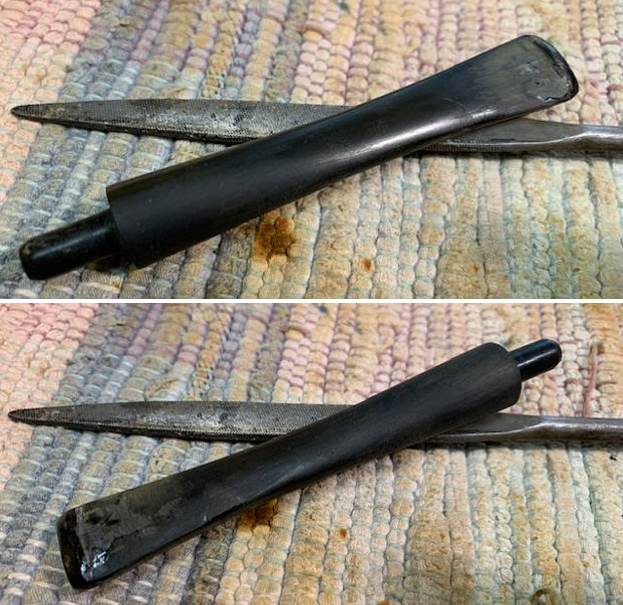
While the stummel was soaking in the alcohol bath, I had a look at the stem repairs and found the repairs completely cured. With a flat head needle file, I sanded these fills to achieve a rough match with the stem surface. I further fine tuned the match by sanding the repairs with a folded piece of 220 grit sand paper pinched between my thumb and forefinger. I followed it up by sanding the entire stem surface using 320, 400, 600, 800, 1000, 1500 and finally with a piece of 2000 grit sand paper. This serves to reduce the sanding marks of the more abrasive sand papers. I also sharpened the button edges while sanding. I wiped the stem with a cotton swab and alcohol to remove all the oxidation and sanding dust from the surface. I applied a little Extra Virgin Olive oil over the stem and set it aside to be absorbed by the vulcanite. 
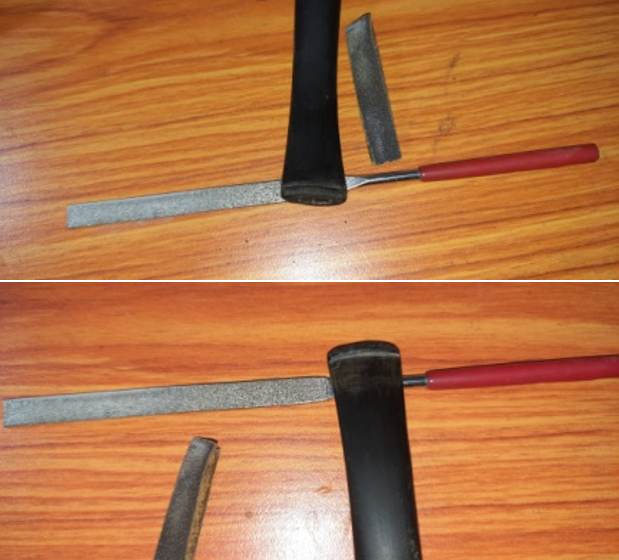
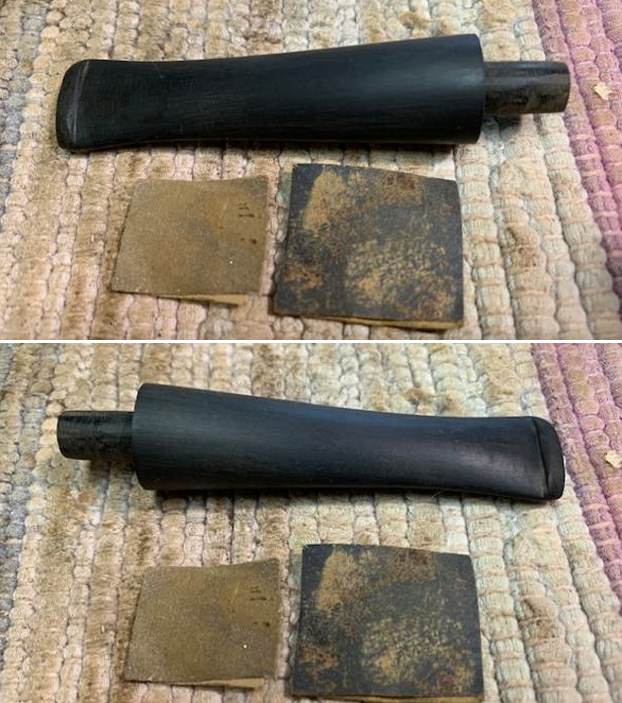
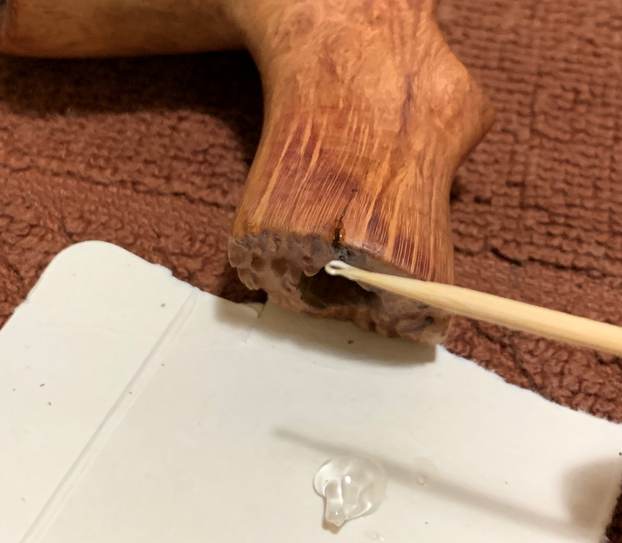
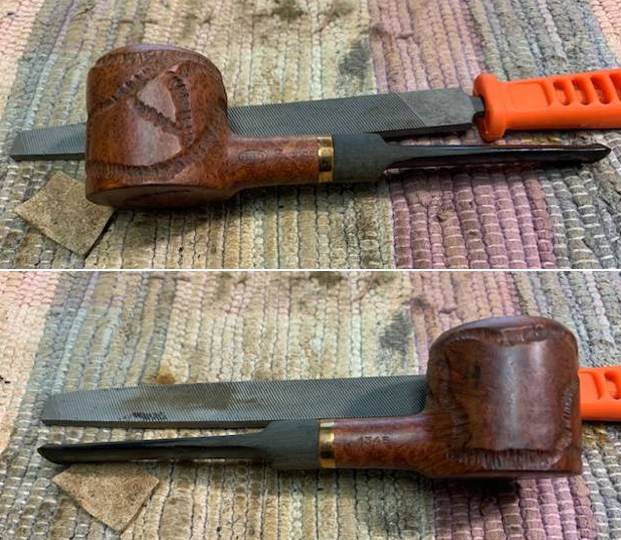
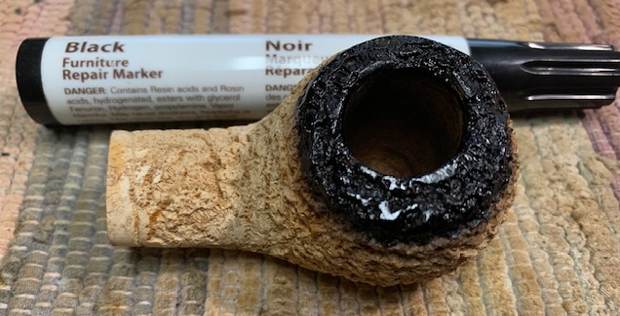
Returning back to the stummel repairs, with a folded piece of worn out 180 grit sand paper pinched between my thumb and forefinger, I carefully gave a rough bevel to the inner rim edge and addressed the issue of charred inner rim edge. I filled up the chipped areas on the outer rim edge with a mix of superglue and briar dust and set the stummel aside for the fills to cure and harden.
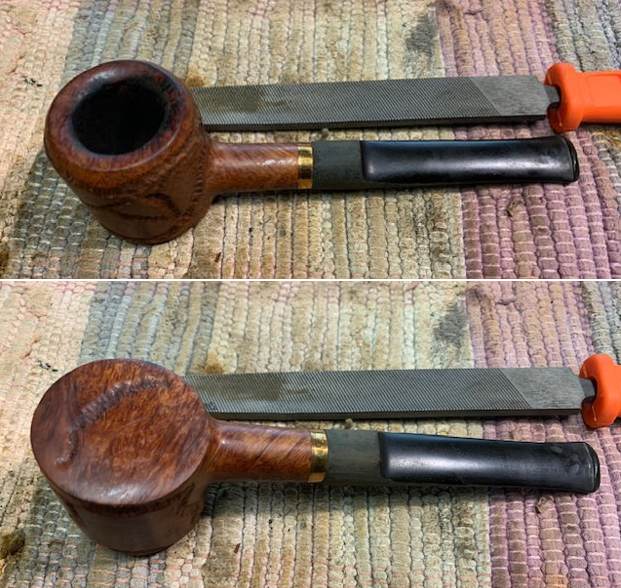
Once the mix had hardened, with a flat head needle file I sanded the fills to achieve a rough match with the rest of the rim edge. I further blended in the fills with a folded piece of 180 grit sand paper. I also sharpened the rough bevel to the inner edge that I had cut earlier. The rim top surface and the edges look much better at this stage of restoration. I further sanded the entire stummel with a piece of 220 grit sand paper to address the minor scratches and dings that would otherwise show after micromesh polishing cycle. 
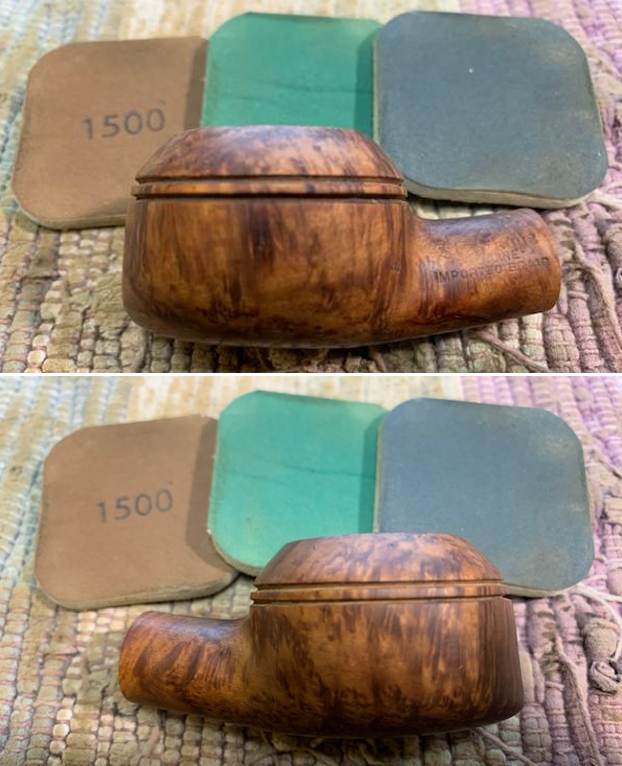
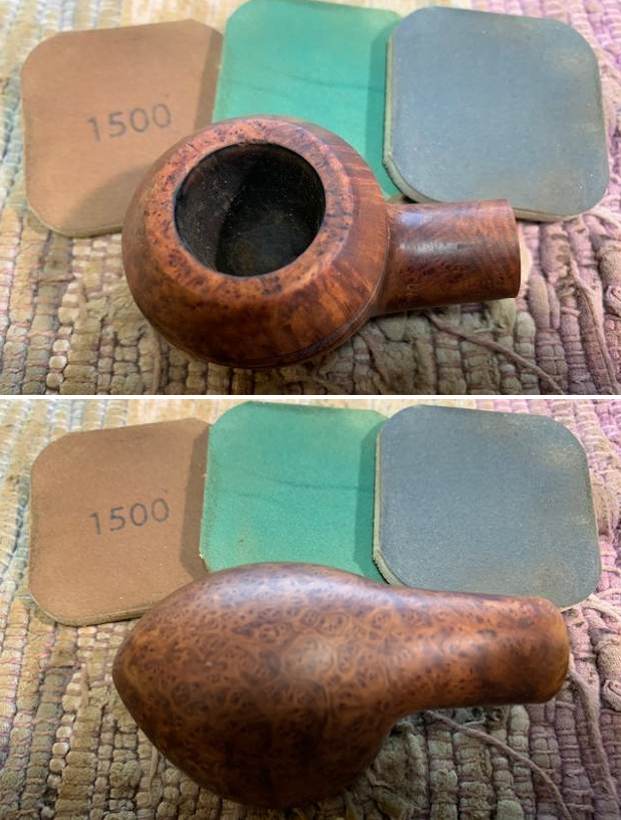
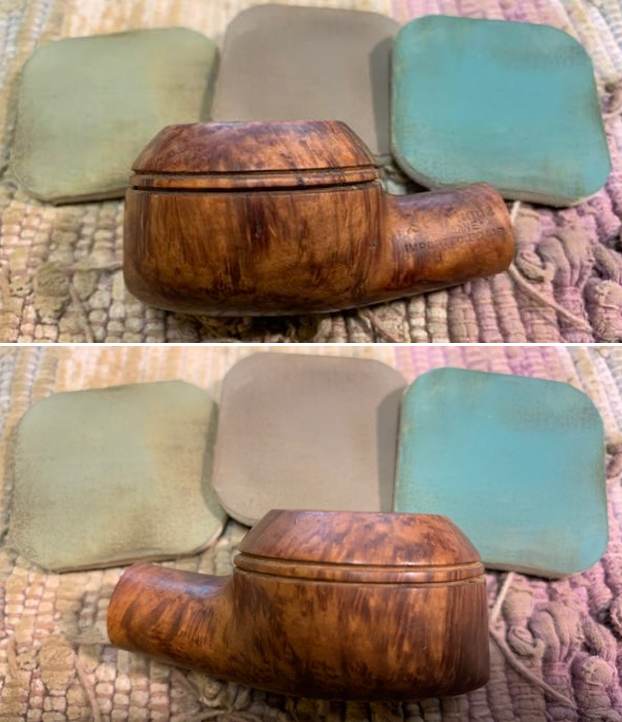
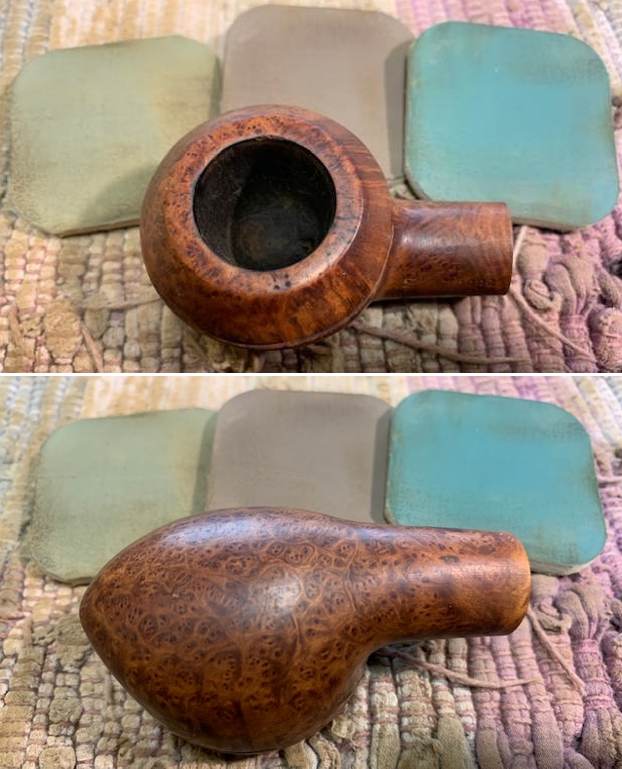
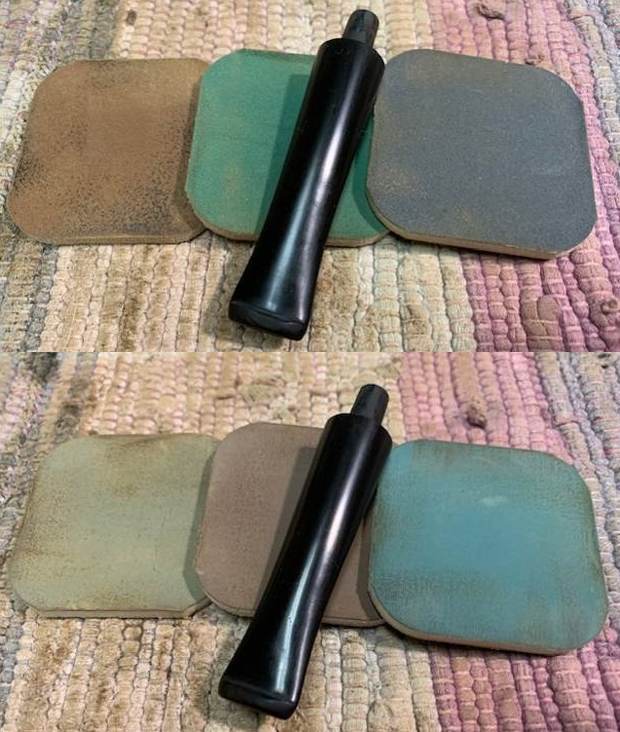
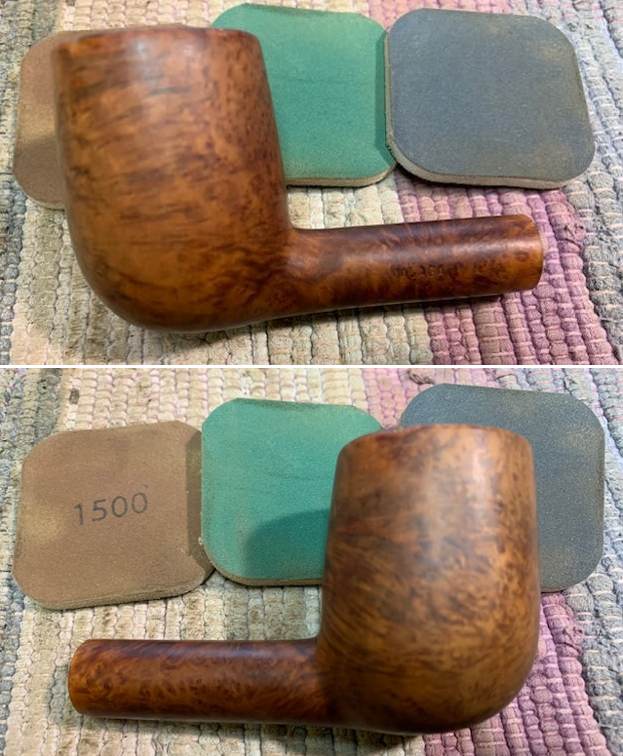
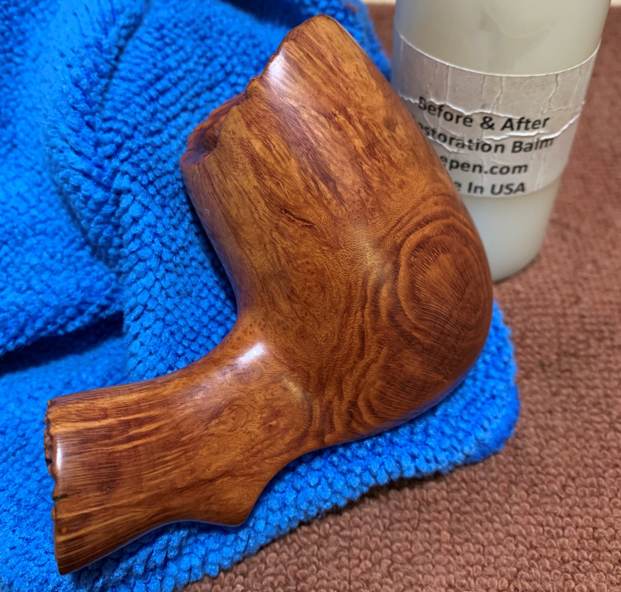
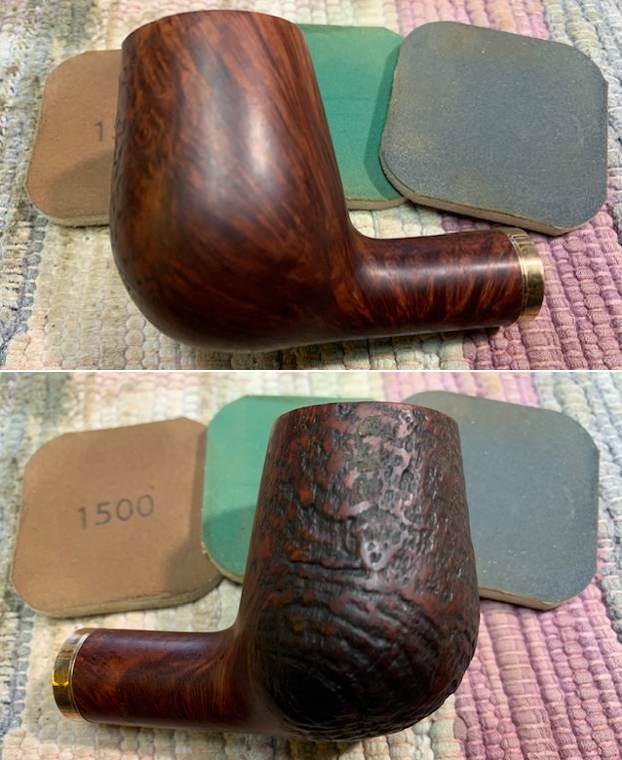
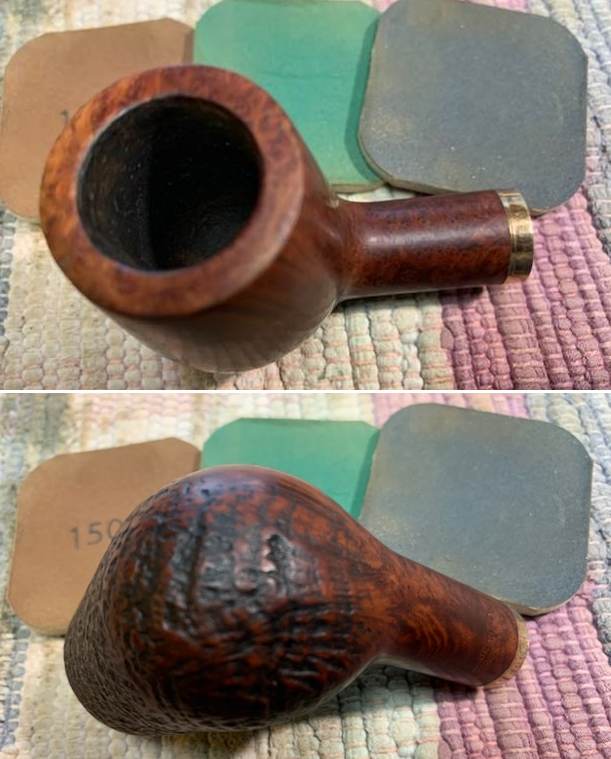
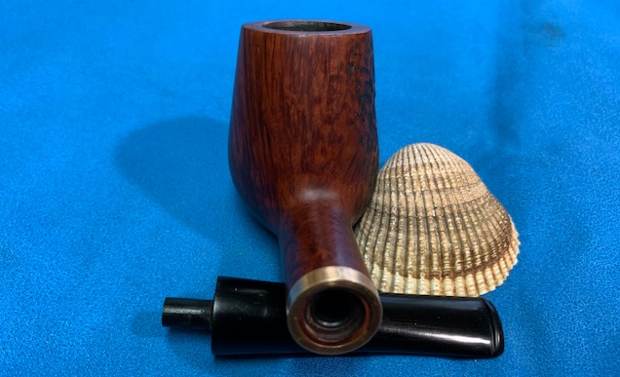
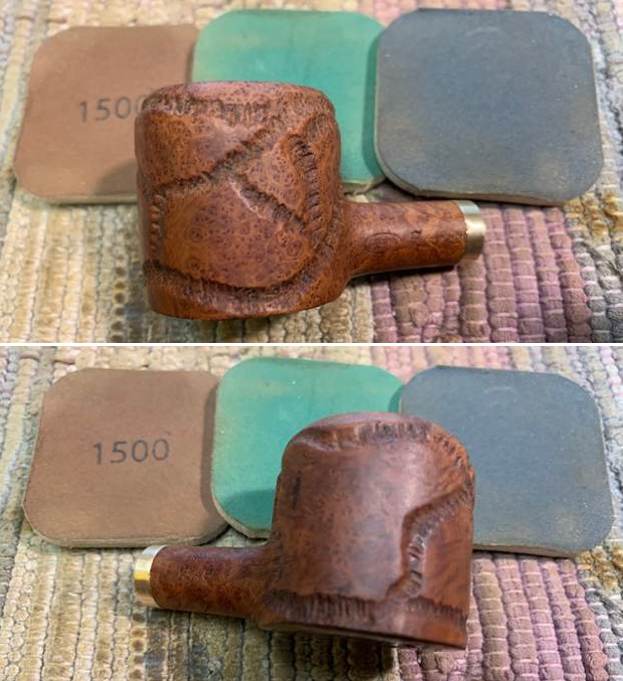
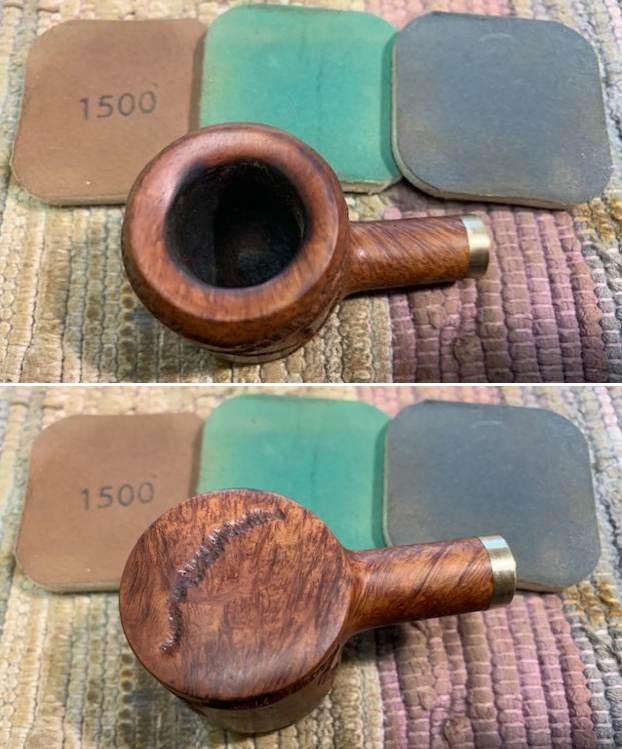
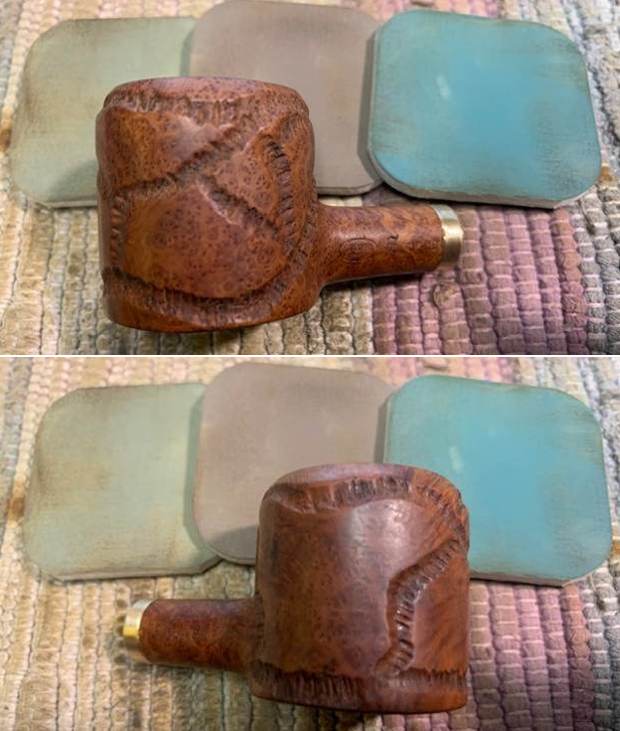
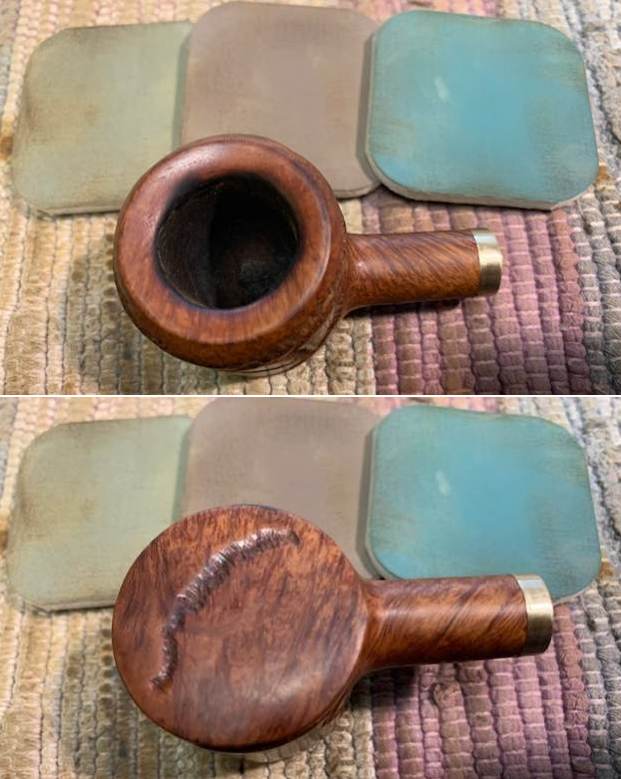
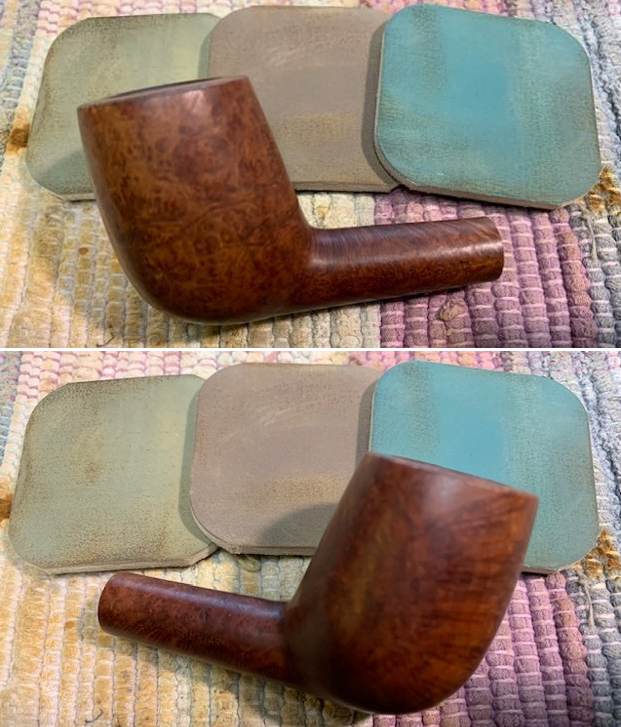
I followed it by wet sanding the stummel with 1500 to 12000 grit micromesh pads, wiping frequently with a moist cloth to check the progress. I rubbed a small quantity of “Before and After Restoration Balm” deep into the briar with my finger tips and let it rest for a few minutes. The balm almost immediately works its magic and the briar now has a nice vibrant appearance with the beautiful grain patterns displayed in their complete splendor. I further buffed it with a horse hair brush and gave a vigorous buff with a microfiber cloth to deepen the shine. 
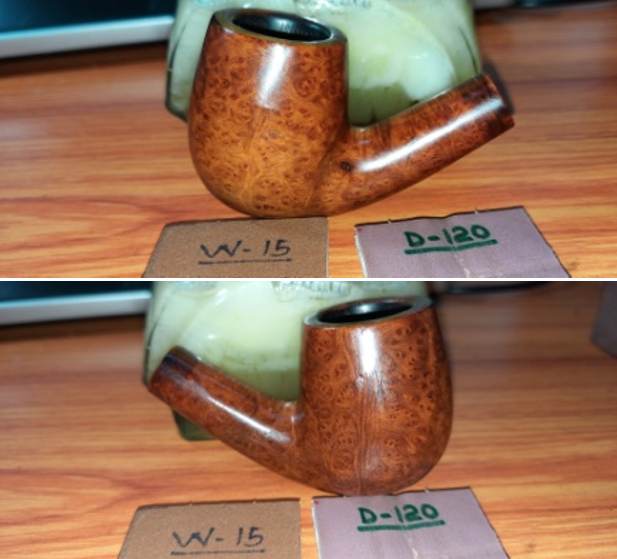
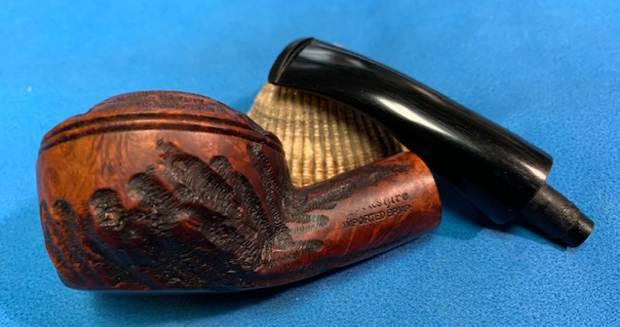
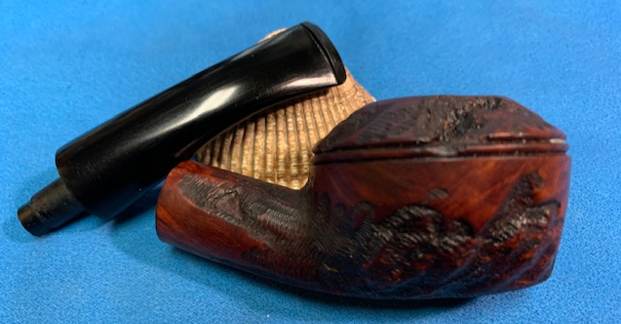
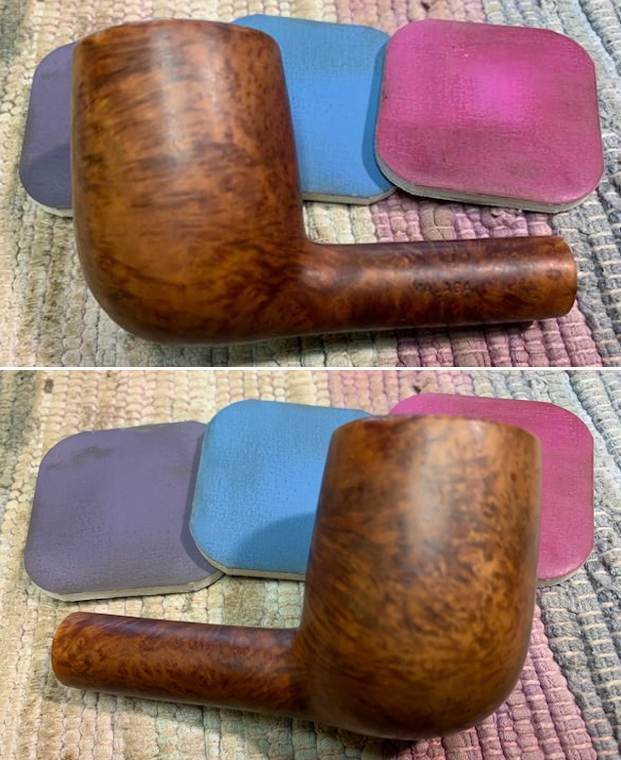
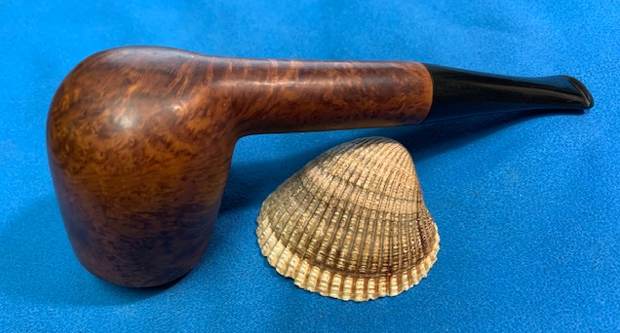
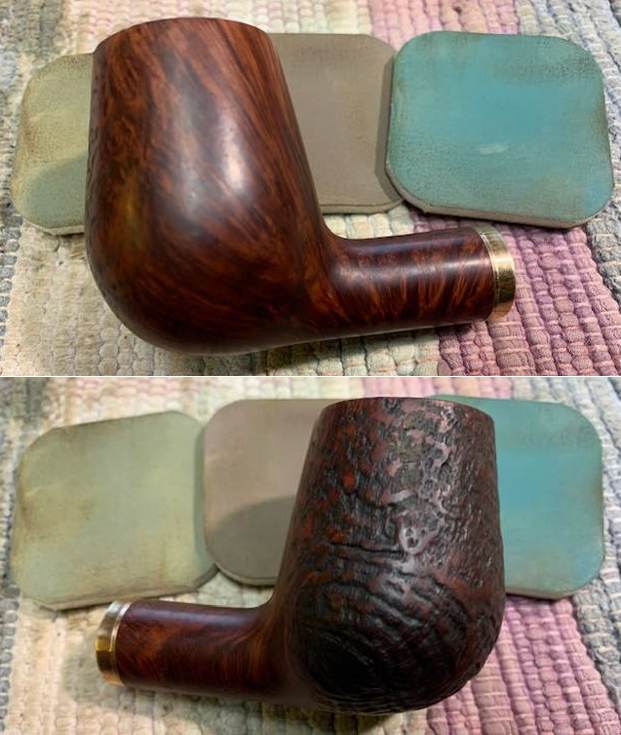
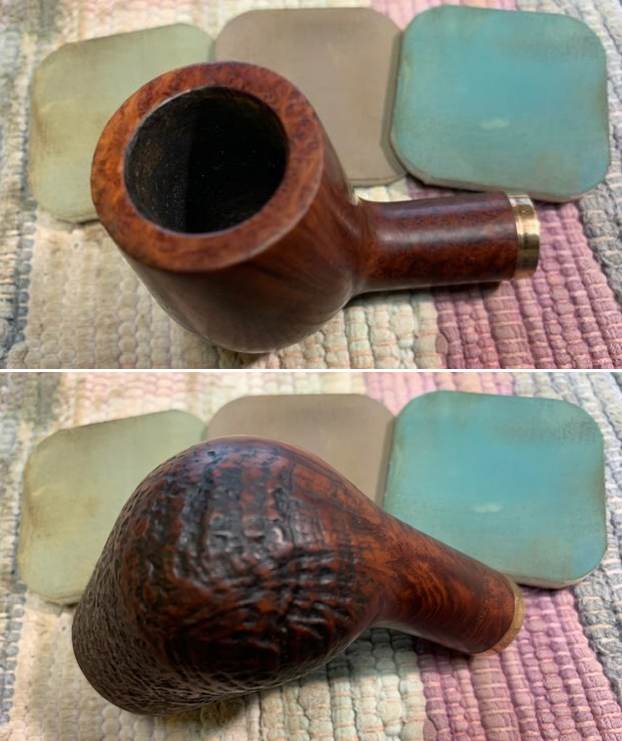
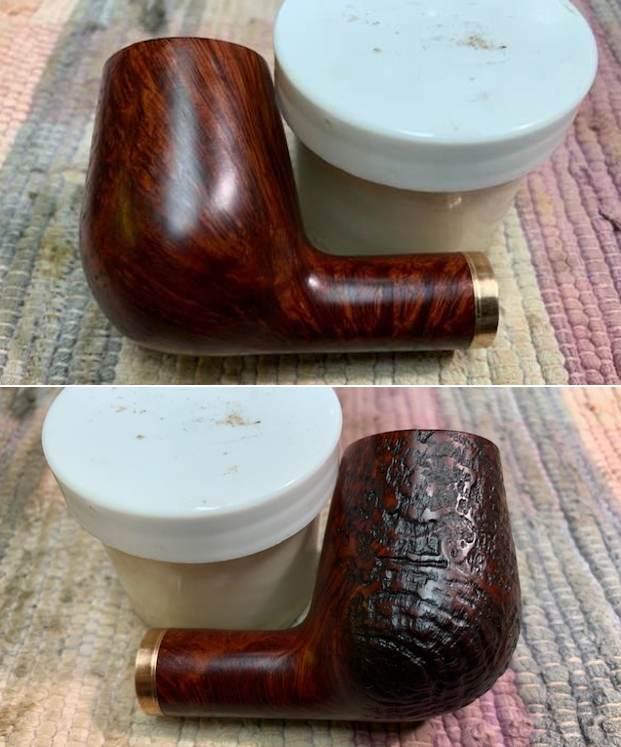
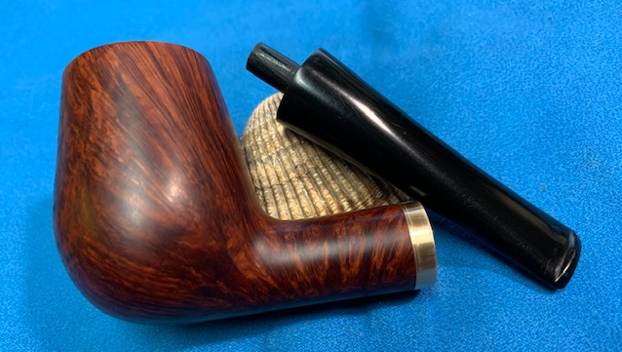
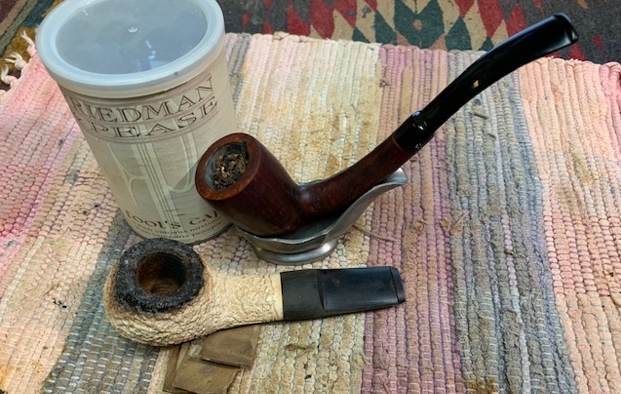
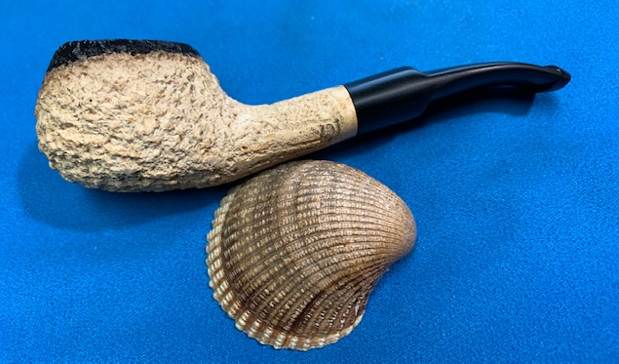
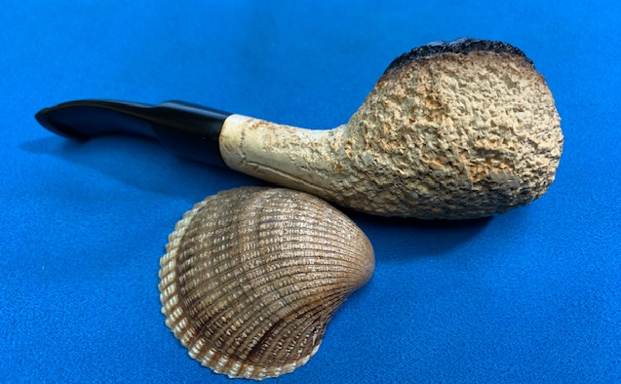
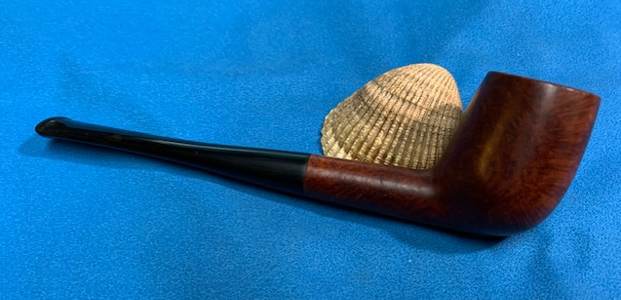
The beauty of this piece of briar is marred ever so slightly by a small pit on the left side of the bowl at the shank and bowl junction. Other than this, the briar only has only bird’s eyes and cross grains to boast. No wonder then that it was sold as a mid level line, below VIRGIN and above THORNEYCROFT.

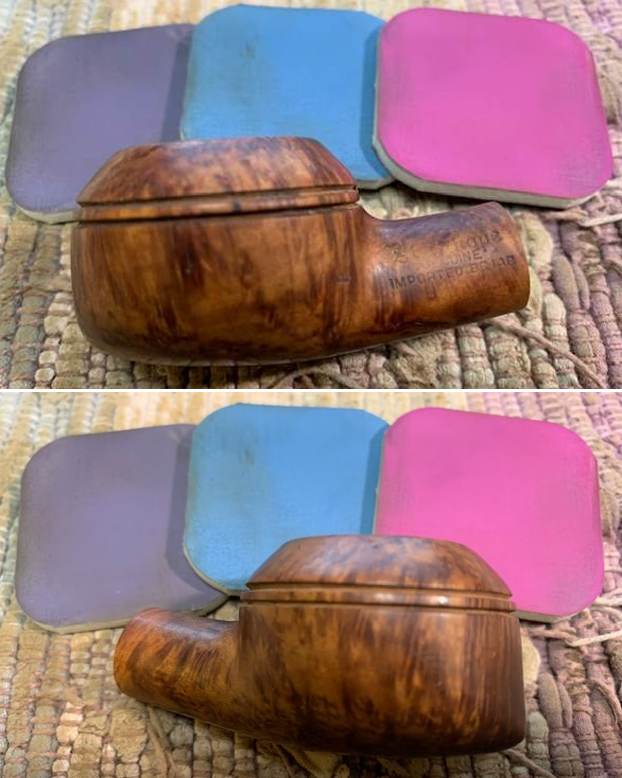
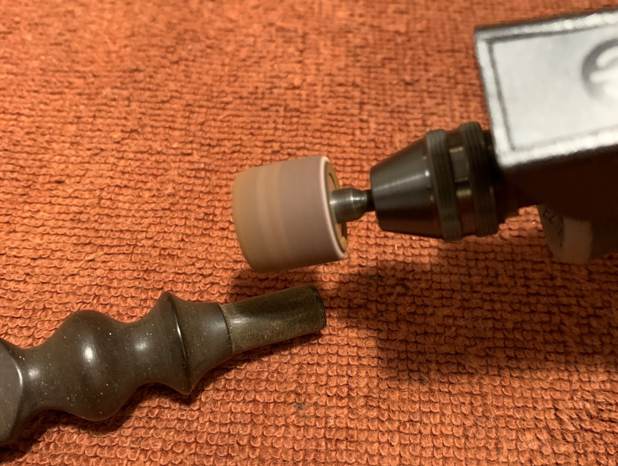
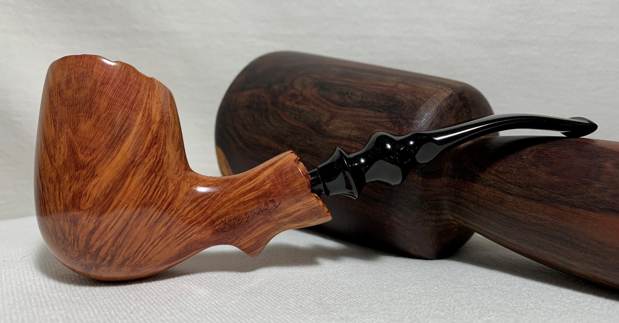
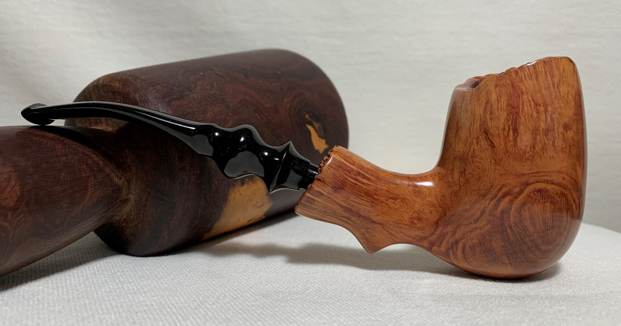
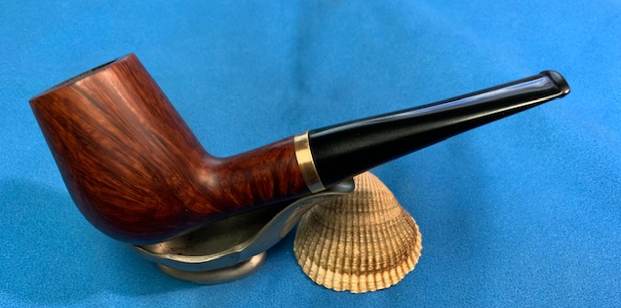
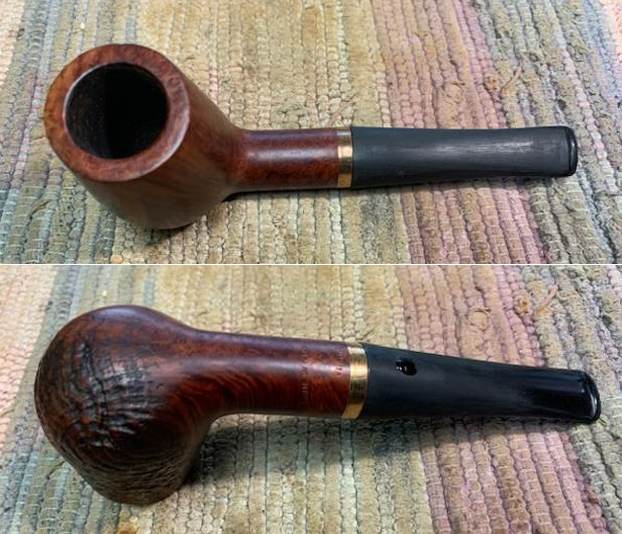
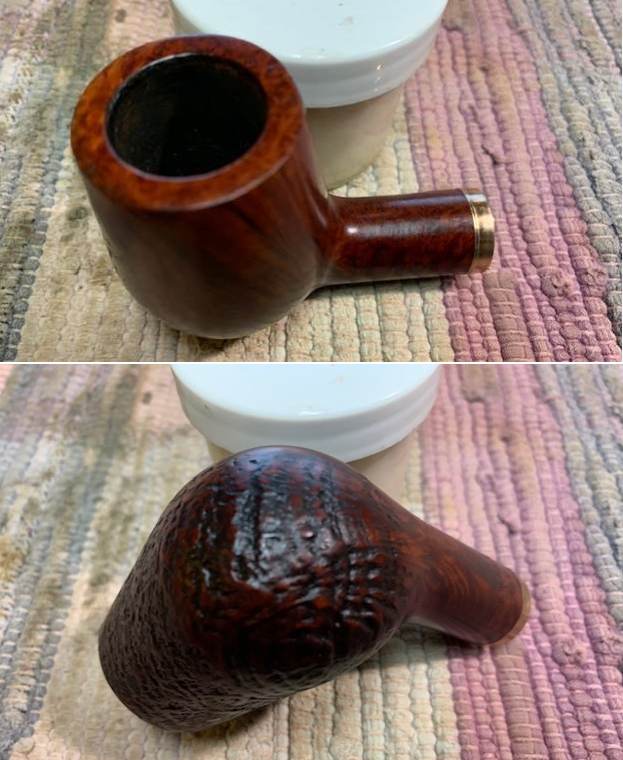
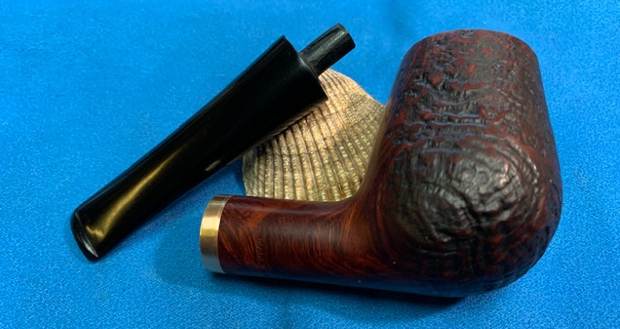
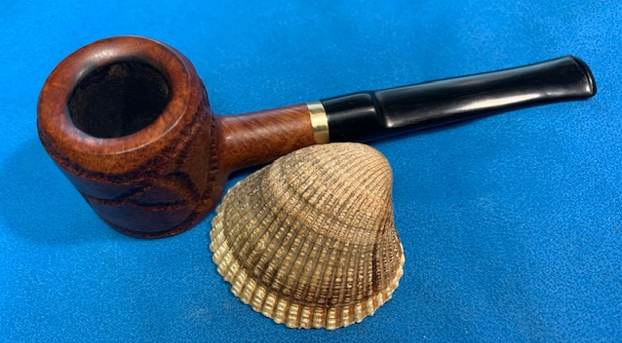
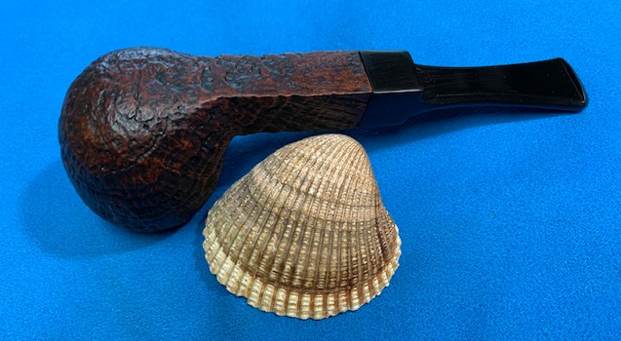
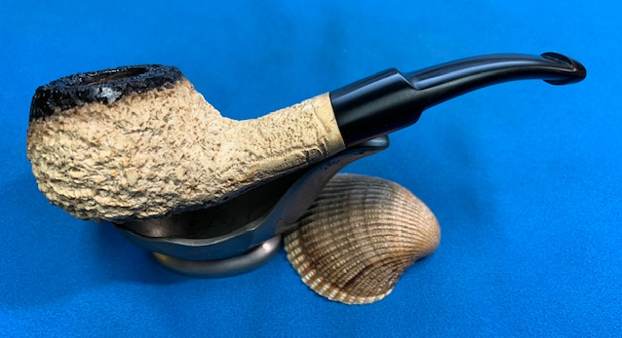
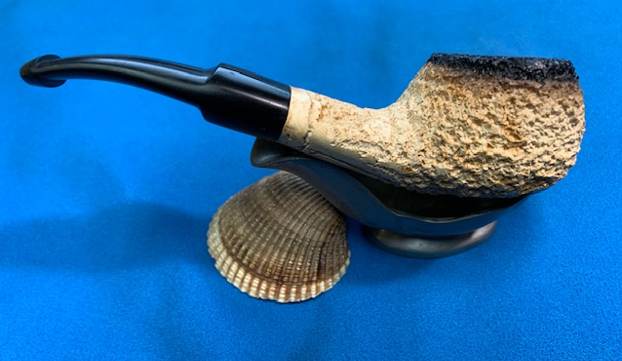
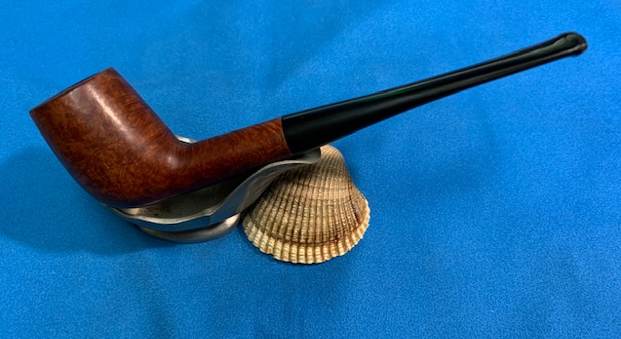
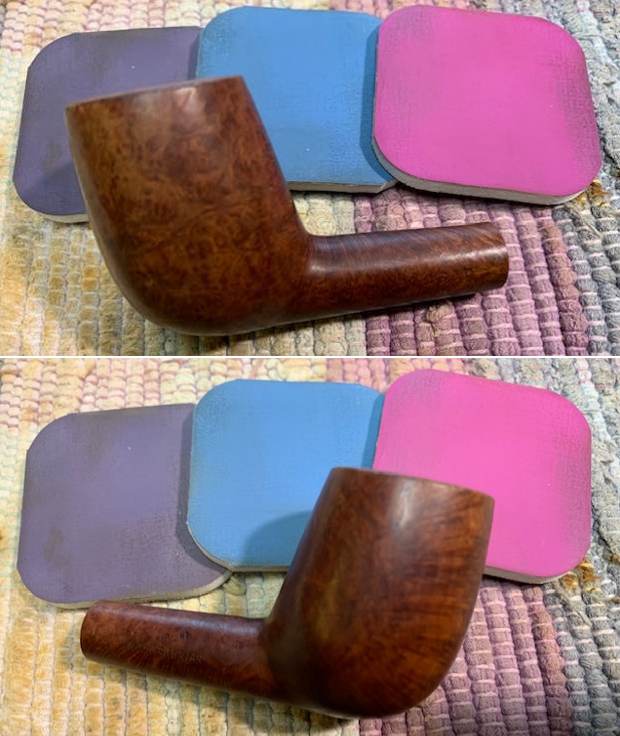
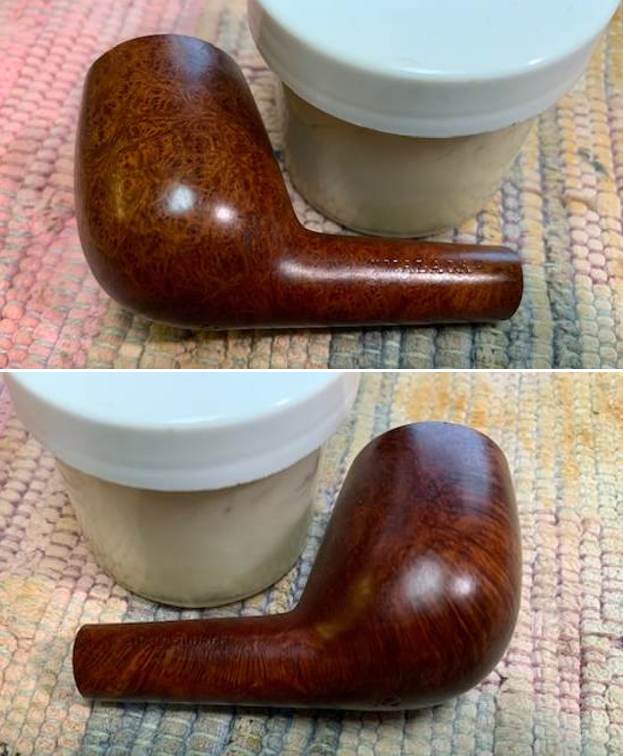
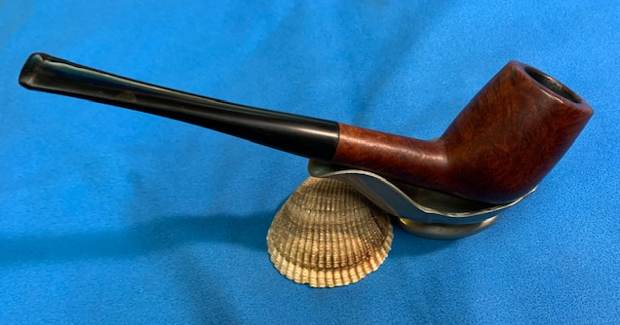
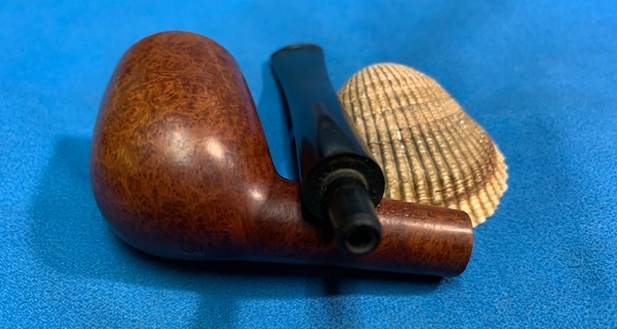
To put the finishing touches, I mounted a cotton cloth buffing wheel onto my hand held rotary tool and polished the stummel and stem with Blue Diamond compound. This compound helps to remove the minor scratch marks that remain from the sanding. Next, I mounted another cotton buffing wheel that I have earmarked for carnauba wax and applied several coats of the wax. I mounted a clean cotton cloth buffing wheel and gave the entire pipe a once over buff. I finished the restoration by giving the entire pipe a rigorous hand buffing using a microfiber cloth to raise the shine further. The finished pipe with the aged patina to the briar looks amazingly beautiful and is now ready for its long second innings with me.

Restemming & Restoring a Stanhope Genuine Imported Briar Smooth Bullmoose


Blog by Steve Laug

I continue on a restemming binge with stummels (bowls) that I periodically go through and see if I have a potential stem that would fit. This is the final bowl of the three stummels that took out to restem last week. The first one was the Malaga Second, the second was a Yorkshire Bullmoose. (https://rebornpipes.com/2022/01/20/restemming-restoring-a-malaga-second-long-shank-billiard/; https://rebornpipes.com/2022/01/21/restemming-restoring-a-yorkshire-imported-briar-bullmoose/). This particular bowl is a smooth Bullmoose style pipe. The grain on the bowl was quite nice with a mix of straight and birdseye. The rim top had some darkening but the inner and outer edges were in good condition. The interior of the bowl was clean and there were not any chips, cracks or checking on the walls. The mortise was clean and well drilled with no issues. The finish was clean and the grain stood out against the light background. It is worn and tired looking. The stamping was clear and readable. On the left side it read Stanhope [over] Genuine [over] Imported Briar. I took photos of the bowl before I started to work on it. I took a photo of the stamping on the side of the shank. It reads as noted above and is clear and though the Stanhope stamp is faint it is still readable.I went through some of stems and found this nice looking saddle stem blank that would work with the bowl. It had already been turned with a tenon tool so that portion of the work was finished. I would need to reduce the tenon diameter slightly for a snug fit. The stem was significantly larger in diameter than the shank. I decided to see what Pipephil’s site had on the brand (http://pipephil.eu/logos/en/logo-s11.html). I found that the pipe was made by LHS (L.H. Stern). I did a screen capture of the particular brand. I have included it below. Now it was time to work on the stem and fit it to the shank of the pipe. The diameter of the tenon was close. I used a flat file that I have here that works well for me to do the fine tuning of the fit. I used it to straighten out the sides of the tenon next to the surface that face the shank. It worked well and fit the shank. I used a Dremel and sanding drum to reduce the diameter of the stem as much as possible before I proceeded. I ran the sanding drum around the diameter of the saddle portion and stem sides to reduce it the also worked it lengthwise to remove more of material. The photos below show the fit at this point. Looking better but still a long ways to go. I continued to reduce the diameter of the stem with a flat file. It was taking quite a bit of time to finish the fit but it was getting there. I think that the stem would look very good once it was properly fit. The fit against the shank was better. There were spots where the stem diameter and the shank diameter did not match were greatly reduced. I used a folded piece of 220 grit sandpaper to smooth out the transition even more between the two. I left a slight Danish style flare to the flow of the saddle. I started polishing it with 400 grit wet dry sandpaper. I polished the stem with micromesh sanding pads – dry sanding with 1500-12000 grit pads. I wiped the stem down after each pad with a cloth and Obsidian Oil. I finished the polishing with Before & After Pipe Stem Polish – both Fine and Extra Fine. I gave it a final coat of Obsidian Oil. I set the stem aside and turned my attention to the bowl. I started by cleaning up the rim top and edges with a folded piece of 220 grit sandpaper. I was able to remove the darkening on the rim top and the inner edge of the bowl.I polished the briar with micromesh sanding pads – dry sanding with 1500-120000 grit pads. I wiped the bowl down after each pad with a damp cloth. The grain began to stand out and the briar took on a shine. I worked some Before & After Restoration Balm into the surface of the smooth briar with my finger tips and a horsehair shoe brush. The product is amazing and works to clean, enliven and protect the briar. I let it sit on the briar for 10 or more minutes and then buff it off with a soft cloth. It really makes the grain sing.   Now it was time to bent the stem to fit the flow of the pipe. I heated the stem with a heat gun on the low setting until the vulcanite was  pliable. I bent it to proper angle and then set it with cool water. I put the pipe back together – the bowl with its new stem. This smooth finished Stanhope Genuine Imported Briar Bullmoose is a real beauty and the chosen stem works well with it. It is an American made pipe with connections to L.H. Stern. The grain on the bowl is quite beautiful and came alive with the buffing. I used Blue Diamond on the buffing wheel on both the bowl and stem. I gave both multiple coats of carnauba wax on the wheel then buffed it with a clean buffing pad to raise the shine. I hand buffed it with a microfibre cloth to deepen the shine. The Stanhope Bullmoose feels great in the hand. It is lightweight and the contrast in the browns of the briar and the polished vulcanite stem is quite amazing. The dimensions of the pipe are Length: 5 inches, Height: 1 ½ inches, Outer diameter of the bowl: 1 ¾ inches, Chamber diameter: 7/8 of an inch. The weight of the pipe is 1.69 ounces/48 grams. It really is a beauty. I will be putting it on the rebornpipes store in the American (US) Pipe Makers section shortly if you are interested in adding it to your collection. Thanks for walking through the restemming and the restoration with me. Cheers.

Restemming & Restoring a Yorkshire Imported Briar Bullmoose


Blog by Steve Laug

I continue on a restemming binge. I have a box of stummels (bowls) here that I periodically go through and see if I have a potential stem that would fit them. This is the second of the three stummels that took out to restem. The first one was the Malaga Second (https://rebornpipes.com/2022/01/20/restemming-restoring-a-malaga-second-long-shank-billiard/). This particular bowl was a bit of a mystery to me. I honestly don’t remember where or when we picked it up but we had reamed and cleaned it before boxing it. It has a mix of smooth and Custom-Bilt style rustication on the bowl and shank. There were some deep groves and valleys around the bowl and rim. The grain on the smooth portions was quite nice worked well with the deep worm trail style rustication and craters. The rim top and edges were in good condition. The interior of the bowl was clean and there were not any chips, cracks or checking on the walls. The mortise was clean and well drilled with no issues. The finish was clean and the fills in the rustication stood out clearly in contrast to the dark stain. The stamping was clear and readable. On the left side it read Yorkshire (in old English Script) [over] Imported Briar. I took photos of the bowl before I started to work on it. I took a photo of the stamping on the side of the shank. It reads as noted above and is clear and though the Yorkshire stamp is faint it is still readable. I took some photos of the putty fills around various parts of the bowl and shank. Interestingly they were in the rusticated portions of the bowl – probably by design. They would need to be stained to blend them into the surrounding briar.I went through some of stems and found this nice looking taper stem blank that would work with the bowl. It had already been turned with a tenon tool so that portion of the work was finished. I would need to strip back the casting materials on the button and sides of the stem and reduce the tenon diameter slightly but the diameter of the stem itself was very close to that of the shank.I decided to see what Pipephil’s site had on the brand (http://pipephil.eu/logos/en/logo-y.html) and interestingly found two different Yorkshire Brands. The first had a plain stamp on the side of the shank that did not match the one I was working on. The second on had the same Old English Style stamp over Imported Briar. The difference of course was the one in the photo below was an all briar pipe. The one I had was a Custom-Bilt style that would have had a vulcanite stem.I followed the clue on the above screen capture and turned to the section on Barnaby Briars (http://pipephil.eu/logos/en/logo-b1.html#barnaby). There I found out that the company was a Smoking Pipe Retailer located at 28 Powell Str., Brooklyn (NY). They must have had the pipes made by someone else but they carried both the Barnaby Briar and the Yorkshire Imported Briar.Now it was time to work on the stem and fit it to the shank of the pipe. The diameter of the tenon was close. I used a flat file that I have here that works well for me to do the fine tuning of the fit. I used it to straighten out the sides of the tenon next to the surface that face the shank. It worked well and looked much better.I cleaned up the file marks with 220 grit sandpaper and the tenon fit well in the mortise. The fit against the shank was clean but there were spots where the stem diameter was slightly larger than the shank diameter. I worked these over with the file to clean up the transition. The photos below show the fit at this point. Looking better but still a long ways to go. The fit against the shank was better. There were spots where the stem diameter and the shank diameter did not match were greatly reduced. I used a folded piece of 220 grit sandpaper to smooth out the transition even more between the two. I started polishing it with 400 grit wet dry sandpaper. With the fit against the shank and diameter corrected and the stem sanded with 220 and 400 grit sandpaper it was now time to bent the stem to fit the flow of the pipe. I heated the stem with a heat gun on the low setting until the vulcanite was pliable. I bent it to proper angle and then set it with cool water. I polished the stem with micromesh sanding pads – dry sanding with 1500-12000 grit pads. I wiped the stem down after each pad with a cloth and Obsidian Oil. I finished the polishing with Before & After Pipe Stem Polish – both Fine and Extra Fine. I gave it a final coat of Obsidian Oil. I set the stem aside and turned my attention to the bowl. I started by touching up the visible fills. I used a Walnut Stain Pen to fill them in to match the other worm trail rustication around the shank and bowl sides. Once it dried the match was perfect. I worked some Before & After Restoration Balm into the surface of the smooth briar with my finger tips and a horsehair shoe brush. The product is amazing and works to clean, enliven and protect the briar. I let it sit on the briar for 10 or more minutes and then buff it off with a soft cloth. It really makes the grain sing. I put the pipe back together – the bowl with its new stem. This restored Partially Rusticated Yorkshire Bullmoose is a real beauty and the chosen stem works well with it. I don’t have a lot of information on the maker other than it is American made. The grain on the smooth portions of the bowl is quite beautiful and the deep worm trails and rugged crevices came alive with the buffing. I used Blue Diamond on the buffing wheel on both the bowl and stem. I gave both multiple coats of carnauba wax on the wheel then buffed it with a clean buffing pad to raise the shine. I hand buffed it with a microfibre cloth to deepen the shine. The Yorkshire Bullmoose feels great in the hand. It is lightweight and the contrast in the browns of the briar and the polished vulcanite stem is quite amazing. The dimensions of the pipe are Length: 6 inches, Height: 2 inches, Outer diameter of the bowl: 1 ½ inches, Chamber diameter: 7/8 of an inch. The weight of the pipe is 2.19 ounces/63 grams. It really is a beauty. I will be putting it on the rebornpipes store in the American (US) Pipe Makers section shortly if you are interested in adding it to your collection. Thanks for walking through the restemming and the restoration with me. Cheers.

Restemming & Restoring a Malaga Second Long Shank Billiard


Blog by Steve Laug

I have been on a restemming binge for the last week or so. I have a box of stummels (bowls) here that I periodically go through and see if I have a potential stem that would fit them. Yesterday when I finished the restoration and restem on the Viking Brandy, I went through the box and picked out three bowls and found workable stems for them. All were in different states of need but all had been thoroughly cleaned before I boxed them up. The first of those that I chose to restem and restore is a lovely Malaga Second Long Shank Billiard stummel. If you have followed me for long you will know that I have worked on a lot of Malaga pipes in the past so I am not a stranger to the brand. This particular bowl is actually quite beautiful and for the life of me I have no idea why is stamped a Second.

The bowl looked very good. The grain around the sides was quite nice and a mix of cross grain and birdseye grain. The rim top had light damage to the inner edge and some nicks of flaws in the outer edge. The rim top had been beat about a bit and showed the wear and damage and there was darkening around the top and edges. The interior of the bowl was clean and there was some light checking on the walls. Examining the mortise it was clean and well drilled with no issues. The finish was washed out and bit and tired but still quite redeemable. The stamping on the pipe was clear and readable. On the left side it read MALAGA [over] Second. I took some photos of the bowl before I started to work on it. I took a photo of the stamping on the side of the shank. It reads as noted above and is clear and readable.I went through some of stems and found this shorter taper stem that needed some work on the tenon and diameter at the shank but it was exactly what I wanted. It has a few tooth marks and chatter on both sides near the button but it would clean up well. I have worked on quite a few Malaga pipes and blogged their restorations, so rather than repeat previous blogs, I am including the link to one that gives some of the history of the Malaga brand and the Malaga Pipe Shop in Royal Oak, Michigan in the USA from a catalogue. It gives a sense of the brand and the history in their own words. Follow the link to get a feel for the brand and the pipemaker – https://rebornpipes.com/2013/02/09/george-khoubesser-and-malaga-pipes/.

Now it was time to work on the stem and fit it to the shank of the pipe. The diameter of the tenon was close. I used the Dremel and sanding drum to bring it close to a fit and then used two files that I have here that work well for me to do the fine tuning of the fit.I used a piece of 220 grit sandpaper to smooth out the file marks on the tenon and make sure it was round. It is an interesting stem in that it has a tube in the tenon for making it “unbreakable”. I fit it on the pipe and took photos of the fit at this point. The fit against the shank was perfect. There were spots where the stem diameter and the shank diameter did not match. I used a folded piece of 220 grit sandpaper to smooth out the transition between the two so it was smooth.I set the bowl aside and turned my attention to the remainder of the stem. I “painted” the stem surface with a Bic lighter flame to raise the tooth marks. I was able to lift some of them to the surface. I filled in what remained with clear CA glue. Once it cured I flattened the repairs and reshaped the button with a small flat file. I then repaired areas 220 grit sandpaper to blend them into the rest of the surrounding vulcanite. I finished this part of the process by starting the polishing of the stem with 400 grit wet dry sandpaper. I polished the stem with micromesh sanding pads – dry sanding with 1500-12000 grit pads. I wiped the stem down after each pad with a cloth and Obsidian Oil. I finished the polishing with Before & After Pipe Stem Polish – both Fine and Extra Fine. I gave it a final coat of Obsidian Oil. I set the stem aside and turned my attention to the bowl. I started with the rim top issues. I used a folded piece of 220 grit sandpaper to smooth out the inner and the outer edge of the rim. I topped the bowl on a topping board with 220 grit sandpaper to smooth out and minimize the damage on the rim top. The top and edges looked much better at this point in the process. I polished the briar with micromesh sanding pads – dry sanding with 1500-12000 grit pads and wiping it down with a damp cloth after each pad. It really began to shine. I worked some Before & After Restoration Balm into the surface of the smooth briar with my finger tips. The product is amazing and works to clean, enliven and protect the briar. I let it sit on the briar for 10 or more minutes and then buff it off with a soft cloth. It really makes the grain sing. Before I finished the buffing on the pipe I wanted to address the checking on the inside of the bowl. I noticed it while I was taking the photos. Sometimes it is part of the cake and sometimes not. This time I was able to clean out the majority of it with a Savinelli Fitsall Pipe Knife and then sandpaper wrapped around a piece of dowel. There is still some shallow checking on the front of the bowl toward the top and a little on the backside but it is far better and should be good for many years. I cleaned out the bowl, shank and stem with alcohol and pipe cleaners to remove the sanding and scraping debris.I put the pipe back together – the bowl with its new stem. This restored Malaga Second Long Shank Billiard is a real beauty and the chosen stem works well with it. I have no idea why it would be marked a second other than the pits on the rim top. The grain on the bowl is quite beautiful came alive with the buffing. I used Blue Diamond on the buffing wheel on both the bowl and stem. I gave both multiple coats of carnauba wax on the wheel then buffed it with a clean buffing pad to raise the shine. I hand buffed it with a microfibre cloth to deepen the shine. The Malaga Second Billiard feels great in the hand. It is lightweight and the contrast in the browns of the briar and the polished vulcanite stem is quite amazing. The dimensions of the pipe are Length: 6 inches, Height: 2 inches, Outer diameter of the bowl: 1 ½ inches, Chamber diameter: 7/8 of an inch. The weight of the pipe is 1.98 ounces/56 grams. It really is a beauty. I will be putting it on the rebornpipes store in the American (US) Pipe Makers section shortly if you are interested in adding it to your collection. Thanks for walking through the restemming and the restoration with me. Cheers.

A Rare Beauty


Blog by Kenneth Lieblich

Next on the chopping block is a spectacular freehand pipe that came in a group of pipes that I bought from Chicago. Freehand pipes have been all the rage among collectors for many years, thanks to the Danes. But this one is not from Denmark – it is from the United States. The pipe is absolutely beautiful and a superb example of American pipe-making craftsmanship. I have been wanting to work on this pipe for ages, but other things always got in the way. Now is the time. Carpe diem!The pipe is a American freehand pipe by the esteemed pipemaker, Sandor Herskovitz. You’ve never heard of him? Do not worry – few have! Not many of his pipes are available on the secondary market. The gorgeous briar wood on this pipe really makes an impression. I am not able to date the pipe, as the photo shows all of the markings to be seen. It simply shows the word Sandor on the left-hand side of the stummel.Little information exists on Pipepedia about him. What information they do have comes from the proprietor of the Red Door Consignment Gallery in Harrisburg, Pennsylvania:

Sandor Herskovitz (of Flushing, NY) used to make pipes and sell them out of a public park in Harrisburg, Pennsylvania in the late 50s and early 60s. Tom Benz had a pipe created for his wife, Hilda, that is a foot with a big toe sticking up. Sandor signed it “Made for Hilda, Sandor”. Tom Benz gave the pipe to a friend who later passed. His daughter gave it to the Red Door Consignment Gallery in Harrisburg, PA to sell. Coincidentally, my father, Leonard Berman, saw the pipe and asked me to e-mail Tom Benz to ask who the man was who used to make pipes in the park. By sheer coincidence, Tom Benz wrote back with the name Sandor Herkovitz and said the pipe was originally his! Of course, I offered it back but he declined and is allowing the public to enjoy it at our gallery. I will continue to research this pipe maker and hope others will contribute as well.

I did my own sleuthing on Sandor Herskovitz. I do not know his life-span for certain, but US genealogical records indicate that a man named Sandor Herskovitz was born in Hungary in 1898, naturalized in Pittsburgh, Pennsylvania in 1923, and died in Erie, New York in 2002. This seems likely to be our man.

I also found two newspaper articles that mentioned Herskovitz in the 1970s. The first article comes from the Washington Post on 13 April 1978, regarding the Spring Arts and Crafts Fair in Gaithersburg, Maryland:

Finding the unusual can be an important factor in the craftsman’s success. By applying his trade to his hobby, Sandor Herskovitz of Flushing, N.Y., found a distinctive way to sculpt briar pipes. For shapes, he found inspiration in the shoes he had been selling for years for Genesco, a shoe corporation. From making pipes in the shape of Benedict Arnold’s boot and Abigail Adams’ shoe he has gone on to make a camera shape for a Nikon executive, a foot shape for a podiatrist and a vertebra shape for an osteopath. His Liberty Bell pipe sent to Washington for the Bicentennial caught the eye of pipe-smoker Gerald Ford. “Maybe I got a little ham in me, maybe that’s why I do it,” said Herskovitz. “You take a piece of wood and you never know what’s inside.”

The second article comes from the Michigan Daily on 20 July 1978, regarding the Ann Arbor Art Fair in Ann Arbor, Michigan:

The vendor of another of the more unusual Art Fair wares is New York pipe carver Sandor Herskovitz. “The things I sell, nobody else sells,” said Herskovitz, puffing on a wooden pipe in the shape of a bare foot. The artist’s array of designs ranges from an abstract, roughly-textured wooden pipe to an intricate miniature replica of Benedict Arnold’s boot. “I sell all over the country, and these are the best handmade pipes in the world, I think,” Herskowitz said. “The people seem to like our pipes in Ann Arbor.”Clearly, Herskowitz was an experienced and talented pipe man. It seems likely that the pipe dates from the 1950s–1970s. I am delighted to be able to work on a pipe like this. One can not only see, but also feel, the quality of the briar and the work he put into it.

On to the pipe and, beautiful though it was, it had a few issues. The stem had some oxidation and plenty of tooth chatter and scratches. It desperately needed a polish. It also had problem with the tenon insofar as it did not fit properly in the stummel’s mortise. Meanwhile, the stummel also had some problems. There was plenty of lava on the rim (and some minor burning), lots of cake in the bowl, and the bowl was pretty darn dirty. In addition, there was a small crack in the wood of the face of the shank. It seems reasonable to deduce that the crack may have been as a result of the misfitting tenon on the stem. This pipe was going to require some work, but it was definitely worth it for such a beauty. The stem was first on my list. I took a BIC lighter and ‘painted’ the stem with its flame in order to lift the tooth marks. This was fairly successful in raising the dents. Then, I cleaned out the insides of the stem with pipe cleaners and isopropyl alcohol. Once this process was done, the stem went for an overnight soak in the Pipe Stem Oxidation Remover. The following day, I cleaned all of the de-oxidizing mess off with alcohol, pipe cleaners, et cetera. The oxidation had migrated to the surface and would be fairly straightforward to remove. I scrubbed vigorously with SoftScrub on some cotton pads to remove the leftover oxidation. Next, I had to carefully remove some of the bulk from the stem’s tenon. Since I do not have a tenon-turning tool, I used my Dremel Rotary Tool. This was a bit scary, since the Dremel tends to have a mind of its own. I had to work precisely and gingerly. In the end, I managed to remove just enough and the stem now fits perfectly in the stummel.Before I moved on to the Micromesh pads, I built up the dents and the button on the stem with cyanoacrylate adhesive and let them fully cure. I then sanded the adhesive down with 220-, 400-, and 600-grit sandpapers to meld seamlessly into the stem. I did the same to the remaining tooth marks. I then used all nine Micromesh pads (1,500 through 12,000 grit) to bring out the lovely black lustre on the stem. I also used Obsidian Pipe Stem Oil in between each pad scrubbing.On to the stummel, and the usual cleaning procedures were in order for this pipe. I used both the PipNet Reamer and the KleenReem to remove the built-up cake and followed that with 220-grit sandpaper to eliminate as much as I could. I took the bowl down to bare briar, as I wanted to ensure there were no hidden flaws in the walls of the bowl. Fortunately, there were none. I then proceeded to clean out the insides of the shank with Q-tips, pipe cleaners, and isopropyl alcohol. There was some nastiness inside this stummel, but fortunately not too much – it only took a handful of pipe cleaners etc. to sort that out. I followed that up by cleaning the insides with some dish soap and tube brushes. I then moved on to cleaning the outside of the stummel with Murphy’s Oil Soap and some cotton pads. That removed any latent dirt and the miserable stains that blighted the wood. I had to work especially hard on the rim of the pipe. Obviously, this is a freehand (with a freehand sort of rim) and, as a result, I do not have the luxury of using a topping board to remove some of the lava. I used a small butter knife to gently chip away at the lava. I then used more Murphy’s with a scrub brush to get into the crevasses. This actually worked quite well. As I mentioned earlier, there were some small burn marks on the rim of the stummel that also needed to be addressed. A lot of this was removed by the Murphy’s. For the burns that remained, I took some oxalic acid on a Q-tip and rubbed and rubbed and rubbed! As you will see, the treatment worked very well and the rim is much improved.On to another issue with this pipe: the crack in the shank. My first step was to ensure that the crack would not continue to creep after I had repaired it. To that end, I took a micro-drill bit, inserted it in my Dremel, and very carefully drilled a hole right through the wall of the shank. This was quite nerve-wracking, but it worked perfectly. Look how thin that drill bit is! I then needed to apply cyanoacrylate adhesive to the crack in order to seal and repair it. I covered the end of the shank with painters’ tape. That done, I carefully applied some adhesive to the tiny hole and the length of the crack. Finally, I clamped it shut and let it sit overnight to cure. This was a great success – obviously, the crack would always be visible, but I was really pleased with how the repair looked. After this, the entire stummel was treated to a scrubbing with all nine Micromesh pads (1,500 through 12,000 grit) and some distilled water. A light application of Before & After Restoration Balm brought out the best in the stummel’s grain. The wood on this pipe is stunning! Now it was off for a trip to the buffer. A dose of White Diamond and a few coats of carnauba wax were just what this pipe needed. I had to be especially careful with the bench polisher on the stummel, since the edges have a tendency to catch on the buffing wheels. I have to admit, this did put my heart in my throat a few times!

This pipe was a delight from start to finish and its beauty only increased through the restoration process. I am pleased to announce that this pipe is for sale! If you are interested in acquiring it for your collection, please have a look in the ‘American’ pipe section of the store here on Steve’s website. You can also email me directly at kenneth@knightsofthepipe.com. The approximate dimensions of the pipe are as follows: length 6¼ in. (160 mm); height 2½ in. (60 mm); bowl diameter 1½ in. (40 mm); chamber diameter ¾ in. (20 mm). The weight of the pipe is 2 oz. (60 g). I hope you enjoyed reading the story of this pipe’s restoration as much I as I did restoring it. If you are interested in more of my work, please follow me here on Steve’s website or send me an email. Thank you very much for reading and, as always, I welcome and encourage your comments.

Restemming & Restoring a Made in Denmark Viking Brandy


Blog by Steve Laug

The next pipe I chose to work on was another bowl from my box of bowls to restem. This one is a nicely grained mixed finish Brandy. The right side and half of the front of the bowl is sandblast and left side and remainder of the bowl is smooth. It has some amazing looking grain around the bowl and shank. The sandblast is deep on that portion. It is stamped on the underside of the shank and reads MADE IN DENMARK [over] VIKING. The stamping was clear and readable with a lens. I think that the pipe is probably made my Bjarne but I would do some digging and see what I could learn. The bowl had been cleaned and reamed somewhere along the way by either Jeff or me. I honestly don’t remember when or where we got this bowl. It looked very good and I was looking forward to seeing the finished Brandy. The shank had a Delrin insert and the mortise was slightly inset for a freehand style stem. The original stem was long gone so I would need to go through my stems and find one that would work for a restemming. It would be a different stemming job because of the inset mortise. I took some photos of the bowl to give a sense of the condition of this nice looking Brandy. There was a smooth panel on the underside of the shank. It is stamped as noted above and is clear and readable with a lens.The next photo shows the rim top and edges. It also shows the condition of the bowl and rim top/edges. It is clean looks quite good. Now it was time to begin my restemming work on this pipe. I went through my can of stems and chose two stems that would give the pipe a completely different look. The first was a thick taper that I had used as a replacement for a Dunhill with a missing stem. It was close to the right diameter but the dot would need to go. The second was a freehand style stem that fit in the inset mortise in the shank. Now I would need to make a decision.

First the bowl with the taper stem:  Second the bowl with the freehand stem:I took a photo of the inset mortise to give a sense of what I was working with restemming this pipe. I decided to put the taper stem in place on the shank for a look. In order to use it required that I place a thin band on the shank end to take care of the rounding of the shank end and facilitate a flush face for the taper stem to sit against. I slipped one in place on the shank and put the stem in place on the shank and took photos. I removed the band and the stem and put the freehand stem on the pipe to have a look at what it would like with this kind of stem. I put it in place and took some photos of it so I could see what I thought. I am personally leaning towards the taper stem. I worked on the fit of the stem to the shank with a file to reduce the diameter of the stem. It took some slow and tedious work to get the stem diameter very close. Once I was finished I liked the way the stem was starting to look. More work to do on it for sure but it is getting there. I was definitely ready to go with the taper stem at this point!I made a decision to go with the thick taper stem as I really like the look of a classic Brandy. I pressed a thin band on the shank end to give me a flat surface for the stem to face against. I like the look of the shank with the band. I continued the shaping of the stem with 220 grit sandpaper to bring the diameter of the shank and stem in sync. Once I had it where I wanted it I started polishing the stem with 400 grit wet dry sandpaper.I polished the stem with micromesh sanding pads – wet sanding with 1500-12000 grit pads. I wiped the stem down after each sanding pad with Obsidian Oil. I polished the stem with Before & After Pipe Stem Polish – both Fine and Extra Fine and buffed it with a cotton cloth. Once I had finished the polishing I gave it final coat of Obsidian Oil and set it aside to dry. With the stem finished I turned my attention to the bowl. I polished the briar with micromesh sanding pads – dry sanding with 1500-12000 grit pads. I wiped the bowl down after each pad with a damp cloth to remove the sanding debris and dust. I rubbed the bowl and shank down with Before & After Restoration Balm. I worked it into the surface of the smooth and the sandblast bowl sides and shank with my fingertips and a horsehair shoe brush to clean, enliven and protect the briar. I let the balm sit for a little while and then buffed with a cotton cloth to raise the shine. The Balm did its magic and the sandblast grain really took on dimension and colour. I am excited to be on the homestretch with this mixed finish (smooth/sandblast) Made in Denmark Viking Brandy with a taper vulcanite stem. This is the part I look forward to when it all comes back together, polished and waxed. I put the bowl, the thin brass band and the new stem together and polished them with Blue Diamond to polish out the scratches in the vulcanite and give a light shine to the bowl. I gave the bowl and the stem multiple coats of carnauba wax. I buffed the pipe with a clean buffing pad to raise the shine. I hand buffed it with a microfiber cloth to deepen the shine. The pipe polished up pretty nicely. The smooth part of the finish and the sandblast finish on the front and right sight looks really good with the band and the new polished black taper vulcanite stem. This Viking Brandy was another fun pipe to work on and came out looking great. It is a comfortable sized pipe to hold in the hand. The finished pipe is shown in the photos below. The dimensions of the pipe are Length: 5 ¾ inches, Height: 2 ¼ inches, Outside diameter of the bowl: 1 ¼ inches, Chamber diameter: ¾ of an inch. The weight of the pipe is 59 grams/2.08 ounces. If you are interested in adding this pipe to your rack it will be on the rebornpipes store in the Danish Pipemakers Section soon. Thanks for reading this blog and my reflections on the pipe while I worked on it.

Restemming & Restoring a French Made GBD Sauvage 1345 Poker/Pot


Blog by Steve Laug

The next pipe I chose to work on was another bowl from my box of bowls to restem. It is a different looking bowl that combines both a Pot and a Poker shape. It has a inward beveled rim, flat bottom and worm trails curled around the bowl sides. When I examined the shank it had a small hairline crack on the right side that would need to be repaired but otherwise it was solid. It was unique enough I wanted to work on it. It is stamped on the left side of the shank and has a GBD oval logo next to the bowl/shank union followed by Sauvage. On the right side of the shank it is stamped FRANCE [over] the shape number 1345. The stamping was clear and readable with a lens. The bowl had been cleaned and reamed somewhere along the way by either Jeff or me. I honestly don’t remember when or where we got this bowl. It looked very good and I was looking forward to seeing the finished pipe. The stem was long gone so this would be a restemming job. I took some photos of the bowl to give a sense of the condition of bowl. The stamping was on both sides of the shank and it is clear and readable as noted above. I have also drawn a red rectangle around the area where the crack in the shank is located in the photo below.The next photo shows the rounded rim top and edges. It also shows the condition of the bowl and rim top/edges. It is clean and looks quite good. There is some burn damage on the inner edge of the bowl and on the beveled rim top at the front and the back of the bowl.Now it was time to begin my restemming work on this pipe. I went through my can of stems and chose a stem that would work. I would need to remove some the diameter of the tenon and the saddle portion to fit the thin almost pencil shank of the pipe. I used a flat file to remove the small amount of excess on the tenon. It was a close fit but I did not want to make the crack in the shank worse by a tenon that was not correct.When I had finished shaping the tenon I sanded it with a piece of 220 grit sandpaper and inserted it in the shank. It was looking pretty good. I would need to trim back some of the diameter of the saddle portion but I liked it! I generally use a Dremel and sanding drum to reduce the diameter of the stem. I do this with the stem in place on the shank so that I do not overdo it. It is a touchy exercise and one slip and I could easily damage the shank and make more work for myself. I move carefully and take it back as close as I can at this point. Once I band the shank I will need to do some more work on it but it is starting to look right. With the fit close enough it was time to band the shank. I generally do the final adjustments on the stem diameter after I have fit the band in place. I picked a band out that would fit when heated. I took a photo of the crack in the shank to show what I was working with. I sanded the shank end and gave it a slight bevel to facilitate pressing the band in place. Once it was ready I put the band on the shank. It was tight so I heated it with a lighter and when it had expanded I pressed it against the pad on my desk and pushed it all the way onto the shank. It covered the “e” on Sauvage slightly but the length of the crack defined what I needed to band it. I used some 220 grit sandpaper to once again take a little bit off the diameter of the tenon and the band compresses the crack and the diameter of the mortise changes. When I was finished I put the stem in the shank and took photos of the newly banded shank. It was going to look good once I finished shaping the stem diameter but it is very close at this point. What do you think of the new look? I finished adjusting the fit of stem diameter with 220 grit sandpaper and everything was aligned. I started the polishing with 400 grit wet dry sandpaper and the stem was looking very good at this point. Now I needed to deal with the tooth marks and chatter on the end of the stem. I “painted” them with the flame of a lighter to lift them as much as possible. I filled in the ones that remained with clear super glue. Once the glue cured I flattened out the repairs with a small flat file. I followed that by sanding the stem with 220 grit sandpaper to blend them into the surface. I started polishing the stem with 400 grit wet dry sandpaper. I polished the stem with micromesh sanding pads – wet sanding with 1500-12000 grit pads. I wiped the stem down after each sanding pad with Obsidian Oil. I polished the stem with Before & After Pipe Stem Polish – both Fine and Extra Fine and buffed it with a cotton cloth. Once I had finished the polishing I gave it final coat of Obsidian Oil and set it aside to dry. With the stem finished (other than to buff the pipe at the end)I set it aside and I turned my attention to the bowl. I used a wooden ball that Kenneth gave me with a piece of 220 grit sandpaper to clean up the bevel. I finished with a folded piece of 220 grit sandpaper to further minimize the burn damage. I touched up the stain with an Oak Stain pen to match the surrounding briar of the bowl. It looked much better at this point. I polished the briar with micromesh sanding pads – dry sanding with 1500-12000 grit pads. I wiped the bowl down after each pad with a damp cloth to remove the sanding debris left behind. I rubbed the bowl and shank down with Before & After Restoration Balm. I worked it into the surface of the smooth and worm trails on the bowl and shank with my fingertips to clean, enliven and protect the briar. I let the balm sit for a little while and then buffed with a cotton cloth to raise the shine. The Balm did its magic and the grain really took on dimension and colour. I am excited to be on the homestretch with this petite French Made GBD Sauvage 1345 Poker/Pot. This is the part I look forward to when it all comes back together, polished and waxed. I put the bowl and the new stem together and polished the stem and bowl with Blue Diamond to polish out the scratches in the vulcanite and give a light shine to the bowl. I gave the bowl and the stem multiple coats of carnauba wax. I buffed the pipe with a clean buffing pad to raise the shine. I hand buffed it with a microfiber cloth to deepen the shine. The pipe polished up pretty nicely. The worm trail carving on the bowl actually looks okay with the rest of the smooth finish. The banded shank and new polished black saddle vulcanite stem works well with this little sitter. This GBD Sauvage Poker/Pot was another fun pipe to work on and came out looking great. It is a comfortable sized pipe to hold in the hand. The finished pipe is shown in the photos below. The dimensions of the pipe are Length: 5 ¾ inches, Height: 1 ½ inches, Outside diameter of the bowl: 1 ½ inches, Chamber diameter: ¾ of an inch. The weight of the pipe is 33 grams/1.16 ounces. If you are interested in adding this pipe to your rack it will be on the rebornpipes store in the French Pipemakers Section soon. Thanks for reading this blog and my reflections on the pipe while I worked on it.

A Straightforward Restemming & Restoration of a Jobey Shellmoor 250 Apple


Blog by Steve Laug

The next pipe I chose to work on was another bowl from my box to restem. This one is a nice sandblast apple. It has a deep and rugged blast around the bowl and shank. When I examined the shank it was threaded which was interesting. Once I saw the stamping that became clear. It is stamped on the underside of the shank and reads Jobey [over] Shellmoor. To the left of that stamp is a shape number 250. Underneath the Shellmoor stamp is another series of numbers – PAT. 3537462. The stamping was clear and readable with a lens. I want to see what I can find out about the Patent number. I don’t recall working on one of those before. The bowl had been cleaned and reamed somewhere along the way by either Jeff or me. I honestly don’t remember when or where we got this bowl. It looked very good and I was looking forward to seeing the finished Apple. The stem was long gone so this would be a restemming job. It would be a different stemming job because of the Jobey Link System so it would be kind of fun. I took some photos of the bowl to give a since of the condition of this nice little Apple. I took some photos of the stamping on the sides of the shank. The stamping is clear and readable as noted above. There was a smooth panel on the underside of the shank. It is stamped as noted above and is clear and readable with a lens.The next photo shows the rounded rim top and edges. It also shows the condition of the bowl and rim top/edges. It is clean looks quite good. I will give it a quick go over with a brass brush but otherwise it looks good.Before I started to work on the pipe I wanted to understand the patent information so I turned to the US Patent search site and entered the numbers. I was able to find both a description of the invention and a diagram that was submitted with the Patent application. Here is the link to the site and a screen capture of the information found there. https://pdfpiw.uspto.gov/.piw?docid=03537462&SectionNum=1&IDKey=6F776849C285&HomeUrl=http://patft.uspto.gov/netacgi/nph-Parser?Sect1=PTO1%2526Sect2=HITOFF%2526d=PALL%2526p=1%2526u=%25252Fnetahtml%25252FPTO%25252Fsrchnum.htm%2526r=1%2526f=G%2526l=50%2526s1=3537462.PN.%2526OS=PN/3537462%2526RS=PN/3537462Now it was time to begin my restemming work on this pipe. I went through my can of tenons and found a Jobey Link that screwed into the shank perfectly. I chose a stem from the can of stems I have here that would the shank well. I would need to remove the standard tenon and drill the stem to receive the end of the tenon. I used a hacksaw to cut off the normal tenon on the stem. That part was very simple but then things went quickly sour. I put a piece of tape on the drill bit to start drilling out the saddle to receive the Link. I started with a small bit and started drilling. The tape move and the bit suddenly came out of the top part of the blade of the stem. Yikes what a mess.Sooo…needless to say the ruined stem went into the waste bin and I had to start over. I chose a new blank from the bag Jeff sent me as the fit was the closest one I had in terms of matching the sides of the shank. I cut off the tenon with the hacksaw. This time I measured the depth of the saddle and the length of the tenon and drilled to match it – very carefully in multiple stages. I checked and rechecked as I did not want to do the work a third time. I used a series of drill bits from one that was slightly larger than the airway and ended with a ¼ inch bit that was the size of the Link.I smoothed out the face of the stem on a topping board with 220 grit sandpaper. I wanted the surface smooth so it would sit well against the shank when the Link was inserted.With the face smoothed out I pushed the snug fitting Jobey Link into the hole in the face of the stem. It fit well against the shank end so that was a plus. Everything lined up so I took some photos of the restem at this point. The casting remnants on the sides of the stem needed to be removed and they were quite rough and messy. I used a flat file (rasp) to flatten out the castings on the saddle and blade sides of the stem as well as the area around the slot in the button. I used my Dremel and a sanding drum to do the rough work on the stem. I worked on it carefully to remove more of the casting marks and to reduce the bottom side of the saddle to match the size of the shank.The only way I know how to do this is with the new stem in place in the shank and then carefully move the sanding drum up and around the stem surface to get a close/rough fit. It was getting much closer but there was a lot more work to do hand shaping it with sandpaper and files.With the majority of the heavy work done it was time to work over the stem with 220 grit sandpaper and get everything aligned. I started the polishing with 400 grit wet dry sandpaper and the stem was looking very good at this point.I polished the stem with micromesh sanding pads – wet sanding with 1500-12000 grit pads. I wiped the stem down after each sanding pad with Obsidian Oil. I polished the stem with Before & After Pipe Stem Polish – both Fine and Extra Fine and buffed it with a cotton cloth. Once I had finished the polishing I gave it final coat of Obsidian Oil and set it aside to dry. With the stem finished (other than to buff the pipe at the end) I turned my attention to the bowl. I used a brass bristle wire brush to clean up the debris still in the sandblast rim top of the bowl. It looked better when I finished.   I rubbed the bowl and shank down with Before & After Restoration Balm. I worked it into the surface of the sandblast bowl sides and shank with my fingertips and a horsehair shoe brush to clean, enliven and protect the briar. I let the balm sit for a little while and then buffed with a cotton cloth to raise the shine. The Balm did its magic and the sandblast grain really took on dimension and colour. I am excited to be on the homestretch with beautiful sandblast PAT. 3537462  Jobey Shellmoor 250 Apple. This is the part I look forward to when it all comes back together, polished and waxed. I put the bowl and the new stem together and polished the stem and bowl with Blue Diamond to polish out the scratches in the vulcanite and give a light shine to the bowl. I gave the bowl multiple coats of Conservator’s Wax and the stem multiple coats of carnauba wax. I buffed the pipe with a clean buffing pad to raise the shine. I hand buffed it with a microfiber cloth to deepen the shine. The pipe polished up pretty nicely. The rugged sandblast finish looks really good with the new polished black square saddle vulcanite stem. This Sandblast Jobey Shellmoor Apple was another fun pipe to work on and came out looking great. It is a comfortable sized pipe to hold in the hand. The finished pipe is shown in the photos below. The dimensions of the pipe are Length: 5 ½ inches, Height: 1 ¾ inches, Outside diameter of the bowl: 1 ¼ inches, Chamber diameter: ¾ of an inch. The weight of the pipe is 38 grams/1.38 ounces. If you are interested in adding this pipe to your rack it will be on the rebornpipes store in the American Pipemakers Section soon. Thanks for reading this blog and my reflections on the pipe while I worked on it.

Restemming and Breathing New Life into a Flumed Genuine Block Meerschaum Author


Blog by Steve Laug

The next pipe I chose to work on was another bowl from my box to restem. This one is an interesting looking meerschaum with a rugged rustication on the bowl and shank. It has a flumed black rim top with the colour going down a short distance on the bowl sides. It is stamped on the underside of the shank and reads Genuine Block [over] Meerschaum. Arched around the end at the shank stem it is stamped GT. Britain. The stamping was faint but readable and to me it looks like an African Meerschaum pipe made by Manx pipes on the Isle of Man. It had been cleaned and reamed somewhere along the way by either Jeff or me. I honestly don’t remember when or where we got this bowl. It was tired looking but showed a lot of promise. The stem was long gone so this would be a restemming job. I took some photos of the bowl to give a since of the condition of this nice little Author. I took some photos of the stamping on the sides of the shank. The stamping is clear and readable as noted above. There was a smooth panel on the underside of the shank. It is stamped/carved Genuine Block Meerschaum. It is faint but still readable.The next photo shows the flumed rim top and edges. It also shows the condition of the bowl and rim top/edges. It is clean but there is still a bit of lava on the rim top that will need to be addressed.Jeff had picked up some great unused stems of all sorts and sizes. In the bag I received from him yesterday was the kind of stem I had been looking for for this pipe. It is an oval saddle stem whose thickness is correct but the width will need to be adjusted. The tenon will need to be turned to fit the shank and will also need to be shortened for a proper depth. Now it was time to work on the pipe itself. I started with fitting the stem to the shank. I used the PIMO Tenon Turning Tool to reduce the diameter of the tenon and smooth out the face of the stem. I drilled the airway to hold the guiding pin and adjusted the cutting head for the first and then the second turn that removed the excess diameter of the tenon. I always love the swirls of vulcanite that peel off while the turner does its work. I cleaned up the casting remnants on the face of the stem with a file for a proper fit against the shank. I constantly checked the fit in the shank while I worked on it. I shortened the length of the tenon a topping board with 220 grit sandpaper. When it was finished I fit it in the shank and took photos of the pipe and its new stem. I still had a lot of work to do but there was progress. Now it was time to adjust the width by reshaping the sides of the new stem. I would also need to do some adjustments to the fit against the shank face. I took some photos of the top and underside to show the excess material on the stem that would need to be removed.I used my Dremel and a sanding drum to do the rough work on the stem. I worked on it carefully to remove as much excess as I could from the sides and reshape the look of the stem to match the stem. The only way I know how to do this is with the new stem in place in the shank and then carefully move the sanding drum up and around the stem surface to get a close/rough fit. It was getting much closer but there was a lot more work to do hand shaping it with sandpaper and files. I decided to enjoy a bowl of Friedman & Pease Fool’s Cap in a Nachwalter I cleaned and restored a while ago. I find that slowly puffing a bowl relieves some of the tedium of shaping and sanding a newly fit stem to get all the angles just right.I took photos of the pipe after I had fit the stem to the shank. The look and fit of the stem looked like it was original. I was pleased with the look and read to move on to polishing it. I polished the stem with micromesh sanding pads – dry sanding with 1500-12000 grit pads. I wiped the stem down after each sanding pad with Obsidian Oil. With the shaping and polishing finished on the straight stem it was time to bend the stem to match the angles of the shank. I used a heat gun to soften the vulcanite and then gave it a slight downward bend. I left the stem in the shank and touched up the polishing of the stem with Before & After Pipe Stem Polish – both Fine and Extra Fine and buffed it with a cotton cloth. Once I had finished the polishing I gave it final coat of Obsidian Oil and set it aside to dry. With the stem finished (all but the final buff) I turned my attention to the bowl. I used a brass bristle wire brush to clean up the debris still in the rusticated, flumed rim top of the bowl. It looked better when I finished.  I scrubbed the rusticated surface of the bowl and rim with a tooth brush and undiluted Murphy’s Oil Soap. I rinsed the bowl off with warm water to remove the debris and clean the brush. The finish looked much better. I used a black stain pen to touch up the flumed rim top and edges. I applied it carefully around outer edge of the bowl as well following the pattern of the previous flume.I am excited to be on the homestretch with interesting British Made Flumed Rusticated Meerschaum Author. This is the part I look forward to when it all comes back together, polished and waxed. I put the bowl and the new stem together and polished the stem and bowl with Blue Diamond to polish out the scratches in the vulcanite and give a light shine to the bowl. I gave the stem multiple coats of carnauba wax. I buffed the pipe with a clean buffing pad to raise the shine. I hand buffed it with a microfiber cloth to deepen the shine. The pipe polished up pretty nicely. The rugged rusticated finish looks really good with the deep nooks and crannied of the rustication and the porous spots showing the “grain” in the meerschaum. The restored bowl goes really well with the new polished black saddle vulcanite stem. This Rusticated Flumed Author was another fun pipe to work on and came out looking great. It is a comfortable sized pipe to hold in the hand. The finished pipe is shown in the photos below. The dimensions of the pipe are Length: 5 inches, Height: 1 ¼ inches, Outside diameter of the bowl: 1 ¼ inches, Chamber diameter: ¾ of an inch. The weight of the pipe is 51 grams/1.80 ounces. If you are interested in adding this pipe to your rack it will be on the rebornpipes store in the Ceramic and Meerschaum Pipe Section soon. Thanks for reading this blog and my reflections on the pipe while I worked on it.

Restoring and Reshaping a stem on a beautiful “Malaga” Imported Briar 3 Cutty


Blog by Steve Laug

The next pipe I chose to work on from my box of pipes to be restored is a lovely “Malaga” Cutty with a poorly fit stem. We bought the pipe off eBay back in January, 2017 from Gilroy, California, USA. The stamping on the pipe was clear and readable. On the left side it read “MALAGA” and on the right side it read IMPORTED BRIAR. On the heel of the bowl it was stamped with the number 3. It was an interesting looking Cutty shaped pipe. The grain around the sides was quite nice and a mix of cross grain and birdseye grain. There was a thick cake in the bowl and a thick lava coat on the rim top. The inner edge of the bowl was so caked it was hard to know what the edge looked like underneath. The stem was oxidized, calcified and had a lot of deep tooth mark and chatter on both sides ahead of the button. It was a bit of a mess. Jeff took some photos of the bowl before he started to work on it. Jeff took photos of the bowl and rim top to show the cake in the bowl and the lava coat on the top and on the inner beveled edge of the bowl. I am hoping that it protected the edge from damage. He also took photos of the stem to show the deep tooth marks and chatter on the oxidized stem. He took photos of the bowl and heel to show the condition of the finish. Though the finish is dirty and grimy you can see some nice grain showing on the bowl sides. Jeff took photos of the stamping on the sides of the shank and the heel of the bowl. It read as noted above and was readable. I have worked on a lot of Malaga pipes in the past so I am not a stranger to the brand. I have blogged their restorations, so rather than repeat previous blogs, I am including the link to one that gives some of the history of the Malaga brand and the Malaga Pipe Shop in Royal Oak, Michigan in the USA from a catalogue. It gives a sense of the brand and the history in their own words. Follow the link to get a feel for the brand and the pipemaker – https://rebornpipes.com/2013/02/09/george-khoubesser-and-malaga-pipes/.

I took some photos of the pipe as I took it out of the box. Here is what I saw. I could see that Jeff had cleaned it well. The bowl had been reamed with a PipNet reamer and Savinelli Fitsall Pipe Knife. He had scrubbed the exterior with undiluted Murphy’s Oil Soap. He rinsed it with warm water. He cleaned out the internals with alcohol, cotton swabs and pipe cleaners. The stem was twisted and tweaked to the right as can be seen in the photos of the top and underside of the pipe. The grain on the bowl is quite nice with just a few small fills that are solid and well blended in with the surrounding briar. I took photos of the pipe before I started my work on it. The rim top had cleaned up very well and you can see the damage to the inner edge of the bowl at the back as well as some darkening on the rim top and outer edges. The stem cleaned up well but the tooth damage is quite deep and messy. I took photos of the stamping on the sides of the shank and heel of the bowl. The stamping is clear and readable as noted above.I took the stem off the shank and took a photo of the pipe. I really like the look of the Cutty shape and the grain on the bowl. It is a beauty. The stem will look good once it has gone through some surgery on the diameter and the shank and the chomping on the button end.I started my work on the pipe by cleaning up the damaged inner edge and top of the rim with a folded piece of 220 sandpaper. Once it was finished it definitely is an improvement.I polished the bowl and rim top with micromesh sanding pads – dry sanding with 1500-12000 grit pads and wiped down the bowl after each sanding pad. I rubbed the bowl and shank down with Before & After Restoration Balm. I worked it into the surface of the bowl sides and shank with my fingertips to clean, enliven and protect the briar. I let the balm sit for a little while and then buffed with a cotton cloth to raise the shine. The Balm did its magic and the grain stood out.   I set the bowl aside and turned my attention to the stem. I decided to address the fit of the stem to the shank. They were significantly different in diameter. I wanted to address that first while at the same time dealing with the deep tooth marks. I took photos of the fit of the stem to the shank. I think you can see the variation in diameter in the photos. The stem is bigger on the top an don the right side. If I turn it over it is the reverse but the fit is better against the shank face in the way it is in the photos below.I sanded the shank end of the stem with 220 grit sandpaper to reduce diameter to a close fit. I got I close then decided to deal with the tooth marks on the stem surface so that I could sand the entire stem to shape and it to the shank. I “painted” the tooth marked area with the flame of a lighter and was able to lift many of them significantly. Those that remained I filled in with clear CA glue and set aside to cure. Once the repair had cured I used a small file to flatten it out and to redefine the button area and edges. It looked much better. I followed that by sanding the repaired area with 220 grit sandpaper to further blend in the repairs to the surrounding vulcanite. I started polishing the stem with 400 grit wet dry sandpaper. With that work down on the button end I could go back to fine tuning the stem to shank fit.I went back to fitting the stem to the shank with 220 grit sandpaper and after some more adjustments the fit works well with the shank and I am pleased with the smooth transition to the shank.I polished it with micromesh sanding pads – 1500-12000 grit pads (somehow the photo of the 1500-2400 grit pads was inadvertently lost). I wiped it down with Obsidian Oil after each sanding pad. I used Before & After Pipe Polish – both Fine and Extra Fine to further polish the stem. I gave it a final coat of Obsidian Oil and set it aside to dry. Once I finished refitting and repairing the stem, this “Malaga” Imported Briar 3 Cutty was another beautiful pipe. The briar around the bowl is clean and really came alive. The rim top looks much better than when I began. The rich brown stains gave the grain a sense of depth with the polishing and waxing. The grain really popped. I put the vulcanite stem back on the bowl and carefully buffed the pipe with Blue Diamond on the buffing wheel. I gave the bowl and the stem multiple coats of carnauba wax on the buffing wheel. I buffed the pipe with a clean buffing pad to raise the shine. I hand buffed the pipe with a microfiber cloth to deepen the shine. The finished “Malaga” Cutty is a beauty and feels great in the hand and looks very good. Give the finished pipe a look in the photos below. The dimensions of the pipe are Length: 6 inches, Height: 1 ¾ inches, Outside diameter of the bowl: 1 ¼ inches, Chamber diameter: ¾ of an inch. The weight of pipe is 1.34 ounces /38 grams. I will be putting it on the rebornpipes store soon. Look for it in the American Pipe Makers section. If you would like to add it to your collection let me know. This is another pipe that has the possibility of transporting the pipe man or woman back to a slower paced time in history where you can enjoy a respite. Thanks for walking through the restoration with me.