Blog by Paresh Deshpande
Re-Cap…
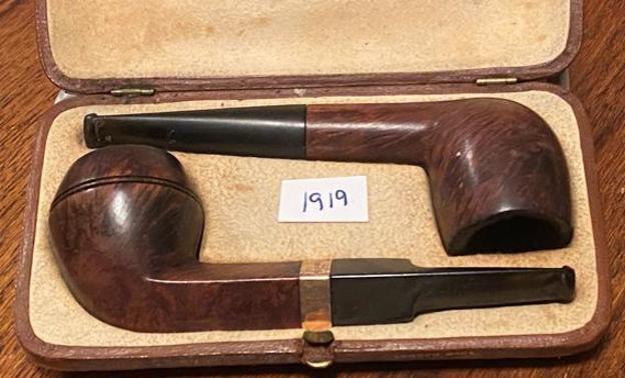
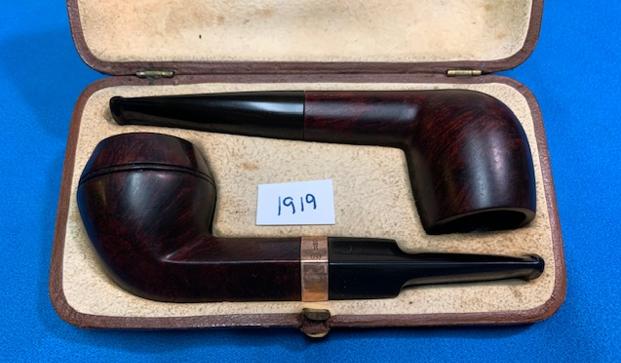
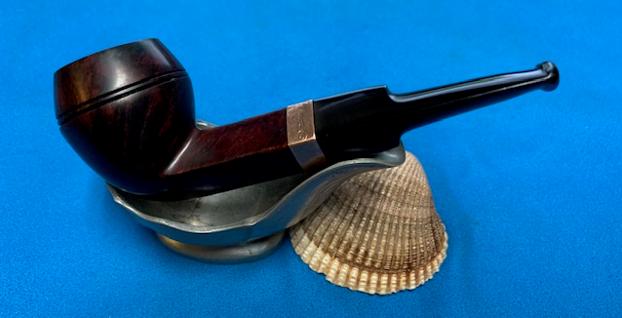
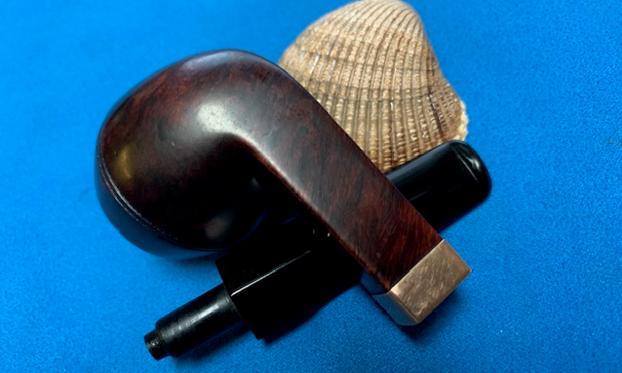
While surfing eBay for estate pipe lots, I came across a job lot that contained four estate pipes. The seller had not included any description for the item other than a simple statement that read “The lot is being sold as is. Pictures are part of description” or words to that effect. The worst part was that there were only two pictures that were posted by the seller!! Here are the pictures. 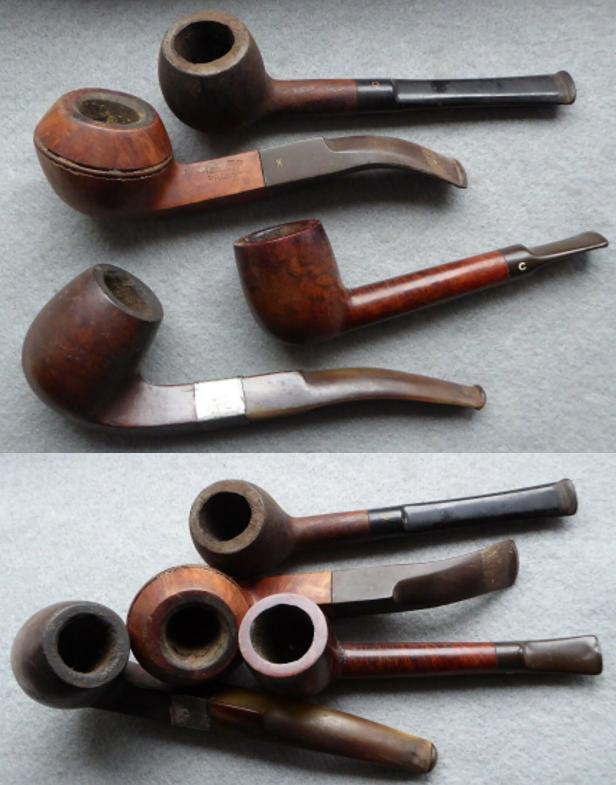 I could make out one Orlik with dental stem, a Hardcastle Bulldog, one Comoy’s Lovat, and the last one was unidentifiable but appeared to be fitted with a horn stem. The pipes appeared to be in a decent condition and included some nice brand names. Soon the pipes reached Abha at my home town.
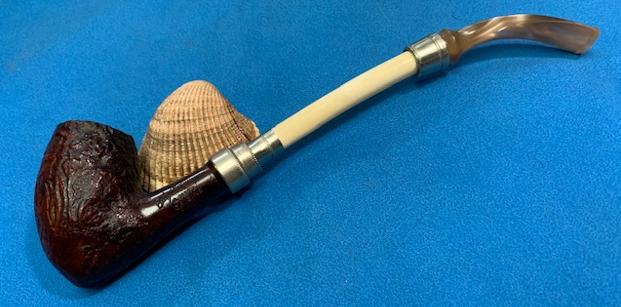
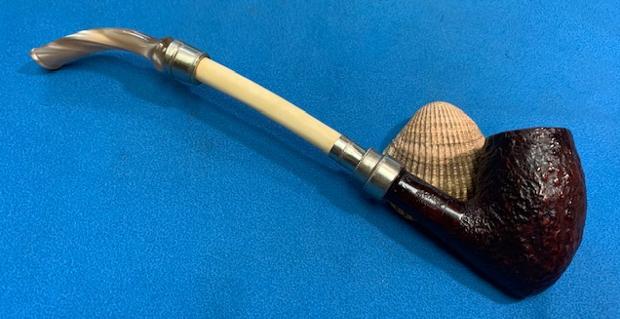
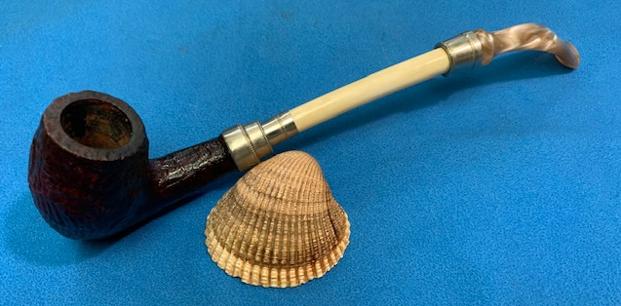
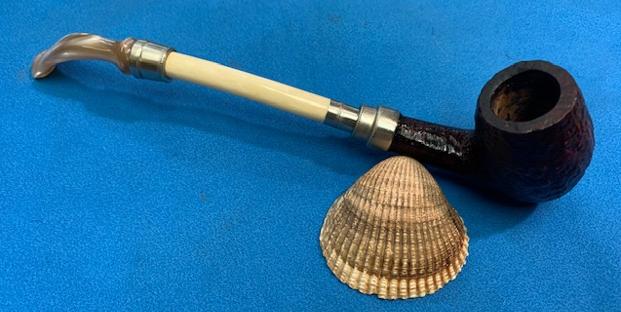
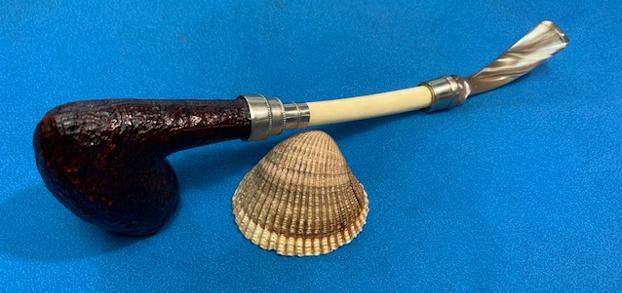
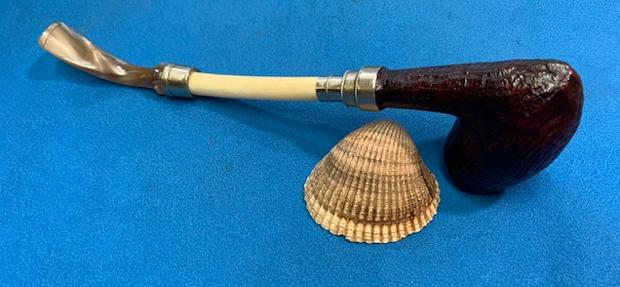
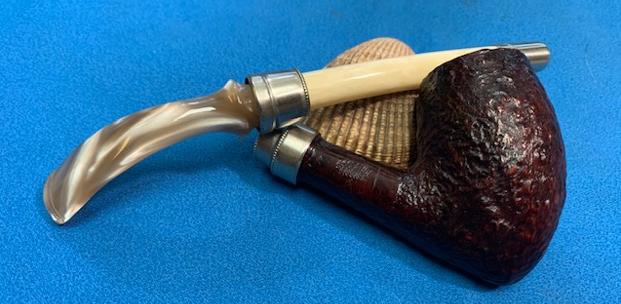
I have restored two pipes from this lot; the first one was the pipe with the horn stem and it turned out to be a gem from an old and reputable maker “Salmon (Barnett) & Gluckstein” from the period 1894 (guesstimated) and the other pipe I refurbished was the Hardcastle “DRAWEL”. Here are the links to both the write ups that were posted on rebornpipes.
Refurbishing an 1894 (?) Hallmarked “S & G” Square Shank Bent Billiard With a Horn Stem | rebornpipes
Refurbishing A Hardcastle’s “Drawal” # 27 | rebornpipes
Returning To The Present…
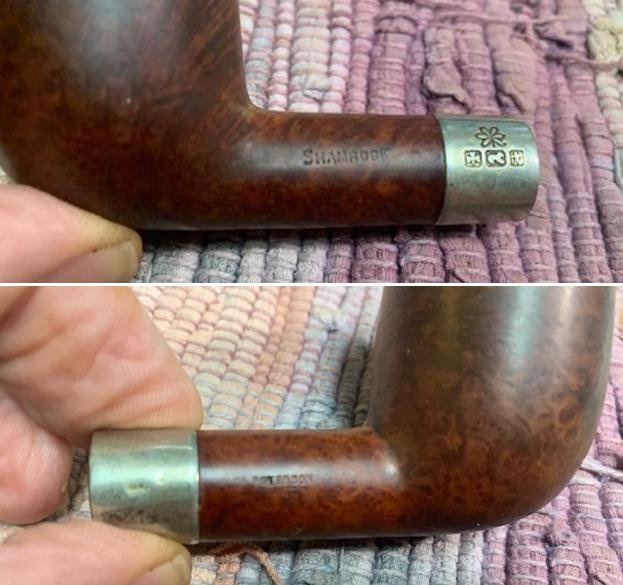
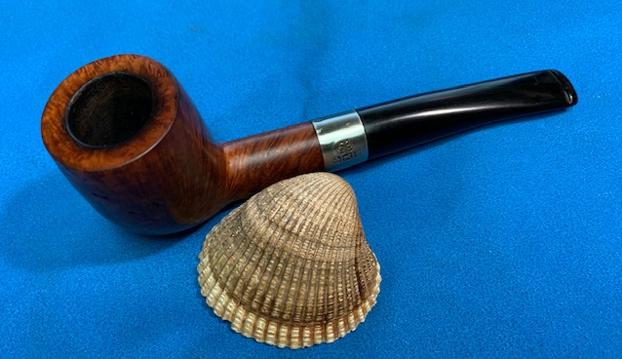
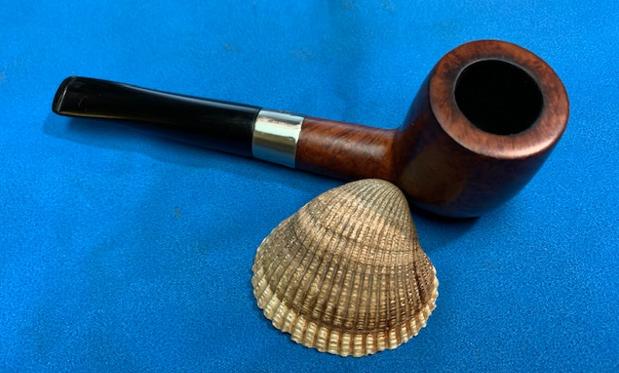
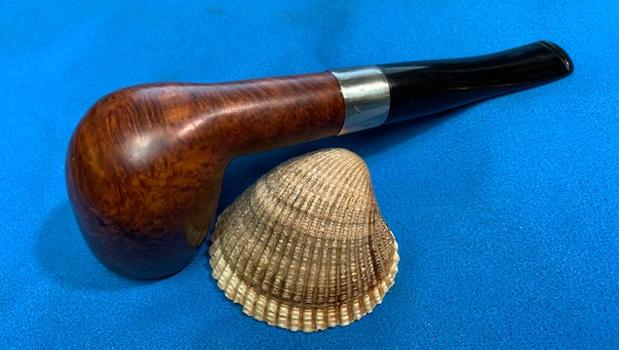
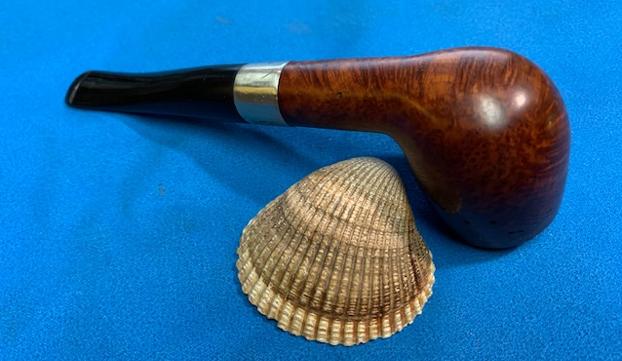
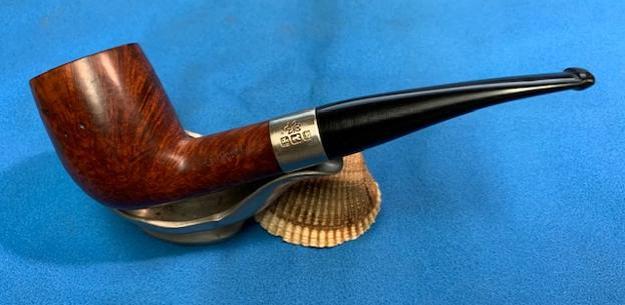
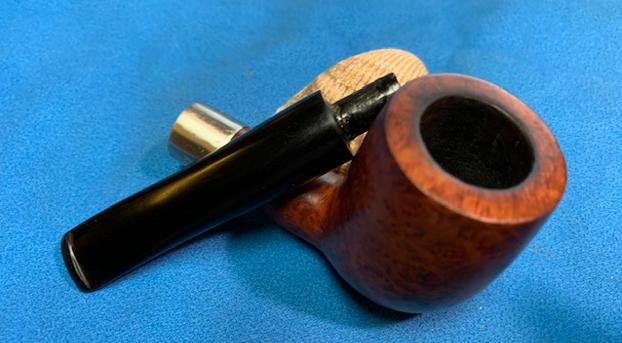
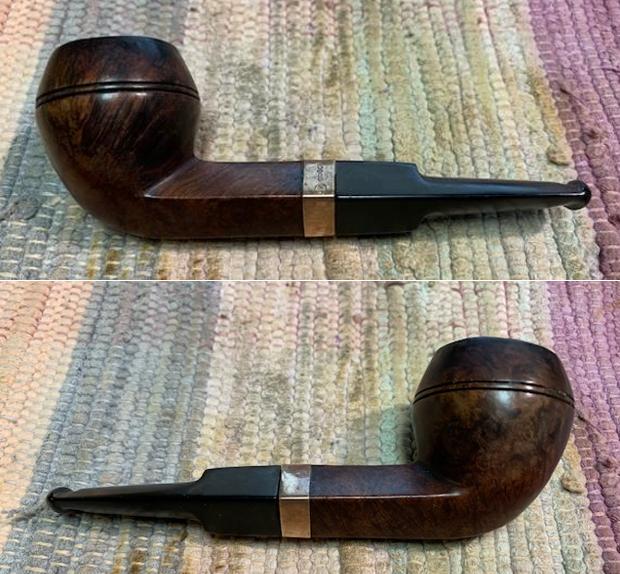
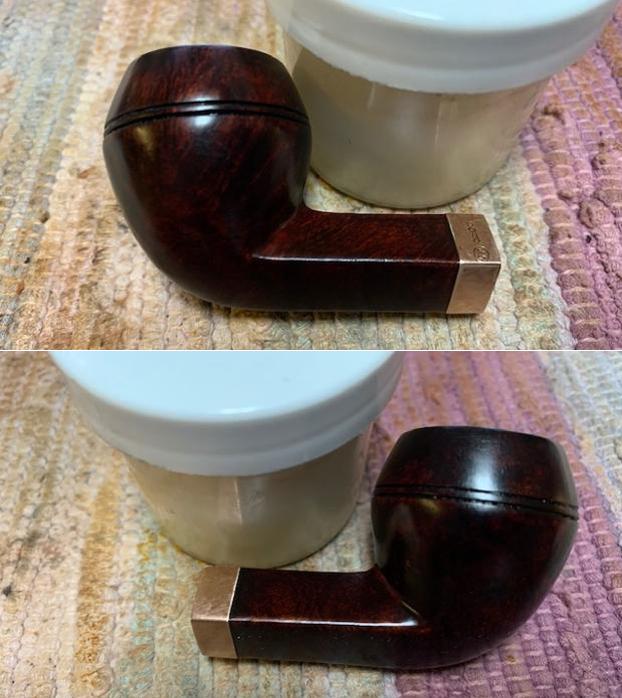
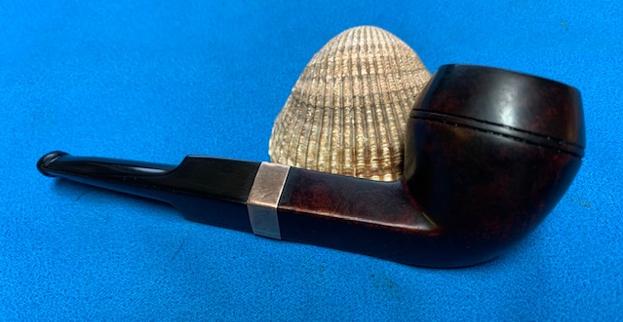
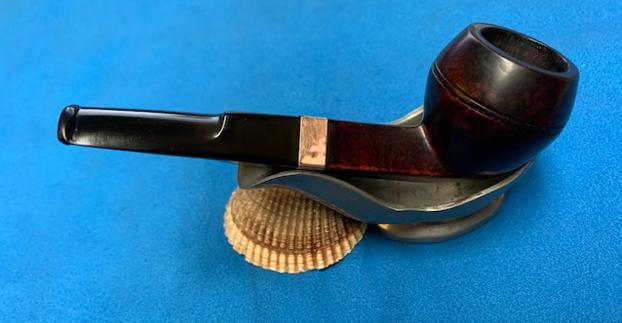
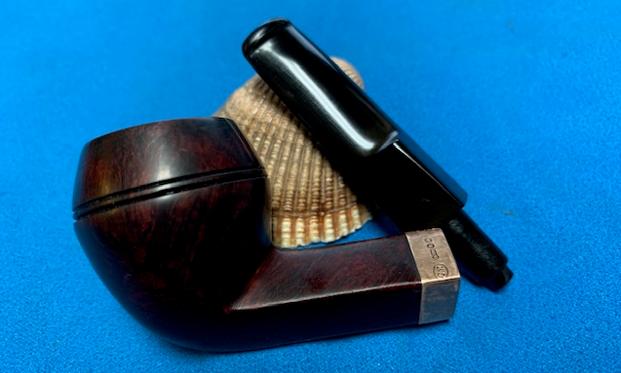
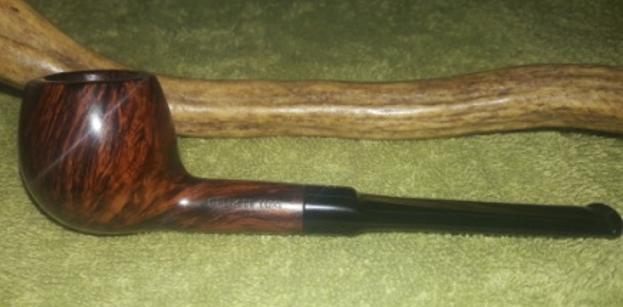
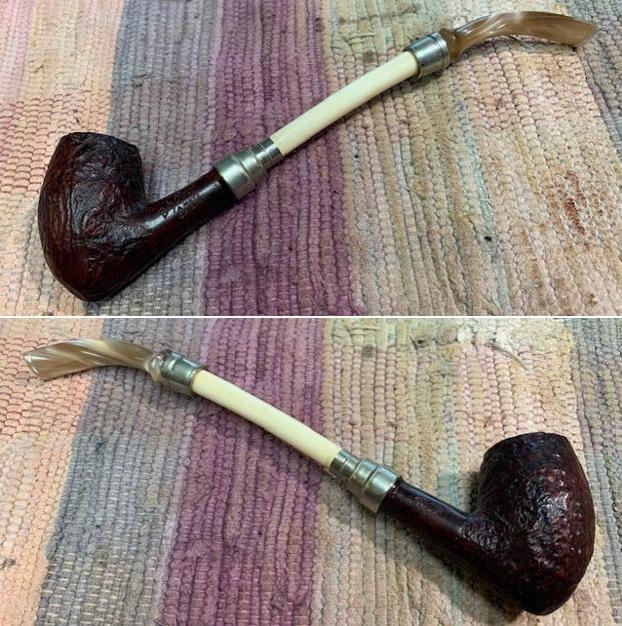
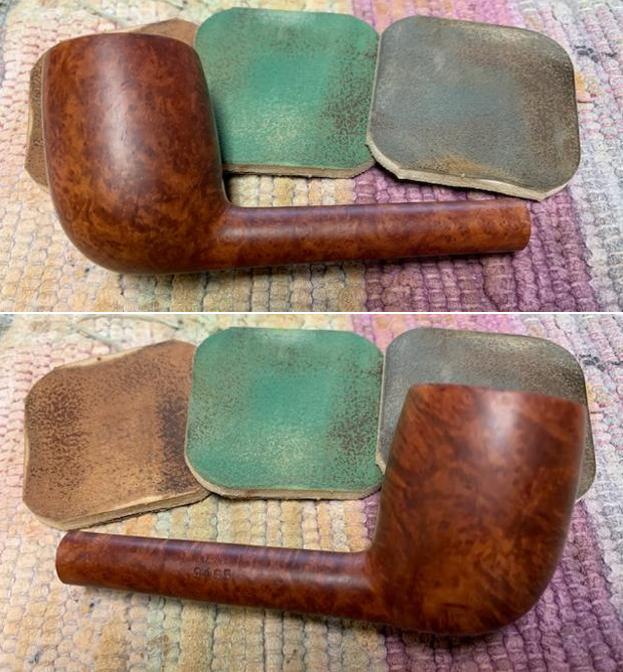
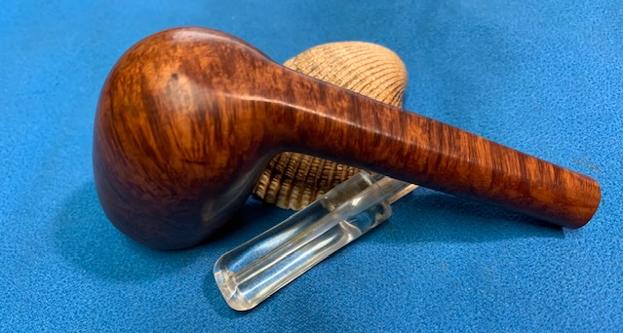
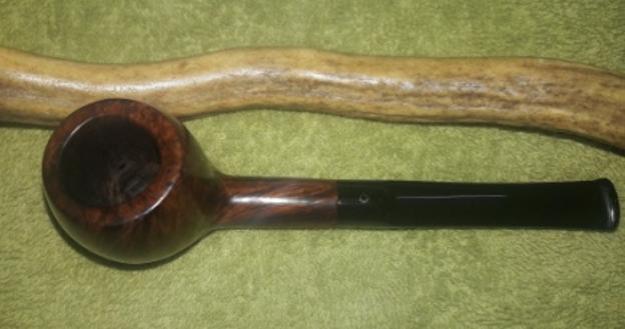
The 3rd pipe that I selected to work on from this lot is the Orlik Deluxe and is indicated with yellow arrow. The pipe is a classic straight Apple with a saddle vulcanite dental stem and a push-fit tenon. It is a medium sized pipe that oozes good quality and one that is light weight. The pipe has some fantastic mix of flame grains and bird’s eye to boast around the stummel surface and is without a single fill. The briar used to carve this pipe is of decent quality and the construction and finish of the stummel and mouthpiece feels top notch too. It is stamped on the left side of the shank as “ORLIK DE LUXE” in a straight line in capital letters over “LONDON MADE” also in capital letters. The right shank panel bears the shape code # LD 33 in the centre. The high quality saddle stem bears the trademark logo “O” atop the saddle as a brass inlay. The stampings are crisp and easily readable and shown below.
 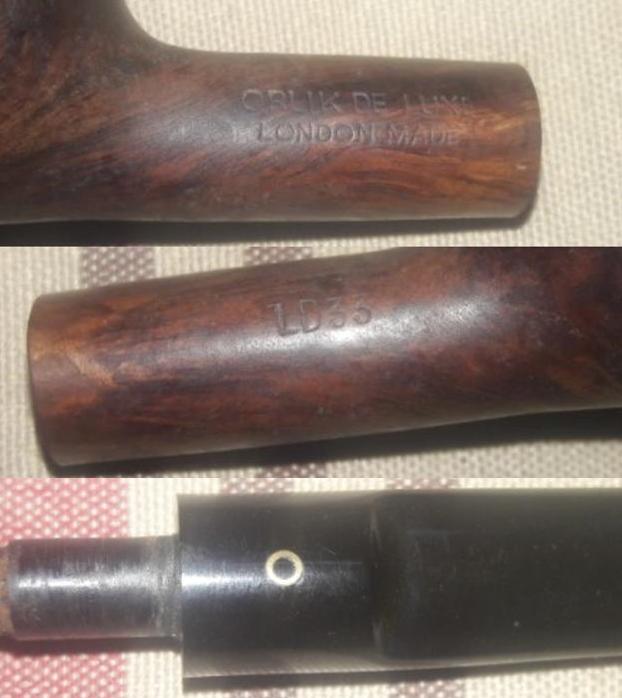 I had repaired the broken meerschaum lining (my first) on an Orlik, Meerschaum lined bent billiards and had read about the marquee. I remembered the brand to be British that was taken over by Cadogan group in the 1980s. To refresh my memory, I visited pipedia.org. I have reproduced the snippets of relevant information for easy referencing of the esteemed readers.
Orlik – Pipedia
In 1899, a pipe manufacturer was founded in London, Bond Street, by Louis Orlik. L. Orlik Ltd. started to produce high quality pipes for a relatively low price but high service and soon became quite popular. By 1907 they used the name L & A Orlik, which apparently added Louis’s brother, Alfred to the company name. In the first quarter of 1900 they also established in Birmingham. This can be verified by silver hallmarks. In 1980 the company was acquired by Cadogan. Like many of London’s other pipe manufacturers they moved to a new built factory in Southend-on-Sea. As all current brands in the Cadogan group, Orlik was being produced in those factories.
Orlik used the slogan “Smoked by all shrewd judges” “(who are also loved by his hard judge)” with a portrait of a judge wearing a wig. The picture is still used in Denmark for manufacturing of Orlik cigarettes.
An onsite link leads to a detailed and well researched article on Dating Orlik pipes by Michael Lankton and excerpts from the article Talk:Orlik – Pipedia. Give it a read for the details.
- De Luxe(L)(LX) – molded stems inferior blocks brown finish, lesser grain, some have hand cut stems and some have molded stems, could perhaps depend on date of manufacture with earlier pipes having hand cut stems
The Orlik series proper will be stamped in all caps in a sans serif font on the port side of the shank one of two ways
ORLIK SERIES_NAME
MADE IN ENGLAND
or
ORLIK SERIES_NAME
LONDON MADE
The starboard side of the shank is stamped simply with the series letter and shape number, except on pipes stamped London Made on the port side, in which case in addition to the series letter and shape number Made in England is stamped in a straight line.
Orlik Pipes Shapes Catalog courtesy Yuriy Novikov (link provided below), is a neat catalog that describes the shape 33 as “MEDIUM APPLE”
Orlik_Pipe_Shapes.pdf (pipedia.org)
Thus from the above information and observing the pipe in my hand, it can be safely concluded that this Orlik De luxe # LD 33 is a lower placed series pipe with a molded stem. It is from the pre Cadogan period, that is 1950s to 1970s and that makes it a fairly collectible piece. It is my educated guess that the “D” in LD stands for Dental stem that is seen on this pipe.
Personally speaking, I am in complete agreement with Mr. Michael Lankton when he says that the early Orlik pipes were similar in quality to Dunhill, Loewe, Barling and Comoy’s based on the quality of the pipe that is currently on my work table. Even though this pipe is from the De Luxe series of Orlik, it is anything but of lesser quality!! The briar has some great straight grains on the sides of the stummel and is sans any fills. The pipe feels solid in the hand and the craftsmanship is perfect.
Armed with the information about the provenance of the pipe on my worktable, it was time for me to start the refurbishing of this pipe.
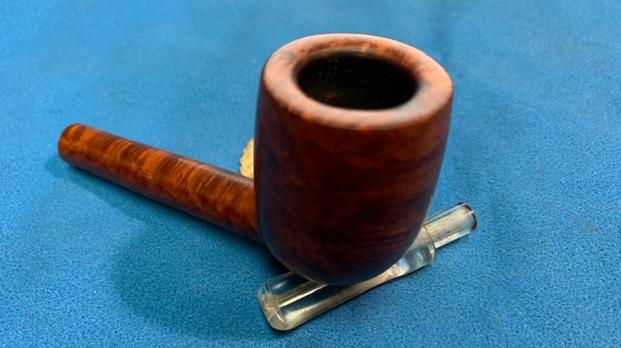
Initial Visual Inspection
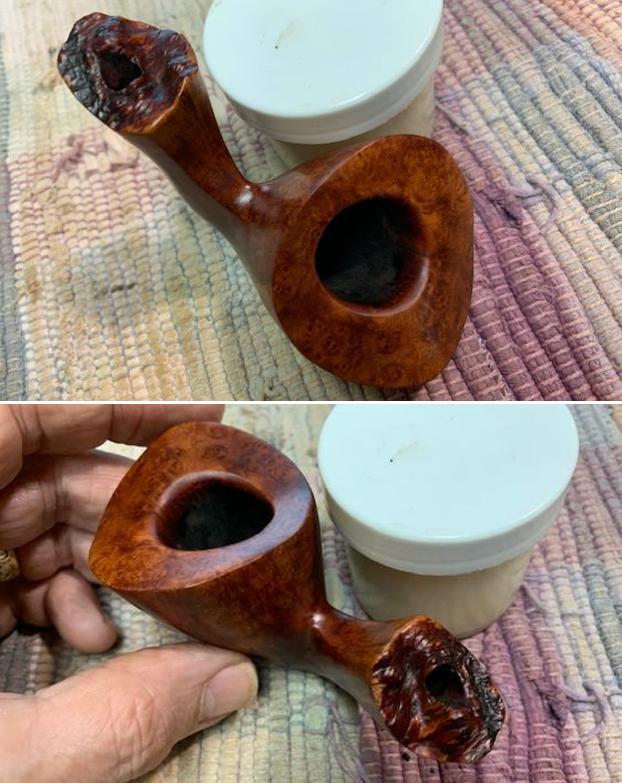
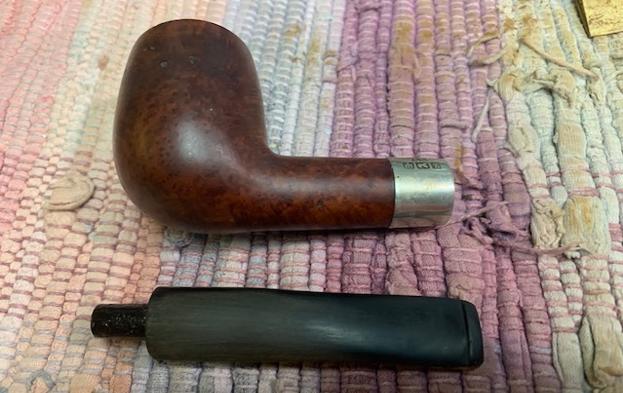
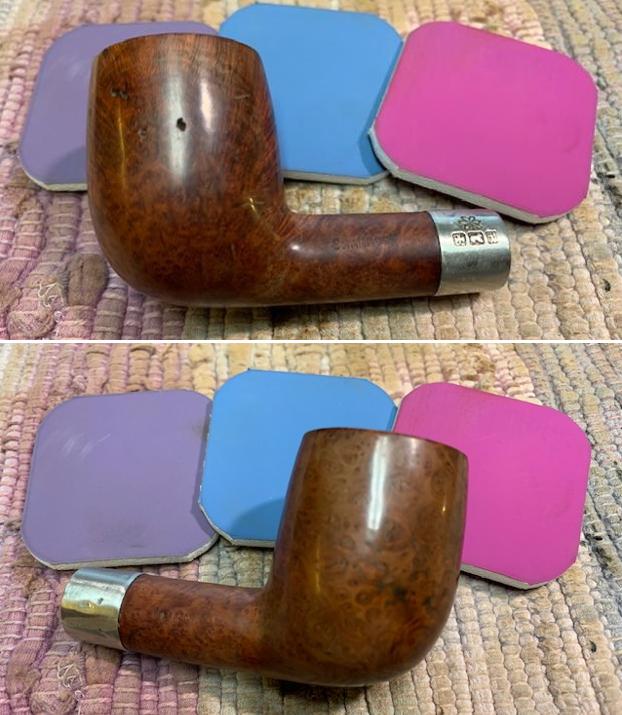
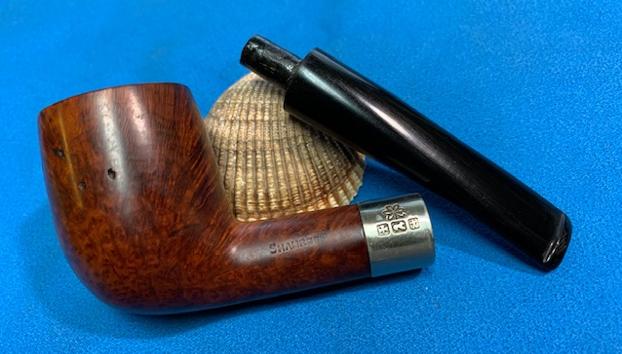
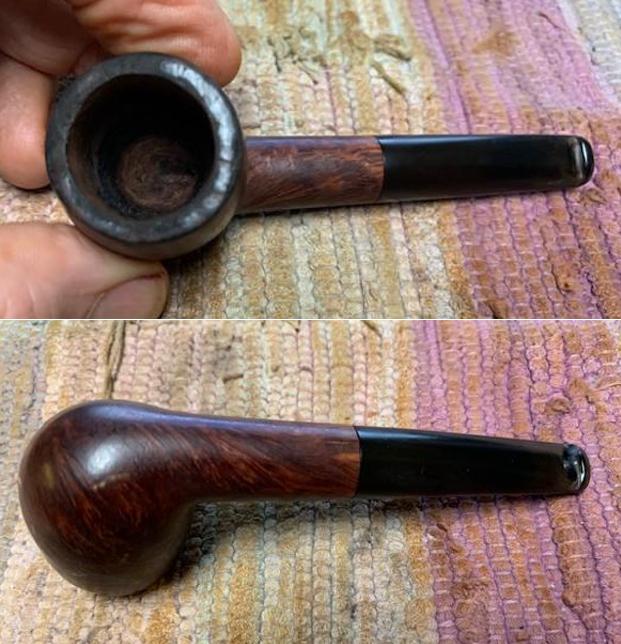
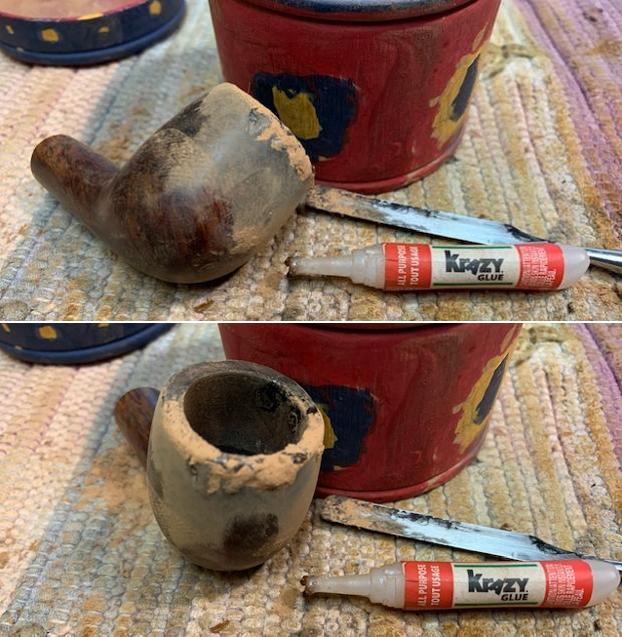
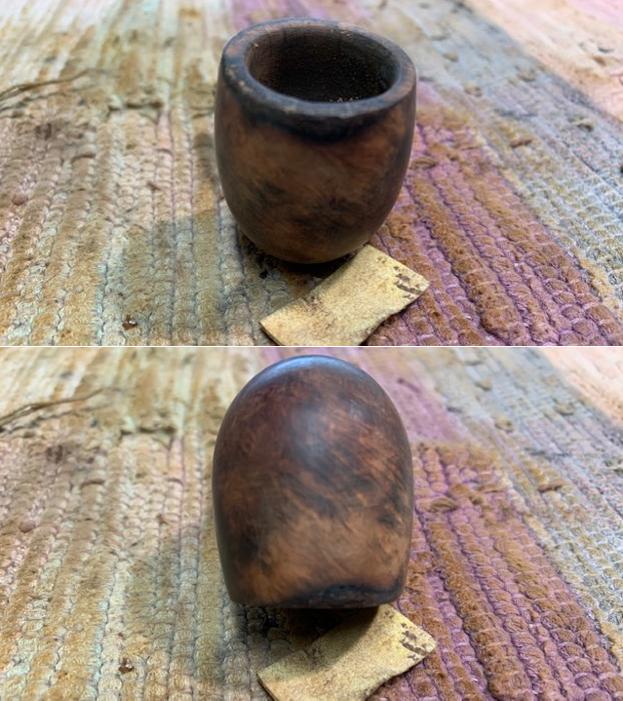
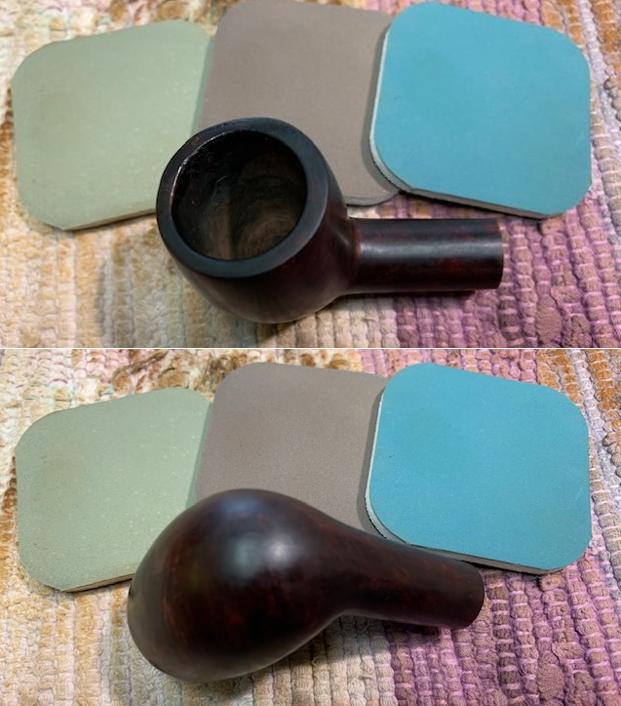
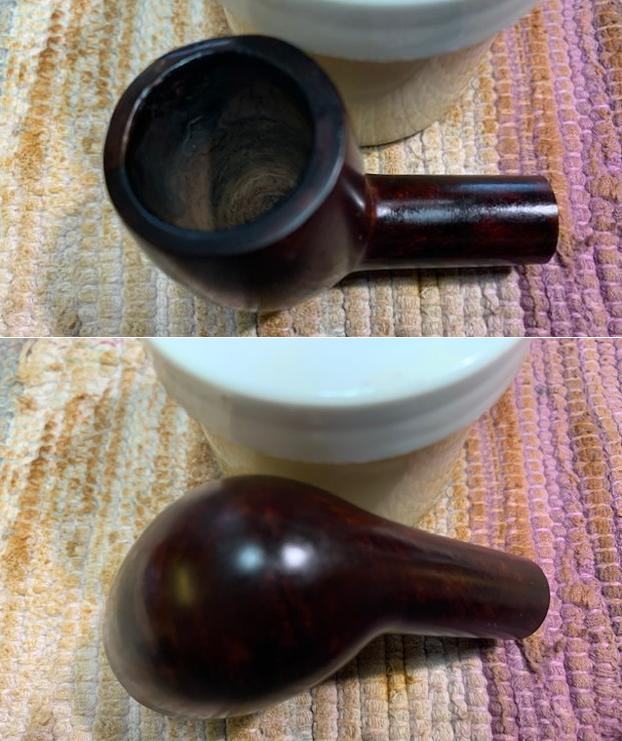
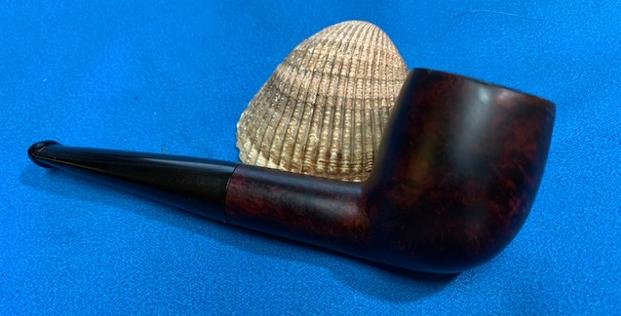
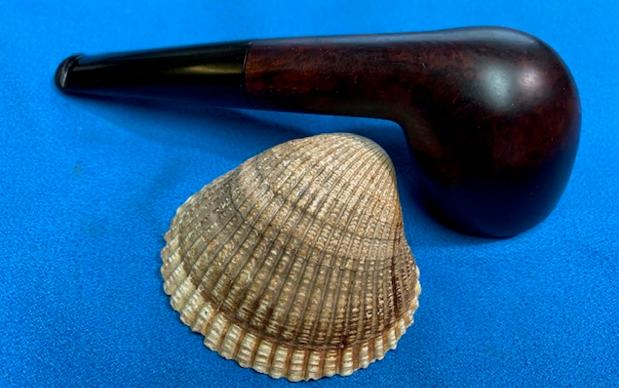
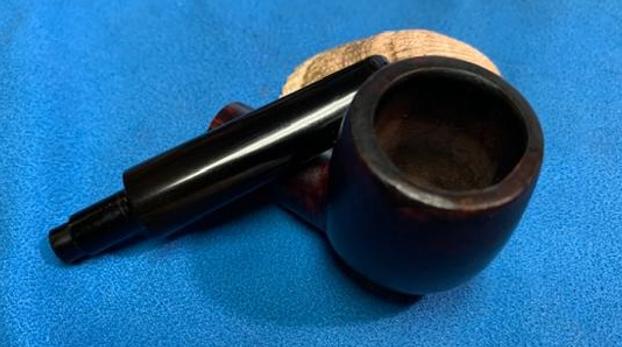
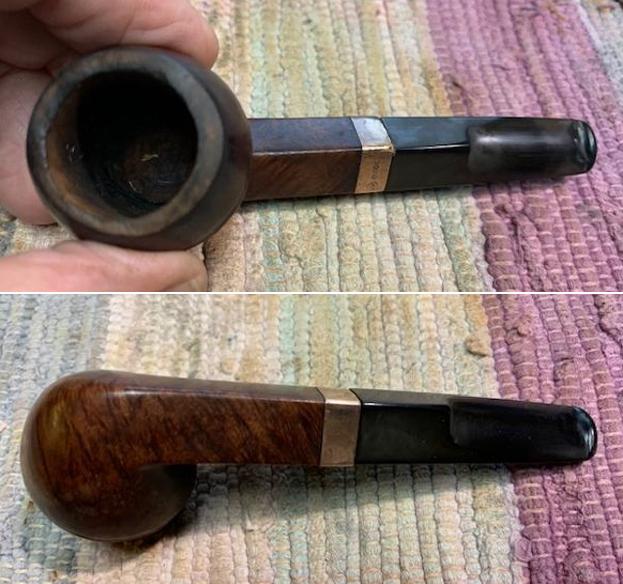
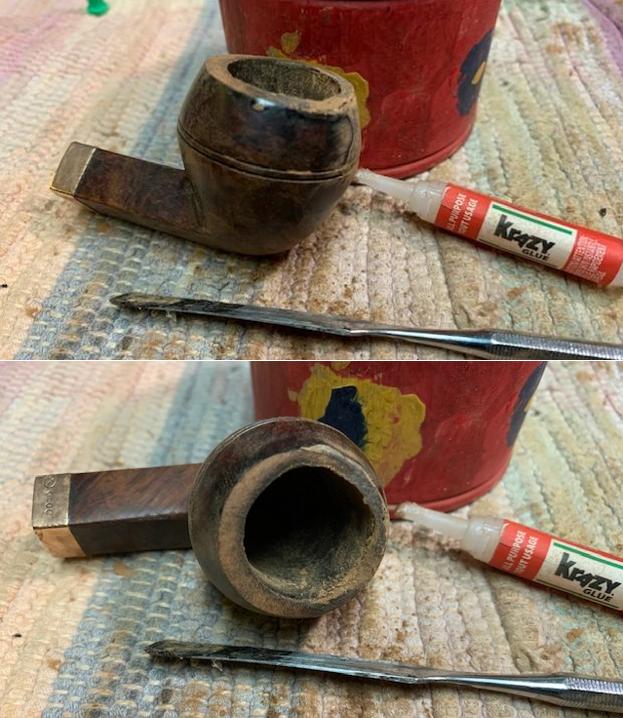
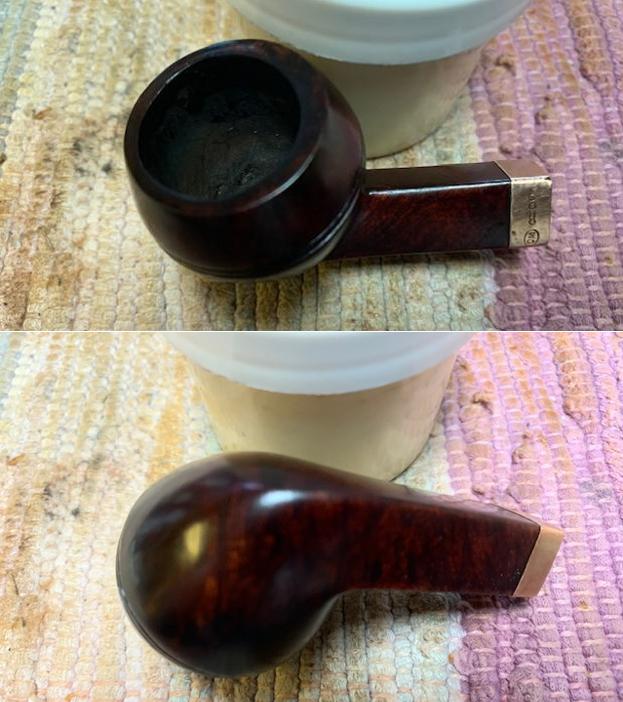
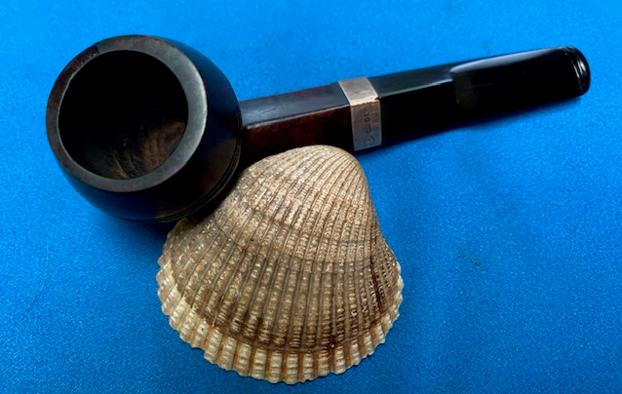
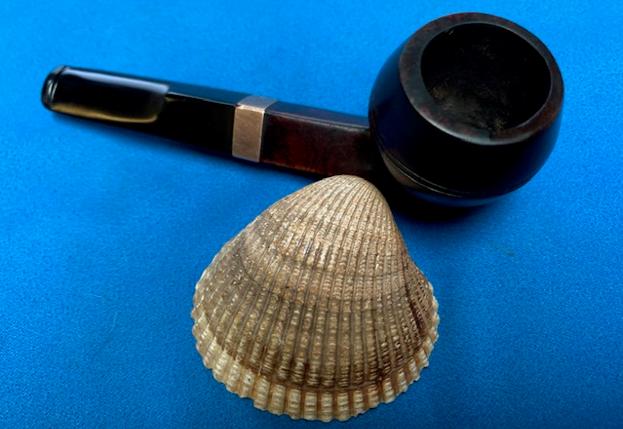
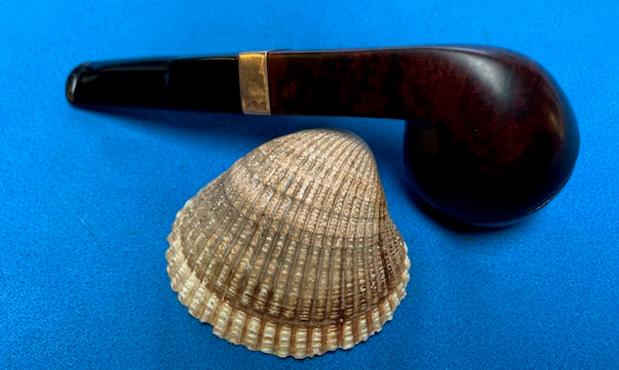
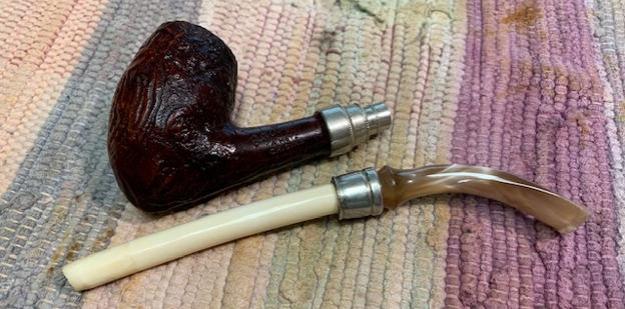
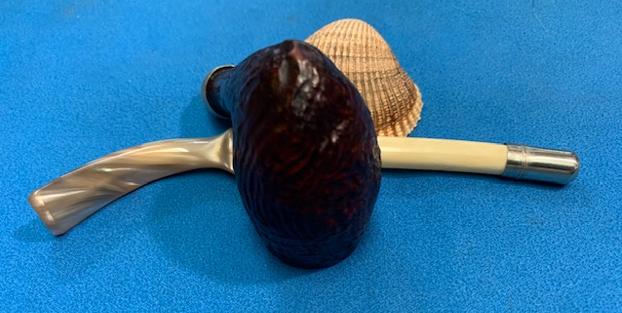
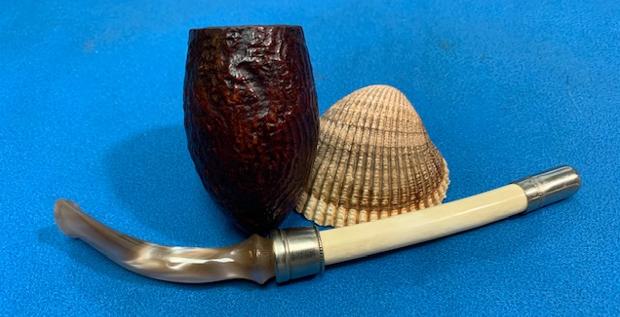
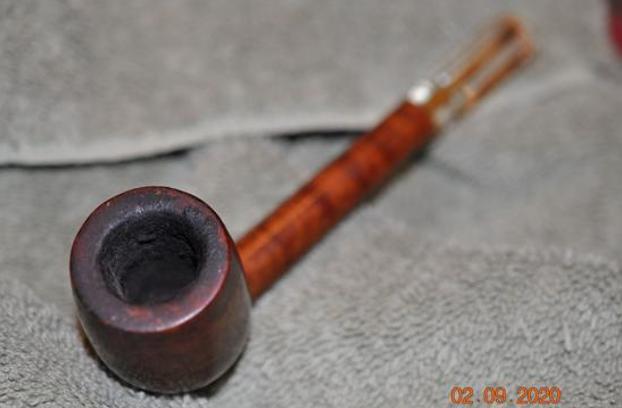
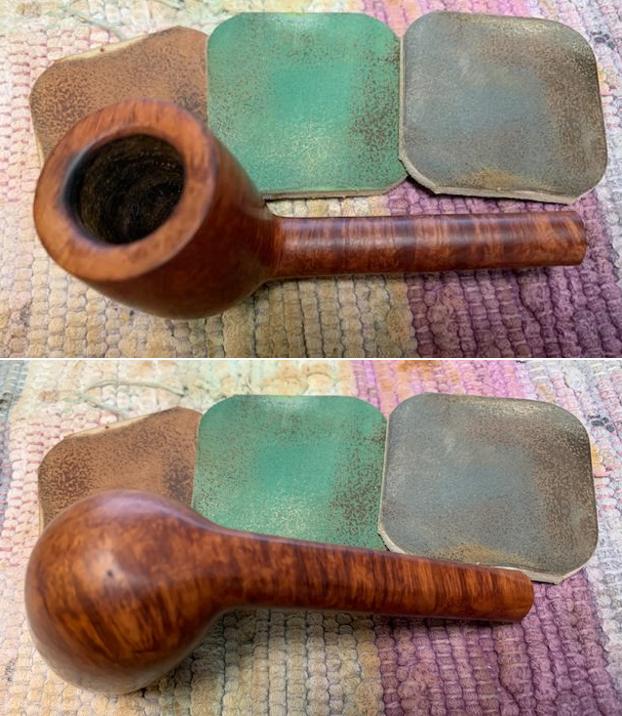
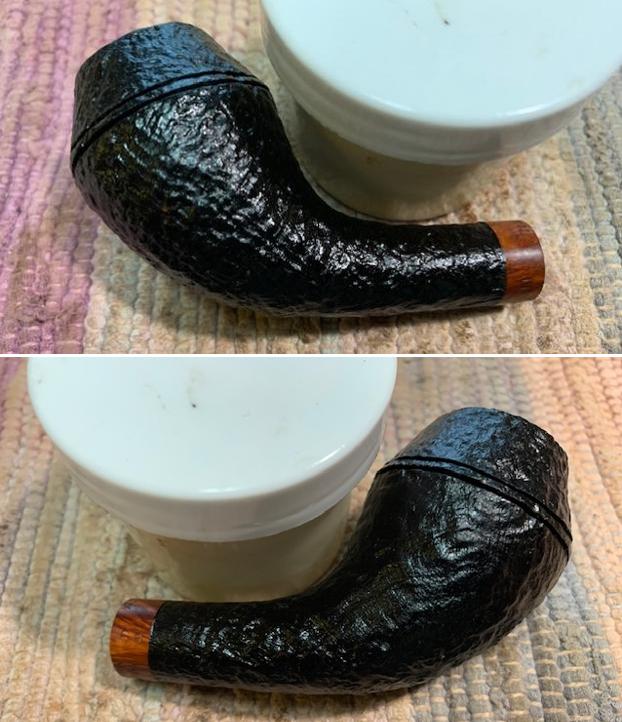
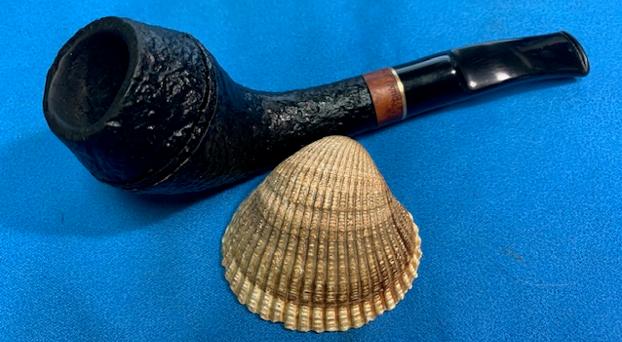
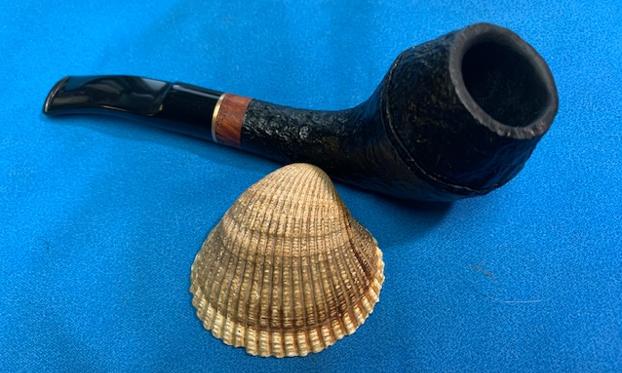
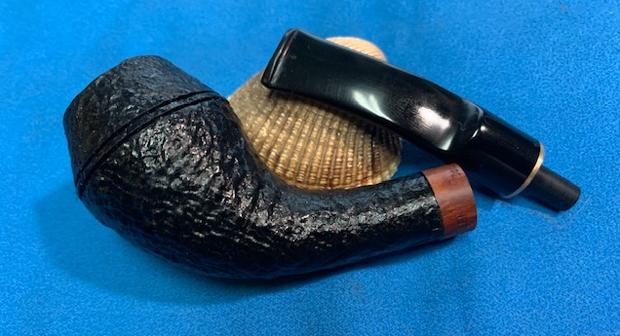
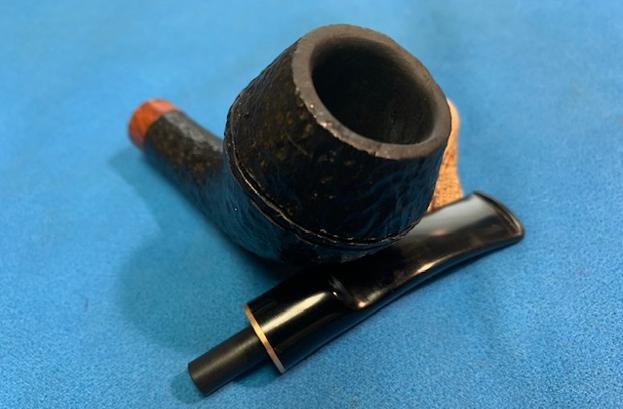
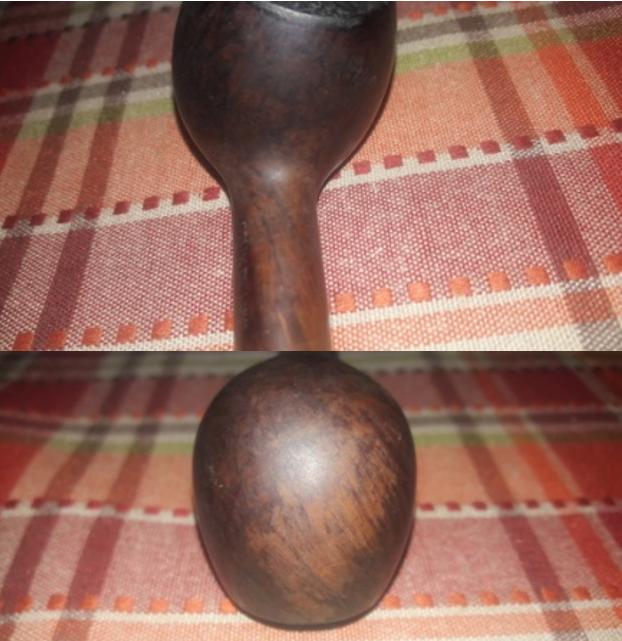
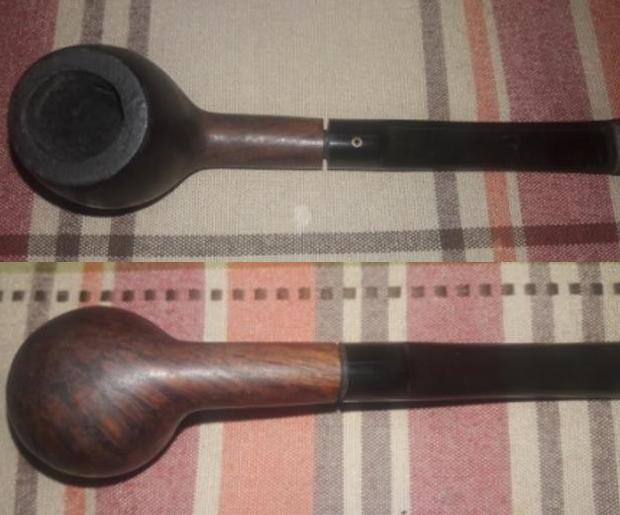
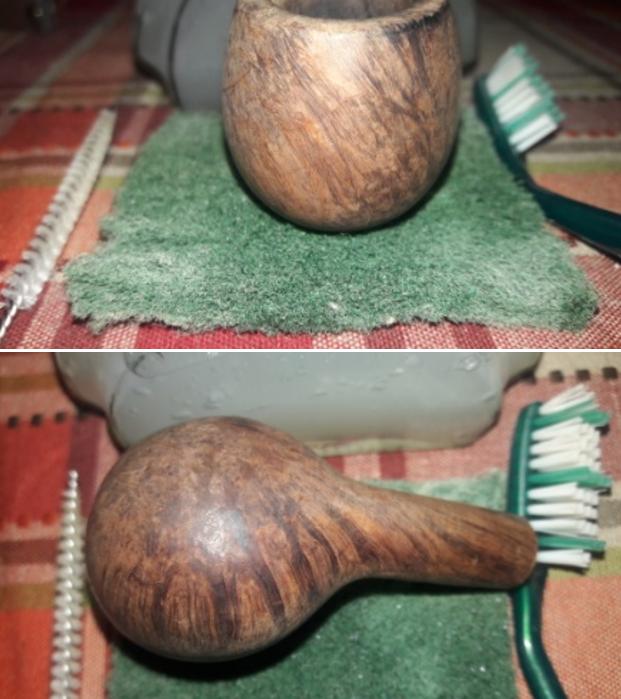
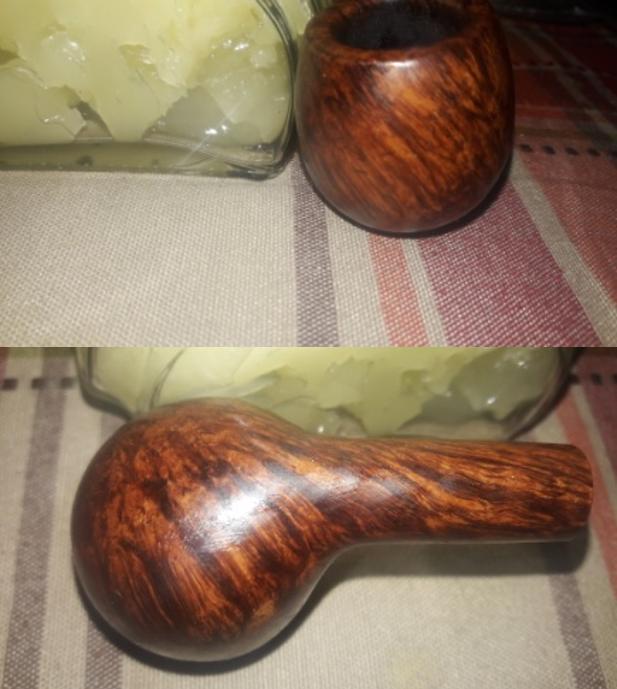
This pipe has the classic straight Apple shape with a medium sized bowl. The stummel boasts of some beautiful flame grains on the left side and swirls on the right. The shank is adorned with beautiful straight grains traversing from the shank end towards the bowl. The stummel surface is covered in dirt and grime of the overflowed lava, hiding the fantastic grain patterns over the stummel surface. There is not a single fill in the briar which speaks of high quality selection of the briar. There is a thick layer of cake in the chamber. The saddle vulcanite dental stem is oxidized with tooth chatter and calcium depositions on either surface in the bite zone. The stem does not seat flush with the shank face. The set of pictures below show the condition of the pipe when it had reached us.
 Detailed Inspection Of The Pipe And Observations
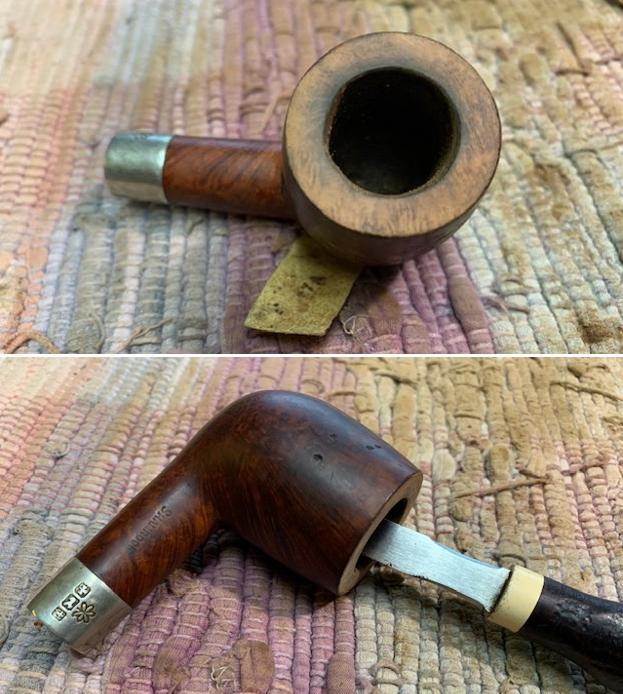
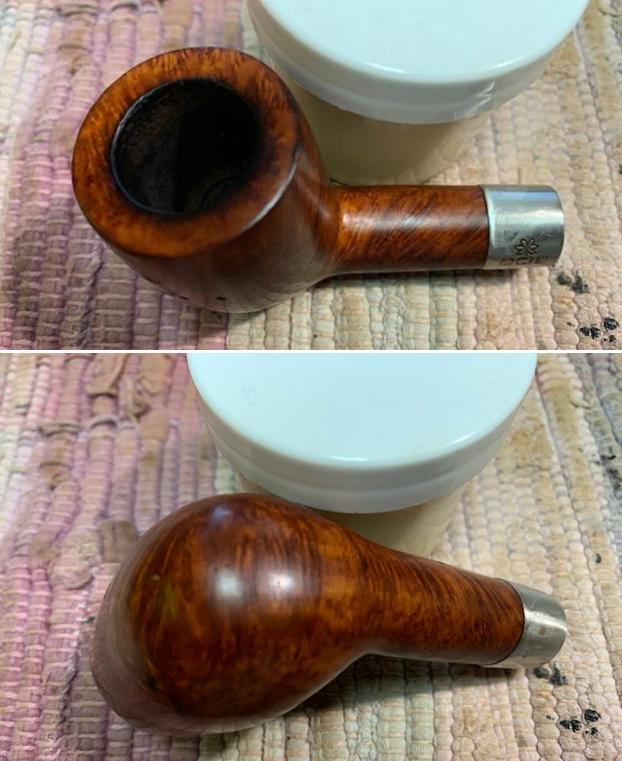
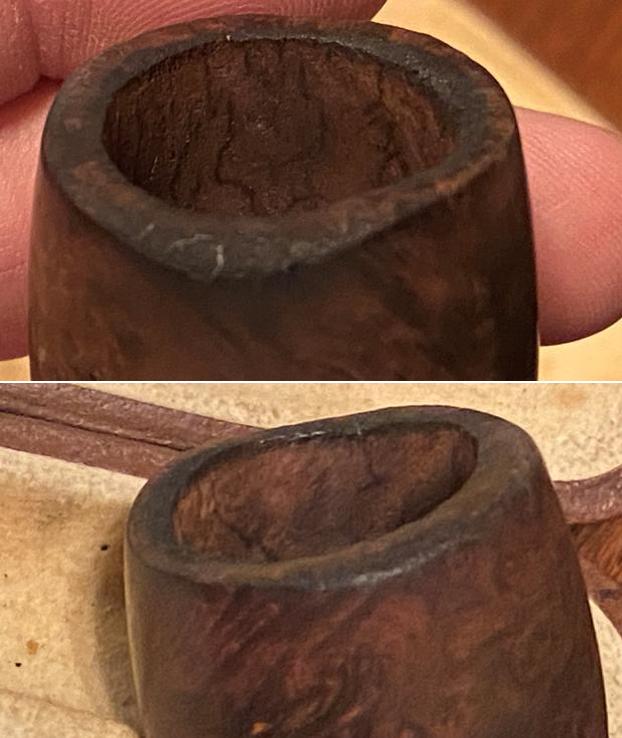
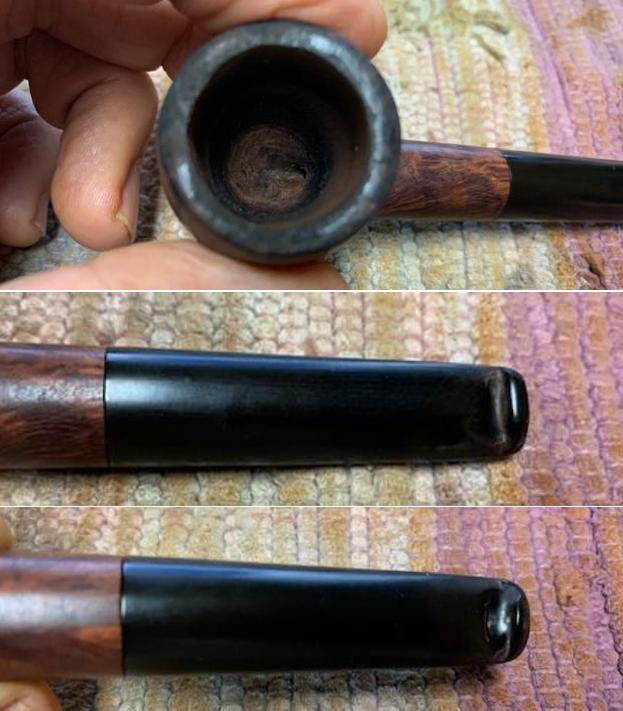
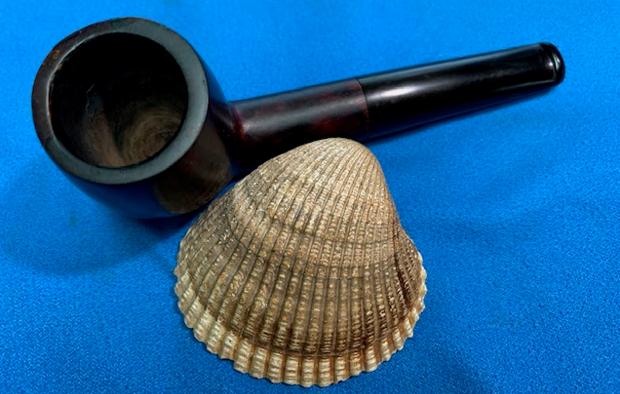
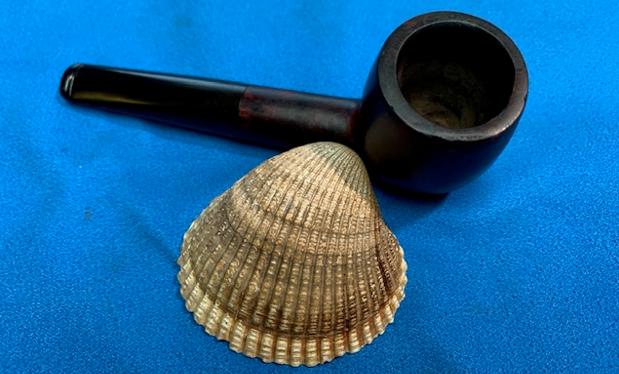
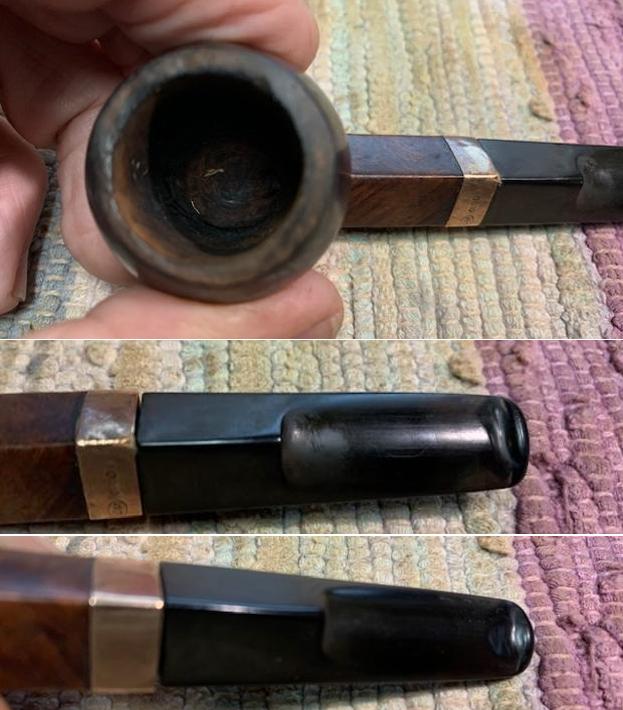
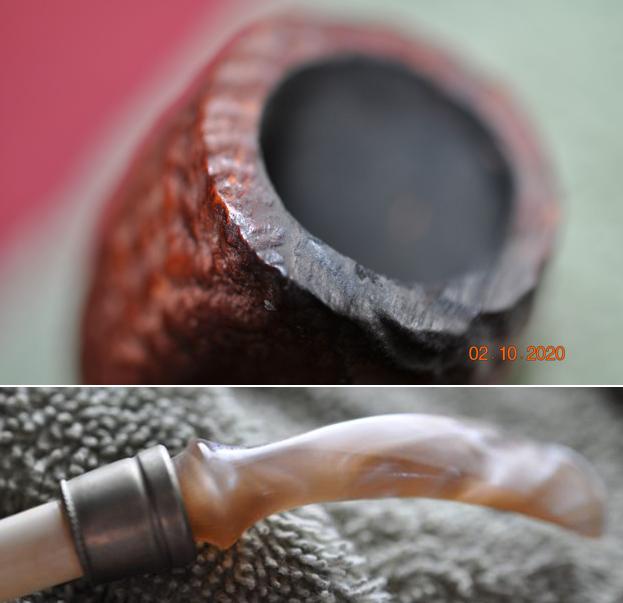
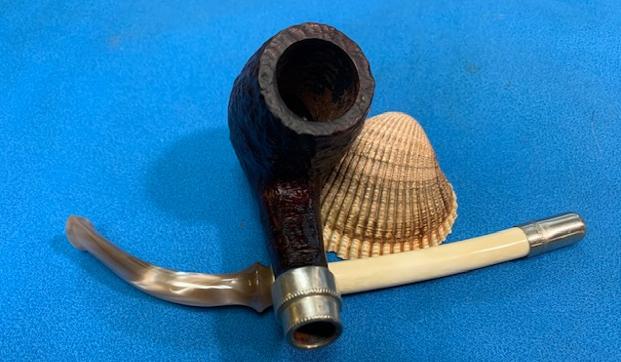
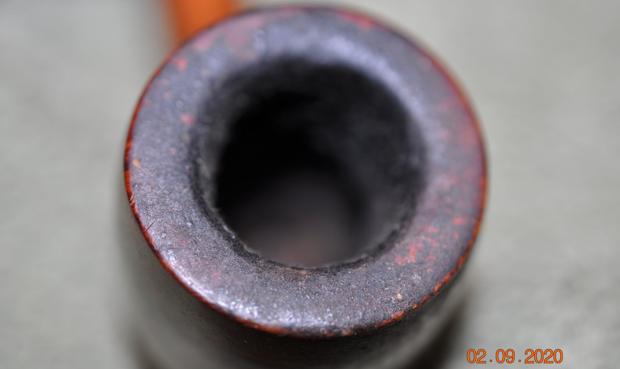
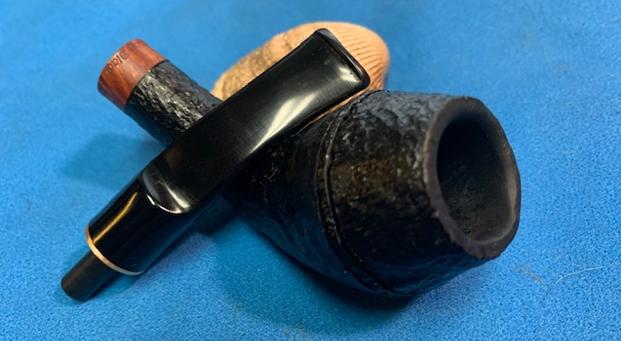
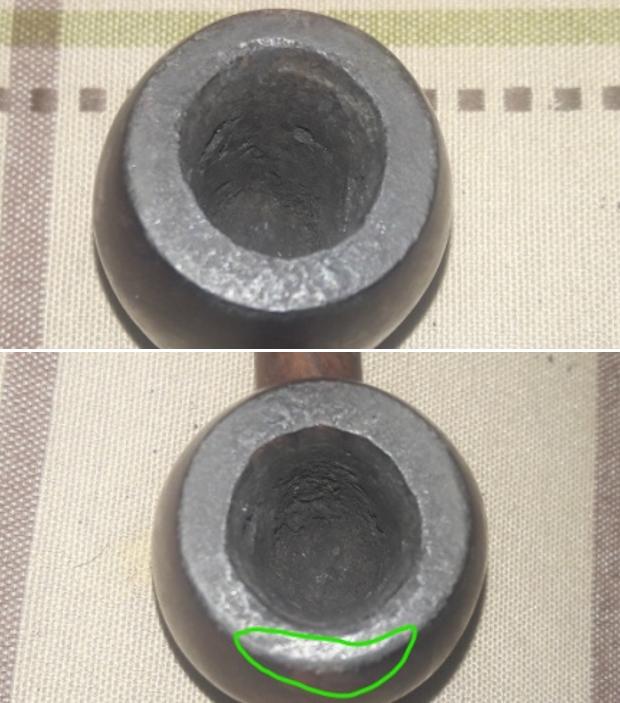
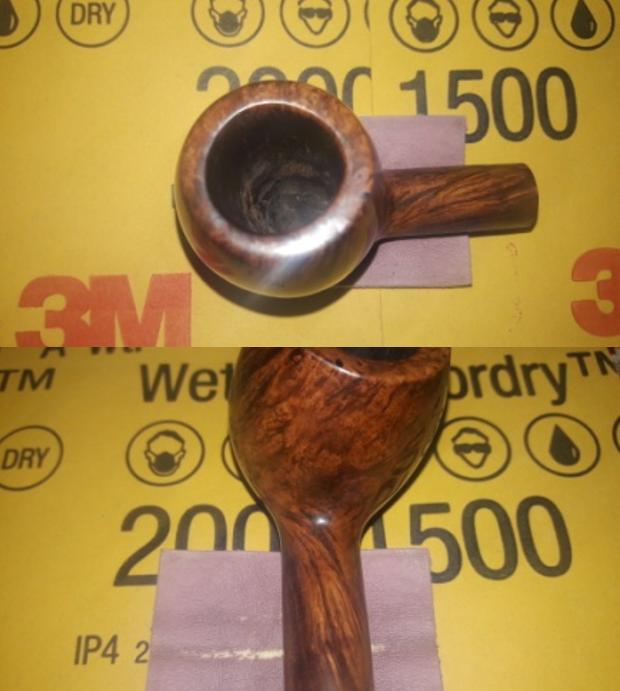
The chamber has an even layer of thick hard cake. The smooth rim top surface is covered in lava overflow, dirt and grime from previous usage. The outer rim edge has suffered a few blows on a hard surface resulting in a few chipped edged surfaces in 12 o’clock direction (encircled in green). The inner edge appears to be charred in 11 o’clock direction with a chipped surface in 5 o’ clock direction (both encircled in pastel blue). The inner rim also shows a few dings and dents (indicated with red arrows), the cumulative effect of which is an out of round appearance to the chamber. The condition of the inner walls of the chamber can be commented upon after the cake has been taken down to the bare briar. The chamber exudes a very strong odor of old tobacco. The draught hole is dead center at the bottom of the chamber and that makes me believe that it should be a great smoke and the thick cake in the chamber lends credence to this observation. The stummel appears solid to the touch all around and hence I do not foresee any serious damage to the walls in the form of a burnout/ deep heat fissures/ lines or pits. Topping the rim surface should address the dents and dings over the rim edges to a great extent, while the remaining damage will be addressed by creating a slight bevel over the rim edge. The reaming and subsequent cleaning of the chamber and mortise should reduce the ghost smells from the chamber.
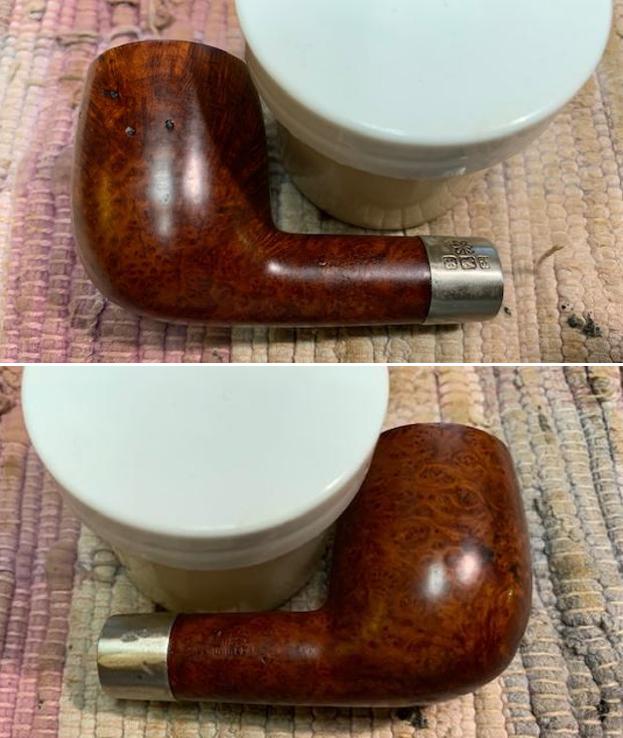
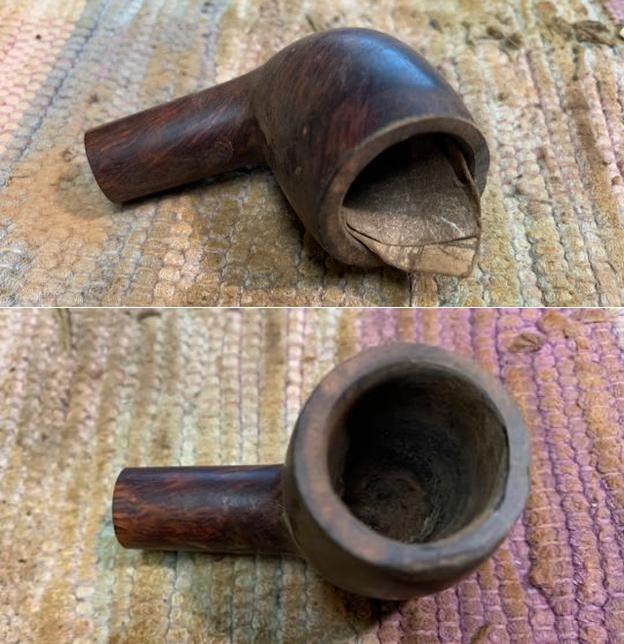
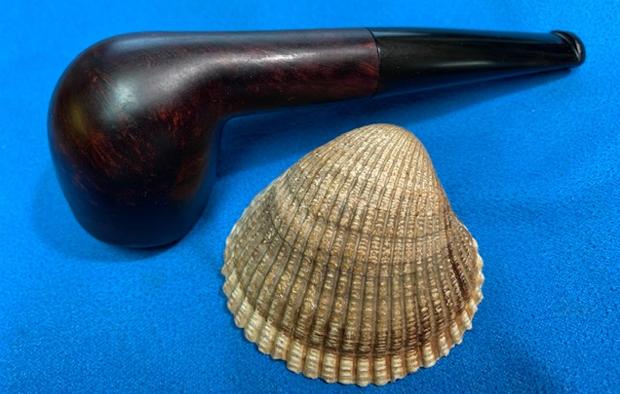
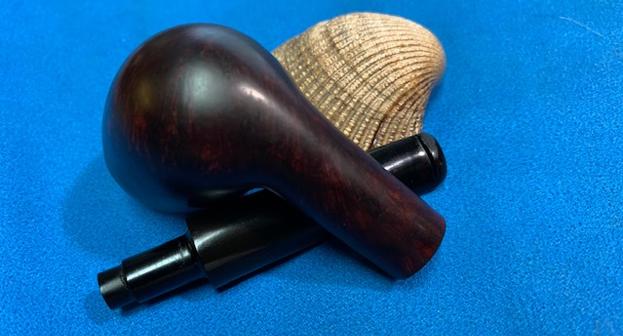
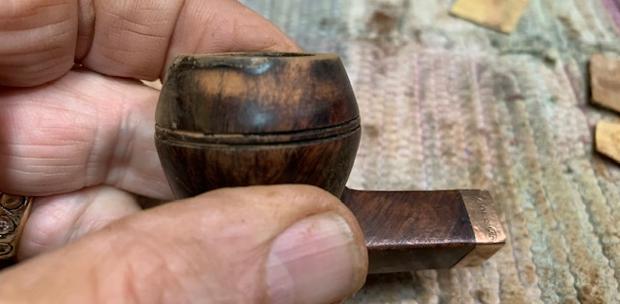
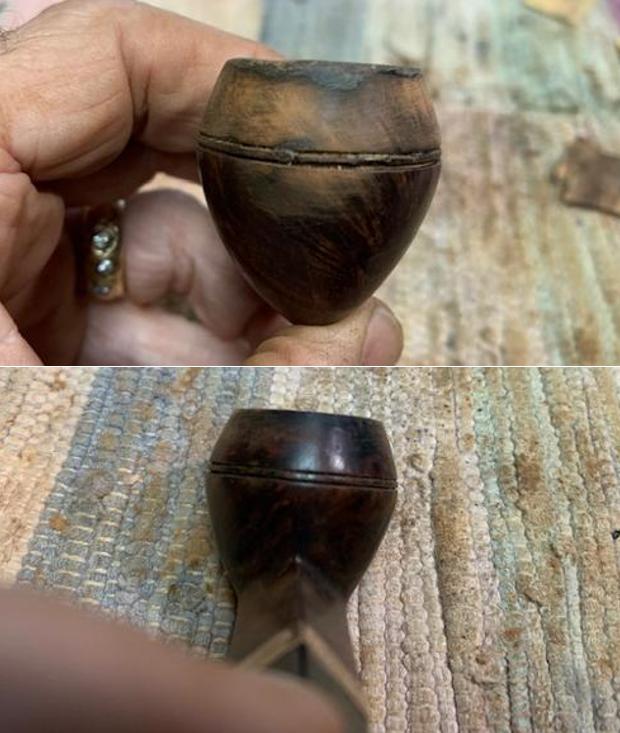
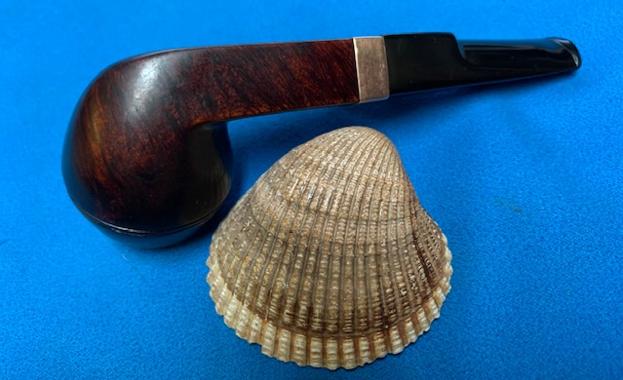
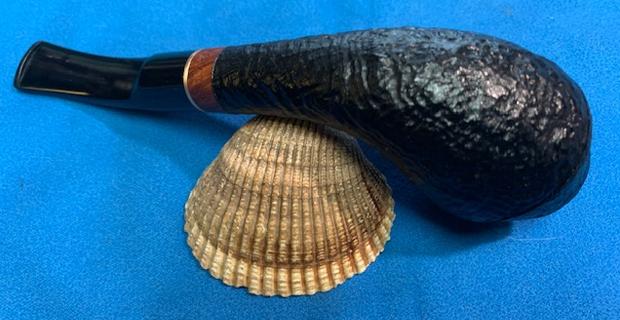
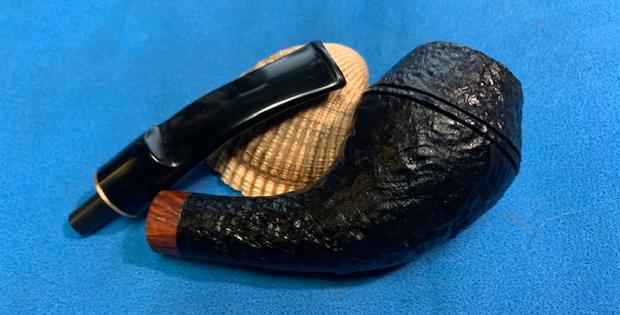
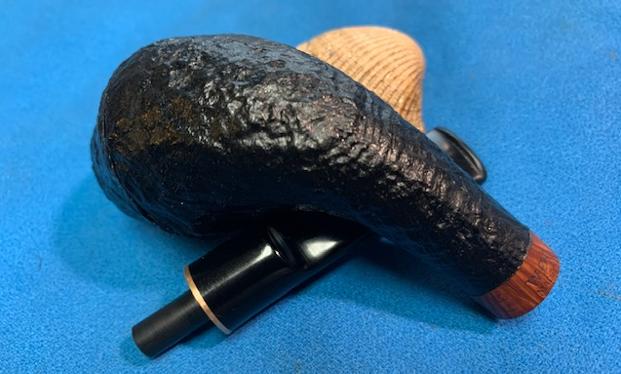
 The smooth stummel surface is covered in lava overflow that has attracted a lot of dust and dirt. The dark brown hued briar has taken on a layer of aged patina through which one can make out the beautiful flame and swirl grains that adorn most of the stummel surface and the shank. There are a few very minute dents and dings over the bowl surface probably due to falls and or rough, uncared for handling of the pipe. The briar looks lifeless and bone dry and has taken on dull dark hues. The mortise shows a heavy accumulation of oils, tars and gunk due to which the air flow is not full and smooth. Thorough cleaning of the stummel surface and rinsing it under warm water should highlight the grain patterns. This cleaning will further reveal any other damage to the stummel surface. The dents and dings to the stummel will be addressed to an extent once it is sanded and polished using micromesh pads.

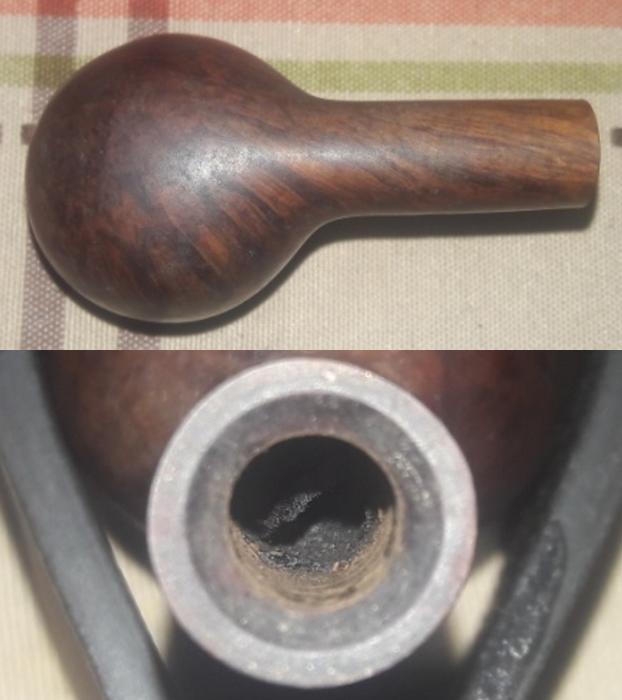 The seating of the stem tenon into the mortise is not flush. The most probable reason for this could be the accumulated gunk in the mortise. Thorough cleaning of the mortise should address this issue.
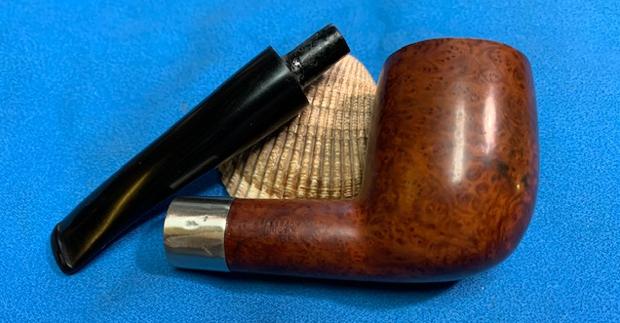
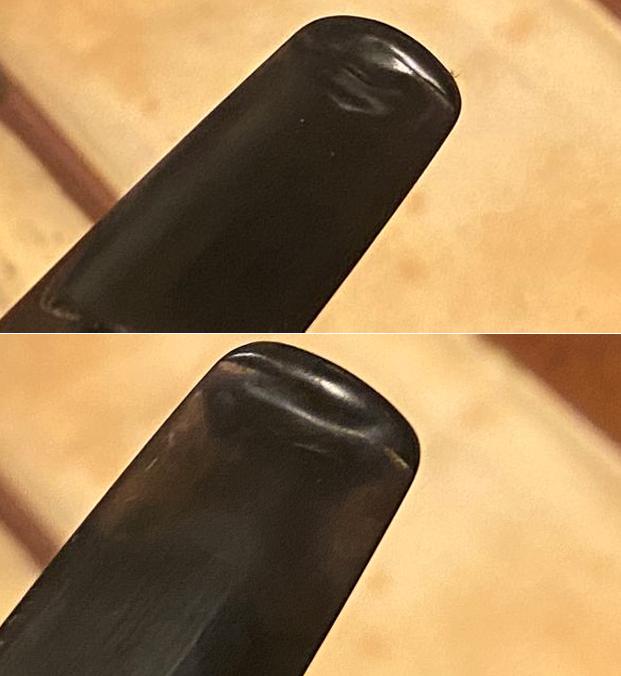
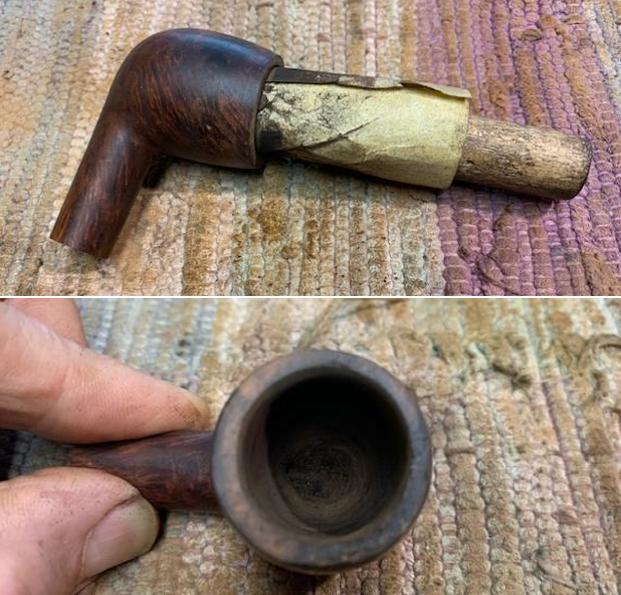
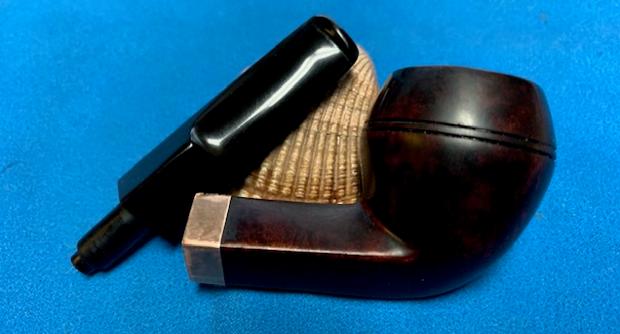
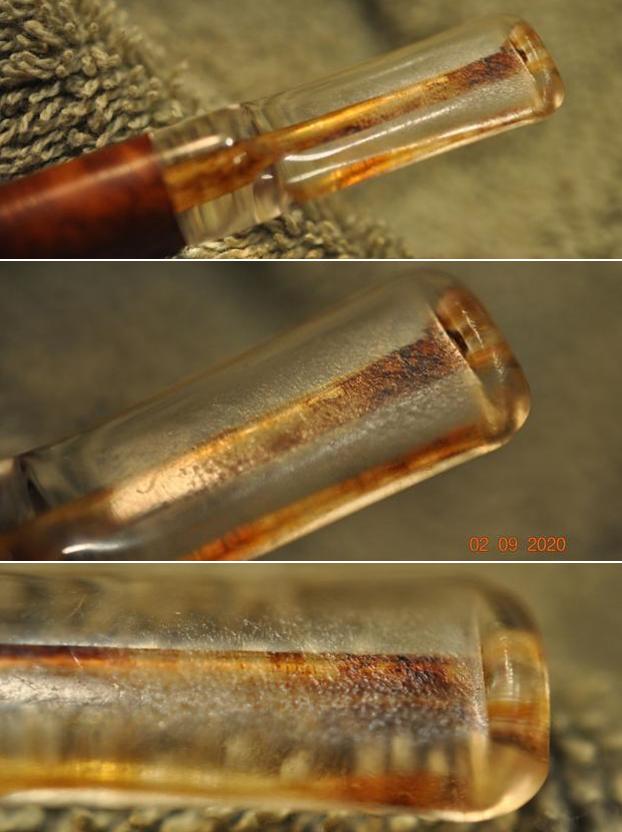
 The vulcanite saddle dental stem is relatively less oxidized. The bite zone has filing marks on either surface, but more pronounced on the upper extended button. The tenon is smeared in oils and tars and grime and so is the horizontal slot. The molded saddle dental stem bears the trademark inlaid brass logo “O” on the top face of the saddle and would need to be polished. Overall, the stem is in a decent condition and the vulcanite should take on a nice shine readily.
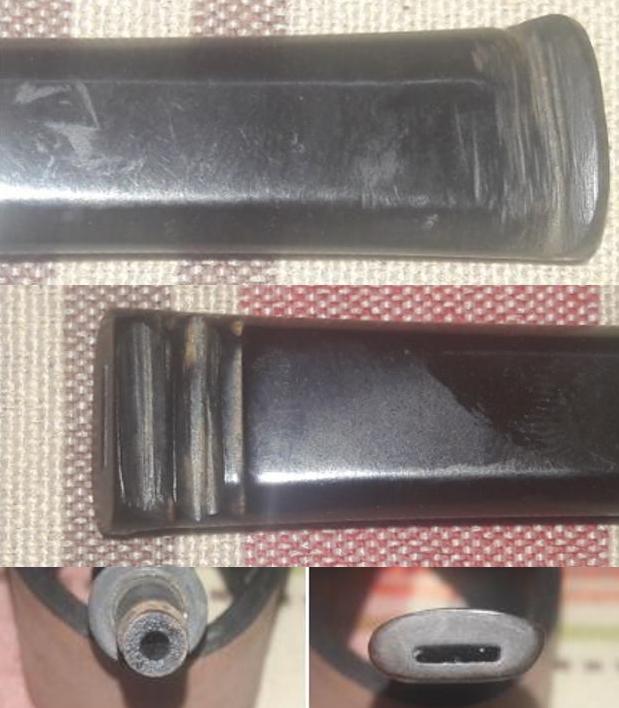 The Process
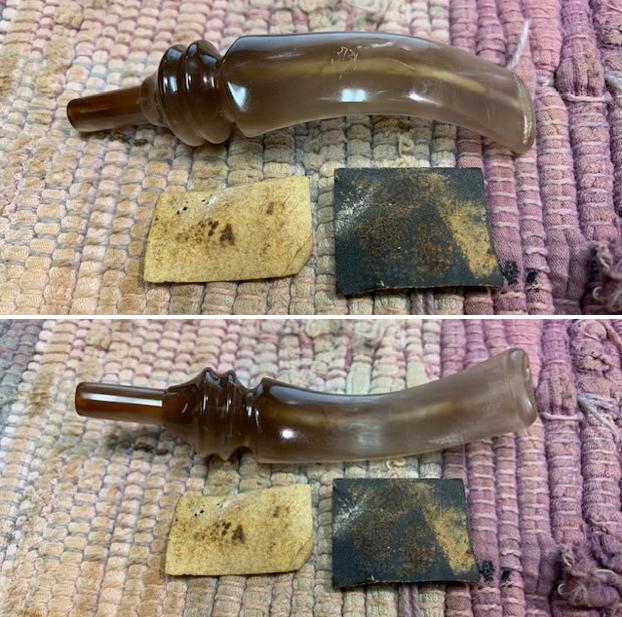
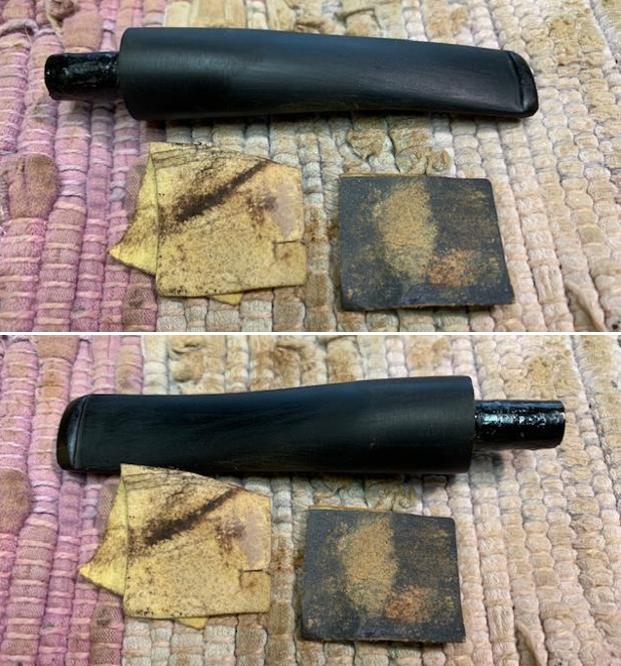
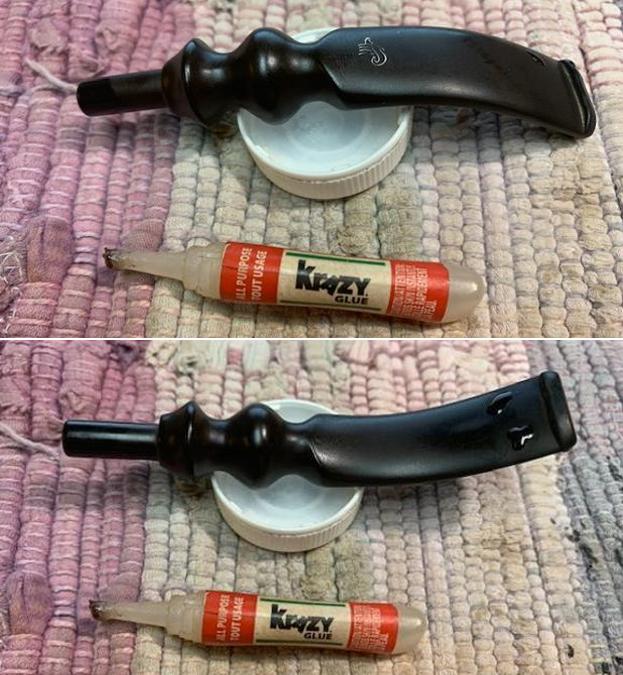
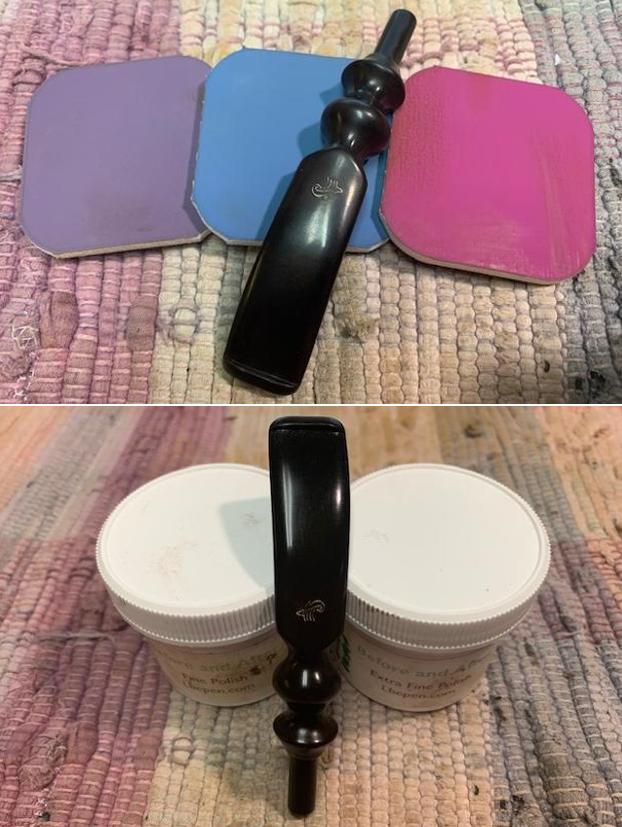
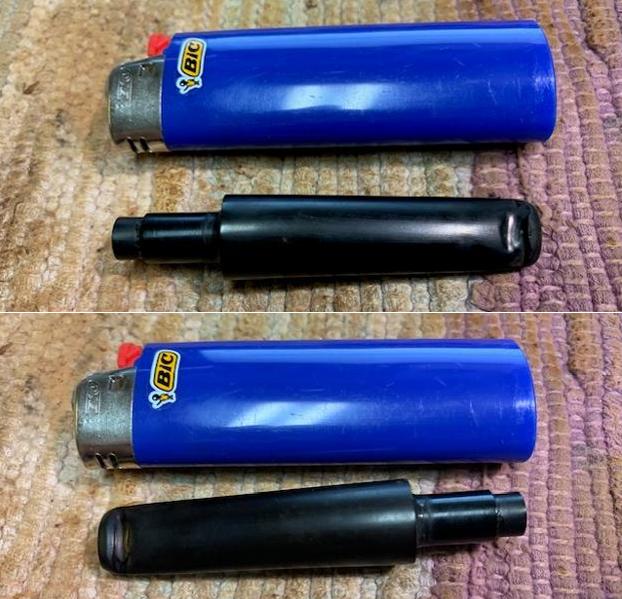
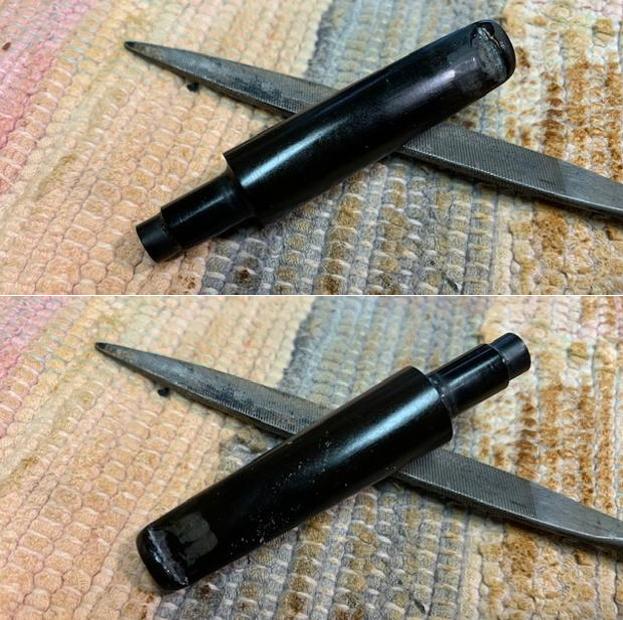
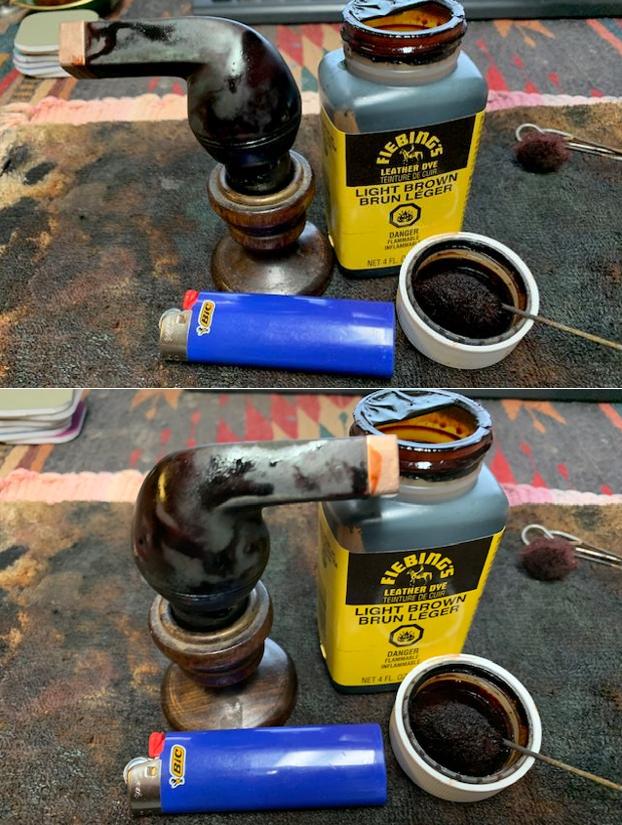
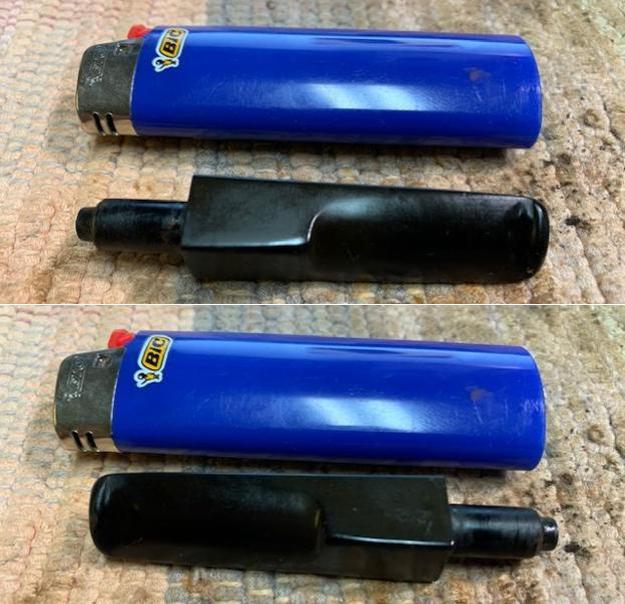
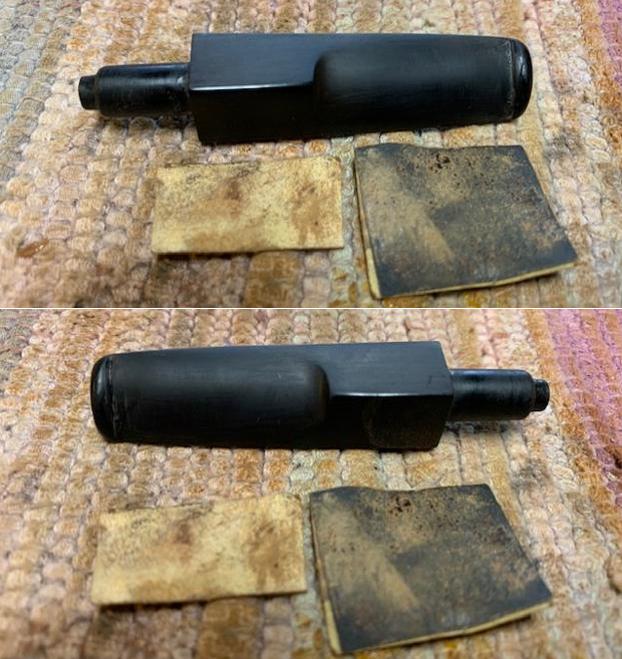
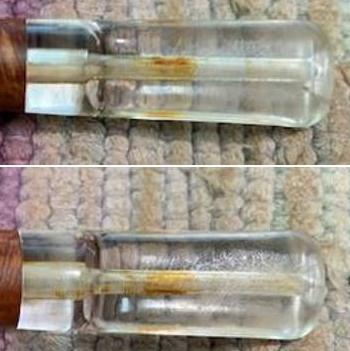
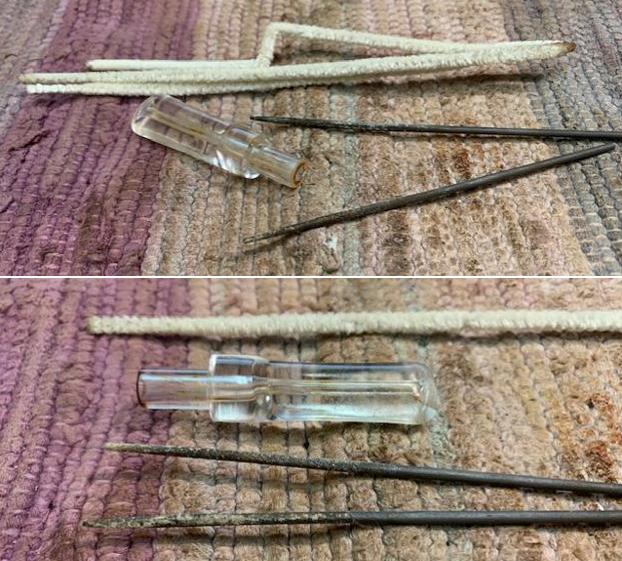
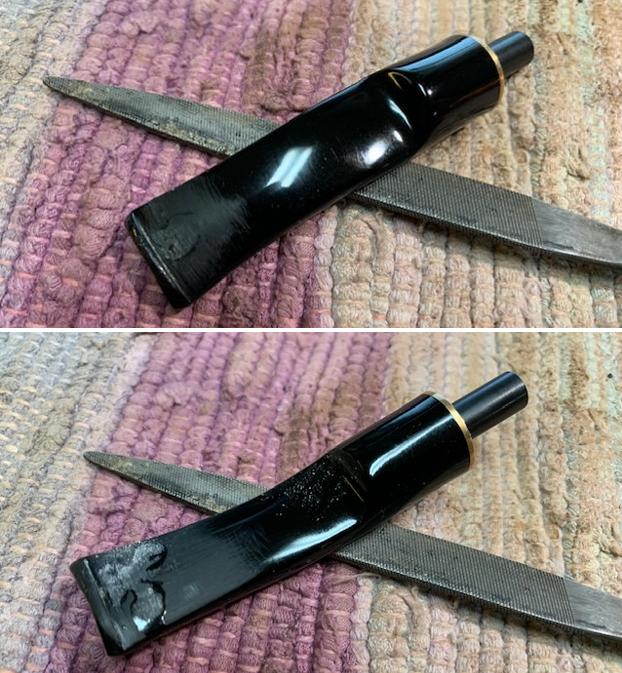
I started the restoration of this pipe by first cleaning the stem. I cleaned the internals of the stem with bristled pipe cleaners and 99.9% pure isopropyl alcohol. With my fabricated knife, I gently scraped out the dried gunk from the tenon end and the horizontal slot. I further cleaned out the stem internals with a shank brush and dish washing liquid soap. Once the stem internals were cleaned, I sanded the entire stem surface with a 220 grit sand paper in preparation for dunking the stem into the Before and After Deoxidizer solution. I thereafter, dropped the stem into “Before and After Deoxidizer” solution developed by my friend Mark Hoover. The solution helps to draw out heavy oxidation to the surface, making it’s further removal a breeze, while the minor oxidation is eliminated to a very great extent. The initial sanding helps to draw out the complete oxidation as the sanding opens up the stem surface that has been initially covered with oxidation. I usually dunk stems of the pipes that are in-line for restoration and this pipe is indicated with a blue arrow. I generally allow the stems to soak overnight for the solution to do its work.
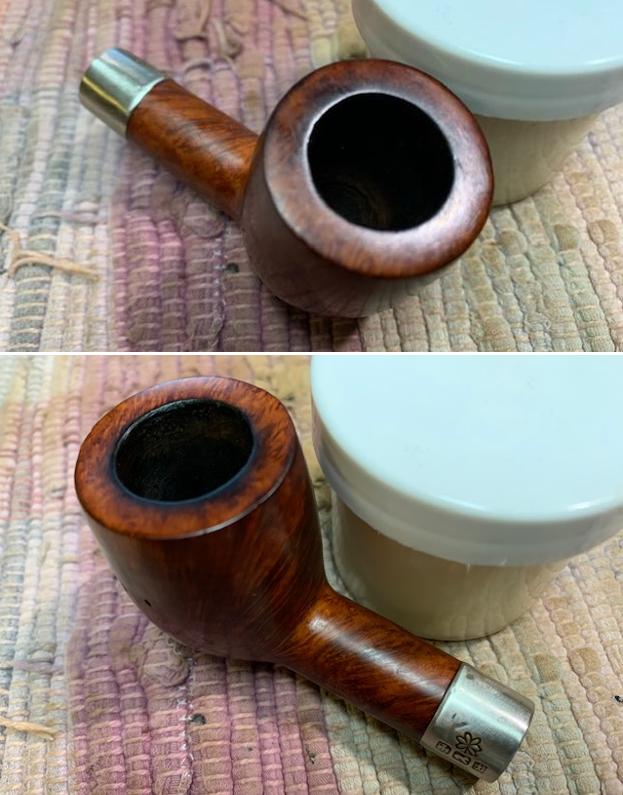
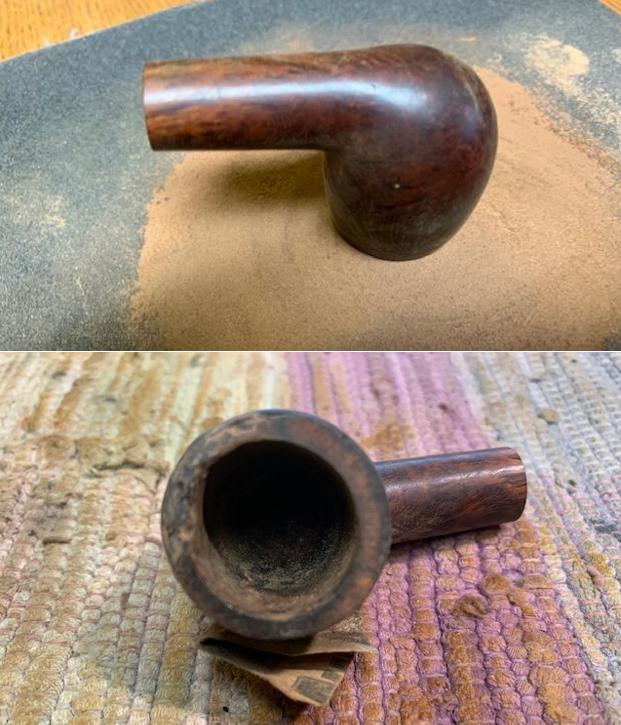
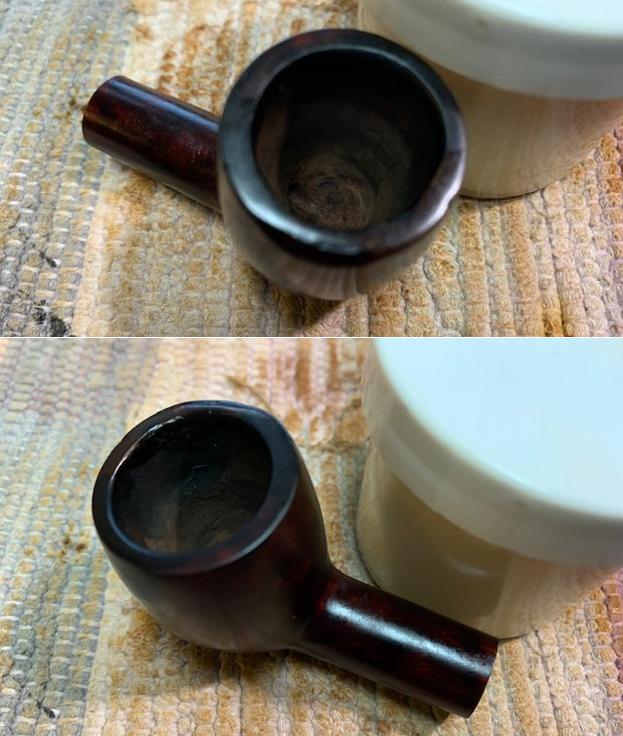
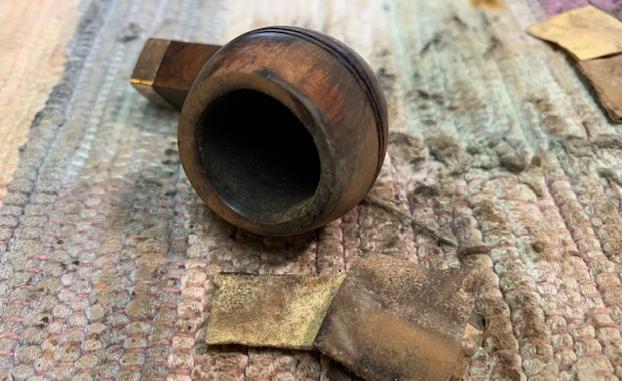
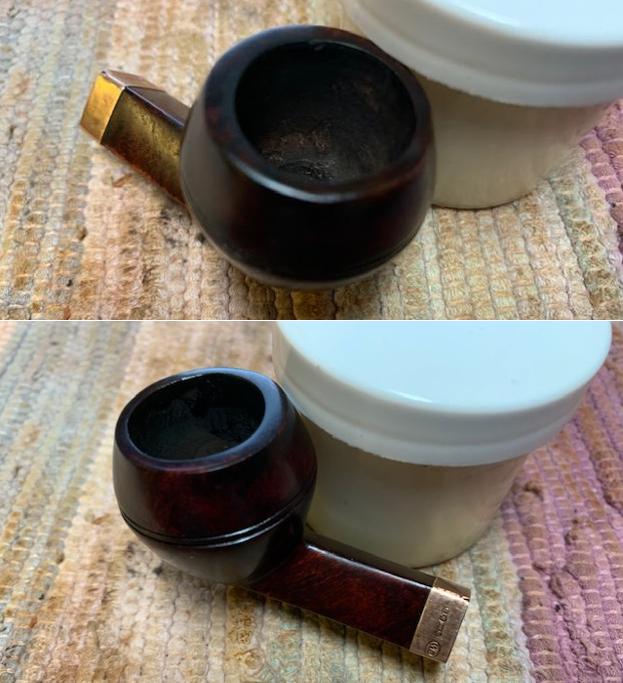
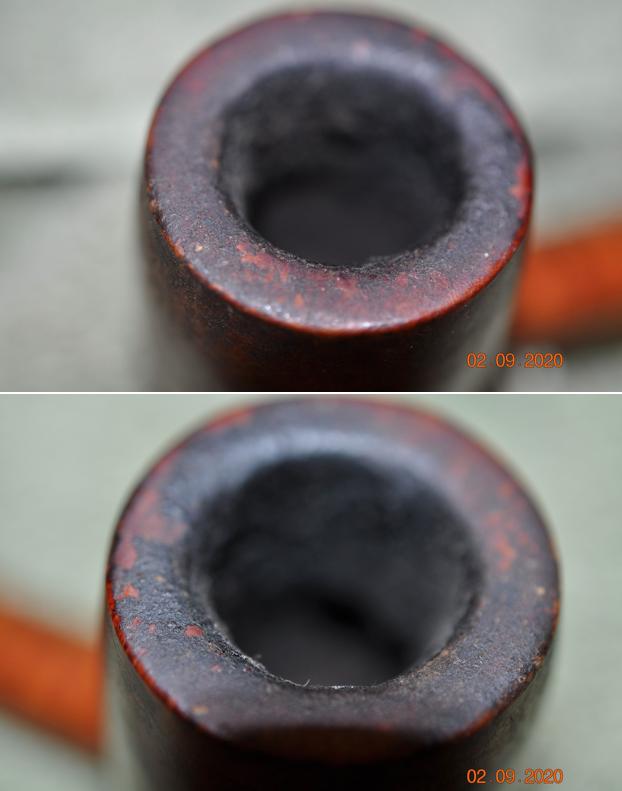
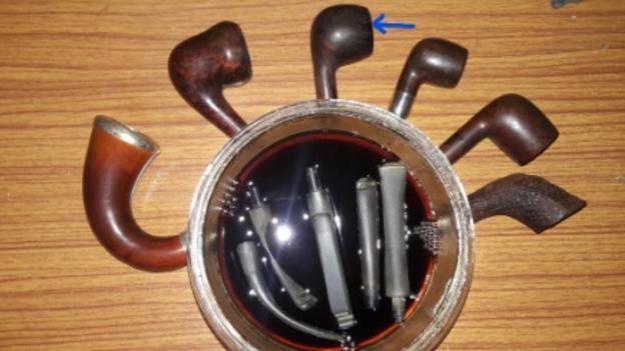 While the stem was soaking in the deoxidizer solution, I reamed the chamber with size 2 head of the Castleford reamer. With my fabricated knife, I further scraped the chamber walls to remove the remaining carbon deposits and also scraped out the lava overflow from the rim top surface. Once the cake was reamed back to the bare briar, I used a 220 grit sand paper to remove all the traces of remaining cake and also to smoothen out the inner walls of the chamber surface. Finally, to remove the residual carbon dust, I wiped the chamber with a cotton pad wetted with 99.9% pure isopropyl alcohol. The chamber walls are in pristine condition with no signs of heat lines/ fissures. The inner rim edge resembles a visual nightmare after the cleaning. The inner edge has suffered extensive damage in 11 o’clock direction, the result of hitting against a hard surface to remove dottle (encircled in yellow). Similar damage is seen over the outer rim edge too and is encircled in blue. This damage to the outer rim edge as well as the inner edge will be addressed to an extent by topping the rim top. The rim top surface itself is peppered with dents/ dings and deep scratches (encircled in green) which will be smoothened by topping. The ghost smells are still very strong and may further reduce after the shank/ mortise are thoroughly cleaned.
 This was followed by cleaning the mortise with cue tips, pipe cleaners and a shank brush dipped in isopropyl alcohol. I scraped the walls of the mortise with my fabricated knife to remove the dried oils and tars. The mortise was a bear to clean and the cleaning will continue when I clean the external surface of the stummel. The old smells of the tobacco are still strong and would need more invasive methods to get rid of these odors.
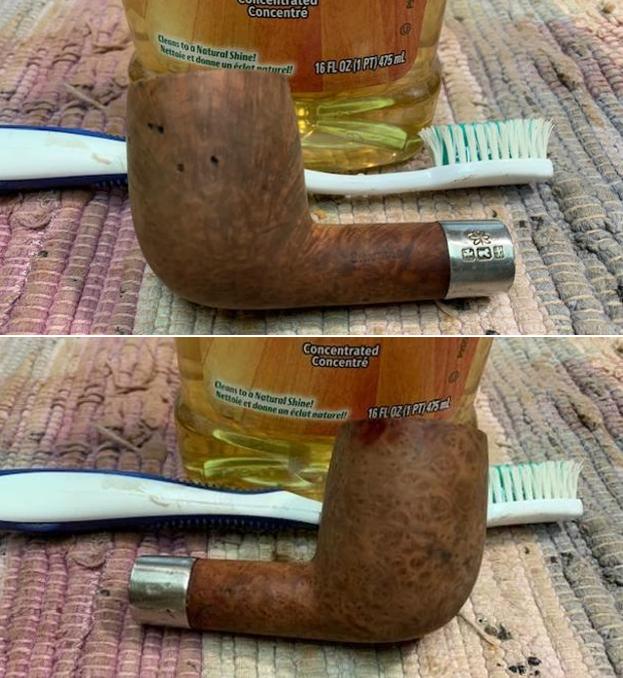
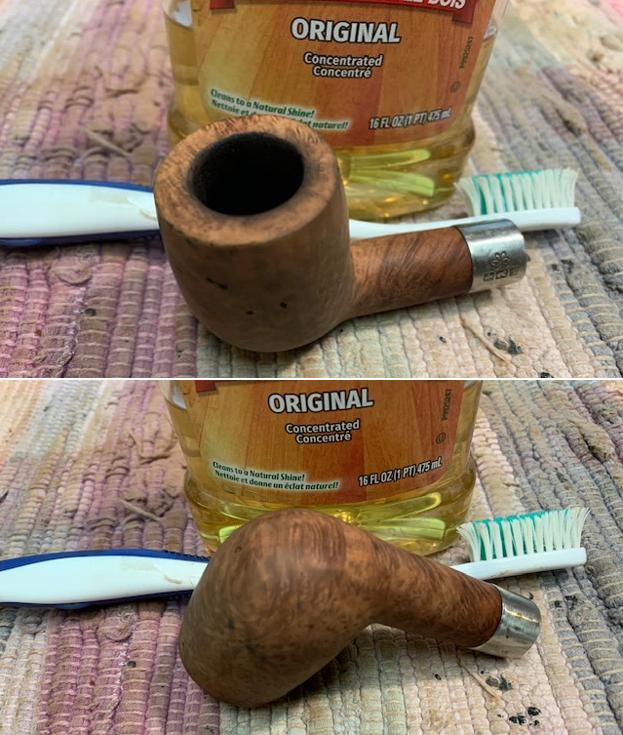
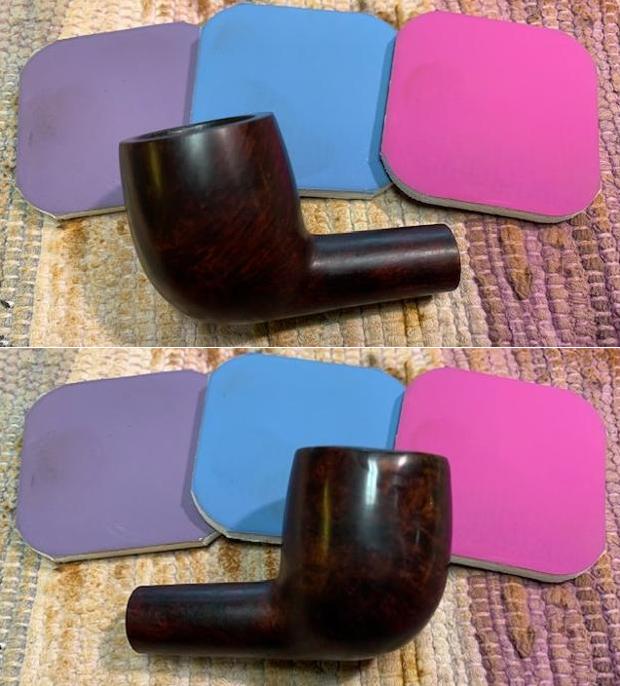
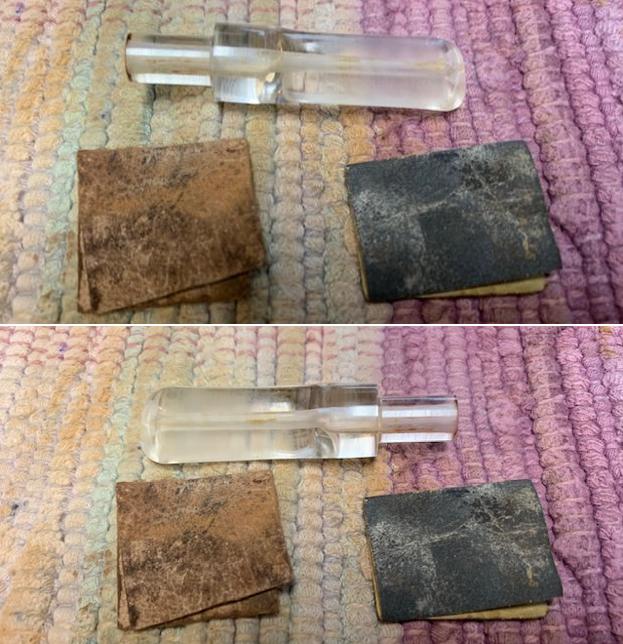
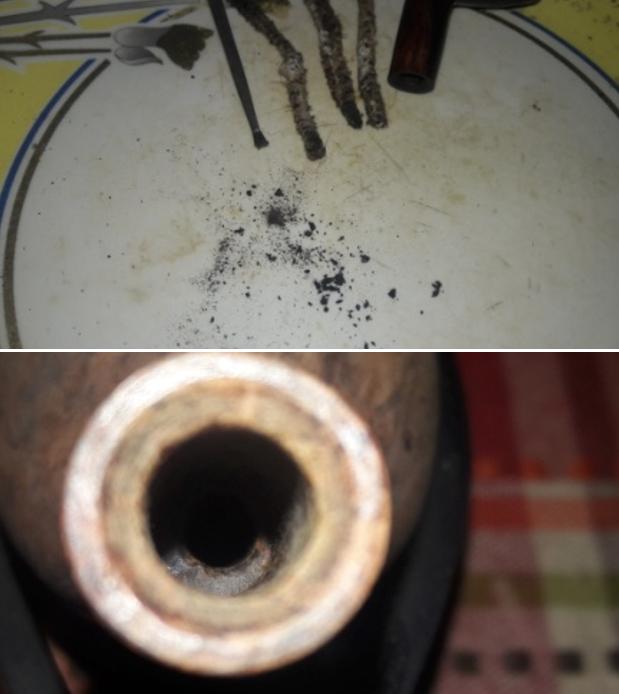 With the bowl internals clean, I moved to clean the exterior of the stummel. I used a hard bristled tooth brush and Briar Cleaner, a product that has been developed by Mark Hoover, to scrub the stummel and the rim top. I set the stummel aside for 10 minutes for the product to draw out all the grime from the briar surface. After 10 minutes, I washed the stummel under running warm water with anti oil dish washing detergent till the stummel surface was clean and dried it using paper towels and a soft cotton cloth. I simultaneously cleaned the shank internals with detergent and a hard bristled shank brush and set the stummel aside to dry out naturally. I diligently cleaned the grooves between the bowl rings that separated the bowl cap from rest of the stummel surface. The stummel surface, including the rim top has cleaned up nicely with the beautiful grain patterns on full display. This cleaning also helped in gauging the extent of topping that would be required to address the damage to the rim edges and rim top surface. I shall subject the chamber to cotton and alcohol treatment to eliminate the ghost smells completely as the smell is still very strong.
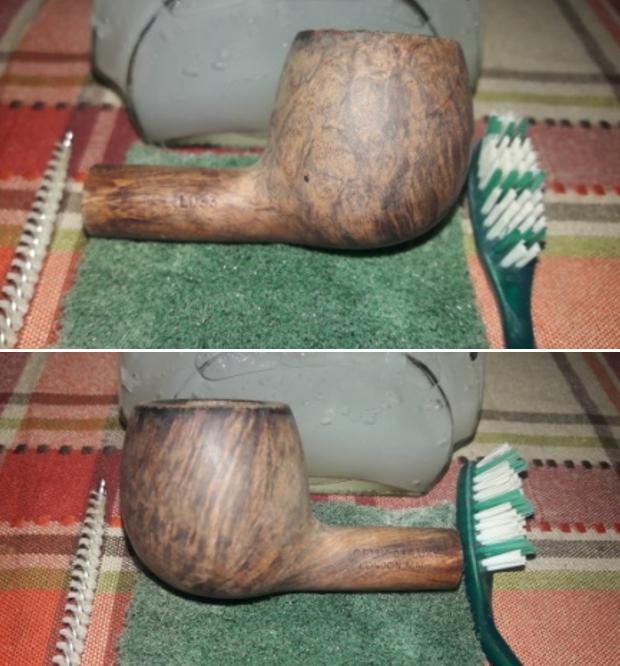

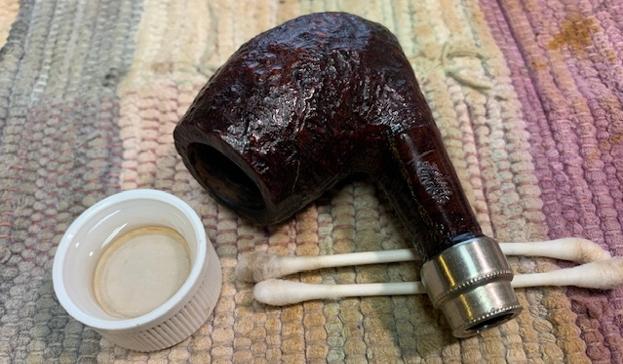
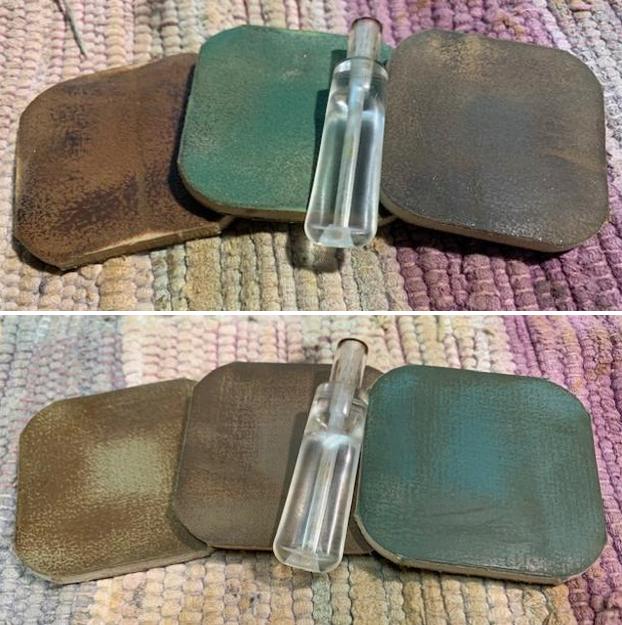
 I continued the cleaning of the chamber and shank internals with a salt and alcohol bath. I used cotton balls which is an at par substitute as I have realized over the years. I drew out a wick from the cotton and along with a folded regular pipe cleaner; inserted it into the mortise and through the draught hole into the chamber. Thereafter, I packed the chamber with cotton balls to about quarter of an inch below the inner rim edge and soaked the cotton balls with isopropyl alcohol up to the brim. About half an hour later, the level of alcohol had gone down, having being absorbed by the cotton. I topped it up once again and set it aside overnight. By the next morning, the cotton and alcohol had drawn out all the remaining oils and tars from the chamber and mortise, fulfilling its intended task. I removed the cotton balls and ran pipe cleaners through the mortise to clean out all the loosened tars and gunk and further cleaned it with alcohol and q-tips. The chamber now smells clean and fresh. I set the stummel aside to dry out naturally.
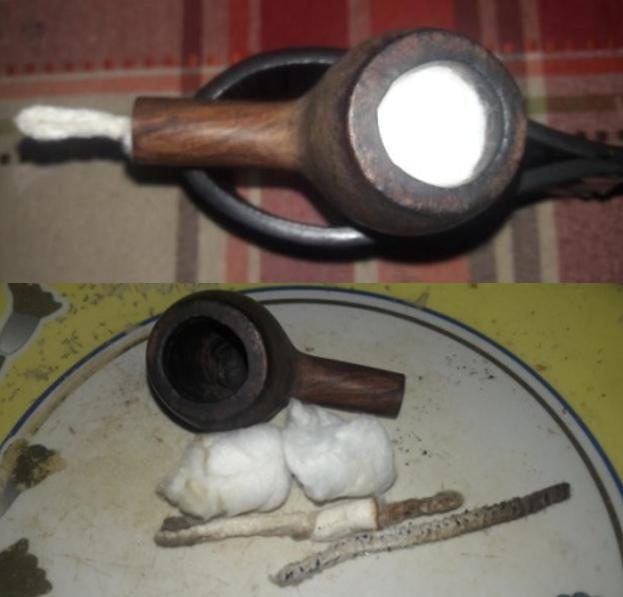
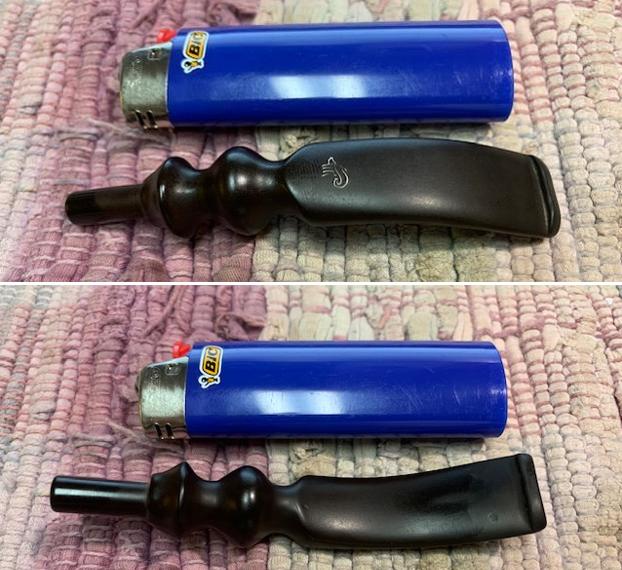
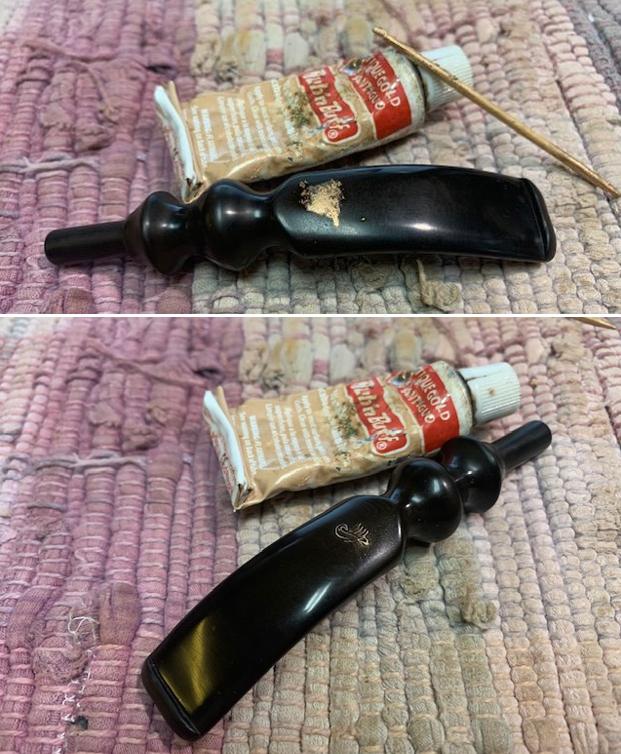
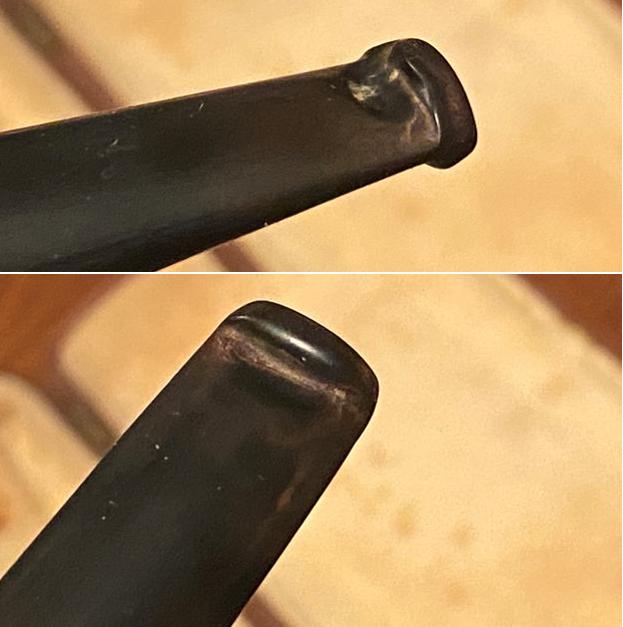
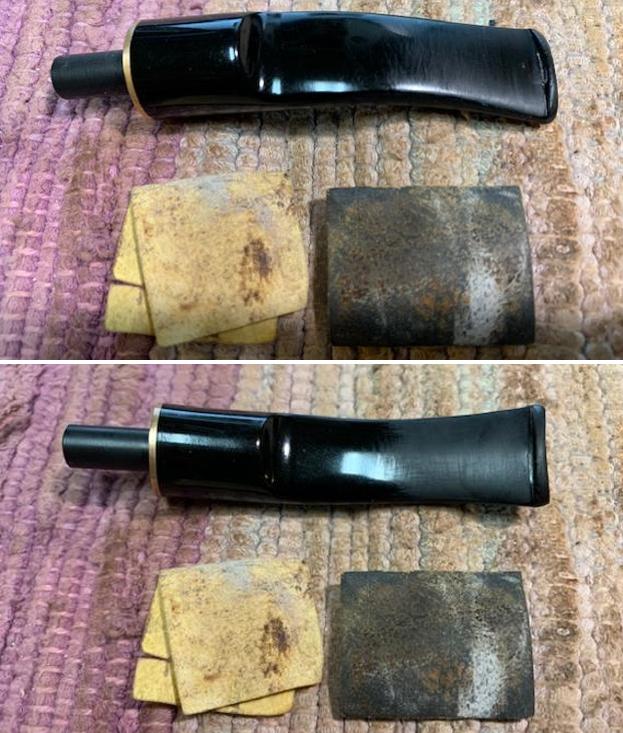
 The next morning, after I had cleaned the chamber and shank, I removed the stem that had been soaking in the deoxidizer solution overnight. I cleaned the stem and the stem airway under running warm water and scrubbed the raised oxidation from the stem surface using a Magic Eraser pad followed by Scotch Brite pad and the airway with a thin shank brush. I further removed the oxidation by scrubbing the stem with 0000 grade steel wool and applied a little EVO to rehydrate the stem. The stem is in pristine condition. The filing marks appear more like denture marks and not file marks per se. These should be easily eliminated when I sand the stem with sand papers and polish with micromesh pads.
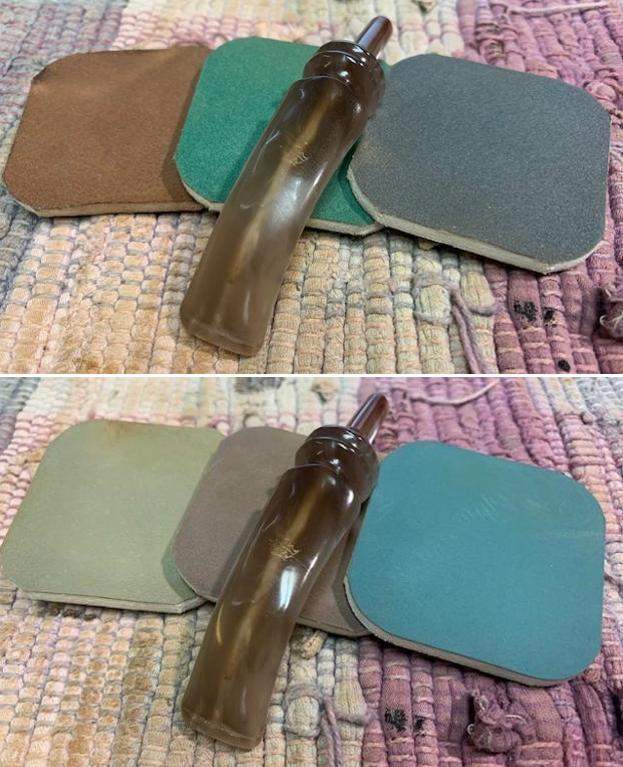
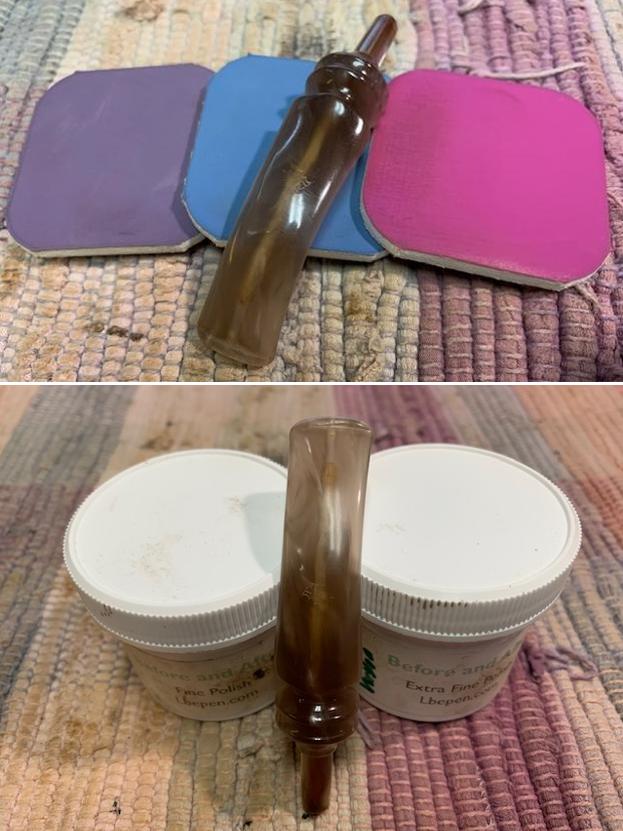
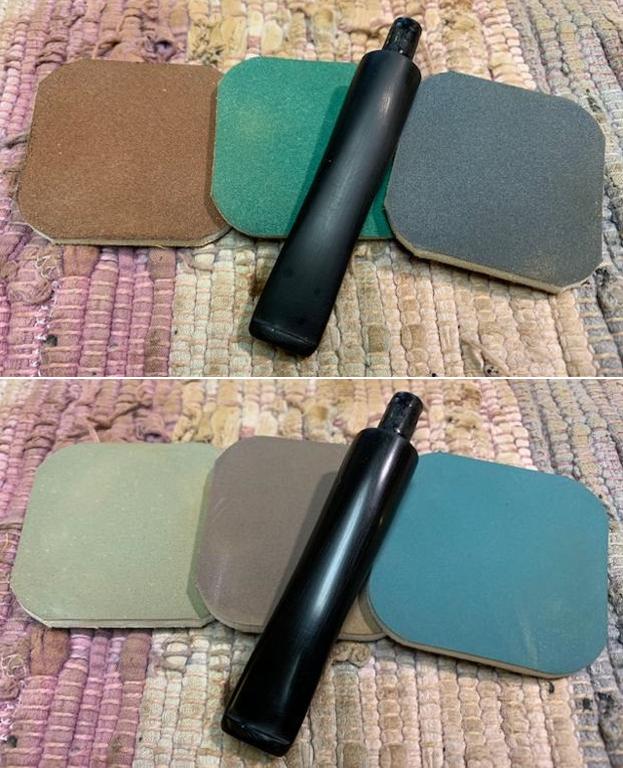
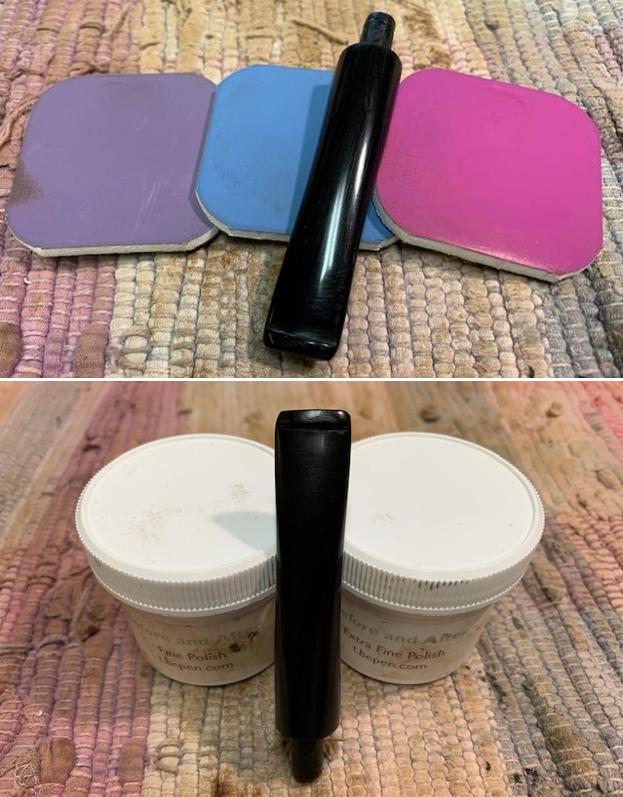
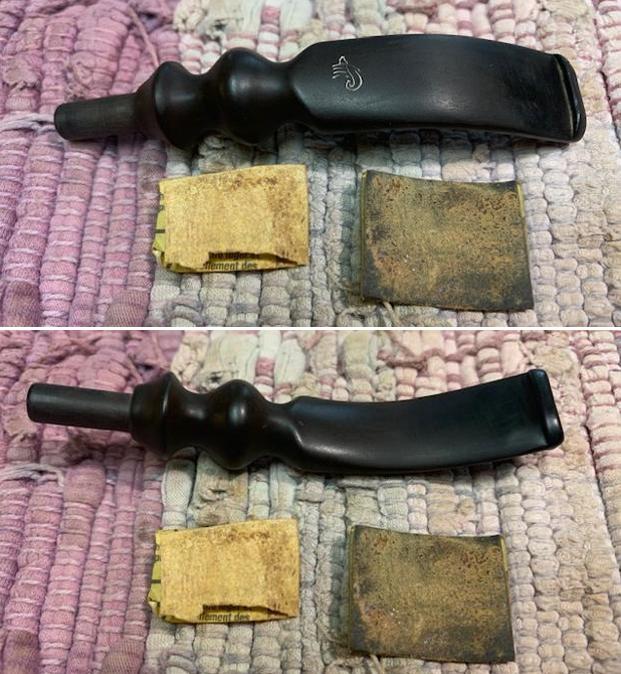
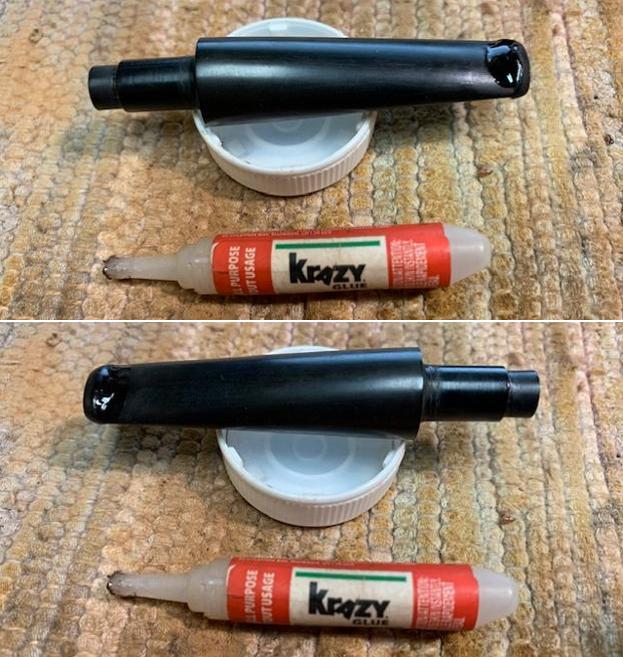
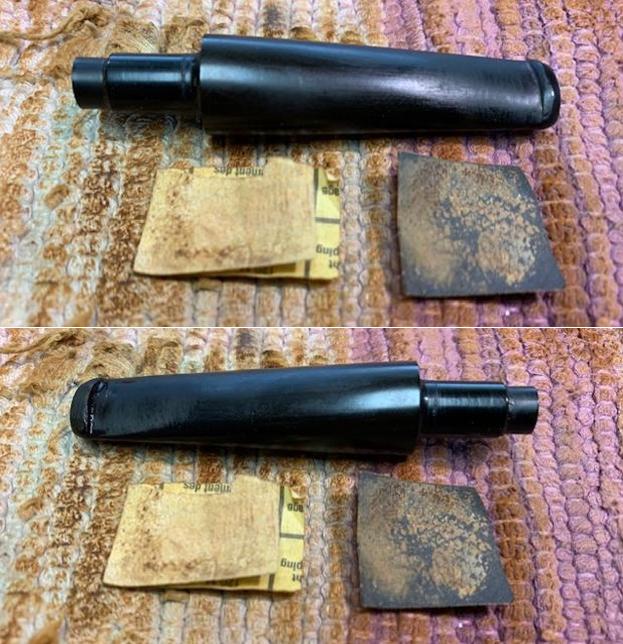
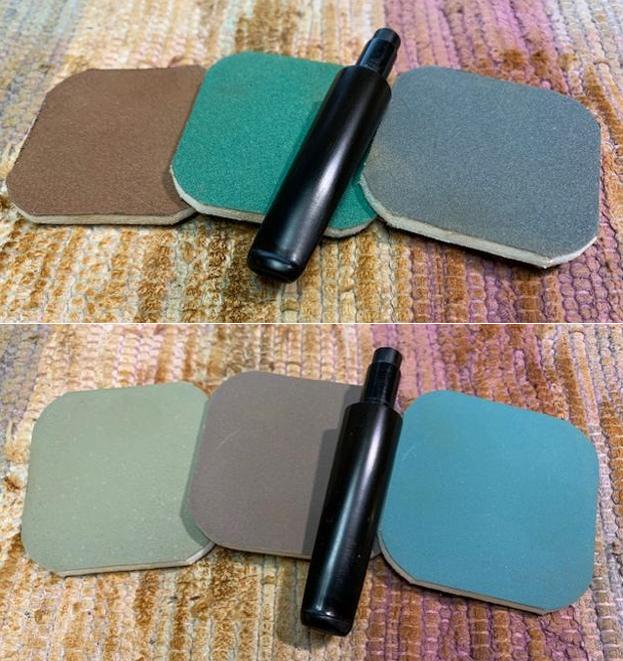
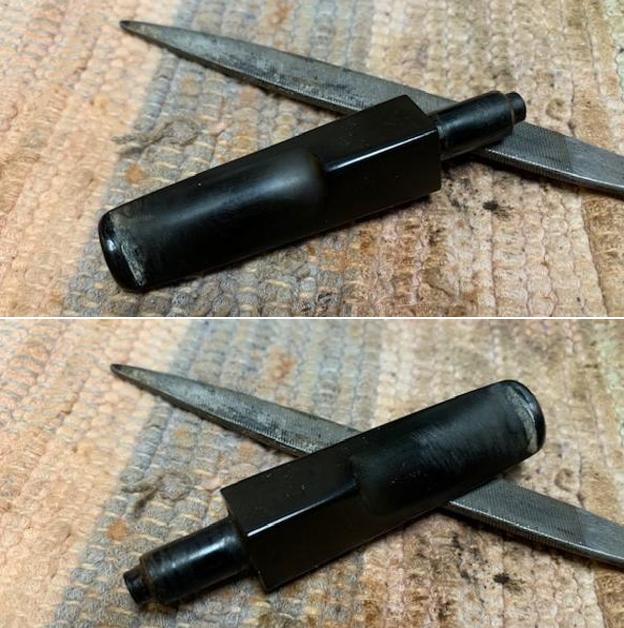
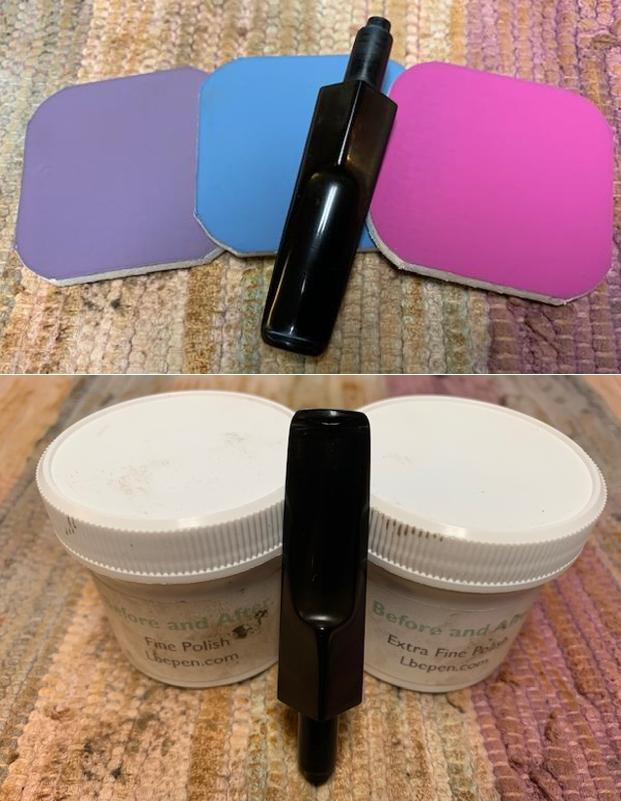
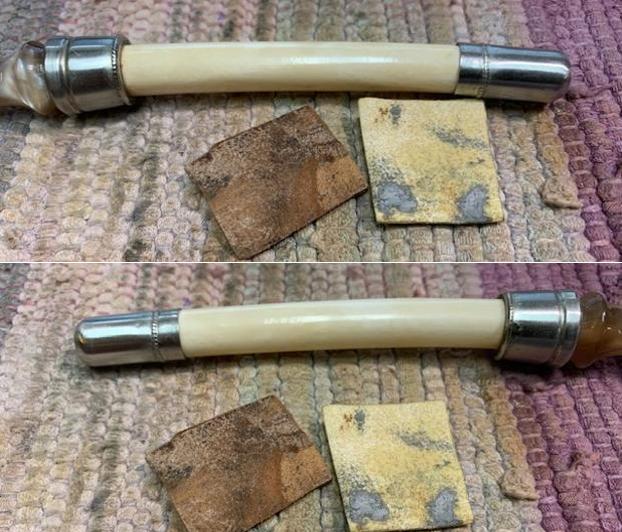
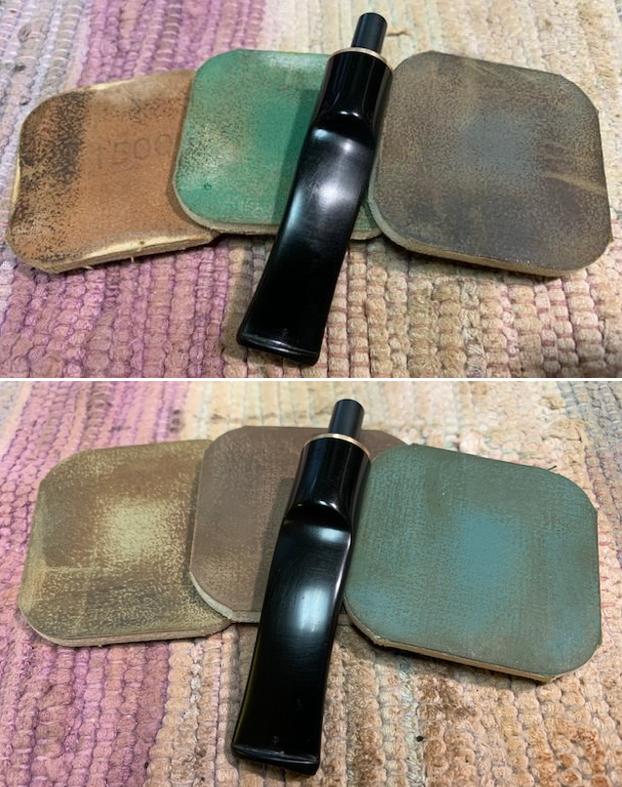
  I sanded the entire stem surface with a folded piece of 220 grit sand paper till the complete oxidation was eliminated from the stem and saddle portion in particular. I sanded out the scratches in the bite zone using the same grit sand paper. I rubbed a small quantity of EVO into the stem surface to hydrate it. To bring a deep shine to the stem, I went through the complete set of micromesh pads, wet sanding with 1500 to 2000 wet & dry sand paper and further with 3200 to 12000 grit micromesh pads. I wiped the stem with moist cloth after each pad and rubbed it down with Extra Virgin Olive oil to rejuvenate the vulcanite. The finished stem is shown below.
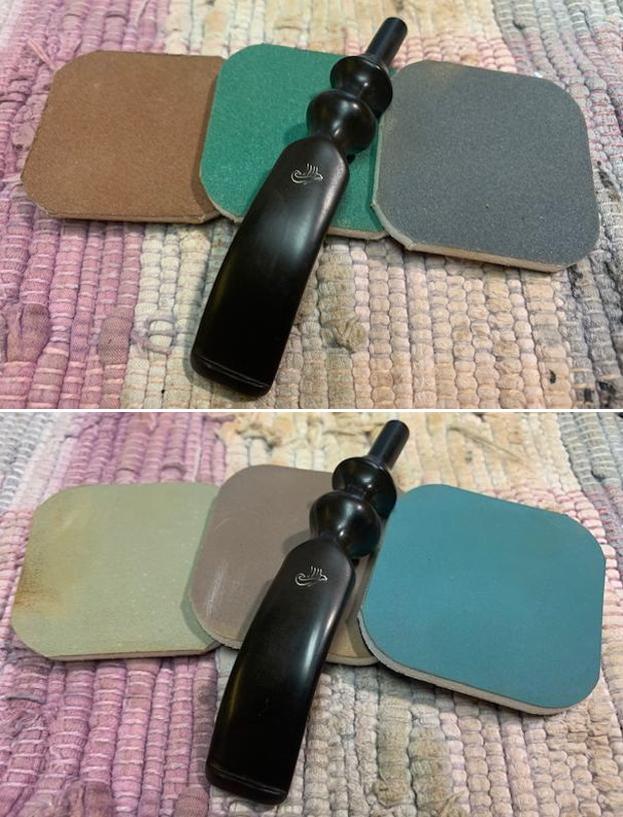
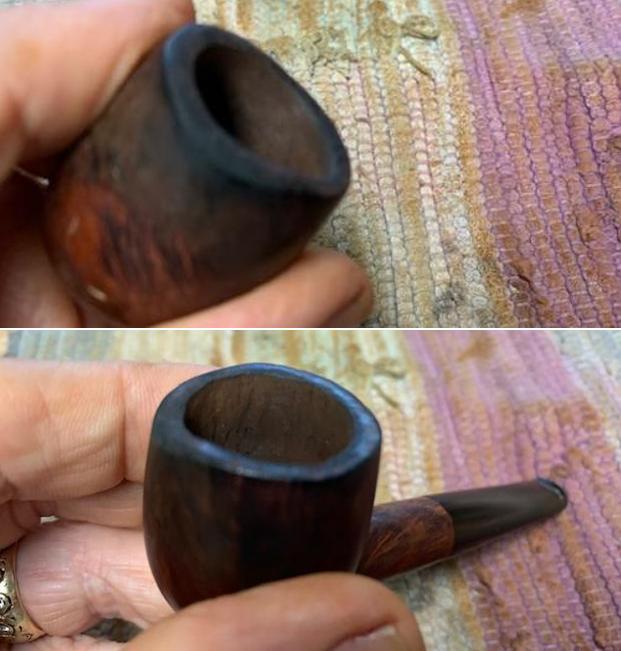
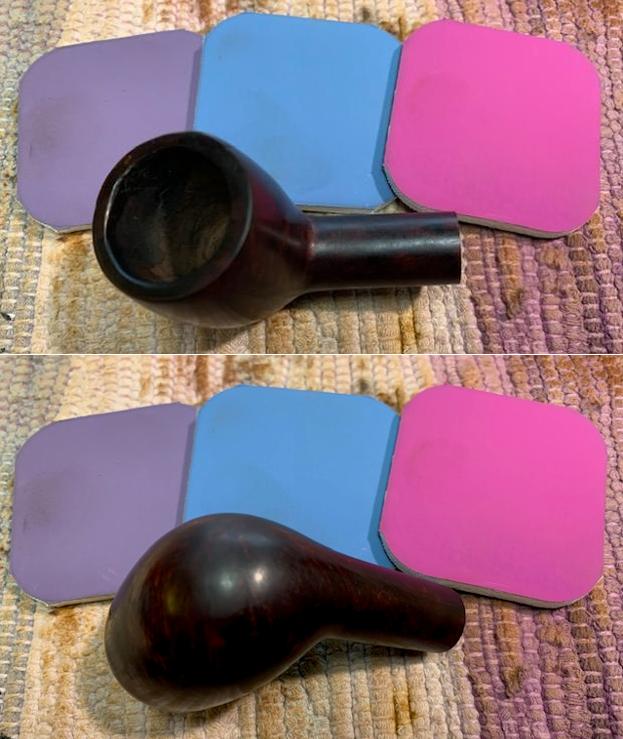
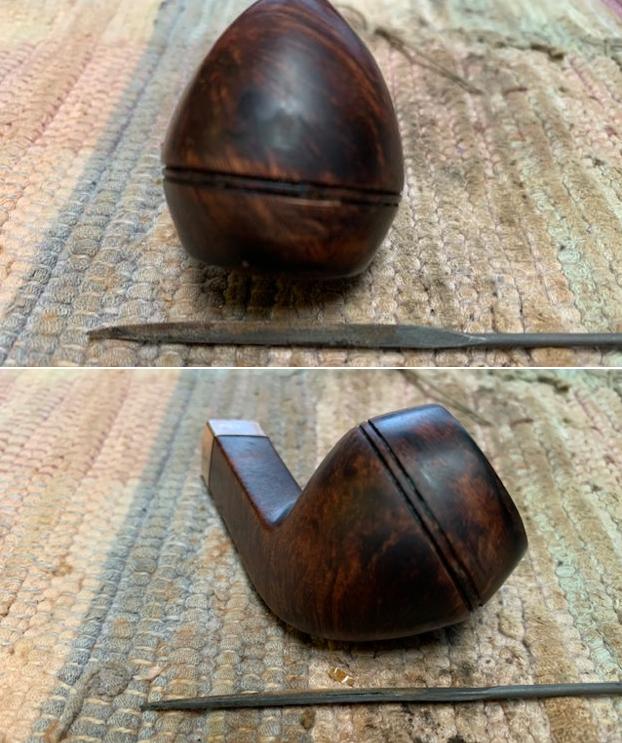
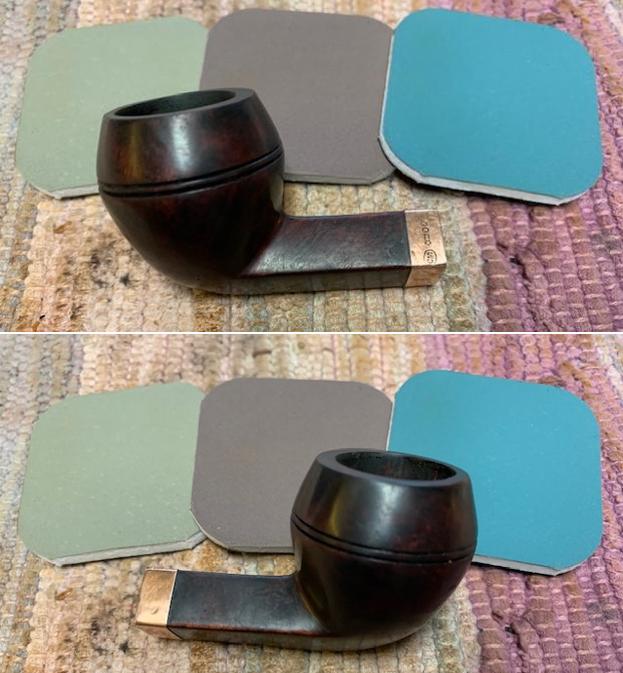
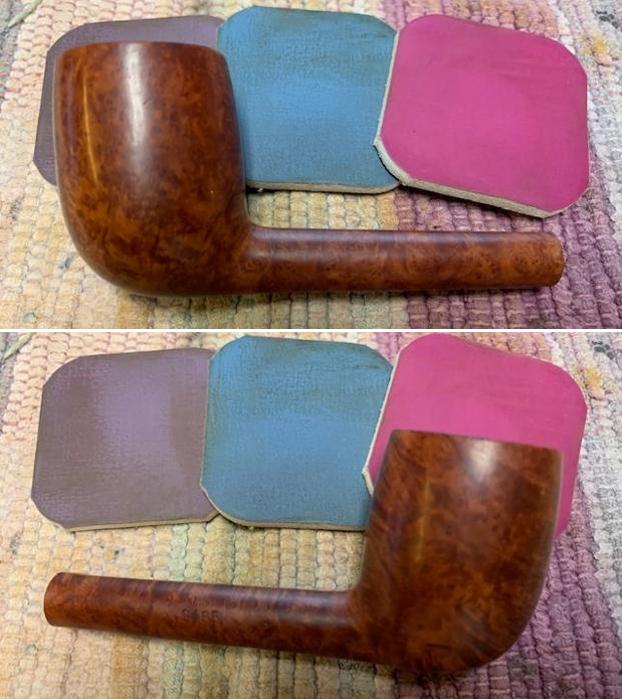
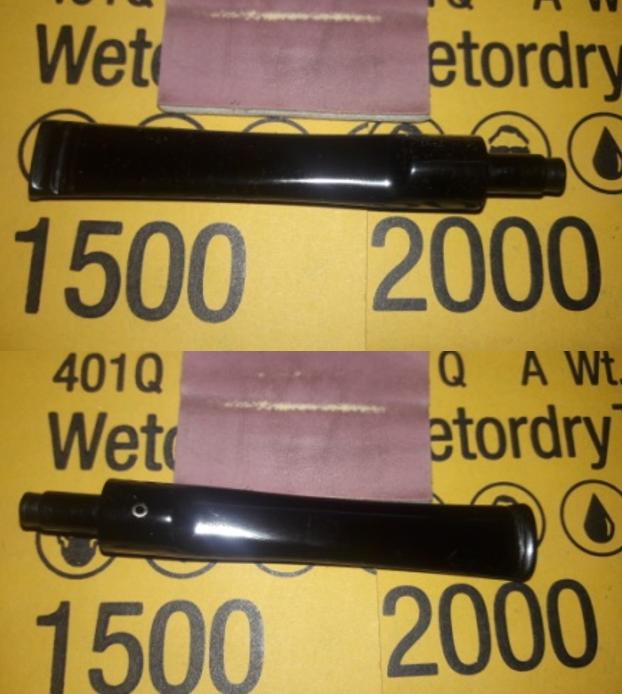 I turned my attention to address the damage to the stummel. I next decided to smooth the rim top surface dents/ dings and the charred surface in 11 o’clock direction to the inner rim edge. I topped the rim top surface on a piece of 220 grit sand paper, checking frequently for the progress being made as I hate to loose briar estate any more than absolutely necessary. The darkened inner rim edge can still be seen, though much greatly reduced. With a folded piece of a 220 grit sand paper pinched between my thumb and forefinger, I cleaned the inner edge of the rim top surface to minimize the darkening. This helps to mask and address the minor dents and dings that had remained on the rim edges after topping. I am careful so as not to alter the profile of the stummel by excessive topping or creation of the bevels. I am pretty pleased with the appearance of the rim top and edges at this stage. The following pictures show the progress being made and improvements to the inner and outer rim edges.
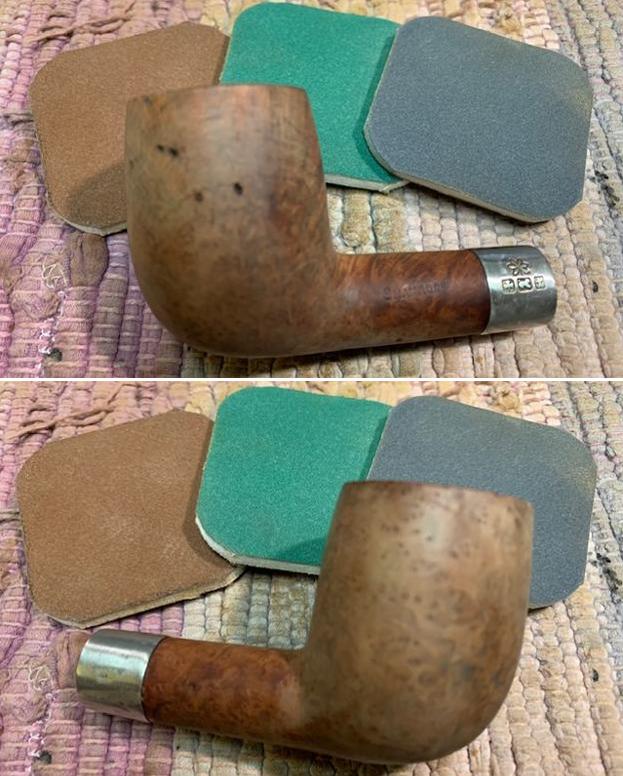
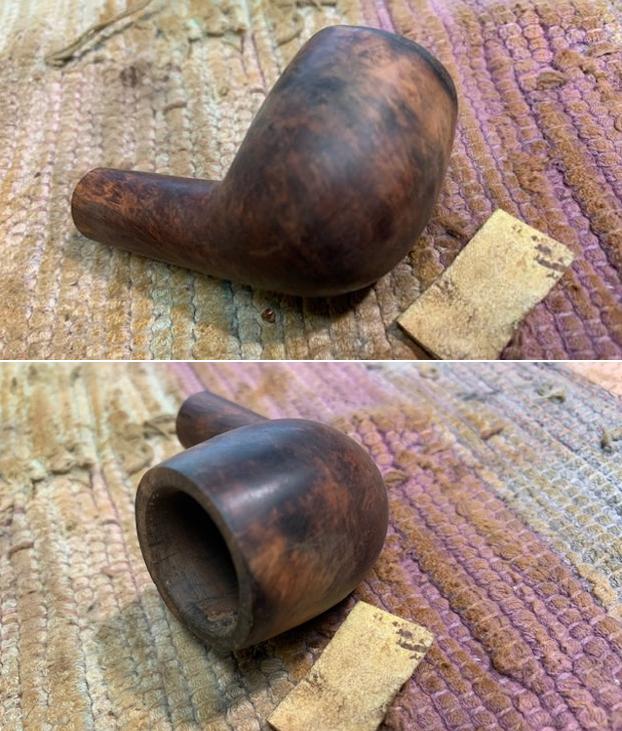
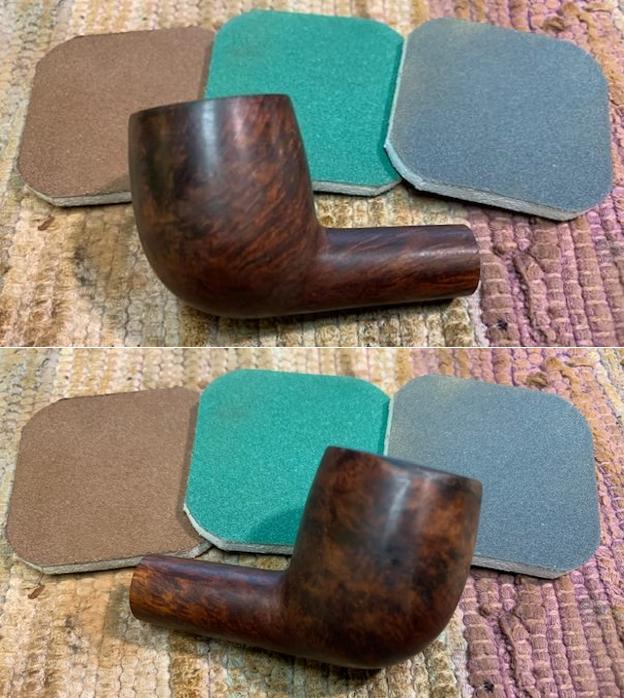
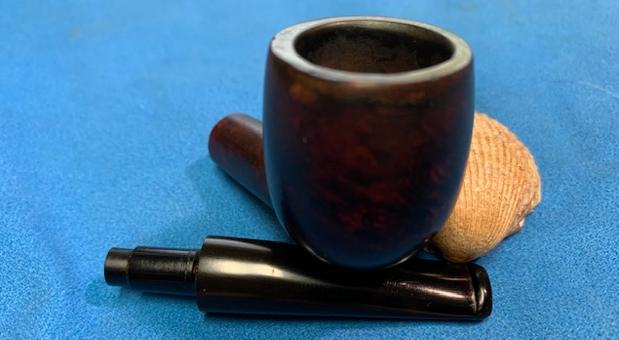
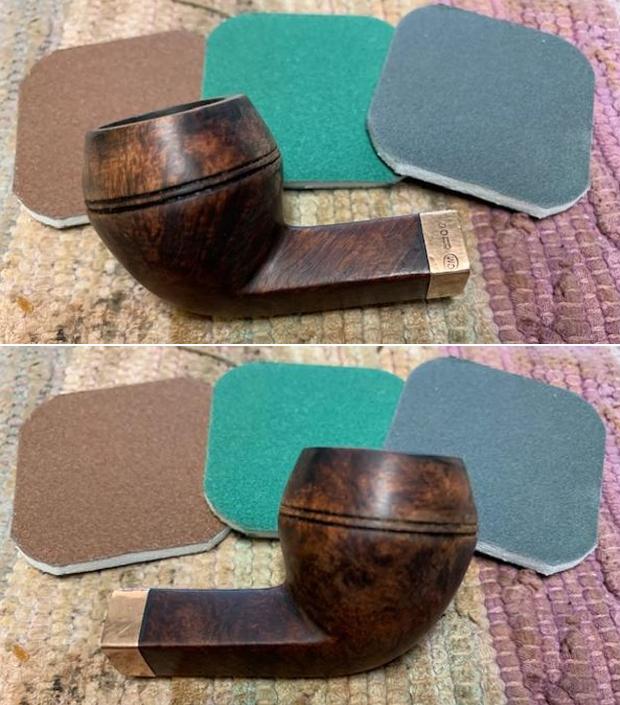
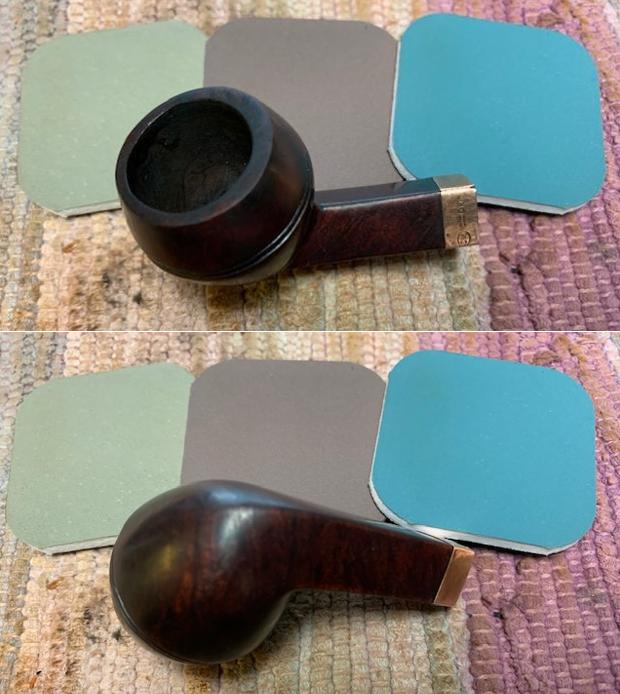
 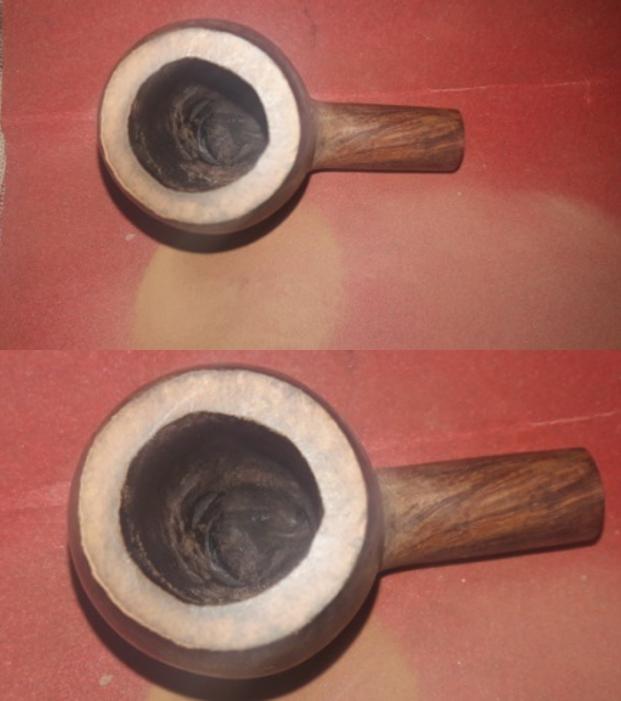 I followed it by wet sanding the stummel with 1500 to 2000 wet & dry sand paper and further with 3200 to 12000 grit micromesh pads, wiping frequently with a moist cloth to check the progress. The minor outer rim damage was repaired to a very large extent and so was the darkening during this process. I really like the look of the stummel at this point in the restoration. The grains and the clean classic lines of this pipe are worthy of appreciation.
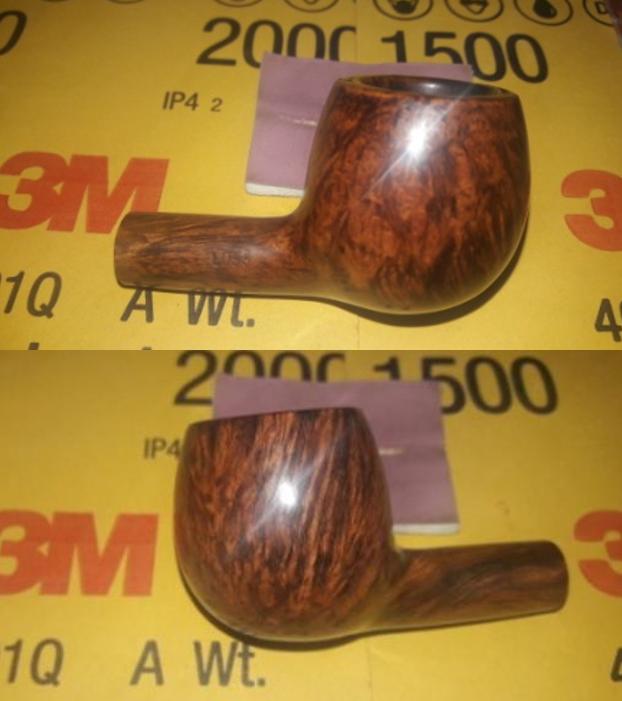
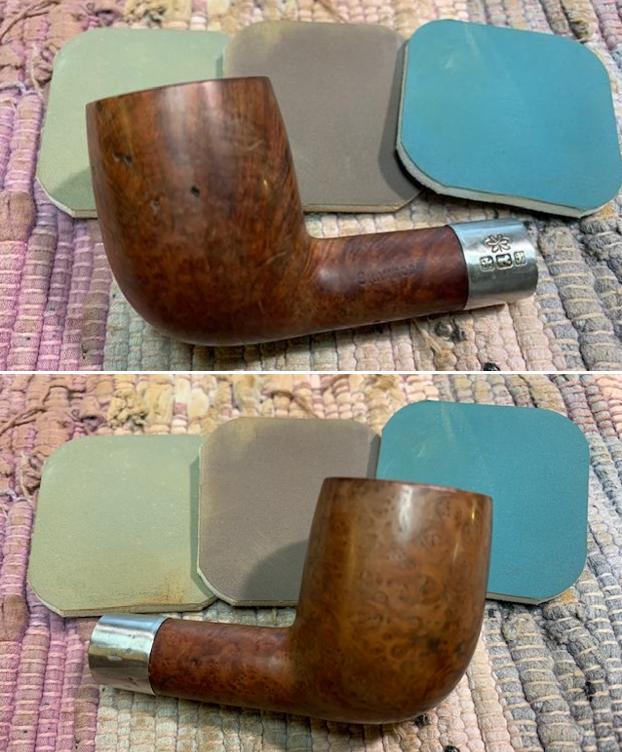
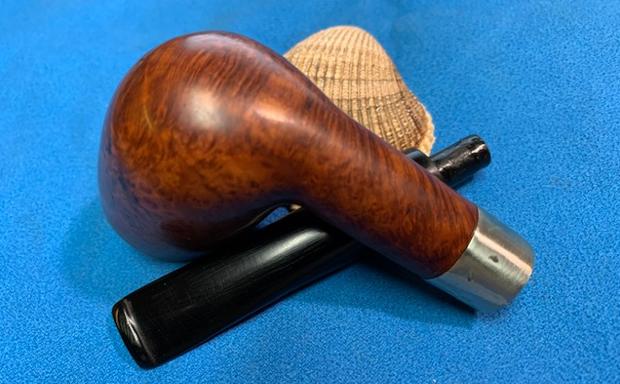
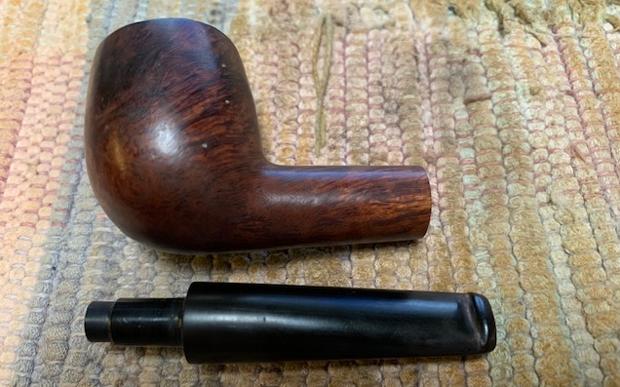
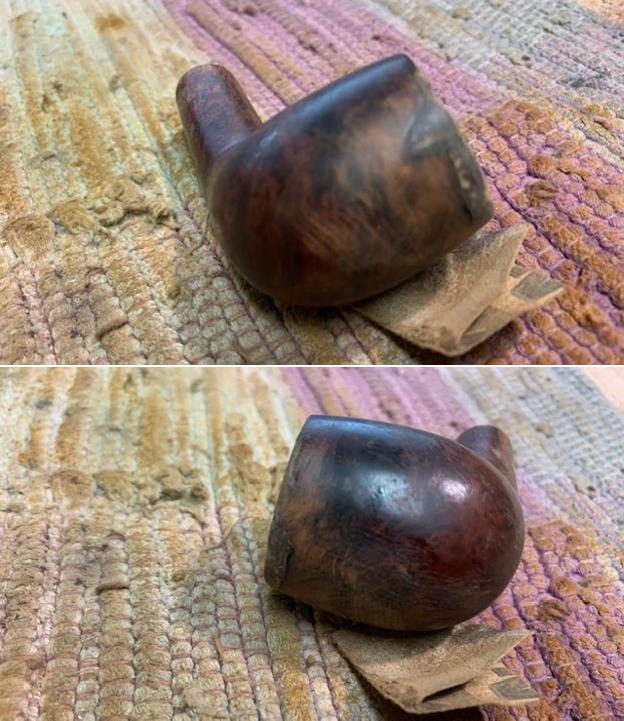
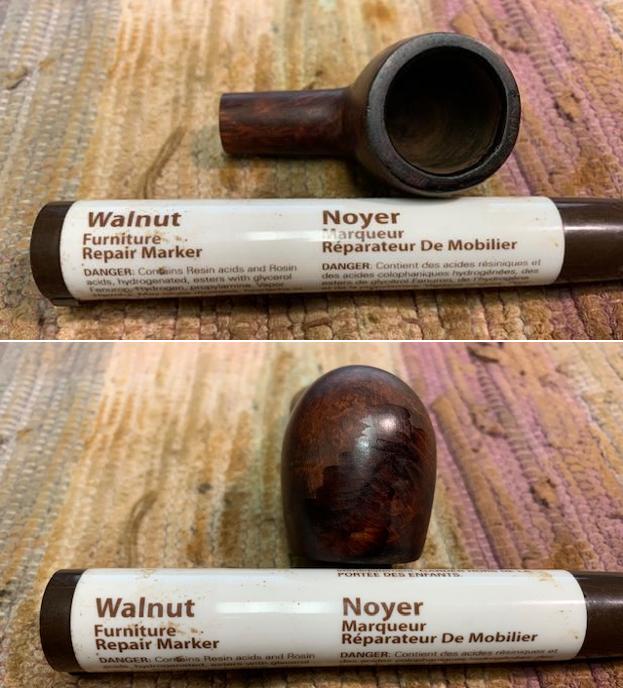
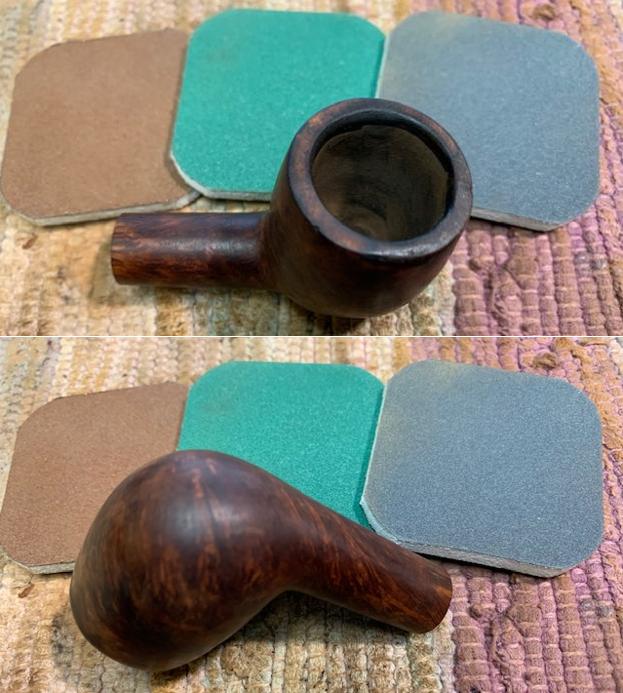
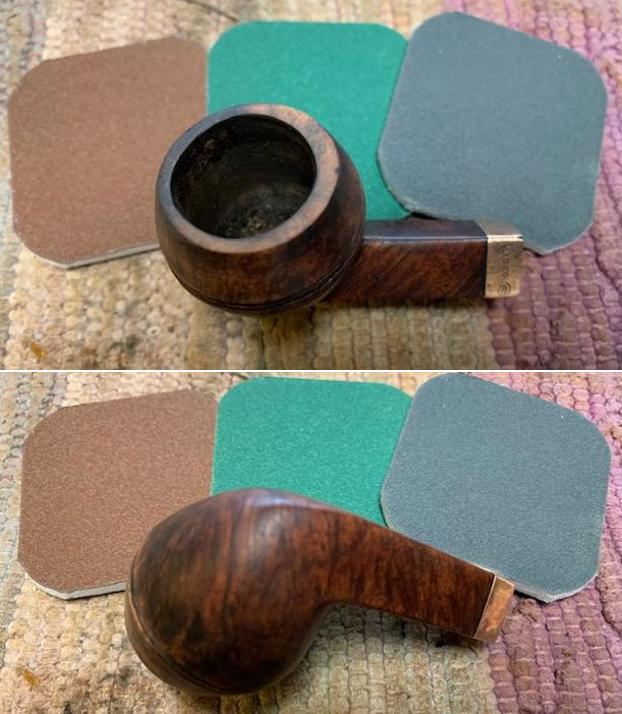
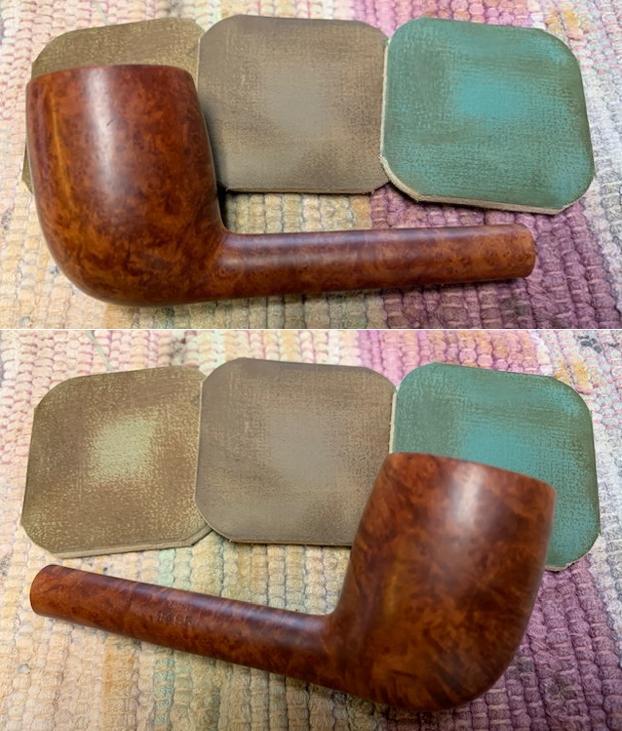
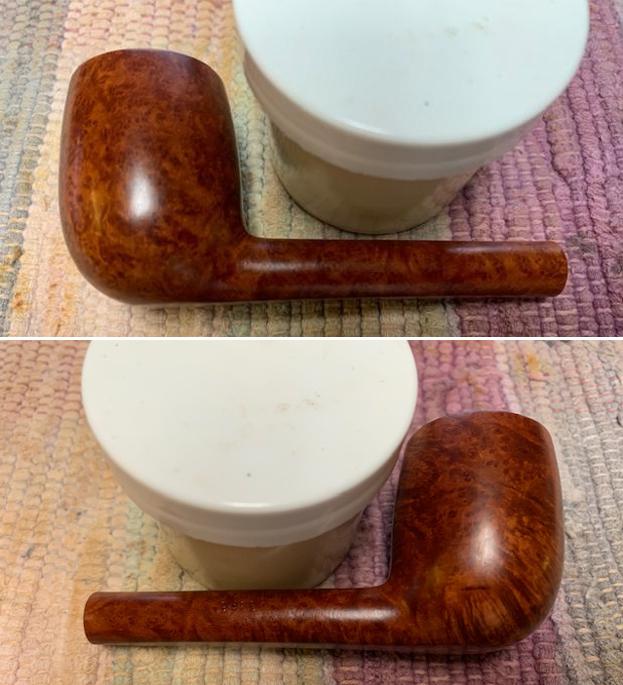
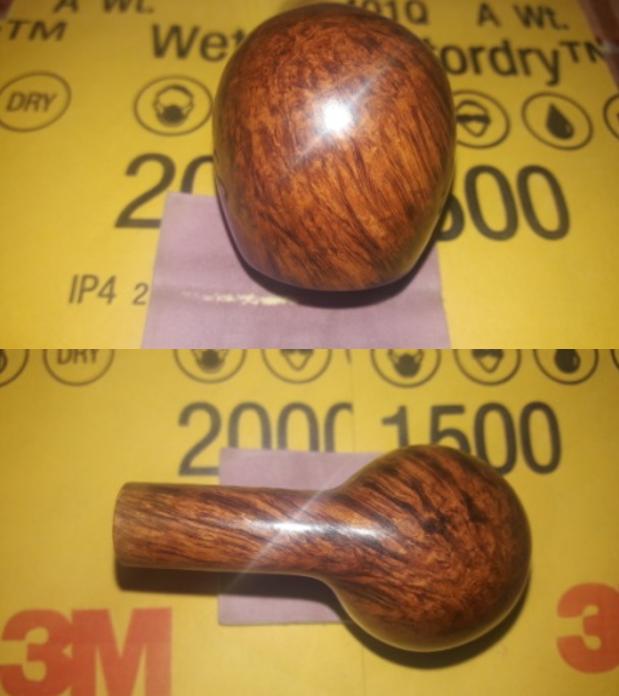 Next, I rubbed a small quantity of “Before and After Restoration Balm” deep in to the briar with my finger tips and let it rest for a few minutes. The balm almost immediately works it’s magic and the briar now has a nice vibrant appearance with the beautiful grain patterns displayed in their complete splendor. I further buffed it with a horse hair brush. The contrast of the dark browns of the Angle hair and swirl grains with the natural patina of the rest of the stummel adds an interesting dimension to the appearance of the stummel.
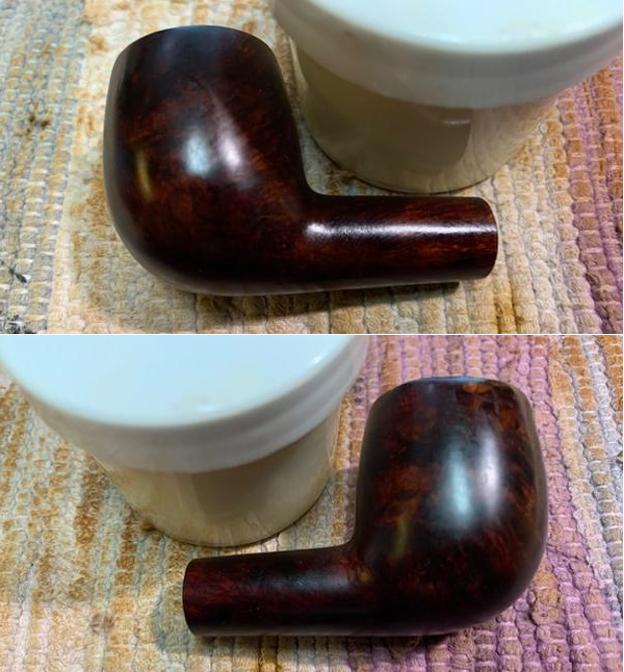
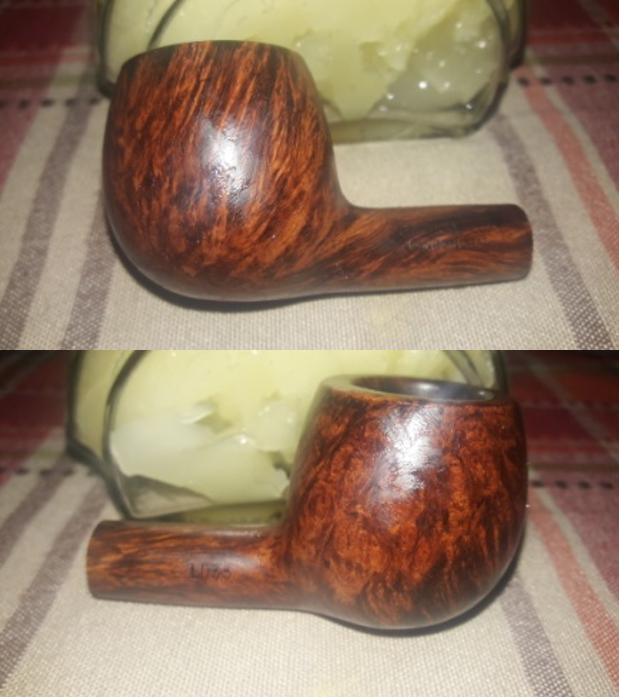
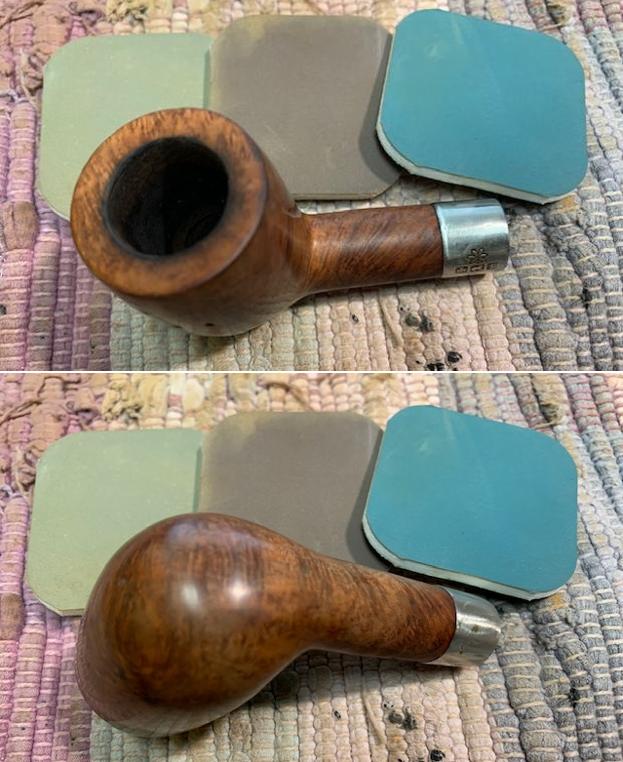
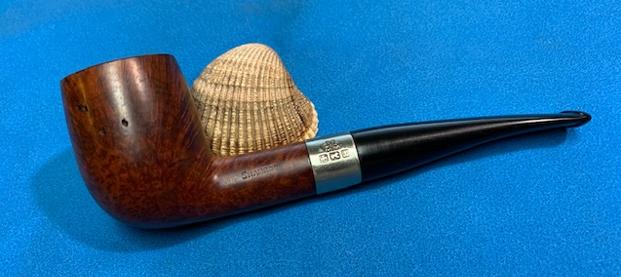
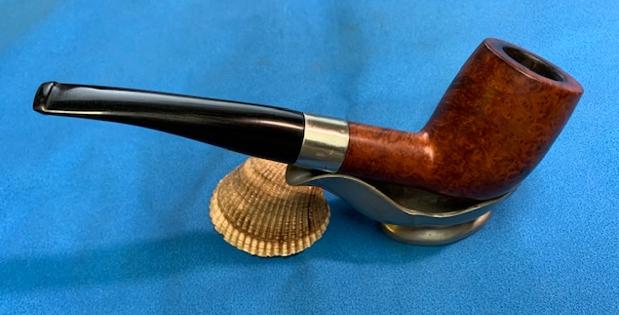
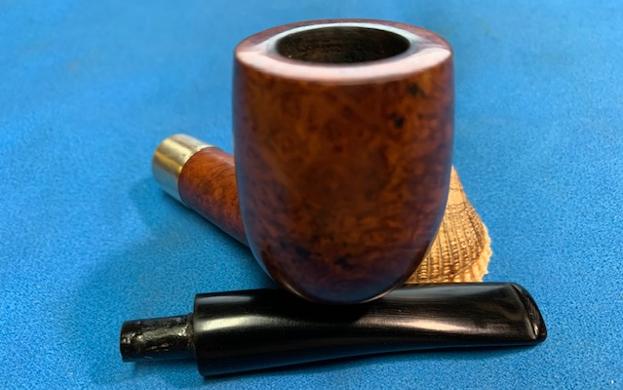
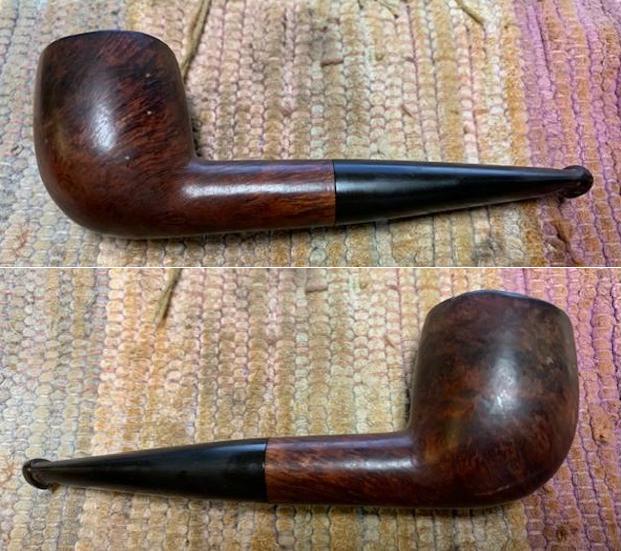
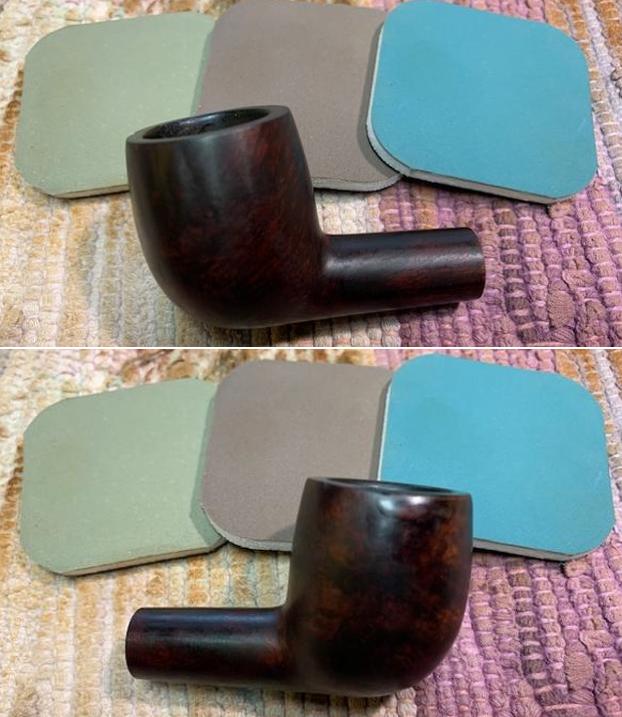
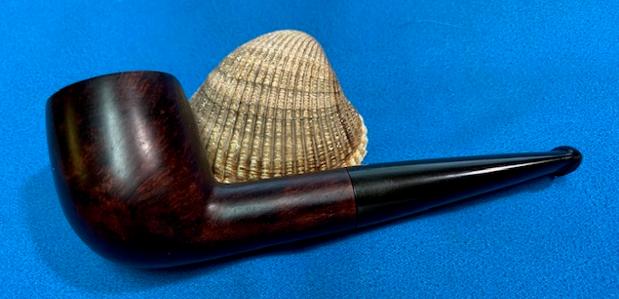
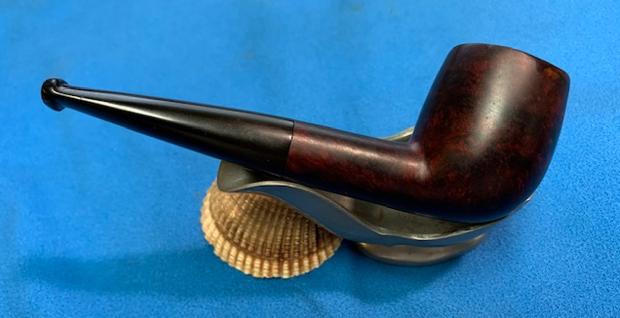
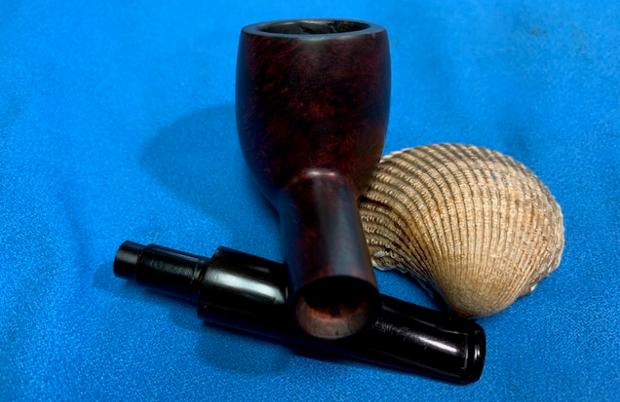
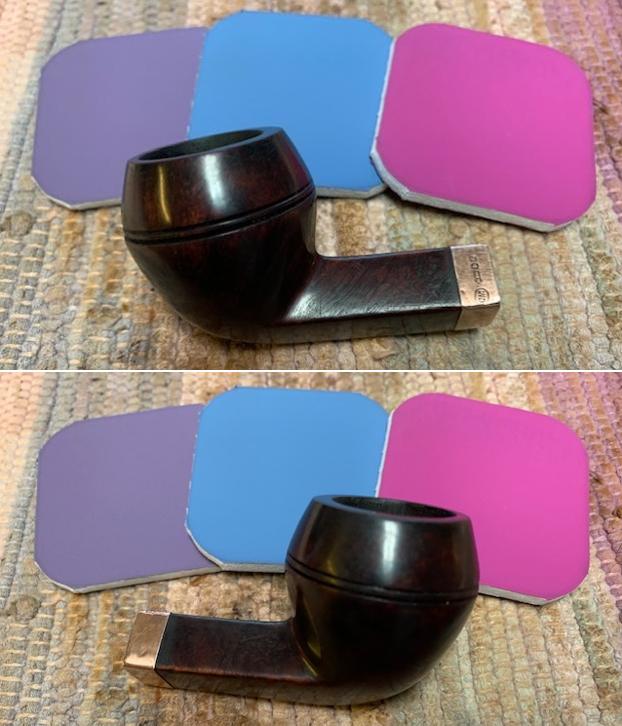
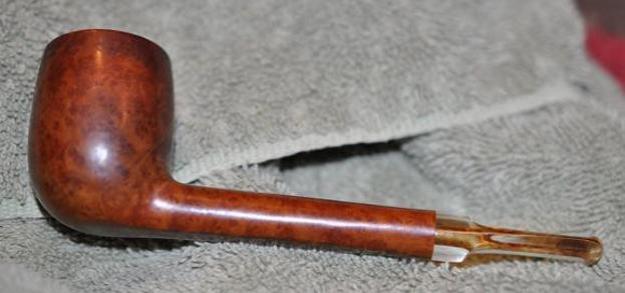
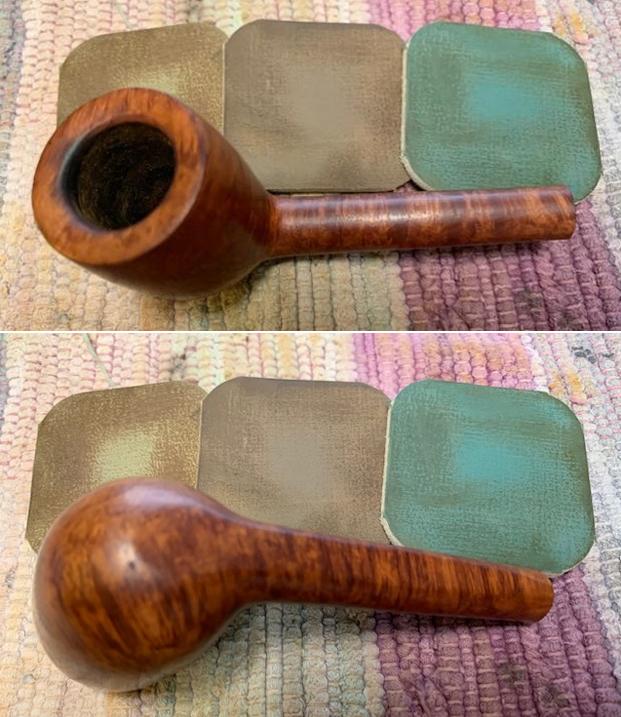
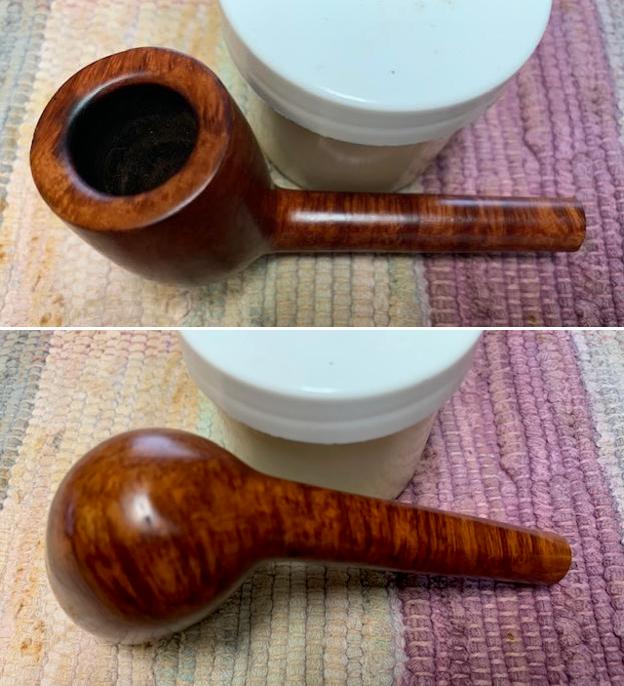
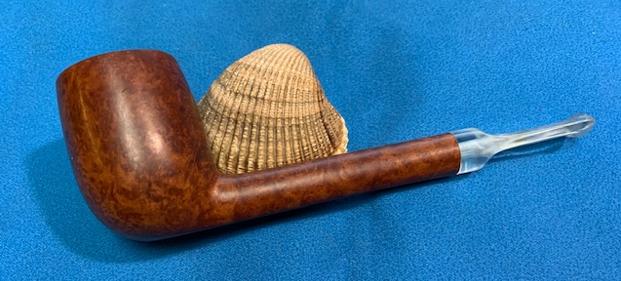
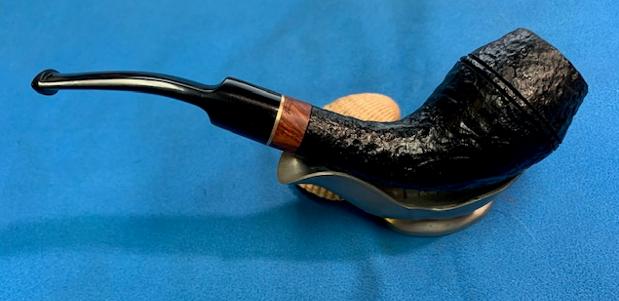
 To complete the restoration, I mounted a cotton cloth buffing wheel onto my hand held rotary tool and polished the stummel and stem with Blue Diamond compound. This compound helps to remove the minor scratch marks that remain from the sanding. I mounted another cotton buffing wheel that I have earmarked for carnauba wax and applied several coats of the wax. I finished the restoration by giving the entire pipe a rigorous hand buffing using a microfiber cloth to raise the shine further. The finished pipe looks amazingly beautiful in person and is ready to provide years of smoking pleasures to the piper who desires this beauty. If this pipe calls out your name, please feel free to contact me at deshpandeparesh@yahoo.co.in
Big thank you to all the readers who have joined me on this path by reading this write up as I restored and completed this project.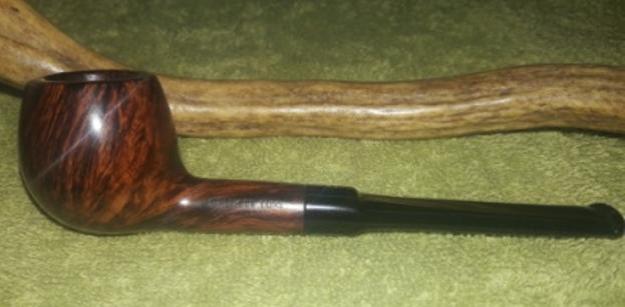


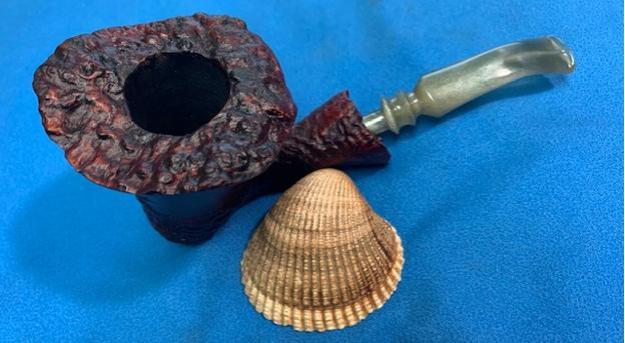
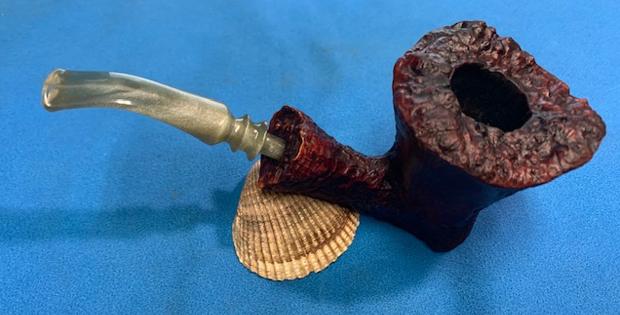
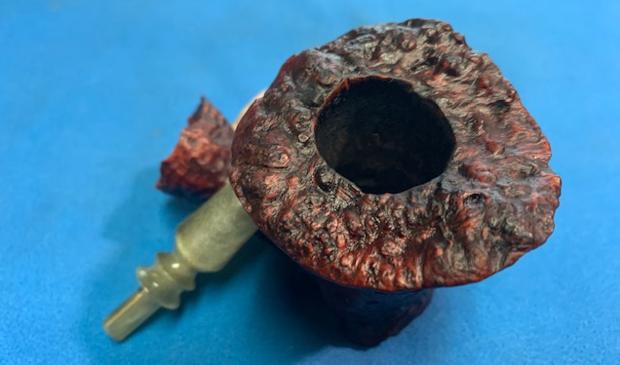
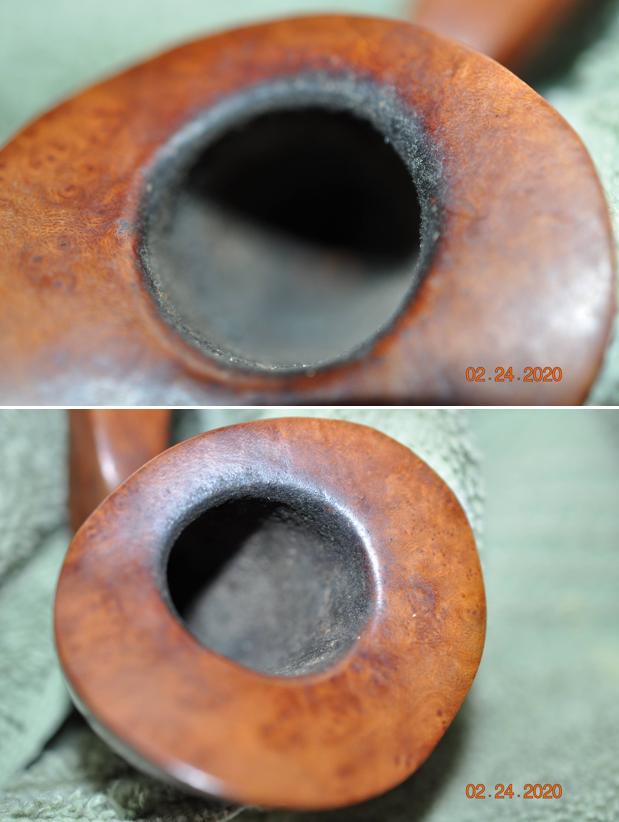
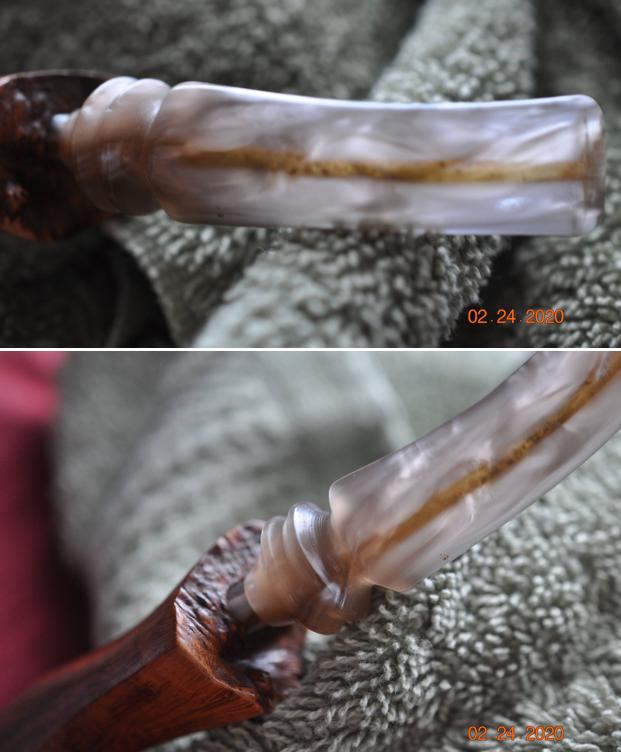
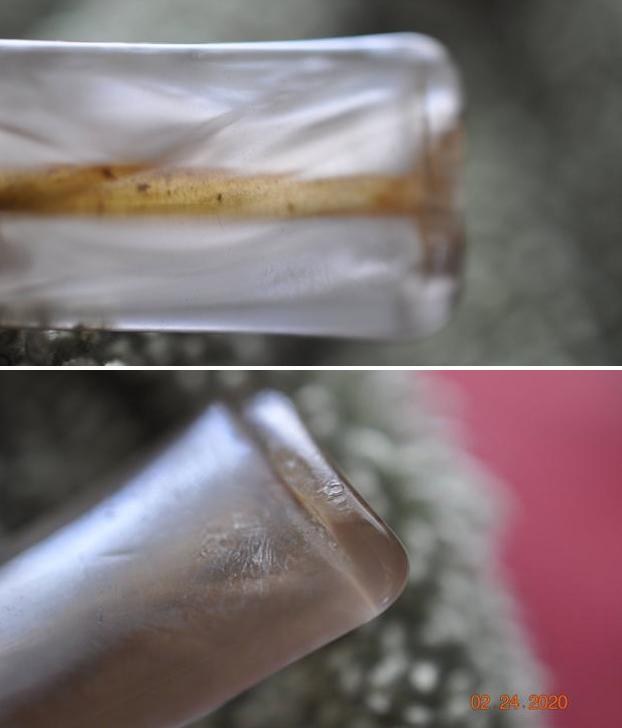
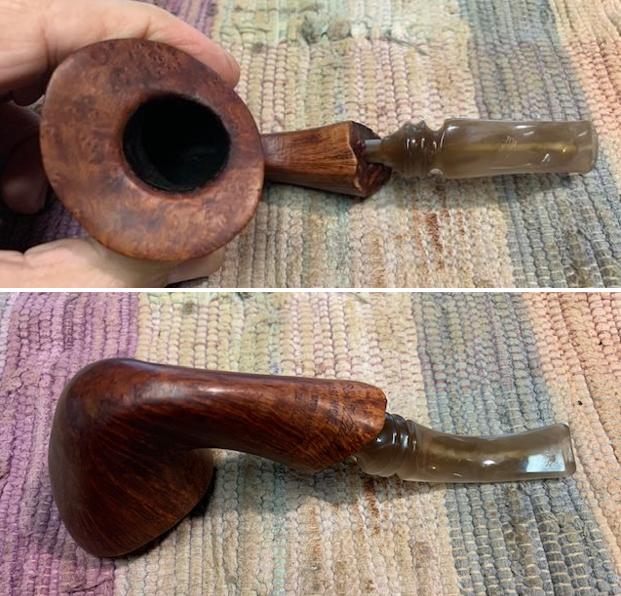
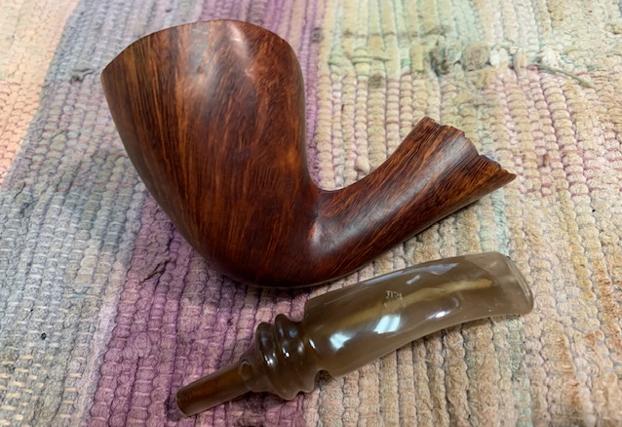
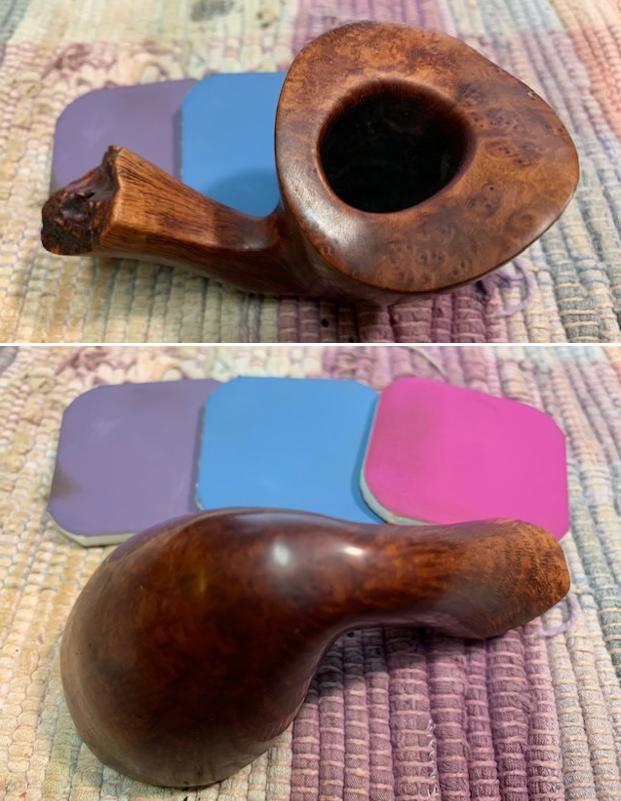
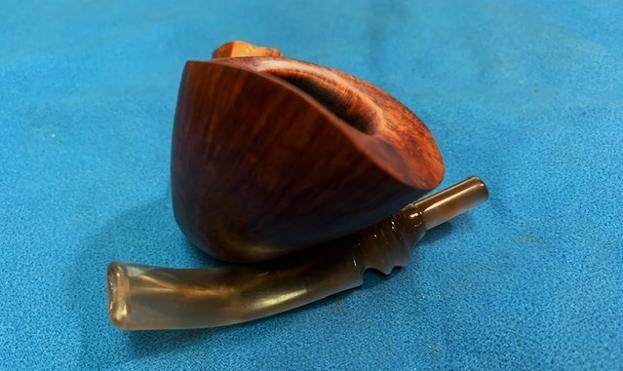
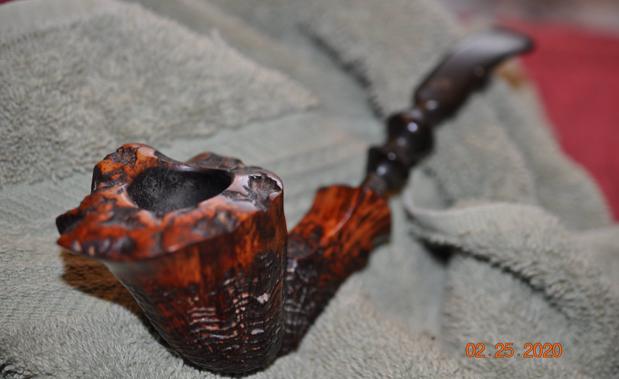
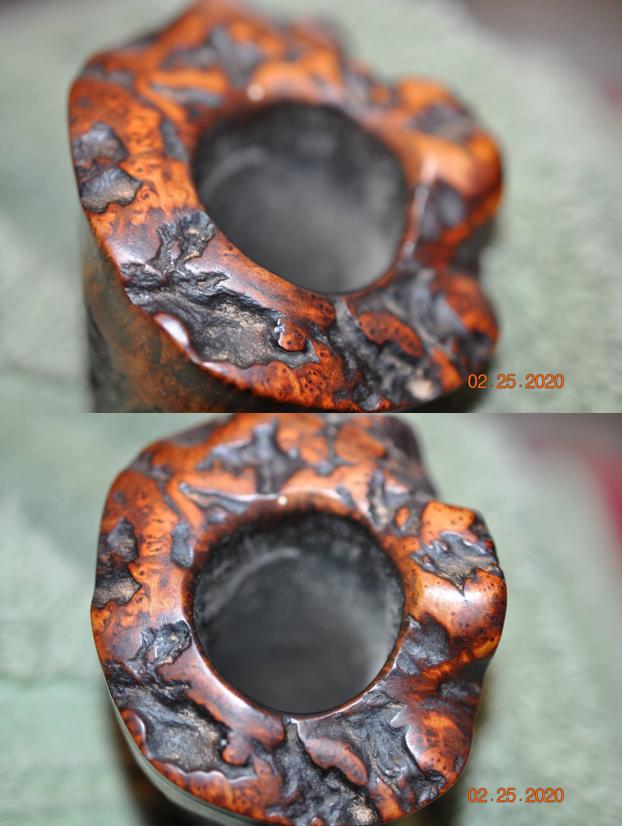
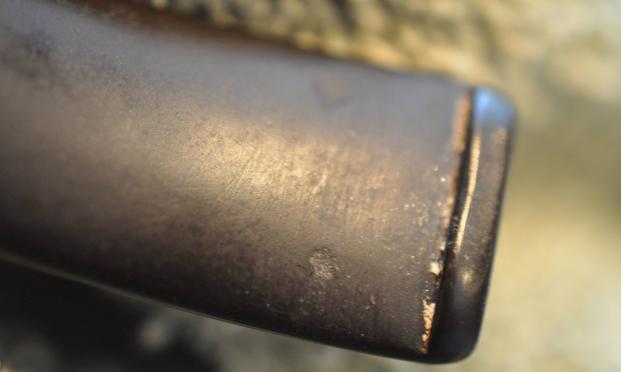
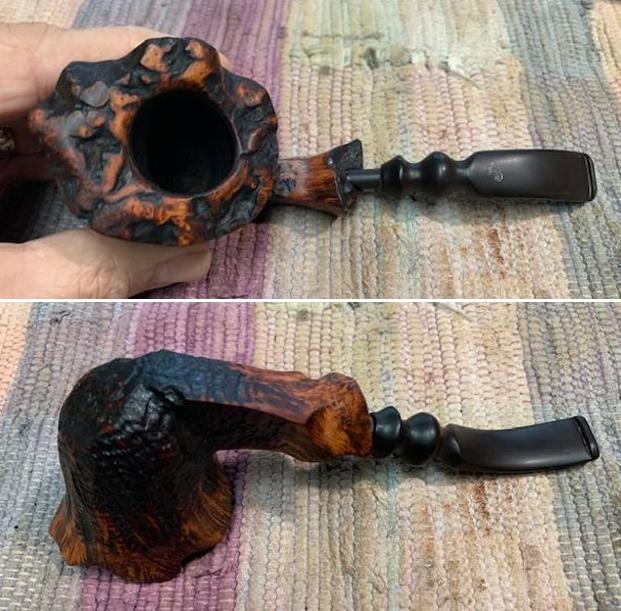
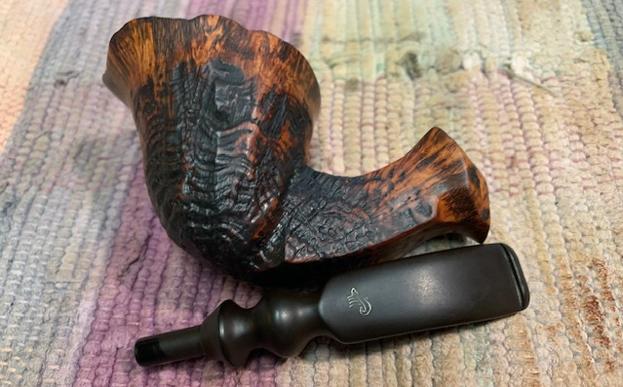
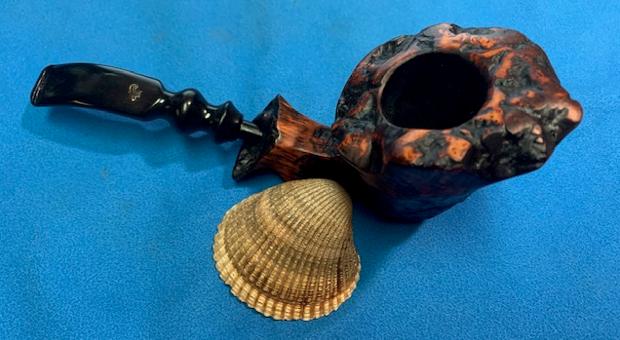
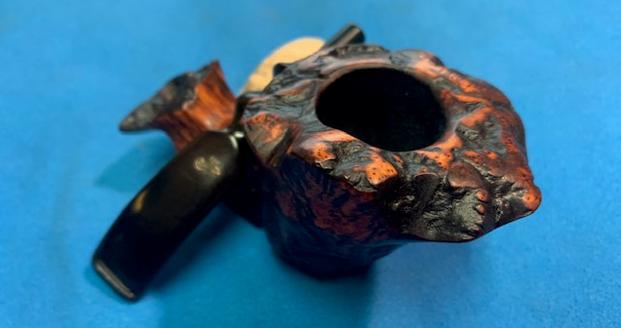
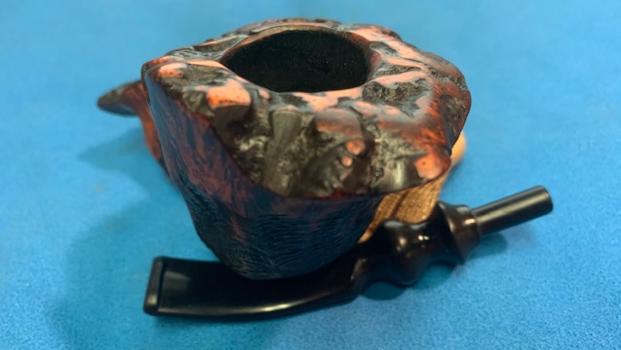
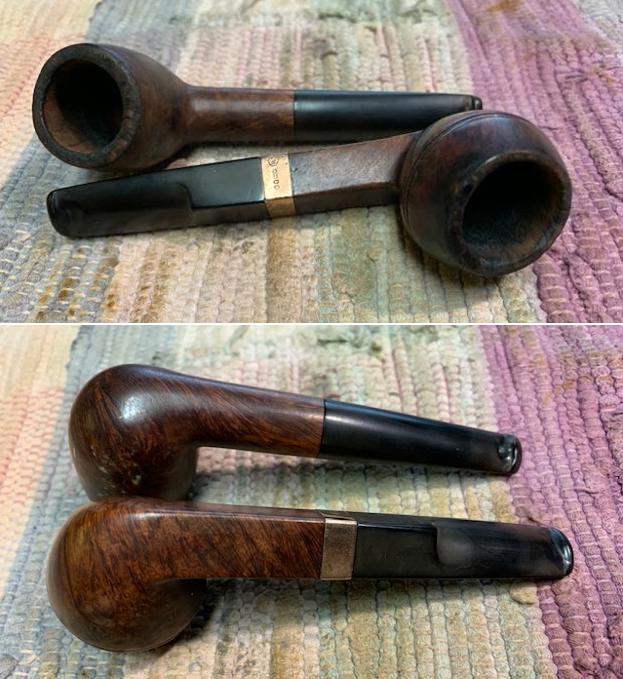
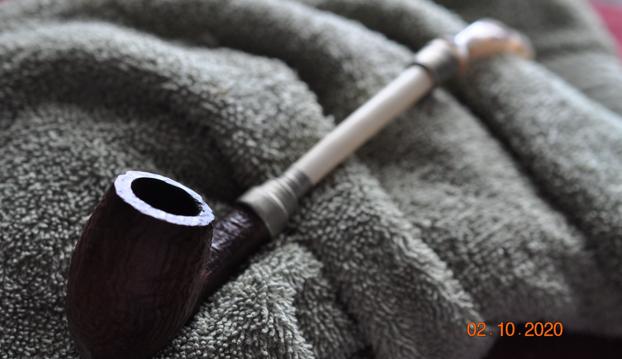
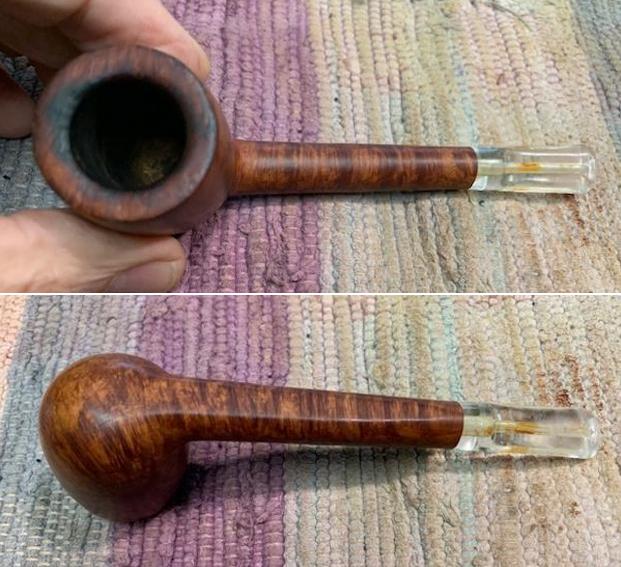
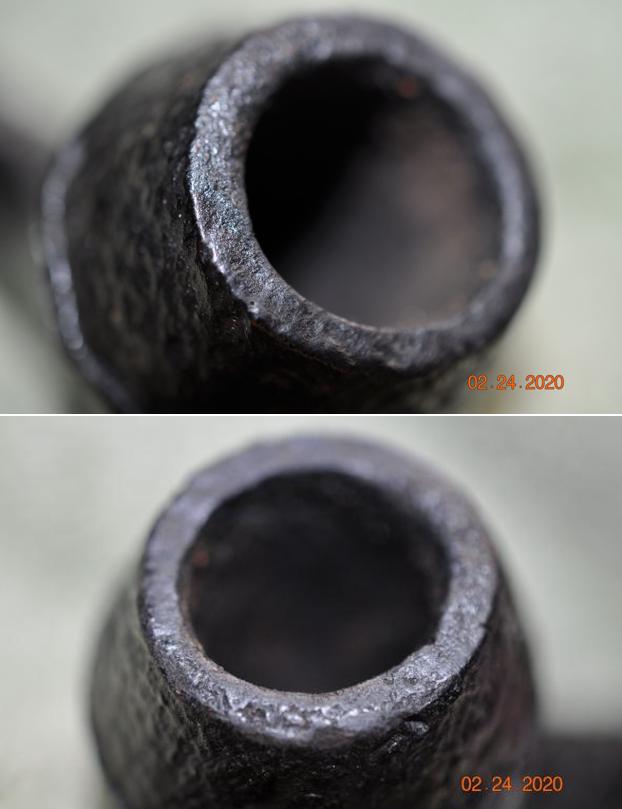
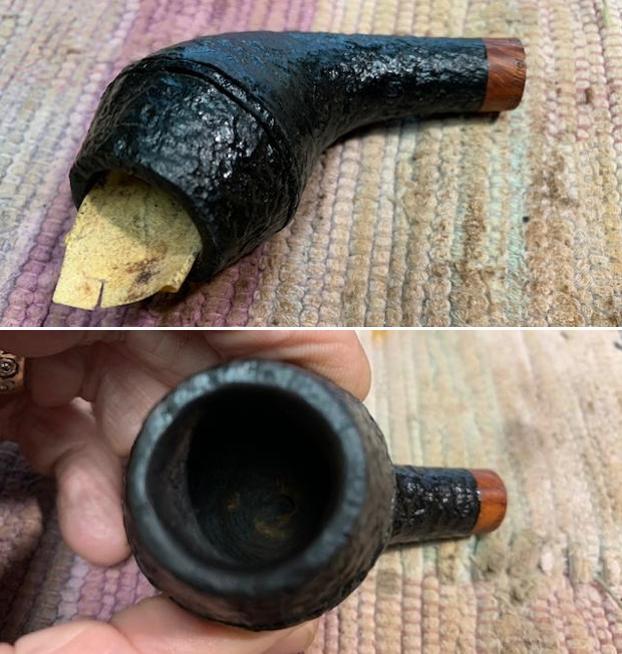
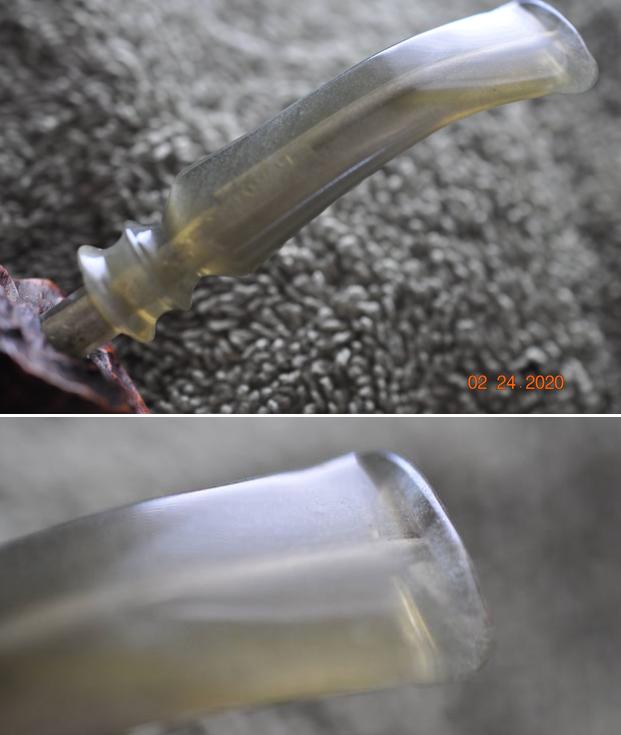
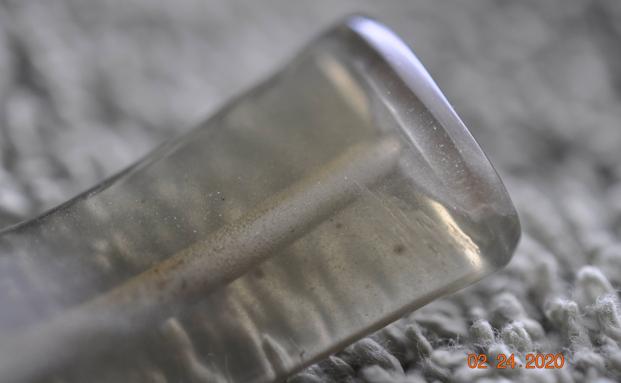
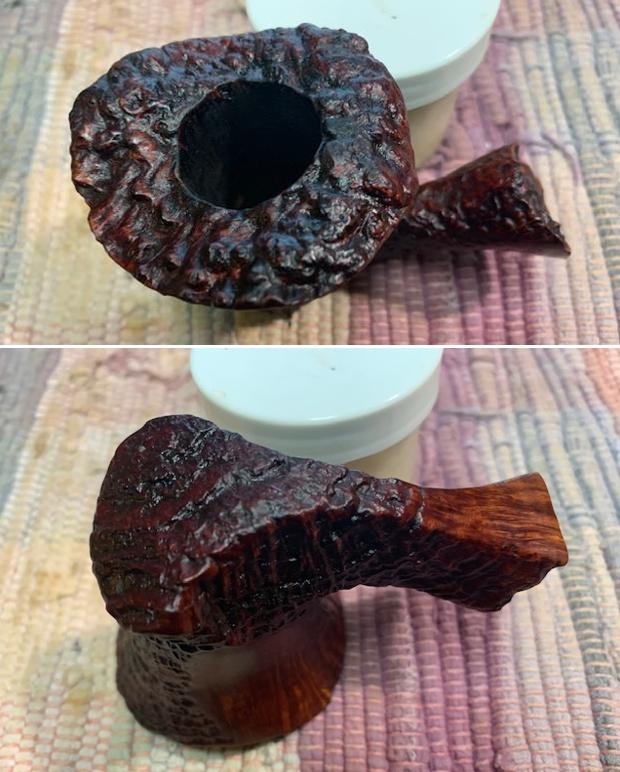
 Jeff took photos of the rim top and the stem to show the condition of the pipe when we received it. You can see the reamed bowl sides and the lava on the plateau rim top and inner edge of the bowl. The turned acrylic stem was dirty and had chatter and a few tooth marks on both sides near the button.
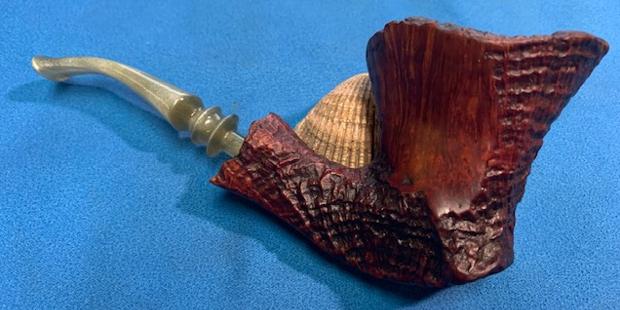
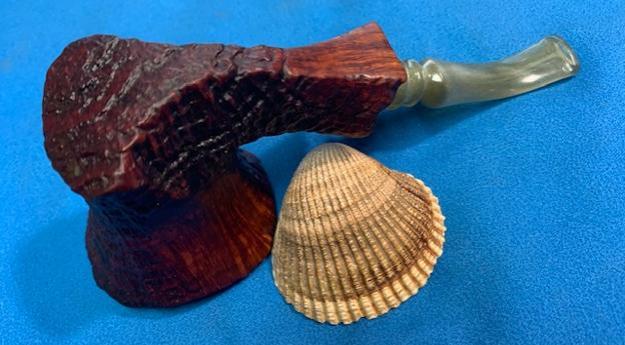
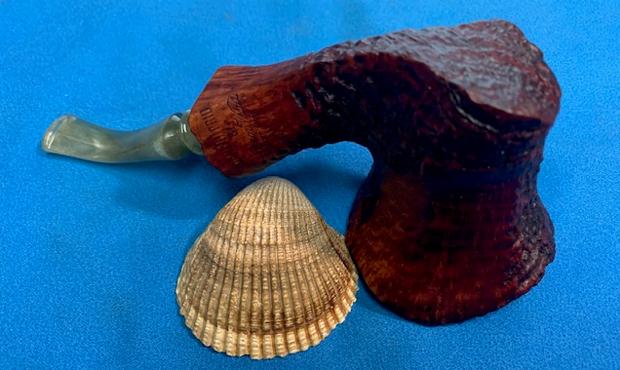
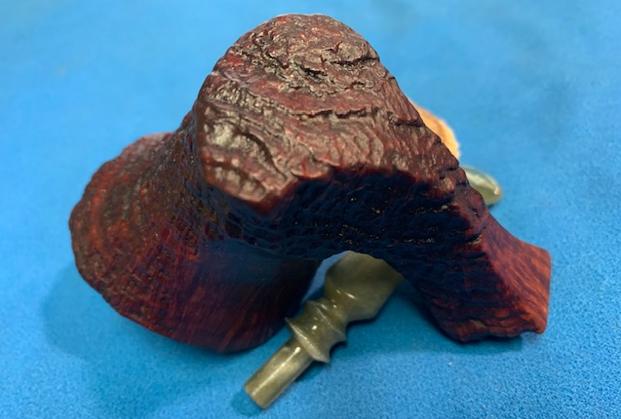
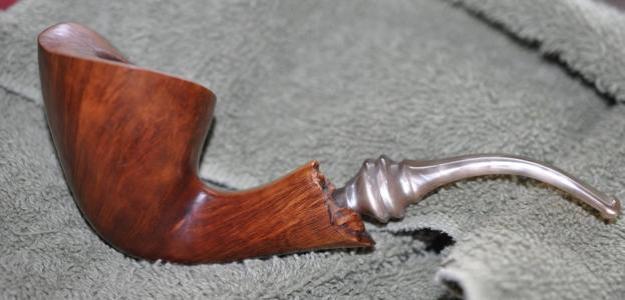
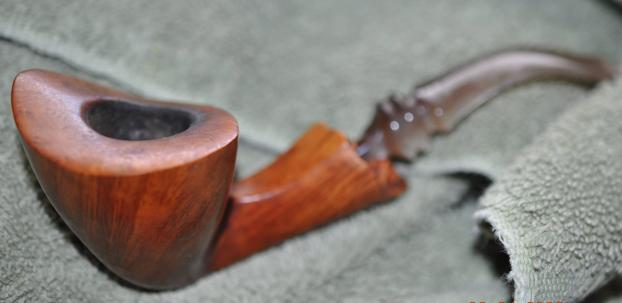
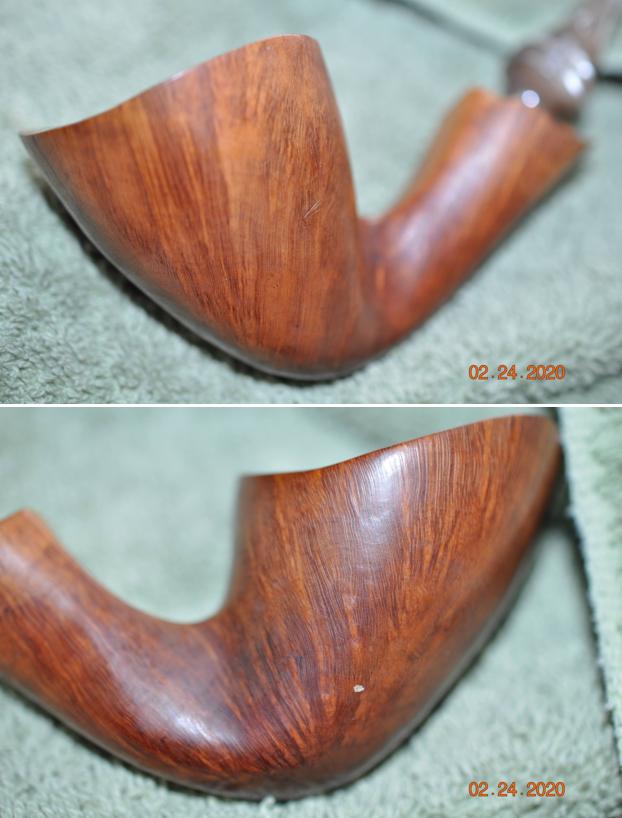
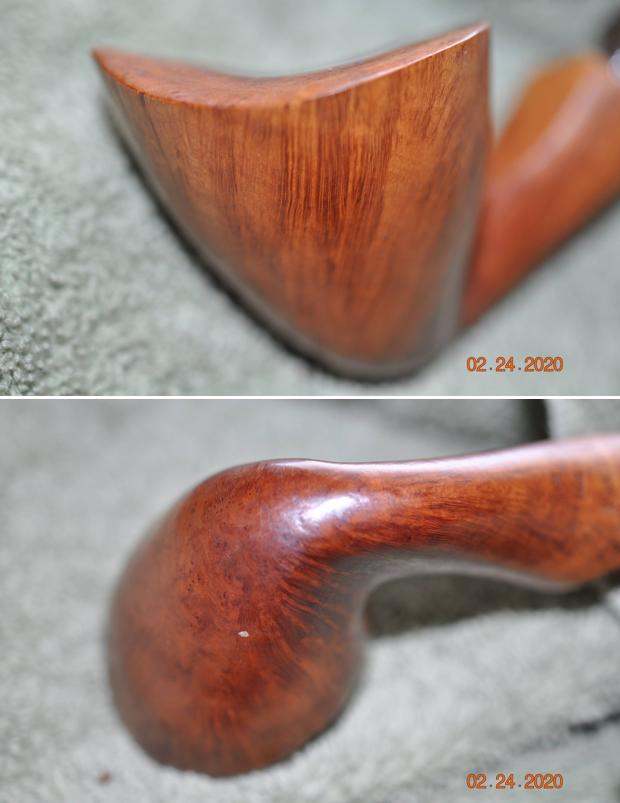
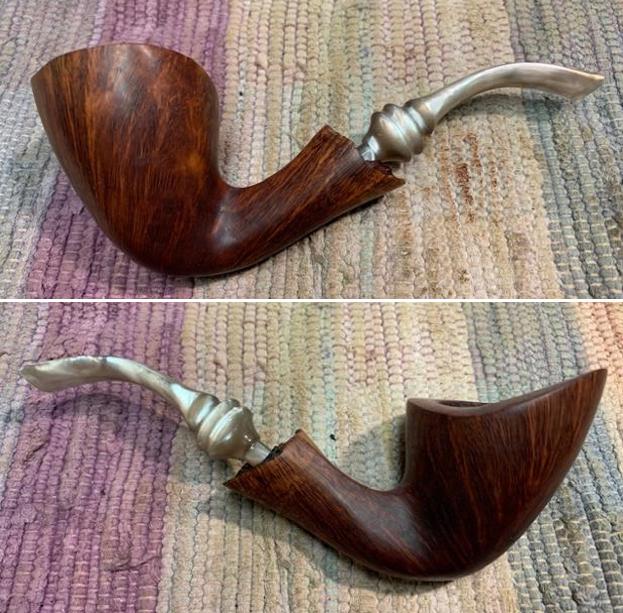
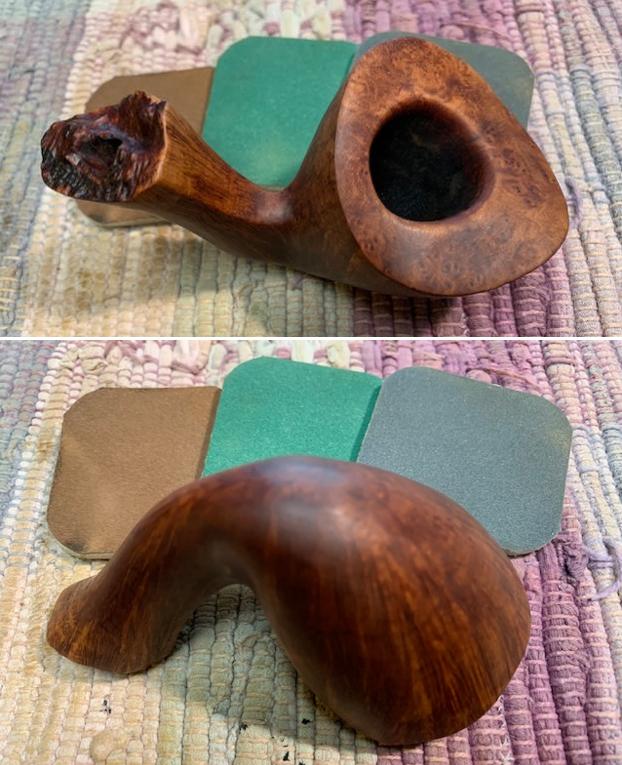
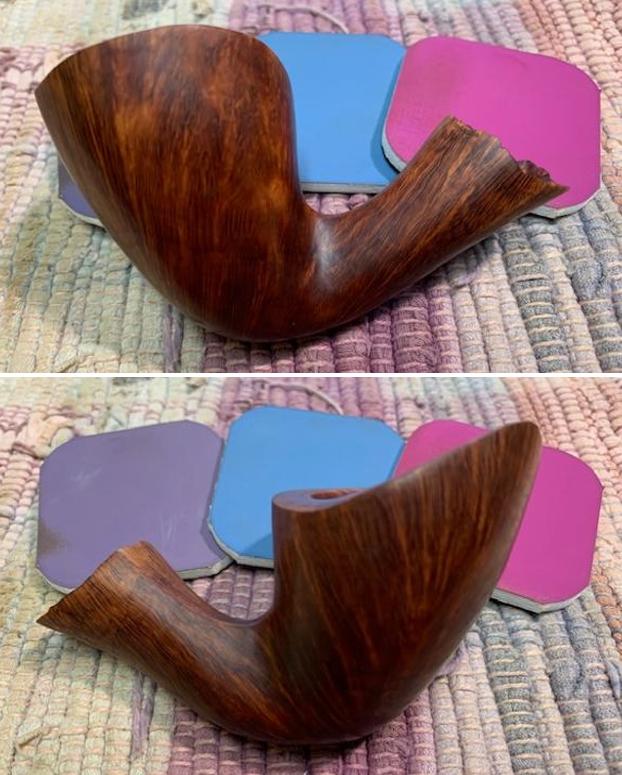
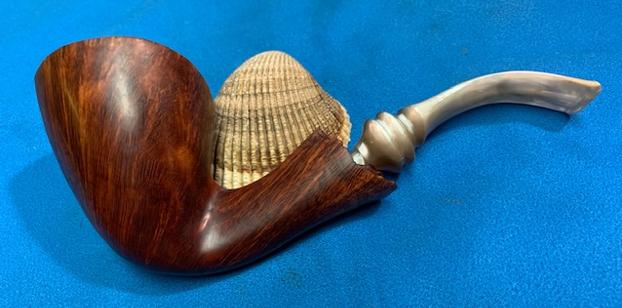
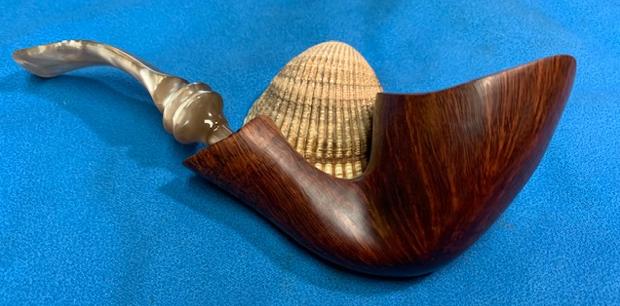
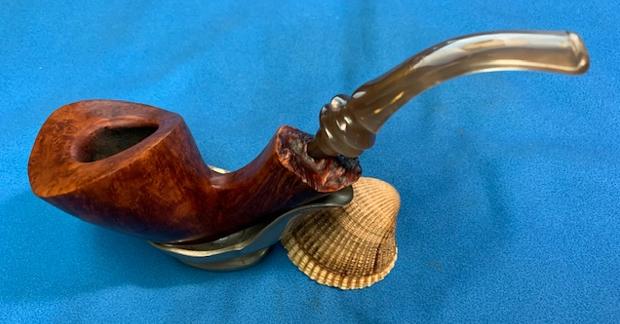
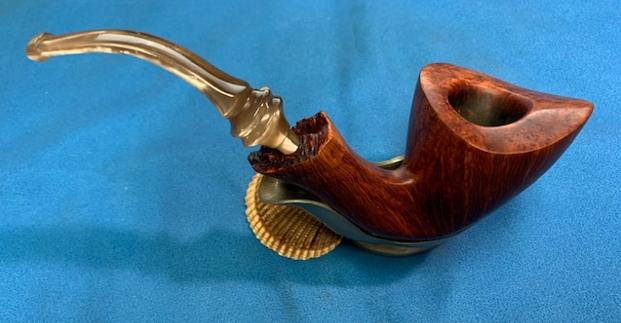
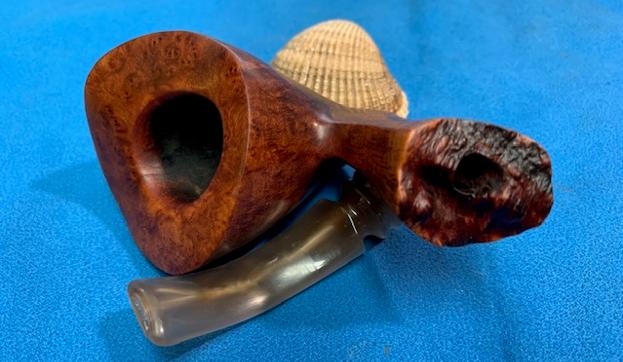
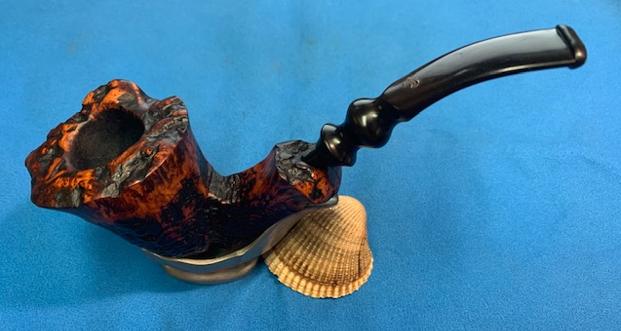
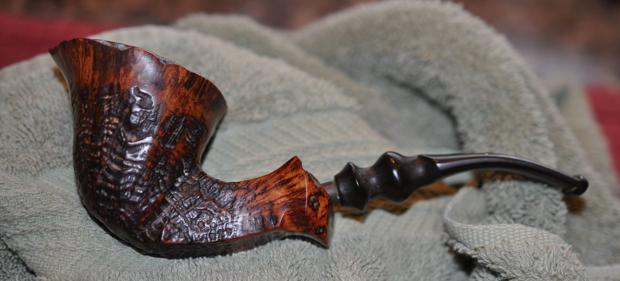
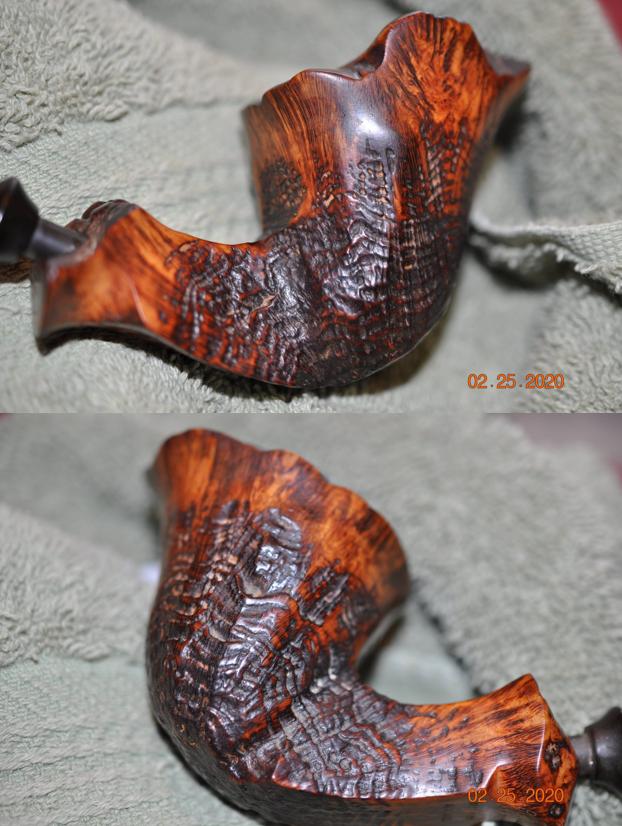
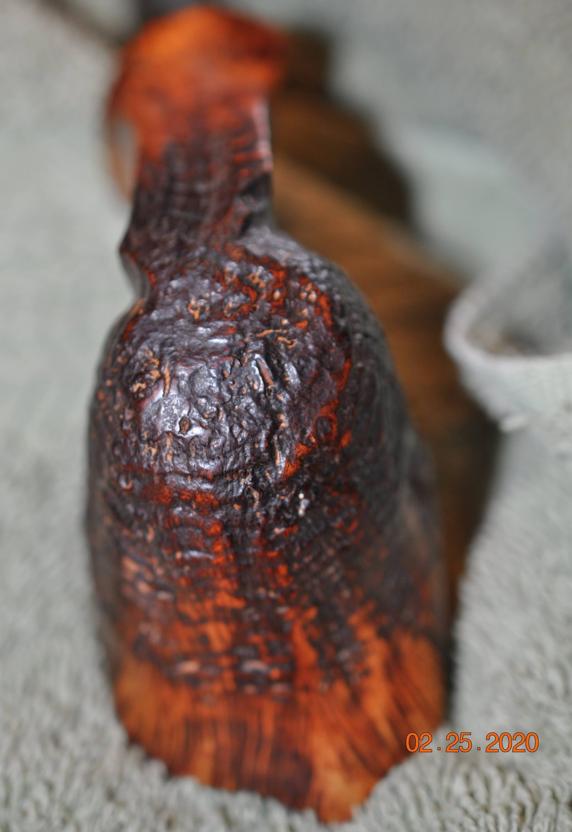
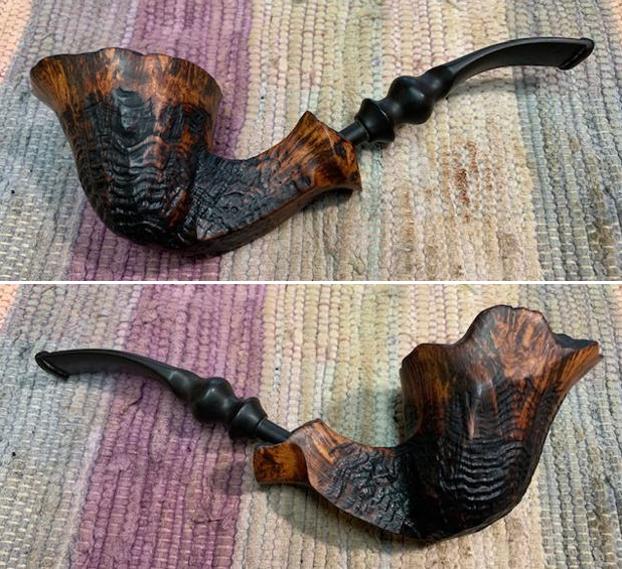
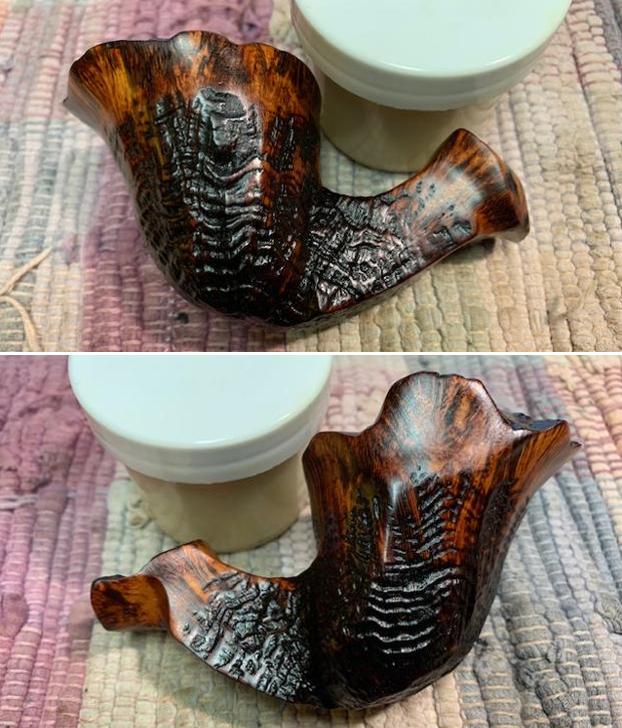
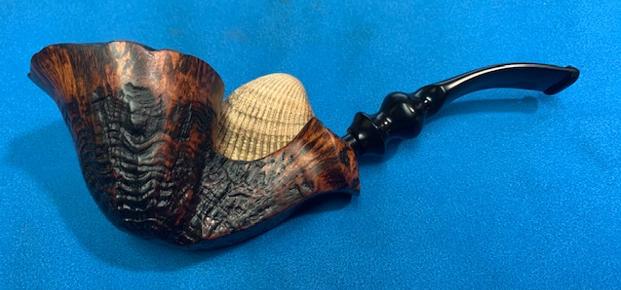
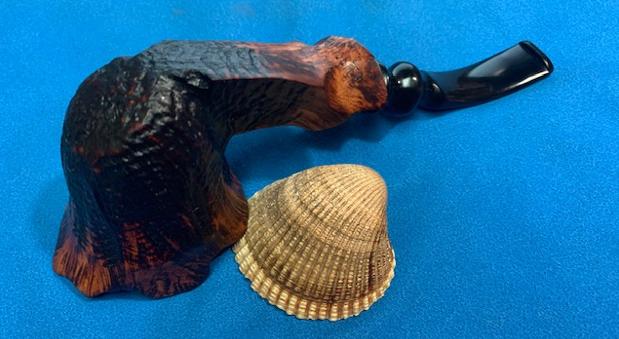
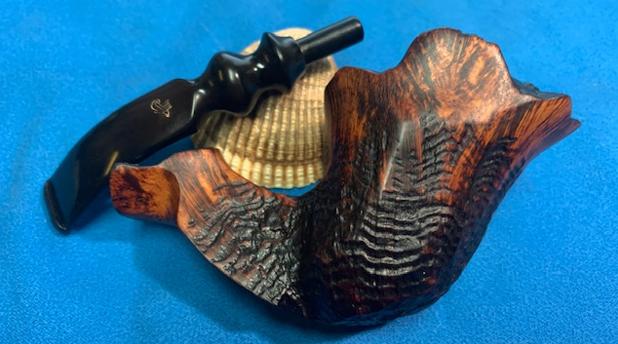
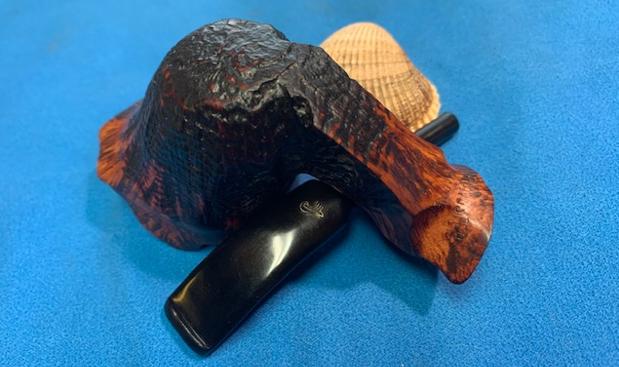
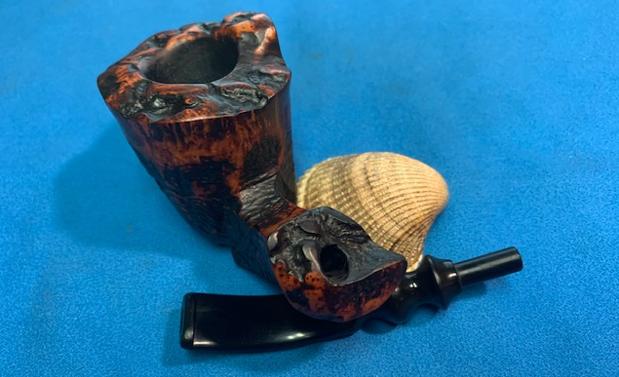
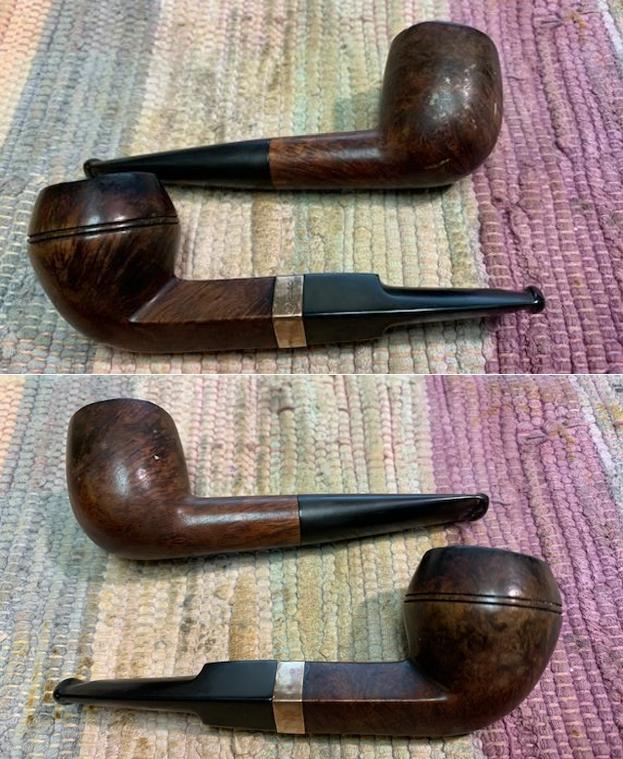
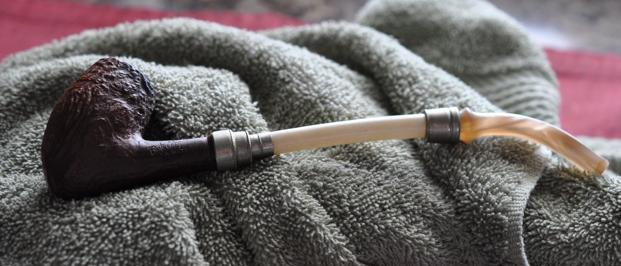
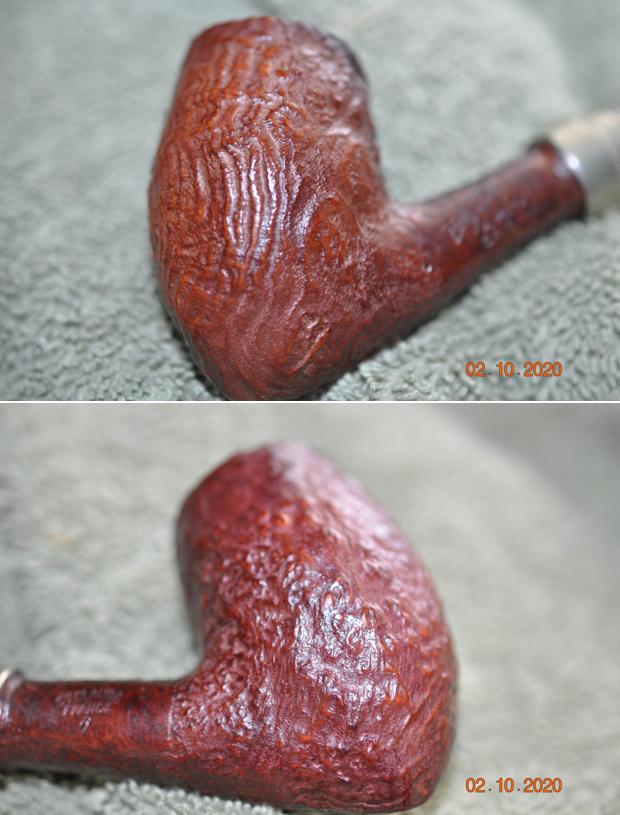
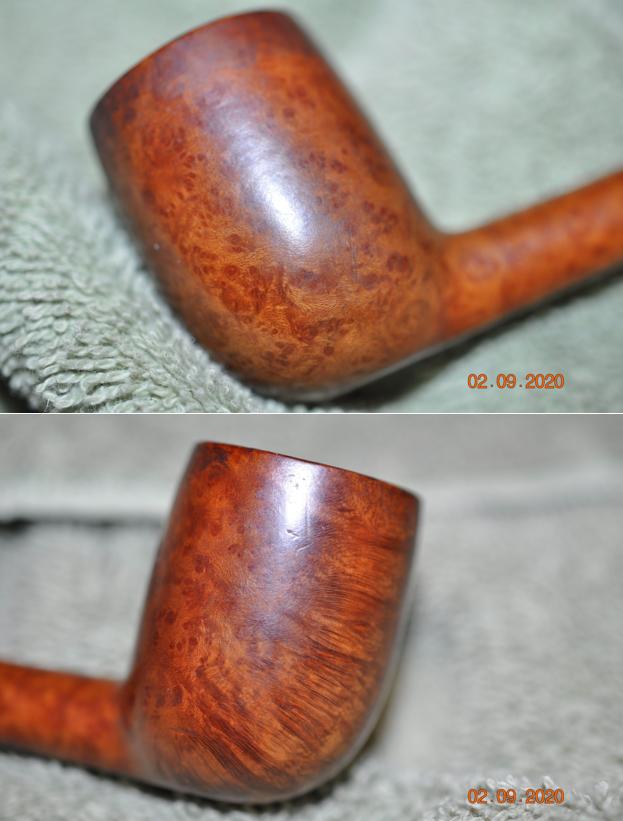
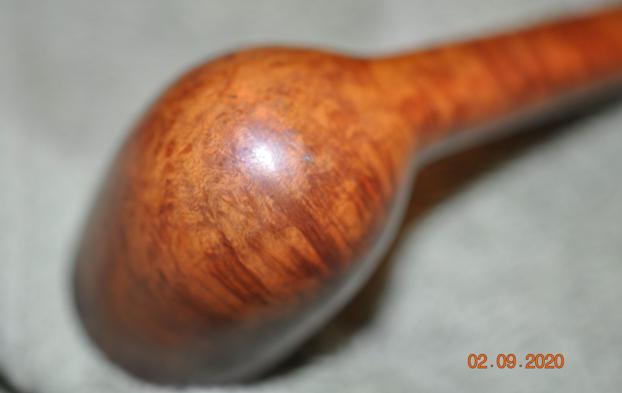
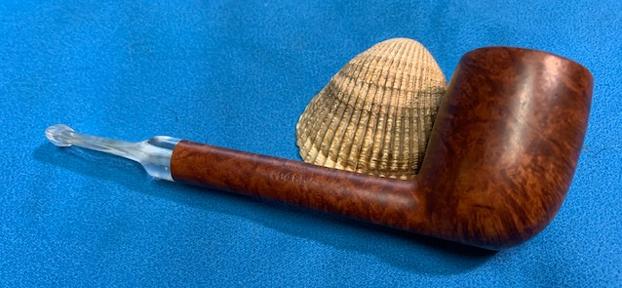
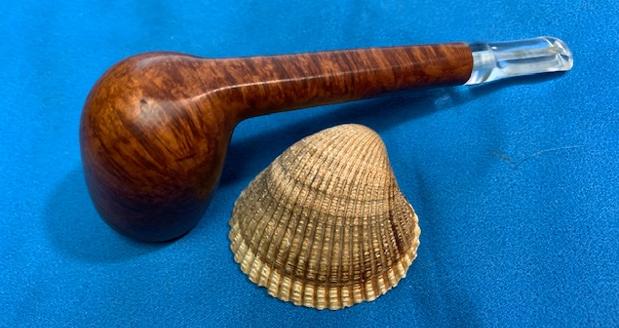
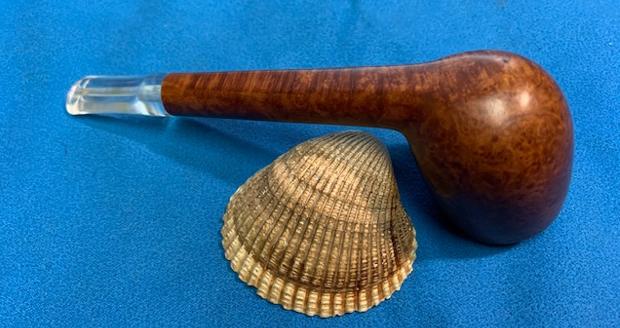
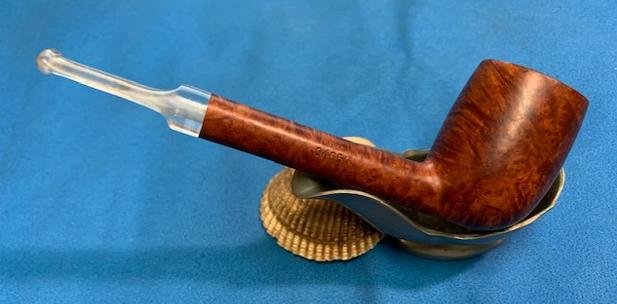
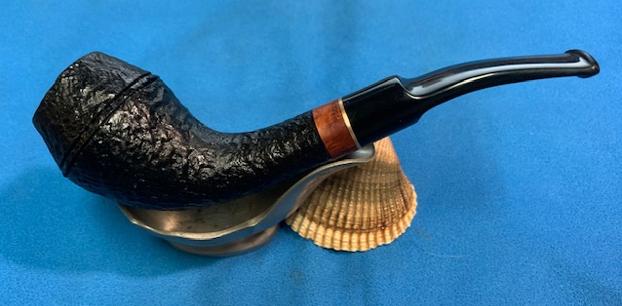
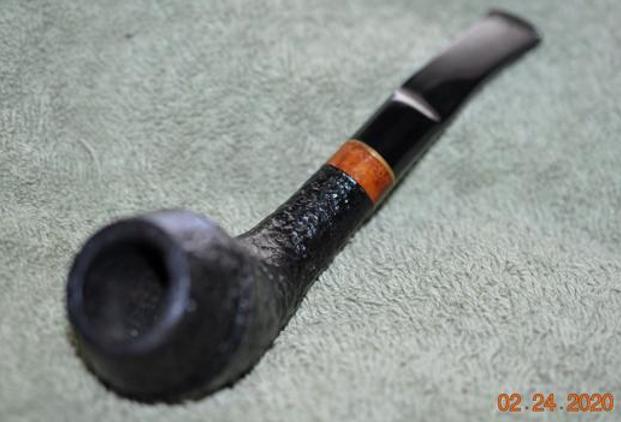
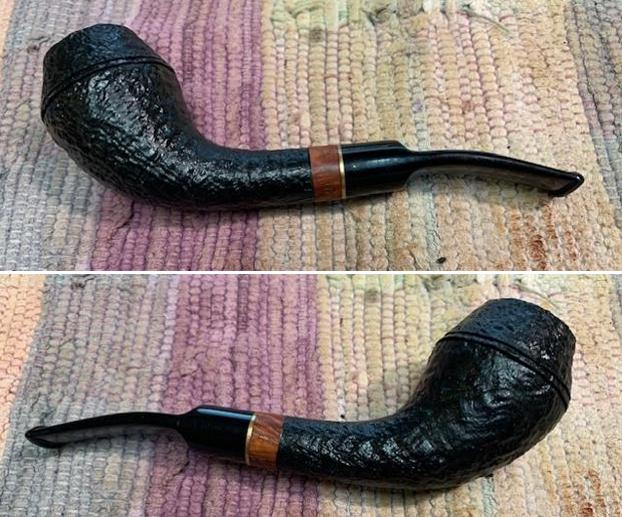
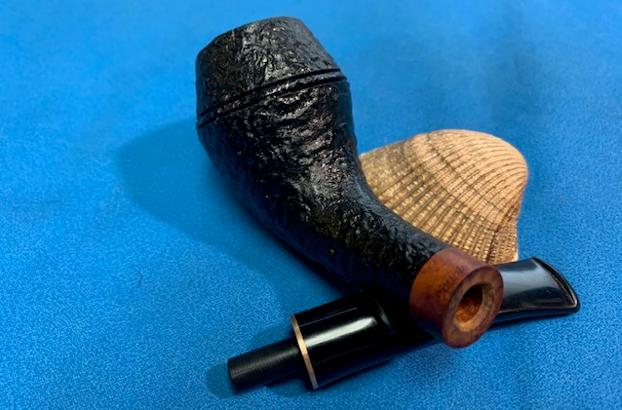
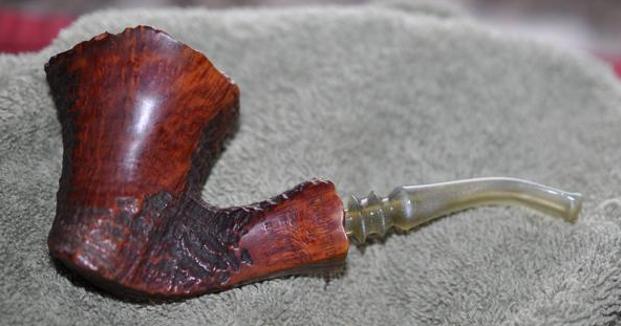
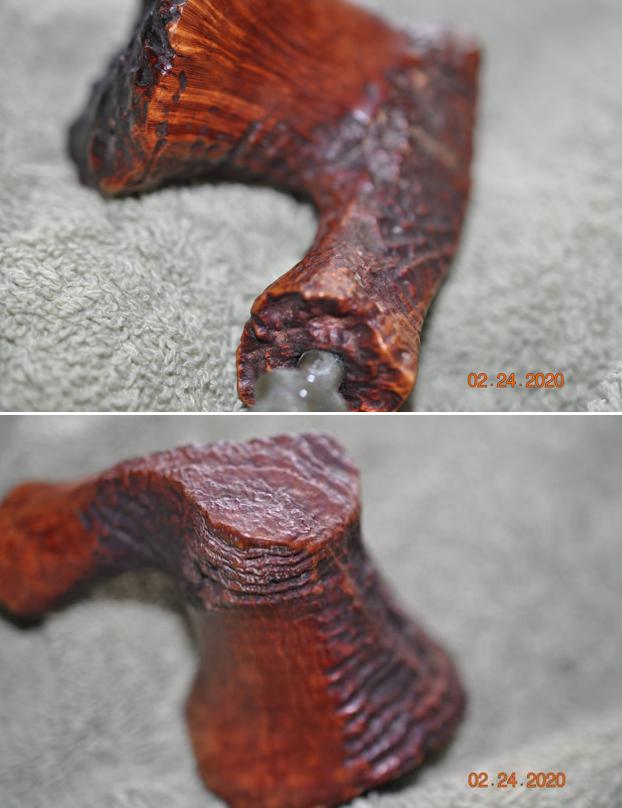
 He took photos of the sides of the bowl and the heel to give an idea of the shape and the condition of the briar around the bowl. It really is a nicely shaped pipe that has the classic look of a Freehand carved by Preben Holm.
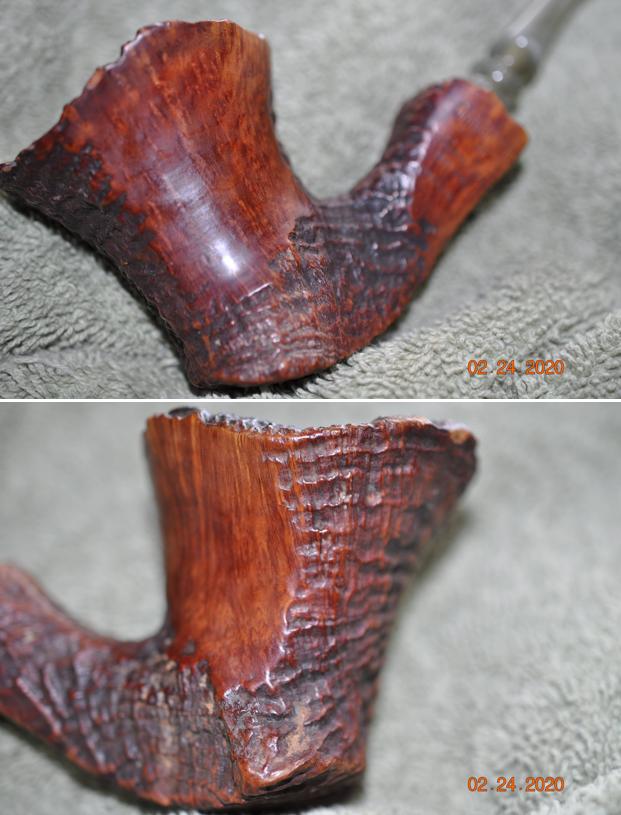
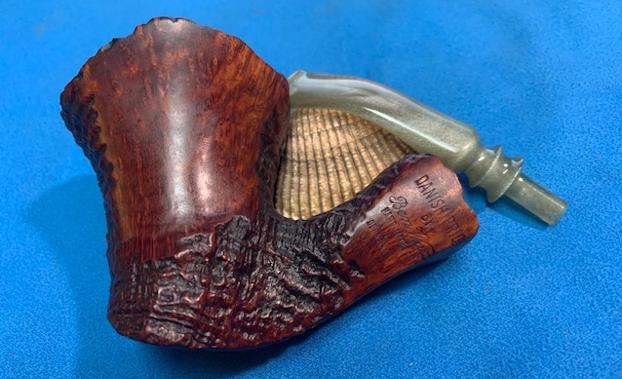
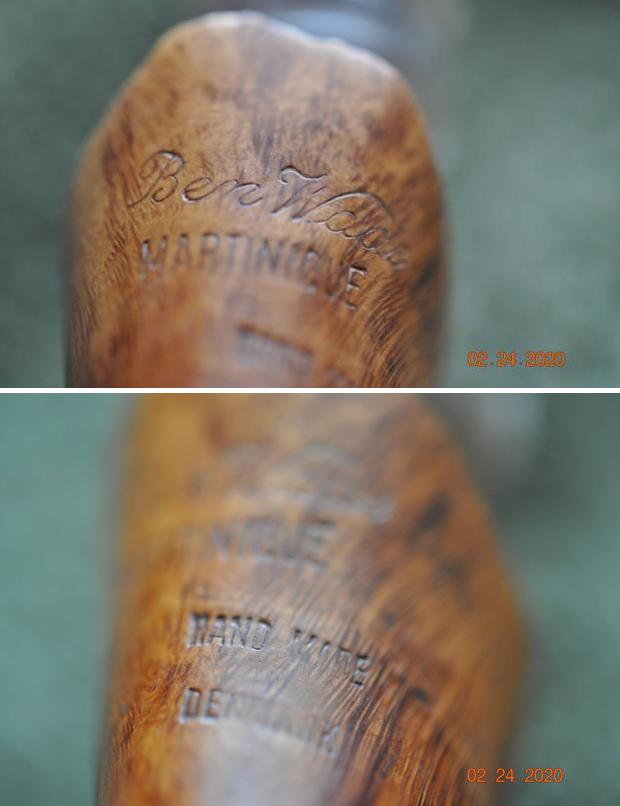
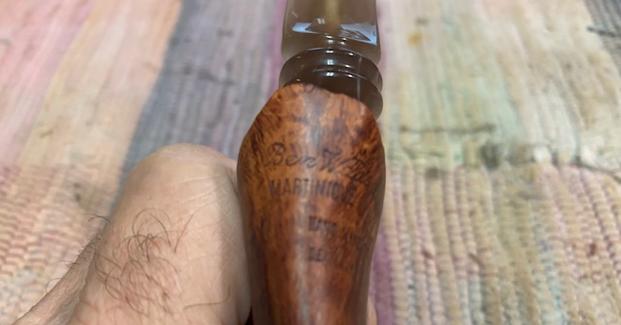
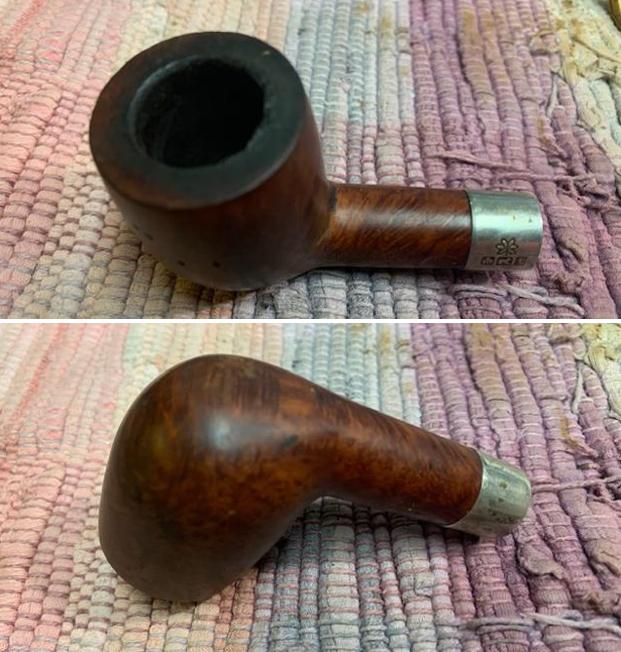
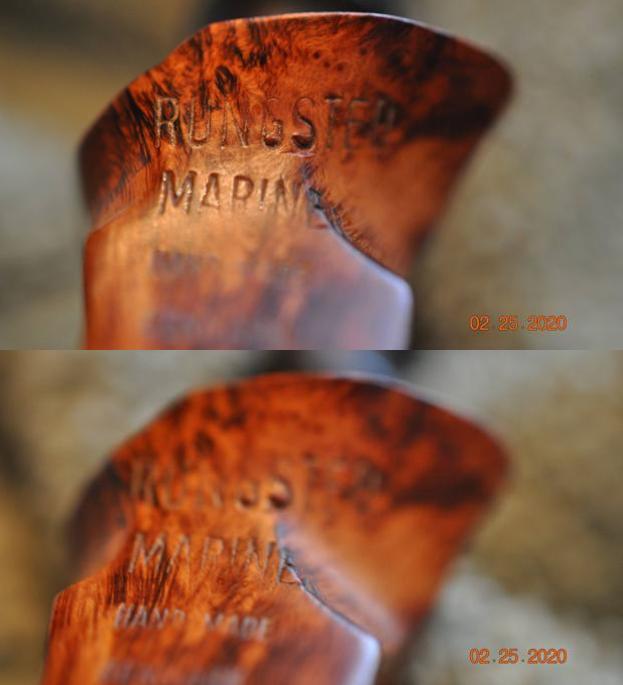
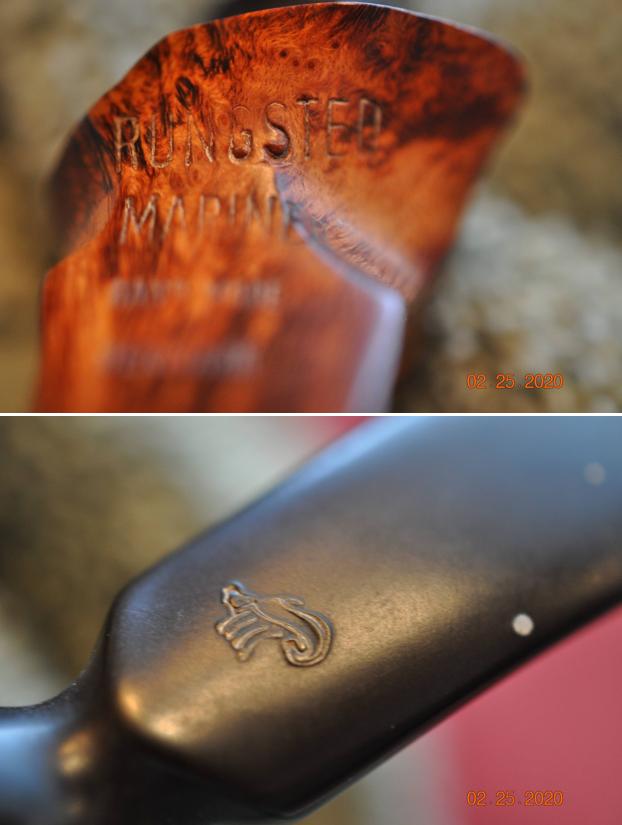
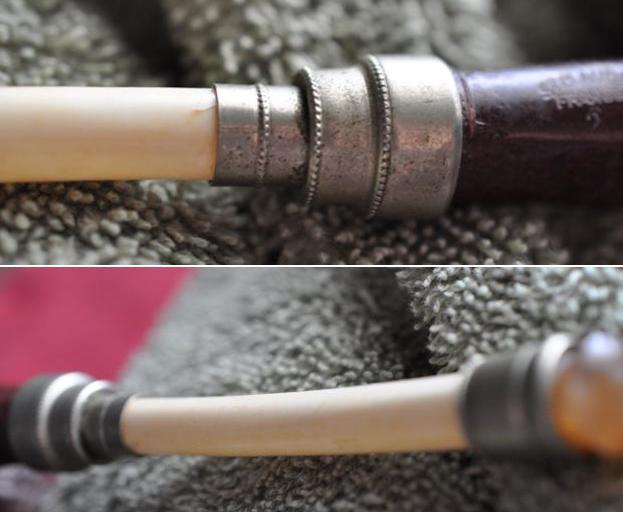
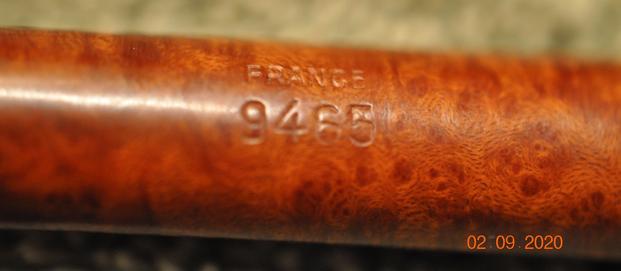
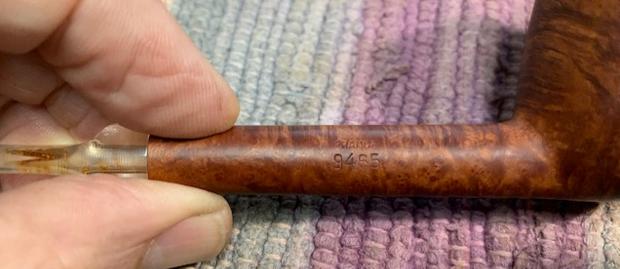
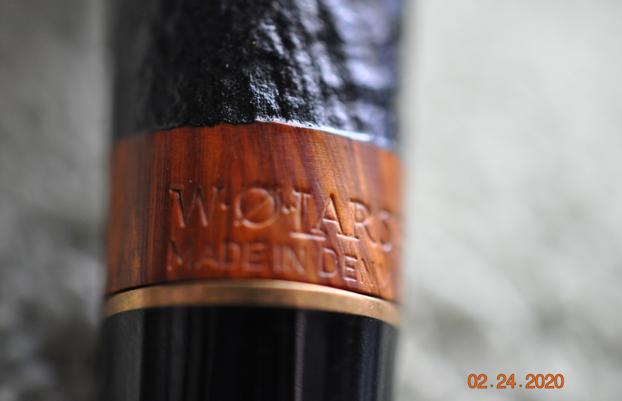
 The next photo Jeff took shows the stamping on the left side of the shank. It is clear and readable as noted above.
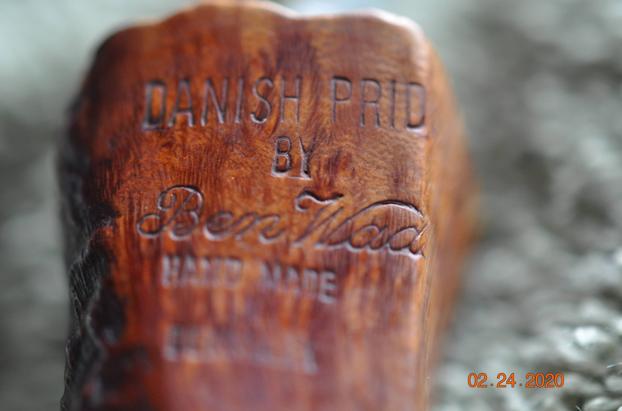 In a previous blog I had researched the brand quite a bit. I have included it below for information on this pipe (https://rebornpipes.com/2020/10/03/restoring-a-danish-pride-by-ben-wade-mixed-finish-handmade-freehand-sitter/). I quote:
 I quote the portion of the article that summarizes the Danish period of the history of the brand:
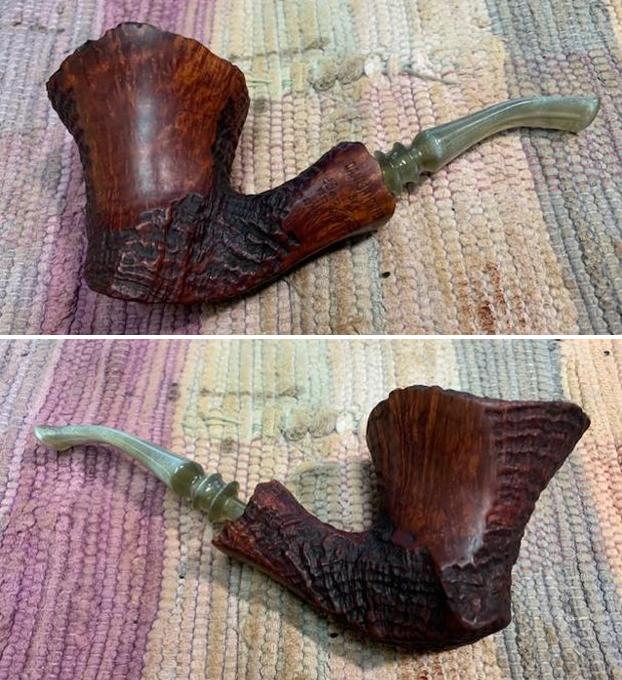
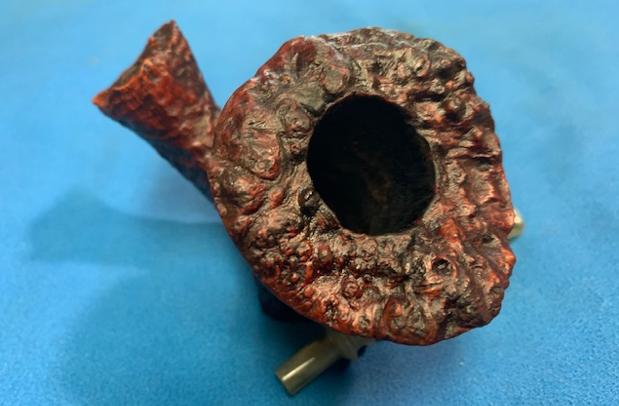
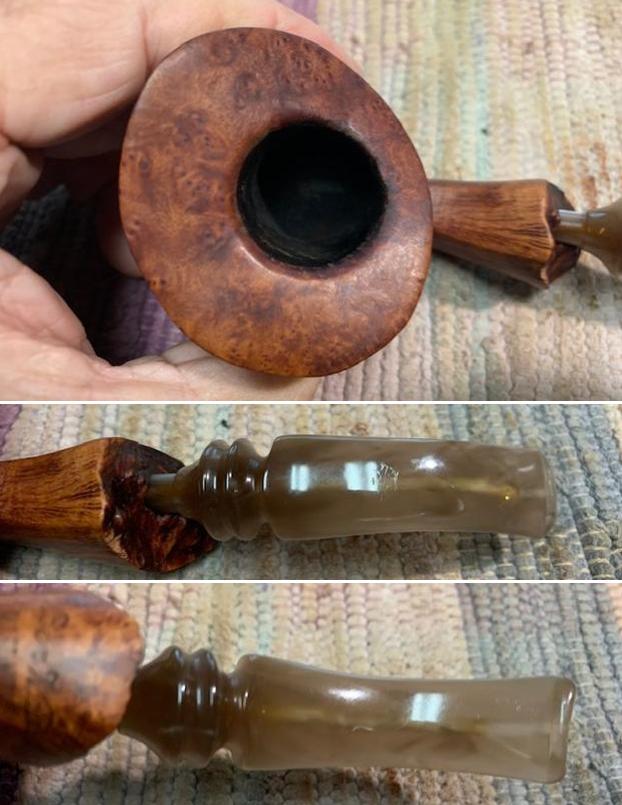
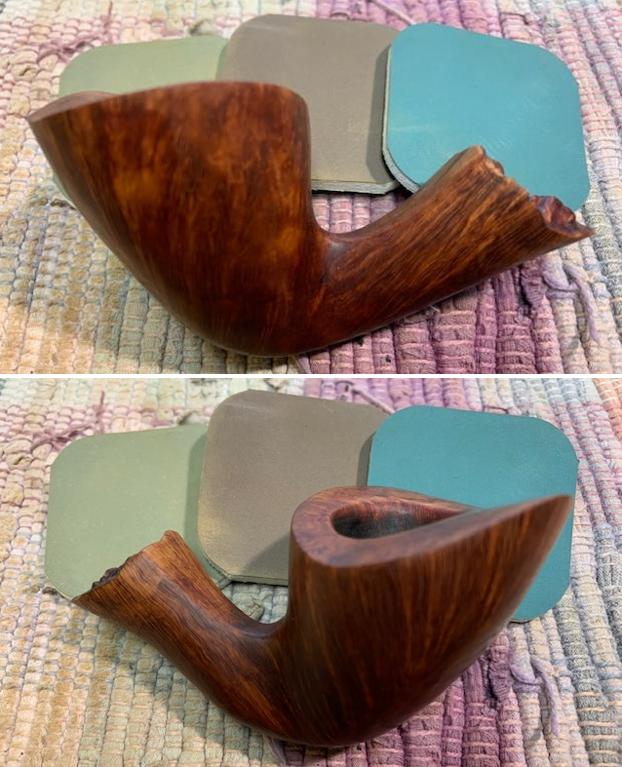
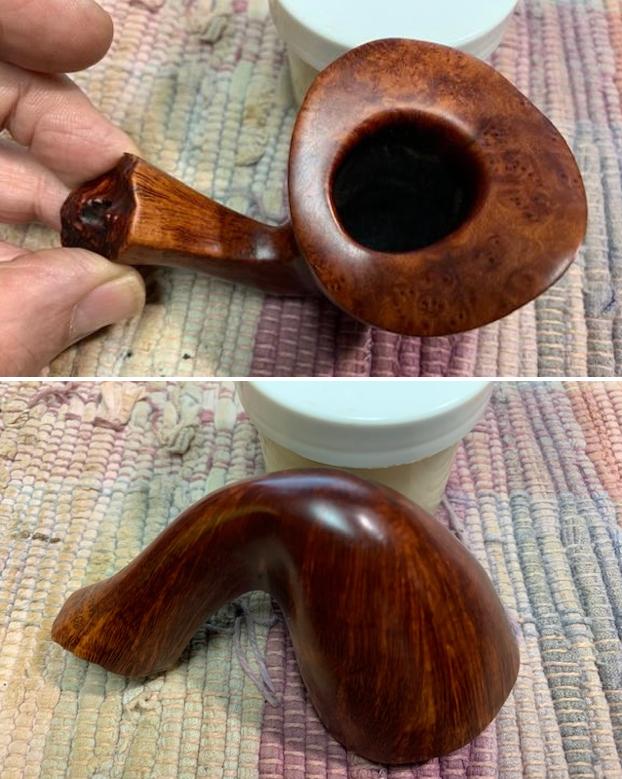
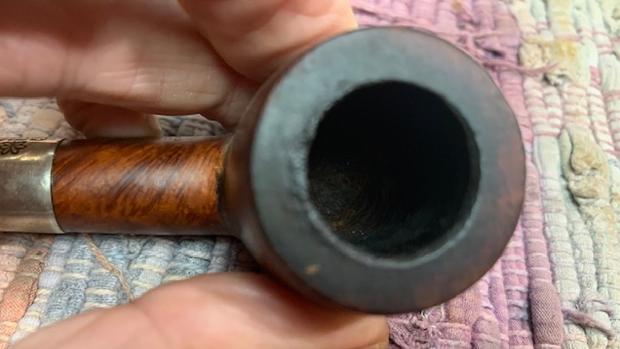
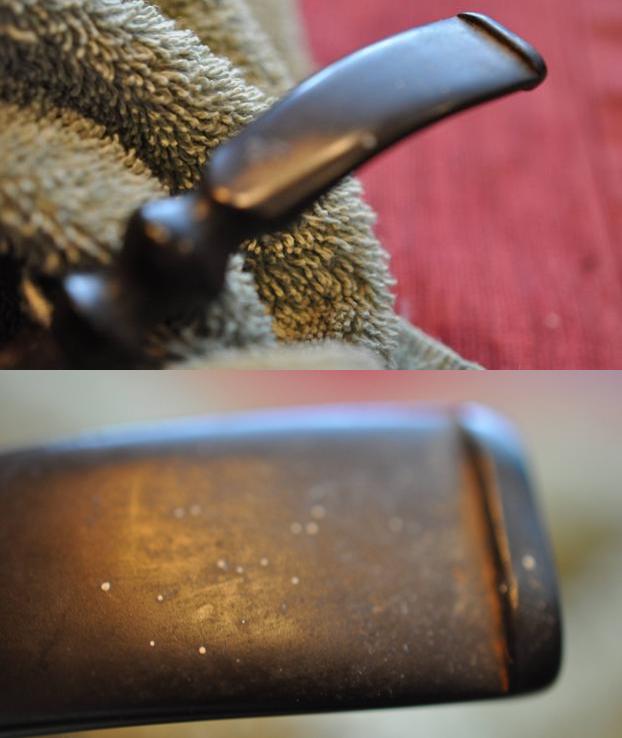
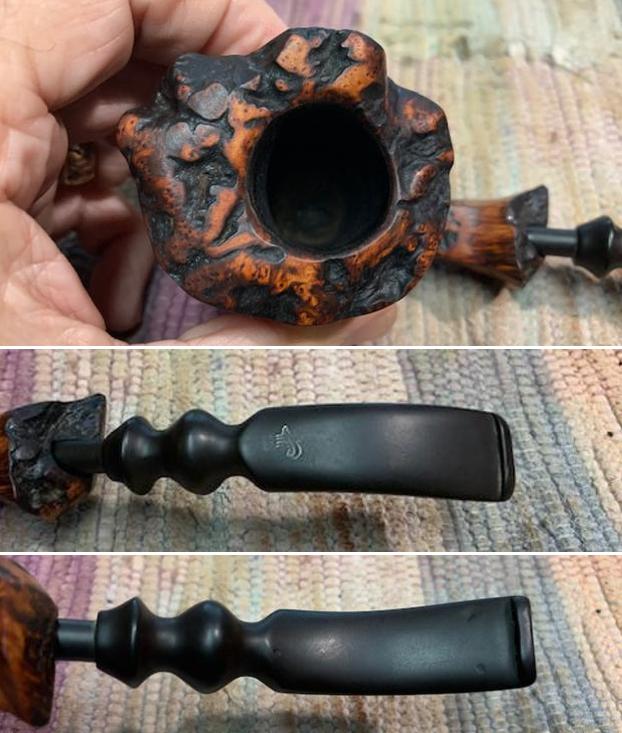
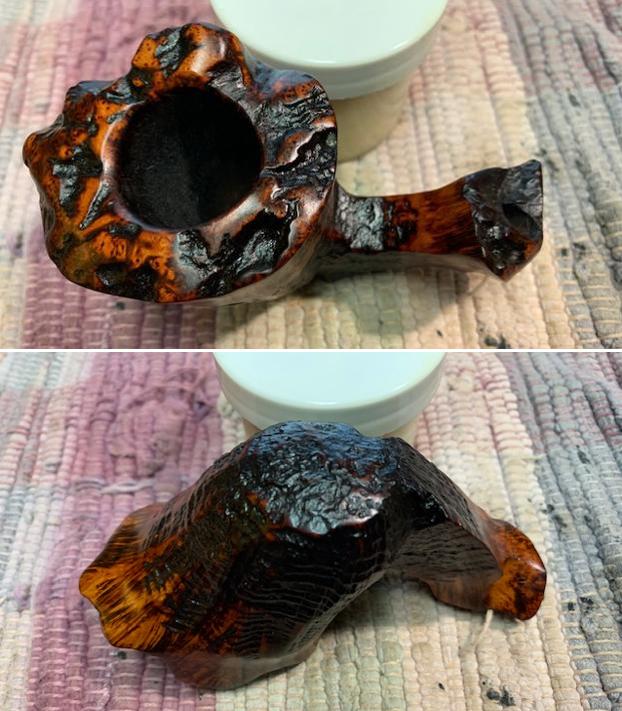
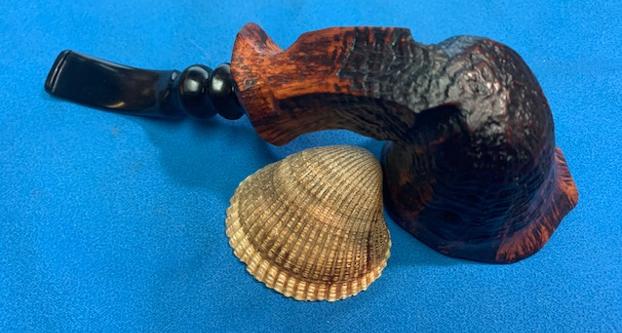
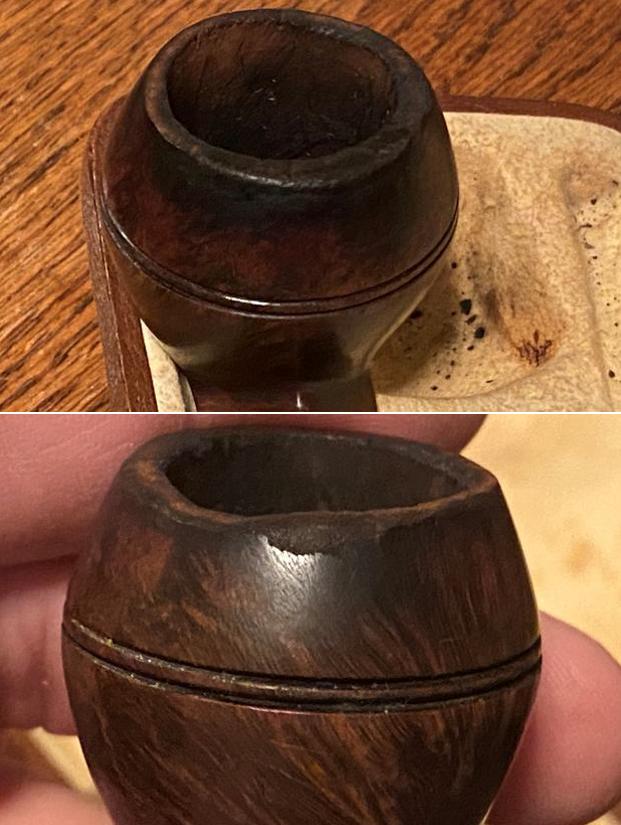
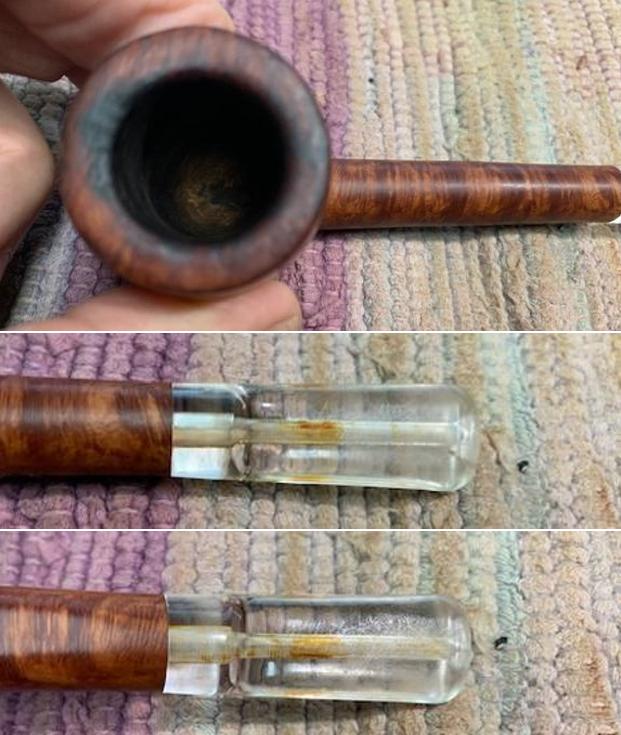
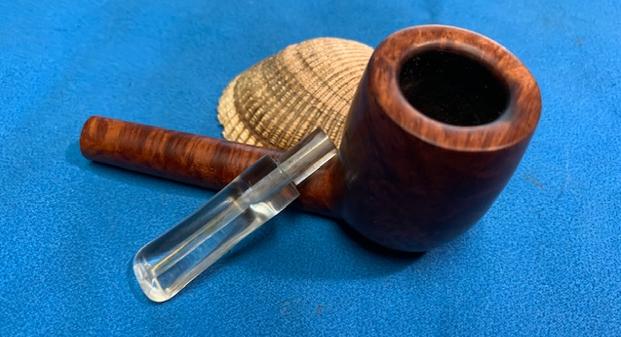
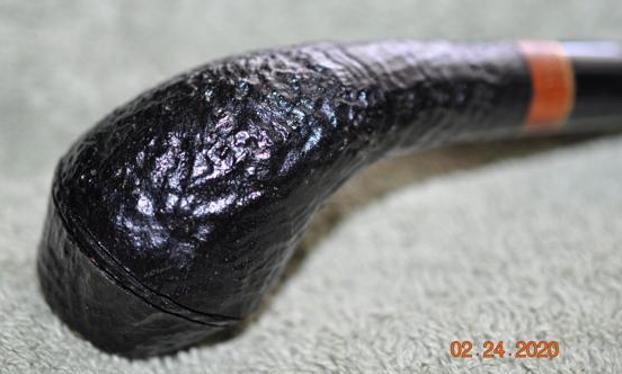
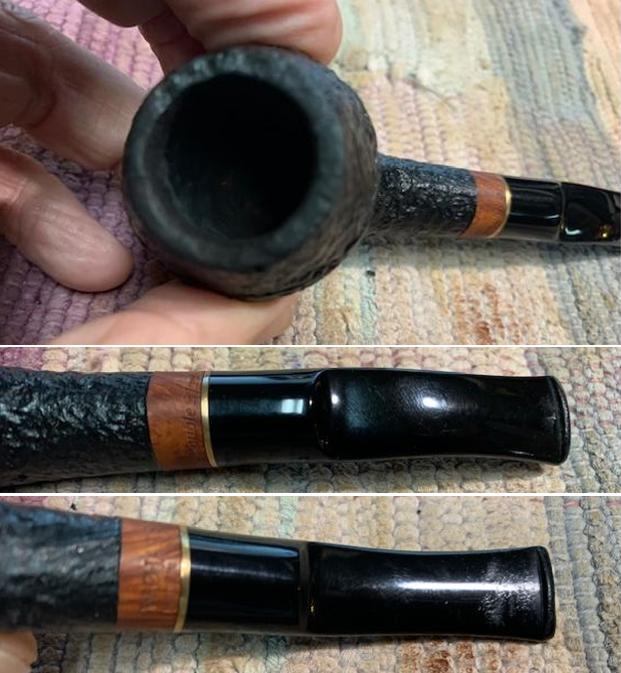
 I took close up photos of the stem and the rim top to show both how clean they were and what needed to be addressed with both. The rim top and bowl look good. The stem looked better and the tooth marks and chatter were still present. I would need to remove those to bring the stem back.
 I took a photo of the stamping on the left side of the shank. You can see from the photo that it is readable. It is clearer on the top half of the stamp than the lower but it is still readable.
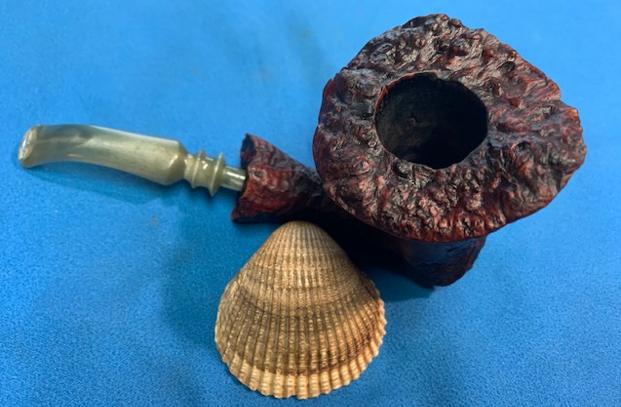
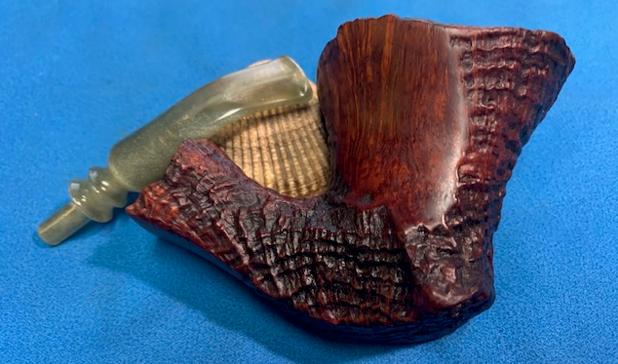
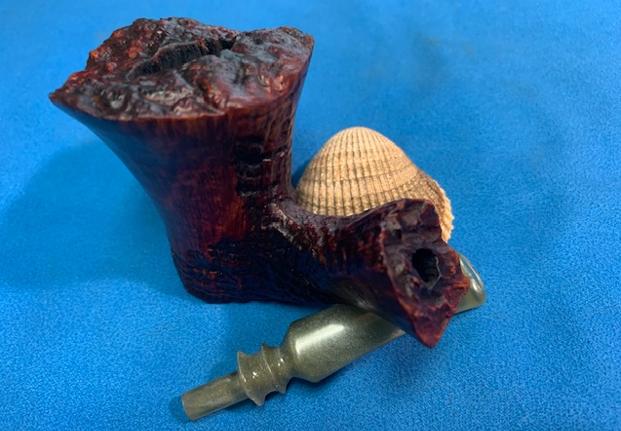
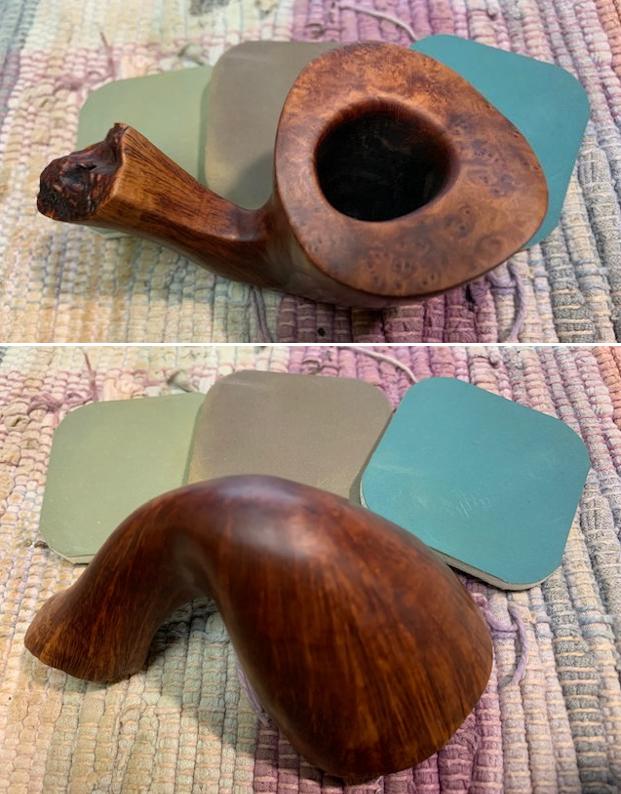
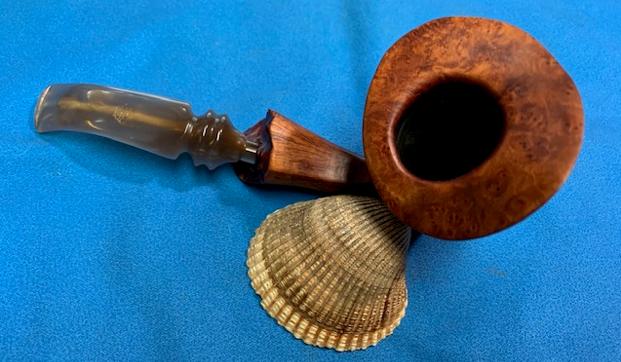
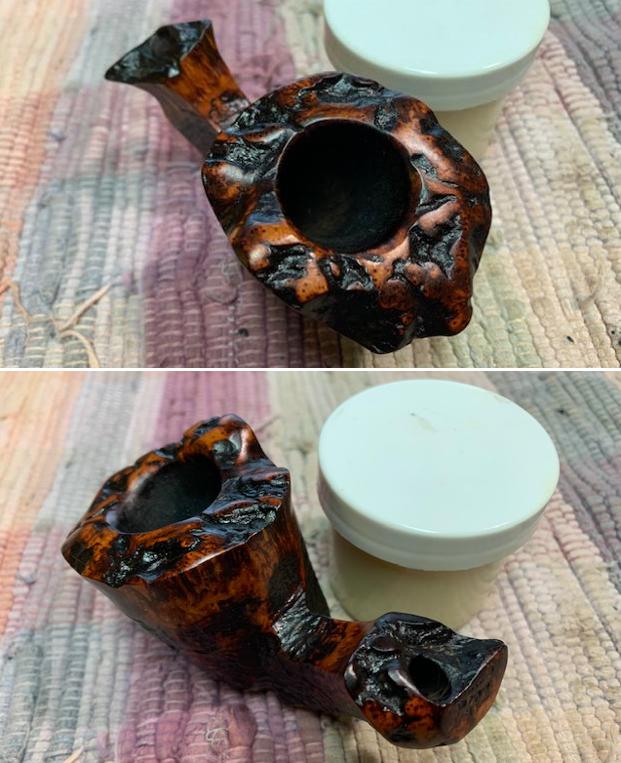
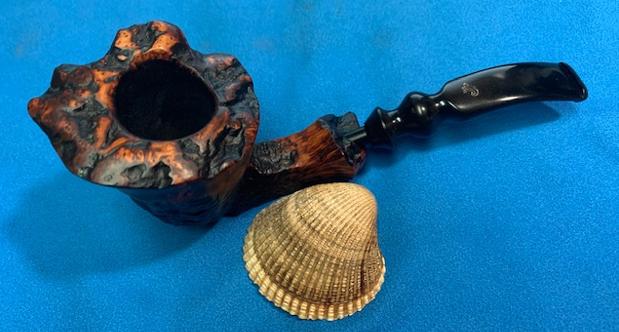
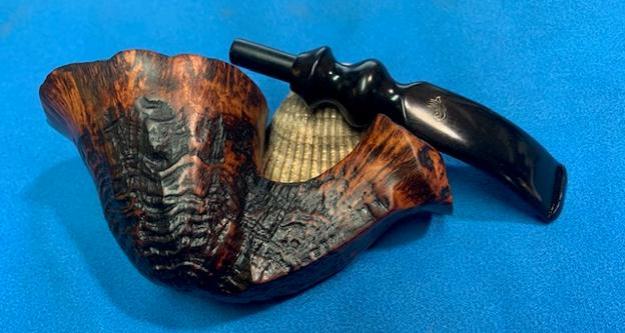
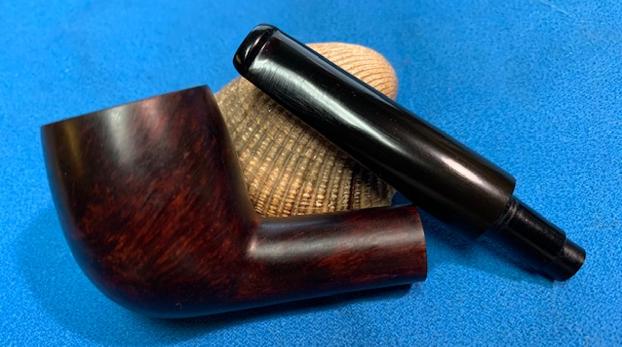
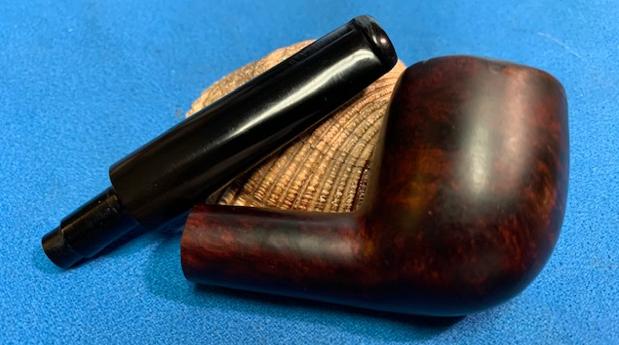
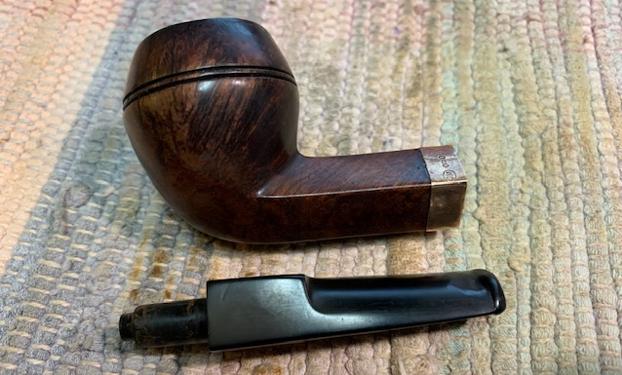
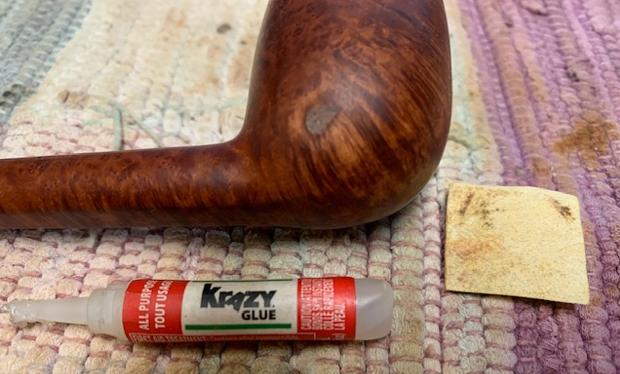
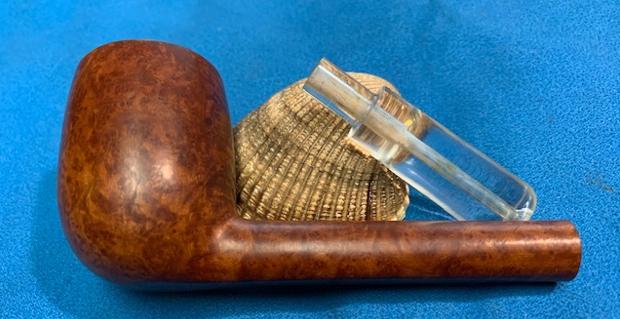
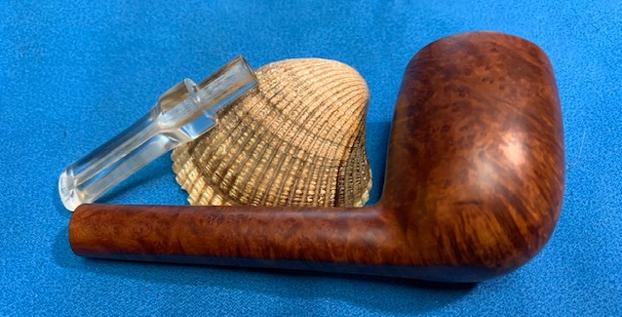
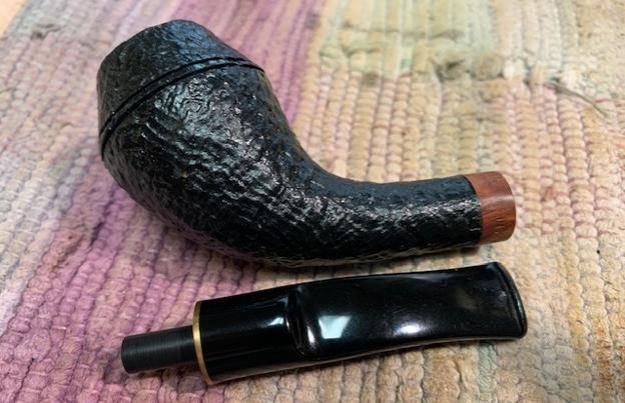
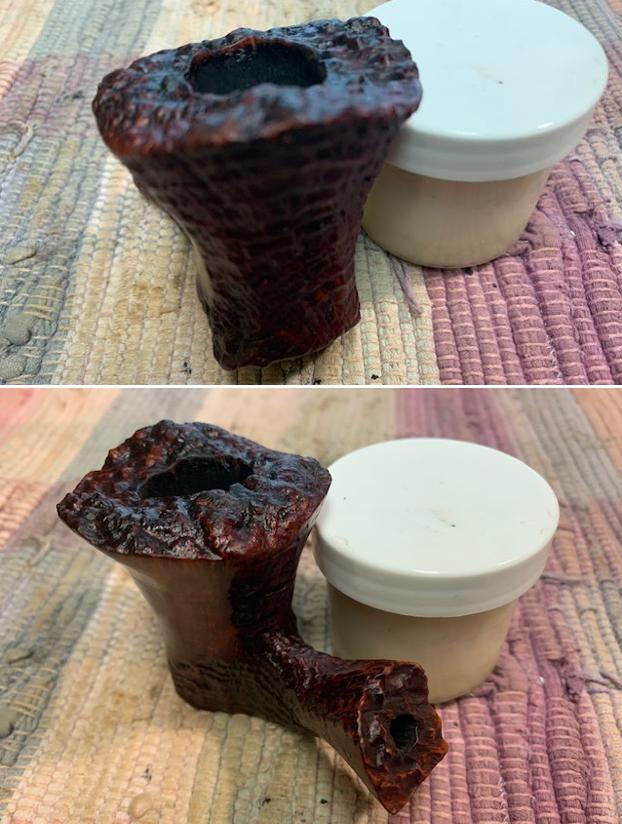
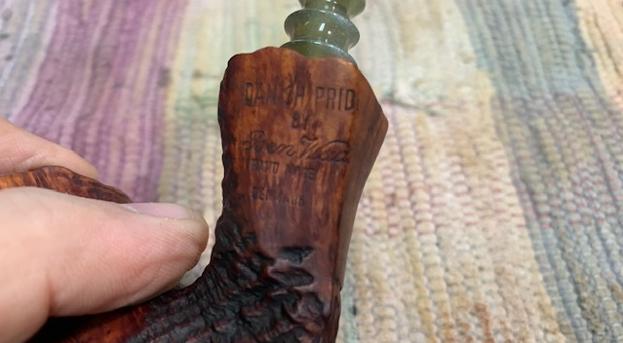 I removed the stem from the bowl and took a photo of the parts to give a sense of the beauty of the pipe.
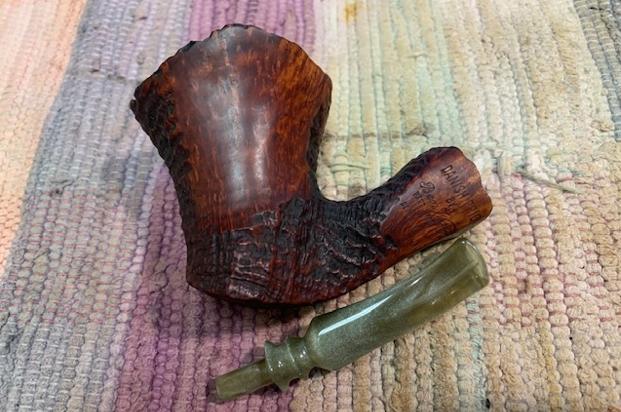 The bowl was in such good conditon after the clean up that I worked some Before & After Restoration Balm into the surface of the briar with my finger tips and a horse hair shoe brush to get into the crevices of the plateau and sandblast portions. The product is incredible and the way it brings the grain to the fore is unique. It works to clean, protect and invigorate the wood.
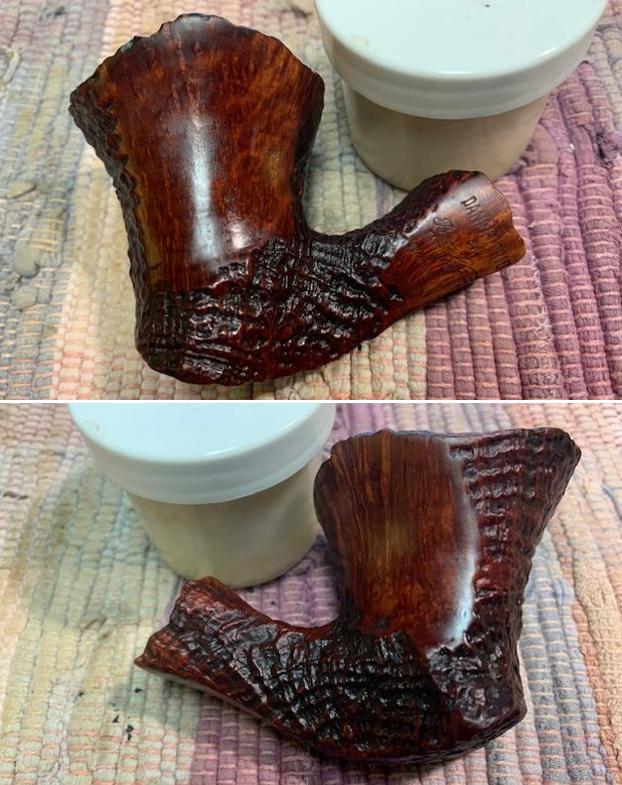
 I set the bowl aside and turned my attention to the stem. I sanded the tooth marks and chatter smooth with 220 grit sandpaper to blend them into the surface of the briar. I started the polishing of the stem with 400 grit wet dry sandpaper.
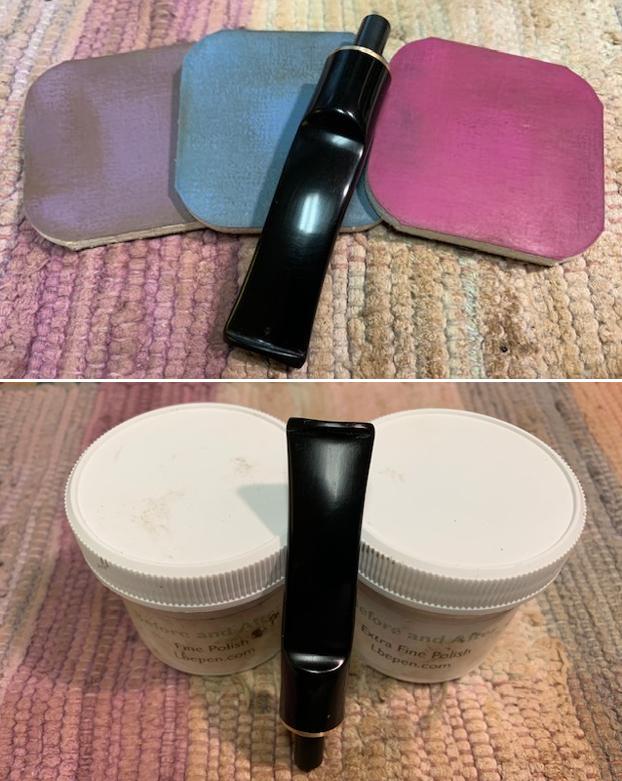
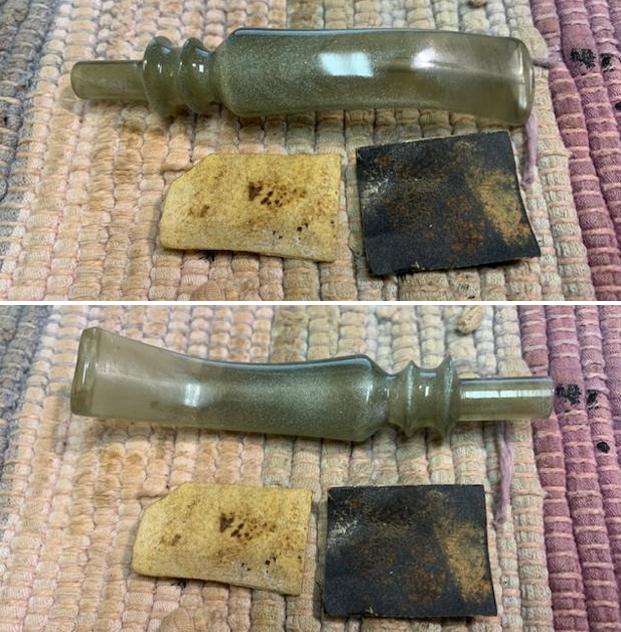 I polished the stem with micromesh sanding pads – wet sanding it 1500-12000 pads. I wiped it down with a damp cloth after each pad to remove the dust and polishing debris. I polished it with Before After Pipe Polish – both Fine and Extra Fine.
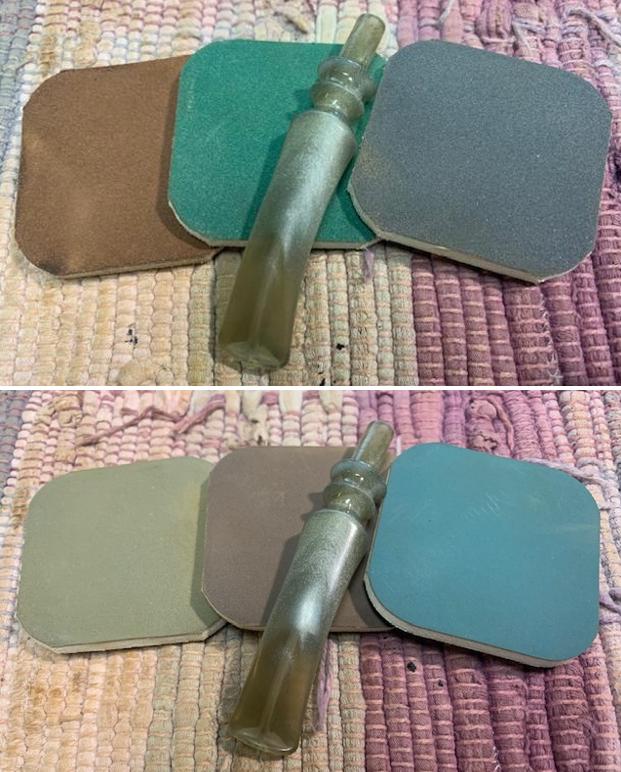
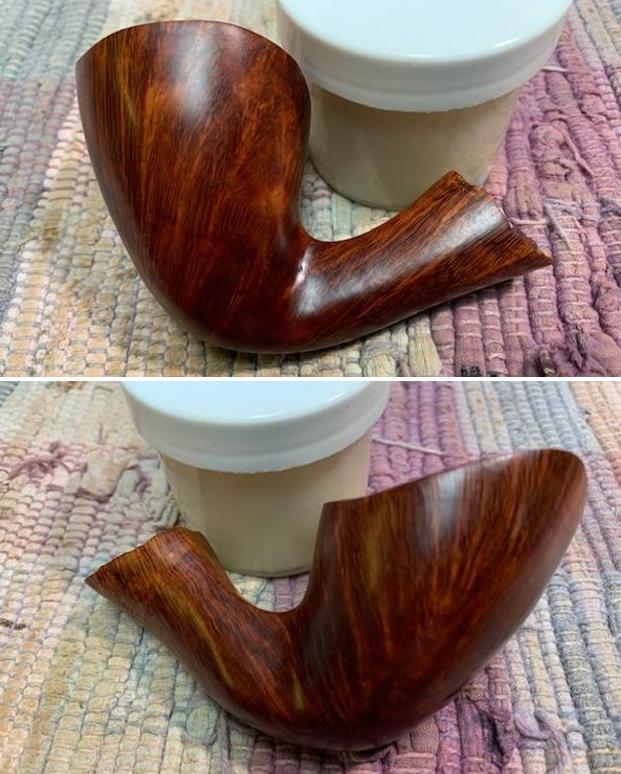
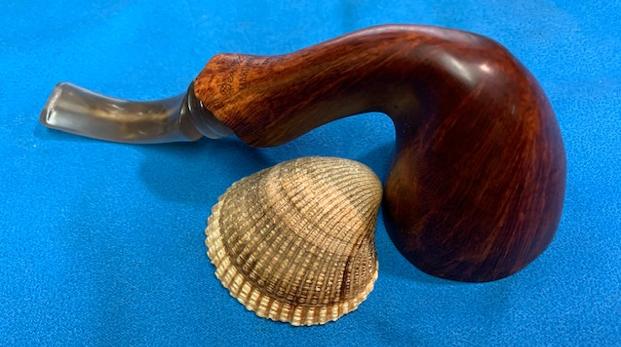
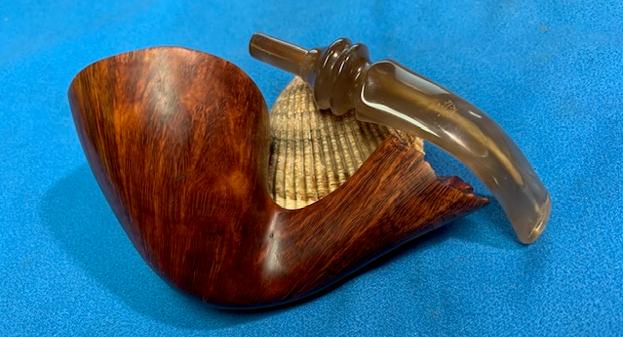
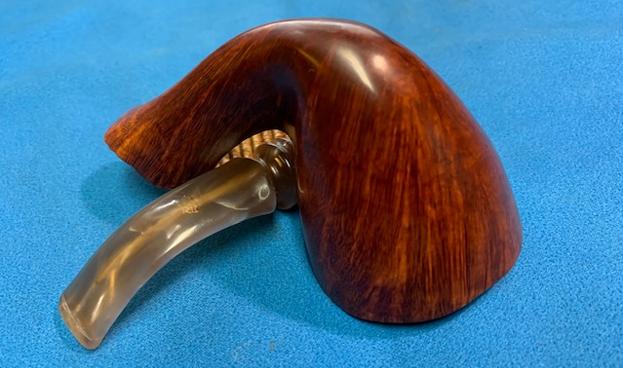
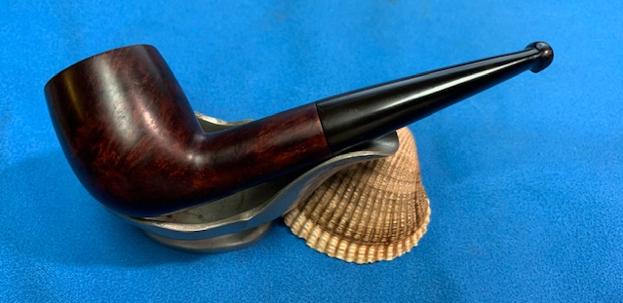
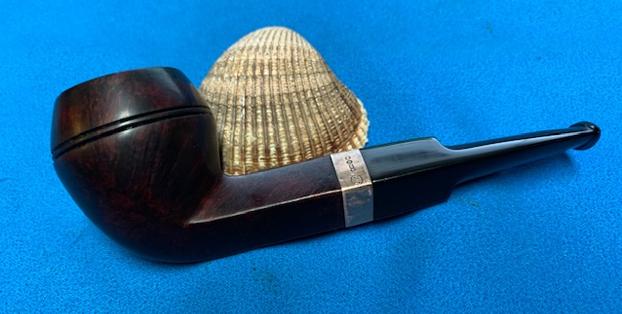
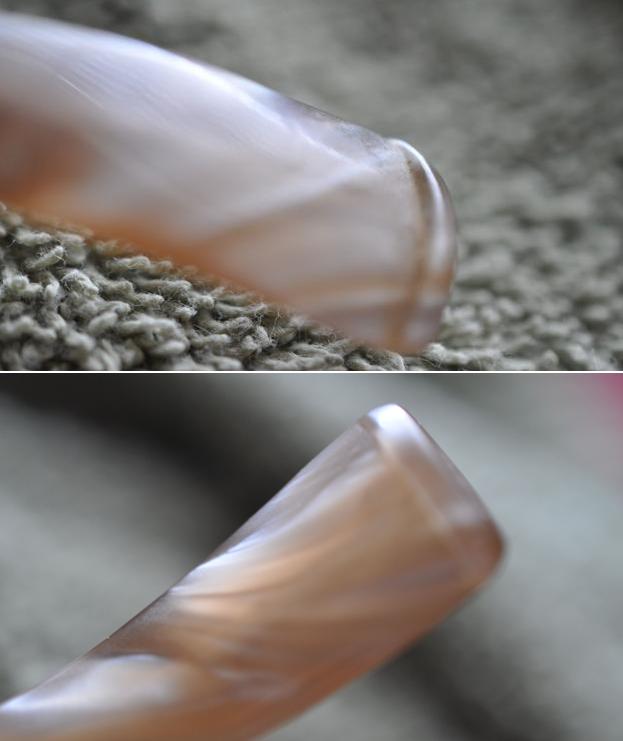
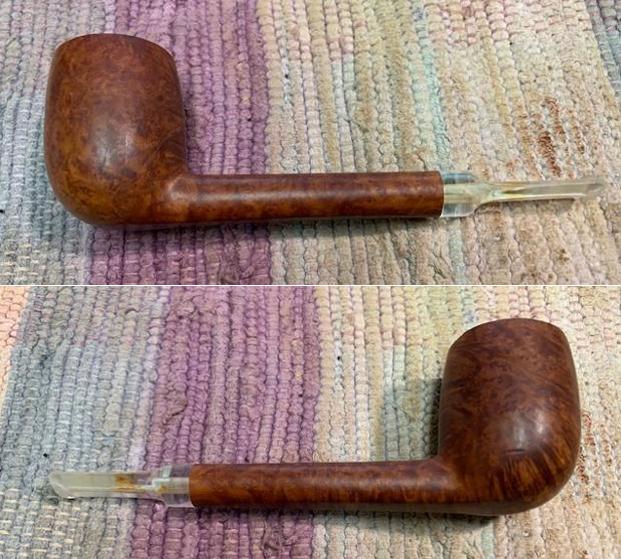
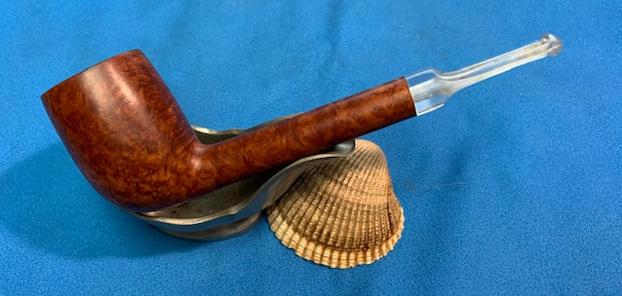
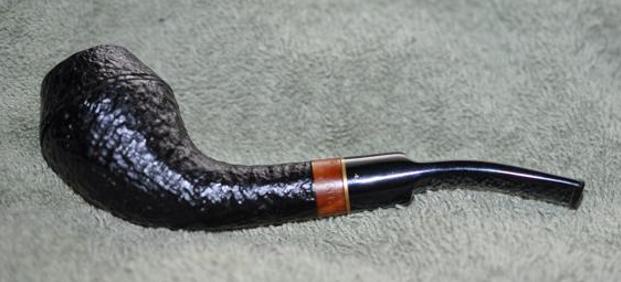
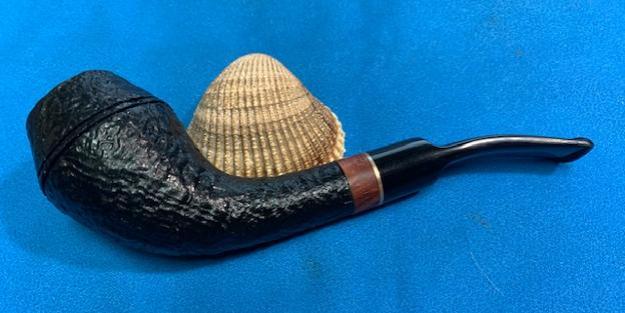
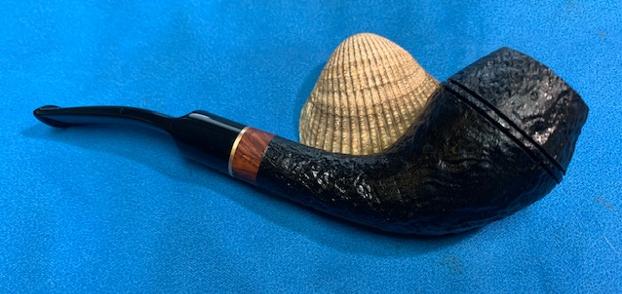
 I am really happy with the way that this Preben Holm Made Ben Wade Danish Pride Freehand turned out. It really is a beautiful looking pipe with a great shape and smooth finished bowl and rim and the remnant of plateau on the shank end. The fancy original acrylic saddle stem is really nice. The opalescent grey green colour of the stem works well with the briar. The briar really came alive with the buffing. The rich brown stains of the finish gave the pipe a sense of depth with the polishing and waxing. I put the stem back on the bowl and carefully buffed the pipe with Blue Diamond on the buffing wheel using a light touch on the briar. I gave the bowl multiple coats of Conservator’s Wax and the stem multiple coats of carnauba wax on the buffing wheel. I buffed the pipe with a clean buffing pad to raise the shine. I hand buffed the pipe with a microfiber cloth to deepen the shine. The finished Ben Wade Danish Pride really is a beauty and feels great in the hand and looks very good. Give the finished pipe a look in the photos below. The dimensions of the pipe are Length: 6 ¼ inches, Height: 2 ¾ inches, Outside diameter of the bowl: 2 ¼ inches long x 2 ¼ inches wide, Chamber diameter: 7/8 of an inch. The weight of the pipe is 62 grams/2.19 oz. The pipe will be going on the rebornpipes store soon. It will be in the section on Danish Pipe Makers if you would like to add it to your collection. Thanks for reading this blog and my reflections on the pipe while I worked on it. It was a fun one to work on!