Tag Archives: repairing tooth marks

Another L. J. Peretti of Boston – Square Shanked Rhodesian


Blog by Dal Stanton

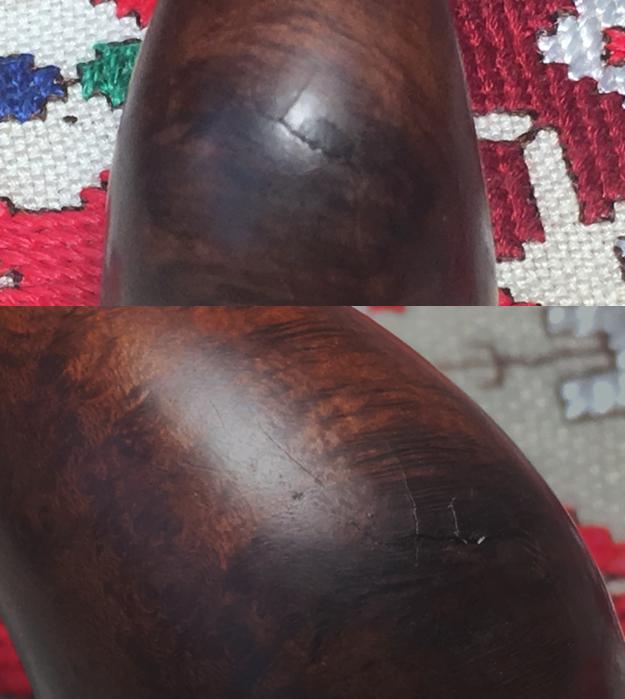
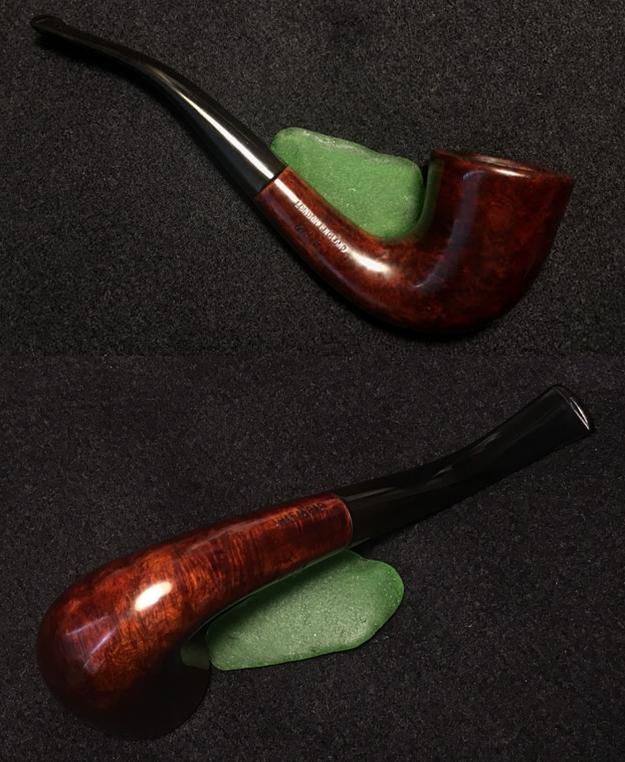
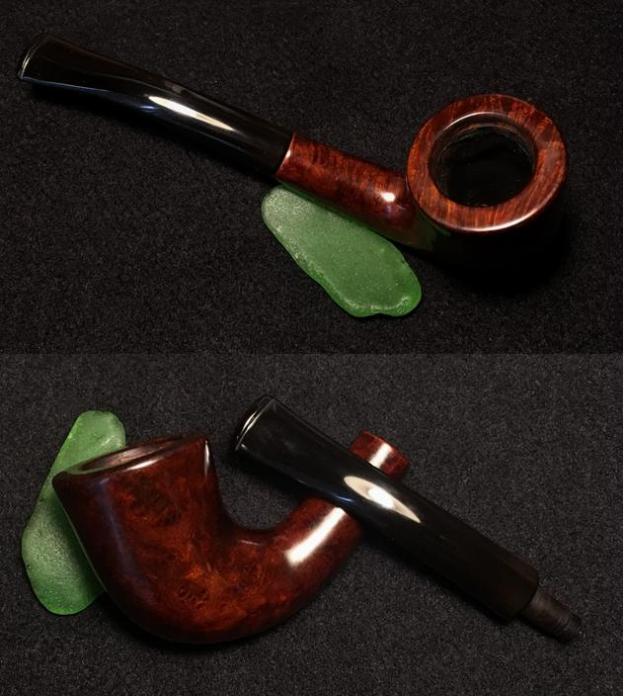
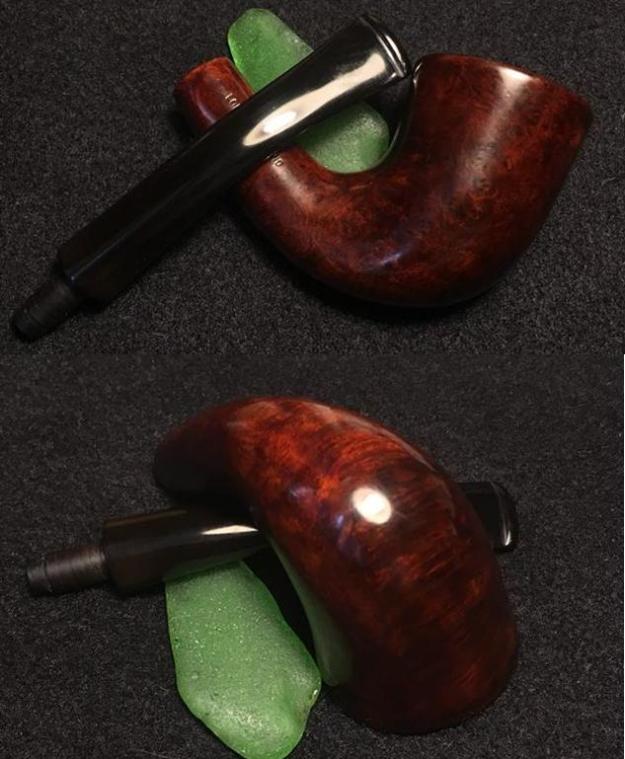
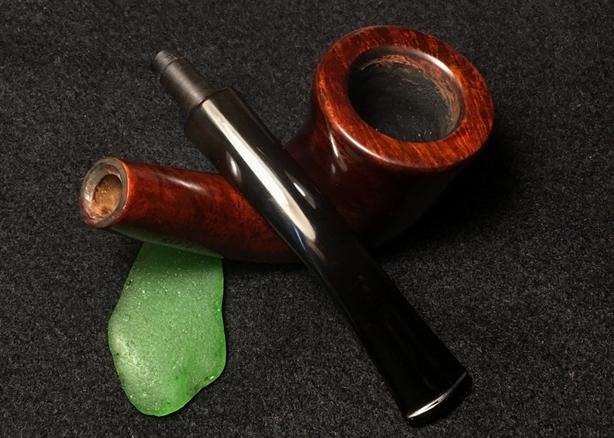
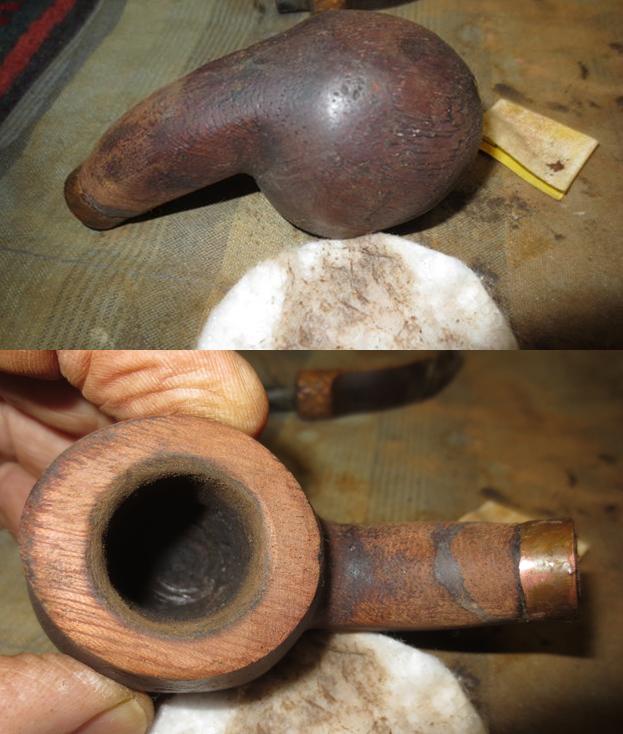
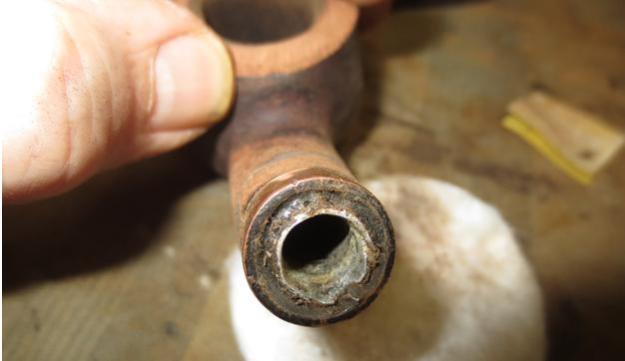
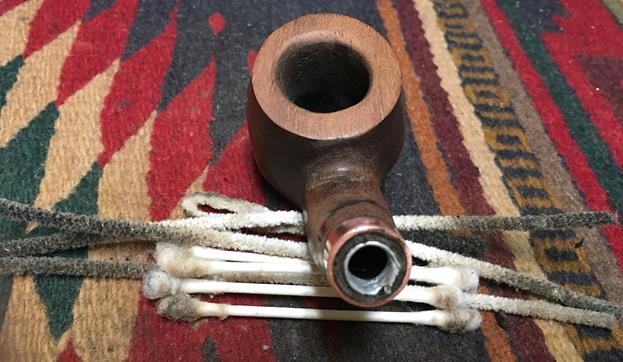
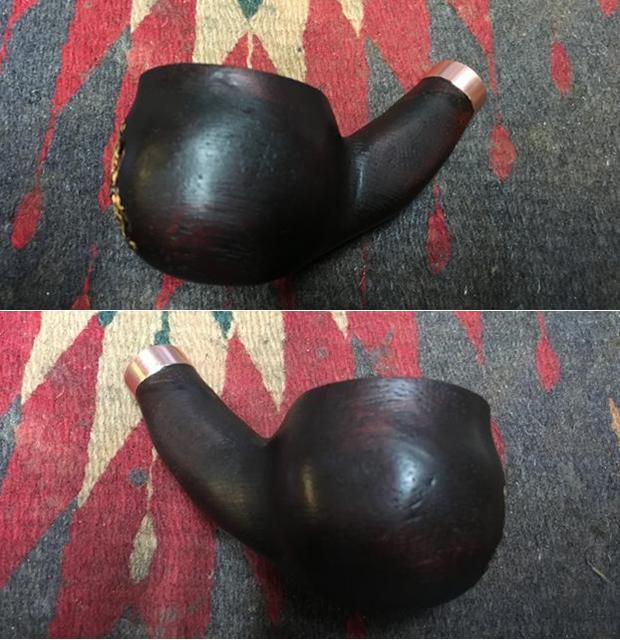
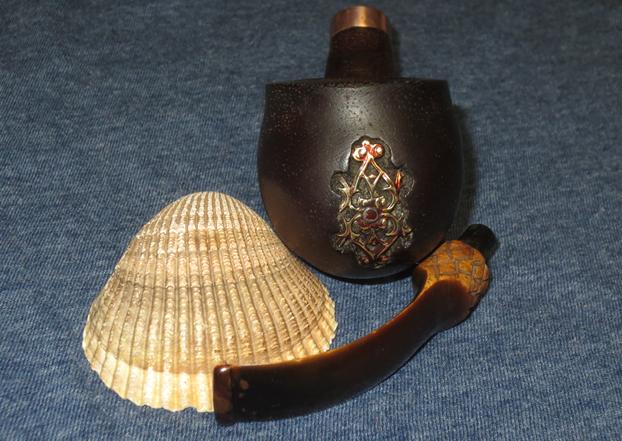
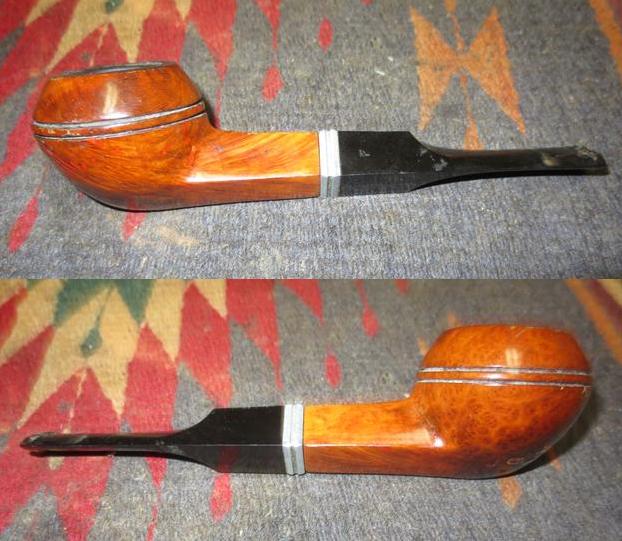
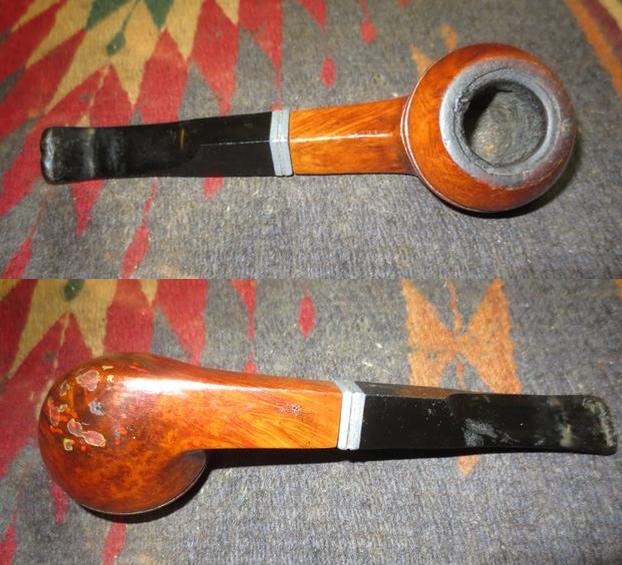
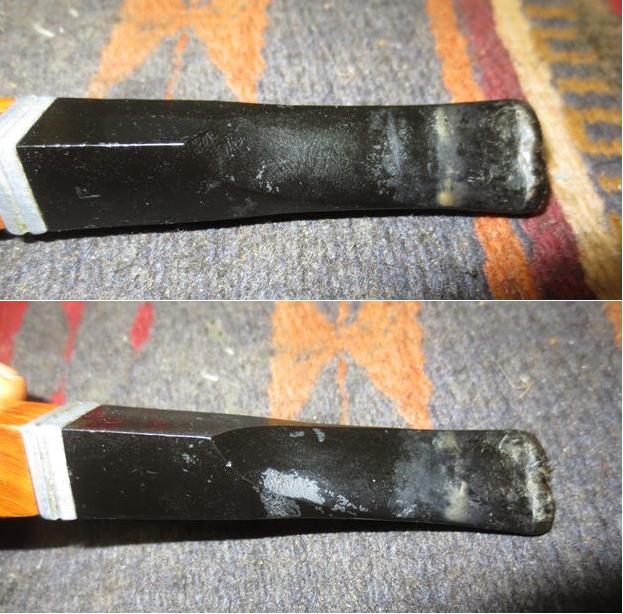
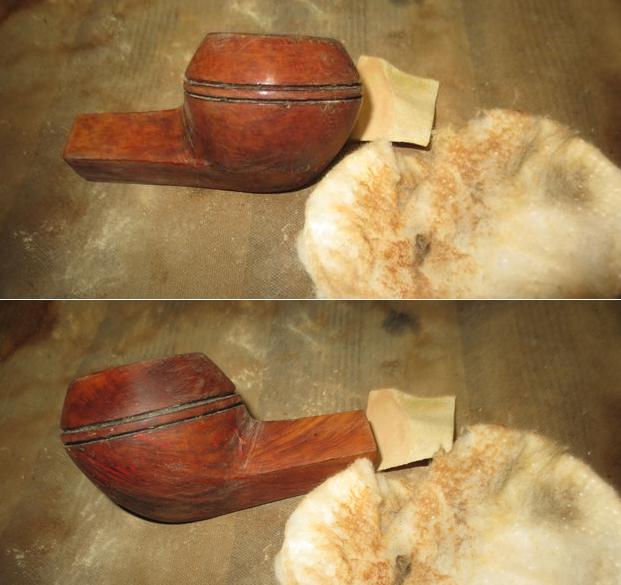
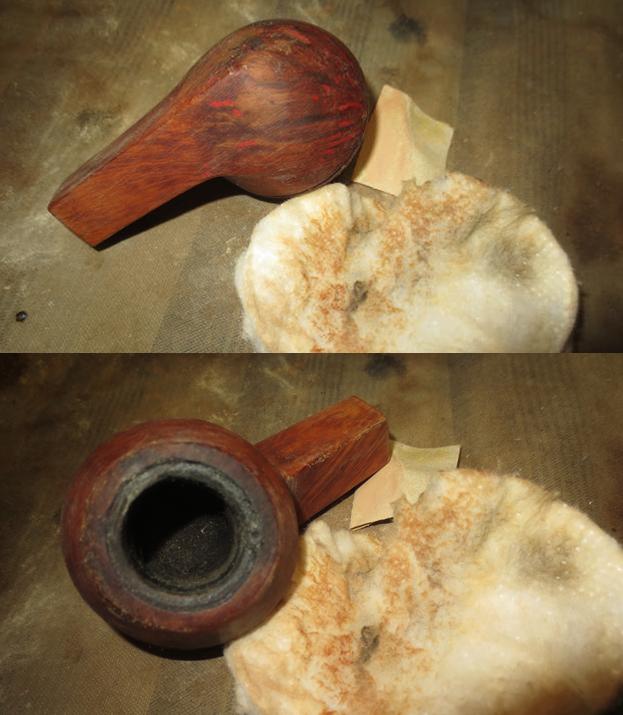
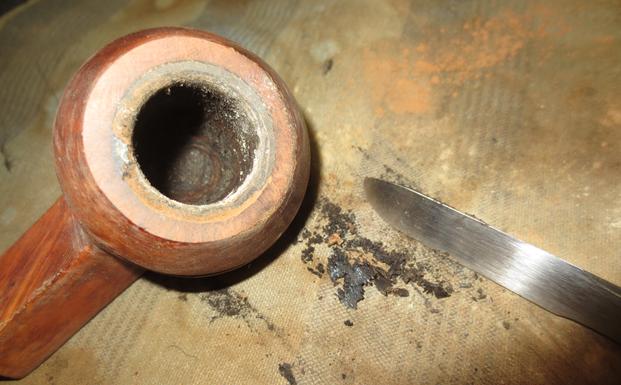
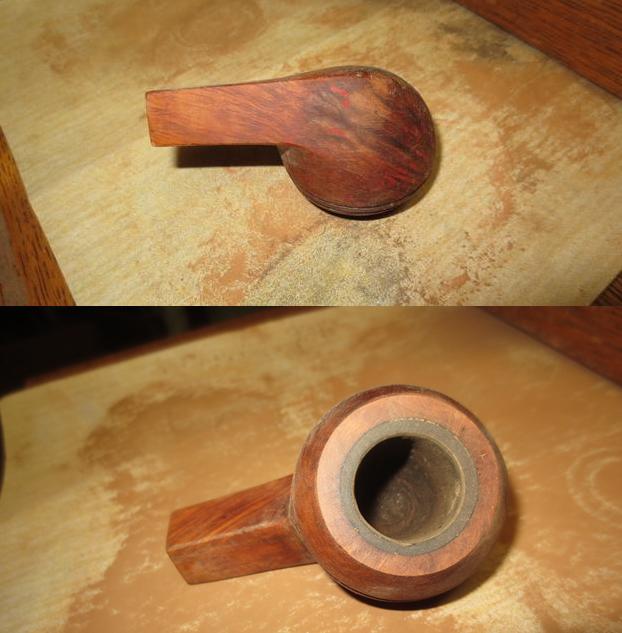
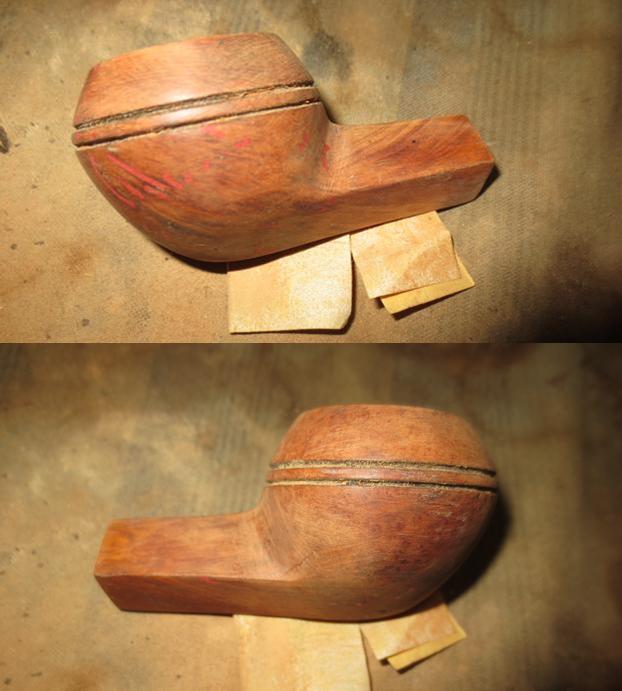
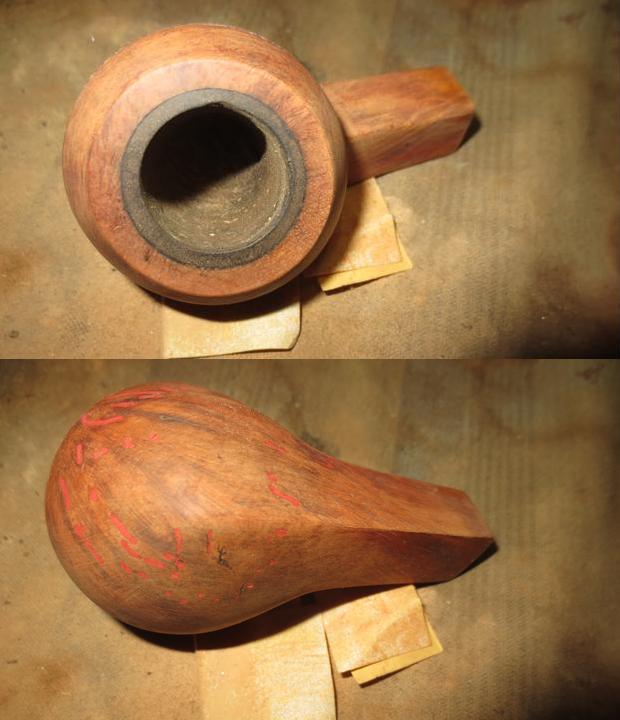
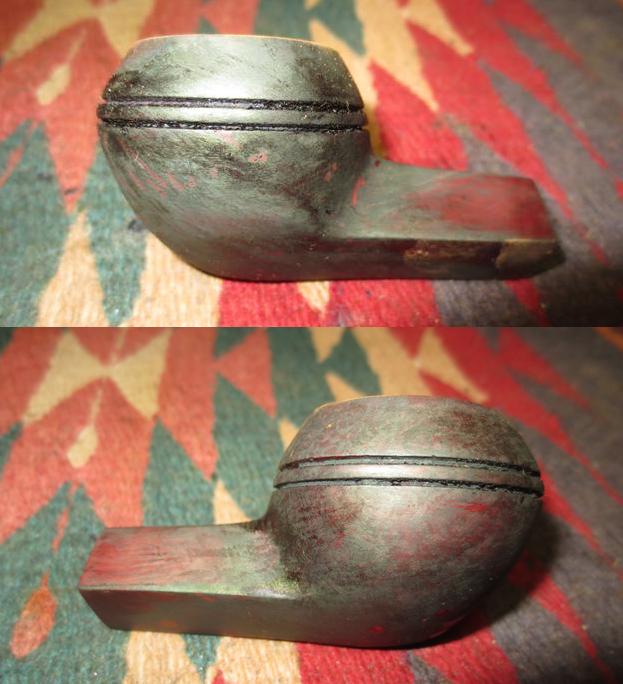
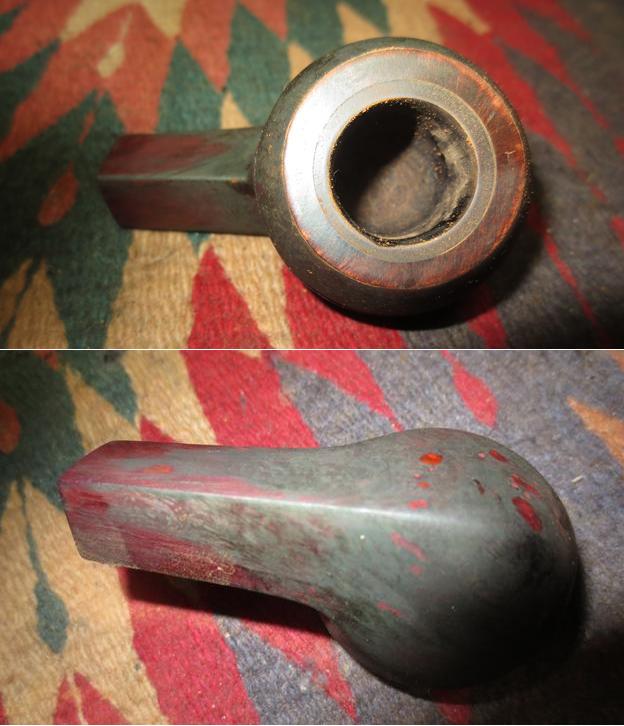
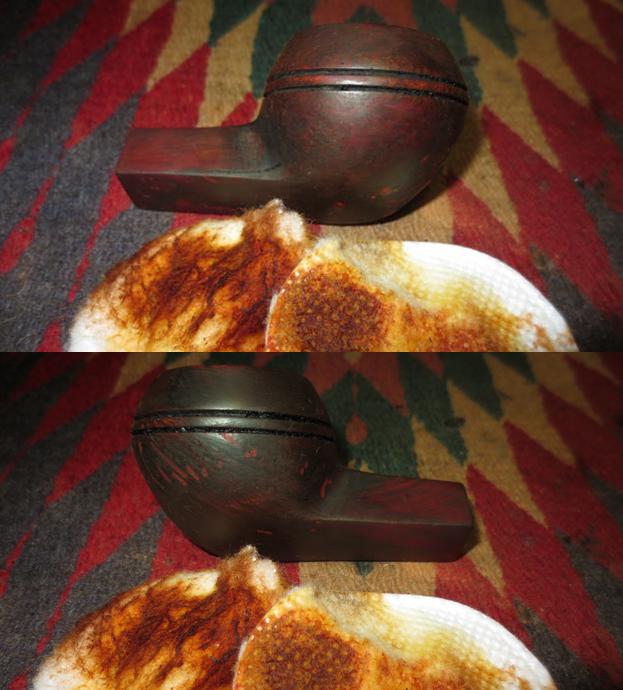
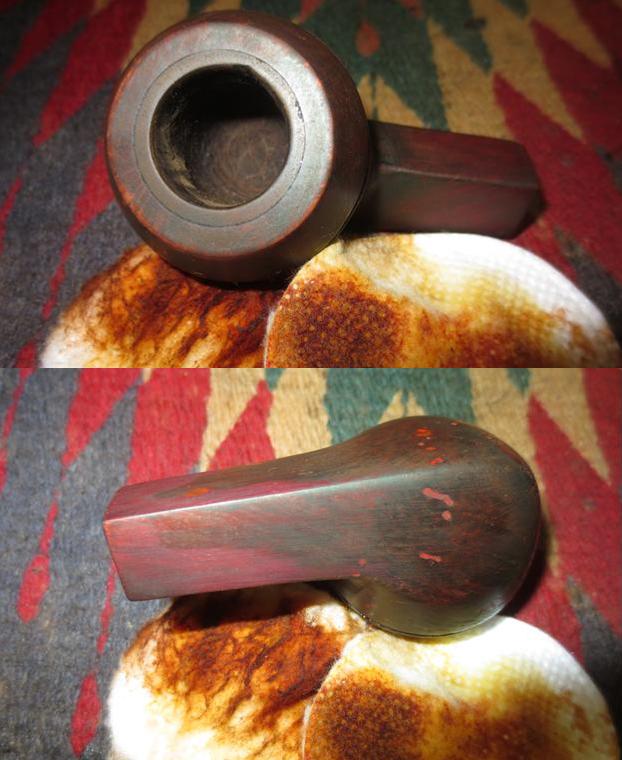
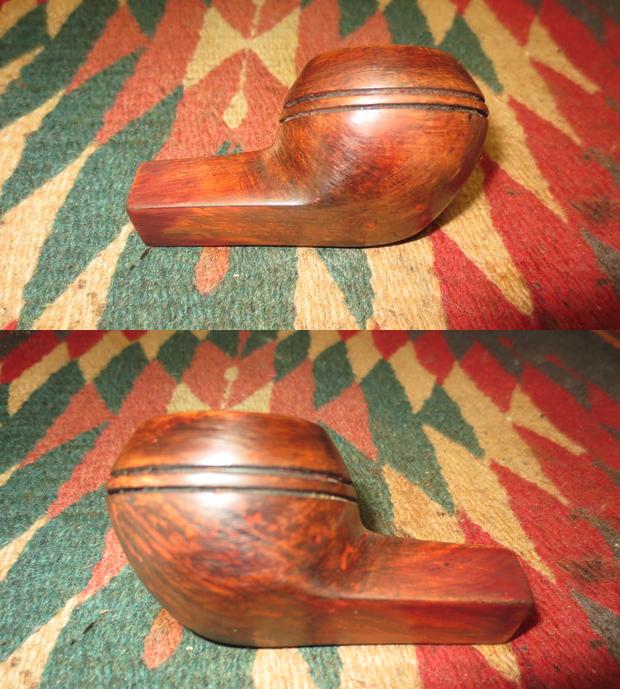
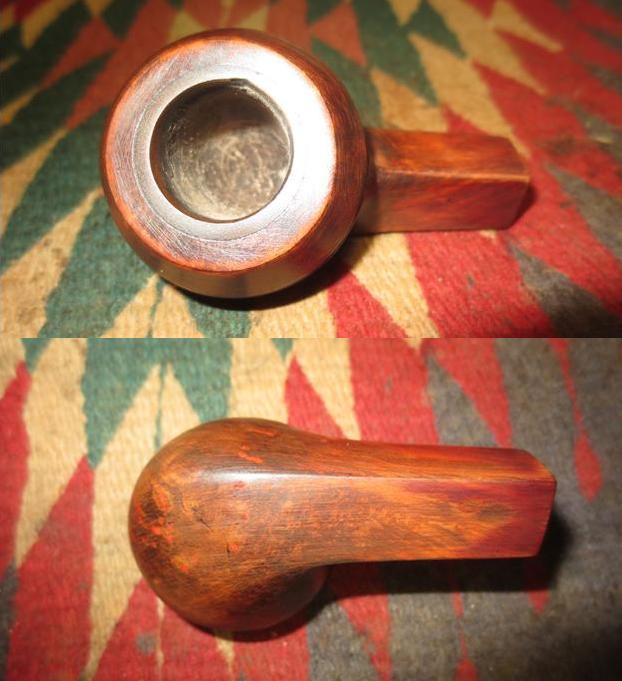
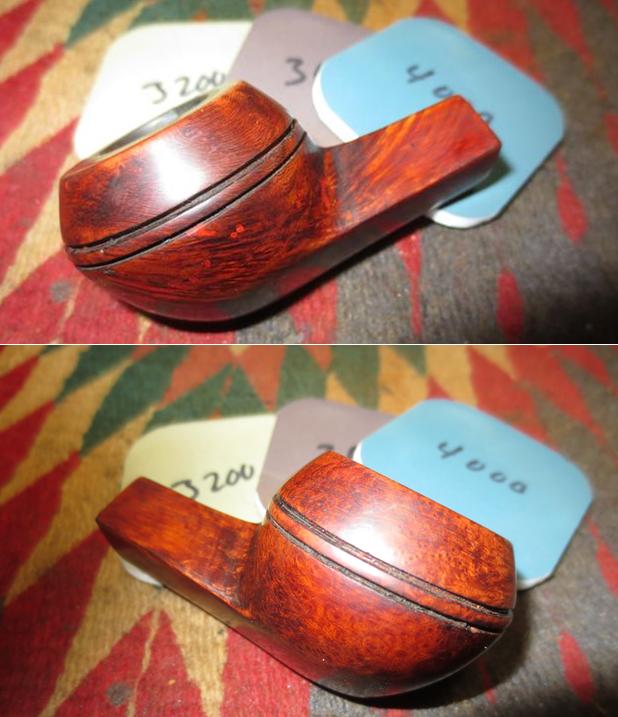
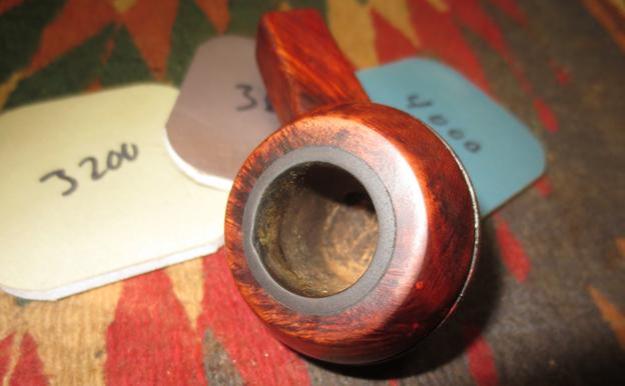
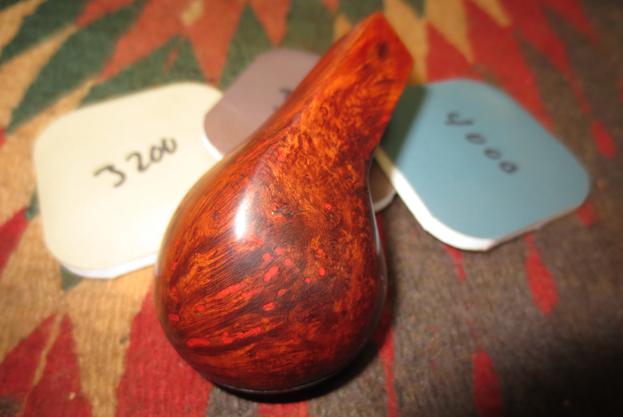
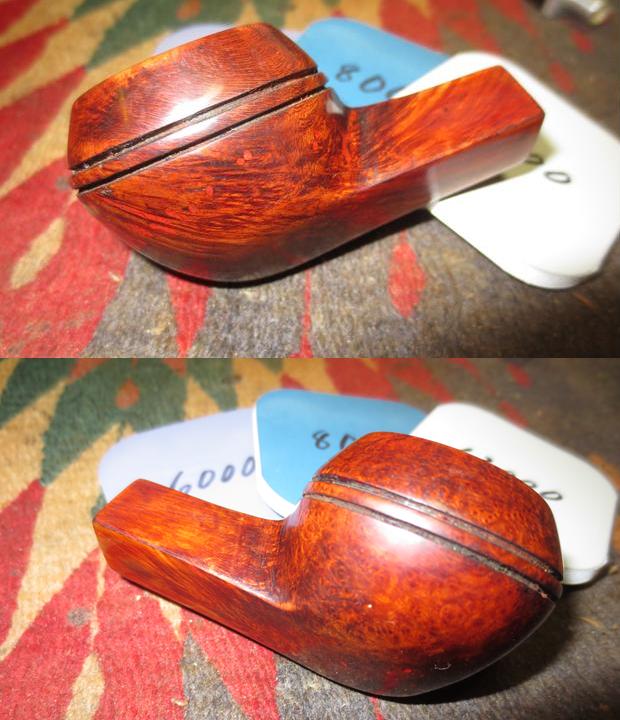
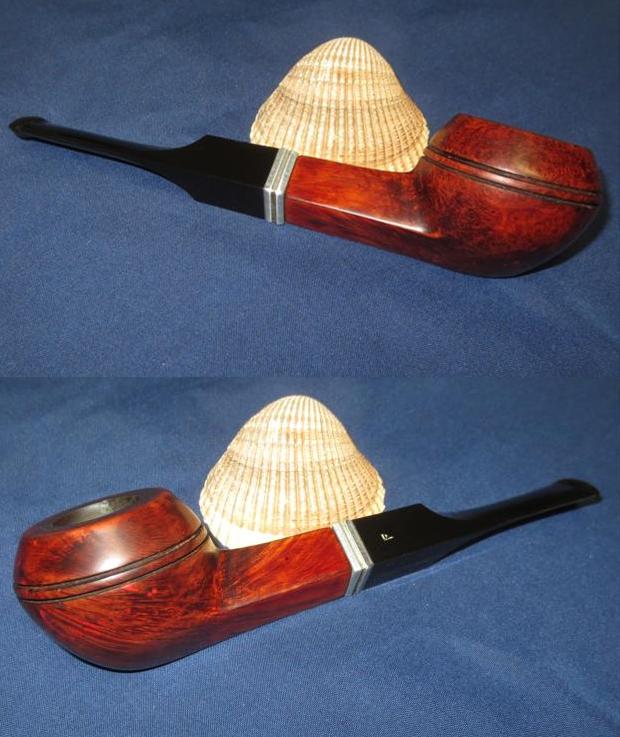
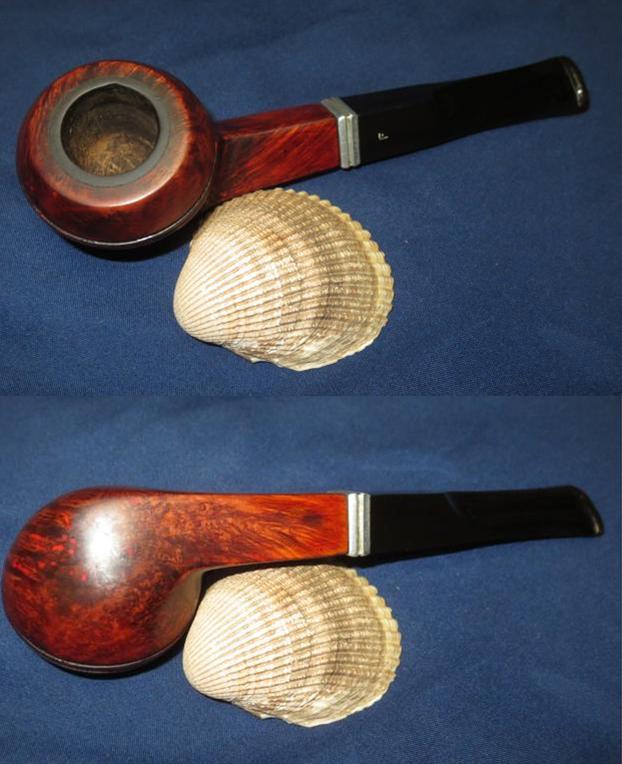
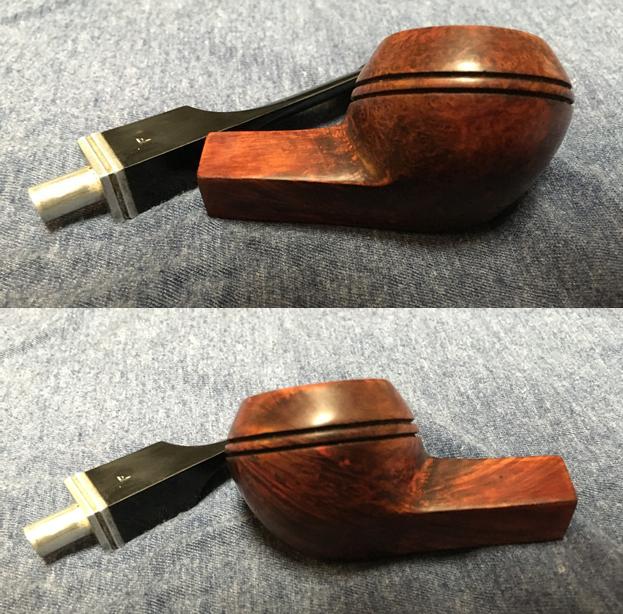
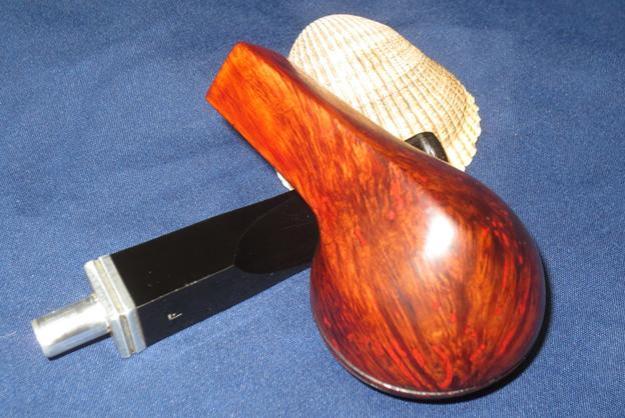
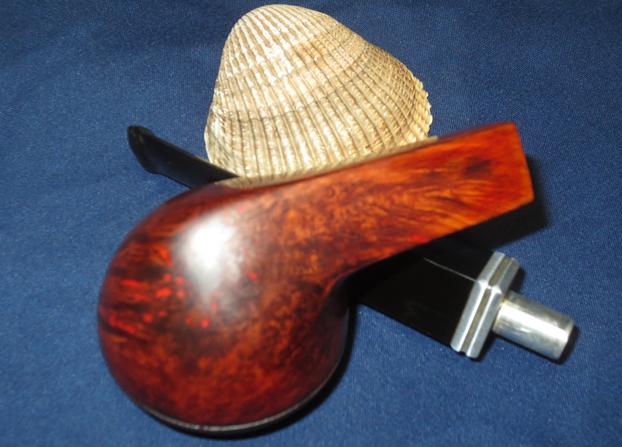
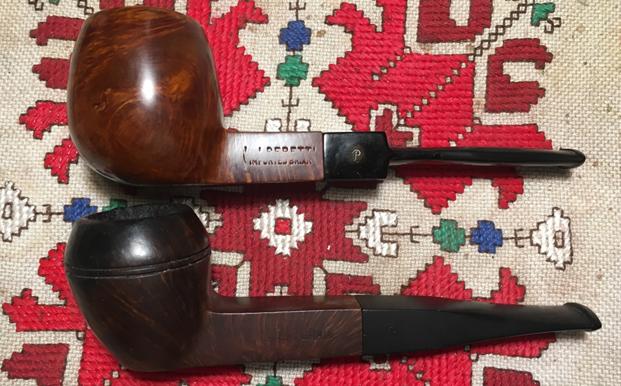
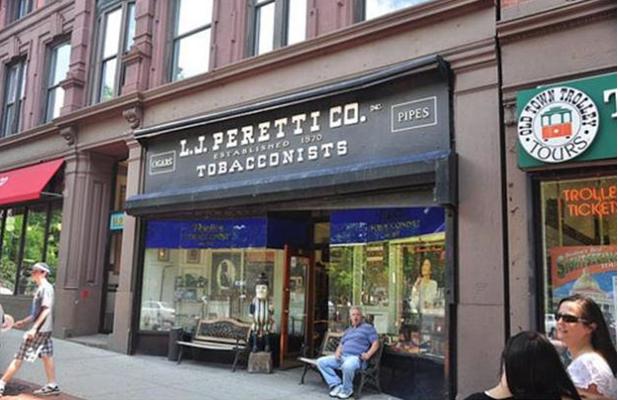
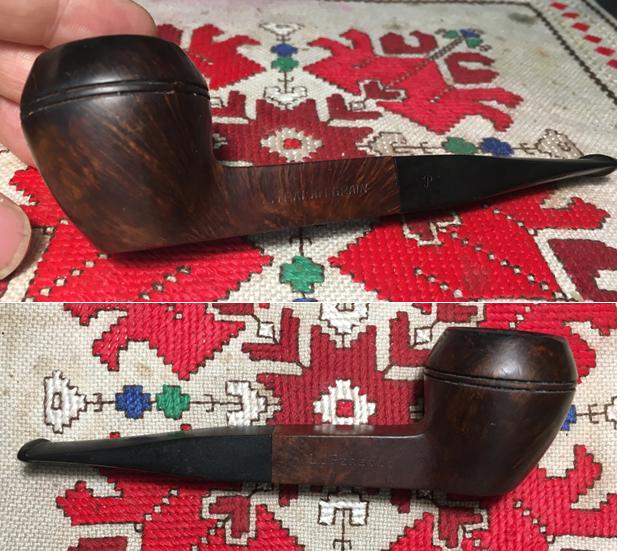
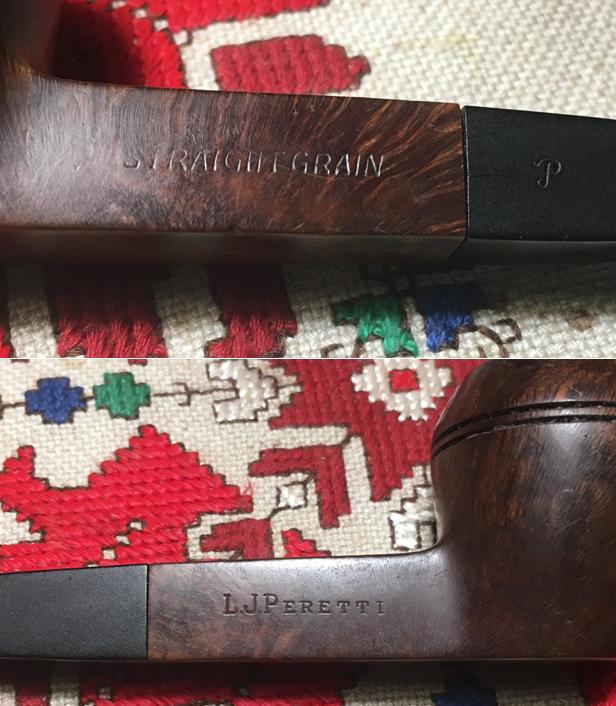
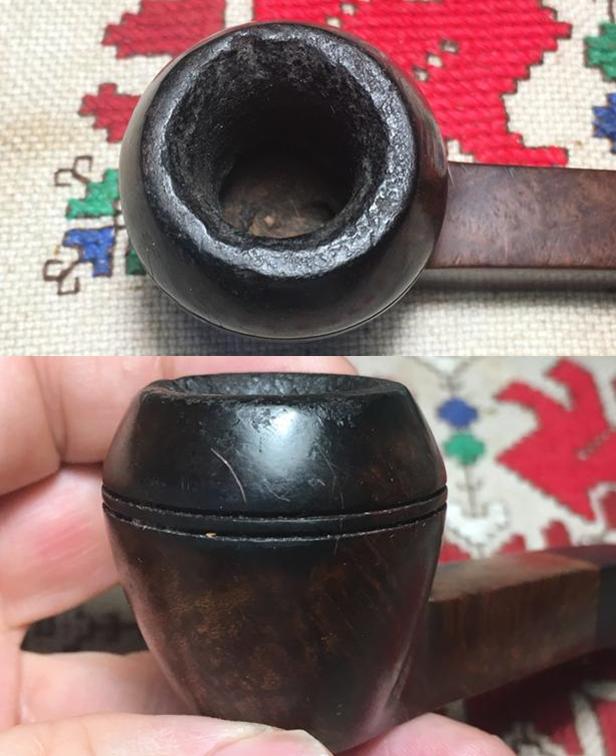
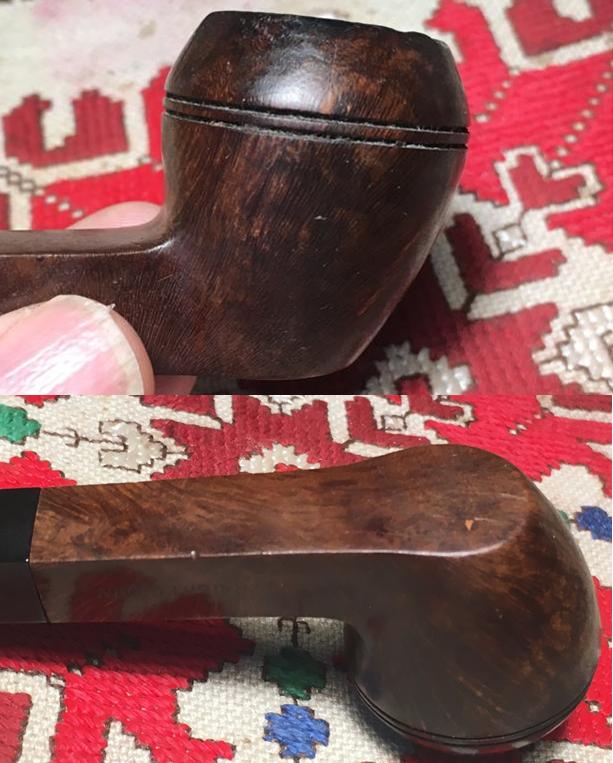
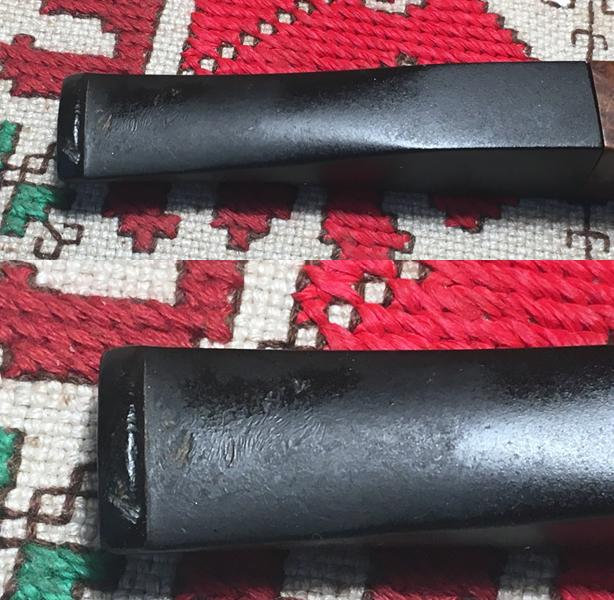
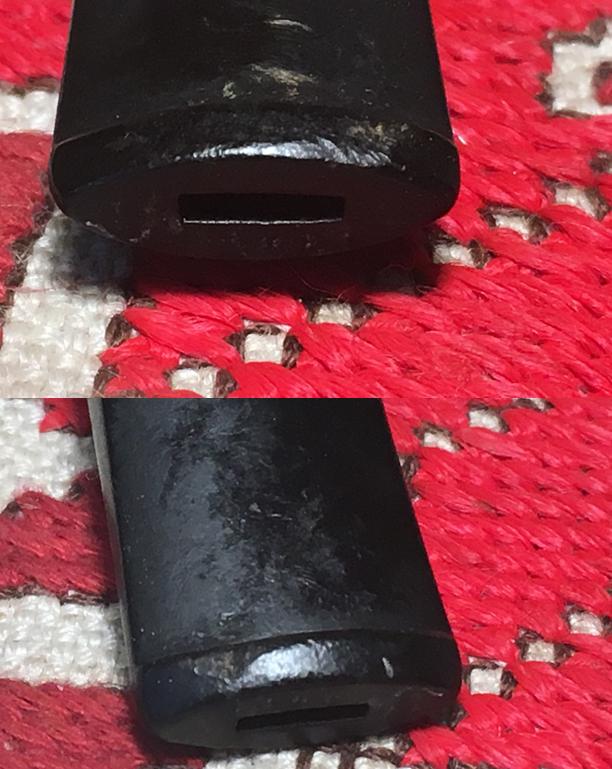
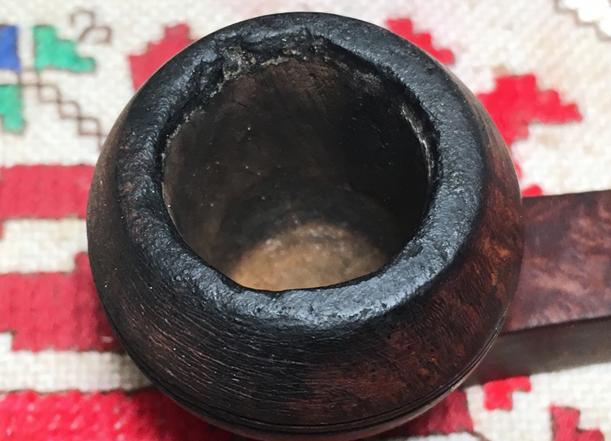
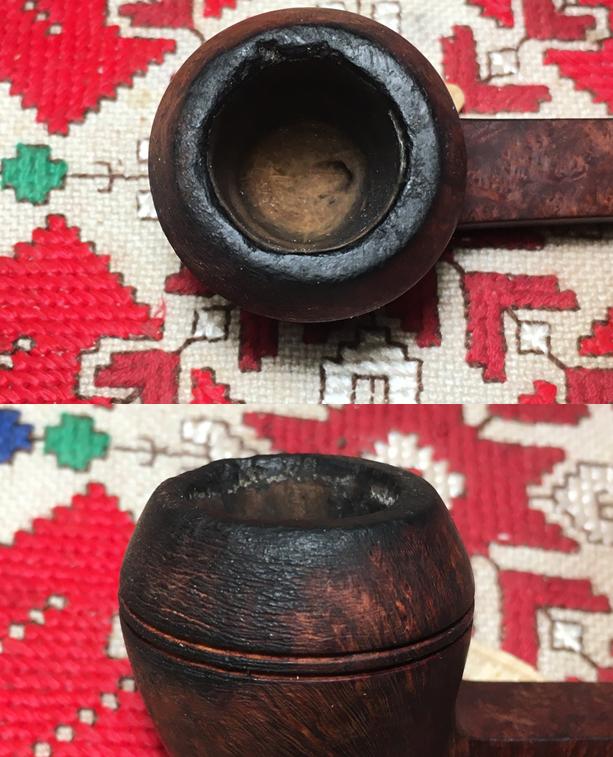
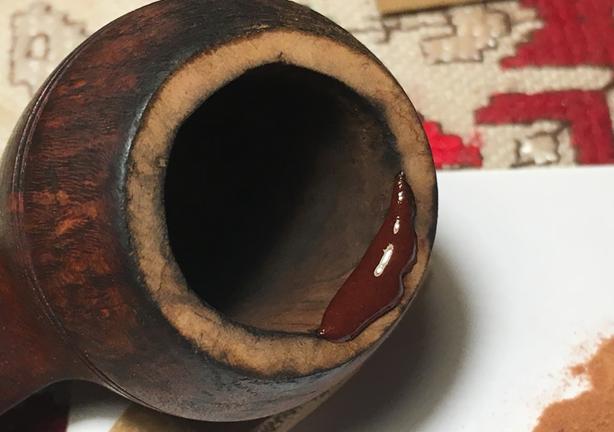
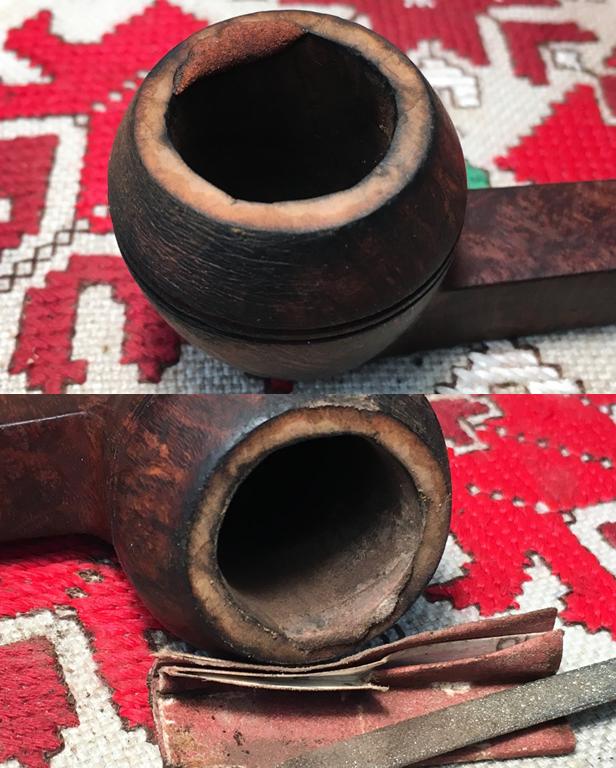
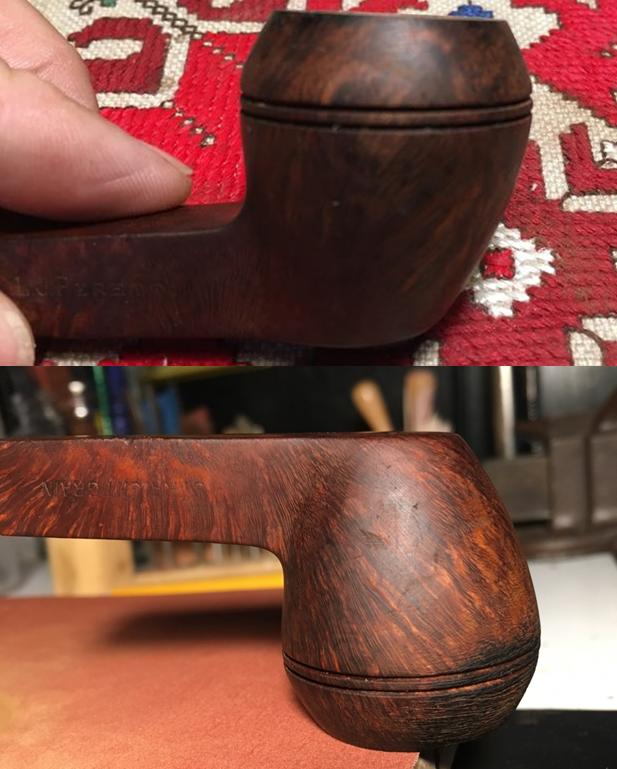
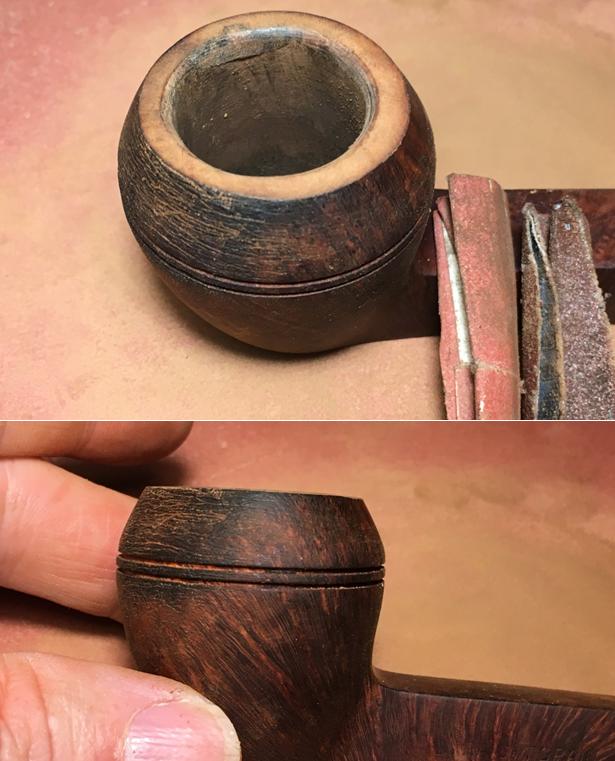
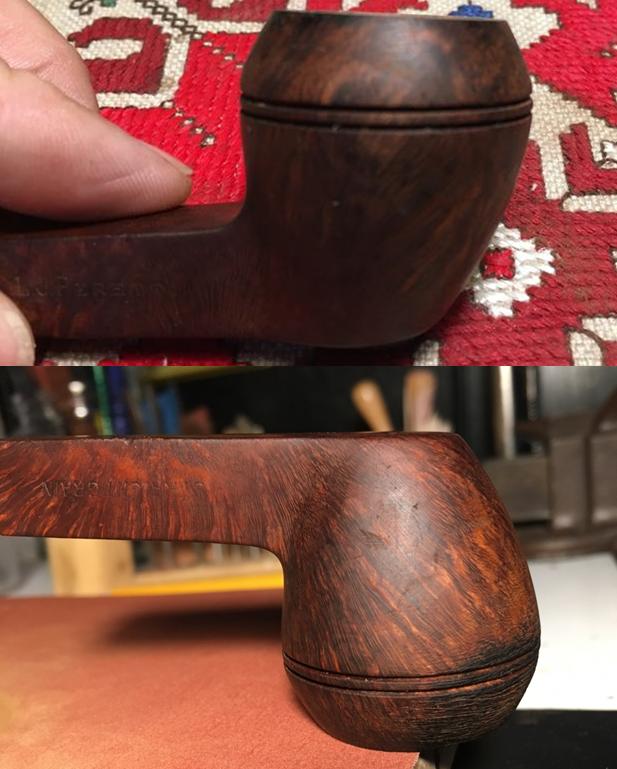
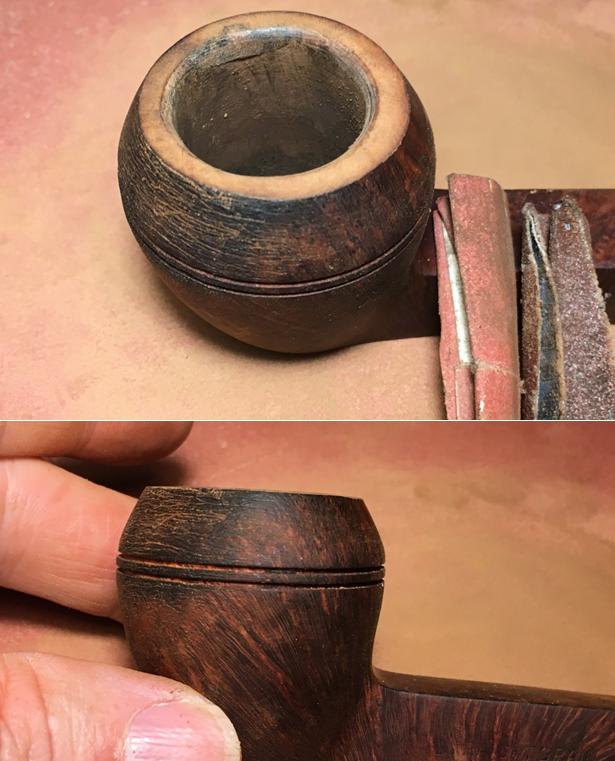
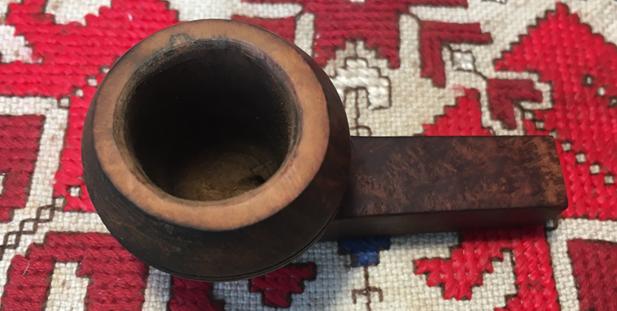
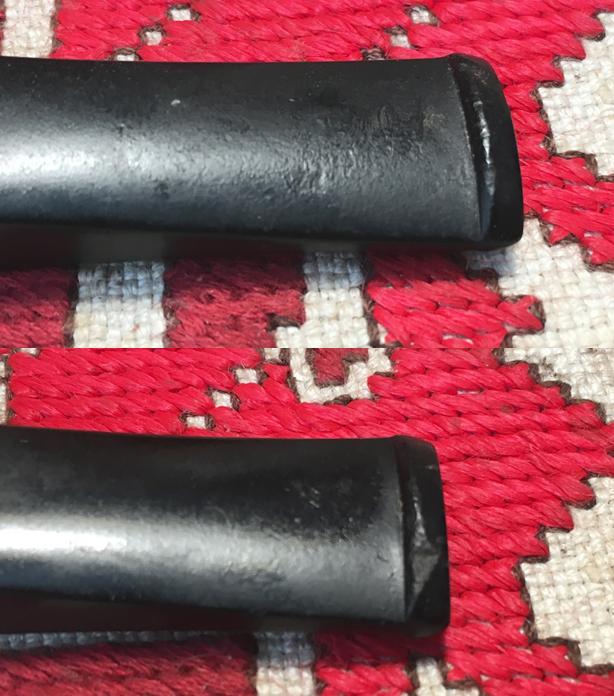
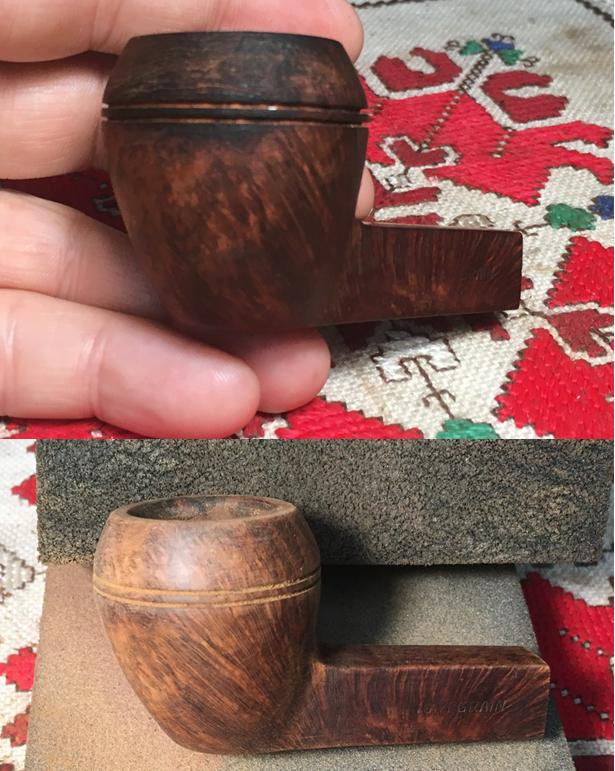
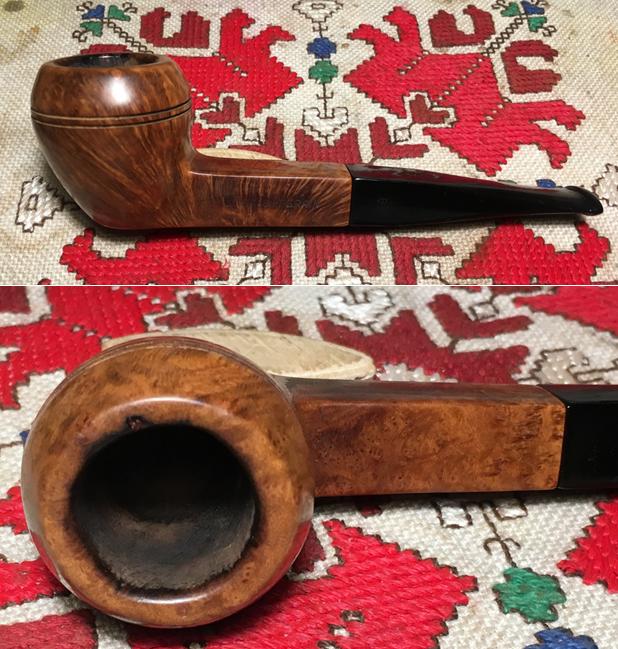
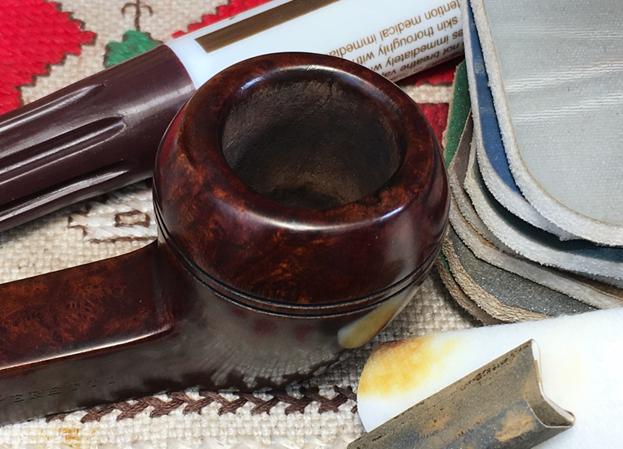
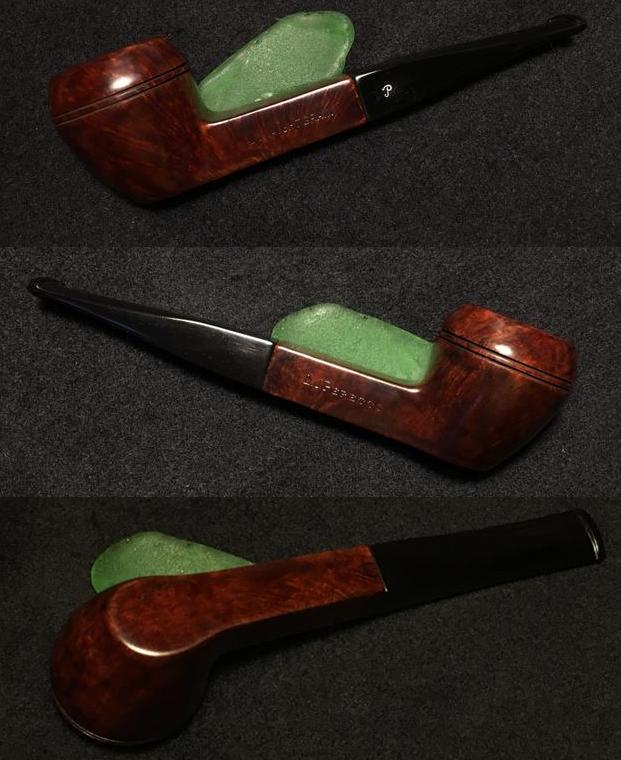
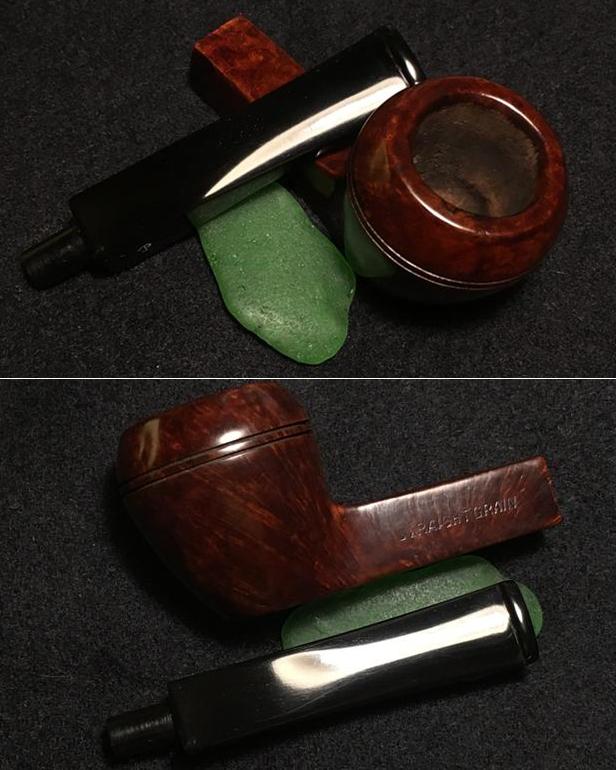
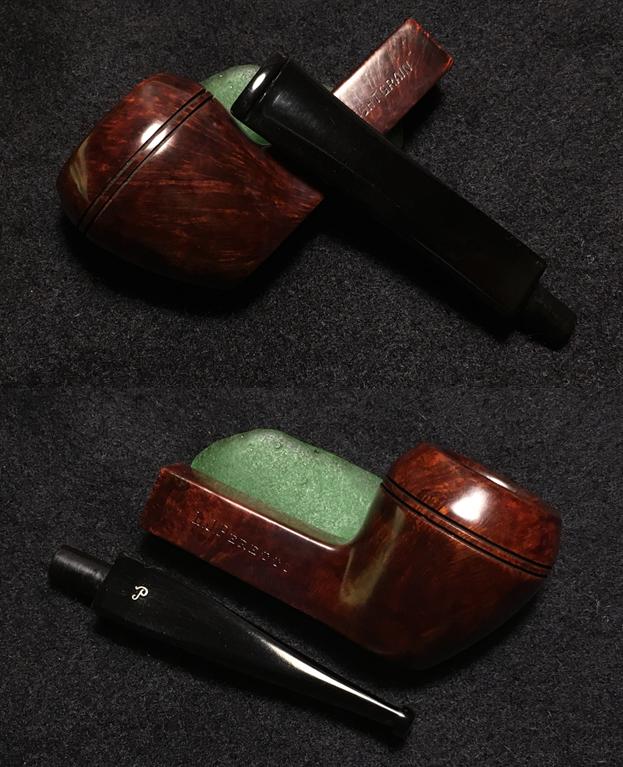
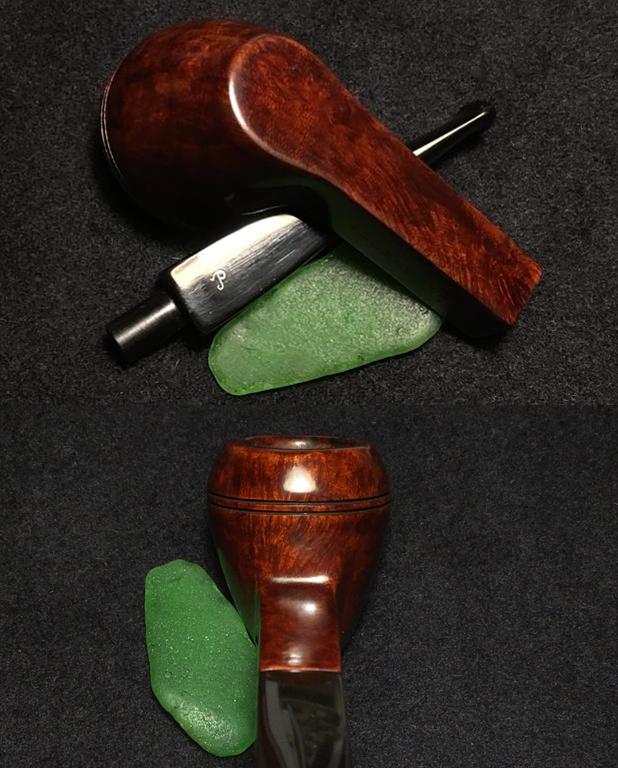
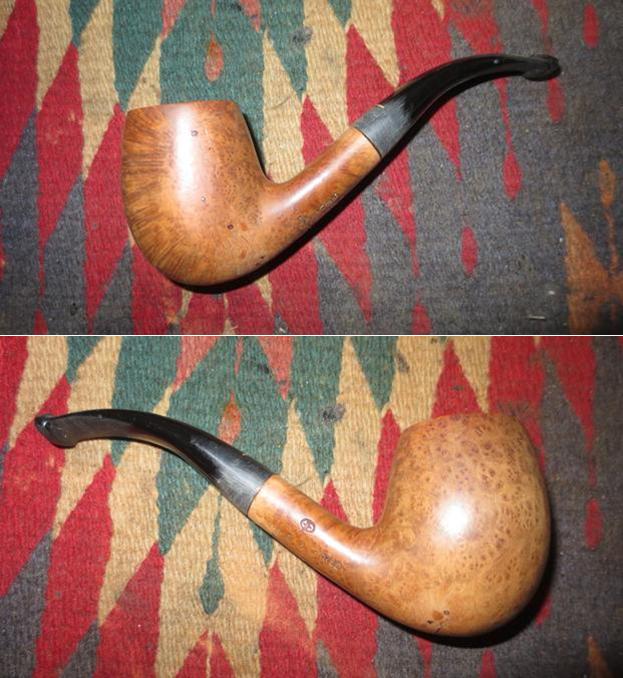
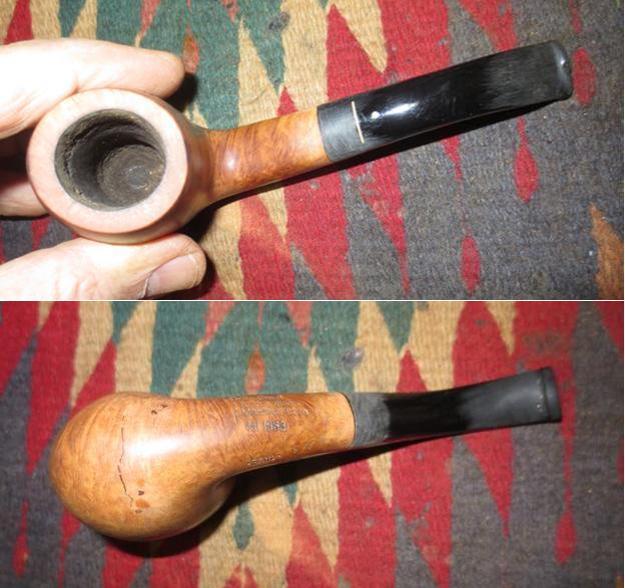
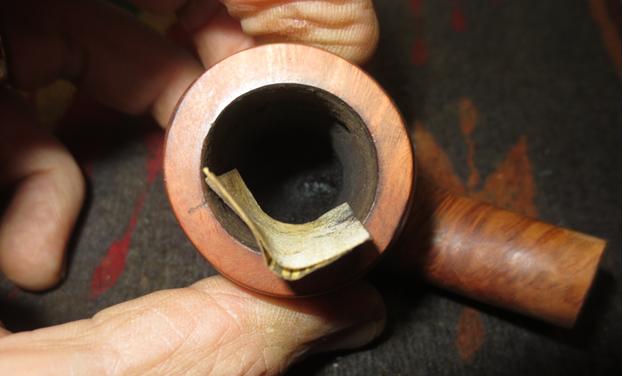
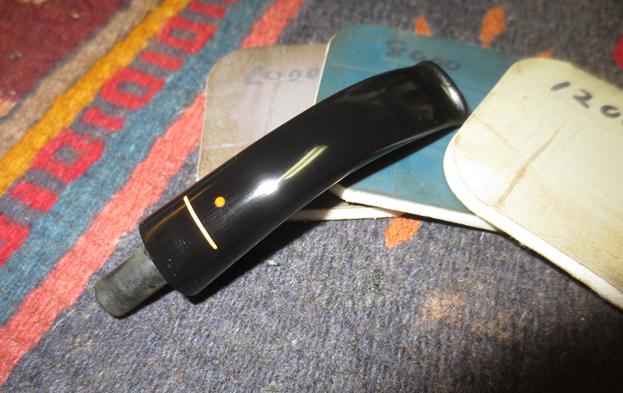
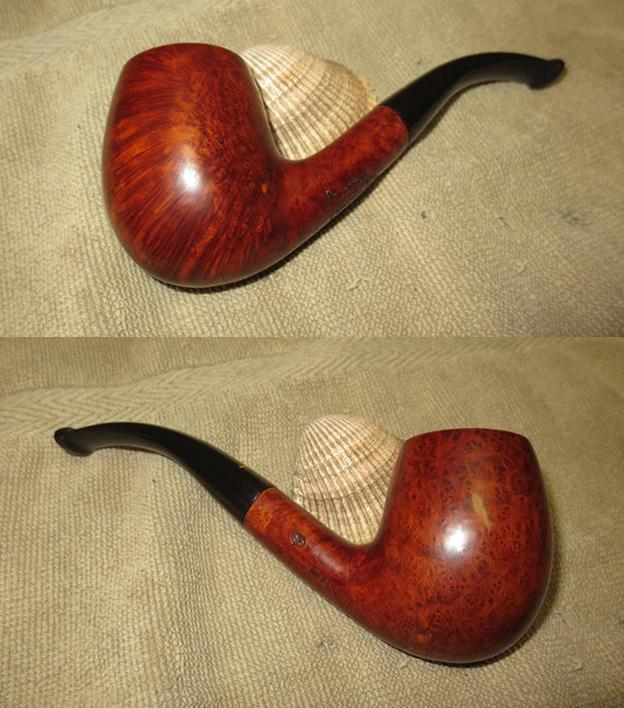
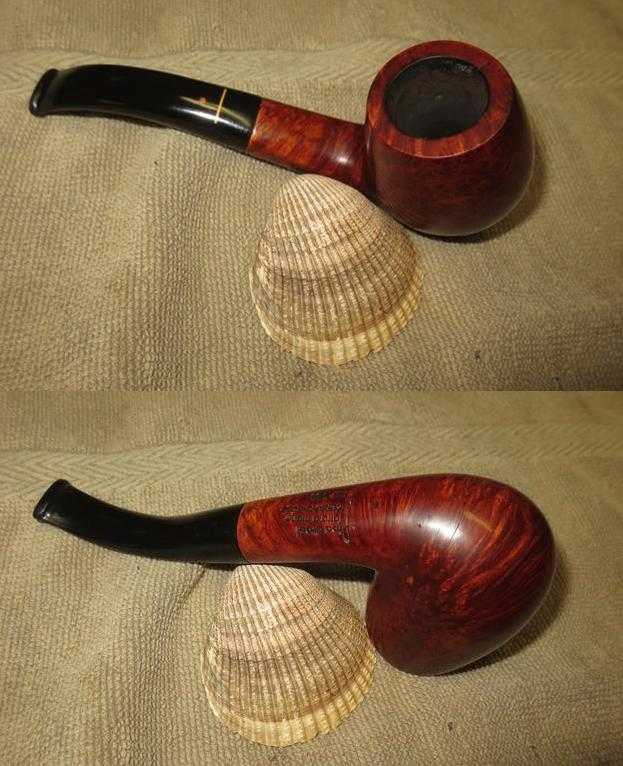
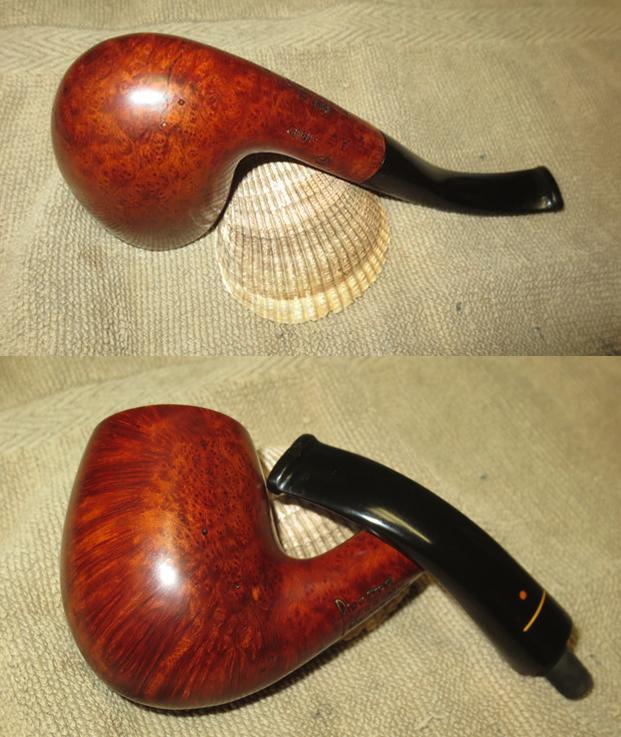
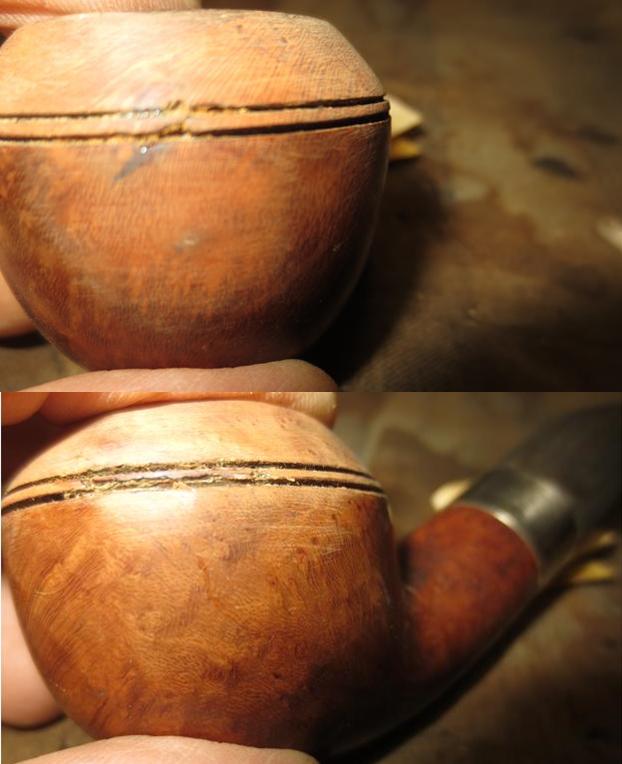
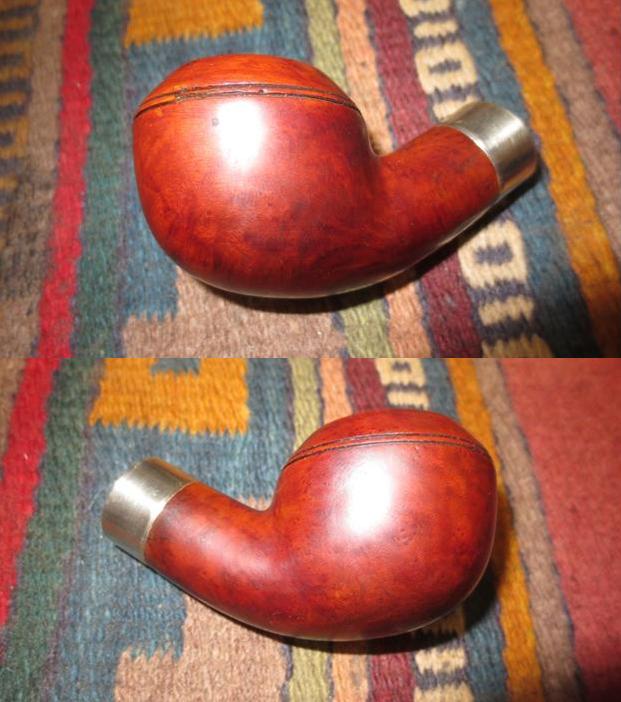
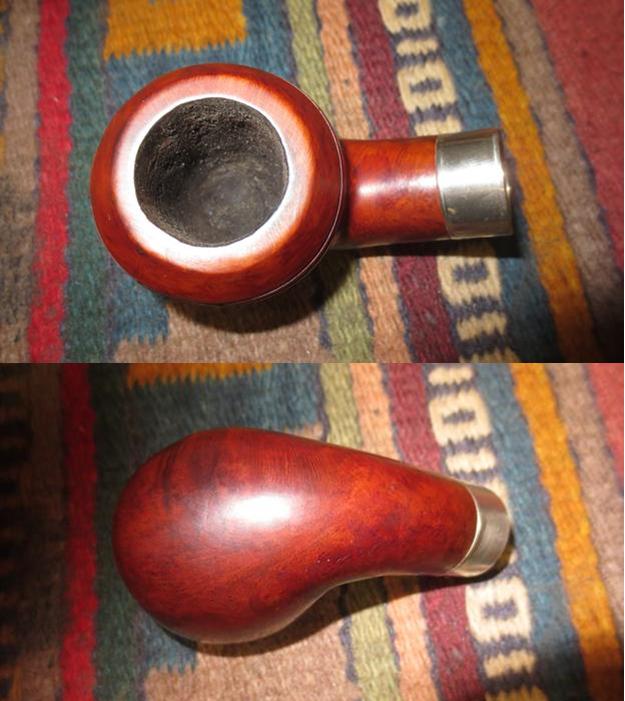
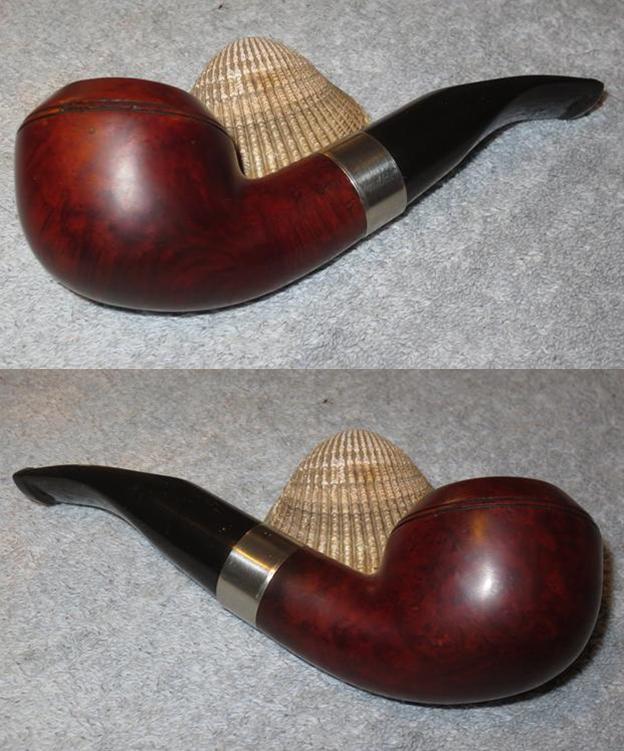
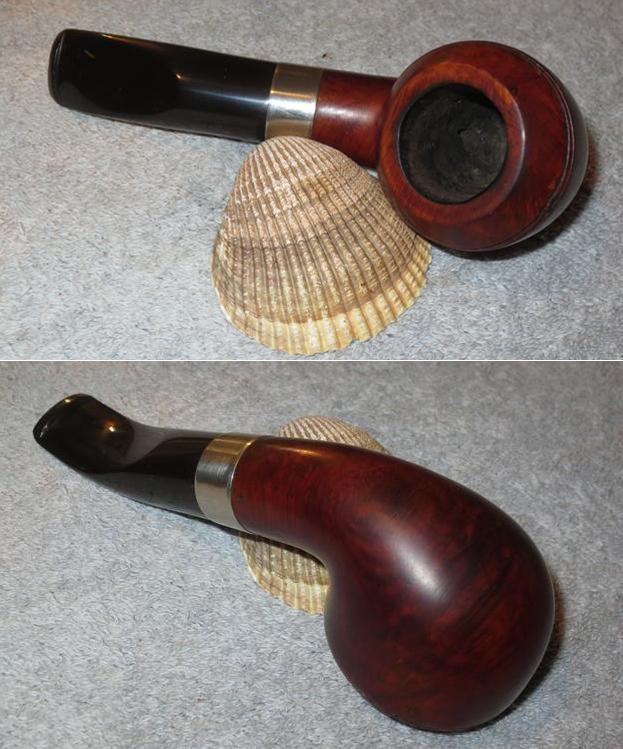
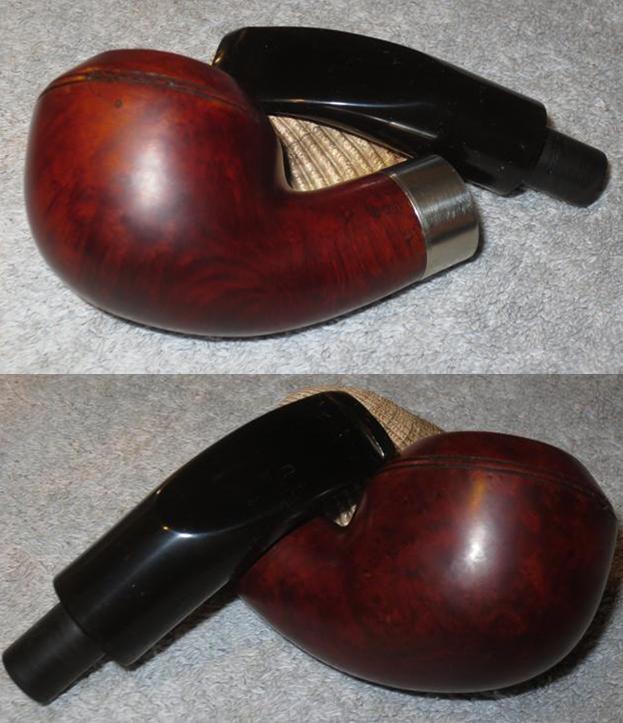
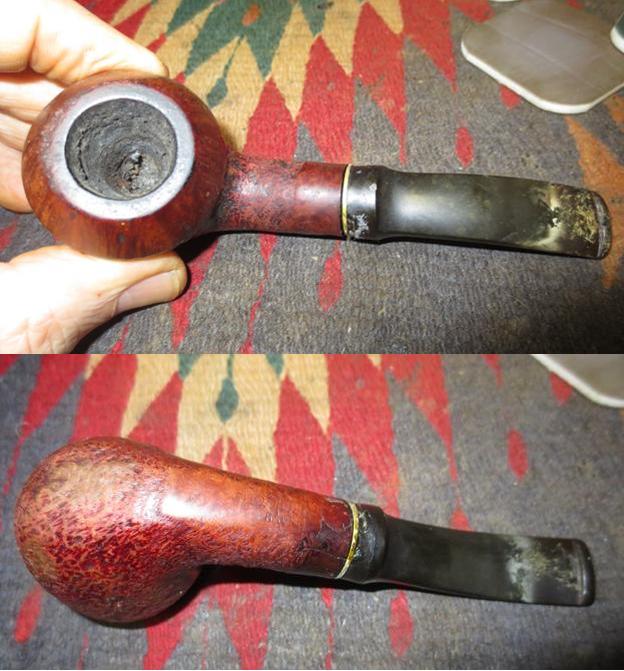
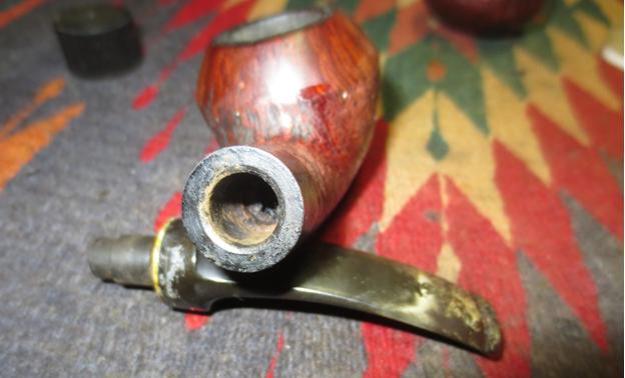
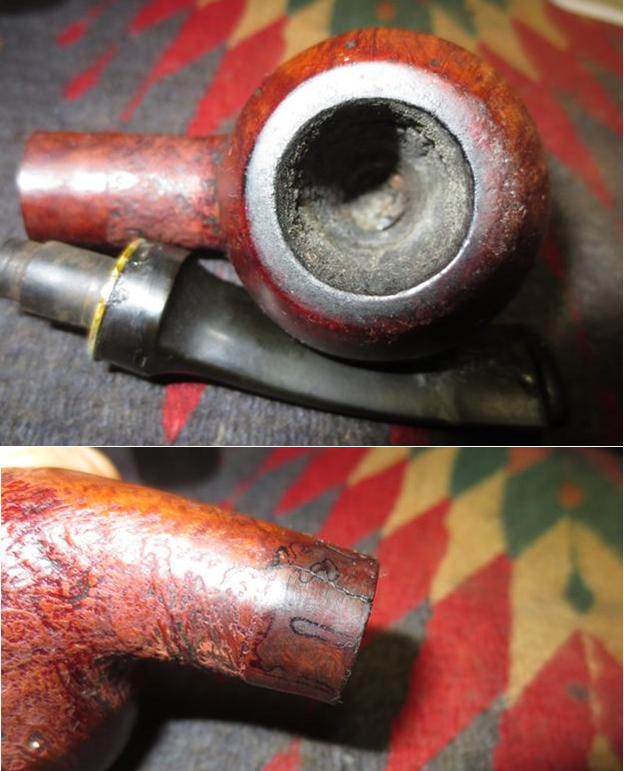
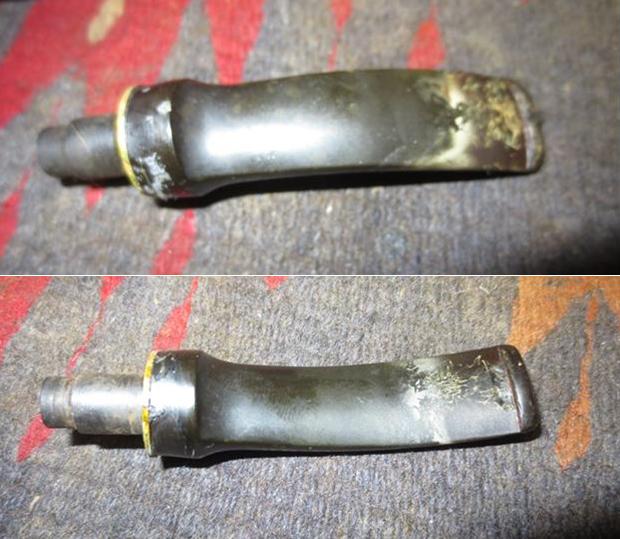
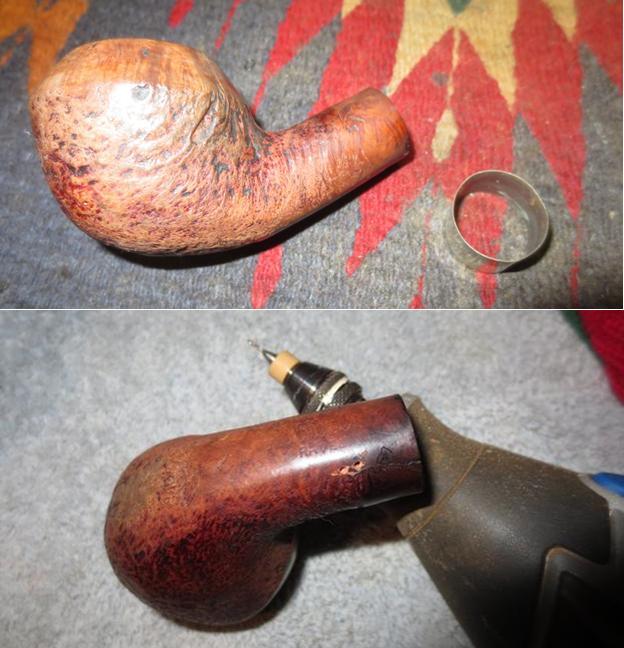
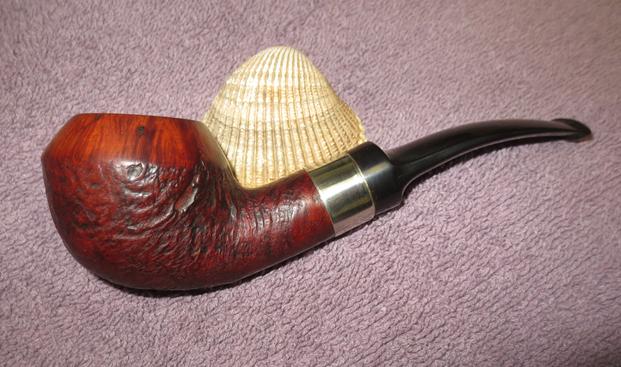
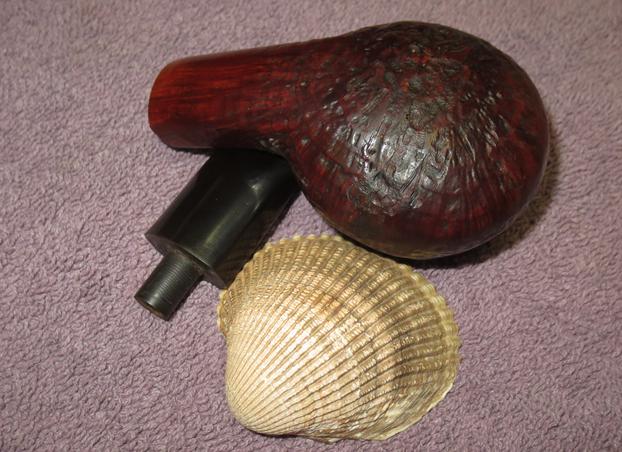
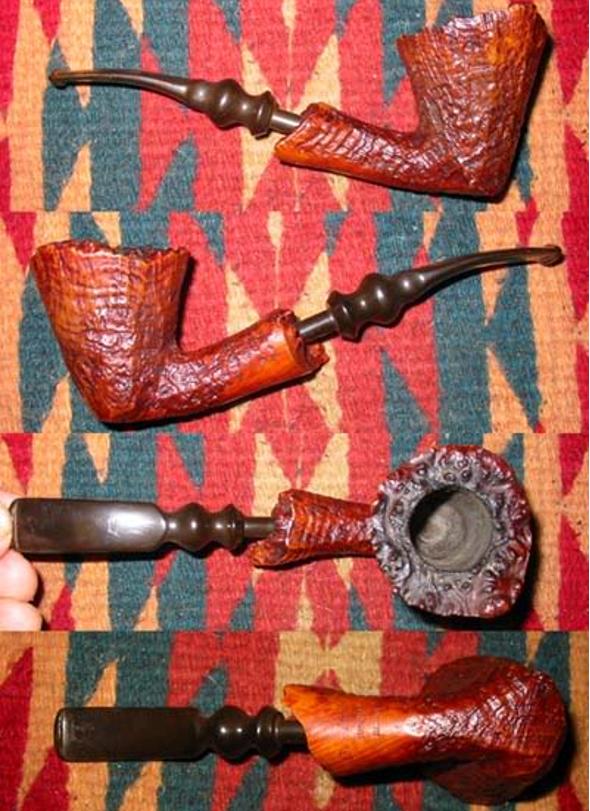
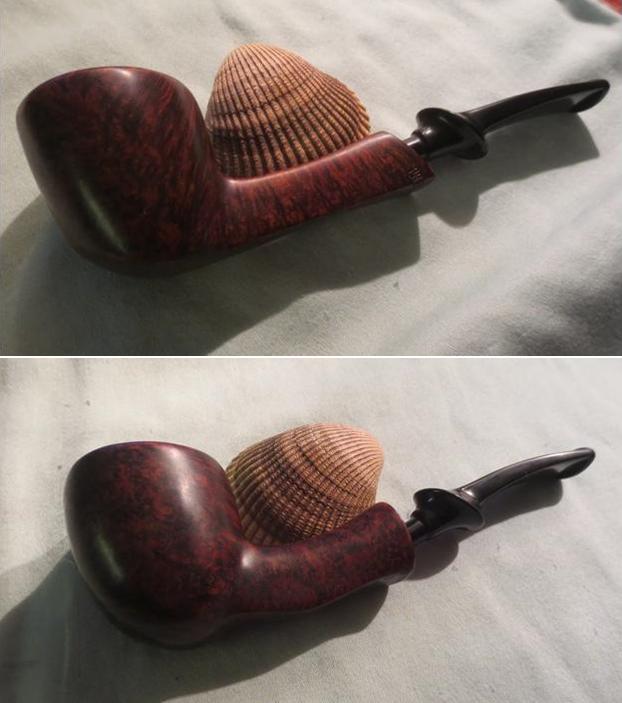
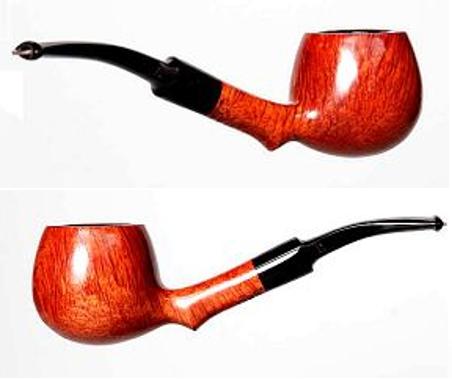
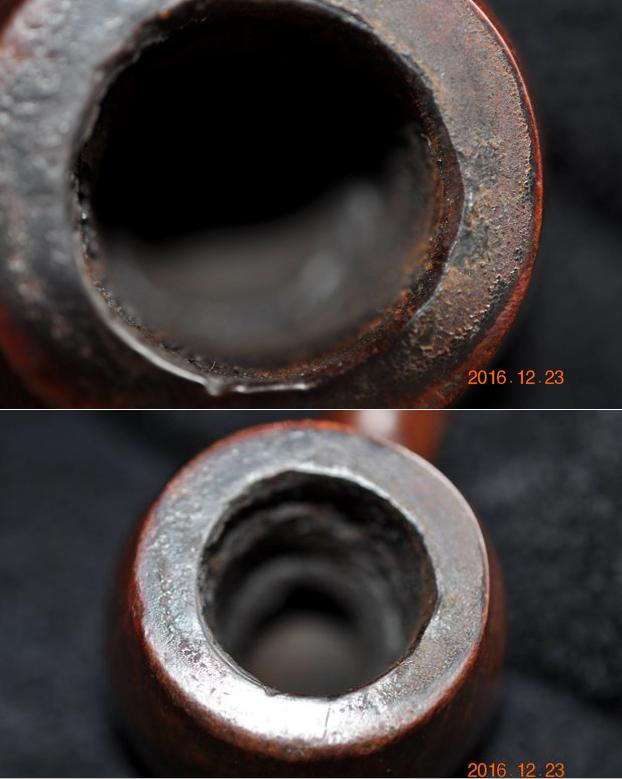
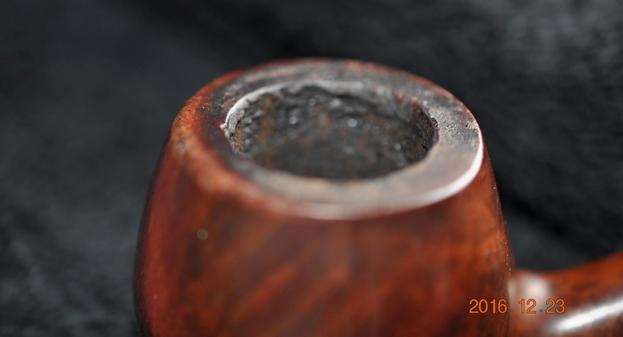
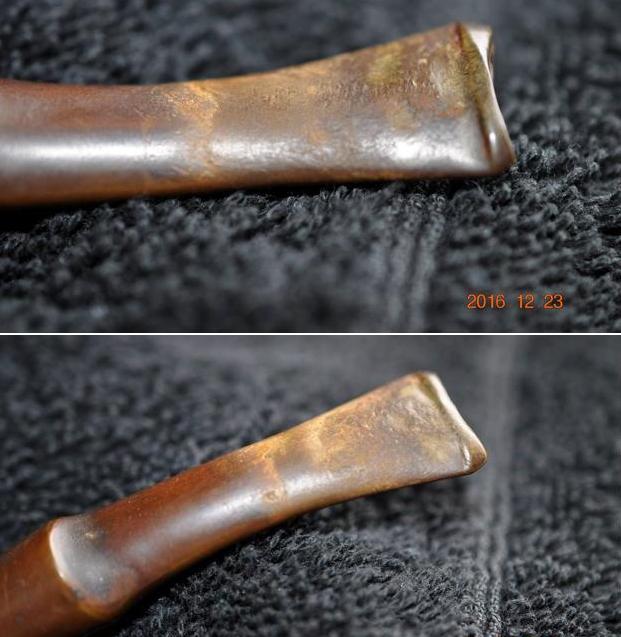
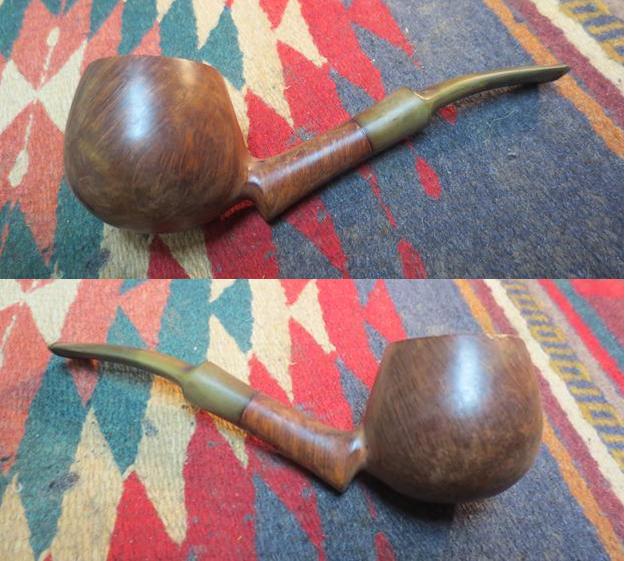
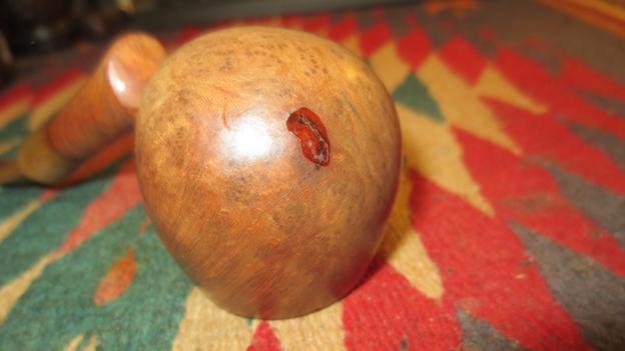
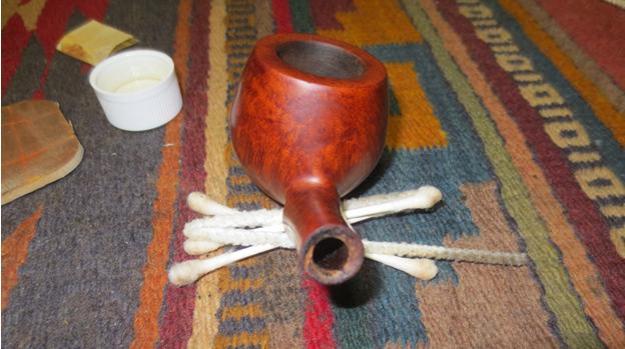
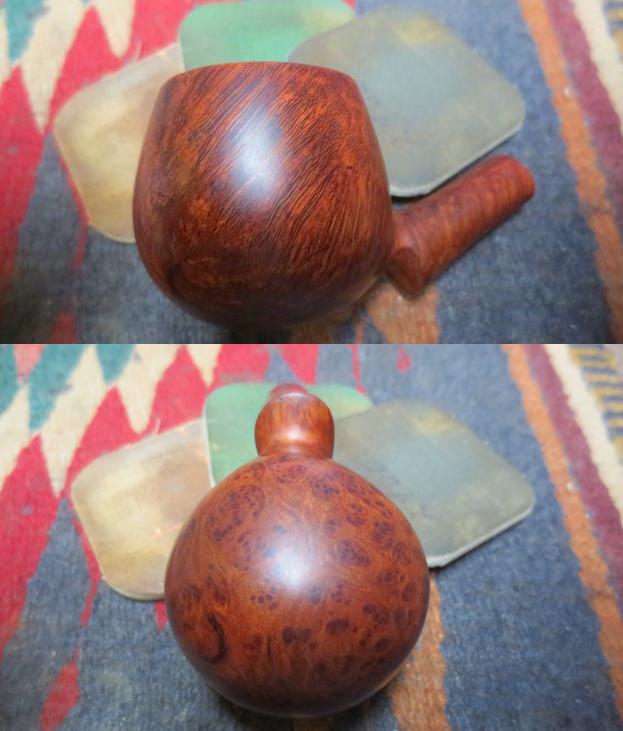
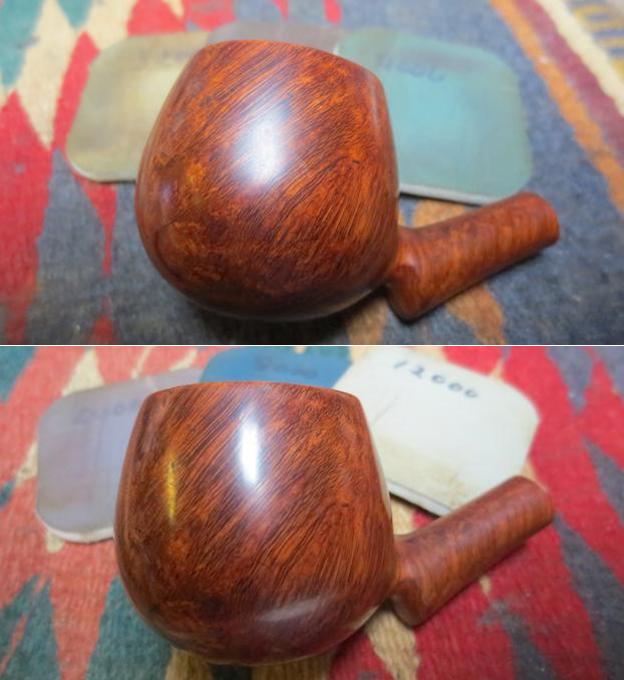
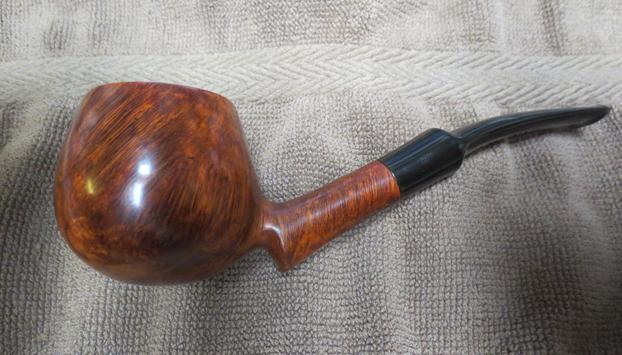
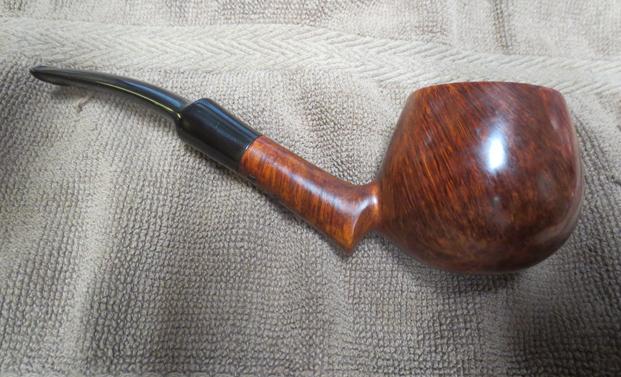
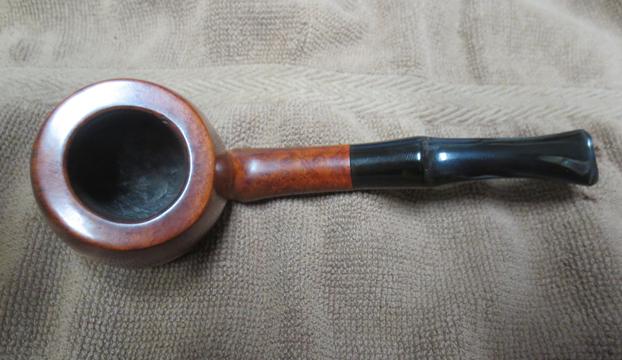
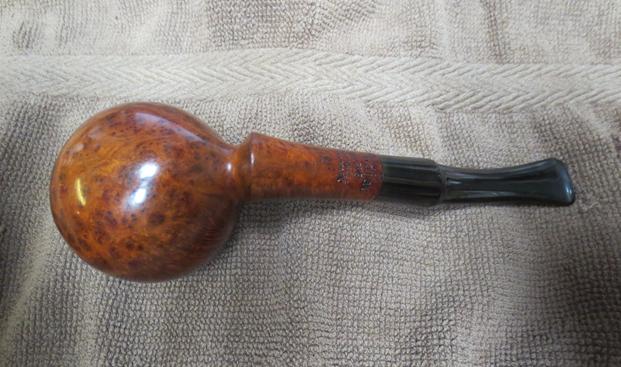
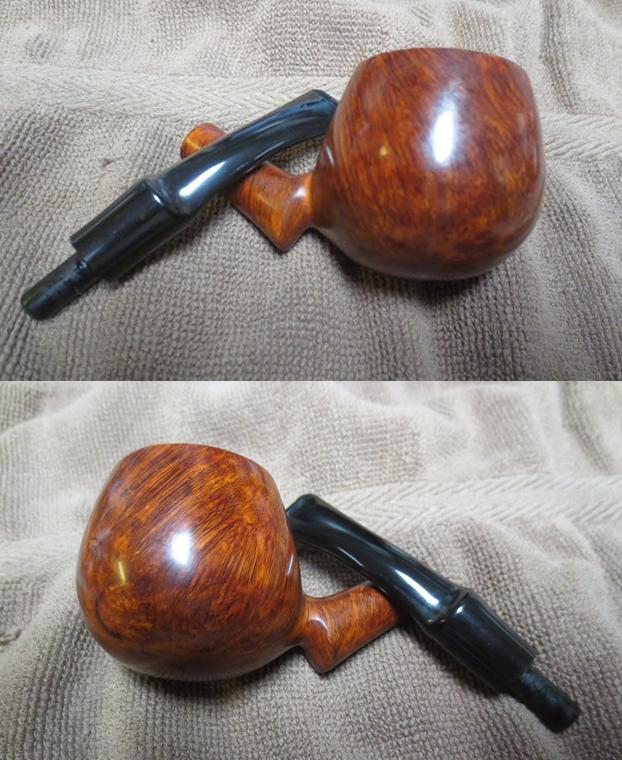
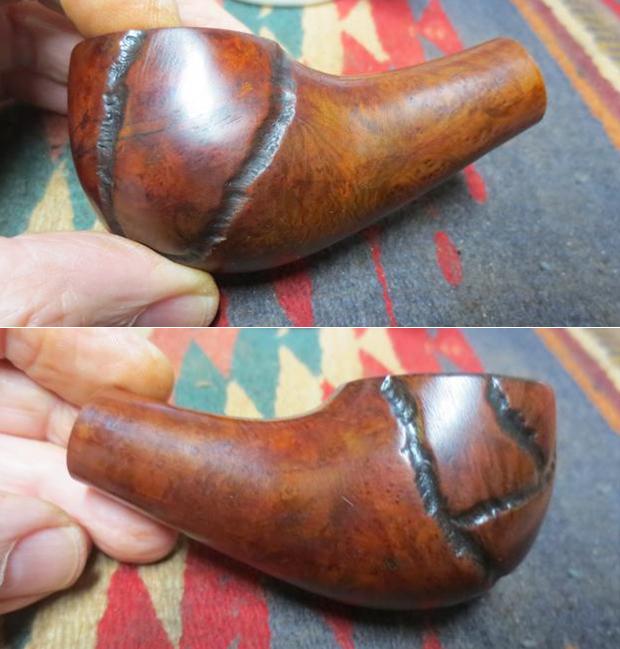
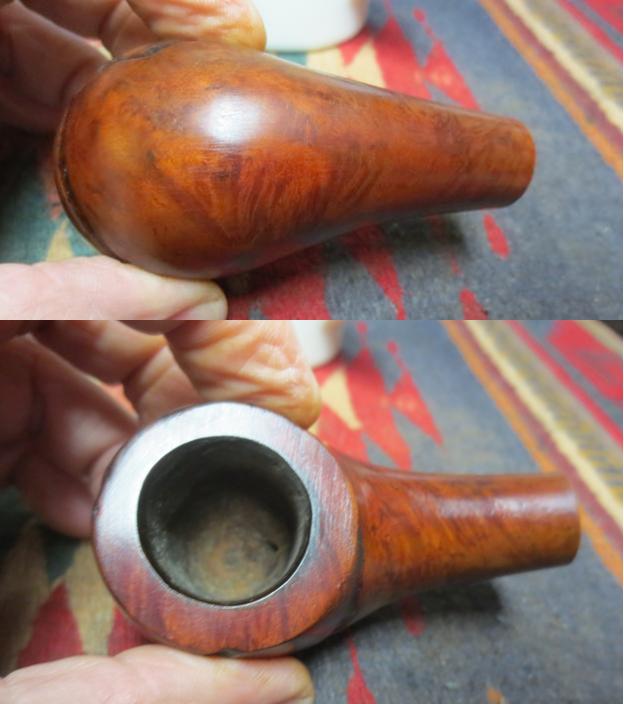
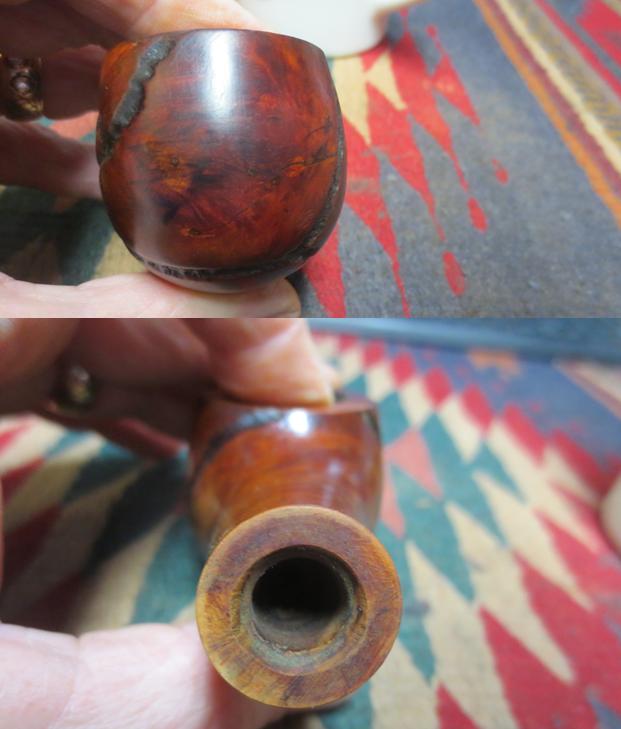
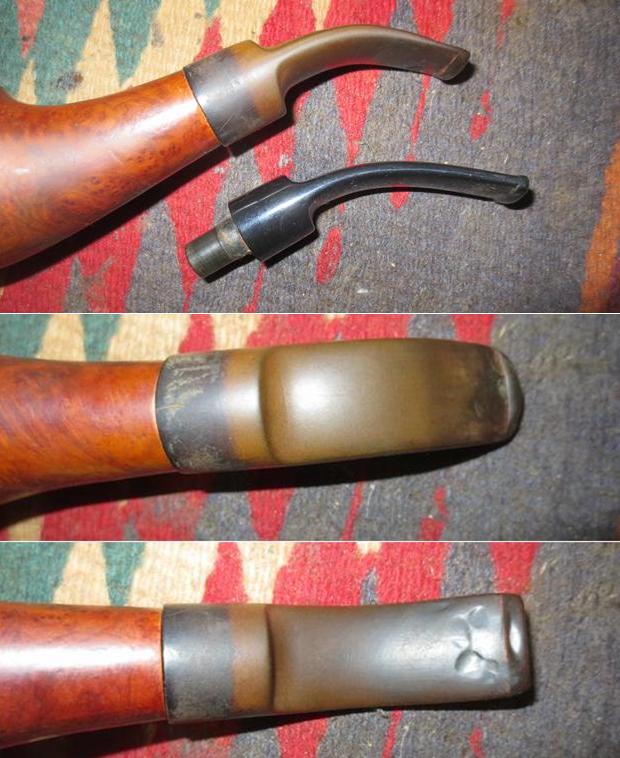
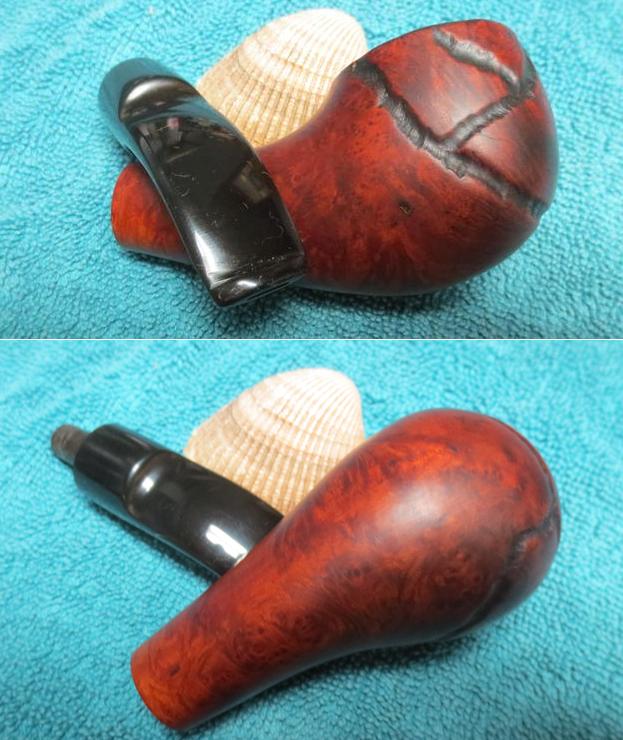
When Jon put the L. J. Peretti out on the table I was excited.  I was in Oslo, Norway, where I met up with two colleagues who work in Ukraine – we were there watching a world class biathlon event and we had a great time.  Jon knew that I was restoring pipes for the Daughters of Bulgaria and had a couple pipes that he was no longer smoking.  He picked the Peretti up off eBay some time ago and he passed it on to me to restore for a new steward – a task I was more than willing to take on!  I grew a bit attached to the Boston-based Tobacconist L. J. Peretti Co., when I restored my first Peretti which my son had gifted me for Christmas.  It was a challenge as I salvaged the original Peretti stamp on the surviving squared saddle stem half and added the other half by cannibalizing another stem and accomplishing a stem splice.  For a look at this project look here:  Peretti Square Shanked Billiard.  I brought the ‘new’ L. J. Peretti home to Bulgaria and the first picture below shows the two Perettis – a remarkable resemblance in the sharp squared shanked style.In the interest of full disclosure, when I first saw the ‘new’ Peretti in Oslo, I really wasn’t sure what the shape classification would be.  The first indicator I cued on was the double groove – Bulldog?  Then, the classic Bulldog usually has a diamond shank/stem.  Rhodesian?  The squared shank didn’t fit.  Ok, a Billiard or Apple with a cool grooved ring going with the squared shank, which I think is very attractive.  My questions gave way to an email to Steve for his input and his response came very quickly.  His call is a squared shank Rhodesian.  My response, “Sweet!”  That works for me.  When I did my original research on the Peretti name I discovered the genesis of a significant story of Americana pipe history with the establishment of the L. J. Peretti Company of Boston in 1870, the second oldest tobacco shop in the US, second only to Iwan Ries & Co. of Chicago established in 1857 (See: Link).  It started in 1870, Libero Joseph Peretti arrived in Boston from Lugano, Switzerland, putting in motion the historical axis that exists today in an iconic tobacconist shop that continues to serve patrons by hand-blending tobaccos from around the world to taste.  One can take his empty bowl to the shop in Boston at 2 1/2 Park Square and test different blends under the watchful assistance of L. J. Peretti staff – total ‘old school’ and I like it! With an appreciation for the L. J. Perretti Squared Shank Rhodesian on my work table, I take more pictures to fill in the gaps. The left side of the shank is stamped “STRAIGHT GRAIN” and, interestingly, the right side is “L.J. Peretti”.  As is true of my other Peretti, usually the name is stamped on the left side.  This Peretti’s pedigree is on the right side of the shank.  The squared, tapered stem has the classic “P” stamped and in good shape. The chamber shows significant cake and will need to be cleaned down to the briar.  The rim has some significant damage on the right side and significant lava flow.  I will need to clean bowl and rim to see what might be lurking beneath.  The Rhodesian upper dome has cuts – one noticeably dissects the twin grooves.  There’s a good bit of grime in the grooves and at least one lightened fill on the heel – with the flat heel this Rhodesian is also a sitter – a nice feature for the table!  I also detect some dents on the squared shank corners – this old boy has taken a bit of bruising along the way.  The stem shows no oxidation but the button shows some biting and tooth dents – both upper and lower button lips have clench marks.  ‘Straight Grain’ is stamped on the shank and the grain has some striking features that will be visible once the grime is cleaned and things shined up a bit.

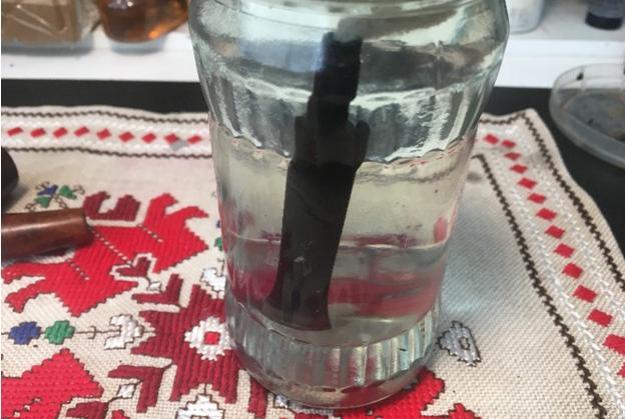
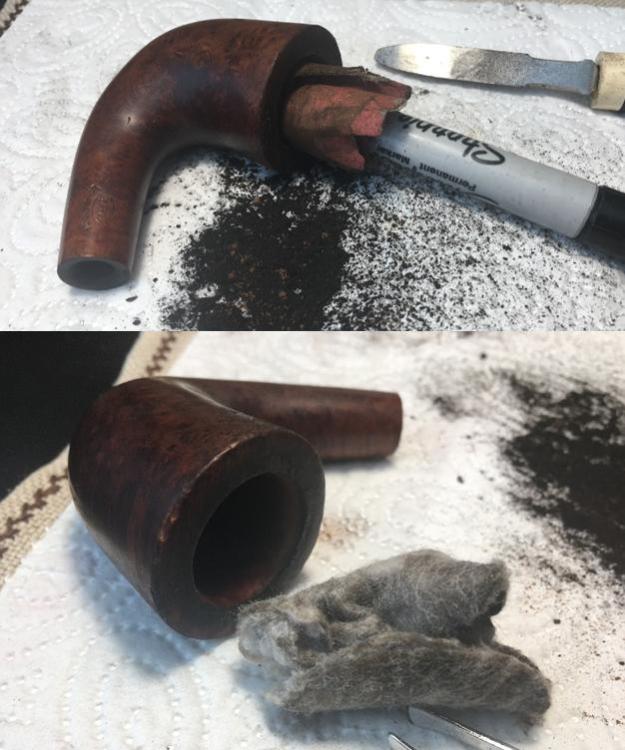
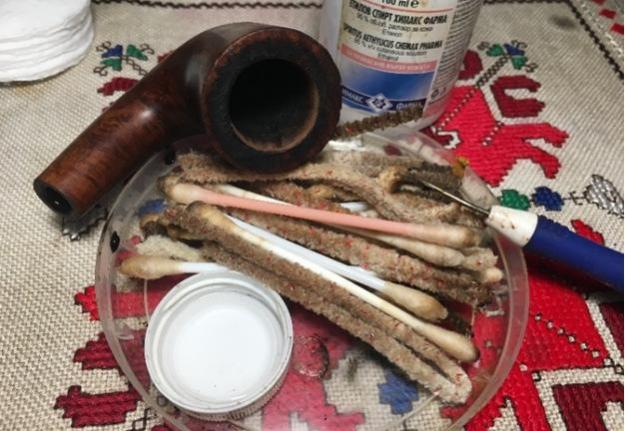
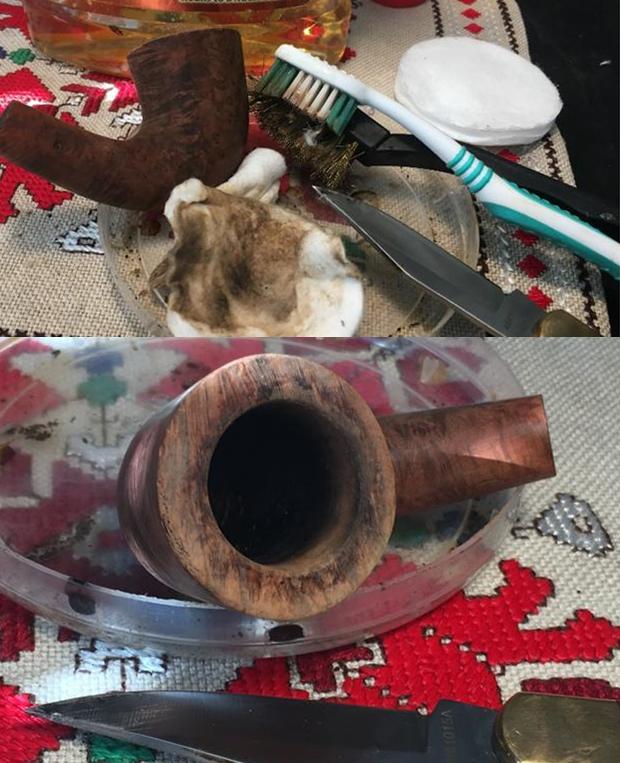
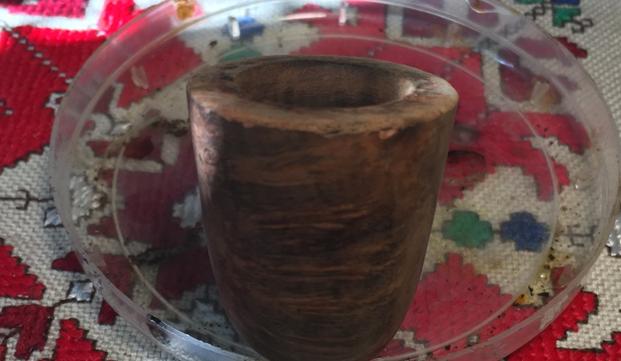
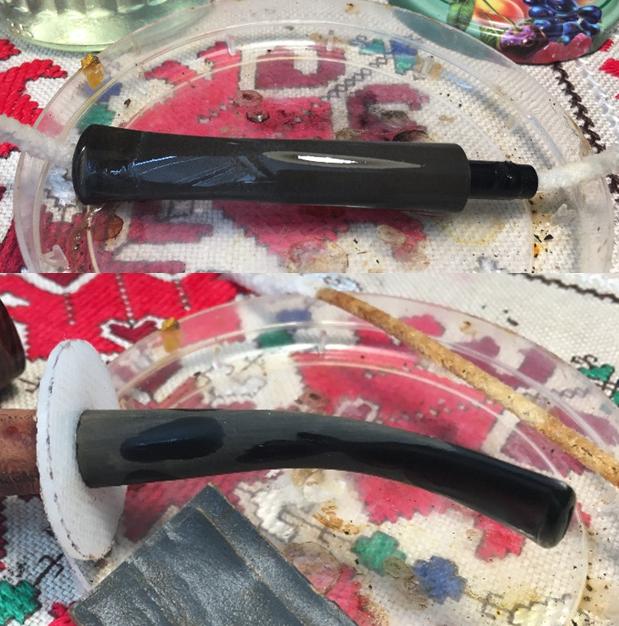
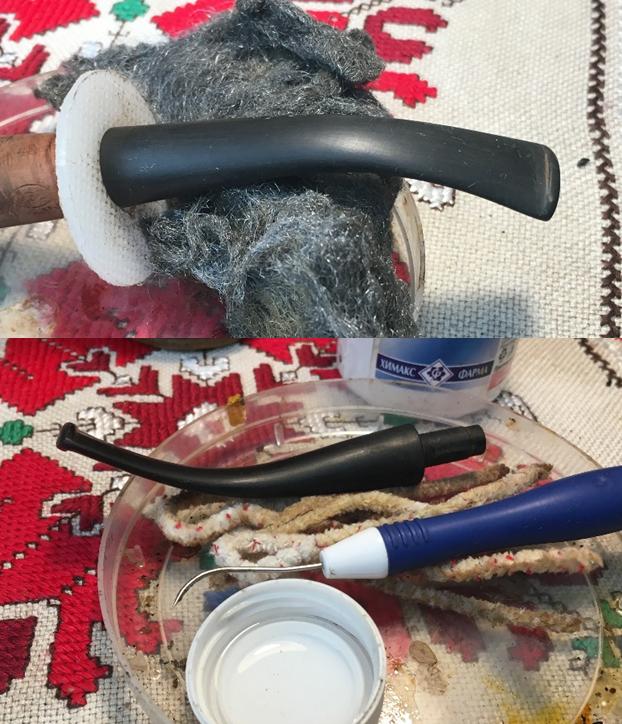
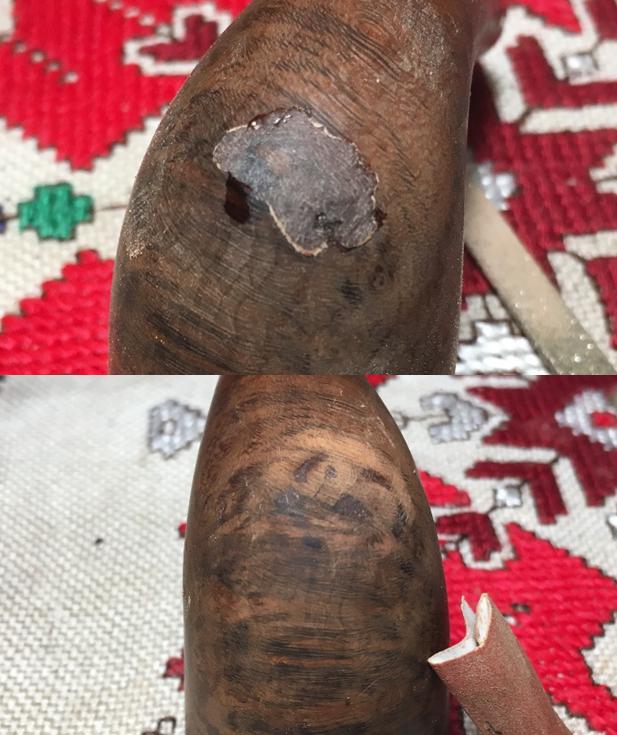
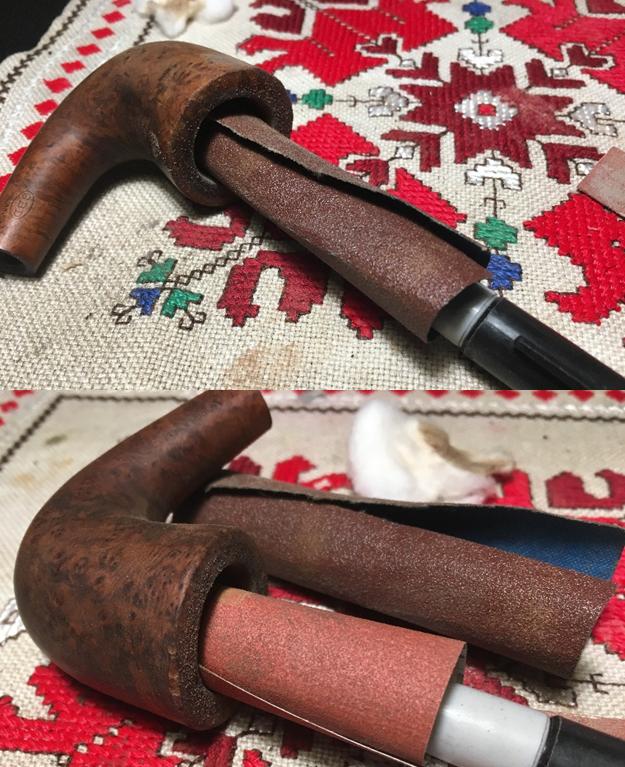
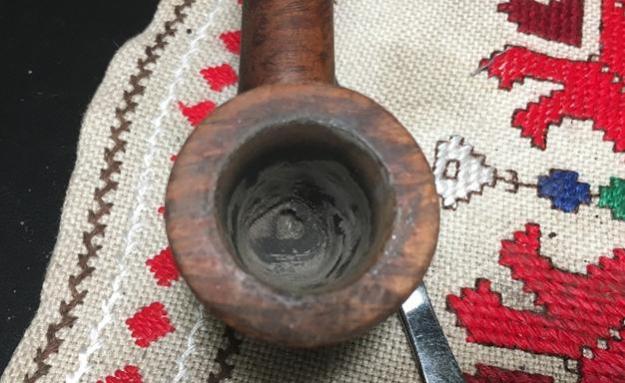
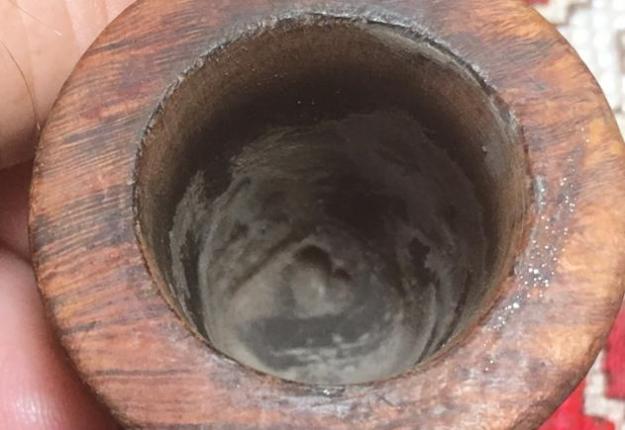
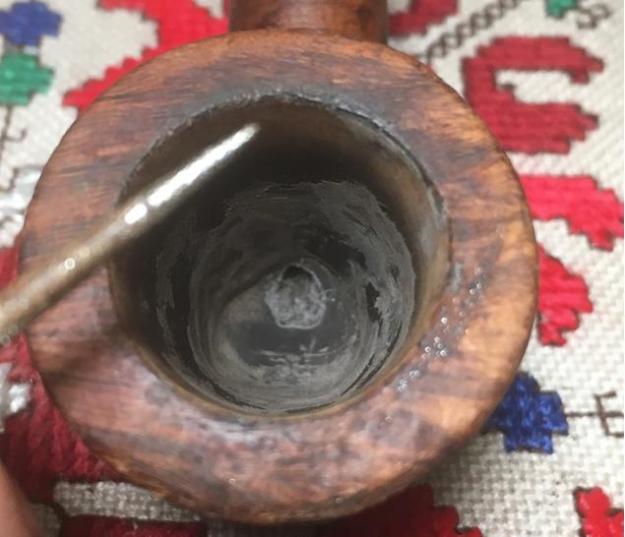
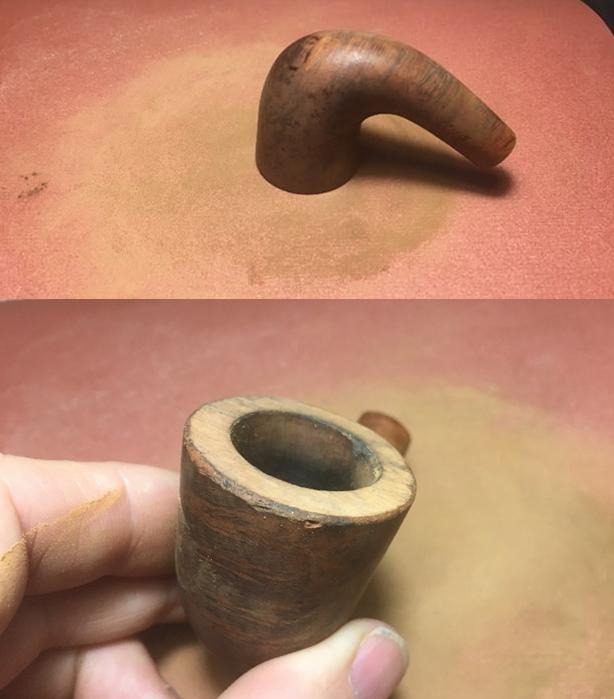
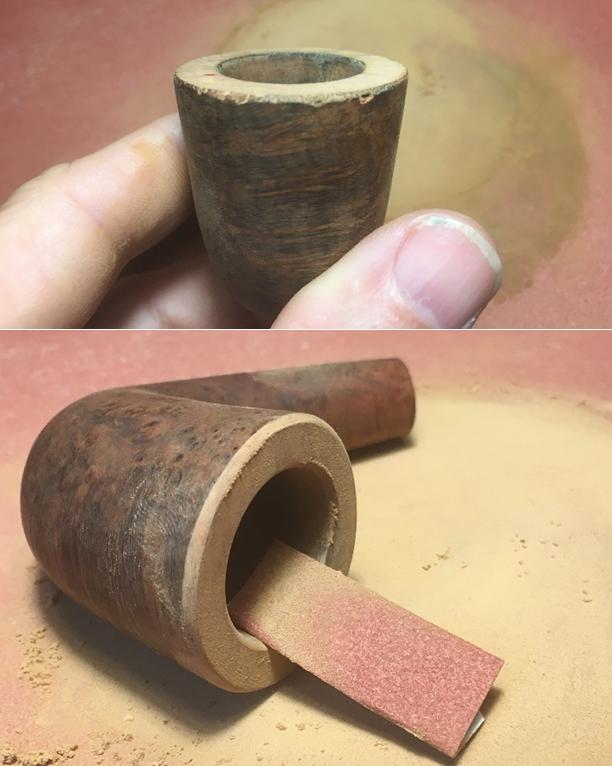
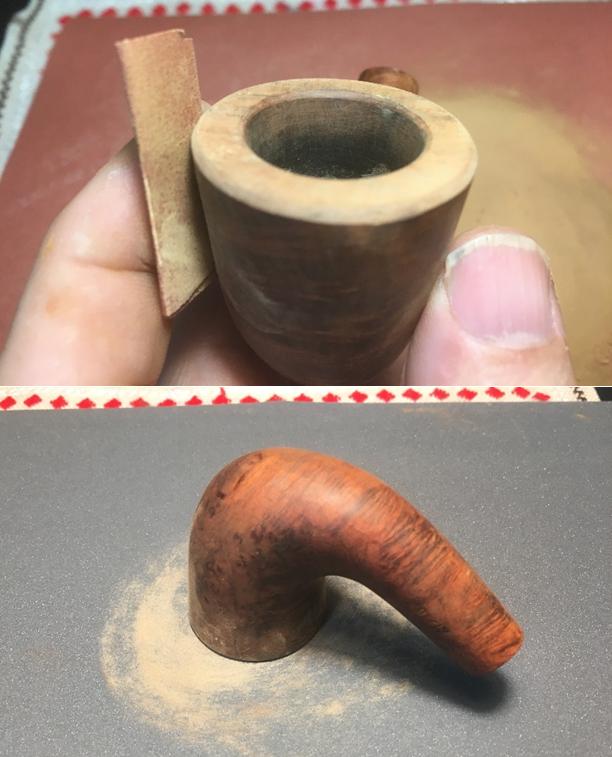
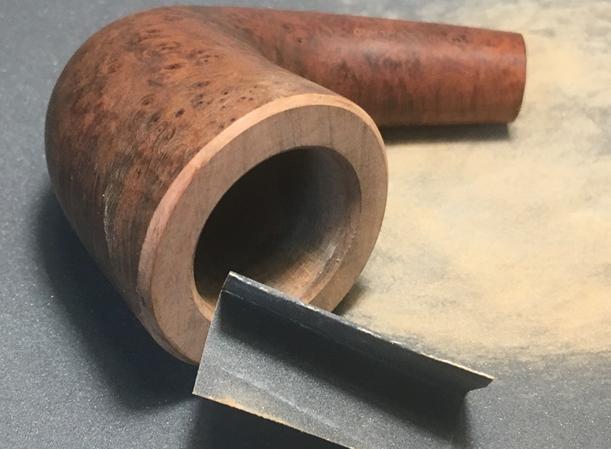
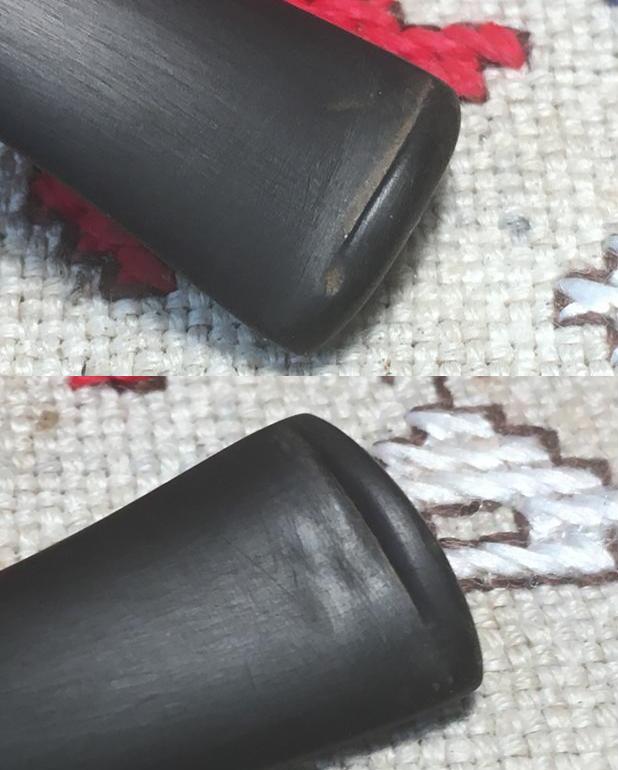
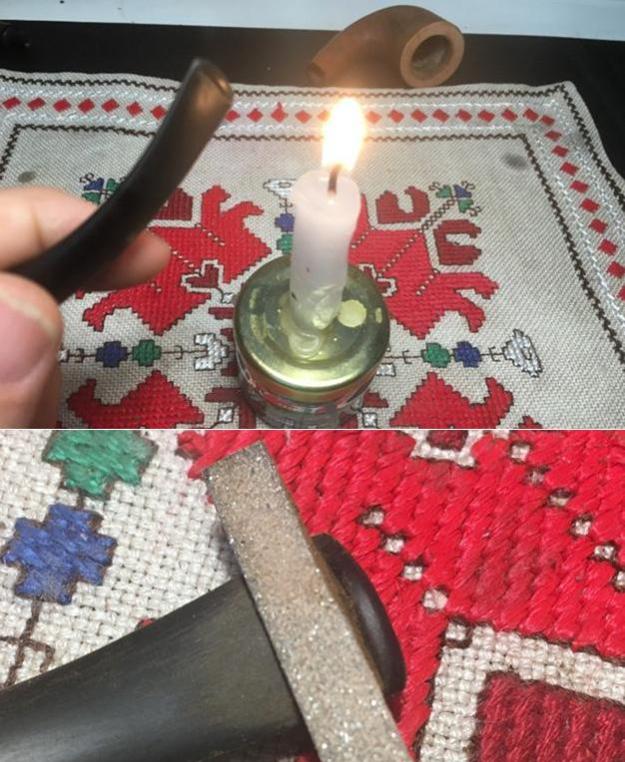
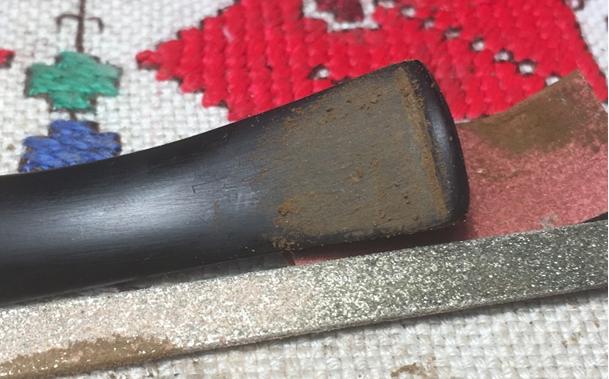
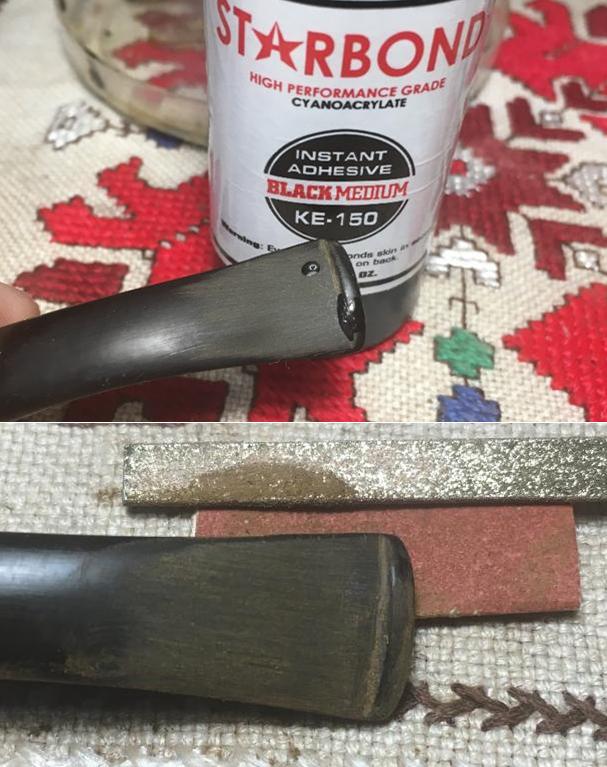
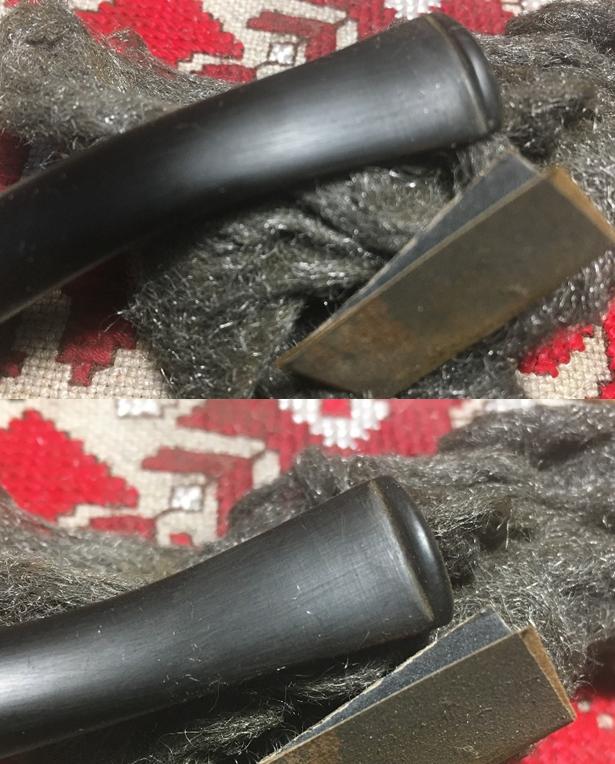
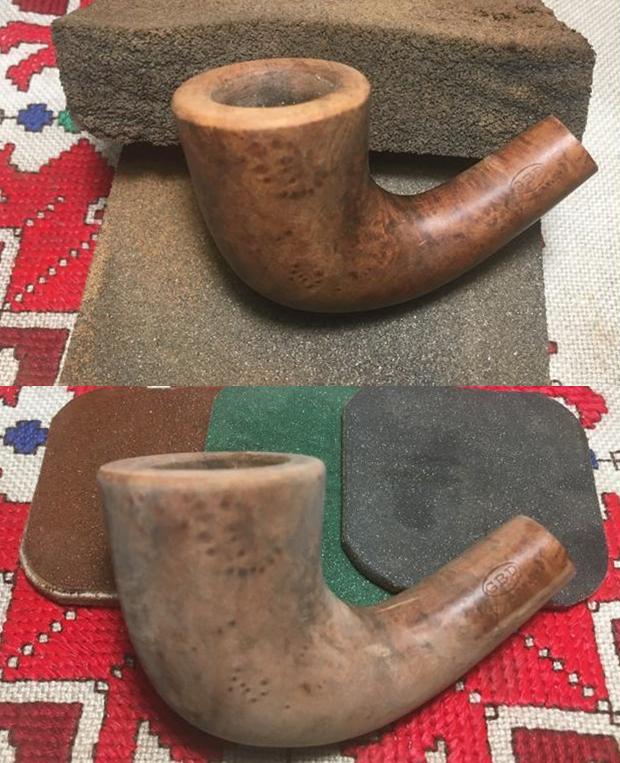
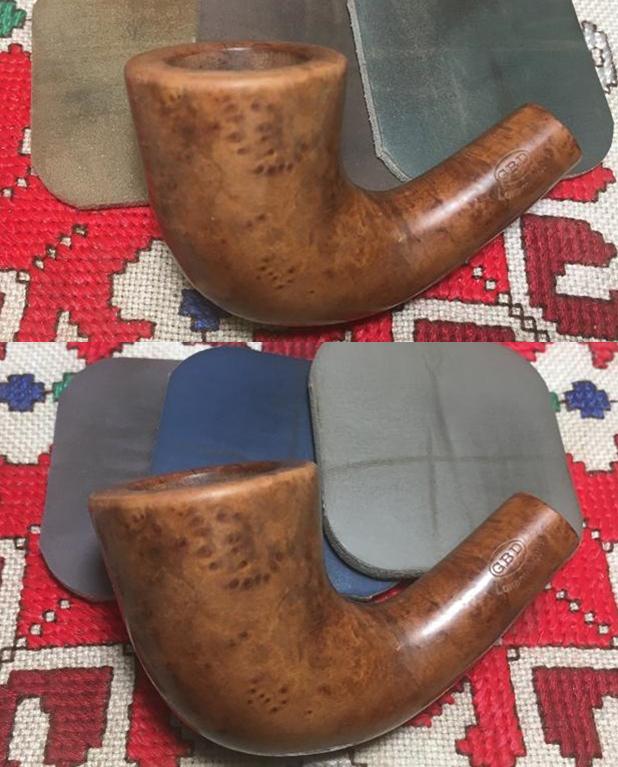
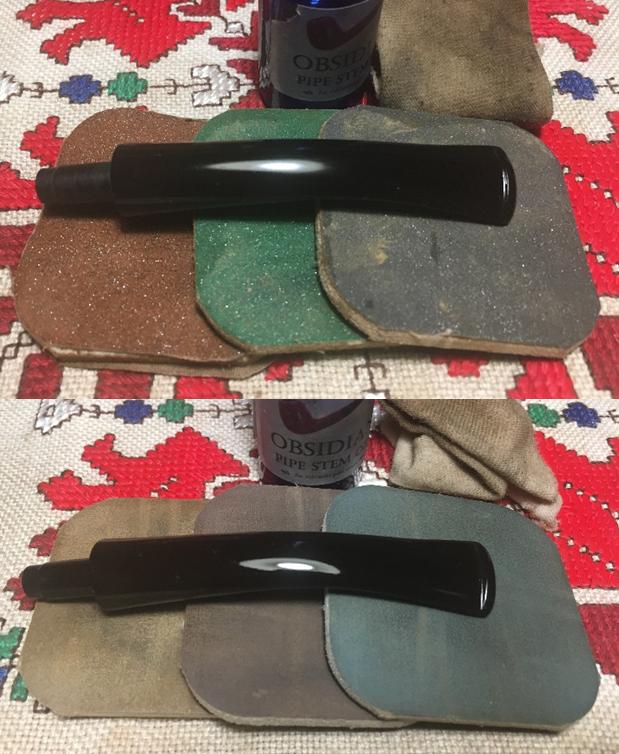
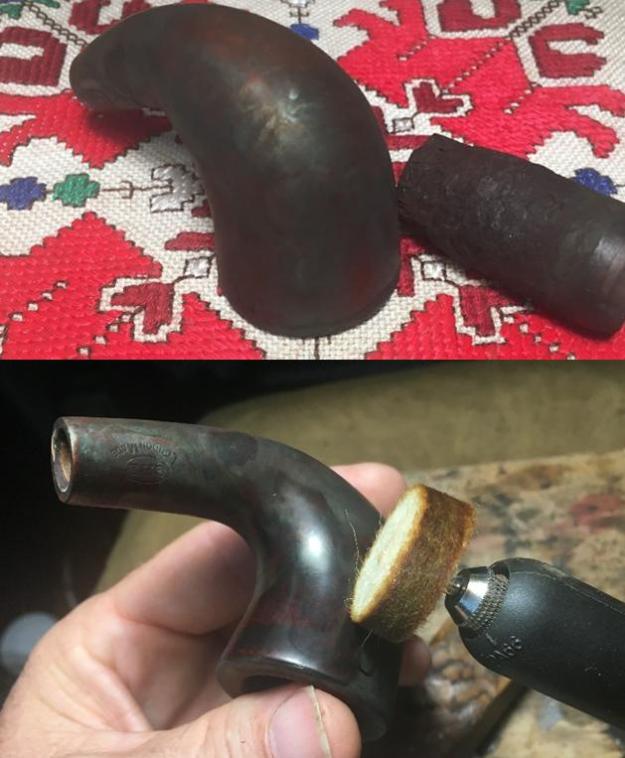
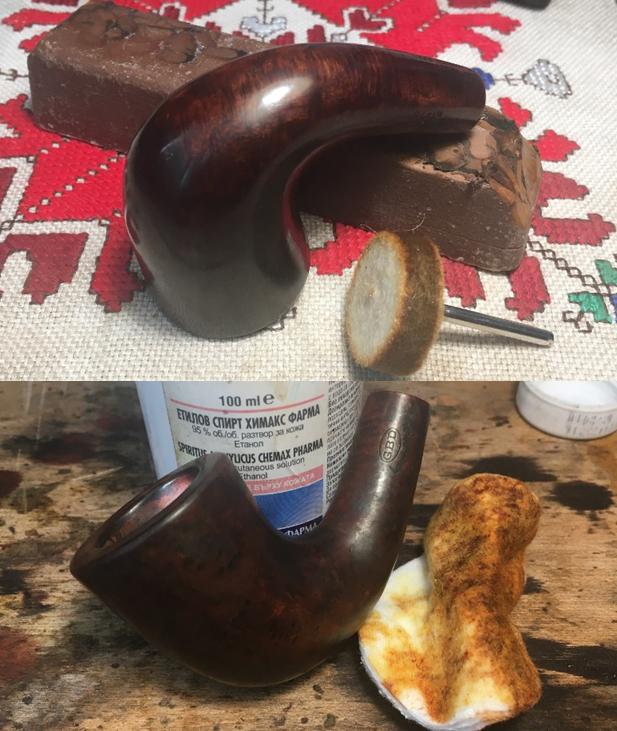
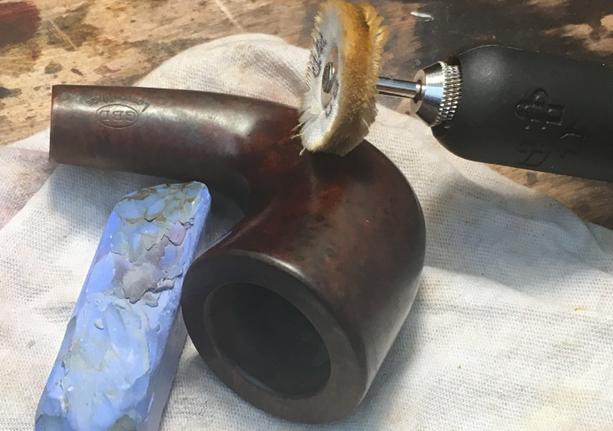
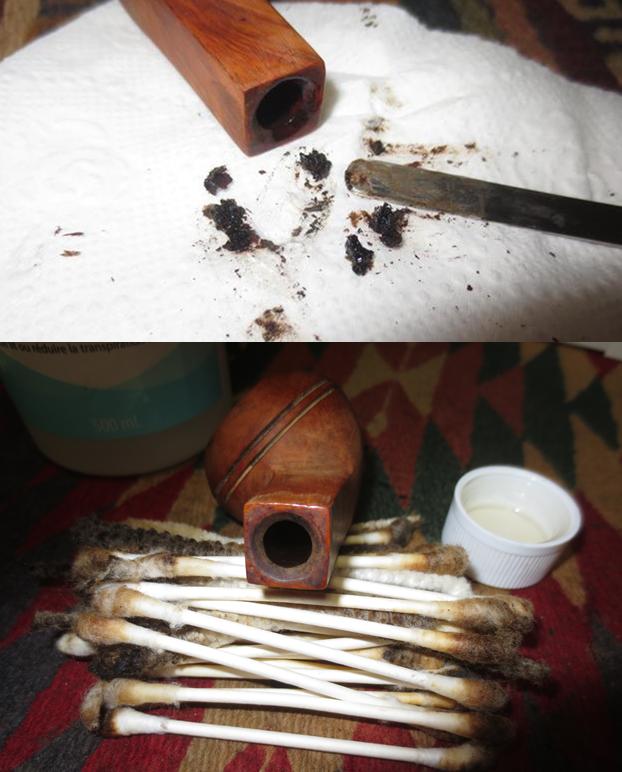
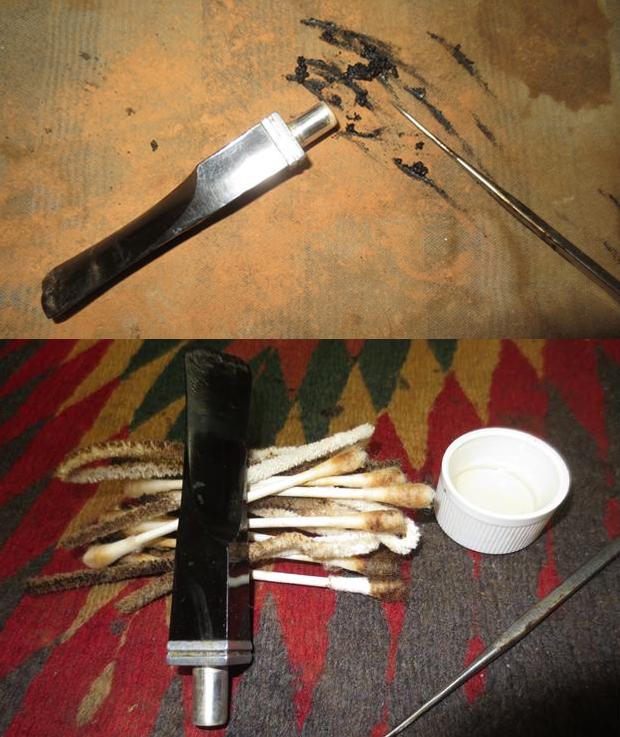
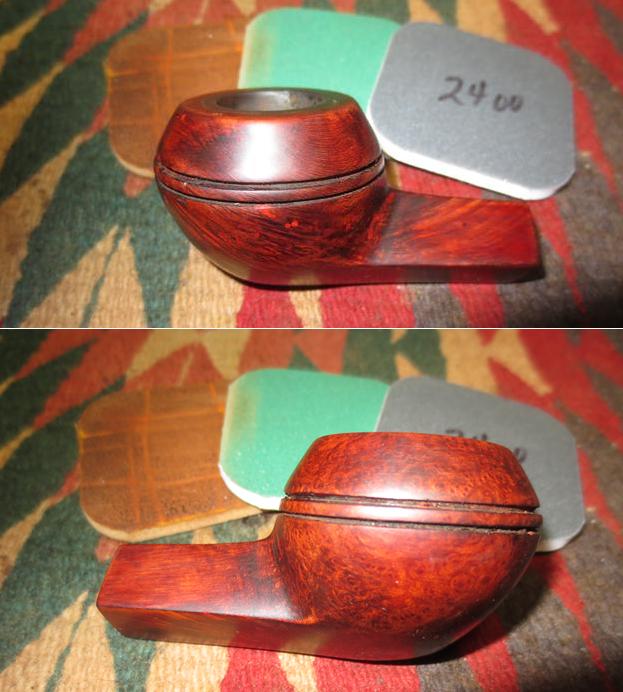
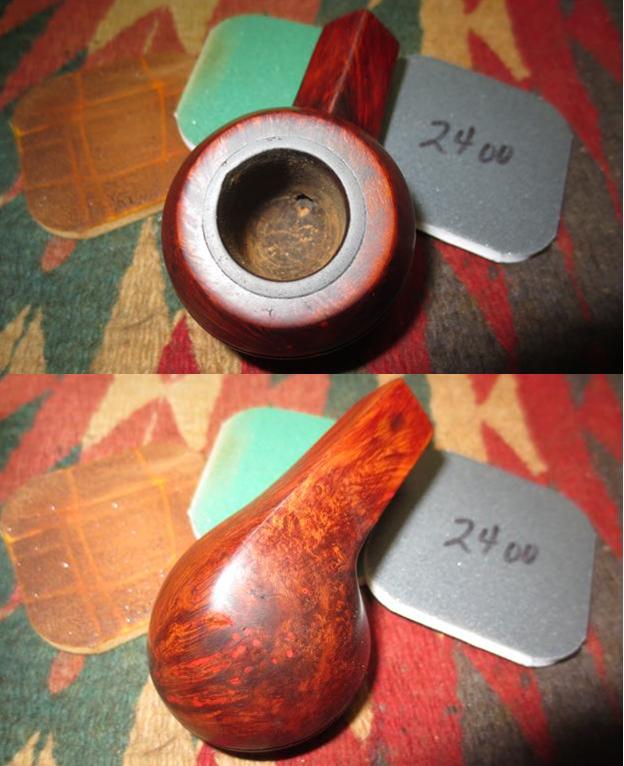
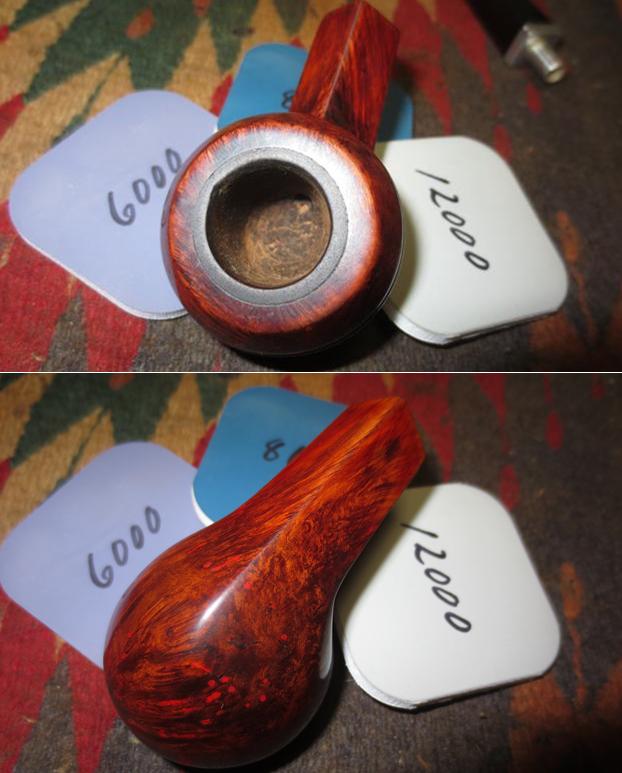
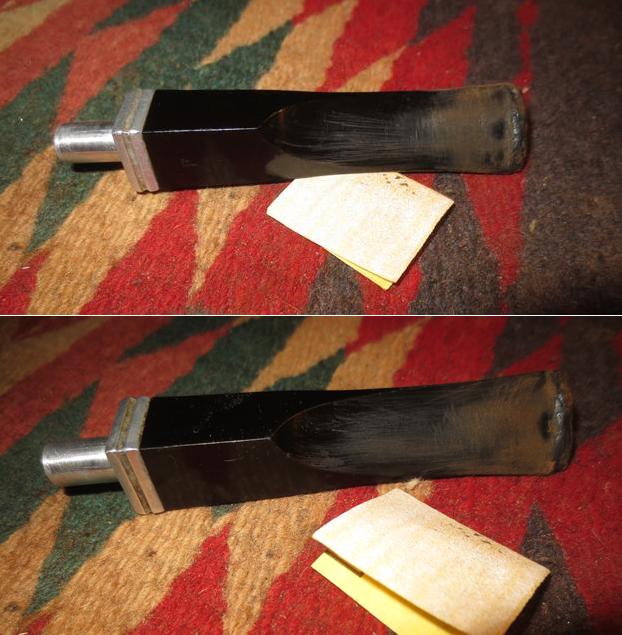
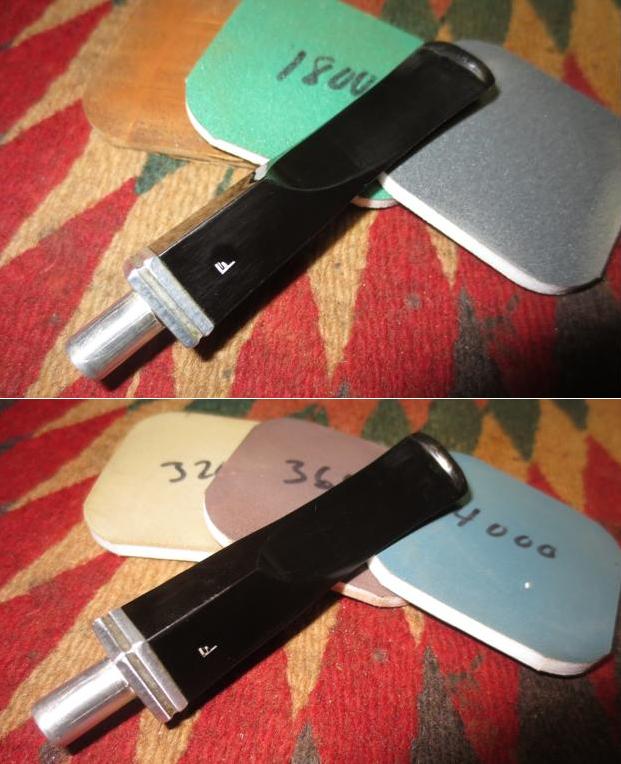
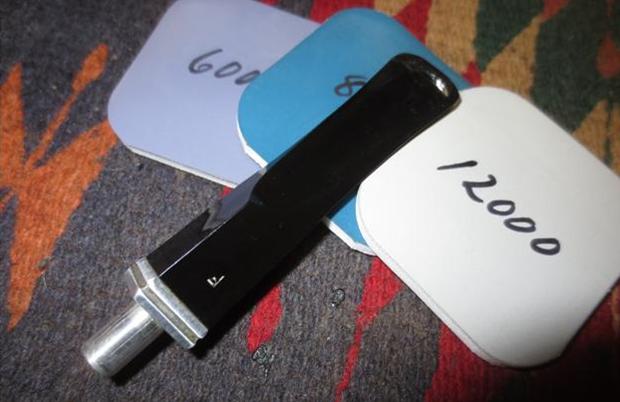
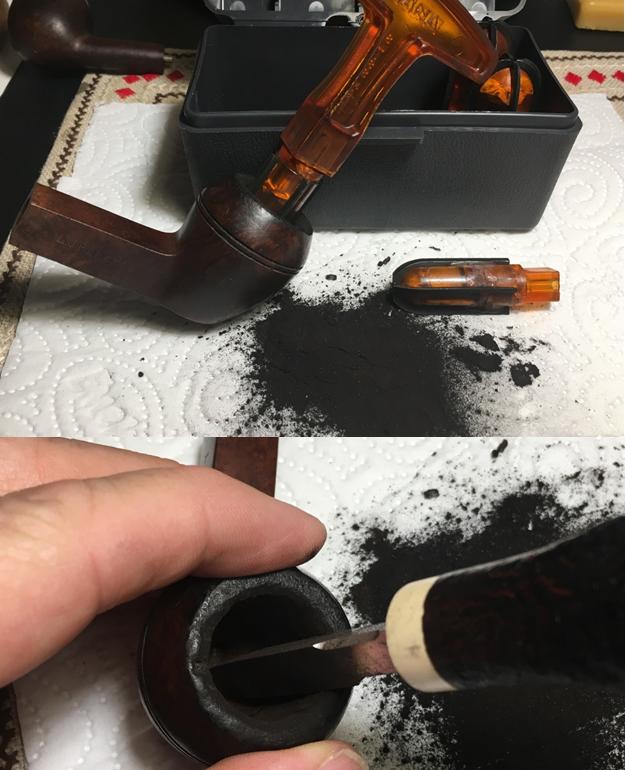
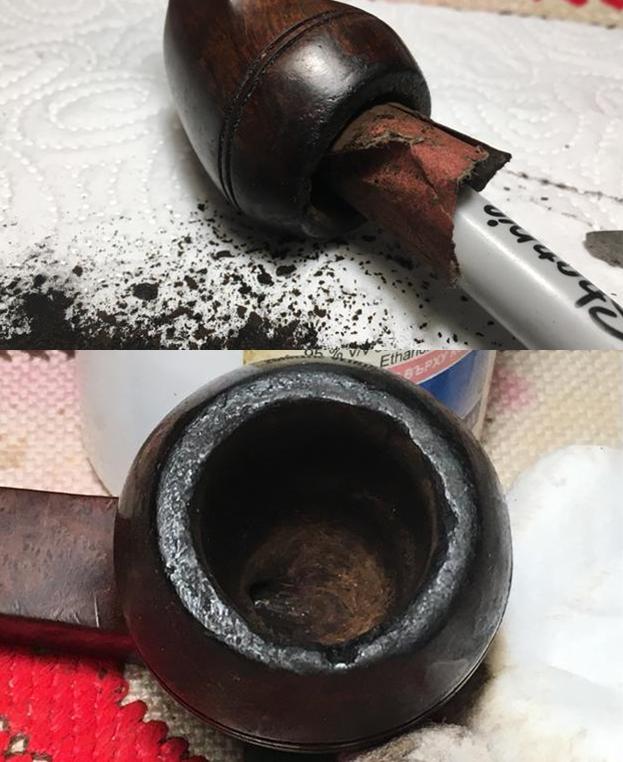
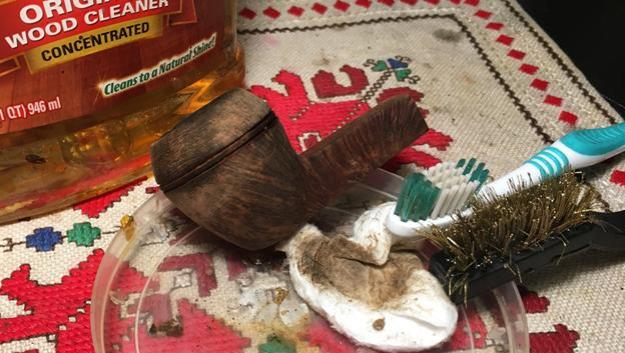
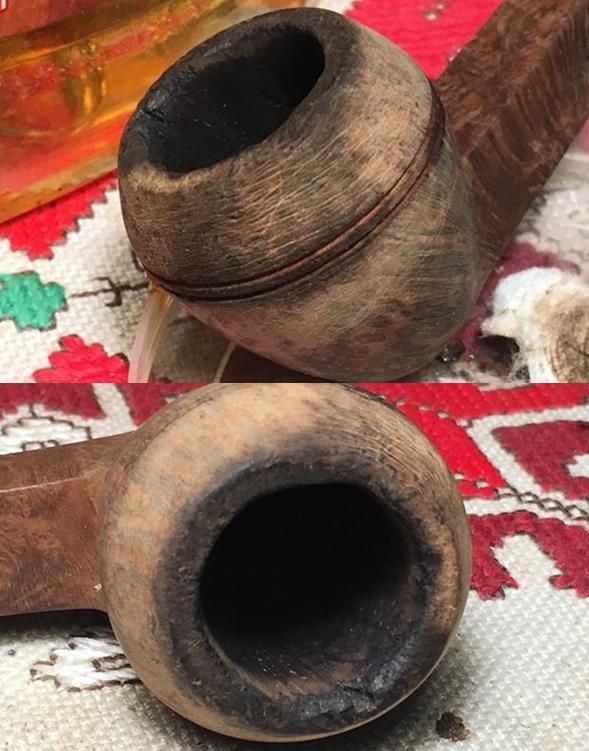
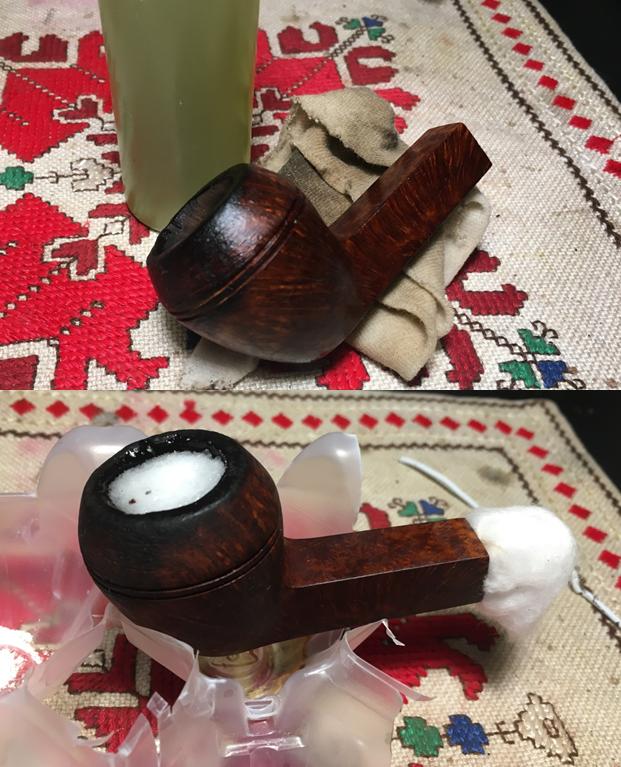
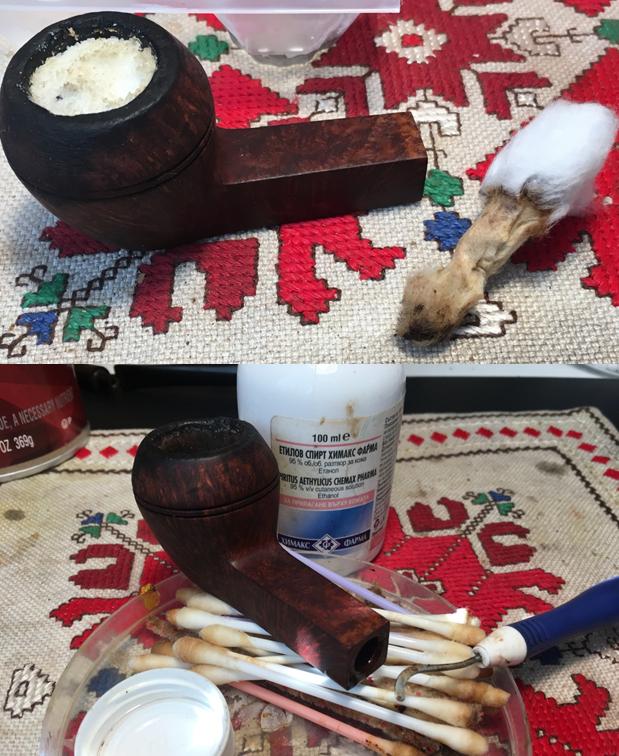
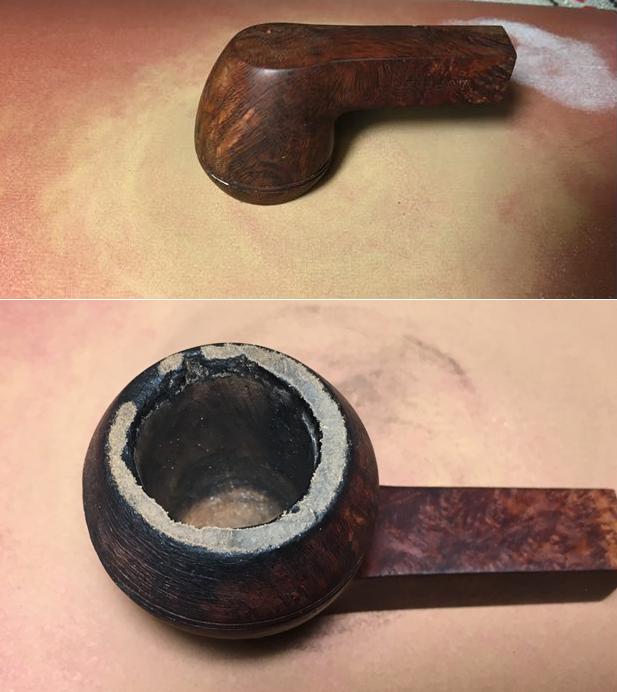
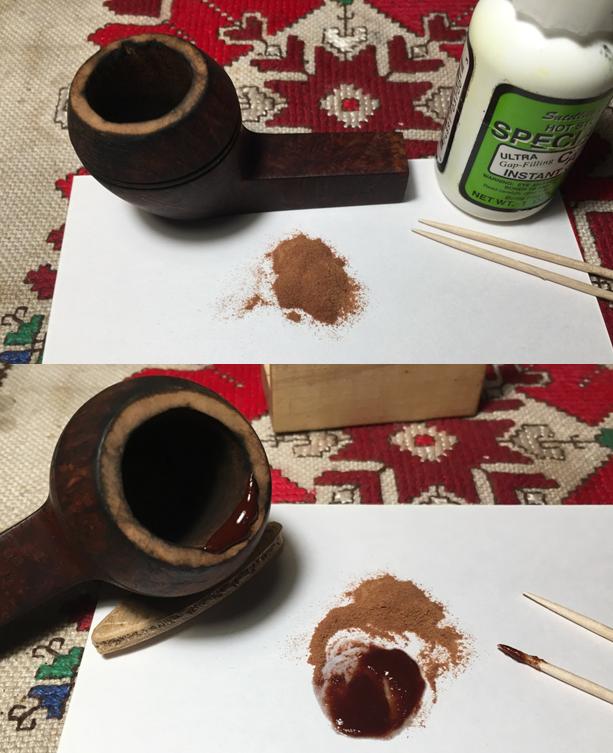
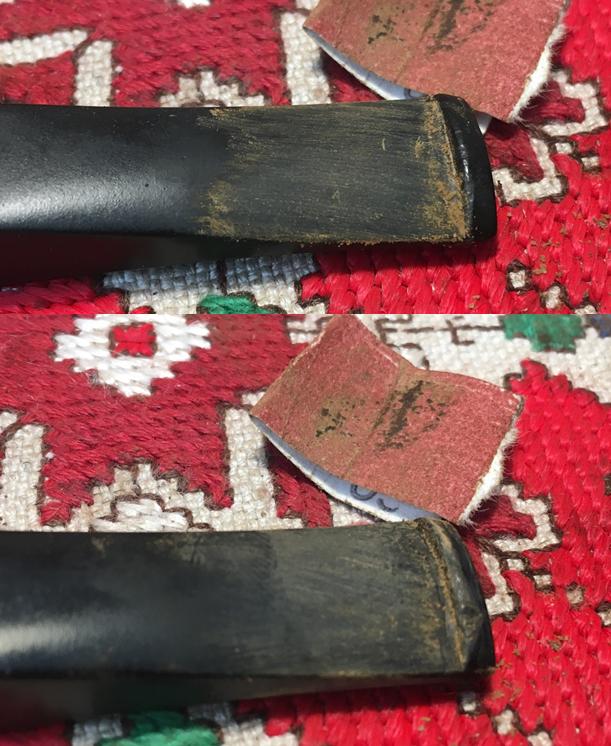
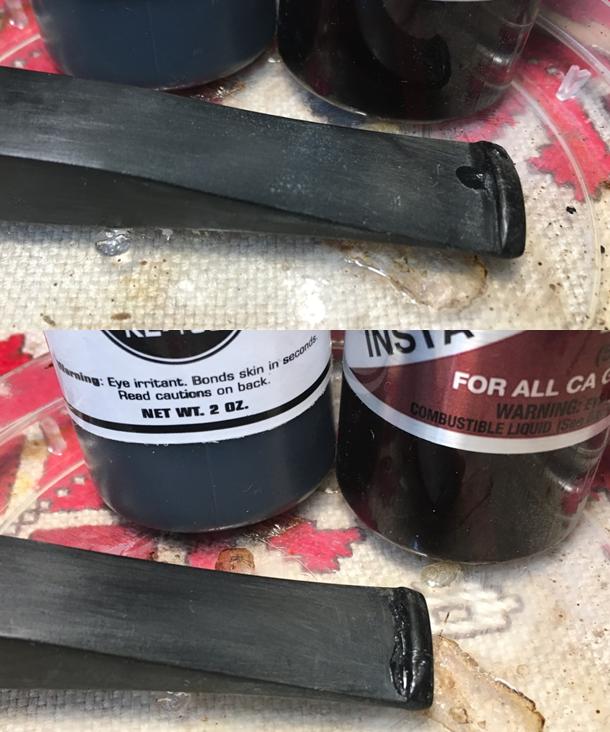
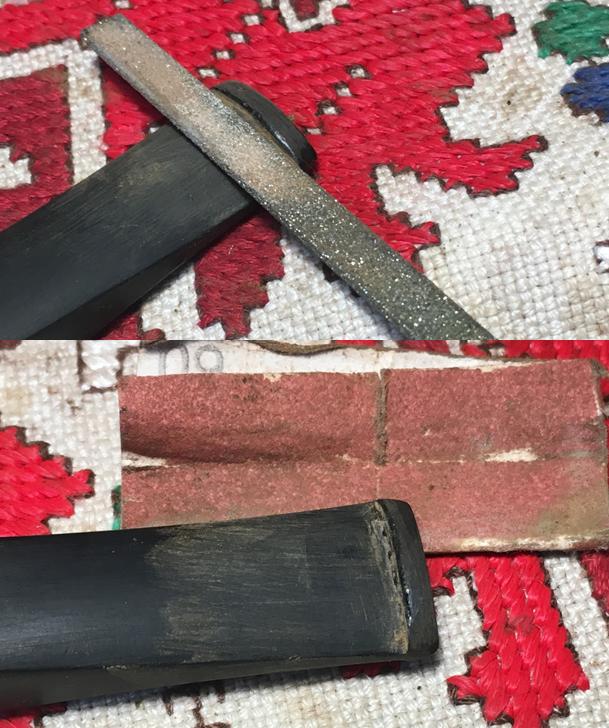
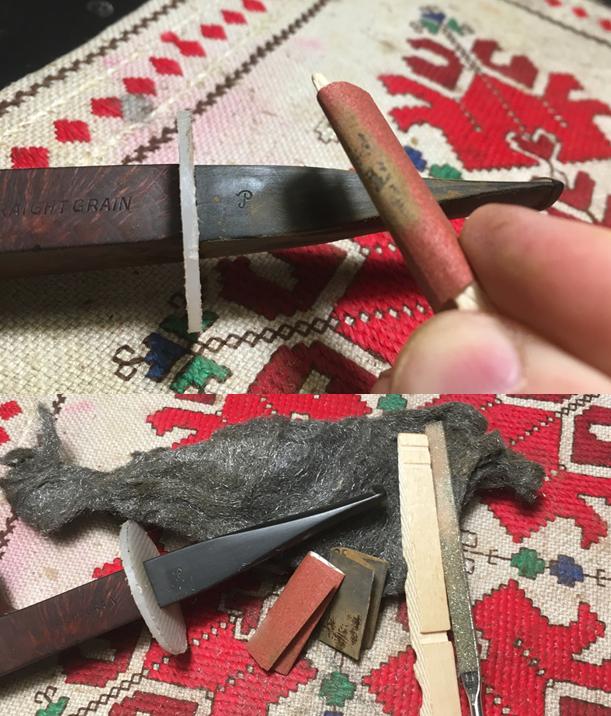
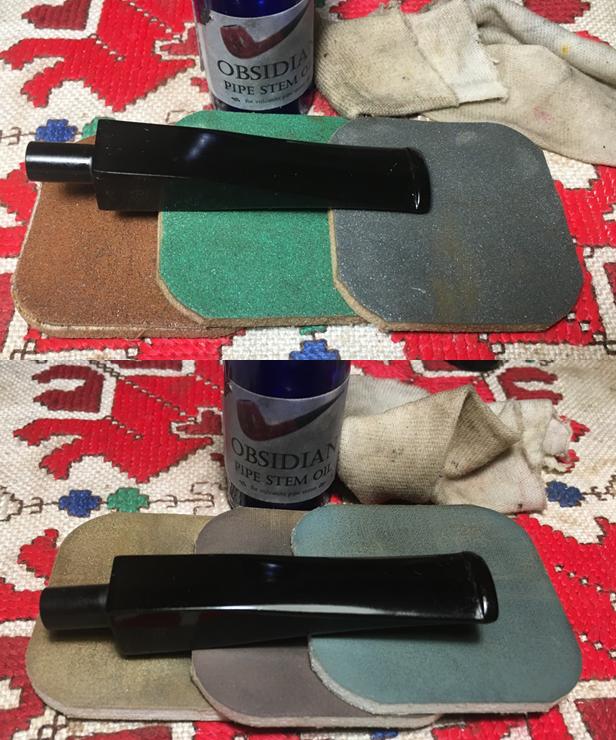
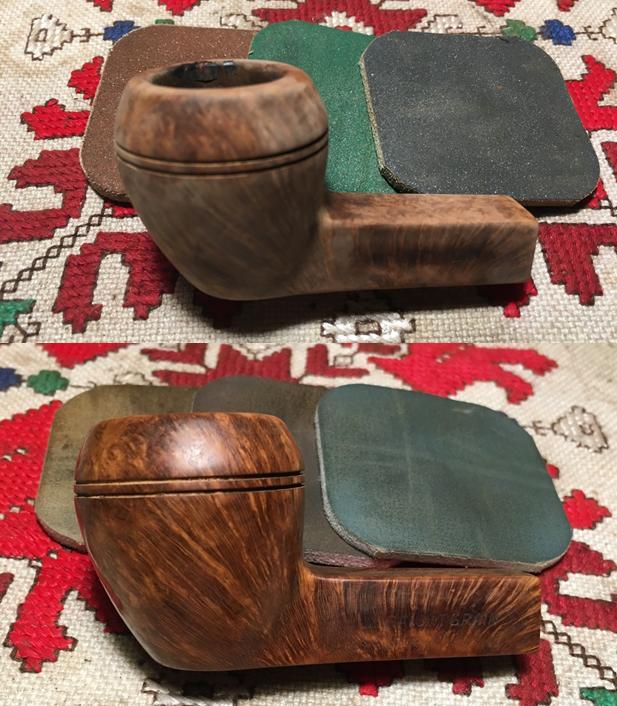
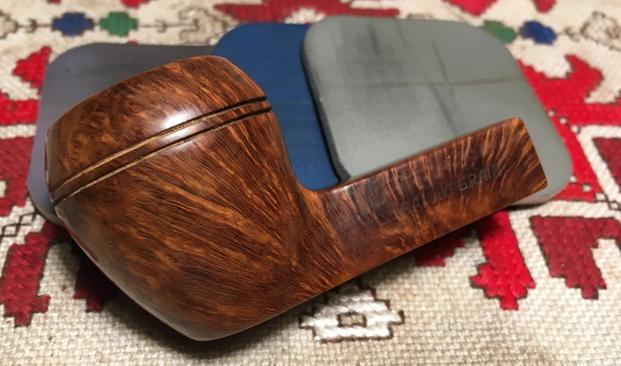
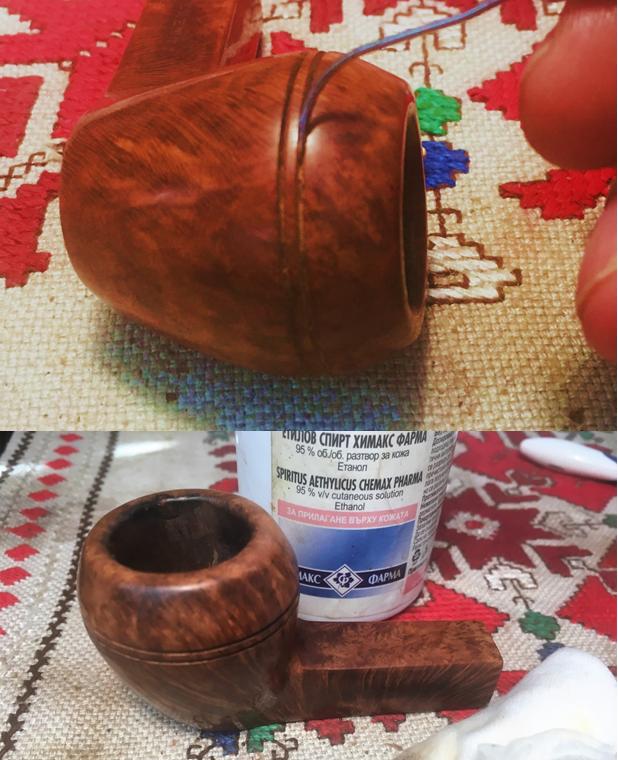
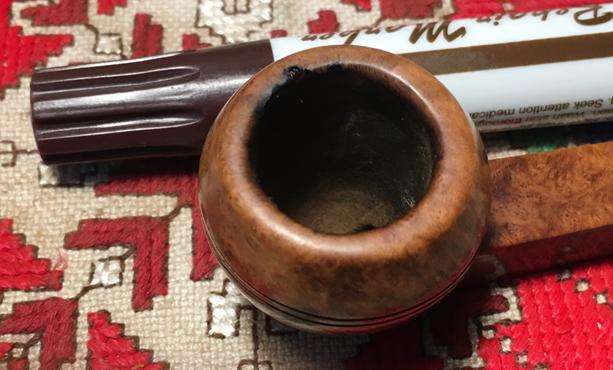
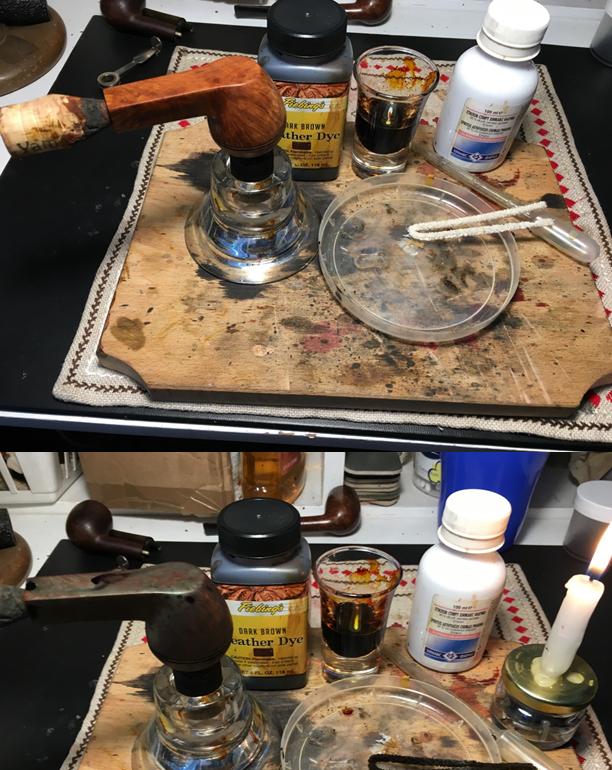
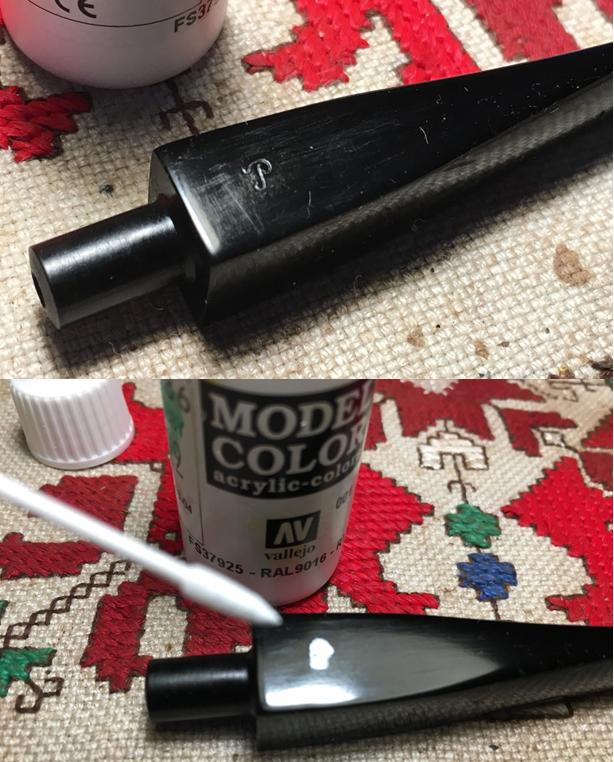
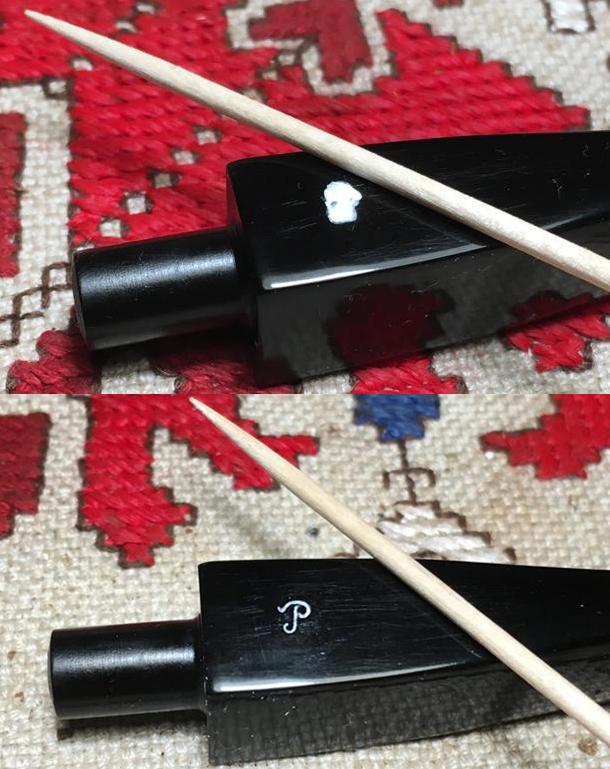
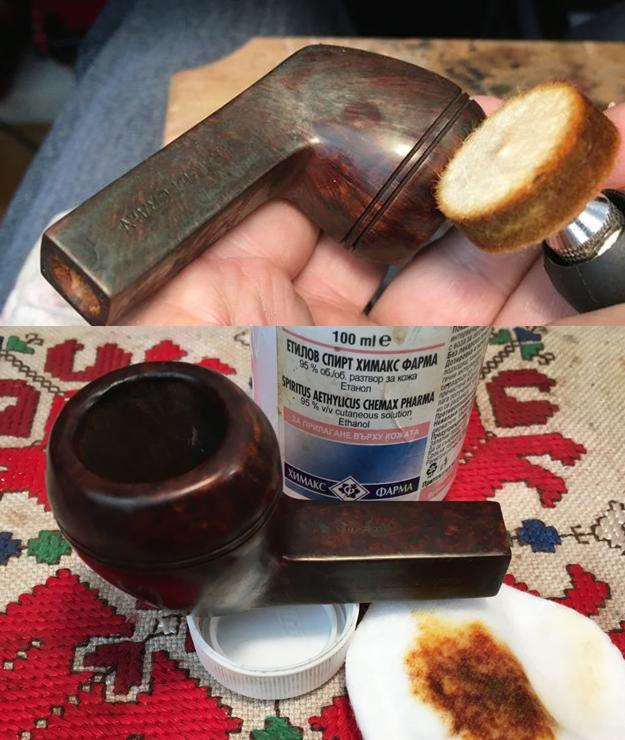
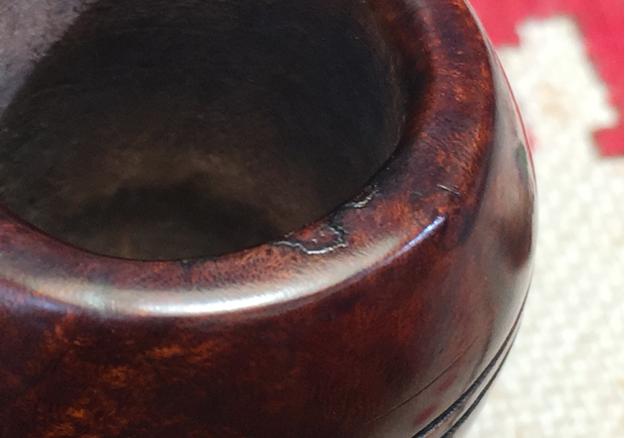
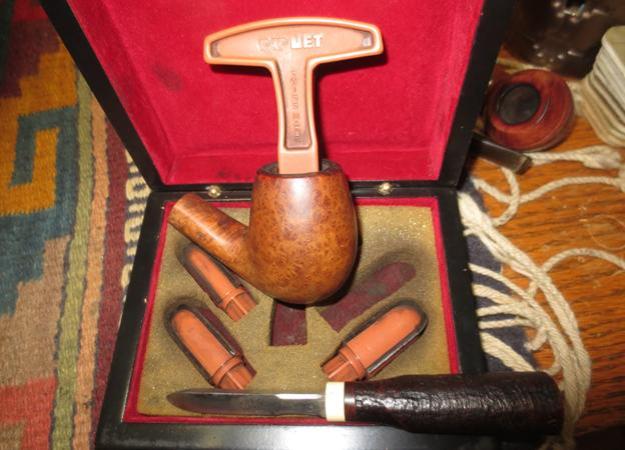
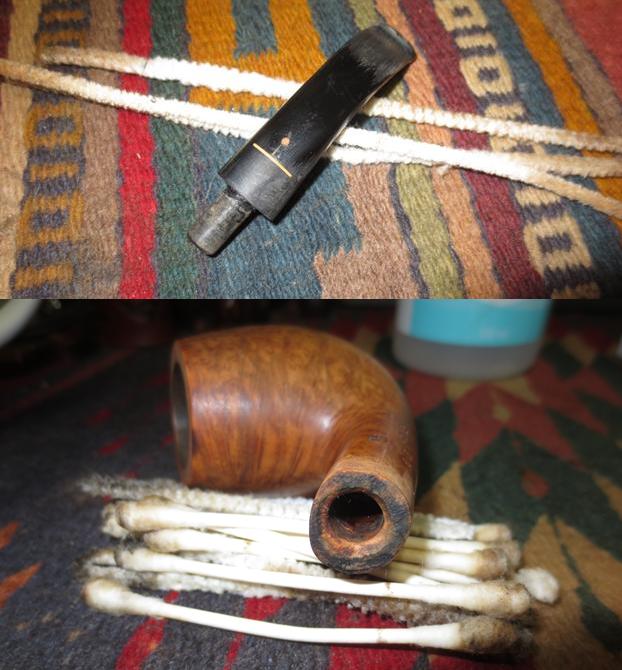
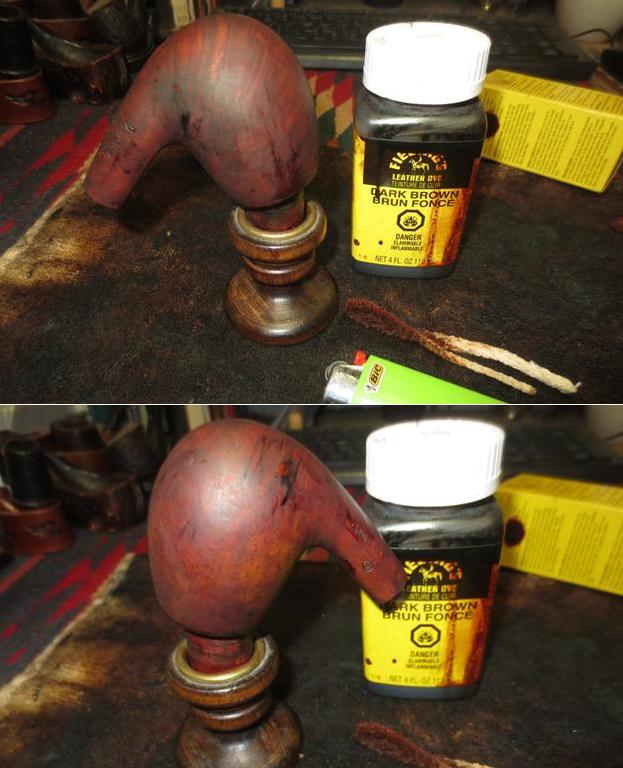
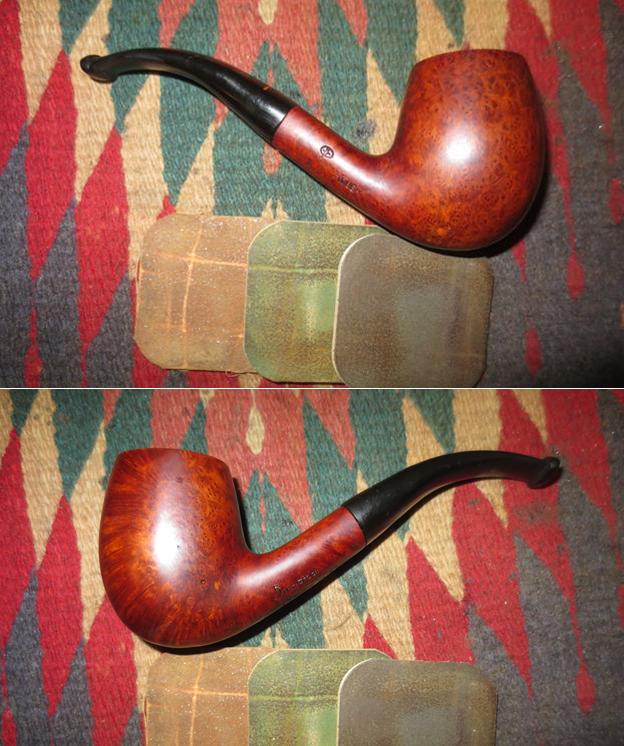
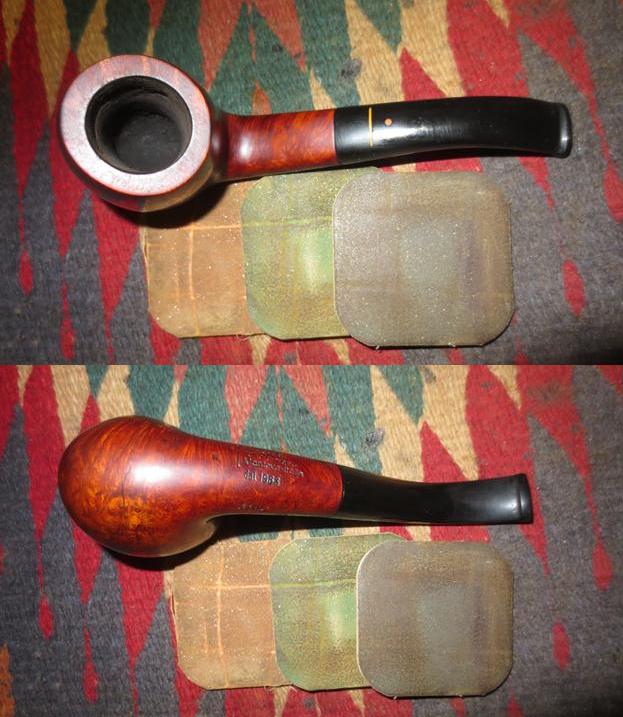
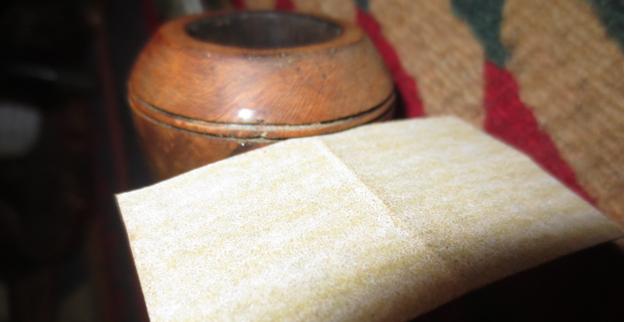
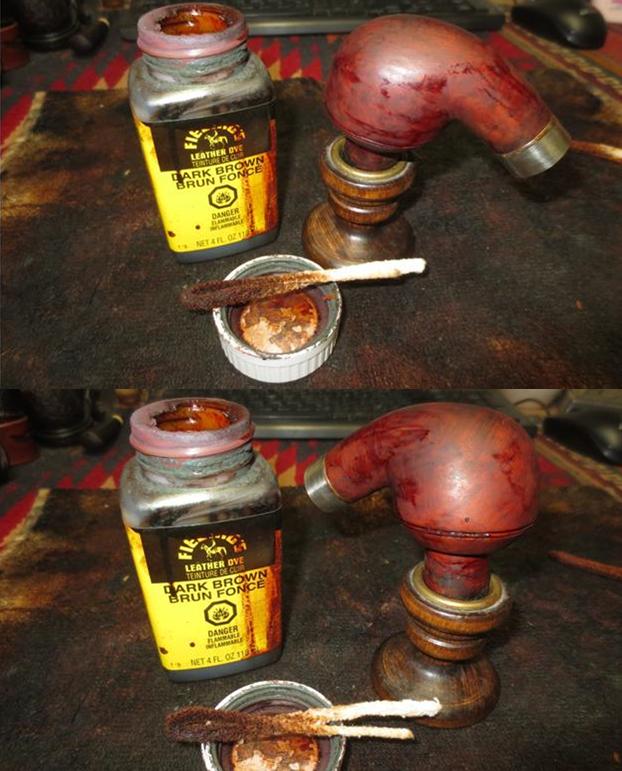
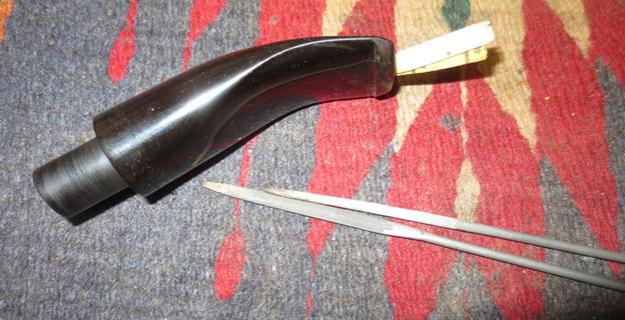
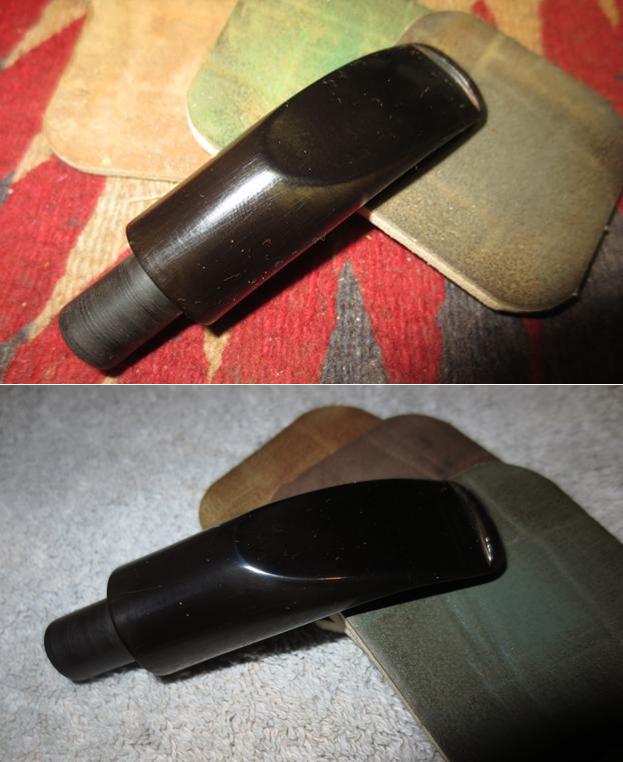
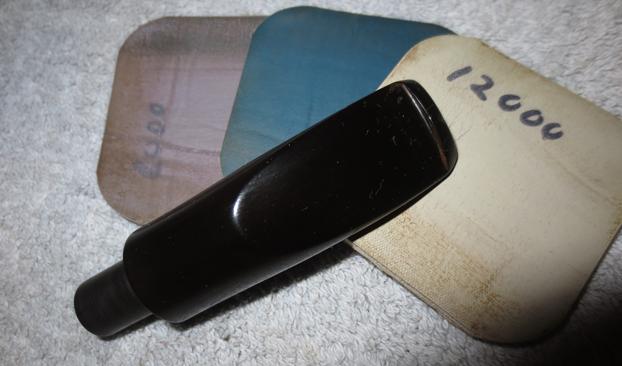
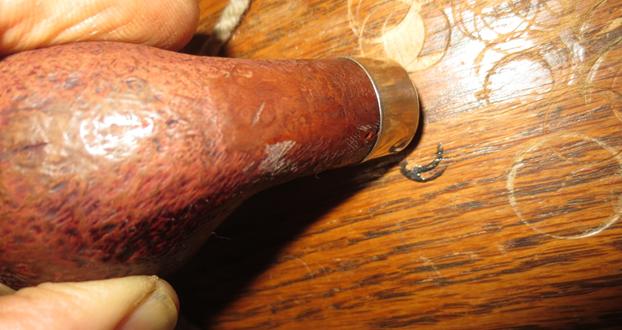
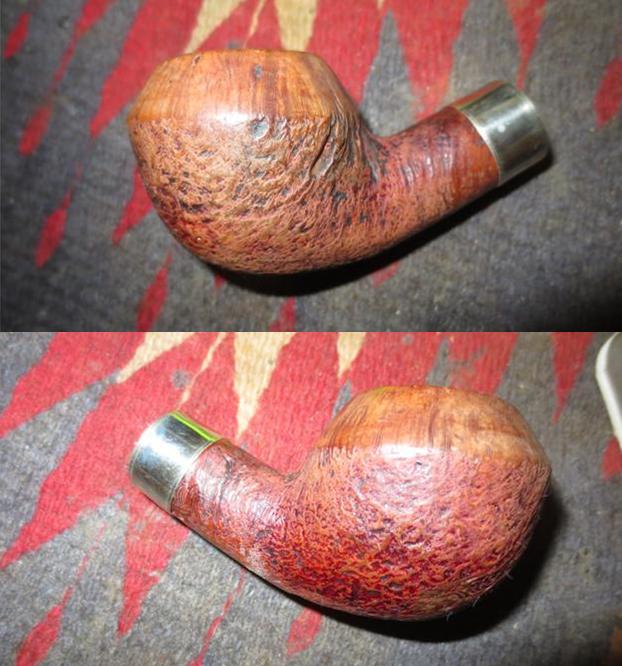
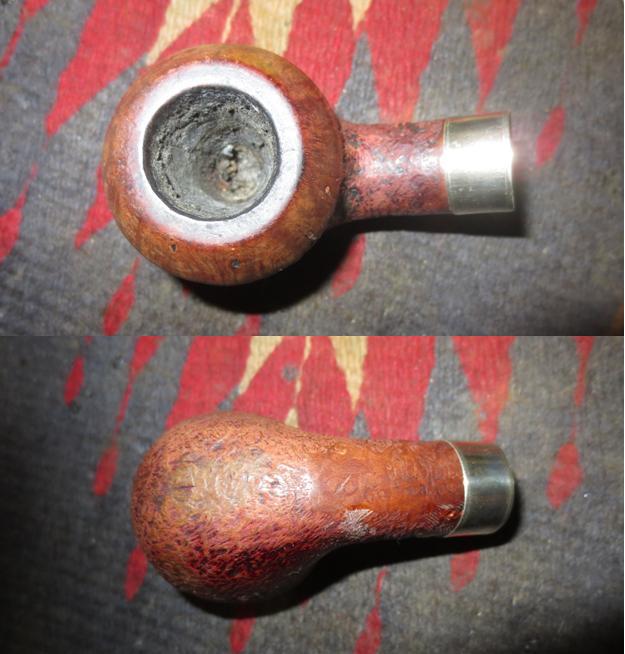
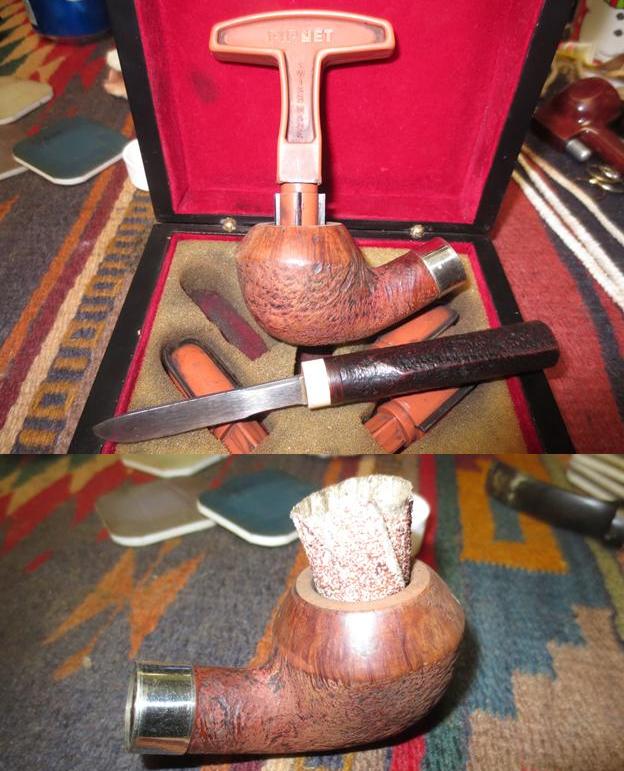
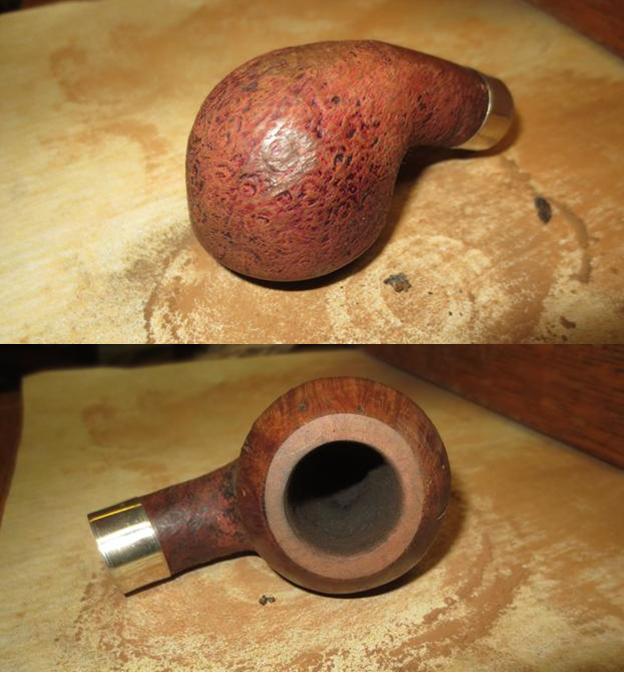
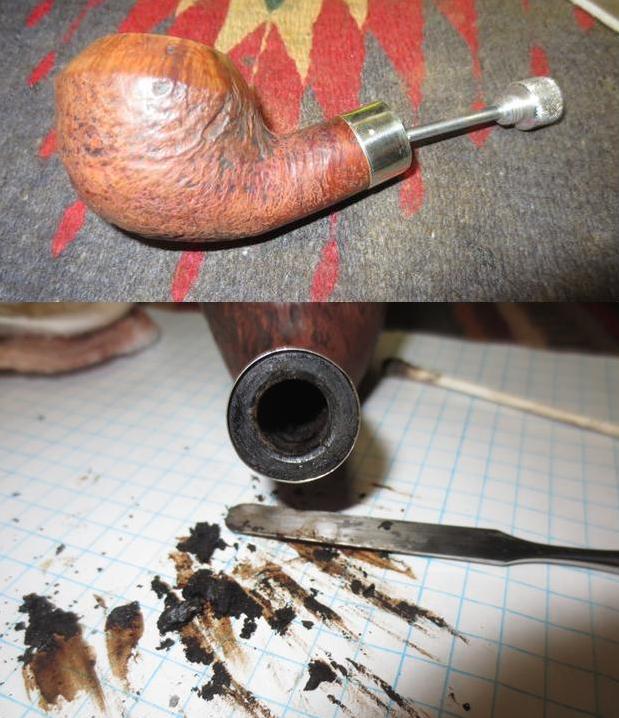
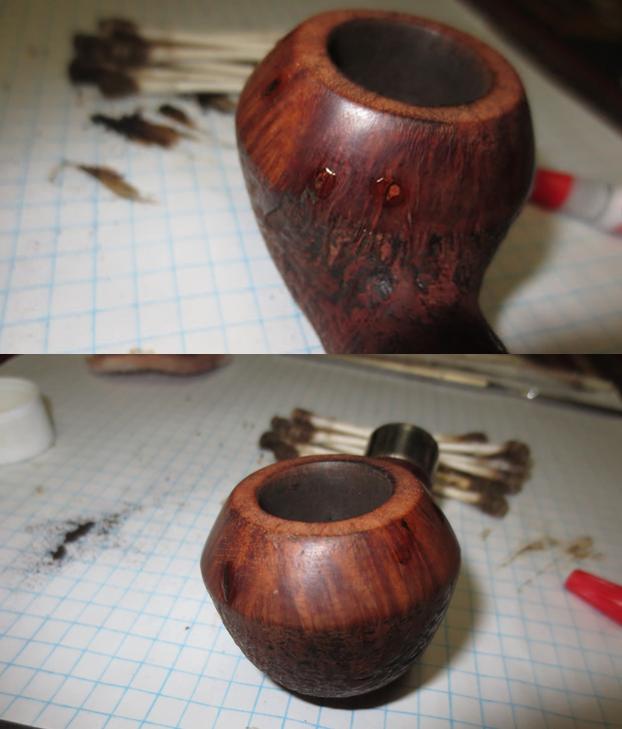
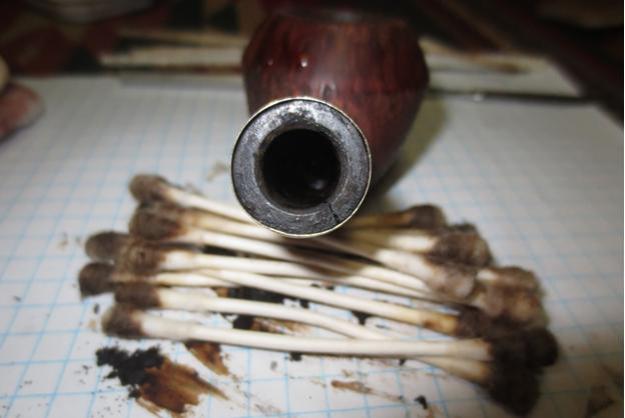
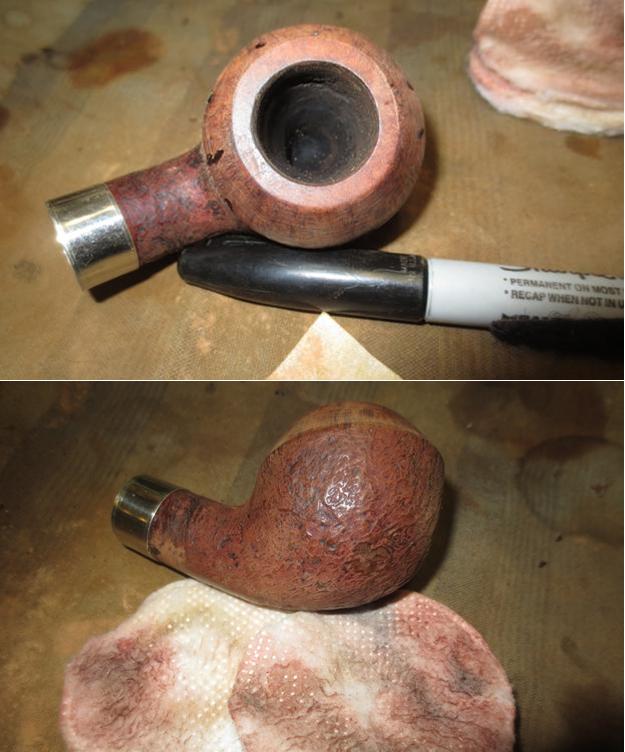
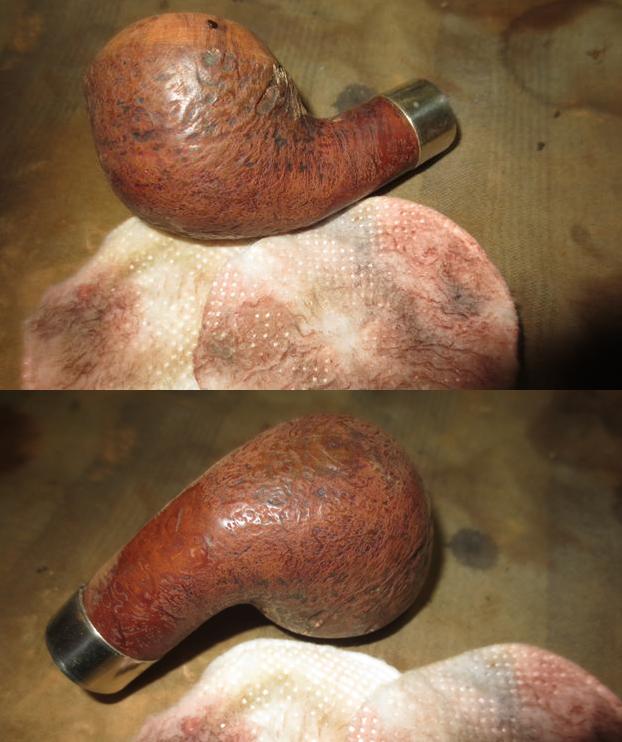
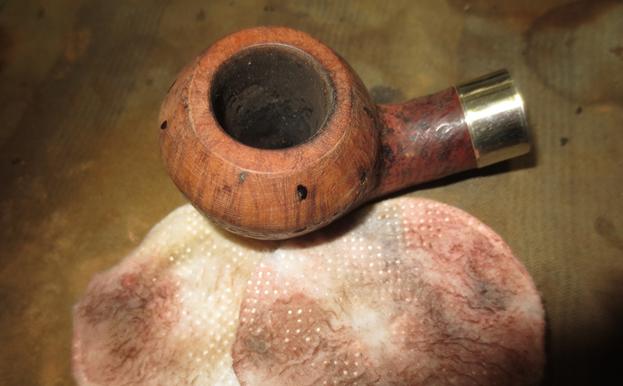
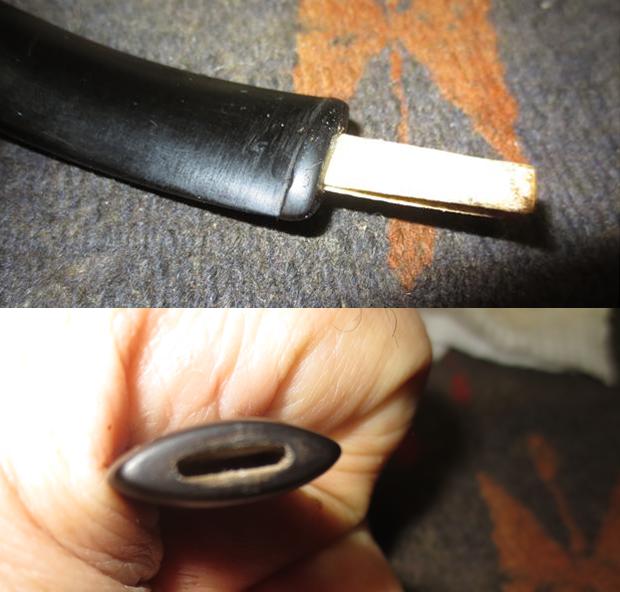
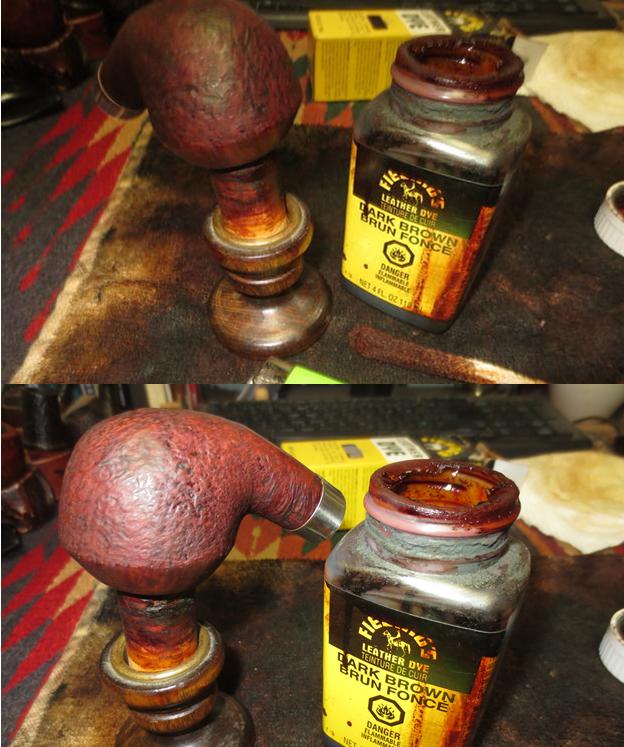
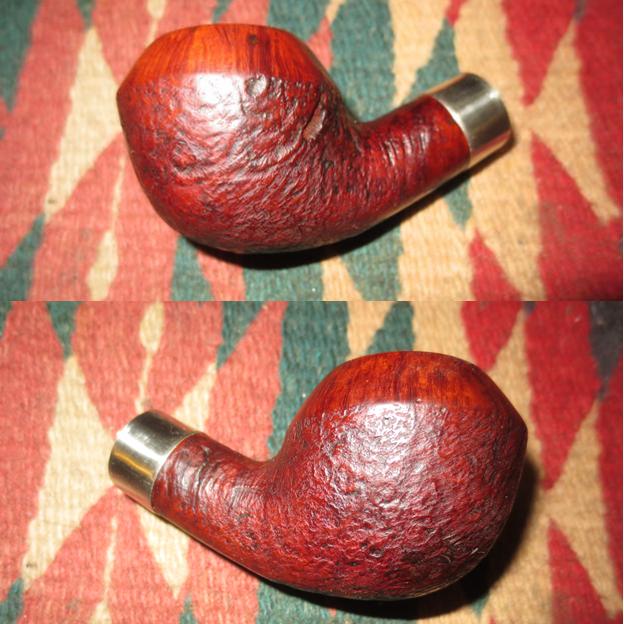
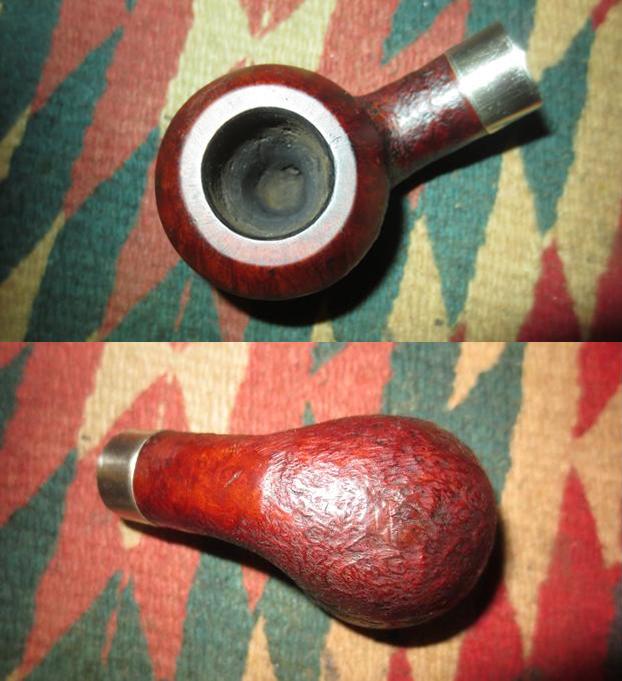
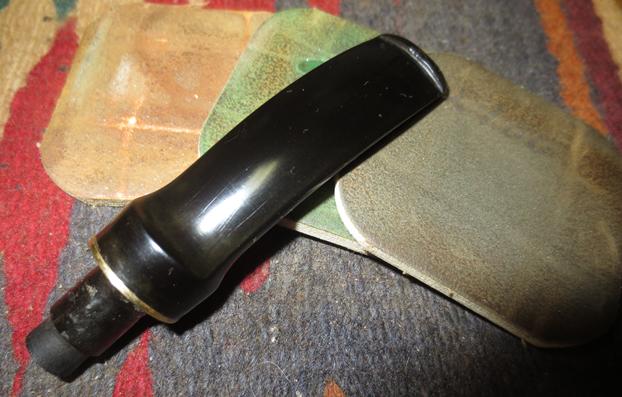
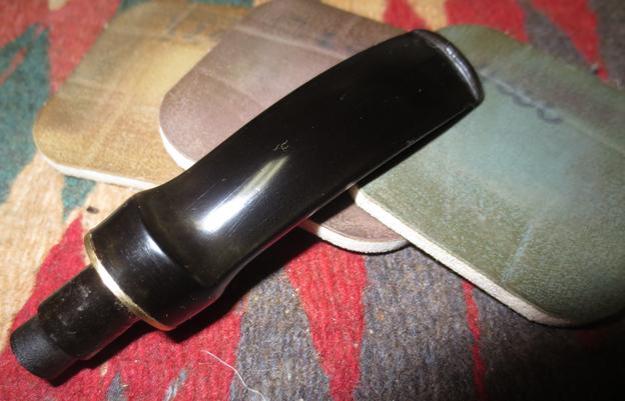
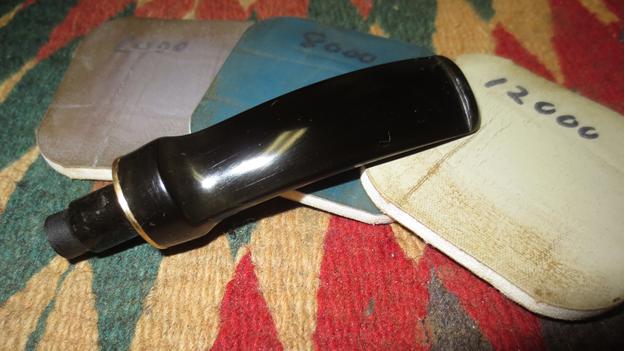
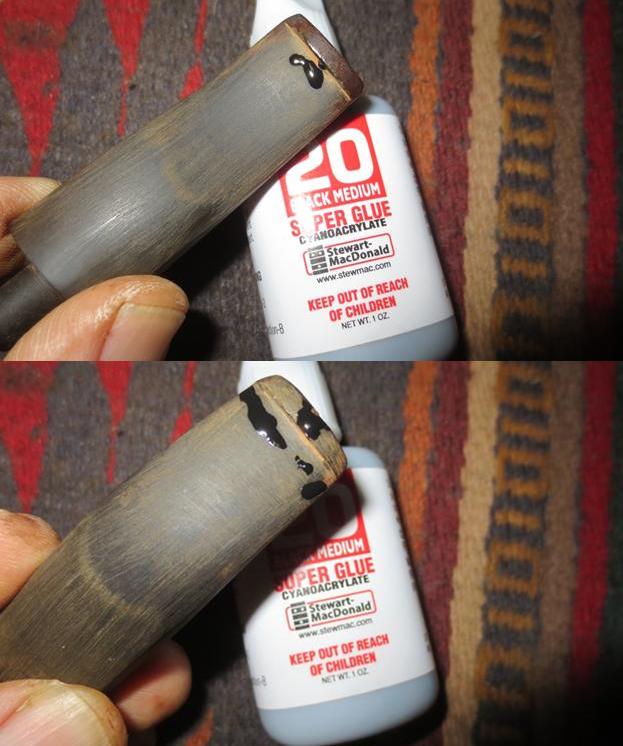
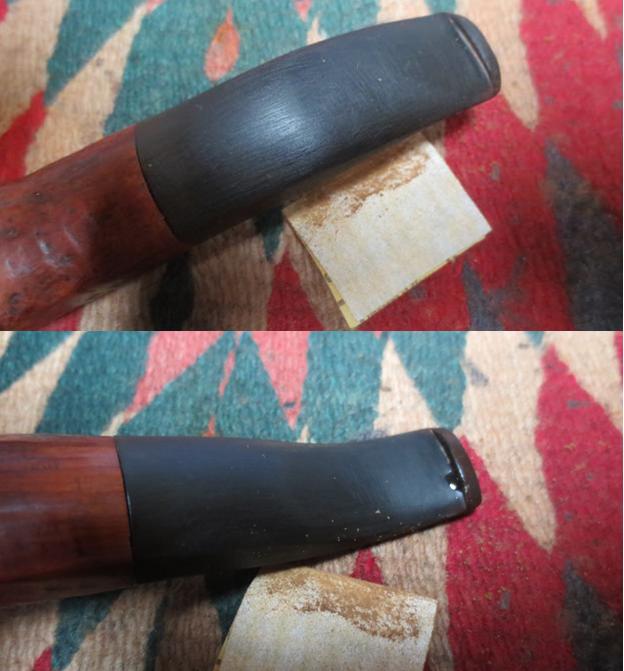
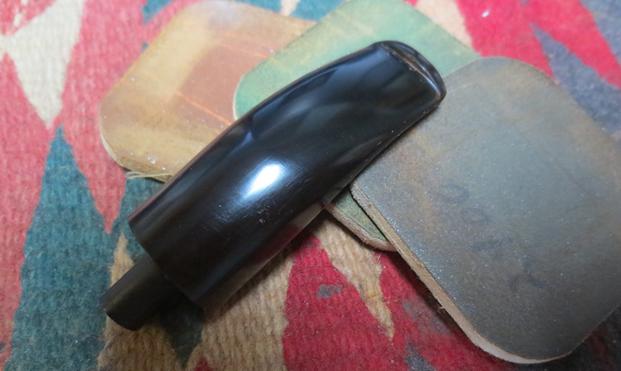
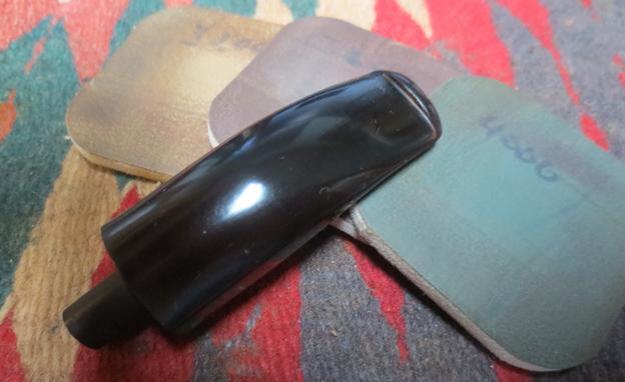
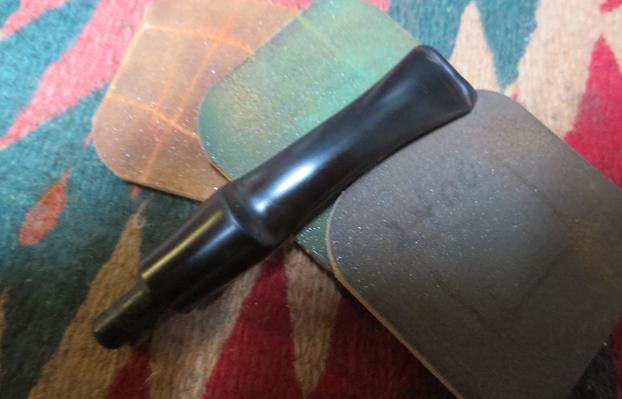
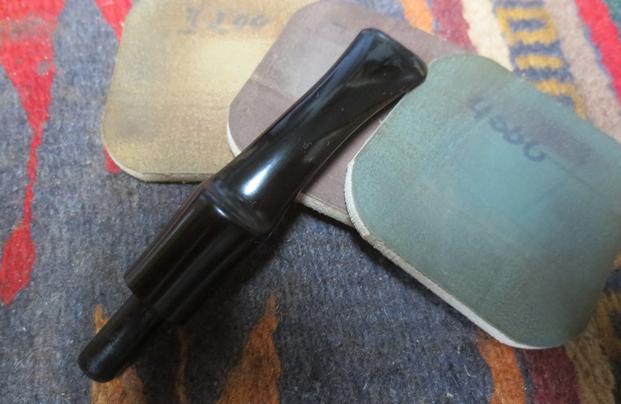
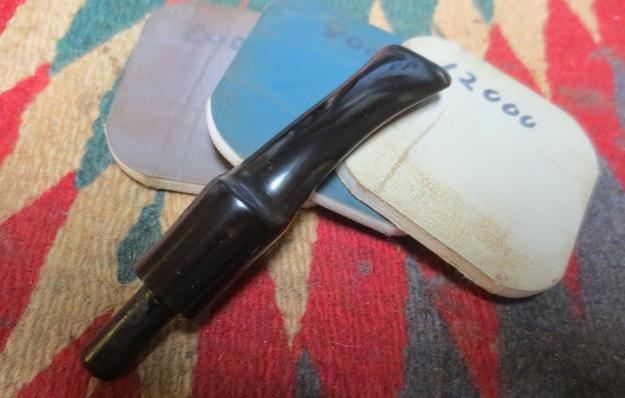
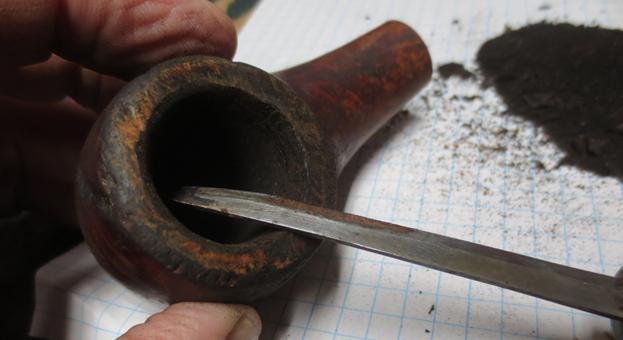
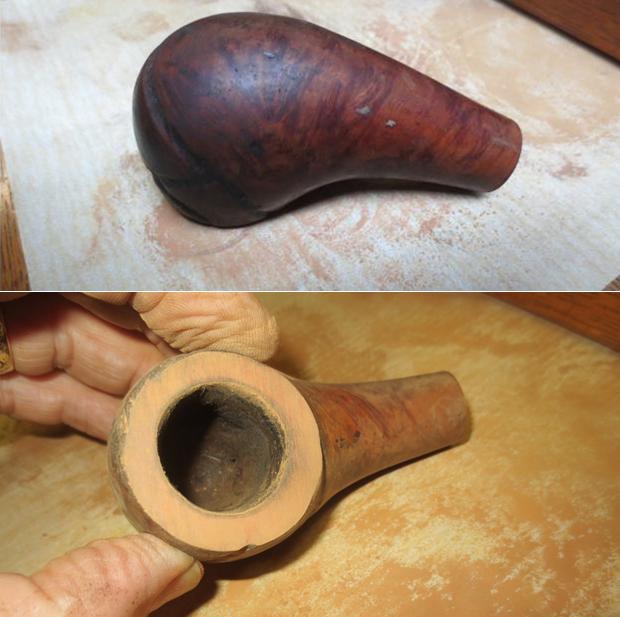
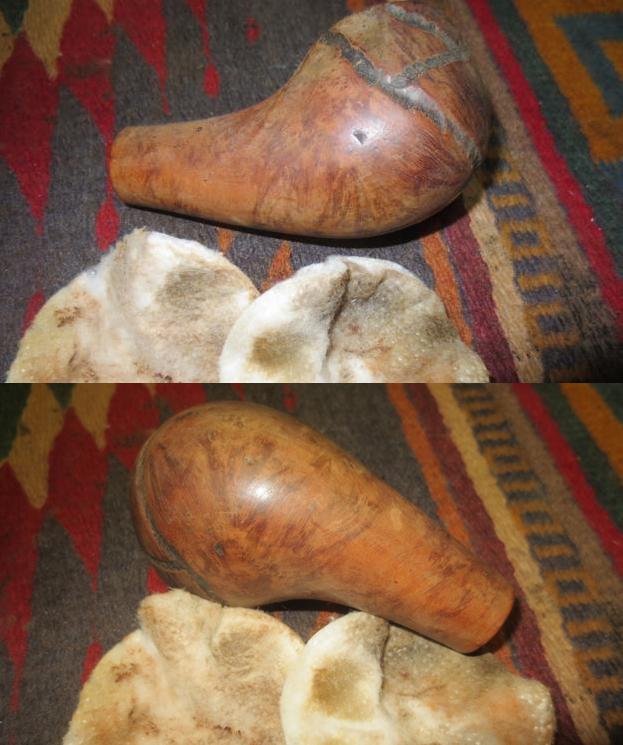
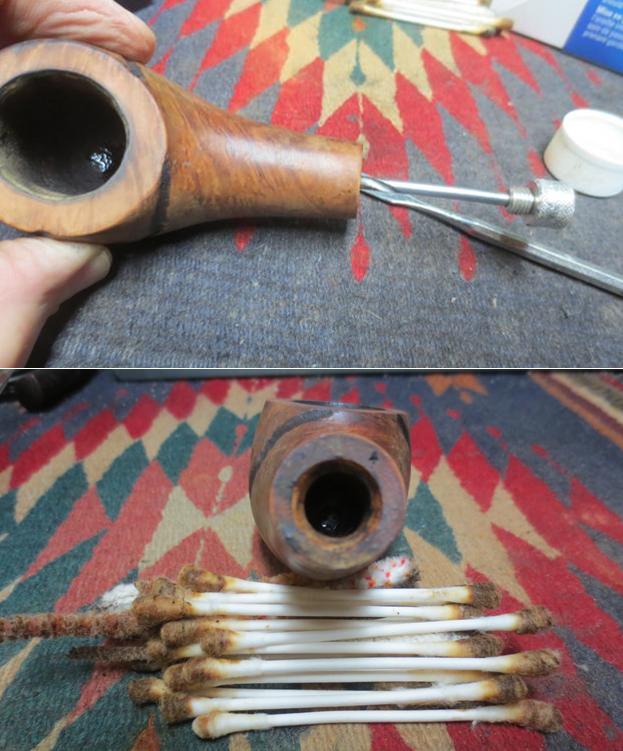
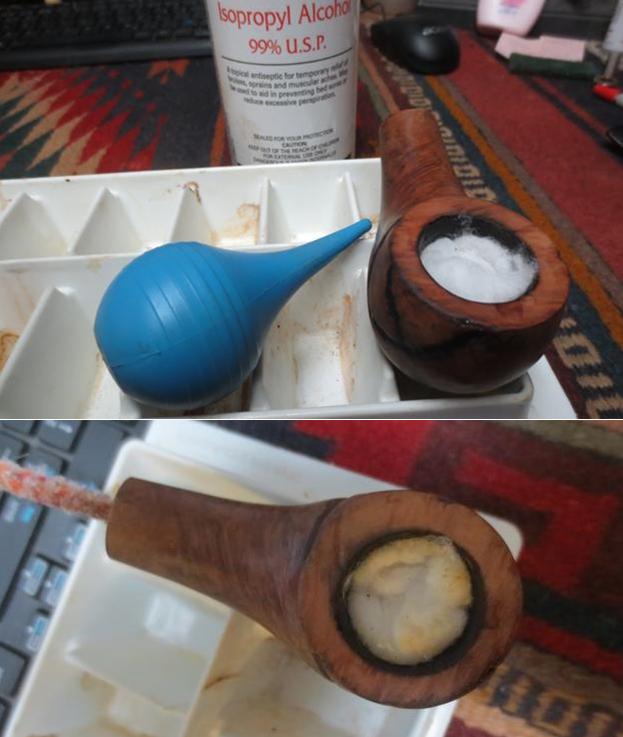
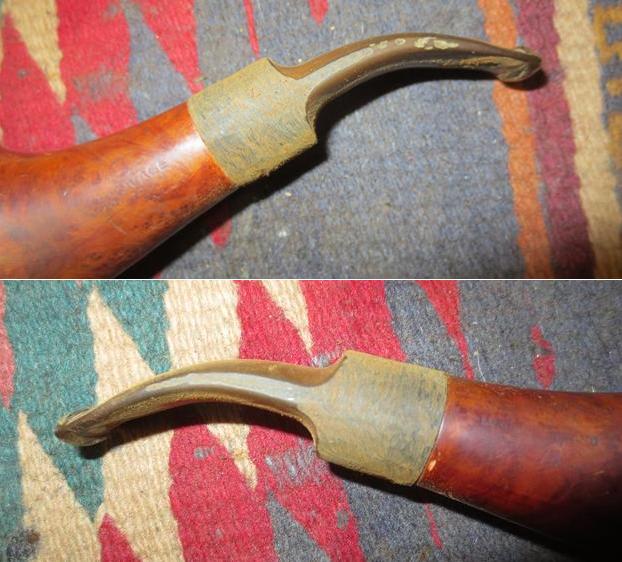
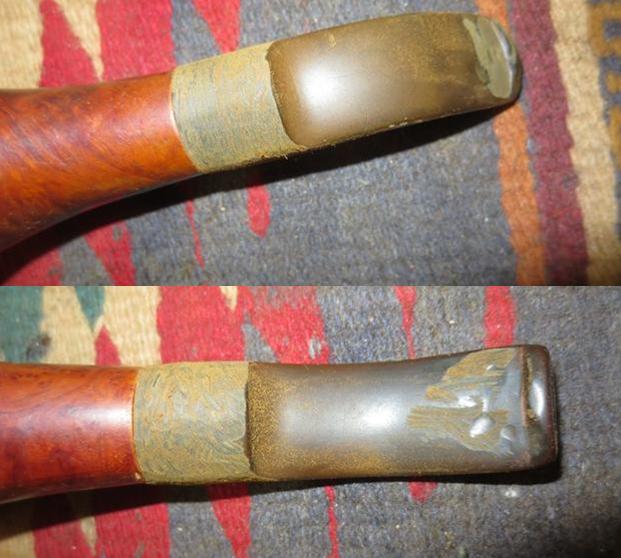
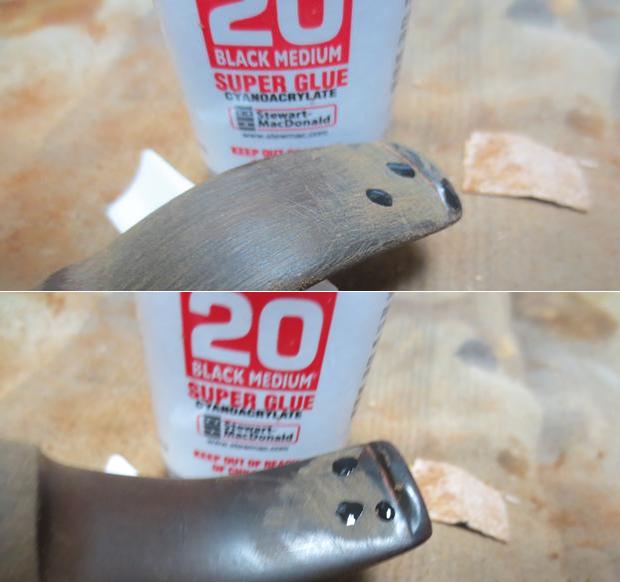
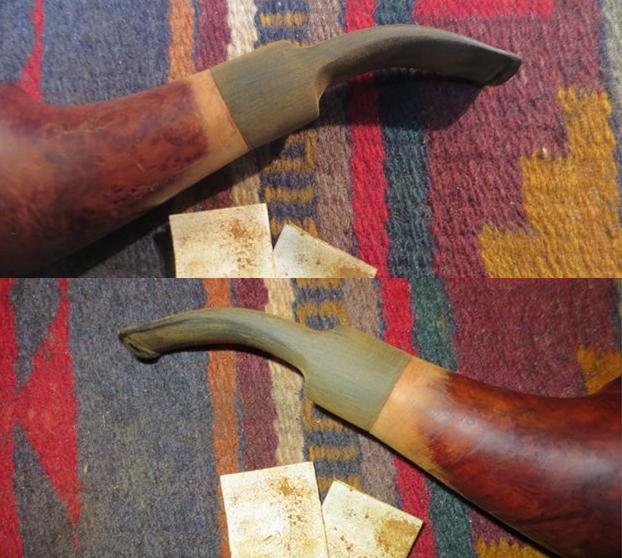
I work on the stummel first.  Taking the Pipnet Reaming Kit I use the two smallest of the four blades available to me and ream the chamber, removing the carbon cake build up to the briar. I then fine tune the ream by using the Savinelli pipe knife which enables me to remove residual cake in more difficult angles.  To clean the chamber further, I take a piece of 240 grit sanding paper and wrap it around a Sharpie Pen and sand the surface of the chamber then clean the left-over carbon dust with cotton pads wetted with isopropyl 95%.  The chamber walls appear to be in good condition.  The pictures show the progress. I now use undiluted Murphy’s Soap with cotton pads, a bristled tooth brush and a brass wired brush to clean the stummel surface, scrub the rim and clean the grime out of the twin grooves.  As I’m cleaning, it becomes evident that the left front of the upper dome is scorched from what appears to be the aftermath of using a lighter flame over the side of the rim to light the tobacco.  I do not use a lighter for this reason – it is difficult to angle the flame without bringing damage to the surface briar.  I use matches and bring the flame directly over the chamber and draw the flame directly to the tobacco.  I’ll need to send Jon a note about this!!!  After scrubbing with all available tools, I rinse the stummel with tap water without introducing water into the internals.  With the rim now clean, the extent of the damage is revealed.  The final picture in the set below, on the lower part of the picture shows this damage. Since my day is ending, I decide to hydrate the stummel surface with a light application of olive oil.  I also decide to use a kosher salt and alcohol soak to work on the internals overnight.  I twist a cotton ball and stuff it down the mortise to act as a wick to draw the oils and tars out.  I then fill the chamber with kosher salt and hold my palm over the top and give it a shake to displace the salt.  Using an eyedropper, I then fill the bowl with isopropyl 95% and leave the stummel in an egg crate for stability and turn off the lights.  The pictures show the progress.The next morning the salt, as expected had discolored somewhat and the cotton served as a wick drawing oils and gunk out of the stummel internals.  I follow with a barrage of pipe cleaners and cotton swabs to finish the cleaning job.  The pictures show the progress.I now face the most daunting part of the restoration of this L. J. Peretti Squared Shank Rhodesian.  I take more pictures for a closer look at the problems.  The burn and scorching damage on the rim and upper dome of the stummel are significant.  The rim at the 11:30 position is cratered severely and it appears that the rim burned and the charred part chipped off after becoming brittle.  From this area, down on the left side to the 7:00 position there is damage but not as severe.  My concern is whether there is healthy briar beneath what I’m seeing or has the wood charred more deeply?  If so, a lot of briar will need to be removed to repair the rim via topping, but this could impact the Rhodesian proportional balance between the upper and lower parts of the bowl – divided by the twin grooves.  This repair reminds me of a rim rebuild I did with a ‘Throw-Away Pipe’ that had little rim left.  With a desire to salvage as much of the rim as possible, I will very lightly top the pipe but only to gain the ‘high ground’ of the rim and then fill the craters and divots in the rim with a briar dust and superglue putty.  I want to ‘build-up’ the rim instead of losing it on the topping board and creating a squat-top, disproportionate Rhodesian.  The pictures show the damage and the challenges. It will be difficult to top the rim evenly with the soft spots created by the charred briar.  With the chopping block covered with 240 grit sanding paper, I very lightly begin to rotate the inverted stummel.  I take pictures to mark the gradual process.  When I arrive at the maximum topping progress, most of the rim has found it’s ‘high ground’ leaving the remainder of the damaged areas more visible.  This allows me to strategically apply patches on the rim.  I notice that there is additional carbon on the inside lip of the chamber so I take out the Peretti Pipe Knife once more and scrape the additional carbon exposed by the topping.  The pictures show the progress of the rim repair. The focus for the briar dust – superglue patch will be the 11:00 area (see above).  The remainder of the damage on the inner rim will be addressed by creating an inner rim bevel.  To prepare the area for the patch I clean it with a cotton swab dipped in isopropyl 95%.  Using Hot Stuff Special ‘T’ CA Instant Glue, I mix it with the briar dust until it reaches a viscosity like molasses.  Using a toothpick as a trowel, I apply the putty excessively over the area with the plan of sanding it down.  I put the stummel aside to allow the patch to cure.  I’ll give it a full 12 hours. The next day, the patch has cured well.  I begin sanding down the excess briar dust patch by using a half-rounded needle file to contour the inner chamber part of the patch.  My goal is to reestablish a round rim by blending the patch with the curvature of the inner rim.  After this I smooth and blend the area further with 240 grit paper.  When satisfied, I turn to the top of the rim using a flat needle file to bring the bump of the patch gently down to the briar rim surface.  The surrounding wood is softer and I avoid collateral filing as much as possible.  I follow to further smooth and blend the whole patch with 240 grit paper.  The pictures show the shaping progress. With the primary patch shaping complete, I want to introduce a bevel to the inner rim lip to remove damage as well as blend the entire rim contour – seeking a round rim.  I believe a bevel always ‘up-classes’ a pipe, too!  I use a coarser 120 grit paper to cut the bevel –  careful to remember the patch area is harder and it is easy to dig in to the surrounding softer briar.  After the 120 grit paper, I smooth and blend further with 240 paper. I complete the rim repair by returning to the topping board with a light topping first with 240 paper followed by 600 grit paper.  This ties things together.  The first picture shows the completed patch shaping to mark the progress of the bevel.  I think things are looking good at this point with the rim repair. Unfortunately, upon closer scrutiny, I discover that my topping inadvertently leaned toward the front of the stummel. This is very evident when comparing the twin grooves to the rim pitch (first picture below).  We do not have a parallel alignment which should be the case.  When I looked back at the pictures above showing the incremental topping process, this is confirmed when the front stummel part of the rim was sanding and the shank side less so.  The result I see is the Rhodesian’s dome lop-sided and that just won’t do.  Even though I’ll give up briar real estate, I take the topping board and hang the stummel over the edge of the 240 paper.  I work only the shank-side of the rim which needs to be lowered and leveled with the front side.  Gradually, I find greater alignment with rim and grooves, though there is still a bit of pitch but not as pronounced. It will work.  I reinstate the bevel and I’m satisfied with the progress.  The pictures show the progress. I put the stummel aside and turn to the stem.  I use 240 grit paper to smooth out the tooth chatter on the upper and lower bit and sand the upper and lower button lips.  By removing the superficial indentations in the vulcanite, I am then able to identify what needs to be filled.  After wiping clean the area, I use Starbond Black Medium KE-150 CA glue to drop fill tooth dents in both the upper and lower button lip as well as the upper bit area.  After application of glue, I spray an accelerator on the cosmetic fills.  I do not use accelerator when the strength of the glue is the issue as the use of an accelerator tends to weaken bonds – from my reading.  I follow with a flat needle file to freshen the button lines and then sanding with 240 grit paper to smooth out the file marks and fills and to blend. I then move to sanding the whole stem.  With some great input from Al Jones in a recent restoration regarding safe-guarding the crisp lines and edges of stems, I mount the stem to the stummel with a plastic disk I fabricated between the two.  This keeps the sanding from creating shoulders over the edge of the vulcanite.  I also wrap the 240, then 600 grit paper around a clothespin half to create a flat sanding surface to guard the sharp edges of the squared shank square and not rounding them.  After completing the sanding, careful to guard the Peretti ‘P’ stem stamp, I buff the stem with 0000 steel wool.  The pictures show the progress.Turning to the internals of the stem, I use pipe cleaners dipped in isopropyl 95% to clean the airway.  I notice that the pipe cleaners have difficulty passing through the slot so I widen it a bit using a rounded needle file against the upper and lower slot opening.  That did the trick.  Pipe cleaners move freely and now, cleanly.  Pictures show the progress.With the stem repairs completed and the internals cleaned, I’m ready to commence the micromesh pad cycle on the LJ Peretti’s squared shank.  Using pads 1500 to 2400 I wet sand the stem.  I follow by dry sanding with pads 3200 to 4000 and then 6000 to 12000.  With each set of 3 pads I apply Obsidian Oil to the stem which revitalizes the vulcanite.  The pictures show the amazing vulcanite ‘pop’ emerging. I put the stem aside to dry.With the stummel showing scorching damage on the upper dome extending downwardly over the grooves, I take another picture for a closer look.  I use a medium grade sanding sponge to address the damaged area.  I need to remove the charcoaled wood and get down to healthy briar beneath the surface.  To aim for uniformity throughout the stummel, I use the sanding sponge on the entire surface, careful to guard the nomenclature on both sides of the shank.  I follow the medium grade sponge with the light grade sanding sponge to finish addressing the charred wood and minor cuts and pits on the stummel surface.  It looks good.  The shank stamping, STRAIGHTGRAIN, is starting to show itself as the grain shows through the once scorched dome area.Taking micromesh pads, I now wet sand the stummel using pads 1500 to 2400.  Following this, I dry sand using pads 3200 to 4000 then 6000 to 12000.  Wow.  I cannot believe the grain making an appearance on this L. J. Peretti Rhodesian.  The pictures show what I watch emerge through each micromesh pad cycle. To get a big picture look at the Peretti, I reunite the stummel and stem.  As with my last Peretti restored, I like the squared shank’s flow from stummel as it tapers out through the stem.  This Rhodesian’s stem tapers whereas my other Peretti Billiard has a squared saddle stem.  Both, very nice variations of the same concept – a classy shank style. Because of the beauty of the grain I’m seeing, I’m tempted to stop at this point, and finish up with carnauba – I like the natural briar that much.  The only issue is that I would like to apply a darker brown shade of dye to better blend the patch and repair of the rim which stands out as is.  The pictures show the story.In preparation for the staining phase, I use a sharp dental probe and run it through the grooves to dislodge any briar dust from the sanding process.  There is a good bit of compressed residue coming loose.  I follow by wiping down the stummel with a cotton pad wetted with isopropyl 95% to clean the surface.  On the stummel heel, I detect one lightened fill.  I darken it with a stain stick to encourage blending.  I also touch up the patch fill on the rim to help blending and masking the patch after dye is applied.  Pictures show the preparation steps. To stain, I use Fiebing’s Dark Brown Leather Dye mixed with isopropyl 95% at 50/50.  I use a large dropper to do the mixing in a shot glass.  With the mixture ready, I heat the stummel using the air gun expanding the briar making a better receptor for the dye.  When heated, I use a doubled-over pipe cleaner to apply the dye to the stummel surface.  I apply the dye liberally seeking to achieve 100% coverage.  When completed, I fire the wet dye which immediately ignites the alcohol in the dye, setting the hue in the grain.  I repeat the above application of dye and flaming after a few minutes.  I put the stummel aside to rest for several hours before removing the fired dye crust.  The pictures show the set-up and the progress.  With the stummel resting, I restore the Peretti’s classic stem ‘P’ with white acrylic paint.  Restoring the stem stamping for me is special, along with guarding the nomenclature – and is why I went through a stem-splice with my first Peretti restore – to save the surviving saddle stem piece with the old, warn ‘P’ stamp.   I apply white acrylic paint to the ‘P’ in a large gob over the area to allow the paint to fully saturate the ‘P’ imprint.  I allow it to dry fully.  Later, when dried (it doesn’t take long), I use the edge of a toothpick and gently scrape the area removing the excess but leaving the paint in the stamp imprint.  Using the side of the toothpick has worked for me as it is a harder surface, yet soft as it’s wood.  The flat area of the toothpick passes over the stamp and does not disturb the paint.  I’m pleased with the results.The next morning, the stummel is waiting to be unwrapped of the flamed crust.  Using the Dremel high speed rotary tool, my tool of choice given the tight quarters of my work table on the 10th floor of a former Communist block apartment building, I mount a felt buffing wheel set at the slowest speed, and use Tripoli compound to apply the gentle abrasion to begin the final buffing stages.  I first purge the wheel of old compound running it against the metal adjustment wrench, then with new compound on the wheel, I apply it to the surface.  I do not use much downward pressure but allow the speed of the wheel’s RPMs and the compound to do the work.  I methodically move over the stummel surface in areas with the sheen of the overhead lamp providing the ‘headlights’ letting me know to spread the compound or apply more to the wheel.  I take a picture to show the felt wheel application of Tripoli compound – I had to stage it because I don’t have enough hands to take a picture and hold stummel and Dremel!  After completing the Tripoli cycle, I lightly wiped the stummel with a cotton pad wetted with isopropyl 95%, not wanting to lighten the hue but to blend certain areas on the heel and shank.  I avoid wiping down the bowl area – it looks good.  Dark enough to mask repairs but on the lighter side to show the striking straight grain definitions.Following the Tripoli compound, I mount a cotton cloth buffing wheel dedicated to Blue Diamond compound.  With the Dremel remaining at its slowest speed I apply the lesser abrasion of Blue Diamond compound to buff the surface preparing it for the carnauba wax application.  I reunite the squared tapered stem to the stummel and apply Blue Diamond compound to both.  I know this borders on eccentricity, but as I was finishing the Blue Diamond cycle, I notice that the rim patch done earlier was showing a ridge around the patch, and not flush with the rim.  A bit late in the game to notice this, but it won’t do.  Very strategically, I roll a piece of 600 sanding paper and address the ridging.  I follow with the full set of 12 micromesh pads folded and strategically addressing the area.  Finally, I apply a dark brown stain stick and lightly wipe a cotton pad wetted with isopropyl 95% to blend the area.  Finally, I run the Blue Diamond wheel over the rim and I’m back to where I started.  The patch is visible, but now without the ridges that draw attention to the repair.  Now, the rim is smooth to the touch.  Much better.  Before and after pictures follow this small detour! With detours behind, I hand buff the stem and stummel with a flannel cloth to remove compound dust from the surface before applying carnauba wax.  I then mount a cotton cloth buffing wheel on the Dremel and increase the speed of the RPMs to 2, a bit faster than the slowest speed, and I apply carnauba wax to both the stummel surface as well as to the mounted stem.  After 3 cycles of applying carnauba wax, I hand buff the pipe with a micromesh cloth to bring out the depth of the grain further.

I appreciate Jon giving me this L. J. Perretti while we were in Oslo.  I’m happy to recommission this very attractive Square Shanked Rhodesian – the grain is exceptional and I like the square shank style of both Peretti’s I’ve restored.  The squared shank, not a common Rhodesian configuration, allows this Rhodesian to function like a ‘table sitter’ as well while one plays their card or board games.  If you are interested in adopting the L. J. Peretti Square Shanked Rhodesian, take a look at my blogsite, The Pipe Steward.  As always, all the profits of the sales from my restorations go to help the Daughters of Bulgaria.  Thanks for joining me!


Resurrection for a Hand Made Pipa Croci Bent that was dropped


Blog by Steve Laug

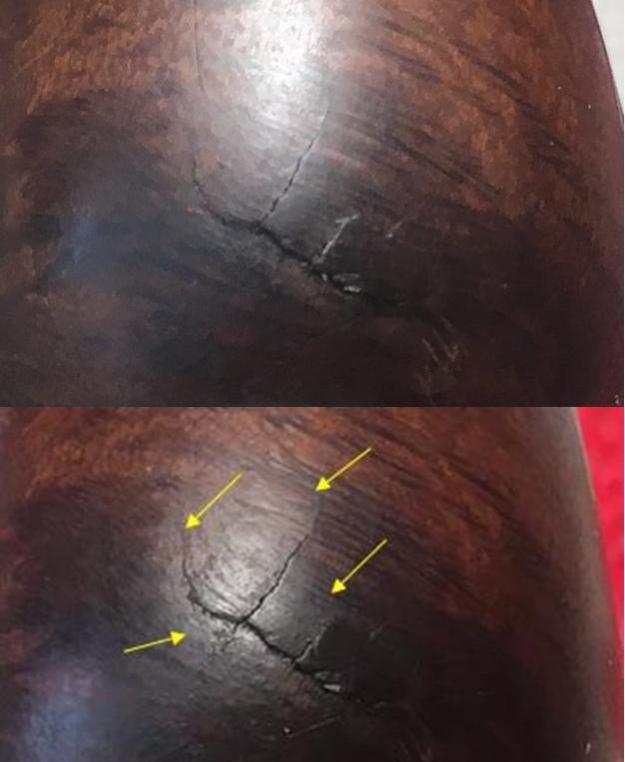
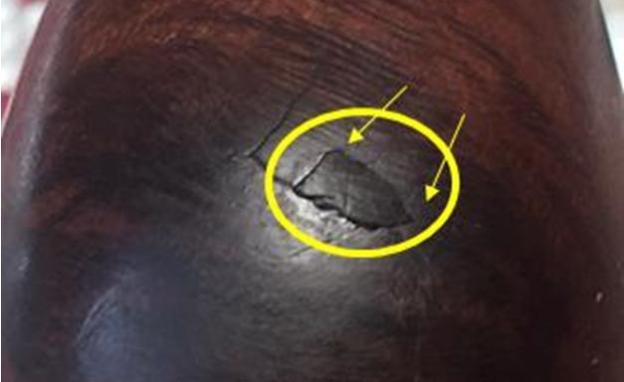
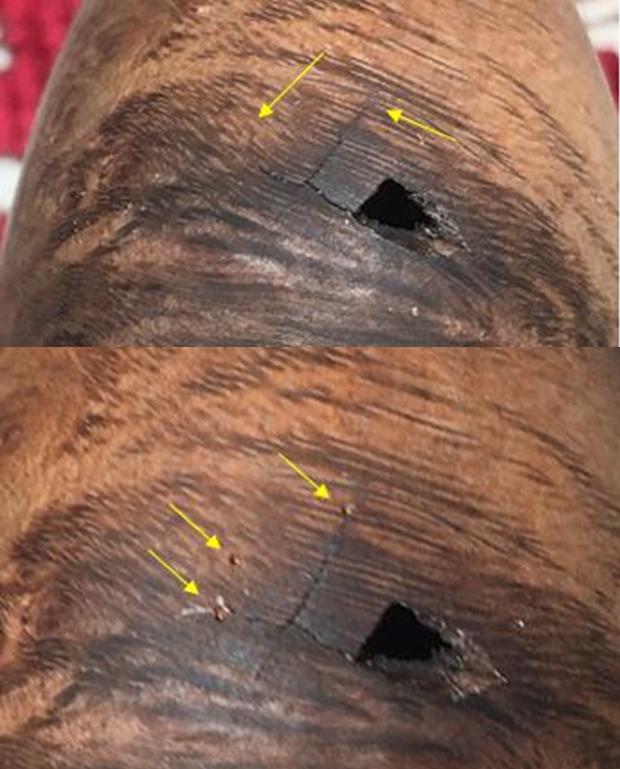
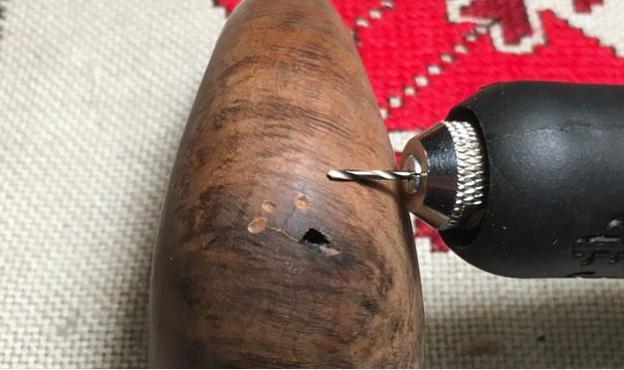
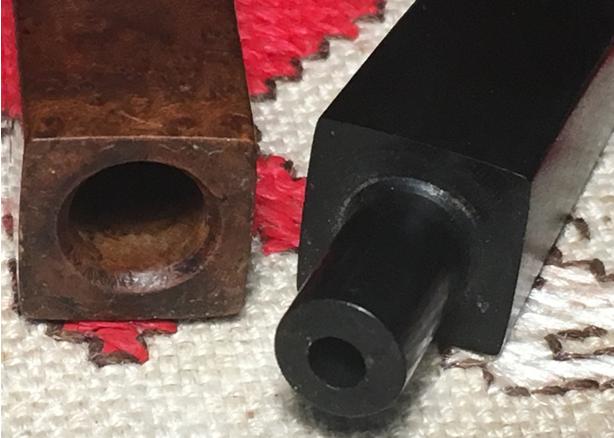
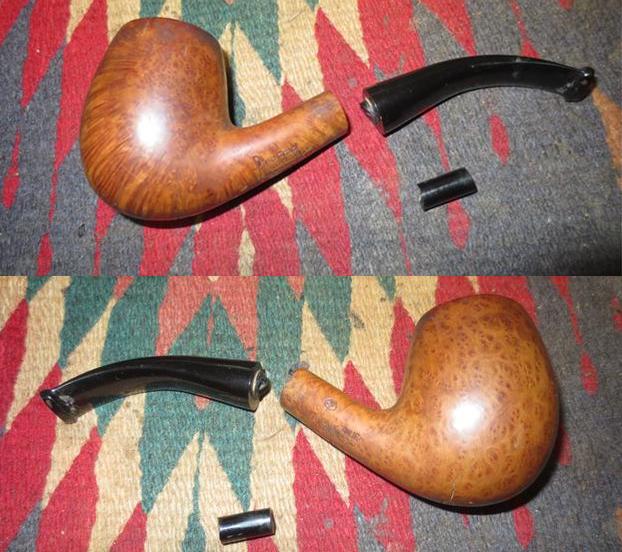
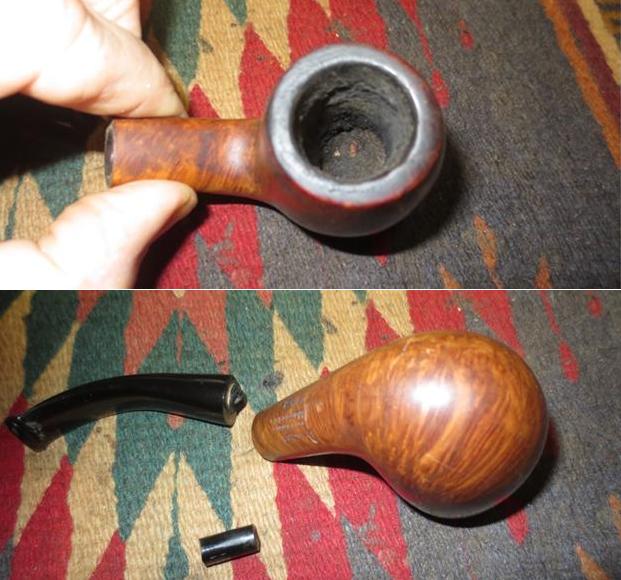
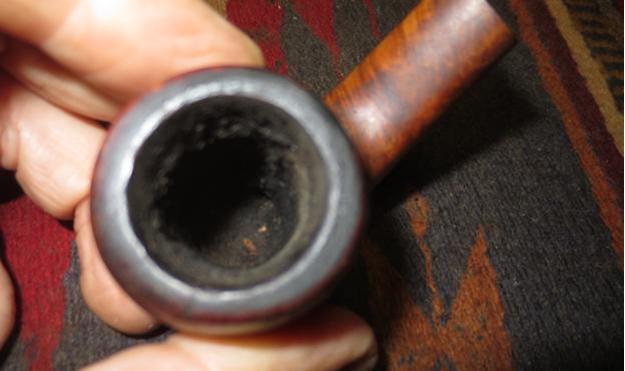
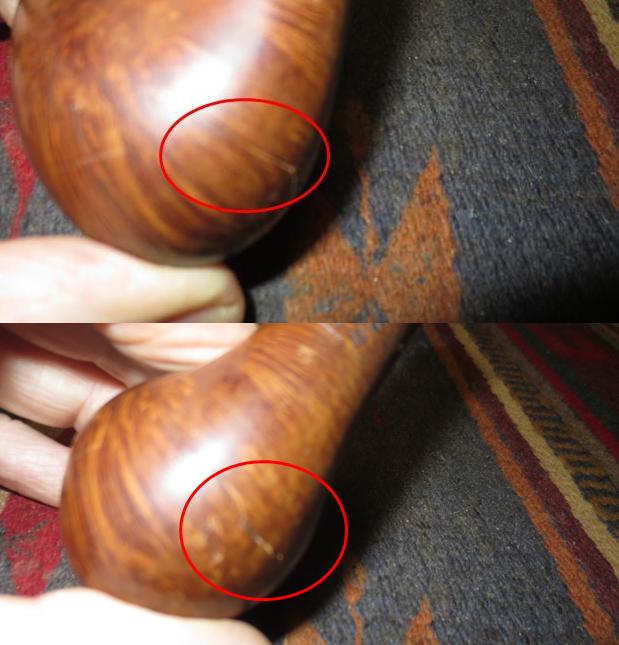
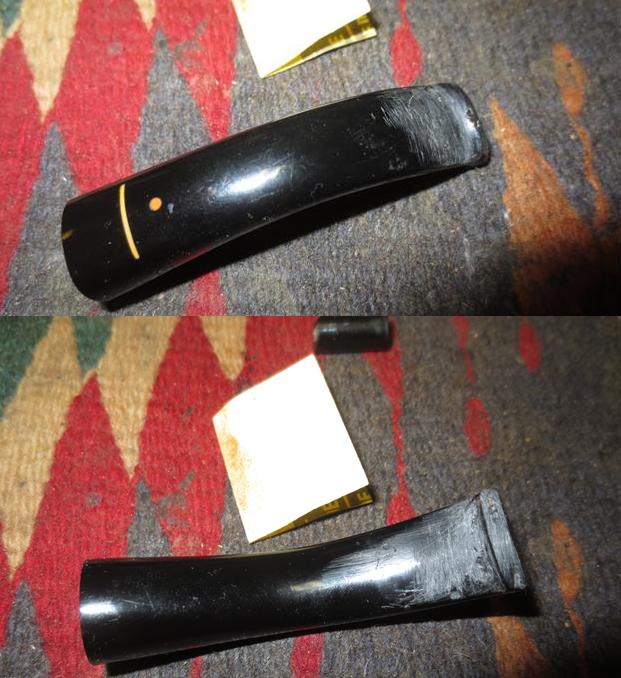
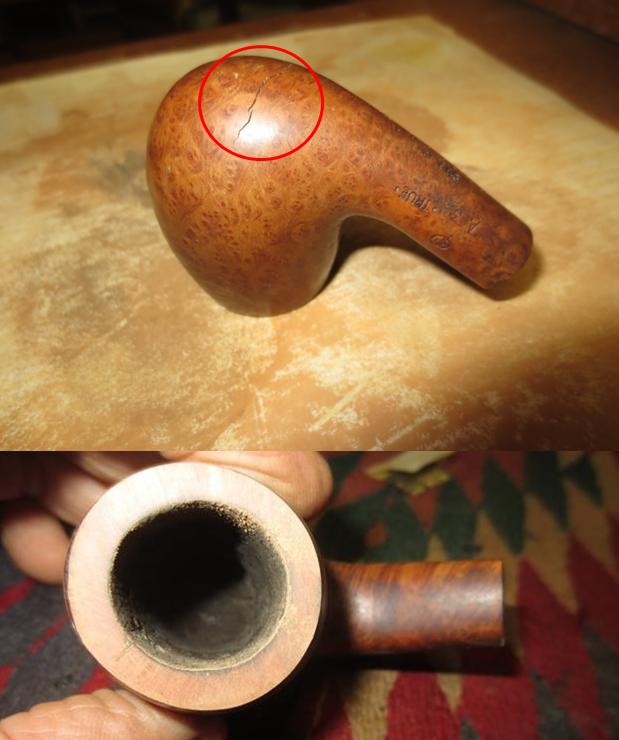
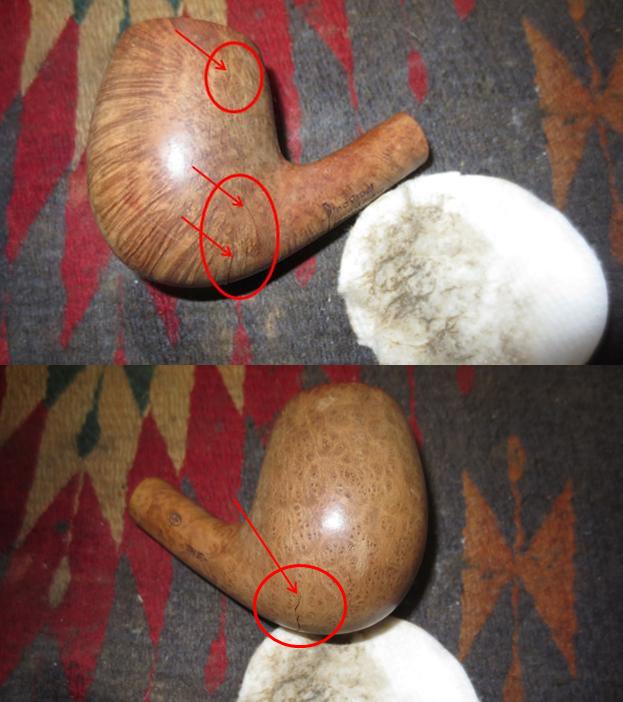
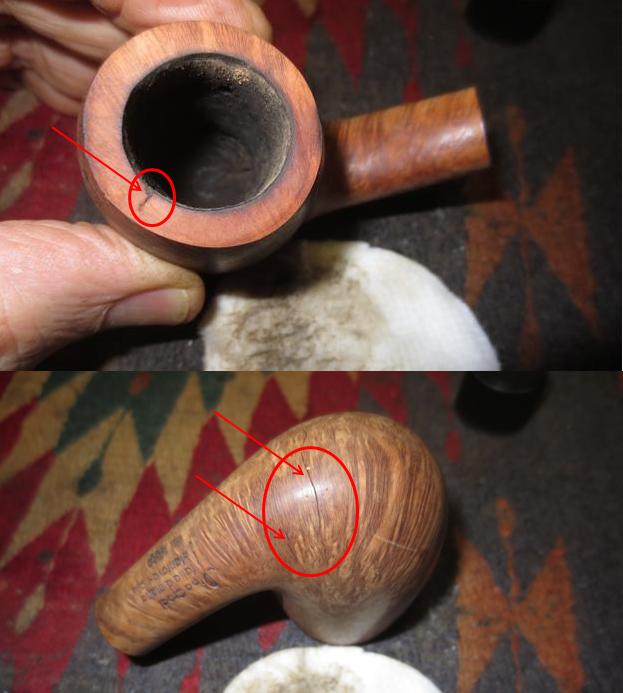
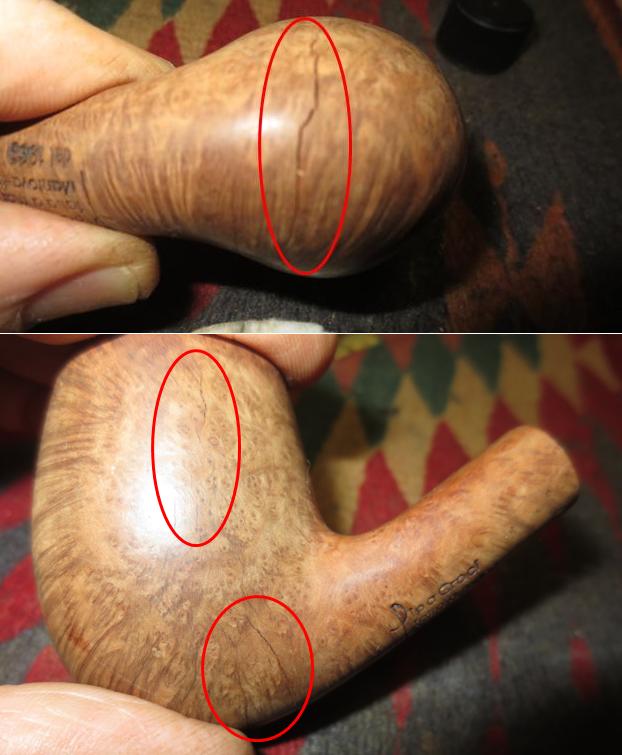
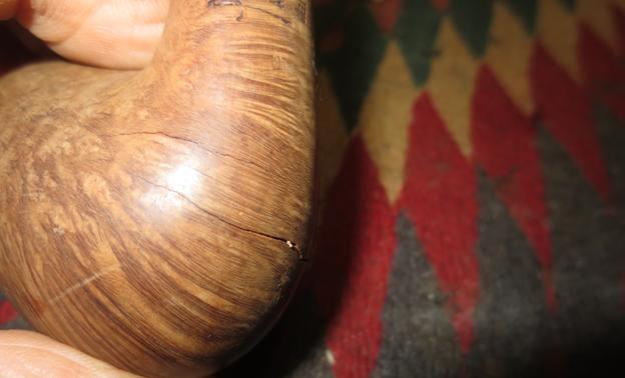
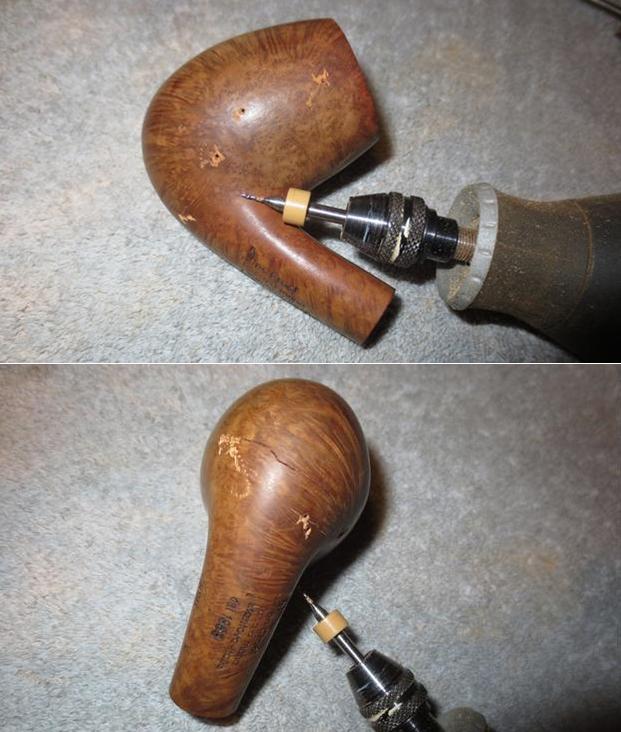
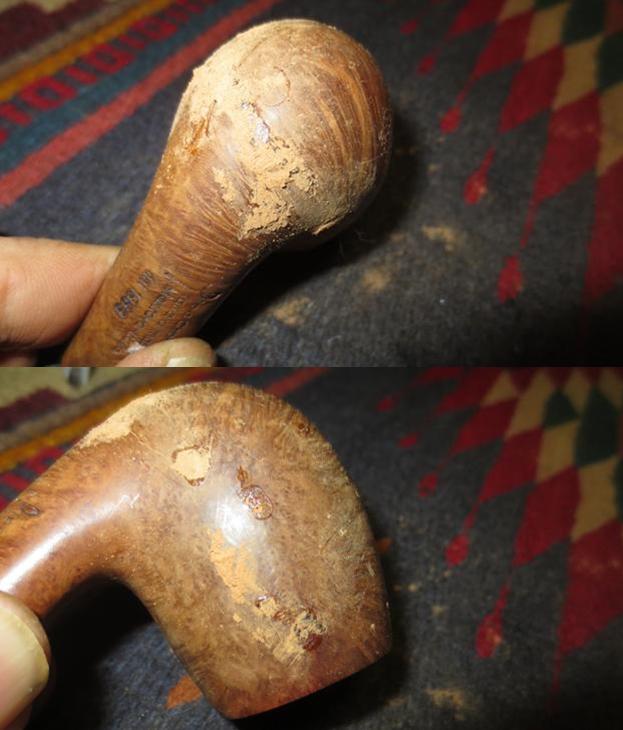
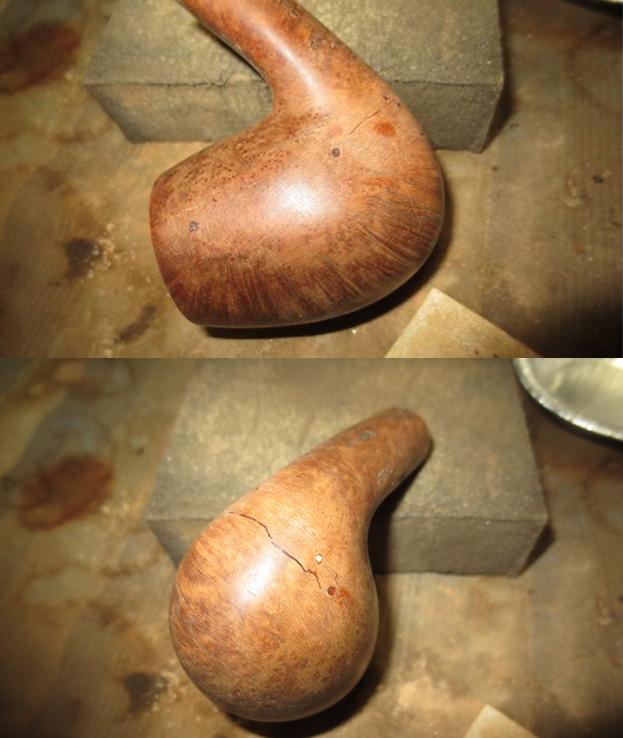
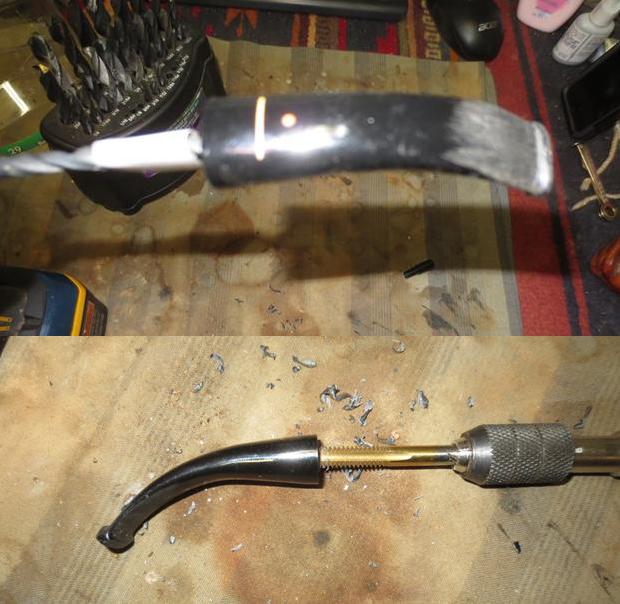
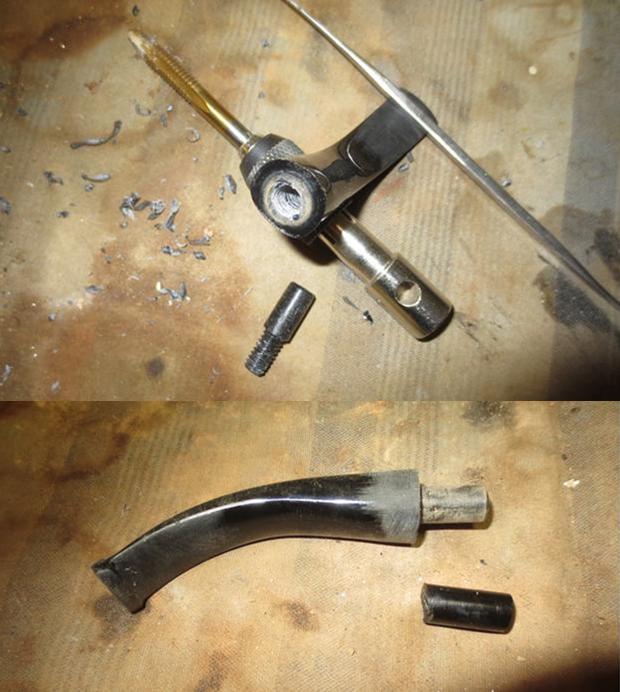
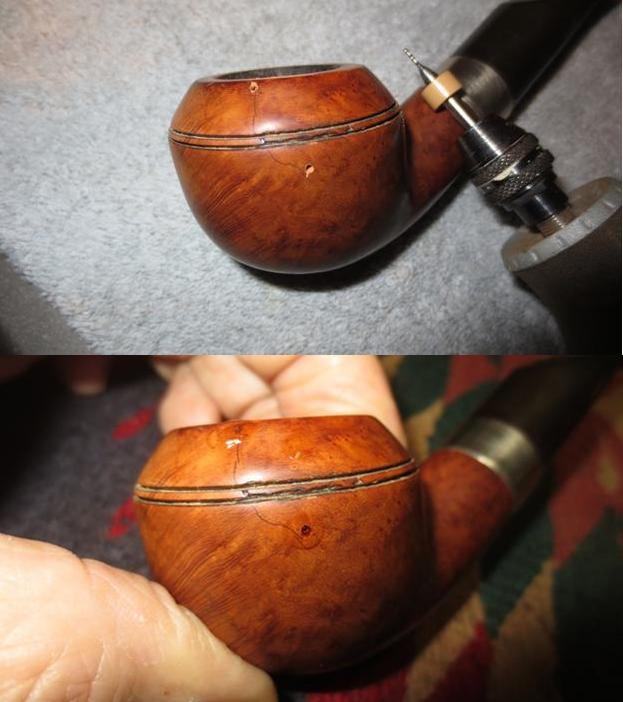
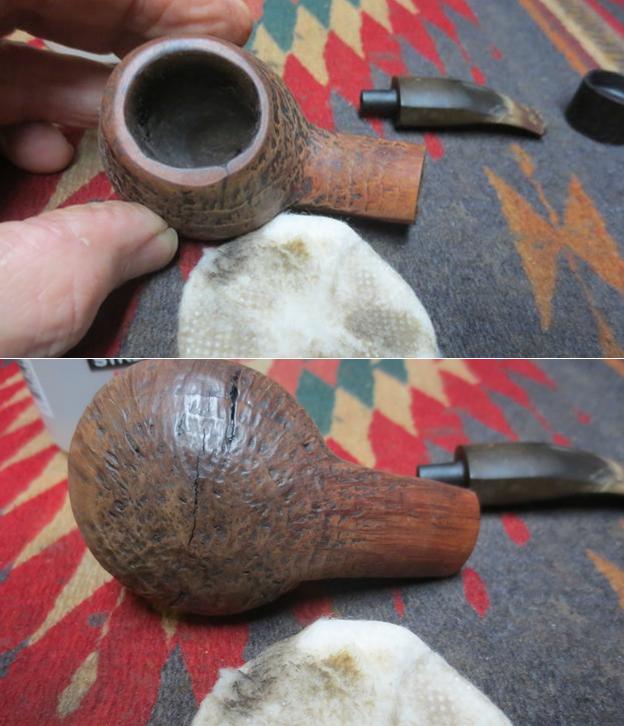
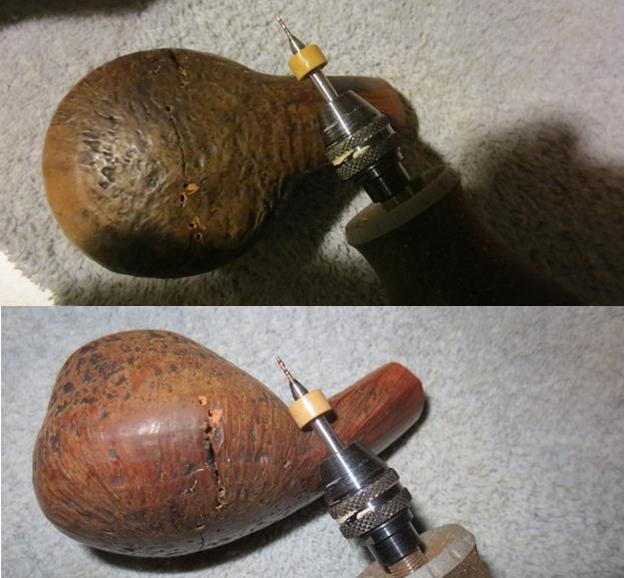
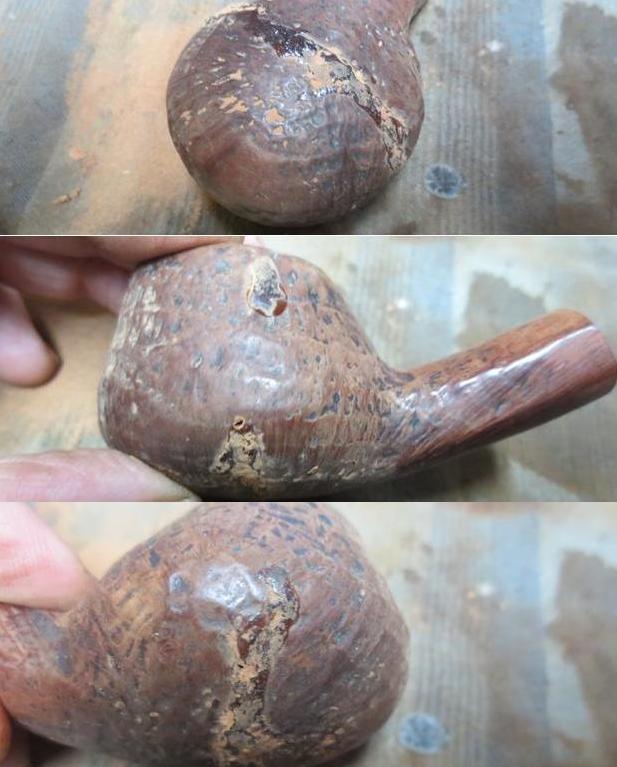
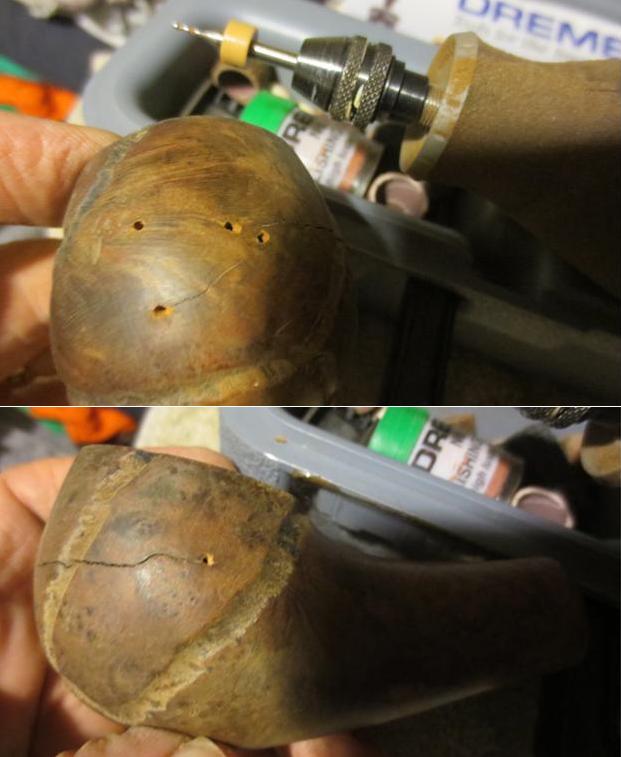
The next pipe up for repairs and restoration (from nine from the fellow who brought them for repair) is a Hand Made Pipa Croci. It is stamped on the left side and continuing to the underside of the shank with the words Pipa Croci (long-tailed P) over fatta a mano over Mantova, Italia and dal 1983. On the right side is stamped PC in a circle with a tail over A3 (shape number for a bent billiard). Next to that is stamped *True*. Fatta a mano means Hand Made. It would have been a great looking pipe when purchased. I am pretty sure that it is the nicest one that he left for me to work on and the one with the most issues. Somewhere along the way he dropped the pipe on concrete and the tenon snapped. If that had been all then that was a simple fix. It was not all! The bowl cracked two places on the bottom, not deep cracks but cracks nonetheless. There was a crack on the left side mid bowl that ran from close to the bottom up to a ½ inch below the rim and a small one on the top of the rim on the left toward the front of the bowl. I took a close up photo of the rim and bowl to show the condition. The cake is thick and the rim has a lava overflow from the bowl and some damage on the outer edge near the front.The next two photos, though a little out of focus show the crack in the bowl bottom circled in red. I will continue to show them in the photos as I clean up the bowl.The Lucite/acrylic stem was rough. There were tooth marks on both the top and underside of the stem in front of the button and a deep bit mark on the top of the button. The broken tenon would need to be replaced and there were some nicks in the sides of the stem close to the button end.I reamed the bowl with a PipNet pipe reamer and took the cake back to bare briar. I cleaned up the reaming with a Savinelli Fitsall Pipe Knife. There would still need to be more work done to smooth things out but the bowl was clean and I could see that the cracks did not go all the way through to the inside walls.I topped the bowl to remove the rim damage, particularly that on the outer edge. I also wanted to expose the crack on the rim top and see how bad it was. This pipe really took a beating when it was dropped – fissures all over the place in the briar. I have circled the crack on the bottom to show the largest one. There is a small one next to it that is hard to see in this picture though it will show in later pictures.I scrubbed the bowl down with acetone to remove the finish and reveal more clearly the cracks on the bowl. I have circled them in the next set of photos and drawn arrows to the points of origin that will need to be drilled. The number of cracks is amazing to me – all from a drop on concrete. This briar is quite stunning with some birdseye and cross grain. I drilled with a microdrill bit in the Dremel at each terminus of the cracks. Some of them had spidered a bit so they took multiple holes. I clean out the cracks with a dental pick and wiped the bowl down with alcohol on a cotton pad. I filled in the holes with briar dust and clear super glue. I sanded the repairs with 220 grit sandpaper to blend the repairs into the rest of the bowl. I sanded them with a medium and fine grit sanding sponge to polish the scratches away. I set the bowl aside for a while and worked on the stem. I flattened out the broken tenon on the face of the stem with a Dremel and sanding drum. Once it was smooth I used a drill bit about the same size as the airway in the stem to start the process of opening the airway to take the new tenon. I put the drill bit in a stationary drill and turned the stem on to the bit by hand. I increased the size of the bit incrementally so as not to split the stem and to keep things aligned. I put a tape on the bit that marked the depth of the threaded tenon. Once the airway was opened to the diameter of the tenon I used a tap to thread the inside walls of the newly drilled opening. I turned the stem onto the tap carefully to keep it straight and aligned.The next two photos show the newly tapped stem and the new tenon that was going to be turned into the stem. The tenon was slightly larger than the mortise so I used the Dremel and sanding drum to take it down to the right size. I dabbed some slow drying glue on the threads of the new tenon and turned it into the stem until it sat tight against the face of the stem. With that done the stem repair was complete. There were some nicks and scratches in the stem around the junction area with the shank that needed to be sanded and cleaned up. I used some 220 grit sandpaper to do that. The stem was ready for the fit and all that remained was to push it into the mortise and check it out once the glue set.I put the stem in place in the mortise to check the alignment and was happy with the overall results. As normal there were some slight adjustments that needed to make to the stem and shank but nothing radical so I was happy with the fit. Now all I had to do was finish the fit and repair the stem. I noticed in the photos below that there was some roughness to the inside of the bowl so I would also need to sand that smooth. I wrapped a piece of 220 sandpaper around my finger and sanded the inside walls of the bowl until I had smoothed them out.I cleaned out the airway in the stem and the bowl as well as the mortise with pipe cleaners, cotton swabs and alcohol until they were all clean. I also scrubbed the darkened end of the shank to remove the stain that was there.I stained the bowl with a dark brown aniline stain thinned 50/50 with alcohol and flamed it to set it in the grain. I repeated the process until the coverage was even around the bowl.  I wanted it to be dark enough to blend the repairs into the sides and bottom of the bowl and hide the drill holes and cracks. I set the bowl aside to let the stain dry overnight and called it a day.In the morning I started the polishing process on the bowl. I sanded it with 1500-2400 grit micromesh and a small amount of olive oil to help the grit cut into the briar. I wiped it down afterwards and inserted the stem to see what was happening. The alignment of the stem was slightly off to the left in the photos so it appears not to fit. However, the fit is actually quite good. I still need to polish and clean up the stem. I continued polishing the bowl with the micromesh pads using 3200-12000 grit pads to really add to the shine of the briar. Each successive grit of micromesh raised the shine more on the briar. The grain really pops on this one… I turned back to the stem. I adjusted the fit with 220 grit sandpaper until the transition was smooth. When the fit was correct I polished the stem with micromesh sanding pads – wet sanding with 1500-2400 grit pads and dry sanding with 3200-12000 grit pads. I wiped the stem down after each grit of pad to clean off the sanding debris and gave it a final wiped down after the 12000 grit pad. I buffed the pipe and stem with Blue Diamond on the buffing wheel to remove any remaining scratches or marks and raise a shine. I gave the bowl and stem multiple coats of carnauba wax and buffed the pipe with a clean buffing pad. I hand buffed it with a microfibre cloth to deepen the shine. The finished pipe is shown in the photos below. The cracks are all sealed and since they do not go all the way through into the interior of the bowl I think that they will hold up well. The pipe has a lot of life in it still and I know that the owner will be glad to get it back in far better nick than it was when he left it here. Thanks for journeying with me on this resurrection.


Resurrecting a Butz Choquin Commander 1028 Rhodesian


Blog by Steve Laug

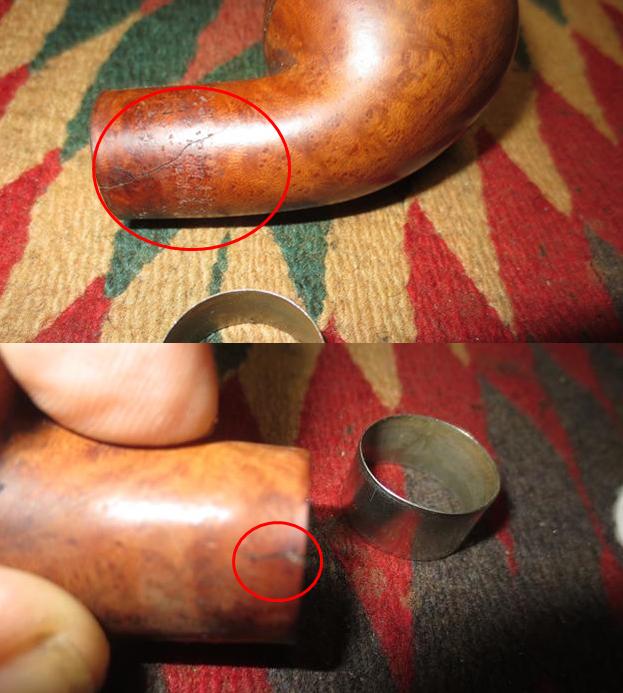
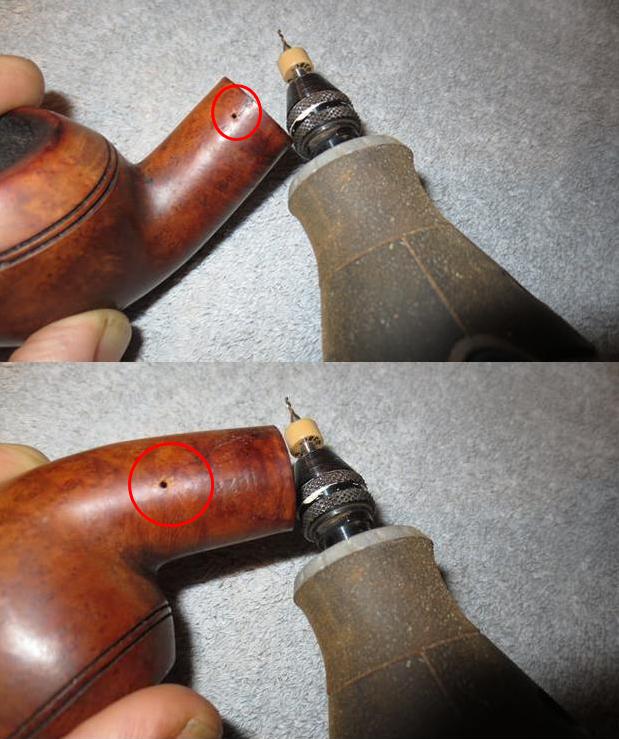
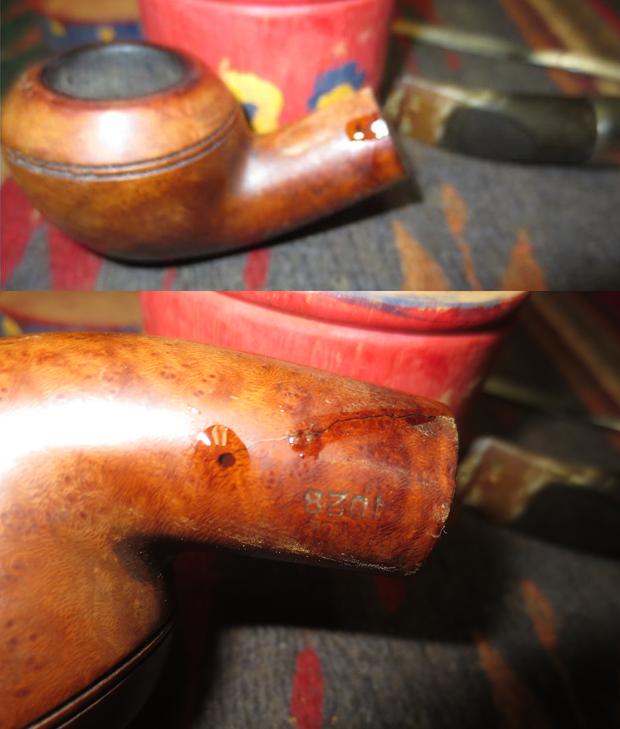
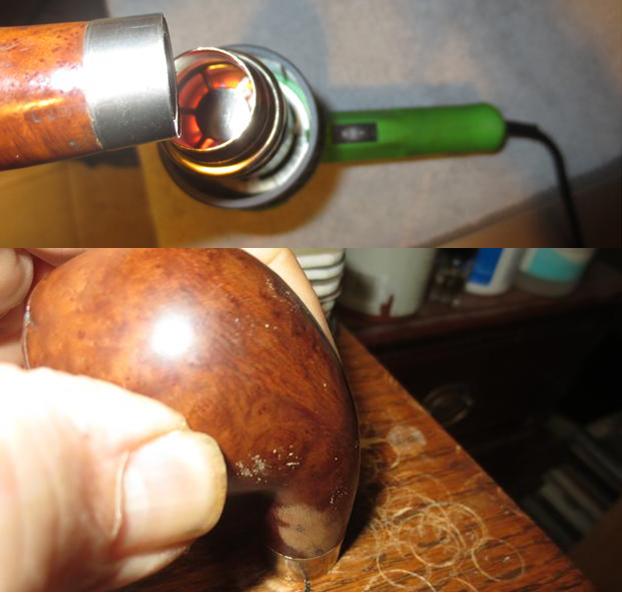
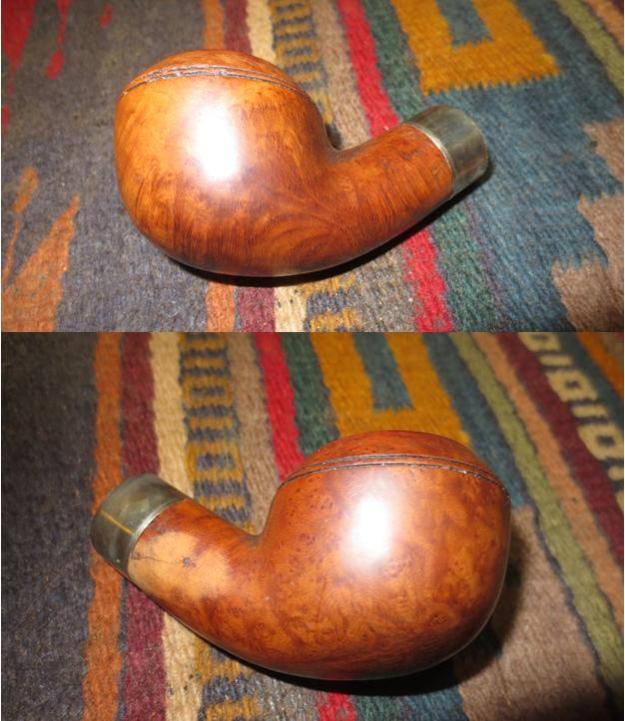
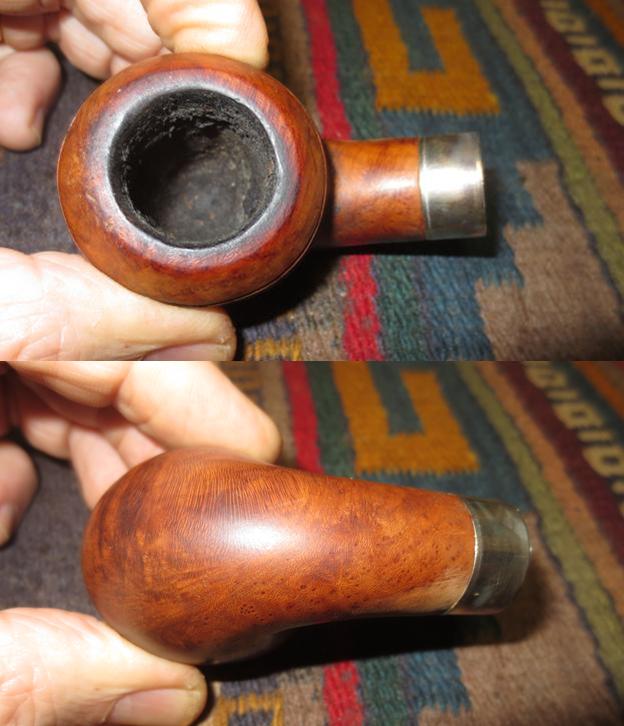
This is the third pipe that I a working on for the pipe smoker who stopped by my house last week and dropped off his pipes for repair. This one is a Butz Choquin Rhodesian. It is stamped Butz Choquin over Commander on the left side of the shank and under that it is stamped Filtre Extra. On the right side, the shape number 1028 is stamped. It was another one that had a replacement stem that is a tight fit in the shank. The owner was pretty sure that the replacement stem is what cracked the shank in two places and that certainly could be true. The stem was oxidized and had tooth marks on both sides just in front of the button. The briar is in rough shape. The rim had a coating of lava that overflow from the bowl and had a lot of nicks and dings from where the pipe had been knocked against a hard surface to remove the dottle. The bowl had a thick crumbly cake that was uneven. There were burn marks around the outer edges of the rim. The double ring had been nicked and some of the band around the top of the bowl was broken. The shank had two cracks on it – one on the right side that extended half way along the shank and one on the top left that was about a ¼ inch long. The finish was gone and the stamping had been over buffed somewhere along the way so it was hard to read. I took a close up photo of the rim and bowl to show the damage and overflow onto the rim. The nicks and roughness are visible in the bowl. It appears that the bowl had been over reamed somewhere along the way and there was a gap between the bottom of the bowl and the entrance of the airway into the bowl. The second photo below shows the crack in the shank on the right side. It was quite long and rough to touch.The next photos show the condition of the replacement stem. You can see the oxidation and tooth marks on both sides and on the button top itself.I took some close up photos of the cracked shank. I circled both cracked areas in red. (I apologize for the blurry second photo. I should have checked the pic before I move on but did not. The crack is still visible.)I drilled a small hole with a microdrill bit at the terminus of both cracks to stop the crack from expanding further. (Again they are circle in red in the photos below.)I pressed briar dust into the cracks and put super glue on top of the dust to fill in the crack and the drilled hole. I sanded the fills until they were blended into the shank.I put the band onto the end of the shank and heated it with a heat gun to expand it. Once it was hot, I pressed it down against a board that I use for this purpose. Make sure to hold the shank straight up and down to keep the band moving up the shank evenly.Once the band was in place on the shank and the end was even with the end of the shank I let is cool. As the band cooled, the cracks were held tightly together and from the end of the shank were visible only if you knew where to look. I took photos of the newly banded shank to show the look of the pipe with the band. I lightly topped the bowl on the topping board with 220 grit sandpaper to remove the rim damage and burn marks.I reamed the bowl with the PipeNet reamer and the Savinelli Fitsall Reamer to take the cake back to the bare walls. I sanded the bowl with sandpaper to smooth it out. I scrubbed the rim and airway in the shank and the stem with pipe cleaners, cotton swabs and alcohol. There was still work to do but it was getting there. I sanded the oxidation and build up on the stem with 220 grit sandpaper to remove it and the tooth marks. Those that could not be sanded out I filled with black super glue.I cleaned out the grooves around the bowl with a thin blade and wiped it down with alcohol. I sanded the rim cap and the ring to smooth out the damage and give me a clear picture of what I needed to do to repair these areas. The two photos below show the damaged areas.I filled in the missing spots on the ring with super glue and briar dust. I used a sharp knife to clean out the rings from the excess glue and fill. I used a piece of sandpaper to sand the edges on the centre ring. I was able to fill in the majority of the damage though there were still some spots on the ring that showed damage.As I cleaned and sanded the rim cap with micromesh sanding  pads I noticed one more small crack on the left side of the bowl from the edge of the rim down the side of the bowl. It was not all the way through the bowl into the inside of the bowl but it was there. I used a microdrill bit on the Dremel to drill small holes at the end of the top edge and also on the hook of the bottom edge of the crack. I filled in the holes and the crack with super glue and briar dust. I sanded the spots once the glue had dried. I smoothed out the repair to blend it into the rest of the briar.I stained the bowl with dark brown aniline stain and flamed it with a lighter to set it in the grain. I repeated the process until I was happy with the coverage on the briar. The stain blended the repairs on the shank and the bowl with the rest of the briar. They are still visible if you know where to look but really look like small black spots in the briar.I hand buffed the bowl with a microfibre cloth and took the following photos to show the state of things at this point in the process. I am pretty happy with the finish at this point. I opened the slot in the button with needle files – both a flat oval and thicker oval to make it easier to pass a pipe cleaner through to the bowl. Once it was clearly opened I used a folded piece of 220 grit sandpaper to smooth out the file marks in the slot.I turned my attention to the surface of the stem. The oxidation was deep and it took some work to get it out. I worked on the stem with 220 grit sandpaper to remove the surface oxidation. It removed much of the oxidation but there was still work to be done. I polished the stem with micromesh sanding pads – wet sanding with 1500-2400 grit pads. The photo below shows that there was still some oxidation to work on. I buffed it with red Tripoli to further remove the oxidation. I was happy with it once it was buffed. I dry sanded it with 3200-4000 grit pads. The second photo shows the stem after that buffing. The oxidation was finally conquered. I rubbed it down with Obsidian Oil. I polished it with the last three grits of micromesh – 6000-12000 grit pads and rubbed it down with Obsidian Oil. I set it aside to let the oil dry.I buffed the bowl and stem with Blue Diamond on the buffing wheel to polish out the last of the scratches. I gave the bowl and stem multiple coats of carnauba wax with the wax wheel. I buffed it with a clean buffing pad to raise the shine and with a microfibre cloth to deepen the shine. The finished pipe is shown in the photos below. The third pipe is finished for the pipe smoker who dropped them by for me to restore. This one had a few challenges but I think they were met and the pipe looks better than when I began. Thanks for looking.

Banding and Restoring a Radford Ravel Rhodesian


Blog by Steve Laug

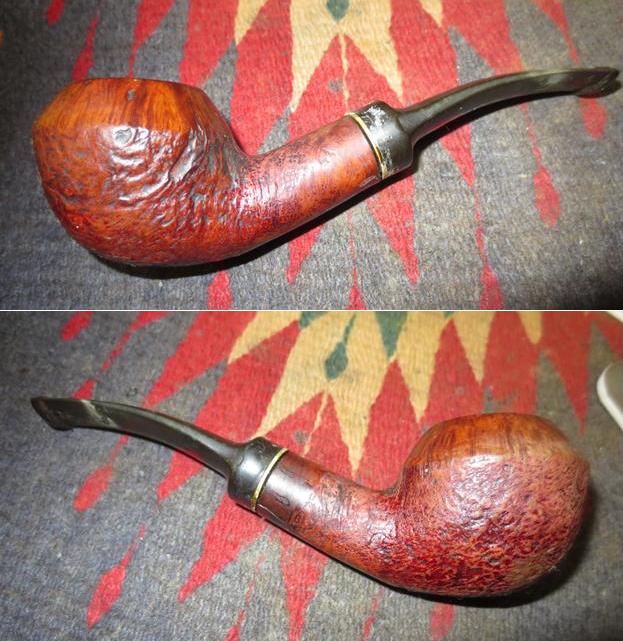
I am working on the second pipe I chose to work on in the lot of nine pipes I am restoring for the pipe smoker who dropped by a box of pipes that badly needed attention. This one was stamped Radford Ravel and had a mixed finish of smooth top and sandblasted shank and bottom part of the bowl. It is a Rhodesian and the cap is smooth and the rest is sandblast. It was finished in a dark brown stain. The finish was very dirty and there were quite a few sandpits and nicks in the smooth portion of the bowl cap. The shank was crack on the lower right side and extended from the shank end up the shank about a ¼ inch. The stem was a replacement and had a brass washer on the tenon and glued against the shank. When the new stem was made the maker put a space on the tenon to add colour to the stem. I figure that the new stem is what cracked the shank. When I received the pipe the stem did not fit tightly. There were tooth marks, tooth chatter and a lot of oxidation on the stem. There was also a bead of glue around the washer on the tenon.

There was something about the brand on the pipe that rang a bell for me. I have a tin of their Sunday’s Fantasy Tobacco in my cellar and I wondered if they might have made pipes as well.

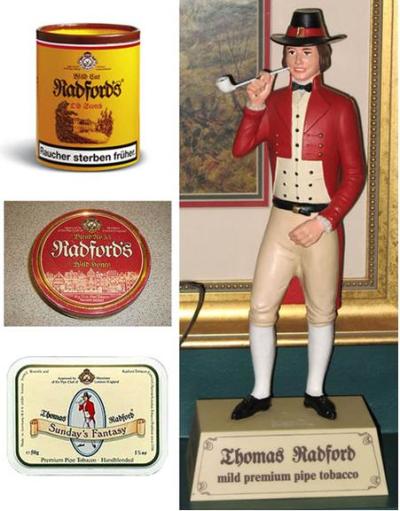
I did a bit of digging and found the picture on the left that showed some of the tobaccos made by the company and also a great figurine with the name Thomas Radford mild premium pipe tobacco on the base. On Pipedia I found that Radford’s Private Label Pipes were crafted by Chacom for the Pöschl Tabak GmbH & Co. in Germany. This information was from “Pipes, Artisans and Trademarks”, by José Manuel Lopes. The pipes were mass produced with ebonite and acrylic stems and were introduced by Butz-Choquin, Chacom, and Nording. On the stem there is generally an embossed logo that was a stylized R. The pipes were made to use 9mm filters and are moderately priced and very attractive. The following three links were the sources I used for this information.

https://pipedia.org/wiki/Radford%27s

http://www.poeschl-tobacco.com/en/products/

http://www.pipephil.eu/logos/en/logo-r1.html

I also looked on another website and got a little more information on the brand. The Radford’s pipe appears in 6 models in 3 variations 1x time a year in autumn. The so called Radford’s Depot contains a minimum of 1 dozen pipes of the actual running collection. Connected to the depot is a listing of the depot holder in Radford’s News.

This particular brand RADFORD’S SERIE RAVEL was a series of 6 elegant models within Radford’s Collection. They are made from good briar wood, sandblast, black/brown with a polished head’s border in dark-red shade. Very nice rich-in-contrast ring at the shaft’s finish. Mouthpiece from Acryl for 9 mm filter. http://cigar.supersmokers.biz/radfords/

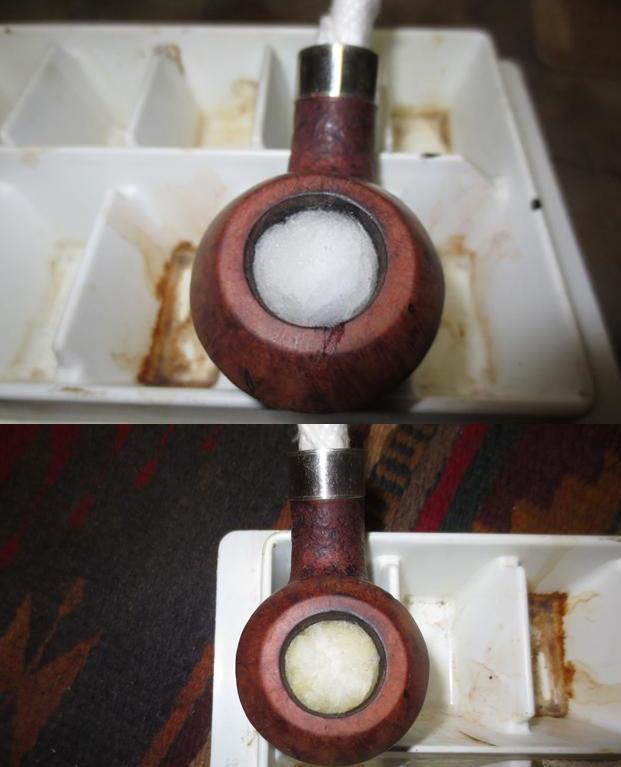
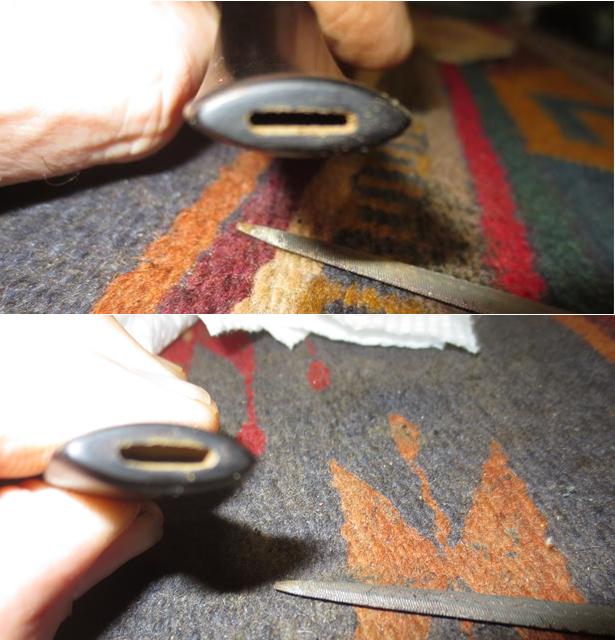
With all of this information I now knew that the pipe was originally made for a 9mm filter. The mortise was drilled deep in the shank to contain the 9mm filter. The replacement stem was a regular push stem without a filter tenon. I took some photos of the pipe before I started working on it. The finish was in really rough shape. You can see the glue and sticky material on the stem near the shank band. I took a photo of the inside of the shank to show the thick tars that had built up on the walls of the shank. The space in the mortise between the end of the tenon and the extra depth for the end of the original filters was filled with tar and oils. It was thick and sticky.I took a close up photo of the bowl to show the thick cake that lined the walls of the tapered bowl. The photo also shows the damage to the front of the bowl where the pipe had been tapped out against a hard surface. The second photo below shows the crack on the right underside of the shank. It appeared to me from the smooth area and the look of the stain that someone had tried to glue the crack and do a repair but it was not done well.The next two photos show the damage to the stem. The calcium build up on the button end of the stem, the oxidation and glue that is globbed on the stem to hold the washer in place on the tenon and the deep tooth marks on both sides near the button show in the photos.I scrubbed down the surface of the bowl with acetone on cotton pads to remove the damaged finish and the grime and oils in the grooves and crevices of the sandblast. I wanted the surface clean so that I could drill a hole to stop the crack before binding it together with glue and a nickel band on the shank. I drilled two pin holes at the end of the shank with a microdrill bit on a Dremel. The first one was slightly short of the end of the crack so I had to drill a second one.I heated the band to make the fit easier on the shank. I painted the shank end with some slow drying super glue and pressed the band in place against the topping board.I scrubbed the bowl with alcohol on a cotton pad to remove that last of the dust. I took pictures of the bowl with the new bling addition. I reamed the bowl with the PipNet reamer to take back the cake to the bare walls of the bowl. I finished the reaming using a Savinelli Fitsall Pipe Knife to scrape the inside of the bowl smooth. I rolled some 180 grit sandpaper around the end of my finger and sanded the walls of the bowl smooth.To remove the damage to the top of the bowl and to clean up the rough front edge of the bowl cap I lightly topped it on a topping board with 220 grit sandpaper.With the bowl exterior cleaned and the damaged rim top repaired I worked on the inside of the mortise and the airway from the mortise end into the bowl. I used the drill bit that is in the handle of the KleenReem pipe reamer to ream out the airway into the bowl. I turned the bit into the bowl using the knurled end to press it through. I cleaned off the drill bit and used the dental spatula to scrape the walls of the mortise all the way to the end where the airway entered the bowl. The amount of grit and oils that came out with the scraping was phenomenal.I wiped the bowl cap down with alcohol and filled in the sandpits around the outer walls of the cap with clear super glue.I cleaned out the shank and mortise once again with alcohol, cotton swabs and pipe cleaners until I had removed all of the loose debris left in the shank.I sanded the repaired patches on the cap with 220 grit sandpaper until the repairs were blended into the surface of the briar. I used a black Sharpie Pen to darken the spots and then wiped the bowl and cap down with alcohol to blend in the black. I scraped the area around the washer and the tenon with a sharp knife and funneled the end of the tenon to facilitate better airflow in the stem. I cleaned out the airway in the stem with pipe cleaners, alcohol and cotton swabs.I sanded the stem with 220 grit sandpaper to clean up the stem surface and wiped the tooth marks down with alcohol. I filled in the tooth marks with black super glue and set the stem aside to let the glue cure.I stuffed a cotton ball into the bowl and rolled a cotton pad into the shank. I set the pipe in an ice cube tray and used an ear syringe to fill the bowl with alcohol and let it sit during the day. I left it sitting all day while I worked on the slot in the stem. At the end of the day the cotton had yellowed the cotton and the alcohol had pulled out tar and oil from the bowl walls.I used needle files to open up the slot in the button. I used a flat, flattened oval and regular oval file to open the slot. I folded a piece of sandpaper and sanded out the inside of the newly opened slot. After sanding it the slot was open enough to easily take a pipe cleaner. By this time the alcohol/cotton ball soak in the bowl was finished. I pulled the cotton balls out of the bowl and the pad out of the shank and threw them away. I cleaned out the shank and airway once again with cotton swabs and pipe cleaners. Once it was clean I stained the bowl with dark brown aniline stain cut 50/50 with alcohol. I flamed the stain to set it in the grain. I repeated the process until the coverage was what I was looking for.I rubbed bowl down with olive oil on a cloth and hand buffed the bowl with a rough cotton cloth. I took some photos of the new look of this old Radford Ravel pipe. The bowl is starting to look really good and shows some promise. I polished the stem with micromesh sanding pads to remove the scratches and raise a shine on the vulcanite. I removed the brass washer on the stem and polished it with sandpaper. I reglued it onto the tenon with super glue. I wet sanded the stem with 1500-2400 grit pads and rubbed it down with Obsidian Oil. There were still scratches and also some oxidation. I repeated the sanding with those pads and then moved on to dry sanding with 3200-12000 grit pads. I rubbed it down with the oil after each set of three pads. After the final pad I gave it a final coat of the oil and set it aside to dry. I buffed the stem with Red Tripoli to try to remove the remaining oxidation and then buffed the entire pipe and stem with Blue Diamond polish on the buffing wheel. I polished the metal band with a jeweler’s polishing cloth. I gave the stem and bowl multiple coats of carnauba wax and buffed the pipe with a clean buffing pad to raise a shine. I hand buffed it with a microfibre cloth to deepen the shine on the briar. The finished pipe is shown in the photos below. It has come a long way from the way it looked when I received it to work on. I really like the looks and the shape of the pipe. I have now finished two of pipes that the pipe smoker dropped off for me to restore before he left on holiday. I look forward to seeing what he thinks of his pipes.

A Very Tired, Very Dirty Stanwell Bent Volcano with a cracked bowl


Blog by Steve Laug

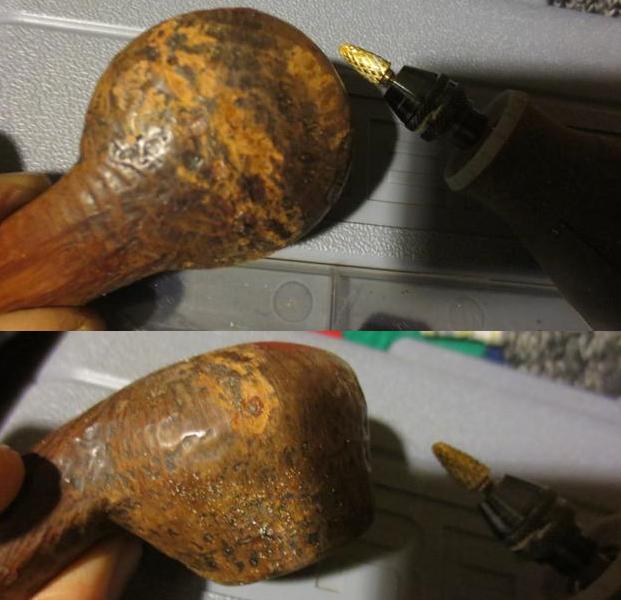
Sometimes when I take in pipes for repair and restoration I am pretty stunned by the condition. This one obviously was an old favourite of the pipesmoker who brought it to me with 8 others in need of some TLC. I sat with him in my living room and went over the repair list of what needed to be done to bring it back to life. It had been restemmed before and the stem was good and heavy so it did not need to be replaced. There were tooth marks near the button on both sides of the stem. It had some deep oxidation that needed attention. Sometime in its life it had been buffed to the point that the stamping was all but gone on the underside of the shank. With a lens I could read Stanwell over Made in Denmark but all but one number of the shape number (1) was buffed away. The finish was sticky to touch from all the waxes and oils on the bowl. The sand blast was pretty worn away and now was shallow. The angled, tapered bowl had a thick cake and it had been reamed into almost an hour-glass shape. The rim top had an overflow of the tars on it and the blast was smooth. There was some damage on the front of the bowl from knocking the pipe out on something hard. There was a small crack on the left side of the bowl from the rim down about a 1/8 of an inch that would need to be repaired. From memory I knew that the bowl was drilled to follow the angle of the exterior of the bowl.When I turned the bowl over the bottom side was covered with cracks. There were four cracks of various sizes that did not go into the interior but rather sat on the surface of heel. They were all different in terms of depth and tended to follow the blast and cut across the ring grain. They were filled with grime and wax. The bottom of the bowl was a real mess.I took a close up photo of the rim to show the damage that had been done to it by reaming it with a knife rather than with a reamer. The cake was sticky and soft and what appeared to be an hourglass shape actually was not it followed the angled bowl walls. I was concerned that the inside of the bowl would also have cracks once the cake was removed. I recommended that we remove entire cake to assess the interior of the bowl. I also took a close up photo of the heel of the bowl to show the cracks.The stem was a replacement that was thick and well made. The fit against the shank was not too bad and there was little gap between the two parts. The stem was oxidized and there was come calcium build up on the first inch on both sides. There were tooth marks and tooth chatter on both sides of the stem near the button.The shank end shows how thick the buildup was inside of the shank. The tars and oils overflow the shank and show up on the end and walls. There were also two small holes drilled to the left and right of the mortise.I reamed the bowl with the PipNet reamer using the largest cutting head. Notice the angle of the cutting head as it shows the angle of the drilling of the bowl. I cleaned up the walls with a Savinelli Fitsall reaming knife.  I sanded the bowl with 180 grit sandpaper wrapped around a piece of dowel. The third photo below shows the bowl after it has been sanded. I scrubbed the exterior of the bowl with acetone on cotton pads to remove the grime and the finish. The grime and oils came off the walls of the bowl and bowl sides and bottom to prepare the bowl for the repairs to the cracks. I drilled each end of all of the cracks with a microdrill bit on a Dremel. There were about 9 holes in the bottom of the bowl and two on the left side at the end of the shank.I put clear super glue into the cracks and pressed it down with a dental pick. I pressed briar dust into the glue and then put more dust in the glue and then more glue on top of the repair to seal it.I used a dental burr on the Dremel to rusticated the repaired areas on the bottom of the bowl and side to match them to the sand blast finish. I knocked off the rough areas of the rustication with 220 grit sandpaper to smooth it into the surrounding finish. The photos show the progress of this process. With the exterior cracks repaired and sealed I turned to work on the internals. The airway in the shank and the mortise was absolutely a mess. I used the drill bit from the KleenReem pipe reamer to clean out the airway into the bowl from the mortise. It was almost closed off with the tars and oils. I turned the bit into the airway until it was smooth. I used a dental spatula to scrape out the inside of the mortise. The scraped tars and oils can be seen in the photos below.There were two small drilled holes in the end of the shank on both sides of the mortise. I filled them in with super glue and briar dust. I cleaned out the inside the mortise and shank with alcohol, pipe cleaners and cotton swabs until they came out clean.The bowl smelled strongly of old tobacco and there were oils in the briar walls. I wanted to remove that smell as much as possible. I stuffed two cotton balls into the bowl, set it in the ice cube tray and used an ear syringe to fill it with alcohol. I left it standing overnight while it pulled the oils out of the briar bowl. In the morning the cotton was stained a yellow brown.I recleaned the mortise and airways after it had soaked using alcohol, cotton swabs and pipe cleaners.I stained the repaired areas on the bowl with a dark brown stain. I used a black Sharpie Pen to fill in some of the grooves in the briar and then restained it. I flamed it with a lighter to set the stain.I buffed the bowl with Blue Diamond on the buffing wheel to raise a shine on the bowl. The photos below show the repaired areas and the blending into the surrounding briar. I set the bowl aside and turned my attention to the stem. I cleaned out the slot with a dental pick and pulled a lot of built up tars from there. I used a sharp knife to bevel the end of the tenon to open the air flow to the slot. I sanded the stem with 220 grit sandpaper to break up the oxidation and to also remove the tooth chatter and some of the tooth marks. Some of them were too deep and they would need to be repaired later. I cleaned out the inside of the stem with alcohol and cotton swabs to remove the buildup in the airway. The slot was very narrow and it was hard to push pipe cleaners through the airway. I decided to open up the slot with needle files to facilitate easier cleaning with pipe cleaners. I did not want to change the shape of the slot, but merely wanted to make it wider and tapered smoothly into the airway. I used both large and small round, oval and flattened oval files to shape the slot. Once I had it large enough for a pipe cleaner to pass through easily I folded a piece of sandpaper and sanded the inside of the slot. I sanded the stem around the button with 220 grit sandpaper and filled in the remaining tooth marks with black super glue. I set the stem aside to dry overnight. In the morning I sanded the stem with more 220 grit sandpaper to smooth out the repairs and blend them into the surface of the stem. I also reshaped the button and smoothed out the repairs I had made there. I wiped the stem down with Obsidian Oil on a cloth to have a better look at where things were at. I noticed a small bubble in the patch on the underside of the stem once I had cleaned it so I put another drop of black superglue on it to fill it in. I polished the stem with micromesh sanding pads – wet sanding with 1500-2400 grit pads and dry sanding with 3200-12000 grit pads. I rubbed the stem down with Obsidian Oil after each set of three pads. After the final set of pads I set the stem aside and let the oil dry. I mixed up a batch of pipe mud – water and cigar ash – and applied it to the inside of the bowl to provide protection to the bare walls while a new cake is formed. When it dried I put the stem on the bowl and buffed it with Blue Diamond polish on the buffing wheel. Blue Diamond is a plastic polish that comes in a block. I load the buffing pad with it and polish the stem and the bowl. I use a light touch on the bowl so that I don’t load up the grooves and crevices with the polish. I gave the stem and bowl multiple coats of carnauba wax and buffed the pipe with a clean buffing pad to raise a shine to the finish. The finished pipe is shown in the photos below. The repairs on the bottom of the bowl blended in very well and those on the stem did also. This is the first of nine pipes that I am repairing for a guy who dropped them off at the house. It is ready for more years of service. Thanks for looking.


Breathing Life into a Preben Holm Zodiac Taurus 12 with an under-slung shank


Blog by Steve Laug

Over the years, since I took up the pipe I have been drawn to pipes made by Preben Holm. He was a Danish pipe maker who made freehand pipes under his own label and under the label, Ben Wade for the US market. He shapes the pipes to follow the grain and flow with it. He made both smooth and sandblast pipes that have a variety of shapes and sizes in the freehand style. He also made smaller classic pipes that always were interesting. There seems to be a certain look about them always gets my attention. I rarely buy them unless it stands out to me and calls me. The first good pipe I purchased is a good example of this. It was a stunning, (at least to my novice eyes) Preben Holm, Ben Wade, sandblast freehand. The pipe shop owner helped me choose it from his estate pipes. I went into the shop near where I worked at that time in Vista, California. He handed it to me, and to me it was a very clean estate pipe. I was in the market for something other than my Medico billiard, which was the only pipe I had at that time. I still smoke the pipe and enjoy it. It is close to 50 years old and it is still going strong.I have since added two more Preben Holm pipes to my rack but they are classic shapes with a twist. Both pipes are what I call a “Dublinish” shape and long shanks and a freehand style mouthpiece. They have rounded edges on the square shank and the rim top. There is no raw plateau on either pipe. The finishes show the same care as all of Preben’s pipes that I have seen or worked on. It has a rich multi-hued brown and dark brown finish that makes the grain really stand out. I traded for both of these in lieu of payment for some restoration work I did for a fellow in Northern British Columbia.To my thinking, Preben Holm was a wizard with shapes and finishes. The sandblast on my freehand maximizes the grain while the plateau on the rim and shank end add another dimension to the look. On the two newer trade pipes I have, the rich brown finish has almost a matte look that I really like. The way in which they are stained also give a deep multi-dimensional look to the grain that is stunning. I keep an eye out for his pipes and regularly cruise eBay looking for shapes that catch my eye.

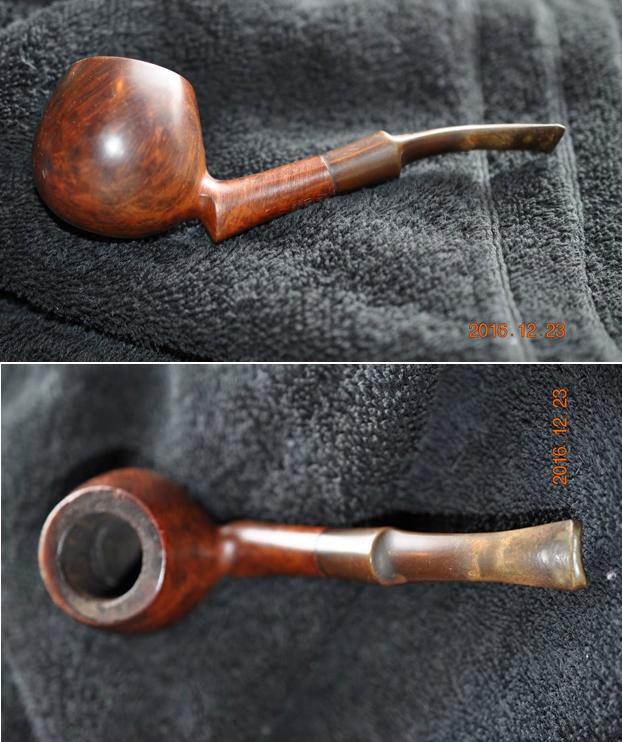
All of that is background to why I was interested when my brother sent me photos of a pipe he had found on eBay listed as a Zodiac. He wanted to know what I thought of it and if I knew who made it. There was something about the look of the pipe grabbed my attention and I encouraged him to bid on it. There were no takers for the pipe so he soon had it in hand. The shape and the design made me think that it might be a Preben Holm made pipe but I was not sure. The underslung shank, the shape of the stem and the look of the finish under the grime led me that conclusion.
I was flying to Idaho for a visit so I knew that I would see it when I arrived and that would help me affirm my conclusions. In the meantime, I did some research on the brand on the web and found a link to Pipedia (https://pipedia.org/wiki/Zodiac) that confirmed that Zodiac pipes were a brand made by Preben Holm. From research on the web I found that the Zodiac line had pipes made that were stamped with different Zodiac names. I found pipes stamped Libra, Taurus and Gemini. I am sure that there were others in the line either made or in design. What was interesting is that the entry did not have much information about the brand other than that the pipe was stamped Copenhagen, Denmark. However, to me the fascinating thing was that there were two photos of the pipe included that were a match to the pipe I am working on.

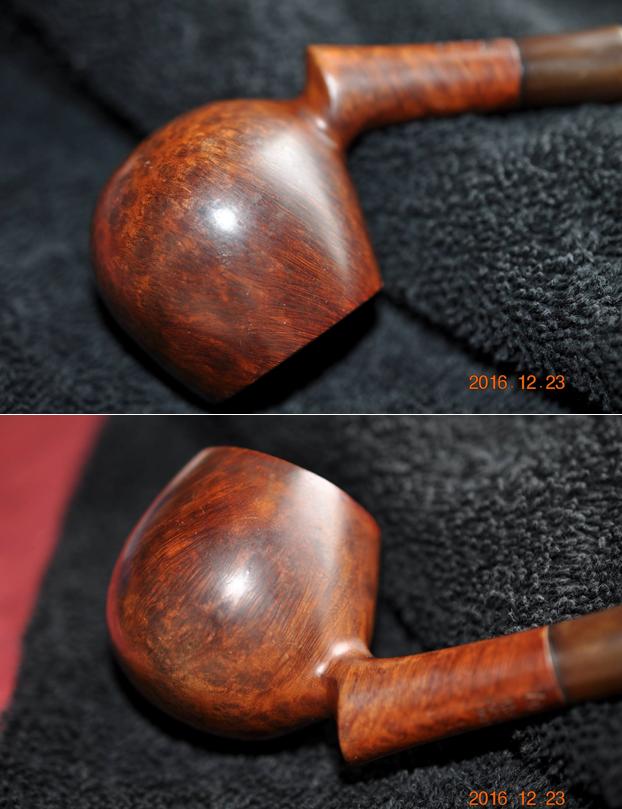
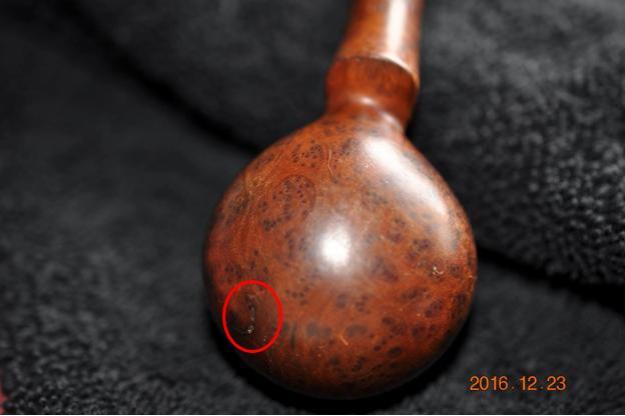
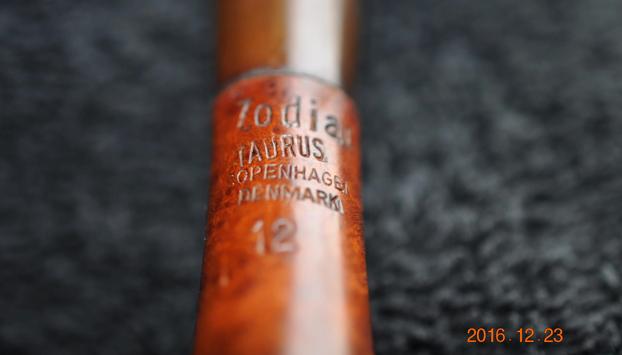
The next series of photos show what the pipe looked like when it arrived in Idaho. The finish was dirty and worn but there were no serious issues. There was no top coat of varnish or shellac on top of the finish so that was a plus. (I find that some eBay sellers feel it necessary to make the pipes that they sell shiny before they sell them.)My brother took close up photos of the bowl sides and bottom to show the overall condition of the briar and the finish before he began his clean up job. In the photo of the bottom of the bowl you can see what looks like a crescent shaped flaw toward the front of the bowl. I have circled it in red for identification. It had not been filled but was left open and had collected grit and dirt. The next photo shows the stamping on the underside of the shank. It is sharp and reads Zodiac Taurus over Copenhagen Denmark with the shape number 12 underneath.The rim had some tars and lava overflow from the cake in the bowl. There was a light cake that looked like it was a bit crumbly. The inner edge of the rim showed nicks and damage from having been reamed with a knife. The stem was oxidized and had tooth dents and tooth chatter. The fit against the left side of the shank was slightly damaged. The button was dented and worn down on both the top and bottom sides and the slot was filled with debris.My brother did his usual great clean up job on the pipe. He reamed the bowl with a PipNet reamer and took the cake back to bare briar. He scrubbed the internals of the mortise and airways in the shank and stem with pipe cleaners, cotton swabs and alcohol until they were clean. He scrubbed the surface of the briar with Murphy’s Oil Soap and was able to remove all of the grime and grit on the surface. I took some photos of the pipe when it arrived. He had been able to remove a lot of the buildup on the rim top. There was still some darkening to the rim top. You can see the damage to the inside edge of the rim. The outer edge also had some damage from what appeared to have been an habitual knocking out dottle on hard surfaces. The bowl was pretty clean but there appeared to be some hardened cake on the bottom of the bowl around the airway. I topped the bowl on the topping board using 220 grit sandpaper to remove the damage on both edges of the rim. I topped off enough of the rim to leave the top flat and smooth and minimized the damage on both the inside and outside edges.Once the bowl was topped I used a folded piece of sandpaper to bevel the inner edge of the rim. I wanted to bevel it to smooth out the nicks and cuts on the inner edge of the bowl. I sanded out the inside of the bowl with a piece of 180 grit sandpaper on a piece of dowel to smooth out the bits of cake that remained in the bowl. The pictures below show the process and the resultant bowl top and rim edges. The sides of the bowl are also cleaner. I sanded the rim top with a medium and fine grit sanding sponge to remove the scratches in the briar. I sanded the bowl surface with the sanding block to remove as many scratches as possible. I wiped the bowl down with alcohol on a cotton pad to remove the sanding dust. I cleaned out the pit on the bottom of the bowl with alcohol and cotton swabs. Once it was clean I pressed in some briar dust and then dribbled super glue into the repaired area. I added more dust to even out the surface and let it dry. I sanded the repair with 220 grit sandpaper to flatten out the repaired area and blend it into the rest of the surface of the briar.I wiped the bowl down with alcohol a final time and cleaned out the interior of the shank to remove the dust that had collected from sanding the bowl and repair. I gave the bowl a light coat of olive oil so that I could see the scratches when I sanded it with micromesh sanding pads.I polished the briar with micromesh sanding pads. I wet sanded it with 1500-2400 grit pads and wiped it down with a cloth dampened with olive oil. I dry sanded it with 3200-12000 grit pads and wiped it down between the second and third set of three micromesh sanding pads. I buffed it with Blue Diamond on the buffing wheel and then gave it several coats of carnauba wax. I buffed it with a clean buffing pad and hand buffed it with a shoe brush and a microfiber cloth. I took some photos of the bowl at this point in the process and then set it aside while I worked on the stem. The oxidation was brought to the surface of the stem by the cleaning it with a soft scrub cleanser. I started cleaning the oxidation off with Mr. Clean Magic Eraser and warm water. I sanded it with 220 grit sandpaper to remove the surface oxidation. I reshaped the button with needle files and the sandpaper. I sanded out the tooth marks and dents in the surface of the stem. The first two photos show the condition of the stem when I started.The next photo shows it after the initial sanding and scrub with the Magic Eraser. You can still see spots on the black vulcanite but it is pretty clean.  I ran a pipe cleaner through the airway and worked it around the button to clean out any remaining debris. It was pretty clean. (I was on a roll and forgot to take photos of it right after sanding it with the 220 grit sandpaper and reshaping the button.)I polished the stem with micromesh sanding pads – wet sanding with 1500-2400 grit pads and dry sanding with 3200-15000 grit pads. I rubbed the stem down with Obsidian Oil after each set of three pads and after the final pad gave it a last coat of the oil and set it aside to dry. I put the stem back on the pipe and buffed the stem with Blue Diamond. I gave the bowl and stem several more coats of carnauba wax and buffed it with a clean buffing pad. I hand buffed it with a microfiber cloth and took the following photos of the pipe. The finished pipe is shown in the photos below. It is a beautiful example of Preben’s workmanship. The finish may have originally been a light brown stain but I am pretty sure that it was a natural/virgin finish using no stain. This may be one that joins the other ones in my collection of Preben Holm pipes. Thanks for journeying with me in the restoration process.

Who would have guessed that there was a Beauty in this Beast


Blog by Steve Laug

Sometimes you have to look past the state of a pipe to really see what could be present underneath all of the layers of dirt and grime. You have to have the right perspective as well. You need to be able to see these pipes as well loved rather than abused; as a favourite pipe rather than a neglected one. This the context in which the next pipe that crossed my worktable is to be viewed. Here is the back-story. Not too long ago I received an email from a friend of mine named Jim, whose pipes I have worked on in the past. He had an interesting story to tell me and a request. I thought rather than tell the story for him I would let him tell it himself. Here is his email in full:

Hey Steve,

I have been hunting about 1200 acres of Farm and Woodland Property owned by an area farmer and old friend of mine named Stephen Lehner. Steve knows I am a pipe aficionado, and approached me the other day with a pipe that had belonged to his father. I was able to get a little history of how this pipe came to be in this abysmal condition. Steve’s father was rather hard on his pipes. As the original owner of this pipe, Steve said his dad, in the latter years of his life, was not given to cleaning his pipes. His cleaning routine, if you could call it that, consisted of digging any ash and unburnt tobacco from the bowl with a pocket knife, then grasping the pipe by the stem, toward the mouthpiece/lip area, and banging it violently against any nearby hard object – trees, brick walls, car mirrors. It was hard enough that Steve’s son, Shawn, remarked that the old man actually damaged the mirrors on his trucks! Mr. Lehner’s pipes were so abused, that he routinely broke stems, necessitating that he acquire new stems – some of which were not well fitted.

In any case, Steve handed me this pipe, stating that it is one of a very few connections he has to his late father, and asked if I could do a cursory cleaning so he could display it as a keepsake (He is not a pipe smoker). I thought the pipe was interesting, if in bad condition. I cannot clearly make out any markings. On one side, there is a partially legible stamping, “…vage” with some cursive writing below it which I cannot make out. On the other side, I can read the number “75.”  I think it is a bulldog style. The tenon will not enter all the way into the mortise, and I am not sure if that is because there is so much crud inside or because it is not the correct bit.  The bowl is heavily caked and cracked. It also looks as though there was some ad hoc rustication on the bowl, as well. The bowl shows a distinct area of impact where it was banged during cleaning as well.

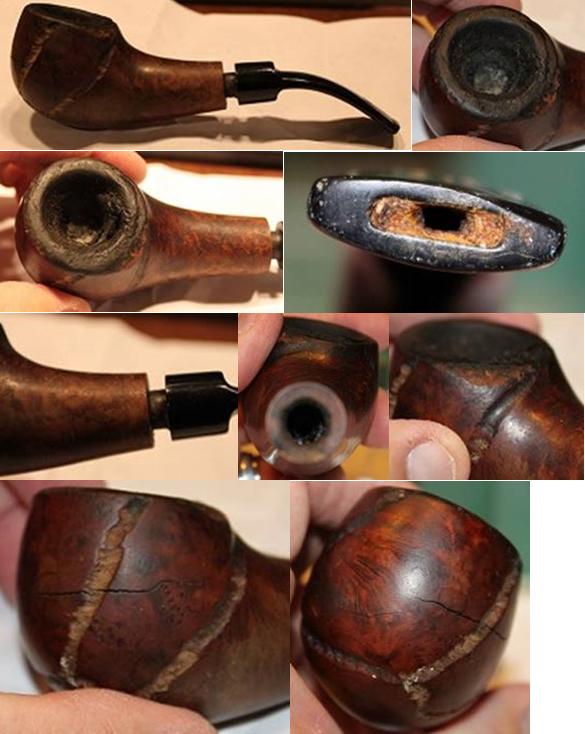
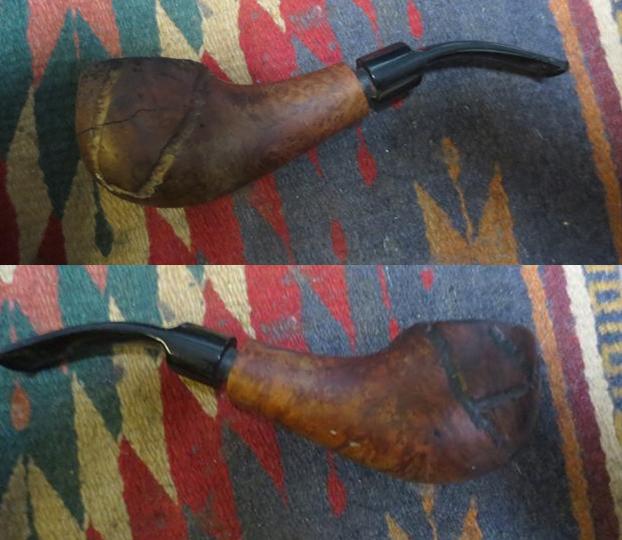
I attached some pix so you could behold this wonder:Once I saw the pictures I was quite taken back by the sheer beastly look of this old pipe. It had quite literally been beaten to death. The bowl was cracked on the outside of the bowl that started at the front of the bowl and extended to almost the back side. There was a second crack below that on the front of the bowl extending from the bottom of the first crack and extending toward the other side of the bowl. The bowl was so badly caked that I could not even get my pinky finger in the bowl. I tried to blow through the end of the shank and I was unable to get any air through the bowl. The finish was dirty and sticky to touch. The worm trail rustication ran over the bowl surface but was filled in with dirt and grit. From the photos it appeared that the shank inside was incredibly dirty. I think that it is fair to say this pipe was a stranger to pipe cleaners. The stem that was in the shank was not a fit. It was of smaller diameter than the shank. The slot in the stem was almost clogged.

After reading his email and looking over the photos I wrote back to my friend. I was pretty certain from the look of the rustication and the shape number he gave me that the pipe was a GBD. The three letters that he could read on the left side of the shank were age. That led me to look in the GBD list I have and concluded that the pipe was a GBD Sauvage. I looked up some information on a chart I have of GBD lines and knew that the pipe was originally sold with a light brown stain, smooth bowl with deep carved lines to hide flaws. It was similar to a Savinelli Sherwood, but much deeper carved lines. The GBD shape number 75 was a Rhodesian with a1/4 Bent Saddle stem. While this old pipe was a mess it was awfully hard to tell if it ever was a Rhodesian. I sent him this information in my reply.

He wrote back and said he wondered if I would be willing to tackle the restoration on this one. If so he would send it to me. I wrote back and said I would do the work. I guess I will find out if my guesses on the brand of this pipe were correct. I would know more once it arrived.

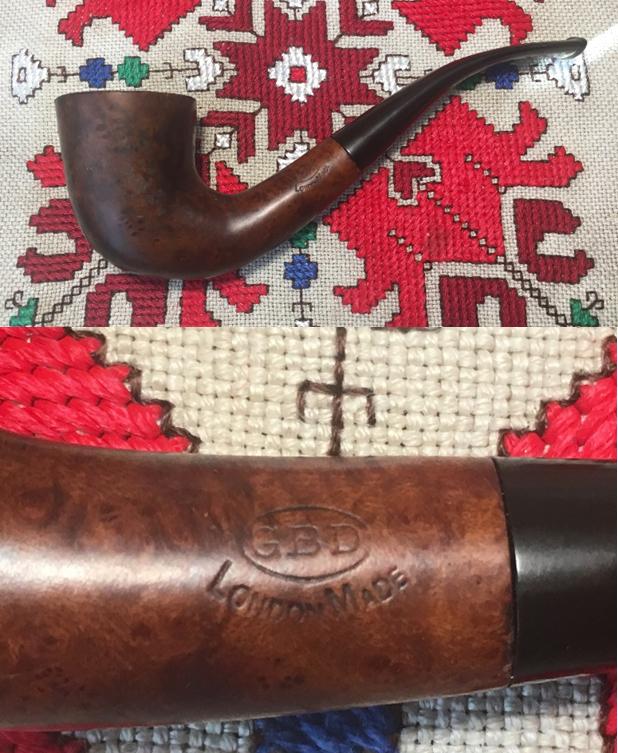
The pipe arrived and it was indeed a mess. On top of the beat up old pipe, the reek of Middleton’s Cherry pipe tobacco filled the room when I opened the box. My daughters immediately commented on how strong the smell was. I examined the pipe with a lens to see if I could identify the pipe. It was stamped on the left side of the shank with the GBD logo in an oval over Sauvage over Collector in script. On the right side of the shank it is stamped Made in England over 75 which is the shape number. The next photos show what the pipe looked like when I received it. I took a close up photo of the rim to show the absolute dreadful condition this pipe was in when it arrived. The bowl had a thick cake that still reeked of the aroma of burnt Middleton’s Cherry pipe tobacco. The rim had been hammered to what looked like the point of no return – though I would not know for sure until I had removed the cake and the buildup on the rim top. The stem was a replacement one and it was obviously a poor fitting one. The diameter of the stem and the shank were not a match and the tenon could not be pushed into the shank because of the grit and tar built up inside. The button had been flattened by biting and there were tooth dents on it and also on the top and bottom sides. I would definitely need to make a new stem for the pipe. I decided to start by reaming the bowl back to bare wood. I wanted to see if the cracks on the outside continued into the bowl. I fully expected the bowl to fall apart once the carbon was removed and ceased to hold everything together. I started reaming with the smallest cutting blade on the PipNet pipe reamer and worked up to the largest cutting head. I finished reaming the bowl with a Savinelli Fitsall Pipe Knife.I rolled a piece of 80 grit sandpaper on my index finger and sanded the inside of the bowl. I wanted to be able to clearly see if the cracks on the outside continued into the bowl. The second photo below shows the inside of the bowl. The crack on the left side of the bowl did not seem to show through inside. The one on the front of the bowl still needed some more work to be certain but it also looked like it did not show through. Notice the buildup on the rim it probably protected the top of the bowl to a large degree.I scraped the rim with a pen knife to peel off the cake that overflowed on the top. I carefully held the blade against the surface of the rim and scraped it slowly until all of the buildup was gone. Underneath all of the buildup the rim was in rough shape. It had been beaten pretty hard and the damage was quite extensive. The rim top showed signs of being knocked about hard against that truck mirror mentioned above. If this pipe could have talked I would love to hear the stories it could tell.I topped the bowl on the topping board using 220 grit sandpaper. I decided that I would sand it until the top of the rim was smooth and the damage on the outer edge of the rim was minimized.With the rim topped and smooth I wiped the bowl down with acetone on cotton pads to remove the grime and clean up the surface so I could assess the next steps in dealing with the external cracks on the left side and bowl front. I used a microdrill bit on my Dremel to drill pin holes at each end of the cracks in the bowl. The length of the bit ensures that I will not be able to drill too far and go into the bowl itself. There were five distinct ends to the series of cracks in the briar.I used a dental pick to clean out the cracks with surprisingly had closed tighter once the cake was removed from the bowl releasing the pressure. Once they were clean I pressed briar dust into the crack surfaces and the drill holes in the bowl. I dripped clear super glue on the cracks and into the plugs in the drill holes. I gave the repair several more coats of briar dust and super glue until the surface was filled. The pictures tell the story. I sanded the dried repair and the rest of the bowl with 220 grit sandpaper to remove the excess briar dust and glue. I wiped the bowl down with alcohol on a cotton pad. I used a Black Sharpie pen to colour in the worm trail rustication around the bowl sides. I had done some research and found that the rustication on the Sauvage line had been darker than the stain on the bowl.I used the drill bit from the KleenReem Pipe reamer to drill out the buildup in the airway from the mortise to the bowl. It was thick and hard so the drill bit took several passes through the airway to clean it out. I used a dental spatula to scrape out the thick, hard tars that lined the walls of the mortise. I scrubbed out the mortise and airway with alcohol, cotton swabs and pipe cleaners until the internals were clean.I stuffed the bowl with cotton balls until they were just below the edge of the rim. I put a pipe cleaner in the airway to wick the alcohol into the shank. I used an ear syringe to fill the bowl and shank with alcohol. I set the bowl upright in an ice cube tray and let it sit over night to draw the oils out of the briar. In the morning I took a photo of the darkened cotton balls. I used a dental pick to pull them out of the bowl. I cleaned out the shank and the bowl with cotton swabs to remove all the excess alcohol. I let the bowl dry.I stained the bowl with a dark brown aniline stain thinned 50/50 with alcohol to make it more transparent. I flamed the stain and restained it. I repeated the process of staining and flaming the surface until the briar had even coverage. I buffed the bowl with Blue Diamond on the buffing wheel and then took the following photos to send to Jim to show him the state of the bowl at this point in the process. There were still scratches in the finish that would need to be polished out but the bowl was showing promise and beauty was emerging from the beast. I left the pipe on my work table while I traveled to Idaho for my mom’s 90th birthday. I stay with my brother Jeff when I am there and as usual he had a batch of pipes for me. There were some amazing pipes there but what caught my eye this time was the stem I needed for this Sauvage. It was slightly bigger in diameter than the shank but it would not take much to fit it to the pipe. When I got home I lightly sanded the tenon with a Dremel and sanding drum until it fit snugly into the mortise. I took the photo below to show the new stem and the one that was with the pipe when it arrived. I took photos of the stem to show the difference in diameters of the shank and the stem. You can also see the deep tooth marks in the top and bottom sides of the stem near the button.I sanded the diameter with a sanding drum on the Dremel. I do this with the stem inserted in the mortise so that I can remove as much of the excess vulcanite as possible without damaging the briar on the shank. I nicked the edged of the briar but fortunately the nick was not deep. I also lightly sanded the top and underside of the stem with the Dremel and minimized the tooth marks. I sanded the areas on the stem where the tooth marks had damaged the vulcanite with 180 grit sandpaper and smoothed out the surface damage. What remained were the deeper tooth marks. I wiped down the surface of the stem with alcohol on a cotton pad to remove the debris and dust from the tooth marks. I filled the remaining tooth marks with black super glue and set the stem aside to dry.When the repairs had cured I sanded them with 180 grit sandpaper to blend them into the surface of the stem. I sanded the saddle portion of the stem to remove the marks left behind by the sanding drum.I put the stem in the shank and sanded the stem and shank with 220 grit sandpaper to make the transition really smooth. I could have done this differently but there was enough damage to the shank that the sanding would smooth out the briar as well. I wet sanded the stem and shank with 1500-2400 grit micromesh sanding pads to smooth out the scratches on the briar and the vulcanite. I was able to remove most of the scratches. The rest would come out with more elbow grease. I cleaned out the inside of the stem with pipe cleaners and alcohol until they came out clean. I used a sharp knife to bevel the airway into the stem. I have found that doing this directs the airflow from the bowl to the button. I put the stem in the shank and took the following photos. There is still a lot of polishing to do but the pipe is beginning to look pretty decent. I continued sanding with the 3200-12000 grit micromesh sanding pads to polish the stem. After each set of three pads I rubbed it down with Obsidian Oil and sanded some more. After the last pad I gave it a final coat of the oil and let it sit to dry.I buffed the bowl and stem with Blue Diamond on the buffing wheel and then gave both the bowl and the stem multiple coats of carnauba wax. I buffed it with a clean buffing wheel to raise the shine and hand buffed it with a microffibre cloth to deepen it. The finished pipe is shown in the photos below. I am repairing and refitting the original stem to send back with the pipe as well. Once it finished I will buff the two stems and finish removing any scratches that can still be seen in the pipe and then send it back for the surprise that Jim has in mind for it. Thanks for looking.

Refreshing a Tiny L&Co. Billiard


Blog by Steve Laug

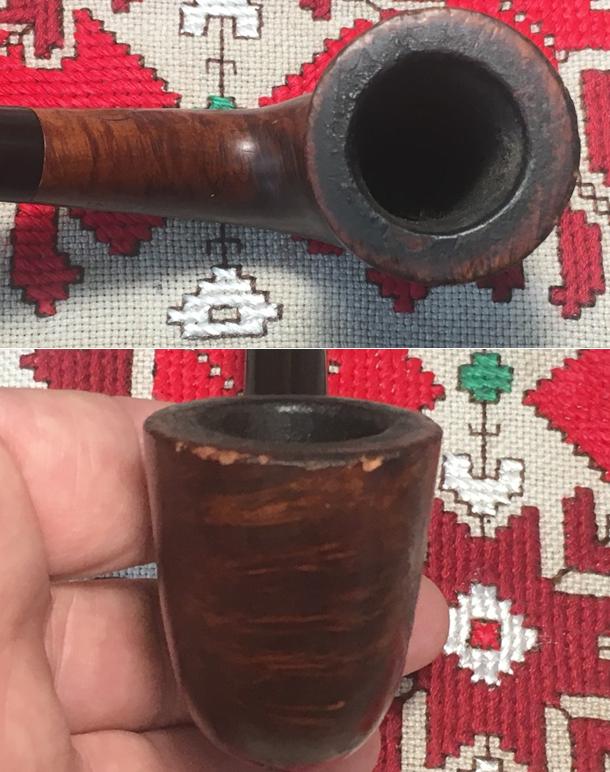
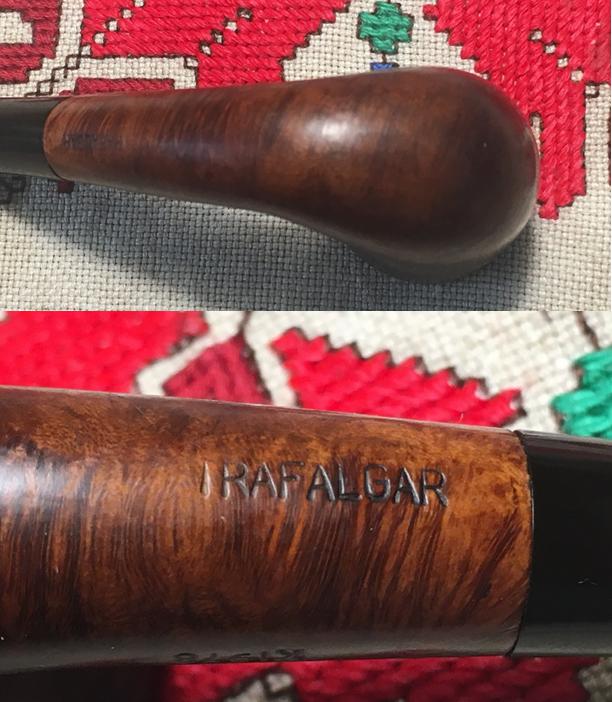
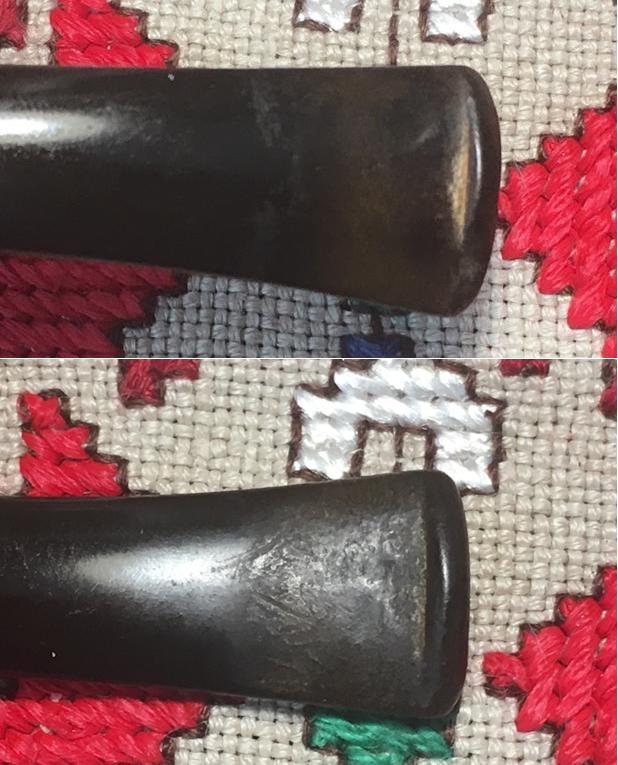
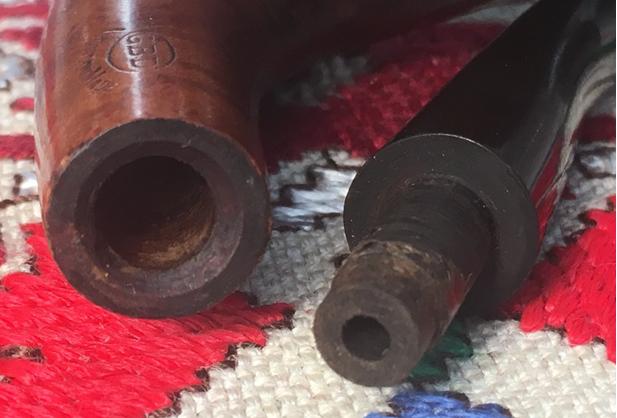
This is the final pipe of the lot of pipes I received from the pipe man in Eastern Canada who picked up an amazing lot an auction. The kind of price he paid makes me envious! This one is an older Loewe and Company graceful and diminutive pipe. It is stamped on the left side of the shank with L&Co. in an oval. On the right side of the shank it is stamped Loewe over England W.

When I received the pipe I took the following photos of it to give you the big picture of this tiny pipe. The stem was in good shape but had the most oxidation of the lot that was sent to me. There were small tooth marks and chatter on the stem near the button on both sides. The finish was dirty but in decent shape. The rim was worn and there were some dents and dings on the top surface. The inner edge of the bowl was slightly out of round. Someone had reamed the pipe back to bare wood but the internals were very dirty. loewe2 loewe3I took a close up photo of the rim to show its condition. The finish was worn on the rim as well as darkened and dented. You can see the damage to the inner edge of the bowl as well.loewe4The next two photos show the oxidation on the stem. It is hard to see the tooth chatter and marks but they are present and will need to be dealt with.loewe5I also took some photos of the stamping. While not perfect you can read the stamps quite well and see the details that I mentioned above.loewe6I reamed the bowl with a Savinelli Fitsall Pipe Knife to clean up the inside of the bowl. The bowl had already been reamed and there were only slight remnants of a cake in the bowl.loewe7With the bowl clean I used a 1500 grit micromesh sanding pad to smooth out the rim and take off the carbon buildup on top. It also worked to take off the scratches in the briar.loewe8I used a folded piece of 220 grit sandpaper to clean up the out of round rim and bevel that were present. It did not take too much sanding and it looked as good as new.loewe9I used a dark brown stain pen to touch up the rim. The colour of the stain was a perfect match to the colour of the stain on the bowl. I stained the bevel and the top of the rim.loewe10I cleaned out the inside of the mortise and the airways in the shank and the stem with alcohol, pipe cleaners and cotton swabs. The pipe was quite dirty in these areas and took a bit of scrubbing to get the grit out of the airways.loewe11I sanded the stem with 220 grit sandpaper to remove the oxidation and the tooth marks and chatter. Several of them were quite deep so I “painted” the tooth marks with the flame of the lighter to lift them to the surface of the stem. They all raised to the surface and a bit of sanding smoothed out the damage.loewe12I polished the stem with micromesh sanding pads – wet sanding with 1500-2400 grit pads and dry sanding with 3200-12000 grit pads. I rubbed the stem down with Obsidian Oil after each set of three pads. I set the stem aside to dry.loewe13 loewe14 loewe15I buffed the pipe and stem with Blue Diamond on the buffing wheel to polish the minute scratches that still remained in the vulcanite and the finish of the briar. I gave the bowl and stem multiple coats of carnauba wax. I buffed the pipe with a clean buffing pad to raise the shine and then hand buffed it with a microfiber cloth to deepen the shine. The finished pipe is shown in the photos below. This evening I packed the pipes and sent them Express Post back to the pipe man in Eastern Canada. I am hoping he enjoys his “new” pipes and adds them to his rotation. Cheers. Thanks for looking.loewe16 loewe17 loewe18 loewe19 loewe20 loewe21 loewe22 loewe23 loewe24


Hole in the Wall Gold Mine: Butz-Choquin Cocarde Major Rhodesian


Blog by Dal Stanton

Even though it was a snow trudging kind of day, making it to the ‘Hole in the Wall’ paid off again.  I mentioned this visit before when I was writing up the restoration of the Stanwell Silver Mount.  On this visit, I saw the Stanwell for the first time, but didn’t bite.  The next time I would!  On this visit, I found another very nice example of St. Claude, France’s claim to fame as an historic center of pipe production – rivaling the UK for market share in Europe.  When I saw the Butz-Choquin Cocarde Major in the pipe basket on the cluttered Hole in the Wall shelf, my initial reaction was its size – a hefty guy.  My first assessment was that it was a Bulldog shape, then I noted the large rounded shank – a Rhodesian or a Bullmoose?  This one is going home with me regardless!  I looked in the basket for a good pipe to bundle and I saw an attractive, diminutive, Bent Billiard Sitter with a swan neck stem – unmarked, but a very nice looking pipe.  When I got home I took a quick picture of the bundled pair and put them in the ‘Help Me!’ basket for later attention.butz1 butz2When I take the BC Cocarde Major out of the basket, I am anxious to recommission this nice-looking Rhodesian, I decide.  The first thing I do is pull up Google Translator and insert Cocarde Major in the French to English machine.  I did not study French in school so help is appreciated.  I want to know if special meaning is attached to this St. Claude BC.  Cocarde translated into English as the word, ‘Cockade’ which was defined as, a rosette, roundel or knot of ribbons worn in a hat as a badge of office or party, or as part of a livery. With a little looking on the internet, I found these interesting French examples of Cocardes.butz3With this meaning for ‘Cocarde’ it put doubt in my mind regarding my original thought that ‘Major’ referred to large or big.  Attaching Major to the idea of the French symbol of national pride, it is most likely pointing to a level of rank, or when ‘Major’ is attached to another rank (e.g., sergeant-major) it denotes the ranking of one superior among those of the same rank.  I emailed a colleague living and working in Toulouse, France, whose command of the language could help.  His comments confirmed what I was thinking:

The word cockade refers to a national symbole for the French, like “cocarde tricolore’ refers to the French flag which is, of course, one of the most important symbols of the French people and national pride.  It has many meanings, but for example official cars or planes have this symbol on it.  You are right about the word Major, refering to a military grade. Used as an adjectif, “majeur” it means big.   I would conclude that this is simply the name of the pipe.  You can’t translate it literally.  The pipe’s name implies in my opinion that it is a symbol of French pride, like the French insignia for a general in the military.

With the symbols of French pride stamped on this BC Rhodesian, I have a greater appreciation for the pipe when I take more pictures now on my worktable.butz4 butz5 butz6 butz7 butz8The stampings on the left side of the shank are “Butz-Choquin” in an arched script over “Concarde” over “Major”.  On the right side is, “St Claude” arched over “France” over “1028”, the BC shape number.  Per Pipedia’s history of the name, when Jean-Baptiste Choquin of Metz, started out as a tobacconist and the business prospered.  In 1858, one of his employees, one Gustave Butz, fell for his boss’ daughter and they were married.  That same year, Butz and Choquin came together to form the enterprise that is now known as Butz-Choquin, and eventually moved the operation from Metz to St. Claude, known as “the world capital of the briar pipe”.  Looking on the internet, I found another BC shape ‘1028’ but was called a ‘Bourbon Major’.  The shape was that of a Bulldog, with the diamond shank.  I know there is debate regarding the difference between Bulldog and a Rhodesian classification, but I am happy with Bill Burney’s descriptive difference in the Pipedia shapes Chart, that the difference between the two is, the Rhodesian has a round shank and the Bulldog, a diamond.

So, looking more closely at the BC Rhodesian in front of me, I see that the surface is generally in good shape – striking grain patterns.  There are two noticeable fills that need addressing.  There is also a chip over the shank, where the double grooves meet – the grooves forming the border between the upper and lower cones of the Rhodesian stummel.  The chamber has thick carbon cake buildup and needs removal down to the briar for a fresh start.  The stem has very little oxidation and a couple distinct clincher tooth marks on the top bit and chatter above and below.  The stamped ‘BC’ stem marking is in good shape but the white color needs touching up.  The following pictures show the question areas on the stummel – mainly fills and the chip.butz9 butz10Even though the oxidation is minor, I put the stem in an Oxi-Clean bath for a few hours to raise the oxidation to the surface.  I first cover the stem ‘BC’ stamp with petroleum oil.  Turning to the stummel, I take the Pipnet Pipe Reamer kit and use the two smaller blades of the four available and remove the cake using first the smallest, then graduating to the next larger when the blade stops meeting resistance.  This cake is hard and crusty but vacates in short order.  I fine tune the reaming with my Savinelli Pipe Knife.  I’ve grown to like this handy tool.  What The Pipe Smoker blog says about it is spot on:

Basically, a three-sided scraper, it can be placed in the chamber exactly where it needs to be placed and then cake is scraped off with a simple movement of the wrist. It allows full control over where the cake is being reduced. It has a rounded tip, which means that it will not damage the bottom of the bowl. It makes no difference, whether the chamber is straight or conical, I can use the same tool on either. It requires no adjustment. 

After the Savinelli pipe knife scrapes the chamber wall, I wrap 240 grit paper around a Sharpie pen and sand the chamber removing the last vestiges of carbon.  I then wipe the bowl with a cotton pad wetted with isopropyl 95%.  The chamber looks great.  I fold up the paper towel and my work station is clean again.  Pictures show the progress.butz11 butz12 butz13 butz14I then switch to the internals of the stummel and clean the mortise and airhole with pipe cleaners and cotton swabs dipped in isopropyl 95%.  After some extended effort, pipe cleaners and cotton swabs are coming out clean.  Later, I’ll add another measure of cleaning by giving the stummel a kosher salt and alcohol soak.  I like to go the extra mile when I’m preparing a pipe for a new steward.  The picture shows the progress.butz15Turning to the stummel externals, I remove the grime on the surface and clean the rim.  I use undiluted Murphy Oil Soap with cotton pads.  I use a bristle tooth brush as well to clean the double grooves circling the cone.  I also employ a brass brush to clean the lava and grime off the rim.  The pictures show the progress.butz16Time to fish the stem from the Oxi-Clean bath.  It’s amazing that even when the stem looks to have little oxidation, the Oxi-Clean bath raises the oxidation to the surface.  I wet sand with 600 grit paper to remove the bulk of the oxidation from the vulcanite and then follow-up using 0000 steel wool. Throughout this process, I give care to work around the ‘BC’ stem stamping.  Pictures show the progress.butz17With the tooth dents on the upper bit, I attempt to remove by using a lit candle’s heat to raise the indentations by expanding the vulcanite but it wasn’t working well.  So, I apply a small drop of super glue to the spots and then apply an accelerator to cure the glue.  After a few minutes, I use the flat edge needle file to file down the superglue patches to the vulcanite surface.  While I have the file out, I file the button lip, upper and lower, to give them more definition.  I follow with applying 240 grit paper to remove the file marks and to fine tune and blend the superglue patches.  I follow with 600 grit paper and then 0000 steel wool.  The pictures show the progress.butz18 butz19 butz20 butz21I clean and freshen the internals of the stummel further with a Kosher Salt/alcohol soak for several hours.  I set the stummel in a sturdy egg carton and twist a cotton ball and feed it into the mortise, pushing it in with a straight wire.  I then fill the chamber with kosher salt which is not iodized – which can leave a taste.  Then, I fill the chamber with isopropyl 95% until it surfaces above the salt.  The pictures show the process.butz22The next morning, the salt/alcohol soak had run its course and from the darkening of the salt and the cotton wick, the process effectively cleaned and freshened the stummel internals even after the plethora of pipe cleaners and cotton swabs.  I dump the old expended salt and thump the stummel on my palm, then use a paper towel and wipe the bowl.  I use bristle brushes to clean the mortise and again, pipe cleaners through the airway to finish the cleanup.  As billed, the soak works.  Pictures show the soak results.butz23With the internals of the stummel clean, I clean the internals of the stem.  Using pipe cleaners dipped in isopropyl 95% I work on the stem.  After I begin, even though the ¼ bent saddle stem is not an extreme bend, I’m surprised that I am not able to move a pipe cleaner through the stem without difficulty.  Finally, I pass a bristled pipe cleaner through and move it back and forth, hoping that it loosens up the passageway. It doesn’t.  I decide to use the technique that Charles Lemon used on Dad’s Pipes (See here: Link) of expanding the airway by heating the stem and moving a pipe cleaner through.  Just to be on the safe side, I draw an outline of the stem’s bend to use as a template for a comparison after I re-bend the pipe back to the original.  I first straighten the stem by warming it with a heat gun until the vulcanite becomes pliable.  After inserting a pipe cleaner through the stem, I then reheat the stem and return the stem to the ¼ bend.  Now, back to the original curve comparing to the template, without difficulty I complete the cleaning of the stem using isopropyl dipped pipe cleaners moving freely through the airway.  I also clean the crud out of the slot with a dental probe.  Pictures show the process.butz24 butz25Before starting the micromesh phase to raise the luster of the BC bent stem, I use Miracle Eraser on the ‘BC’ stem stamp to remove the oxidation without applying an abrasive to the stamp.  It does seem to help.  Then, I wet sand the stem using micromesh pads 1500 to 2400, followed by dry sanding with 3200 to 4000, then 6000 to 12000.  I complete each set by applying Obsidian Oil to revitalize the vulcanite.  To watch the stem gradually pop, is an amazing process.  This Butz-Choquin is cleaning up nicely.  I set the stem aside to dry.butz26 butz27Now I return to the stummel and take a close look.  After cleaning with Murphy’s Soap, I detect about 4 or 5 fills on the surface that need addressing. The fills are solid but with some, I’m able to scrape of the upper layer of the fill.  There is also a chip in the double grove going around the stummel.  With the smaller fills, that are not pitted, I use dye sticks, starting with a lighter hue and graduating to a darker hue, until the blend is best.  I then use a lightly dampened cotton pad with isopropyl 95% to dab the areas to blend further with the surrounding briar.  The pictures show the progress.butz28 butz29With those more pitted, I mix a bit of superglue and briar dust to form a putty and apply on the pitted fills.  Carefully, I also paint the groove chip and before the putty start hardening, I clear overflow putty from the grooves with a sharp dental probe.  I use an accelerator to cure the briar dust putty patches more rapidly.   After a short time, I sand each putty fill to bring it to the briar surface.  I first carefully use a flat needle file to work the putty hills down to almost surface level then I use 240 grit paper to sand to the surface level.butz30 butz31 butz32Decision time.  I want to restore this Butz-Choquin as close to the original shade as I can.  I discovered on TobaccoPipes.com a BC in the same shape group as the Cocarde Major – 1028.  In the picture below, the shade of the stummel is light and I think I can achieve this by simply sanding the stummel and restoring the briar to its original natural luster – MINUS what appears to be an acrylic finish below. I can still decide to apply a stain at the end of the sanding process after I have a better idea of the briar as it emerges.  The shape below is a BC Cocarde 1025 – the only difference I detect is the tapered stem versus the saddle stem.butz33First, I want to freshen the rim lines and re-cut an inner bevel which will look better and remove discoloration on the inner rim edge.  The rim has a subtle slant toward the chamber.  I cut the initial bevel using a coarse 120 grip paper rolled tightly.  When I reestablish the bevel, I follow by sanding with 240 grit sanding paper.  I then sand the stummel using a medium grade sanding sponge, followed by a light grade sanding sponge.  I am careful to work around the stampings on the sides of the shank.  Before I move on to the micromesh sanding, I use dye sticks to help blend the fill patch areas that are not yet blending.  After applying the dye stick, I then lightly dab the area with a cotton pad slightly wetted with alcohol.  This helps blend with the surrounding briar.  The pictures show the progress.butz34 butz35 butz36 butz37I follow by using micromesh pads 1500 to 2400 and wet sand the stummel.  After this, I dry sand using 3200 to 4000 then finish with pads 6000 to 12000.  I then run a toothpick through both grooves connecting the upper and lower domes of the Rhodesian to remove residue remaining from the sanding process.butz38 butz39To step back and take in the big picture, I reunite stem and stummel and take a picture.  I see two distinct briar dust putty fills that are looking like I should have used a clear superglue fill instead.  They are darker than the surrounding grain environment – not an ideal situation.butz40I decide I can live with the fill on the upper cone, next to the rim.  It is smaller and I hope that it will blend after applying a light brown stain which is looking like will be needed.  With the larger lower fill, I will delicately try reaming the fill with the point of a Dremel tool to remove the putty.  Depending on how that goes, the next step will be to shape the fill somewhat so that the shape is less circular and flows more with the surrounding grain pattern.  Then, I will fill the new hole with clear superglue, sand and again be back to where I am now – hopefully with better blending.  Phase one seems to go well – very carefully.  With the Dremel tool I clean the putty fill and shape the pit circle to flow with the grain.  I then spot-glue and use accelerator to cure the new clear patch.  Looking good so far.   I use a flat needle file to remove the superglue fill mound almost to the briar surface, then I use 240 grit paper rolled, to strategically stay on top of the glue to bring it down to surface.  I follow with 600 grit, then steel wool, then the full array of 9 micromesh pads, 1500 to 12000.  I touch up a bit with a light dye stick and blend with a cotton pad with a bit of alcohol.  I am now back to where I was at the beginning of the detour. The fill is still visible, but doesn’t jump out proclaiming, “Here I am, Boys!”  The pictures show the detoured progress.butz41 butz42 butz43 butz44Now, to promote blending throughout the entire stummel, I use Fiebing’s Light Brown Leather Dye.  I warm the stummel to open the grains to receive the dye.  Using a doubled-over pipe cleaner I liberally apply the dye over the stummel careful to achieve full coverage, rim and grooves.  I then flame the aniline dye with a lit candle and the alcohol immediately burns off, setting the dye in the grain.  To achieve total coverage, I repeat the process above after a few minutes, complete with flaming.  I put the stummel aside to rest and I’ll return to it after work this evening.butz45One last task to do before heading to work.  I want to freshen the ‘BC’ stem marking with white acrylic paint.  I put a small dab of paint over the ‘BC’ and then use a toothpick to spread the paint, making sure the marks are fully covered.  Tonight, after the paint is fully cured, I’ll scrape off the excess leaving a fresh Butz-Choquin stem.butz46Back home and ready to go.  The white acrylic paint has fully cured on the stem marking.  I take a toothpick and gently scrape the excess paint away using the side of the toothpick.  Doing this, the toothpick passes over the top of the stamping leaving the indentations fully renewed.butz47Time to ‘unwrap’ the fire crusted stummel after applying Fiebing’s Light Brown Leather Dye.  Using the felt wheel, I set the speed of the Dremel to the slowest possible and using Tripoli compound, after purging the wheel of old compound with the sharp edge of the Dremel’s adjustment wrench, I remove the crust from the stummel.  I take a picture to show this process.  After the crust is removed, I use cotton pads wet with isopropyl 95% to wipe down the stummel.  I lighten the stummel’s hue a good bit aiming for the original as closely as possible and to blend the dye across the grain.  When I reach the hue that looks good, I switch to a cotton cloth wheel mounted on the Dremel, and after reuniting stem and stummel, I apply Blue Diamond compound both.  I’m loving watching the grain on this BC Cocarde Major Rhodesian start popping – it is truly an amazing process and the components of such fine abrasion produce such a result in the briar. When completed with Blue Diamond I give the pipe a buff with a felt towel, not so much for shining but to remove residue compound before I apply the wax.  After mounting the cotton cloth wheel on the Dremel, I increase the speed to the second slowest speed and apply several coats of carnauba wax to stem and stubble.  When finished, I rigorously hand buff the pipe with a micromesh cloth.butz48 butz49The grain on this Rhodesian is placed perfectly to enhance the proud, chin forward carriage of the stummel.  The horizontal flame grain crosses the heel of the stummel and flows to the sides terminating in bird’s eye – a beautiful showpiece of briar that is well-suited to bear the name of French pride – Cocarde Major.  This Butz-Choquin Rhodesian, another traveler from St. Claude, is looking for a new steward.  I sell the pipes I restore and give the profits to benefit the work we do here in Bulgaria with the Daughters of Bulgaria – rescuing women and children who have been trafficked and sexually exploited.  If you are interested in adding this Butz-Choquin Cocarde Major Rhodesian to your collection, you can find it at the store at my blog site, The Pipe Steward.  Thanks for joining me!butz50 butz51 butz52 butz53 butz54 butz55

Another Wedding Trip Pick: A 1961 DUNHILL EK Shell Briar Made in England 1 4S


Blog by Dal Stanton

Unbelievably, I found this classic Dunhill EK Shell Briar at Madeline’s Antiques & Uniques during the trip for our daughter’s wedding in the US last November. Madeline’s was one of those picker paradises waiting on the I 24 Exit near Manchester, TN, that thankfully, we did not drive past! I had pleasure restoring and gifting our youngest son on Christmas in Denver, the Aged Imported Briar Poker (Red Dot) pictured below on the bottom (See: Link) and the restored Poker’s picture following. Now, shift two pipes above the Poker in the picture below, and you’ll see the Dunhill EK Shell Briar that now has my attention after rescuing him from my ‘Help Me!’ basket here in Sofia, Bulgaria.dal1 dal2At 5 3/4 inches in length, it is a nicely sized square shanked paneled billiard – a very nicely blasted Dunhill Shell pipe.  The stampings are worn but legible on the lower panel of the squared shank.  On the left quadrant, it reads, “Dunhill” over “EK Shell Briar”.  The right reads, “Made In” over “England 1”. Then, to the extreme right on the shank’s edge is 4 ensconced in a circle followed by S.  On the top panel of the squared, tapered stem is embedded the well-known Dunhill white dot – a mark of excellence since 1915.

In 1915, the famous white spot was introduced for very practical concerns. With straight pipes, customers had trouble knowing which way to insert the handmade vulcanite mouthpieces. So, Alfred Dunhill ordered white spots to be placed on the upper side of the stem. This very practical solution would become a definitive trademark of Dunhill pipes. The “white spot” soon became known as a symbol of quality. (Link to Pipedia’s history for Dunhill)

This is my first opportunity to research Dunhill to understand better the heritage of the pipe on my work table.  There is much information about Dunhill on the internet, which is nidal3ce change.  My impressions of the founder, Alfred Dunhill, are that he was a talented and creative businessman, who understood well that a quality product would create a financial boon along with understanding the ‘needs’ of a market.  Per Pipedia, in 1893, he inherited a harness business at only age 21, but was savvy enough to see the approaching reality of the automobile and he leveraged his company to prepare for it. He started, “Dunhill Motorities” to capitalize on this new industry. His first experiment in pipe making was to accessorize for the ‘new’ and sophisticated needs of those now driving cars which were faster than horse and carriage.  To me, this epitomizes Alfred Dunhill’s approach to business and perhaps, to life as well. With wind in the faces of potential customers, he birthed the idea of marketing a pipe with a windshield! We laugh, but this says something about the man who guided his company through the Great Depression when many pipe manufacturers were closing their door.  Dunhill expanded.  The Pipedia synopsis describes the world-wide growth of Dunhill Pipes and their association with quality – the preferred pipe of the rich and famous and the aristocracy.  This ‘market share’ was due in part to Alfred Dunhill’s practice of giving pipes to the English military officers during WW1.  Altruism or good marketing?  During that time the aristocracy of England was awarded military commissions by birth-right.  Dunhill was a smart businessman, there’s little doubt of this.  I also read that it was Alfred Dunhill who kept Winston Churchill well-supplied in cigars.  Another interesting thing I saw as I did my research was threads and discussions arguing why Dunhill pipes are more expensive than most?  Quality or overrating based upon a name?  This Pipe Magazine thread is one example.

The largest part of my curiosity regarding Dunhill is to understand better the creation of the ‘Sand Blast’ finish, or as it’s called in Dunhill Land, Shell.  In my diminutive time rescuing and restoring pipes, I’ve never had clarity in my mind about the differences between blasted and rustified surfaces – and variations therein.  These distinctions are clear to most enthusiasts in pipe collecting and restoration but I’ve been a bit slow on the uptake!  I’m looking at the Dunhill Shell Briar – my first thought had been that it must have something to do with shells on a sea shore….  This small article was especially helpful from the same Pipedia page:
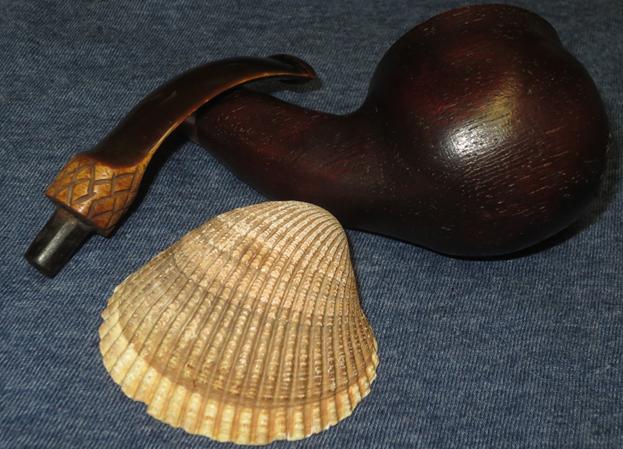
Shell

A deep craggy sandblast with a black stain finish. Dunhill patented the sandblast finish in England in 1917 (Patent No. 1484/17) and the U.S. in 1920 (Patent No. 1,341,418). See The Art of Sandblasting, by R.D. Field, for in depth look at Dunhill’s revolutionary new finish. The deepest and craggiest finishes were from Algerian briar, which is softer and yields more to the blasting. These are found in circa 1920’s, 1940’s, and 1960’s Shells. The pipes were double blasted until the 1960’s, and then the double blast technique resumed in the 1980’s calling it the “Deep Shell” finish. During the 1960’s and 70’s Dunhill could not acquire the Algerian briar. Consequently, the company’s sandblast pipes were much shallower and less distinct. Once again Dunhill showed itself to be innovative, inventing the “double blast” technique to bring about a deeper blast even with harder briar. The black shell sandblast finish uses a stain the was developed for the color, not the taste. They have a more bitter taste, even when well smoked.

Now I have it.  The knowledge that blasting highlights briar grain by removing softer wood through the process has changed how I now look at the surface of a blasted pipe or with Dunhill, a Shell pipe.  ‘Shell’ reportedly came from observations of the earliest experiments with sand blasting briar shapes – they were shriveled and looked like a ‘shell’ – that is, a shadow of their former states.  Even with the limited number of restorations I’ve done to date, it is obvious that I thoroughly love and enjoy working on smooth briars, simply for the challenge and delight of witnessing the beauty of briar grain appear.  Now, I study the Dunhill EK Shell Briar with a new appreciation for a different perspective on the same beautiful grains but revealed via blasting.  So much for my reflections!  Here are pictures of the Dunhill I’ve been reflecting upon!dal4 dal5 dal6 dal7 dal8 dal9Before I begin the restoration work, one last tick on the research list – the nomenclature.  The two pictures above show the markings on the lower shank panel.  I admit, when I first started trying to make sense of the plethora of information on Dunhill dating, it was daunting and a bit confusing, but as I looked at R.D. Fields’ A Dunhill Pipe Dating Guide published in Pipedia, Pipephil’s unbelievable charts, and tooling through all the examples of Dunhill nomenclature exemplified year-by-year, and also Pipephil’s, Dunhill Dating Key – pieces started coming together.  Reborn Pipe’s reposting of Eric Boehm’s Dunhill Shapes Collated was helpful as well.  When I first looked at the pictures above, I had missed the ‘E’ of the EK Shell Briar which is barely legible due to the wear next to the heel of the stummel.  Boehm’s information about ‘EK’ shape was: “Quaint Shape” Hexagonal panel billiard, square shank, angled tapered bit “Stand-up” 1928.  The EK Hexagonal panel is interesting in that a hexagon has 6 sides.  Over the years, this shape may have added more angled variety.  This EK is either squared if you only count the 4 major panels, but it is possible when including the tapered, smaller panels creating the corners, 8 panels are encircling this stummel.  The Pipephil Dunhill Shape Code chart calls the EK a square panel and provides an example of an EK 1958.  The markings are:
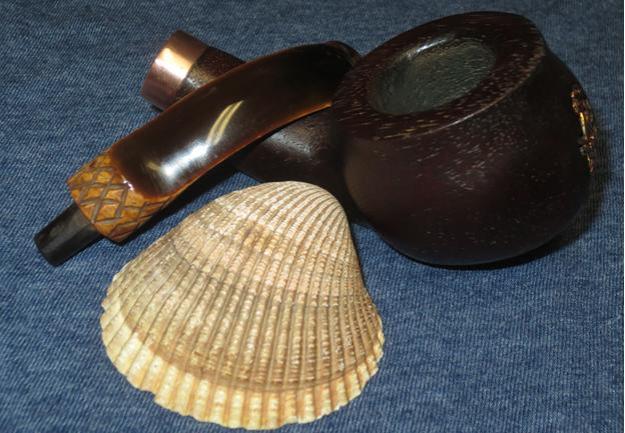
EK = Square Panel (shape letters)

4 (in circle) = Bowl Size

S – material: Shell or sand blasted

The dating of this pipe is 1961, based upon the suffix number ‘1’ following ‘England 1’.  Clear? Starting in 1955, Dunhill stopped including the full patent number in the nomenclature.  So, for Dunhills without the patent number, if the number following the ‘England’ is 5-0 (underlined or a subscript) then it would be the year 1950 + X = Year.  So, a Dunhill having ‘England 5’ is from 1955.  With the 1960s the system changed to 1960 being the base starting point with suffix numbers added to ‘England’ that were not underlined or subscripted, but the same size as the D in England.  Are you confused – I was, but it finally became clear.  The dating suffix in the picture above is ‘England 1’ which indicates a dating of 1960 +1 = a 1961 dating!  If I had an ‘England 24’ it would be dated 1984.  I found another EK Shell Briar on this finished eBay listing which was “London 8” – 1968.dal10

Pipe Pages had this example of an Owl Catalogue of 1962 with a picture of the same EK shape in the center but its dating would look like this: “England 2”.  I don’t know if this makes it clearer, but I am thankful for Dunhill dating his pipes!

With a new appreciation for Dunhill, and the EK Shell Briar, Made in England 1, 4S, before me, I hope that I can recommission this pipe for another lifetime and to serve another steward!  The stummel generally looks good – it needs to be cleaned thoroughly – the internals and the blasting.  The cake in the chamber needs to be removed to the briar to allow a fresh start and to examine the chamber wall.  The rim is seriously caked with oils and lava flow and the rim has a small chip on the shank-side panel which will need coloring and blending.  The lower shank panel with the Dunhill nomenclature is already worn – I will clean the area but stay clear of any abrasives.  I thought I detected a crack in at the 4 o’clock mark looking at the shank, but with a closer look, thankfully it is grain and not a crack!  The stem is the challenge.  The oxidation is heavy and needs to be removed.  The button has a bite-through on the lower side that breaches the lip.  The button will need rebuilding and the hole patched.  I remove the stem from the shank and put a pipe cleaner through the airway and plop it in an Oxi-Clean bath to start addressing the heavy oxidation.dal11With the stummel, I take the Pipnet Reaming Kit to address the cake build-up in the chamber. I take another picture of the cake to mark the progress.  For easier clean-up, I always put down a double layer of paper towel to catch the exorcised carbon.  I use the two smallest blades of the 4 available to me to ream the chamber.  Starting with the smallest, then the next larger size.  After this, to fine tune the reaming, I use the Savinelli Pipe Knife by scraping the walls further.  Then, wrapping 240 grit paper around a Sharpie Pen, I sand the walls to remove the smallest traces of carbon and to bring the chamber again to briar.  I finish by using a cotton pad wetted with isopropyl 95% and wipe the chamber to remove the carbon dust. After inspection, the chamber walls show no sign of burning through though I do detect heat fissures that are not serious, but need attention in the last stages of the restoration.  The pictures show the reaming process and inspection questions.dal12 dal13 dal14 dal15Before moving to the external cleaning, I tackle the internals – using cotton swabs and pipe cleaners dipped in isopropyl 95% I clean the inside airway.  The resistance is significant so I take a drill bit, the size of the airway, and ream and scrape it – trying to dislodge the gunk and bring it out.  I continue with cotton swabs and pipe for some time – also utilizing sharp and spaded dental probes to reach and scrape into the mortise.  After some time, the pipe cleaners started returning less soiled.  I’m calling the frontal siege completed, but at the close of the day, I will commence the Trojan Horse attack to further clean the internals with a Salt and Alcohol soak.   The pictures show the progress.dal16Now to the externals.  Using undiluted Murphy’s Oil Soap, I scrub the rim and blast surface using cotton pads and a bristled tooth brush to get into the crags and crevices.  I also use a brass wire brush on the rim to loosen the crusting.  The brass wire will not harm the briar. dal17Ridding the rim of the lava crust reveals several nicks and bare briar around the rim panels.  I also note that there are several places along the shank/stem junction that have lightened because of wear.  I use furniture repair markers starting with the lightest hue (Maple) and methodically start touching the rim spots as well as around the shank.  When the ‘scarring’ or lightened areas are still evident, I graduate to the next darker brown hue, then a third stick darker still.  Looking for the blending to occur.  As I go, I have a cotton pad lightly dampened with alcohol to wipe the areas gently to create more blending of the dyed areas along the rim and shank.  The first 3 pictures show the problems (forgot to picture the shank!) and the last 3 after using the dye sticks.dal18 dal19 dal20 dal21With the stummel repairs completed, I give the internals more cleaning and freshening.  I put the stummel in the egg carton and fill the bowl with Kosher Salt and twist a cotton ball and stuff it down the mortise, to help draw out the left-over gunk.  I then fill the bowl slowly with isopropyl 95% until it reaches the level of the salt.  I put it stummel aside and let the salt/alcohol soak to do its thing.dal22With the stummel soaking, I fish the stem out of the Oxi-clean bath.  The bath did a good job causing the olive greenish oxidation to rise to the surface.  Using 600 grit paper, I wet sand the stem taking off the raised oxidation.  I follow this with using 0000 steel wool – removing more oxidation and shining and smoothing the vulcanite stem.  I’m careful to avoid sanding over the shoulders of the stem to round off the squared shank.  The pictures show the progress.dal23I turn now to the internal stem airway using pipe cleaners dipped in isopropyl 95%.  As hoped, the resistance was little and the pipe cleaners were coming through the airway and emerging clean. dal24With clean internals, what remains is to rebuild the button and patch the bite-through hole from the former stewards clinching.  I create a slot insert using an index card cut to fit and then covered with slick scotch tape – the plastic looking kind.  This will keep the charcoal-superglue putty from sticking to the insert.  The insert serves two purposes.  First, it protects the airway from putty dripping down and plugging things which would add significantly to the work load!  It also provides the form underneath the hole to shape the fill.  I open a capsule of activated charcoal on an index card and I mix it with Hot Stuff Special ‘T’ CA glue – after I place a puddle of it next to the charcoal.  Gradually, I pull charcoal into the puddle of CA glue using a toothpick until I reach a viscosity of molasses and then strategically I dollop the putty in to the tooth hole and around the button – more than needed so that during the sanding phase there’s enough material to shape the button adequately.  Just as an experiment, I’m putting the putty on a bit wetter than usual and use an accelerator to cure it more rapidly.  I want to see if the result might be fewer air pockets in the patch material.  The pictures show the progress with the button patch and rebuild.dal25 dal26 dal27After a fruitful day at work, I’m anxious to return to the worktable.  The Kosher Salt and alcohol bath has run the course and as expected, the salt has darkened and the cotton stuffed into the mortise has acted as a ‘wick’ drawing out the oils and tars – thank you Charles Lemon of Dad’s Pipes for the suggestion of using cotton rather than a cork.  It worked well.  After dumping the salt, I wipe the chamber with a paper towel to remove all the residue salt.  I also employ bristle brushes to clean out the mortise to remove all the old used salt.  Then I return to using some cotton swabs and pipe cleaners down the mortise and they came out clean. Job done.  The pictures show the progress.dal28Many of the pipes I’ve been restoring have had significant stem issues – splicing the L J Peretti, and several button rebuilds have come my way.  I like to think I’m getting more practice resulting in better results!  So is the hope.  I take fresh pictures, top and bottom, of the patched area using activated charcoal dust and Special ‘T’ CA glue to mark the progress.  Beginning from the slot-side, I use a sanding drum with the Dremel to remove quickly the large hunk of runover.   Then, using a flat needle file, I work toward bringing the new edge of the button to where the original slot is.  After this is accomplished, I carefully file inside the slot to shape it. Care is given because the lower slot lip in the center, is 100% patch fill from the tooth hole breaching the slot.  The patch material tends to be softer than the vulcanite so the center – lower area of the slot may be soft and give up too much territory as I file.  I gently (and patiently!) use the small circular part of a pointed needle file to shape the inner part of the slot.  It looks good.  Pictures show the progress to establishing the new rough slot.dal29 dal30 dal31Now I establish the upper edge of the shank-side of the button lip.  I do this by eyeballing a logical place to have the lip – maybe giving me a little more lip than needed now – I can always file it down, but can’t file it up! I place a score in the patch bulge with the corner edge of the flat needle then gradually file the score across the button and moving downward toward the original stem surface.  As I file with the flat needle file, I keep the left edge of the file off the stem and lean into the patch area. I don’t want to scar up the stem for no reason!  Pictures show the gradual, patient shaping process with the file.dal32 dal33With the top shape-out completed with the file, I flip the stem and repeat the process on the bottom side.  I follow the button line from the top to the bottom by continuing to score the line around the excess on the stem edges, filing and rounding the button on the left and right.  I use the stem’s lines on the left and right sides, coming from the shank-side to create the line through the left and right side of the button.  At the end, it’s a smooth transition on the sides from the stem’s sides to/though the button’s sides. I picture what I’m attempting to explain in the last picture in this set below.  I’m also careful to uncover gradually the tooth hole patched area in the center bottom.  I expect the patch area to be softer than the vulcanite and I want the patch to blend.  The pictures show the progress on the lower side of the button.dal34 dal35The last two pictures show the completion of the button shaping upper then lower, using 240 grit paper followed by 600 grit paper and 0000 grade steel wool to catch the button repair area with the rest of the stem.  The button rebuild looks great and the hole patch is blending well.dal36 dal37At this point I take a close look at the patch area and I see some air pockets – not many, but some.  That cannot stand for the recommissioning of this 1961 Dunhill.  What comes to your mind when you reflect on 1961?  This is what I see, a ’61 Chevy with this Dunhill along for the ride!  Perhaps I need to acquire one of Alfred Dunhill’s Patent Shield Pipe too!dal38This Dunhill might be a good Birth Year Pipe for someone if I can give it up.  I take regular superglue and make a small puddle and use a toothpick to hole drop glue and paint some areas to fill the air pockets and I follow by spraying the fills with accelerator.  Following this, I sand the fill areas with 600 grit paper and then 0000 grade steel wool.  I declare button repair consummatum est! dal39 dal40 dal41I take the Dremel and finally fabricate a plastic washer to guard against sanding down the shoulders of the stem.  Using the washer with the stummel providing the resistance, I wet sand with micromesh pads 1500 to 2400, then dry sand using the next set of 3200 to 4000, then 6000 to 12000.  I follow each set of three with an application of Obsidian Oil to revitalize the vulcanite.  My, this stem and Dunhill White dot are ready for the ’61 Chevy convertible!dal42 dal43I may have created a problem showing the ’61 Chevy paired with a British-born pipe.  So, I suppose this British made ’61 MGA Roadster would do OK in a pinch 🙂dal44With the micromesh phase completed, I turn again to the stummel.  Previously, I applied dye sticks to lightened wear areas to give a fresher look.  I look at the rim a little closer and it still appears crusty and black – lacking the light reddish speckling present in the rest of the stummel.  I lightly sand the rim with the 1500 micromesh pad and then use my pen knife and gently scrape the top.  I only remove the crust on the sand blasted surface.  After scraping, I return to Murphy’s Oil Soap and with a brass brush, scrub the rim again and rinse with tap water.  I’m seeing a better contrast of hues now in the blast textured surface. I then take the darker hue stain stick and randomly paint portions of the rim to add more contrast and interplay and then lightly dab and wipe with a slightly wetted cotton pad with isopropyl 95% to blend.  I want to keep the original color of the EK Shell Briar and the look of a classic 1961 Dunhill.  The pictures show the progress.dal45 dal46Using a cotton cloth wheel, I apply Blue Diamond compound to the stummel.  I set the Dremel speed to 1, the slowest possible.  With the Dremel’s wheel, as small and concise as it is, I can rotate the stummel and guide the wheel so it’s going with grains – maneuvering in the peaks and valley of the Shell moonscape surface.  I don’t overload the wheel with compound and press with too much force downward, but allow the RPMs of the Dremel and the compound to do the work.  After completing the compound application, I hand-buff the stummel with a flannel cloth to remove the loose compound residue before applying the wax.   With the stem and stummel reunited, I give both several coats of carnauba wax.  I use a separate cotton cloth Dremel wheel dedicated to carnauba, I set the speed at 2, with 5 being the fastest setting.  As I did with the Blue Diamond, I utilize the strategic smallness of the Dremel’s wheel as I maneuver to distribute the carnauba wax without gunking up in the Shell textured surface.  Following the wax, I give the Dunhill a brisk hand-buff with a micromesh cloth.
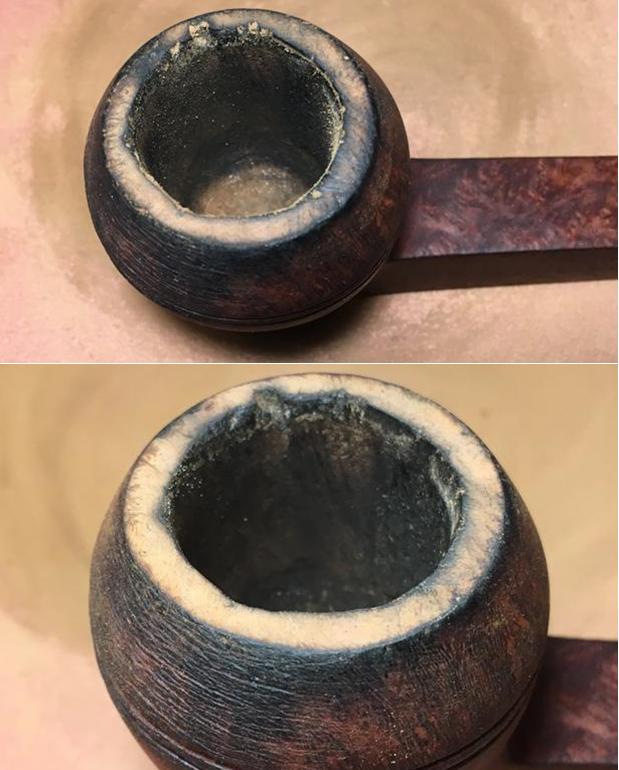
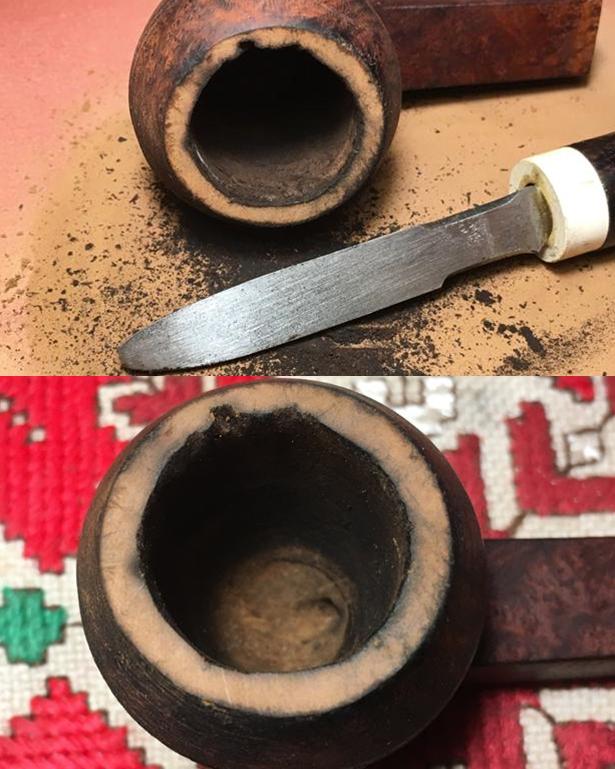
One last need on the check-list before recommissioning this 56-year-old Dunhill.  After this many years of active service, heat fissures had developed in the chamber. I want to coat the chamber with a mixture that helps protect the briar while at the same time provides a temporary foundation for the cake to develop which will provide the long-term protection of the chamber briar.  I have heard, and repeat here, proper cake depth to be maintained is about the thickness of a US dime.  It would have been easier to do this before polishing the stummel, but I forgot until now.  No problem. dal47In the past, I’ve used a coating mixture of activated charcoal dust and sour cream (here on Reborn Pipes) – which works wonderfully and leaves no taste or smell – it is inert.  Since I don’t see any sour cream in the refrigerator, I decide to use the method that Charles Lemon uses which he described here on Dad’s Pipes using maple syrup and activated charcoal as the main ingredients.  Since we do not have maple syrup in Bulgaria (bummer!), Charles assured me after an emailed question, that honey, plentiful in Bulgaria, would serve well as a substitute.  Charles’ directions are straight forward, which I follow:

  1. Insert a pipe cleaner in the stem of the pipe to keep the airway open.
  2. Wipe maple syrup around the inside surfaces of the bowl. Try for a nice even layer.
  3. Pour activated charcoal powder into the bowl right up to the rim.
  4. Allow the pipe to sit for an hour or more. This gives time for a layer of charcoal powder to be absorbed by the syrup.
  5. Dump out the excess charcoal powder, remove the pipe cleaner from the stem.
  6. Now the hard part. LET THE PIPE SIT FOR 5-7 DAYS. The bowl coating will cure smooth and hard.
  7. After curing, your pipe is ready to go!

These pictures show the progress with the final picture a few hours after clearing the excess charcoal.  I will need to let the pipe sit now for 5 to 7 days for the bowl coating to fully cure, which will not be a problem! dal48 dal49 dal50I’m very pleased with the outcome of the stem/button repair.  There is no perceptible indication that there was a hole that breached the lower button lip.  The Shell Briar cleaned up well and shines with a rich, deep, brown/burgandyish textured shade.  When restoration began, I did not realize how I would grow to appreciate the name, “Dunhill” and the pipes bearing this respected name.  The debate will remain regarding Dunhill’s higher pricing – whether one is paying for only a name or for advanced excellence in a pipe.  I suspect that both are true.  After seeing the beauty of this 1961 Dunhill EK Shell Briar emerge, especially as he responded to the carnauba treatment, coupled with the solid feel of the 4-paneled, square billiard bowl, and the strong bearing of the squared shank transitioning into a squared stem that gracefully tapers to the button –  and, all is crowned with Alfred Dunhill’s happenstance white dot mark of excellence – and I agree, I am looking at a quality pipe.  I’m conflicted whether to keep this Dunhill, my first, or to put him up for adoption???  Oh well…. I sell my restorations with a special purpose.  The profits help the work we do with the Daughters of Bulgaria – women and children sexually exploited and trafficked.  This vintage 1961, Dunhill EK Shell Briar, Made in England 1, is ready to serve a new steward.  If you’re interested in adopting him and helping the Daughters, go to my blog site at The Pipe Steward Store and check it out.  Thanks for joining me!dal51 dal52 dal53 dal54 dal55 dal56