Blog by Dal Stanton
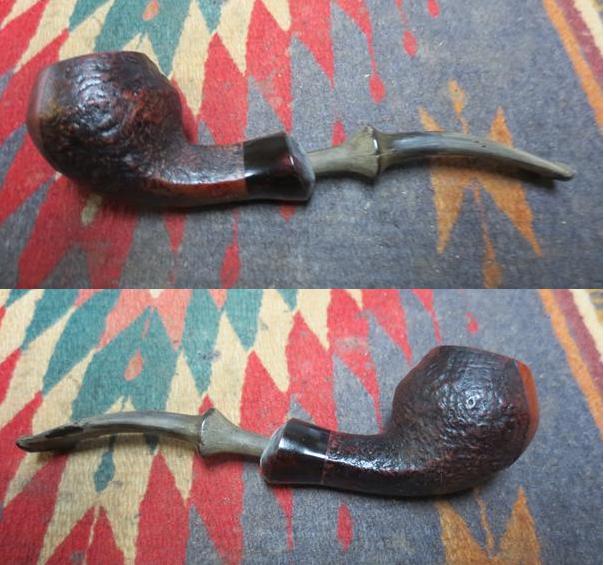
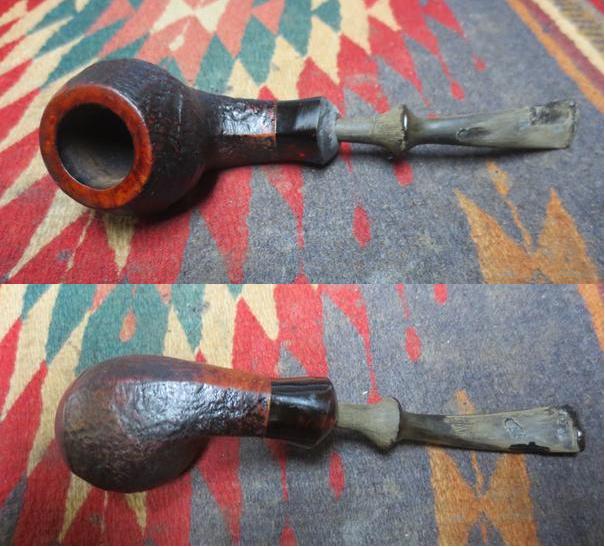
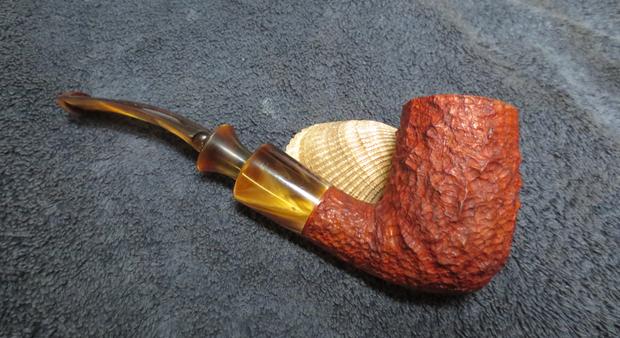
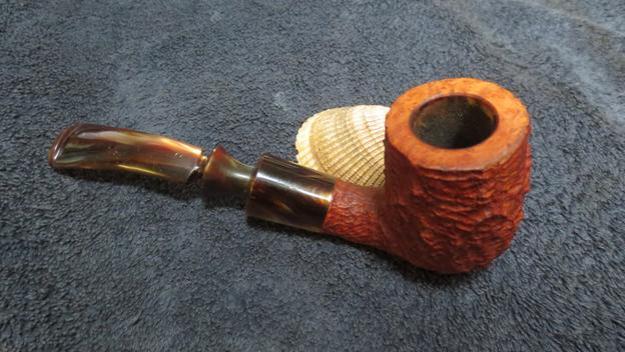
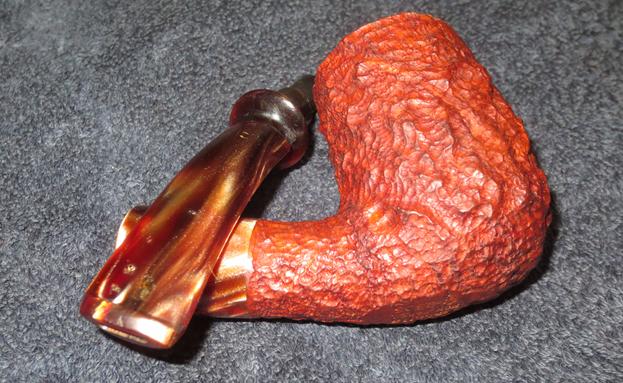
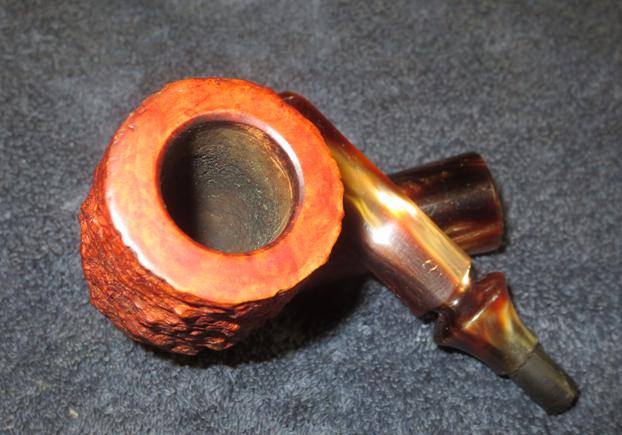
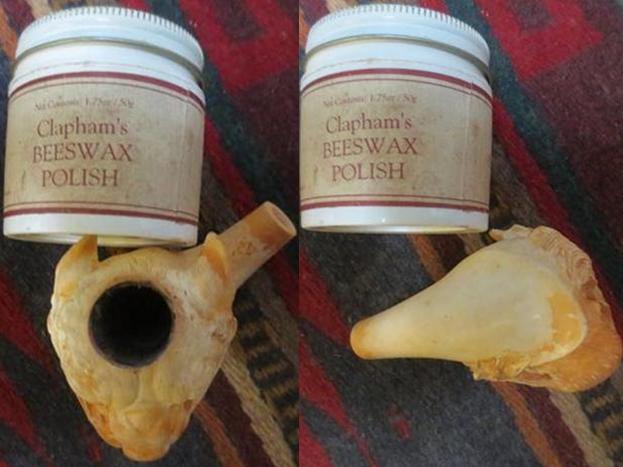
I know exactly where I was when Charles Lemon, of Dad’s Pipes, posted his blog Family Heirloom Comes in from the Cold on December 22. I was dutifully, pushing the shopping cart at the Target in Golden, Colorado, while my wife and I were engaged in last-minute Christmas shopping. Well, my wife was shopping and I was catching up on pipe blog reading with my iPhone 6s. The story Charles told was of a pipe (without a stem) discovered on a stroll in a pasture, how it arrived there was a mystery, which, after some research looking at old photos, was determined to belong to a great-great uncle. The restoration was to be a Christmas gift for the great-great nephew, the pipe finder’s step-father…. It was an excellent restoration on Charles’ part, but the story itself, the condition of the pipe, the fact that it was found after how many years – contributed to one of the core reasons I love restoring pipes. As I read Charles’ heart-warming story, I found myself rooting for the pipe to make it and to again be restored to the lineage of the steward. While I continued faithfully to keep pace with the shopping cart, dodging frantic shoppers and kids on too much sugar and reading Charles’s post, ‘Gramps’ came to mind. The first time I saw the pictures of ‘Gramps’ and read the eBay seller’s comments, I determined to place my bid to rescue the old, worn out, tossed aside, pipe. Why did I immediately name him ‘Gramps’? Here is what the eBay seller said:
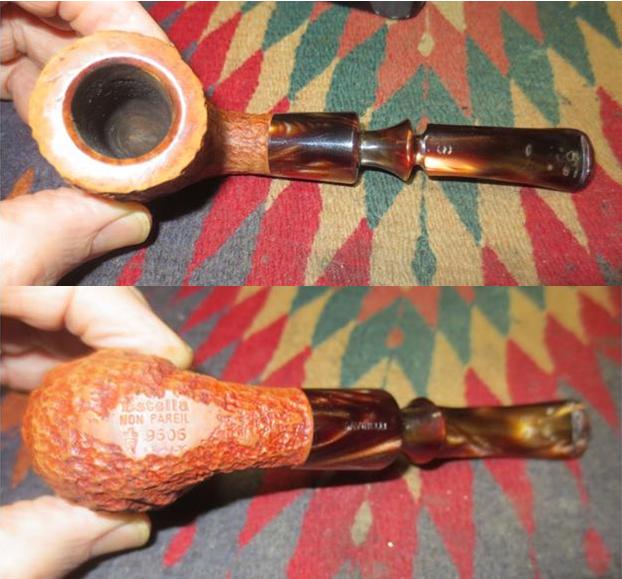
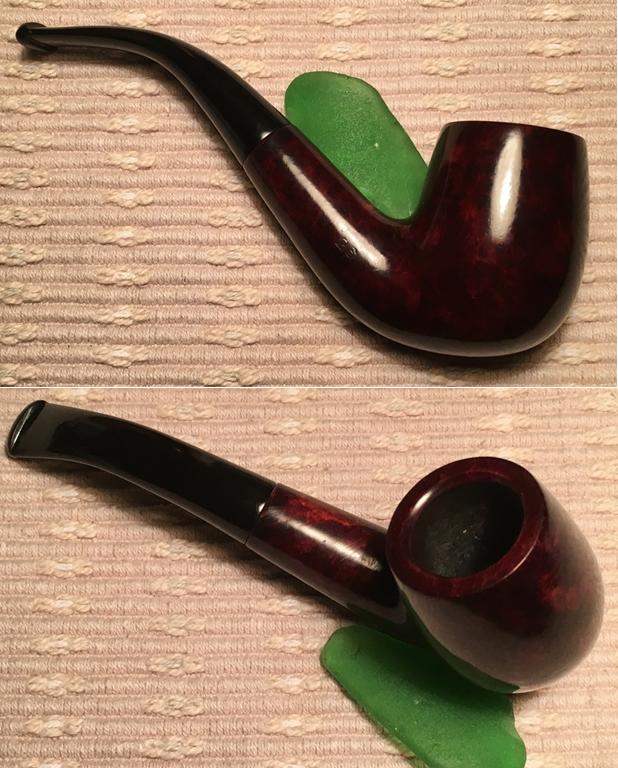
Vary rare REDONIAN Pipe. Found at the Estate Auction of a 98-year-old man. (Who said smoking will kill ya?…no way). So the pipe has some ware marks up by the mouth piece, see pictures. Pipe is marked bowl piece is marked 26 on one side and SARDINIAN de Luxe Made in London on the other. It is a used pipe. Ready to be Enjoyed, Gifted or Resold…ENJOY!
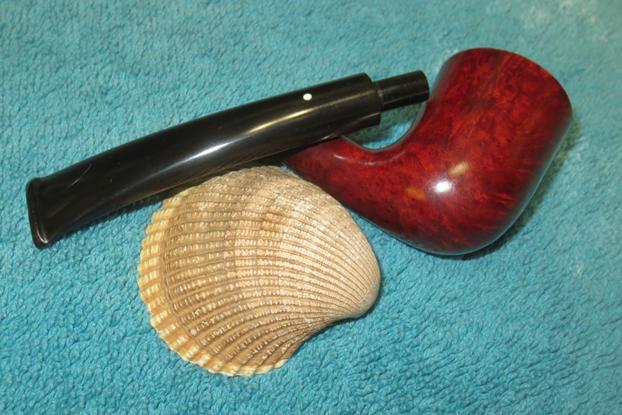
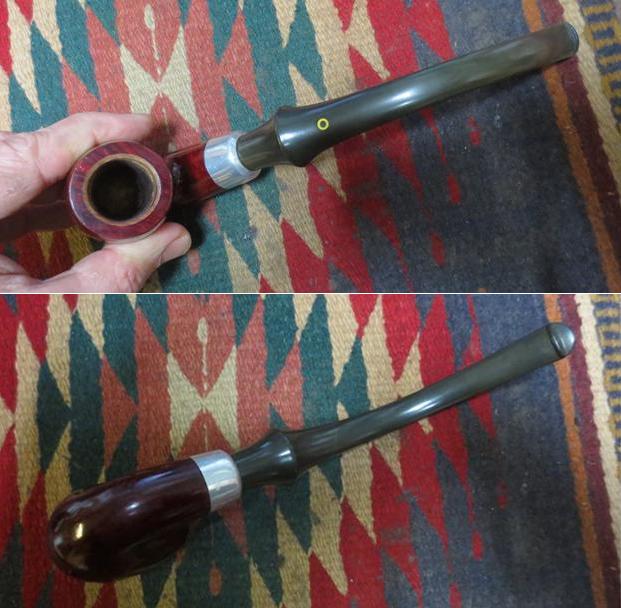
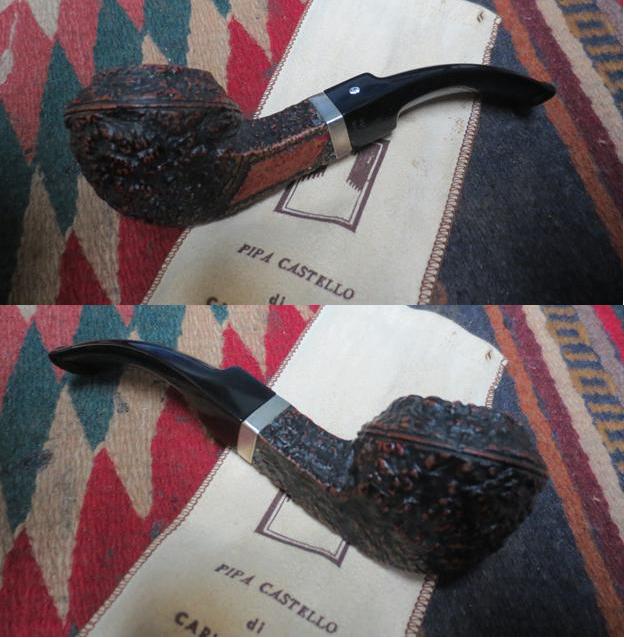
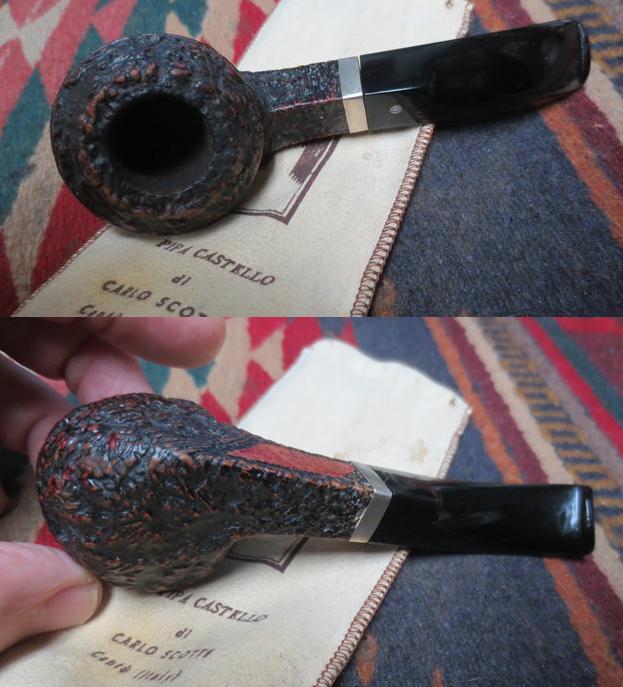
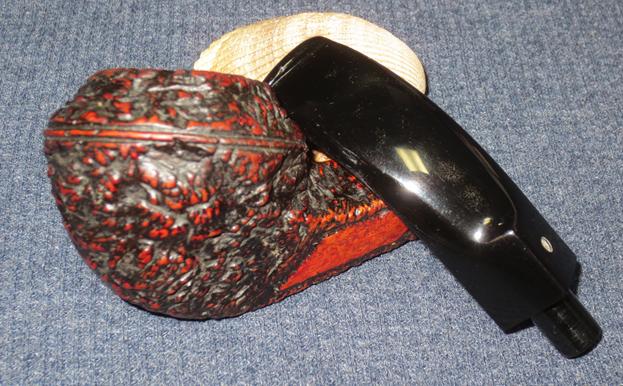
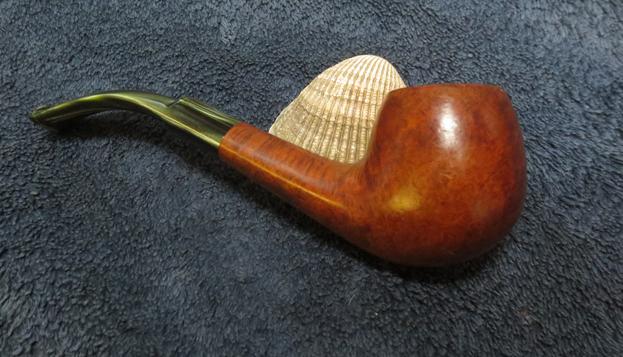
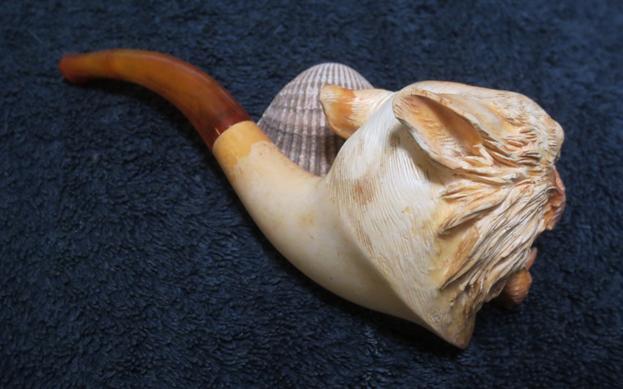
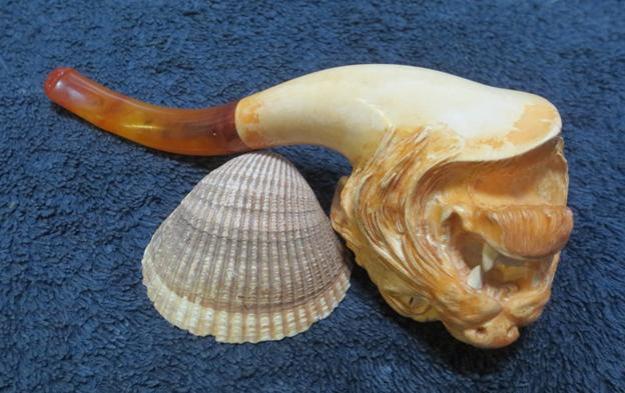
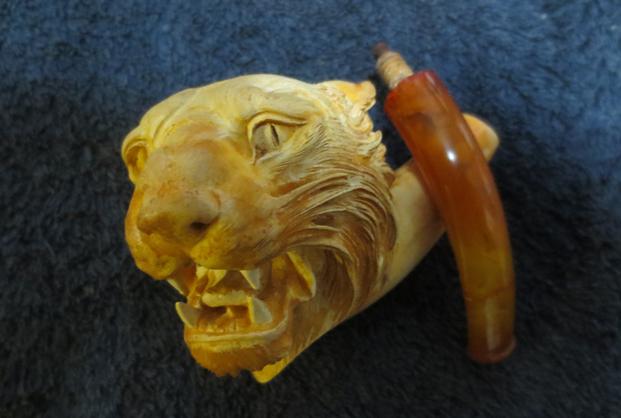
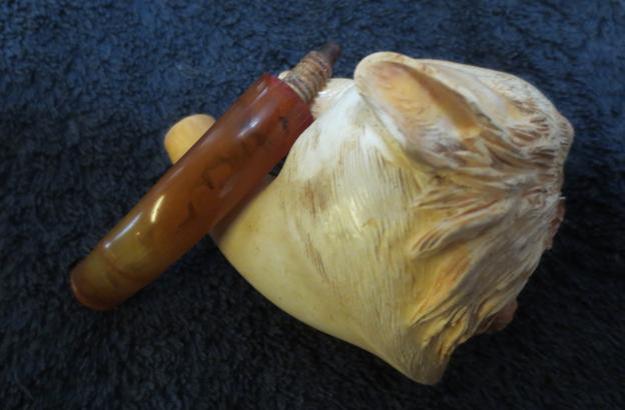
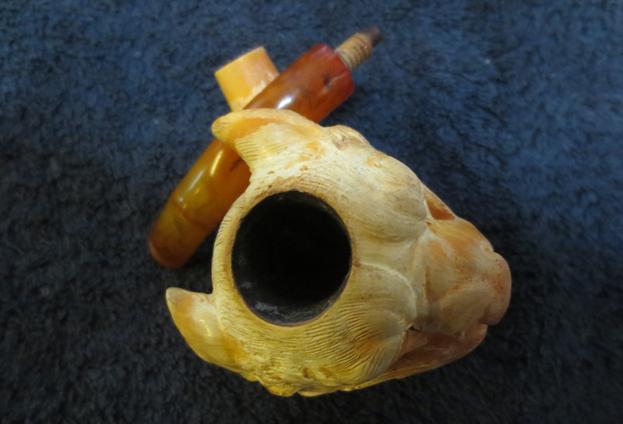
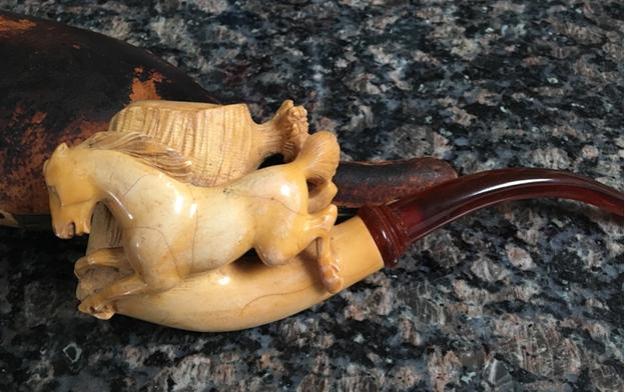
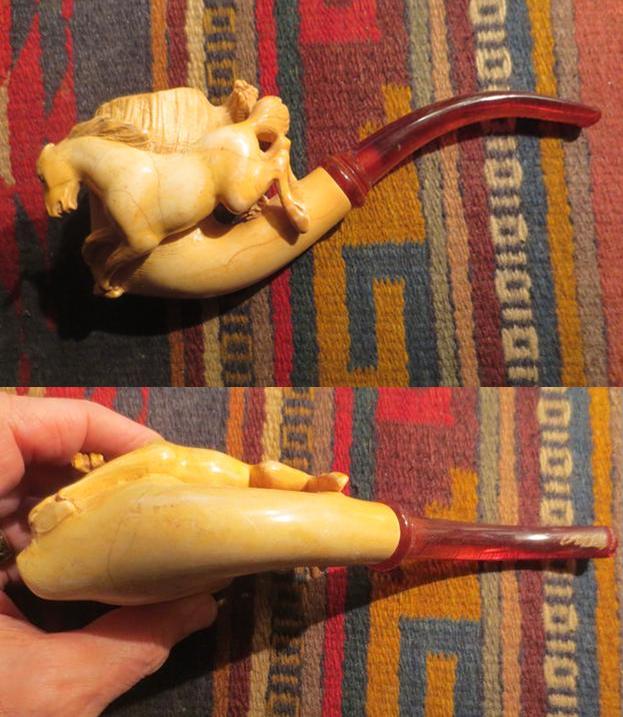
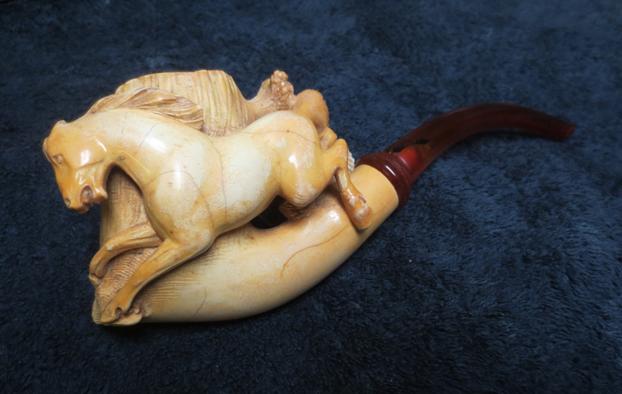
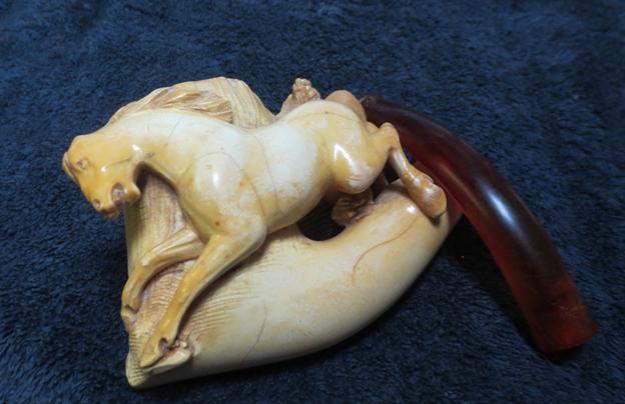
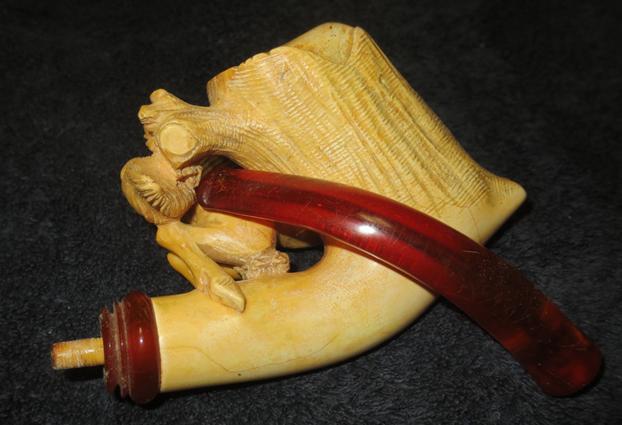
With a smile on my face while looking at Gramps’ pictures, notwithstanding the ‘mild’ exaggeration of the seller’s sales bravado, “Ready to be Enjoyed, Gifted or Resold…ENJOY!”, this is what I saw:
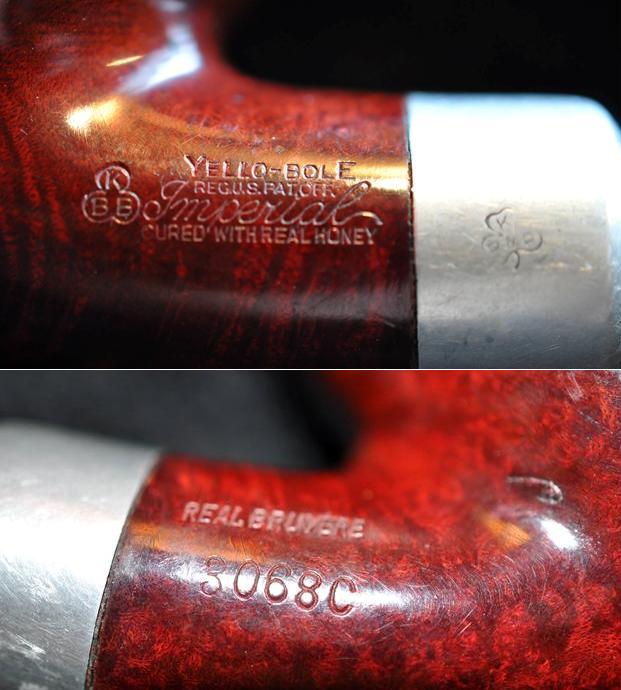
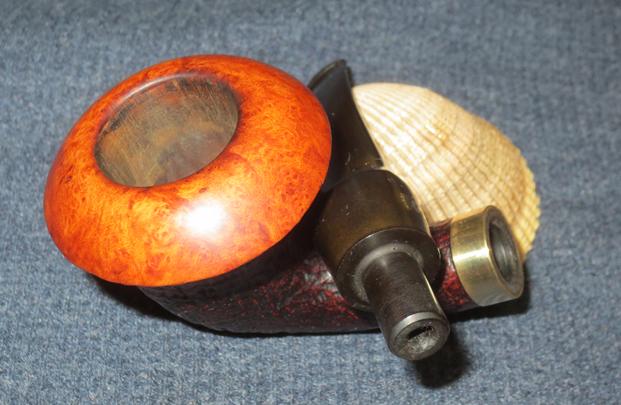
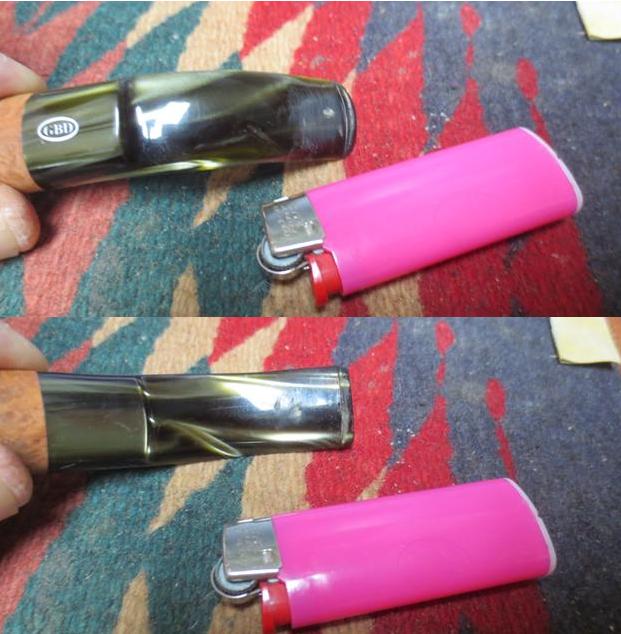
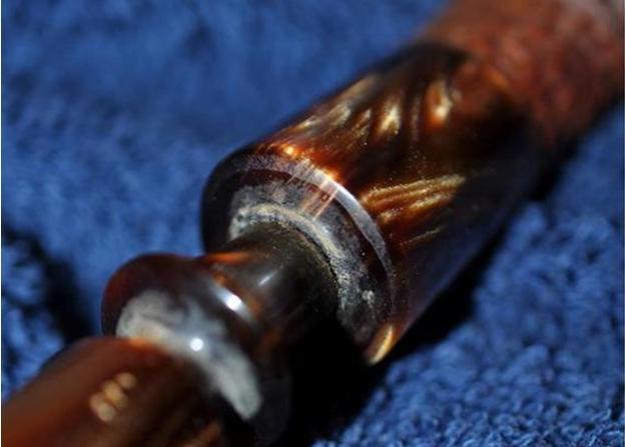
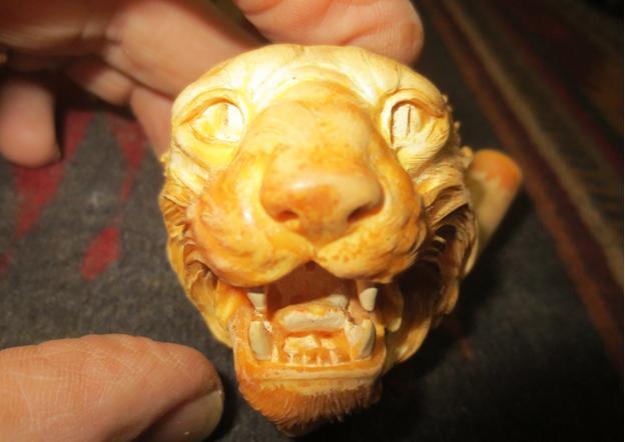
 I have no idea if I can bring Gramps to drink of the Fountain of Youth or not, but I’m now looking at him on my worktable here in Sofia, Bulgaria. The markings on the left shank are Redonian Deluxe over London Made. The right side of the shank bears the mark, 26, which I assume is the shape number. Surprisingly, the stem stamping is legible – a red ‘R’ ensconced in a circle. A look at Pipedia and I discover that the Redonian was made by the John Redman Ltd./British Empire Pipe Co. in London, the same company that was a possible manufacturer of the L. J. Perretti I restored not long ago – the Perretti Co. is based in Boston and the second oldest Tobacconist in the United States. According to the Pipedia article, John Redman Co. pipe lines, along with Redonian, include Aristocrat, Buckingham, Buckingham Palace, Canberra, Captain Fortune, Dr John, Golden Square, Richmond (not Sasieni), and Twin Bore. I take some additional pictures of ‘Gramps’ for a fresh look.


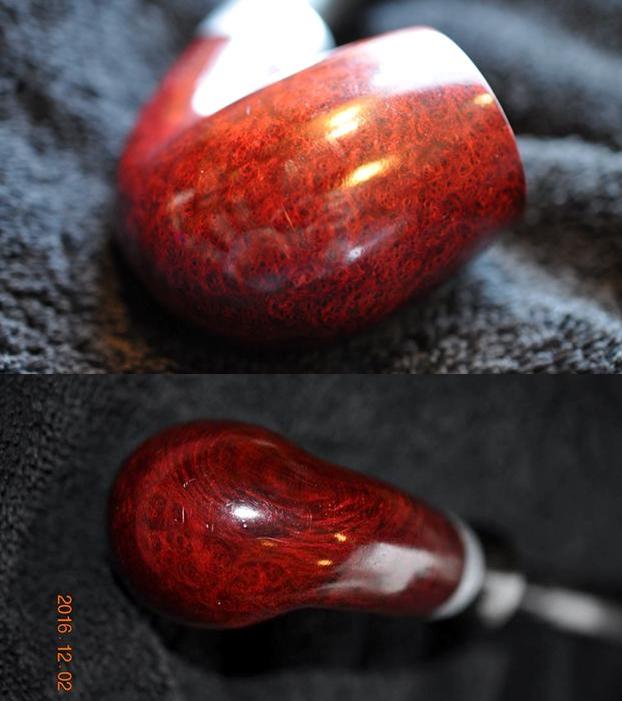
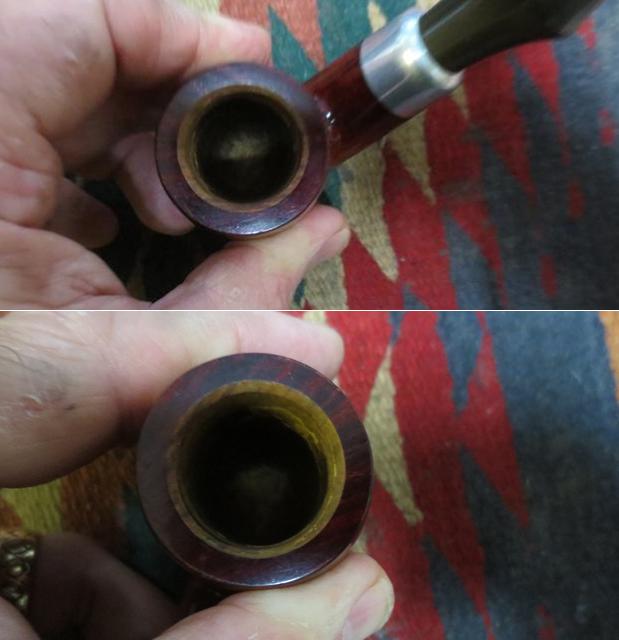
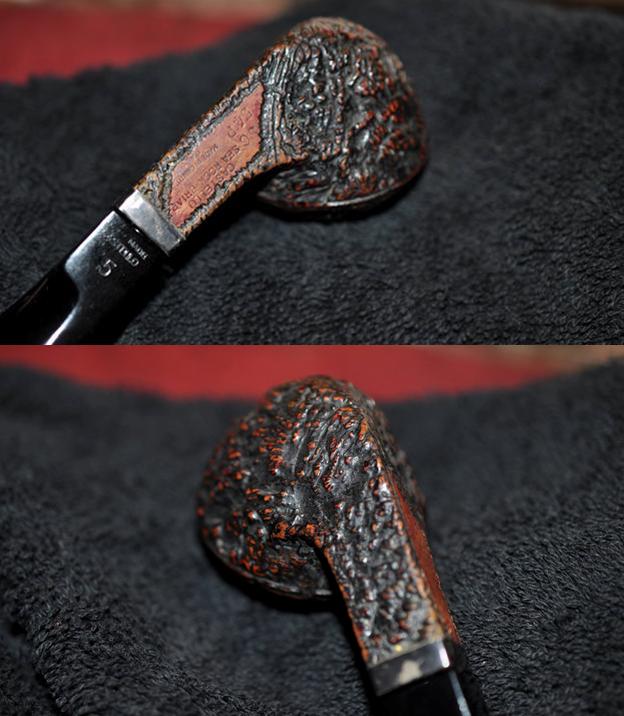
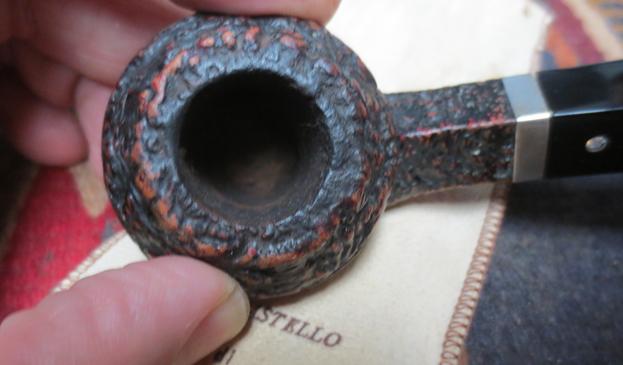
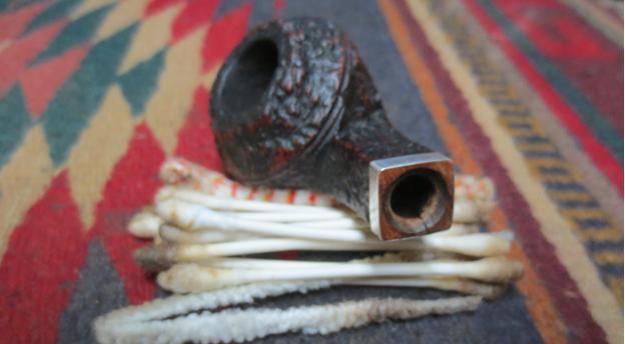
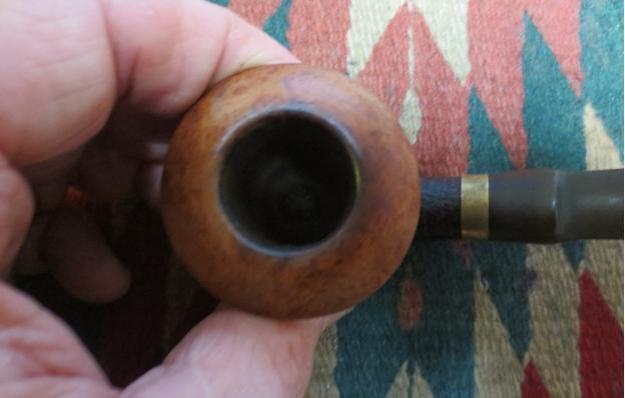
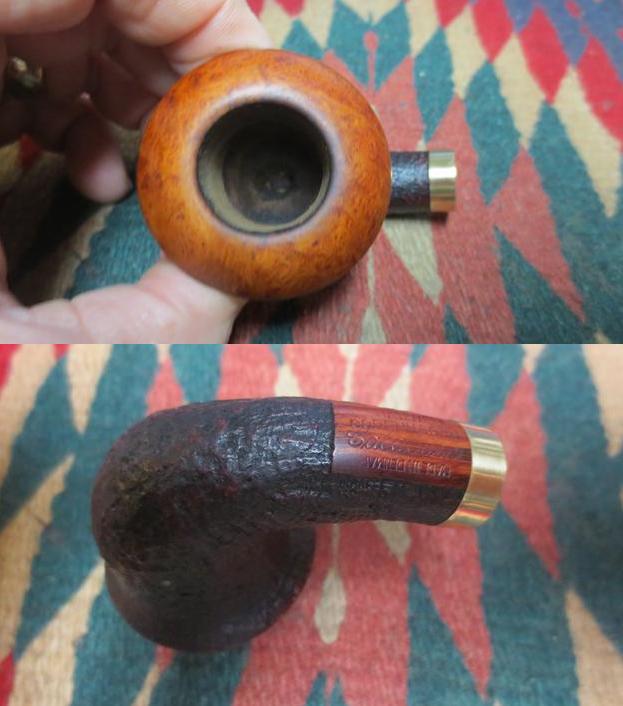
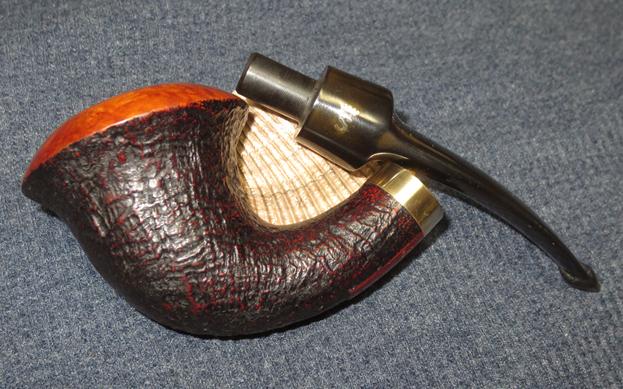
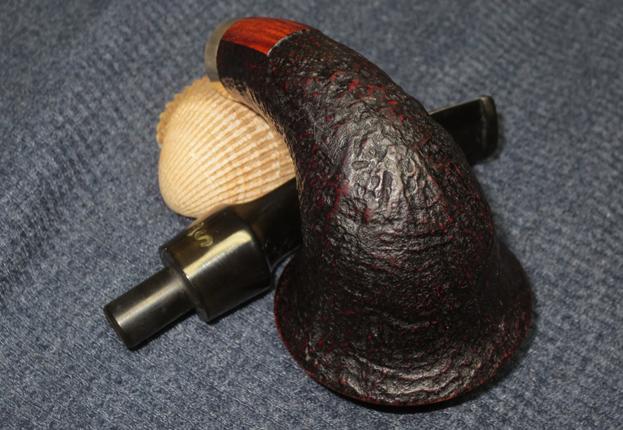
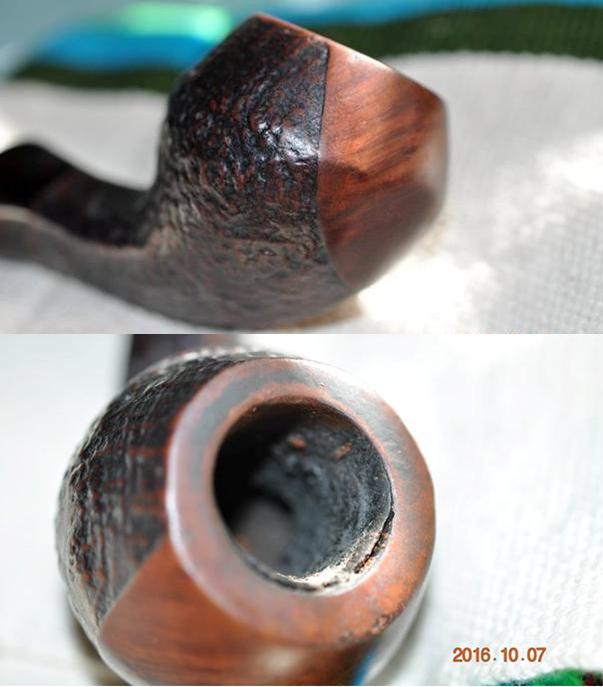
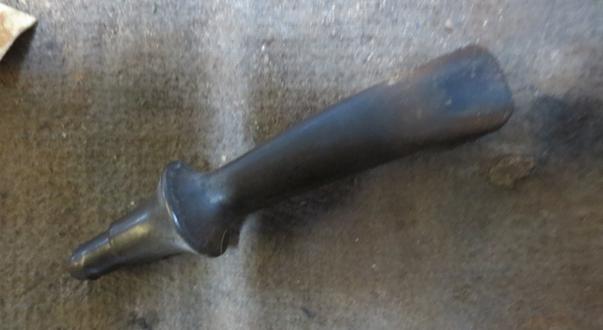
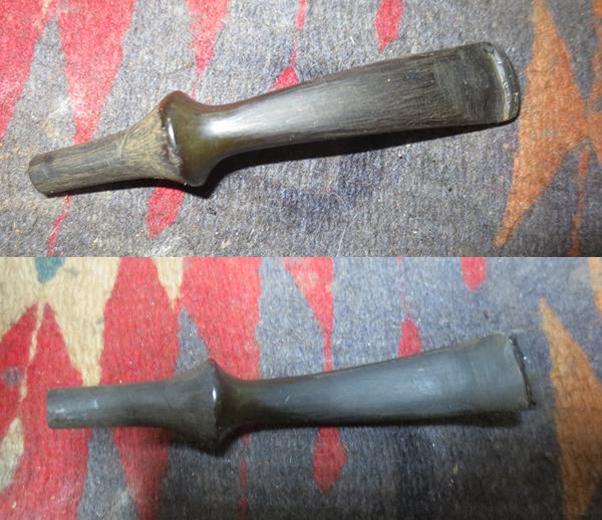
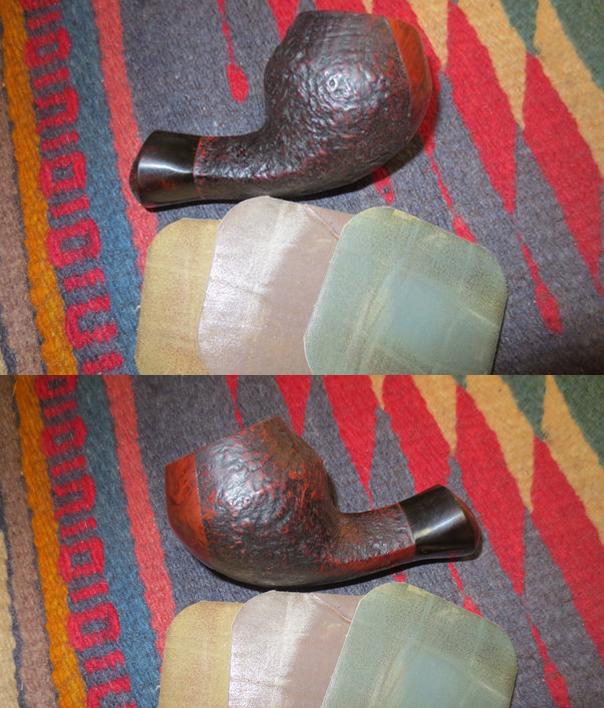
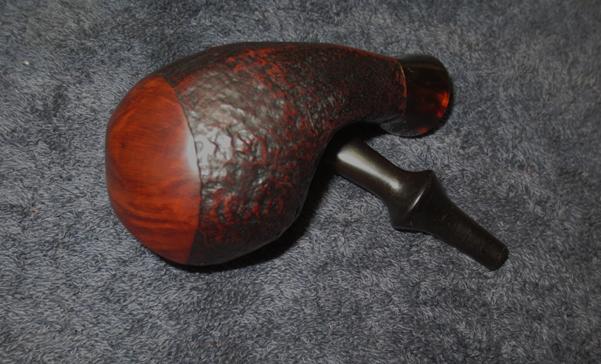
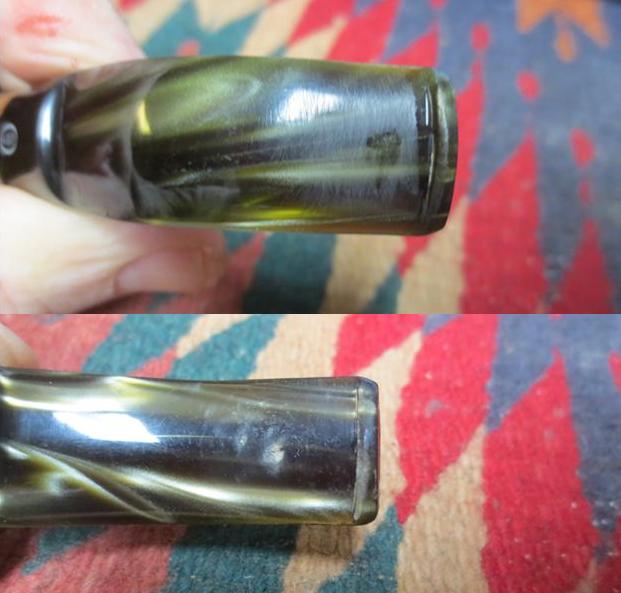
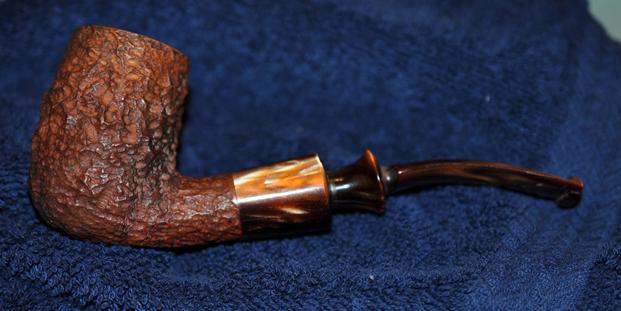
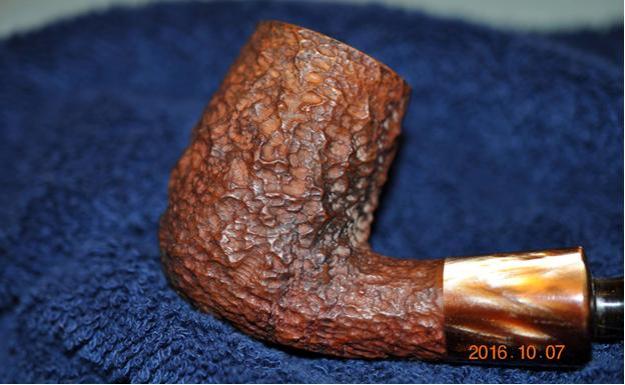
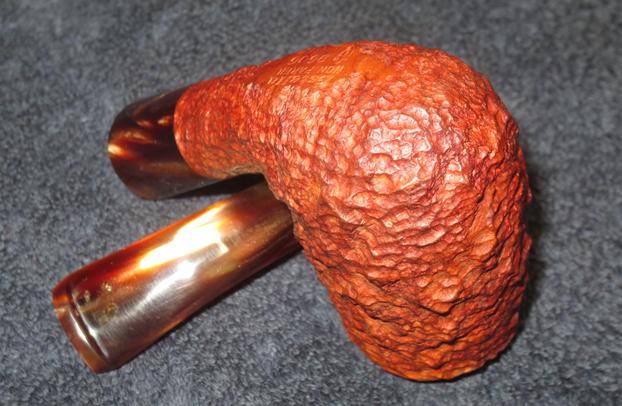
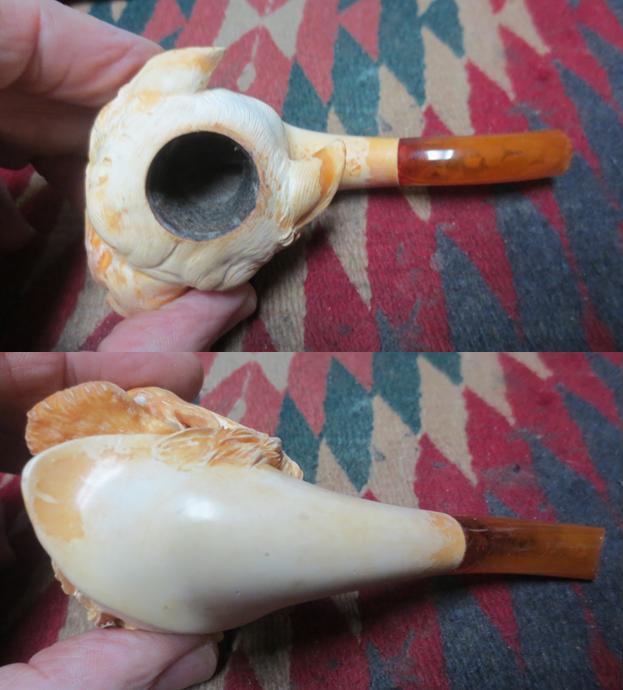
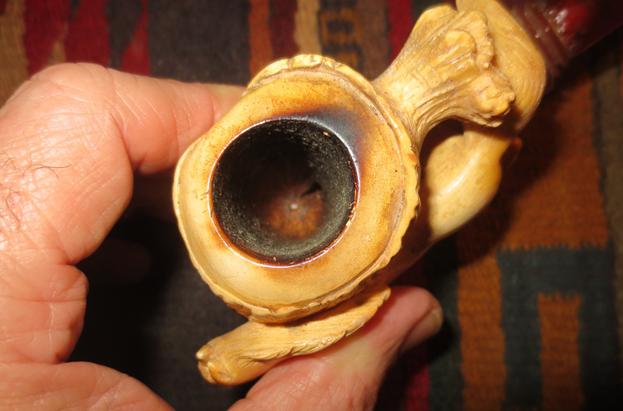
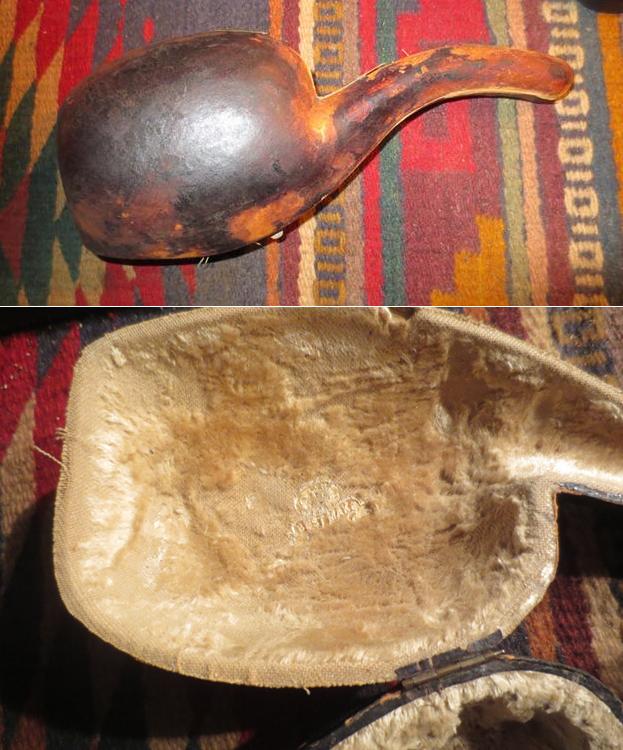
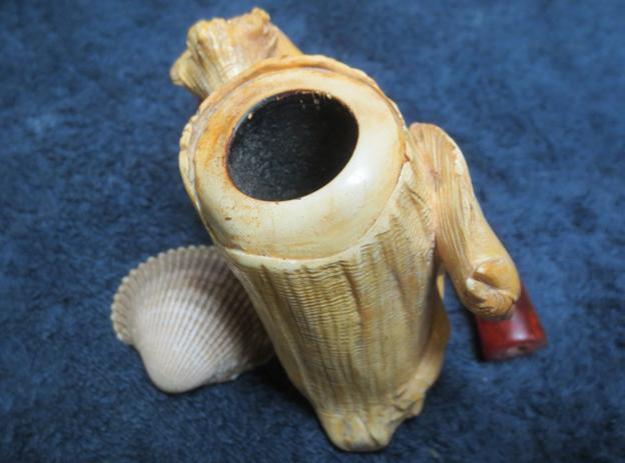
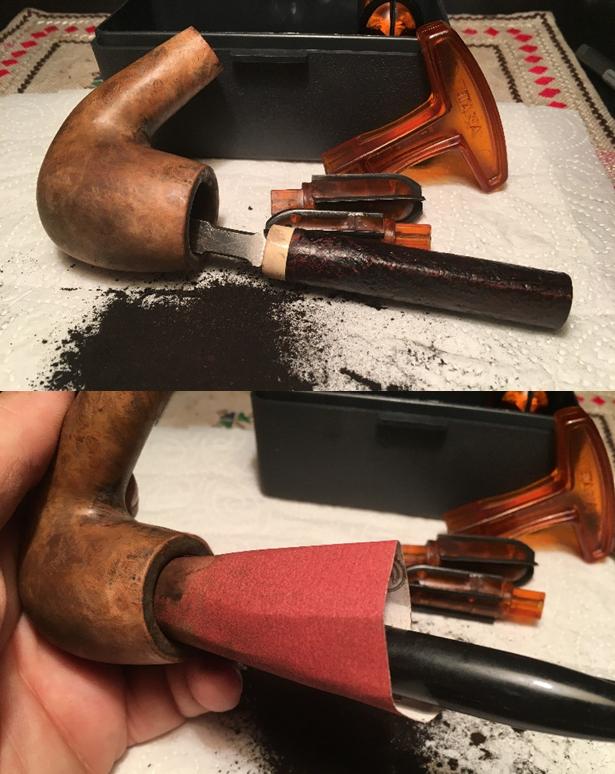
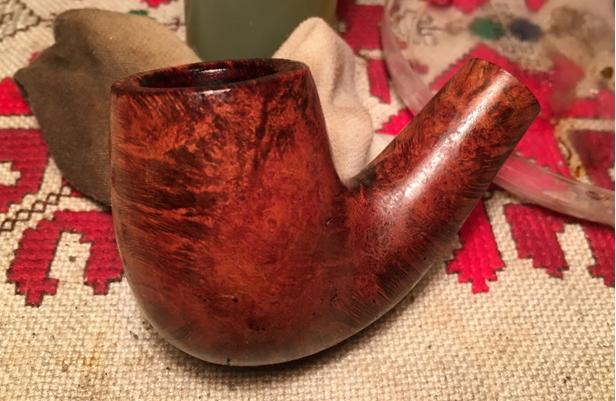
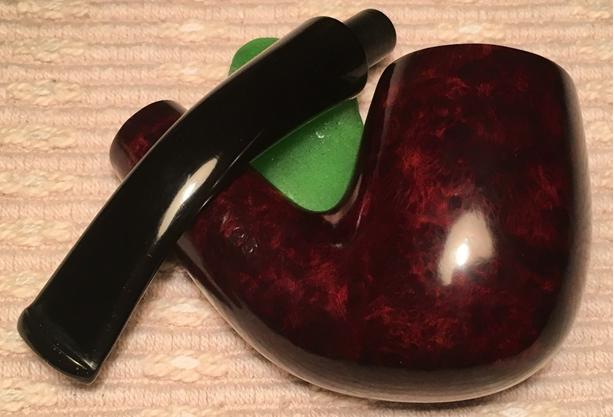
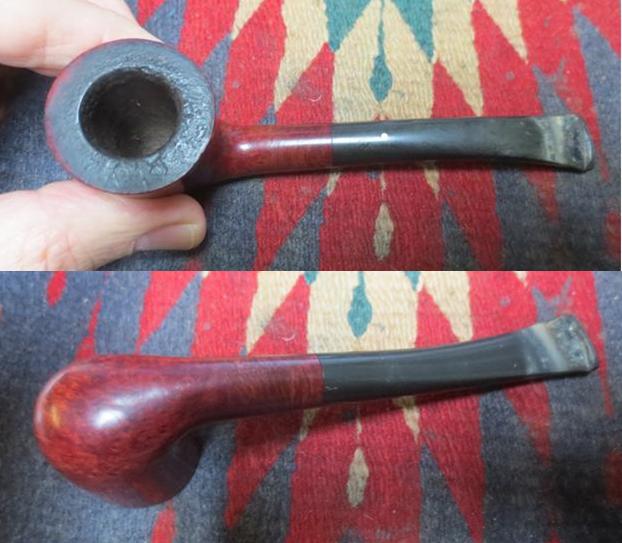
 Like Charles’ patient, this pipe looks to have been left outside or exposed in a barn or something, as half of it seems to be colored differently – laying on its side for some time. The stem has the heaviest oxidation I’ve seen to date – perhaps something else is going on – it appears to be leprous! The surface is so soiled and the cake so thick – there appears to be a spider web in the fire chamber – I really can’t determine the condition of either the stummel or stem, so after taking some pictures from my work table, I plop the stem in Oxi-Clean to start dealing with the stem leprosy and I plop the stummel along with spider web, in an alcohol bath – isopropyl 95% to soften the ages of crud clinging to the stummel – inside and out.
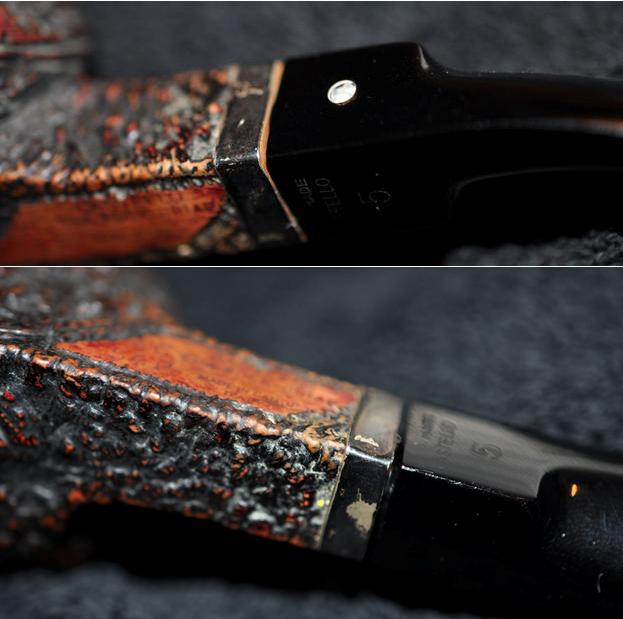
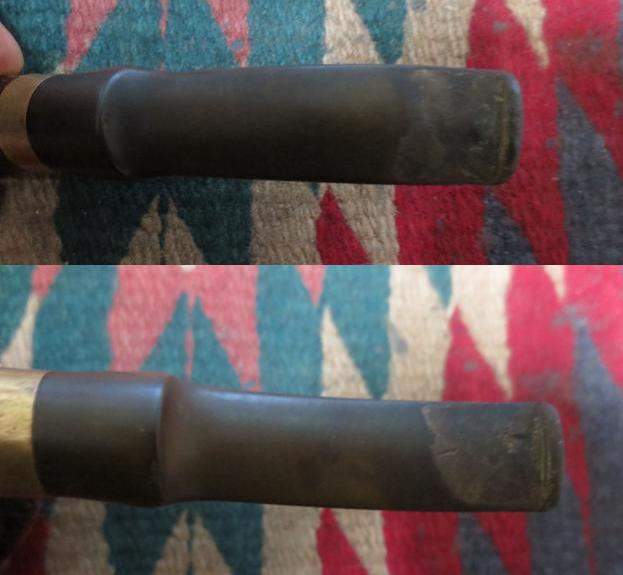
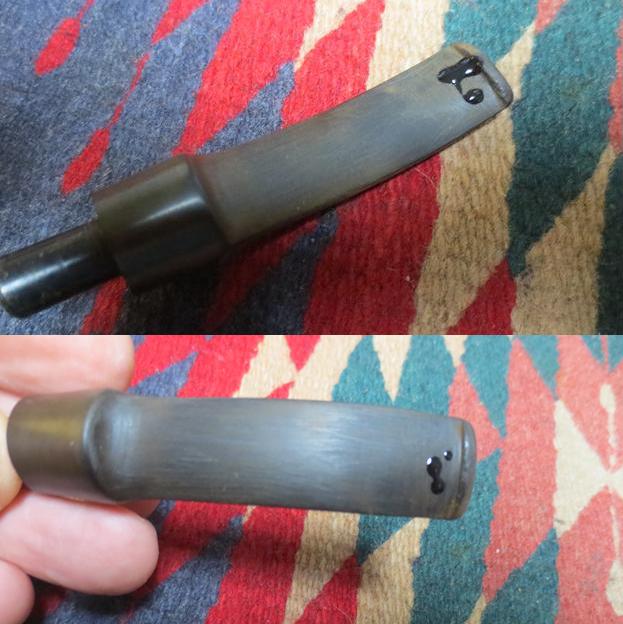
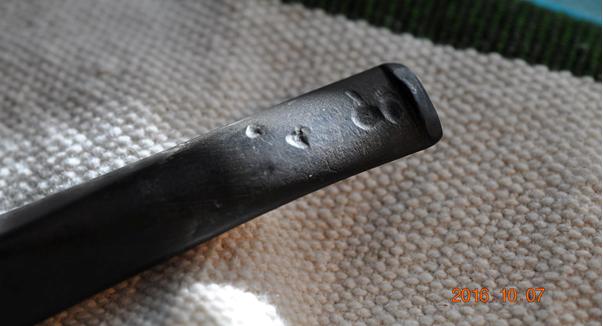
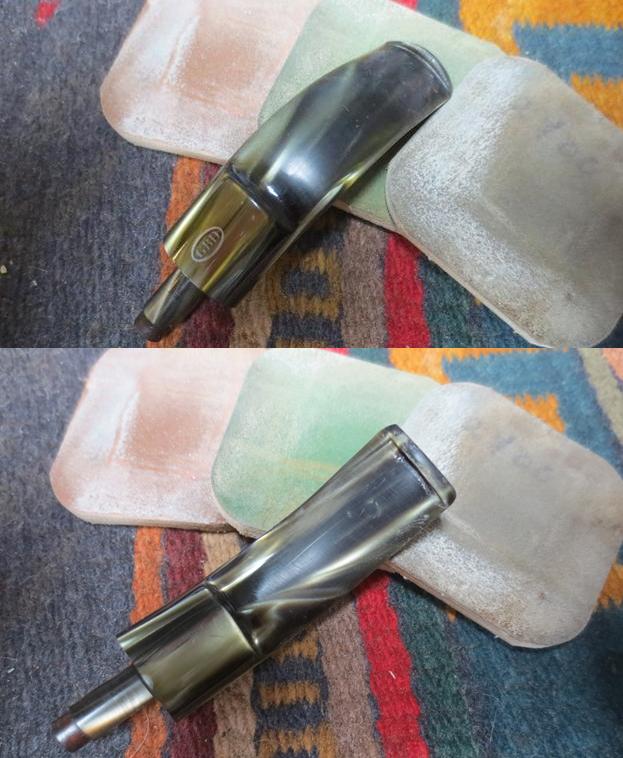
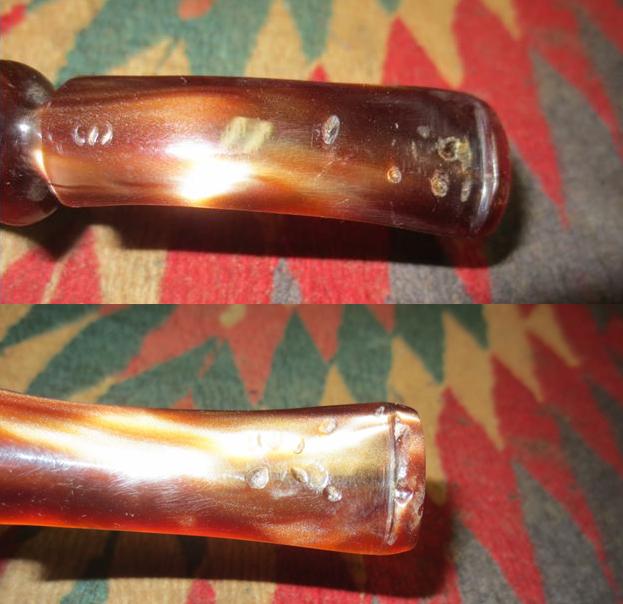
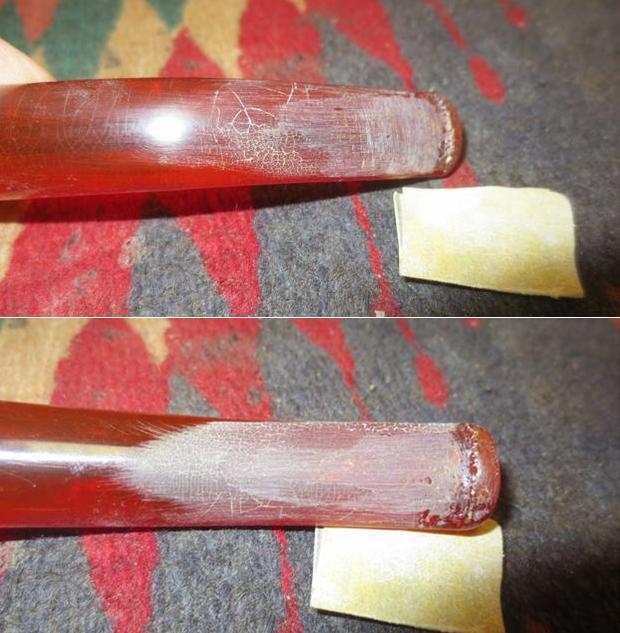
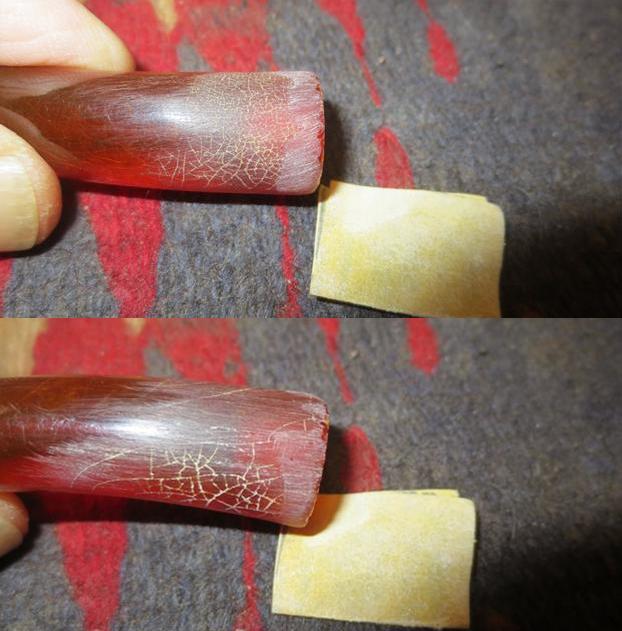
 About 24 hours later, I retrieve the stem from the Oxi-Clean bath and the oxidation was raised to the vulcanite surface as hoped and expected. I first attack the oxidation by wet standing the stem with 600 grit sanding paper. I’m very careful to stay clear of the Redonian ‘R’ stamping and work around it. I sand for quite some time. After making some progress, I switch to using 0000 steel wool to take off more oxidation and smooth in the process. Again, I’m steering clear of the ‘R’ stamping. I wish I would have taken a picture at this point. The stem is looking much improved except for the circle ‘R’ stamping – still encased in thick oxidation. I know that taking anything abrasive to the stamping will erode it and for me, this is anathema. I try another tack – I think I remember reading somewhere about using Mr. Clean Magic Eraser. I brought it to Bulgaria from the US and hadn’t used it yet. The sponge that emerges from the box would not be abrasive – I hope. So, I wet the sponge and start working on the area of the stamping. I start very cautiously and gingerly apply pressure with the sponge Magic Eraser. When I discover that it is not eating away at the stamping I apply more pressure. Before long I was working on the area aggressively. Very gradually, and without perceptible damage to the ‘R’, the oxidation disappeared – or at least, in very large measure. The last picture in the set below shows the magic brought by the Magic Eraser! I’m pleased with the progress cleaning up a once, leprous stem!
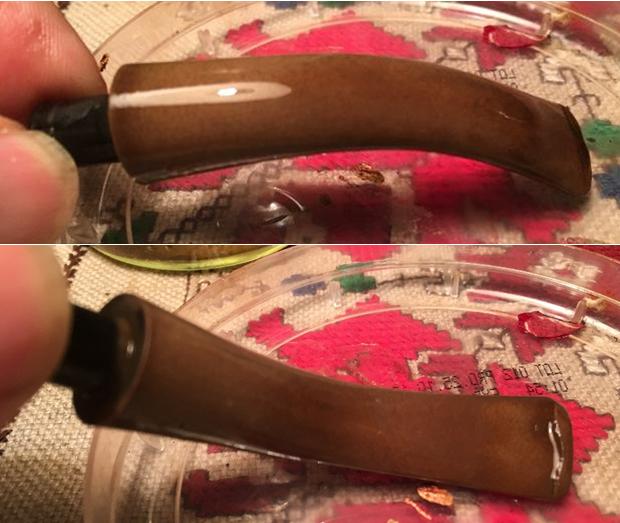
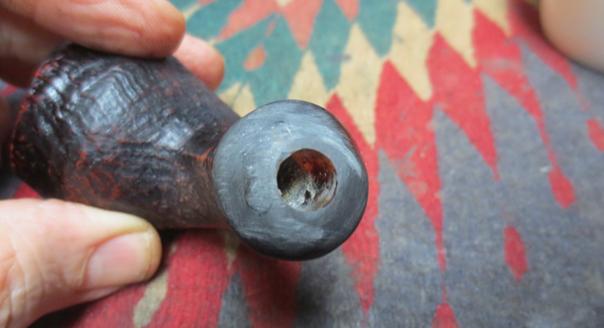
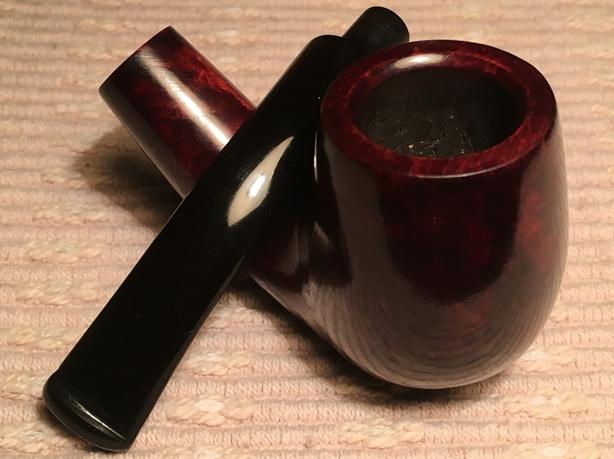
 Satisfied with the progress on the stem, I fish the stummel out of the alcohol bath. I use several pipe cleaners attempting to open the airway between the mortise and draft hole – unsuccessfully. I then use about a 6-inch length of hanger wire as a probe and to ream the airway gently. After a while, I finally push through the ancient muck and reconnect the mortise and bowl. After this, I put the stummel back in the alcohol bath to soak further after stirring up and opening the internals.
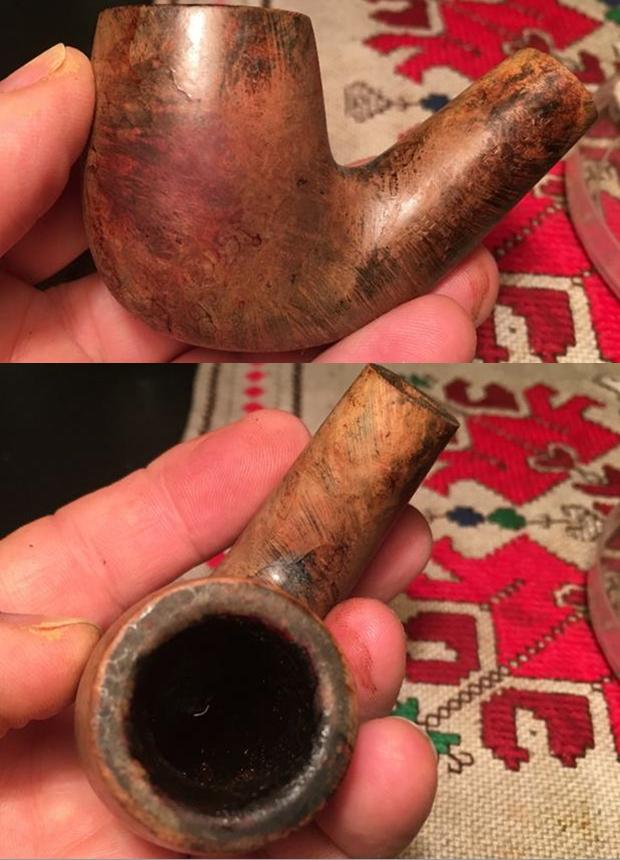
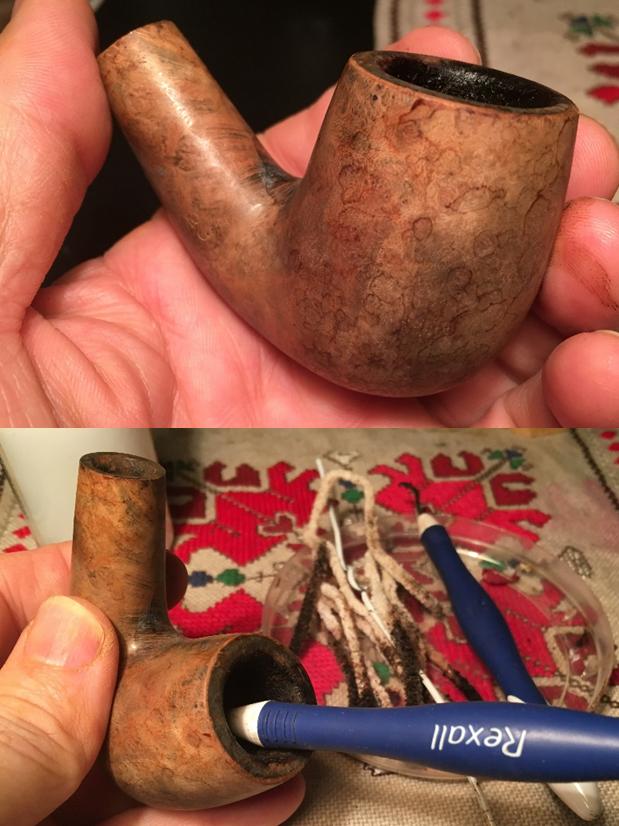
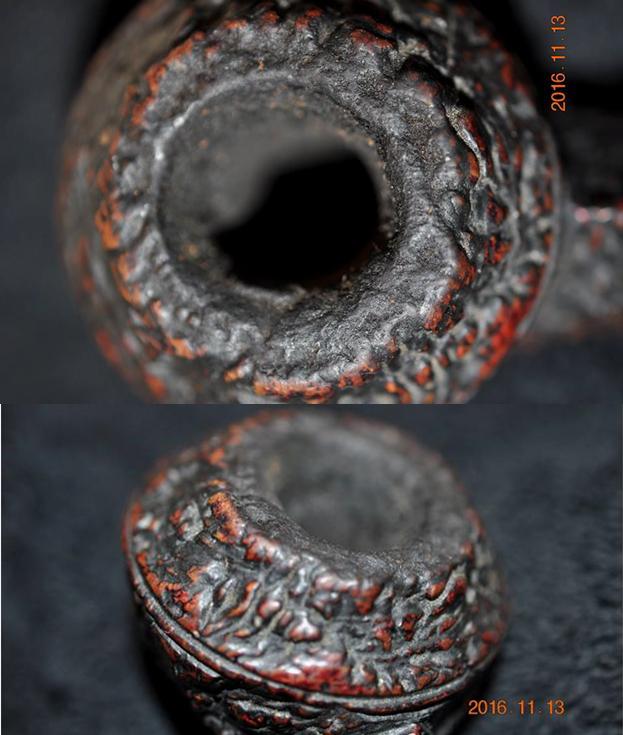
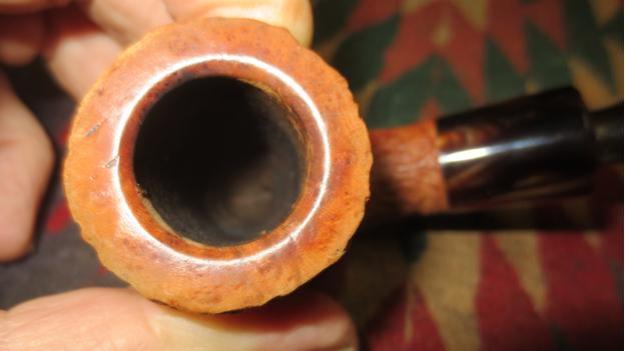
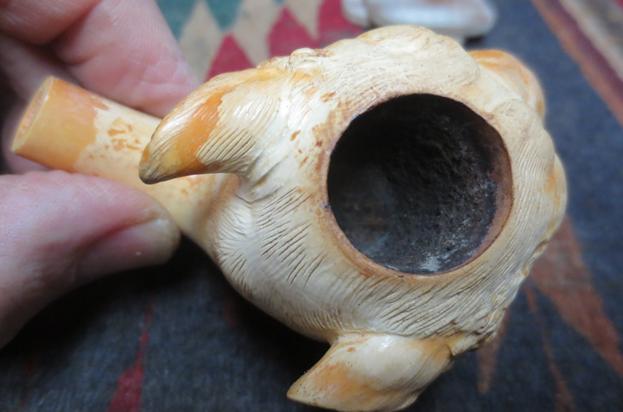
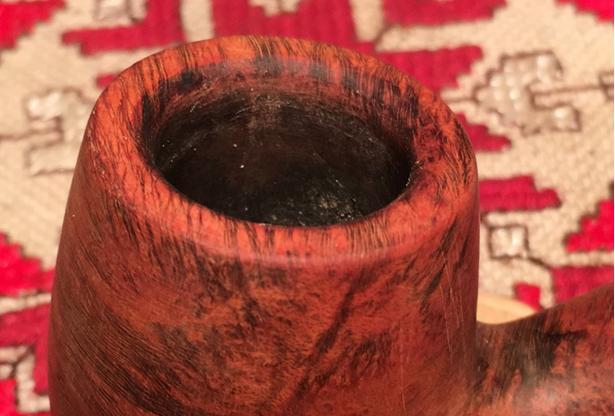
 Out of the bath again, I take Q-tip cotton swabs and pipe cleaners and clean the gunk out of the mortise and draft airway while it is still loosened. It’s cleaning up well, but I need to ream the bowl to remove the softened cake and the old residues. I want Gramps to have a new start down to the fresh briar. I use the Pipnet reaming kit using the two smaller blades of the four available. The cake comes easily. I fine tune the reaming more using the Savinelli pipe knife. I then take 240 grit sanding paper, wrapped around a Sharpie Pen and sand the chamber walls to remove the remaining carbon. I finish by cleaning the bowl using cotton pads wetted with isopropyl 95%. The fire chamber looks good – no problems, no burn throughs detected visually. The pictures mark the progress.
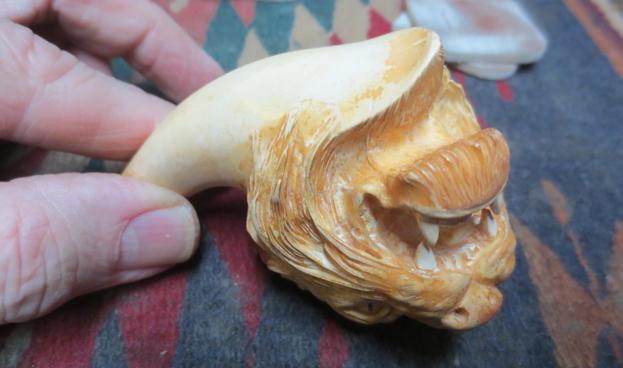
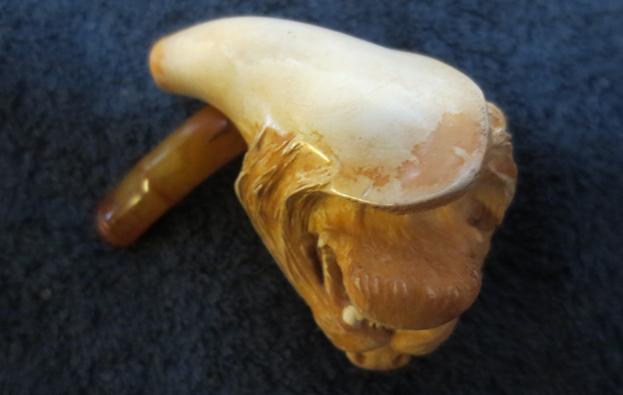
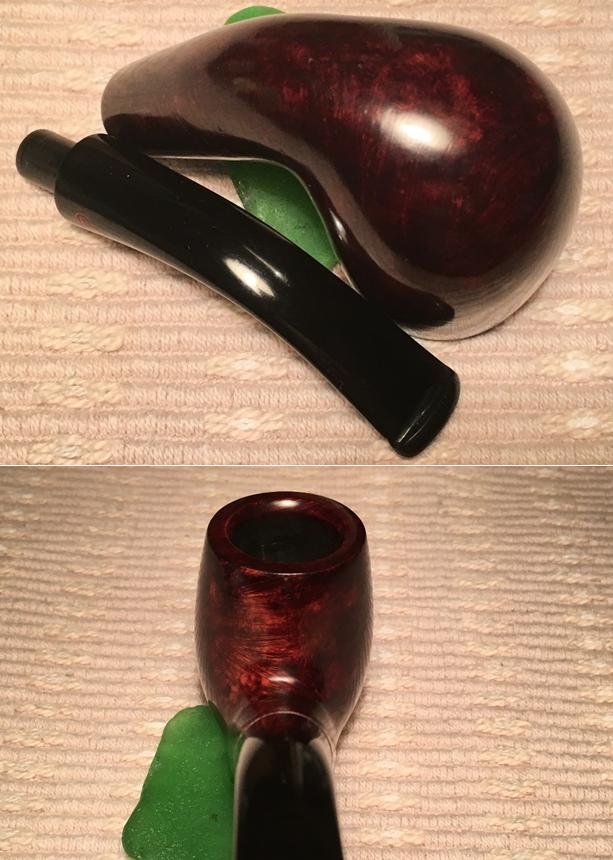
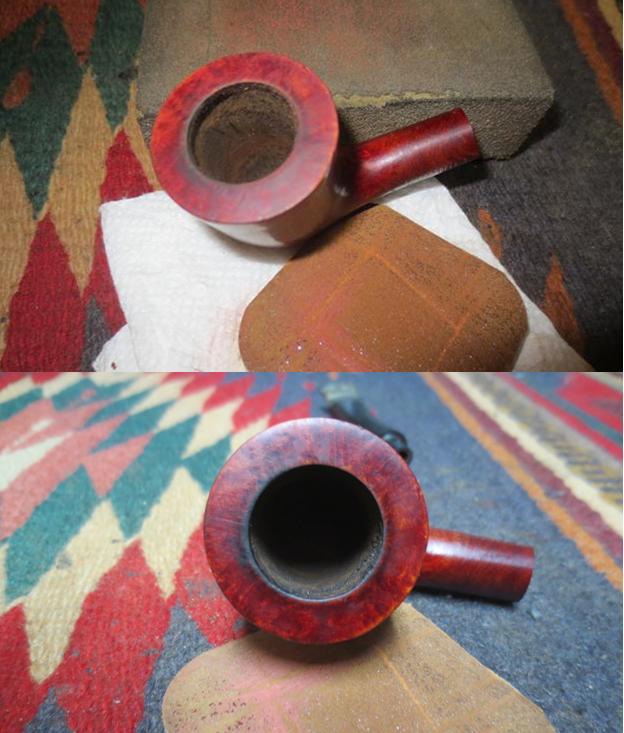
 With the bowl reamed and cleaned, I now turn to the stummel externals. I take another critical look at the stummel surface and lava flow on the rim and take a few pictures to show the condition of the briar before I use Murphy’s Oil Soap. I want to mark the progress moving from the desperate condition in which the Redonian Deluxe started. I use undiluted Murphy’s Soap and scrub the rim and stummel surface with cotton pads. I also use a bristled tooth brush to scrub the surface. After cleaning, I rinse the stummel with warm tap water careful not to allow water into the stummel internals. The rim cleans nicely and it looks good. Looking at the briar surface, not surprising I detect several pits which need to be either sanded or filled. What is emerging from underneath the gunk, grime and grunge is a piece of briar holding much potential to shine with the gradual appearance of some nice-looking grain. With my work day ending, I decide to apply olive oil to the stummel to hydrate the very dry wood – letting it absorb the oil through the night. The pictures show the progress.
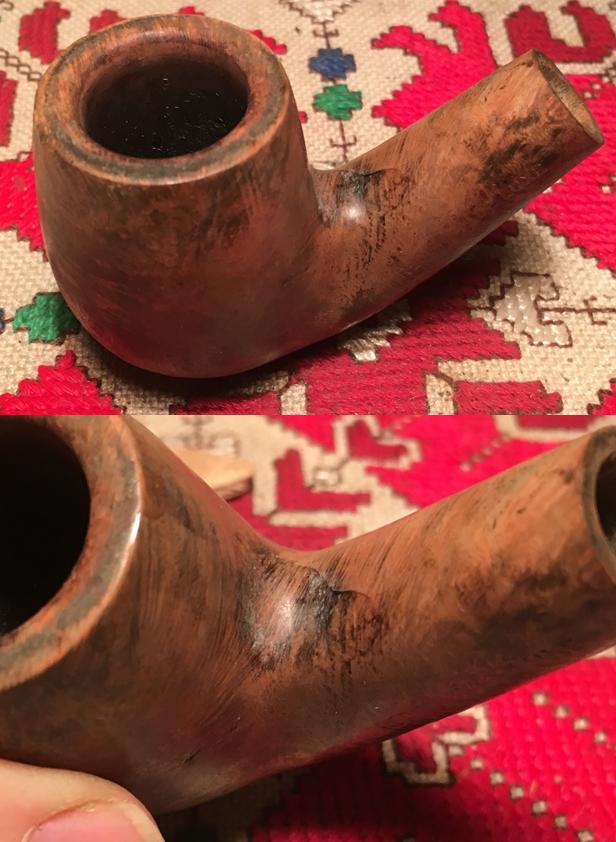
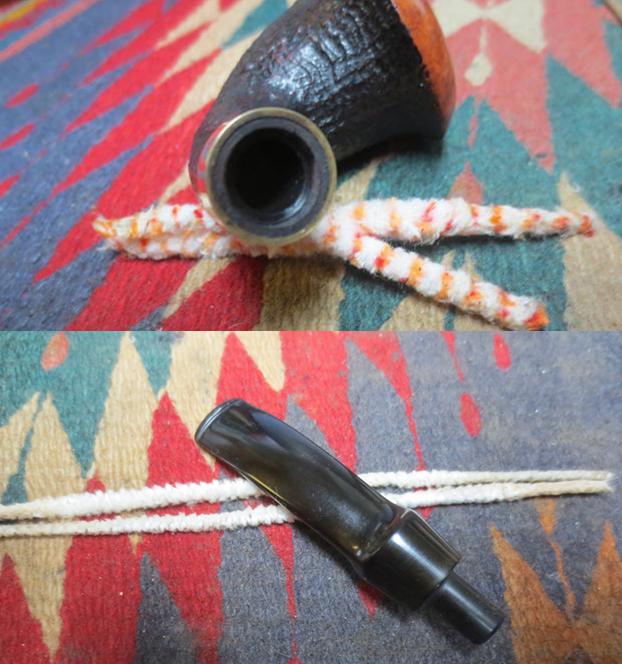
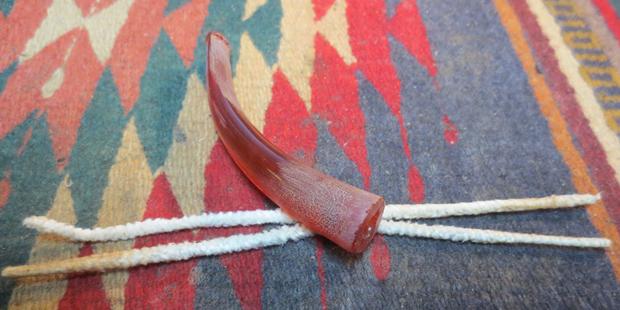
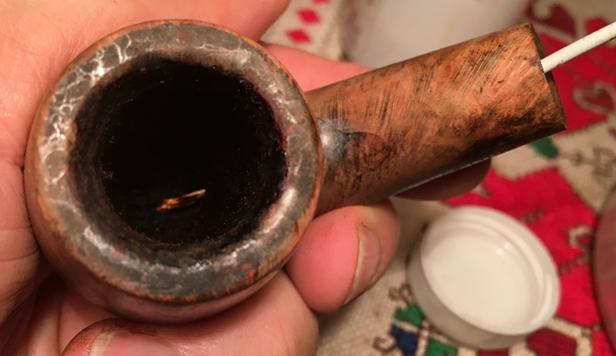
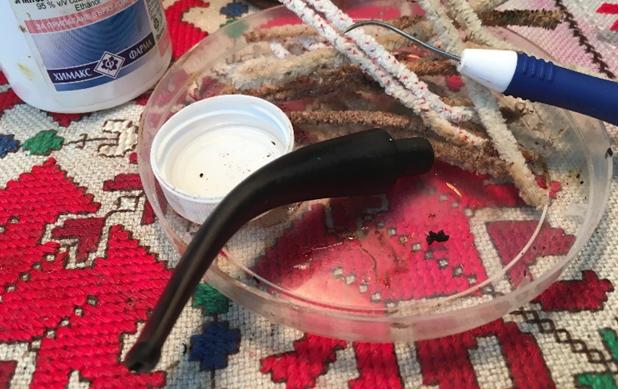
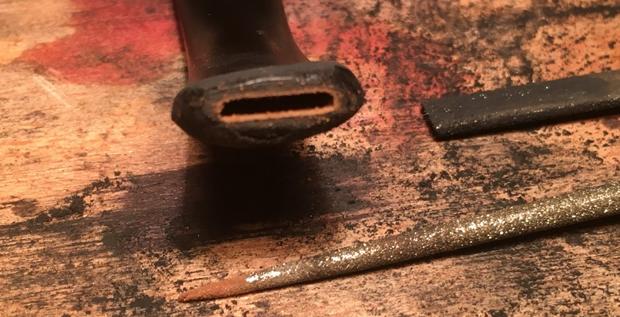
 The next morning, I decide to further clean and purify the stummel using the salt/alcohol soak. I fill the bowl with Kosher Salt and cover the opening with my palm and shake the stummel to distribute the salt. I then place the stummel in an egg carton to give stability, and fill the stummel with isopropyl 95% until it surfaces over the salt. I then cork the mortise and let it sit and do its thing – letting the salt absorb the crud. I then turn to the stem. I clean the stem internals using pipe cleaners dipped in alcohol. Using a sharp dental probe, I dig gunk out of the slot to clean it. It takes a while to work a pipe cleaner all the way through the stem. Once I do accomplish this, I use a bristled pipe cleaner with alcohol to run it back and forth several times to clear and clean the airway – hopefully allowing a pipe cleaner easier passage.
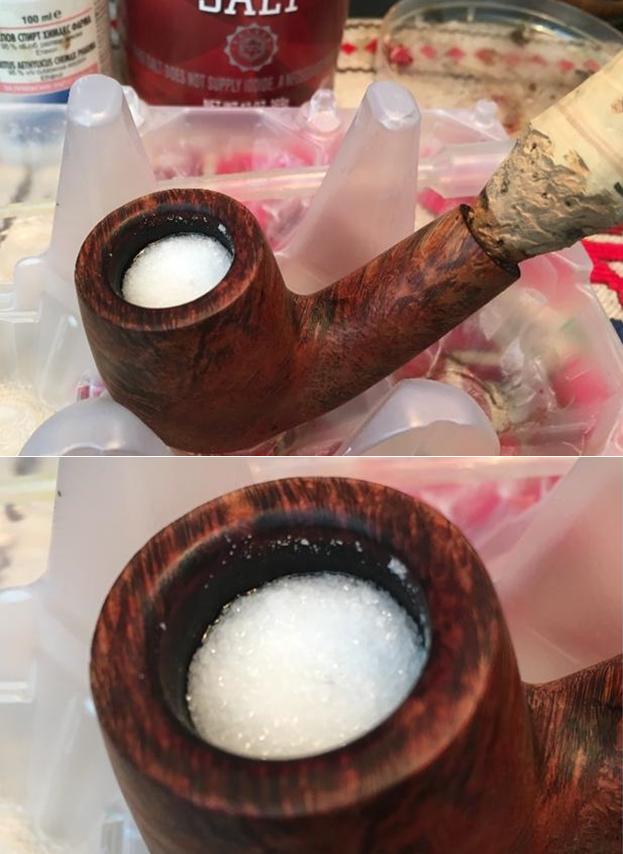
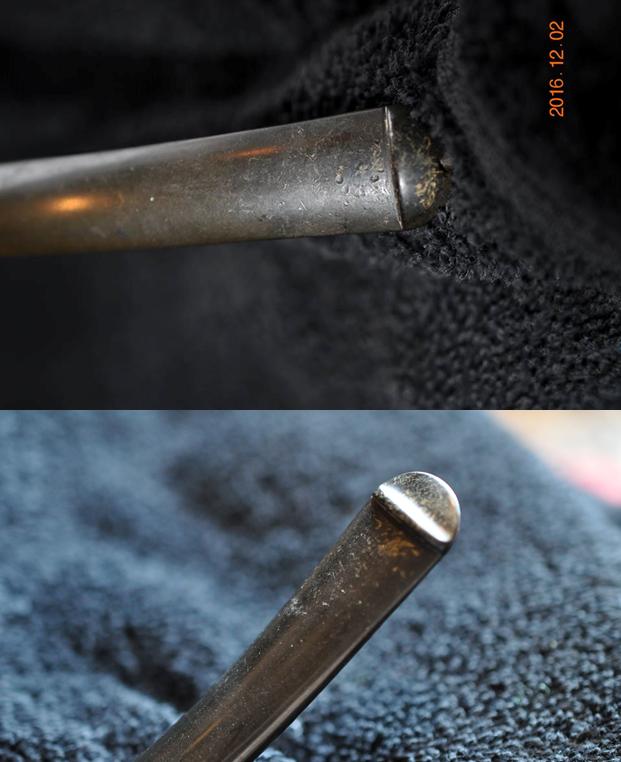
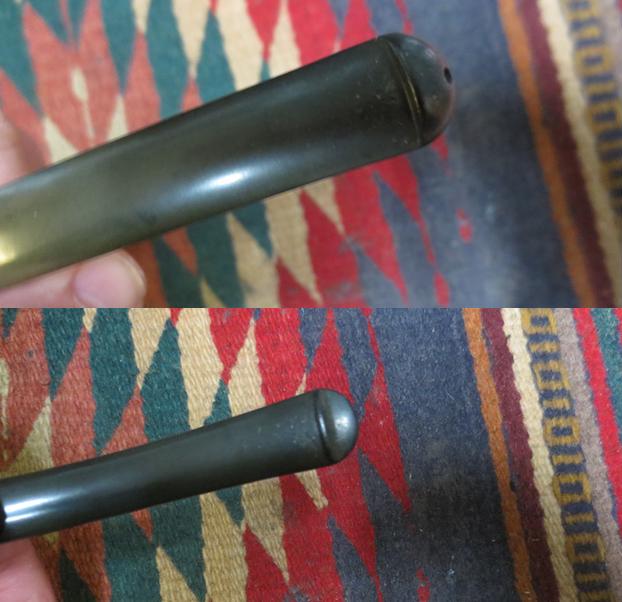
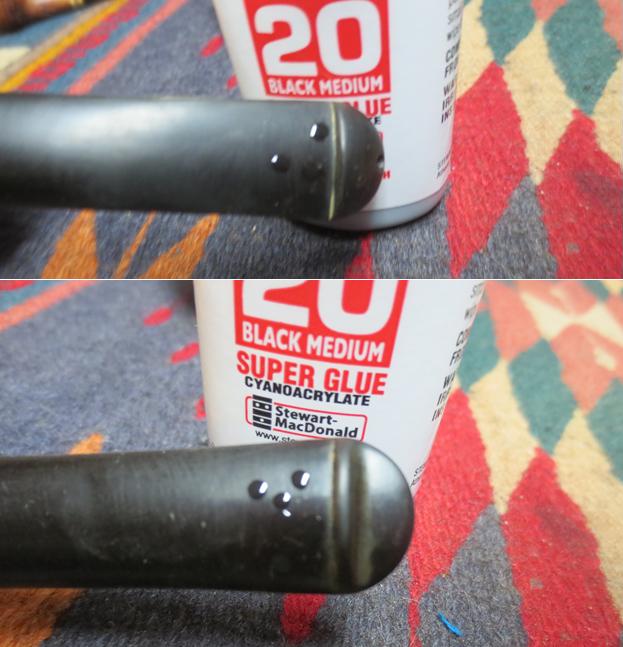
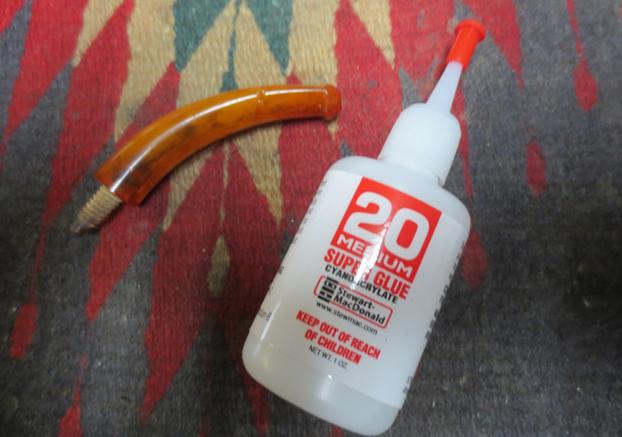
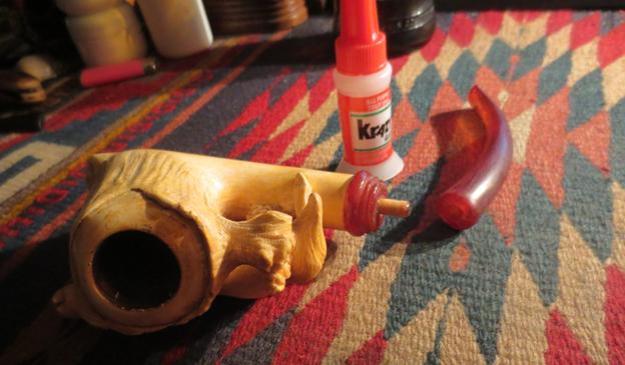
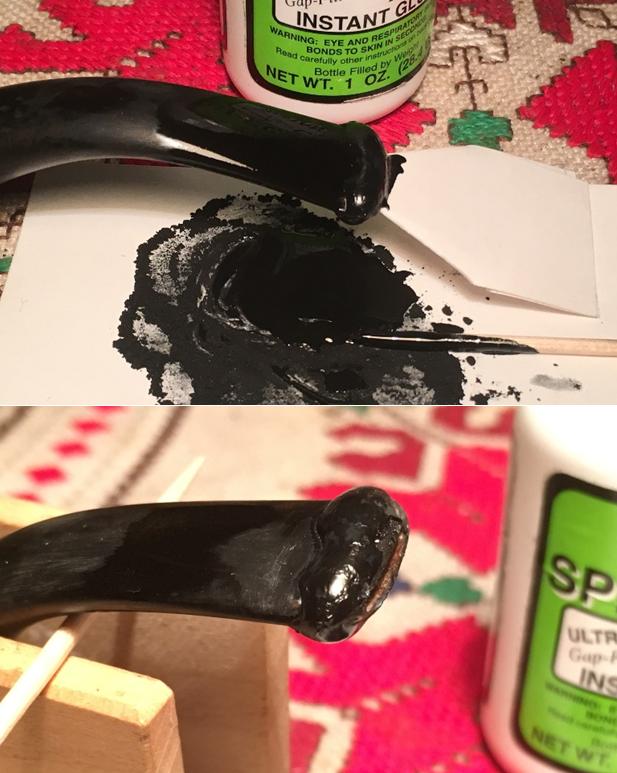
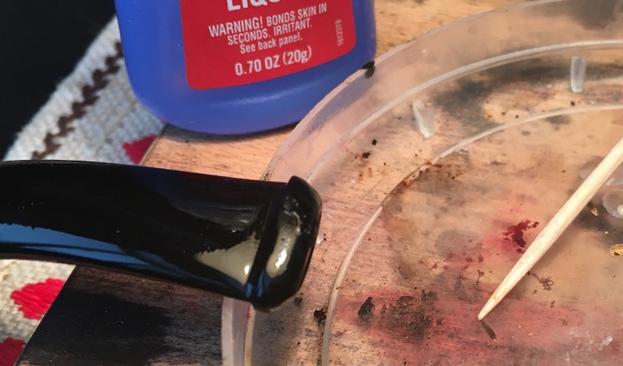
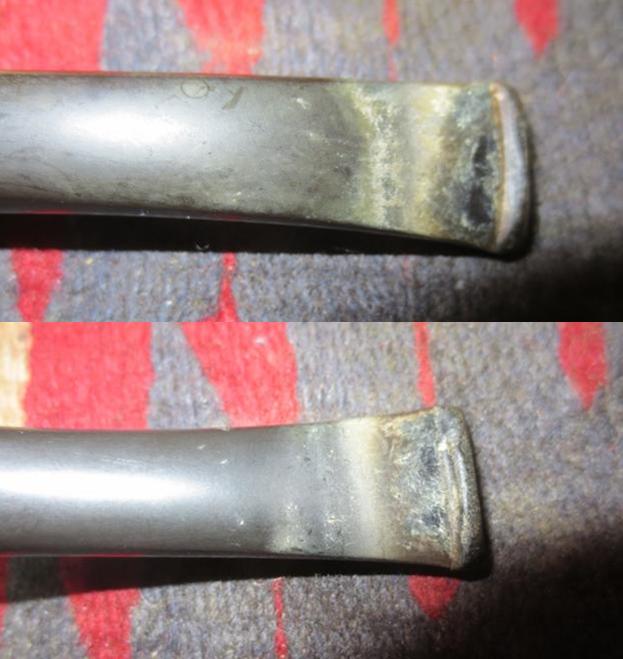
 After cleaning the internals of the stem, I now look at the condition of the button area. The 98-year-old grandpa that owned the Redonian did not leave teeth marks (is that a clue to his dental condition??) but the upper and lower bits are almost flush with the stem surface. This is not good – the button edges are necessary to hang the pipe properly on the teeth so that one does not bite the stem leaving the teeth chatter and dents one must remove when restoring a pipe! I will use charcoal/superglue putty to build up the button area. I form a wedge made of index card and fit it into the slot of the stem to keep putty from covering the opening. I open a capsule of activated charcoal and pour the powder on an index card. I then put a small puddle of Hot Stuff Special ‘T’ CA glue (extra thick glue) next to the charcoal powder. With a toothpick, I draw charcoal into the glue, mixing it as I go. I continue to add charcoal powder until I reach a thickness like molasses. When I reach this viscosity, I then dollop the putty around the button area – more than is needed to provide excess to sand down to the proper button proportions. I use an accelerator to set the putty. I then remove the wedge from the slot and put the stem aside to cure. The pictures show the process.
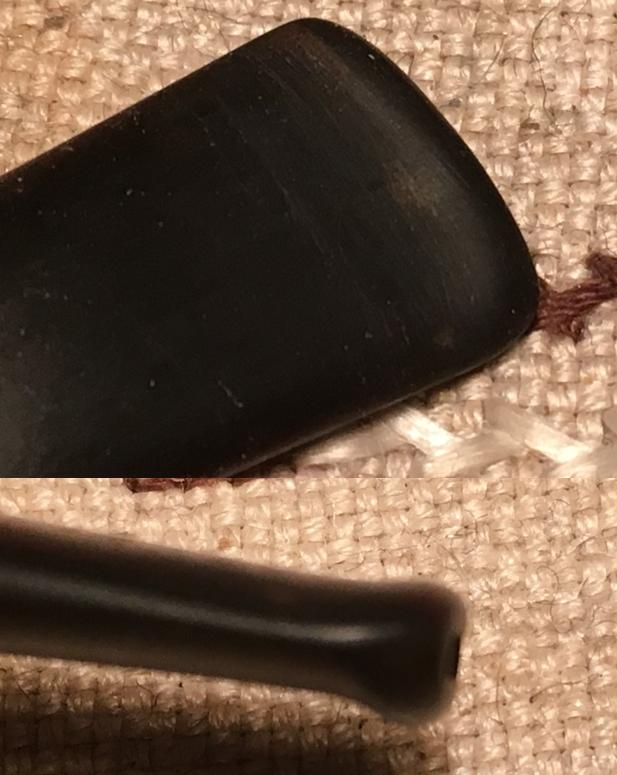

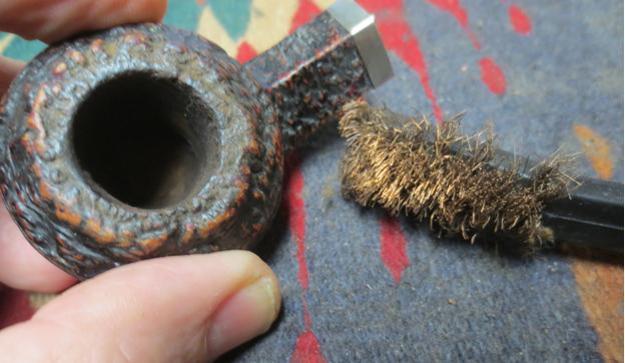
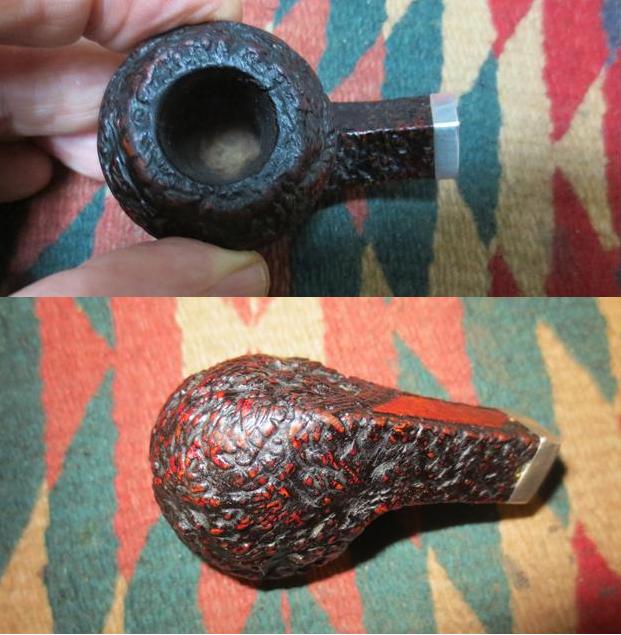
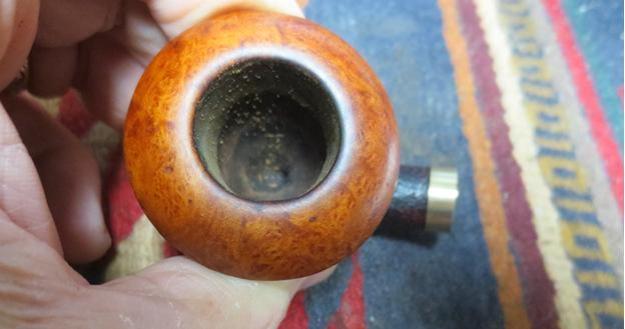
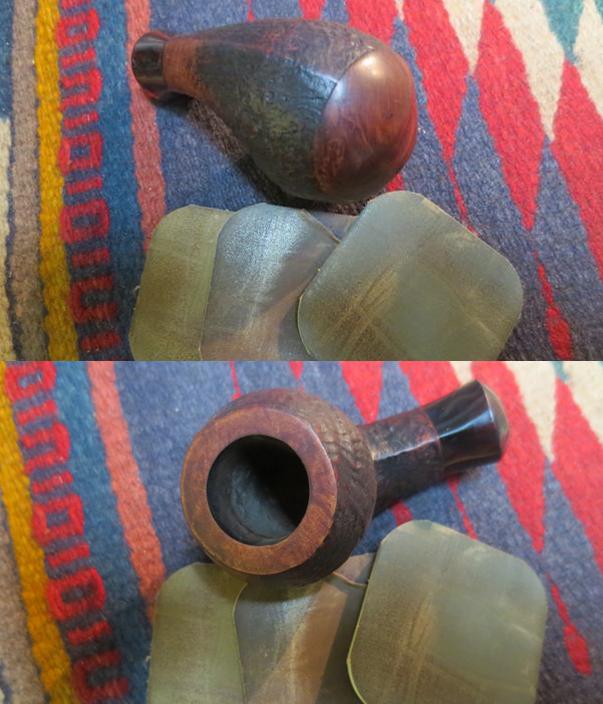
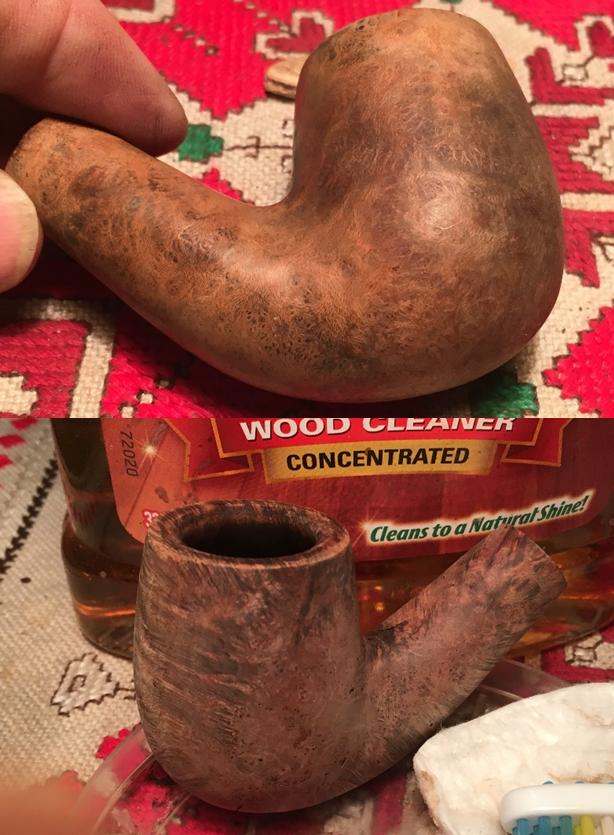
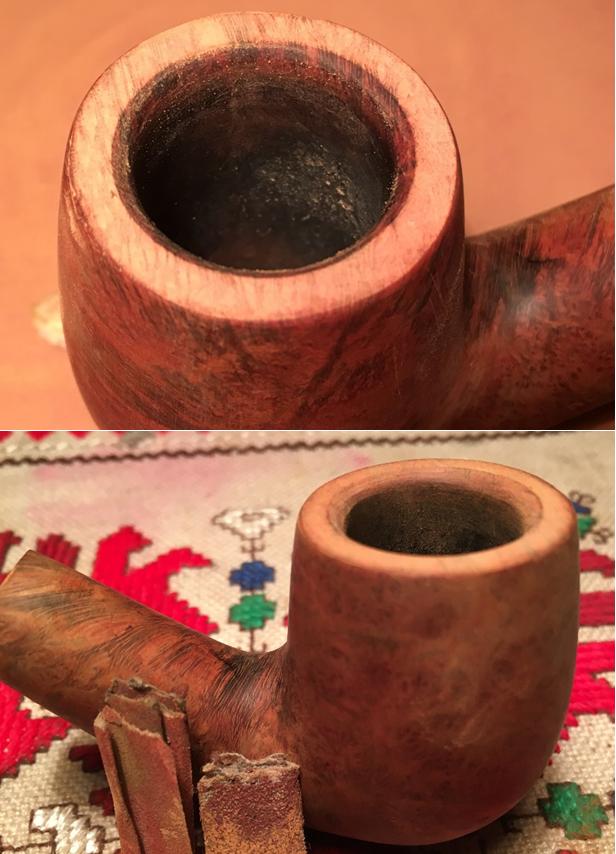
 Several hours have passed since the stummel began its salt/alcohol soak. The salt has darkened some, so I assume it’s done its work! I dump the used salt from the stummel and thump it on my palm to remove lodged salt crystals. I take a paper towel and wipe out the bowl. Using a bristle brush, I clean the mortise to remove any salt lodged in the internals. I want to be sure all the salt is purged. I then return to using Q-tip cotton swabs, pipe cleaners and isopropyl 95% to complete cleaning the internals. With 2 Q-tips, the verdict is in – the Kosher Salt and alcohol soak did a great job drawing out the muck and freshening the mortise. I complete the job by wiping the chamber with a cotton pad with isopropyl 95%. Done. The pictures show the result!
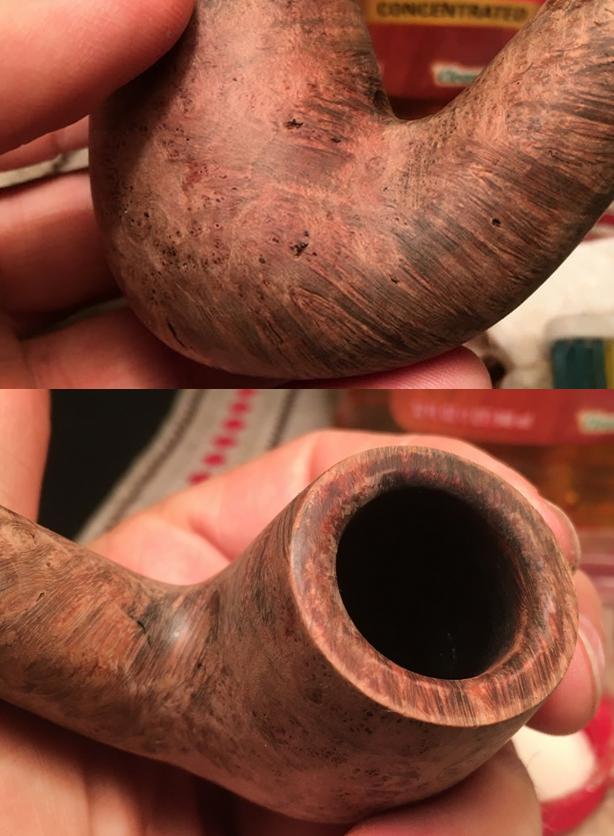
 With the stummel now clean, I take a close look at the stummel surface to be reminded of the question areas. I take a few pictures to show these. The stummel is in surprisingly good condition for what it looked like when I started. I find some pitting on the surface that I will fill with superglue. I also detect a rim ‘skin’ on the front end of the stummel. There are also other nicks around the rim from normal wear and tear. I start preparing the stummel surface by sanding with a medium grade sanding sponge to remove a layer off the finish – to determine where fills are needed. After using the medium grade sanding sponge, I apply super glue to the 3 places on the stummel I detected earlier to fill the larger pits and a small crevasse and put the stummel aside for the superglue fills to cure. The pictures show the progress.
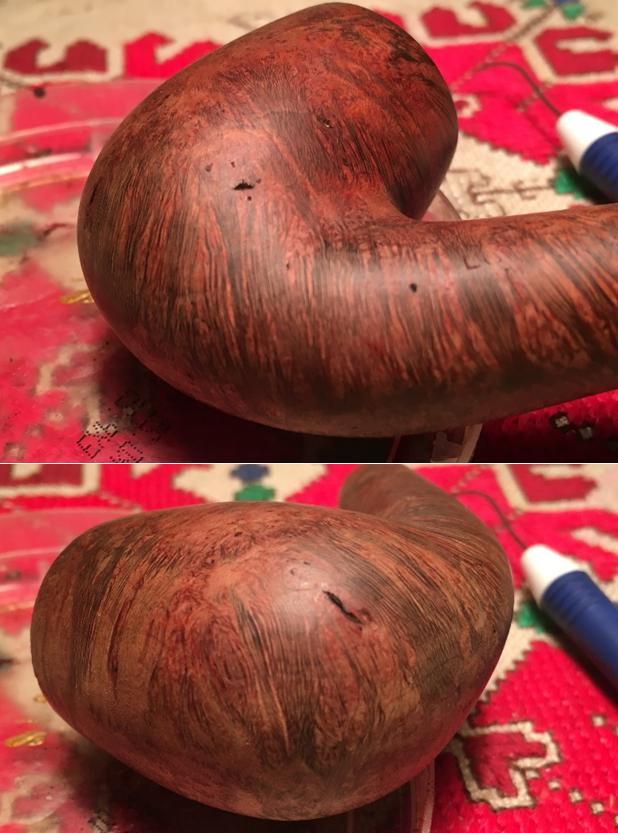

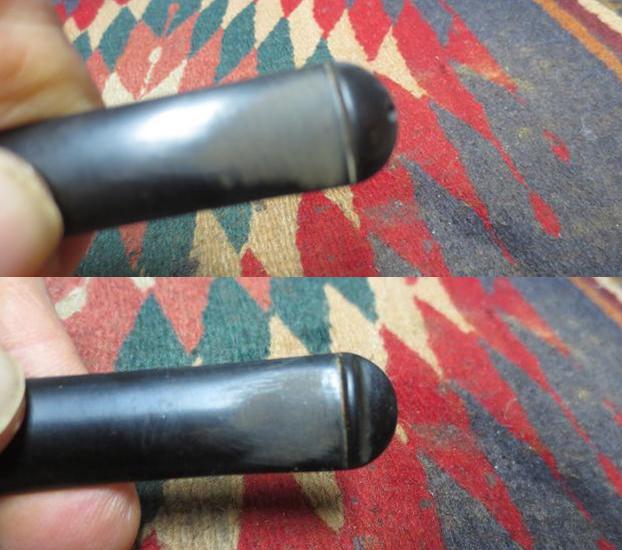
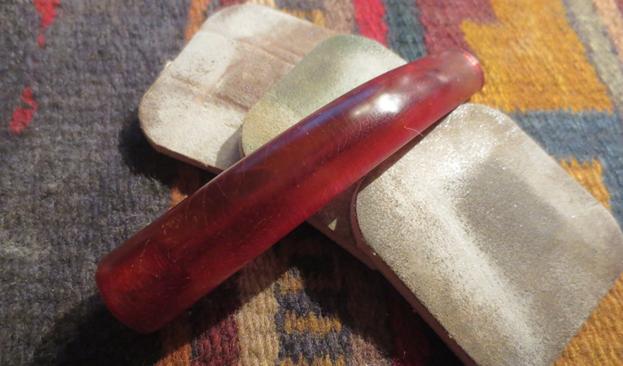
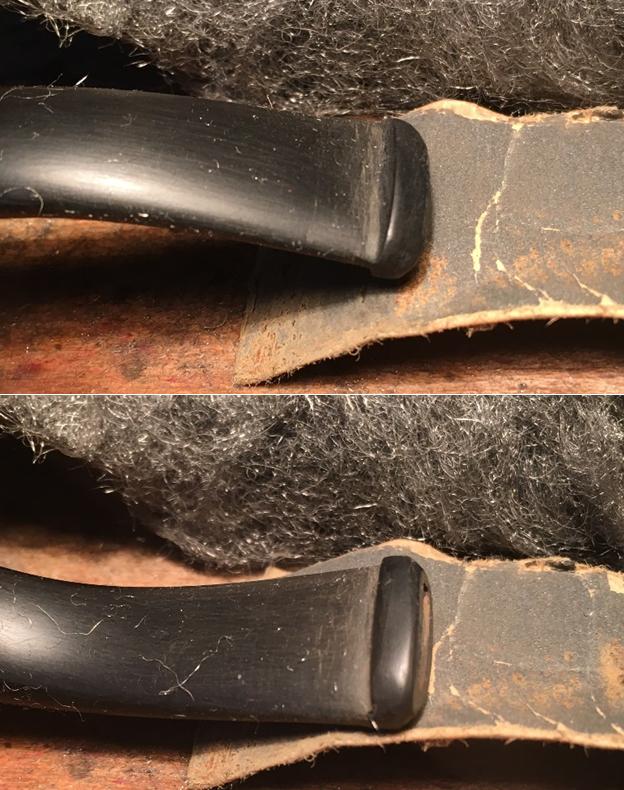
 Now to return to the stem’s button rebuild. The charcoal superglue putty has fully cured and ready for shaping. I take pictures of the upper and lower bit to mark the progress.
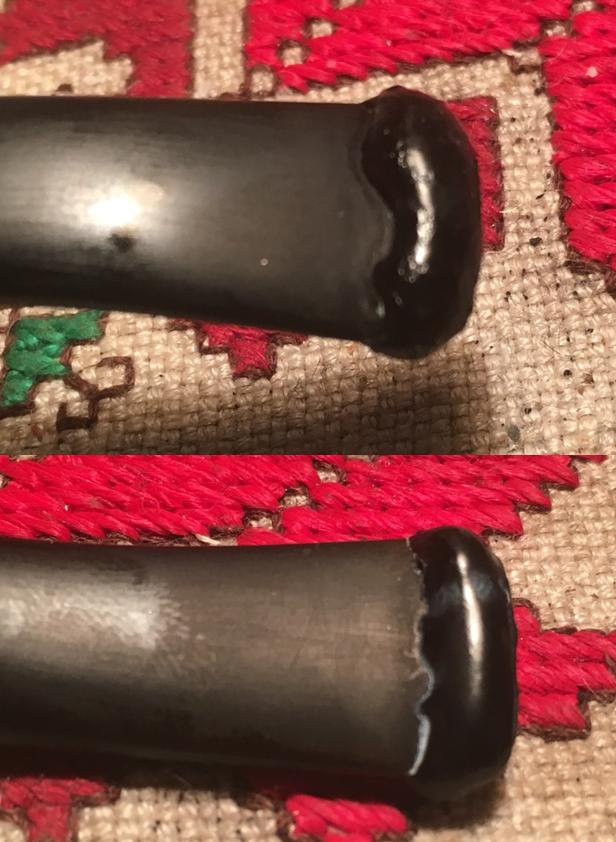 The technique I’ve developed for button shaping is to start at the end of the stem, using a flat needle file I file to establish the vertical – perpendicular slot area – that it’s flat. This establishes a base-line for the end of the button and shaping the rest (I forgot to document this in a picture!). I then start with the upper button area with the flat needle and begin filing from the stummel-side toward the end to establish the straight edge of the button’s ‘lip’. I gradually file this toward the stem’s end until it appears a good depth for the upper button. I then file top of the bit’s lip to shape in further. When I’m satisfied with the upper button shaping, I then flip the stem over doing the same with the lower button seeking to match the upper. When the basic filing is completed, I use a pointed needle file to enlarge the slot. The pictures show the button rebuild process.

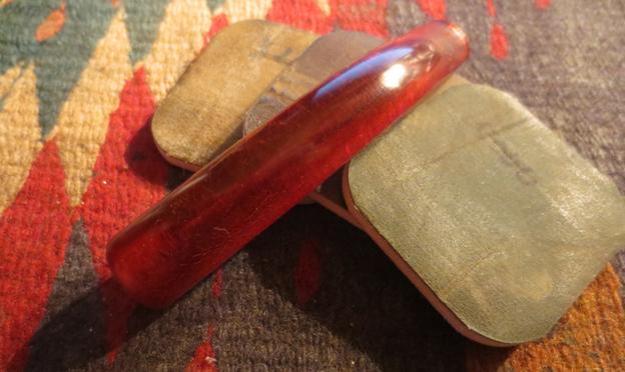
 To remove the roughness of the files, I then use 240 then 600 and finally 0000 steel wool to further perfect the shape and to cover the treads left by the files. Which often is the case, air pockets encased in the charcoal/superglue are exposed during the shaping and sanding process. I apply some CA glue to the button surface and paint it with a toothpick to cover the pin-sized air pocket holes and then spray an accelerator on the glue to cure it more rapidly. After a while, I return with 240, 6000 paper and then 0000 steel wool to remove the excess CA glue on the button and complete the button rebuild. The pictures show the completion of the button rebuild.
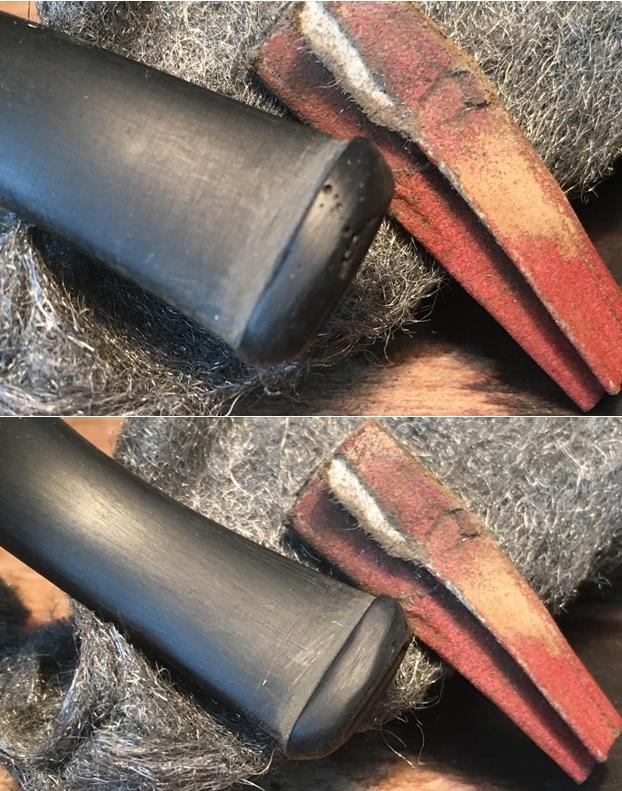
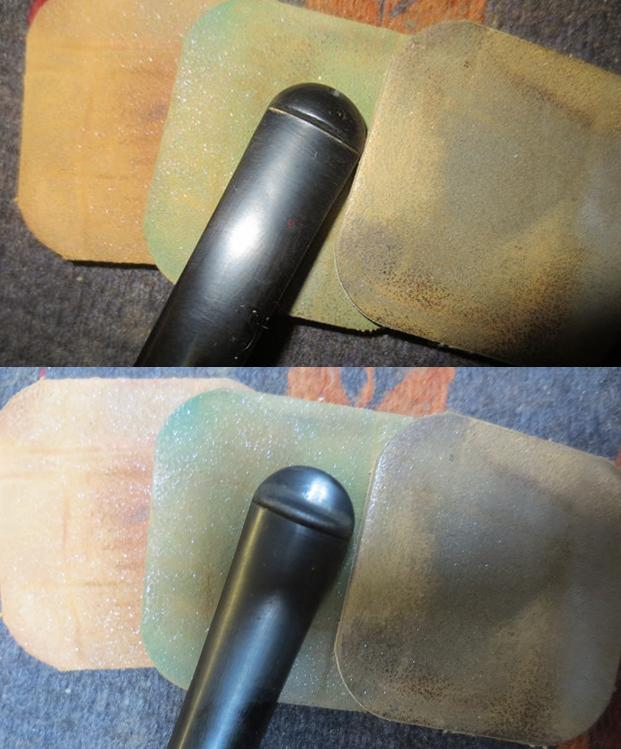
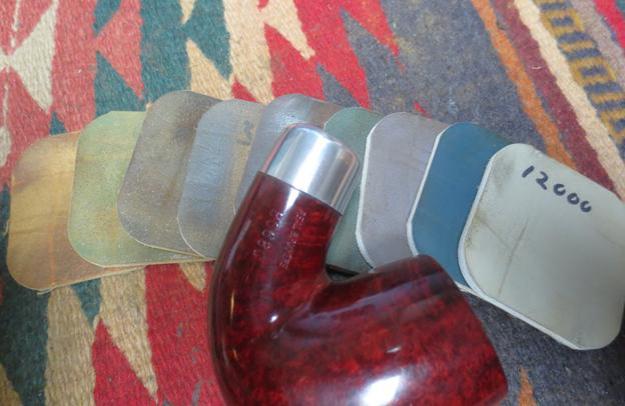
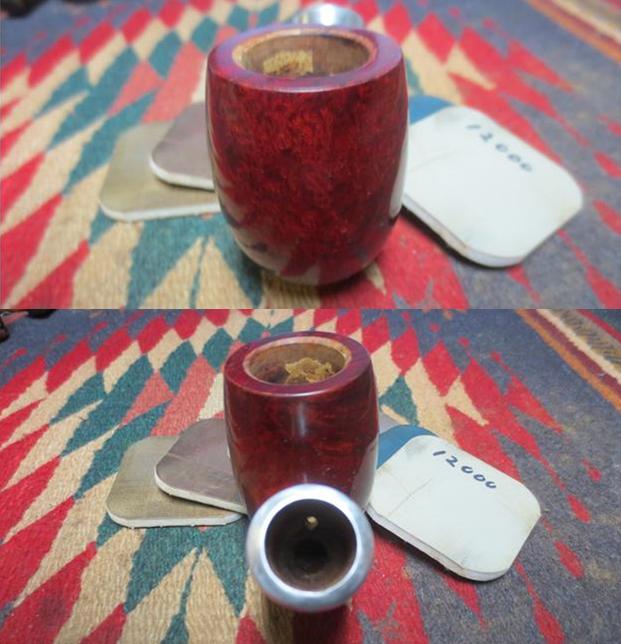
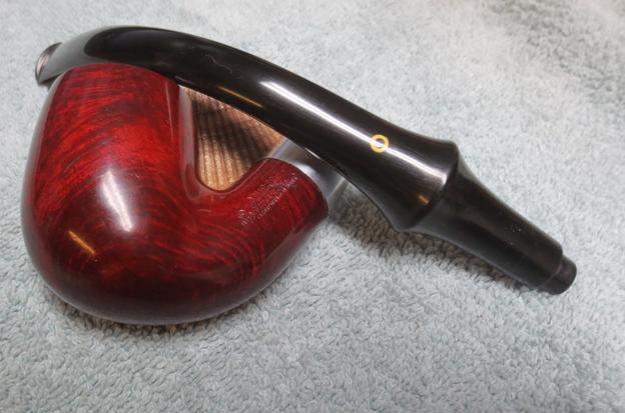
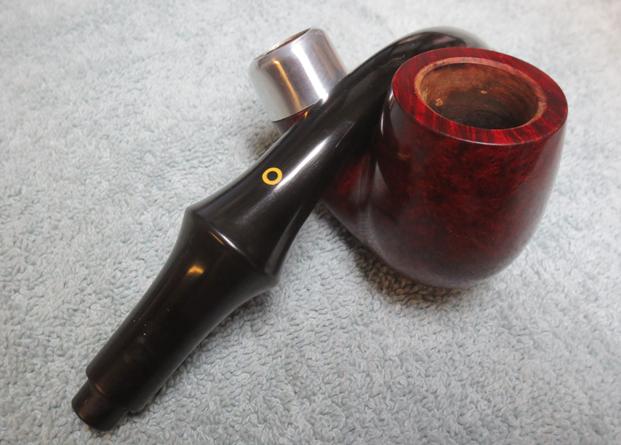
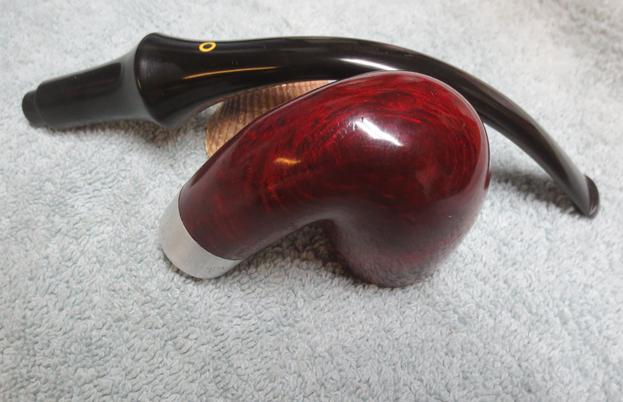
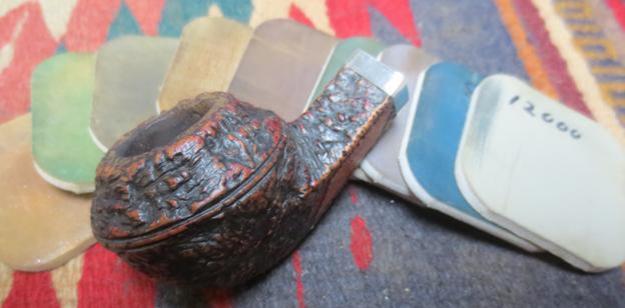
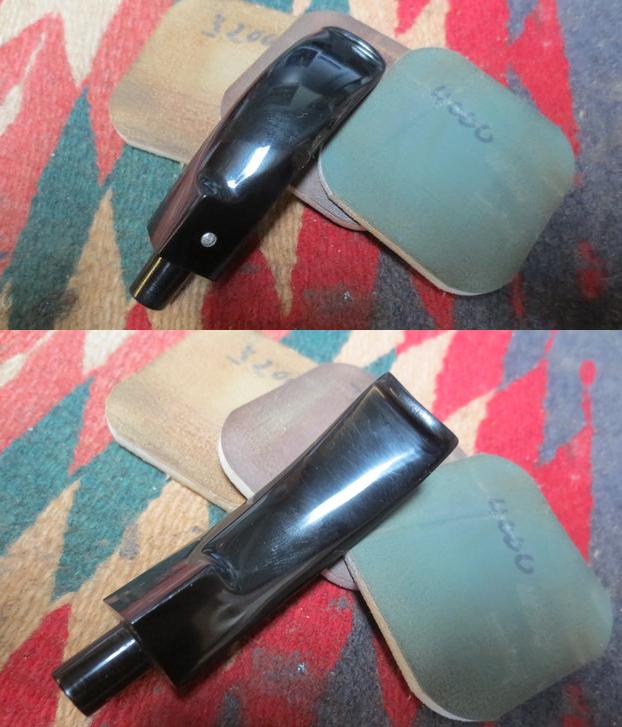
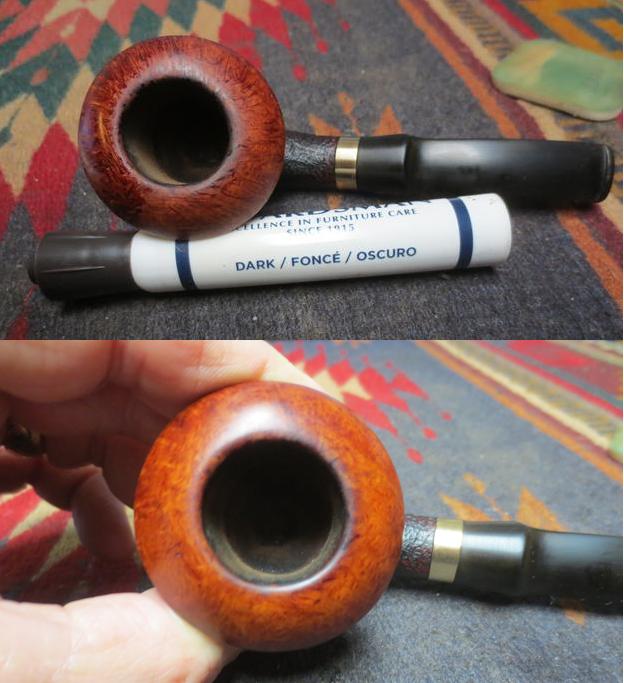
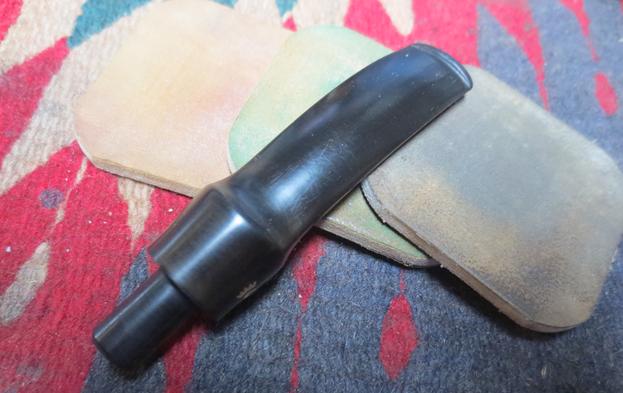
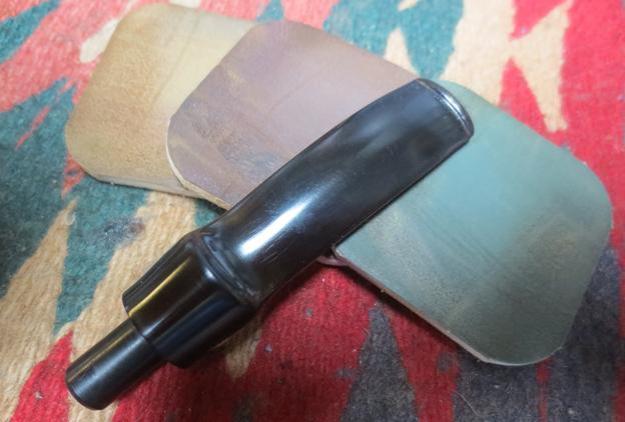
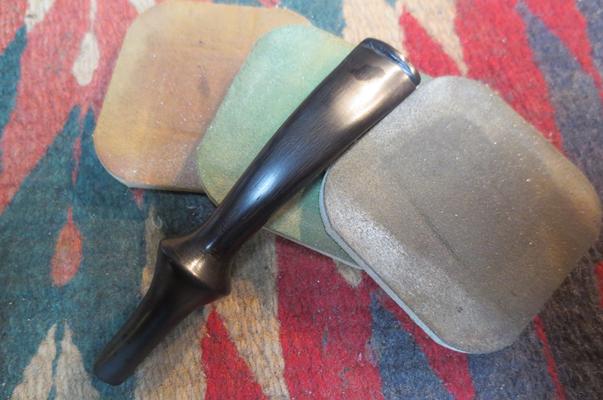
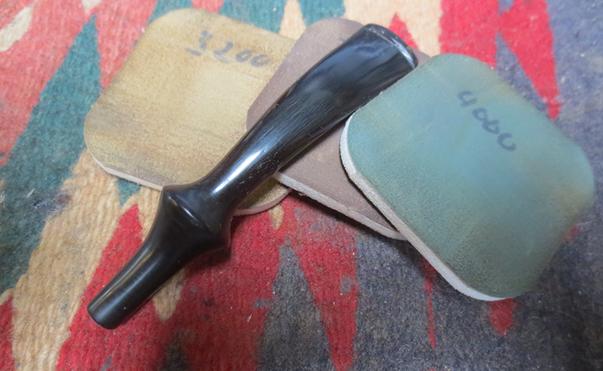
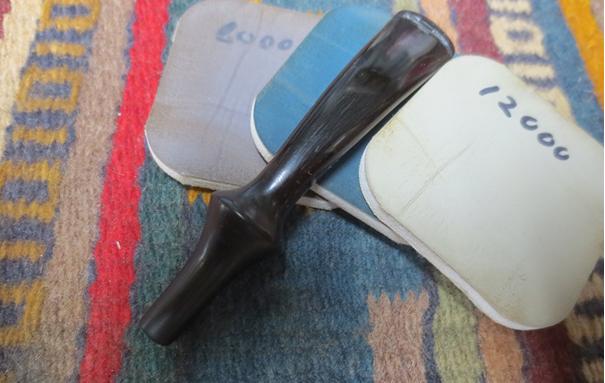
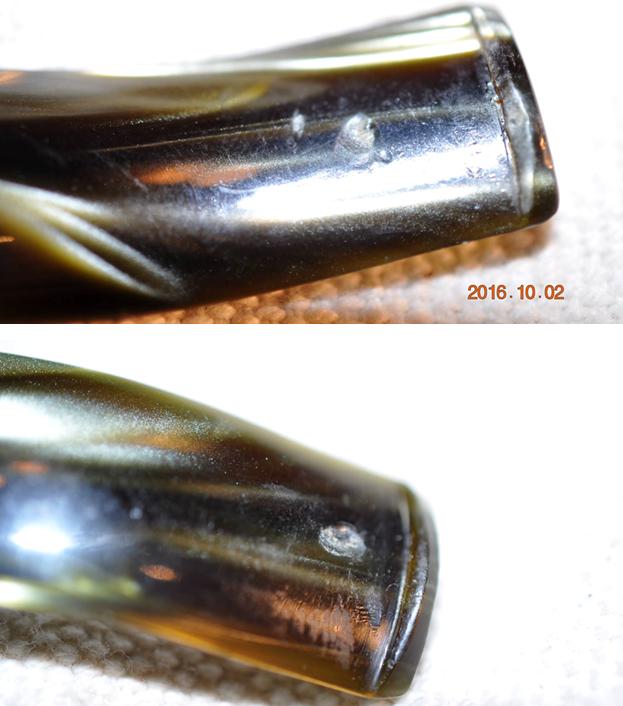
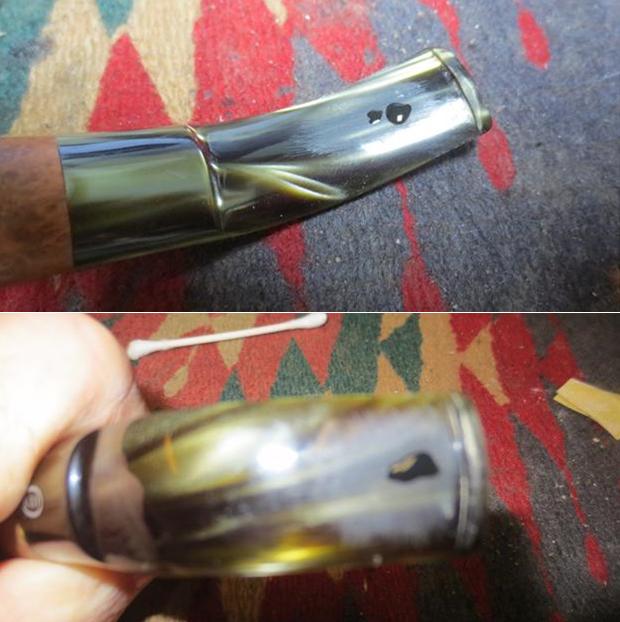
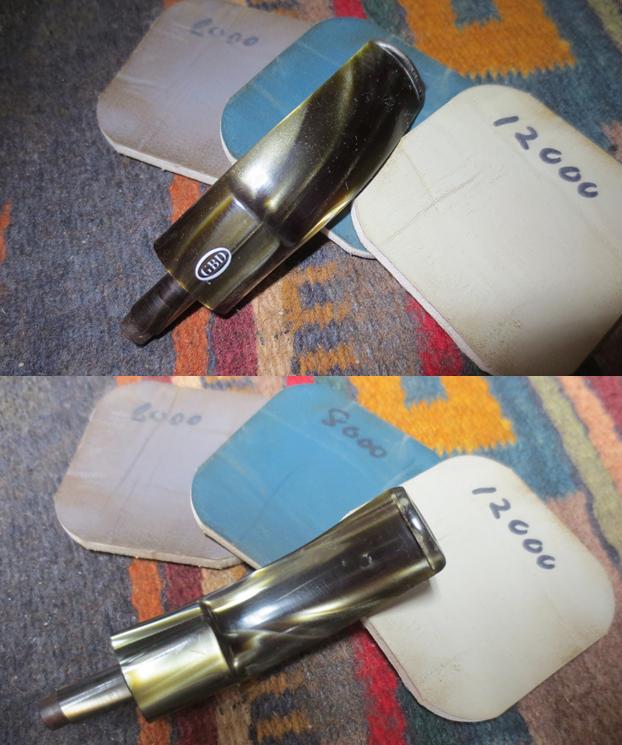
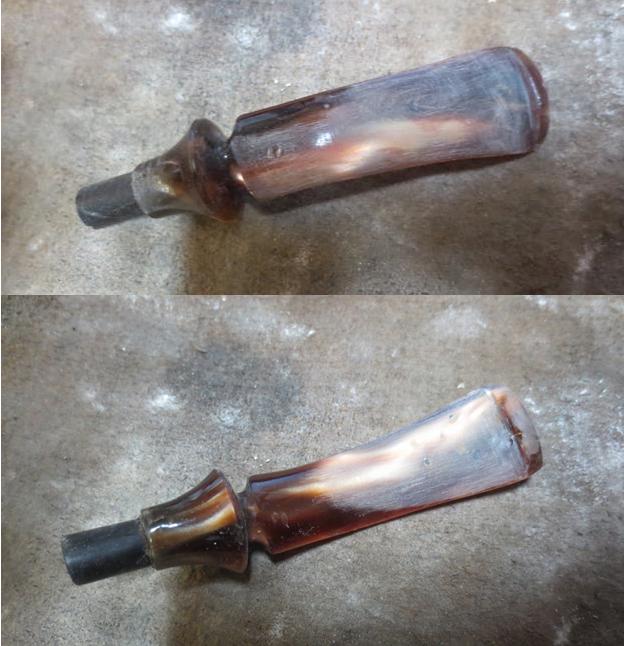
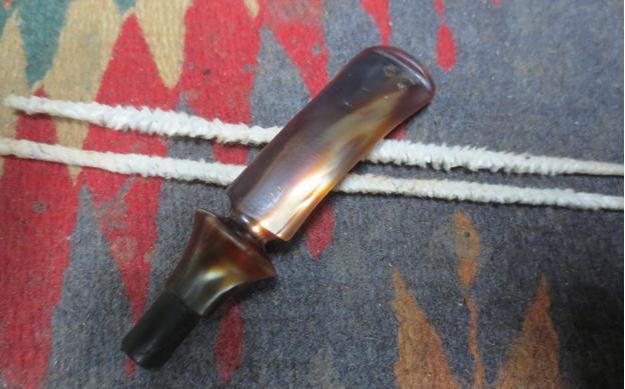
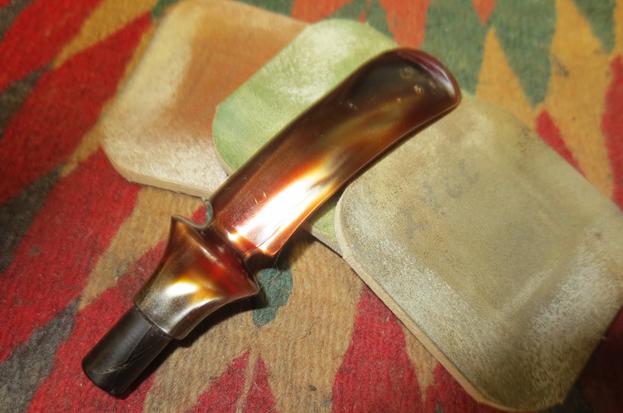
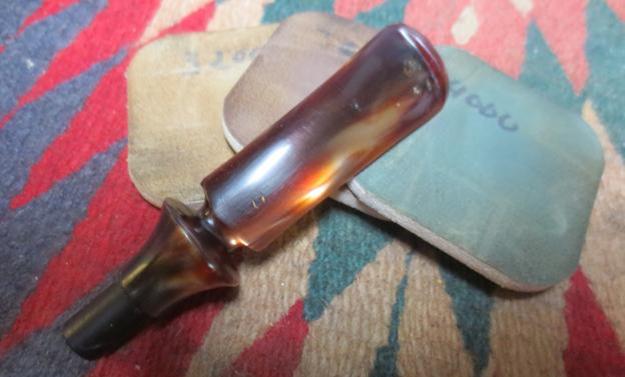
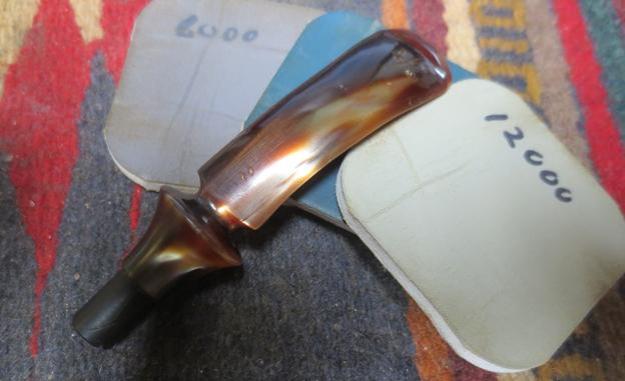
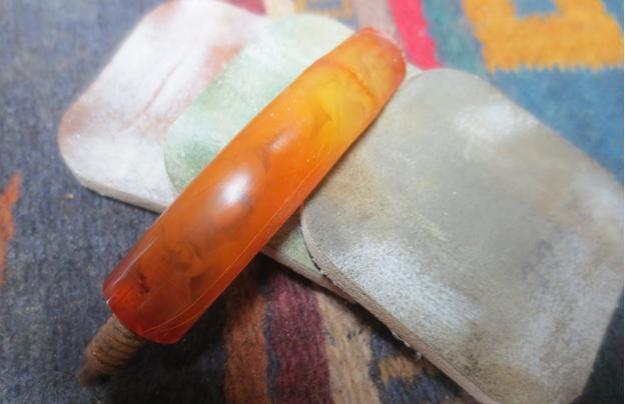
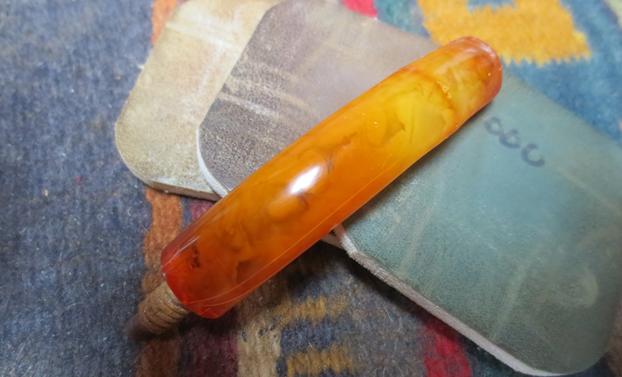
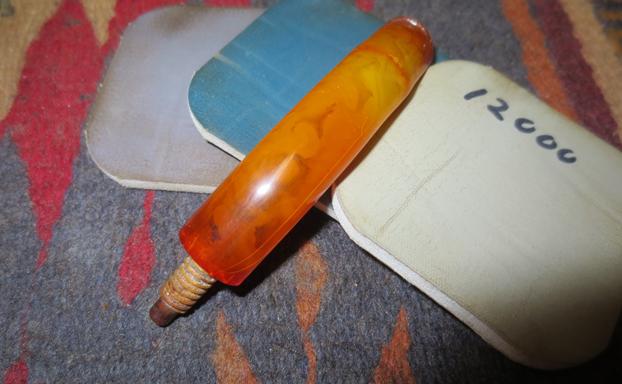
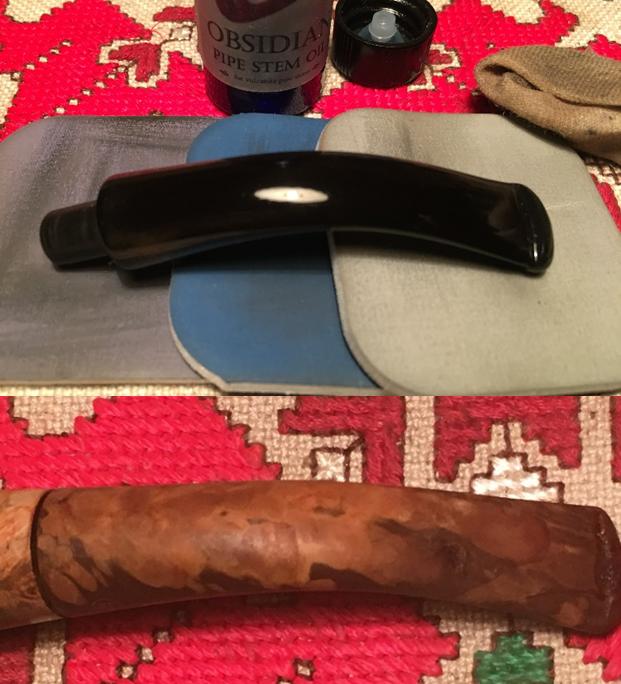
 With stem internals cleaned, and new button completed, I transition to the externals. Using micromesh sanding pads 1500 to 2400, careful to guard the Redonian ‘R’ stamping, I wet sand the stem and follow the set by applying Obsidian Oil. I then use micromesh pads 3200 to 4000 and after, pads 6000 to 12000 following each set with an application of Obsidian Oil. I set Gramps aside to soak in the Obsidian Oil. All I can do is to say, ‘Oh, my!’ Gramps is responding well to the TLC. The pictures tell the story – I can’t but help to throw in a reminder of how far we’ve come!
 With a reborn stem waiting, I turn to the stummel. The 3 pit-holes that were filled with superglue are cured. Using 240 grit paper I sand the excess glue to the surface and blend the patches.
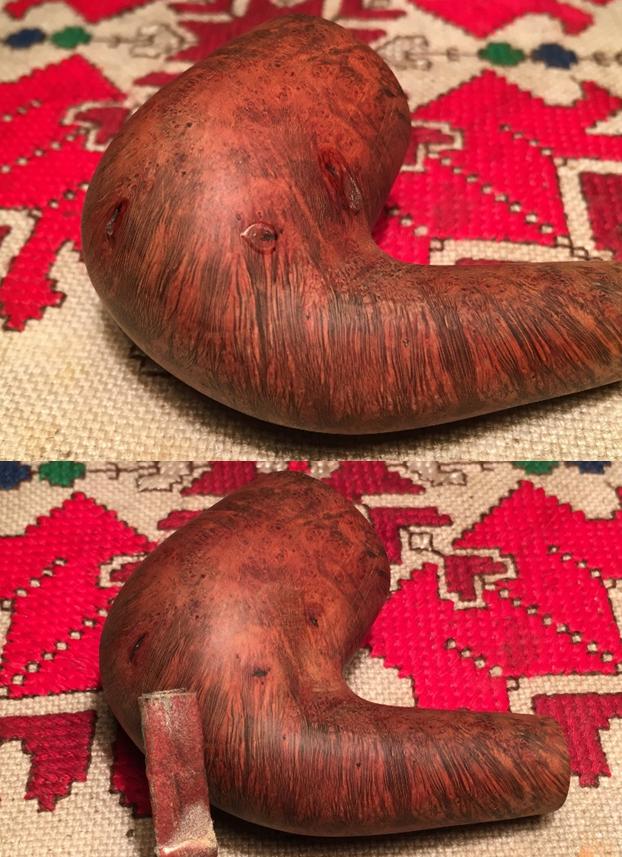
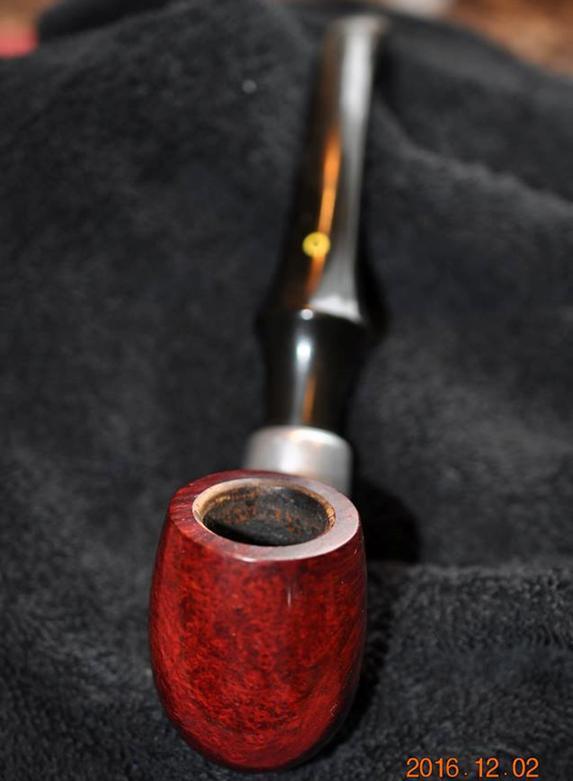
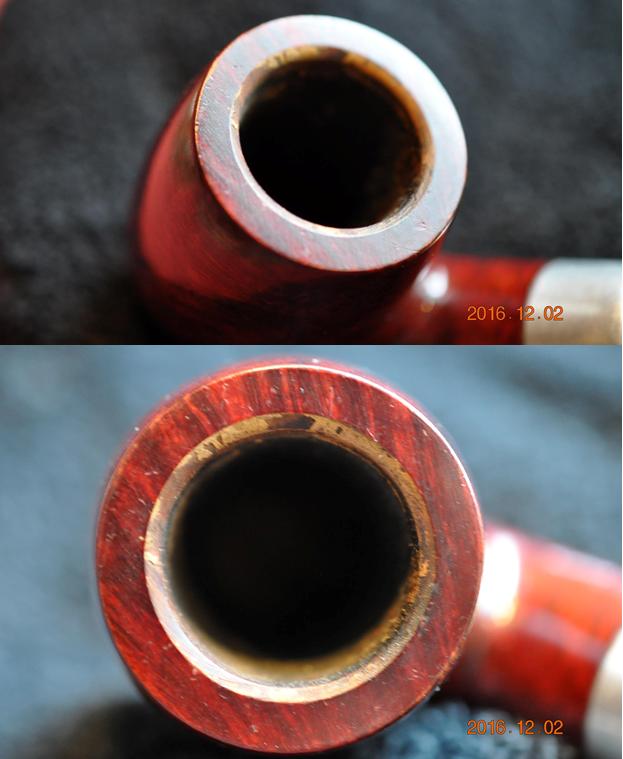
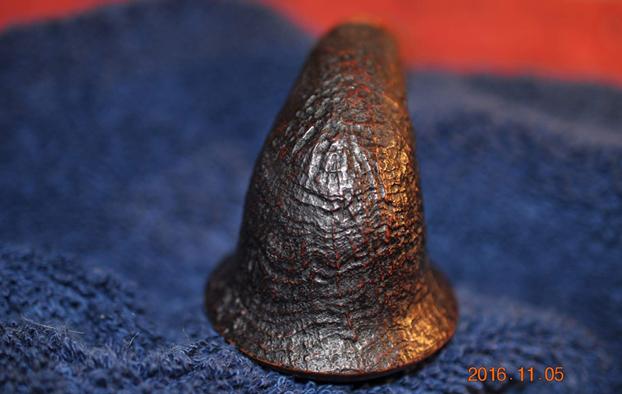
 I take a close-up picture of the rim and inspect the rim more closely. Along with nicks, I can see that rim lines are not sharp. There is evidence of a bevel on the inside ring of the rim which is scorched. I decide to mildly top the stummel and reestablish a crisp bevel. The bevel will also remove the scorching I see. I use 240 grit paper on a chopping board and rotate the inverted stummel in an even, circular motion to remove old briar. I stop and check things after every couple of revolutions to make sure I’m staying level. I only take off enough to leave the former bevel more distinct. To recut the inner bevel, I use 120 grit paper rolled very tightly to create a hard-sanding surface. I want the bevel to be straight and uniform. I follow the 120 using 240 grit also tightly rolled to remove the coarser lines. The topping and bevel look good. The bowl is in-round.
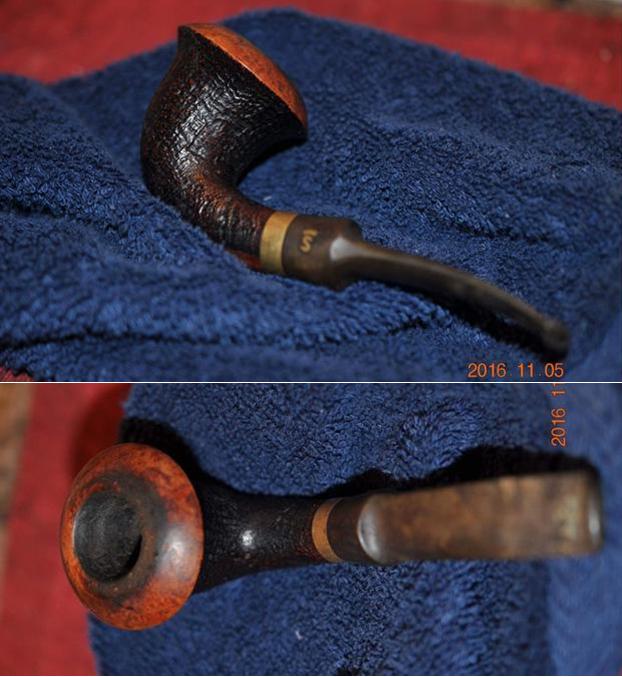
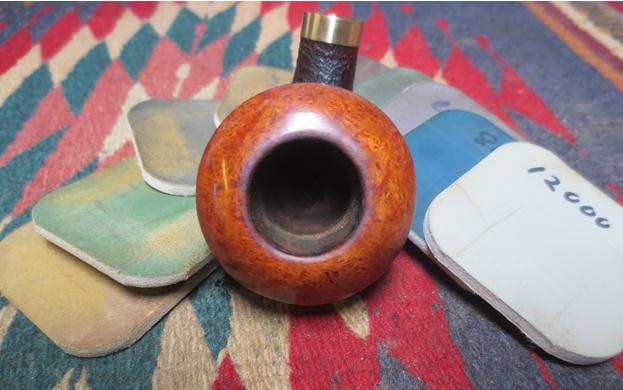
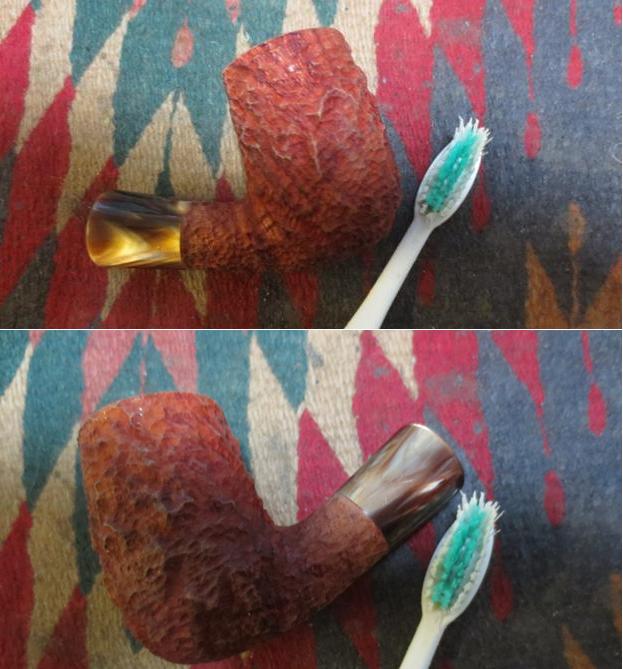
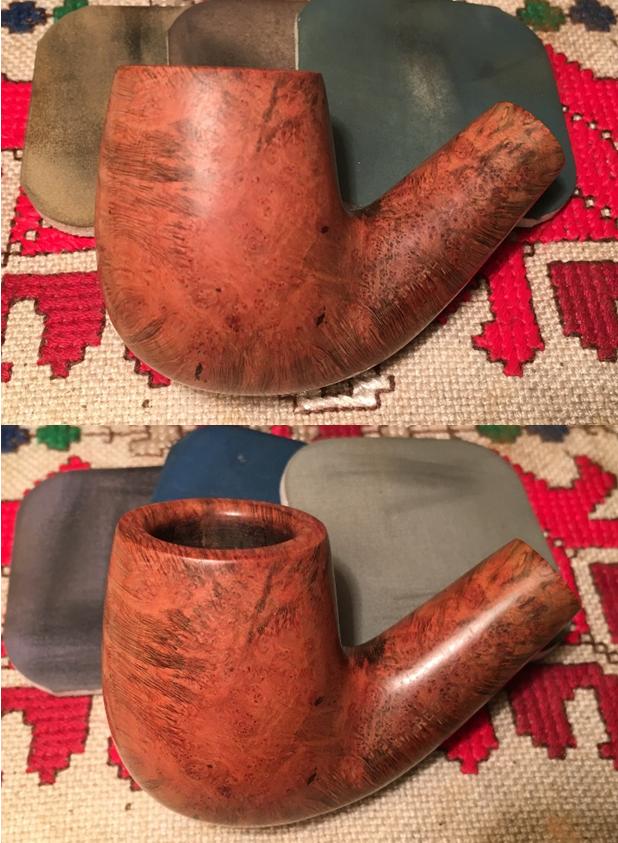
 After completing the rim and bevel, I take a medium grade sanding sponge and then a light grade sanding sponge and sand the stummel to blend the superglue fills – careful to work around the Redonian Deluxe London Made markings on the stummel. Then, using micromesh pads 1500 to 2400 I wet sand the stummel, followed by dry sanding using micromesh pads 3200 to 4000 and then 6000 to 12000. I never tire seeing the grain emerge during this process. After I complete the micromesh cycles, I unite stummel and stem to get a look at where we are. Gramps is looking good. The pictures show the progress – woops, I forgot to take a picture after the first micromesh cycle!
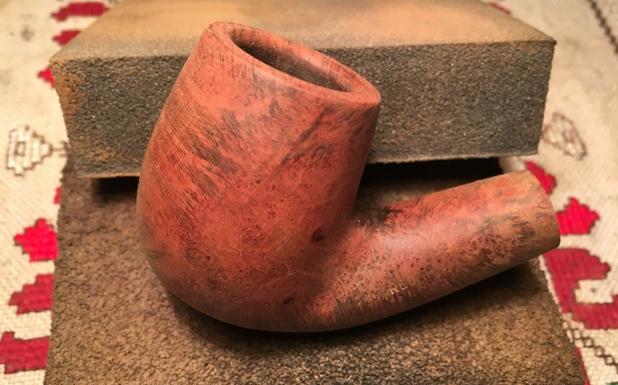
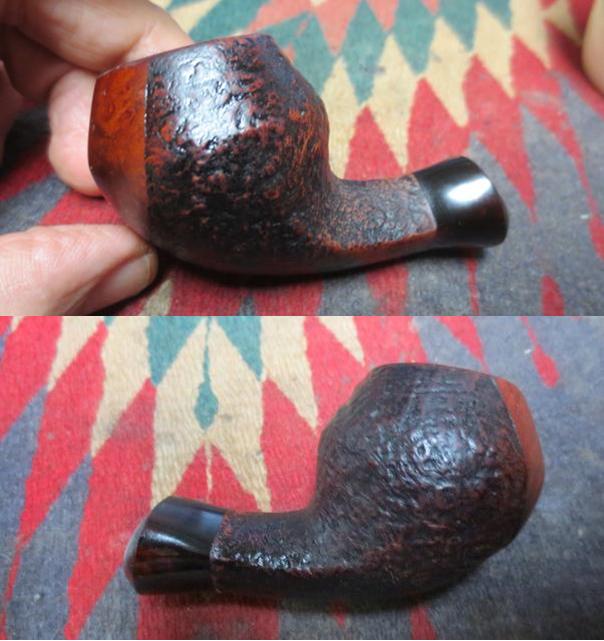
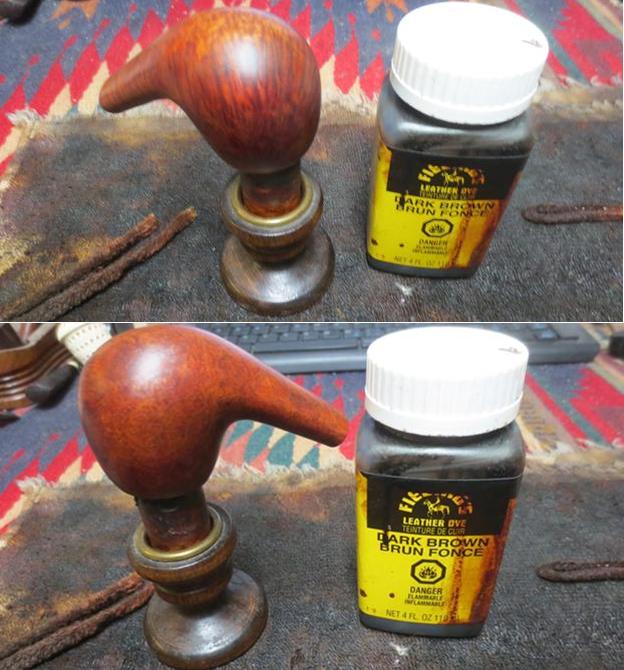
 I’m liking very much the progress of the Redonian Deluxe London Made – aka, Gramps. I decide to use Fiebing’s Dark Brown Leather Dye with Gramps. I think the rich depth of the leather dye will create the subtle expression of the straight grain hugging the bottom of the stummel as it expands into horizontal patterns and scattered bird’s eye on top. I give the surface a quick wipe with a cotton pad to clean and remove any leftover briar dust. I use my wife’s hair dryer to warm the stummel to expand the wood to help the grain to be more receptive to the dye. I use a cork in the shank as a handle and I then take a folded over pipe cleaner and apply the dark brown dye over the entire surface. After this, I fire the wet dye which immediately burns the alcohol and sets the dye in the grain. In a few minutes, I repeat the process concluding with firing the wet dye. I put the crusted stummel aside to rest. I decide to do the same and call it a day. The pictures show the progress.
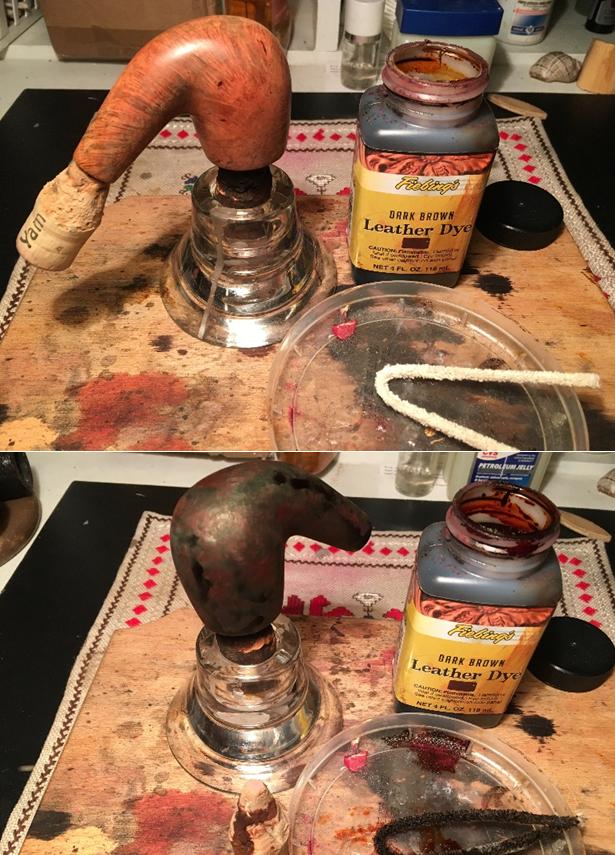 The next day, after a full day’s work, I’m anxious to look at Gramps, and with the Dremel I begin unwrapping the fired dye crust. After mounting a dedicated felt wheel for applying Tripoli, I set the Dremel’s speed for 1, the slowest possible, and first purge the wheel with the sharp edge of the Dremel’s tightening wrench – to rid it of old compound and to soften the felt wheel. I apply very little pressure on the briar surface, allowing the RPMs and compound to do the work for me. To reach the inside of the bent shank elbow with the Tripoli compound, I switch to a smaller, pointed felt wheel to get in the tight angles. With the Tripoli finished, I rejoin the stem to the stummel and I mount a Blue Diamond dedicated felt wheel and again buff stem and stummel. When completed, I hand buff the pipe with a cotton cloth to remove the compound dust left over. The pictures show the progress.
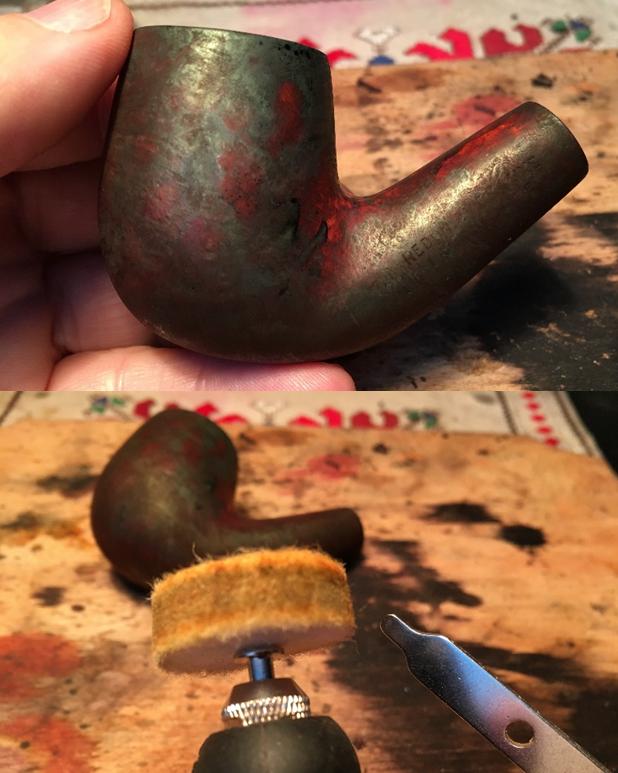
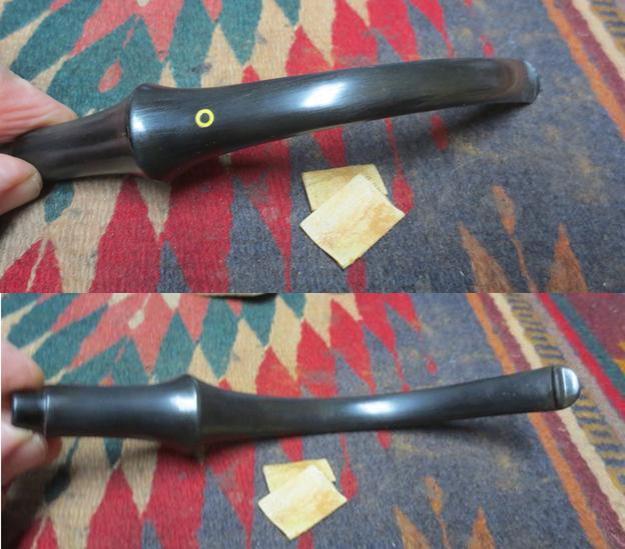
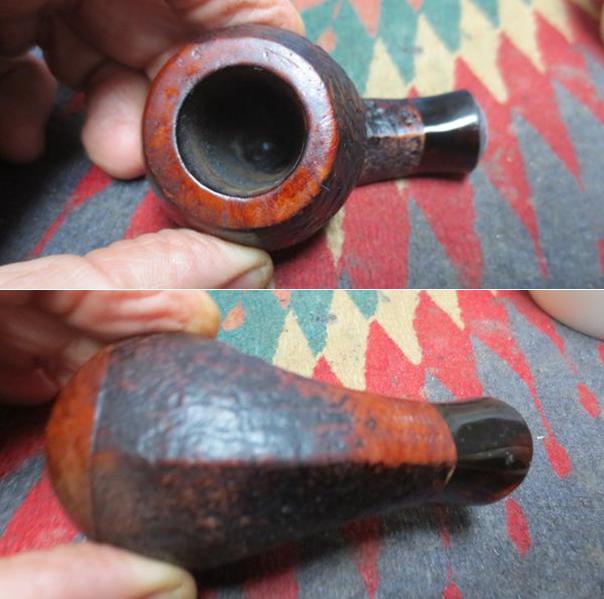
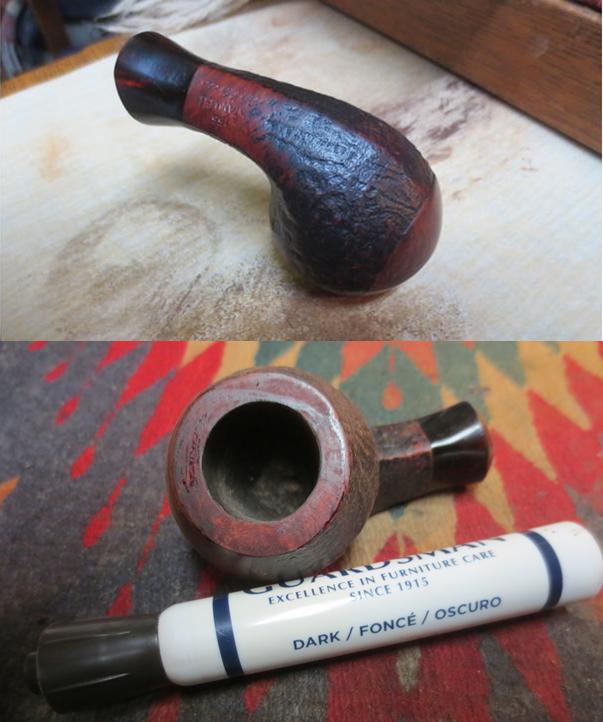
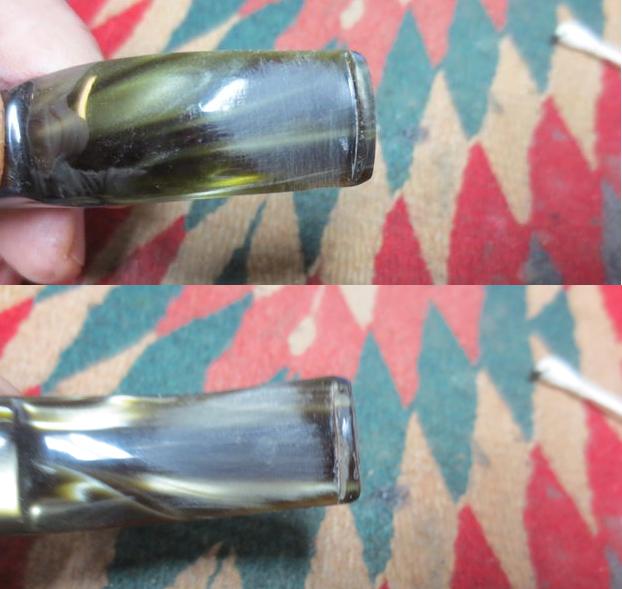
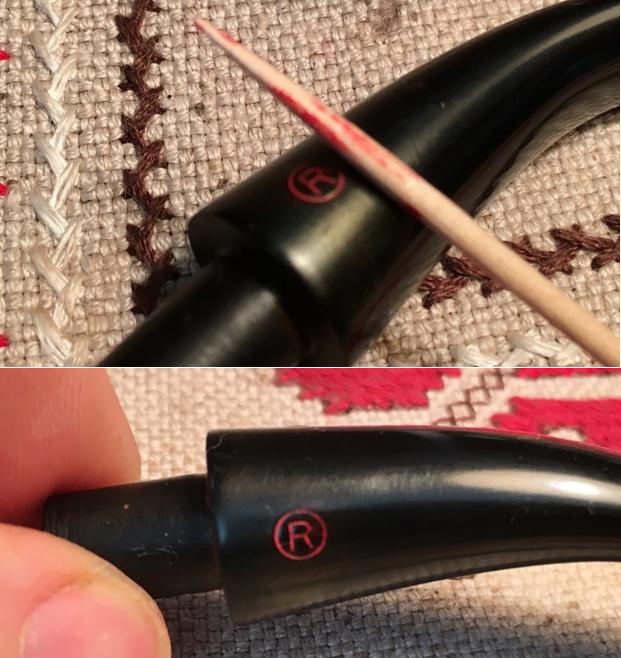
 With the abrasive application of the compounds finished, before I apply carnauba wax to the stummel and stem, I want to dress up Gramps’ stem stamping. The original appears to have been red so I take red acrylic paint and apply a dab over the Redonian ‘R’ and circle and let it dry thoroughly – overnight. When dry, I gently rub/scrape off the excess with the flat side of a toothpick which protects the paint in the indentations. After this, I rub it well with a cotton pad to clean the remainder of the excess – gently leaving a rebranded stem – very nice, a refreshed stem stamping. The pictures show the results.
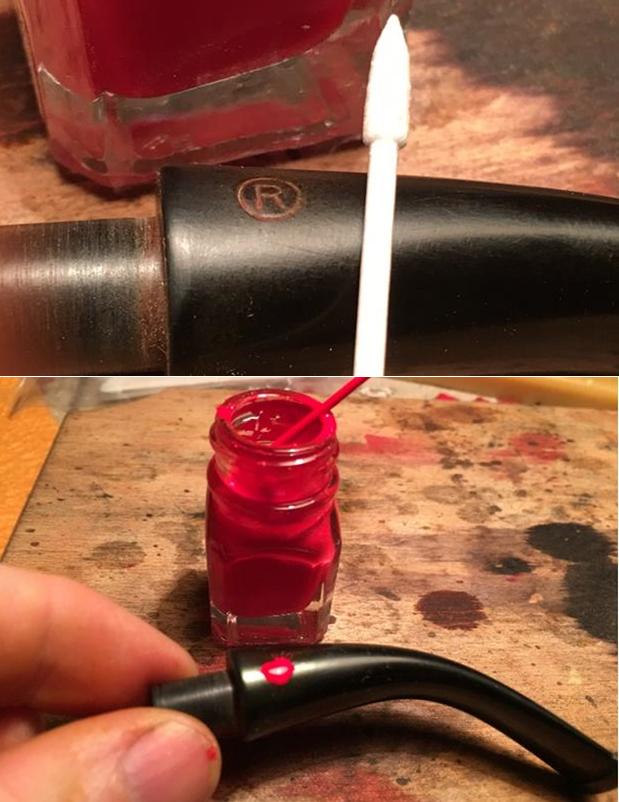
 With the Redonian stem stamp completed, I reunite stem and stummel and mount the cotton cloth Dremel wheel and apply several coats of carnauba wax to the pipe. I increase the speed of the Dremel to 2. I follow the carnauba wax with a vigorous hand-buff using a micromesh cloth to dissipate wax that was not spread evenly and to deepen the gloss of the shine.
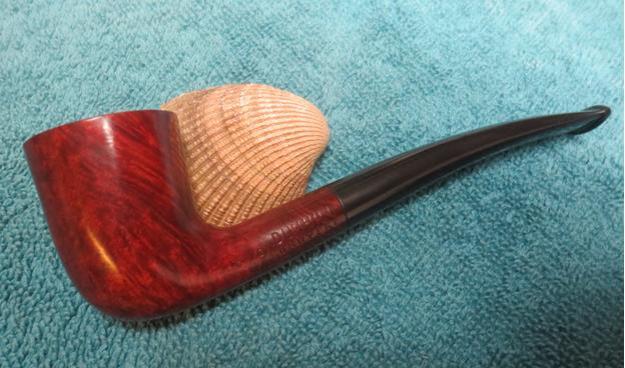
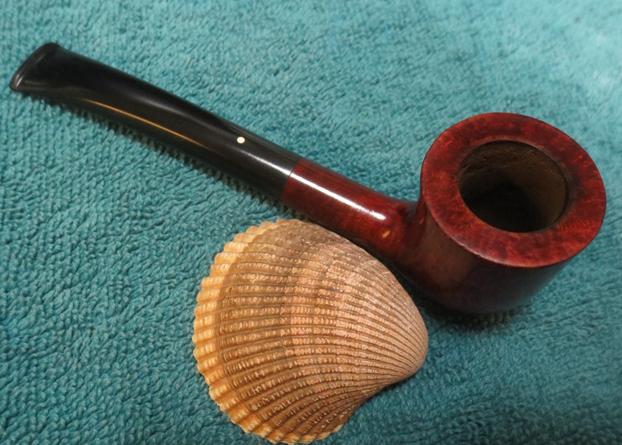
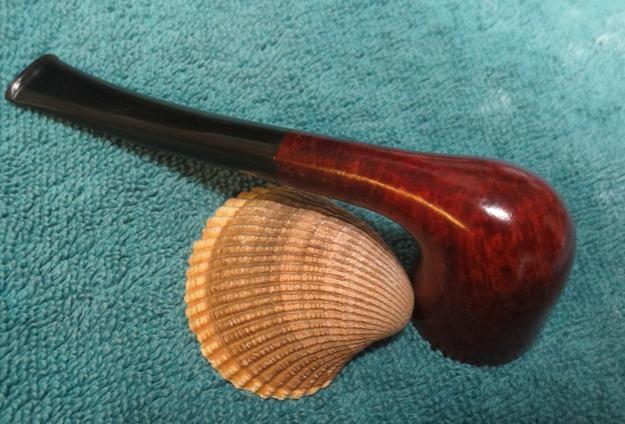
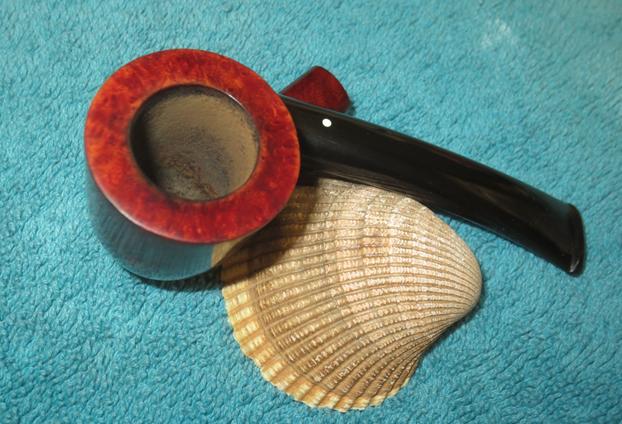
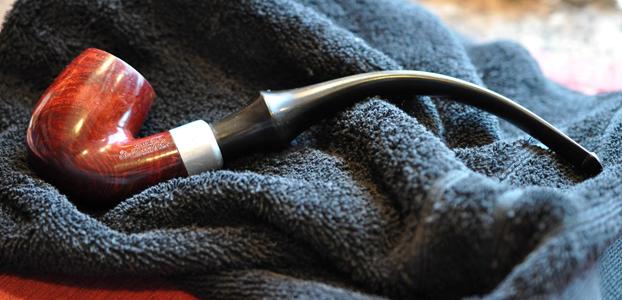
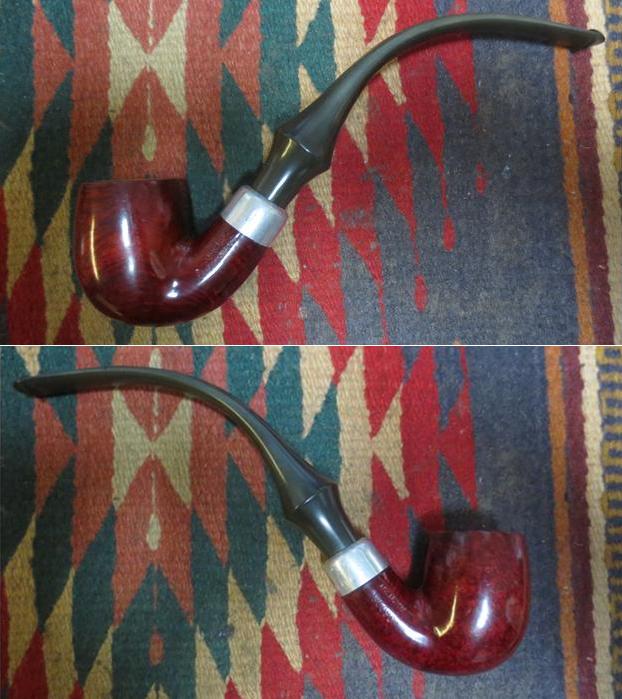
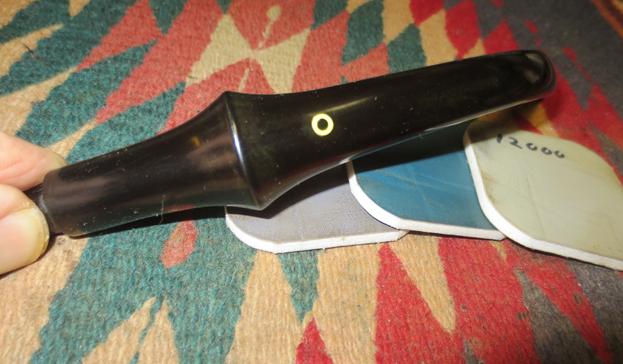
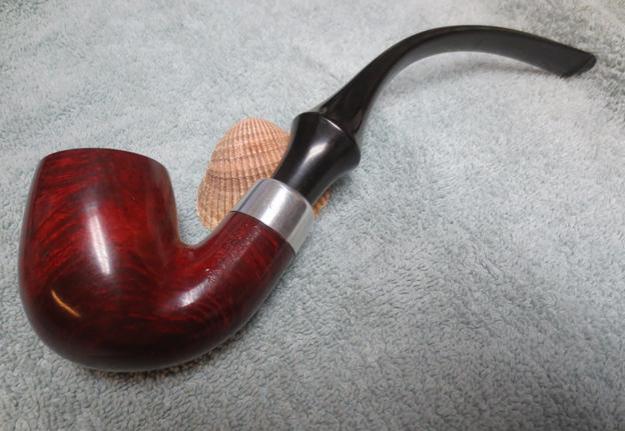
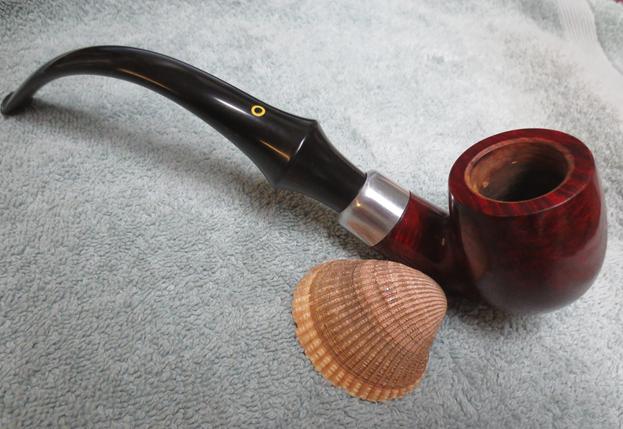
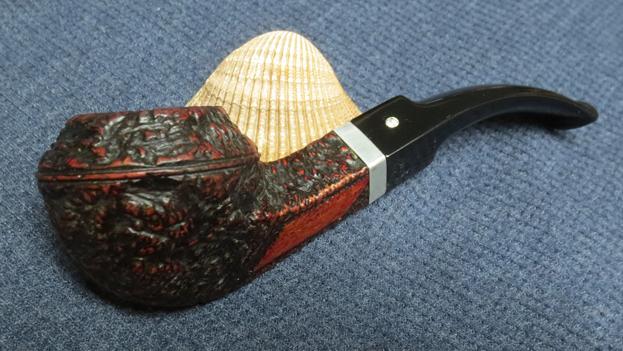
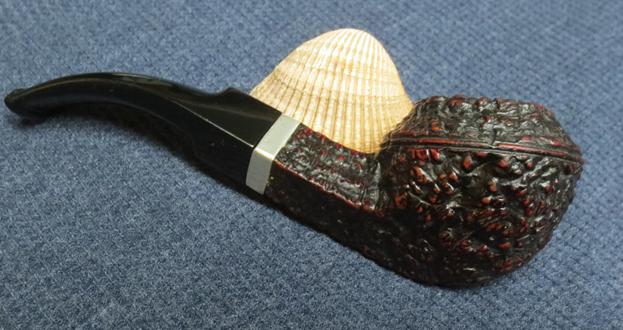
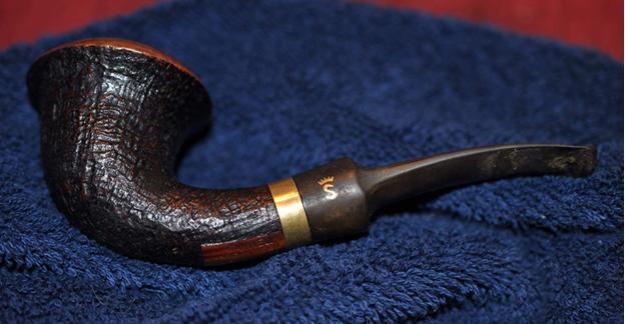
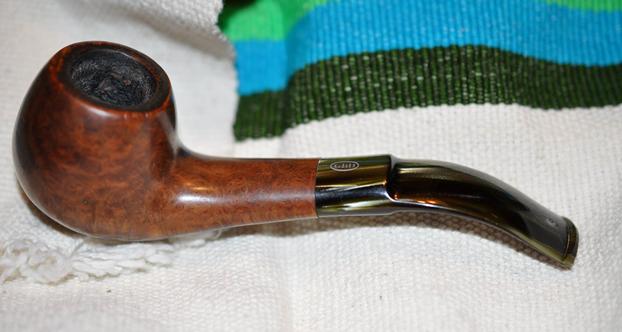
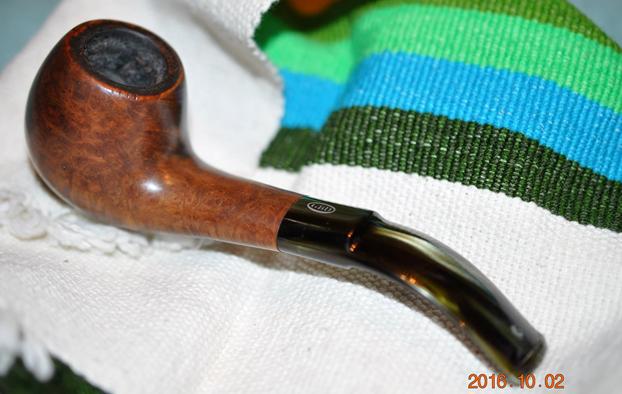
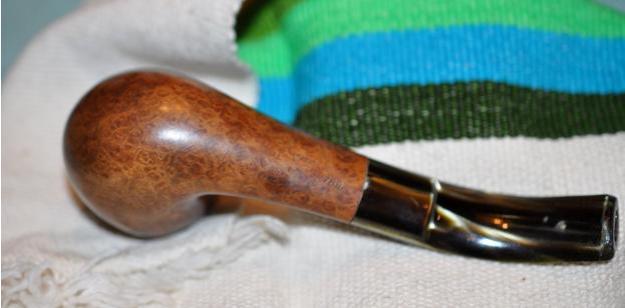
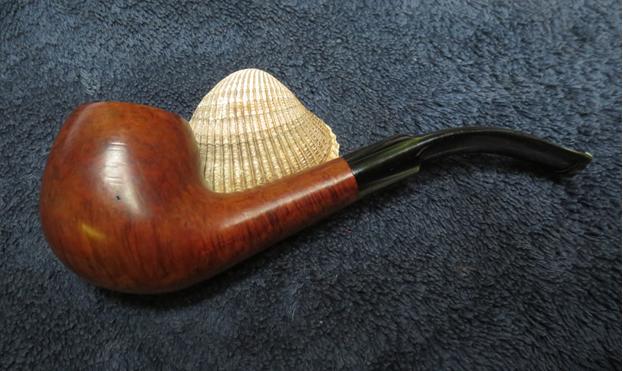
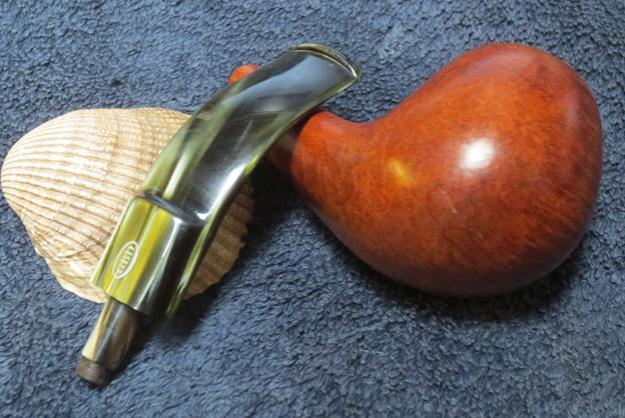
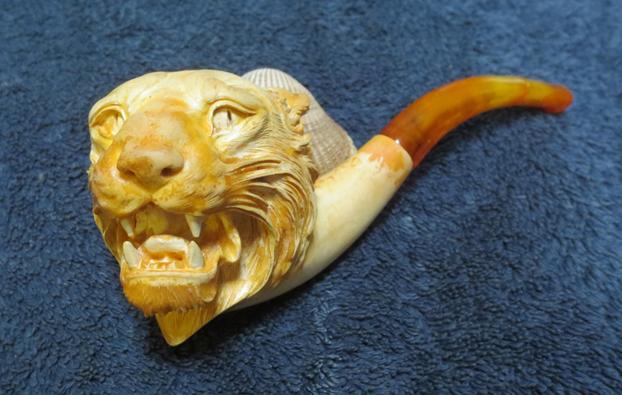
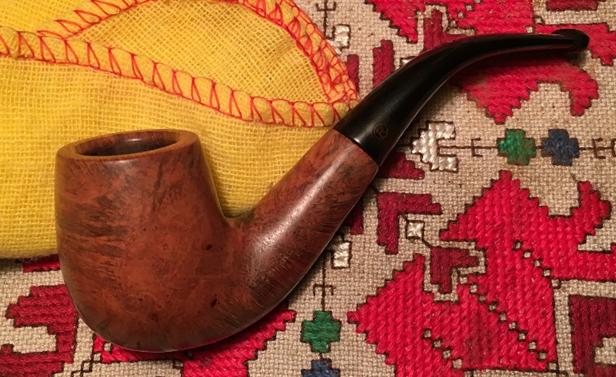
When I think about the 98-year-old steward from whose estate this Redonian Deluxe London Made came, I cannot believe he would have dreamt his pipe would one day start a new lifetime serving another steward. I gave this old, worn pipe the nickname, ‘Gramps.’ Bear with me one more time to put a picture of ‘Gramps’ in front of the younger man he has now become. I’m amazed at the transformation and it is why I love this hobby – the pictures speak for themselves. I sell my restorations with the profits helping the work we do with the Daughters of Bulgaria – those sexually exploited and trafficked. This Redonian Deluxe London Made is ready to serve a new steward. If you’re interested in adopting him and helping the Daughters, check out ‘Gramps’ at The Pipe Steward Store. Thanks for joining me!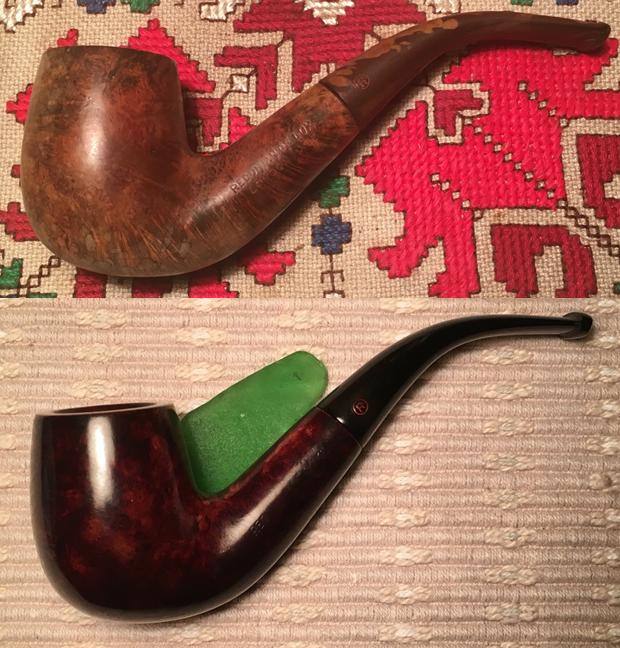


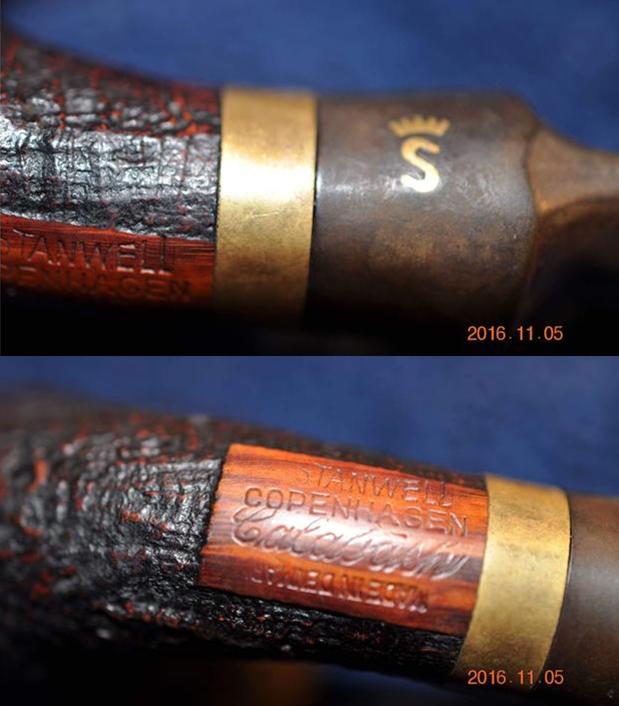
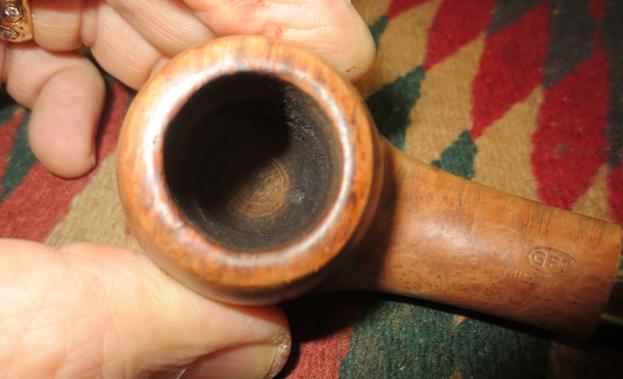
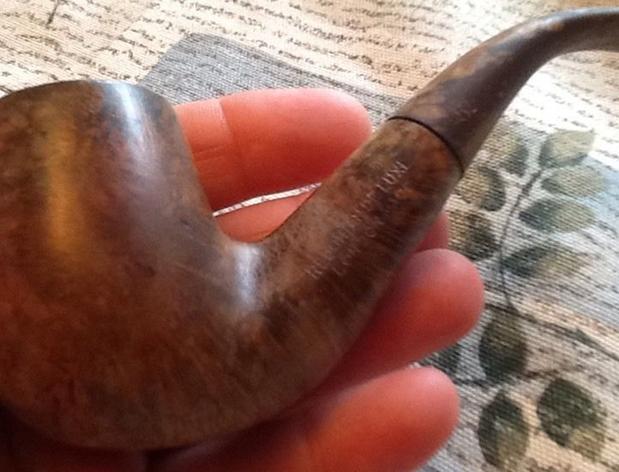
 I took some close up photos of the stamping on both sides of the shank. You can see the shape number clearly on the left side. It reads 21143. I have learned that reading the numbers gives a lot of information. From past experience with four digit numbers I know that the first number tells me the size of the bowl – a Group 2. The second number tells me the style of the original stem which in this case is 1 referring to a tapered stem. The third and fourth numbers reference the shape number of the pipe which is number 14 and on the Dunhill charts is a Bent Dublin. The only number I am not clear about it the final digit 3. That will take some more work to see if I can narrow down what it refers to. The rest of the stamping is pretty straightforward on the left and right side of the shank.
 Since I had not seen the five digit shape stamping before I first turned to Pipephil’s site to see if there was help there. I have used his Dunhill information and found it a great help in deciphering the stamping in the past. However in this case his site did not give any information on the last digit of the five digit stamping. It gave me the information that I already knew – which was the interpretation of the stamping on the pipe. It was made in 1977 and was a Group 2 sized pipe with a taper stem in the 14 Shape which was a bent Dublin. It did not give me the information on the final number in the shape group – the 3. He left that number blank in his interpretation of the stamping on the pipe.
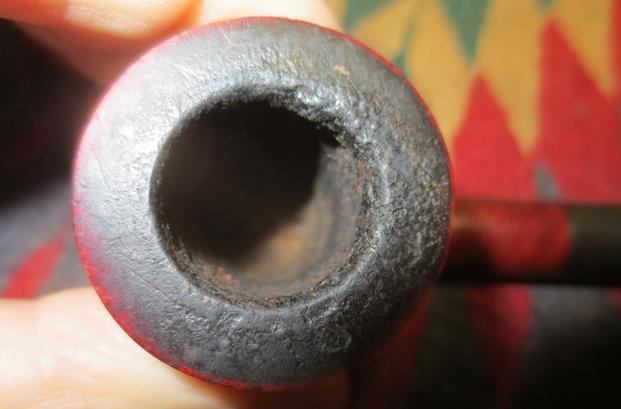
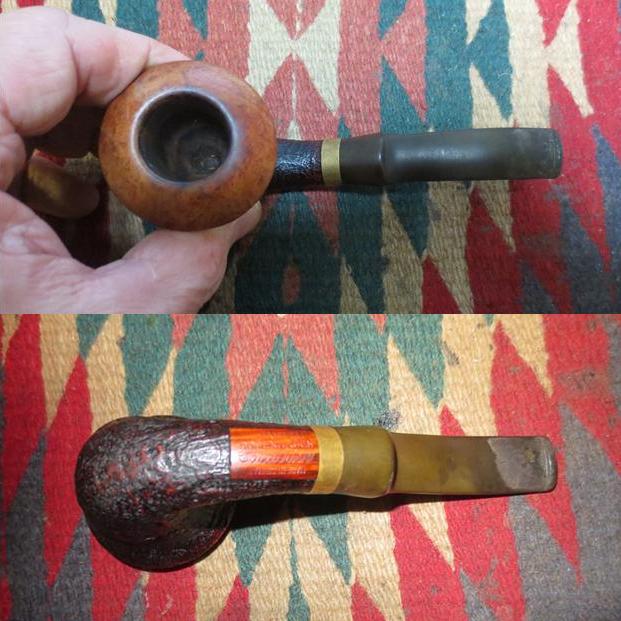
 I started the restoration by reaming the bowl. I decided to work on the crumbling cake with the Savinelli Fitsall Reaming Knife and took the cake back to bare wood. I used a small sharp pen knife to carefully scrape the lava off of the rim top. I scrubbed the rim with saliva on cotton pads until I removed all of the hardened cake. I sanded the rim top with a medium and a fine grit sanding sponge to take off the residual tars that remained. I finished by sanding the top of the rim with micromesh sanding pads from 1500-4000 grit.
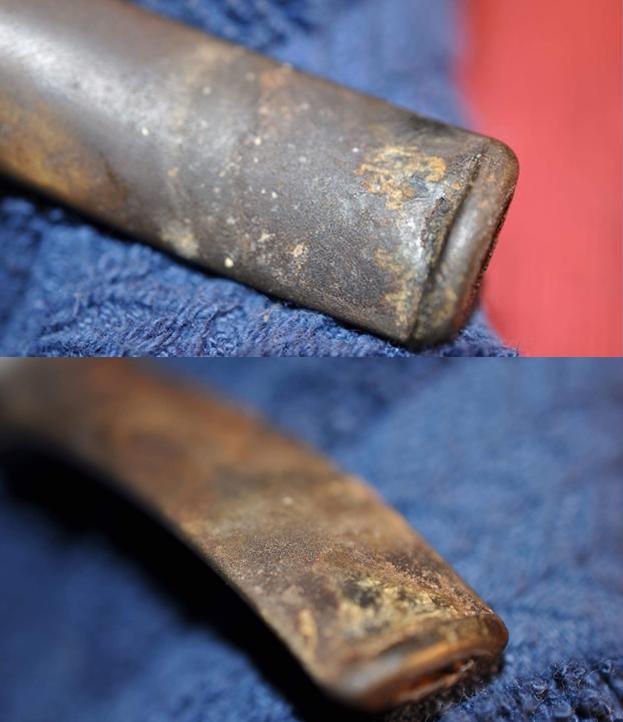
 I cleaned out the slot in the button with a dental pick to remove the clogged buildup on both sides of the slot narrowing the airway considerably. I sanded the stem with 220 grit sandpaper to remove the calcification and to minimize the dents. I heated the dents by “painting” them with the flame of a lighter and was able to raise them. I sanded the repaired dents and blended them in with the sandpaper. I reshaped the top edges of the button on both sides.
 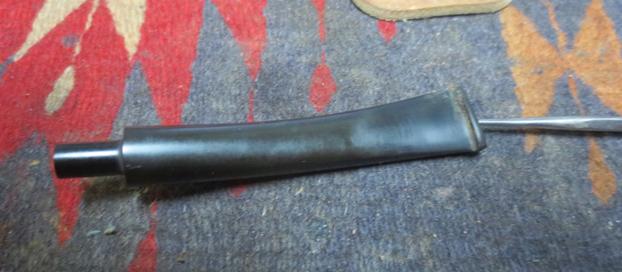 I scrubbed out the mortise and the airways in the shank and the stem with pipe cleaners, cotton swabs and alcohol until the swabs and cleaners came out white.
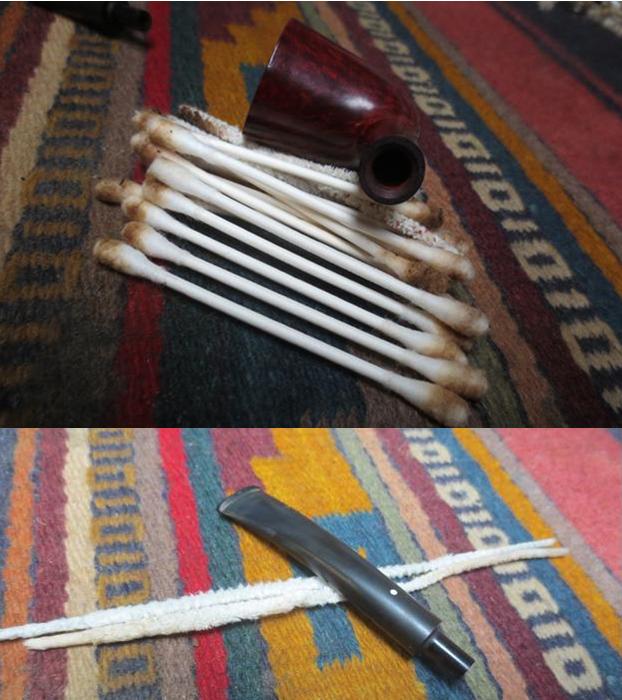 I polished the stem with micromesh sanding pads – wet sanding with 1500-2400 grit pads and dry sanding with 3200-12000 grit pads. I rubbed the stem down between each set of three pads with Obsidian Oil. I was able to remove all of the scratching and the oxidation on the stem.

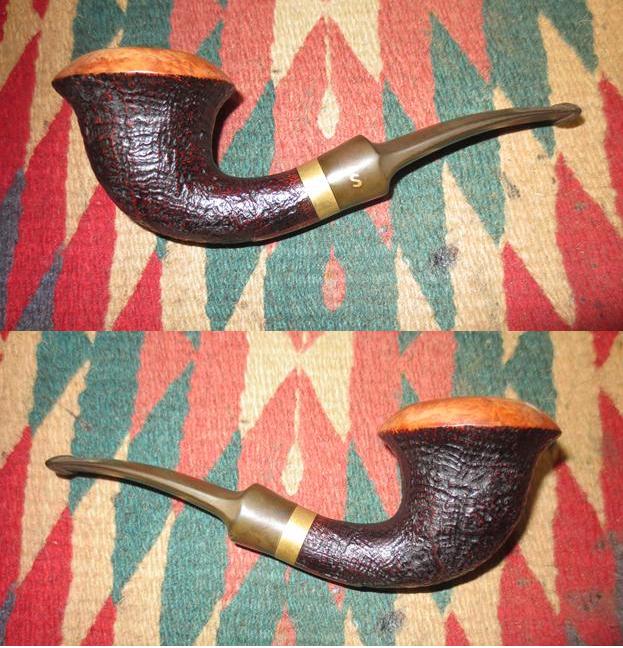
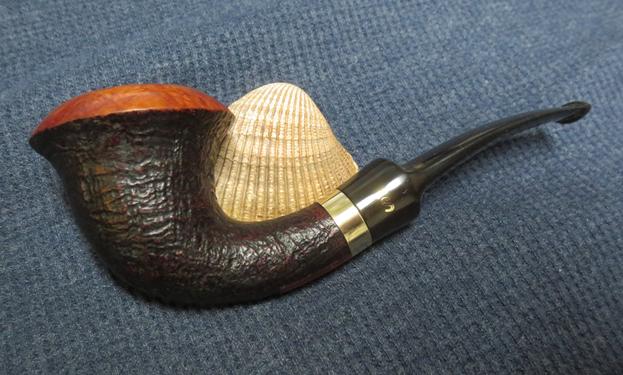
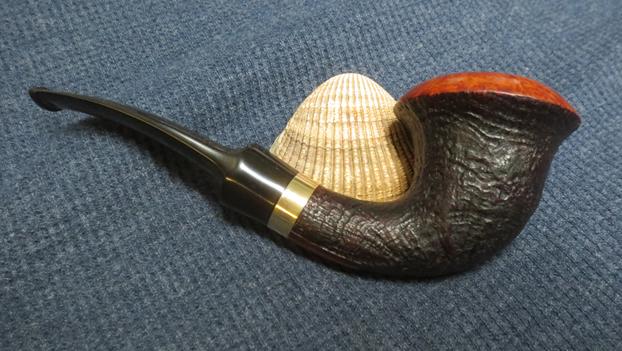
 I reconnected the stem and the bowl and buffed the pipe with Blue Diamond on the buffing wheel and then gave the entire pipe multiple coats of carnauba wax. I buffed it with a clean buffing pad to raise a shine and by hand with a microfibre cloth to deepen the shine. The finished pipe is shown in the photos below. It looks far better than when I started cleaning and refurbishing it. It should give the next pipe man who takes on its care a long life of good smokes. Thanks for looking.