Blog by Dal Stanton
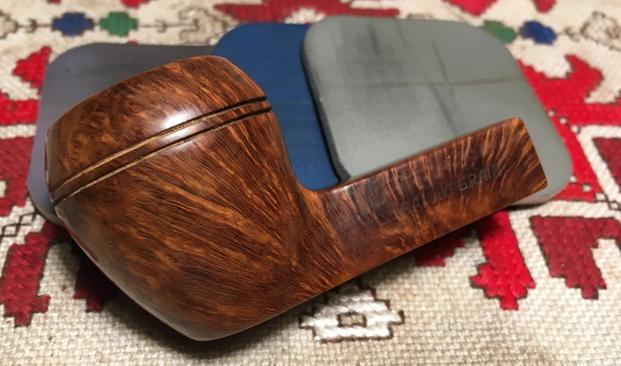
When Jon put the L. J. Peretti out on the table I was excited. I was in Oslo, Norway, where I met up with two colleagues who work in Ukraine – we were there watching a world class biathlon event and we had a great time. Jon knew that I was restoring pipes for the Daughters of Bulgaria and had a couple pipes that he was no longer smoking. He picked the Peretti up off eBay some time ago and he passed it on to me to restore for a new steward – a task I was more than willing to take on! I grew a bit attached to the Boston-based Tobacconist L. J. Peretti Co., when I restored my first Peretti which my son had gifted me for Christmas. It was a challenge as I salvaged the original Peretti stamp on the surviving squared saddle stem half and added the other half by cannibalizing another stem and accomplishing a stem splice. For a look at this project look here: Peretti Square Shanked Billiard. I brought the ‘new’ L. J. Peretti home to Bulgaria and the first picture below shows the two Perettis – a remarkable resemblance in the sharp squared shanked style.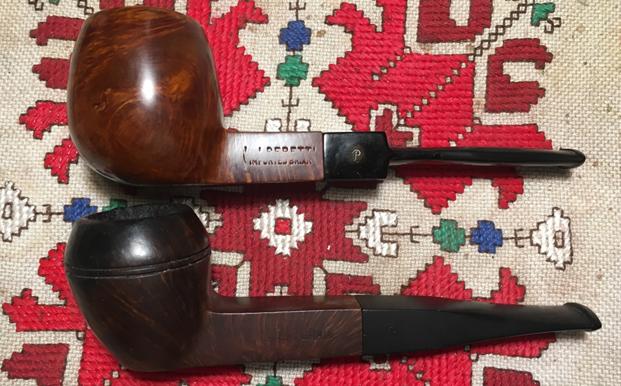 In the interest of full disclosure, when I first saw the ‘new’ Peretti in Oslo, I really wasn’t sure what the shape classification would be. The first indicator I cued on was the double groove – Bulldog? Then, the classic Bulldog usually has a diamond shank/stem. Rhodesian? The squared shank didn’t fit. Ok, a Billiard or Apple with a cool grooved ring going with the squared shank, which I think is very attractive. My questions gave way to an email to Steve for his input and his response came very quickly. His call is a squared shank Rhodesian. My response, “Sweet!” That works for me. When I did my original research on the Peretti name I discovered the genesis of a significant story of Americana pipe history with the establishment of the L. J. Peretti Company of Boston in 1870, the second oldest tobacco shop in the US, second only to Iwan Ries & Co. of Chicago established in 1857 (See: Link). It started in 1870, Libero Joseph Peretti arrived in Boston from Lugano, Switzerland, putting in motion the historical axis that exists today in an iconic tobacconist shop that continues to serve patrons by hand-blending tobaccos from around the world to taste. One can take his empty bowl to the shop in Boston at 2 1/2 Park Square and test different blends under the watchful assistance of L. J. Peretti staff – total ‘old school’ and I like it!
 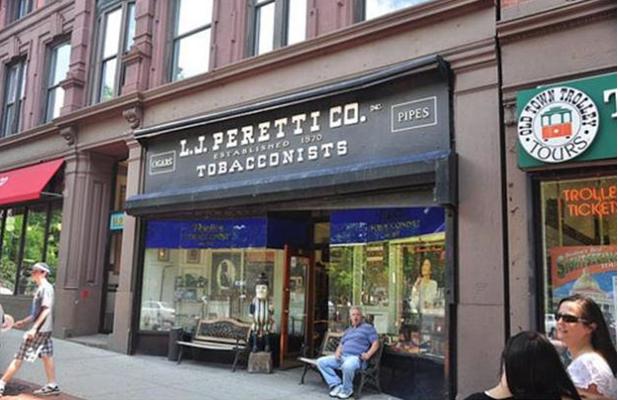 With an appreciation for the L. J. Perretti Squared Shank Rhodesian on my work table, I take more pictures to fill in the gaps.
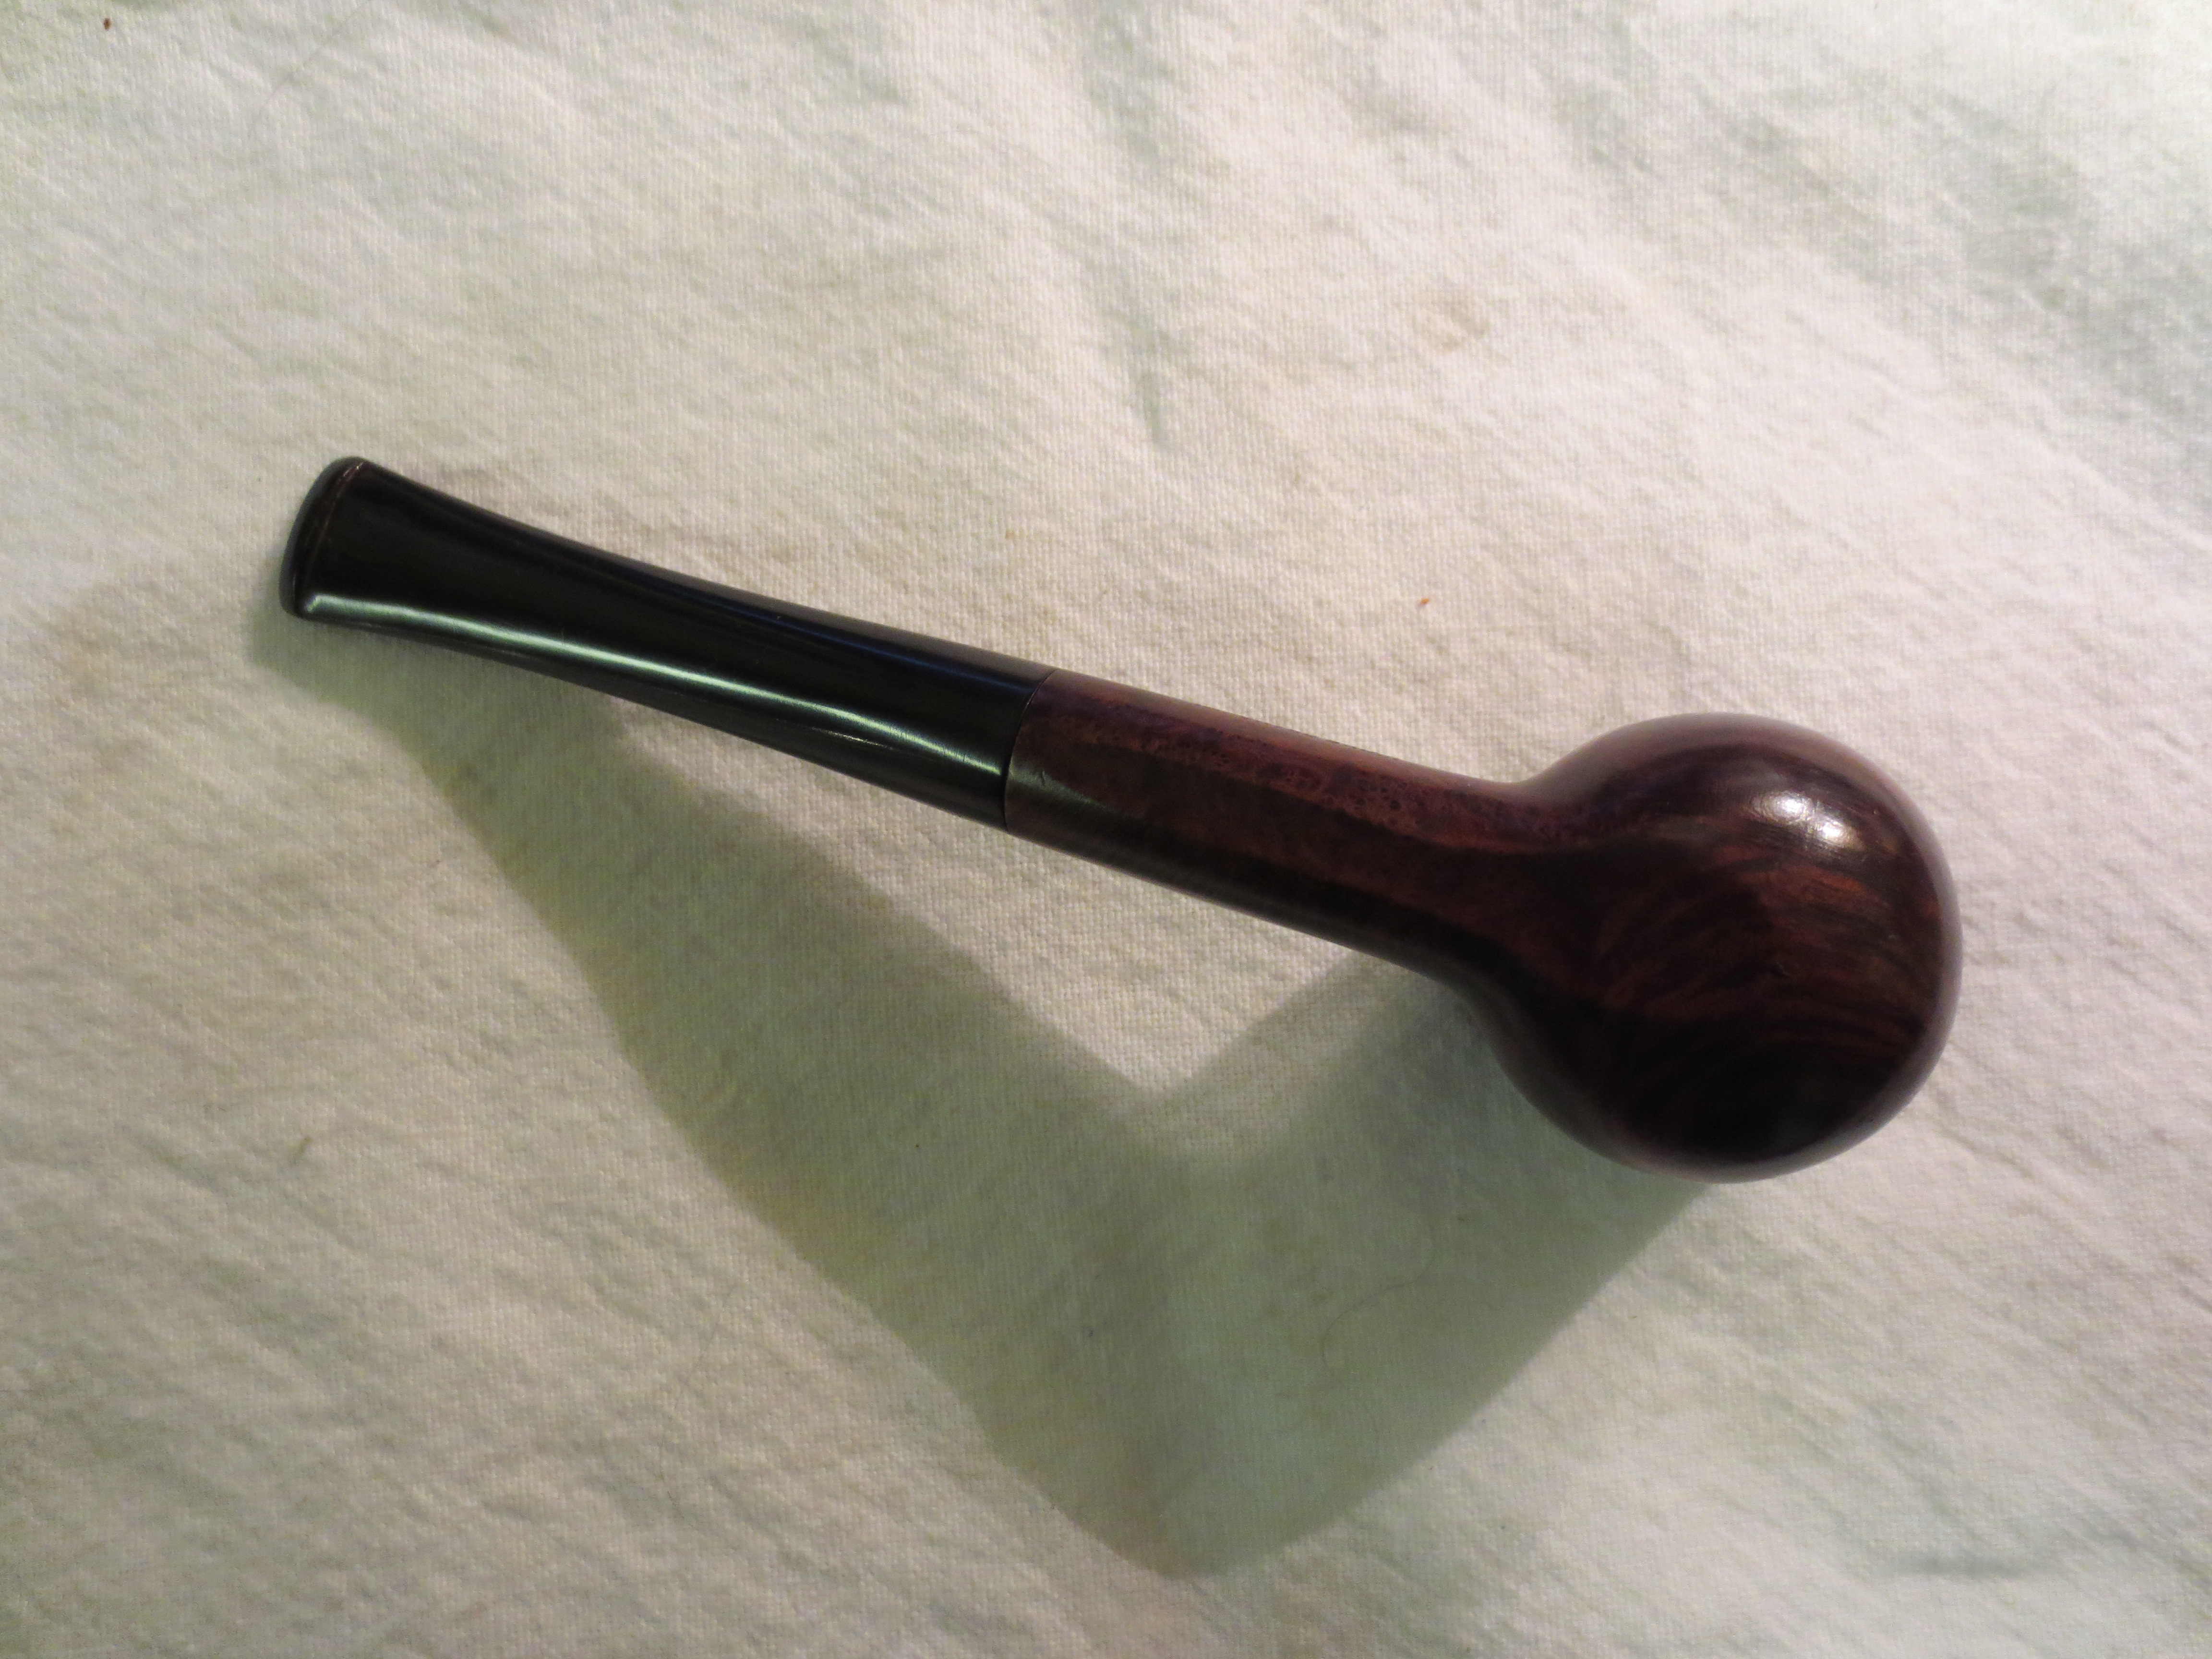
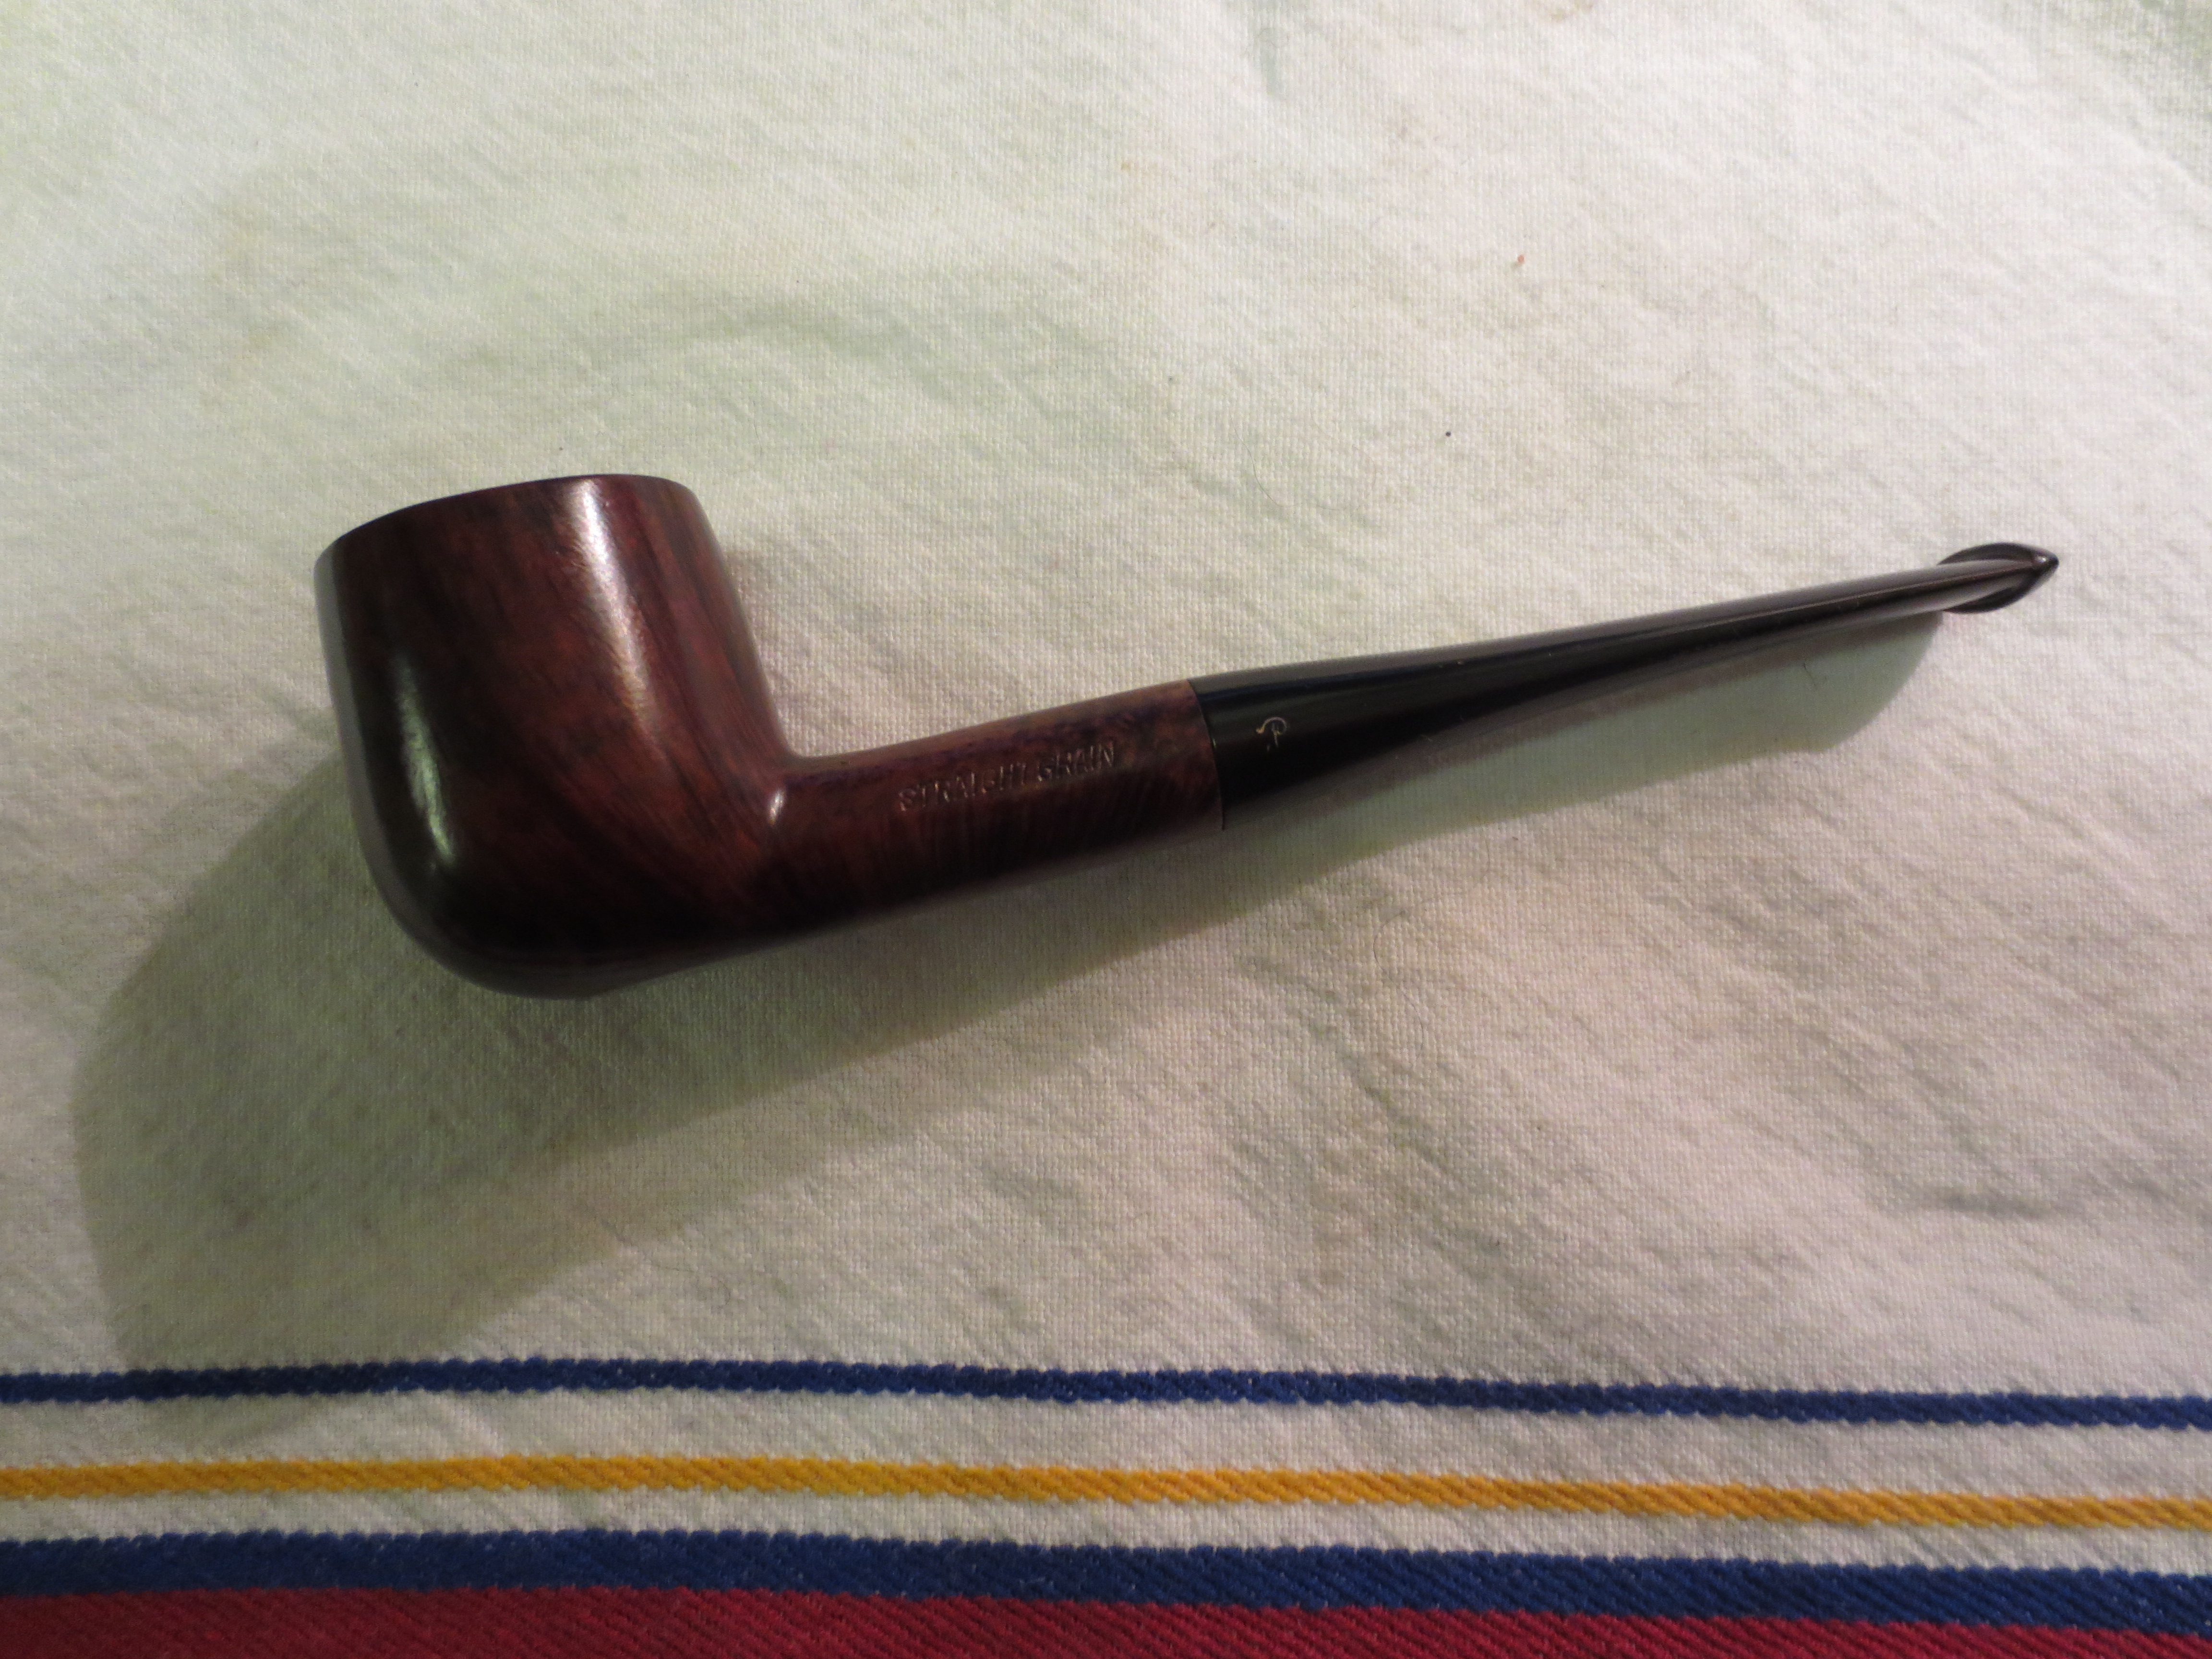
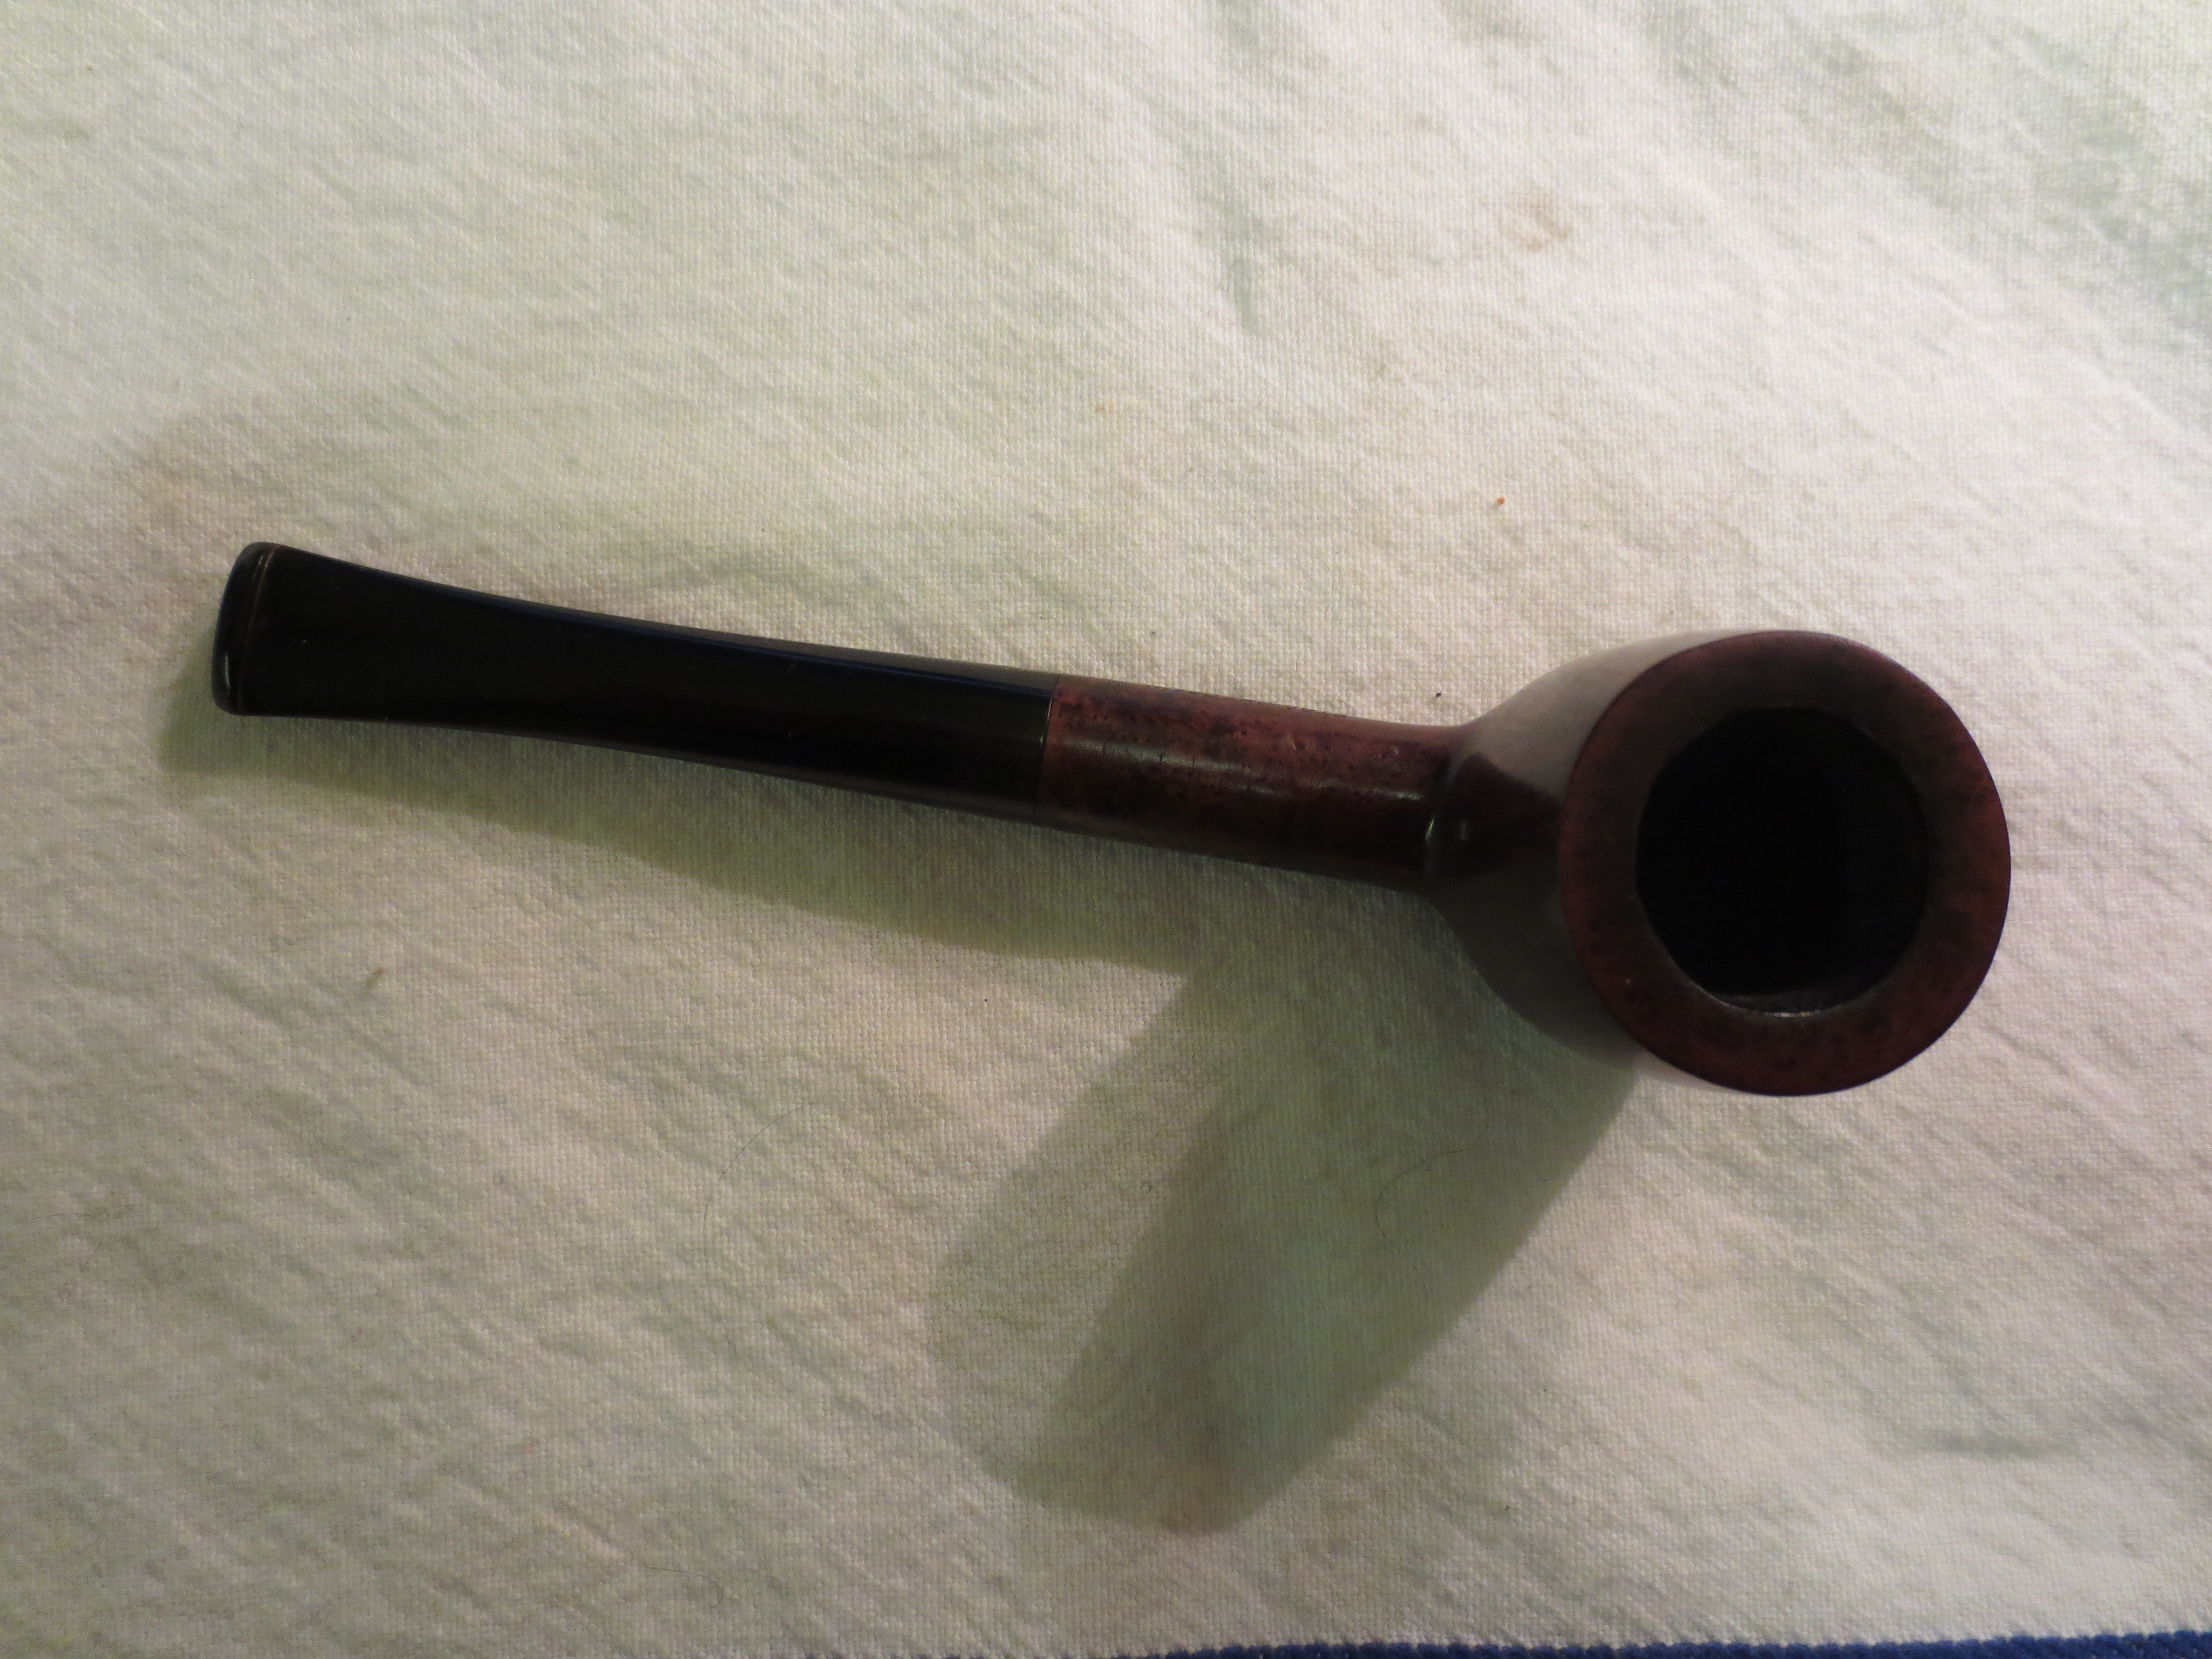
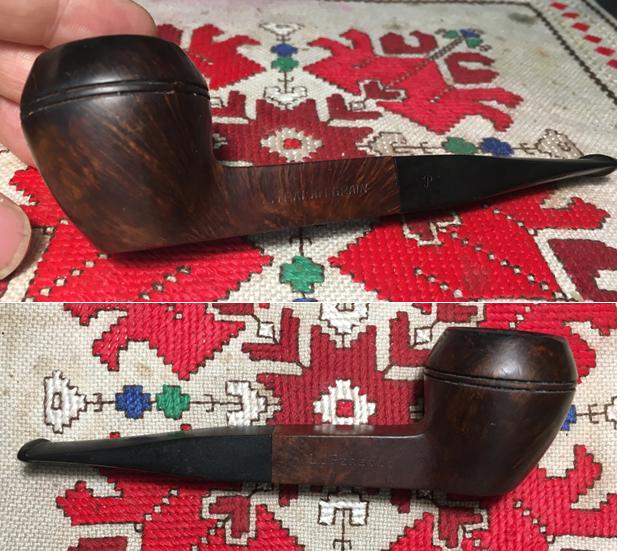
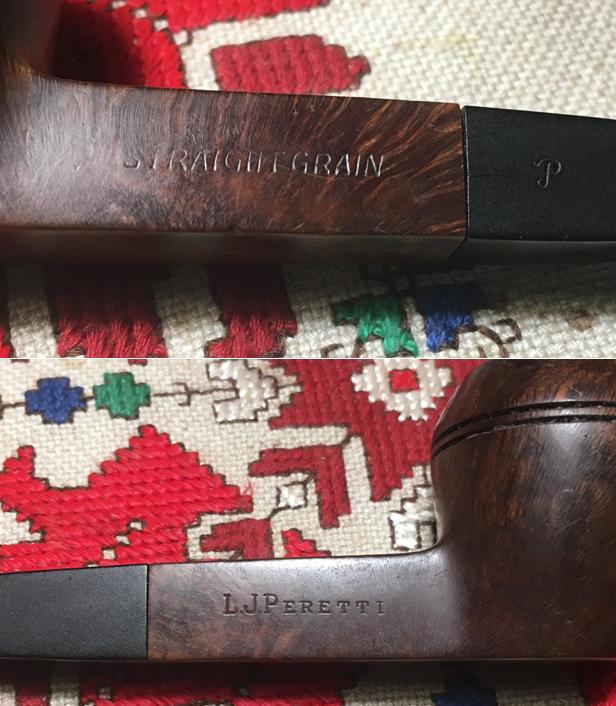
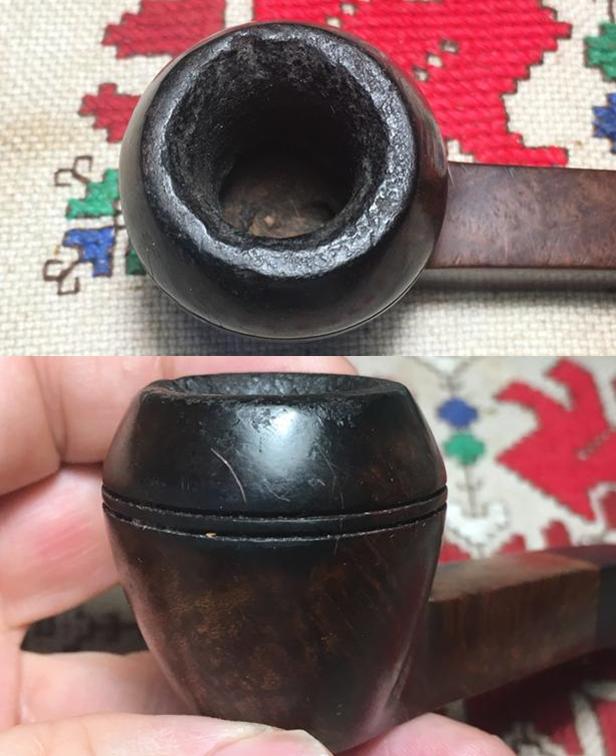
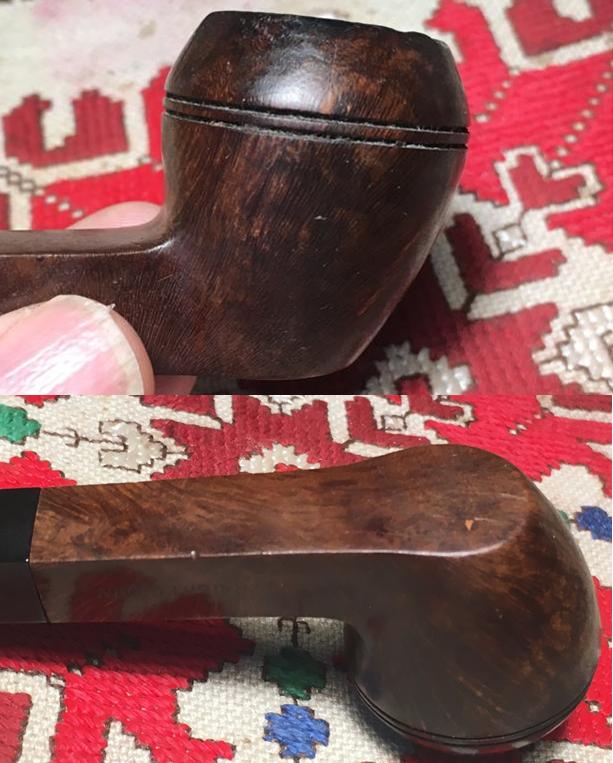
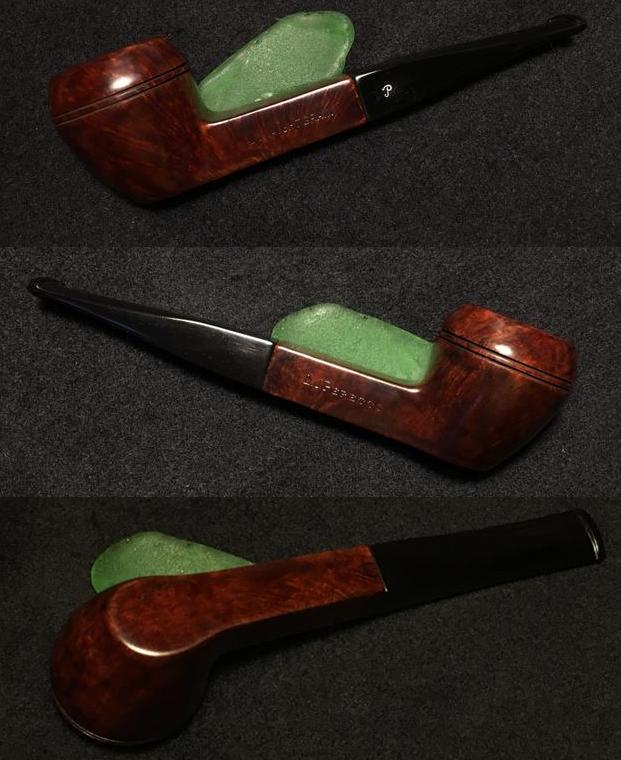
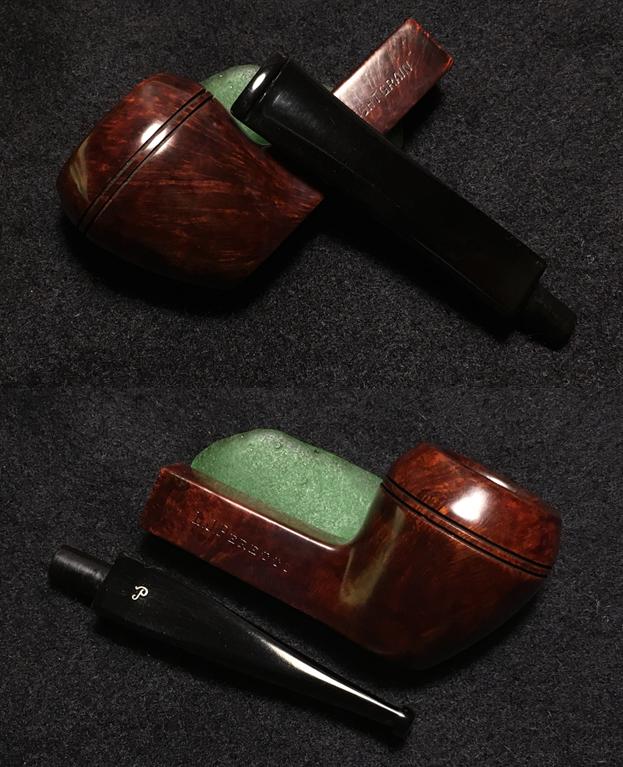
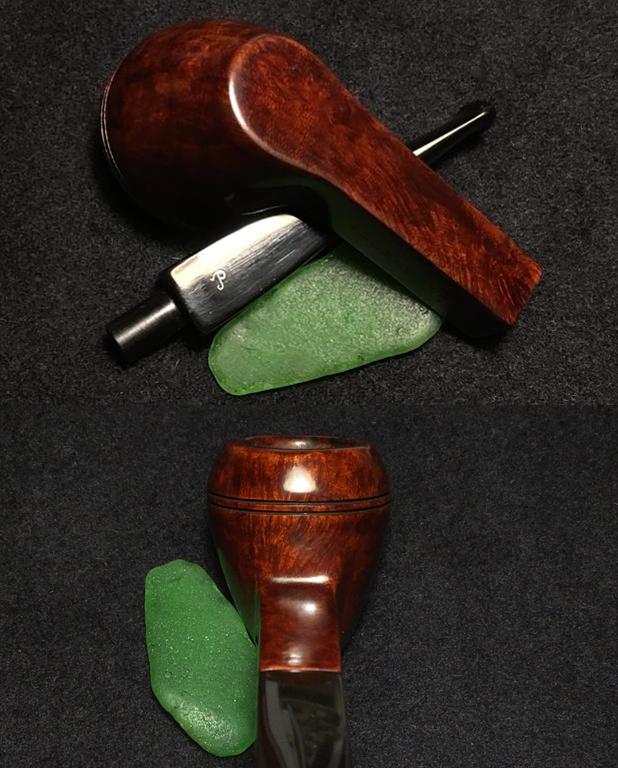
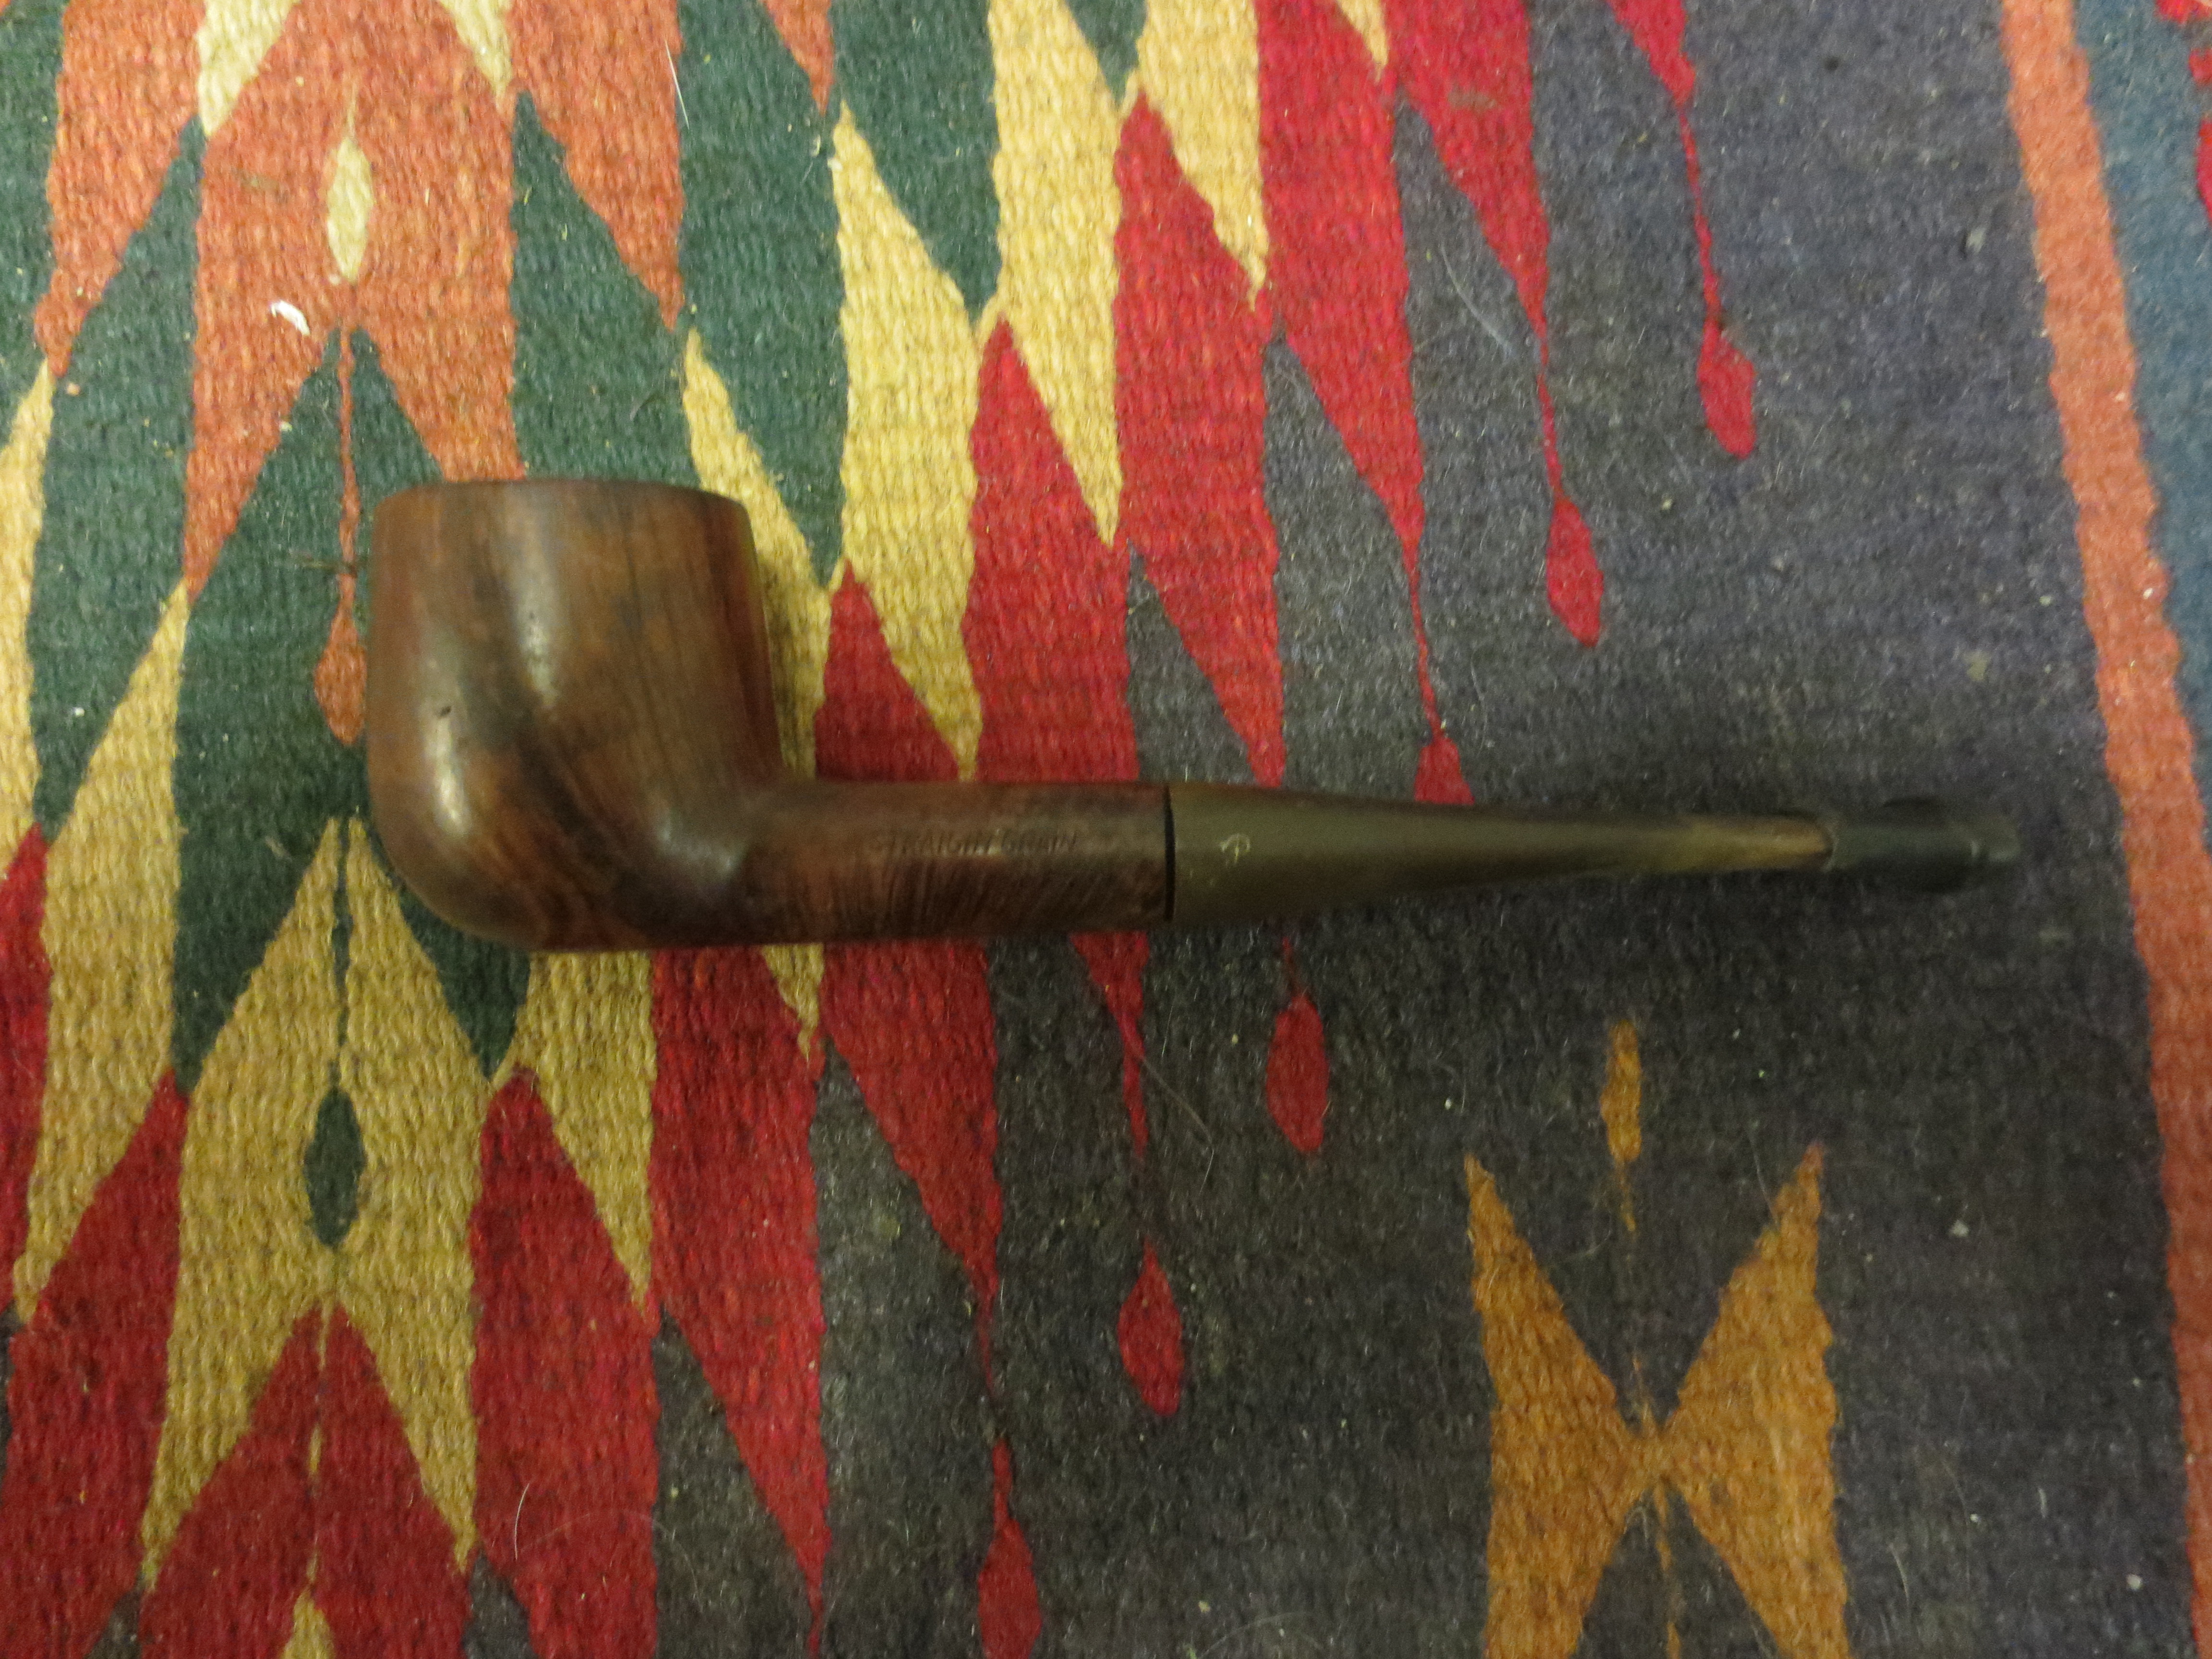
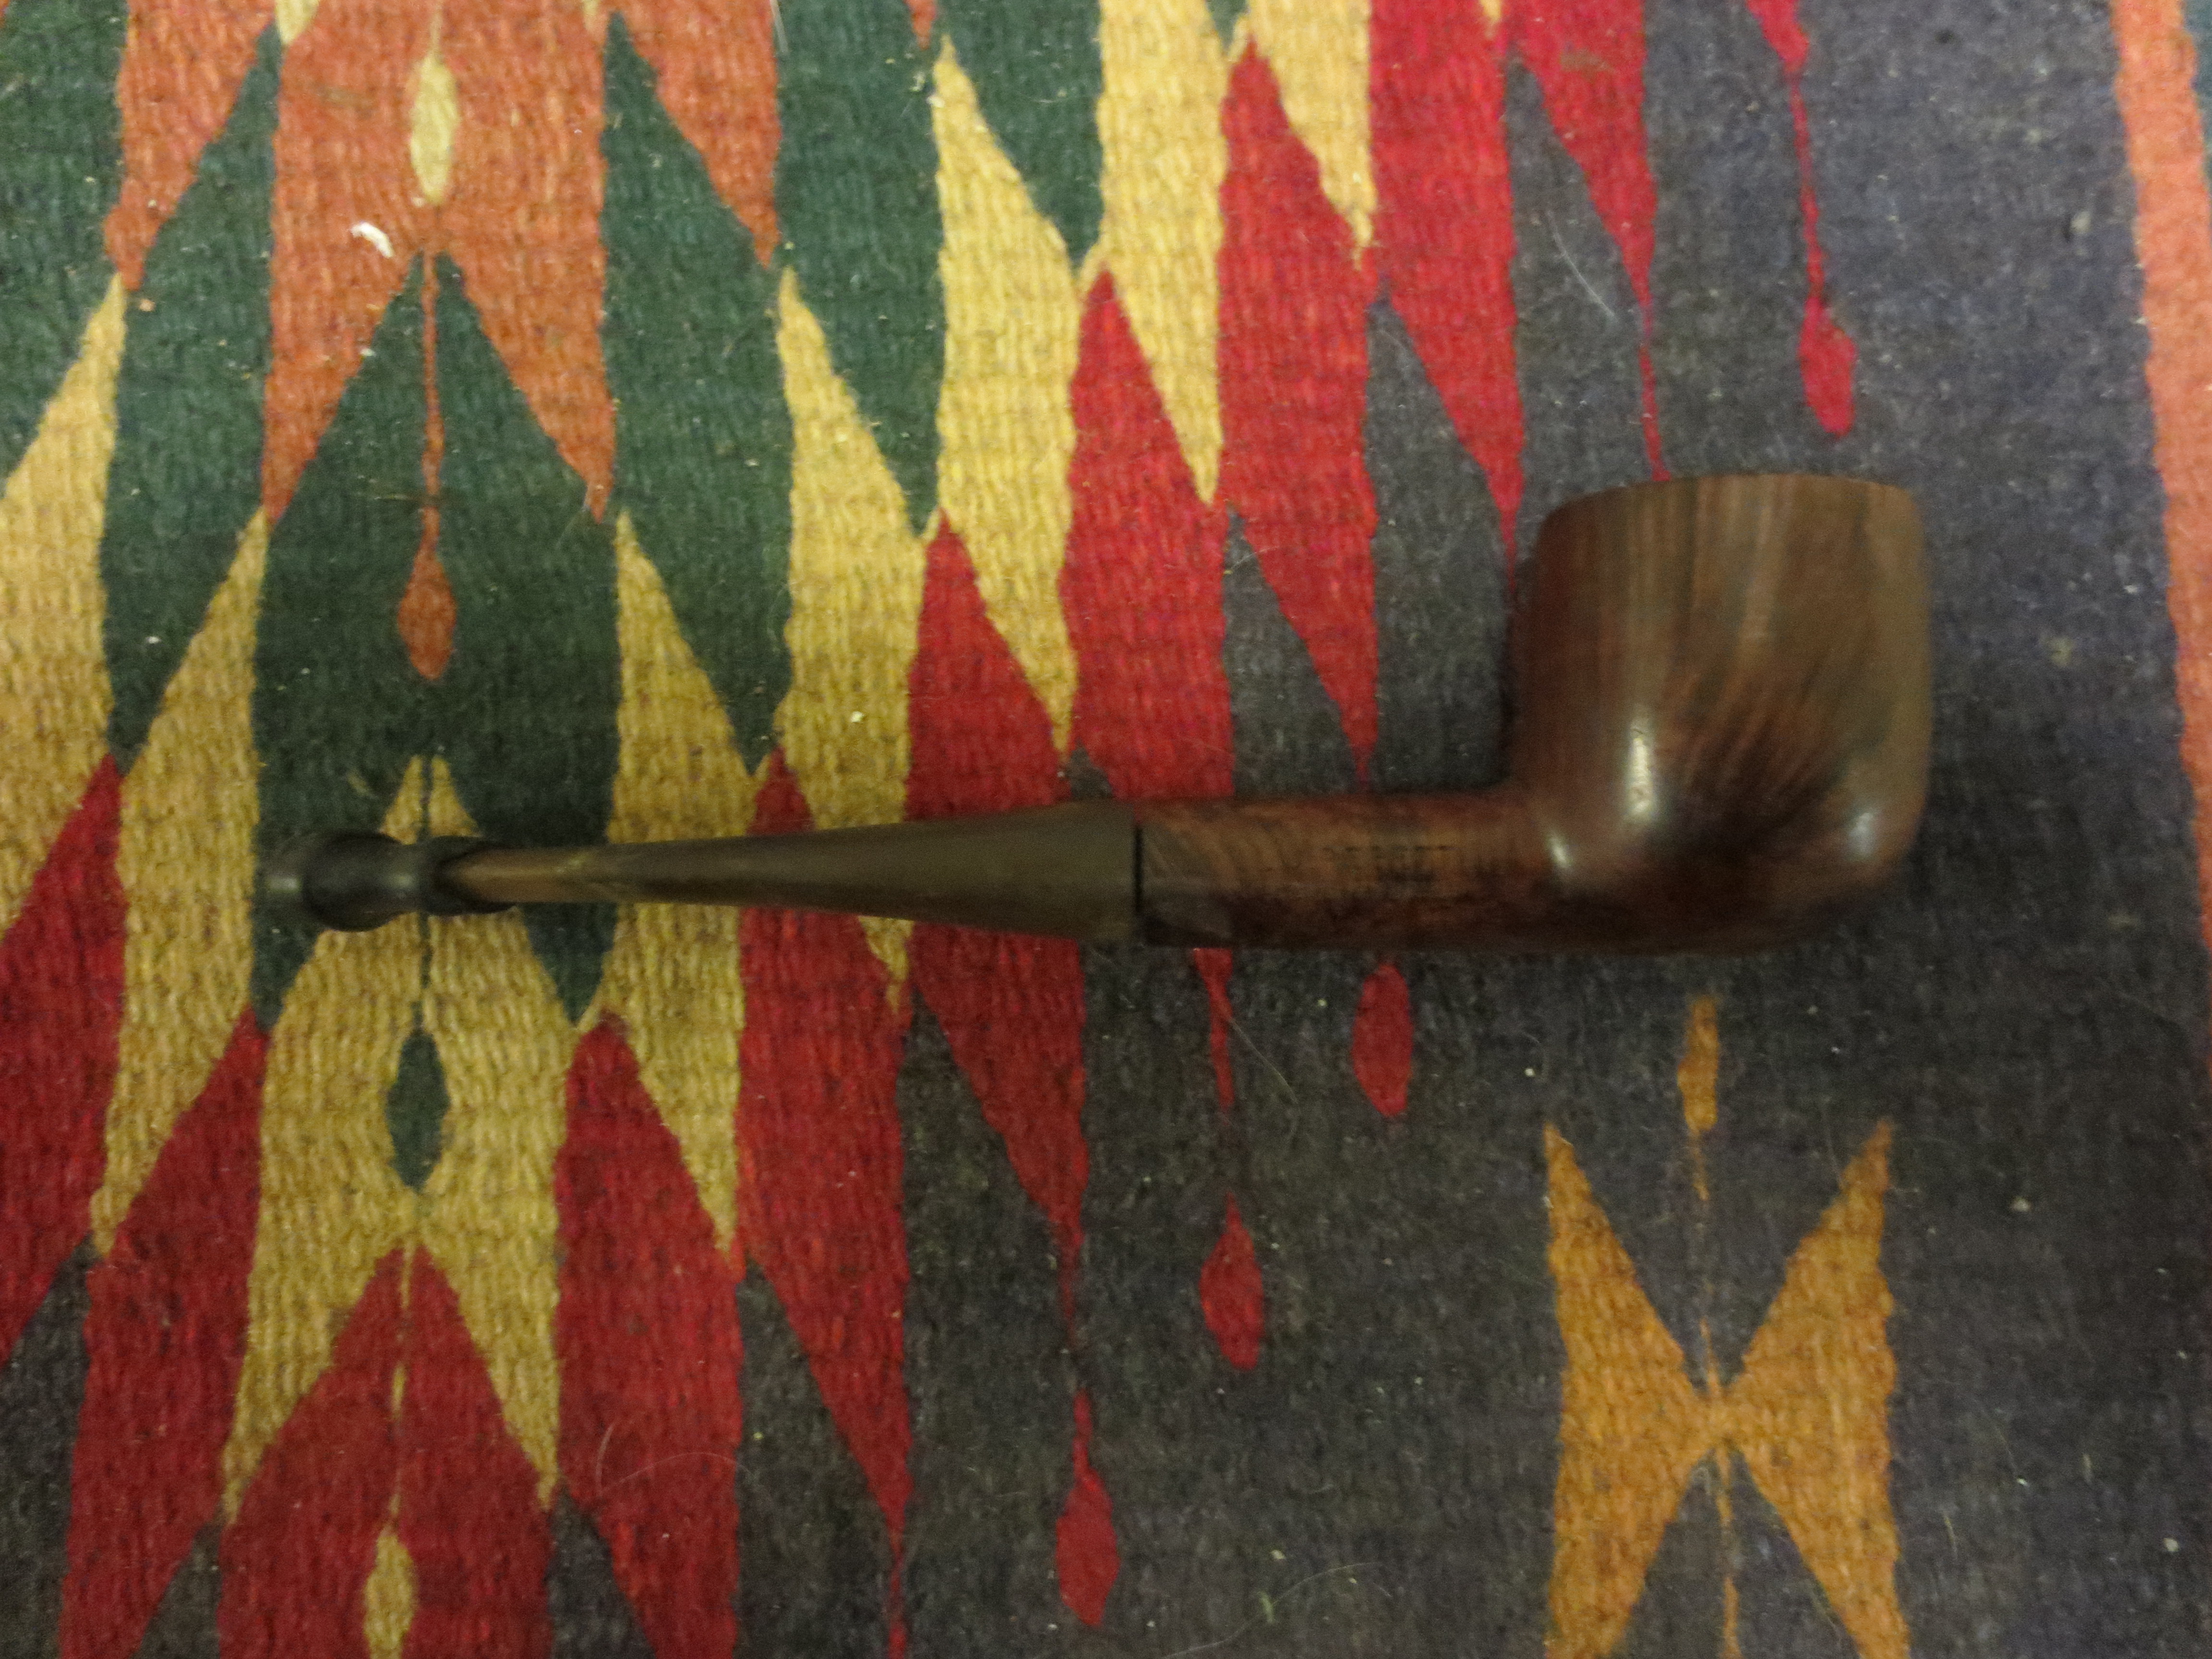
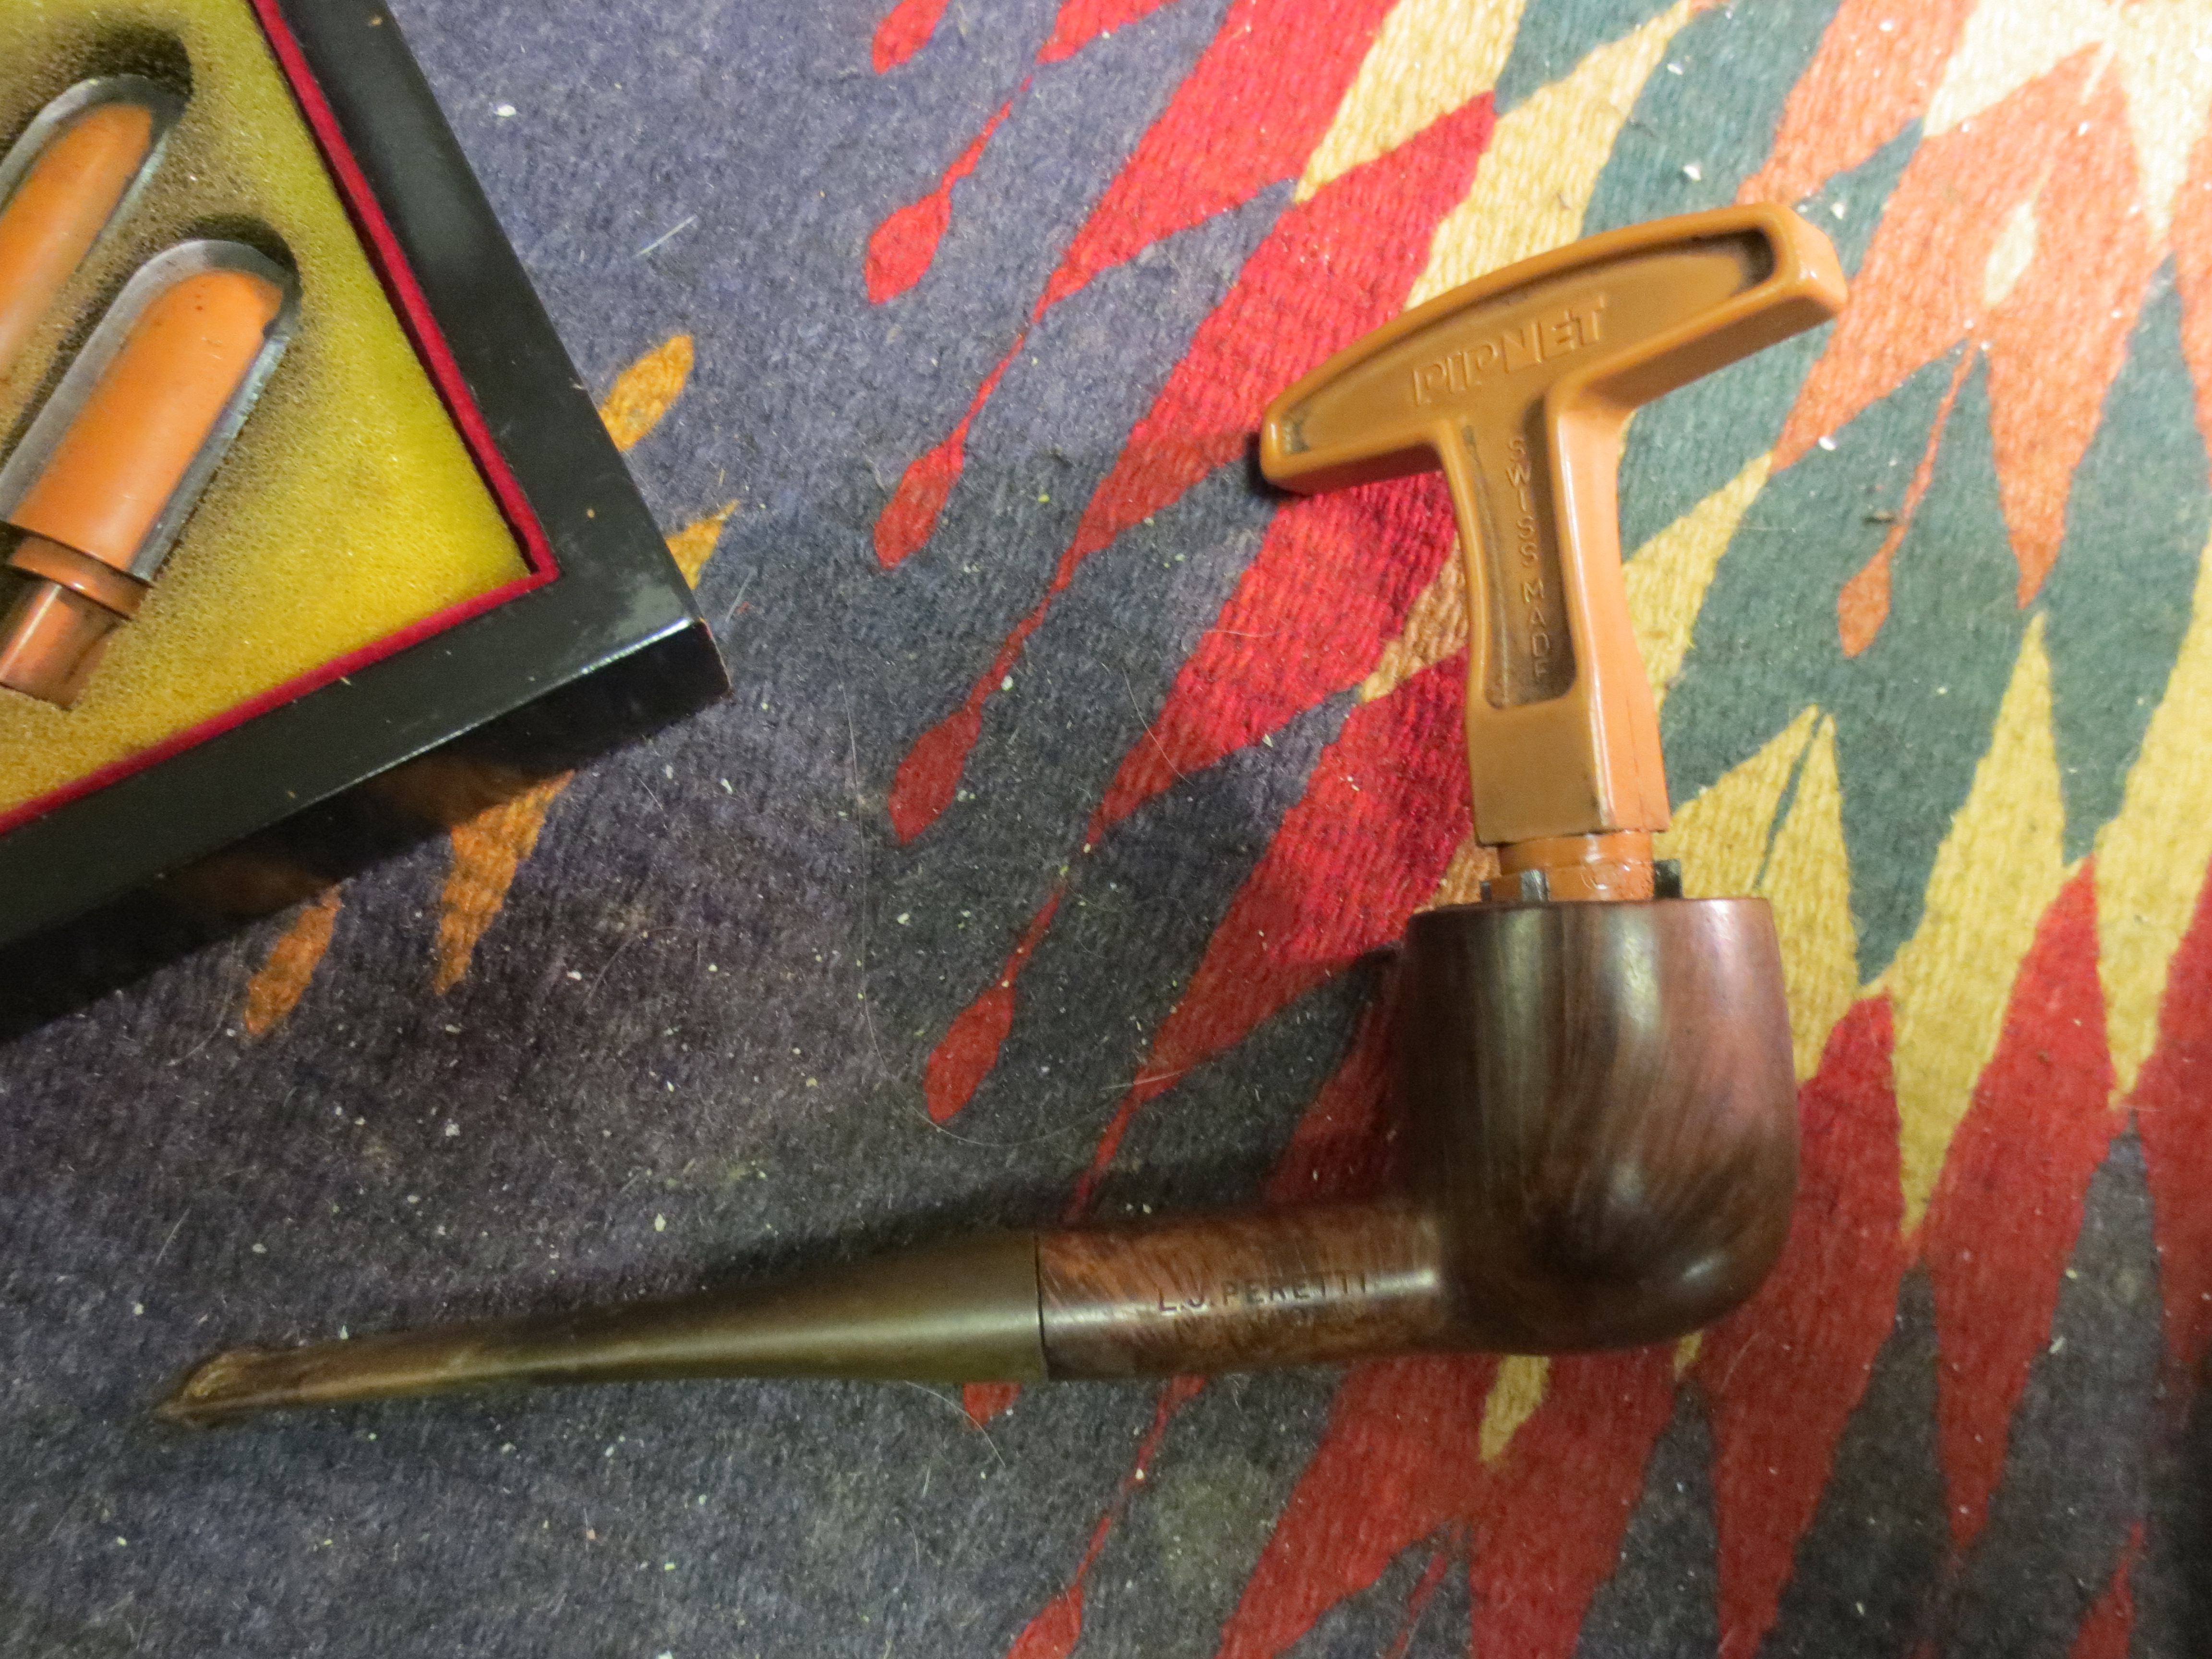
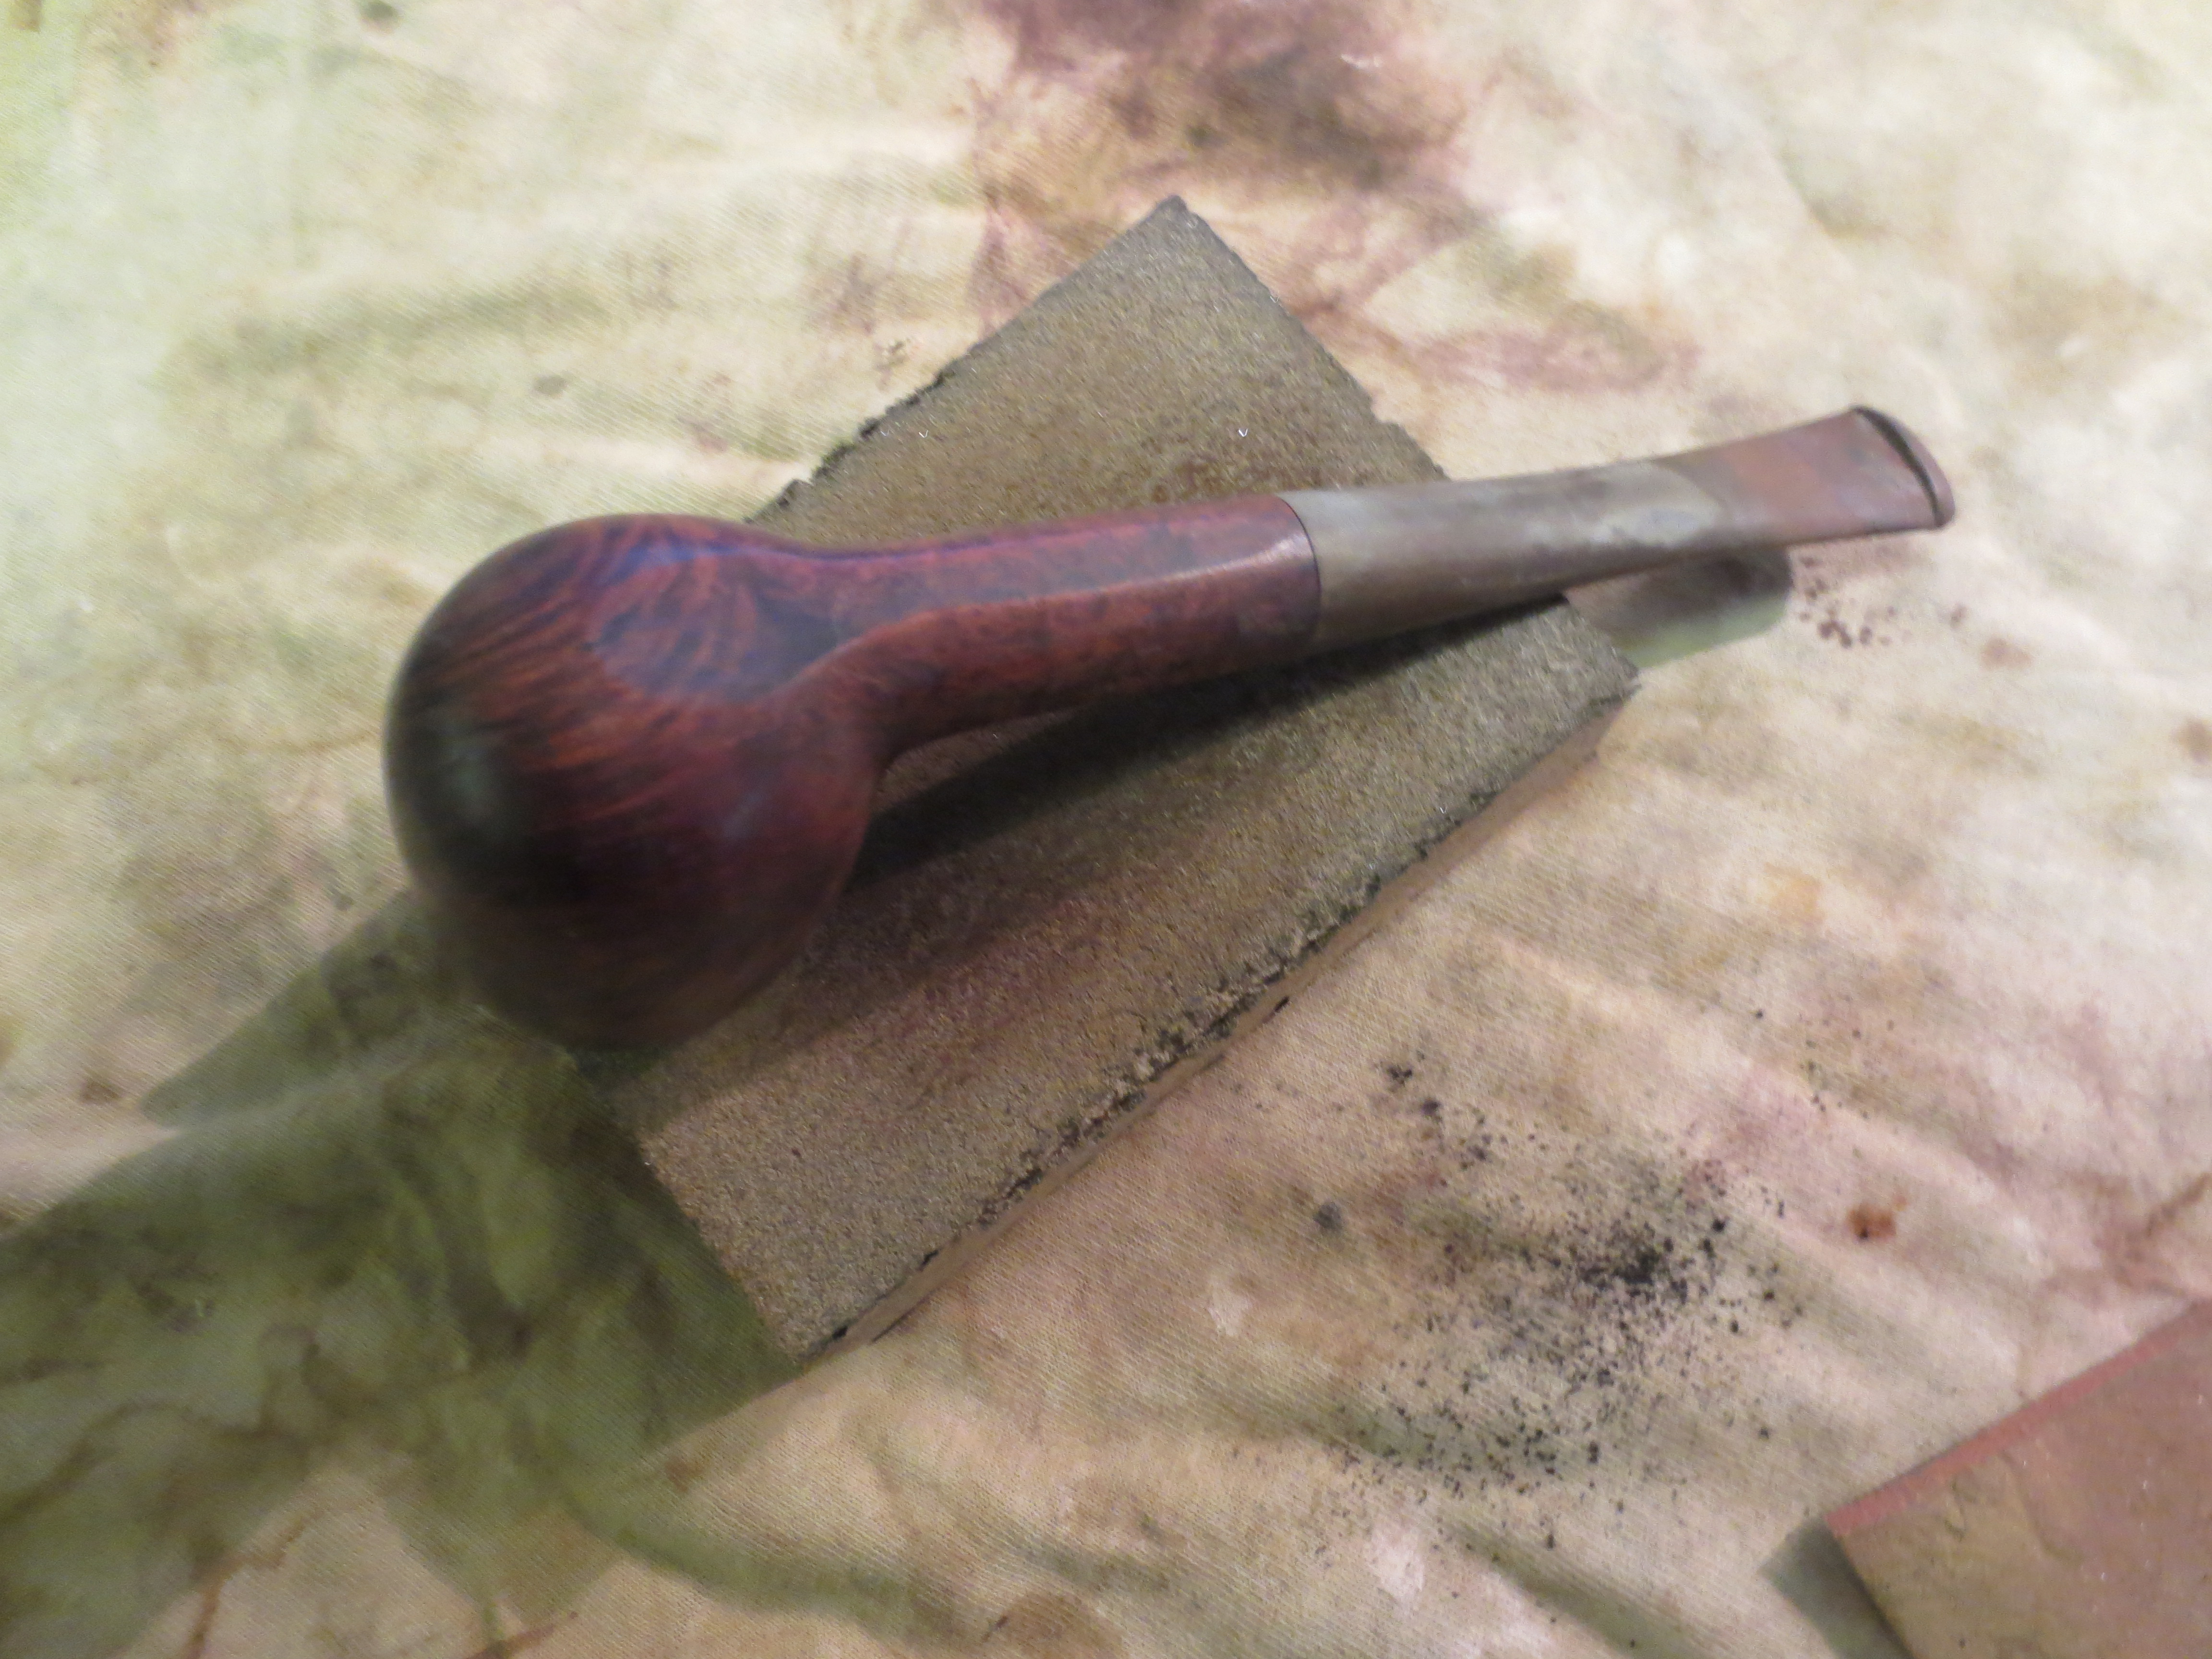
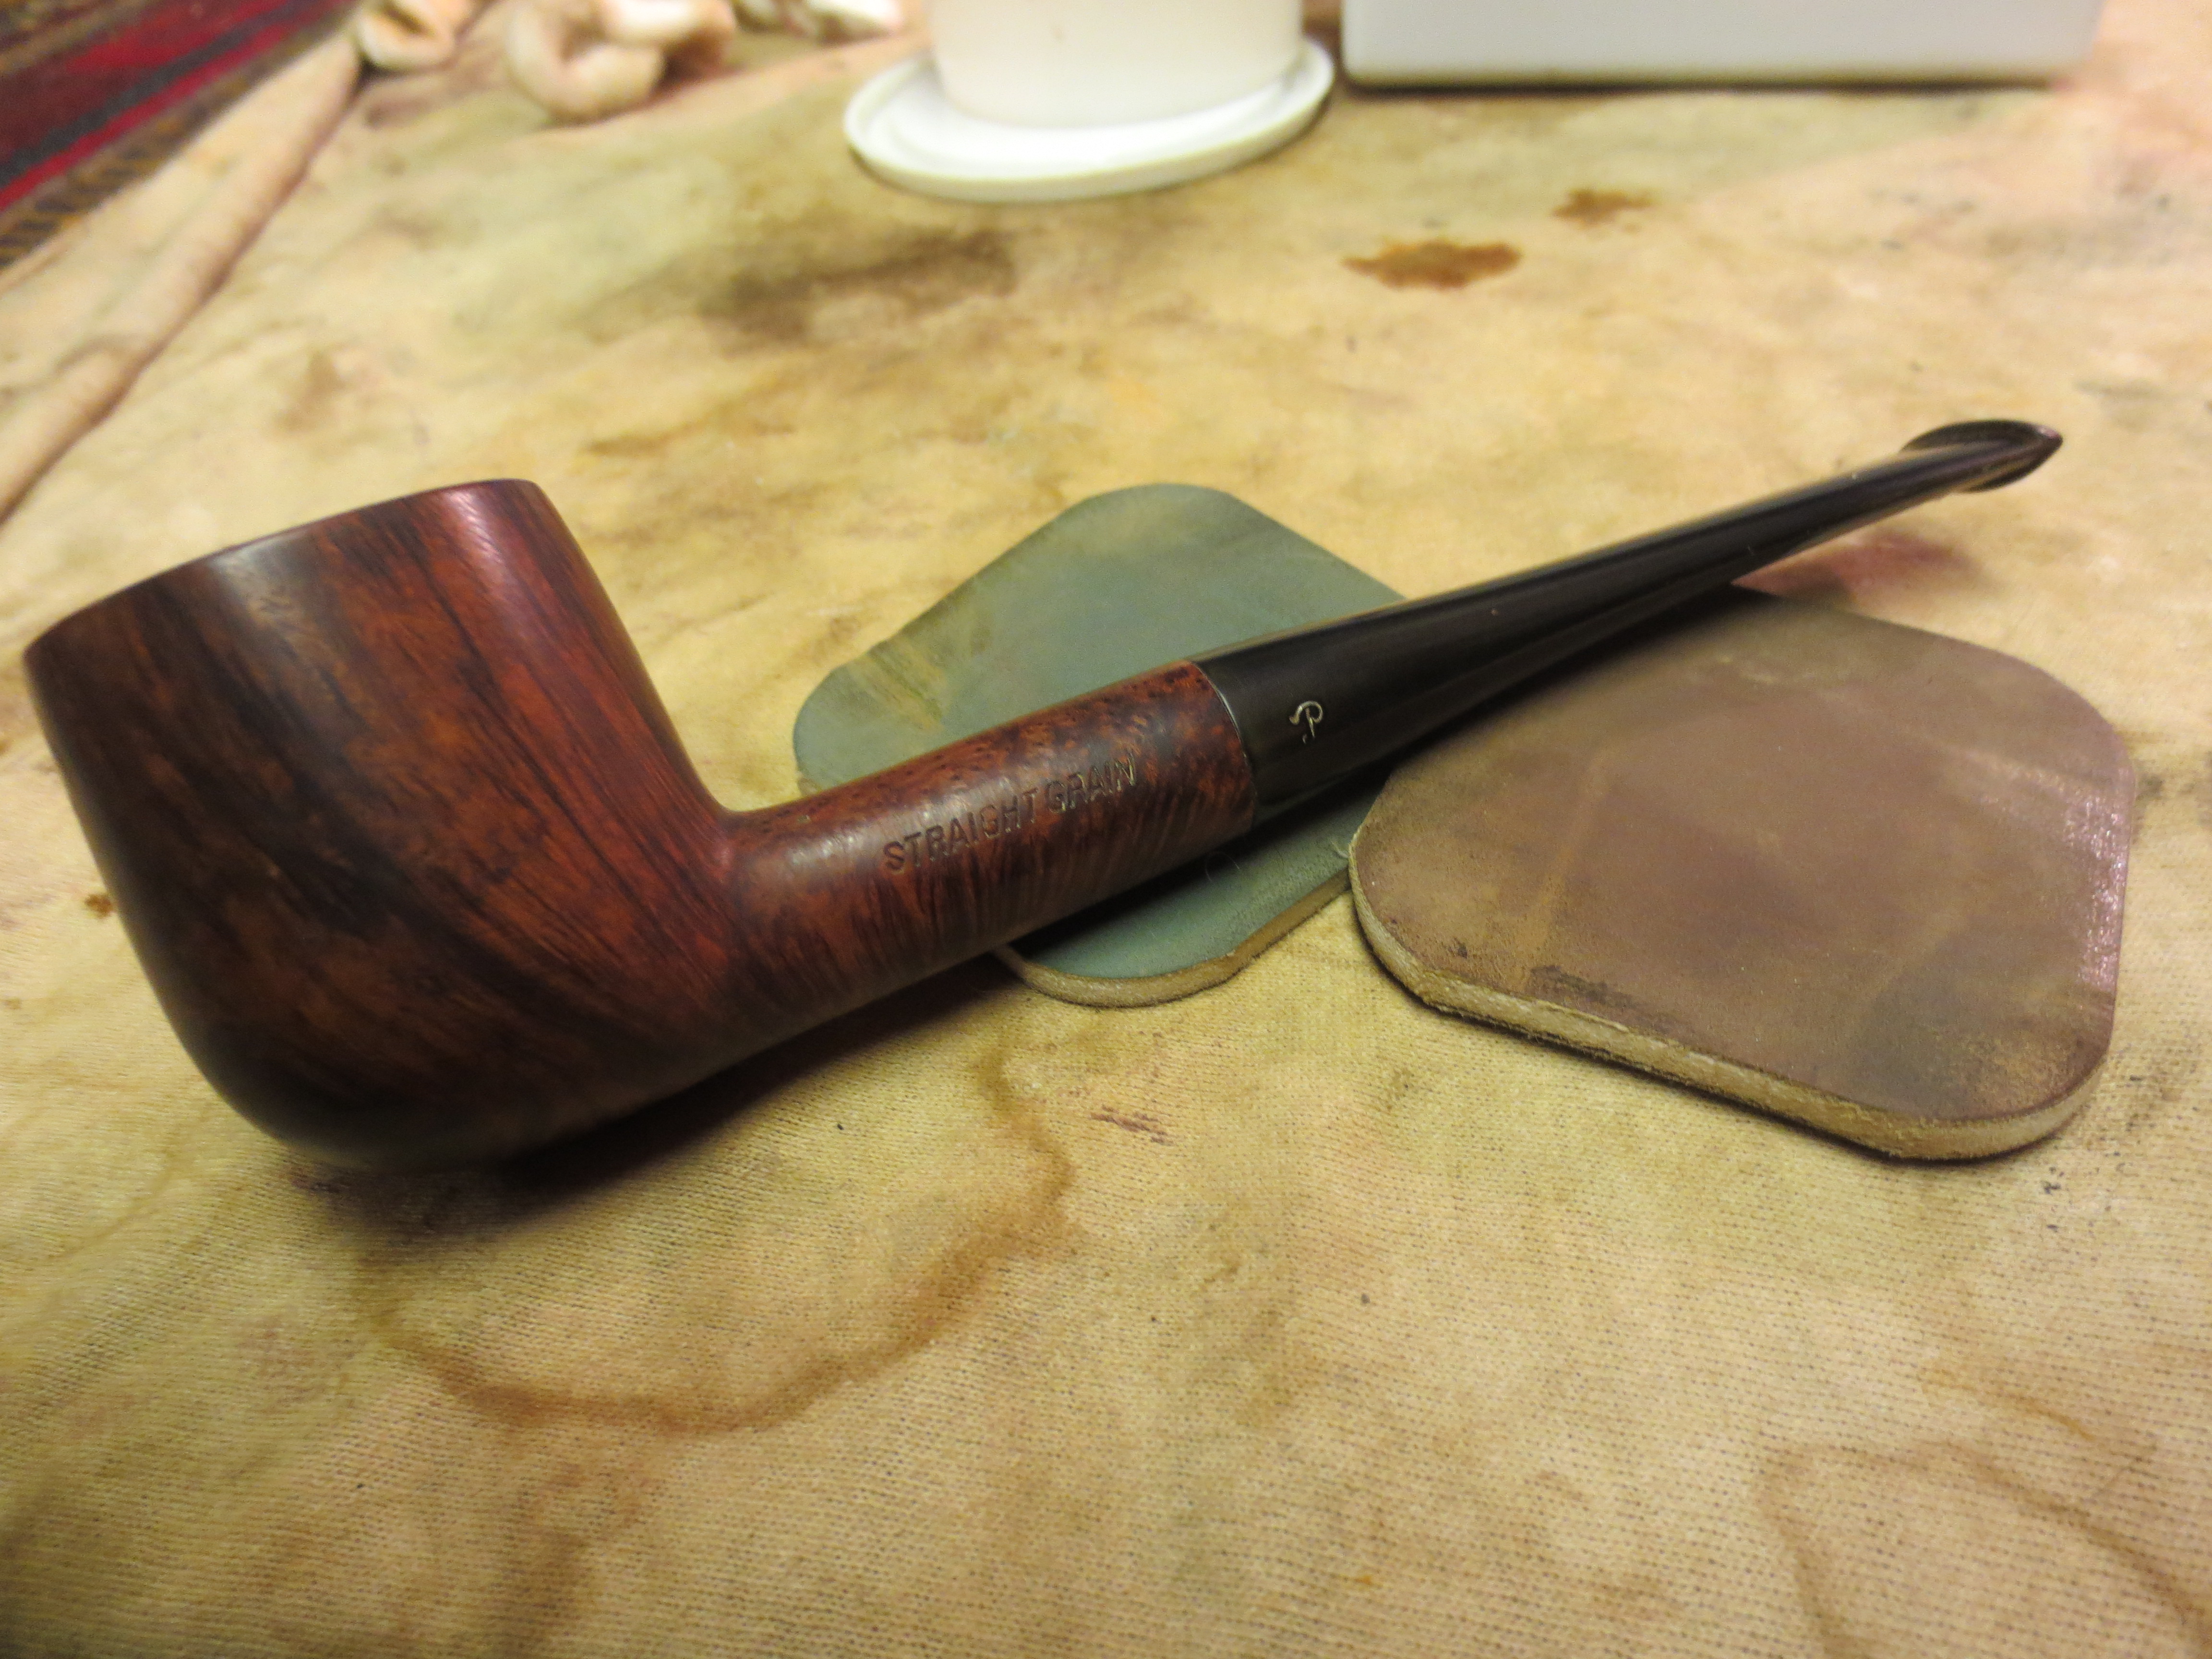
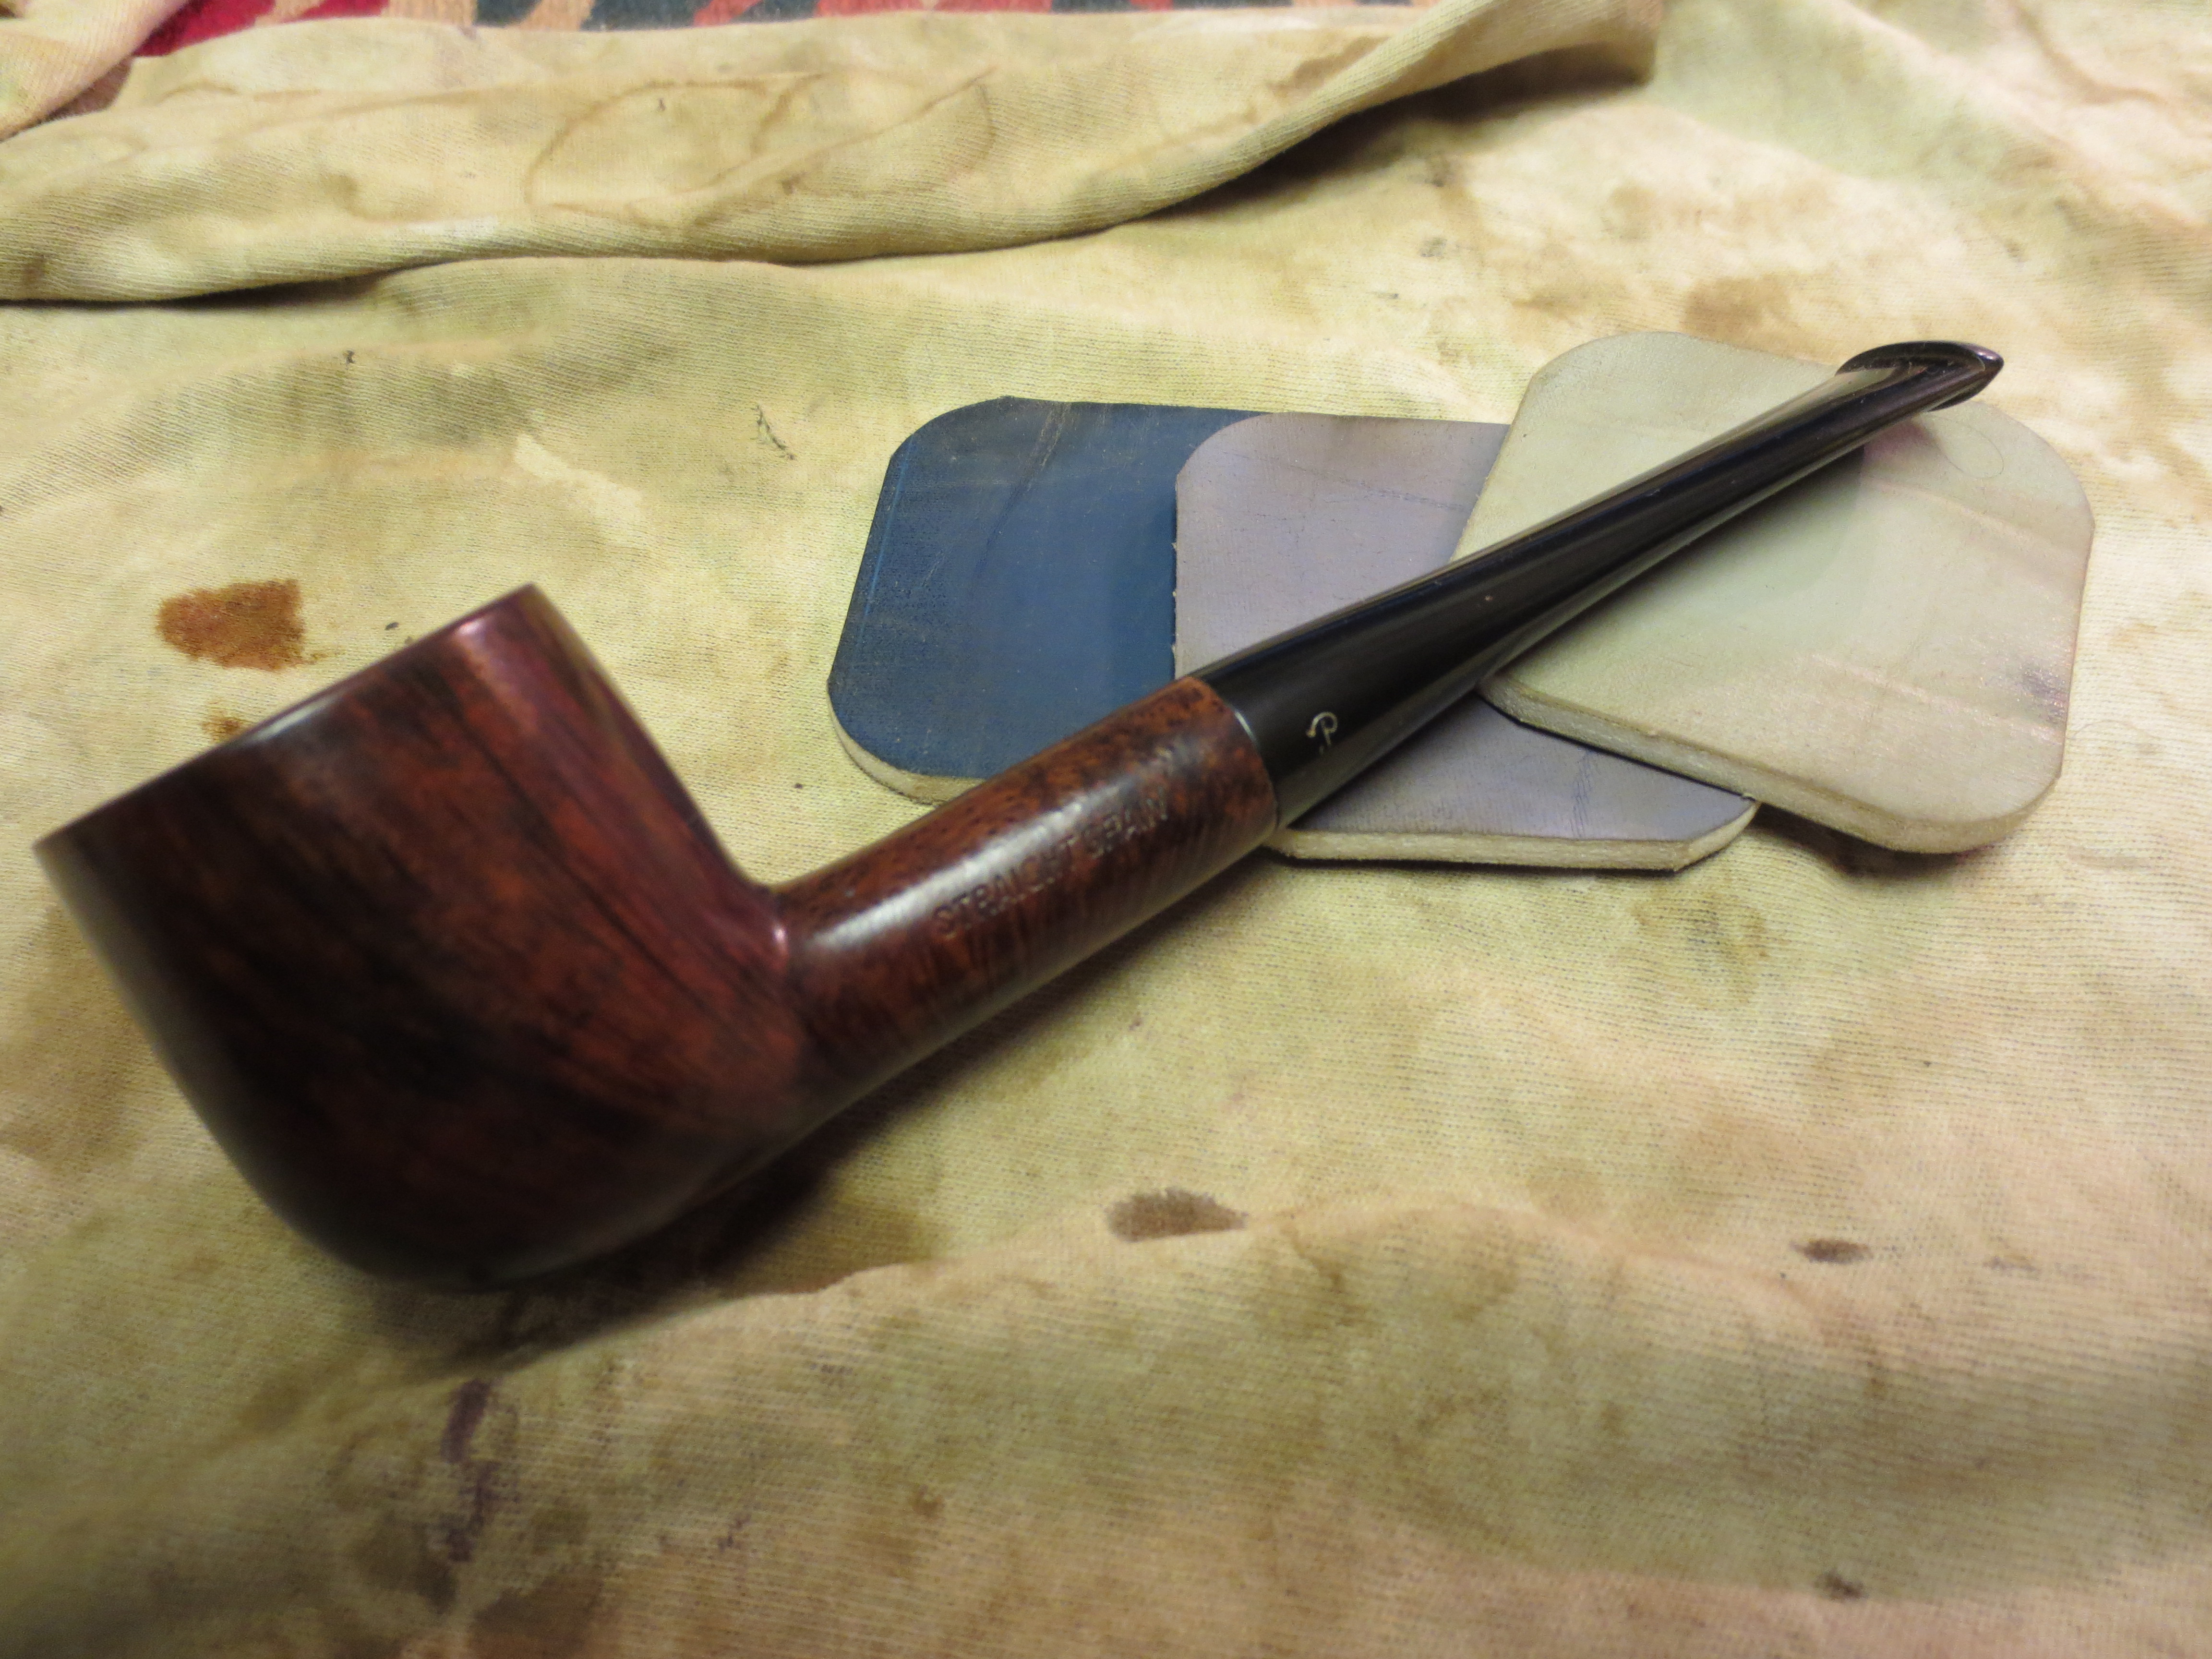
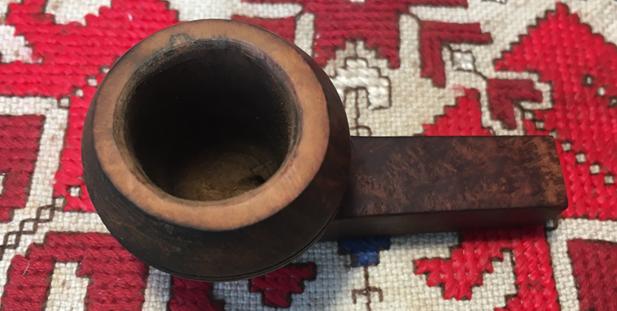
 The left side of the shank is stamped “STRAIGHT GRAIN” and, interestingly, the right side is “L.J. Peretti”. As is true of my other Peretti, usually the name is stamped on the left side. This Peretti’s pedigree is on the right side of the shank. The squared, tapered stem has the classic “P” stamped and in good shape. The chamber shows significant cake and will need to be cleaned down to the briar. The rim has some significant damage on the right side and significant lava flow. I will need to clean bowl and rim to see what might be lurking beneath. The Rhodesian upper dome has cuts – one noticeably dissects the twin grooves. There’s a good bit of grime in the grooves and at least one lightened fill on the heel – with the flat heel this Rhodesian is also a sitter – a nice feature for the table! I also detect some dents on the squared shank corners – this old boy has taken a bit of bruising along the way. The stem shows no oxidation but the button shows some biting and tooth dents – both upper and lower button lips have clench marks. ‘Straight Grain’ is stamped on the shank and the grain has some striking features that will be visible once the grime is cleaned and things shined up a bit.
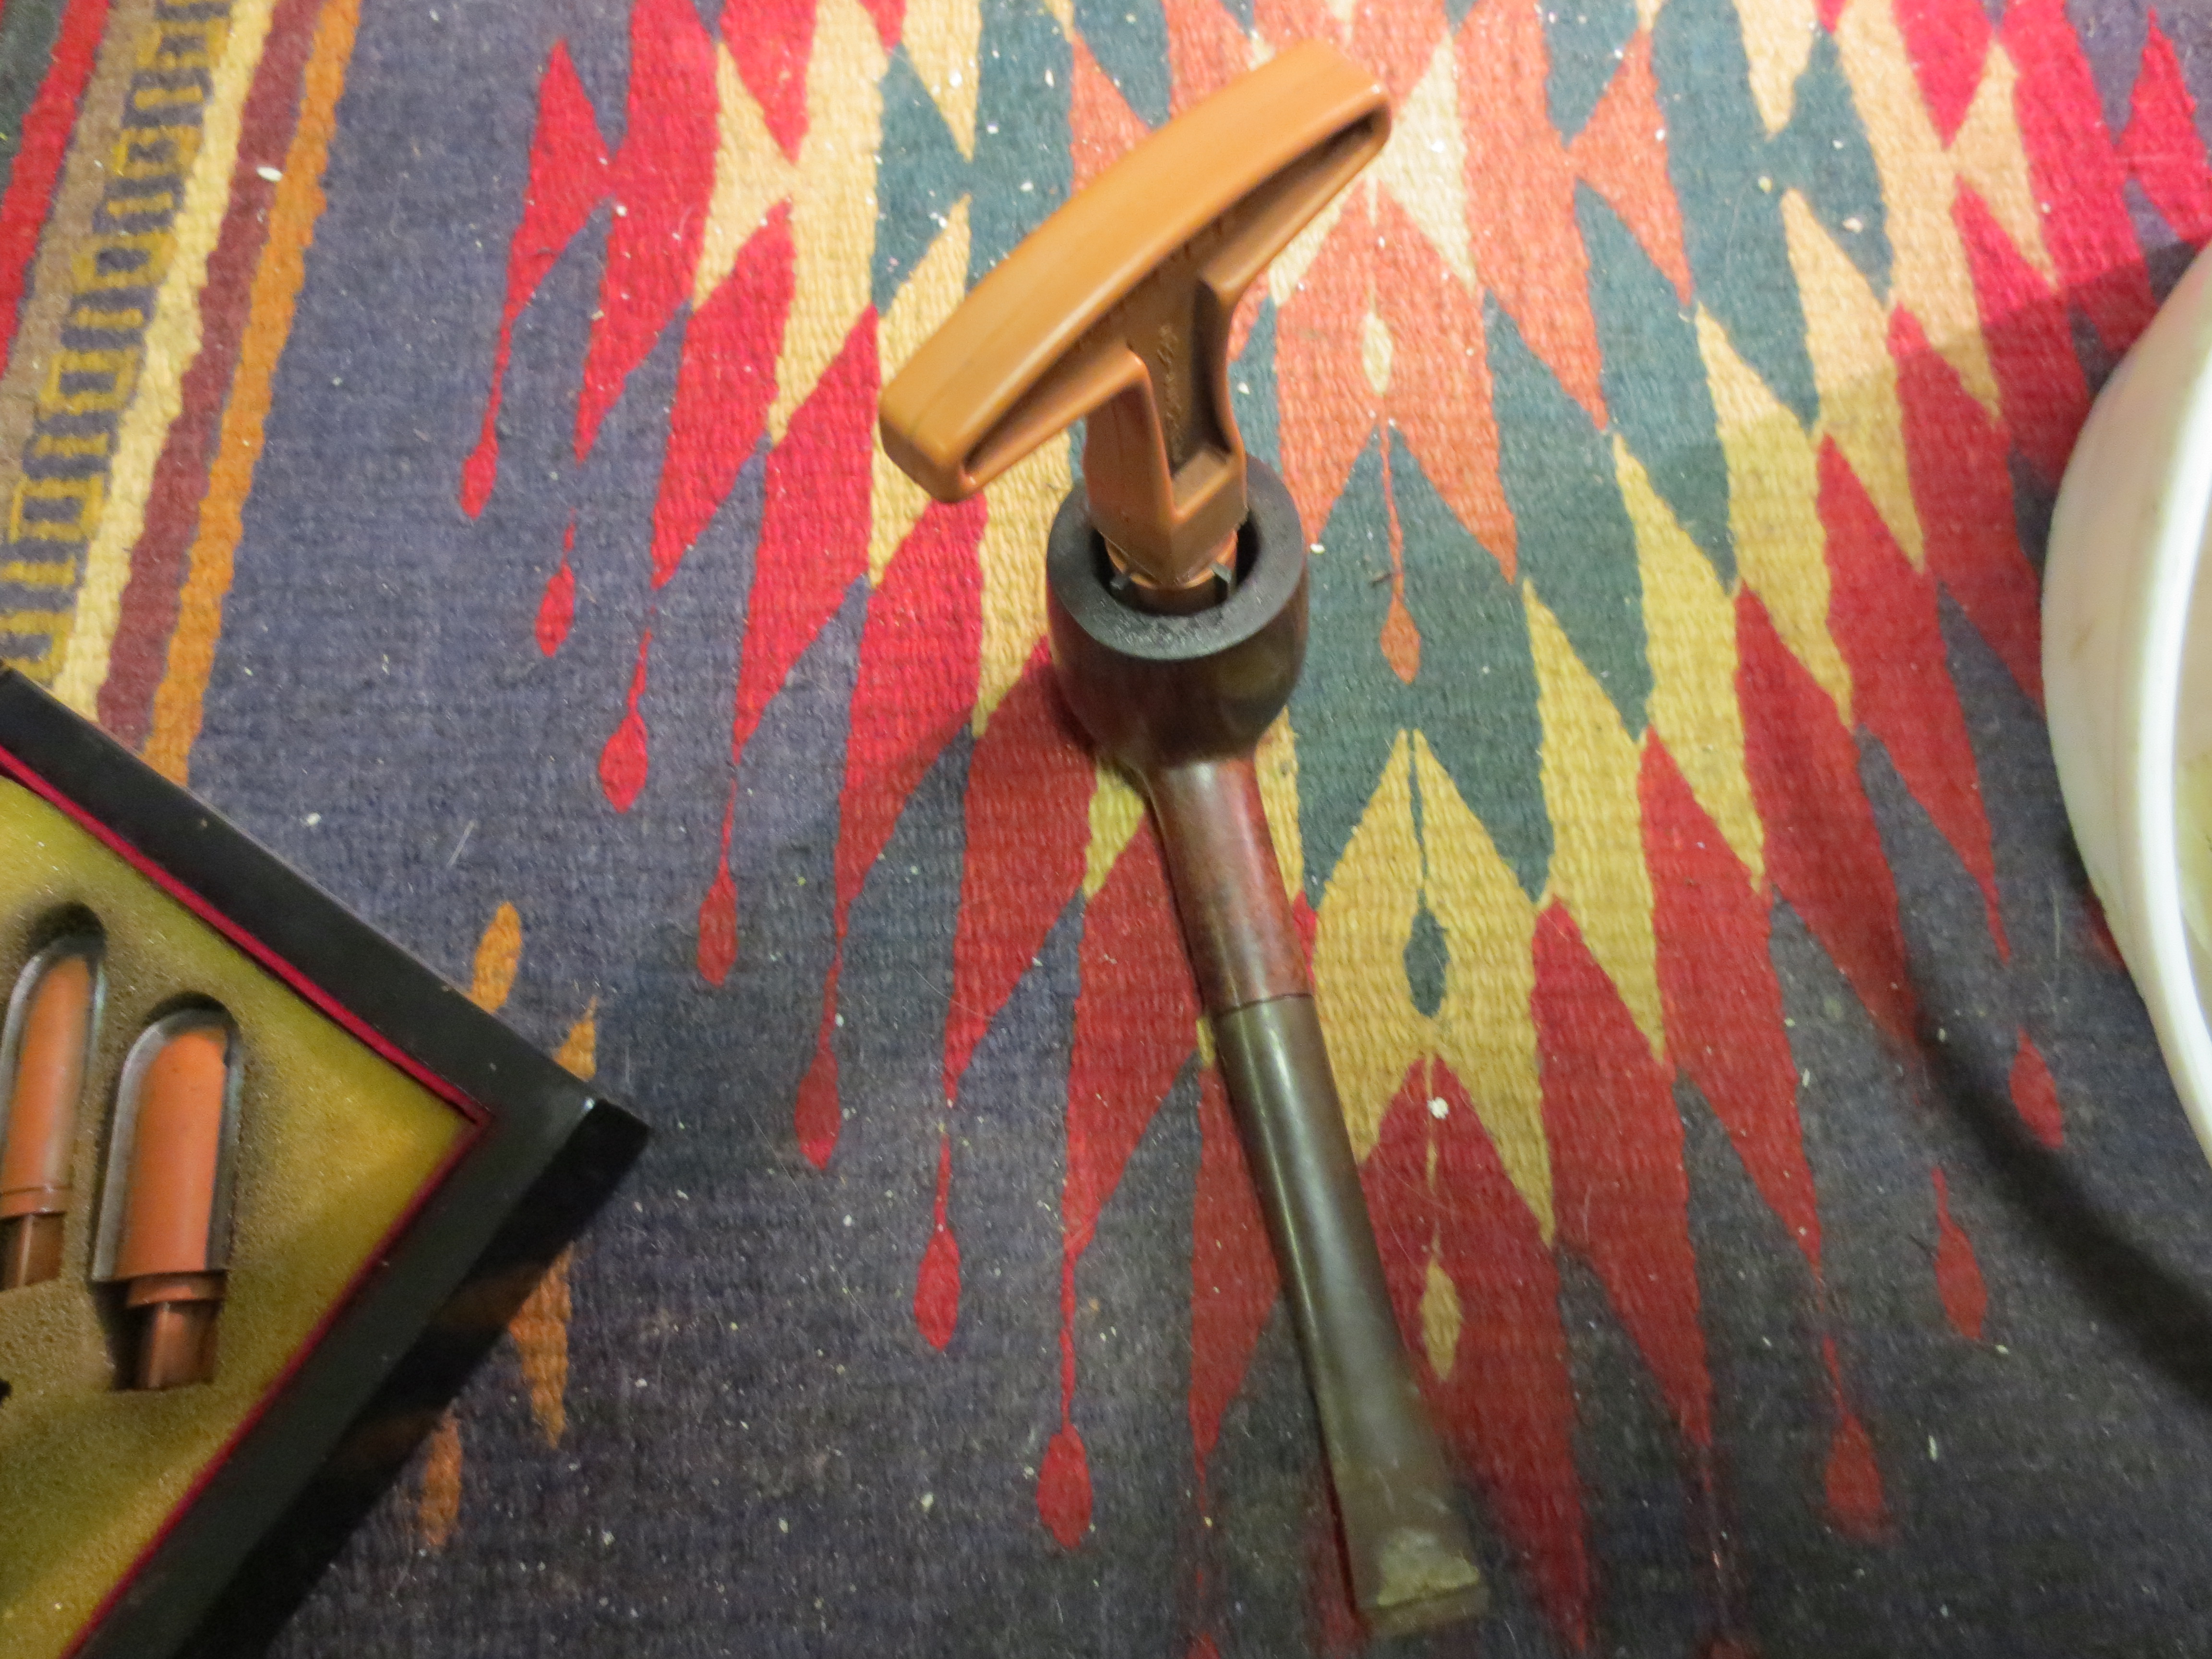
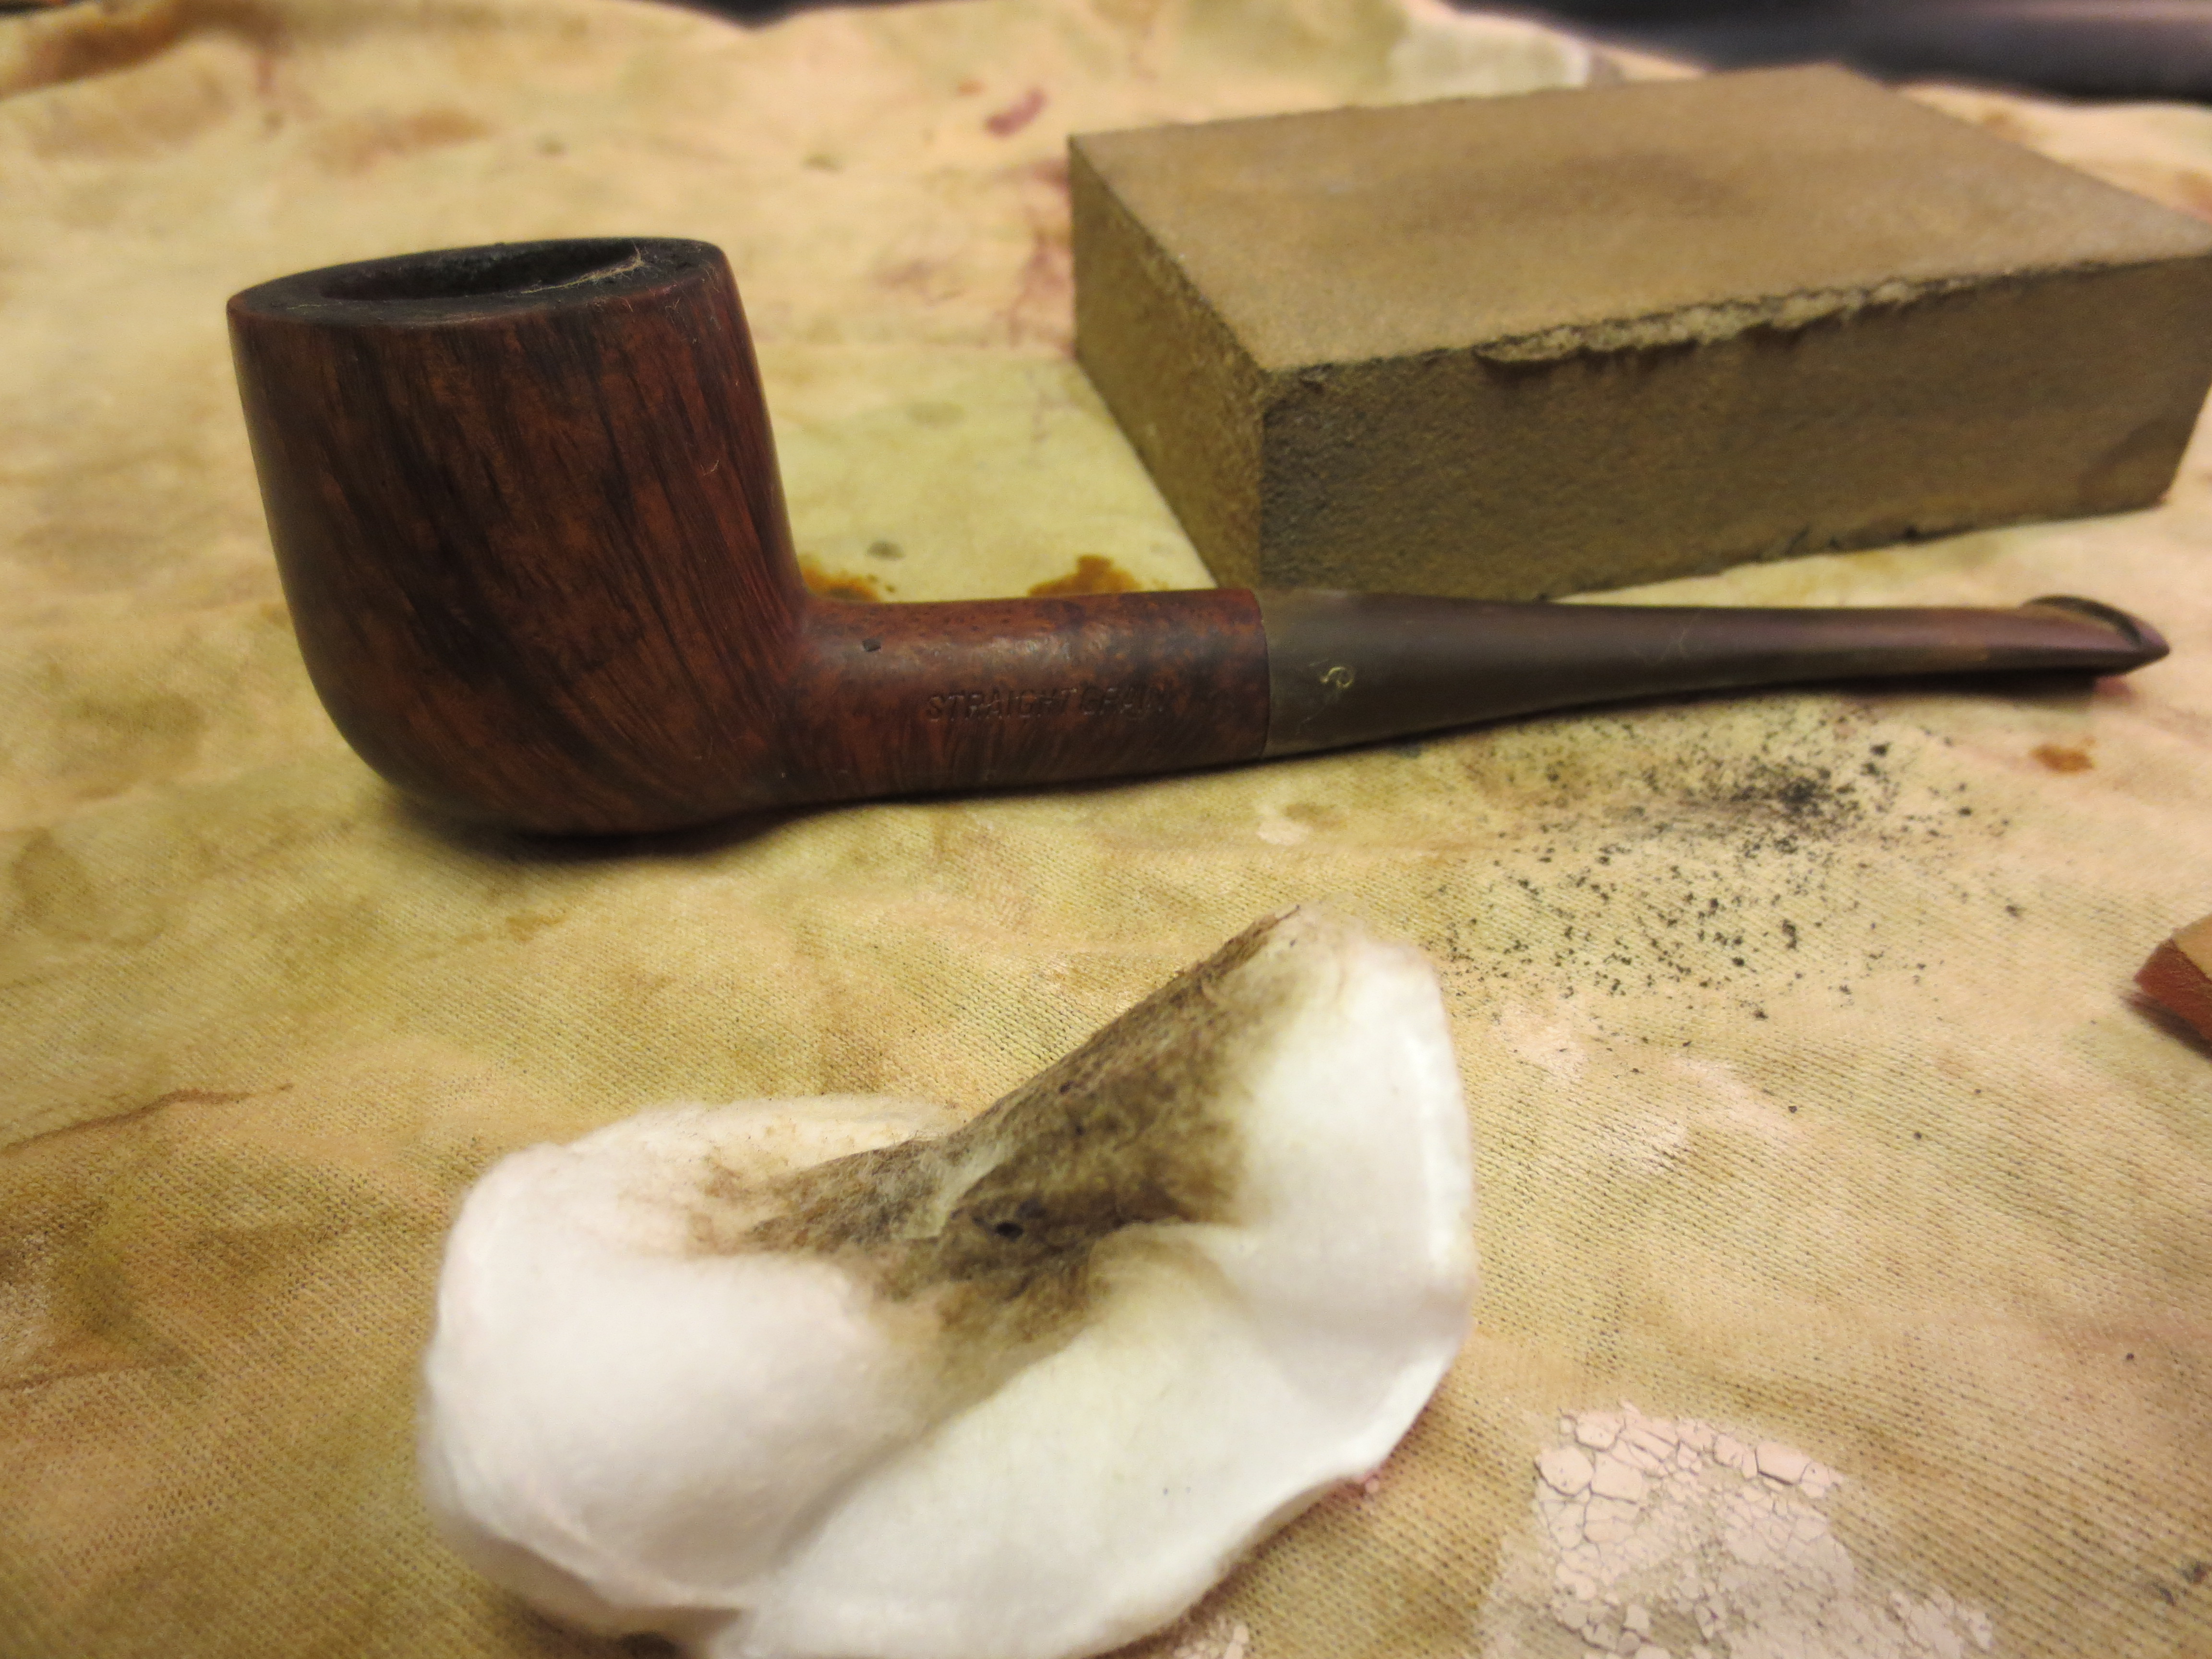
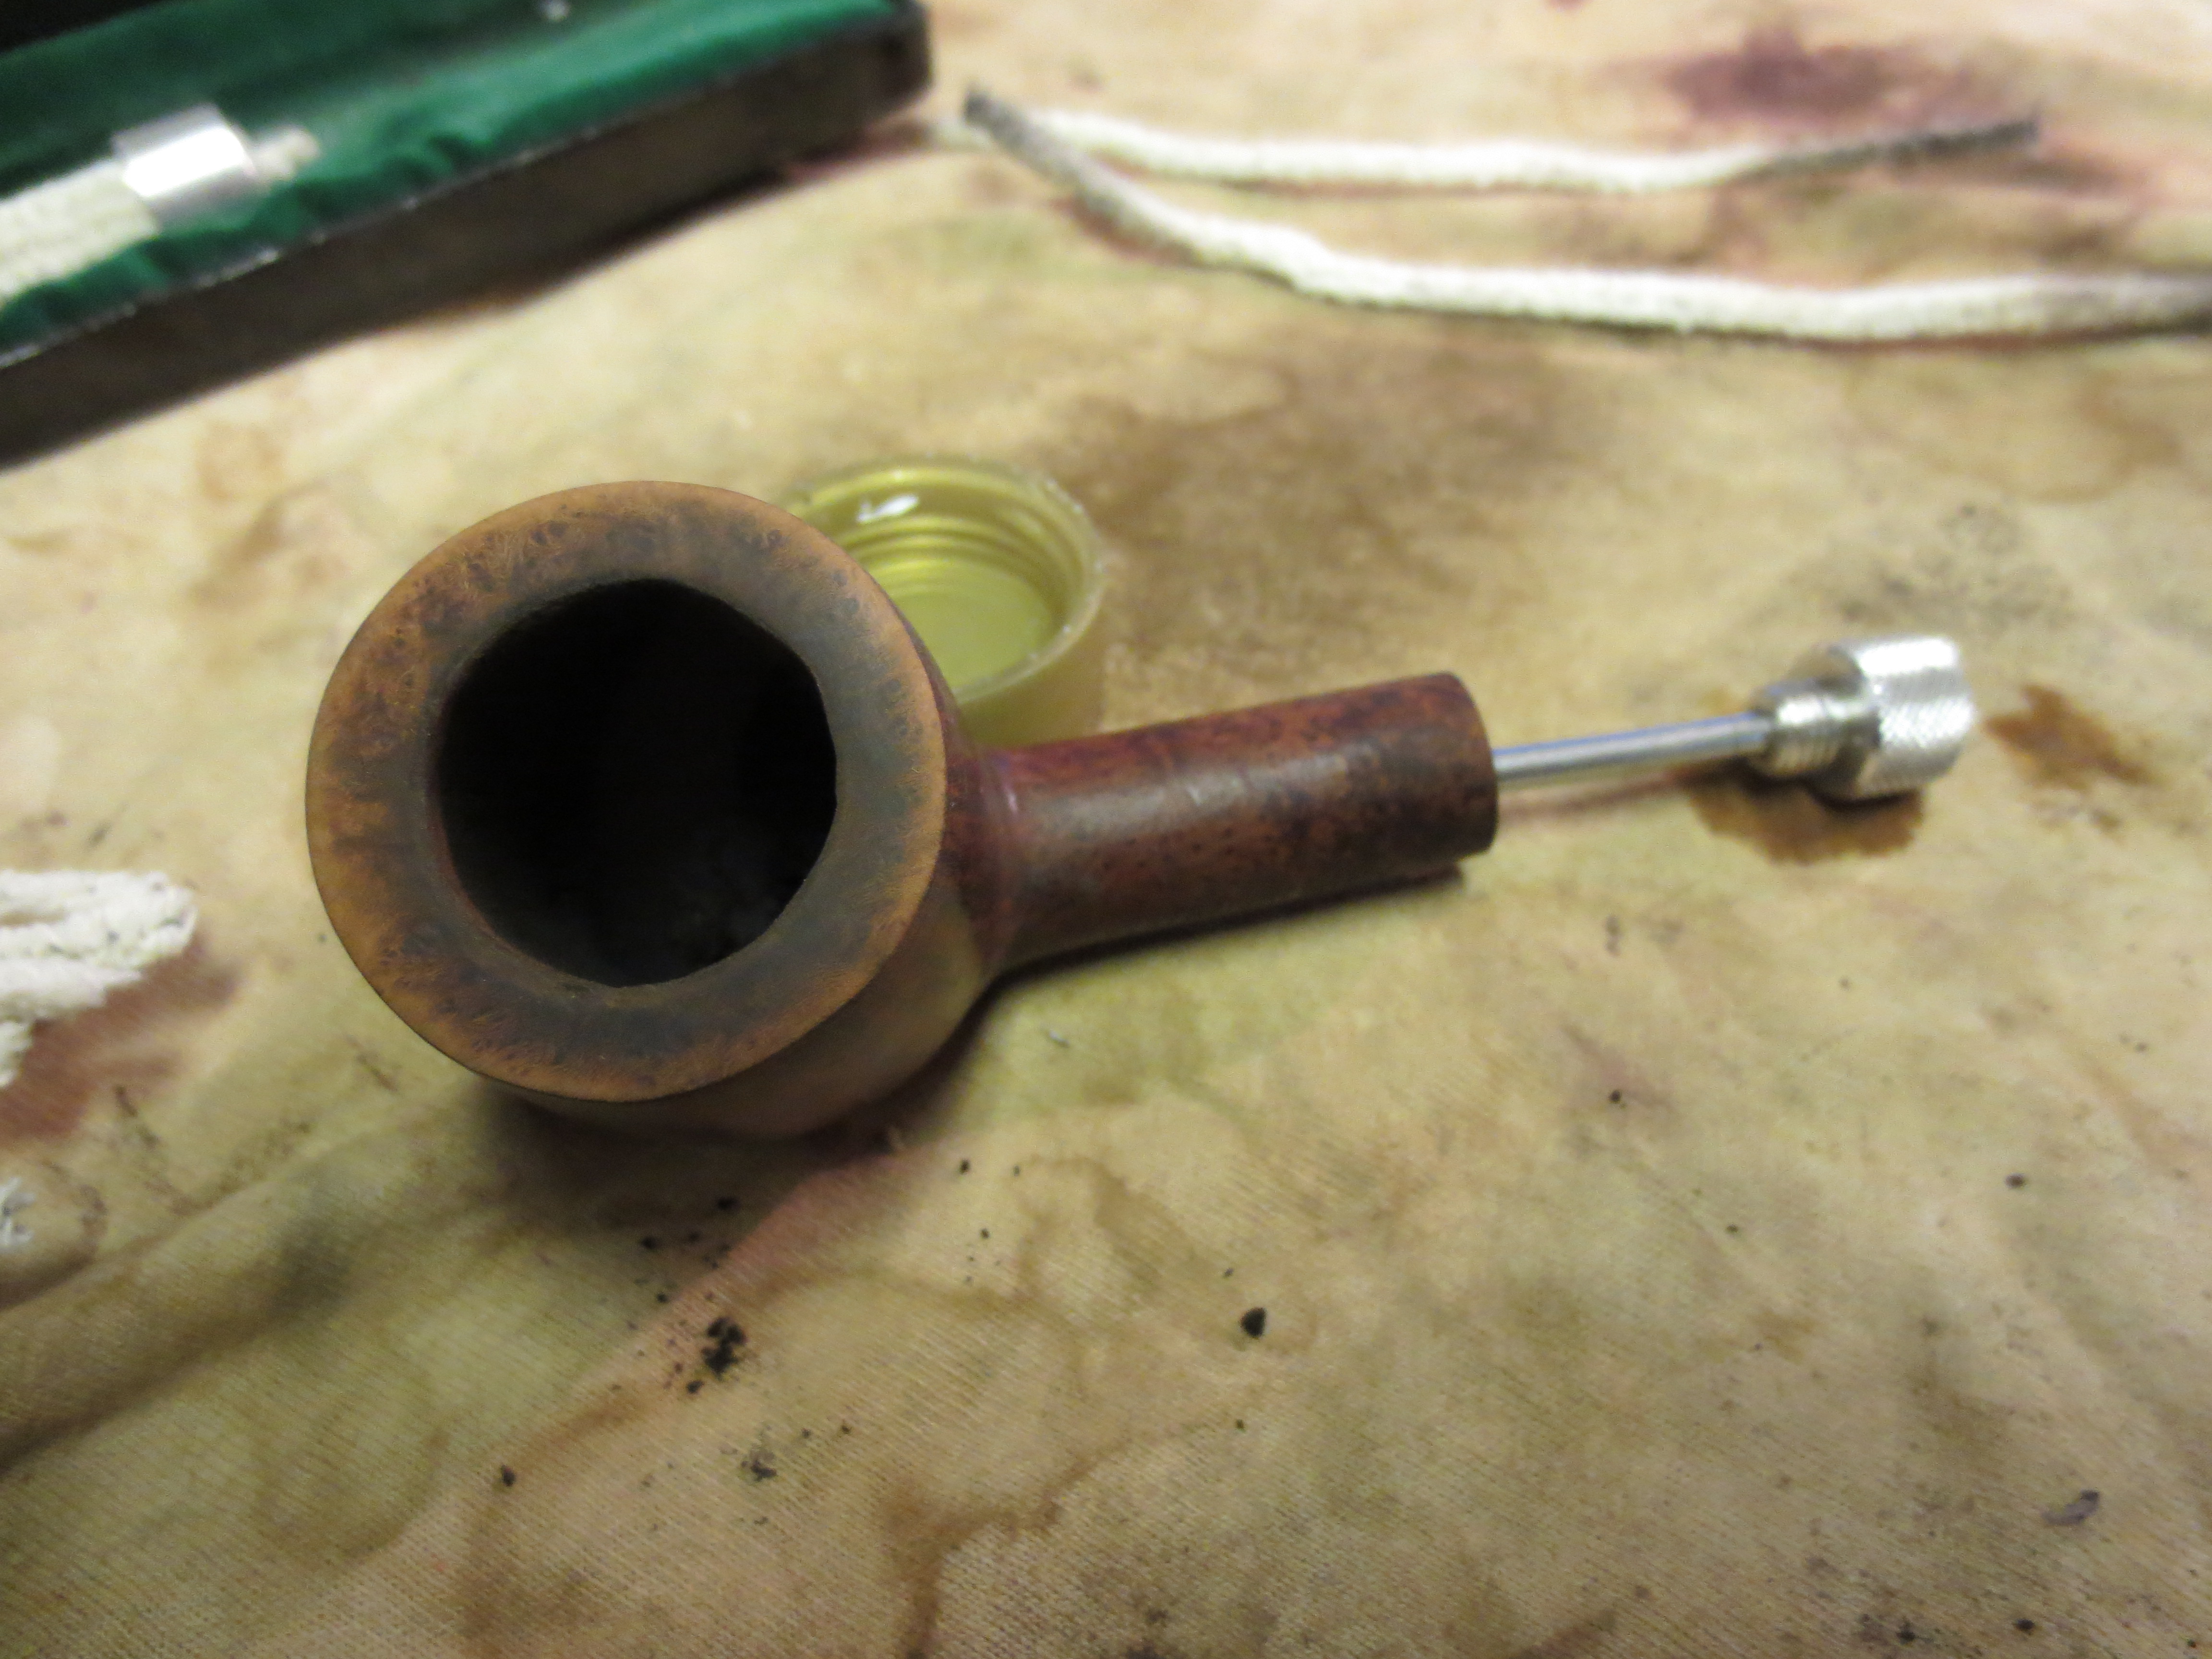
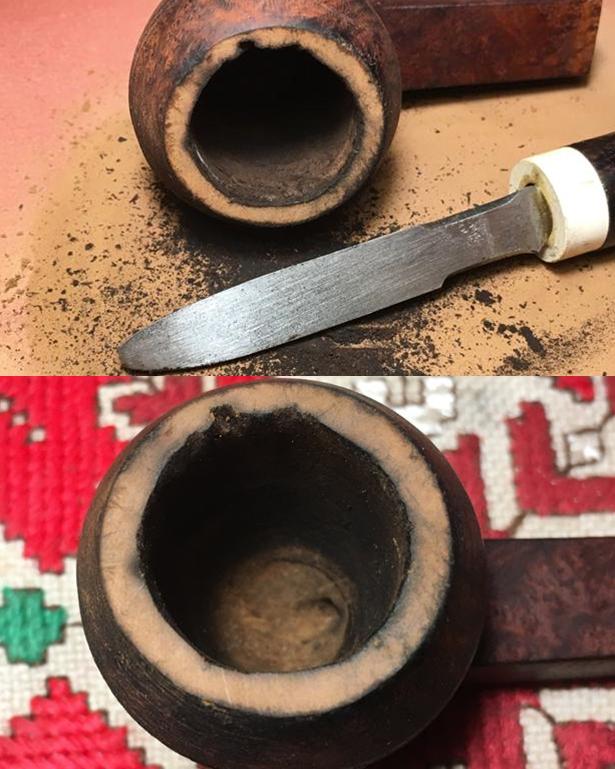
I work on the stummel first. Taking the Pipnet Reaming Kit I use the two smallest of the four blades available to me and ream the chamber, removing the carbon cake build up to the briar. I then fine tune the ream by using the Savinelli pipe knife which enables me to remove residual cake in more difficult angles. To clean the chamber further, I take a piece of 240 grit sanding paper and wrap it around a Sharpie Pen and sand the surface of the chamber then clean the left-over carbon dust with cotton pads wetted with isopropyl 95%. The chamber walls appear to be in good condition. The pictures show the progress.
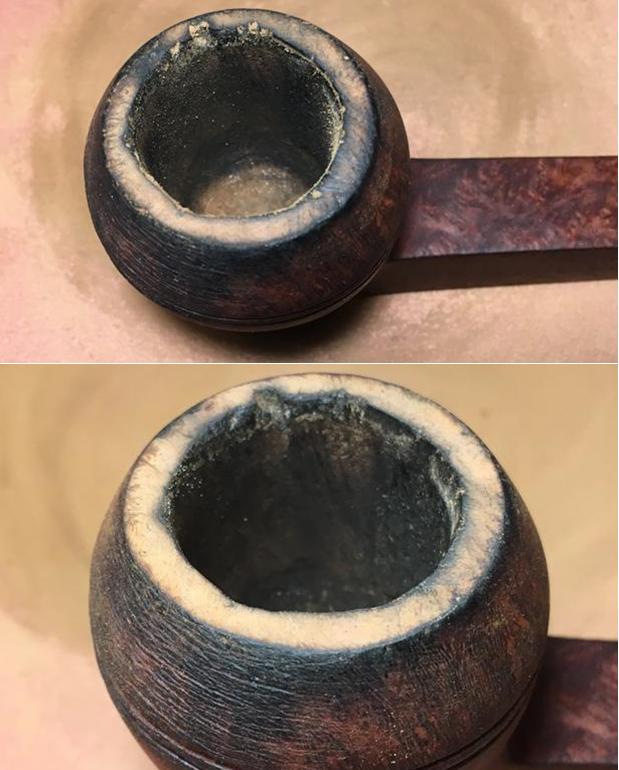
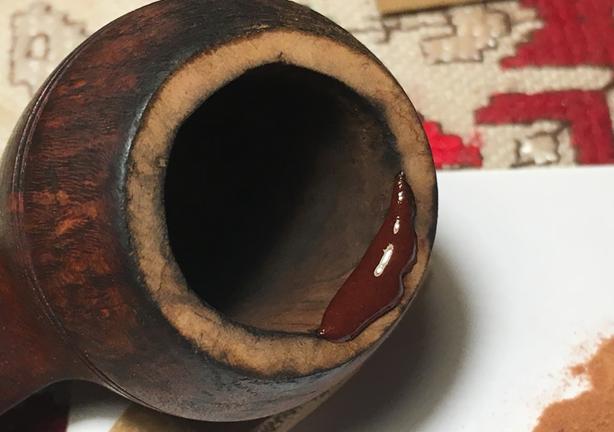
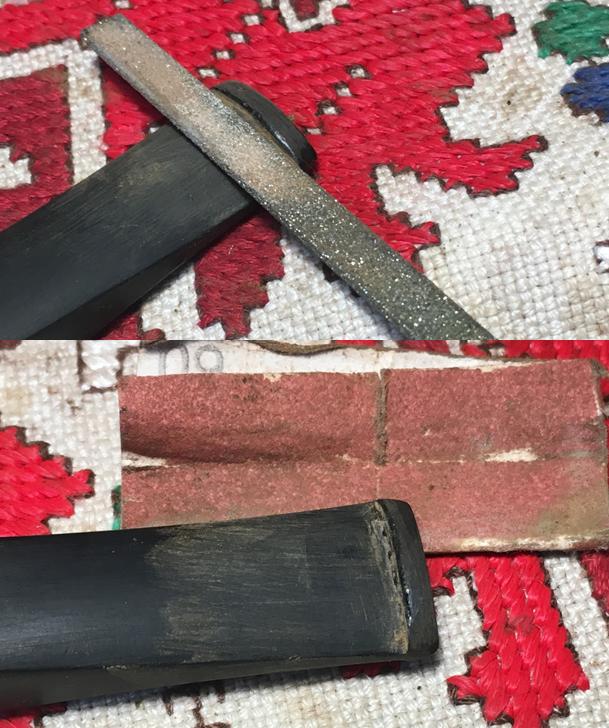
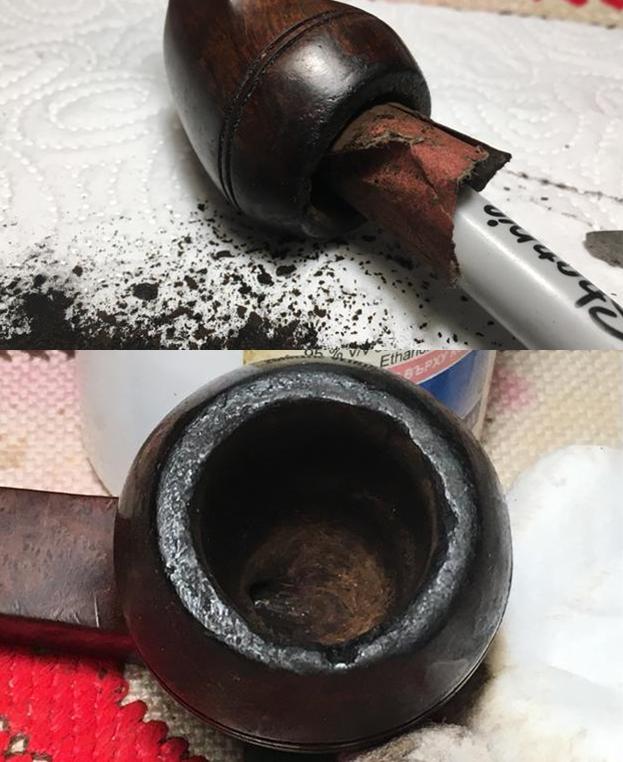 I now use undiluted Murphy’s Soap with cotton pads, a bristled tooth brush and a brass wired brush to clean the stummel surface, scrub the rim and clean the grime out of the twin grooves. As I’m cleaning, it becomes evident that the left front of the upper dome is scorched from what appears to be the aftermath of using a lighter flame over the side of the rim to light the tobacco. I do not use a lighter for this reason – it is difficult to angle the flame without bringing damage to the surface briar. I use matches and bring the flame directly over the chamber and draw the flame directly to the tobacco. I’ll need to send Jon a note about this!!! After scrubbing with all available tools, I rinse the stummel with tap water without introducing water into the internals. With the rim now clean, the extent of the damage is revealed. The final picture in the set below, on the lower part of the picture shows this damage.
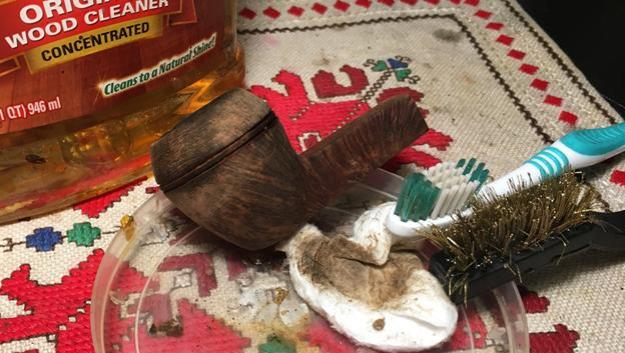
 Since my day is ending, I decide to hydrate the stummel surface with a light application of olive oil. I also decide to use a kosher salt and alcohol soak to work on the internals overnight. I twist a cotton ball and stuff it down the mortise to act as a wick to draw the oils and tars out. I then fill the chamber with kosher salt and hold my palm over the top and give it a shake to displace the salt. Using an eyedropper, I then fill the bowl with isopropyl 95% and leave the stummel in an egg crate for stability and turn off the lights. The pictures show the progress.
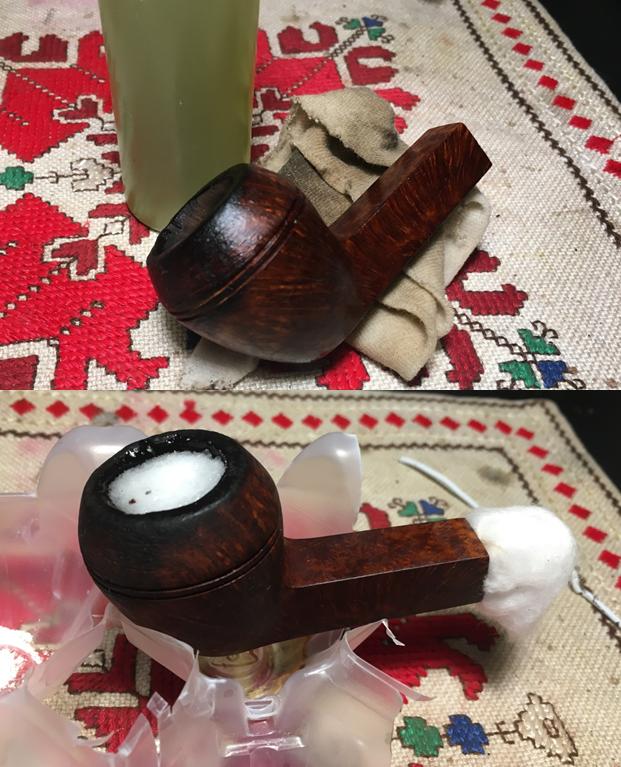 The next morning the salt, as expected had discolored somewhat and the cotton served as a wick drawing oils and gunk out of the stummel internals. I follow with a barrage of pipe cleaners and cotton swabs to finish the cleaning job. The pictures show the progress.
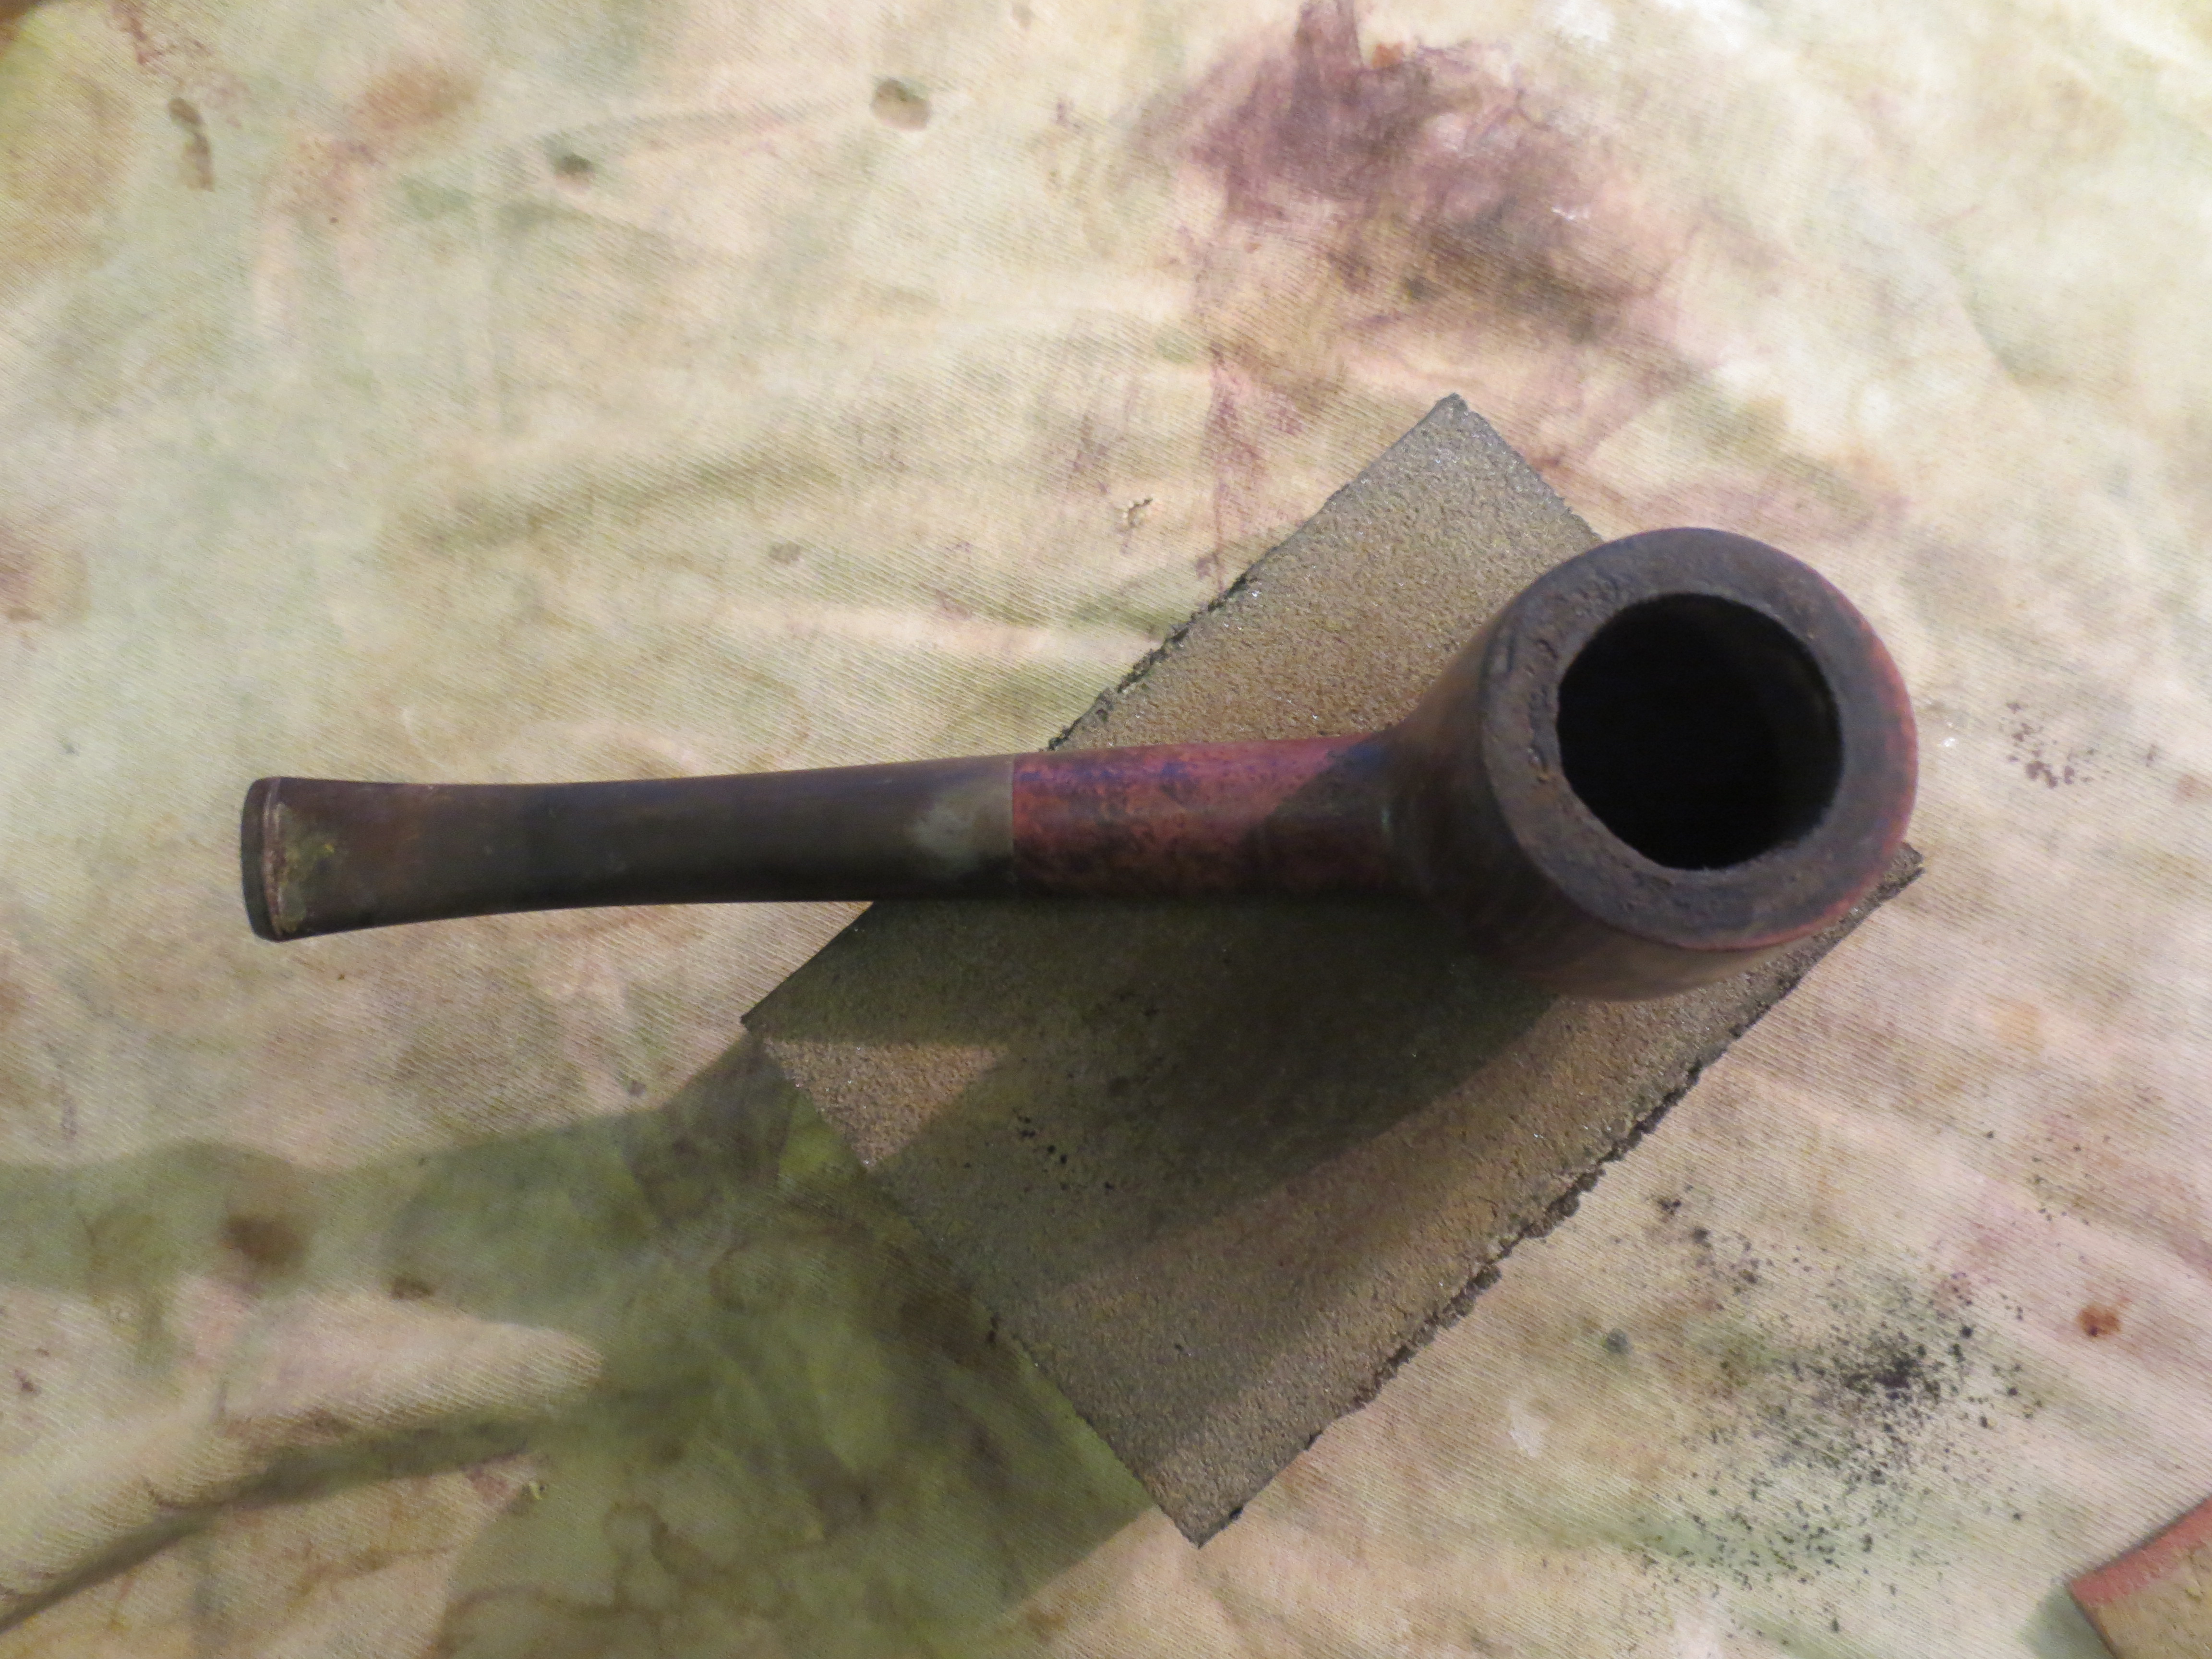
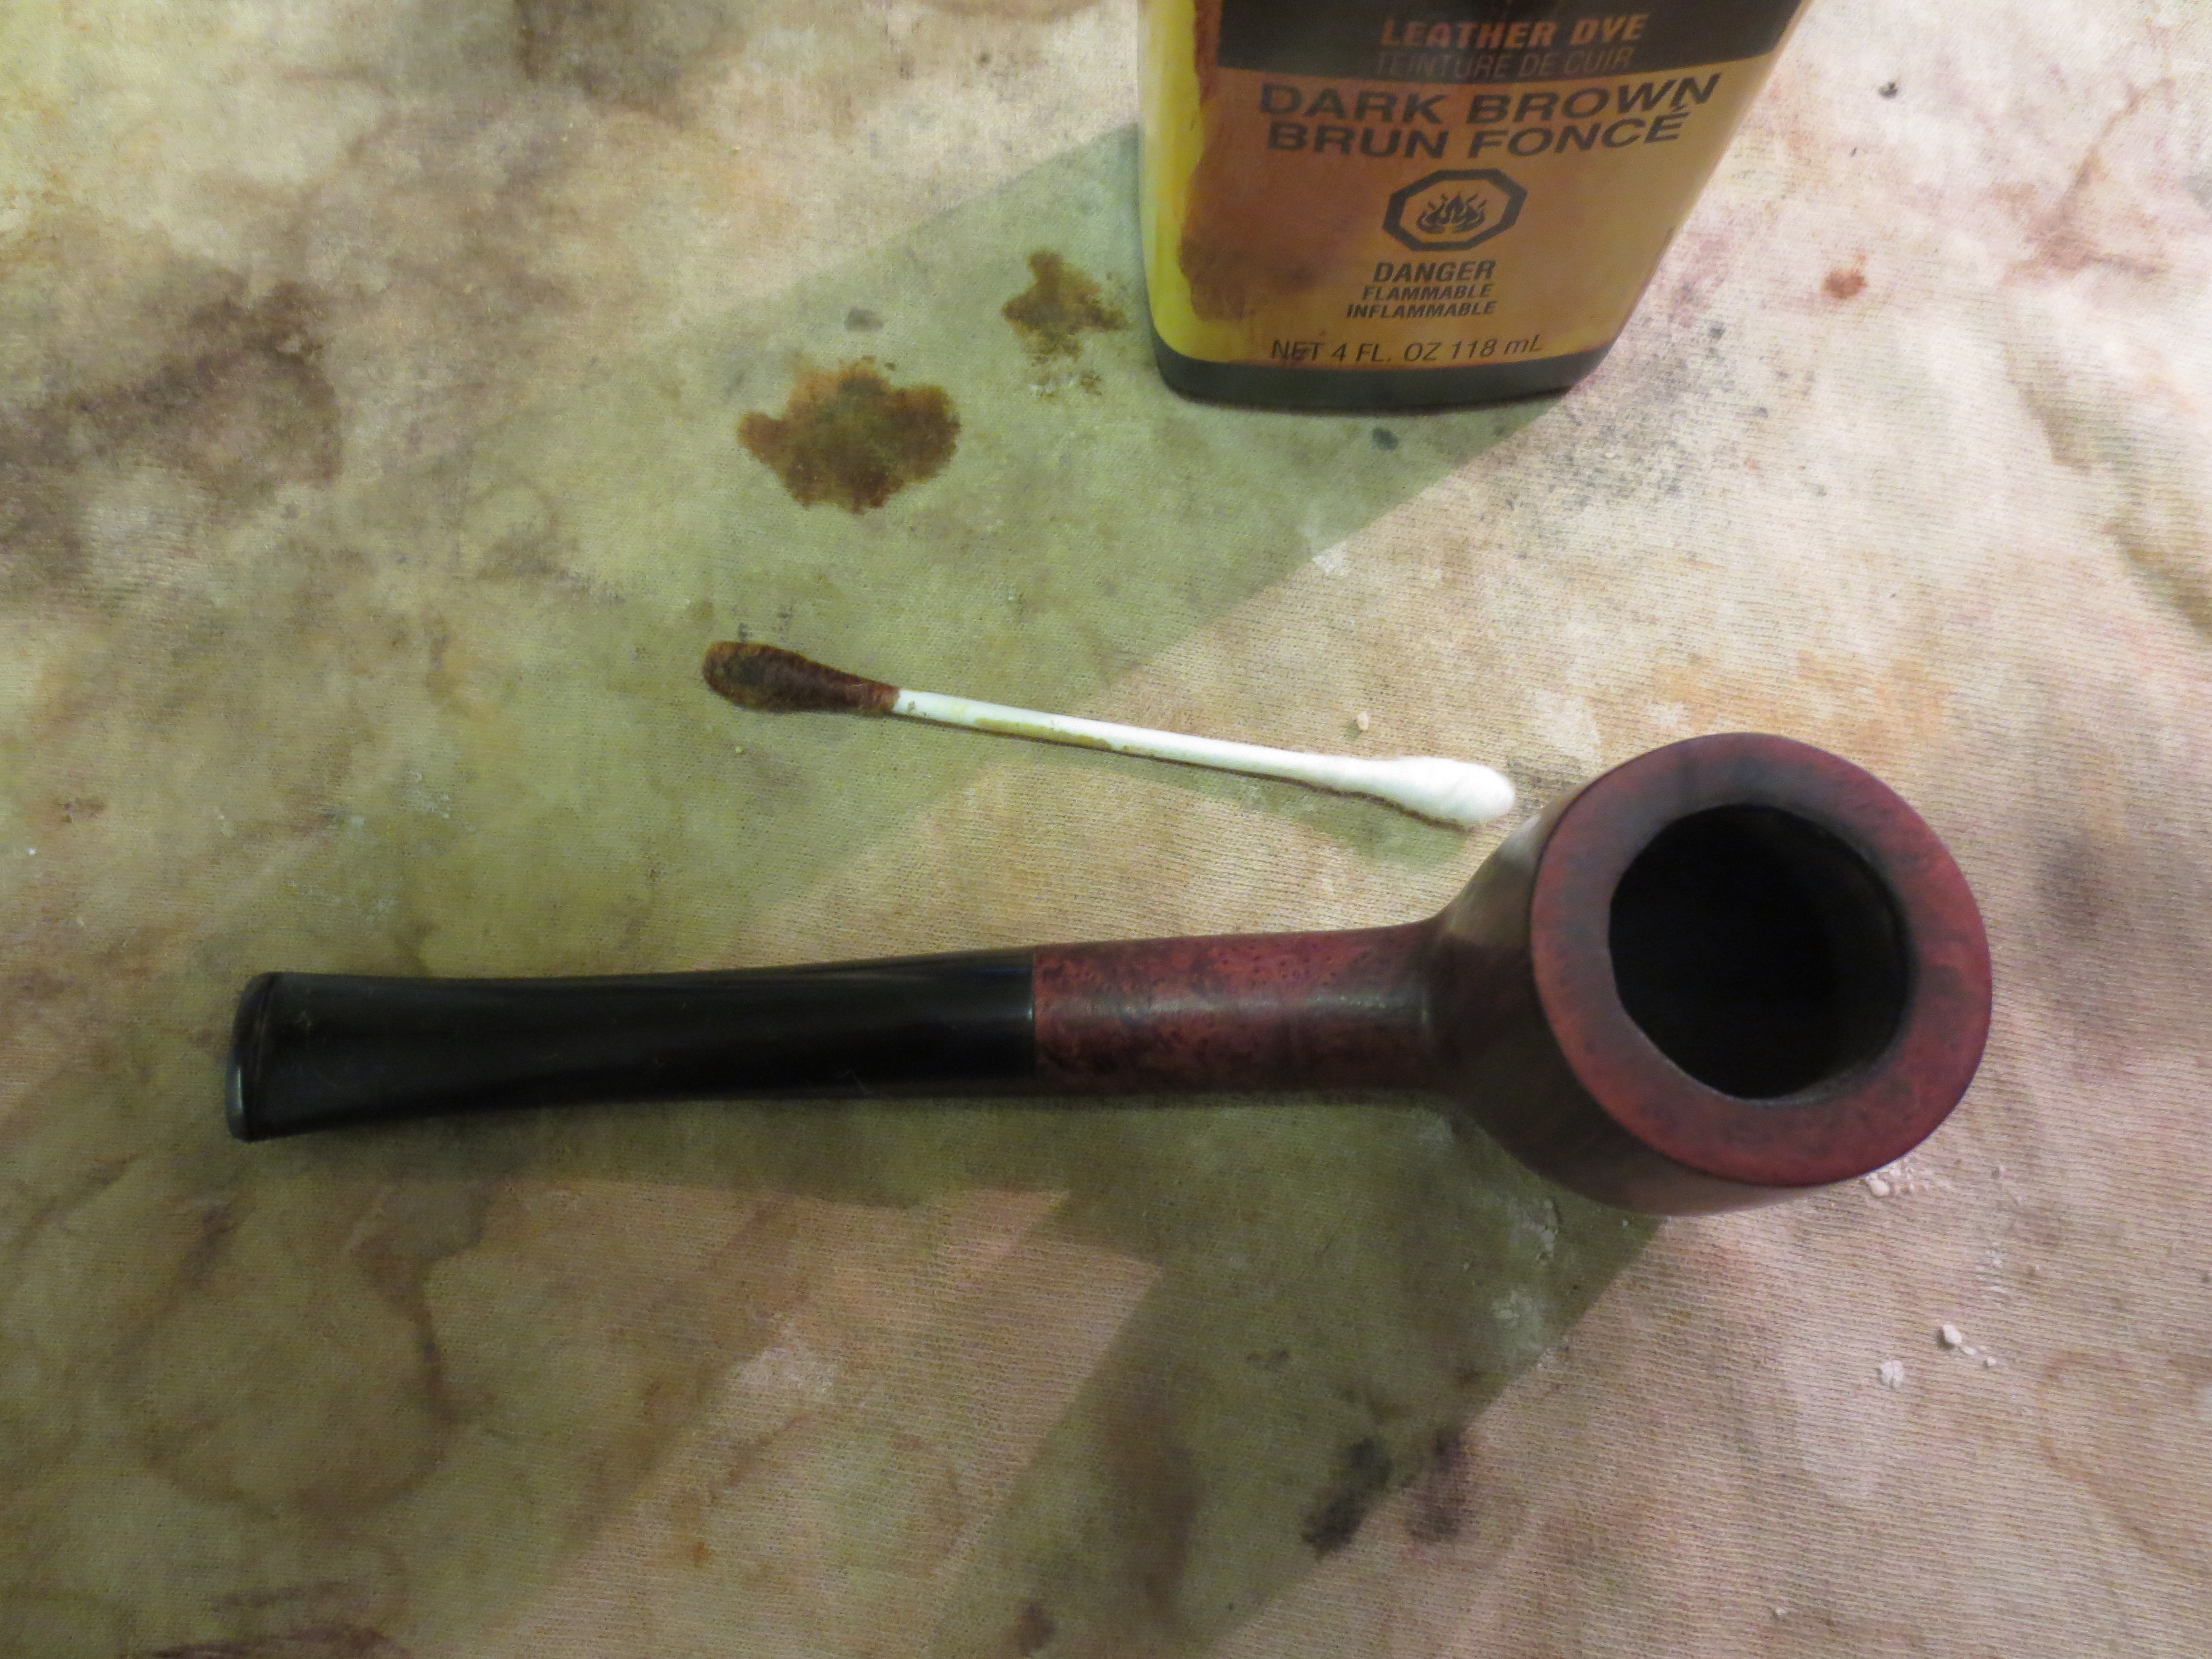
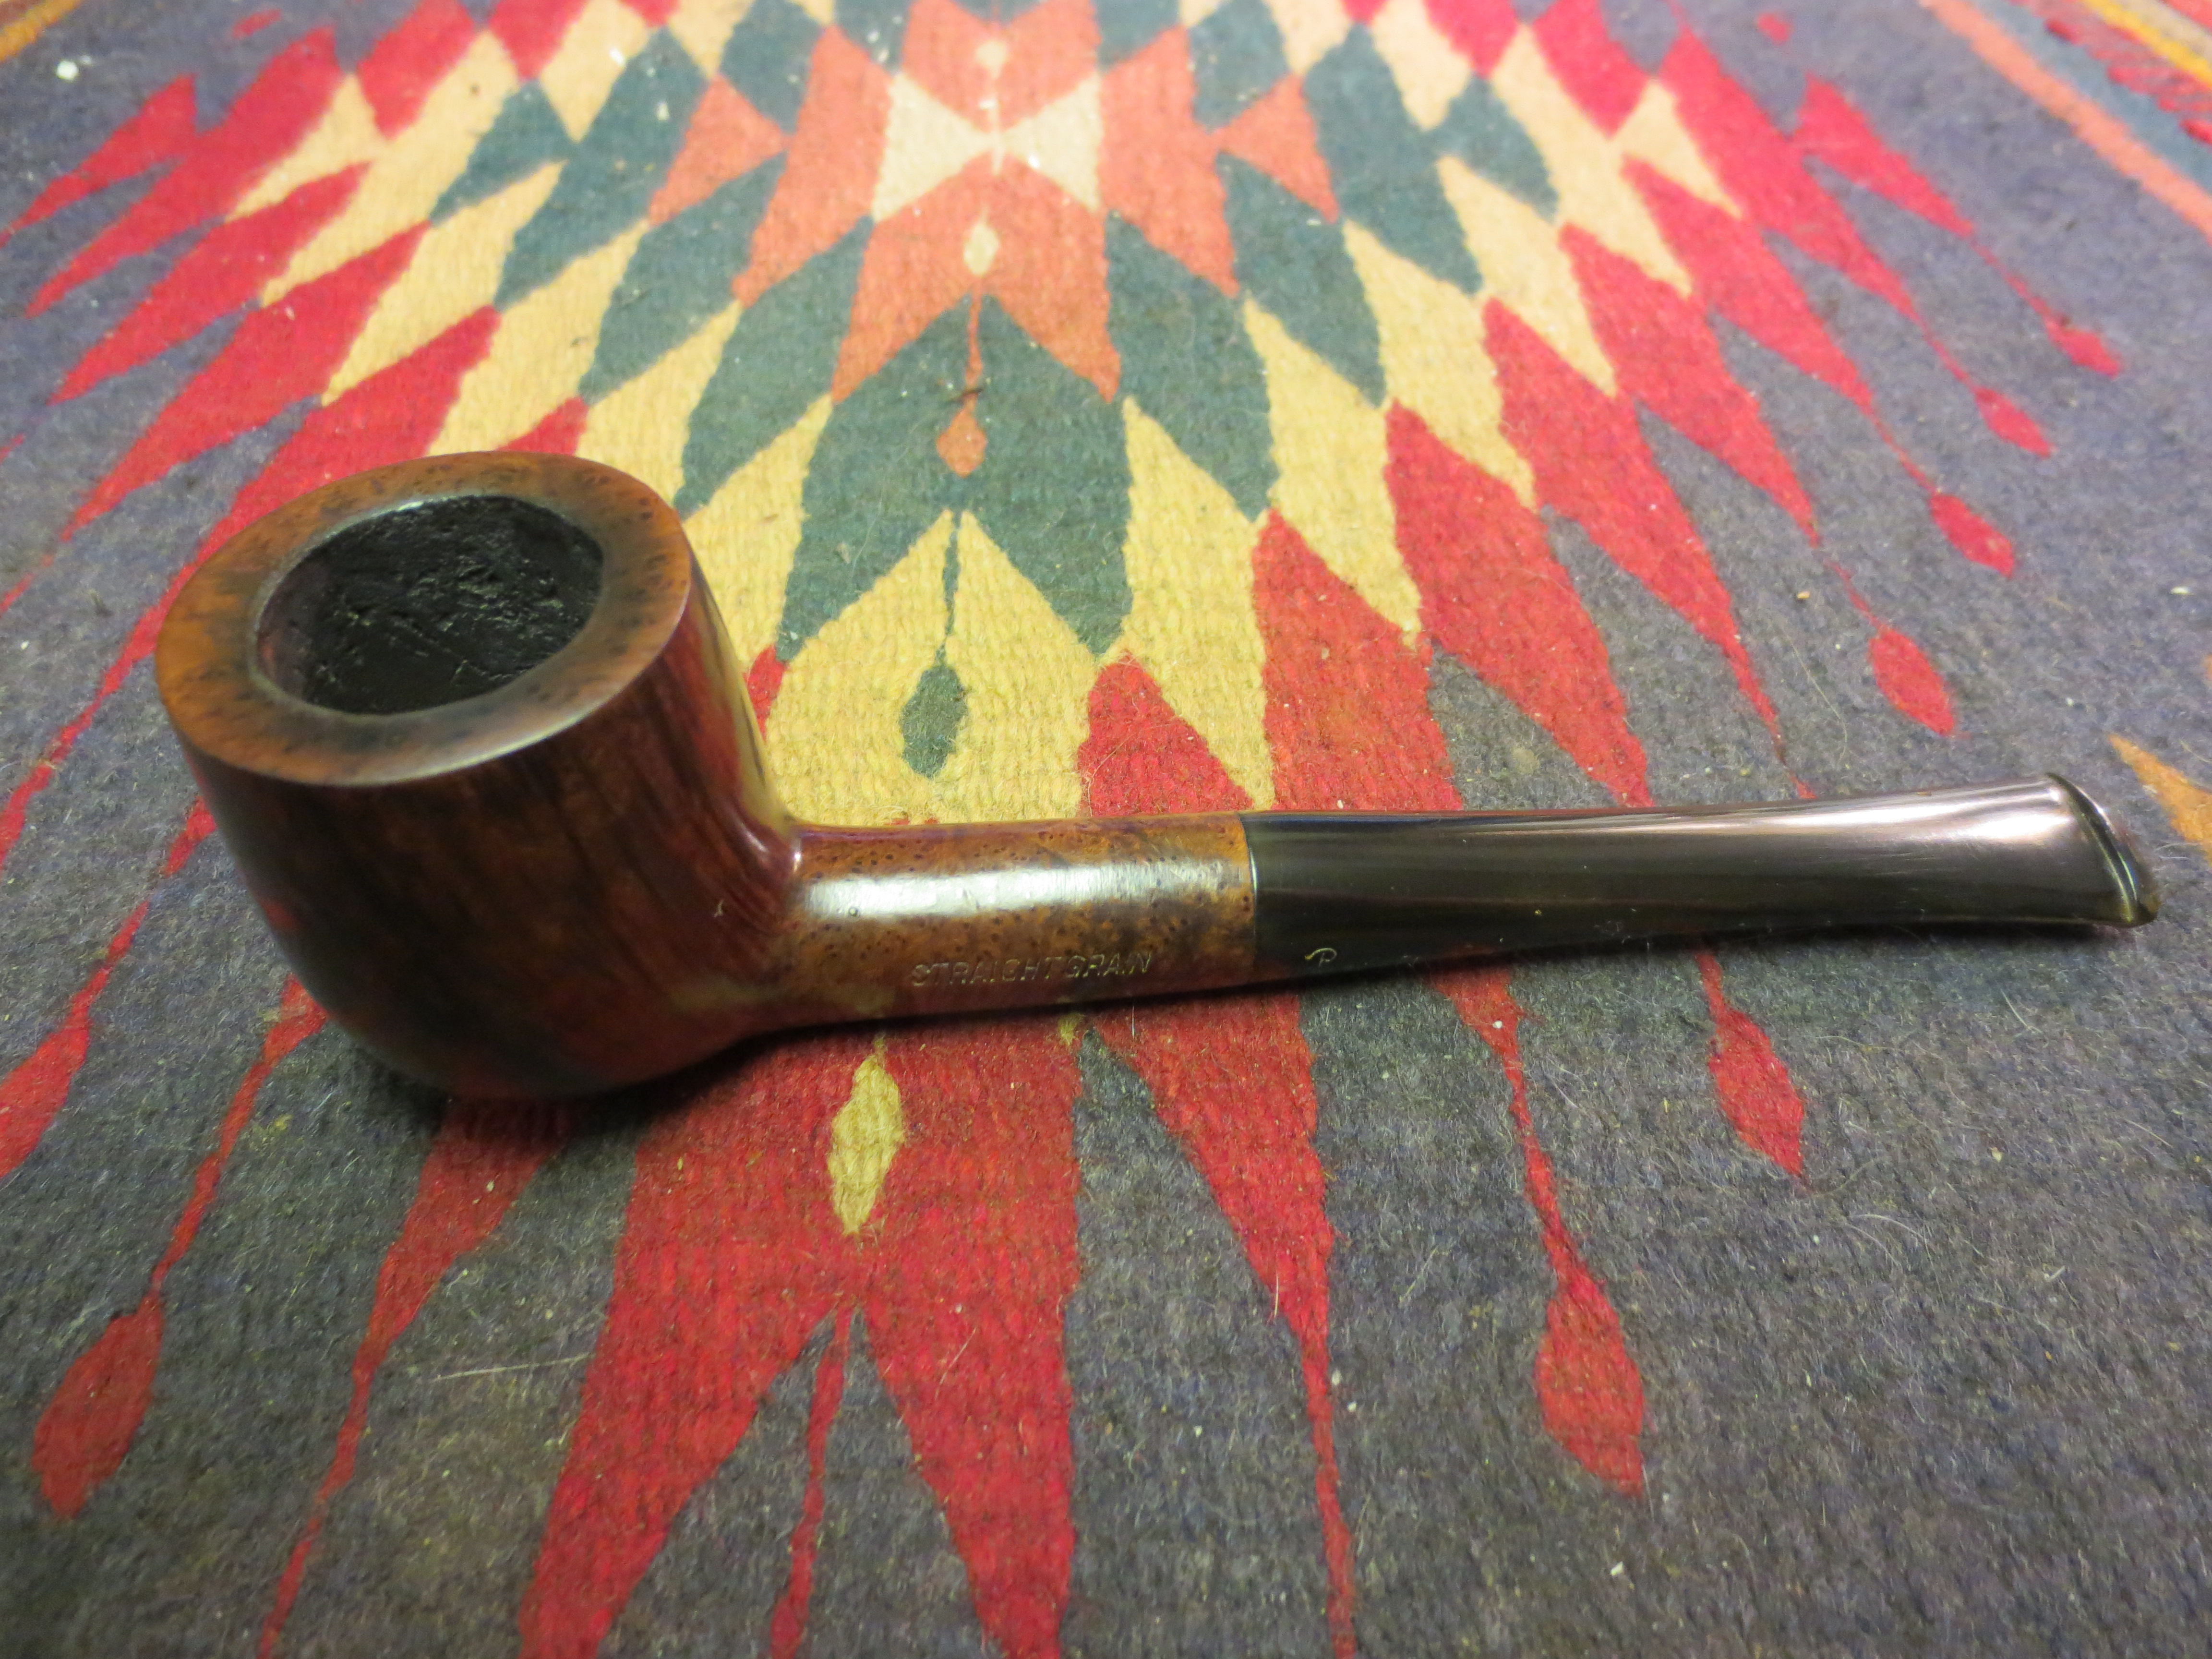
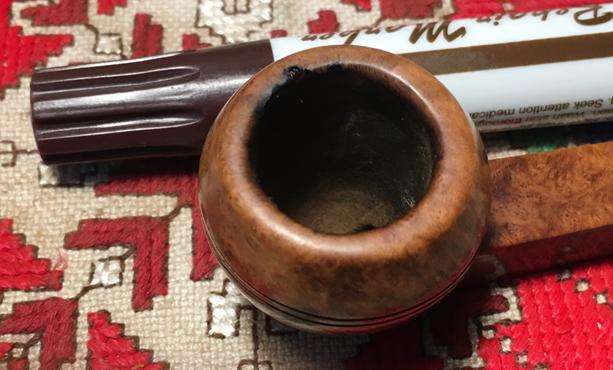
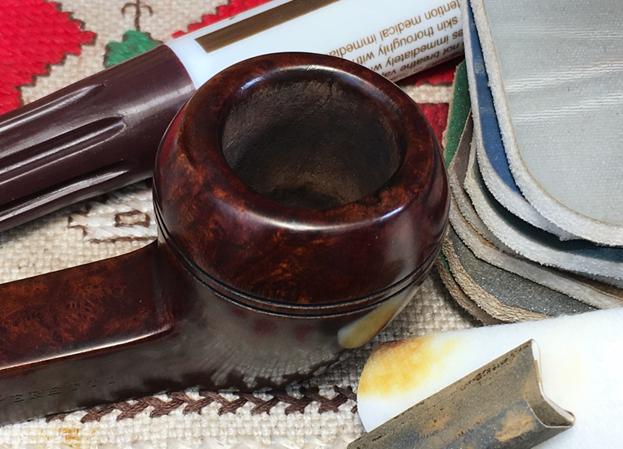
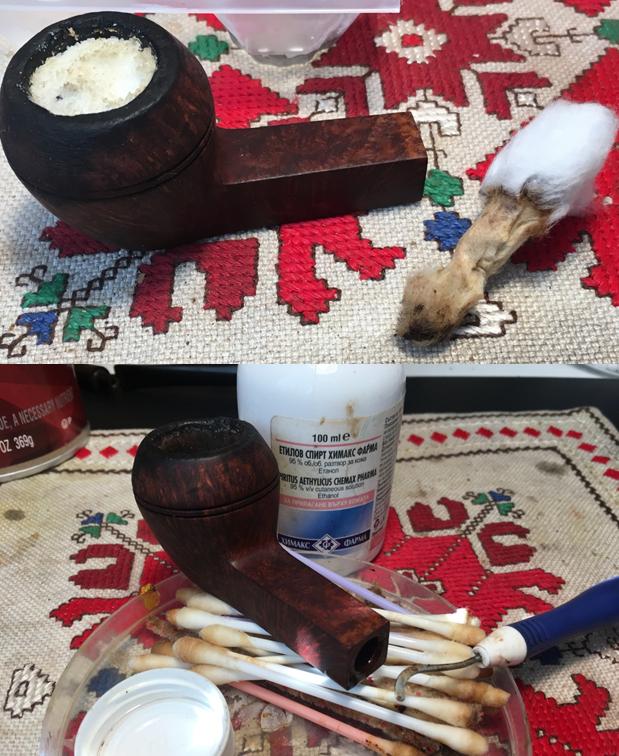 I now face the most daunting part of the restoration of this L. J. Peretti Squared Shank Rhodesian. I take more pictures for a closer look at the problems. The burn and scorching damage on the rim and upper dome of the stummel are significant. The rim at the 11:30 position is cratered severely and it appears that the rim burned and the charred part chipped off after becoming brittle. From this area, down on the left side to the 7:00 position there is damage but not as severe. My concern is whether there is healthy briar beneath what I’m seeing or has the wood charred more deeply? If so, a lot of briar will need to be removed to repair the rim via topping, but this could impact the Rhodesian proportional balance between the upper and lower parts of the bowl – divided by the twin grooves. This repair reminds me of a rim rebuild I did with a ‘Throw-Away Pipe’ that had little rim left. With a desire to salvage as much of the rim as possible, I will very lightly top the pipe but only to gain the ‘high ground’ of the rim and then fill the craters and divots in the rim with a briar dust and superglue putty. I want to ‘build-up’ the rim instead of losing it on the topping board and creating a squat-top, disproportionate Rhodesian. The pictures show the damage and the challenges.
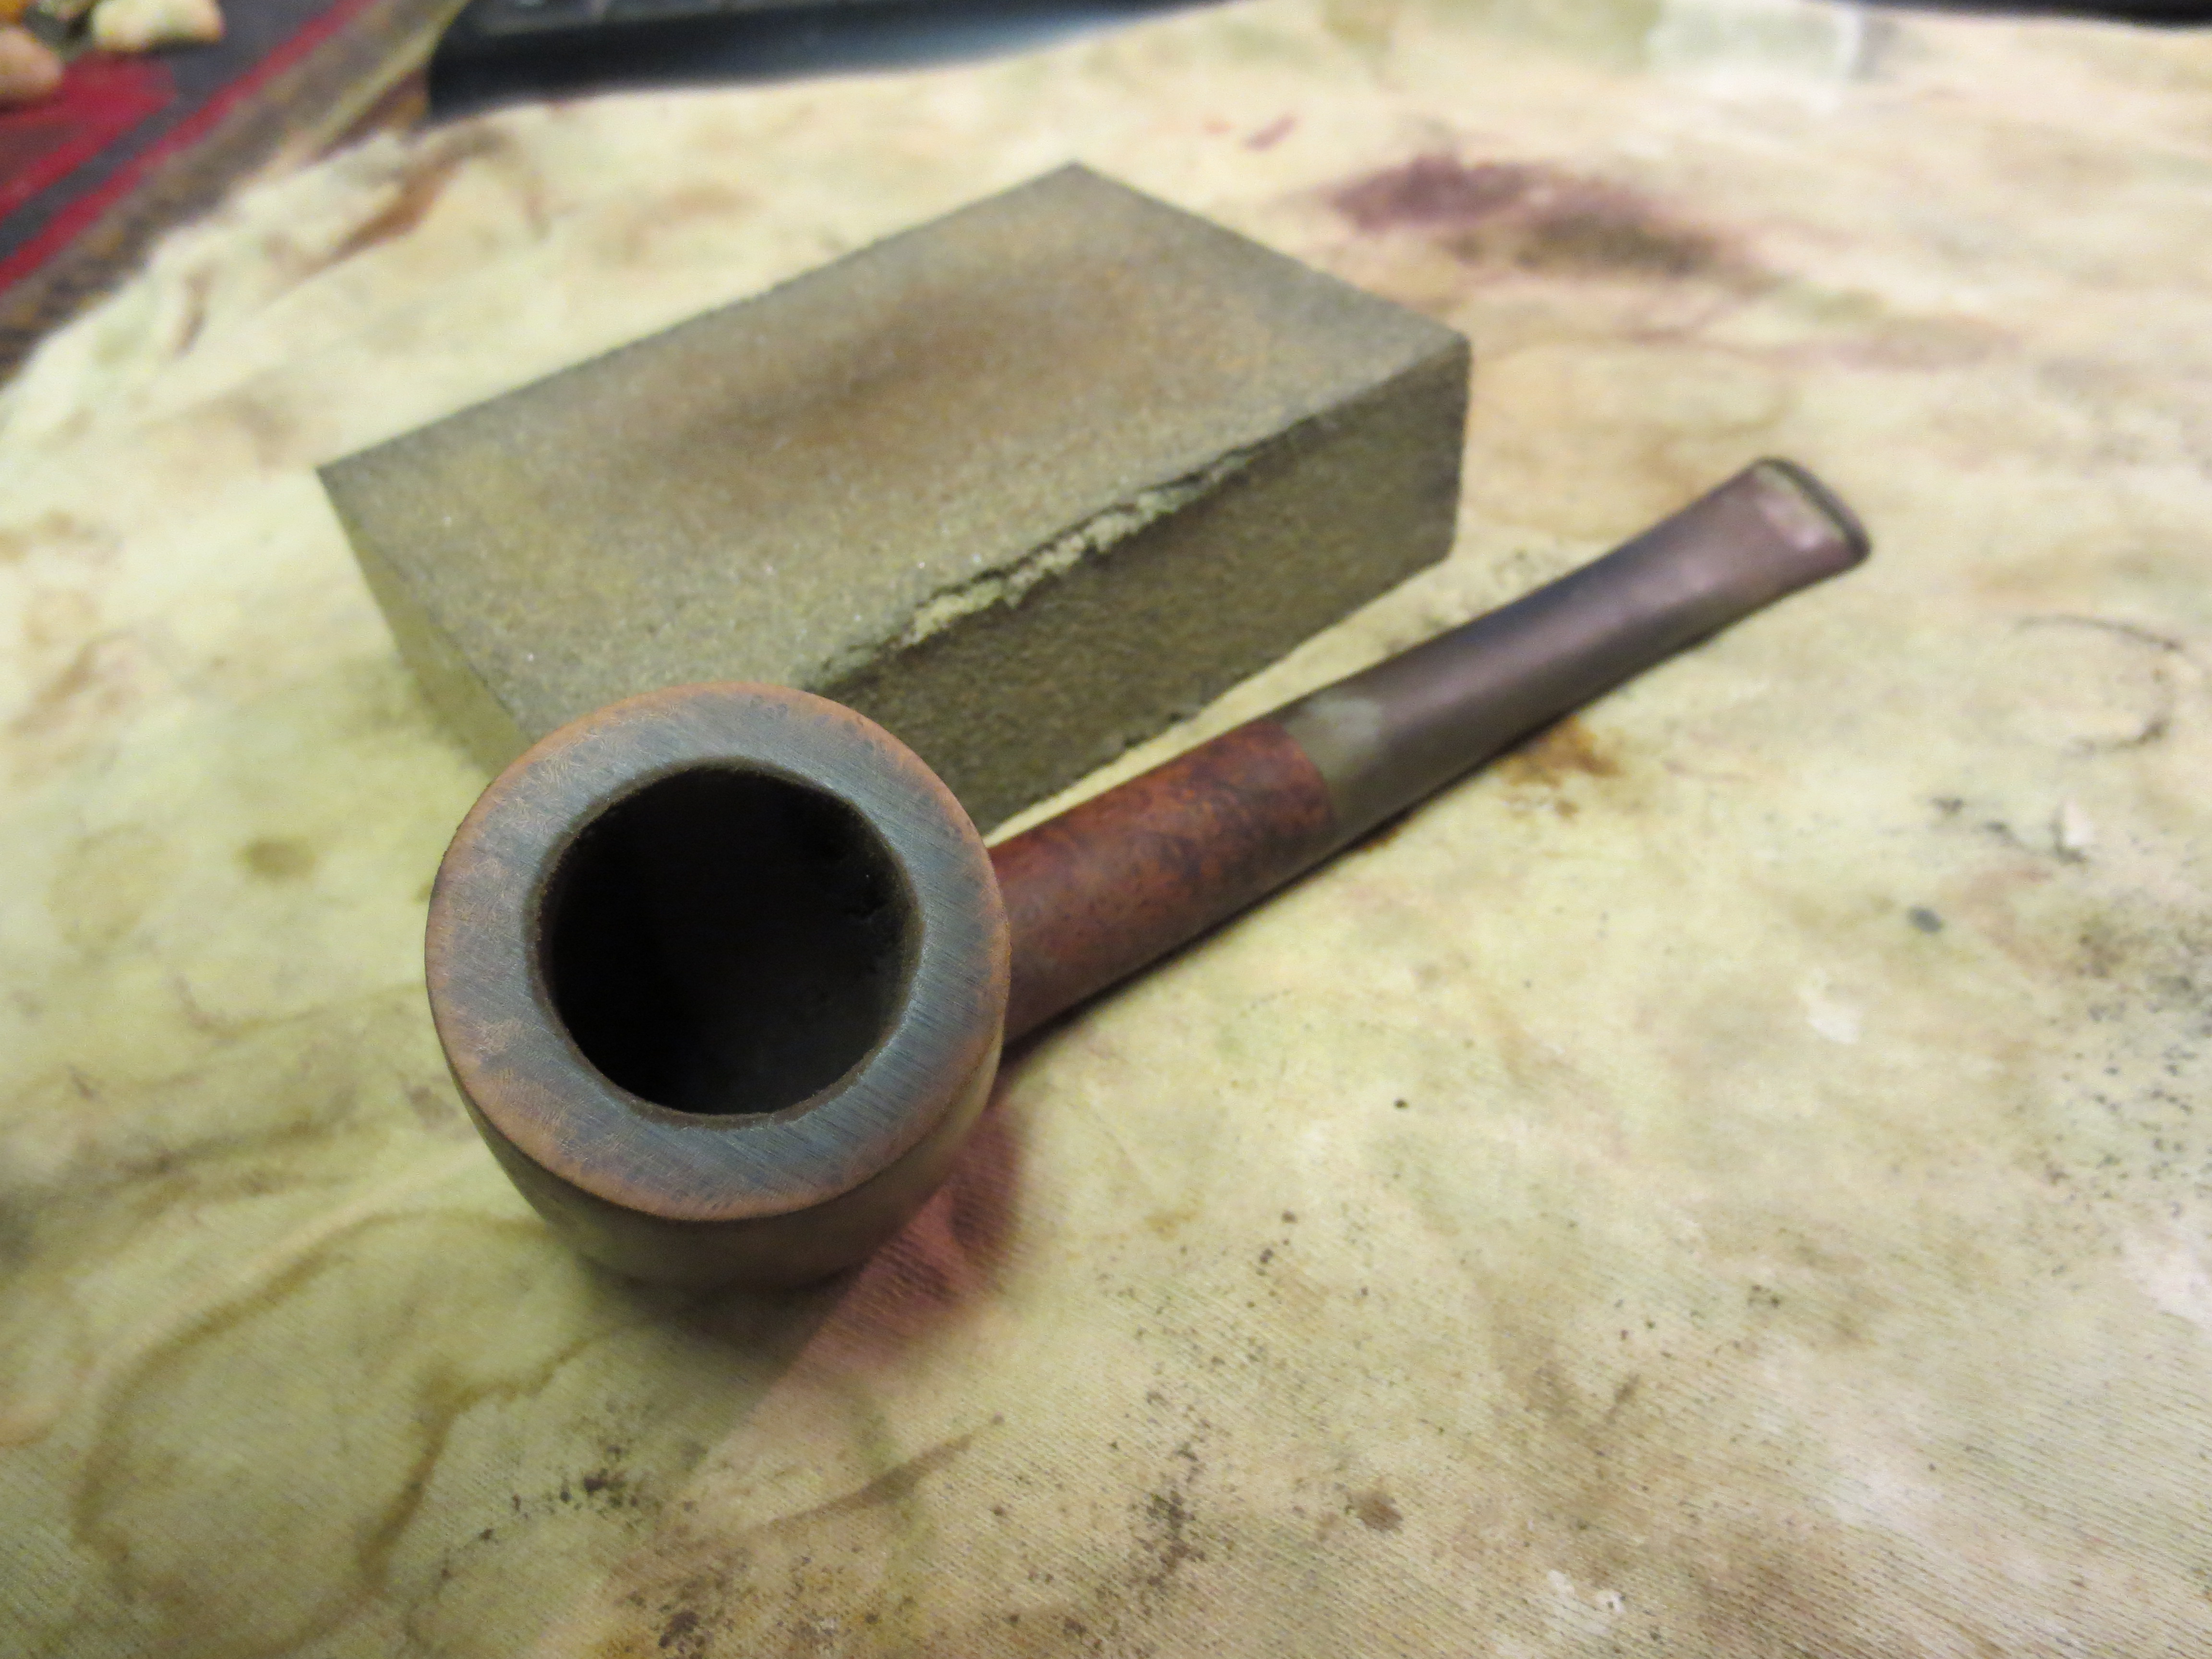
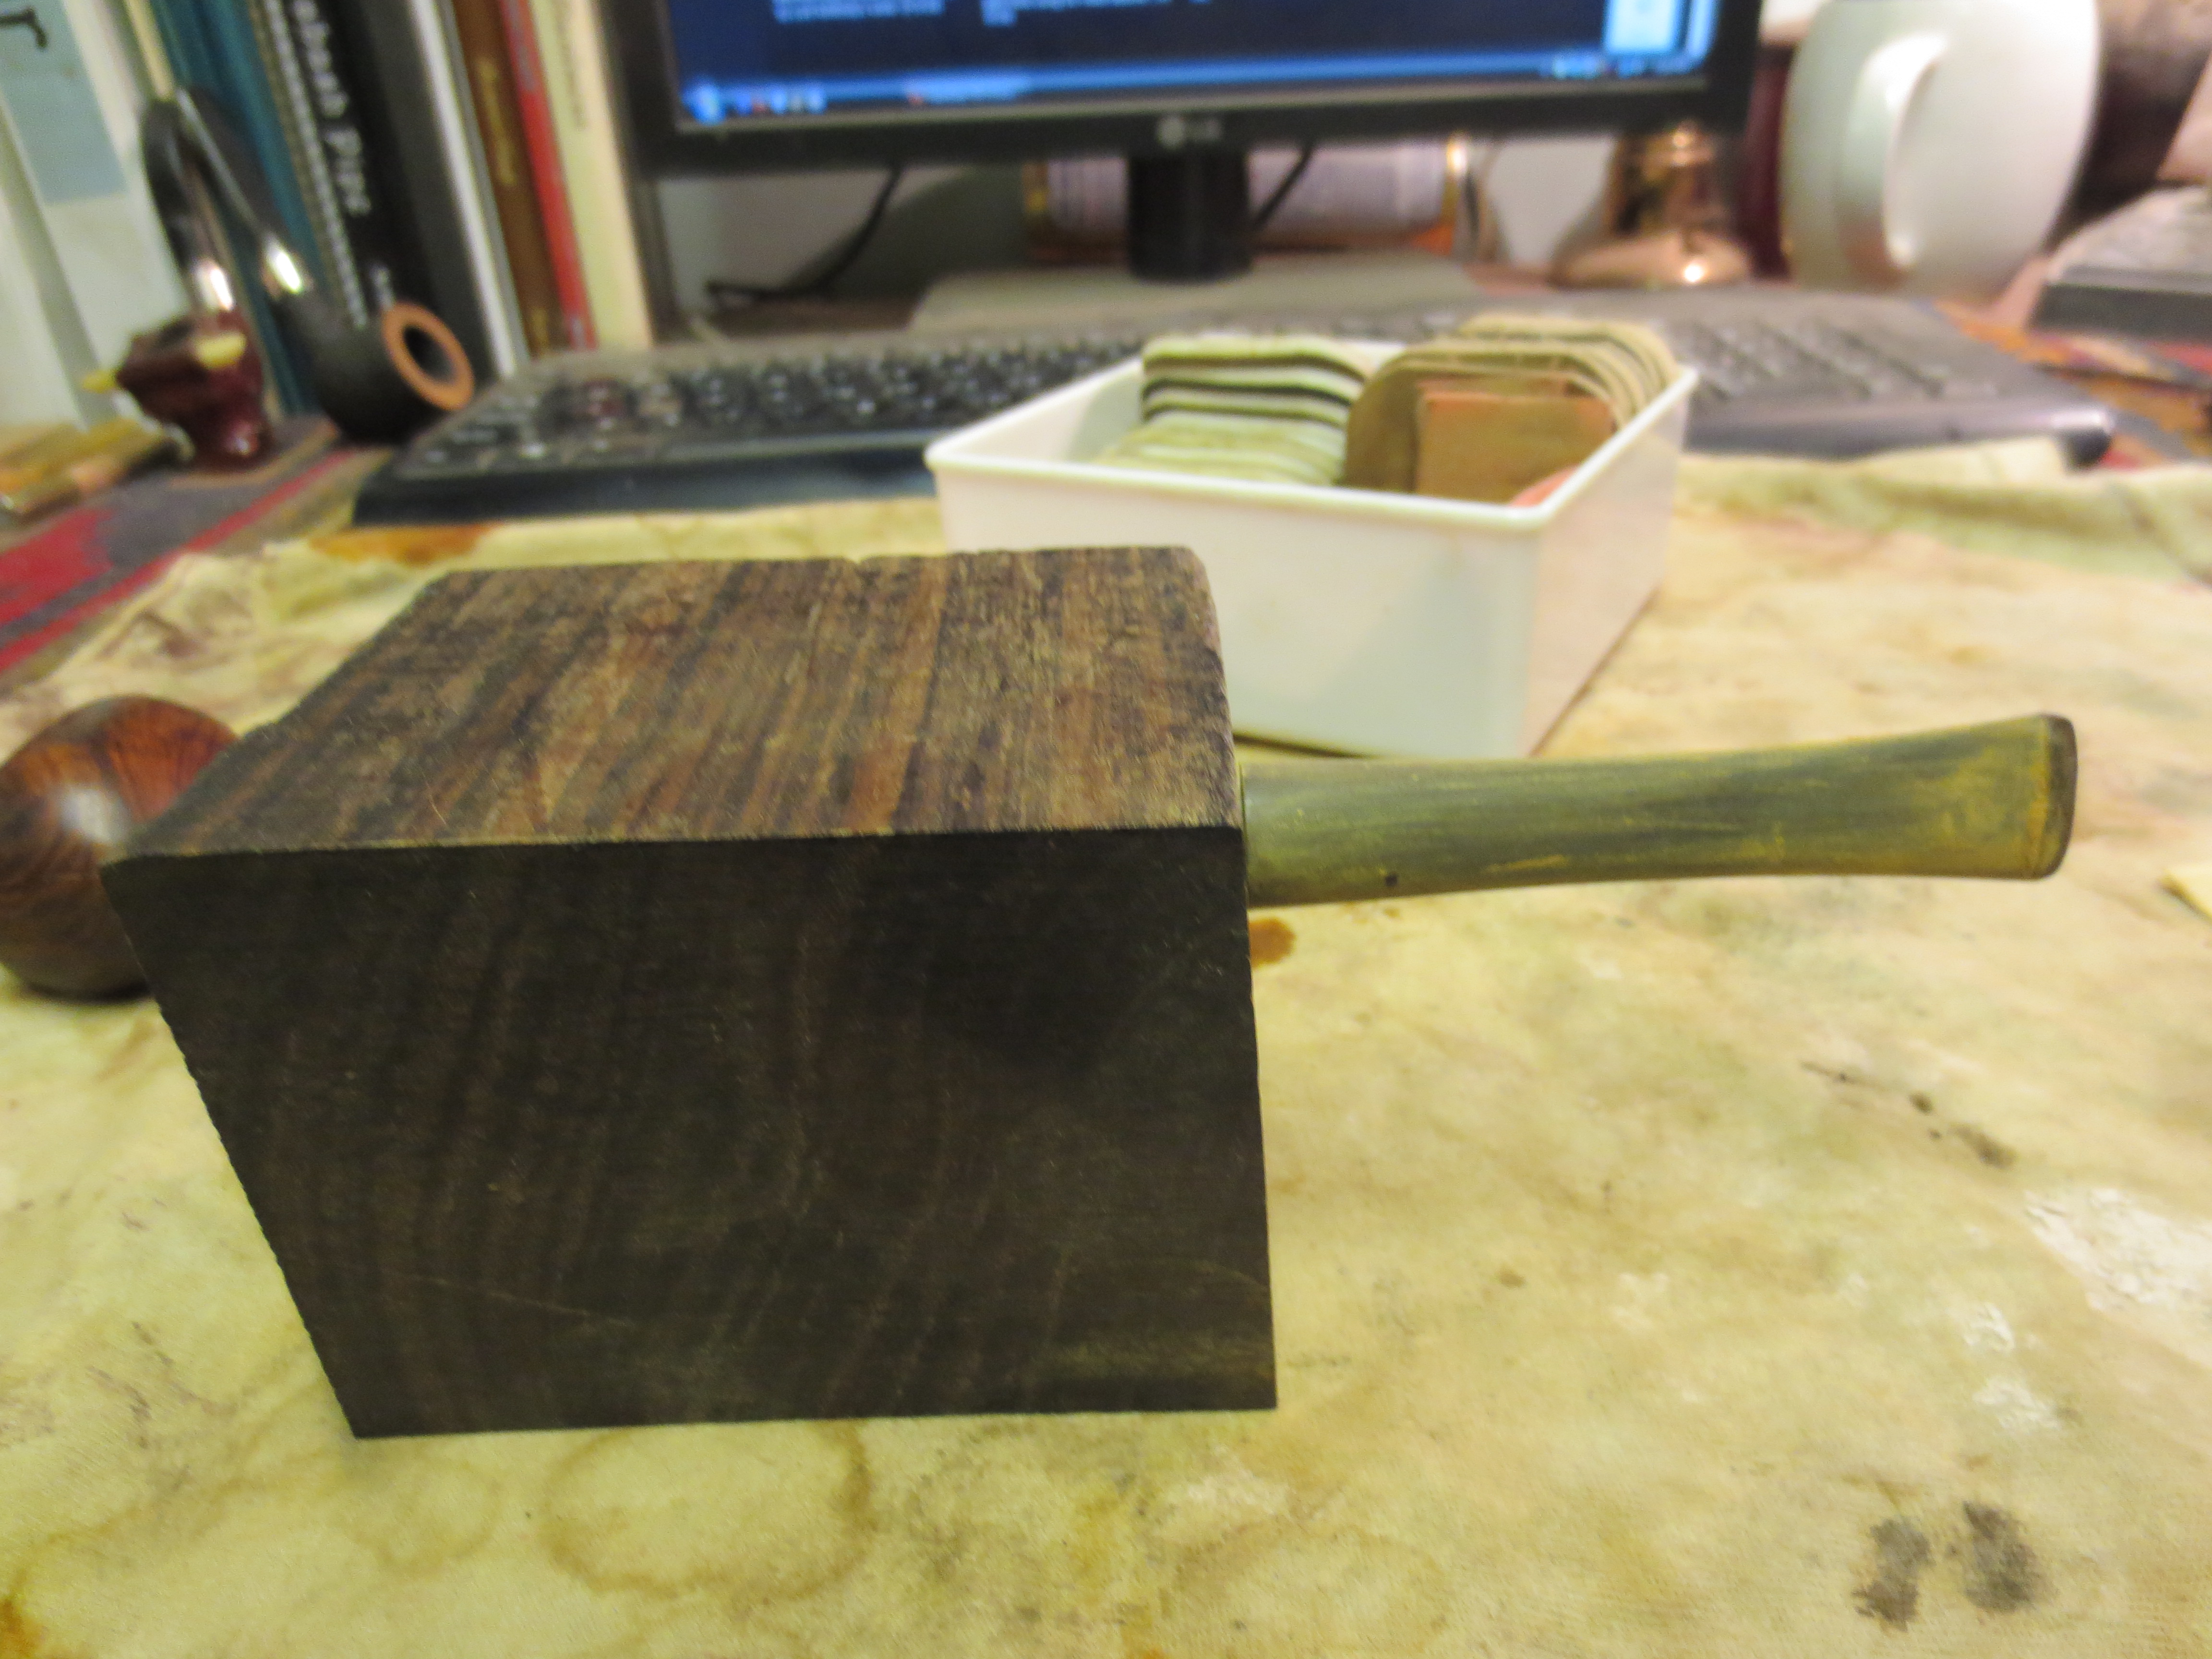
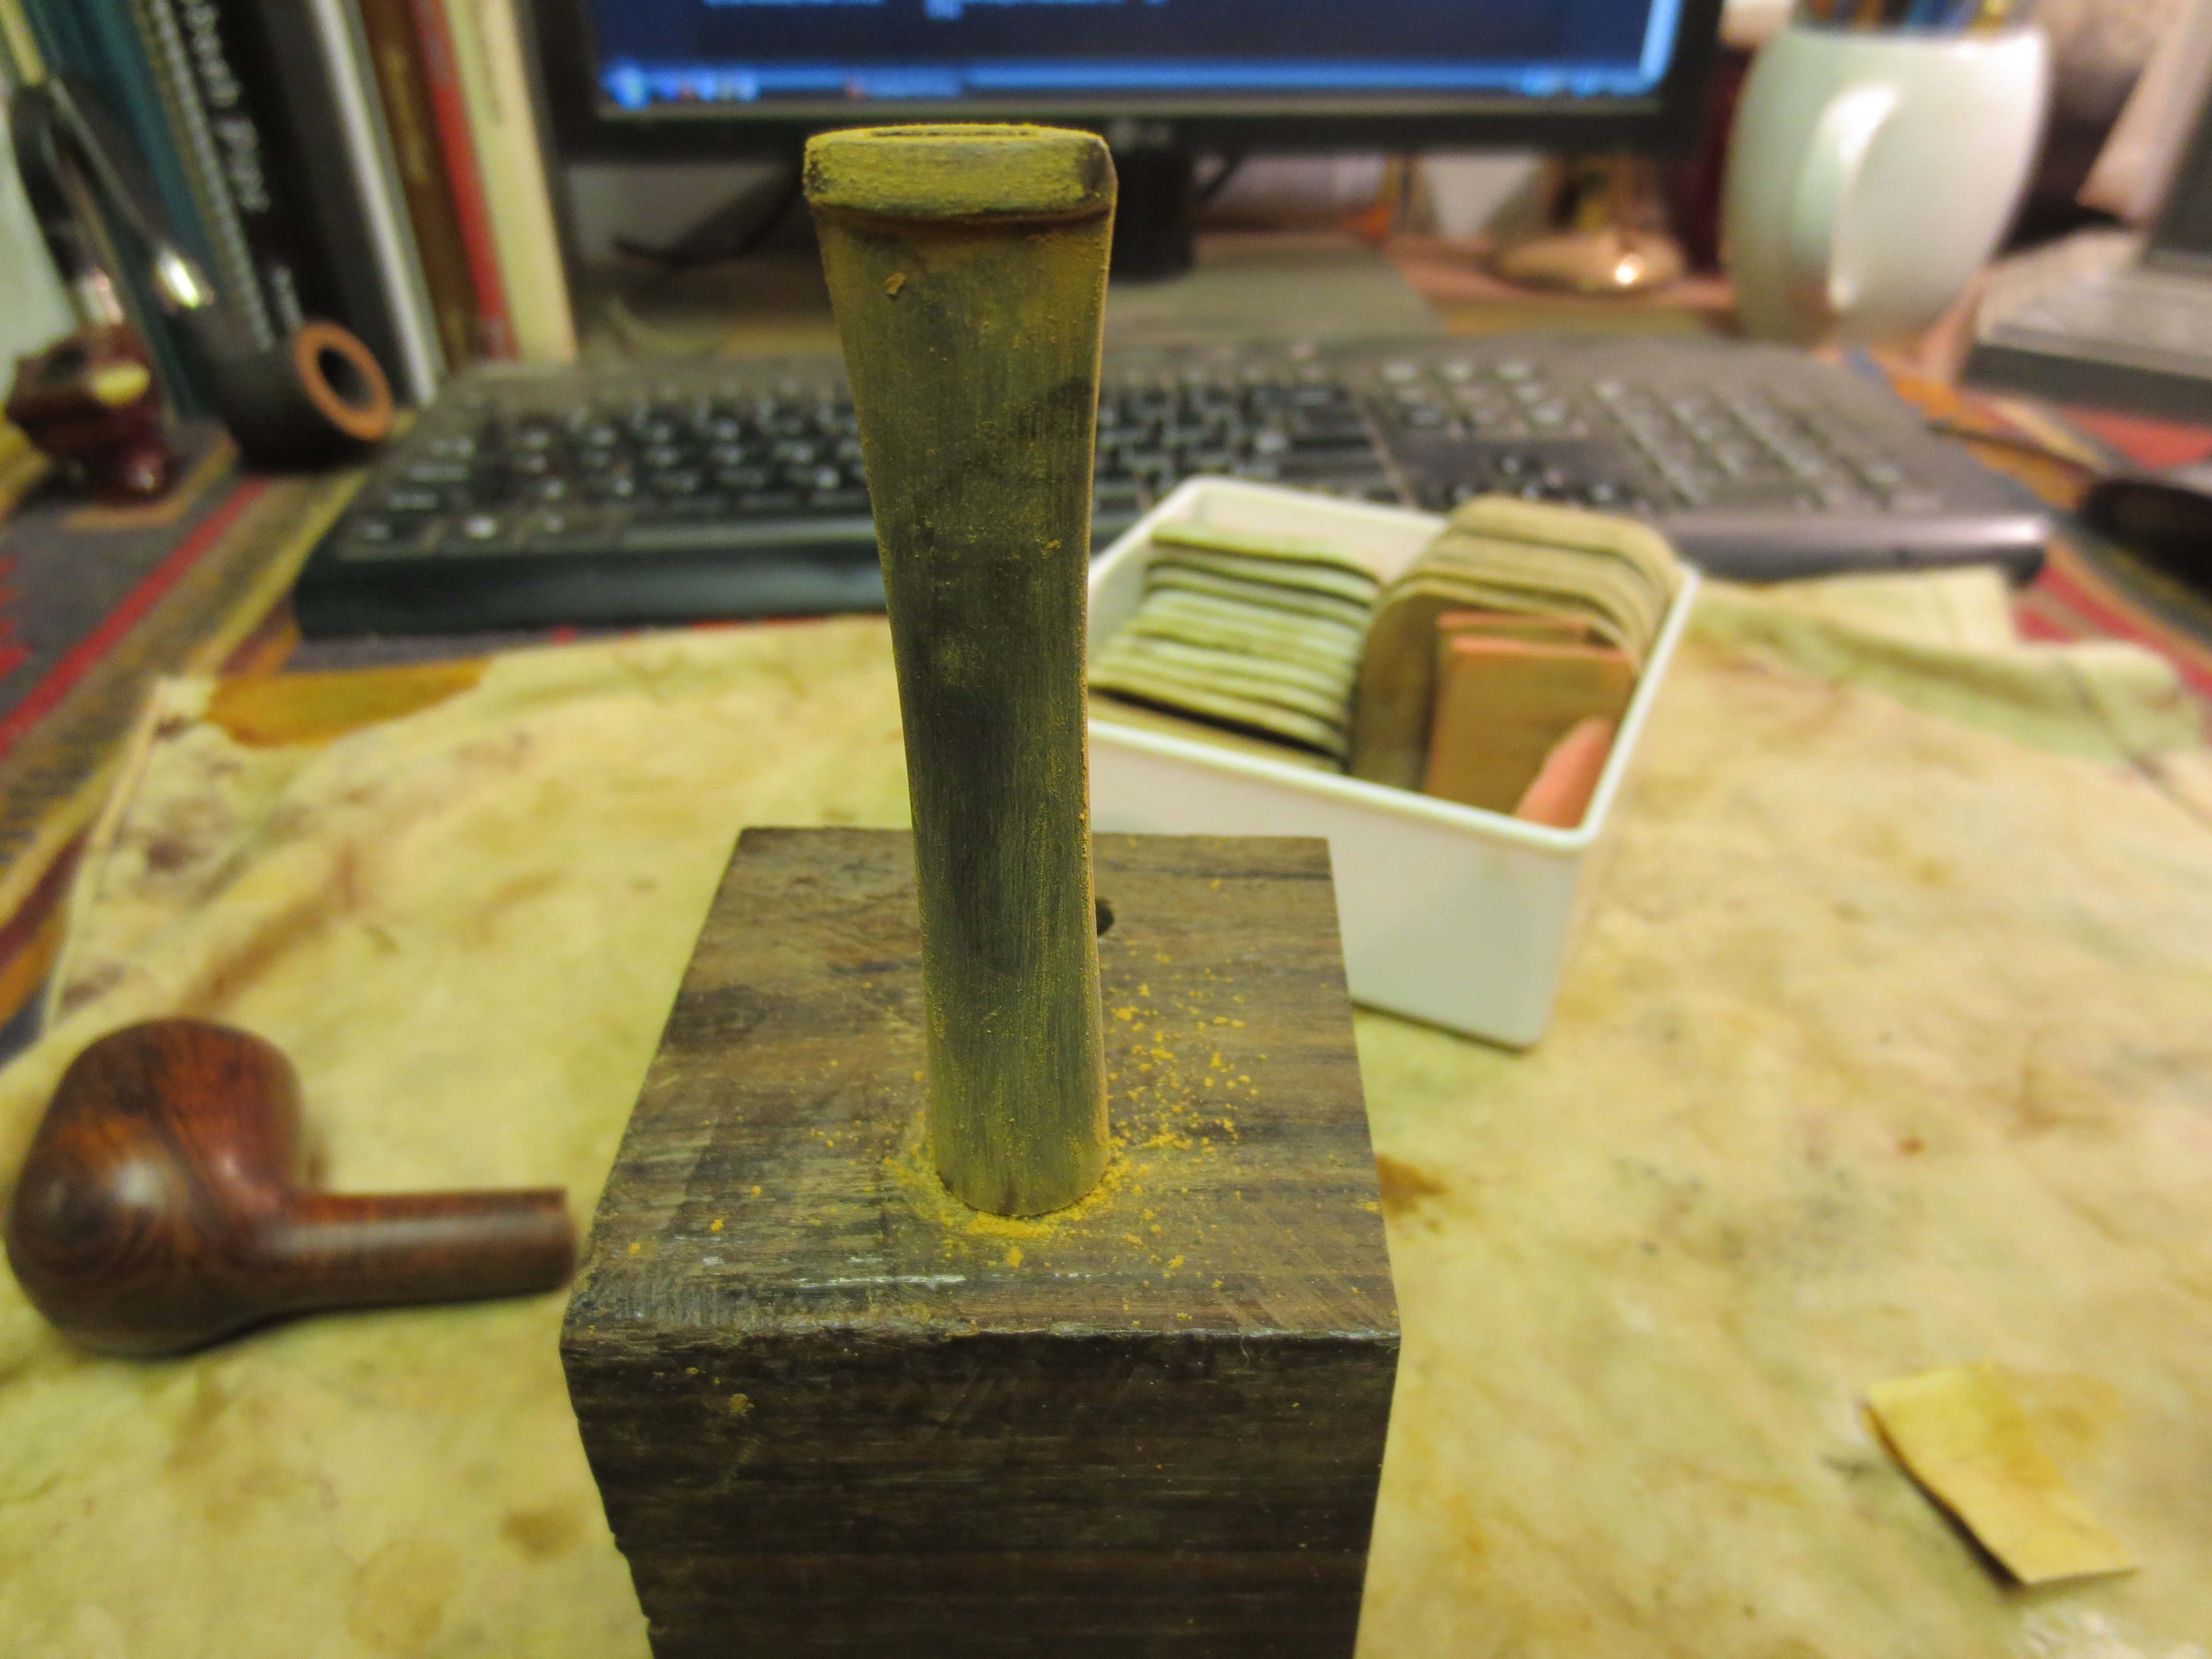
 It will be difficult to top the rim evenly with the soft spots created by the charred briar. With the chopping block covered with 240 grit sanding paper, I very lightly begin to rotate the inverted stummel. I take pictures to mark the gradual process. When I arrive at the maximum topping progress, most of the rim has found it’s ‘high ground’ leaving the remainder of the damaged areas more visible. This allows me to strategically apply patches on the rim. I notice that there is additional carbon on the inside lip of the chamber so I take out the Peretti Pipe Knife once more and scrape the additional carbon exposed by the topping. The pictures show the progress of the rim repair.
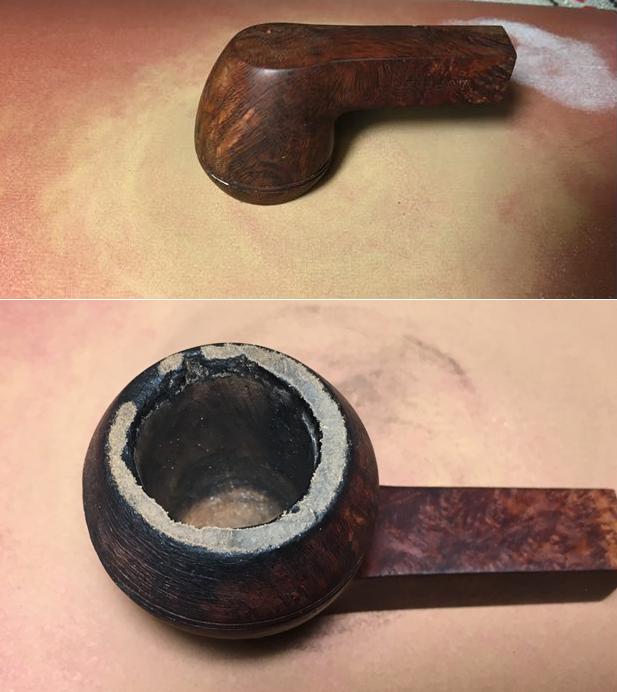
 The focus for the briar dust – superglue patch will be the 11:00 area (see above). The remainder of the damage on the inner rim will be addressed by creating an inner rim bevel. To prepare the area for the patch I clean it with a cotton swab dipped in isopropyl 95%. Using Hot Stuff Special ‘T’ CA Instant Glue, I mix it with the briar dust until it reaches a viscosity like molasses. Using a toothpick as a trowel, I apply the putty excessively over the area with the plan of sanding it down. I put the stummel aside to allow the patch to cure. I’ll give it a full 12 hours.
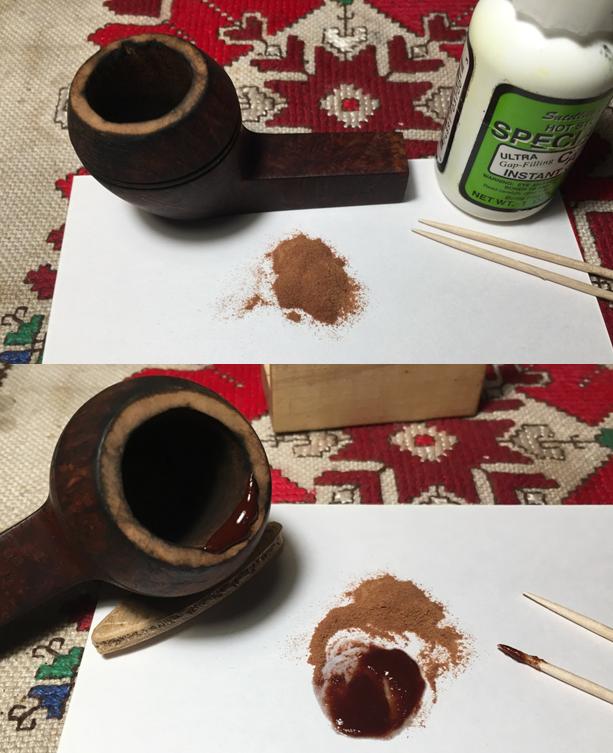
 The next day, the patch has cured well. I begin sanding down the excess briar dust patch by using a half-rounded needle file to contour the inner chamber part of the patch. My goal is to reestablish a round rim by blending the patch with the curvature of the inner rim. After this I smooth and blend the area further with 240 grit paper. When satisfied, I turn to the top of the rim using a flat needle file to bring the bump of the patch gently down to the briar rim surface. The surrounding wood is softer and I avoid collateral filing as much as possible. I follow to further smooth and blend the whole patch with 240 grit paper. The pictures show the shaping progress.
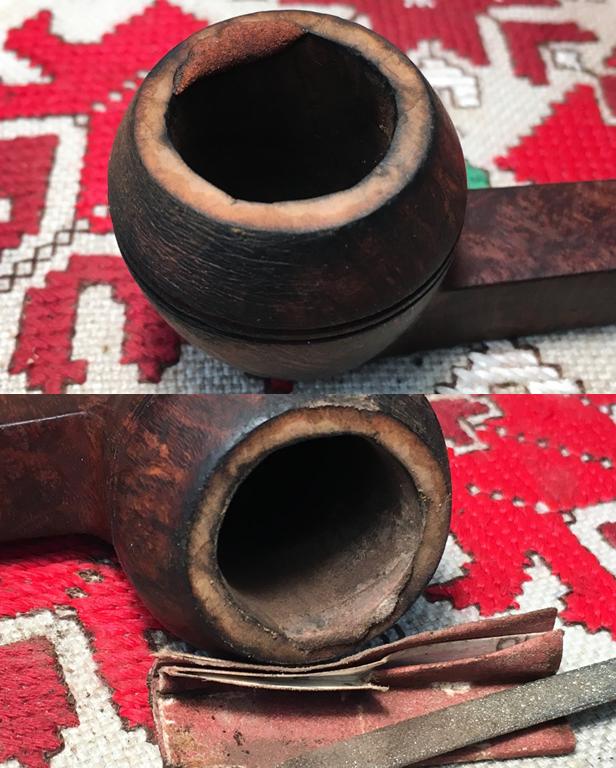
 With the primary patch shaping complete, I want to introduce a bevel to the inner rim lip to remove damage as well as blend the entire rim contour – seeking a round rim. I believe a bevel always ‘up-classes’ a pipe, too! I use a coarser 120 grit paper to cut the bevel – careful to remember the patch area is harder and it is easy to dig in to the surrounding softer briar. After the 120 grit paper, I smooth and blend further with 240 paper. I complete the rim repair by returning to the topping board with a light topping first with 240 paper followed by 600 grit paper. This ties things together. The first picture shows the completed patch shaping to mark the progress of the bevel. I think things are looking good at this point with the rim repair.
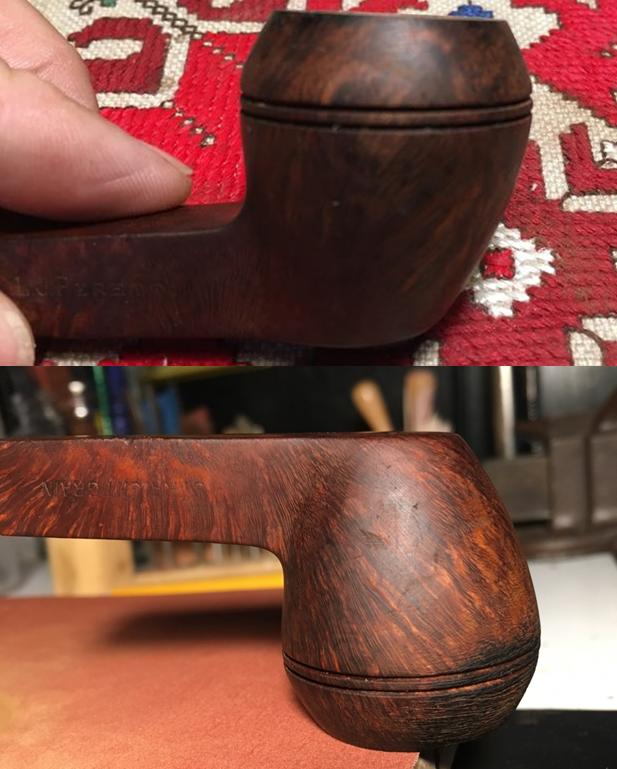
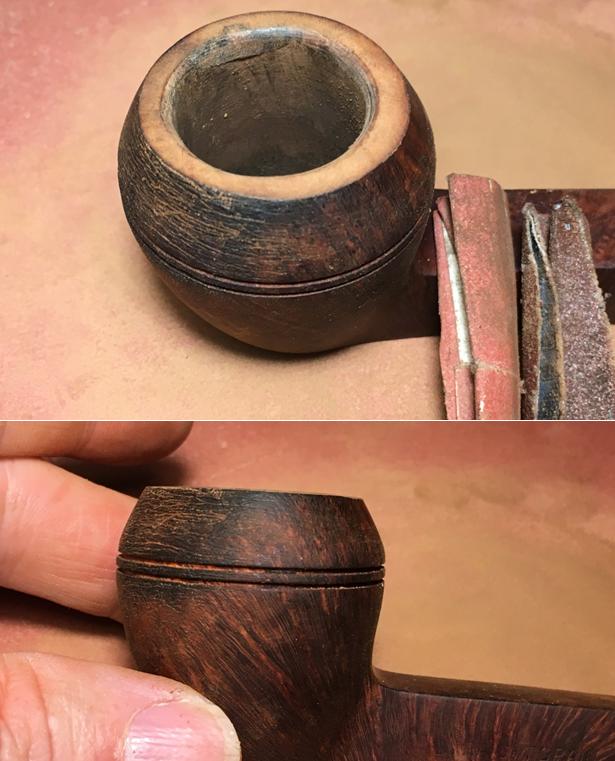 Unfortunately, upon closer scrutiny, I discover that my topping inadvertently leaned toward the front of the stummel. This is very evident when comparing the twin grooves to the rim pitch (first picture below). We do not have a parallel alignment which should be the case. When I looked back at the pictures above showing the incremental topping process, this is confirmed when the front stummel part of the rim was sanding and the shank side less so. The result I see is the Rhodesian’s dome lop-sided and that just won’t do. Even though I’ll give up briar real estate, I take the topping board and hang the stummel over the edge of the 240 paper. I work only the shank-side of the rim which needs to be lowered and leveled with the front side. Gradually, I find greater alignment with rim and grooves, though there is still a bit of pitch but not as pronounced. It will work. I reinstate the bevel and I’m satisfied with the progress. The pictures show the progress.

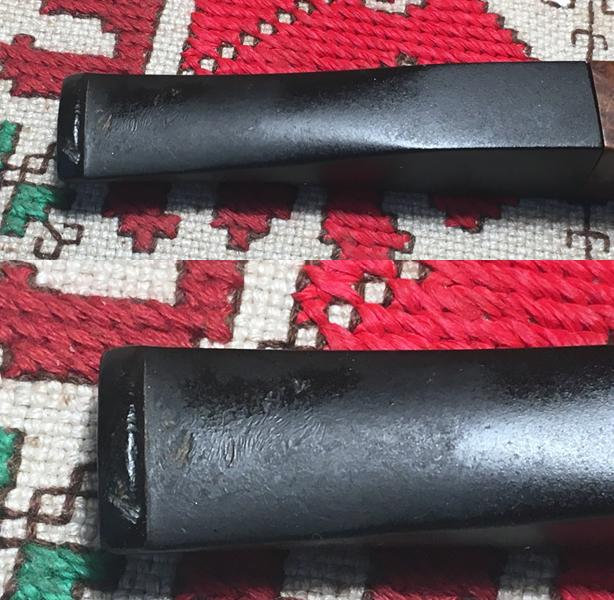
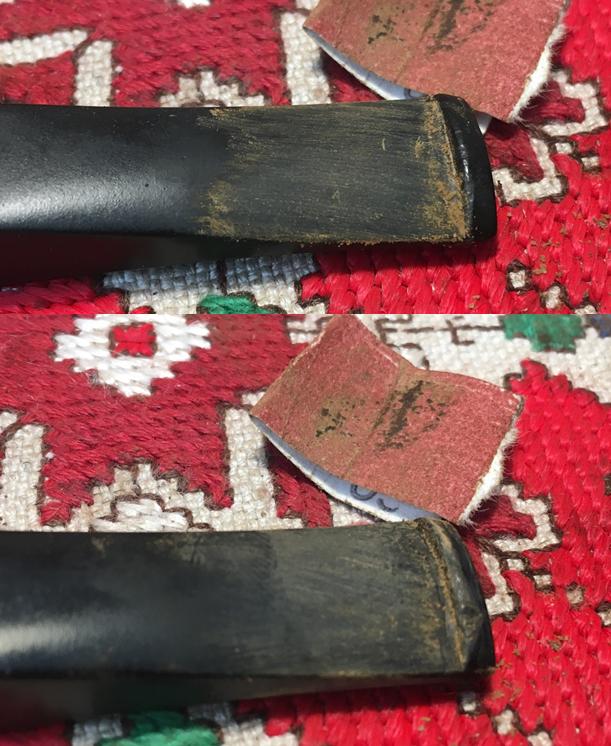
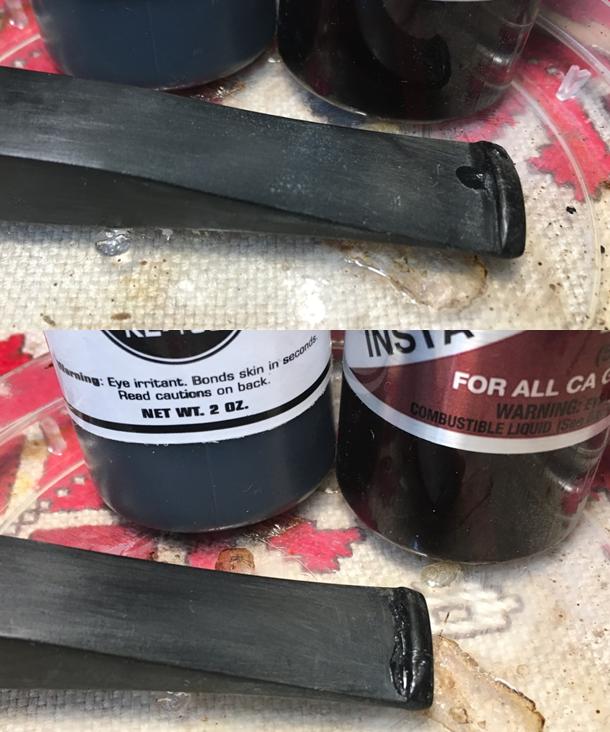
 I put the stummel aside and turn to the stem. I use 240 grit paper to smooth out the tooth chatter on the upper and lower bit and sand the upper and lower button lips. By removing the superficial indentations in the vulcanite, I am then able to identify what needs to be filled. After wiping clean the area, I use Starbond Black Medium KE-150 CA glue to drop fill tooth dents in both the upper and lower button lip as well as the upper bit area. After application of glue, I spray an accelerator on the cosmetic fills. I do not use accelerator when the strength of the glue is the issue as the use of an accelerator tends to weaken bonds – from my reading. I follow with a flat needle file to freshen the button lines and then sanding with 240 grit paper to smooth out the file marks and fills and to blend.
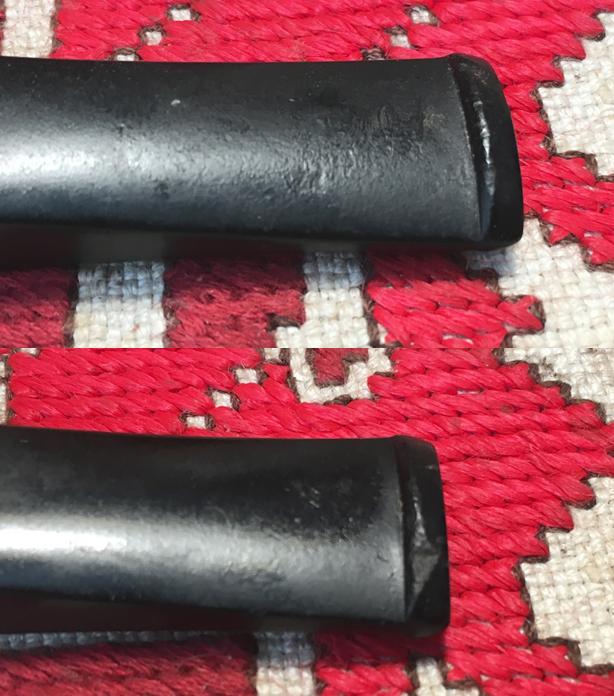
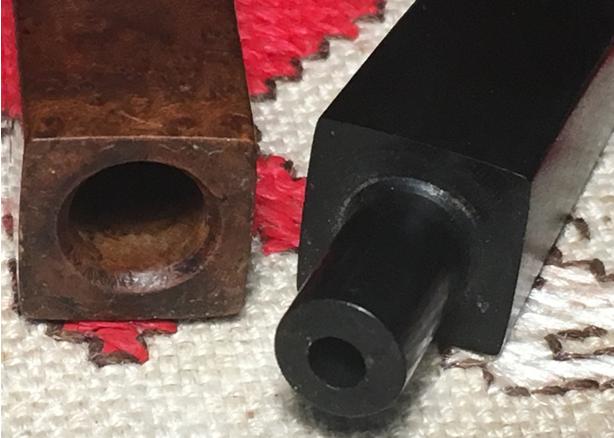
 I then move to sanding the whole stem. With some great input from Al Jones in a recent restoration regarding safe-guarding the crisp lines and edges of stems, I mount the stem to the stummel with a plastic disk I fabricated between the two. This keeps the sanding from creating shoulders over the edge of the vulcanite. I also wrap the 240, then 600 grit paper around a clothespin half to create a flat sanding surface to guard the sharp edges of the squared shank square and not rounding them. After completing the sanding, careful to guard the Peretti ‘P’ stem stamp, I buff the stem with 0000 steel wool. The pictures show the progress.
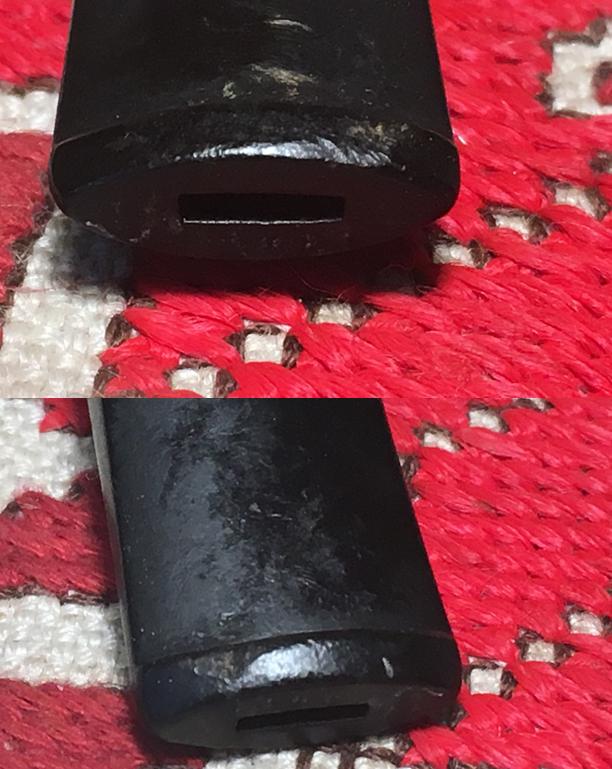
 Turning to the internals of the stem, I use pipe cleaners dipped in isopropyl 95% to clean the airway. I notice that the pipe cleaners have difficulty passing through the slot so I widen it a bit using a rounded needle file against the upper and lower slot opening. That did the trick. Pipe cleaners move freely and now, cleanly. Pictures show the progress.
 With the stem repairs completed and the internals cleaned, I’m ready to commence the micromesh pad cycle on the LJ Peretti’s squared shank. Using pads 1500 to 2400 I wet sand the stem. I follow by dry sanding with pads 3200 to 4000 and then 6000 to 12000. With each set of 3 pads I apply Obsidian Oil to the stem which revitalizes the vulcanite. The pictures show the amazing vulcanite ‘pop’ emerging. I put the stem aside to dry.
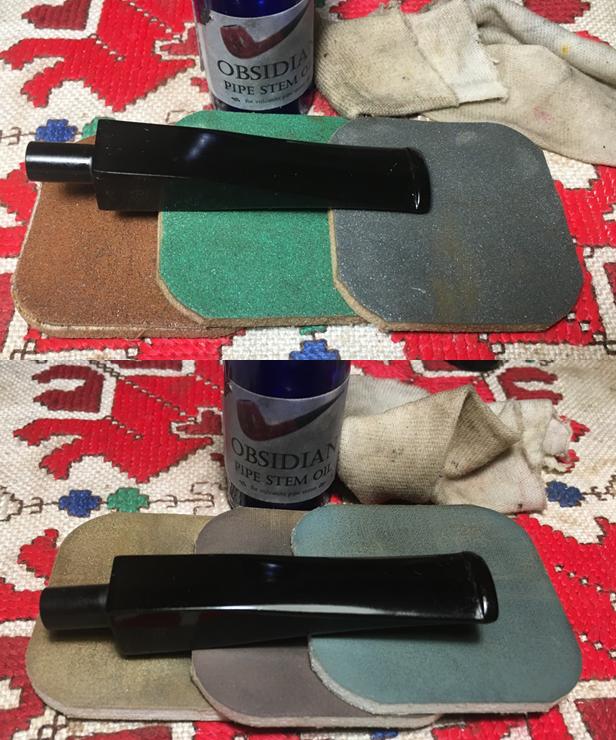
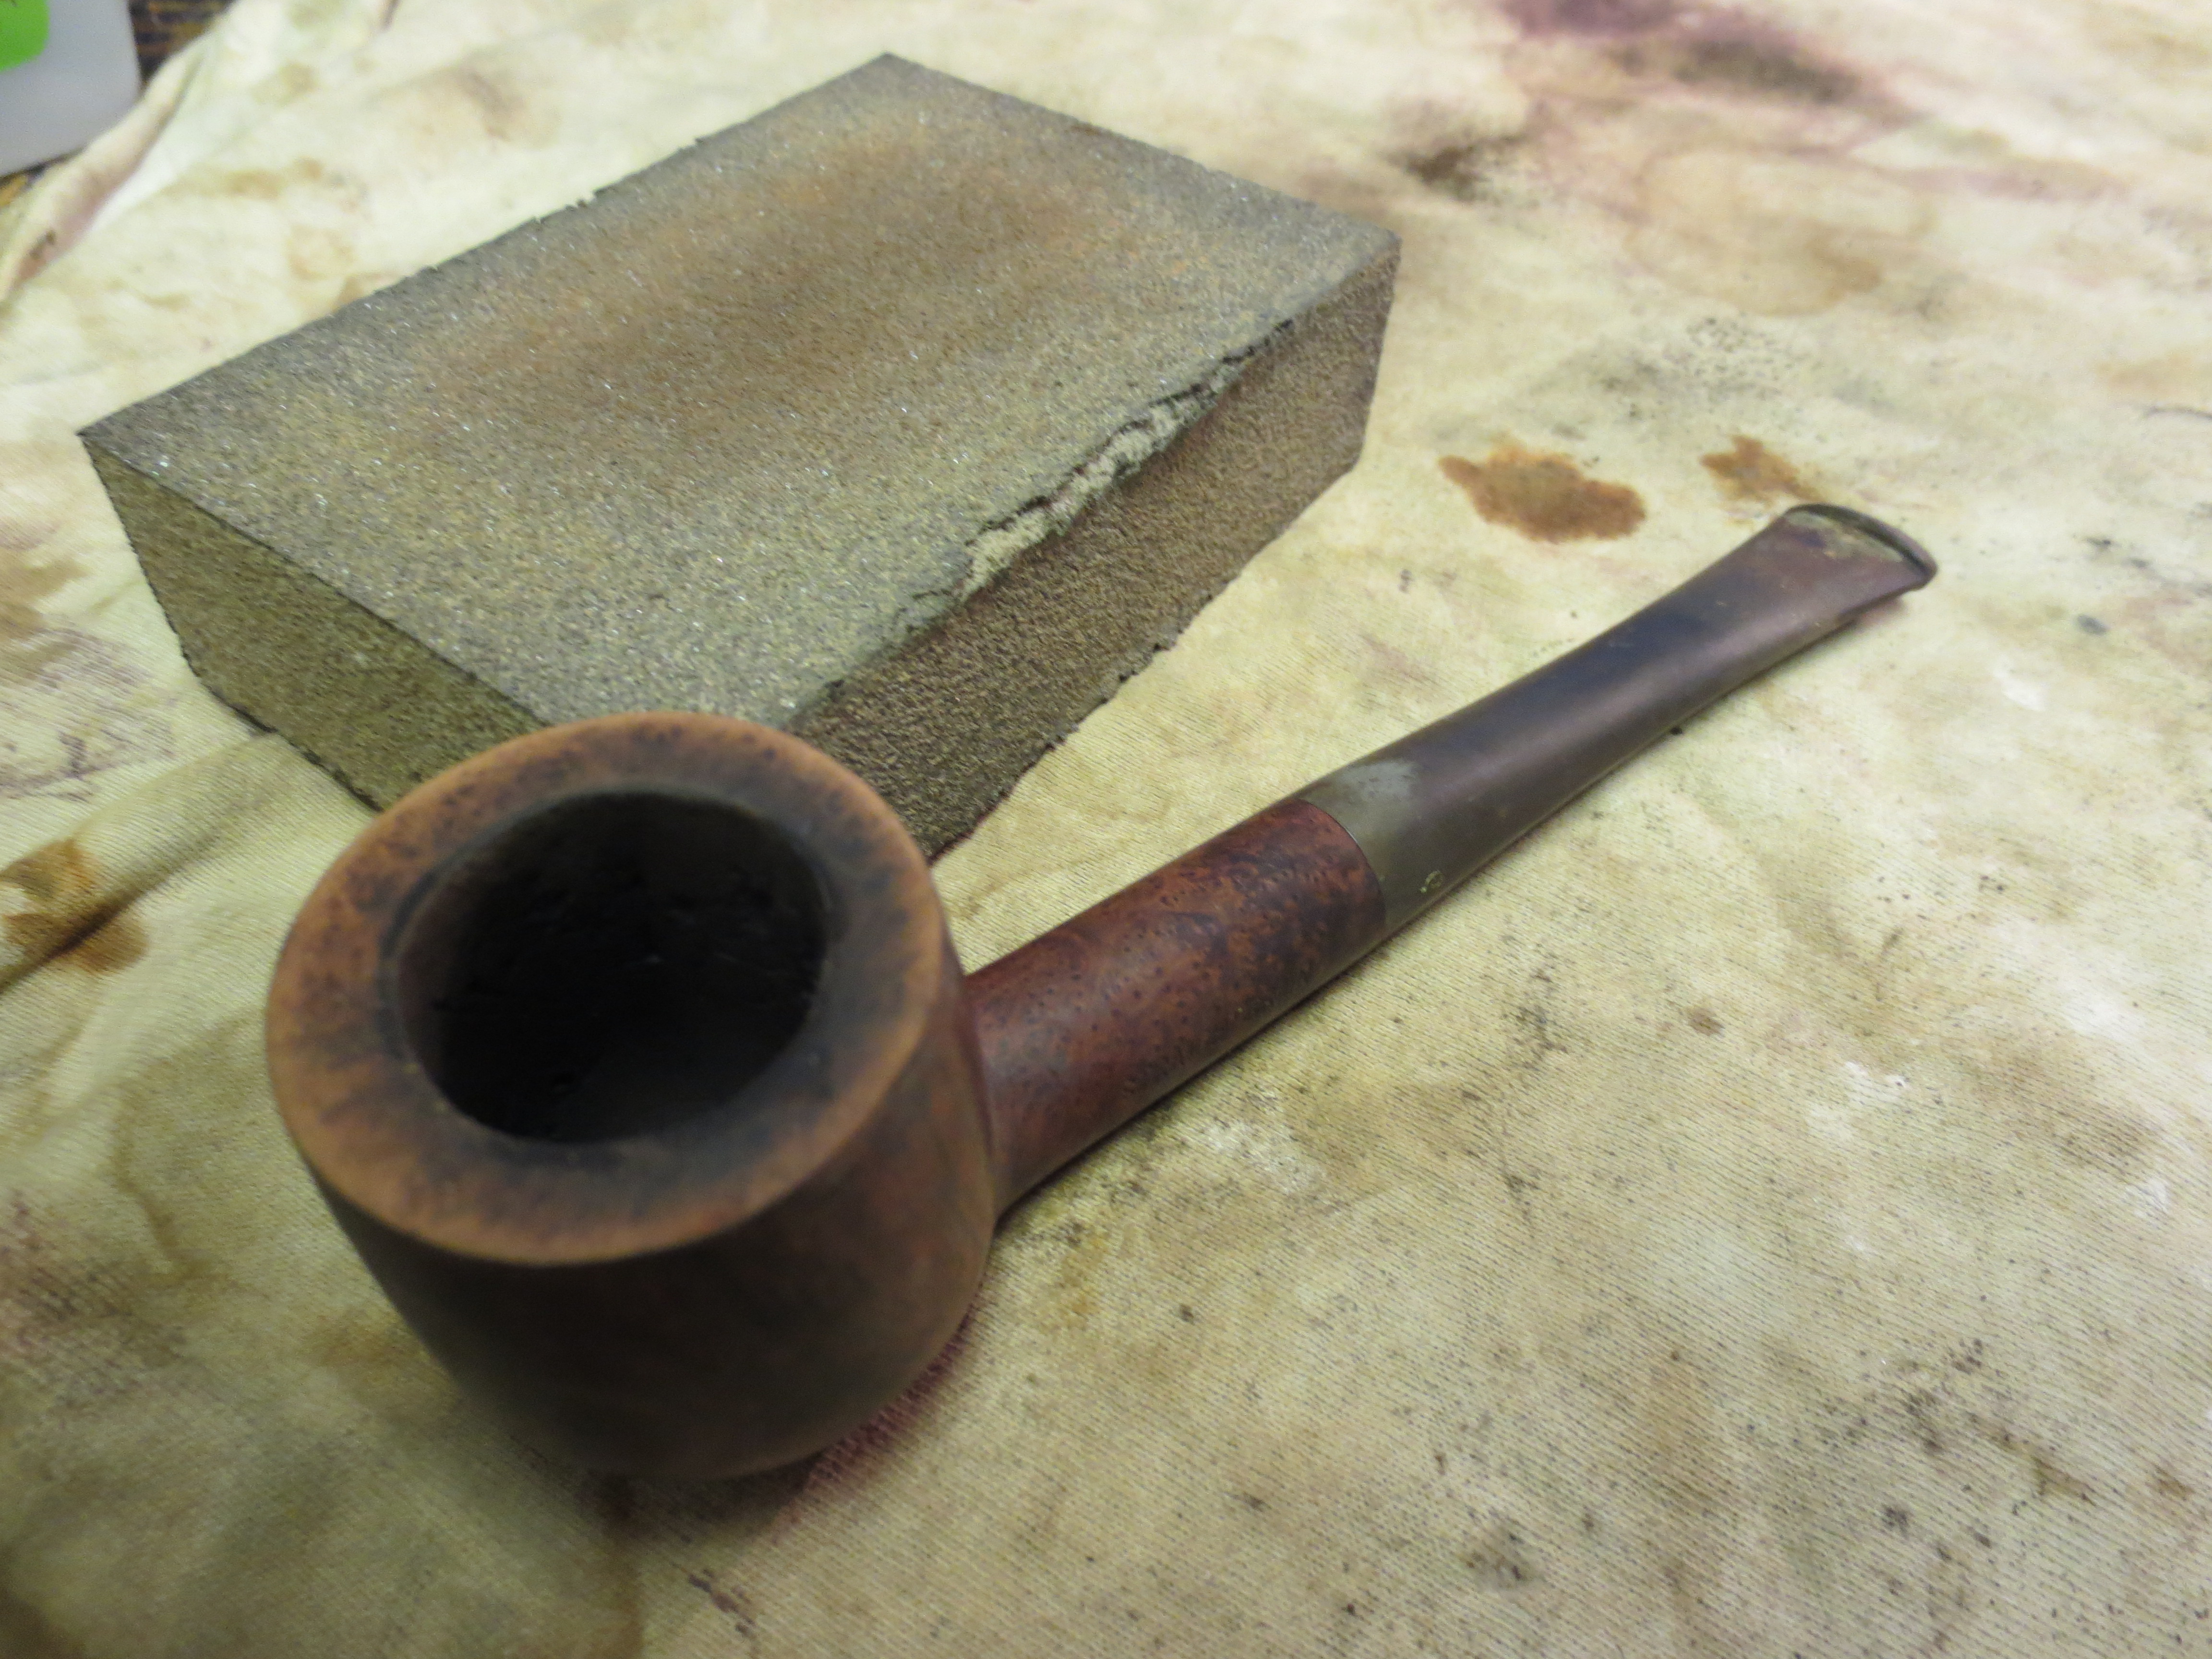
 With the stummel showing scorching damage on the upper dome extending downwardly over the grooves, I take another picture for a closer look. I use a medium grade sanding sponge to address the damaged area. I need to remove the charcoaled wood and get down to healthy briar beneath the surface. To aim for uniformity throughout the stummel, I use the sanding sponge on the entire surface, careful to guard the nomenclature on both sides of the shank. I follow the medium grade sponge with the light grade sanding sponge to finish addressing the charred wood and minor cuts and pits on the stummel surface. It looks good. The shank stamping, STRAIGHTGRAIN, is starting to show itself as the grain shows through the once scorched dome area.
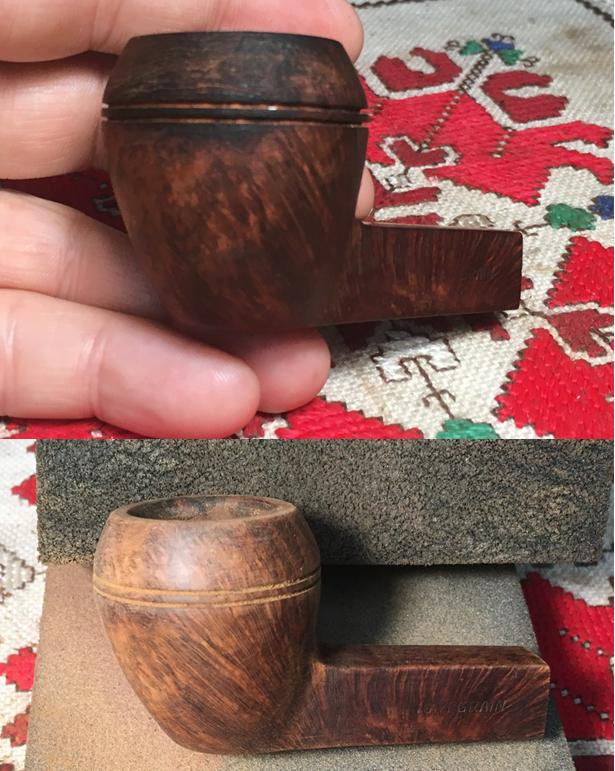 Taking micromesh pads, I now wet sand the stummel using pads 1500 to 2400. Following this, I dry sand using pads 3200 to 4000 then 6000 to 12000. Wow. I cannot believe the grain making an appearance on this L. J. Peretti Rhodesian. The pictures show what I watch emerge through each micromesh pad cycle.
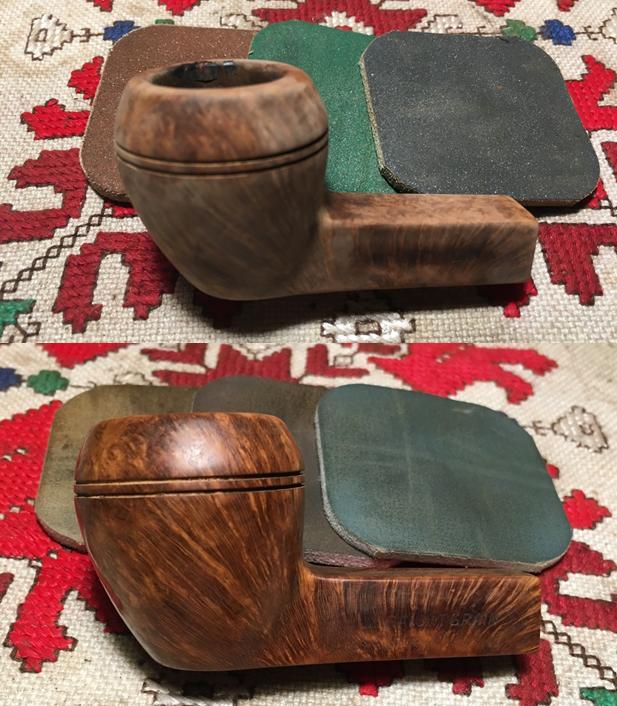
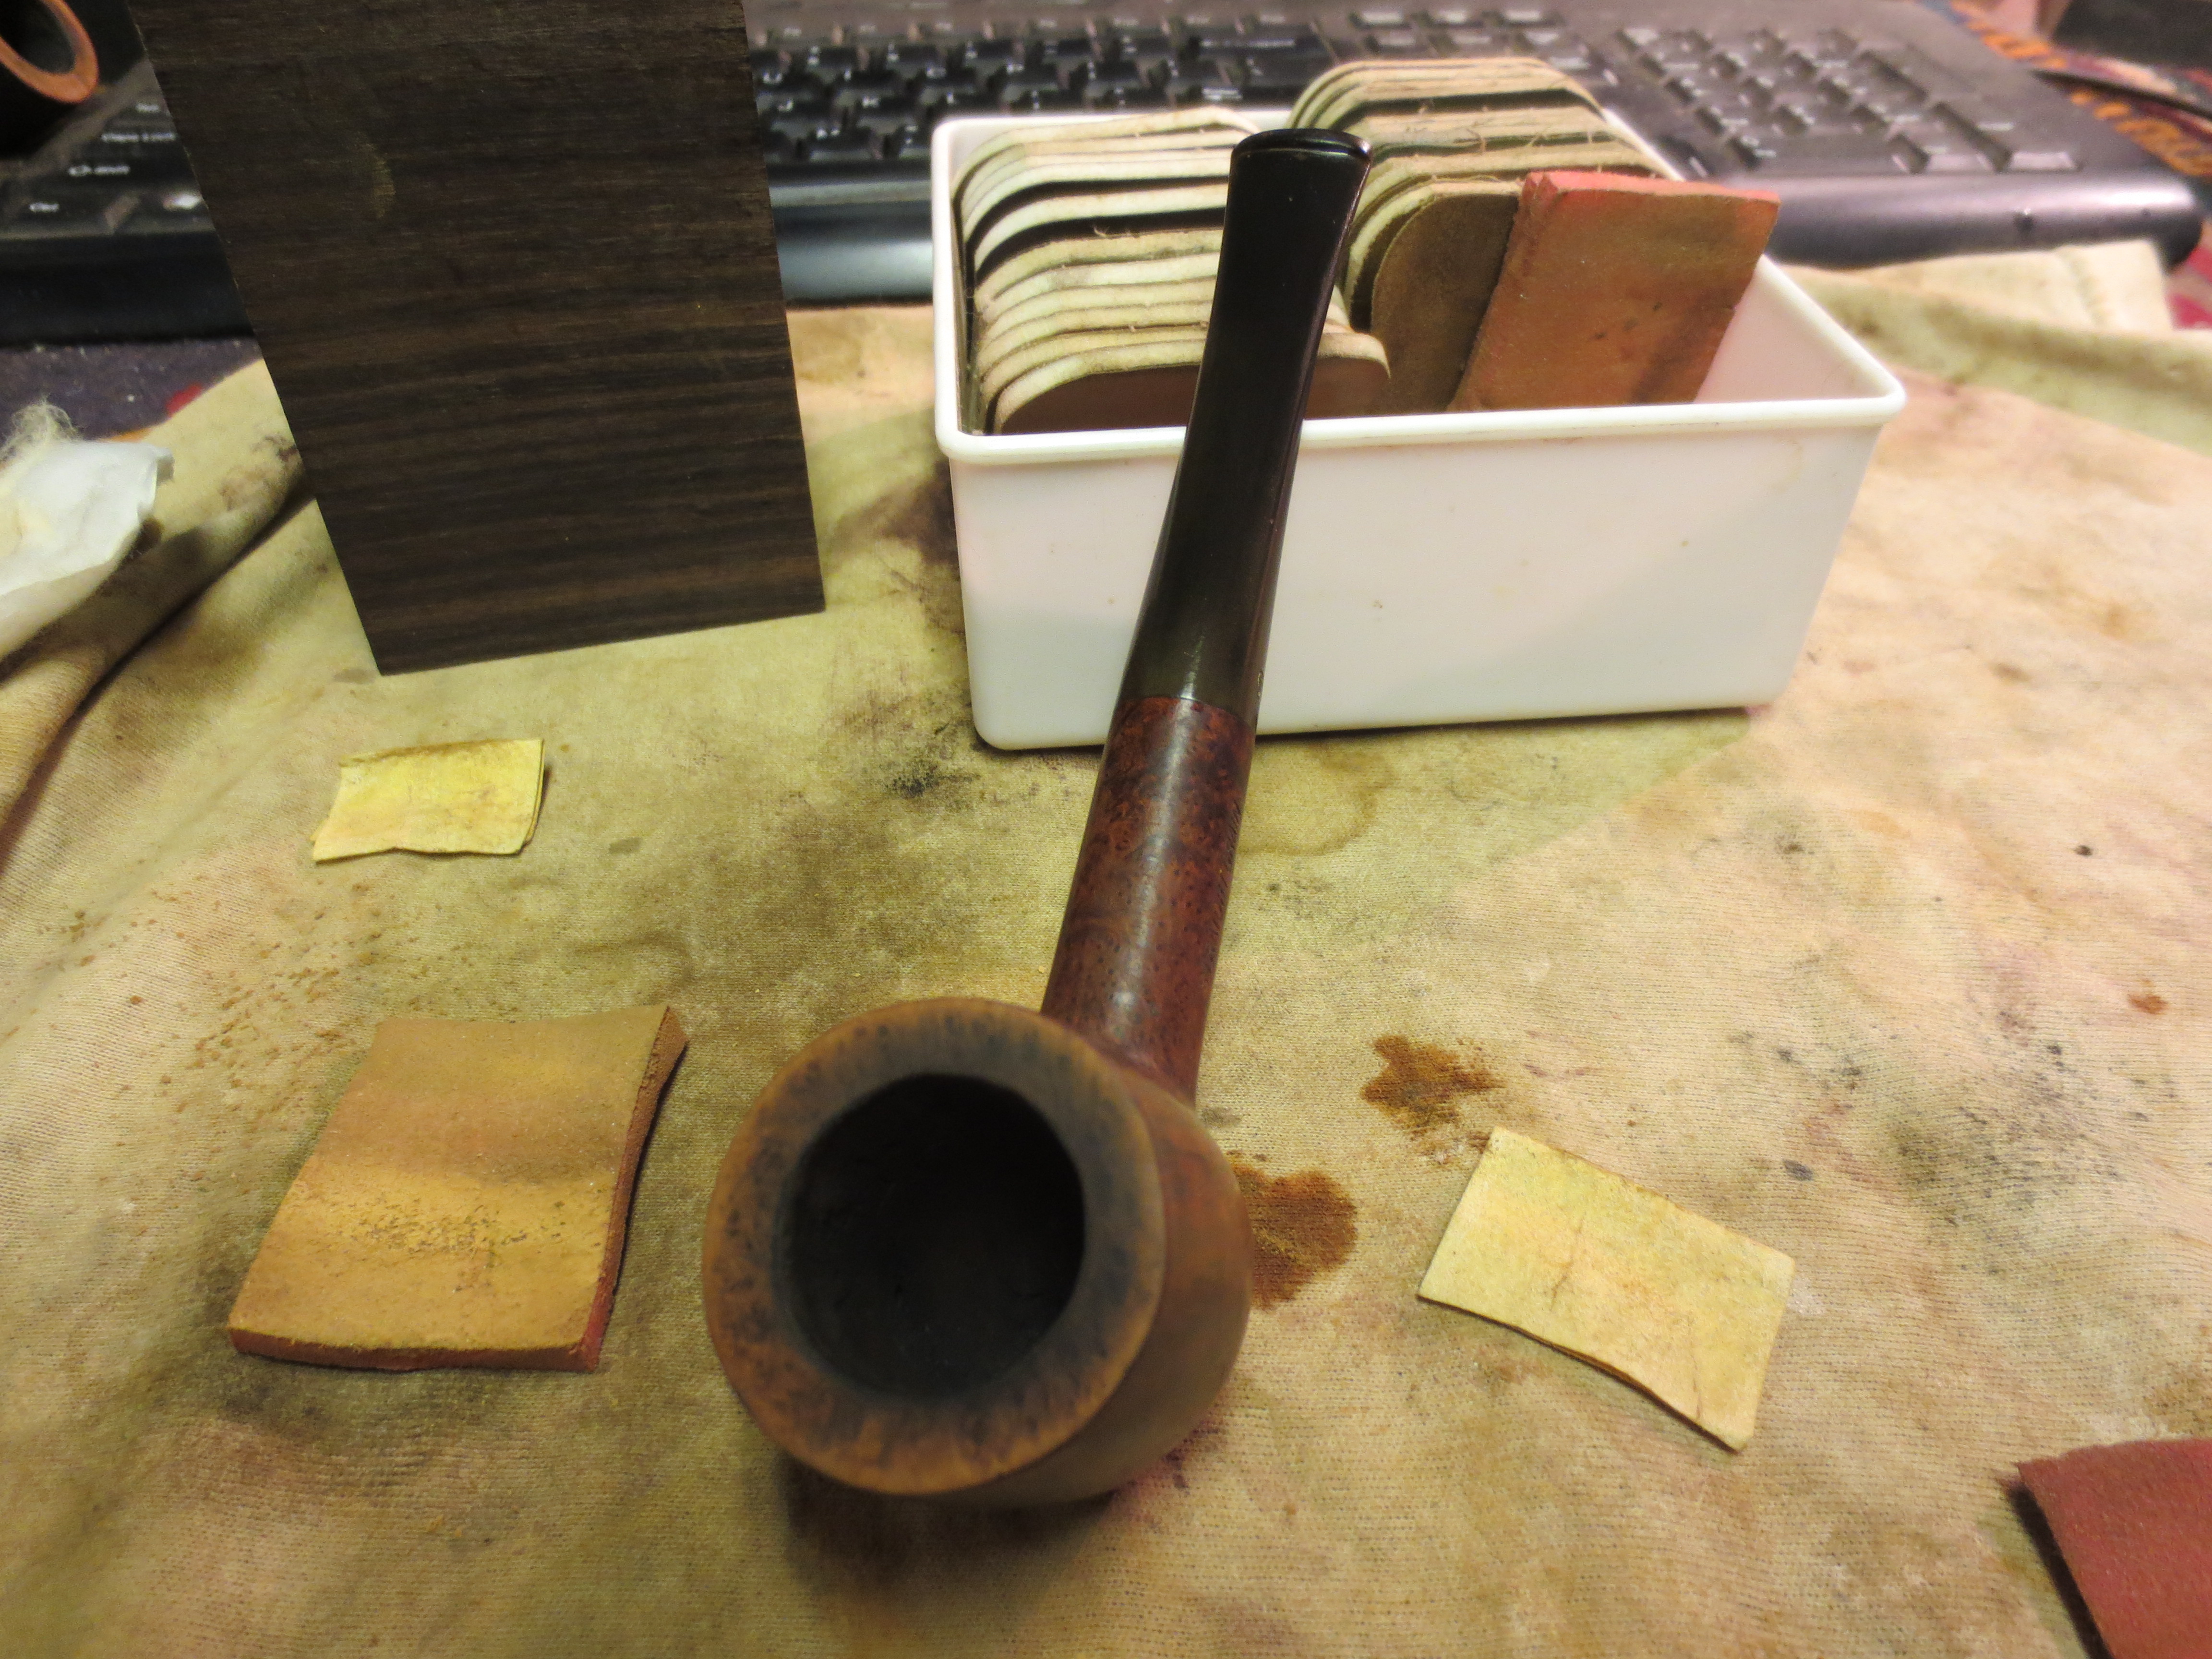
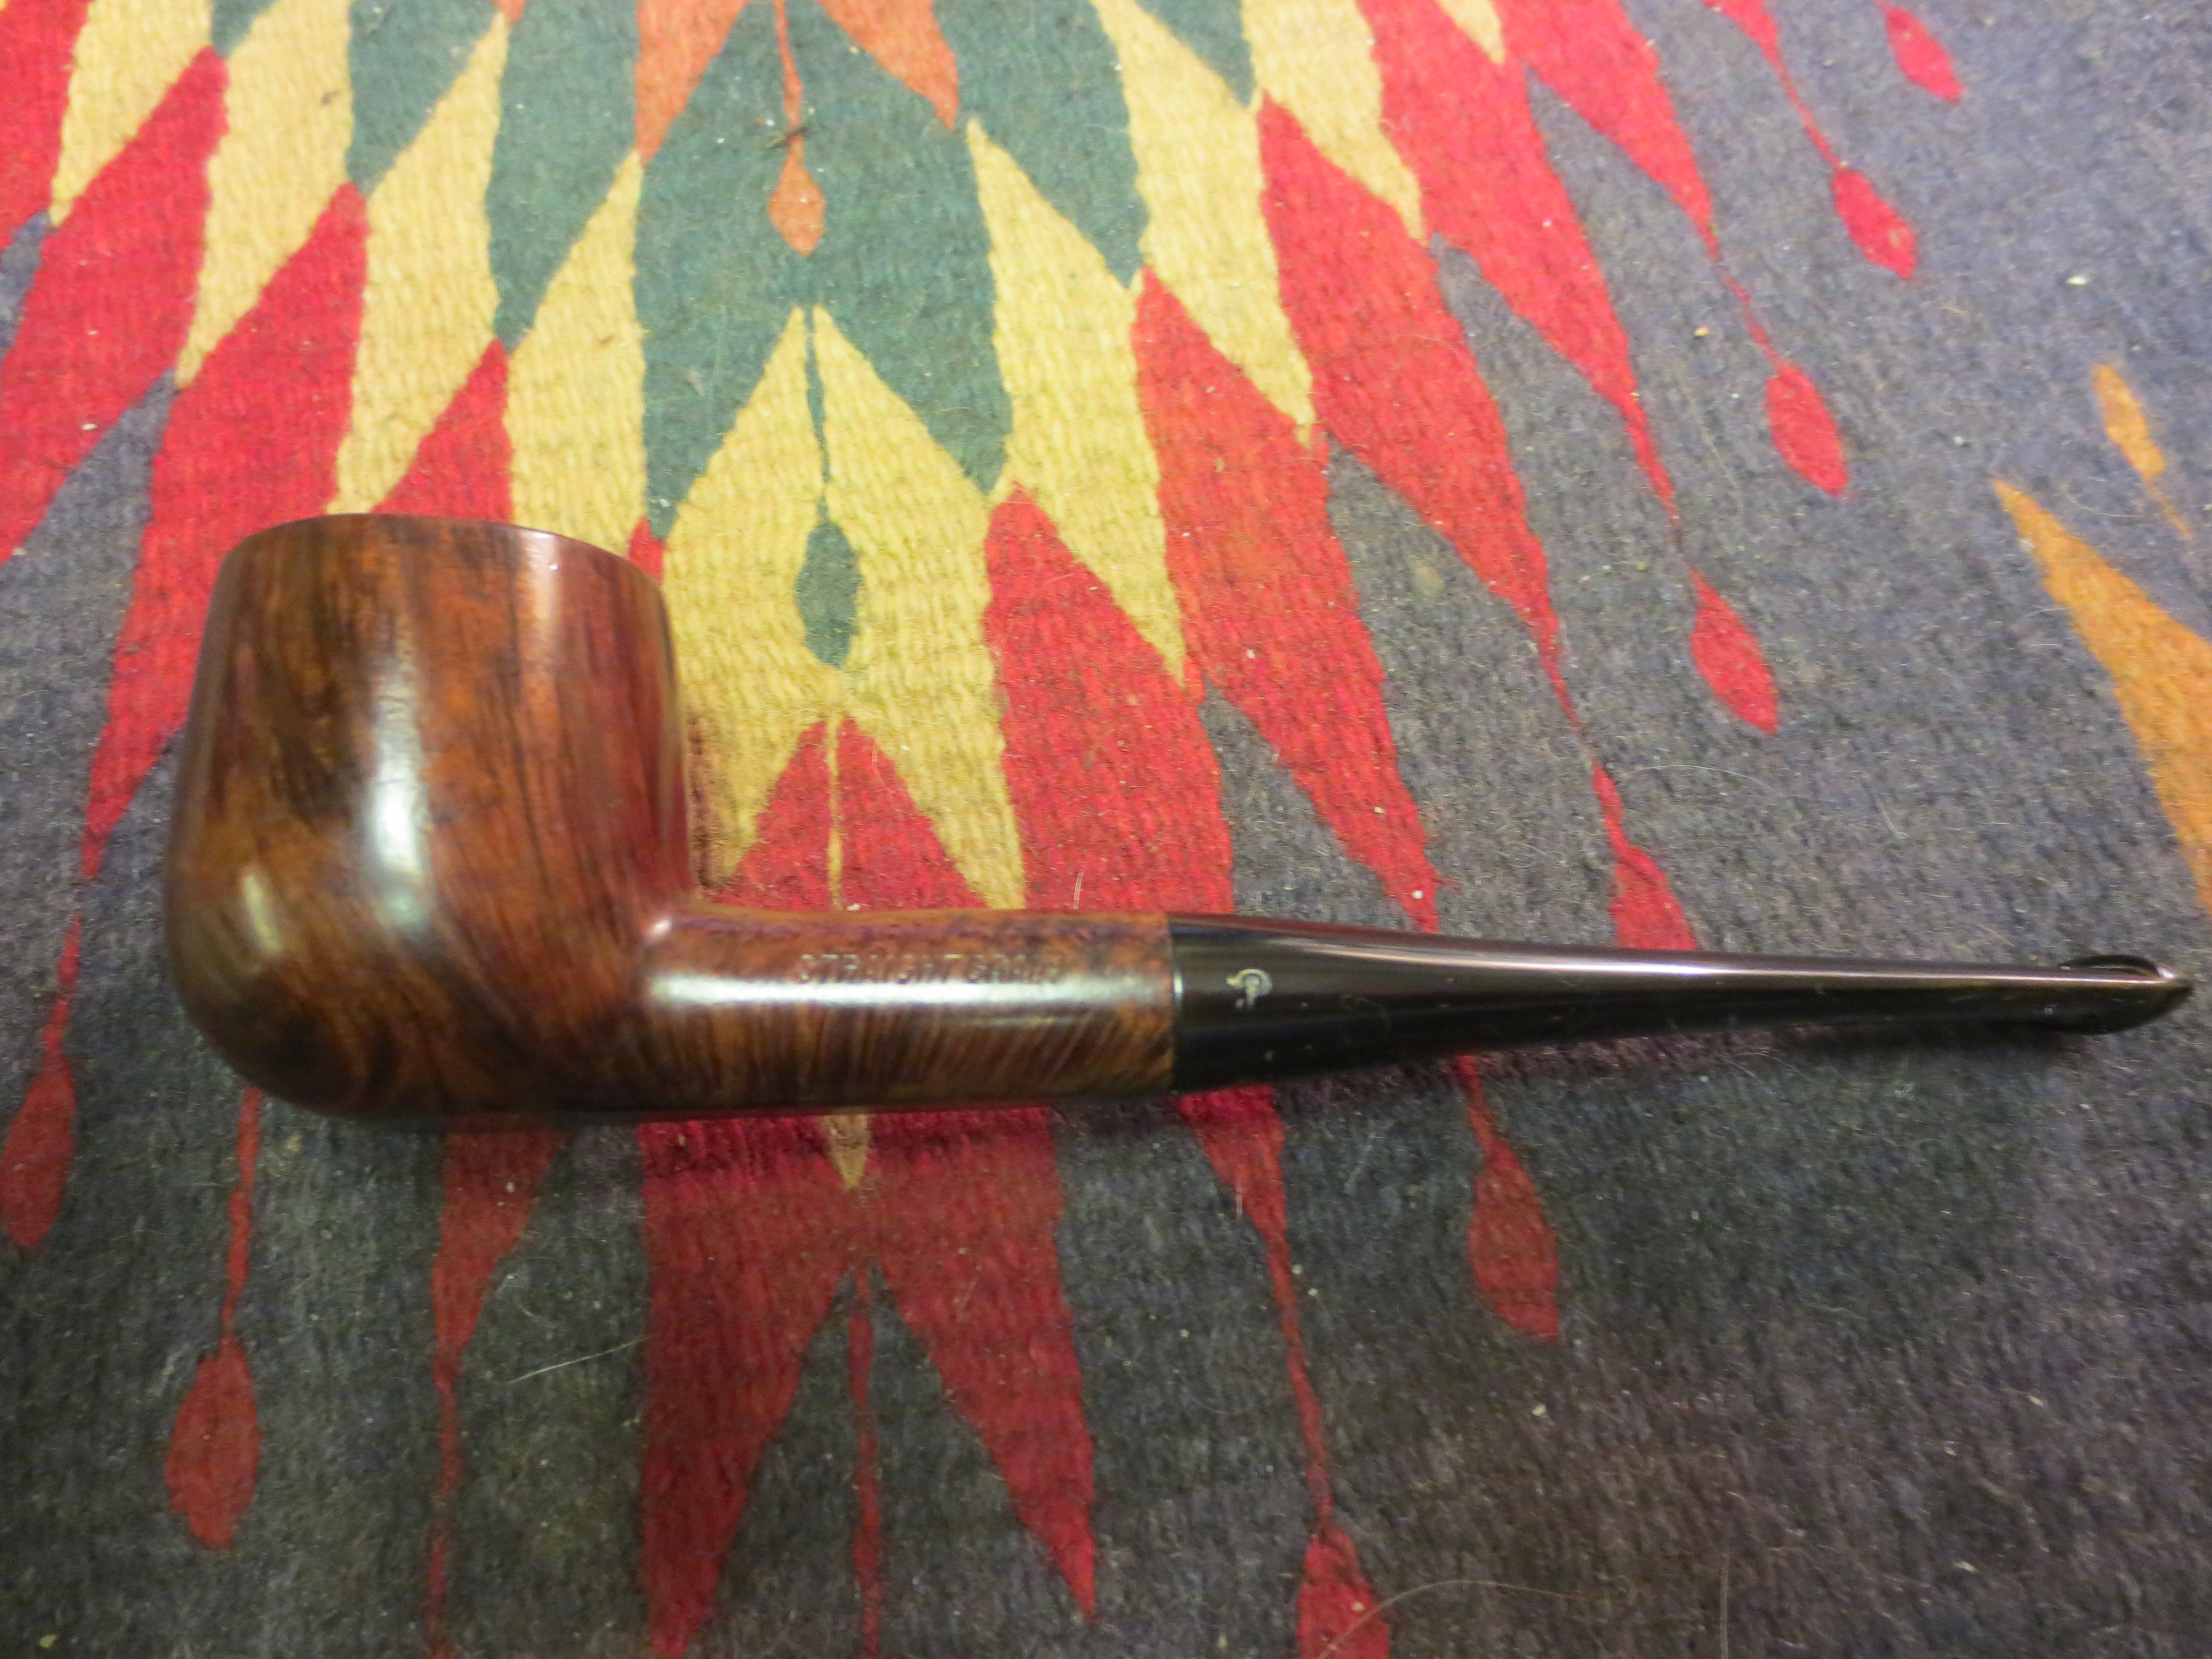
 To get a big picture look at the Peretti, I reunite the stummel and stem. As with my last Peretti restored, I like the squared shank’s flow from stummel as it tapers out through the stem. This Rhodesian’s stem tapers whereas my other Peretti Billiard has a squared saddle stem. Both, very nice variations of the same concept – a classy shank style. Because of the beauty of the grain I’m seeing, I’m tempted to stop at this point, and finish up with carnauba – I like the natural briar that much. The only issue is that I would like to apply a darker brown shade of dye to better blend the patch and repair of the rim which stands out as is. The pictures show the story.
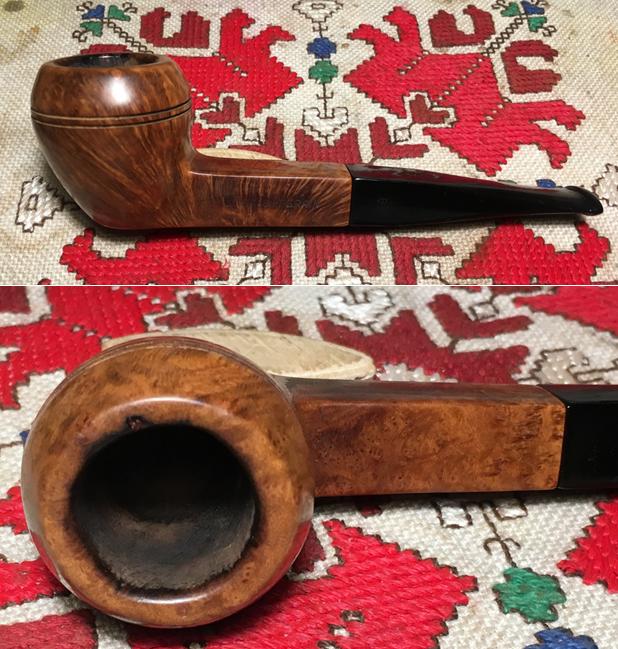 In preparation for the staining phase, I use a sharp dental probe and run it through the grooves to dislodge any briar dust from the sanding process. There is a good bit of compressed residue coming loose. I follow by wiping down the stummel with a cotton pad wetted with isopropyl 95% to clean the surface. On the stummel heel, I detect one lightened fill. I darken it with a stain stick to encourage blending. I also touch up the patch fill on the rim to help blending and masking the patch after dye is applied. Pictures show the preparation steps.
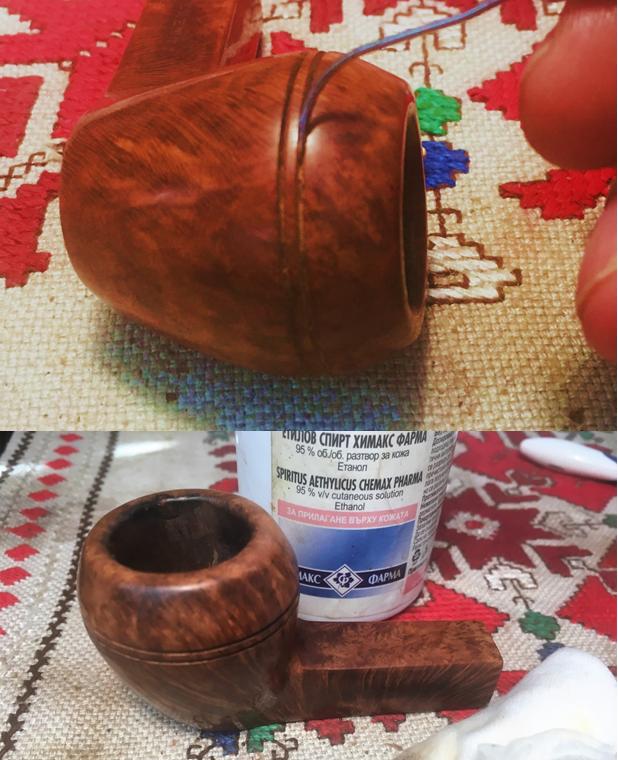

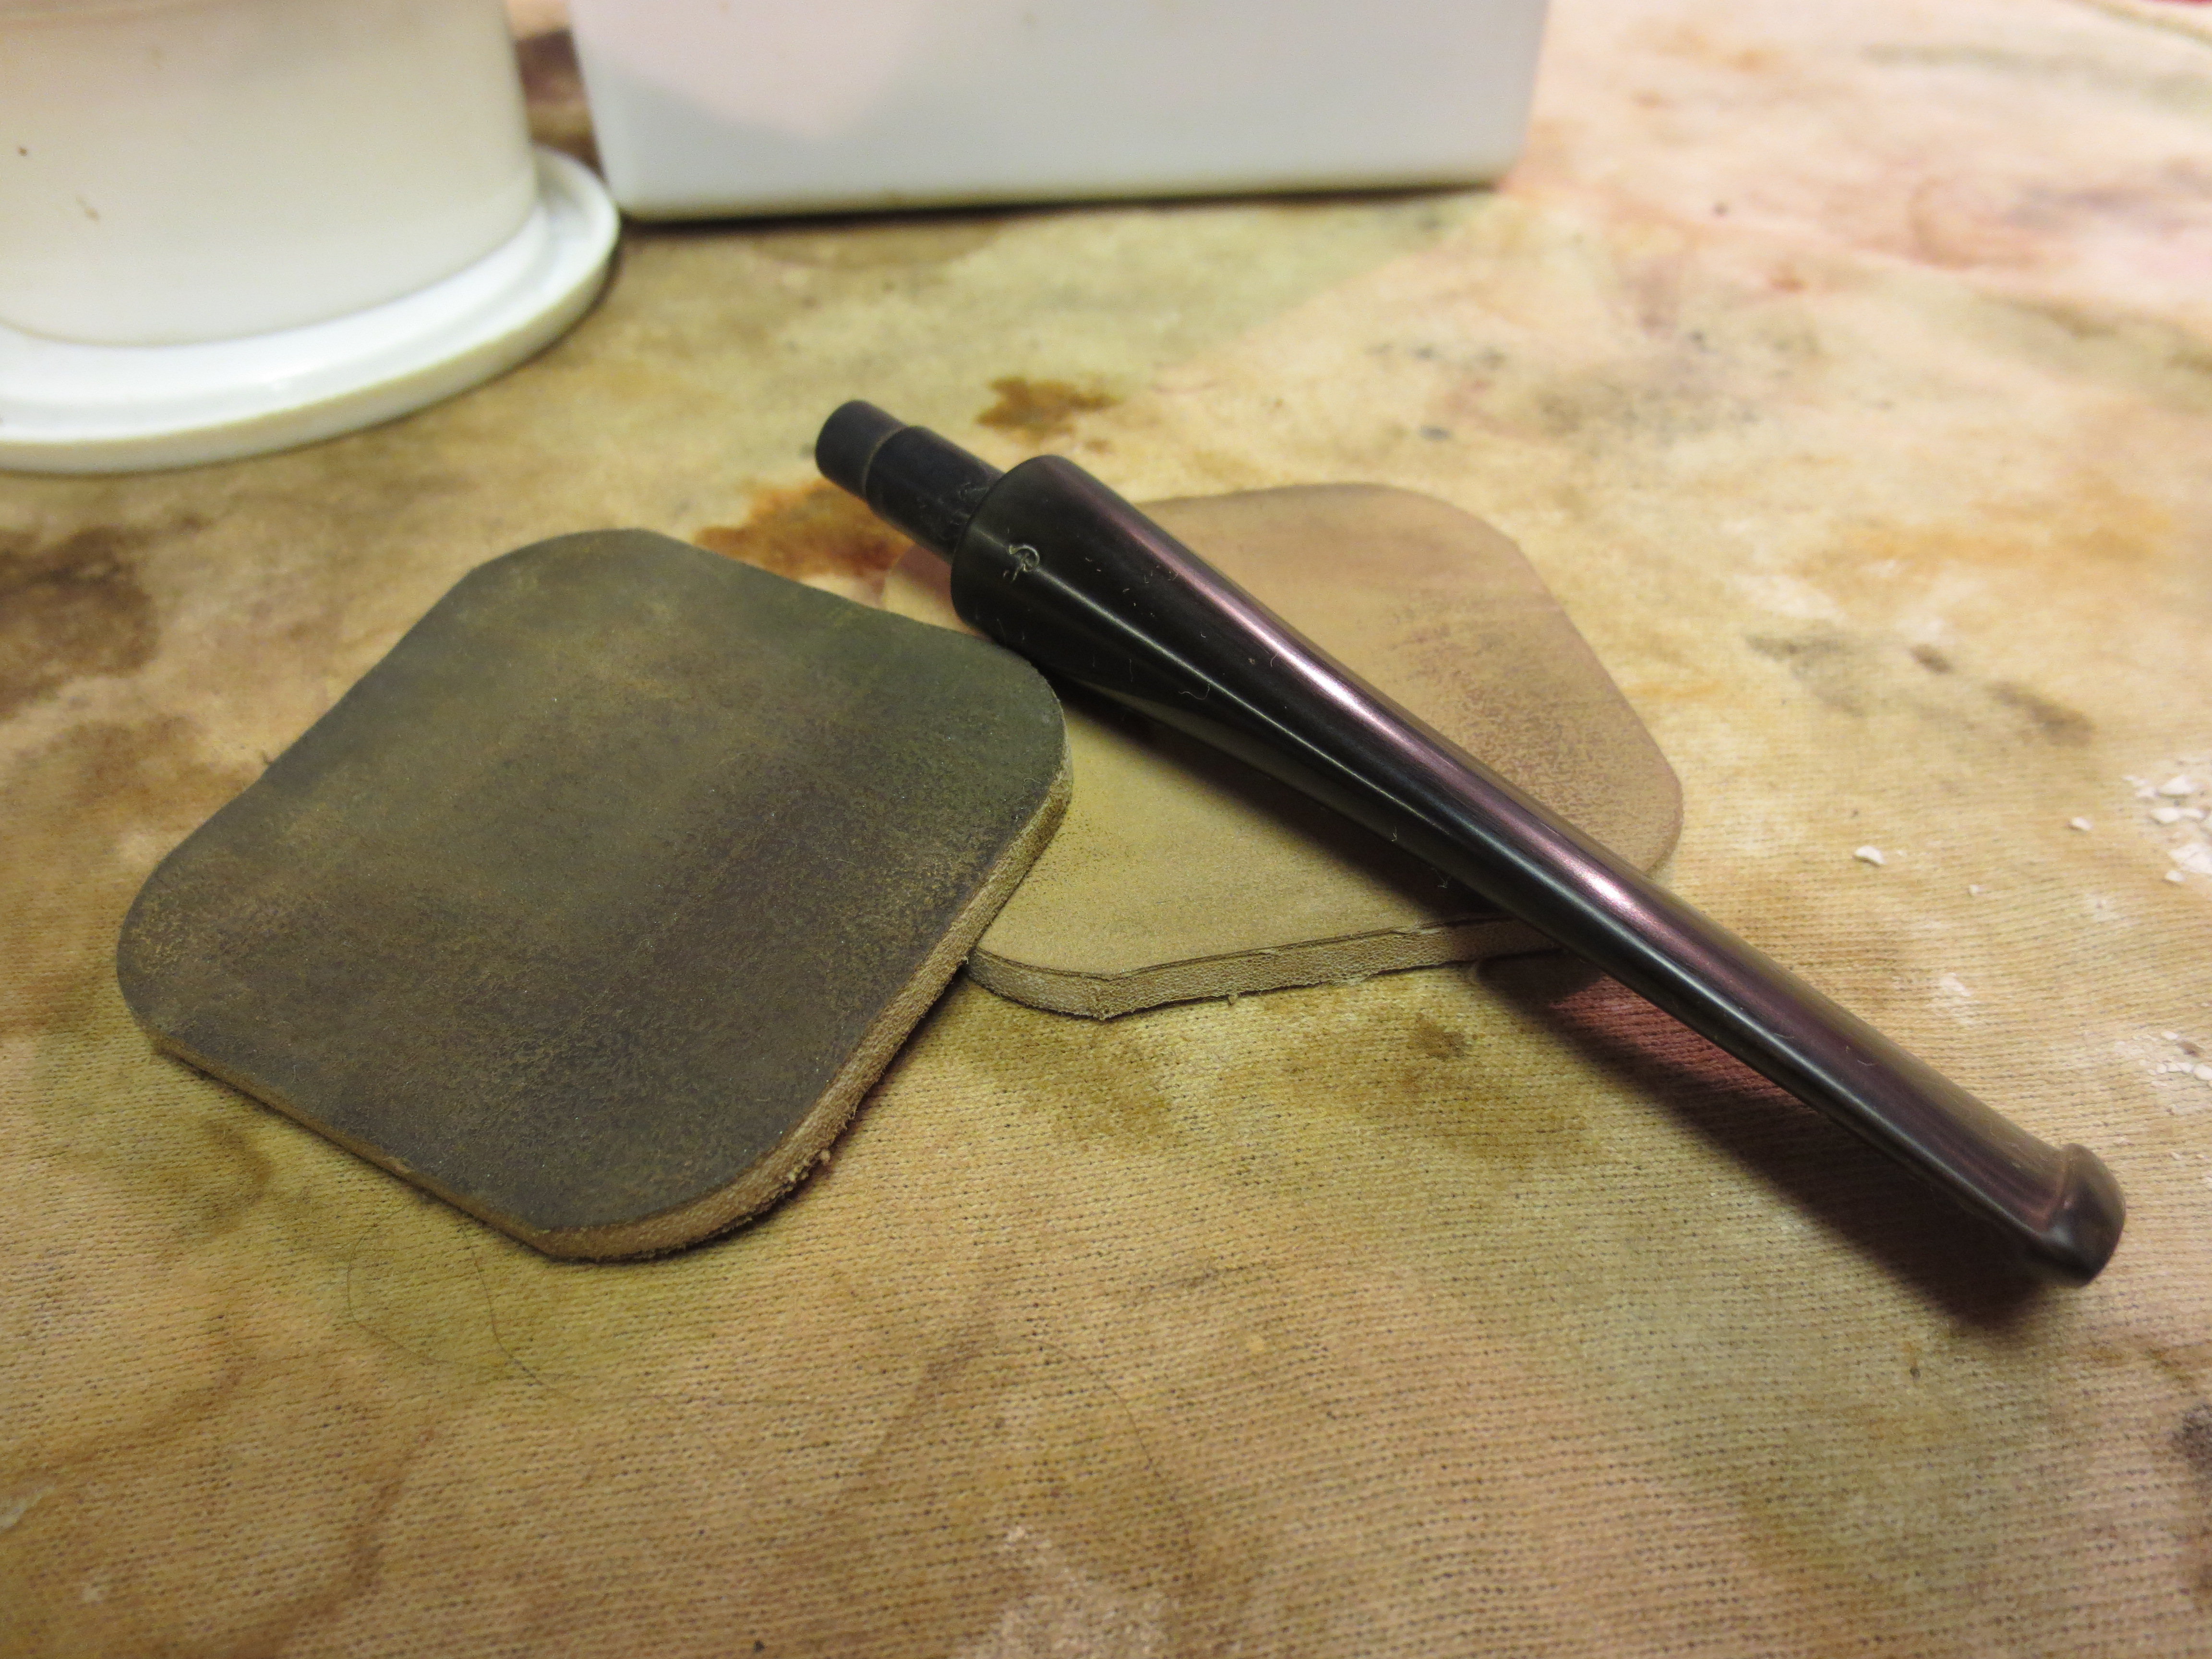
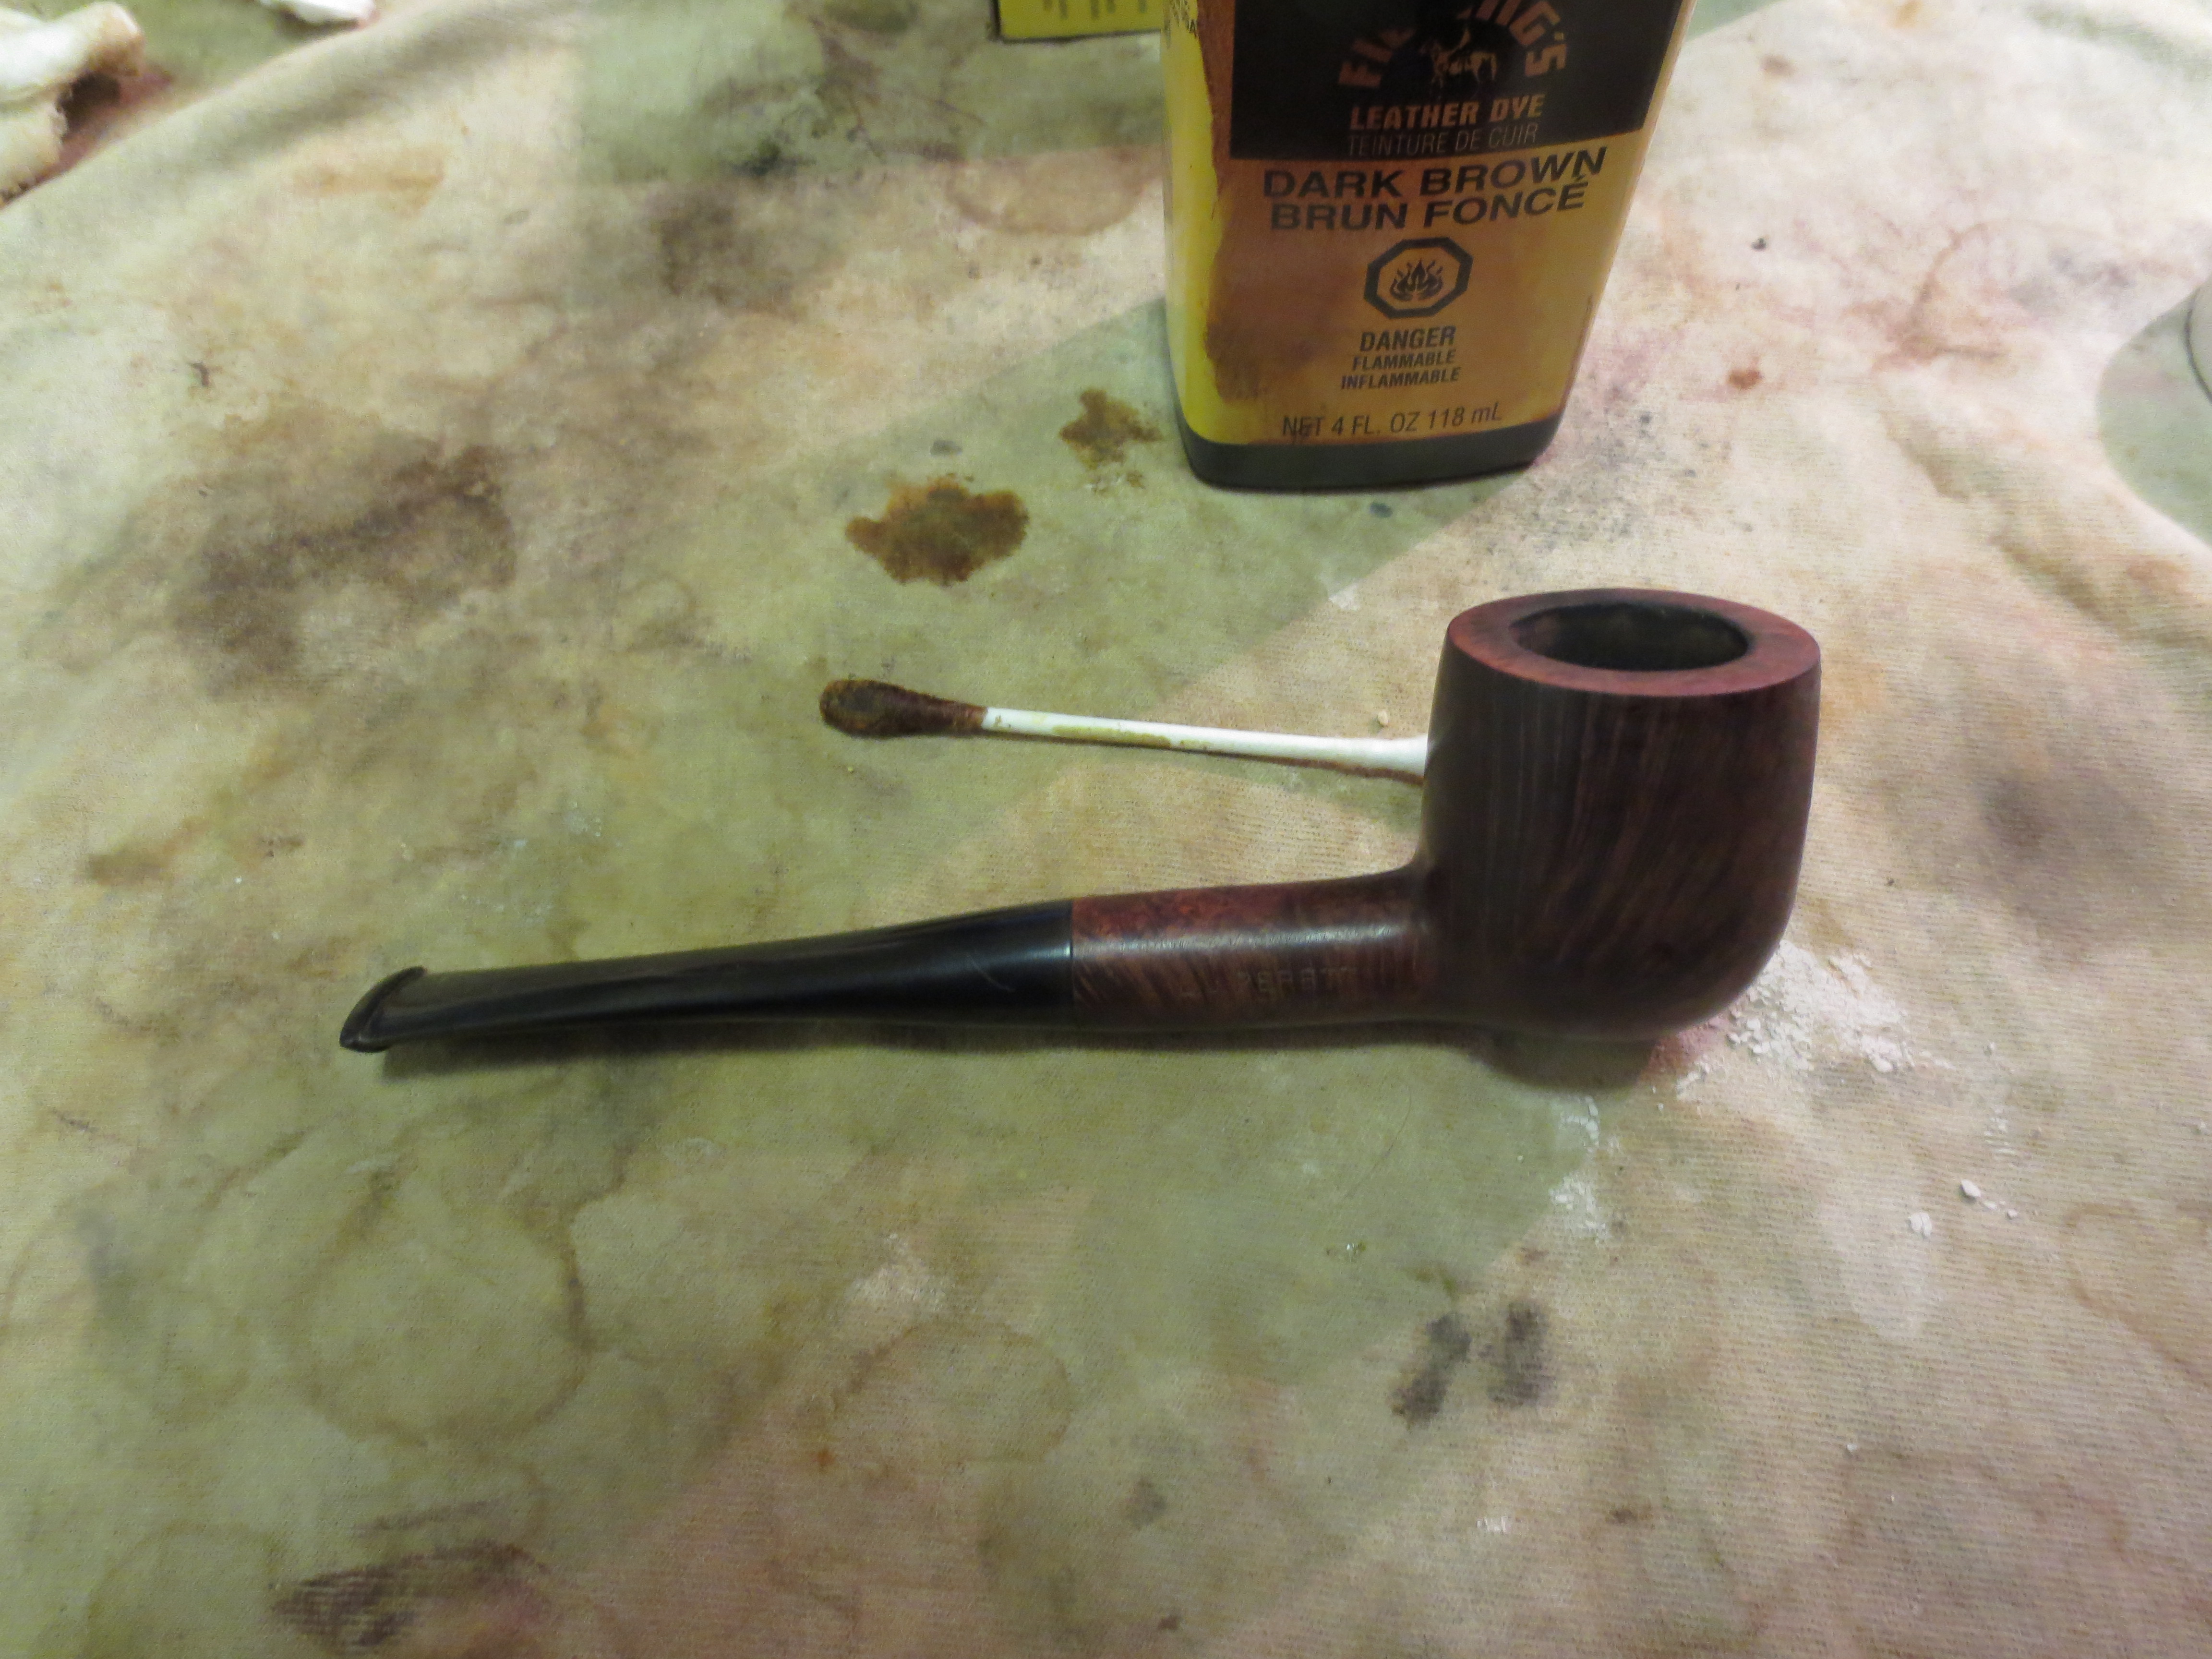
 To stain, I use Fiebing’s Dark Brown Leather Dye mixed with isopropyl 95% at 50/50. I use a large dropper to do the mixing in a shot glass. With the mixture ready, I heat the stummel using the air gun expanding the briar making a better receptor for the dye. When heated, I use a doubled-over pipe cleaner to apply the dye to the stummel surface. I apply the dye liberally seeking to achieve 100% coverage. When completed, I fire the wet dye which immediately ignites the alcohol in the dye, setting the hue in the grain. I repeat the above application of dye and flaming after a few minutes. I put the stummel aside to rest for several hours before removing the fired dye crust. The pictures show the set-up and the progress.
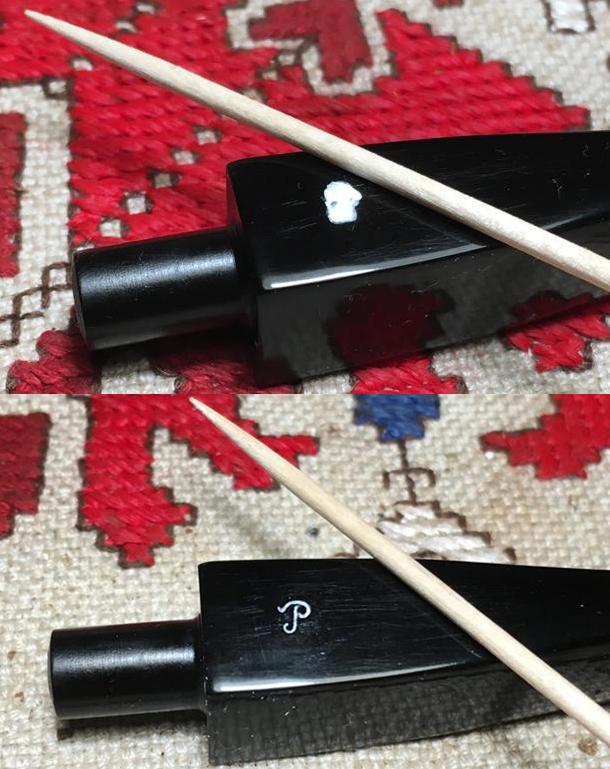
 With the stummel resting, I restore the Peretti’s classic stem ‘P’ with white acrylic paint. Restoring the stem stamping for me is special, along with guarding the nomenclature – and is why I went through a stem-splice with my first Peretti restore – to save the surviving saddle stem piece with the old, warn ‘P’ stamp. I apply white acrylic paint to the ‘P’ in a large gob over the area to allow the paint to fully saturate the ‘P’ imprint. I allow it to dry fully. Later, when dried (it doesn’t take long), I use the edge of a toothpick and gently scrape the area removing the excess but leaving the paint in the stamp imprint. Using the side of the toothpick has worked for me as it is a harder surface, yet soft as it’s wood. The flat area of the toothpick passes over the stamp and does not disturb the paint. I’m pleased with the results.
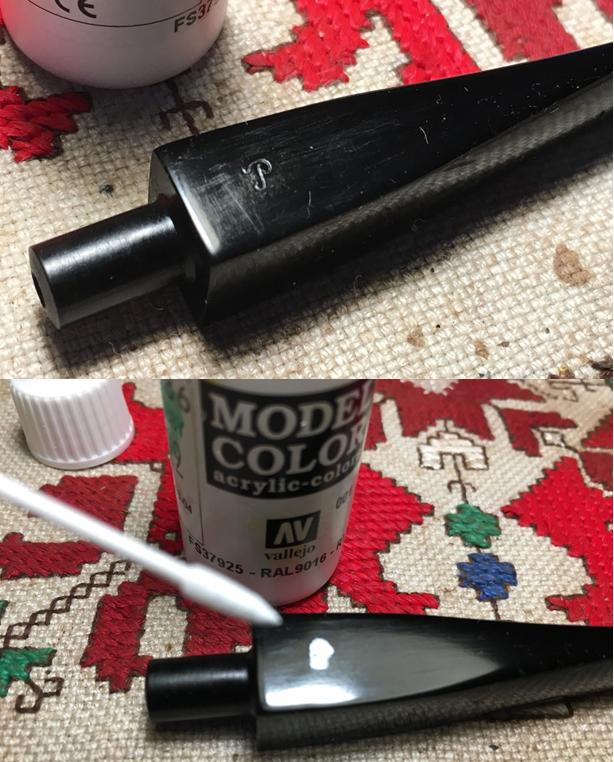
 The next morning, the stummel is waiting to be unwrapped of the flamed crust. Using the Dremel high speed rotary tool, my tool of choice given the tight quarters of my work table on the 10th floor of a former Communist block apartment building, I mount a felt buffing wheel set at the slowest speed, and use Tripoli compound to apply the gentle abrasion to begin the final buffing stages. I first purge the wheel of old compound running it against the metal adjustment wrench, then with new compound on the wheel, I apply it to the surface. I do not use much downward pressure but allow the speed of the wheel’s RPMs and the compound to do the work. I methodically move over the stummel surface in areas with the sheen of the overhead lamp providing the ‘headlights’ letting me know to spread the compound or apply more to the wheel. I take a picture to show the felt wheel application of Tripoli compound – I had to stage it because I don’t have enough hands to take a picture and hold stummel and Dremel! After completing the Tripoli cycle, I lightly wiped the stummel with a cotton pad wetted with isopropyl 95%, not wanting to lighten the hue but to blend certain areas on the heel and shank. I avoid wiping down the bowl area – it looks good. Dark enough to mask repairs but on the lighter side to show the striking straight grain definitions.
 Following the Tripoli compound, I mount a cotton cloth buffing wheel dedicated to Blue Diamond compound. With the Dremel remaining at its slowest speed I apply the lesser abrasion of Blue Diamond compound to buff the surface preparing it for the carnauba wax application. I reunite the squared tapered stem to the stummel and apply Blue Diamond compound to both. I know this borders on eccentricity, but as I was finishing the Blue Diamond cycle, I notice that the rim patch done earlier was showing a ridge around the patch, and not flush with the rim. A bit late in the game to notice this, but it won’t do. Very strategically, I roll a piece of 600 sanding paper and address the ridging. I follow with the full set of 12 micromesh pads folded and strategically addressing the area. Finally, I apply a dark brown stain stick and lightly wipe a cotton pad wetted with isopropyl 95% to blend the area. Finally, I run the Blue Diamond wheel over the rim and I’m back to where I started. The patch is visible, but now without the ridges that draw attention to the repair. Now, the rim is smooth to the touch. Much better. Before and after pictures follow this small detour!
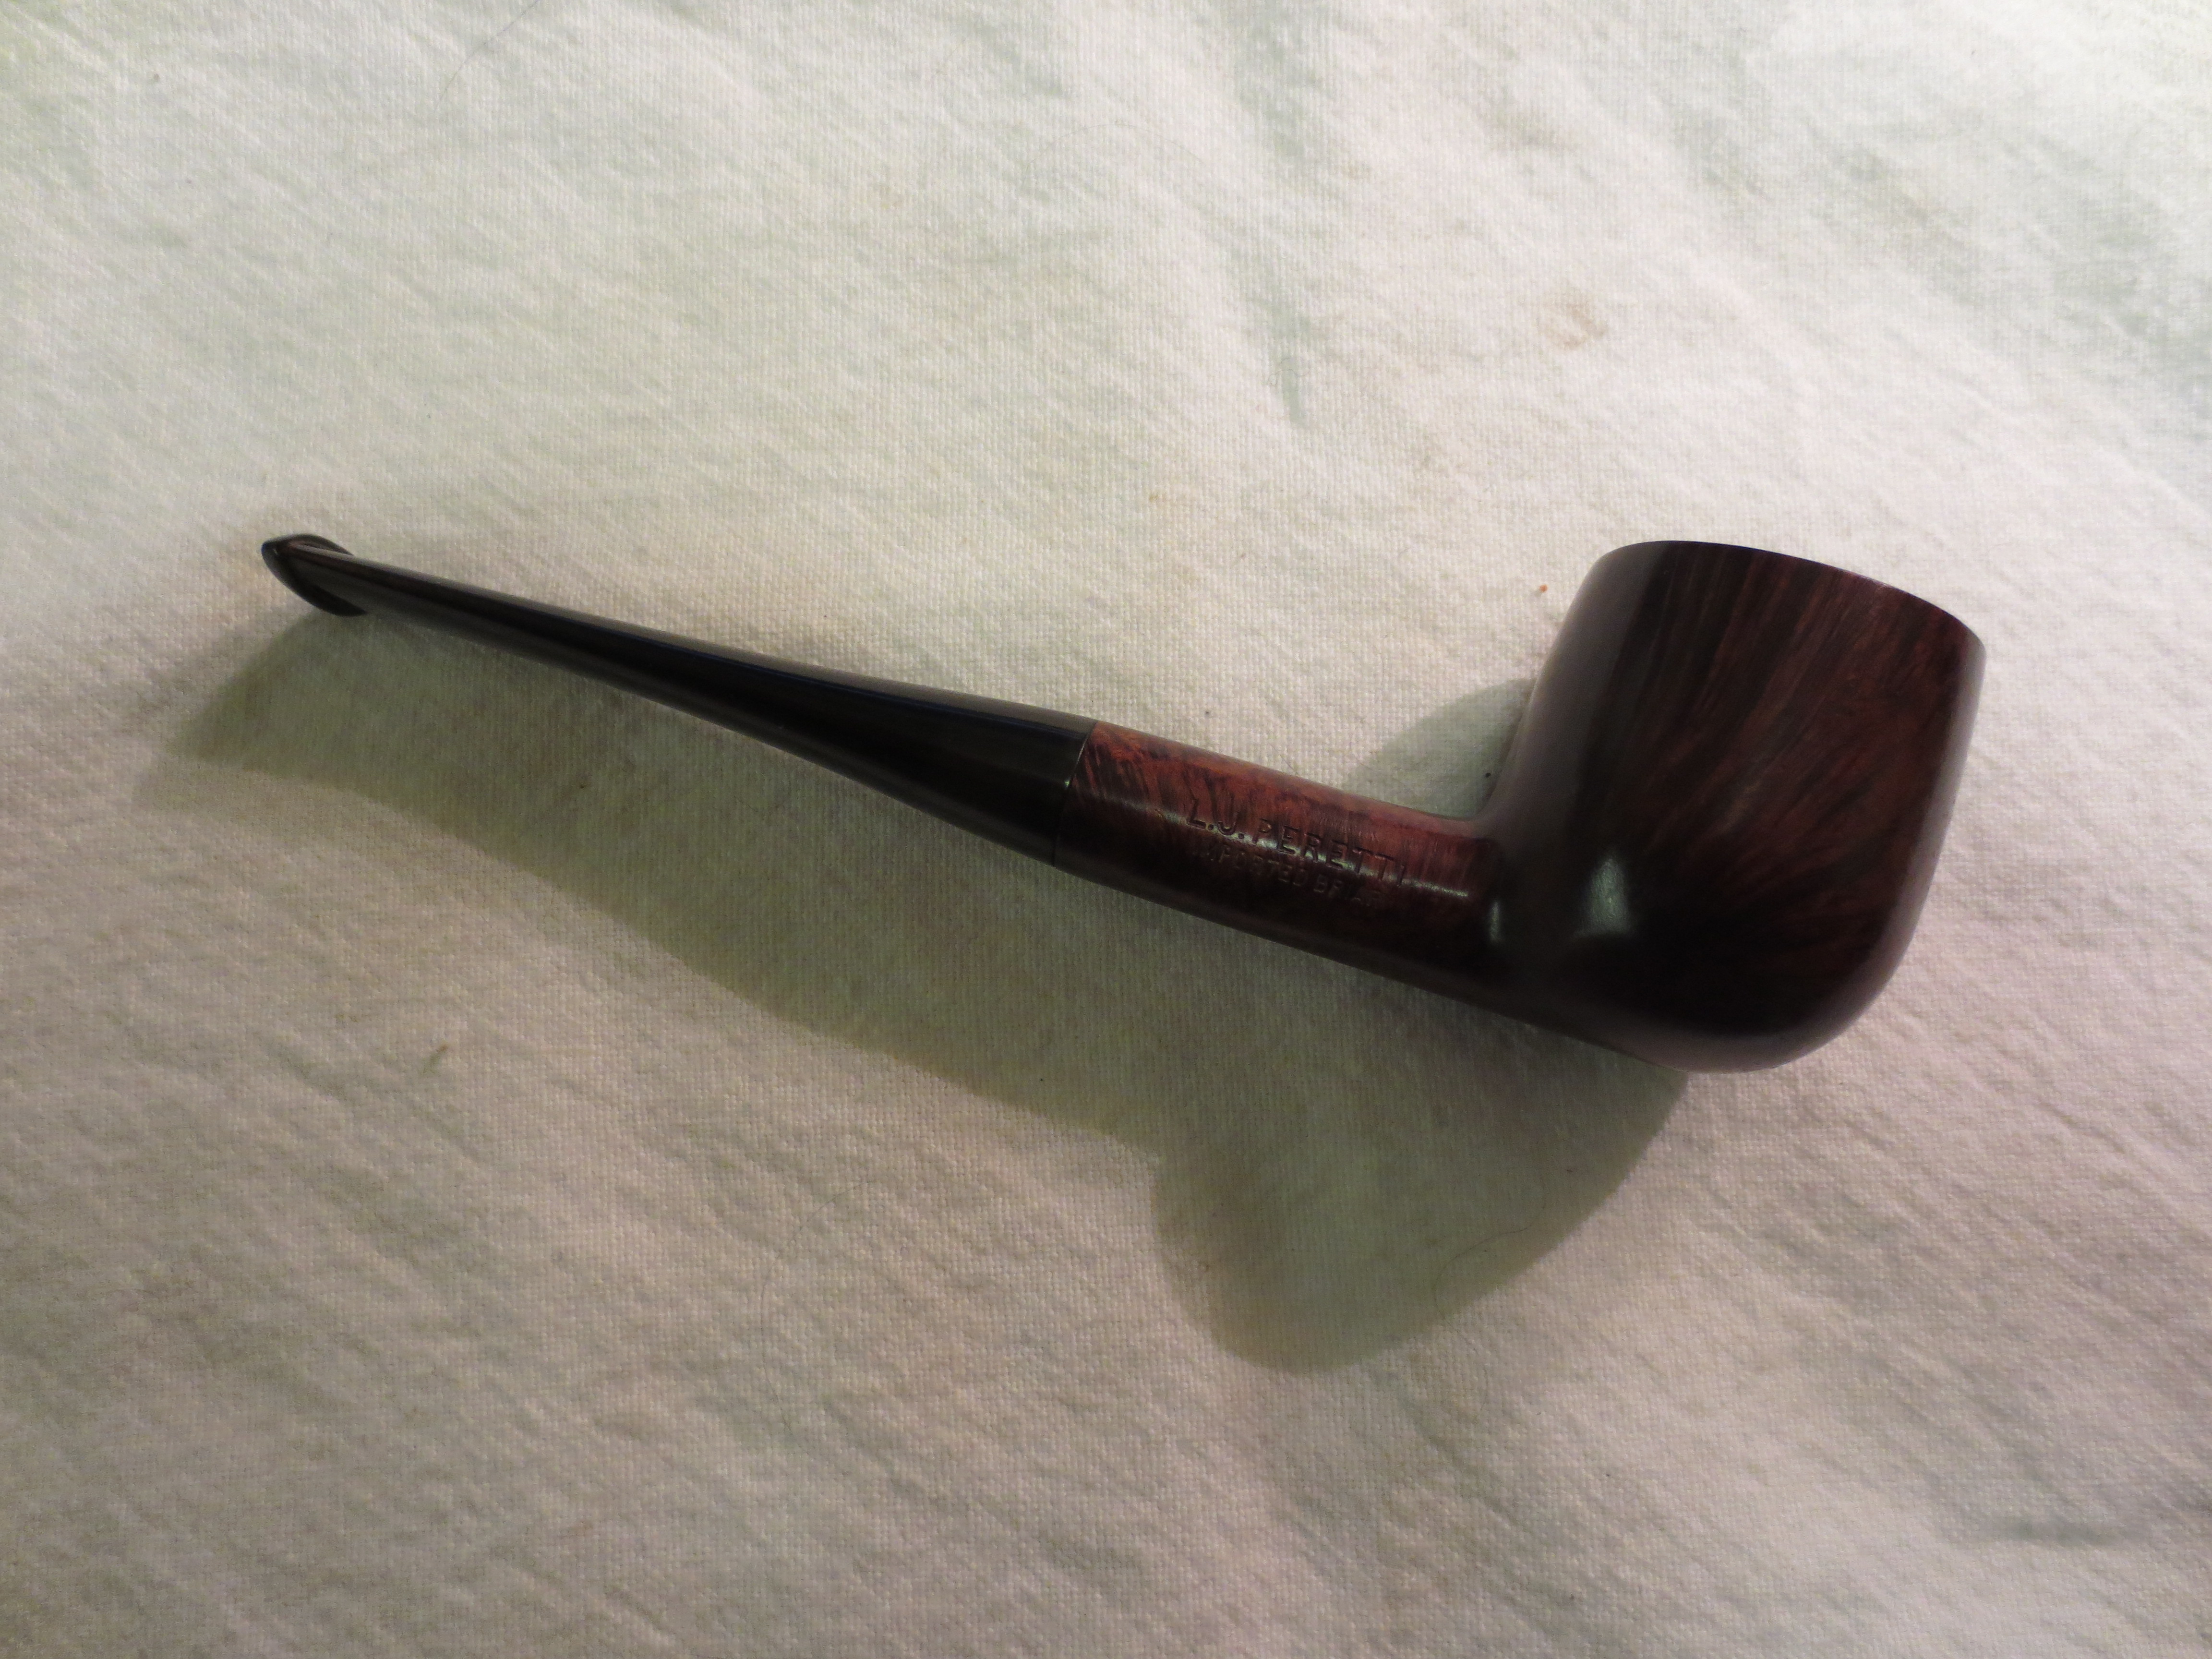
 With detours behind, I hand buff the stem and stummel with a flannel cloth to remove compound dust from the surface before applying carnauba wax. I then mount a cotton cloth buffing wheel on the Dremel and increase the speed of the RPMs to 2, a bit faster than the slowest speed, and I apply carnauba wax to both the stummel surface as well as to the mounted stem. After 3 cycles of applying carnauba wax, I hand buff the pipe with a micromesh cloth to bring out the depth of the grain further.
I appreciate Jon giving me this L. J. Perretti while we were in Oslo. I’m happy to recommission this very attractive Square Shanked Rhodesian – the grain is exceptional and I like the square shank style of both Peretti’s I’ve restored. The squared shank, not a common Rhodesian configuration, allows this Rhodesian to function like a ‘table sitter’ as well while one plays their card or board games. If you are interested in adopting the L. J. Peretti Square Shanked Rhodesian, take a look at my blogsite, The Pipe Steward. As always, all the profits of the sales from my restorations go to help the Daughters of Bulgaria. Thanks for joining me!