Mark Irwin sent me two pipes from the late Mike Leverette’s estate. He had been tasked with selling some of Mike’s pipes for his wife Jeanette. I asked him to pick out a pipe or pipes for restoration that covered the gamut of restoration issues for this article. Mark chose well – a reproduction 1910 Straight Bulldog and Deluxe 11S. He emailed me the descriptions of the pipes (Mark’s description of Pipe #1 is included in italics below and the description of Pipe #2 is in italics in Part 2 of this article) before I actually had the pipes in hand.
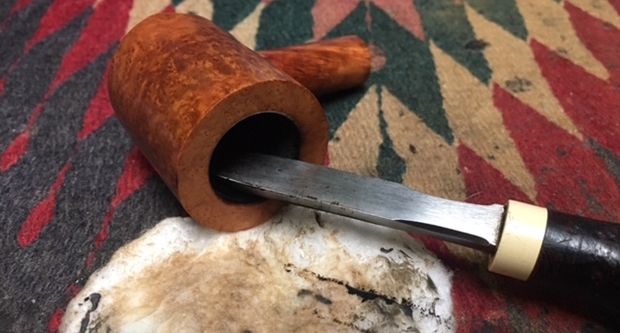
Pipe #1 –A Reproduction 1910 straight Bulldog (from the Antique Collection) that looks like it has either been left out in the sun or someone has attempted to remove the original stain. In addition, it has been poorly reamed, with what looks like a pocket knife. Stem and ferrule oxidation, no real dental damage to button.
When the pipes arrived I was excited to open the box and see them in person. It is my habit to spend time looking over a pipe very carefully before I start working on them. In this case I wanted to see the issues that Mark noted firsthand and to note others as well. I decided to work on the two pipes separately. I began with the little Reproduction 1910 Straight Bulldog. I recorded my observations to give a clear idea of the work that needed to be done. They were as follows:

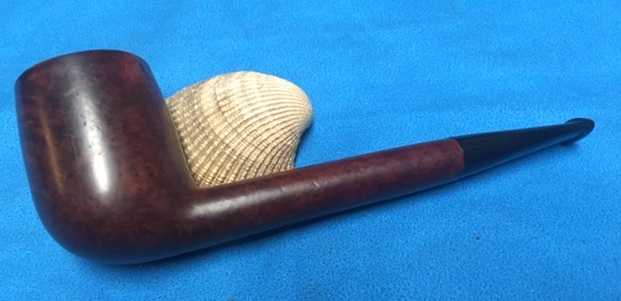
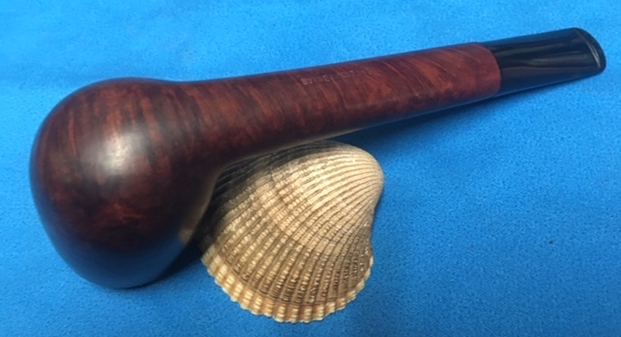
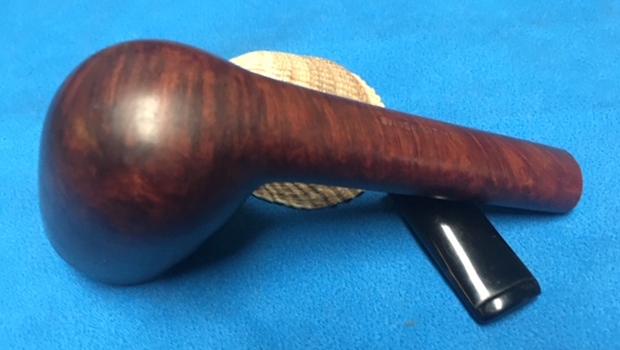
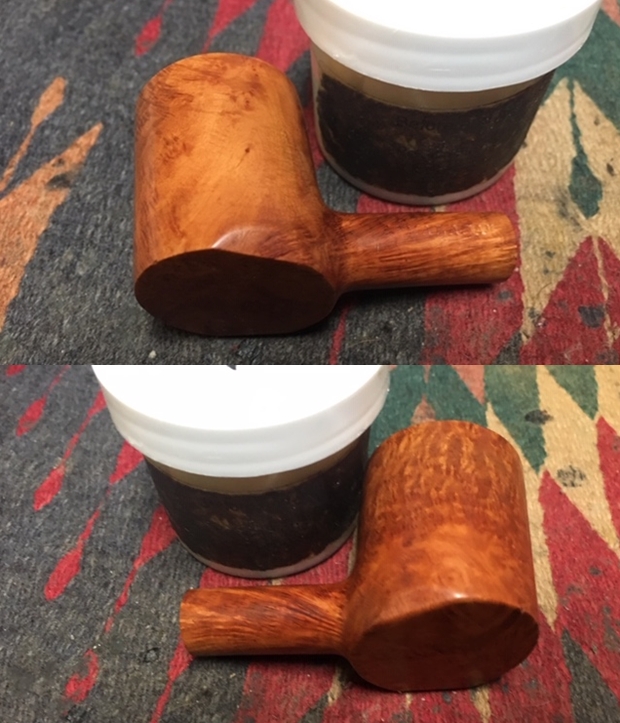
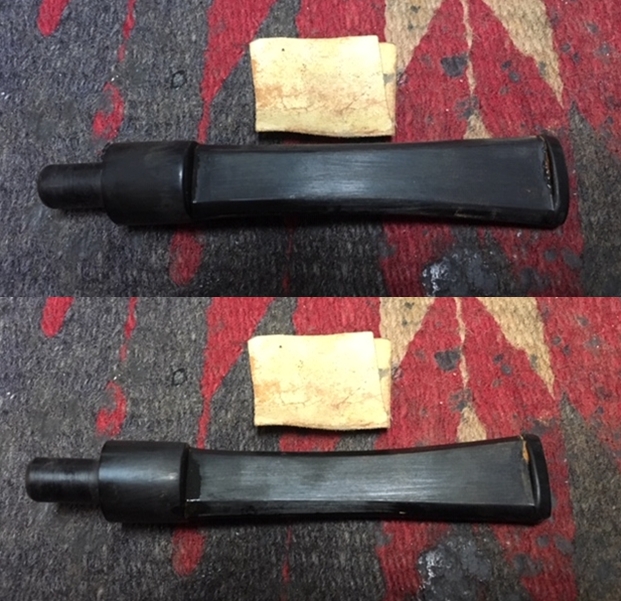
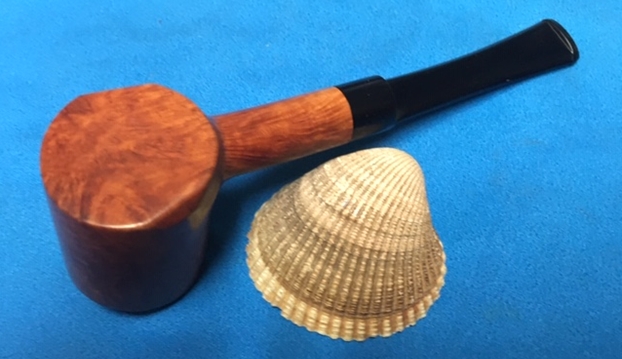
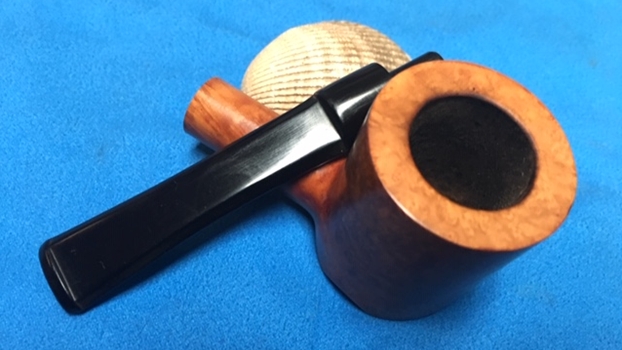
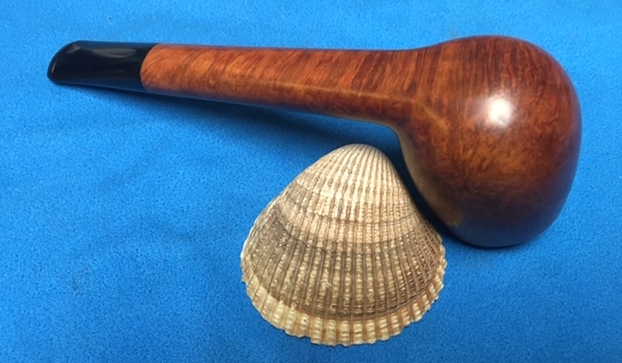
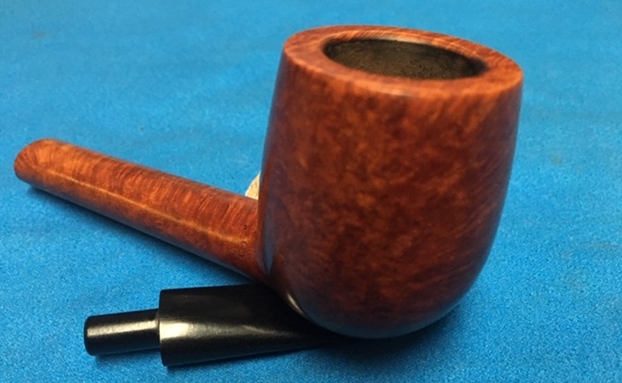
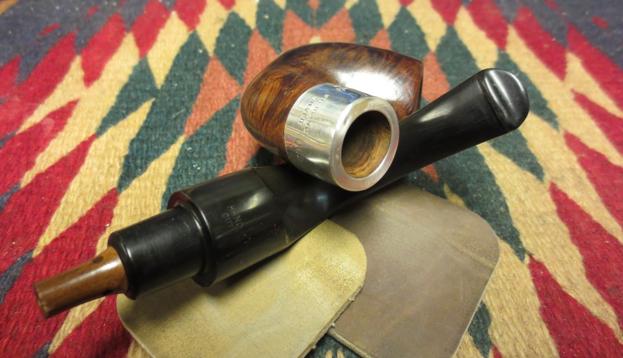
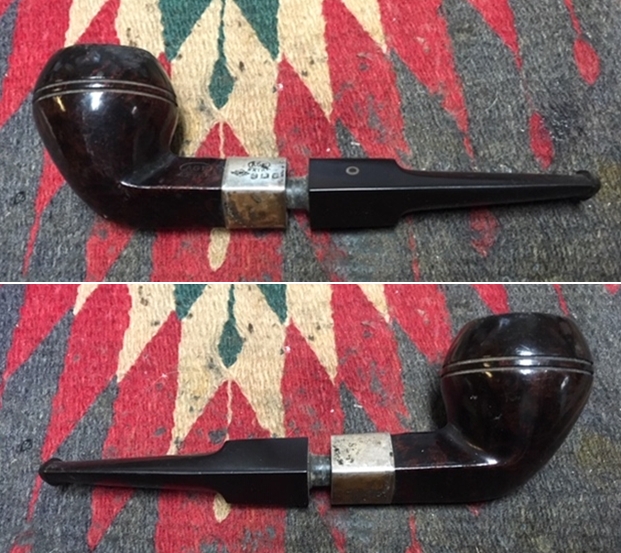
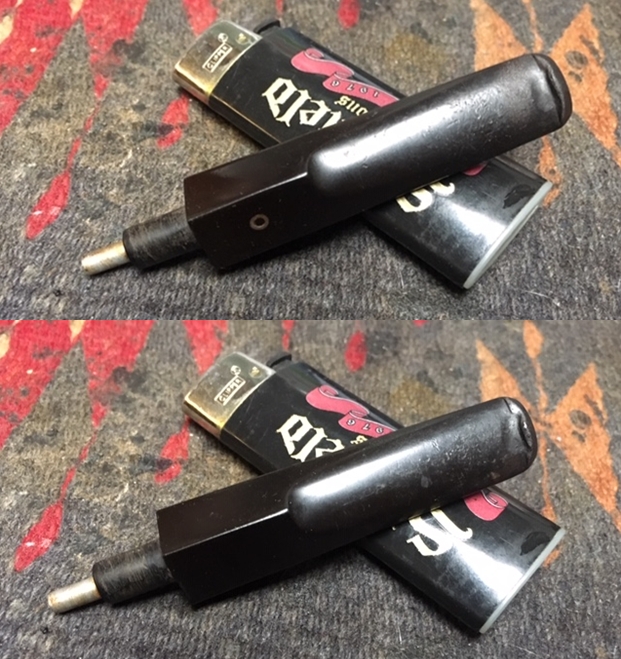
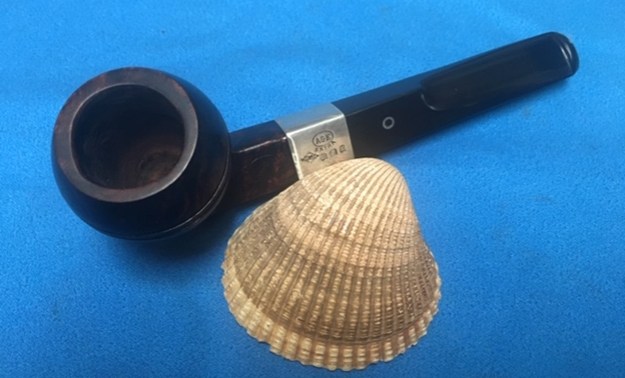
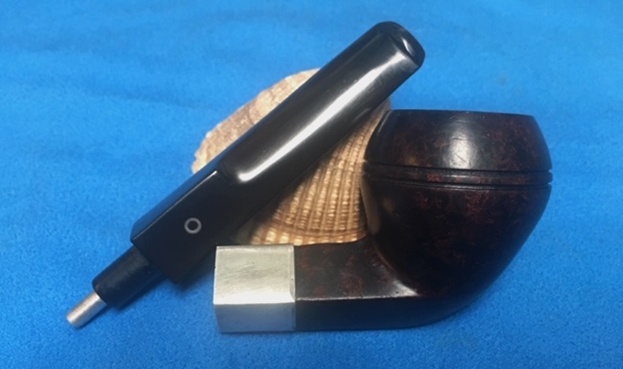
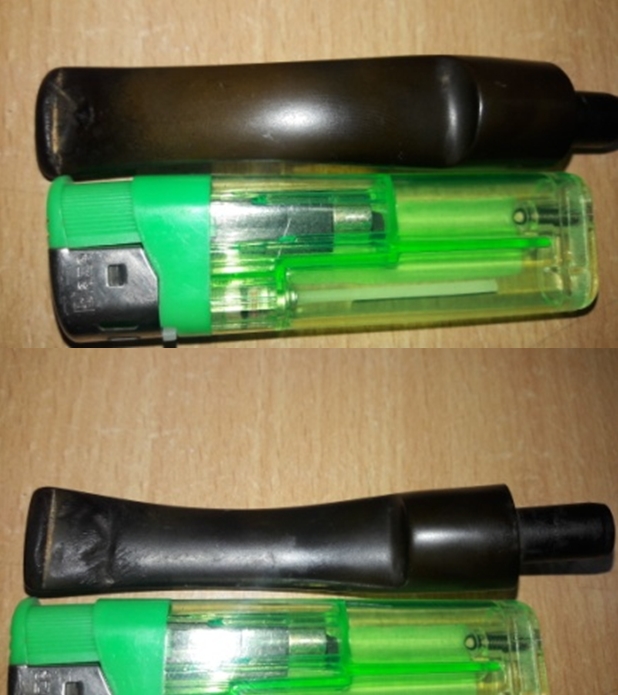
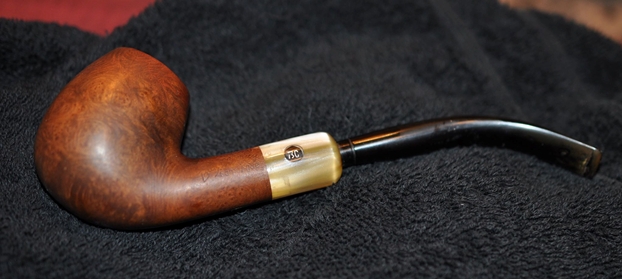
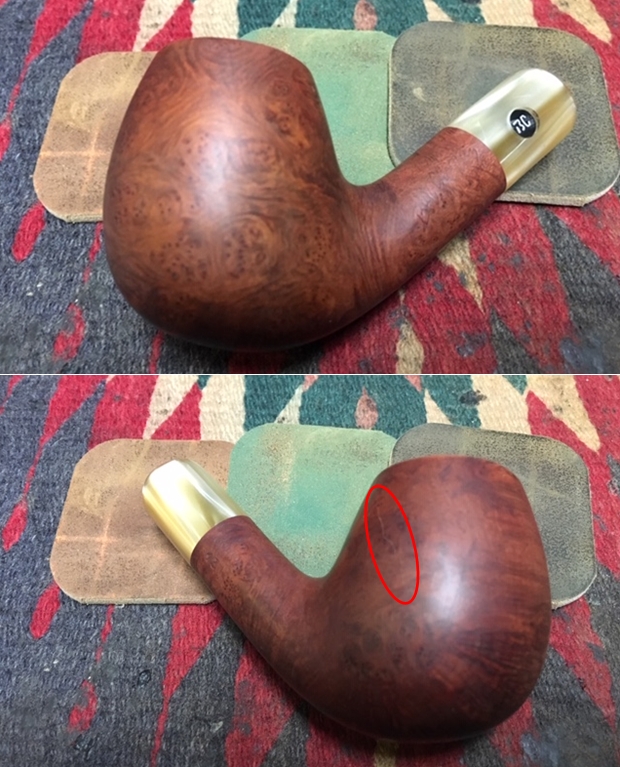
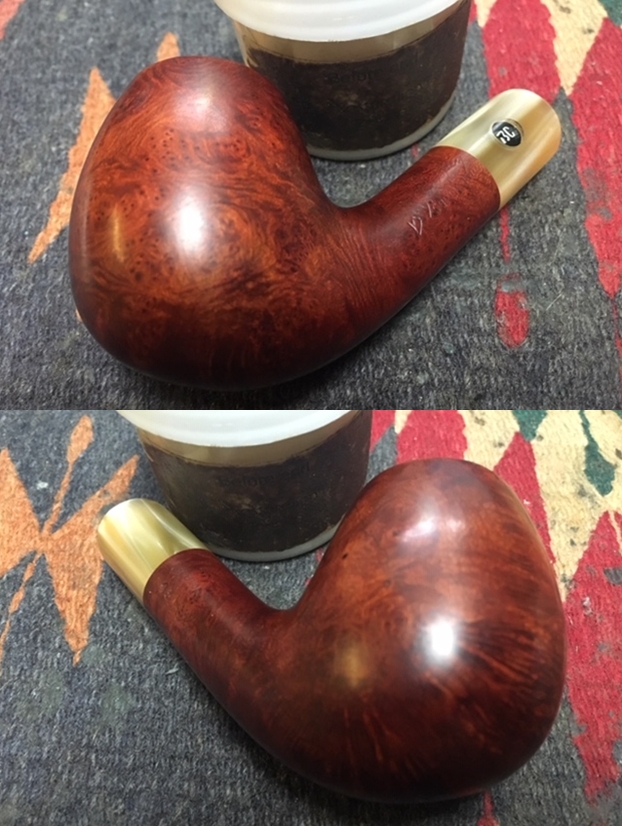
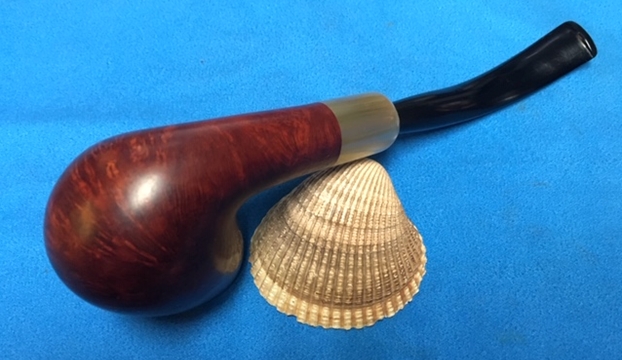
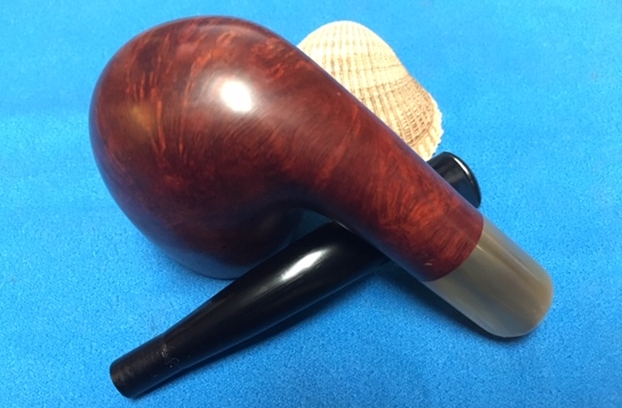
Photo 1 Bottom side of the pipe and stem
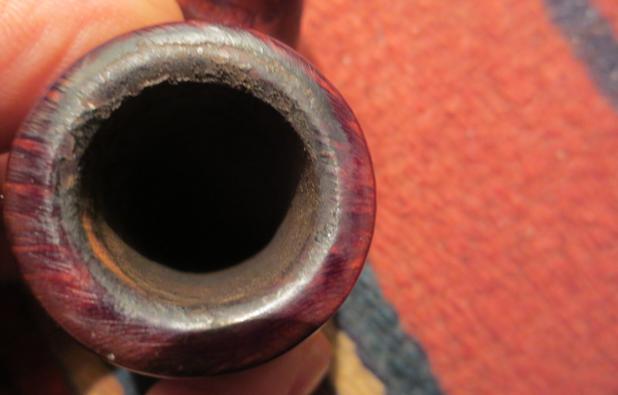
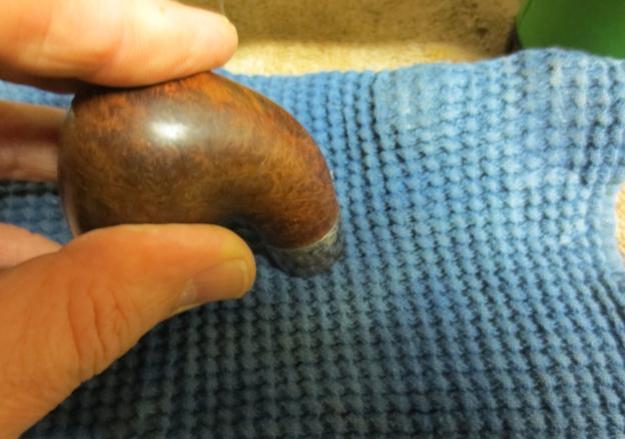
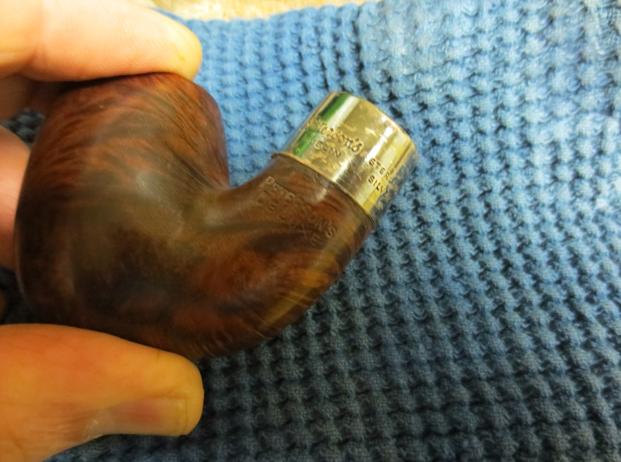
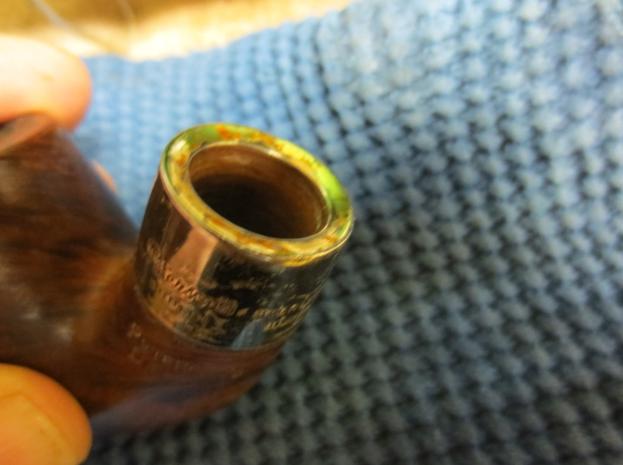
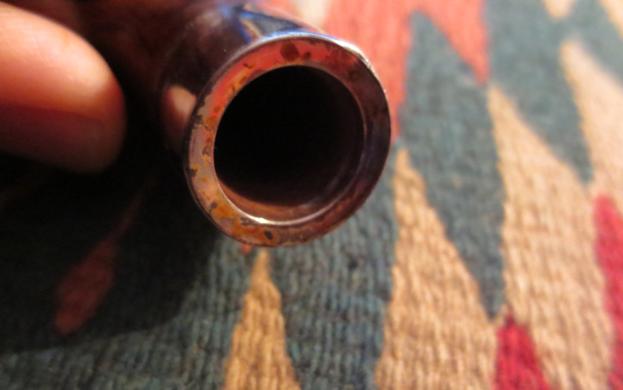
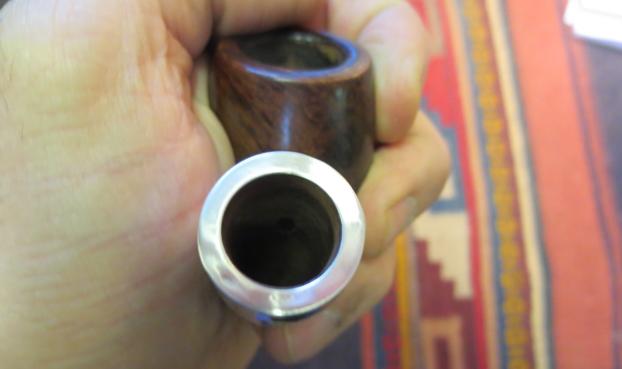
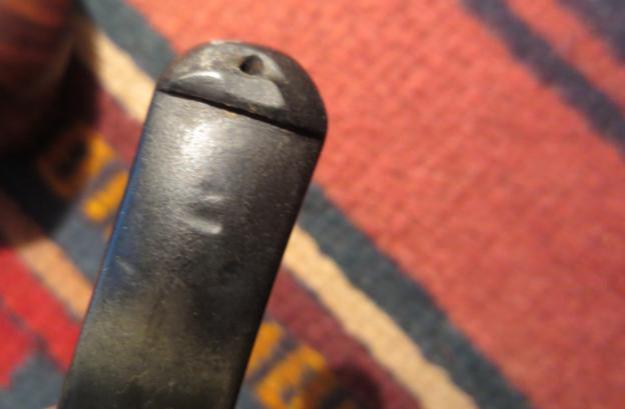
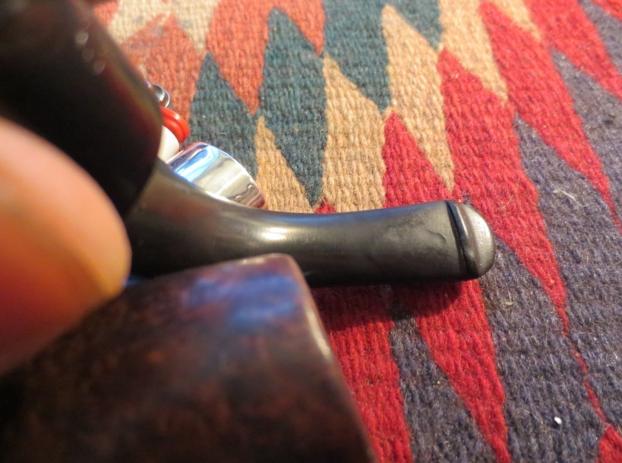
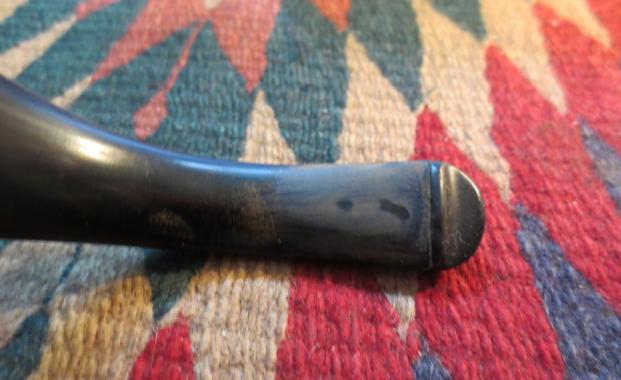
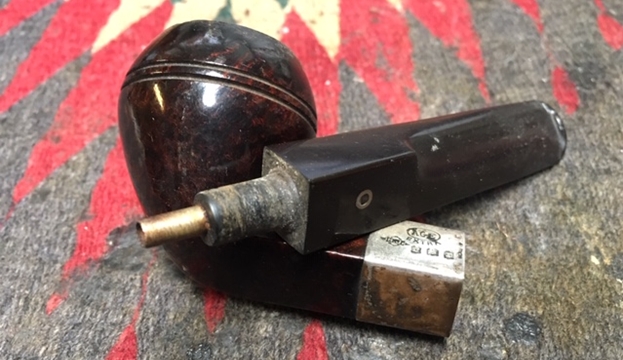
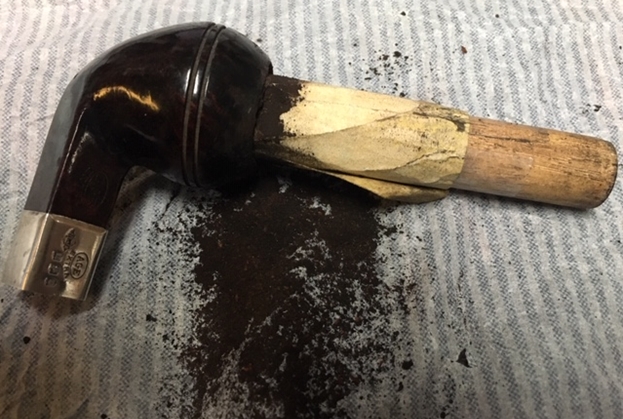
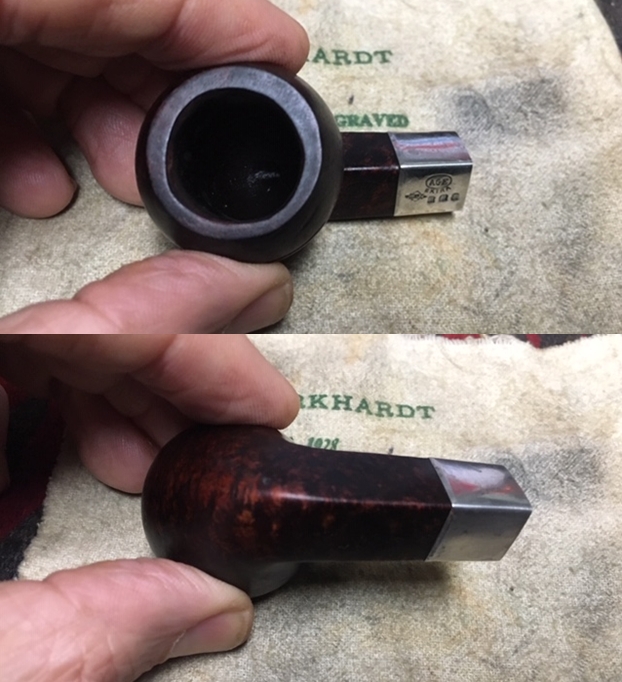
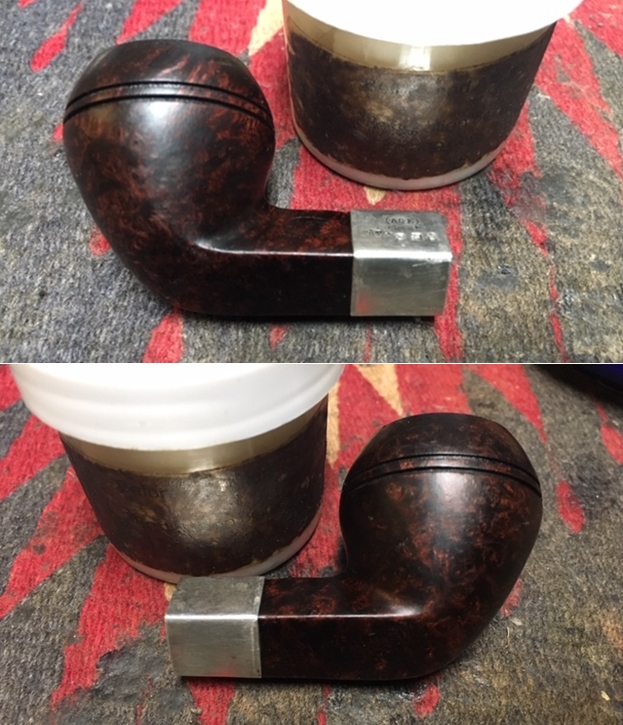
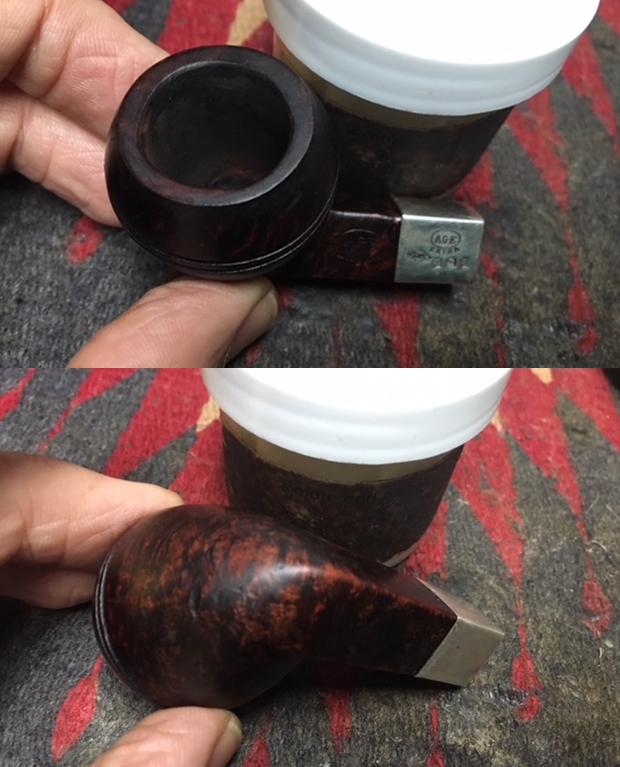
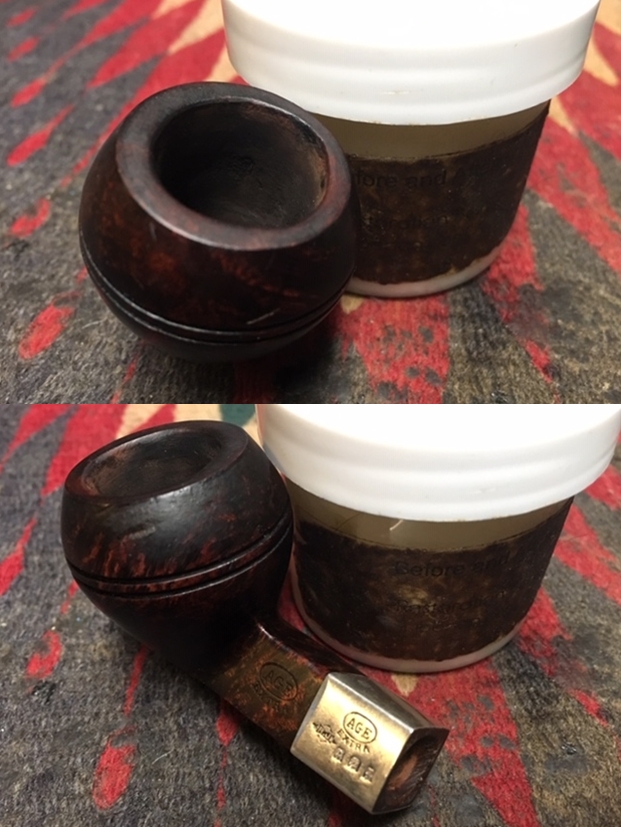
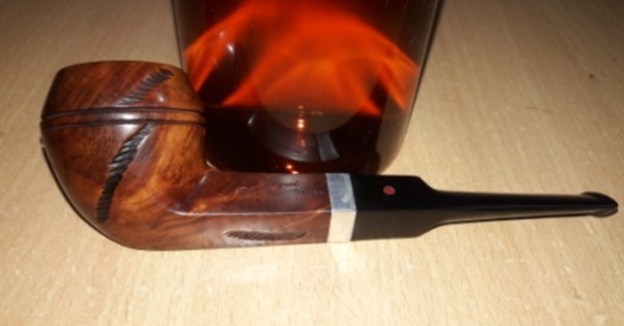
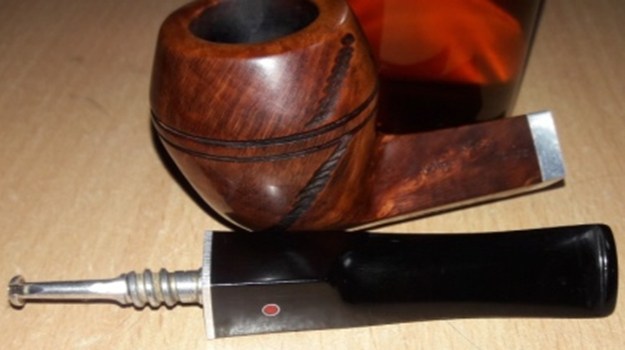
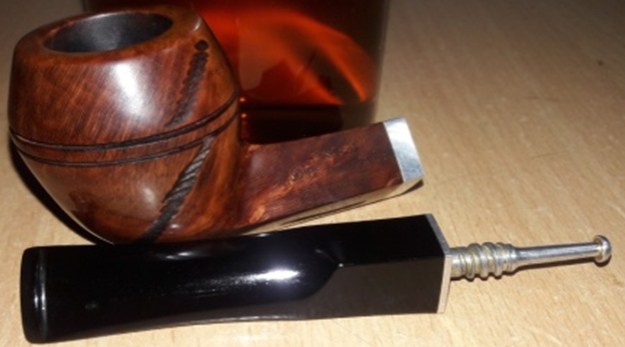
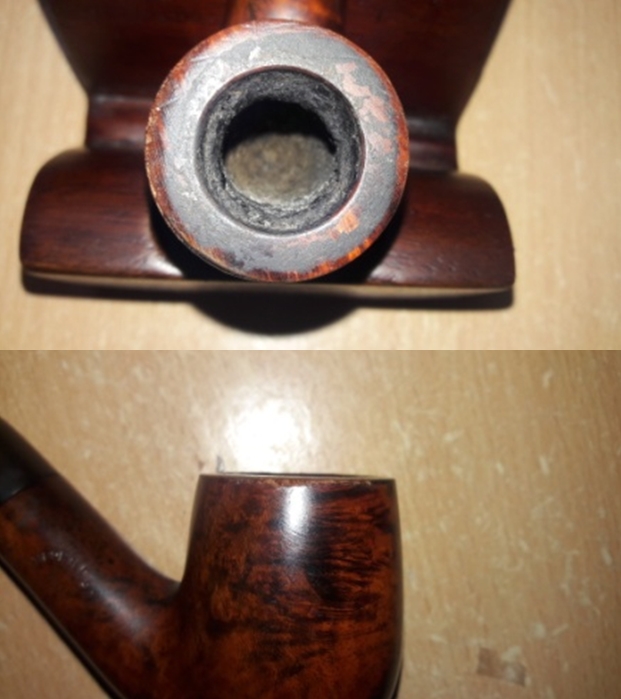
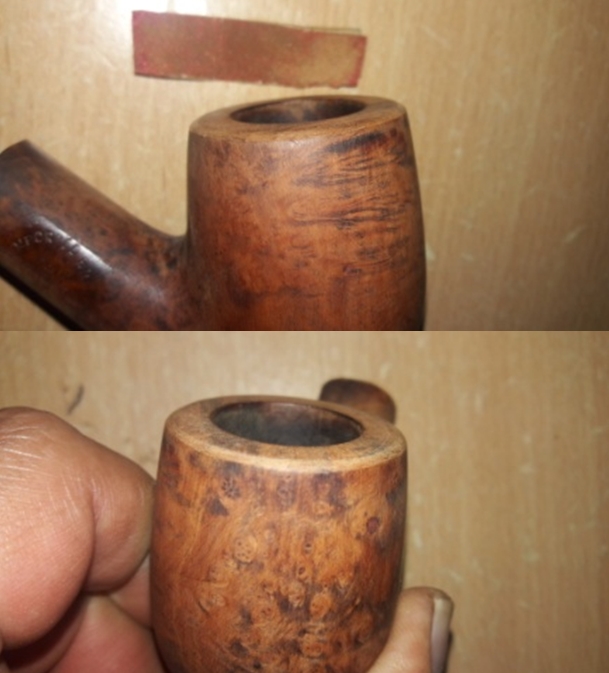
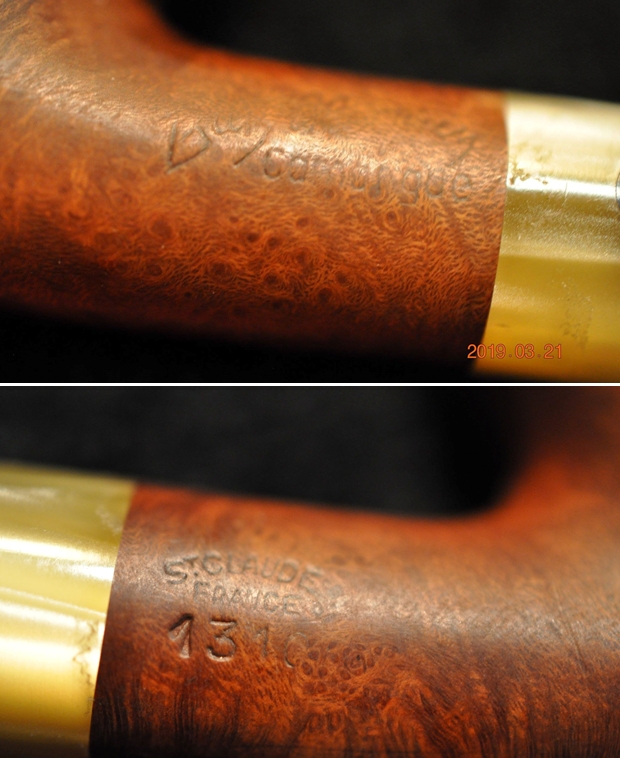
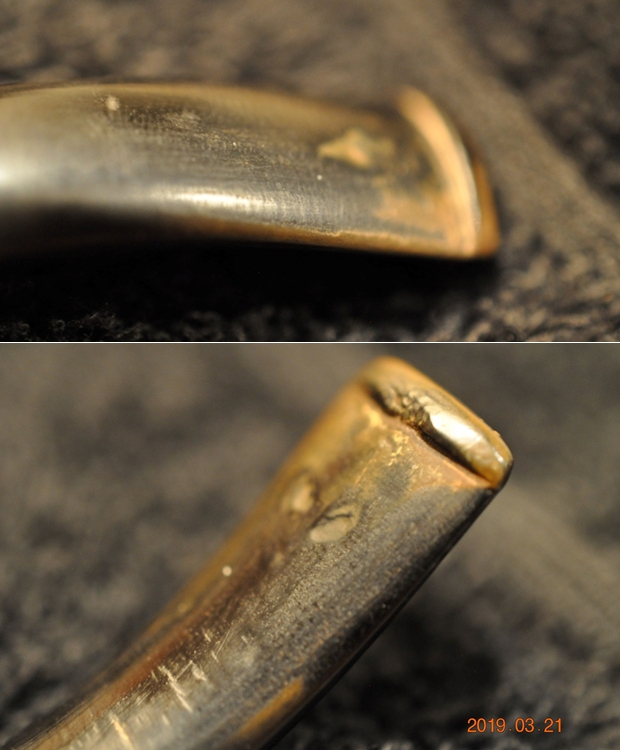
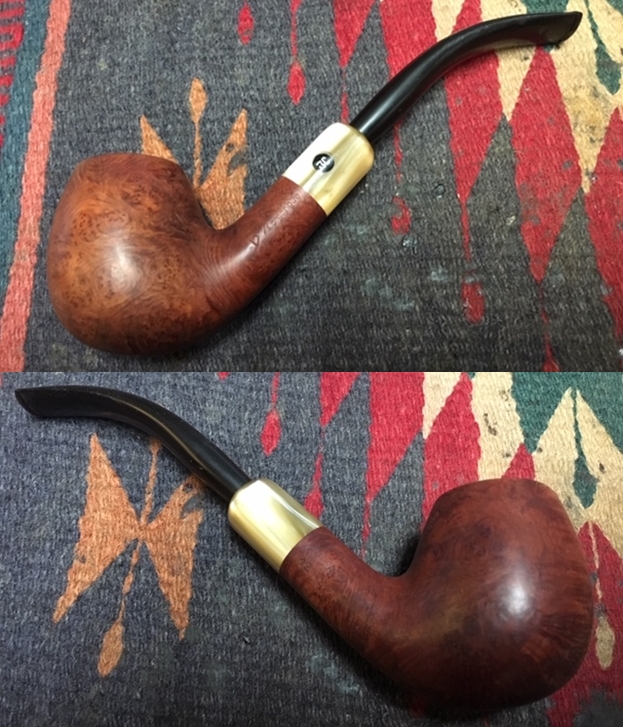
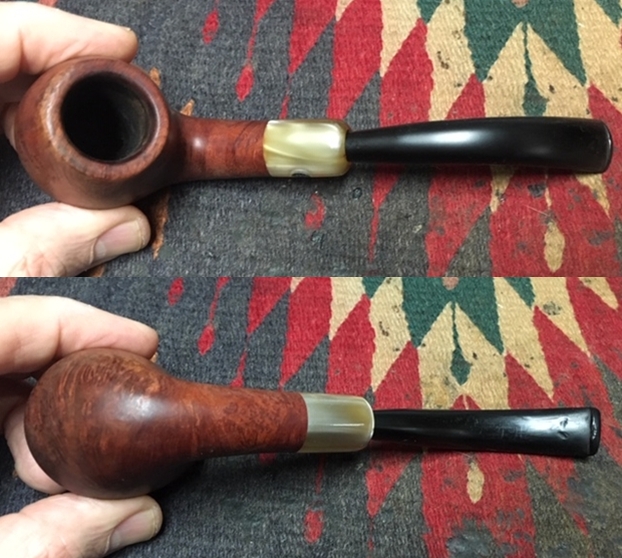
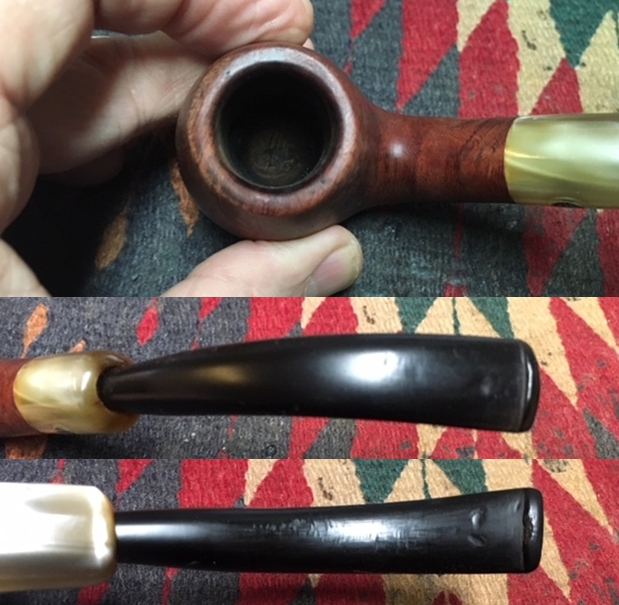
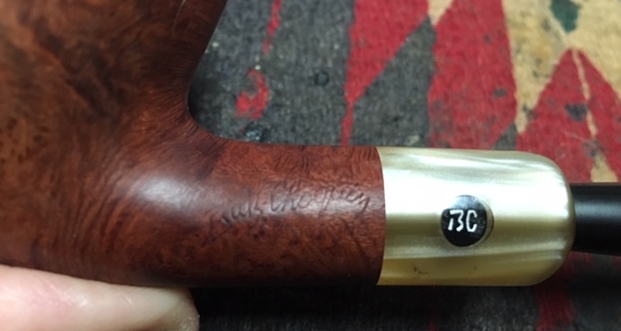
Pipe #1. The pipe is stamped on the left side of the shank Peterson’s over Dublin. On the right side it is stamped Made in Ireland. The stamp has classic Pre-Republic era stampings (the forked tail on the P and “Made in Ireland”). The silver ferrule/end cap is stamped K&P over three hallmarks, the last is a cursive capital “J” which dates the pipe as having been made in 1995. These are stamped above Peterson’s of Dublin on the left side and on the right side of the cap it is stamped 1910 which indicates the year this Bulldog shape first appeared in Peterson’s offer. A first pass over the pipe showed that the finish was as Mark had noted – very faded. The stain was virtually gone and the briar was a dull grey brown in colour. The silver was dented and tarnished; so much so that it was hard to read the hallmarks. The double ring around the bowl was packed with grit and grime as well as some older stain that had bunched up in balls in the grooves. Moving to the rim I could see what Mark had noted regarding the poor reaming. It was very roughly reamed and the nicks from the knife blade were many. This left the bowl out of round. The cake was hard and the surface of the rim had a build up on it that was also quite thick. Removing the stem I could see that the upper right edge of the mortise had a large crack/gap in it where a chunk of briar was missing. The mortise was tarry and dark. The chamber/sump region in the mortise was also quite full of tarry build up and grit. The stem itself was good at the insert end. There were no cracks or missing pieces, which I expected after the chip in the shank. The top side and underside of the stem were dented with tooth marks that had been worked on. The surface had deep scratches and pits in it from the previous work. It looked like the stem had been treated with bleach to deal with the oxidation which leaves the surface pitted. The top 90 degree edge of the button had a divot taken out of it. The hole in the top also was out of round with several small divots removed from the surface. On the underside of the button the ridge/shelf that goes across the bottom of the P-lip had a divot missing as well – a tooth dent that was very evident. The portion of the tenon that sat in the shank was dark and black while the rest of the stem was oxidized and had slight brown tints. The five photos below highlight the areas of concern that would need to be addressed in a restoration/refurbishment.
Photo 1 Bottom side of the pipe and stem

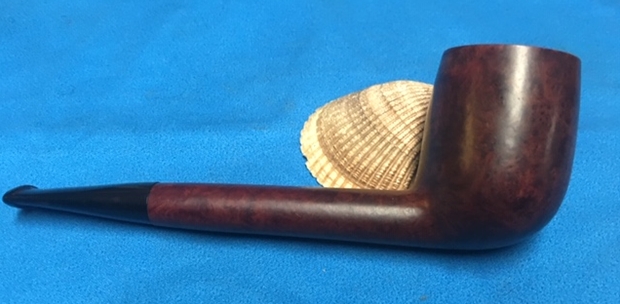
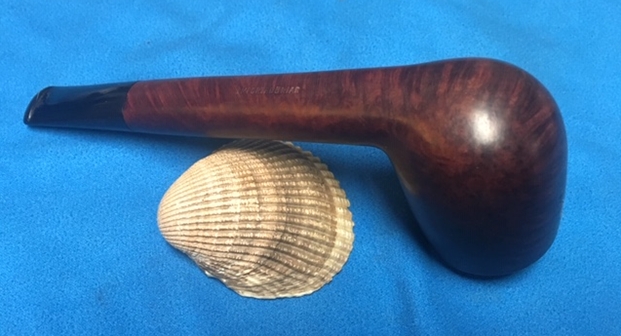
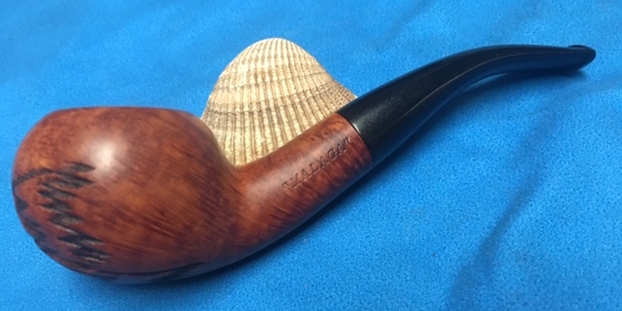
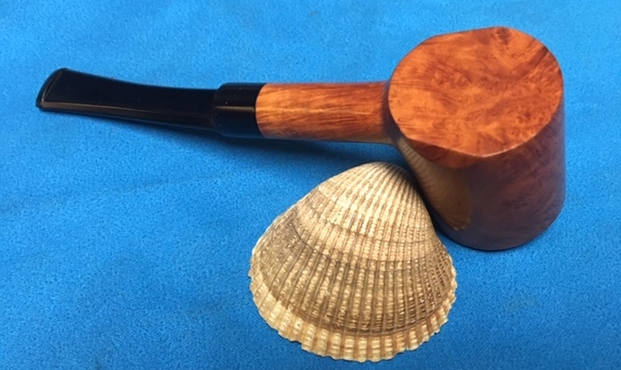
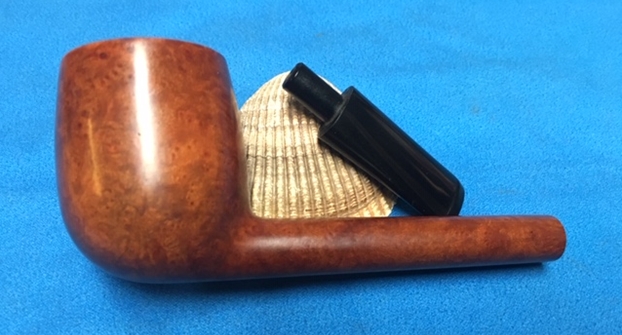
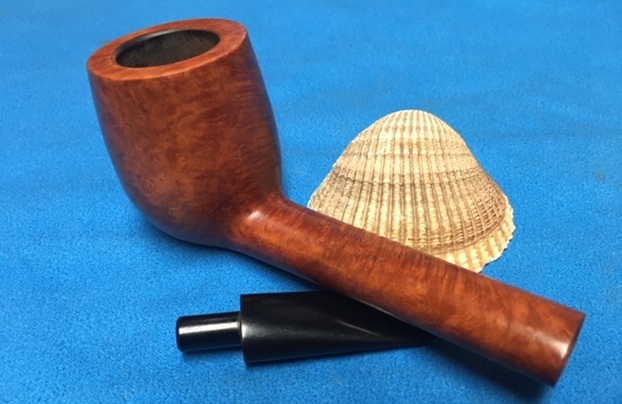
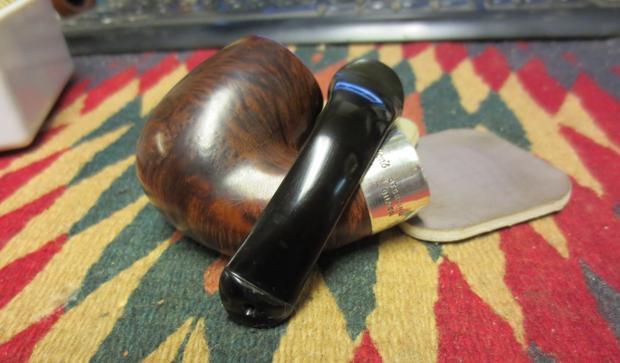
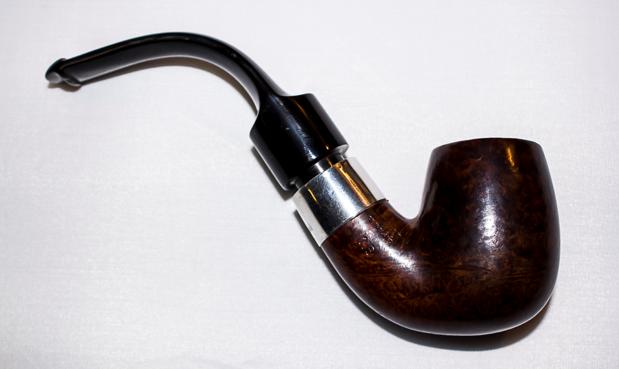
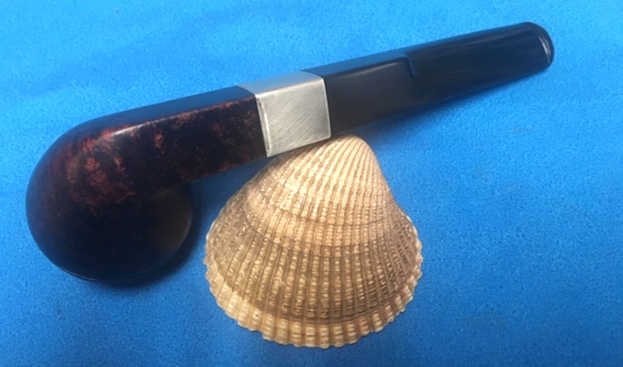
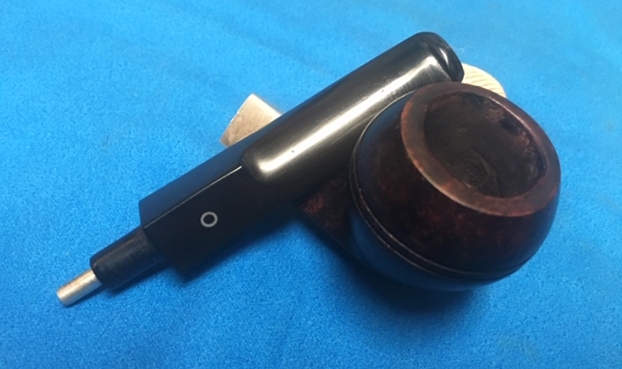
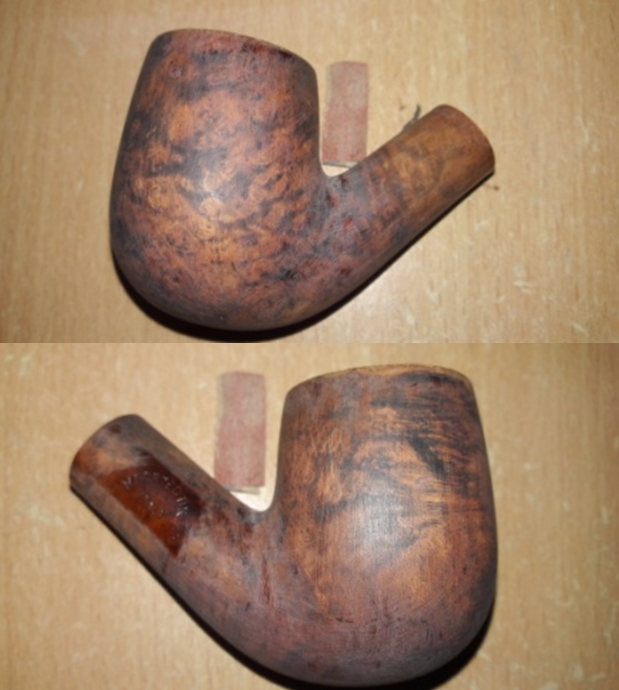
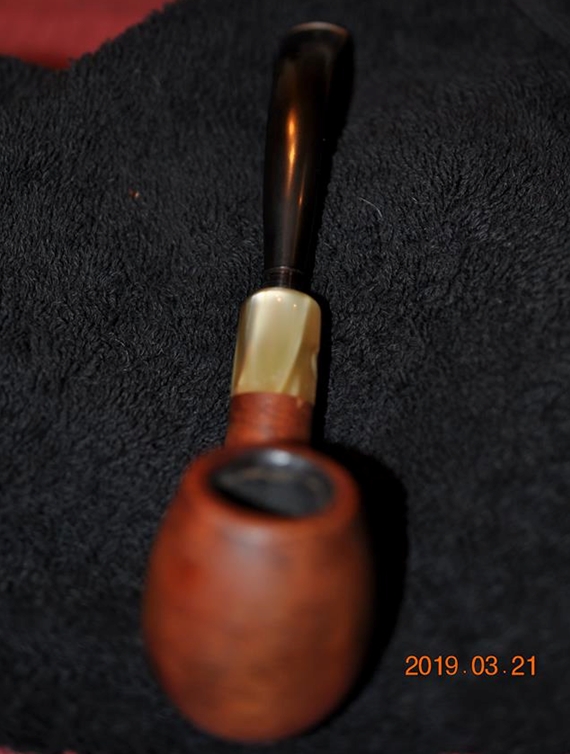
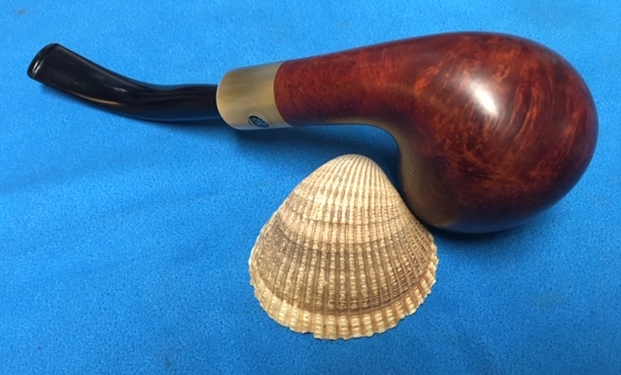
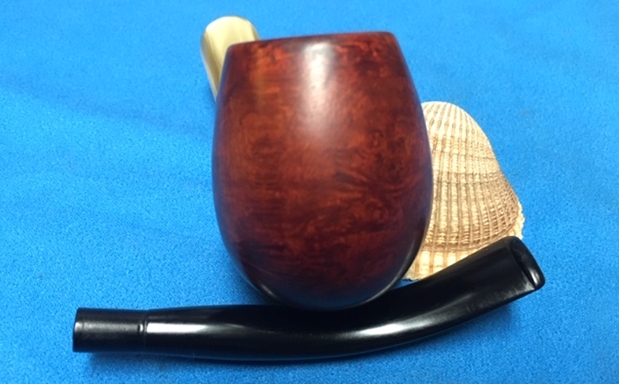
Photo 2 Right side view

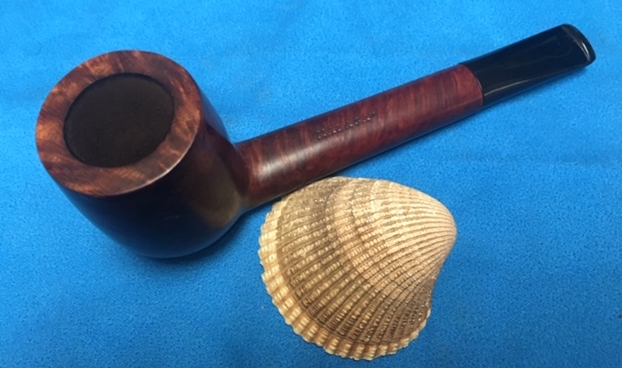
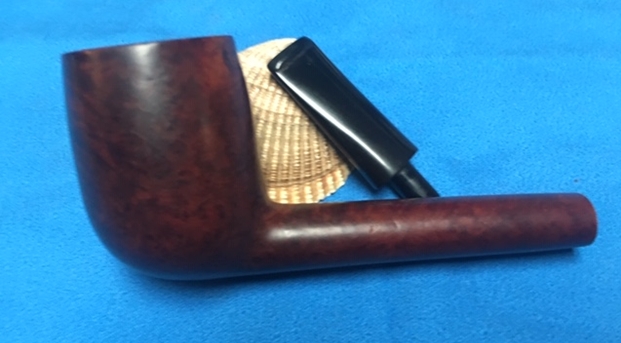
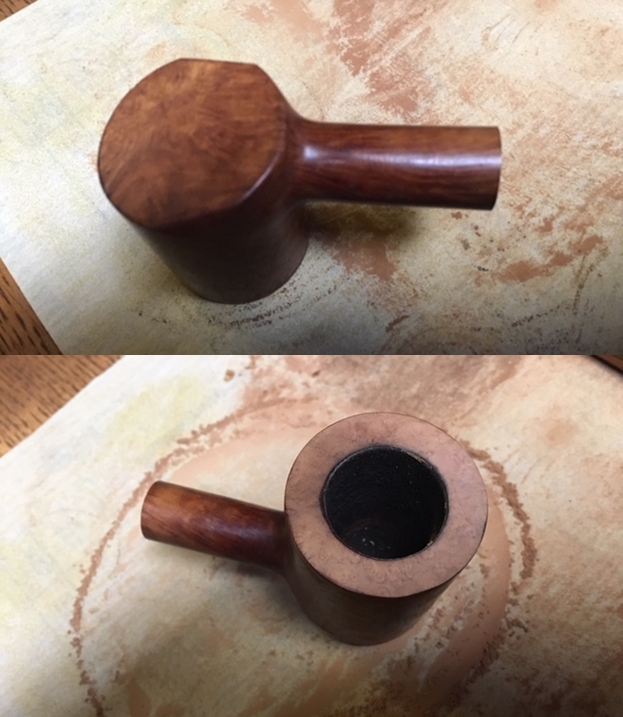
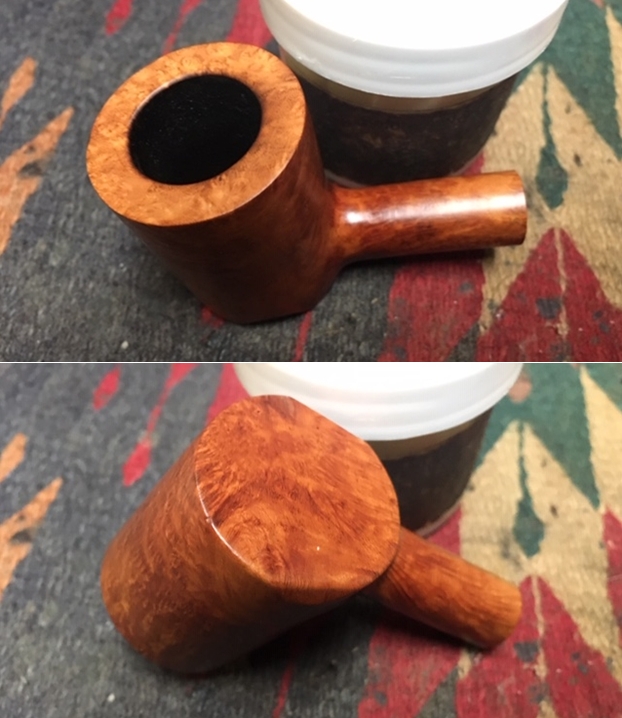
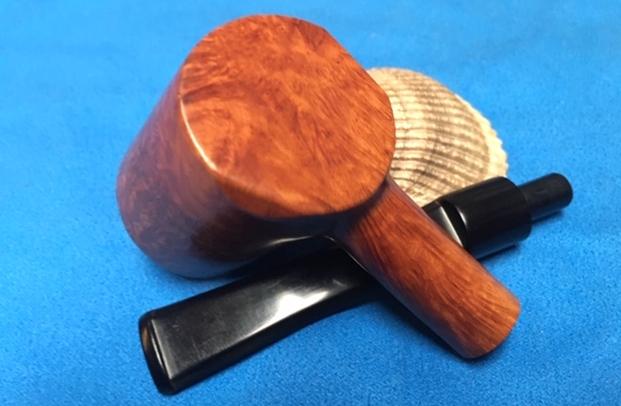
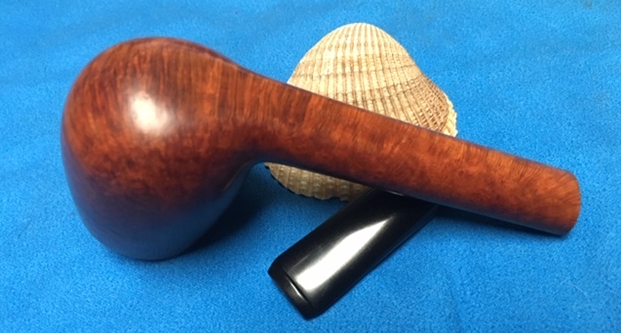
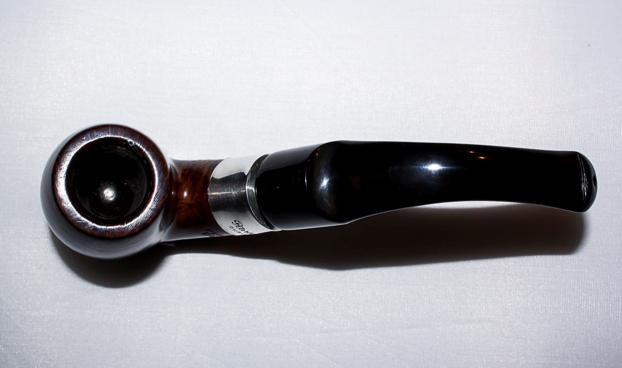
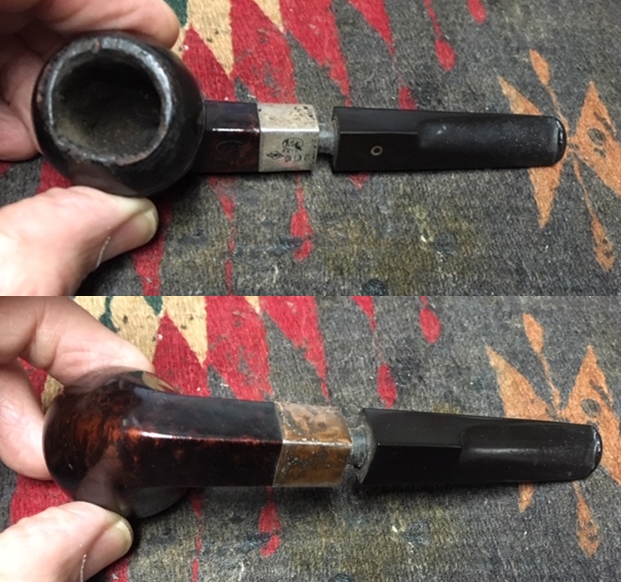
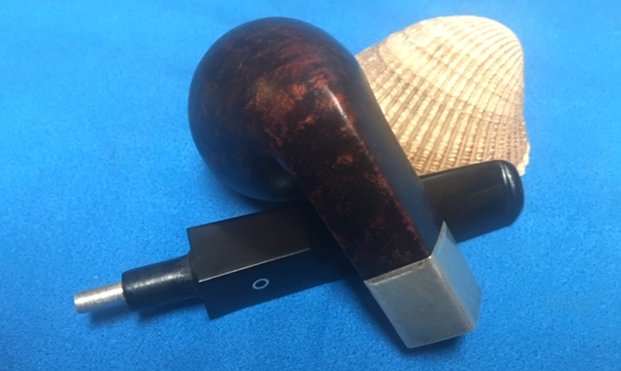
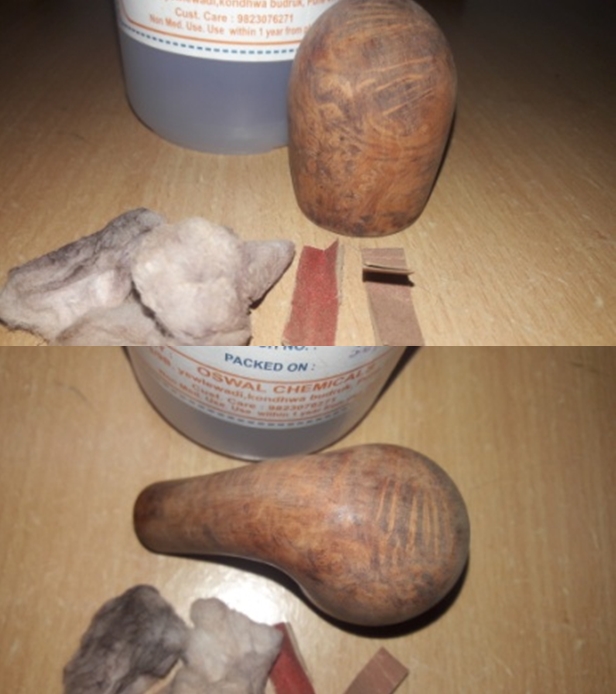
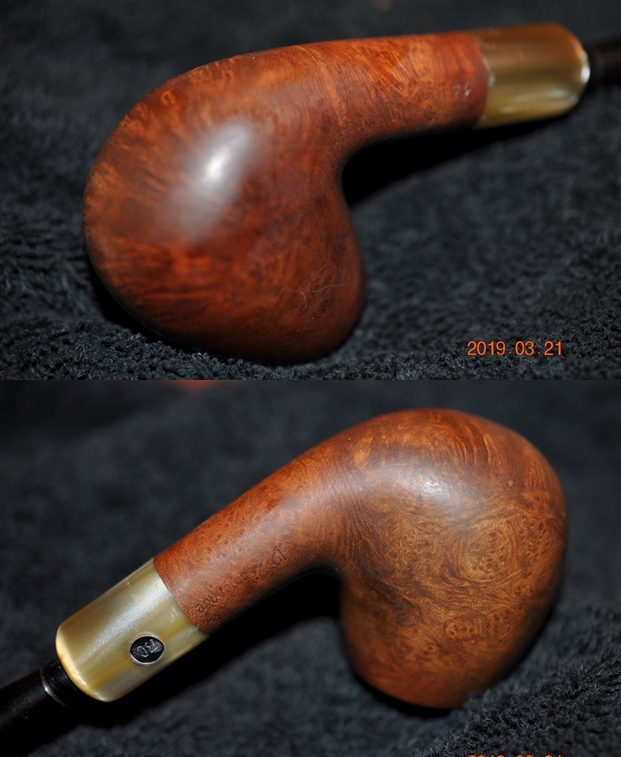
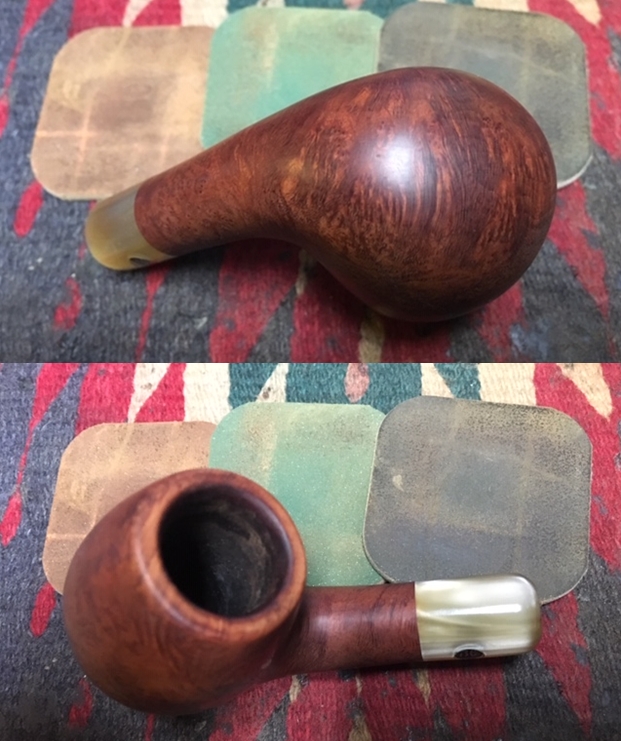
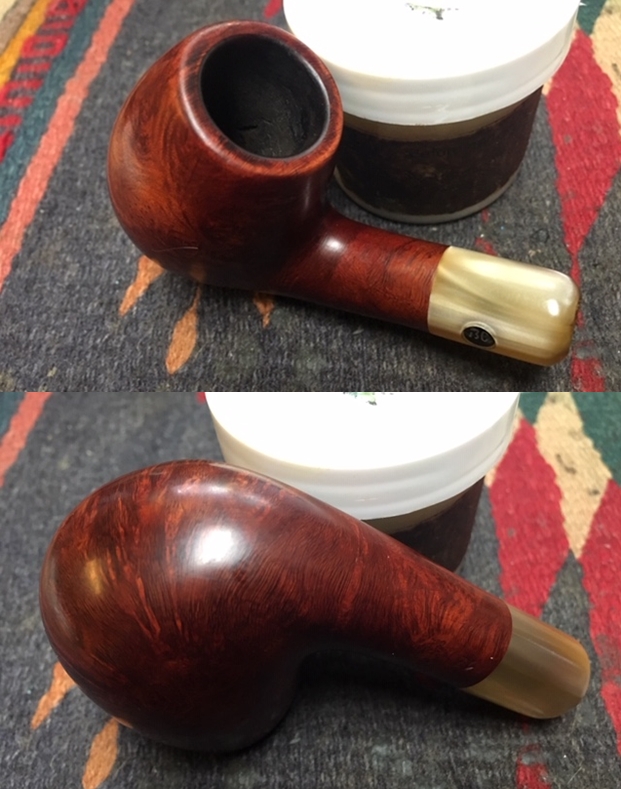
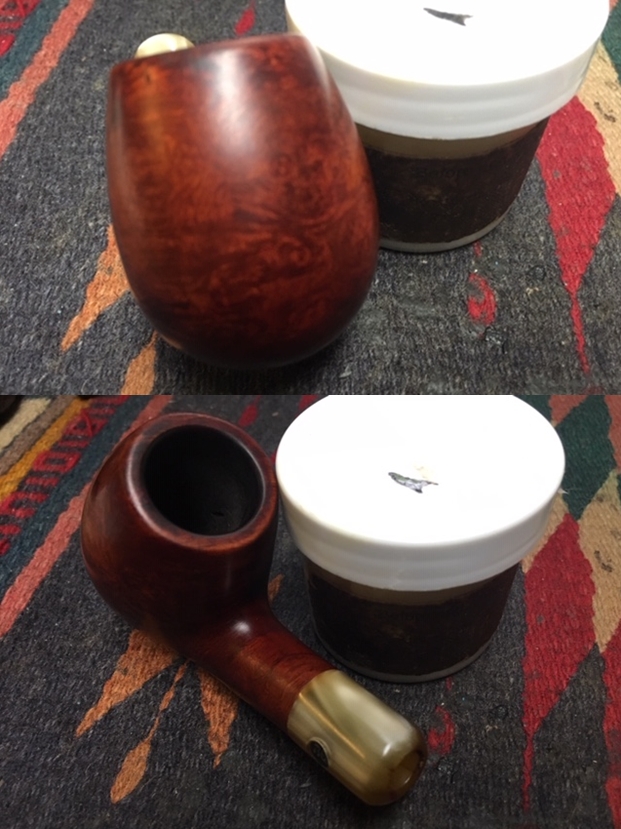
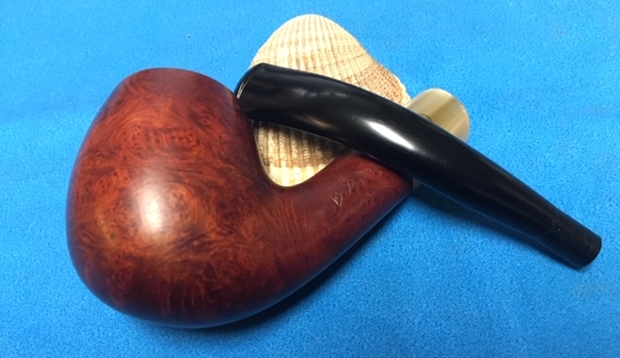
Photo 3 Top view

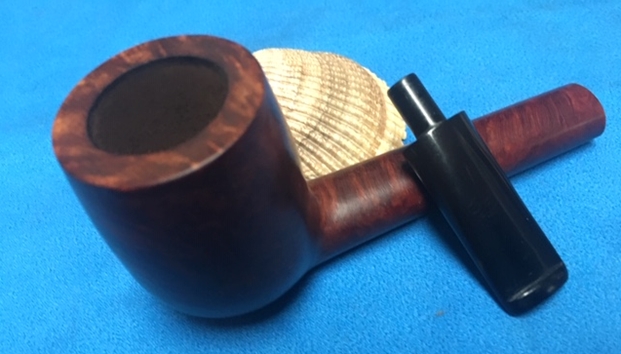
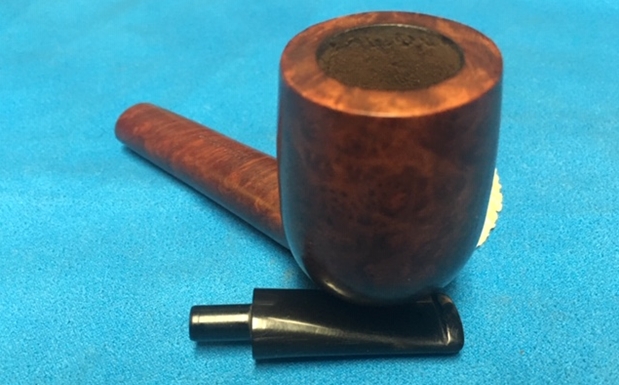
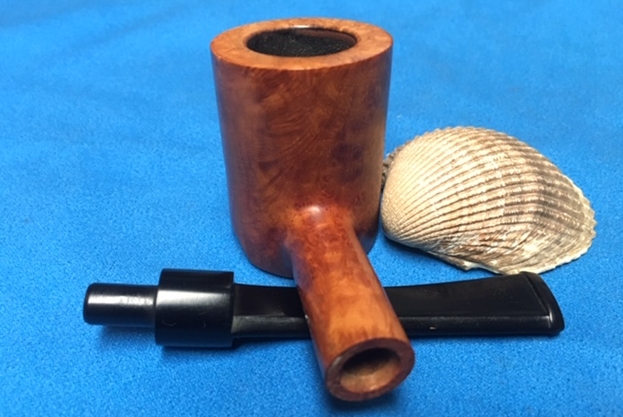
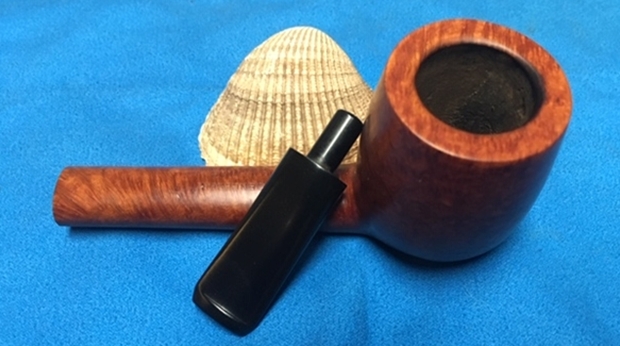
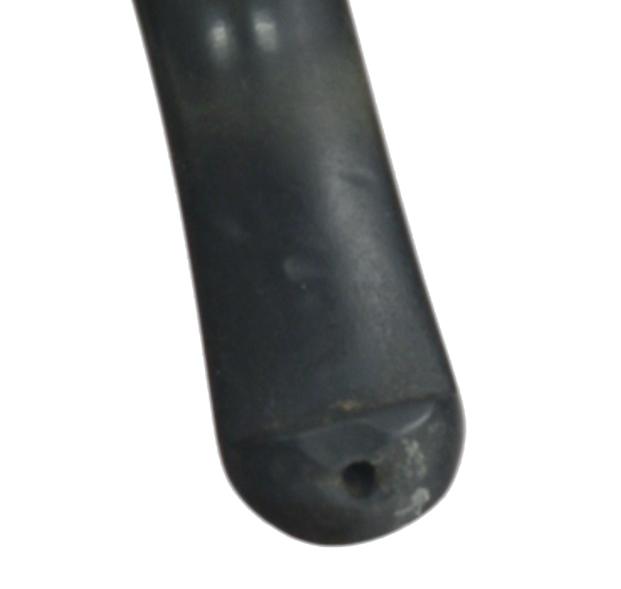
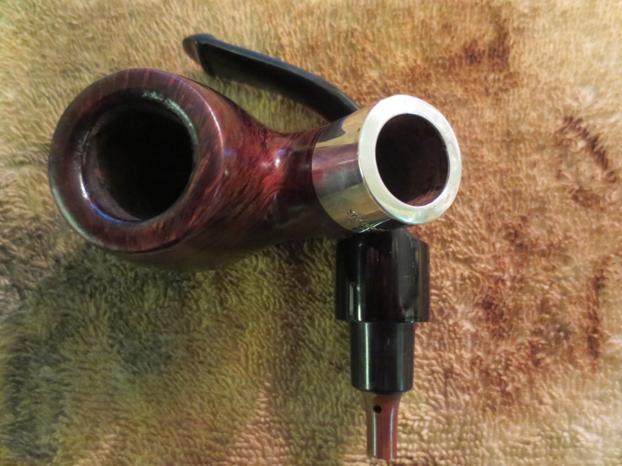
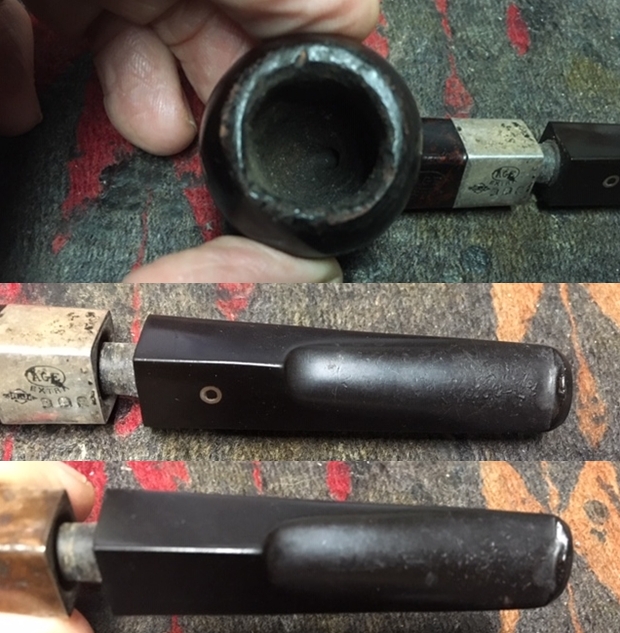
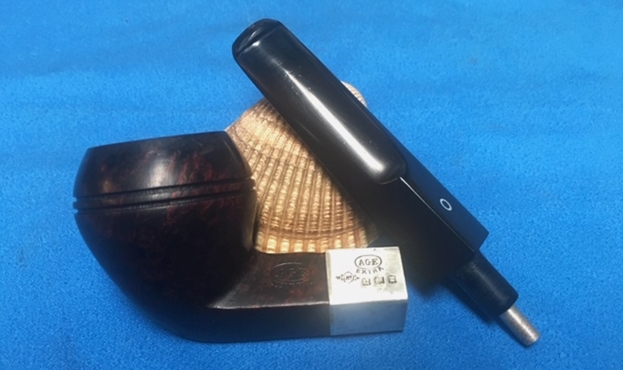
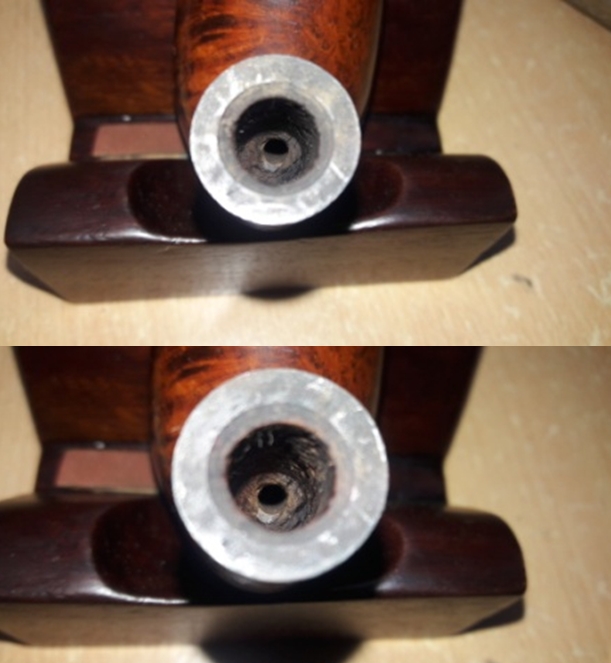
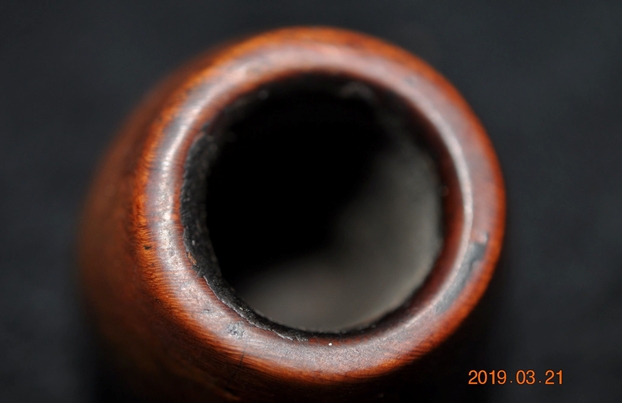
Photo 4 Looking into the shank

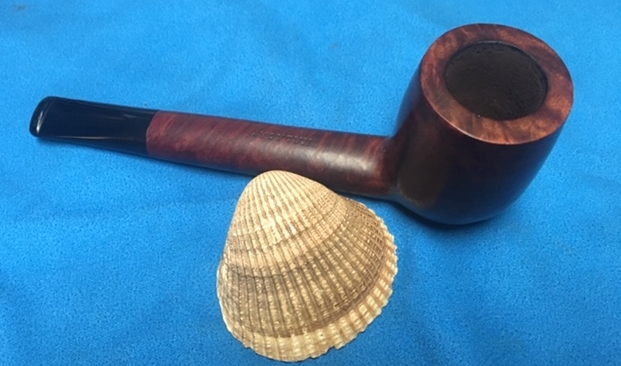
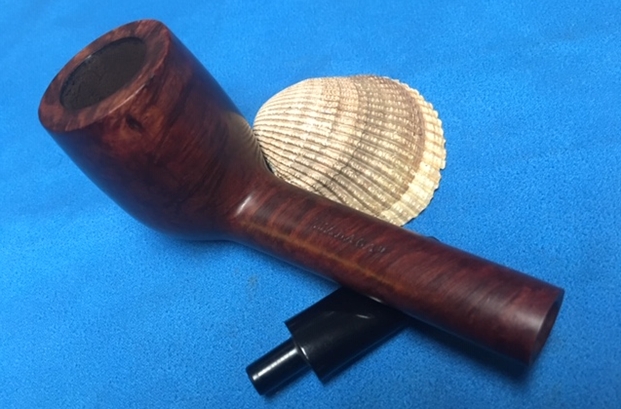
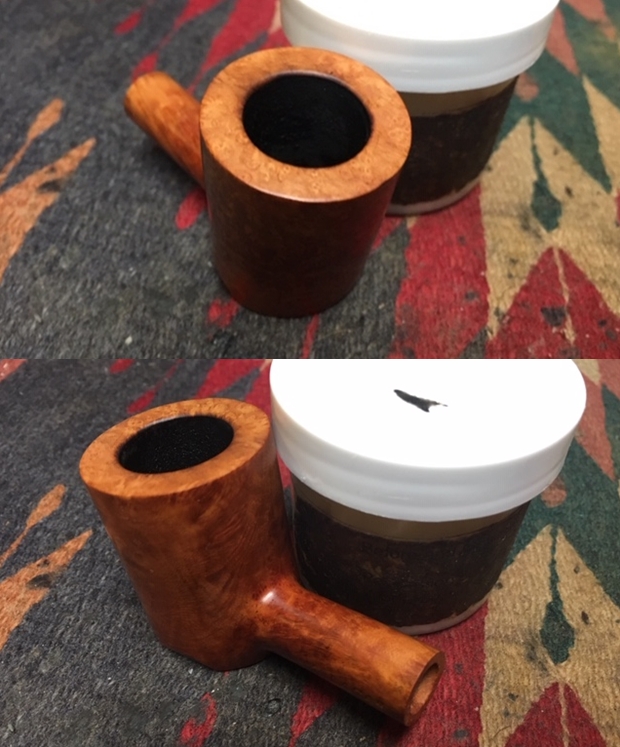
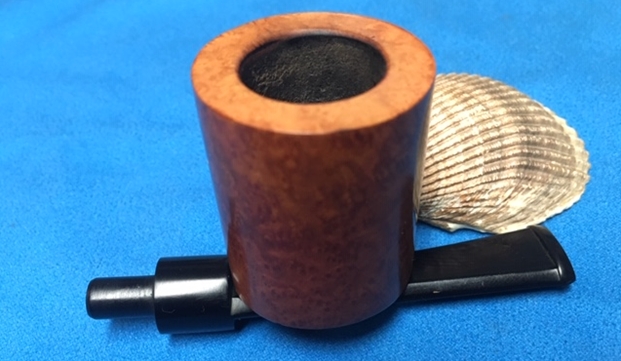
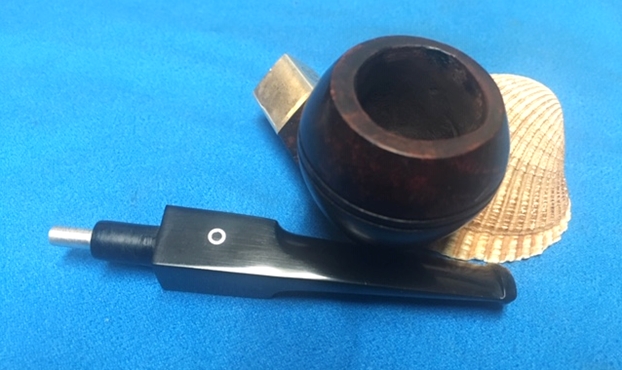
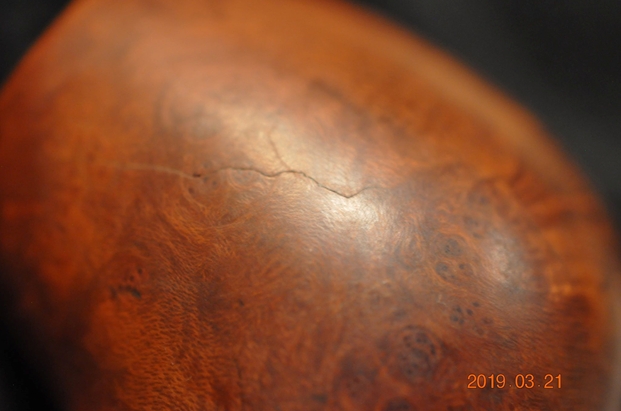
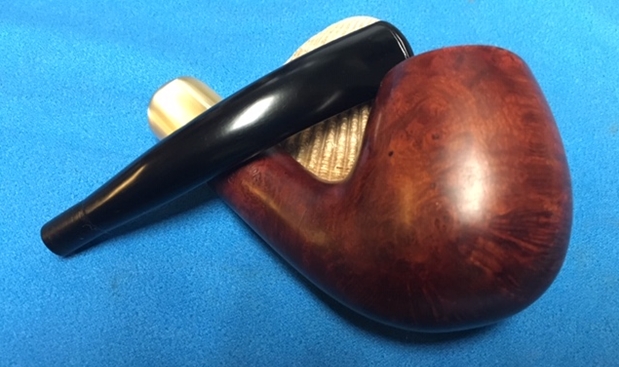
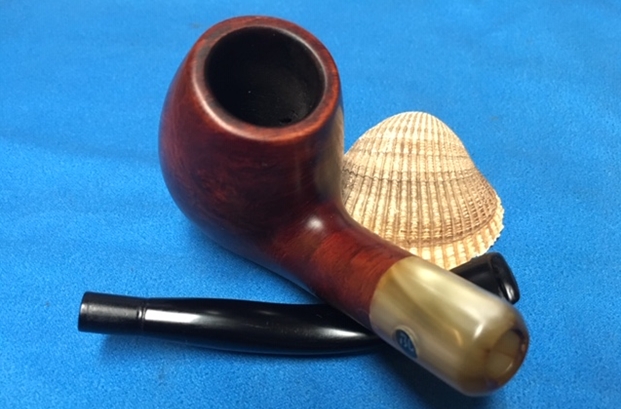
Photo 5 Top view of the bowl and shank
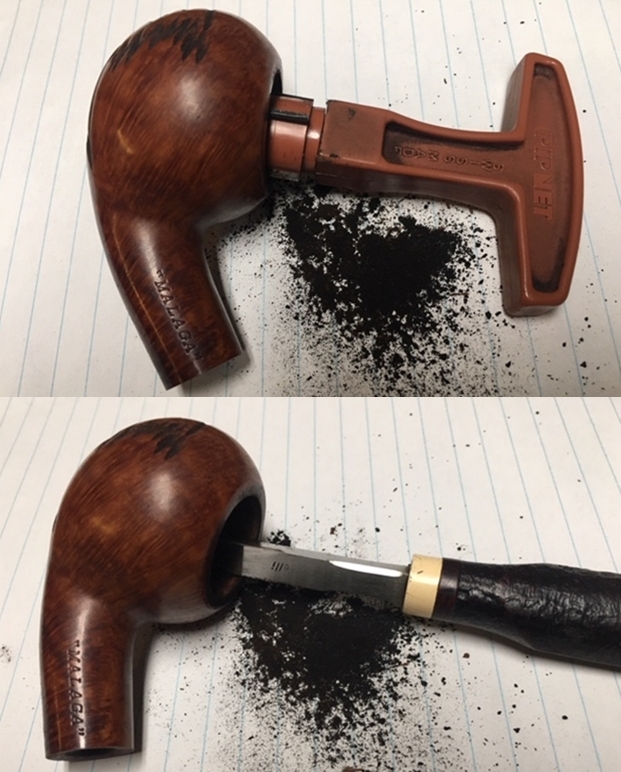
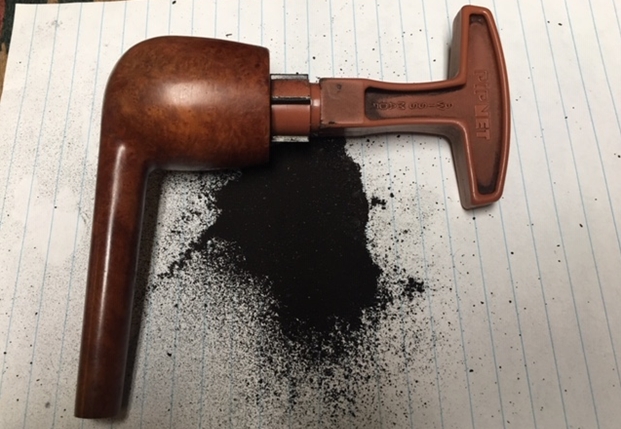
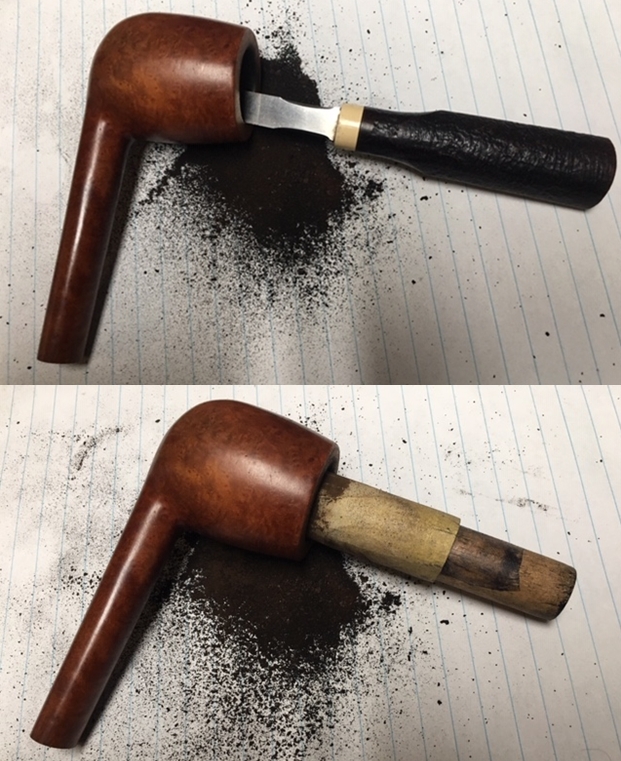
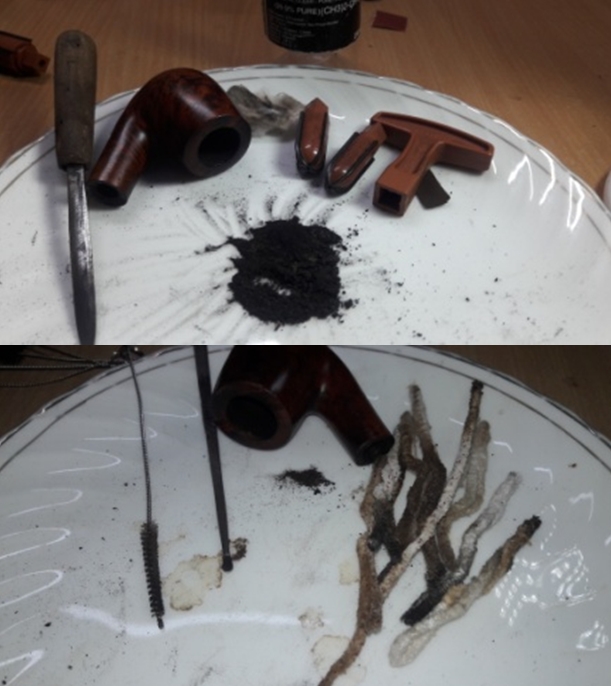
After completing my observation of the pipe, I decided to begin the work by cleaning up the inside before dealing with the externals. I reamed the bowl with a PipNet reamer – a T handle with four different sized cutting heads (Photo 6). I started with the smallest head and worked up to the size that fit the internals of the bowl (Photos 8 – 10). My objective was to take the cake out completely bringing the bowl back to briar so that I could reshape the inner edge of the rim and clean up the mess left by the knife reaming job.
Photo 6 PipNet Reamer set

Photo 7 Reaming with the second cutting head

Photo 8 Second Cutting head

Photo 9 Reaming with the third cutting head

Photo 10 Third cutting head
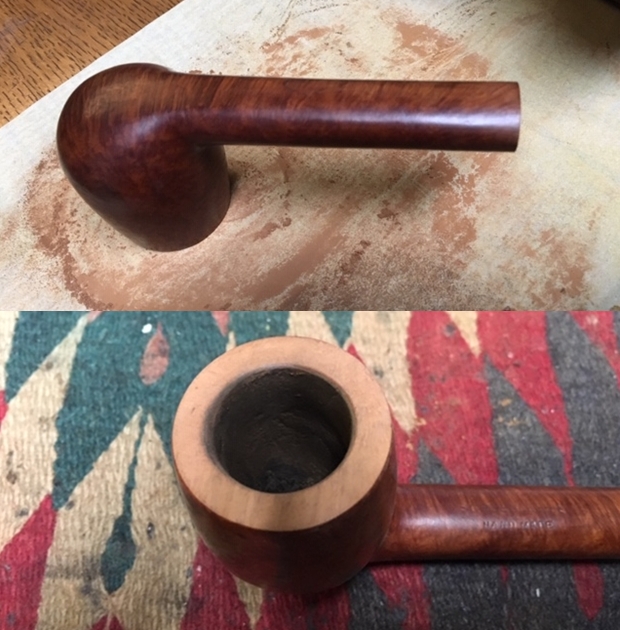
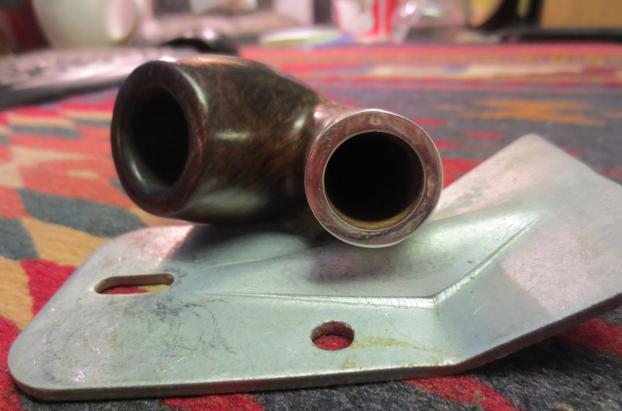
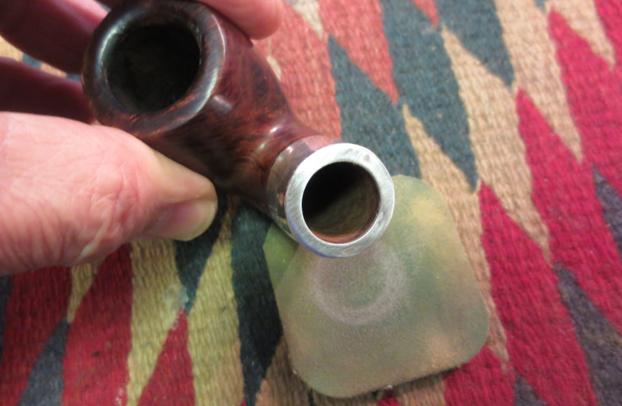
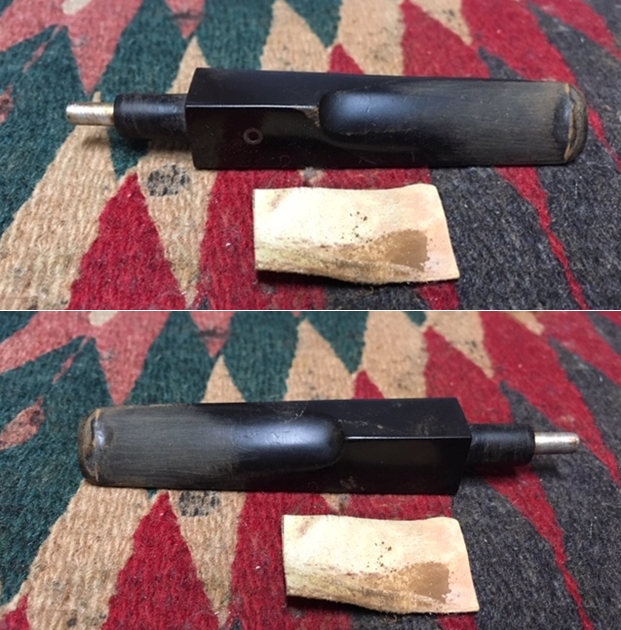
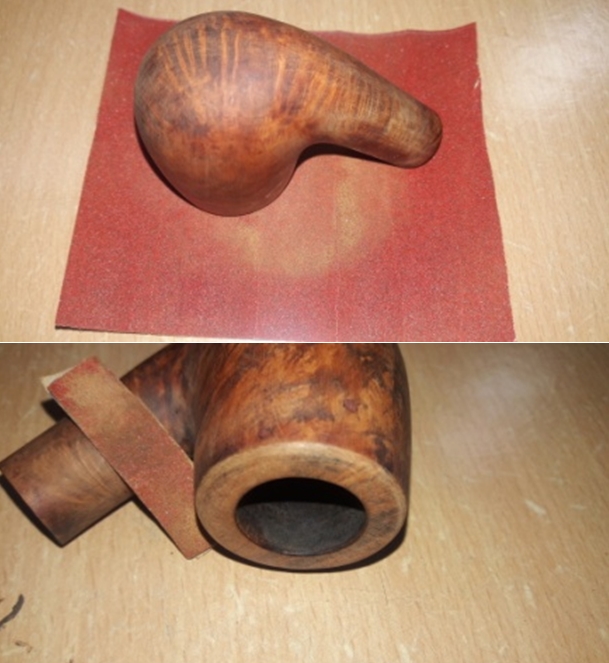
The finished bowl, after reaming with the various cutting heads, is shown in Photo 11 below. Once the cake was gone from the inside of the bowl I could clearly see what needed to be done to bring the bowl back into round and repair the damage to the inner rim. It was at this point I decided to top the bowl. Photo 12 below shows the process of setting up a piece of sandpaper on a hard, flat surface and sanding the bowl top by pressing it into the sandpaper and rotating it to slowly remove damaged briar from the top of the bowl. For this particular bowl I used 220 grit sandpaper. I did not want to leave deep scratches in the rim, but I wanted to smooth out the surface and remove the damaged material. Photo 13 shows the finished bowl top. I removed enough of the surface to get rid of the knife cut angles on the inner edge. Photos14 – 16 show how I sanded the inside edge of the rim using a folded piece of medium grit emery paper. The idea was to work on the inner edge and slowly and carefully bring it back to round and remove the remaining damage left by the knife. After the cleanup I used a fine grit sanding sponge to remove the remaining scratch marks left in the surface of the rim (Photo 17).

Photo 11 After reaming

Photo 12 Topping the bowl

Photo 13 Topped bowl

Photo 14 Smoothing the inner edge

Photo 15 Inner edge after smoothing

Photo 16 Close up of the inner edge

Photo 17 Sanding with a fine sanding sponge
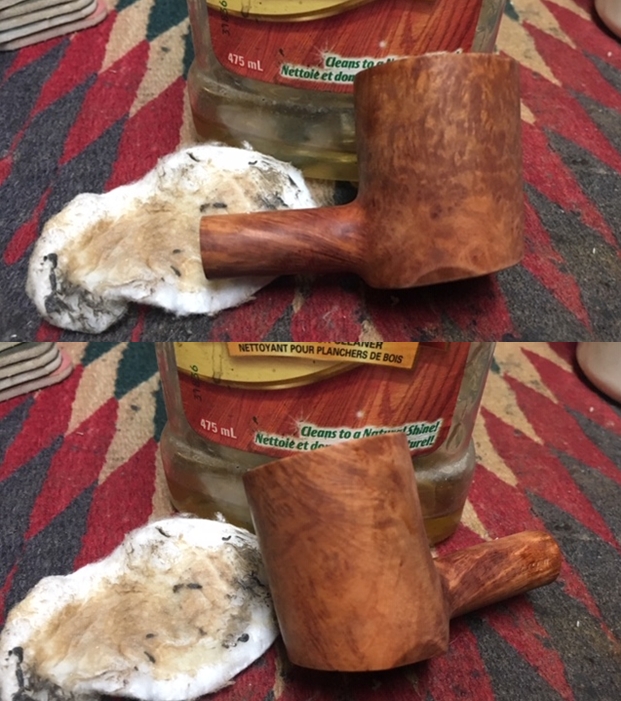
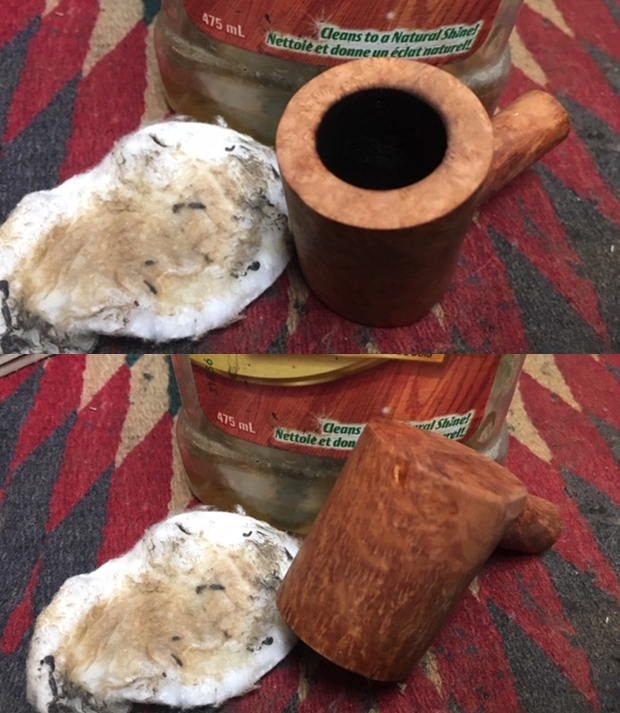
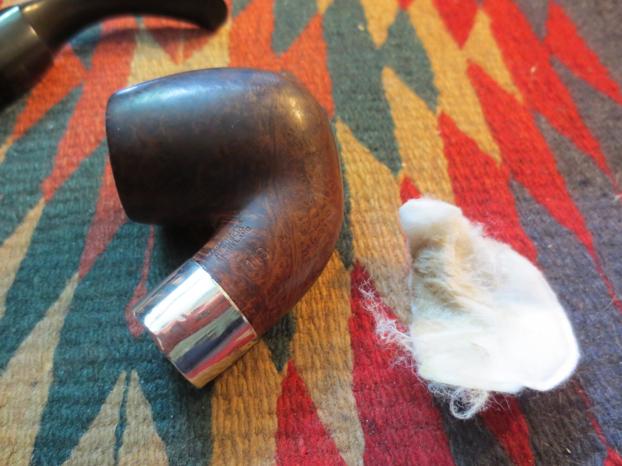
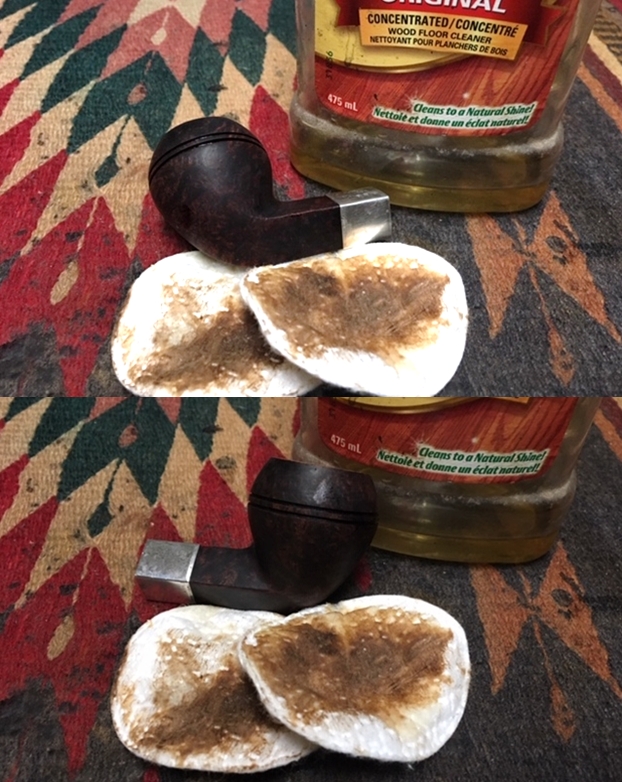
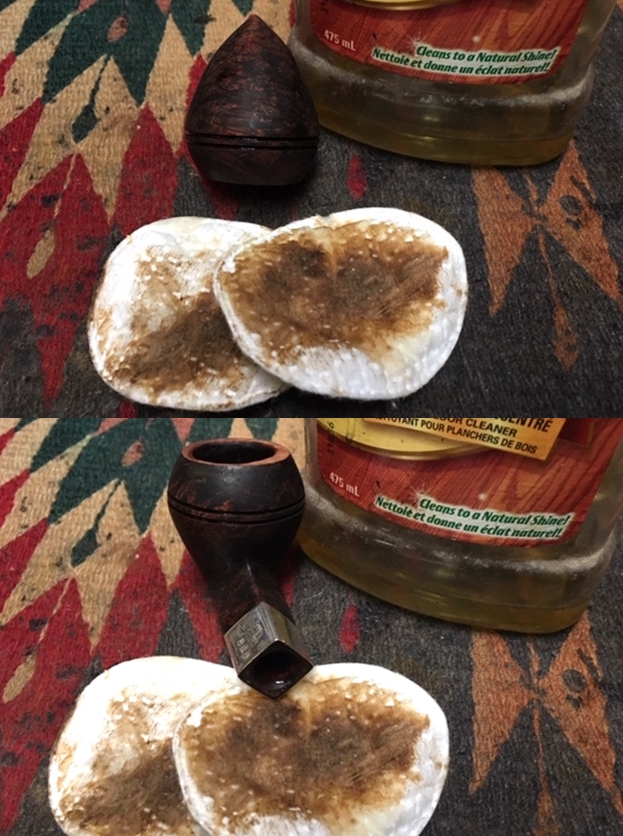
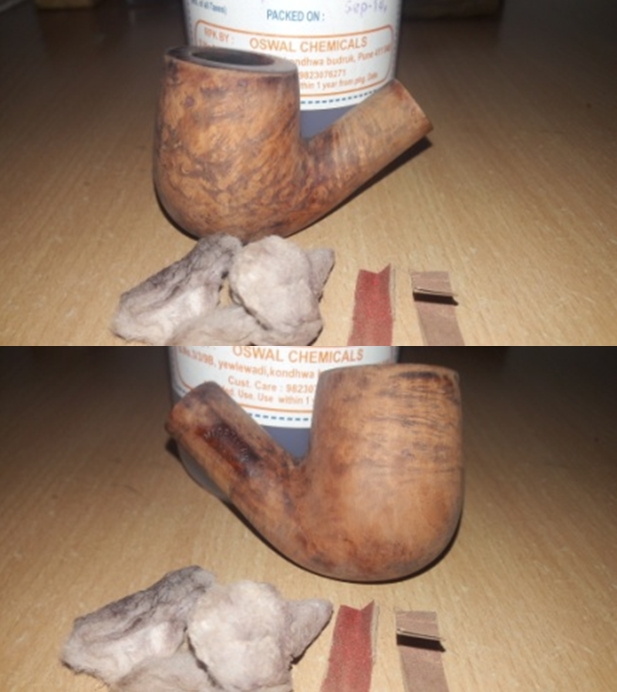
With the bowl back in shape and the rim cleaned and sanded it was time to remove the remnants of the finish on the bowl. I wiped the bowl down with acetone on a soft cotton makeup removal pad (Photos 18 – 20). For the acetone I use fingernail polish remover. I have found that it removes the grit and oils that have ground into the bowl as well as the finish. I wiped the bowl down until I was satisfied that I had removed the finish. The best way to tell this is when the pads come back clean and fresh after wiping the bowl down.

Photo 18 Acetone and cotton pads

Photo 19 Acetone and cotton pads

Photo 20 The bowl and cotton pads after being wiped down
In Photo 21 below, the bowl is dry and clean. The finish is gone. At this point I used the drill bit in the handle of the KleenReem tool to clean out the airway in the shank and bowl. I find that this tool quickly removes the buildup in the airway and is the best way to minimize the number of pipe cleaners used to clean out the shank. I carefully twist the bit into the airway making sure not to twist it through the airway and into the other side of the bowl bottom (Photos 22 – 23).

Photo 21 Clean bowl with KleenReem Pipe Cleaner

Photo 22 Drill bit from the handle

Photo 23 Drill bit inserted into the airway
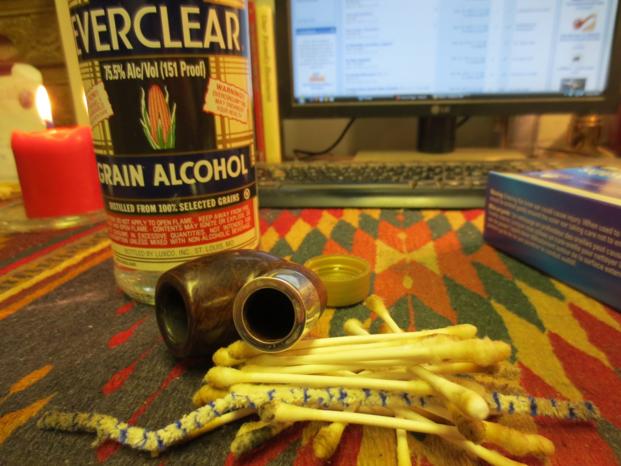
I cleaned out the double rings around the bowl using a dental pick. I wiped the bowl down with Everclear as I ran the dental pick in the grooves on the bowl. The amount of dried stain and grit that comes out of the rings makes me always take this step when I am cleaning a bulldog or Rhodesian shaped bowl (Photos 24 – 25).

Photo 24 Cleaning the rings

Photo 25 Rings cleaned
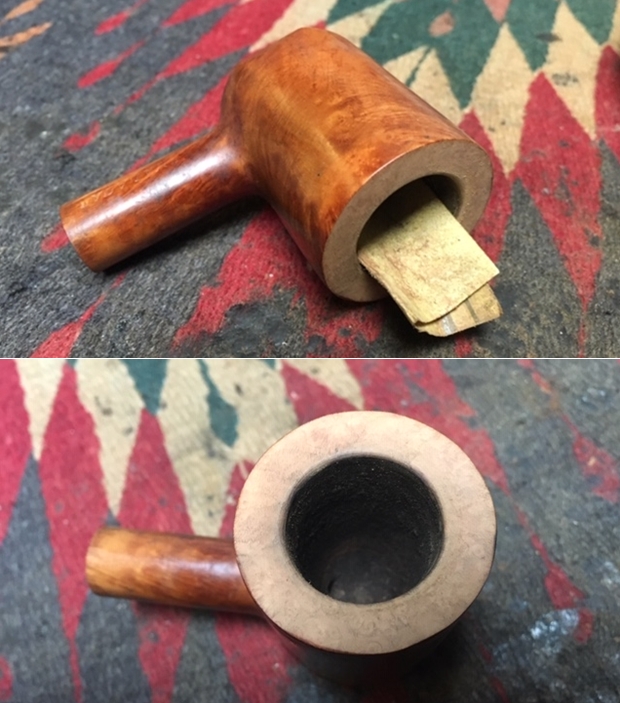
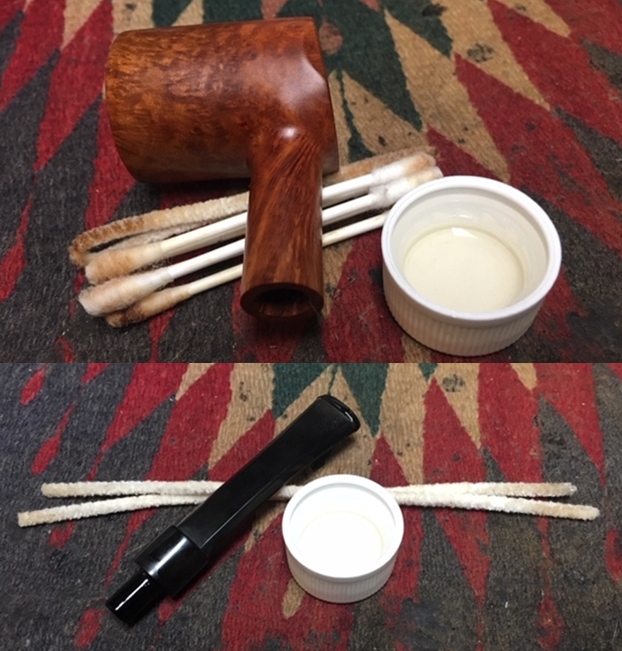
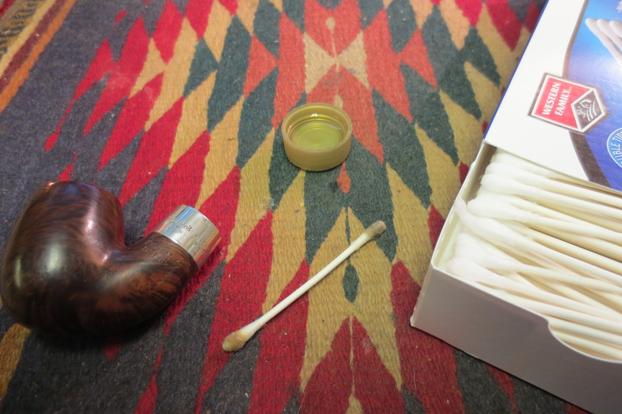
Now it was time to turn my attention to the internals of the shank – both the airway and the condensation chamber in the Peterson pipes. In the bents this is the area I call the sump. It collects a lot of tar and oils from the smoke that is drawn through it. It takes detailed work to remove all of the grime. In this case I used many pipe cleaners – both bristle and fluffy as well as cotton swabs to clean out the area. I folded the pipe cleaners in half to give me the area needed to clean out the walls of the shank. Photos 26 – 28 show the work and the resultant pile of cleaners. I cleaned out the area until the pipe cleaners came out clean and the pipe smelled clean.

Photo 26 Time to clean the shank

Photo 27 Folded and inserted

Photo 28 Many pipe cleaners later
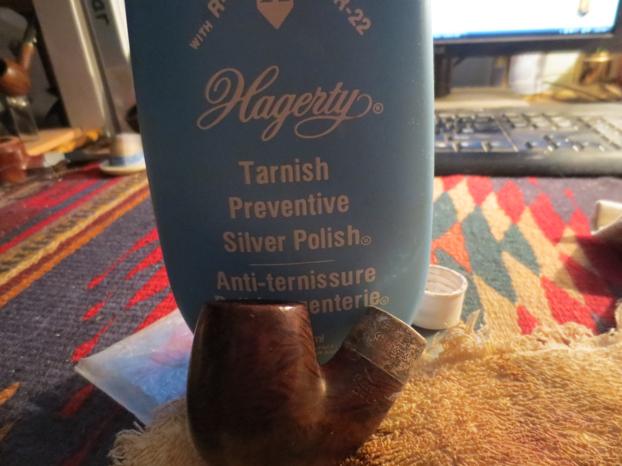
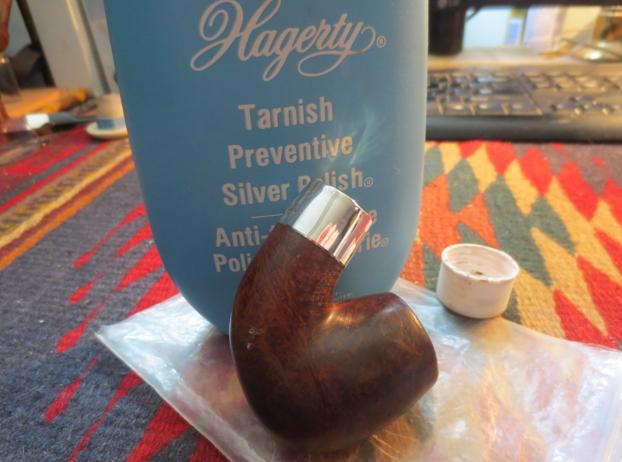
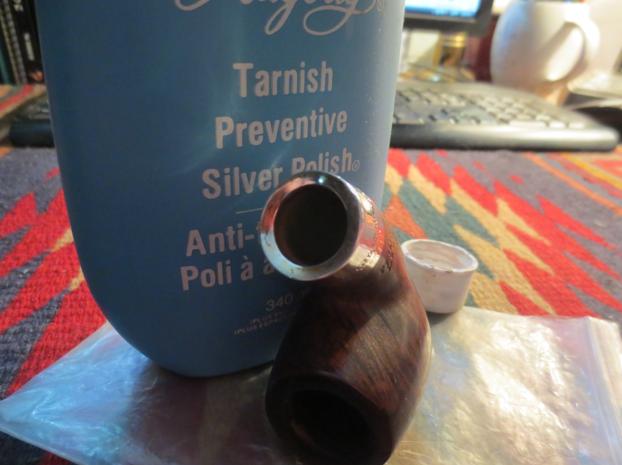
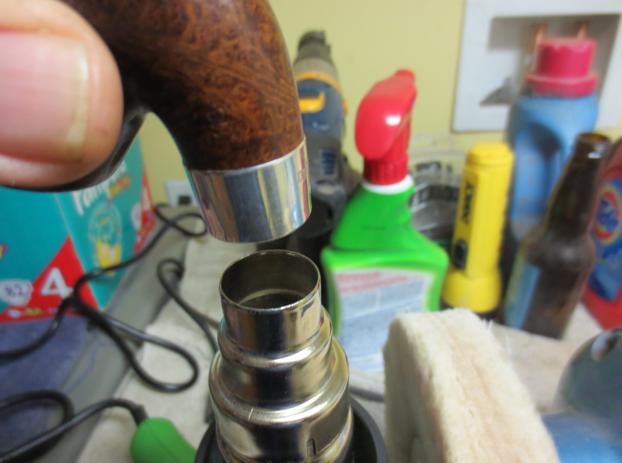
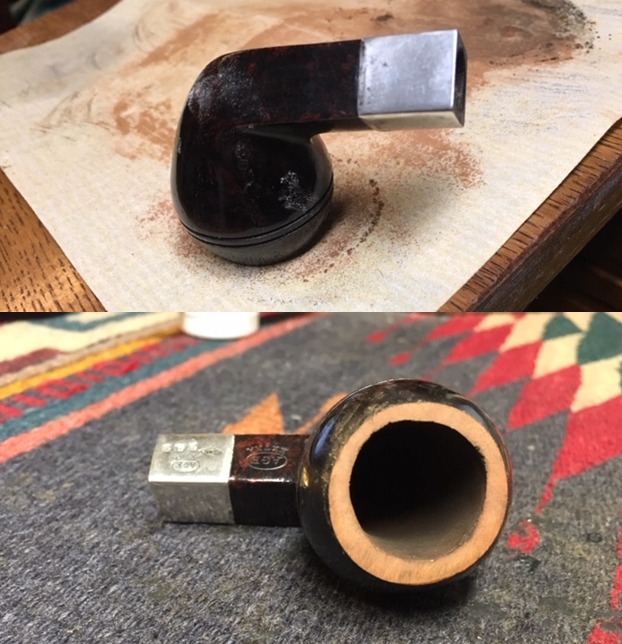
For the silver ferrule/cap on the shank I used a jeweler’s cloth that I purchased at a local jewelry shop. It is impregnated with a cleaning solution that effectively removes the level of tarnish found on this cap. I wiped down the cap with the cloth repeatedly until the tarnish was gone and the silver gleamed. Photos 29 – 31 show the polished cap and the cleaned bowl.

Photo 29 Polished cap

Photo 30 Polished cap

Photo 31 Polished cap
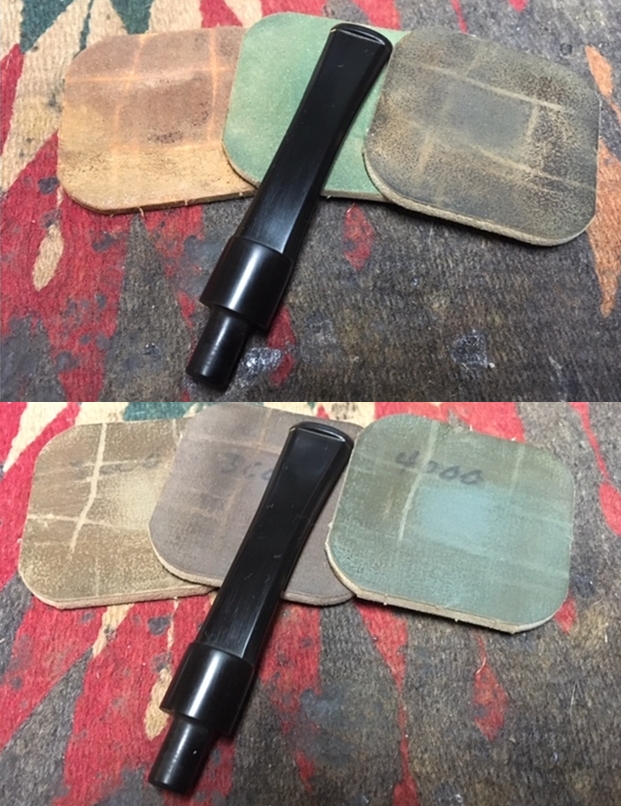
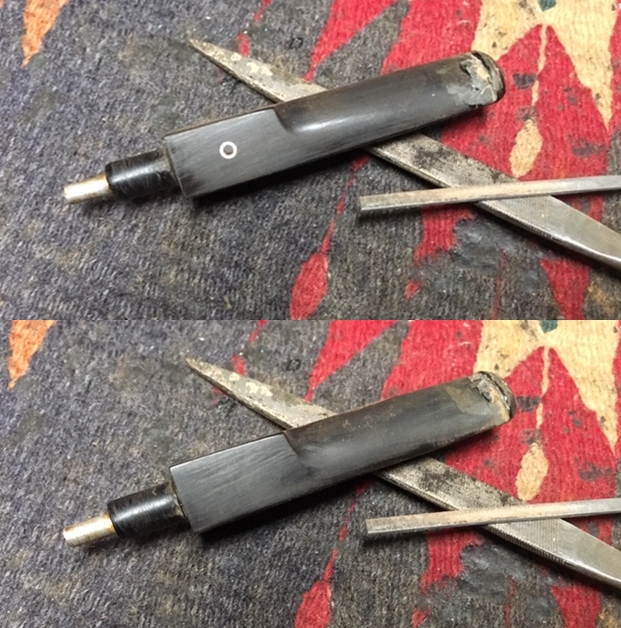
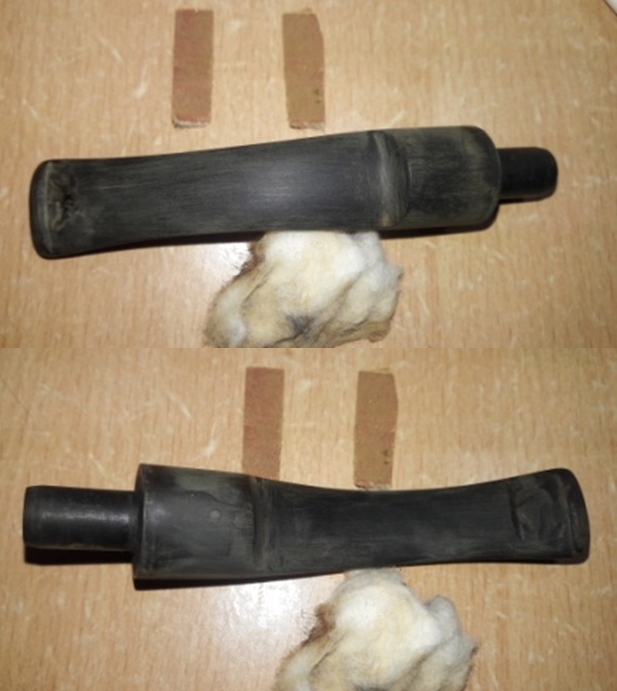
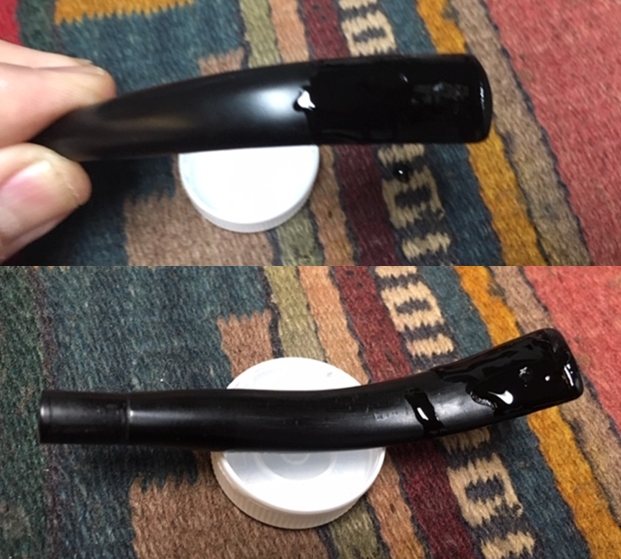
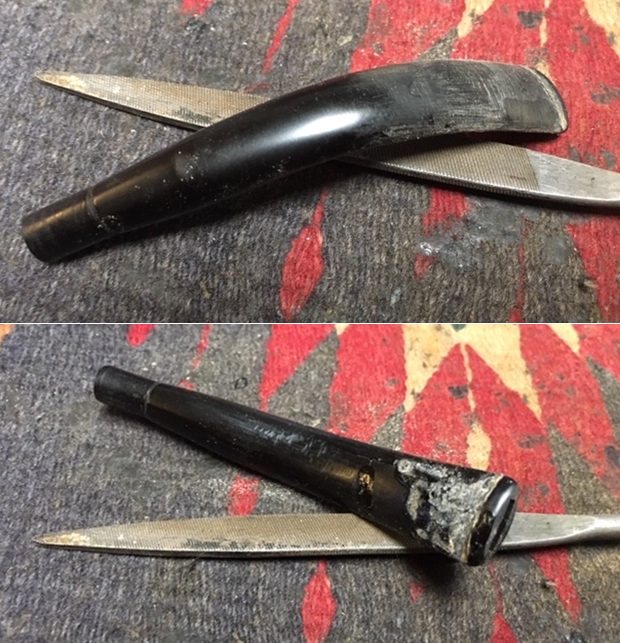
With the bowl ready to restain, it was time to turn my attention to the stem. As mentioned above there were some dents and divots in the stem and button area. These would take some work. There are several different procedures that I used in addressing the issues in this stem. I always begin by sanding the area around the dents with 220 grit sandpaper to better assess the damaged areas. If the dents are merely dents then heat will lift them and the stem will return to its smooth surface. If however the dents have edges that are cut then no amount of heat will lift the areas and other methods will need to be employed. In this case the dents were indeed just dents and heat would lift those (Photos 32 – 33). The divots out of the top side of the button and the underside ridge were another matter. To reshape the 90 degree angle on the top side of the button I used a square needle file. I cleaned up the edge of the button and the place it met the surface of the stem (Photos 34 – 35). I used the same file on the bottom side of the button ridge/shelf as well. Again the idea was to clean up the edges and sharpen them the angles (Photo 36). These areas needed to be redefined in order to have the sharp and distinct edges that were originally there.

Photo 32 Topside after sanding

Photo 33 Bottom side after sanding

Photo 34 Reshaping the angles on the button topside

Photo 35 Angles reshaped with files

Photo 36 Reshaping the angles on the button bottom side
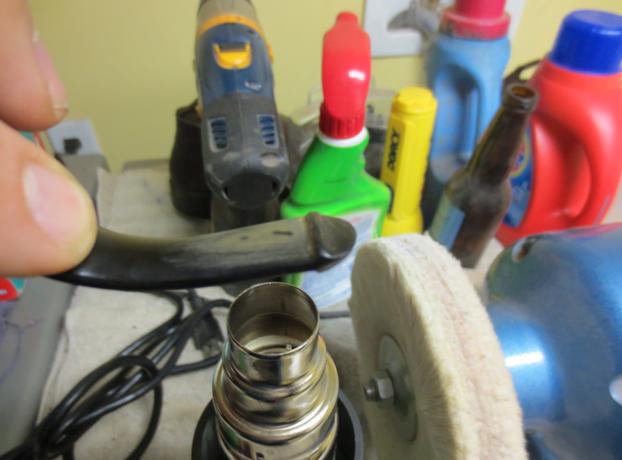
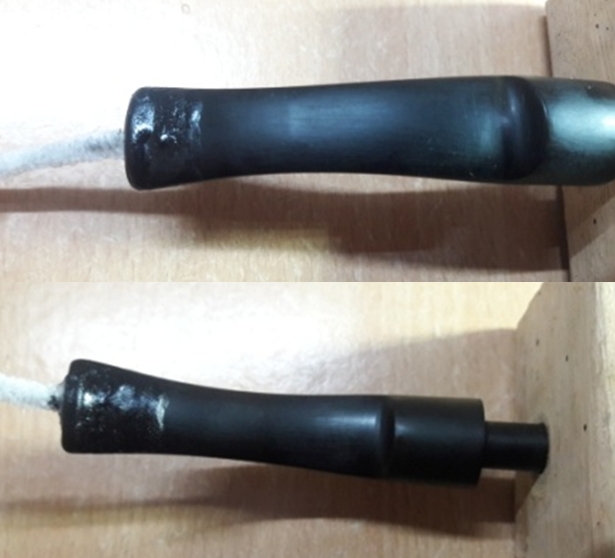
I used a Bic lighter to heat the stem surface. The key to this is to quickly move the flame across the surface of the dented areas. Do not leave it in one place too long as it will burn the vulcanite. Quickly passing it over the surface repeatedly and checking often I was able to lift the dents from both the topside and underside of the stem (Photos 37 – 39).

Photo 37 Using a Bic Lighter to lift the dents on the underside of the stem

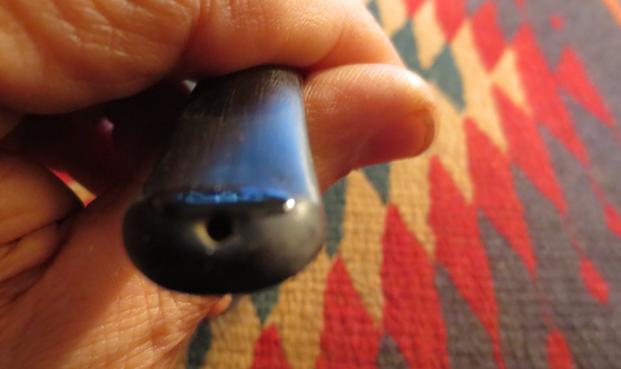
Photo 39 Underside of the stem after heating

Photo 38 Using a Bic Lighter to lift the dents on the top side of the stem
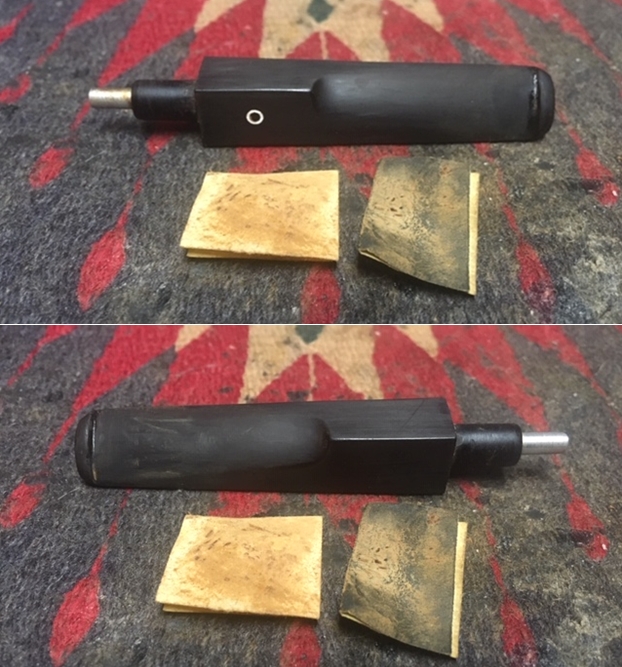
I sanded the newly smoothed surface with a medium grit sanding sponge. When I finish heating a stem, whether I use a Bic lighter or a heat gun, I sand it to ensure that I have finished lifting the dents. It is easy to be fooled when removing it from the heat. If it needs a bit more heat after the sanding it is a simple task and best done before progressing to the next steps of sanding the stems (Photos 40-41).

Photo 40 Top side sanded with a sanding sponge

Photo 41 Underside sanded with a sanding sponge
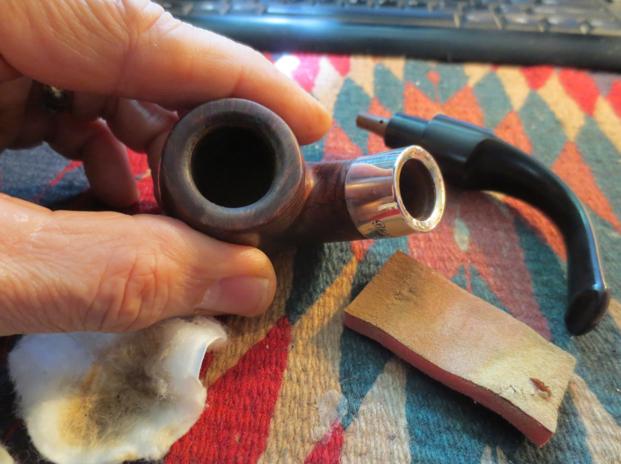
To repair the missing chunk of briar from the inside of the shank I used some Weldbond wood glue and briar dust. It is water soluble until it dries and then is hard and impermeable. I cleaned the surface area of the shank and then put the glue in place. I moved it around the area, pressed briar dust into the glue and cleaned up the surrounding area with a dental pick (Photo 42). I set it aside to dry while I returned to the stem cleanup.

Photo 42 Shank repair
For several years now I have been using black superglue (cyanoacrylate) to repair divots from the button and stem areas. It is glue that has been used medically in the field by medics to repair tears in the skin so I believe it is safe. It dries very hard and shiny black and does not disintegrate with cleaning once it is cured. Once the stem is buffed and polished the repair is virtually invisible. On this pipe I needed to build up the divots on the edge of the button on the topside and the ridge on the underside. I purchased the black superglue from Stewart Macdonald, a supplier of repair products for musical instruments (http://www.stewmac.com/). It is slow drying so you may want to consider purchasing an accelerator product from them as well. I apply the glue to the areas I am repairing and set it aside overnight (Photos 43 – 45). It dries hard in about 6-8 hours and cures in just over twelve hours. I find that once it is dry to touch I can sand the surface and blend it into the stem.

Photo 43 Black Superglue on the ridge of the button

Photo 44 Black Superglue on the topside divot on the button
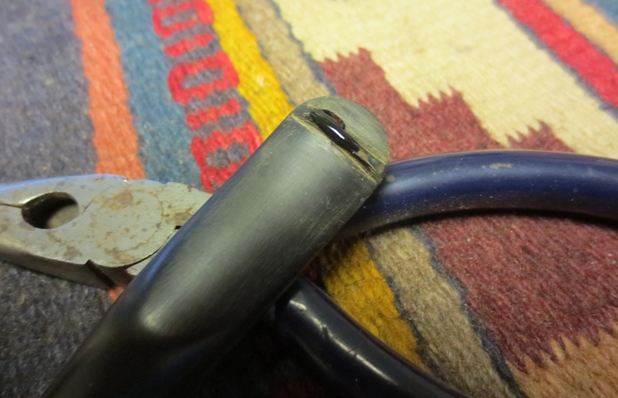
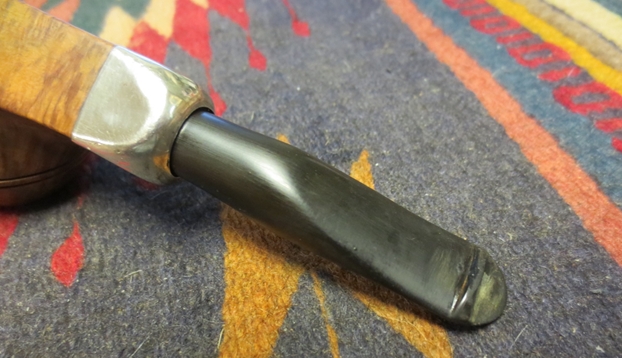
Photo 46 Superglue dried on the underside ridge

Photo 47 Glue dried on the topside
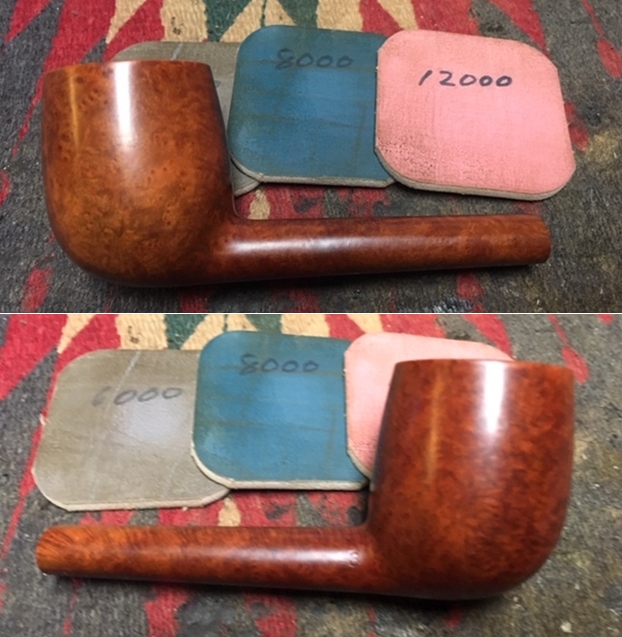
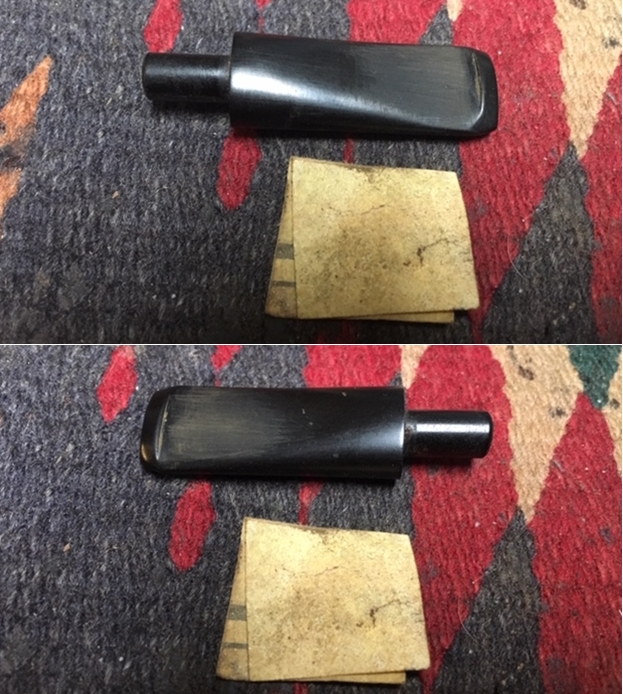
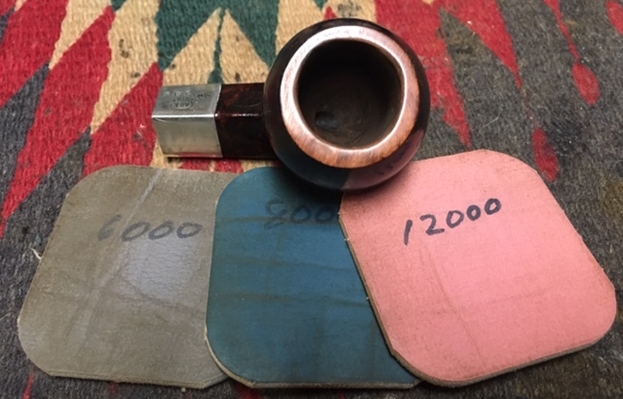
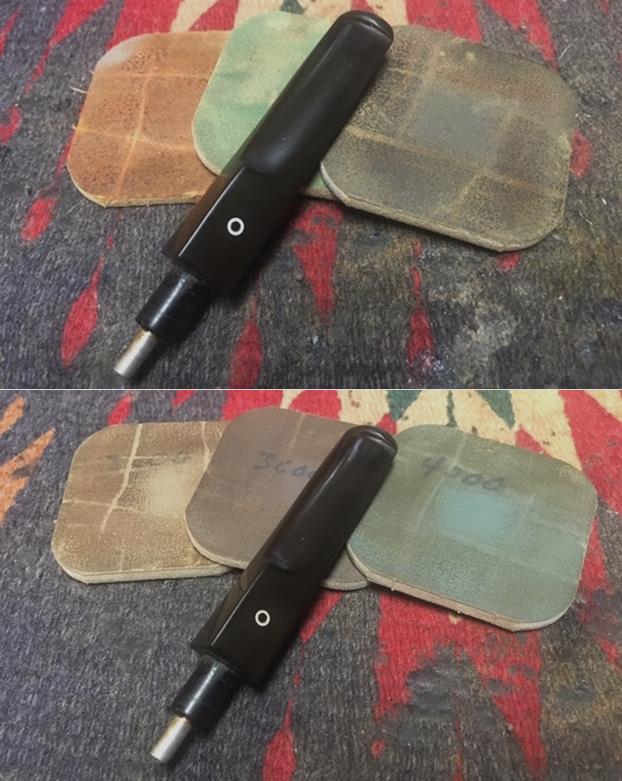
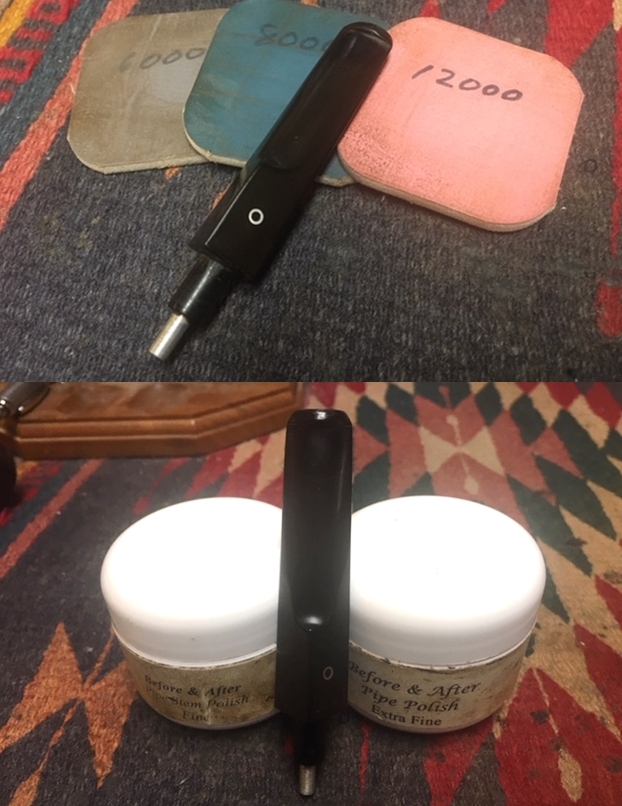
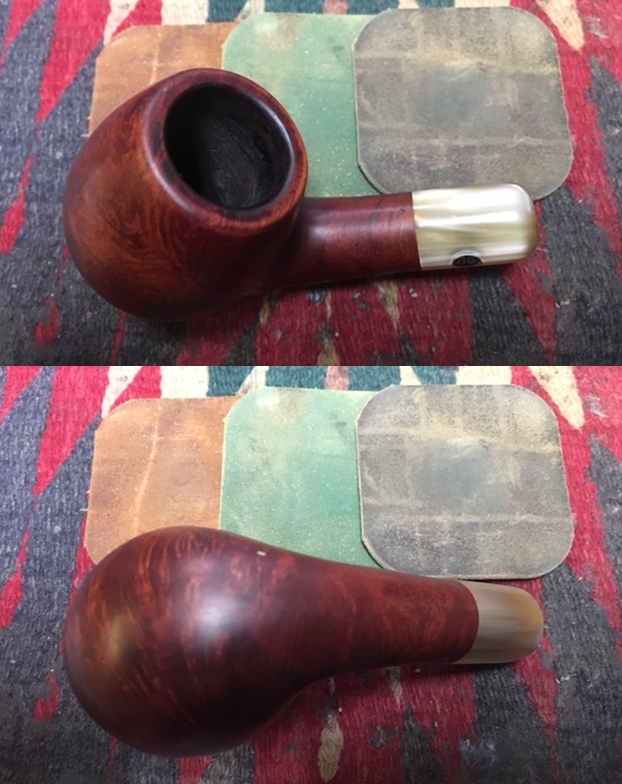
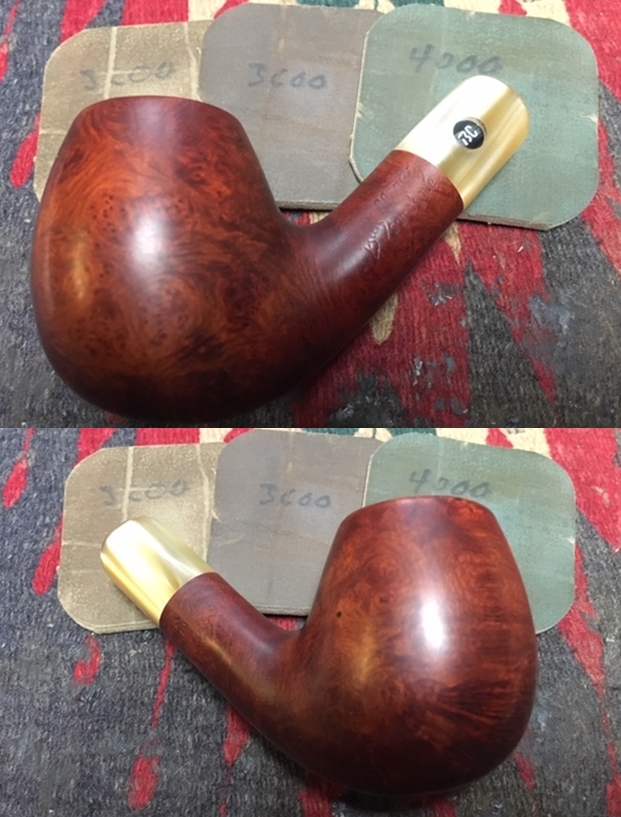
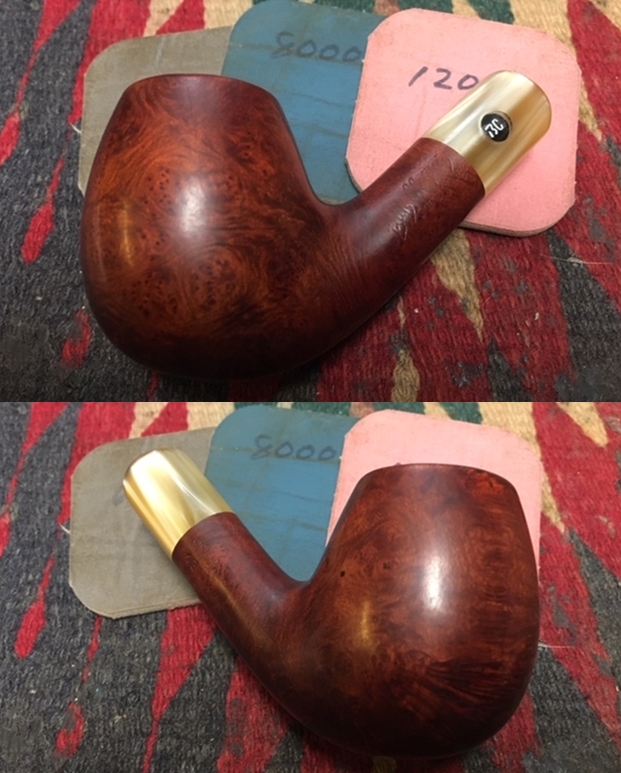
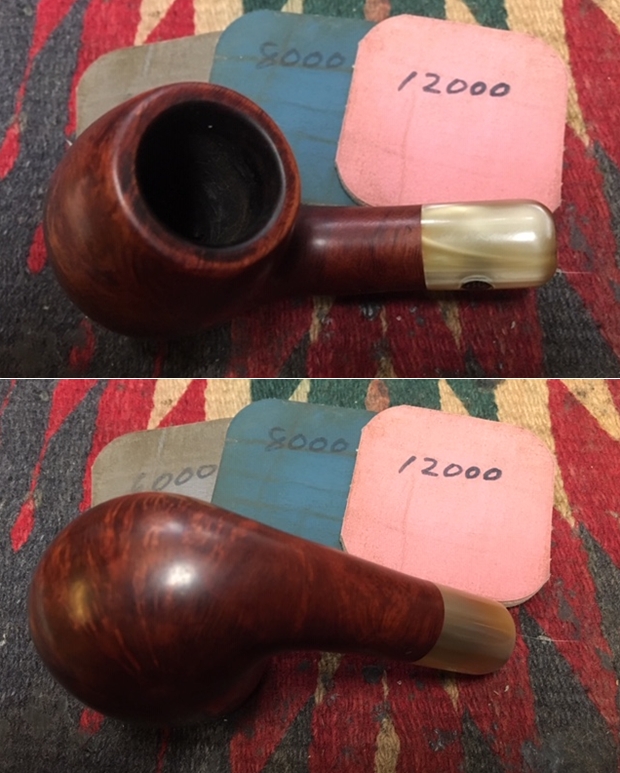
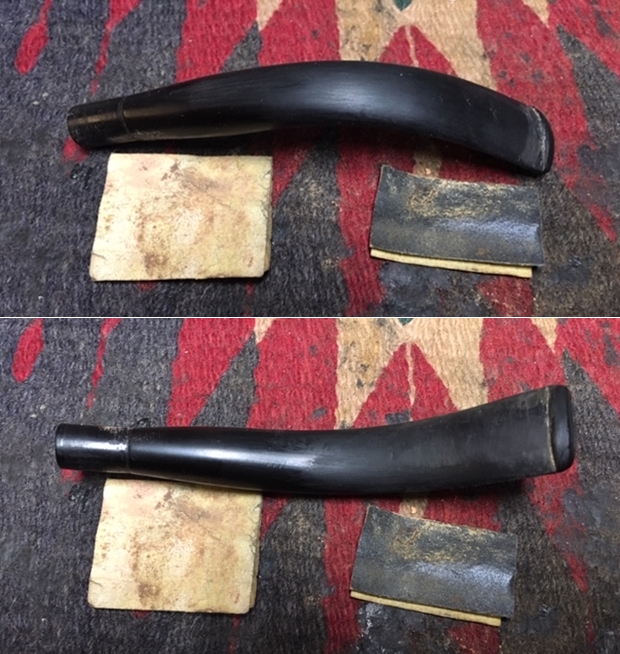
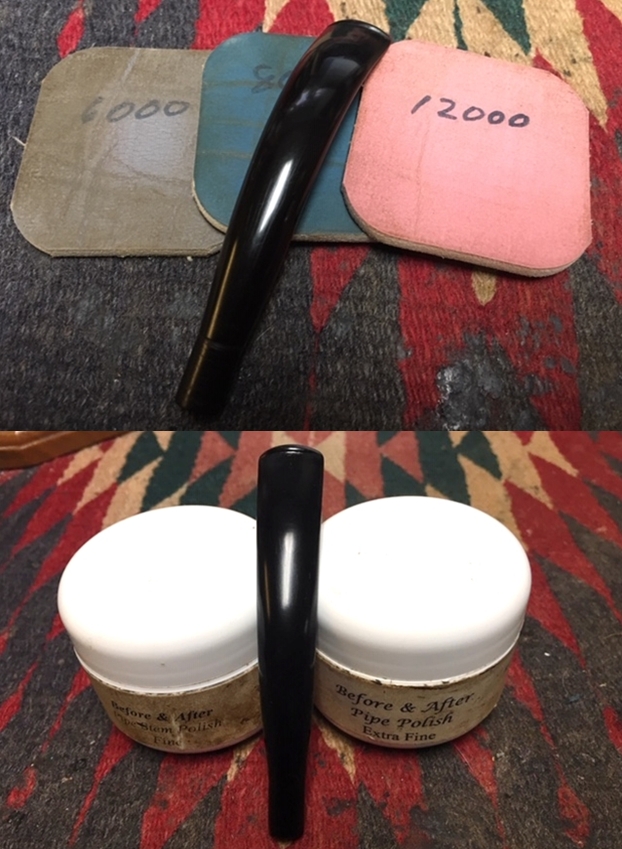
The next series of photos show the progressive sanding of the stem with 1500-12,000 grit micromesh sanding pads (Photos 48 – 59). These are also available through Steward Macdonald as well as other fine woodworking stores or can be ordered online.

Photo 48 Sanding the topside with 1500 grit micromesh
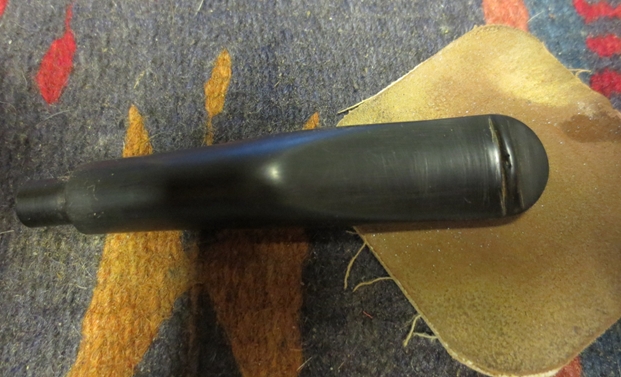
Photo 49 Sanding the underside with 1500 grit micromesh
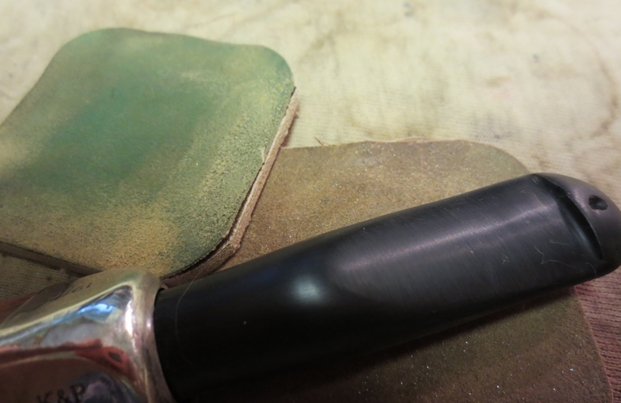
Photo 50 Sanding the topside with 1800 grit micromesh
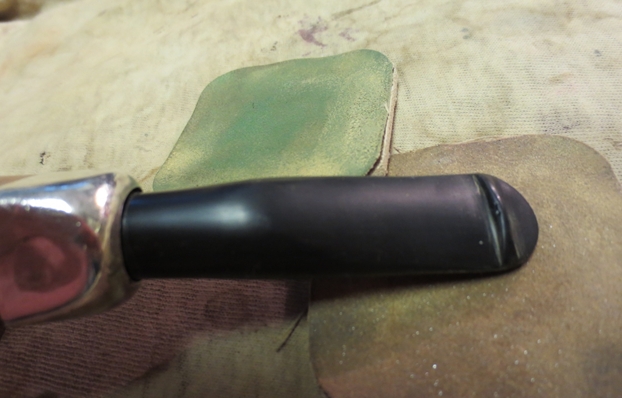
Photo 51 sanding the underside with 1800 grit micromesh

Photo 52 Sanding the topside with 2400 grit micromesh
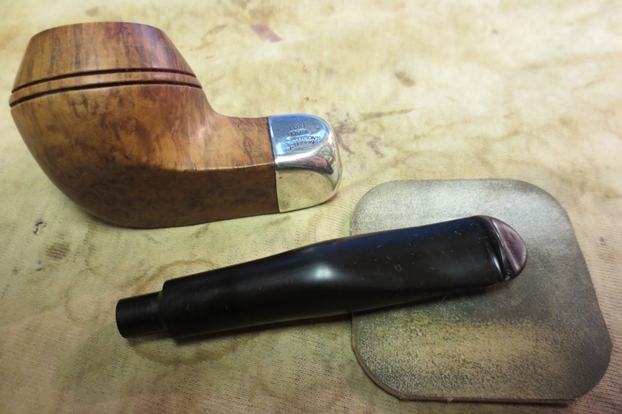
Photo 53 Sanding the underside with 2400 grit micromesh
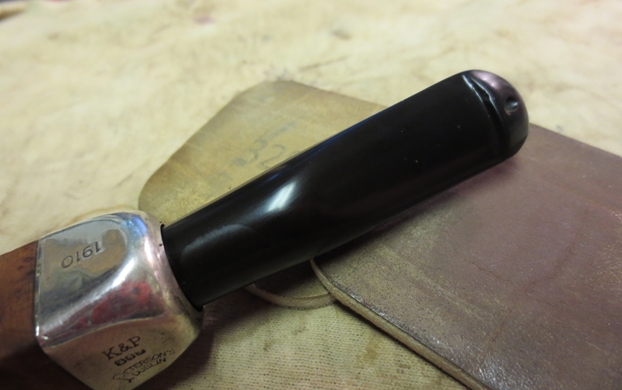
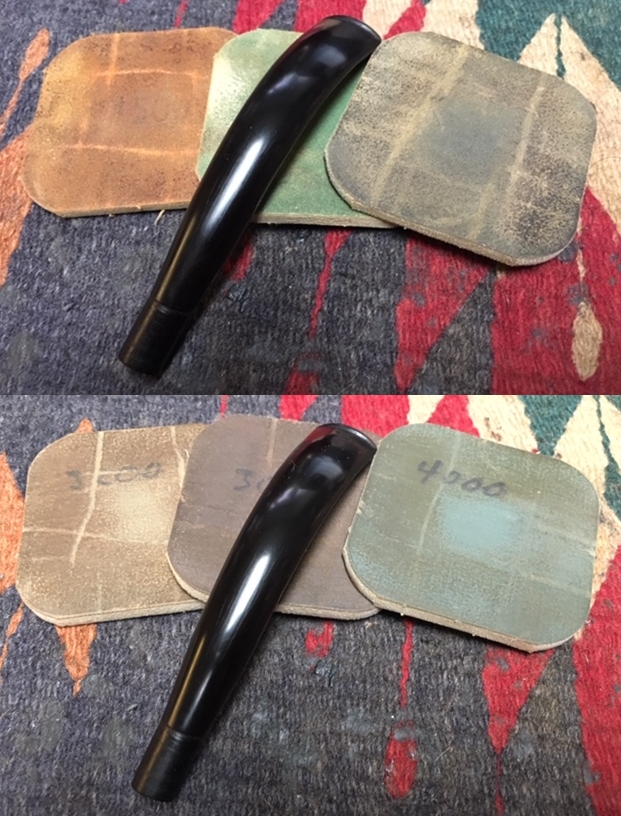
Photo 54 Sanding the topside with 3200 and 3600 grit micromesh
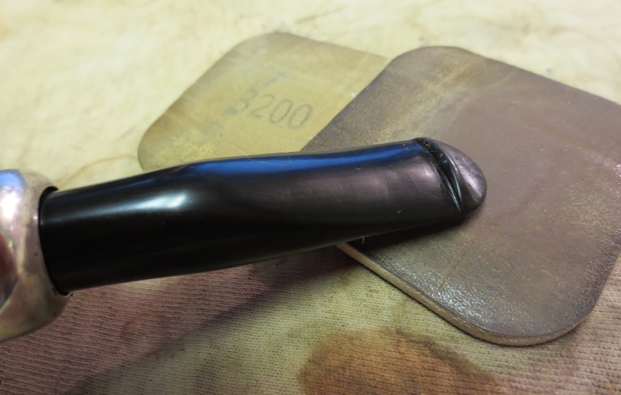
Photo 55 Sanding the underside with 3200 and 3600 grit micromesh
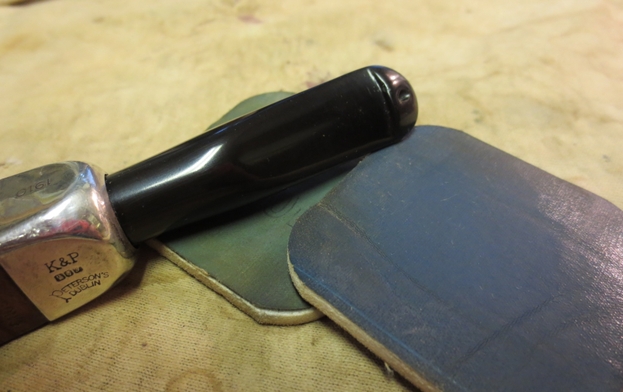
Photo 56 Sanding the topside with 4000 and 6000 grit micromesh

Photo 57 Sanding the underside with 4000 and 6000 grit micromesh
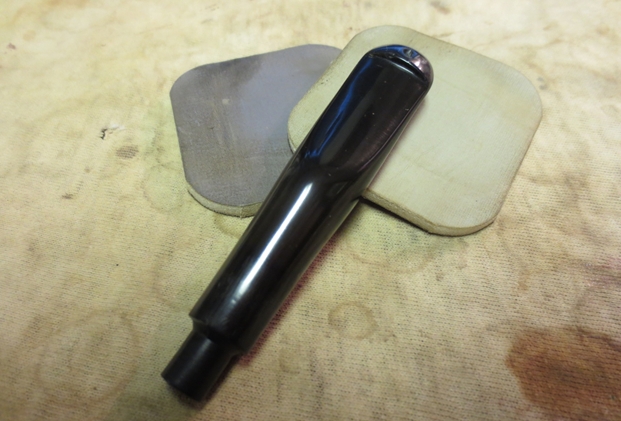
Photo 58 Sanding the topside with 8000 and 12,000 grit micromesh
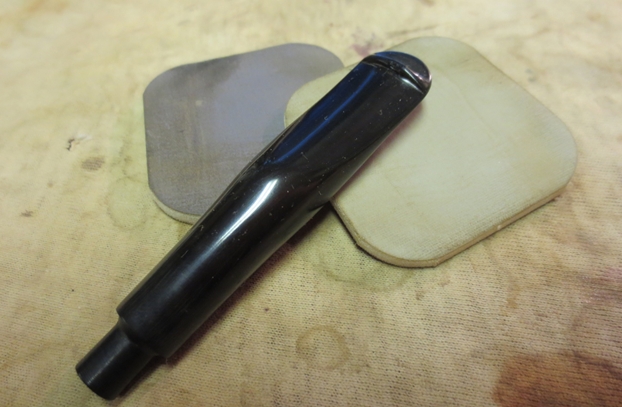
Photo 59 Sanding the underside with 8000 and 12,000 grit micromesh
By this time the shank repair was dry. Photos 60 and 61 show the dried and finished repair. I used a small piece of folded 220 grit sandpaper to smooth out the repaired area.
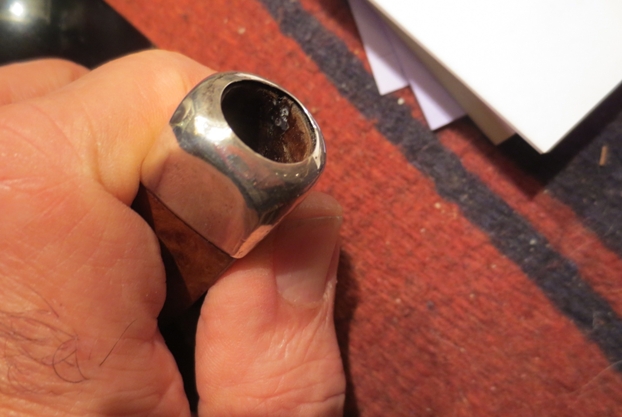
Photo 60 Finished shank repair
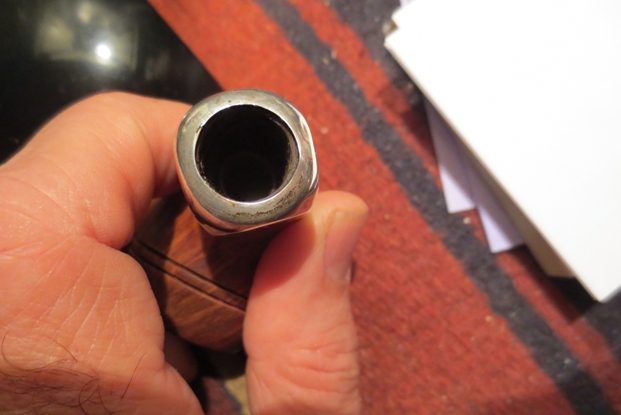
Photo 61 Finished shank repair
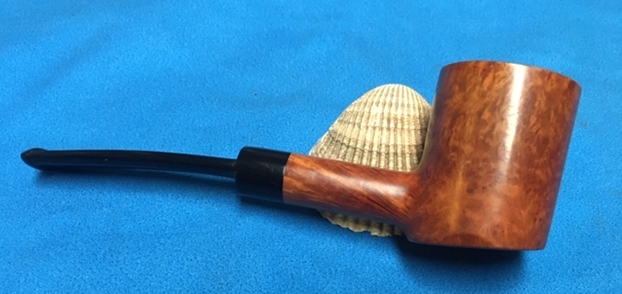
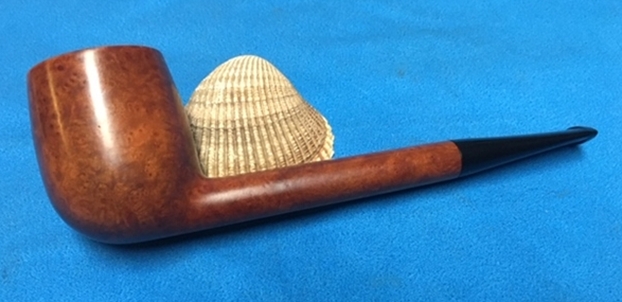
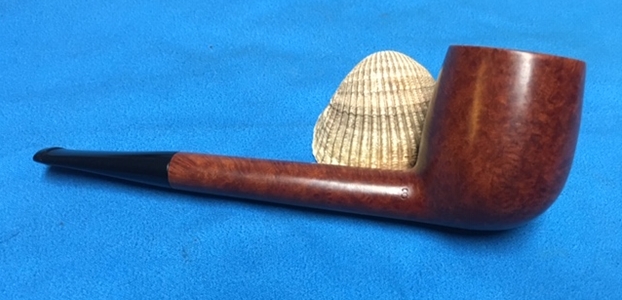
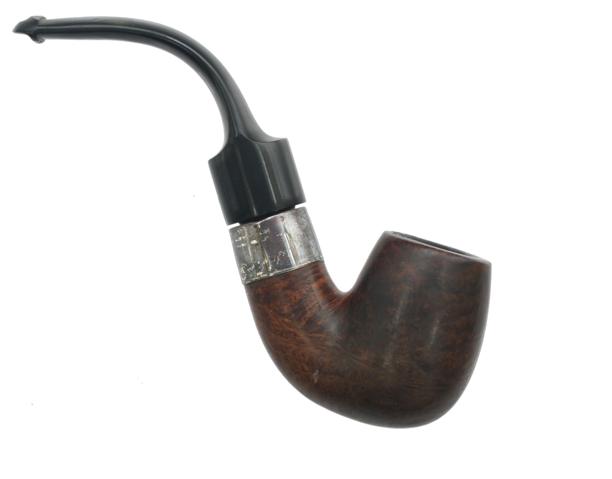
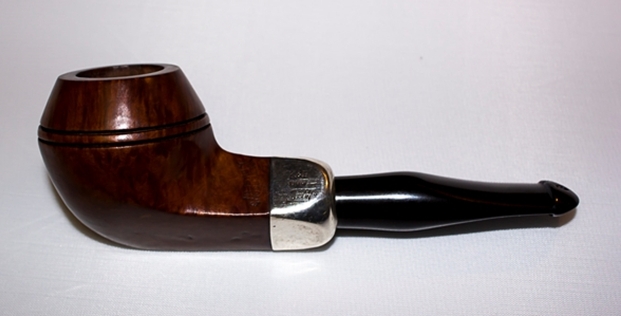
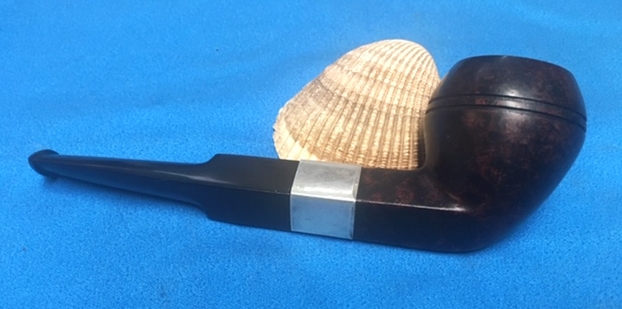
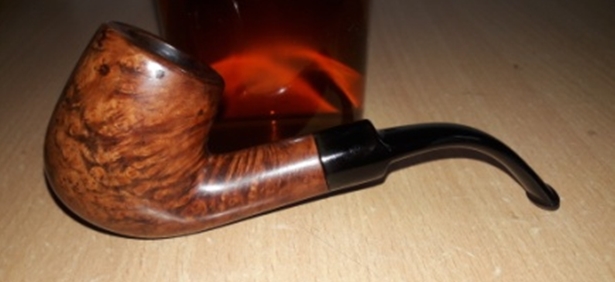
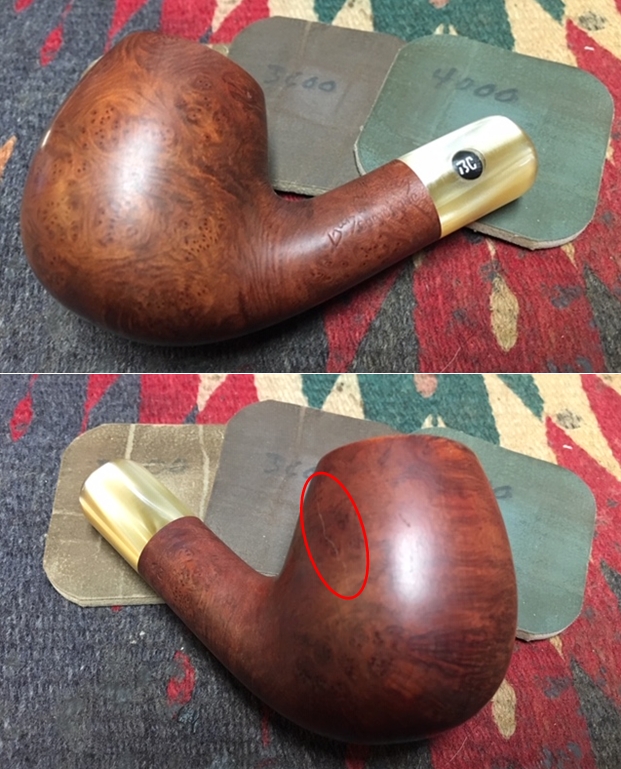
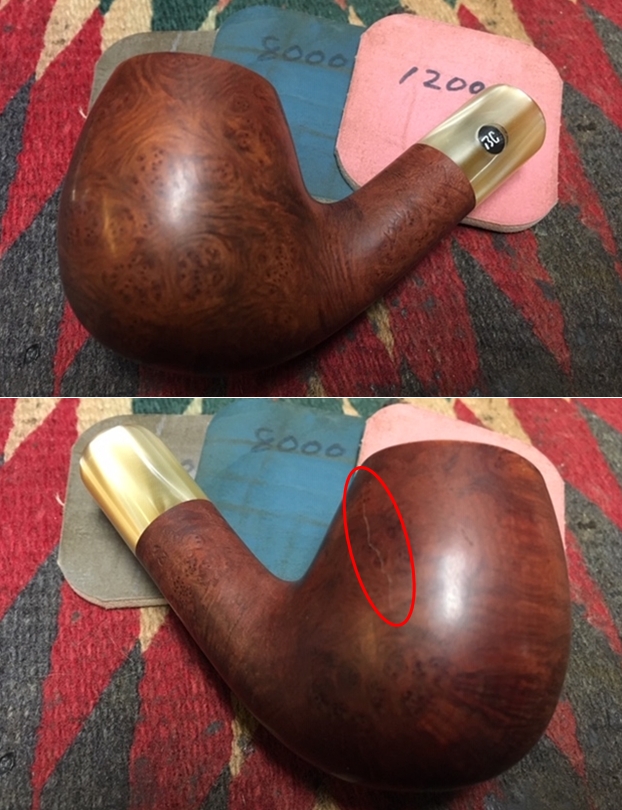
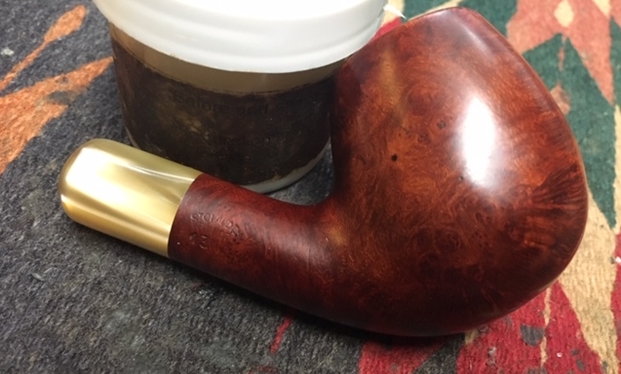
I wanted to match the stain on the pipe to the original stain on this line of pipes so I researched the line on the internet and found the picture below (Photo 62) that gave me a good idea of what the stain colour should be. In studying the photo I could see both brown and red stains were used to bring out this colouration. For me this would be a two step staining process.

Photo 62 Correct stain colour
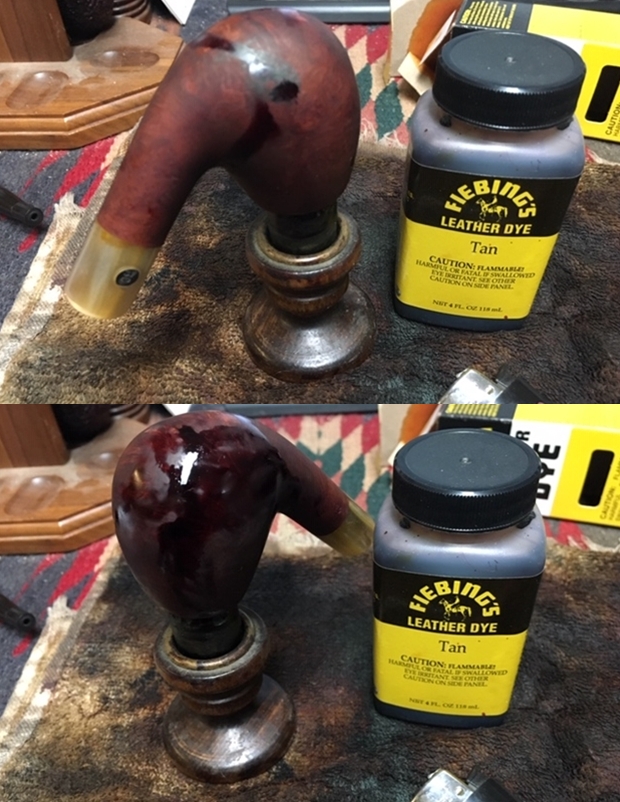
I started with a dark brown aniline stain. I have used Feibing’s Leather Dye for years as it is an aniline based stain and works very well. I thinned it 2:1 with Isopropyl alcohol to get the brown I wanted in the undercoat (2 parts stain to 1 part alcohol). I remove the stem for the staining and insert a dental pick in the shank for a handle to hold while I turn the bowl in my hands during the staining. I applied it to the bowl with a folded pipe cleaner. Once the bowl was covered with stain and while it is wet I light it on fire with a lighter. This is called flaming. It burns off the alcohol and sets the stain more deeply into the grain of the briar. Generally I start by staining the bottom of the pipe first as the stain runs toward the top naturally and then follow up with the side, back and front of the bowl. I stain the rim last and am careful to not get stain inside the bowl. I repeat the process of staining and flaming the bowl until I am happy with the coverage. Photos 63 – 66 show the bowl after it has been stained, flamed, and stained and flamed again.
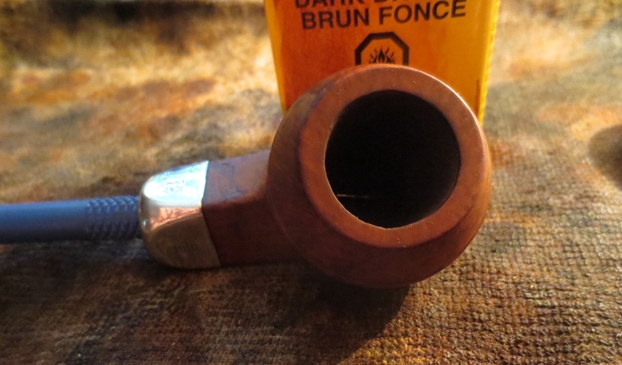
Photo 63 Stained bowl topside view
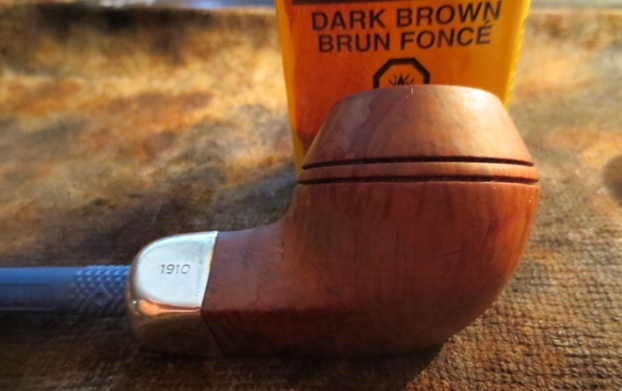
Photo 64 Stained bowl right side
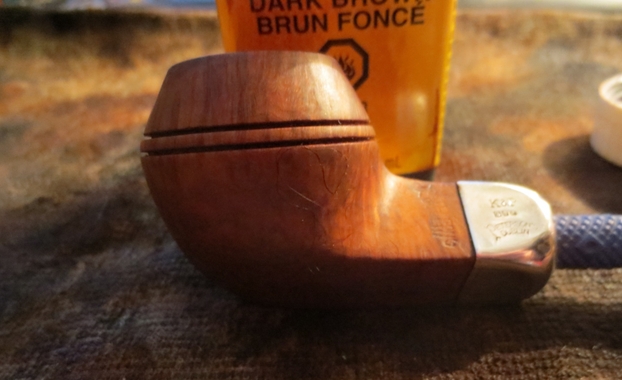
Photo 65 Stained bowl left side

Photo 66 Stained bowl underside
I hand buffed the newly stained pipe with a soft cotton terry cloth (old piece of bath towel) until the finish had a shine. I do this to check the coverage of the undercoat. I want to make sure that the coverage is even and that there are no heavy spots or weak spots before I give the pipe the next coat of stain (Photos 67-68).
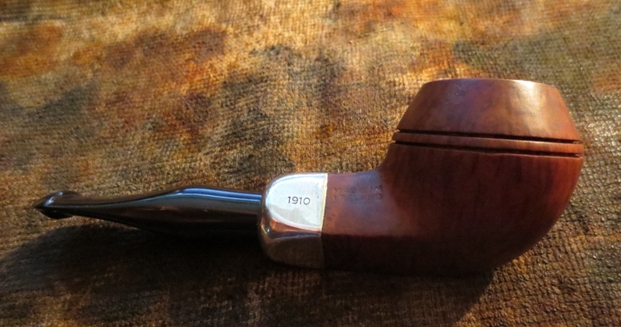
Photo 67 Right side after hand buffing
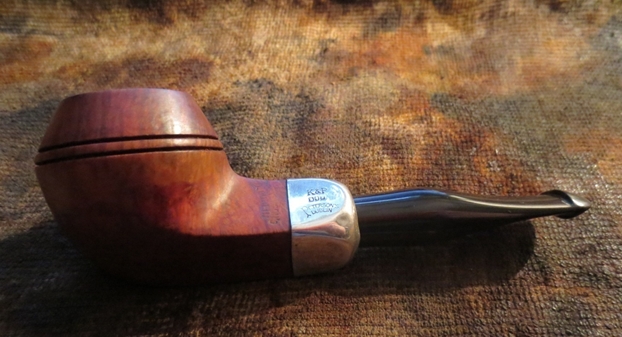
Photo 68 Left side after hand buffing
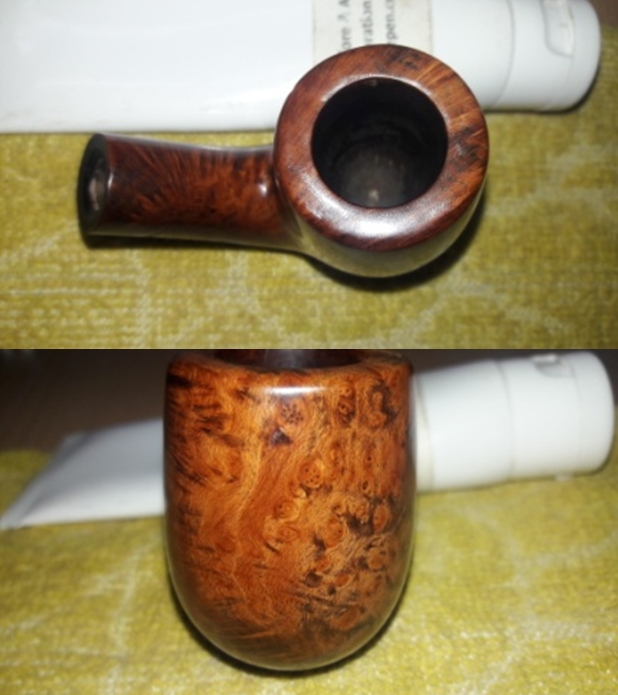
I applied the second stain to the bowl. For this I used an oxblood coloured aniline paste stain. I don’t worry about getting it on the stem as it is thicker and does not run when applied. I start at the bottom of the bowl out of habit with this stain. I work my way around the bowl, making sure to get an even coverage of stain and finish the process by carefully staining the rim (Photos 69 – 70). Once it is applied I let it dry for about 3 minutes and then wipe it off with a soft cloth and cotton pads. I want the colour to stay in the briar but not be wet on the surface (Photos 71 – 73). Again I check for coverage to make sure I have an even colour over the entire bowl. I reapply stain to weak spots to blend them into the colour. I want an even stain coat on the entire bowl. I hand buffed the bowl a second time to check on the colour and compare it against the photograph that I had found online (Photos 74 – 77).
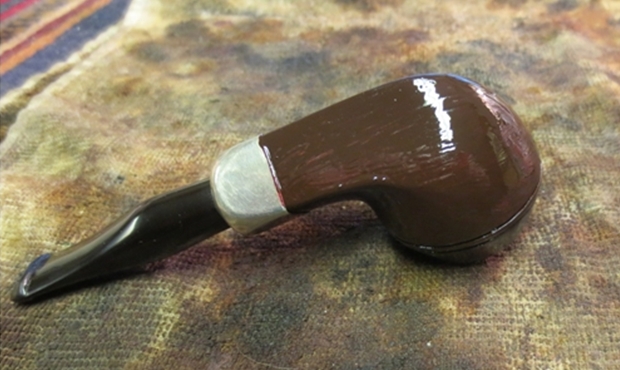
Photo 69 Oxblood stain applied

Photo 70 Oxblood stain applied
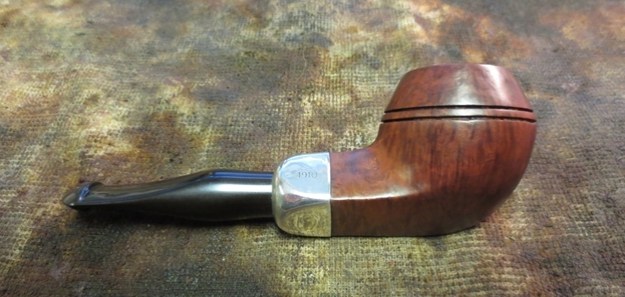
Photo 71 Right side after being wiped down
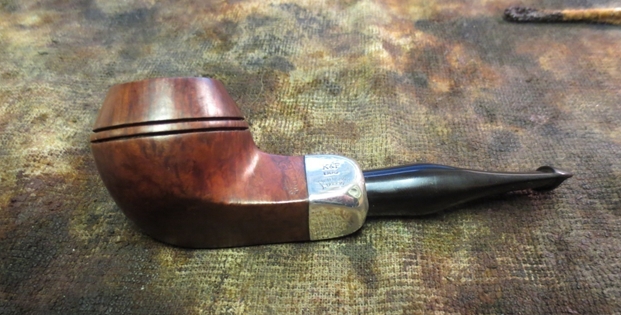
Photo 72 Leftside after being wiped down
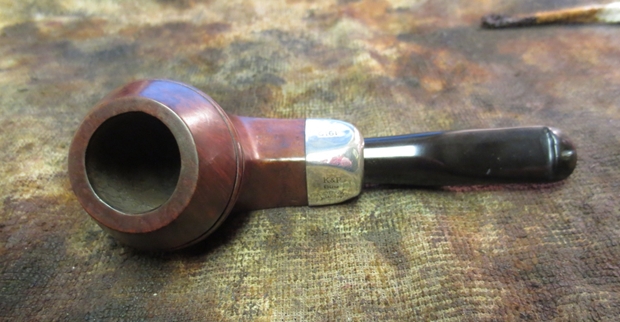
Photo 73 Top side after being wiped down.
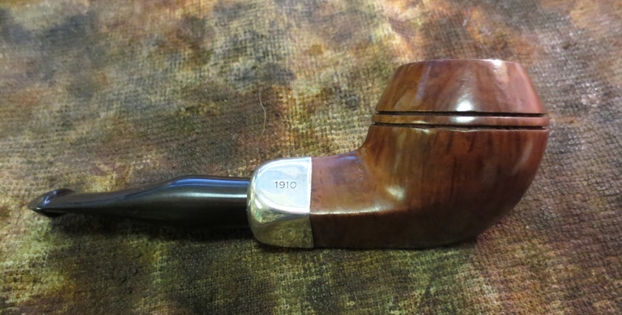
Photo 74 Right side after hand buffing
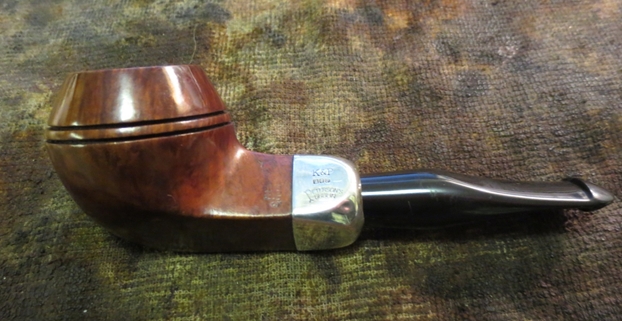
Photo 75 Leftside after hand buffing

Photo 76 Top side after hand buffing
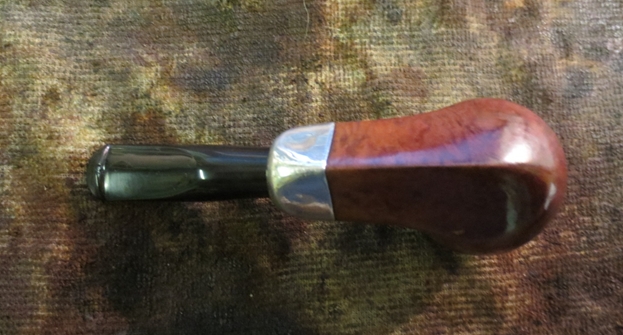
Photo 77 Underside after hand buffing
While I liked the colour of the bowl I found that it was too dark to really match the photo colour. I wet a cotton pad with acetone and wiped the bowl down to reduce the opacity of the stain and lighten it slightly. I only wiped it down once and carefully covered the whole bowl in one detailed wipe down to keep the coverage even. The new colour look lighter and almost appears to be too light but I have learned that after I buff it and give it several coats of wax it will be a match.
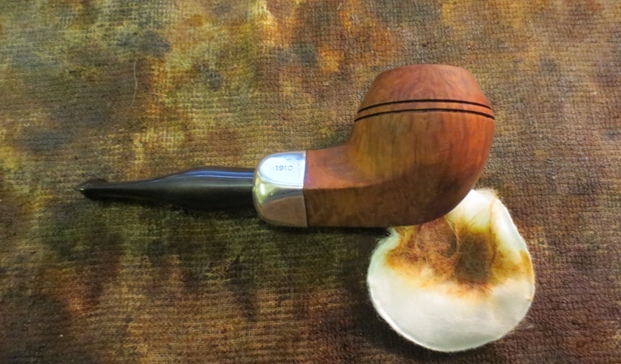
Photo 78 Right side after being wiped down with acetone
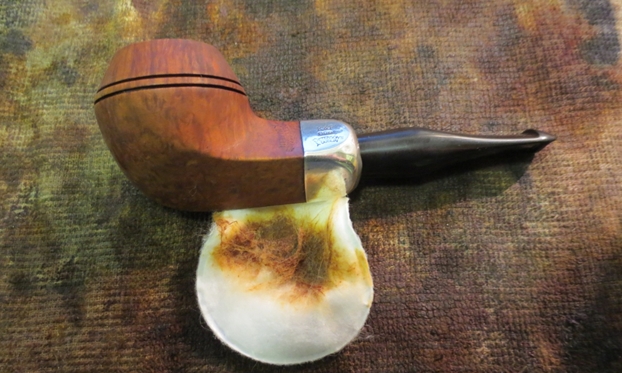
Photo 79 Leftside after being wiped down with acetone
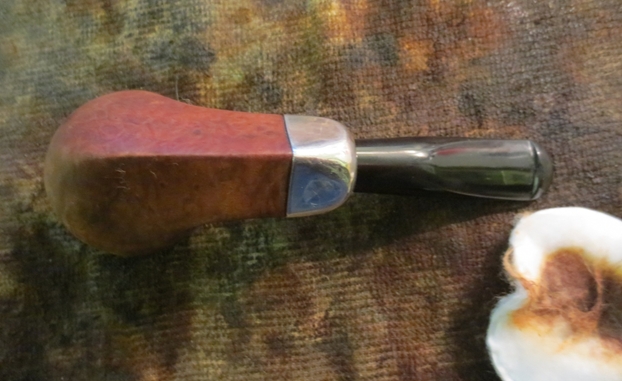
Photo 80 Underside after being wiped down with acetone
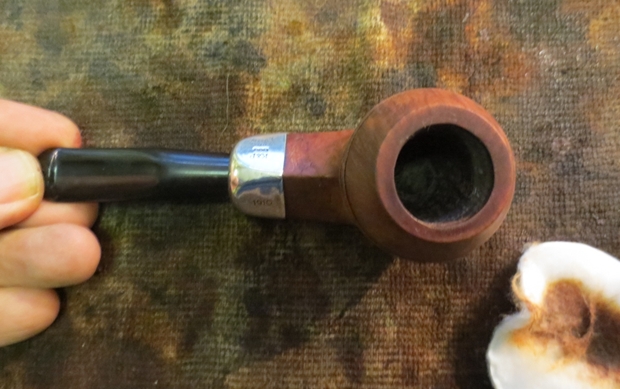
Photo 81 Topside after being wiped down with acetone
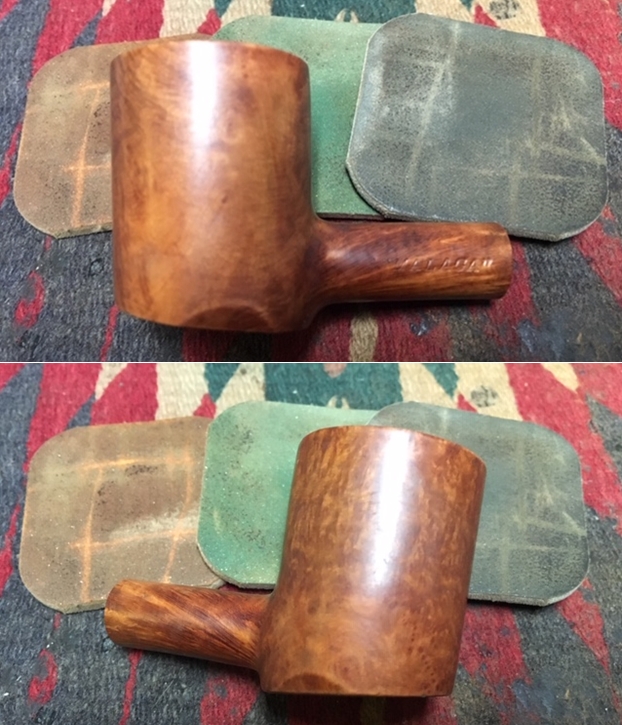
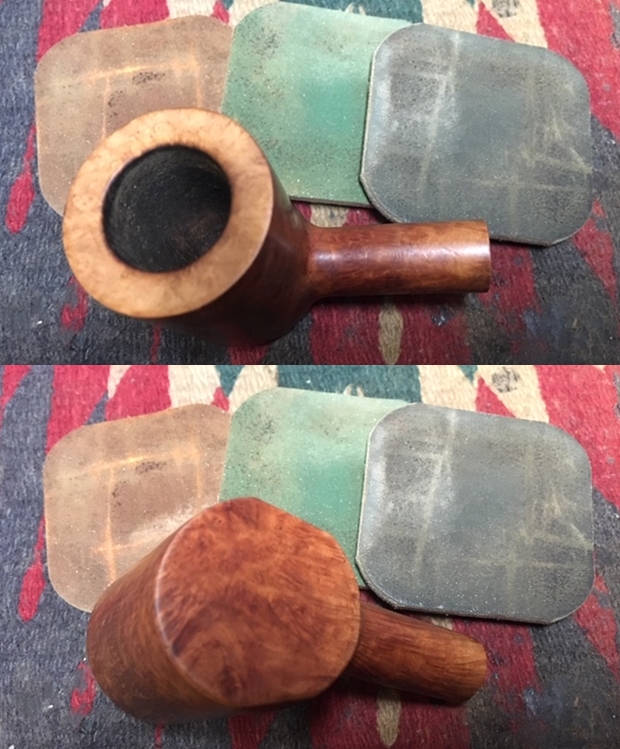
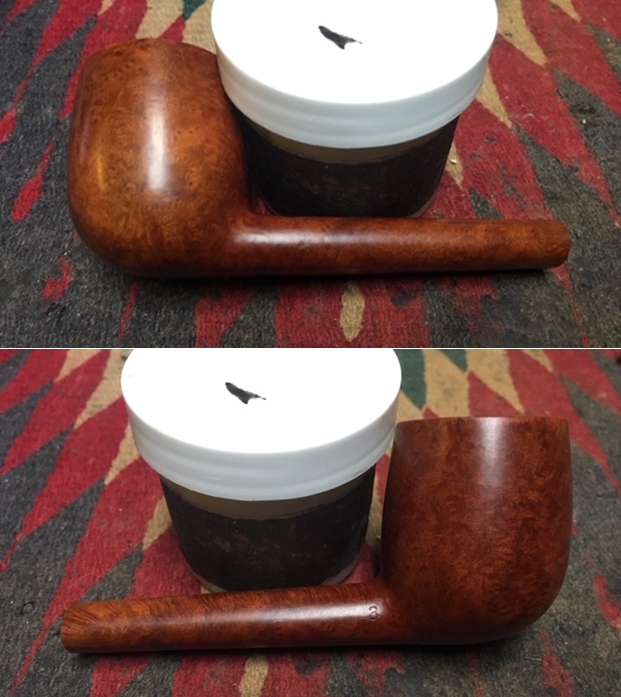
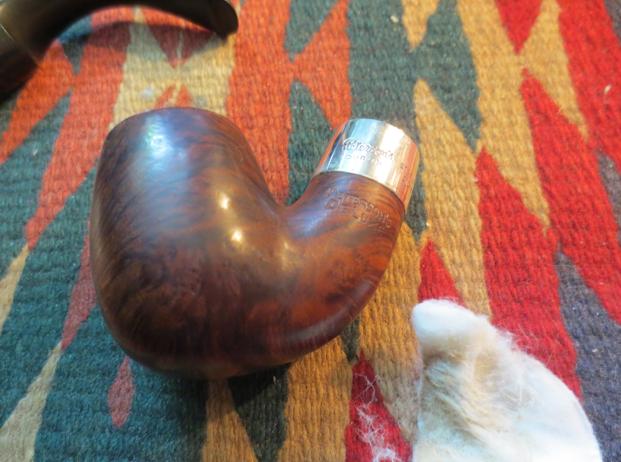
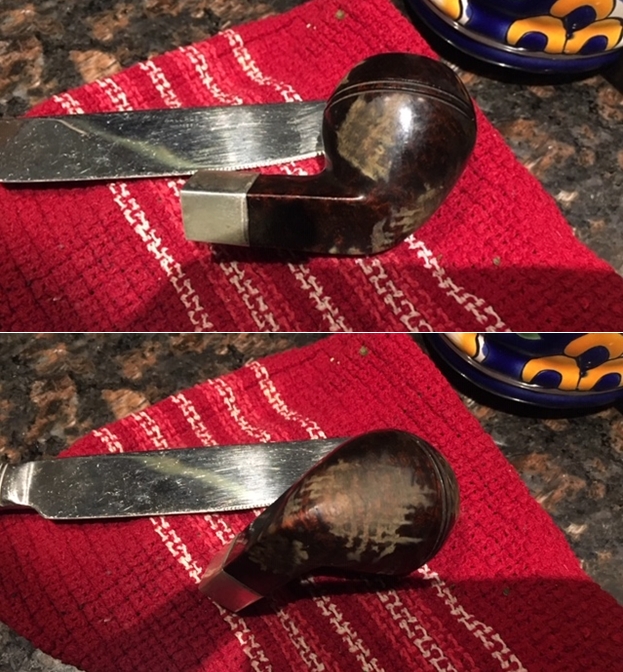
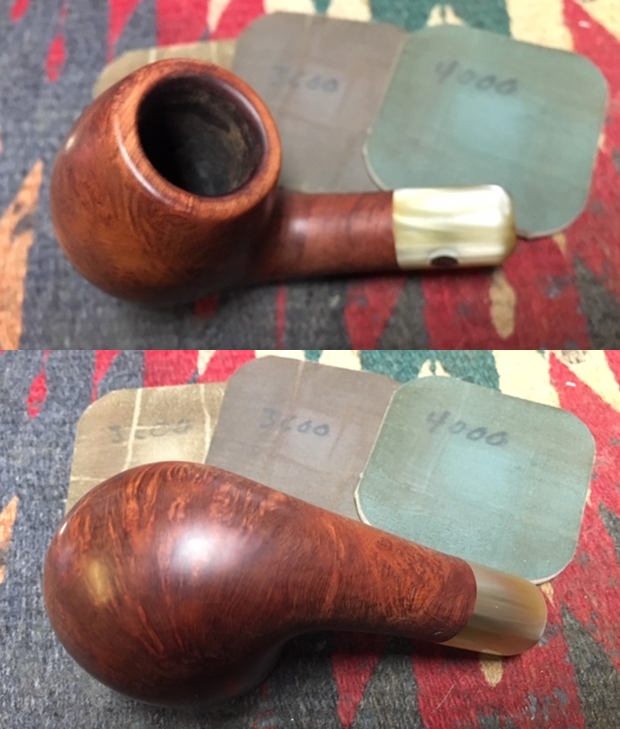
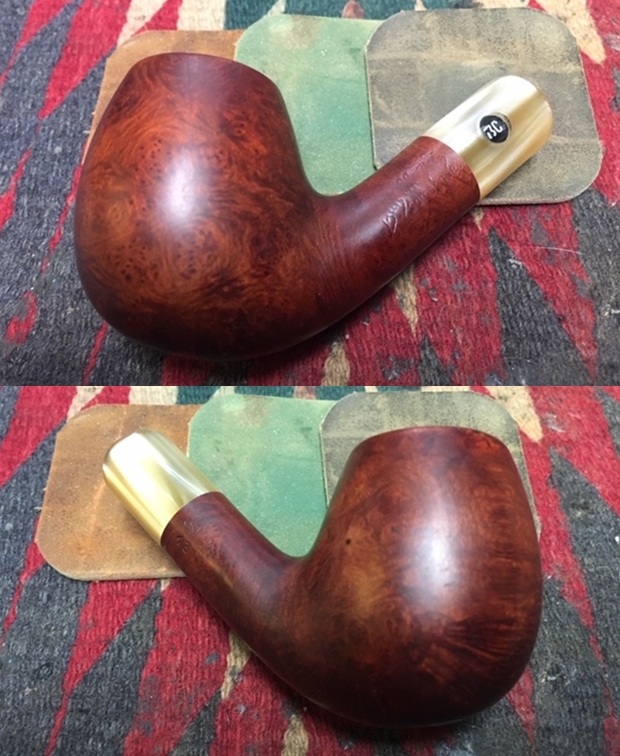
I took the bowl to the buffer and gave it a quick buff with White Diamond on the buffing wheel. It gave the bowl a good shine. I brought it back to my work table and applied a coat of Conservator’s Wax which is a microcrystalline wax and cleaner. I have found that this gives the bowl a deeper polish and shine. After that I generally take it to the buffing wheel and give it multiple coats of carnauba wax (Photos 82 – 83).
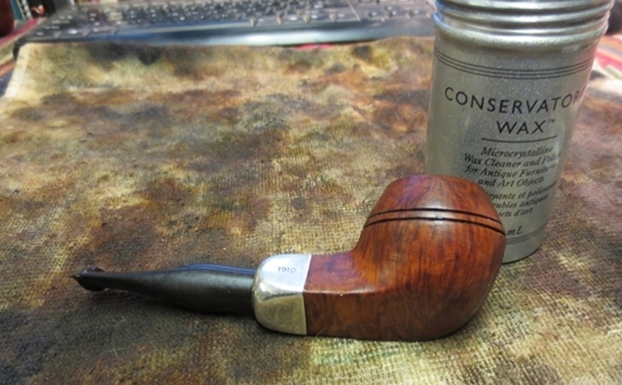
Photo 82 After buffing and waxing

Photo 83 After buffing and waxing
At this point in the process of refurbishing the work is just about finished. The cleanup and restoration work is done and all that remains is to apply the final coats of carnauba wax to polish and protect the “new” look of your pipe.
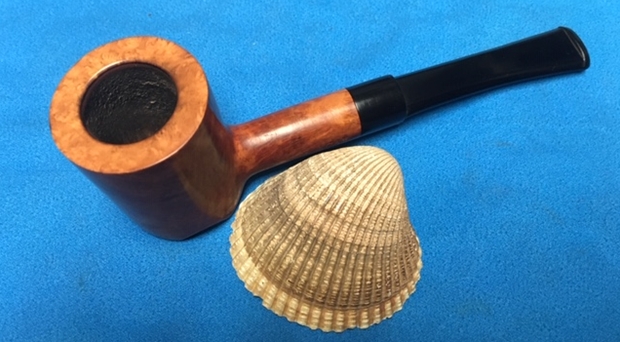
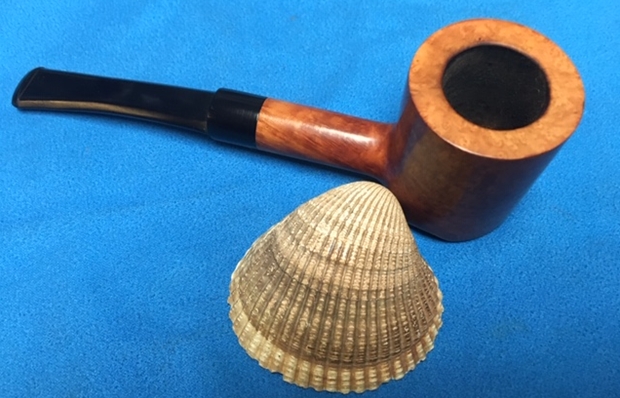
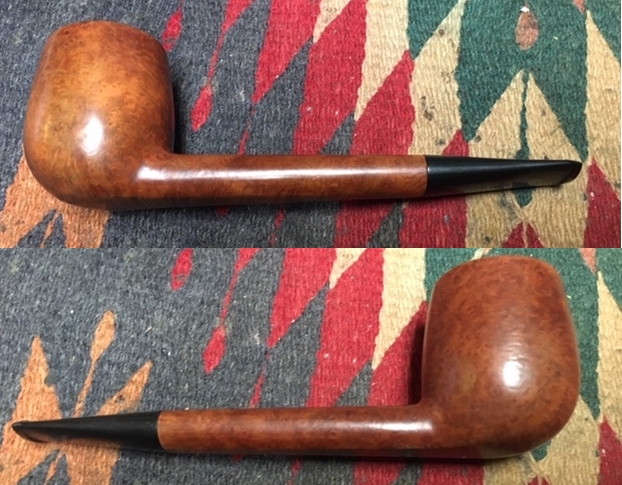
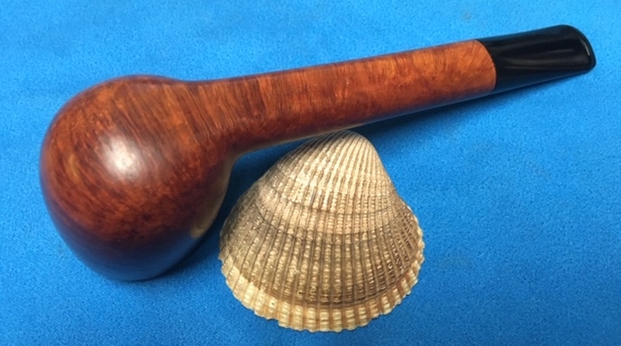
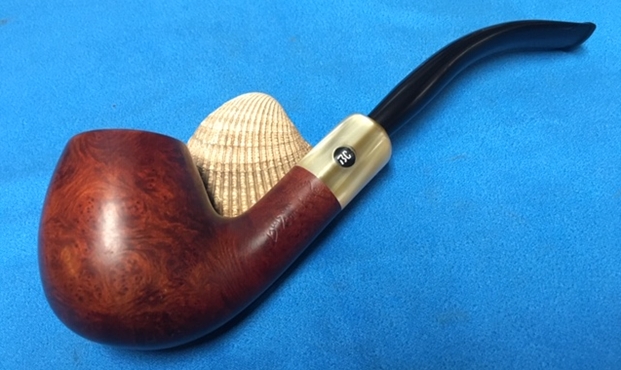
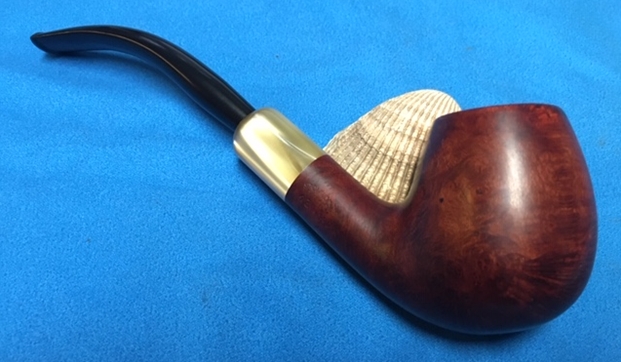
The final photos show the finished pipe. It has had several coats of carnauba wax and was buffed with a clean flannel buffing pad on the buffer. The shine is deep and rich. The stem looks new and the rich dark shine reflects light well.The tooth marks are gone and there is no sign of their earlier presence. The bowl is back in round and ready to load up and smoke.
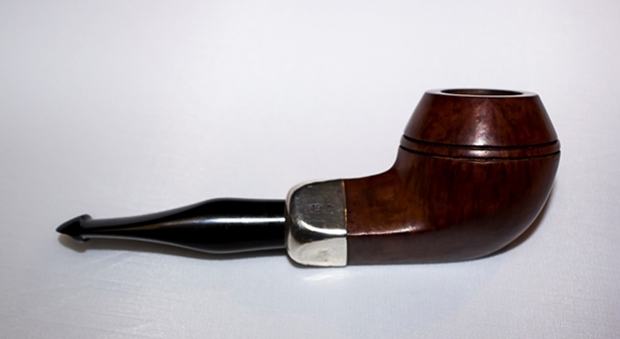
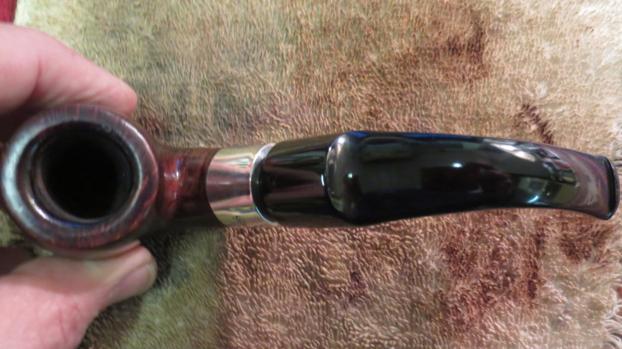
Photo 84 Right side view of the finished pipe.

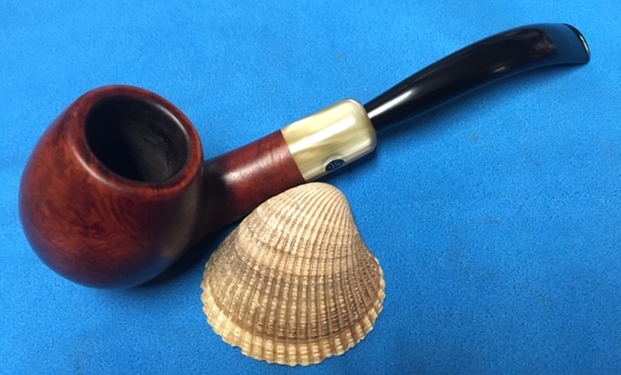
Photo 85 Left side view of the finished pipe

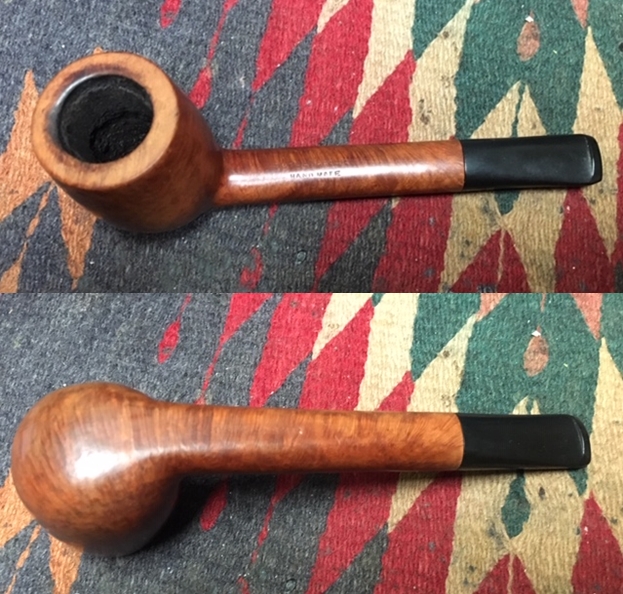
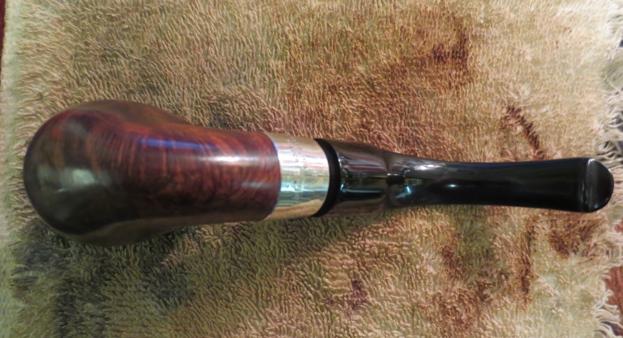
Photo 86 Bottom side view of the finished pipe

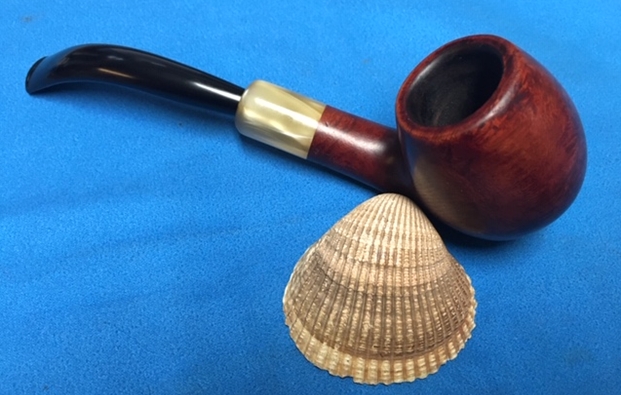
Photo 87 Top view of the finished pipe
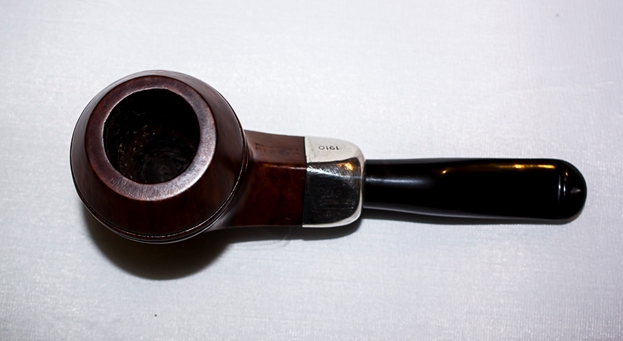
Photo 88 Top view of the finished pipe


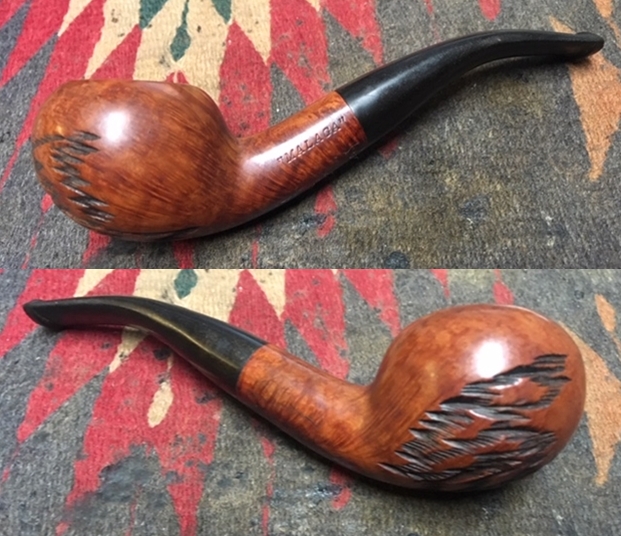
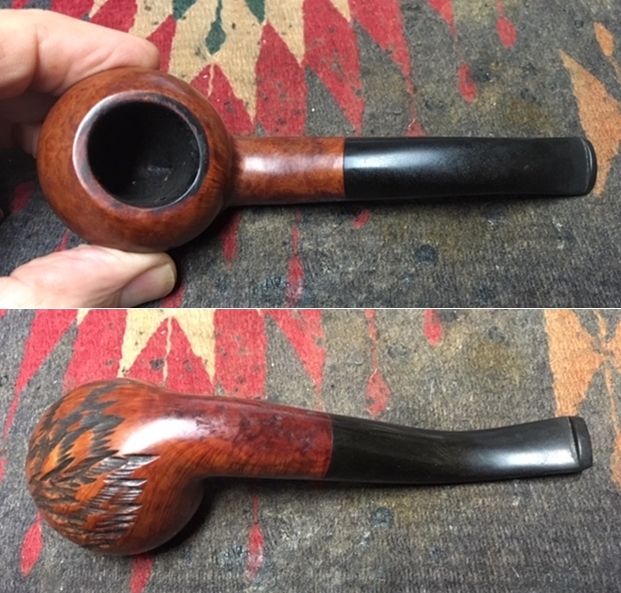
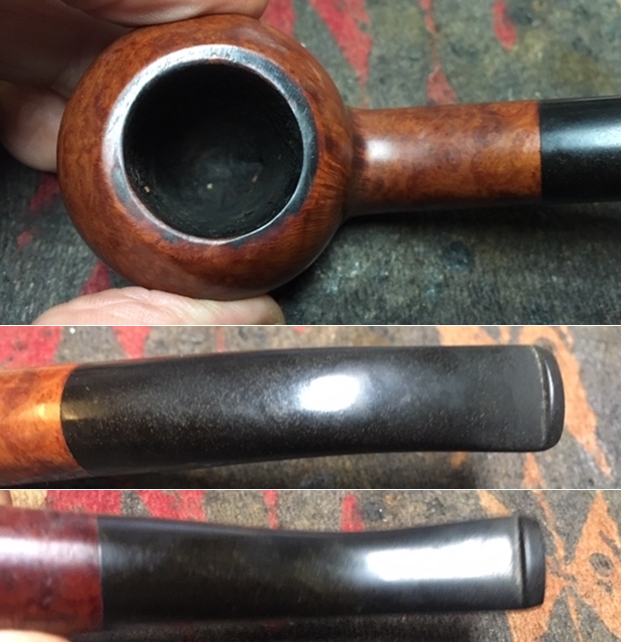
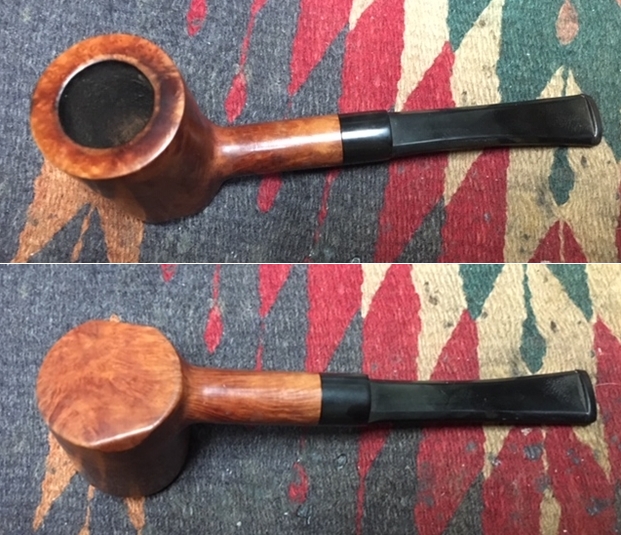
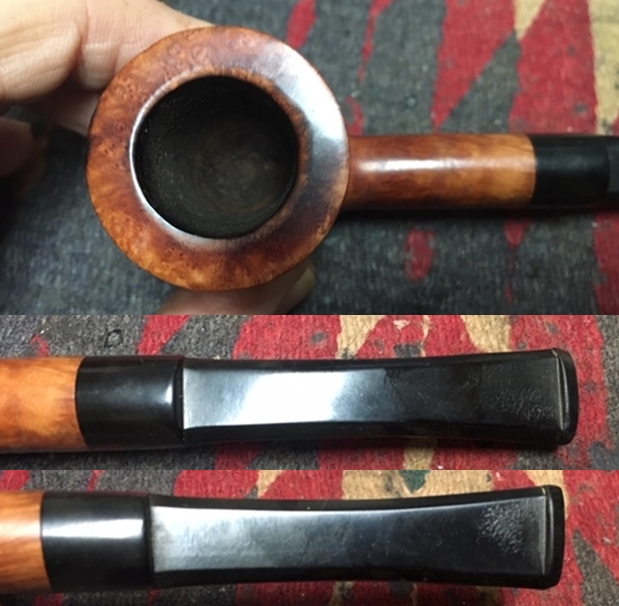
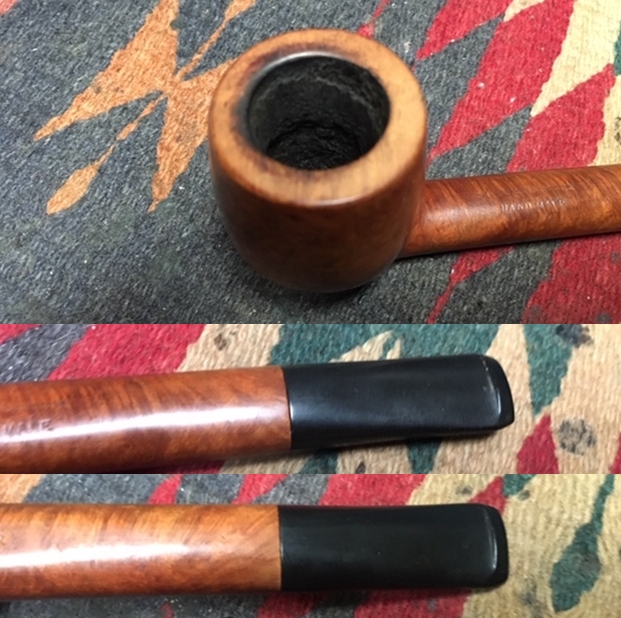
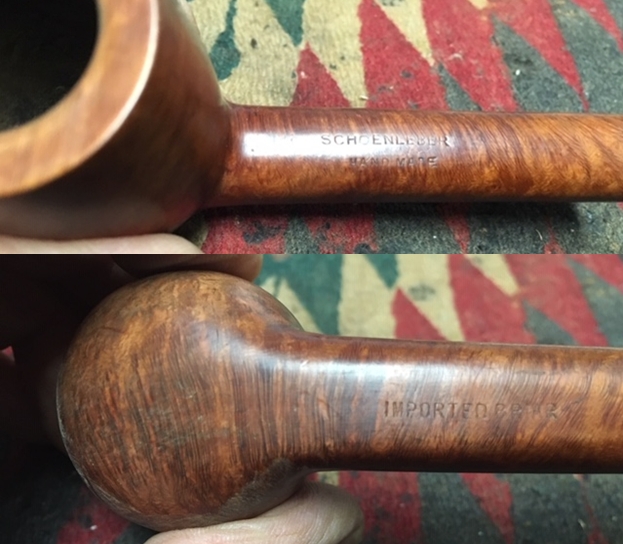
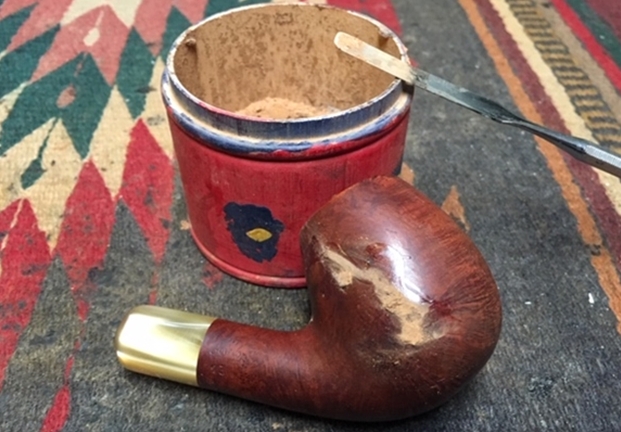
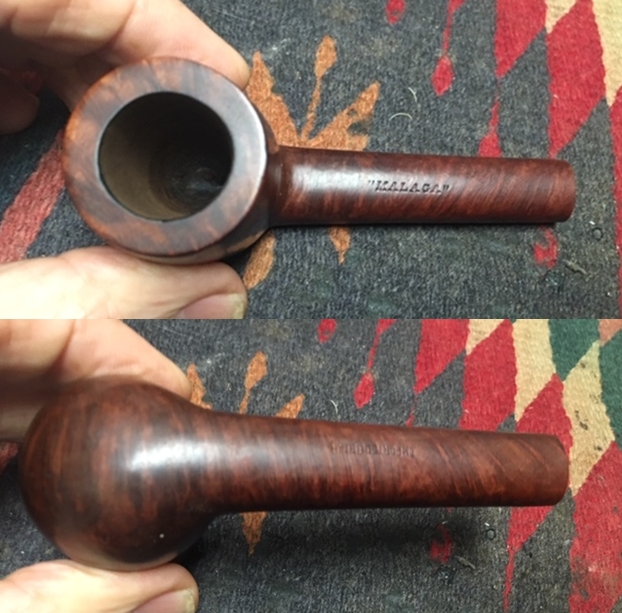
 I took a photo of the bowl and rim to capture the condition of the pipe before I started my cleanup work. The bowl had a thin cake and the rim top significant damage to the top and edges of the bowl. The inner edge of the rim seemed to be slightly out of round and showed some burn damage. The outer edge had chips and dents and was rounded. The stem was a mess. There was some deep tooth marks on the stem and the button on both sides.
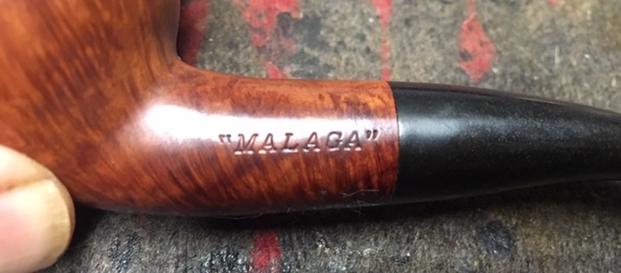
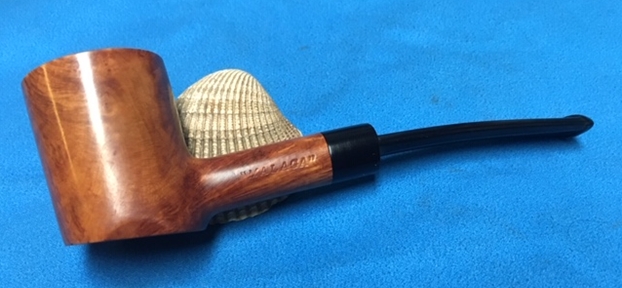
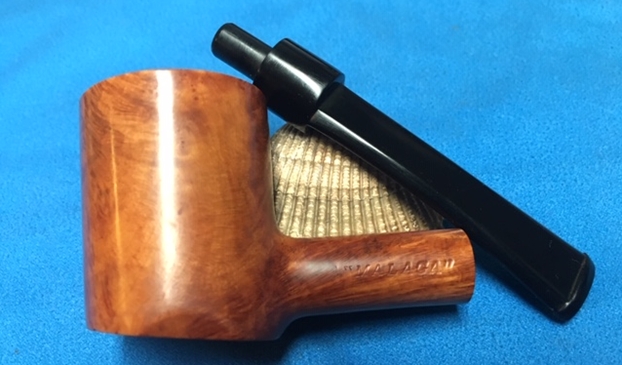
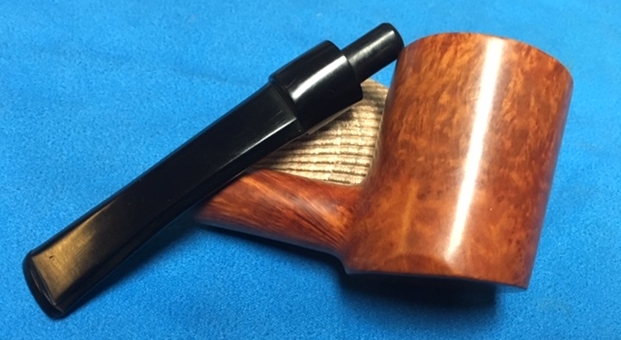
 I also took a photo of top side of the shank to show the stamping. The stamping is readable in the photo below and is as noted above – “MALAGA”. The stamping on the underside reads IMPORTED BRIAR very visible in the second photo below.
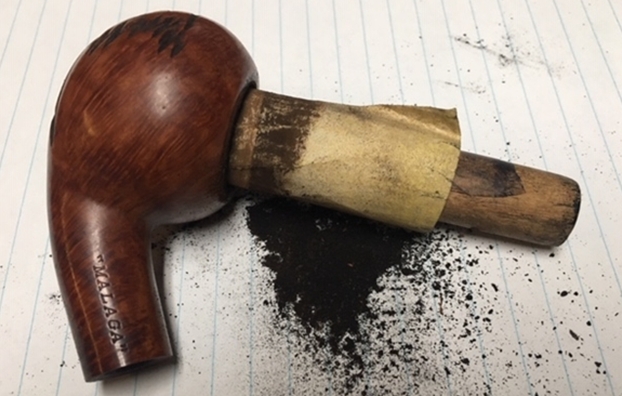
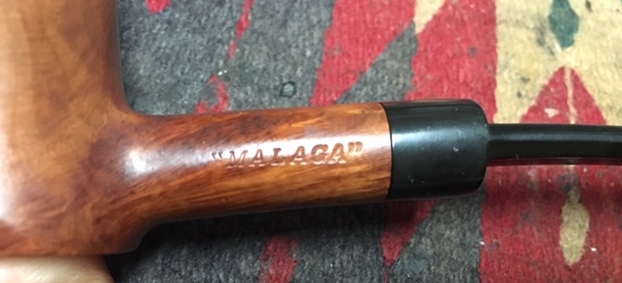
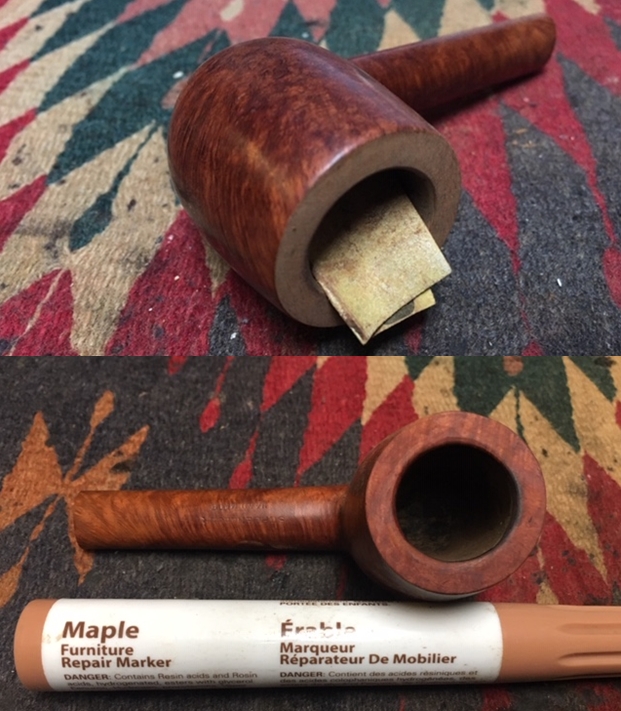
 For those of you who are unfamiliar with the brand, I am also including the link to a blog that I wrote that gives some of the history of the Malaga brand and the Malaga Pipe Shop in Royal Oak, Michigan in the USA. Here is the link – https://rebornpipes.com/tag/malaga-pipes/. That blog also includes links to a catalogue and the history of the pipemaker George Khoubesser. If you are interested to learn more then I invite you to follow the link to get a feel for the brand and the pipemaker.
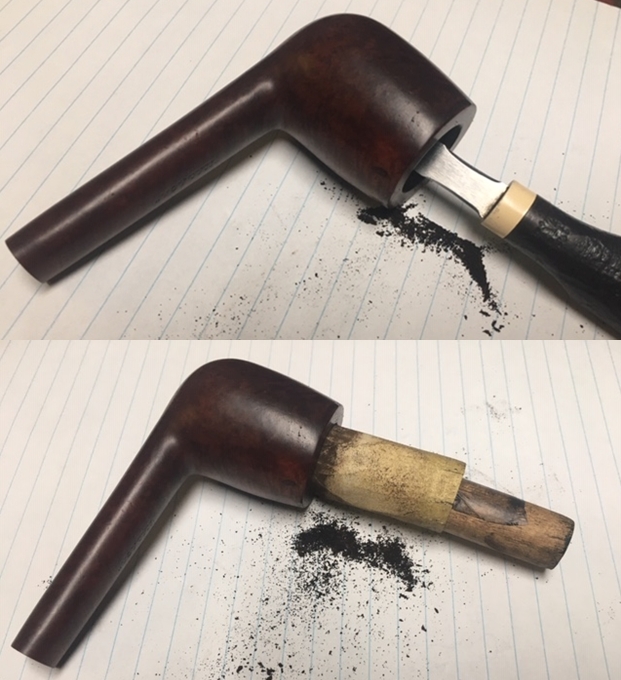 I decided to address the damage to the rim top and edges first. I topped the bowl on a topping board using 220 grit sandpaper to remove the damaged portions of the rim surface.
 I filled in the damaged around rim and the bowl with clear super glue. The photos below show the extent of the damaged areas.
 When the repairs had cured I sanded the briar with a folded piece of 220 followed by 400 grit sandpaper. I used the sandpaper to blend the repairs into the surface of the briar and to smooth out the inner edge of the bowl at the same time.
 I scrubbed the bowl with a cotton pad and undiluted Murphy’s Oil Soap. I rinsed the bowl under running water to wash off the soap and the grime that had been loosened.
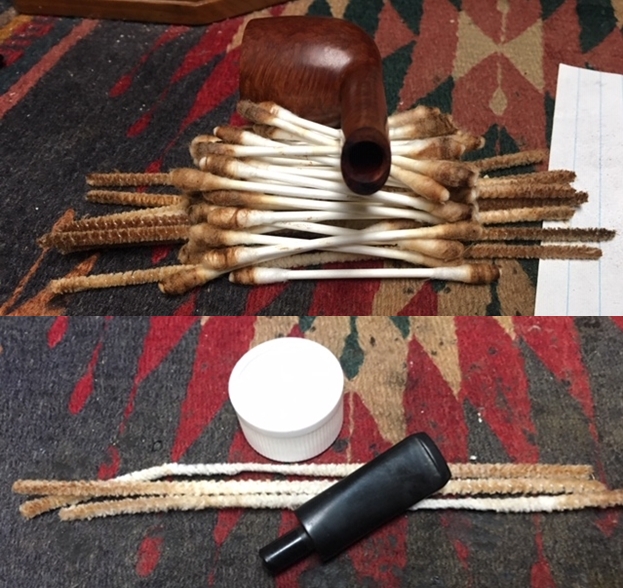
 I cleaned up the inside of the shank and mortise with a dental spatula to remove the tar build up. I ran some cotton swabs, pipe cleaners and alcohol through the shank to remove the tars and oils. I also cleaned out the airway in the stem using pipe cleaners and alcohol.
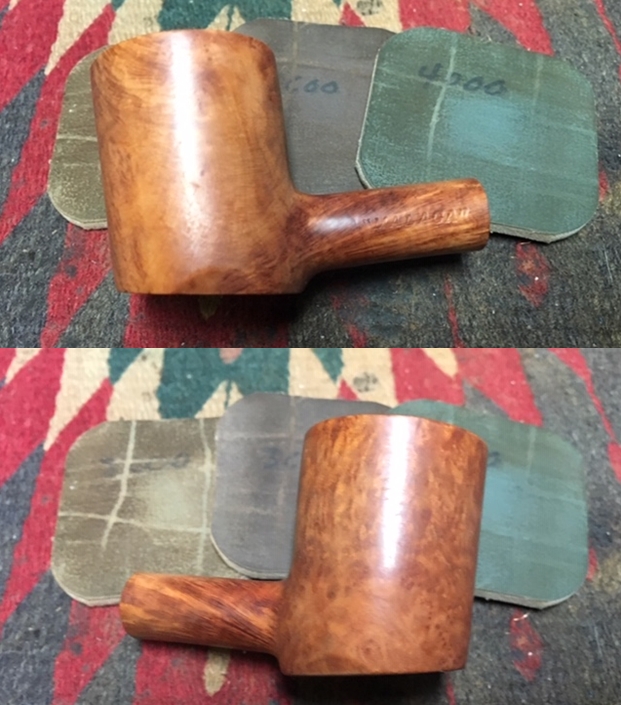
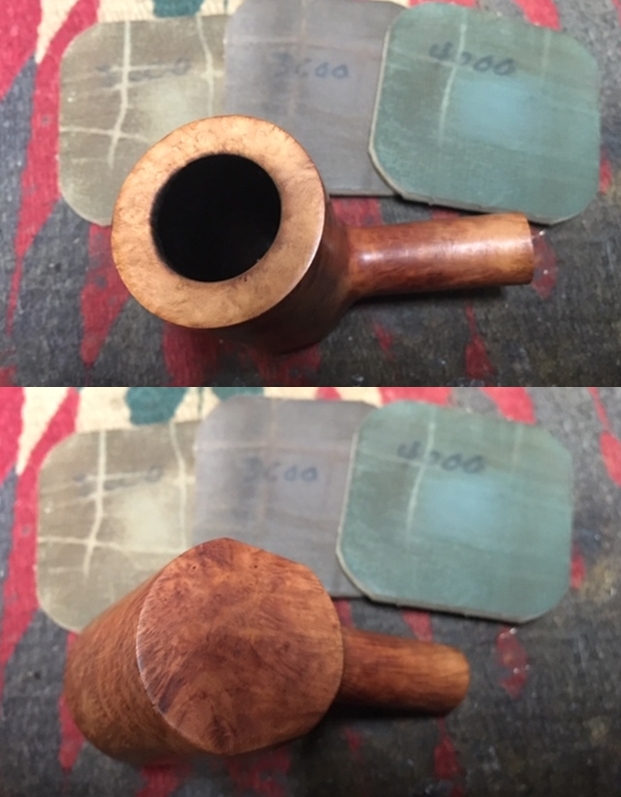
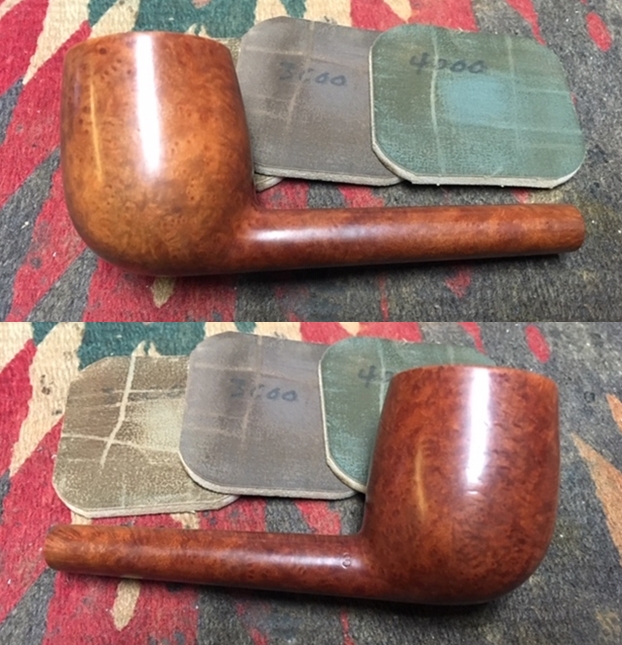
 I polished the rim and the outside of the bowl with micromesh sanding pads – wet sanding with 1500-2400 grit pads. I wiped the bowl down after each pad with a damp cloth to remove the sanding debris.
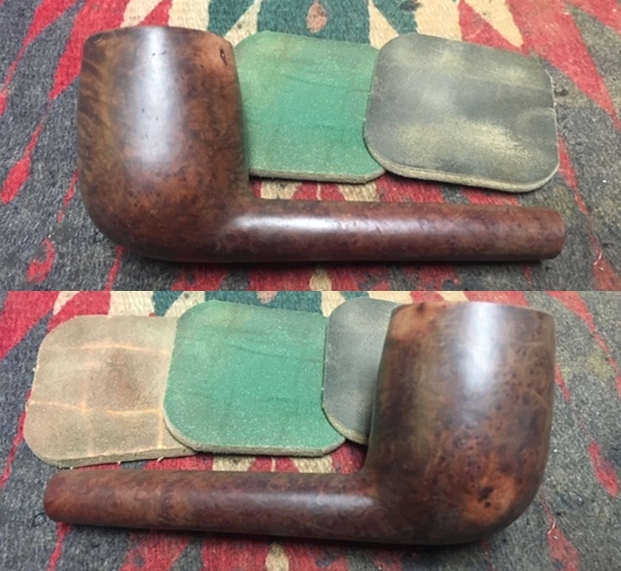
 I started the process of matching the stain on the bowl to the repaired and sanded areas I had worked on. I used a Walnut and a Cherry stain to begin the match.
 I polished the bowl further, wet sanding it with 3200-4000 grit micromesh sanding pads. I wiped the bowl down after each pad with a damp cloth.
 I wiped the bowl down with alcohol on a cotton pad to further blend the stain into the surrounding finish on the rest of the bowl and shank.
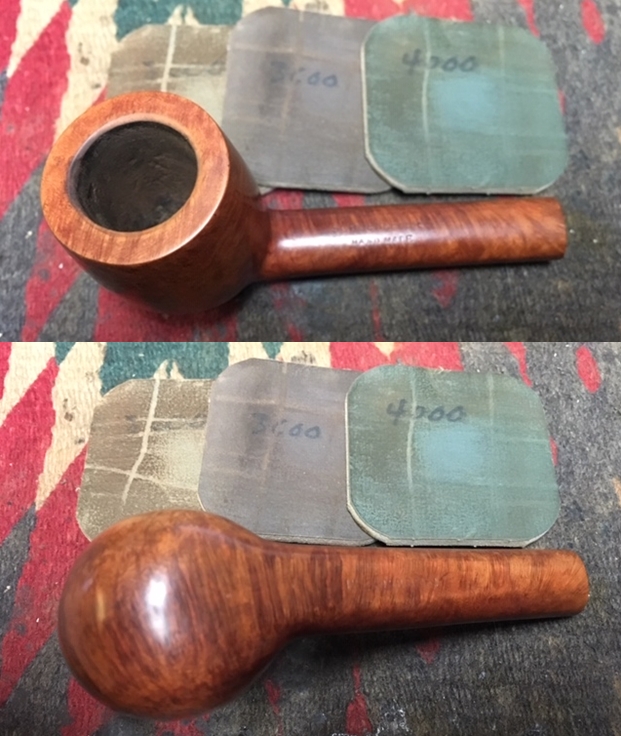
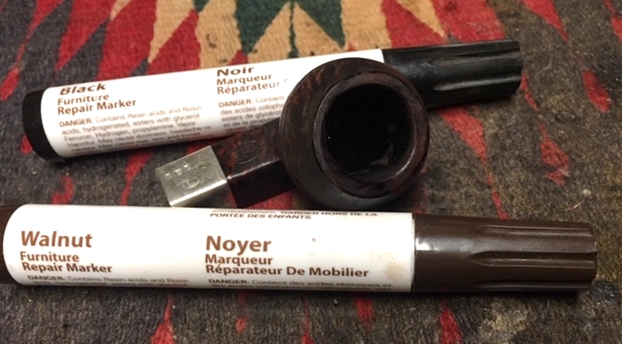
 I used Black stain pen to further blend the stain into the surface of the surrounding briar. I wiped it off with the alcohol dampened cotton pad. The photos below tell the story.
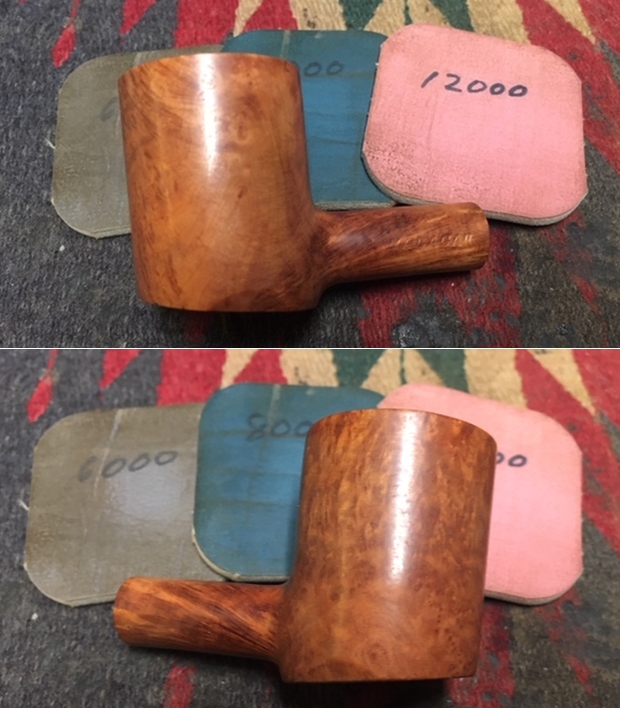
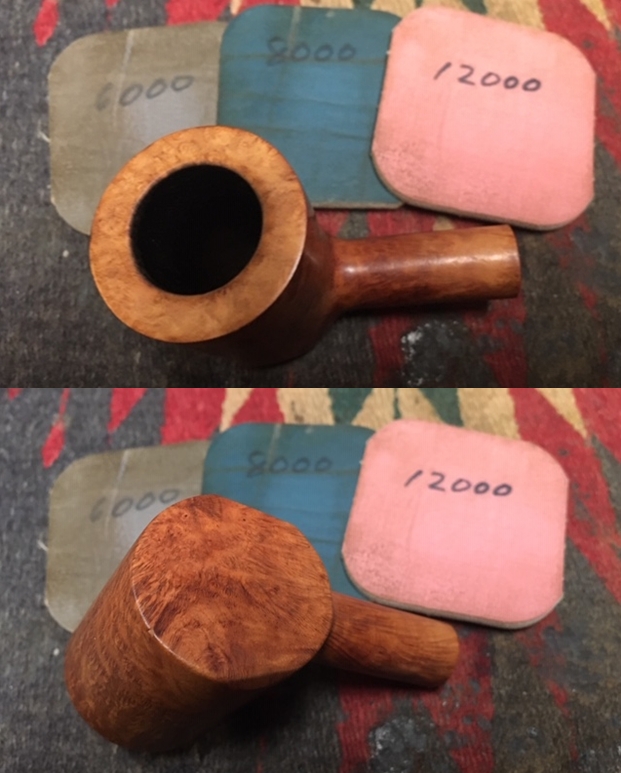
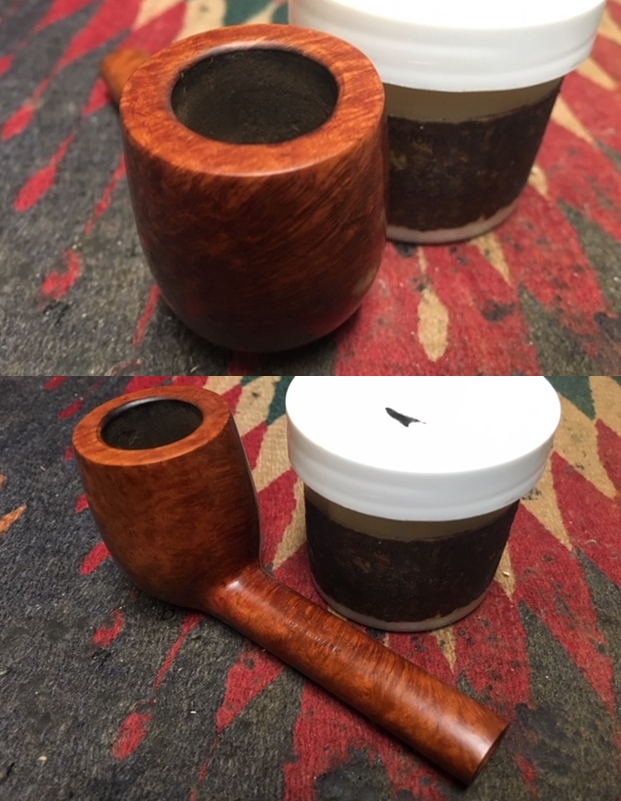
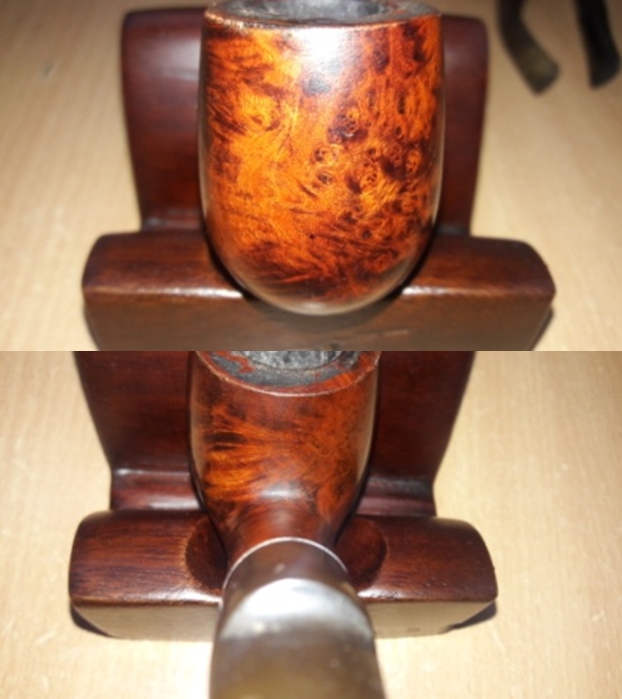
 I finished polishing the bowl and shank with 6000-12000 grit micromesh sanding pads and wiped the bowl and shank down after each pad with a damp cloth. The photos show the stain blend on the newly repaired areas. I am pretty happy with the results.
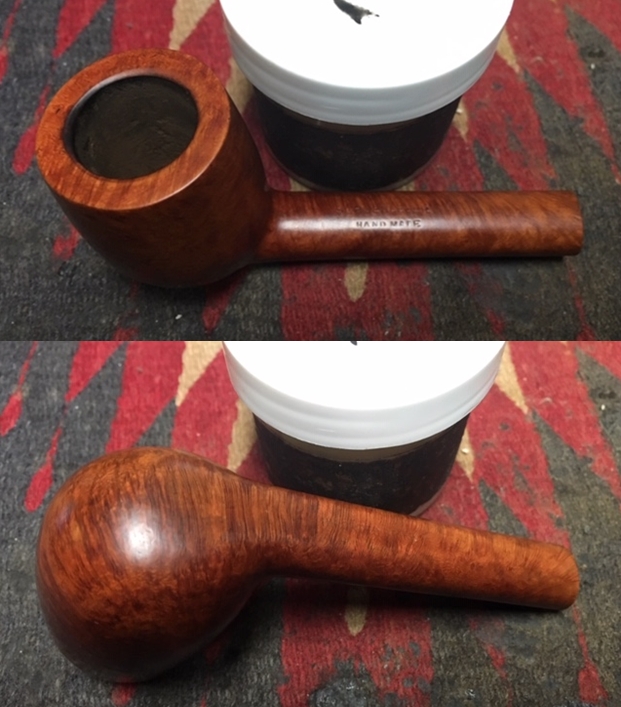
 I worked some Before & After Restoration Balm into the surface of the briar with my fingertips to clean, enliven and protect it. I let the balm sit for a little while and then buffed with a cotton cloth to raise the shine.

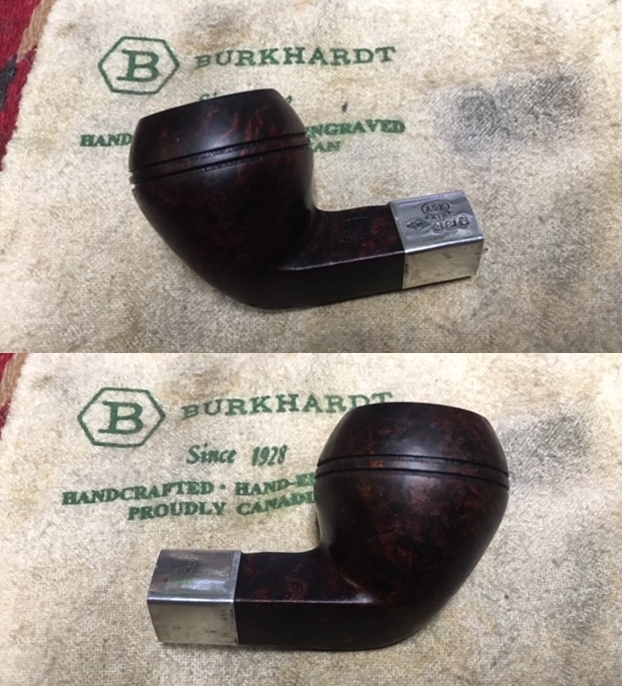
 I buffed the bowl with a microfiber cloth to polish the briar. I took photos of the pipe at this point to show what it looked like.
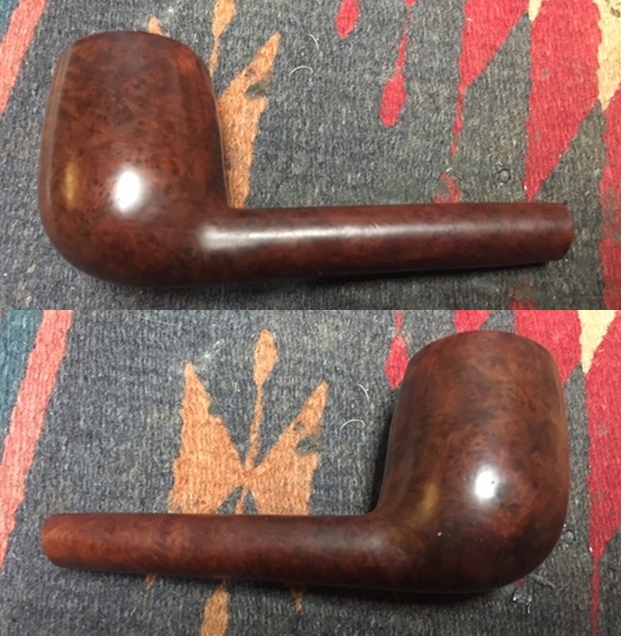
 With the bowl finished I set it aside and turned my attention to the stem. I filled in the deep tooth marks and rebuilt the surface of the button with clear super glue. Once the repair had cured I used a needle file to smooth out the repairs to the surface of the vulcanite.
 I sanded the repairs on the stem surface with 220 grit sandpaper to blend the repairs into the surface of the stem. I am happy with the stem surface once that was done. I started the polishing of the surface with 400 grit wet dry sandpaper.
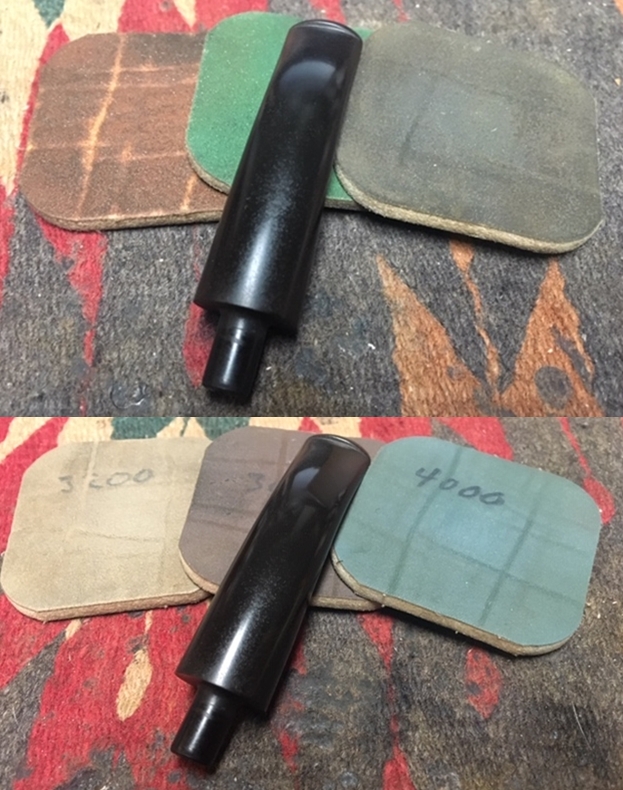
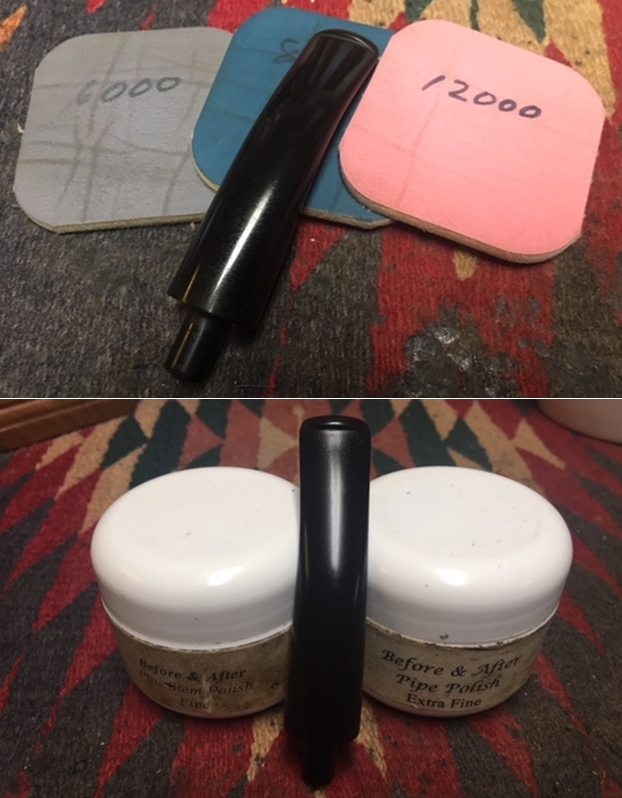
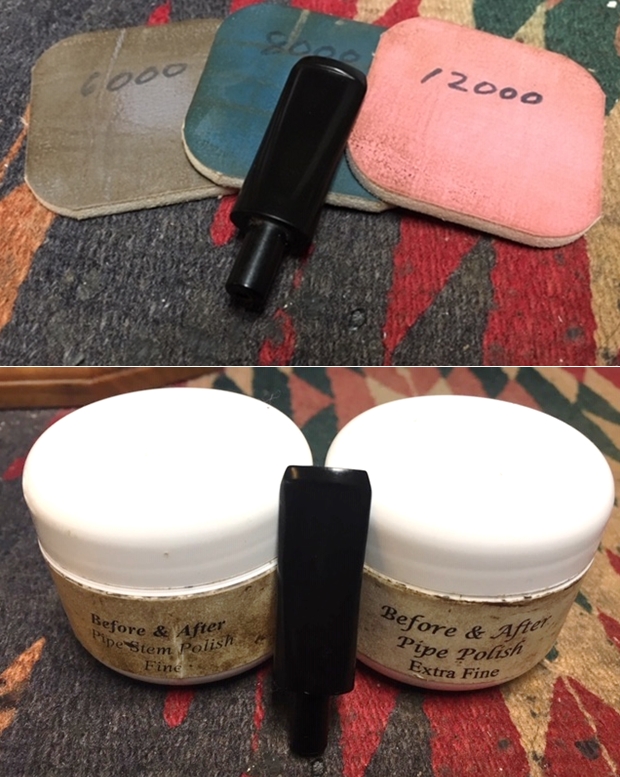
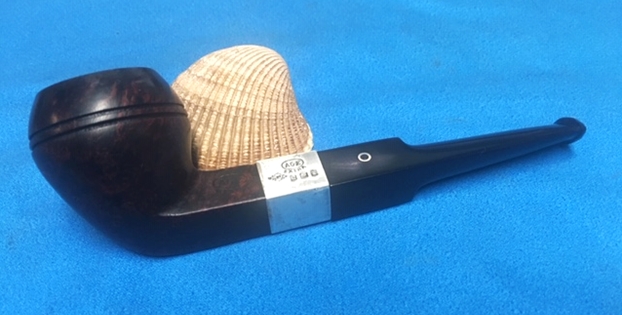
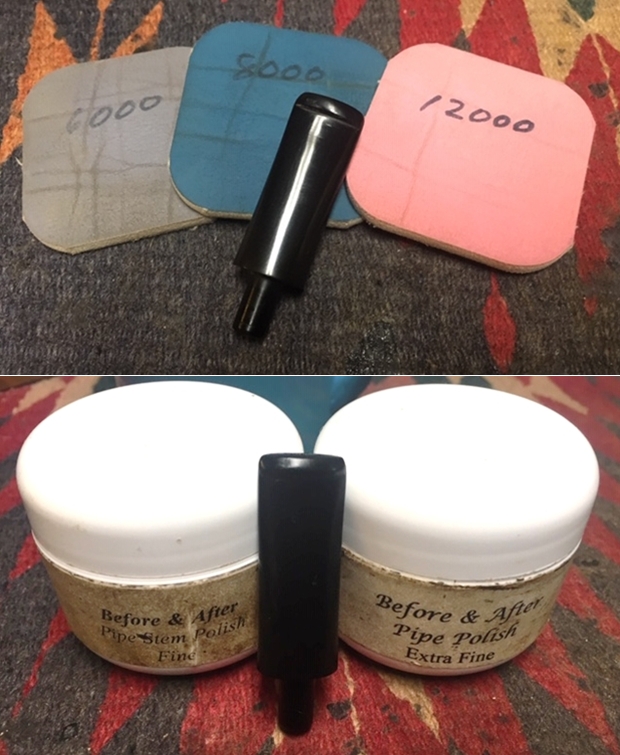
  I polished the stem with micromesh sanding pads – wet sanding it with 1500-12000 grit pads. I wiped the stem down with a damp cloth after each pad. I further polished it with Before & After Pipe Polish – both Fine and Extra Fine. I wiped it down with a coat of Obsidian Oil and set it aside to dry.
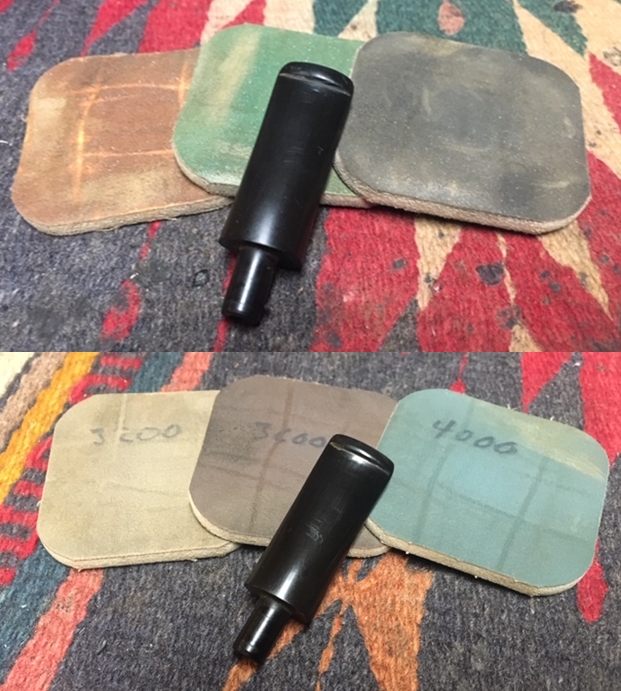
 I put the pipe back together and polished both the bowl and the stem with Blue Diamond polish on the buffing wheel. I gave the bowl and the stem multiple coats of carnauba wax. I buffed the pipe with a clean buffing pad to raise the shine. I hand buffed it with a microfiber cloth to deepen the shine. The pipe polished up pretty nicely. The oil cured finish and the grain came alive with the buffing. The grain really stands out against the dark finish providing a rich contrast. The finish on the briar works well with the polished black vulcanite stem. The finished pipe is a well-proportioned, nicely grained Canadian. Have a look at it with the photos below. The dimensions are Length: 5 3/4 inches, Height: 2 inches, Outside diameter of the bowl: 1 3/8 inches, Chamber diameter: 3/4 of an inch. This Malaga Canadian will be going back to Alex to add to his rack of Malaga pipes that are in his collection. Thanks for walking through the restoration with me on another of Alex’s Malaga collection.