Blog by Steve Laug
Before I left for my work trip to Nepal and India I received an email from a reader of the blog regarding an old 1919 pipe that had come into his possession. I include the first email here for the information that he included.
I realize that you must get hundreds of requests to work on peoples pipes, and that your back log is most likely prohibitive in my case, but I do have a request for your work.
I’ve been following your site for some time now and have become a fan of your work. Many of your tips and photos have helped me on my path of repairing pipes. This pipe that I’ve recently purchased is too precious and too well made for my skill level.
My pipe is a 1919 AGE Extra Bulldog, hallmarked London. Naturally there is the added significance that this year is its 100th birthday. I would like to request a full restore (as much as could be done) to ensure it makes it to see its 200th birthday, although I won’t be around to see it. The idea of this humble pipe, in my care, making it well past my time here on the planet is breathtaking in its scope.
I appreciate the time you’ve given to my request and I hope to hear back from you.
Kind Regards, Kerry
He included the pictures that follow as part of the temptation to do the restoration on this old timer. It is a good thing he did because I am not currently taking on any more work. I have a backlog of pipes to work on that will take me at least the rest of the next year of more to complete. However, there was something interesting and even compelling about this old pipe. The age and condition interested me as did the brand. I am unfamiliar with the AGE brand but the brand spoke to me.


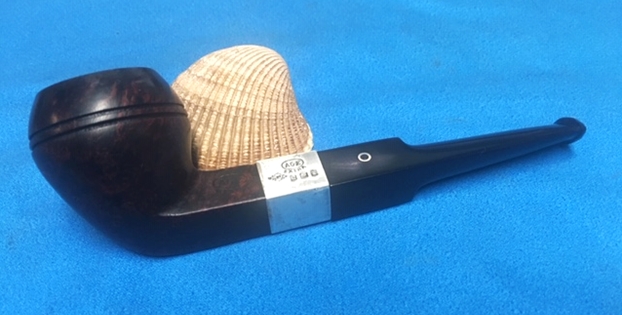
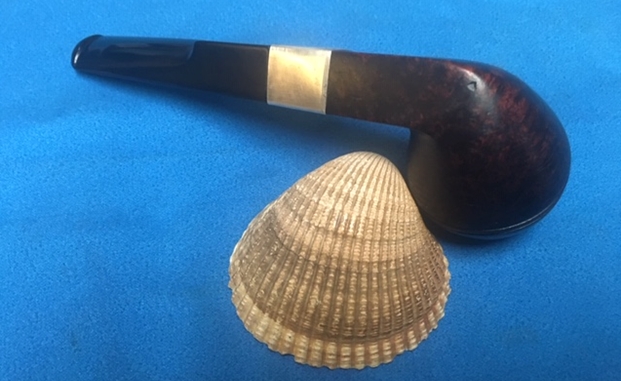
 A few emails went back and forth and I decided to have him send it to me to have a look at the pipe and decide what I wanted to do. It arrived shortly before I left for Nepal. I looked it over and made a decision to take it on as a project and see what I could do with it. It was an intriguing looking pipe that is for sure. The bowl had a lot of nicks and dings in the finish. The exterior of the pipe was dirty with grime and grit rubbed into the surface of the finish. The silver band was tarnished and dirty but the stamping and hallmarks were quite readable. The rim top was badly damaged. The inner edge of the bowl was damaged and the bowl was slightly out of round. The exterior was also damaged. The stamping on the left side of the shank was readable. It read AGE in an oval over EXTRA. The silver band also read AGE in an oval over EXTRA. There were also hallmarks as shown above. There was also a diamond with a banner and a R.J. stamp on it. The stem would not sit correctly in the shank. The stem had some tooth marks in front of the button on both sides of the stem and some tooth chatter on both surfaces. There was an inlaid silver O on the left side of the saddle stem.
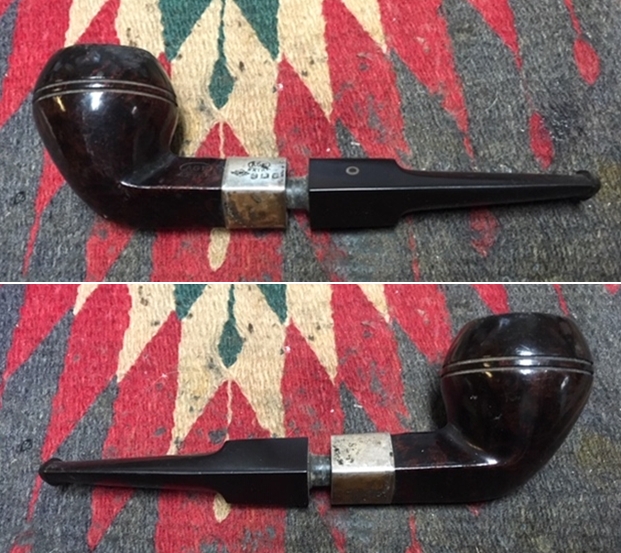
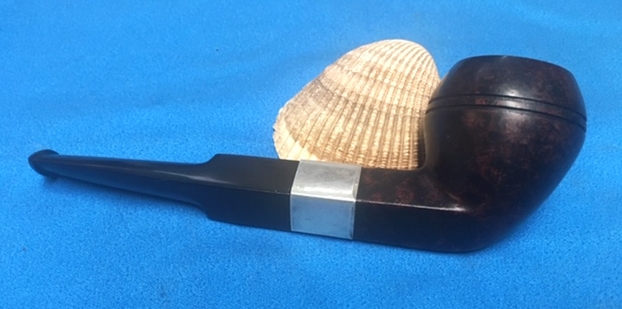
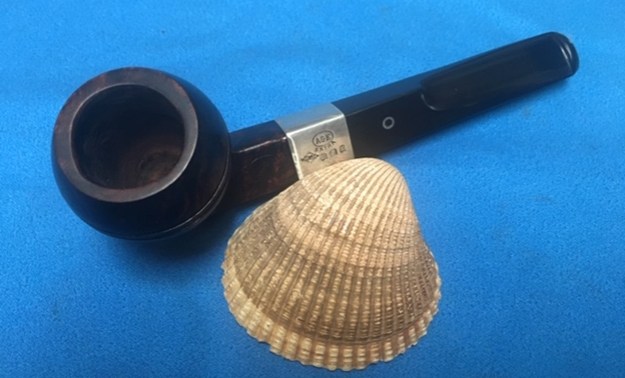
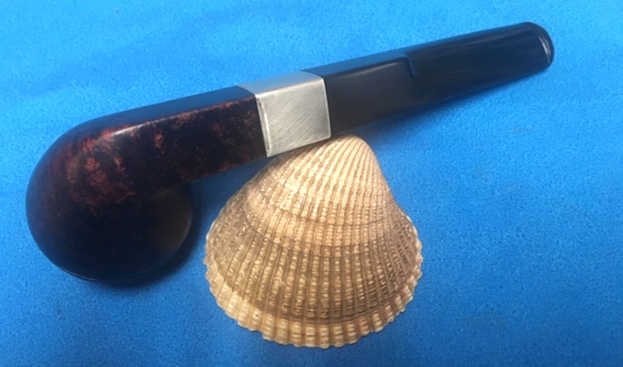
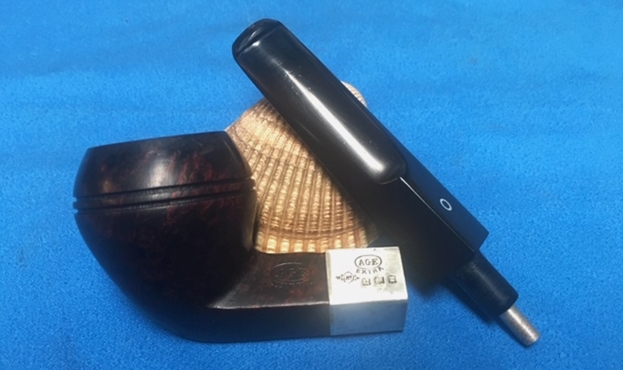
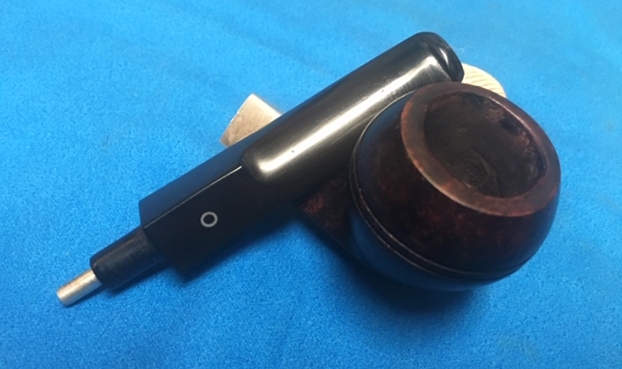
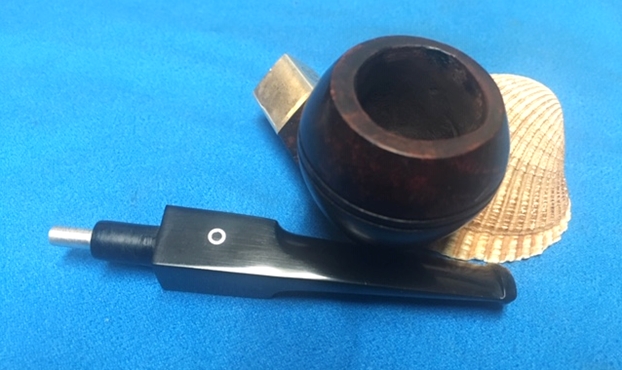
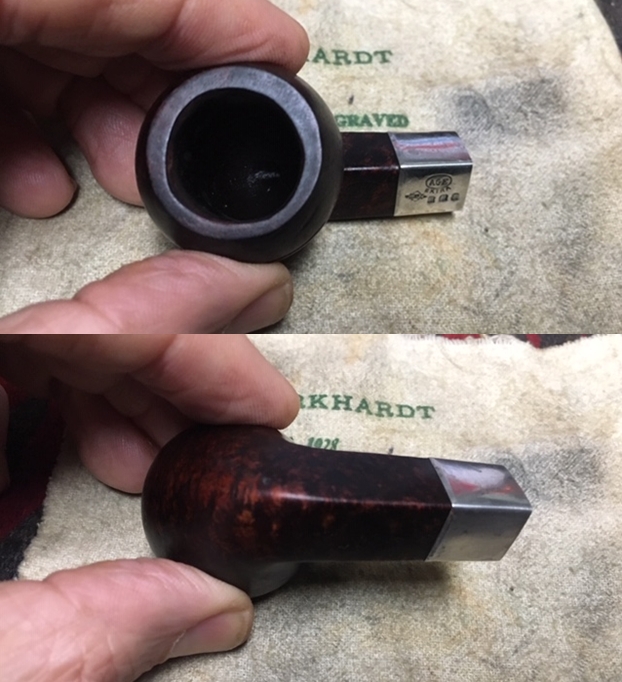
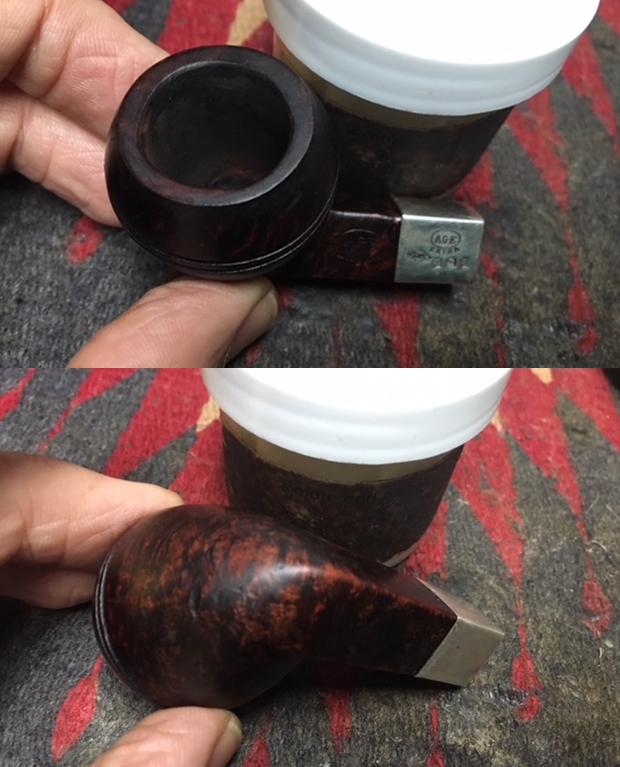
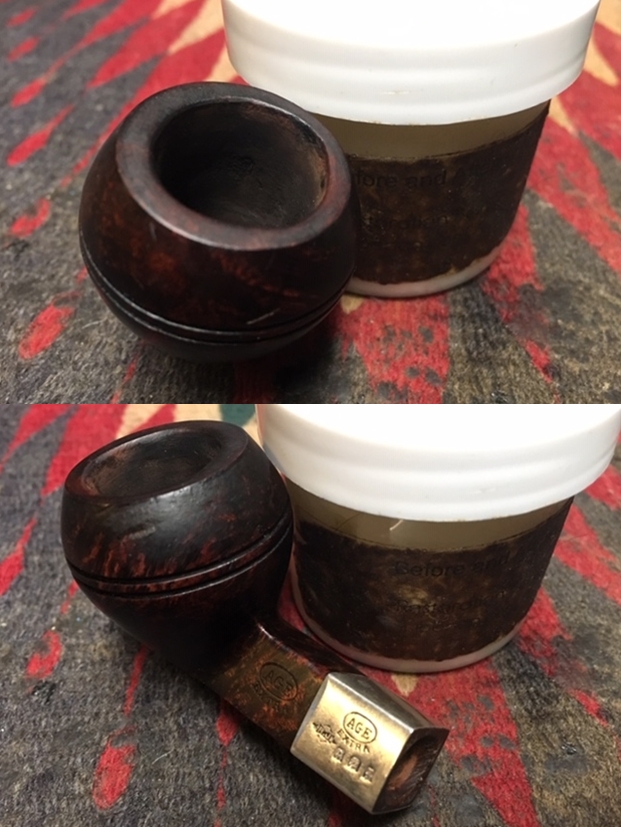
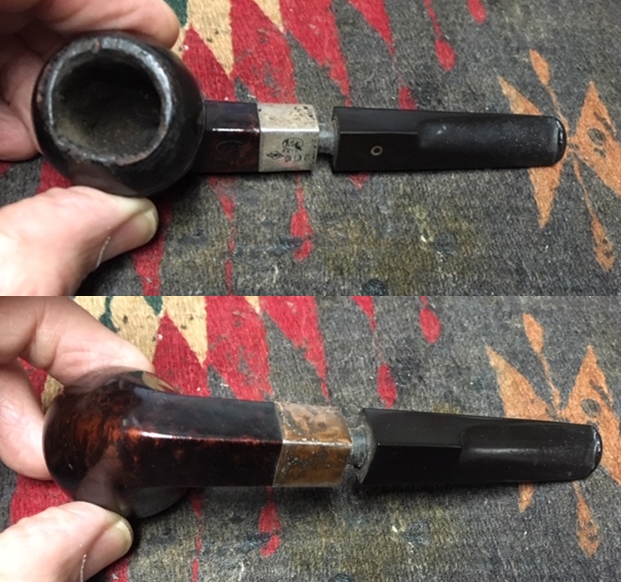 I took close up photos of the bowl and rim as well as the stem to show the condition of the pipe when it arrived. You can see the damage to the rim top and inner edge of the bowl. The oxidation on the silver band and the tooth chatter and damage to the stem and button edges on both sides of the stem. I also took a photo of the shank and the band to show the stamping in the silver.
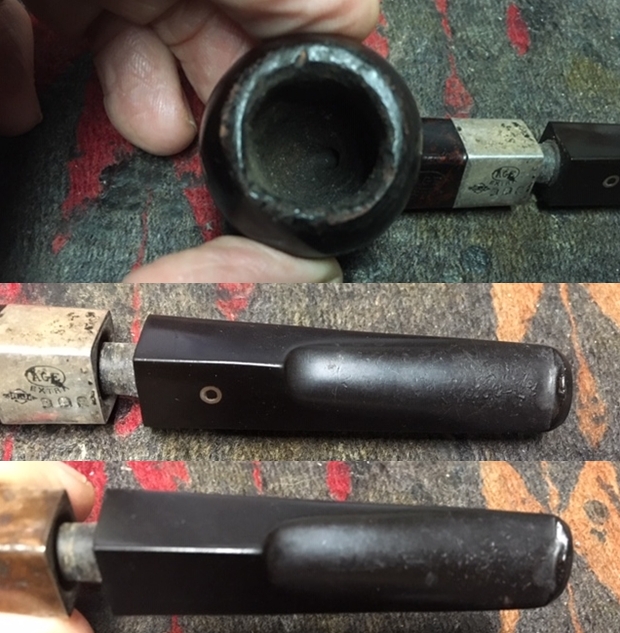
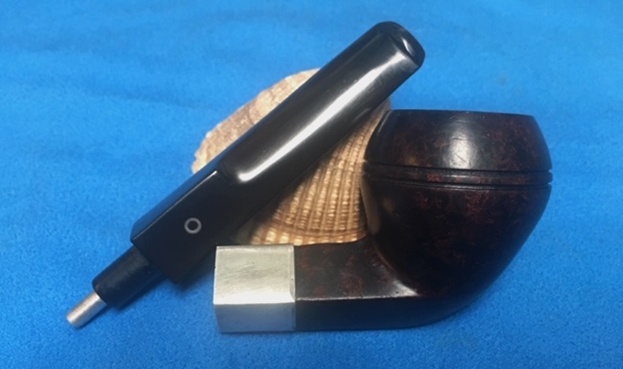
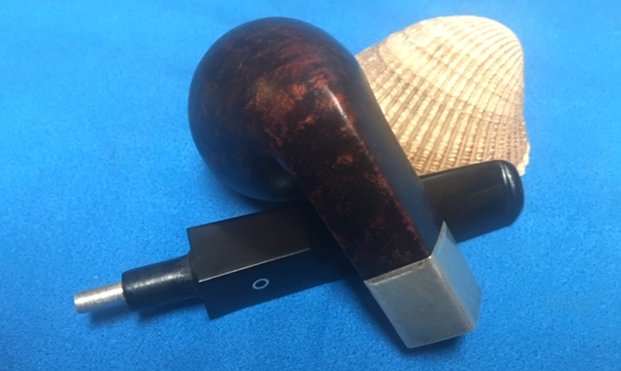
 I took a photo of the stem removed from the shank to show the inner tube and the condition of the tenon and tube. The build up on the tenon was part of the reason for the stem not seating in the shank.
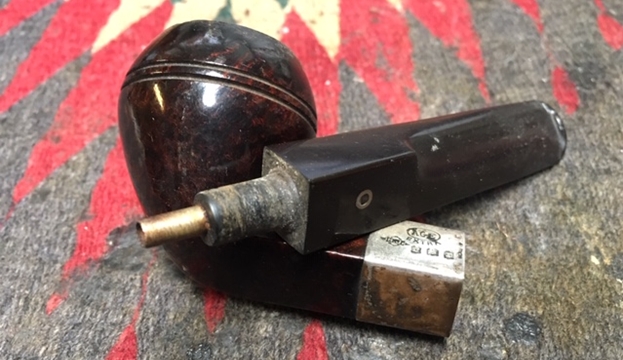 The maker of the brand was a bit of a mystery to me. Checking my usual sources I found absolutely no information on the AGE brand. There was no info on the Pipedia website or on the Pipephil site on the brand. I also checked on Who Made That Pipe by Wilczak and Colwell. There I found two possible makers fro the brand. They are shown in the screen capture below.
![]() The two options were La Bruyere 1918 a French made briar and also Salmon & Gluckstein an English made briar. The hallmarks on the band seemed to point to an English connection so I did some more looking online to identify the company who made the pipe.
The two options were La Bruyere 1918 a French made briar and also Salmon & Gluckstein an English made briar. The hallmarks on the band seemed to point to an English connection so I did some more looking online to identify the company who made the pipe.
I turned first to a website on English silver marks. I was specifically looking for information on the R.J. stamp on the silver to help identify the silversmith. I did a screen capture of the section on the R.J. stamp matching the one on the silver band on the pipe in question. Here is the link to the website: http://www.silvercollection.it/englishsilvermarksXRDUE.html. It identifies the R.J. in a rectangle and a lozenge as the mark of Reuben Jordan. They were active in London. The page also gave a link to a Makers, Pipe Mounters Marks page. I followed the link on that page to the section on Tobacconists, etc. On that page I could see that the Reuben Jordan – London silversmith did bands for Imperial Tobacco Co. in London. That brought this part of the investigation to a close in terms of the pipe maker in question taken from the silver hallmarks. http://www.silvercollection.it/DICTIONARYTOBACCONISTR.html
  Now I turned to do some work on the information given by Who Made That Pipe. Their identification of the brand as having made by Salmon & Gluckstein brand name was what I wanted to work on at this point. It was clearly an English made pipe as determined from the above information I had found thus far with the hallmarks and silver makers marks. I turned to Pipephil’s site to see what he had on the brand (http://www.pipephil.eu/logos/en/logo-s2.html). I did a screen capture of the listing on the brand and have included it below.
 From the information found about the brand on that page I learned that it was a long time brand in London and that it had been bought out by Imperial Tobacco Co. in 1902. Since that was prior to the purported date of this pipe it made sense that it was made by Imperil Tobacco Co. The brand continued under their manufacture until 1955 when the brand was dropped. The pipe fit within the time frame of the stamping on the silver band.
I then turned to Pipedia (https://pipedia.org/wiki/Salmon_%26_Gluckstein) to further read about the brand. The article on Pipeia quote from Pipes, Artisans and Trademarks, by José Manuel Lopes. It read in full as follows:
Salmon & Gluckstein was an early 20th century English distribution chain, with its own pipe catalog, probably made by La Bruyère. It had over 100 shops in England, which after being purchased by Imperial Tobacco Co., changed their name to Bewlay.
 The Pipedia link actually put the two brands from Who Made That Pipe both the Salmon & Gluckstein connection and the La Bruyere come together with the purchase of the company by Imperial Tobacco Co. Interestingly it also ties the brands to a brand I am very familiar with- Bewlay. Given that information it appears that the pipe was a brand of the Imperial Tobacco Co. and linked to the Salmon & Gluckstein brand.
Now it was time to try to figure out the date of the pipe from the hallmarks on the band. I examined them with a lens and found the following information. The first hallmark was a lower case “d” in a shield. This was the date letter on the pipe. The second hallmark was a lion passant in a shield. The emblem connects the pipe to London assay offices. It also identifies the band as being silver. The third hallmark was a leopard’s head uncrowned which identifies the pipe as English made between 1821 and the present.
I knew now that the pipe was London Made with a silver hallmark identifying a London silversmith identified by the R.J. stamp noted above as Reuben Jordan. The only thing left to fully learn about the pipe from the stamp was the date to be determined from the “d” stamp.
I turned to a website that I regularly use to identify the dates on English made hallmarks. The link is: http://www.silvercollection.it/englishsilverhallmarks.html. The screen capture of the chart on the left shows the dates and letter marks from 1916-1935.
Kerry had correctly identified the date of the pipe as being made in 1919. I always love when the pieces all come together and I can arrive at both a manufacturer and a date for the pipe.
Armed with this information I turned to work on the pipe. I started by cleaning up the silver with silver polish to remove the tarnish from the band. I rubbed the material on the band and polished it with a cotton pad to remove both the tarnish and polish the pipe.
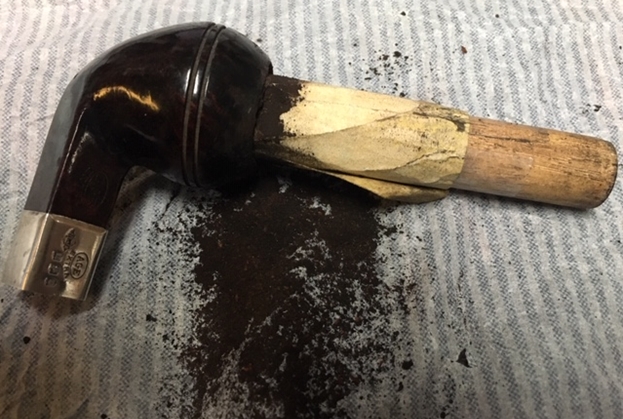
 I reamed out the bowl with a PipNet pipe reamer using the first three cutting heads to remove the cake. The bowl needed some work at the rim as it was out of round and I needed to see what I was dealing with so I took it back to bare briar. I cleaned up the remnants of cake with a Savinelli Fitsall knife and then sanded the bowl insides with sandpaper on a dowel. Afterwards I examined the bowl and could see that the walls were solid and that with a little work I could bring the bowl close to round.
 I cleaned the internals of the pipe with pipe cleaners, cotton swabs and alcohol to remove the debris inside the mortise and the airway into the bowl and the stem. I scraped the mortise walls with a dental spatula to remove the tars that had hardened on the walls.
  To deal with the damaged rim top I topped it lightly on a topping board with 220 grit sandpaper to smooth out the damage and remove the roughness of the rim. It did not take too much work to remove the damage and give me a flat surface to work with in the restoration.
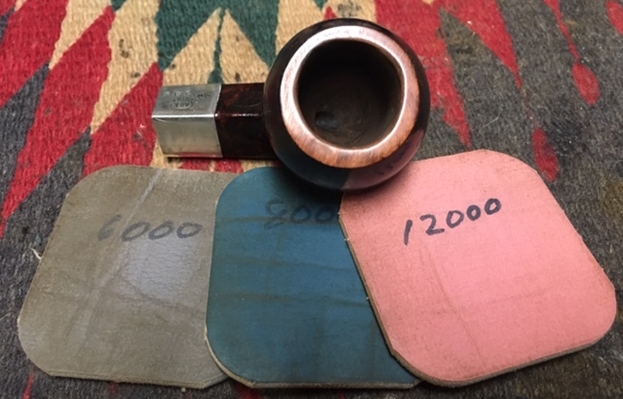
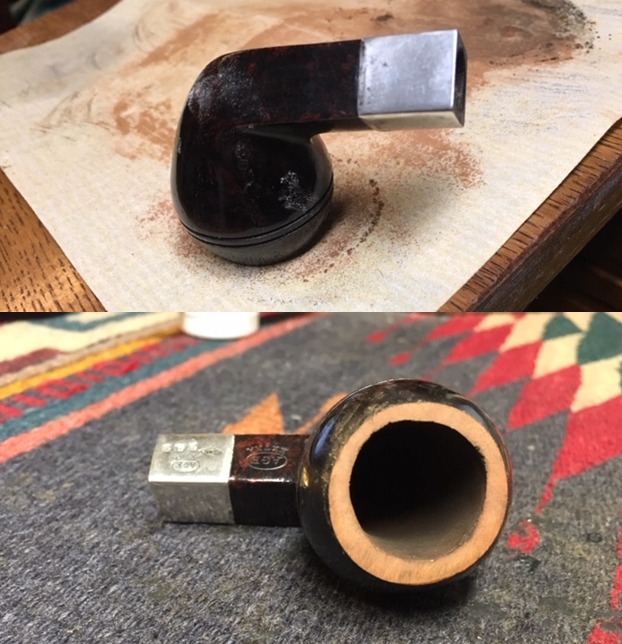 I polished the rim top with micromesh sanding pads – wetsanding with 1500-12000 grit pads as suggested by Paresh on my recent trip to Pune, India. I have to say that is working very well. I wanted to polish out the scratches so that I could work on matching the stain on the rest of the pipe and finish that portion of the restoration.
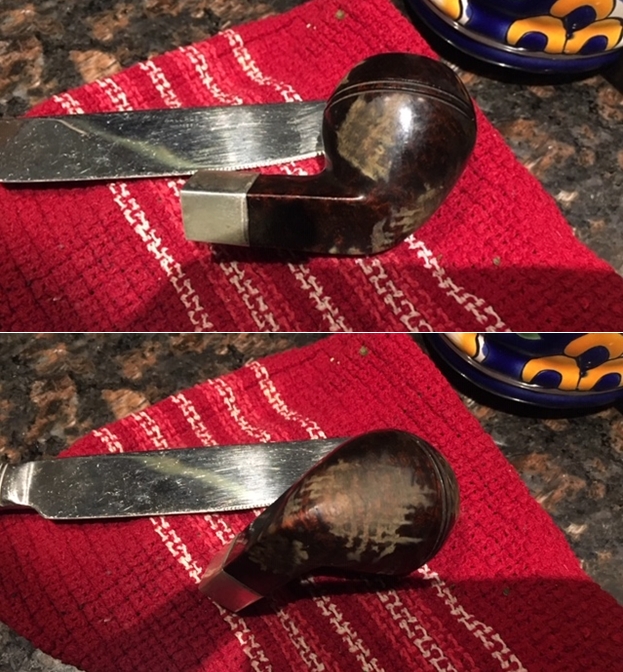
 I steamed out the dents around the bowl sides and cap with a wet cloth and a hot butter knife. I was able to reduce many of them. As is usual when steaming out the dents with a knife and stem there was some discolouration on the bowl sides that would generally disappear with polishing.
 I scrubbed the exterior of the bowl with undiluted Murphy’s Oil Soap and a tooth brush. I rinsed the bowl off with warm water under the tap and dried it with soft cloth.
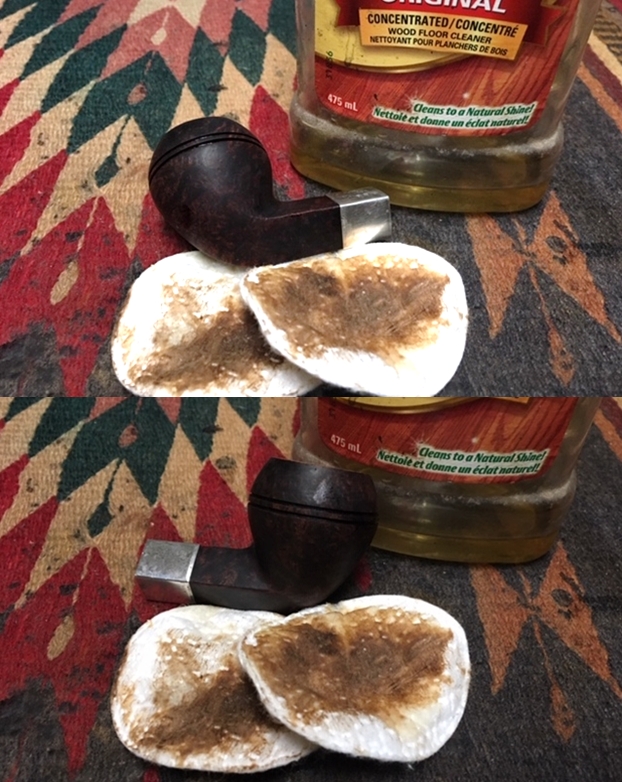

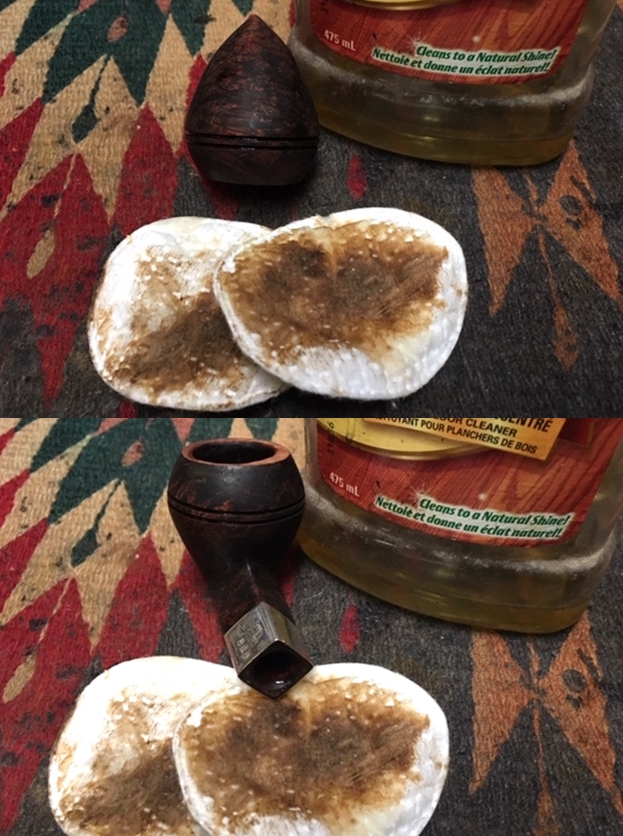 I used a dark brown (Walnut) and black stain pen to blend a stain to match the colour of the rest of the bowl. I rubbed it into the surface of the polished rim top and blended it with an alcohol dampened cotton pad. I was able to get a perfect match to the bowl colour.
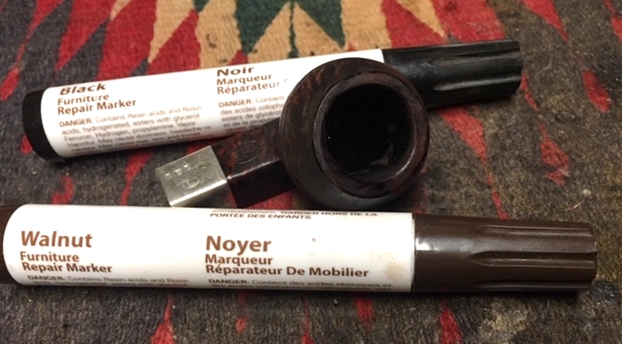 I polished the silver on the band with a jeweler’s polishing cloth. I worked it over the surface trying to get the tarnish from the stamping.
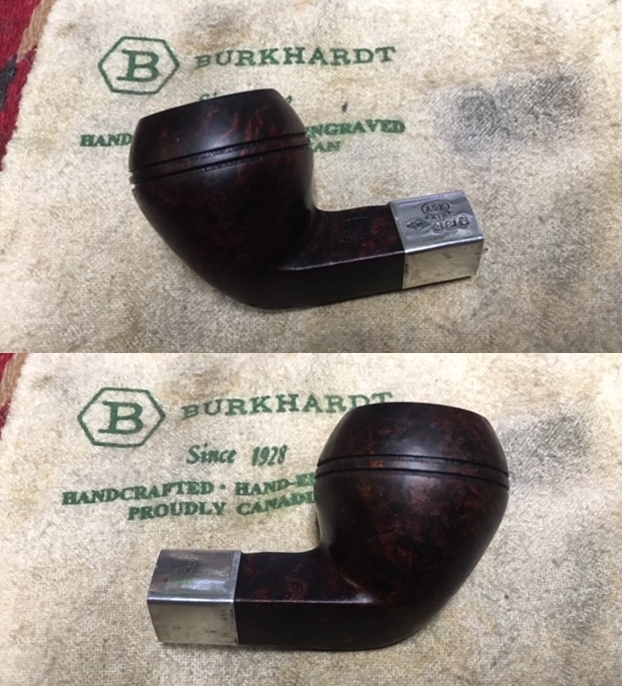
 I rubbed the bowl down with Before & After Restoration Balm, working it into the grain of the briar. The balm enlivens, refreshes and protects the briar. In this case it brought life back into the old piece of briar. While some of the dents and scratches were gone others remained. I left the remaining dents in the briar as ongoing testimony to the journey of this pipe. I only wish that it could tell its story. I let the balm sit on the briar and then buffed it out with a soft cotton cloth to raise the shine.
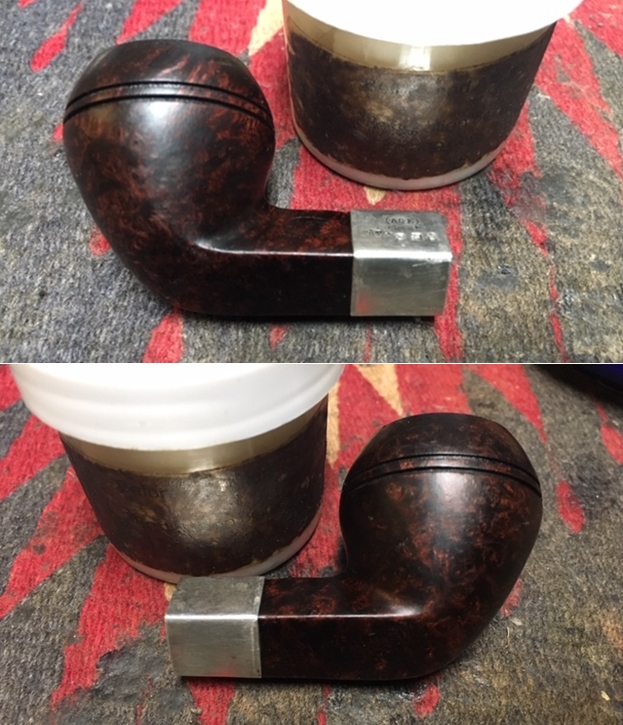
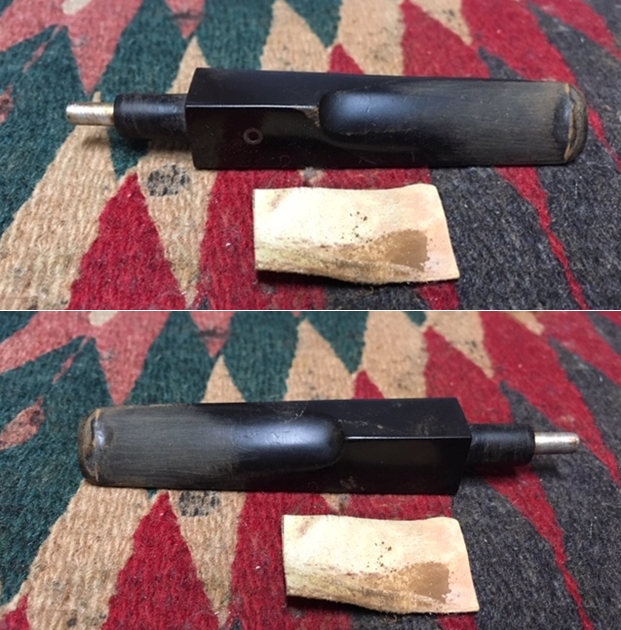
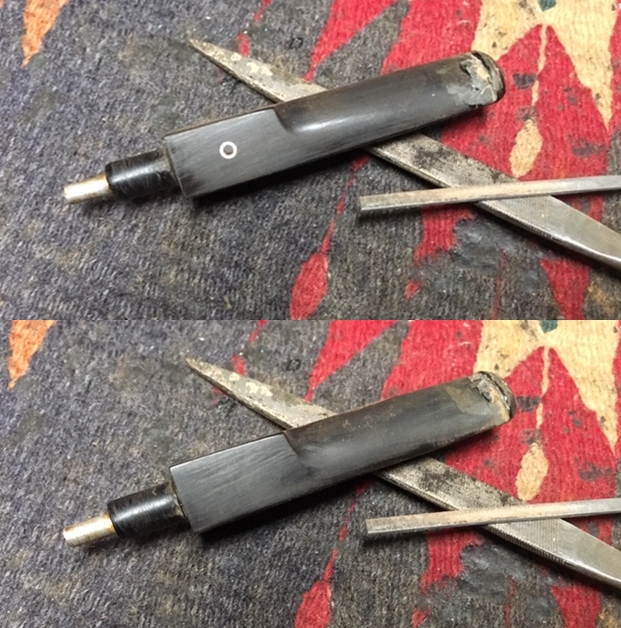
 I set the bowl aside and turned my attention to the stem. It had deep tooth marks on the top and underside of the stem near the button. I painted the stem surface with the flame of a lighter to lift the dents in the vulcanite. I sanded the stem with 220 grit sandpaper to smooth out the tooth chatter in the surface and cleanup around the dents in preparation for the repairs.
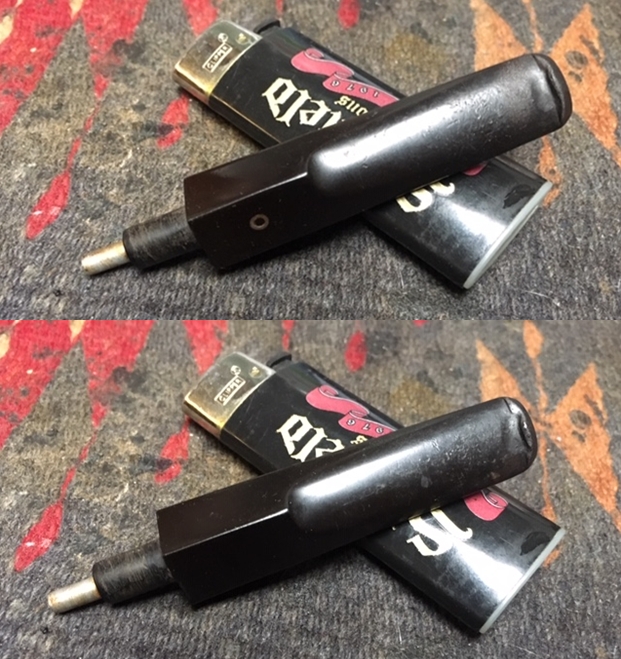
 I cleaned out the dents with a cotton swab and alcohol. I filled them in with clear superglue and set the stem aside to cure. Once the repairs cured I used a needle file to redefine the button edge and also smooth out the repairs to the dent. I sanded the stem with 220 grit sand paper and 400 grit wet dry sandpaper to smooth out the sanding marks in the vulcanite.
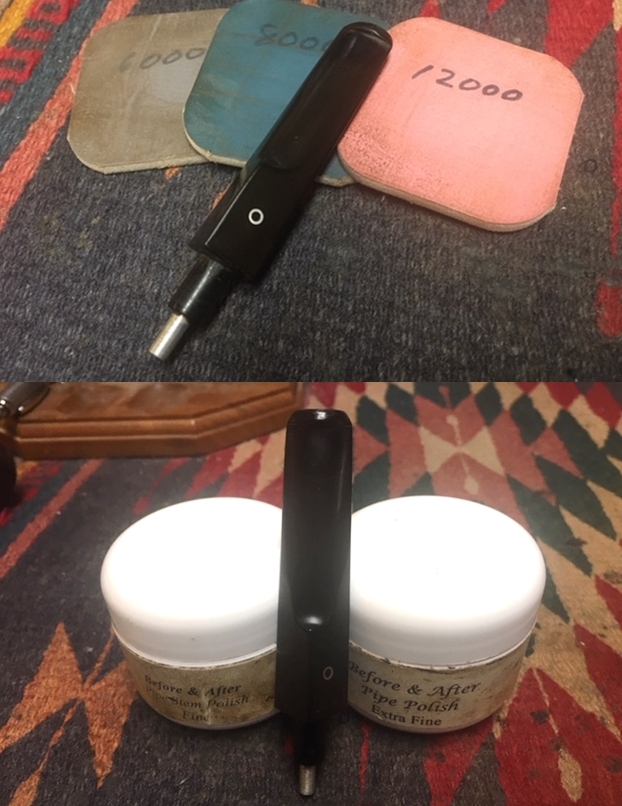
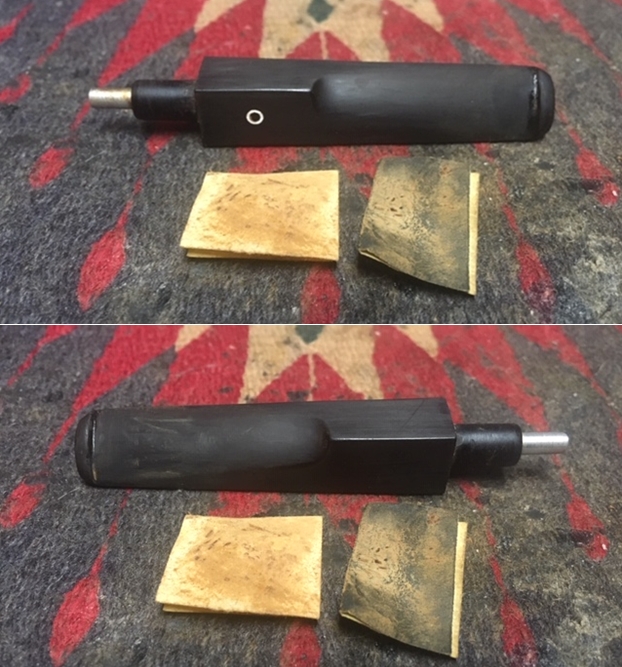 I polished the vulcanite stem with micromesh sanding pads – wet sanding with 1500-12000 grit pads. I have been trying wet sanding with all of the pads after discussions with Paresh while we were in Pune, India. It does seem to give the stem a good shine and reduce the scratching. I finished the polishing with Before & After Pipe Polish – both fine and extra fine polishes.
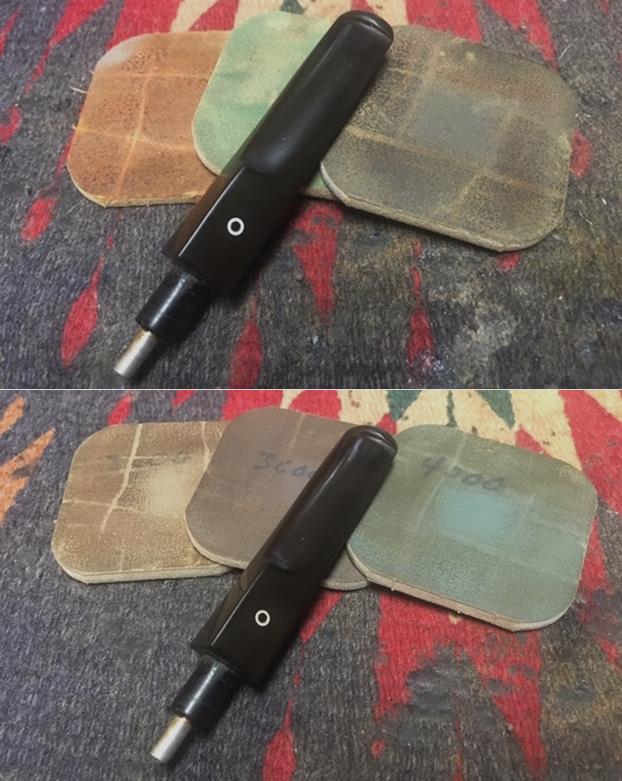
 I put the stem back on the bowl and buffed the pipe with Blue Diamond polish on the buffing wheel. I gave the bowl and stem multiple coats of carnauba wax and buffed it with a clean buffing wheel to raise the shine. I polished the band with a jeweler’s cloth once more, then hand buffed the entire pipe with a microfiber cloth to deepen the shine. This 100 year old AGE EXTRA Bulldog is a beautiful pipe. The grain really stands out with a combination of birdseye, cross grain and swirls surrounding the bowl give it a rich look. The rich contrasting brown and black stains makes the grain stand out while hiding the dents that remain. I left the remaining dents in the briar to leave the story of the pipe’s travels intact. It is a proportionally well carved pipe. The polished black vulcanite stem had a rich glow. The finished pipe is a beautiful straight Bulldog that feels good in the hand and the mouth. Have a look at it with the photos below. The dimensions are Length: 5 inches, Height: 1 3/4 inches, Outside diameter of the bowl: 1 1/4 inches, Chamber diameter: ¾ of an inch. This pipe will be going back to Kerry next week. I am excited to hear what he thinks of this beauty. Thanks for walking through the restoration with me as it was a pleasure to work on.