Blog by Dal Stanton
 I remember well where I found this very nice looking Butz Choquin Festival. Living in Bulgaria, I have had the opportunity to visit our neighbor to the south several time – Greece. We were with a group of interns who were participating in our summer training program in Sofia which included a field trip to visit the ancient city of Athens. It is an amazing city with the Parthenon towering over the city set atop the acropolis right next to Mars Hill where the Apostle Paul made his historic stand arguing with the Greek philosophers. Since I had seen these sites several times before, while the group of interns went hiking in that direction, I went in another toward the Ministirski area to do some pipe picking – one of my favorite pastimes!
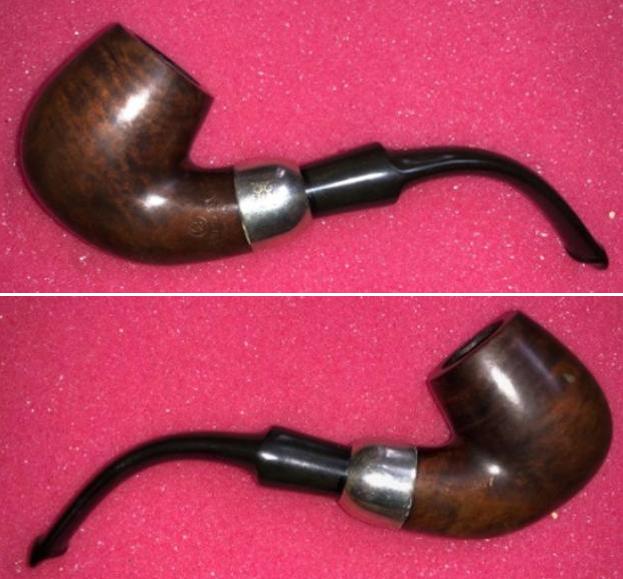
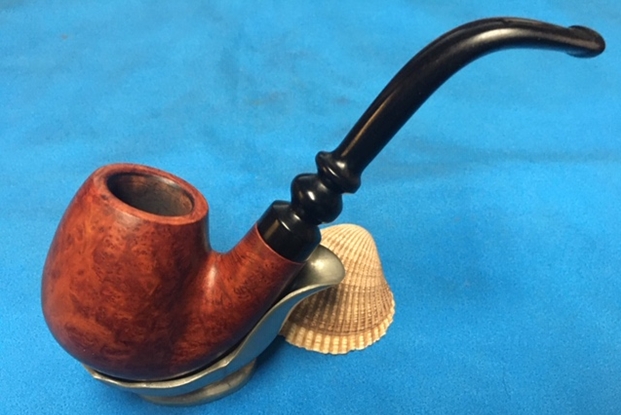
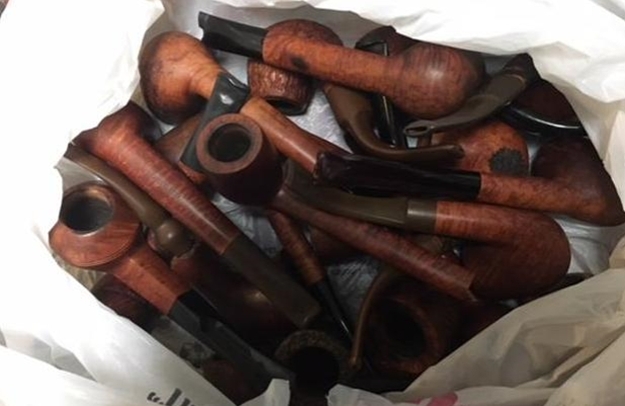
This area has many secondhand stores and antique shops with hidden treasures that lurk in the most unexpected places – I couldn’t pass up this opportunity! There happened to be a Flea Market in session near the ancient meat market area and it was there that I found the BC Festival now on my worktable. I spied a cluster of pipes amidst coins, bracelets and knock-off sunglasses. The lady vendor had some very nice pipes but the asking prices started too close to the stratosphere and my pocketbook was a bit closer to earth! I decided to focus my attention on the French BC Festival. The shape number is 1305 which pointed to the very shapely Bent Billiard I was focused on. What attracted me was the very full bowl/shank transition continuing to a full stem bending toward the zenith. It also had a very solid feel in the palm – one of those pipe whisperer moments – “Take me home!” After some serious negotiating, I think I got a good deal and the BC Festival came home with me and has been waiting for a new steward in my online collection, ‘For “Pipe Dreamers” Only!’.  This is where a few months later, Michael from Kansas, wrote asking about the BC Festival. After we communicated a bit, he commissioned the BC and he wrote this:
Sounds good! I saw this post on Facebook in the Gentlemen’s Pipe Club and was interested. I was taken by your work and wanted to know more. I’m from the states (Kansas to be exact). Smack dab in the middle. Currently it’s 17 degrees out and a nice pipe sounds pretty tasty. I’m looking forward to seeing this beauty restored.
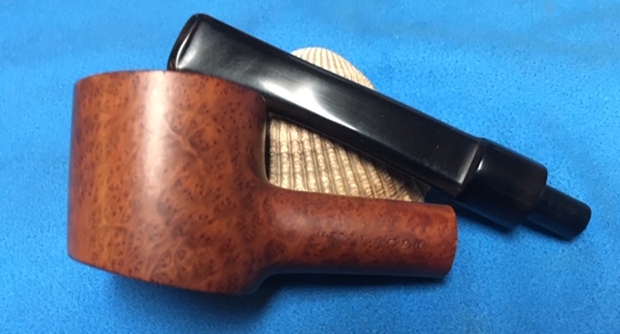
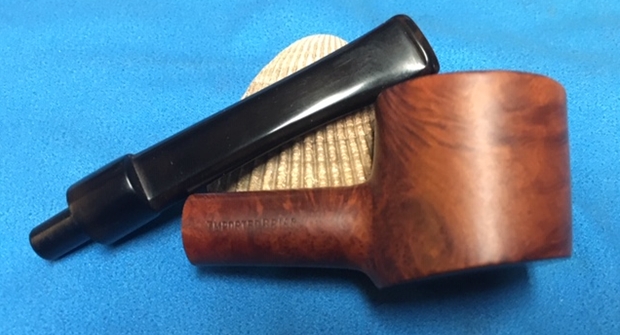
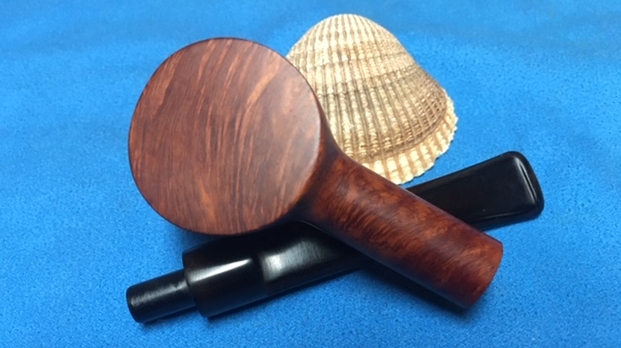
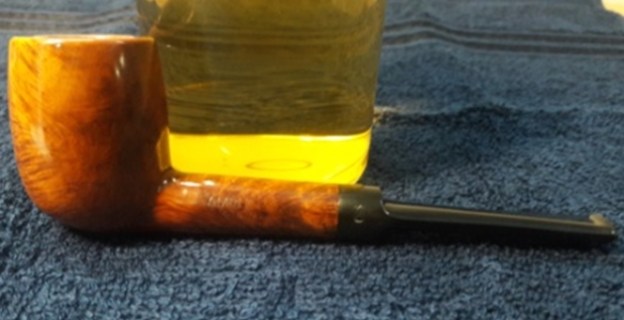
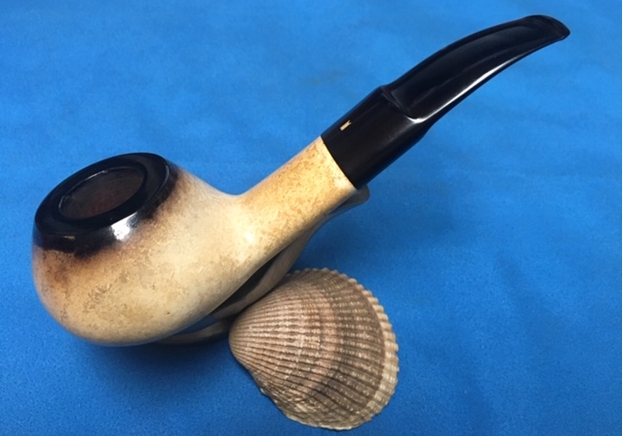
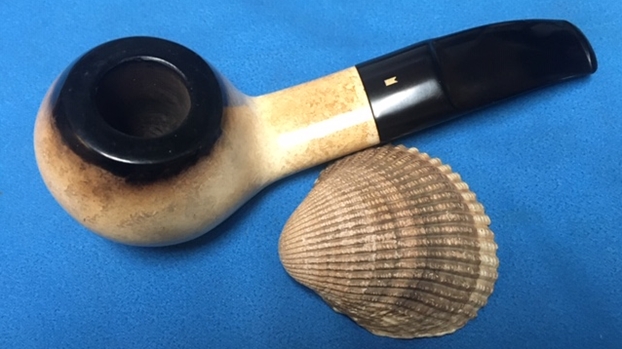
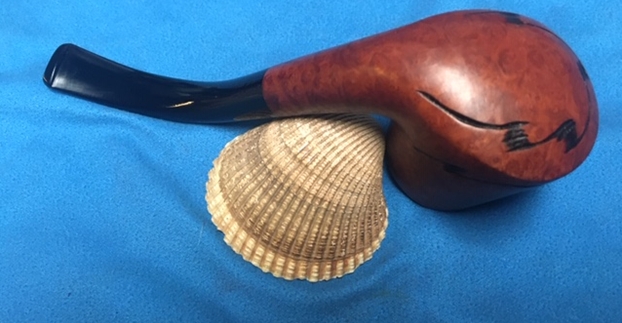
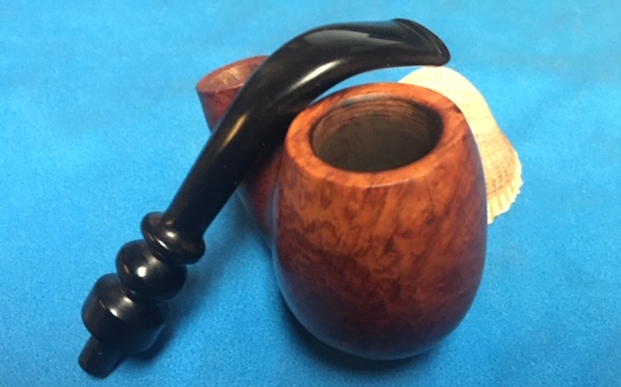
I appreciated Michael’s words and I also appreciate his patience! The Butz Choquin Festival he commissioned benefits our work here in Bulgaria with the Daughters of Bulgaria – working with women and girls who have been trafficked and sexually exploited. The attractive BC is now on my worktable and I take more pictures for a closer look at this Athens find:


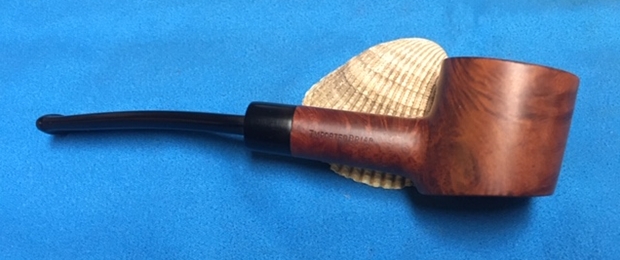
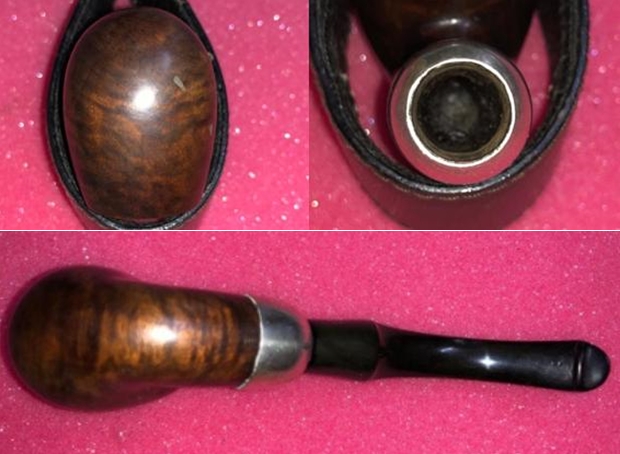
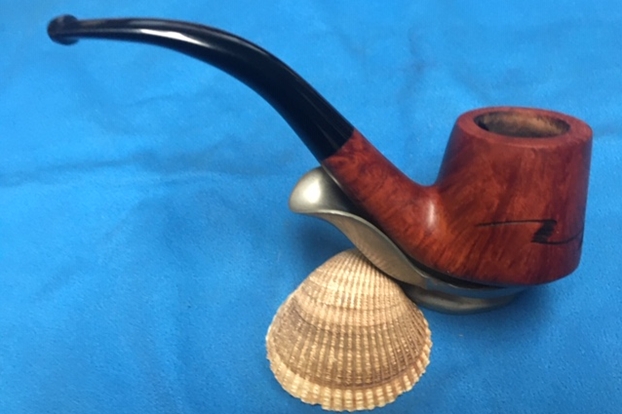
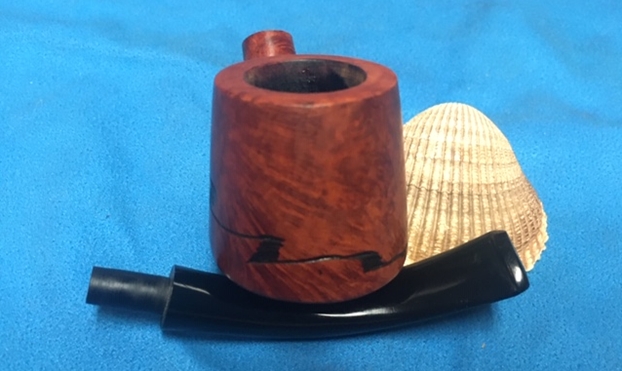
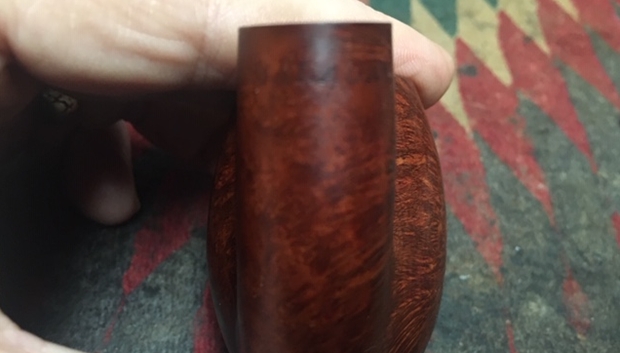
 The nomenclature is stamped on the left flank of the shank and reads in fancy cursive, ‘Butz Choquin’ [over] ‘Festival’. The right shank side is stamped with a curved ST. CLAUDE [over] FRANCE [over] 1305. A very thin, ghosted ‘BC’ is stamped on the left side of the stem.
 I’ve had the opportunity to restore several pipes from the center of French pipe making, St. Claude. As a refresher, Pipedia provides this information about the origins of Butz Choquin:
Jean-Baptiste Choquin of Metz started out as a tobacconist. This enterprise was prosperous; he had several employees. Among those, there was a certain Gustave Butz who was its first workman and who became his son-in-law by marrying Choquin’s daughter Marie in 1858. In 1858 Jean-Baptiste Choquin created, in collaboration with Gustave Butz, the Choquin pipe. This bent pipe with a flat-bottomed bowl was finished with an albatross-bone mouthpiece, fixed with silver rings. In 1858, still in Metz, Gustave Butz built an establishment for the manufacture of the Choquin pipe which took the name of [Butz-Chochin]. In 1951, the Berrod-Regad company bought the trademark, continuing manufacture until 2002. Departing from Metz, the workshop was relocated to Saint-Claude, then also called ‘the world capital of the briar pipe,’ under the Berrod-Regad group. The Berrod-Regad group would go on to completely rebuild the network of representatives until finally entering the export market in 1960 and has since won several prizes, as well as the Gold Cup of French good taste.
In a few years, the brand’s collection increased from ten to seventy series. 135 years after it was founded, the pipe is still well-known not only in France but throughout the world. In 2002, the Berrod family, wishing to preserve manufacture of pipes in Saint-Claude, handed over the company to Fabien Guichon, a native of the area, who will continue to develop the brand during the 21st century.
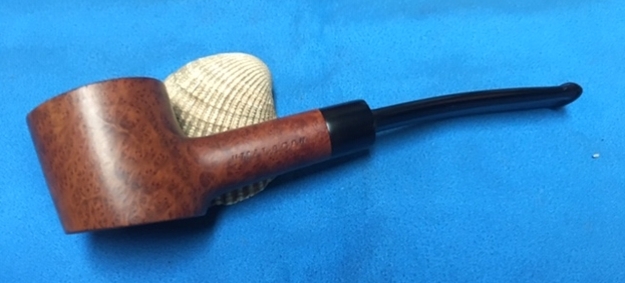
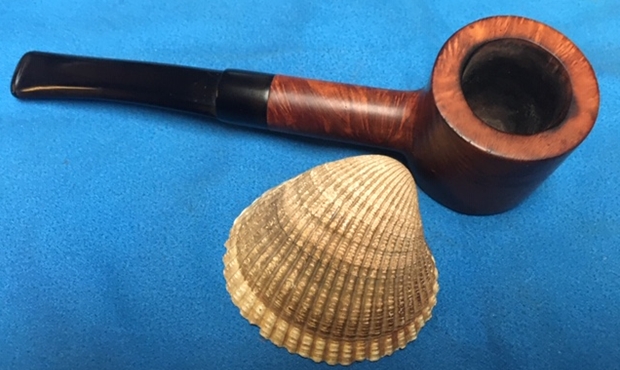
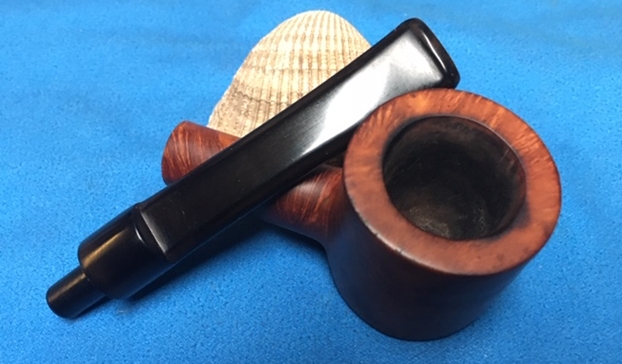
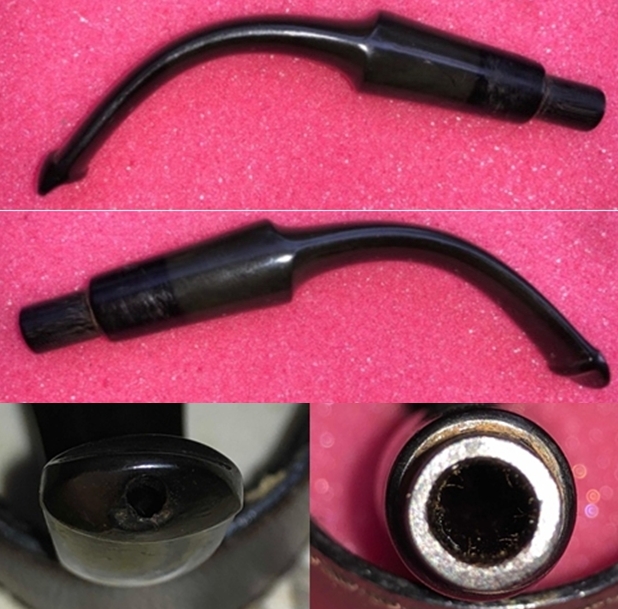
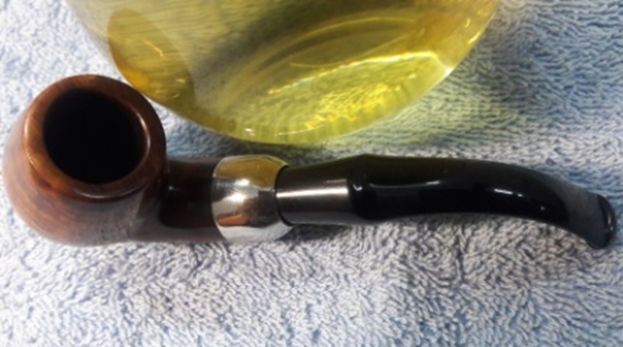
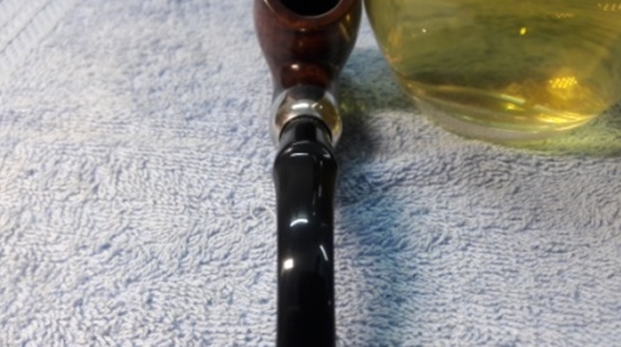
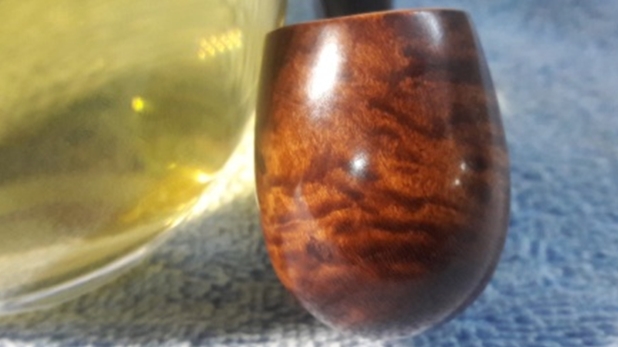
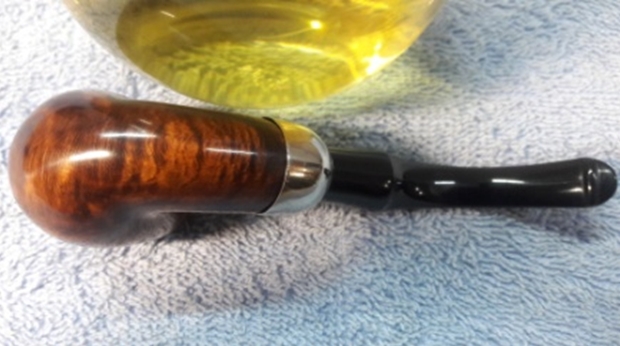
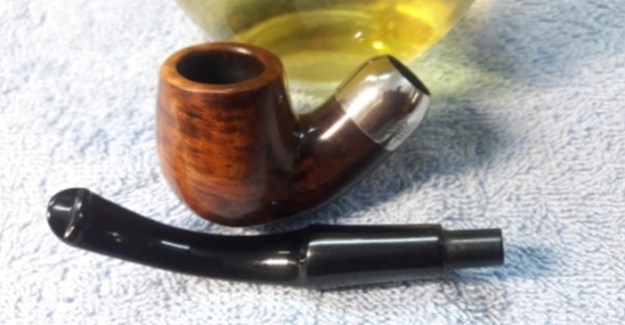
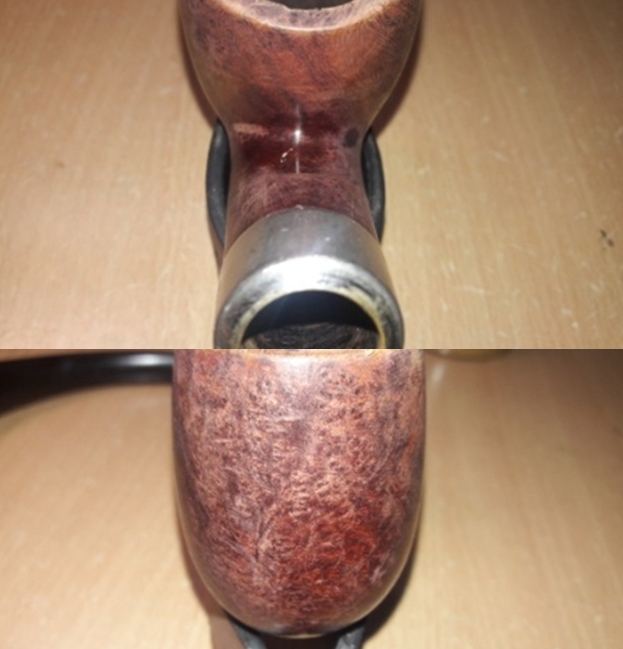
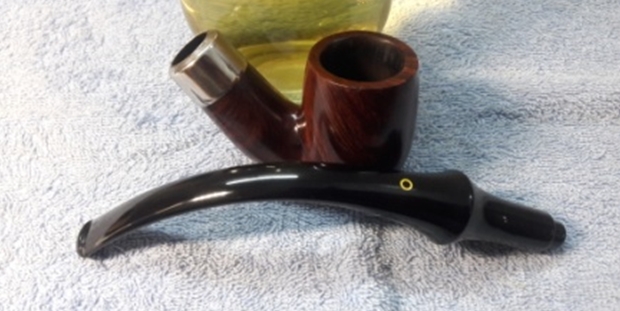
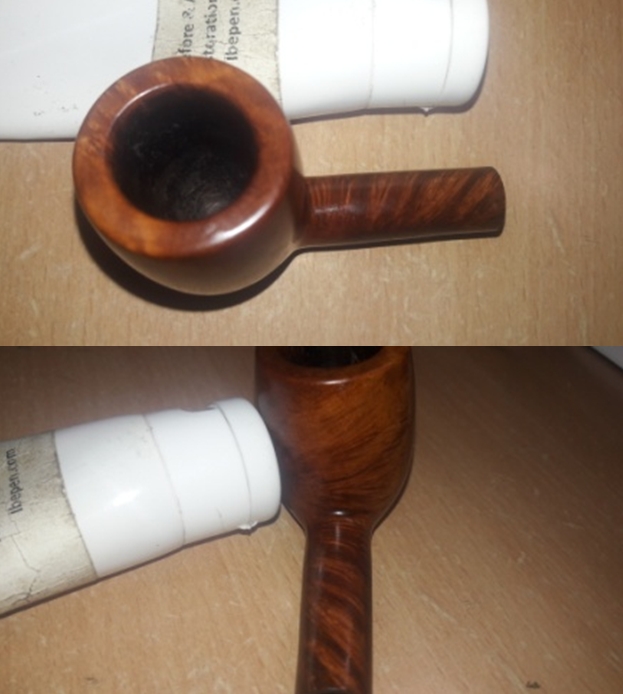
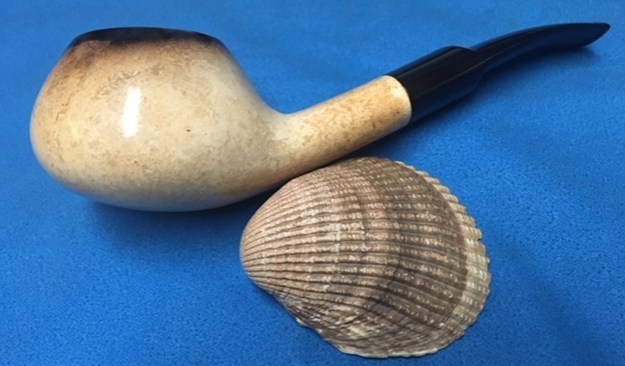
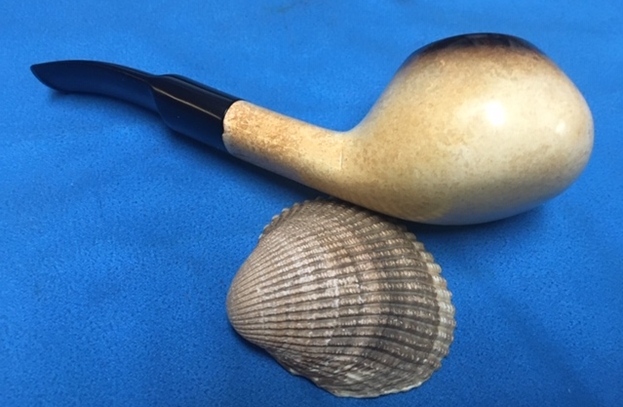
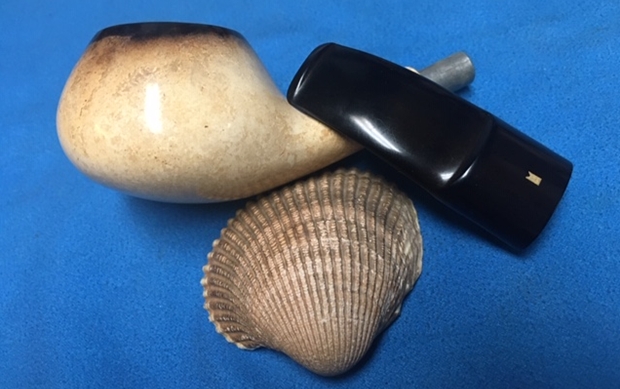
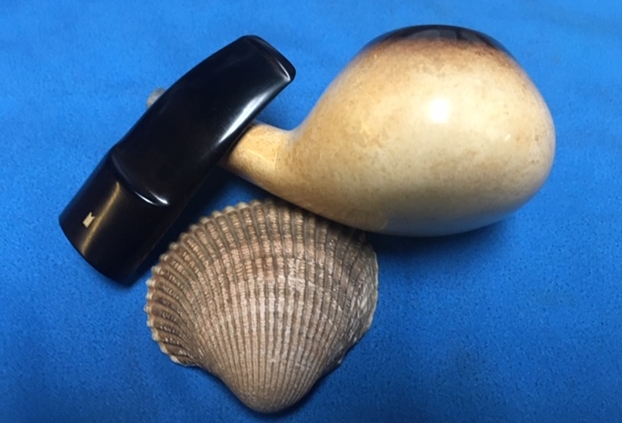
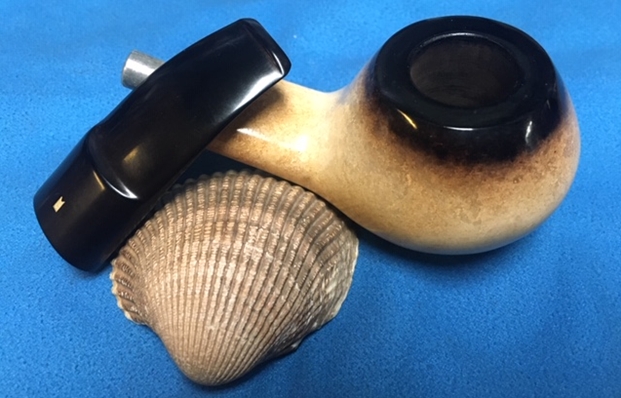
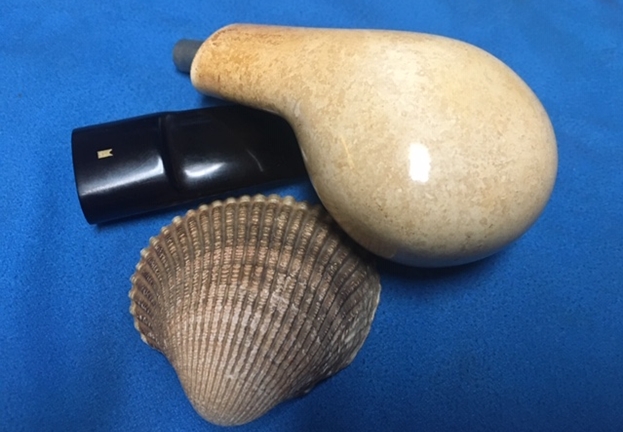
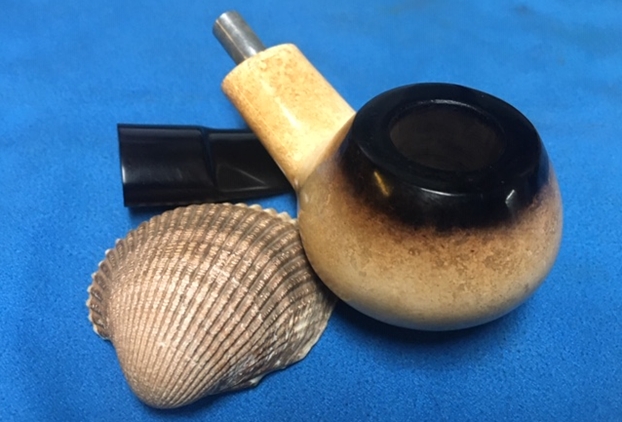
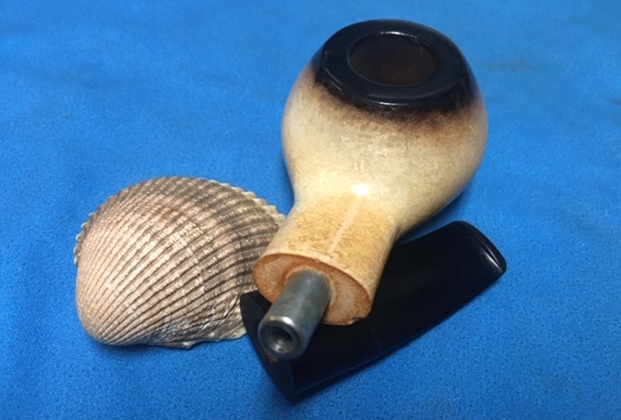
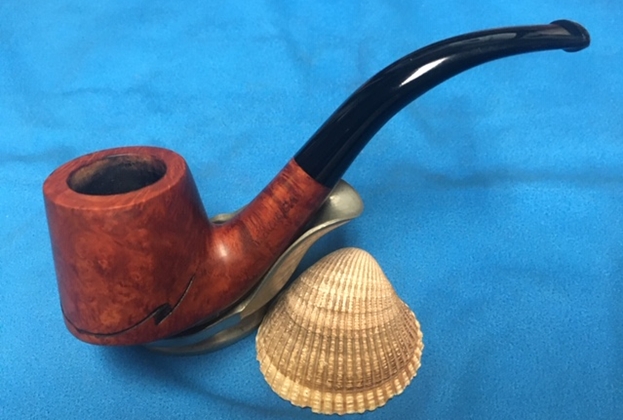
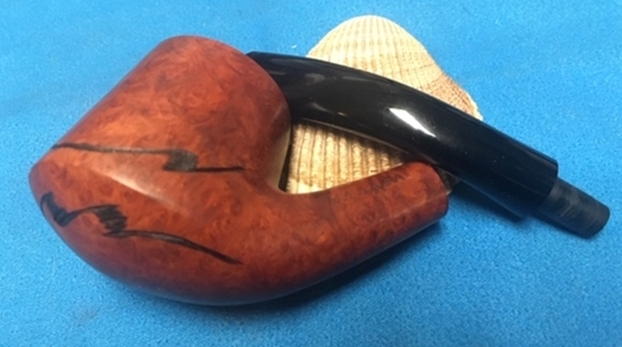
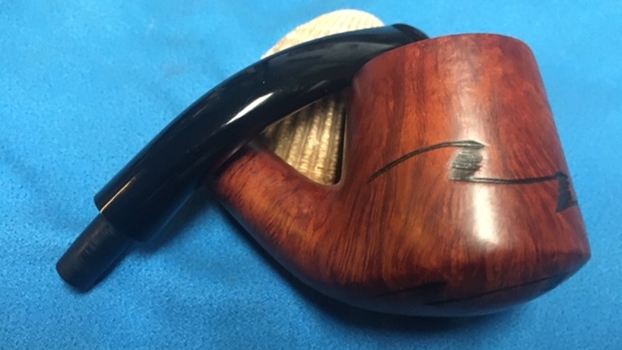
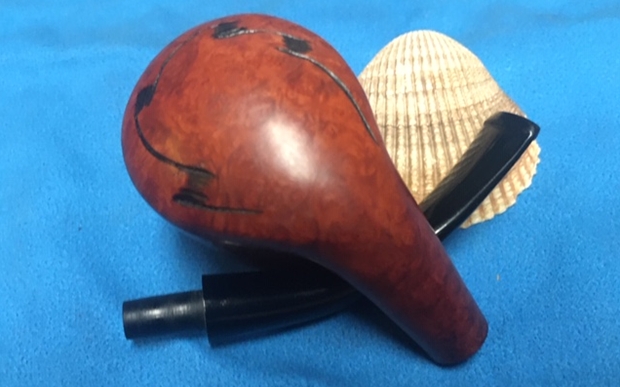
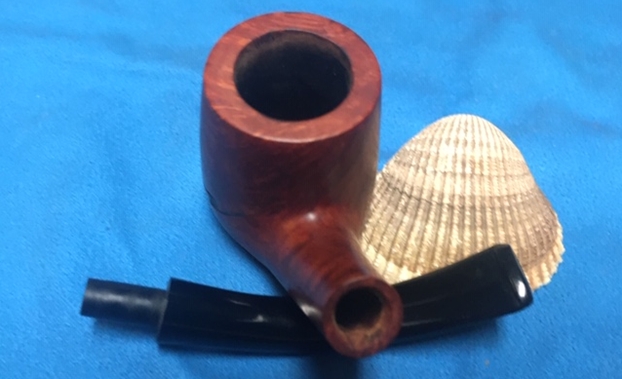
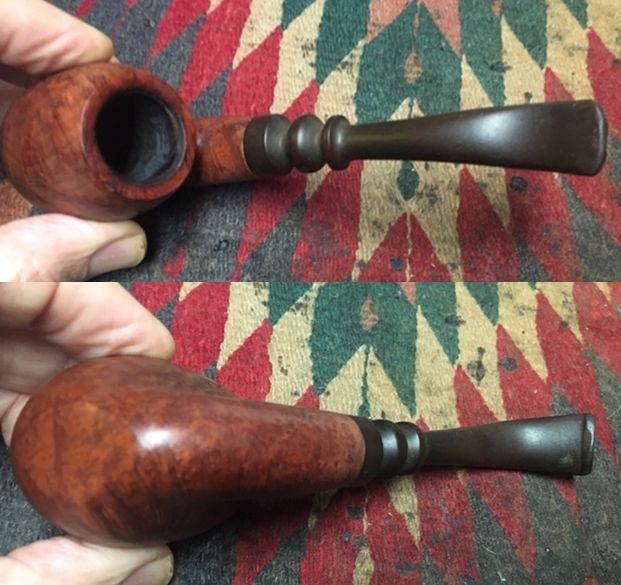
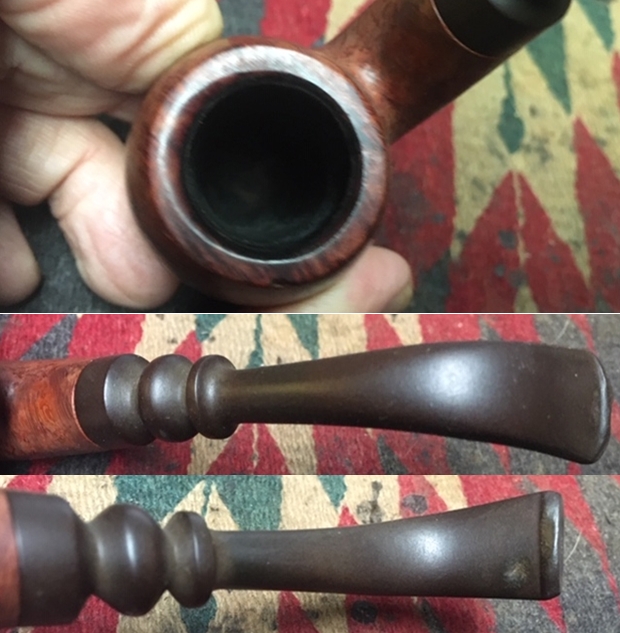
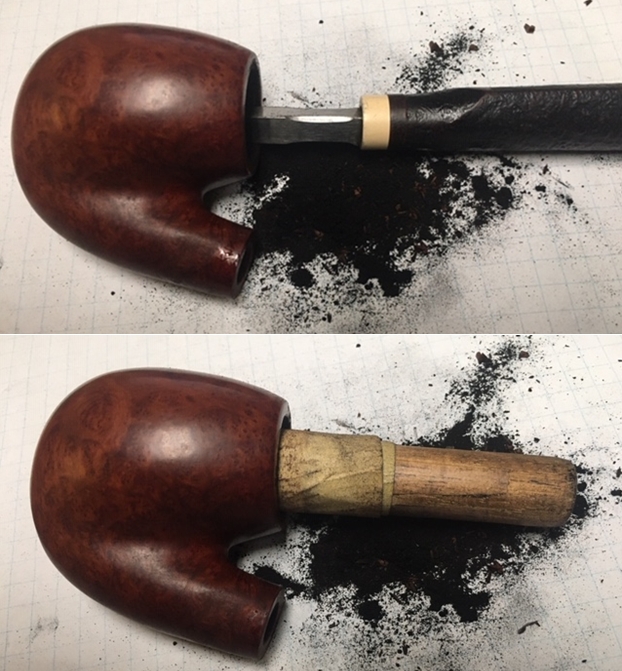
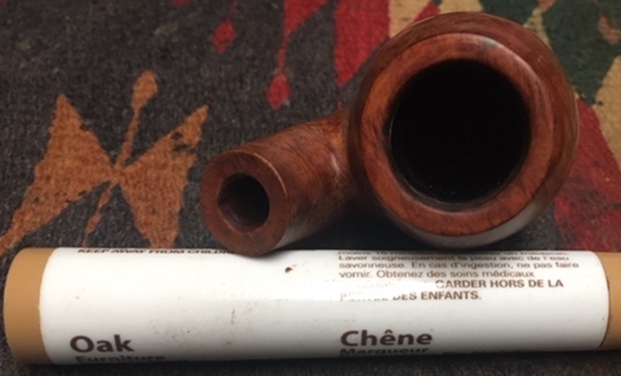
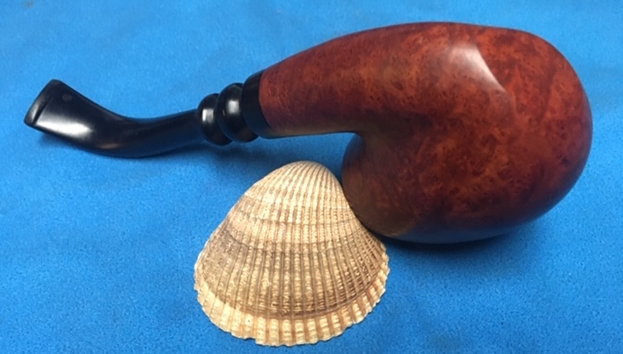
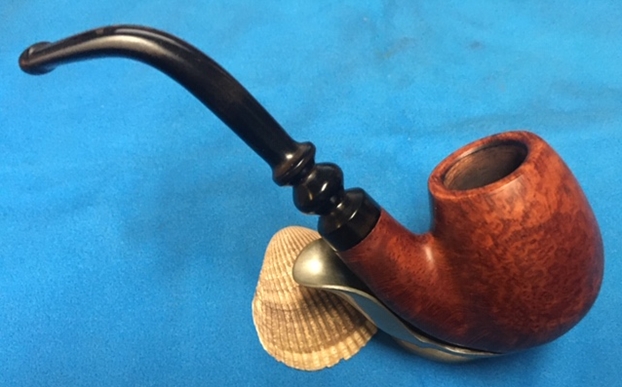
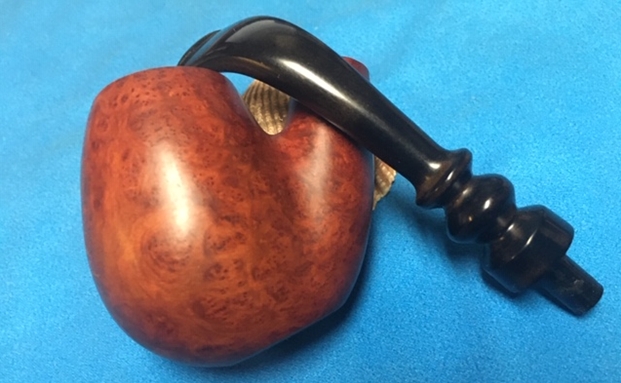
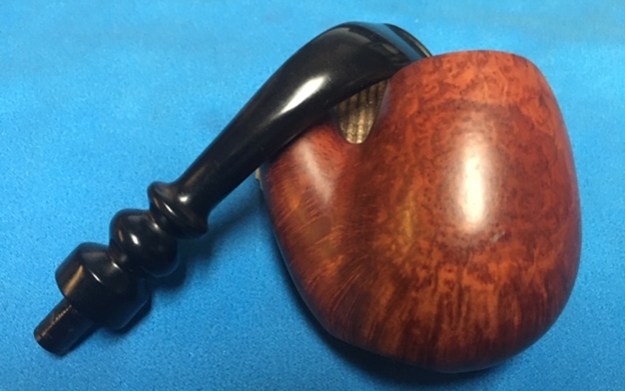
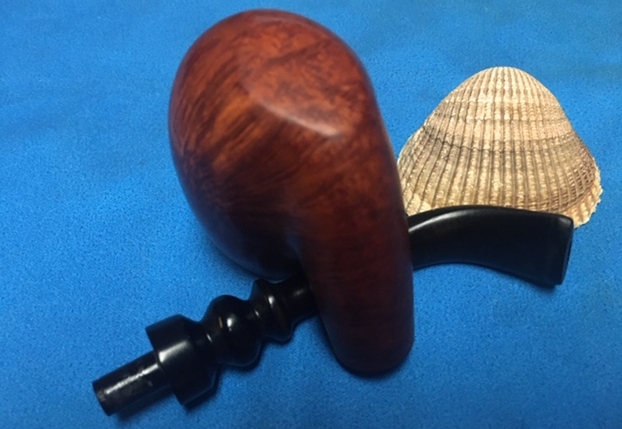
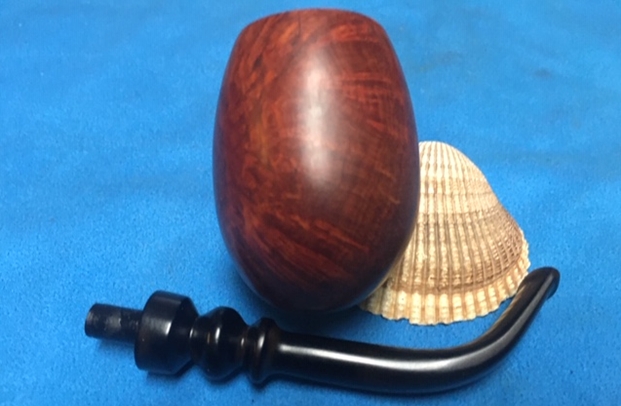
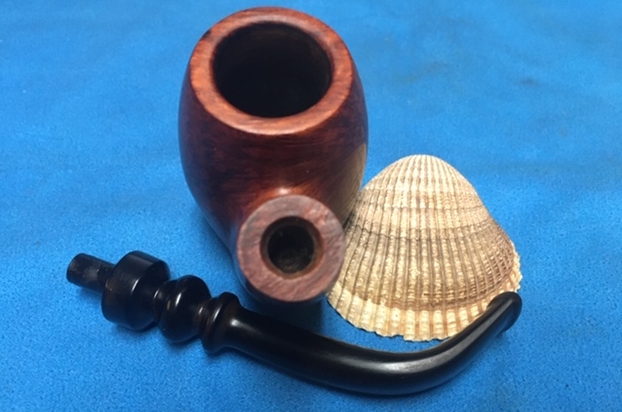
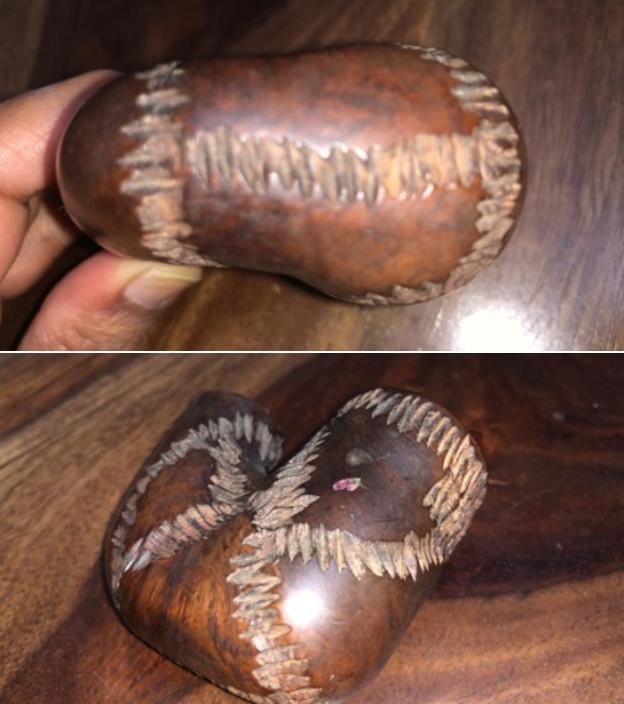
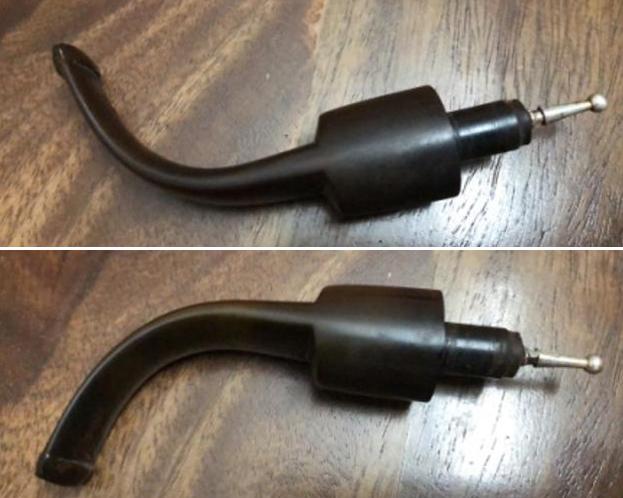
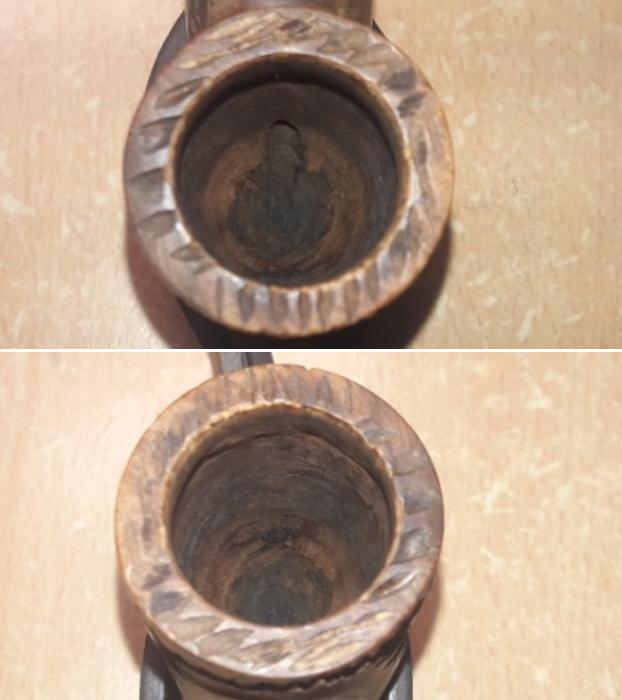
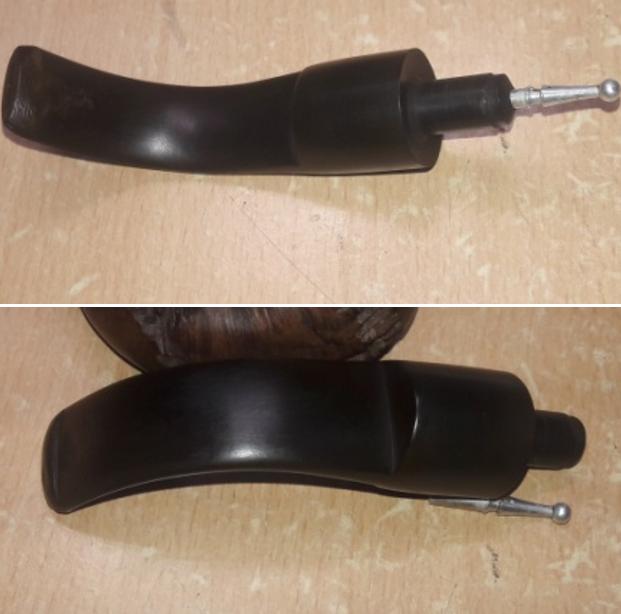
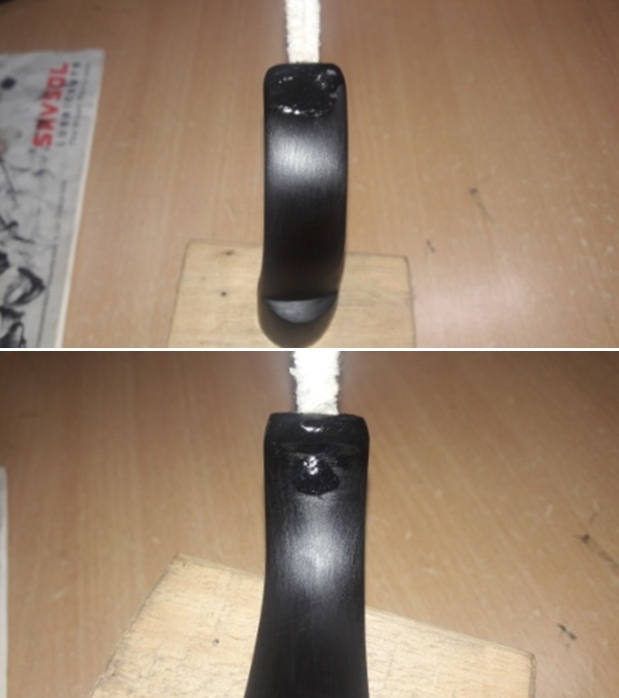
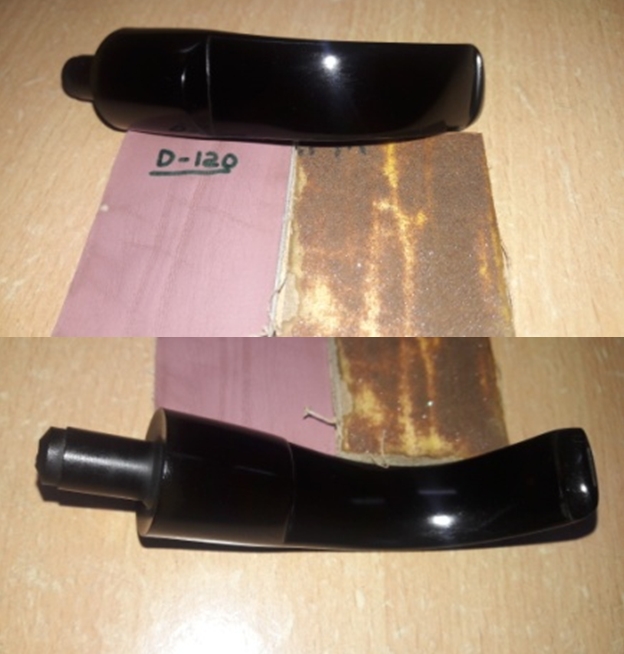
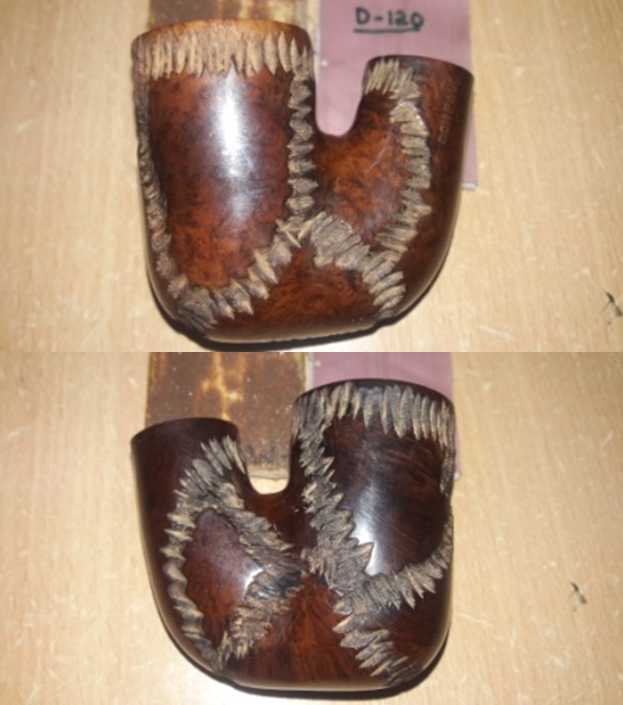
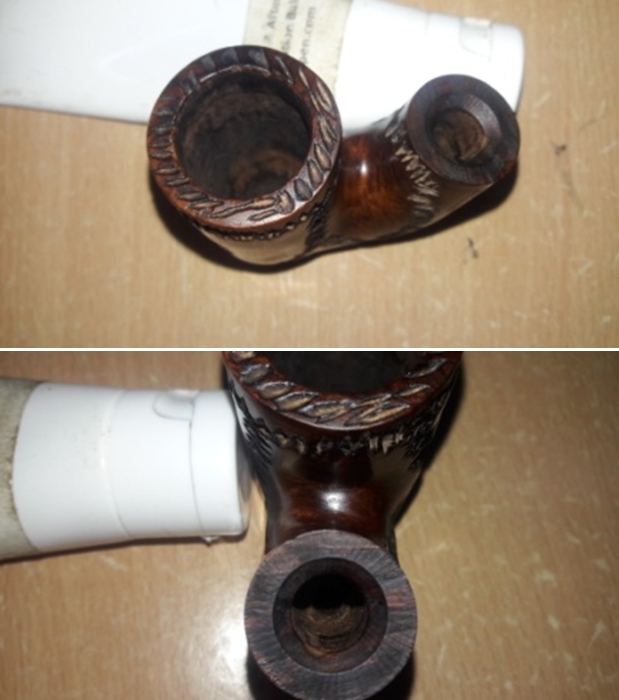
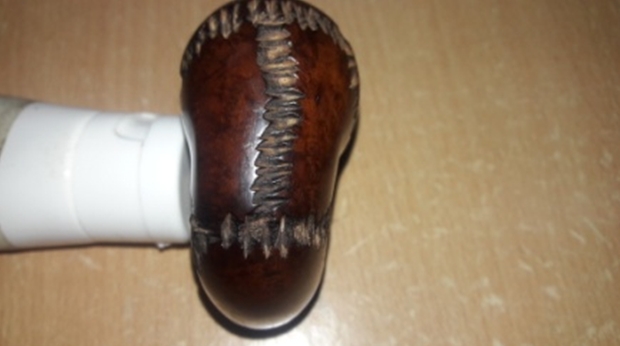
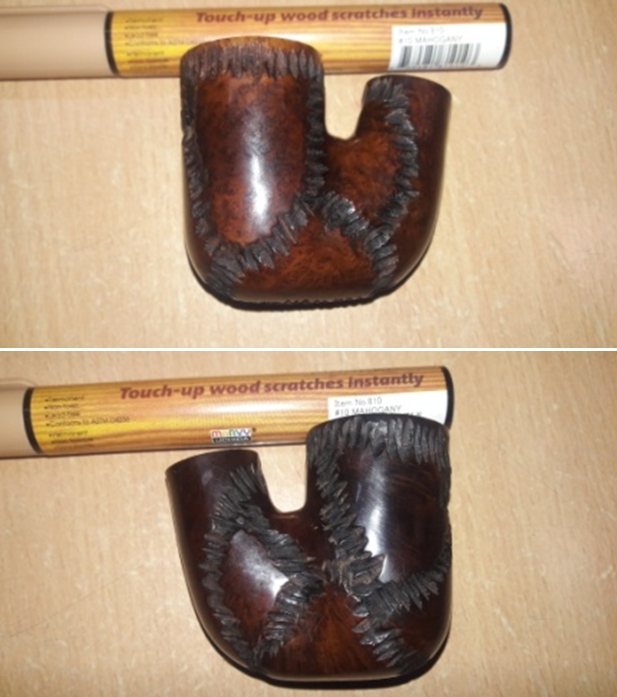
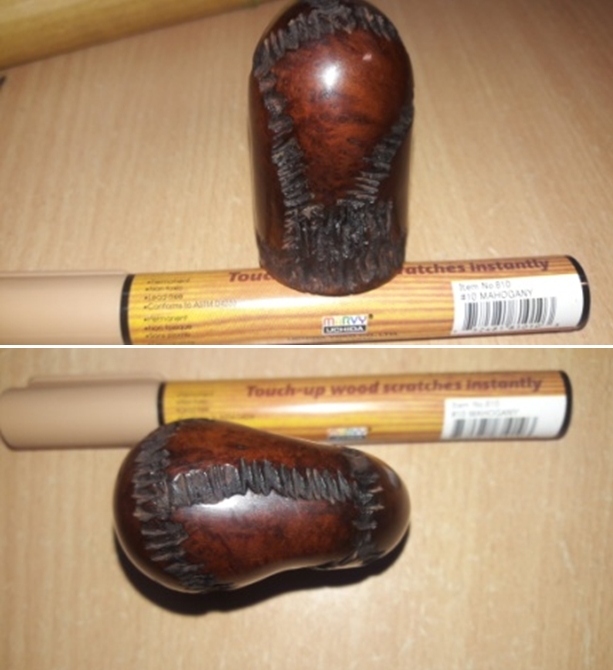
The condition of the Festival on my worktable is generally good. The chamber is clean, and I will soon find out whether the cleaning of the chamber is true also of the internals. The external briar surface appears only to need a sprucing up, but with a closer look, I find several pockets and dents over the surface. This will require some work to fill the pockets and to try raising the dents. I take a few pictures to show these challenges. The grain is very nice and expressive – this guy will clean up nicely. The stem shows some oxidation and the bit has distinct biting compressions on the upper and lower bit. This will be addressed.


 To begin the recommissioning this commissioned Butz-Choquin Festival, I address the oxidation issues of the stem using Before & After Deoxidizer. I clean several stems of other pipes in the queue at the same time. To preserve the Deoxidizer solution, I first run pipe cleaners wetted with isopropyl 95% through the stem’s airway to clean it. Unfortunately, when I inserted a pipe cleaner into the BC’s airway, I discover it is blocked. By measuring the pipe cleaners’ progress, the blockage is toward the button. I try blowing through the airway and it is rock-solid blocked. Since, I’m in the conveyer line of cleaning, I move forward with the deoxidation process first.
 After soaking in the B&A Deoxidizer for several hours, I fish out the BC’s stem and wipe it down to remove raised oxidation with cotton pads wetted with isopropyl 95%.
 I apply paraffin oil to begin rejuvenating the vulcanite stem and I set it aside to absorb.
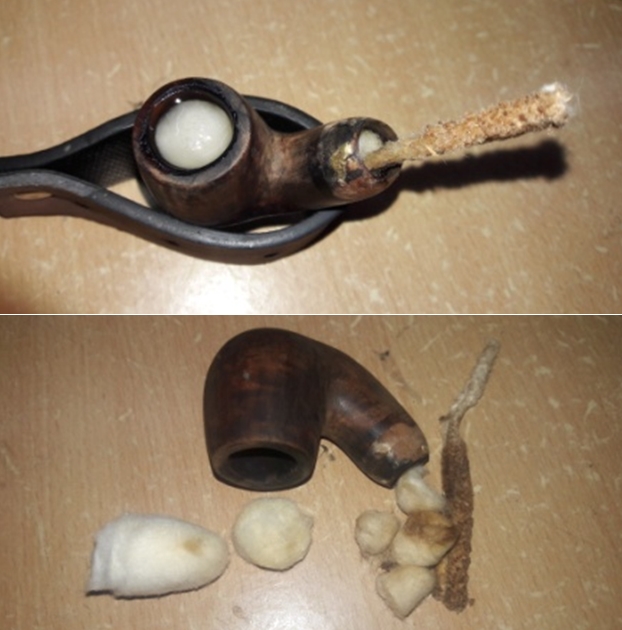
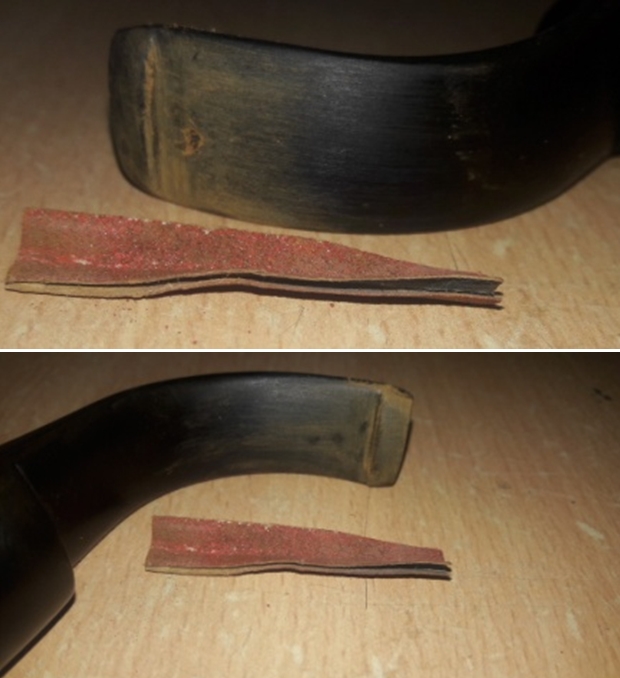
 Before moving on, I need to figure out how to clear the airway of the blockage. From the button, the blockage begins about 1/2 inch from the end of the stem. When reaching with a pipe cleaner from the tenon side and measuring, the blockage appears to be about a 1/4 inch of blockage. I use the straightest dental probes I have and reach into the stem airway to extract the blockage. The dental probes both have spurs on the topside of the metal points which prove useful in hooking and pulling out debris.
  What I start pulling out with the probes appears to be paper, of course shredded at this point. I have no idea how paper would be lodged in the stem. This method has some success, but soon the probes’ effectiveness is nullified by the bend in the stem.
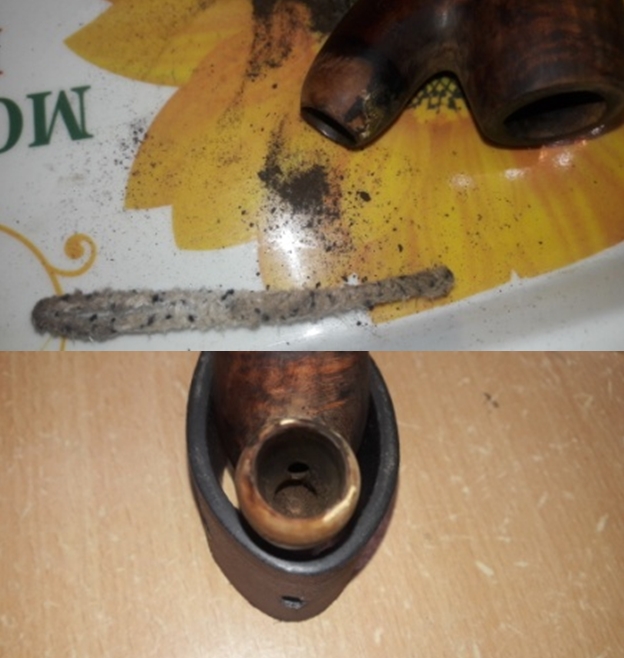
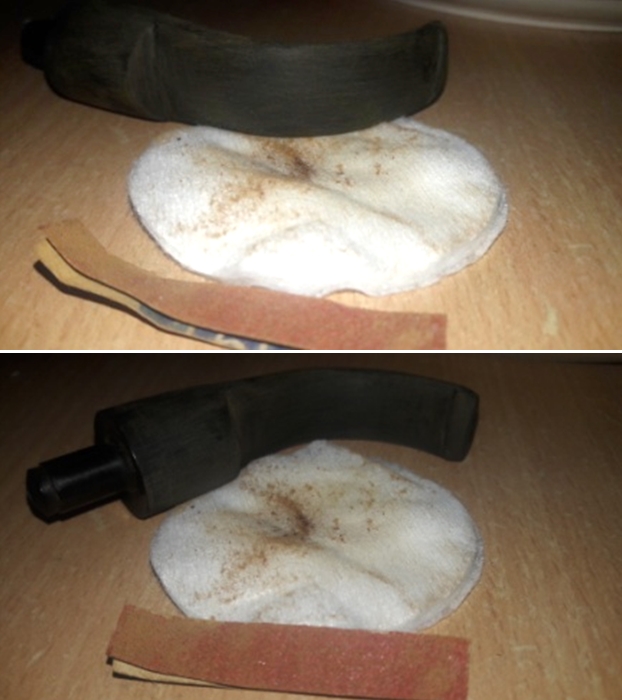
  After some time of using the probe and realizing diminishing returns, I decide to straighten the stem to reduce the pressure in the bend. I heated the stem with the hot air gun to do this. As the vulcanite heats, I’m able to unbend the stem. What I forgot to picture was the use of a drill bit that fit into the airway from the mortise side. As I heat the vulcanite and as it unbent, I wedged the drill bit further into the airway. I did this to keep the airway straight and it works well. The downside was that the drill bit was not long enough to do the full job.
 With the stem straightened, I’m able to continue with some success the use of the dental probes. I use a long stiff wire to push from the tenon side, and then dig more with the dental probes from the button side. The progress is slow.
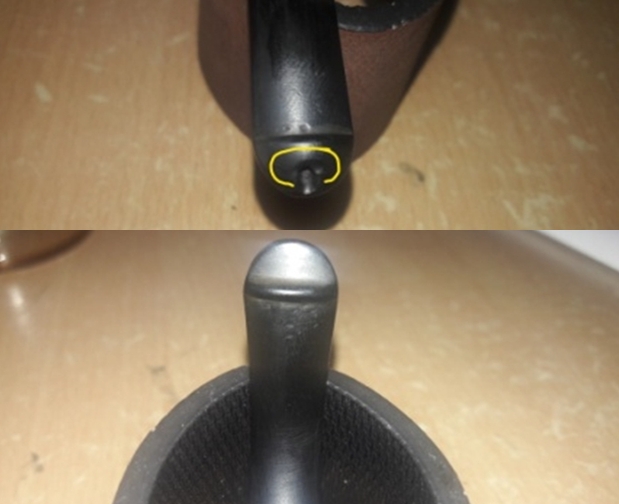
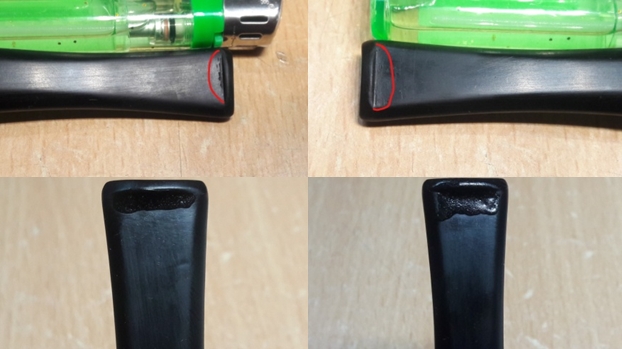
 Progress was slow but unfortunately, overzealousness reaching with the dental probe cracked the button. Ugh! What I failed to do is to take into consideration the gradually expanding shaft of the probe that pushed outwardly on the slot and the rest is history. Doing repairs on a pipe one is restoring is one thing. Creating more problems for a restoration is not what we aim for! I take a few closeups of the cracks – not a pretty picture!
  I decide to continue carefully digging out the blockage. Eventually, the paper, or whatever, is extricated and I’m able to run a pipe cleaner through. This took a lot of time and unfortunately, friendly fire damage to the button to open the airway must now be addressed.
 I proceed with the stem repairs. Before addressing the button damage – cracks and bite compressions, I re-bend the stem to restore it to the original profile. Again, after placing a pipe cleaner through the stem to protect the airway integrity, I heat the vulcanite stem with the hot air gun, but I first focus on heating and bending the thicker section of the stem. If I heat the whole stem at once to make one bend, the thinner part of the stem, toward the button, will accept the bend much easier and this will create a more severe end bend appearance rather than a gentle curve throughout.
  When the thicker portion of the stem becomes supple and willing to be shaped, I place it over a miniature cue ball #15 and gently shape the fat part of the stem. I hold it in position over the ball for a few minutes allowing the vulcanite to cool and firm its position. Then, holding the bend in place I take it to the sink to cool the rubber further under cool tap water. I forgot to picture the current state of the stem’s orientation, but in the picture below you can see that the end of the stem is still shooting out straight without any bend.
 With the fat part of the stem’s bend solidified, I then take the stem back to the hot air gun heating the thinner section which softens much more rapidly. When supple, I again take it to #15 and finish the bend. My aim is to have the end of the stem’s trajectory parallel with the plane of the rim. The finished bend looks good. I move on.
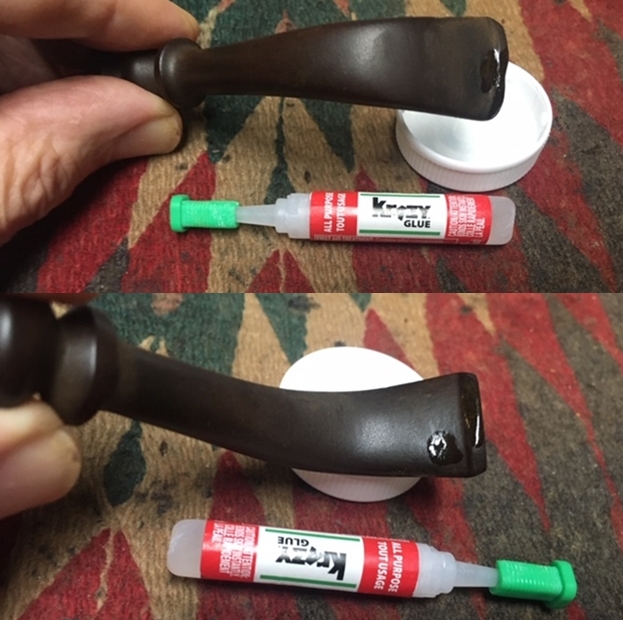
 Now, I take another close look at the cracks and button biting problems. Normally, at this point I would attempt to raise and expand the compressed vulcanite using the flame method – painting the vulcanite with the flame of a Bic lighter. With the cracks, and a desire to salvage the stem as it is without the whole button cracking off, I also want to apply CA glue to weld the cracks together. The question in my mind is concerning the composition of the CA glue. If I apply CA glue now, before applying the heating method, will the composition of the CA glue be a problem if I then heat it? If I use the flame first and then glue it, will the ‘new’ contour of the bit hinder gluing cleanly… Or, should I forgo using the flame method? Questions….
 Using regular clear CA glue, I apply a line of glue over the cracks. I stress flex the cracked button a small amount allowing the thinner glue to seep into the cracks more efficiently. My hope is that this will form a solid weld.
 After the clear CA glue cures, I go to work on the upper button repair. I use a flat needle file to redefine the button lip and follow by sanding with 240 grade paper. The crack is still visible at this point, but the repair appears to be solid.
 Flipping over to the lower bit, it has serious bite compressions and the button lip has been chewed. I take a starting picture before using the flame technique to raise the compressed vulcanite. I use a Bic lighter to paint the area with flame and as the vulcanite heats it expands and reclaims the original position of the stem – or at least in theory.
 After painting with the flame, there isn’t a substantive change in the compressions.
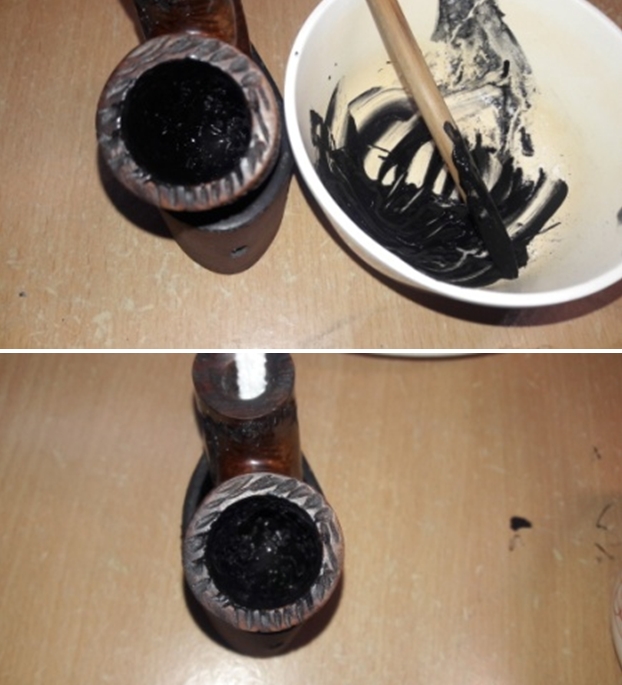
  Using a medium thick black CA glue, I apply glue to the bit filling the compressed areas. I also apply the glue to the button lip edge and put the stem aside for the glue to cure.
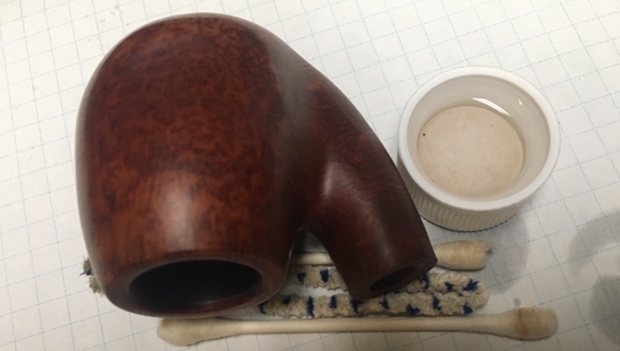
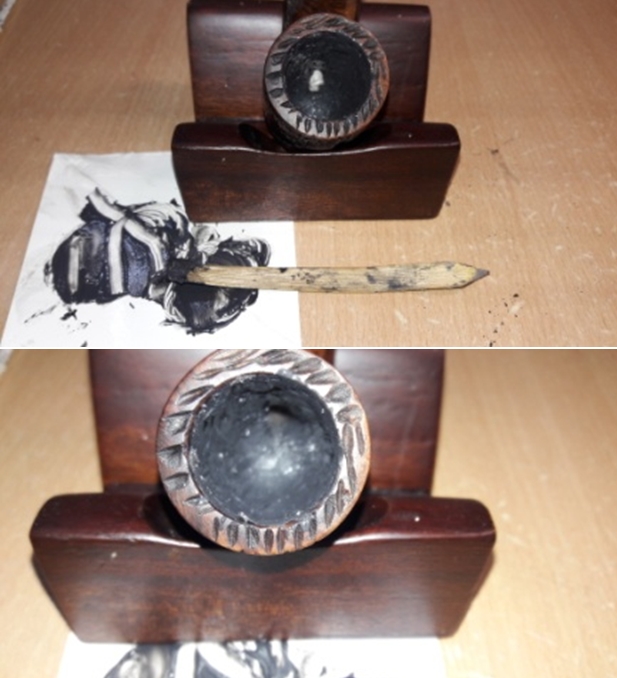
 With so much attention drawn to the challenges of the stem – obstruction, cracked button to repair and compressions, it’s been awhile since the stummel was in view. Returning now to the regular rhythm of the restoration, with the stem put to the side, I now turn to cleaning the stummel. There is no cake build up in the chamber and to clean the briar I use a piece of 240 grade sanding paper wrapped around a Sharpie Pen and sand the chamber.
 Next, using undiluted Murphy’s Oil Soap, I scrub the stummel using cotton pads. The gunk on the rim comes off easily. Then, taking the stummel to the sink, I rinse it with warm tap water. Continuing the cleaning in the mortise and airway, I use shank brushes with a bit of anti-oil dish soap and scrub the internals. After a thorough rinsing, I bring the stummel back to the worktable.
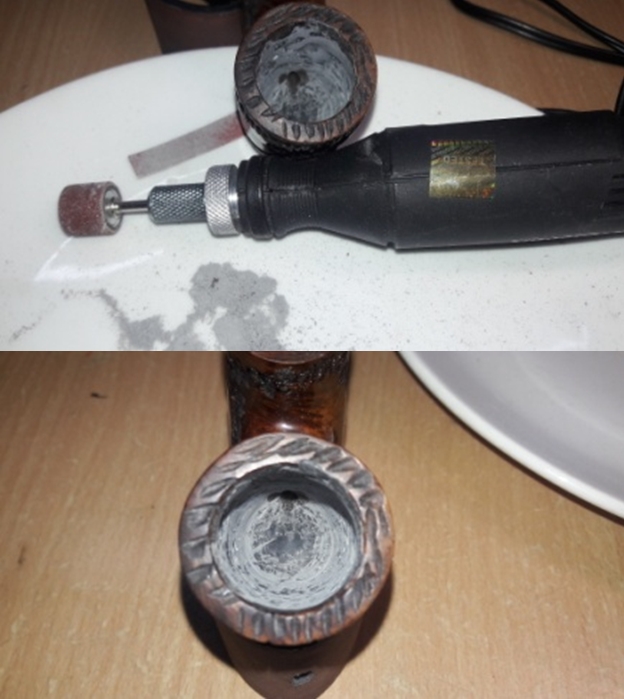
 I continue the internal cleaning using pipe cleaners, cotton buds dipped in isopropyl 95%. A dental spoon assists in scraping oils and tar build-up off the sides of the mortise. After some effort, the pipe cleaners and buds start to lighten, and I call it clean for now. I’ll continue later with a kosher salt and alcohol soak to clean further.
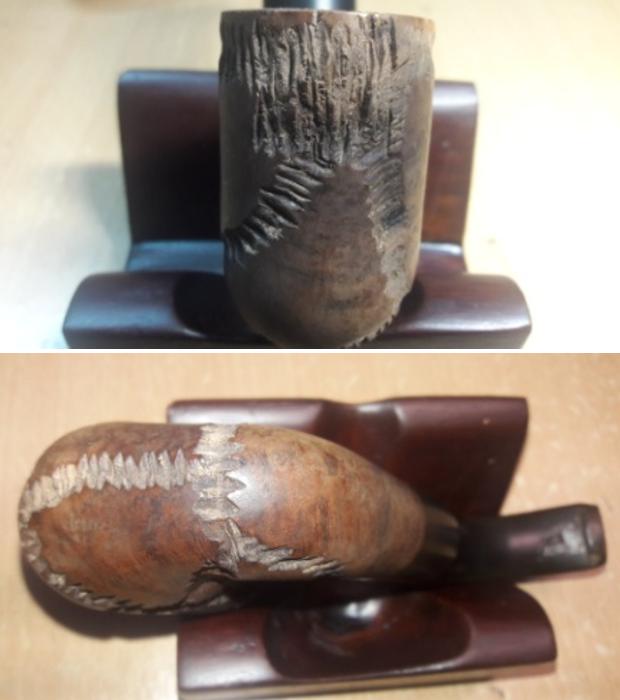
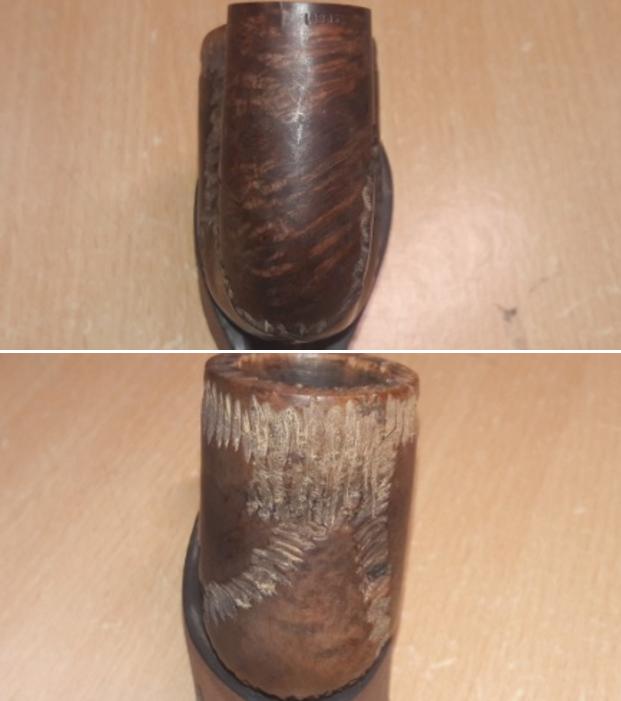
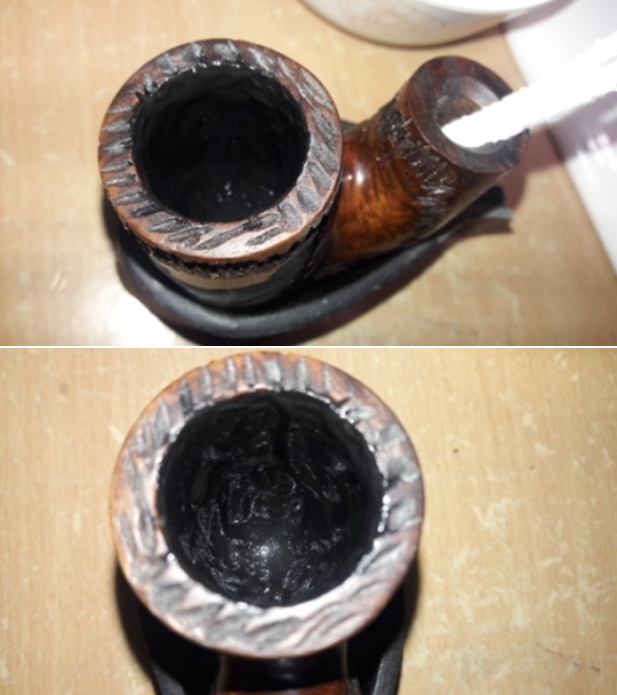
 Looking at the external briar surface, I identified earlier a couple pits that need filling. I use a dental probe to clean out the pits before filling.
 After wiping the surface with alcohol to clean, I go to work mixing briar dust and BSI Extra Thick CA Glue. I do the mixing on an index card after covering a patch with scotch tape. I use the tape to keep the moisture of the glue from being absorbed into the card stock.
  After putting a small mound of briar dust on the tape, I add a small puddle of CA glue next to it. Using the toothpick as my stirrer and trowel, I pull small amounts of the briar dust into the puddle and stir with the toothpick as I go. After the putty begins to thicken – about the consistency of molasses, I trowel the putty with the toothpick to fill the pits.
  The end of the toothpick is used to knead the putty before it begins to harden which hopefully minimizes air bubbles from being trapped. I put the stummel aside for some hours for the putty patches to cure.
  The black CA glue filling the lower bit tooth compressions has cured.
 Using a flat needle file, I file carefully and gently remove the excess patch material and to form the button lip.
 After the file brings the patch material down to the stem surface, I sand using 240 grade paper to remove more patch material and to smooth. I like the results.
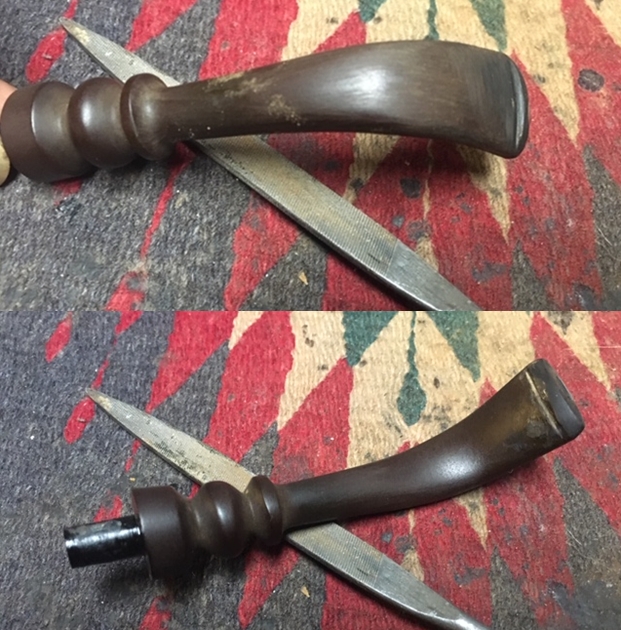
 There are ripple marks in the vulcanite on the lower side at the bend. These ripples developed when I re-bent the stem after clearing the airway obstruction. I expand the sanding to smooth this area as well as the upper side of the stem. First, 240 grade paper is employed then following with 470 grade over the entire stem.
 Finally, I wet sand the stem using 600 grade paper. Throughout the sanding process, I’ve avoided sanding the ‘BC’ stamping on the stem, which is already ghosting. I follow the 600 grade paper with 0000 steel wool over the entire stem. The repairs on the upper and lower bit are looking good. I’m hopeful!
 The slot is rough. A pointed, rounded needle file does a good job smoothing the slot edges. Following the file, 240 grade paper finishes the edges well.
 The briar putty filling the pits on the stummel have cured. Before sanding these, earlier, along with the pits, one dent was detected on the fore of the stummel. I take another look at it before powering my wife’s iron. Wood is porous and has sponge-like characteristics when exposed to heat and moisture. To draw out the dent, I use the heat of the iron while pressing it on a wetted cloth against the dent – I use a cotton handkerchief, to ‘steam’ the dent. I have been amazed how this has helped with previous restorations. I take a close-up to show the dent with the help of the arrows. I’ll use this picture to compare with the ‘after’ steaming picture.
 The procedure worked. The dent is gone as hoped! Moving on.
 Next, using a flat needle file and following with 240 grade sanding paper, I go to work removing the excess briar putty on the 3 patches. For each, I first apply the file over the patches by filing them down very close to the briar surface without slipping off the patches and causing collateral damage to the surrounding briar. I then use 240 paper to bring the patch flush with the briar surface. The pictures show the progress with each patch.

 The rim cleaned up nicely before but a residual ring of darkened briar on the internal edge of the rim from mild charring.
 Using 240 sanding paper, I gently sand the rim and I go with the slight internal beveling to remove the darkened briar. I follow the 240 sanding with a quick 600 grit sanding. The results look good. The sanding does not impact the patina.
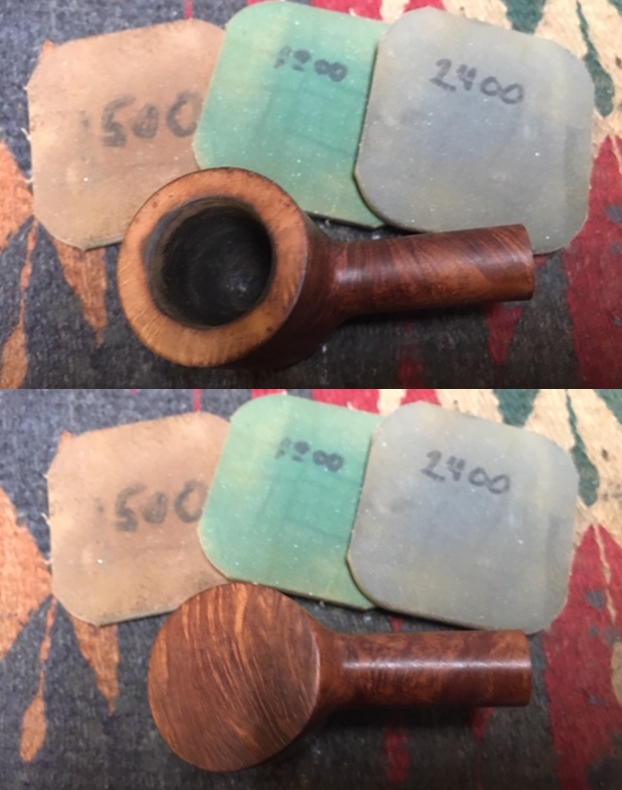
 To clean the briar surface further of minor nicks and scratching, I employ 3 sanding sponges – coarse, medium and light grade sponges. I like using sanding sponges as they are gentler and are not as invasive as regular sanding papers. After using each in succession, the briar surface looks good and the grain is emerging with nice bird’s eye patterns.
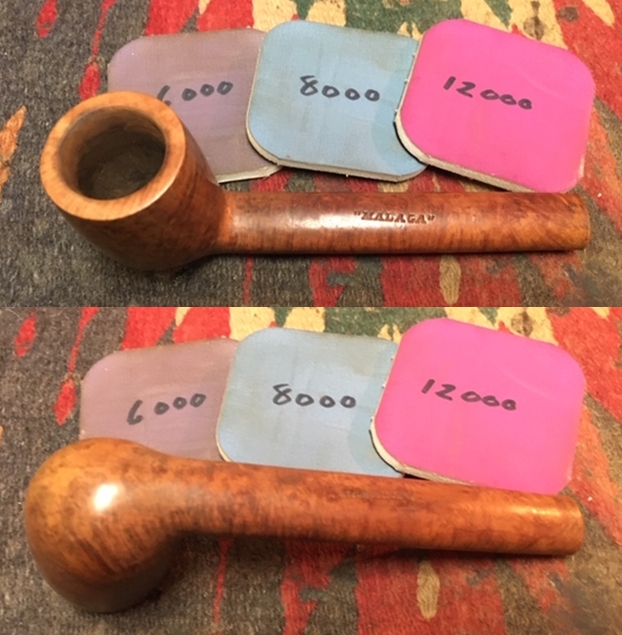
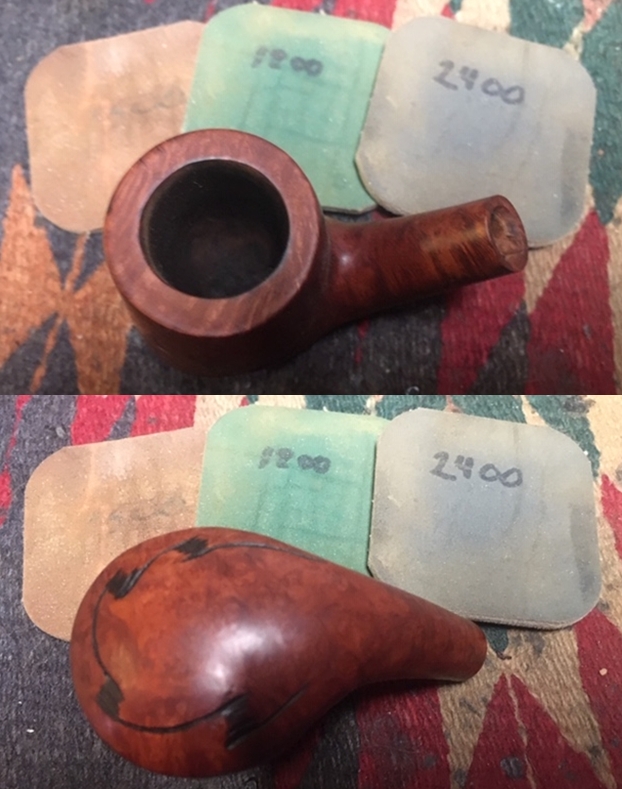
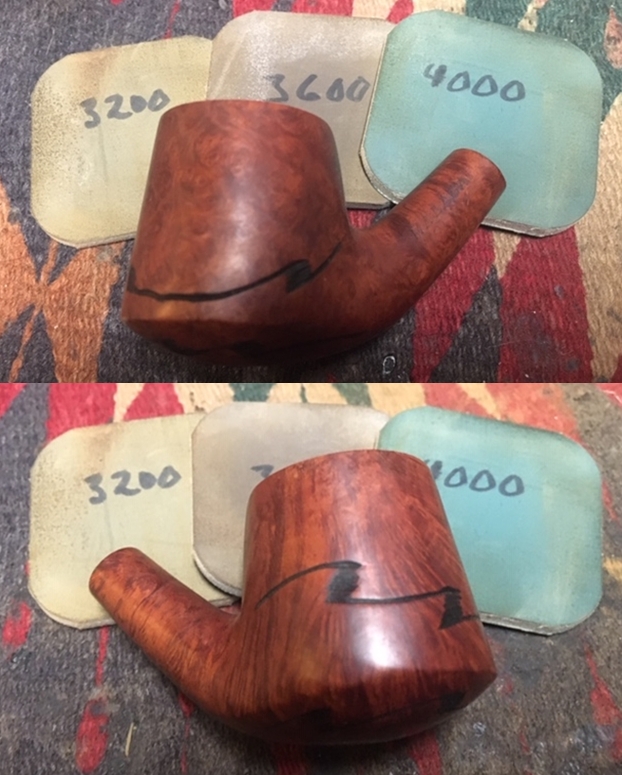
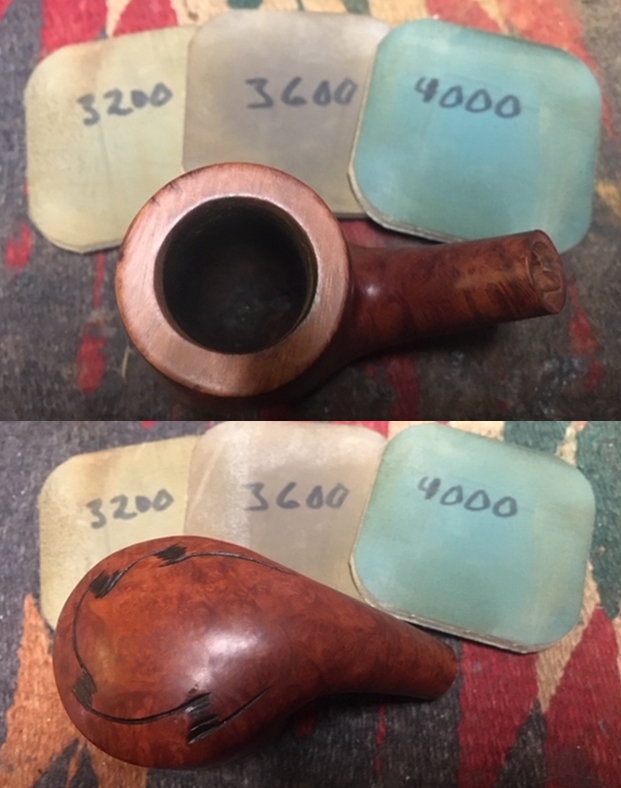
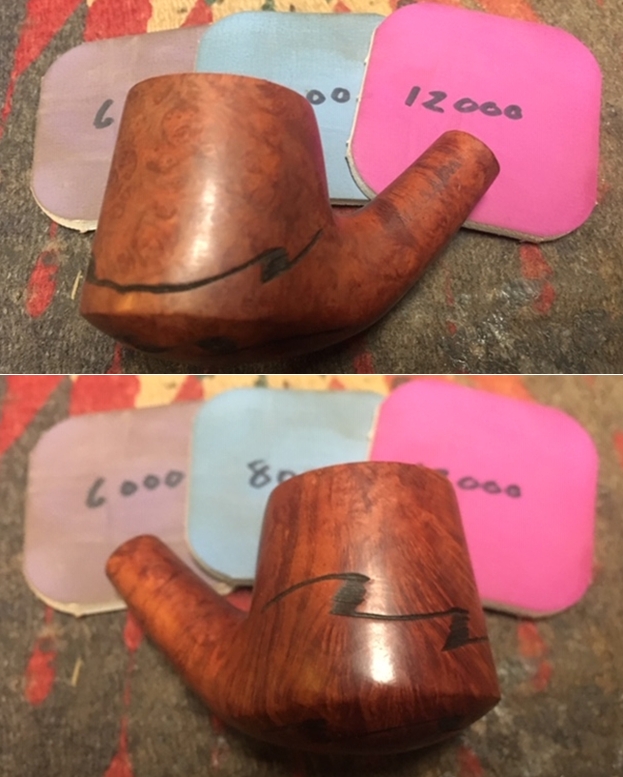
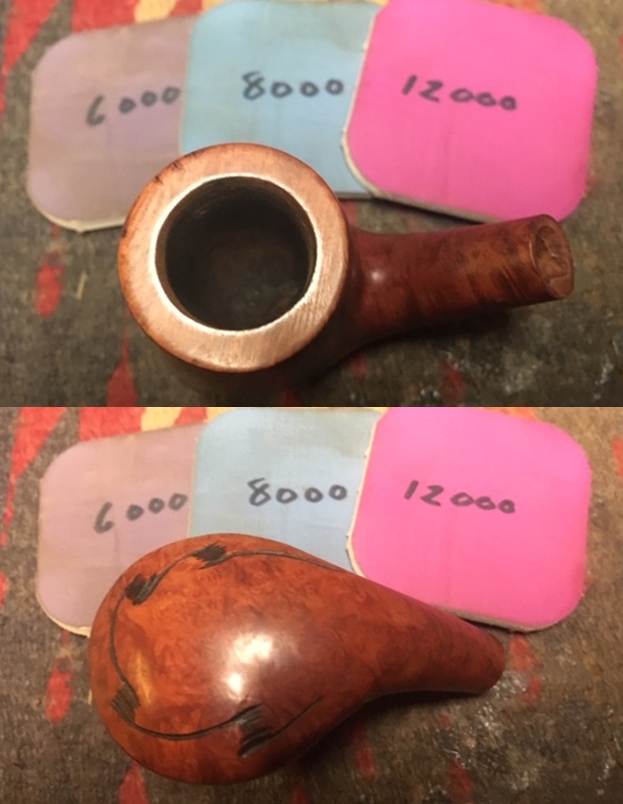
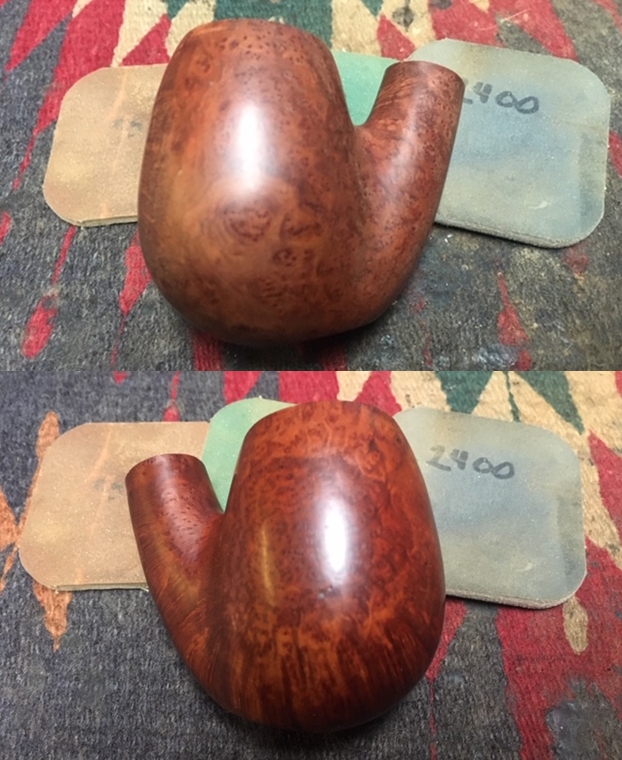
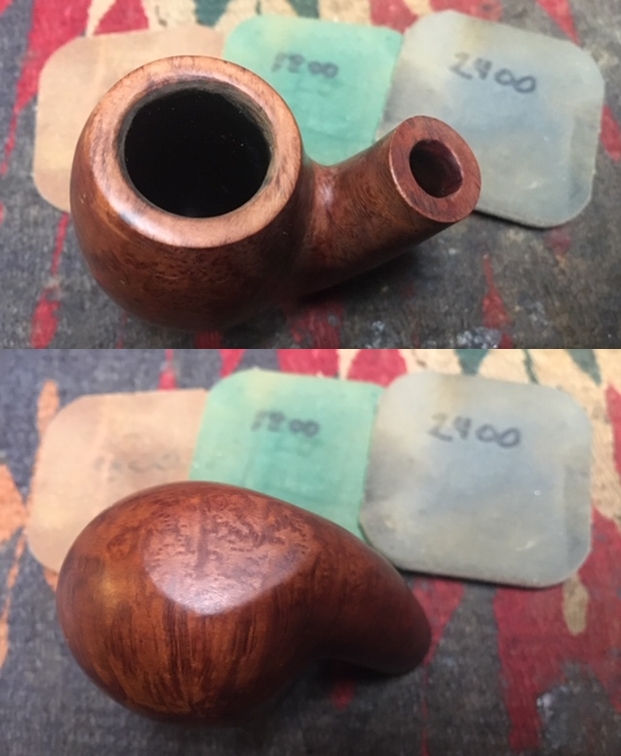
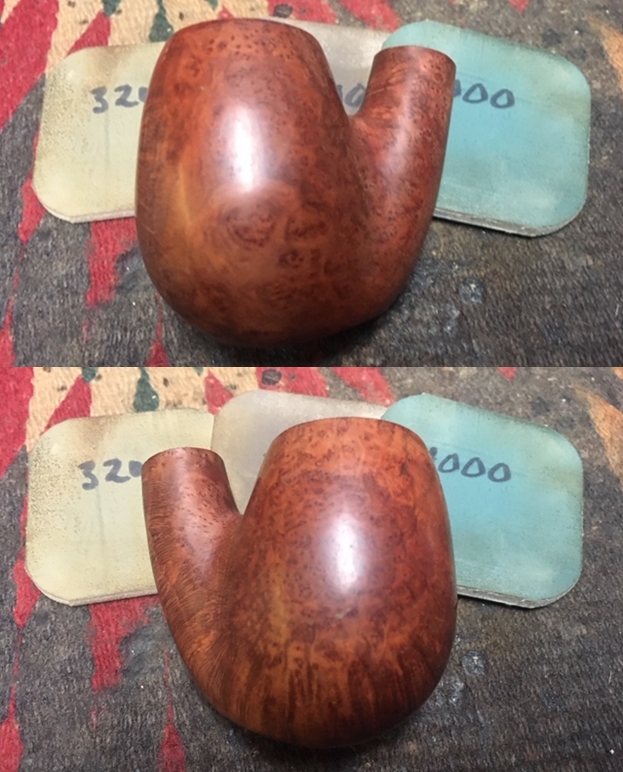
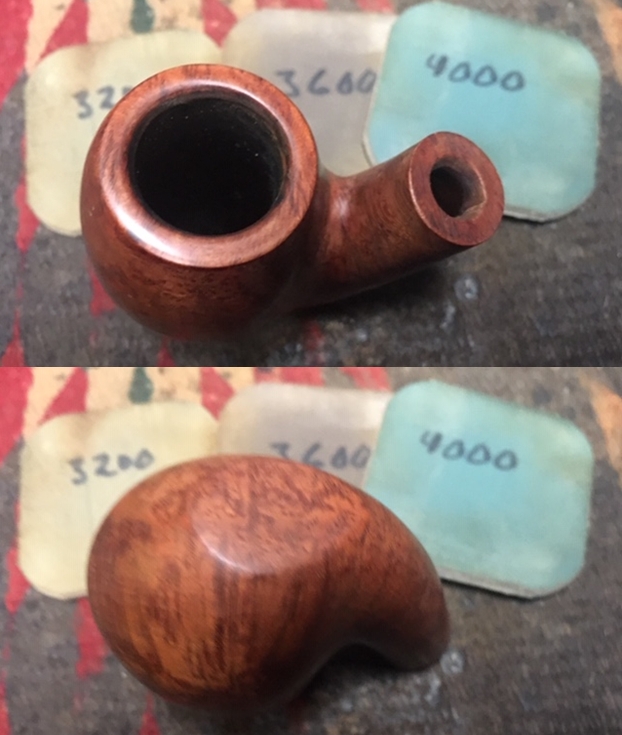
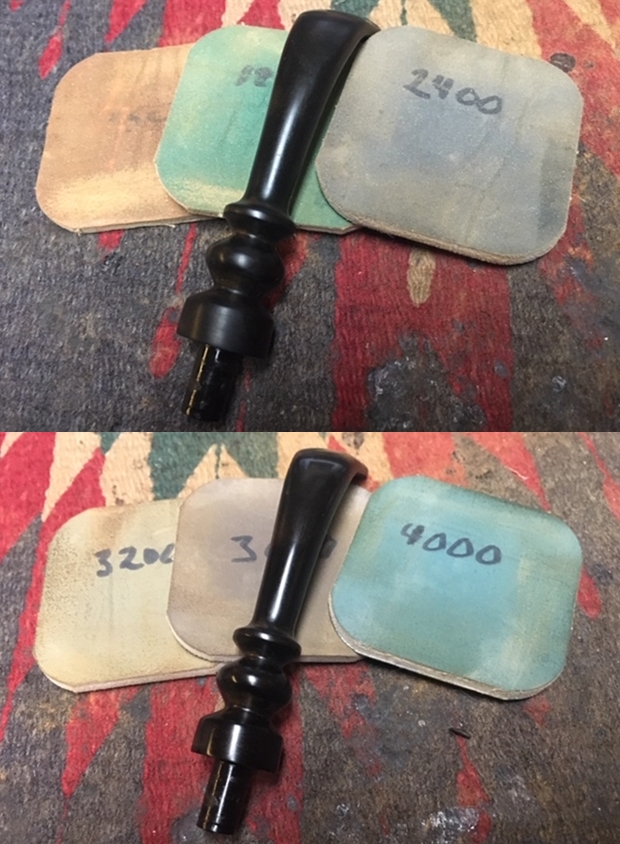
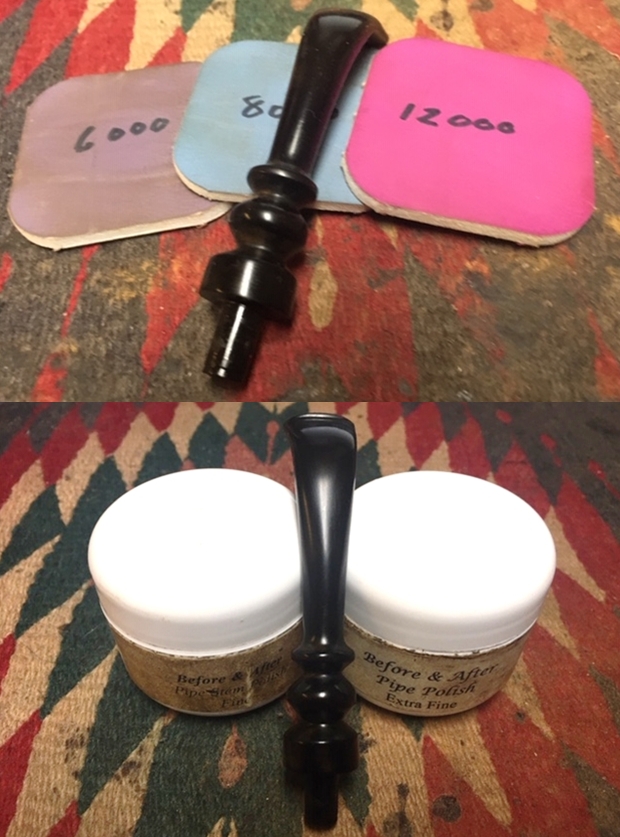
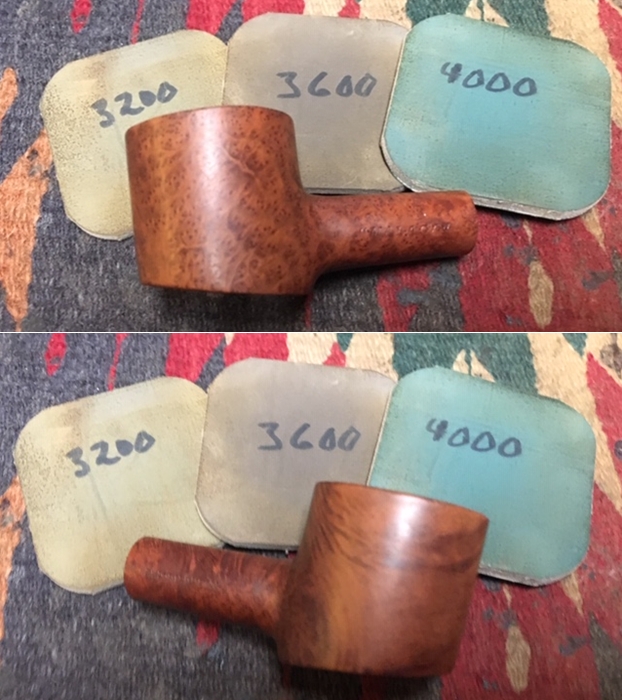
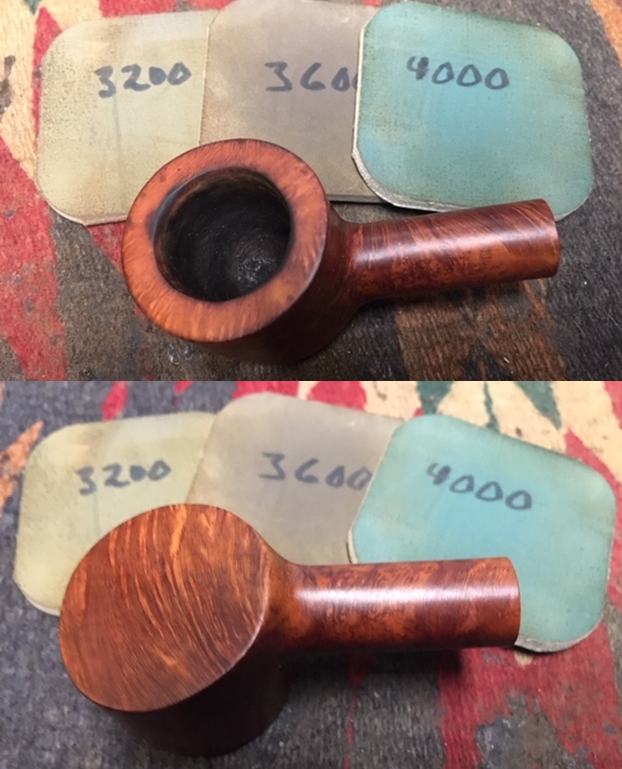
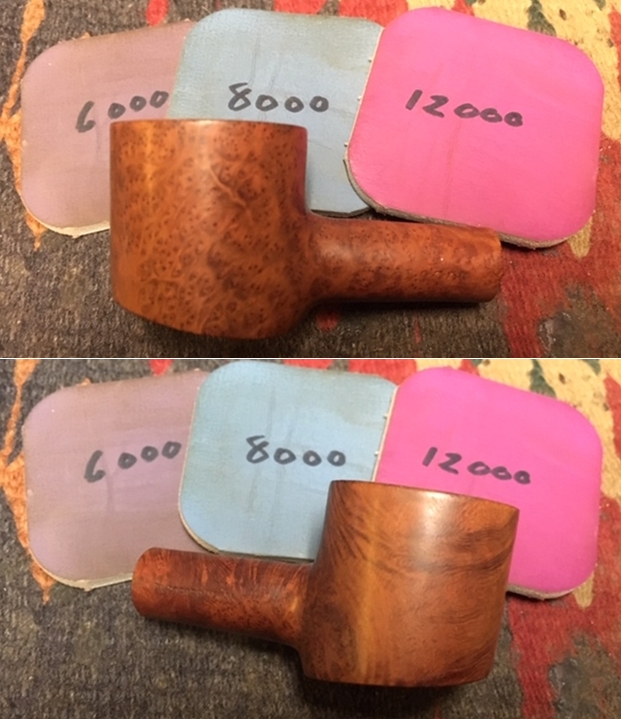
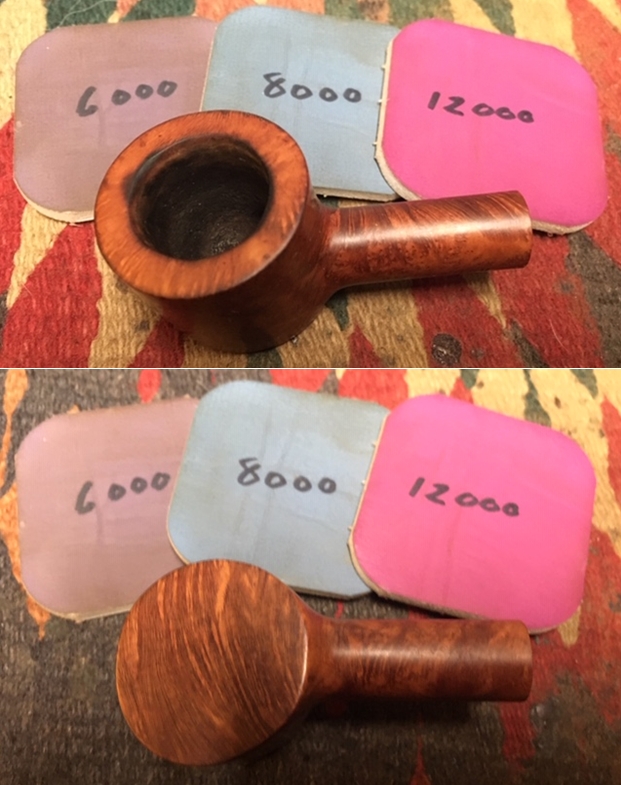
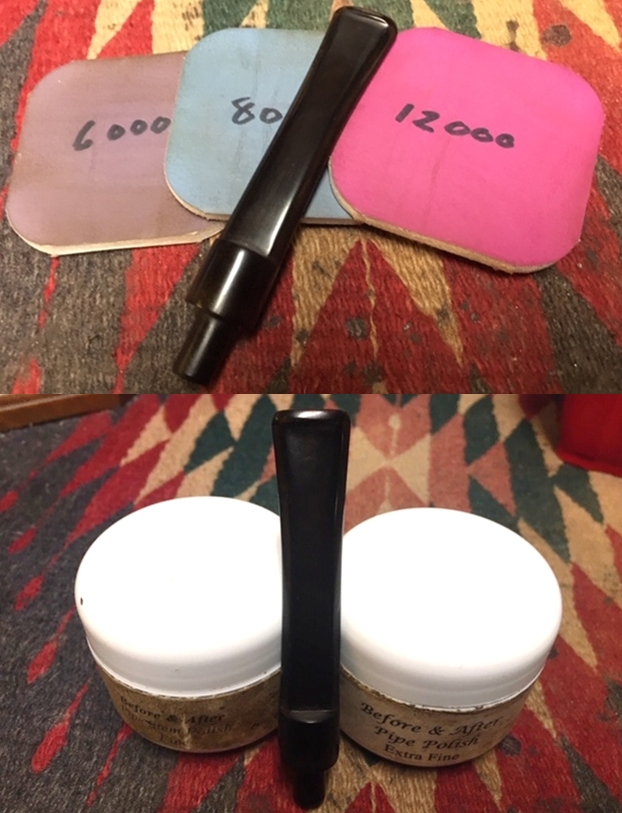
 From the sanding sponges, the full regimen of 9 micromesh pads is used by first wet sanding with pads 1500 to 2400 and then dry sanding with pads 3200 to 4000 and 6000 to 12000. The pictures show the progression.
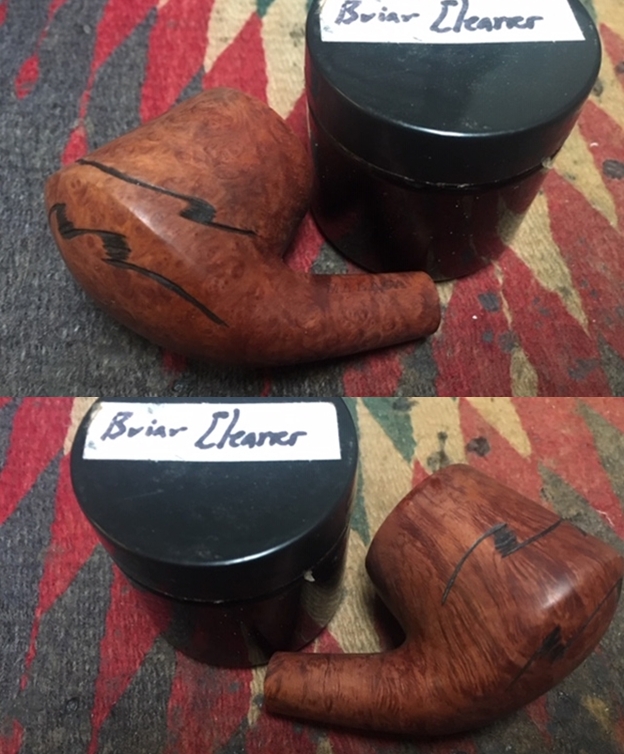
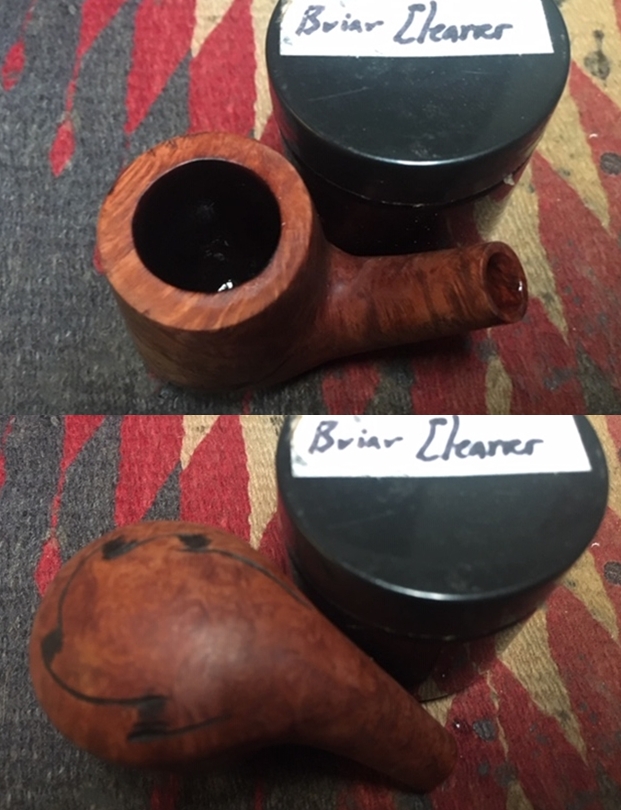
 Before proceeding further with the external briar surface conditioning, the internal cleaning is continued using the kosher salt and alcohol soak. This not only cleans the internal briar more but freshens the pipe for the new steward. Using a cotton ball, I pull and twist the cotton to form a wick to insert into the mortise and airway. This ‘wick’ serves to draw the oils and tars out of the internal walls.
 I use a stiff piece of hanger wire to help guide the wick down through the airway. After the wick is in place, I fill the bowl with kosher salt which has no after taste and place the stummel in an egg carton for stability. Next, using a large eye dropper, the bowl is filled with isopropyl 95% until it surfaces over the salt. After a few minutes when the alcohol has been absorbed, the bowl is topped off once more. I put the stummel aside for several hours allowing the soak to do its thing.
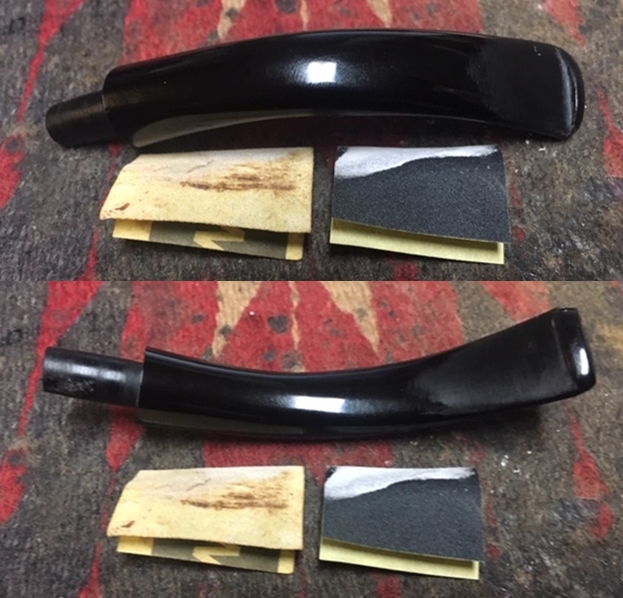
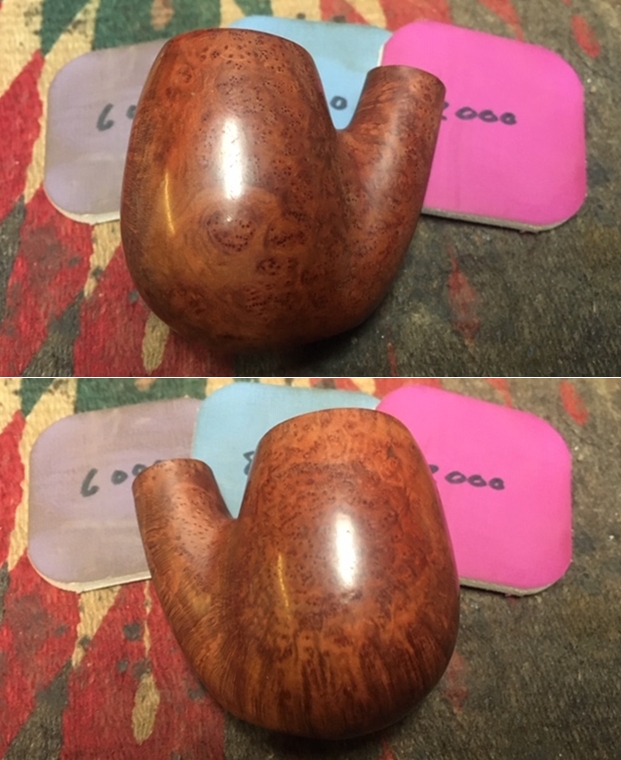
 With the stummel on the sidelines, attention is turned to the stem to apply the full regimen of micromesh pads. Before starting, to guard against over-zealousness in sanding, a small piece of masking tape is cut and covers the ghosted ‘BC’ stem stamping. The Butz Choquin stamp is on its last legs and I do not wish to add to its deteriorated condition! Next, using pads 1500 to 2400, I wet sand the stem. Following this, using pads 3200 to 4000 and 6000 to 12000, I dry sand. Between each set of three pads Obsidian Oil is applied to the stem which aids in rejuvenating the vulcanite.
 After several hours, the kosher salt and alcohol soak resulted in soiled salt and wick. I toss the expended salt in the waste and wipe the chamber with a paper towel as well as blow through the mortise to remove salt crystals. To make sure the internals are clean, I run a few more cotton buds and pipe cleaners wetted with isopropyl 95% through the mortise and airway and all looks good. Moving on.
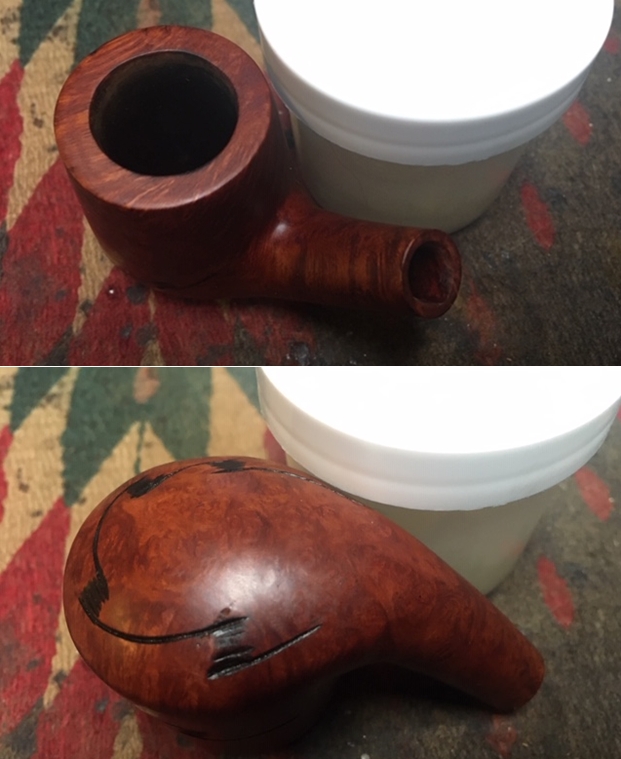
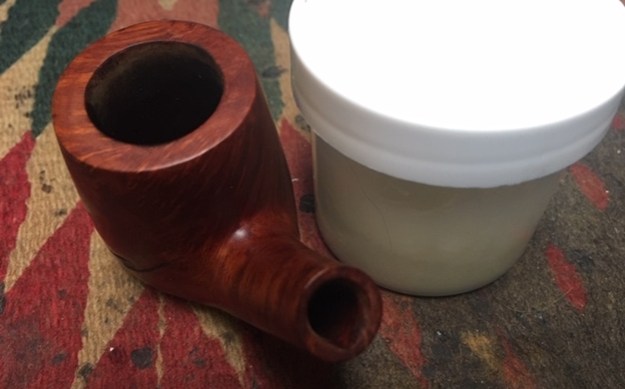
 Next, with the cleaning complete, Before & After Restoration Balm is applied to the stummel by putting some on my fingers and rubbing it in to the briar surface. I like the Balm because it brings out the subtle hues of the natural briar. The Balm begins with a cream-like consistency and gradually thickens as it is massaged into the briar. After applying the Balm, the stummel is set aside for about 15 or 20 minutes while the Balm is absorbed. I take a picture during this state. Following this, using a cloth I wipe the excess Balm away and buff the stummel with a microfiber cloth.
  With the B&A Restoration process completed, I reunite Butz Choquin Festival stem and stummel and after mounting a cotton cloth buffing wheel on the Dremel, setting speed at 40% of full power, I apply Blue Diamond compound to the pipe. When I finish, using a felt cloth I buff the pipe to remove the compound dust before applying the wax. After applying the Blue Diamond, I take a closer look at the stem repair on the button and I’m not satisfied with what I’m seeing. The button lip where the crack was repaired is not smooth. I use a dental probe to test the seam of the repair and the piece of the button I tried to salvage pops off. Well, the button repair was not successful and I’m glad that I discover this before shipping it off to a new steward! I take a picture to show the break and new challenge.
 My second approach to repairing this button will be to mix activated charcoal and Extra Thick CA glue to form a patch material. I first clean the area with alcohol then form an insert made from index card stock. I form a cone with a pipe cleaner inserted through it. The end of the cone is covered with scotch tape and I coat it with a small amount of petroleum jelly to prevent sticking with the CA glue. The cone inserts into the open slot with the pipe cleaner in the airway.
 Next, I mix activated charcoal and Extra Thick CA glue. I first cover a piece of index card with scotch tape so that the glue is not absorbed into the card stock. After putting a small mound of charcoal on the card, I then put a small puddle of CA glue next to the charcoal. Using a toothpick, I pull charcoal dust into the glue and mix as I go. To thicken the patch material, I draw more charcoal into the mixture. When it is about the thickness of molasses, I trowel the patch material with the toothpick and apply it to the bit.
 I fill the slot cavity and cover the entire button lip. I do this to provide the foundation for filing and shaping a new button. After applying the patch material, I set the stem aside, turn out the light and leave it to cure through the night.
 The next morning, with a little jiggling, the card stock wedge comes out of the slot.
 The view toward the ‘raw’ end of the stem.
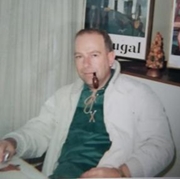
 Using a flat needle file, the excess is first removed from the end of the stem and then the file is used to shape the rebuilt button. The change in the work surface reveals that I’m enjoying a sunny day on our 10th floor balcony which I call my ‘Man Cave’. First a picture of me enjoying a bowl while I work!
 After filing to shape the button and slot, I use 240 grade paper to smooth further and remove excess patch material.
 After the 240 paper, I use in succession, 470, 600 and 000 steel wool to work on the surface.
  As I sand and smooth the area, the pits emerge which is irritating! I continue to try to figure out how to minimize the air pockets that always emerge after using the CA glue and activated charcoal patch pictured below.
  To remedy this, I use a regular, thin CA glue to fill the pits by painting the area with a thin film of glue using a toothpick. After applying the CA glue, I put the stem aside to cure.
  To remove the excess CA glue, in succession I apply 470, 600 grade papers and 000 steel wool.
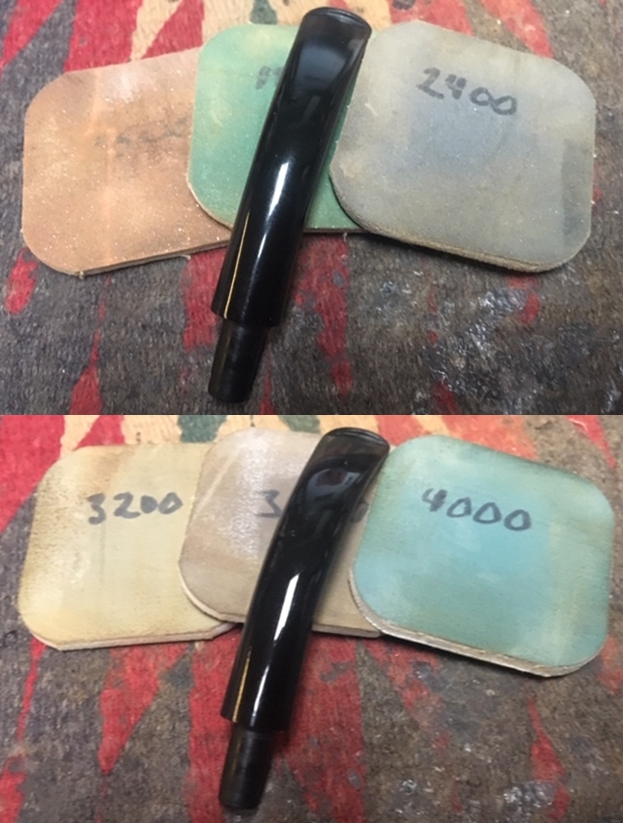
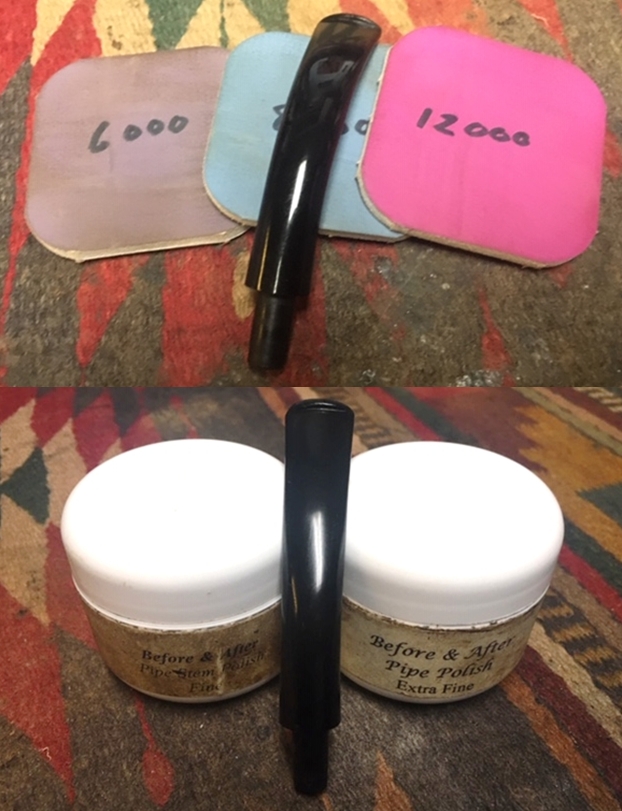
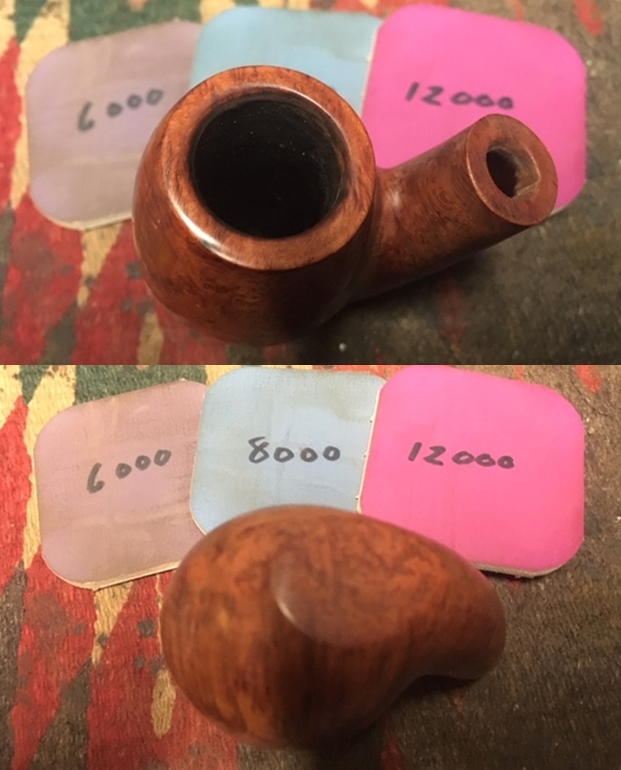
 Next, as before, I apply to the bit area the full 9 micromesh pads from 1500 to 12000 by first wet sanding with 1500 to 2400 and dry sanding from 3200 to 12000. I apply Obsidian Oil between each set of three.
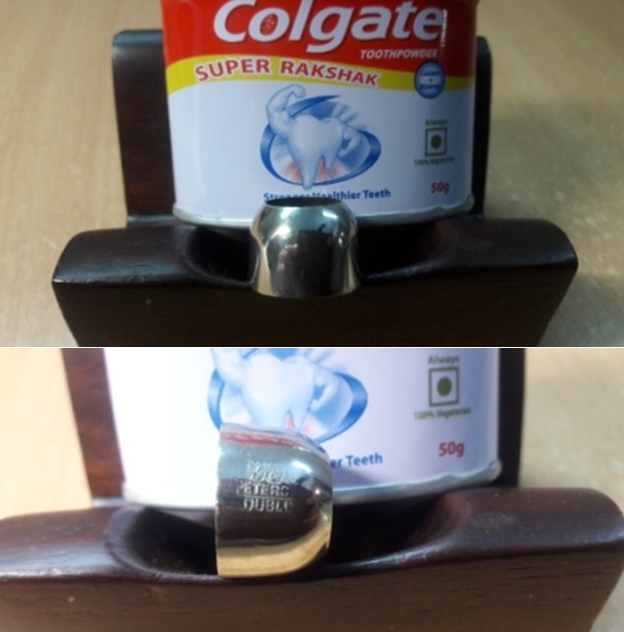
 I again apply Blue Diamond compound to the button and bit. I shine up the stinger that came with the pipe with steel wool and replace it in the tenon. After reuniting stem and stummel and changing the buffing wheel again to another cotton cloth buffing wheel, maintaining the same speed, I apply a few coats of carnauba wax to stem and stummel. To complete the restoration, I give the pipe a rigorous hand buffing with a microfiber cloth to raise the shine.
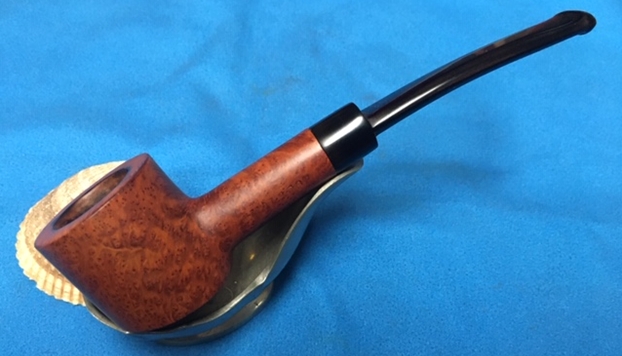
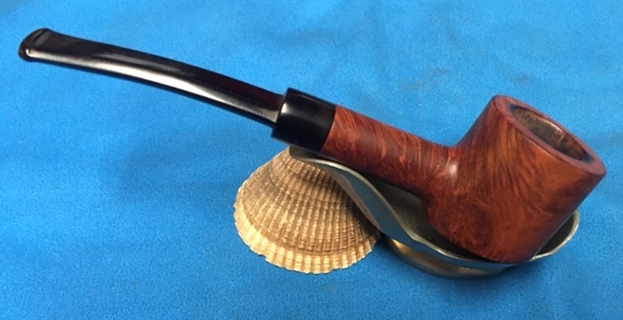
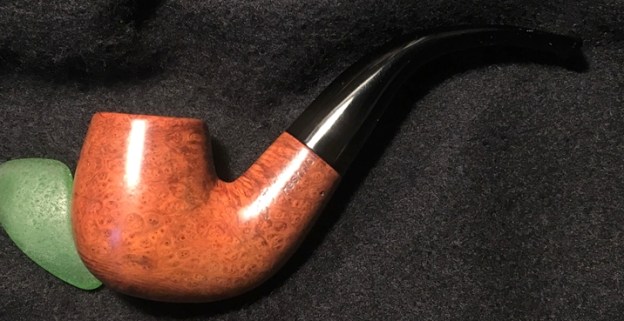
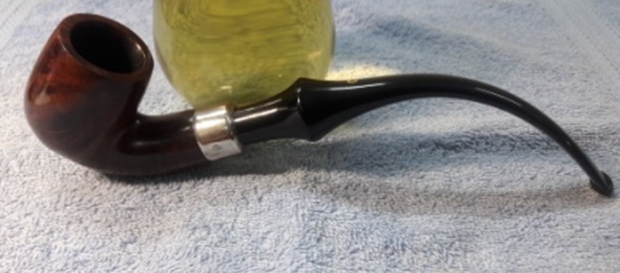
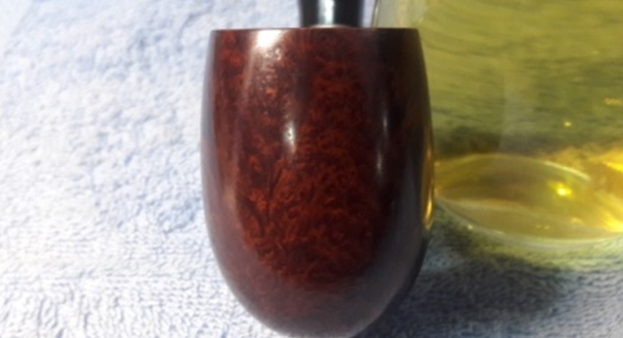
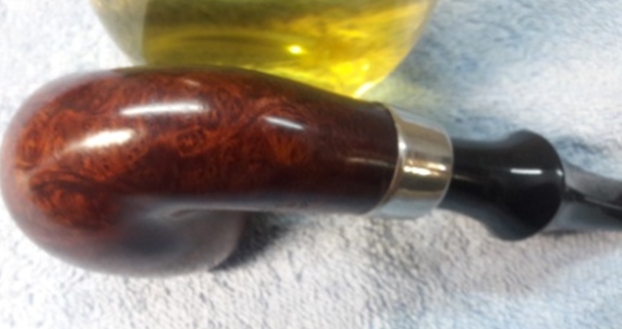
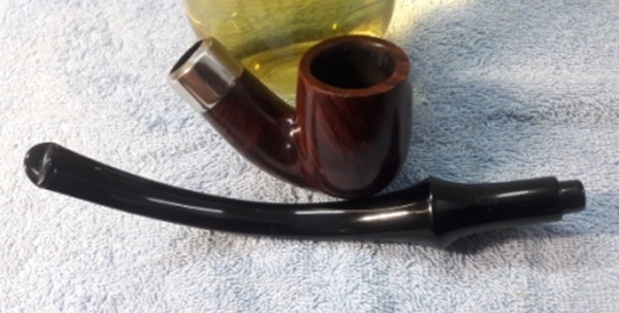
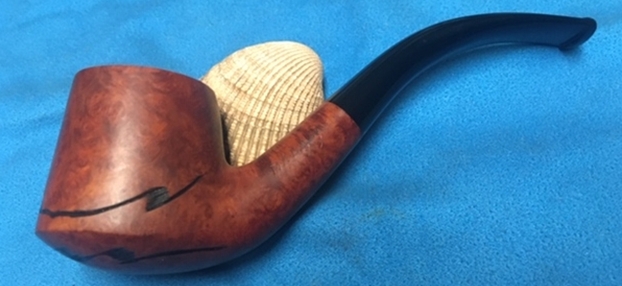
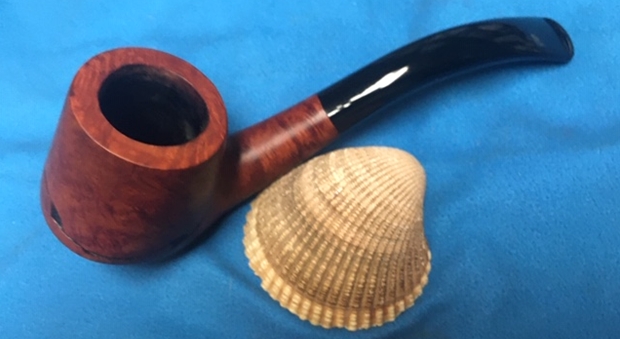
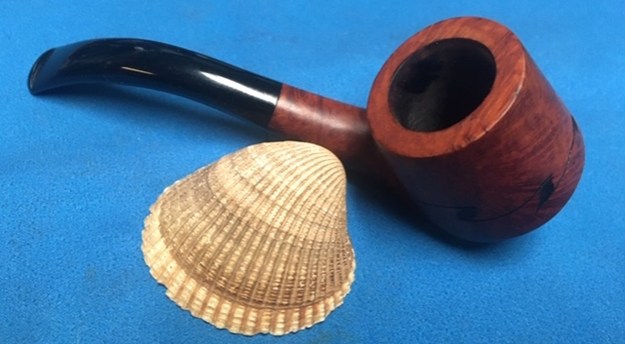
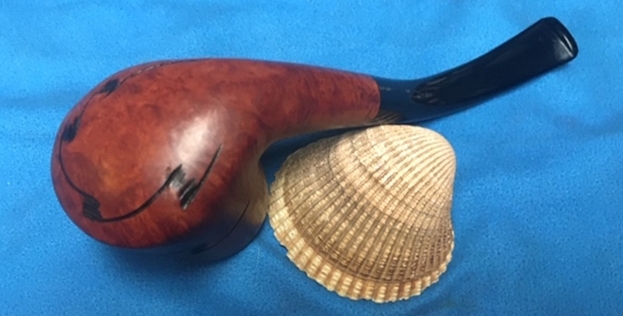
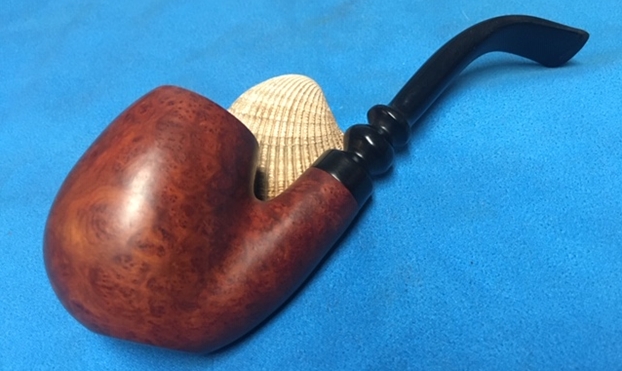
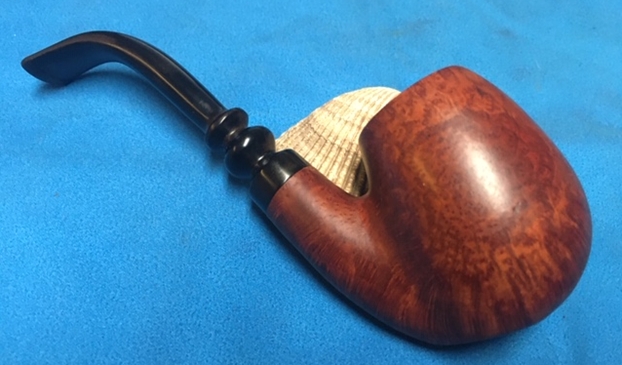
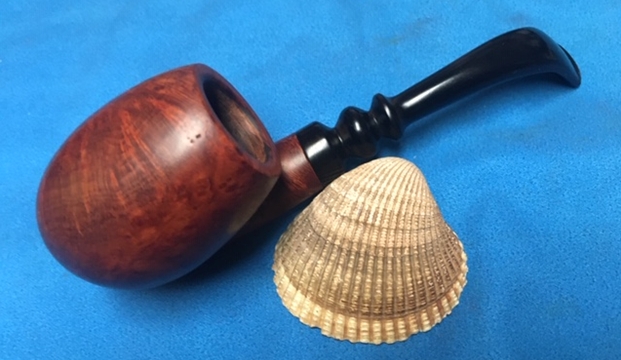
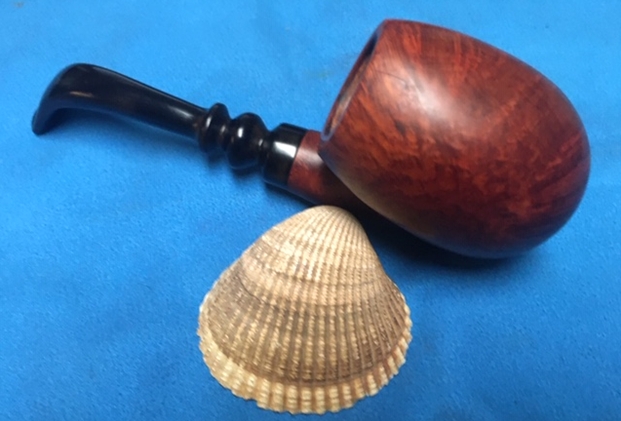
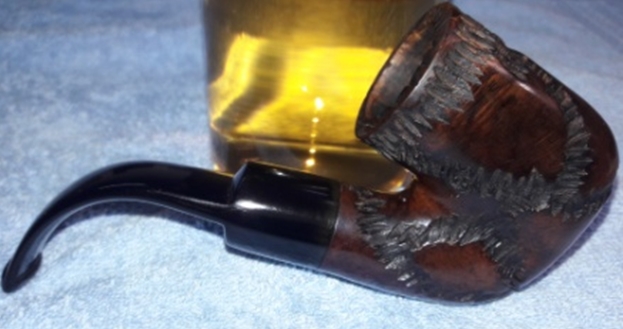
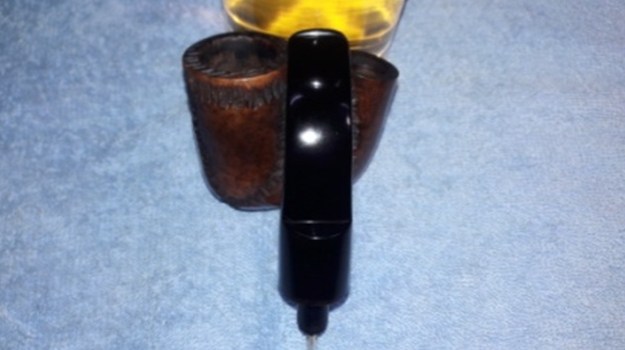
This BC Festival Bent Billiard is a beautiful pipe. The full Bent Billiard shape has a nice balance and settles well in the hand. The grain is appealing with a serious patch of bird’s eye covering much of the bowl. The challenges with the stem obstruction, leading to a friendly fire cracked button was not in the plan! Yet, the repair is completed, and this French Butz Choquin Festival is ready for a new steward. Michael will have the first opportunity to secure the BC Festival from The Pipe Steward Store benefiting our work here in Bulgaria working with women and girls who have been trafficked and sexually exploited – the Daughters of Bulgaria. Thanks for joining me!


 In each of the previous blogs that I have written on the restoration of George’s pipes I have told his story. If you have followed the restorations you will have read the information and the background piece that Kathy did on her father. Here is a link to one of the previous blogs on his Malaga pipes where I included her tribute in full (https://rebornpipes.com/2019/01/26/back-to-kathys-dads-pipes-restoring-a-%c2%bc-bent-malaga-author/). You can also read the bio on her Dad, George Koch. It is an interesting read and one that shows just how far our pipe collecting passion can go when we find a brand of pipes that we enjoy. I am going to only include the portion on the Malagas at this point. If you wish to read the rest follow the link above.
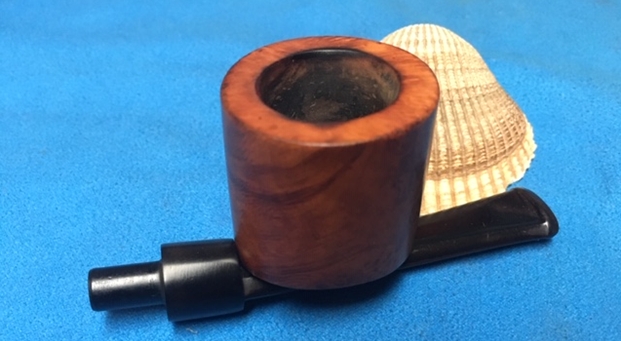
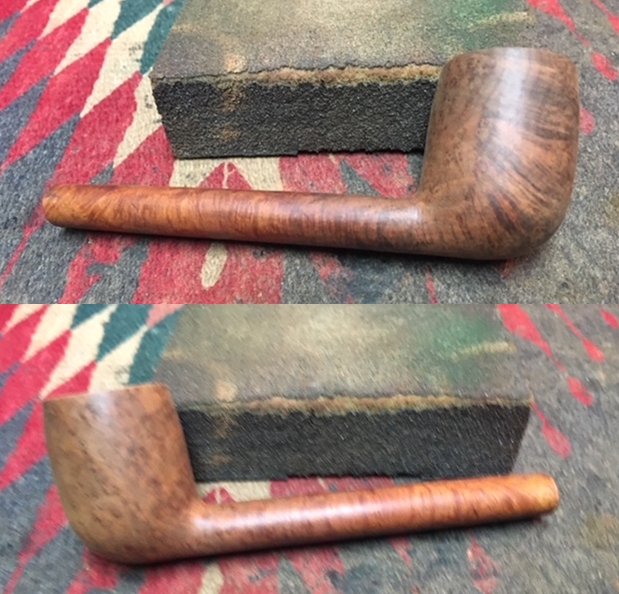
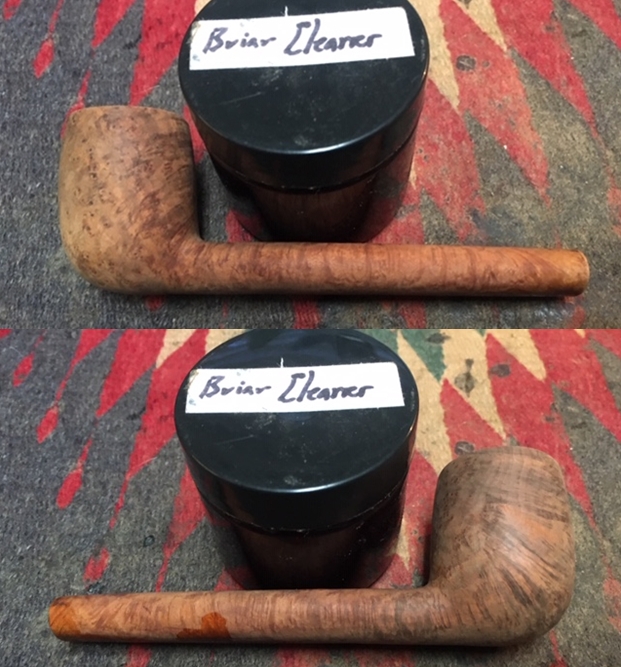
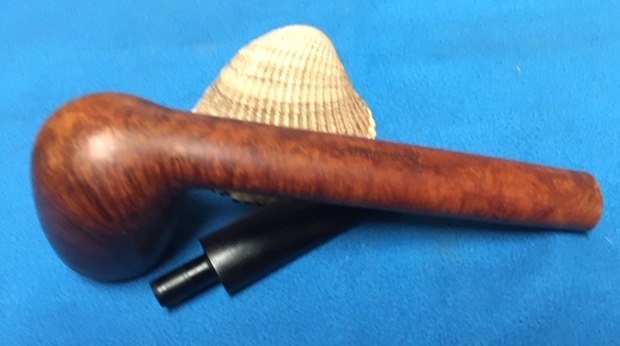
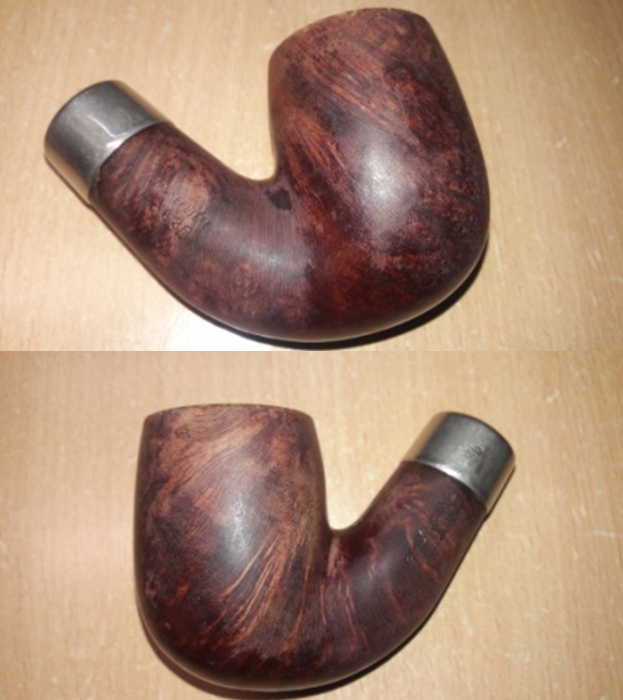
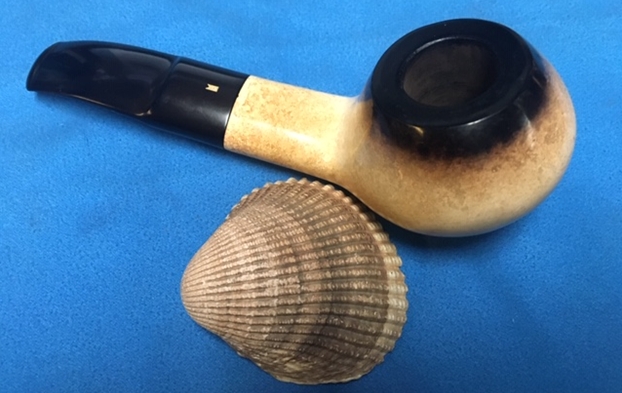
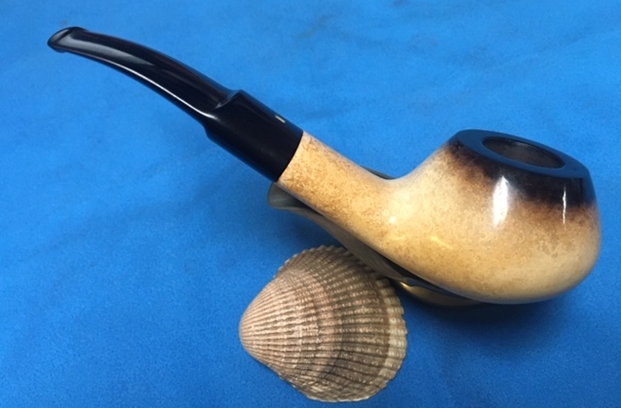
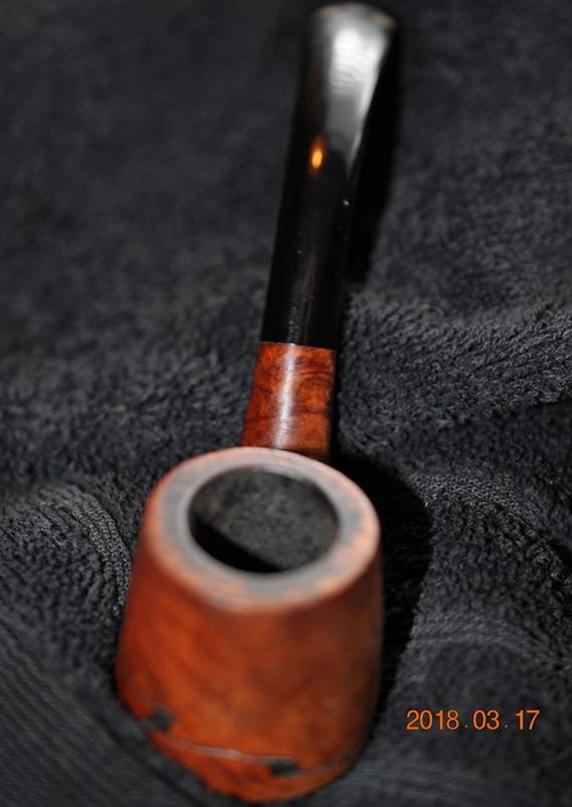
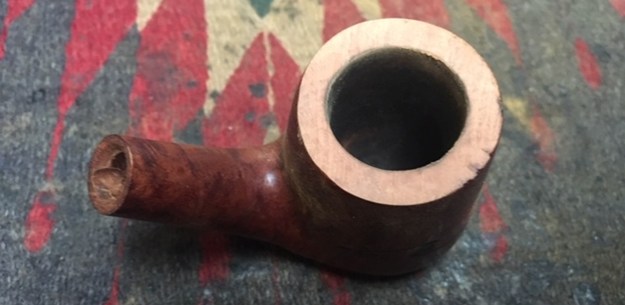
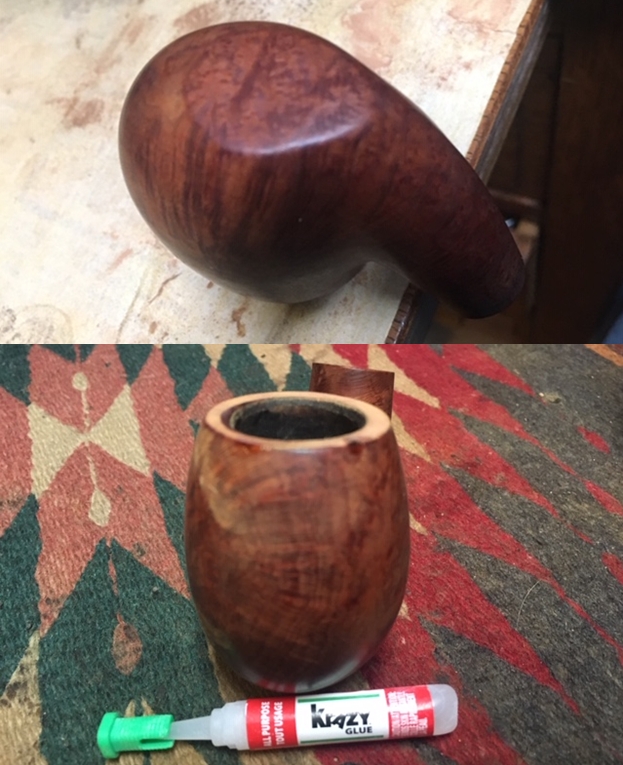
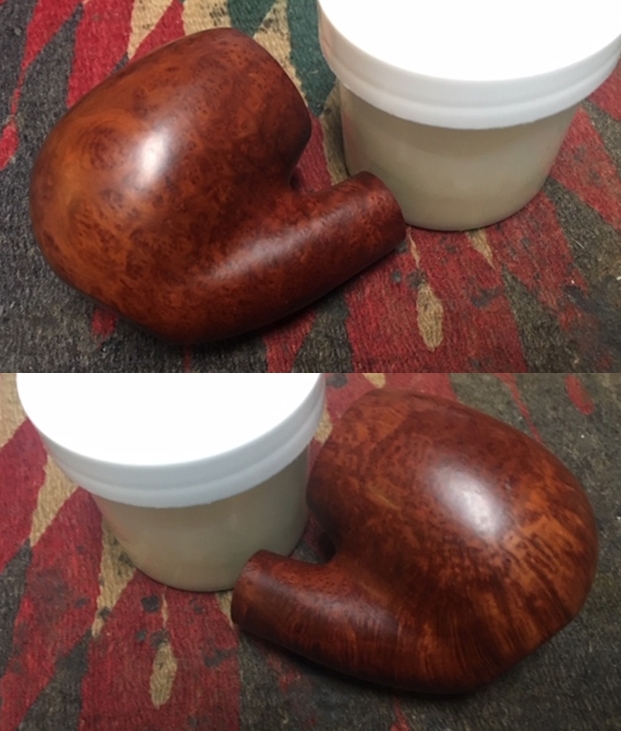
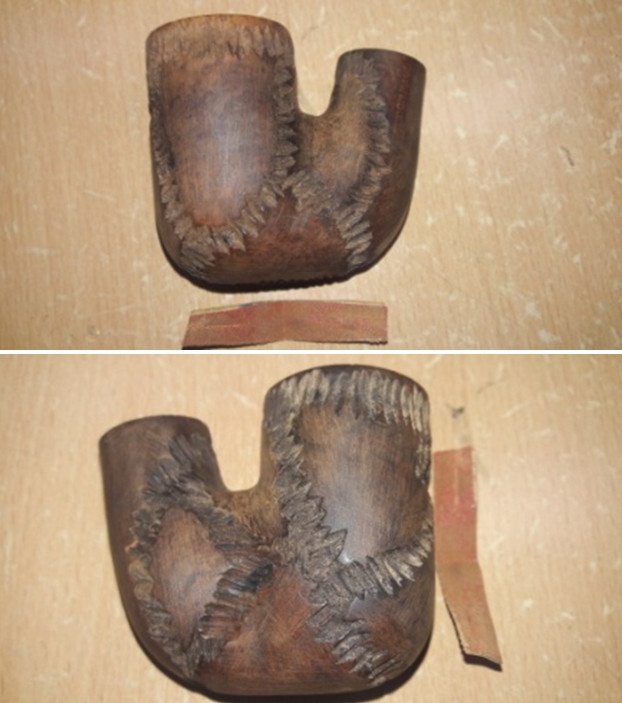
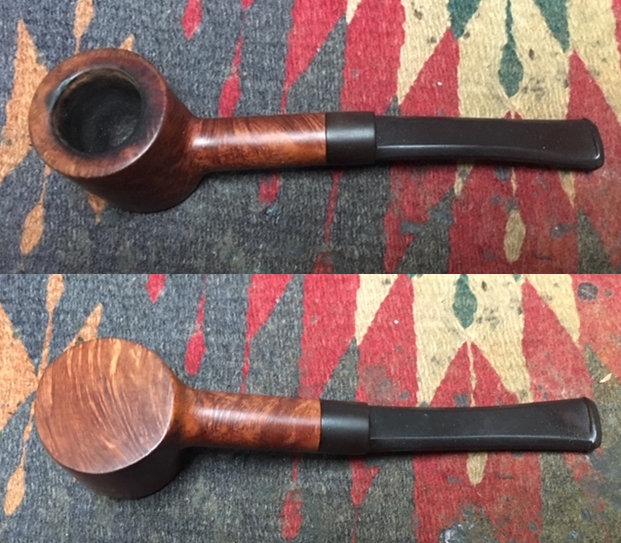
 Jeff took close up photos of the bowl and rim to capture the condition of the pipe before he started his cleanup work. The rim top had some lava overflow and darkening on the back of the bowl. There appeared to be some damage to the inner edge of the grimy pipe. The outer edge looked to be in decent condition with perhaps some burn marks on the front.
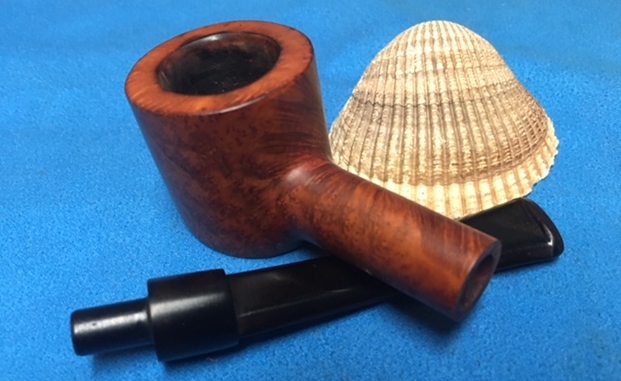
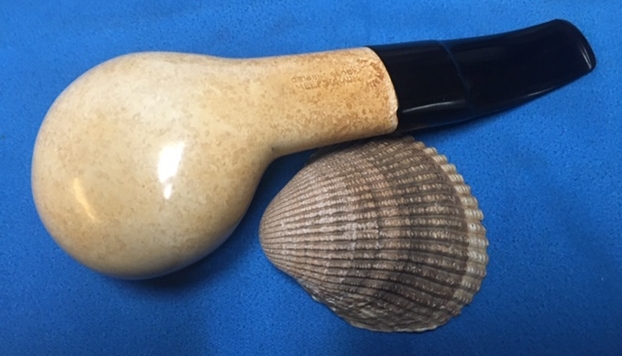
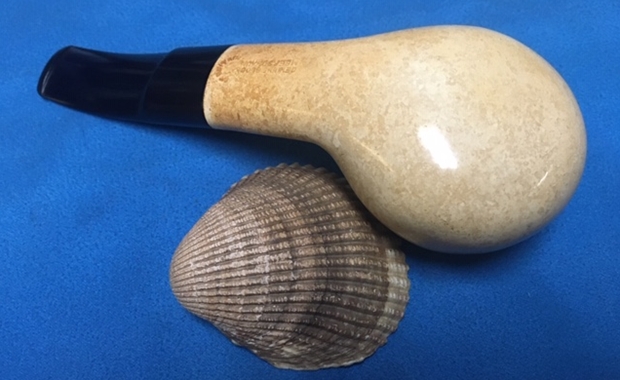
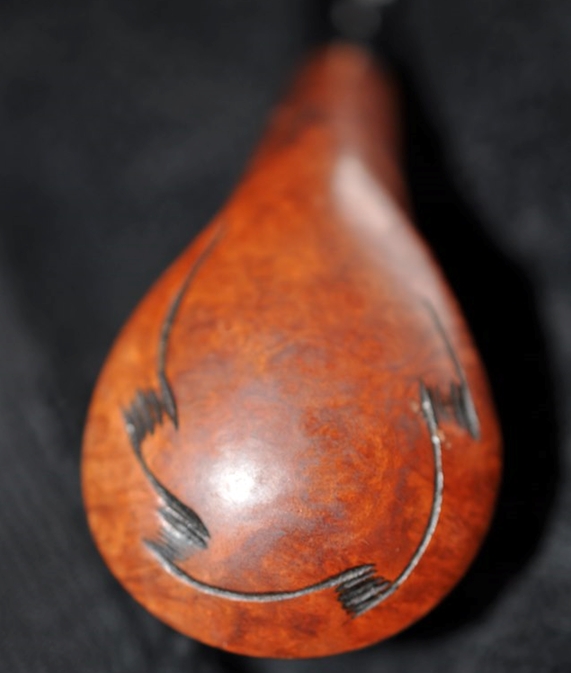
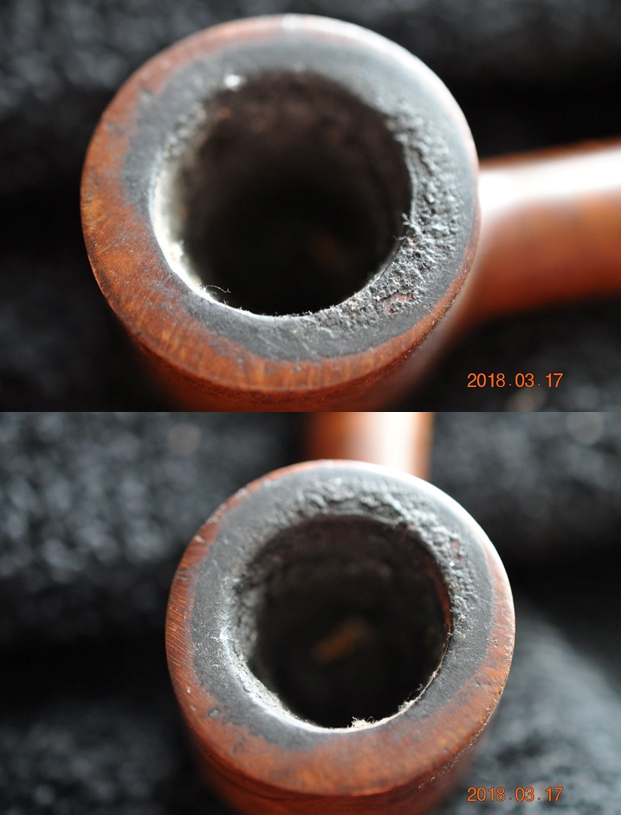 He also took photos of the side and bottom of the bowl and shank to show the beautiful grain around the bowl. The photos show the general condition of the bowl and dirt and wear on the rich oil finish. It is very dirty but this is another beautiful pipe.
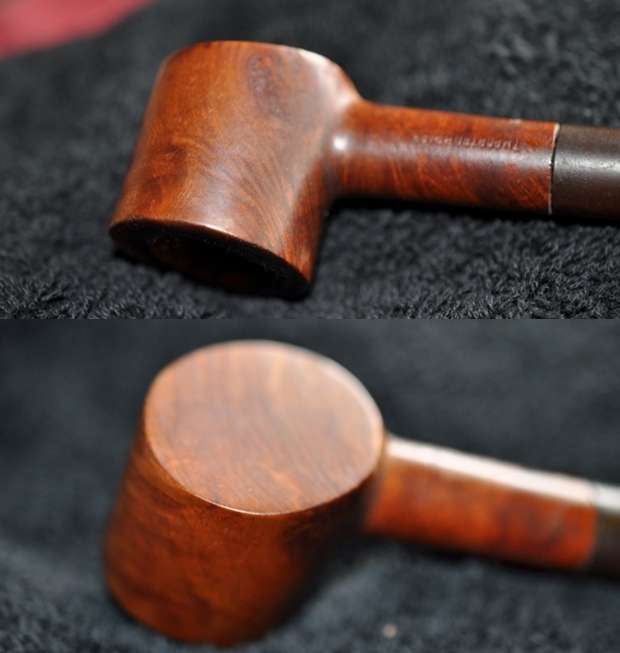
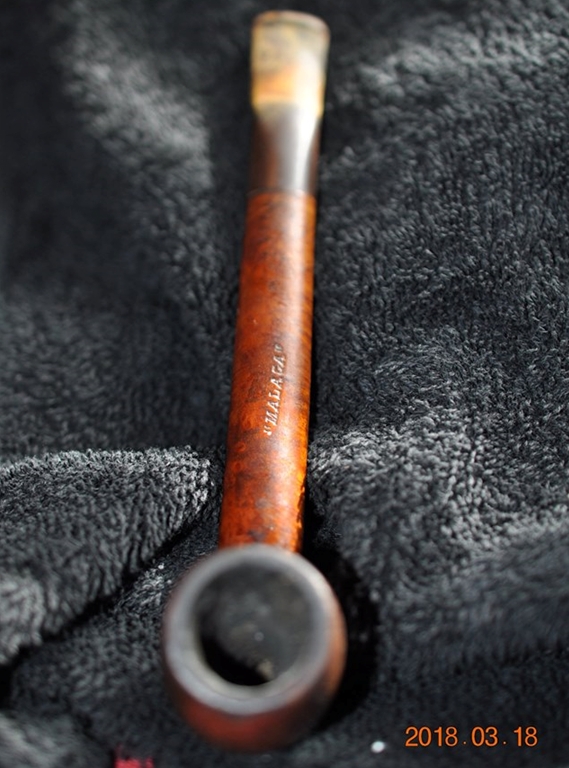
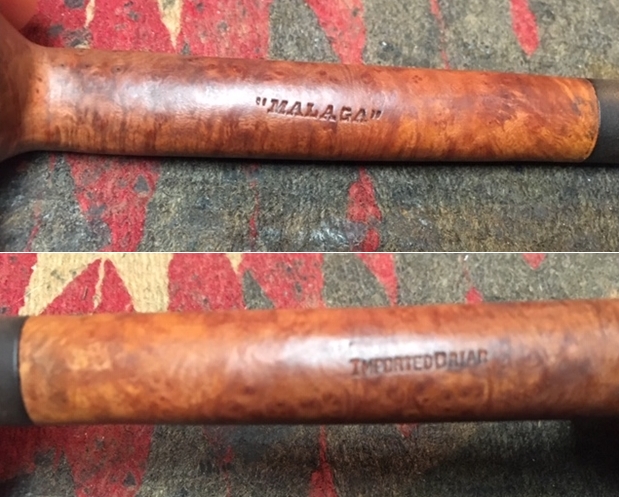
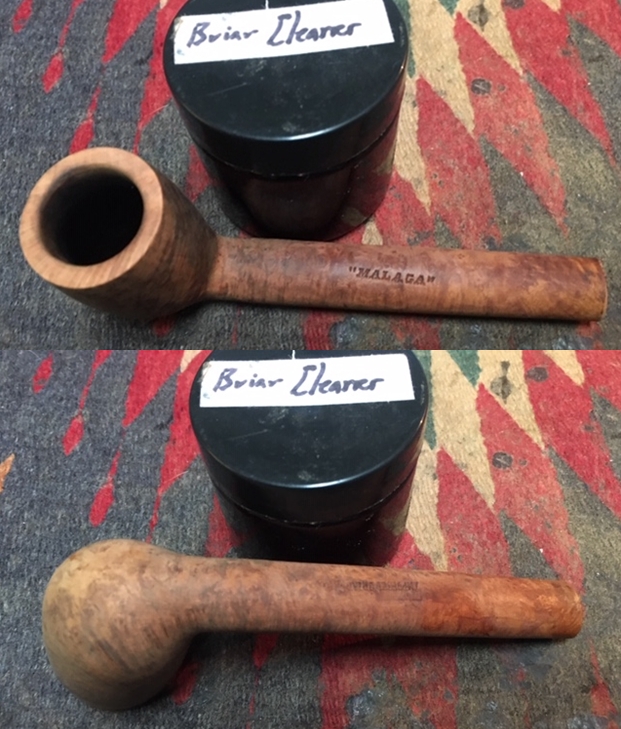
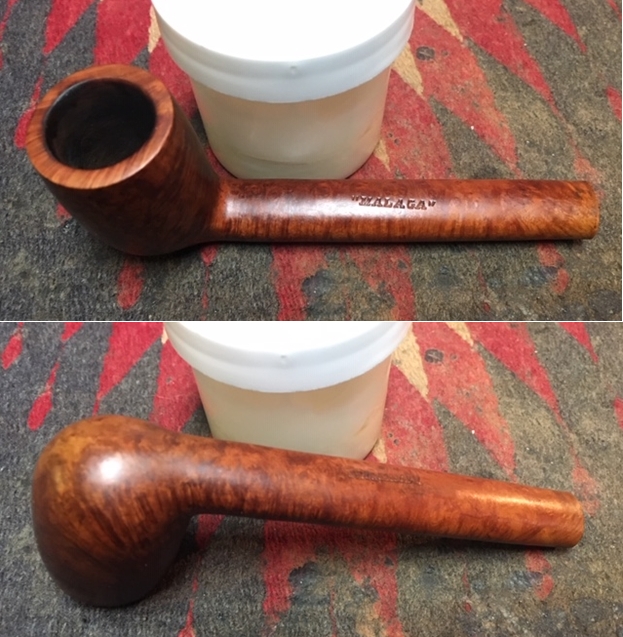
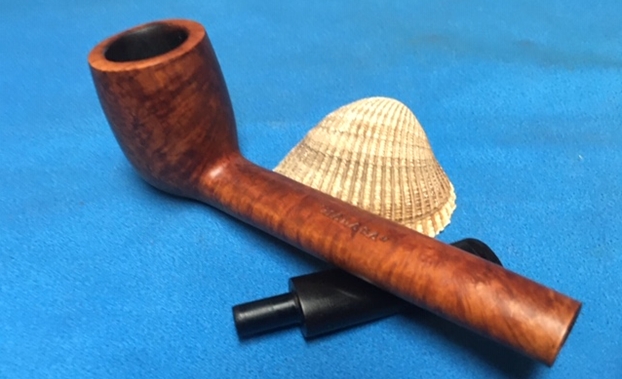
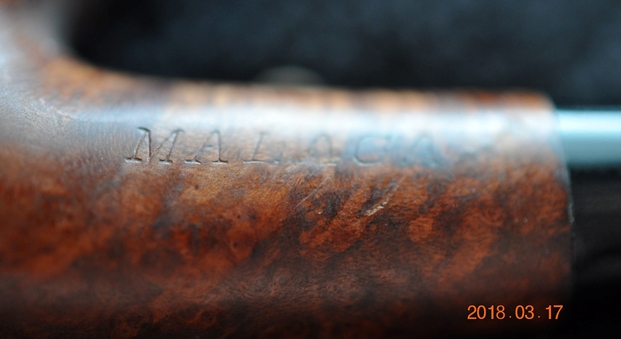
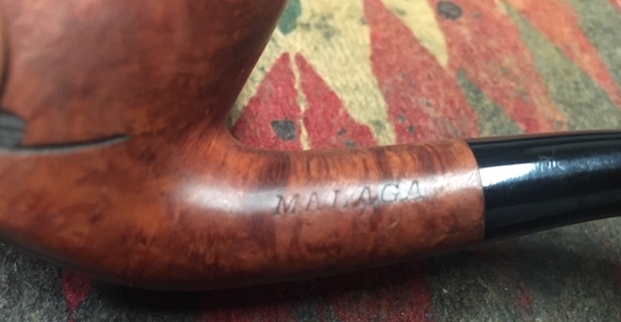
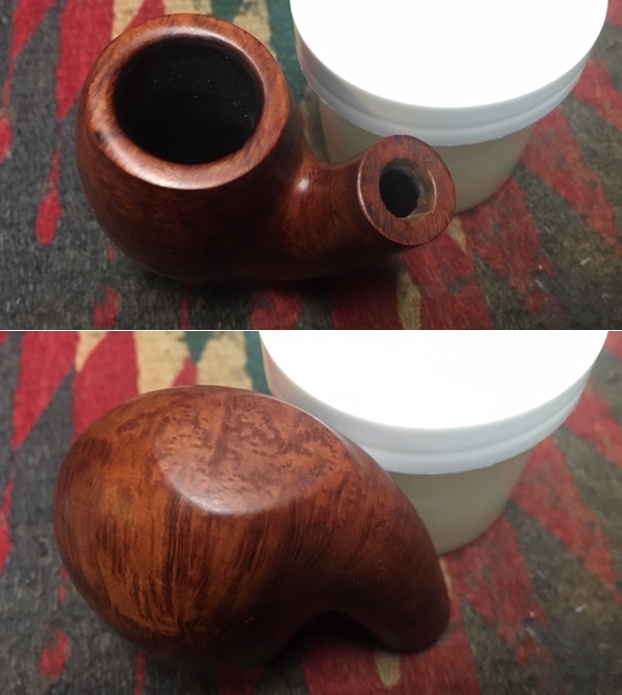
 Jeff took a photo to capture the stamping on the top side of the shank. The photos show the stamping “MALAGA” on the left side of the shank and IMPORTED BRIAR on the right side. The stamping is very readable.
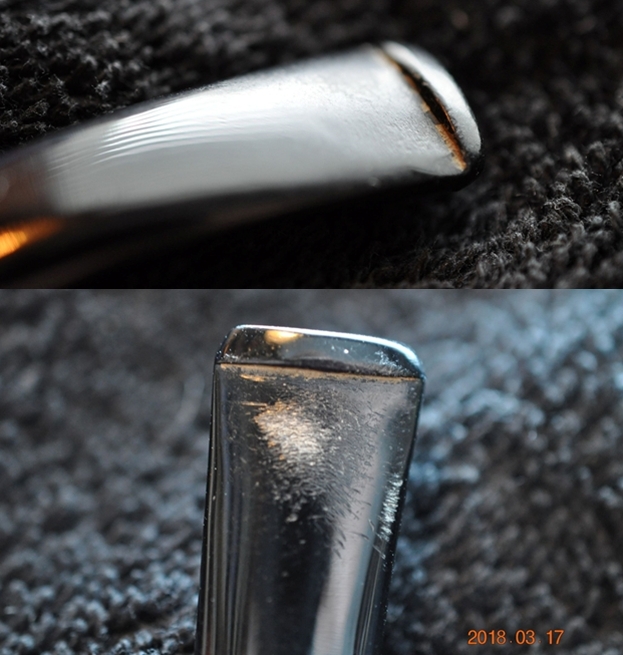
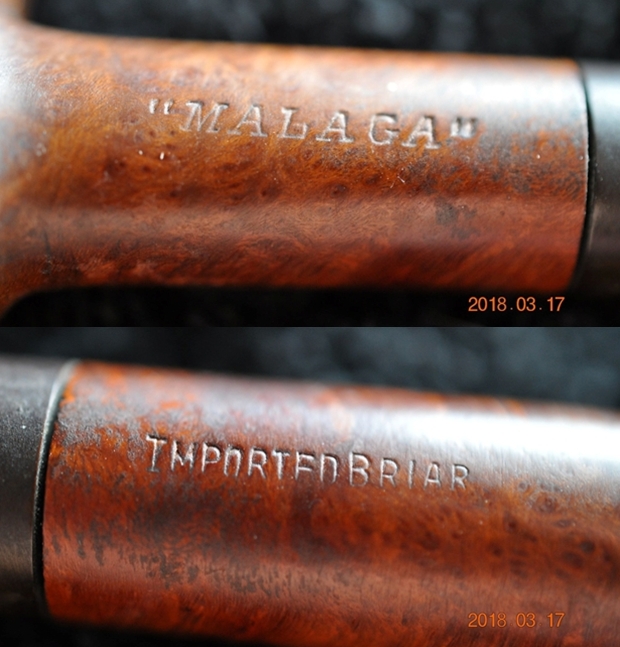 The next photos show the stem surface. There are tooth marks and chatter on both sides near the button and wear on the button surface and edges. You can also see the calcification and the oxidation on the stem.
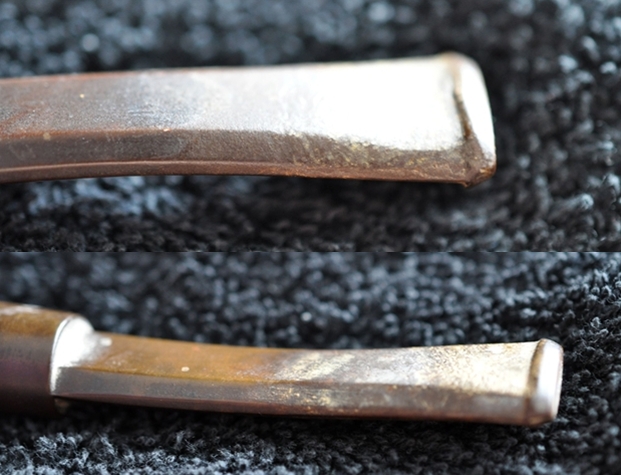
 I am also including the link to a blog that I wrote that gives some of the history of the Malaga brand and the Malaga Pipe Shop in Royal Oak, Michigan in the USA. I have written an earlier blog to give a little history of the Malaga Brand and the pipemaker, George Khoubesser. Here is the link – https://rebornpipes.com/tag/malaga-pipes/.That blog also includes links to a catalogue and the history of the pipemaker George Khoubesser. Follow the link to get a feel for the brand and the pipemaker.
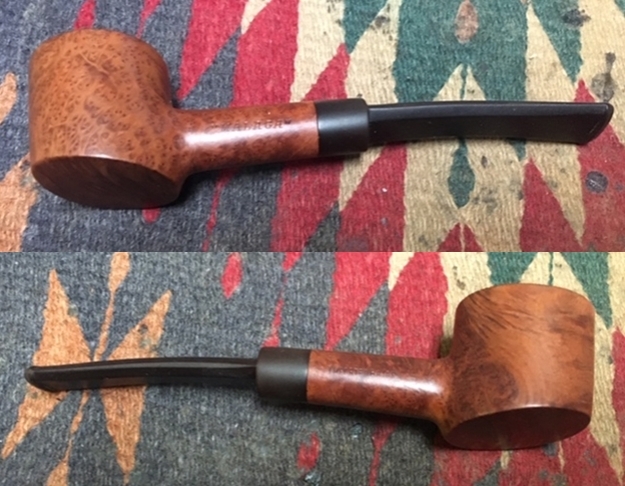
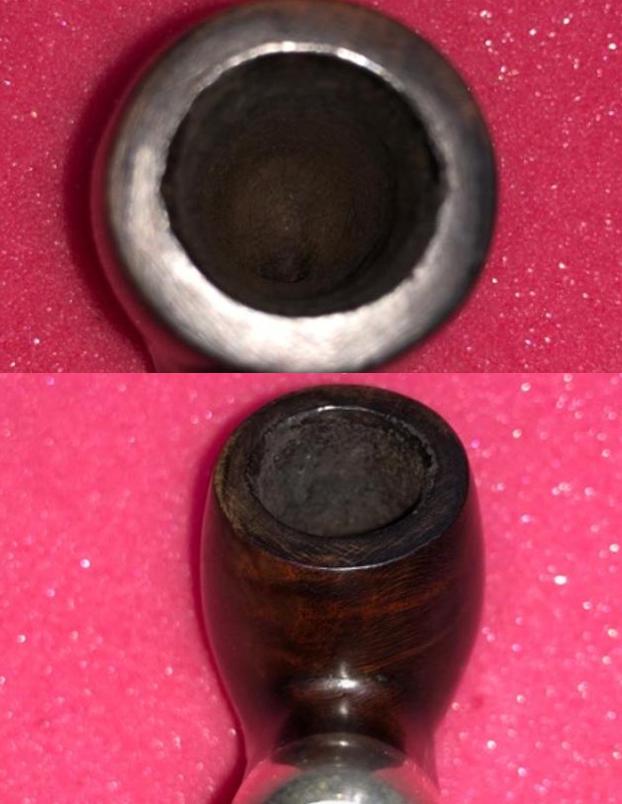
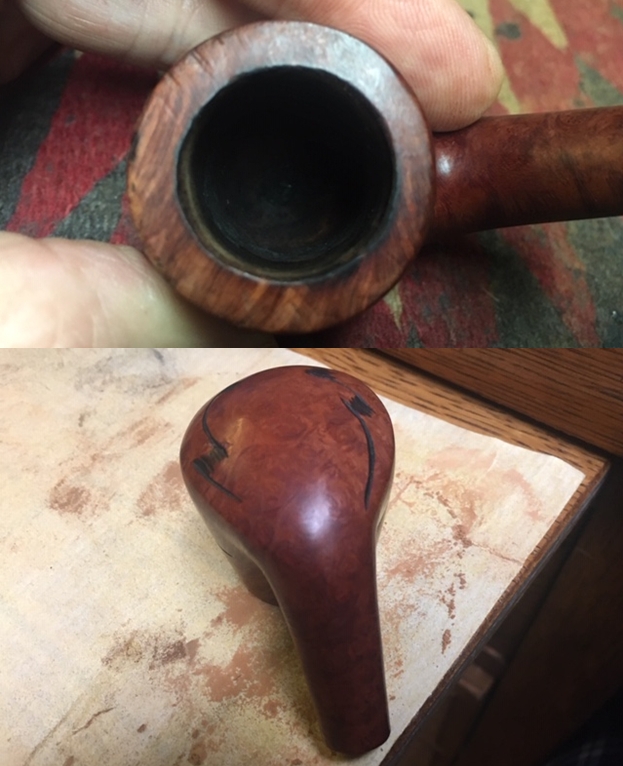
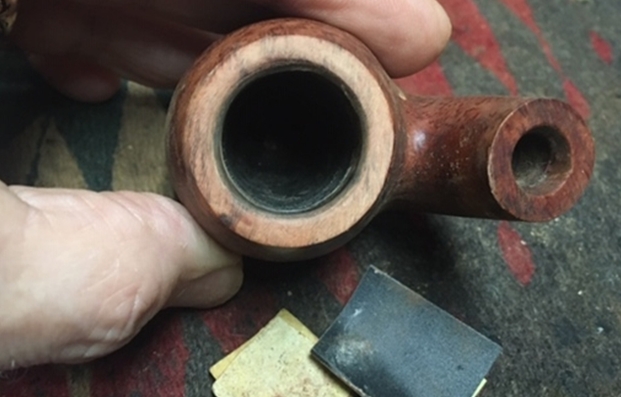
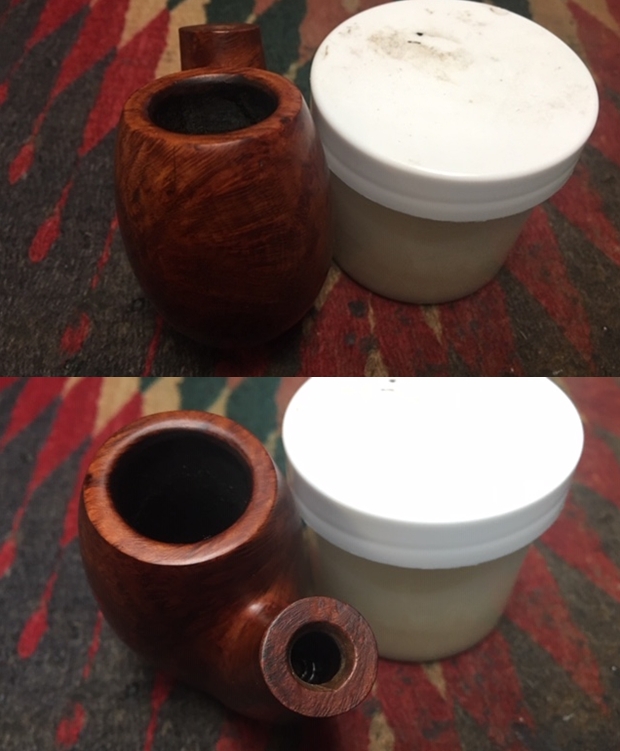
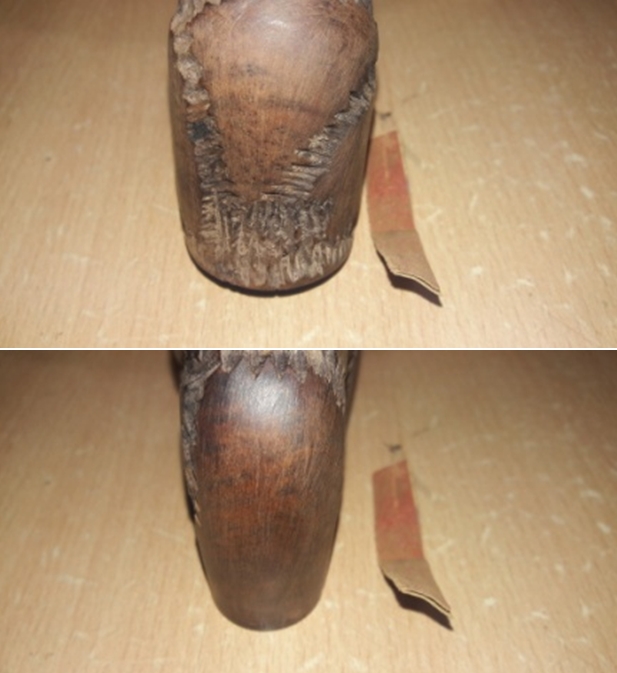
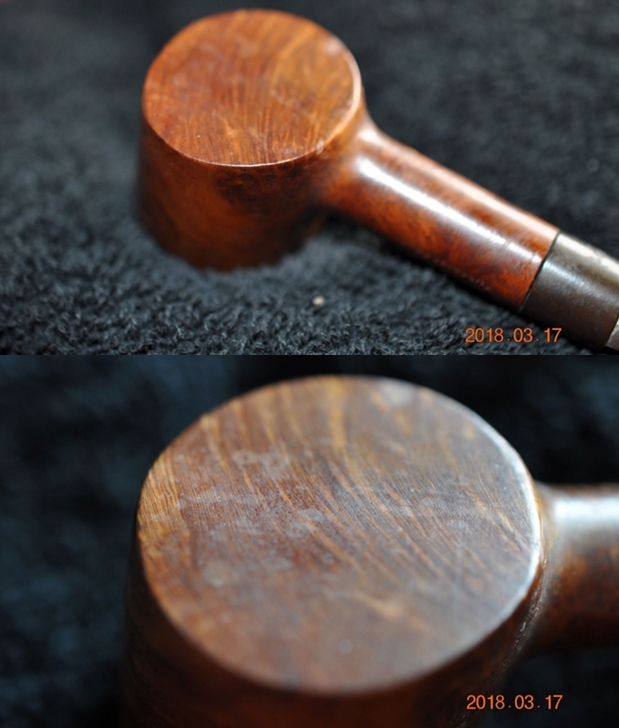
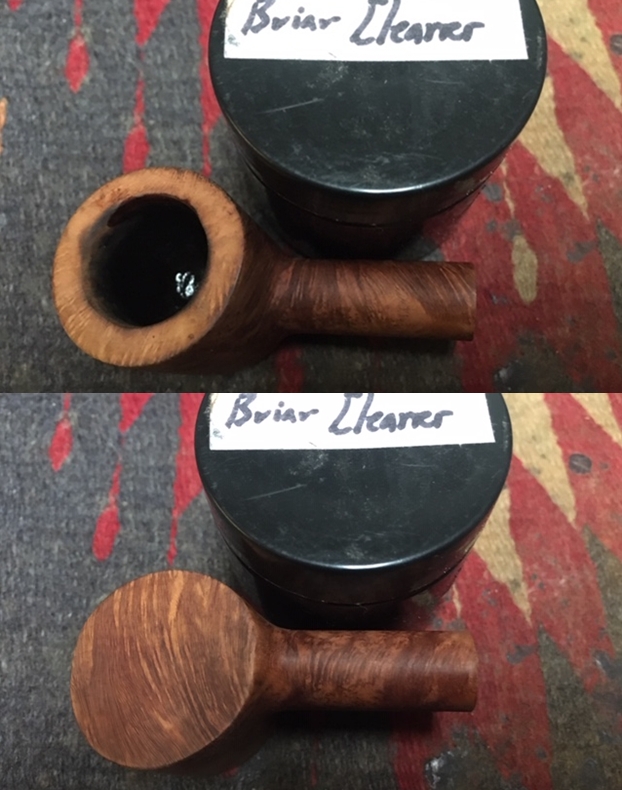
 I took close up photos of the bowl and rim top as well as the stem. You can see the condition of the rim top and bowl in the first photo. Jeff was able to remove all of the tar and oils but you can now see the damage on the top and inside rim edge. The edge is out of round. There is a burn mark that extends across back and right front edge of the rim top at that point. The stem had tooth marks and chatter on both sides near and on the button surface on both sides.
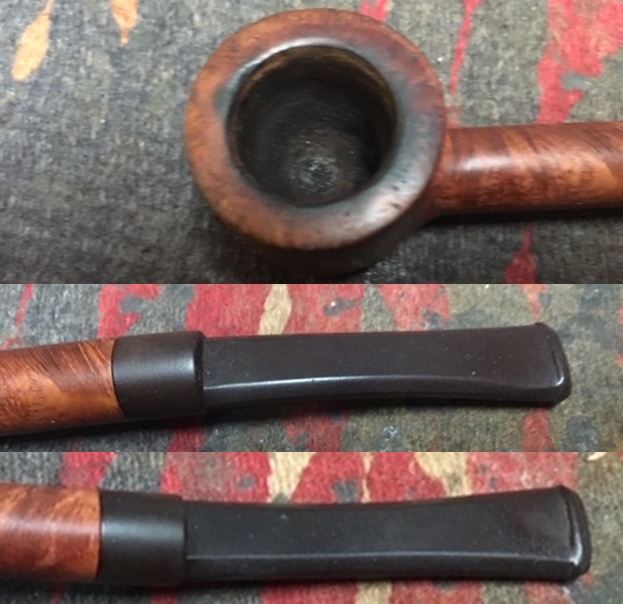 I took a photo of the stamping on the shank to show how good the condition is. It shows the “MALAGA” and the IMPORTED BRIAR stamp and they are very legible.
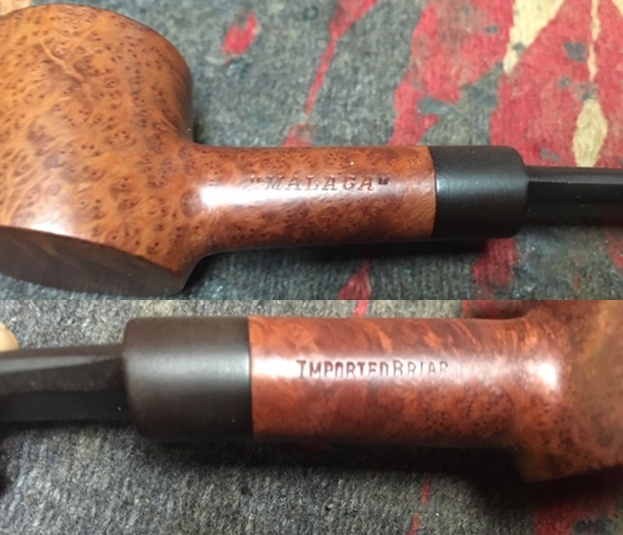 I decided to address the rim top first. I topped the bowl on a topping board with 220 grit sandpaper. I wanted to minimize the damage on the top, remove the darkening and clean up the damage on the inner edges of the bowl. I used a folded piece of 220 grit sandpaper to clean up the damage on the right rear inner edge of the bowl. I gave the inner edge a slight bevel to repair the damage. I polished the edge with 400 grit wet dry sandpaper. The rim top and edges really looked better (I forgot to take photos of the rim top at this point but did so with the micromesh).
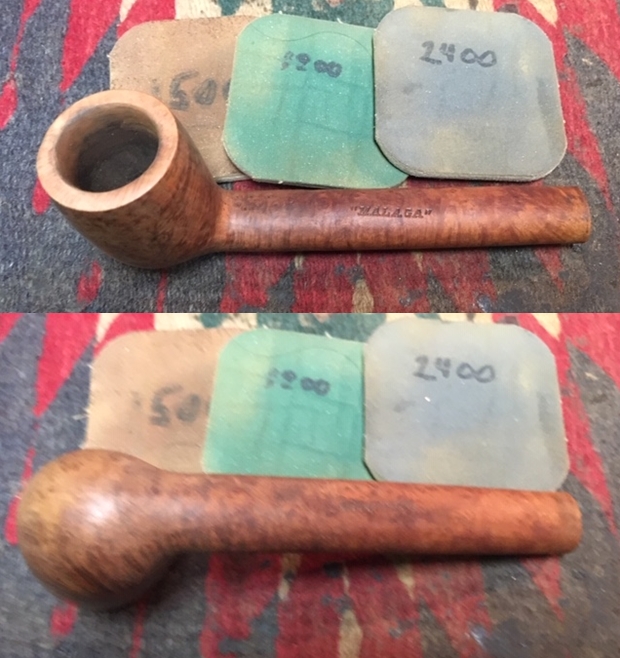
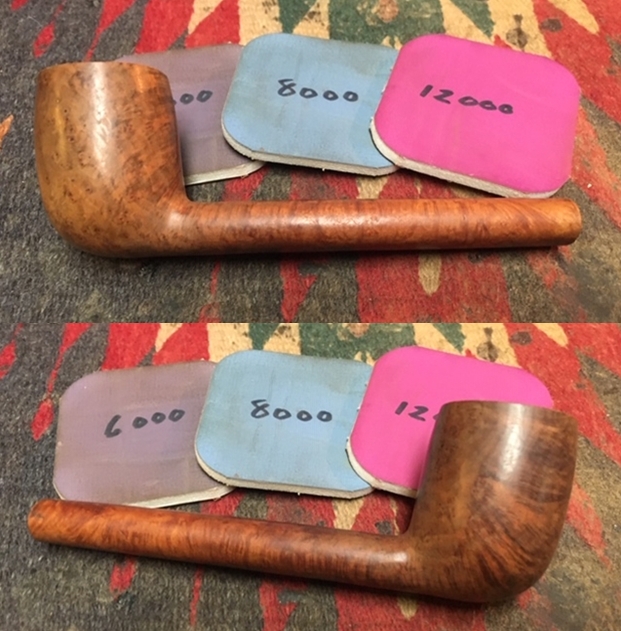
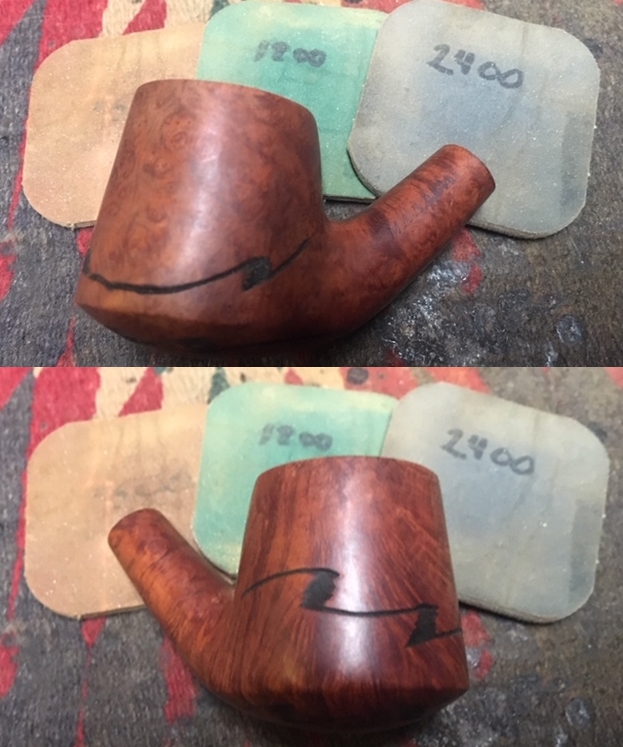
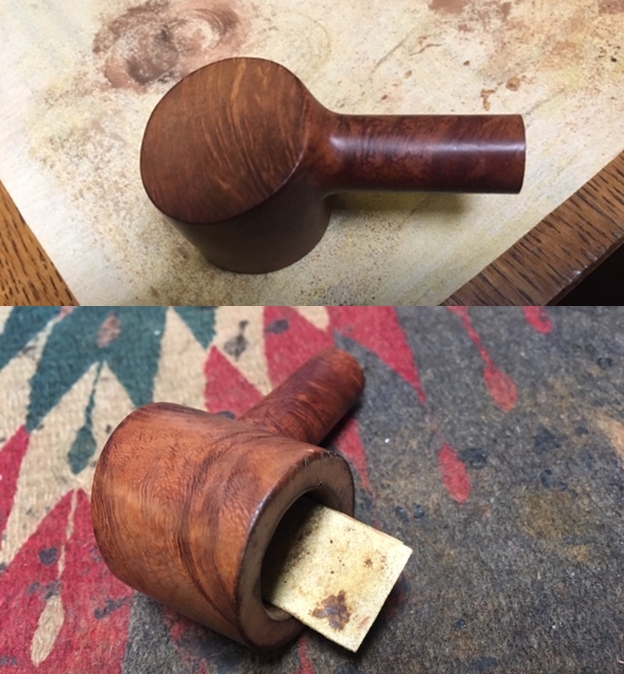 I polished the rim top and the briar with micromesh sanding pads. I wet sanded the bowl with 1500-12000 grit sanding pads. I wiped the bowl down after each pad with a damp cloth to remove the sanding dust.
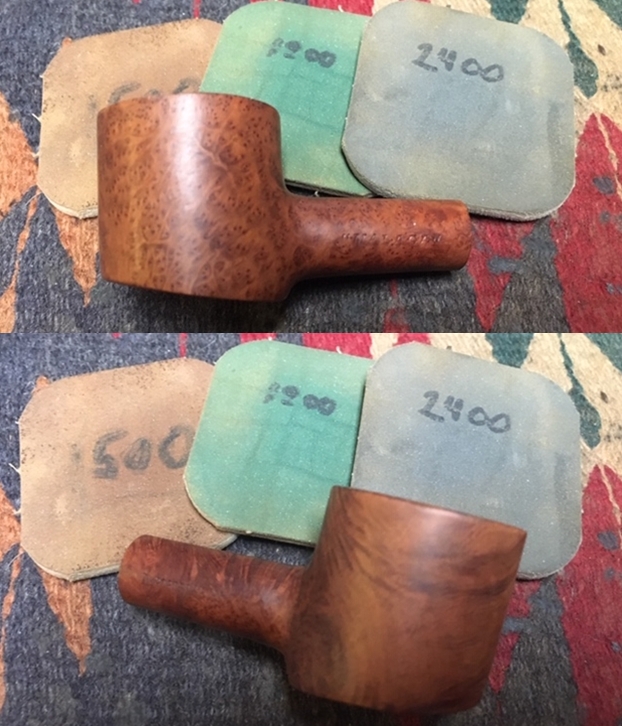
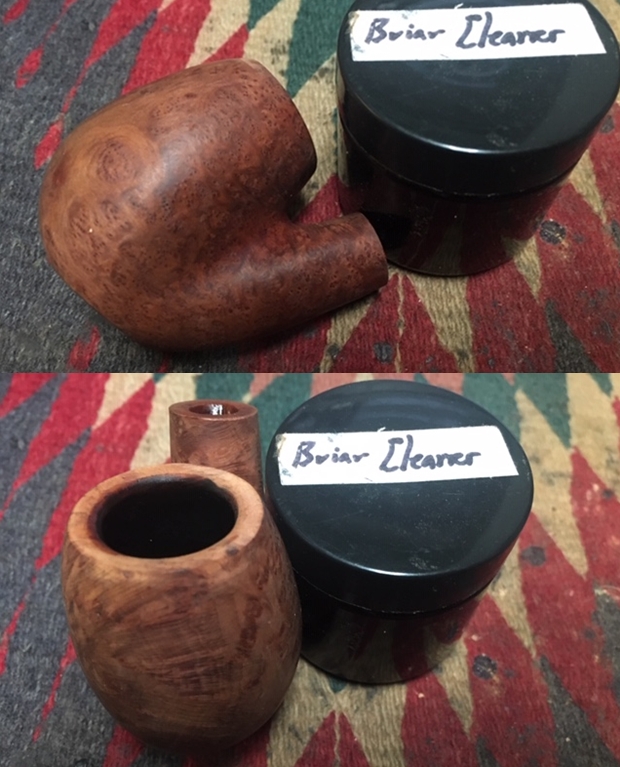
 I scrubbed the briar with Before & After Briar Cleaner and a tooth brush. I rubbed it into the surface of the briar with my finger tips and let it sit for about 10 minutes then rinsed it off with running water. I dried it off with a soft cloth.
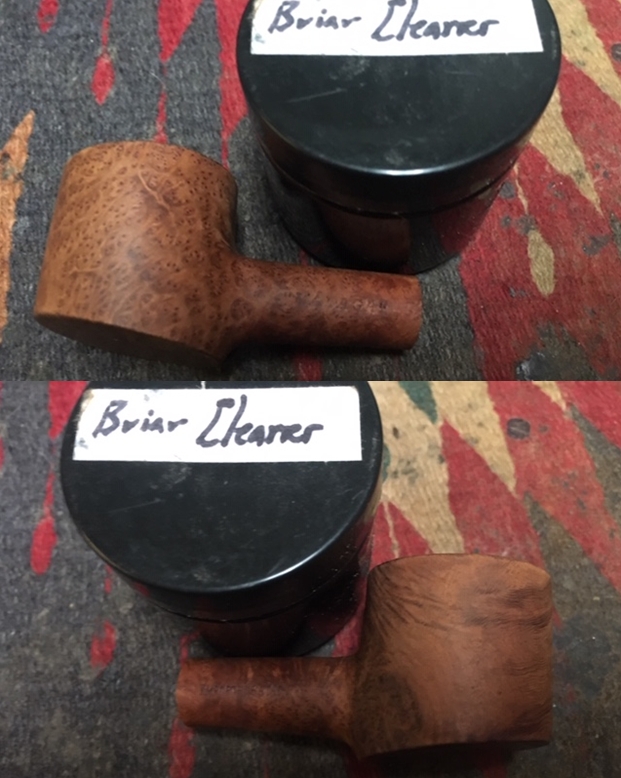
 I worked some Before & After Restoration Balm into the surface of the briar with my fingertips to clean, enliven and protect it. I let the balm sit for a little while and then buffed with a cotton cloth to raise the shine. The following photos show the bowl at this point in the restoration process. I am very happy with the results.
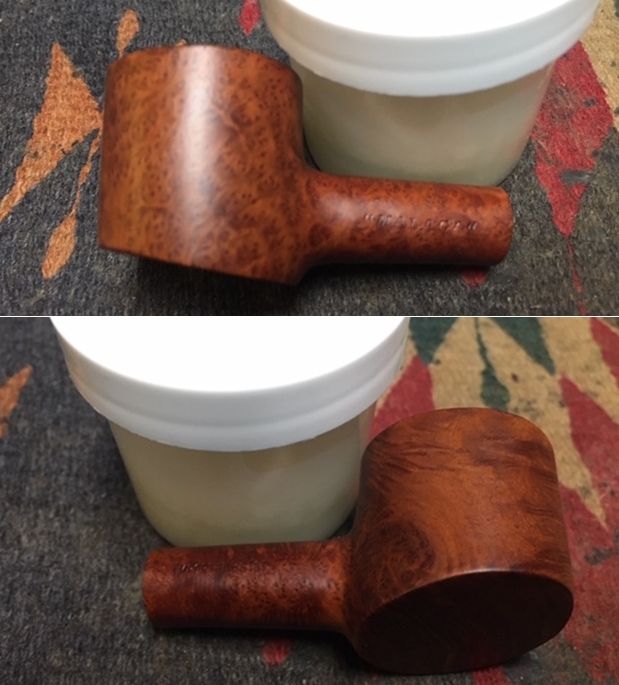
 I turned to the stem to address the issues on the surface of both sides at the button. I sanded both sides smooth with 220 grit sandpaper and 400 grit sandpaper to blend the tooth chatter into the surface of the stem. As I sanded and reshaped the button and stem surface the tooth chatter disappeared.
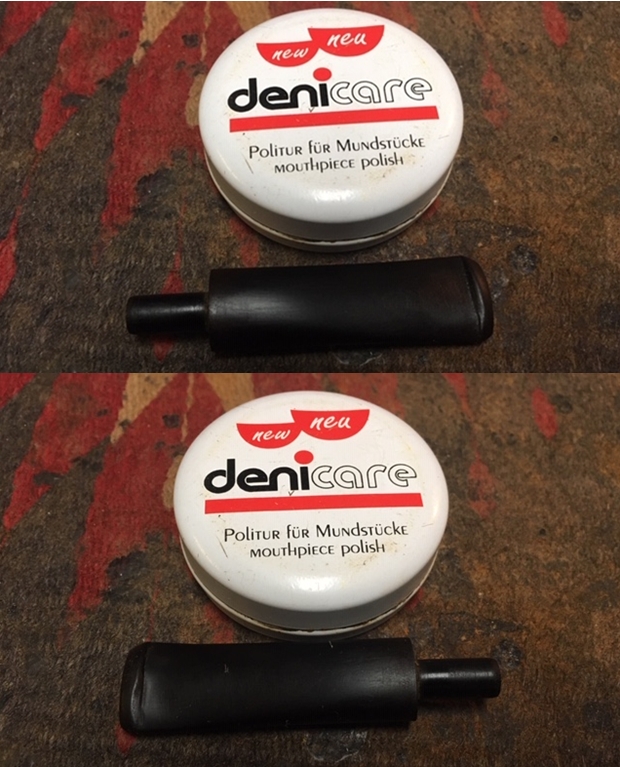
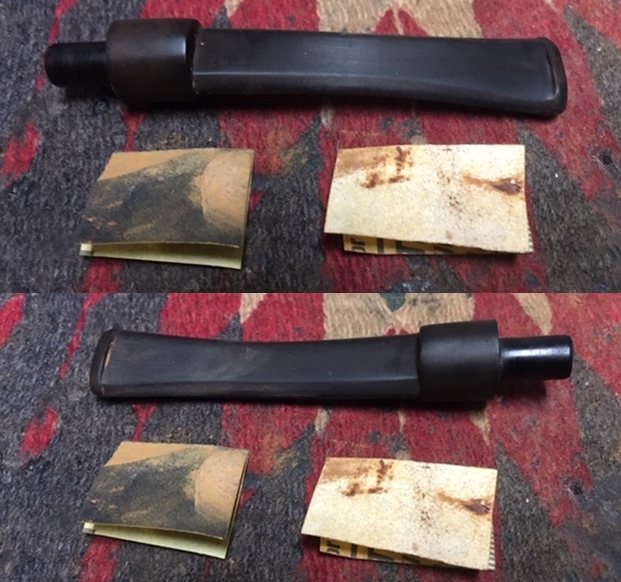 I used some Denicare Mouthpiece Polish that I have in my kit to start polishing out some of the scratches and remaining oxidation on the stem. I rubbed it in with a cotton pad and my finger tip and buffed it off with a cotton pad.
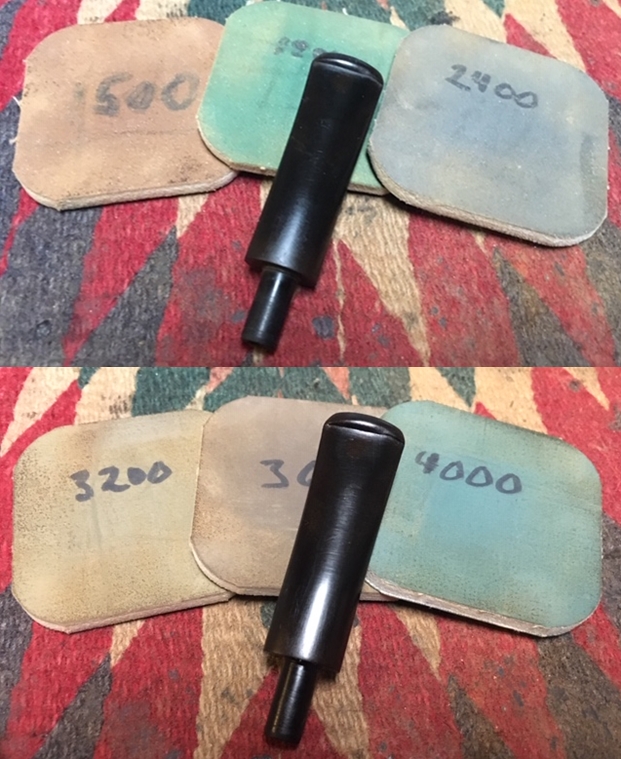
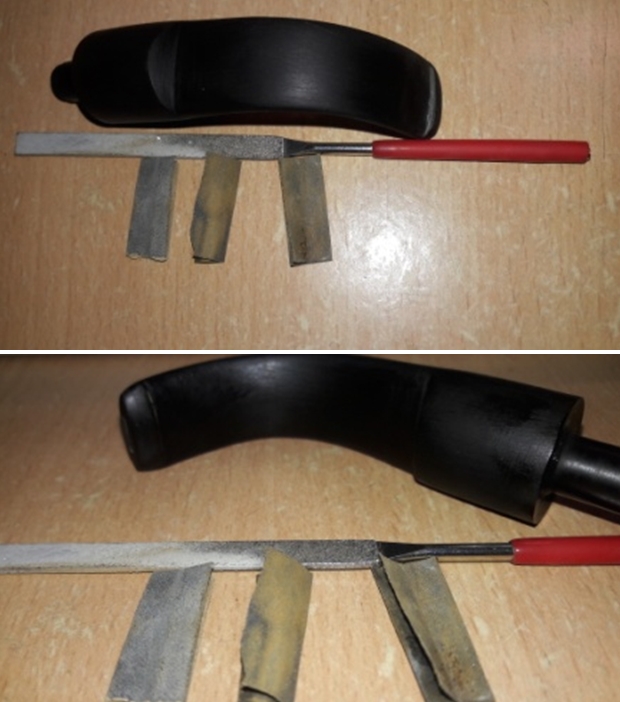
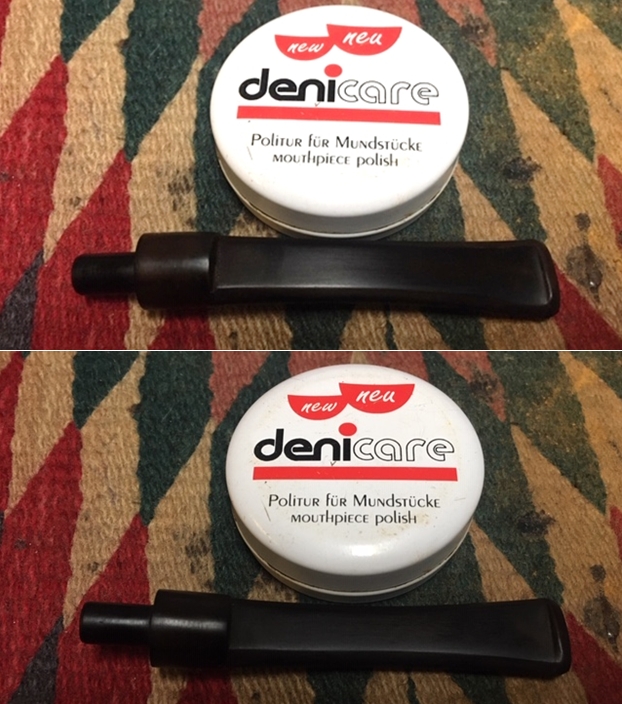 I polished the stem with micromesh sanding pads – wet sanding with 1500-12000 grit sanding pads. I wiped it down after each sanding pad Obsidian Oil. I finished by polishing it with Before & After Pipe Stem Polish both fine and extra Fine and then wiped it down with a final coat of Obsidian Oil.
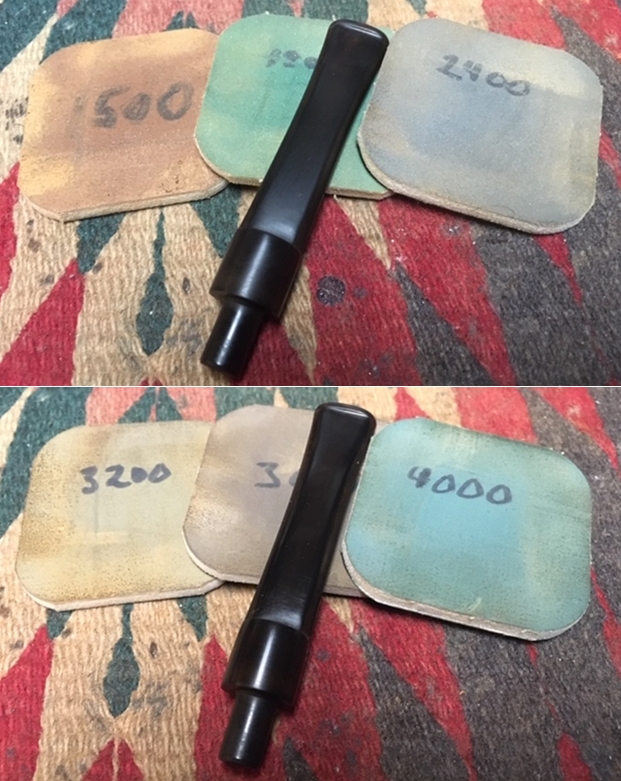
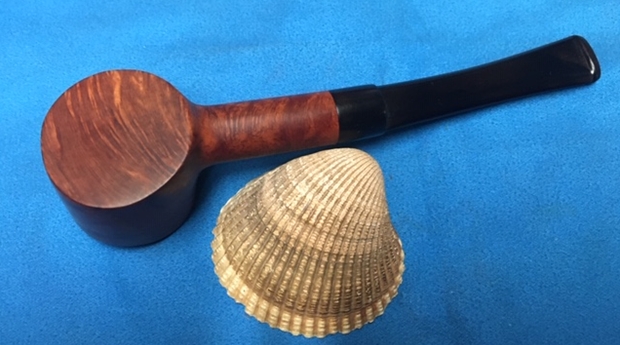
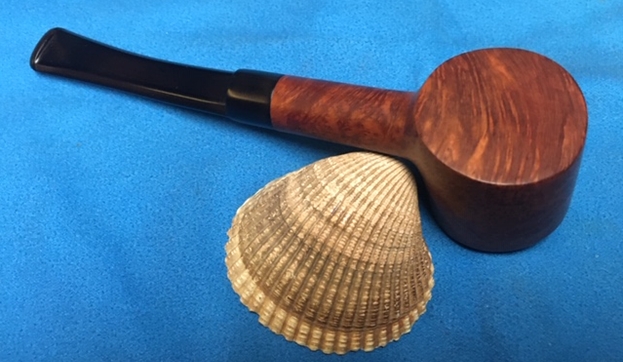
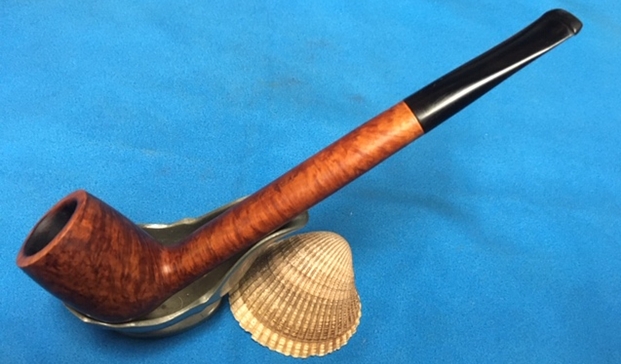
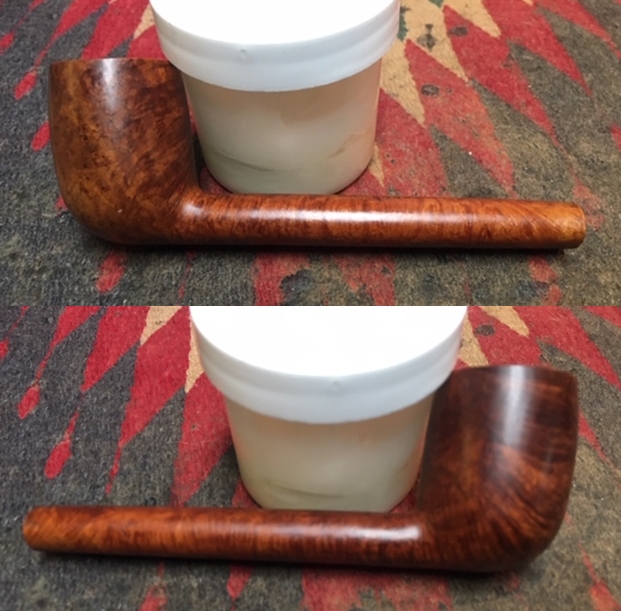
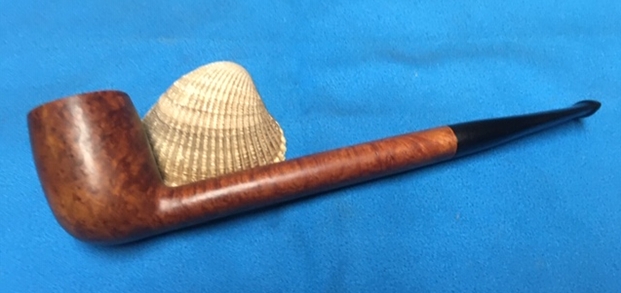
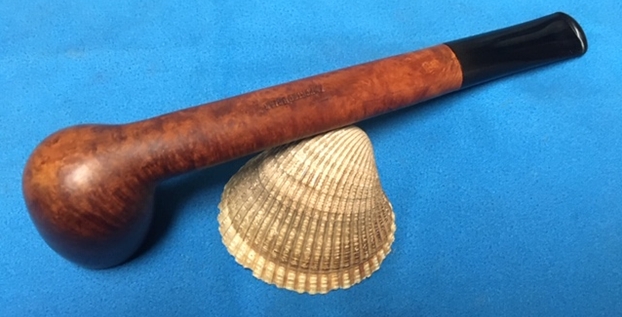
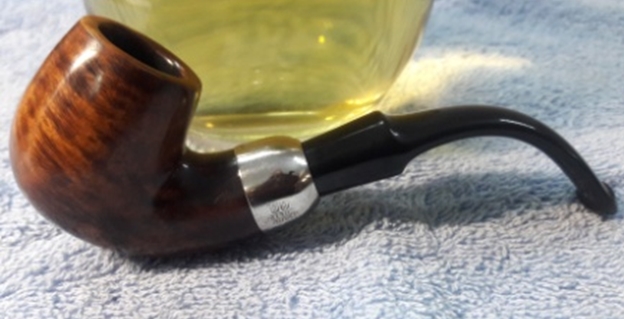
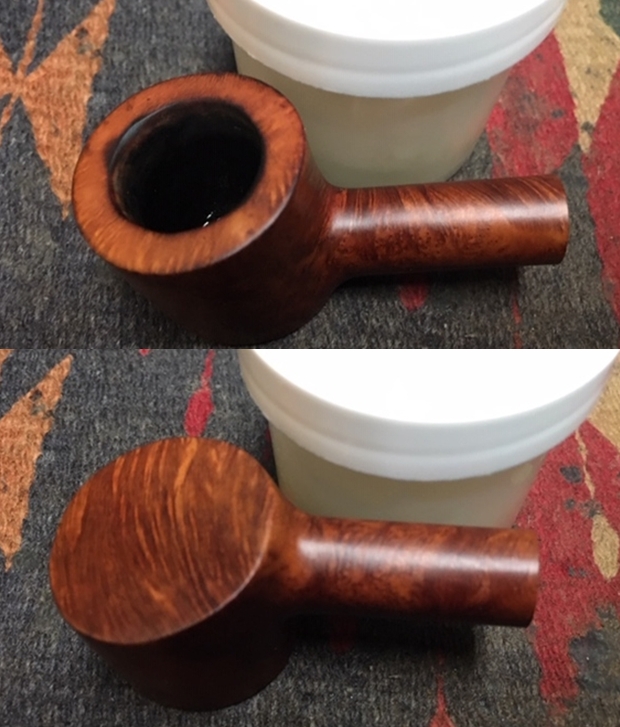
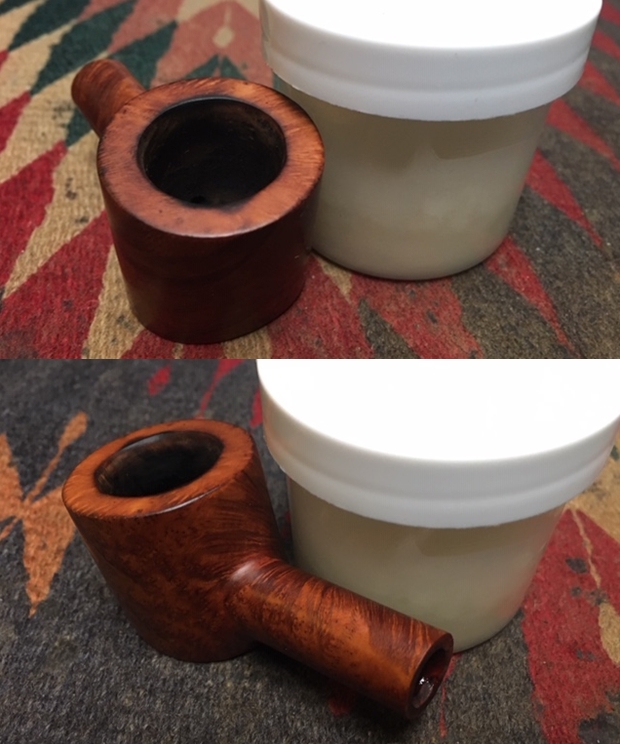
 This is a “Malaga” Imported Briar small Cherrywood with a ¼ bent vulcanite saddle stem has a great look and feel. The shape of the bowl, the cut of the rim top and briar work well to highlight the grain around the bowl sides. I polished stem and the bowl with Blue Diamond polish on the buffing wheel. I gave the bowl and the stem multiple coats of carnauba wax. I buffed the pipe with a clean buffing pad to raise the shine. I hand buffed it with a microfiber cloth to deepen the shine. The pipe polished up pretty nicely. The grain took on life with the buffing. The rich oil cured colour works well with the polished vulcanite stem. The finished pipe has a rich look that is quite catching. Have a look at it with the photos below. The shape, finish and flow of the pipe and stem are very well done. The dimensions are Length: 5 ¾ inches, Height: 1 7/8 inches, Outside diameter of the bowl: 1 ¼ inches, Chamber diameter: ¾ of an inch. Now that the second Malaga is finished it is ready to mail off to Diane with the Canadian. I can’t wait to hear what her colleague thinks when she opens her Christmas present! I am glad that she is carrying on both the trust for George Koch and her family. Thanks for walking through the restoration with me as I worked over another one of Kathy’s Dad’s Pipes.