Blog by Dal Stanton
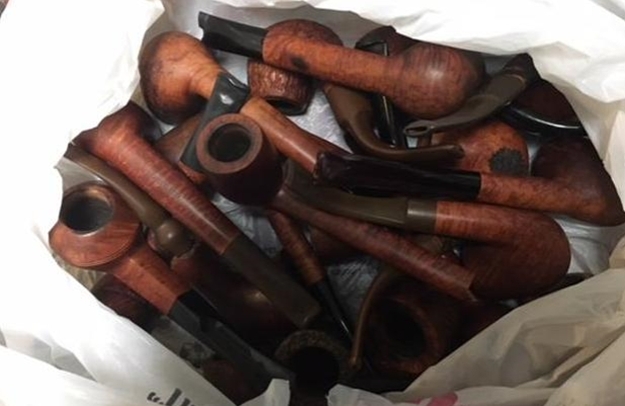
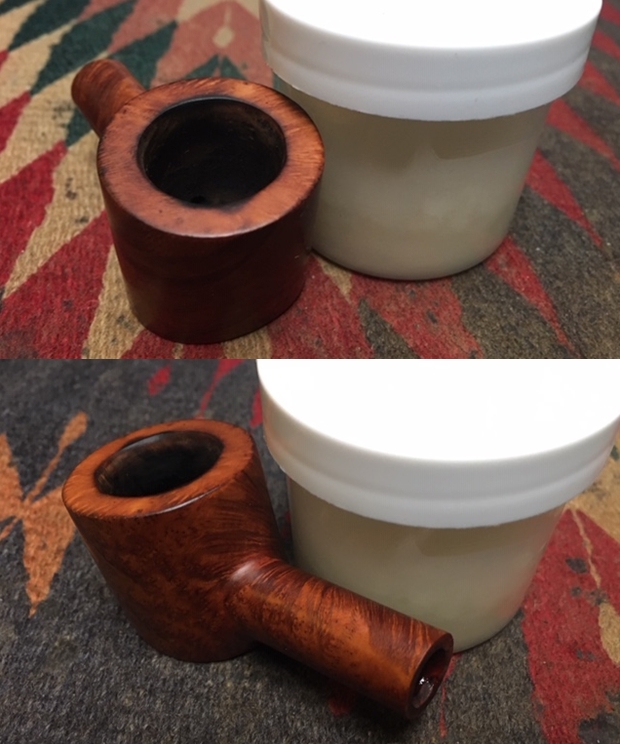
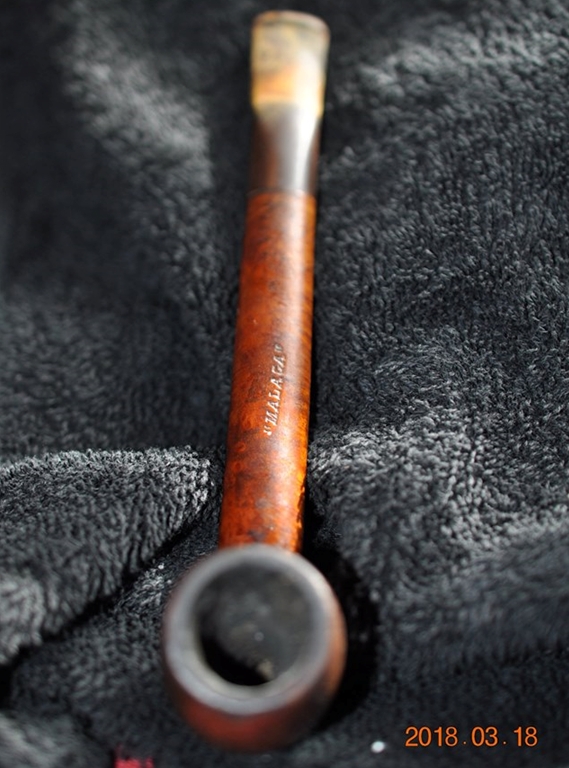
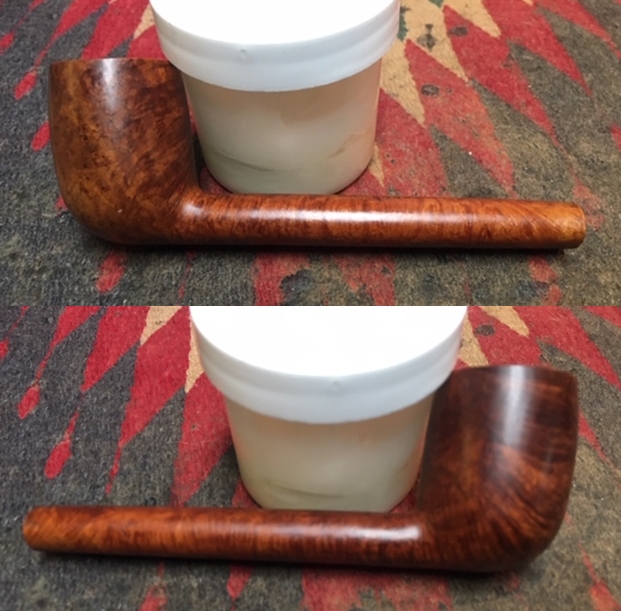
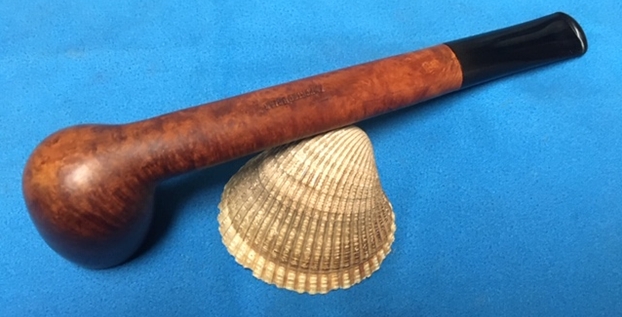
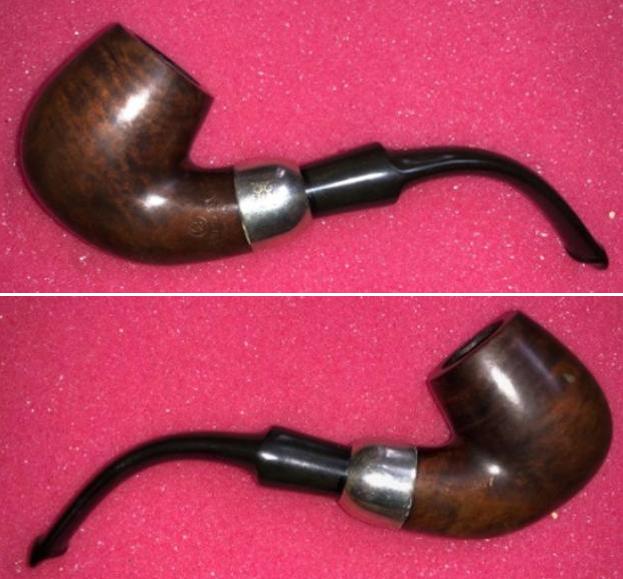
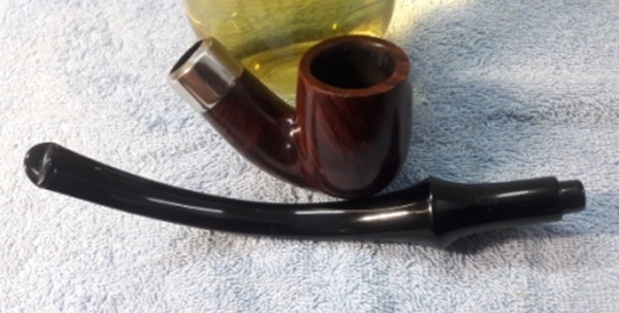
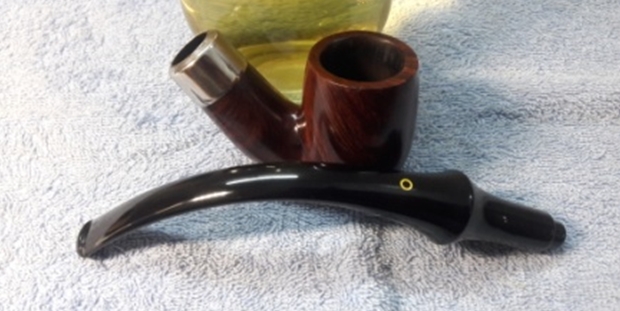
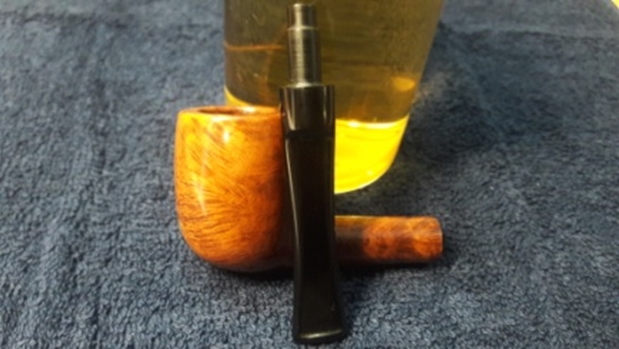
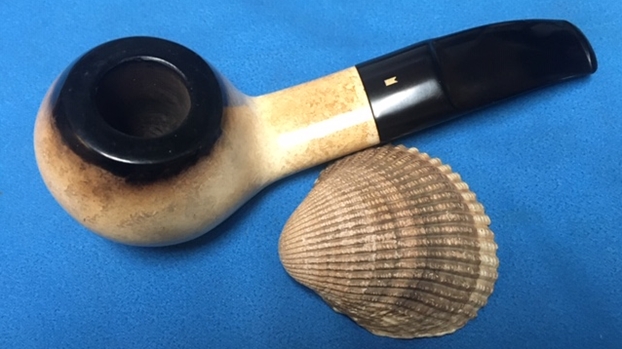
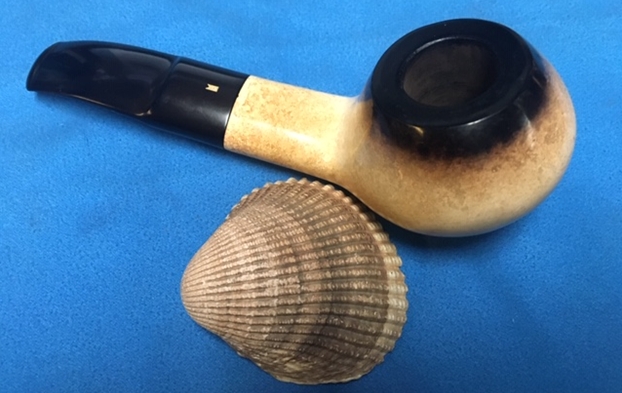
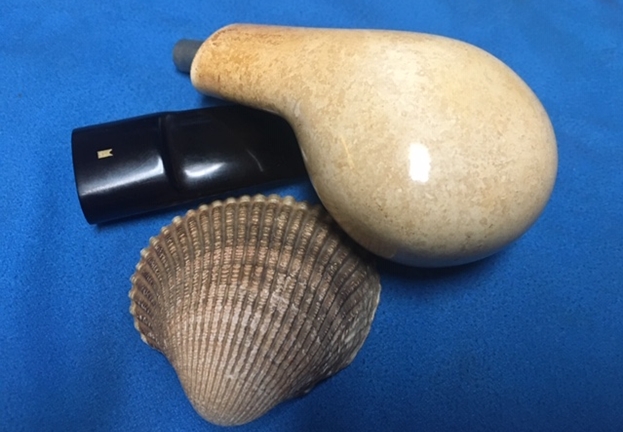
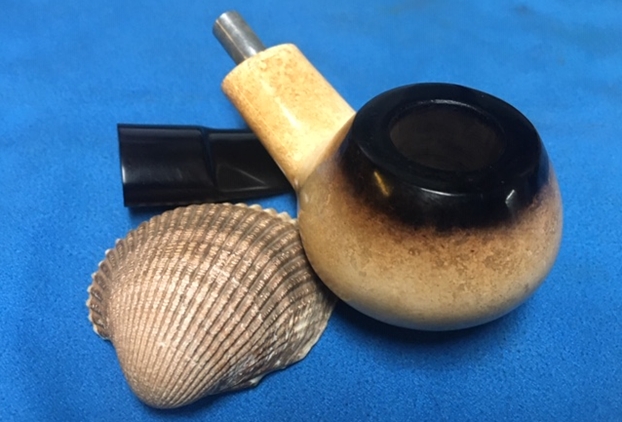
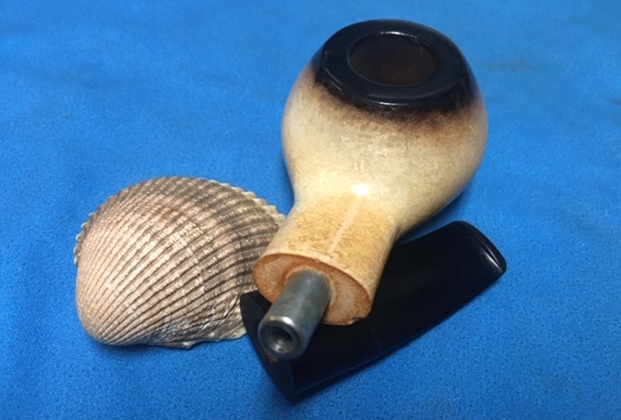
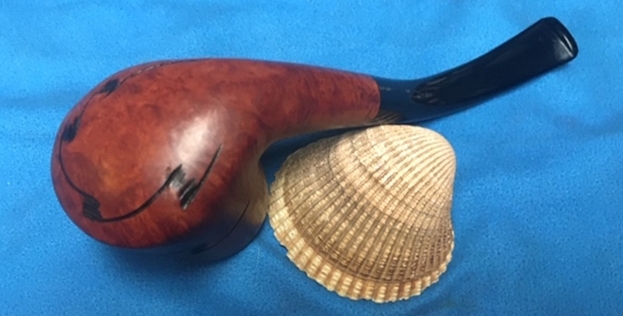
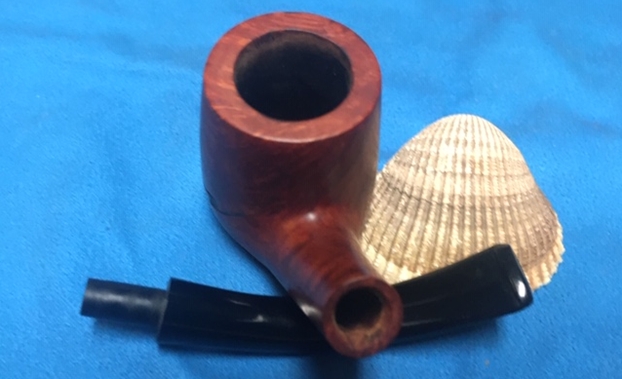
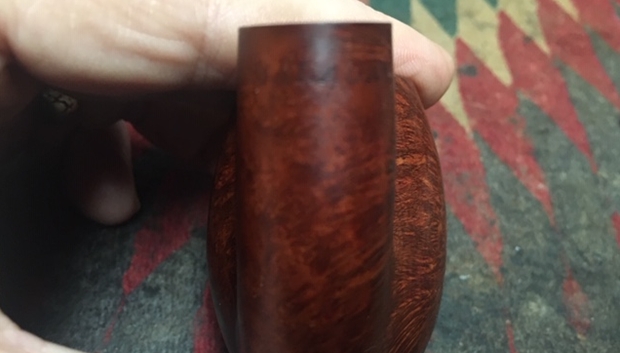
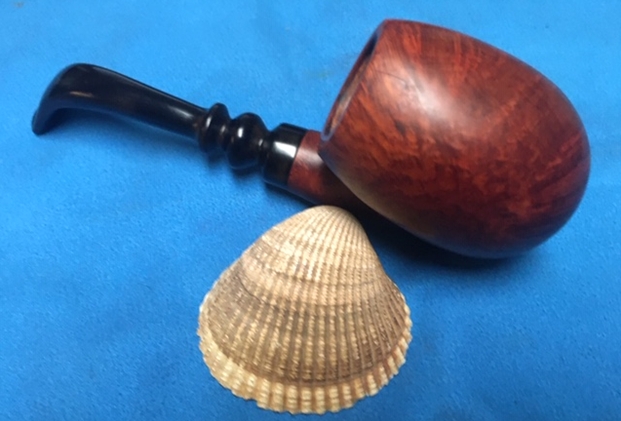
Without doubt, one of my favorite pastimes is go pipe picking! My wife and I were on the Black Sea coast in the Bulgarian city of Burgas returning to an antique shop I had visited before on the main walking street very near the Black Sea coast. I was not disappointed when I spied the copper pot full of pipes waiting for someone like me to come along. The Butz Choquin Supermate now on my worktable was in the bunch that I pulled out to get a closer look. To the left of the BC (pictured below) were a Oldo Billiard and Lincoln London Made with the Lindburgh Select Poker to the right. Not pictured below that also came home with me is a Harvey Meer Lined Rusticated Dublin Rustified LONDON PARIS NEW YORK. A very nice haul!
 Jim saw the BC Supermate in the online ‘For “Pipe Dreamers” ONLY!’ collection along with a ‘Nightmare’ Canadian that was not needing a restoration but a resurrection! In my communications with Jim, I discovered that he was from Pennsylvania and an engineer who has several hobbies that where he works with his hands and expressed appreciation for the restorations that he had seen posted from my worktable. It was for that reason he looked at ThePipeSteward website and found two pipes that called his name and he commissioned them. He also expressed appreciation for our work with the Daughters of Bulgaria – women and girls who have been trafficked and sexually exploited. All the pipes commissioned by potential stewards benefit this cause.
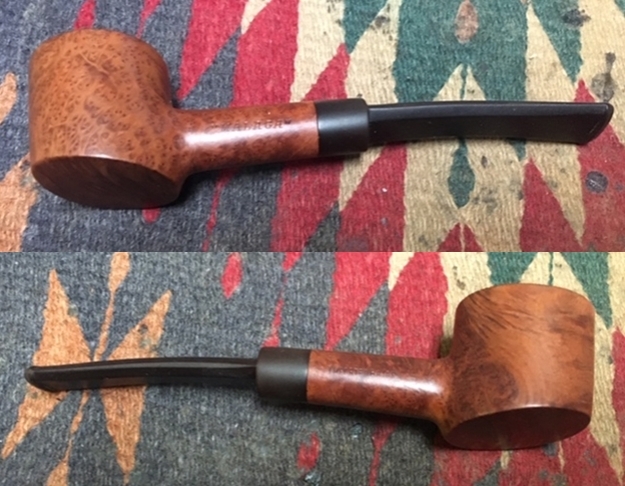
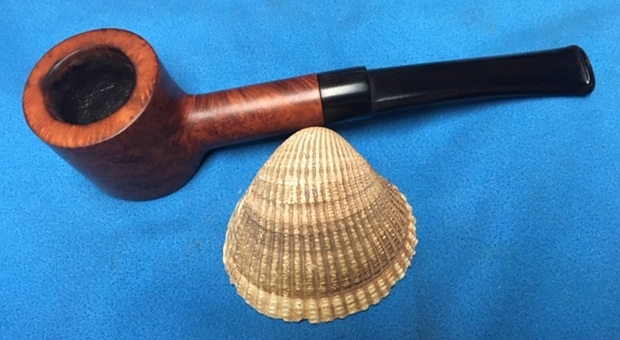
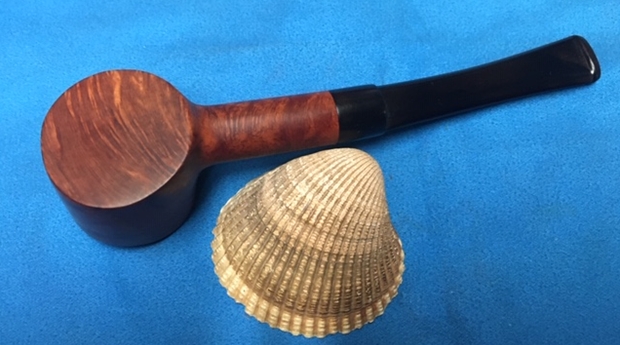
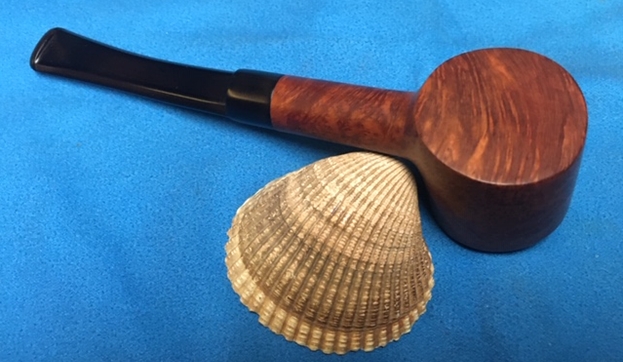
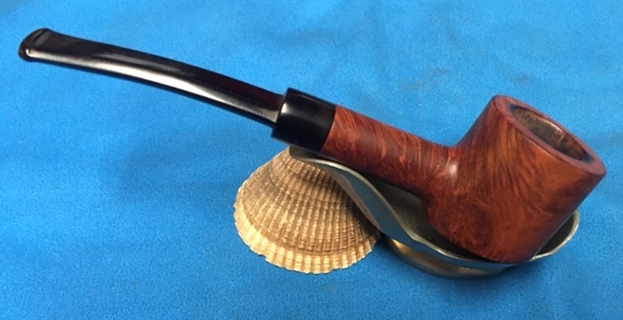
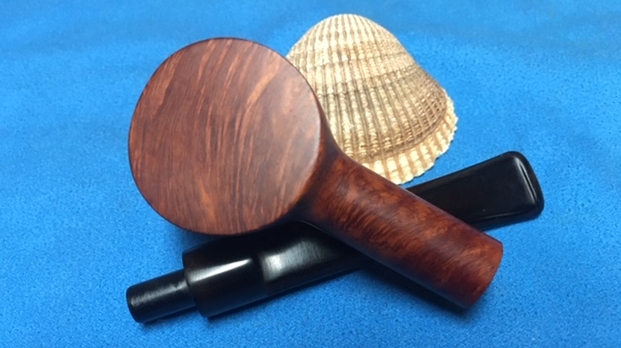
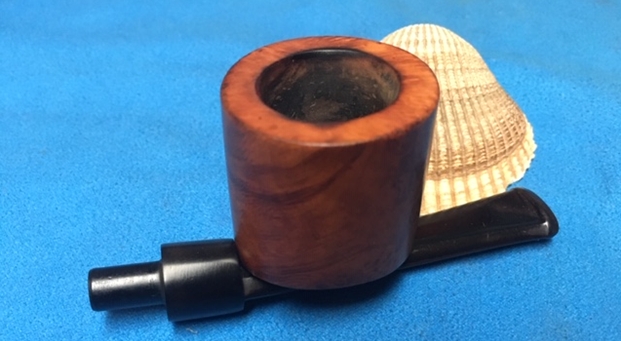
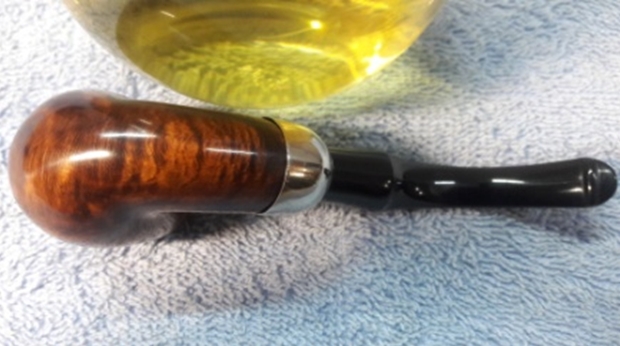
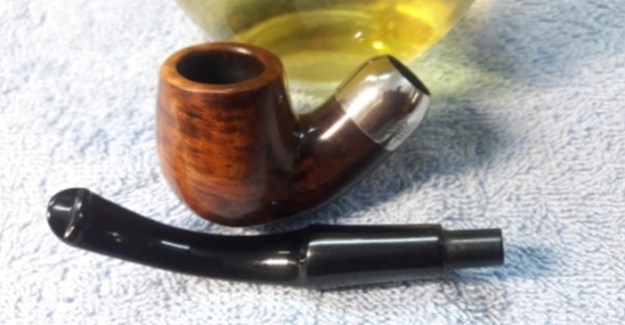
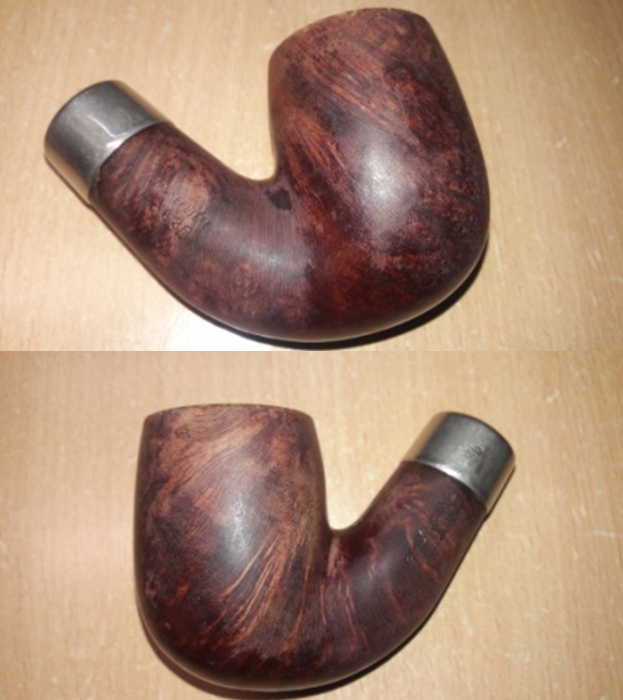
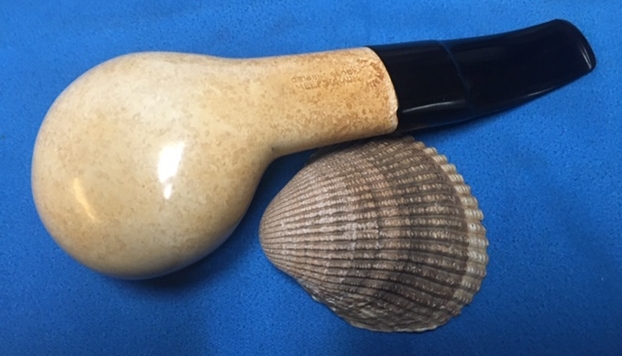
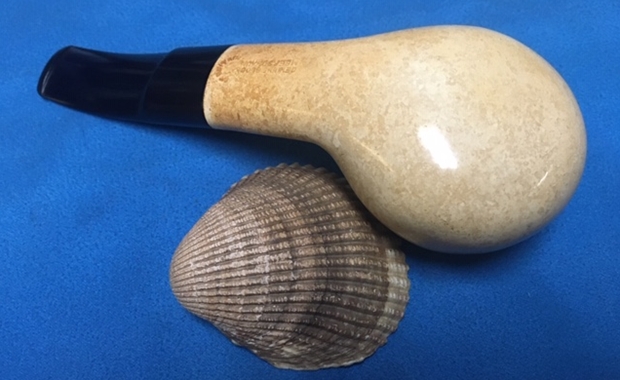
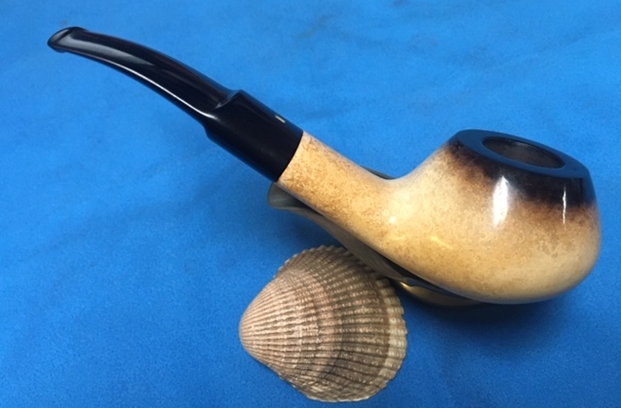
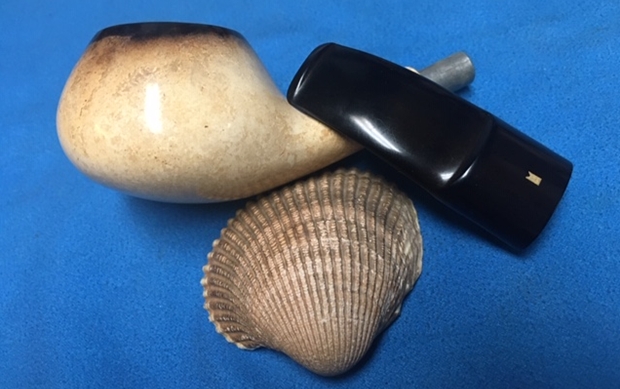
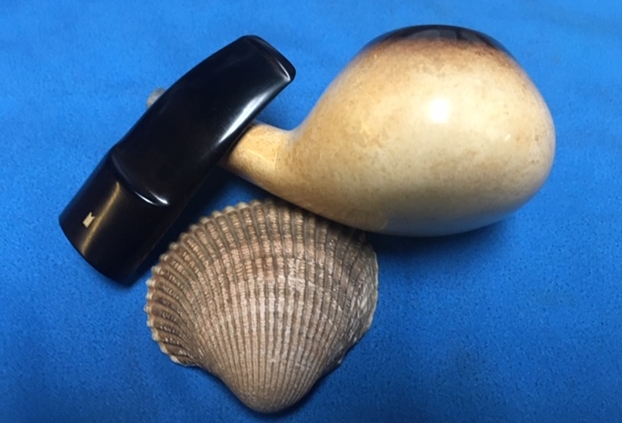
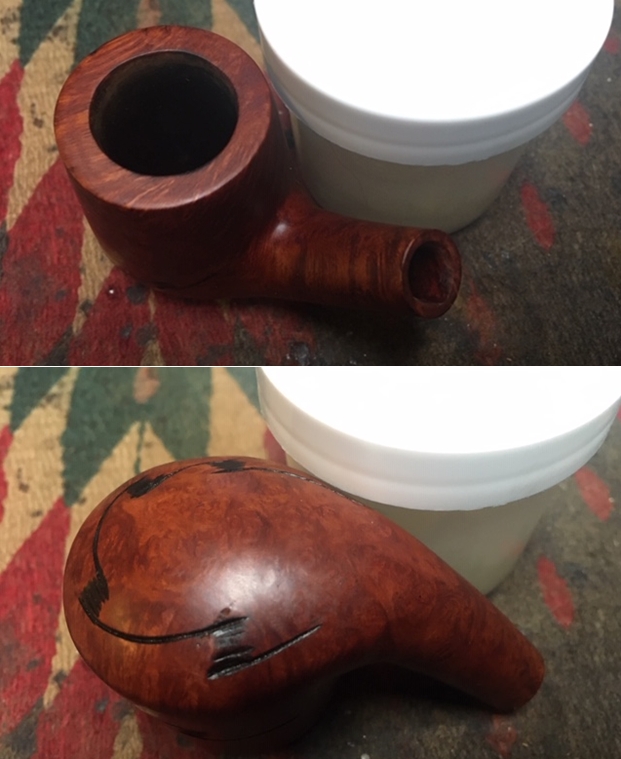
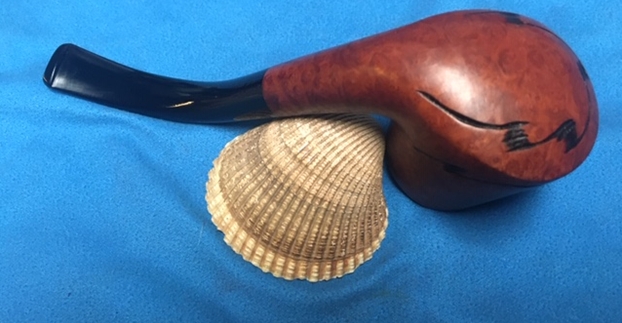
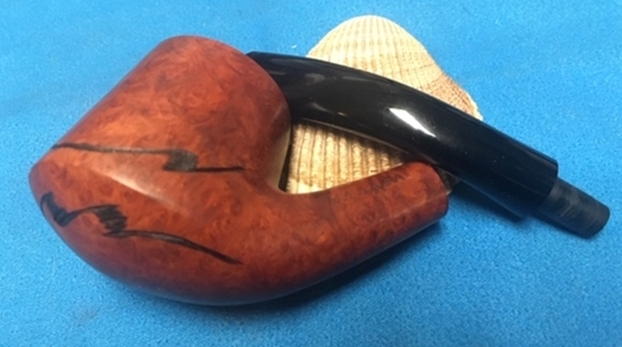
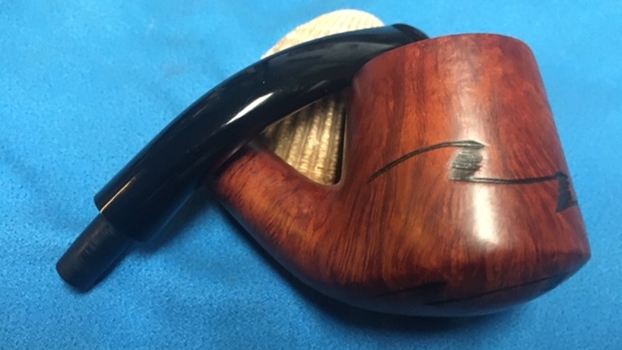
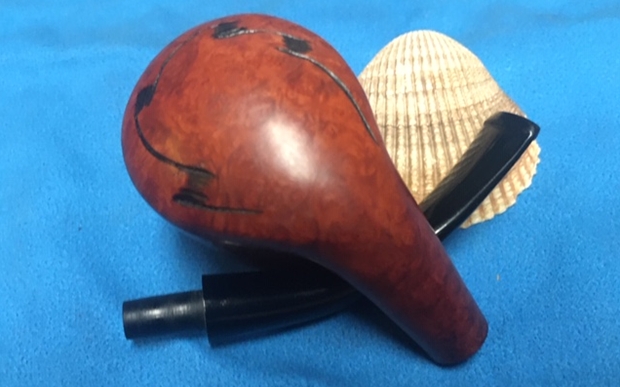
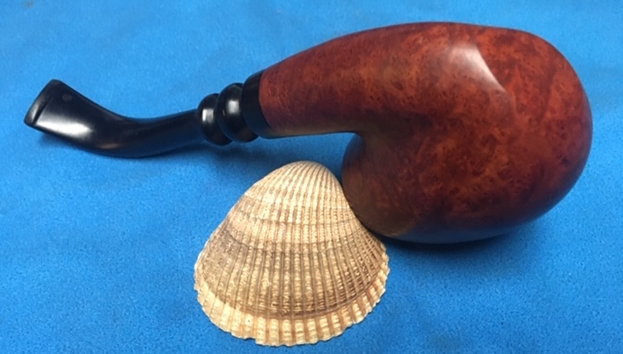
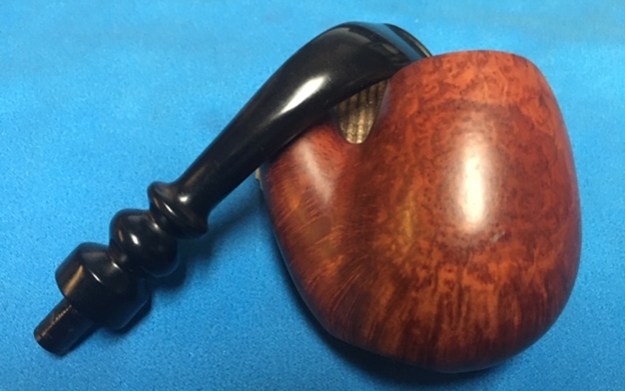
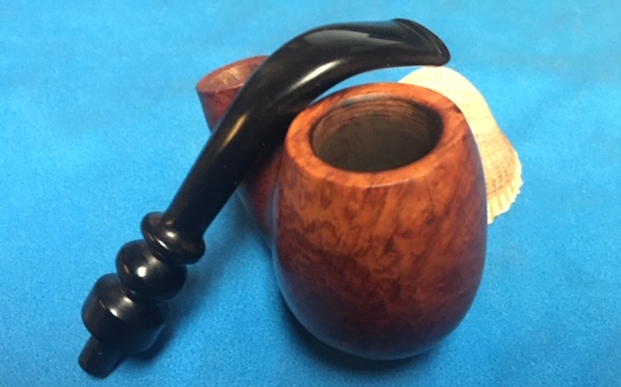
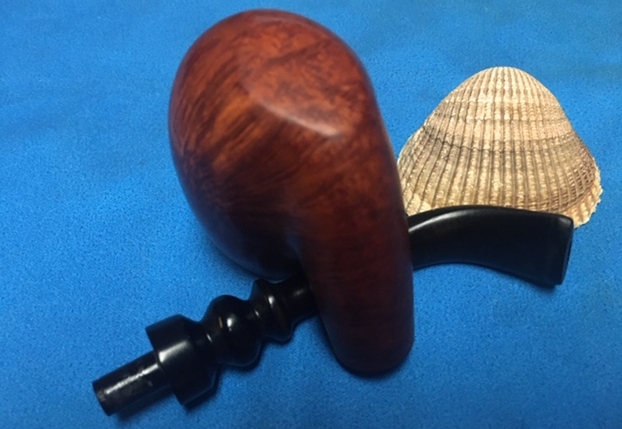
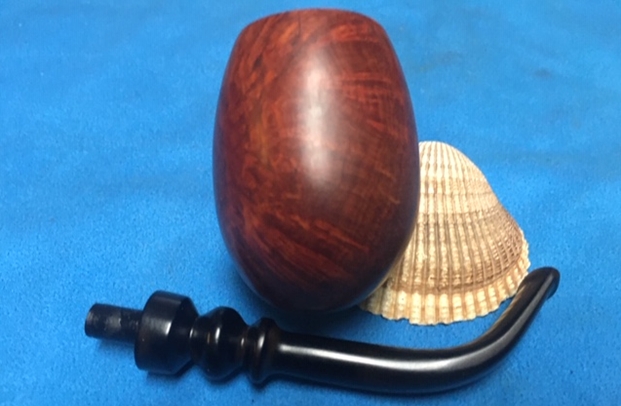
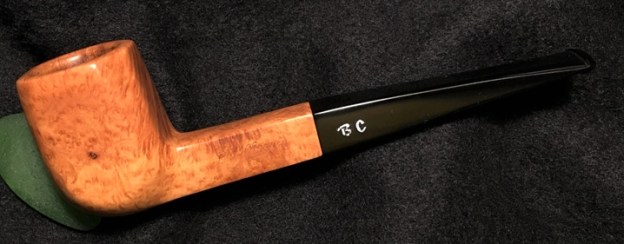
  Here are pictures of this nice Paneled Butz Choquin 1596 now on my worktable.
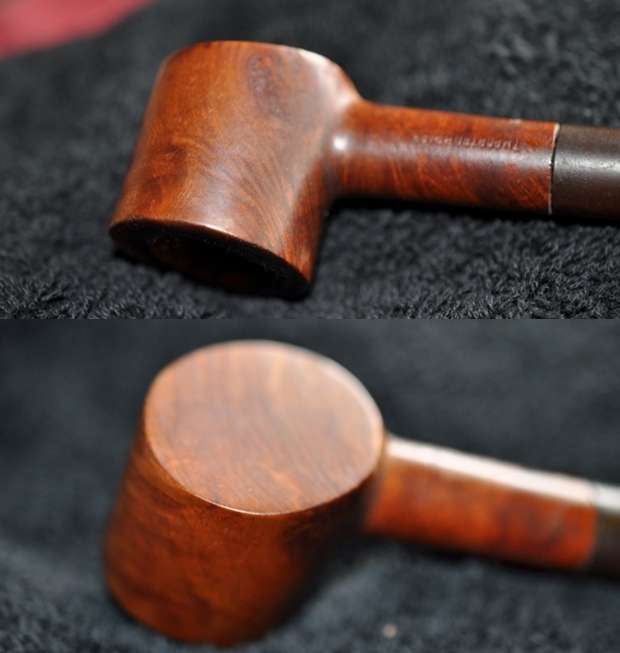
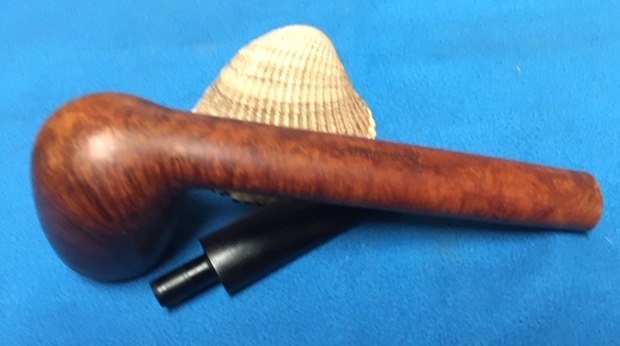
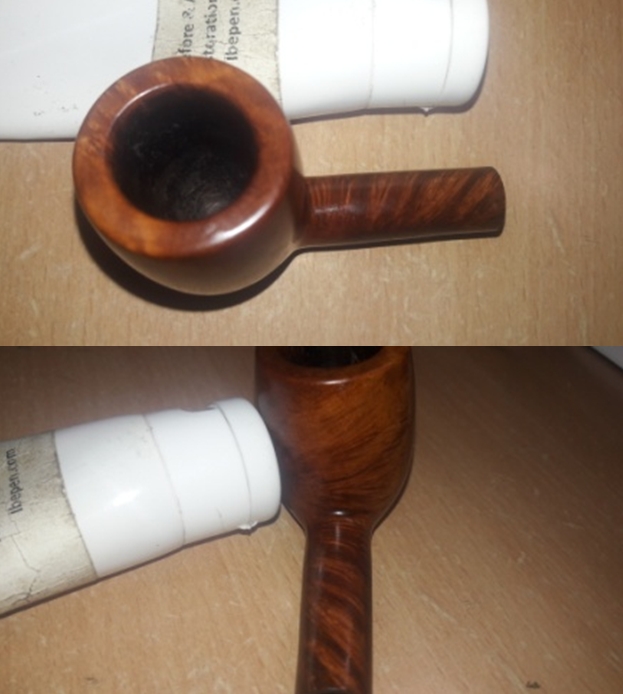
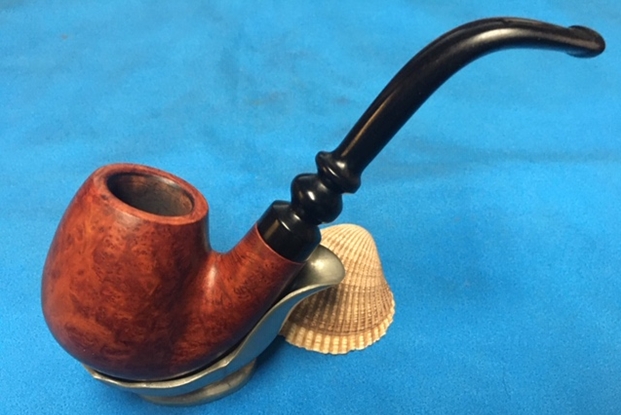

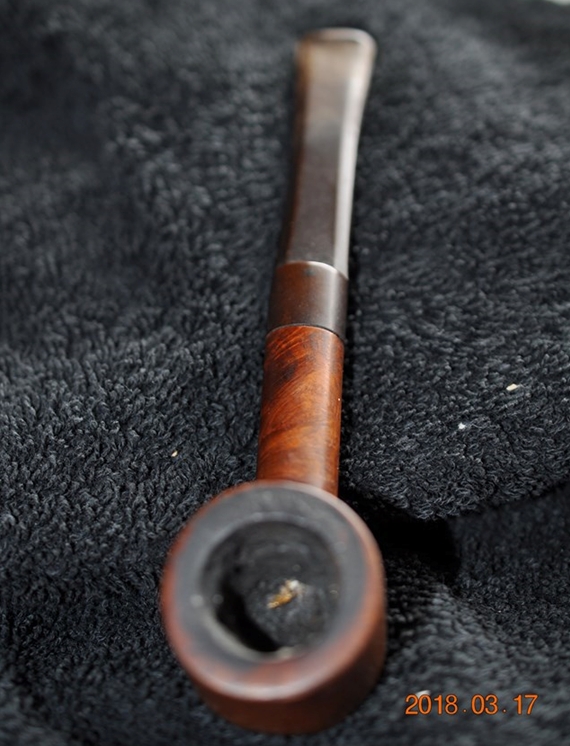
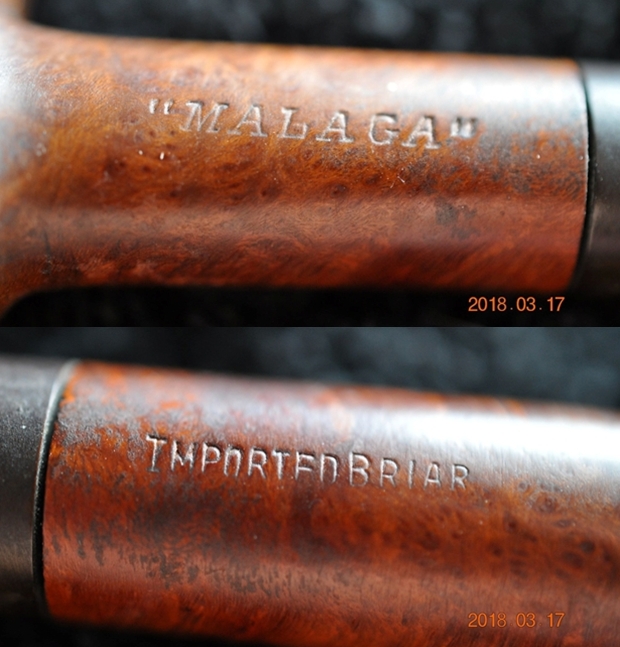
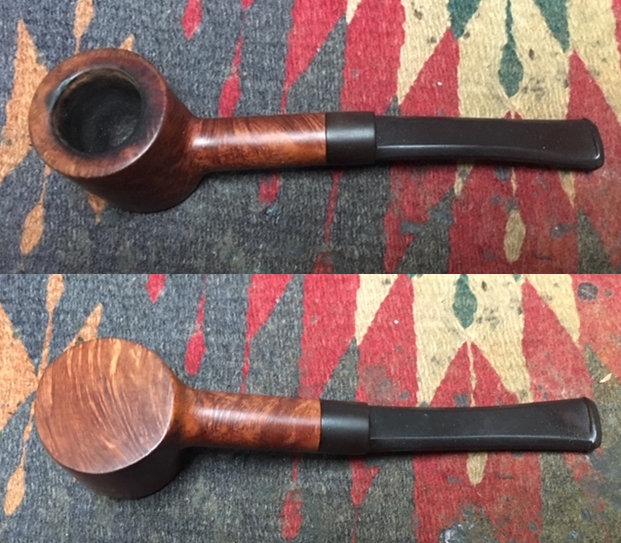
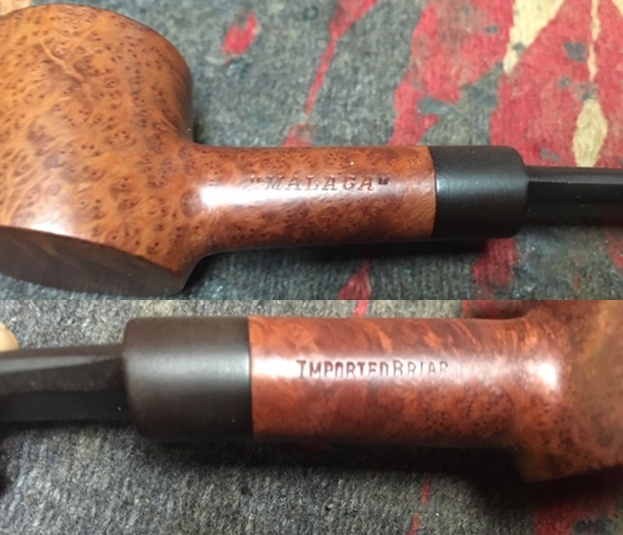
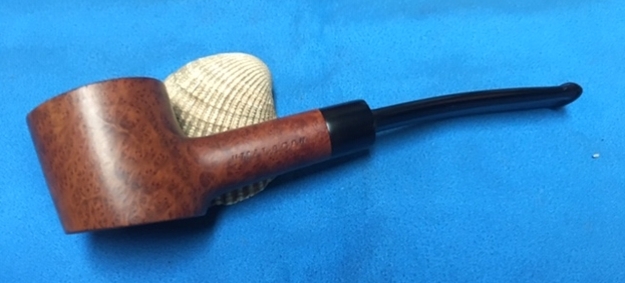
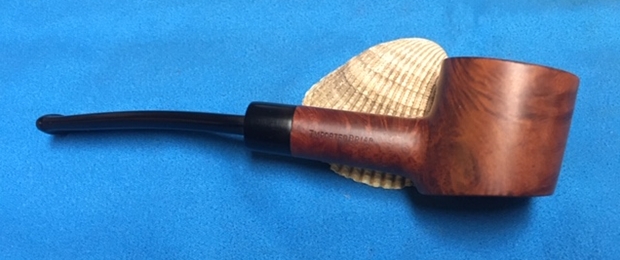
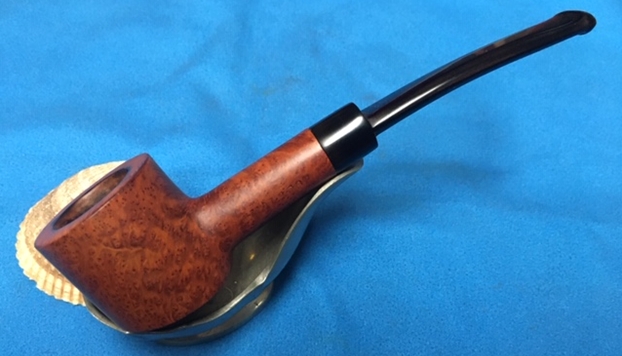
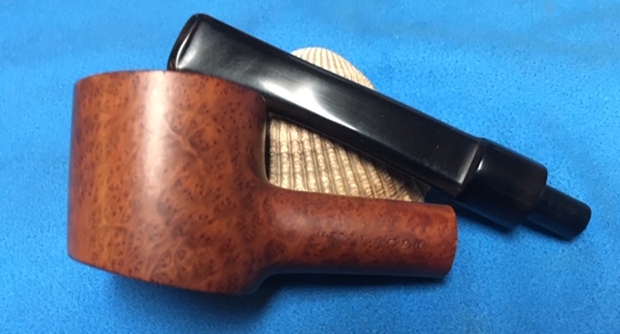
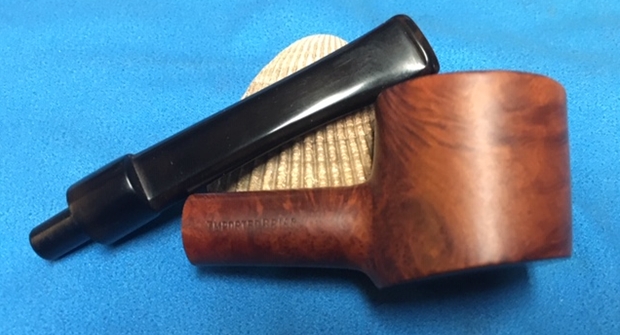
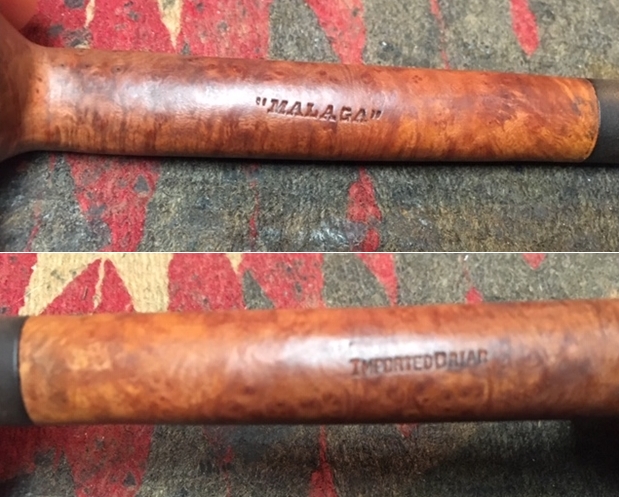
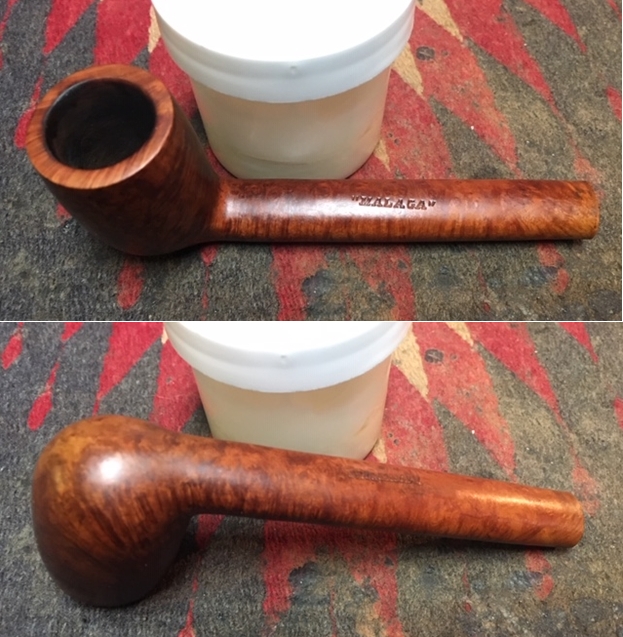
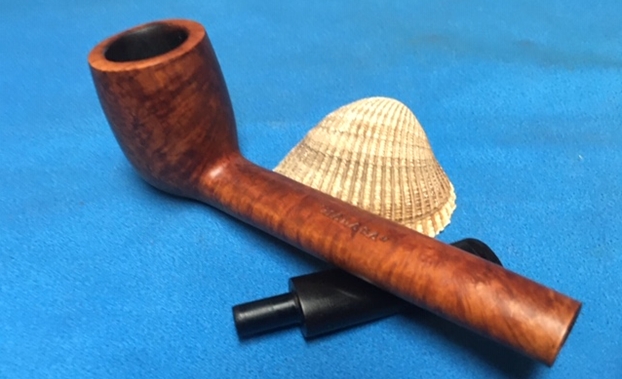
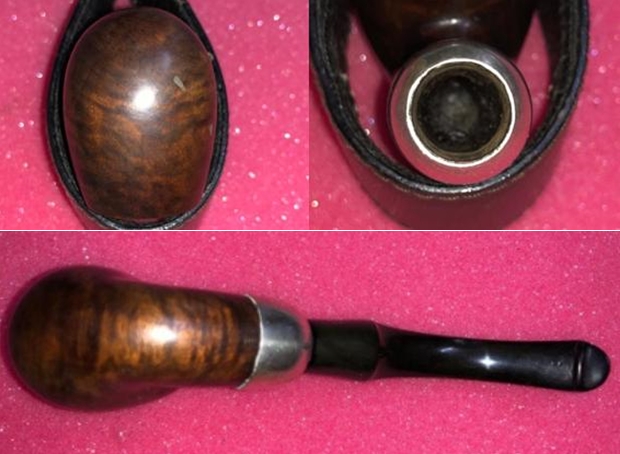
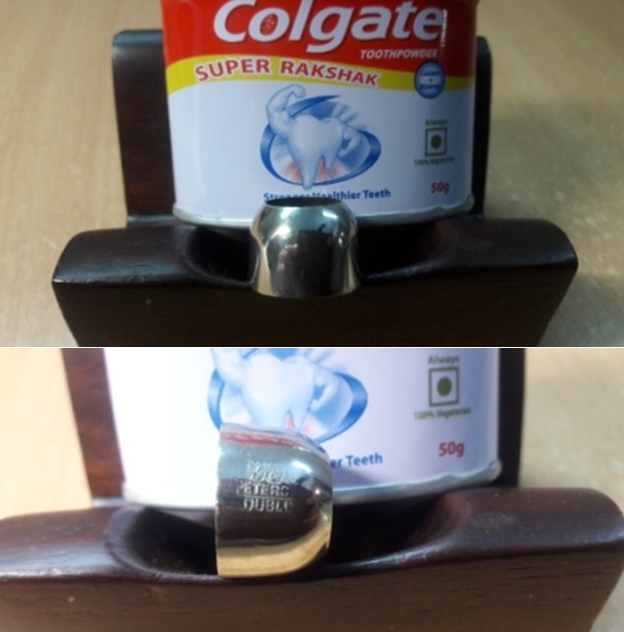
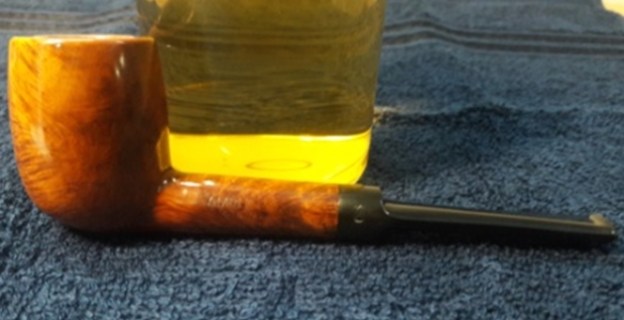
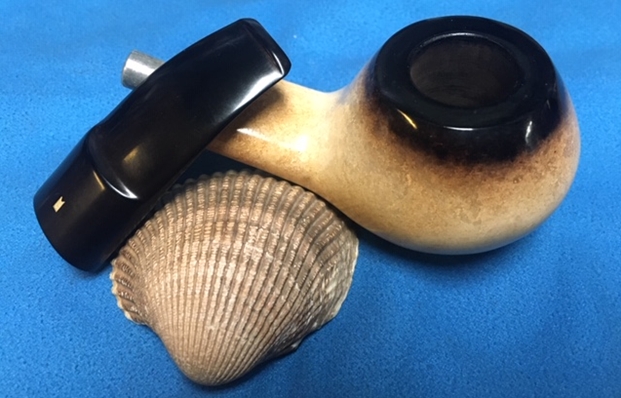
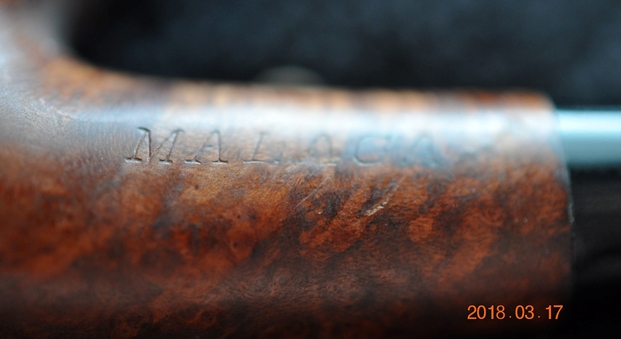
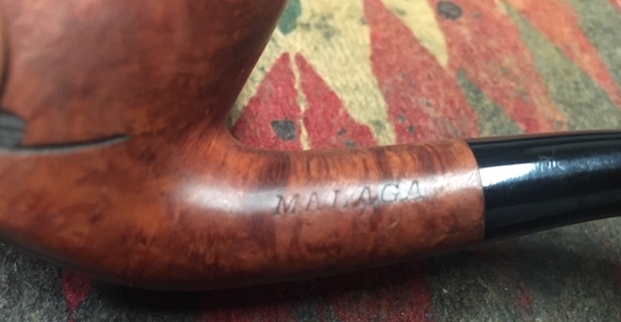
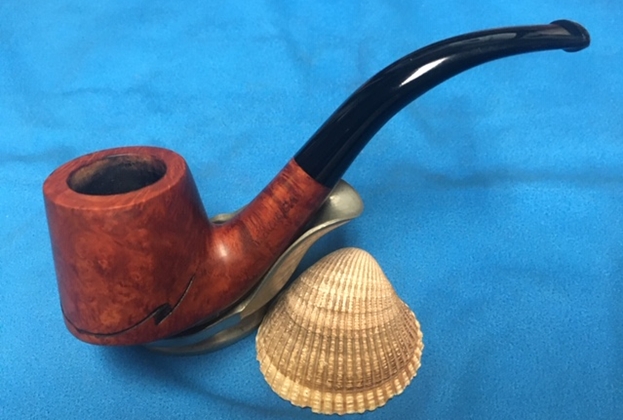
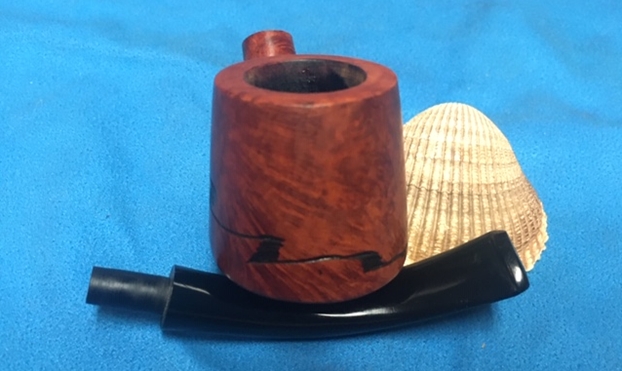
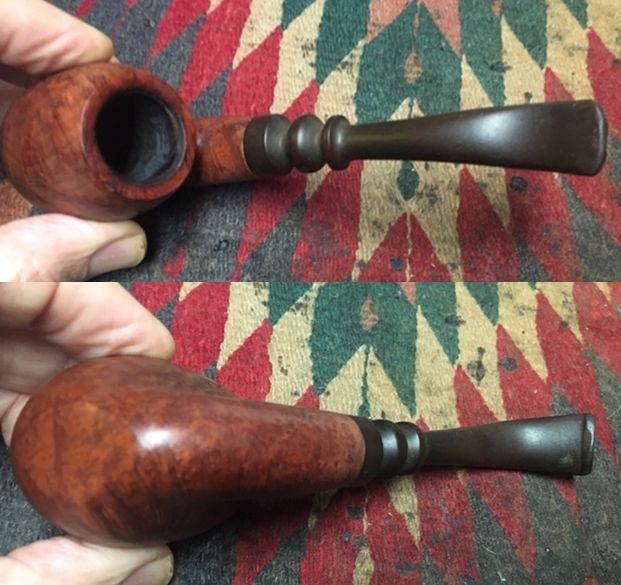
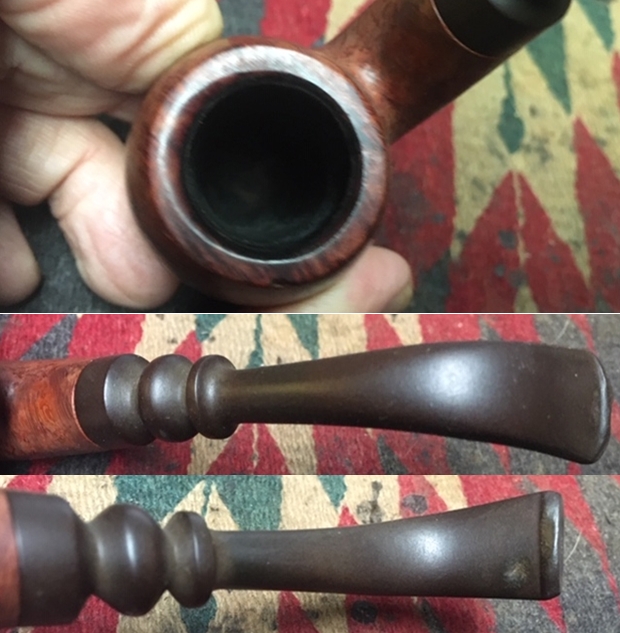
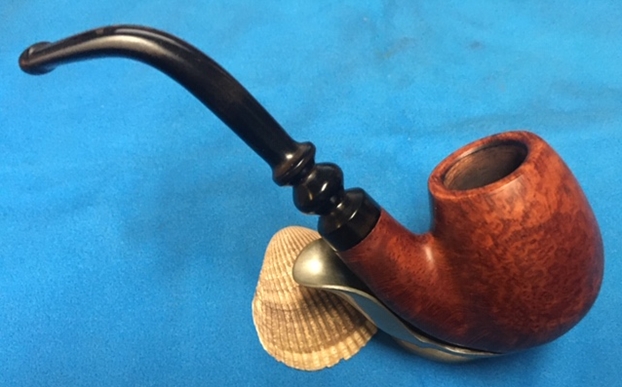
 The nomenclature on the left side of the shank is the BC fancy script ‘Butz-Choquin’ [over] ‘SUPERMATE’. To the right, the stem is stamped with the traditional ‘BC’. On the right shank side is the COM and shape number: ‘STCLAUDE – FRANCE’ [over] 1596.
  I have heard on FB group postings that the long-time French pipe manufacturer is closing its doors. I went to the main website of Butz Choquin and it was active, and I saw no notifications. I’ll continue to investigate. One of my first research projects with a French pipe, Jeantet, connected me with the history of St. Claude, France, the place that most say represent the birthplace of modern pipe manufacturing. The BC name is among the earliest residents of St. Claude. Pipedia provides this information about the origins of Butz Choquin:
Jean-Baptiste Choquin of Metz started out as a tobacconist. This enterprise was prosperous; he had several employees. Among those, there was a certain Gustave Butz who was its first workman and who became his son-in-law by marrying Choquin’s daughter Marie in 1858. In 1858 Jean-Baptiste Choquin created, in collaboration with Gustave Butz, the Choquin pipe. This bent pipe with a flat-bottomed bowl was finished with an albatross-bone mouthpiece, fixed with silver rings. In 1858, still in Metz, Gustave Butz built an establishment for the manufacture of the Choquin pipe which took the name of [Butz-Chochin]. In 1951, the Berrod-Regad company bought the trademark, continuing manufacture until 2002. Departing from Metz, the workshop was relocated to Saint-Claude, then also called ‘the world capital of the briar pipe,’ under the Berrod-Regad group. The Berrod-Regad group would go on to completely rebuild the network of representatives until finally entering the export market in 1960 and has since won several prizes, as well as the Gold Cup of French good taste.
In a few years, the brand’s collection increased from ten to seventy series. 135 years after it was founded, the pipe is still well-known not only in France but throughout the world. In 2002, the Berrod family, wishing to preserve manufacture of pipes in Saint-Claude, handed over the company to Fabien Guichon, a native of the area, who will continue to develop the brand during the 21st century.
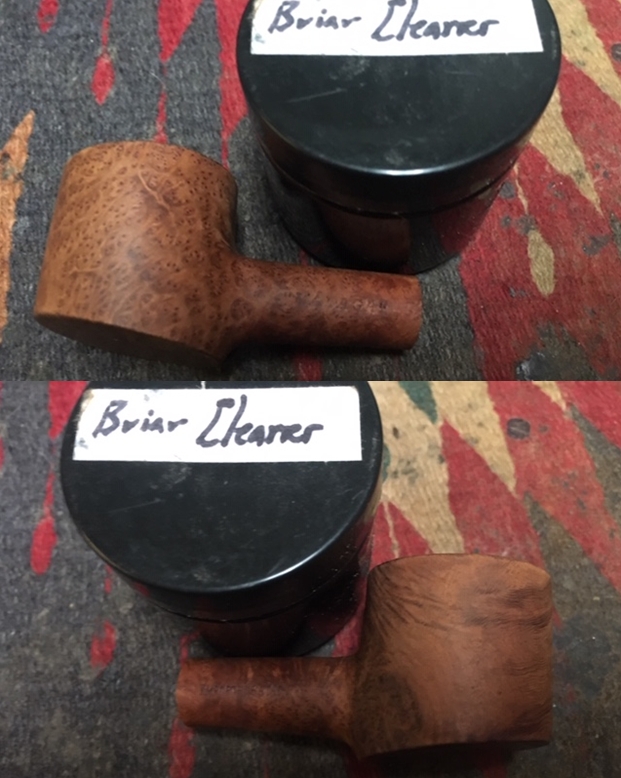
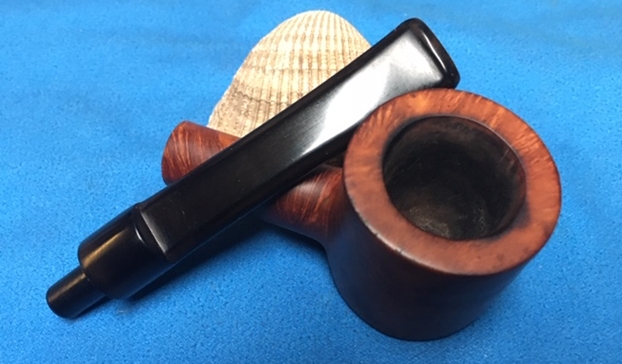
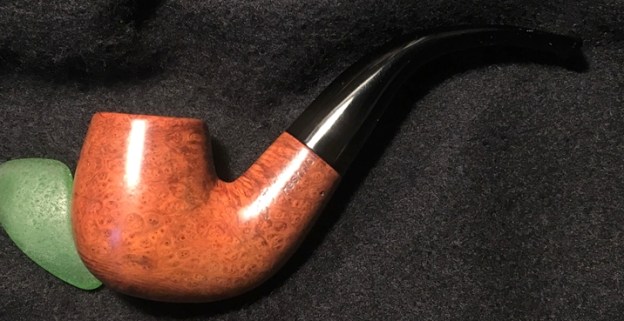
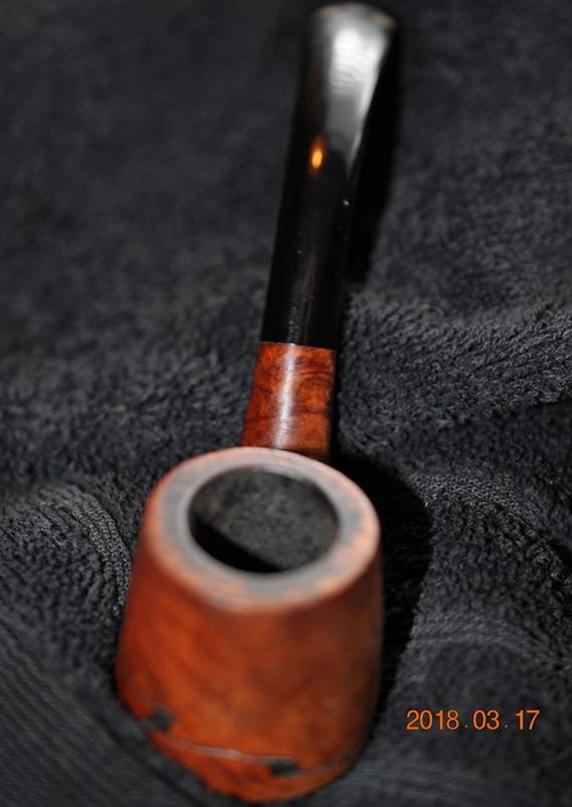
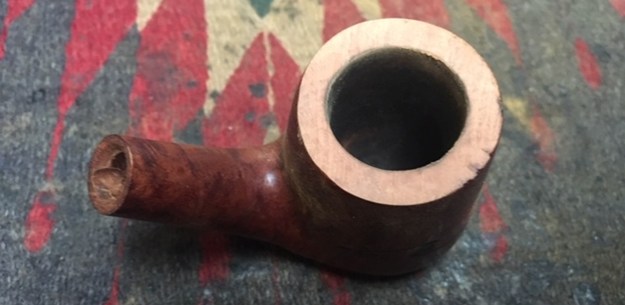
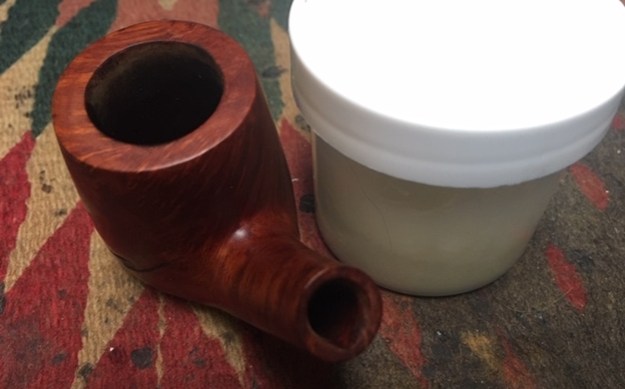
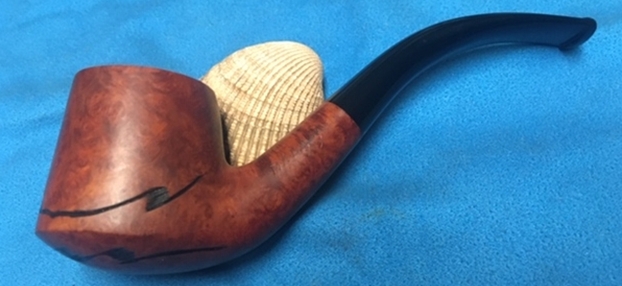
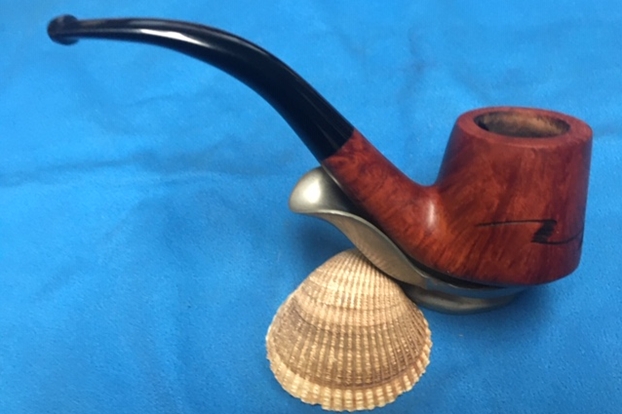
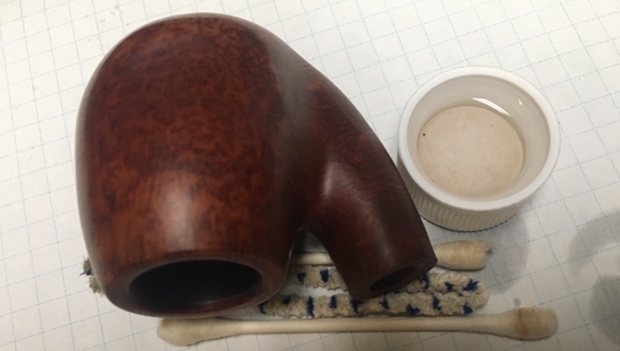
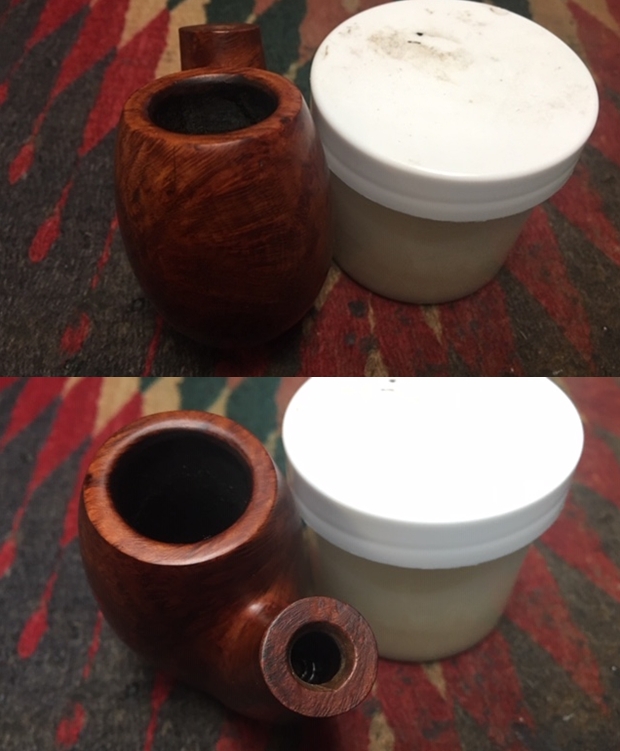
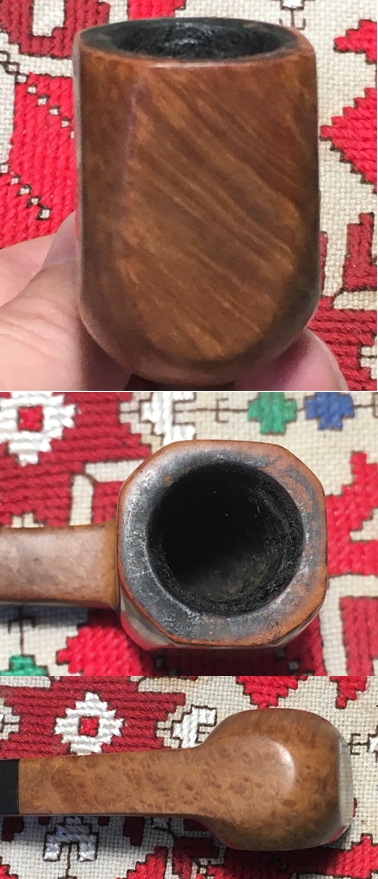
I found this great picture of the Butz Choquin Supermate Panel in an ad on TobaccoPipe.com. The box is classic, and I wish I had the pipe sock to go along! I found the text along with the picture to be interesting as well in its description of the finish and the collectibility of this 1596 shape. The condition of the pipe on my table is a far cry from the other pipe that Jim commissioned, the Comoy’s The Lumberman! While the chamber has moderately thick cake and the rim shows lava flow, the pipe generally is in very good shape. Cleaning and working on the stem’s tooth chatter and oxidation do not appear to offer any surprises. To begin the sprucing of this BC Supermate, the stem is removed and cleaned with a pipe cleaner wetted with isopropyl 95% and added to a soak of Before & After Deoxidizer with other stems in the queue.
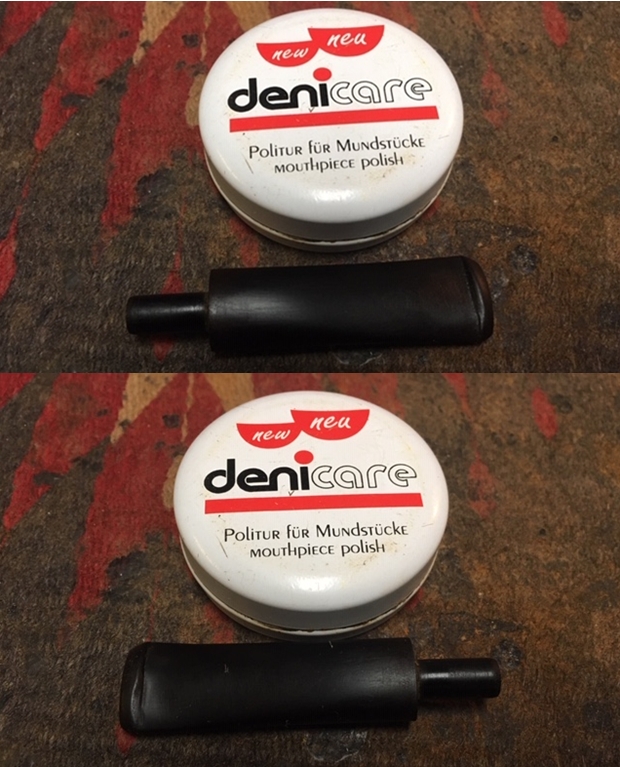
 After several hours of being in the soak, I take out the BC stem and clean the airway with a pipe cleaner dipped in isopropyl 95% to remove the Deoxidizer. I also wipe off the raised oxidation using cotton pads also wetted with alcohol.
 To revitalize the stem, paraffin oil is applied with a cotton pad.
 Next, I tackle the stummel cleaning. The cake in the chamber is moderately thick.
 To remove the cake, I use 2 of the 4 blade heads that come in the Pipnet Reaming Kit. Following this, using the Savinelli Fitsall Tool to scrape the chamber walls, helps to fine tune the removal of carbon cake. Finally, sanding the chamber walls with 240 grade paper wrapped around a Sharpie Pen provides further cleaning of the chamber and I then wipe the carbon dust remaining with a cotton pad wetted with alcohol.
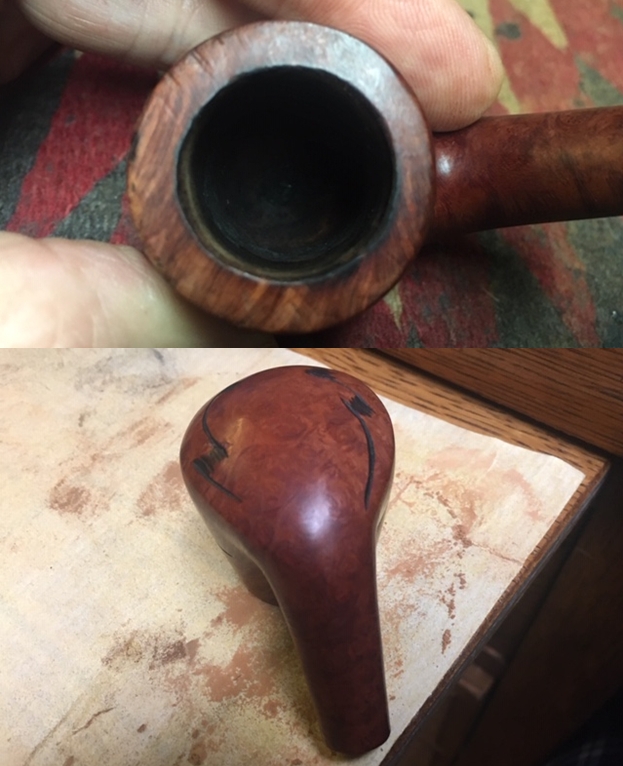
 Inspection of the chamber afterwards reveals healthy briar. I move on.
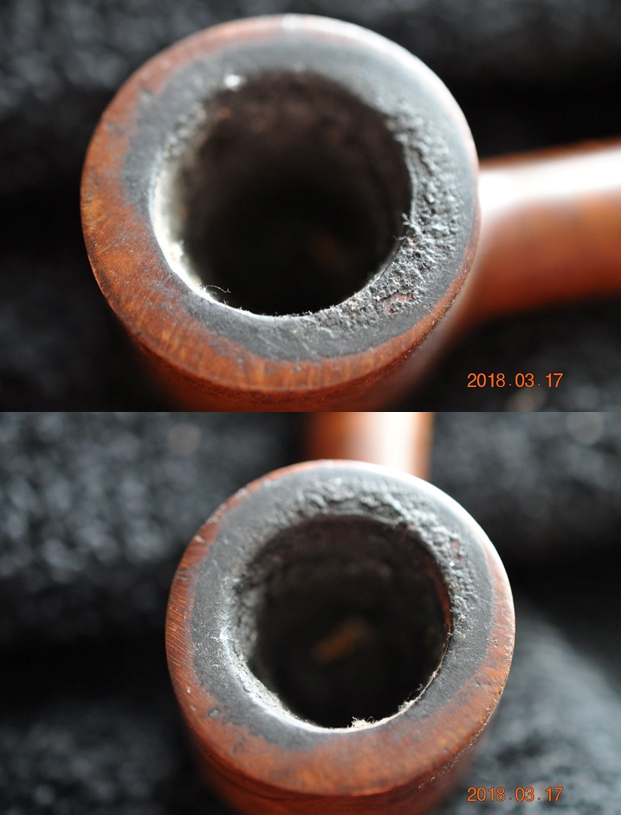
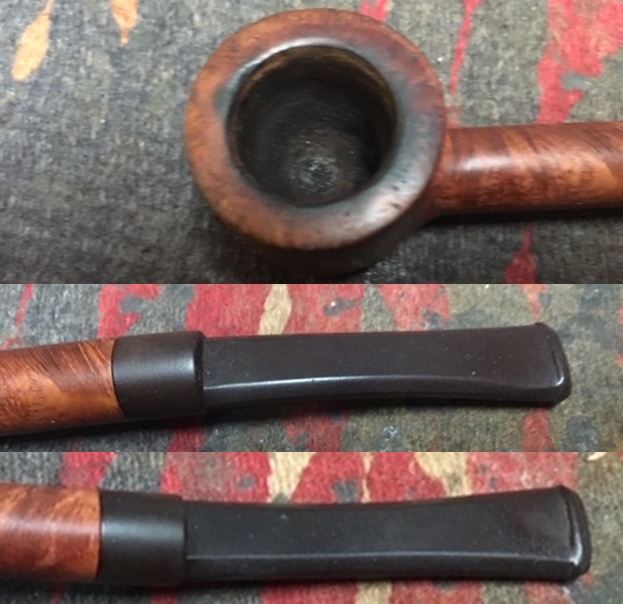
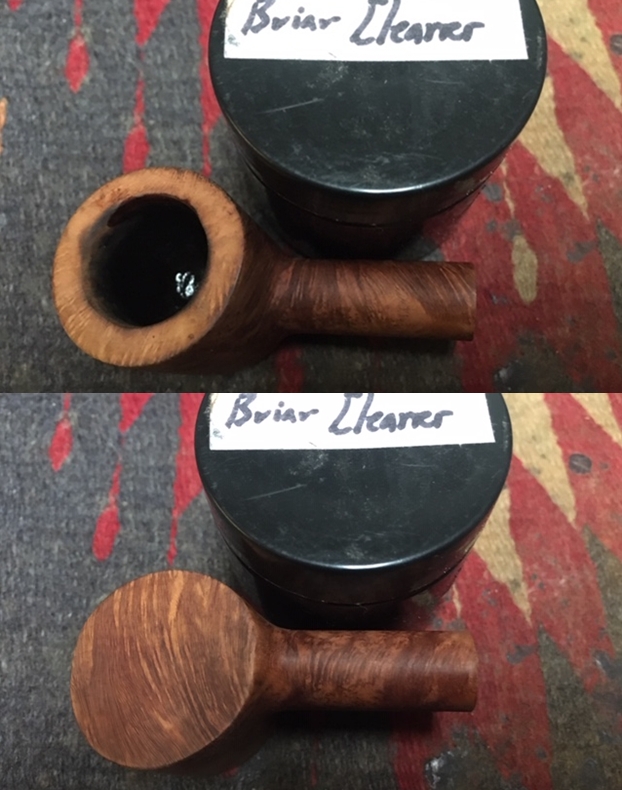
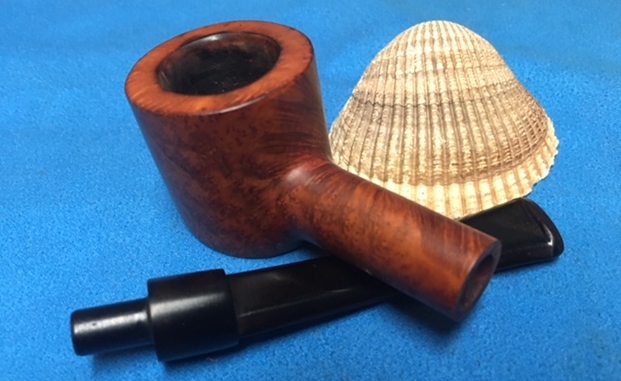
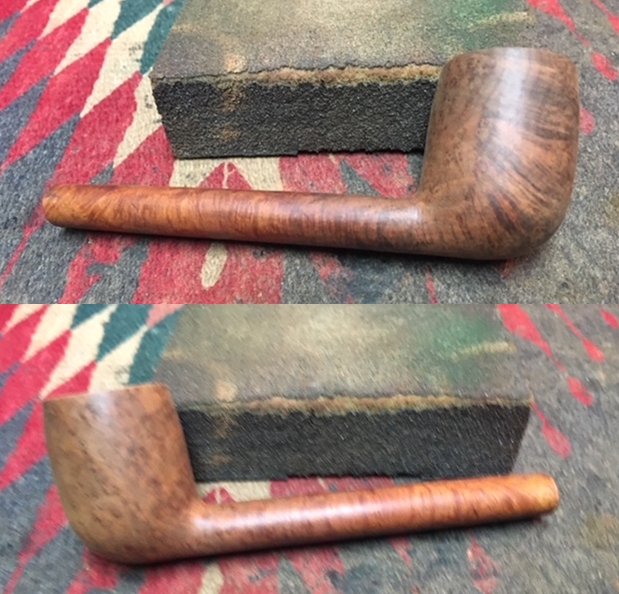
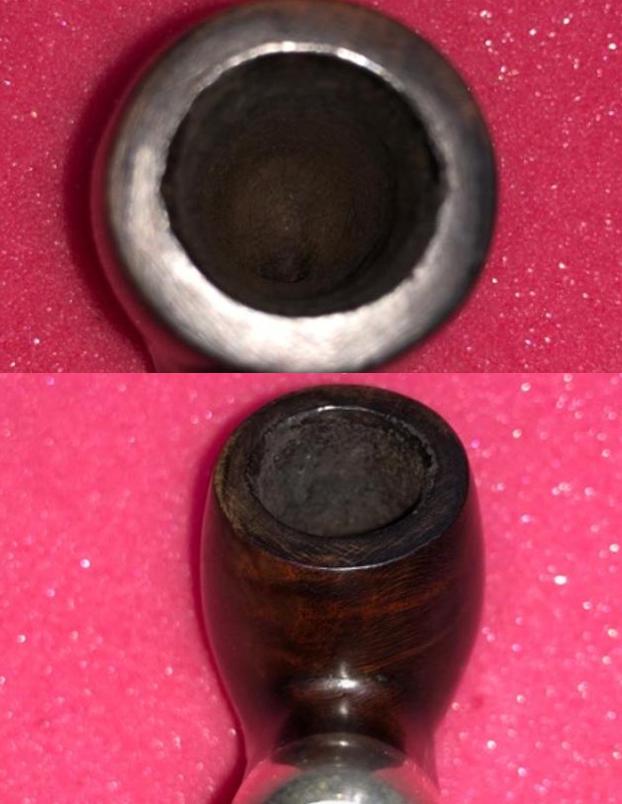
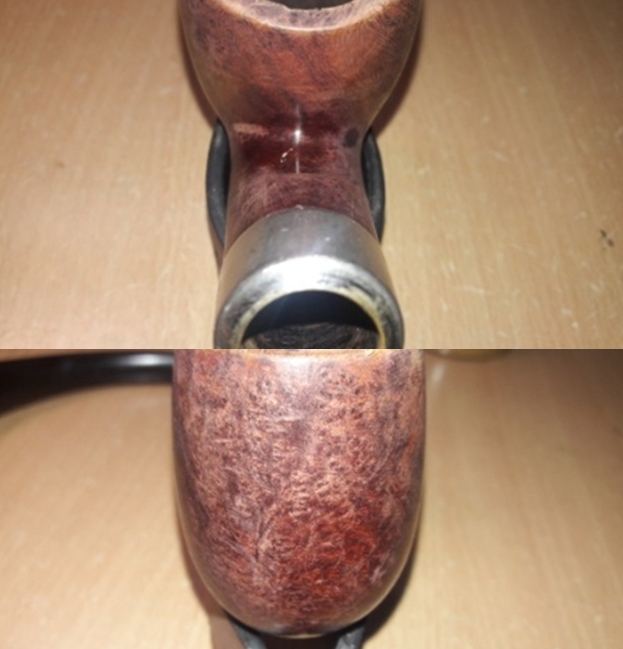
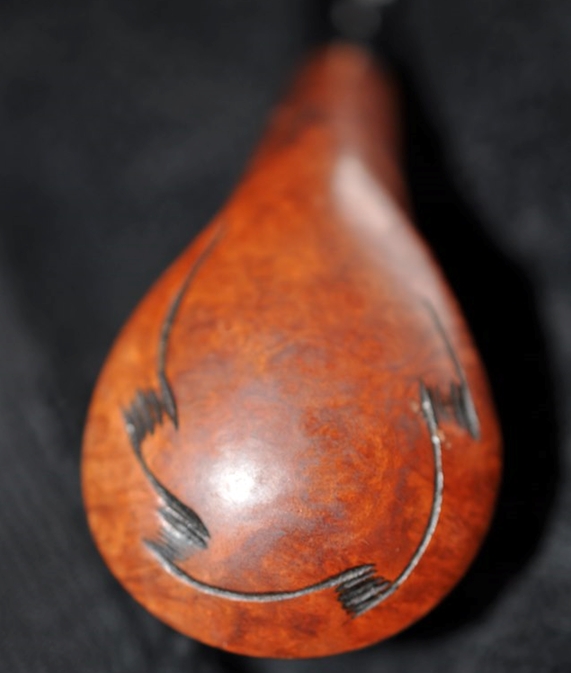
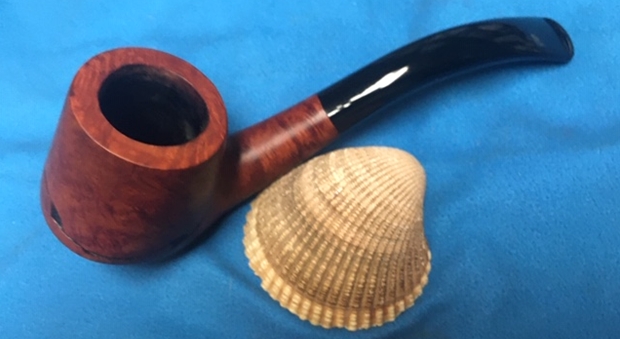
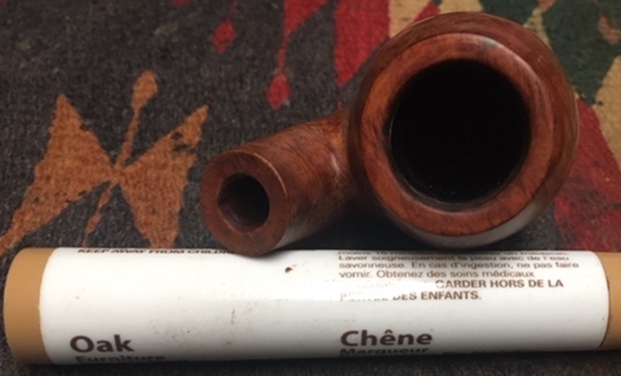
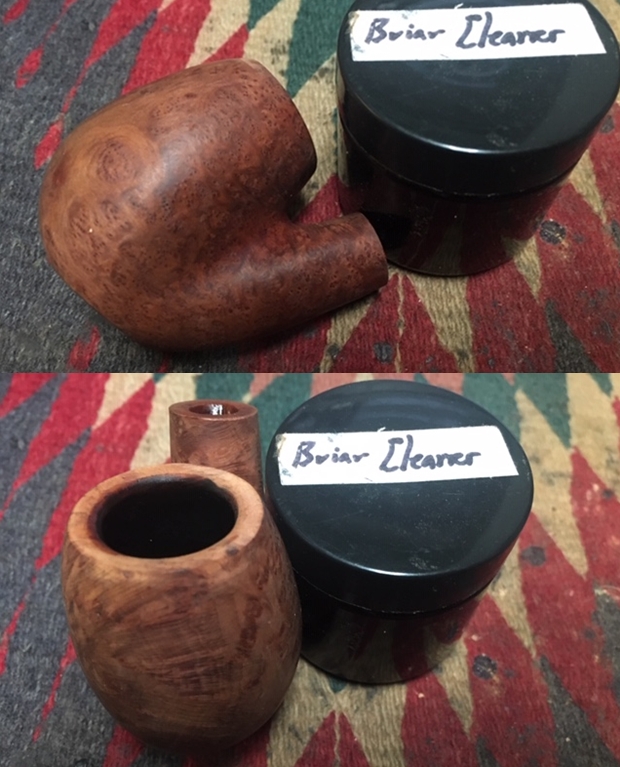
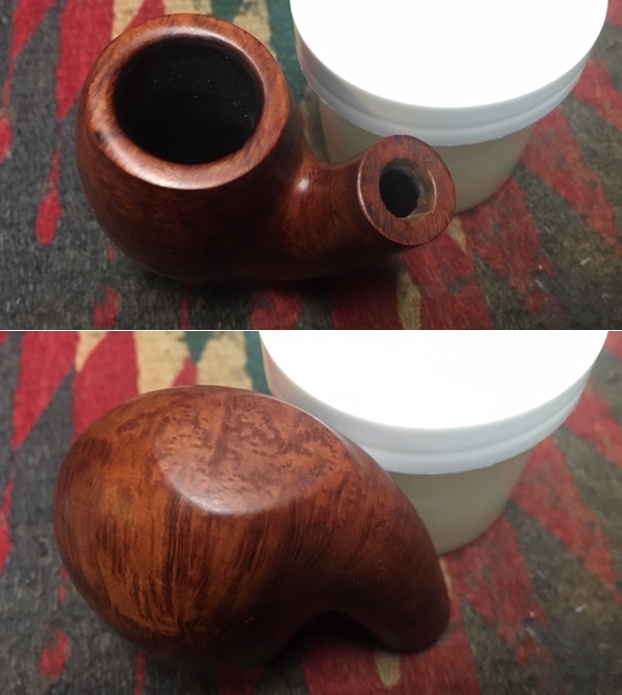
 The picture above shows the lava buildup on the rim. I turn now to cleaning the external briar surface using undiluted Murphy’s Oil Soap and a cotton pad. I also utilize my Winchester pocketknife carefully to scrape the rim. I take the stummel to the sink and continue the cleaning the internals with bristled shank brushes and anti-oil dish liquid soap. After a thorough rinsing, back to the worktable to continue. The rim cleaned off well and the stummel surface looks good.
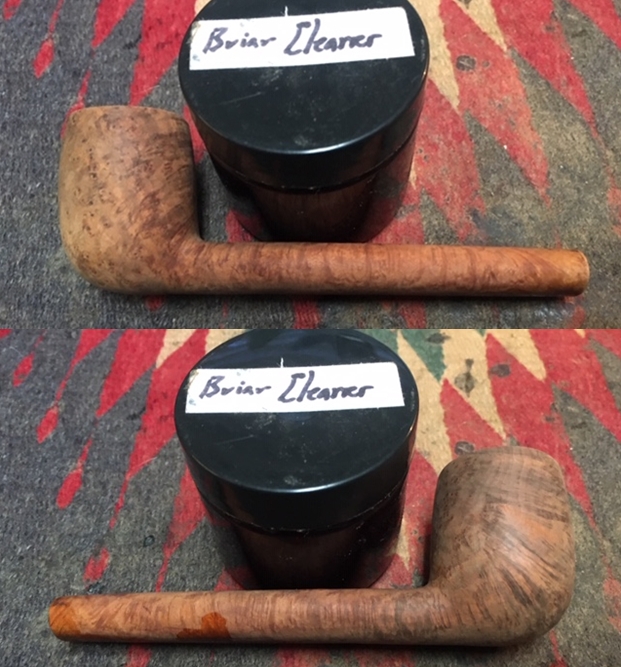
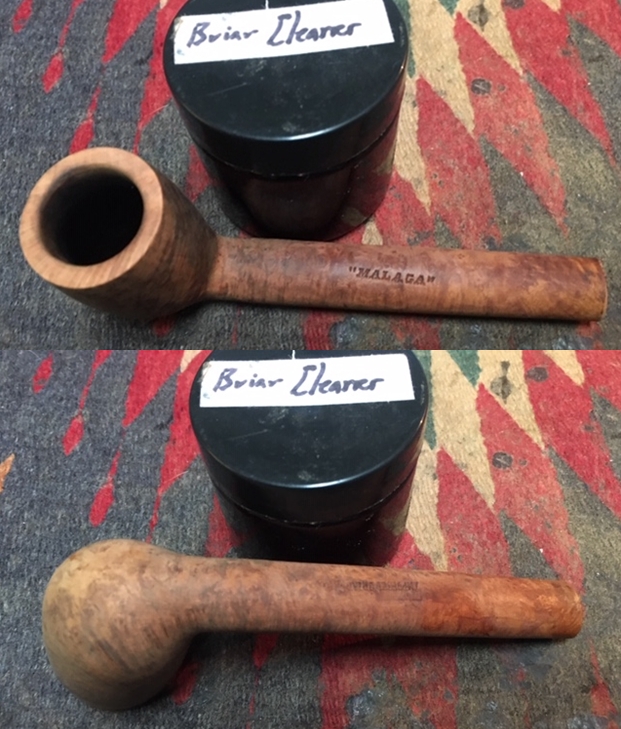
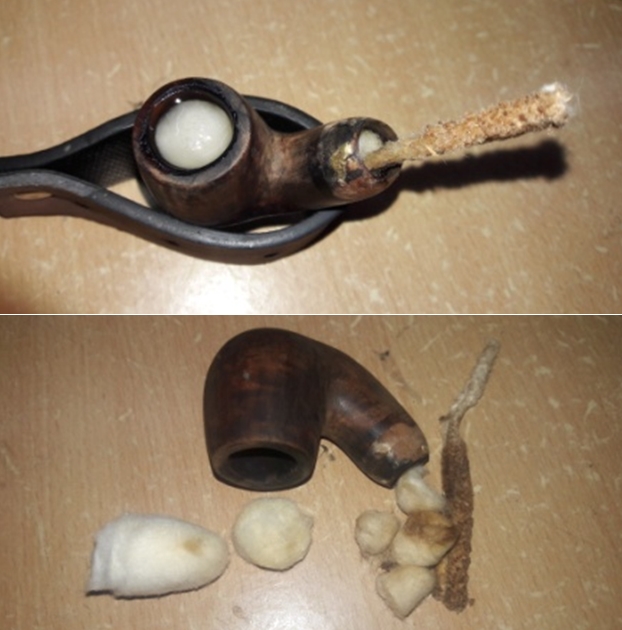
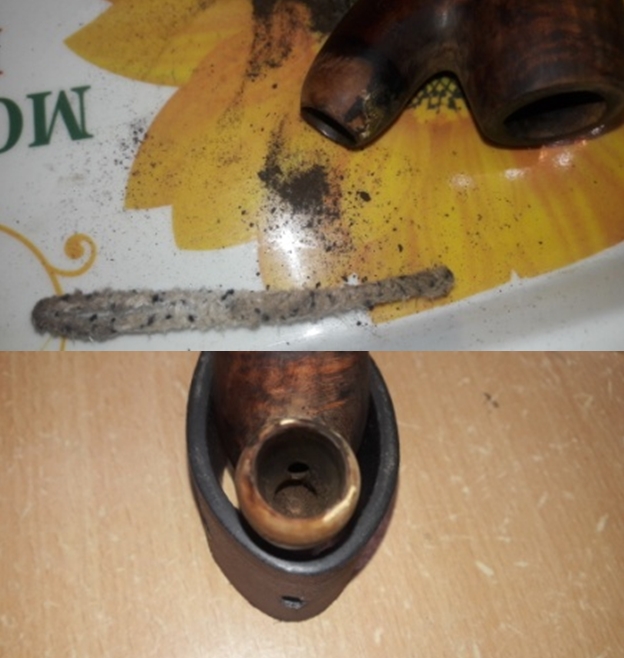
 Next, targeting the internal cleaning further, pipe cleaners and cotton buds wetted with isopropyl 95% are used. Tar and oils are excavated from the mortise walls by scraping with a small dental spoon. After much effort, the pipe cleaners and buds start lightening and I decide to save the rest of the cleaning for later by employing a kosher salt and alcohol soak.
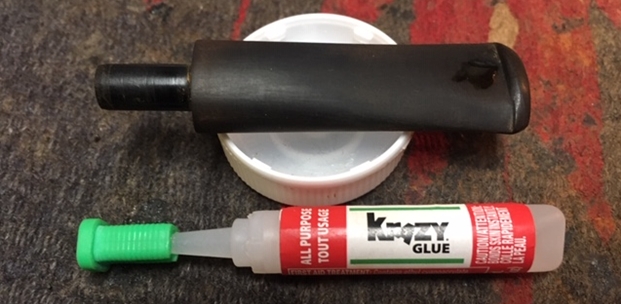
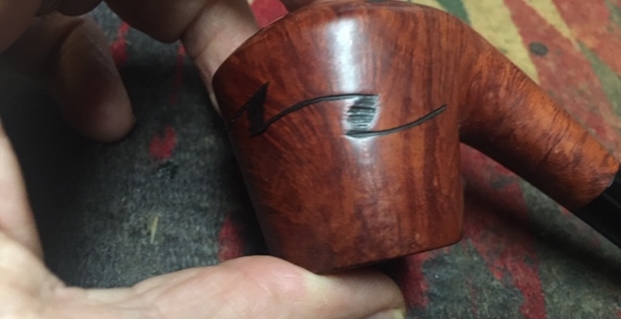
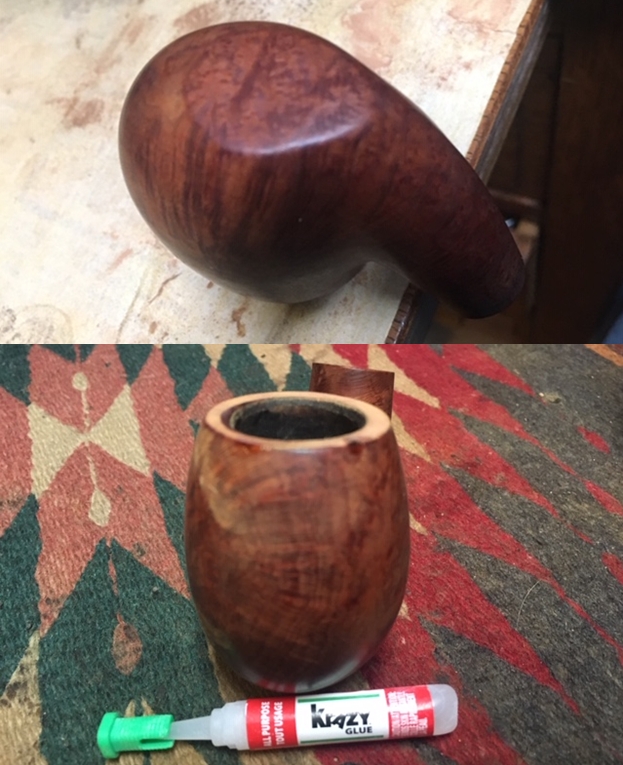
 After inspecting the briar surface, I find one old fill that I dig out with a dental probe and refill using clear CA glue. I spot drop the glue on the small pit and use an accelerator to quicken the curing time.
 With 240 then 600 grade papers, I sand off the excess glue.
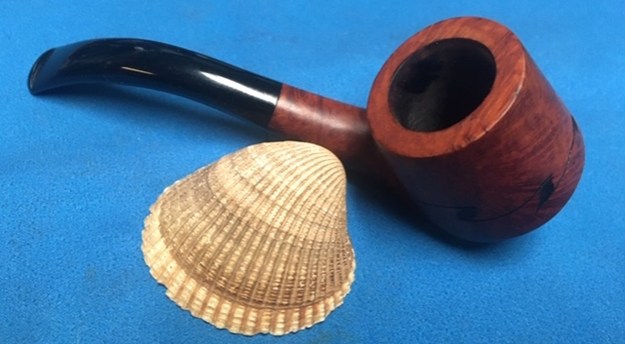
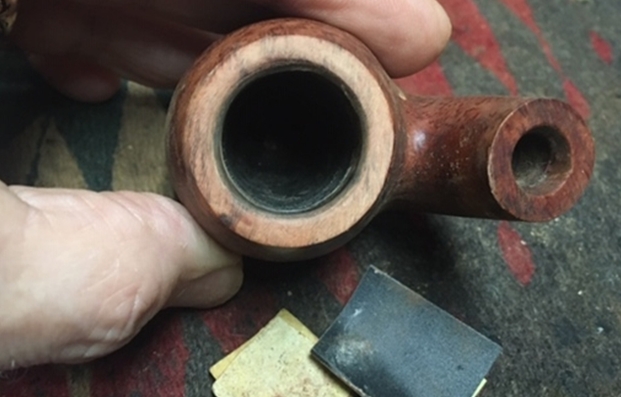
 The rim is still discolored with a dark ring around the inner rim edge. I use a piece of 240 grade paper very lightly to sand the rim as well as the dark ring.
 After lightly sanding, it is apparent that there was a bevel on the inside edge of the rim which I decide to fresh. Using 240 grade paper with a hard surface pressing behind helps to form the bevel. The bevel looks classy! I like it.
 There are minor nicks and cuts on the stummel surface which I use sanding sponges to address. Beginning with the coarse sponge and following with the medium and light grade sponges the nicks and cuts are cleaned up. I like sanding sponges as they are not as invasive as sanding papers but clean up minor problems on the surface.
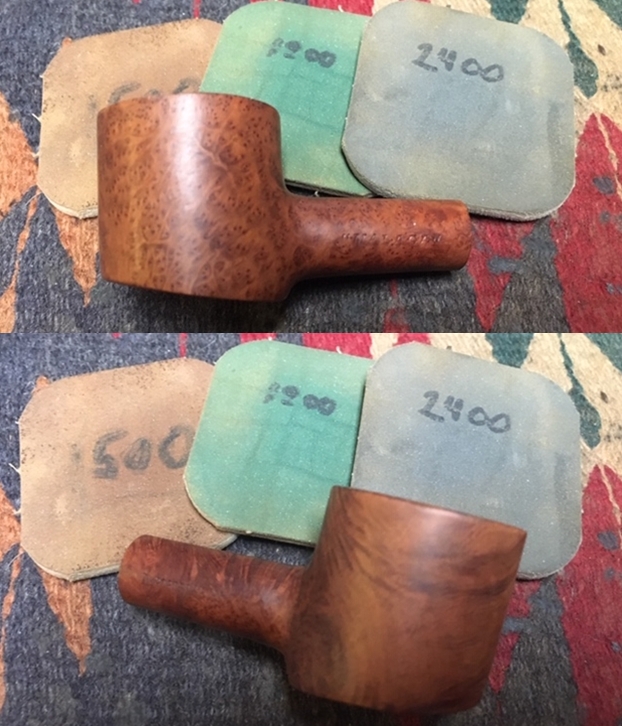
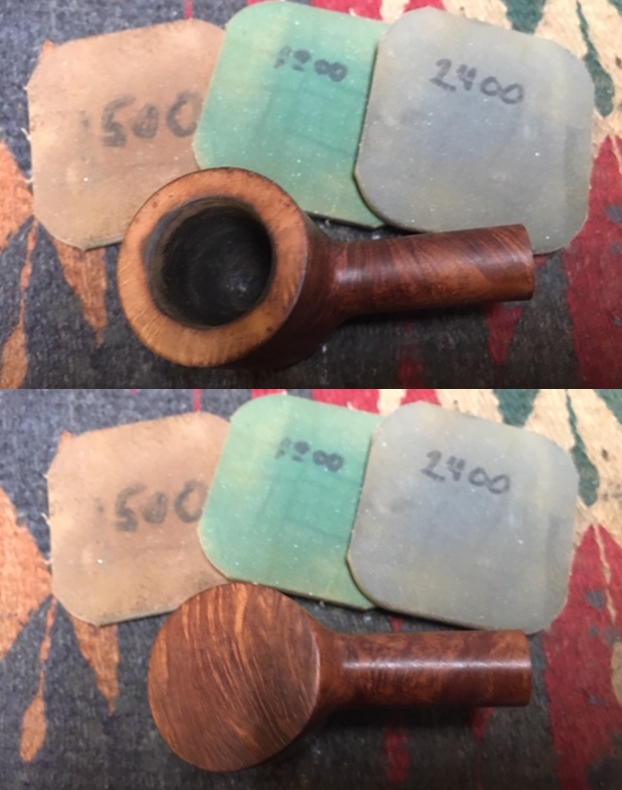
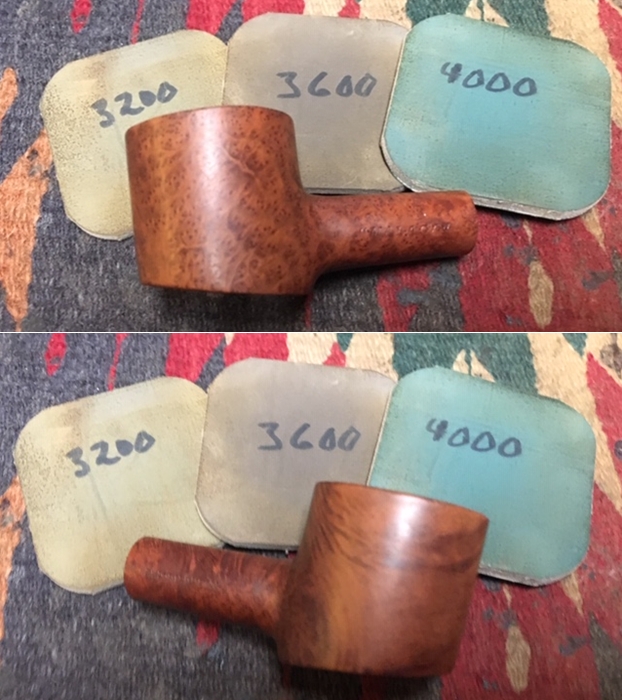
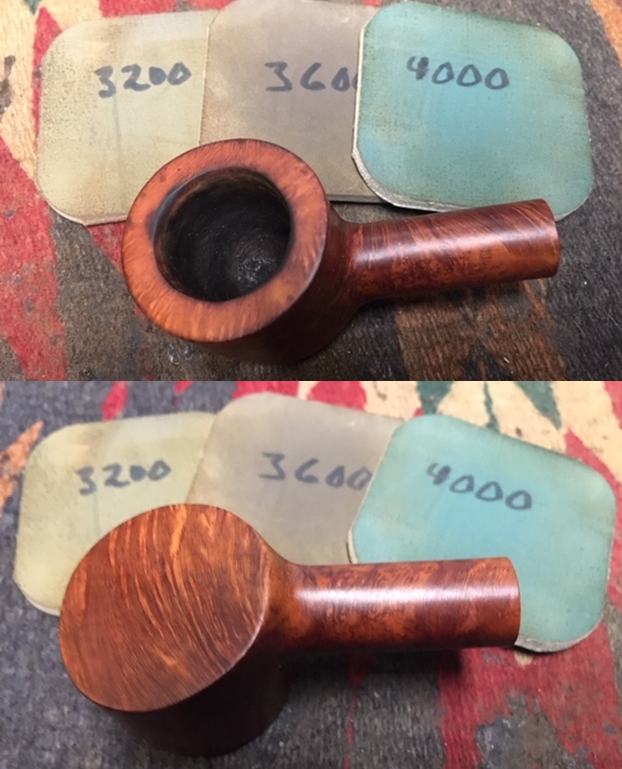
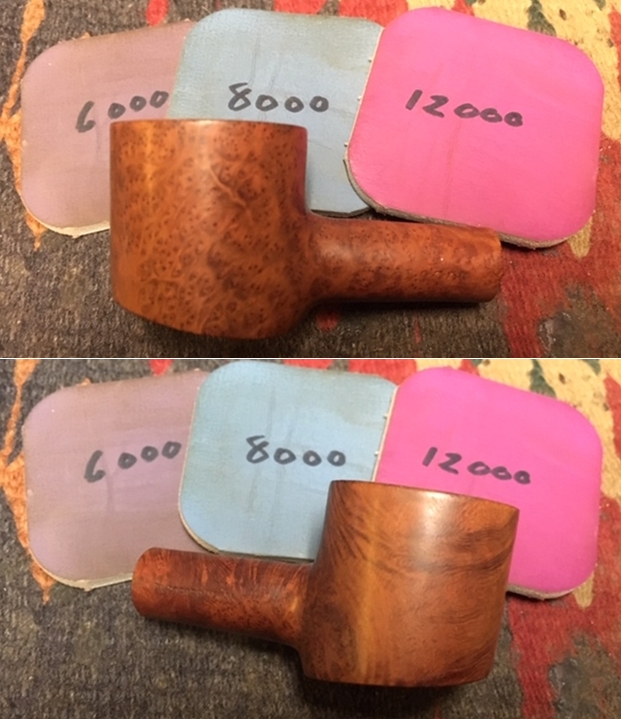
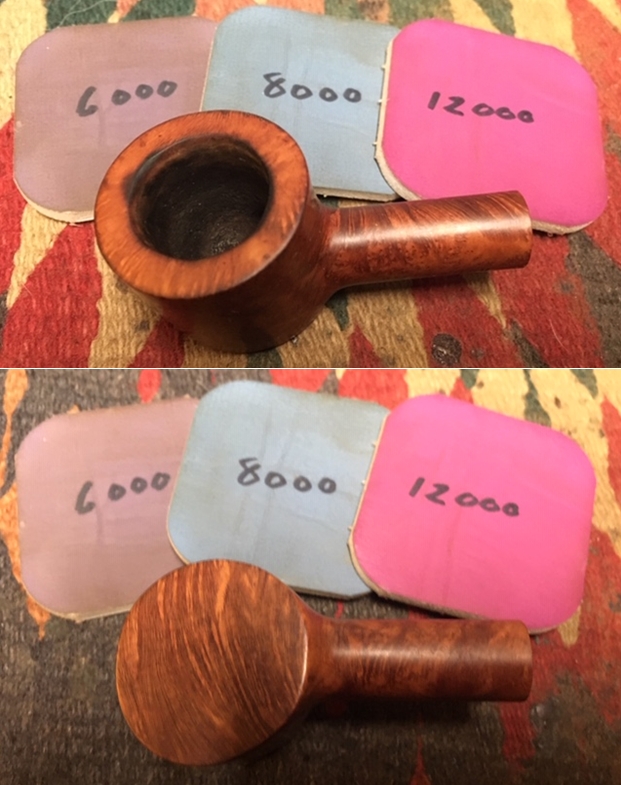
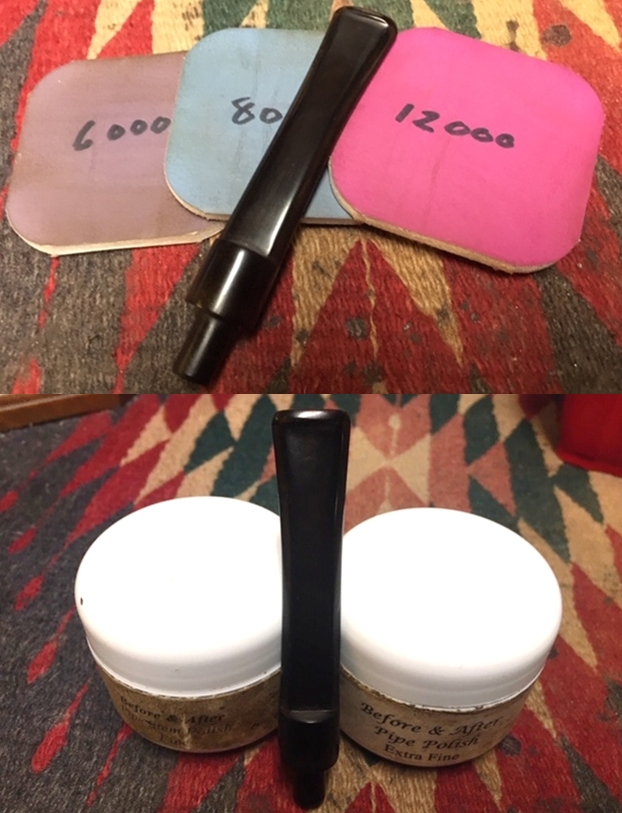
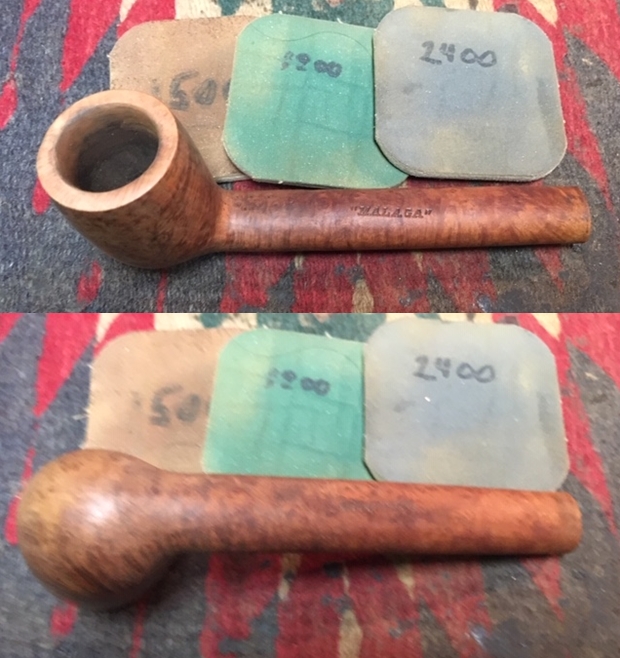
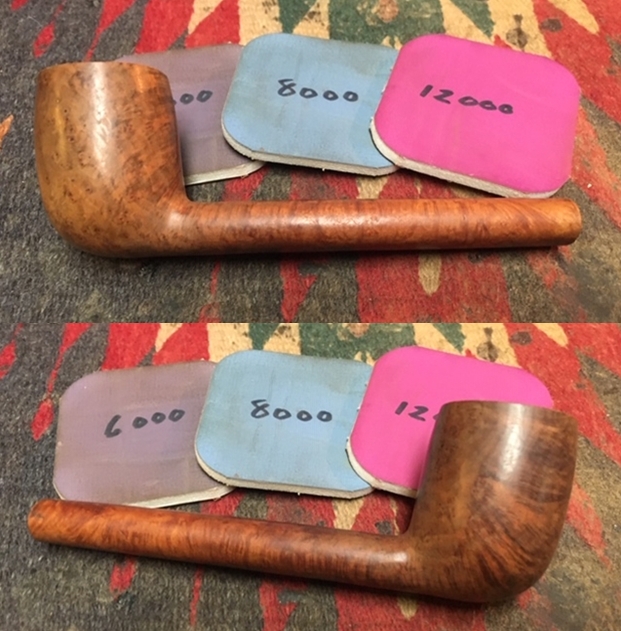
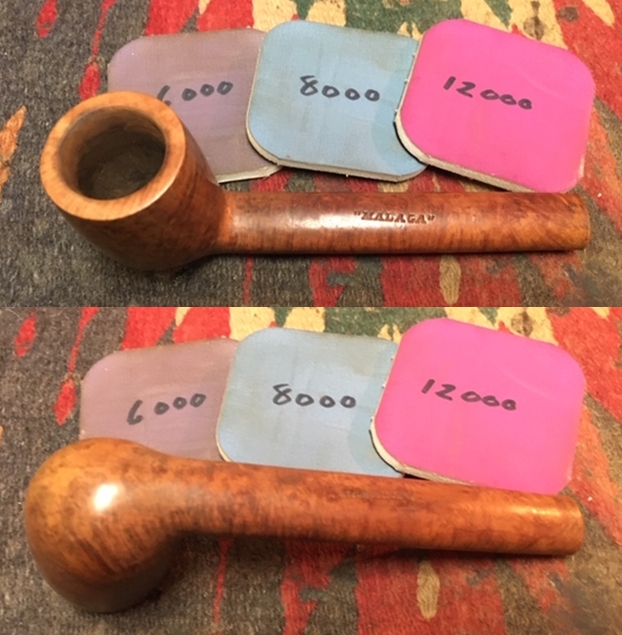
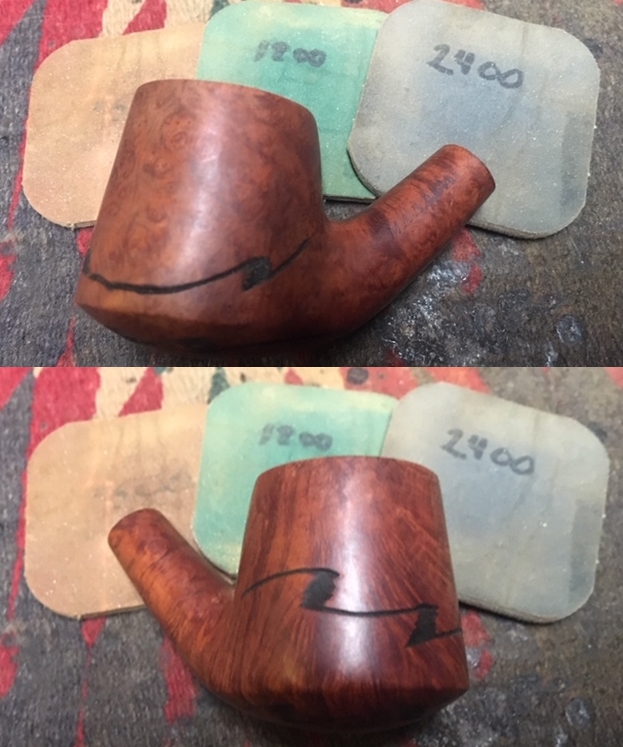
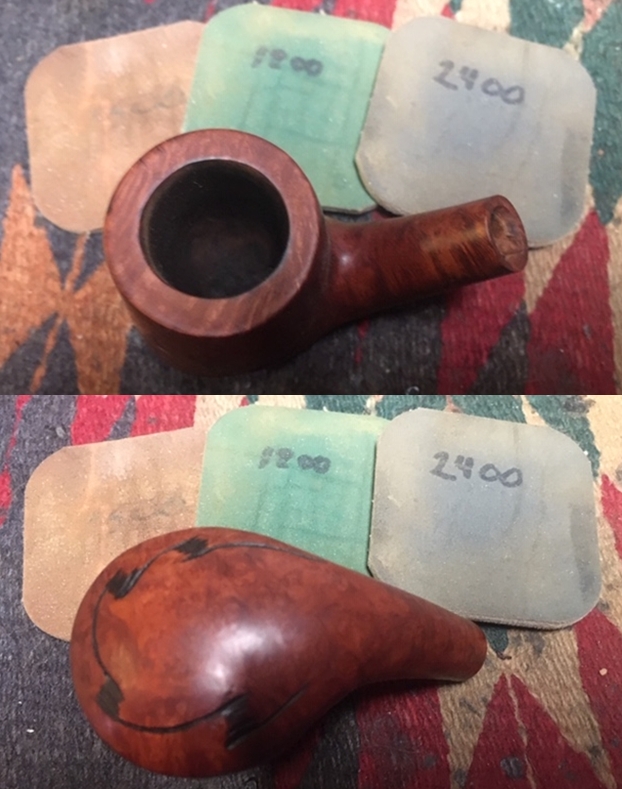
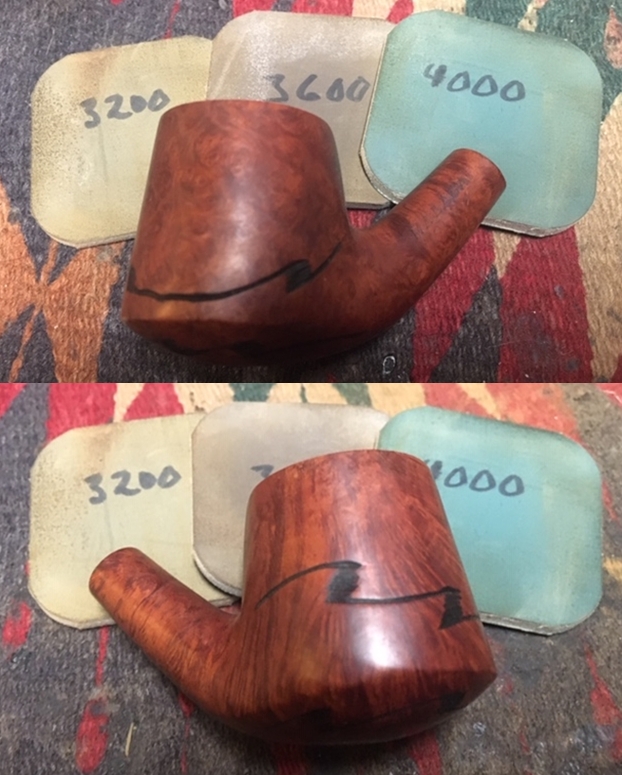
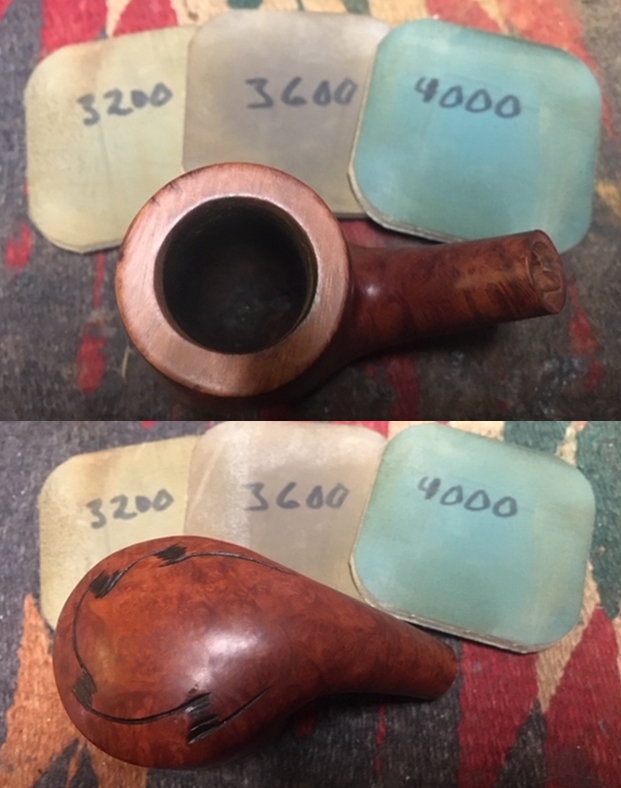
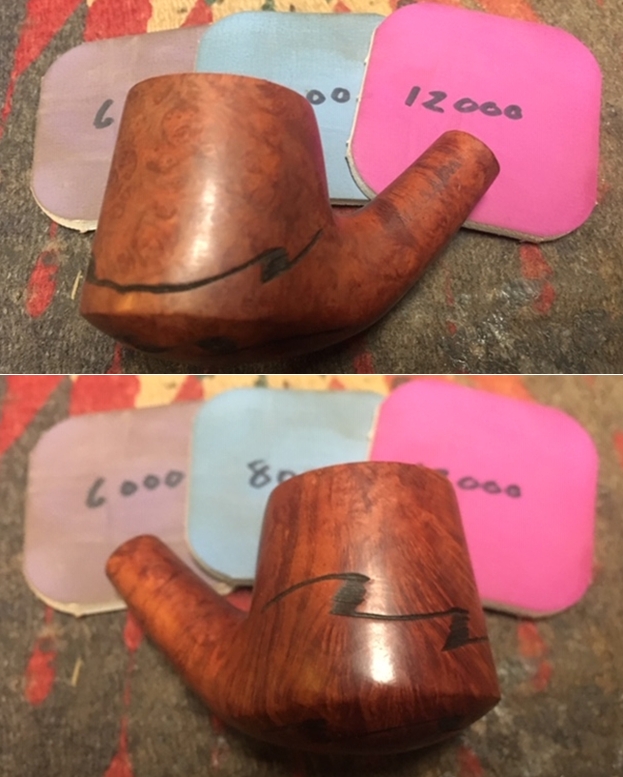
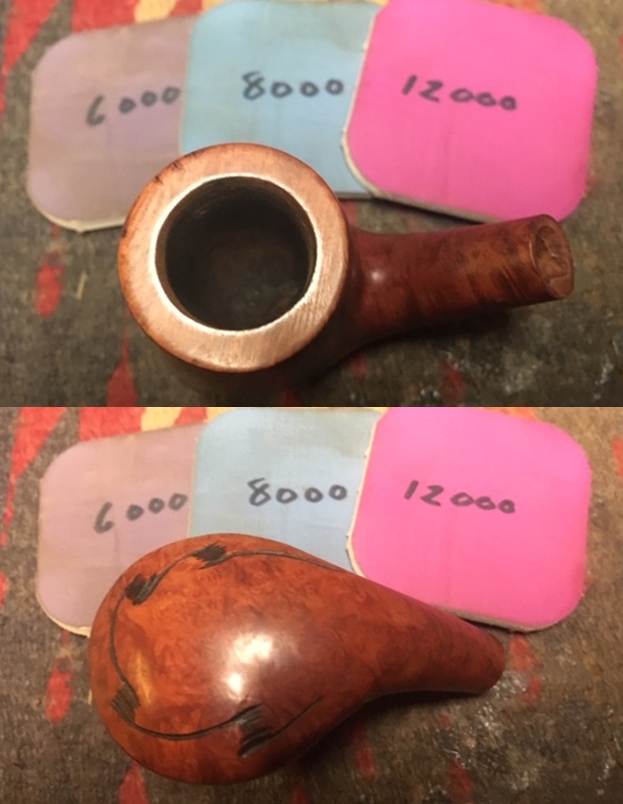
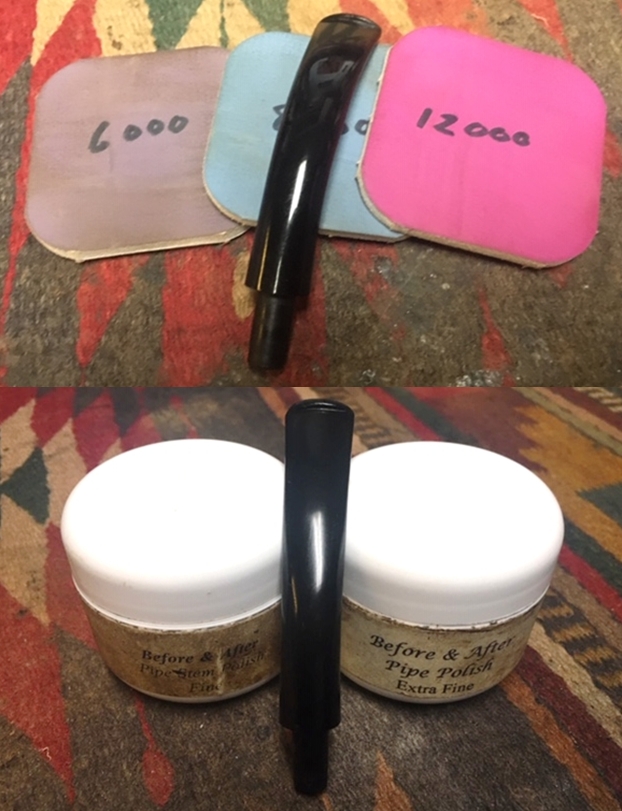
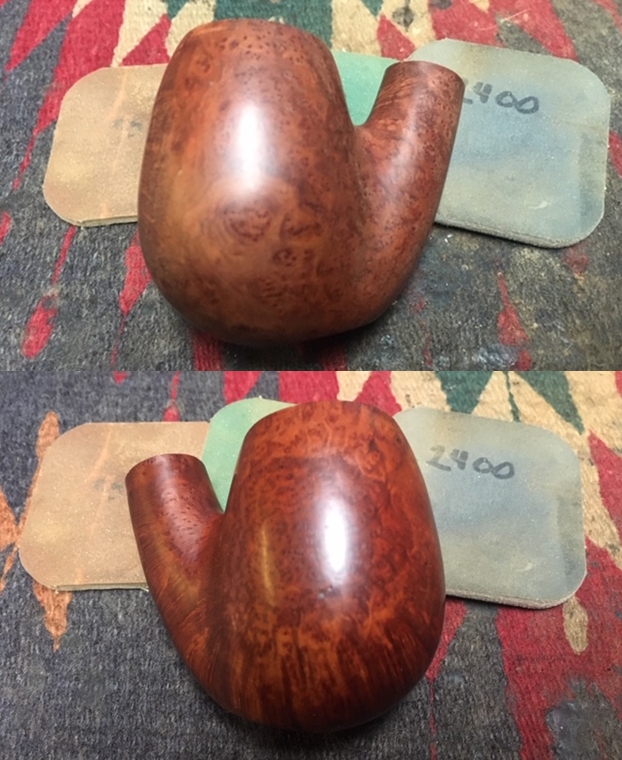
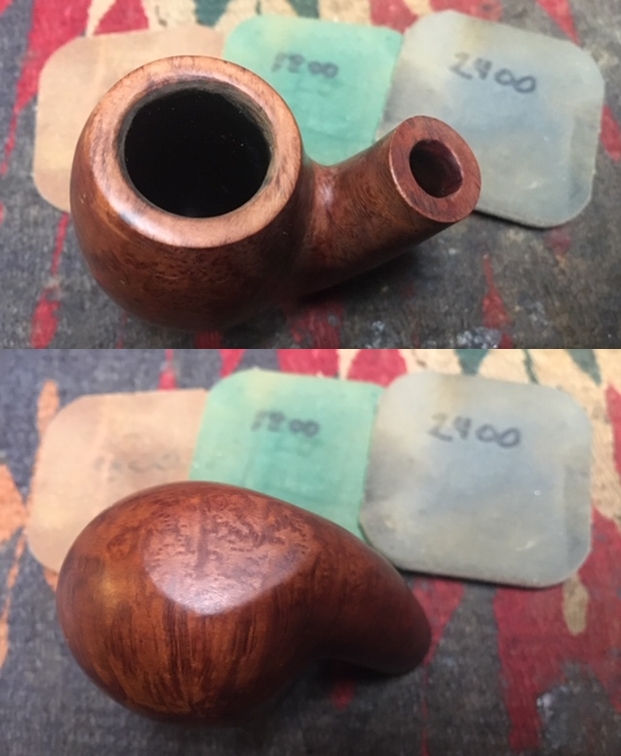
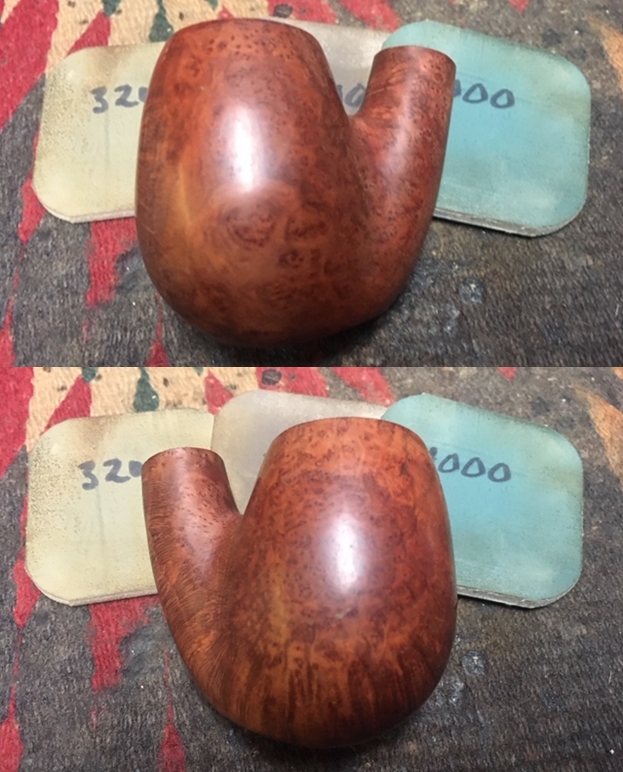
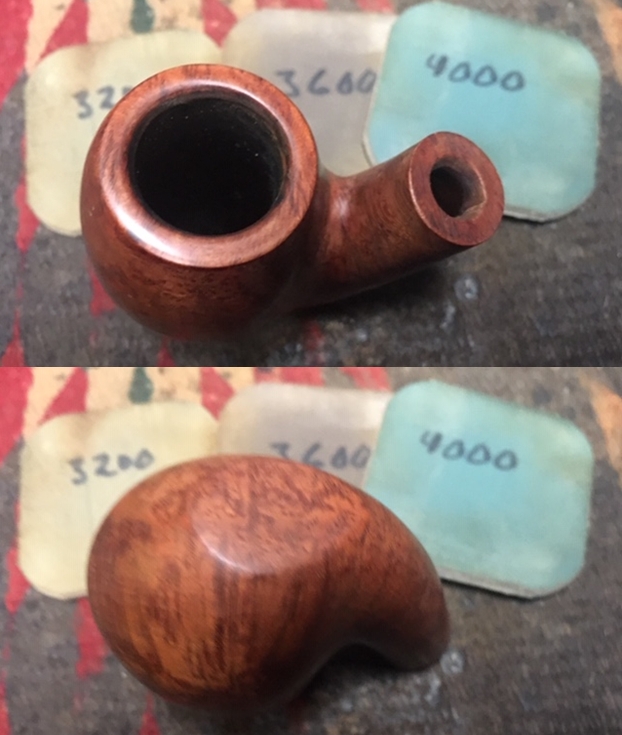
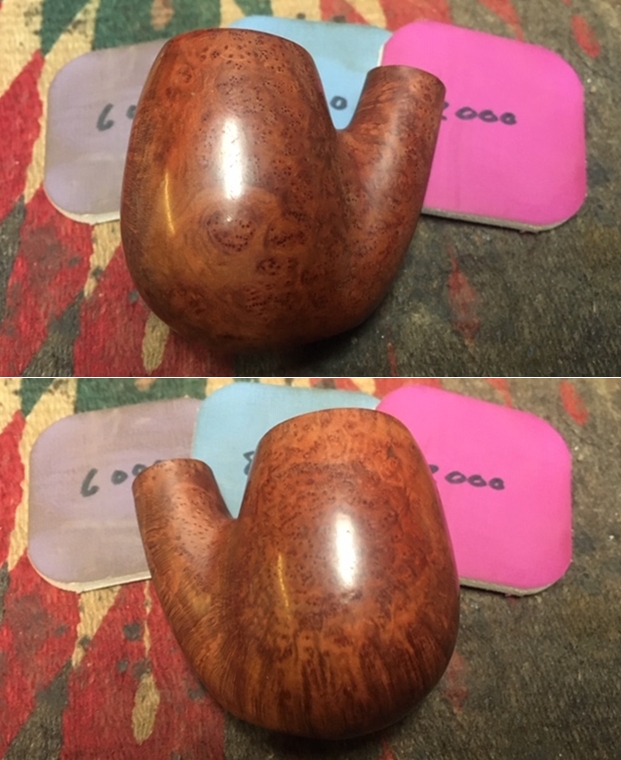
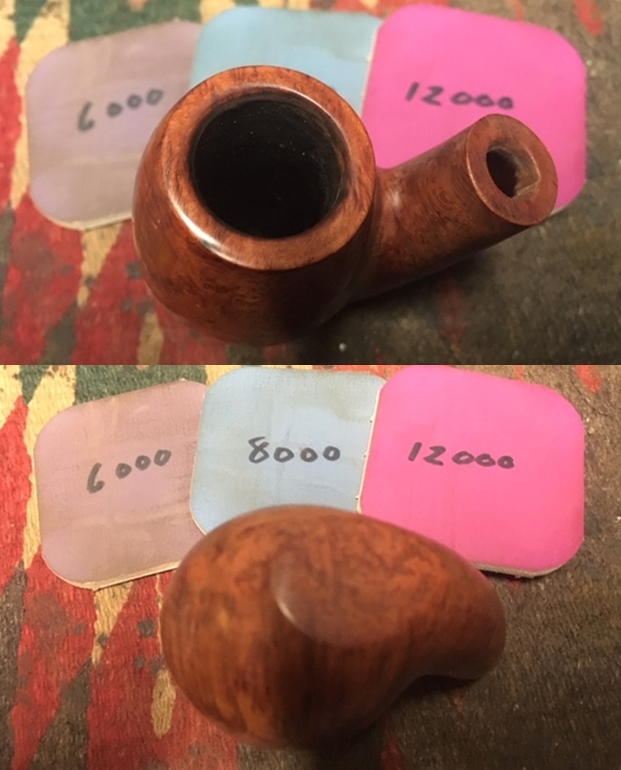
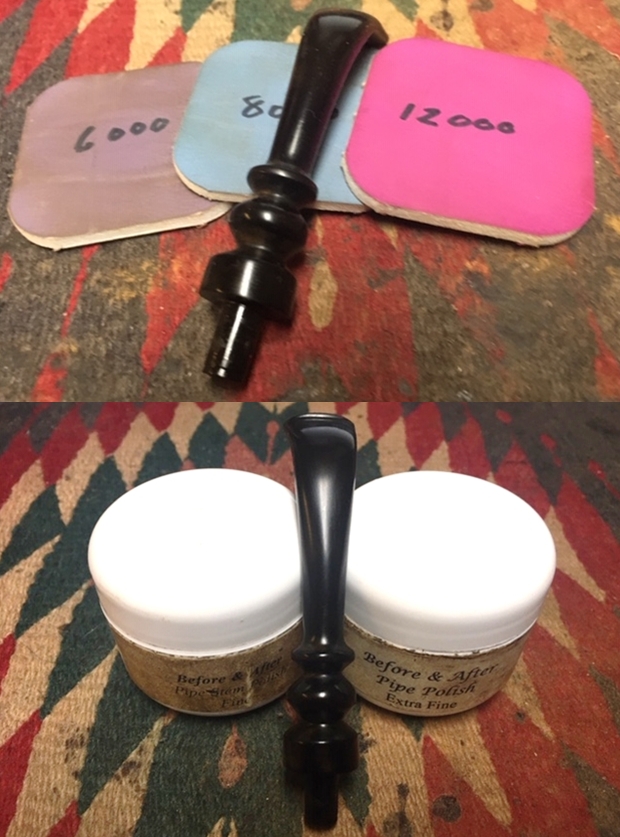
 Next, I use micromesh pads to clean and smooth the stummel. Starting with pads 1500 to 2400, I wet sand followed by dry sanding with pads 3200 to 4000 and 6000 to 12000. I stay clear of the shank panels holding the nomenclatures.
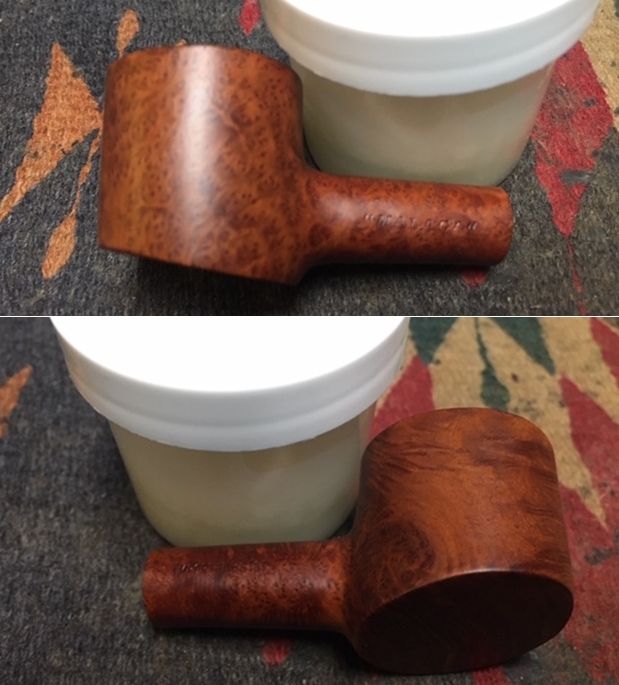
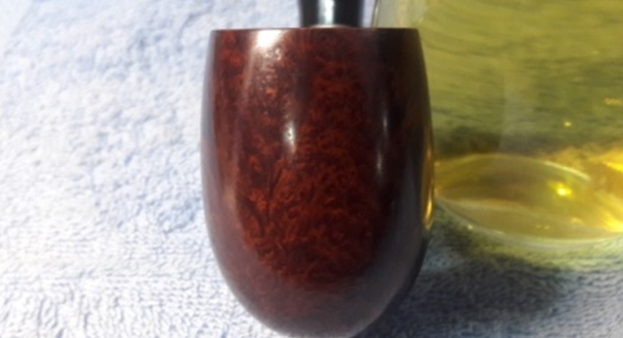
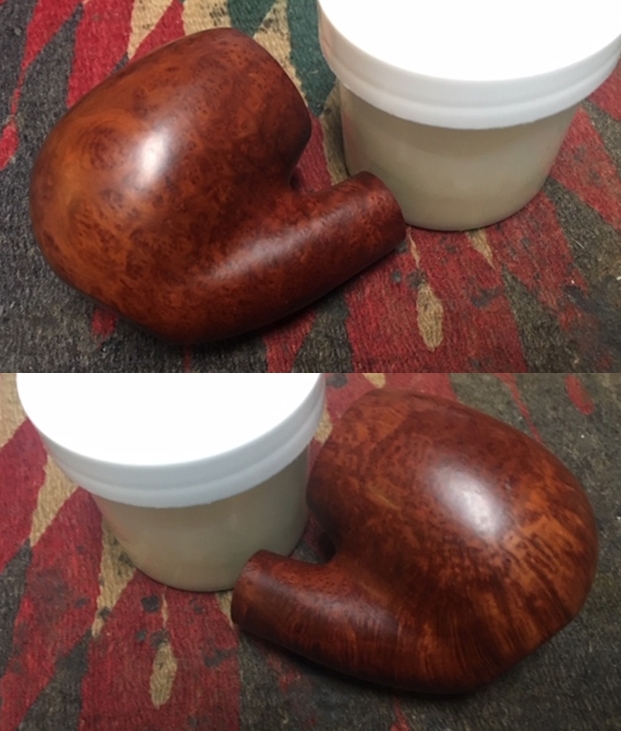
 Using Before & After Restoration Balm brings out the natural hues of the briar with a subtlety that I find attractive. To apply it to the surface, I put some of the Balm on my fingers and work the Balm into the briar. The consistency of the Balm starts with a cream-like texture and then thickens into a waxy substance. After the Balm is fully worked in, I put the stummel aside to allow the Balm to do its things. I take a picture during this stage.
 After 20 to 30 minutes, I remove the excess Balm with a cloth and then buff it up some with a microfiber cloth dedicated to the post-Balm buffing. As hoped and expected, the deepening of the natural hues is very attractive – it looks great. Moving on.
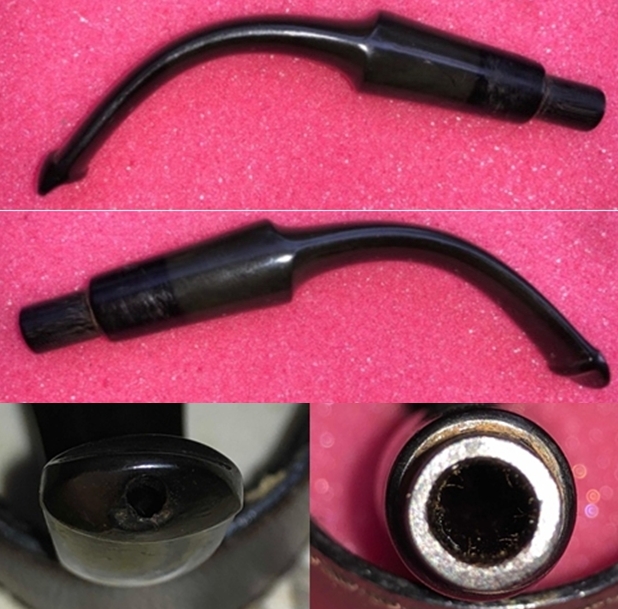
 The stem repairs are waiting, and I take a closer look at the tooth chatter and compressions on the upper and lower bit.
 The first step is to use the heating method by painting the damaged areas with the flame of a Bic lighter. As the vulcanite heats, physics take over and the rubber expands. The chatter and indentations hopefully will also expand to regain the original condition, or closer to it. After using the flame, the upper bit’s tooth chatter all but disappeared. The lower bit compressions lessened but are still evident.
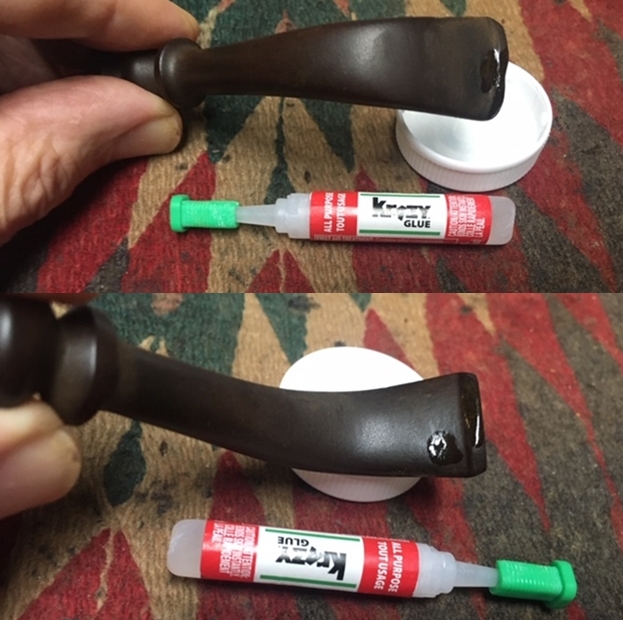
 Addressing the remaining compressions on the lower bit, I use Starbond Black Medium-Thick CA glue to fill the indentations. I first wipe the area with a cotton pad wetted with alcohol to clean the area. Carefully, I spot drop glue on each compression. I set the stem aside for the CA glue to cure.
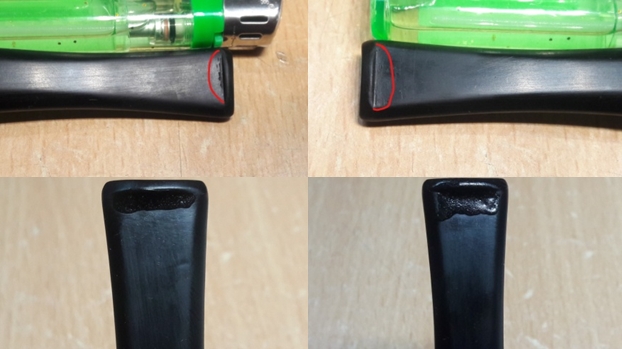
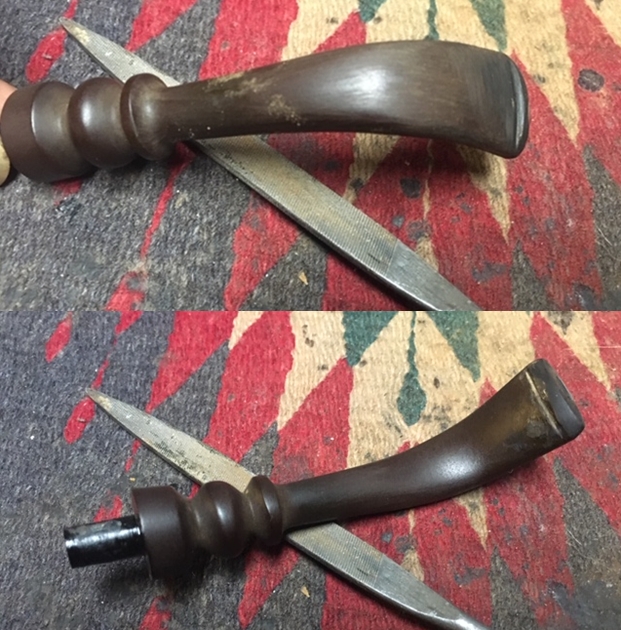
 After the Black CA glue cures, I go to work removing the excess patch material using a flat needle file. I also work on the button to refresh the lines.
 Following the filing, 240 grade sanding paper is employed to erase the file marks and to smooth the lower bit.
  Also using the file to freshen the button lip and 240 grade paper on the upper bit, tooth chatter sands out with no problems.
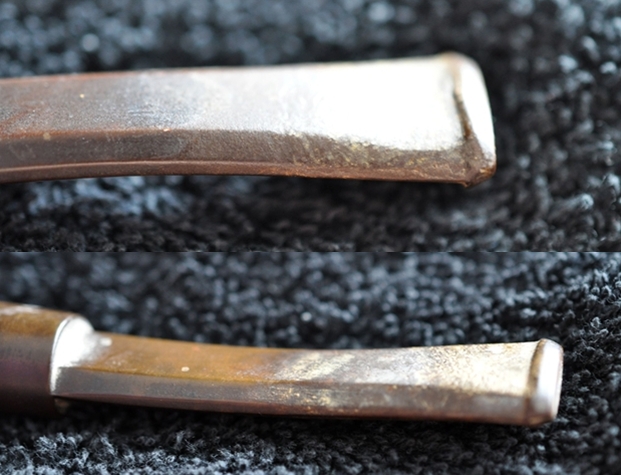
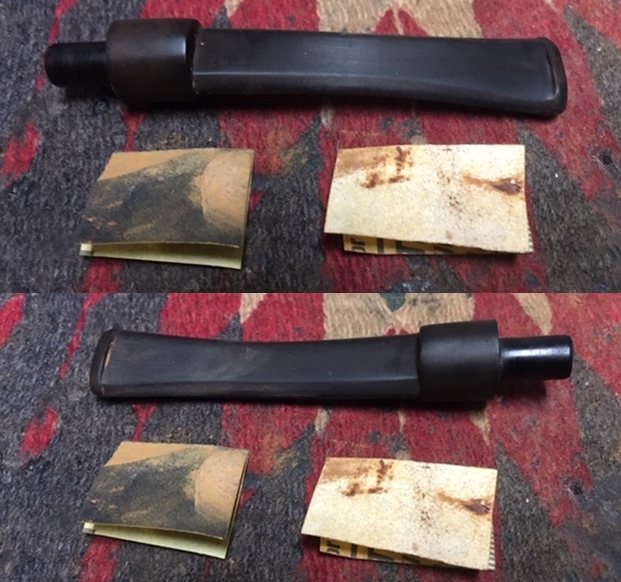
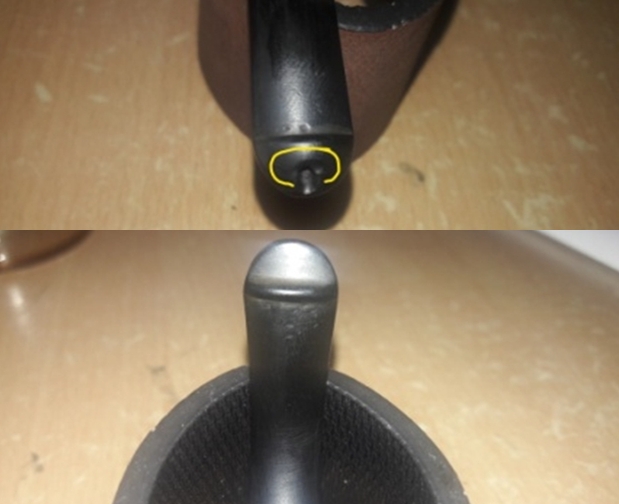
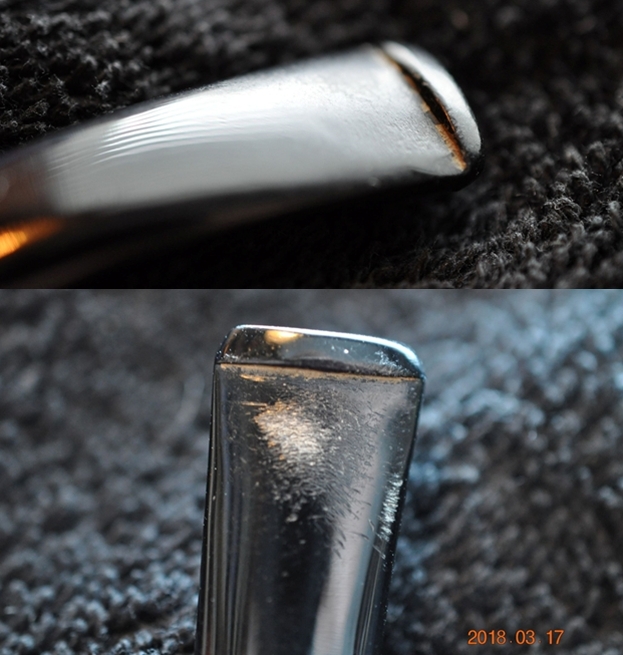
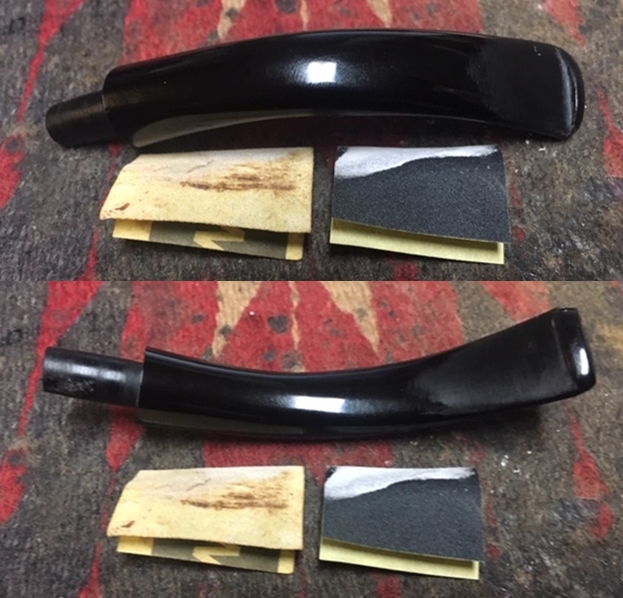
 Next, wet sanding with 600 grade paper followed by 000 grade steel wool smooths further – the upper then the lower bit pictured. I’m careful to avoid sanding the BC stem stamping on the left stem panel. In the second picture, a close look at the shiny reflection reveals the subtle lines of the patch. It looks great!
 Even though the ‘BC’ stem stamp is healthy, which is nice for a change(!), I avoid direct sanding over it. To clean around the stamping and to remove residual oxidation, I use a Mr. Clean Magic Eraser sponge which is less abrasive than sanding paper. It helps to darken and clean the vulcanite around the stamping.
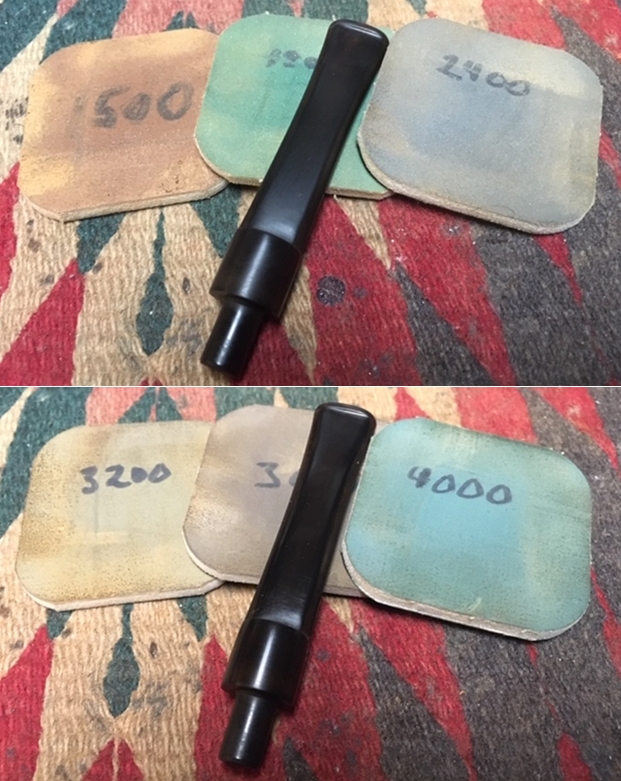
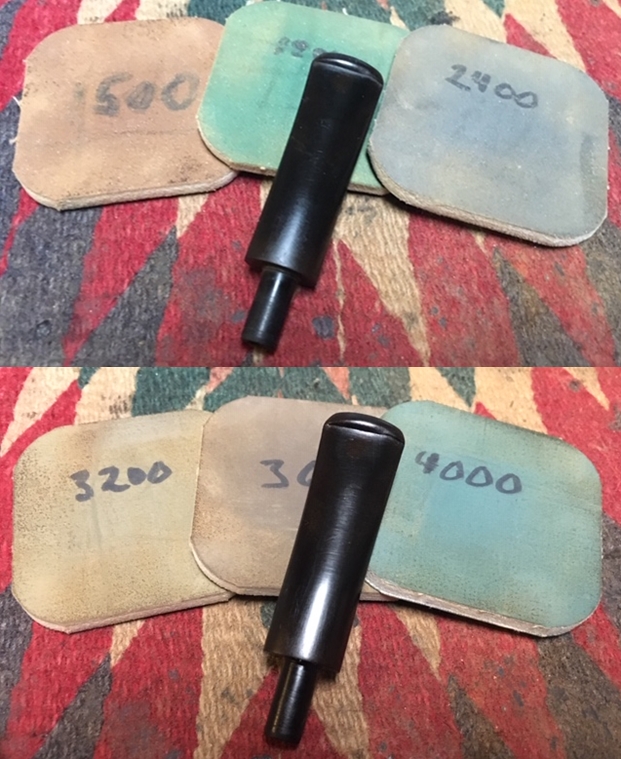
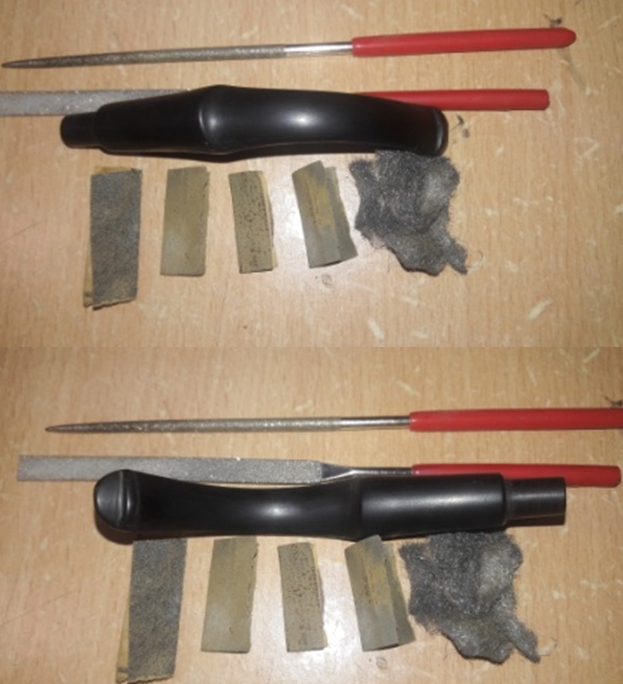
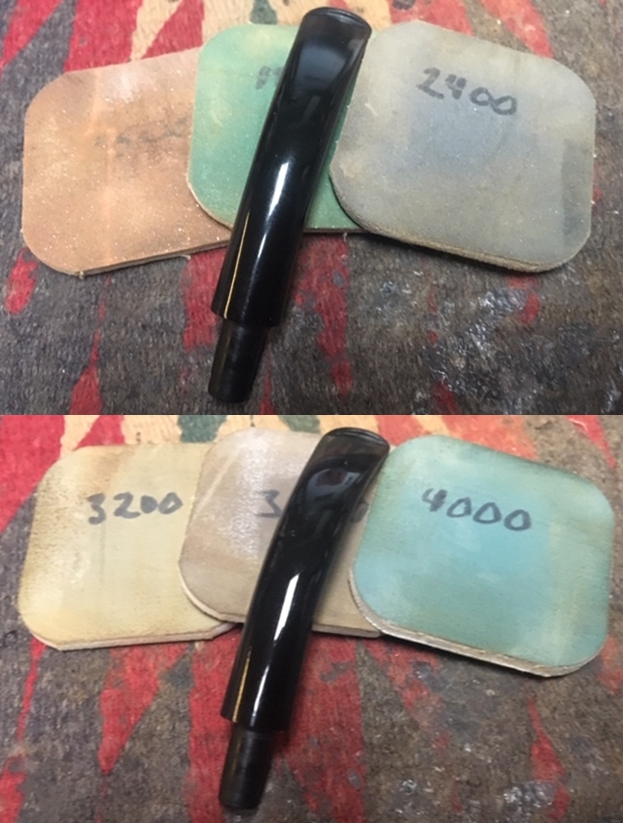
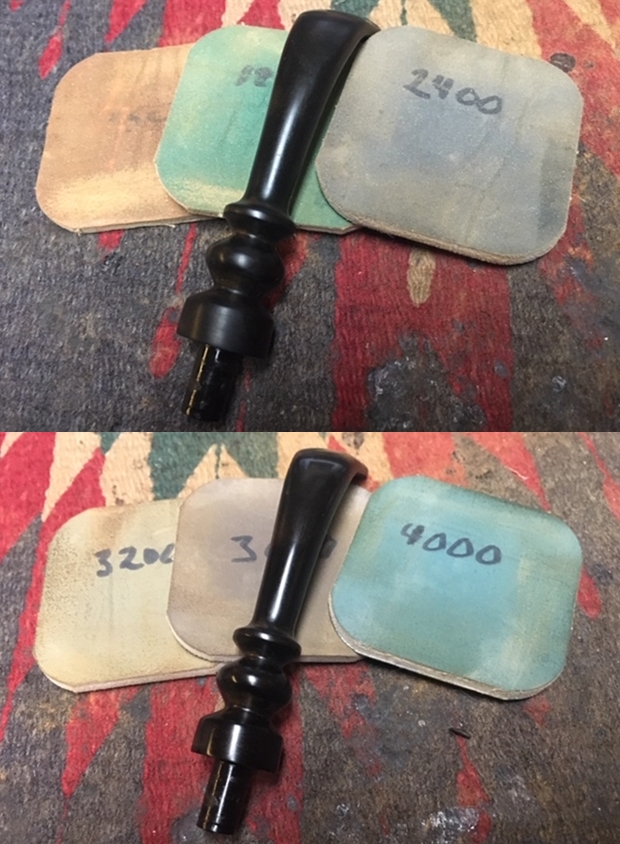
 On a roll, I move forward with the full regimen of 9 micromesh pads. Starting with pads 1500 to 2400, wet sanding is employed. Following this, using pads 3200 to 4000 and 6000 to 12000, I dry sand. Between each set of 3 pads, Obsidian Oil is used to revitalize the vulcanite stem. The pads and Oil do the job – nice!
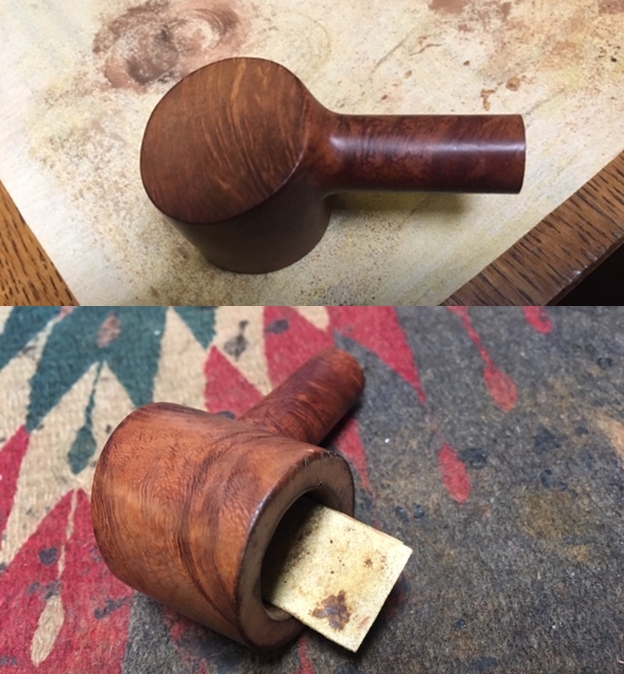
 After attempting to rejoin the stem and the stummel to apply compound, as is the case sometimes, the tenon fit is too tight. With the cleaning process, the briar expands, and this sometimes results in the fit being too tight. It is best not to force the fit and risk cracking the shank. I use a half round needle file to lightly file the mortise surface – very lightly. After another try and discovering that it is still too tight, I use 470 grade paper wrapped around the tenon and rotate the stem while the paper hugs the tenon. After a few attempts to fit, the tenon finally seats well.
 With the stem and stummel rejoined, a cotton cloth buffing wheel is mounted to the Dremel with the speed set at 40% full power. Blue Diamond is then applied methodically to both stem and stummel. After finishing with applying the compound, a felt cloth buffing helps to remove the residual compound dust in preparation for applying wax.
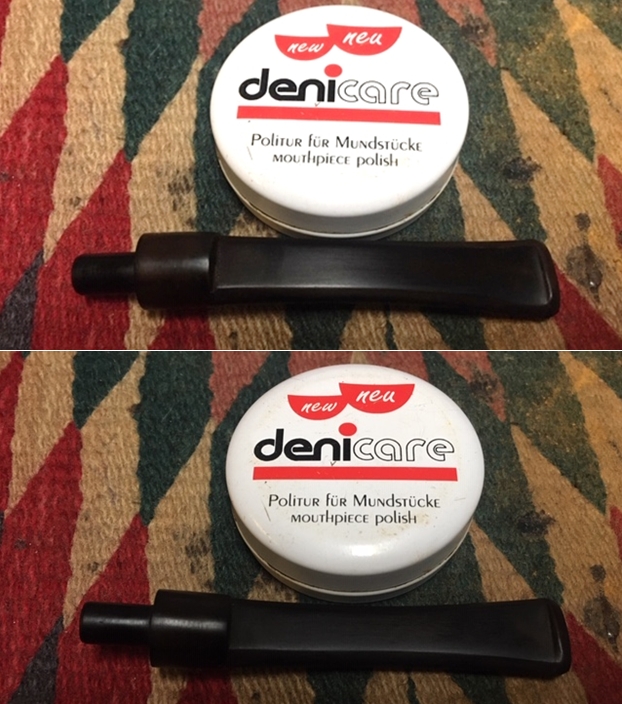
 Before applying the wax, one project awaits: the ‘BC’ stem stamp. To refresh the ‘BC’ stamping on the stem I dab white acrylic paint on the lettering. Then the excess paint is absorbed using a cotton pad. It doesn’t take long for the paint to fully dry. After it dries, I carefully remove the excess paint using the point of a toothpick. I also use the flat edge of the toothpick to scrape over the top of the stamp to sharpen the lines. It looks great!
 After changing the cotton cloth buffing wheel on the Dremel, maintaining the same speed, carnauba wax is applied to the entire stem. After applying a few rounds of wax to the pipe, I follow by giving the pipe a serious buffing with a microfiber cloth to raise the shine.
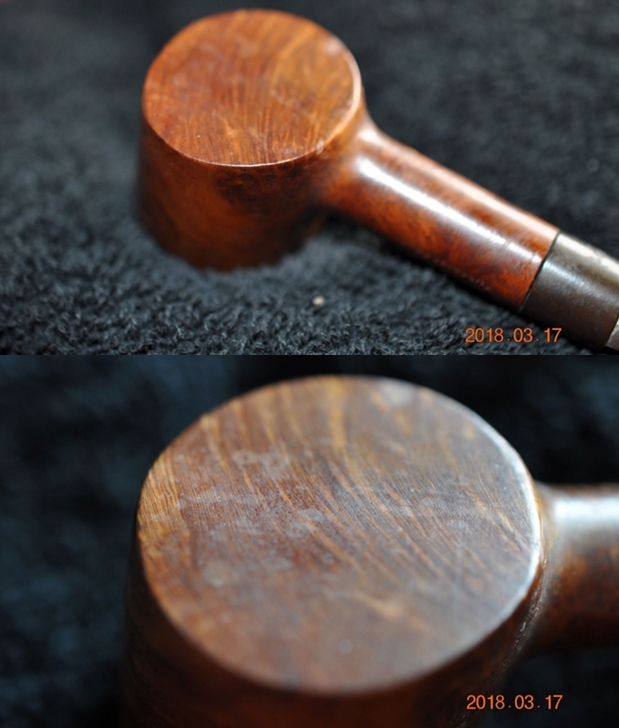
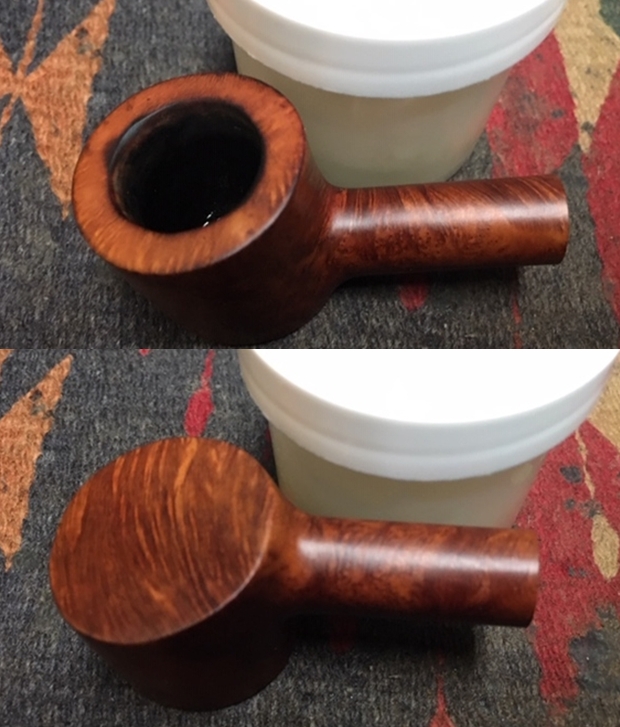
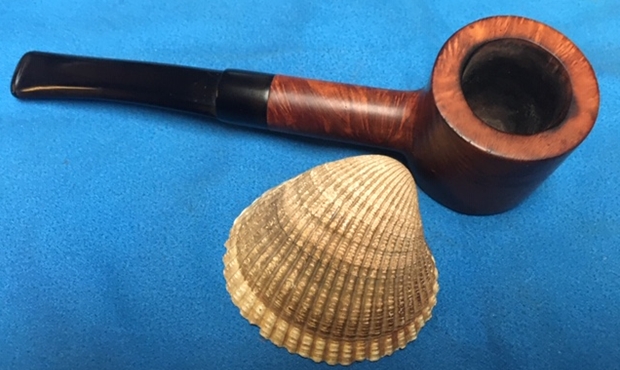
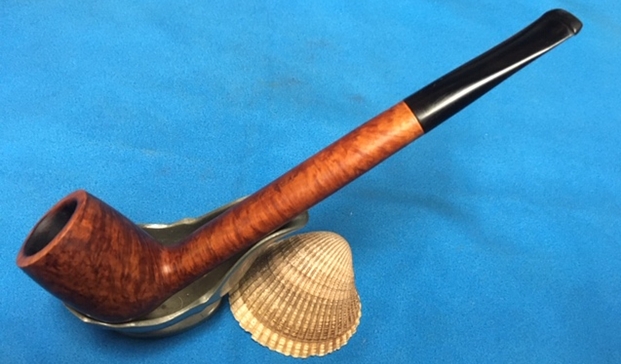
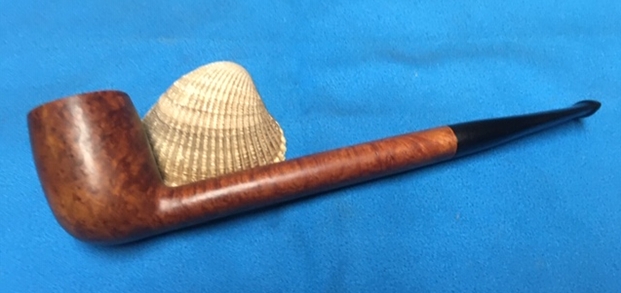
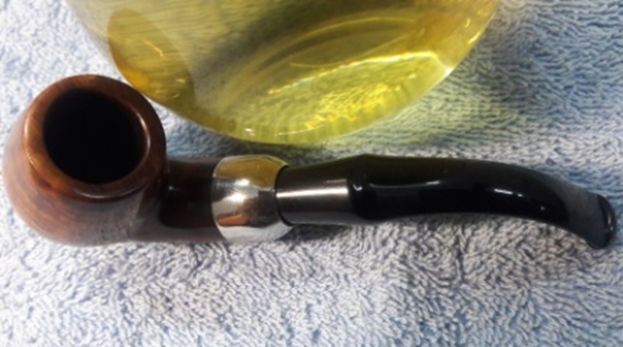
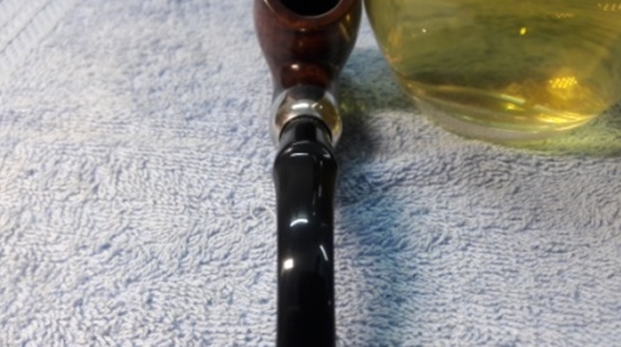
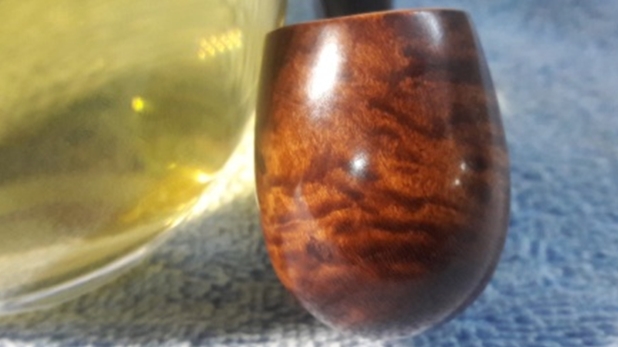
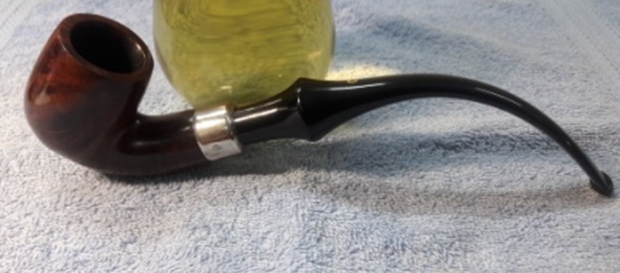
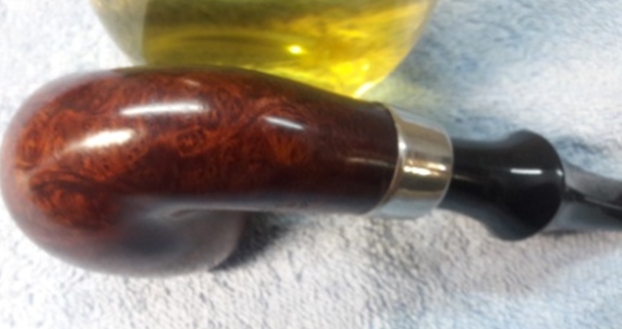
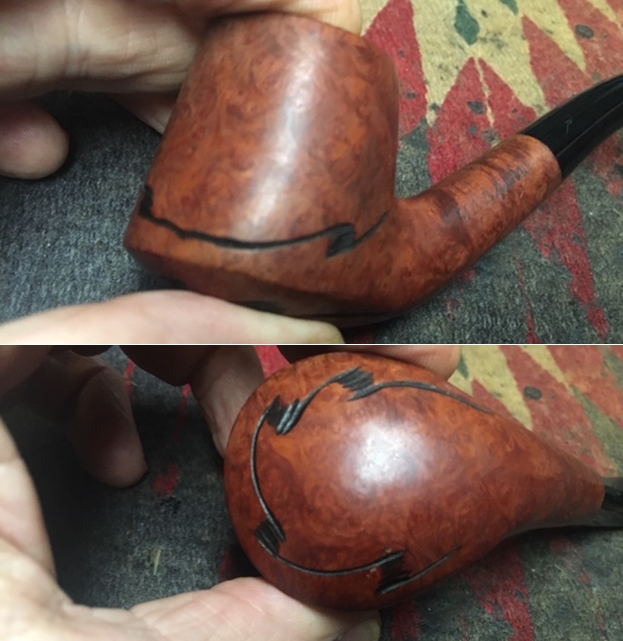
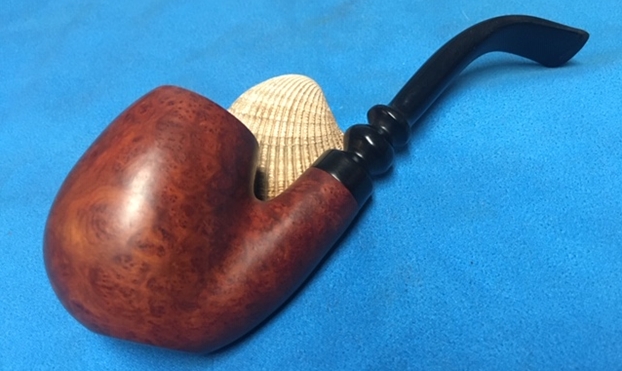
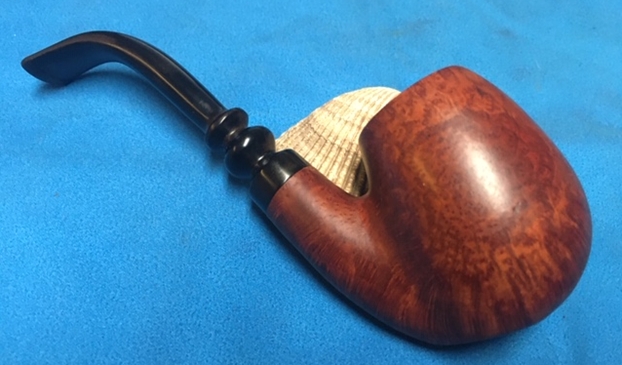
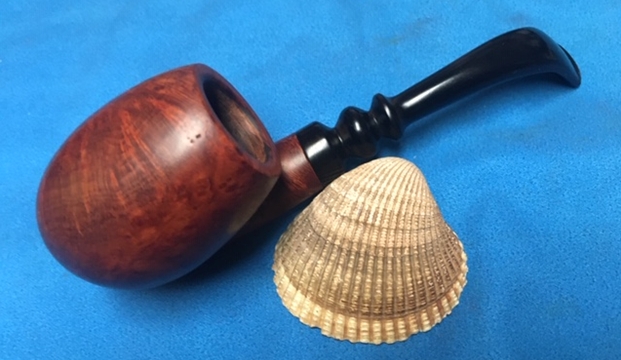
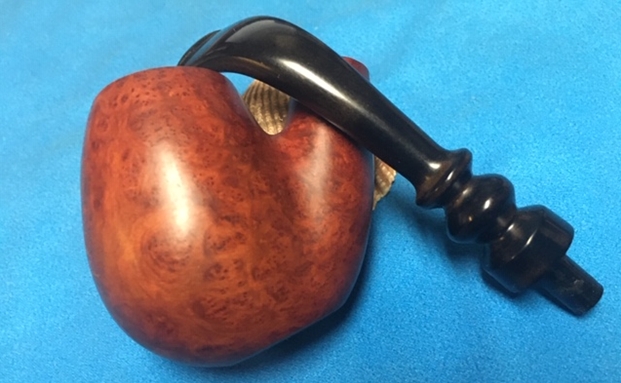
 Earlier, the ad described this pipe shape as ‘esteemed’. This description fits well. I have a square shank Peretti Billiard that I like a lot. This Butz Choquin Supermate 1596’s square shank transitioning to a tapered square stem is very attractive – the lines draw the eye in for a closer look. Added to this, the Panel shape alignment compliments the flow of the shank and stem to give an overall solid or full look. The light hues of the briar grain also add to this ensemble. Jim commissioned this BC Supermate and will have the first opportunity to acquire it in The Pipe Steward Store. This pipe benefits our work here in Bulgaria with the Daughters of Bulgaria – women and girls who have been trafficked and sexually exploited. Thanks for joining me!