Blog by Paresh Deshpande
My pipe cleaning factory back home is churning out pipes galore and these cleaned pipes once they reach me are being liked by people who see them and sales are also improving, though restricted only to local customer, yes, you read it right, without an ‘s’, as only one colleague has been motivated to take up enjoying a pipe!! I am sure more will follow. Those readers who have been following my work on rebornpipes.com are well aware that here in India, pipe smoking culture died its natural death in 1970’s when old pipe shops and tobacconists were pushed out of business by cigarette manufacturers and people got used to the convenience of a ready-to-smoke cigarette. And to add to our woes, there is a ban on importing tobacco!! Well, wish me luck that I am able to revive this culture back here again…
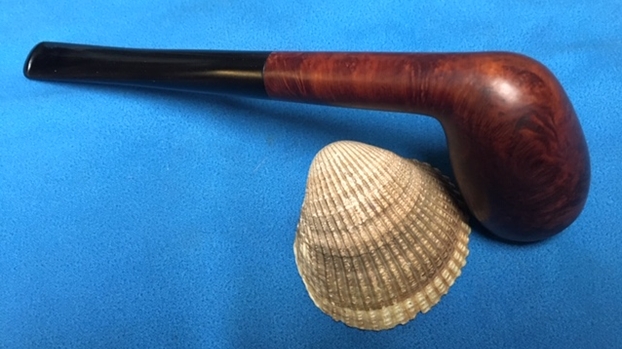
The next pipe that I decided to work on, well not exactly by choice but out of economic considerations, is a lovely Brandy bowl shaped Barling’s Make pipe in a smooth finish. Through all the dark hues of Oxblood (not sure its Oxblood or Cordovan, as I have used neither in person) and darkened lacquer coat, beautiful mixed grains can be seen all around the stummel. The pipe is stamped on the left of the shank as “Barling” in cursive hand over “MAKE” over “INTERNATIONAL” in block letters. On the right of the shank, close to the shank end it is stamped as “T.V.F.” followed by the shape code (???) “# 911” over “MADE IN DENMARK”. The stampings are all crisp and prominent. I had previously worked on a couple of Barling pipes from my inherited pipe collection; here are the links to both the write up, https://rebornpipes.com/2019/03/26/a-simple-restoration-of-an-early-transition-era-barling-2639/, https://rebornpipes.com/2018/12/10/decking-out-my-grandfathers-battered-pre-transition-barling-1354/ and had researched this brand then. To refresh my memory, I revisited the write ups and also pipedia.org. Here is an interesting excerpt from pipedia.org……
https://pipedia.org/wiki/Barling
In the late 1970’s production of Barling pipes was shifted to Denmark where Eric Nording manufactured Barling pipes for Imperial. There may have been other factories, but as of this writing, none has been identified. Nording stated that he made approximately 100.000 pipes for Imperial.
Despite these attempts to diversify the line, Barling lost its market. These pipes just weren’t equivalent to the family era pipes. Finally, Imperial decided to close down the Barling operations entirely by 1980.
Thus from the above snippets of information, it is safely concluded that the pipe currently on my work table is from the period between late 1970’s to 1980 and most likely carved by master craftsman Eric Nording!!
INITIAL VISUAL INSPECTION
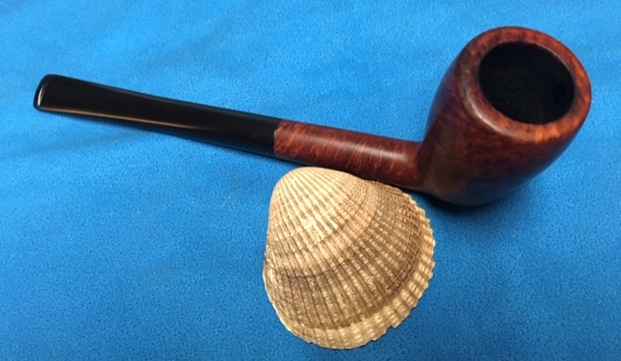
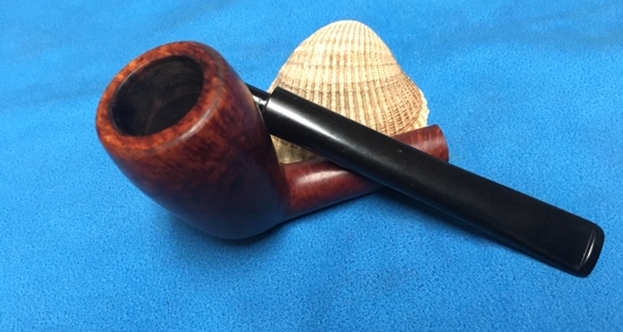
The pipe came to us in a very sorry state, to say the least. It was heavily smoked and a thick layer of cake build up is observed in the chamber. The thin rim top is covered in the thick overflow of lava and is severely damaged due to the repeated hammering it must have received at the hands of the previous owner to remove the dottle. This will need to be worked on. The smooth stummel surface has beautiful grain patterns with a mix of Bird’s eye, cross grains and nice swirls. The stummel surface has a dark lacquer coat that has dulled a bit and appears lifeless due to accumulation of dust and dirt and peeling of the lacquer coating in patches. The mortise is clogged with accumulation of oils and tars making the draw laborious.

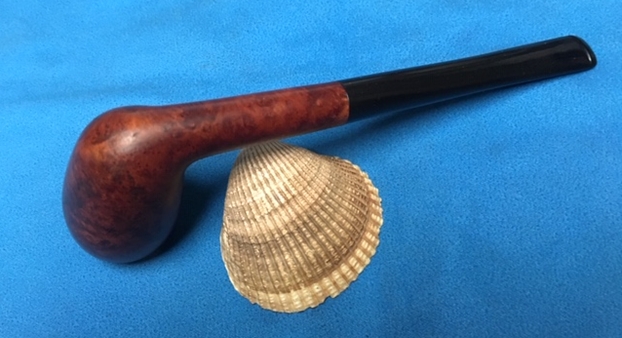
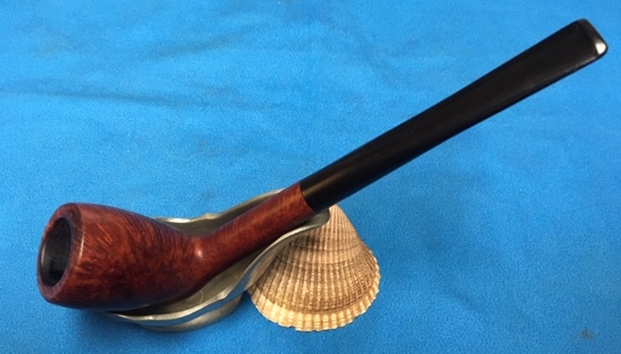
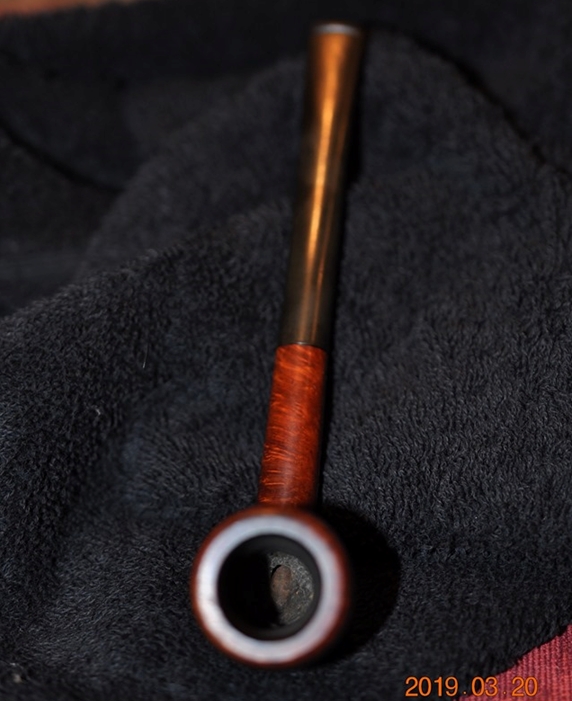
 The straight, broad vulcanite saddle stem is deeply oxidized with bite marks and tooth chatter on either surface in the bite zone. The insides of the slot and tenon have signs of accumulated gunk. The crossed Barling logo on the saddle top of the stem is crisp and deep.
 INITIAL CLEANING BY ABHA…
The initial cleaning on this pipe was done by Abha, my wife (she has cleaned up around 40-50 pipes and these have now reached me for further restoration). She reamed out the complete cake and further smoothed out the chamber walls with a folded piece of 220 grit sand paper. She further cleaned out the internals of the shank with pipe cleaners and alcohol and cotton buds. She followed the internal cleaning of the shank with external cleaning of the stummel using Murphy’s Oil soap and hard bristled tooth brush and dried it with paper napkins and cotton cloth.
Next she cleaned out the internals of the stem air way and immersed it in “Before and After Deoxidizer” solution along with the stem of other pipes in line for restoration. Once the stem had soaked overnight, she cleaned the stem under running warm water and scrubbed the raised oxidation from the stem surface using Scotch Brite pad. She further removed the oxidation by scrubbing the stem with 0000 grade steel wool and applied a little olive oil to rehydrate the stem.
ONCE THE PIPE IS ON MY WORK TABLE…
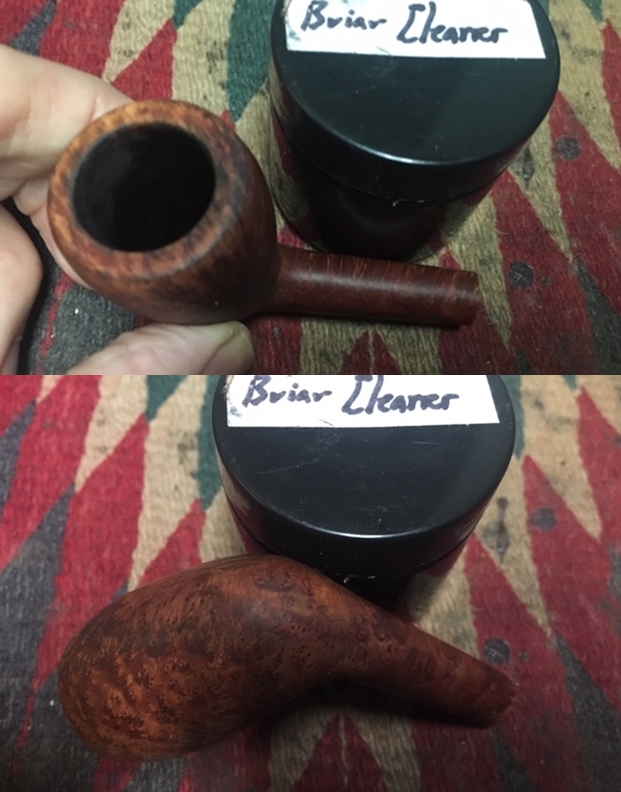
The cleaned up pipes presents a very clear picture of what needs to be done to restore this pipe to a pristine and smokable condition. I really cannot thank Abha, my wife, enough for all the help and support that she extends me in my pursuance of this hobby. I proceed to carry out my appreciation of the work that needs to be done on this pipe to restore it.
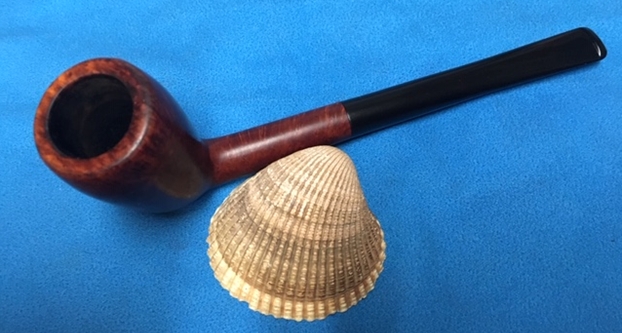
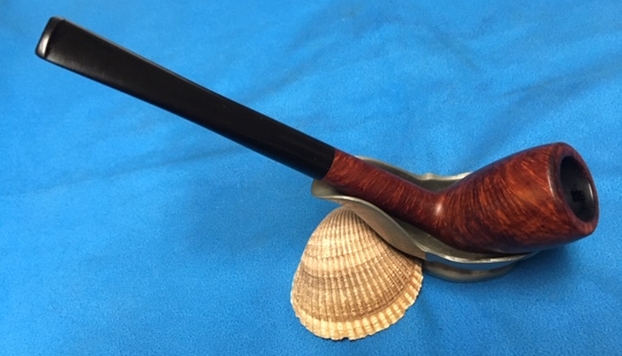
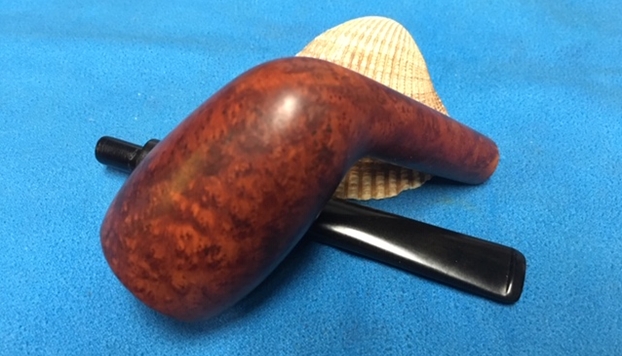
The chamber is odorless and the walls are solid without any signs of damage. The smooth and thin rim top surface is where all the action is on this pipe with an equally damaged inner and outer rim edge. The front and back of the outer rim edges and top surface has signs of charring. This should be addressed to some extent when I top the rim surface. The mortise and shank internals are nice and clean.
 Even though most of the lacquer coat was removed when the stummel was cleaned up by Abha, I could still see remnants of the peeling lacquer coat over some parts of the stummel. I shall have to remove this coat and thereafter decide on staining the stummel or otherwise. The stummel surface is sans any fills; however, the left side surface has some damage in the form of dents and dings, probably caused due rough handling of the pipe by the previous owner.

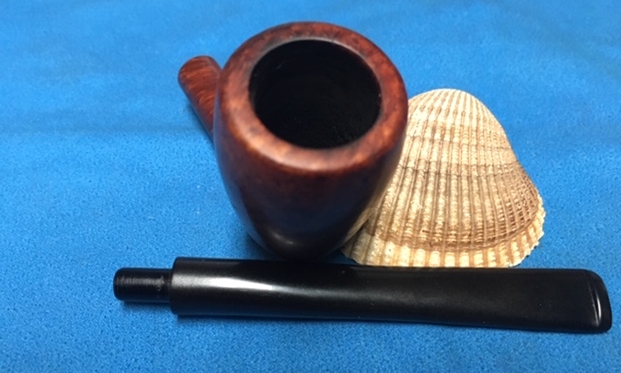
 The oxidation on the vulcanite stem has been greatly reduced thanks to all the efforts put in by Abha, clearly defining the deeper bite marks and the damage to the button edges on both surfaces of the stem. These tooth marks would be required to be filled with a mix of activated charcoal and superglue. A bit of sanding to match the fill and remove the deeper oxidation followed by micromesh polishing cycle should add a nice shine to the stem.
 THE PROCESS
The first issue I addressed was that of the stem repairs as this would take the maximum of my time to clean, repair and spruce up the stem. I flamed the damaged button edge and the tooth indentations with the flame of a lighter. This helps the vulcanite to rise to the surface as it has an inherent property to regain its original shape when heated. I sand the stem with a folded piece of 220 grit sandpaper to even out the raised stem surface and address the minor tooth chatter. I mixed superglue and activated charcoal powder and diligently applied it over the deeper tooth indentations in the bite zone on lower stem surface and over the button edge on the upper stem surface and set it aside to cure.

 With the stem fill set aside to cure, I decided to address the issues on the stummel surface. I start by steaming out the dents and dings from the left side of the stummel. I heated my fabricated knife over a candle flame till hot. I spread a wet Turkish hand towel over the dents and dings on the stummel and placed the heated knife over the hand towel. The resulting sizzle produces steam which in turn expands the briar and evens out the dents. The results are exactly as I wanted them to be.
 The next stummel issue to be addressed was that of the rim top surface damage. I topped the rim on a piece of 220 grit sand paper, checking frequently till I was satisfied that the charred surface was addressed to a great extent and the rim top surface is nice, smooth and even. The inner edge is still uneven, though much better than before topping, and shall be addressed subsequently.
 Close observation of the rim top surface revealed remnants of charred inner rim edge on the right side and below it on the same side, a briar flaw (all encircled in red). This flaw, when polished would stand out like a sore thumb and hence I decided to address this by topping the rim top further. A few careful rotations of the rim top on a piece of 220 grit sandpaper and the issue of briar flaw was completely addressed and the charred inner rim edge was further reduced. The rim top looks significantly better at this stage.
 With a folded piece of a 220 grit sand paper pinched between my thumb and forefinger, I created a slight bevel on the inner edge of the rim top surface. This helped to mask and address the minor charred marks that had remained on the inner rim edge.
 Continuing with my work on the stummel, I sand the entire stummel surface with a piece of 220 grit sand paper. This helped to address all the minor dents from the surface and removed what little lacquer coating that had remained, while providing a smooth surface for the next stage of micromesh polishing cycle.
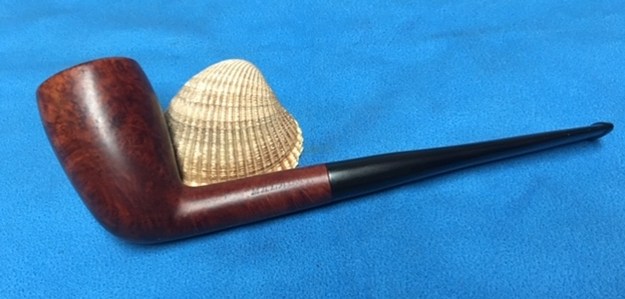
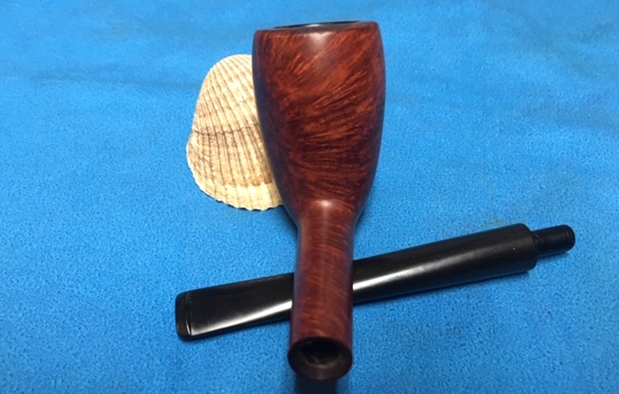
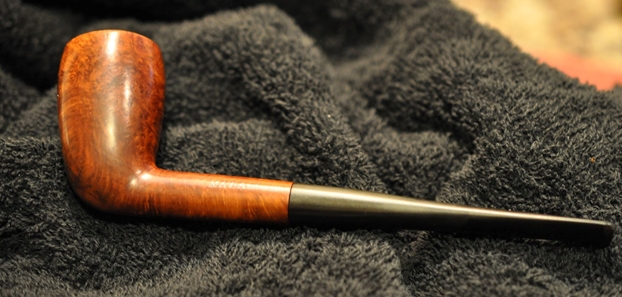
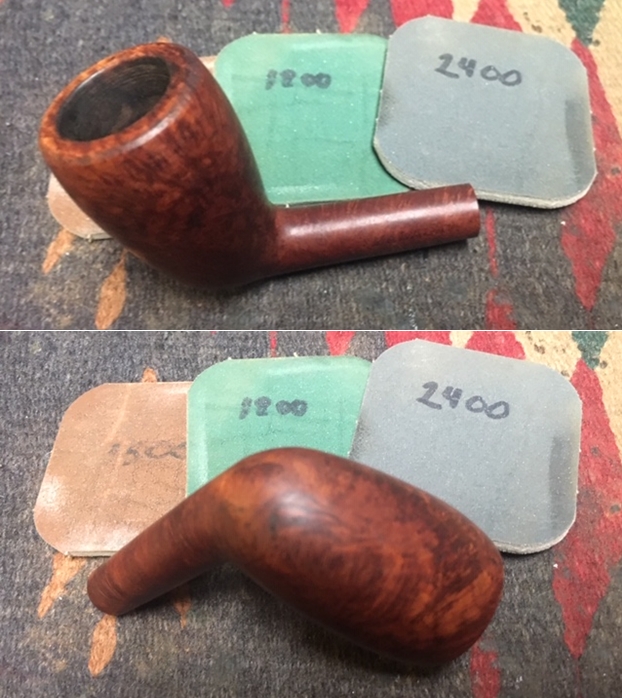
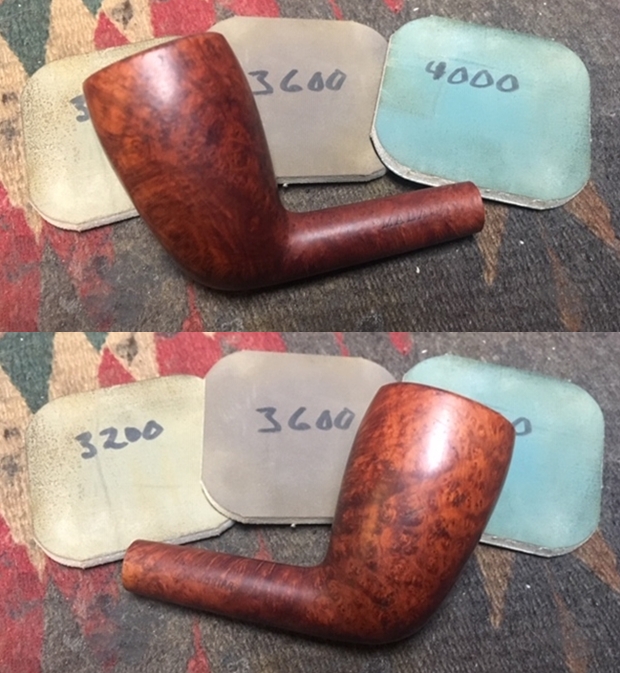
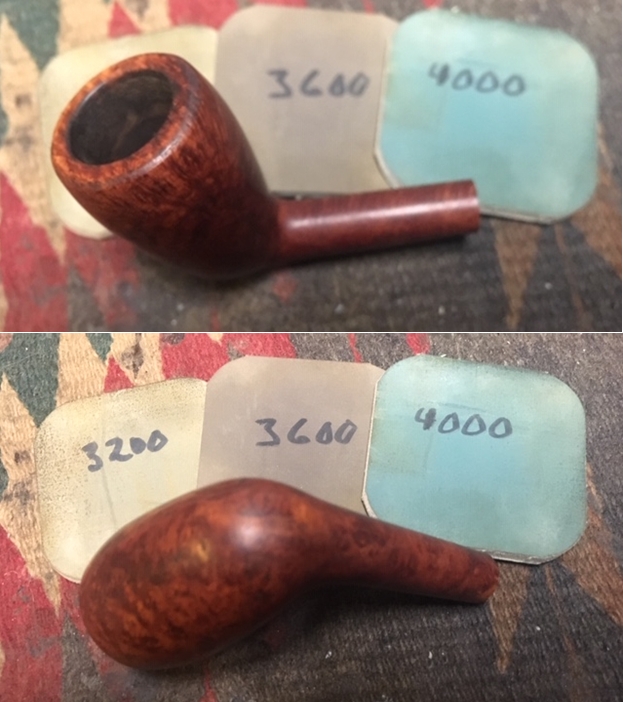
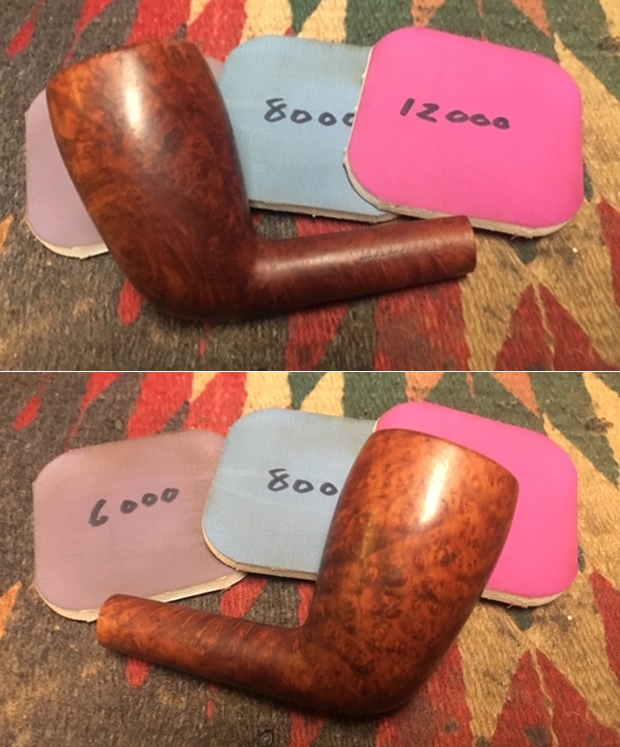
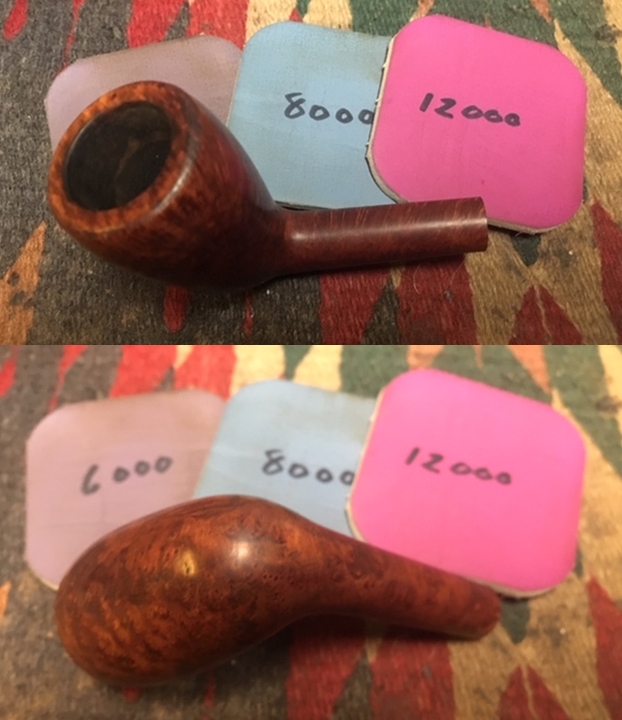
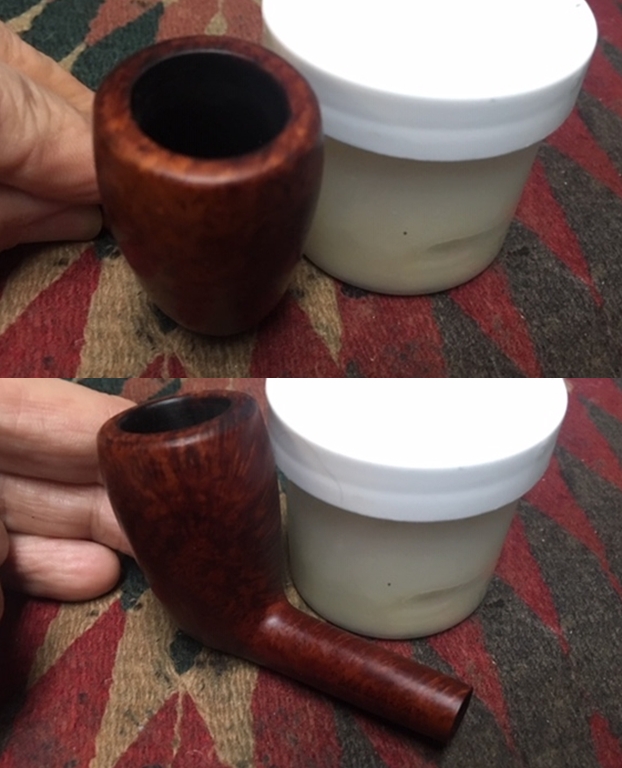
 To remove the sanding marks and bring a deeper shine, I polished the stummel with micromesh pads, wet sanding with 1500 to 12000 pads. I wiped the surface with a soft cloth at the end of the micromesh cycle. The stummel looks amazing with a deep dark shine and beautiful grains all around. I showed the stummel to the new owner and discussed if he wanted me to stain the stummel or preferred it the way it appeared at this stage. I took this opportunity to explain him that the stummel would darken further as I finished with the polishing regime. He liked the pipe without stain and that’s how it shall remain.

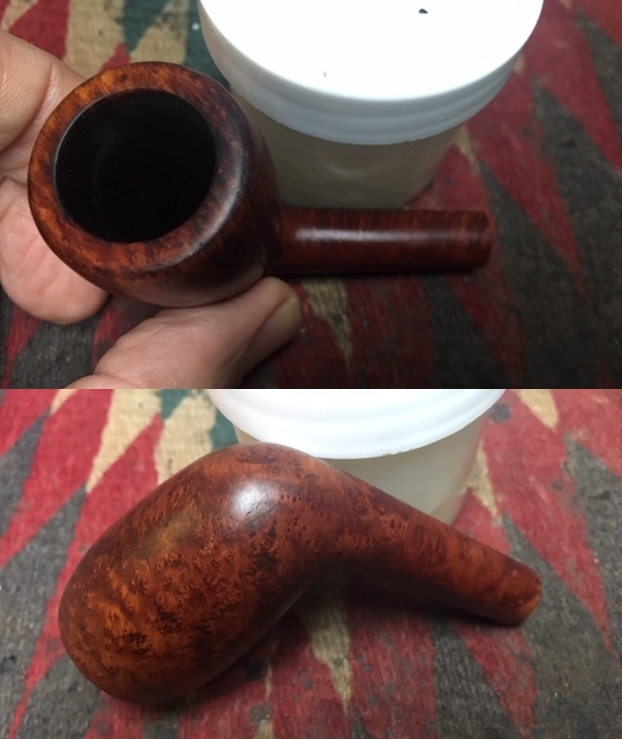
 As a result of all the topping and subsequent polishing, the rim top surface had a lighter hue as compared to the rest of the stummel surface. I matched the rim top surface with the rest of the stummel by staining the surface with a dark brown stain pen. I set it aside for the stain to cure and once I was satisfied, I wiped it with a microfiber cloth. The rim top is now perfectly matched with the rest of the stummel dark coloration. I am very pleased with the blend.
 Next, I rub a small quantity of “Before and After Restoration Balm” in to the briar with my finger tips and let it rest for a few minutes. The balm almost immediately works its magic and the briar now has a nice vibrant appearance with the beautiful darkened grain patterns on full display. I further buff it with a horse hair shoe brush.

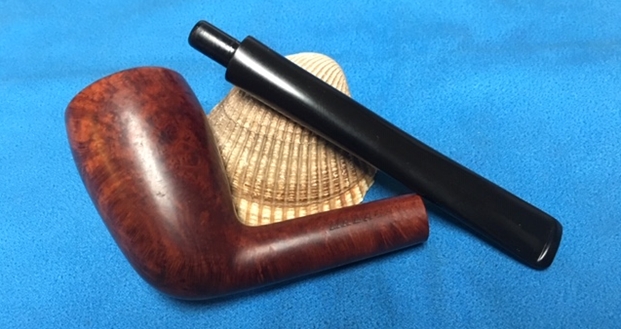
 Now that the stummel was nearly complete, I turned my attention to the stem repairs. The stem fills had cured completely by this time. With a folded piece of a 220 grit sand paper, I sand down the fills to achieve a rough match with the rest of the stem surface. I followed it up by sanding it with 400, 600, 800 grit sand papers and finally with a piece of 0000 grade steel wool. This serves to achieve a perfect blend of the fills with the rest of the stem surface, remove the deep seated oxidation and also reduces the sanding marks of the more abrasive sand papers. I wiped the stem with a cotton swab and alcohol to remove all the oxidation and sanding dust from the surface. I applied a little Extra Virgin Olive oil over the stem and set it aside to be absorbed by the vulcanite.
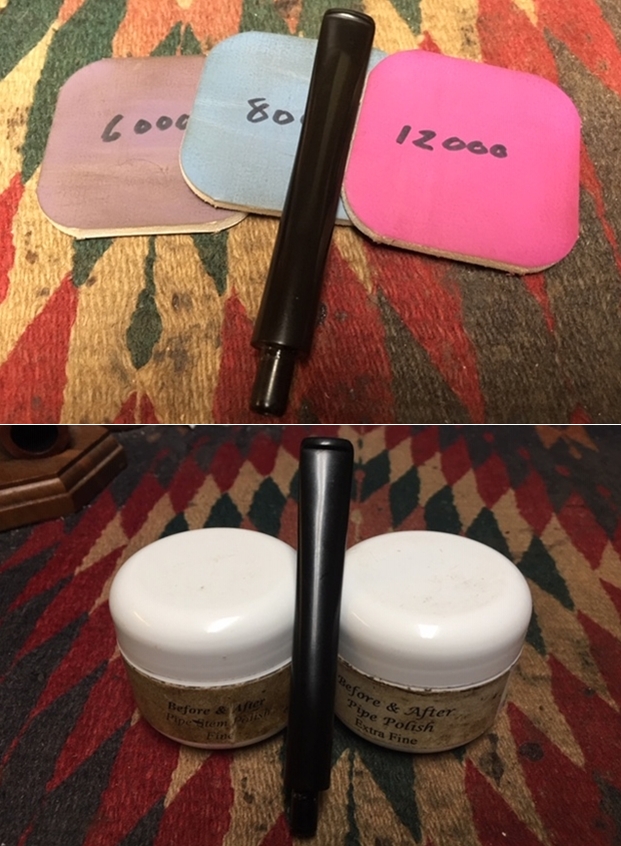
 I followed up the sanding regime with micromesh polishing to bring a shine on the stem surface. I wet sand the stem with 1500 to 2400 girt micromesh pads. Continuing with my experimentation that I had spelled out in my previous posts, I mount a cotton buffing wheel on my hand held rotary tool and polish the stem with Red Rouge polish as I had read that this polish has grit between 2400 to 3200 grit pads of the micromesh pads. Further, I mount a fresh buffing wheel on the rotary tool and polish the stem with White Diamond polish as it has grit equivalent to 3800- 4000 of micromesh pads. I finish the stem polish by wet sanding with 6000 to 12000 grit pads of the micromesh. I rub a small quantity of olive oil in to the stem surface to hydrate it and set it aside. I am really happy with this process of stem polishing as the results are excellent while saving me huge amounts of time and effort.


 The stem looks nice and shinning black, but there was something that I felt I had missed out. I realized that the stem logo is yet to be refreshed and highlighted. With a white fine tipped correction pen, I filled the crossed Barlings stamping and once it had dried a bit, with a toothpick, I scrapped off excess of the correction ink. The stamping is now completely refreshed and sits proudly on the top of the saddle.
 To apply the finishing touches, I mount a cotton cloth buffing wheel on to my hand held rotary tool and apply a coat of Blue Diamond to the stummel and the stem to polish out the minor scratches. With a cotton buffing wheel that I use for carnauba wax, I apply a coat of carnauba wax and continue to work on it till the complete coat of wax had been polished out. I mount a clean cotton cloth buffing wheel and give the entire pipe a once over buff. I finished the restoration by giving the entire pipe a rigorous hand buffing using a microfiber cloth to raise the shine further. The finished pipe looks beautiful and is ready to be handed over to the new piper. Hope he enjoys his leisure time with this beautiful and gorgeous looking pipe, smoking his favorite tobacco!!


 P.S. This is the third pipe that was selected by this gentleman to carry forward the trust posed in the pipe by the previous piper and I am sure that this pipe will provide the new piper many years of happy smokes and will remind him of our association. There is one more pipe which he has selected that I need to work on before I can get back to my choice of pipes to work on!!
I can never thank Abha, my wife, enough who not only supports my hobby of pipe restoration, but actively helps in this work by doing all the dirty work of initial cleaning and providing me a clean platform to work further. It is her work that helps potential buyers to select a pipe for themselves.
Thanks to all readers of Reborn pipes who have spared a moment of their invaluable time in reading through this write up and as is always, your suggestions and advice on my experimentation is always welcome as this would also help the new pursuers of this art.

 Jeff took close up photos of the bowl and rim to capture the condition of the pipe before he started his cleanup work. The rim top had some very light spots of lava and a little darkening on the back of the bowl. The edges of the bowl were not too bad. The inside edge was clean and the outside had a few small dents and nicks. Other than being so dirty that it was in great condition.
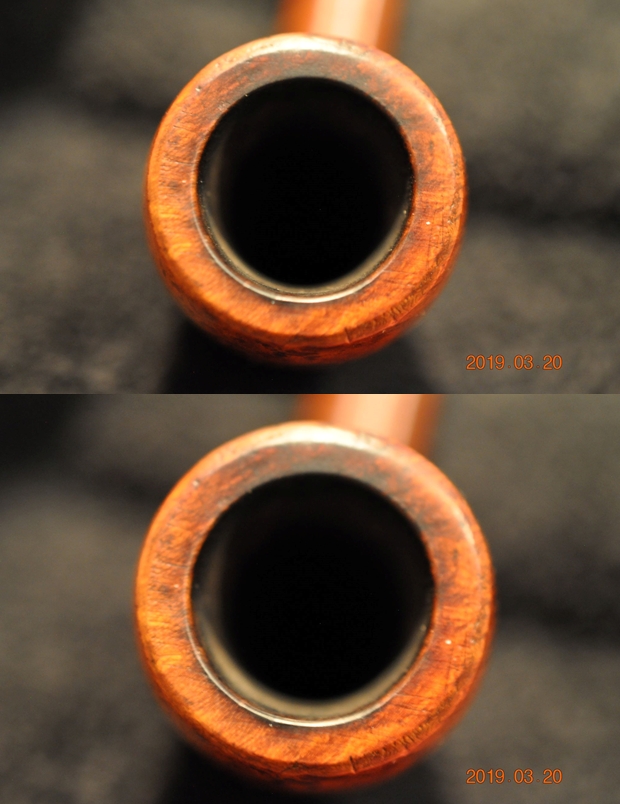 He also took photos of the sides and bottom of the bowl and shank to show the beautiful mixed grain around the bowl. The photos show the general condition of the bowl and wear on the finish. It is dirty but this is another beautiful pipe.

 Jeff took a photo to capture the stamping on the top side of the shank. The photos show the stamping “MALAGA” on the left side of the shank and on the right it is stamped Imported Briar in caps. The stamping is very readable.
 The next two photos show the stem surface. There are light tooth marks and chatter on both sides near the button. There is also some wear on the sharp edge of the button.
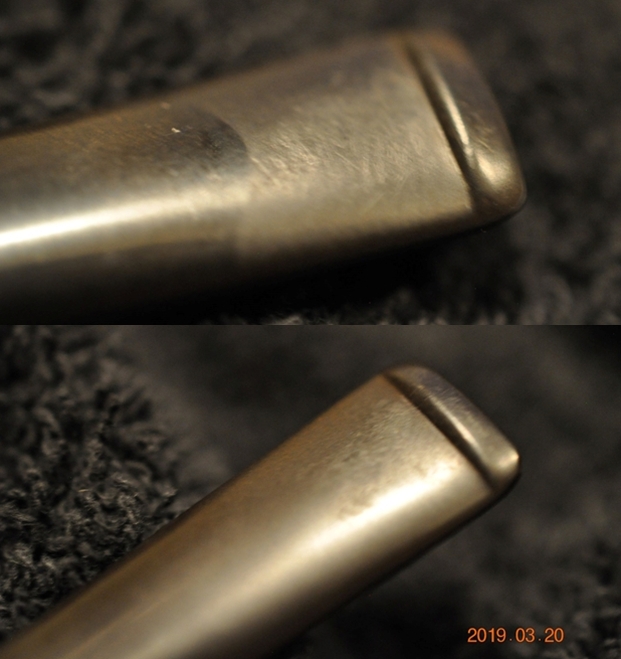
 If this is the first of the Malaga restorations that you have read about then you should know the backstory of the brand. I am including the link to a blog that I wrote that gives some of the history of the Malaga brand and the Malaga Pipe Shop in Royal Oak, Michigan in the USA. I have written an earlier blog to give a little history of the Malaga Brand and the pipemaker, George Khoubesser. Here is the link – https://rebornpipes.com/tag/malaga-pipes/.That blog also includes links to a catalogue and the history of the pipemaker George Khoubesser. Follow the link to get a feel for the brand and the pipemaker.
 I took close up photos of the bowl and rim top as well as the stem. You can see the condition of the rim top and bowl in the first photo. Jeff was able to remove all of the tar and oils but you can now see the darkened area on the back of the rim top. The vulcanite stem had tooth chatter on the top and underside of the stem near and on the button surface.
 I took photos of the stamping on both sides of the shank to show the condition. The first one shows the “MALAGA” stamp on the left side of the shank. The second photo shows the stamping on the right side of the shank. It reads Imported Briar.
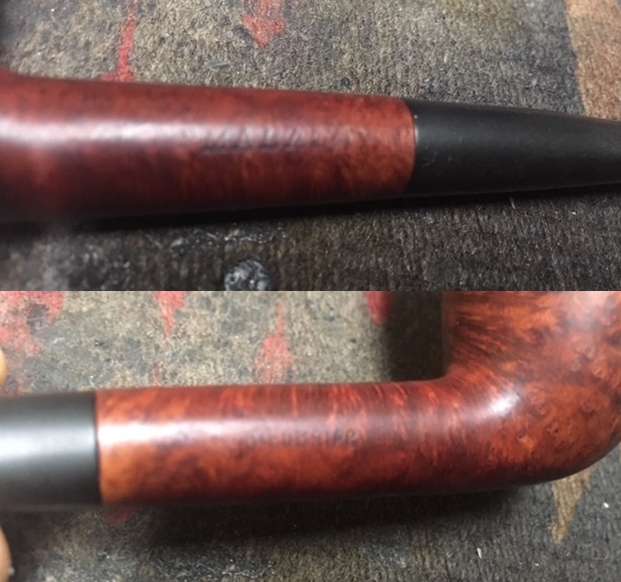 I polished the rim top and the exterior of the bowl with micromesh sanding pads – wet sanding with 1500-12000 grit pads. I wiped the bowl down after each sanding pad to remove the dust. Each grit of micromesh gave it more of a shine.
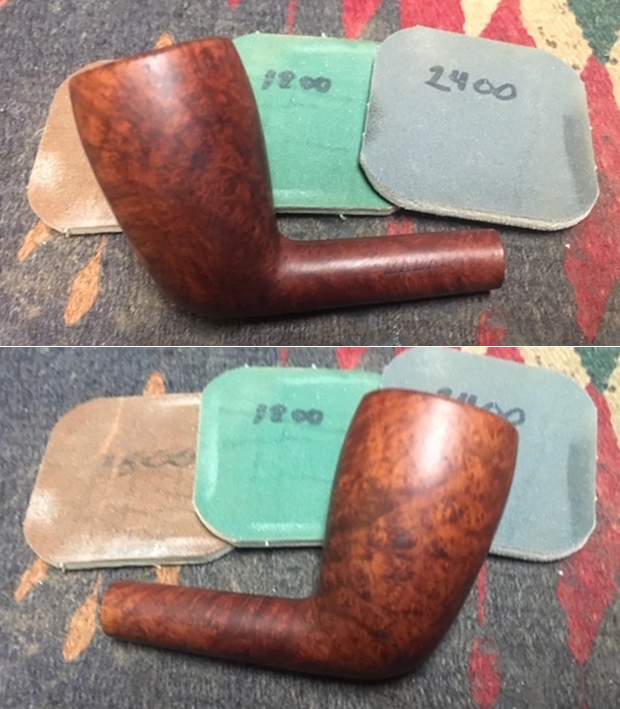
 I scrubbed the briar with Before & After Briar Cleaner. I rubbed it into the surface of the briar with my finger tips and let it sit for about 10 minutes then rinsed it off with running water. I dried it off with a soft cloth.
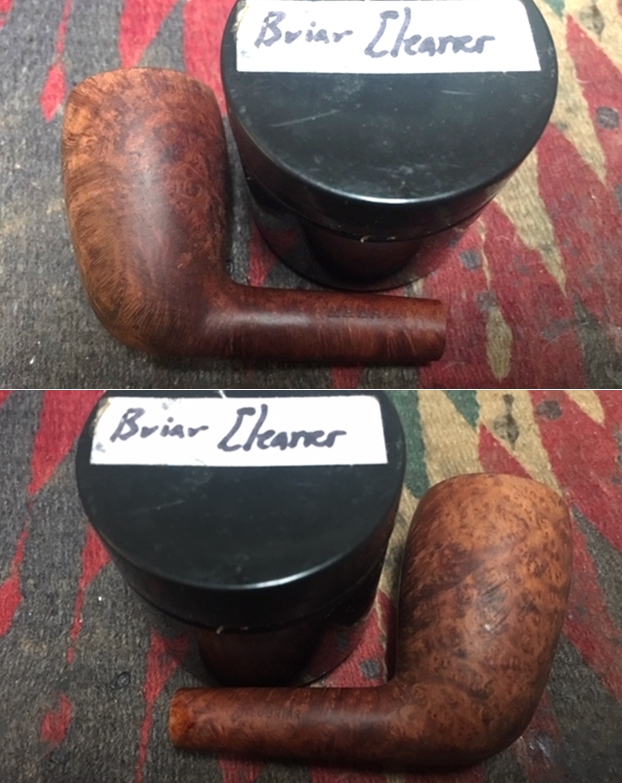
 I worked some Before & After Restoration Balm into the surface of the briar with my fingertips to clean, enliven and protect it. I let the balm sit for a little while and then buffed with a cotton cloth to raise the shine. The photos show the bowl at this point in the restoration process.
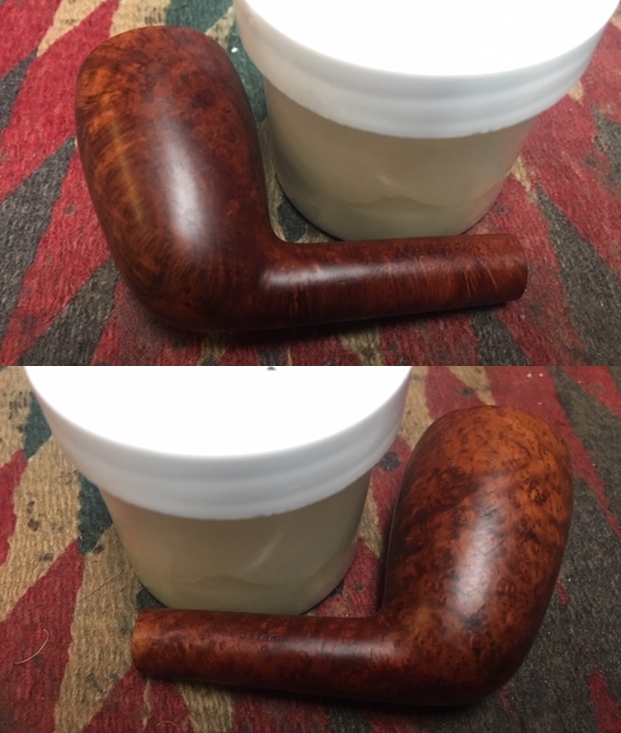
 The stem was in excellent condition, without tooth chatter or tooth marks. It was well cut stem and had a great look and feel. It was lightly oxidized so it did not take a lot of work to bring back a shine. I polished the stem with micromesh sanding pads – wet sanding with 1500-12000 grit sanding pads. I wiped it down after each sanding pad with a damp cloth.
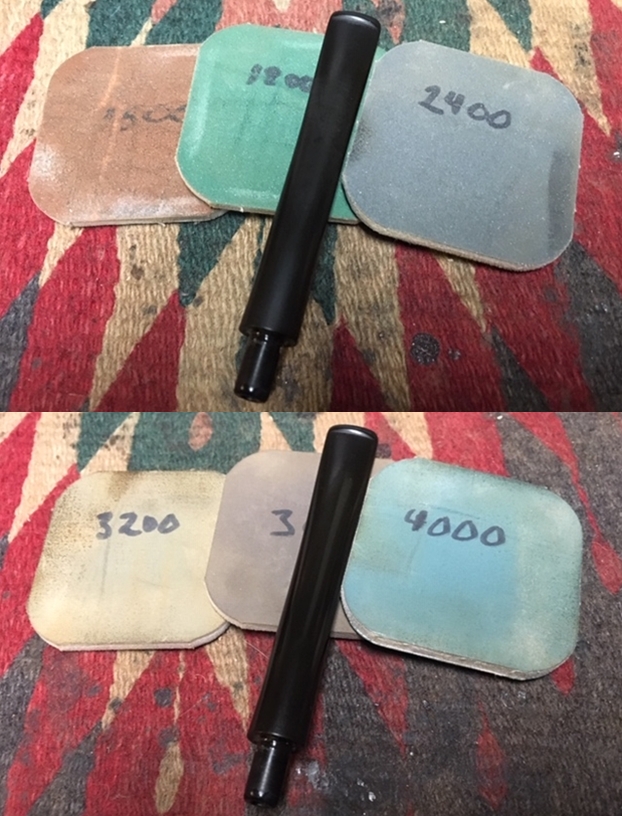
 This is a beautiful Pencil Shank Malaga Cutty with a black vulcanite stem. It has a great look and feel. The thin shank flowing into a tall bowl works well to highlight the birdseye and cross grain around the bowl sides. I polished stem and the bowl with Blue Diamond polish on the buffing wheel. I gave the bowl and the stem multiple coats of carnauba wax. I buffed the pipe with a clean buffing pad to raise the shine. I hand buffed it with a microfiber cloth to deepen the shine. The pipe polished up pretty nicely. The grain took on life with the buffing. The rich oil cured colour works well with the polished black vulcanite stem. The finished pipe has a rich look that is quite catching. Have a look at it with the photos below. The shape, finish and flow of the pipe and stem are very well done. The dimensions are Length: 6 ½ inches, Height: 2 inches, Outside diameter of the bowl: 1 1/8 inches, Chamber diameter: 5/8 of an inch. I will be adding the pipe to the finished Malaga pipes that I have set aside for Alex. This will be a great addition to his collection of Malaga pipe. Thanks for walking through the restoration with me as I worked over another Malaga.