
Blog by Paresh Deshpande
Having worked on a few difficult projects from my Mumbai Bonanza, involving major stem reconstruction and addressing flaws in the stummel (read refreshing fills!!) taking a lot of time and heartburn and efforts which had left me drained, I decided to work on something simple and relatively quick refurbishing of pipes from my inherited collection.
The Barling pipe on my work table is an exquisite bent billiards with beautiful and very tightly packed bird’s eye grains on either side of the bowl and shank, extending over to more than half of the front of the stummel. Equally tightly packed cross grains are seen on the front left and back of the bowl and also on the upper and bottom surface of the shank. It is stamped on the left side of the shank as “BARLING” in script hand over the numeral “2639” over “LONDON ENGLAND”. There is no other stamping seen on the stummel. The double bore vulcanite saddle stem bears the trademark Barling stamped in cross on the upper surface of the saddle.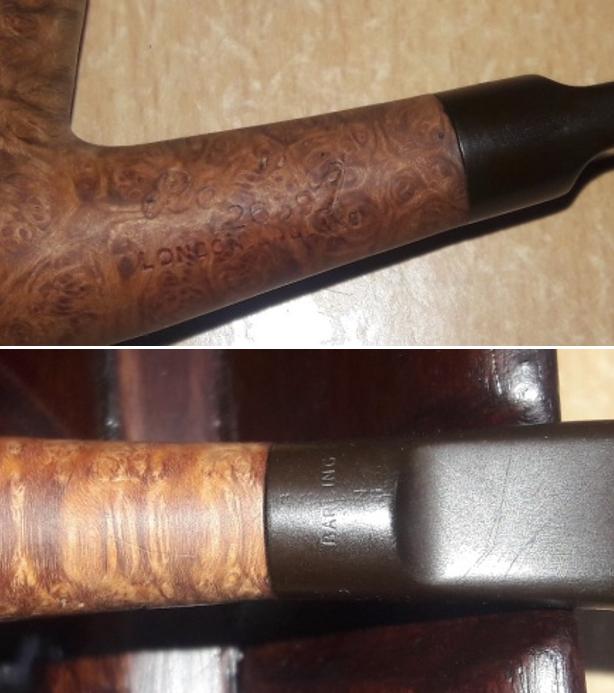 Even though there are quite a few Barlings in my grandfather’s collection, this beauty is the second of the Barling’s that I shall be restoring. During my reading while working on my first Barling, I had read about this brand, its passage through times and pointers towards their dating. To refresh my memory about the brand, the lines offered by the maker and attempt to date this particular pipe, I visited Pipedia which has a wealth of neatly cataloged heading-wise information on Barling’s pipes. From the stamping seen on this pipe and correlating it with my information, it was immediately apparent that this one is definitely not a Family Era pipe, but a later era pipe. Luckily, on the same page, towards the end, there is a link to 1962 Barling catalog, courtesy Yuriy Novikov. This catalog, on page 7 shows the pipe which is on my work table, here is the link to this catalog: https://pipedia.org/images/d/d9/BARLING_CATALOG_1962.pdf
From the above information, it is conclusive that this piece is a size 2, flat bent billiard from the Transition period/ Corporate era and was made during 1962. The minimalist stamping and the double bore stem indicate that this pipe was intended to be sold in the local markets.
INITIAL VISUAL INSPECTION
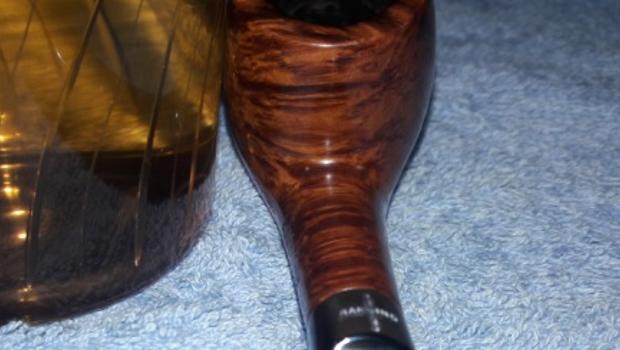
This pipe was one of the pipes that Abha, my wife had sent me after she had reamed out complete cake back to the bare briar and cleaned the stummel exterior and rim top surface with Murphy’s oil soap. She had also cleaned out the mortise and the shank using regular and hard bristled pipe cleaners dipped in isopropyl alcohol. The cleaned up pipe on my work table now, can be seen in the following pictures. It really feels nice to work on a clean pipe; I must admit and cannot help but thank her for doing all the dirty work and saving me time while sharing my hobby. Unfortunately, she did not click any pictures of the condition of the pipe before she worked her magic on them. When I inquired about the condition before she had cleaned it, her one line reply was “no different from his (grandfather’s) other pipes!!!” For those who have been reading my previous write ups would recollect that my grandfather never really believed in cleaning his pipes, he would rather buy new ones when the old pipes chocked up and became unsmokable.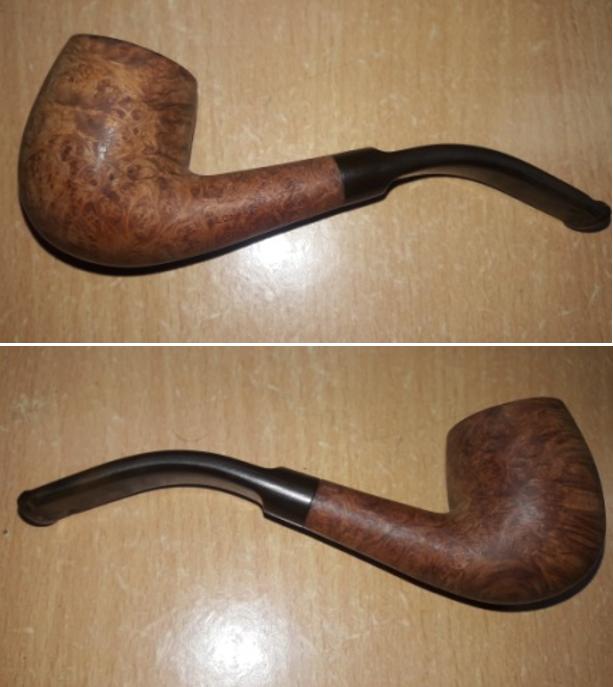
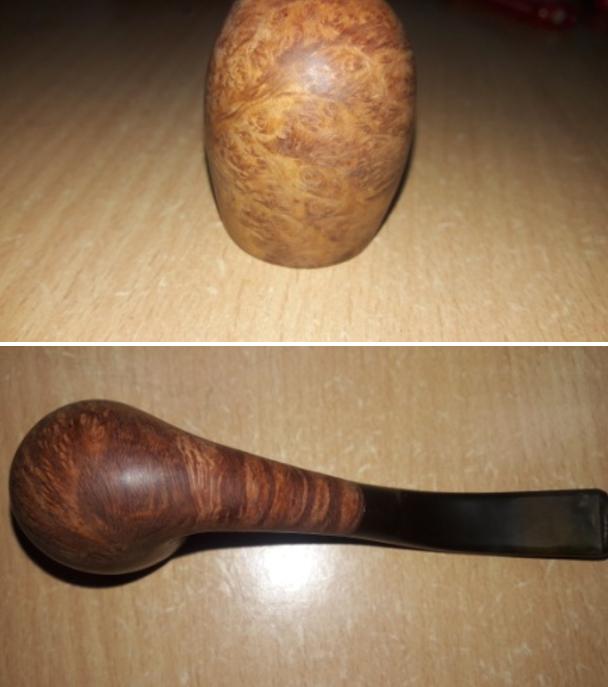
 From the present condition of the pipe, there are only two issues that I would need to address on the stummel; one is the darkened rim top surface with an uneven inner rim edge and the other is slightly deep gouges on the chamber walls.
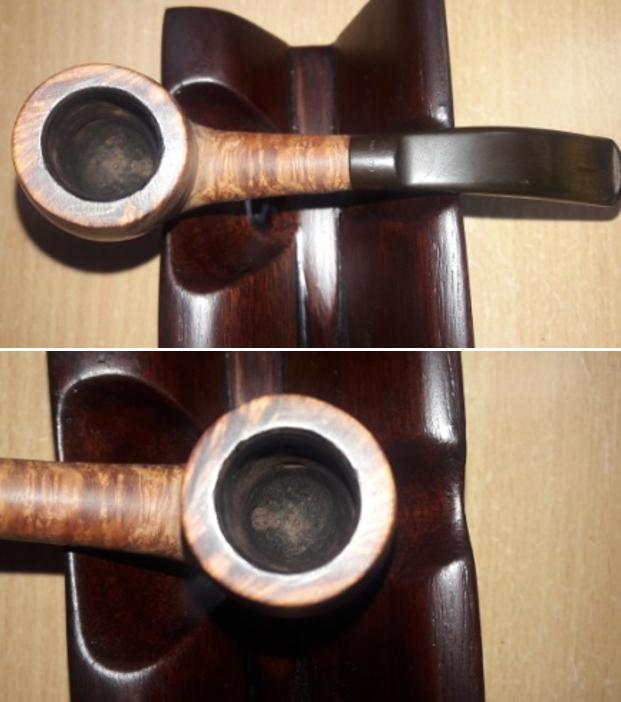
 The vulcanite stem is heavily scratched and shows deep oxidation on the surface. Some heavy tooth chatter is seen on both surfaces of the stem towards the lip with few deep bite marks on the upper and lower surfaces. This issue should not be a major headache to address. The lip edge on both sides is distinct but damaged showing tooth marks. The quality of vulcanite is good.
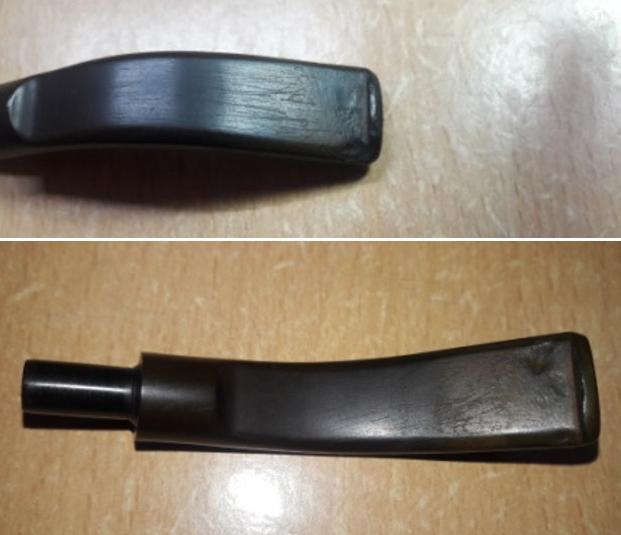 THE PROCESS
I flamed the surface of the stem with a Bic lighter to raise the tooth indentations and scratches on the stem. The heat from the flame of Bic lighter causes the vulcanite to expand and regain its natural shape, reducing the marks. I followed it up by sanding the entire stem surface with a folded piece of 220 grit sand paper to reduce the tooth chatter while removing the oxidation from the area to be filled. I wiped the stem surface clean with a cotton pad dipped in alcohol to remove all the dust and dirt from the surface. The tooth marks which were visible after the flaming and sanding were filled with a mix of activated charcoal and clear CA superglue and I set it aside to cure overnight.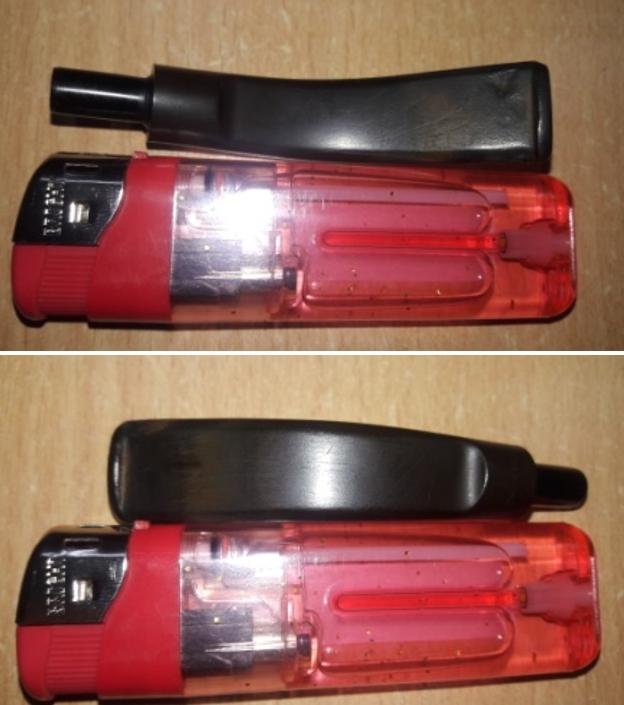
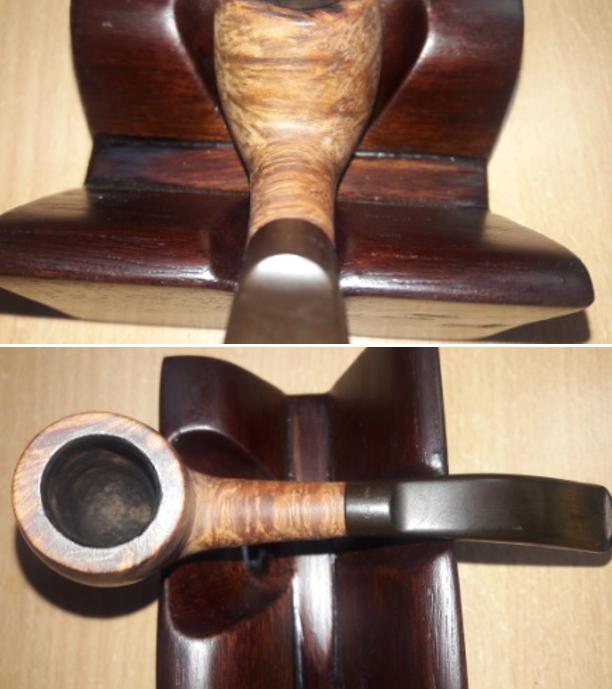
 While the stem fill was set aside for curing, I decided to address the darkened rim top surface and the uneven inner rim edge issue observed on the stummel. I did not resort to topping straight away, but decided to try scrubbing the rim top with Murphy’s oil soap and scotch brite pad. The result of this scrubbing far exceeded my expectations. The rim top is now clean and there are no traces of rim darkening. To address the issue of an uneven inner rim edges, with a folded piece of 220 grit sand paper, I created a slight bevel to the inner edge. The rim top and inner edge issues are now pristine.
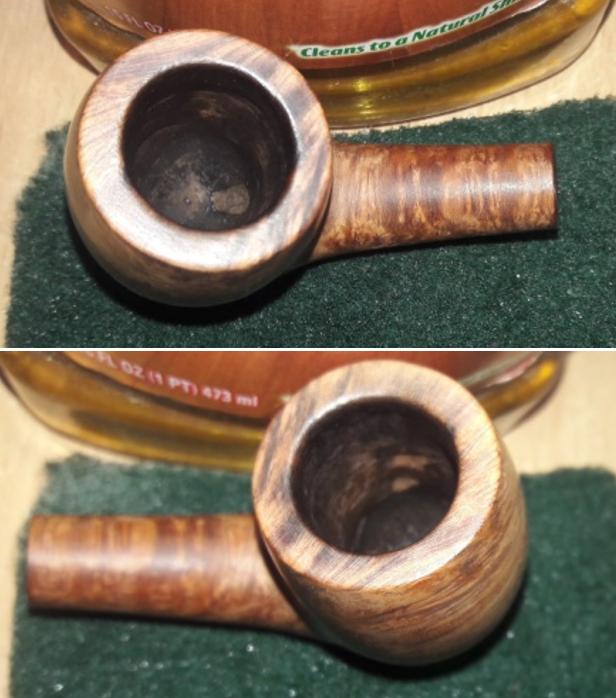
 The next step in the process was to bring out the shine and highlight the beautiful grain on the stummel. I had an option of using more abrasive 220 grit sandpaper followed by micromesh pad cycle and loose the patina or straight away go to the micromesh cycle. Using the more abrasive sand paper, minor dents and dings would be further addressed but I would lose out the old sheen which the briar has taken over the years. I decided on keeping the old sheen and went straight for the micromesh cycle. I wet sand the stummel with 1500 to 2400 grit pads and follow it up by dry sanding with 3200 to 12000 grit pads. The stummel, at this stage, looks absolutely stunning with the grain popping out from every inch.

 I rub a small quantity of “Before and After Restoration Balm” in to briar and let it rest for a few minutes. The balm almost immediately works its magic and the briar now has a nice vibrant appearance. I further buff it with a horse hair shoe brush.
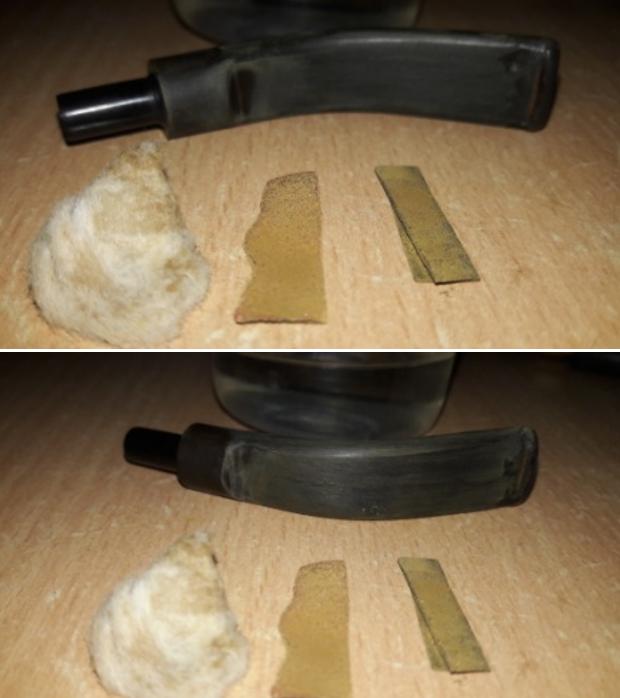
 Turning my attention to the stem, I first covered the stamping on the stem with whitener using a whitener pen. The filling of charcoal and CA superglue had cured and using a needle file, I sand the filling to match the surface of the stem. For a better blending, I further sanded the entire stem with 220 followed by 400, 600 and 800 grit sandpapers. This helps to reduce the sanding marks left behind by the more abrasive 220 grit paper. To bring a deep shine to the vulcanite stem, I went through the complete set of micromesh pads, wet sanding with 1500 to 2400 grit pads and dry sanding with 3200 to 12000 grit pads. I wiped the stem with alcohol after each pad and rubbed it down with Extra Virgin Olive oil. The internals of the stem was cleaned out using alcohol and pipe cleaners. The finished stem is shown below.
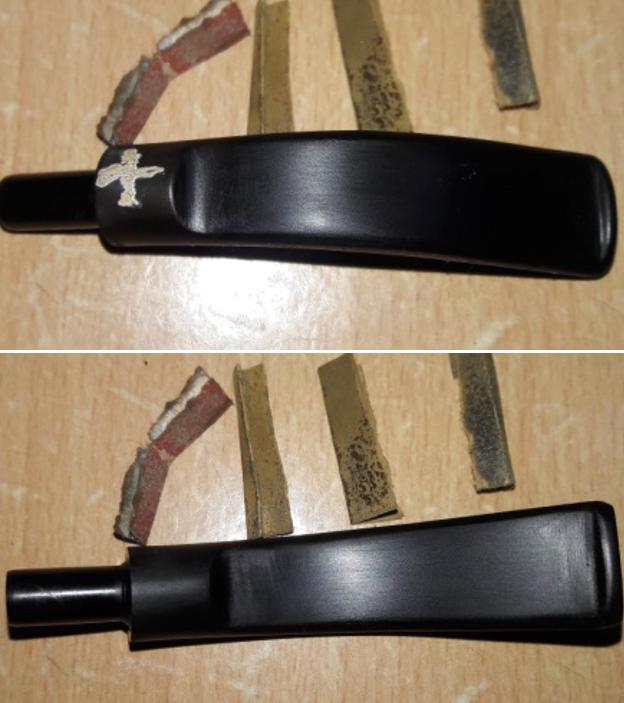
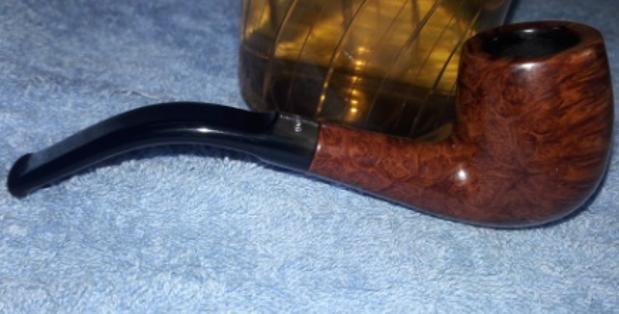
 To finish, I re-attach the stem with the stummel. I mounted a cotton cloth buffing wheel to the Dremel (actually it is not the brand machine, but a local machine which is similar). I set the speed at about half of the full power and applied White Diamond compound to the entire pipe. I wiped/ buffed the pipe with a soft cotton cloth to clear it of any leftover compound dust. I then mounted another cotton cloth wheel on to the polishing machine and applied several coats of carnauba wax. I finished the restoration by giving the entire pipe a rigorous hand buffing using a microfiber cloth to raise the shine further.
  The completed pipe looks lovely, fresh and vibrant; the photographs in this case, do not do justice to the appearance of this beautiful little pipe. This beautiful piece of briar, without a single blemish to the stummel, will find a place of pride in my collection. If only it could tell me stories it had witnessed and experiences, trials and tribulations and joyous moments in my grandfather’s life journey!!!! Thank you for having the patience to reach this far while reading the write up.
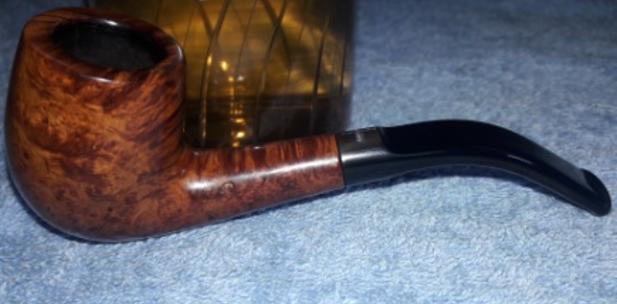


 PS: This project was a welcome break from the previous difficult stem reconstruction and stummel restoration projects that had posed a challenging obstacle at every stage in the process. I must thank my wife, Abha, who had done all the dirty work and presented a simple and quick refurbishing project.

Pingback: Restoring a Danish Made Barling Make International 911 Brandy | rebornpipes
Pingback: A Fresh Lease on Life for a Barling T.V.F # 911, Made in Denmark | rebornpipes
Paresh, I’m always asking my pipes to tell me their stories! I’m sure your grandfather would be glad to dirty this one up again! The grain turned out nicely – good job teasing it out. . It’s a good one to add to the collection.
LikeLike