Blog by Paresh Deshpande
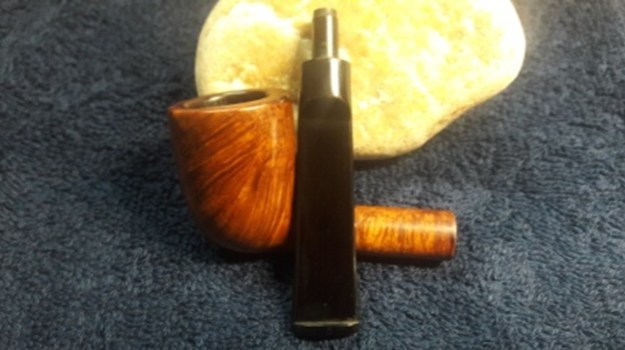
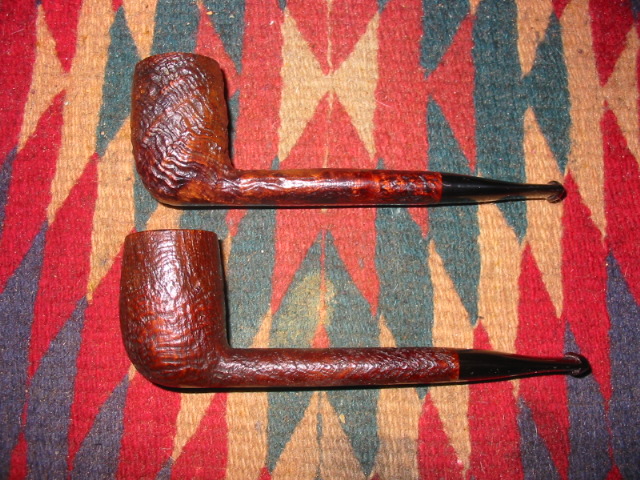
In one of a first, I had decided to work on four pipes simultaneously. Well, honestly, it was a decision which was forced on me due to extraneous circumstances that I had created for me. It so happened that after having discussed with my mentor, Mr. Steve, I decided to work on a John Bessai creation from my Grandfather’s collection. As I was turning the John Bessai in my hands, I felt that there were not very many major issues involved in its restoration and the small Barling’s, also from my old man’s collection, appeared to be a straight slam dunk of a restoration. Thus, I decided to work on both simultaneously, which appeared doable. However, things turned in to a challenge when I was just surfing YouTube on pipe restoration topics. In one of the videos, Hydrogen Peroxide and water solution was used to raise the oxidation to the surface and subsequent cleaning of the same was a breeze. I decided to try out this method and in order to make max use of the solution; I dunked stems of two more pipes in to it. Now I have four pipes in line to restore. I can still manage the restorations; it is the write ups that are a huge challenge for me as Mr. Steve will vouch for the delayed submissions.
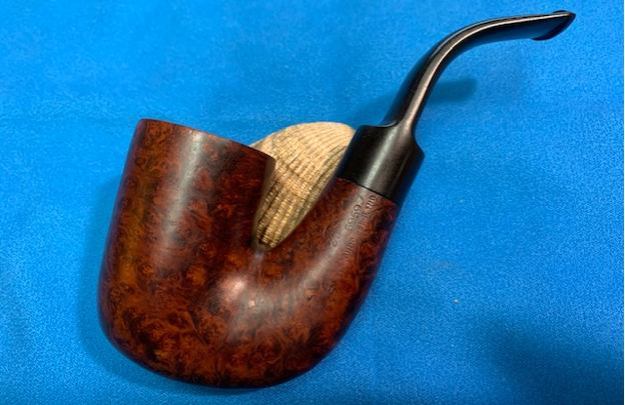
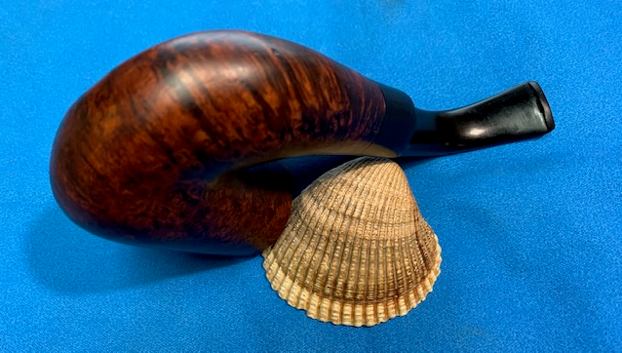
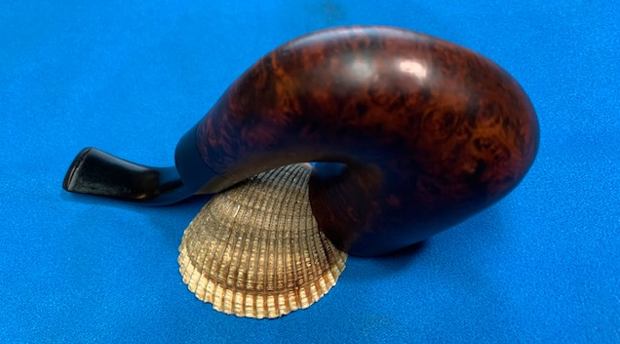
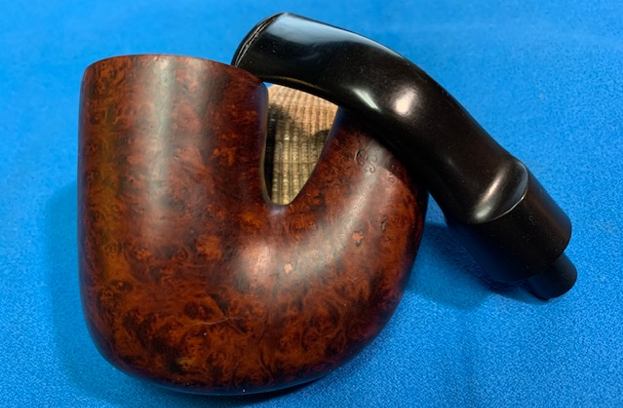
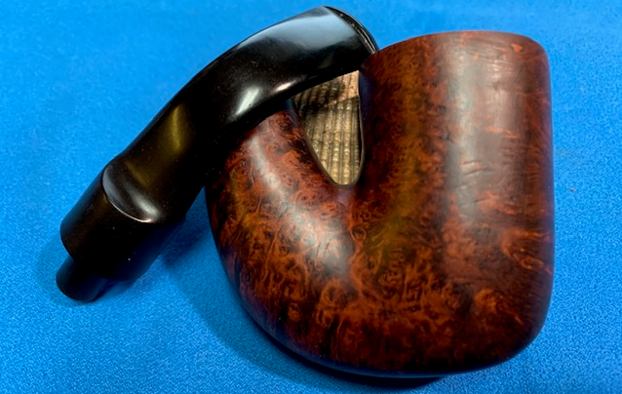
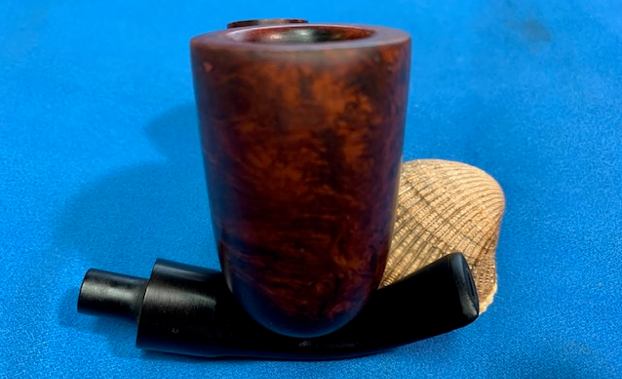
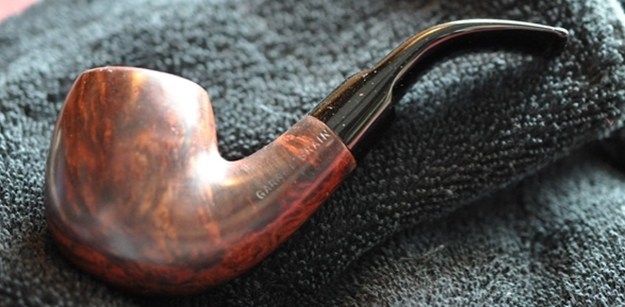
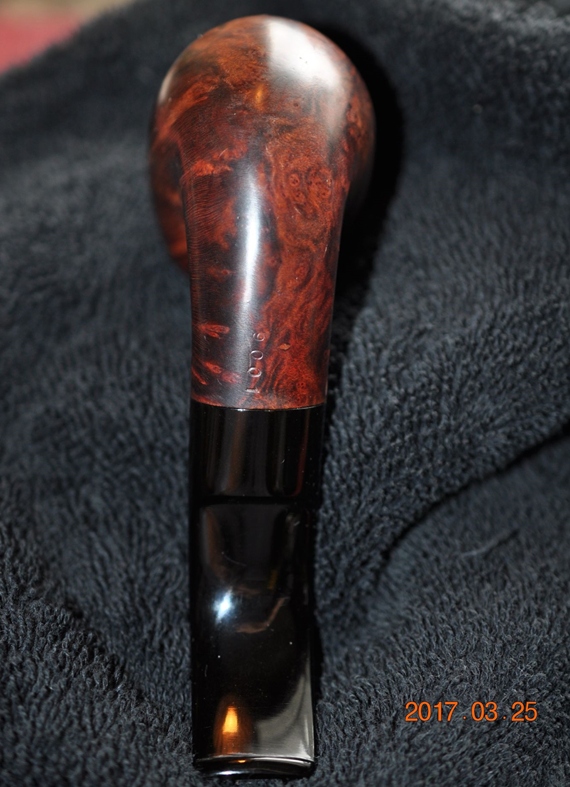
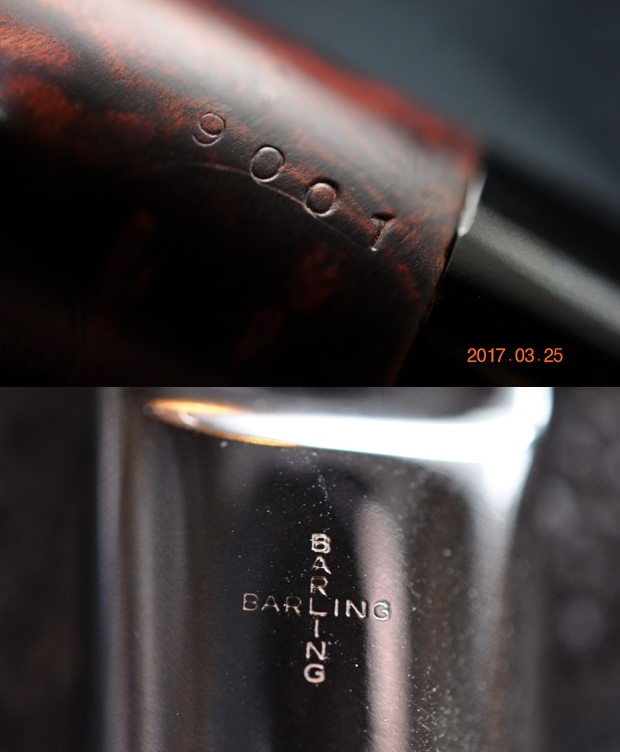
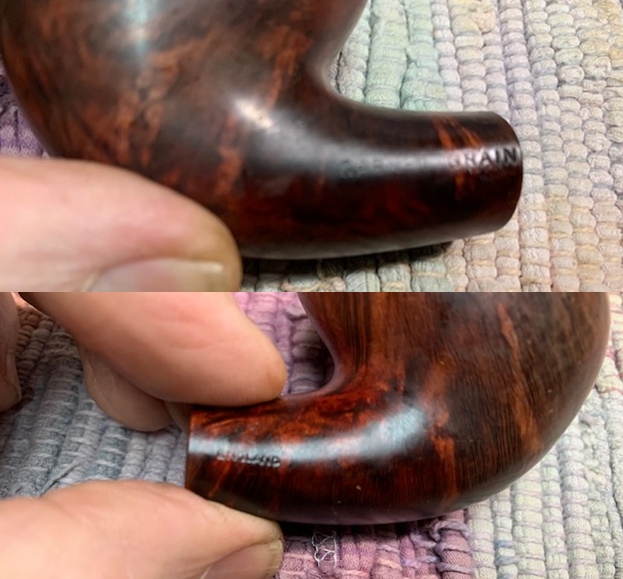
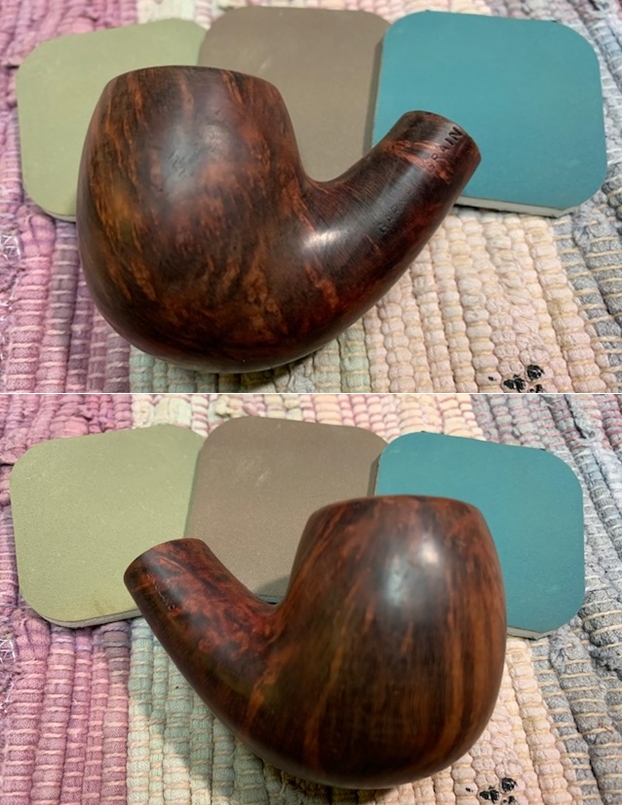
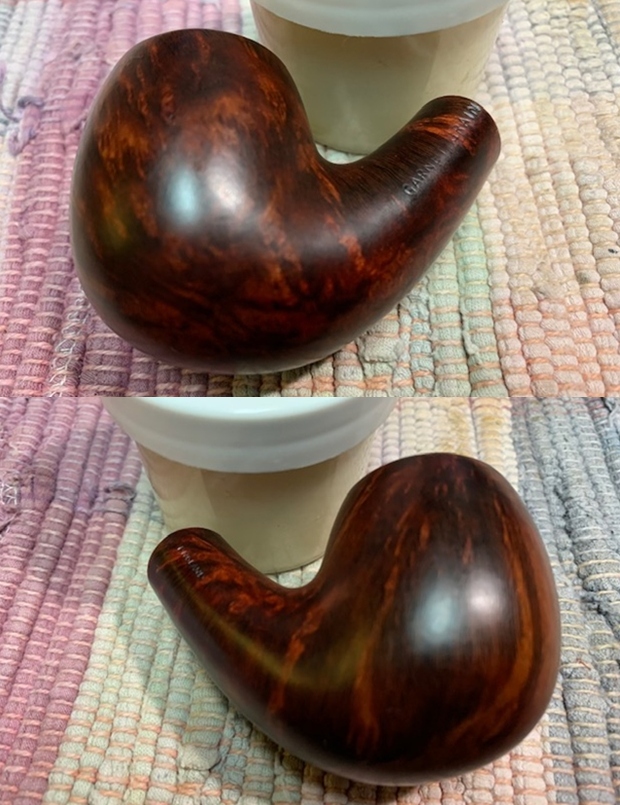
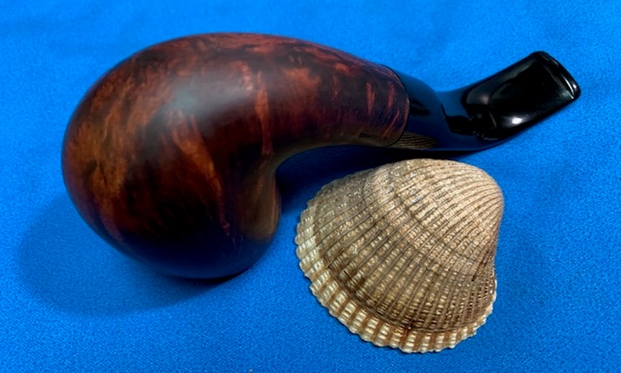
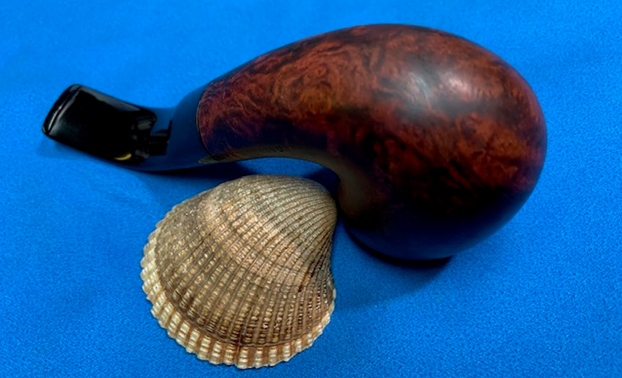
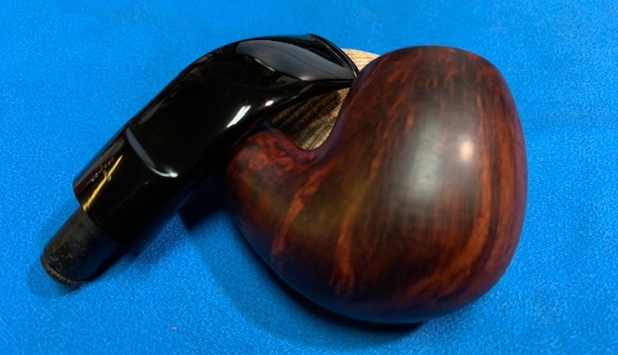
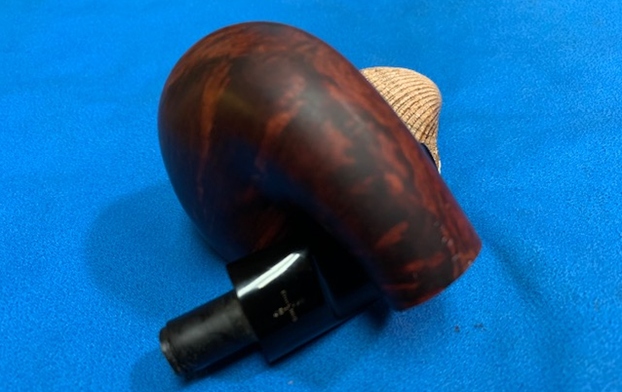
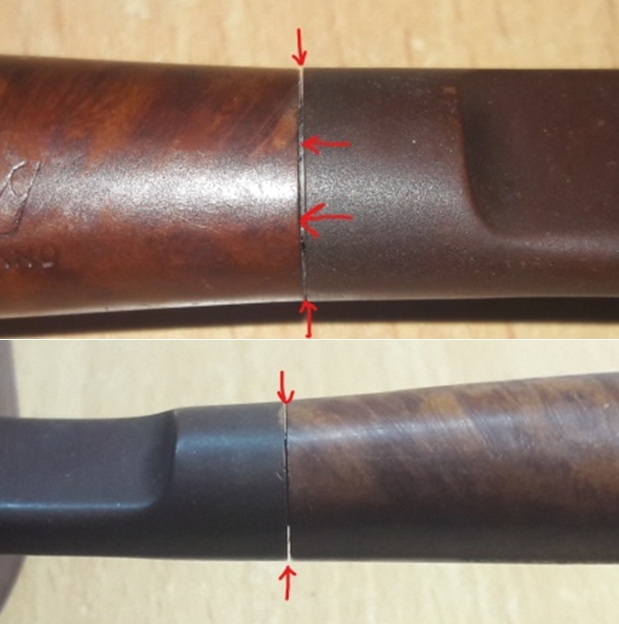
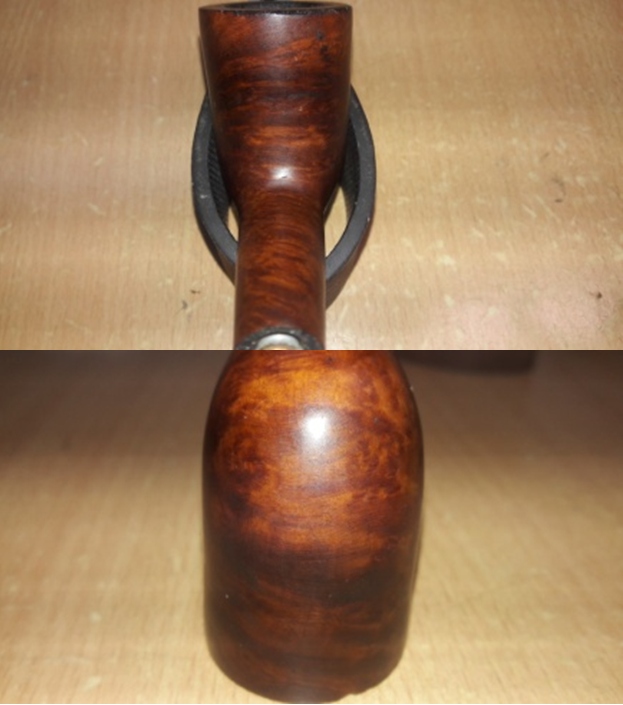
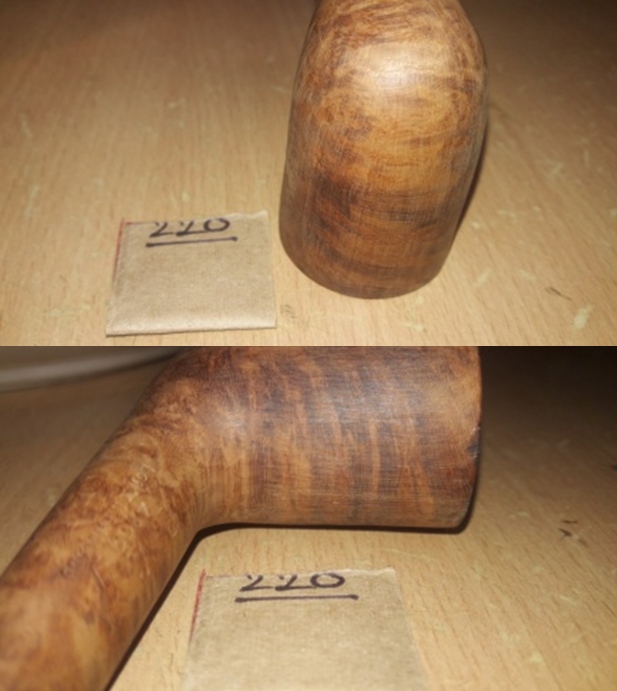
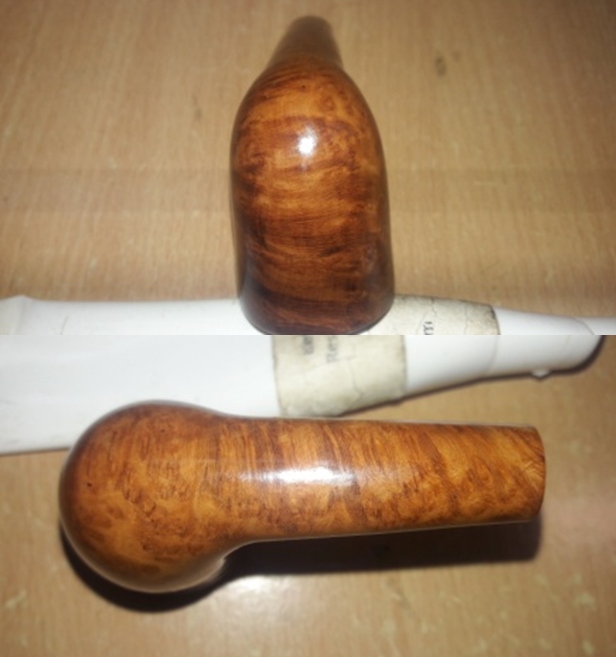
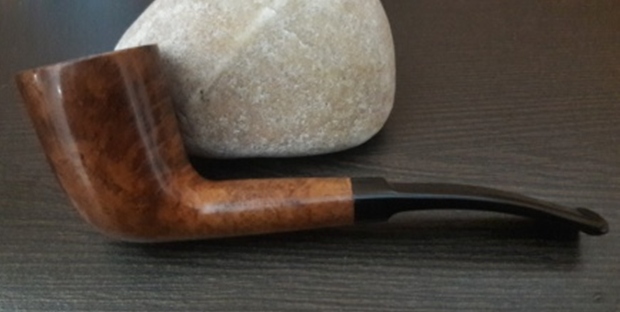
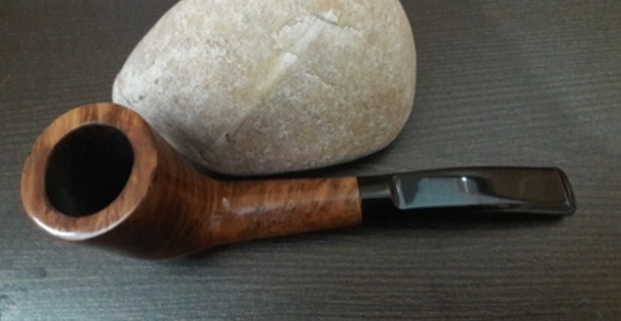
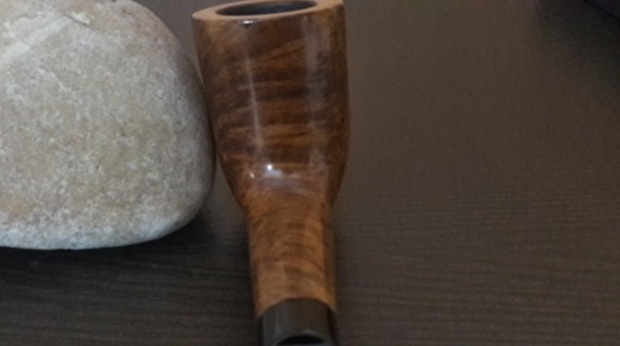
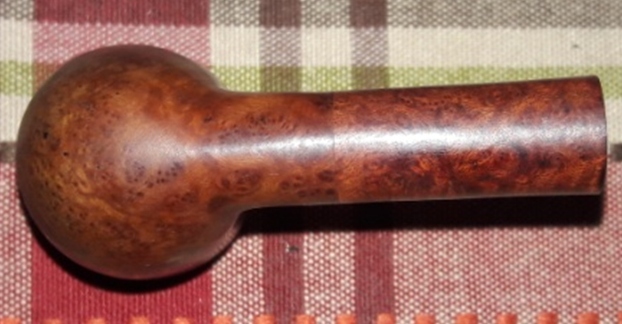
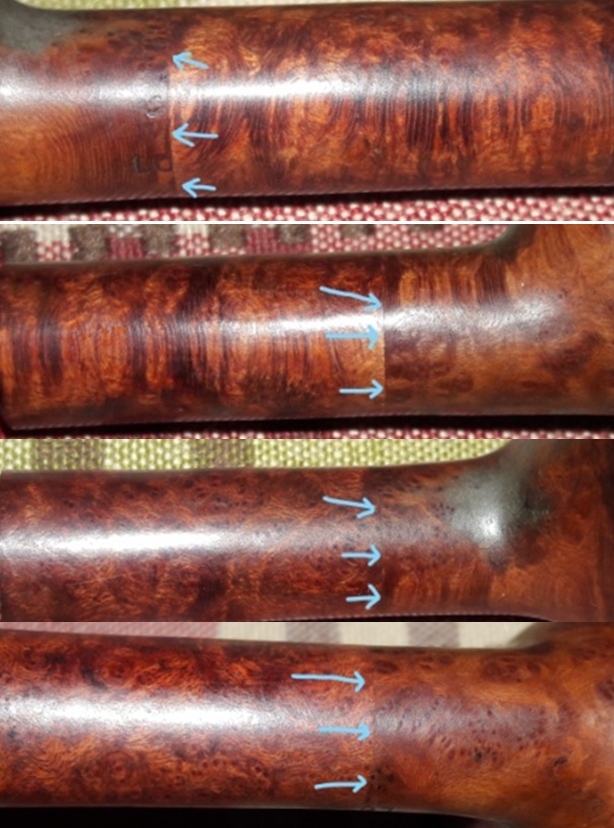
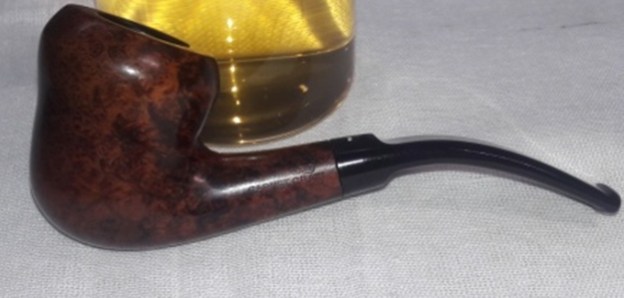
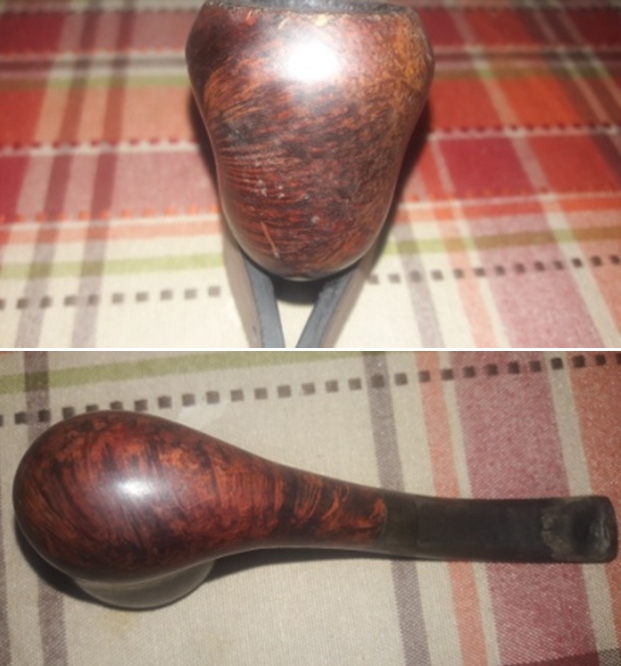
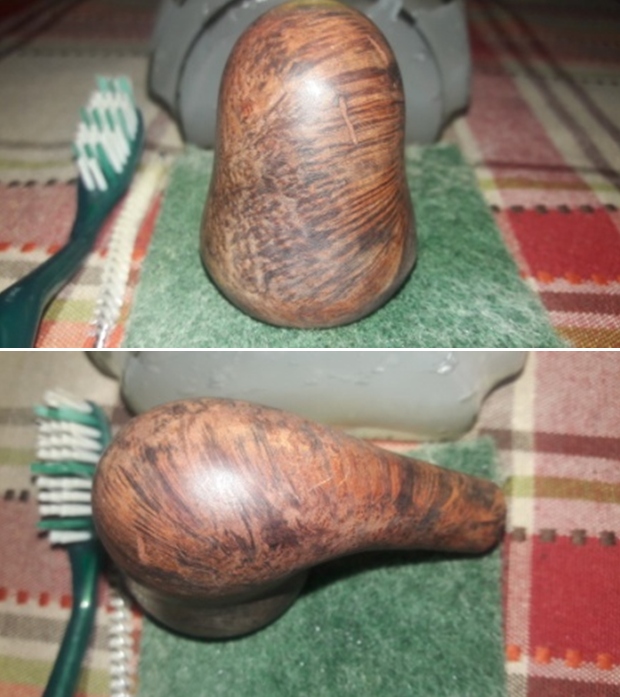
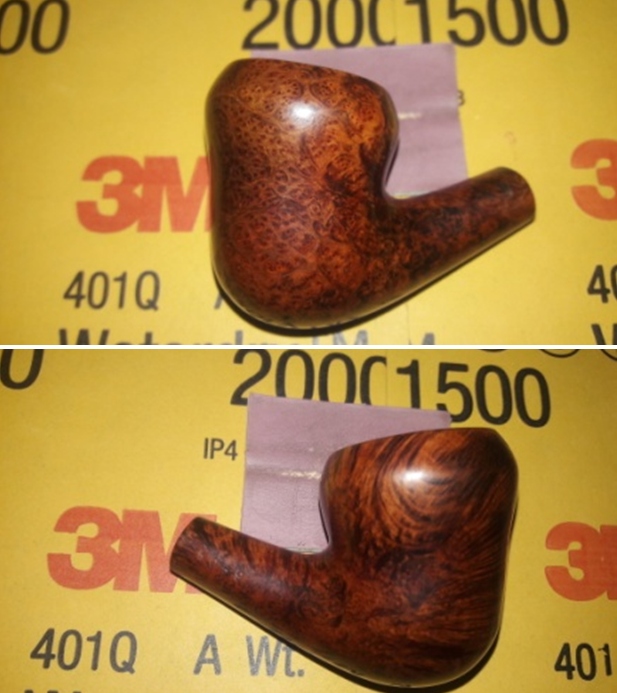
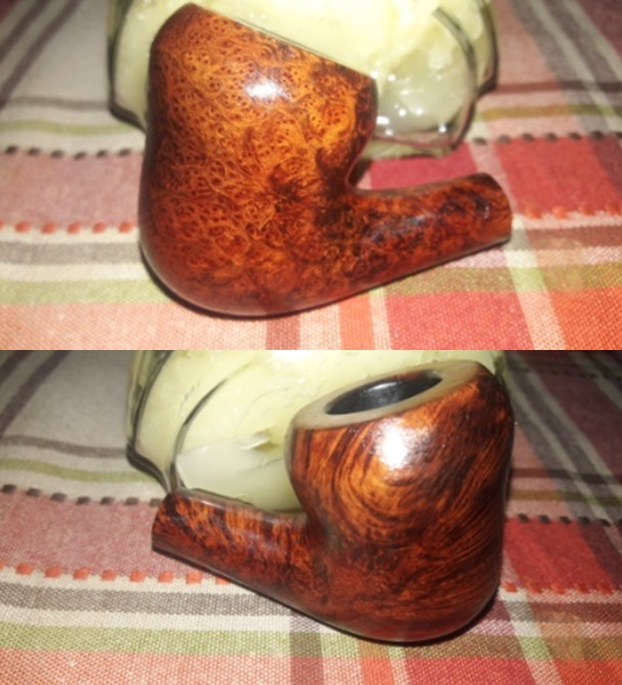
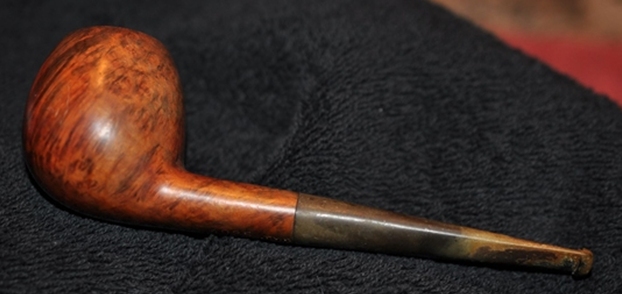
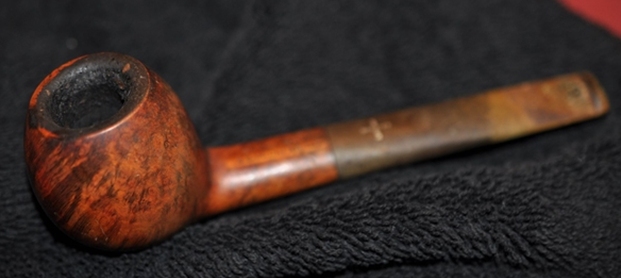
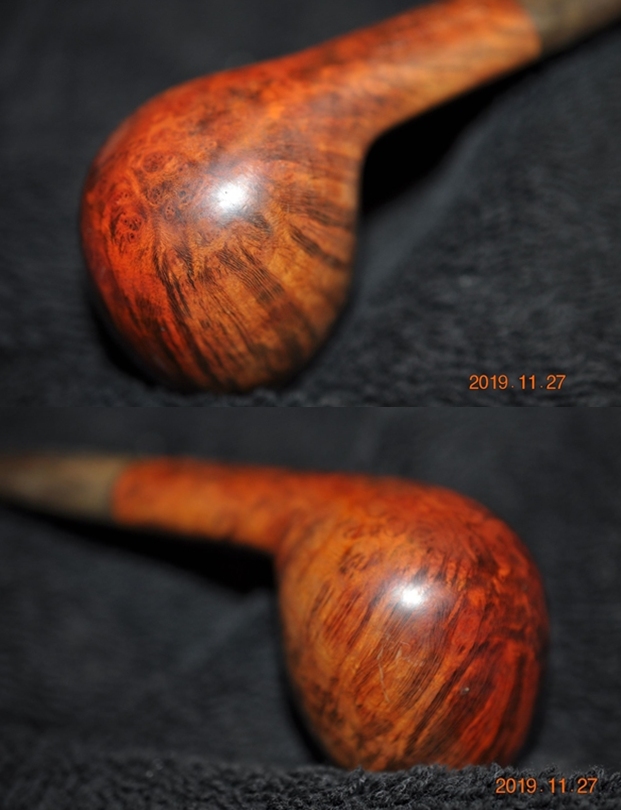
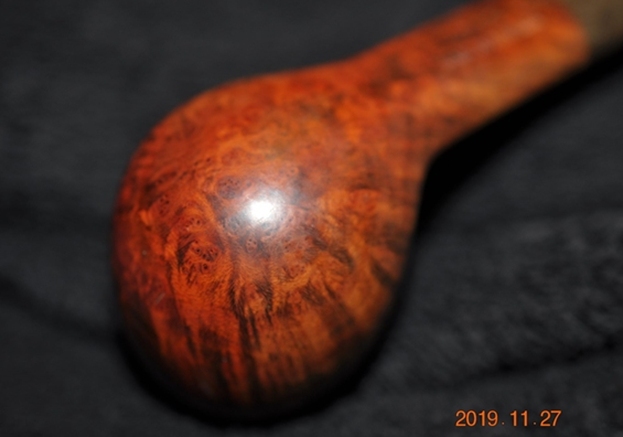
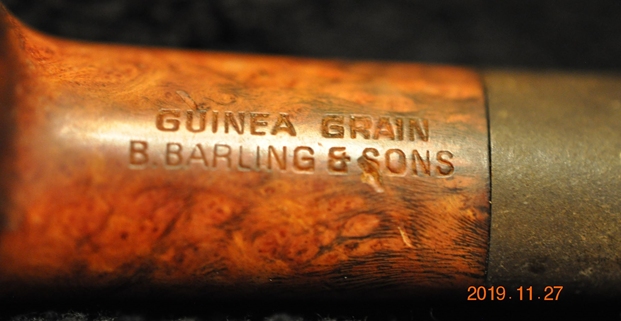
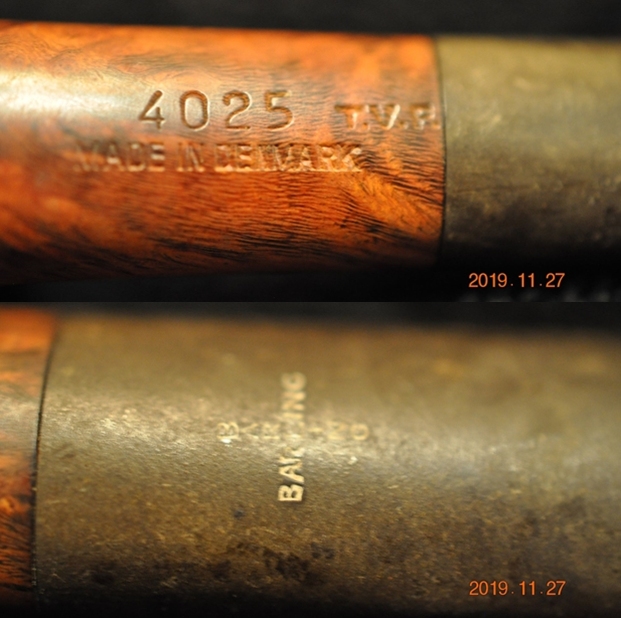
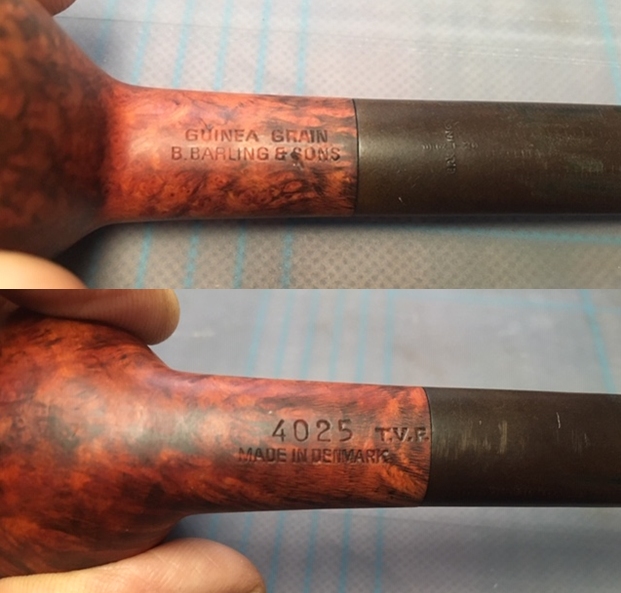
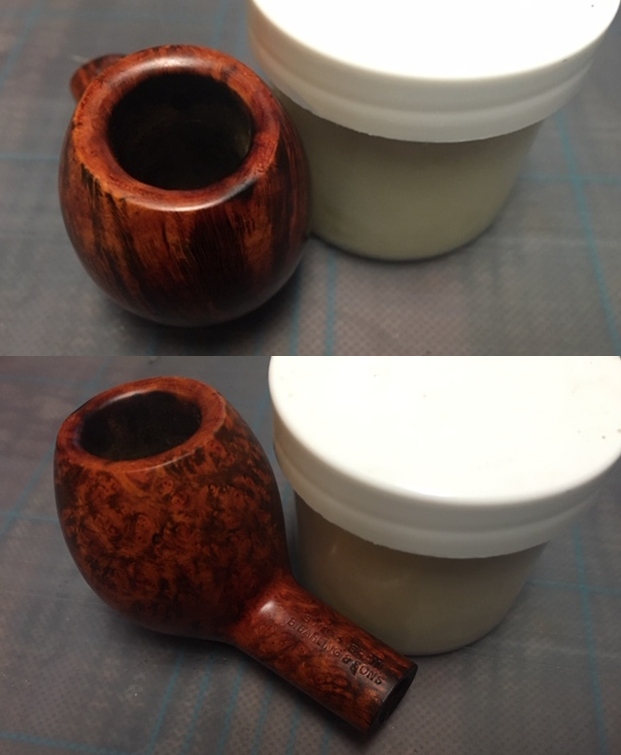
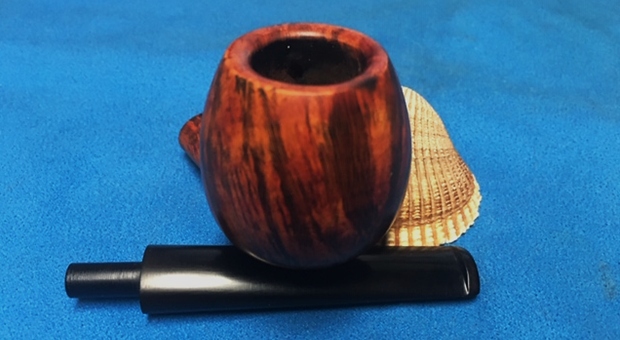
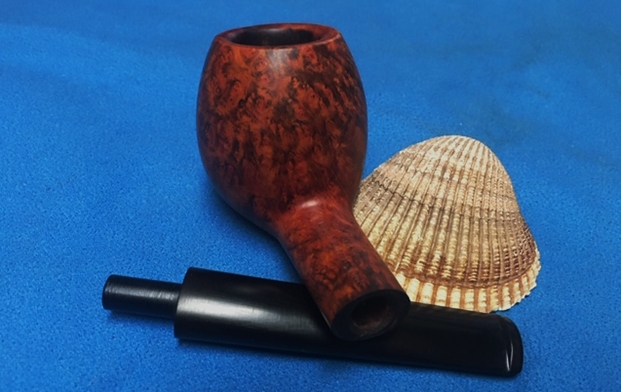
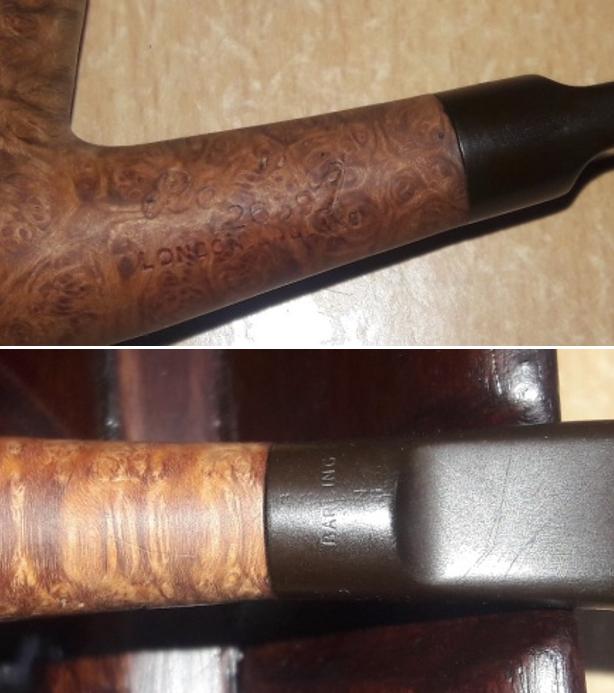
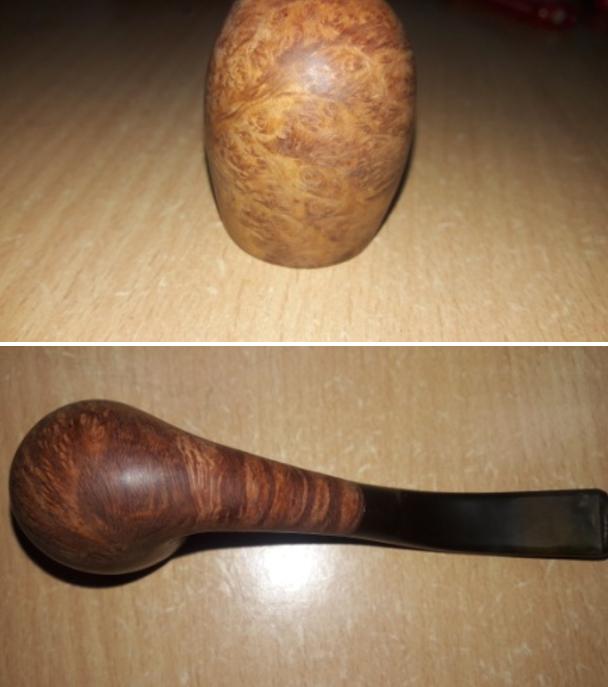
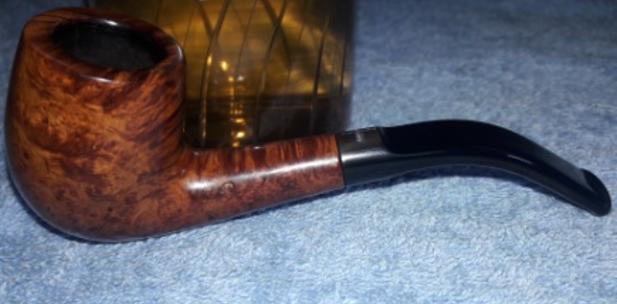
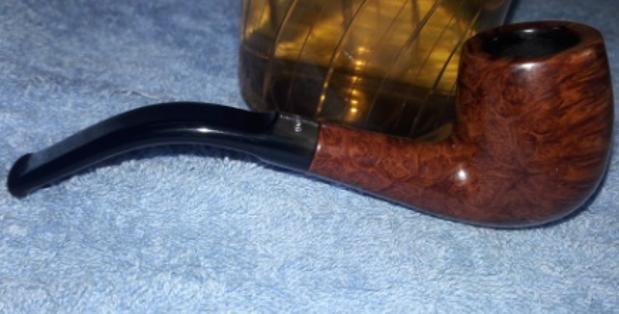
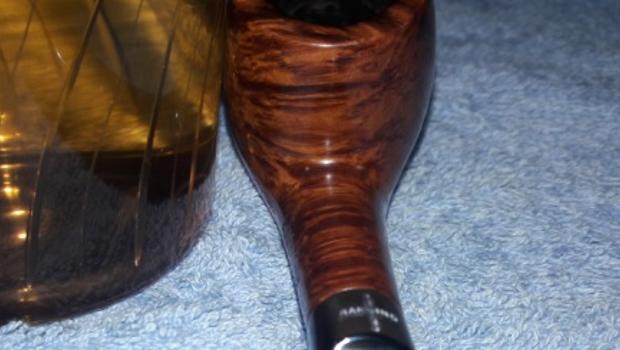
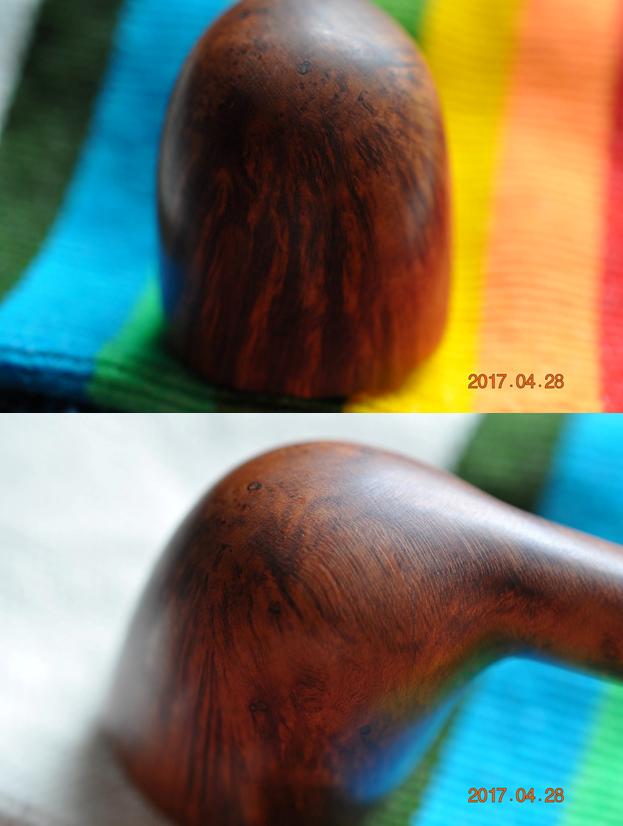
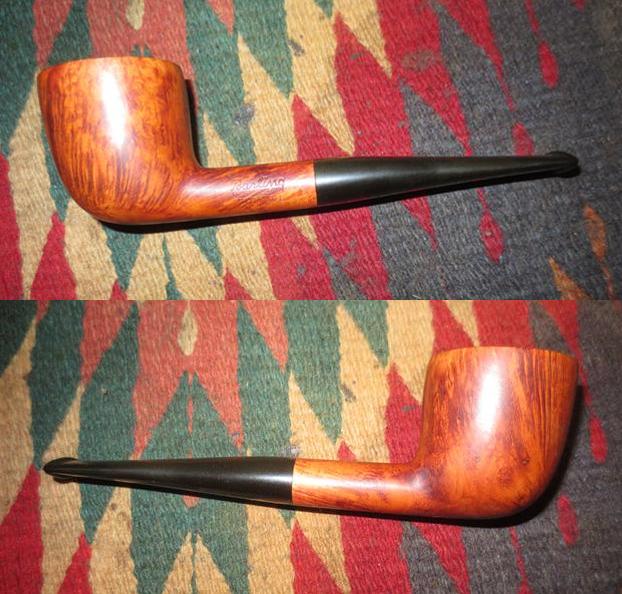
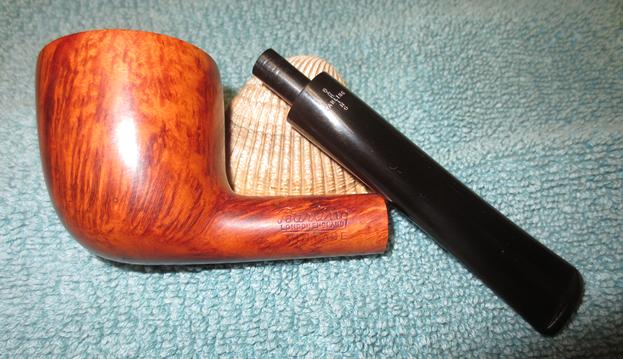
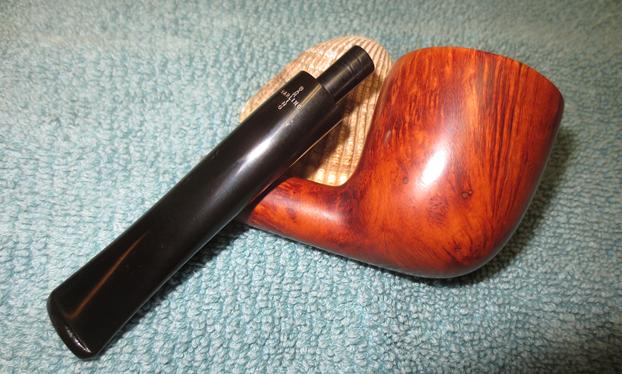
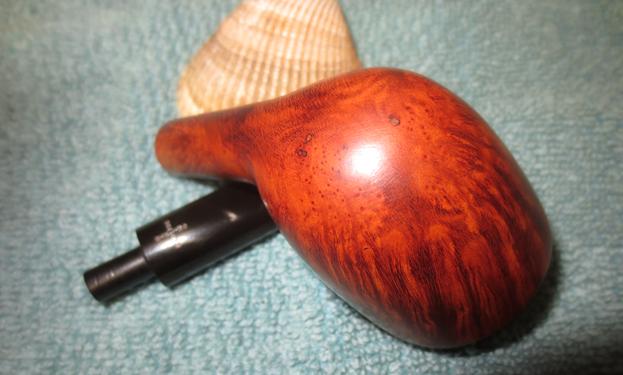
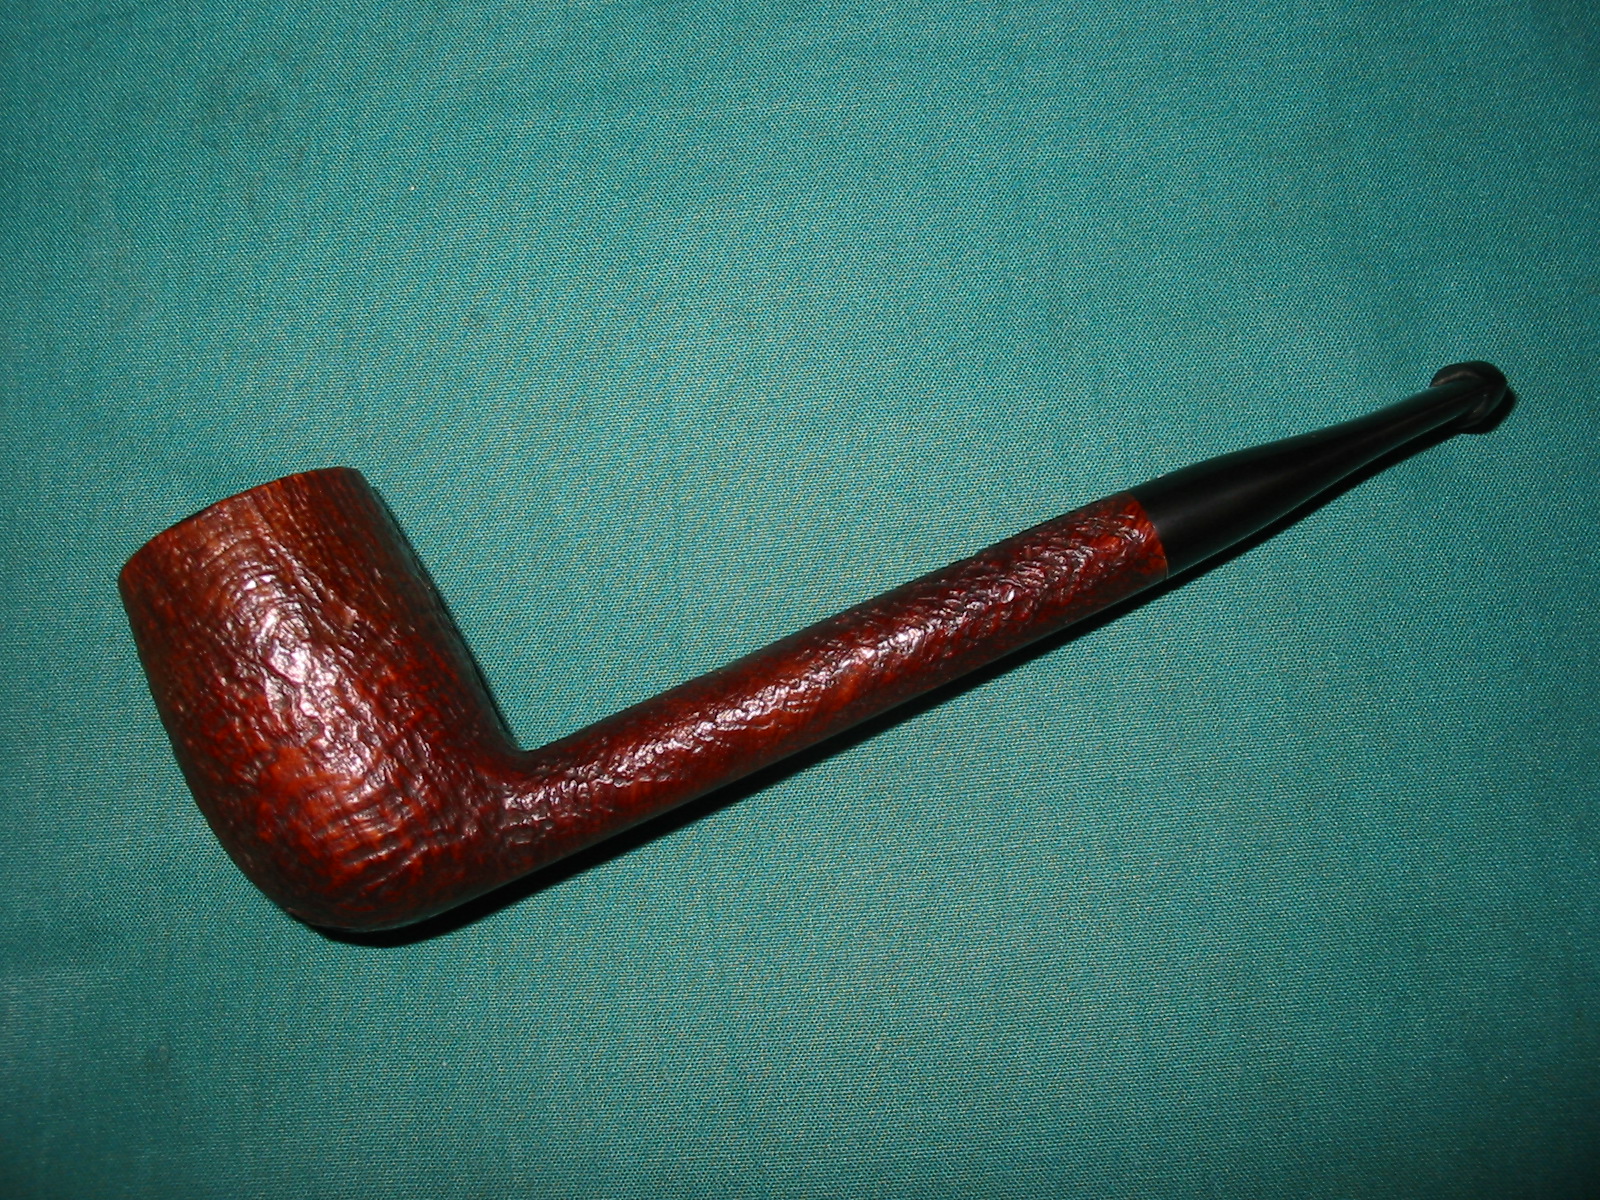
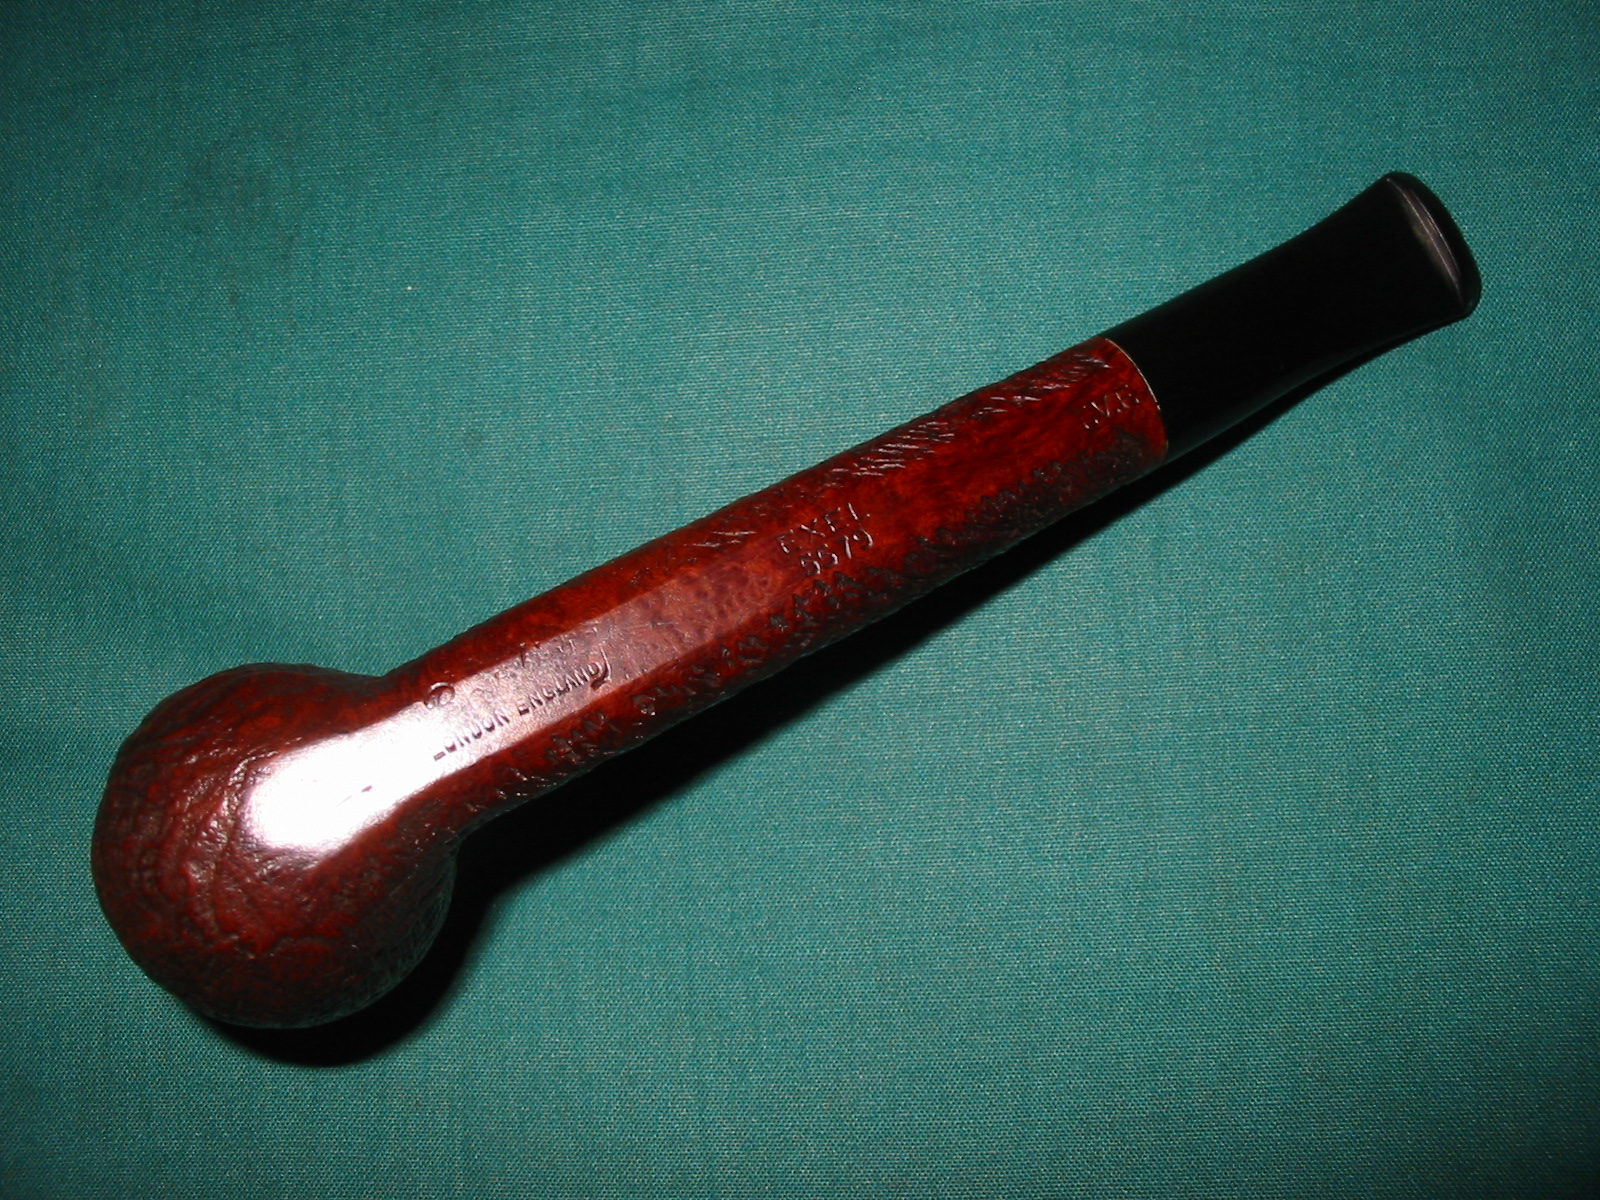
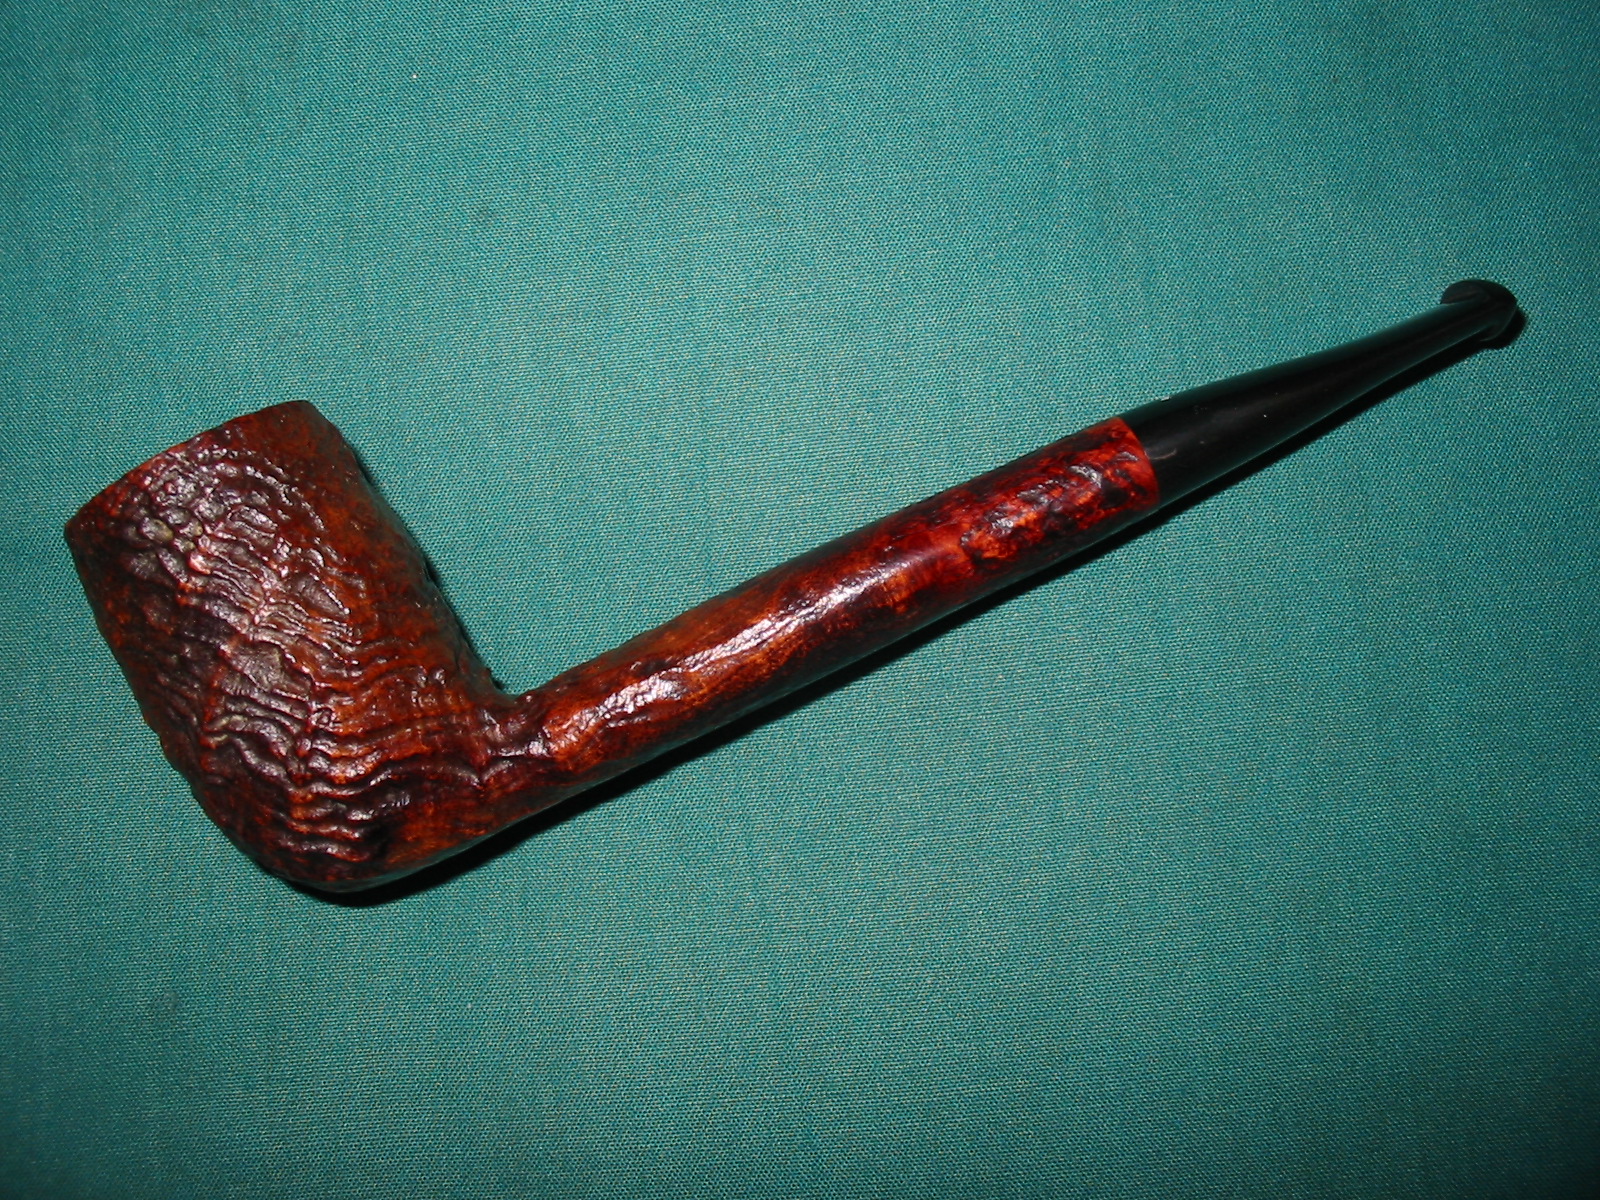
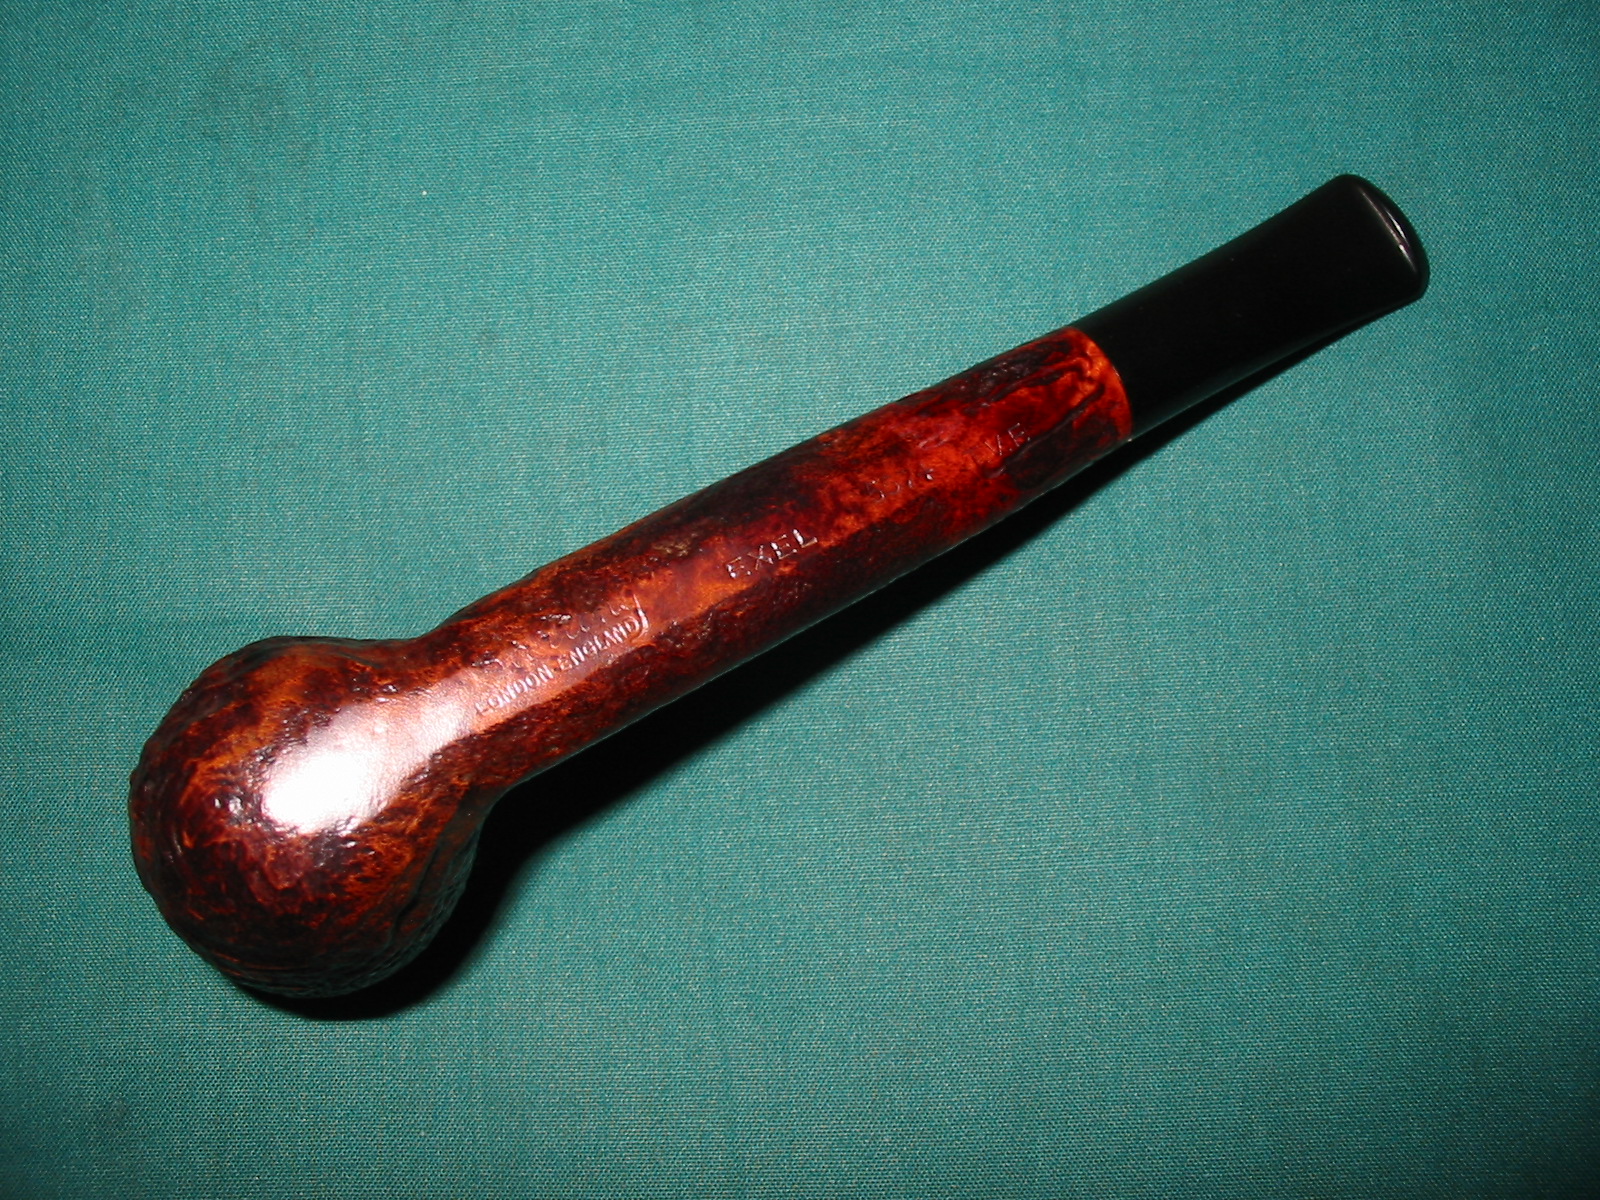
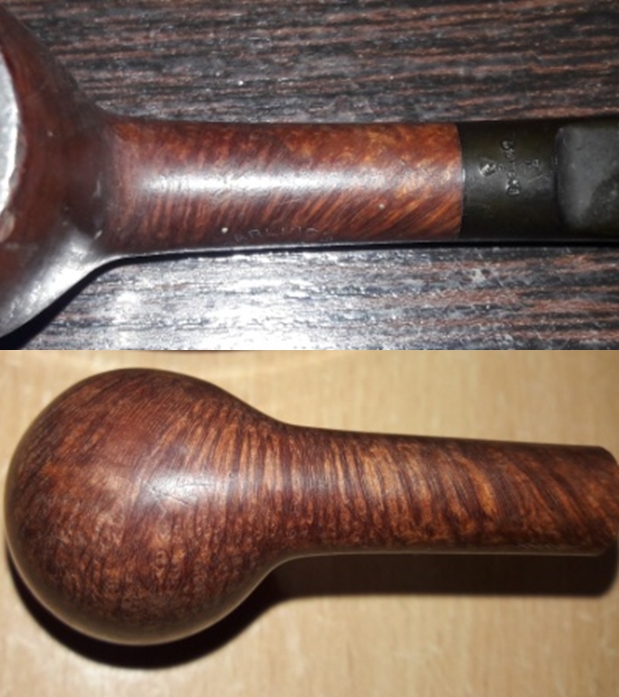
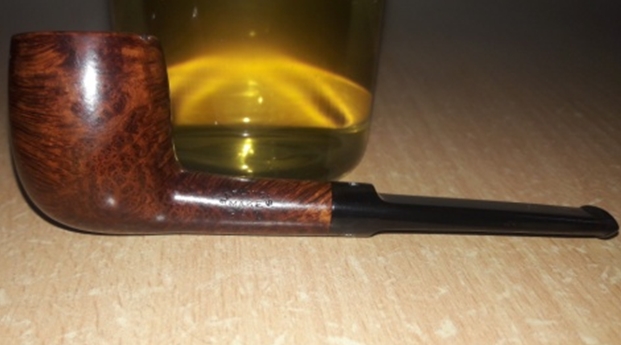
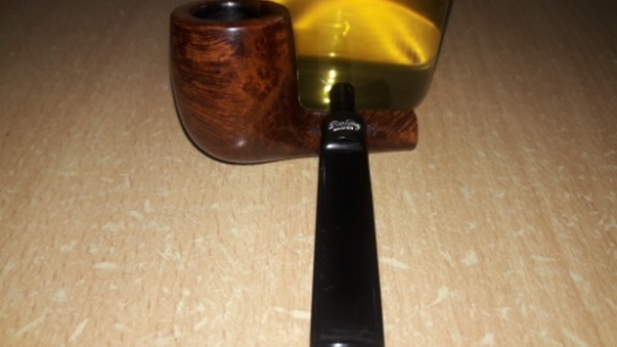
The Barling’s Make pipe on my work table is a quaint little billiards with beautiful and very tightly packed birdseye grains on either side of the bowl and shank, extending over to more than half of the front of the stummel. Equally tightly packed cross grains are seen on the front left and back of the bowl and also on the upper and bottom surface of the shank. It is stamped on the left side of the shank as “BARLING’S” in an arch with block capital letters over “MAKE” in a straight line over the numeral “1354”. The right side of the shank bears the spaced out stamp “S M” towards the bowl shank junction. The vulcanite saddle stem bears the trademark Barling stamped in cross on the upper surface of the saddle and “Barling” over “Design” in a cursive hand on the lower surface of the saddle. 
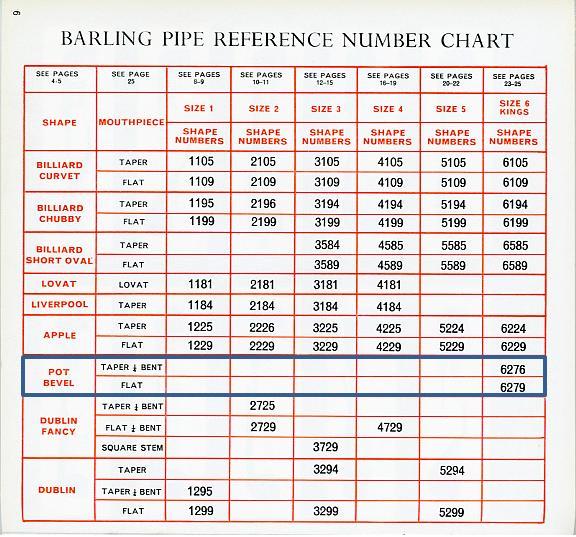
 Even though there are quite a few Barling’s in grandfather’s collection, this beauty is the first of the Barling’s that I am trying to restore. To know more about the brand, the lines offered by the maker and attempt to date this pipe, I visited Pipedia which has a wealth of neatly cataloged heading-wise information on Barling’s pipes. Here is the link and the snippets of relevant information that I picked up https://pipedia.org/wiki/Barling#Model_Numbers:
Model Numbers:
Also according to Tad Gage, the only four-digit number that denotes a Pre-Transition piece begins with “1,” which was used for pipes sold in England. Any other four-digit Barling pipe is a Transitional piece– (Tad Gage in P & T magazine).
Model numbers were occasionally stamped below the logo as early as the late 1920’s.
Other Nomenclature:
The “MADE IN ENGLAND.” stamp was in use in the 1930’s thru 1962. As with all things related to Barling nomenclature there are variations. Sometimes there is no “MADE IN ENGLAND.” stamp. Examples exist with a “MADE IN LONDON” over “ENGLAND” stamp. And, there are examples with “MADE IN ENGLAND” with no period after the word “ENGLAND”.
Size Stampings:
Up to 1926 and possibly beyond, Barling used specific, completely unrelated, model numbers to designate the various sizes of a specific shape. They produced pipes in three sizes, small, medium, and large.
Barling’s published price lists show that they continued to offer pipes in only three sizes, small, medium, and large until 1941. That’s it, small, medium, and large. So when someone claims that they have a 1930’s EL, EXEL, or other size, they are mistaken.
In 1941 the published range of sizes expanded. Going from the smallest to the largest, they are SS, S, S-M, L, EL, EXEL, and EXEXEL. There is no “G” for giant. Giant pipes, or magnums, which are oversized standard billiards, were not stamped “G” but are commonly identified by collectors as such because they are obviously large relative to even EXEXEL pipes, and carried no size stampings (Gage).
Size stamps were rare before WW2, but we do an example from 1925 that we will discuss later as it is part of a forgotten class of Barling pipes.
Patent Stamps:
In addition to the stampings on the briar, Barling stems had stampings that relate to specific periods. In 1935 Barling received a patent for a stem design that radically improved airflow as well as cooling of the smoke.
Pipes made in 1934-5 may have the words “Reg’d Design” on the underside.
Following the granting of the patent in 1935, Barling stems featured the following patent numbers:
REG’D 98 046 – US patent number – 1936 – 1949 • REG’D 42/8968 – WW2 production – 1942 – 1950 • REG’D 754 068 – WW2 production • Barling Design – 1950 – 1962
Not all pipes have this stamping on the underside of the stem, but its presence is a good indicator for the period of manufacture, assuming that the stem is original.
Throughout their history Barling continued to innovate in the area of stem and bit design.
From the above information, it is conclusively assumed that this piece is from the Family era/ Pre- transition period and was made somewhere during 1950s to 1960s. The minimalist stampings indicate that this pipe was intended to be sold in the local markets.
INITIAL VISUAL INSPECTION
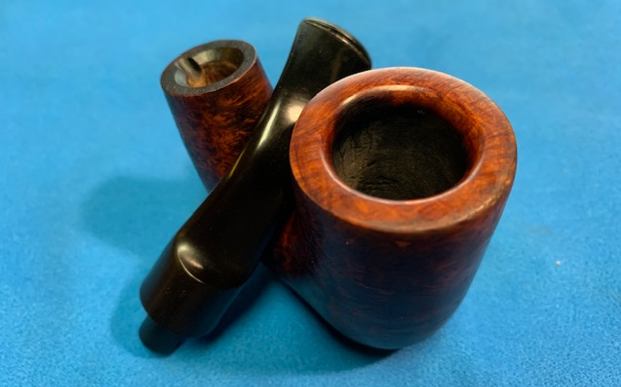
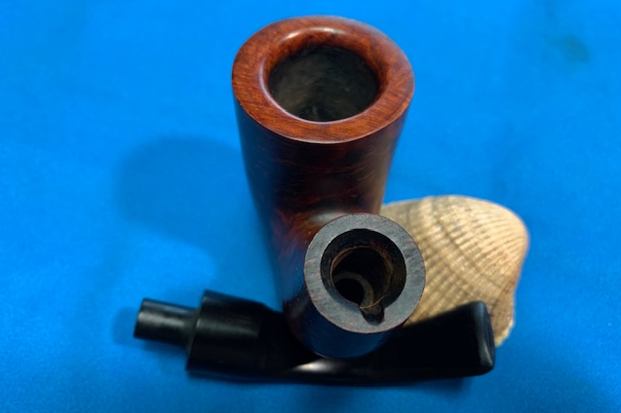
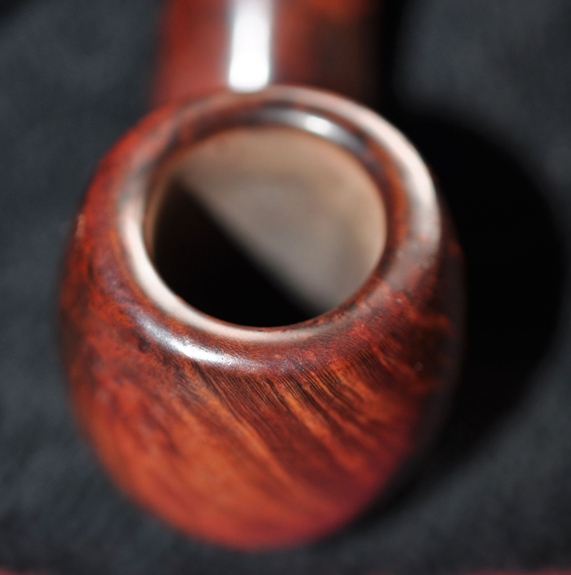
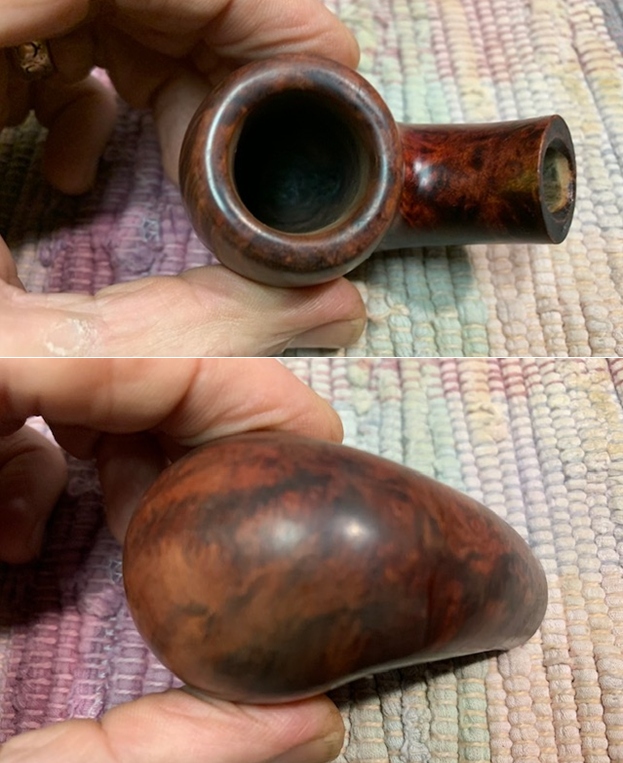
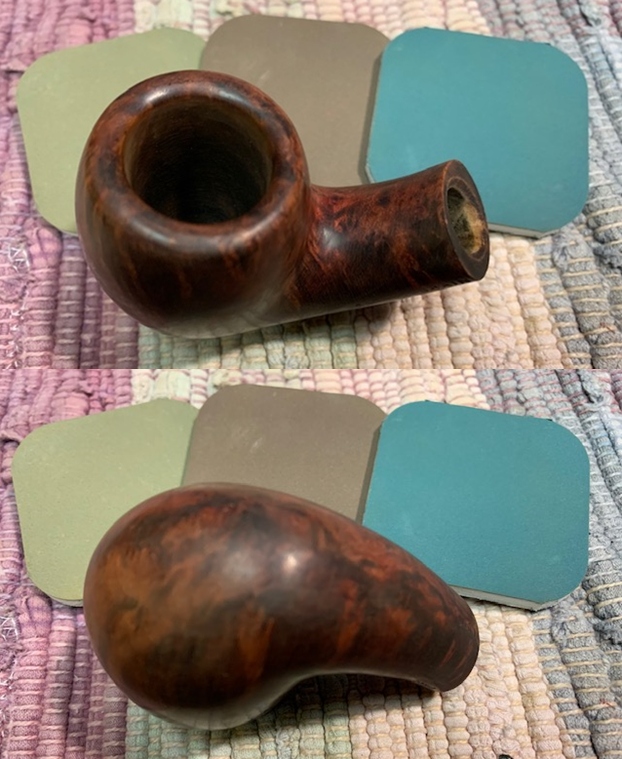
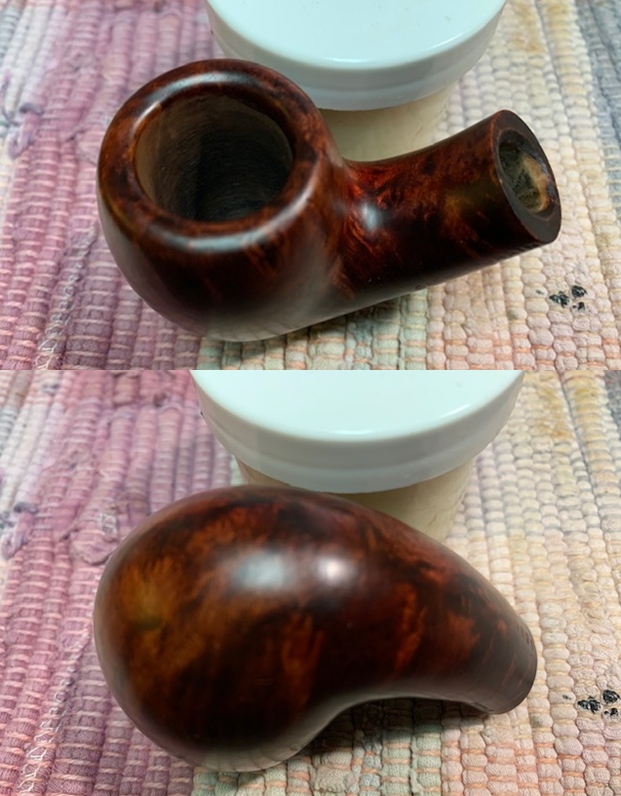
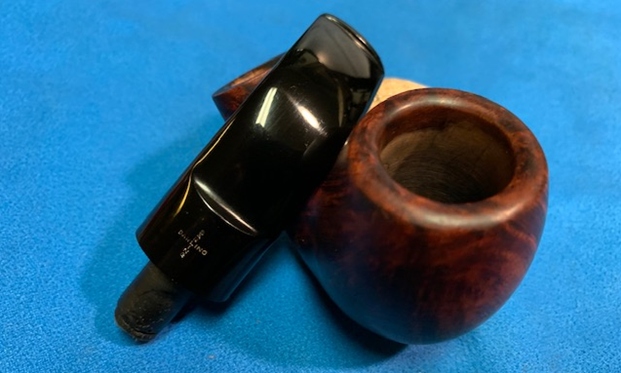
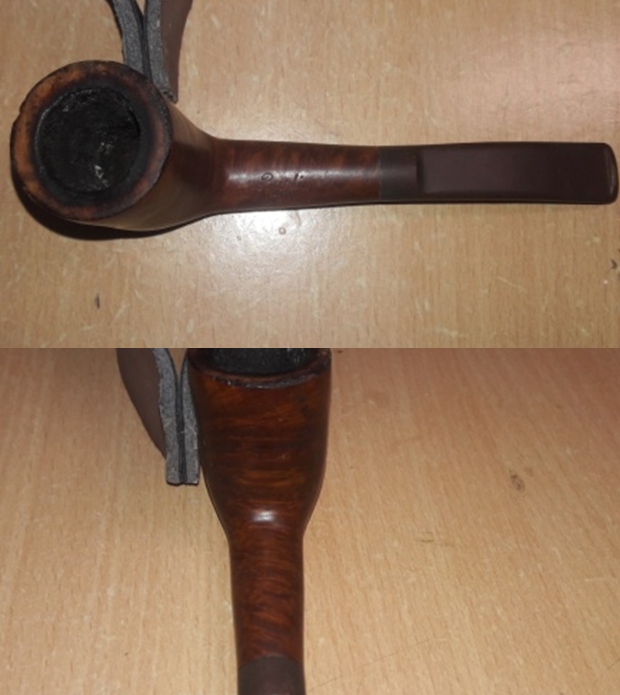
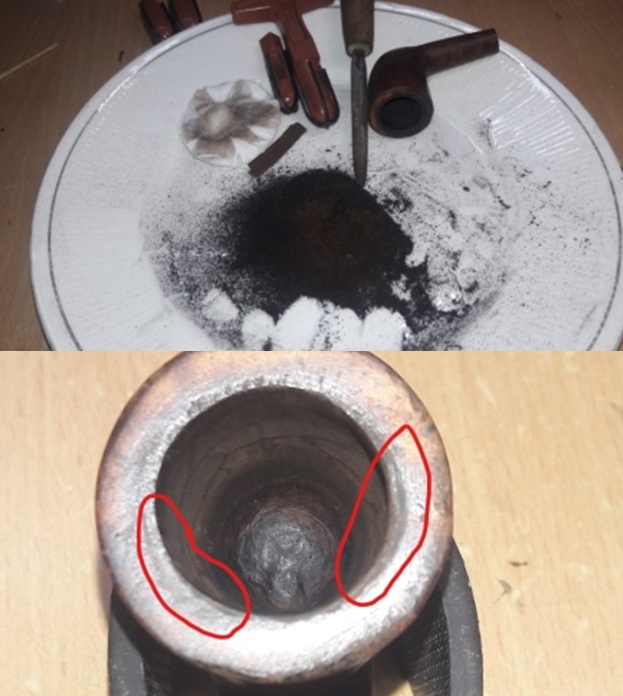
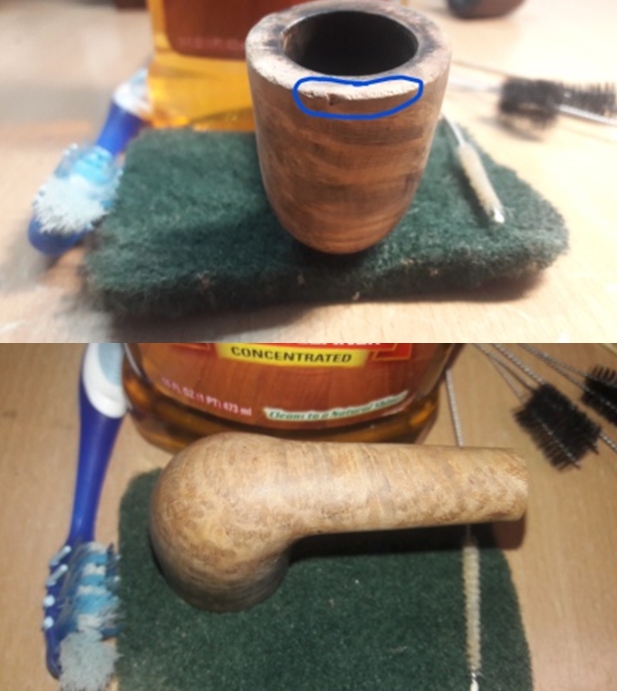
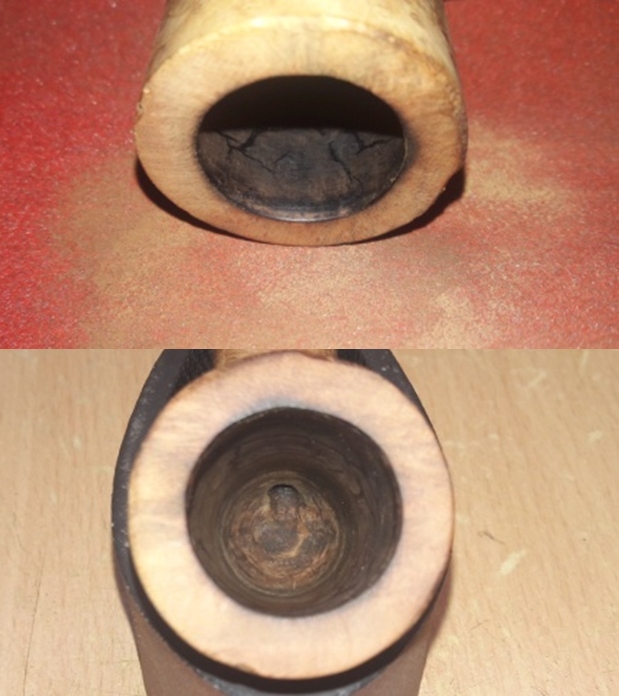
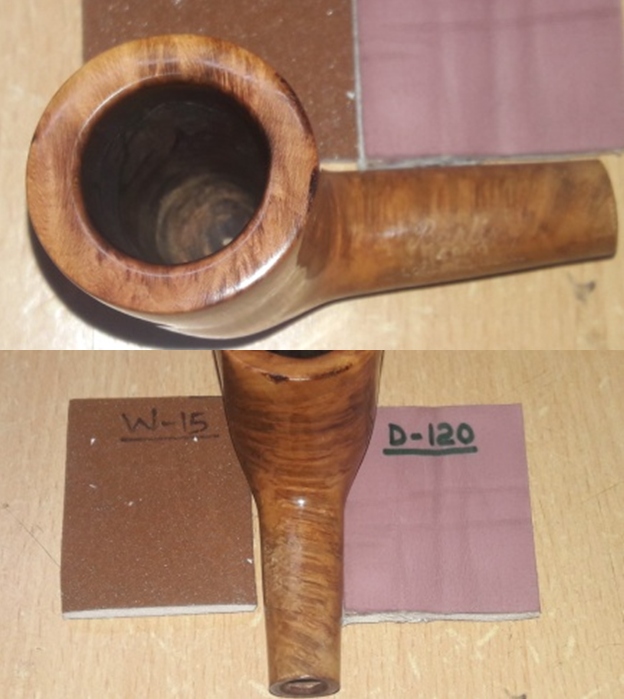
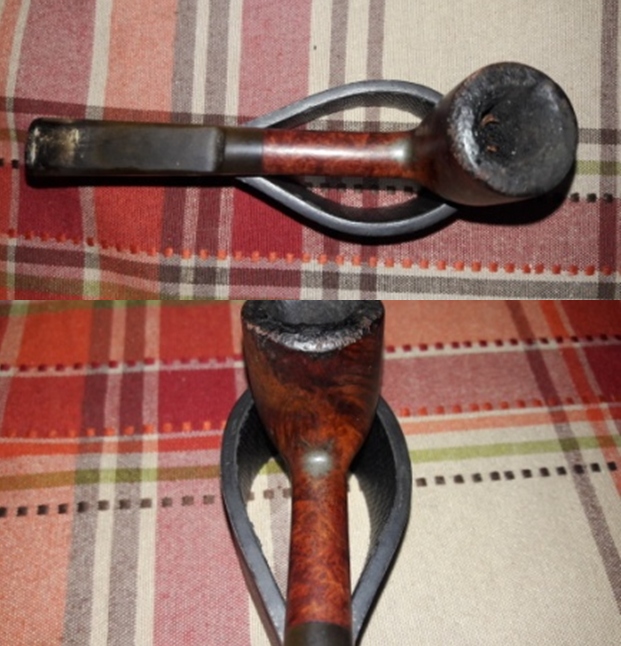
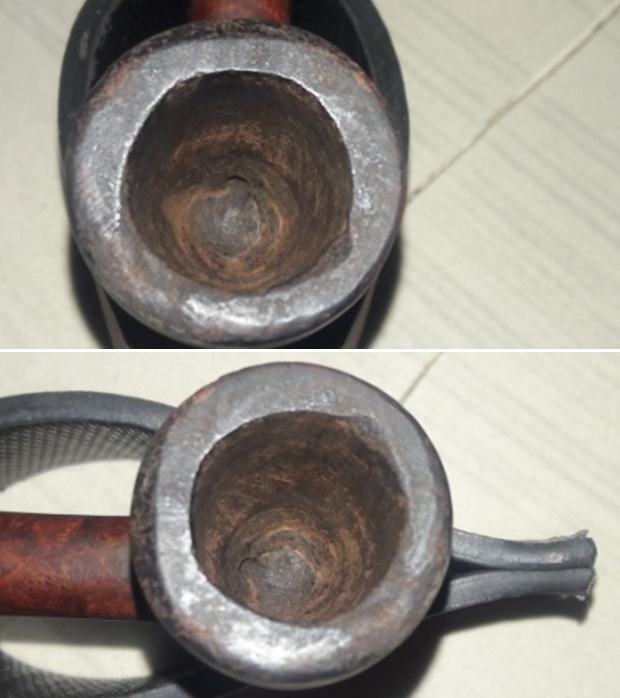
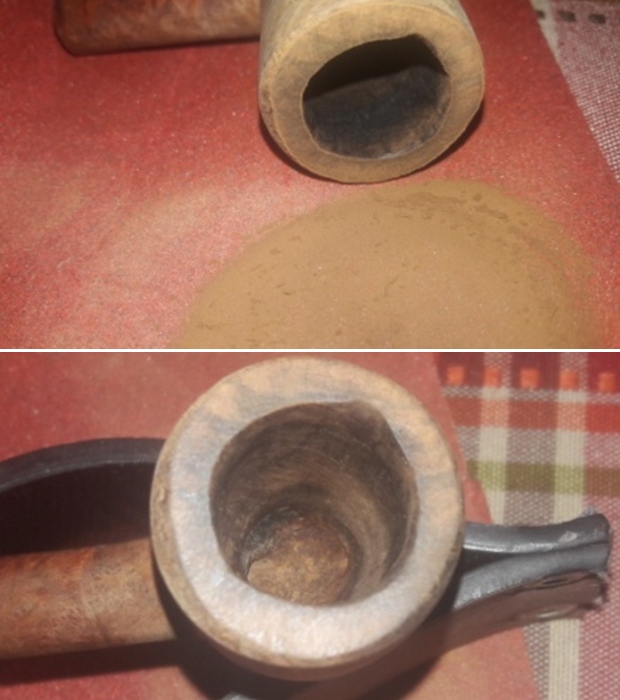
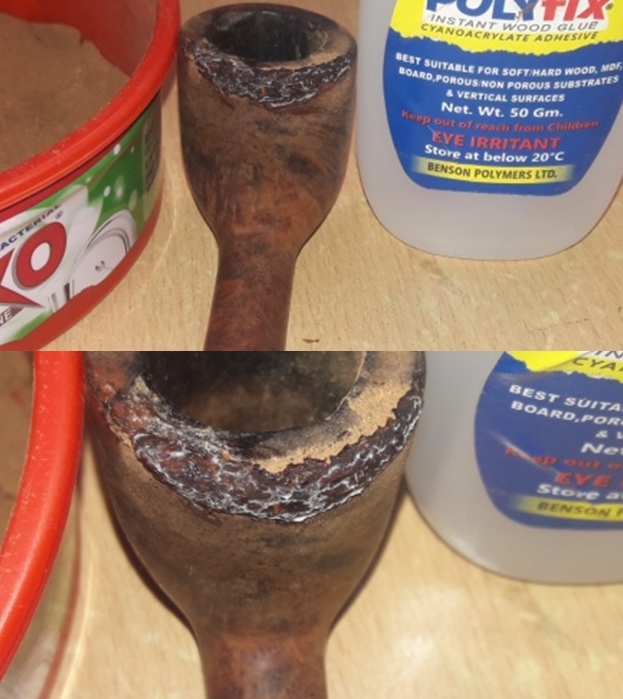
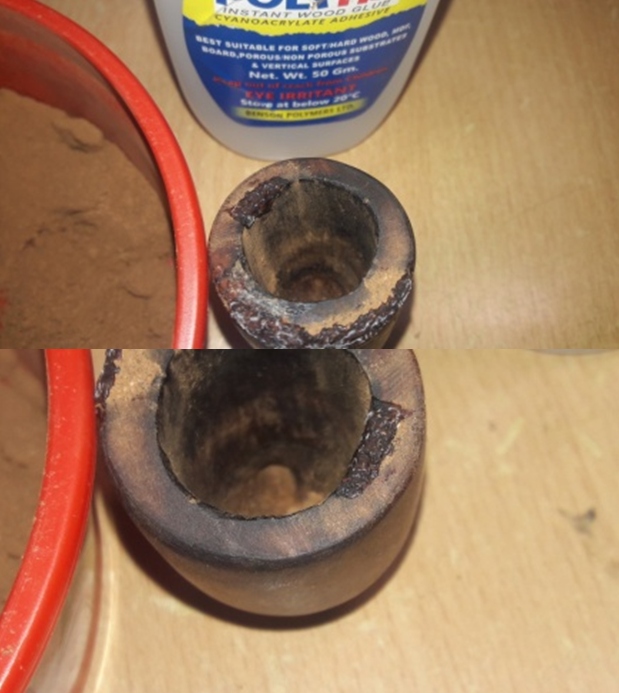
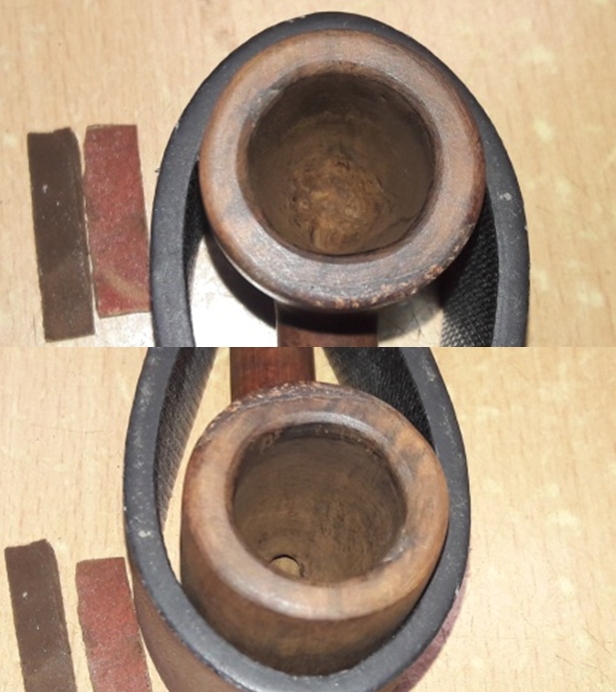
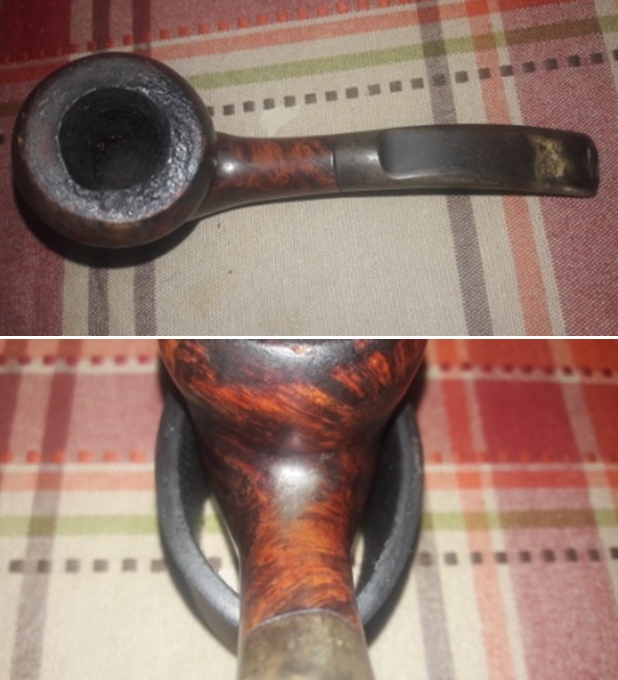
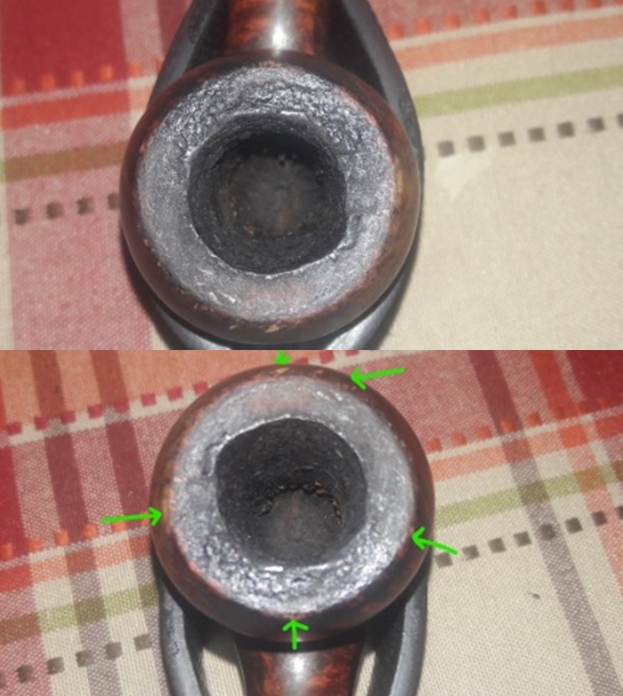
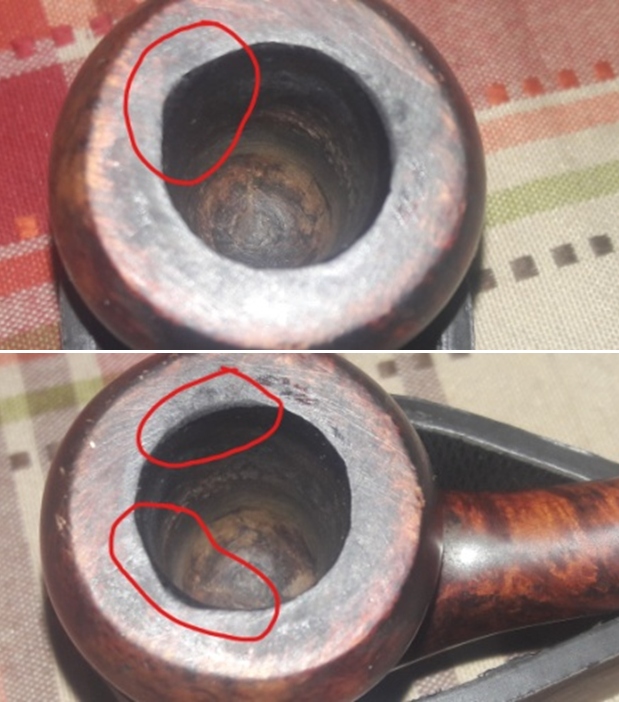
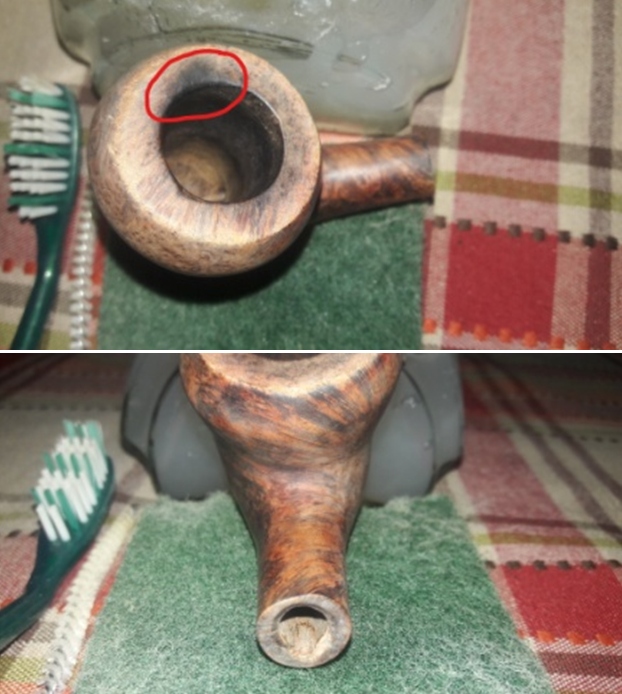
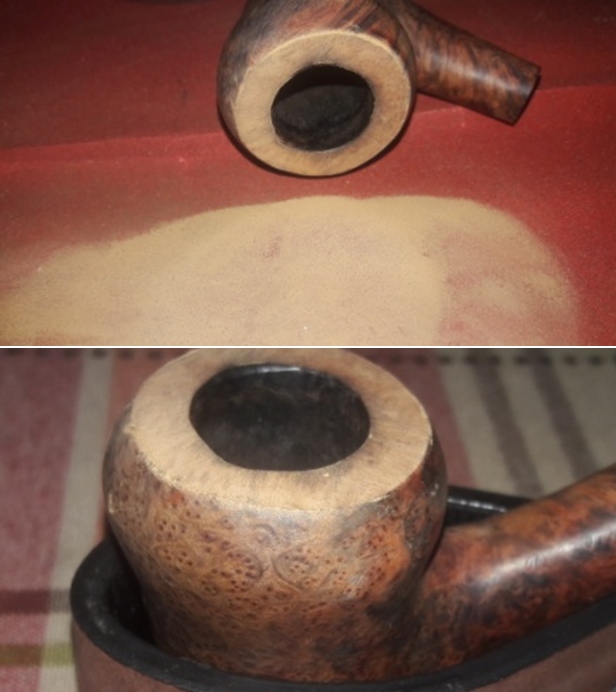
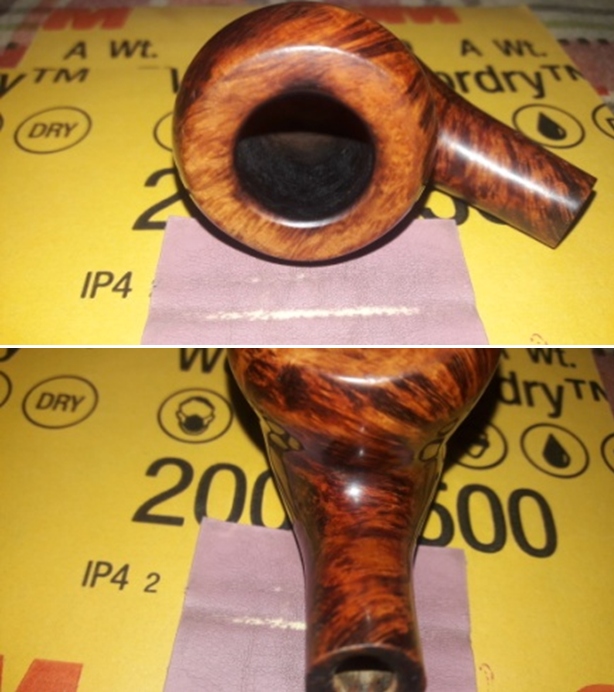
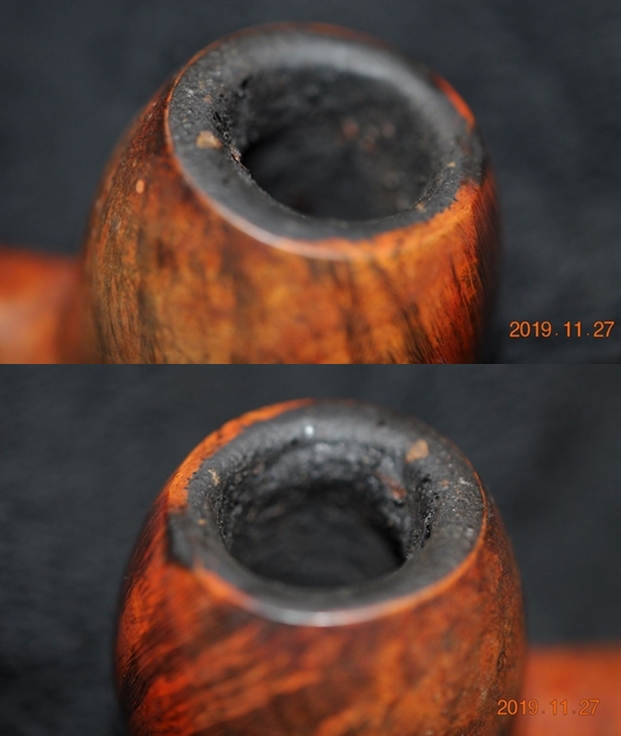
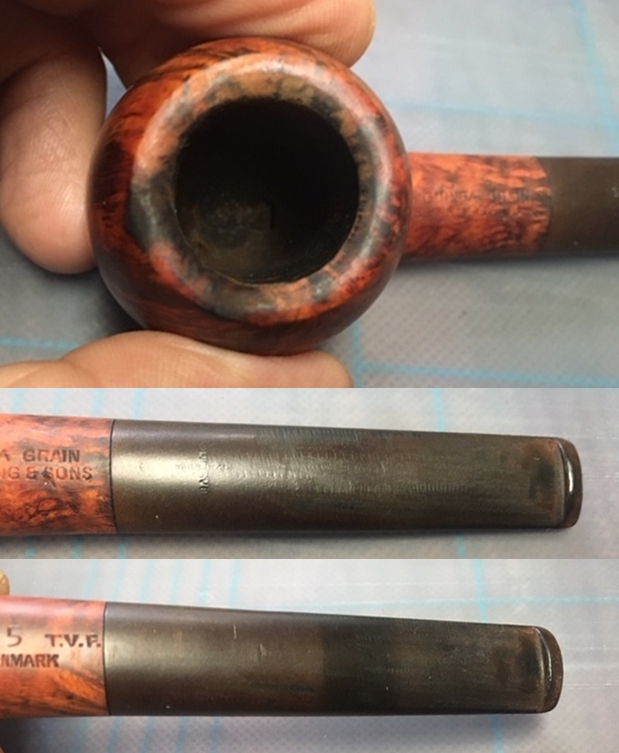
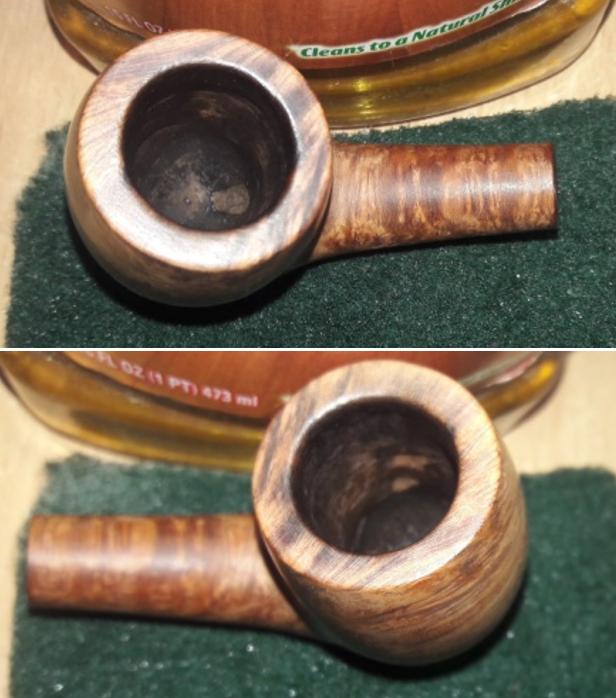
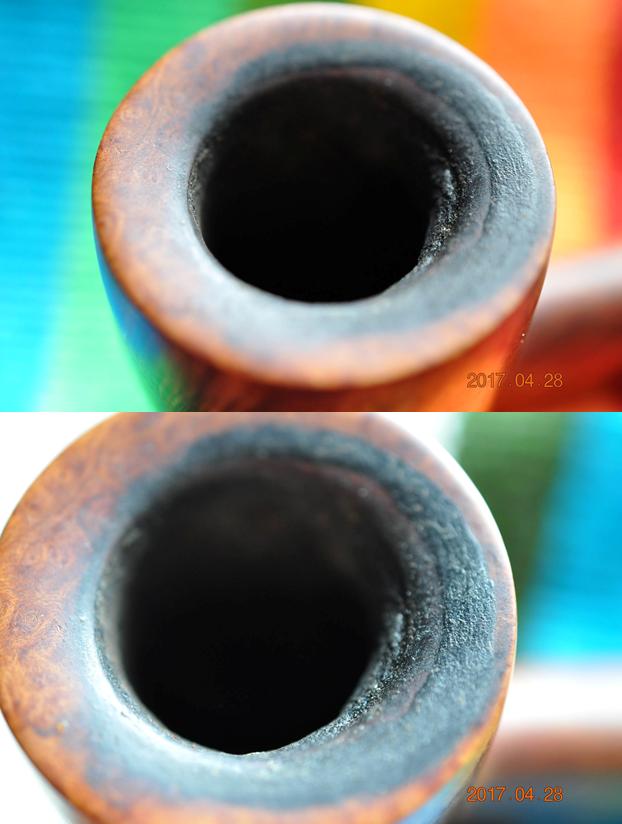
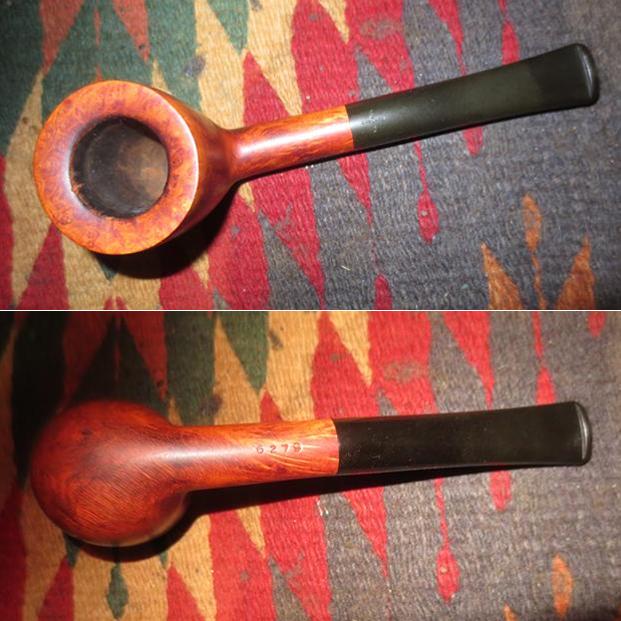
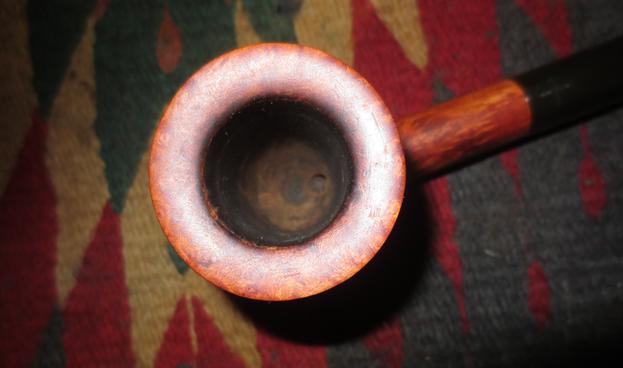
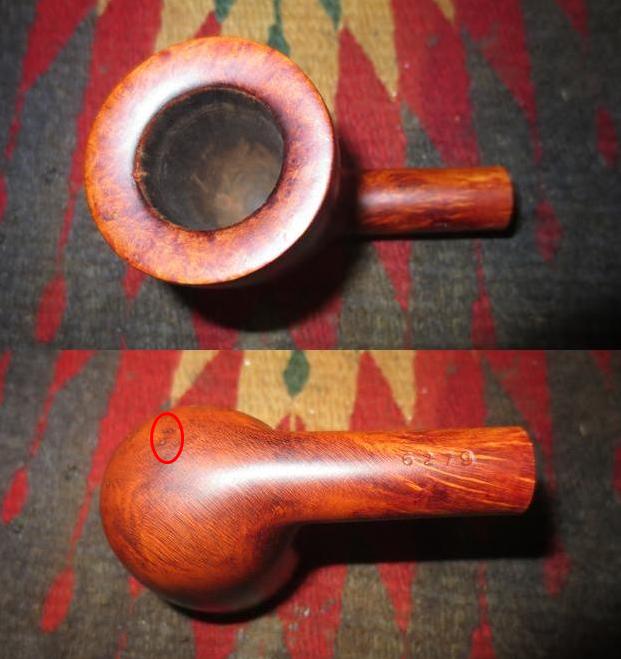
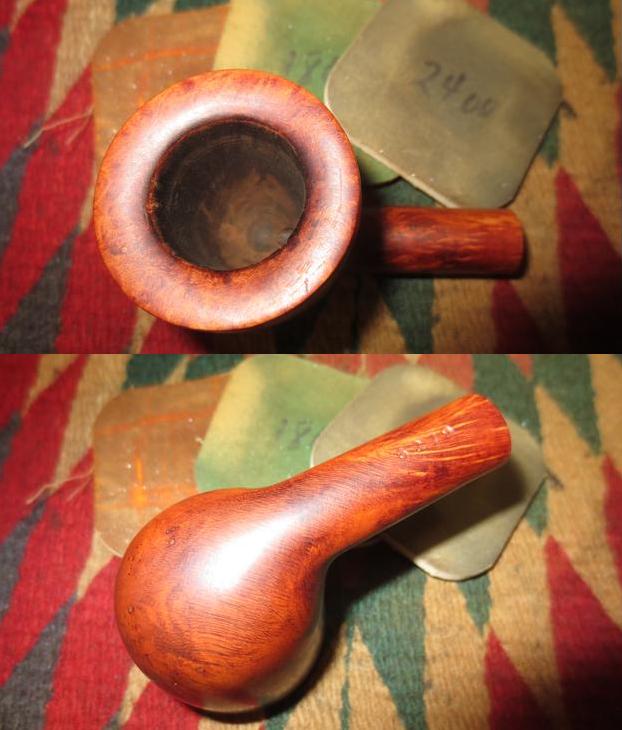
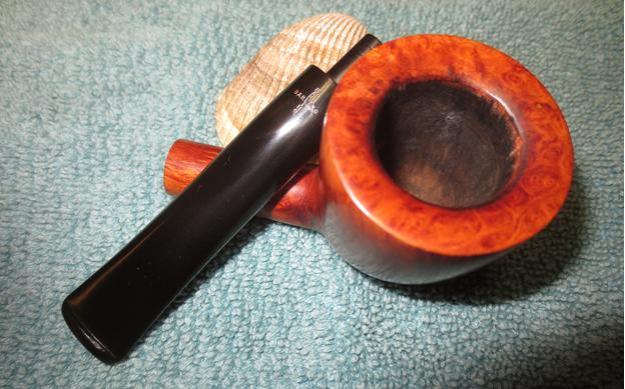
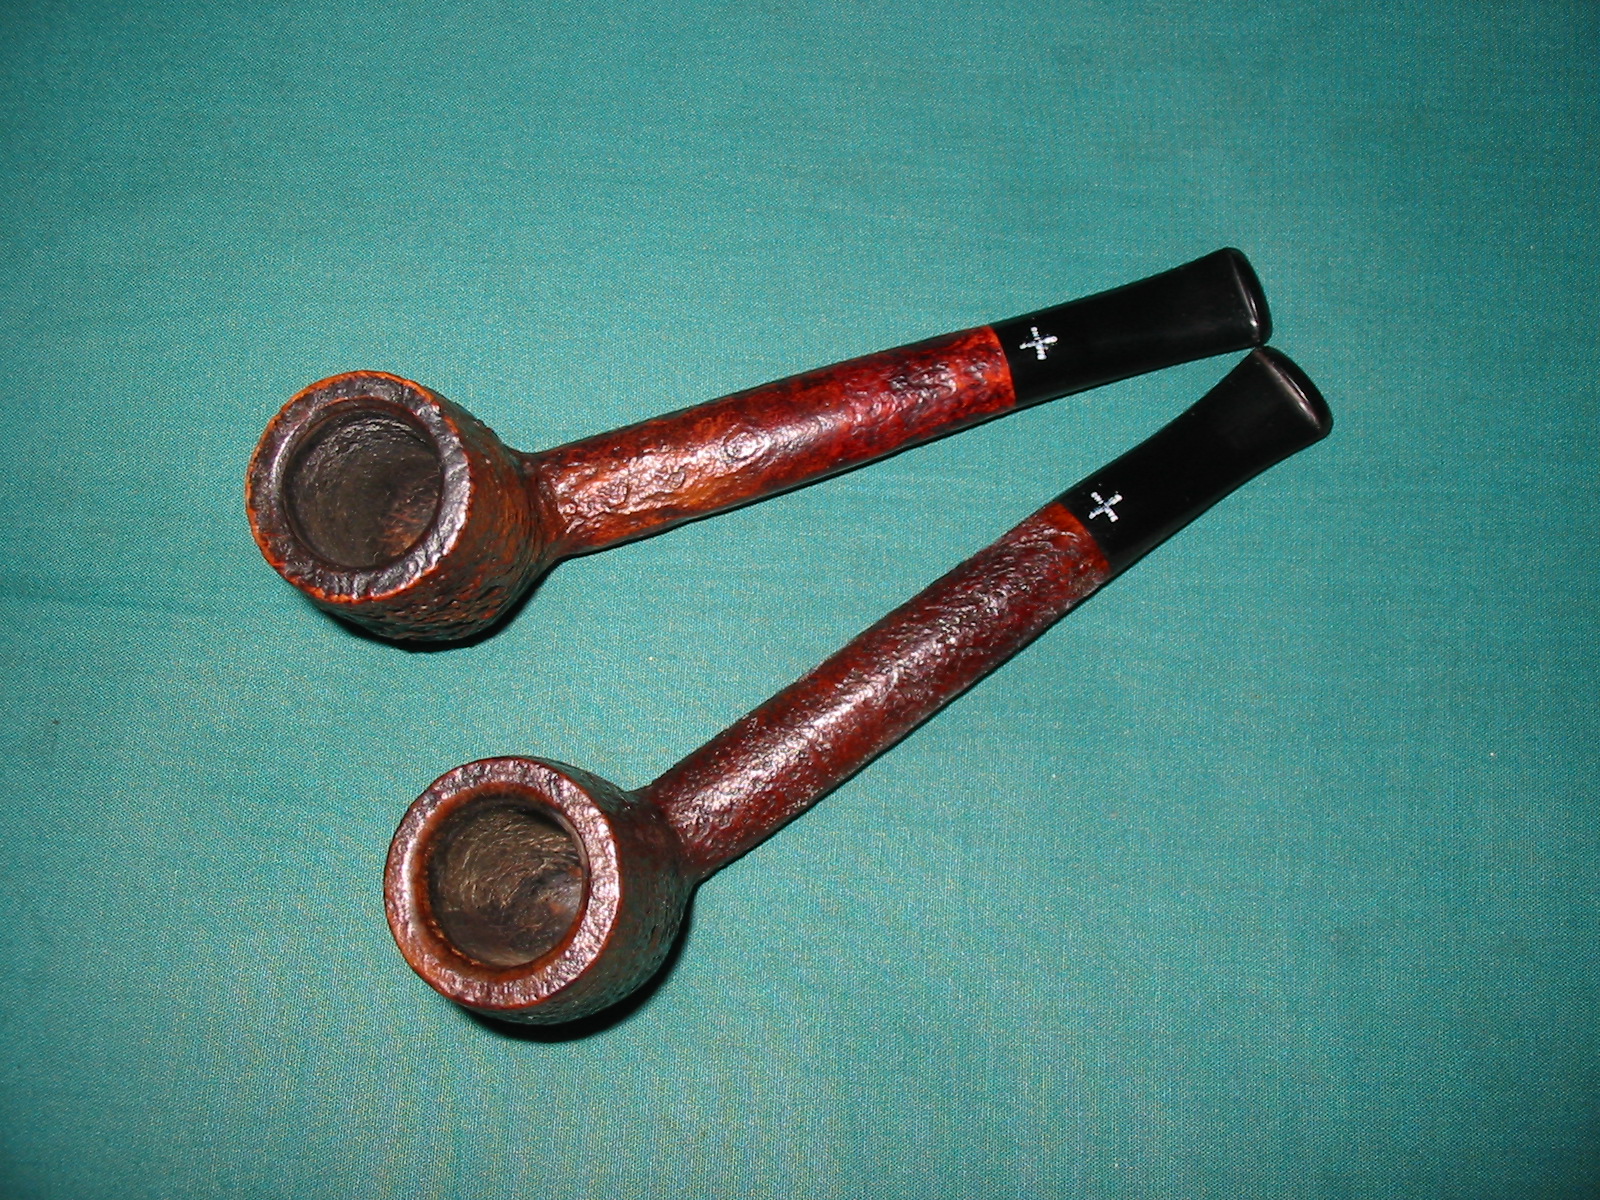
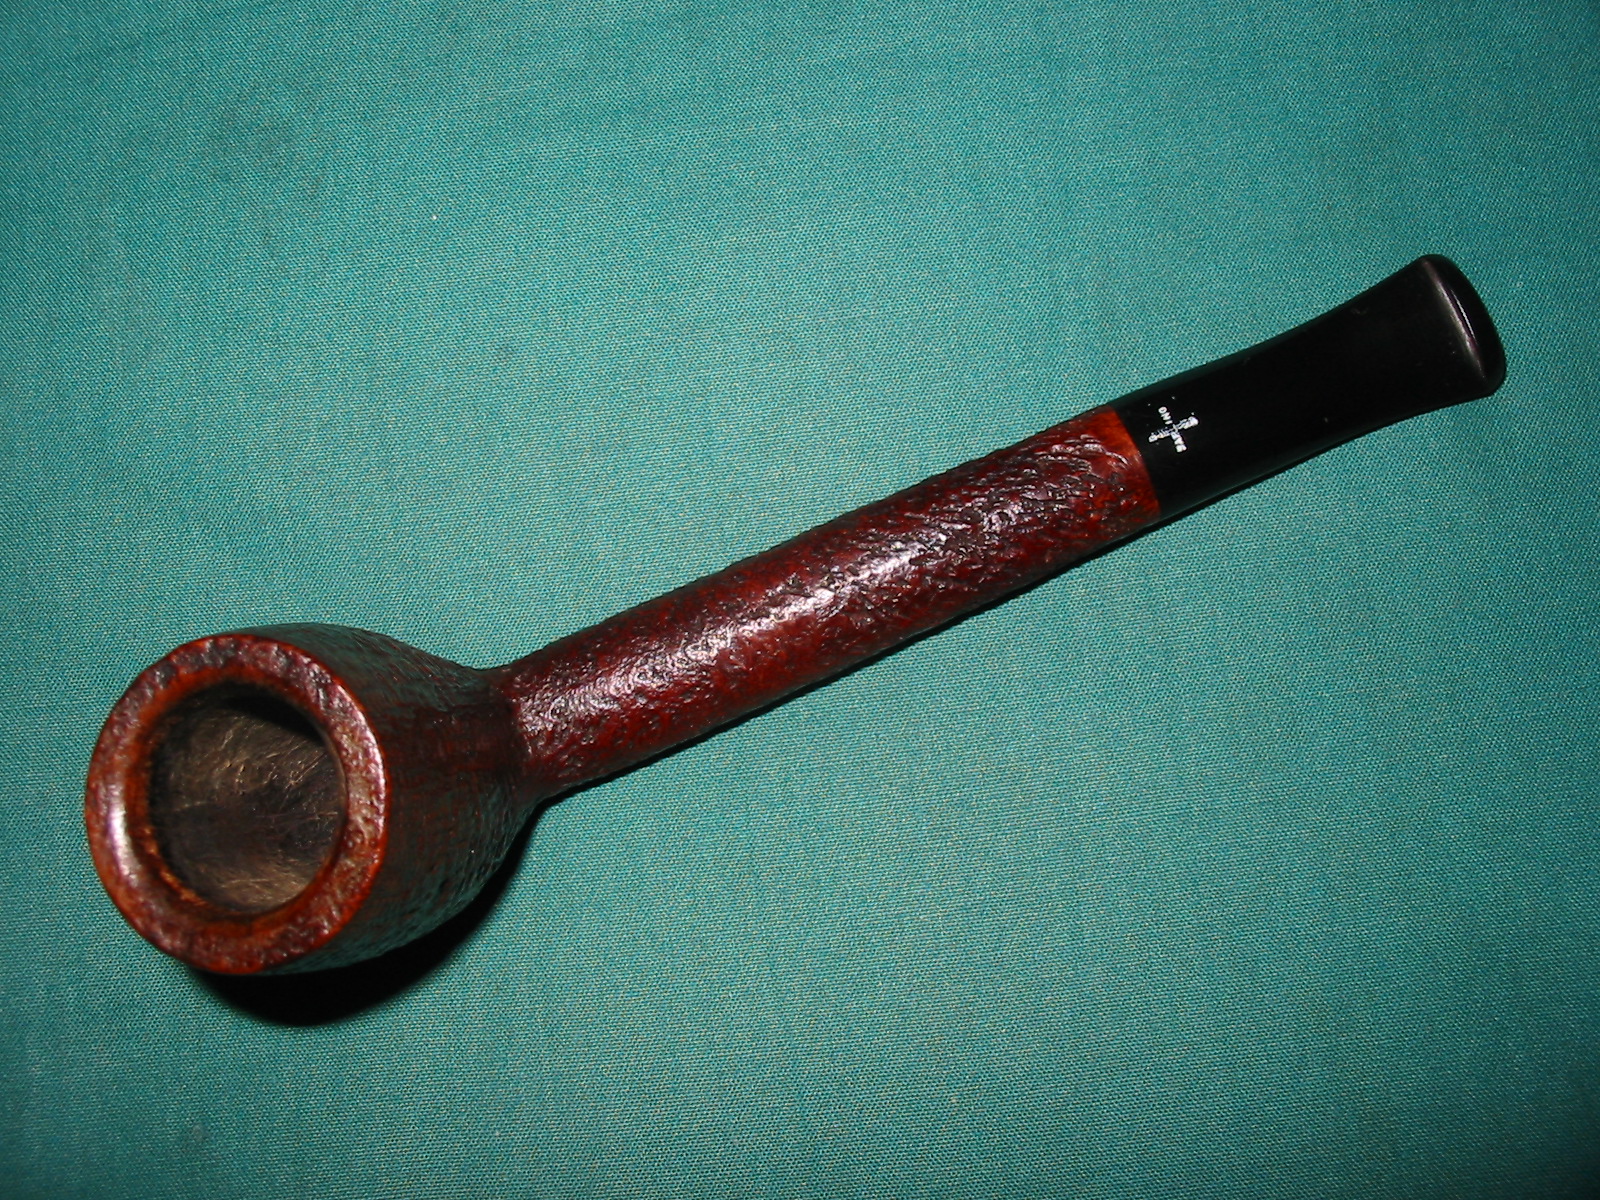
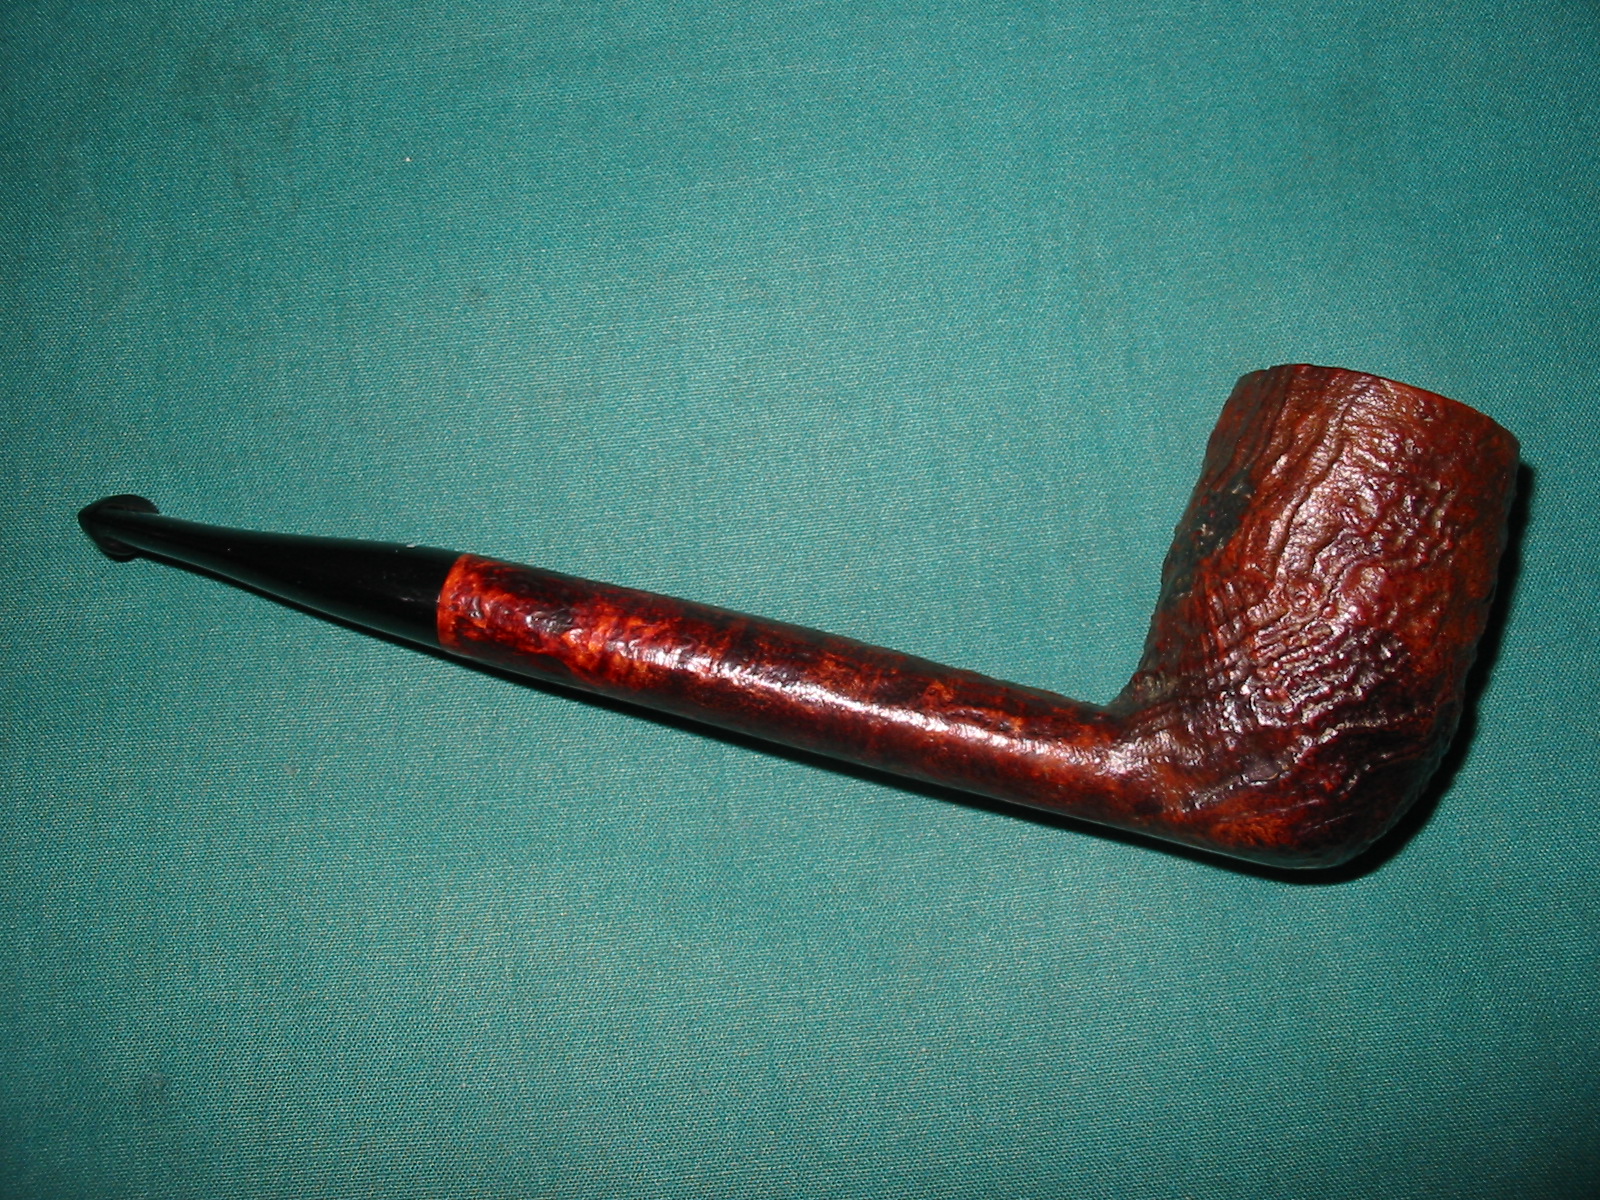
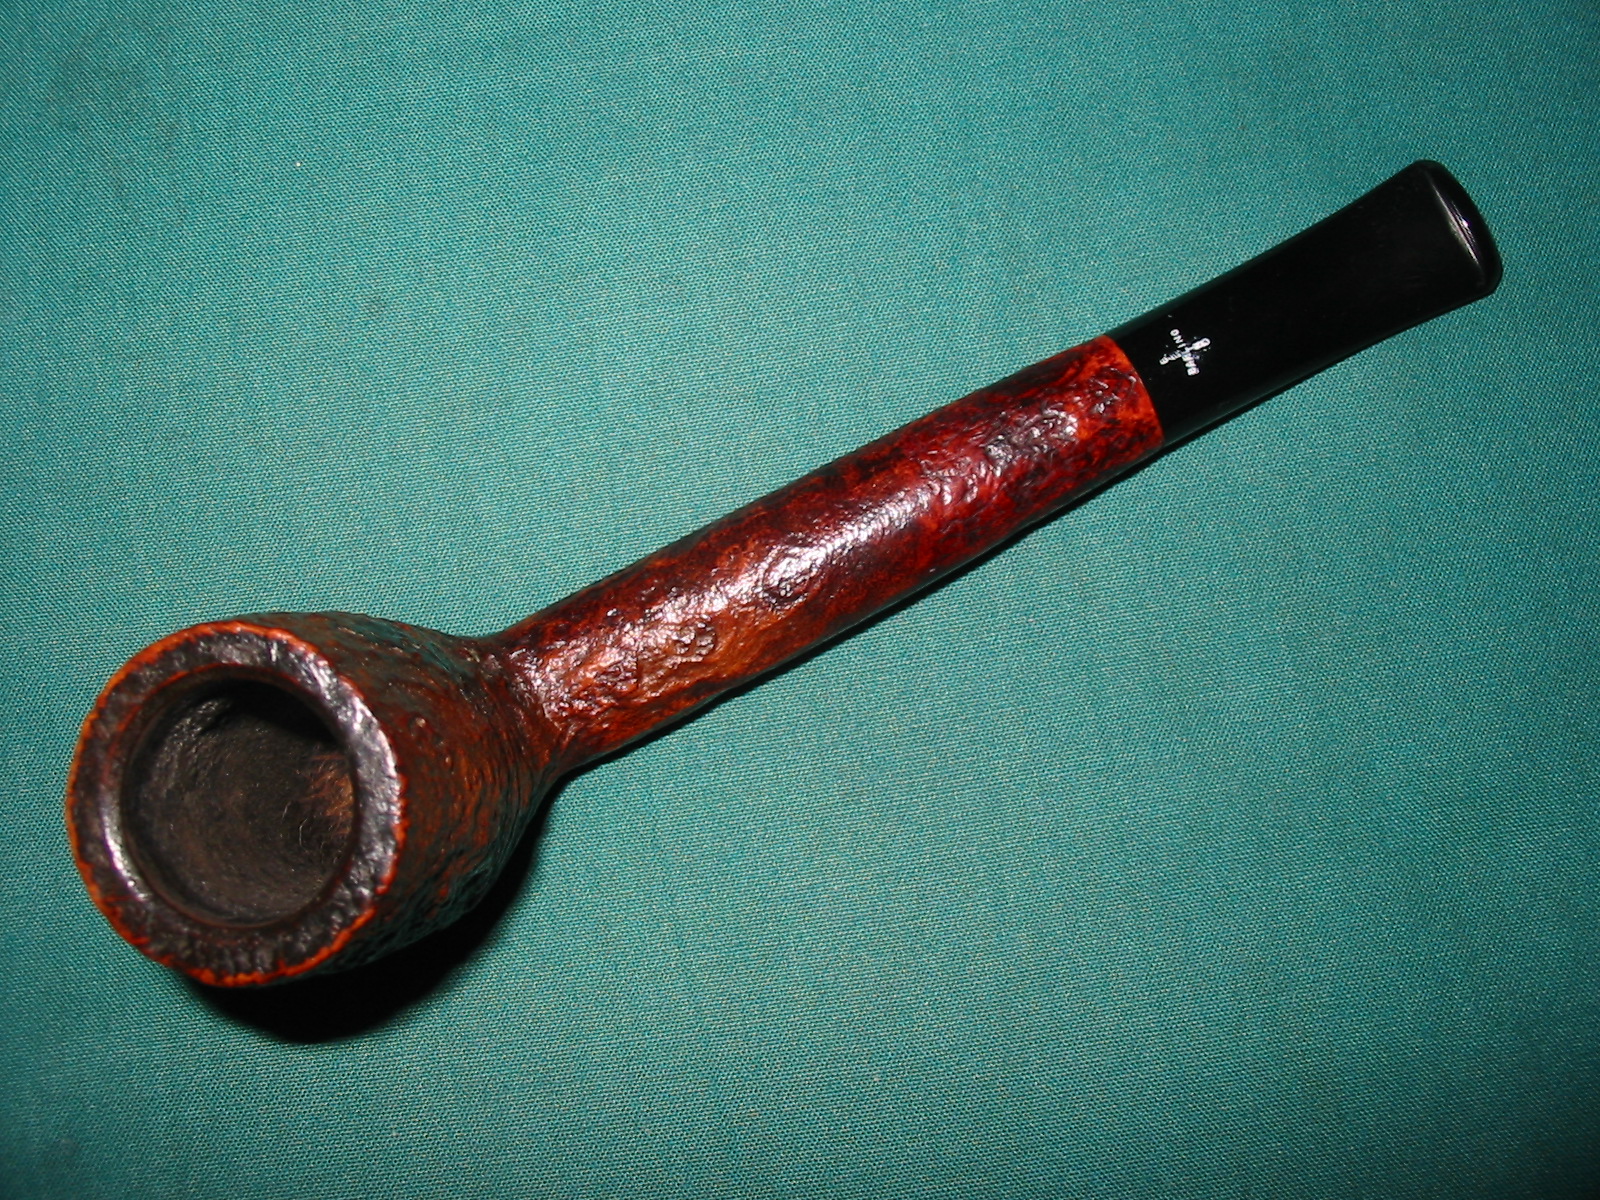
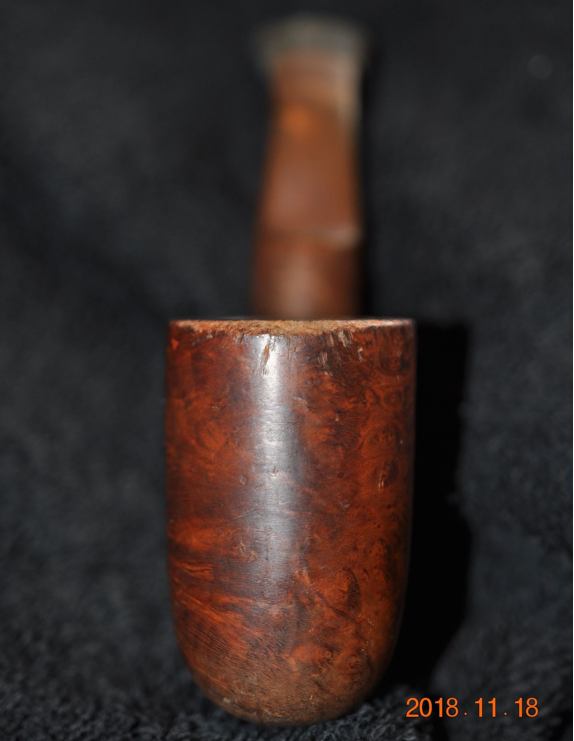
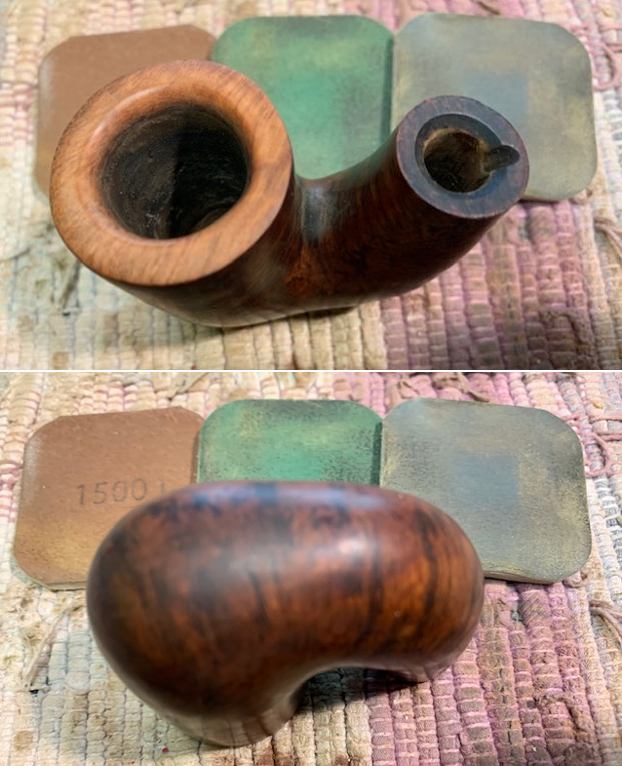
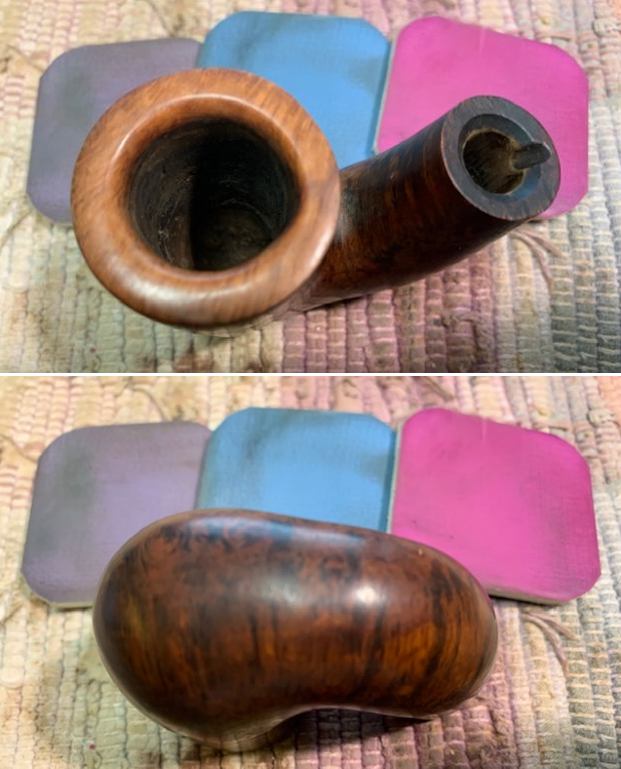
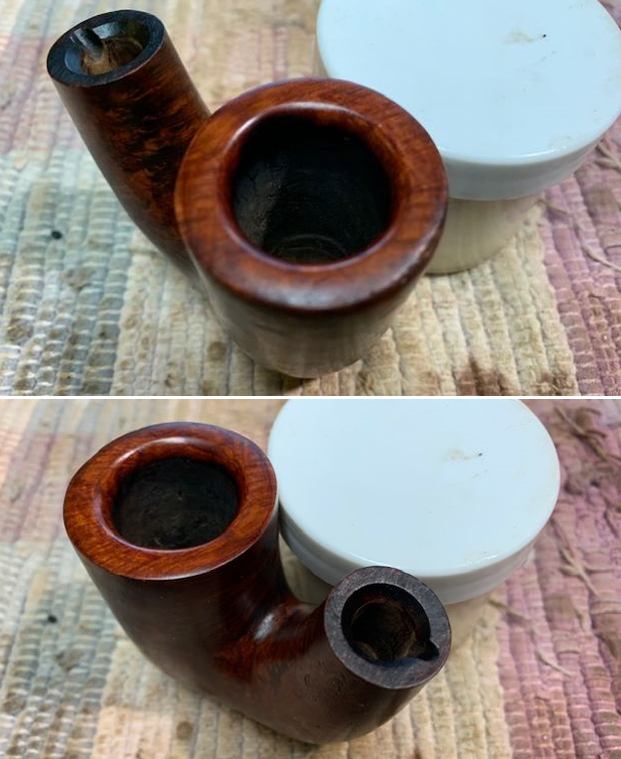
The chamber shows a nice even build up of a thick cake which makes it difficult to comment on the condition of the inner walls of the chamber. There is a thick overflow of lava and completely covers the rim top and further spills over on to the stummel surface. The condition of the inner edge of the rim and rim surface will be ascertained only after chamber has been reamed down to its bare briar. The outer rim, however, is damaged and has a number of chips and dents, probably caused due to hitting the bowl against a hard surface to remove the dottle! Criminal, to say the least!
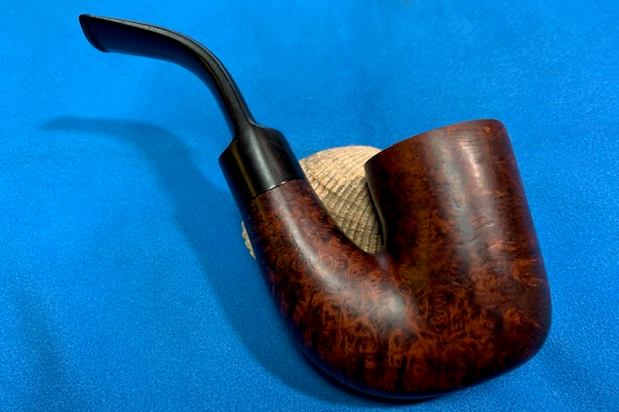
 The surface of the stummel is covered by the overflowing lava, which in turn has attracted a lot of dirt and grime over a period of time. The stummel surface is peppered with numerous dents and dings, more so towards the heel of the bowl, probably caused due to careless and uncared for storage for the last 40-45 years!!!! It will be a big decision whether to address these dents and dings by abrasive sanding method and loose the patina which has developed on the surface, or let them be. Well, I shall cross the bridge when I reach it. The mortise is surprisingly clean and air flow through it is open and full.
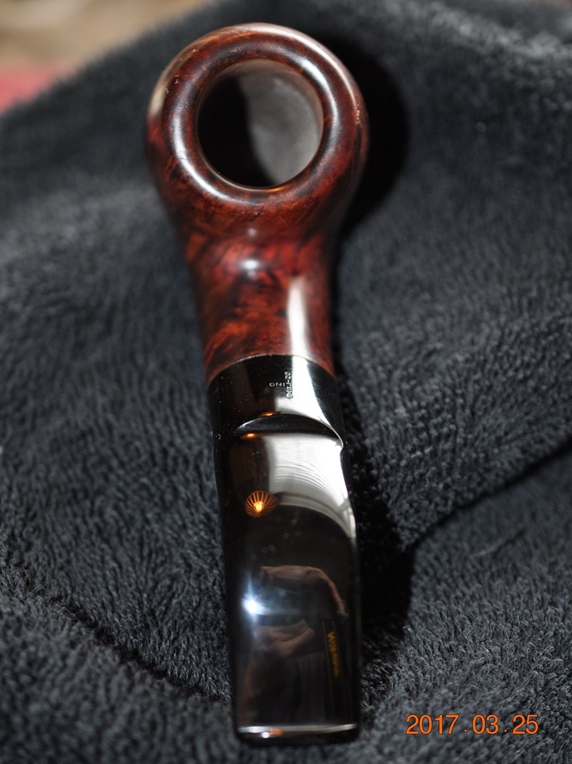
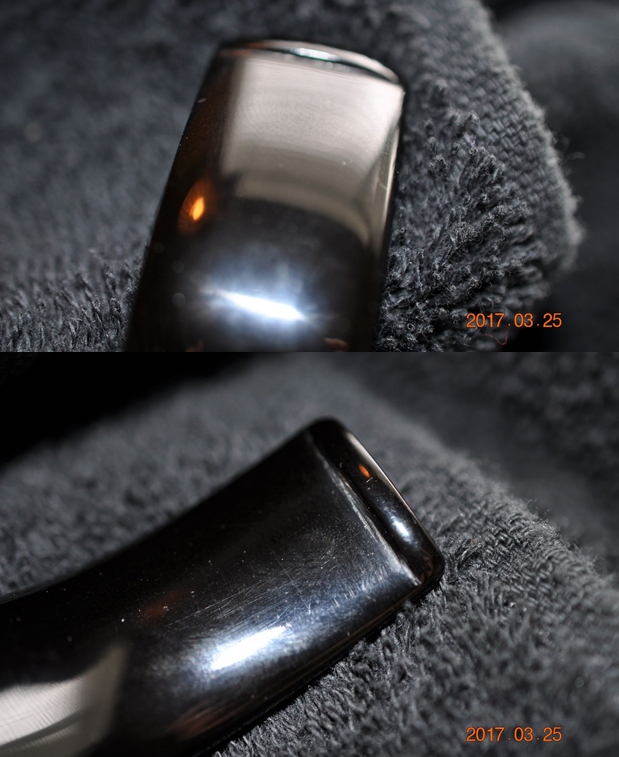
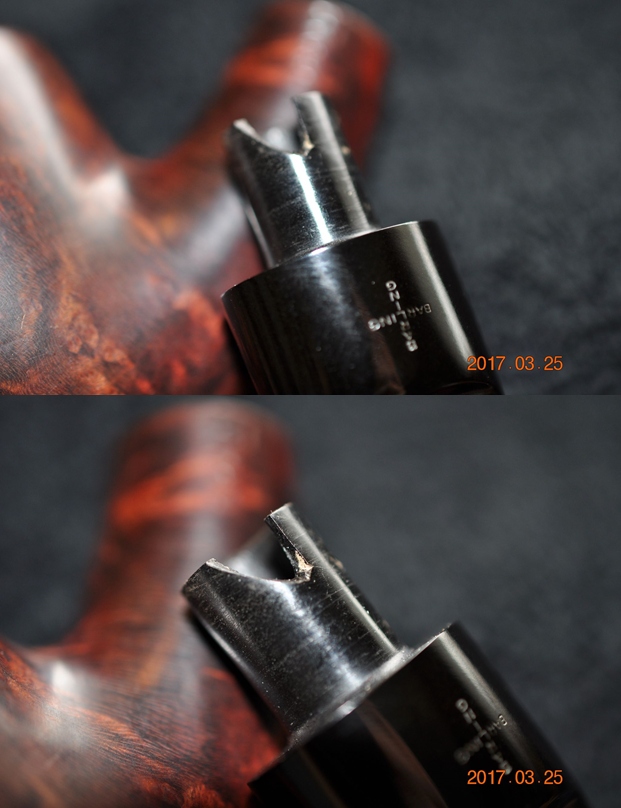
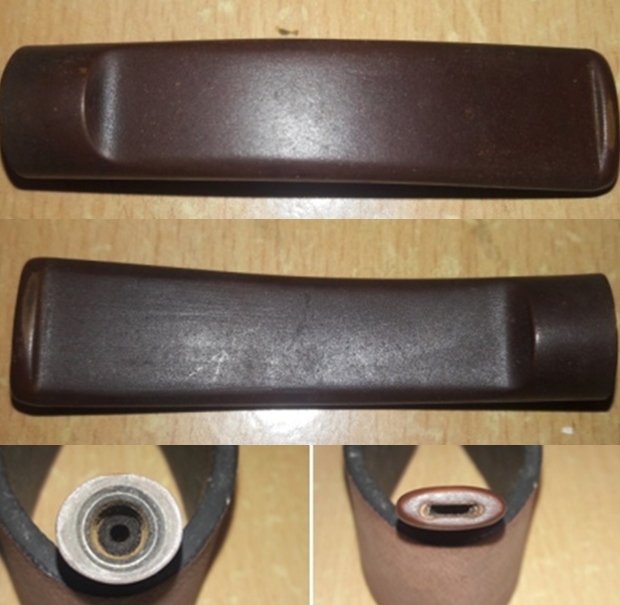
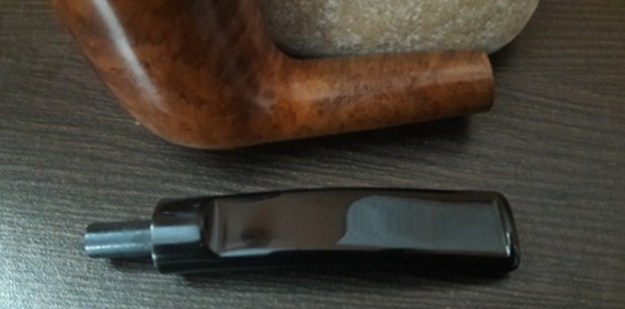
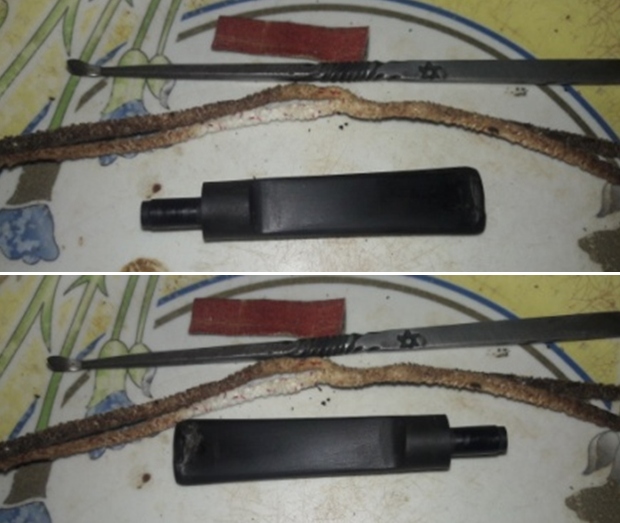
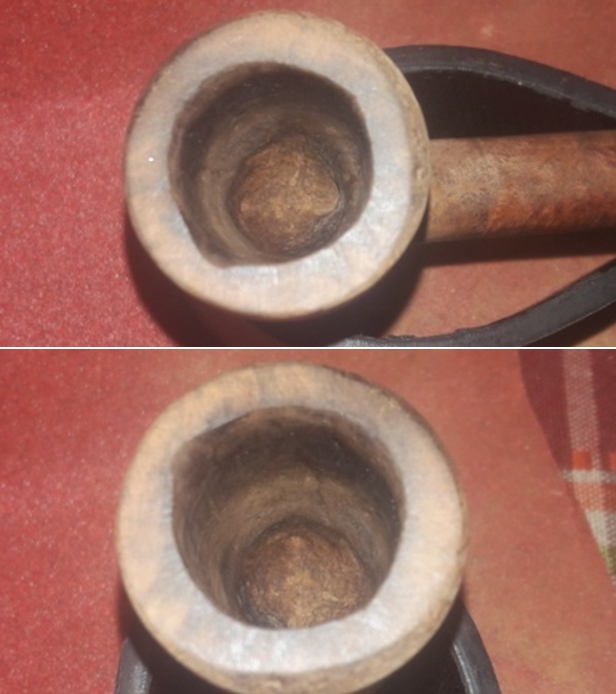
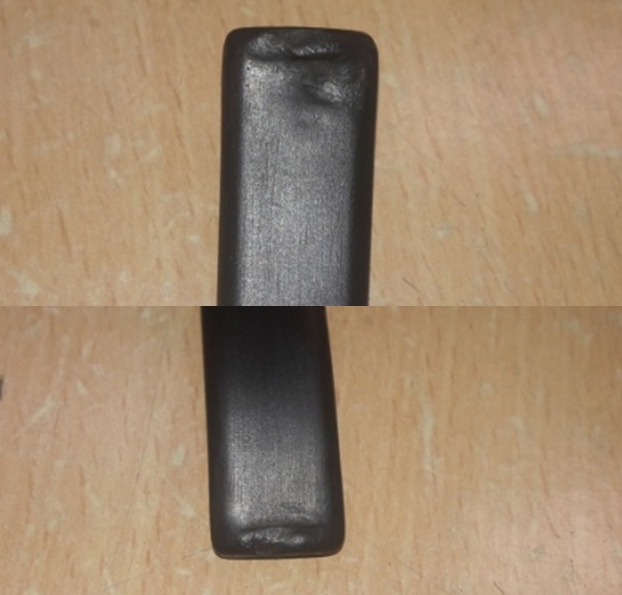
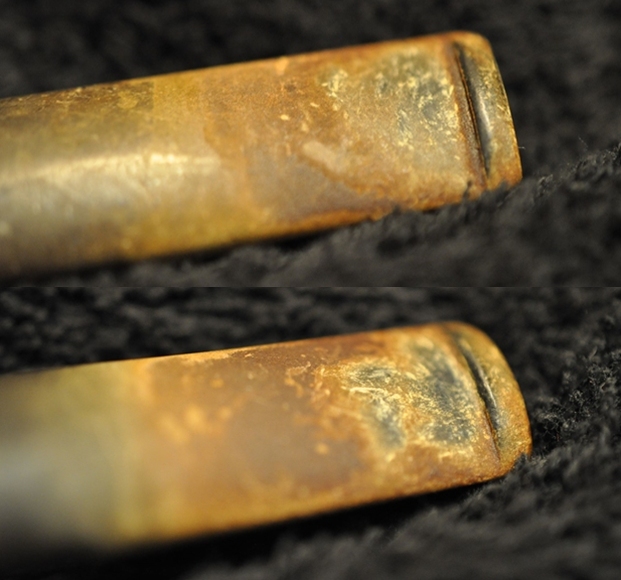
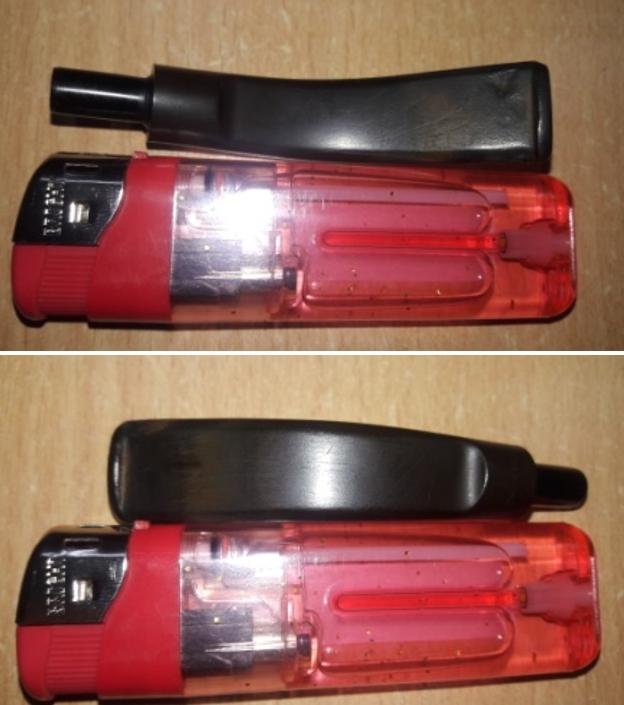
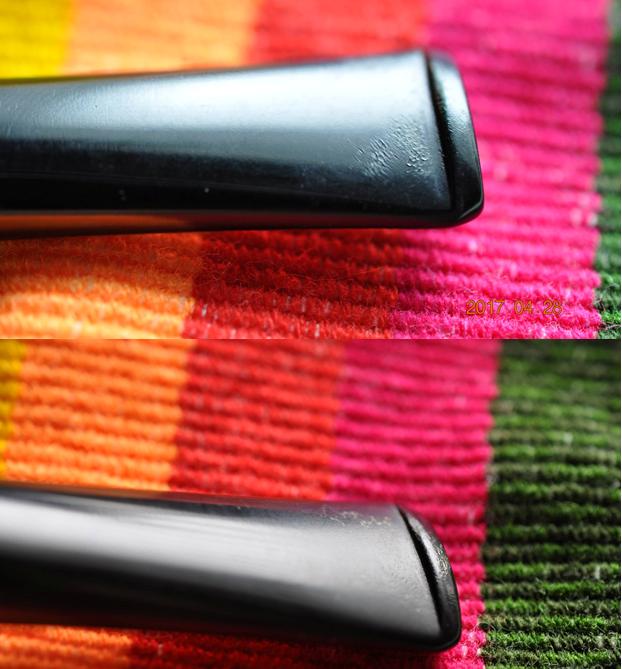
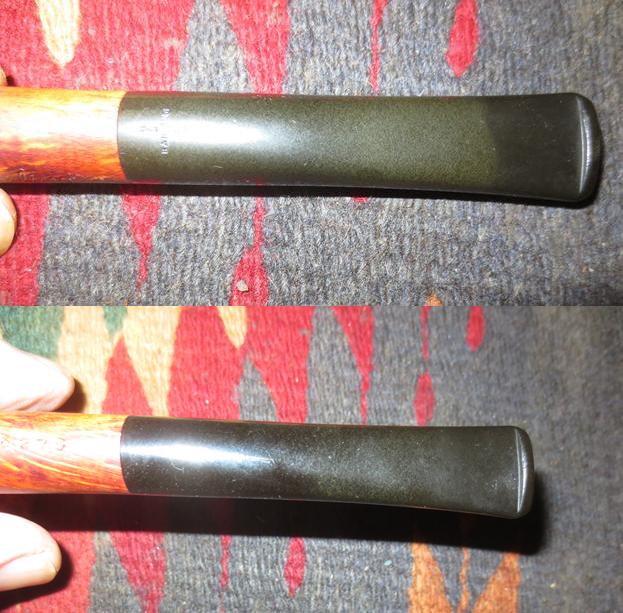
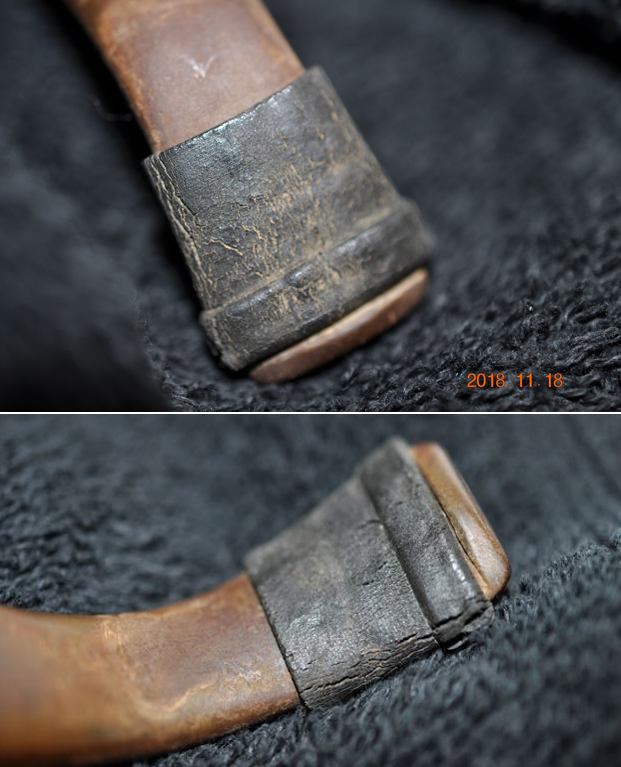
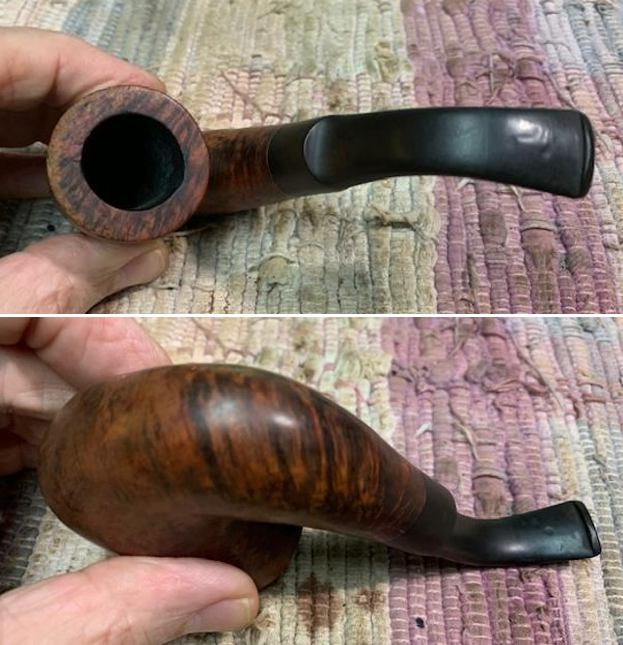
 The vulcanite stem is heavily scratched, but not oxidized. Some light tooth chatter is seen on both surfaces of the stem towards the lip with one deep bite mark on the upper surface. This issue should not be a major headache to address. The lip edge on both sides is crisp but lightly damage. The quality of vulcanite is good.
 THE PROCESS
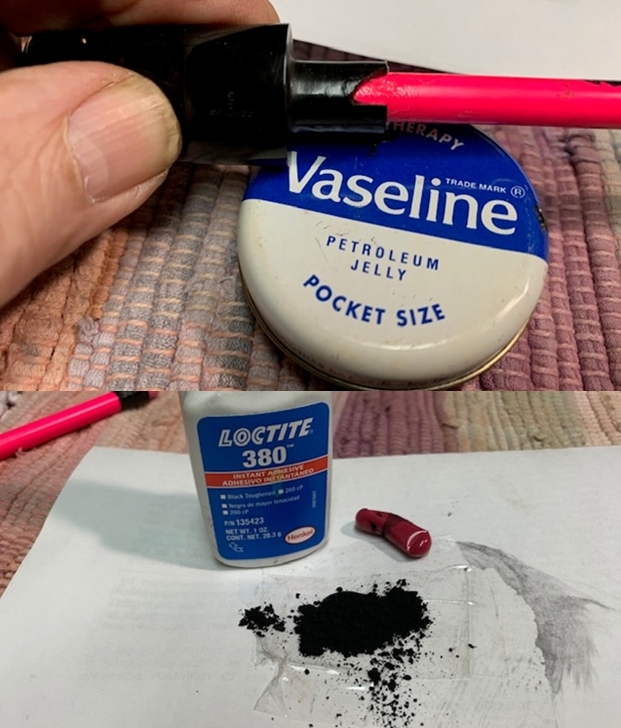
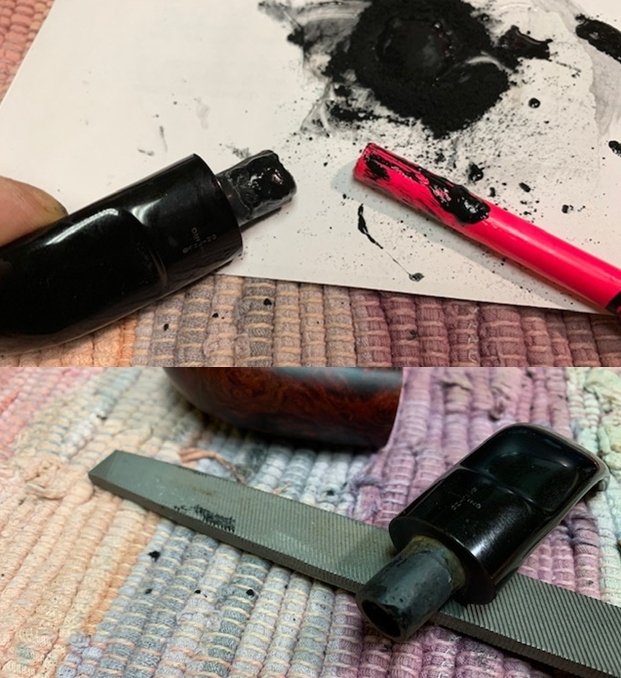
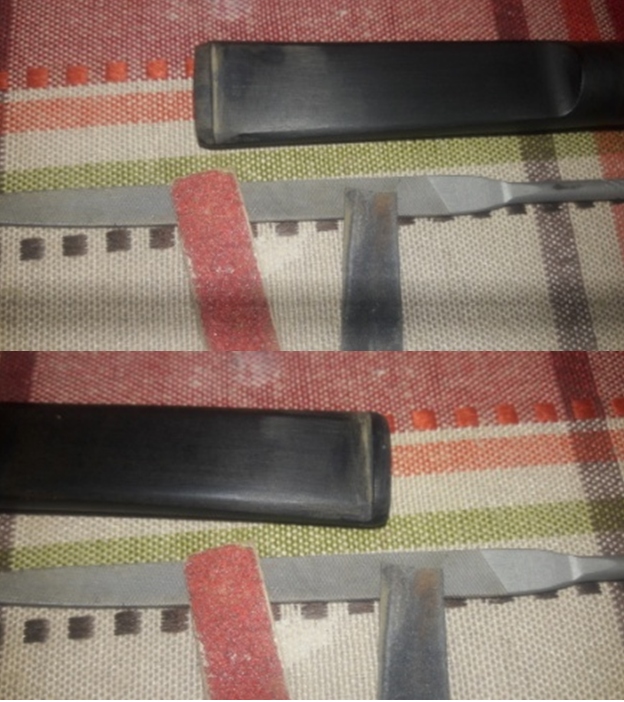
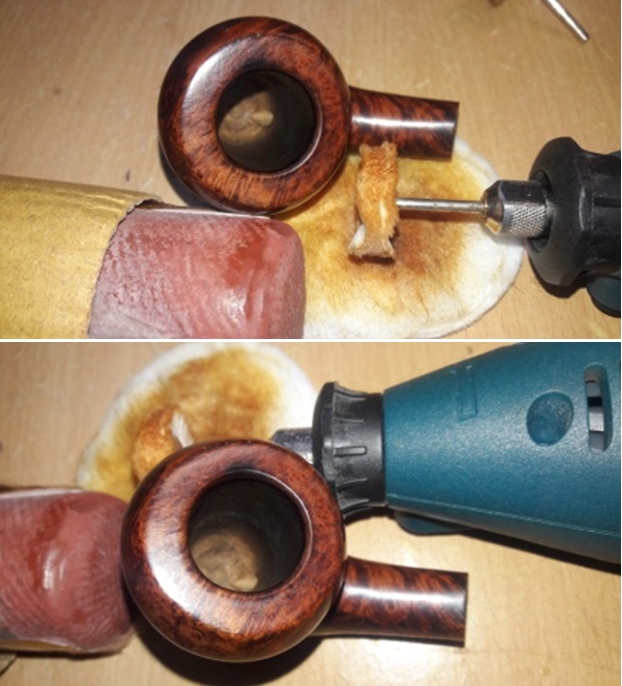
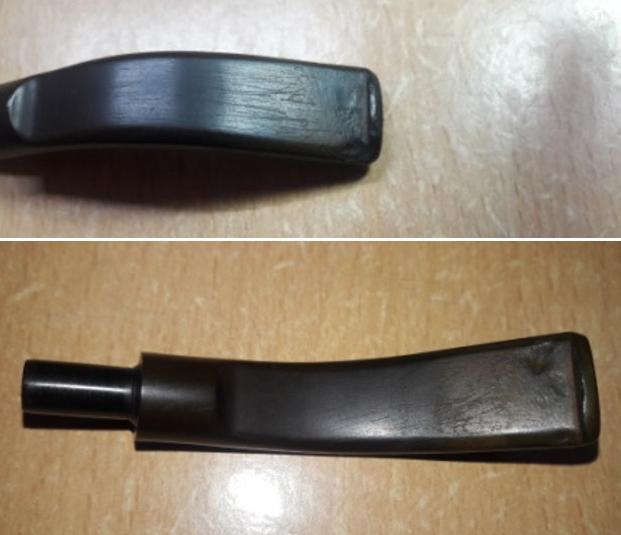
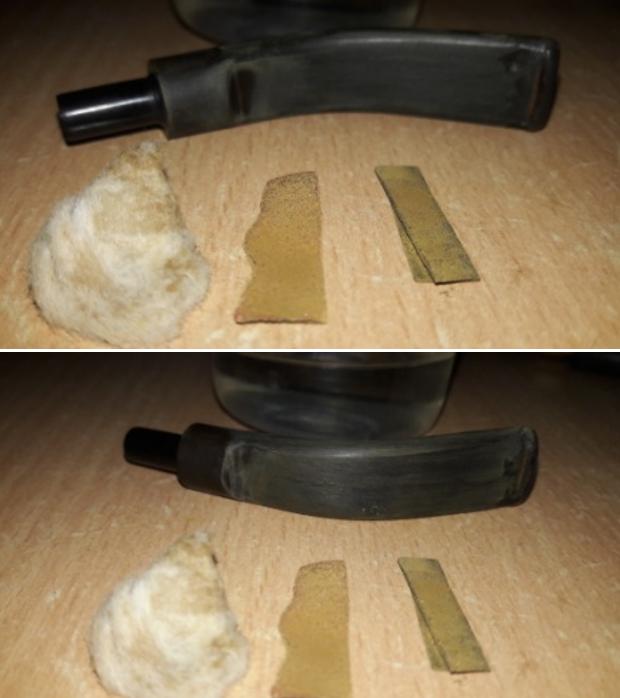
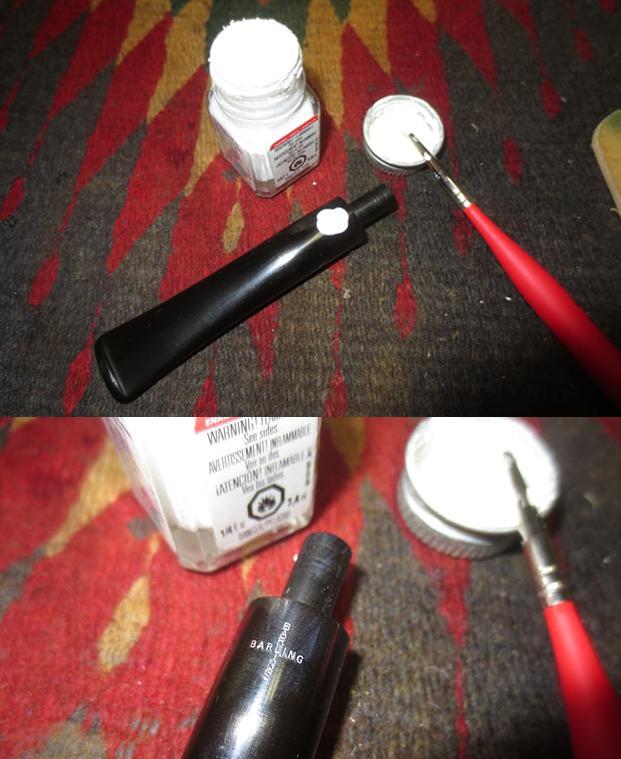
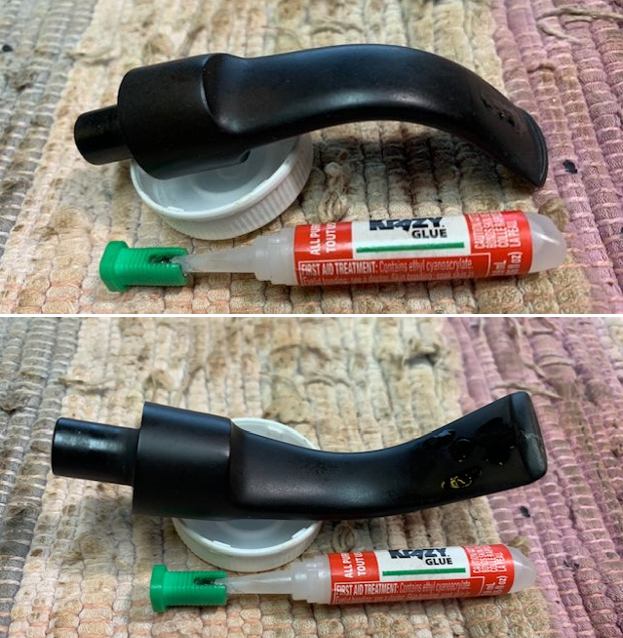
I did not soak the stem of this pipe in the Hydrogen Peroxide solution as I was not sure how it would affect the stamping and so decided to play it safe. I flamed the stem surface of the stem with a Bic lighter to raise the tooth indentations and scratches on the stem. The heat from the flame of Bic lighter causes the vulcanite to expand and regain its natural shape, reducing the marks. The tooth bite marks which were visible after the flaming were filled with a mix of activated charcoal and clear CA superglue and I set it aside to cure overnight.
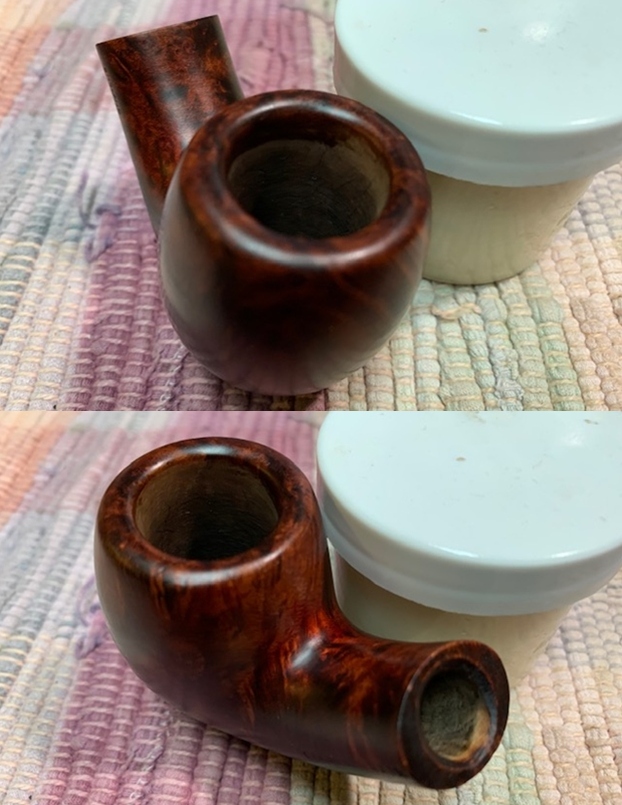
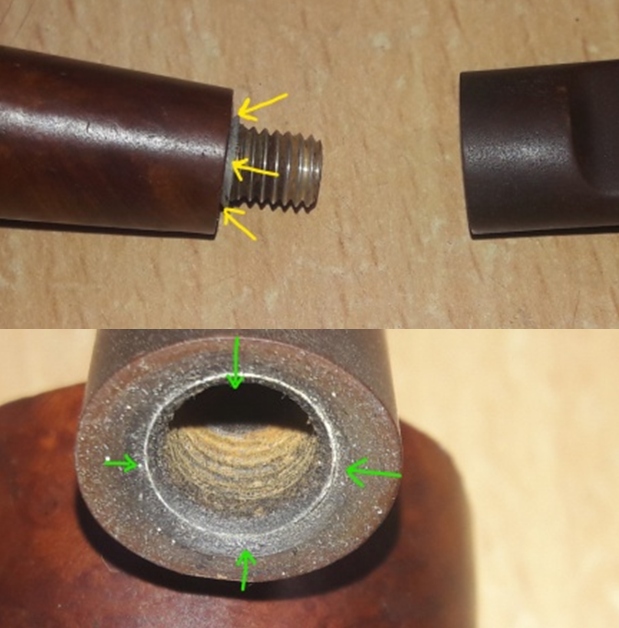
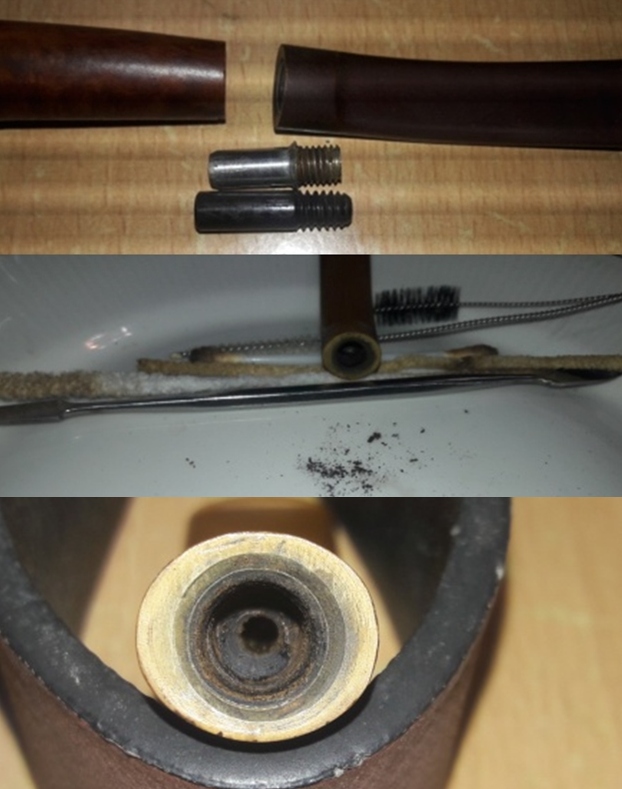
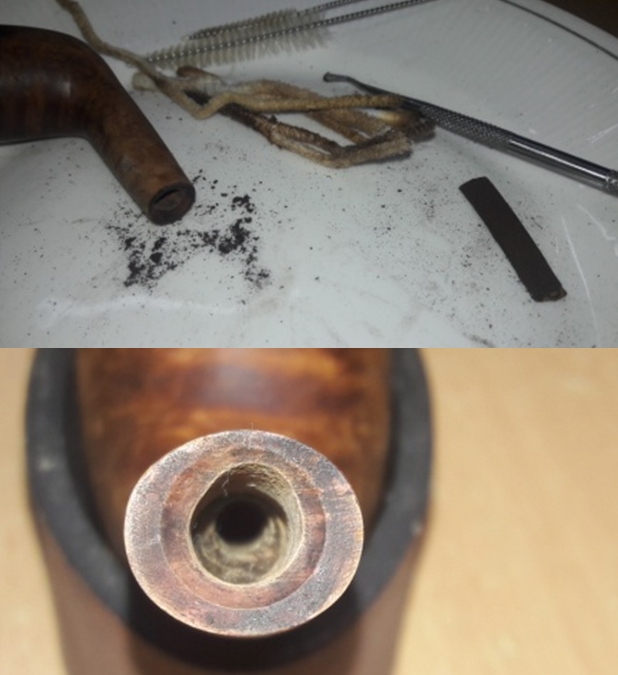
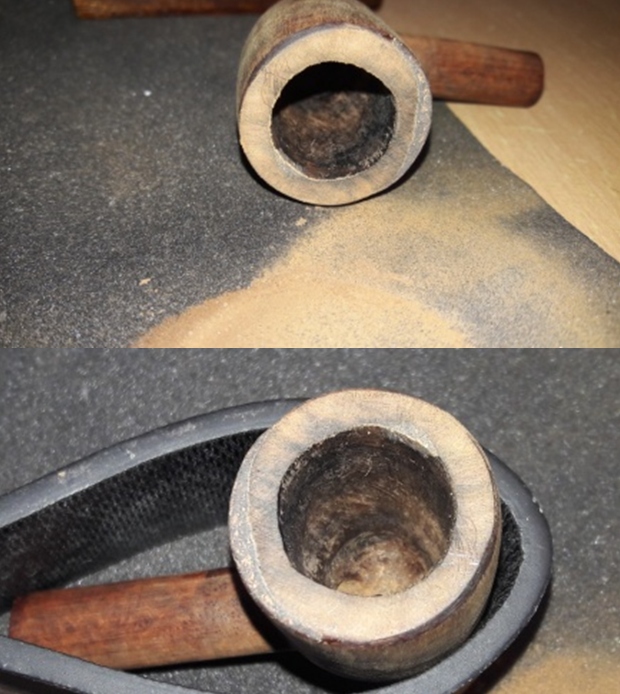
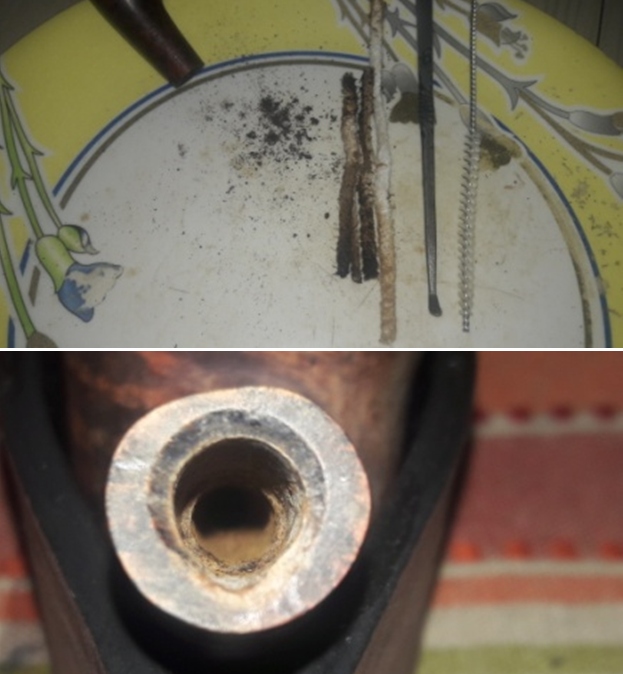
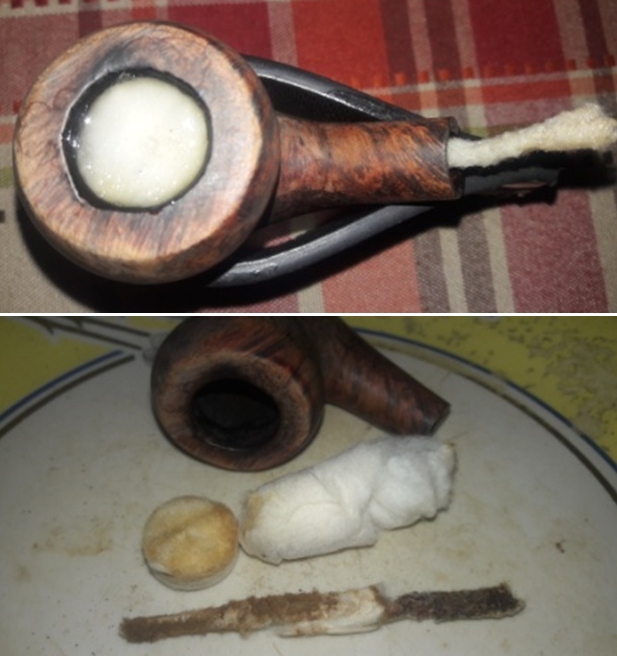
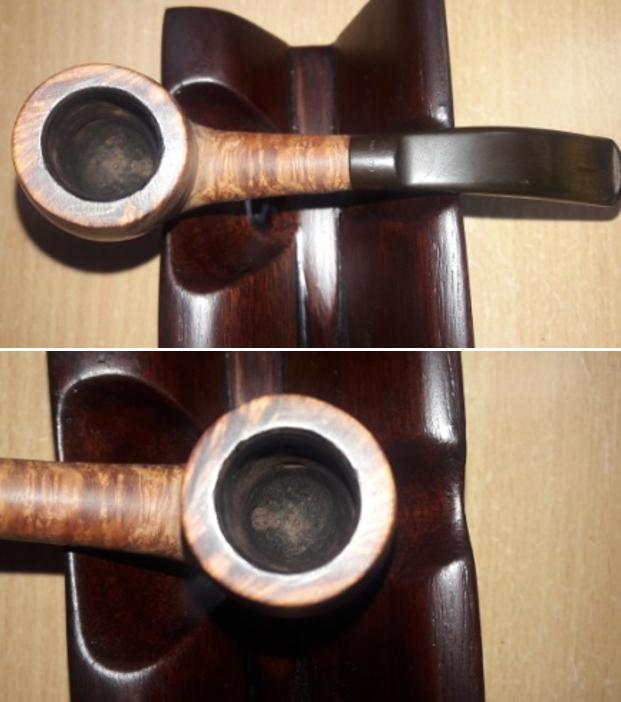
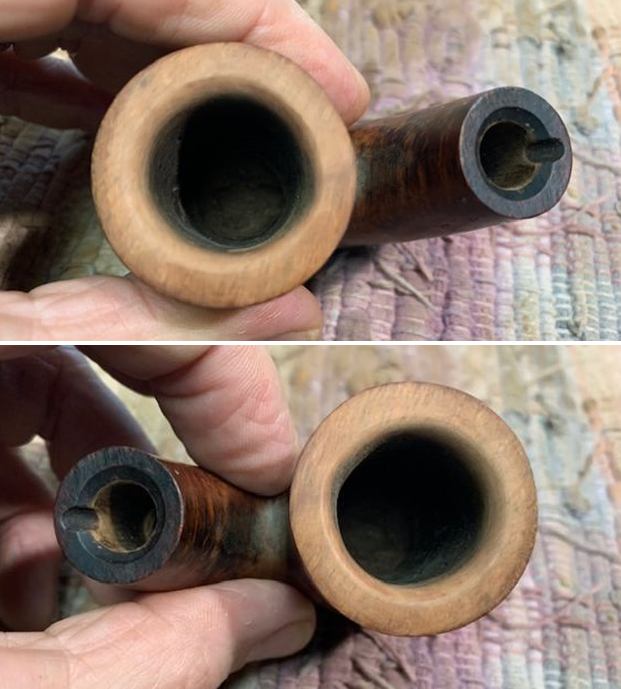
 I reamed the chamber with size 1 head of a PipNet reamer and followed it with a size 2 reamer head. To reach the areas where the PipNet reamer could not reach to remove the carbon cake, I used my smaller fabricated knife and scraped out all the remaining cake. I further use a folded piece of 180 grit sandpaper to sand out the last traces of remaining cake and expose the walls of the chamber to ascertain that there are no cracks/ heat fissures. I wiped the chamber with a cotton pad dipped in isopropyl alcohol to remove the carbon dust left behind by all the reaming and sanding process. The walls of the chamber were solid with no damage. I gently scraped the rim top surface with a sharp knife to remove the lava overflow. This was followed by cleaning the mortise with cue tips, pipe cleaners and shank brush dipped in isopropyl alcohol. This further eliminated traces of old smells from previous usage. The old smell was still prevalent, though greatly reduced.
 To completely eliminate the smell, I decided to resort to alcohol bath. I packed the chamber, just below the rim, with cotton balls. I stretched a cotton ball into a thick wick, tapering at one end, and inserted it in to the shank and pushed it as far inside as I could using a straightened paper clip. I topped the bowl with isopropyl alcohol using a syringe. I know that it is generally a practice to use Kosher salt for this procedure, but since Kosher salt is not easily available here, and when available, it’s very expensive, I use cotton balls. I find that cotton balls work just fine in drawing out all the tars and smells from the mortise and the bowl. I topped the bowl with alcohol again after 20 minutes when the alcohol level had gone down and set it aside overnight for the cotton and alcohol to do its intended job.
 The next day, the cotton and alcohol had fulfilled its intended task. I removed the cotton balls and ran pipe cleaners through the mortise to clean out all the loosened tars and gunk. The internals of the stummel is now clean and fresh. Now, it was the turn of the stummel to get cleaned up. Using a hard bristled tooth brush dipped in undiluted Murphy’s oil soap, I very deliberately scrubbed the surface of the stummel. I cleaned the rim too. The stummel and rim top was dried using paper napkins and soft cotton cloth. I am not very happy the way the rim top appears at this stage with all the charring and uneven inner and outer rim edges. This needs to be addressed. I set the stummel aside to dry out naturally.


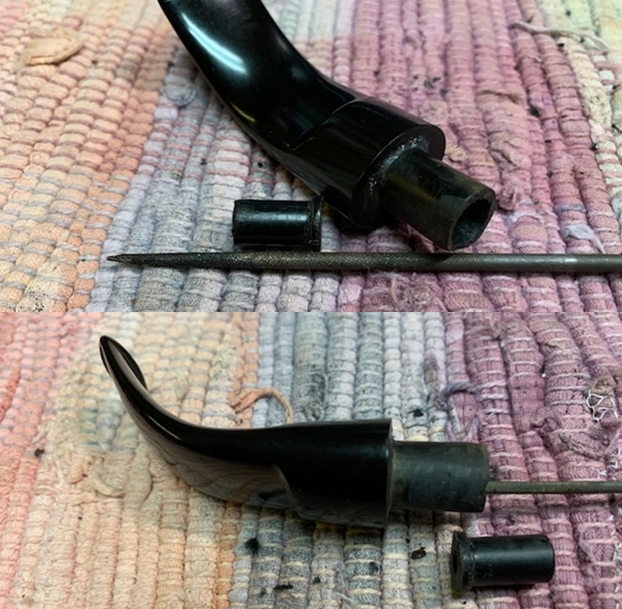
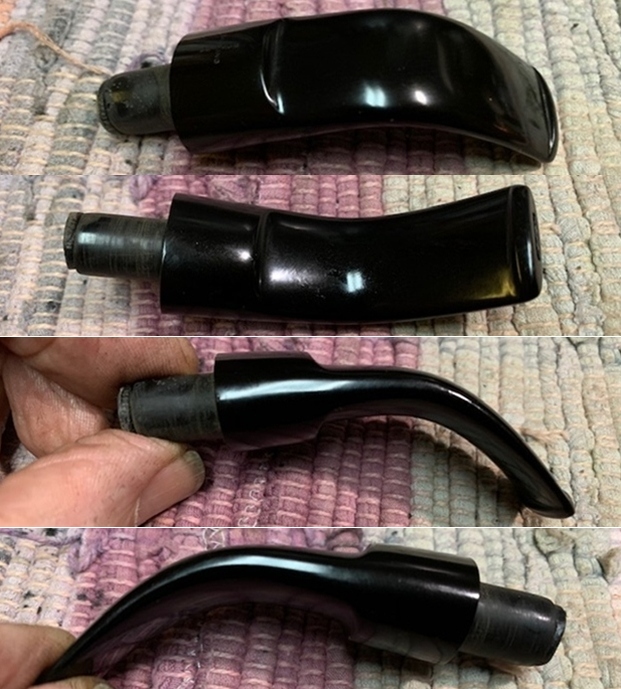
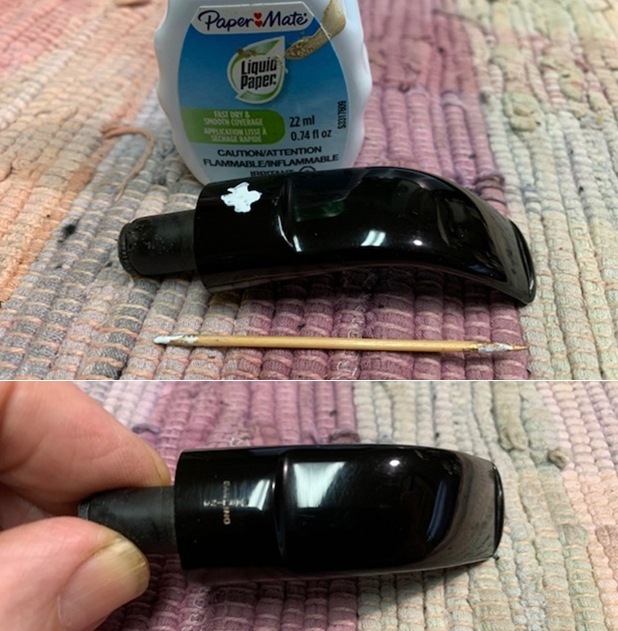
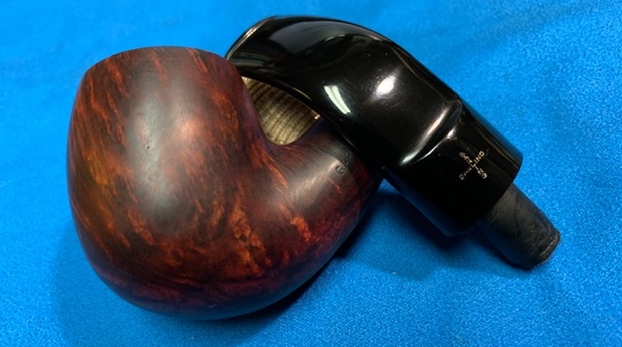
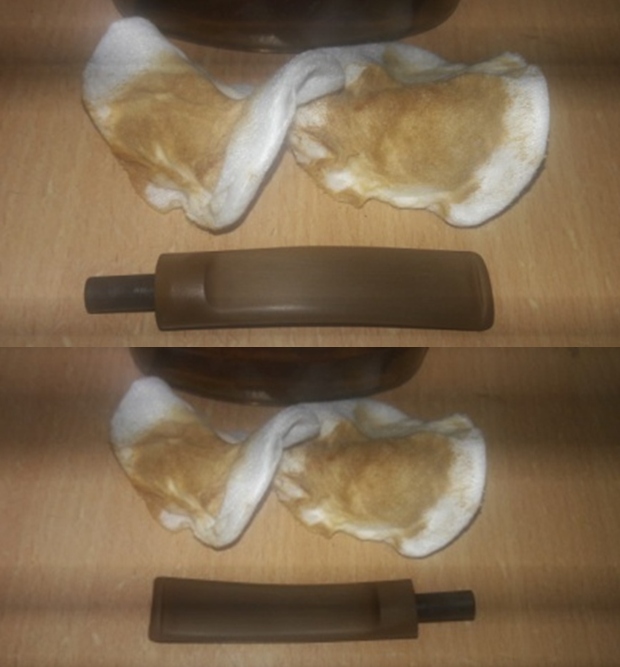
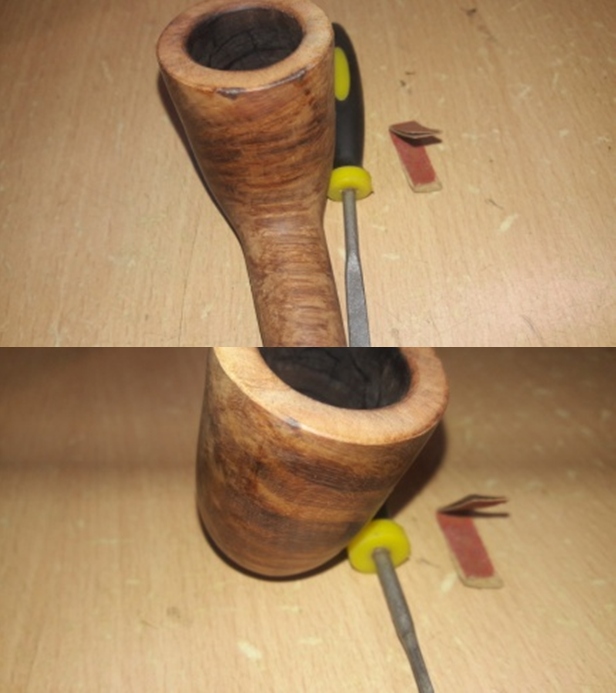
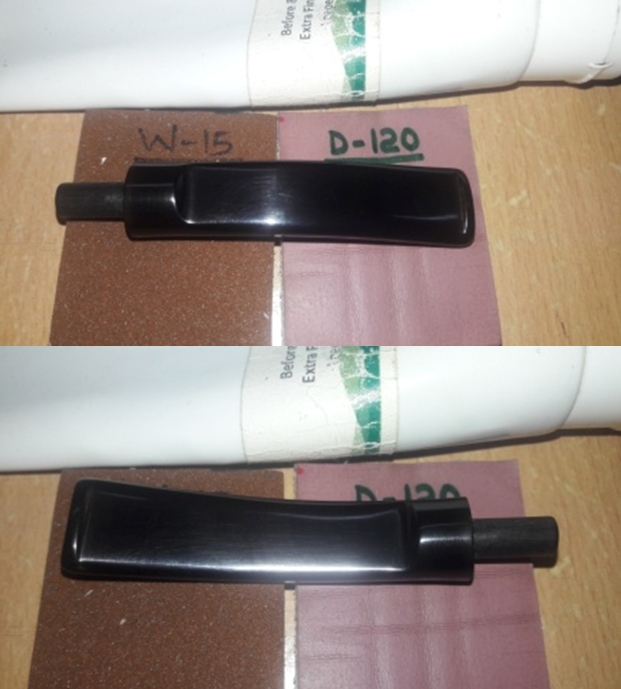
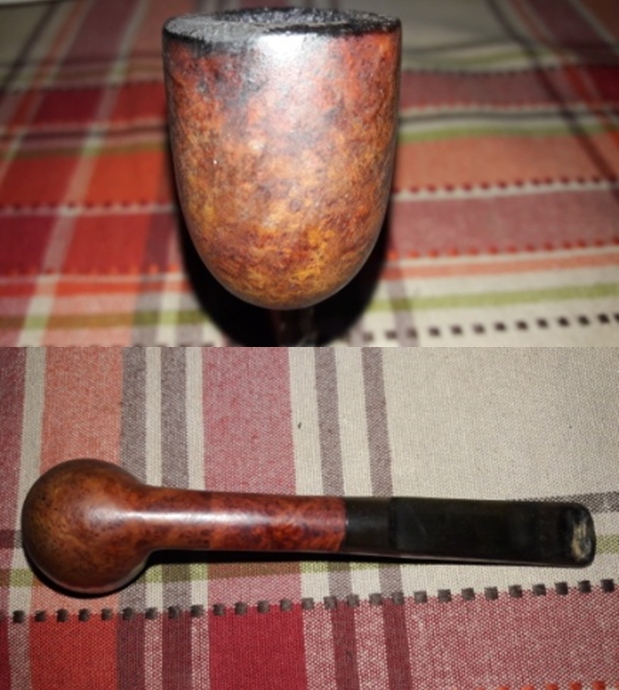
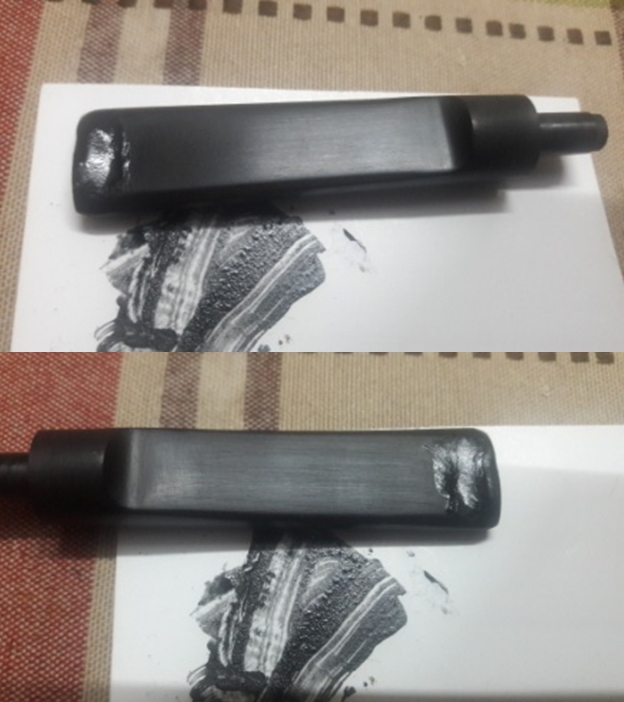
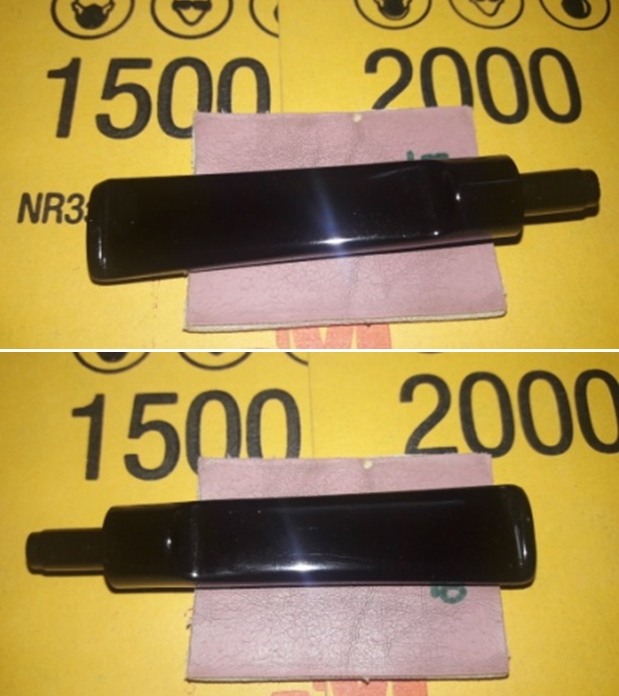
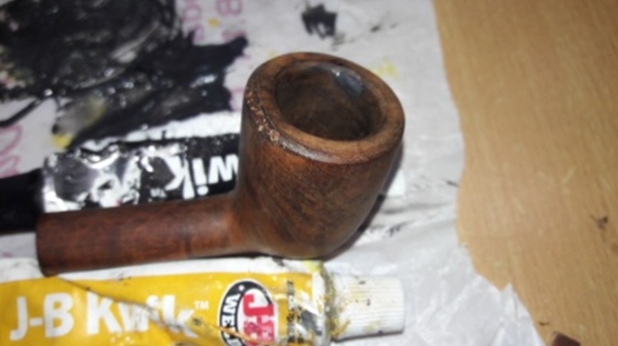
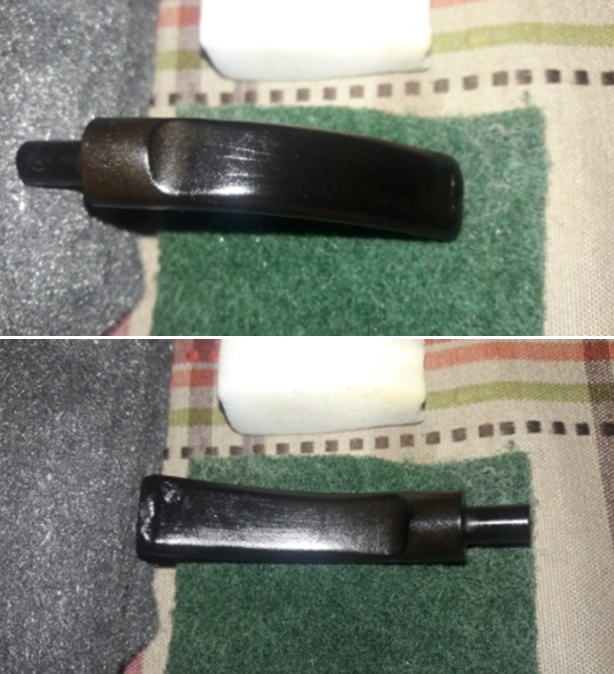
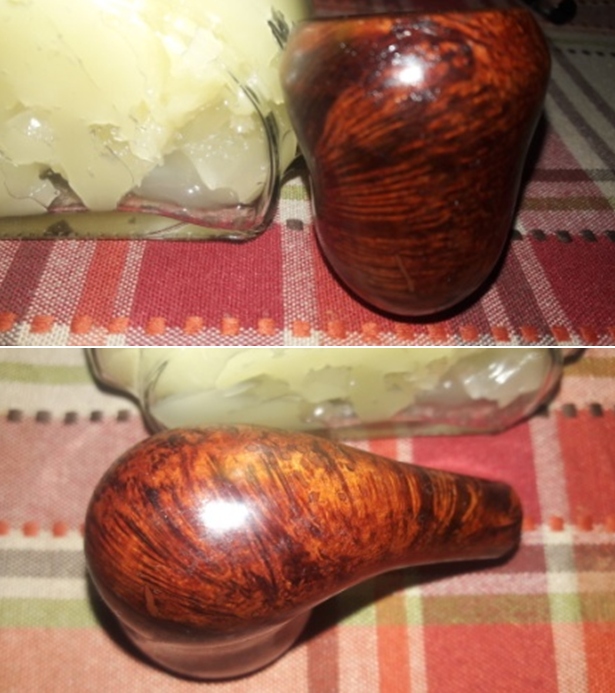
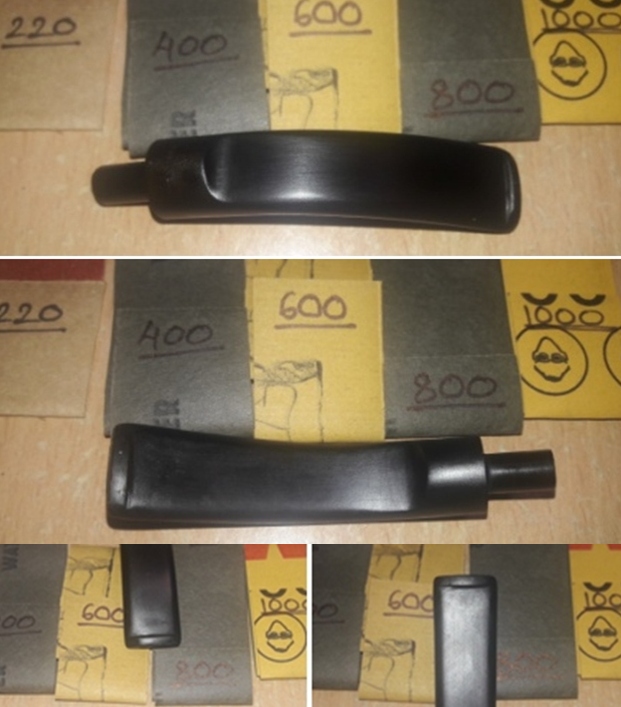
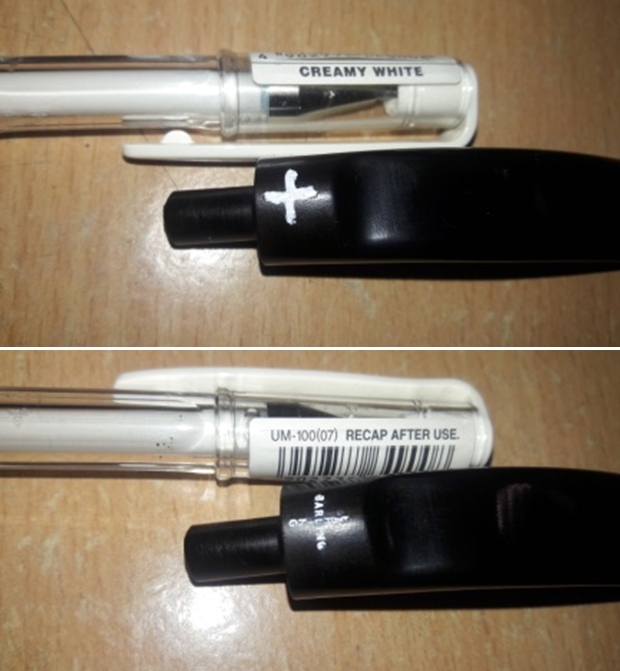
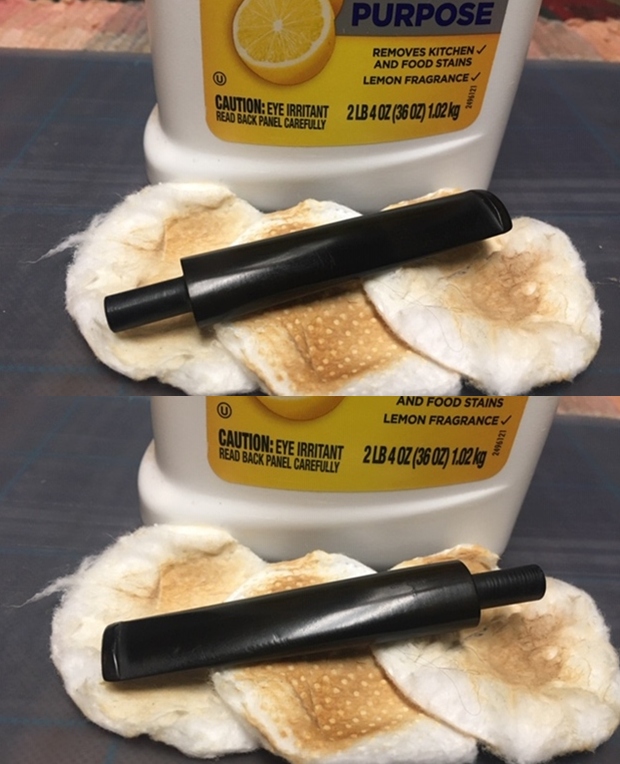
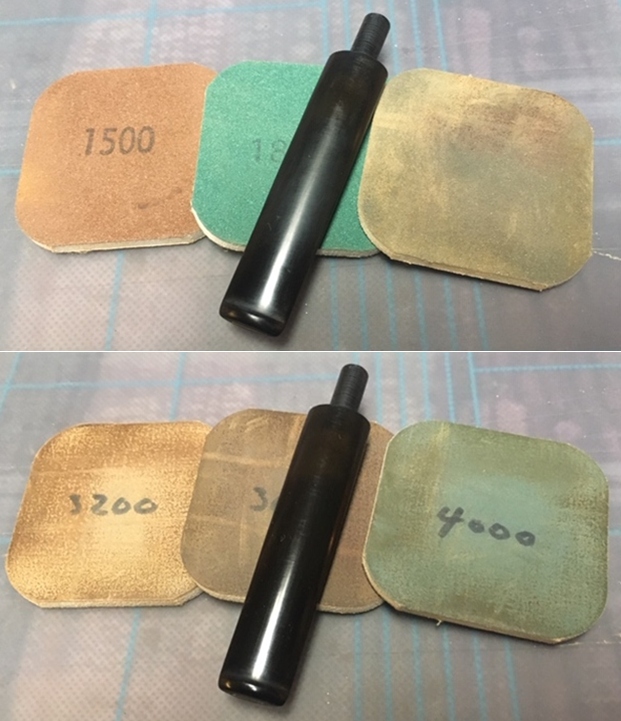
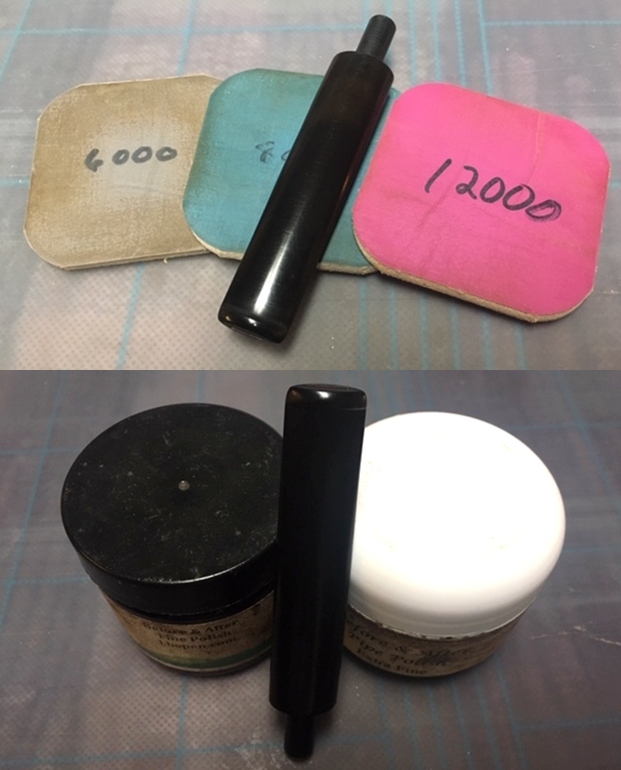
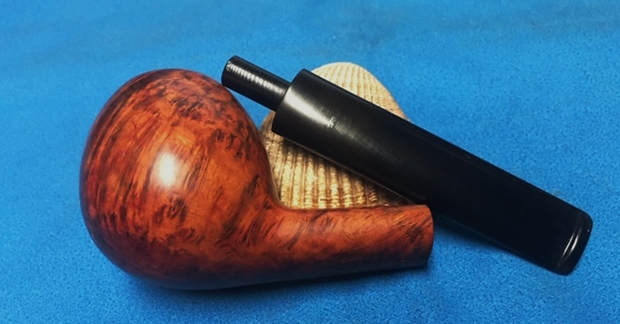
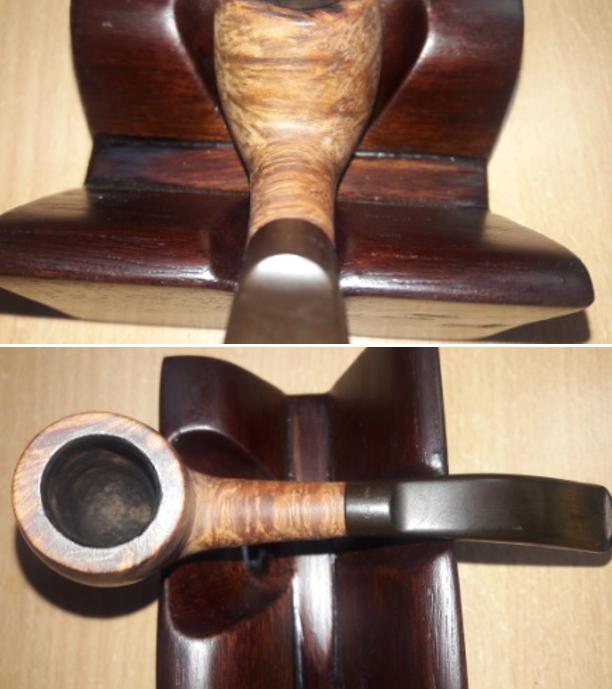
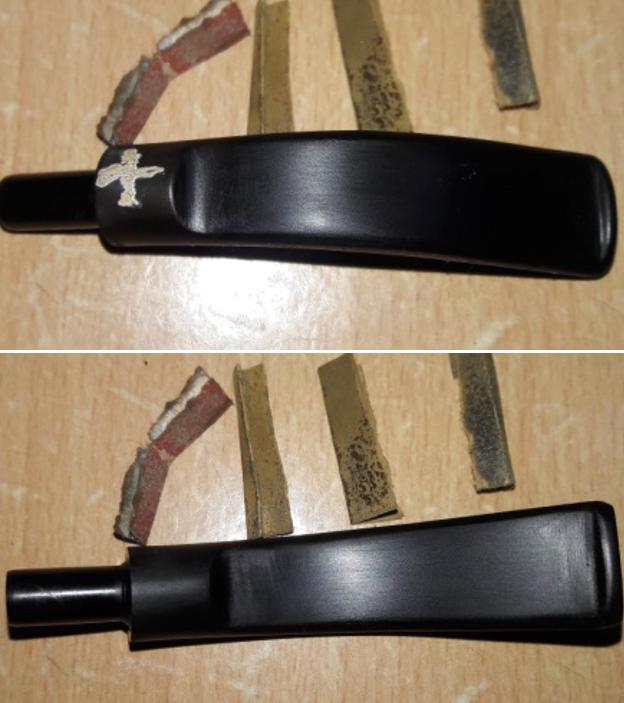
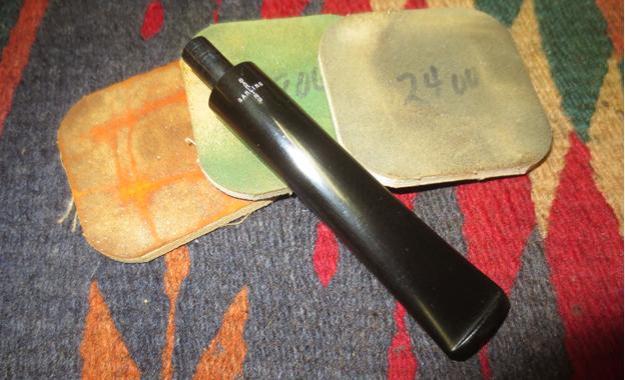
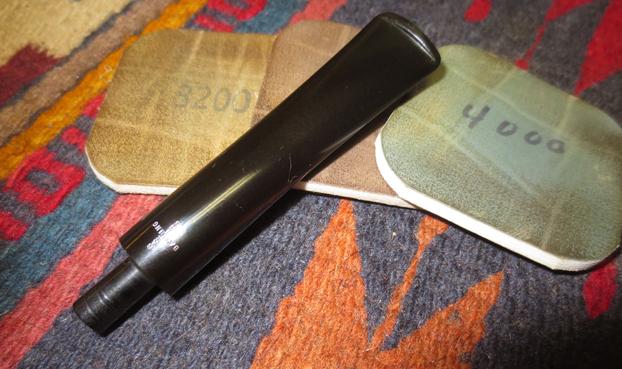
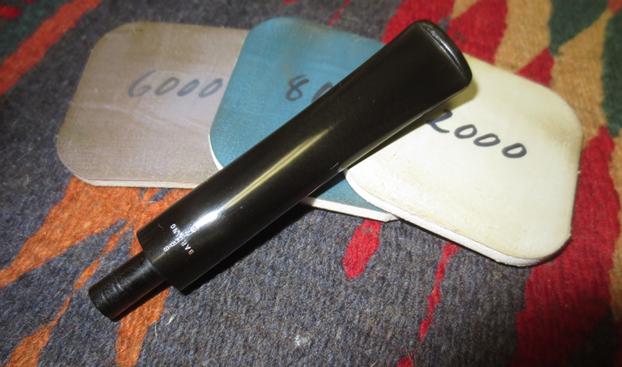
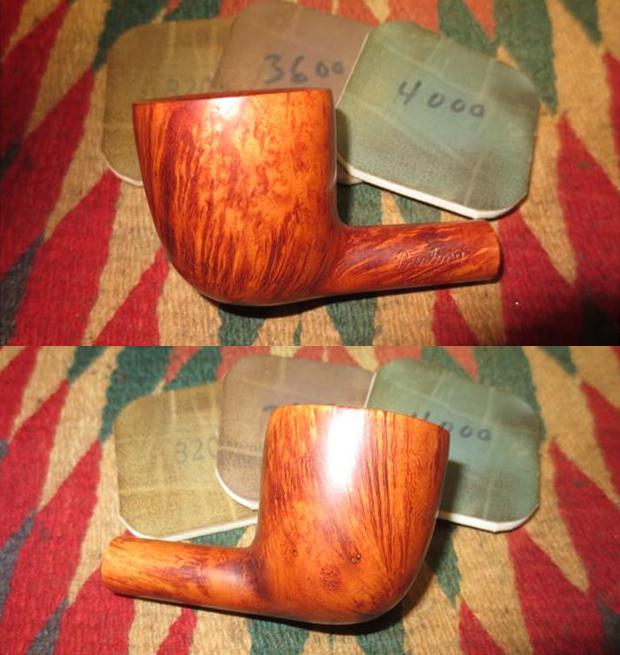
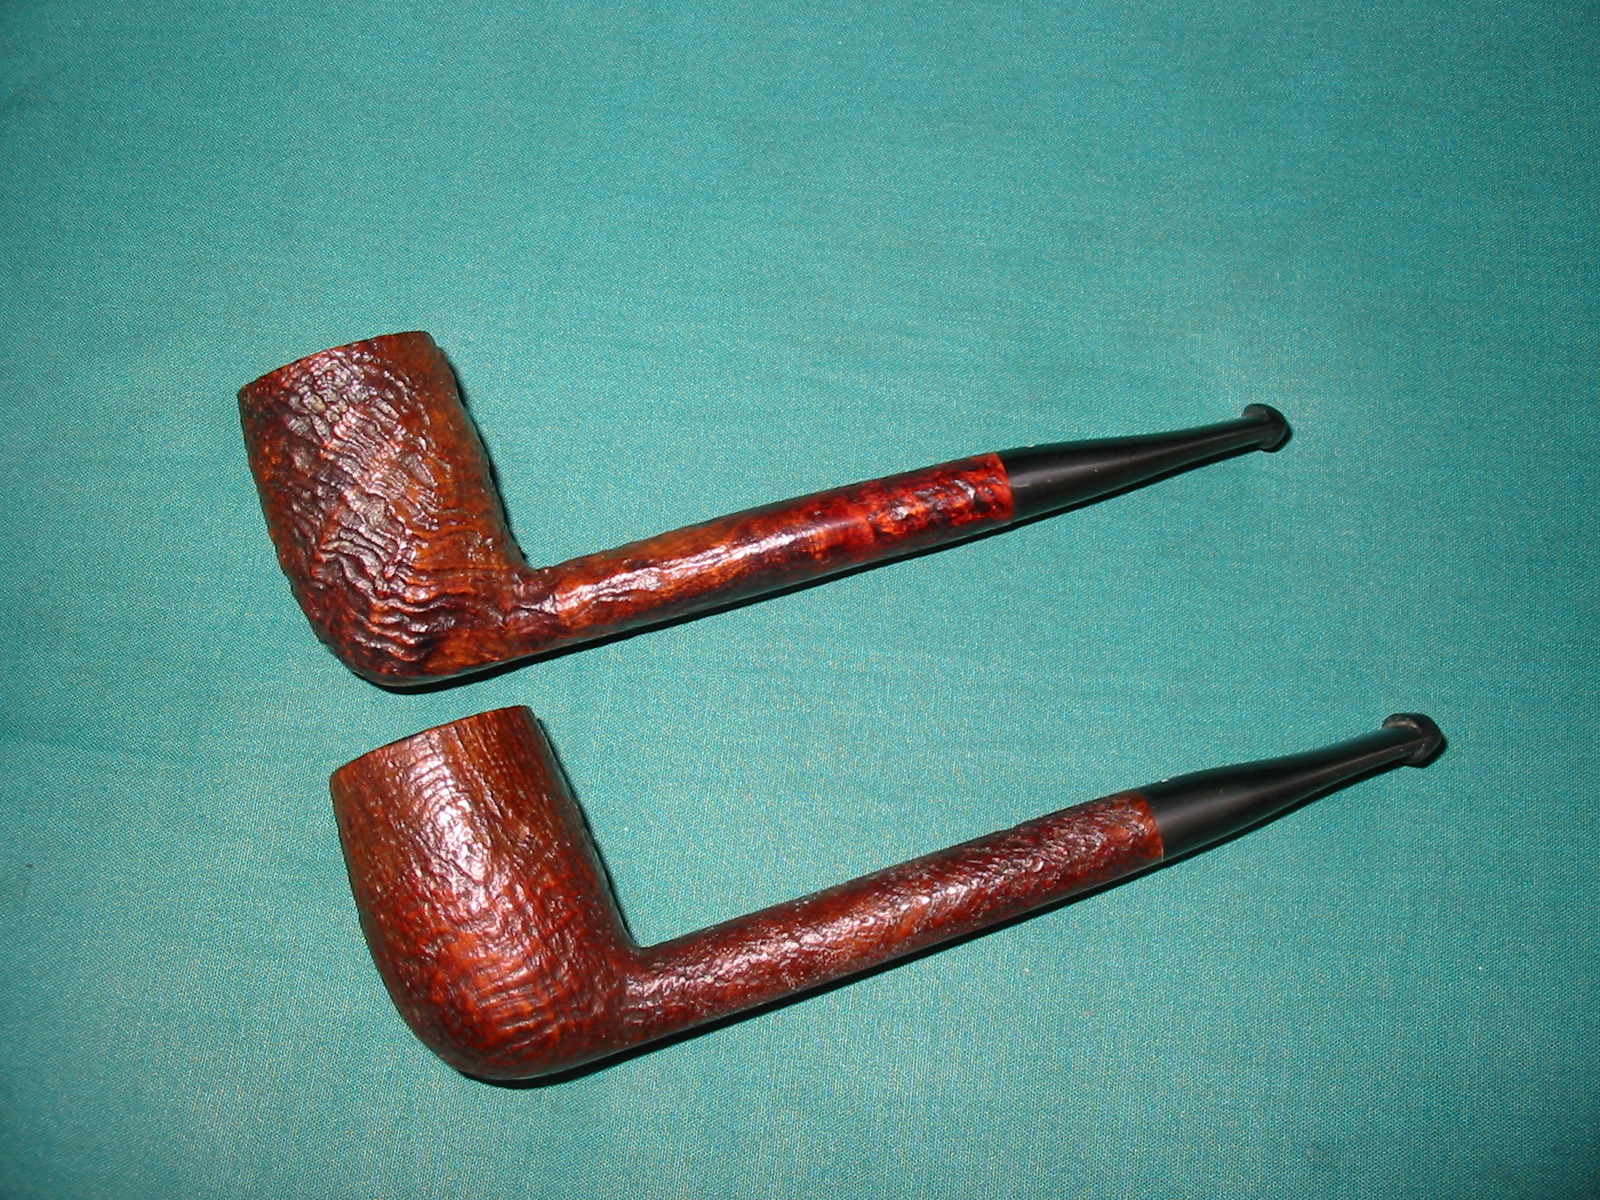
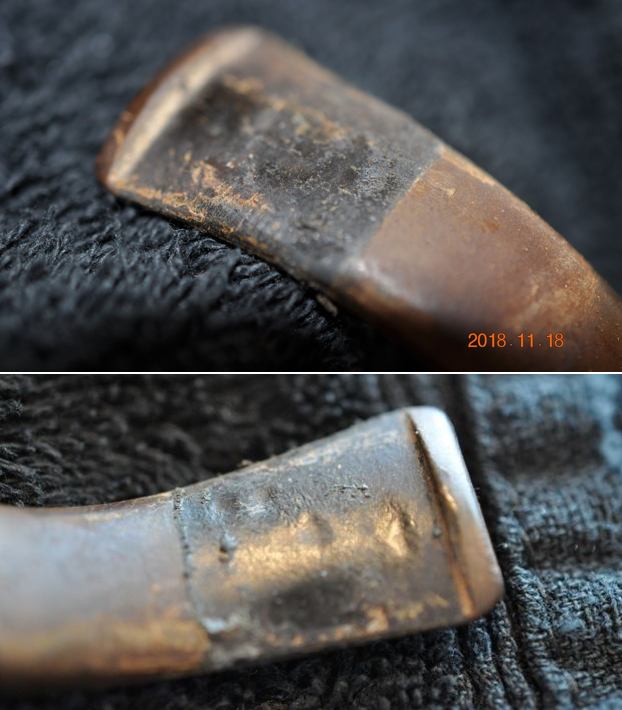
 While the stummel was drying, I worked the stem. I covered the stampings on the stem with whitener using a whitener pen. The filling of charcoal and CA superglue had cured and using a needle file, I sand the filling to match the surface of the stem. For a better blending, I further sanded the entire stem with 220 followed by 400 and 800 grit sand paper. This helps to reduce the sanding marks left behind by the more abrasive 220 grit paper. To bring a deep shine to the vulcanite stem, I went through the complete set of micromesh pads, wet sanding with 1500 to 2400 grit pads and dry sanding with 3200 to 12000 grit pads. I wiped the stem with alcohol after each pad and rubbed it down with Extra Virgin Olive oil. The internals of the stem was cleaned out using alcohol and pipe cleaners. The finished stem is shown below.
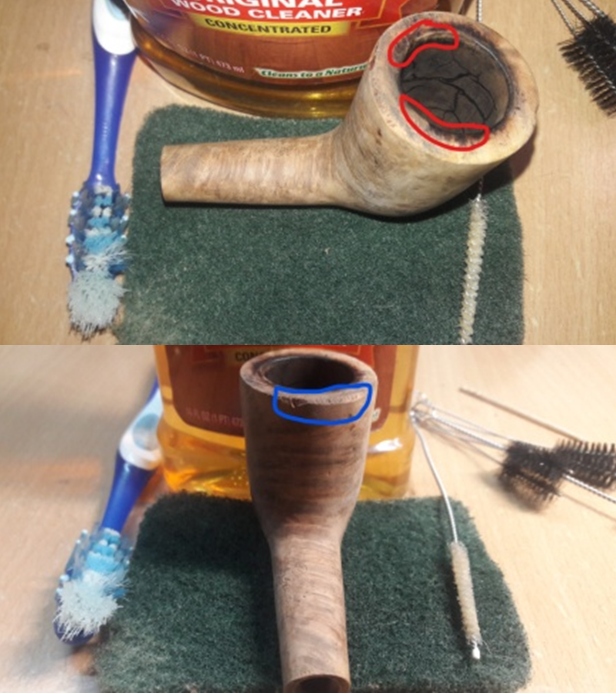
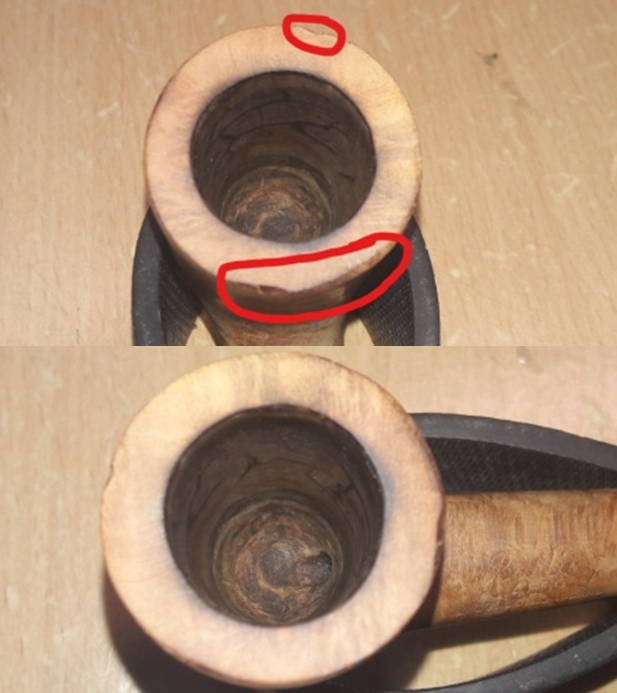
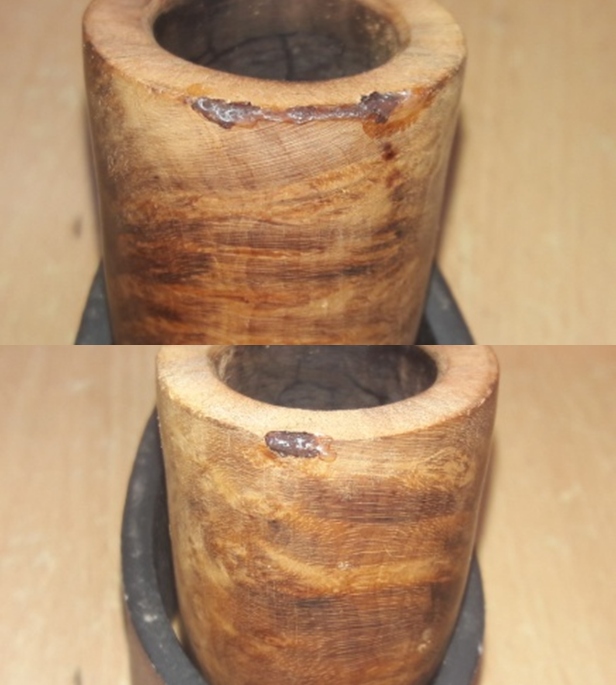
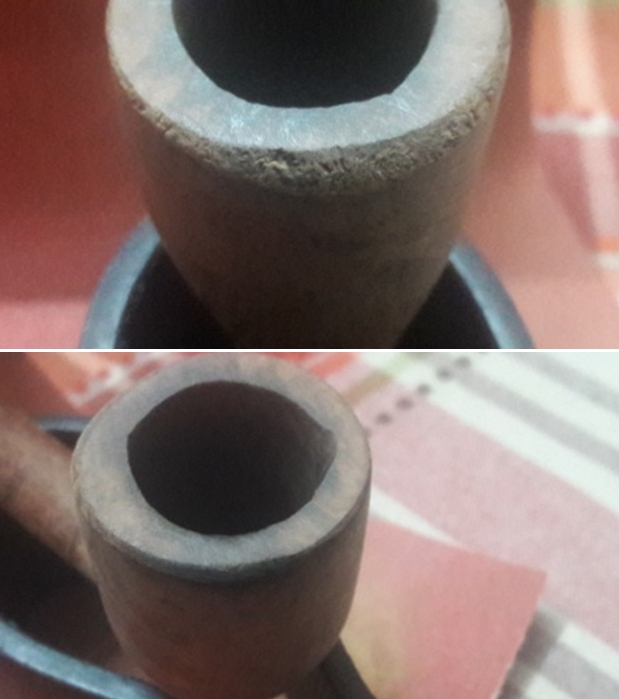
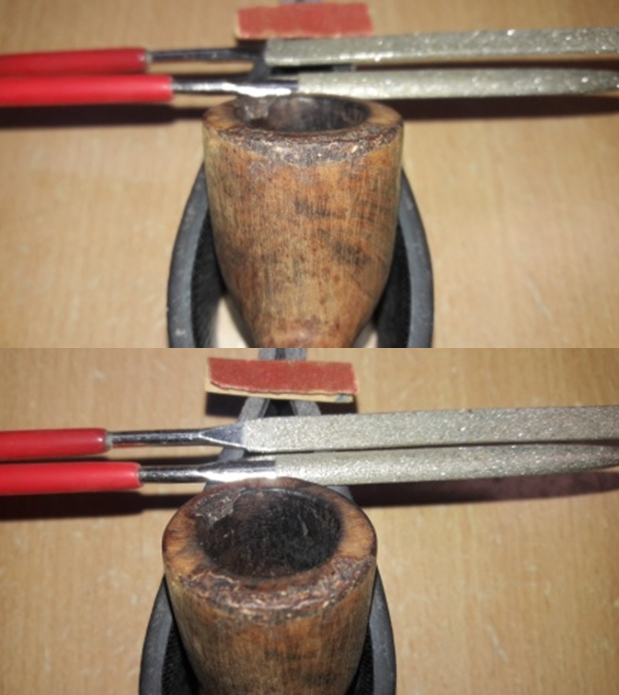
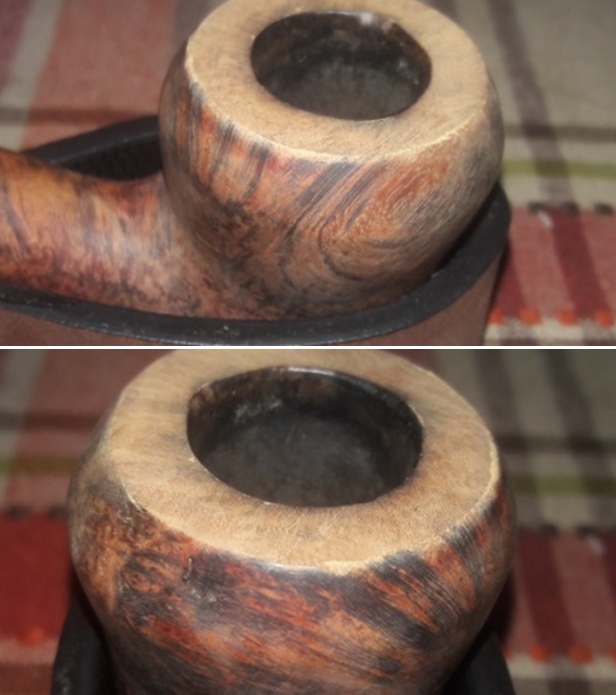
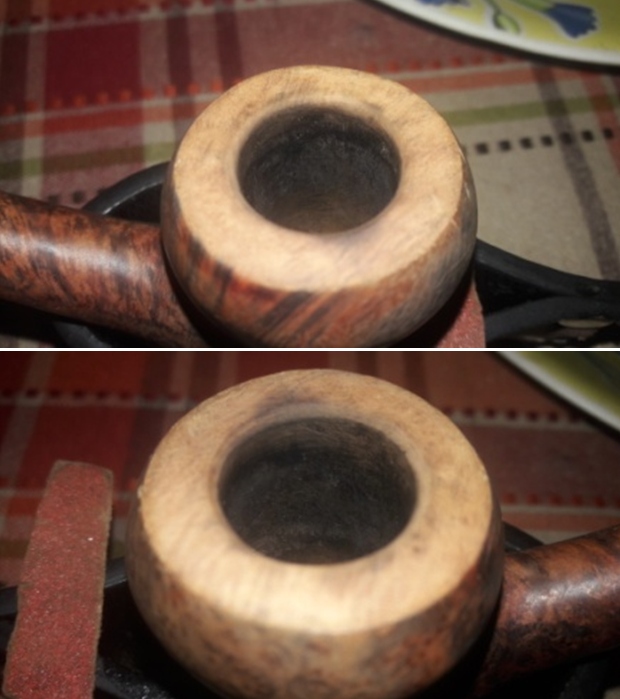
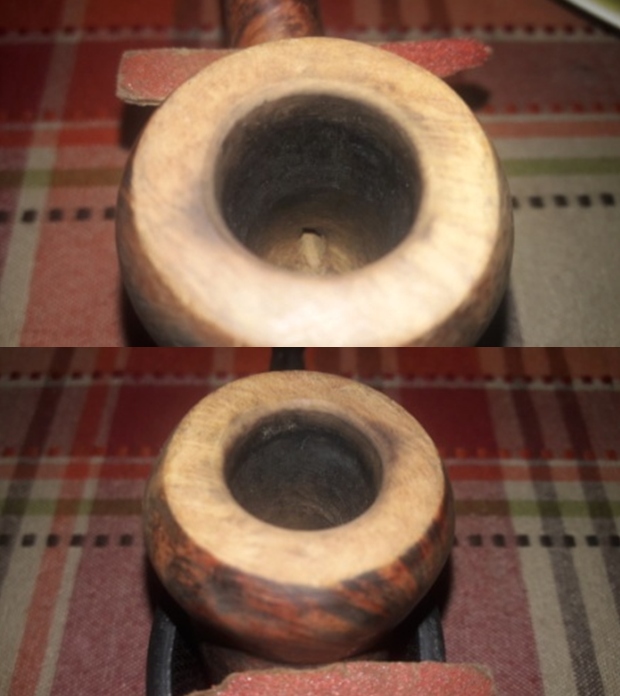
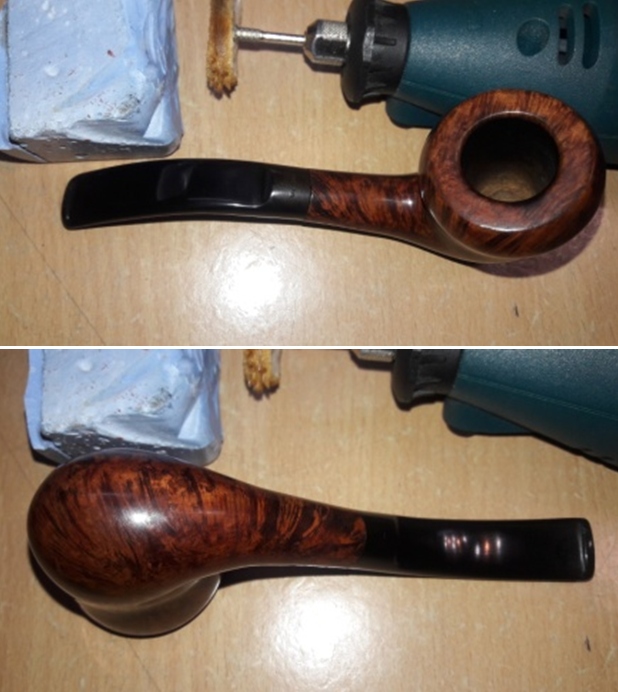
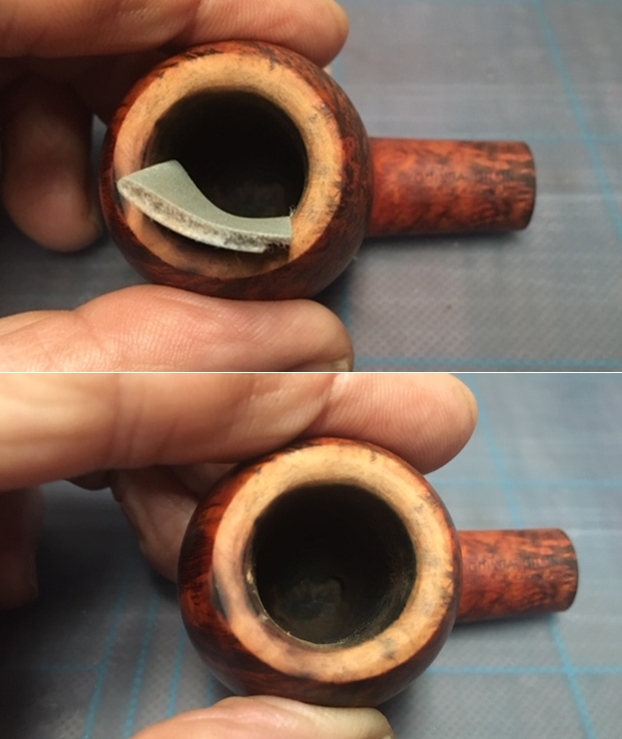
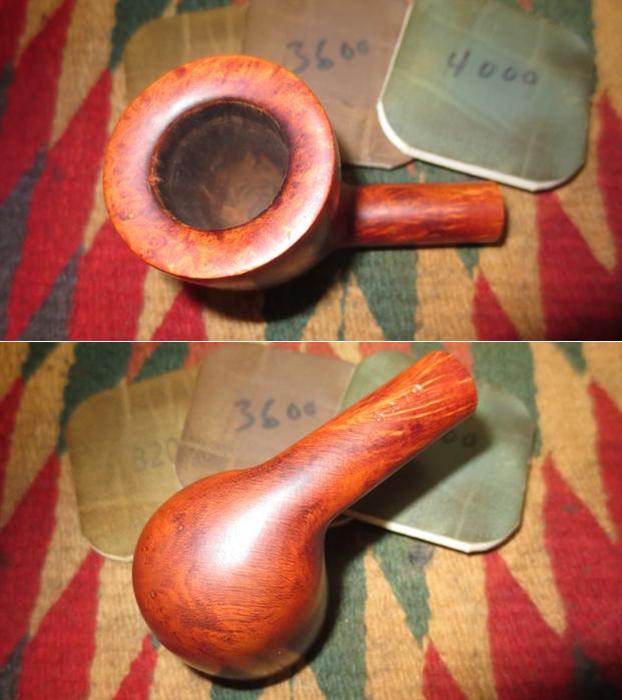
 After cleaning the rim top with Murphy’s oil soap, I had observed that the rim top surface was charred and the inner edge was uneven, presenting a very sorry appearance. I topped the rim on a 220 grit sand paper, checking frequently till I was satisfied that the charred surface was greatly reduced. The inner edge is still uneven, though much better than before topping, it will need to be addressed.
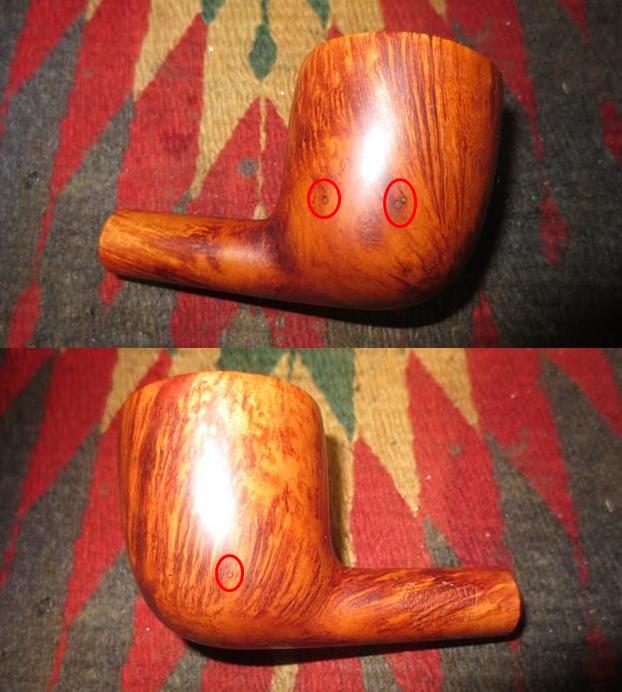
 Next, I decided to address the dents and dings on the stummel surface and on the rim outer edge. Using a whitener pen, I marked all the major areas with dents and dings as I had decided to leave the minor ones as they were. I heated my fabricated knife over the flame of a candle, placed a wet Turkish hand towel over the marked areas and steamed out the dents by placing the heated knife over the towel. Though some dents were still observed, these were greatly reduced when compared to before steaming.
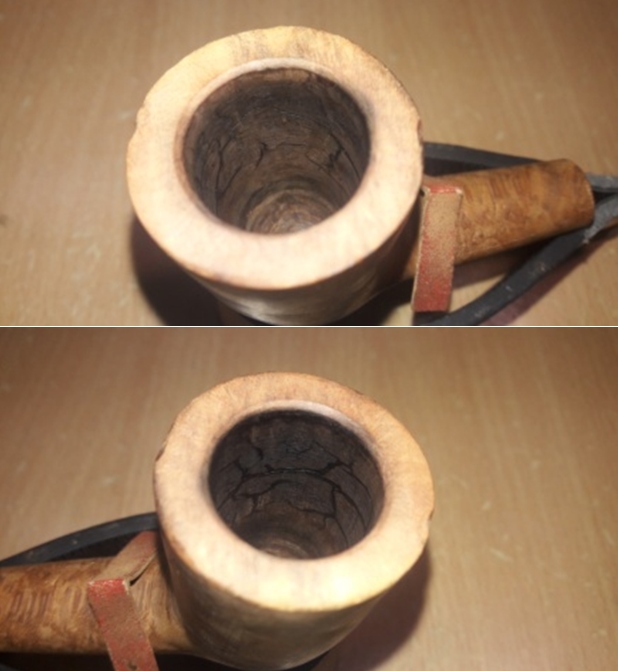
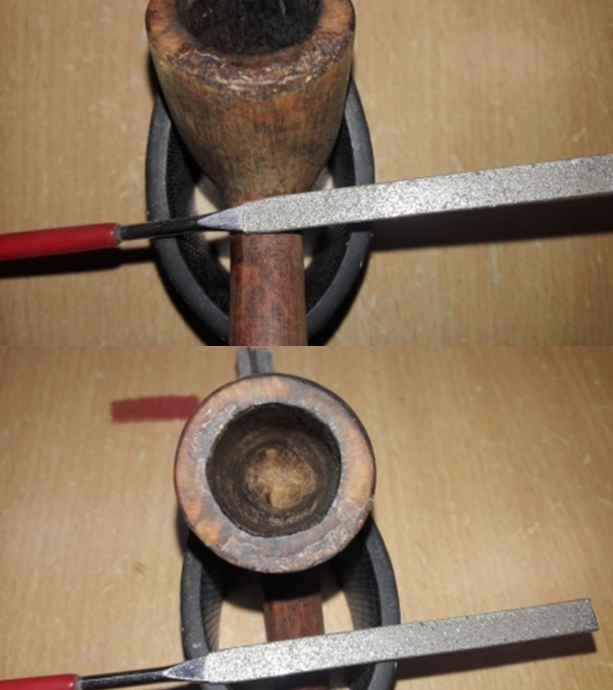
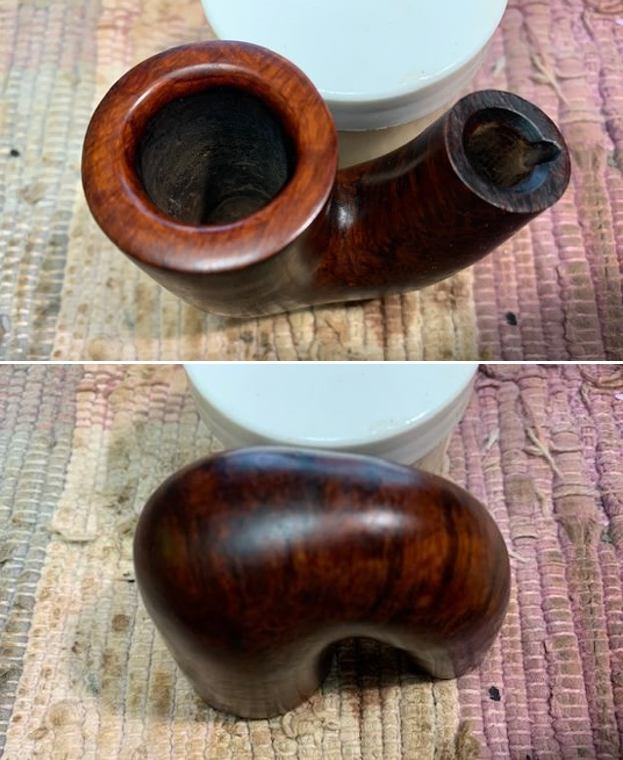
 The steaming method had raised to the surface all the major dents and dings. However, the outer and inner edges of the rim were still uneven. I took a piece of used and worn 180 grit sand paper, folded it and pinching it between my thumb and forefinger, created a slight inner bevel on the inner edge of the rim. Using the same technique, I created a light bevel on the outer edge. Now the rim surface and both its edges appear clean, even and well rounded.
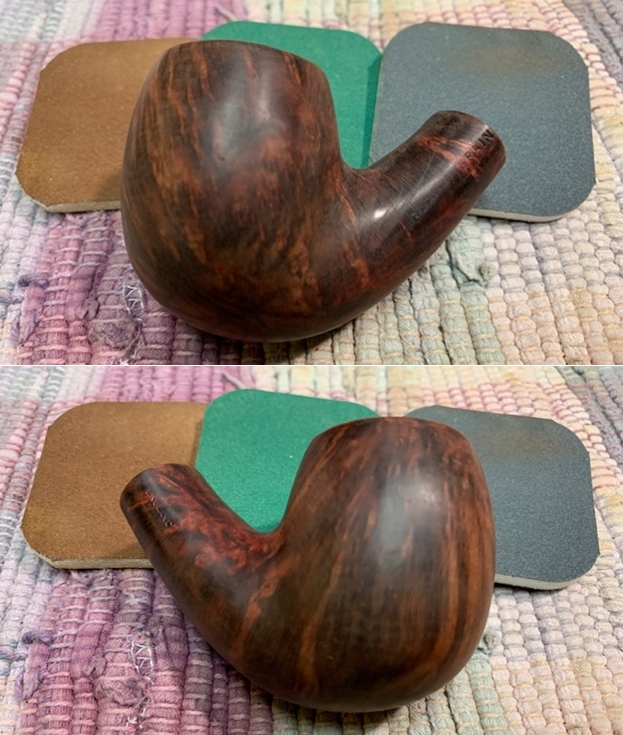
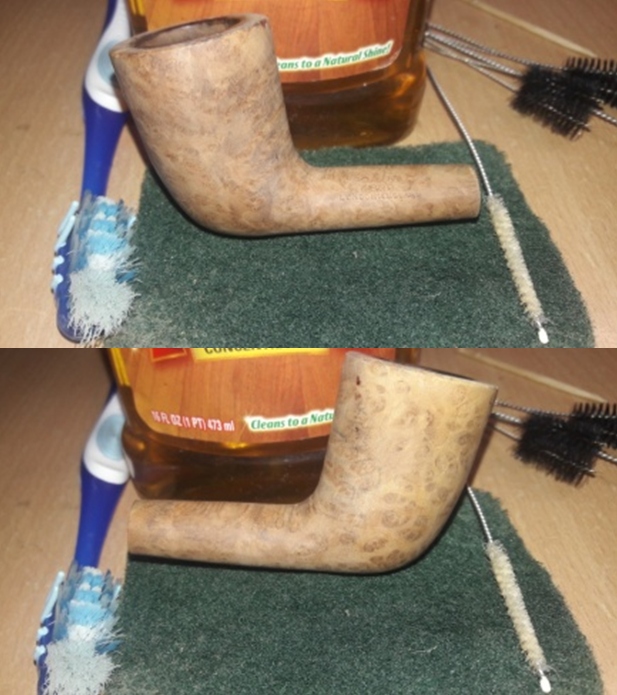
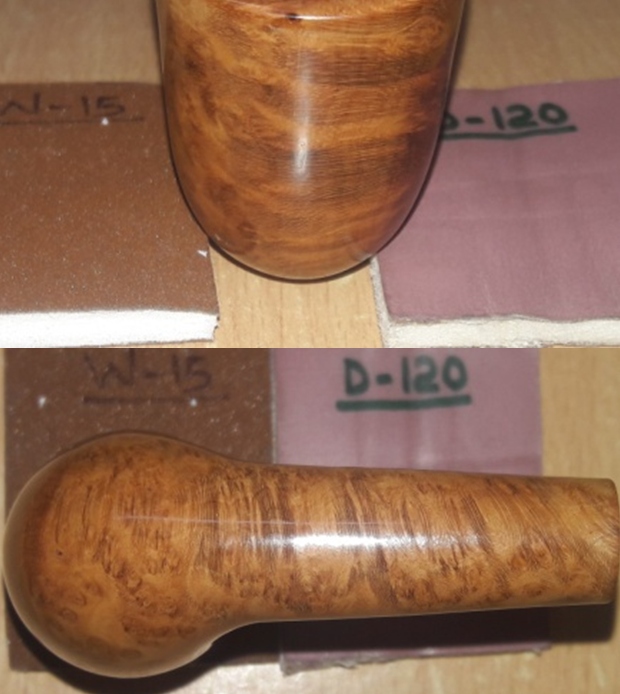
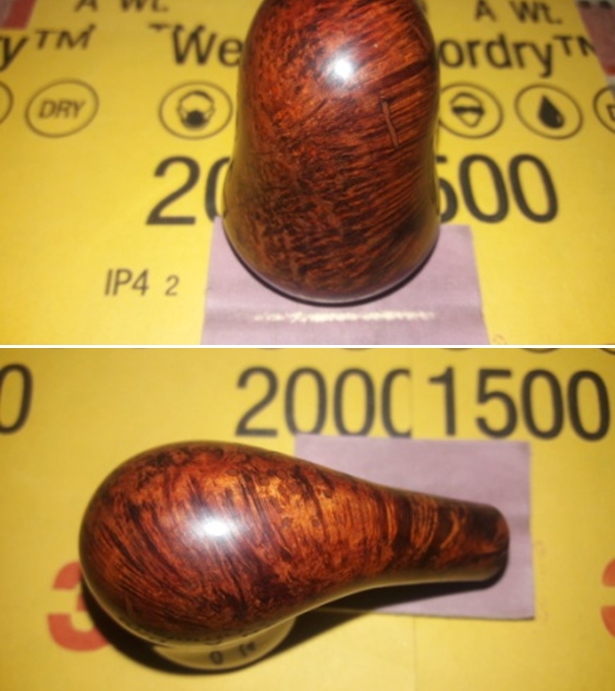
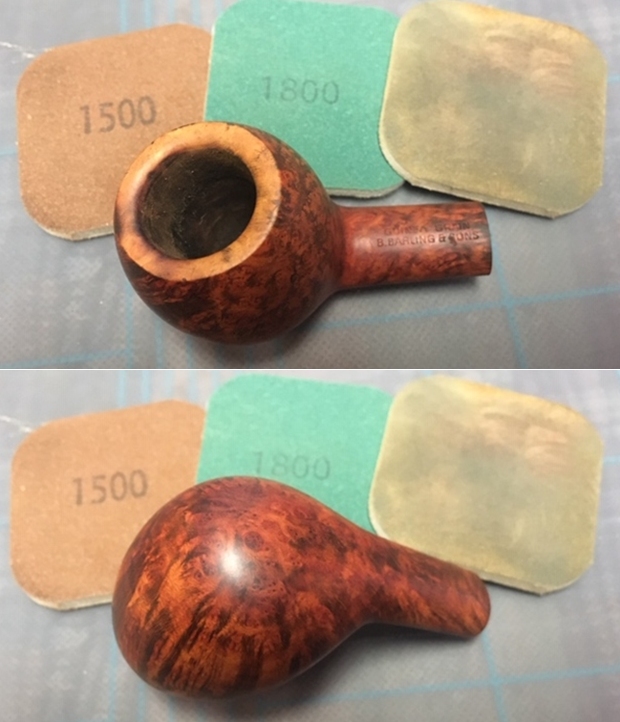
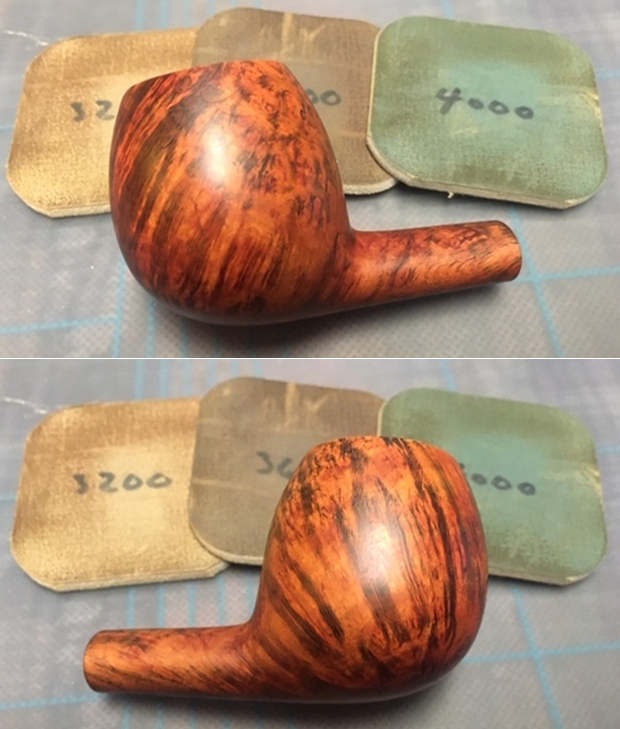
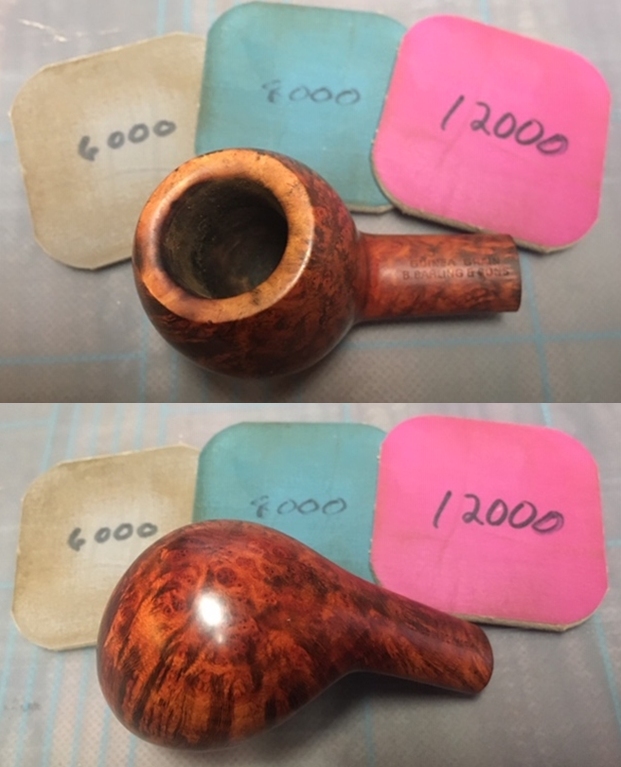
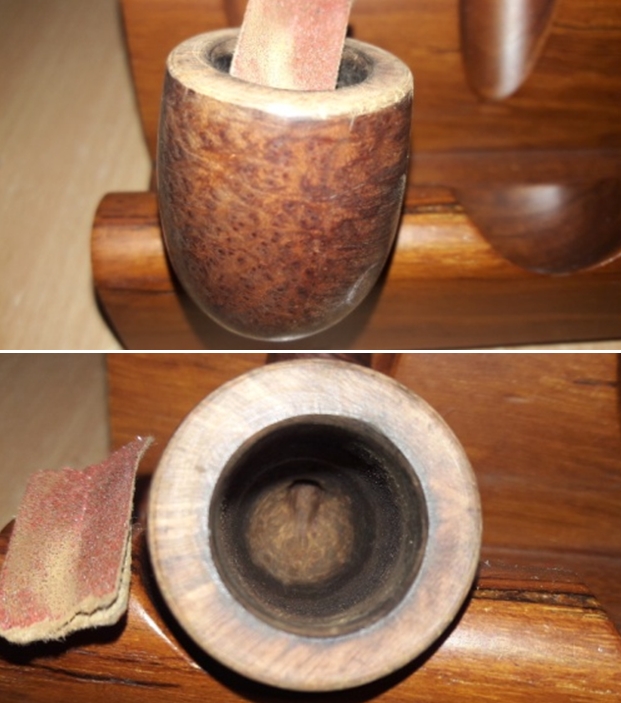 Steaming out the dents and dings from the stummel surface had necessitated that the surface of the stummel be evened out by sanding. I had an option of using more abrasive 220 grit sand paper followed by micromesh pad cycle and loose the patina or straight away go to the micromesh cycle. Using the more abrasive sand paper, minor dents and dings would be further addressed but I would lose the old sheen which the briar has taken over the years. I decided on keeping the old sheen and went straight for the micromesh cycle. The old patina and the minor dents and dings would add to the vintage look of the pipe, which it was. I wet sand the stummel with 1500 to 2400 grit pads and follow it up by dry sanding with 3200 to 12000 grit pads.

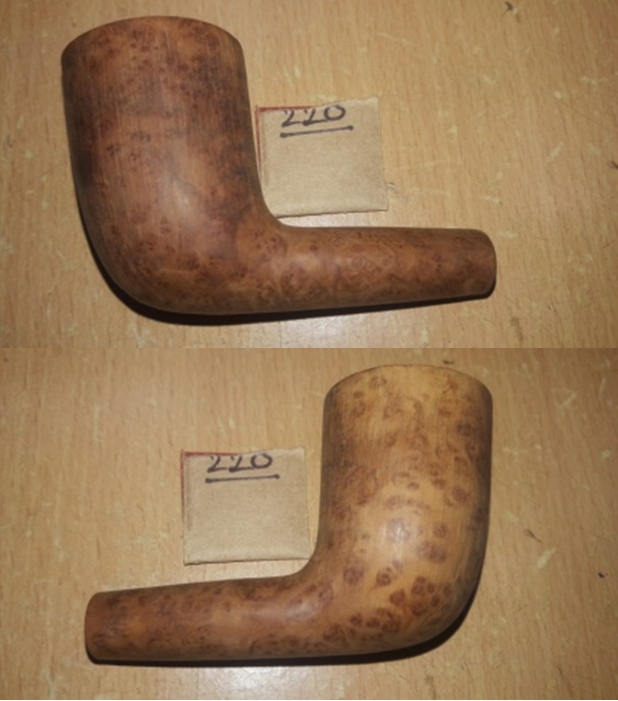
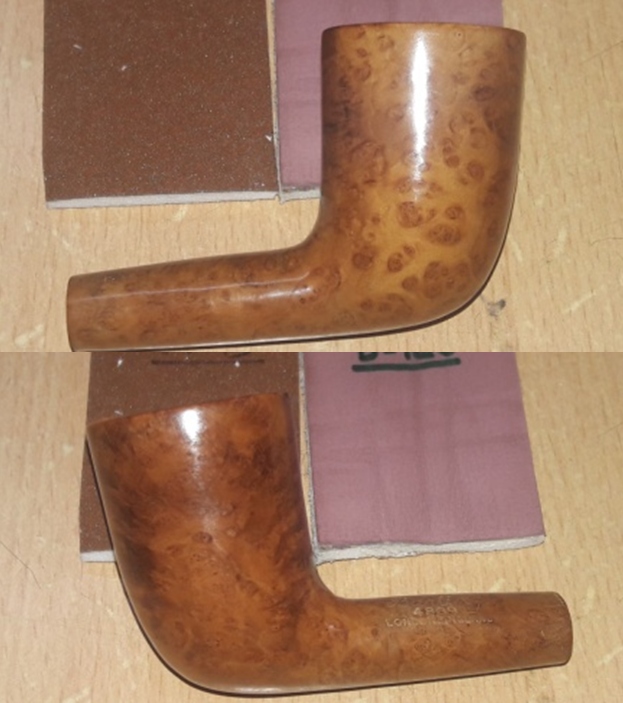
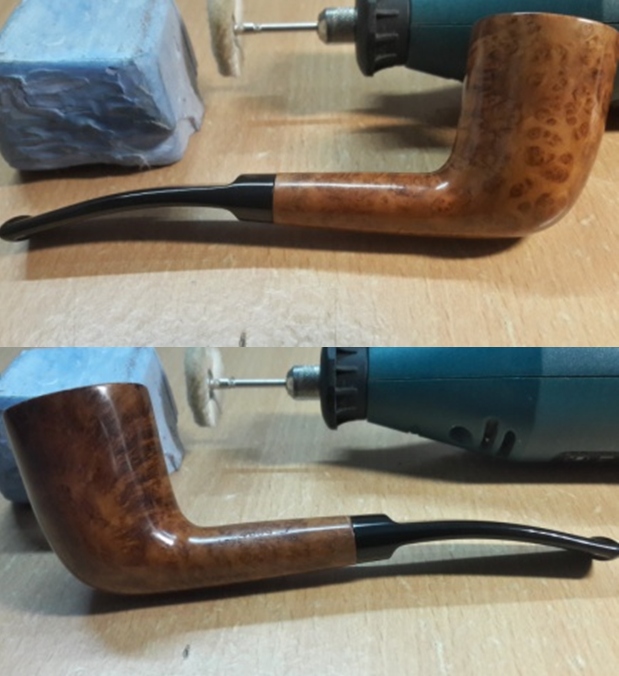
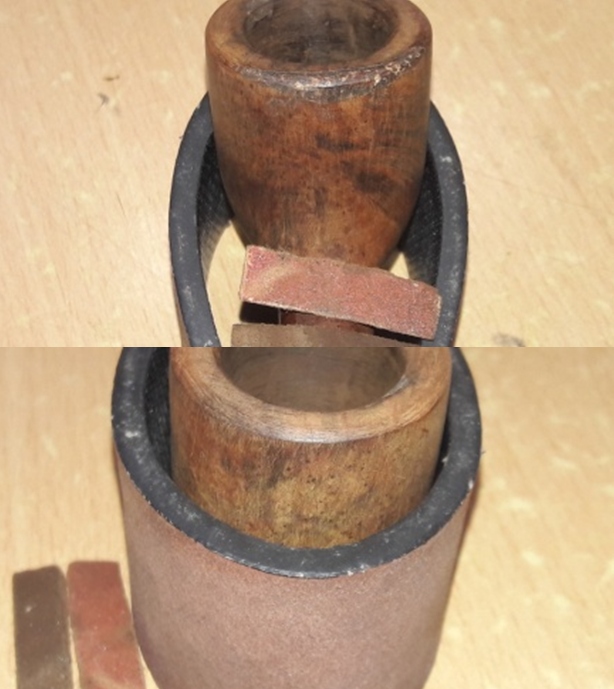
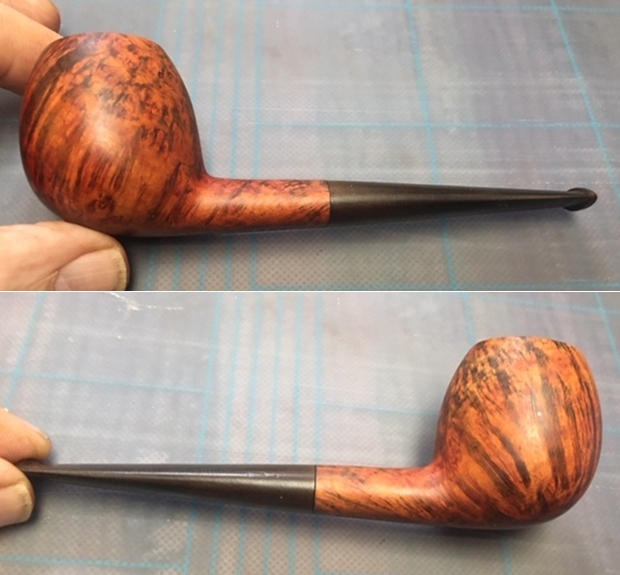
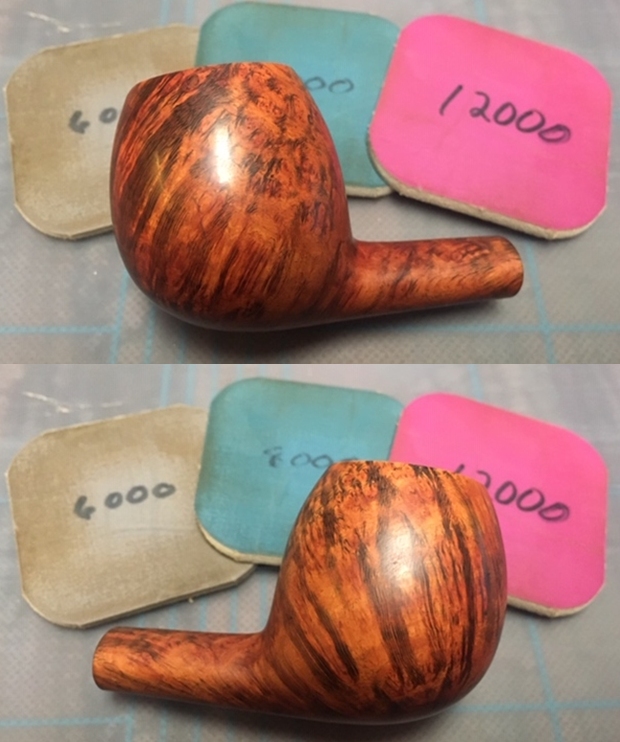
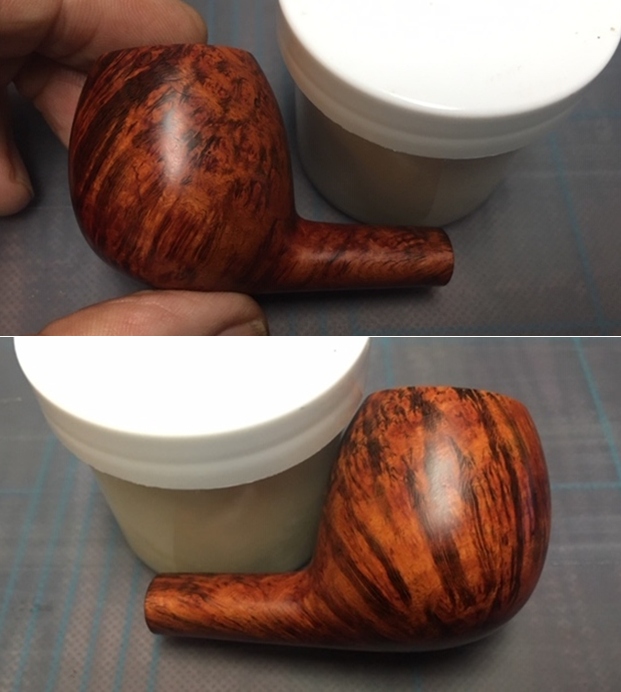
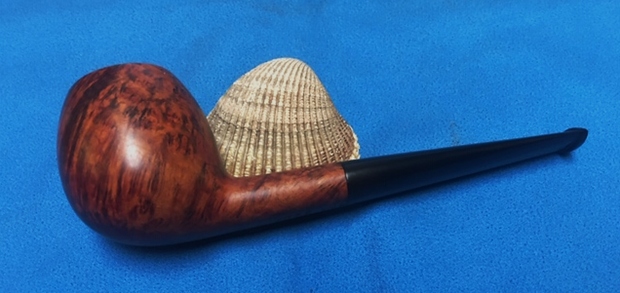
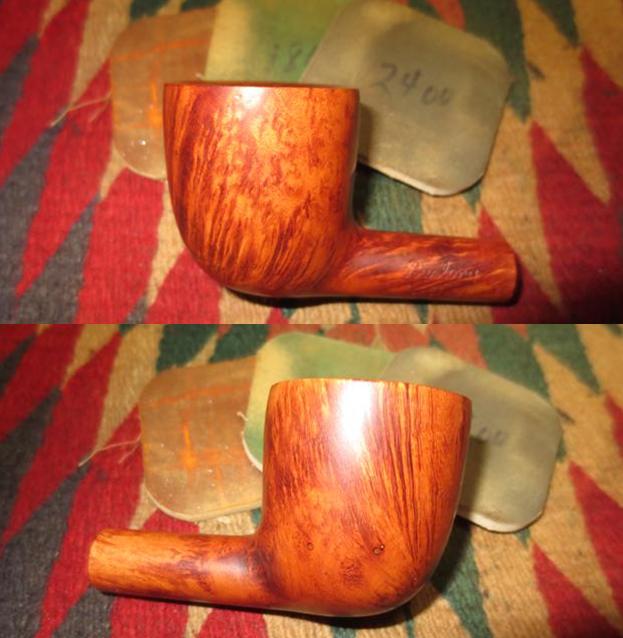
 I rub a small quantity of “Before and After Restoration Balm” in to briar and let it rest for a few minutes. The balm almost immediately works its magic and the briar now has a nice vibrant appearance. I further buff it with a horse hair shoe brush.


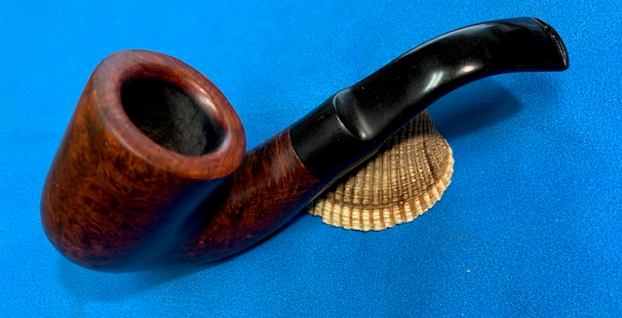
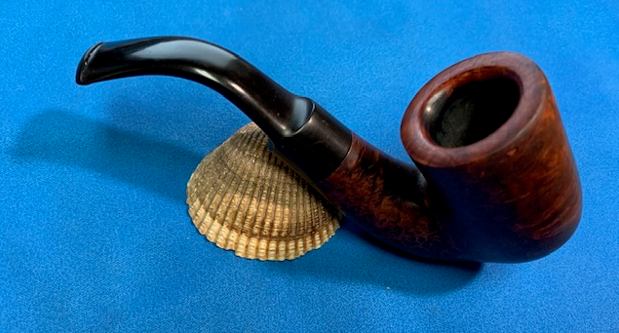
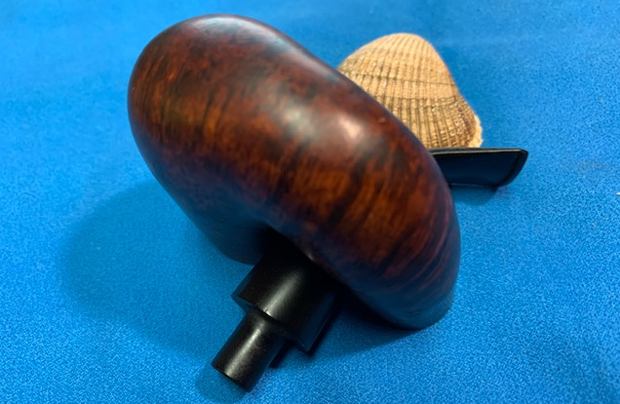
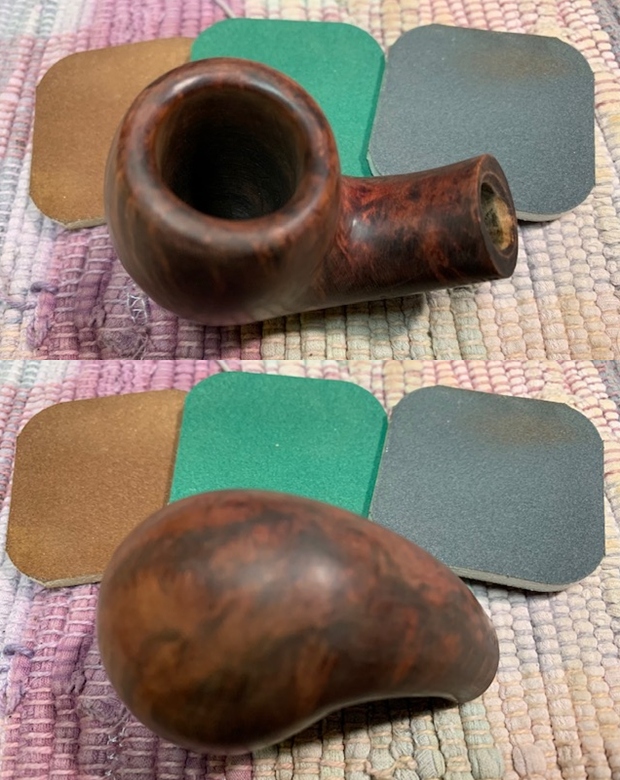
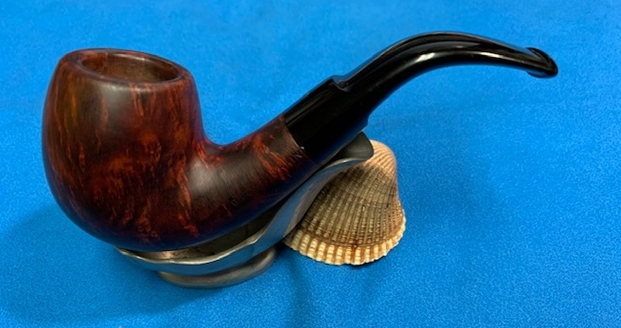
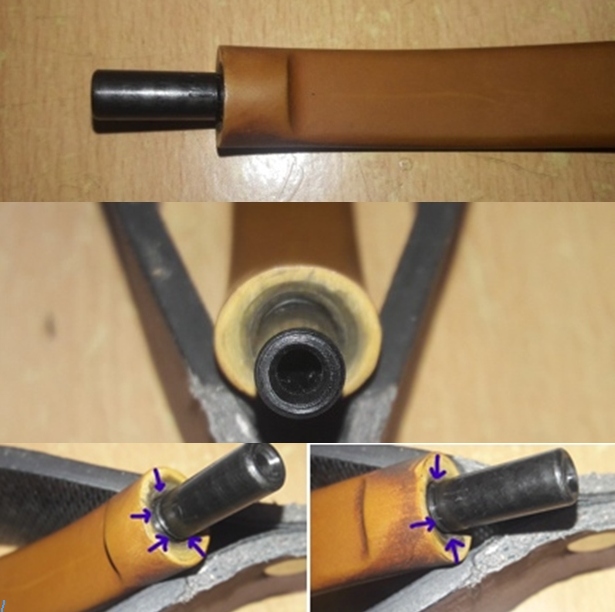
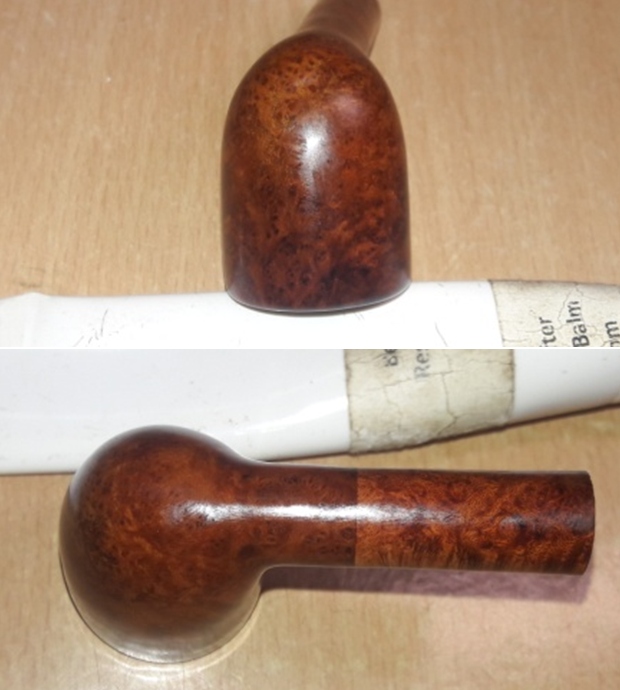
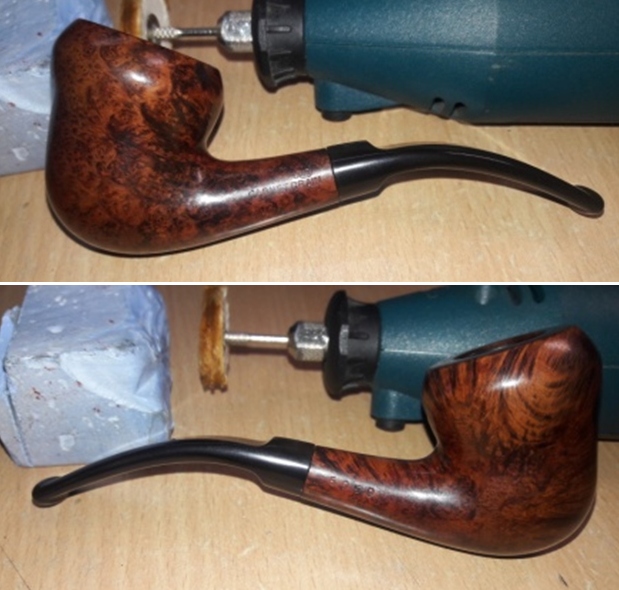
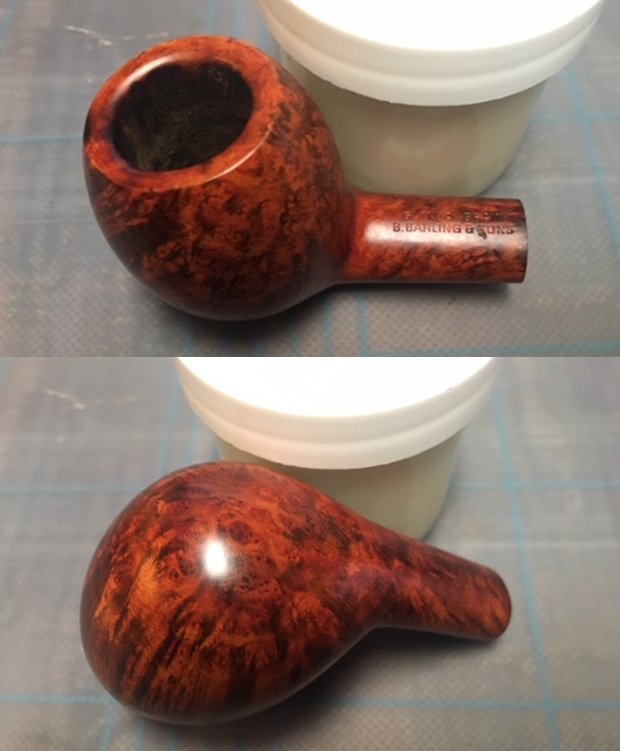
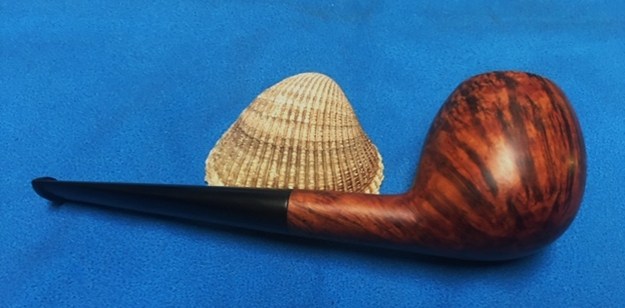
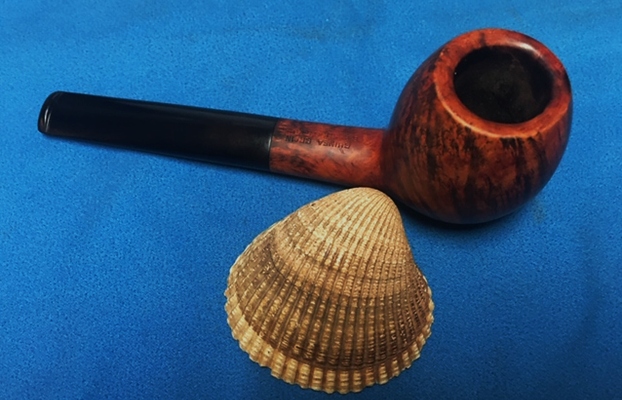
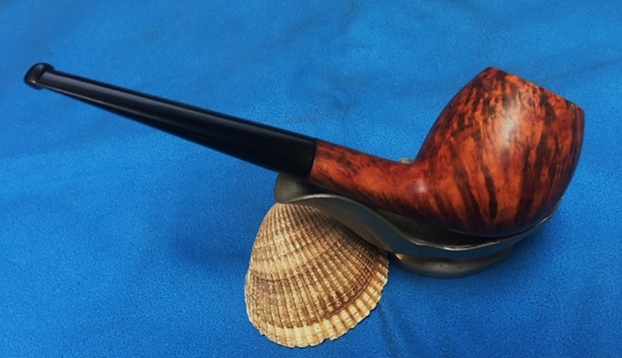
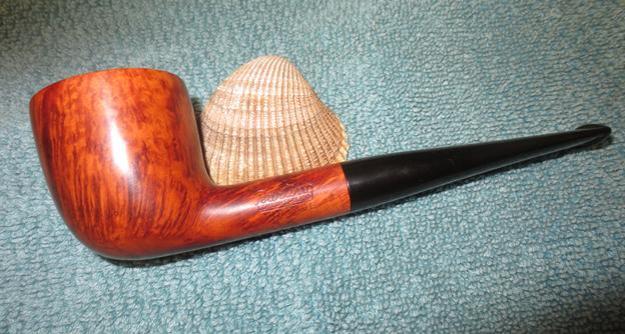
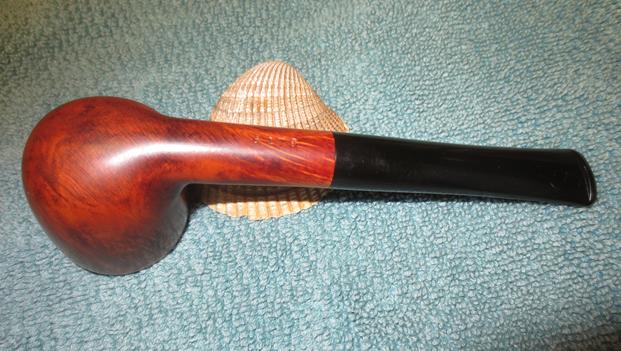
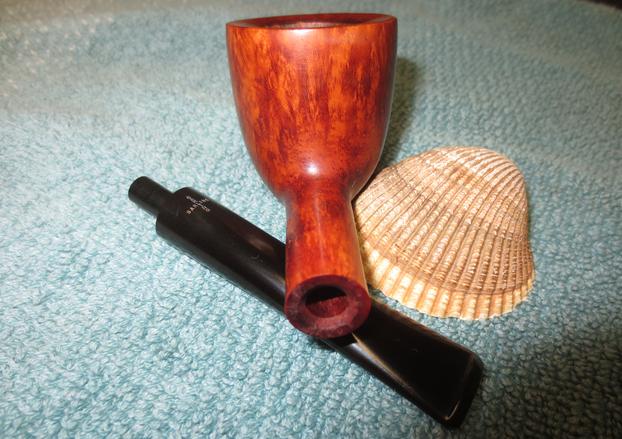
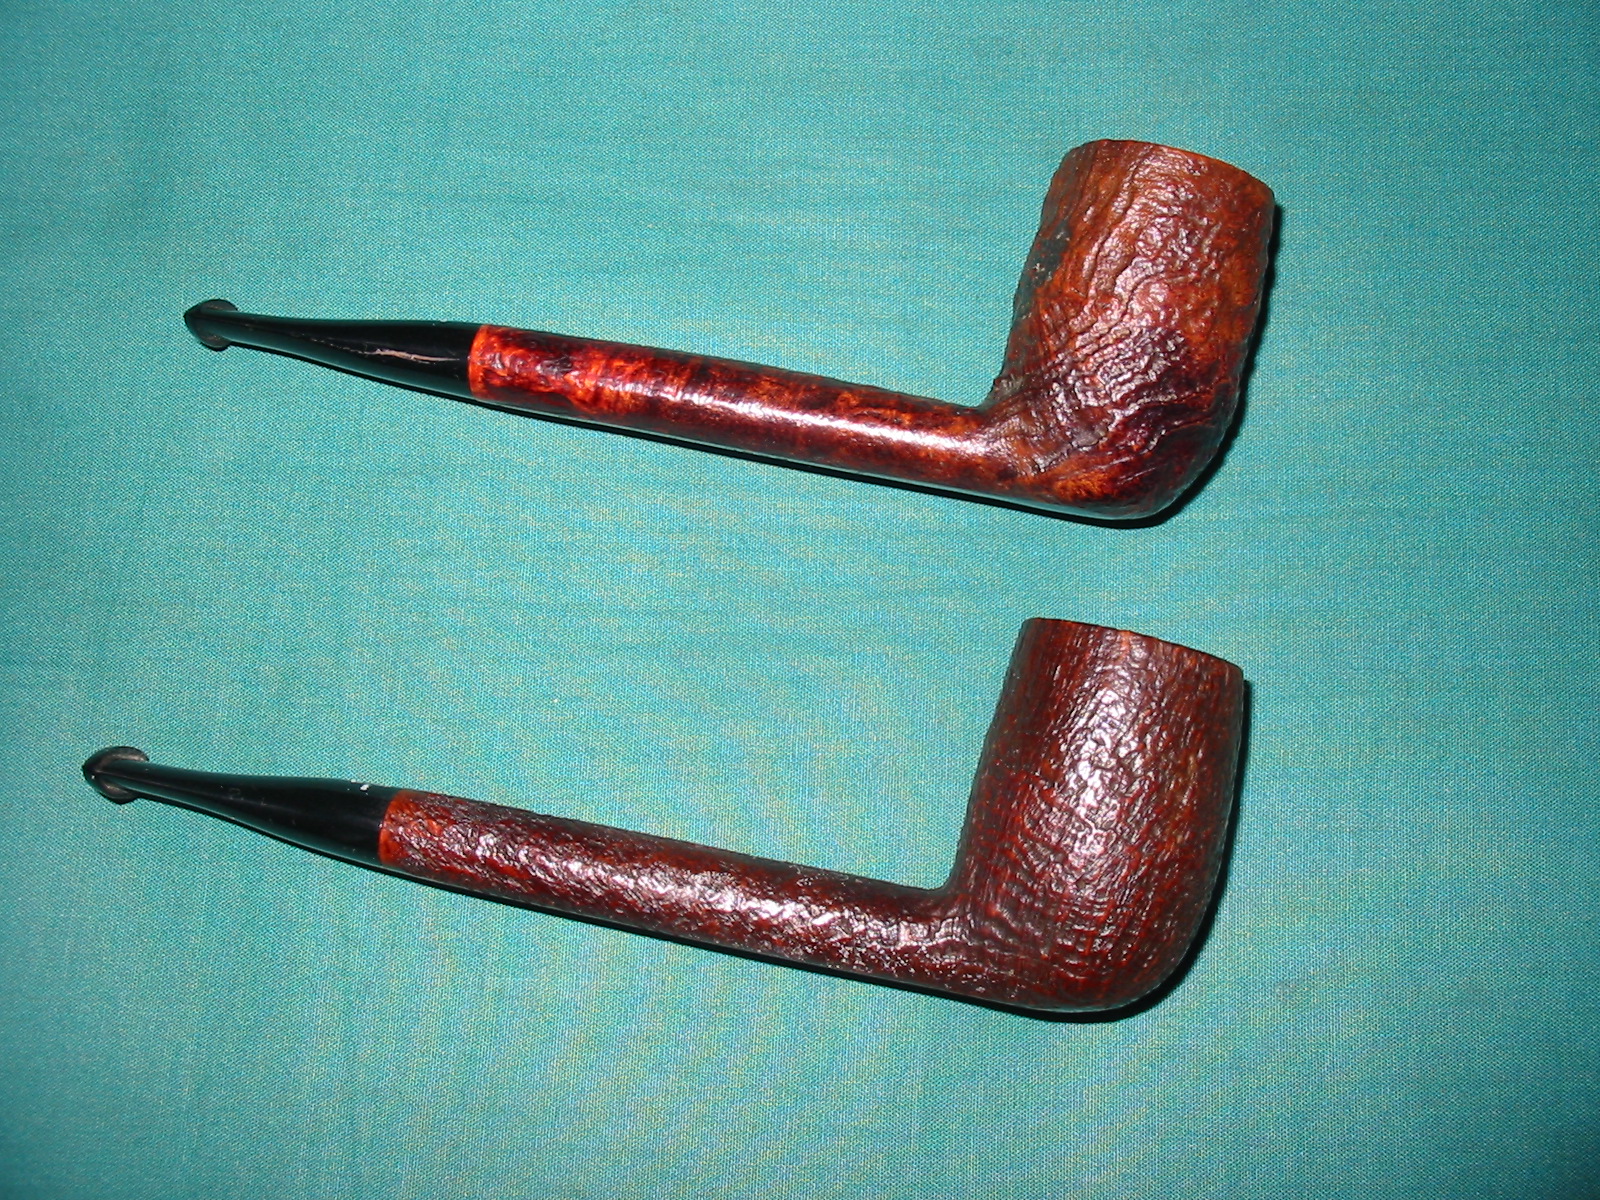
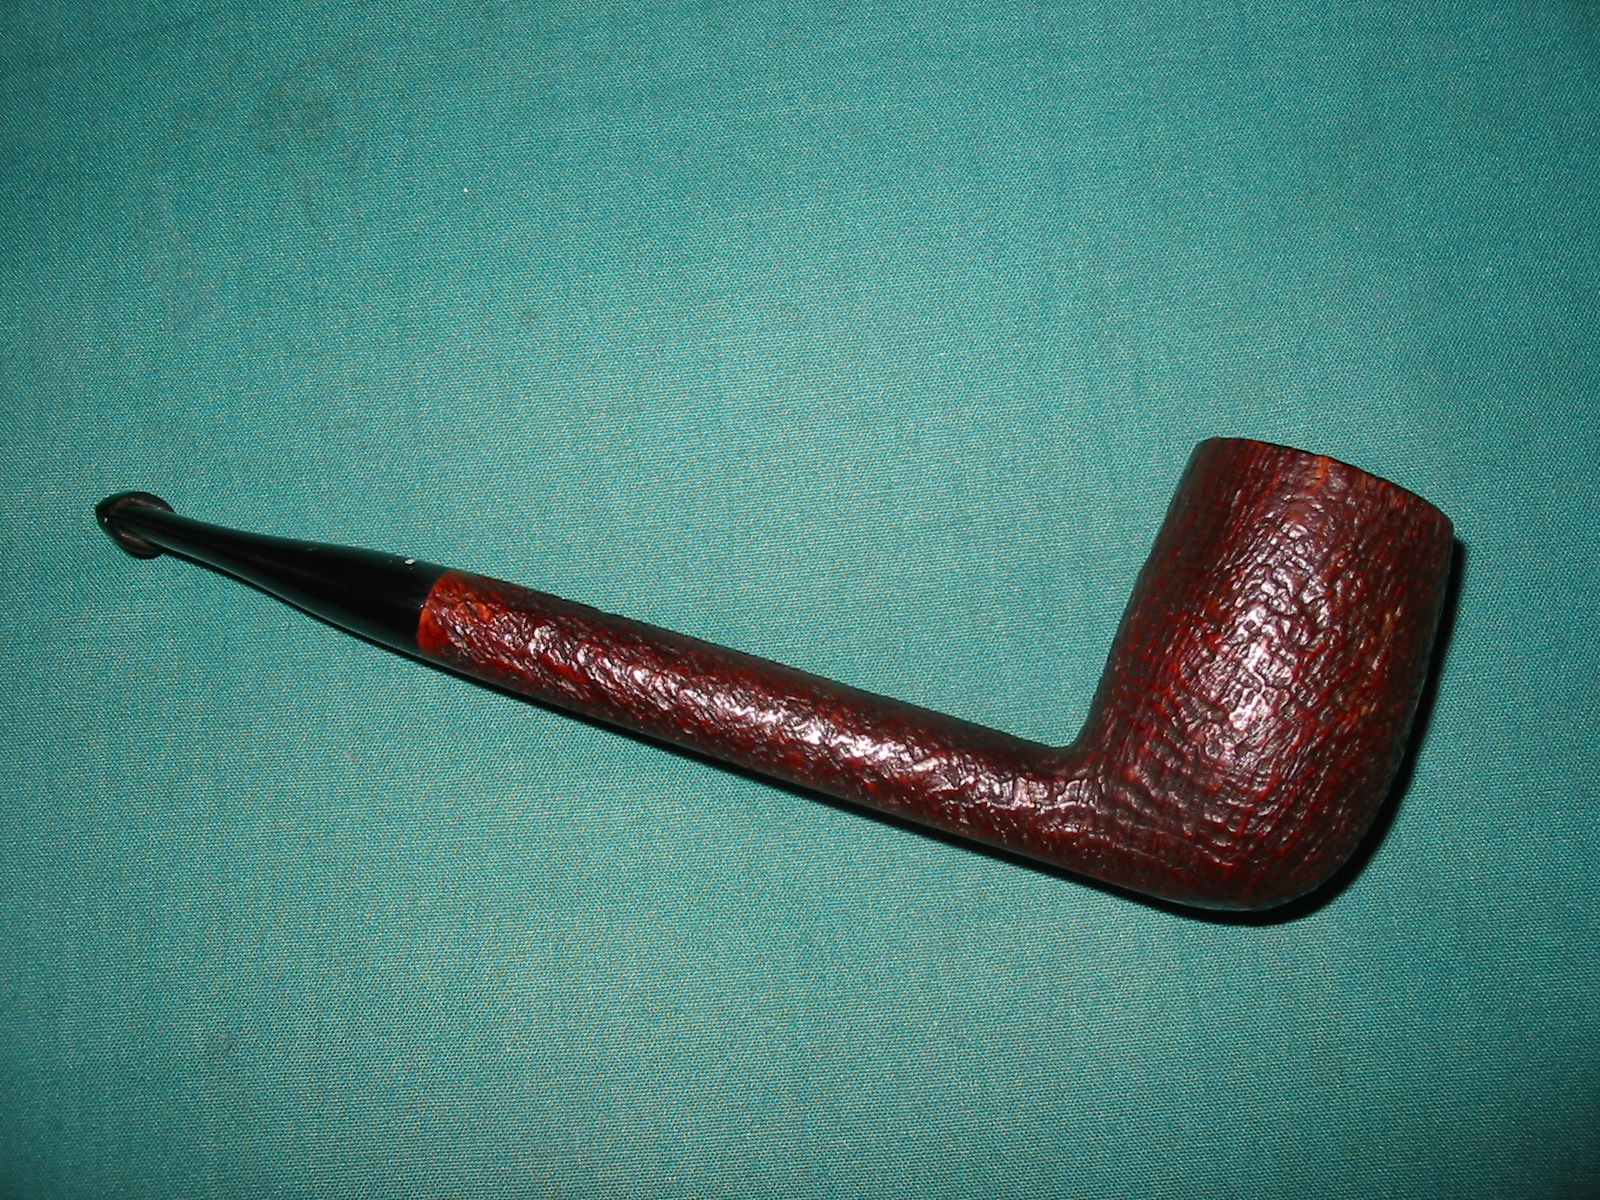
 To finish, I re-attach the stem with the stummel. I mounted a cotton cloth buffing wheel to the Dremel (actually it is not the brand machine, but a local machine which is similar). I set the speed at about half of the full power and applied White Diamond compound to the entire pipe. I wiped/ buffed the pipe with a soft cotton cloth to clear it of any leftover compound dust. I then mounted another cotton cloth wheel on to the polishing machine and applied several coats of carnauba wax. I finished the restoration by giving the entire pipe a rigorous hand buffing using a microfiber cloth to raise the shine further.
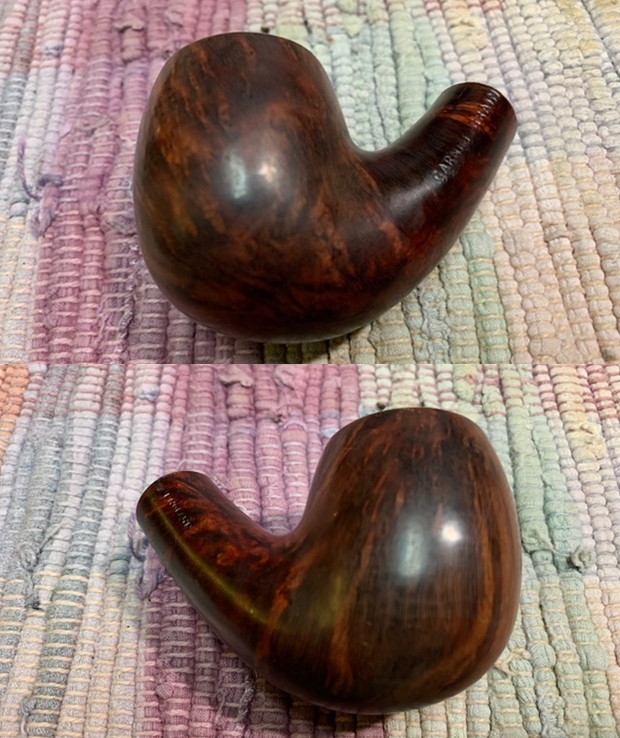
 The completed pipe looks lovely, fresh and vibrant; the photographs in this case, do not do justice to the appearance of this beautiful little pipe. Thank you for having the patience to reach this far while reading the write up.


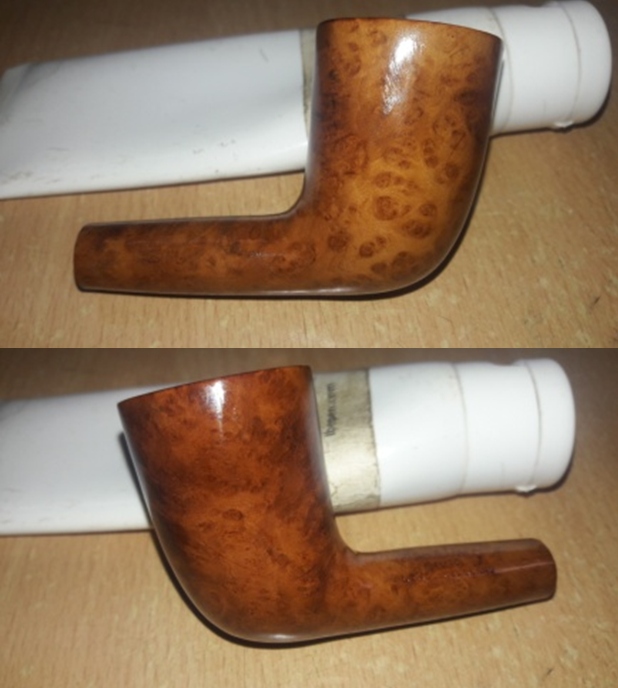
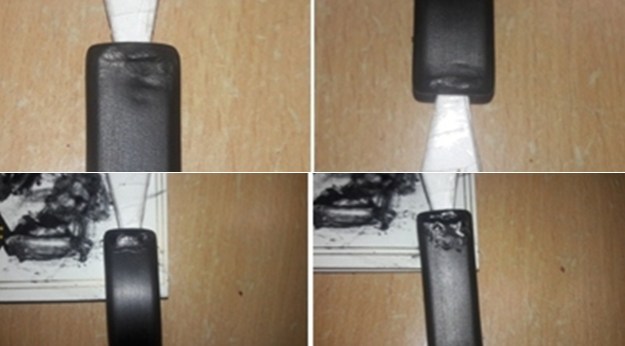
 He took some photos of the bowl, rim top and edges to show the condition of the pipe before he started. There appeared to be some damage on the inner edge at the back of the bowl. The outer edge at the front was a real mess. He took photos of the stem with the Softee Bit in place and with it removed. It really is a mess with oxidation, calcification and tooth marks and chatter on both sides of the stem.
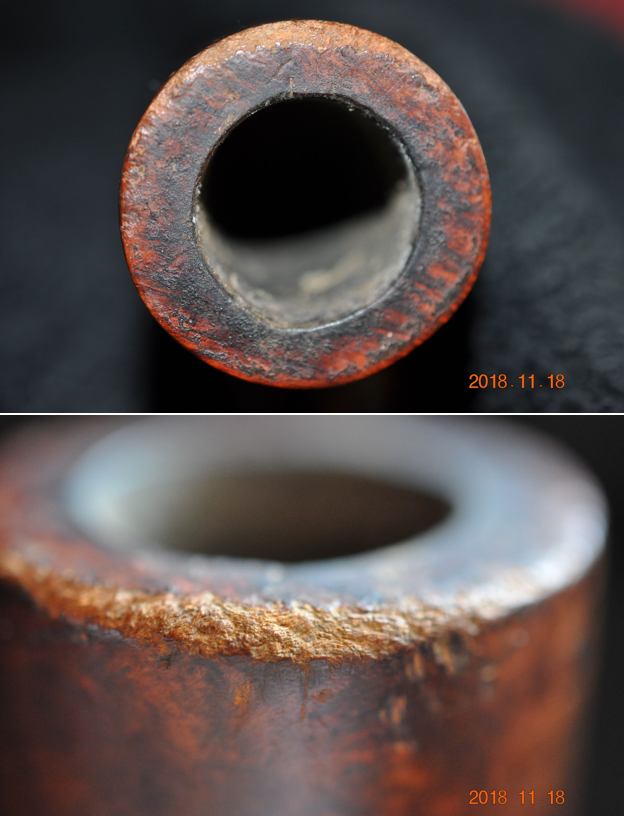
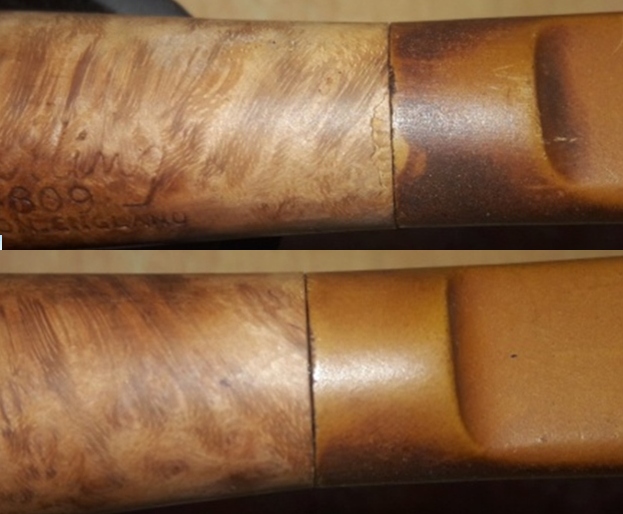
 He took photos of the stamping on the shank sides. It is clear and readable as is noted above.
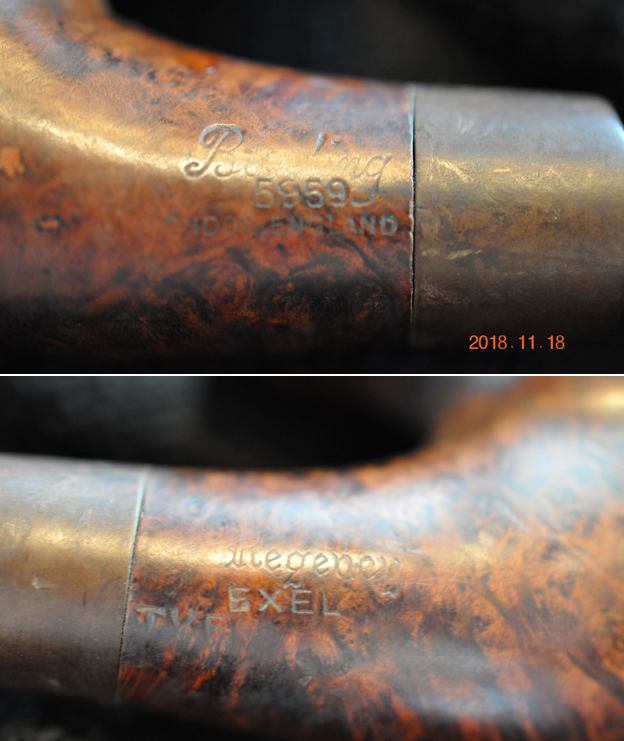 He took a photo of the side and heel of the bowl to show the grain that was on this particular piece of briar. It was a beauty.
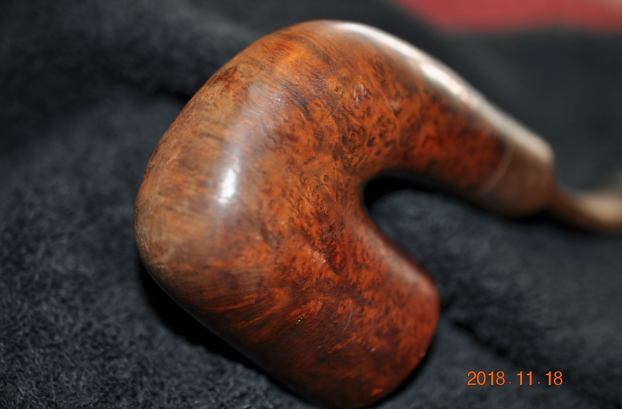 I checked the usual sources for information on the Barling Regency and did not come up with much. I am pretty certain it is a Post Transition Era pipe from the late 1960s to 1970s. I cannot narrow it down much further than that so I know that it is a new pipe (still over 50years old at least). Now it was time to move on to the pipe itself.
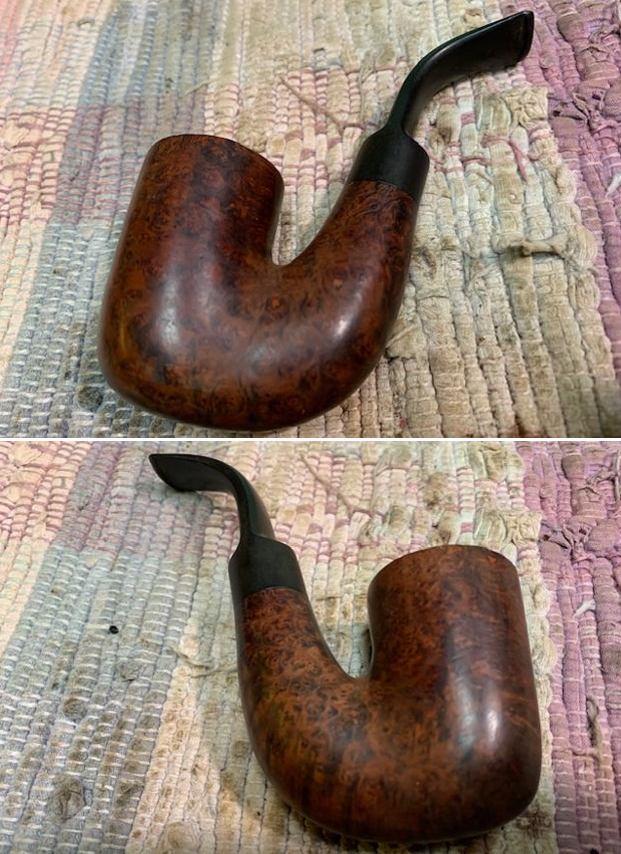
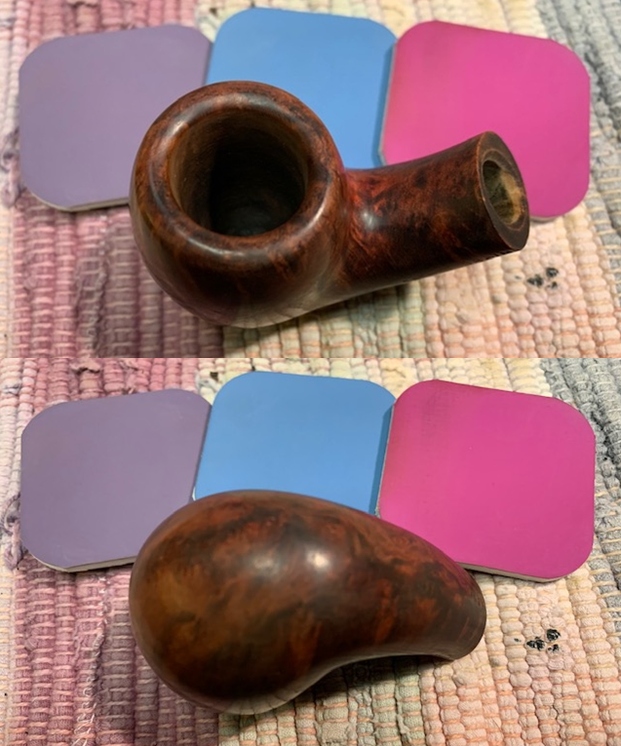
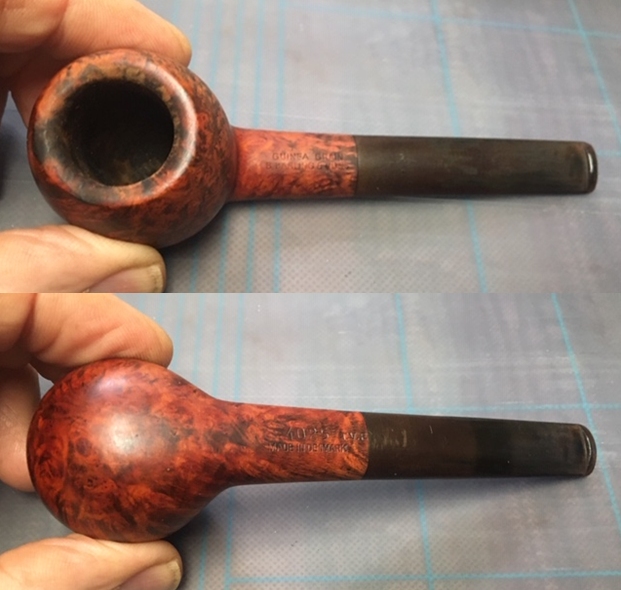
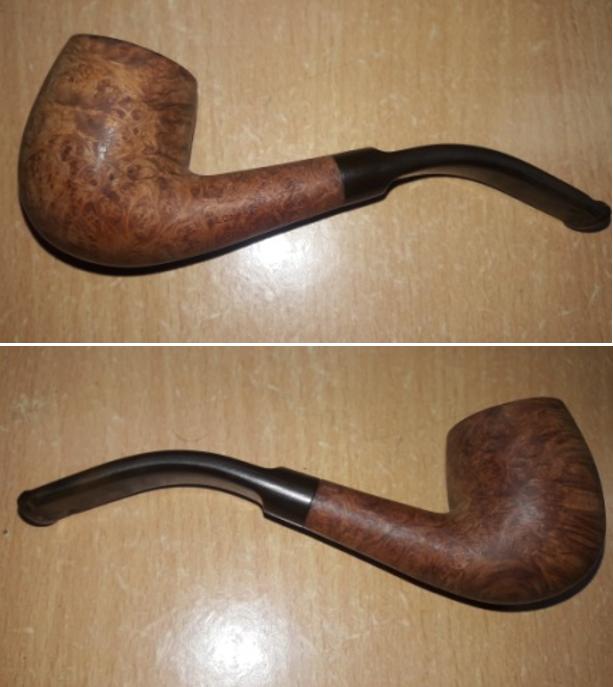
 I took a photo of the rim top and bowl to show the condition of the briar. You can see the damage on the outer edge of the bowl on the front side. The top surface is scratched and marred. The inner edge of the bowl shows some burn damage on the back of the bowl. The stem looked good but the tooth marks are very visible.
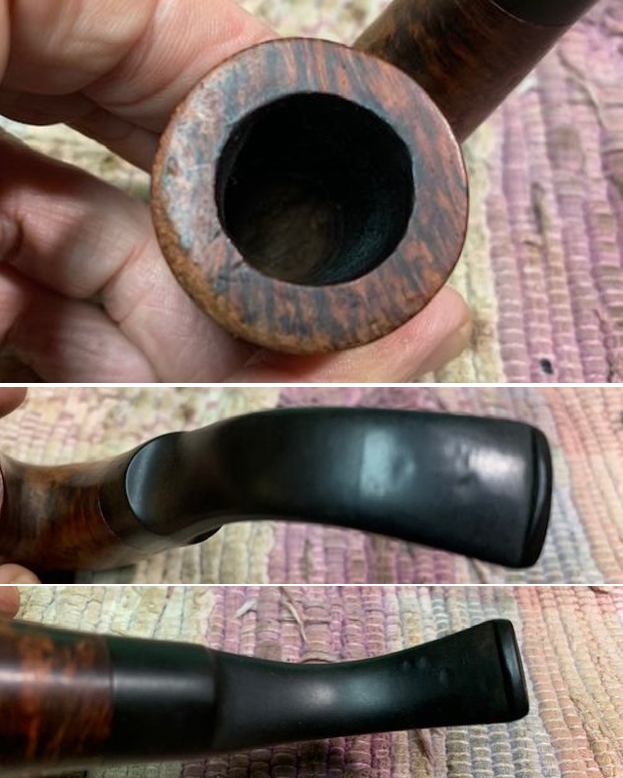 The next photos show the stamping on both sides of the shank. It is clear and readable though faint. The grain is also quite stunning.
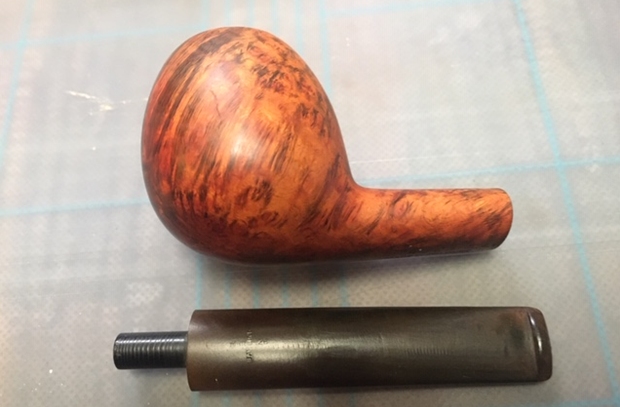
 I took a photo of the pipe with the stem removed to give a sense of the proportion of the bowl and the stem.
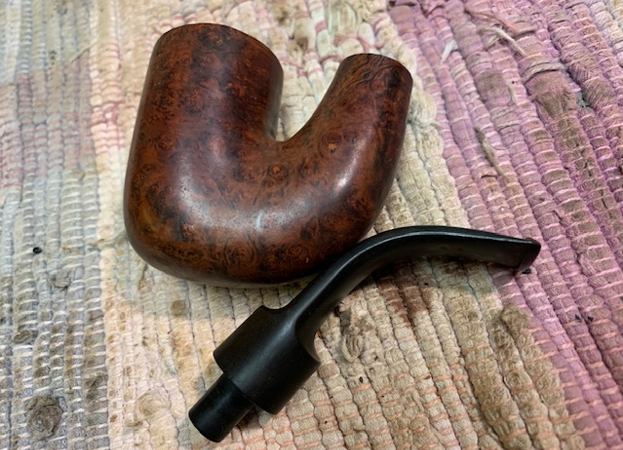 I decided to start by dealing with damage to the inner and outer edge of the bowl and clean up the rim top. I began with the inner edge and used a folded piece of 220 grit sandpaper to smooth out the damage there and begin a slight bevel on the edge. I topped the bowl to clean up the top and to deal with the damage on the front outer edge. I took photos of the refreshed rim top and edges. It looked much better.
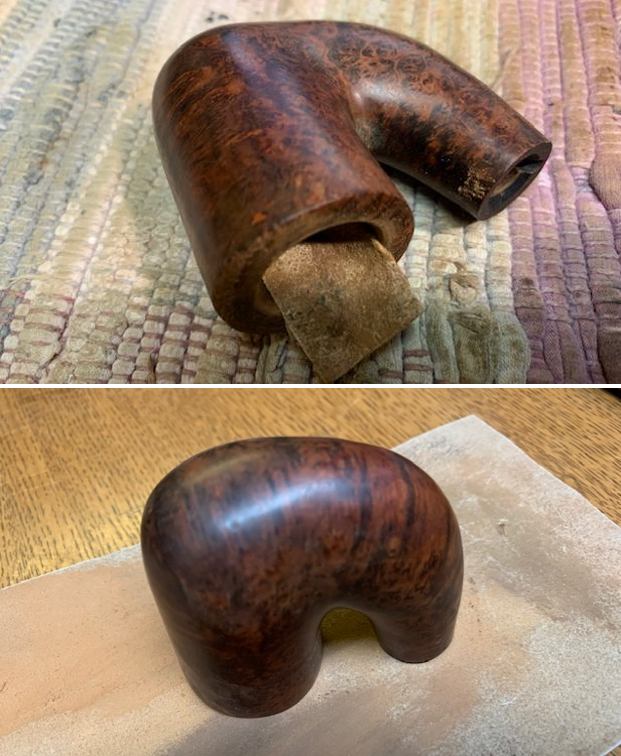
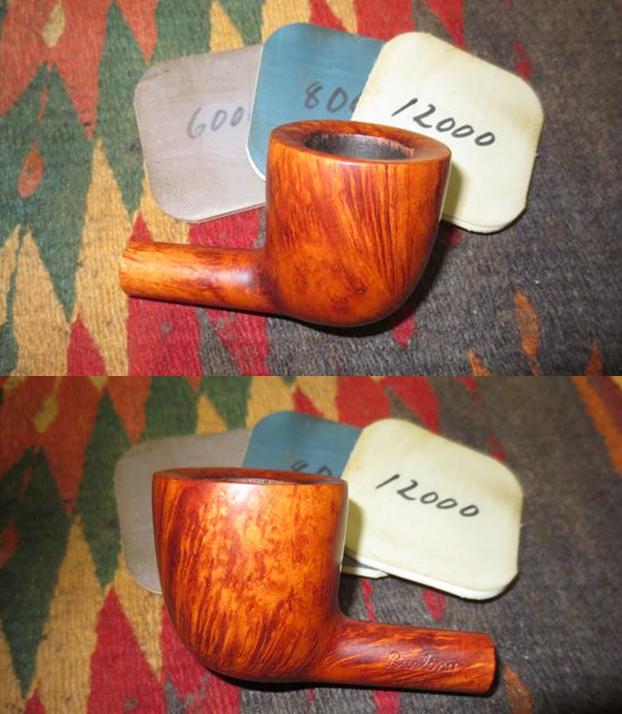
 I polished the rim top and the bowl with micromesh sanding pads – dry sanding with 1500-12000 grit pads. I wiped the bowl down with a damp cloth between each pad. The bowl began to take on a shine as I went through the various pads.
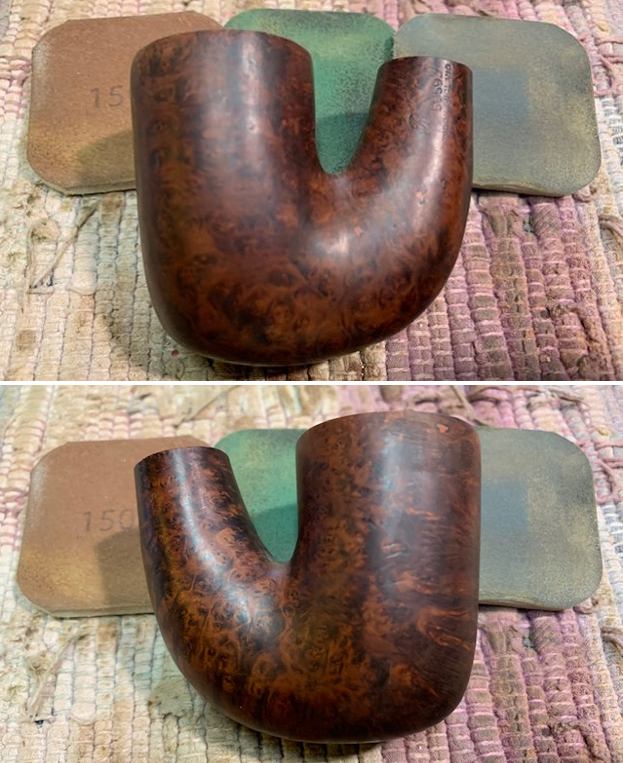
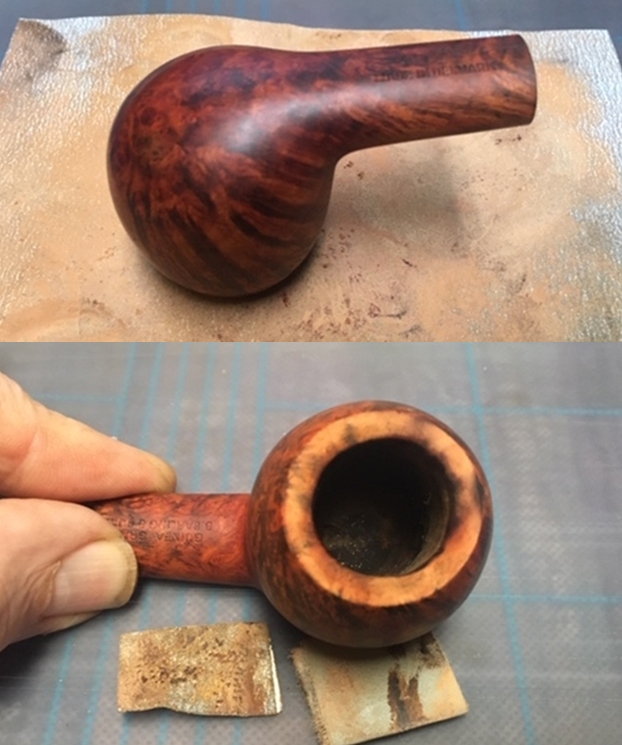
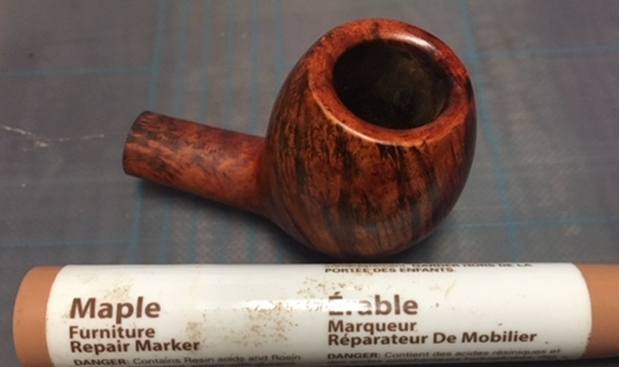
 I stained the top of the bowl with a Maple stain pen to blend in better with the rest of the bowl colour. It will definitely blend well once the pipe is buffed and polished.
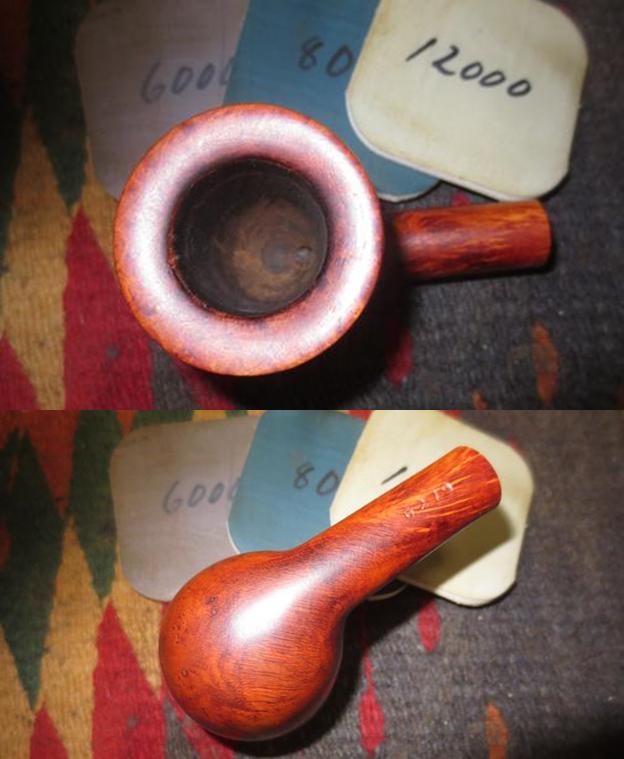
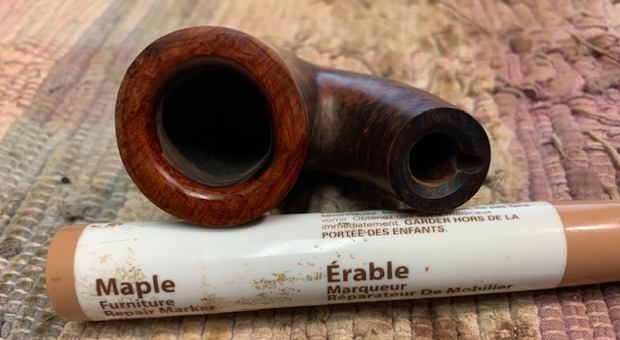 I rubbed the bowl and shank down with Before & After Restoration Balm. I worked it into the surface of the bowl sides and shank with my fingertips to clean, enliven and protect the briar. I let the balm sit for 10 minutes and then buffed with a cotton cloth to raise the shine. If you look you can see the many small fills in the briar but they actually blend in surprisingly well.
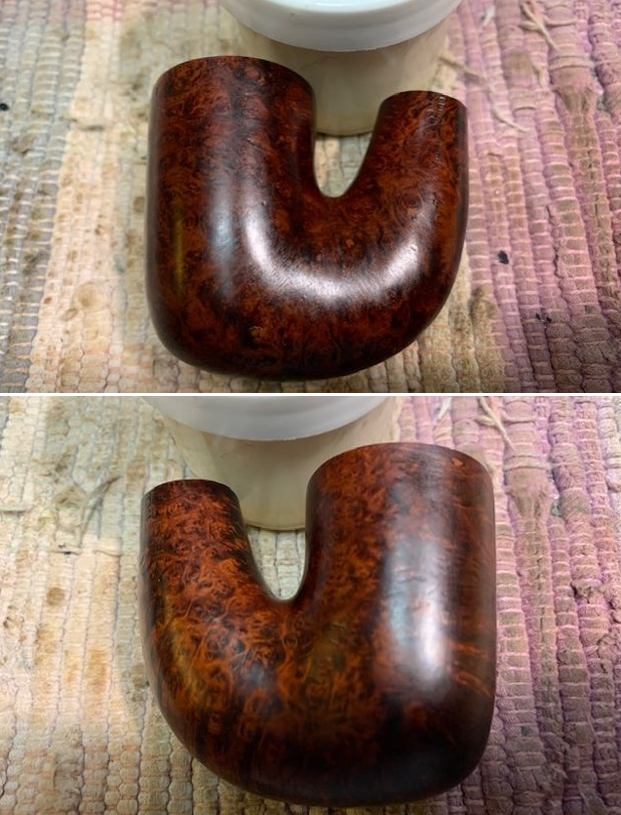
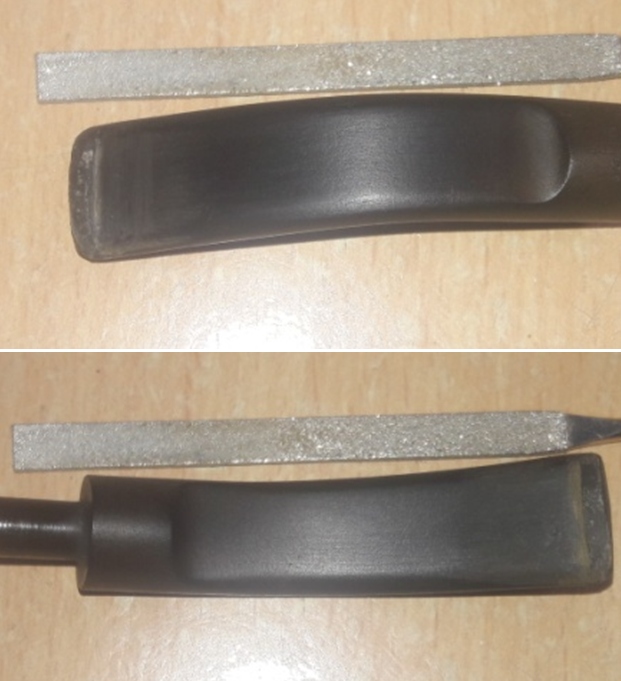
 I set the bowl aside and turned my attention to the stem. I “painted” the surface of the stem on both sides with the flame of a lighter. I was able to lift many of the tooth mark. I filled in the remaining tooth marks on the button surface and just ahead of it on the underside with clear super glue and set the stems aside to let the repairs cure.
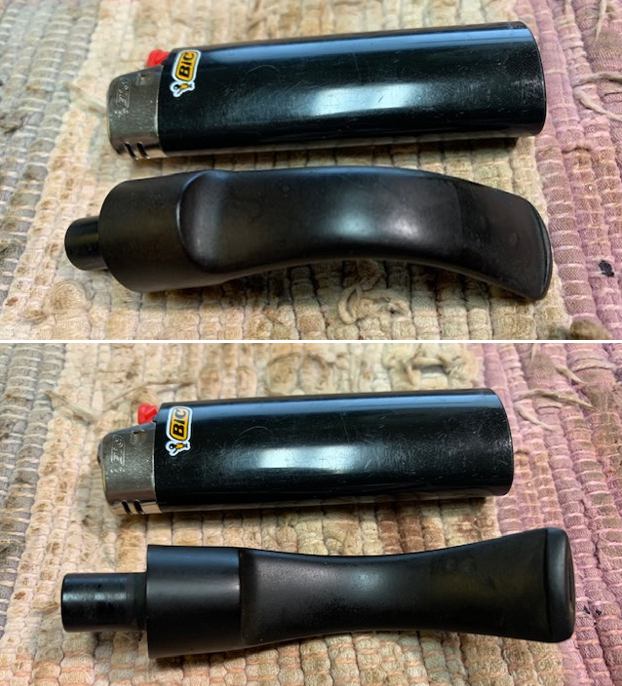
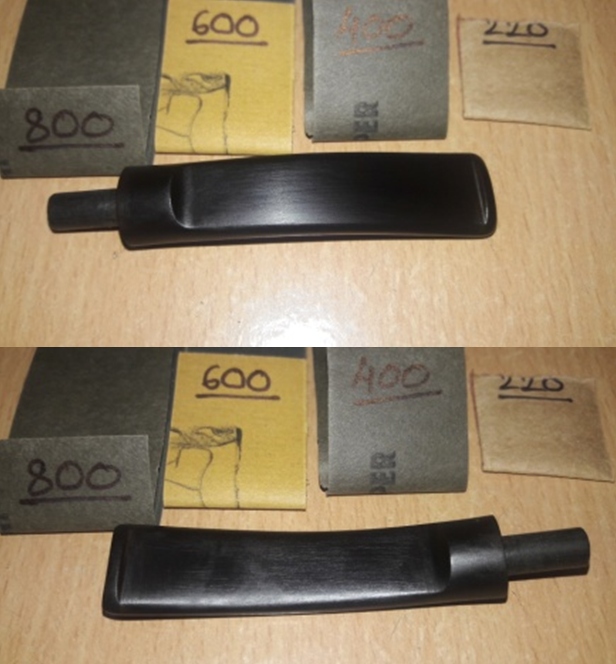
 Once they cured I smoothed out the repairs with a small file and started blending them into the surface of the stem (I forgot to take photos of that part of the process). I sanded the repairs with 220 grit sandpaper to further blend it into the stem surface. I started polishing it with 400 grit wet dry sandpaper.
 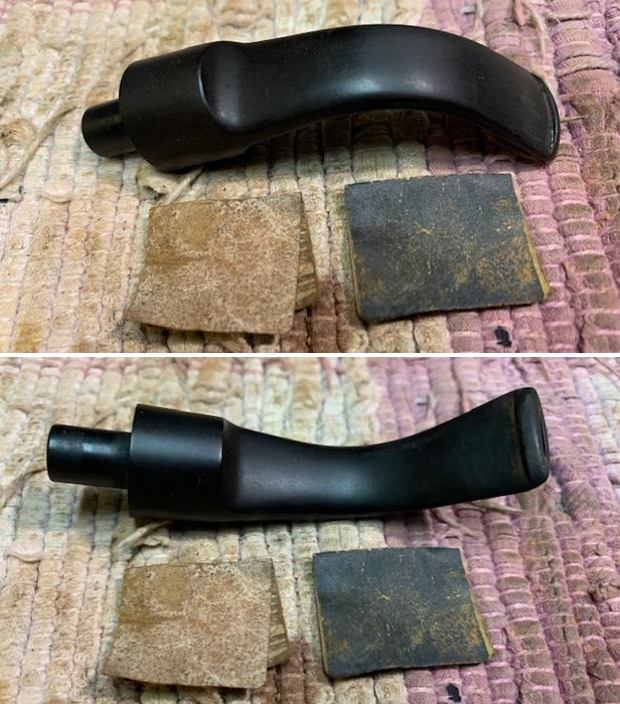 I polished the vulcanite stem with micromesh sanding pads – 1500-12000 grit pads. I wiped it down with a damp cloth after each sanding pad.
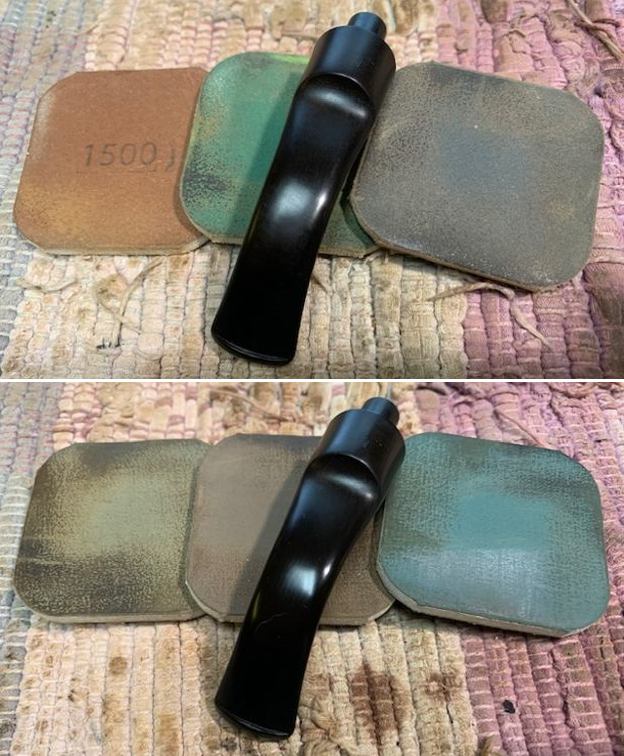
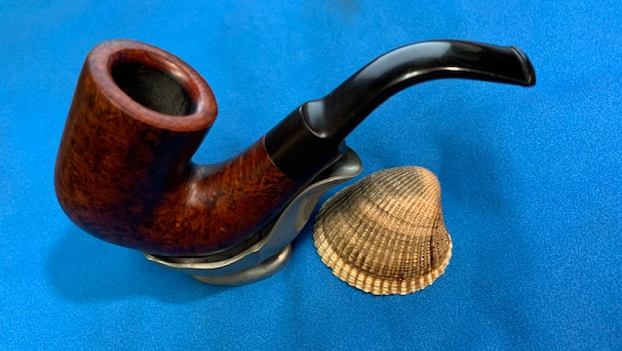
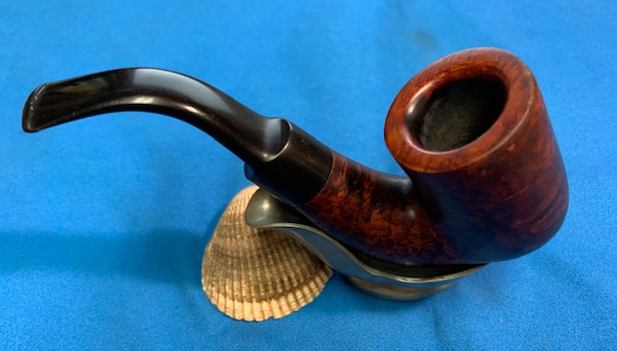
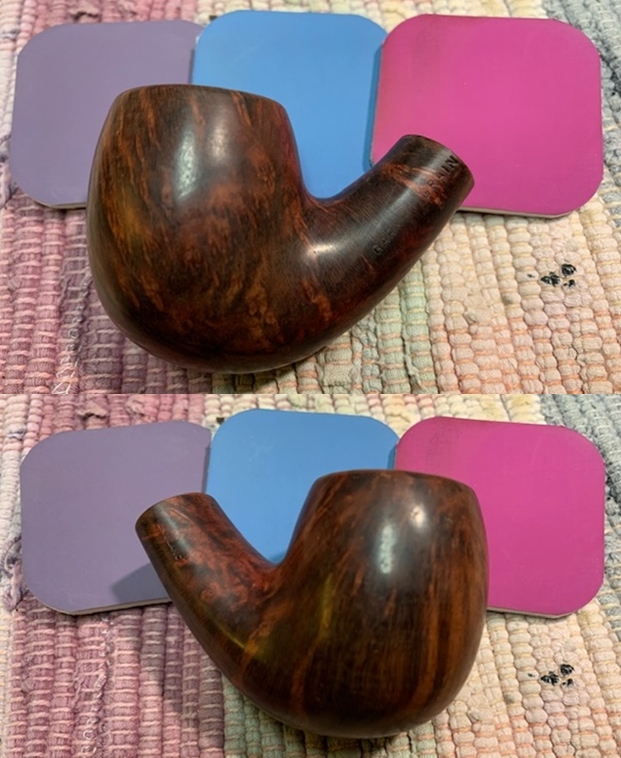
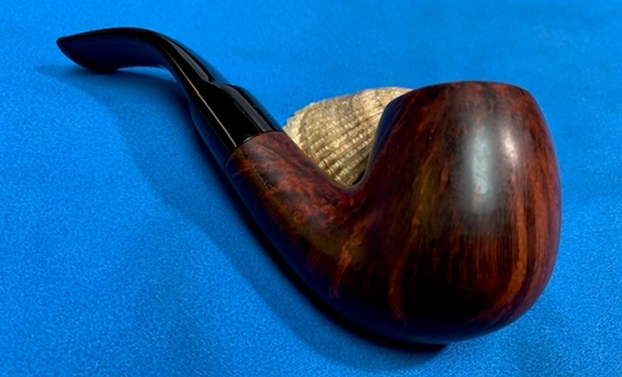
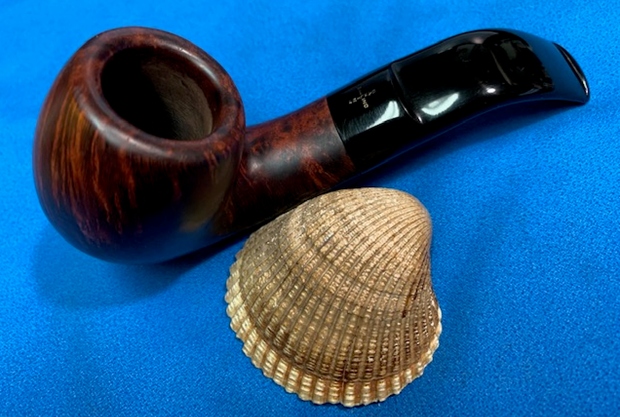
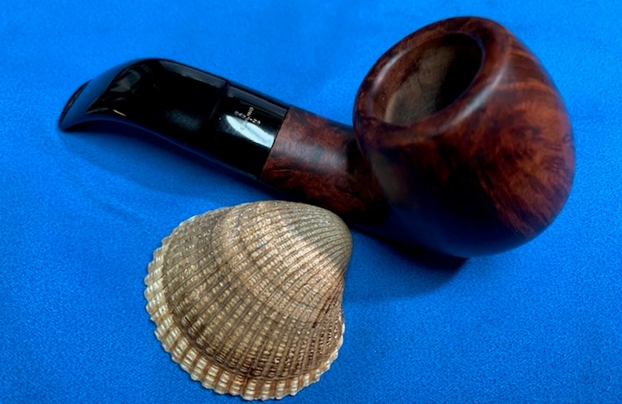
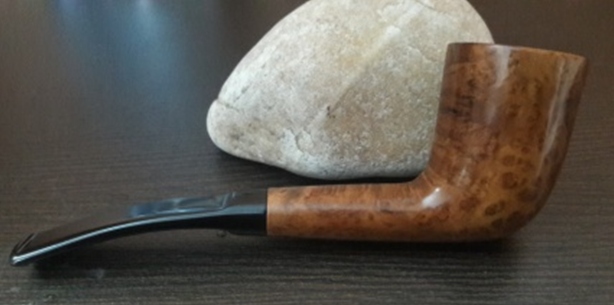
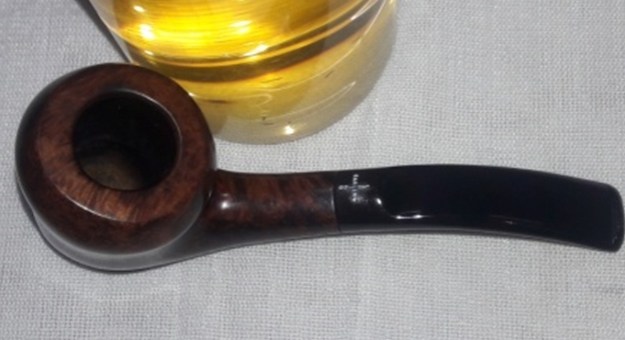
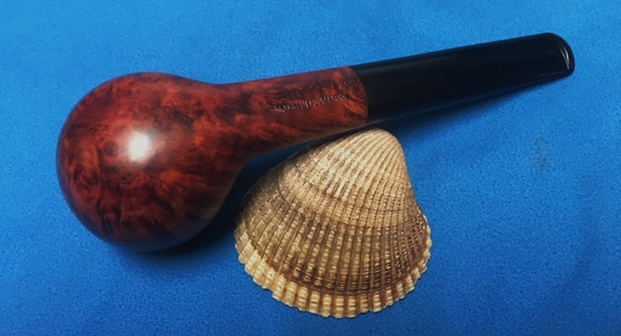
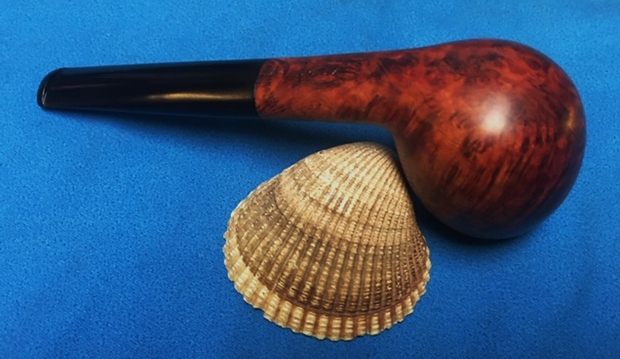
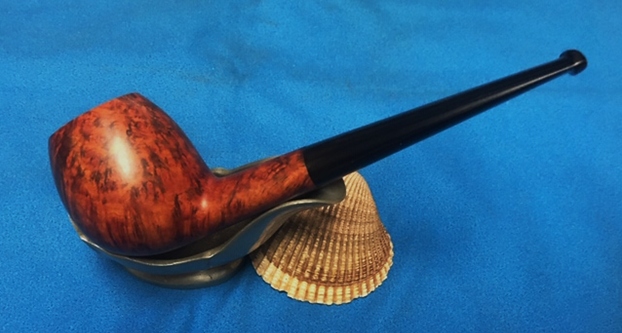
 This Barling Regency 5959 Oom Paul with a vulcanite saddle stem is a great looking pipe now that it has been restored. The rich browns and blacks of the contrasting stains came alive with the polishing and waxing. I put the stem back on the bowl and carefully buffed the pipe with Blue Diamond on the buffing wheel using a light touch on the briar. I gave the bowl and the stem multiple coats of carnauba wax on the buffing wheel and followed that by buffing the entire pipe with a clean buffing pad. I hand buffed the pipe with a microfiber cloth to deepen the shine. The finished Barling Regency Oom Paul is a beauty and fits nicely in the hand and looks very good. Give the finished pipe a look in the photos below. The dimensions of the pipe are Length: 4 inches, Height: 2 ¼ inches, Outside diameter of the bowl: 1 ½ inches, Chamber diameter: 7/8 of an inch. The weight of the pipe is 64 grams/2.26 ounces. I will be putting this Barling on the British Pipe Makers section of the rebornpipes store shortly if you want to add it to your collection. Thanks for reading this blog and my reflections on the pipe while I worked on it. There are many more to come!