Blog by Paresh Deshpande
It’s been a while that I had worked on my Grandfather’s pipe collection and that is what I decided to work on as my next project. I had professed my appreciation and liking for Custom-Bilt pipes for their large size, shape, hand feel and the rustic looks.
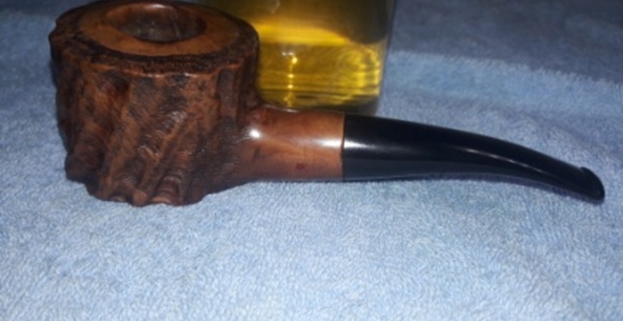
The Custom-Bilt pipe that is now on my work table is a large Pot shaped pipe, having the trademark scraggy large vertical rustications and very fine, thin horizontal linear rustications in between. This is a beautifully carved pipe with a unique construction in that the chamber appears to be placed inside the outer casing of the briar wood. However, the chamber is carved from the same piece of briar with a smooth rim top surface that is slightly raised above the surrounding rim surface with thin rustications. The short shank is smooth and extends in to the large smooth foot of the stummel.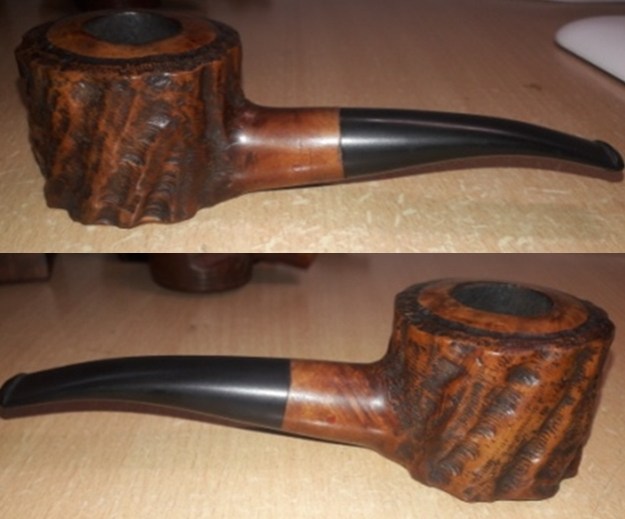
 It is stamped on the left side of the shank as “Custom-Bilt” with a hyphen between the two words, in cursive hand. There are two prominent red dots on either side of the shank with a square symbol on the right side of the shank towards the stummel joint. The IMPORTED BRIAR, a commonly observed stamp on these pipes, is conspicuous by its absence on this one!!
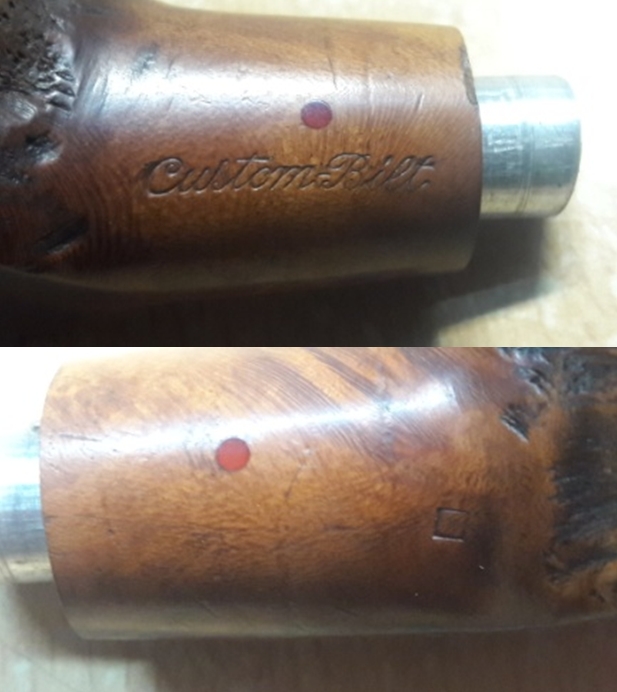 Having worked on a few Custom Bilt pipes in the past and researched this brand and based on the stampings seen on this pipe, I can say with an amount of certitude, that this pipe is from the period 1938- 46. Here is the proof in determining the vintage based on stampings as researched by William E. Unger, Jr., PhD, which deals with the study of Custom-Bilt pipes.
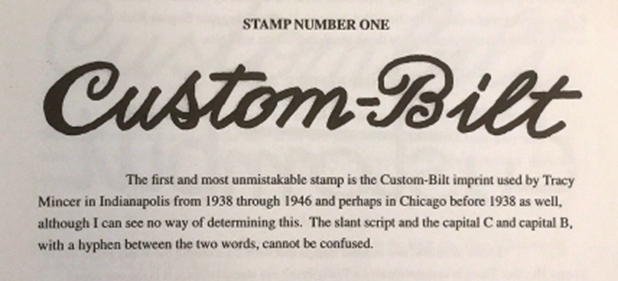 With this confirmation as regards to the vintage of this pipe, I move ahead with the initial visual inspection of this pipe.
INITIAL VISUAL INSPECTION
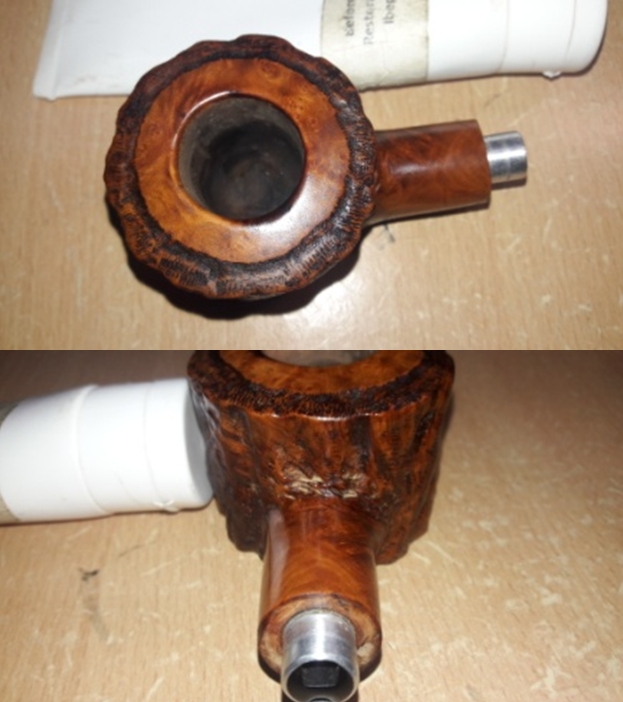
The chamber has an even decent layer of cake. The condition of the inner walls of the chamber can be determined only after the cake has been completely reamed out down to the bare briar. The draught hole is dead center and at the bottom of the chamber. This should be a fantastic smoker. The smooth and slightly raised rim top surface has severely charred inner rim edge on the left in 8 o’clock direction and a minor charring on the right side in the 3 o’clock direction, both marked in red circle causing the bowl to appear out of round. The remaining rusticated rim top surface is covered in dust and grime of overflowing lava.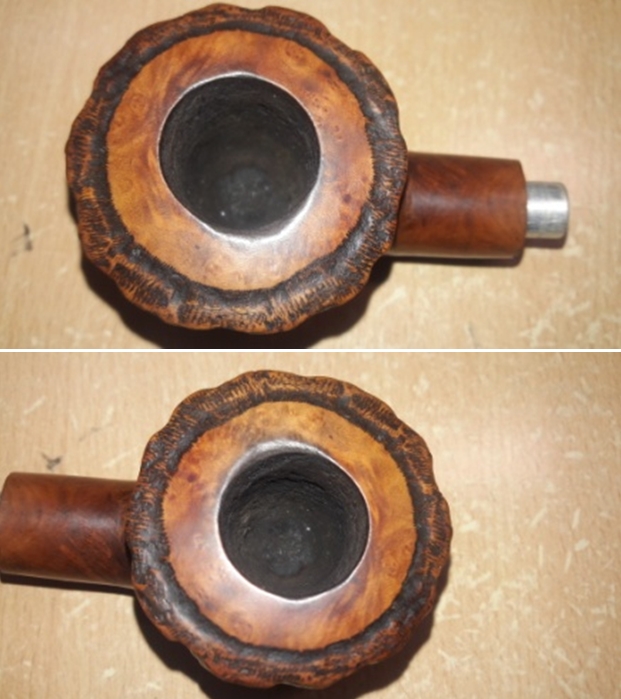
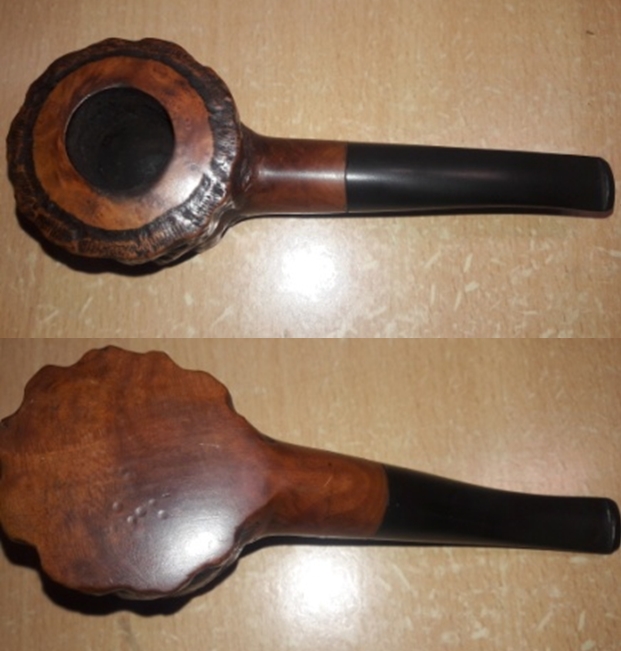
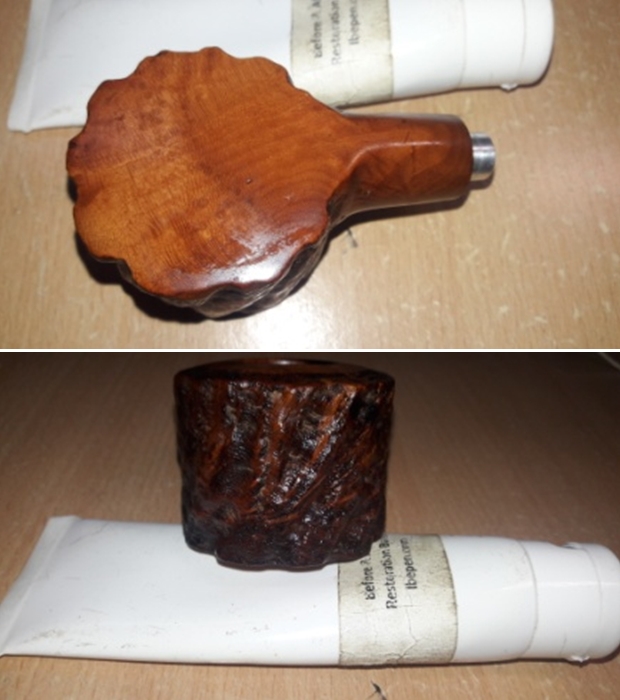
 The flat bottomed stummel feels solid to the touch and makes for a nice fit in the hands of the smoker. The vertical worm rustication with its horizontal thin line rustications within makes for a visual treat. Though covered in dust and grime of all these years of uncared for storage, these should clean up nicely. The smooth flat bottom of the stummel has a number of perfectly rounded small dings and will need to be addressed.
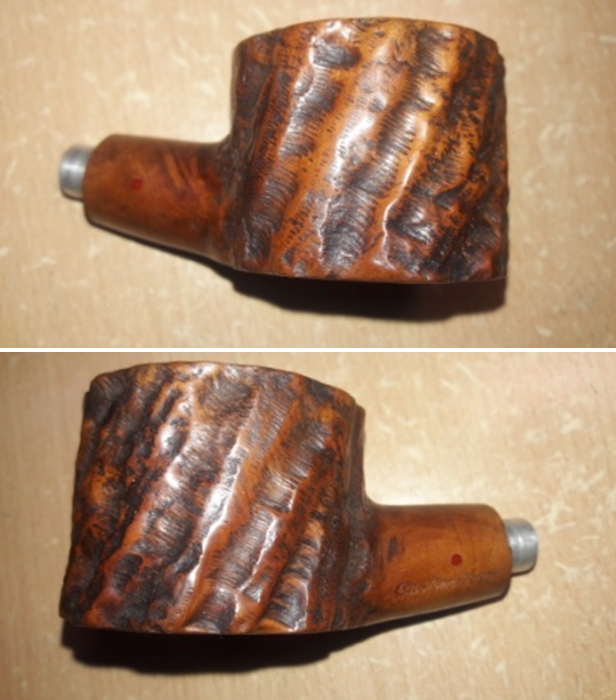

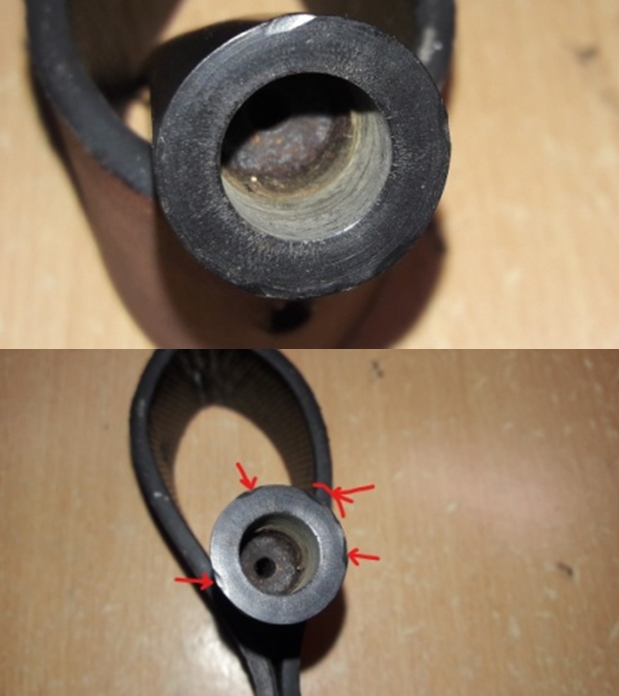
 The short and smooth surfaced shank has an aluminum shank/ mortise extension fixed inside of the mortise. I have seen a similar extension on another Custom-Bilt from my Grandfather’s collection which I had restored about a year back!!! This aluminum shank/ mortise extension (or should it be called a tenon?), has two airways, a larger one above a smaller one, both with the same draught hole at the other end. The purpose of these two airways in the same tenon was shrouded in mystery then and to this day, still remains so. Any inputs on this mystery from the esteemed readers will help all other readers in understanding the functional aspects of this dual airway. Both these airways are clogged with oils and tars and dirt from all these years of smoking and storage, making the draw a bit laborious. This draw should even out once the shank extension and shank has been cleaned out.
 The slightly bent vulcanite stem sits atop the aluminum shank/ mortise extension and is peppered with tooth chatter on either surface of the stem. The edges of the button are slightly damaged due to tooth marks. These issues are not severe and should be easily addressed by sanding. The tenon end of the stem surface is chipped in at number of places with the edges slightly raised (indicated with red arrows). I shall address this issue first by sanding and if required, will fill it with a mix of superglue and activated charcoal.
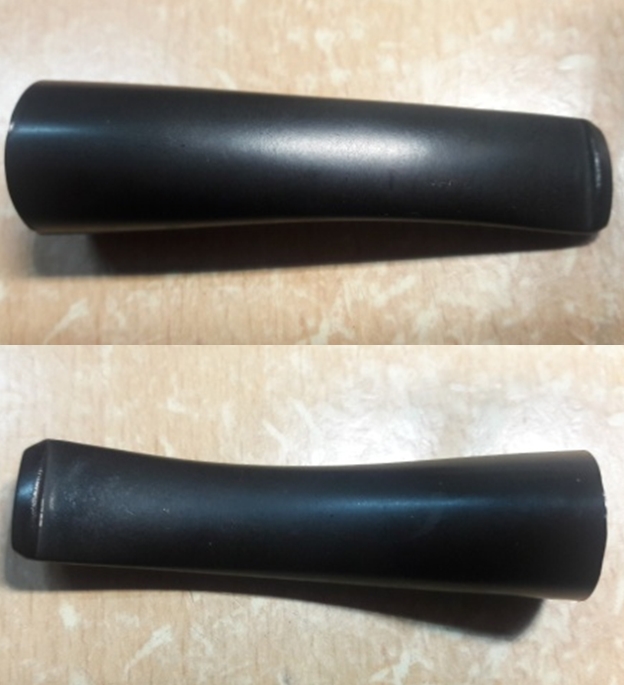
 THE PROCESS
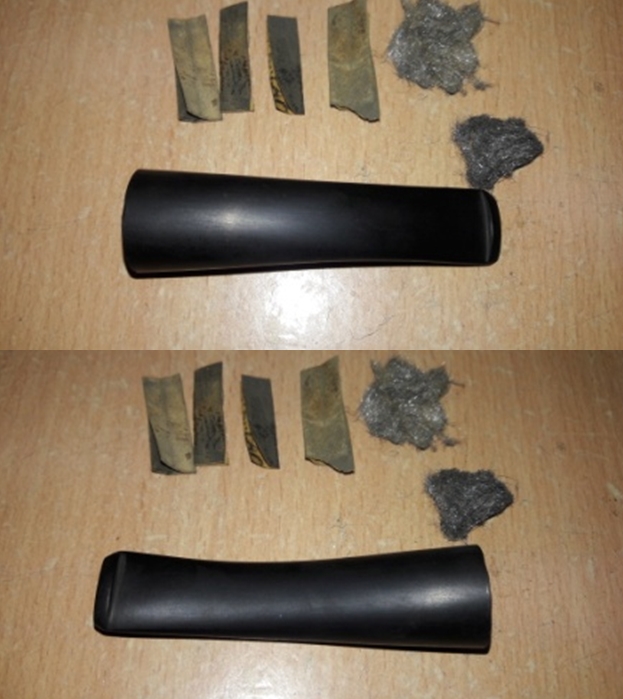
I started the restoration of this beautiful pipe by first reaming the chamber with size 3 followed by size 4 head of the PipNet pipe reamer. The amount of cake dislodged from the chamber points to the fact that this would have been a favorite of my Grandfather!! With my fabricated knife, I removed the cake from areas where the reamer head could not reach. I followed this reaming with sanding the chamber walls with a folded piece of 220 grit sand paper to completely remove any residual cake. This also helps to smooth the walls of the chamber. How I miss the help of Abha, my wife and Pavni, my youngest daughter who specializes in sanding the chamber walls to a smooth and even surface. I wiped the chamber with a cotton swab and alcohol to get rid of all the carbon dust and expose the bare briar of the chamber. It was a relief to note that the chamber is sans of any heat fissures/ lines.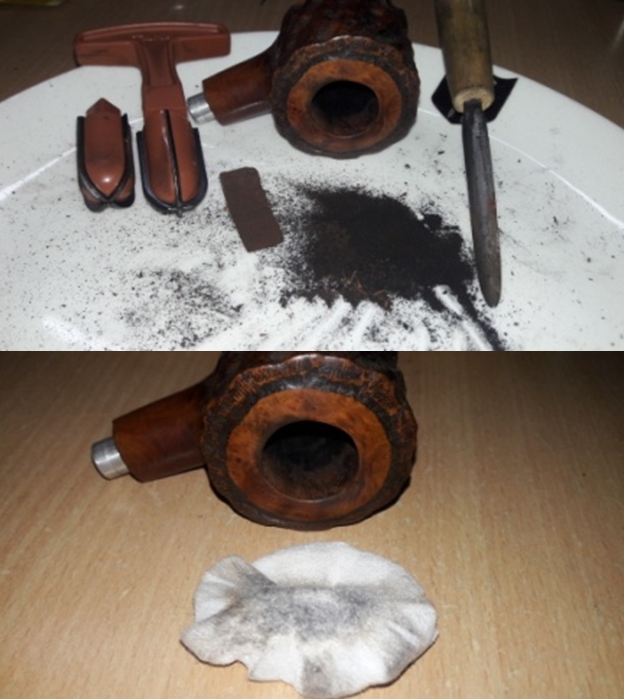
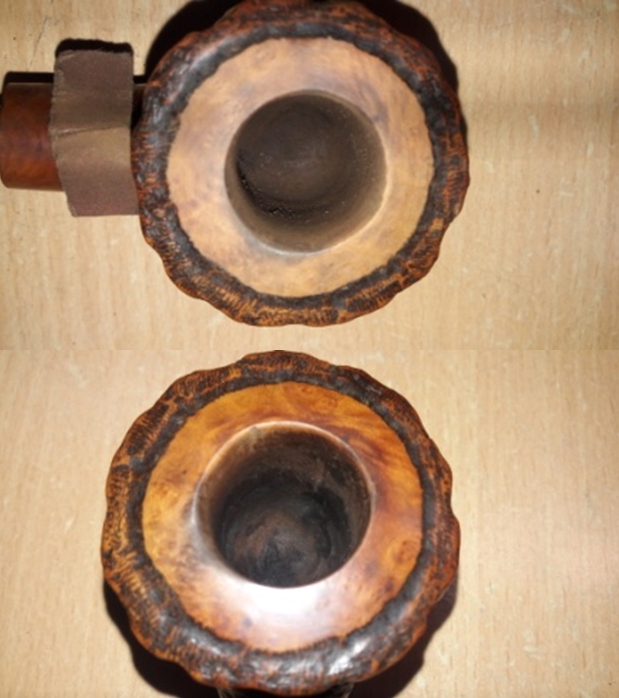
 The next issue that I addressed was that of the charred inner rim edge. With a folded piece of a 220 grit sand paper, the charred surfaces were sanded down till I reached solid briar wood. A bevel to the inner edge would look out of place on this pipe and so it was decided to keep the edges straight. I sand the entire inner rim edge and the chamber with a folded 180 grit sand paper till it matched with the damaged rim edge. The inner rim edge looked good and also the chamber is now nicely rounded. I further sand the entire smooth rim top surface to remove the blackened surface from the charred area and also to get rid of any minor dents/ dings and grime from the surface.
 I followed up the cleaning of the chamber with that of the shank internals. Using hard and regular pipe cleaners and alcohol, I cleaned the aluminum mortise extension and the shank internals. It was a bit of an exercise to clean the lower of the two air ways as it sloped upwards and posed difficulties in maneuvering the pipe cleaner towards the draught hole. A number of attempts and pipe cleaners later, the shank internals are clean and the draw is nice, smooth and even.
 The internal cleaning was followed by external cleaning of the stummel surface using Murphy’s Oil soap and a hard bristled tooth brush. I also used a brass wired brush to diligently clean out all the dirt and grime from within the worm rustications. With a shank brush and dish washing soap, I thoroughly cleaned the shank internals and the mortise. I dried the bowl with paper napkins and soft cotton cloth.

 To expel all the moisture from the shank and the aluminum extension, I blew air through the draught hole and to my chagrin; there were droplets of water that came out from the joint between the shank end and extension (marked with red arrows). This is definitely a sign of leak from the joint. I wiped the area dry and with my sharp dental tool picked the area clean. With a toothpick, I applied clear superglue all around the joint and held it vertical for the glue to seep in to the joint. I was careful to apply a small quantity as I did not want the glue to enter and harden inside of the mortise. I wiped off the extra glue from the shank end as I would disturb the seating of the stem over the aluminum extension. I set the stummel aside for the glue to cure.
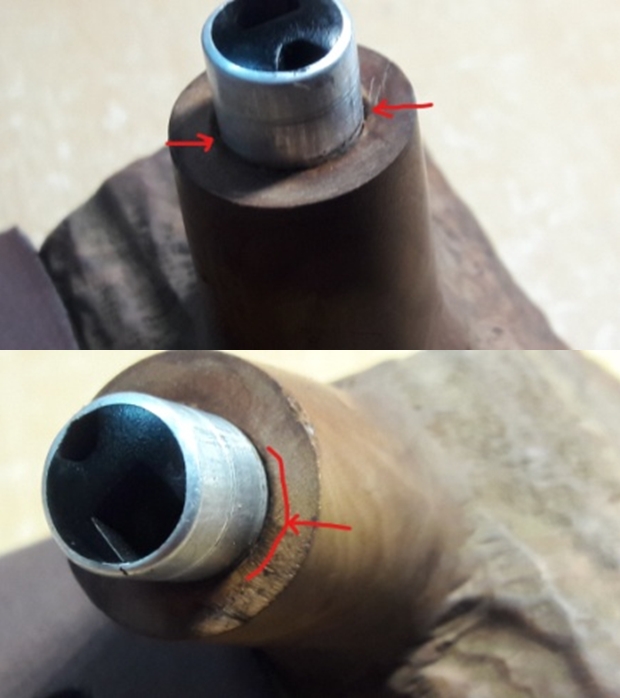
 With the stummel set aside for the glue to cure, it was time to move ahead with the stem restoration. I cleaned the stem internals with pipe cleaners, q-tips and alcohol. With the bent flat end of a dental tool, I scrubbed the dried out oils and tars from the area of the tenon end of the stem that seats on top of the aluminum shank/ mortise extension.
 I flamed the bite zone with the flame of a lighter. The heating of the vulcanite raises the tooth chatter to the surface and followed it with a light sanding with a piece of 220 grit sand paper to even out the surface around the bite zone. Using a flat head needle file, I reshaped and sharpened the button and button edges. This was followed by sanding the entire stem surface with 400 followed by 600, 800 and 1000 grit sand papers to remove the oxidation. I also evened out the raised indentations from the tenon end caused due to chipping. I finished the sanding with a 0000 grade steel wool. Using progressively higher grit sand papers helps in a smooth surface while minimizing the sanding marks left behind by the more abrasive sanding papers. I wiped the stem with a small amount of Extra Virgin Olive oil and set it aside to be absorbed by the stem surface.

 While the stem was set aside to hydrate, I worked the stummel, sanding away excess dried glue from the joint between shank end and the aluminum extension. I polished the extension with a piece of 0000 grade steel wool. The next issue that I addressed was the numerous rounded dings from the perfectly flattened foot of the stummel. I decided to steam out these dings since these dings were slightly deeper. I heated my fabricated knife over the flame of a candle till nice and hot. I covered the dings with a thick wet Turkish hand towel and placed the hot knife over it. The sizzling steam that is generated expands the briar and pulled out the dings. I am pretty happy with the results!!
 I set the stummel to dry out and went ahead with polishing and completing the stem. I followed up the sanding regime with micromesh polishing to bring a shine on the stem surface. I wet sand the stem with 1500 to 2400 girt micromesh pads. Continuing with my experimentation that I had spelled out in my previous posts, I mount a cotton buffing wheel on my hand held rotary tool and polish the stem with Red Rouge polish. Further, I mount a fresh buffing wheel on the rotary tool and polish the stem with White Diamond polish. I finish the stem polish by wet sanding with 6000 to 12000 grit pads of the micromesh. I rub a small quantity of olive oil in to the stem surface to hydrate it and set it aside again. I am really happy with this process of stem polishing as the results are excellent while saving me huge amounts of time and effort.


 With the stem polishing now completed, I moved ahead with micromesh polishing of the smooth surfaces on the stummel (part of the rim top surface, the short shank and the foot of the stummel). I polished the stummel by wet sanding with 1500 to 12000 micromesh pads.
 Next, I rub a small quantity of “Before and After Restoration Balm” in to the briar with my finger tips and let it rest for a few minutes. The balm almost immediately works its magic and the briar now has a nice vibrant appearance with the beautiful worm rustication patterns on full display. I have been using this balm ever since I embarked on this journey and it is this part of restoration that I always look forward to. I further buff it with a horse hair shoe brush. There are a few spots where I had missed out on the application of the balm, as would have been observed by some discerning readers in pictures below, but let me assure you that I had reapplied the balm using a q-tip but missed out on taking pictures.
 On to the homestretch!! I mount a cotton cloth buffing wheel on to my hand held rotary tool and apply a coat of Blue Diamond to the stummel and the stem to polish out the minor scratches.
 With a cotton buffing wheel that I use for carnauba wax, I apply a coat of carnauba wax and continue to work on it till the complete coat of wax had been polished out. I mount a clean cotton cloth buffing wheel and give the entire pipe a once over buff. I finished the restoration by giving the entire pipe a rigorous hand buffing using a microfiber cloth to raise the shine further. The finished pipe looks amazingly beautiful and is now ready for its long second innings with me. I only wish it could share with me its life story of the past 70 plus years, if only the pipe could tell some of my grand Old man’s stories and recount incidents it had witnessed while I enjoy smoking my favorite Virginia blend in it!! … Cheers!!