Blog by Steve Laug
About a month ago I received a phone call from a guy from Nova Scotia who was visiting in Vancouver and had made a stop at City Cigar on 4th Ave. W. and asked about having a pipe repaired. He told me that he had a freehand pipe that had been sitting in a bag for years with a broken tenon. He was going to leave it with his brother in law and they would get in touch with me about repairing it. Earlier this week I received a text from his brother in law with photos of the pipe that needed the repair. I have included those photos below. It was a nice looking Freehand with a fancy turned stem. The tenon was snapped off in the shank and was stuck from the look of the photos. The shape and the look of the pipe reminded me of other freehands I have worked on that were made by Preben Holm. We made arrangements and we booked a time for him to drop the pipe off.
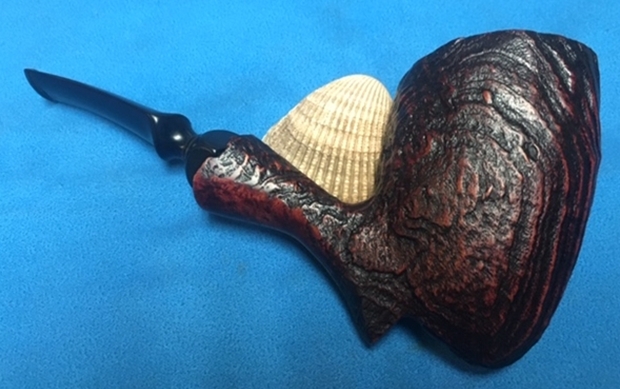
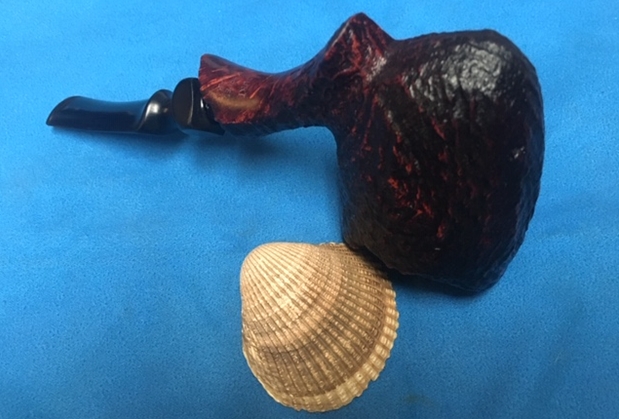
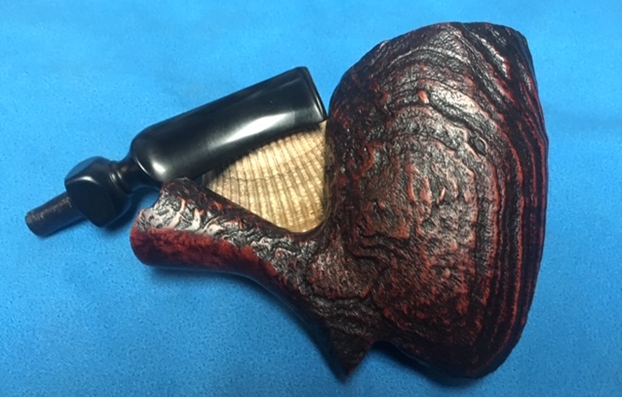
 Today I had the day off and I received a text that he was dropping the pipe by today for a repair. I took some photos of the pipe before I started working on it. The tenon was stuck in the shank and was not moveable. The finish was dusty but in excellent condition. The rim top and edges were in excellent condition. There was a light cake in the bowl and the pipe smelled of a strong vanilla aromatic in the bowl. The stem was lightly oxidized and was snapped very close to the square/diamond turned piece on the fancy stem.
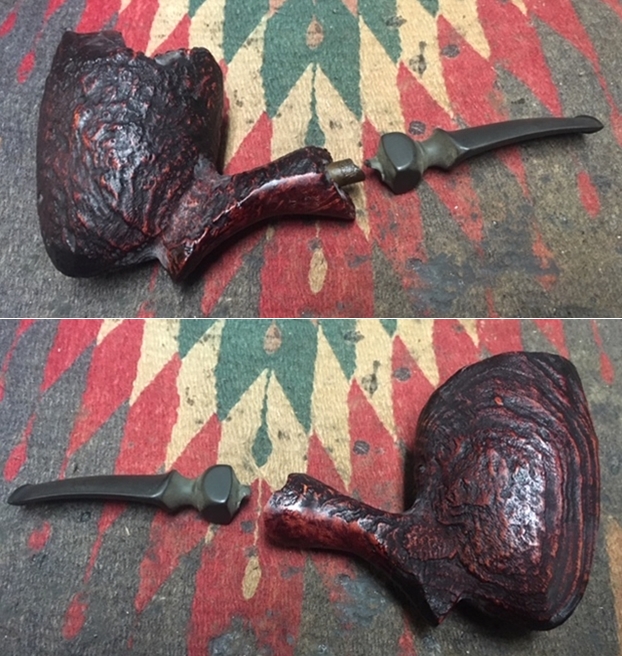
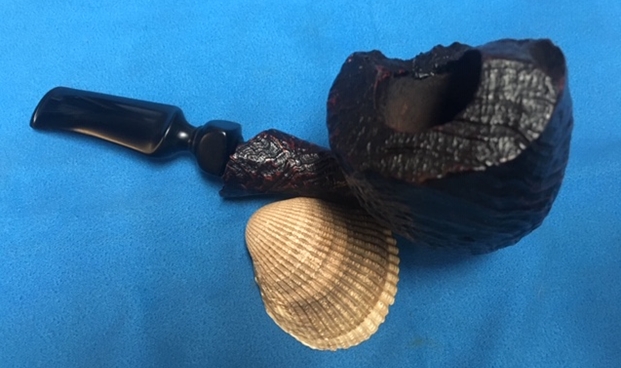
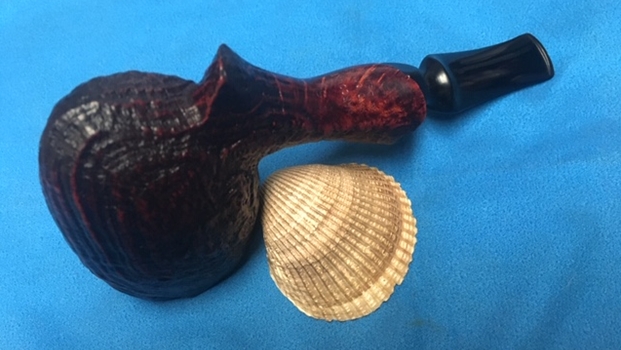
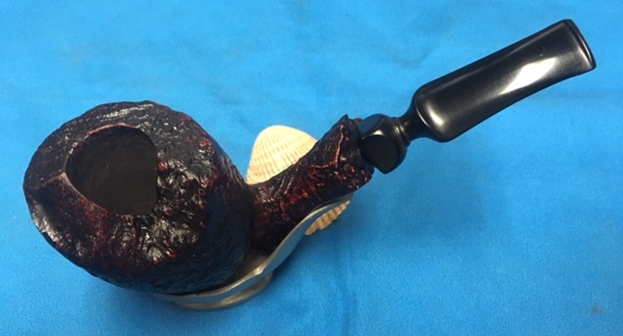
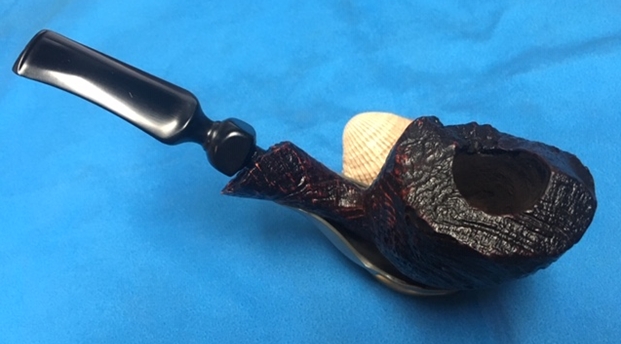
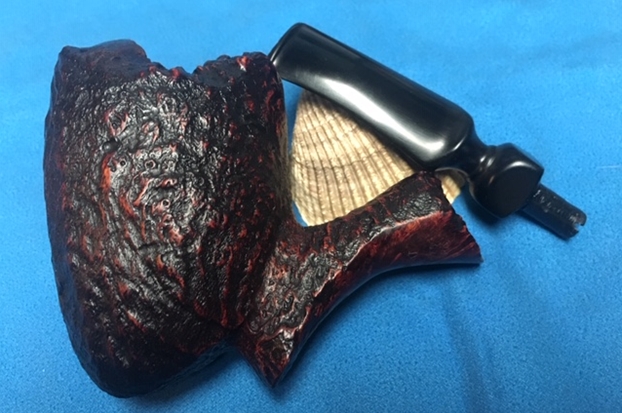
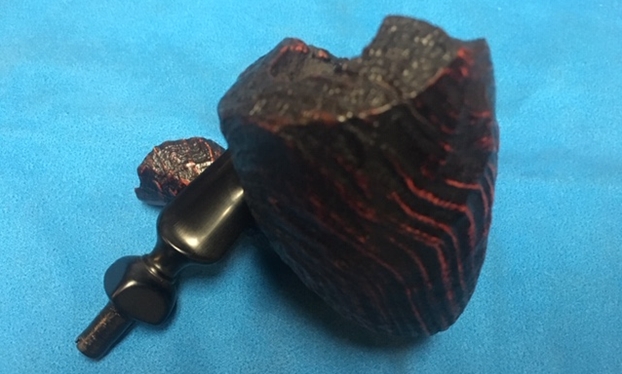
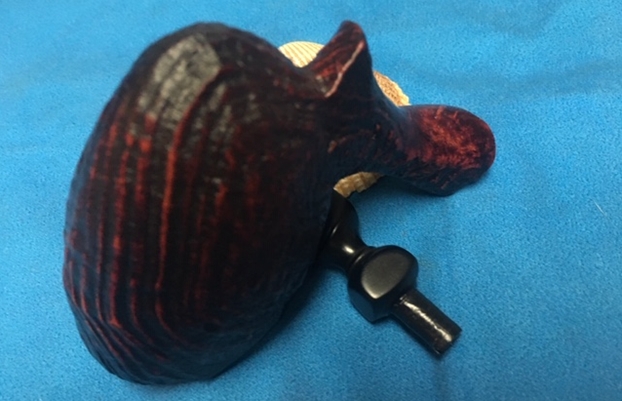
 I took a photo of the plateau on the rim top and the shank end. The pipe was dusty but otherwise the finish was in great condition. I took a photo of the stem surfaces. Other than being lightly oxidized there were no tooth marks or chatter on the stem surface.
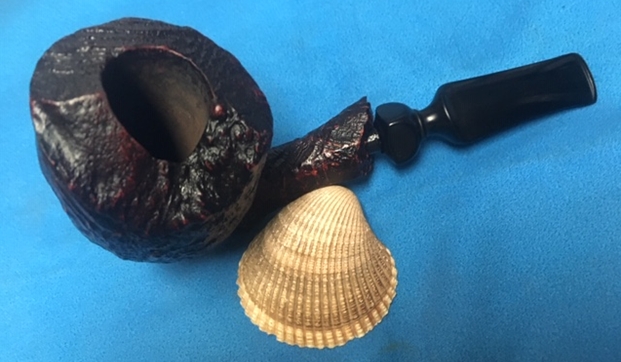
 I took a photo of the stamping on the underside of the shank. It had a uppercase S at the top of the stamping. Under that it read Harcourt over Hand Carved in Denmark.
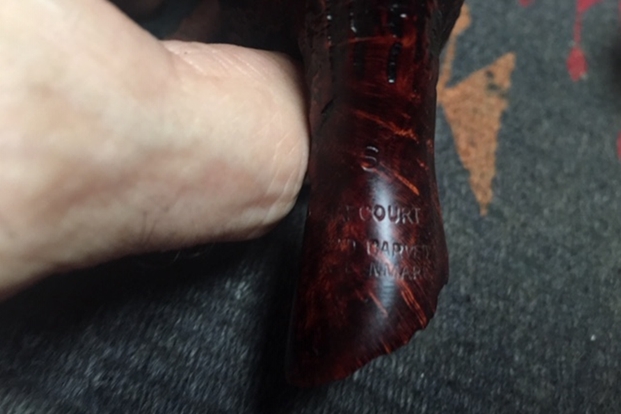 After I took the photos I put the bowl in the freezer so that I would be able to pull the broken tenon from the shank. The time in the freezer causes the briar to release the broken tenon that was stuck. After a half hour in the freezer I took it out and the broken tenon easily came out of the shank. I took photos of the parts.
 I decided to refresh my memory about the brand before I started working on it. I did a quick search on rebornpipes to read the posts that I had there. The first of these was by Charles Lemon of Dad’s pipes (https://dadspipes.com/2016/10/20/in-praise-of-international-cooperation-cleaning-up-a-large-harcourt-grade-d-freehand-by-preben-holm-for-dunhill/). I quote the pertinent part of Charles piece.
By all accounts, the Danish Fancy pipe boom of the 1960s and 1970s caught the great English pipe house of Dunhill unprepared. Dunhill was unable to produce the new Freehand shapes in-house, so if the firm was to capitalize on the surging demand for Danish pipes, it would have to look elsewhere. The answer came in the form of a contract with the Preben Holm factory for the production of what became the Harcourt brand of pipes, destined for distribution through Dunhill’s network of principal pipe dealers.
The Harcourt on my worktable arrived in excellent estate condition. It is easily one of the largest pipes I’ve worked on – its overall length is just 5.75 inches, but the stummel is a real fistful of briar measuring 2.5 inches tall by 1.6 inches wide with a copious tobacco chamber of nearly one inch in diameter and 2.25 inches deep! Despite its size, the pipe weighs only 2.3 ounces or 64 grams.
That helped me confirm the connection to Preben Holm that I remembered. It connected Preben Holm with Dunhill as well. The other blog was one that had written on a Harcourt that I restored (https://rebornpipes.com/2018/06/29/a-harcourt-hand-carved-freehand-7-of-anthonys-dads-pipes/). I quote a portion of the blog and include one of the photos that I had used in that blog:
I had some vague memory about the Harcourt brand that had a connection to Preben Holm and the stamping seemed a lot like the way that he stamped his pipes. I did a bit of research on the brand to see the connection. The first place I looked was on Pipedia at the following link: https://pipedia.org/wiki/Harcourt. There I found the following information which I quote in full.
The brand Harcourt was produced by Preben Holm (†) for Dunhill to secure a share of the Danish fancy boom for Dunhill’s principal pipe dealers. Later Erik Nørding made Harcourt pipes for a shorter period. These pipe are sometimes (partially) rusticated.
It had been reported that the second generation of Harcourt pipes were sold exclusively through Dunhill stores, but we now know through Rich Mervin that the Brick Church Pipe Shop, a chain of 3 stores in NJ sold Danish freehands in the 1970s and 80s including Knute, Ben Wade, and Harcourt. They were also an authorized Charatan and Dunhill retailer. So, apparently Harcourt freehands were sold through at least some Dunhill dealers as well as the Dunhill stores.
I then turned to the pipephil site at this link and found out some more information on the brand. http://www.pipephil.eu/logos/en/infos/harcourt1.html. I followed the links there to some photos of a boxed pipe and the stamping on the shank.
This box contains a pipe carved for Dunhill in the 1970s. Harcourt pipes were Dunhill’s answer to the passion Danish style raised during this period. From my previous research I confirmed the connection between the pipe I am working on and the Harcourt pipes that were made by Preben Holm. The connection between Preben Holm and Dunhill’s desire to tap into the Danish Freehand market in the US was also helpful as it gave me a potential date for the pipe. It was made in the 1970s – the height of the Danish period in the US. Now it was time to replace the broken tenon.
I used the Dremel and sanding drum to smooth out the face of the stem and remove the damaged portion of the broken tenon. I also went through my box of tenons and found one that would be a good replacement for the broken one. It was a threaded tenon that was a Jobey replacement tenon. It had the correct diameter and with a bit of work the threaded portion would anchor well in the stem.  I used my cordless drill to open the airway in the stem to the diameter of the threaded portion of the new tenon. I started with a bit slightly larger than the current airway. I drilled it to the depth of the threaded portion of the tenon. I worked my way through various drill bits until I had one that was slightly larger than the new tenon.
 I took a photo of the open airway on the stem. I roughed up the threads on the tenon replacement and removed the ridge in the middle with the Dremel and sanding drum. I coated the end of the tenon with super glue and pressed it into the open airway on the stem. Once the glue cured I took photos of the stem in the pipe.
 Once the glue cured I took photos of the stem in the pipe. The pipe still needed to be cleaned up but the look was very good and the feel in the hand and mouth was perfect.
 I took a photo of the stem out of the shank to show the finished tenon replacement. The stem and tenon needed to be polished but the fit and shape is perfect.
 With the stem repaired it was time to do the restoration on the pipe as a whole. I started with the bowl. I reamed the bowl with a Savinelli Fitsall Pipe Knife, scraping the light cake from the bowl. I sanded the inside of the bowl to remove the rest of the cake with 220 grit sandpaper wrapped around a piece of dowel.
 I cleaned out the inside of the shank and the airway to the bowl with alcohol, pipe cleaners and cotton swabs. I cleaned the inside of the airway in the stem at the same time.
 I rubbed the bowl down with Before & After Restoration Balm. I worked it into the surface of the briar with my fingertips and a horsehair shoe brush to clean, enliven and protect it. I let the balm sit for a little while and then buffed with a cotton cloth to raise the shine. Mark Hoover’s Balm is a product that I have come to appreciate and one I use on every pipe I have been working on.

 I set the bowl aside and turned my attention to the stem. I sanded the stem with 220 grit sandpaper to break up the oxidation. I started the polishing with 400 grit wet dry sandpaper to remove the scratching. It is starting to look good.
  I have one more tin of Denicare Mouthpiece Polish left from a few that I have picked up over the years. It is a coarse red pasted that serves to help remove oxidation. I polished the stem with that to further smooth out the surface of the vulcanite (and to be honest – to use it up).
  I polished the stem with micromesh sanding pads – wet sanding with 1500-12000 grit pads. I wiped the stem down after each sanding pad with Obsidian Oil. I polished it with Before & After Pipe Stem Polish – both Fine and Extra Fine. Once I had finished the polishing I gave it final coat of oil and set it aside to dry.
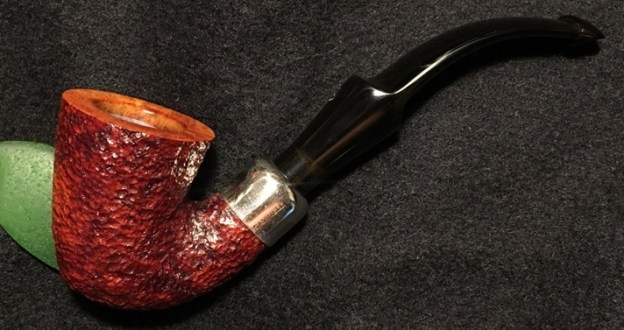
 When this pipe was dropped off yesterday I told the fellow that it would be a couple of weeks before I got to work on it. However, yesterday afternoon I felt like doing something a bit different in the restoration process. I finished the repair yesterday and finished the polishing it today. With every pipe I work on, I look forward to when it all comes back together, polished and waxed. I put the bowl and stem back together. I polished the bowl and stem with Blue Diamond to polish out the scratches in the briar and the vulcanite. I gave the bowl multiple coats of Conservator’s Wax and the stem multiple coats of carnauba wax. I buffed the pipe with a clean buffing pad to raise the shine. I hand buffed it with a microfiber cloth to deepen the shine. The pipe polished up pretty nicely. The sandblast finish looked really good with the polished black vulcanite. This Harcourt Hand Carved Preben Holm Freehand was another fun pipe to work on. It really has a great Freehand look that catches the eye. The combination of various oxblood, black and brown stains really makes the pipe look attractive. It is another comfortable pipe to hold in the hand. The finished pipe is shown in the photos below. The dimensions of the pipe are Length: 6 inches, Height: 3 inches, Outside diameter of the bowl: 2 inches, Chamber diameter: ¾ of an inch. I look forward to when the fellow picks it up and I get to hear what he thinks of the pipe. Thanks for reading this blog and my reflections on the pipe while I worked on it. This is an interesting estate to bring back to life.