Blog by Steve Laug
Early in August I received an email from an interesting woman on Vancouver Island regarding some pipes that she had for sale. She was looking to sell the pipes from her late husband Ken and one from her Great Grandfather. Here is her email:
I have 5 John Calich pipes that date from 1979 to 1981. One is graded 11 and the other four are graded 12. I had bought them as Christmas and birthday gifts for my late husband. He was a very light smoker for a 3 year period.
I am a wood sculptor and always admired the grain and shapes of John’s best pipes. John was a friend as well. We exhibited at many exhibitions together for over 25 years.
I am wondering if you can provide any information on how I might be able to sell them.
Thanks you for any help you might be able to provide
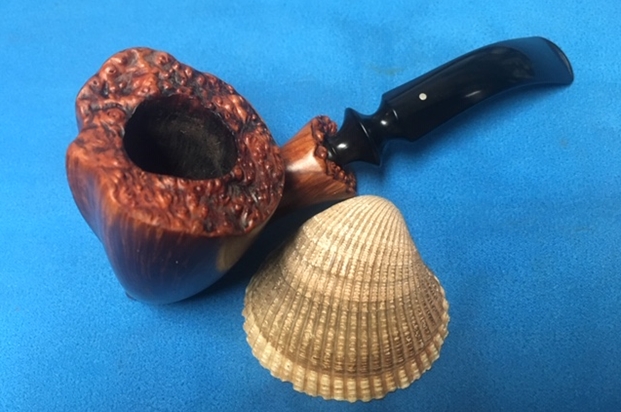
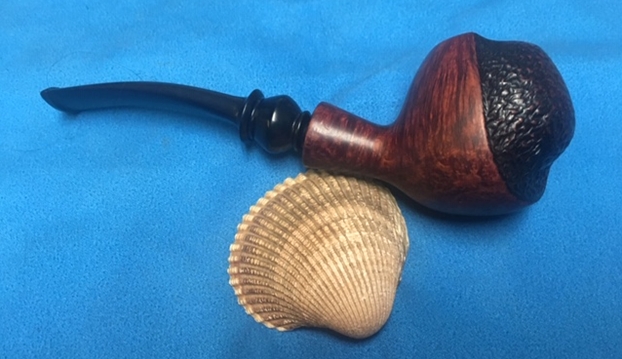
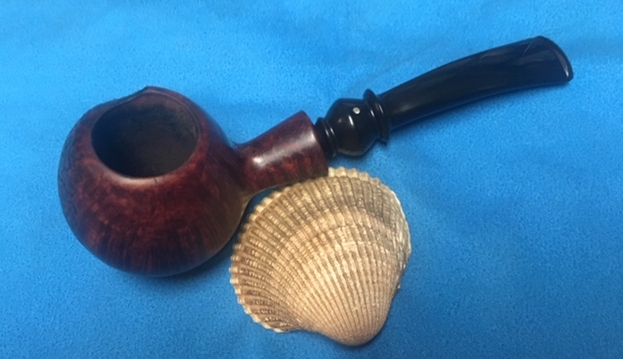
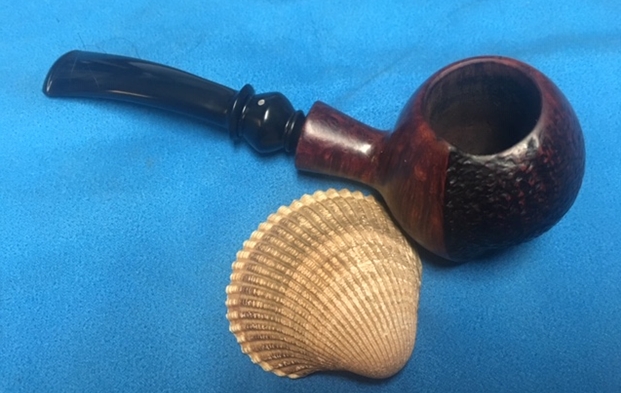
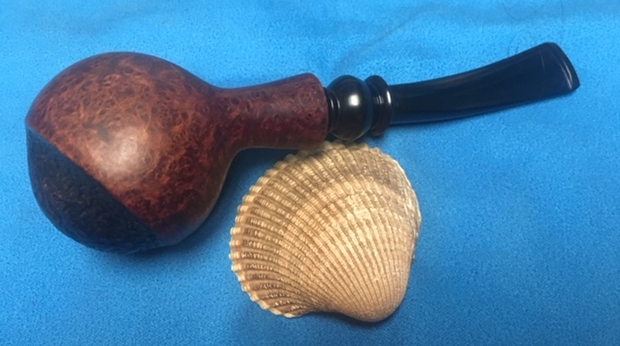
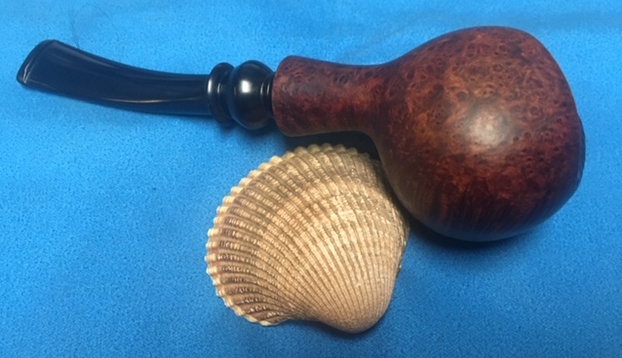
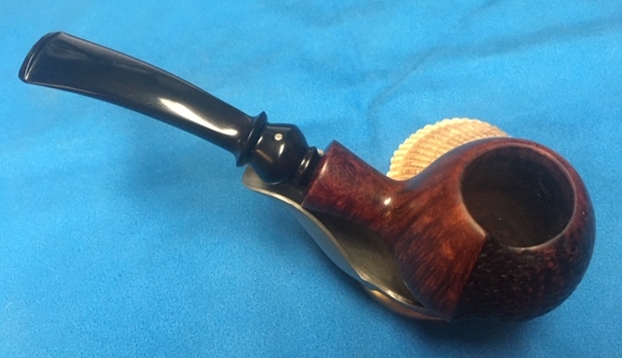
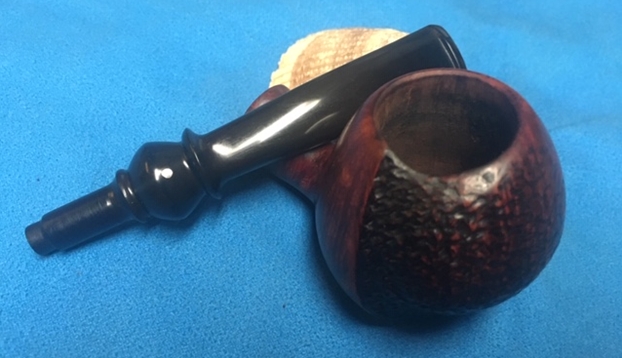
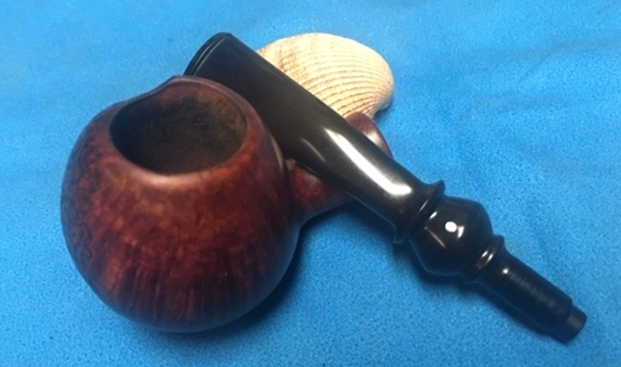
I wrote her back and told I was very interested in the pipes that she had for sale and asked her to send me some photos of the lot. She quickly did just that and we struck a deal. I paid her through an e-transfer and the pipes were on their way to me. They arrived quite quickly and when they did I opened the box and found she had added three more pipes – a Brigham, a Dr. Plumb and a WDC Milano. There was also a wooden cigar box in the package that housed the Calich pipes. They are all lovely looking freehand style shapes – even the two apple shaped pipes had a freehand twist to them. The package also had the BBB Gourd Calabash that I have written about earlier (https://rebornpipes.com/2019/08/27/breathing-new-life-into-a-bbb-gourd-calabash-with-an-amber-stem/). Pat sent me photos of each of the pipes before the deal was struck so I could see the pipes before I made a decision. I kept the photos that she sent me. I have included the two photos of this pipe that she sent me below.
 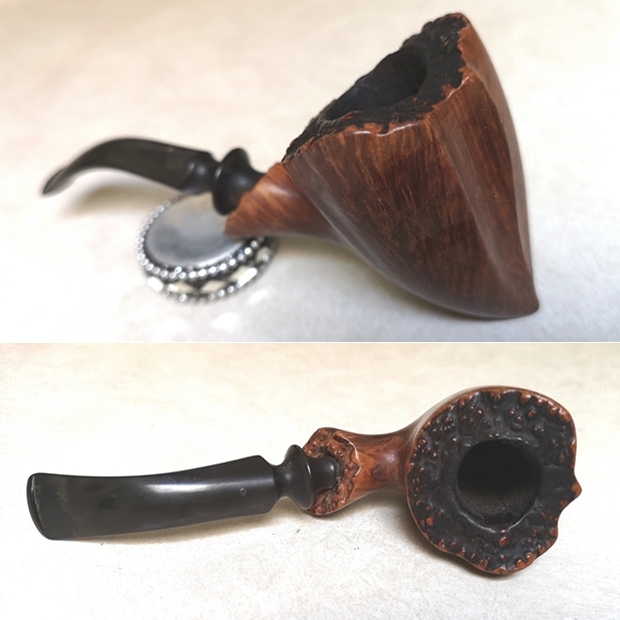 I wrote to Pat and asked her if she would be willing to write short remembrance of her late husband and her Great Grandfather. She wrote that she would be happy to write about them both. In her email she included a story about John Calich that I really enjoyed. I decided it was well worth including in this second blog about these Calich pipes.
My best John story is one you won’t likely be able to print. We were set up beside each other in the late seventies at the Ottawa Tulip Festival in army tents. It was cold and wet. John always had a jar of good tobacco that he shared with past and prospective customers. One morning a guy that looked like he was dirt poor started chatting with John. He pulled out his cheap pipe and stuffed it too full of the expensive tobacco and then asked John for a light. As he walked away John muttered under his breath to me “I’d like to give him a kick in his pants to get him puffing”
I had to laugh because in conversations I had with John we had some great laughs. He was a real character and this was truly a fitting reminder for me as I was preparing to work on the pipes.
I wrote to Pat again and told her I was thinking of restoring her husband, Ken’s pipes next. She is working on a piece for me but sent along a great story and a photo in case I “need some inspiration while you work”. I have also included that photo and the story below. It indeed was an inspiration and gave me an idea on what pipe to work on first. Here are Pat’s words:
 I’d like you know that Ken was an incredibly talented and creative man with a smile and blue eyes that could light up a room. His laugh was pure magic. He could think outside the box and come up with an elegant solution to any problem…
Pat sent me this reflection on her husband Ken’s life. Thanks Pat for taking time to do this. I find that it gives another dimension to the pipes that I restore to know a bit about the previous pipeman. Pat and Ken were artists (Pat still is a Sculptural Weaver) and it was this that connected them to each other and to John Calich. Here are Pat’s words.
Here is the write up for Ken. We meet in University and it was love at first sight. I consider myself blessed to have shared a life together for 37 years.
Ken graduated from Ryerson University with Bachelor of Applied Arts in Design in 1975.
Ken lived his life with joy. Each day was a leap of faith in the creative process. His smile would light up the room and the hearts of the people he loved.
He combined the skilled hands of a master craftsman, with the problem solving mind of an engineer, and the heart and soul of an artist. He used his talents to create unique and innovative wood sculptures. Using precious hardwoods, he incorporated the techniques of multiple lamination and three dimensional contouring to create sculptural pieces that captivate the eye and entice the hand to explore.
His career was highlighted by numerous corporate commissions, awards and public recognition in Canada and abroad.
A quote from Frank Lloyd Wright sums up Ken’s approach to design. “Form follows function – that has been misunderstood. Form and function should be joined as one in a spiritual union.”
A friendship with John Calich developed over years of exhibiting their work at exhibitions. How could a wood sculptor resist some of John’s finest creations…
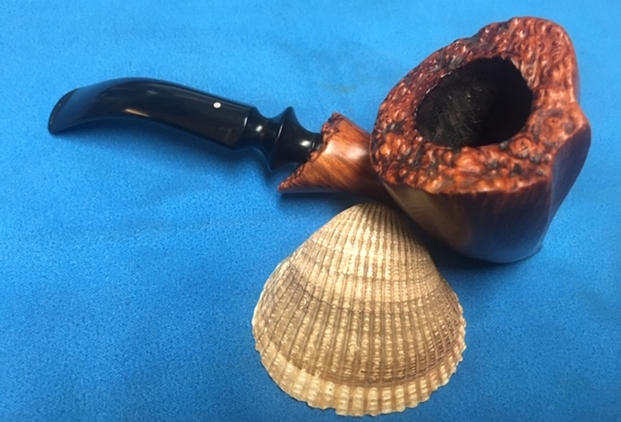
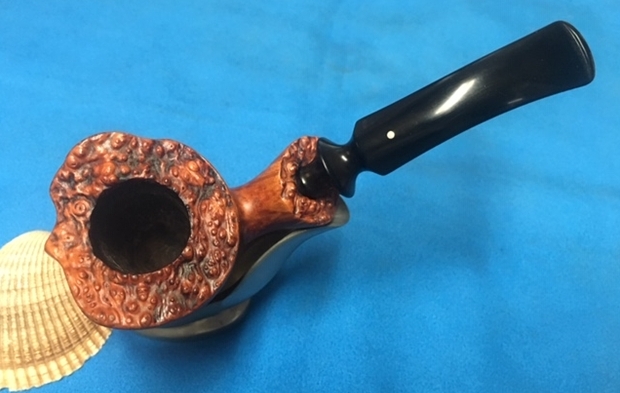
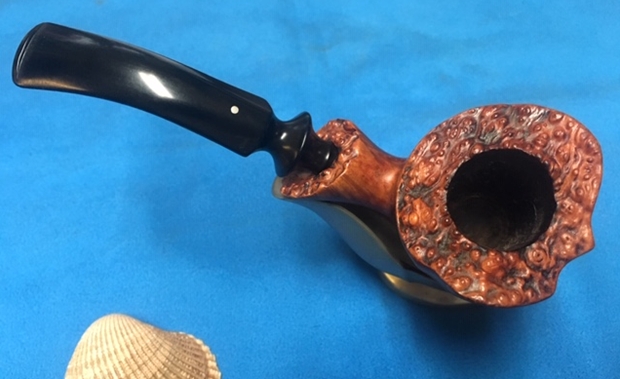
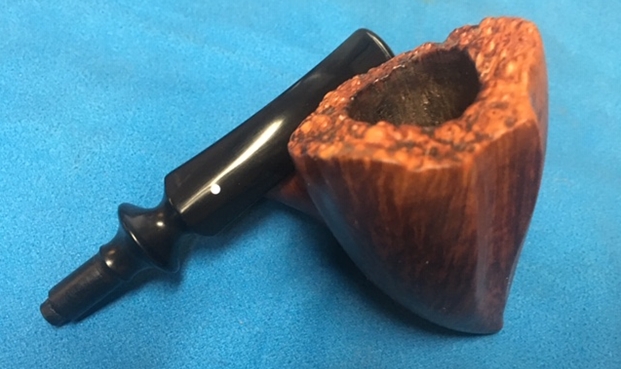
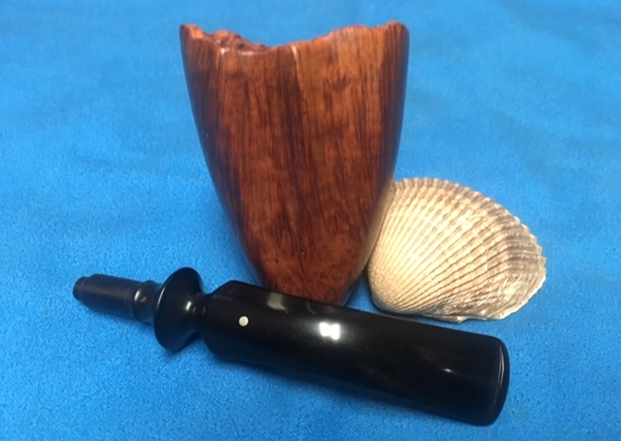
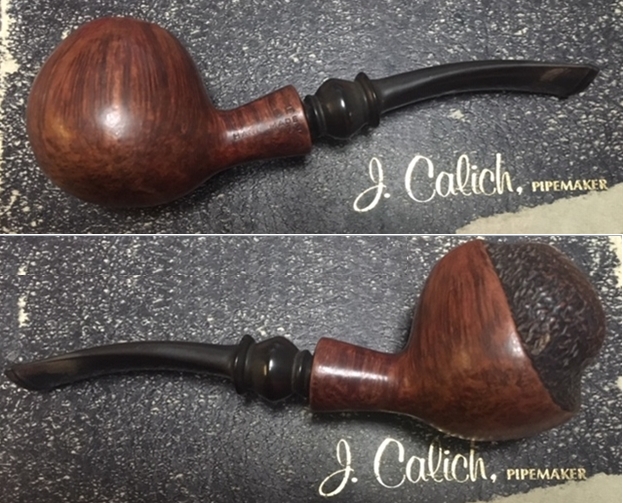
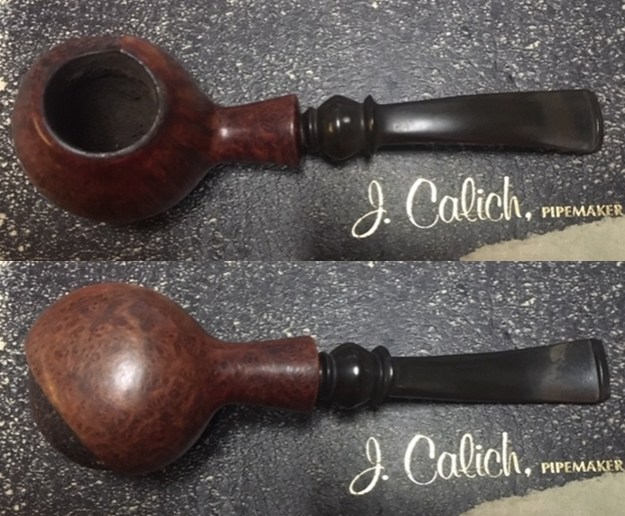
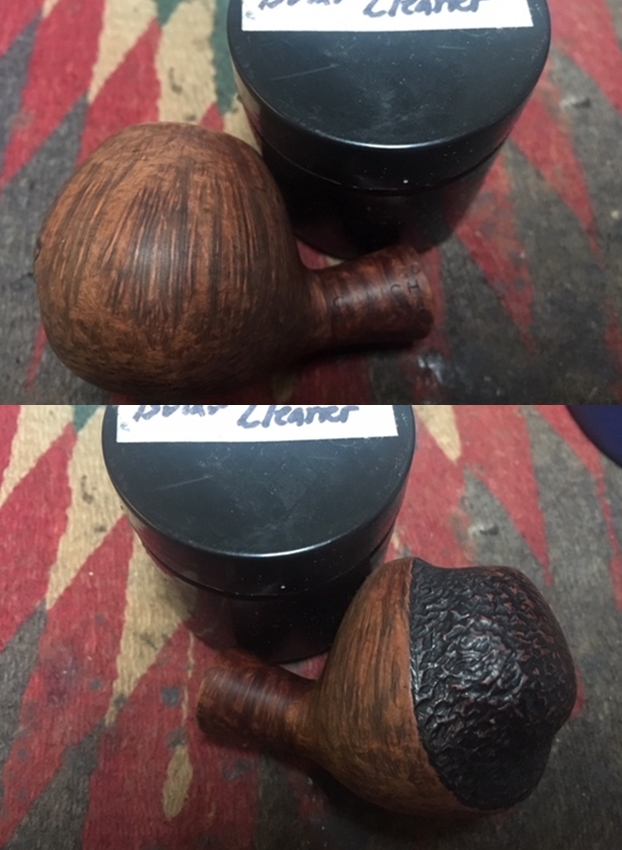
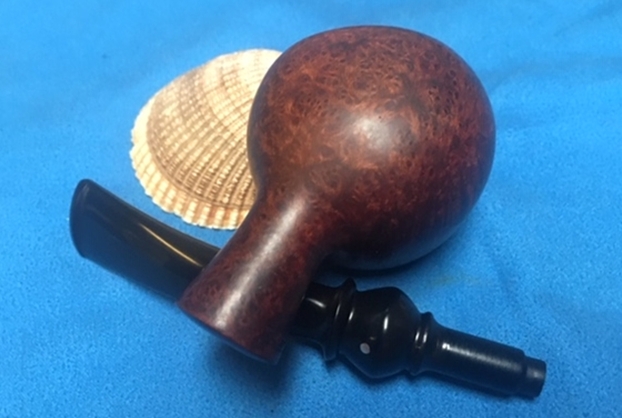
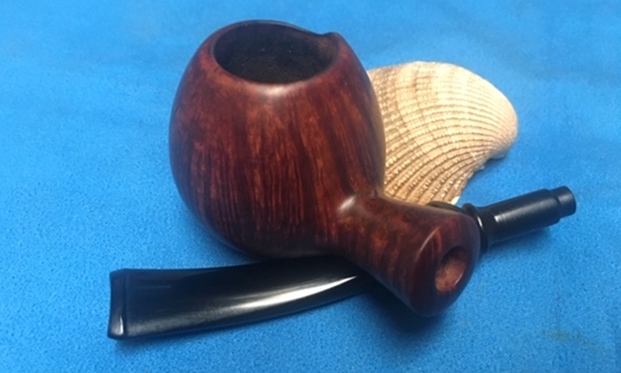
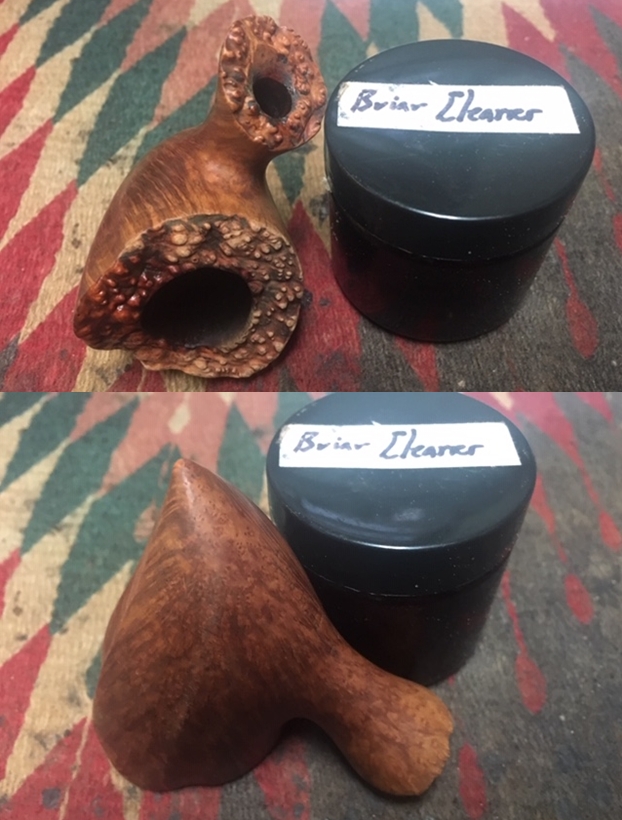
Pat had included the top of a box that Ken had kept from the pipes he had purchase from John. I used the box top as a back drop for the photos of the pipe. This third Calich pipe also had a very interesting shape. It is an a freehand that I would call a Pickaxe with beautiful grain and a dull finish due to sitting unused in storage. The front side of the bowl was sculpted with two grooves that ran from the top to the pointed heel. The rim top and shank end were plateau briar and were rugged. The smooth bowl seemed to have a natural finish almost like oil – I like the way John’s pipes take on a rich patina as they age. The bowl had a cake in it and there was a lava overflow on the plateau rim top filling in the grooves and darkening the natural finish. The rim top and edges of the bowl were in excellent condition. The stamping on the underside of the shank read CALICH over Hand Made. After that stamping there was a superscript 81 stamped (year it was carved) with a subscript 12 which was the grade number. The stem was lightly oxidized as was the single metal dot in the top of the saddle. There was light tooth chatter on both sides of the stem on both sides near the button. The shank and stem were dirty inside. 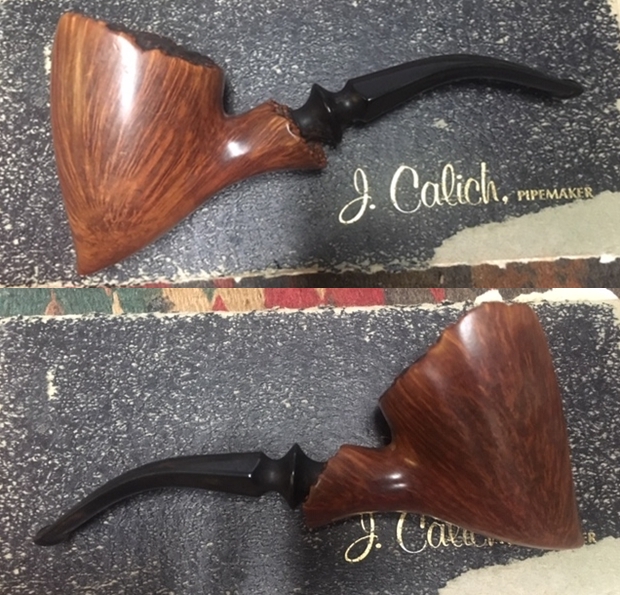
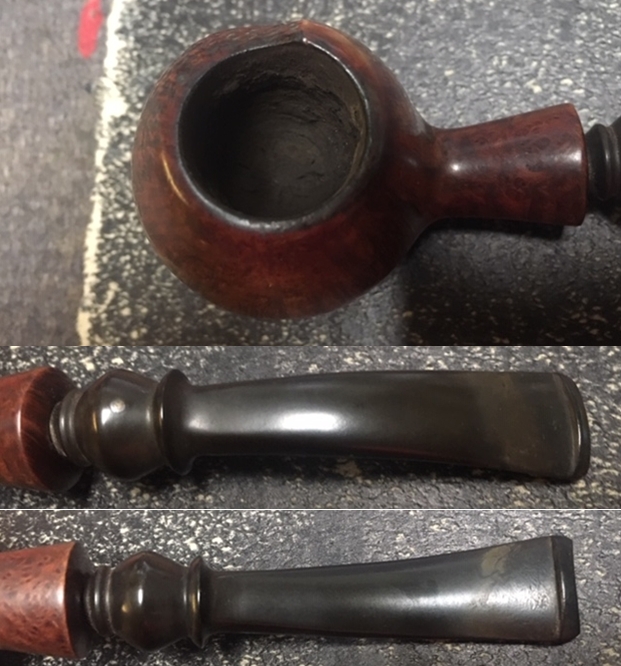
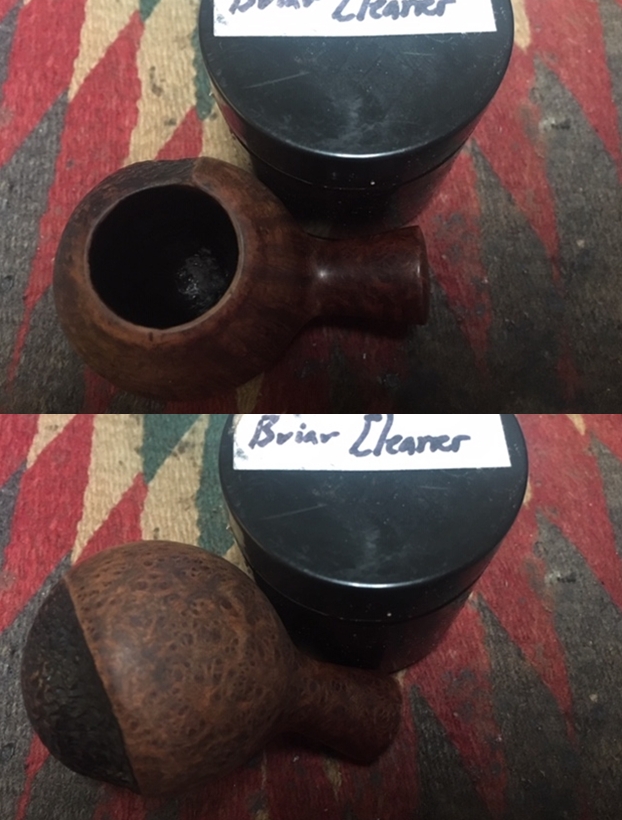
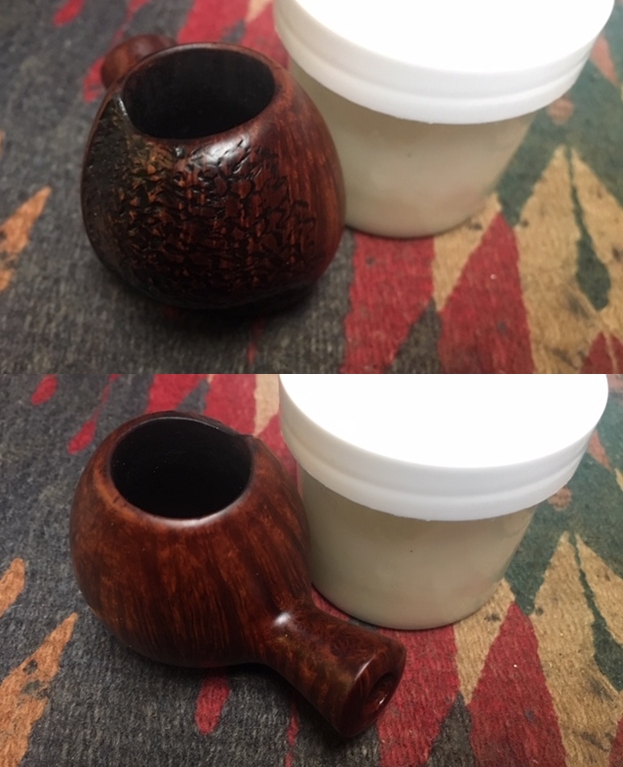
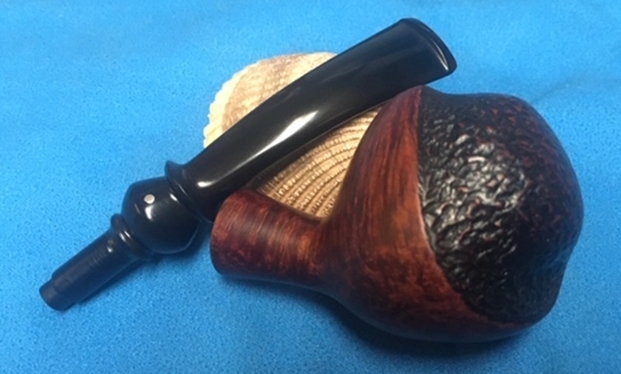
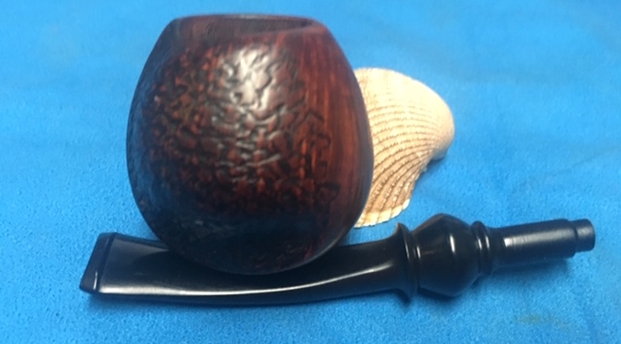
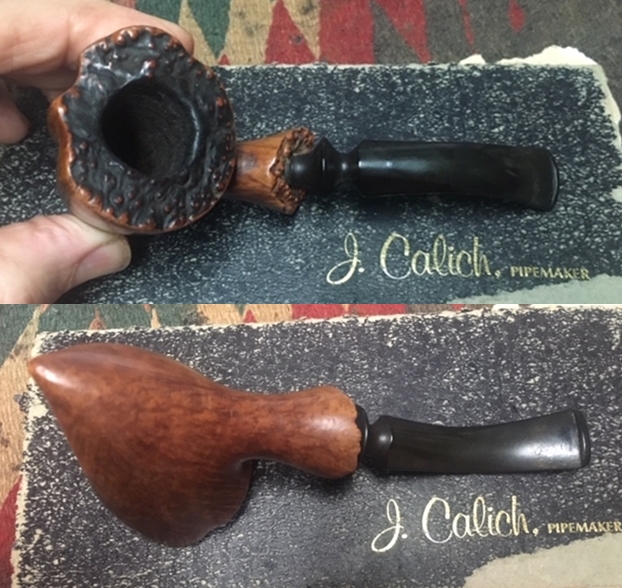 I took a photo of the bowl and rim top to show the cake in the bowl and the lava build up in the plateau surface of the rim top. It is quite thick and fills in the grooves and darkens the natural finish of the plateau top. The cake was thick and hard but hopefully it had protected the rim and edges from damage. Otherwise it looks pretty good. I also took photos of the stem to show the oxidation on both sides and the light tooth chatter on both sides near the button.
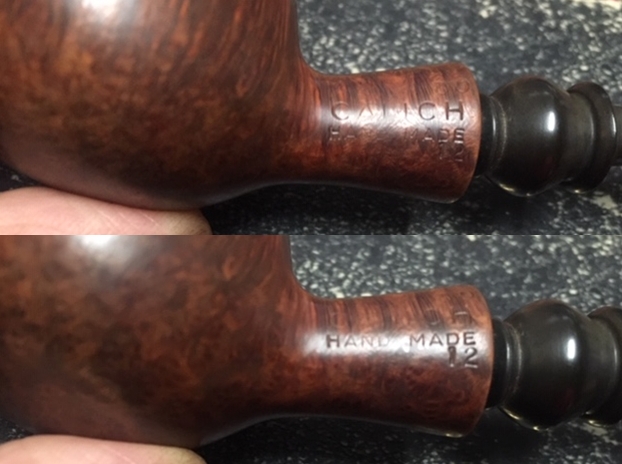
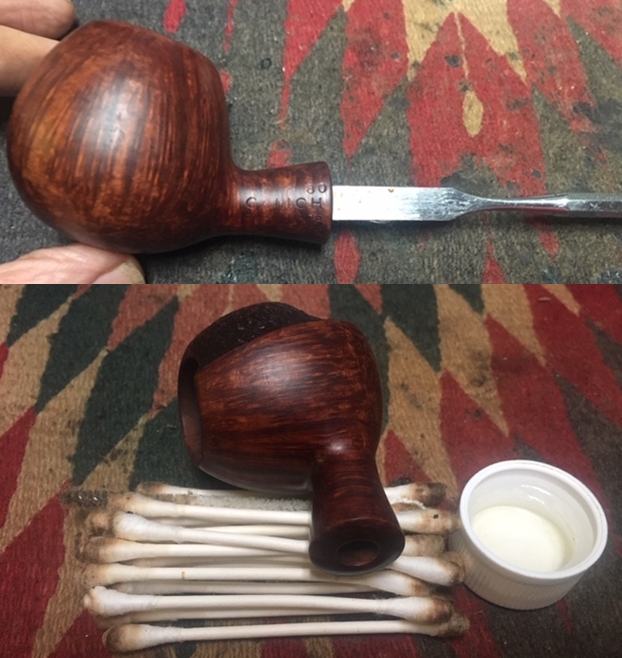
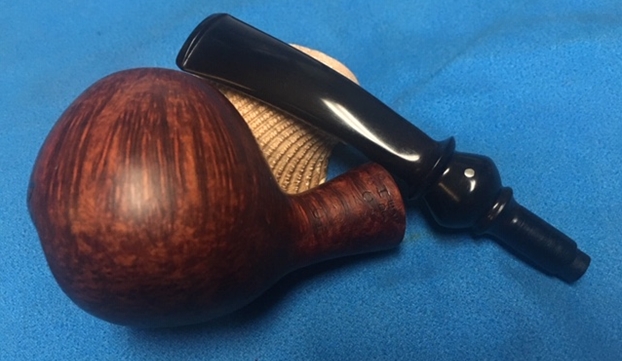
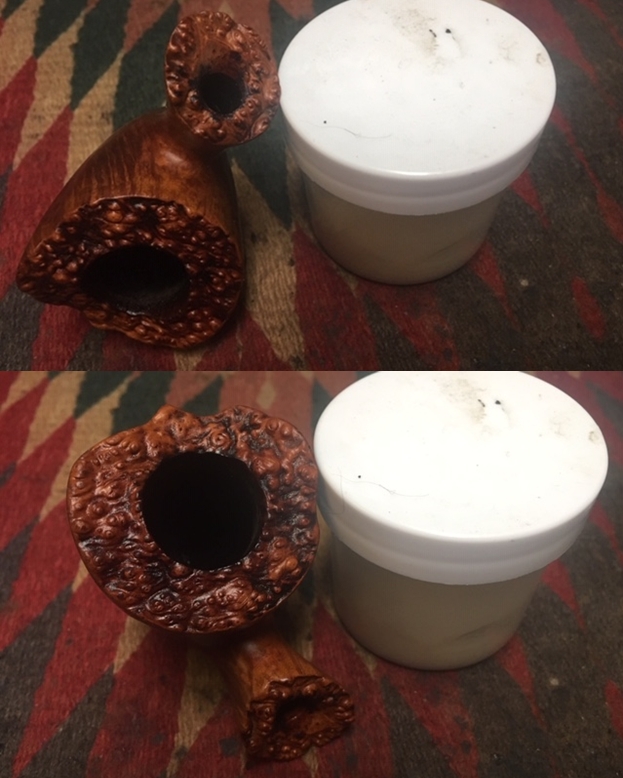
 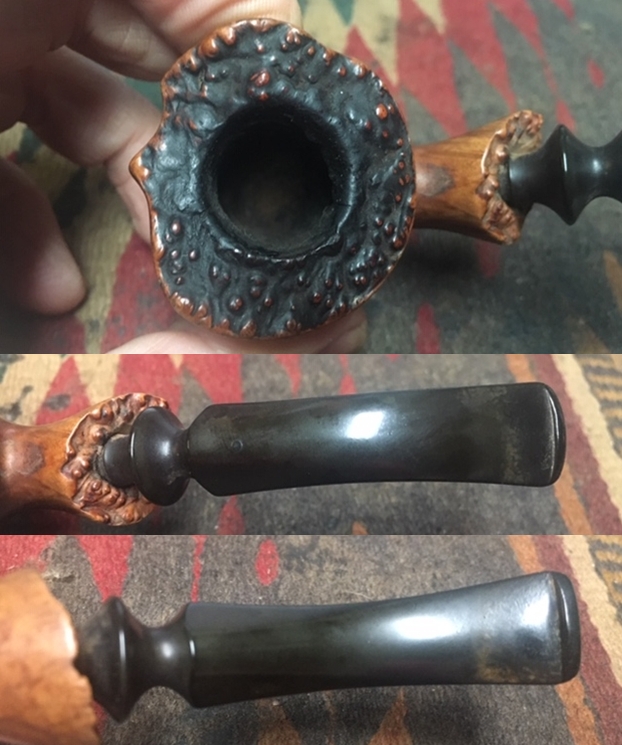 I took a photo of the underside of the shank to show the condition of the stamping. You can see the Calich stamp over Hand Made. Below that is the number 12 with the number 81 above that. The second photo shows the plateau finish on the rim top and shank end. The natural finish of the plateau on the shank end is what clued me to the fact that the rim top probably started that way as well.
  I decided to include a bit about John Calich the pipemaker as I have loved John Calich’s pipes for over 25 years now and have collected a few of them. I have restored quite a few of them and written blogs about them that can be read if you are interested in seeing the kind of pipes that John made. They are unique and beautiful. Each one of them is a work of art to me. I am including the links to the previous blogs that have written about his pipes.
https://rebornpipes.com/2015/03/03/one-of-my-john-calich-pipes-a-calich-ee-billiard/
https://rebornpipes.com/2019/01/23/i-am-the-happy-owner-of-an-unsmoked-pipe-by-the-late-john-calich/
https://rebornpipes.com/2015/03/03/one-of-my-john-calich-pipes-a-calich-ee-billiard/
https://rebornpipes.com/2014/03/21/reflecting-on-my-collection-of-john-calich-pipes/
Each of the blogs reflects on John’s pipes if you want to get a feel for them take a few minutes and read them.
When John was living I spoke with him several times via phone and had him make some new stems for some of his pipes that I picked up off eBay. He was a very kind gentleman and was always helpful when I spoke with him. He was always ready with encouragement and when I needed to know how to do something when I was first learning to repair pipes he was willing to help. He was one of the old guard of Canadian Pipe makers. I miss him. I am including a short piece from Pipedia on John to give details on his work and the grading of his pipes. The second paragraph below is highlighted in blue as it gives some information on the Grade 12 Apple that I am working on with the single silver dot now.

John Calich, courtesy Doug Valitchka
John Calich was one of Canada’s finest carvers. He died in July 2008. John was a full time pipe maker for the last 40 years. Calich pipes were mostly traditional shapes. His signature style is rustication and smooth on the same pipe along with his unique skill to stain a pipe in contrasting colors. He used only top quality Grecian and Calabrian briar. The mouthpieces are hand finished Vulcanite “A”. Each pipe was entirely made by hand. John Calich was featured in the summer 2005 issue of Pipes & Tobacco.
His pipes are graded 3E – 7E. Retail prices range from$ 145.00 to $ 500.00 Each pipe is stamped “CALICH” 3-8E, his earlier pipes were graded from 3-14, and a single, tiny silver dot is applied to the top of the stem (https://pipedia.org/wiki/Calich).
I summarize the dating information from those blogs now: From my research and conversations I learned that John’s his later pipes were graded 3E – 8E. The retail prices for them ranged from $145.00 to $500.00. Each pipe was stamped “CALICH” and given an E grade. His earlier pipes were graded from 3-14 and had a single, tiny silver dot applied to the top of the stem. More information can be found at the Pipedia article above. All of this information told me as expected that the pipe I had was an earlier one.
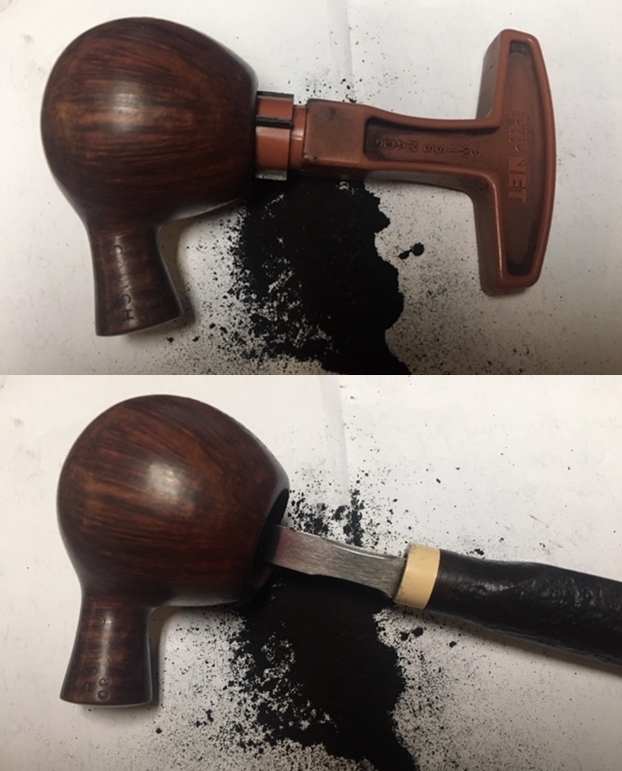
Armed with Pat’s stories of John and her husband Ken and the information about John’s grading system it was time to work on the pipe. I reamed the bowl with a PipNet Pipe reamer using the third cutting head. I took the cake back to bare briar so that I could check out the inside walls. I used a Savinelli Fitsall Pipe Knife to scrape back the remaining cake. I finished my cleanup of the walls by sanding it with 220 grit sandpaper wrapped around a piece of dowel. 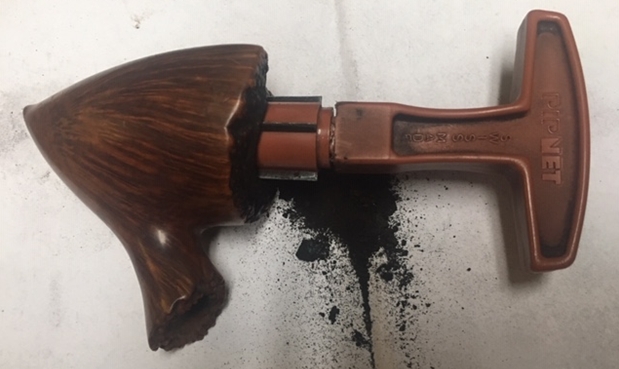
 I decided to address the heavy lava overflow on the rim top with a brass bristle wire brush to start with. I would follow that up with scrubbing it under running water with the brush afterward.
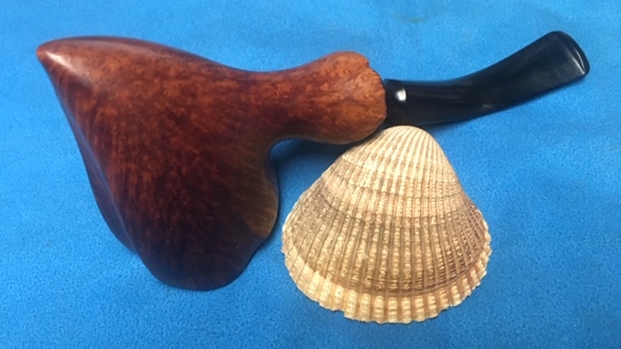
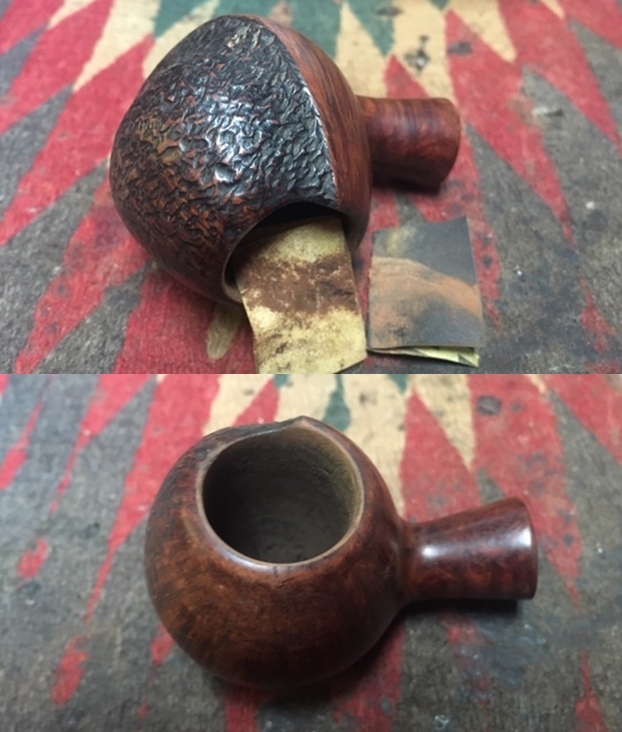
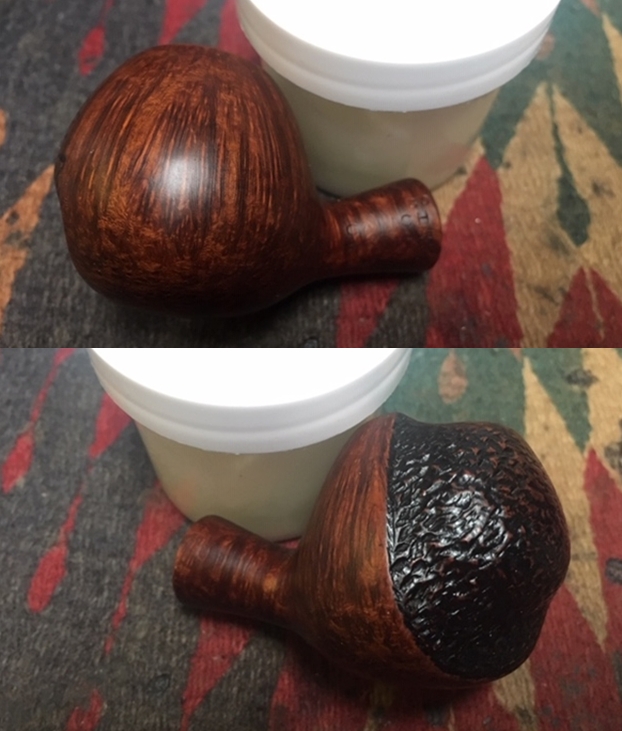
 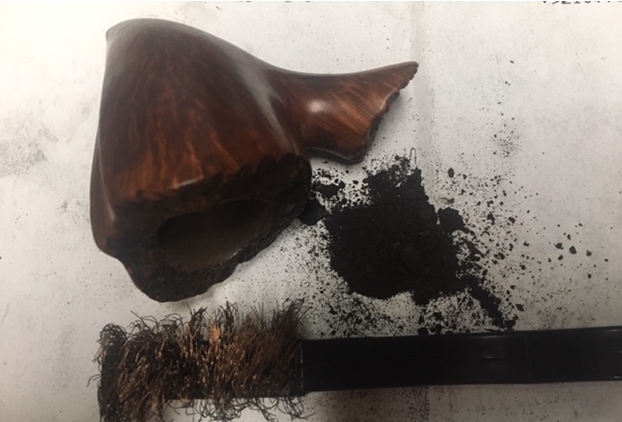 I scrubbed the briar with Before & After Briar Cleaner and rinsed it off with warm running water. I scrubbed the plateau rim top with the wire brush and warm running water at the same time. I dried the bowl off with a soft microfiber cloth and gave it a light buffing. The photos show the cleaned briar and the grain is really beginning to pop. John really followed the grain on the shaping of this pipe.
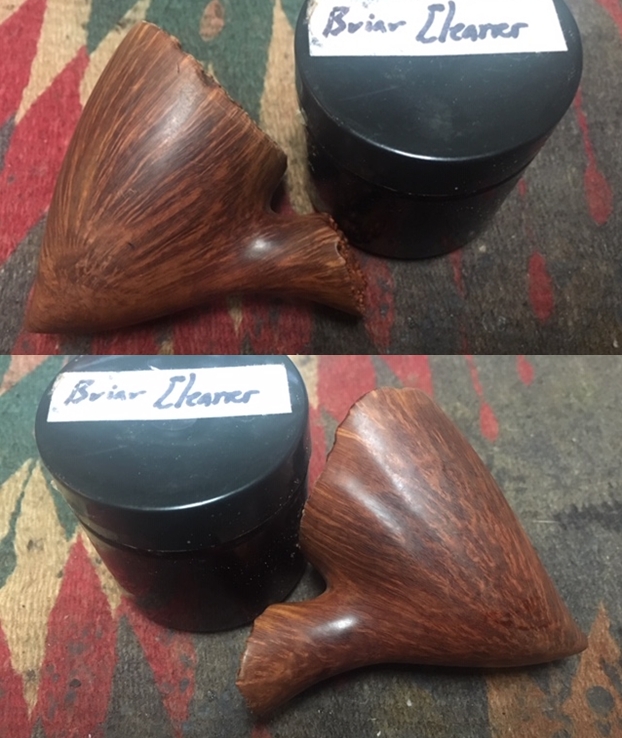
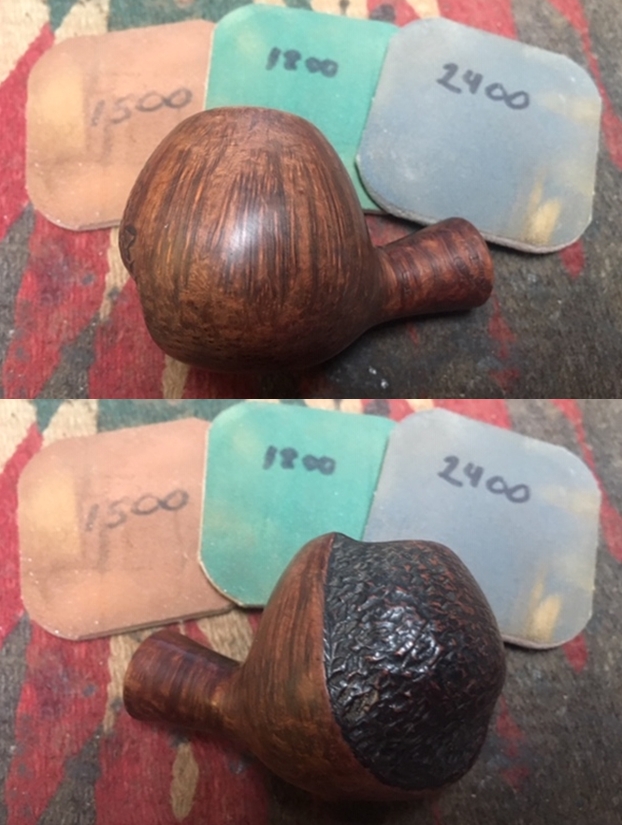
 I rubbed the bowl down with Before & After Restoration Balm. I worked it into the surface of the briar with my fingertips to clean, enliven and protect it. I let the balm sit for a little while and then buffed with a cotton cloth to raise the shine. Mark Hoover’s Balm is a product that I have come to appreciate and one I use on every pipe I have been working on.
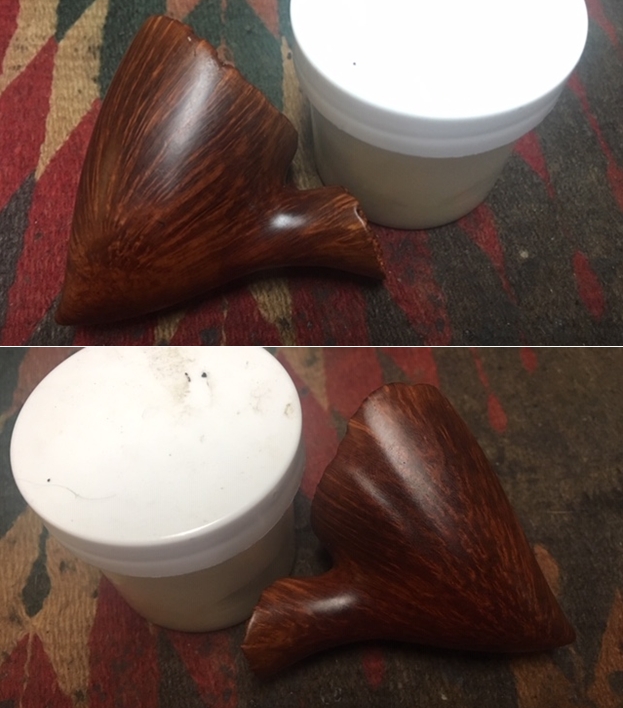

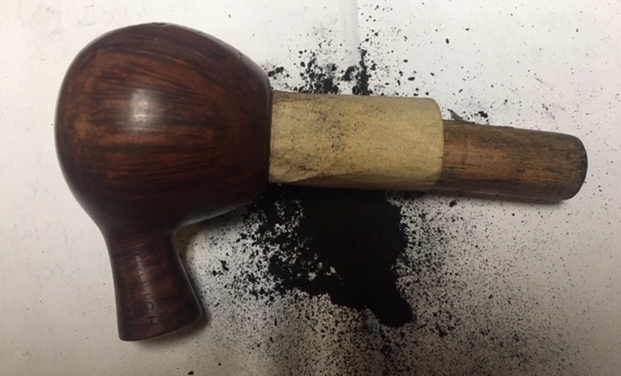
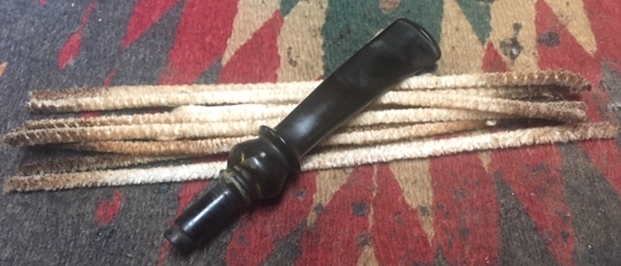
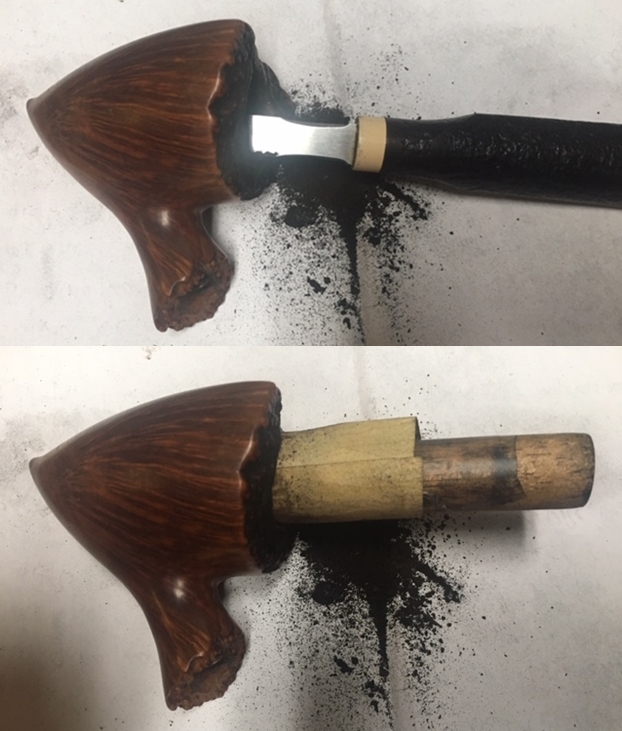
 With the externals cleaned I worked on the internals. I scraped the inside of the mortise with a dental spatula to remove the hardened tars and oils that lined the walls of the shank. Once I had that done I cleaned out the airway to the bowl, the mortise and the airway in the stem with pipe cleaners, cotton swabs and alcohol. When I finished the pipe smelled very clean.
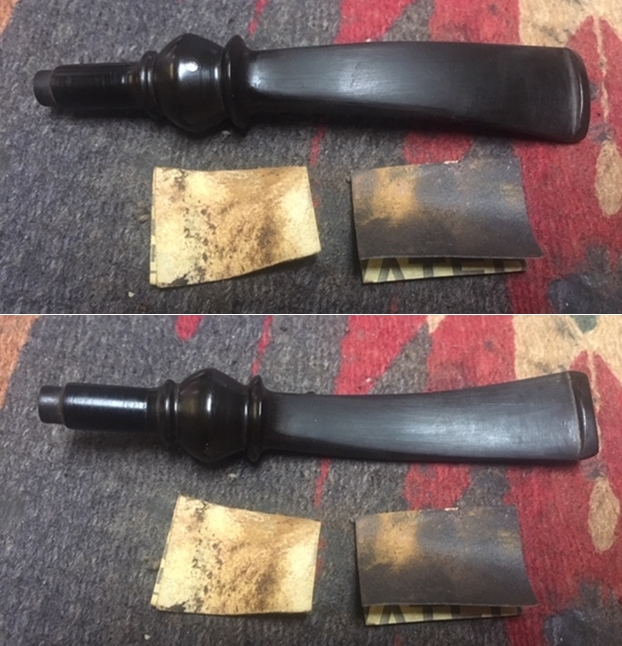
 I set the bowl aside and turned my attention to the stem. I sanded the stem with 220 grit sandpaper to break up the oxidation. I started the polishing with 400 grit wet dry sandpaper to remove the scratching. It is starting to look good.
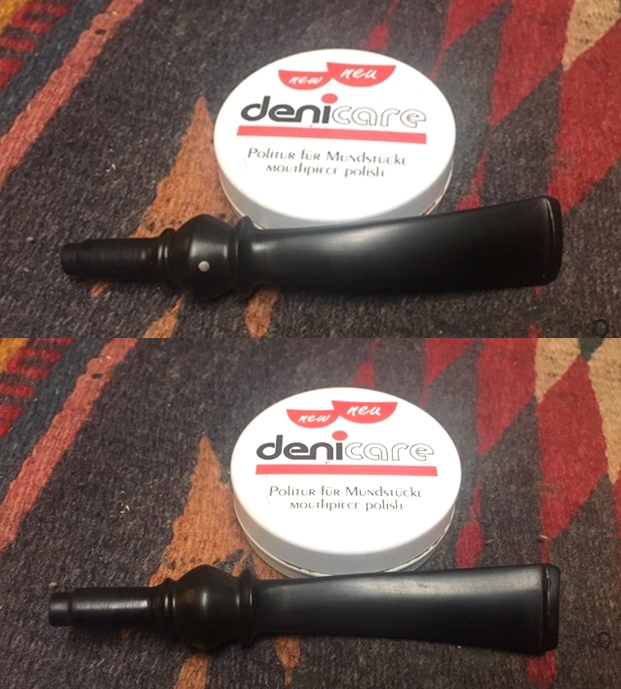
 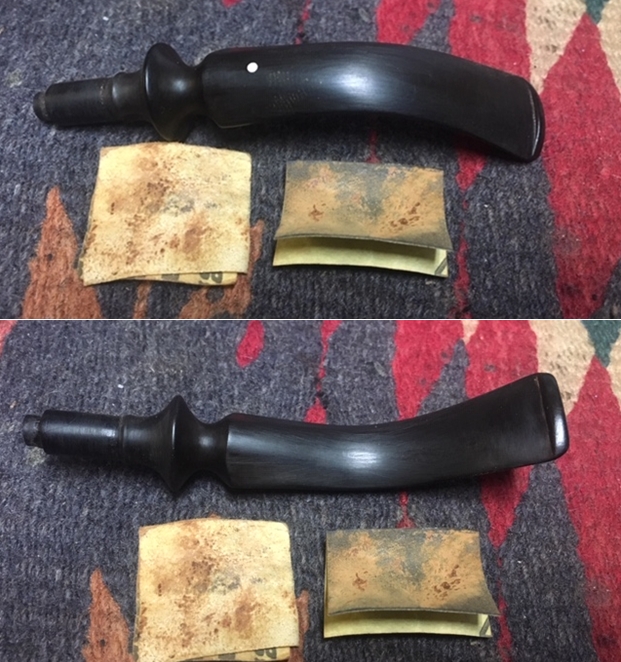 I have one more tin of Denicare Mouthpiece Polish left from a few that I have picked up over the years. It is a coarse red pasted that serves to help remove oxidation. I polished the stem with that to further smooth out the surface of the vulcanite (and to be honest – to use it up).
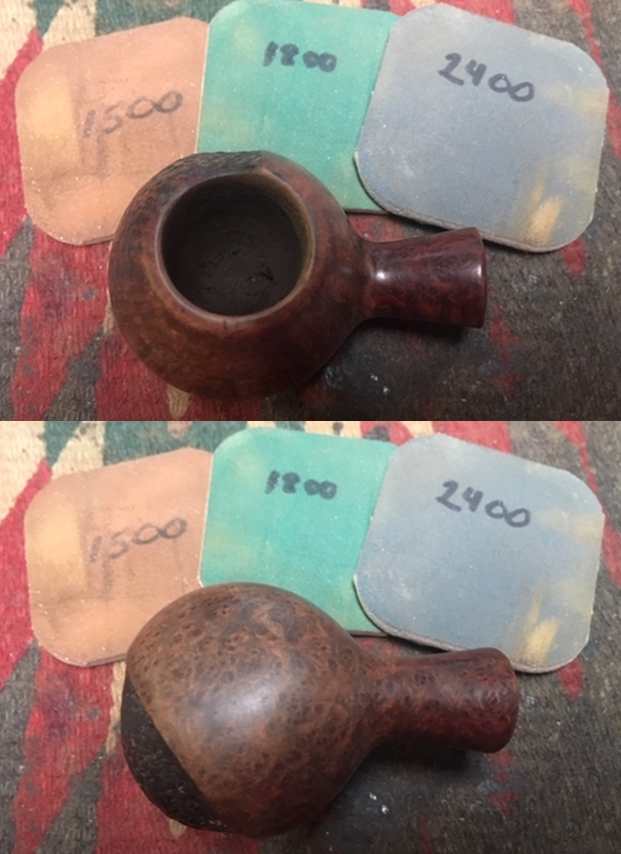
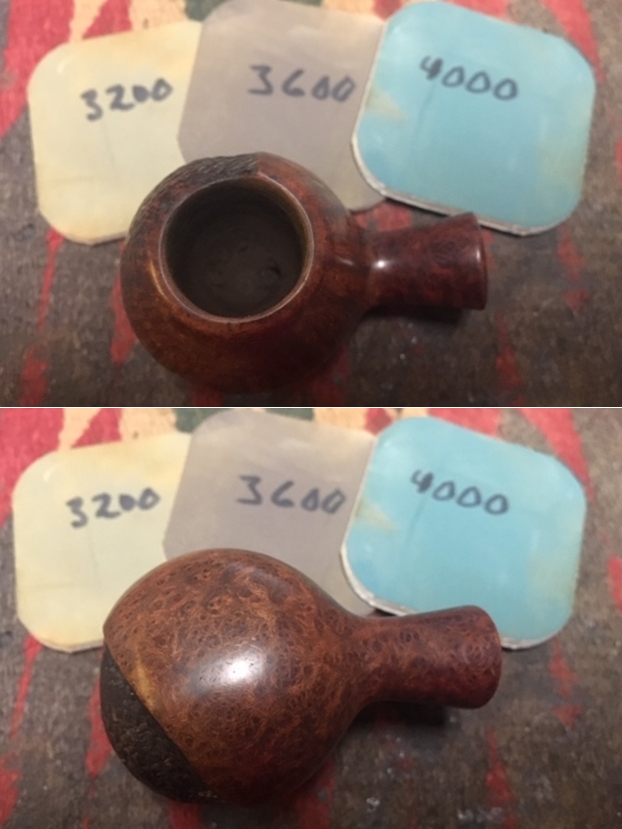
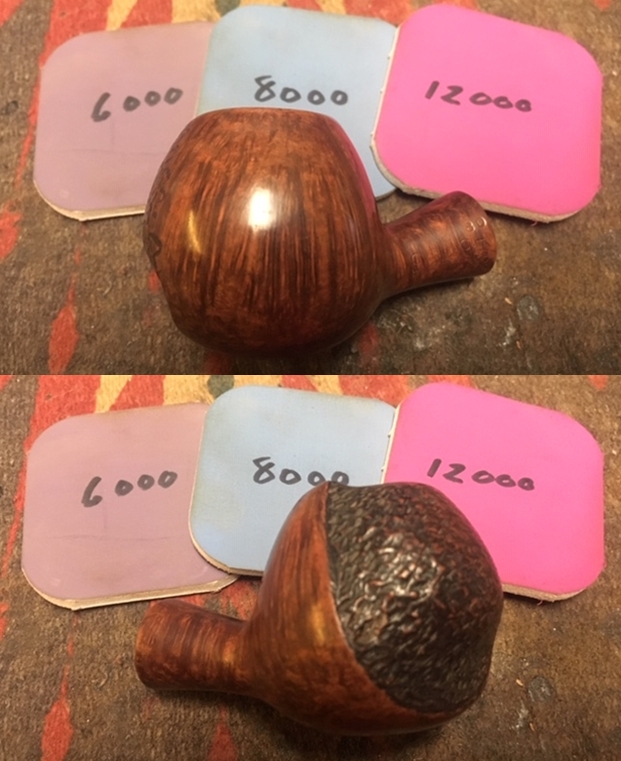
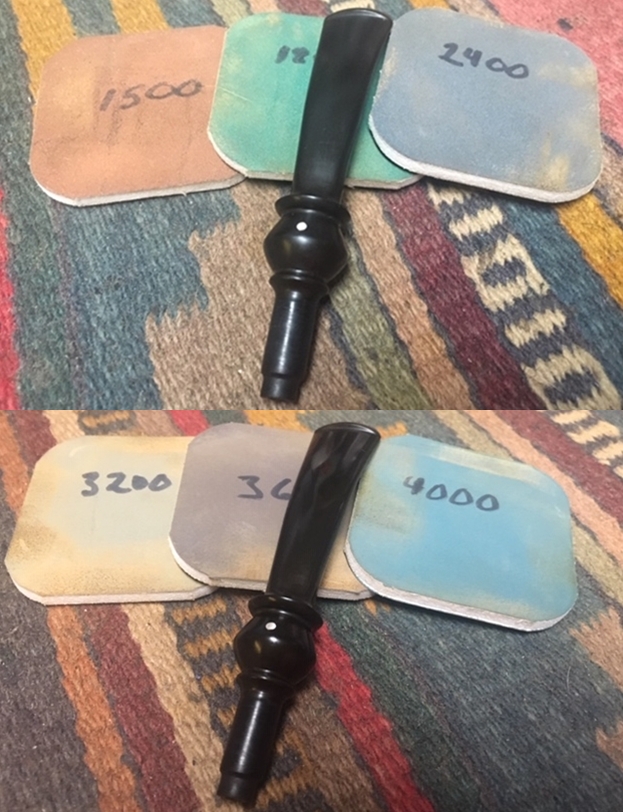
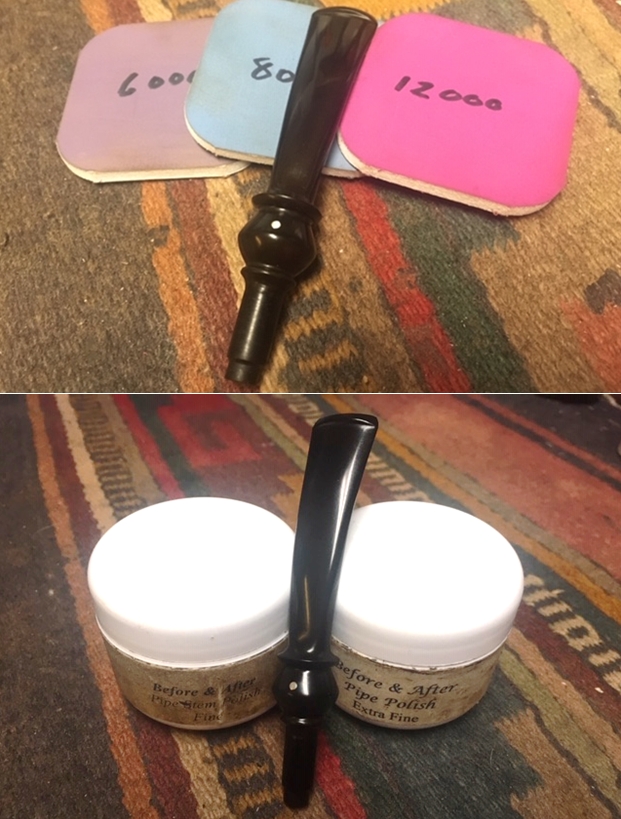
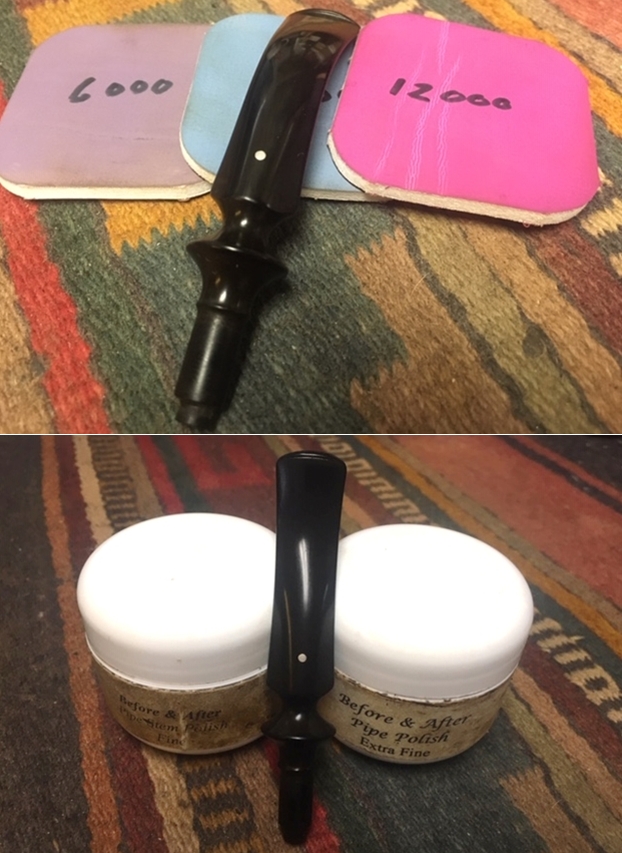
 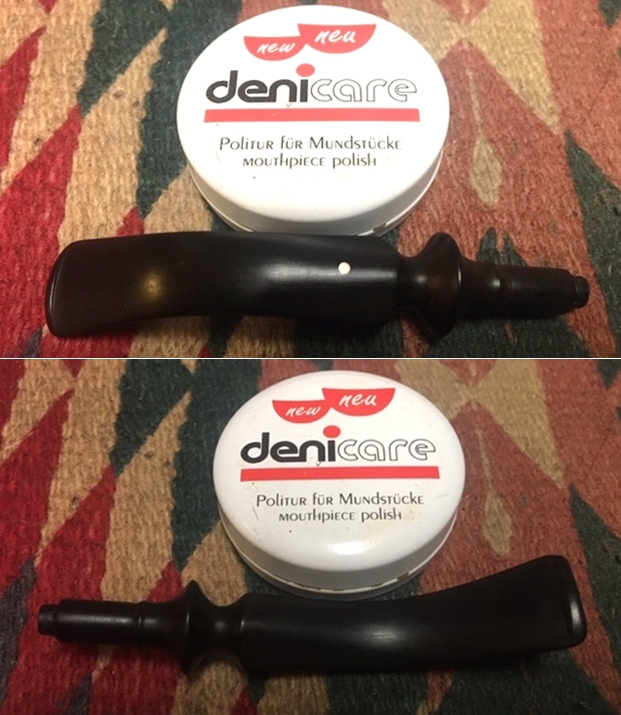 I polished the stem with micromesh sanding pads – wet sanding with 1500-12000 grit pads. I wiped the stem down after each sanding pad with Obsidian Oil. I polished it with Before & After Pipe Stem Polish – both Fine and Extra Fine. Once I had finished the polishing I gave it final coat of oil and set it aside to dry.
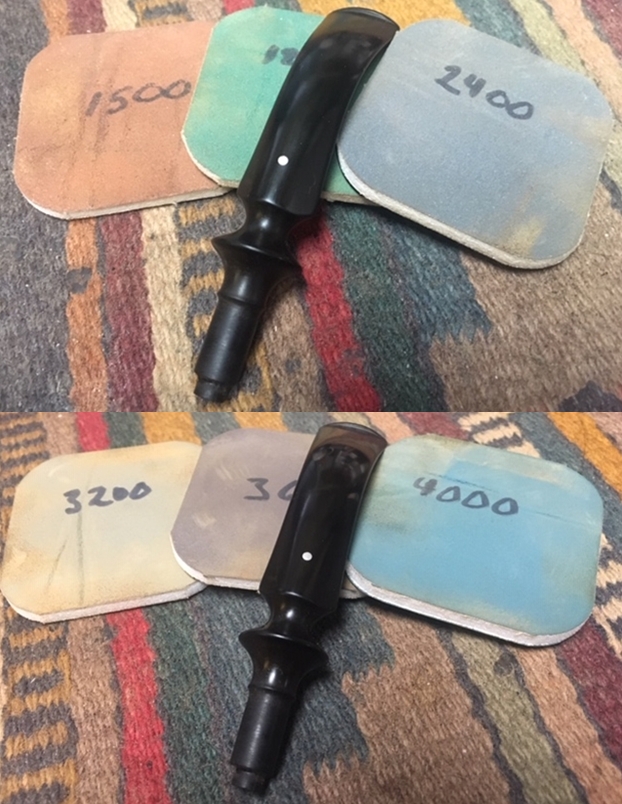
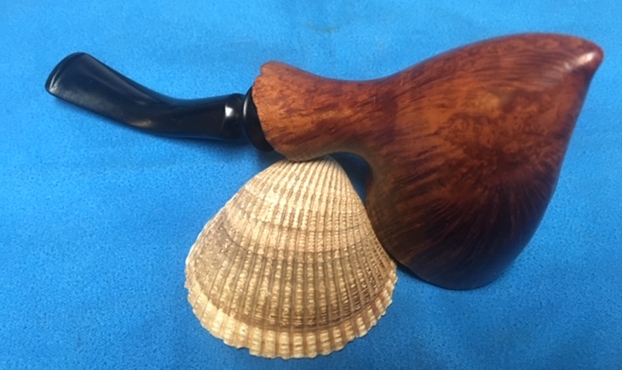
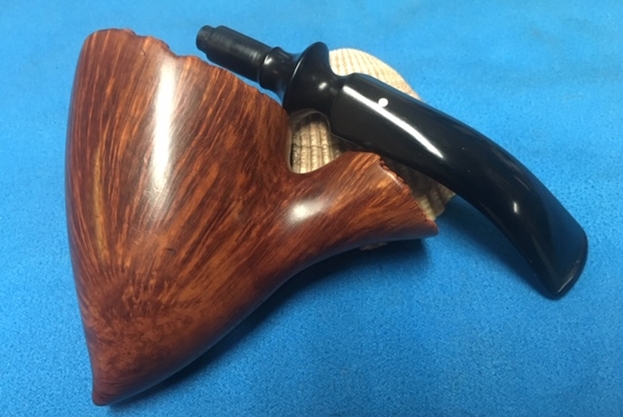
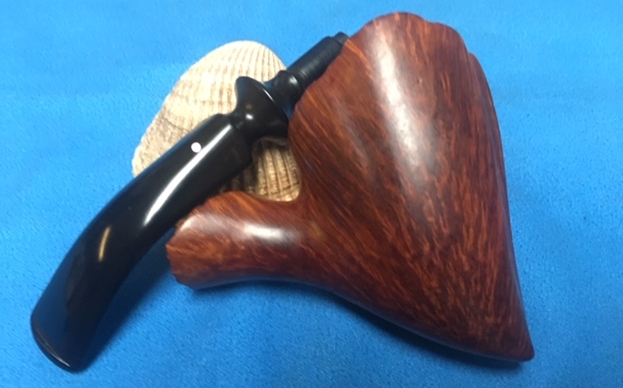
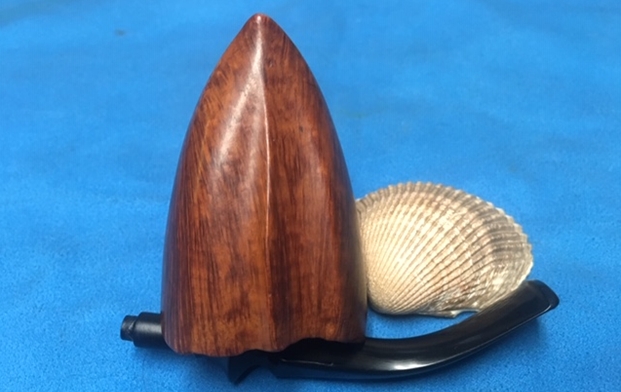
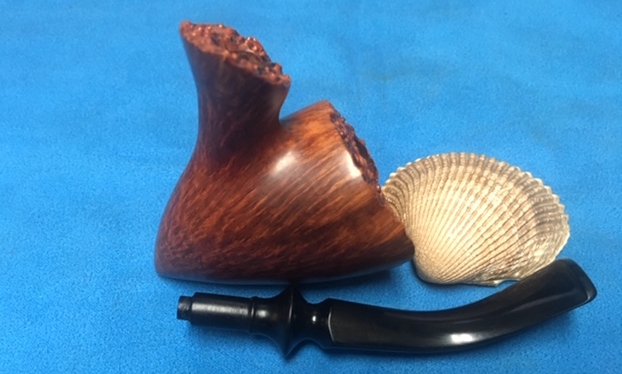
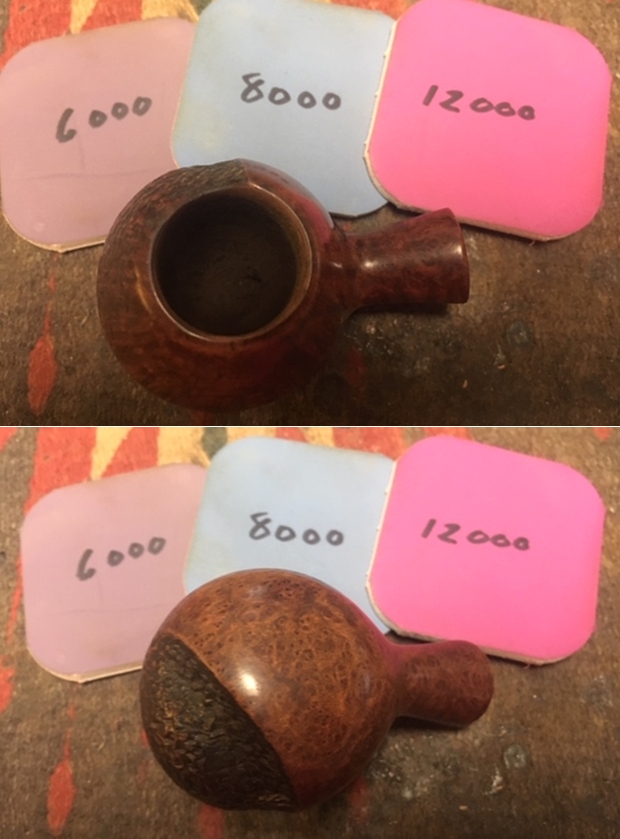
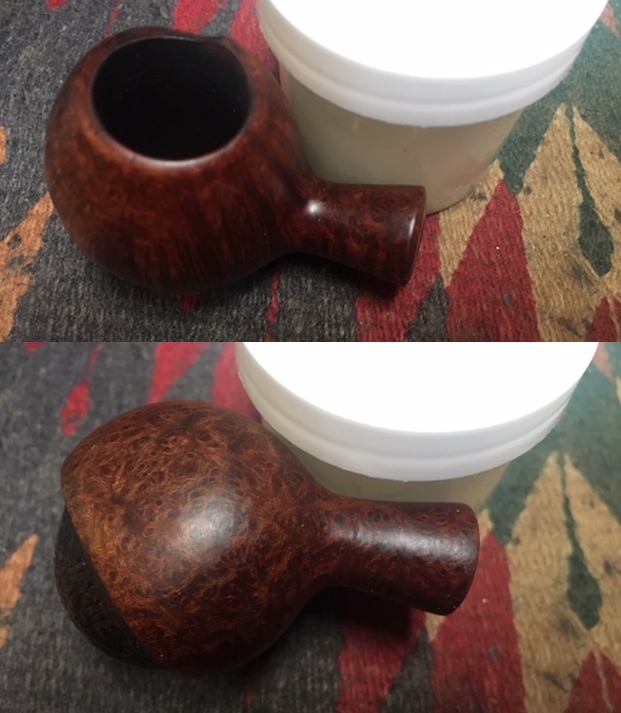
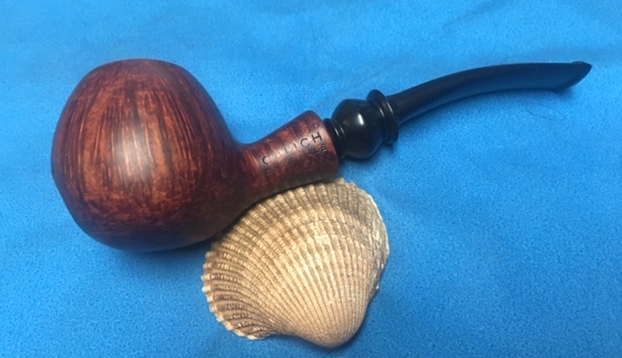
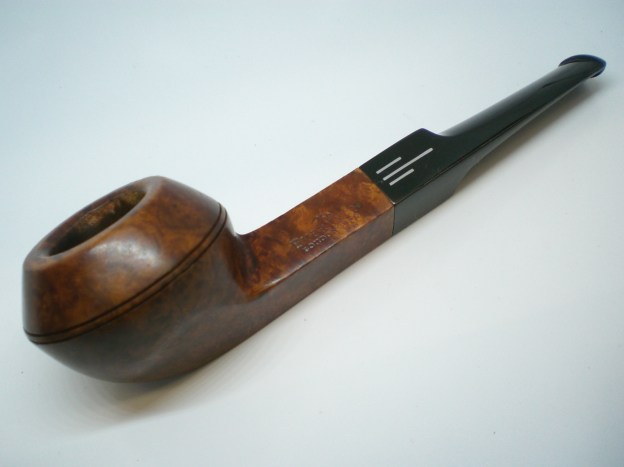
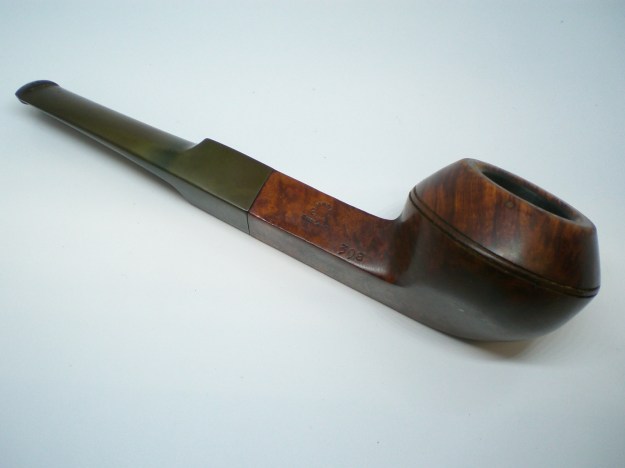
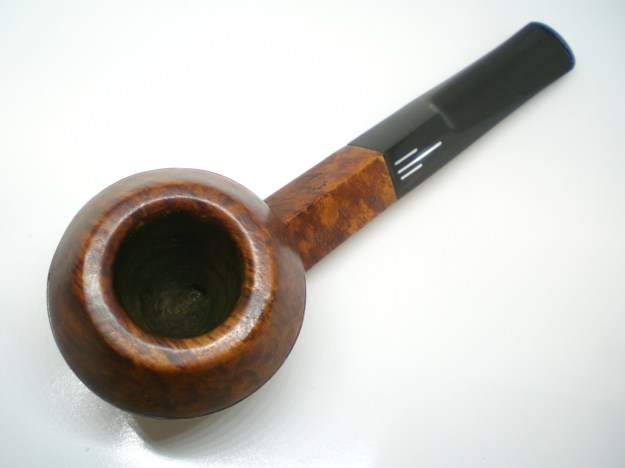
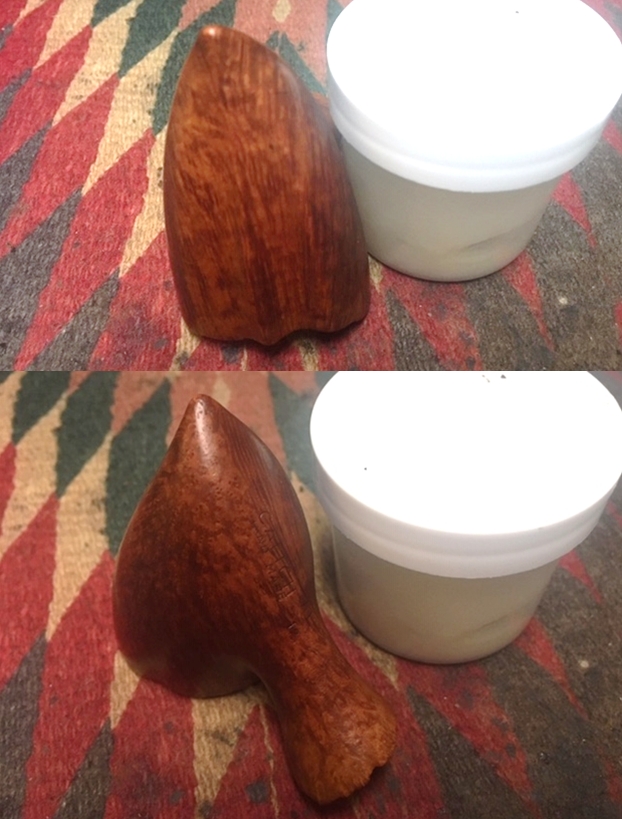
 This is the third Calich from Ken’s Estate that I am working on. It is another beautifully grained Pickaxe shaped Hand Made freehand. It has the kind of beauty I have come to expect from John’s pipes with a sculpted groove on the front and the plateau on the rim top and shank end. I am excited to be on the homestretch with another one of Ken’s pipes. This is the part I look forward to when it all comes back together, polished and waxed. I put the bowl and stem back together. I polished the bowl and stem with Blue Diamond to polish out the scratches in the briar and the vulcanite. I gave the bowl and the stem multiple coats of carnauba wax. I buffed the pipe with a clean buffing pad to raise the shine. I hand buffed it with a microfiber cloth to deepen the shine. The pipe polished up pretty nicely. The straight and flame grain around the sides of the bowl and shank is quite stunning. There is plateau on the rim top and shank end. The polished smooth finish look really good with the black vulcanite. This Calich Hand Made was fun to bring back to life because of the story that Pat shared with us. The connection between Ken and Pat and John Calich adds colour. The natural finish and the twin sculpted grooves on the front makes the pipe look attractive. It is another comfortable pipe to hold in the hand. The finished pipe is shown in the photos below. The dimensions of the pipe are Length: 5 ½ inches, Height: 2 1/2 inches, Outside diameter of the bowl: 1 ¾ inch, Chamber diameter: ¾ of an inch. Thanks for reading this blog and my reflections on the pipe while I worked on it. This is an interesting estate to bring back to life.