Blog by Steve Laug
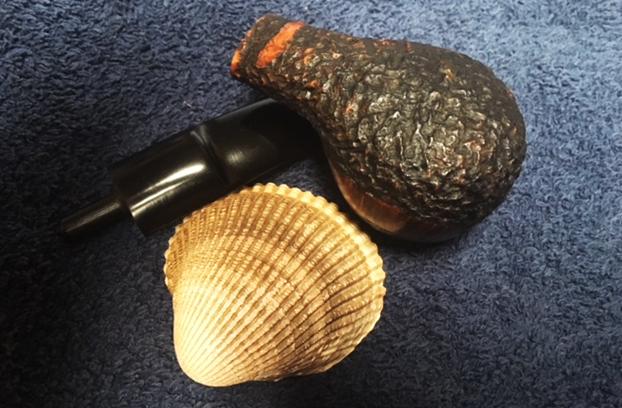
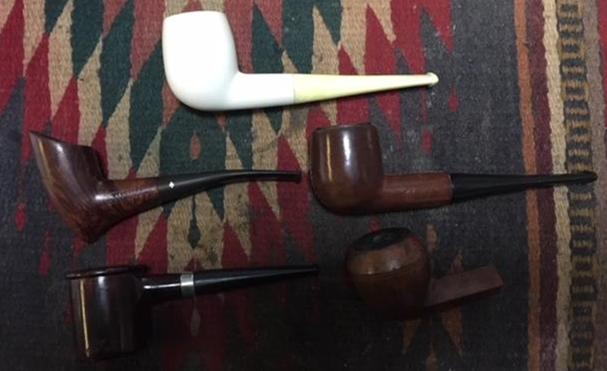
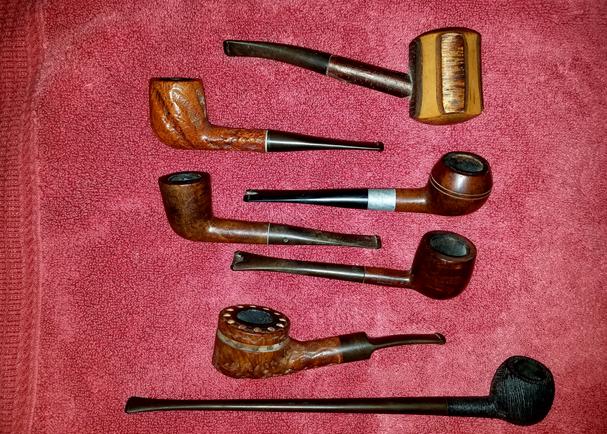
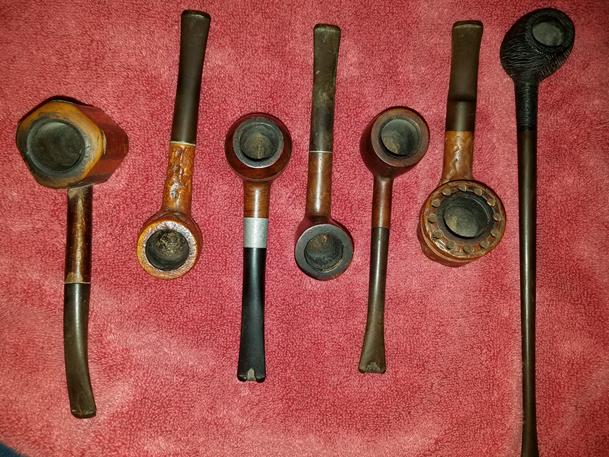
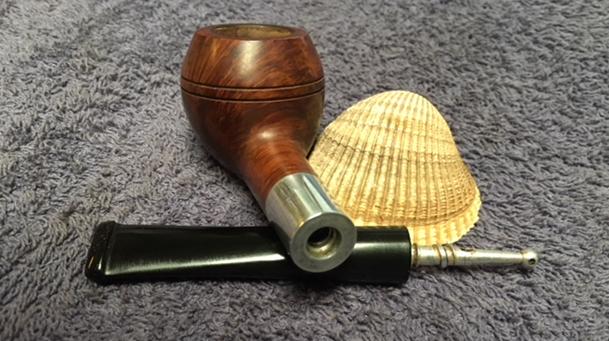
After my brother Jeff found an assortment of House of Robertson pipes at an auction in Wilder, Idaho which is an area in the greater Boise, Idaho area. He kept an eye out for more of the brand on his weekly pipe hunts. He found several others that are quite unique in an antique mall near where he lives. There were two large long shanked pipes – one round shanked and one square shanked. The third of the batch that he finds is a nice little classic apple shape. It looks tiny with the size of the other two. The two larger pipes are a combination of smooth and rusticated. They both have smooth panels on the sides or front of the pipes. Both of the large ones are banded with a sterling silver band. It seems to me that the bands on both the square shank and the round shank are decorative rather than a repair for a cracked shank.
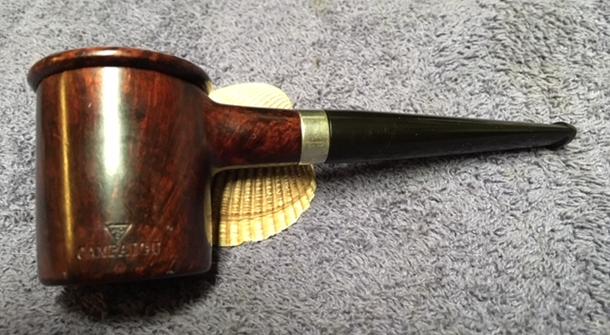
 I finished the restoration of the square shanked sitter, the bottom pipe in the above photos and did the blog write up on it (https://rebornpipes.com/2018/02/28/restoring-a-rusticated-house-of-robertson-war-club/). It is soon on its way to a fellow who was a regular of the House of Robertson Pipe Shop in Boise, Idaho. He is excited to be adding it to his collection. Each of these pipes has the name House of Robertson roughly hand-etched on the side or underside of the shank with an engraving tool. I am also including the information that I found when I received my first of the House of Robertson Pipes. “House of Robertson” was in business for many years, but alas, closed their doors in 1999. They were located in Boise, Idaho. They are noted for making rather large and interesting pipes. Thayne Robertson was a Master Mason, AF & AM, and started the shop about 1947 and his son Jon started working there in 1970 when he finished college, along with Thayne’s daughter. Thayne and his son started making the big pipes at that time, and made them together until 1987 when Thayne passed away. Jon kept the store and his sister moved on to other things. The House of Robertson appears to have closed around 1999. https://pipedia.org/wiki/Robertson
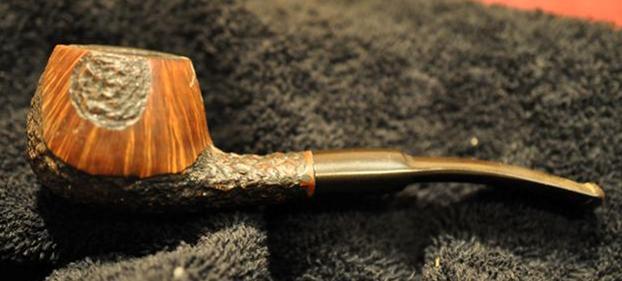
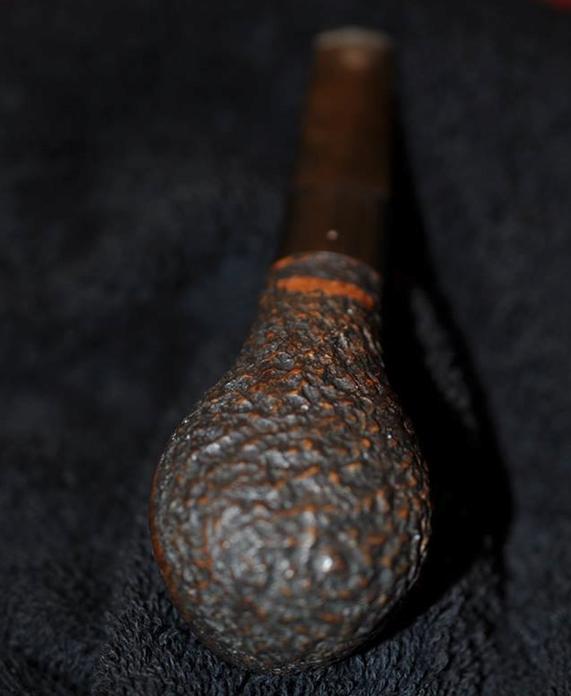
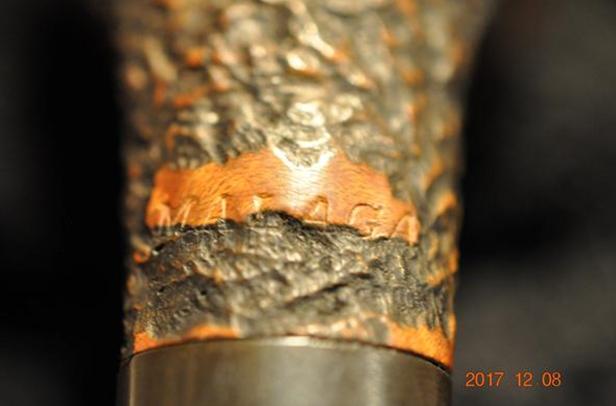
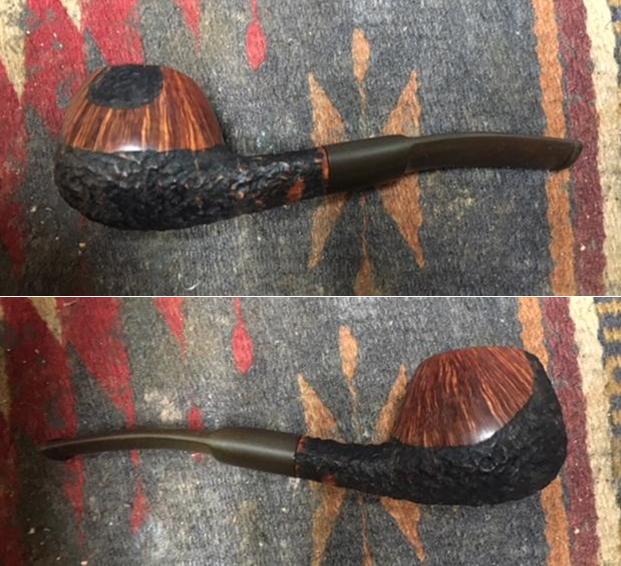
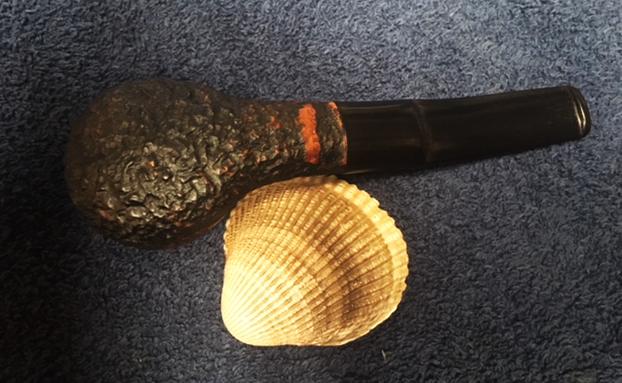
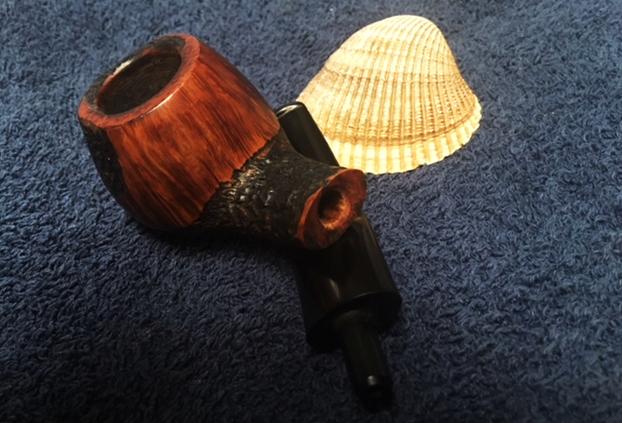
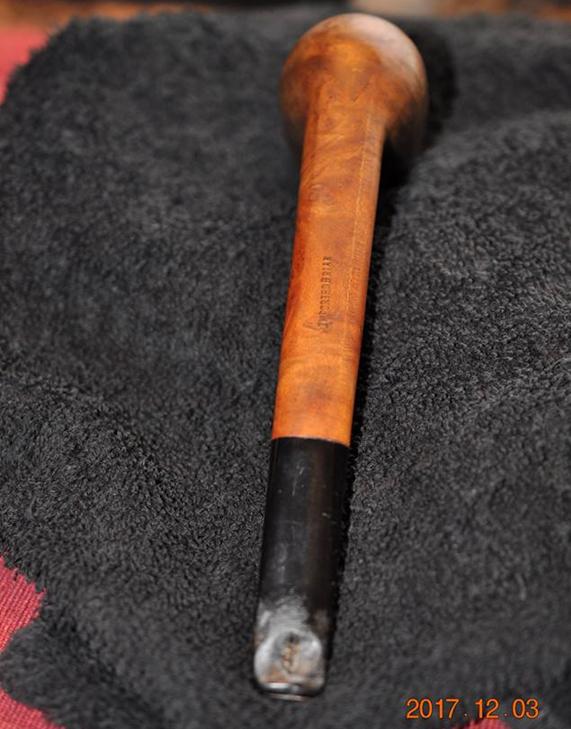
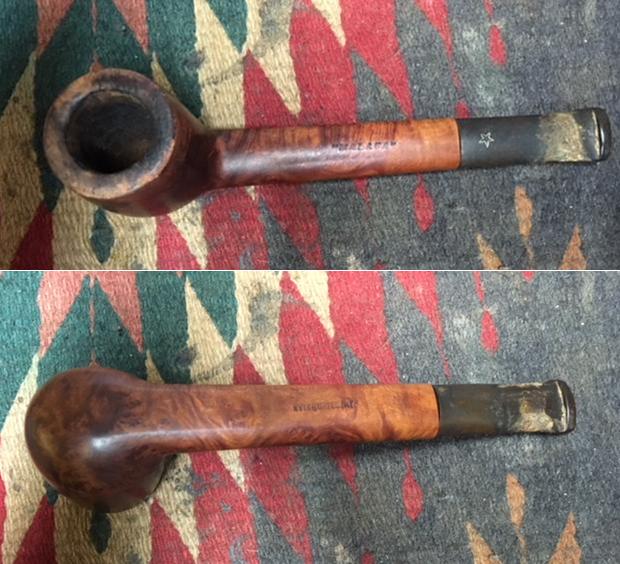
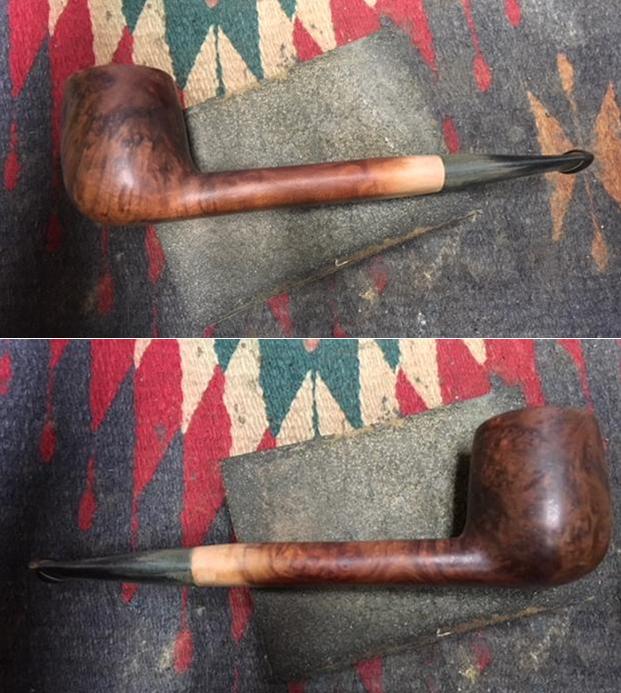
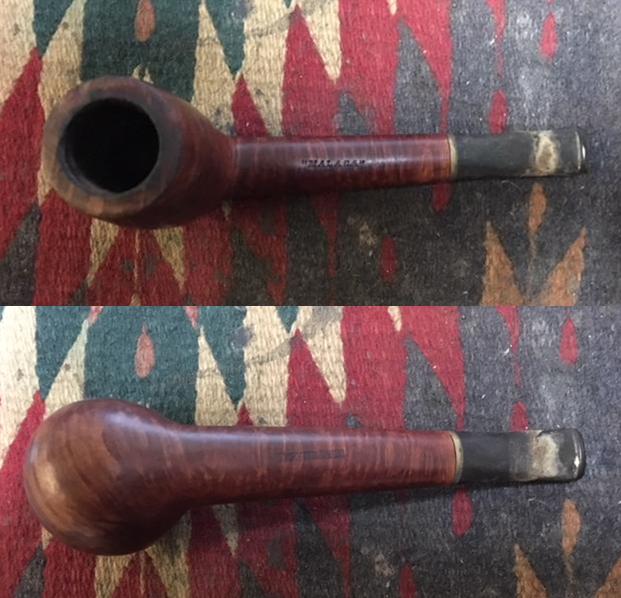
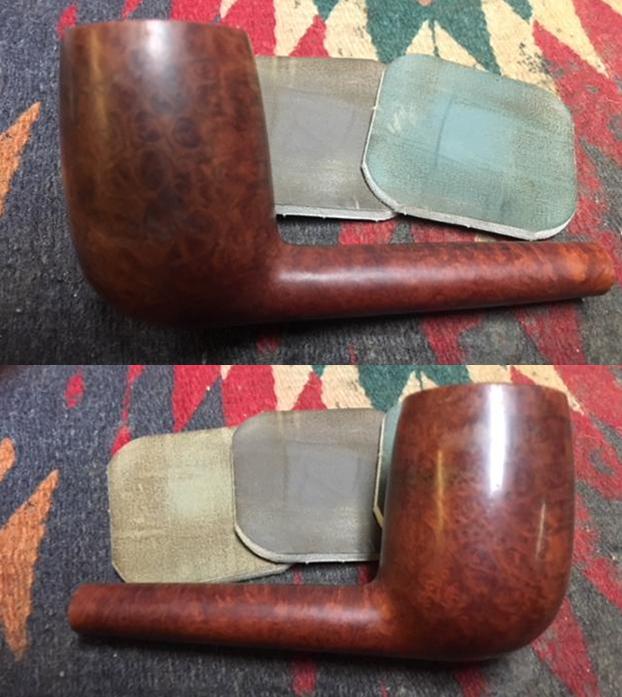
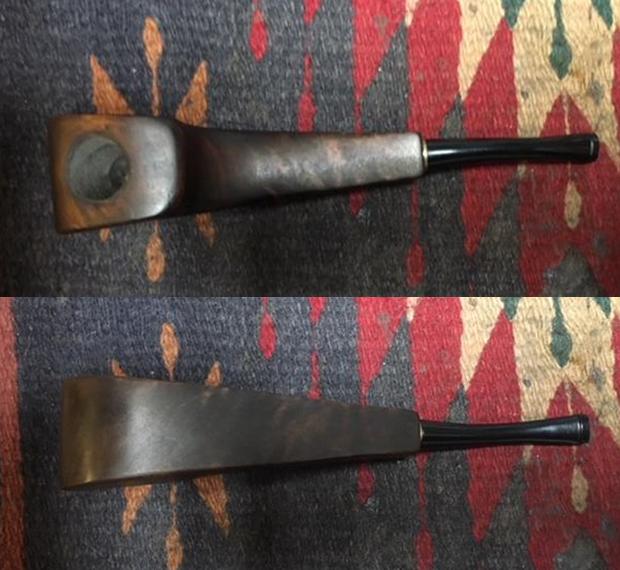
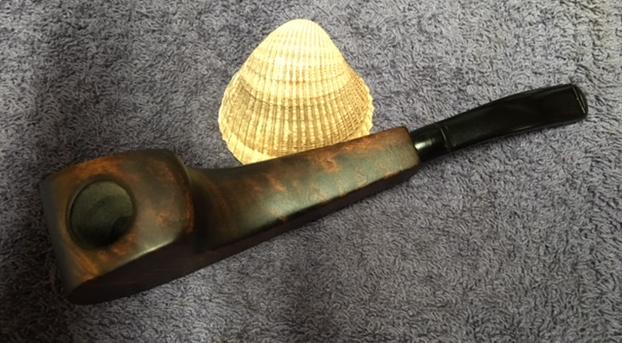
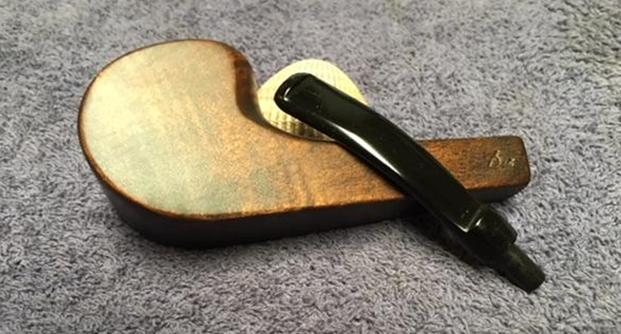
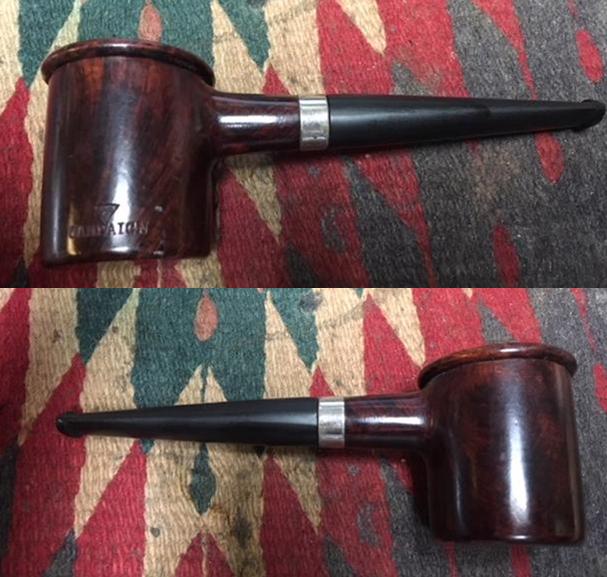
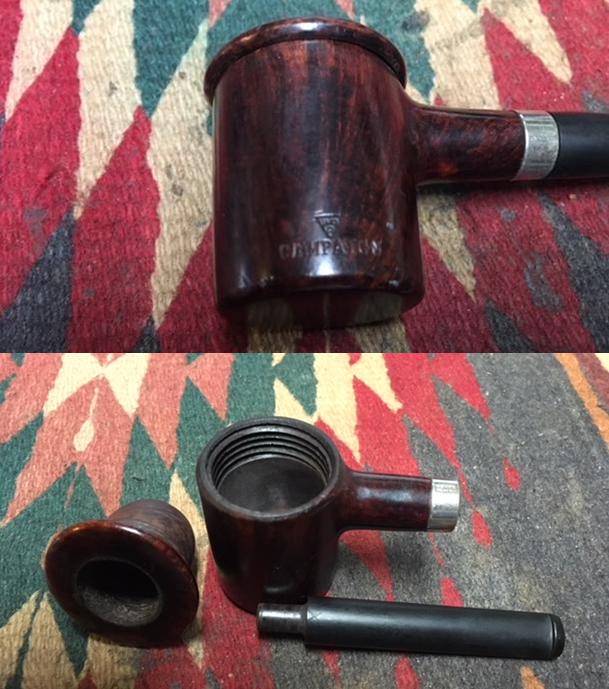
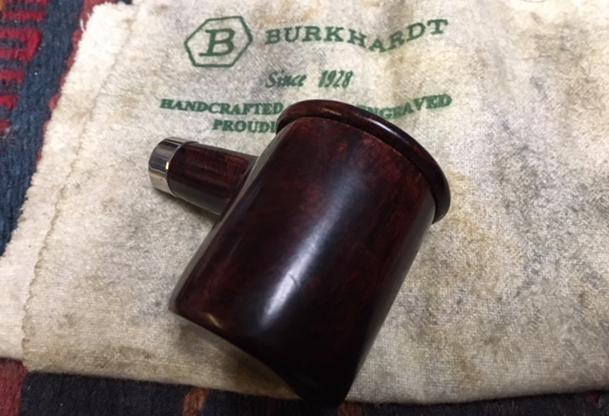
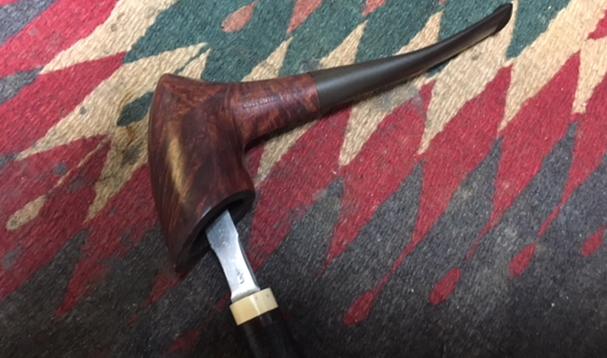
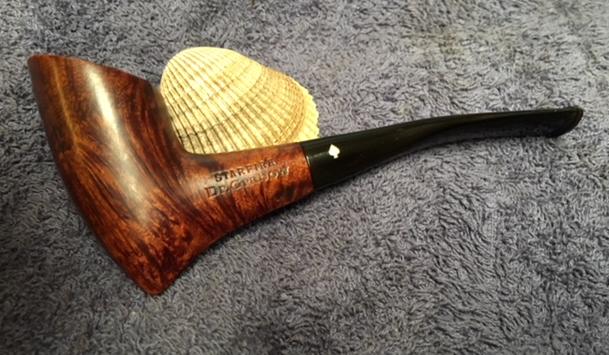
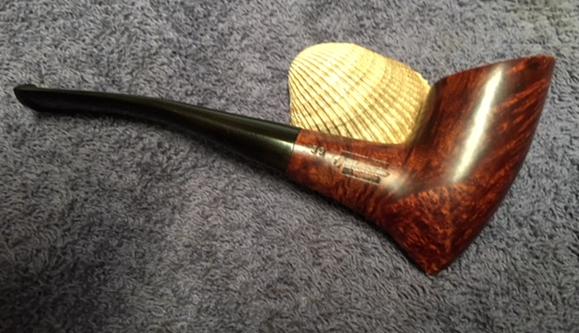
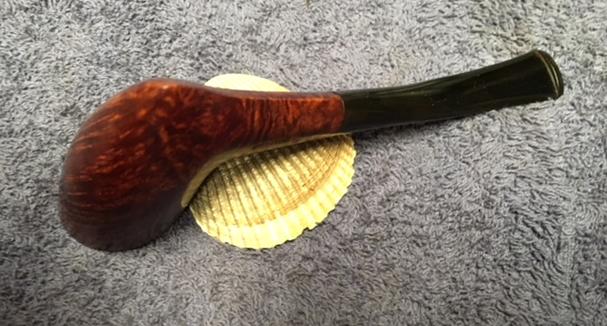
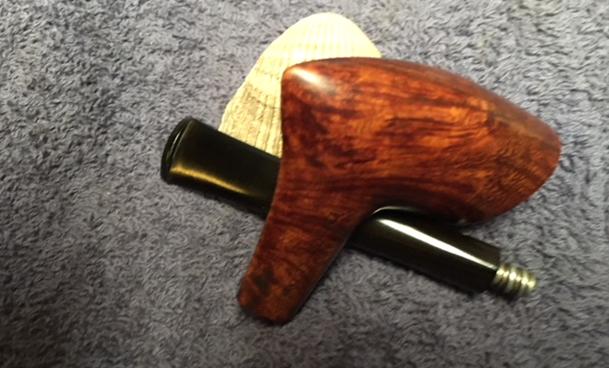
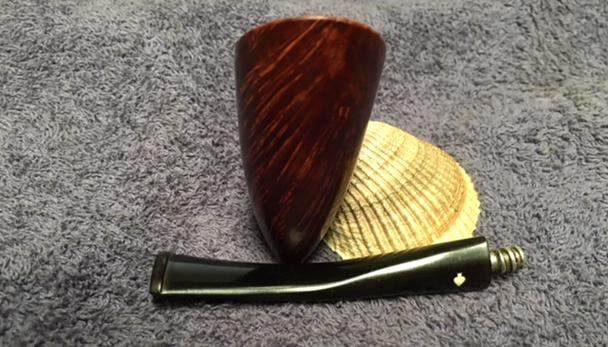
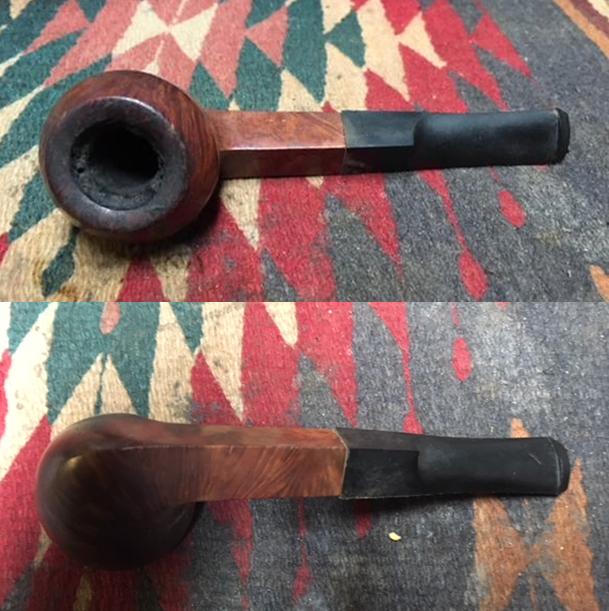
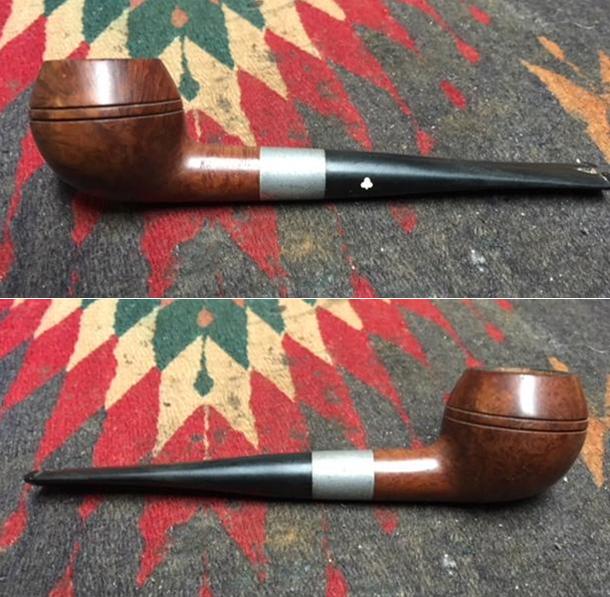
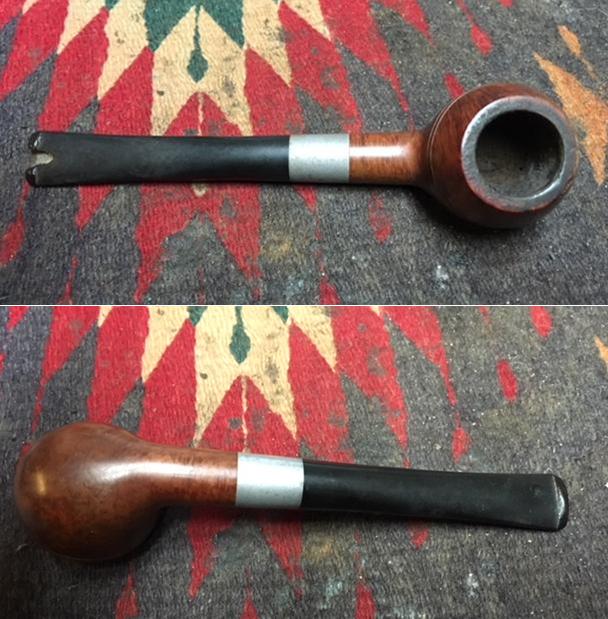
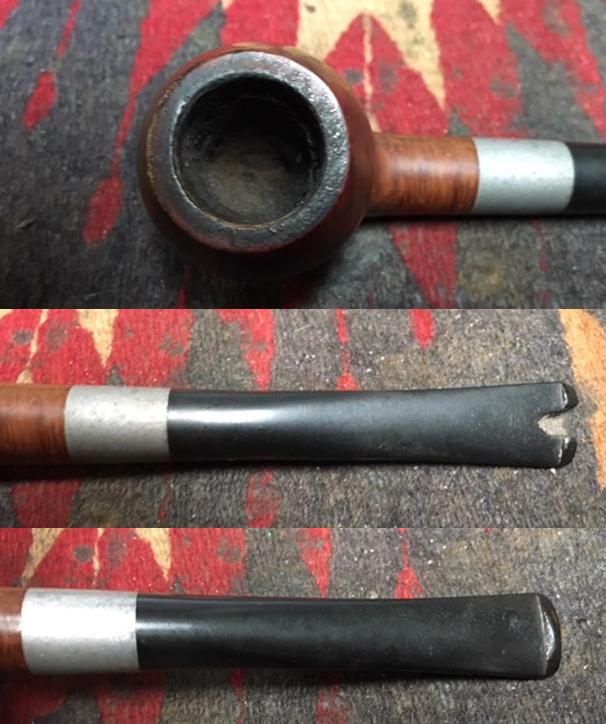
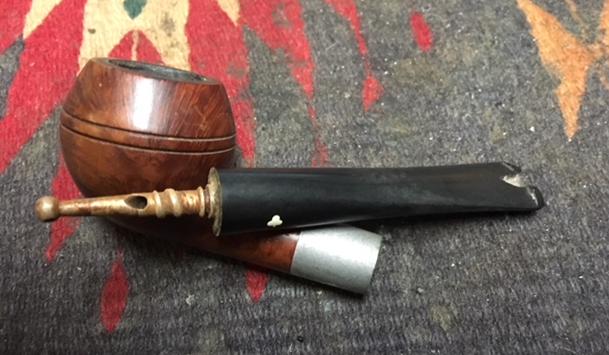
The second pipe, the next House of Robertson pipe I chose to work on is a large rusticated billiard with smooth panels on the sides and front of the bowl and a hexagonal shaped bowl. It is another very different pipe than the others pipes from this Boise based store. It is large and similar to the previous larger pipe in this threesome – 7 long with a bowl that is 2 1/8 inches tall. It is engraved with the House of Robertson signature on the smooth portion of the shank on the left side just ahead of the band. There is a smooth panel on the right, left and front sides of the bowl. The rim top was rusticated. The pipe was dirty but underneath all of the grime it appears to be in excellent condition. The rustication on the bowl and shank was nicely done and was made to look like a sandblast finish. The bottom of the bowl and shank also appeared to be sandblasted. It is definitely an interesting pipe and should clean up very well. The band on the shank is decorative as the shank is undamaged. It has the look of a repurposed band from an older pipe. There are some worn hallmarks on the oxidized Sterling Silver band. The fit of the stem to the shank was good. The stem was oxidized and had some small tooth marks and chatter on both sides of the stem near the button. Jeff took photos of the pipe before he started the cleanup. 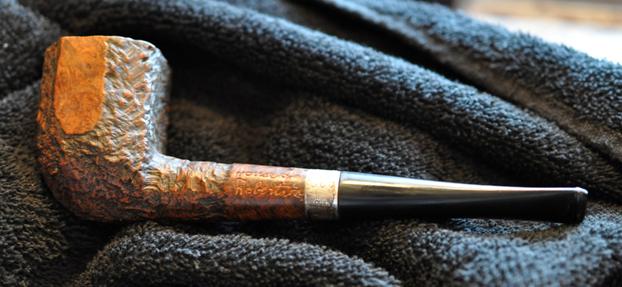
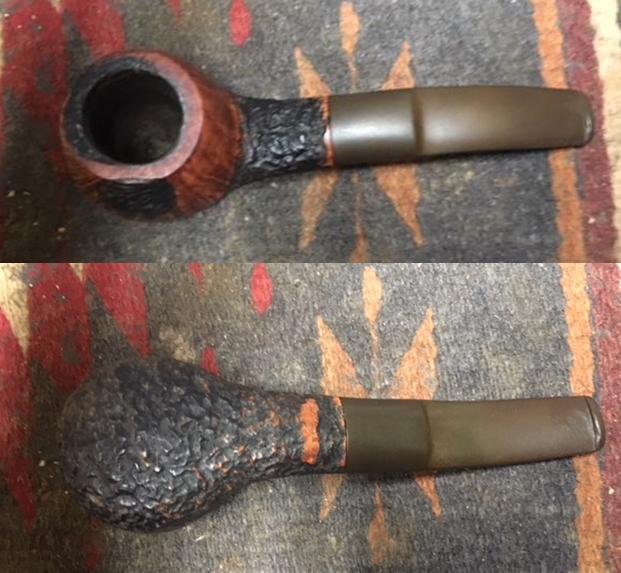
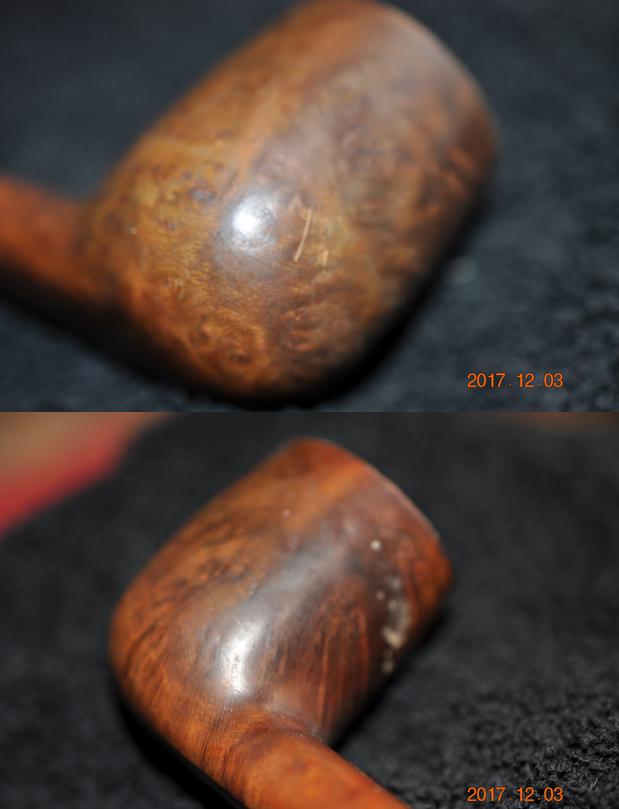
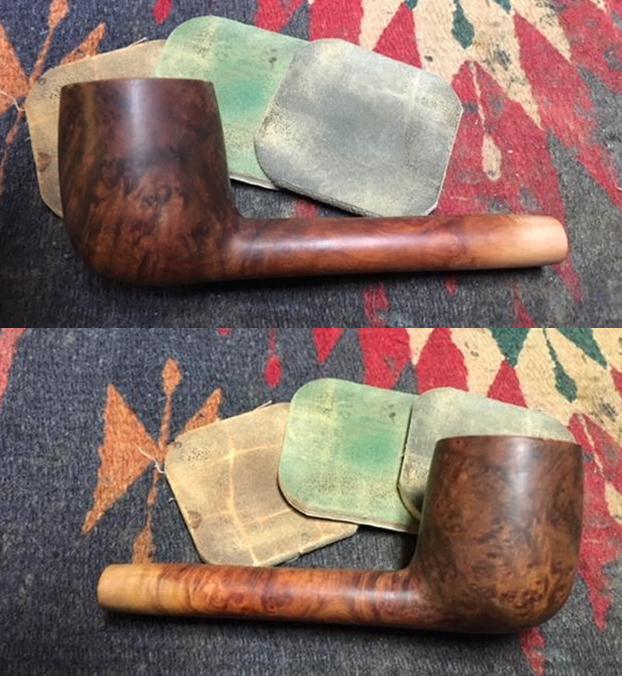
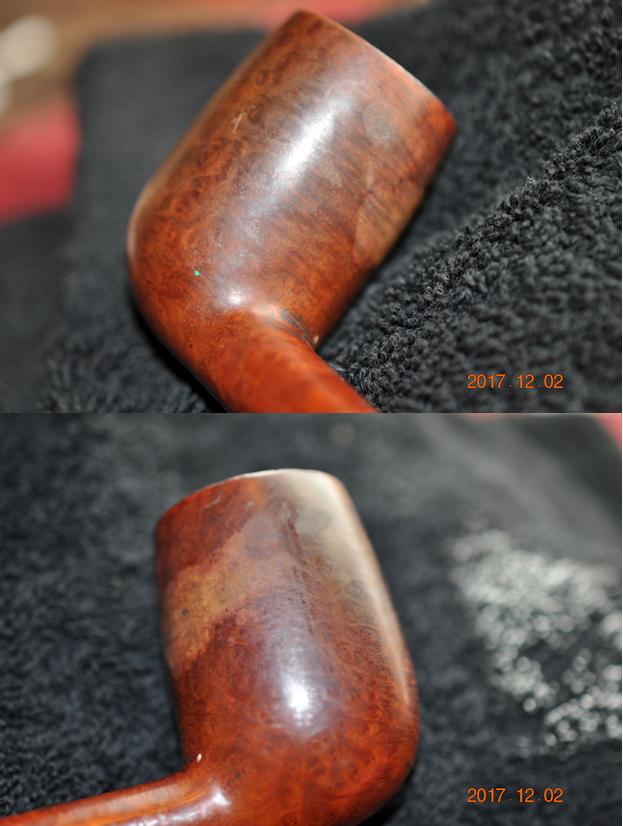
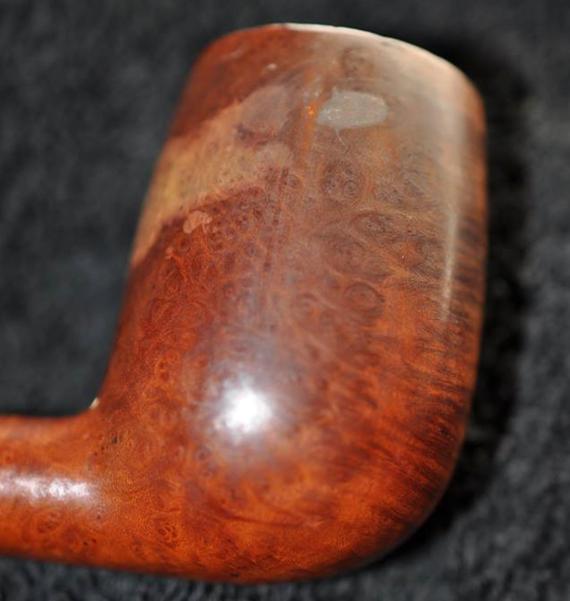
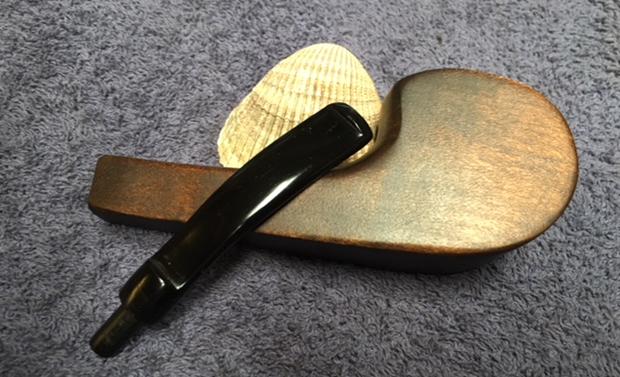
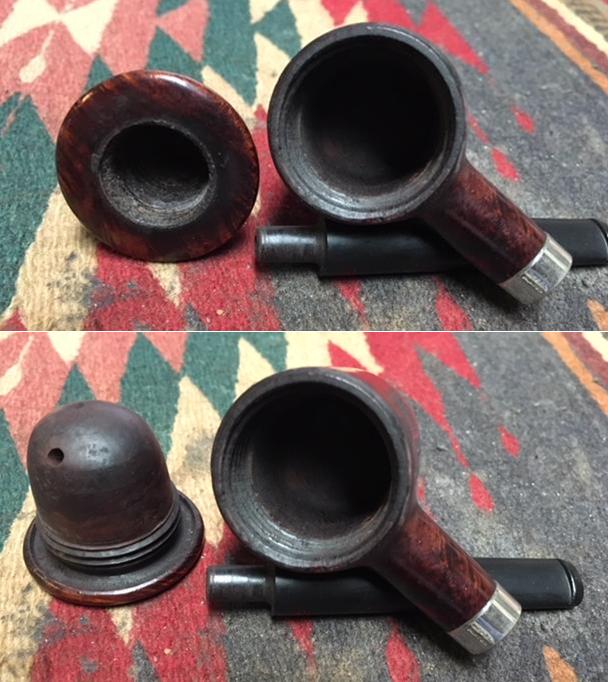
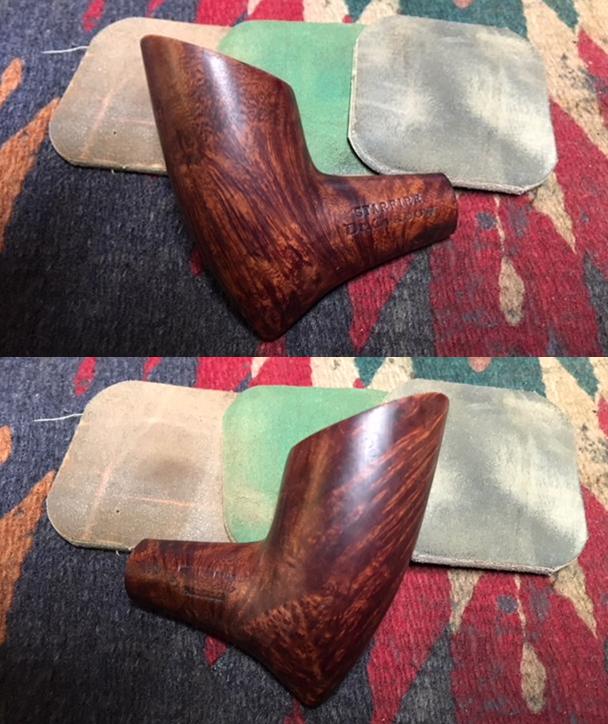
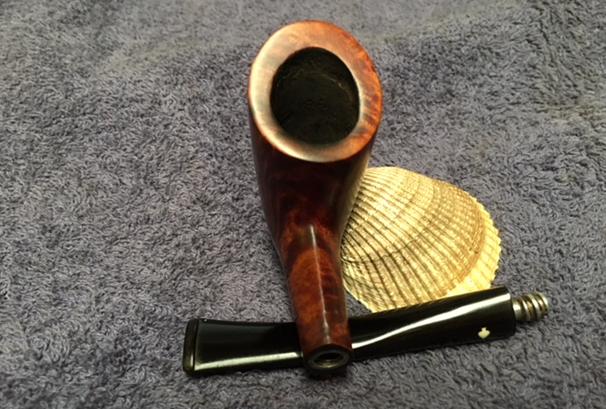
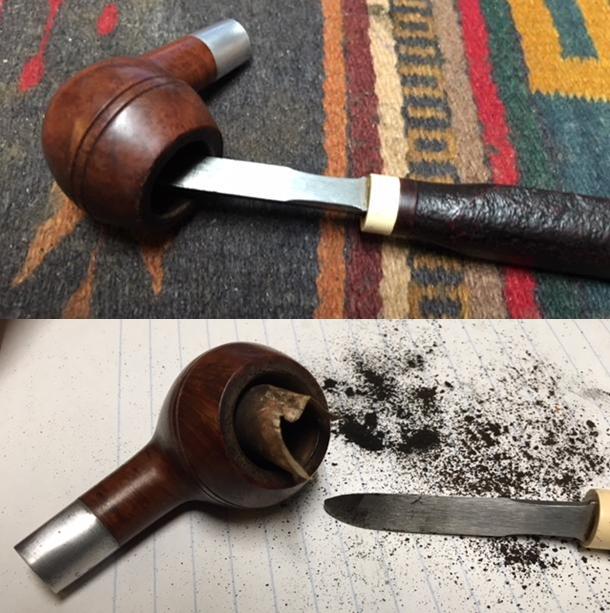
 The next close-up photos show the finish on the top and the sides of the bowl. The first photo shows cake in the bowl and the lava overflowing onto the rim top. The inner and outer edge of the rim looks really good. The finish on the rim top was appeared to be in great condition but the lava coat as pretty thick. The next two photos show sides of the pipe. It was a different rustication from any of the other Robertsons that I have done and it was interesting.
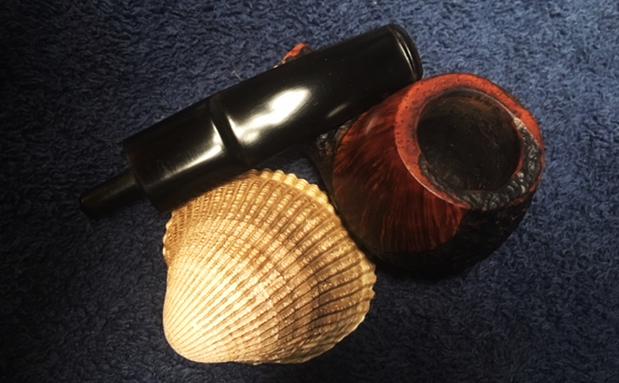
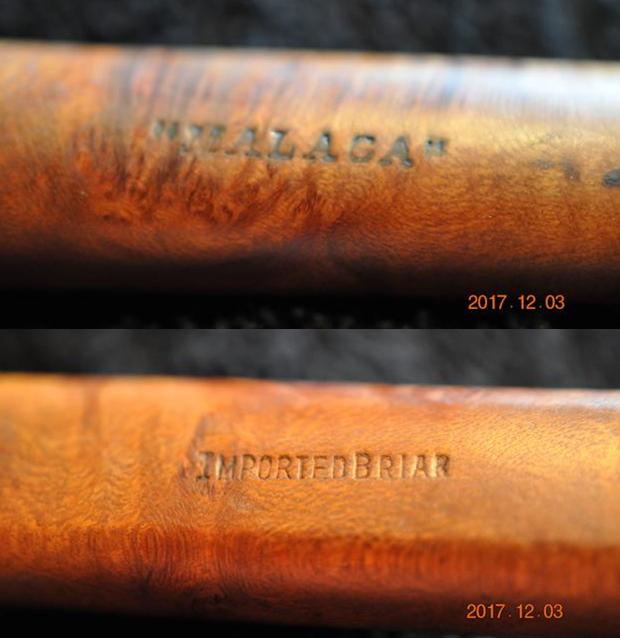
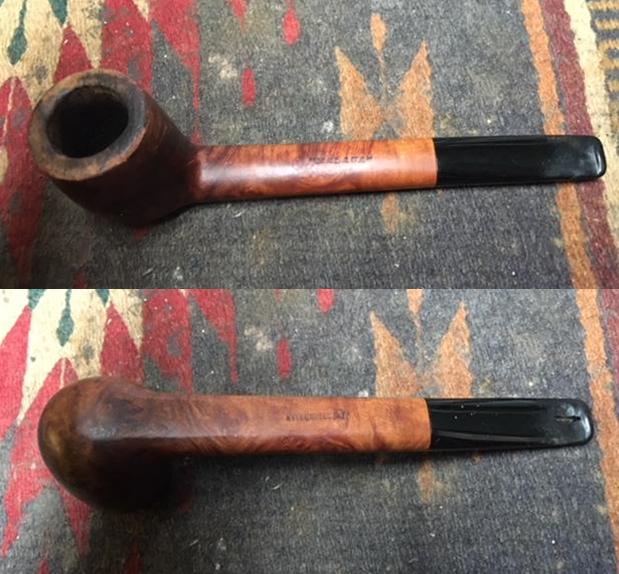
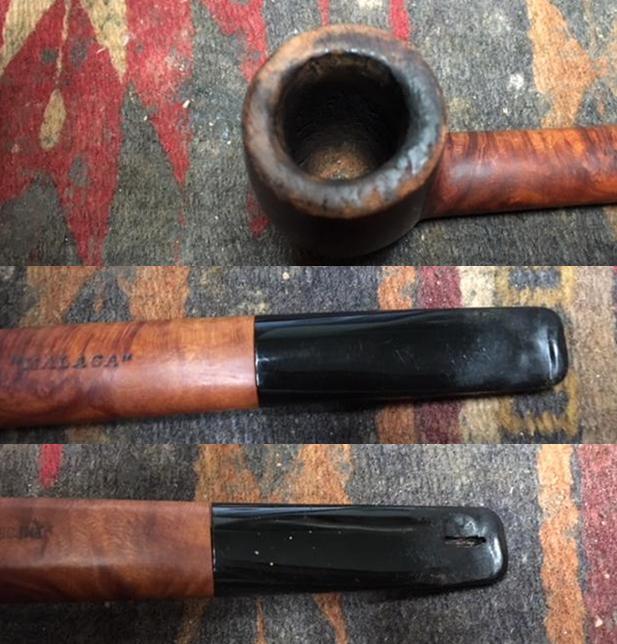
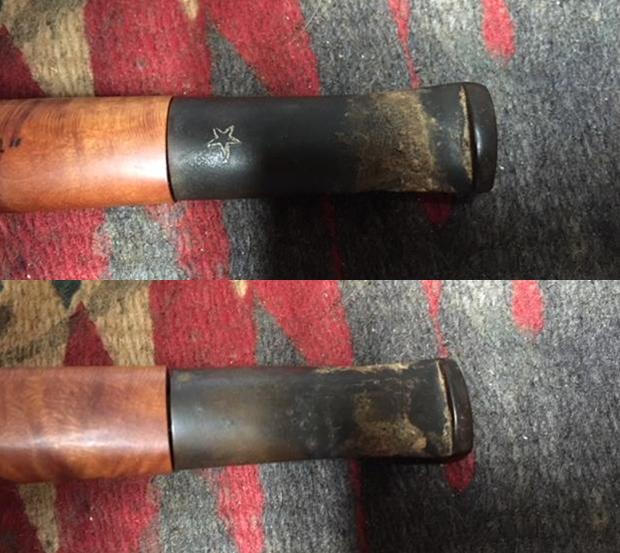
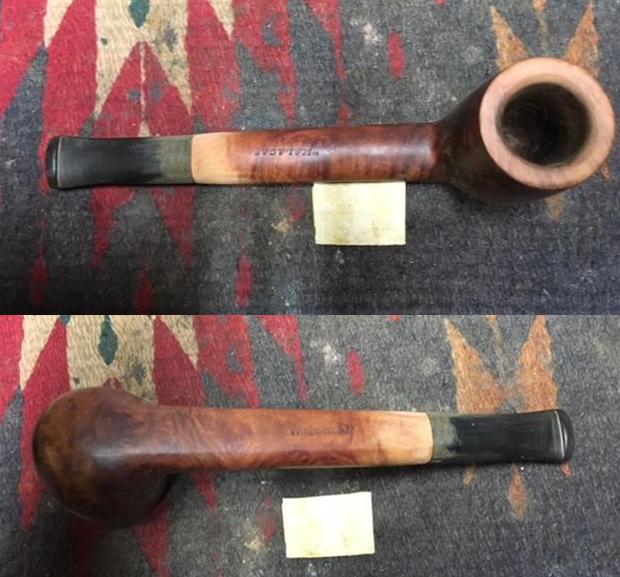
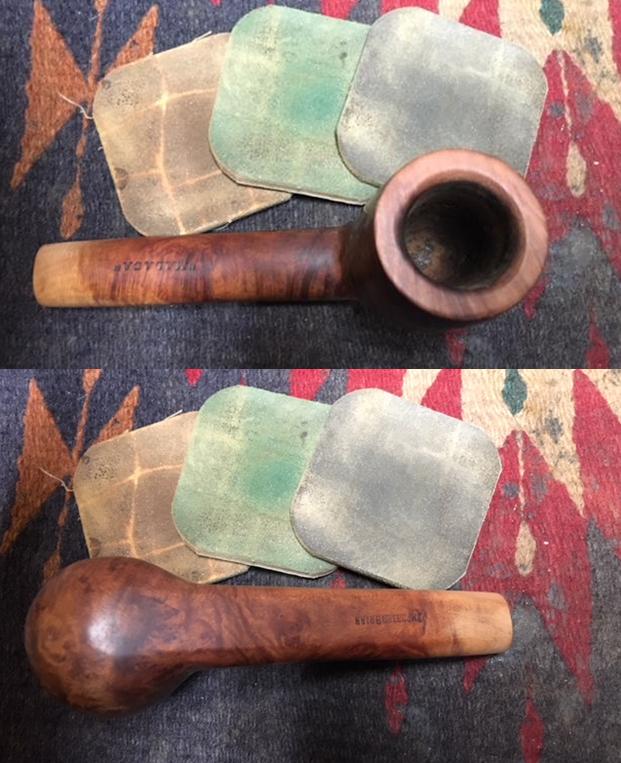
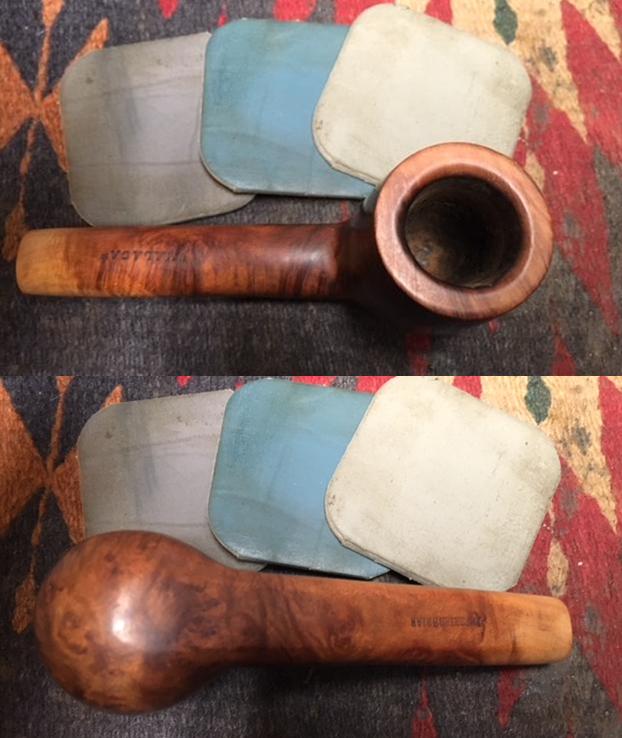
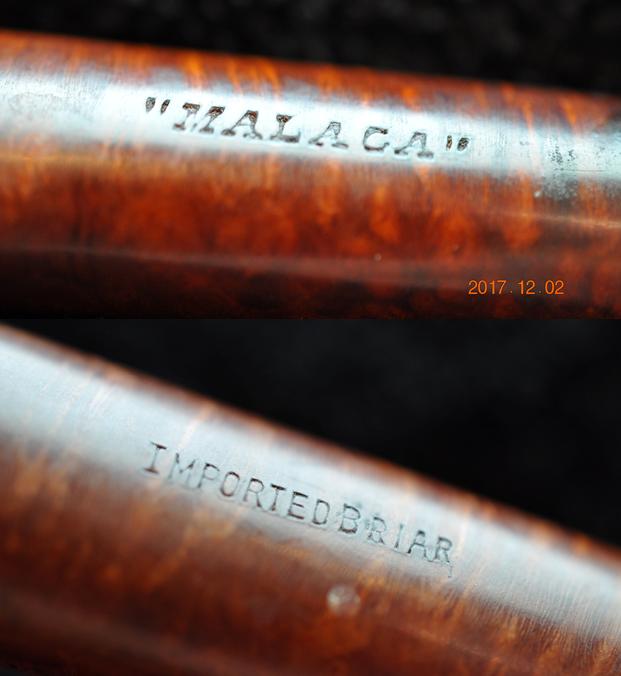
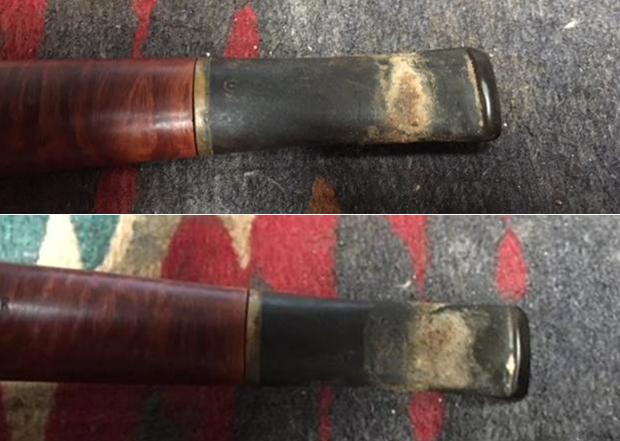
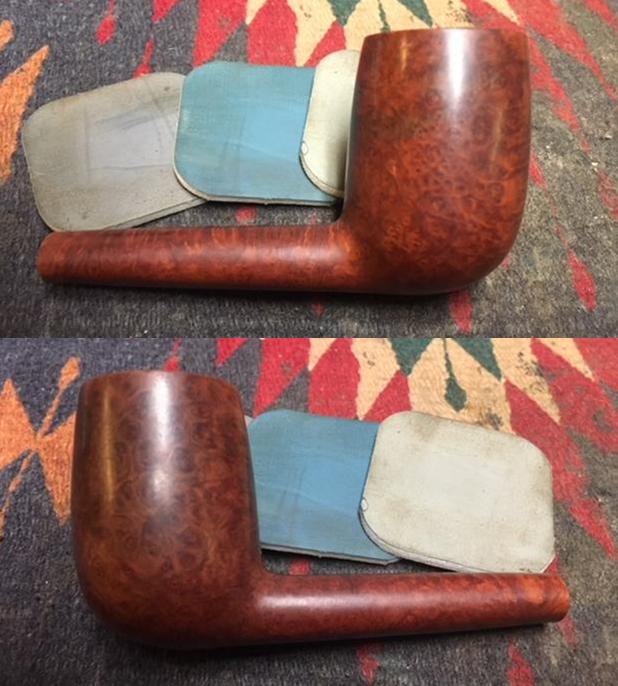
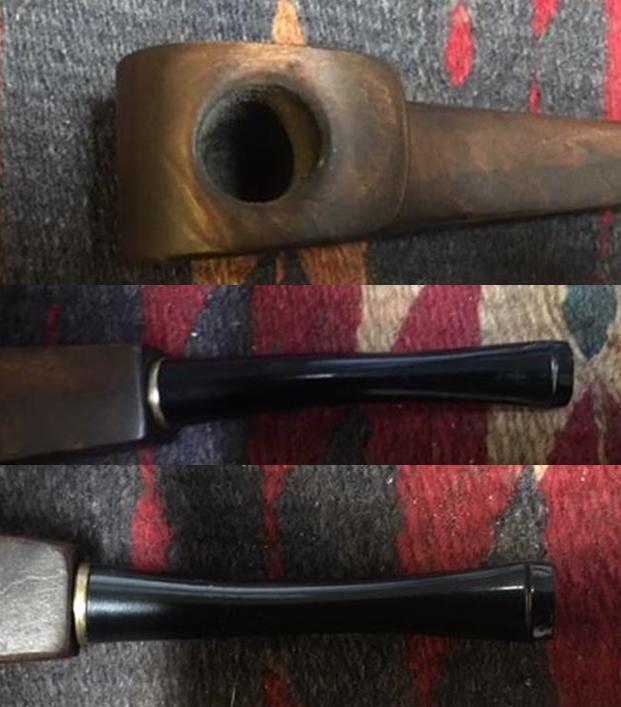
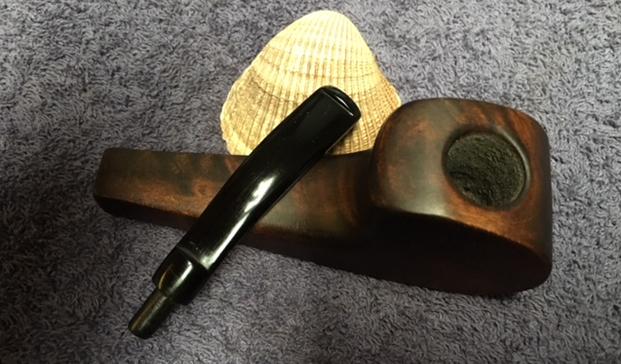
 The next photo shows the etched name on the left side of shank on a smooth panel of briar. It reads House of Robertson. The second photo shows the stamping on the band. You can also see the general condition of the grime in the rustication of the briar.
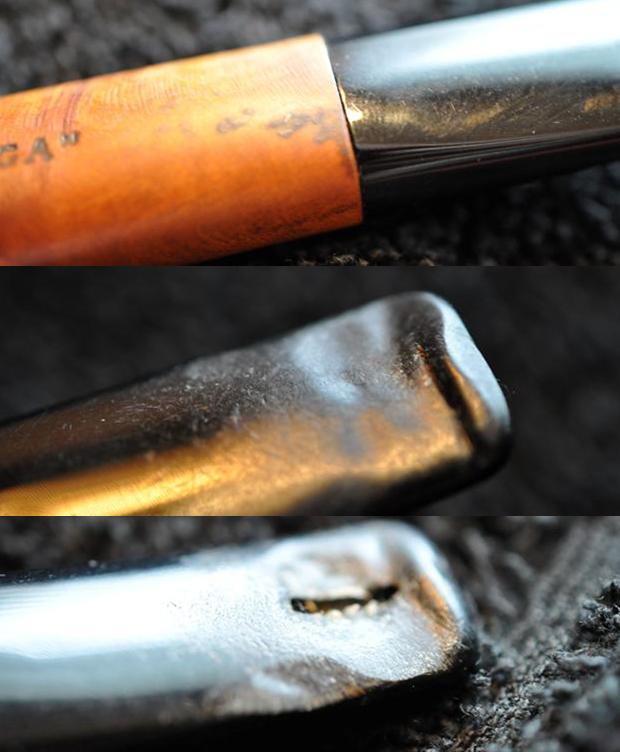
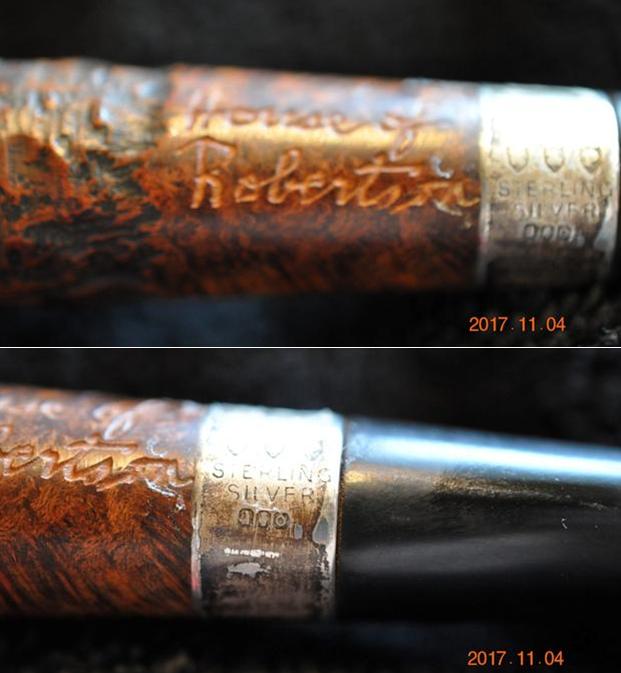 The tapered stem was oxidized and had tooth chatter and marks on both sides of the stem near the button. The edge of the button had some dents in it as well.
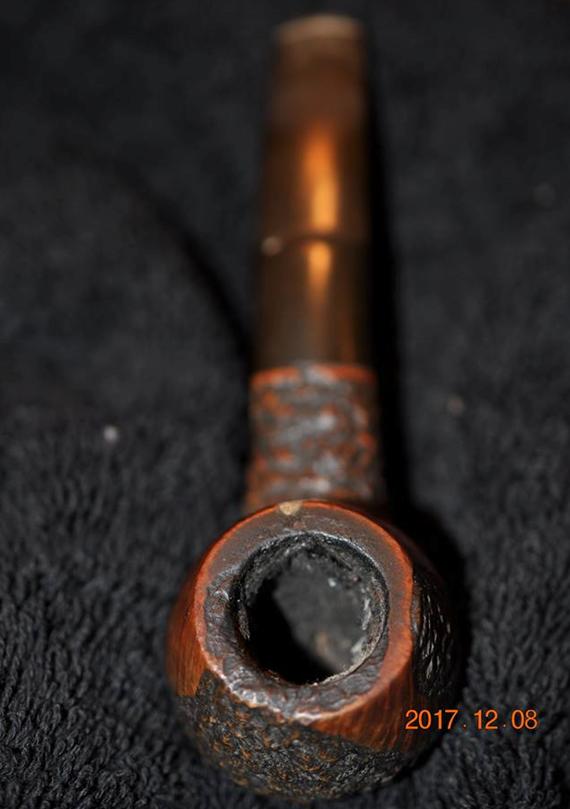
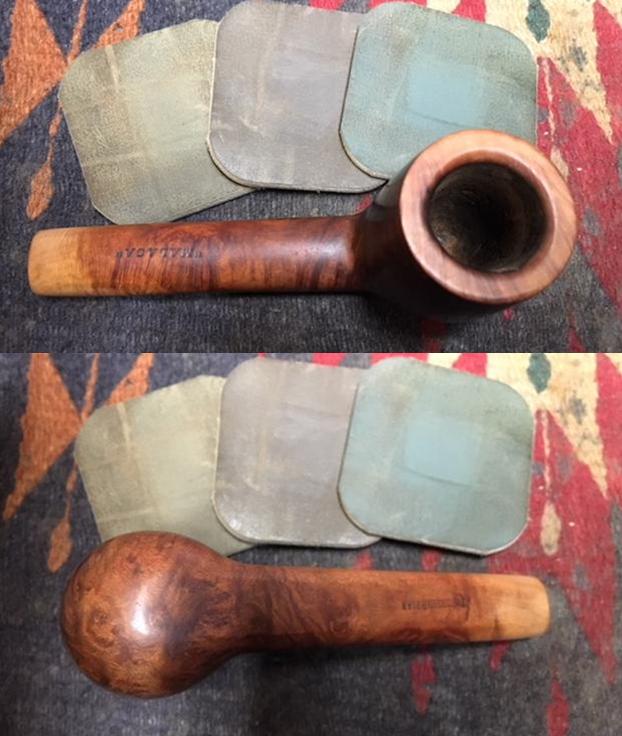
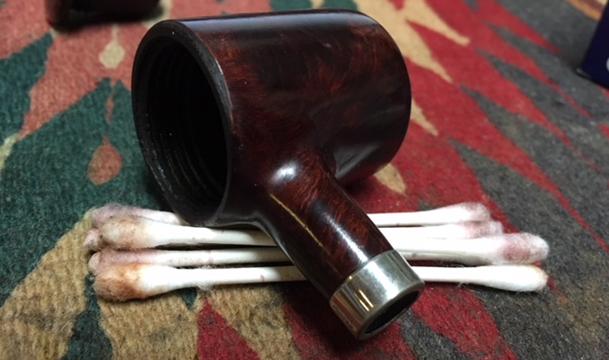
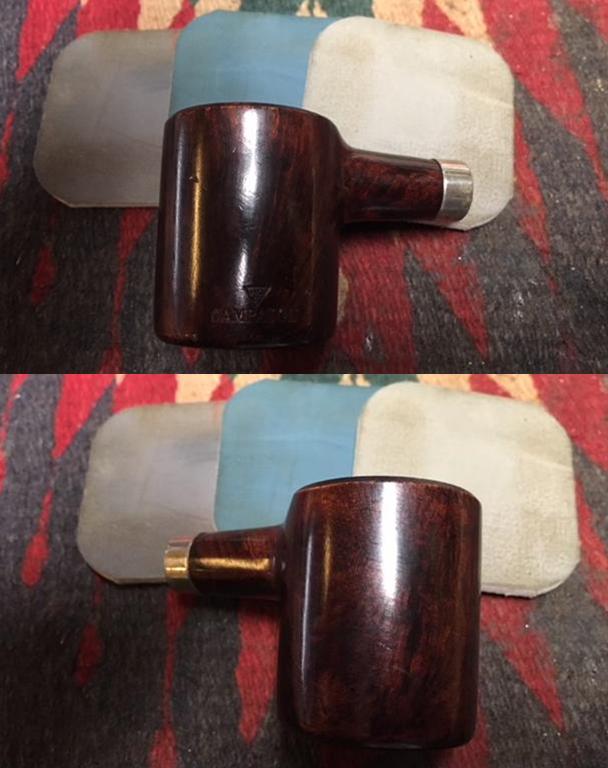
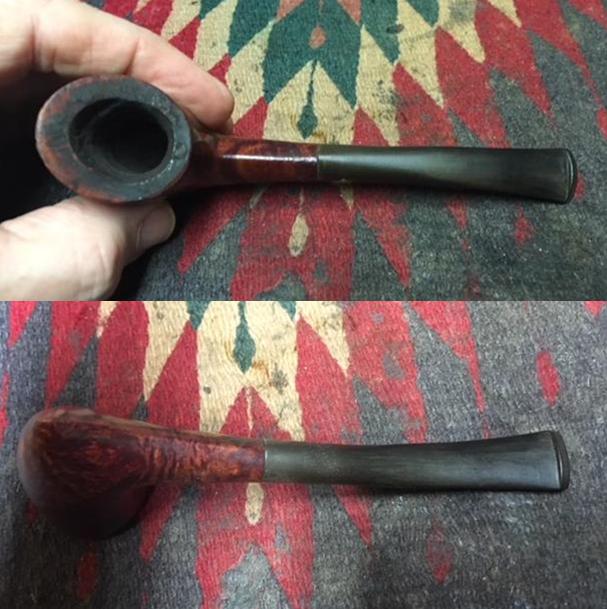
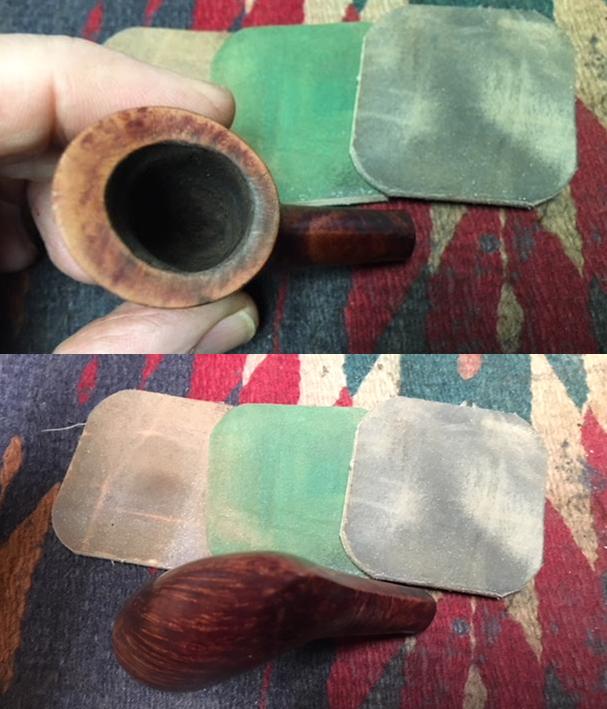
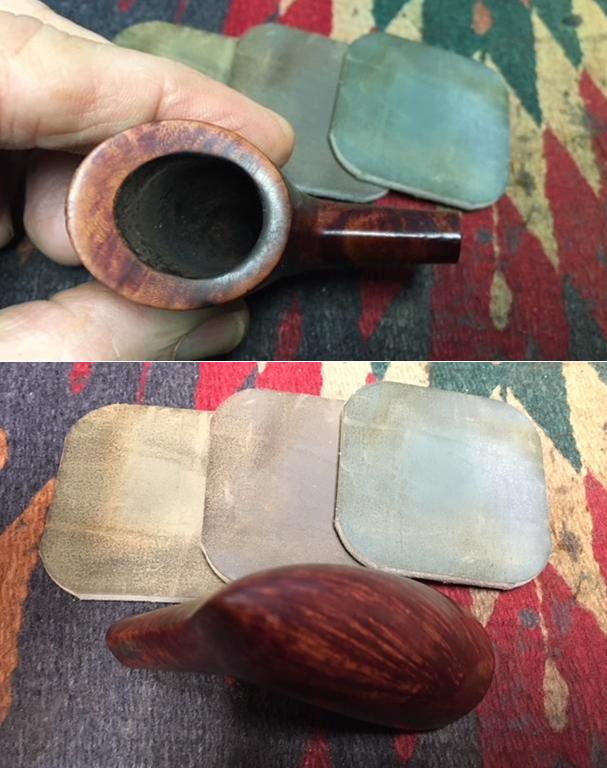
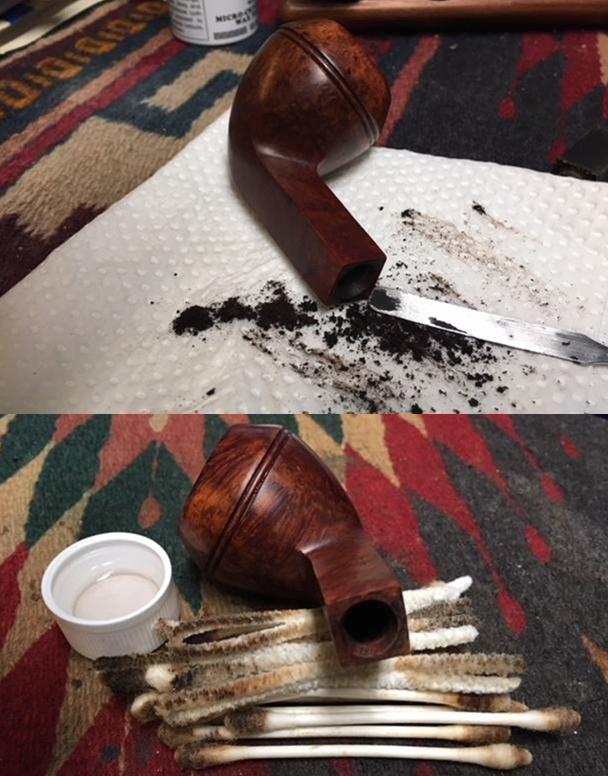
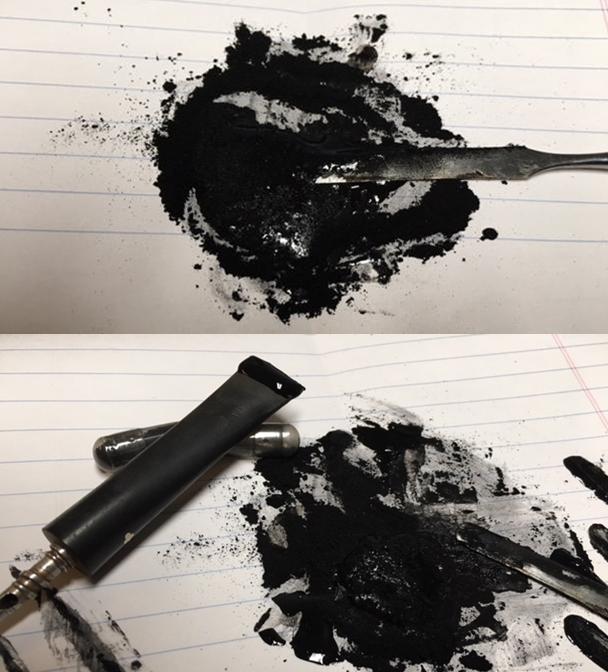
 This unique pipe was really dirty with a thick cake, overflow of lava on top the rim and dust and debris in the heavy rustication on the sides of the bowl. He reamed the bowl with a PipNet pipe reamer and cleaned up the remnants with the Savinelli Fitsall Pipe Knife. He scrubbed out the mortise and the airway in the shank and the stem with alcohol, cotton swabs and pipe cleaners. He scrubbed the exterior of the bowl, rim and shank with a tooth brush and Murphy’s Oil Soap to remove the dust in the rustication on the bowl and shank as well as the smooth portions. He rinsed it under running water. He dried it off with a soft cloth. Once the dust and debris were removed the finish was dull but appeared to be in excellent condition. I took photos of the pipe to show its condition before I started my work on it.
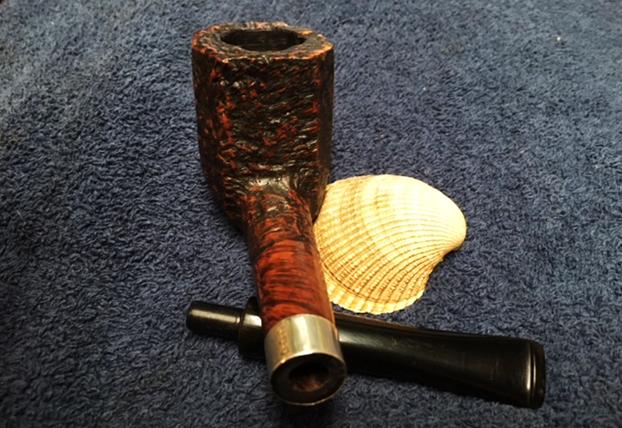
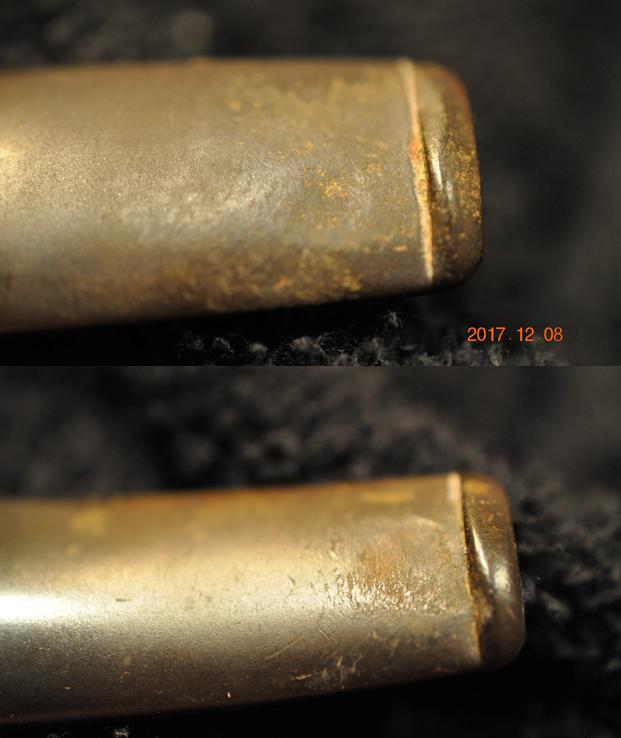
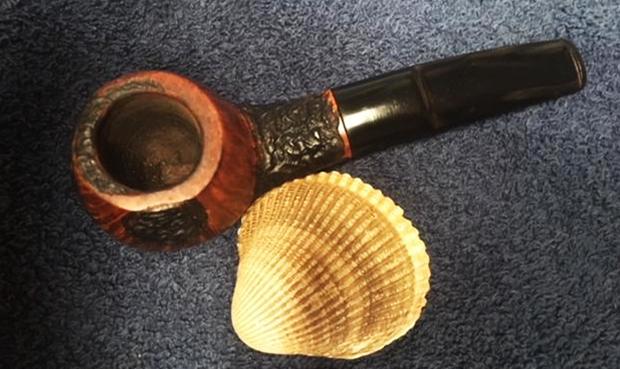
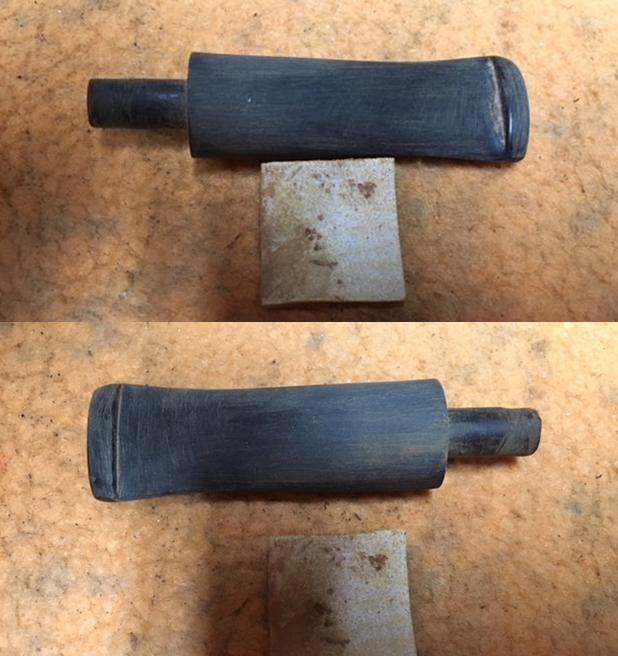
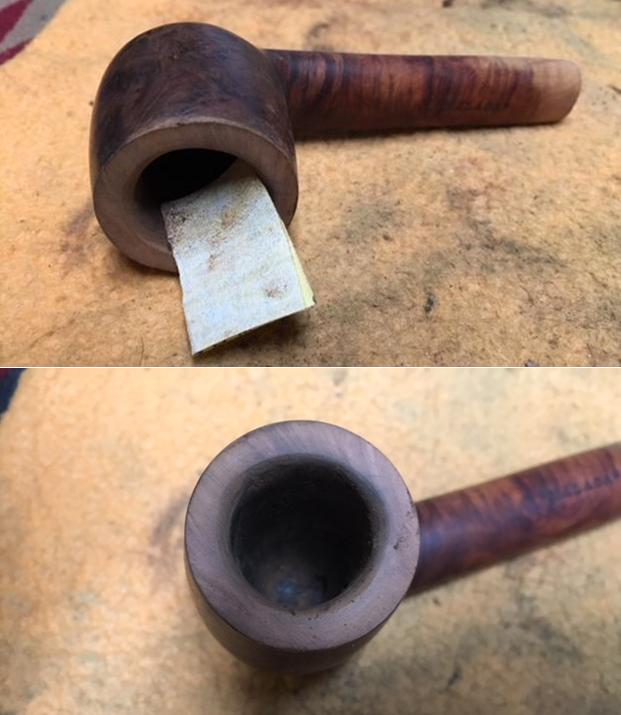
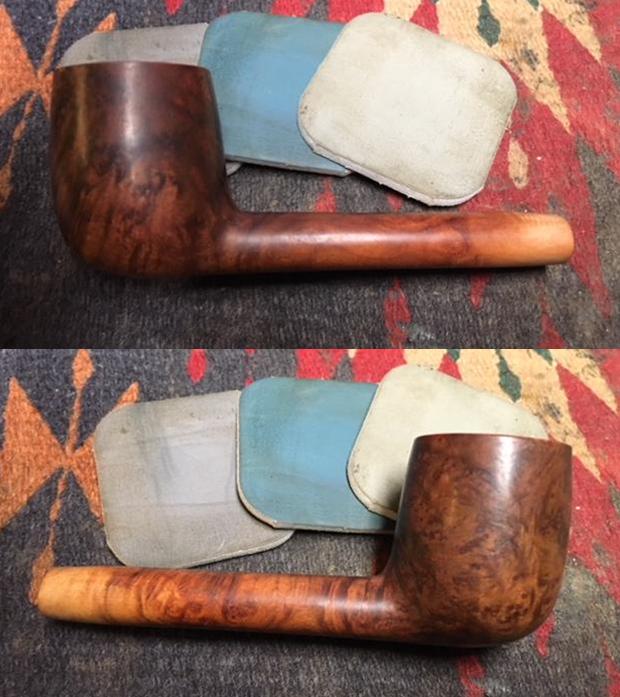
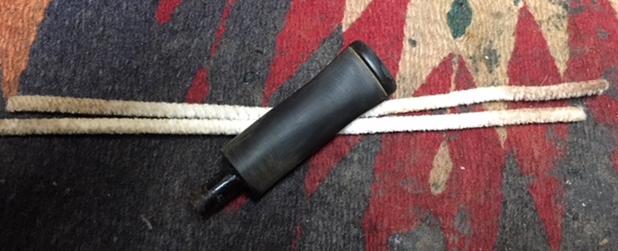
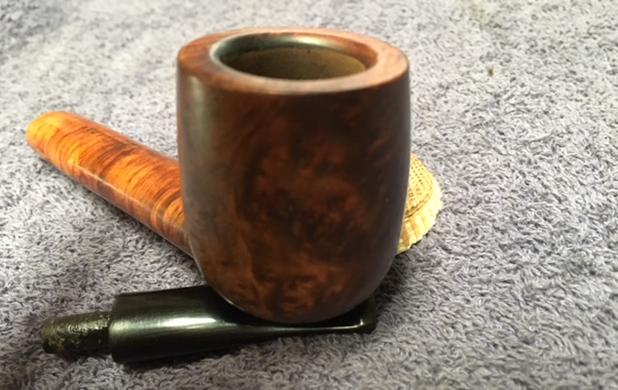
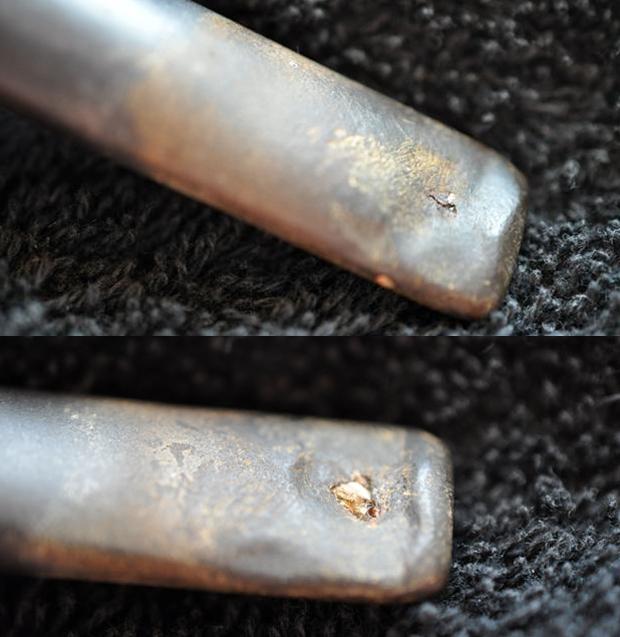
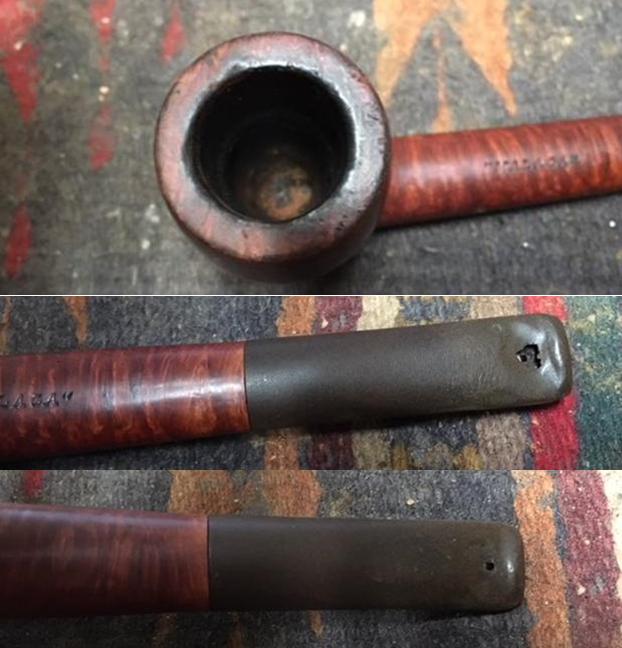
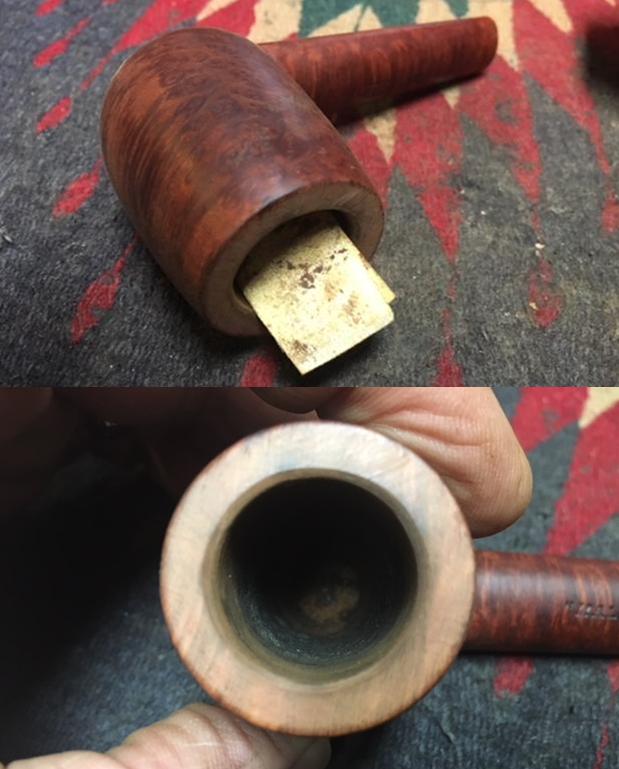
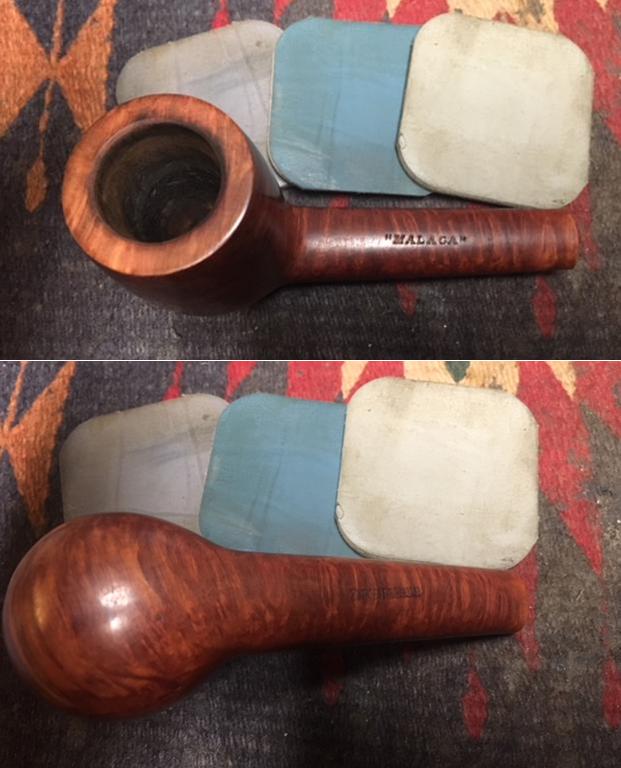
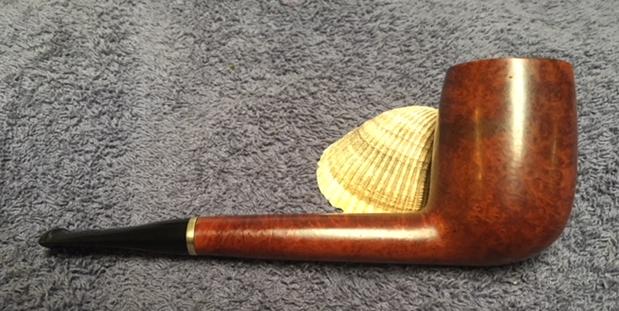
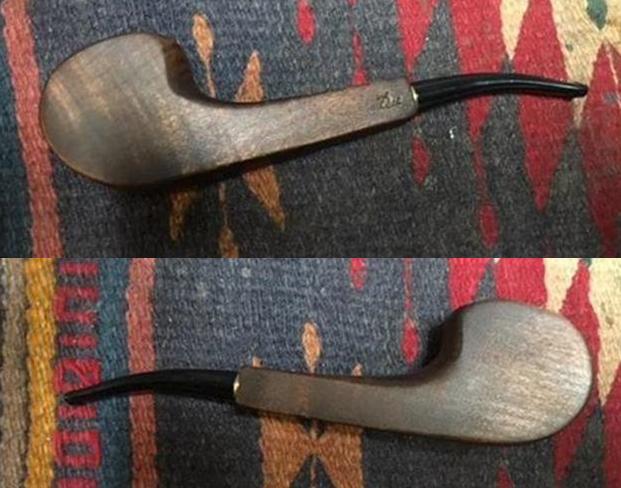
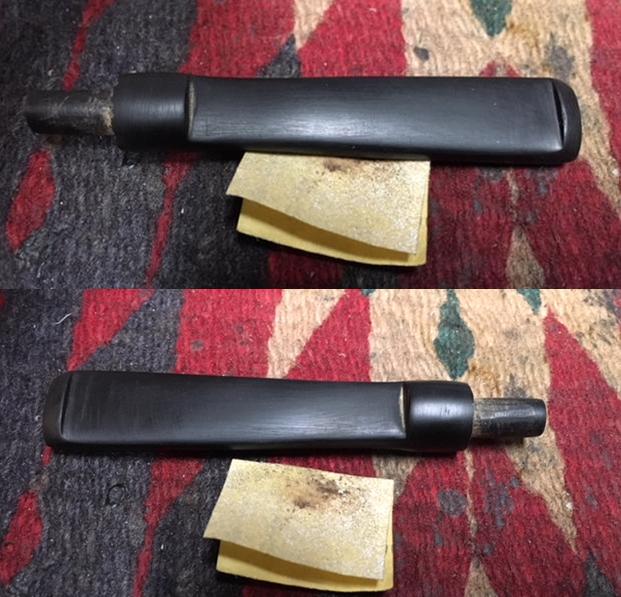
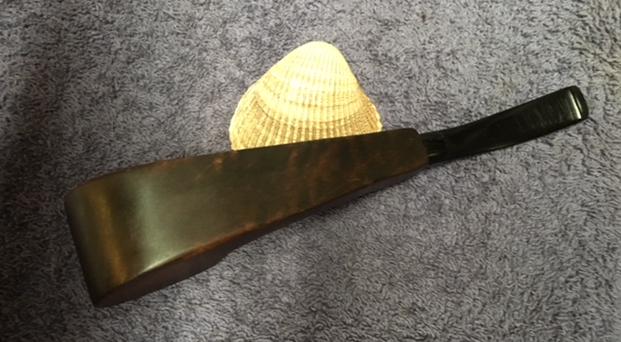
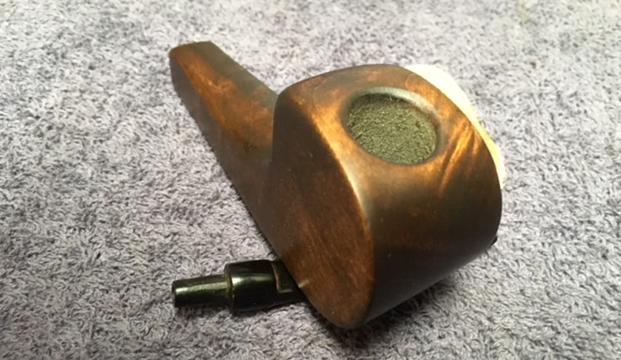
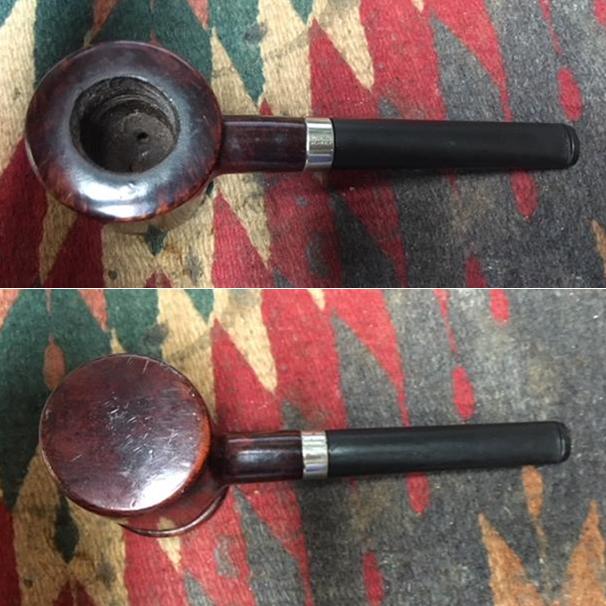
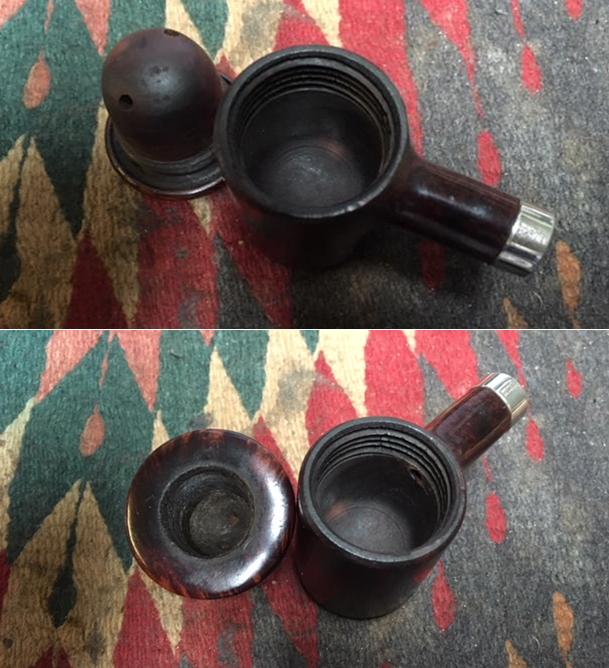
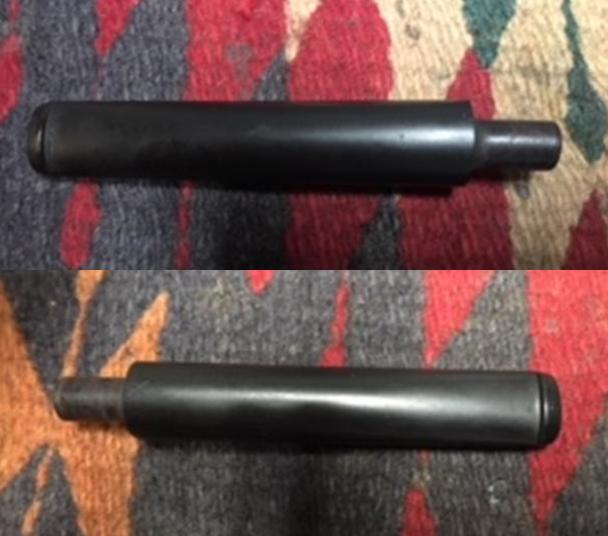
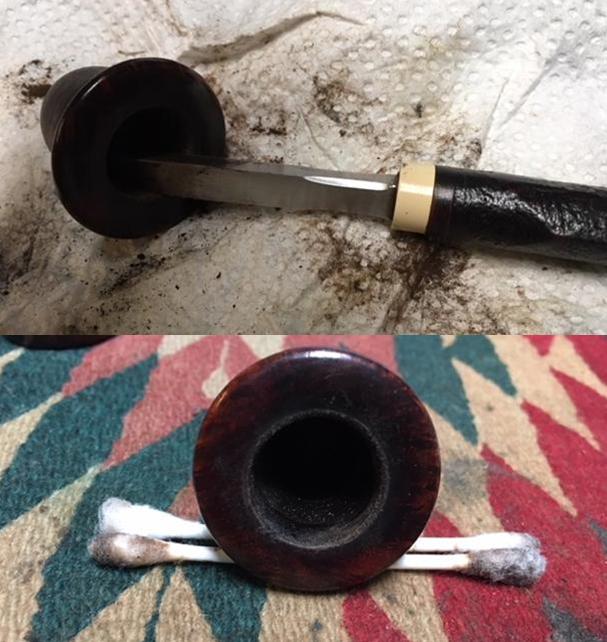
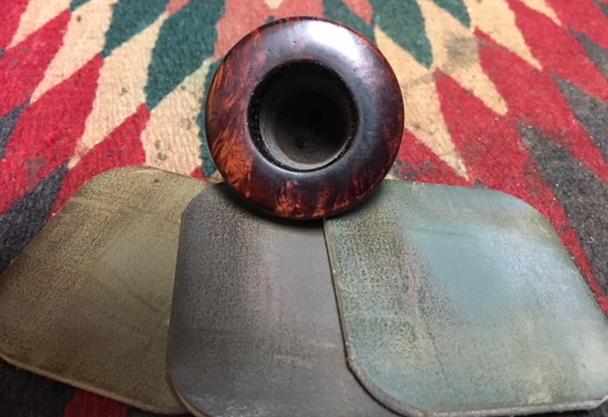
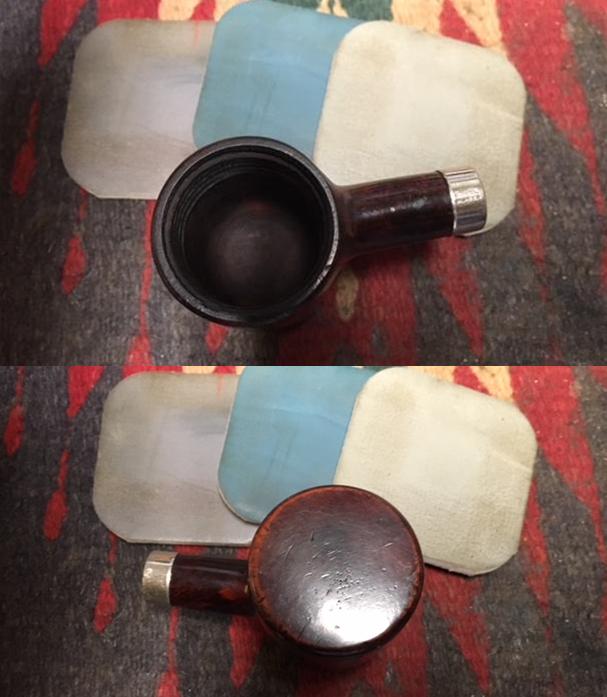
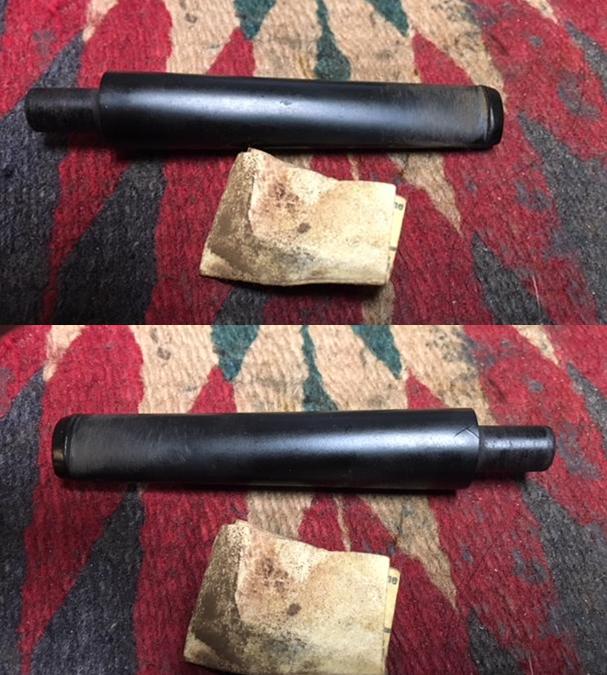
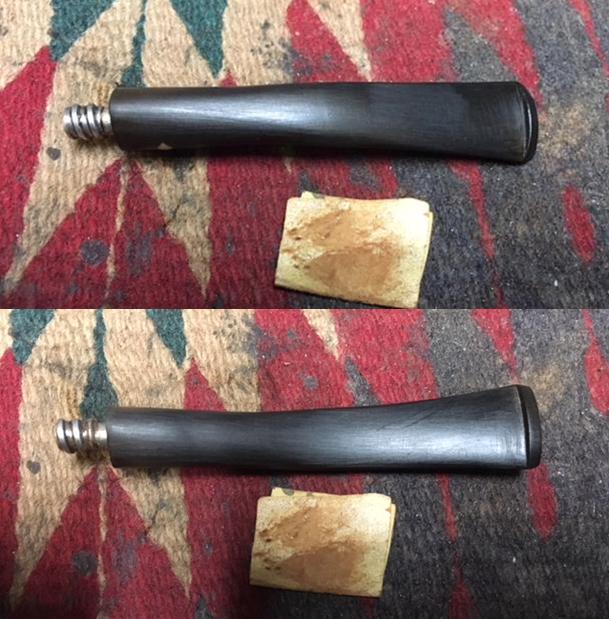
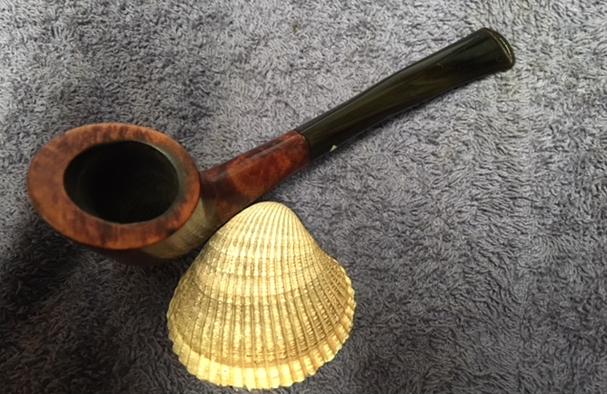
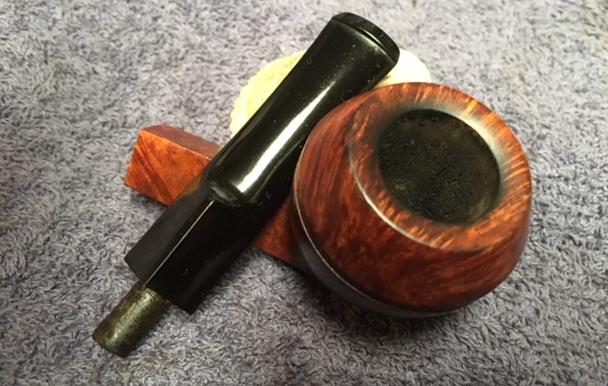
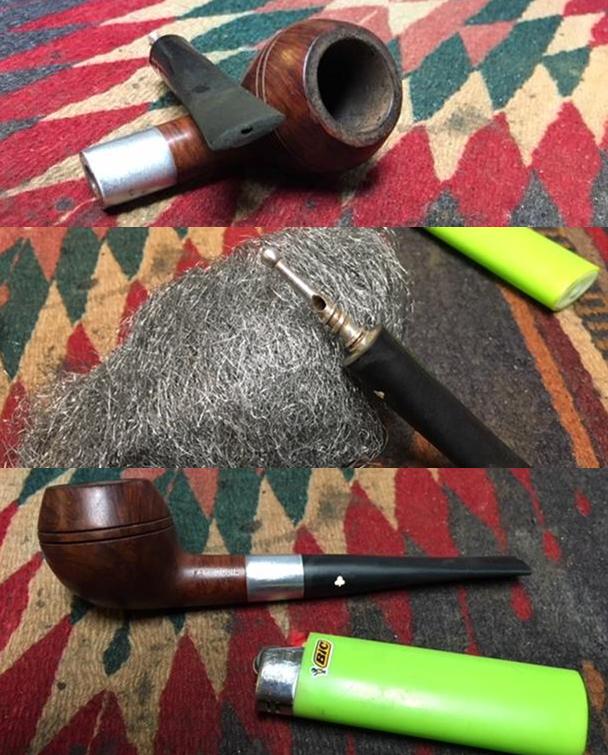
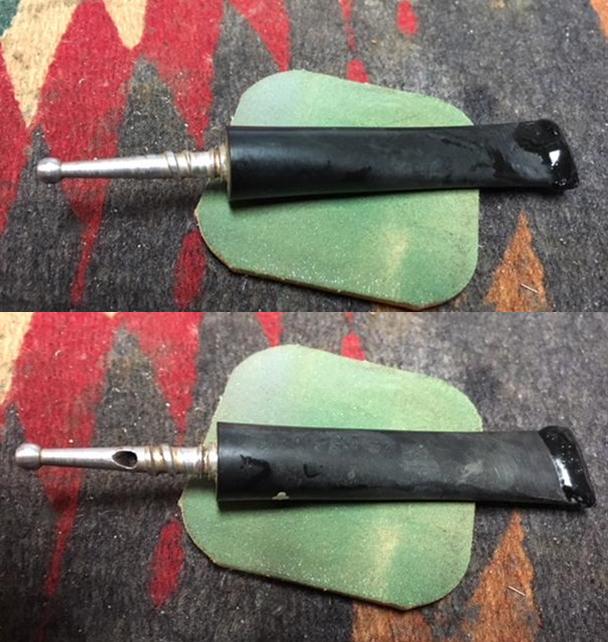
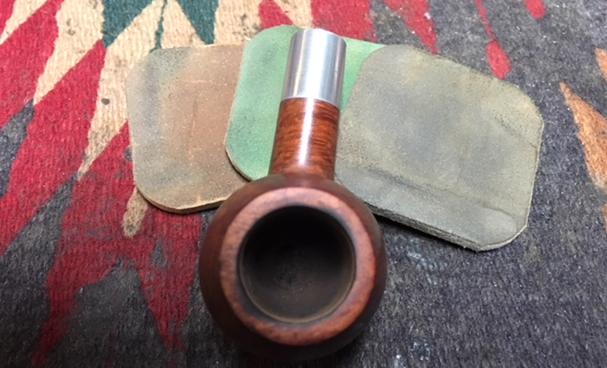
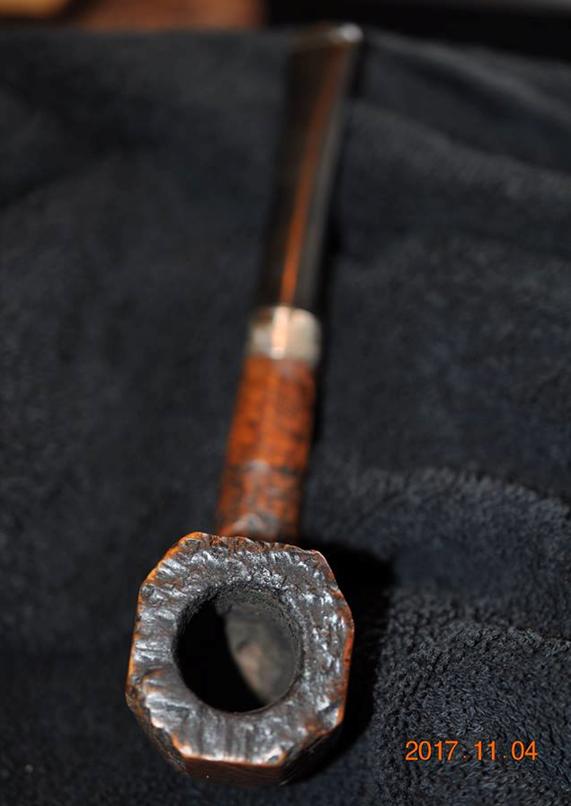
 I took a photo of the bowl and rim top to show the condition it was in once it was cleaned off. It has an interesting rustication on the rim top – it has the look of almost a faux plateau. Normally I would include photos of the stem at this point as well to show its condition. Sadly while I was chatting with my brother on Facetime I dropped the pipe on the floor next to my worktable and the stem snapped off leaving the tenon in the shank… Arghhh I hate that. It is not enough to have to clean up and restore an old timer now I have to replace the tenon on the stem and get the fit in the shank correct… oh well these things happen. I am attaching photos of the stem after the “accident” to show what it looked like.
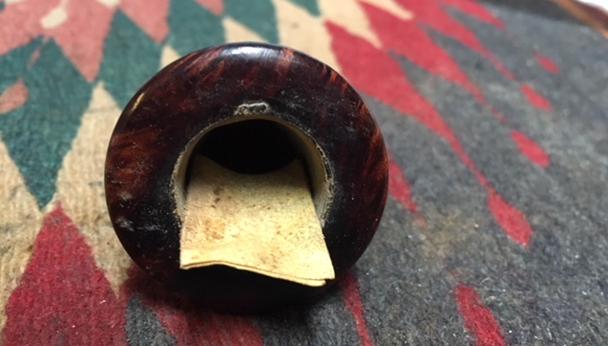
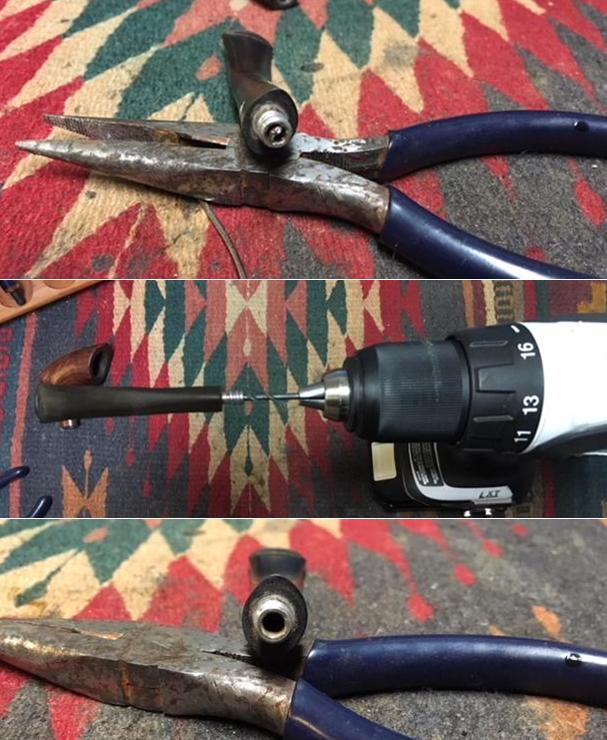
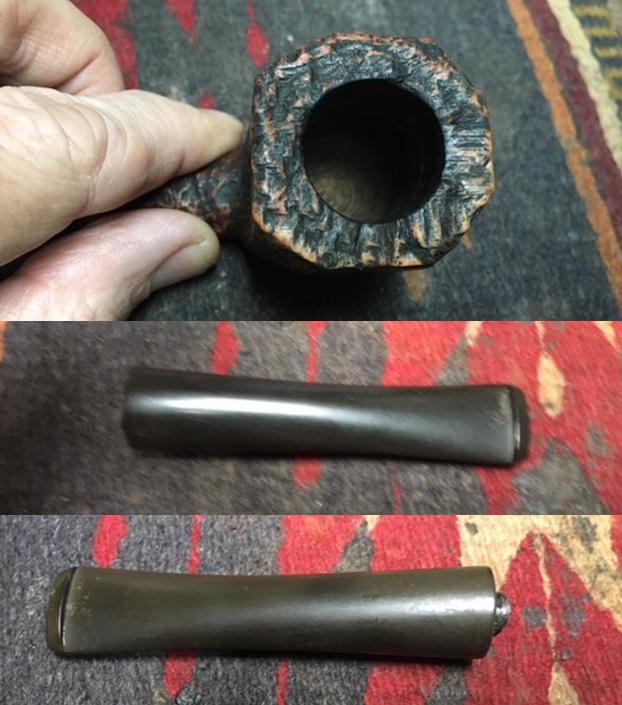 Normally my habit at this point in the restoration is to work on the bowl. However, with the broken tenon I decided to address that first before even touching the bowl. I used a long drywall screw to pull the broken tenon out of the shank. I screw it into the airway on the broken tenon and wiggle it out of the shank.
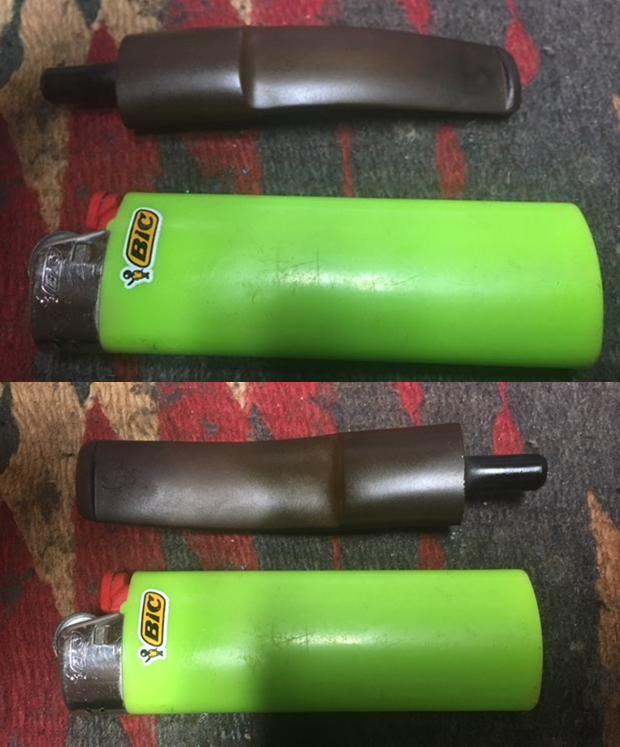
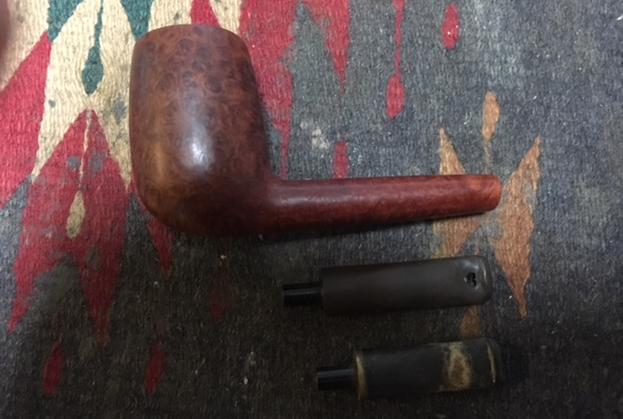
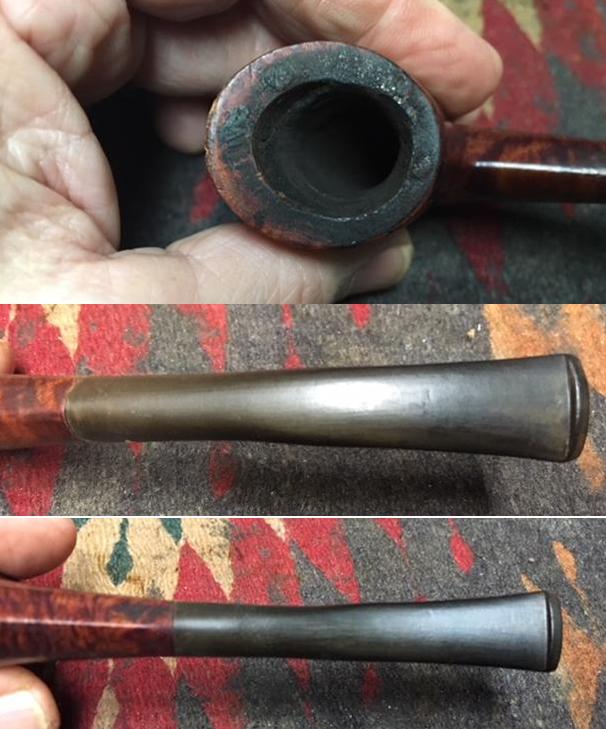
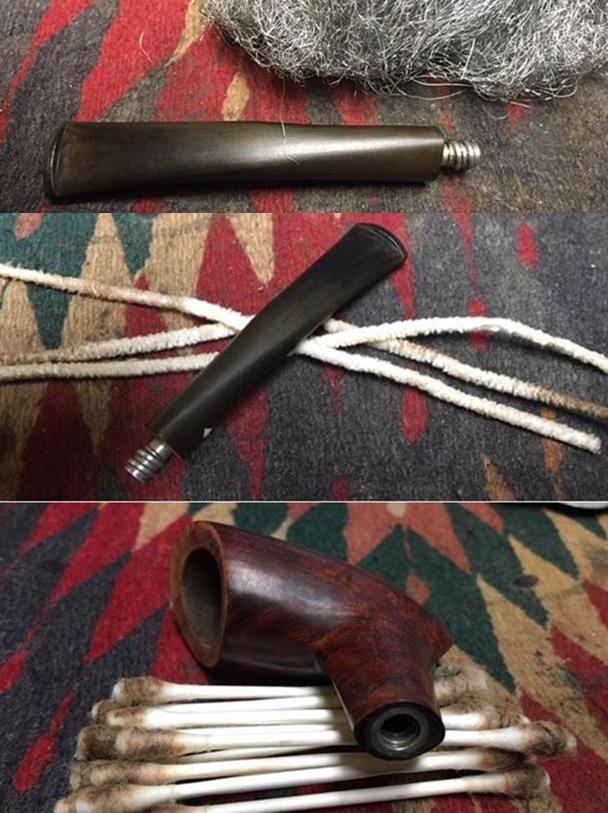
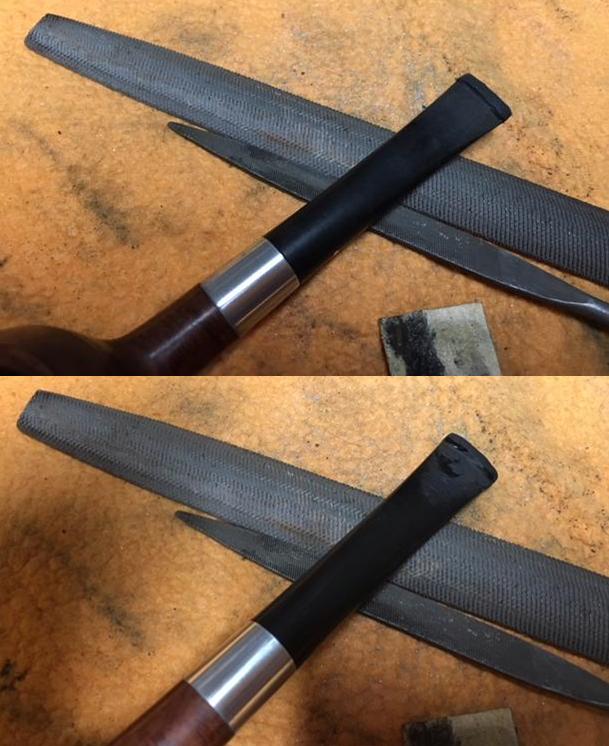
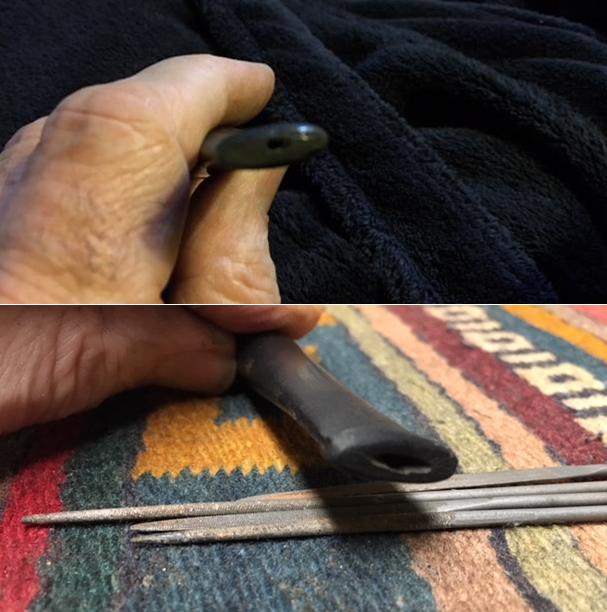
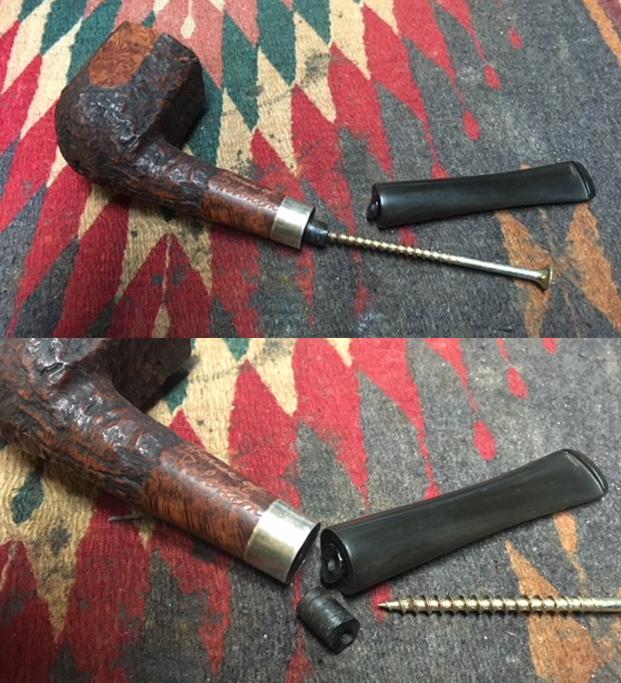 I have a small container of threaded replacement tenons that I have on hand for just this kind of “accident”. I went through the tenons and found one that was the same size as broken one. I flattened the broken edges remaining on the stem end with a Dremel and sanding drum to make the face smooth. I started drilling it with a bit slightly larger than the airway to begin to open it up to receive the threaded tenon end. I worked my way up to a bit the same size as the tenon end. The critical part when you are doing this by hand is to keep everything straight or you can end up with a crooked tenon. I finished the drilling and cleaned up the opening in the stem with a needle file to ensure that everything was smooth. Once it was clean and ready I checked out the fit of the tenon and then glued it in place in the stem. The photos show the process.
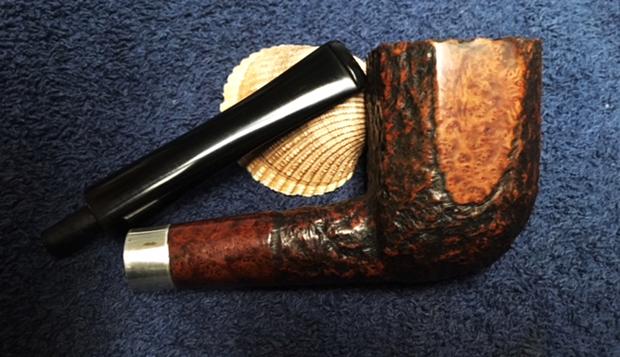
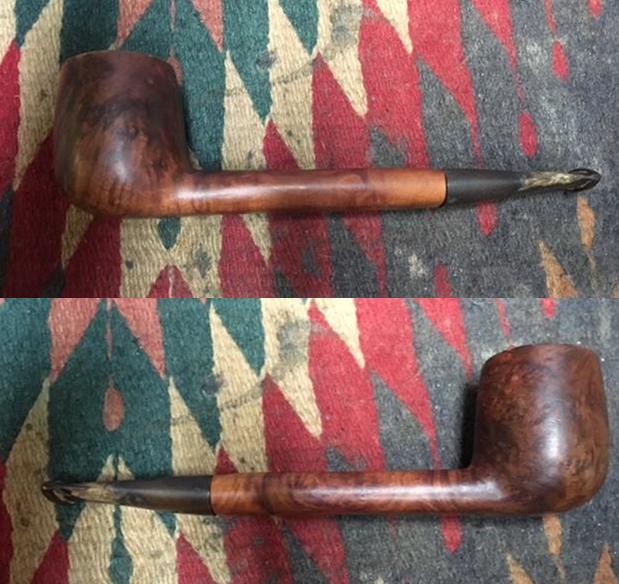
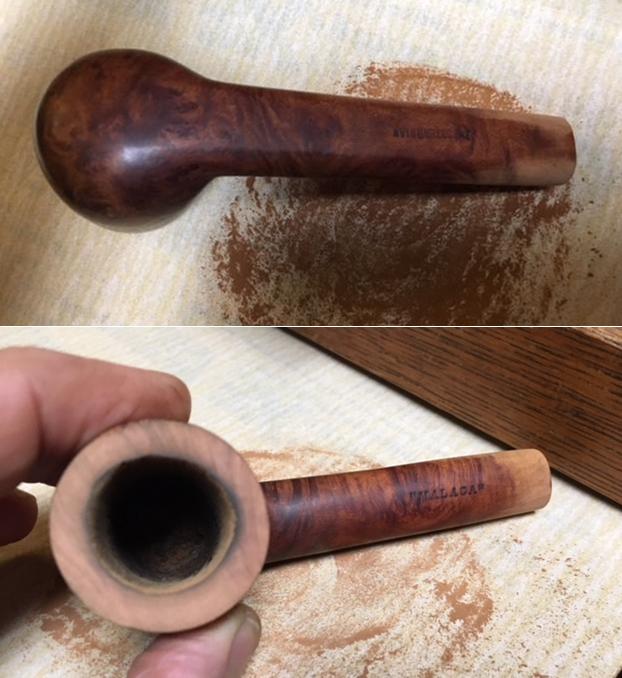
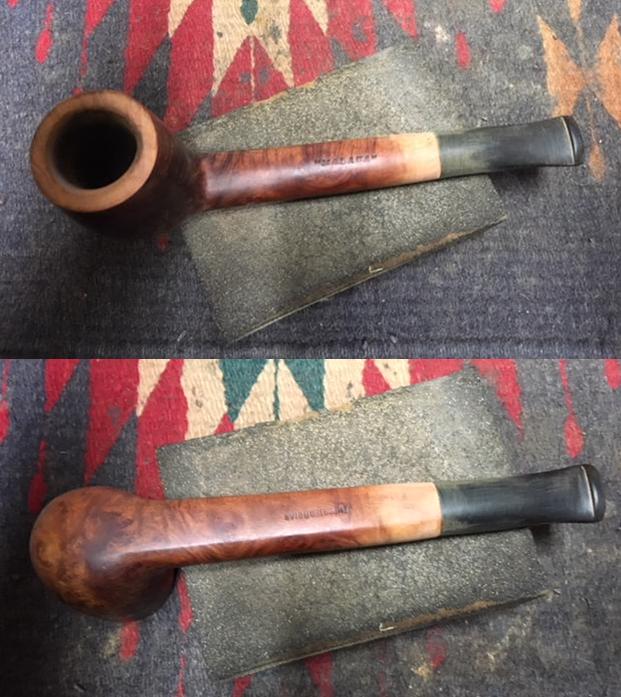
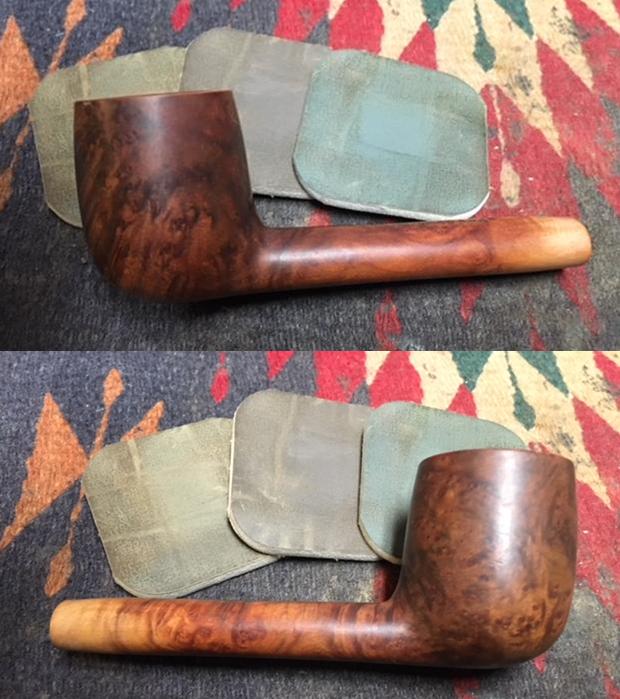
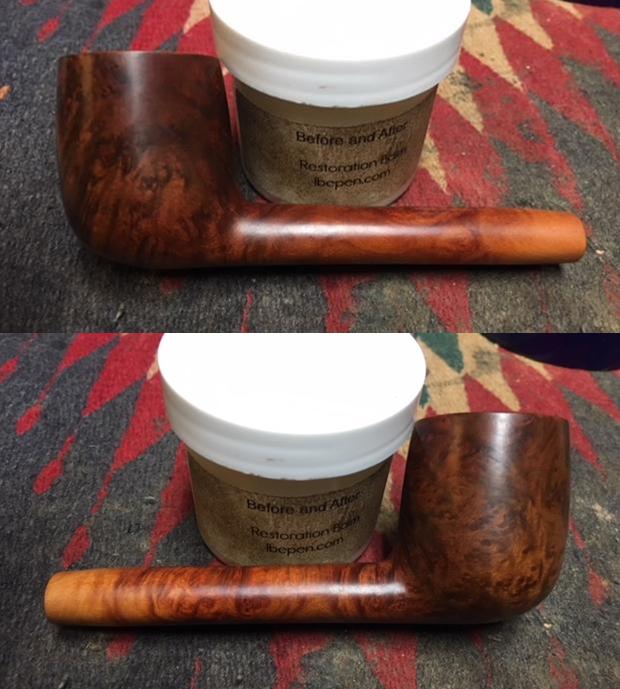
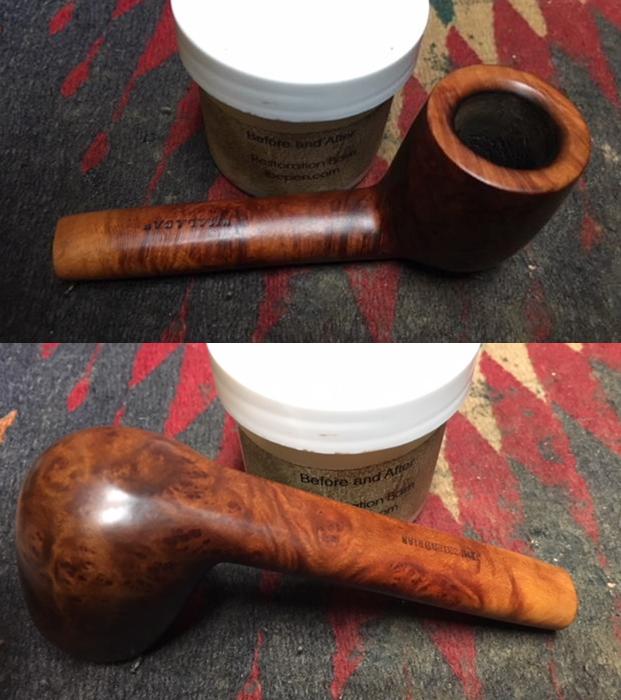
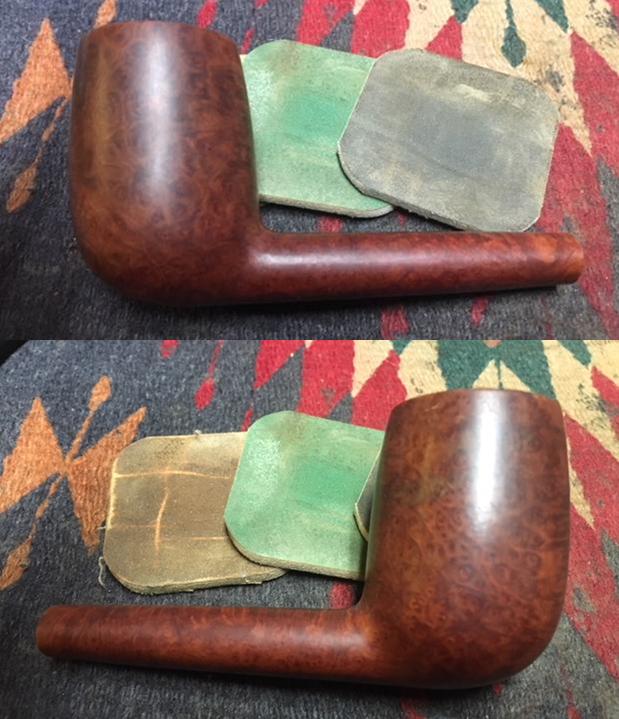
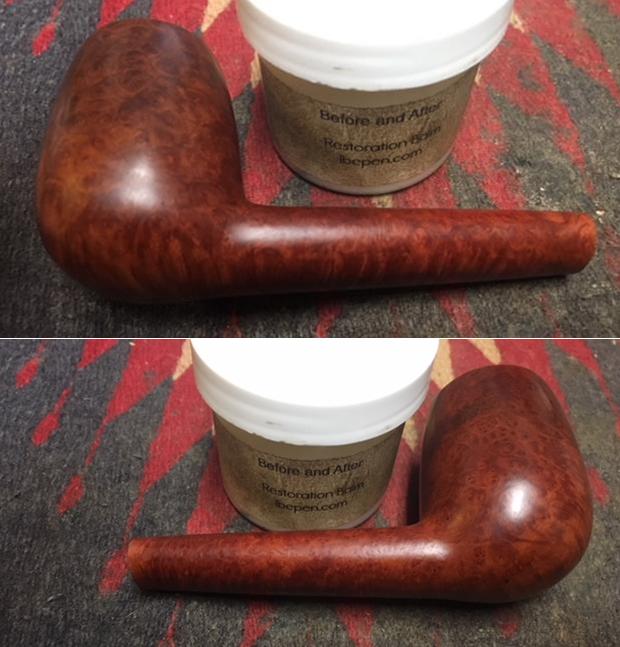
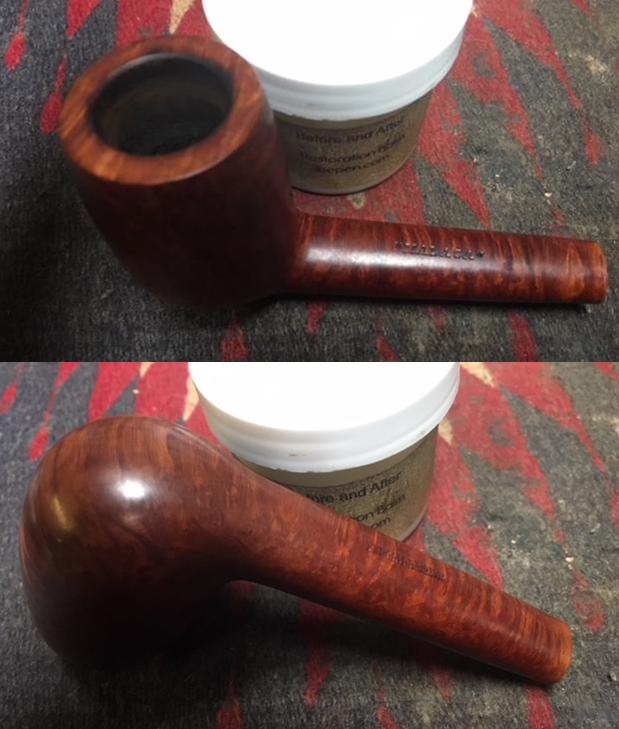
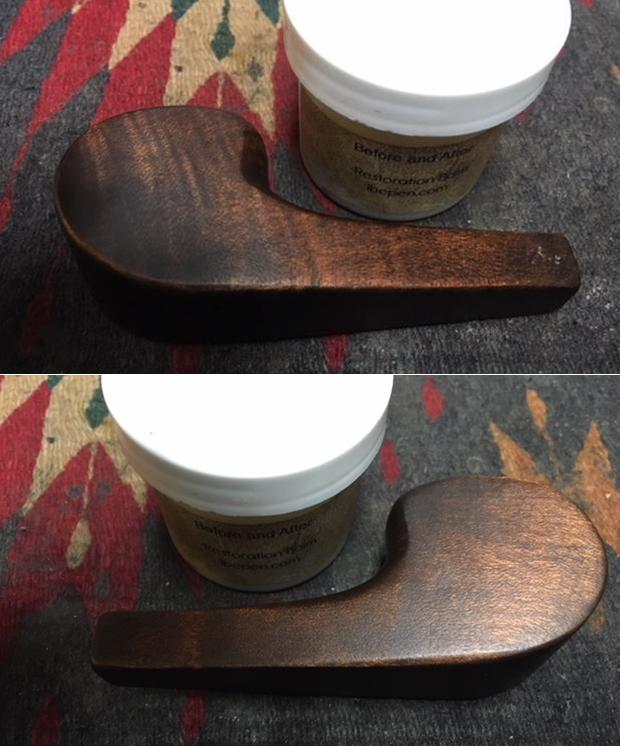
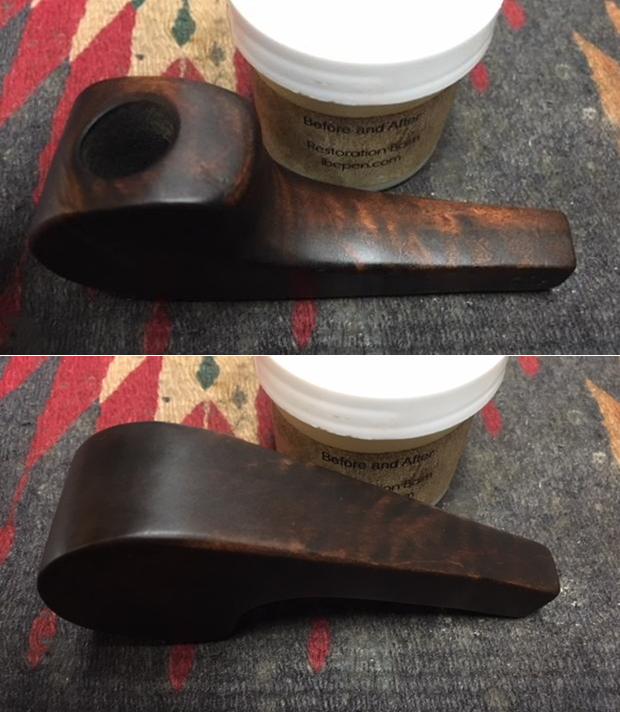
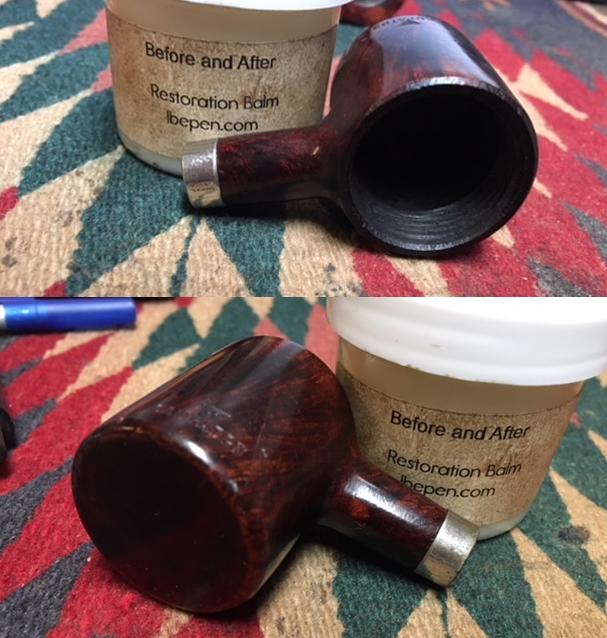
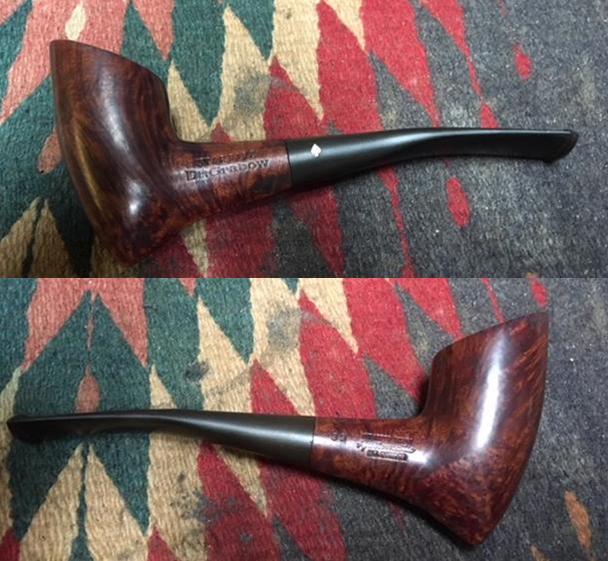
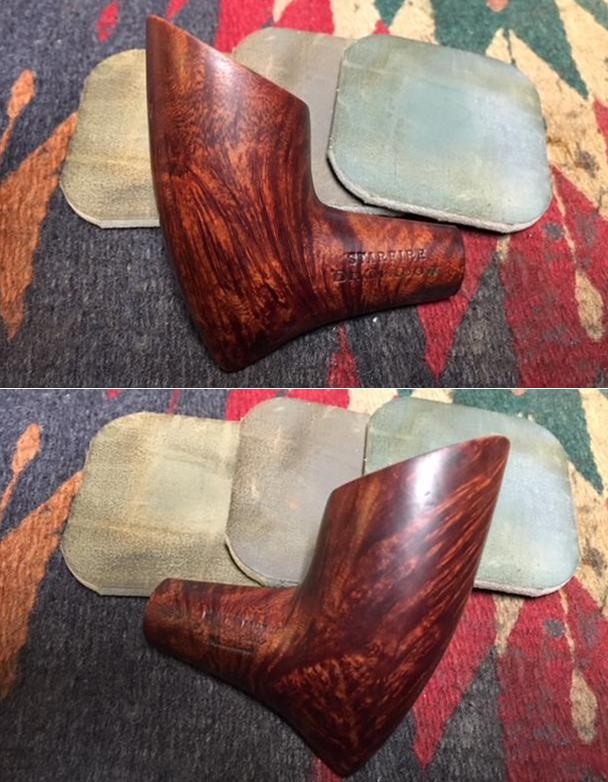
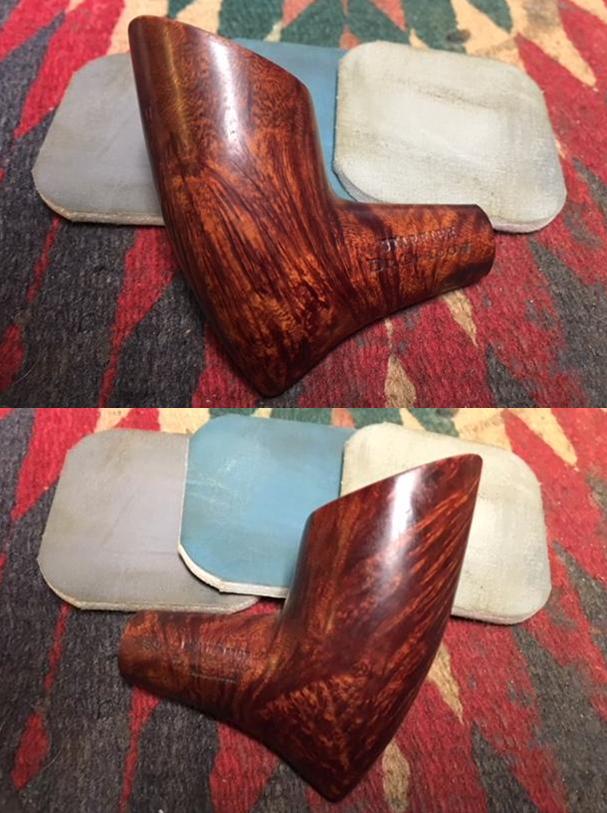
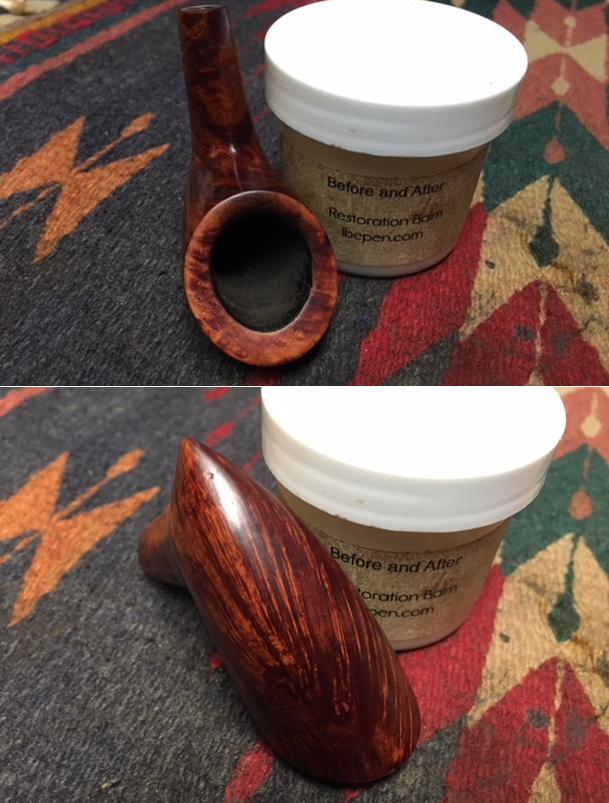
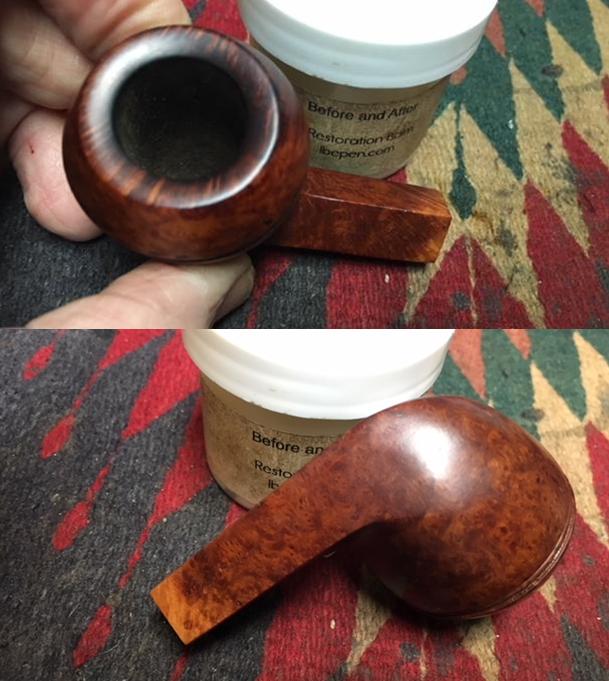
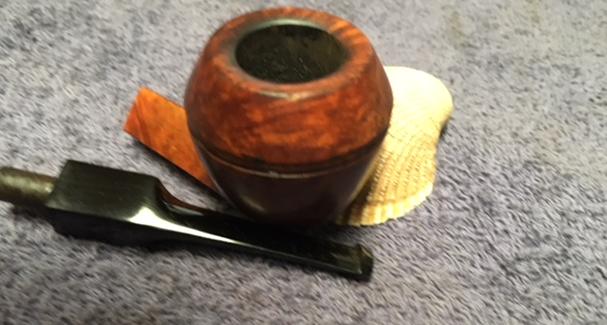
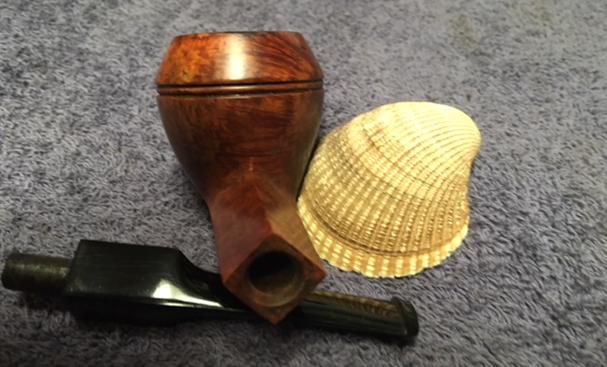
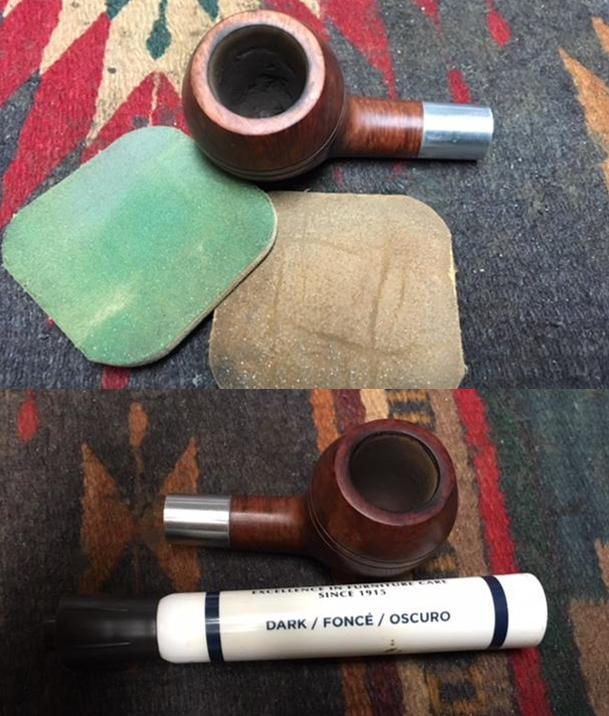
 I worked Before & After Restoration Balm deep into the nooks and crannies of the rusticated finish to clean, enliven and protect the briar. I hand rubbed it with my fingers and worked it into the finish with a horsehair shoe brush. I wiped it off with a soft cloth. I buffed the bowl with a cotton cloth to polish it. It really began to have a deep shine in the briar. I took some photos of the bowl at this point to mark the progress in the restoration. The grain on the smooth panels on the sides of the bowl stands out, while the grooves of the rustication look almost undulating. It is another unique and strangely beautiful House of Robertson pipe.

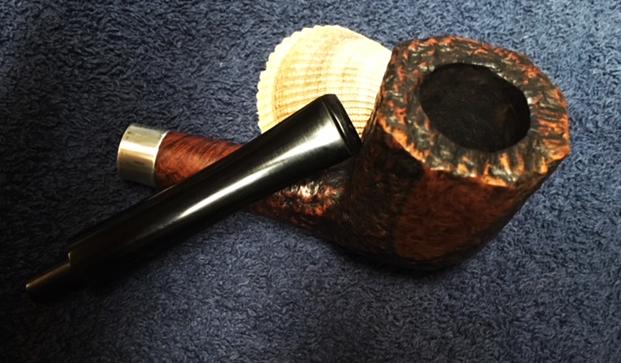
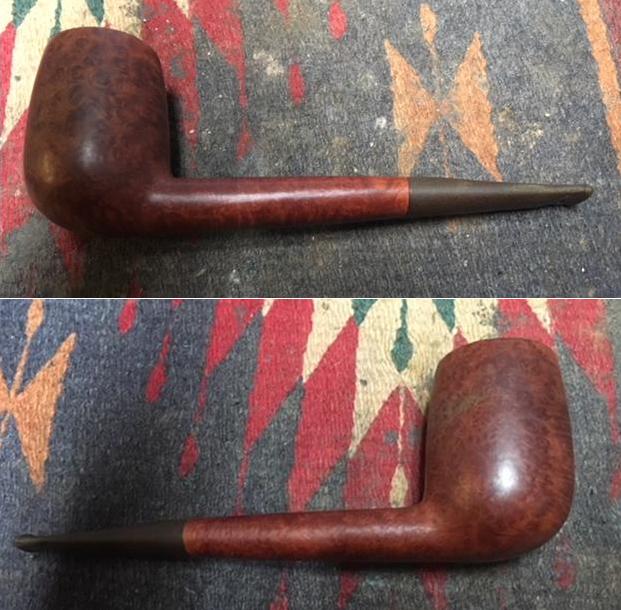
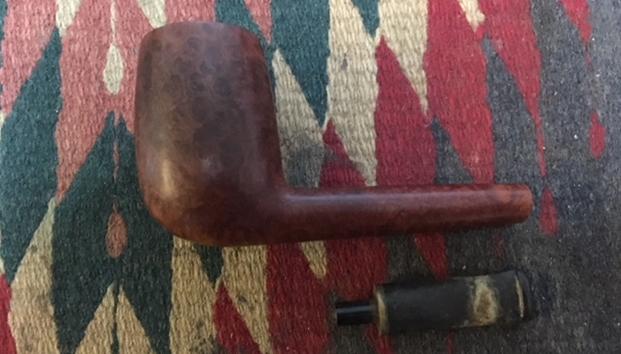
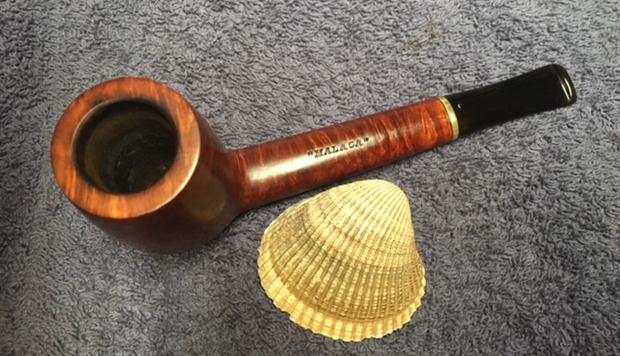
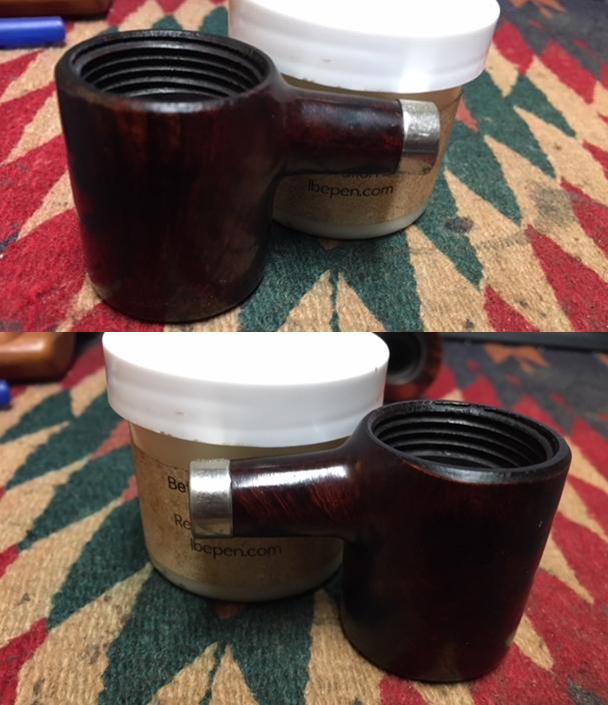
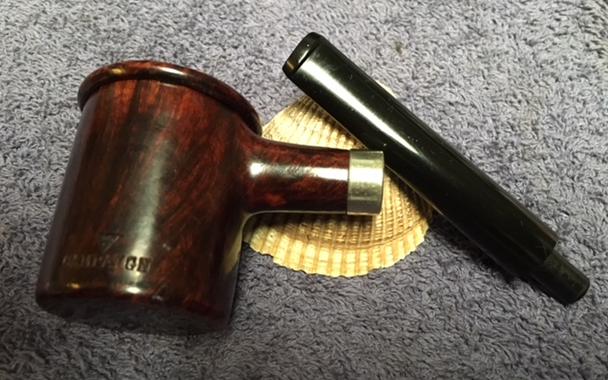
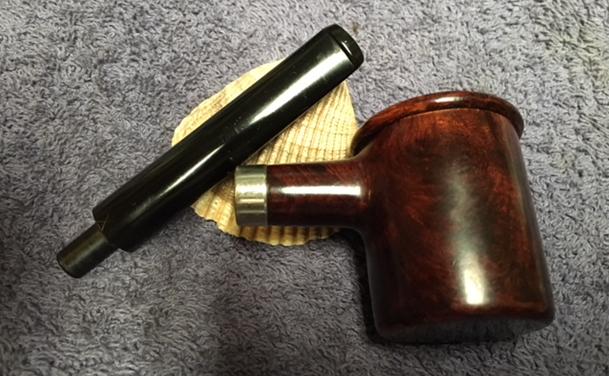
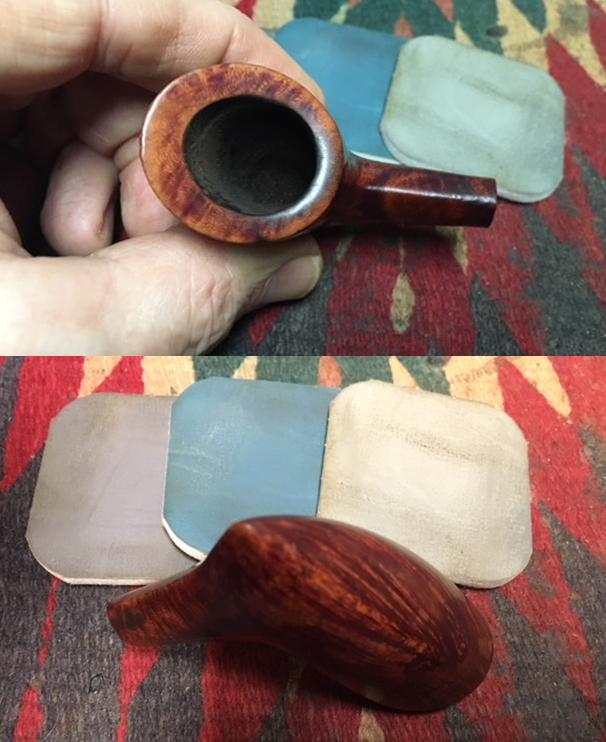
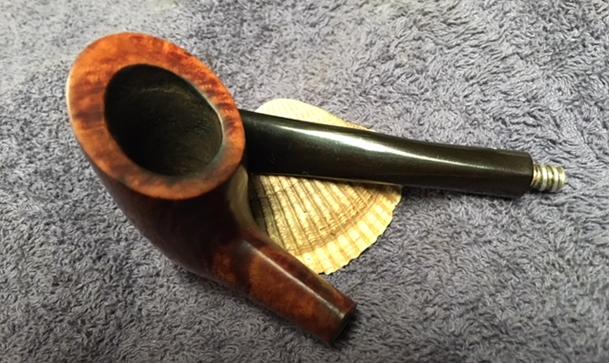
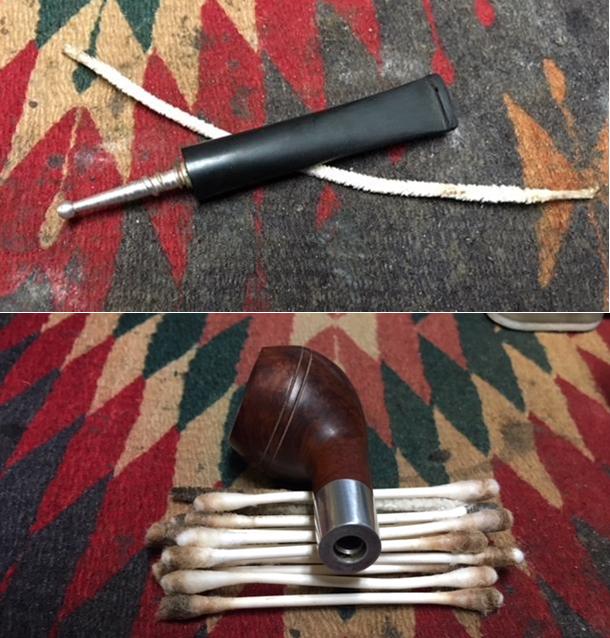
 Once the glue on the tenon was set I put the stem in the shank and took the following photos to show the fit of the repaired stem to the shank. Finally, after the “accidental” extra steps I am back to where I was when the pipe arrived. It is ready to be cleaned up and restored.
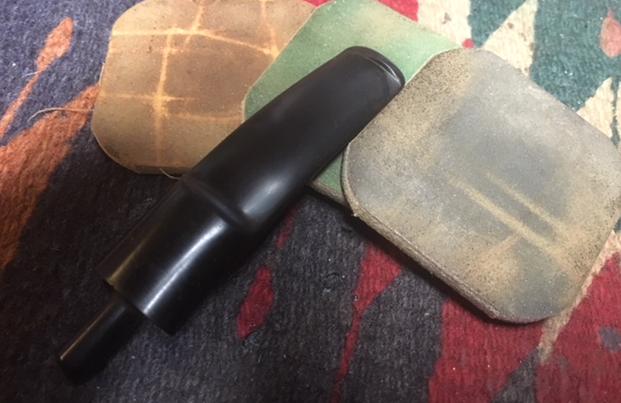
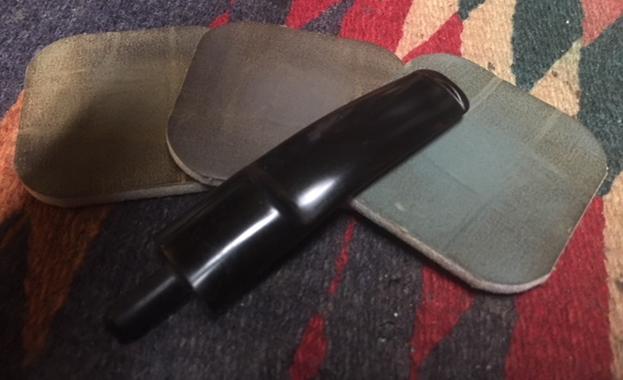
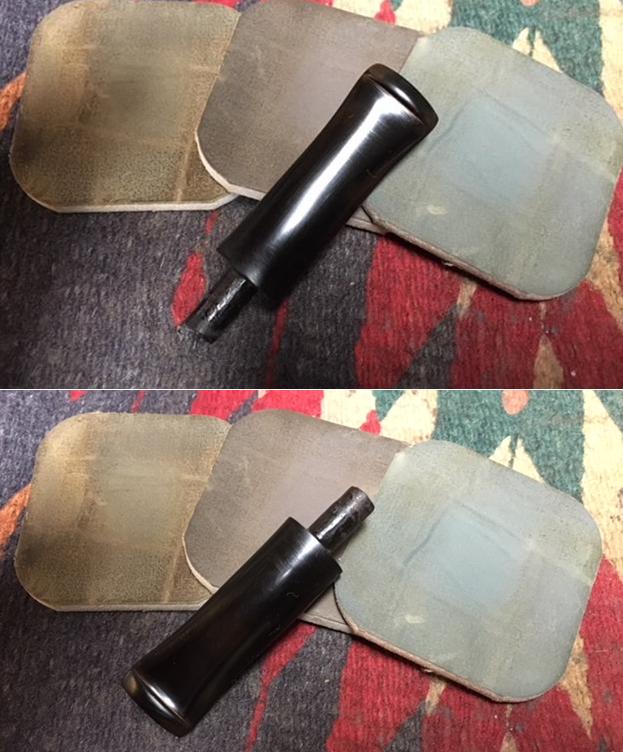
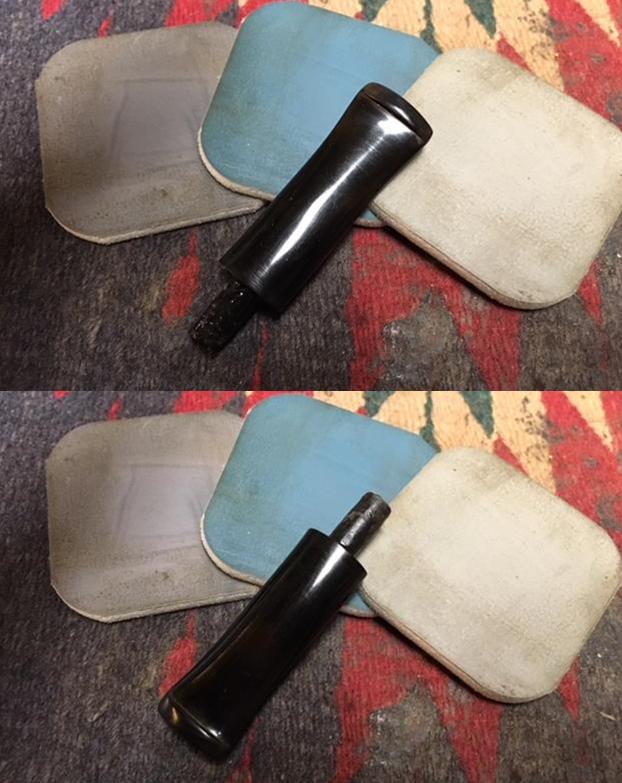
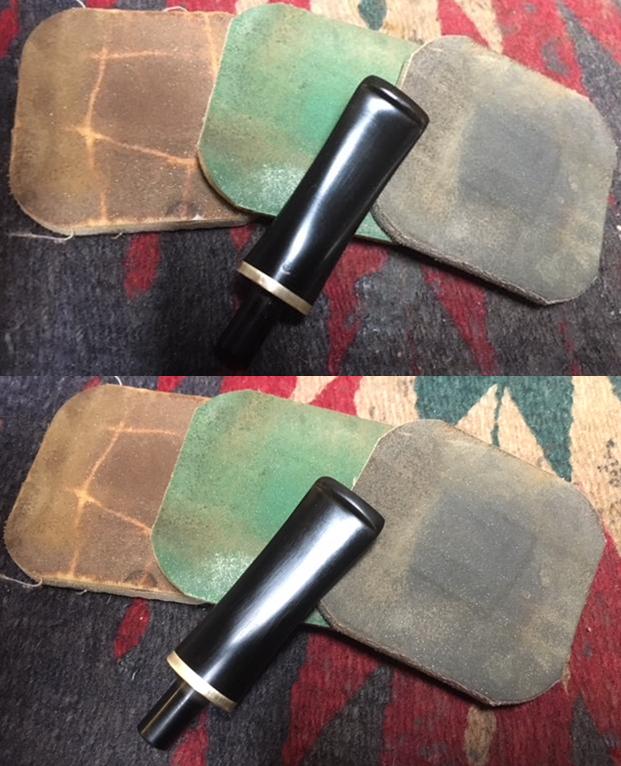
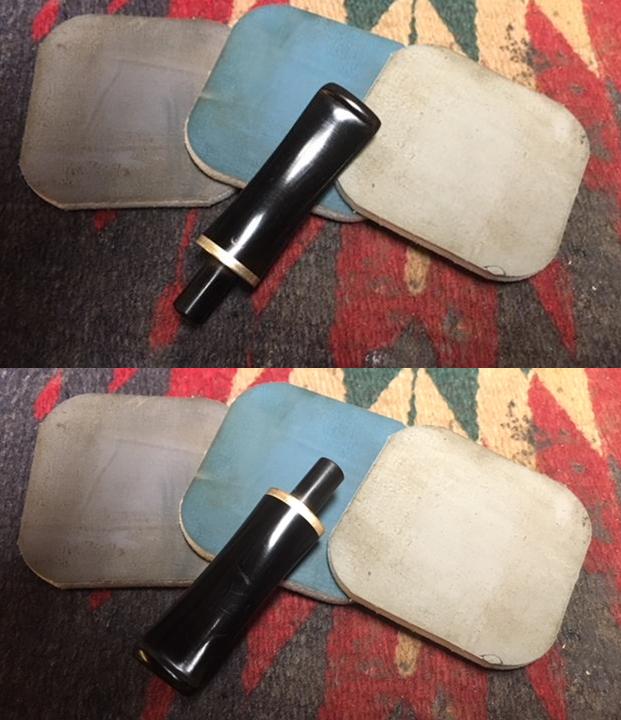
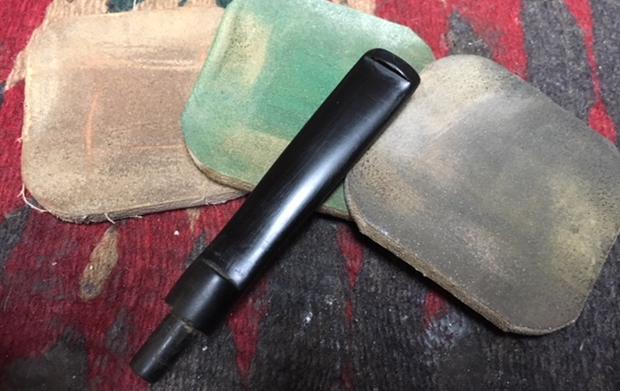
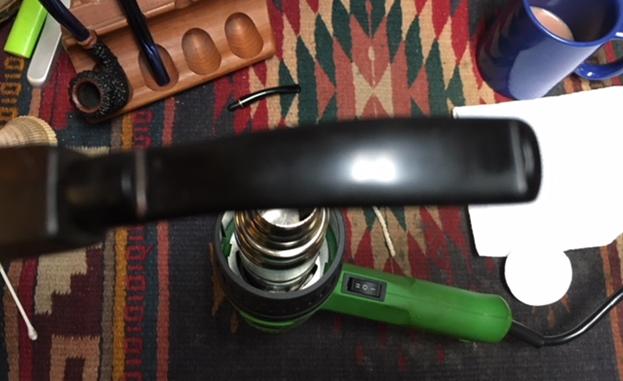
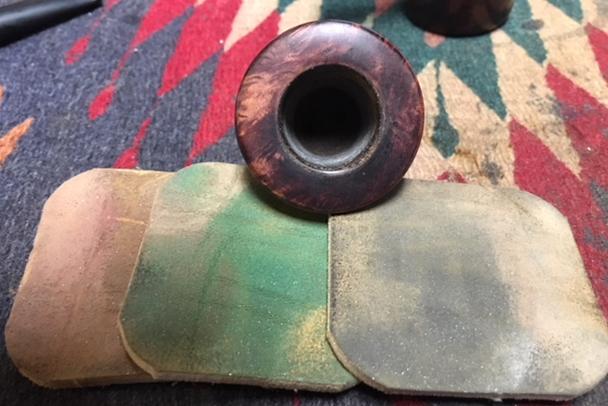
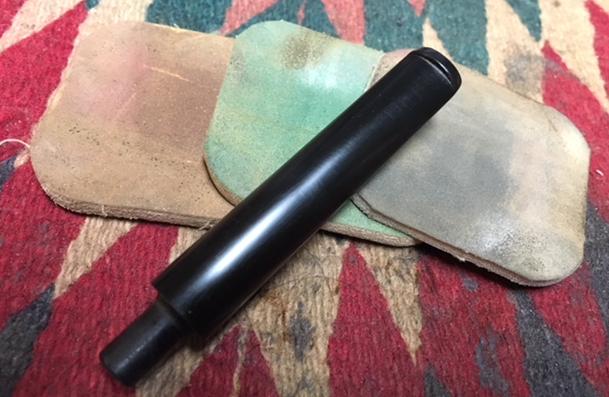
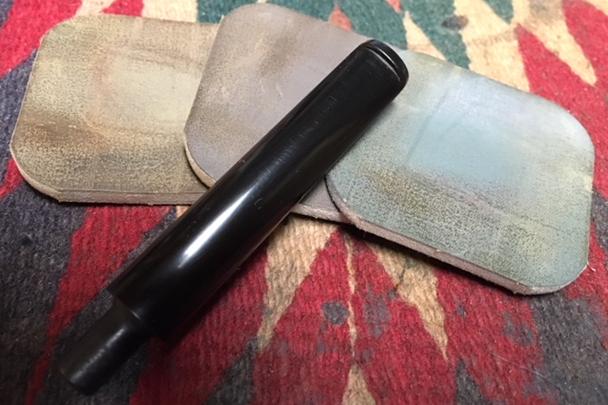
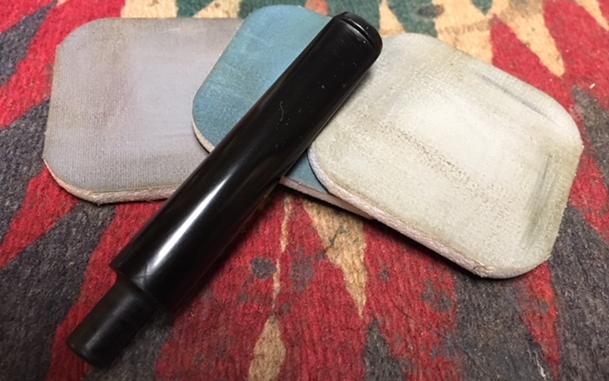
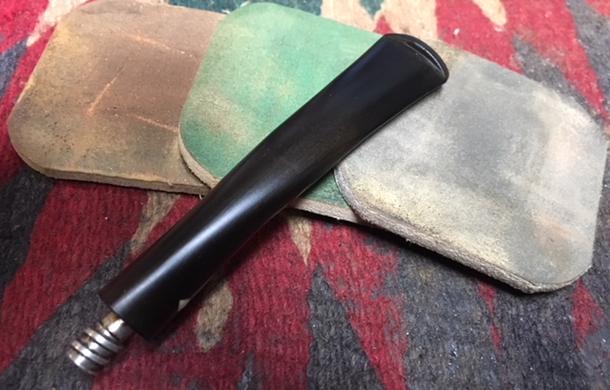
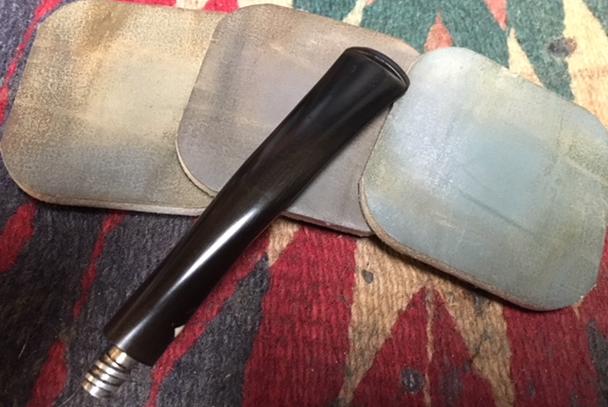
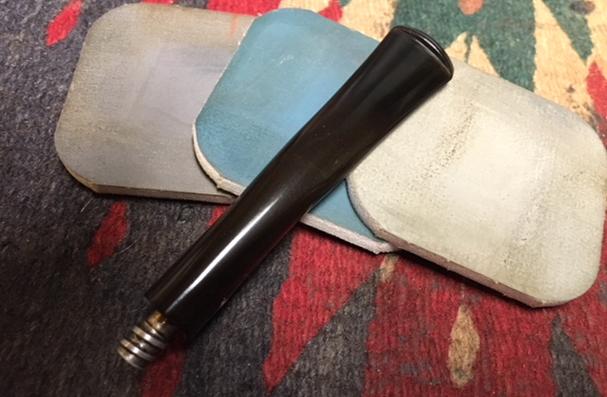
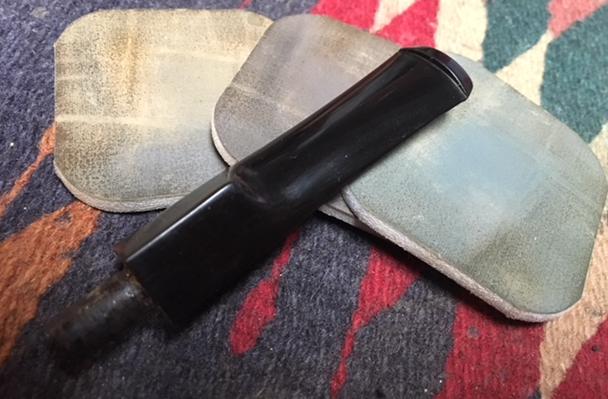
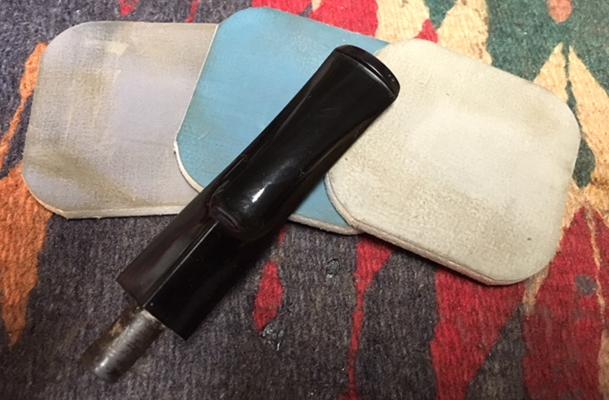
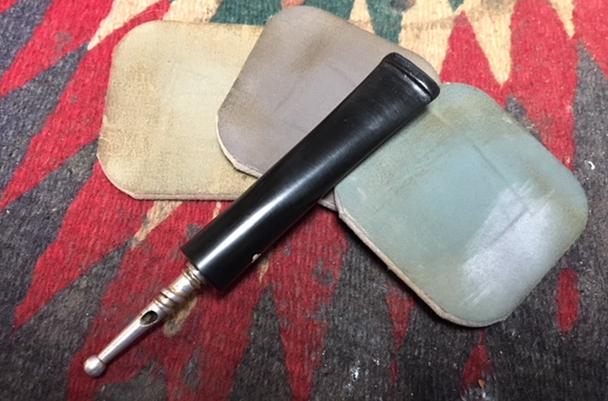
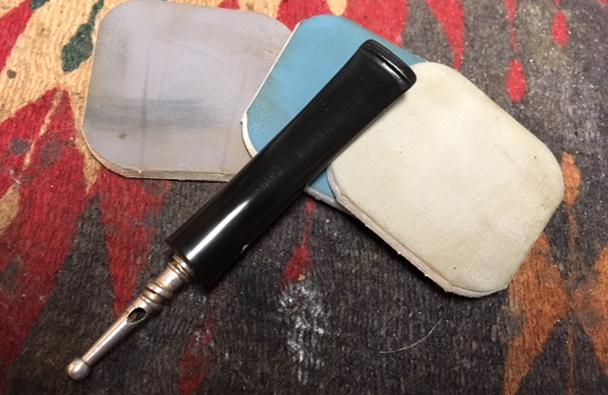
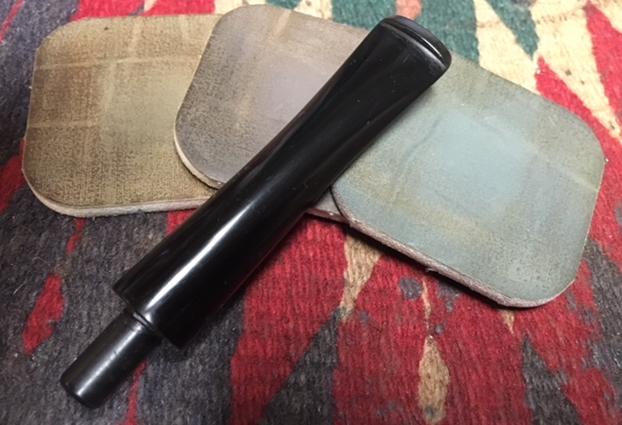
 I sanded the stem with 220 grit sandpaper to remove the oxidation on both sides of the tapered stem and remove the tooth marks and chatter on the top and bottom sides at the button.
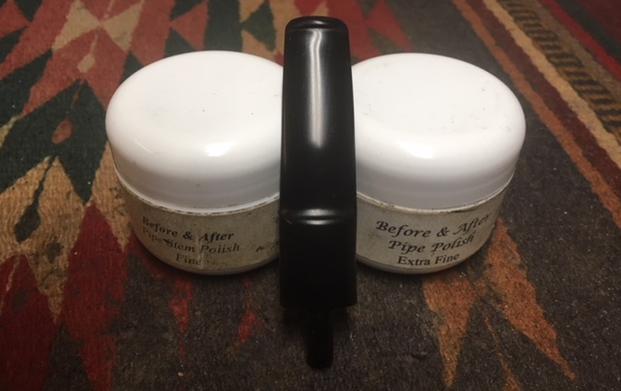
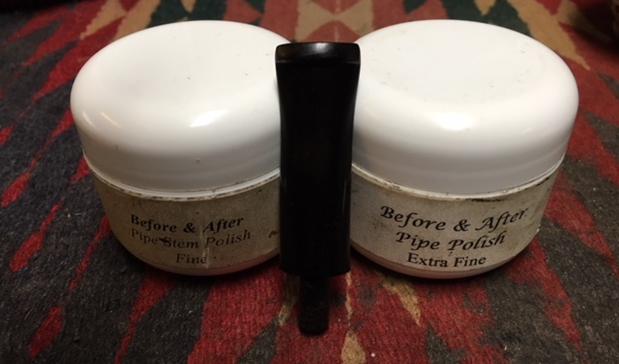
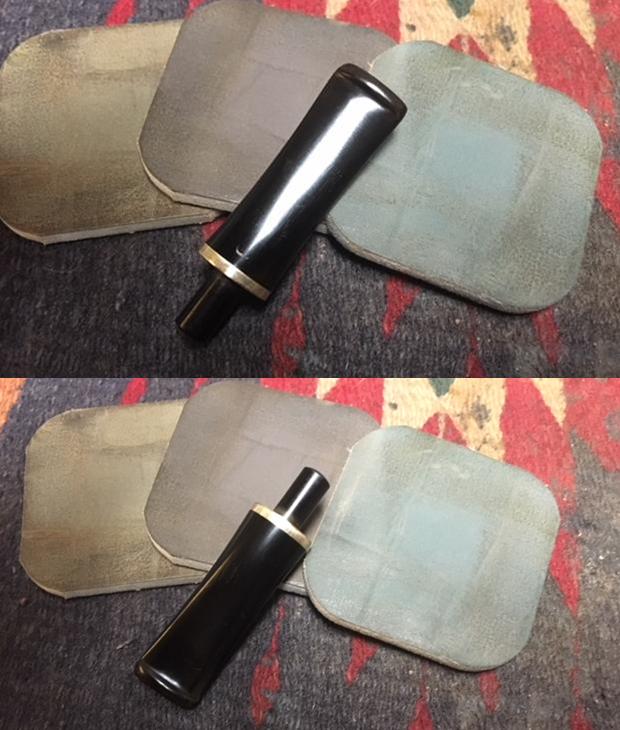
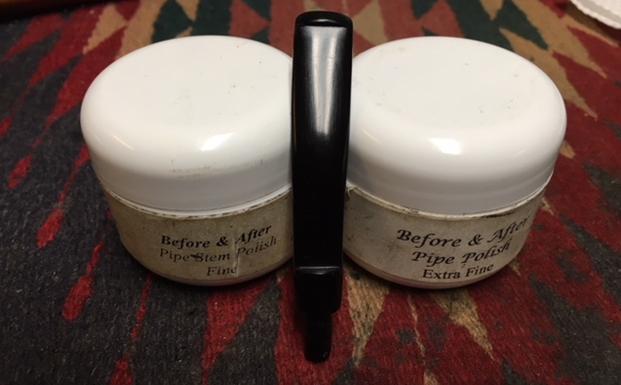
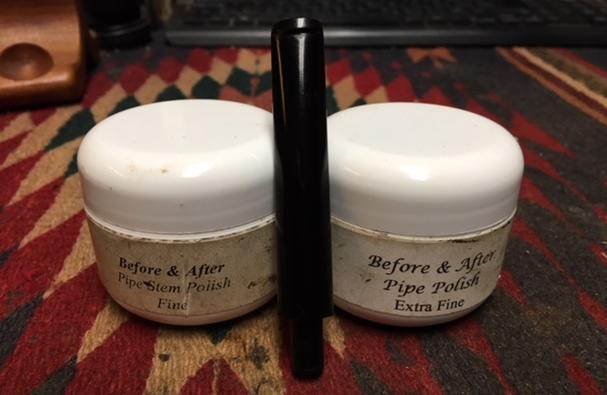
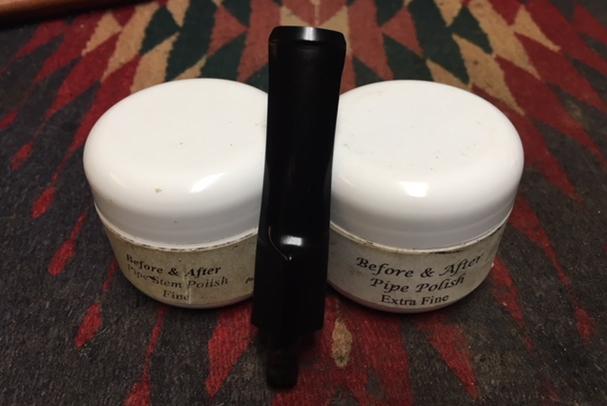
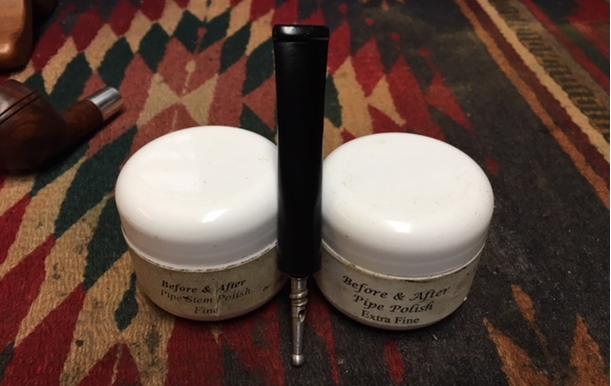
 I polished out the sanding scratches and marks in the vulcanite with micromesh sanding pads – wet sanding it with 1500-2400 grit pads and dry sanding it with 3200-4000 grit pads. I wiped the stem down with Obsidian Oil after each sanding pad. I buffed the stem with Blue Diamond on the buffing wheel. I brought it back to the table and sanded it with the final three 6000-12000 grit pads. I polished it further with Before & After Pipe Polish –using both the Fine and Extra Fine Polishes. I gave it a rubdown with Obsidian Oil one last time and set it aside to dry.
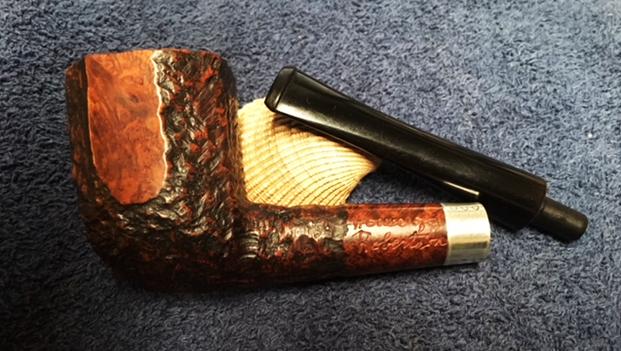
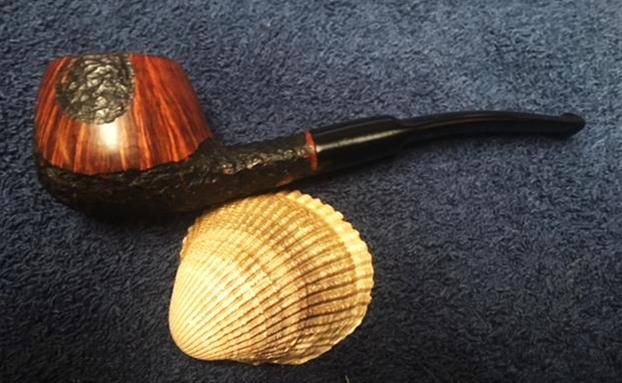
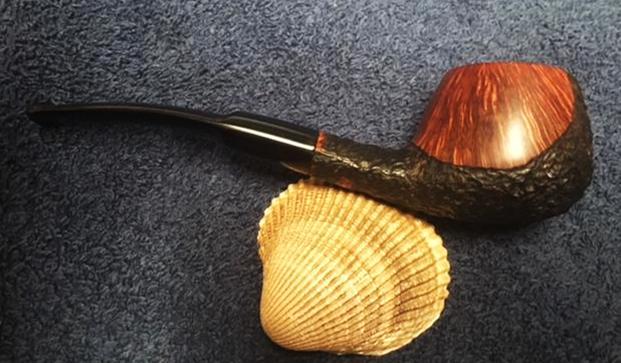
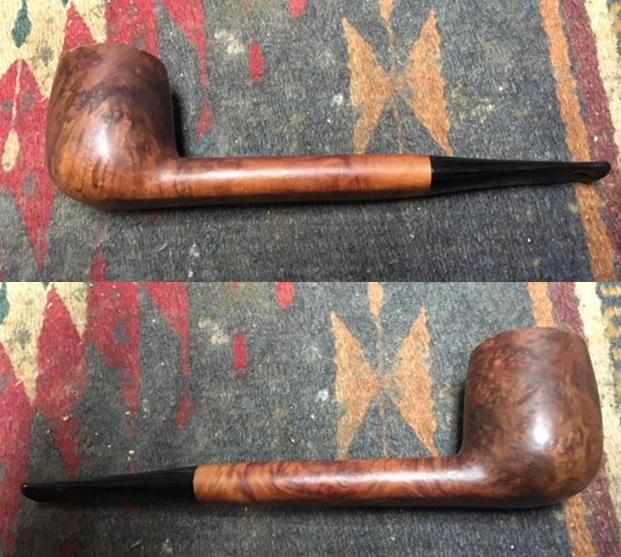
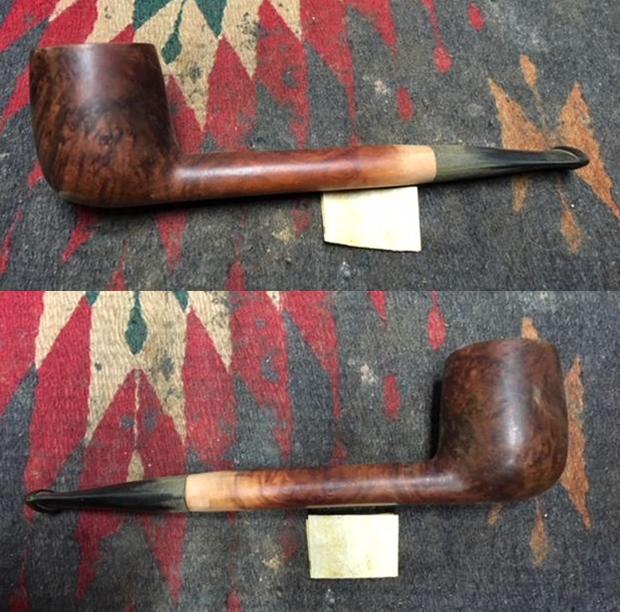
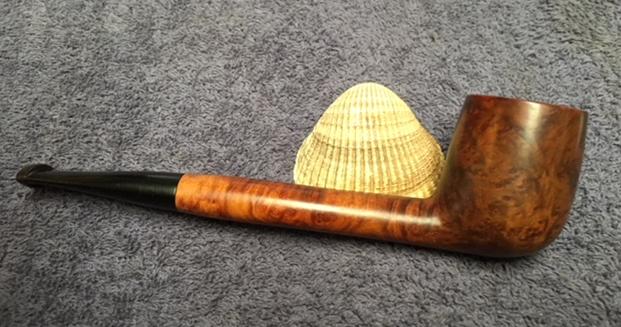
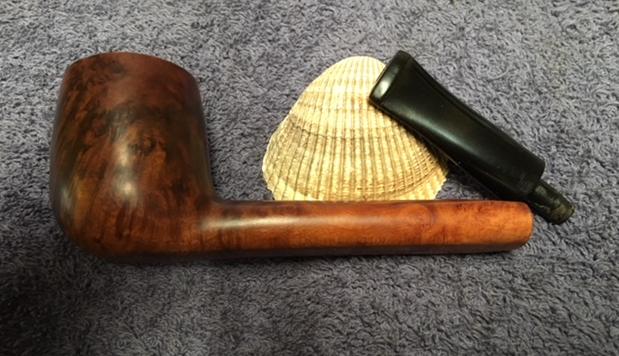
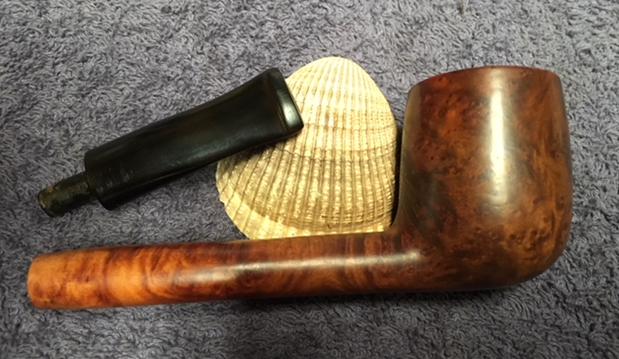
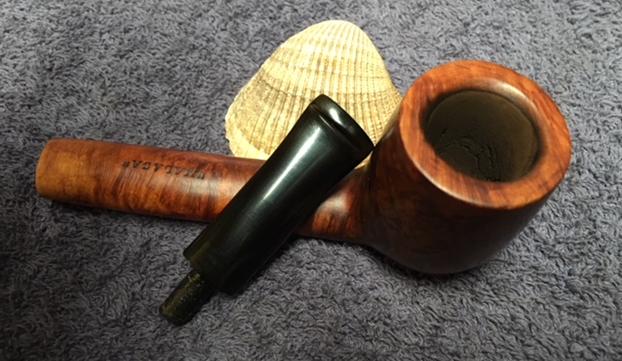
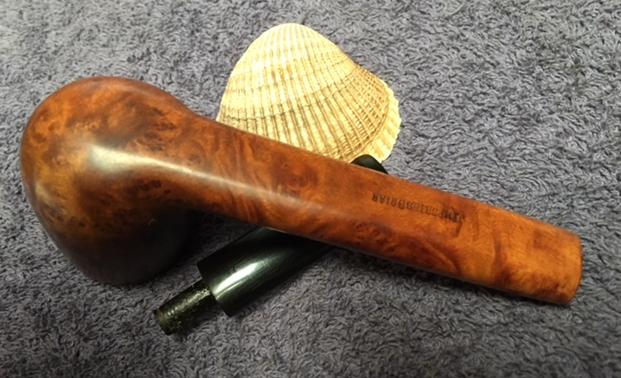
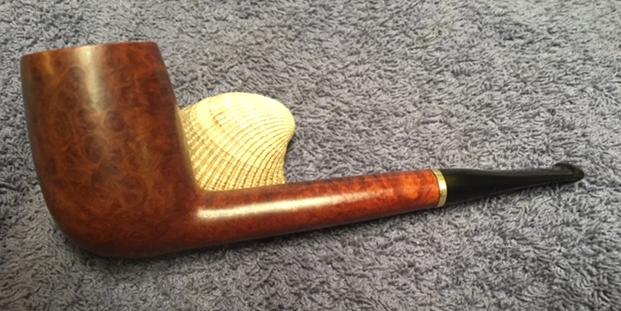
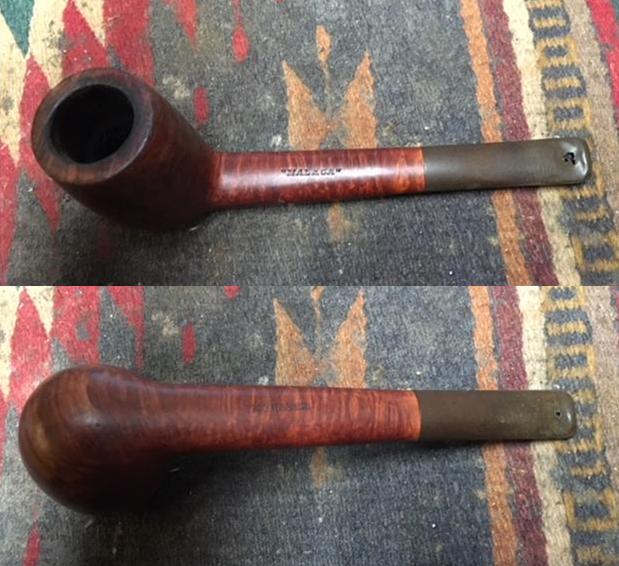
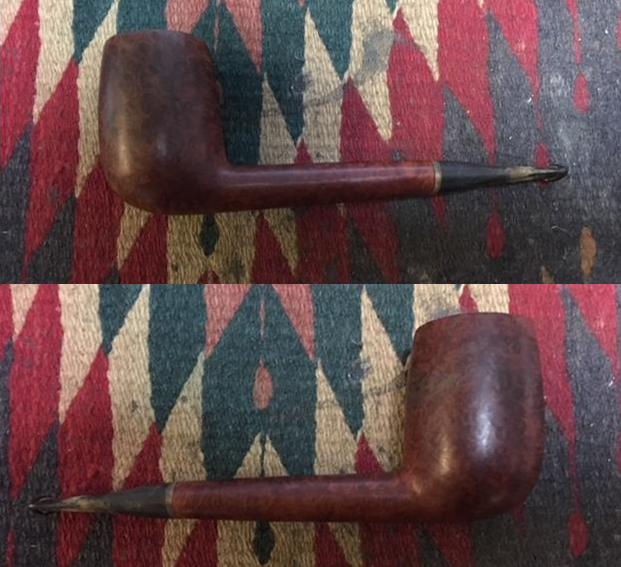
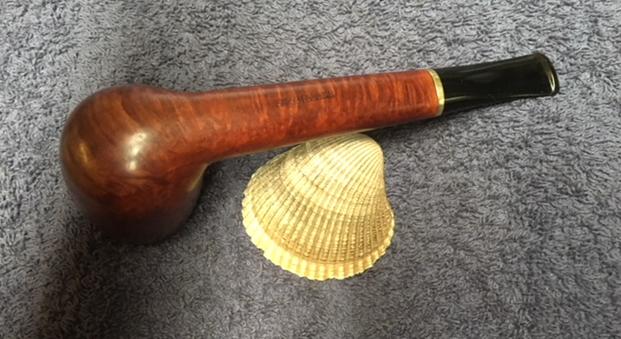
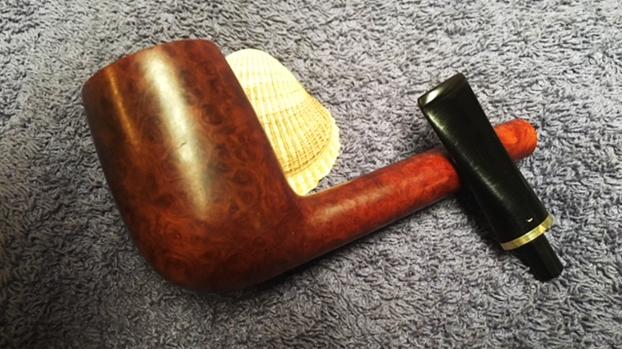
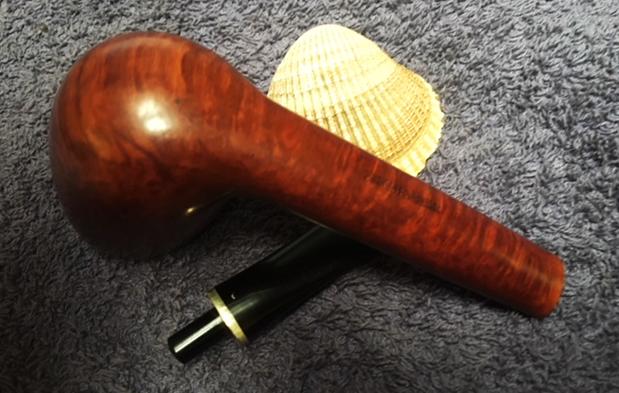
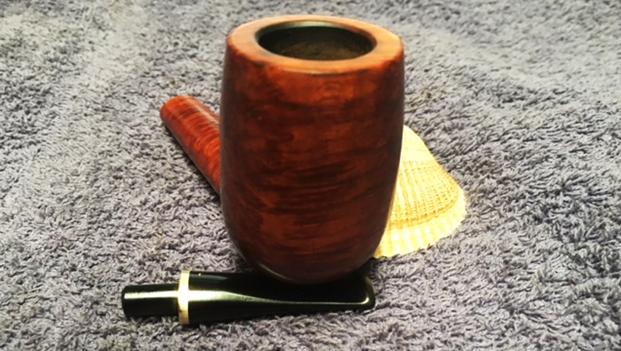
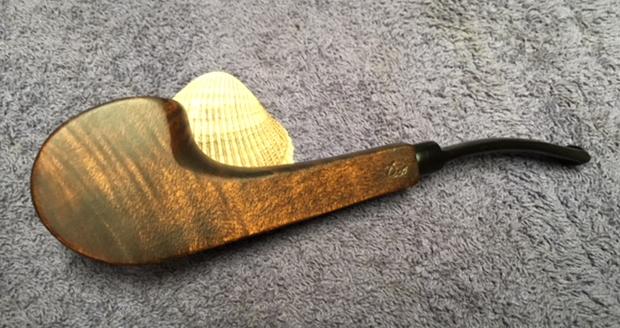
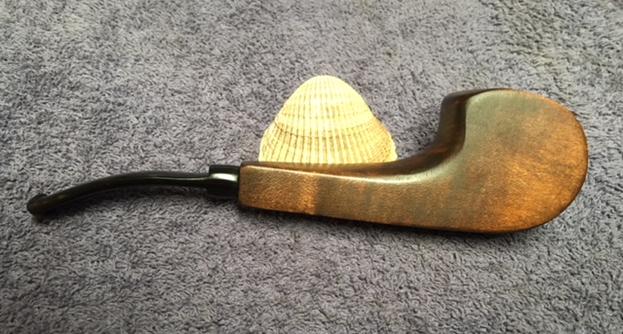
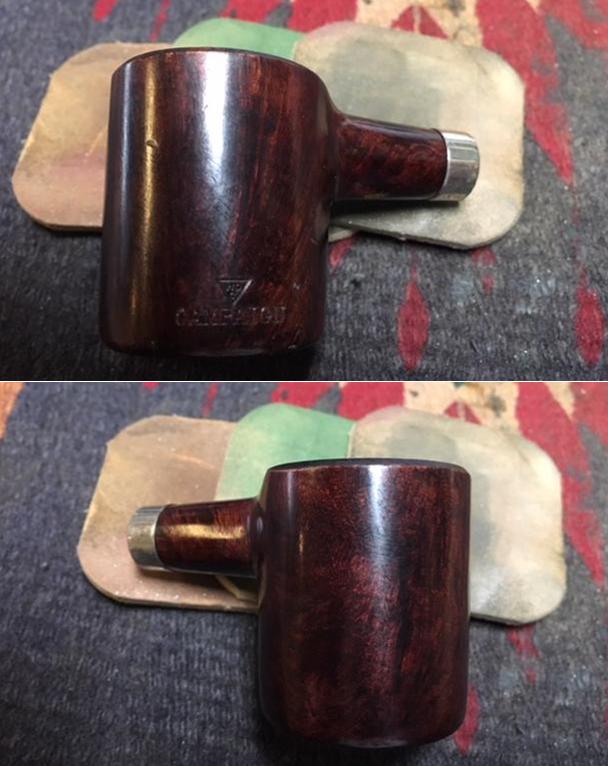
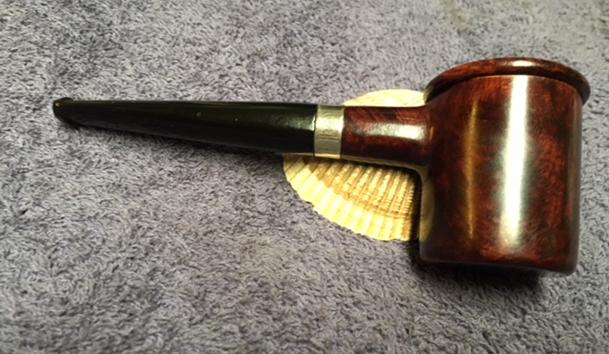
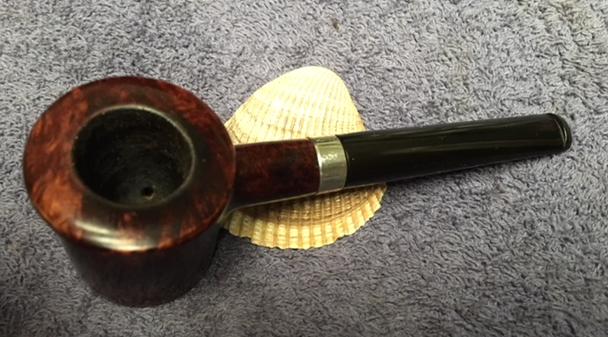
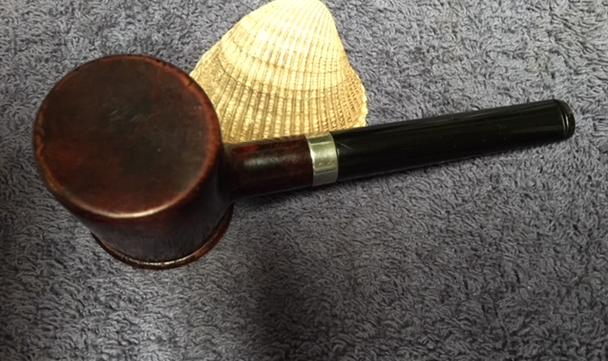
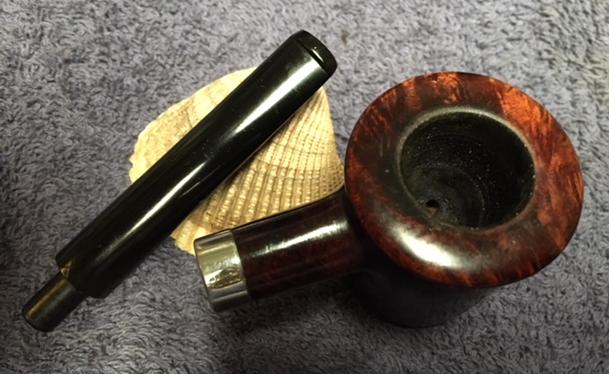
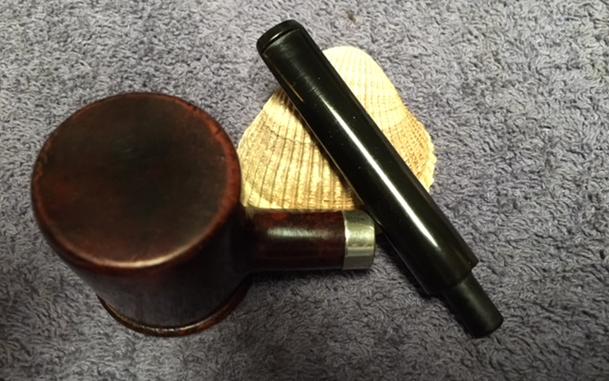
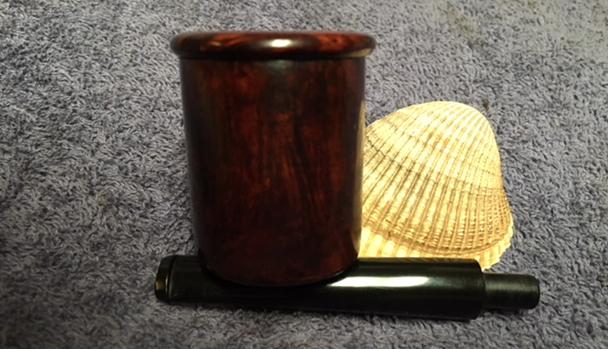
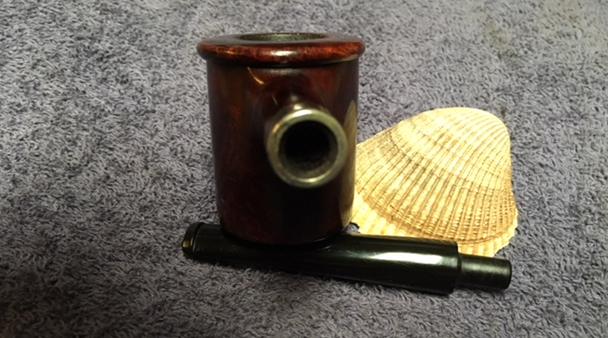
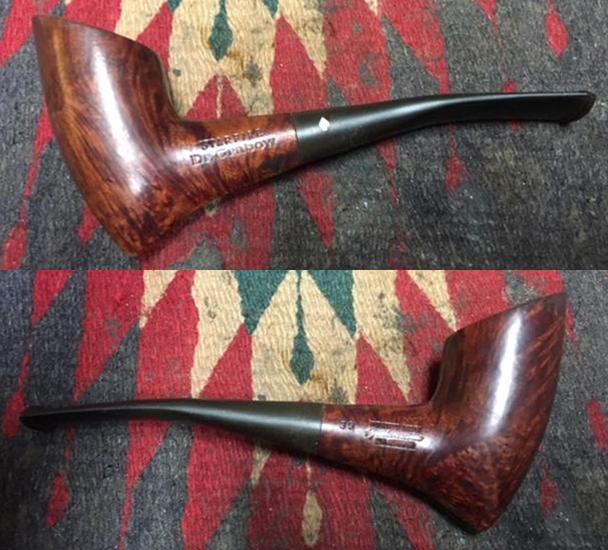
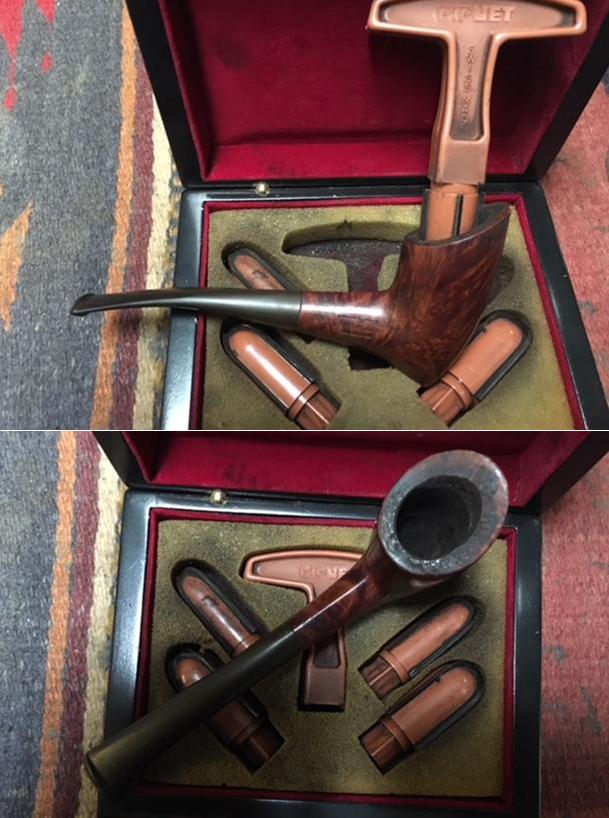
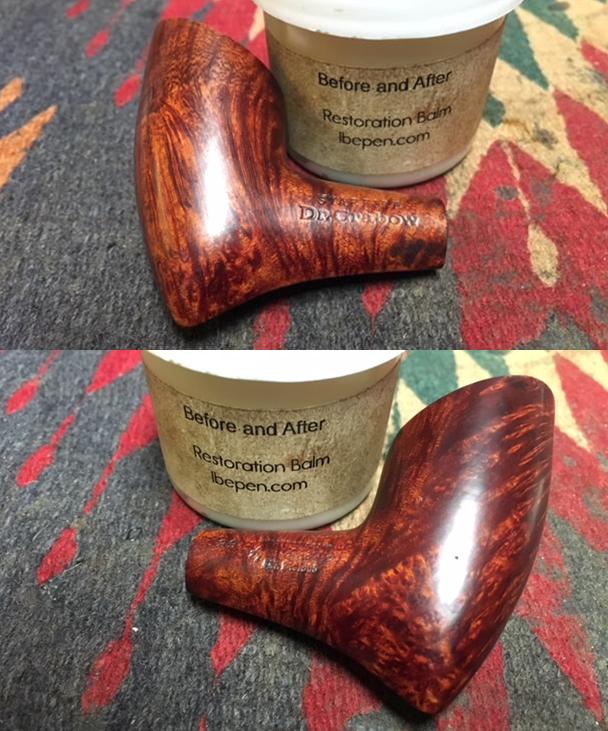
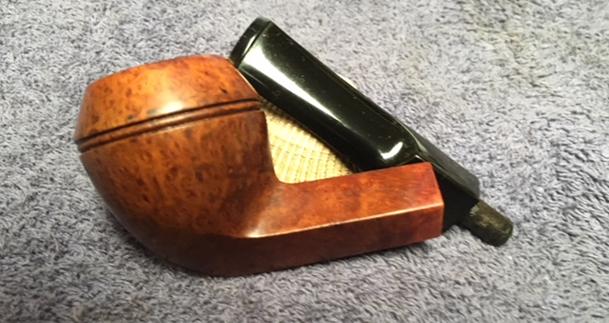
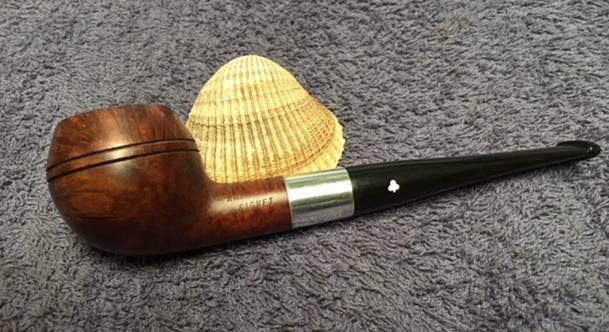
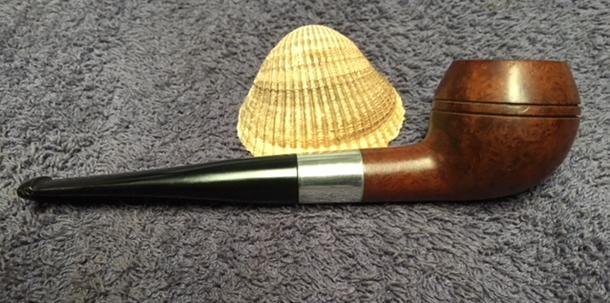
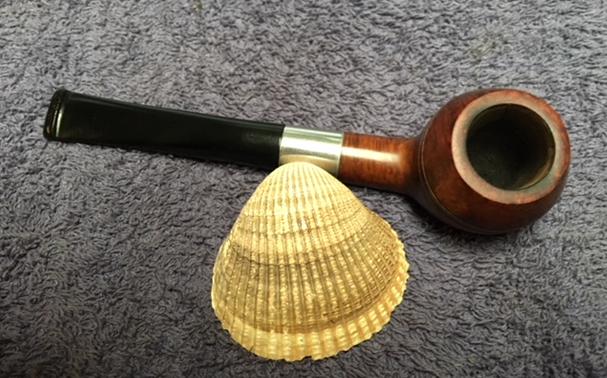
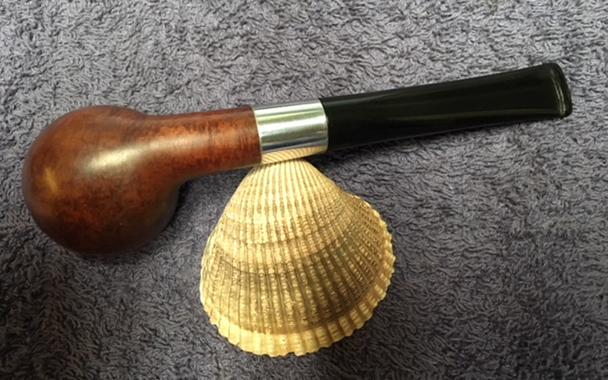
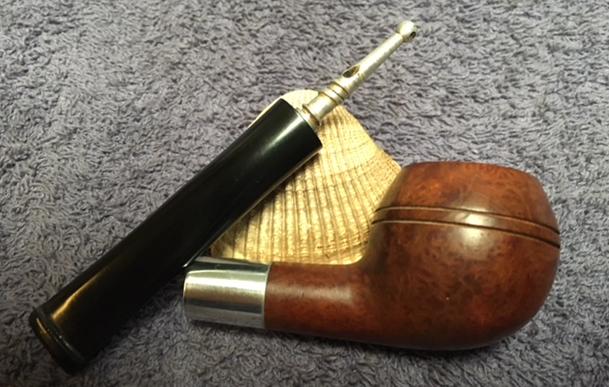
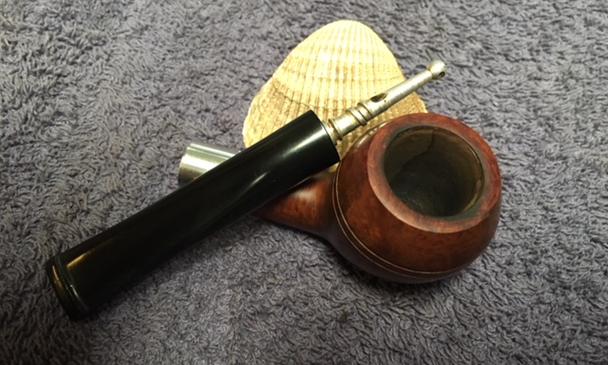
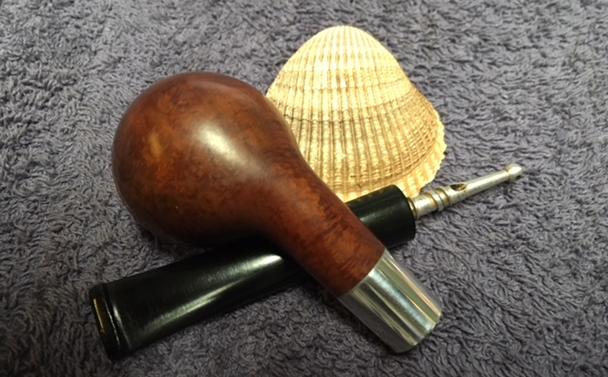
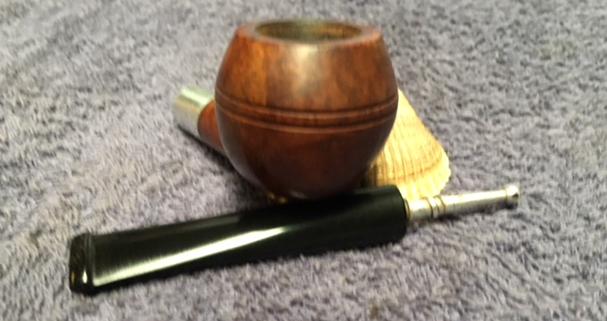
 I put the stem back on the bowl and worked the pipe over on the buffing wheel using Blue Diamond to lightly polish the stem. I buffed the bowl with a light touch so as not to get any of the buffing compounds in the grooves of the rustication. I buffed the stem to raise the gloss on the vulcanite. I gave the bowl multiple coats of Conservator’s Wax and gave the stem multiple coats of carnauba wax. I buffed the entire pipe with a clean buffing pad to raise the shine. I hand buffed it with a microfiber cloth to deepen the shine. The finished pipe is shown in the photos below. The medium brown and dark brown stains on the rusticated billiard shaped bowl with a smooth panels and bands works well with the rich black of the vulcanite stem. The polishing of the stem material left this a beautiful and interesting looking pipe. The dimensions of the pipe are: Length: 7 inches, Height: 2 1/8 inches, Outside Diameter: 1 1/2 inches, Diameter of the chamber: 3/4 inches. I will be putting this pipe on the rebornpipes store shortly. It is another big pipe and will make a great addition to someone’s collection. If you are interested in adding this unique pipe let me know. Thanks for looking.