Blog by Steve Laug
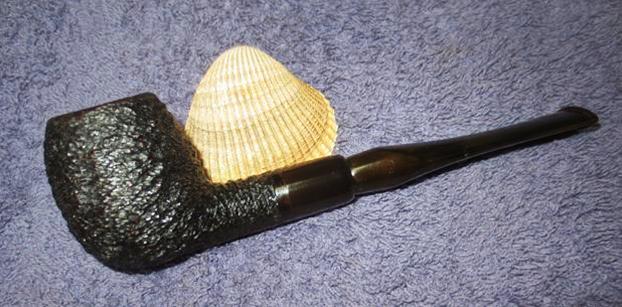
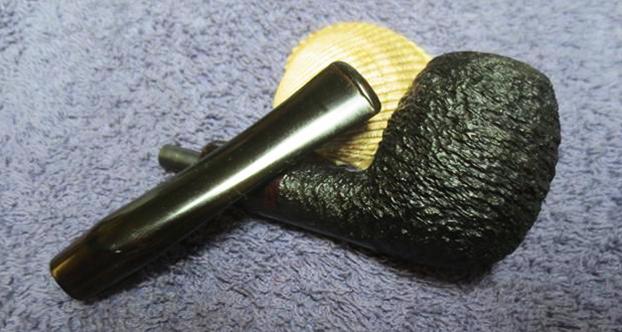
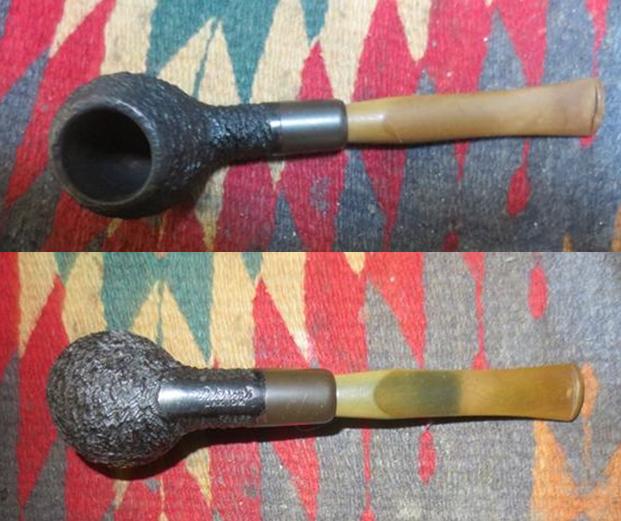
The next pipe on the table is Peterson’s Laxiom Apple with a Military bit and a vulcanite shank extension. My brother, Jeff picked this one up in Montana on a trip there is October. He was drawn to it because he had never seen a Peterson pipe like it before. It has a heavily rusticated finish on the bowl and shank and is stained a dark brown colour. There is a little translucency in the stain and you can see the wood underneath. While the finish is rough it has been buffed to take off the sharp edges so it has a very tactile finish on the bowl. There is a smooth band of unrusticated wood at the shank end next to the vulcanite shank extension. The pipe is stamped on a smooth portion of the underside of the shank with the words Peterson’s over Laxiom. The bowl had a light cake build up and light lava on the thin rim edge but was in great condition overall. The extension and the military style bit were both oxidized. On the left side of the stem it is stamped with the characteristic Peterson’s P and on the underside it is stamped Great Britain. There were some tooth marks on the stem and button on both sides. Jeff took photos of the pipe before he did his cleanup work.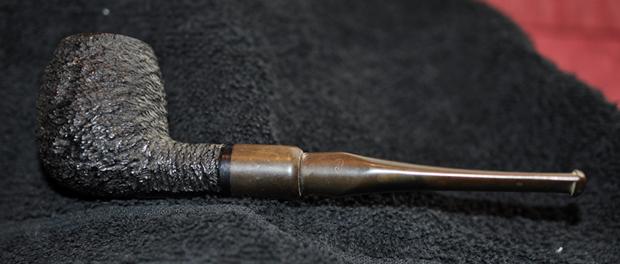
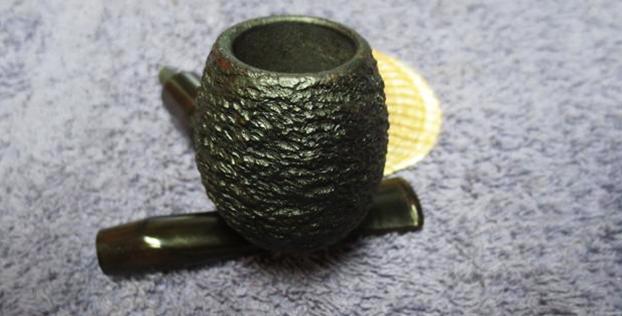
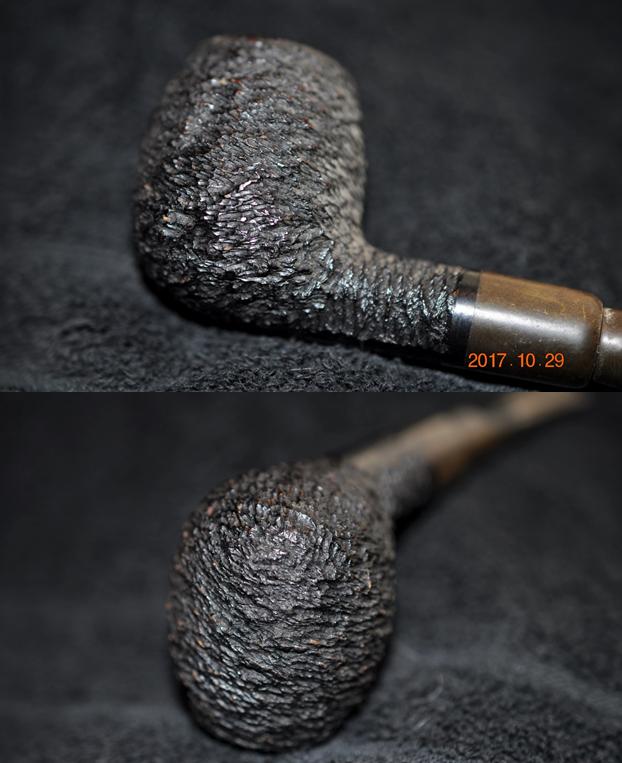
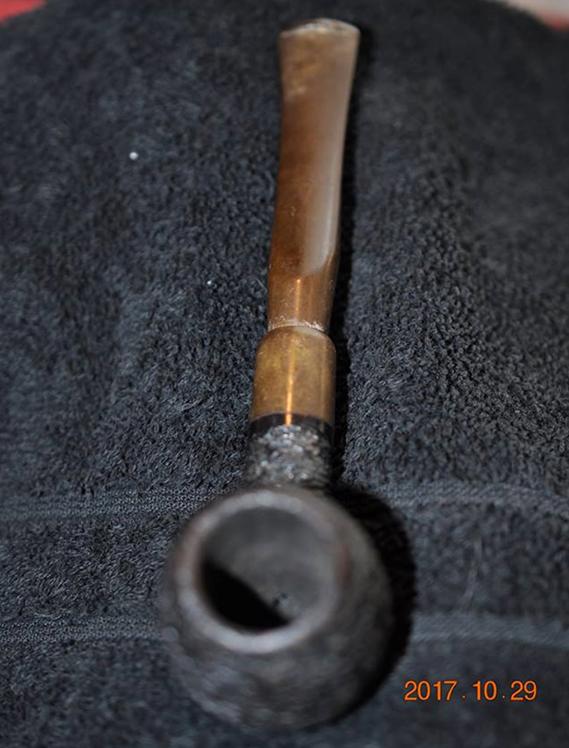 He took this close up photo of the bowl to show its condition. I am amazed that the pipe is in excellent condition overall with little wear or tear to the bowl and rim top. He also took some photos of the bowl from various angles to show the finish on the bowl. It is a unique and pretty little pipe.
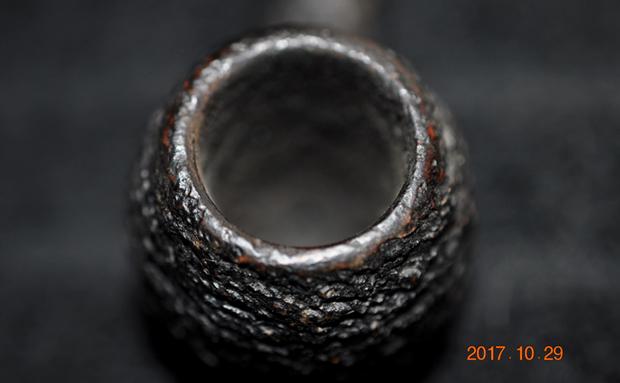
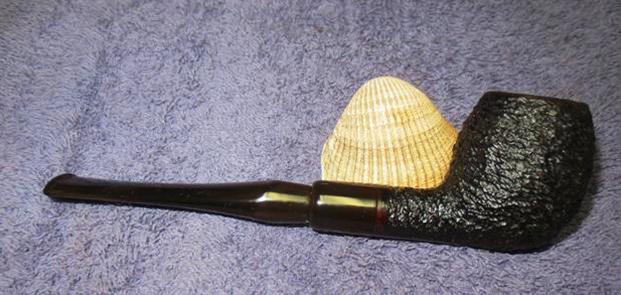
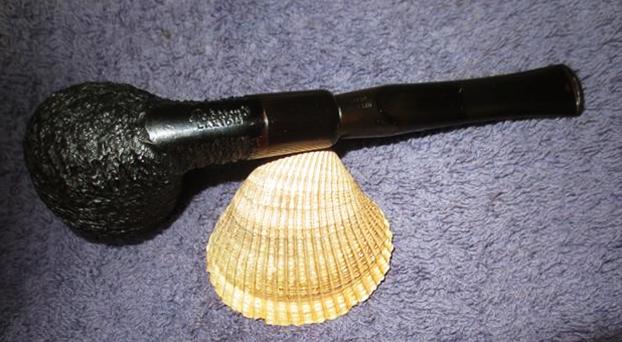
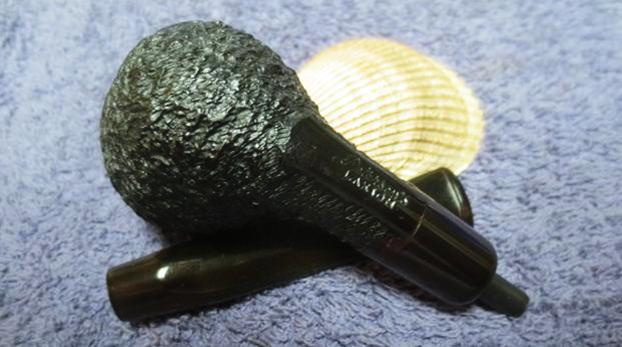
 The next two photos show the stamping on the underside of the shank and the underside of the stem. Both are very clear and readable.
 The stem and shank extension/ferrule were oxidized with a deep oxidation that would take some time to remove. The condition is very clear in the photos below. The second photo shows tooth marks on the button itself and the third photo shows tooth marks and chatter next to the button.
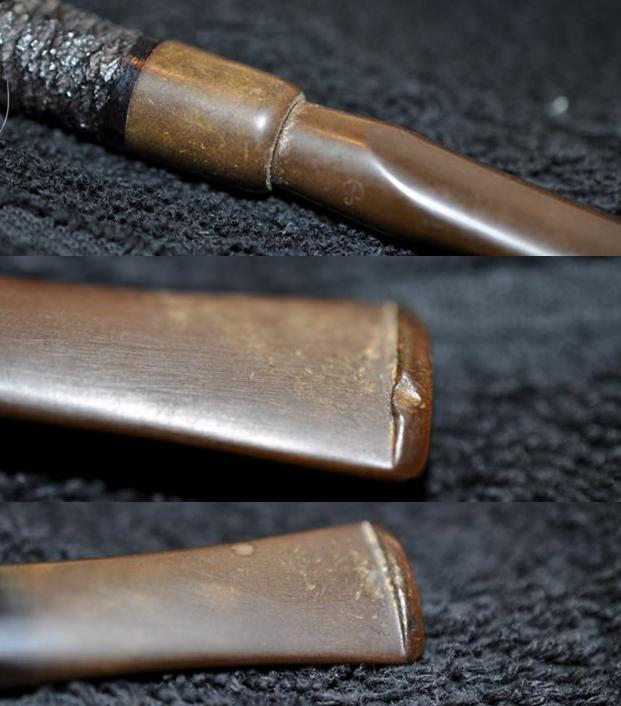 I did some hunting on-line to see if I could find any information on the brand and found a link on the pipesmagazine.com forum (http://pipesmagazine.com/forums/topic/peterson-laxiom-pipes). I did not find it too helpful in that the pipe I had in hand was not meerschaum but definitely wood. I quote it below in full because the one thing that was a clue was the Peterson Manx link that I knew was a fact.
I just picked up a couple Peterson Laxiom pipes that are quite unusual. Both are stamped “Great Britain” on the stem. Both are black rusticated models which reminded me of a black Pioneer Block Meerschaum in my collection, in large part due to their similar stem and ferrule design. The Petes are relatively lighter in weight and are not labeled as meerschaum.
I noticed that Laxey Pipes Ltd made African meerschaum bowls for Peterson and that it was a Peterson Manx partnership with a factory on the Isle of Man, which closed in 1981 when Peterson’s meerschaum production was moved to Dublin.
Putting two and two together, I’m guessing that Peterson Laxiom pipes are East African meerschaum, but it’s gnawing at me that they might be some sort of wild composite, like Brylon. I can say with almost 100% certainty that the draft hole was drilled and not molded, as one of the two is obviously off-center.
A post from a number of years ago regarding Laxiom pipes came up empty, even after inquiring with three longtime Peterson employees.
Now I had a link to Manx but I was pretty certain the pipe was not meerschaum. It felt and looked like briar. I wrote to a good friend and go to Peterson’s aficionado, Mark Irwin to see if he could help me with information. He wrote back with his usual great information and a couple of photos from a catalogue showing the brand. I quote Mark’s answer in part.
Hi Steve,
… let’s look at the Laxiom…Thanks for these great photos, first of all. I have never seen one with the vulcanite shank extension unscrewed, and did not know it worked that way.
When you complete your restoration, if you have time, would you send me a photo for the Encyclopedia chapter with the pipe broken down this way? One picture goes a long way in understanding how something is put together, and I want readers to see how the Laxiom worked.
Laxiom: 1971-1975 A briar line produced for Iwan Ries, black rustic or walnut smooth or sculpted finish with acrylic threaded (removable) ferrule and vulcanite Laxi P-Lip or fishtail mouthpiece, made at the Peterson-Manxman factory in seven shapes. See Laxi.
…Laxi 1971-1975 Easy-push mouthpiece for Iwan Ries, often with ferrule, P-Lip or fishtail. Military stem extended into mortise of removable (threaded) acrylic ferrule. Stem could be re-ordered if broken.
I have included 2 pages for your use in the blog from the 1971 Iwan Ries catalog. I’m beginning a series of articles on the Peterson – IRC connection, but I don’t mind a bit if you print these before I do! … Best, Mark 
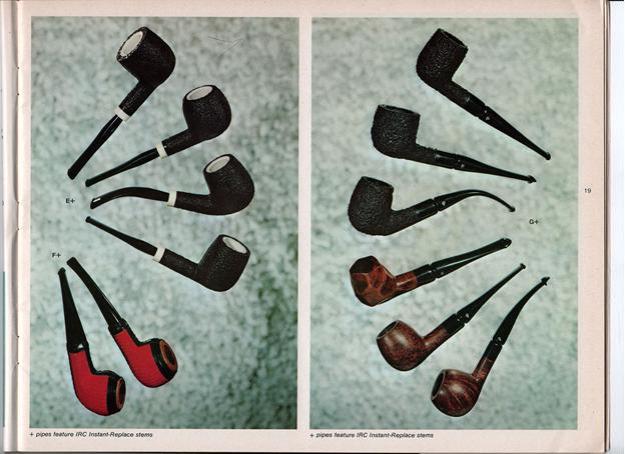 The first page above describes the pipes and the second shows the variety of offerings. I have enclosed the description in a red box. Here is what it says:
Laxiom, a giant step ahead. Select briar, fine vulcanite stem. Another Peterson’s of Dublin, from their Manxman Division in the Isle of Man. Our exclusive mind-opening model – once again brings pipes out of exile. No longer relegated to a drab, drag world. Sensible, bigger bowl capacity disproves the old thick-bowled concept that left a thimble sized tobacco chamber! Stems aren’t shackled either by stem repair traumas. They’re delivered, at last, by the great new Laxi stem – a 71 Instant-Replace, the bit worth its weight in gold. Evidence is convincing – this IRC pipe escapes yesterday’s uniformityisms into today’s land of self-expression. Both regular and Peterson Lip are interchangeable, instantly substituted. Here’s more unconventionalism that makes it – everywhere. Yesterday’s experienced knowledge + Today’s awareness and vision = a pipe with a lot of smoking to do! Only in shapes shown – prince, apple, Dublin, billiard, pot, full bowl design carved apple.
I8J1913 Walnut $11.50
I8J1914 Black Sandblast $9.50
I8J1913s Instant-Replace Stem, reg. $2.50
I8J1913sp Instant-Replace stem, Peterson’s Lip $3.50
I am almost feel I don’t need to say this anymore as you all know by now that my brother Jeff does the cleanup on the pipes that we get. It is amazing to start with pipes that are already cleaned and reamed. In fact on the local repairs I do I have to do all the work and I really miss his work. He did the work on this one as usual. He reamed the bowl with a PipNet pipe reamer and cleaned up the last bit of cake with a Savinelli Fitsall reamer. He cleaned the internals of the shank and the stem with alcohol, pipe cleaners and cotton swabs. He scrubbed the exterior of the pipe with Murphy’s Oil soap and a tooth brush and was able to remove all of the dust, tars and oils built up on the briar. He was able to remove all of the tars and lava on the rim top and leave it looking very clean. He soaked the stem in an Oxyclean bath to raise the oxidation to the surface of the vulcanite. When it arrived it looked very clean. I took photos of the pipe before I started my restoration work.
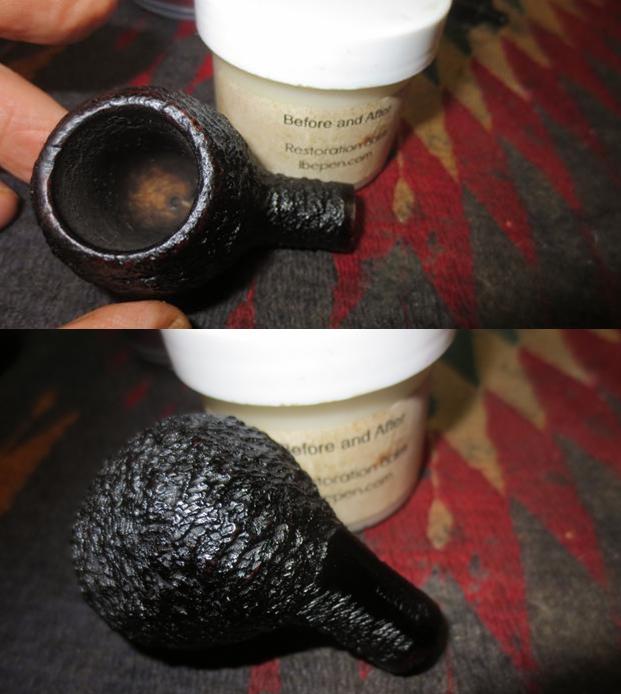
 I took a photo of the bowl and rim to show its condition after his cleanup work. It looked really good.
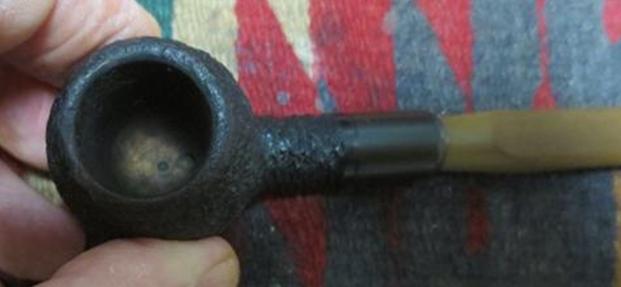 The Oyclean brought the oxidation to the surface of the stem and the tooth marks were very visible on both sides. This is when I wish I could order one of those Insta-Replace Lax stems and just put this one aside. But there are none available so it is a cleanup job.
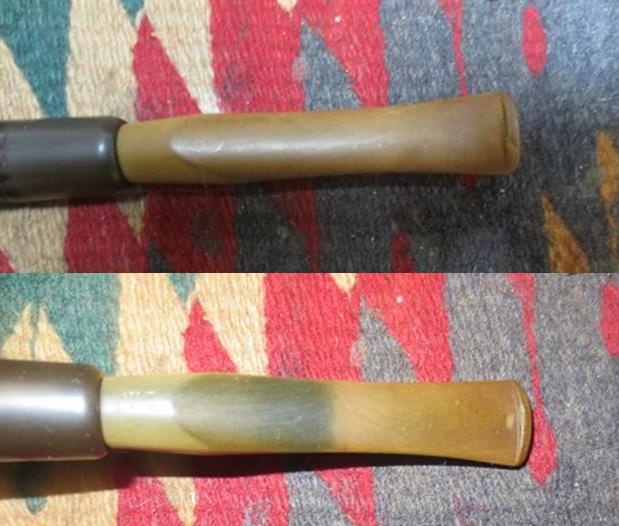 I pulled the stem off and put it in a bath of Before & After Pipe Stem Deoxidizer and left it to soak overnight. In the morning I removed the stem from the deoxidizer and wiped off the excess deoxidizer from the surface of the stem with a paper towel. I cleaned out the airway in the stem with pipe cleaners and alcohol to remove any remnants of the bath from that part of the stem. The photos below show the stem after the soak and rub down. It was still lightly oxidized but the oxidation was significantly less than when I started. I decided to work on it without further soaking. It would be a stem that I would have to hand work to get rid of all the oxidation. The tooth marks are visible on the top and underside of the stem in the photos.
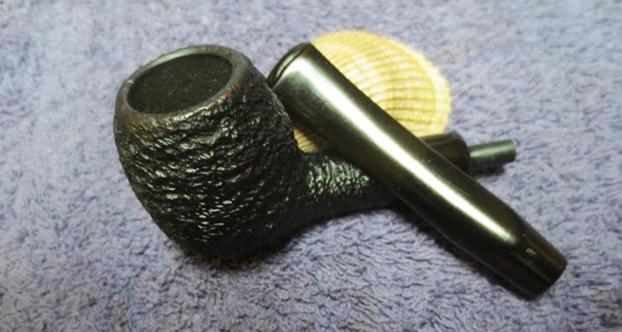
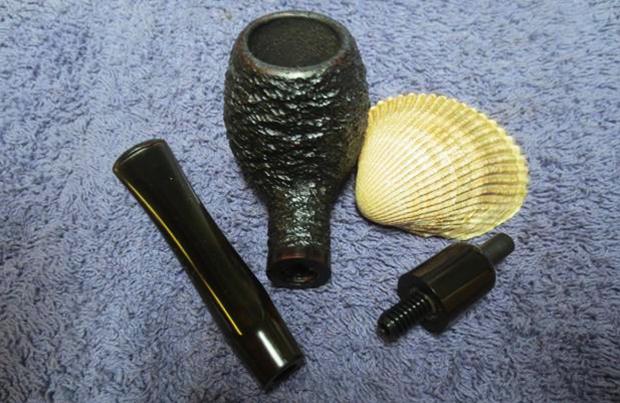
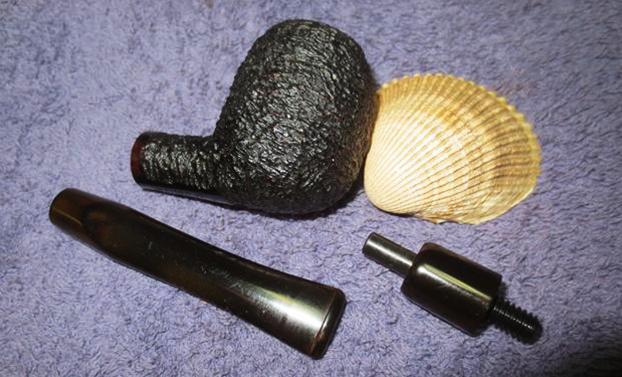
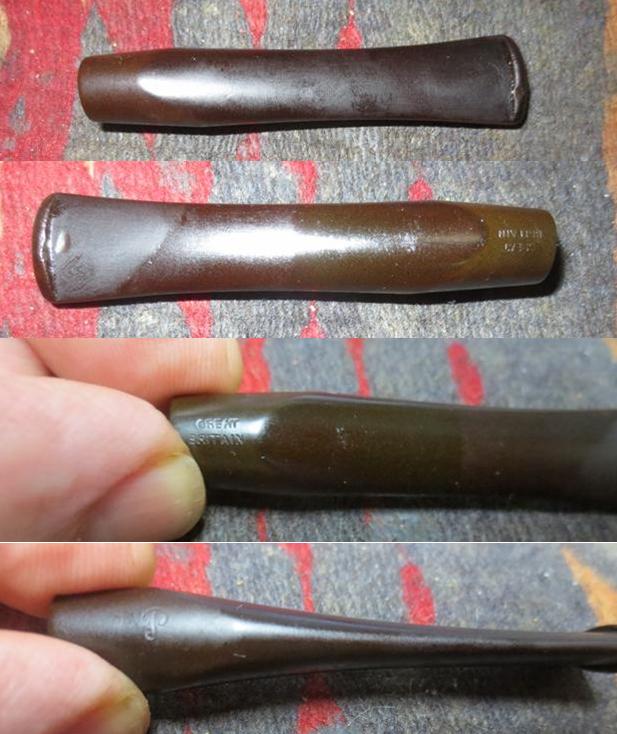 I noticed that while I was wiped the shank extension down with some Obsidian Oil there was a bit of give in the extension. Since I could find little information on the brand I had no idea what to expect in this case. I carefully turned the shank extension and it came unscrewed from the shank of the pipe. I was pleased in that it would be easier to work on with it separated. I took photos to show the parts of the pipe.
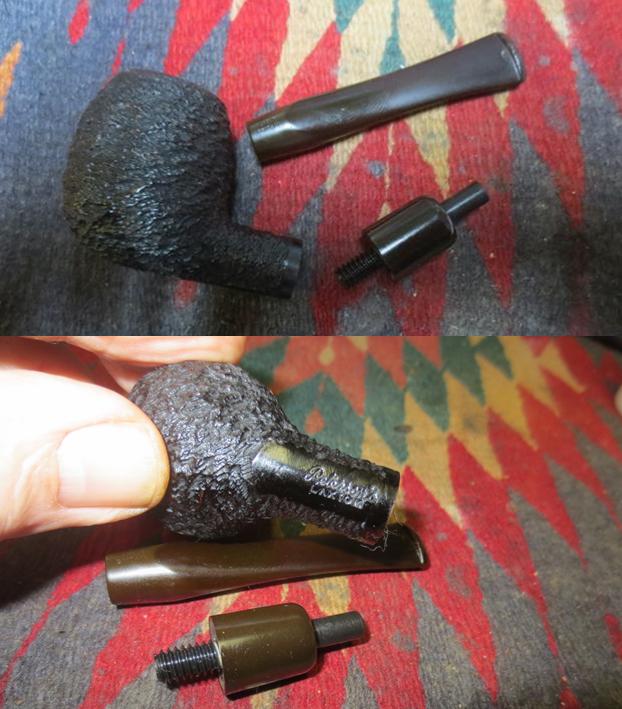
 With the shank extension removed I scrubbed out the airway with a pipe cleaner and alcohol to double check if there was debris in this section of the shank with the threaded tenon removed. It was very clean. I rubbed the bowl down with Before & After Restoration Balm to deep clean the smooth finish, enliven and protect the briar. I hand rubbed it with my fingers and wiped it off with a soft cloth. I buffed the bowl with a horsehair shoe brush to raise the shine. I took some photos of the bowl at this point to mark the progress in the restoration.
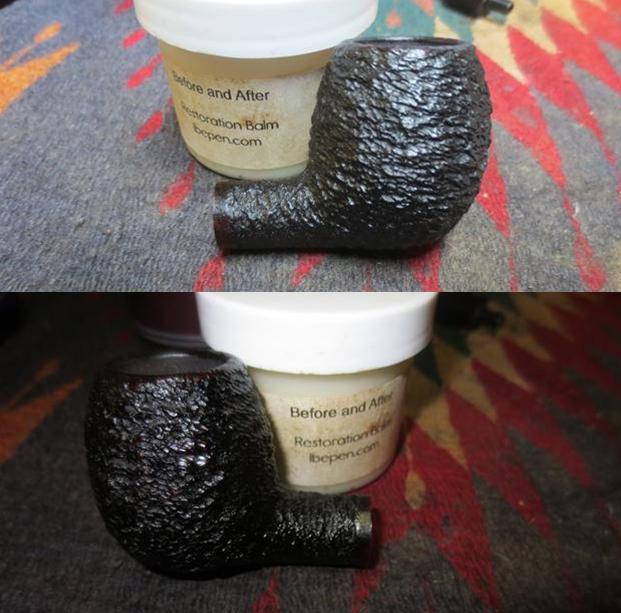
 I rubbed some Vaseline Petroleum Jelly on the threads of the shank extension to make it easier to turn into the shank and protect the threads in the process.
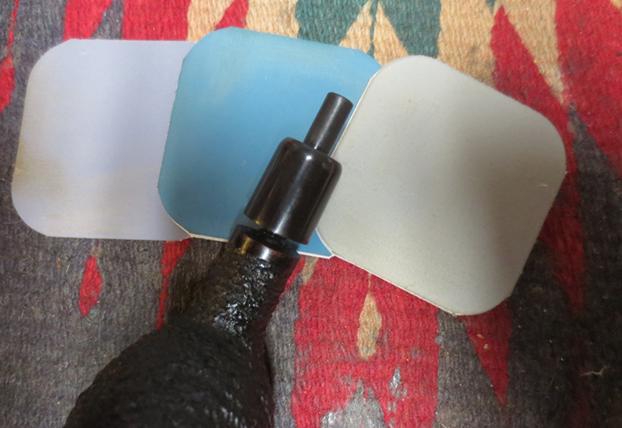
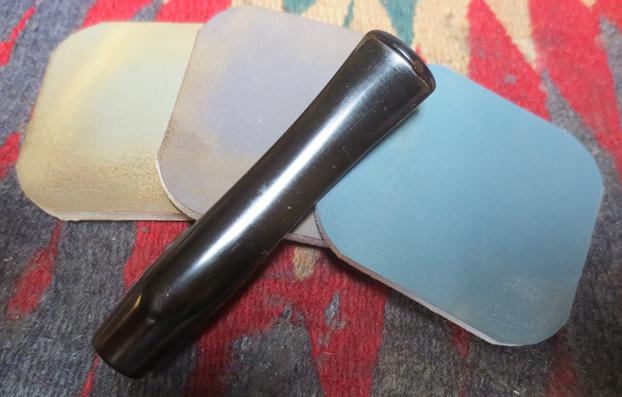
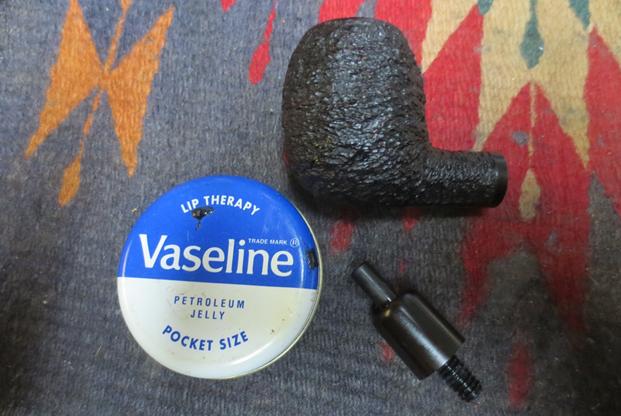 I screwed the extension part way into the shank and polished it to remove the oxidation. I sanded it with 1500-4000 grit micromesh sanding pads and rubbed it down with Obsidian Oil after each pad. I buffed the shank extension with Red Tripoli and Blue Diamond on the buffing wheel to polish it further and remove the stubborn oxidation that was still present. I took it back to the work table and sanded it with 6000-12000 grit micromesh pads, once again rubbing it down with oil after each pad. After the final pad I gave it a final coat of oil and let it dry.
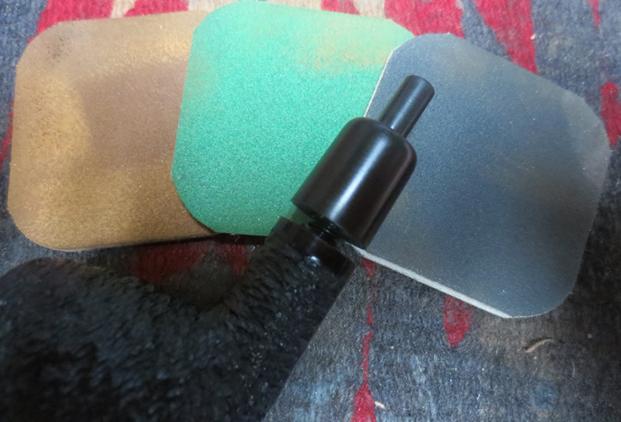

 I repaired the deep bite marks in the surface of the button and the underside of the stem near the button. I cleaned up the surrounding area and wiped it down with alcohol. I filled them in with black superglue.
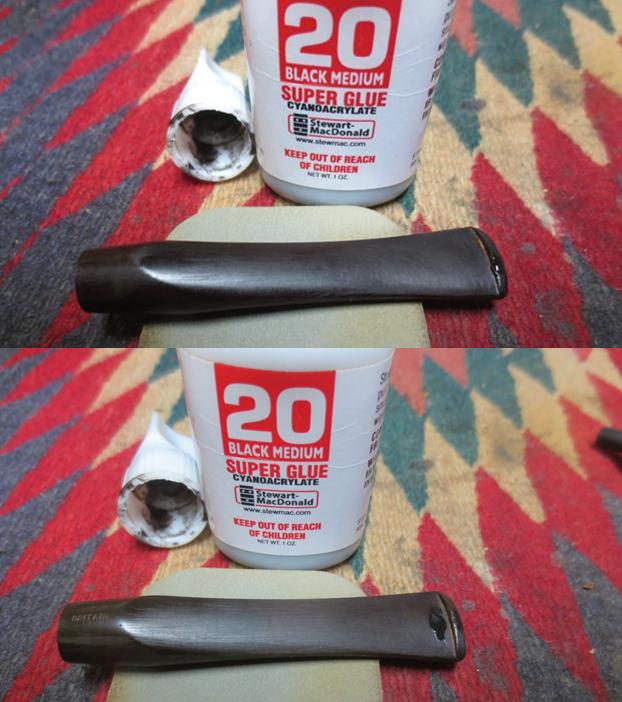 After the repairs had dried I sanded them to blend them into the surface of the stem. I used 220 grit sandpaper to smooth out the repaired areas and reshaped the top of the button.
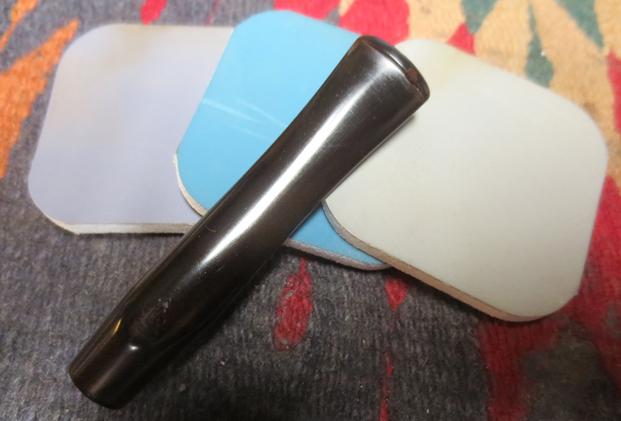
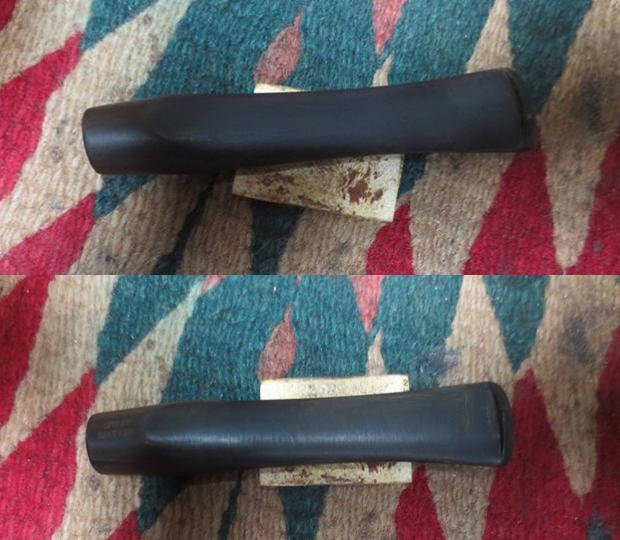 I polished out the sanding scratches and marks in the vulcanite with micromesh sanding pads – wet sanding it with 1500-2400 grit pads and dry sanding it with 3200-4000 grit pads. I wiped the stem down with Obsidian Oil after each sanding pad. I buffed the stem with Blue Diamond on the buffing wheel. I brought it back to the table and sanded it with the final three 6000-12000 grit pads. After the final pad I gave it a final coat of oil and set it aside to dry.
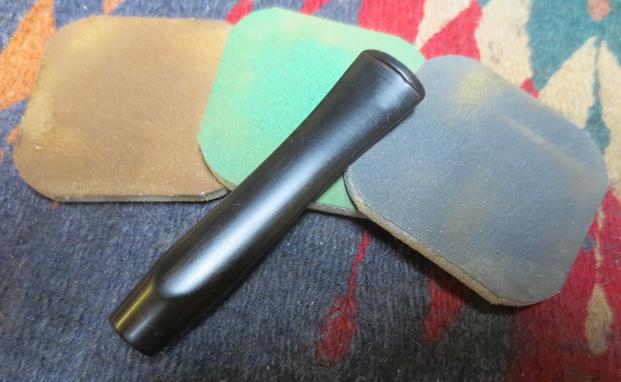
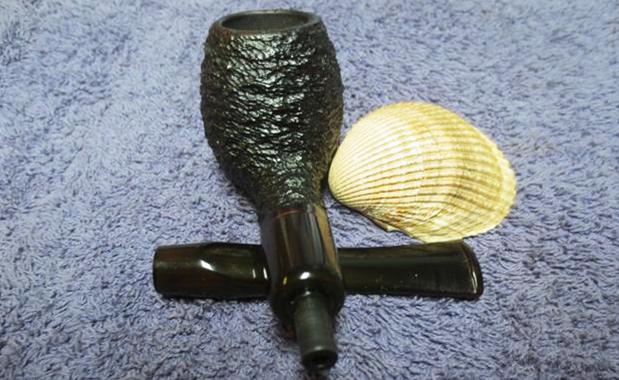
 I put the stem back on the bowl and worked the pipe over on the buffing wheel using Blue Diamond to polish the bowl and shank. I lightly buffed the bowl so as not to leave behind polishing compound in the rustication. I used more pressure on the stem to raise the gloss on the vulcanite. The P stamp on the side of the stem was not deep enough to hold a repaint so I left it. I gave the bowl multiple coats of Conservator’s Wax and the stem multiple coats of carnauba wax. I buffed the entire pipe with a clean buffing pad to raise the shine. I hand buffed it with a microfiber cloth to deepen the shine. The finished pipe is shown in the photos below. The dark brown stain on the rustication of the apple shaped bowl works well with the rich black of the vulcanite stem. This is a unique pipe the likes of which I have never before seen. It is a beautiful and well-made pipe. The dimensions of the pipe are: Length: 6 inches, Height: 1 3/4 inches, Diameter of the bowl: 1 inches, Diameter of the chamber: 3/4 inches. Thanks for looking.