Tag Archives: restemming

Restoring a Piece of Danish Pipe History – a Suhr Kobenhavn Bruyere Extra Dublin


By Steve Laug

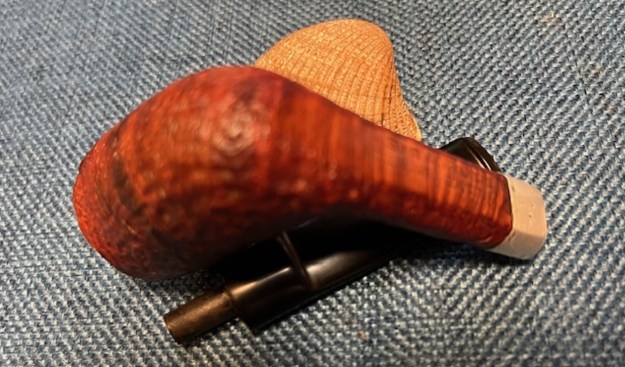
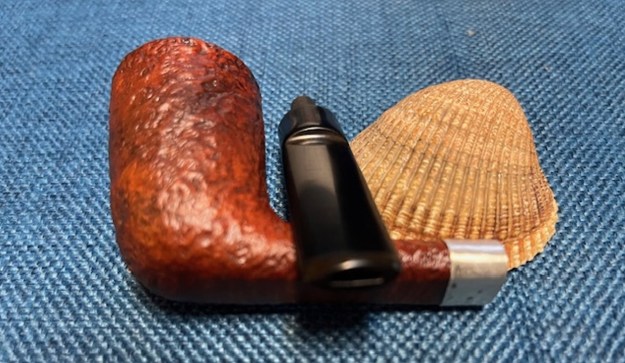
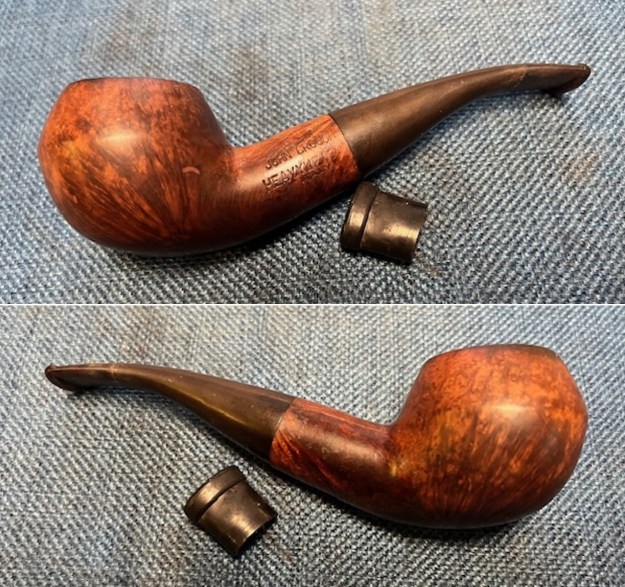
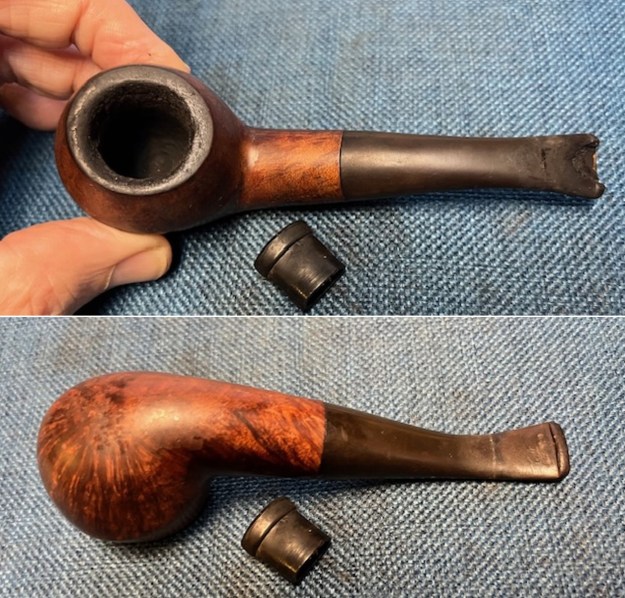
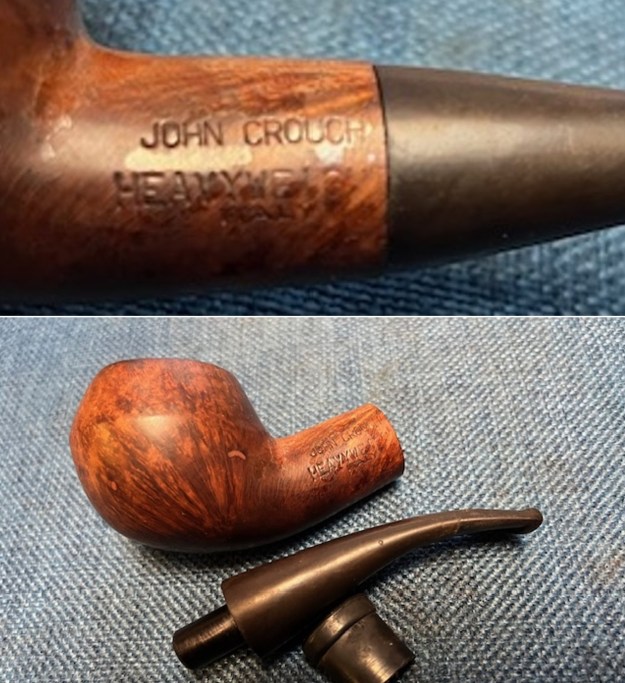
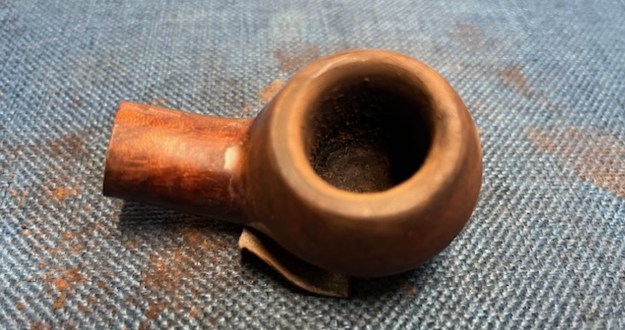
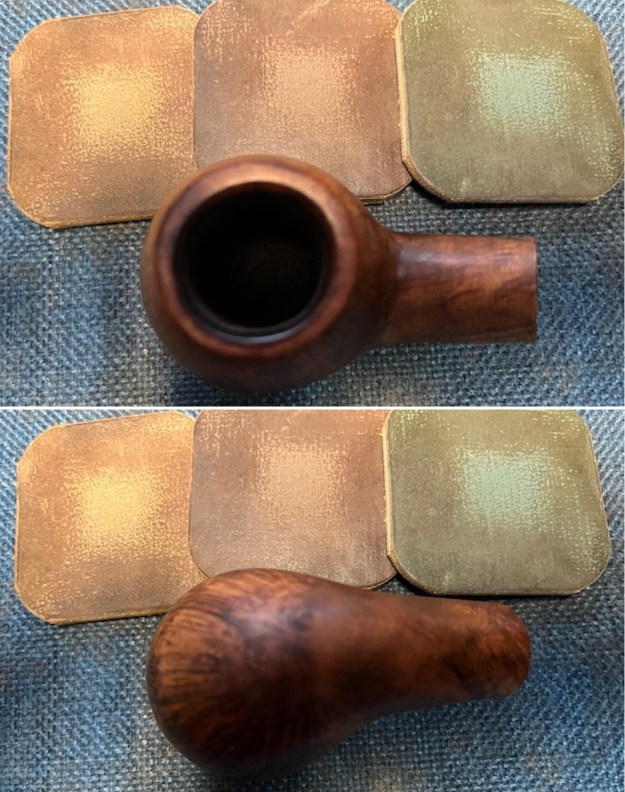
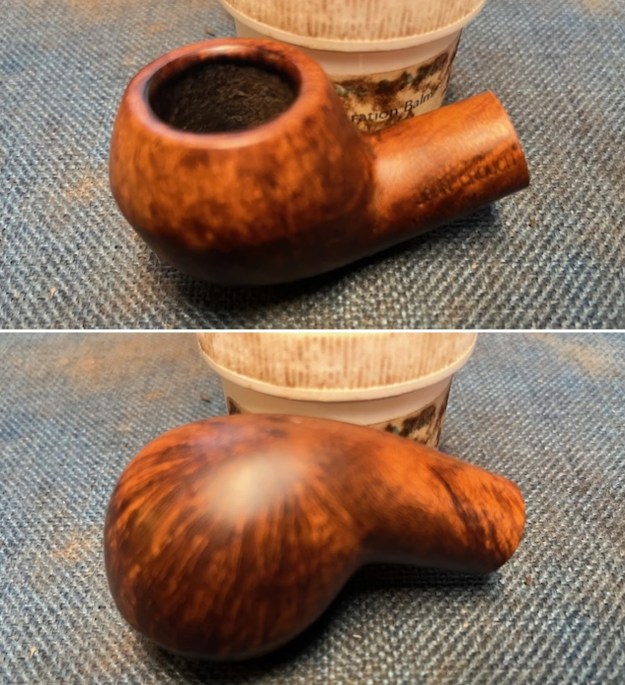
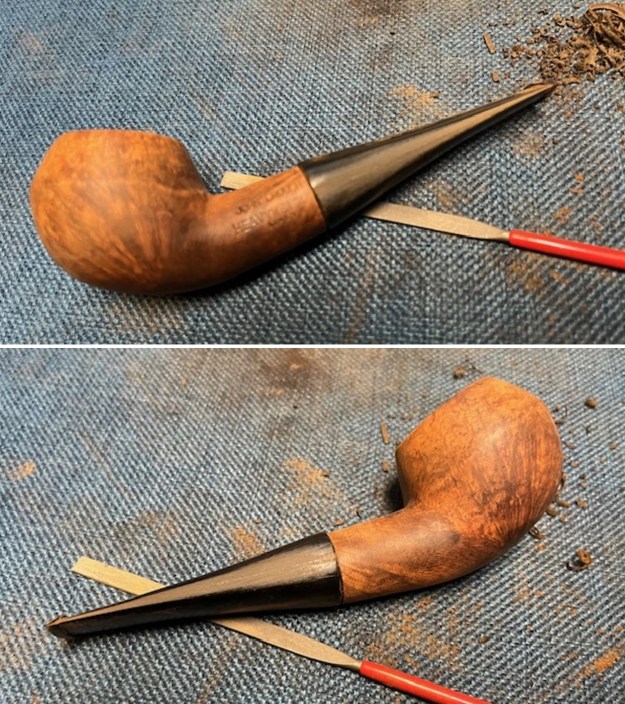
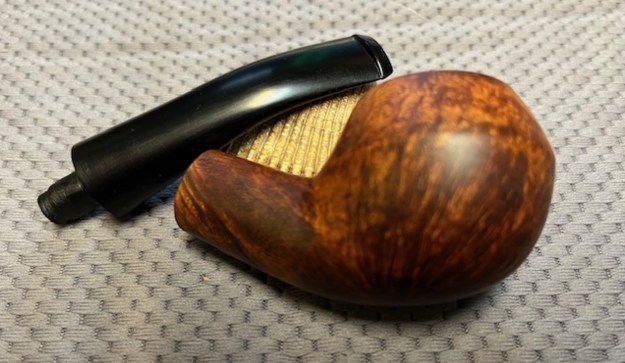
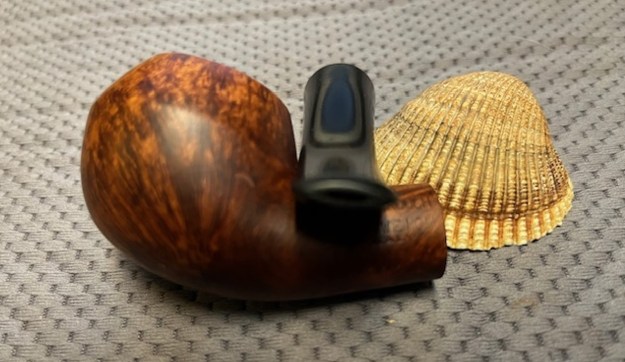
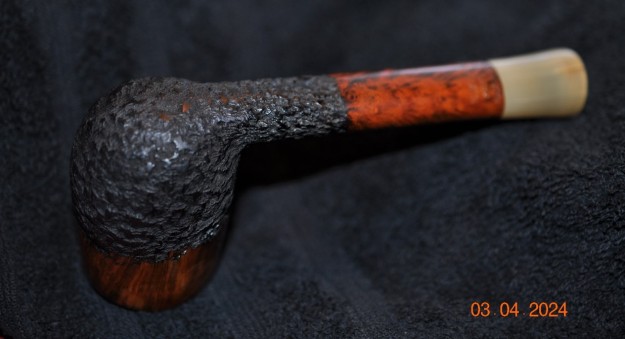
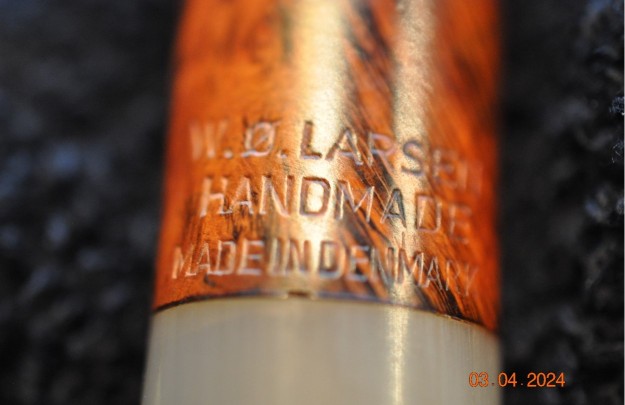
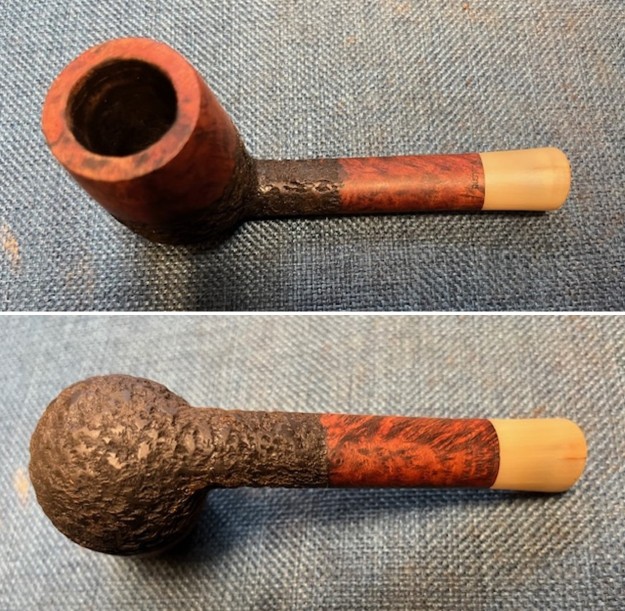
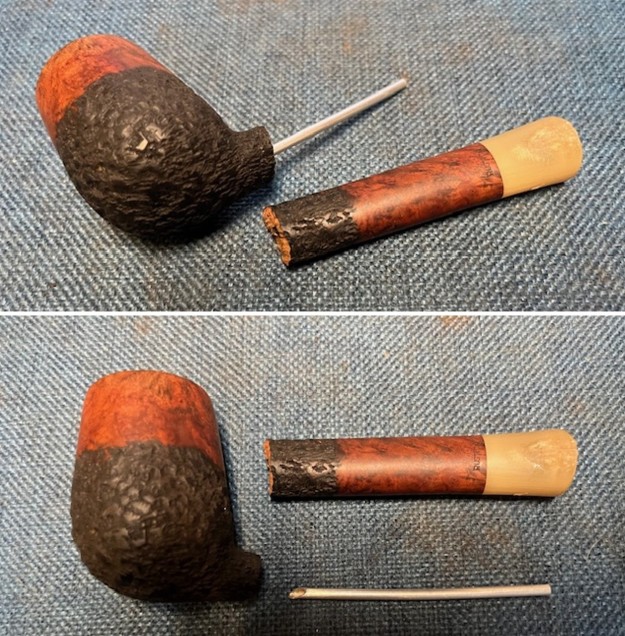
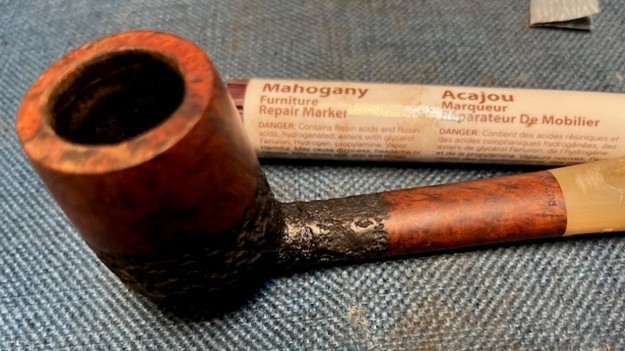
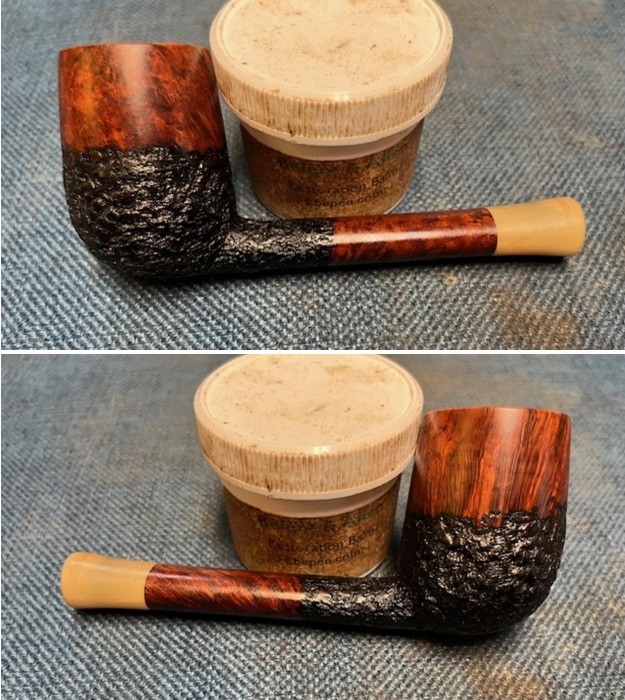
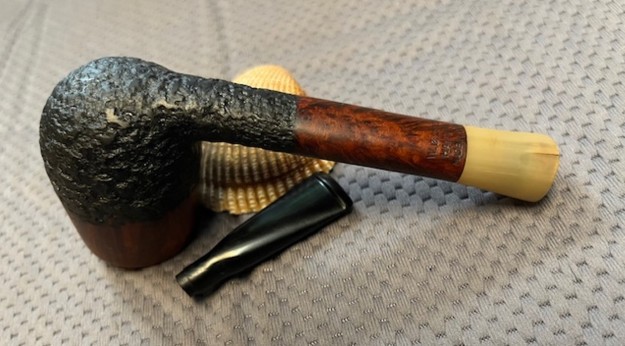
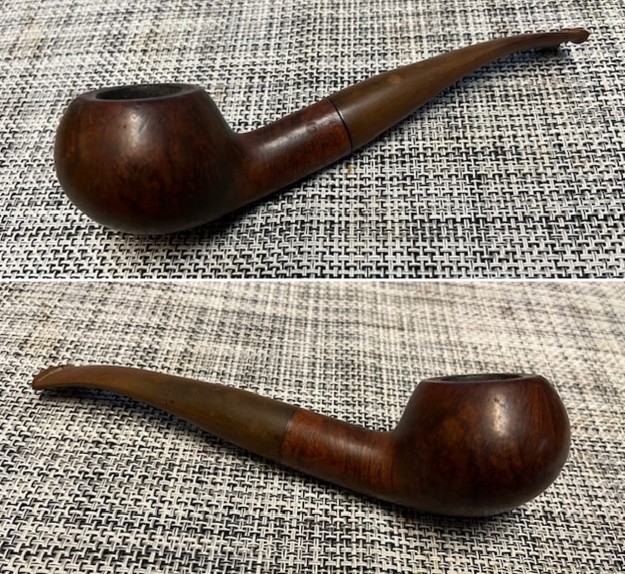
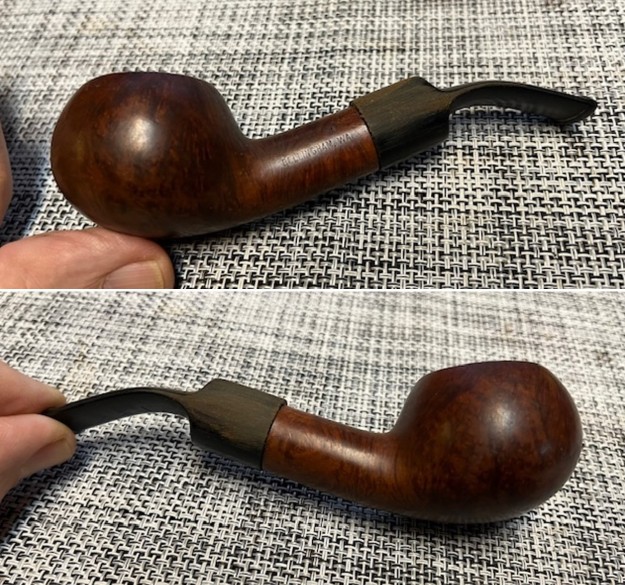
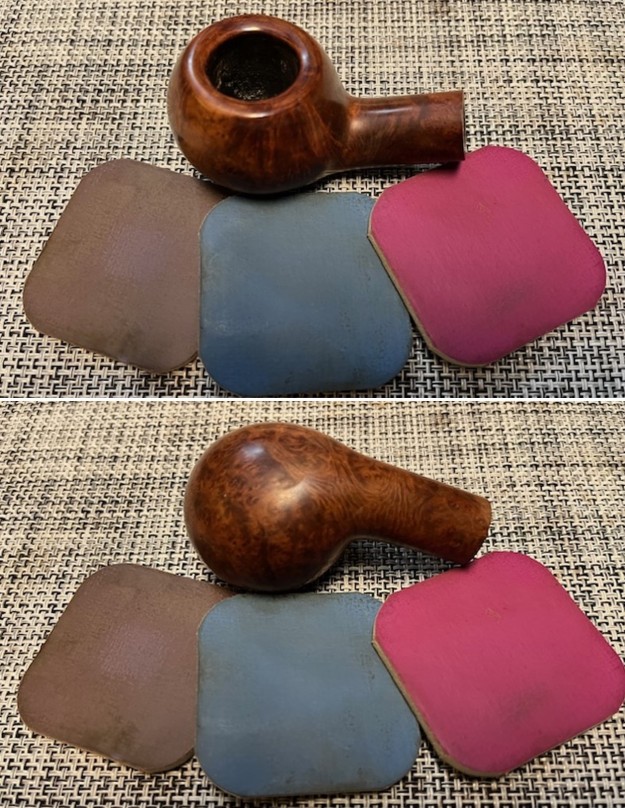
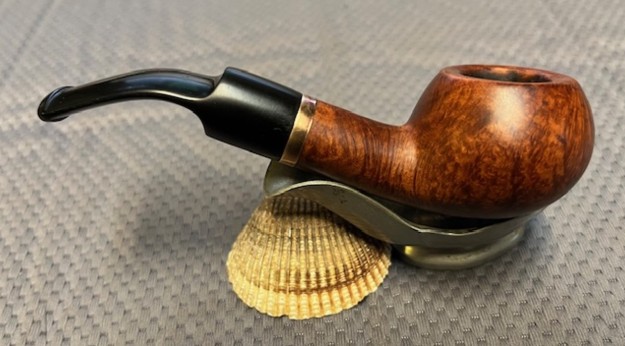
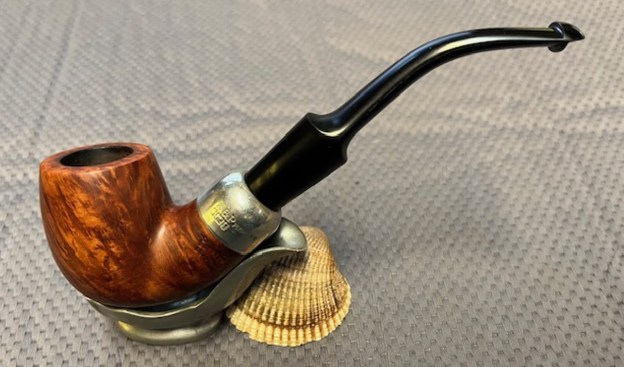
The next pipe on the table is an interesting short stemmed, sandblast Dublin that I found in a display cabinet. We purchased it from an Antique Mall in Lincoln City, Oregon, USA on 08/24/2024. The pipe is stamped on the underside of the shank Suhr [over] Kobenhavn. That is followed by Bruyere [over] EXTRA. The band covers some of the next portion of the stamp but it looks like it reads By Hand [over] a shape number beginning with 9. The band is stamped Birmingham Sterling Silver and has a T date stamp. The shank is cracked and I assume that someone put an English band on it that in no way reflects the country of origin. The bowl had a thick cake and lava overflowing on the rim top and inner edge. The sandblast finish was dirty with grime in the sandblast. The stem is worn and has been cut off and a button shaped at the end. There was no bother taken on the slot and it is uneven and rough. It leaves a short snorter of a pipe that does not quite look right.  I took photos of the pipe before I started my clean up work. I have included them below. 
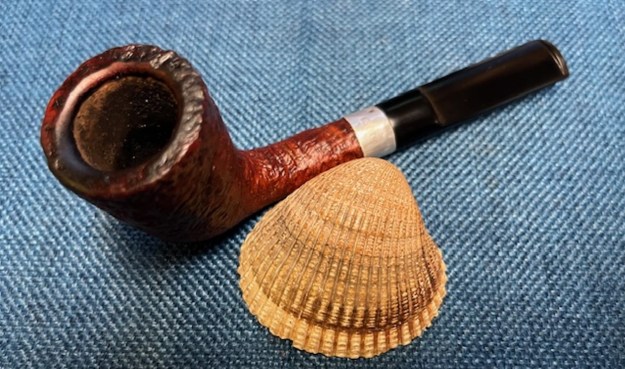
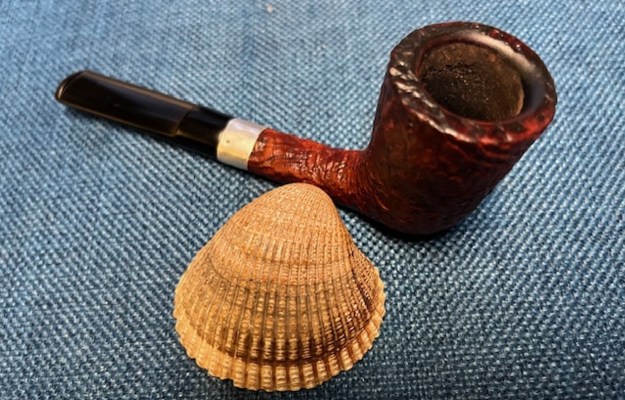
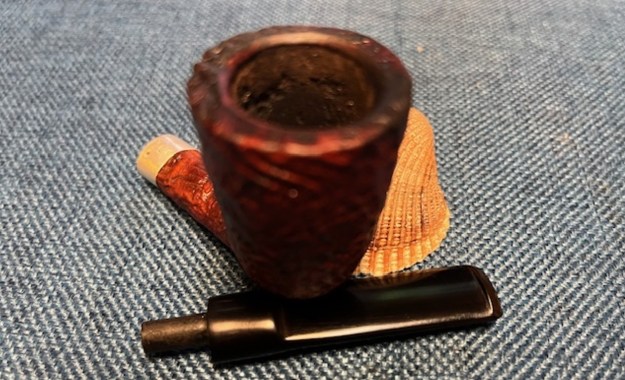
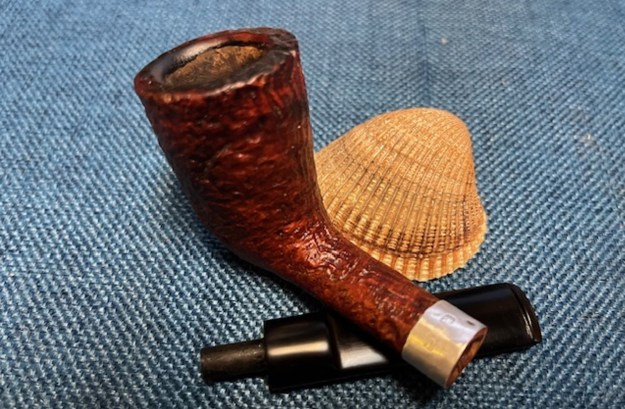
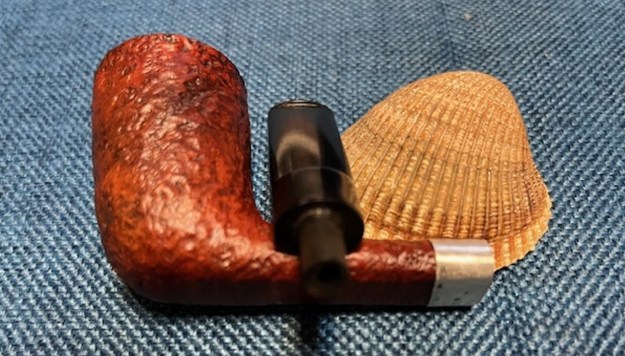
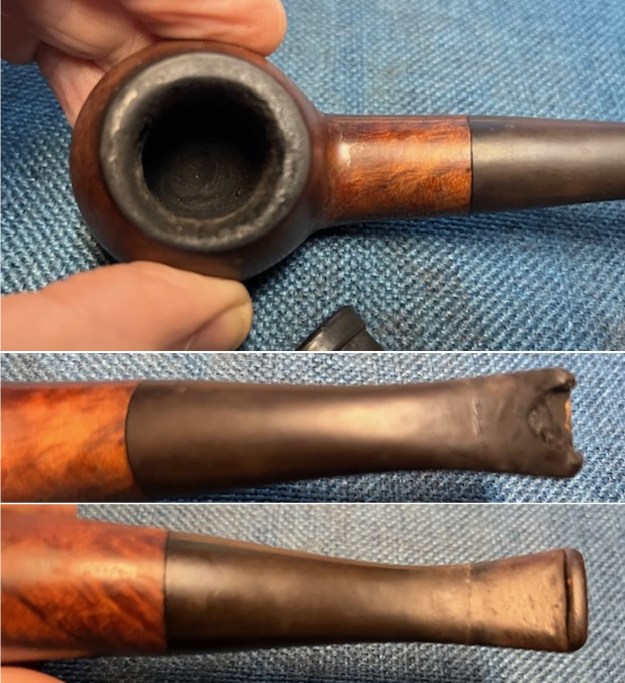
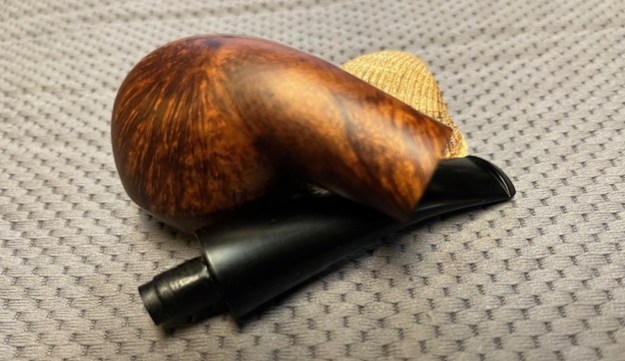
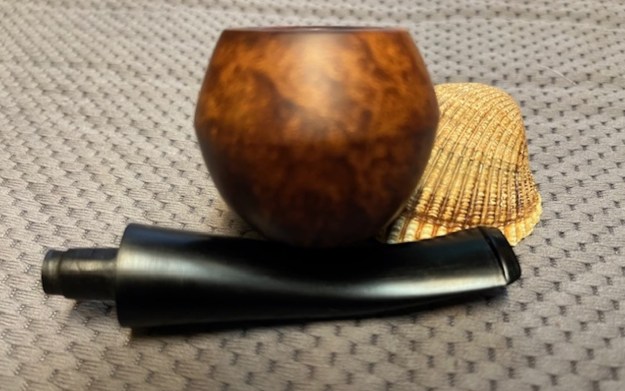
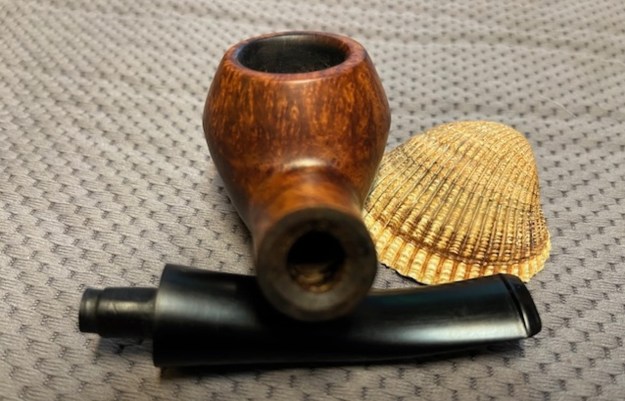
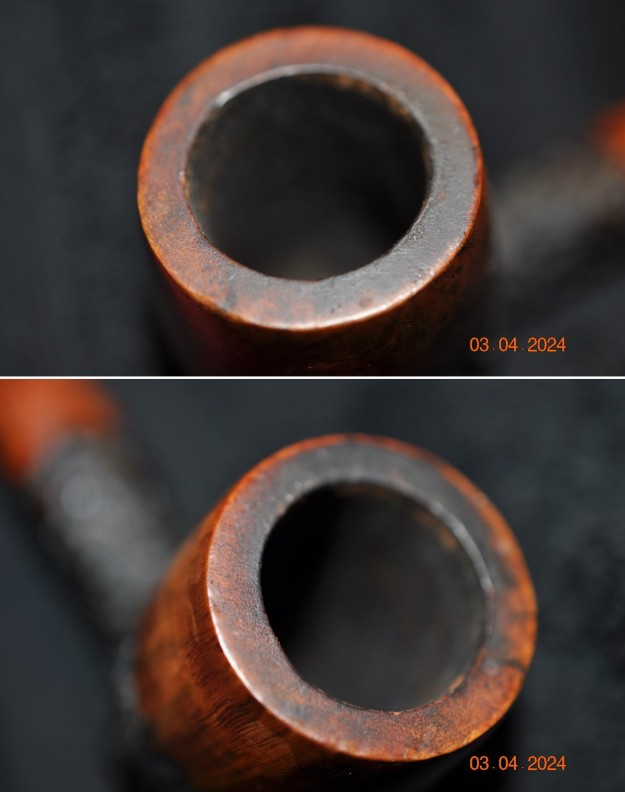
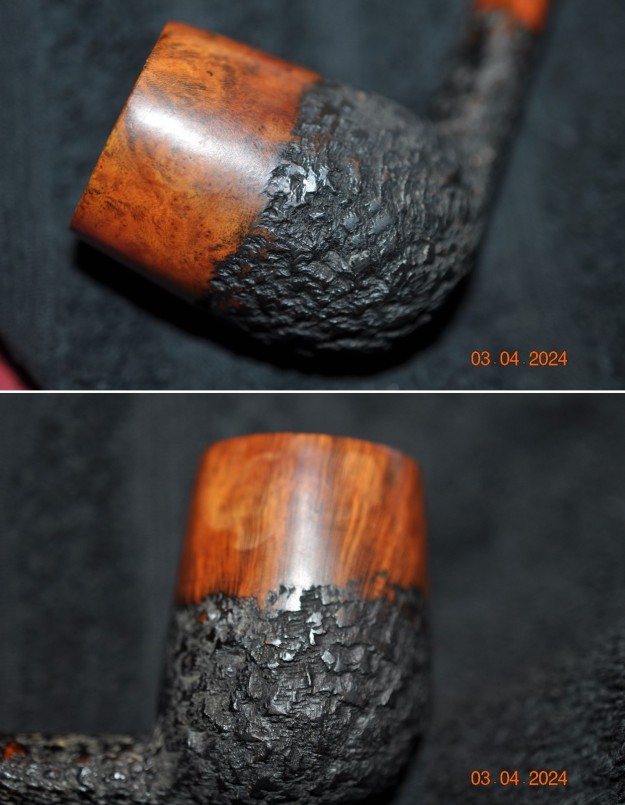
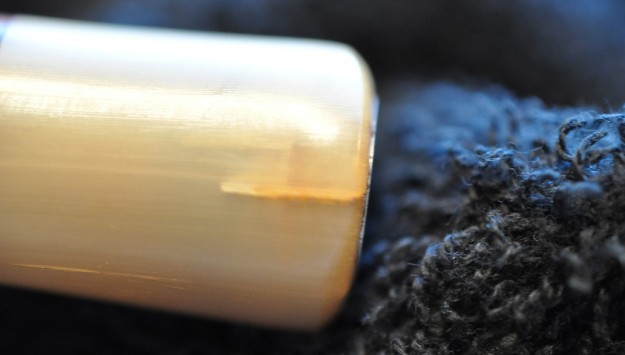
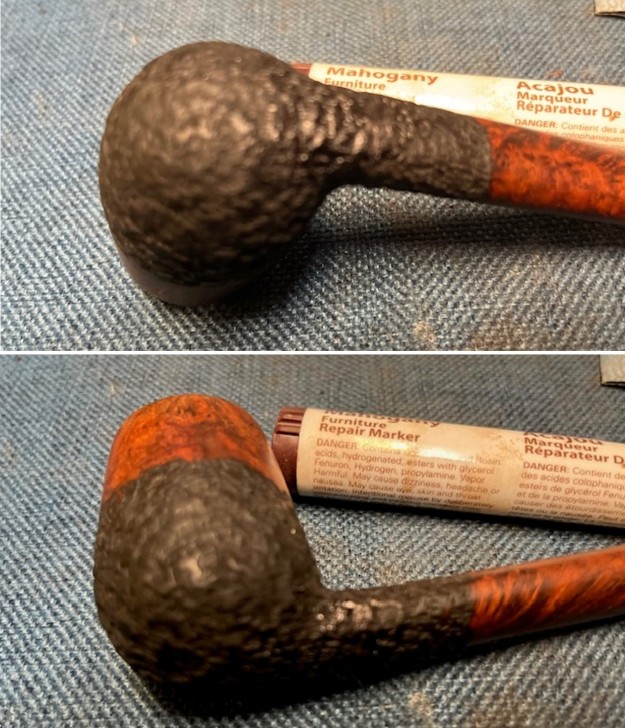
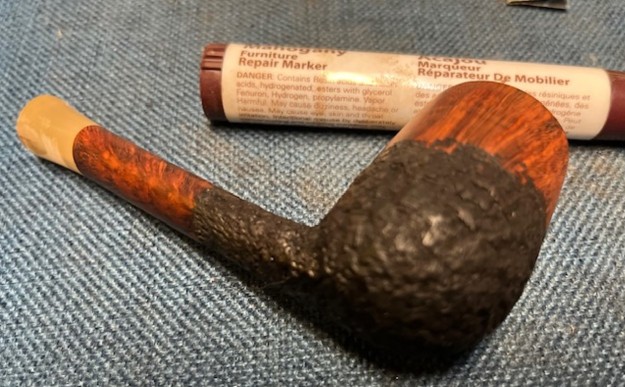
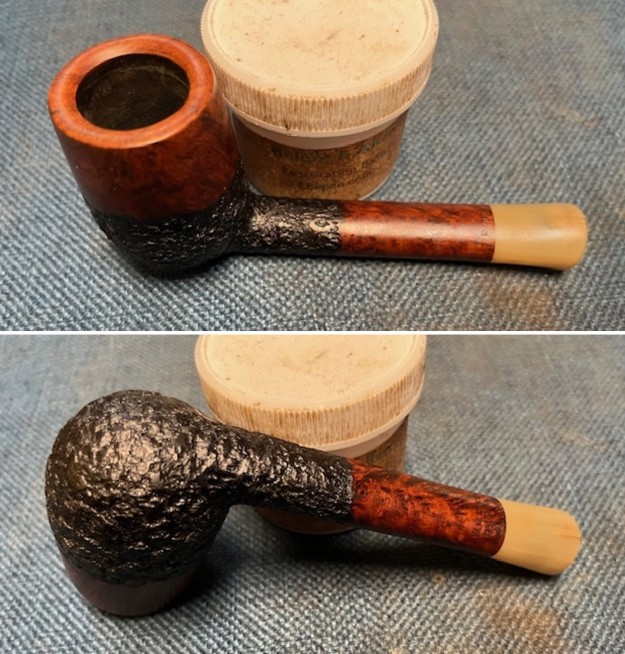
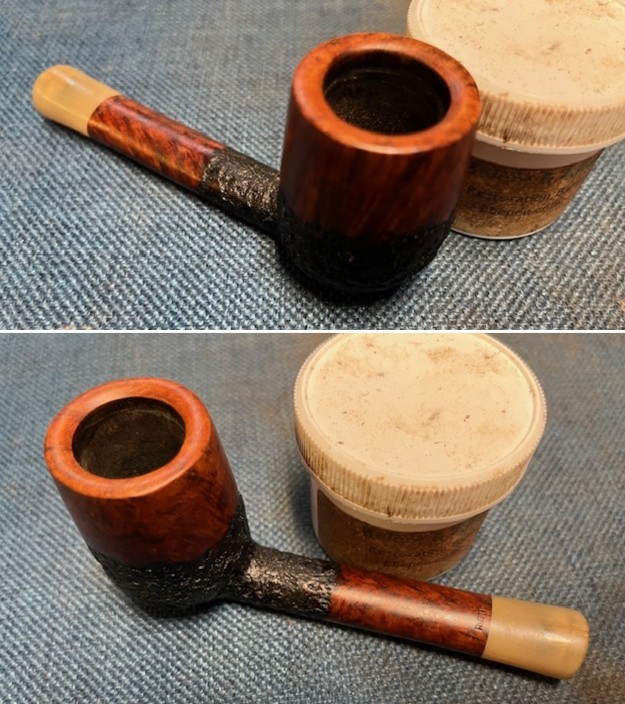
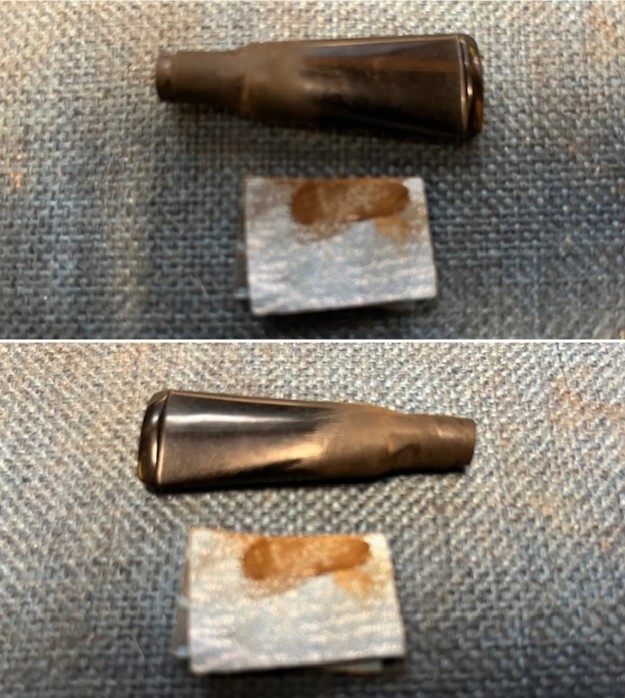
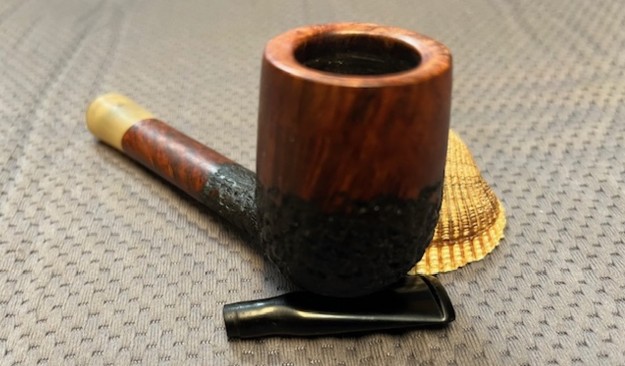
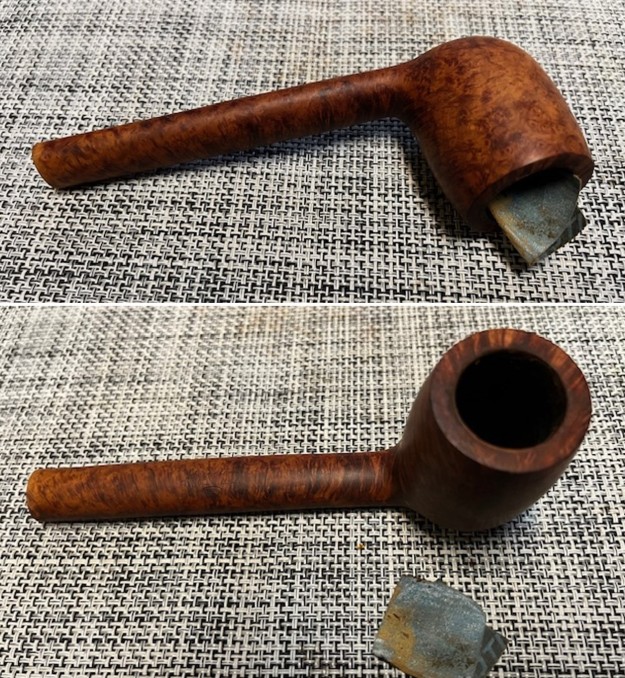
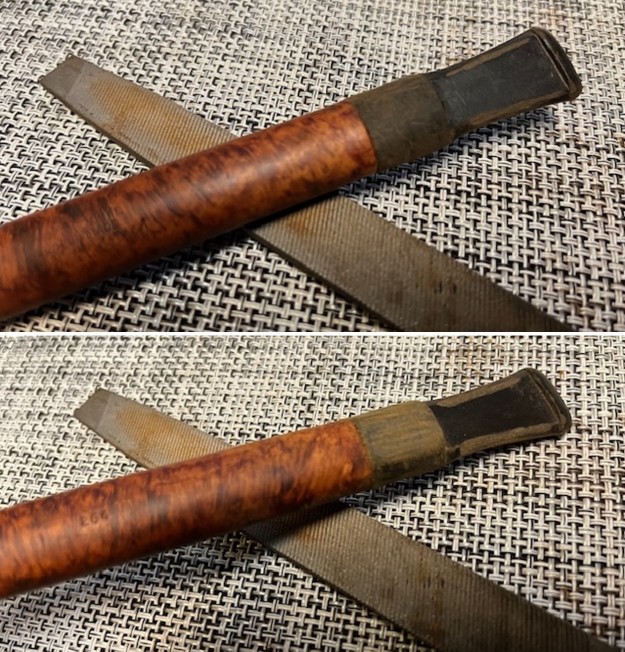
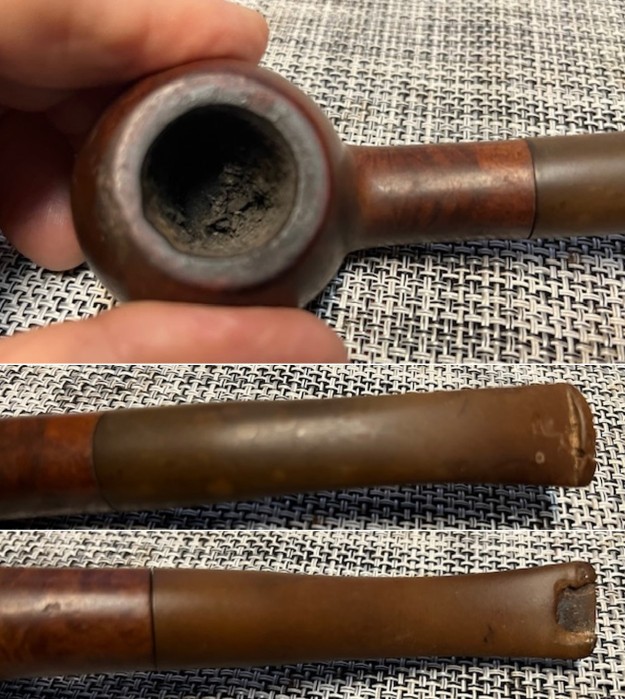
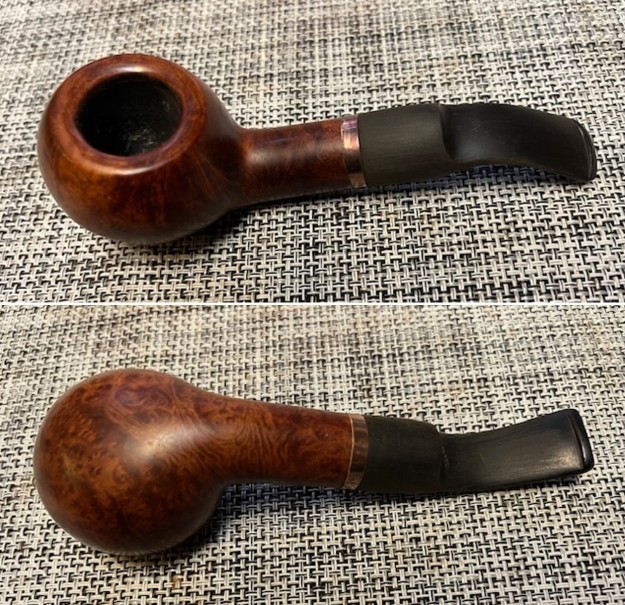
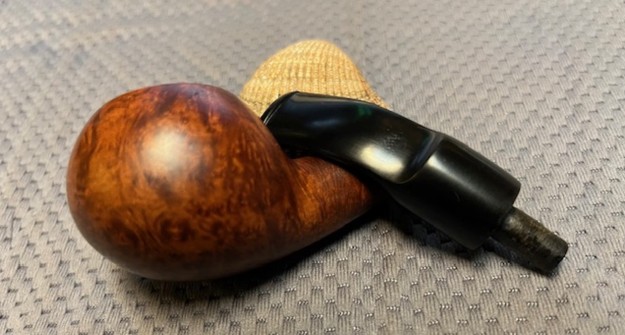
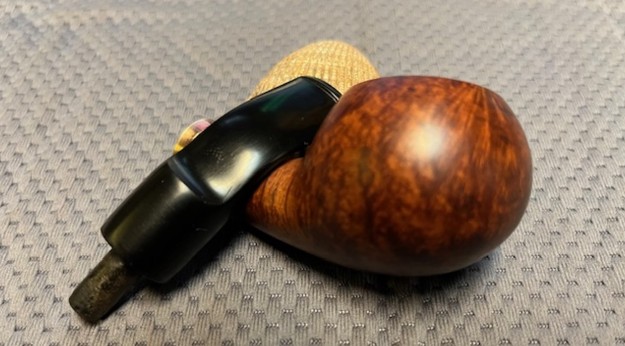
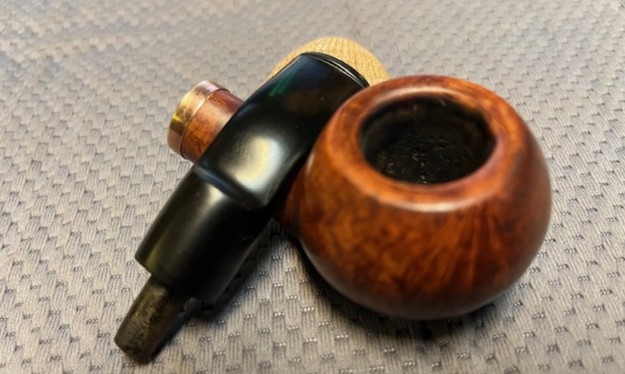
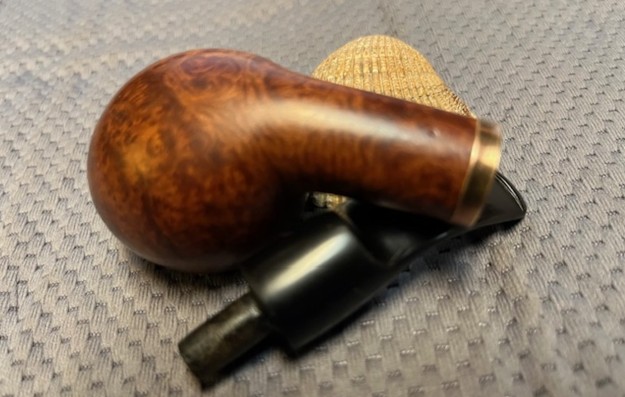
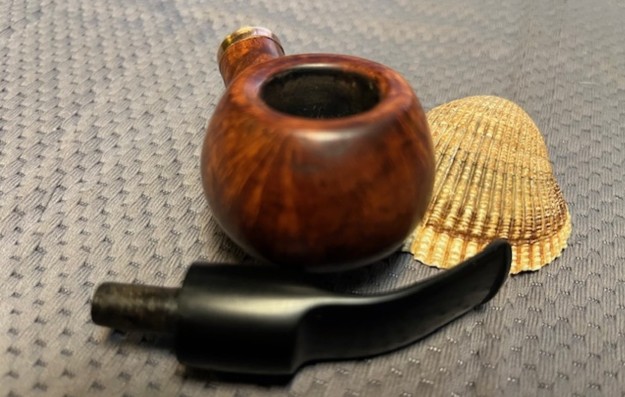
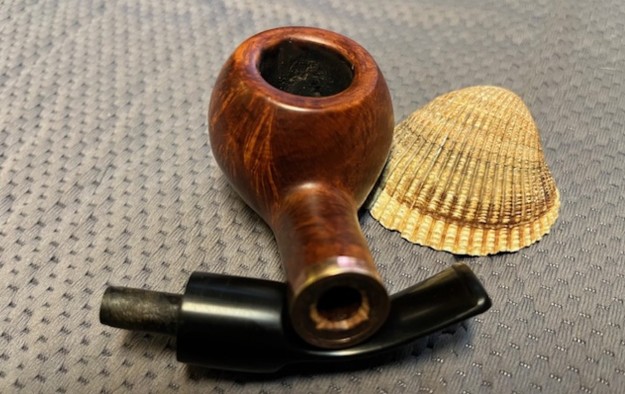
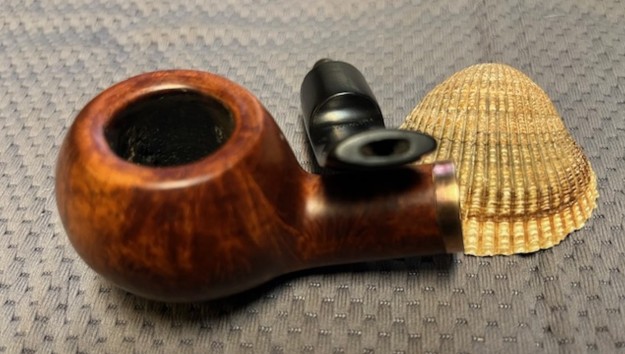
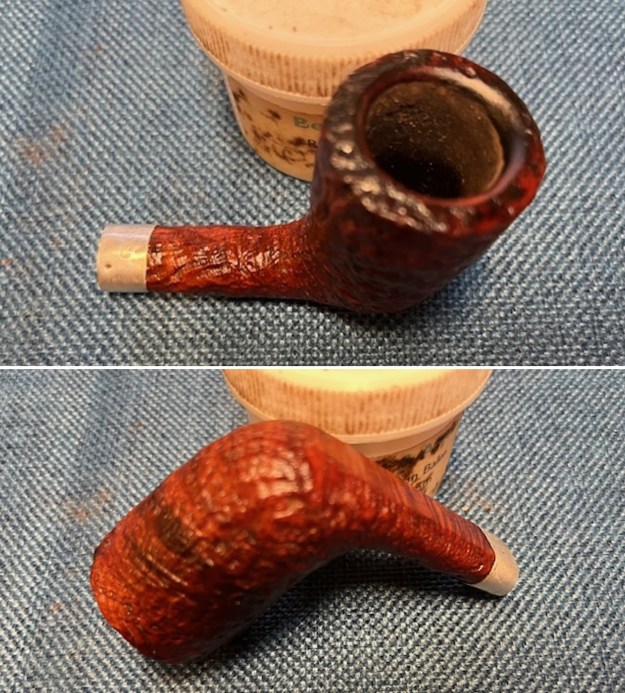
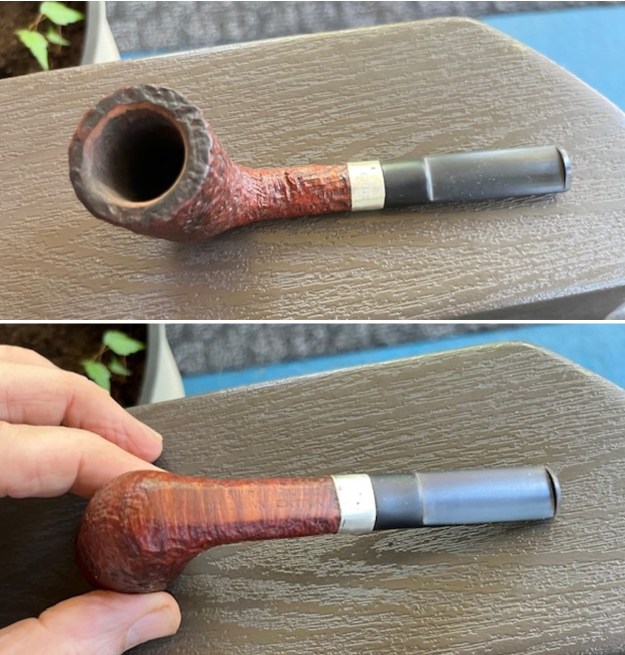
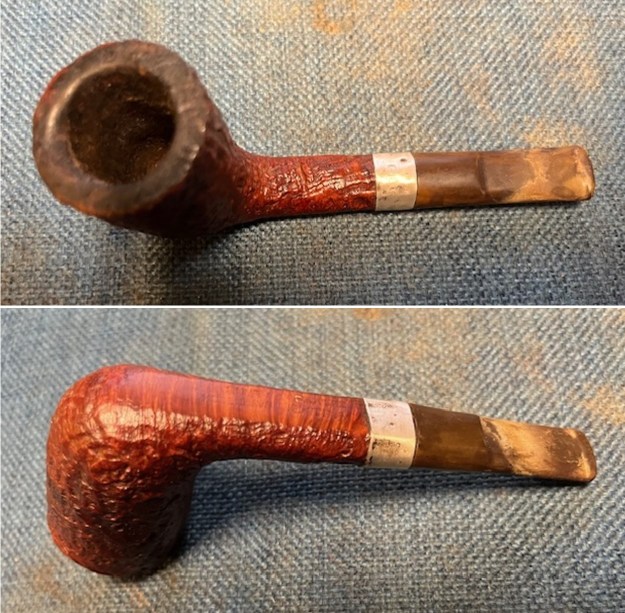
I took a photo of the rim top, bowl and the surfaces of the stem to give a sense of the condition of the pipe. The bowl is out of round toward the front of the bowl. There was a thick lava coat on the rim edges or top filling in the sandblast. The stem is heavily oxidized, calcified and dirty. It has also been cut off a bit crooked and the button is not clean. The Sterling Silver shank band is dented, scratched and oxidized. It has also been cut at an angle.
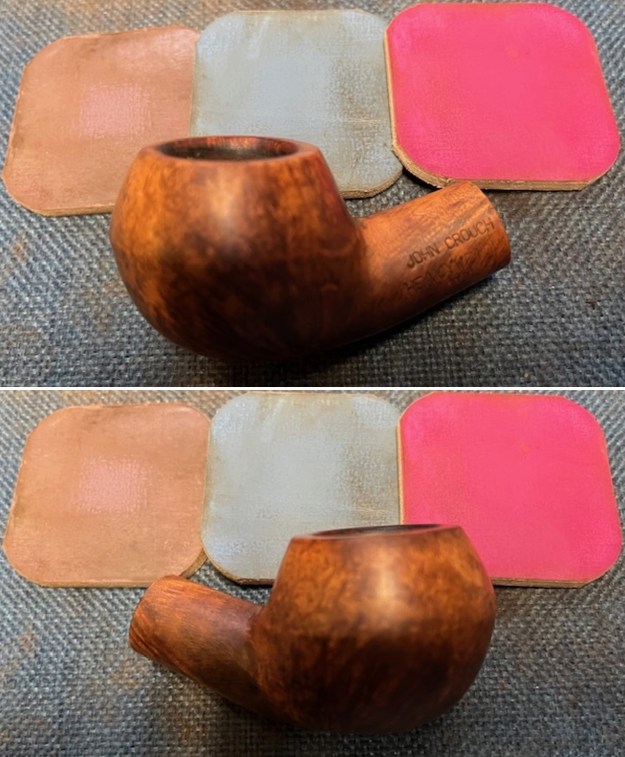
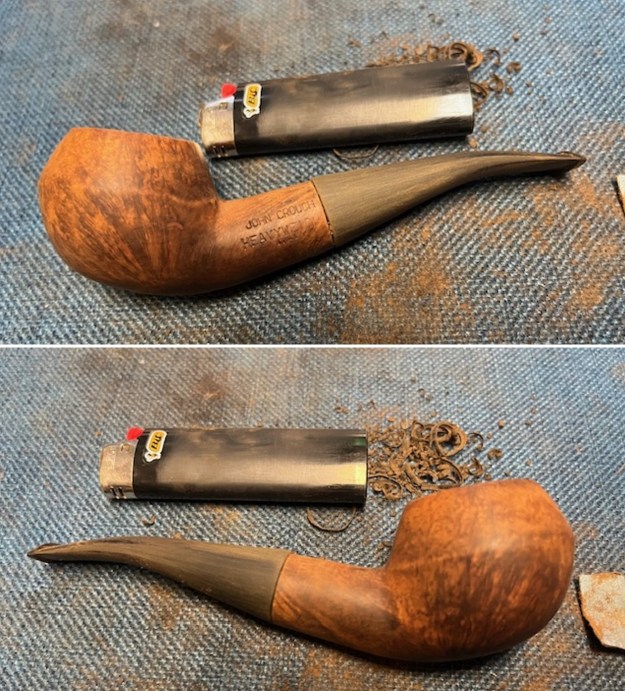
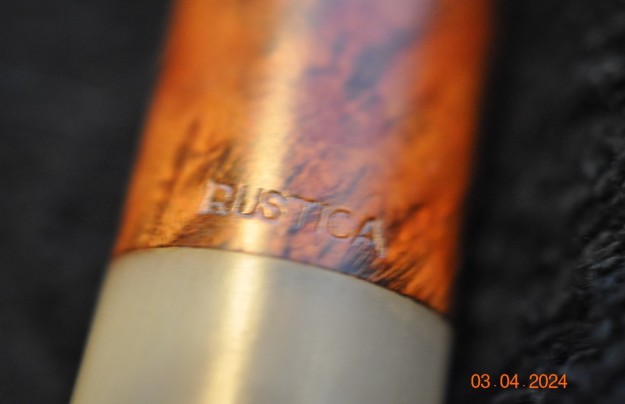
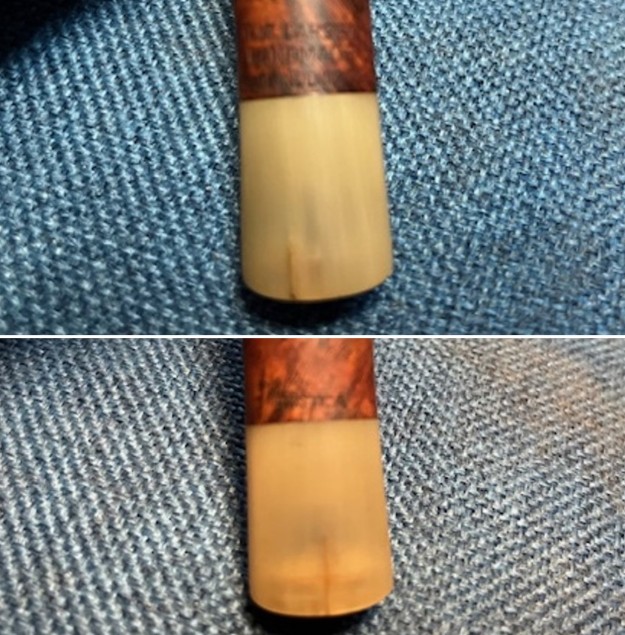
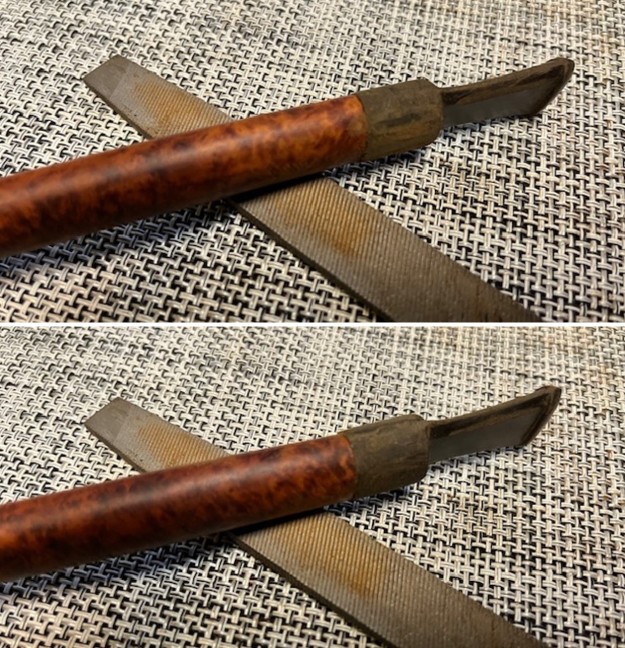
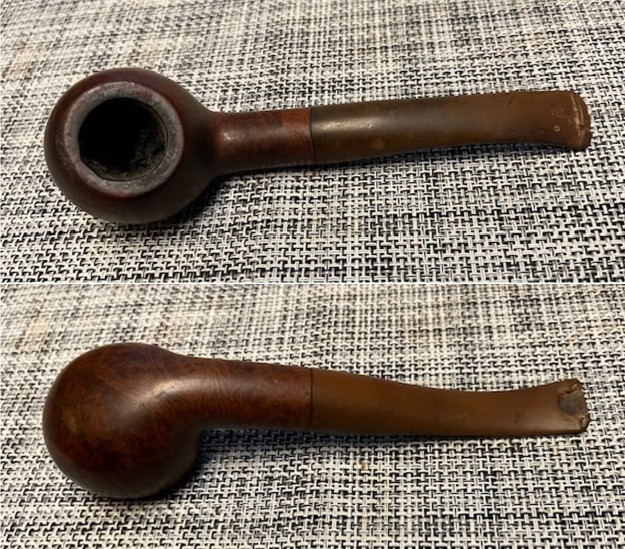
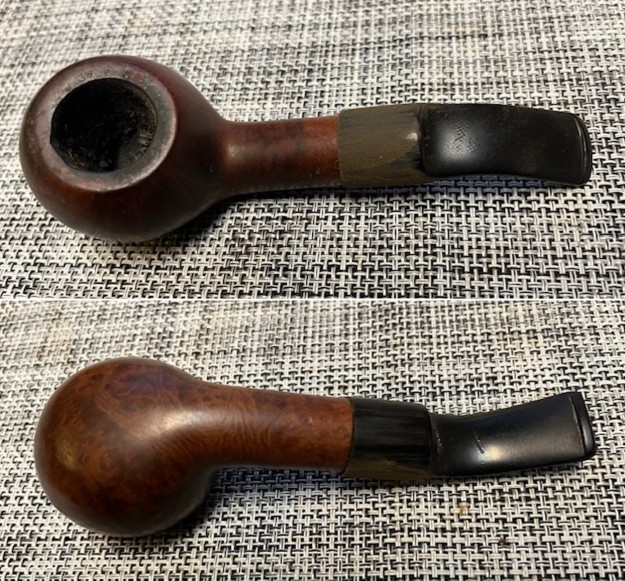
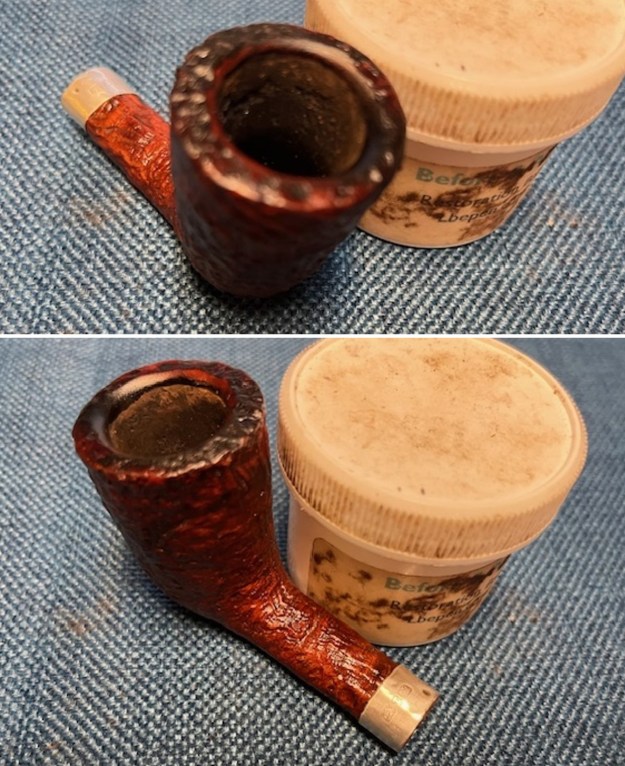
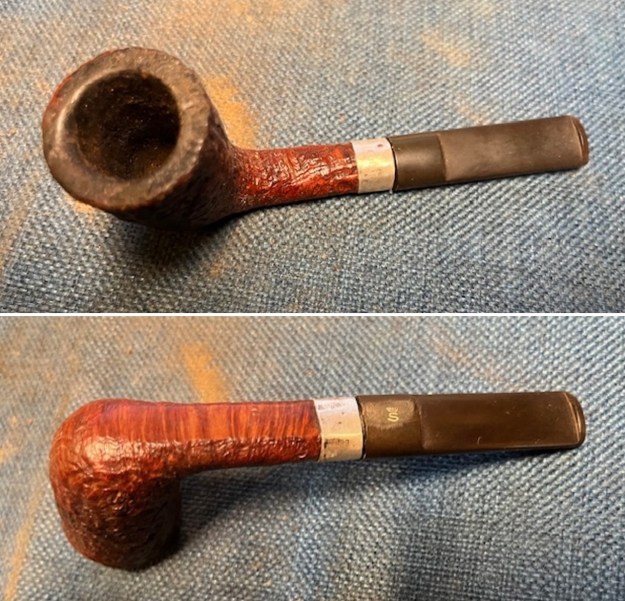
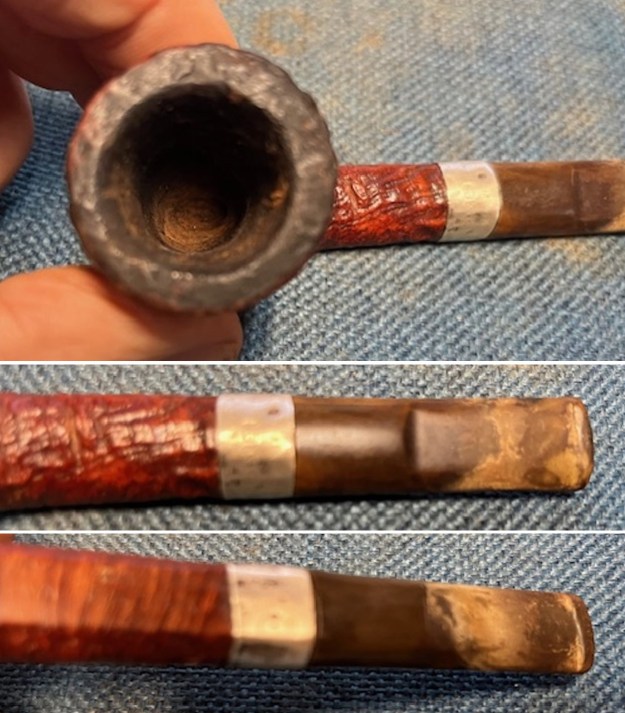
I took photos of the stamping on the sides of the shank. It is clear and readable and read as noted above. I took a photo of the pipe with the stem removed. It is definitely dirty and very oxidized on the shank extension and the stem.
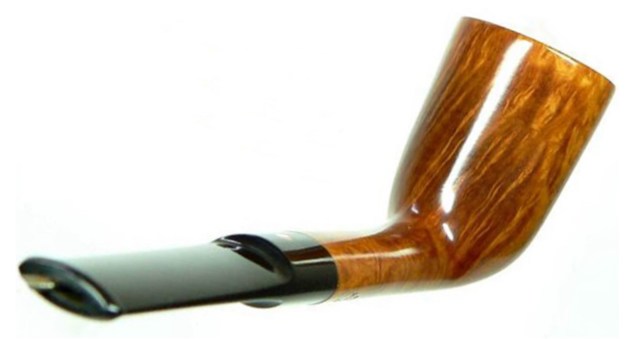
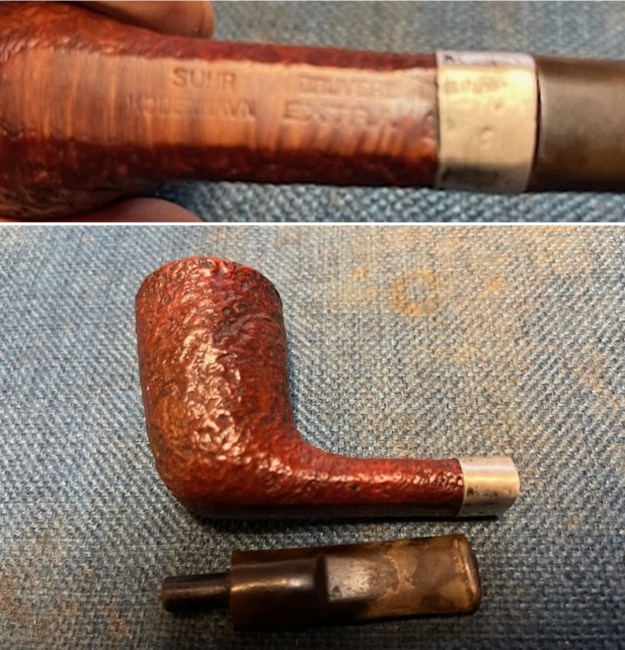
While I was looking at the pipe in the Antique Mall I looked up the Suhr brand on Pipephil’s helpful site where he has some great resources on stamping (http://pipephil.eu/logos/en/logo-s13.html). I had a fleeting memory of the name but I could not give it any data. I read about the brand and looked at the shape of the pipe shown on the site which was very similar to the pipe I was looking at. I was pretty convinced that the pipe at the shop was made by the same Suhr as shown on Pipephil’s site. The photos included also gave a clear picture of what the original stem may have looked like on the pipe when it left the maker. I bought it based on that information and added it to the purchase.

I have added the information, photos and a screen capture of the section below for the purpose of putting the information together with the restoration. 
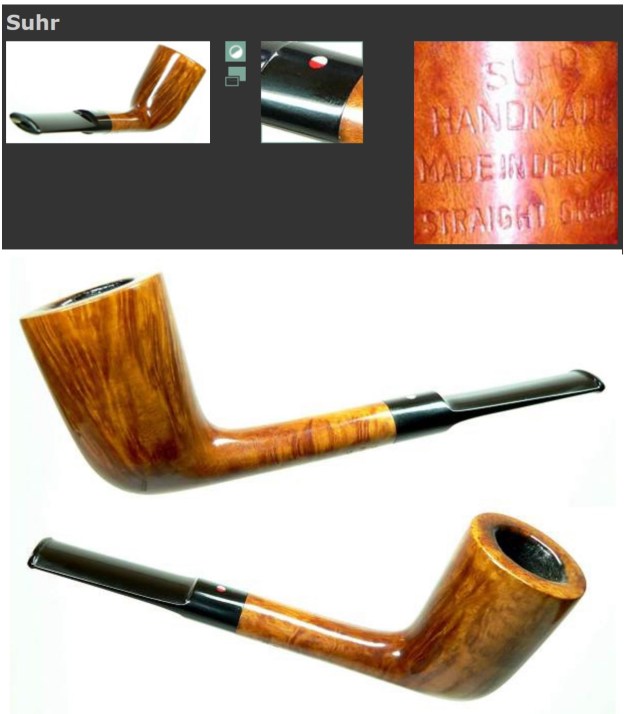
Suhr’s Pibemageri (pipe workshop) was owned by Teophil Suhr. Poul Rasmussen († 1967), Svend Axel Celius or Sven Knudsen used to produce the pipes proposed in the shop.

It is not established the red-white dot is Suhr’s original logo. it may be the symbol used by Poul Rasmussen himself. See also: Anne Julie (widow of Poul Rasmussen)

When I got home and before I began working on the pipe I reread PipePhil’s info included above and turned to Pipedia for more (https://pipedia.org/wiki/Suhr%27s_Pibemageri). I quote from that site below.

Suhr’s Pibemageri was a pipemaking workshop started by Teofil Suhr in Copenhagen central to the birth of the modern Danish pipe. When Sixten Ivarsson, then a debt collector newly moved to Copenhagen, broke his pipe, it was to Suhr’s he went for a repair, only to find a broken lathe and no pipemaker. Soon after, he was working as the foreman at Suhr’s, where, among others, Peter Micklson got his start and Sven Axel Celius learned pipemaking from Poul Rasmussen and his then foreman Sven Knudsen. Pipes from Suhr’s were stamped with the workshop name Suhr, and on occasion carried the same red and white dot used by Anne Julie to this day.

While it is said to be a disagreement with Suhr’s that led Ivarsson to leave for Stanwell, and all of these names went on to greater fame in later years, it would be impossible to overstate the importance of Suhr’s to the evolution of the modern smoking pipe.

I googled Suhr to find more information. I found some on the Smokingpipes.com web site (https://www.smokingpipes.com/pipes/new/suhr/). I quote the information on the brand there.

Suhr is a venerable name, tracing back to the 1940s in Copenhagen, where it was primarily a pipe repair shop before picking up pipe manufacturing. Sixten Ivarsson served as foreman there in the 1940s before moving on to Stanwell. When he left, Poul Rasmussen became foreman and made Suhr pipes until his death in 1967. His widow, Anne Julie, started making pipes at that time, and eventually trained other carvers, including Tom Eltang.

The grandson of famous pipe makers Poul Rasmussen and Anne Julie, Johannes Rasmussen trained with Tom Eltang for years before carrying on the Suhr name.

When Johannes decided to pursue pipe making, he went full circle in his family history and contacted Tom Eltang for an apprenticeship. While at the Eltang workshop, he learned the basics and began exploring his own creative voice, expanding his artistic reach until confident about breaking out on his own.

It was natural to resurrect the Suhr name for his pipes. Johannes credits his grandparents and Tom Eltang for his inspiration, and they were all part of Suhr history. He maintains a keen understanding of his place in the historical legacy of pipe making, in which he stands on the shoulders of giants.

I also turned to another site listed by google called Worthpoint. The site also showed a Suhr pipe and the description is very similar to mine (https://www.worthpoint.com/worthopedia/bruyere-extra-suhr-kobenhavn-hand-1864270360). I quote the site’s description below.

No cracks or rim chips. Reads “2085 BRUYERE EXTRA SUHR KOBENHAVN BY HAND ” on the shank.

The shape number 2085 is the only difference in the stamp. The order of the stamp is slightly different but the data is the same. From that it helped me interpret what is partially hidden under the silver band. I now knew that it read By Hand and the shape number starting 9.

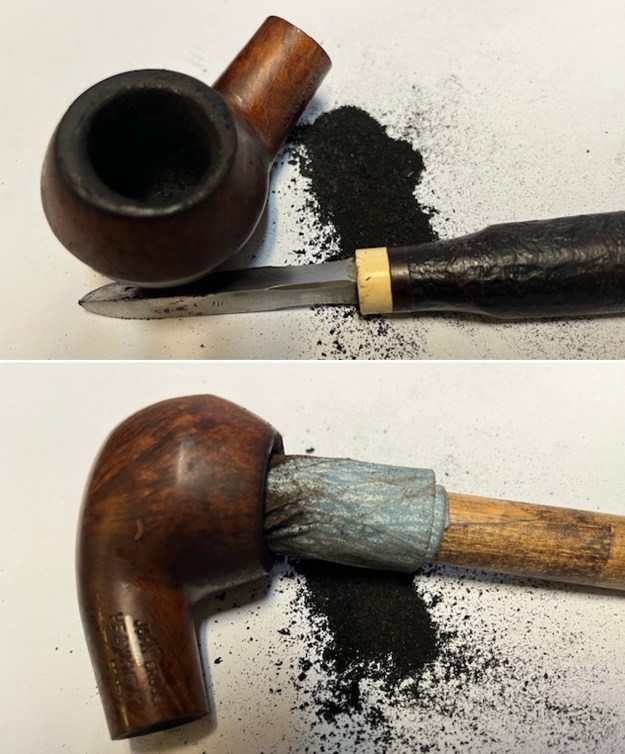
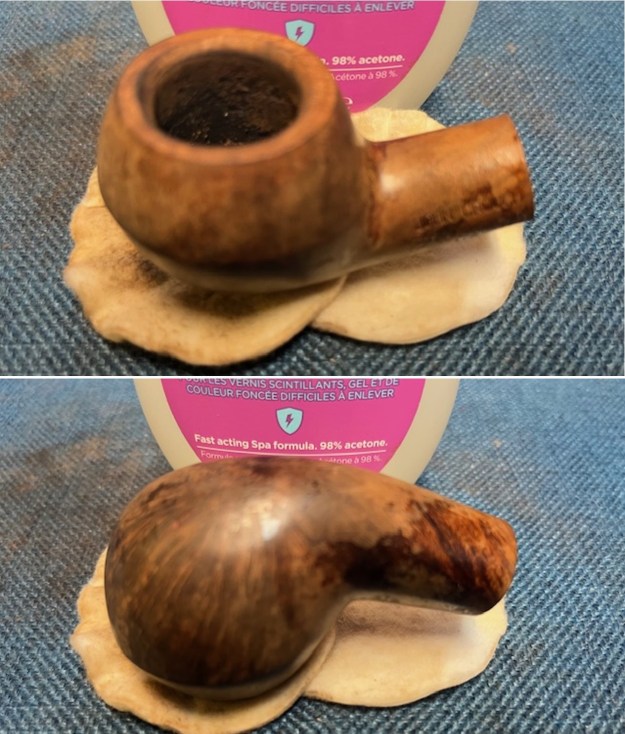
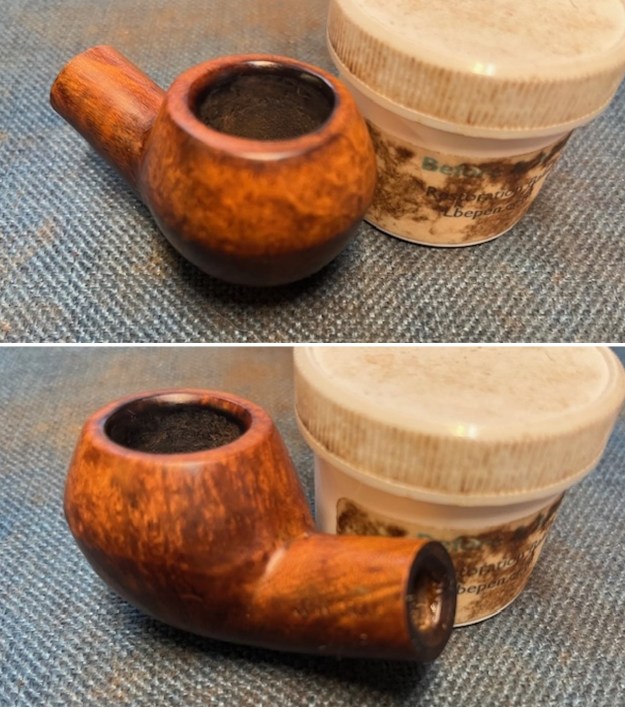
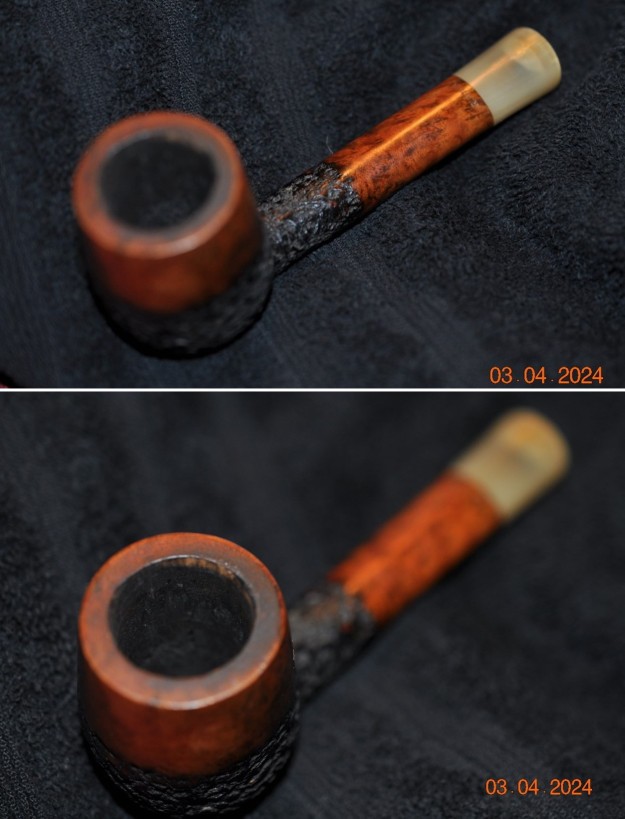
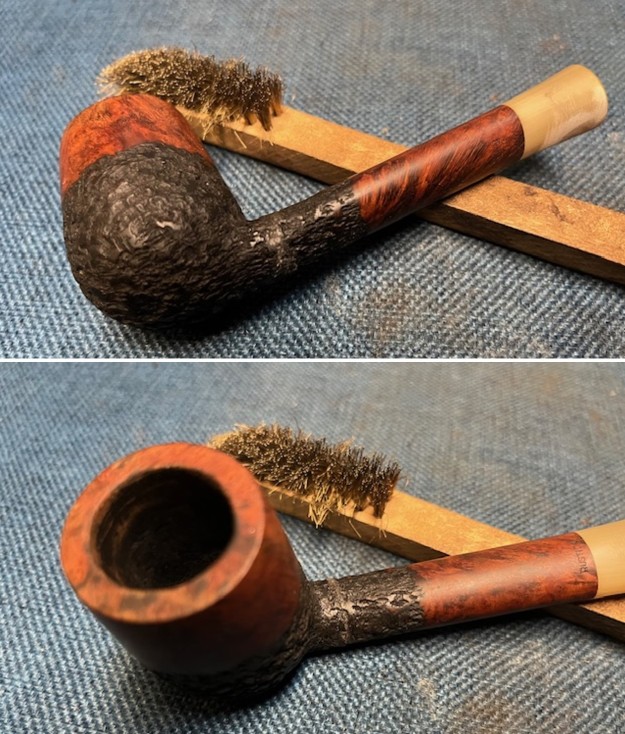
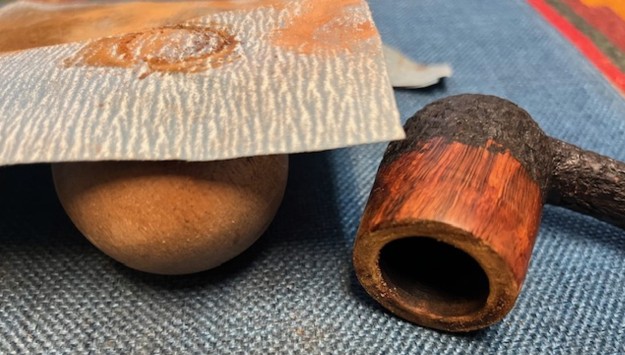
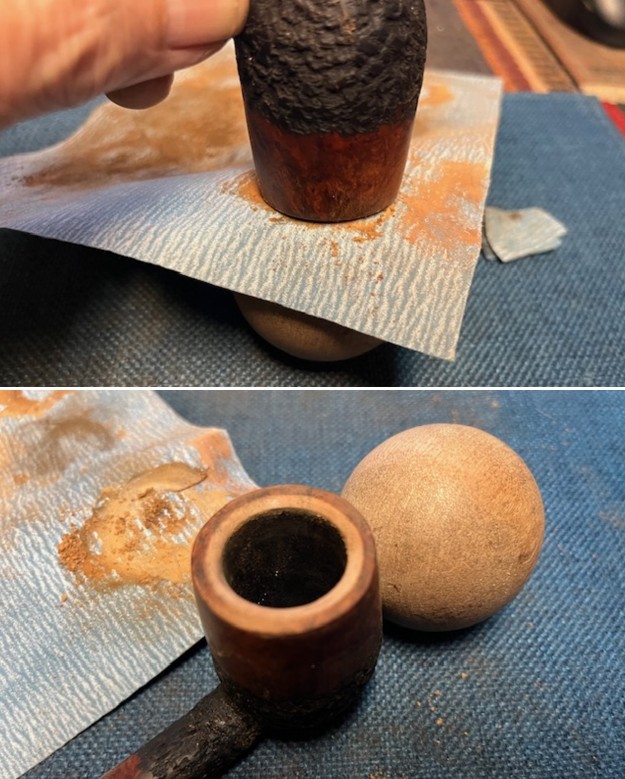
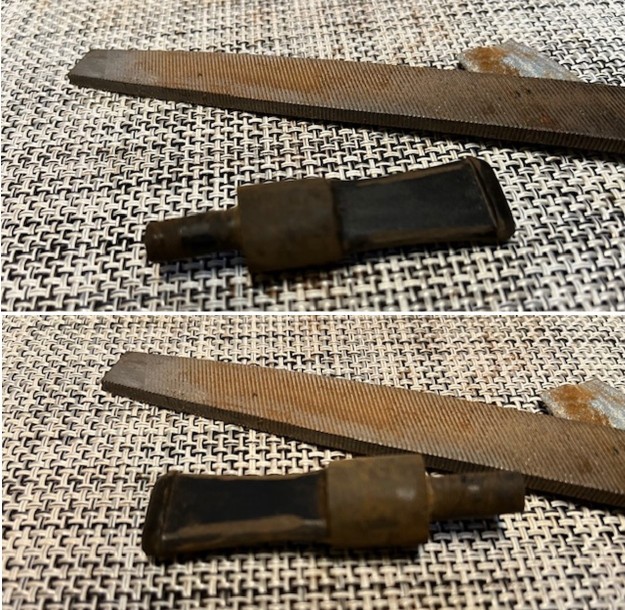
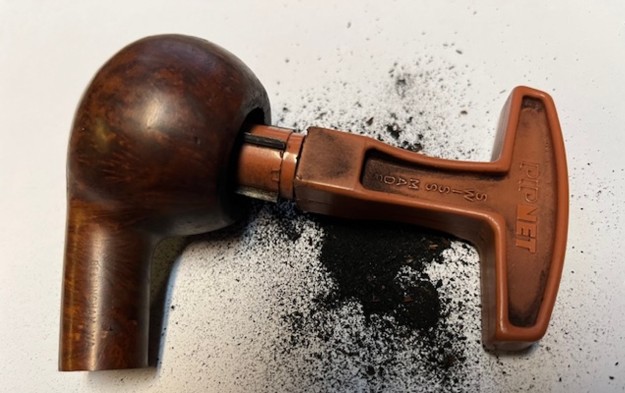
Now it was time to work on the pipe. I started my work by reaming the cake and debris in the bowl. I reamed it with a PipNet pipe reamer using the 1st and 2nd cutting heads to remove the cake. I took it back to bare briar. I followed that by scraping out what remained on the bowl walls with a Savinelli Fitsall Pipe Knife. I sanded the walls smooth with 220 grit sandpaper wrapped around a piece of dowel. The bowl walls looked very good with no burn damage or checking on the walls. 
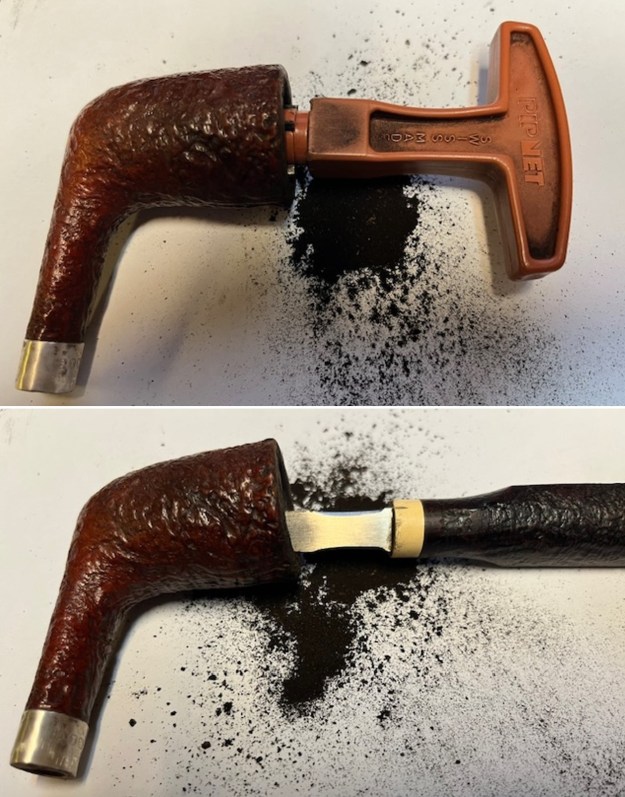
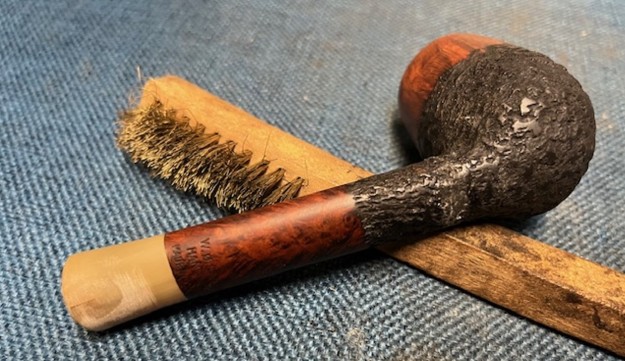
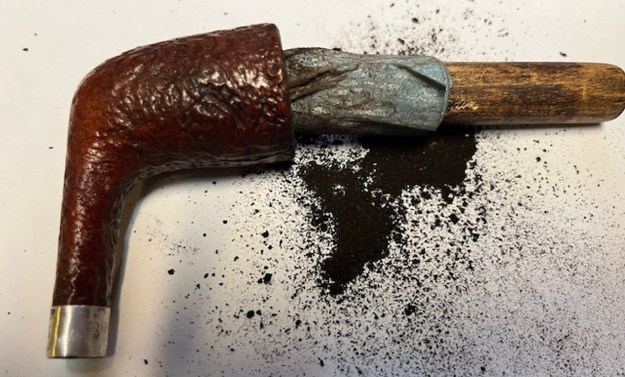
I scraped the rim to with the Fitsall knife to remove the thick lava coat. I went over it with a brass bristle brush to clean out the grooves in the sandblast rim and it was starting to look better.
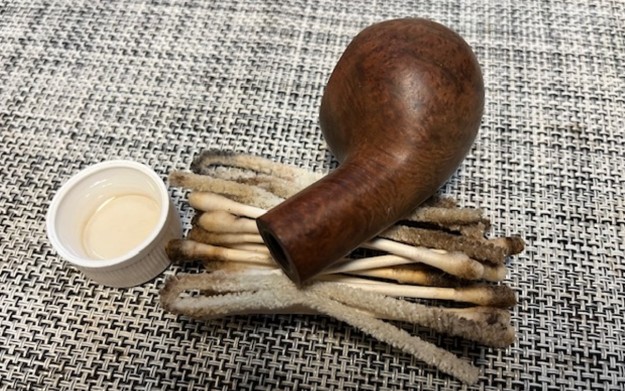
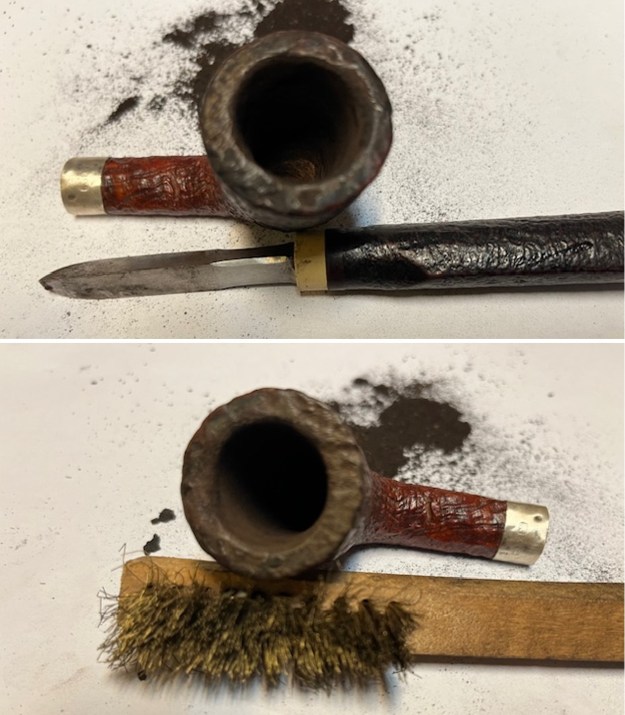
I cleaned out he internals of the shank, mortise and airway in the shank and the stem with alcohol, cotton swabs and pipe cleaners. I hard started shaping the new stem (an older worn Stanwell saddle stem seemed a fitting one to use). I paused to clean it at this point.
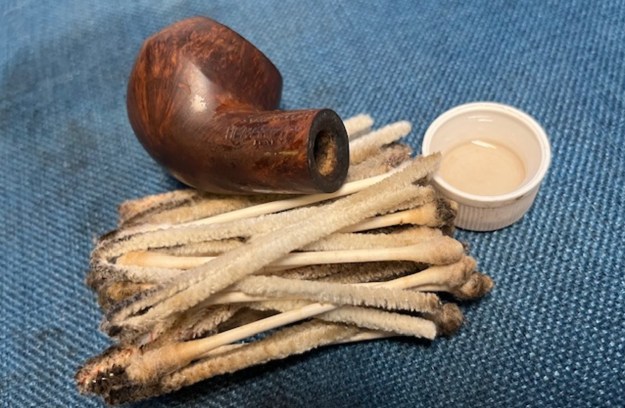
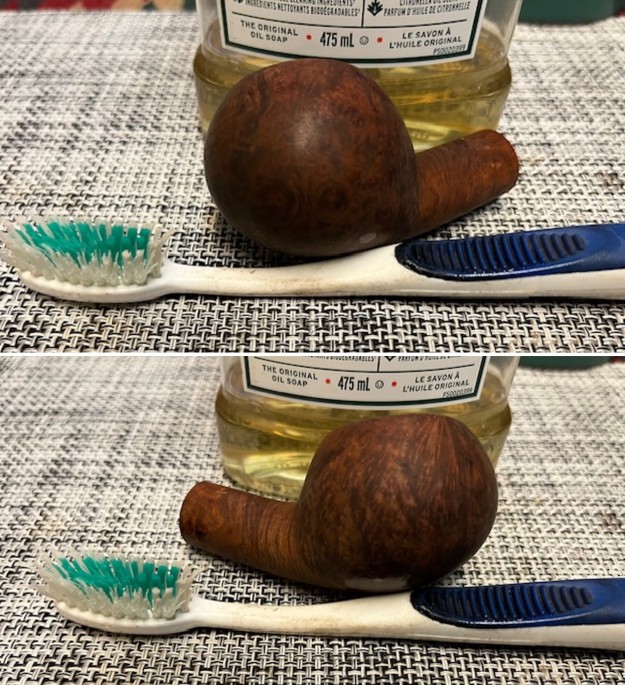
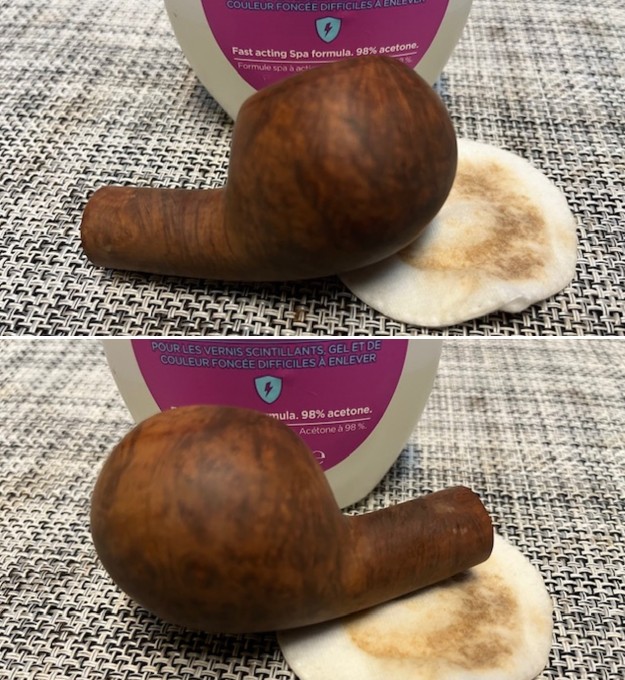
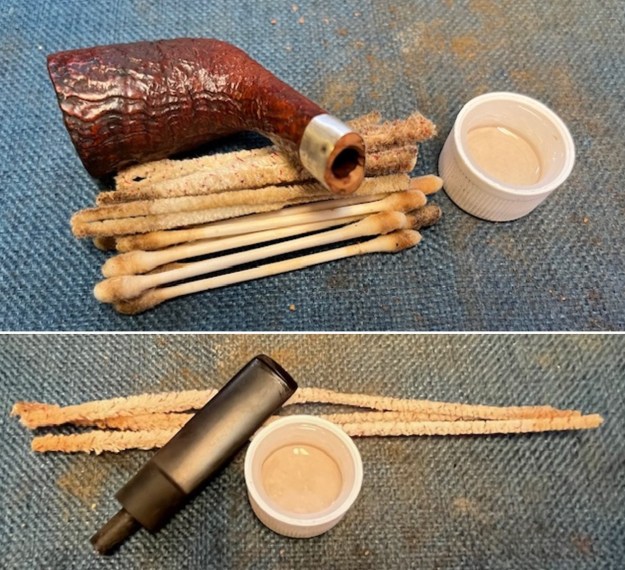
I scrubbed the dirty bowl with a tooth brush and undiluted Murphy’s Oil Soap. I rinsed it off with warm water and dried it with a cotton cloth. It did a great job removing the oils and tars and overall the bowl looked much better. 
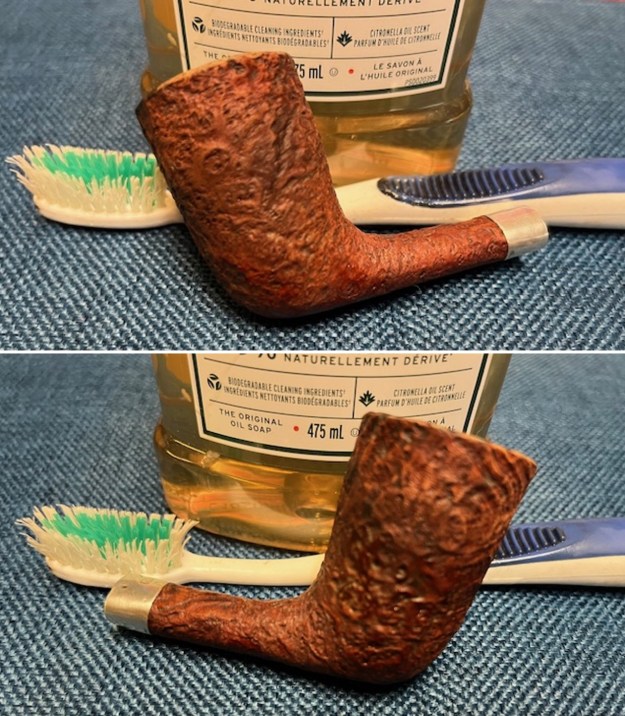
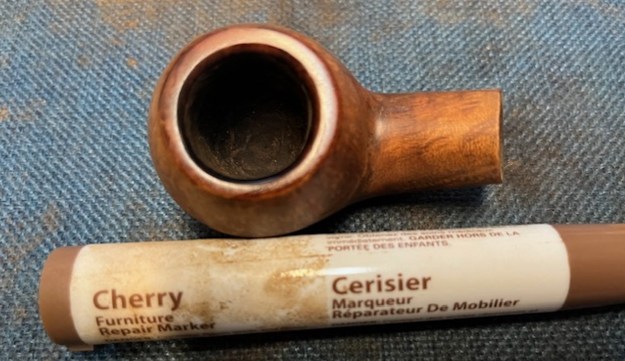
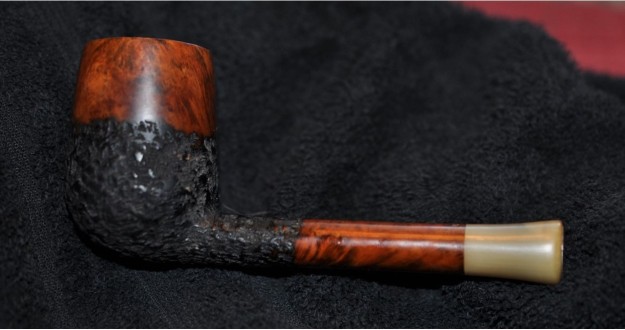
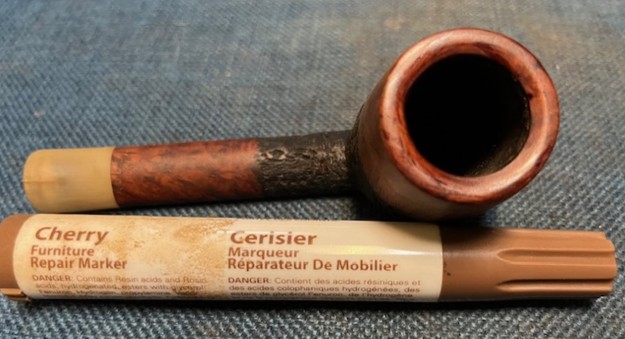
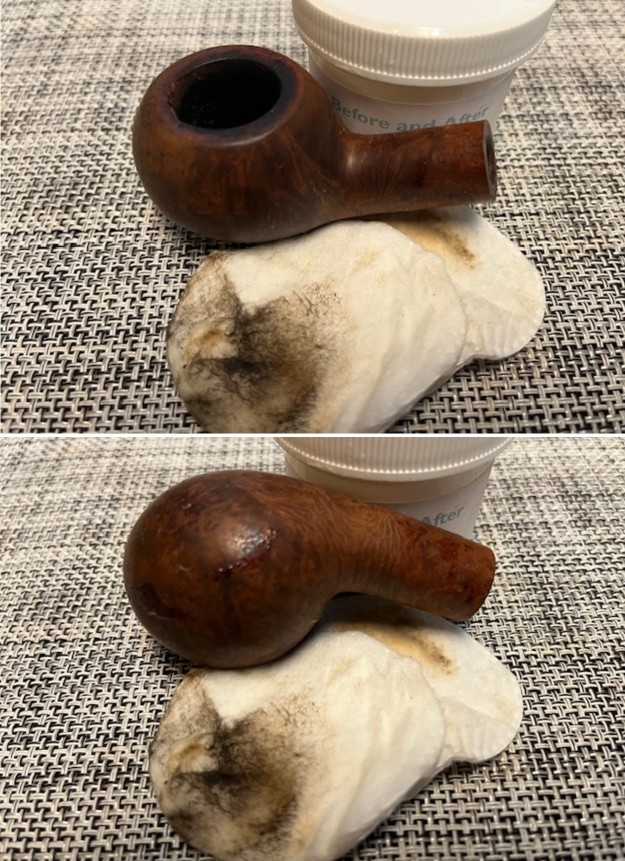
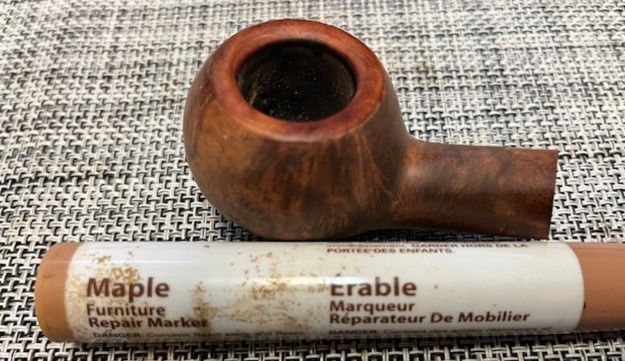
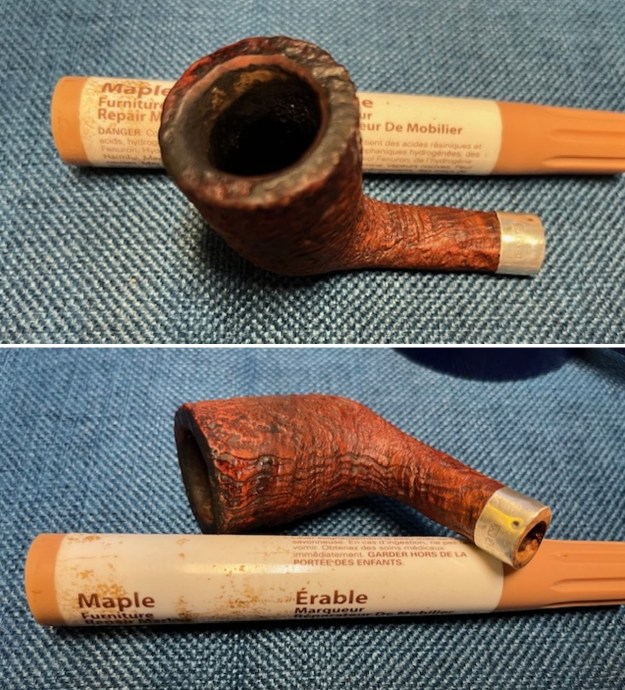
I touched up the outer edge where it was worn and the top of the rim with a Maple Stain Pen. The colour was a perfect match. The only frustration was the burn damage on the front of the inner edge now really is visible. I think I will need to go back and work on that area. I worked over the inner edge again with a folded piece of 220 grit sandpaper to give it a bevel and try to minimize the damage. Once finished I restained it with the Maple Stain Pen.
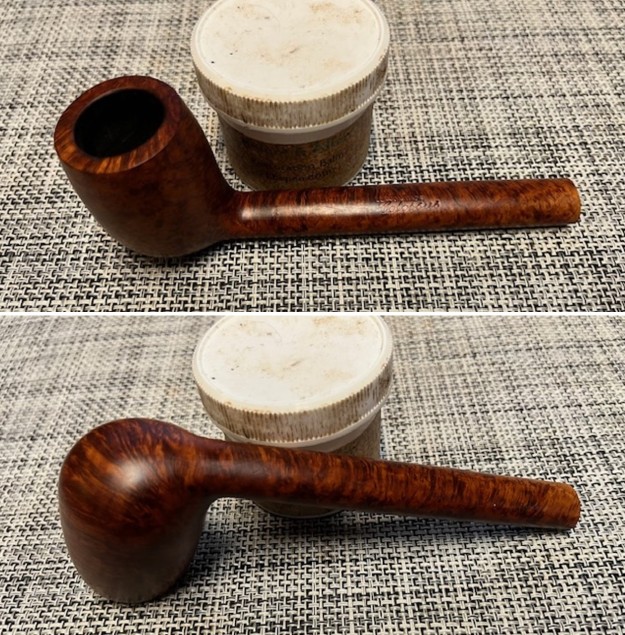
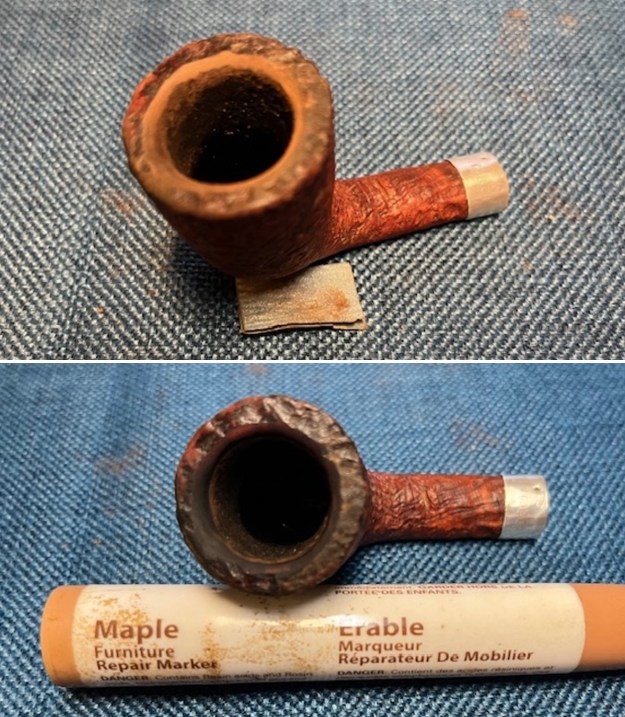
I rubbed the briar down with Before & After Restoration Balm. I worked it into the sandblast finish with my fingertips and a shoe brush. The product works to clean, enliven and preserve the briar. I let it sit for 10 minutes then I buffed it with a cotton cloth to deepen the shine. The briar really comes alive with the balm. 
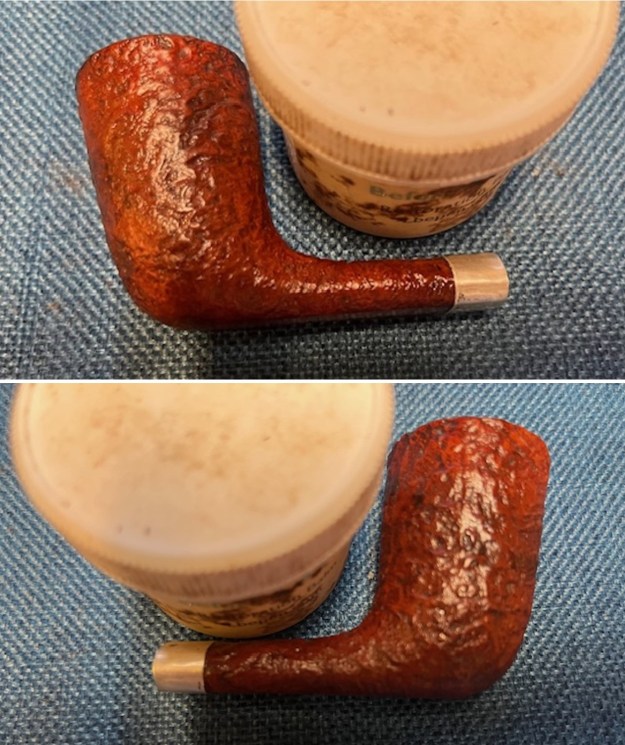
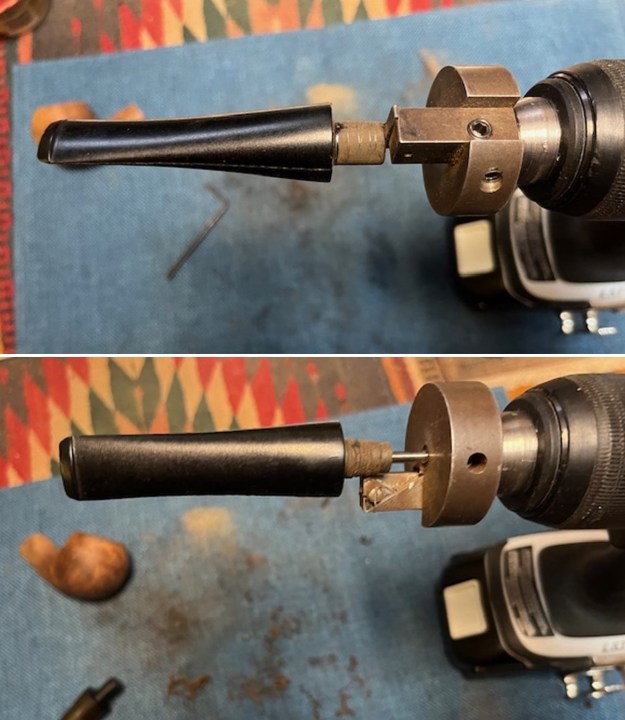
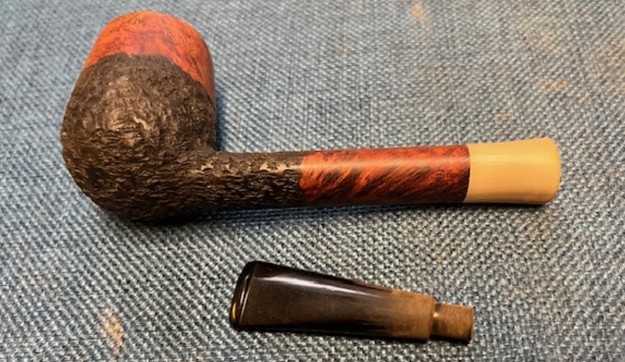
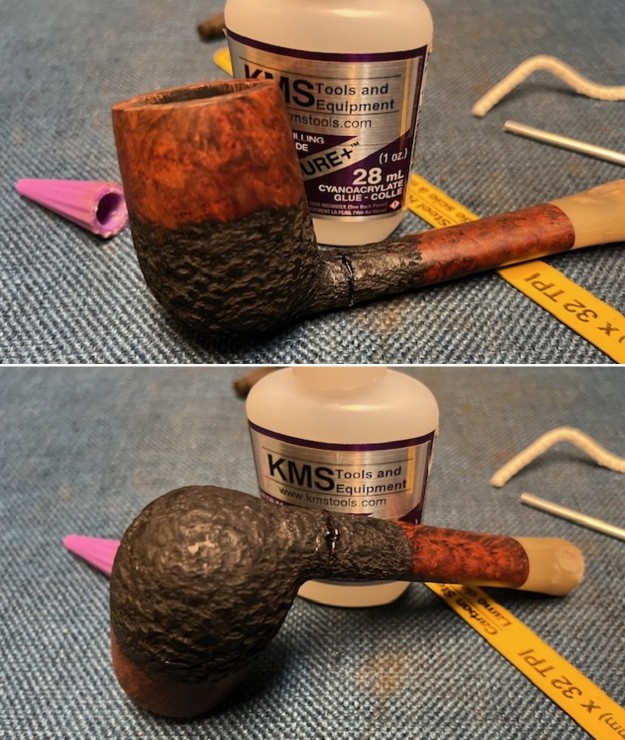
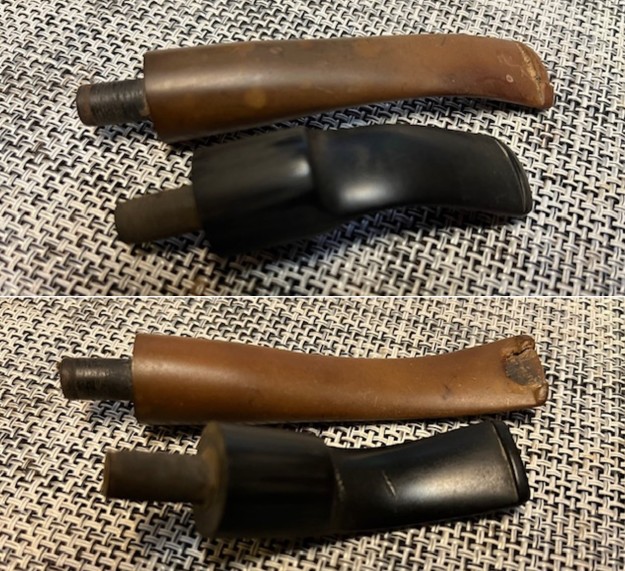
The blog is slightly out chronological order as I worked on the stem fit before I worked on the bowl but I decided to write it this way. Using your imagination walk with me through the stem fitting process. I had to search for a stem in my collection of stems that would work with this pipe. I wanted a saddle stem that had some more length on it and would require a minimum of shaping and contouring. I had a tired older Stanwell saddle stem that I think looked very similar to the Suhr in the photos on PipePhil. I think it is quite appropriate to use a Stanwell stem on this Danish piece of history. I would need to reshape the saddle portion and clean up the tenon but the stem would do the trick. 
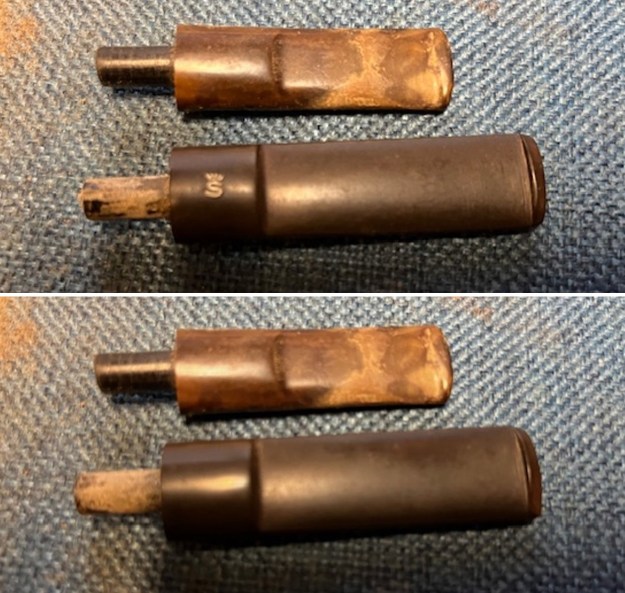
Before I cleaned up the pipe I ft the stem to the shank to get a sense of what it looked like. It would take a lot of shaping and sanding to get the fit right but I liked the look. Whoever had banded the pipe in the past had put the band on crooked so the shank end was no longer straight It was off to the left side and the stem would not face against the shank well. 
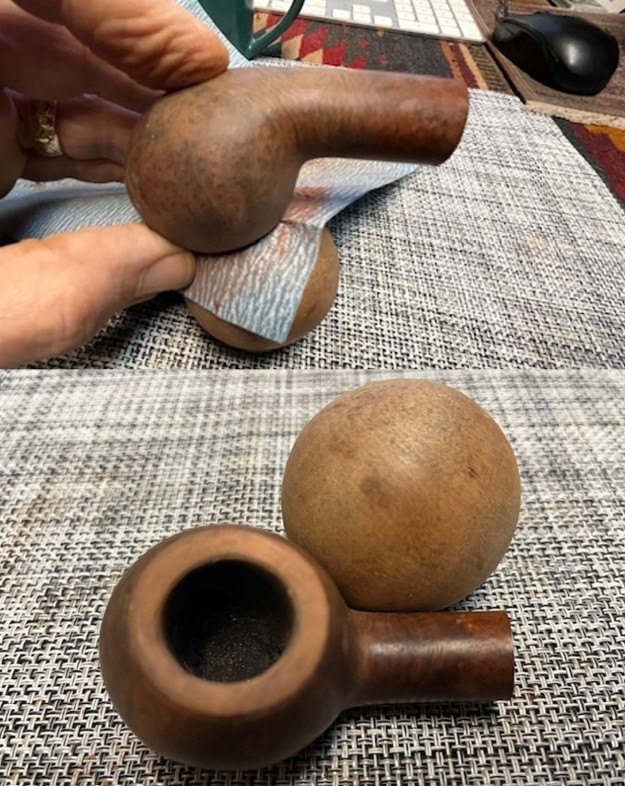
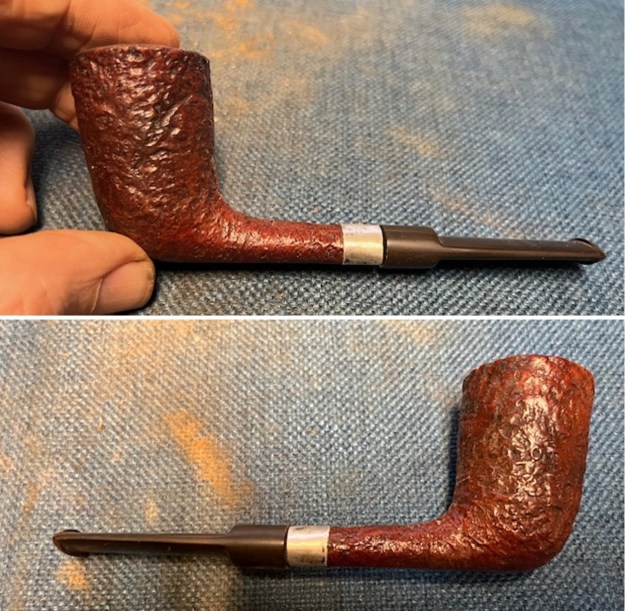
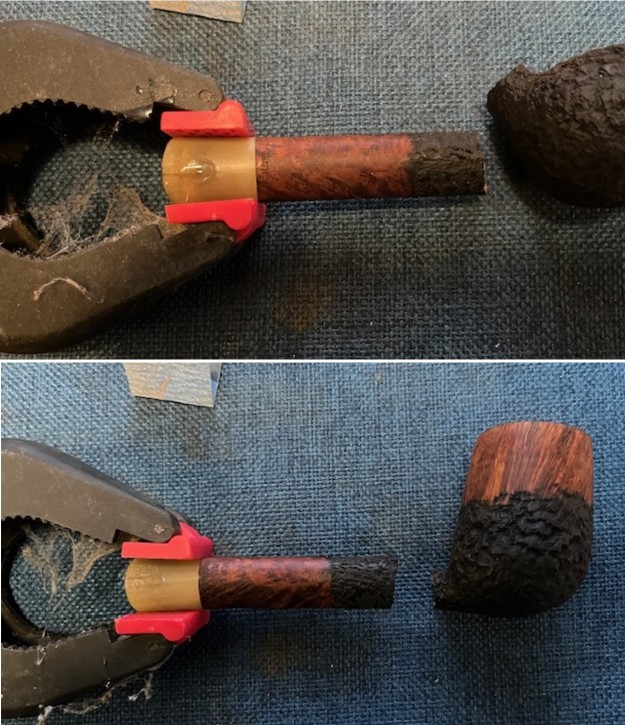
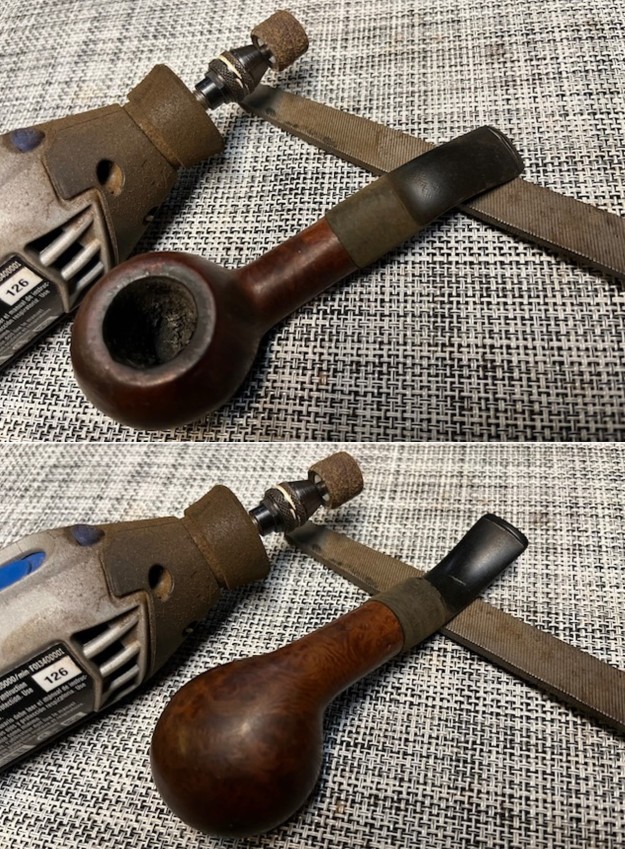
Since I was going to make a mess with the stem I decided to do the fitting work before I cleaned up the pipe. I used a Dremel and a Sanding drum to shape the saddle portion to fit the follow of the shank. It took a bit of work but I was able to get a rough fit. 
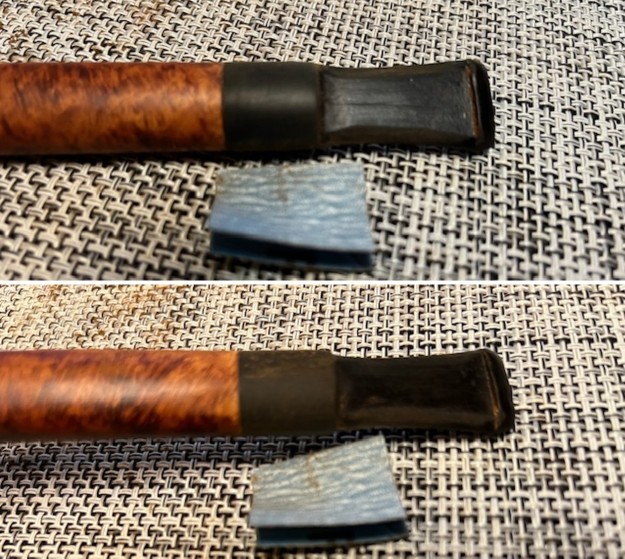
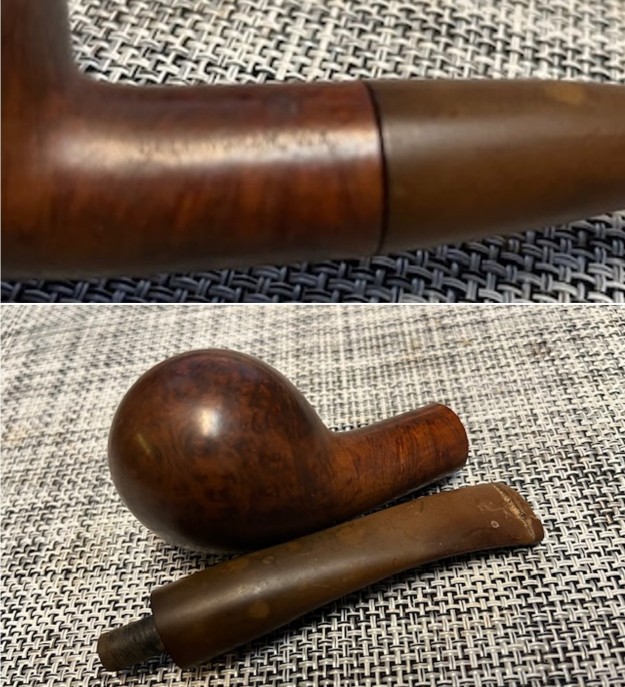
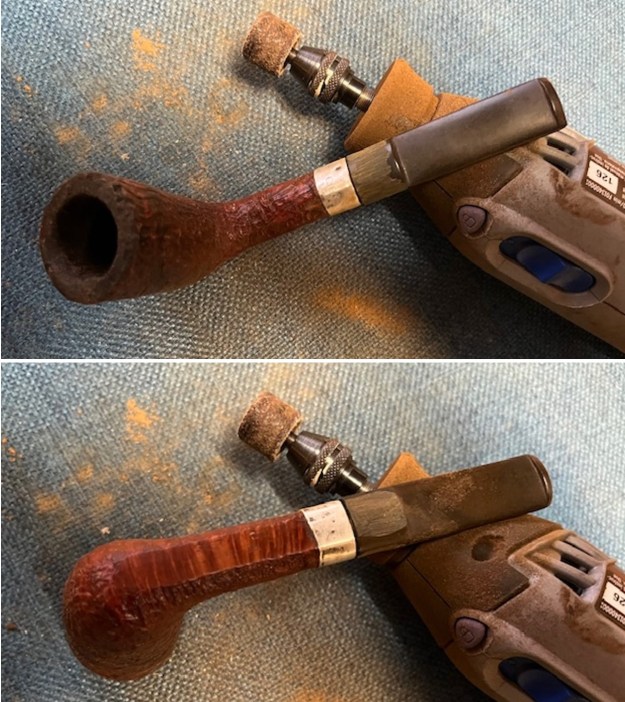
I heated the band with my heat gun to loosen the band. It was tightly in place. I used some acetone to try and it to failed. It seemed that the band had been glued in place on the shank with epoxy during the repair. It refused to move! So, the Danish Pipe would be permanently joined with a British Sterling band from Birmingham made in either 1943 or 1968. The stamping on the band was not altogether clear though it was a T. The only I am sure of is that it was added after market as a repair using a band that was handy. Left with that unmovable nature I had to work with what I had. I used a topping board with 220 grit sandpaper and hand sanding to flatten the shank end and square it up for a better stem fit. The stem fit better against the shank. Now I needed to sand the sides to shape them to match the shank curves. 
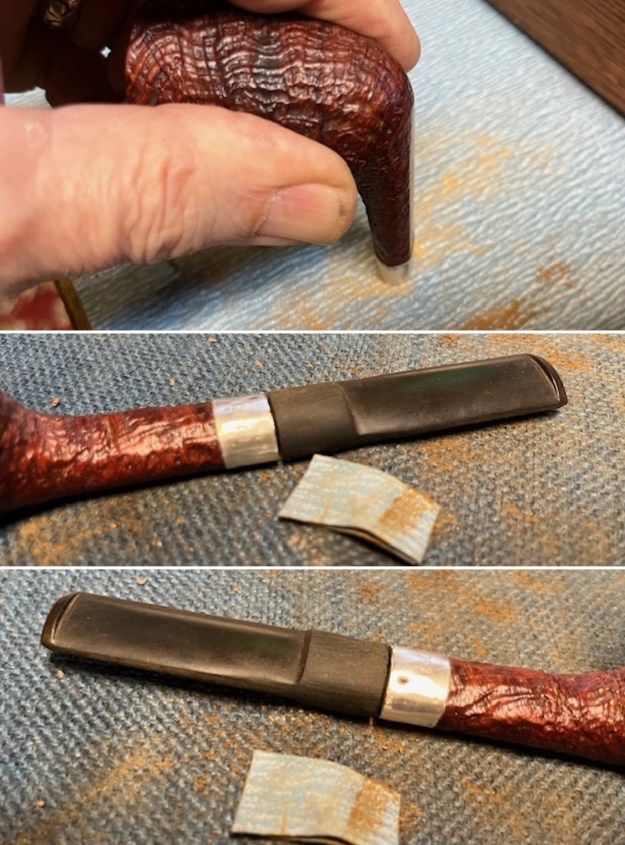
I worked over the stem with 220 grit sandpaper while I sat on my front porch. I shaped it in place on the shank just to make sure the fit was right. The shape of the shank appears to be oval but it is flat on the bottom and domed on the top. It took a lot of sanding and shaping to get the fit right but the photos show where it is after much sanding. 
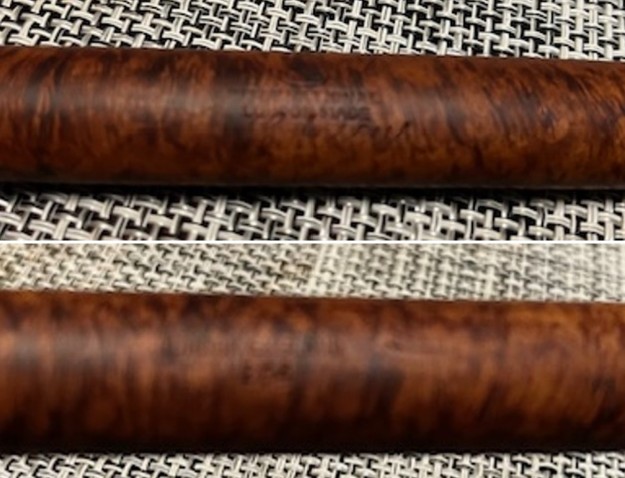
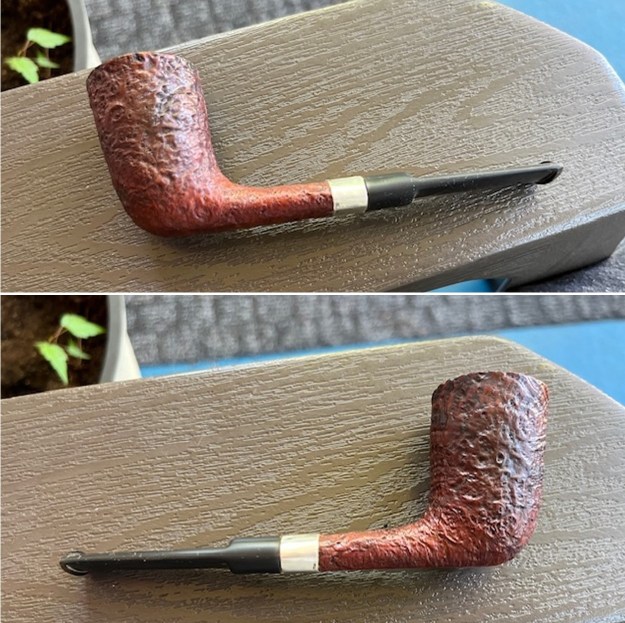
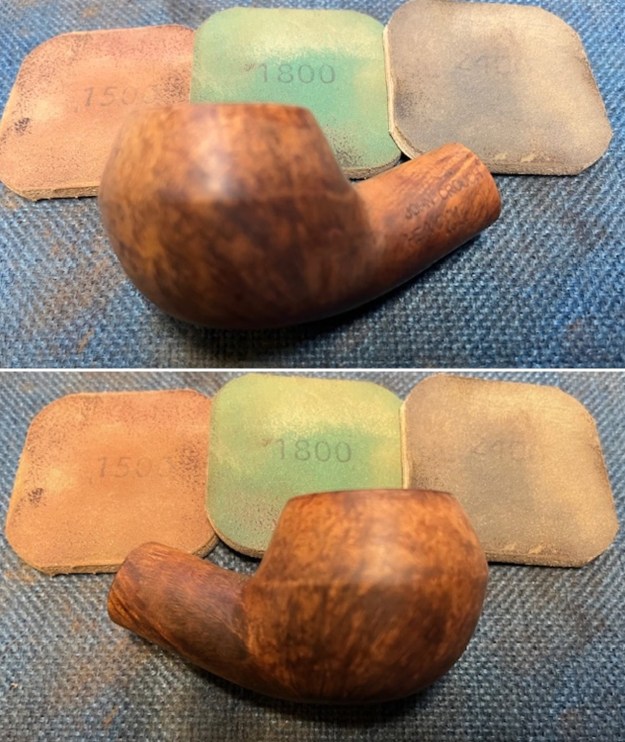
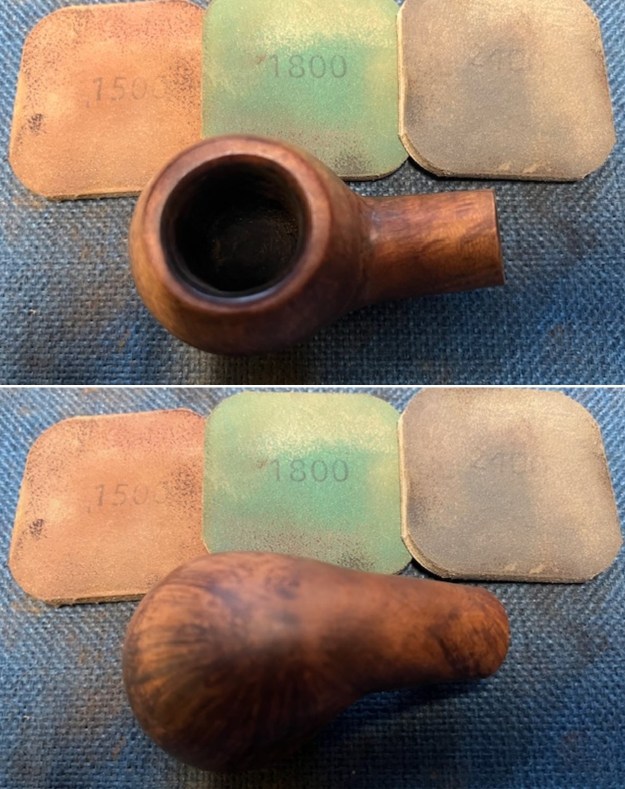
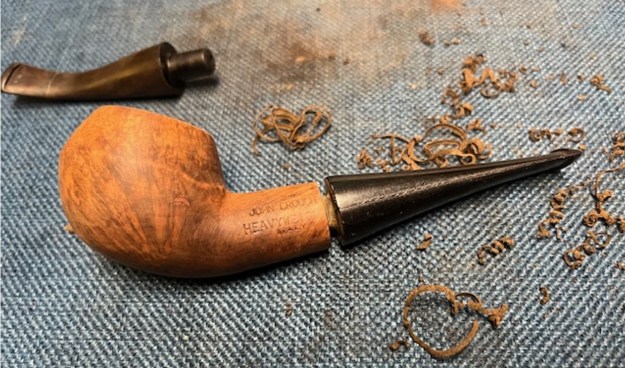
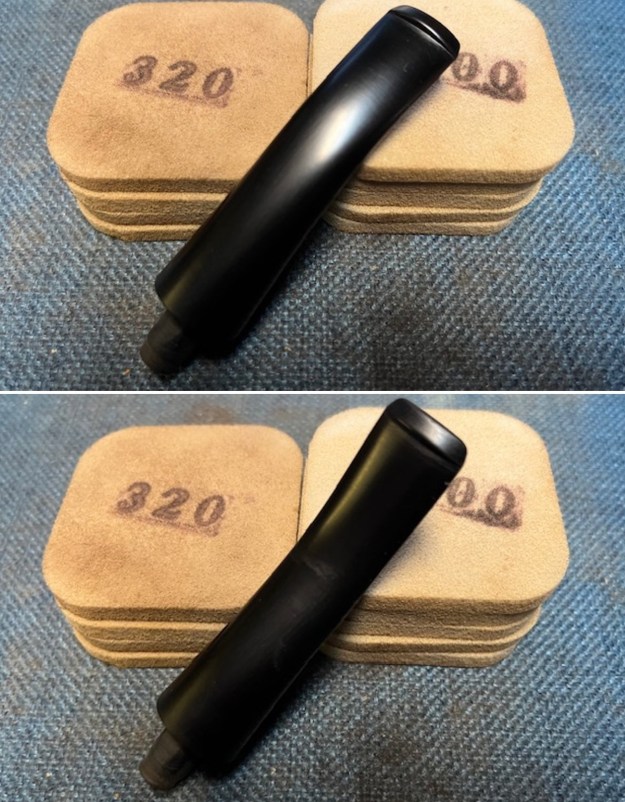
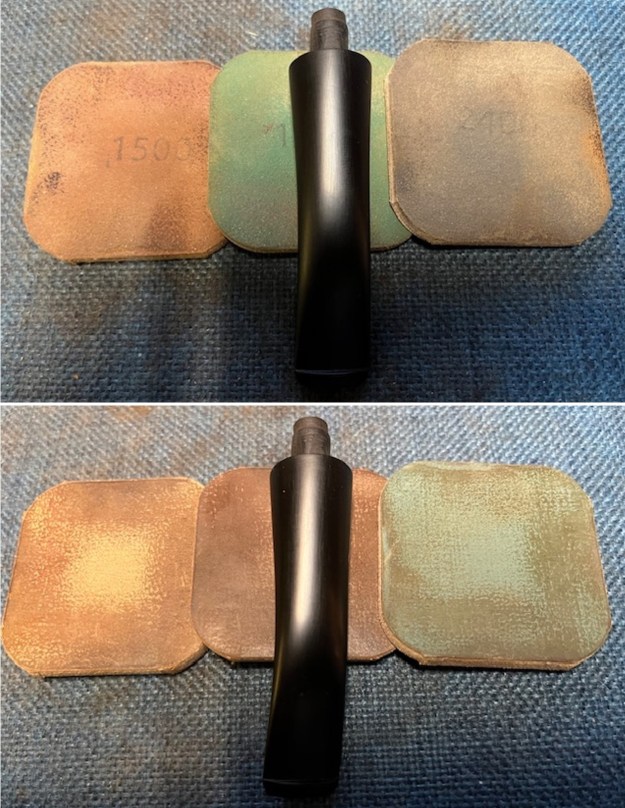
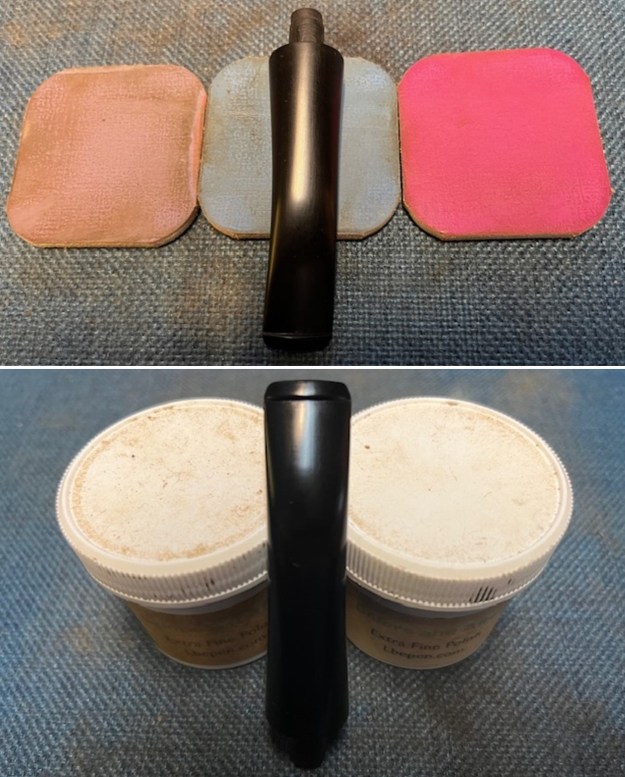
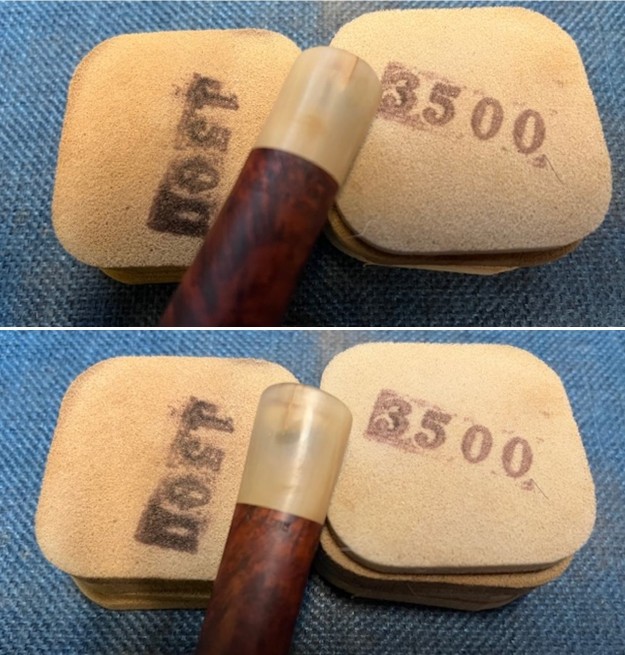
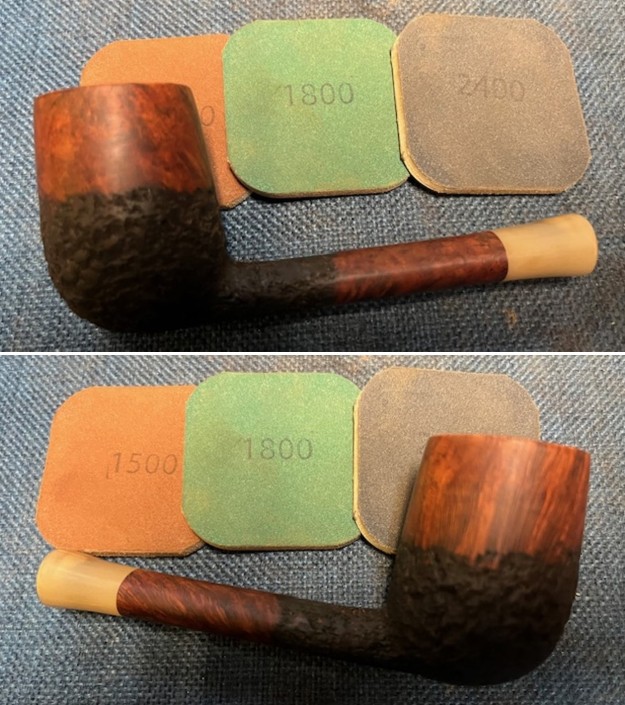
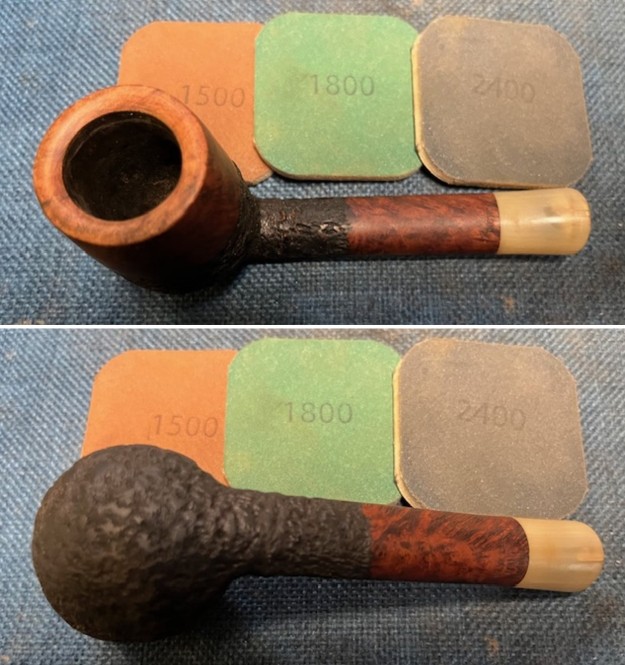
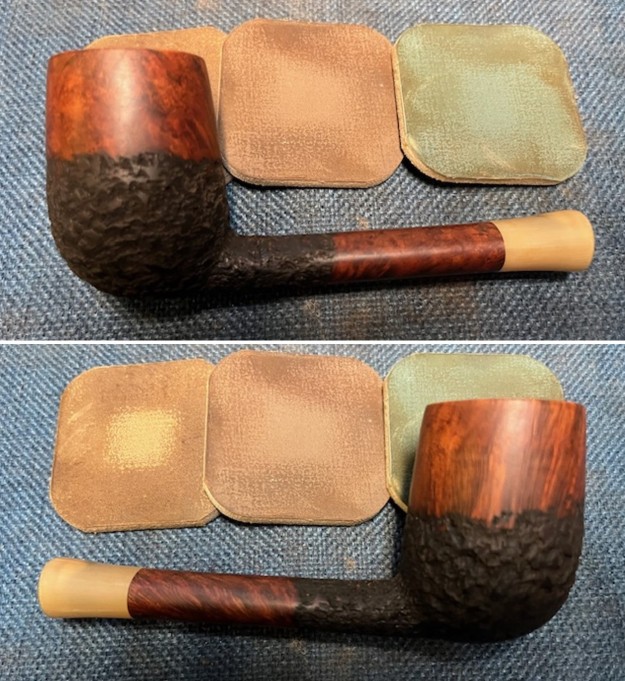
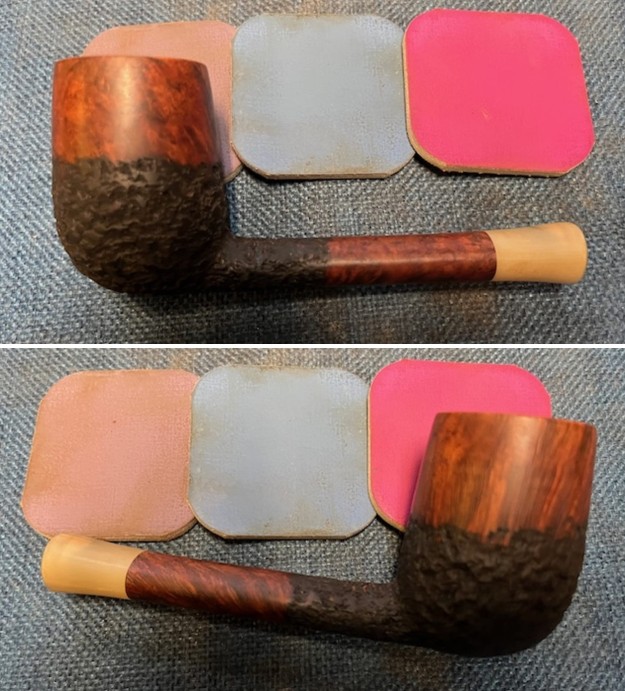
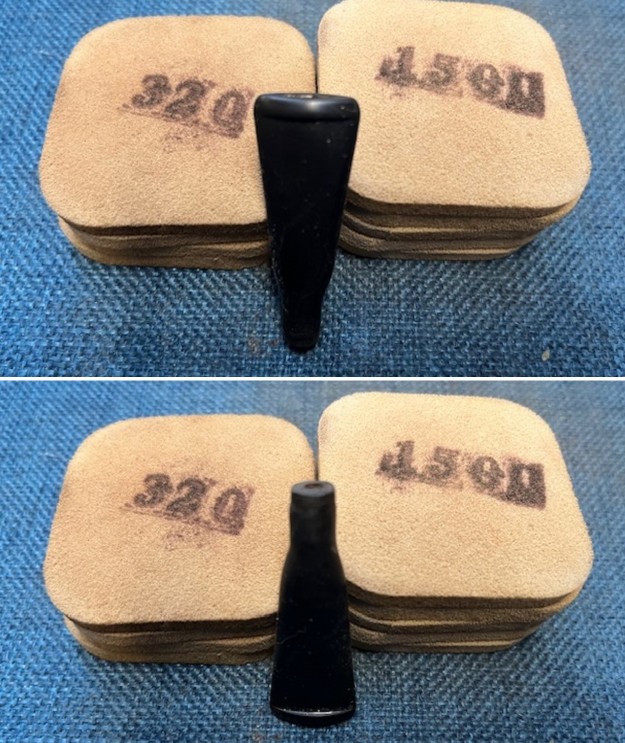
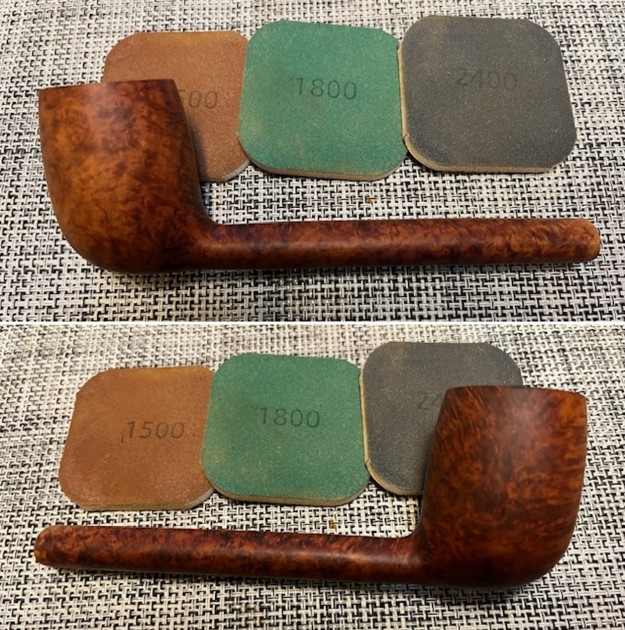
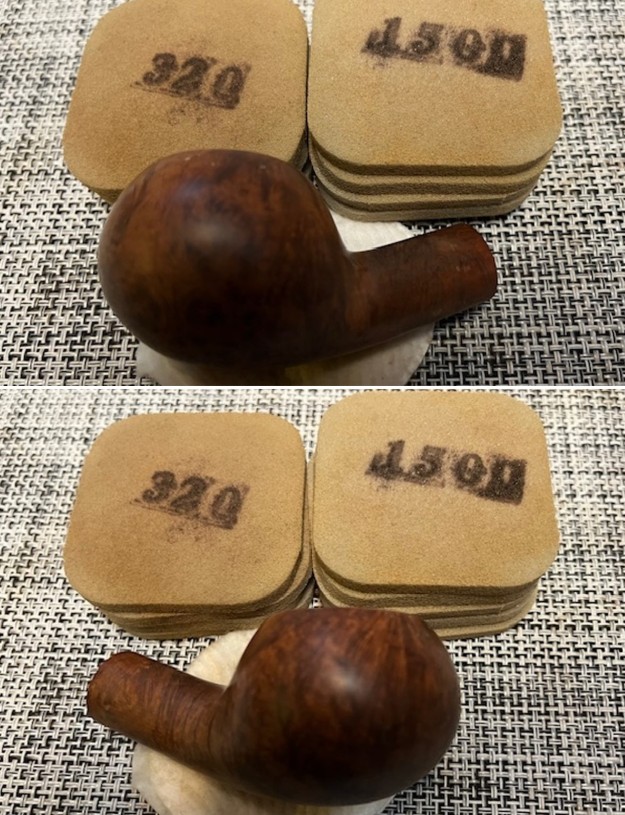
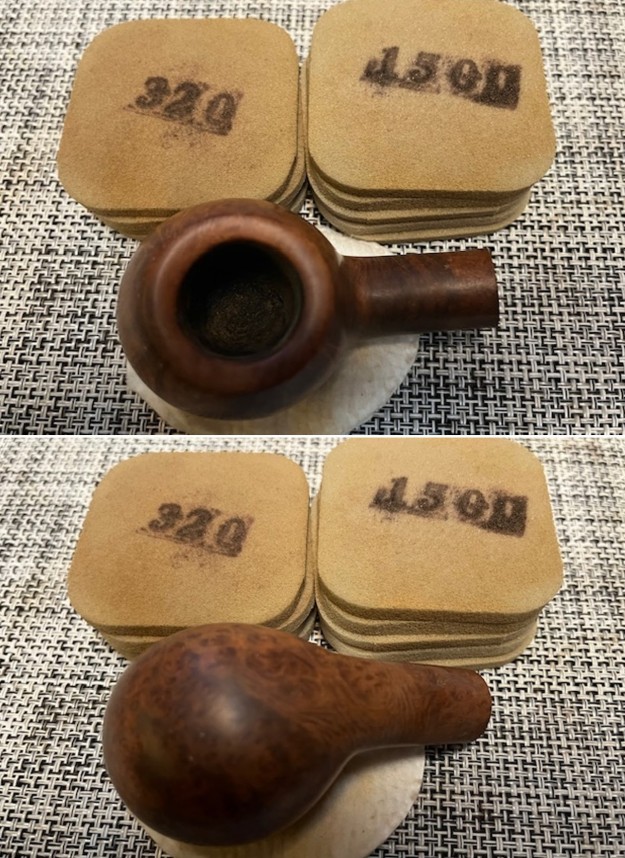
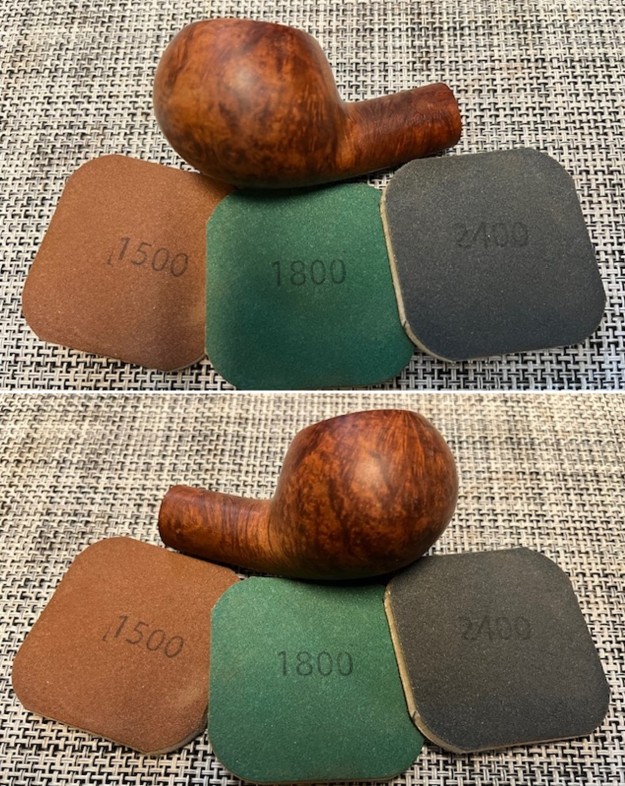
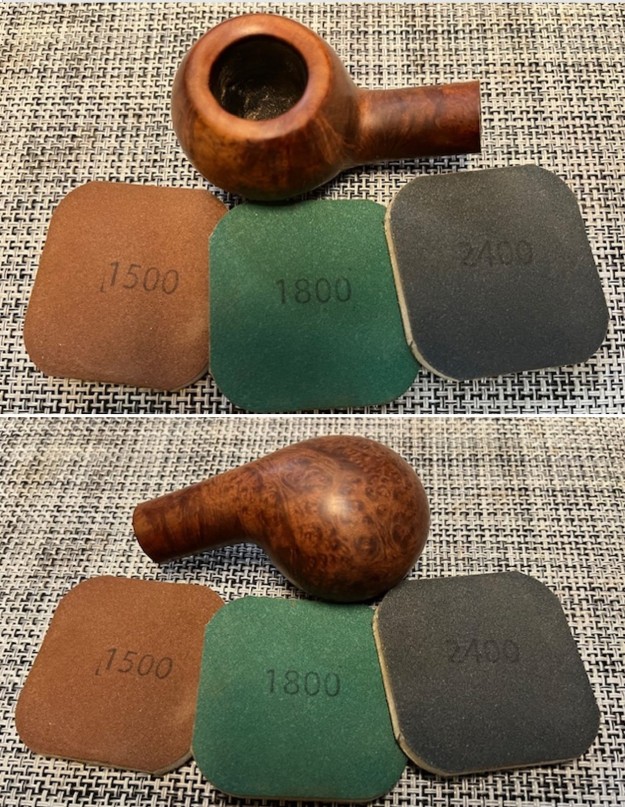
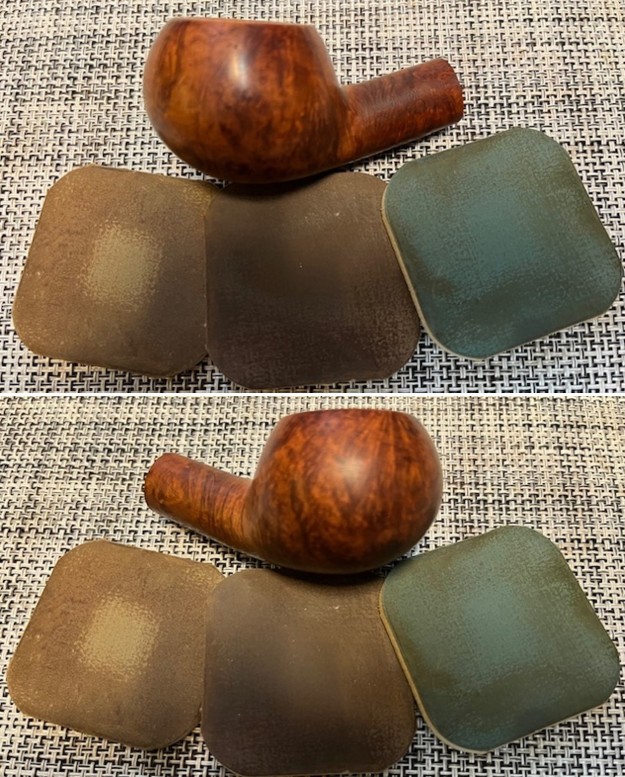
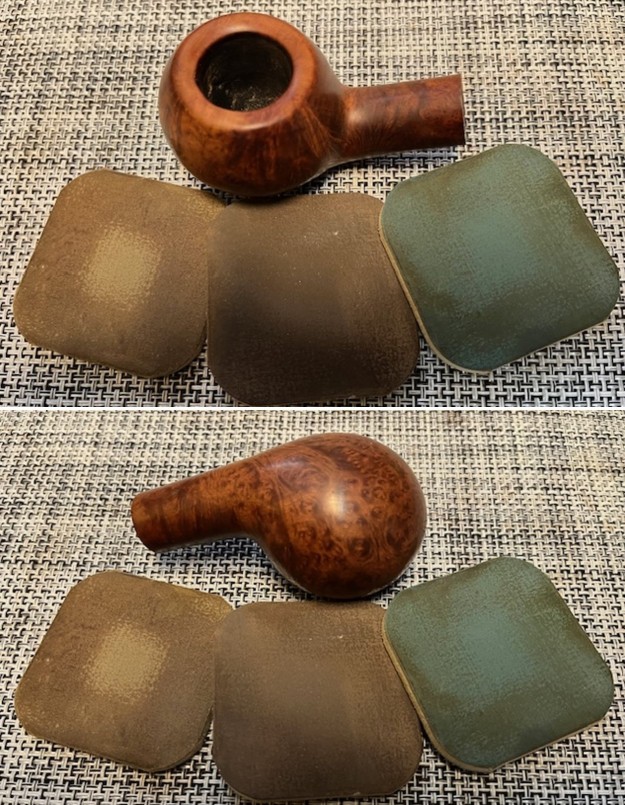
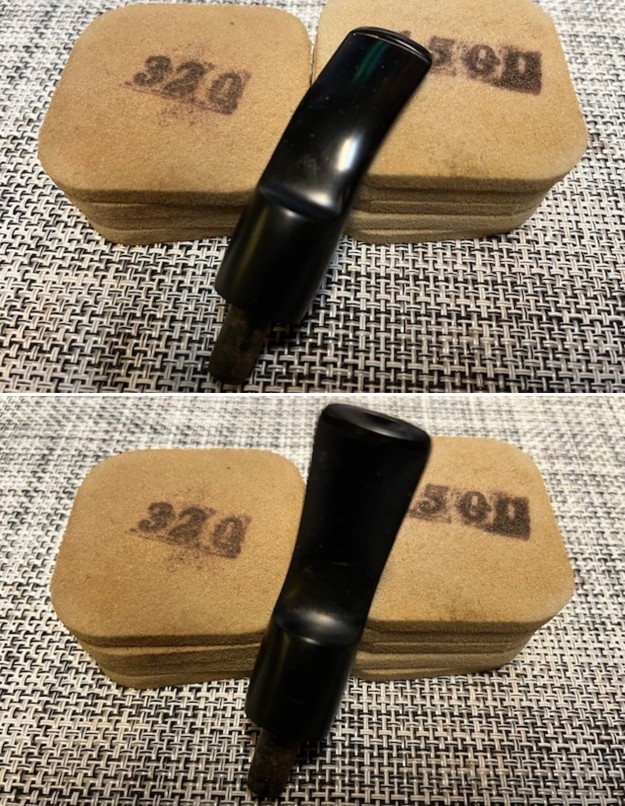
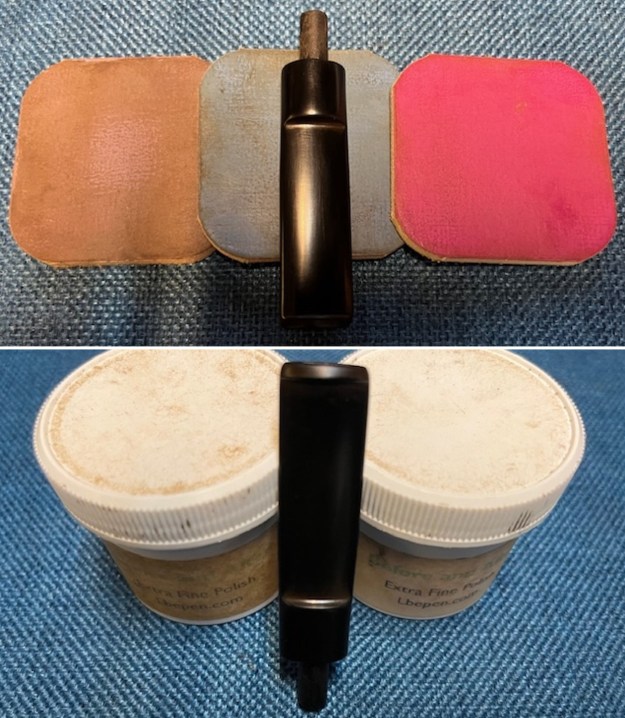
Chronologically it was at this point in the process that I removed the stem and went back and scrubbed the bowl to clean up the mess. I cleaned it and used the Balm on it. While it sat doing its magic I started the polishing process on the stem. I sanded it with 320-3500 grit sanding pads. I wiped it down after each sanding pad with an Obsidian Oil impregnated cloth. It really began to take on a finished look.
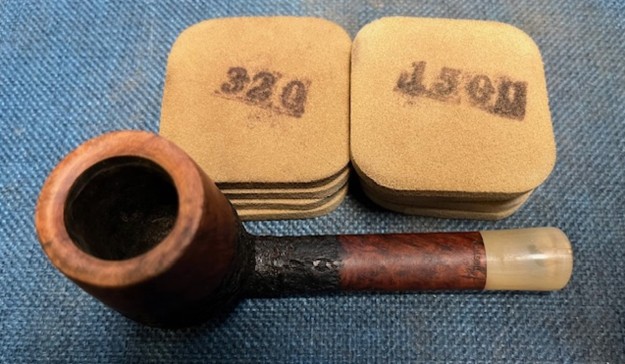
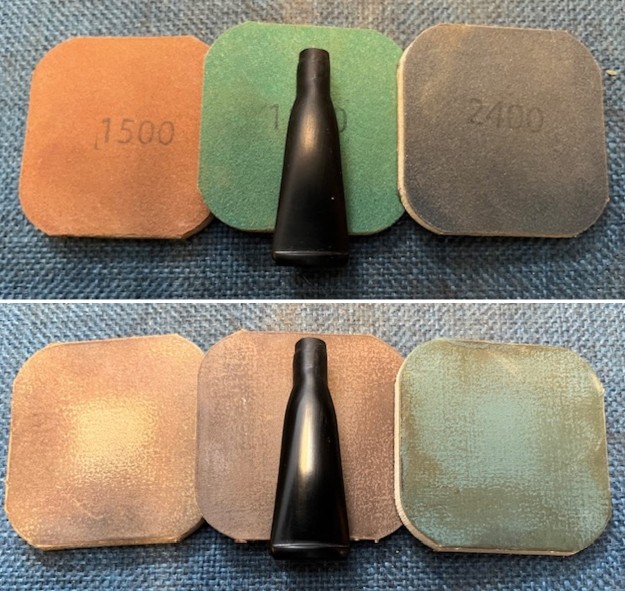
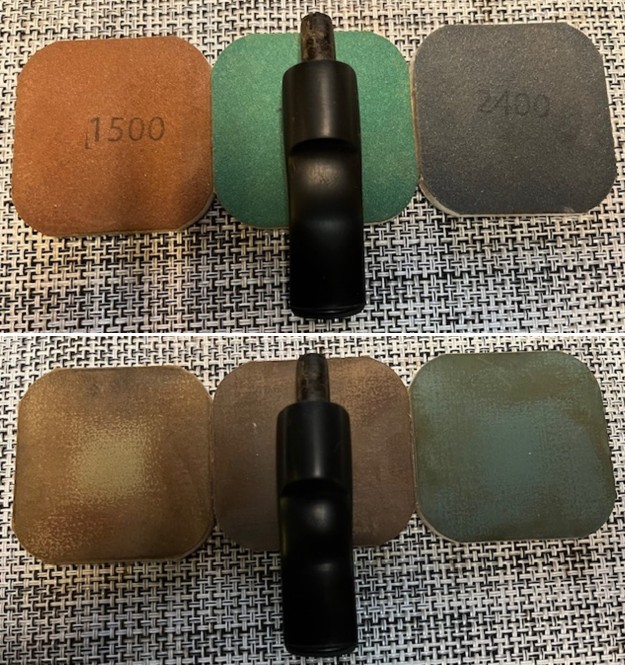
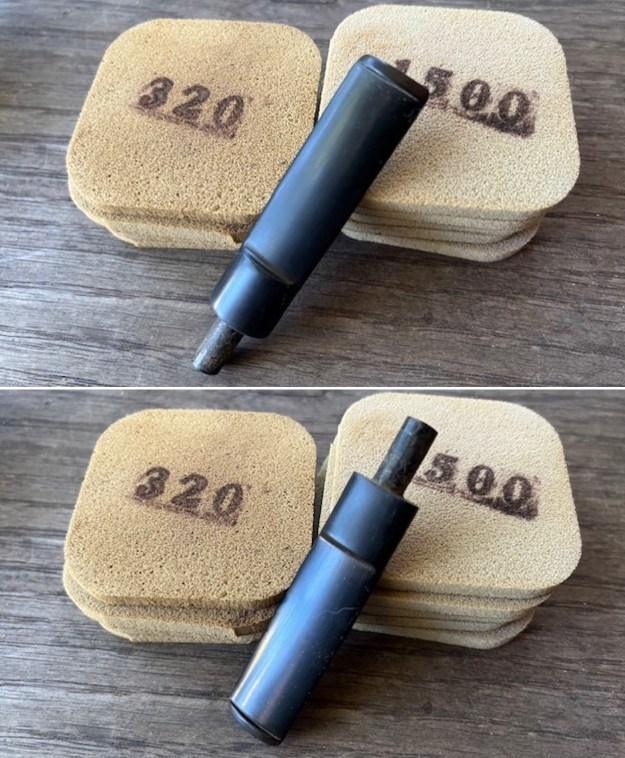
I polished the vulcanite stem with micromesh sanding pads – 1500-12000 grit pads. I wiped it down with Obsidian Oil after each sanding pad. I used Before & After Pipe Stem Polish – both Fine and Extra Fine to further polish the stem. I gave it a final coat of Obsidian Oil and let it dry. 
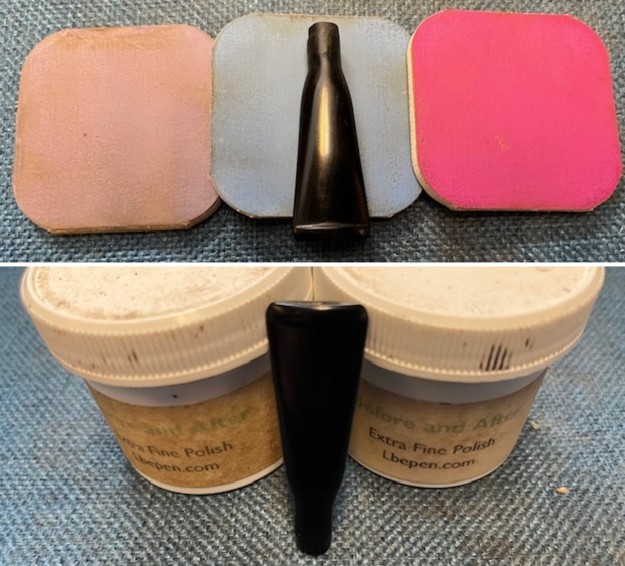
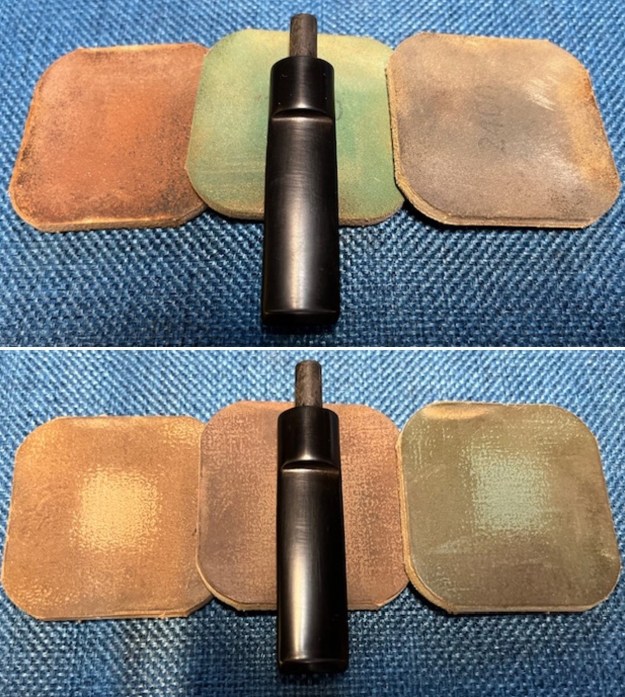
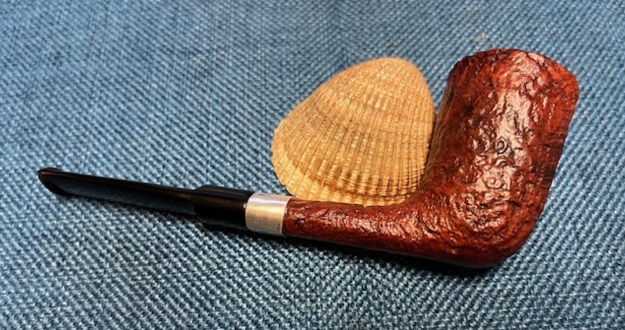
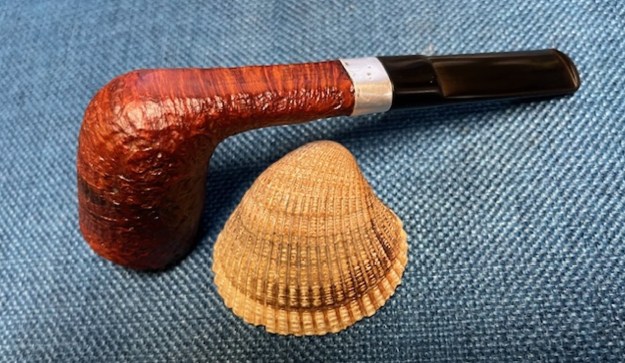
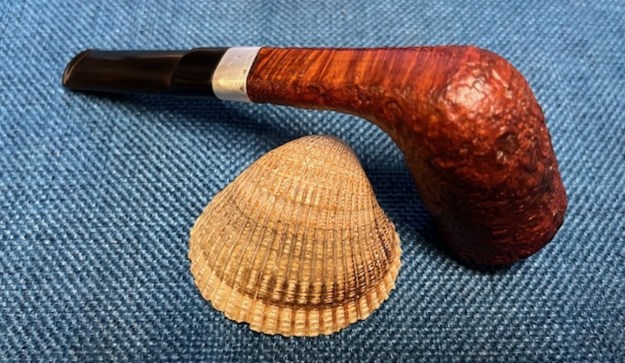
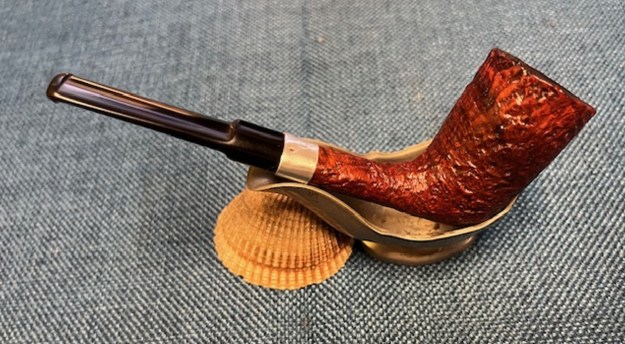
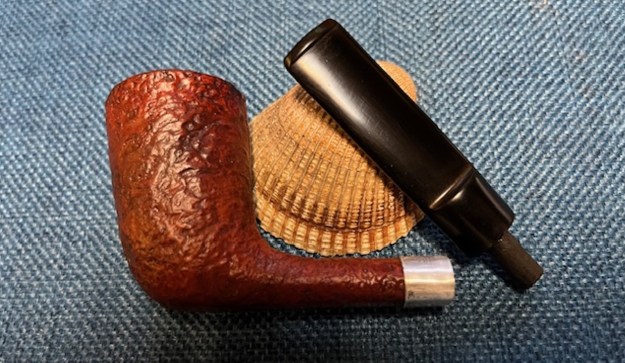
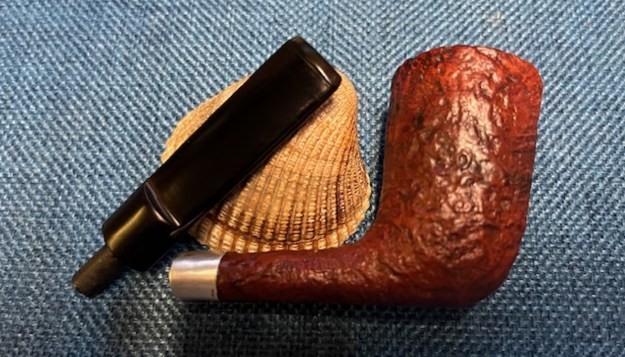
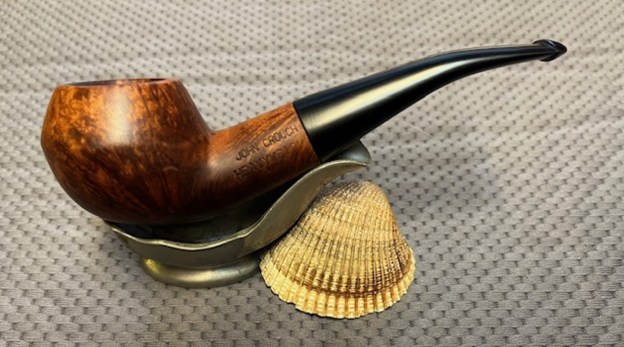
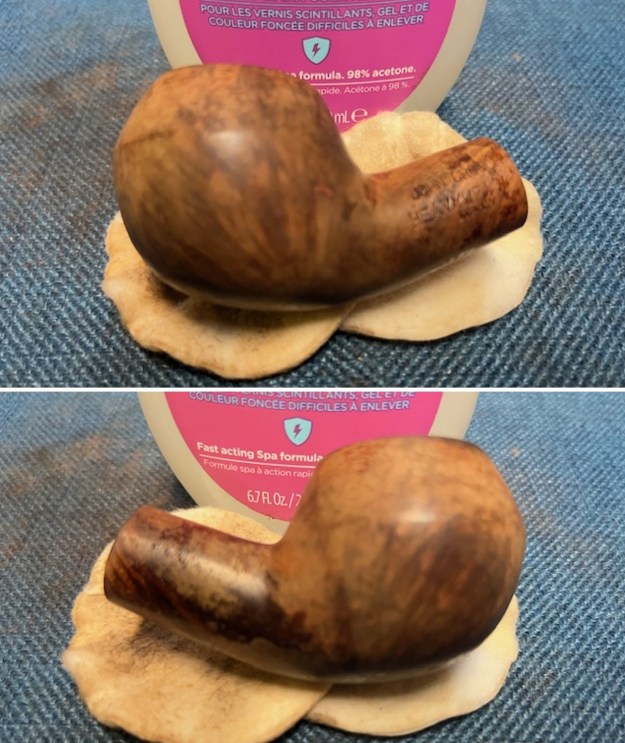
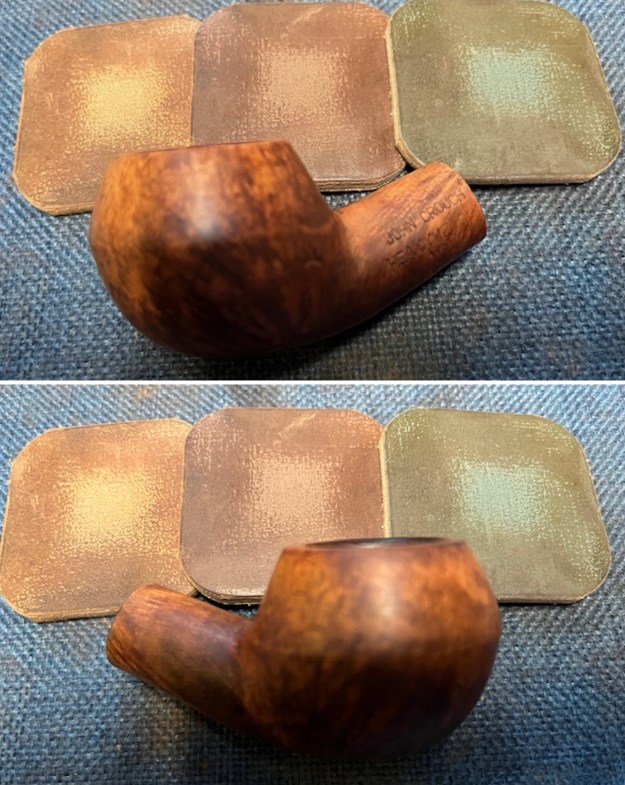
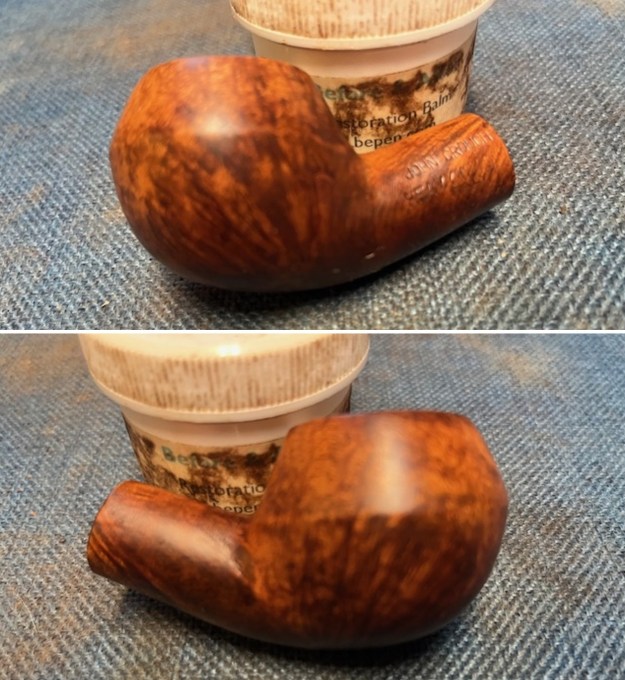
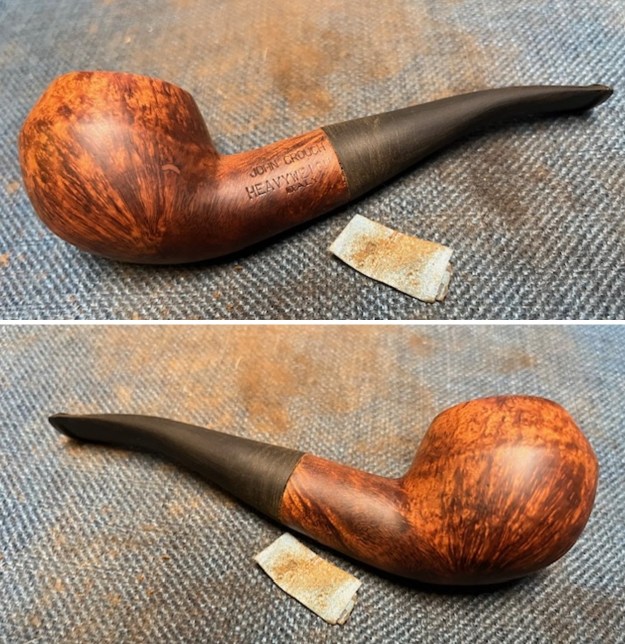
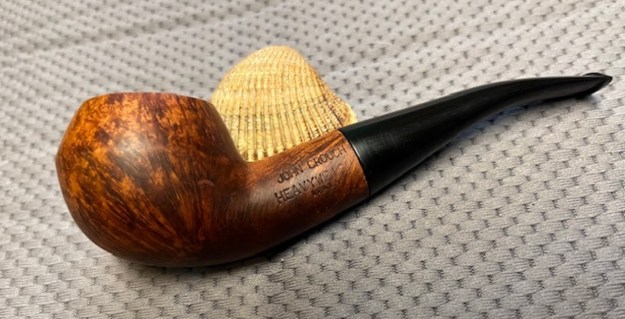
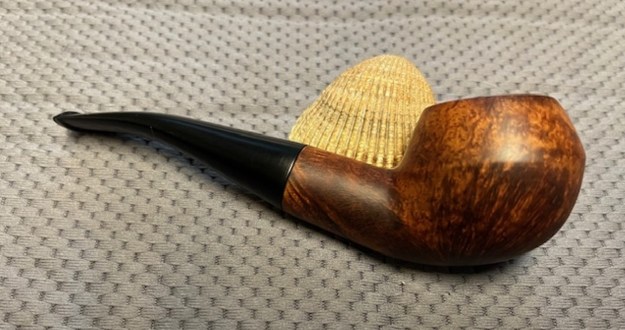
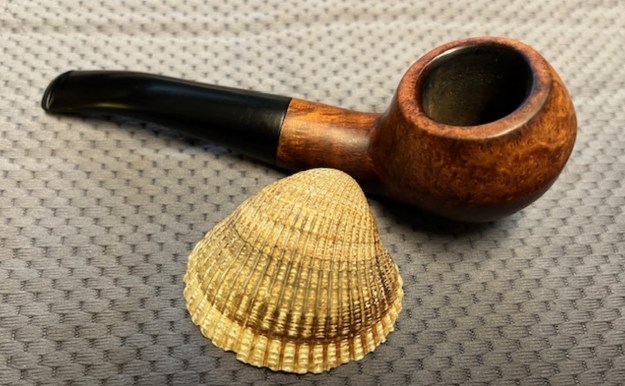
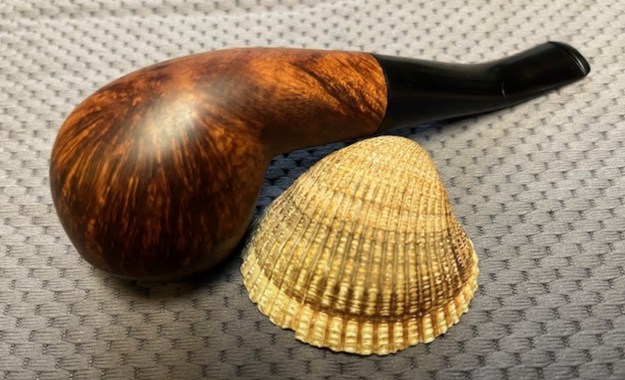
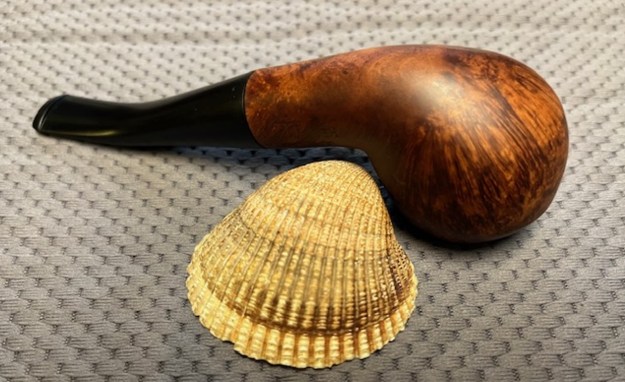
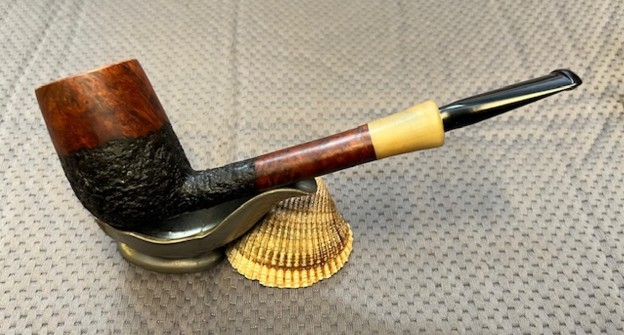
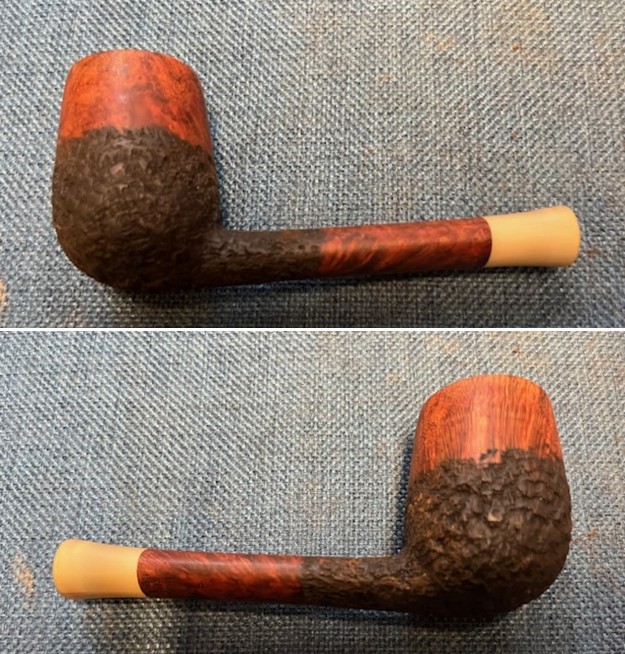
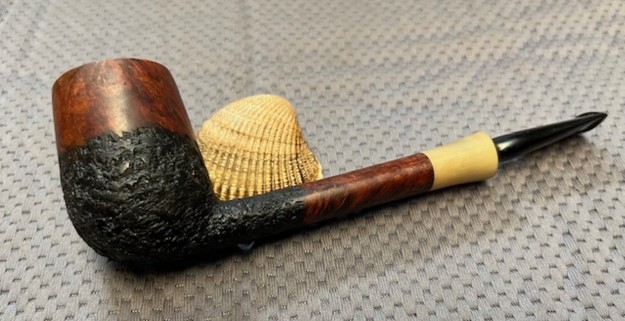
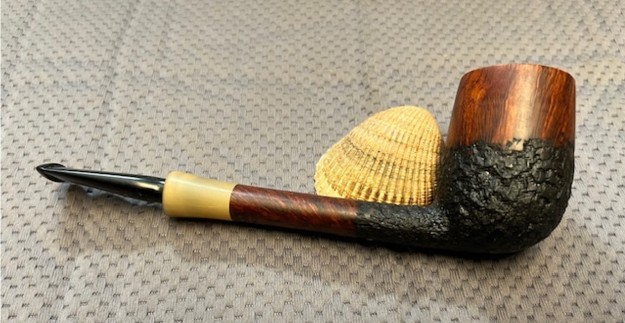
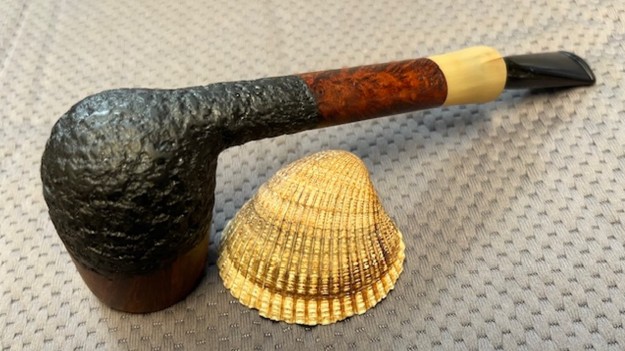
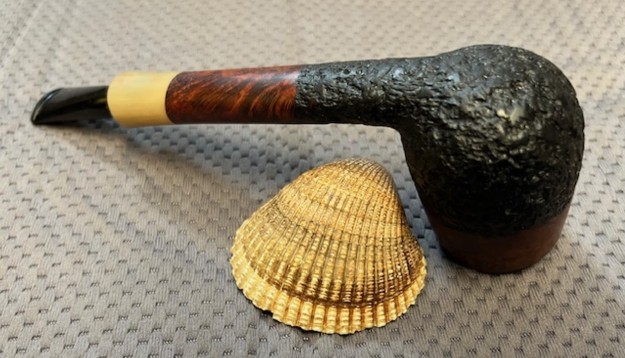
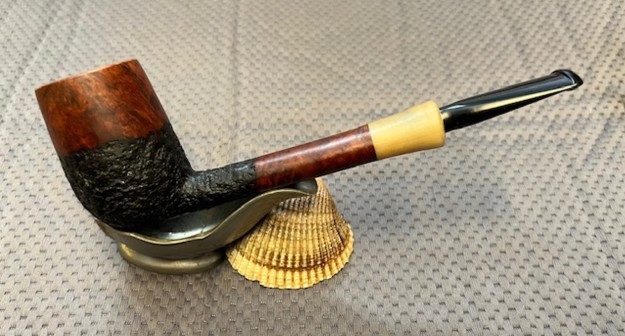
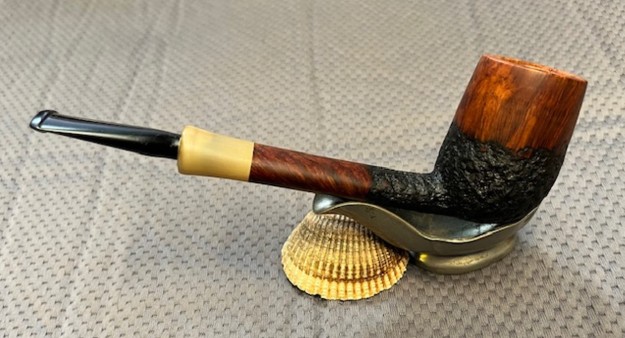
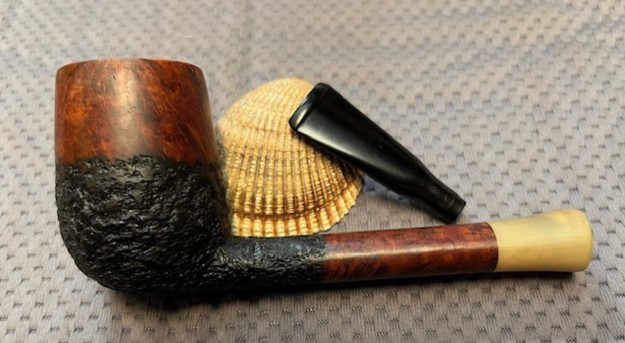
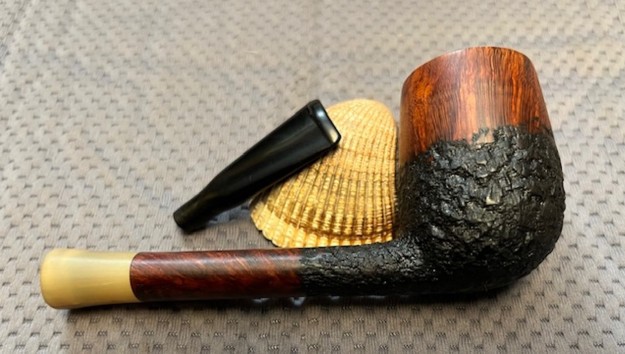
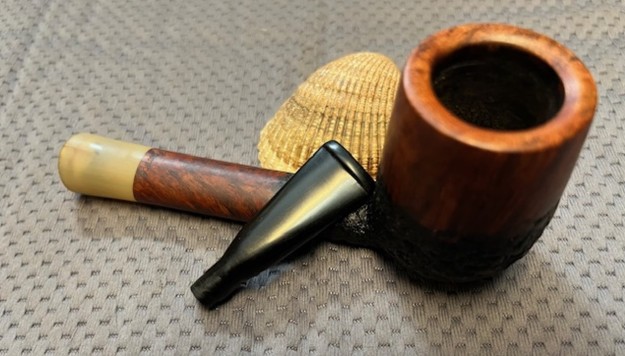
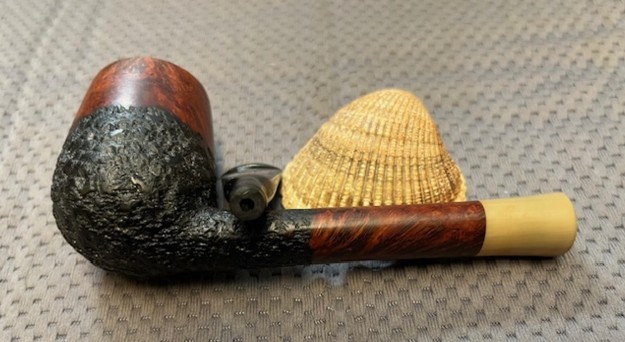
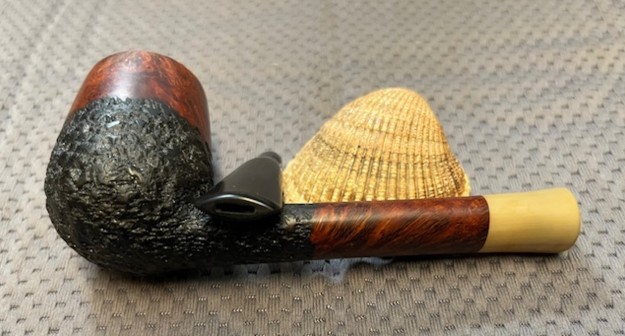
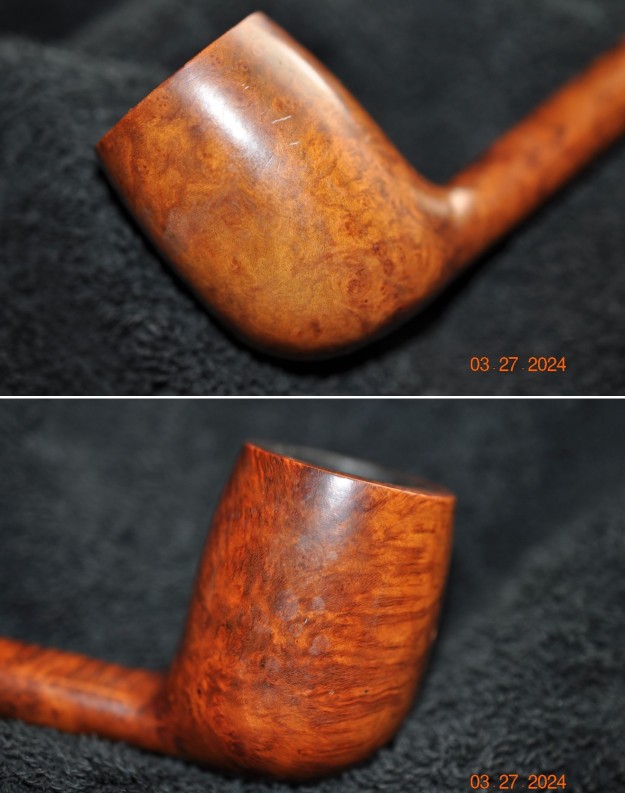
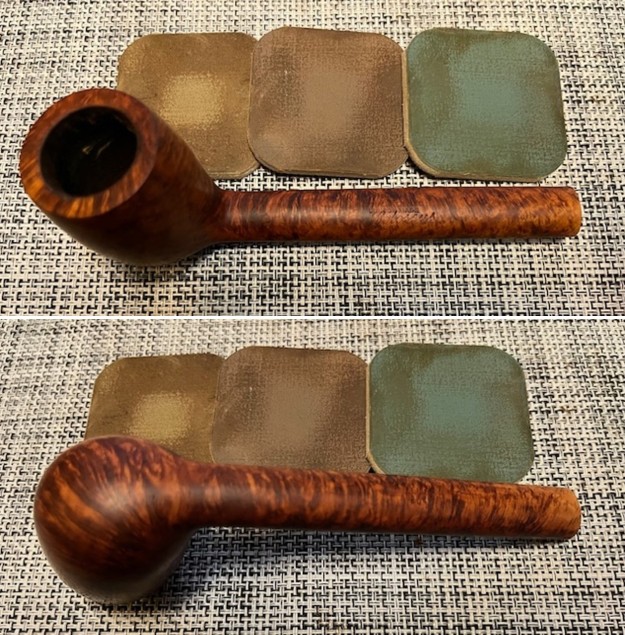
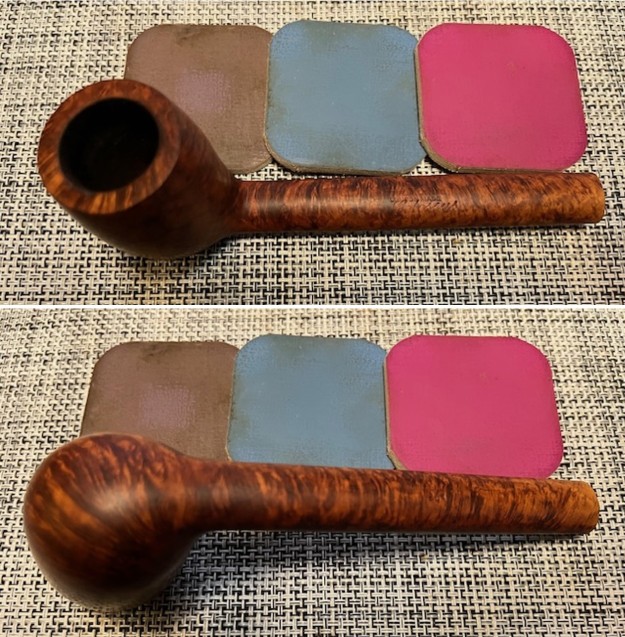
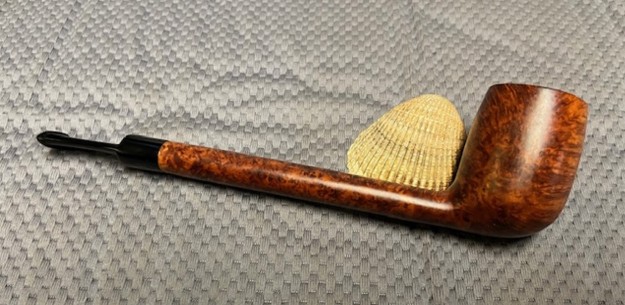
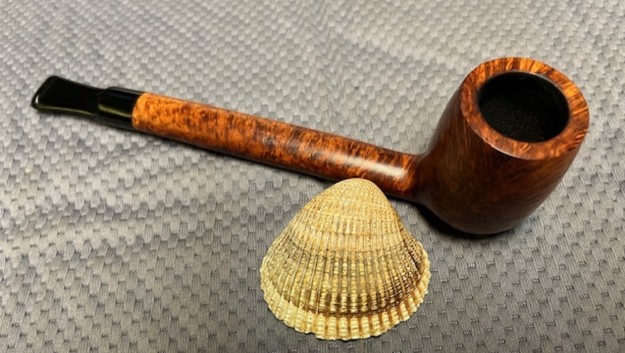
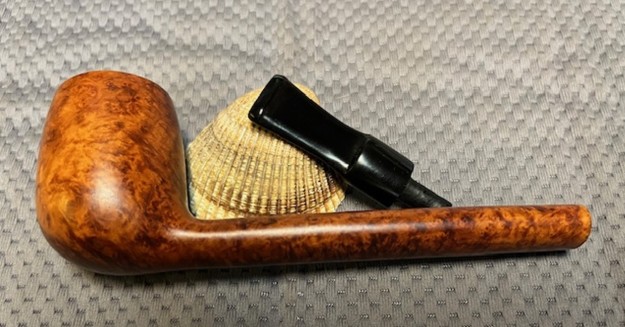
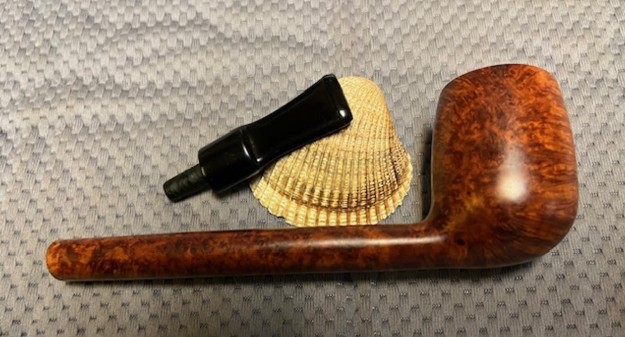
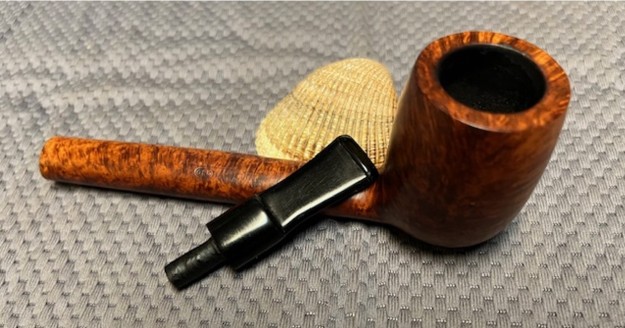
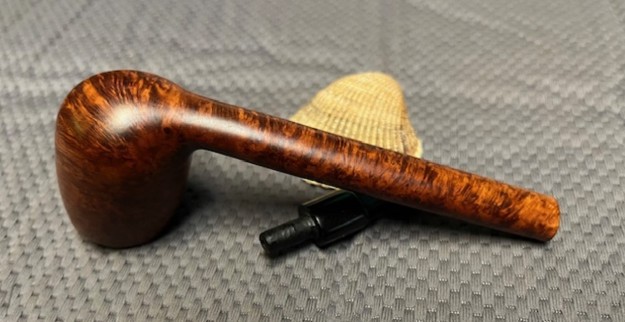
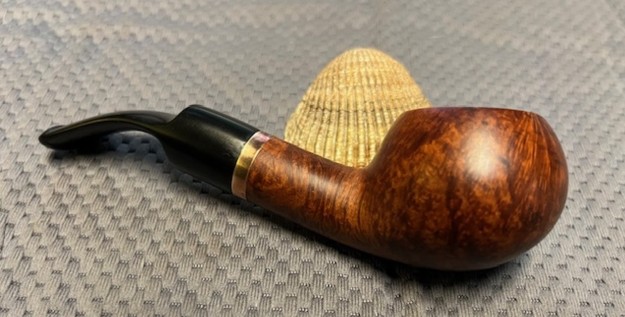
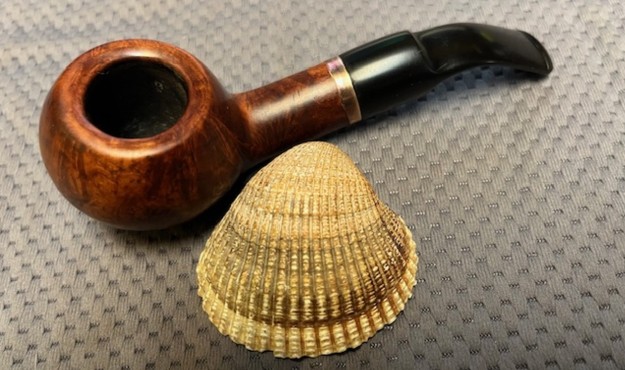
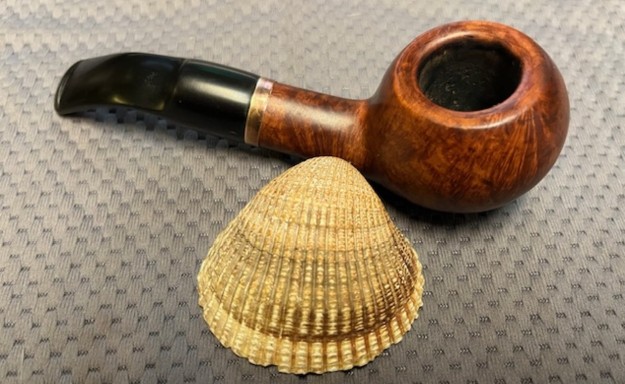
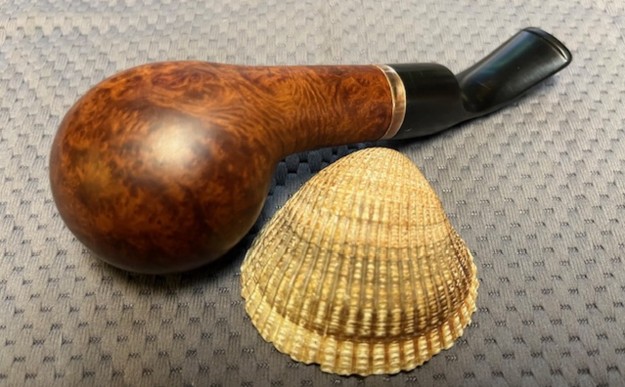
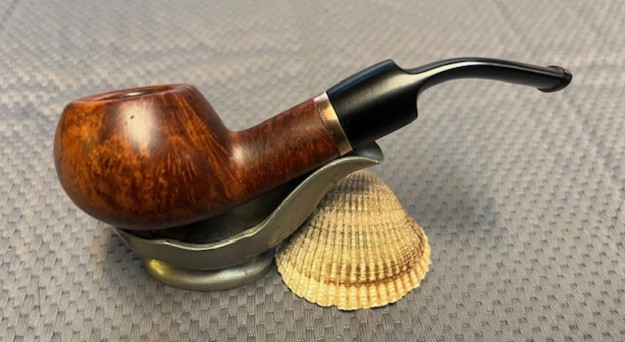
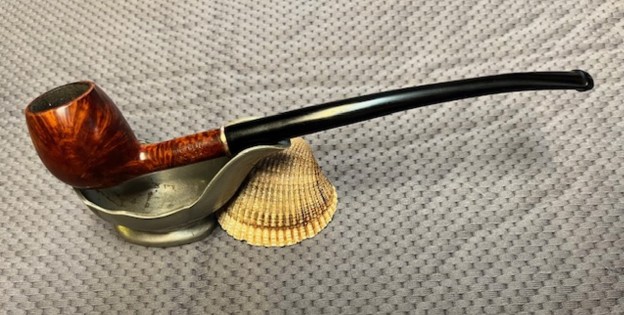
This beautiful Suhr Kobenhvn Bruyere Extra Zulu with a newly fit saddle looks amazing. The briar is clean and the finish really came alive. The rich brown stains gave the finish a sense of depth with the polishing and waxing. I put the stem back on the bowl and buffed the pipe with Blue Diamond on the buffing wheel using a light touch on the briar. I gave the bowl multiple coats of Conservator’s Wax and the stem multiple coats of carnauba wax on the buffing wheel. I buffed the pipe with a clean buffing pad to raise the shine. I hand buffed the pipe with a microfiber cloth to deepen the shine. The finished Suhr Kobenhvn Zule really is a beauty and feels great in the hand and looks very good. Give the finished pipe a look in the photos below. The dimensions of the pipe are Length: 5 ¼ inches, Height: 2 inches, Outside diameter of the bowl: 1 ¼ inches, Chamber diameter: ¾ of an inch. The weight of the pipe is 28 grams/.95 ounces. This beautiful pipe will reside in my collection at least for a while as I enjoy this piece of Danish Pipe History. If the condition of the pipe when it was found is any indicator, the pipe should be a great smoker. Thanks for reading this blog and my reflections on the pipe while I worked on it. It was a fun one to work on.

Restoring and Restemming a John Crouch Heavyweigh Rhodesian


By Steve Laug

A while back I received an email reaching out about a pipe that the writer, Anthony had acquired long ago and wanted to know if I had heard of it. He wrote the following email:

Hello, I am just wondering if in all your refurbishings you’ve come across any pipes stamped with the name John Crouch? I would love to send you photos but don’t see a way possible to do that. I’ve had this for 20 years and don’t really remember where I picked it up. Any help would be greatly appreciated. Thank you for your time.

I wrote him back and asked for photos of the pipe and the stamping so I had something to work with. For me this always helps in the hunt for the identity as generally it gives me a lot of information. Anthony wrote back and sent some photos for me.

Hi Steve, thank you for the quick response!! Here are a few shots I have of this beauty. It’s one of the only bulldogs I’ve seen without the double lines engraved into it. Like I said in my first message. I’ve had it for 20+ years. If I had to guess I picked it up in Colorado when I lived out there. I would love to hear what you think. Thanks again!!! ps. if you need more photos let me know. The third photo he included gave a clear look at the stamping on the left side of the shank. It read John Crouch [over] HEAVYWEIGH [over] Italy. My initial thinking before doing any digging on the brand is that it was a pipe made for a pipe shop by someone like Savinelli (Italy). It is stamped with what I think is the shop name. I think that the “T” is missing on the end of HEAVYWEIGH as the shank is to short for the stamp. But some digging will clear that up.I wrote Anthony back with what I found. I was surprised that Pipedia included the brand but not surprised that it confirmed my suspicions about it being a pipe shop pipe. Here is my email:

The pipe is a beauty Anthony. I did a bit of digging and found this information on https://pipedia.org/wiki/John_Crouch

“John Crouch Tobacconist embodies the essence of Virginia. After all, tobacco is Virginia’s oldest industry. Years ago, tobacco was believed to have medical properties and a tobacconist was consulted in much of the same way that a pharmacist is today. In those days, a tobacconist would create a blend of tobacco products to ease an ailment. John Crouch Tobacconist has been home to the Washington areas’ nicest and largest humidor for over 30 years.” Apparently they also have pipes made for them under their name. I have also included photos from that listing. Hope that helps – Steve

I am including the following photos from Pipedia and the advertising page that Anthony sent as well as they give a clear picture of the manufacturer of the pipe and the shop it was made for. Now I really want to visit this shop! Anthony wrote back and I include that below. I think his idea of calling or emailing them is perfect. He also asked if I would consider working on it if he chose to send it to me.

Hey Steve, Thanks for the info. I, too, found this but didn’t think it was associated with the shop in Virginia!!! I guess I need to give them a call or email them to try to get to the bottom of this. Thanks for the help. Actually, two other things. 1.Is there a reason so few bulldogs lack the double engraved lines around the bowl? 2. If down the line what would a refurbishing run me? Rough estimate, nothing set in stone find of thing. Again. Thanks for your quick responses and your time.

I answered him that I would gladly take on the project for him for the chance to see the pipe up close and personal. I answered his other questions about the lack of rings around the bowl cap. Some time went by and he wrote again.

I also wanted to thank you for helping me figure out my John Crouch Heavyweigh pipe!! I contacted and talked with one of the guys down there in Alexandria, VA. He said, yes, back in the 70’s they in fact imported these Italian pipes then stamped and sold them. I would love to send you this pipe for a restoration. If you could send me your address I’ll send it off in the next few days. I should have ask first if you have time or backed up on restorations? Or when would be a good time to send it to you?

I look forward to seeing what you can do to this amazing pipe. I love how detailed your blog posts and restoration process are!!

Thank you again and hope to hear from you soon.

I answered and Anthony wrote that he had sent the pipe to me. He also included another piece of information that would be important in the restoration and repair.

Hey Steve… I should tell you I did break a chunk of the stem off. I slipped off a step as I was walking down then and unfortunately one of my reactions was to bite down and it broke the mouth piece of the stem. I think I have them still. If I can find the pieces should I send them?

Thank you in advance. I can’t wait to see the transformation and the documentation on the blog. All the best!! Anthony

The pipe arrived yesterday just as I finished the repair on the table that was ahead of it. Great timing! I opened the box and took photos of the pipe as I examined it to get a clear assessment of the work that lay ahead of me. Before I took the photos I removed the Softee Bit from the stem so I could see the damage on the stem top that Anthony had mentioned. I love the shape of the pipe – to me a Rhodesian without the rim cap rings but still the right shape. The pipe is well used and must be a great smoker. There was a moderate cake in the bowl and lava on the rim top. The inner edge of the bowl is rough and shows some reaming damage leaving it out of round a bit. The finish is dirty and there are some spots of varnish or shellac remaining around the bowl and shank. There are a few fills but they are solid. The pipe is stamped on the left side of the shank and reads as noted above. The stamp is clear and readable. I wonder if the HEAVYWEIGH stamp is missing the “T” but suppose we won’t know for sure. The stem is well fit but the damage on the topside was more extensive than I thought once I remove the Softee Bit. I have mad patches this big before but really never have been happy with the suspected lack of durability of them. I think this one would be better off with a new stem. I took some closeup photos of the bowl and rim top to show the condition. You can see the damage on the inner edge and the generally roughness of the top and edge. The photos of the stem surface show the size of the damage. I hope you can see my rationale for restemming this one rather than making a patch that large.I took a photo of the stamping on the shank. It is clear as noted. You can also see why I wondered if the HEAVYWEIGH portion is missing the T. You can also see the shellac or varnish on the shank in this photo. To give a sense of the proportion of the of the pipe I removed the stem and took a photo of it. This will help me when I choose a new stem for it.Now to work on the pipe itself. I started by reaming it with a PipNet Pipe Reamer. The bowl was large enough that I used the second and third cutting heads. I took the cake back to bare briar. I cleaned up the reaming with a Savinelli Fitsall Pipe Knife. I also scraped off the lava build up on the rim top with the knife. I sanded the bowl walls with 220 grit sandpaper wrapped around a dowel. I took it back to smooth walls. The walls looked very good with no sign of checking or burning. I cleaned out the shank, mortise and the airway in the bowl with pipe cleaners, cotton swabs and isopropyl alcohol. It took a lot of cleaners but I got the grime and oils out of the shank and though the pipe smelled of tobacco it was much cleaner smelling than previous to that. I chose not to clean the stem since I was going to replace it.With the internals cleaned I turned my attention to the rim top. I worked over the inner edge of the bowl and the rim top with a folded piece of 220 grit sandpaper. I then gently topped the bowl on a topping board with 220 grit sandpaper. I cleaned up the inner edge a bit more. The pipe looked amazingly good. I wiped down the bowl with acetone soaked cotton pads to remove the varnish/shellac coat. It was particularly heavy around the stamping on the shank – both sides. It took much work to remove the shiny coat. I sanded the bowl with sanding pads – 320-3500 grit pads. I dry sanded it and wiped it down with a damp cloth after each pad. I was able to remove all of the shiny coat and the bowl began to take on a natural shine. I stained the rim top with a Cherry stain pen to match the rest of the briar. I also stained the lighter areas around the shank end. The rim top looked much better.I polished the briar with micromesh sanding pads – dry sanding with 1500-12000 grit pads. I wiped it down after each sanding pad with a damp cloth to remove the sanding debris on the surface. I rubbed the bowl down with Before & After Restoration Balm. I worked it into the surface of the briar with my fingertips to clean, enliven and protect it. I used a shoe brush to work it into the twin rings around the bowl cap. I let the balm sit for a little while and then buffed with a cotton cloth and shoe brush to raise the shine. I set the bowl aside and turned my attention to a new stem. I found a blank in my can of stems that was close to the right diameter and just slightly longer. With a few adjustments to the tenon and the diameter at the shank the fit will be good. You can also see the large broken chunk missing on the original stem in the photo below. In the second photo below, I knocked off the casting debris with a Dremel and sanding drum in preparation for using my tenon turning tool.I used the PIMO tenon turner to bring the tenon down close to the size that I wanted. I do this in stages as the tool can chip the tenon if you take too big a bite at one time. The second photo shows it getting closer. I paused mid turn to show how it cuts away material. Once I cleaned it up the fit was very close. Some sanding would make the fit perfect. I used a small flat file to remove the casting marks on the sides of the stem and fine tune the tenon fit in the bowl and took some photos of where it stands at this point.I started sanding the diameter of the stem to match the shank and then decided to give it a quick bend. I heated it with the flame of a lighter until the vulcanite was soft then bent the end to get the angle correct. I checked it against the original stem and the bend matched. Good to go! Now I had a lot of hand sanding to do to trim back the diameter to fit the shank. I do this next part all by hand with the stem removed and constantly putting it on the shank and checking progress. It is tedious so I can think of other things while sanding. It makes the process a bit of a respite. I can’t tell you how many hours of sanding this took but it is finally there. The fit is right and now it is time to polish it. Once the fit was correct, I started polishing out the scratch marks and smoothing the stem with 320-3500 grit sanding pads. I wiped the stem down after each sanding pad with an Obsidian Oil impregnated cloth. It removes the dust and also gives the sanding pads some bite. By the final pad it was looking quite good.Following my usual process in restoration I polished the stem with micromesh sanding pads – dry sanding with 1500-12000 grit sanding pads. I wiped it down after each sanding pad with Obsidian Oil. I polished it further with Before & After Stem Polish – both Fine and Extra Fine. I gave it a final coat of Obsidian Oil and set it aside to absorb the oil. The John Crouch Heavyweigh(t) Rhodesian has been restemmed and is finished other than the final waxing and buffing. I polished the new stem with Blue Diamond to polish out the remaining small scratches and gave it several coats of carnauba. I buffed the pipe with a clean buffing pad on the buffer to raise the shine. I hand buffed it with a microfiber cloth to deepen the shine. The pipe polished up pretty nicely. The finished pipe is shown in the photos below. The dimensions are Length: 5 ½ inches, Height: 1 ½ inches, Outside diameter of the bowl: 1 ¼ inches, Chamber diameter: ¾ of an inch. The weight of the pipe is 45 grams/1.59 ounces. It does not feel heavy and the weight certainly does not put it in a heavy category for me. I will be sending it back to Anthony shortly. I look forward to hearing what he thinks of it once he has it in hand. If the condition was any indicator it is a good smoker. Thanks for walking through the restoration with me as I worked over this John Crouch Heavyweigh(t) Rhodesian.

Argggh…sometimes the easiest restoration becomes a real nightmare


Blog by Steve Laug

The next pipe on the worktable is a Danish made pipe from the workshop W.O. Larsen. It is a combination of rustication and smooth portions and a horn shank extension. The bowl is a classic Danish looking Canadian with almost a Brandy shaped bowl. It came without a stem. The pipe came to us from eBay on 01/22/2024 from a seller in Jordan, Minnesota, USA.  The pipe is very dirty with a thick cake in the bowl and lava on the rim top. The rim edge looks like it might be slightly out of round but it was hard to know what was under the lava coat on the top and edges. It is stamped on the underside of the bowl and shank on a smooth panel. It reads W.O. Larsen [over] Handmade [over] Made in Denmark. On the top side it is stamped Rustica. The finish was dusty and there were oils and grime ground into the rusticated and the smooth finish around the sides of the bowl. The horn shank extension had a metal insert to protect it from cracked but there were still two hairline cracks – one on the top and one on the underside. Jeff took some photos of the pipe before he started his cleanup work. Jeff took a photo of the rim top to show the thick build up of lava in the sandblast of the rim top. It is also built up on the inner edge of the bowl. The thick cake in the bowl is very visible.He took photos of the sides and the heel of the bowl to show the blast finish on the pipe. It is a unique blast that really shows the birdseye and other grain around the bowl sides. He took two photos to capture the stamping top and underside of the bowl. Each one moves down the shank to the horn shank extension. It is clear and readable as noted above. Jeff took a photo of the hairline crack on the underside of the horn extension. There is a matching one on the topside. The shank itself is lined with a metal insert that actually stabilized the extension to protect it from further cracking.I turned to Pipephil (http://www.pipephil.eu/logos/en/logo-l2.html) to get a quick view of the brand once again. I did a screen capture of the site’s information and have included that below. The pipe I am working on is a W.O. Larsen as it is stamped similarly to the ones in the photos. It is interestingly stamped with a lot more detail than any of the ones shown in the screen capture below. With the “Designed By W.O. Larsen” addition it is a bit unique.I turned to Pipedia (https://pipedia.org/wiki/W.%C3%98._Larsen) for a quick read. The site is worth reading the history of the shop and the brand and its influence on Danish pipe carving. There was no additional information on the unique stamping on this pipe.

What I learned from the research is that the pipe is a W.O. Larsen made pipe that could have been designed by W.O Larsen himself or at least one of the shop carvers. It is a beauty though.

With that information I moved forward to work on the pipe itself and see what I had to do with it. Jeff had done an amazing job in removing all of the cake and the lava on the sand blast rim top. He had reamed the bowl with a PipNet Pipe Reamer and cleaned up the remnants with a Savinelli Fitsall Pipe Knife. He took the cake back to bare briar so we could check the walls for damage. He scrubbed the exterior of the bowl with Murphy’s Oil Soap and a tooth brush to remove the grime on the bowl and rim and was able to remove the lava and dirt. The finish on the bowl and rim top looked very good showing a unique and beautiful combination of smooth and rusticated finishes. He cleaned out the interior of the bowl and shank with pipe cleaners, cotton swabs and alcohol until they came out clean. I took photos of the pipe before I started my part of the restoration. I took some close up photos of the rim top showing the inner edge of the bowl – damages and nicks in the edge and some damage on the top itself. I took photos of the cracks in the top and underside of the horn shank extension.I took photos of the stamping on the top and underside of the shank to show the condition after the cleanup. This stamping is clearer than the photos show. I went through my can of stems and I found one that was the right shape and length. It has been shaped a little but I would need to reduce the shank end diameter and shape for a proper fit in the metal shank insert. NB: This is the reason I am always picking up stems where ever I can find them. I just know that one day I will need one and it might just be the one!I laid the stem aside to work on the shank repair first. I applied some clear super glue to the crack in the horn extension on the top and the underside and clamped the horn shank end with a small clamp. THEN DISASTER STRUCK! I was standing at my work table and was about to lay it down with the pipe shot out of the clamp. It literally shot across the room and hit the floor. I cannot tell you enough how many times I have dropped the pipe on the same floor with nothing happening to the pipe. I would pick it up and carry on. BUT THE TIME THAT SOMETHING WAS GOING TO HAPPEN WAS THIS TIME! THE BOWL SHOT OUT FURTHER & THE SHANK AND CLAMP WAS MUCH CLOSER.

Now I needed to add yet another project to the work on this pipe. I wrote Jeff and told him about the accident and his response was that he was okay with throwing it away. I told him that I still wanted to work on it. I cleaned up the cracks on the shank and added new glue to the repairs. I clamped the extension together with the clamp while it was laying on the table. You can see the snapped off bowl and shank in the photos below. The only good news was that it was a clean snap and everything fit together really well.Once the repair cured on the shank end it was time to address the broken shank. I found a metal piece of tubing in my collection of tubes and stingers that fit into the hole in the shank and in the airway into the bowl. I cut off a piece long enough to extend into the airway into the bowl and into the shank end almost a half inch each way. I glued the cut off tube into the bowl airway first with a clear CA glue. I coated the shank ends on both sides with clear CA glue and painted the tube with the same glue. I pushed the bowl and shank together. The tube went easily into the shank and the pieces of briar fit together with no sign of the damage other than the glue.Once the repair cured and the shank was stable I worked over the repaired area with a brass bristle brush to remove the excess glue. It was looking much better once I finished. I stained the repaired area with a Mahogany stain pen to match the colour on the rusticated portions of the bowl. It looked much better once it was finished. With the repair finished I turned to address the rim top and inner edge of the rim. I used a folded piece of 220 grit sandpaper to remove the damage and smooth out the edge. I used a wooden sphere and a piece of 220 grit sandpaper to reshape the rim edge and give it a light bevel. It cleaned up the edge and the darkening to the rim top at the same time. I sanded the rim top and the horn shank repairs with 320-3500 grit sanding pads. I sanded the horn shank extension at the same time. I wiped it down after each sanding pad to remove the dust and debris. I restained the rim top with a Cherry Stain pen to match the smooth finish around the bowl. The finish was spotty but it matched well. I knew that once I polished it with micromesh sanding pads and the stained top blended in very well.I polished the briar and the horn shank extension with micromesh sanding pads – dry sanding with 1500-12000 grit pads. I wiped the bowl down after each pad with a damp cloth to remove the sanding dust. I rubbed the bowl down with Before & After Restoration Balm. I worked it into the smooth and the rusticated finish of the bowl, rim top and shank with my fingertips and a shoe brush to clean, enliven and protect it. I find that the balm really makes the briar come alive again. The contrasts in the layers of stain and the contrasting finish really made the grain stand out. I let the balm sit for 15 minutes and then buffed with a cotton cloth and shoe brush to raise the shine. The shank repair and the rim top reworking came out looking very good at this point. I started with the stem fitting. I needed to shape the flow of the stem from the shank upward. It needed some work to change the taper to incorporate and tenon that fit in the shank and still allowed the stem to fit well. I used a Dremel and sanding drum and files to shape the stem to fit. I fine tuned the shape of the stem with a folded piece of 220 grit sandpaper to give it the stem a proper fit in the shank.Now I needed to sand it to clean up the file marks and fine tune the shape. I sanded the newly shaped tenon with 320-3500 grit sanding pads. I worked on the file marks and fine shaping of the stem fit against the shank. The pads worked to polish out the marks and the fit to the shank was very good. The stem began to take on a rich shine in the vulcanite by the time I sanded it with the 3500 grit pad. I set the bowl aside and polished it with micromesh sanding pads – dry sanding with 1500-12000 grit sanding pads. I wiped it down after each sanding pad with a cloth containing some Obsidian Oil. I finished polishing it with Before & After Pipe Stem Polish – both Fine and Extra Fine and buffed it off with a cotton cloth. This W. O. Larsen Hand Made Rustica Canadian is a great looking pipe now that it has been restored. The shape is elegant and flowing with a thin, fitted taper vulcanite stem. I put the new stem on the bowl and carefully buffed the pipe with Blue Diamond on the buffing wheel using a light touch on the briar. I gave the rusticated parts of the bowl multiple coats of Conservator’s Wax and the smooth portions and the stem multiple coats of carnauba wax on the buffing wheel and followed that by buffing the entire pipe with a clean buffing pad. I hand buffed the pipe with a microfiber cloth to deepen the shine. The finished W. O. Larsen Rustica Canadian fits nicely in the hand and feels great. Give the finished pipe a look in the photos below. The dimensions of the pipe are Length: 6 ½ inches, Height: 2 inches, Outside diameter of the bowl: 1 ¼ inches, Chamber diameter: ¾ of an inch. The weight of the pipe is 1.55 ounces/44 grams. I will be putting it on the Danish Pipe Maker Section of the rebornpipes store shortly. If you are interested in adding this pipe to your collection send me a message or an email. Thanks for reading this blog and my reflections on the pipe while I worked on it. There are many more to come!

Restemming and Restoring a GBD International London Made Colossus 264


Blog by Steve Laug

The next pipe on the work table is long and classic looking smooth finish long shank possible Canadian. It is stamped on the topside of the shank and clearly reads GBD in an oval [over] International [over] London Made [over] Colossus in script. On the underside of the shank it is stamped London England [over] the shape number 264. It came from a lot we purchased on 03/21/2024 from an estate in Oregon City, Oregon, USA. It is Canadian/Lumberman shaped pipe with some great grain and only lacking the original vulcanite stem. The shape of the new stem would be determined by the what I could find out about the shape 264. If a Canadian then it would have a new taper stem. If it was a Lumberman then it would have a short saddle stem.The bowl has a thick cake and some lava overflow in the finish on the rim top and inner edge. The finish looked quite good in terms of wear and tear but there was dirt and hand oils in the finish. But under the grime the finish looked very good and highlights some beautiful grain. Jeff took photos of the pipe before he started his cleanup. He took photos of the pipe’s bowl and rim top to show the cake in the bowl and the lava coat overflowing onto the top and over the edges. It is another dirty pipe. He took photos of the sides and the heel of the bowl to give a sense of the condition of the pipe and the interesting grain around the sides and heel. It really is a beautiful pipe bowl. Jeff took photos of the stamping on the top and underside of the shank and it is clear and readable as noted above. It is a bit faint on the top edges of the stamp and the lower edges on both the top and bottom shank.I remembered that Kenneth had restemmed a GBD International London Made Colossus and generally he does some work on the brand to understand the background of the pipe that he is working on. I googled and found the link to the blog he had written on rebornpipes about his Calabash pipe (https://rebornpipes.com/tag/gbd-international-london-made-pipes/). I followed the link to his blog and reread his work on it. I quote the interesting info on the line that he had included. I quote below:

This pipe is a calabash-shaped GBD Colossus. As the photos show, it is stamped on the left side of the shank with GBD [over] International [over] London Made [over] Colossus. On the right side it is stamped Made in London [over] England [next to] 9552 – this, of course, is the shape number. There is quite a bit of information on GBD on the Internet – they have a long and storied history in pipemaking. In this case, I was curious about International and Colossus. The main Pipepedia article on GBD tells us about their origins:

In 1850 three gentlemen got together in Paris to establish a firm dedicated to the fabrication of Meerschaum pipes – a courageous step in politically restless times. Ganneval probably came from the area of Saint-Claude where he had learned making wooden pipes. Bondier’s family obviously came from Paris and had emigrated in 1789 to Geneva. He himself had worked as a wood turner in the clay and china pipe industry in and around Saint-Claude making stem extensions etc. Donninger was an Austrian or Swiss and had worked in Vienna, the world’s center of the Meerschaum pipe. They agreed on the acronym GBD selecting the initials of their surnames.

The Pipedia article provides a lot more information on their interesting history. I would encourage you to read on here. The shape number 9552 corresponds correctly with GBD’s identification of this pipe as a calabash. The page on GBD models states the following concerning the International line and the Colossus size:

International – France and England made: medium brown smooth, carved top rim, rim stained black. In addition to the pipe line and shape information stamped on the pipe, GBD also had codes for plus sized pipes. These codes in ascending order of size were Conquest, Collector, Colossus.

He also included a screenshot from Pipephil:I did some more work on the shape 264. Without the stem I was not sure I was dealing with a Canadian or a Lumberman – same family different stem. I did a Google search on the GBD shape number 264. I did not find the shape number on the shape list so I did a bit more digging. I found a link on Smokingpipes.eu to a GBD Premier Colossus Lumberman (264) (O) (pre-1980)(https://www.smokingpipes.eu/pipes/estate/england/moreinfo.cfm?product_id=168478). The one I am working on is an International while this one is a Premier but the shape number is identical. The pipe is identified as a Lumberman 264 and the photo below (from that site) tells me that the pipe had a saddle stem. Now I knew what I needed for a new stem on the pipe.I turned to work on the pipe itself. Jeff had done an amazing cleanup of the pipe. He reamed the cake with a PipNet reamer and cleaned up that with a Savinelli Fitsall Pipe Knife. He scrubbed the internals of the bowl and stem with alcohol, cotton swabs, pipe cleaners and shank brushes. He scrubbed the externals with undiluted Murphy’s Oil Soap and rinsed the bowl off with running water. He was able to remove the lava on the rim top and edges and the grime from the bowl. The pipe looked better when I received it. I took photos of the pipe before I started my work on the restoration and restemming. I took a photo of the rim top to show the condition. It looks good with the tars and oils removed from the rim top. The condition of the bowl and rim top were very good. There was some damage on the inner edge at the back of the bowl. I took photos of the top and underside of the shank to show the stamping. The stamping is very clear and reads as noted above. It was hard to capture in the photos.I used a folded piece of 220 grit sandpaper to smooth out the inner edge of the rim. I gave the rim a slight bevel to minimize the burn damage. It looked much better once it was smoothed out.I polished the briar on the bowl and shank with micromesh sanding pads – dry sanding it with 1500-12000 grit sanding pads. I wiped the briar down after each pad with a damp cloth to remove the sanding dust. I rubbed the bowl and shank down with Before & After Restoration Balm. I worked it into the surface of the briar with my fingertips to clean, enliven and protect it. I let the balm sit for a little while and then buffed with a cotton cloth to raise the shine. Mark Hoover’s Balm is a product that I have come to appreciate and one I use on every pipe I have been working on. With the bowl finished it was time to find a stem. Earlier today I assumed the pipe was a Canadian so I fit a taper stem to the shank. I liked the look of the pipe with the taper stem. Then on a whim I looked up the information I quoted above on the shape 264. It made it immediately clear to me that the pipe was not a Canadian but was a Lumberman. I started over to find one like that in the photo of the GBD 264 from Smokingpipes above. I would completely need to start over. Oh well! I went through my stem bins and found an oval saddle style stem that would work for this one. I needed to fit the stem to shank. With a little adjustment the tenon fit perfectly to the shank end. It was a snug fit. The diameter of the stem is slightly larger all the way around and would need to be reduced. I used my Dremel and sanding drum to start the process of shaping the saddle portion of the stem to fit the shank. Once I had it close I continued the fitting with a file. I also smoothed out the ridges and casting marks on the blade of the stem to round them out and shape them to be similar to the one on the photo that I found. I put it back on the shank and continue to shape the saddle portion of the stem. It is starting to look much better. I fine tuned the fit with 220 grit sandpaper. I removed all of the remaining excess with the sandpaper. Once I finished the transition between the stem and the shank it was smooth and the fit was snug in the shank. I put the stem and took photos of the pipe with the fit. It looks very good. I touched up the stain on the shank end to cover the lighter areas and match it to the rest of the shank. I used a Cherry Stain Pen to match it. The stain was a perfect match. It looked good.I sanded the stem with 320-1500 grit sanding pads. I dry sanded and after each pad wiped the stem down with a cloth impregnated with Obsidian Oil. By the final pad the stem looked very good and the fit was perfect.I polished the stem with micromesh sanding pads – wet sanding it with 1500-12000 grit pads. I polished it further with Before & After Pipe Stem Polish – both fine and extra fine. I finished by wiping it down with Obsidian Oil and buffing it to a shine. I always look forward to this part of the restoration when all the pieces are put back together. I put the GBD International London Made Colossus 264 Lumberman back together and carefully buffed the stem with Blue Diamond on the buffing wheel. I gave the bowl and the stem multiple coats of carnauba wax. I hand buffed the pipe with a soft cloth to raise the shine. It is fun to see what the polished bowl looks like with the new black vulcanite saddle stem almost glowing. This GBD International London Made Colossus Lumberman is nice looking and feels great in my hand. It is one that could be clenched and smoked while doing other things as it is very light weight and well balanced. It must have been a fine smoking pipe judging from the condition it was when I received it. Have a look at it in the photos below. The dimensions are Length: 7 inches, Height: 1 ¾ inches, Outside diameter of the bowl: 1 ¼ inches, Chamber diameter: ¾ of an inch. The weight of the pipe is 1.52 ounces/43 grams. I will be putting it in the English Pipemakers Section of the rebornpipes store soon. This will make a great addition to someone’s pipe collection. Thanks to each of you who are reading this blog. Remember we are not pipe owners; we are pipemen and women who hold our pipes in trust until they pass on into the trust of the next pipeman or woman.

Restoring the second Antique Collectible Find – a GT&Co Peterson’s System Standard 1307


Blog by Steve Laug

Last weekend on April 27 Kenneth and I went to an antique and collectible sale at an arena in New Westminster, BC, Canada. I wrote about the adventure and posted it in a previous blog last weekend (https://rebornpipes.com/2024/04/28/you-have-to-join-kenneth-and-me-on-a-great-morning-pipe-hunt/). On the hunt I picked up four pipes that I have listed below:

  1. Jeantet Fait Main Bent Freehand Dublin 4 with a diamond shank
  2. Jeantet Fait Main Bent Apple 9 with a uniquely shaped shank and stem
  3. Republic Era Peterson’s System Pipe 1307 Bowl sans stem
  4. Brigham Made in Canada 625 Squat Straight Bulldog

I have included photos of the foursome below. They are in the order of the list above. I chose to work on the third pipe in the above photos. It is shown in the photos below and is Peterson’s with a forked tail [over] System [over] Standard on the left side of the shank. On the right side of the shank it is stamped Made in the Republic of Ireland (in three lines) [over] 1307 the shape number. There is a very clean nickel ferrule that is stamped on the left side and reads K&P over Makers Marks which makes it pre-circa 1963.The three symbols are a Shamrock, a Wolfhound and a Tower without a door. That is followed by the stamping Peterson’s. The pipe has some great grain around the bowl sides and shank. The rim top is flat and the edges look good. The bowl had a moderate cake on the walls and a light lava coat on the rim top and edges of the bowl. The briar has some grime and grit ground into the briar. There was no stem so I would need to fit a new one on the bowl. The photos below show what I saw when I examined the pipe. I took photos of the stamping on the undersides of the shank. It reads as noted above. It is faint in spots but is still very readable. I took the stem off and took a photo of the parts to give a sense of the size of the bowl.I have included the information on the shape number on this pipe that I picked up on researching the other pipes. It is a Peterson’s System Standard pipe with a 1307 shape number. The 307 is identical in shape, size and marking. I started my hunt for information by turning to a Peterson Catalogue that I have on rebornpipes and looked up the System Standard pipes (https://rebornpipes.com/tag/peterson-hallmark-chart/). I have put a red box around the 307 shown in the catalogue page shown below. That should give a clear picture of the size and shape of the pipe. But there was nothing to give me any information on what number 1 meant in the shape number 1307 that I am working on. Since this is stamped with the same “1” as previous Peterson pipes that I have worked on I turned to the blog and had a look. I am including the information on the unique numbering. Mark pointed me in the direction that I needed. I quote the pertinent part of his email. The underlined portion was the clue I was looking for on this pipe. I have already cleaned up several of Bob’s pipes that were sold through GT&C (Genin, Trudeau and Company, Montreal, Quebec).

The index at the back of the book is pretty good, and points you to all the GT&C goodies, but 155 has a photo from the catalog with your 1307, while 318 and 323 explain the rationale for the “1” prefix. In a nutshell, just drop the “1” and you’ve got the shape. My theory is that GT&C added this to aid them in warranty work, so they’d know the pipe was bought on Canadian soil.

I turned then to a previous blog I had written on a Kapruf 54 that had an odd shape number stamp and referred to the Canadian numbering system used by GT&C. Here it the link to that blog (https://rebornpipes.com/2019/08/09/back-to-bob-kerrs-estate-another-canadian-import-petersons-kapruf-a-54/). In the blog I included a link to a blog I did on the GT&C Catalogue that came to me in some paperwork the family gave me. I have included the cover of the catalogue and the page on the system pipes showing the 1312 shape. I have put a red box around the shape for ease of reference (https://rebornpipes.com/2016/09/13/petersons-pipes-brochure-from-genin-trudeau-co-montreal-quebec/). Be sure to check out the rest of the document on the link.

The GT&C Catalogue combined with the earlier Peterson Pipe Catalogue page make the link definitive. I am also including the information from Pipedia’s article on Peterson pipes. It is a great read in terms of the history of the brand (https://pipedia.org/wiki/Peterson). I have included a bit of the pertinent history here.

1950 – 1989 The Republic Era – From 1950 to the present time, the stamp for this era is “Made in the Republic of Ireland” in a block format generally in three lines but two lines have been used with or without Republic being abbreviated.

During the 1950’s and 60’s the Kapp & Peterson company was still in the ownership of the Kapp family. However 1964 saw the retiral of the company Managing Director Frederick Henry(Harry) Kapp.

Pipedia also included a section of information on the System pipes including a diagram of the sytems look (https://pipedia.org/wiki/Peterson#Republic_Era_Pipes). I quote a section of the article in part and include a link to another article on Pipedia on the System pipe.

The Peterson System pipes are the standard bearers of the Peterson pipe family, famous for the excellent smoking pleasure they provide. Often imitated but never equaled, the Peterson System smokes dry, cool and sweet, thanks to the scientific effectiveness of the original design. The heart of the System is the unique graduated bore in the mouthpiece. This makes the suction applied by the smoker 15 times weaker by the time it reaches the tobacco chamber. The result is that all the moisture flows into the reservoir and, thus cannot reach the smoker’s mouth. The Peterson Lip further enhances the effectiveness of the graduated bore by directing the flow of smoke upwards and away from the tongue. This achieves a uniquely even distribution of smoke and virtually eliminates any chance of tonguebite or bitterness. Furthermore, the shape is contoured so that the tongue rests comfortably in the depression under the opening. Each “PLip” mouthpiece is made from Vulcanite. For the Peterson System pipes to work properly, the stem/tenon has to have an extension, the tip of which will pass by the draft hole from the bowl and into the sump. Upon the smoker drawing in smoke, this extension then directs the smoke down and around the sump to dispense a lot of the moisture before the smoke enters the extension and stem. On the System Standards and other less expensive systems, this extension with be made of Vulcanite turned integrally with the stem. On the more expensive System pipes this extension will be made of metal which screws into the Vulcanite stem. This extension on the earlier pipes will be of brass and the newer pipes will be of aluminium. Most smokers not knowing this function of the metal extension, assumes that it is a condenser/stinger and will remove it as they do with the metal condensers of Kaywoodie, etc. Should you have a System pipe with this metal extension, do not remove it for it will make the System function properly and give you a dryer smoke (https://pipedia.org/wiki/A_closer_look_at_the_famous_Peterson_Standard_System_Pipe).

With that information in hand I knew what I was dealing with in terms of the stamping and the age of this pipe. I knew from the information that the pipe was made during the Republic Era between 1950 and 1989. I also knew that the pipe was brought into Canada by the Canadian Importer, Genin, Trudeau & Co. in Montreal, Quebec. Noting above that the catalogue postal code puts it in the late 60s early 70s which also fits the story. Now it was time to work on the pipe.

I cleaned up the thin cake in the bowl with a Savinelli Fitsall Pipe Knife and sanded the bowl with a piece of 220 grit sandpaper wrapped around a piece of dowel. I used a folded piece of 220 grit sandpaper to clean up the top of the rim and the inner edge to make it look better.I scrubbed the exterior of the bowl and shank with undiluted Murphy’s Oil Soap and a tooth brush to remove the grime. I rinsed it off with warm running water and dried it off with a soft cloth. I cleaned the mortise and the airway in the shank with alcohol, cotton swabs and pipe cleaners. They were dirty but the pipe is clean now.   I sanded the surface of the briar with 320-3500 grit sanding pads. It took on a real shine on the briar. I wiped it down after each sanding pad with a damp cloth to remove the sanding dust and debris left behind. I polished the bowl and rim top with micromesh sanding pads – wet sanding with 1500-12000 grit pads. I wiped the rim down after each sanding pad to remove the dust and debris from the sanding. The rim top was looking very good after the final polishing pad.  I rubbed the bowl and shank down with Before & After Restoration Balm. I worked it into the surface of the briar with my fingertips to clean, enliven and protect it. I let the balm sit for a little while and then buffed with a cotton cloth to raise the shine. I set the bowl aside and turned my attention to fitting a new stem. I chose a new stem for the pipe from my lot of new stem blanks. It is a Peterson’s Made Replacement stem so it should fit well once the work is done.I used a flat rasp to sand out the casting marks on the sides and ends of the stems. I followed that up with a folded piece of 220 sandpaper. I flattened out the casting marks and the sanded them smooth and blended them into the surface. I also sanded out the casting marks on the end of the stem and around the P-lip button. It looked much better at this point. I took a photo of the pipe bowl and the new stem. I still needed to do a lot more work on it to smooth out the scratches and file marks. It is going to look very good.I reshaped the shank end with 220 grit sandpaper to get a snug fit in the ferrule. It took time but as I shaped the angles the stem fit very well deep enough in the shank. I heated it with a lighter to soften the vulcanite and bent it to fit the angles of the bowl. I fit it in the shank and took photos of the pipe put back together. It looks good. I sanded the stem with 320-3500 grit sanding pads. I wiped it down after each sanding pad with a damp cloth to remove the debris left behind. It is beginning to look much better.I polished the stem with micromesh sanding pads – wet sanding it with 1500-12000 grit pads. I wiped the stem down after each sanding pad with a cotton pad to remove the sanding debris. I finished polishing the stem with Before & After Pipe Stem Polish – both fine and extra fine. I finished by wiping it down with Obsidian Oil and buffing it to a shine. It feels good to be finishing the restoration of this Made for Canada GT&Co Republic Era Peterson’s System Standard 1307. I look forward to the final look when it is put back together, polished and waxed. I put the bowl and stem back together. I polished them with Blue Diamond to polish out the scratches in the briar and the vulcanite. I gave the bowl and the stem multiple coats of carnauba wax. I buffed the pipe with a clean buffing pad to raise the shine. I hand buffed it with a microfiber cloth to deepen the shine. The pipe polished up pretty nicely. The grain is quite stunning and really pops with the wax and polish. The newly fit shiny black vulcanite stem is a beautiful contrast to the browns of the bowl and thick shank. This Peterson’s System Standard 1307 Bent Billiard is a beauty. The polished nickel Ferrule works as a contrast between the stem and the briar and binds it all together. It really is a quite stunning piece of briar whose shape follows the flow of the briar. The pipe is comfortable pipe to hold in the hand. The finished pipe is shown in the photos below. The dimensions of the pipe are Length: 6 ½ inches, Height: 2 inches, Outside diameter of the bowl: 1 ¼ inches, Chamber diameter: ¾ of an inch. The weight of the pipe is 68 grams/2.40 ounces. I will be adding the pipe to the rebornpipe store in the Irish Pipe Makers Section. If you are interested in adding it to your collection let me know. Thanks for reading this blog and my reflections on the pipe while I worked on it. This was an interesting estate to bring back to life.

Restemming a Stemless Sandblast Larsen Super Canadian


Blog by Steve Laug

The next pipe on the worktable is a Danish made pipe from the workshop W.O. Larsen. It is a sandblast Canadian with silver band on the shank end. The bowl is a classic Danish looking Canadian with almost a Brandy shaped bowl. It came without a stem. The pipe came to us from eBay on 01/22/2024 from a seller in Jordan, Minnesota, USA.  The pipe is very dirty with a thick cake in the bowl and heavy lava on the rim top. The rim edge looks to be okay but it was hard to know what was under the lava coat on the top and edges. It is stamped on the underside of the bowl and shank on a smooth panel. It reads * followed by Larsen [over] Copenhagen. That is followed by Handmade [over] Made in Denmark. That is followed by the stamping Super. The finish was dusty and there were oils and grime ground into the sandblast finish around the sides of the bowl. The silver band was in good condition and was faintly stamped Sterling Silver arched on the top back of the band. Jeff took some photos of the pipe before he started his cleanup work. Jeff took a photo of the rim top to show the thick build up of lava in the sandblast of the rim top. It is also built up on the inner edge of the bowl. The thick cake in the bowl is very visible.He took photos of the sides and the heel of the bowl to show the blast finish on the pipe. It is a unique blast that really shows the birdseye and other grain around the bowl sides. He took a series of photos to capture the stamping on the heel of the bowl and the underside of the shank. The first photo shows the * on the heel of the bowl. Each one moves down the shank to the band on the shank end. It is clear and readable as noted above. He also took photos of he band on the end of the shank. It is well fit and it is cosmetic rather than a repair band. There is no crack in the shank end.The shape and stamping on this one reminded me of another Larsen Super Canadian I had worked on in the past. I remembered the shape and look of the pipe. I looked up the link and have included it below (https://rebornpipes.com/2021/10/25/restoring-a-sandblast-canadian-hand-made-designed-by-w-o-larsen-super-tan-65/). I also quoted the information on  the brand that I had researched at that time.

I turned to Pipephil (http://www.pipephil.eu/logos/en/logo-l2.html) to get a quick view of the brand once again. I did a screen capture of the site’s information and have included that below. The pipe I am working on is a W.O. Larsen as it is stamped similarly to the ones in the photos. It is interestingly stamped with a lot more detail than any of the ones shown in the screen capture below. I turned to Pipedia (https://pipedia.org/wiki/W.%C3%98._Larsen) for a quick read. The site is worth reading the history of the shop and the brand and its influence on Danish pipe carving. There was no additional information on this pipe.

What I learned from the research is that the pipe is a W.O. Larsen made pipe that was probably esigned by W.O Larsen himself or at least one of the shop carvers. It is a beauty though.

With that information I moved forward to work on the pipe itself and see what I had to do with it. Jeff had done an amazing job in removing all of the cake and the lava on the sand blast rim top. He had reamed the bowl with a PipNet Pipe Reamer and cleaned up the remnants with a Savinelli Fitsall Pipe Knife. He took the cake back to bare briar so we could check the walls for damage. He scrubbed the exterior of the bowl with Murphy’s Oil Soap and a tooth brush to remove the grime on the bowl and rim and was able to remove the lava and dirt. The finish on the bowl and rim top looked very good showing a unique and beautiful sandblast. He cleaned out the interior of the bowl and shank with pipe cleaners, cotton swabs and alcohol until they came out clean. I took photos of the pipe before I started my part of the restoration. I took a photo of the stamping on the underside of the shank to show the condition after the cleanup. This stamping is clearer than the photo shows. The Sterling Silver stamp on the band is scratched with wear but still readable. I went through my collection of stems looking for one that would match the previous Larsen Super that I referred to above (https://rebornpipes.com/2021/10/25/restoring-a-sandblast-canadian-hand-made-designed-by-w-o-larsen-super-tan-65/). I found one that was the right shape and length. It was a little wider so it would take some work to fit it to the shank size. The tenon was very close so a little sandpaper would remember that and make the fit proper. Here is a photo of the stem. NB: This is the reason I am always picking up stems where ever I can find them. I just know that one day I will need one and it might just be the one!I decided to start my work this time following Kenneth’s pattern of working on the stem first. This something I rarely ever do, but there is always room for change. I started with the stem fitting. I marked the stem width with a pencil, ran some sandpaper over the tenon for a fit and took off the excess width on the stem on the top and each side with a rasp. With a bit of careful fiddling and fussing I was able to get a proper fit on the stem. I put it on the shank and took the photos below. Now I needed to sand it to clean up the file marks and fine tune the shape.I started polishing the stem with 320-3500 grit sanding pads. I worked on the file marks and fine shaping of the stem fit against the shank. The pads worked to polish out the marks and the fit to the shank was very good. The stem began to take on a rich shine in the vulcanite by the time I sanded it with the 3500 grit pad.I set the bowl aside and polished it with micromesh sanding pads – dry sanding with 1500-12000 grit sanding pads. I wiped it down after each sanding pad with a cloth containing some Obsidian Oil. I finished polishing it with Before & After Pipe Stem Polish – both Fine and Extra Fine and buffed it off with a cotton cloth.  I set the finished stem aside and turned my attention to the bowl. I worked over the sandblast surface on the rim top and bowl sides with a brass bristle brush to remove any residual debris from the valleys in the finish. I wiped it down with a damp cloth to remove anything that remained. It was a nice sandblast finish. I worked some Before & After Restoration Balm into the surface of the sandblast briar with my fingertips and a horsehair shoe brush to clean, enliven and protect the briar. I let the balm sit for about ten minutes and then buffed with a cotton cloth to raise the shine. The photos show the bowl at this point in the restoration process. I polished the silver band with a jeweller’s cloth to raise the shine and protect it from oxidation. The scratches have been lessened, though still remaining. It looks much better at this point. This Larsen Hand Made Larsen Super Canadian is a great looking pipe now that it has been restored. The shape is elegant and flowing with a thin turned vulcanite stem. I put the new stem on the bowl and carefully buffed the pipe with Blue Diamond on the buffing wheel using a light touch on the briar. I gave the bowl multiple coats of Conservator’s Wax and the stem multiple coats of carnauba wax on the buffing wheel and followed that by buffing the entire pipe with a clean buffing pad. I hand buffed the pipe with a microfiber cloth to deepen the shine. The finished Larsen Super Canadian fits nicely in the hand and feels great. Give the finished pipe a look in the photos below. The dimensions of the pipe are Length: 6 inches, Height: 2 inches, Outside diameter of the bowl: 1 ¼ inches, Chamber diameter: 7/8 of an inch. The weight of the pipe is 1.69 ounces/49 grams. I will be putting it on the Danish Pipe Maker Section of the rebornpipes store shortly. If you are interested in adding this pipe to your collection send me a message or an email. Thanks for reading this blog and my reflections on the pipe while I worked on it. There are many more to come!

Repairing and Restemming a Big Ben Lectura 420 pipe


Blog by Steve Laug

Last week I received and email from Dayton regarding a pipe he was seeking to have repaired. He was referred to me by our local pipe and cigar shop called City Cigar. He wrote the following email regarding the pipe.

Hey Steve my name is Dayton. I got your information from City Cigar, they said you’d be able to help with a pipe stem repair? If so I’d really appreciate it. Does email work or would you prefer text!

Thanks again – Dayton Lewis.

He wrote that it needed to have a stem repair done on the pipe. Before I take on work I always ask for photos or at least a photo to show me what needed to be done or at least the damage to the pipe. I wrote back and asked for a photo of the pipe that showed what needed to be repaired. He sent the photo below. You can see the nicely grained bowl on the pipe and the stem with the snapped tenon. The tenon included a metal stinger apparatus. It appeared to me that the break had occurred at the internal end of the inserted portion of the stinger. We talked about a price and he dropped the pipe off for repair yesterday evening.I brought the pipe and stem along with the broken parts in the bag he dropped off to the work table last evening. I examined the pipe carefully to see what I was dealing with in terms of a repair. I like to know the details about the pipes I work on. The pipe is stamped on the left side of the shank and reads Big Ben [over] Lectura. On the right side of the shank it was stamped with the shape number 420 [over] Made in Holland. The finish on the bowl was in good condition. The bowl had a thin cake inside and a light overflow of lava on the rim top. Overall the pipe was quite clean. With a repair on the stem the pipe would be in good condition to keep providing a great smoke to Dayton. I took photos of the pipe when I received it. In the photos above don’t miss condition of the bowl and the shank. The pipe looks quite clean and should polish up well. I examined the bowl and shank for damage that might have occurred when the tenon snapped. I have learned over the years to examine it carefully with a bright light and a lens. In this case I found there was a hairline crack on the lower right side of the shank just below the stamping Made in Holland. It extends from the shank end about a half inch up the shank dipping to mid-underside. I have inserted a red arrow in the second and third  photos below to show that location of the crack. I wrote to Dayton and told him about my recommendations for a thin band to repair the cracked shank. I am waiting to hear from him. I repaired the crack with a spot of clear CA glue and then pressed the thin brass band on to the shank end and it drew the parts of the crack together. Now on to the stem repairs my first thoughts were that I would insert a replacement tenon in the drilled-out air way in the stem. I examined the stem diameter and found that it was too thin to drill out. The tenon was quite large in diameter and it would not leave much on the stem if I were to drill it out. I decided to rather find a replacement stem for the pipe. I went through my stems and found one that was the same length, similar diameter and had a solid vulcanite tenon that would need slight adjustment to fit in the shank.I worked on the diameter of the tenon on the new stem with a file/rasp and removed enough to get a close fit. I used 220 grit sandpaper to smooth it out and bring it to round and get the fit what I needed. I also used the file and the sandpaper to reduce the diameter of the stem itself to get a clean fit against the shank end.I fit the stem on the shank and took photos of the fit. The stem looks perfect against the shank end. It is a snug fit and looks very good with the thin brass band.I sanded the stem with the 2 inch square 320-3500 grit sanding pads. I wiped down the stem after each sanding pad. I was able to remove the tooth marks and chatter on both sides with the pads. The stem looked very good. I wiped the stem down with some Obsidian Oil on a cloth to remove the debris from sanding. It was looking much better.I polished the vulcanite stem with micromesh sanding pads – dry sanding it with 1500-12000 grit pads. I wiped the stem down after each sanding pad with Obsidian Oil and set it aside to dry.  I polished it further with Before & After Pipe Polish – using both the Fine and Extra Fine Polishes. I gave it a rubdown with Obsidian Oil one last time and set it aside. I put the Big Ben Lectura 420 back together and worked the pipe over on the buffing wheel using Blue Diamond to lightly polish the stem. I buffed the bowl and stem to raise the gloss on the briar and the vulcanite. I gave the pipe multiple coats of carnauba wax. I buffed the entire pipe with a clean buffing pad to raise the shine. I hand buffed it with a microfiber cloth to deepen the shine. The finished Ben Ben Lectura is shown in the photos below. The medium brown stains on the smooth Billiard shaped bowl works well with the rich black of the vulcanite stem. The dimensions of the pipe are: Length: 7 ½ inches, Height: 1 ¼ inches, Outside Diameter: 1 inch, Diameter of the chamber: 3/4 inches. The weight of the pipe is .71 ounces/21 grams. This is an interesting piece of briar, cross grain and mixed grain on the bowl and shank. The patterns on the sides are a real mix. I really like how the briar, the thin brass band and the vulcanite work well together. This one will soon be going back to Dayton once I contact him. Thanks for walking with me through the restoration process.

Jeff saw this Malaga Second Bowl sans stem, liked it and went for it


Blog by Steve Laug

The next pipe on the table is an interesting Malaga Freehand/Skater bowl. Jeff saw it on eBay and purchased it on 12/01/2023 from a seller in Swartz Creek, Michigan, USA. It was dirty pipe with a lot of wear and tear and obviously it had been someone’s favourite smoker. The pipe is stamped on the underside of the shank and reads Malaga [over] Second. The dirty smooth finish was not able to hide the beauty of the grain around the bowl and shank. There were tars and oils ground into the surface of the briar. The bowl had a very thick cake that flowed over the top of the smooth rim in a heavy lava coat. The cake in the bowl was thick right up to the top of the rim. It was hard to fully assess the condition of the inner edge. The outer edge of the bowl showed some nicks and dents. There was also a tar/lava build up on the shank end as well. The pipe was a mess. The stem was missing so it would need to be fitted with a new stem. Jeff took photos of the pipes before he started his clean up work. Jeff took photos of the rim and bowl to show the heavy cake and heavy lava coat covering the rim top. The inner edge of the rim was so thickly caked that it was not possible to know with certainty the condition. It really was a dirty pipe but still a beauty. The photos of the sides and heel of the bowls show some beautiful grain around the bowl and shank sides. Malaga pipes are oil cured and you can see that it adds depth to finish on the pipe and makes the grain really stand out on the bowl and shank. This bowl shows real promise. Jeff captured the inset on the shank end and the grime and tars built up on the surface of the briar.Jeff captured the stamping on the underside of the shank with the next photo. It was clear and readable and read as noted above. The grain below the stamp is also quite nice. I am including the link to a blog that I wrote that gives some of the history of the Malaga brand and the Malaga Pipe Shop in Royal Oak, Michigan in the USA. I have written an earlier blog to give a little history of the Malaga Brand and the pipemaker, George Khoubesser. Here is the link (https://rebornpipes.com/2013/02/09/george-khoubesser-and-malaga-pipes/). That blog also includes links to a catalogue and the history of the pipemaker George Khoubesser. Follow the link to get a feel for the brand and the pipemaker.

Jeff had cleaned up the pipe using his usual procedure. He reamed the pipe with a PipNet pipe reamer and removed the rest of it with a Savinelli Fitsall Pipe Knife. He scrubbed the bowl with undiluted Murphy’s Oil Soap with a tooth brush. He rinsed it under running warm water to remove the soap and grime. He cleaned out the inside of the shank and the airway with alcohol, cotton swabs and pipe cleaners. The shank had an inset to take in the tenon and the end of the stem so I would need to fit a stem to sit in the shank. I took photos of the pipe once I received it. I took a photo of the stamping on the underside of the shank. It is quite clear and easy to read.I went through my can of stems and found this acrylic taper stem. The diameter of the stem portion was a little too large in diameter to fit in the inset of the shank. I would need to sand the stem diameter to get a good fit to the inset.  I started my cleanup of the bowl and rim top by using a folded piece of 220 grit sandpaper to smooth out the inner rim edge and remove the darkening on the rim top around the edge. It worked very well and the cleaned-up rim and top looked much better.With all my sanding and trying various stems I was concerned about the dust and debris in the shank. I wanted to clean it up and also the inside of the airway in the stem. I used isopropyl alcohol, pipe cleaners and cotton swabs.I polished the bowl and the rim top with micromesh sanding pads. I dry sanded it with 1500-12000 grit pads. I wiped the bowl down after each pad with a damp cloth. The pipe began to take on a rich shine and grain was beginning to stand out. I worked on the diameter of the stem with 220 grit sandpaper so that it would fit in the inset on the shank end. It would take a regular tenon in the mortise and the portion of the stem above the tenon would fit in the inset. I sanded the diameter of the stem to match the diameter of the inset. Once it fit snug in the shank it was ready to be polished. Once I had adjusted the diameter of the stem I fit it in the inset shank end and took photos of the look of the pipe with the new stem in place. I like the grey brown acrylic stem and its flow with the shape of the pipe. I still need to polish the stem but it is looking good. I put the stem aside to finish later and returned to the bowl. To finish it at this point I rubbed the bowl and shank down with Before & After Restoration Balm to deep clean the finish on the bowl and shank. The product works to clean, enliven and protect the briar. I worked it in with my fingers to get it into the briar. I let it sit for 10 minutes then I wiped it off and buffed it with a soft cloth. The briar really began to have a rich shine. I took some photos of the bowl at this point to mark the progress in the restoration. It is a beautiful bowl.I set the finished bowl aside and we back to the stem. I started the polishing of the stem with 2 inch sanding pads – dry sanding with 320-3500 grit pads and wiping it down after each pad.I set the bowl aside and worked on the stem at this point in the process. I polished the stem with micromesh sanding pads – dry sanding with 1500-12000 grit pads. I wiped the stem down after each sanding pad with Obsidian Oil. I polished the stem with Before & After Pipe Stem Polish – both Fine and Extra Fine. I gave it a coat of Obsidian Pipe Stem Oil. It works to protect the stem from oxidizing. I set it aside to dry. I put the new stem back on the Malaga Second Freehand and took it to the buffer. I buffed the bowl and stem with Blue Diamond to polish the briar and the acrylic. Blue Diamond does a great job on the smaller scratches that remain in both. I gave the bowl and the stem several coats of carnauba wax and buffed the pipe with a clean buffing pad to raise the shine. I hand buffed it with a microfiber cloth to deepen the shine. I am amazed at how well it turned out. The finished pipe is shown in the photos below. This is a beautiful Malaga Second Freehand – the acrylic taper stem and smooth finish combine to give the pipe a great look. I honestly have no idea why it is labeled a second as there are no fills or flaws in the briar. The dimensions of the pipe are Length: 6 ½ inches, Height: 2 inches, Outside diameter of the bowl: 1 ½ inches wide x 2 inches long, Chamber diameter: 7/8 of an inch. The weight of the pipe is 1.48 ounces/43 grams. This is another pipe that I will be putting on the rebornpipes online store in the American Pipe Makers and Pipemaking Companies Section shortly, if you are interested in adding it to your collection. Thanks for walking through the restoration with me on this beauty!

As always, I encourage your questions and comments as you read the blog. Thanks to each of you who are reading this blog. Remember we are not pipe owners; we are pipe men and women who hold our pipes in trust until they pass on into the trust of those who follow us.

Can this Danmore 3090 Be Brought Back to Life?


Blog by Steve Laug

Sometimes I look at a pipe we purchased and wonder what we were thinking when we went for it. That was the case with this Danmore 3090 freehand. We purchased it from an online auction in Los Fresnos, Texas, USA on 01/10/2018. You can see from the fact that it has been sitting here in a bag since 2018. When Jeff received it, the pipe was in pieces and he put it together for these photos. The bowl was intact with no cracks or serious nicks. The horn shank extension had come unglued and looked like it might have some delaminating happening on the long portion that held the stem. The pipe was stamped on the underside of the shank with the shape number 3090 followed by Danmore [over] Handmade Denmark. The stem had a rubber tube fit on the end that had originally been in the shank extension but was now stuck on the stem. The stem itself had been chewed or broken off and was probably missing at least ½ inch of its length. It still had the Danmore Logo on the top of the taper but that was all it had going for it. The bowl was thickly cake and there was a thick lava coat on the rim top obscuring the edges of the bowl. It had obviously been someone’s favourite pipe and had been smoked to death. The finish was filthy with grime and hand oils ground into the smooth panels and the sandblast making it all almost smooth to touch. It was impossible to know if the rim top was smooth or sandblast as there was so much tar on it. The inside of the shank that held the extension was filled with tars and oils and the inside of the horn shank extension was the same. Jeff got some good photos of the pipe before he did his clean up work and I have to hand it to him it looked pretty interesting. The question in my mind really was whether it was redeemable. The bones were nice but what was underneath once it was cleaned remained a haunting question. He took photos of the rim top and bowl and you can see what I mean by the thickness of the cake in the bowl and the lava on the rim top. It is so thick that it is flaking off in chunks only to reveal another layer! You can also see the broken off/chewed off condition of the stem in the photos he included. He included photos of the sides of the bowl and the contrasting patches on the bowl sides along with an interesting sandblast. The only thing that can be said is that the stamping on the underside of the shank is clear and readable as noted above and the Danmore D logo is very readable on the chewed off stem. You can also see the separation of the horn shank extension for the shank end in these photos. Lots of work to be done in the resurrection.The horn shank extension was originally lined with a Delrin or rubber liner to stabilize the horn from the inside. It would have been glued in place in the horn and not moved when the stem was removed. In the photo above and those that follow you can see that the liner piece has crept up the stem to where there is very little that is actually in the horn itself. I am hoping that once it is here I can work it off the stem and reinsert it in the horn again. We shall see.Jeff let the pipe fall back into its parts and took photos of it. You can see the bowl and its filthiness, the stem with the creeping rubber insert from the horn and the tired looking horn extension. In the second photo you can see the filth in the inside of the horn and into the shank itself… lots of work in cleaning it and not making things worse.I knew that the pipe was a Danish Made pipe but it has been awhile since I worked on a Danmore pipe. I turned first to Pipephil’s site (http://www.pipephil.eu/logos/en/logo-d2.html). There was a very short clip there with one photo of a pipe very different from the one I am working on. It simply states that the factory is closed and that the pipes are made by third parties. Not too much helpful information there that is for sure.I then turned to Pipedia (https://pipedia.org/wiki/Danmore) and was much more successful. The article is short and succinct but very helpful. I have included it below for ease of reference.

Danmore was founded by Hans Sørensen in the early 1970s, and produced pipes from that time until the early 1980s, at one point having up to 30 employees. The pipes were sold in the first Dan Pipe catalog. In the early 1980’s, however, production ceased in Denmark due to labor costs, and the company’s production was outsourced to Italy and Spain, and they began to also make pipecleaners and smokers articles.

Sørensen focused on the pipecleaner side of the concern, and eventually bought a share in the factory in the Far East making them. Today the company, owned by Hans’ sons Jesper and Lars Sørensen, no longer makes pipes, and instead makes only pipe cleaners under the name Danmore Hobby Aps, selling only to hobby and craftshops in Denmark and Scandinavia.

Hans Sørensen passed away in 2012. The Sørensen family continues to own the trademarks for the use of the Danmore name in relation to pipes, matches, and tobacco.

Now I knew that the pipe was made by Hans Sorensen and was made between the early 1970s and early 1980s when production ceased in Denmark due to labor costs. From that point on the pipes were outsourced to Italy and Spain. So, I guess the pipe was made during the 10 year or so window when the pipes were handmade in Denmark. All of that info makes me a bit more interested in resurrecting this pipe.

When it arrived here it was in a plastic sandwich bag and I promptly put it aside in a drawer of pipes to work on. Periodically I would take the bag out and dump out the parts and look it over. Everytime other than today I have just put it back in the drawer, shaking my head. I think it could be fixed but did I want to was the serious question that haunted me each time I looked at it. From 2018-2024 my answer was categorically, NOT INTERESTED! So, what changed today? Got me! Last evening, I took it out of the baggie and looked it over, put the pieces together and took some photos. Something about it caught my eye this time around and I wanted to see if I could bring it back to life. I sent Jeff a note and he sent me the photos above.

Jeff had done a great job cleaning up the pipe as usual. He reamed the pipe with a PipNet reamer and cut back the cake back to the bare briar. He cleaned up the walls with a Savinelli Fitsall Pipe Knife. He scrubbed the interior of the bowl and shank with pipe cleaners, cotton swabs and alcohol to remove the tars and oils. He scrubbed the exterior of the pipe with Murphy’s Oil Soap and a tooth brush to remove the grime from the finish. He worked on the rim top lava and darkening with the soap and tooth brush. He scrubbed the inside of the horn shank extension and the stem with alcohol and pipe cleaners. He scrubbed the exterior of the stem with Soft Scrub and then soaked it in Before & After Pipe Stem Deoxidizer. He washed it off with warm water to remove the Deoxidizer. The pipe looked far better when it arrived. I took a photo of the bowl and rim top to show how good it looked. The sandblast rim top was clean and the inner edges aw also in good condition. The stain had faded some but it would not be too much to bring it back. The shank extension was very loose with nothing holding it in place in the shank. The stem was another story. The end had been either gnawed off or broken off and still smoked that way. It cleaned up well for sure – looked much better. It would need to be replaced.Though the photo below is a bit blurry the stamping is very clear on the underside of the shank. I removed the stem from the shank end and took a photo of the pipe and extension with the stem below to get a sense of what was there now.Now it was time to put the pieces back together again. For me this is the challenge that I enjoy. Will I be able to reconstruct the pipe back to functionality without changing the plan that crafted it originally? I love that challenge. In this case I decided to start with regluing and rebuilding the shank extension. I am very thankful that it was not delaminating. The horn was dry but still very stable which took away a very time-consuming part of the work. I worked on removing the old glue from the shank end and the tenon of the extension. I used a dental spatula and small blade to scrape the surfaces and then scrubbed them with 99% isopropyl alcohol and cotton swabs and pipe cleaners. I also worked on the airway in the mortise of the briar so that the extension would have a very clean surface to bond with.Once the mortise was dried out I used some all-purpose white glue and painted the inside of the mortise and the tenon on the extension with it. I pressed the parts together and held them with pressure until the glue cured. Once it had hardened sufficiently to take the pressure off and wiped off the excess glue that had squeezed out with a damp cotton pad. I took photos of the pipe at this point. I cleaned up the Delrin/rubber ring that fit in the shank end and gave it a thin coat of all-purpose glue. I pressed it into the shank extension end and set it aside to cure. Once the glue hardened I polished the joint of the horn extension and the briar with 320-3500 grit sanding pads. I wiped the horn down after each sanding pad with a cloth impregnated with Obsidian Oil. The horn began to take on a shine. I polished the smooth panels on the bowl sides and the horn shank extension with micromesh sanding pads – dry sanding with 1500-12000 grit sanding pads. I wiped the horn down after each sanding pads with Obsidian Oil. It began to take on a shine as I worked through the pads. I used a Walnut Stain Pen to touch up the spotty finish around the bowl and shank and on the faded rim top. It looked significantly better once the stain cured. The colour looked much better. I rubbed the briar down with Before & After Restoration Balm. I worked it into the briar with my fingertips and a horsehair shoe brush. The product works to clean, enliven and preserve the briar. I let it sit for 10 minutes while I worked on the stem. After the time passed I buffed it with a cotton cloth to deepen the shine. The briar really comes alive with the balm. I went through my collection of stems to find one that would work on the pipe. The one I found is identical to the broken one. It has the same shape as the broken one with the fishtail button. It was about ½ inch longer that accommodated the broken portion of the stem. It would need to be cleaned up and polished but it was a good match.I cleaned out the internals of the stem with alcohol and pipe cleaners. It smelled and looked much better.I started working on polishing the stem with my 320-2500 grit sanding pads. I was able to remove the scratches and light tooth marks and chatter on both sides ahead of the button. It looked much better at this point in the process.  I polished the stem with micromesh sanding pads – dry sanding with 1500-12000 grit pads. I wiped the stem down after each sanding pad with Obsidian Oil. I polished it with Before & After Pipe Stem Polish – both Fine and Extra Fine. I gave it a coat of Obsidian Pipe Stem Oil. It works to protect the stem from oxidizing. I set it aside to dry. This beautiful sandblast Danmore 3090 Freehand with a horn shank extension and a military mount stem turned out very nice. It came together amazingly well – far better than when I began. The mix of brown stains highlights the grain around the bowl sides and bottom. The rim top and edges look very good. The finish on the pipe is in excellent condition. I put the stem back on the bowl and carefully buffed the pipe with Blue Diamond on the buffing wheel. I gave the bowl and stem multiple coats of carnauba wax on the buffing wheel and followed that by buffing the entire pipe with a clean buffing pad. I hand buffed the pipe with a microfiber cloth to deepen the shine. The finished Danmore 3090 Freehand is very nice and feels great in the hand. Give the finished pipe a look in the photos below. It is a nice pipe whose dimensions are Length: 6 inches, Height: 1 ¾ inches, Outside diameter of the bowl: 1 ¾ inches, Chamber diameter: 1 inch. The weight of the pipe is 48 grams/1.69 ounces. Thanks for walking through the restoration with me as I worked over another beautiful pipe. This one will be going on the rebornpipes store, in the Danish Pipe Makers Section shortly. If you are interested in adding it to your collection let me know by message or by email to slaug@uniserve.com. Thanks for your time.

As always, I encourage your questions and comments as you read the blog. Thanks to each of you who are reading this blog. Remember we are not pipe owners; we are pipe men and women who hold our pipes in trust until they pass on into the trust of those who follow us.