Blog by Kenneth Lieblich
One of my dearest friends contacted me recently to inquire if I could repair and restore a pipe that belongs to his father. His father told me that the pipe had been given to him by his wife (my friend’s mother) as a graduation gift in 1967. I was only too happy to oblige – not just to help my friend, but to raise this beautiful pipe back to life.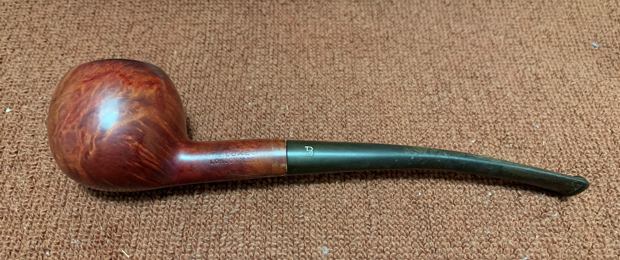
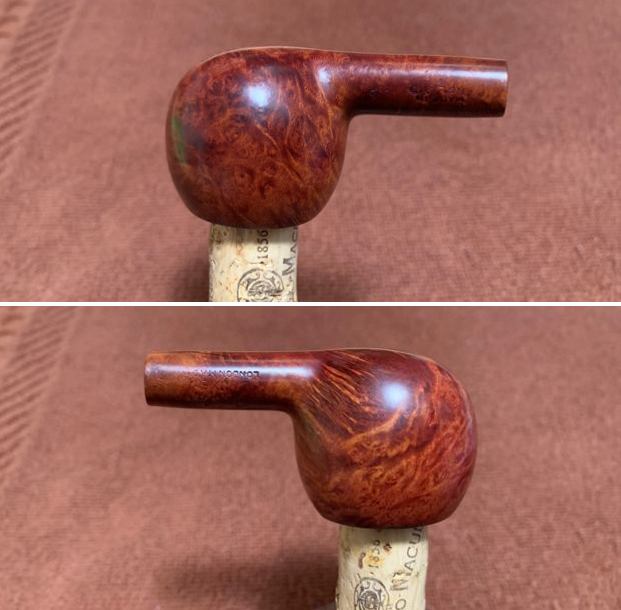
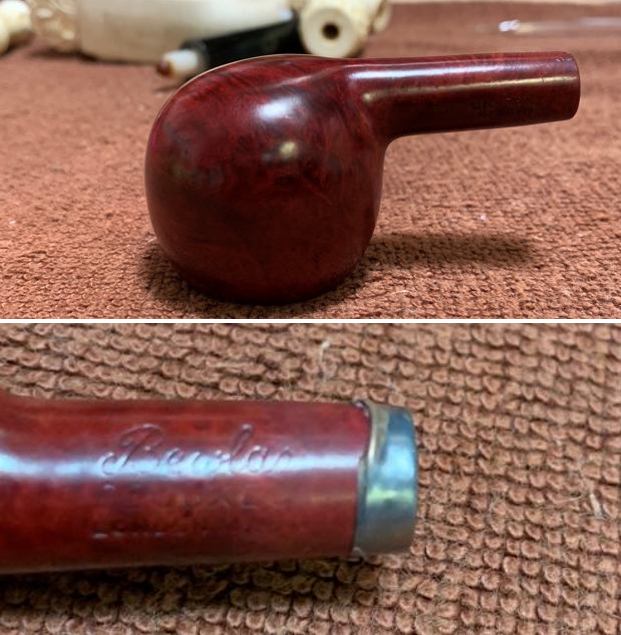
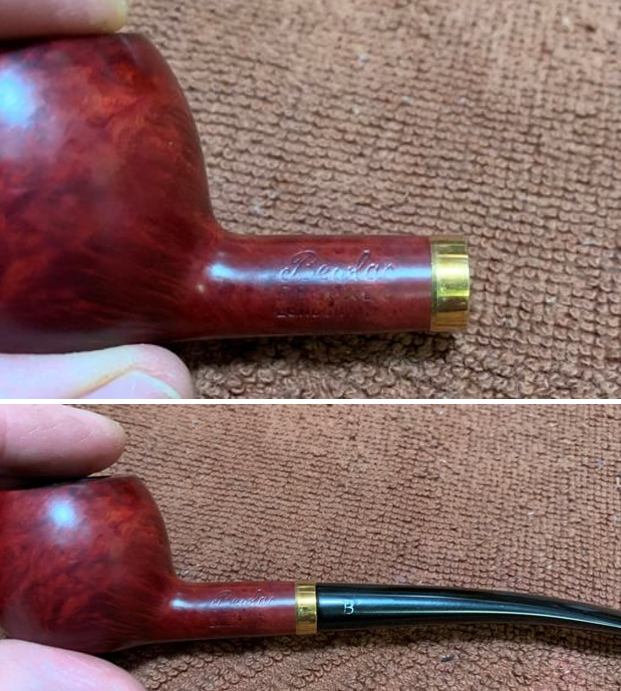
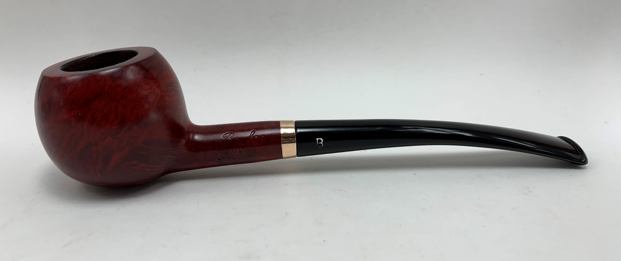
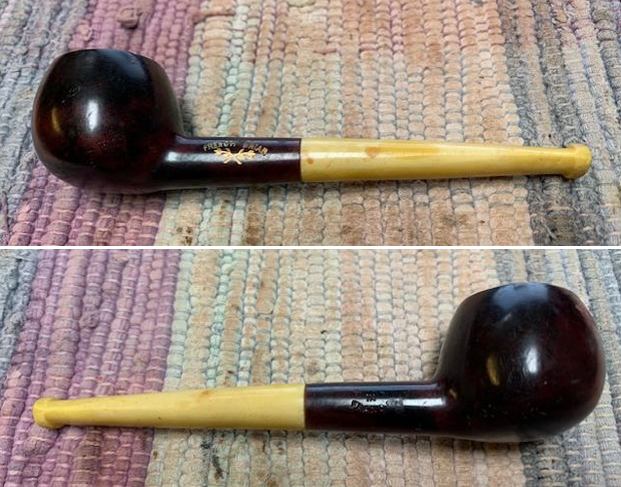
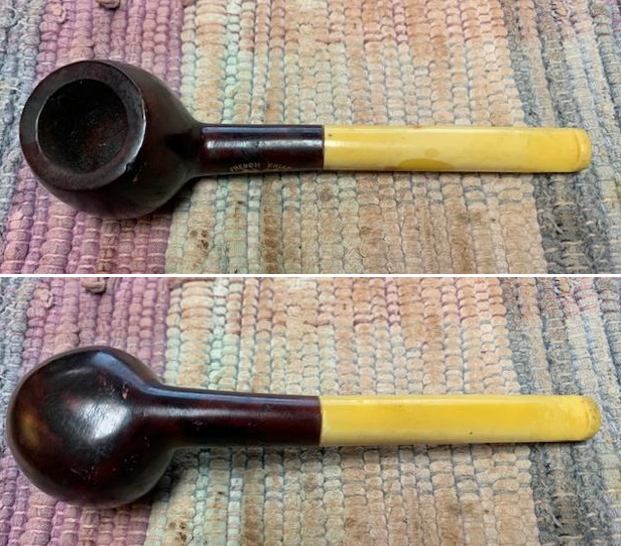
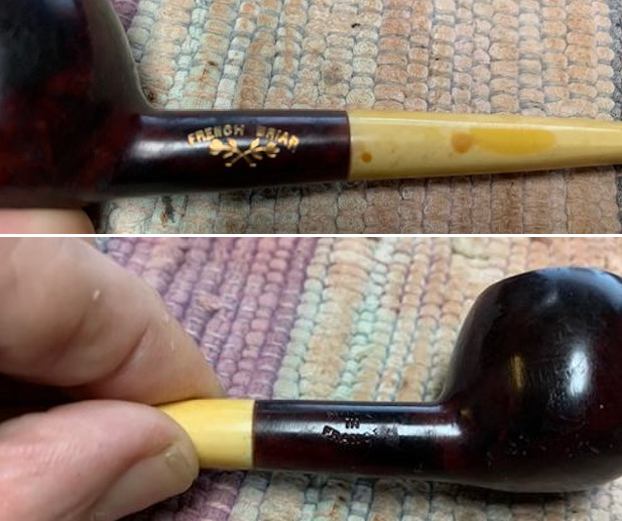
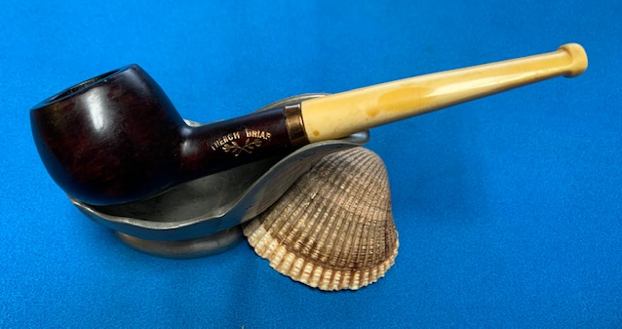
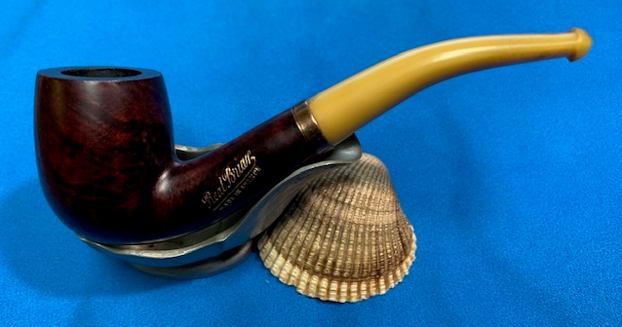
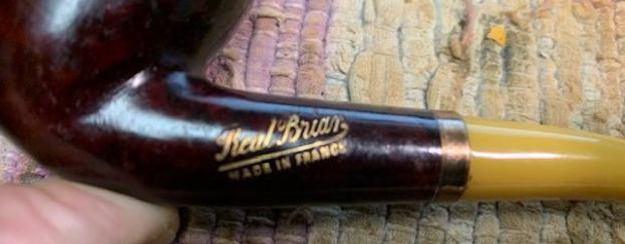
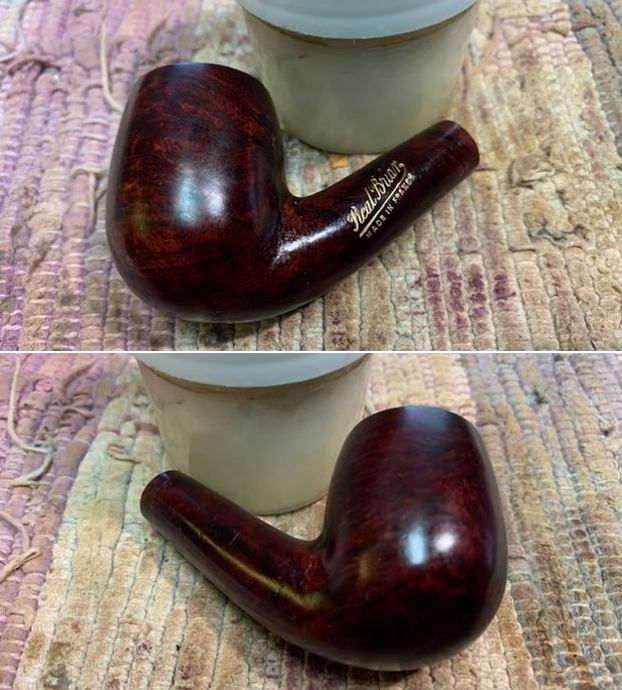
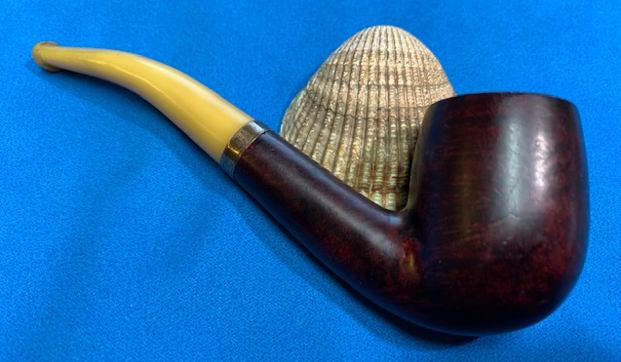
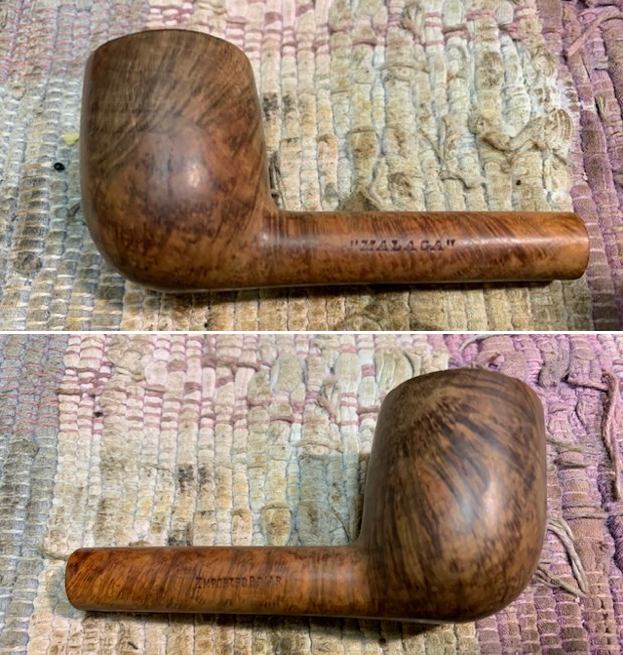
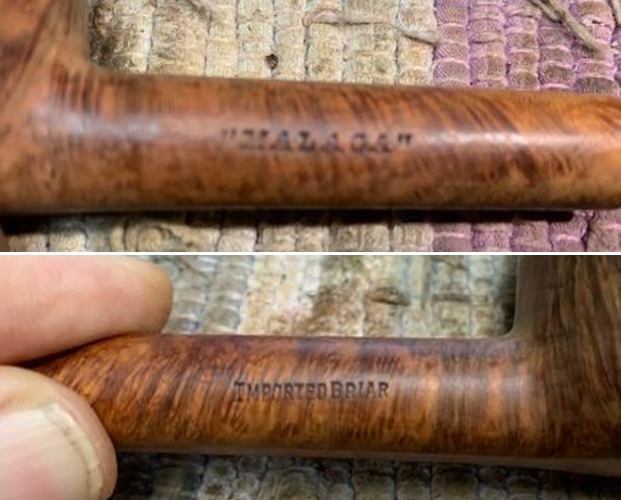
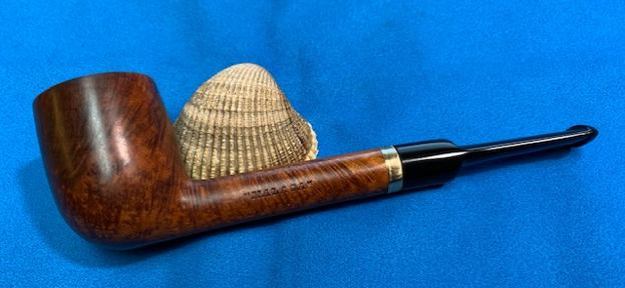
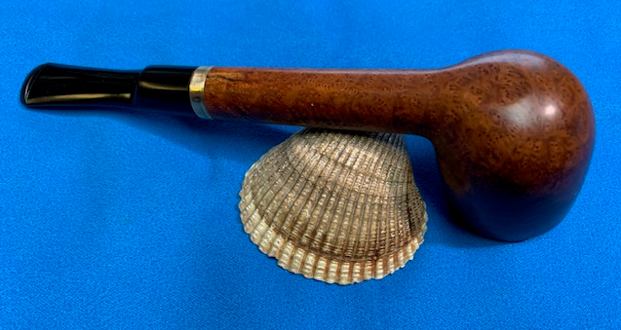
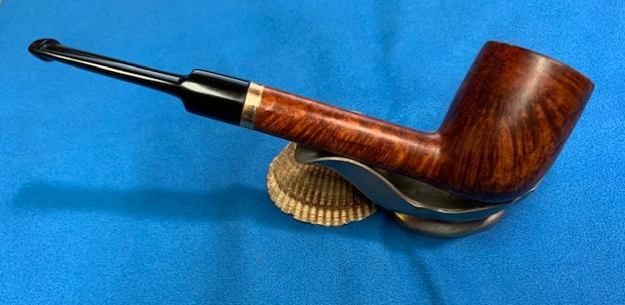
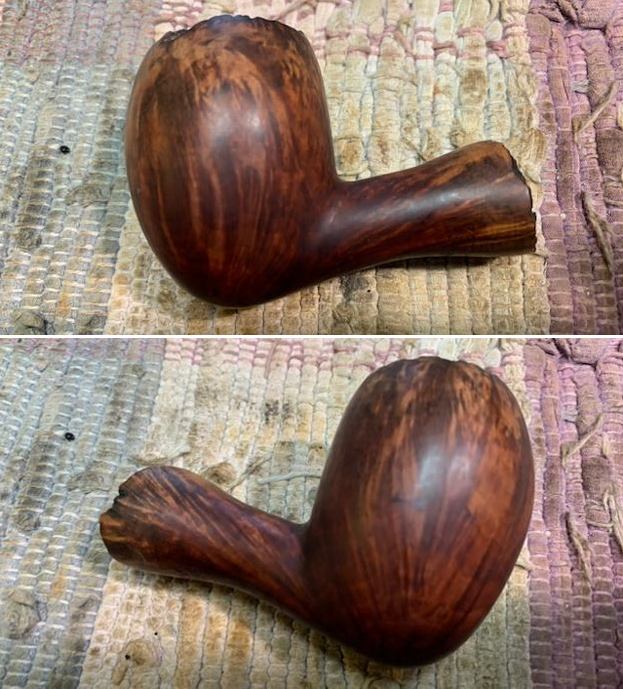
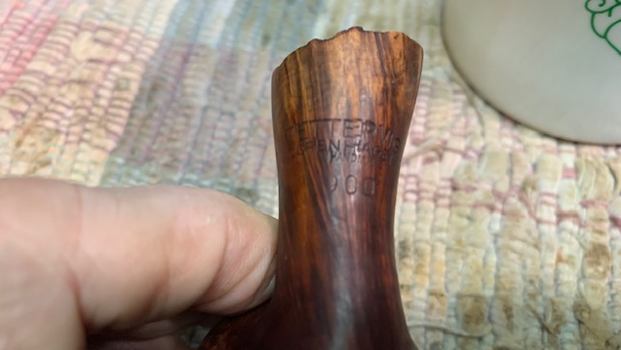
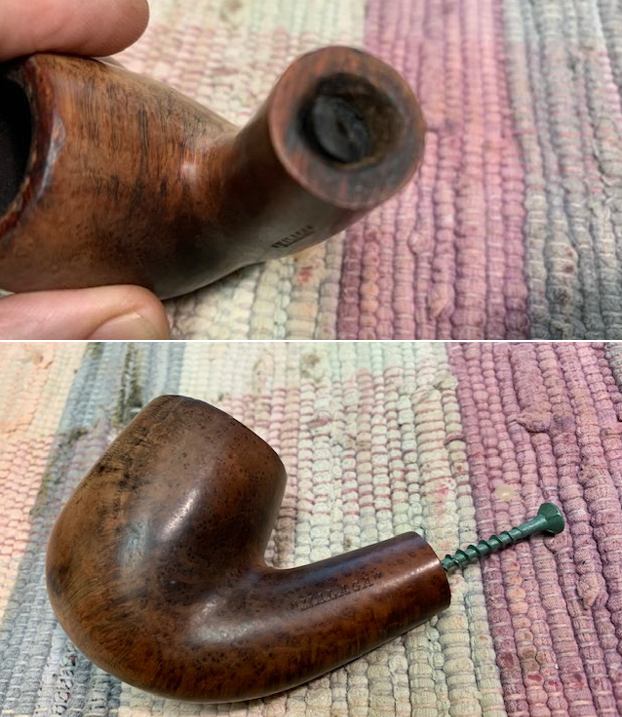
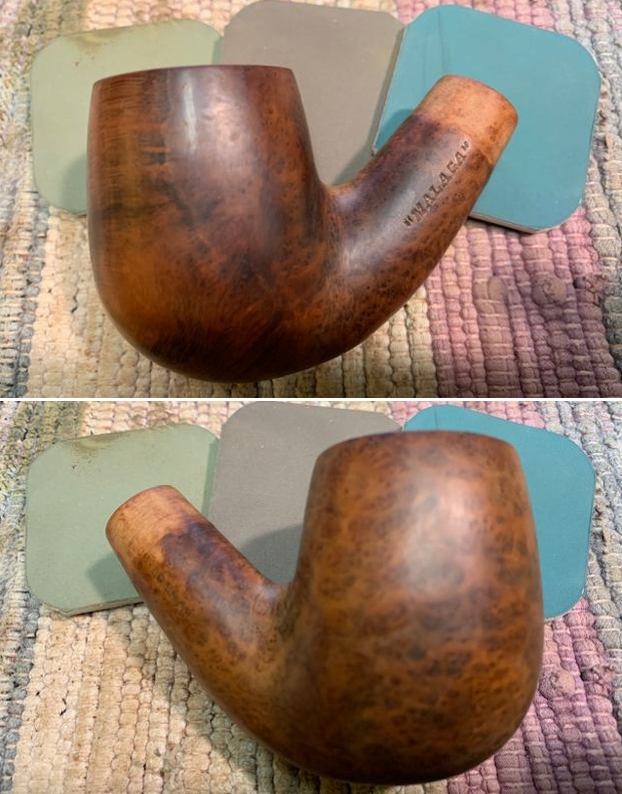
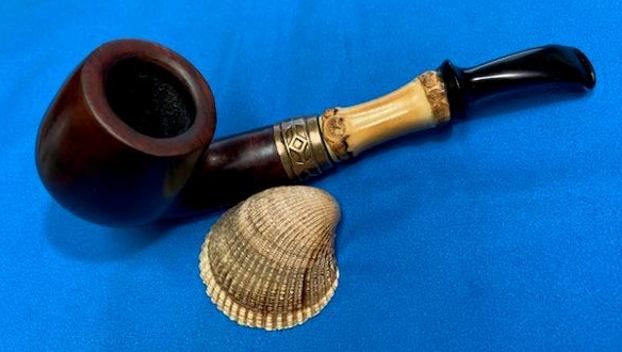
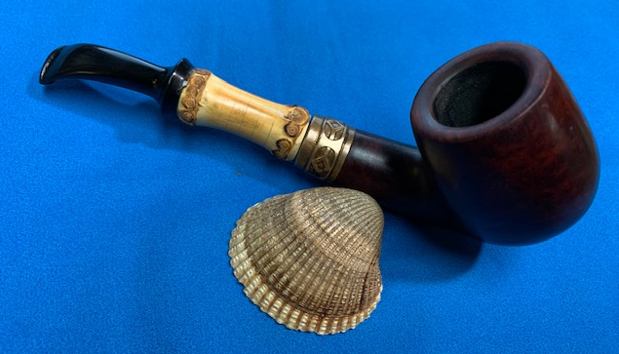
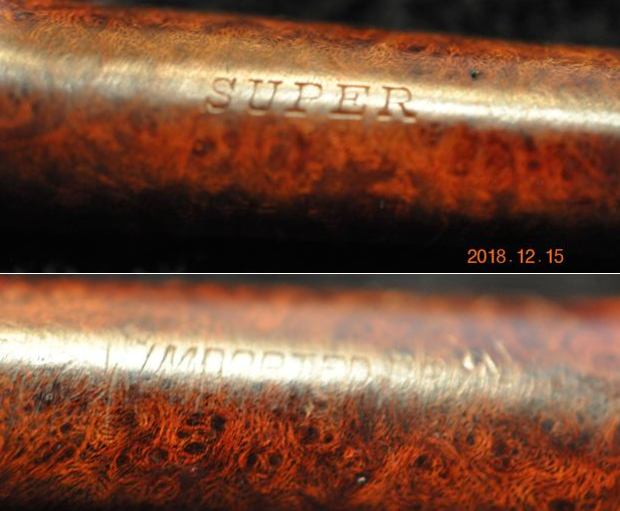
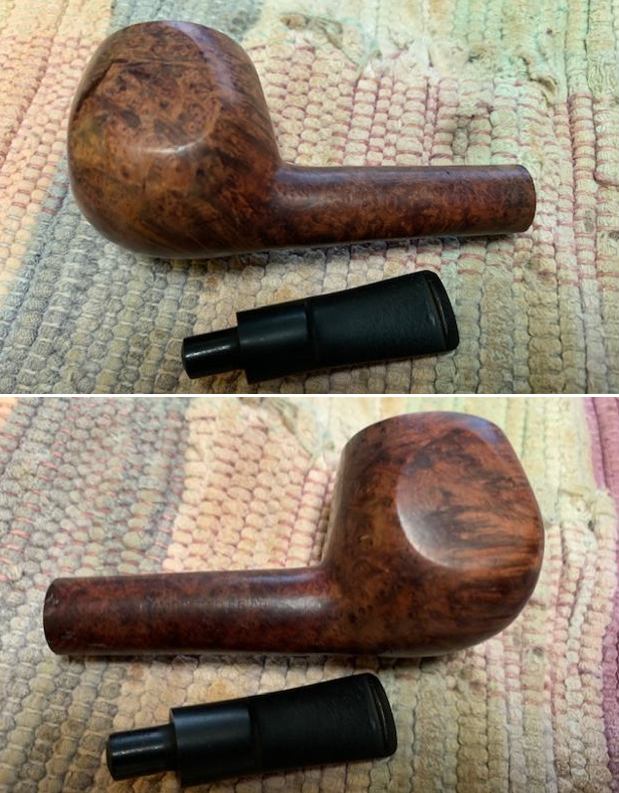
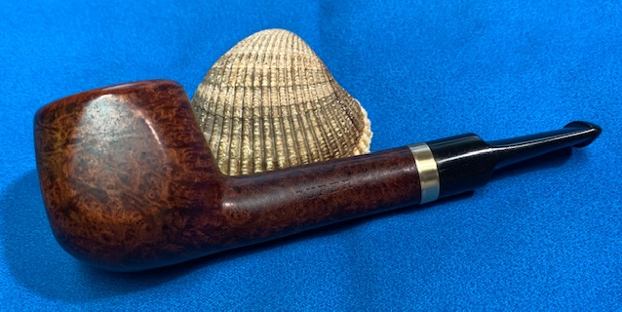
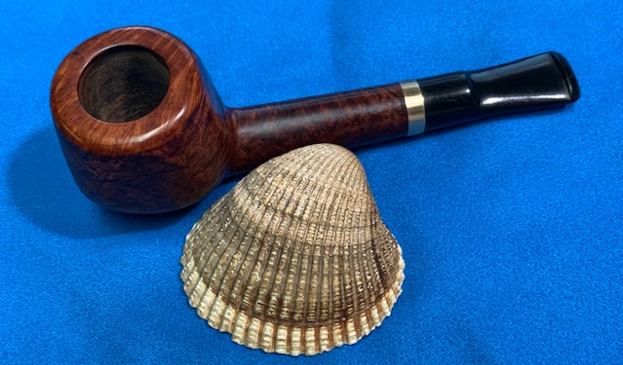
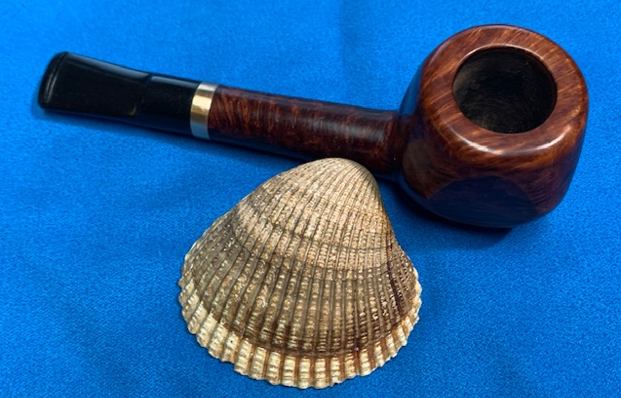
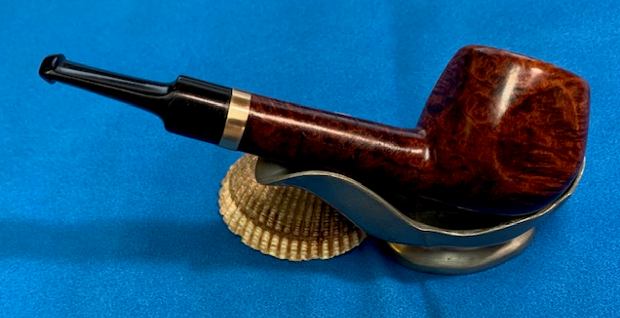
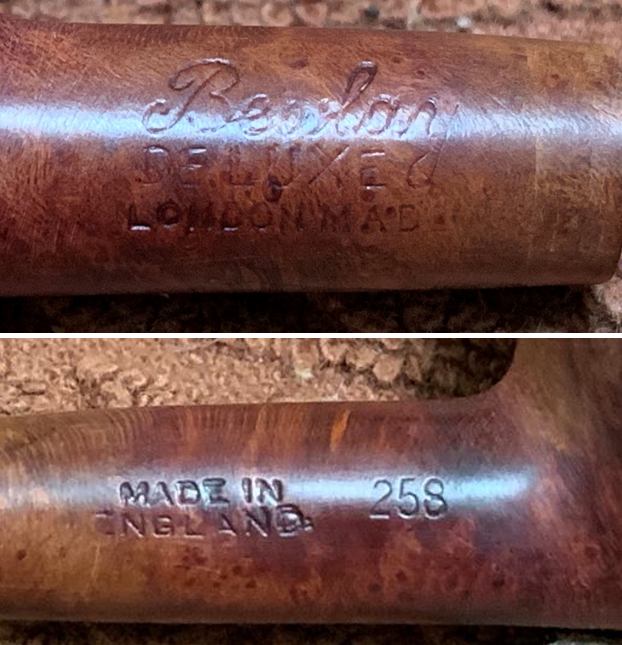 The pipe is from The House of Bewlay and is a Prince shape. Just as an aside, the shape was named after Prince Albert, the Prince of Wales, who later became King Edward VII (1841–1910). What a gorgeous pipe! I must admit that the prince is one of my favourite pipe shapes (and possibly my outright favourite). This one is the epitome of elegance in pipe smoking. The pipe’s markings read Bewlay [over] Deluxe [over] London Made. The other side of the pipe read Made in [over] England and the shape number, 258. This corresponds nicely with a Bewlay catalogue from the late 60s, as you can see in the photo below. One additional piece of information that was useful was the date of the gift: 1967. This certainly gives us a good idea of the time period from which this pipe dates. Let us read a bit more about Bewlay from the Pipedia article:
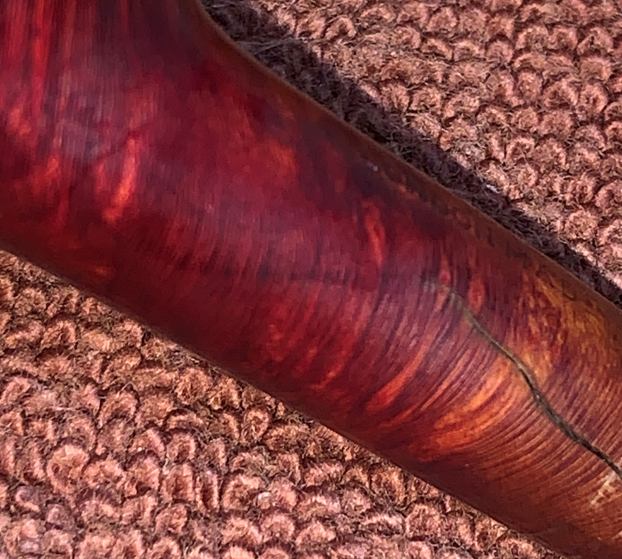
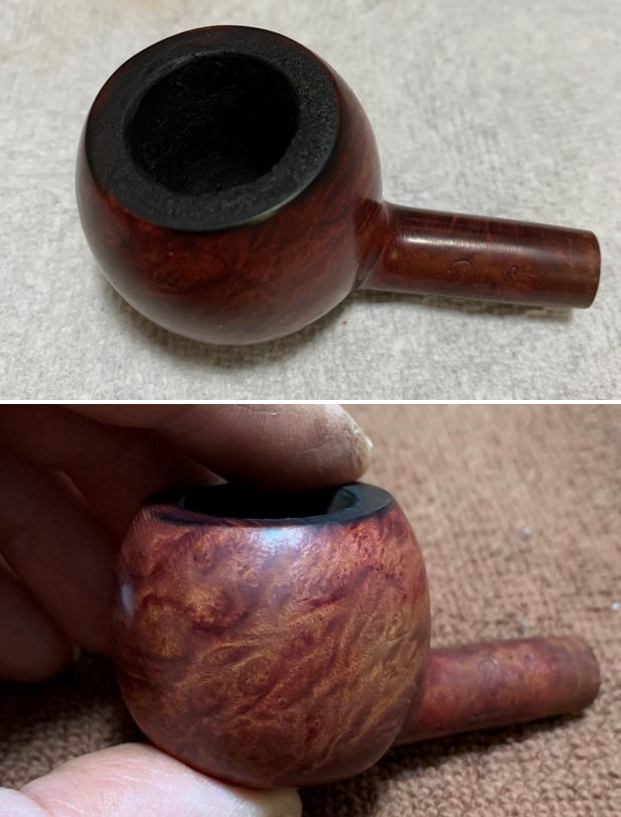
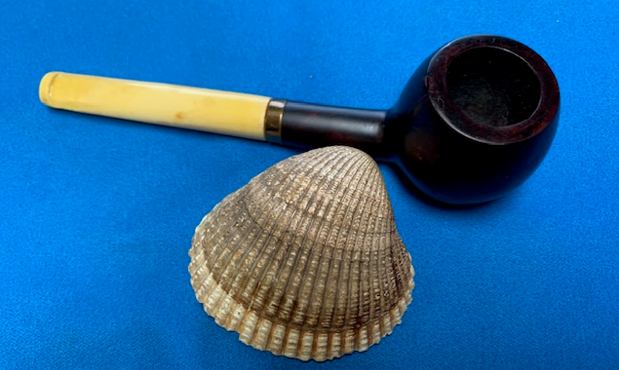
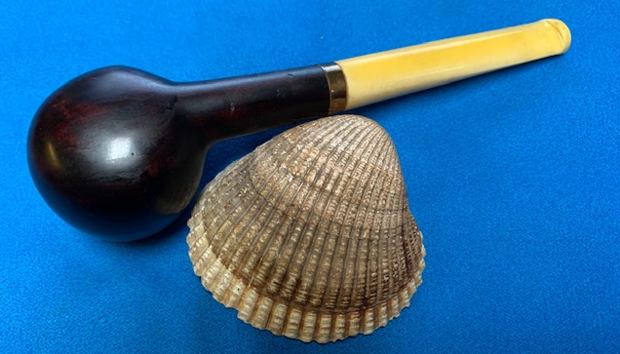
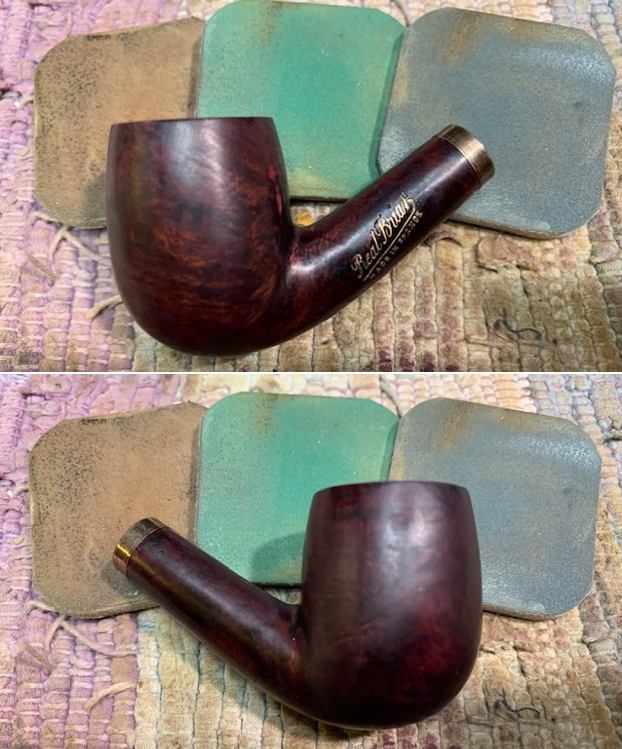
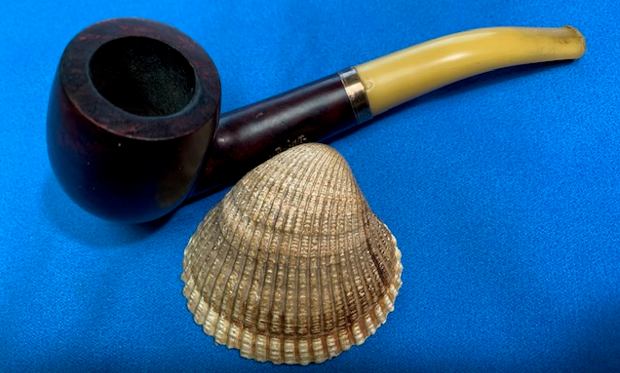
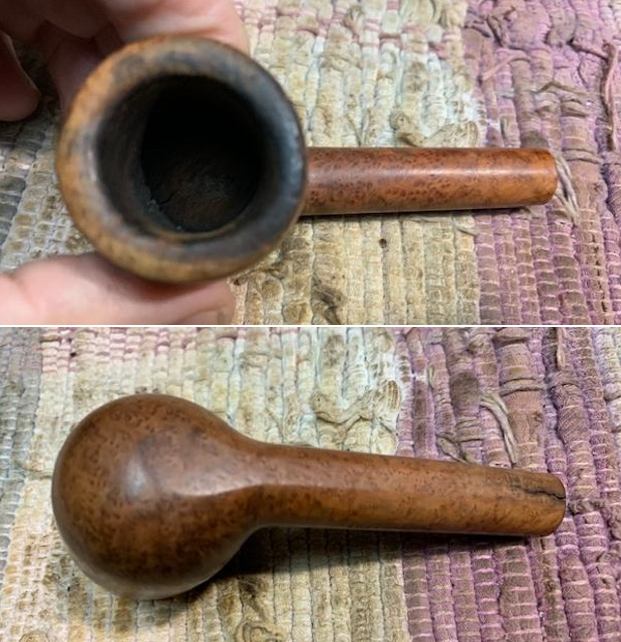
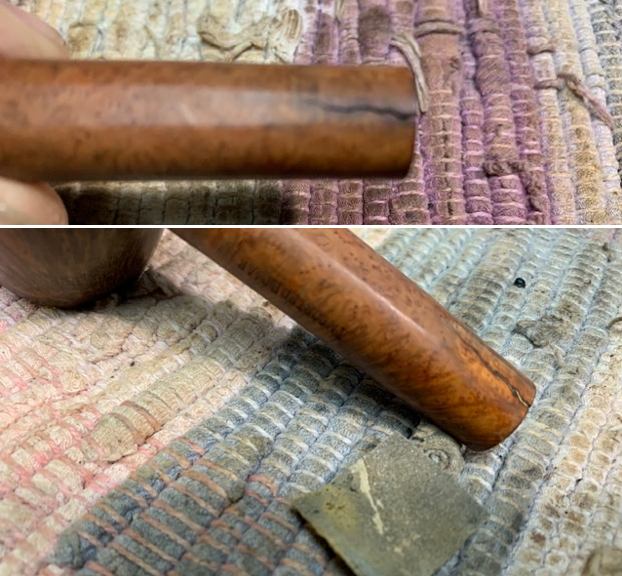
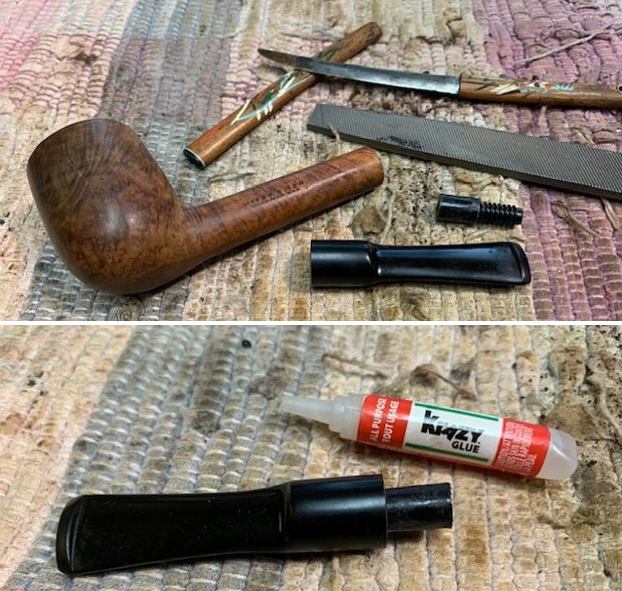
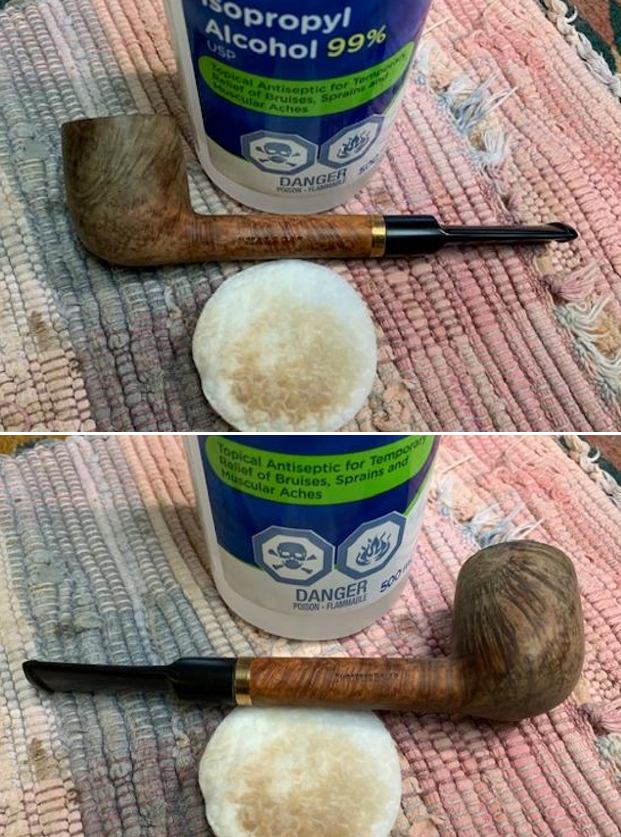
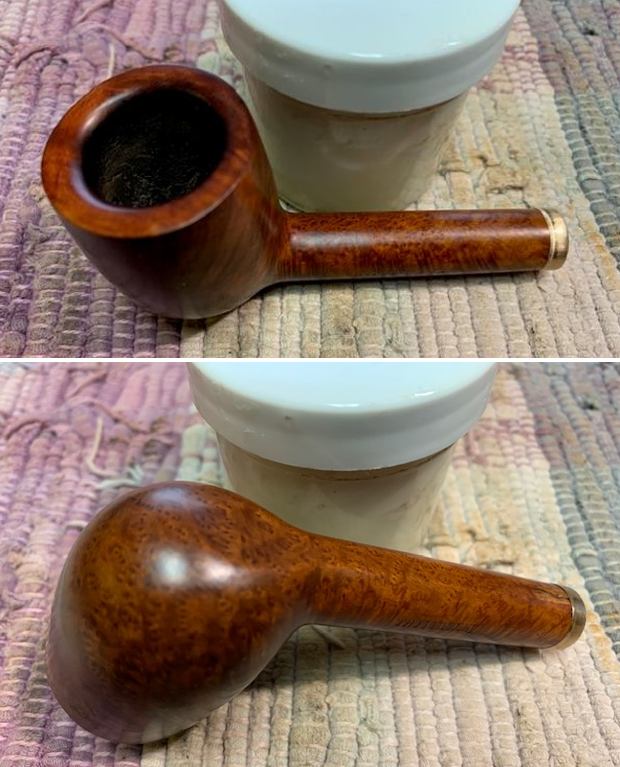
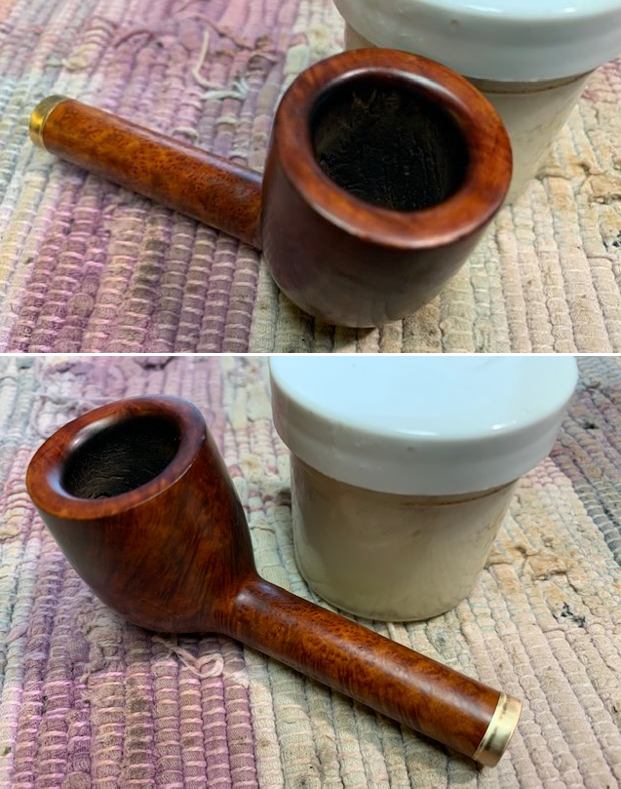
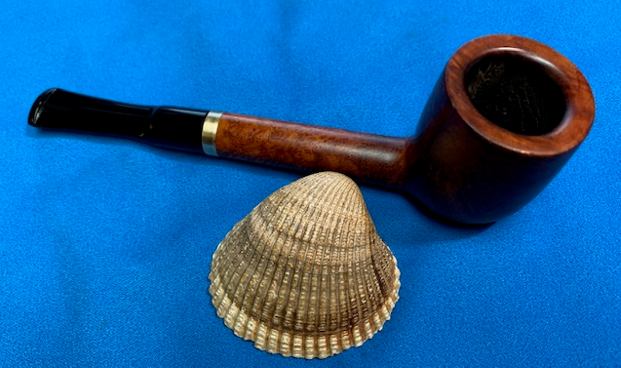
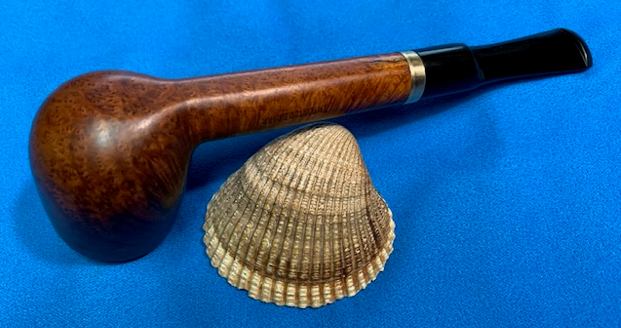
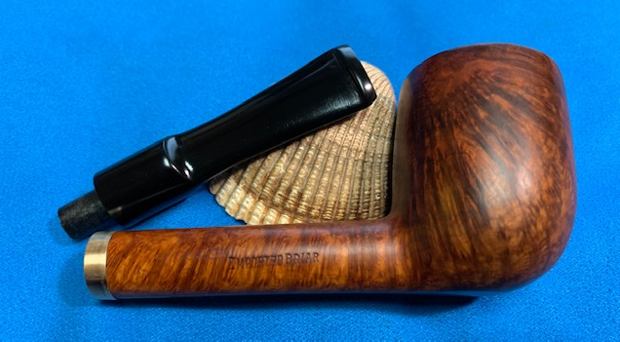
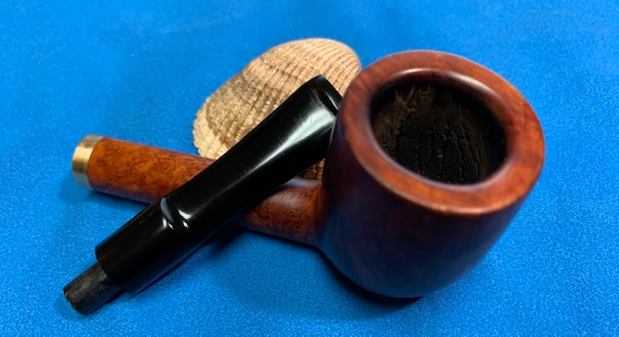
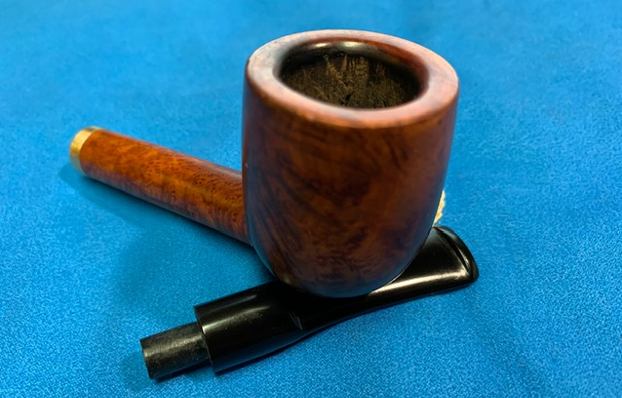
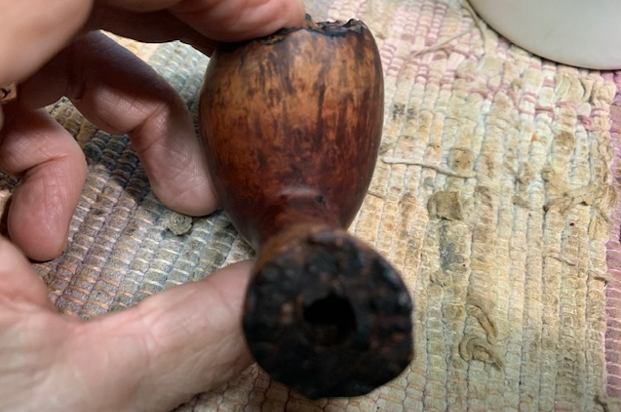
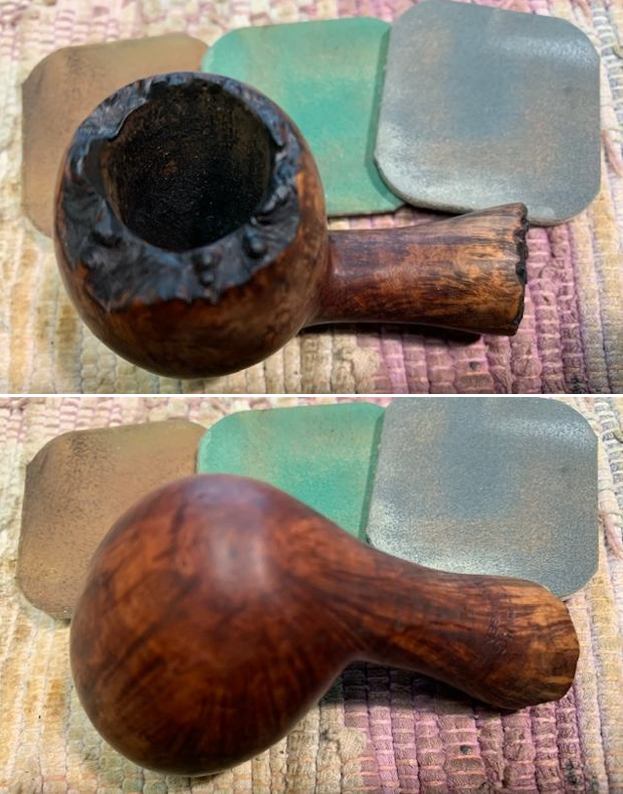
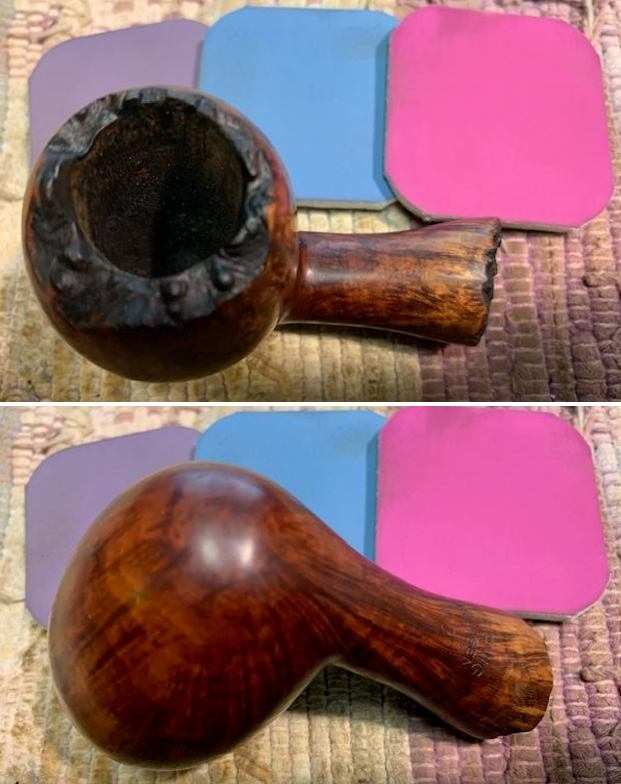
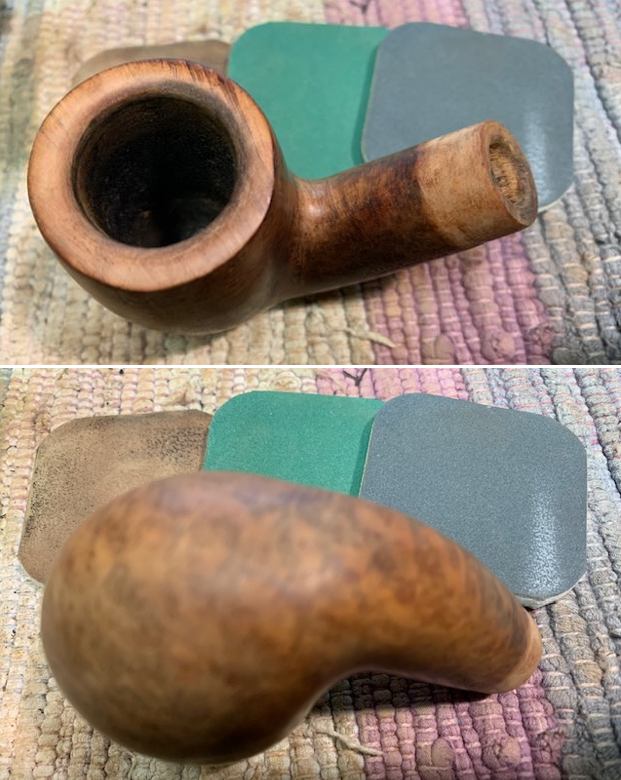
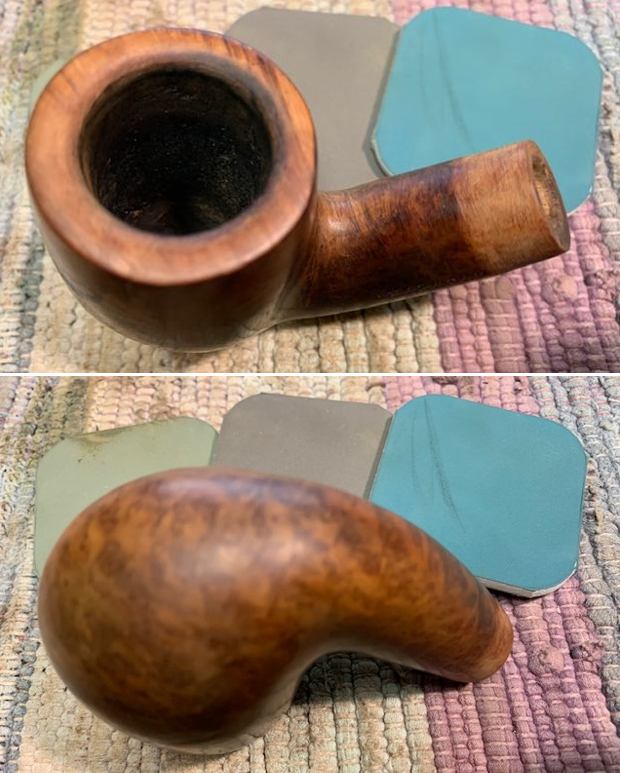
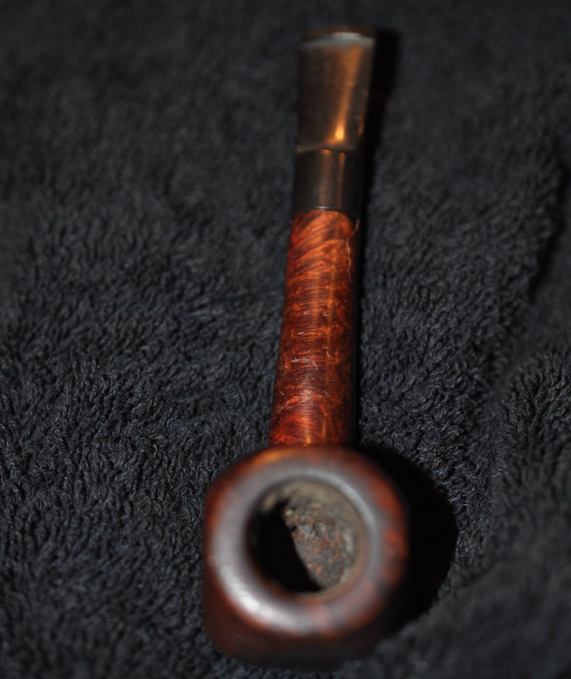
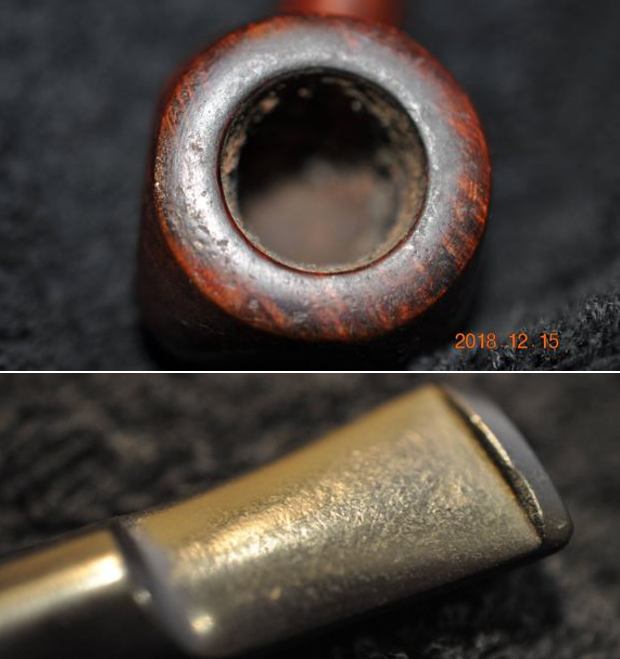
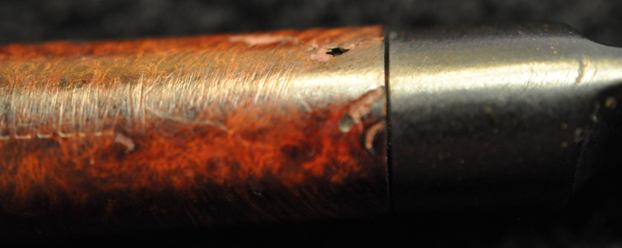
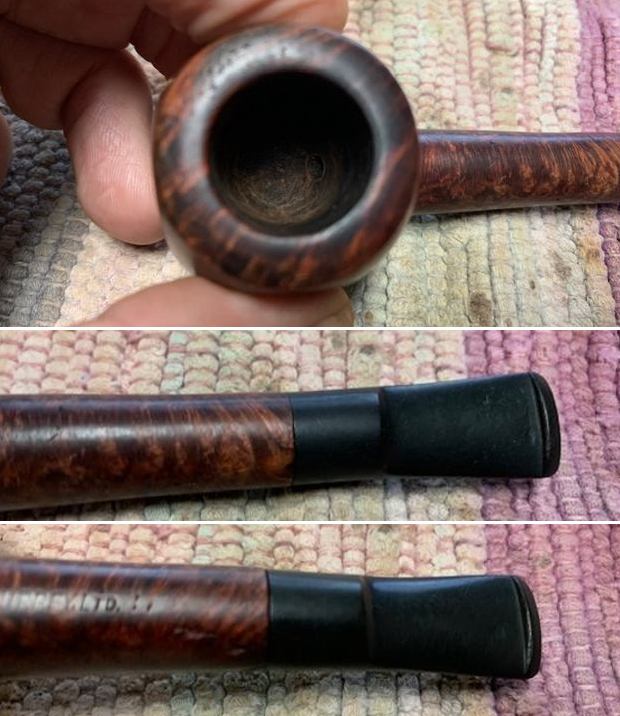
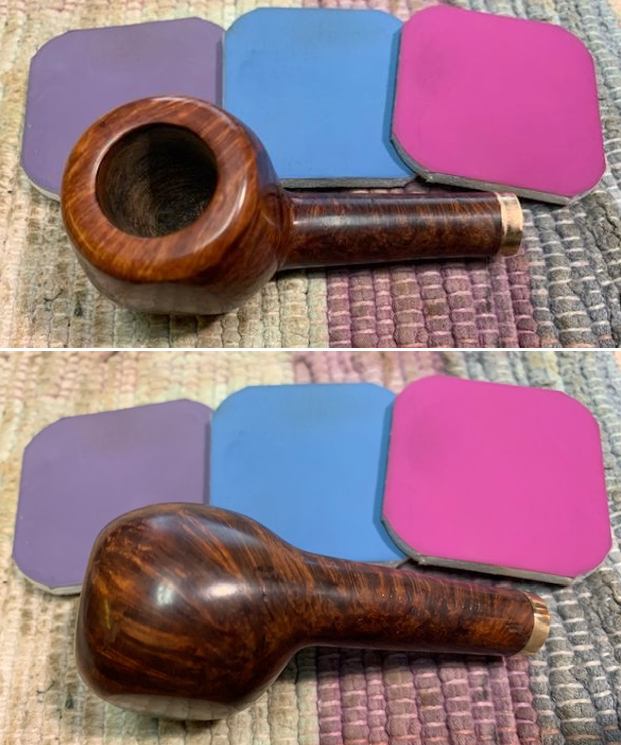
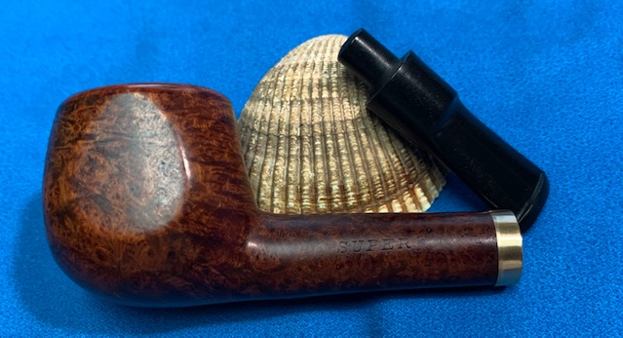
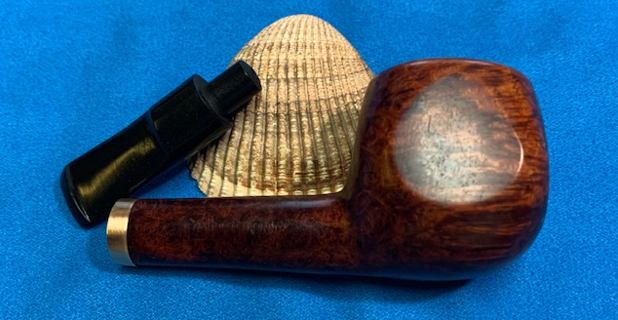
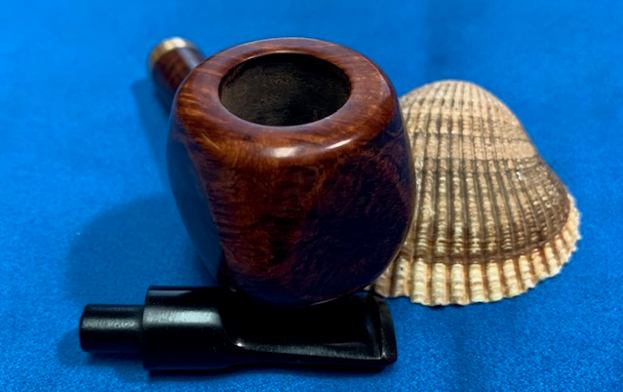
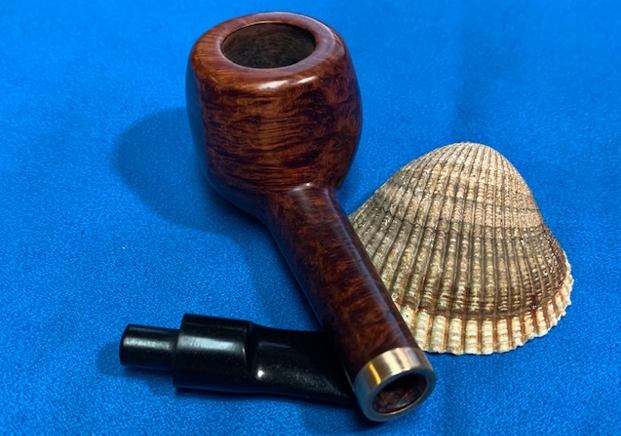
The English brand of Bewlay & Co. Ltd. (formerly Salmon & Gluckstein Ltd.), was in business from the early 20th century until the 1950s. The brand ended up being sold and taken over by Imperial Tobacco Co. The shop chain closed in the 1980s but there seems to be one shop still in business on Carr Lane in the city of Hull. Bewlay pipes were made by prestigious firms. Notably Barling, Charatan, Loewe & Co., Sasieni, Huybrecht, and Orlik. So understandably, the English considered a Bewlay pipe a quality pipe. Anyway, on to the pipe – and what a beauty it was. However, it was not without its issues. The stummel had the following problems: lava on the rim, a notable burn to the rim, plenty of cake in the bowl, strange stain patterns, and – most serious of all – a nasty crack to the shank. Meanwhile, the stem had its own set of problems: the ‘B’ logo was nearly obliterated, some oxidation and calcification, and minor tooth marks and dents. This pipe was not going to be too tough, but I needed to be especially careful to ensure the crack would be repaired perfectly – so it could be used for many years to come.
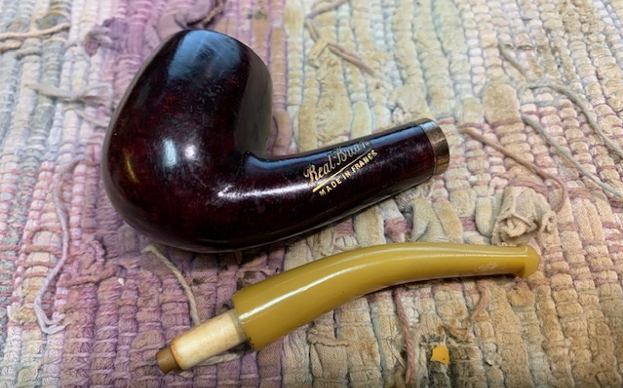
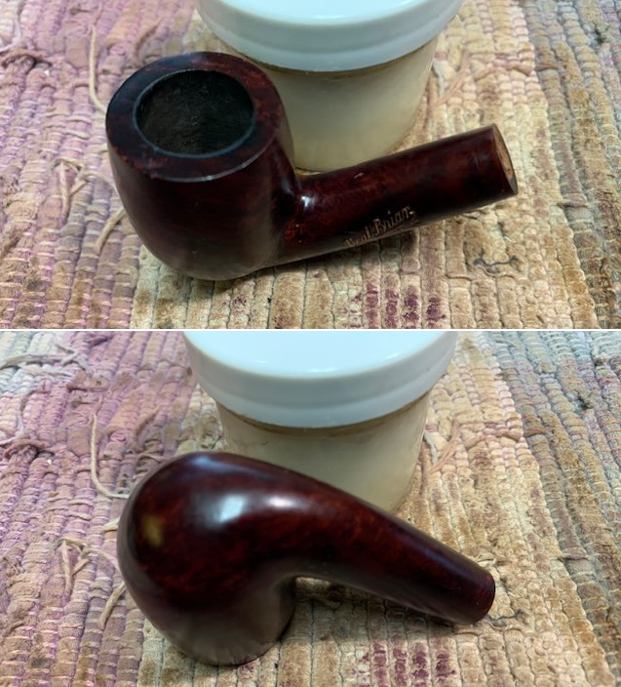
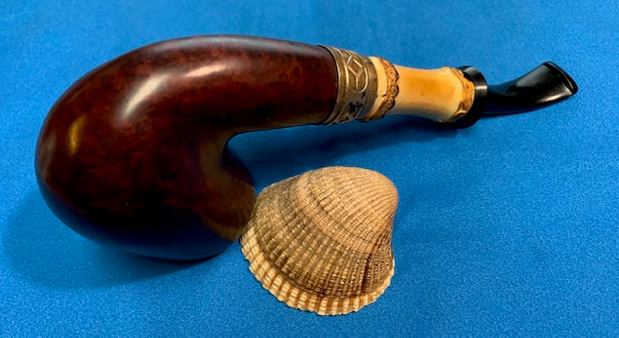
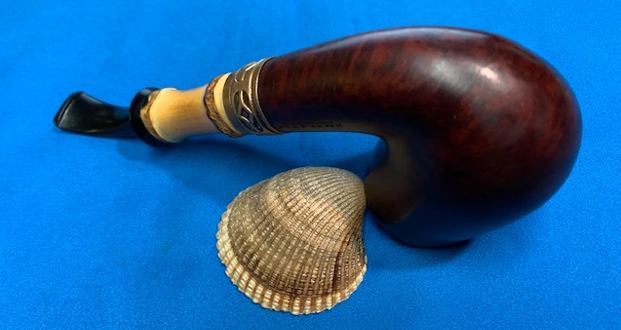
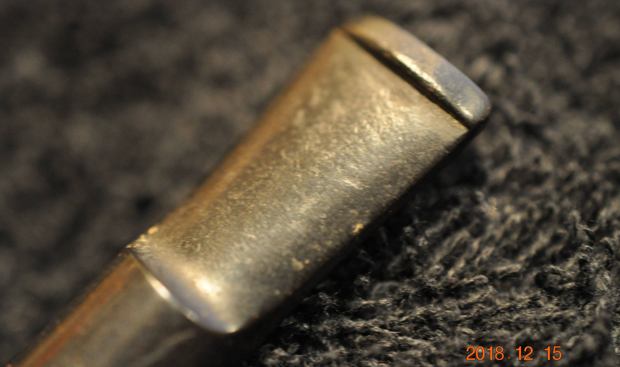
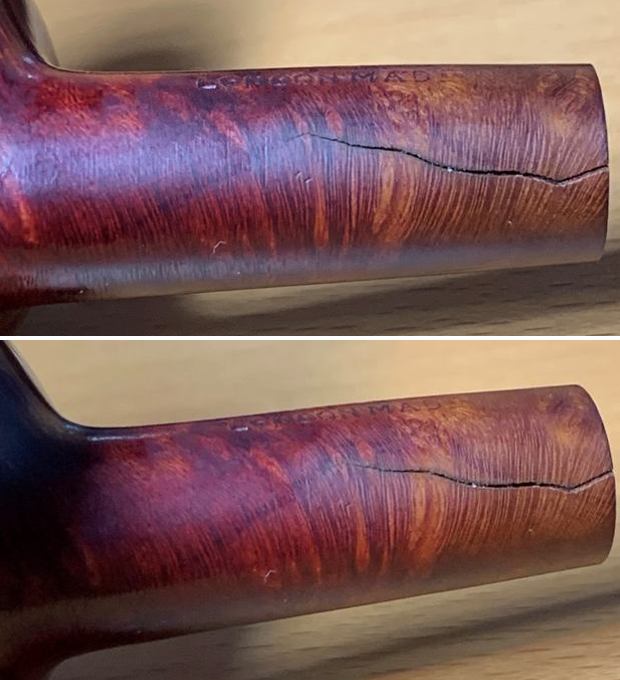
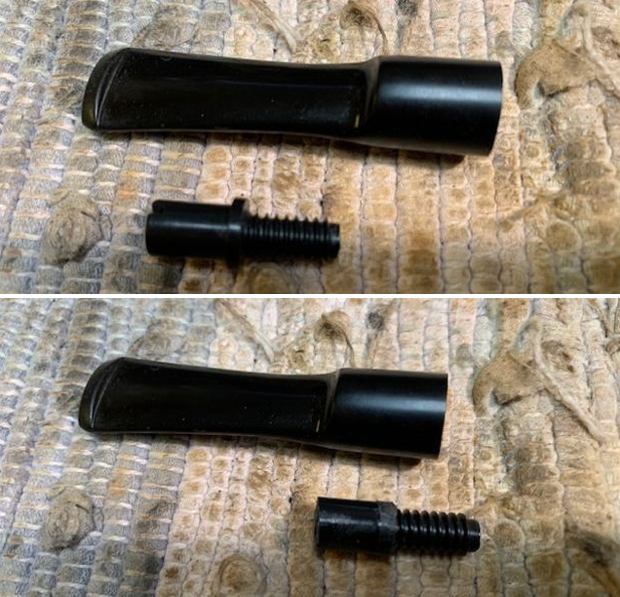
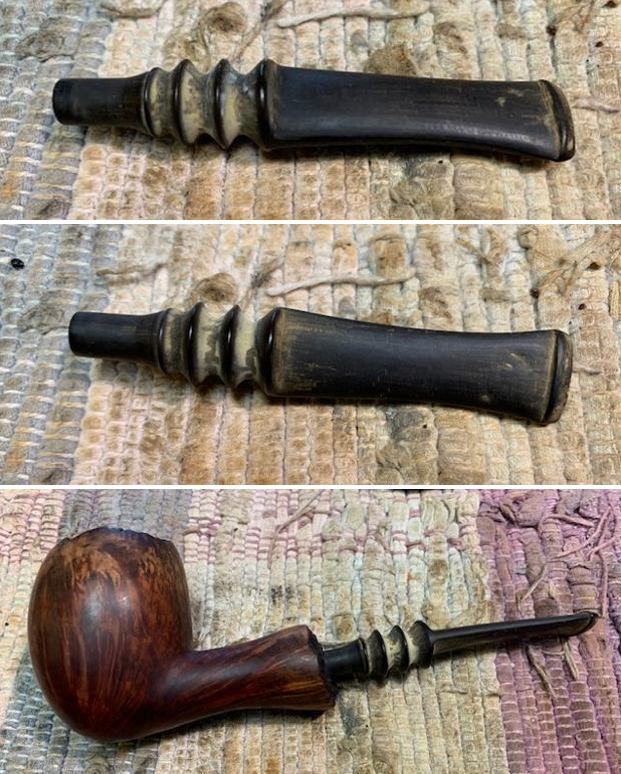
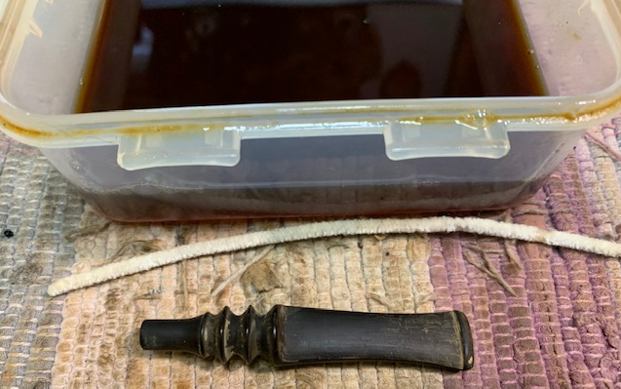
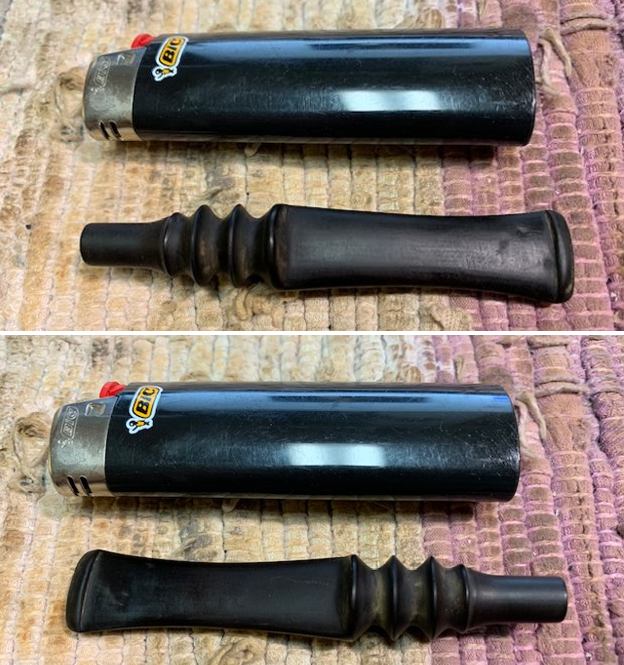
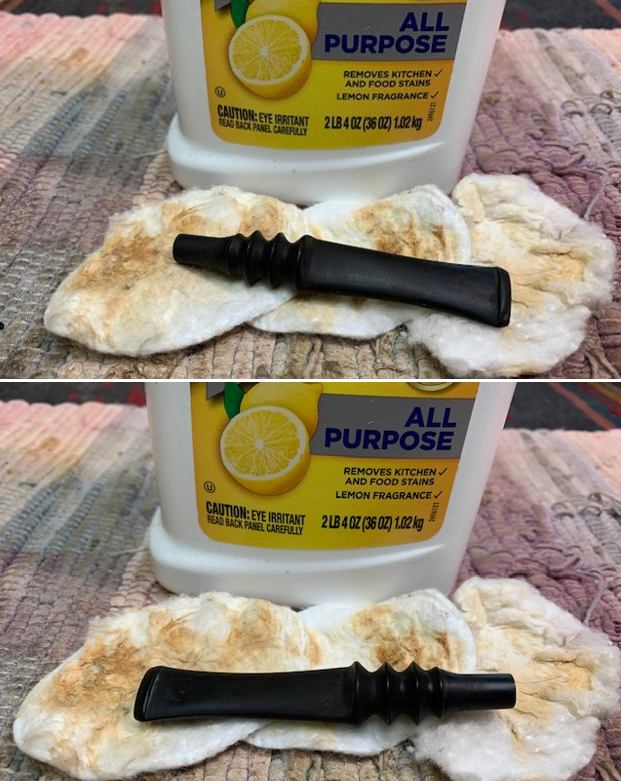
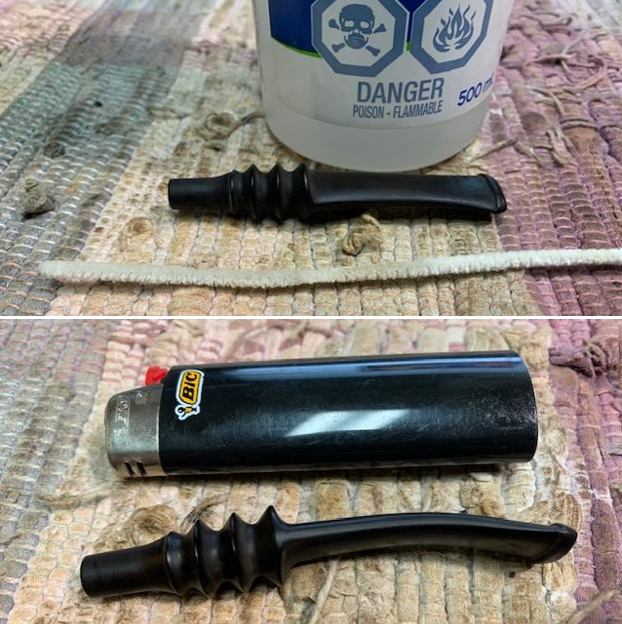
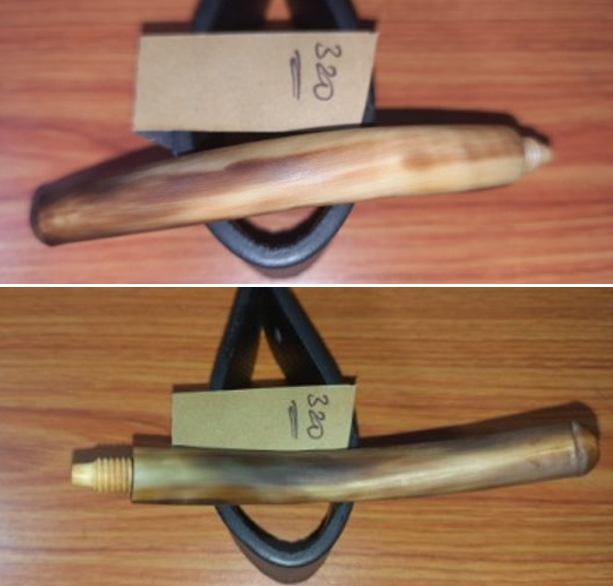
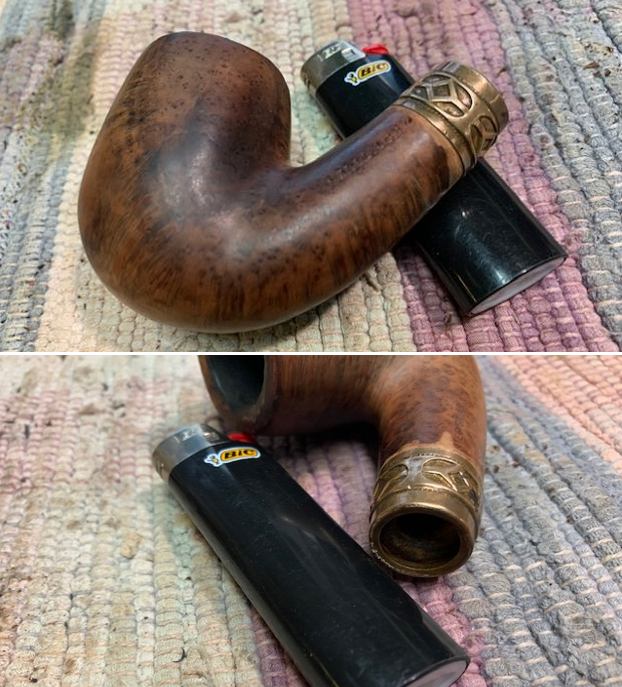
 The stem was first on my list. I took a BIC lighter and ‘painted’ the stem with its flame in order to lift the tooth marks. This was reasonably successful in raising the dents. Then, I cleaned out the insides of the stem with pipe cleaners and isopropyl alcohol. It was dirty, but not too bad and I went through a decent number of pipe cleaners in order to clean it up. I also soaked the stinger in lemon-infused isopropyl alcohol. This loosened everything up and I was able to clean it up very nicely.
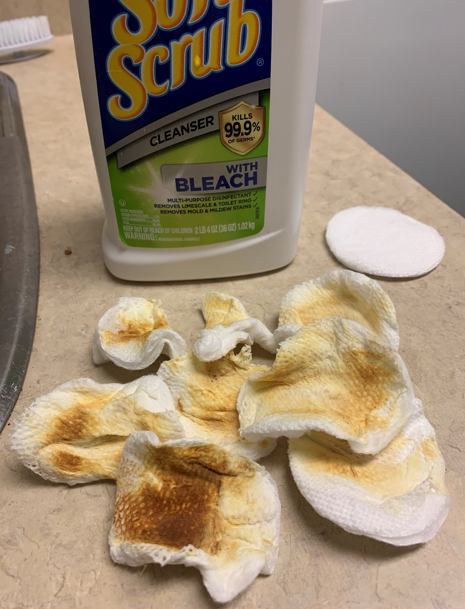
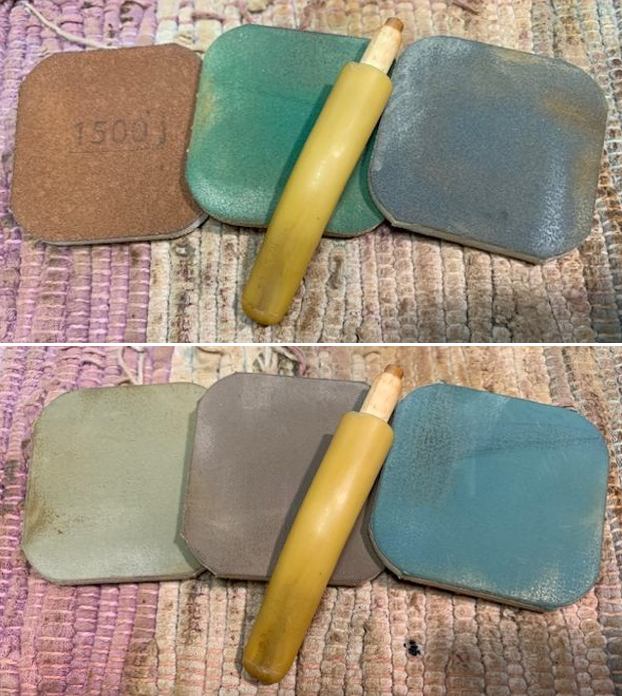
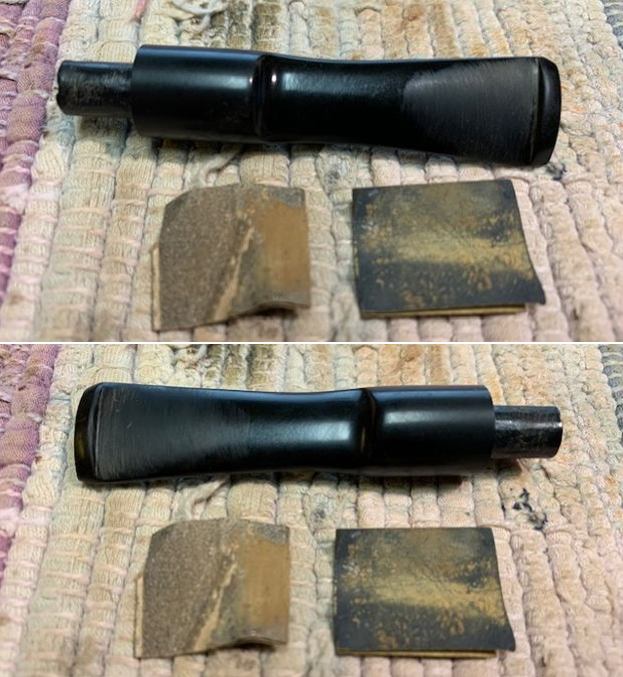
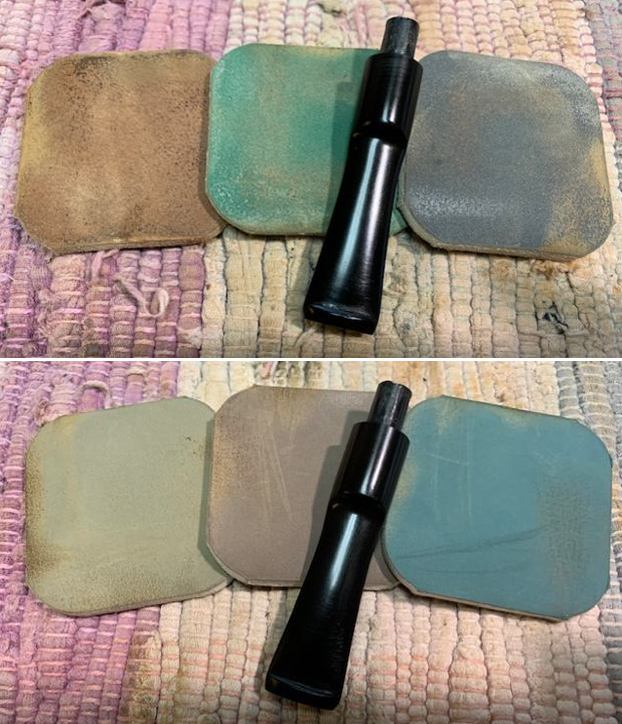
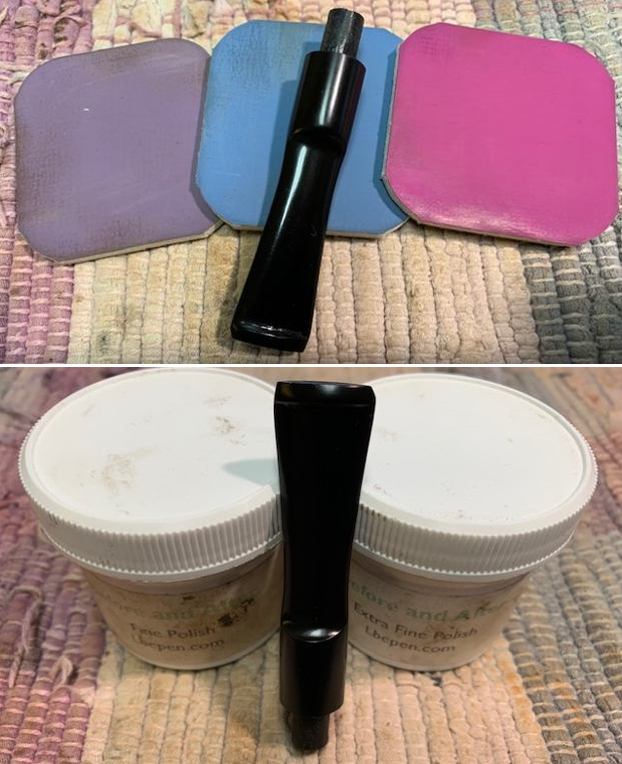
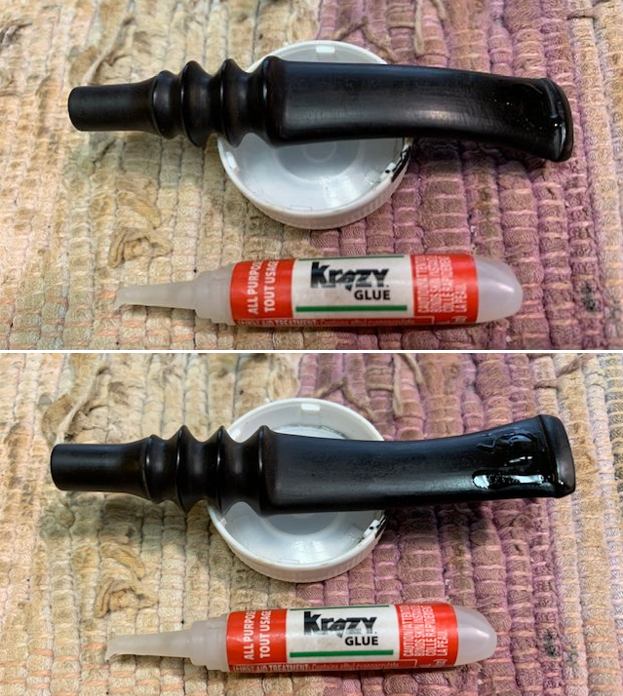
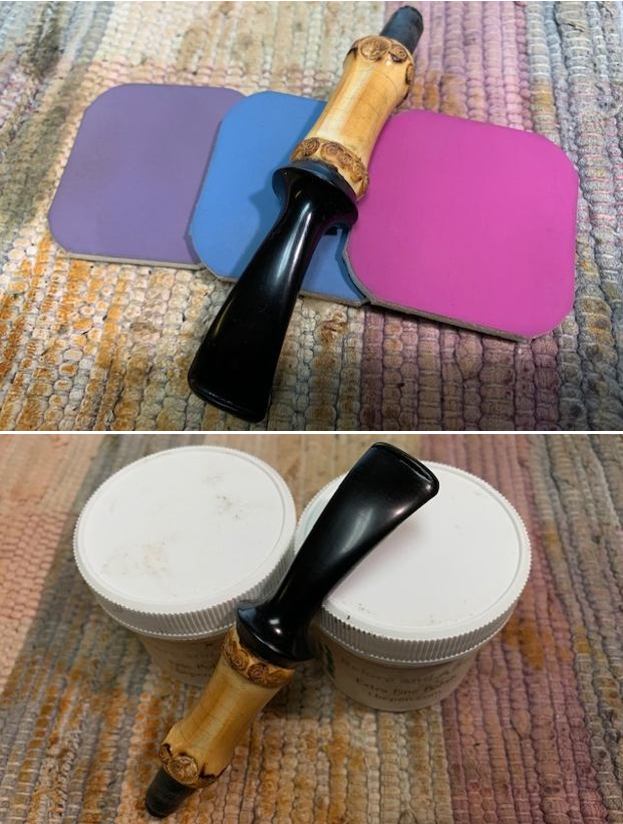
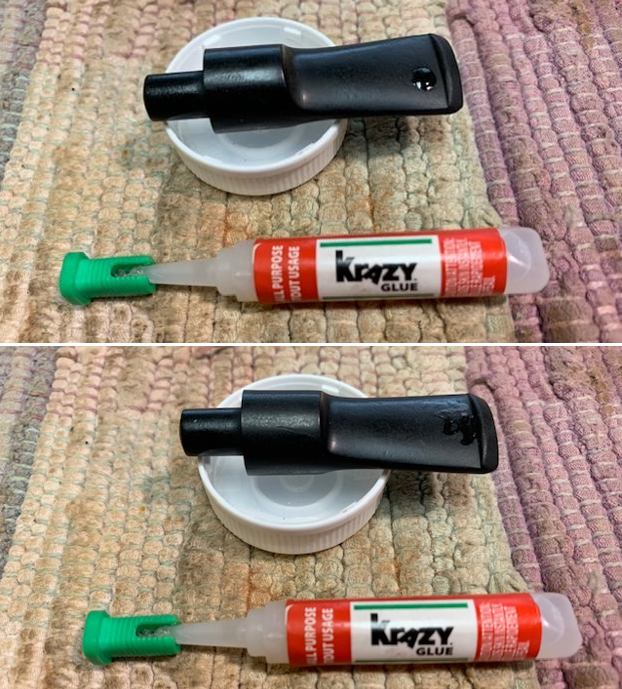
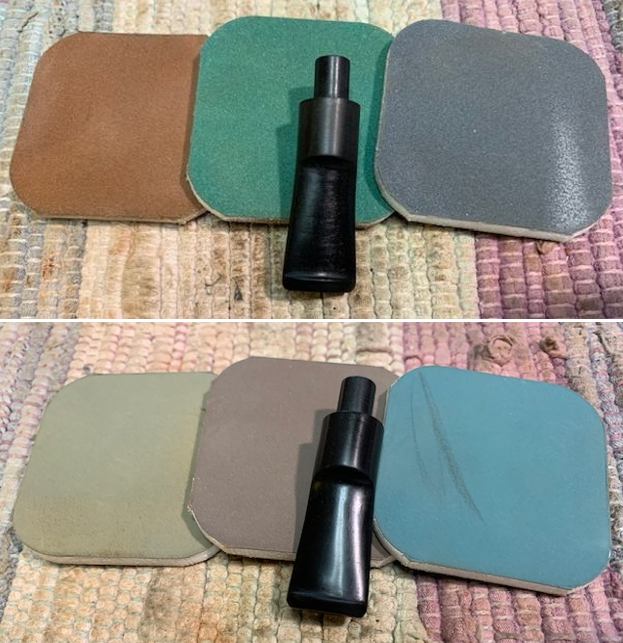
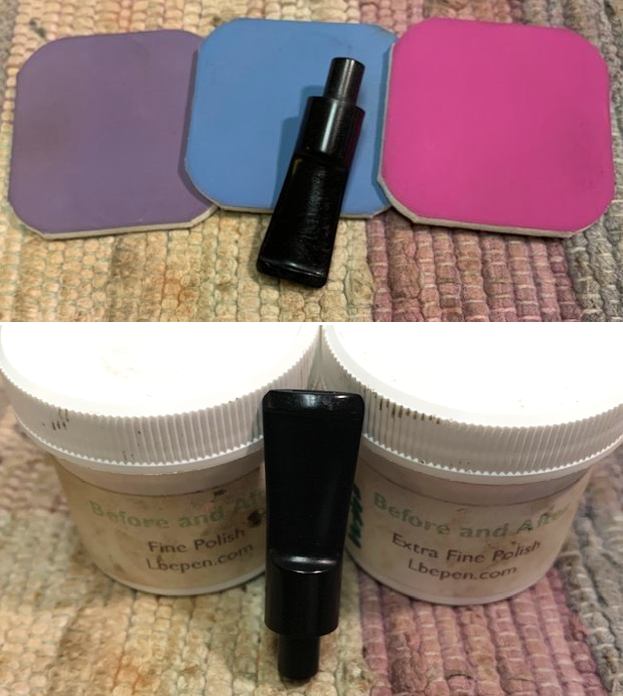
 Once this process was done, the stem went for an overnight soak in the Before & After Hard Rubber Deoxidizer. The following day, I cleaned all of the de-oxidizing sludge off with alcohol, pipe cleaners, et cetera. The oxidation had migrated to the surface and would be fairly straightforward to remove. I scrubbed vigorously with SoftScrub to remove the leftover oxidation. Before I moved on to the Micromesh pads, I built up the small dents on the stem with cyanoacrylate adhesive and let them fully cure. I then sanded it down with 220-, 400-, and 600-grit sandpapers to meld the repair seamlessly into the stem. This ensures that it keeps its shape and looks like it should. I then used all nine Micromesh pads (1,500 through 12,000 grit) to bring out the lovely black lustre on the stem. I also used Obsidian Pipe Stem Oil in between each pad scrubbing.
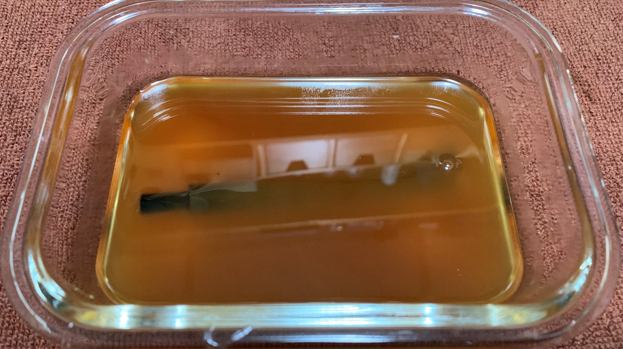
 I then took the opportunity to repair the “B” logo on the stem. It had faded – both by loss of paint over time and also by fingers inadvertently smoothing out the “B” over time. So, I added some acrylic paint with a paint brush, let it dry, and buffed it to make it look good. The “B” is back, but, as later photos reveal, a little bit has disappeared into history.
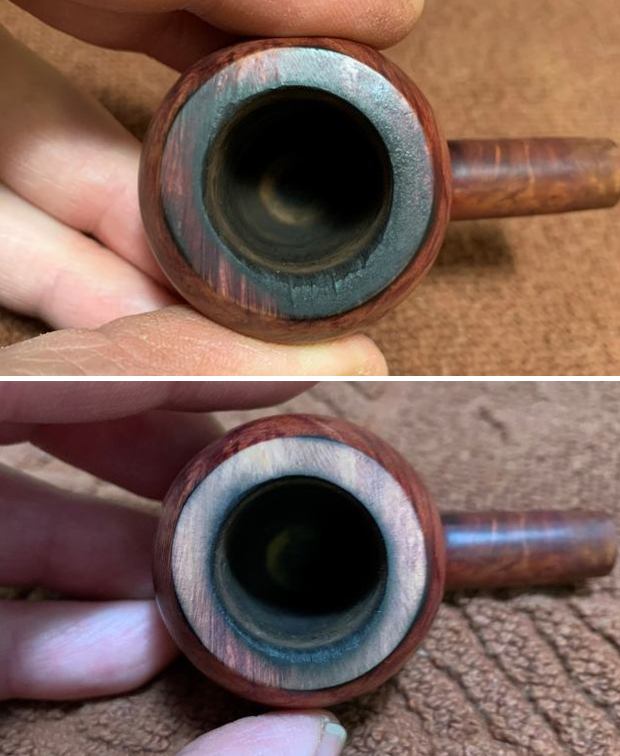
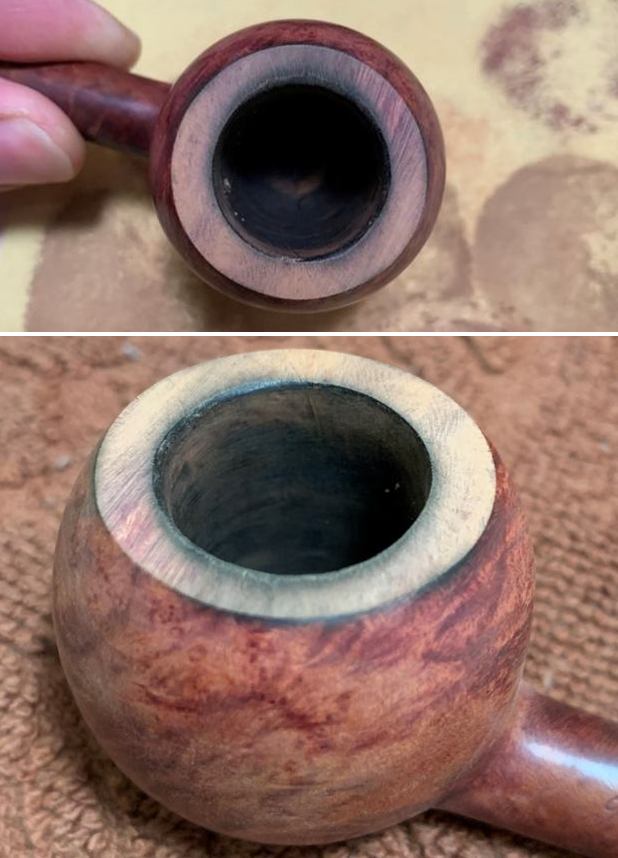
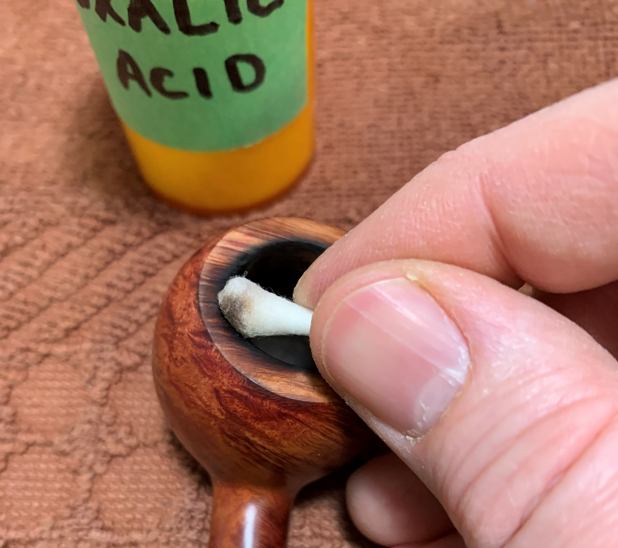
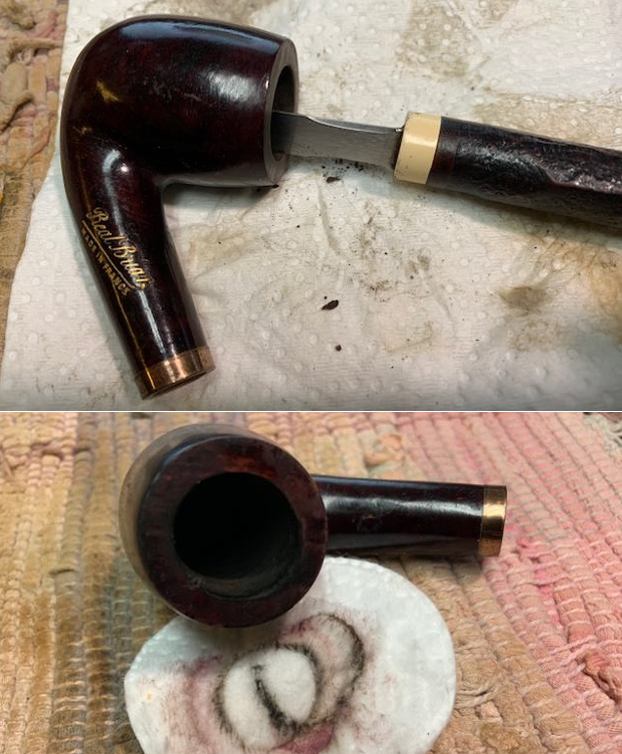
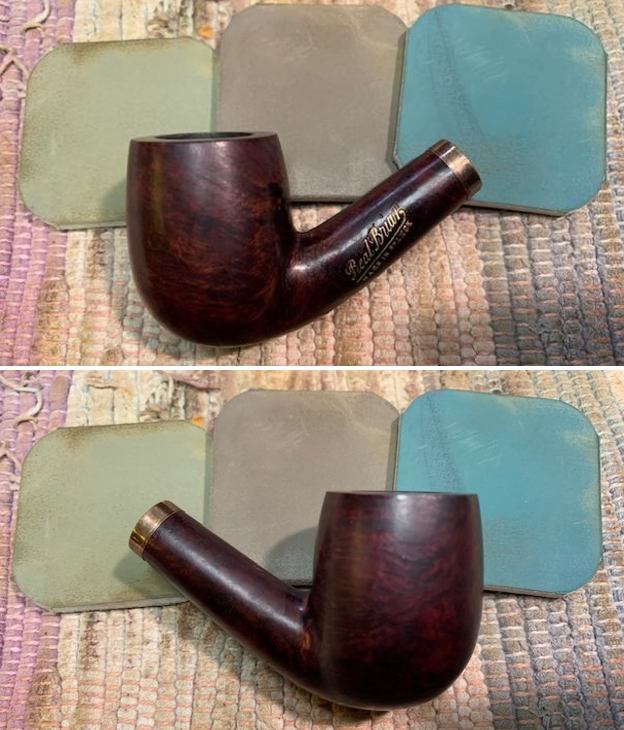
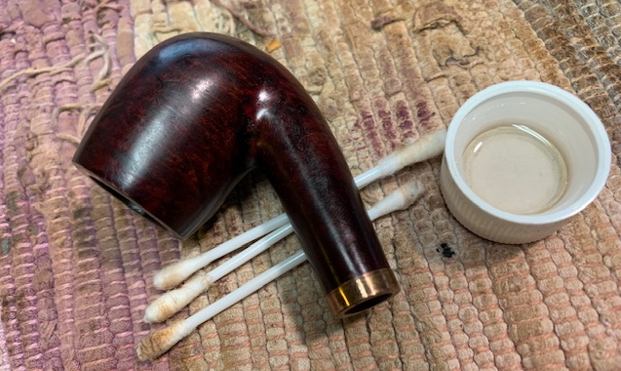
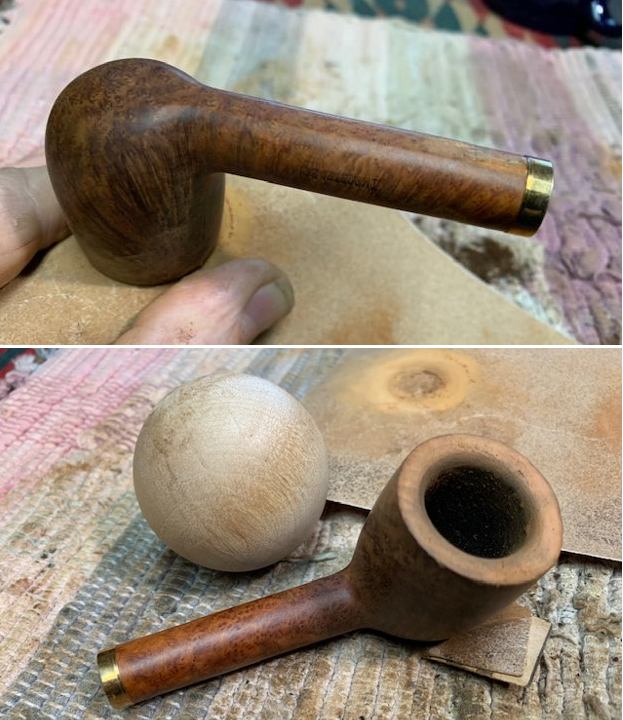
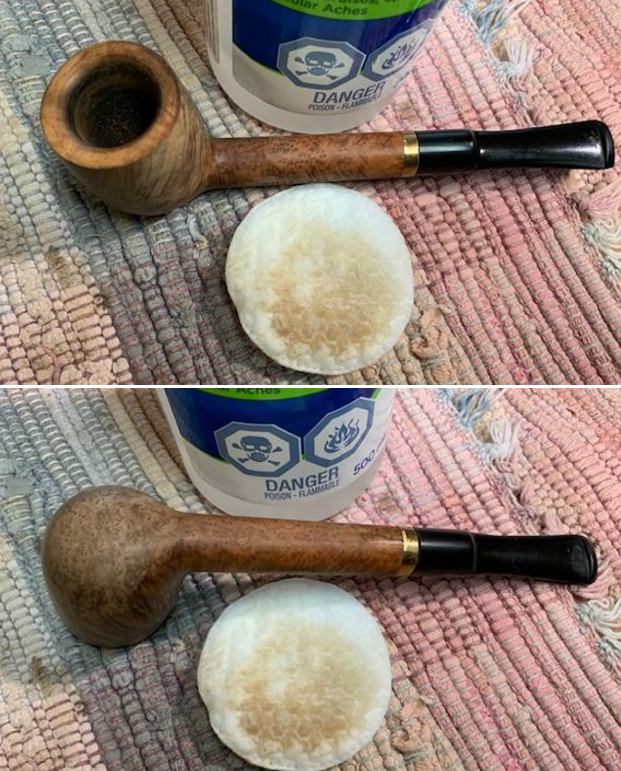
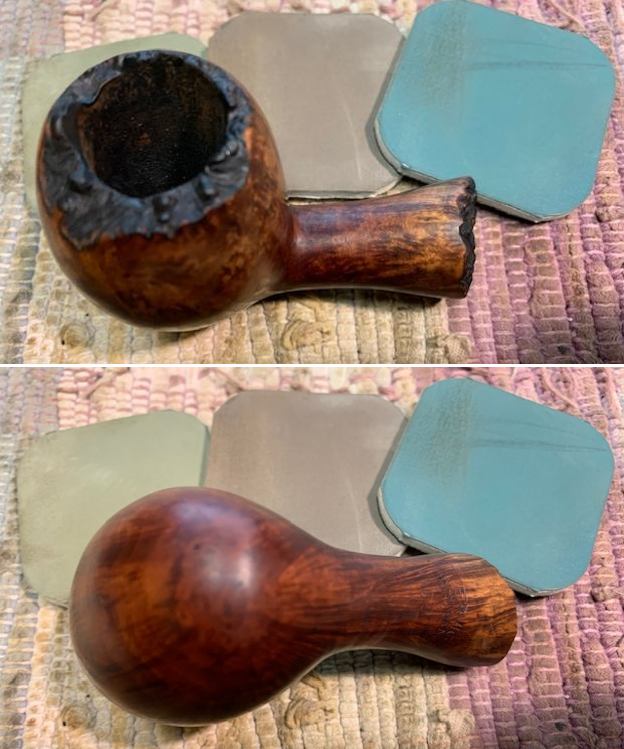
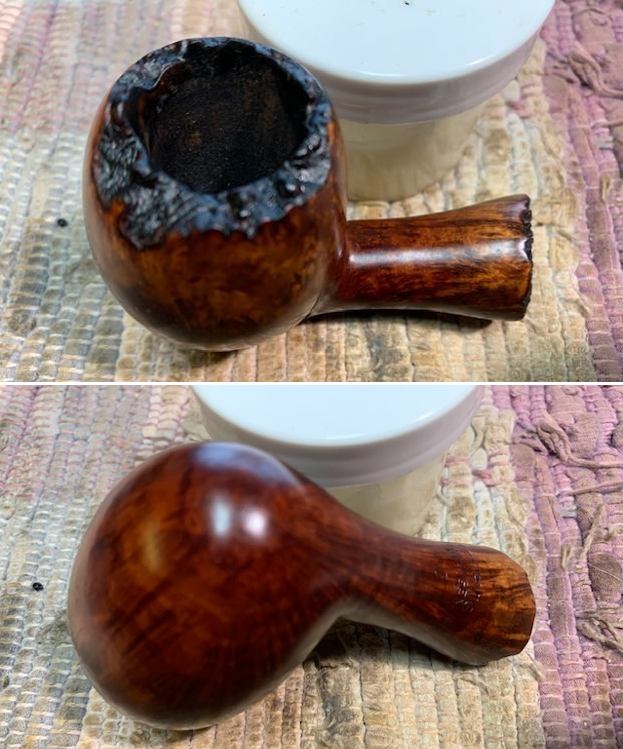
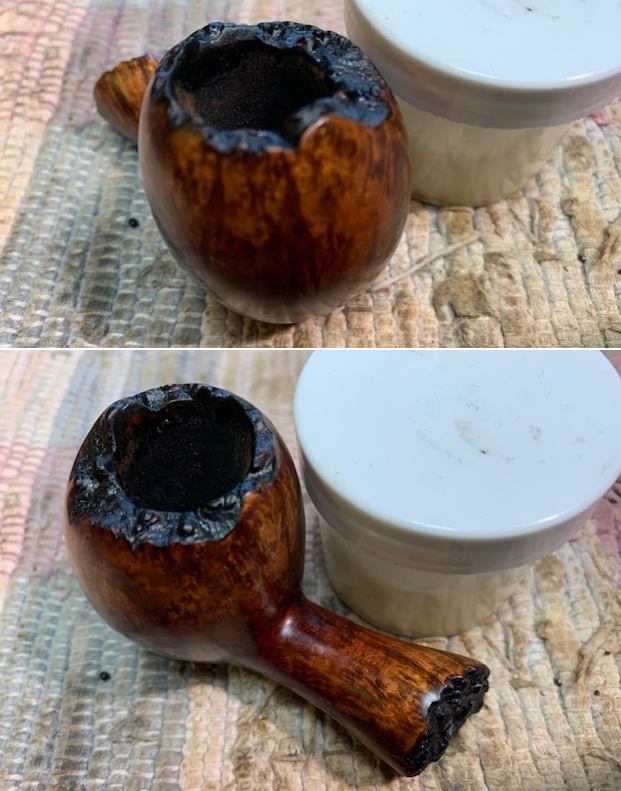
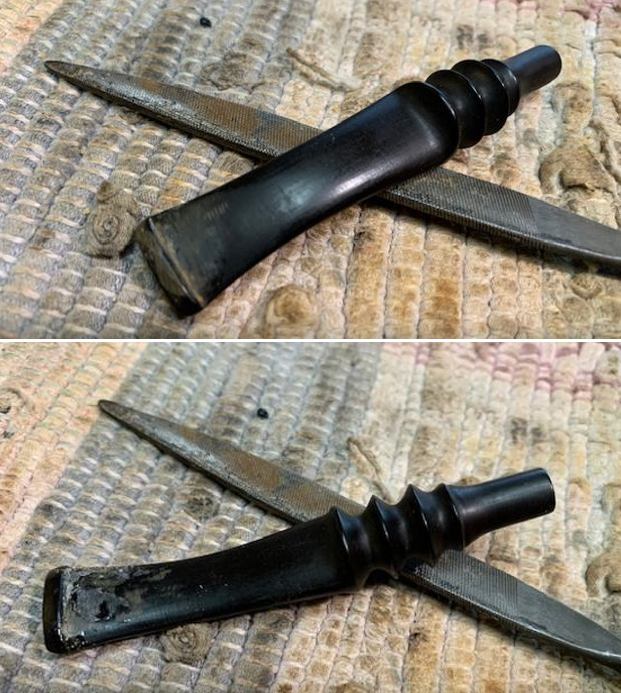
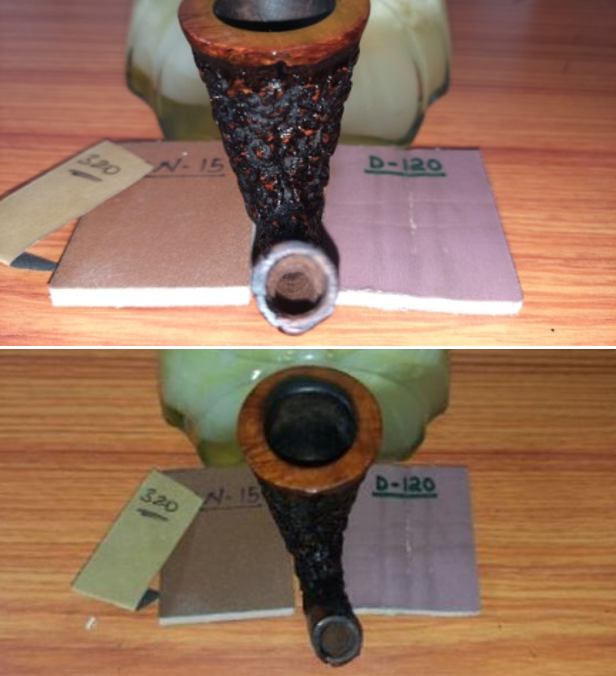
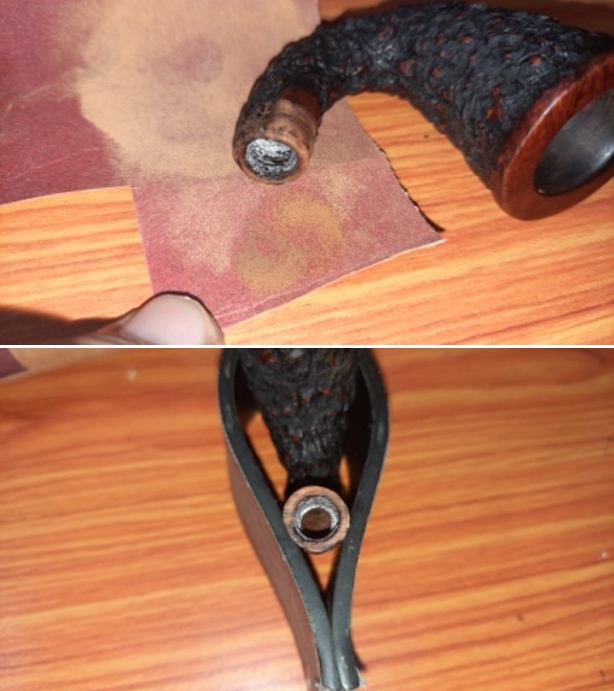
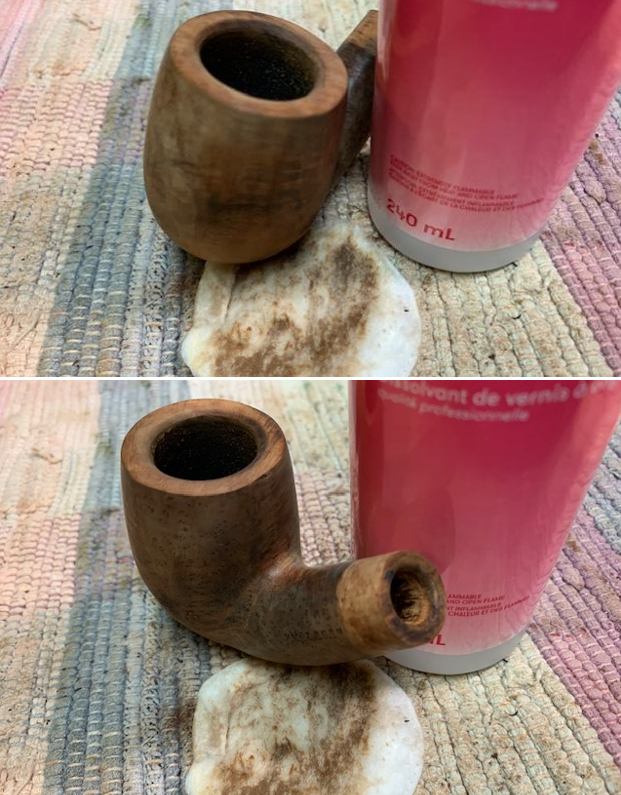
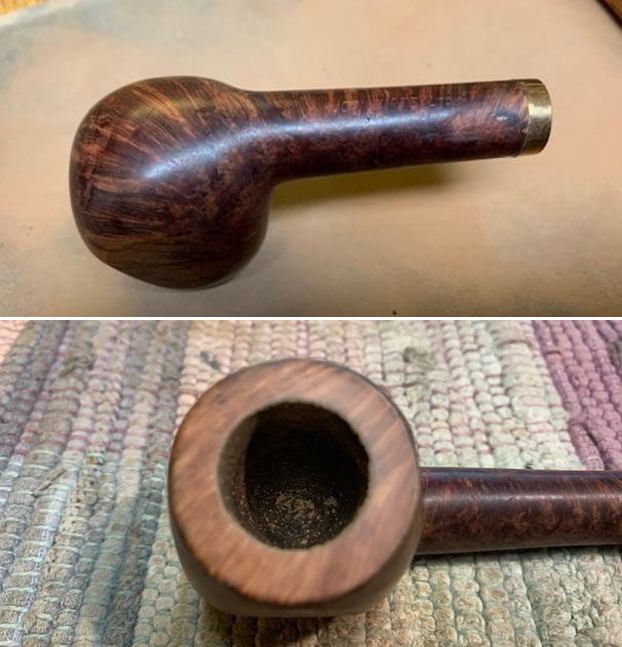
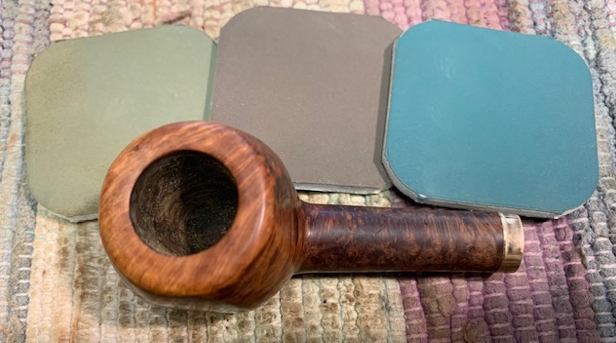
On to the stummel, and the usual cleaning procedures were in order for this pipe. I used both the PipNet Reamer and the KleenReem to remove the built-up cake and followed that with 220-grit sandpaper to remove as much as I could. I wanted to take the bowl down to bare briar to ensure there were no hidden flaws in the walls of the bowl. Fortunately, there were none. I then proceeded to clean out the insides of the shank with Q-tips, pipe cleaners, and isopropyl alcohol. There was some nastiness inside this stummel, but fortunately not too much – it only took a handful of pipe cleaners etc. to sort that out. I followed that up by cleaning the insides with some dish soap and tube brushes. I then moved on to cleaning the outside of the stummel with Murphy’s Oil Soap and some cotton pads. That removed any latent dirt. By the way, I deliberately did not de-ghost this pipe – I wanted to leave as much of the original tobacco essence as I could for the owner.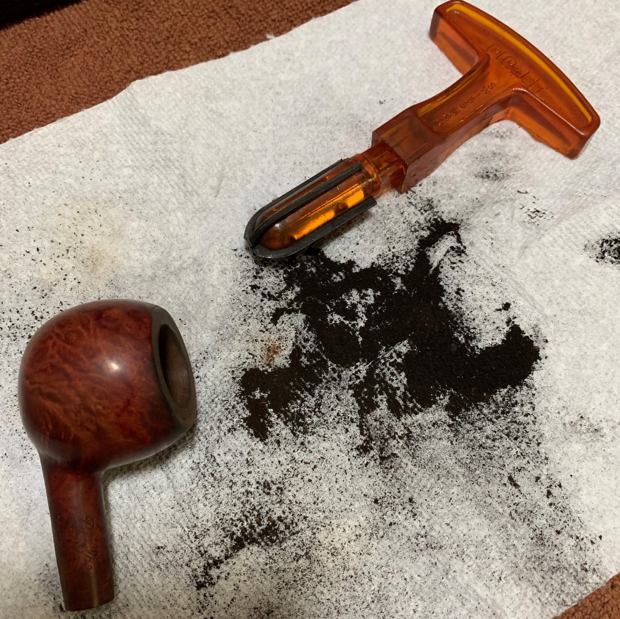 As I mentioned earlier, there was some lava and a substantial burn on the rim of the stummel that also needed to be addressed. In order to minimize the impact of both, I “topped” the pipe – that is to say, I gently and evenly sanded down the rim on a piece of 220-grit sandpaper. This effectively removed the lava and most the damage, without altering the look of the pipe. However, I had to stop short of removing it all, otherwise the look of the pipe would have been altered. For the remaining bits of burn, I took some oxalic acid on a Q-tip and rubbed and rubbed and rubbed! The burn site did improve but never fully disappeared. It would be a permanent feature of the pipe going forward. I took solace from the fact that the burn did not affect the integrity of the wood. I then took a solid wooden sphere, wrapped sandpaper around it, and gently sanded the opening of the tobacco chamber. This was to achieve on the inner part of the rim the same thing that I achieved by “topping” on sandpaper.
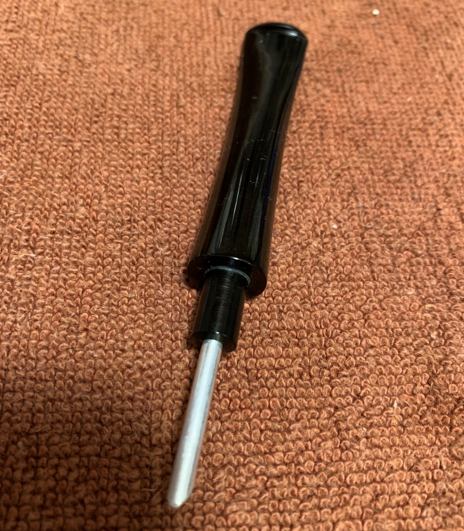
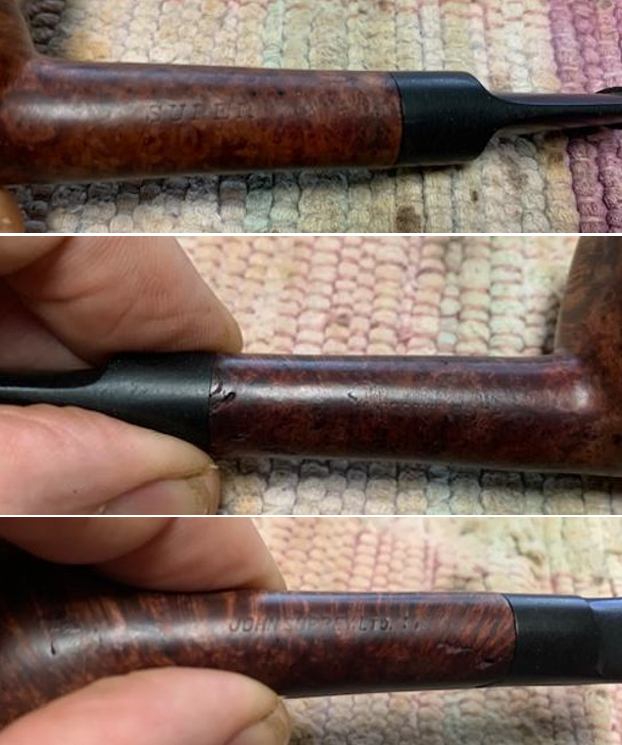
 On to the major issue with this pipe: the crack in the shank. Naturally, Steve had the answers to all of this pipe’s problems. He explained that my first step was to ensure that the crack would not continue to creep after I had repaired it. To that end, I took a micro-drill bit, inserted it in my Dremel, and very carefully drilled a hole right through the wall of the shank. This was quite nerve-wracking, but it worked perfectly.
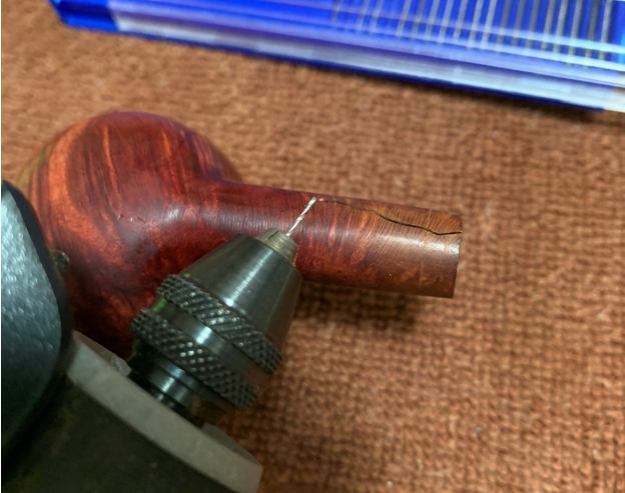
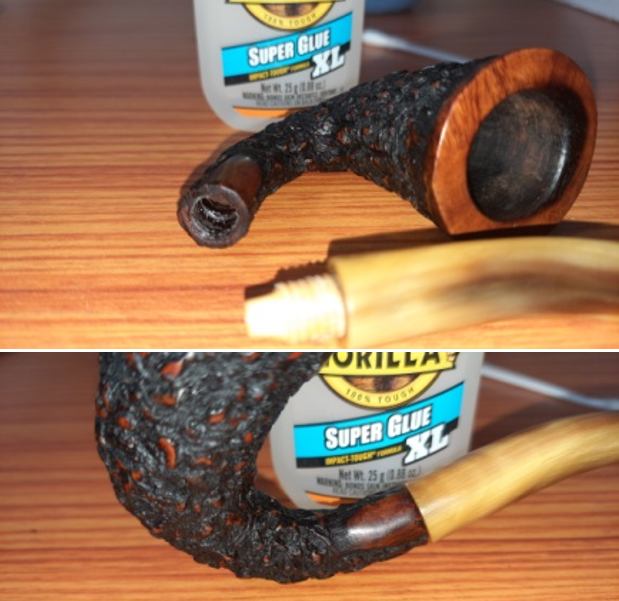
 I then needed to apply cyanoacrylate adhesive to the crack in order to seal and repair it. First, however, I used a Q-tip and a folded pipe cleaner to coat the inside of the shank with petroleum jelly. This would prevent the adhesive from dripping inside the shank and creating further problems. That done, I carefully applied a bead of adhesive to the tiny hole and the length of the crack. Finally, I clamped it shut and let it sit overnight to cure. This was a great success – obviously, the crack would always be visible, but I was really pleased with how the repair looked.
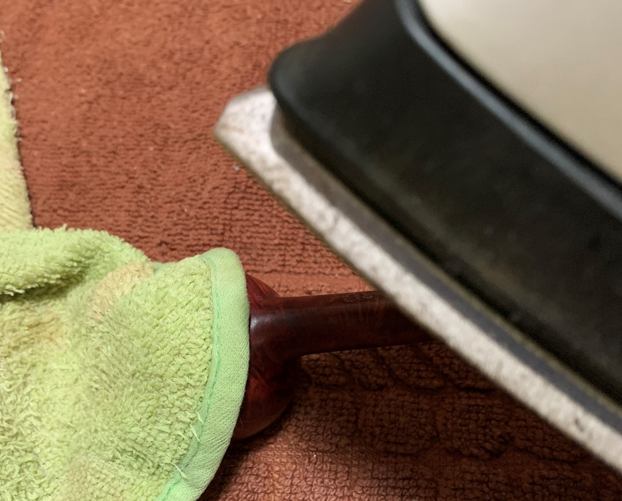
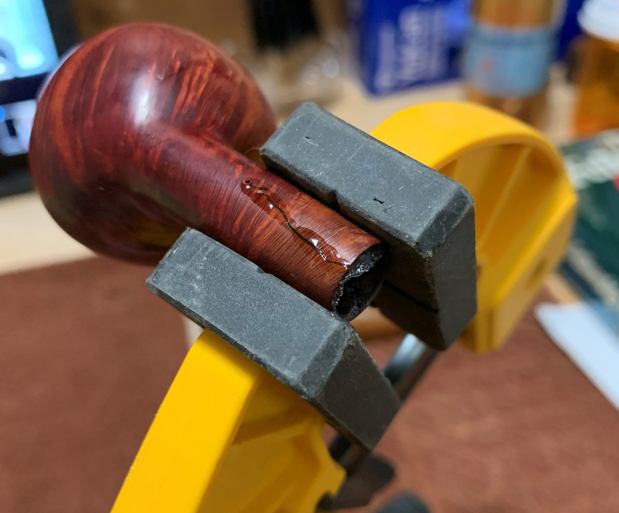 Before moving on to sanding, there were a couple of small nicks on the underside of the stummel that I needed to sort out. I dug out my iron and a damp cloth to try and raise the nicks. The hot and moist steam created can often cause the wood to swell slightly and return to shape. There was some movement – not a lot, but it was better than doing nothing. I filled the remaining divots with cyanoacrylate adhesive.
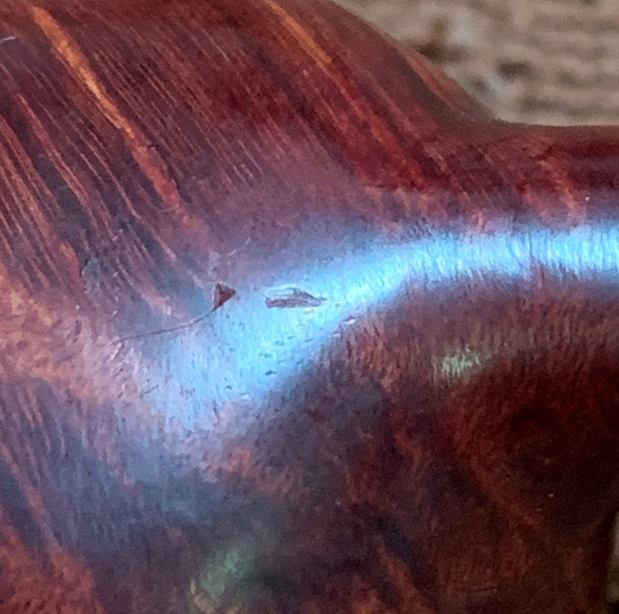
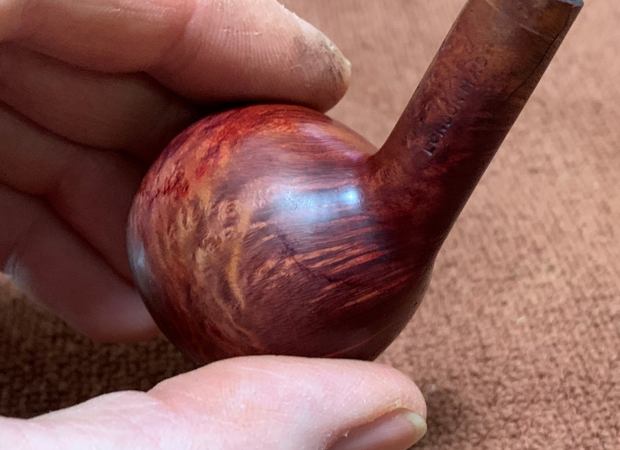
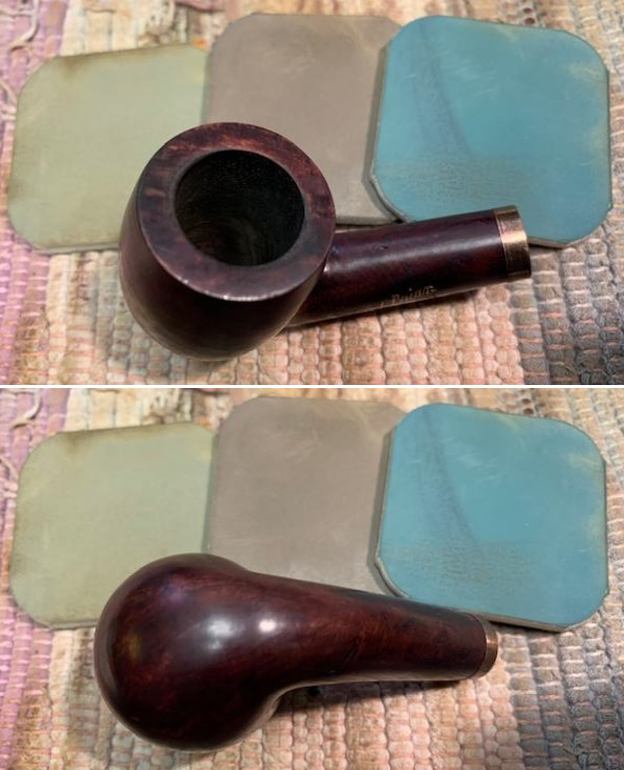
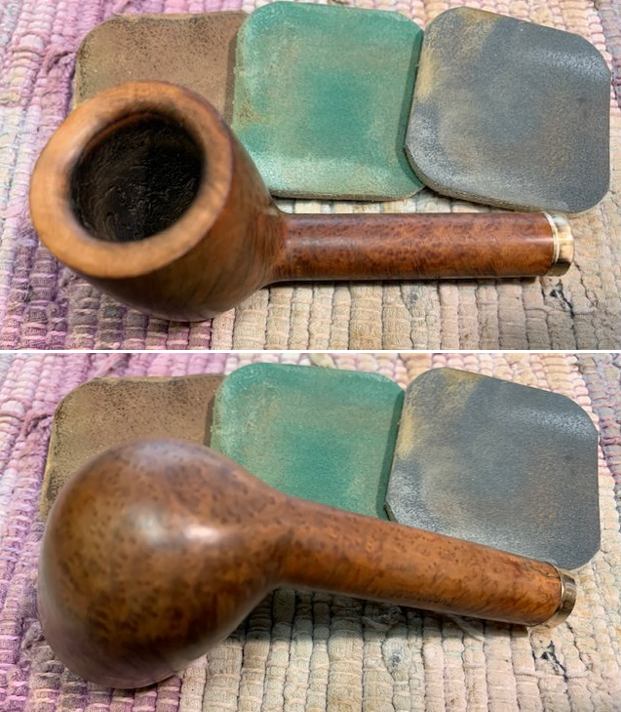
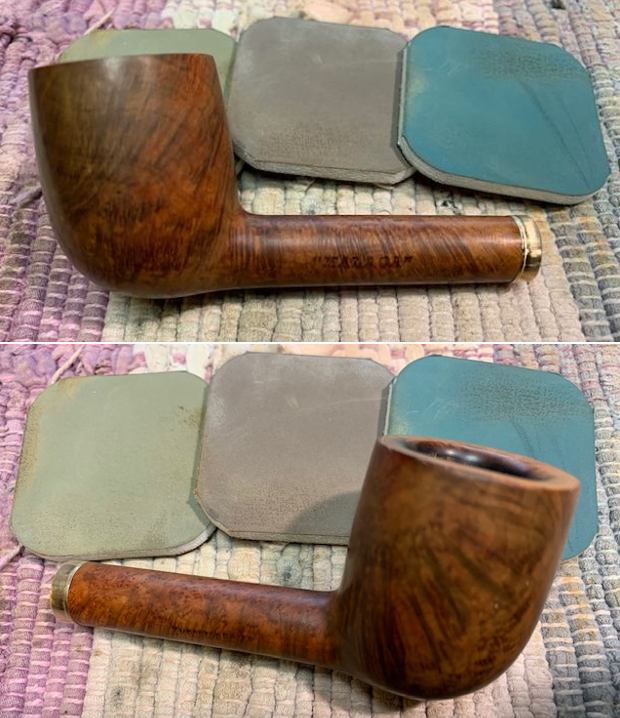
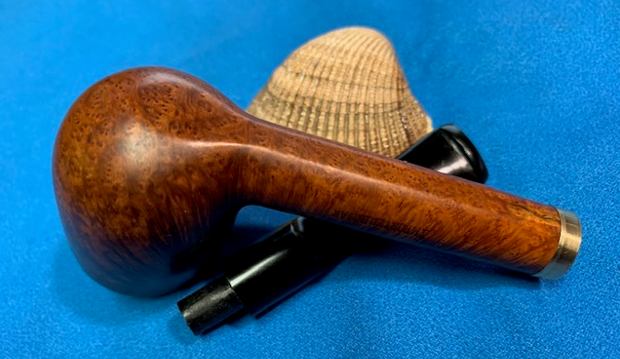
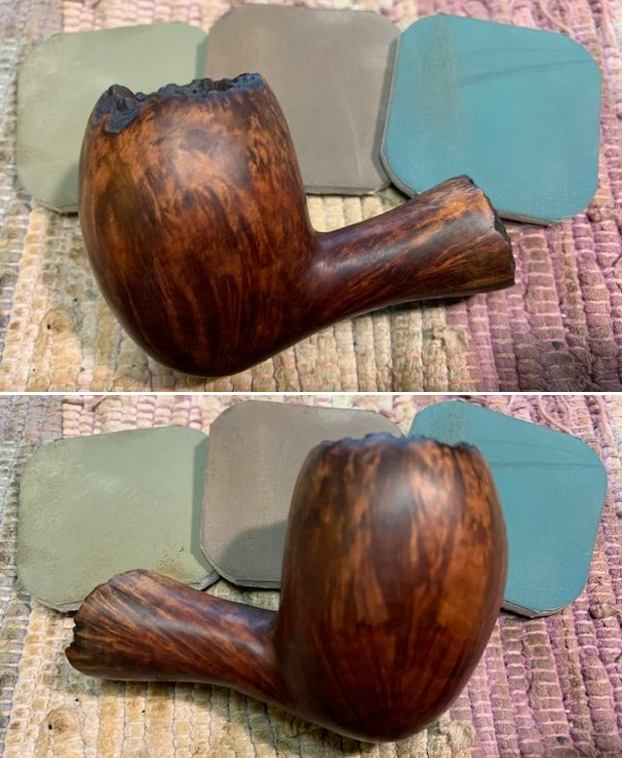
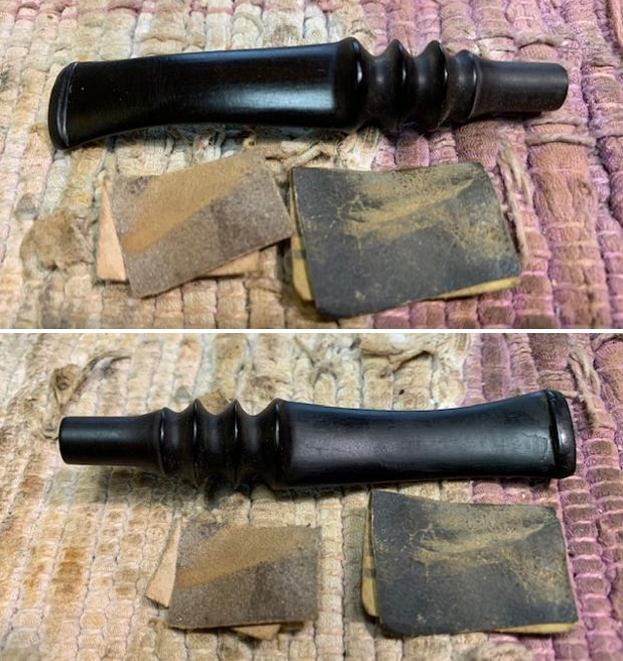
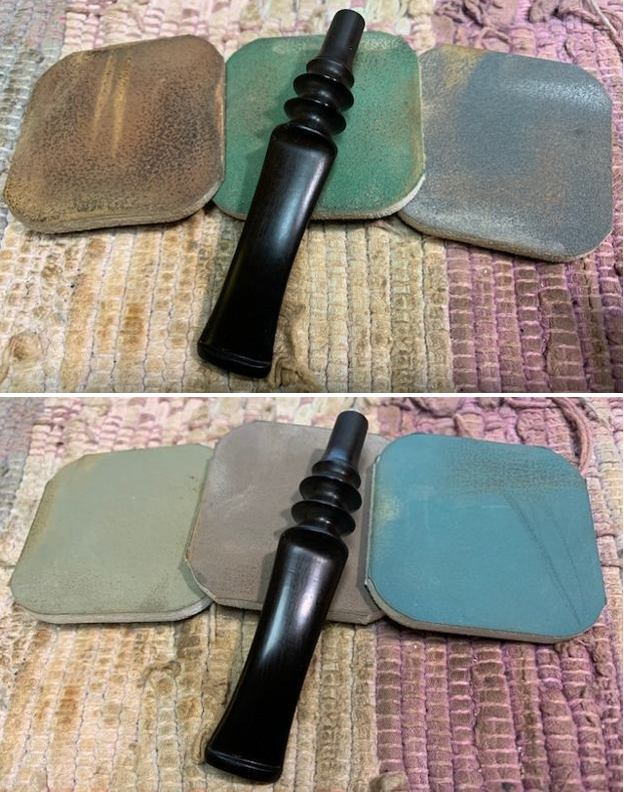
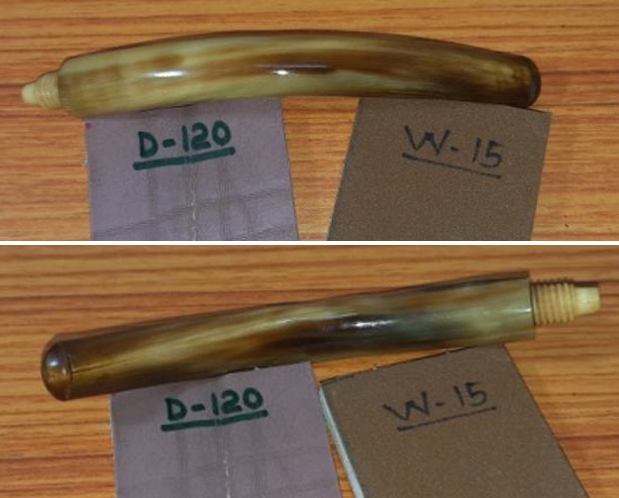
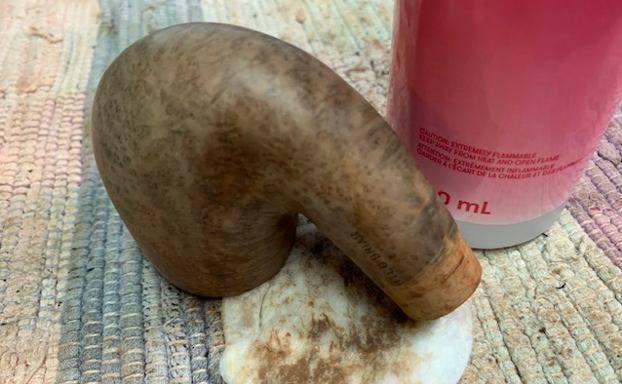
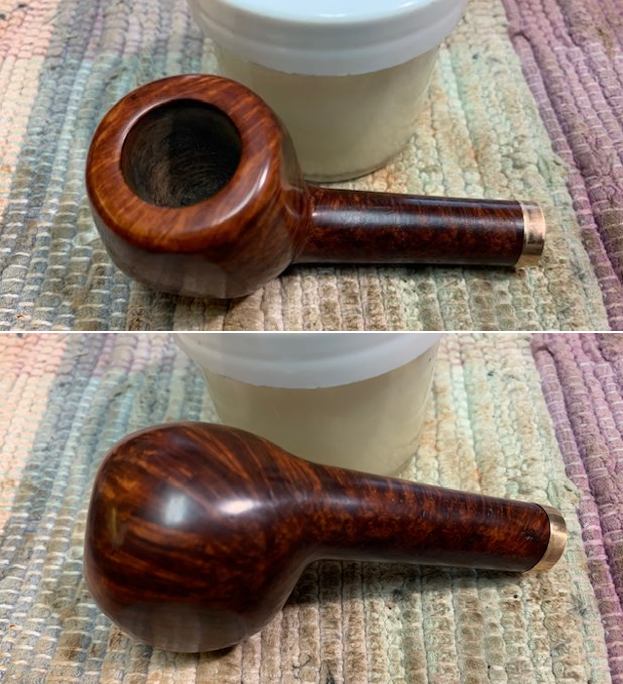
 Now, with the crack repaired and the nicks filled, it was time to sand down the stummel. Just like the stem, I used all nine Micromesh pads (1,500 through 12,000 grit) to sand everything smooth. A light application of Before & After Restoration Balm brought out the best in the stummel’s grain.
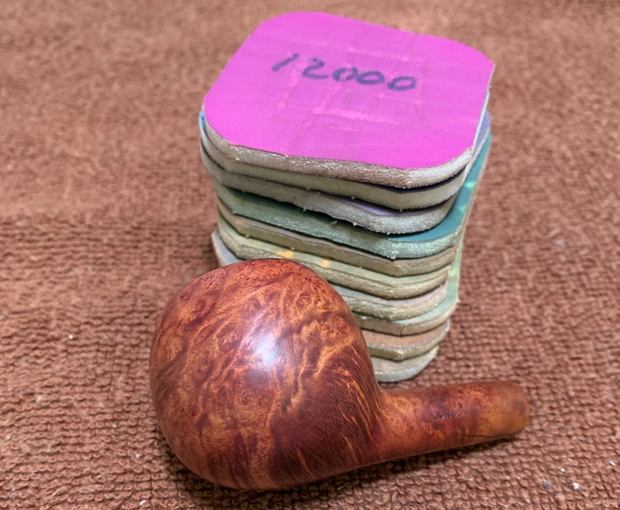
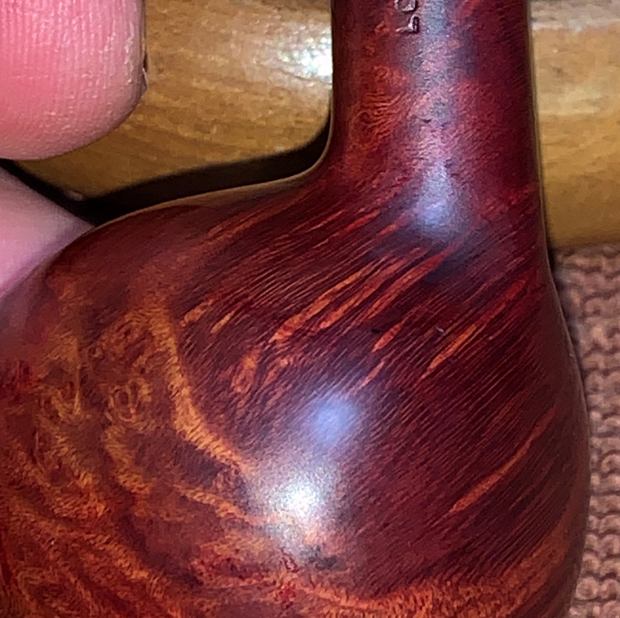
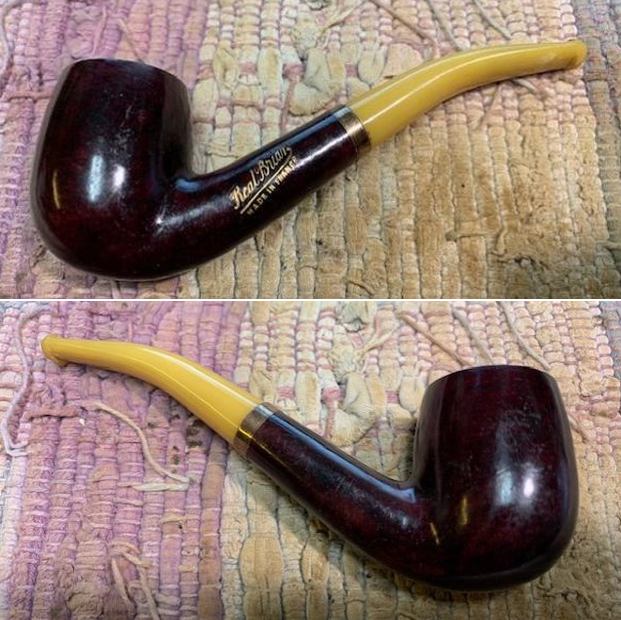
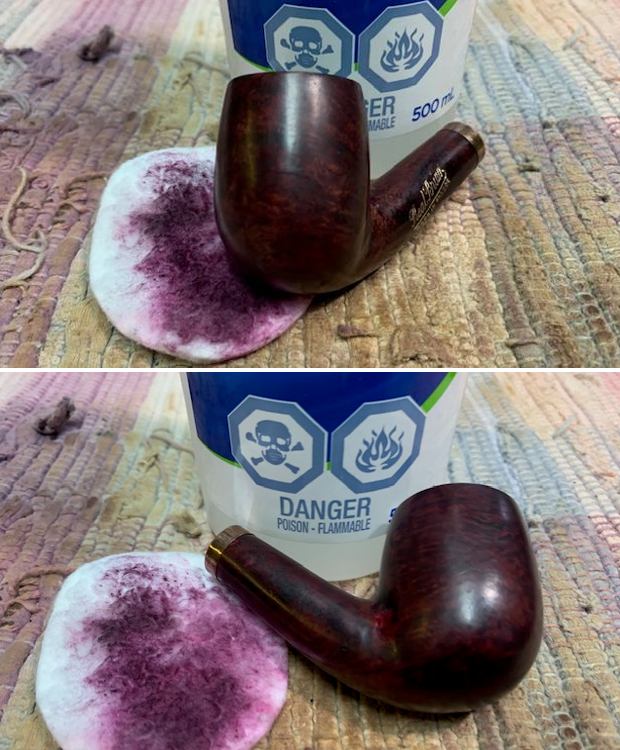
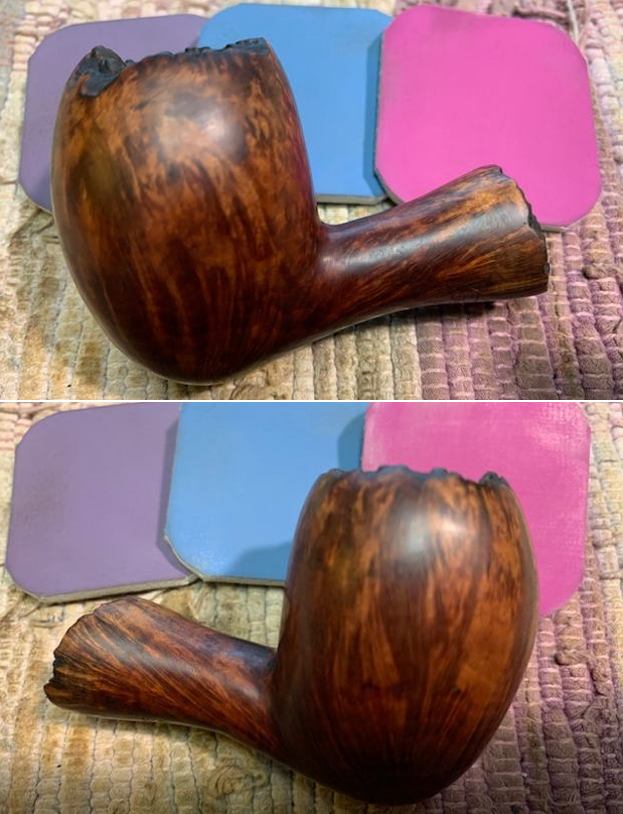
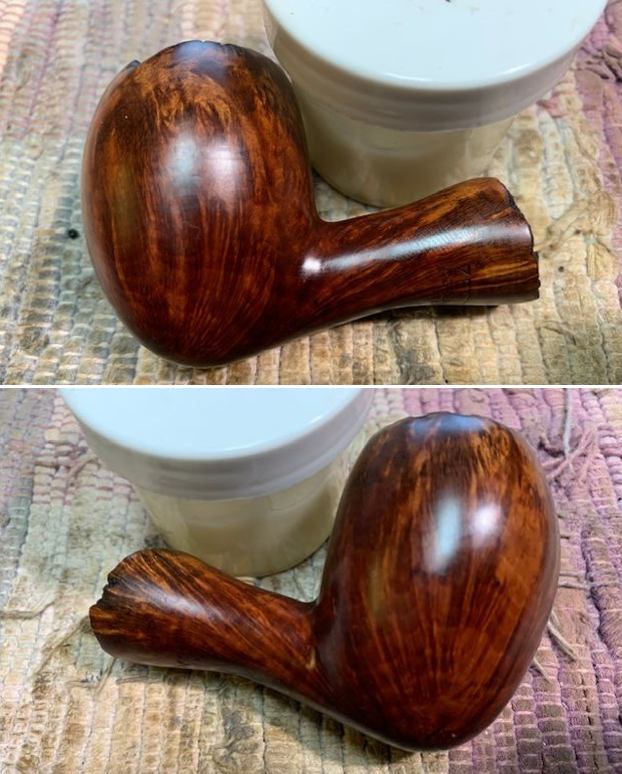
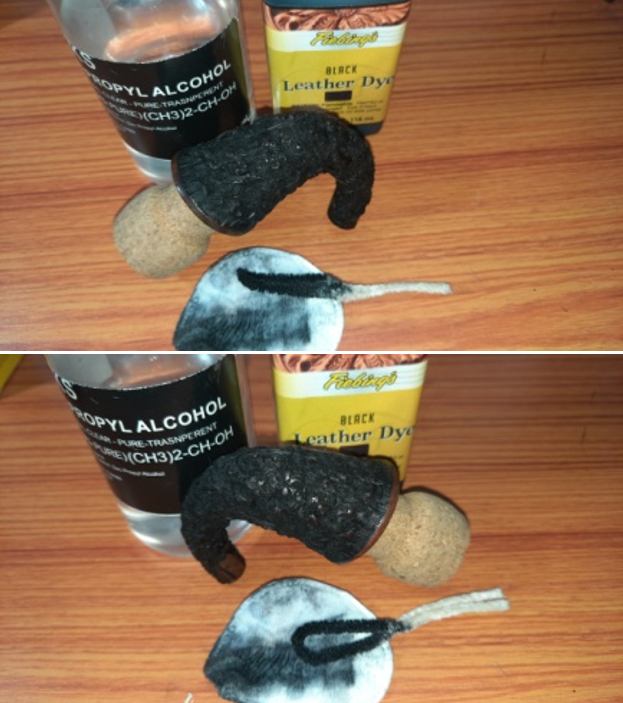
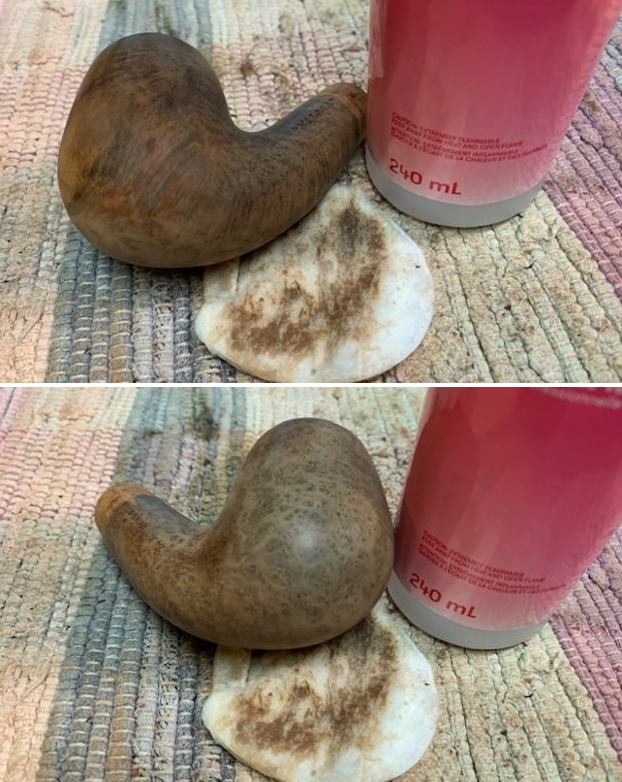
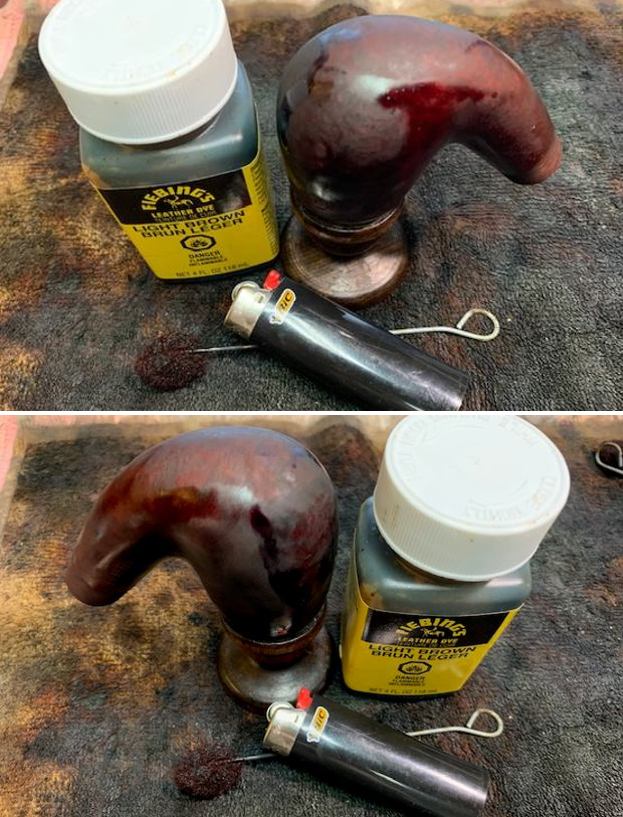
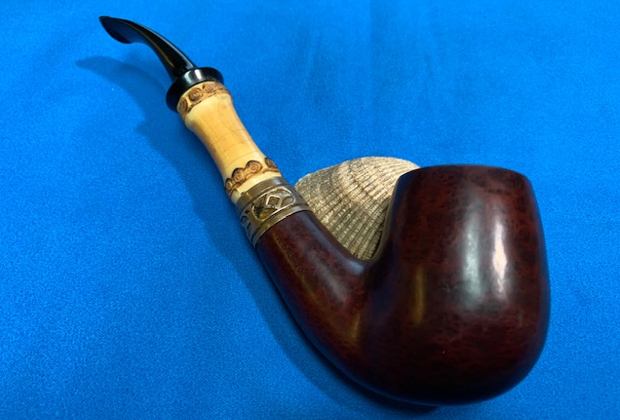
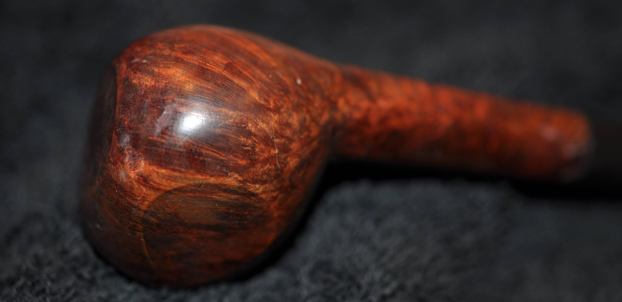
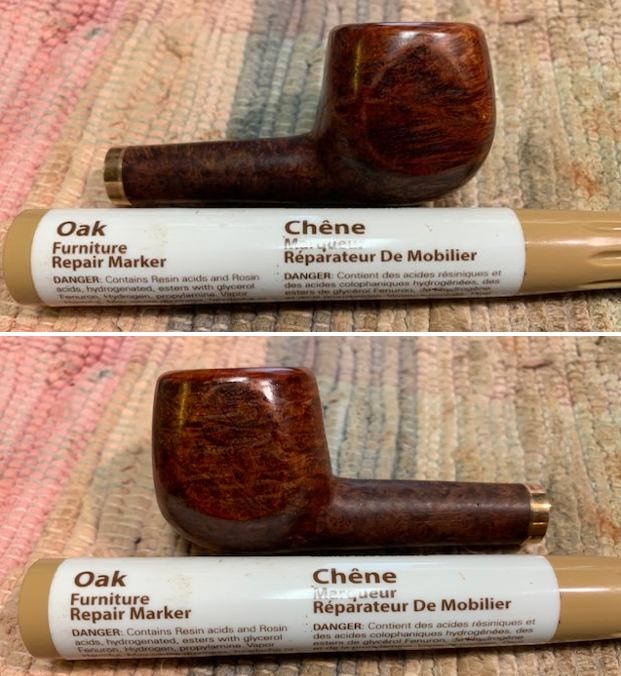
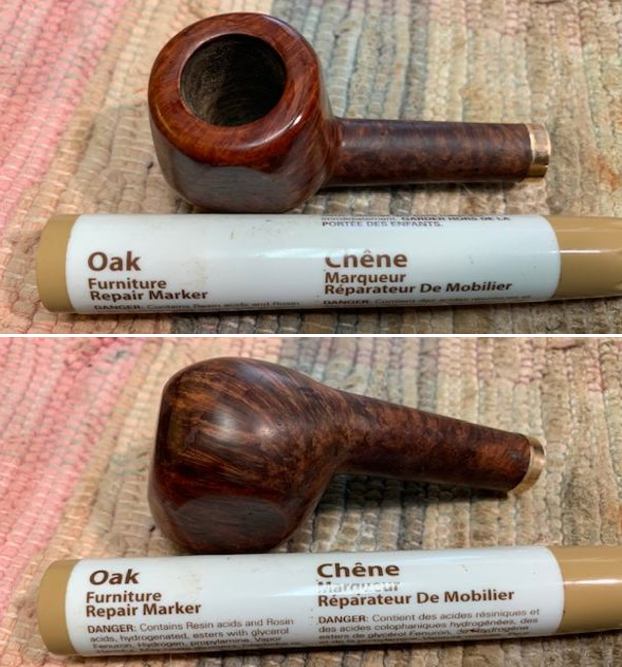
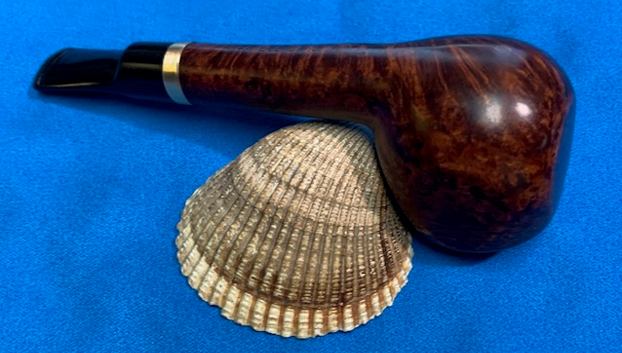
 All of the work I had done to this point had taken its toll on the colour of the wood. Originally, there was a lovely sort of brownish-Burgundy colour on this pipe, and I wanted to restore this as best I could – and I also wanted to ensure that we got rid of that weird mottling. In order to bring back some life to this pipe, I opted for aniline dye. I dragged out some of Fiebing’s Oxblood Leather Dye, but it looked too reddish to me. Instead, I experimented with mixing to see what I could come up with. I made my own concoction of Oxblood and Medium Brown dyes, painted the stummel, and then applied flame in order to set the colour. Furthermore, since it is an alcohol-based dye, I was able to adjust the colour to my liking by applying my own isopropyl alcohol to the colour. Let it sit overnight and it worked like a charm!
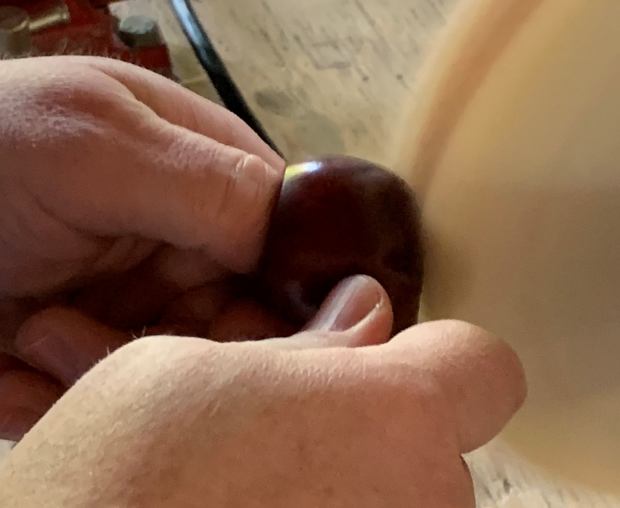
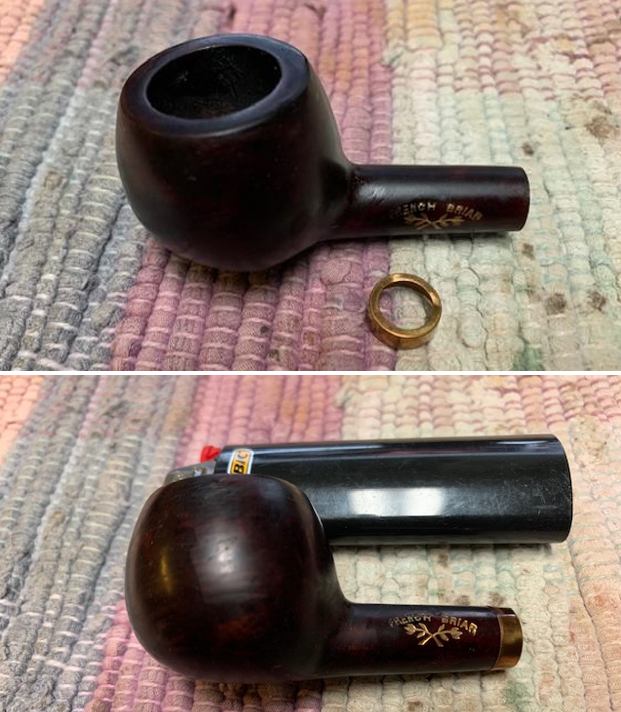
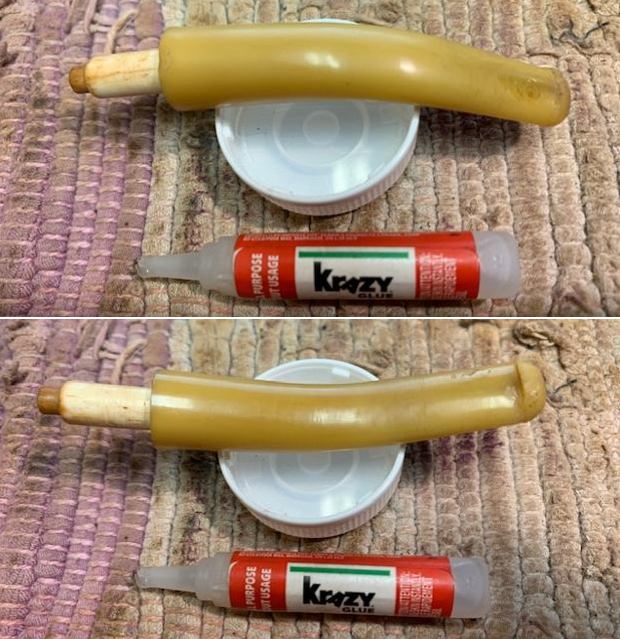
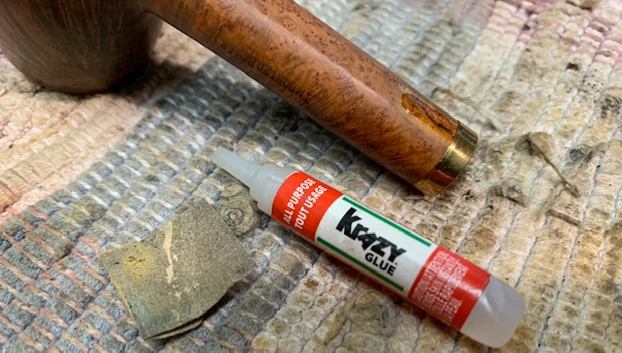
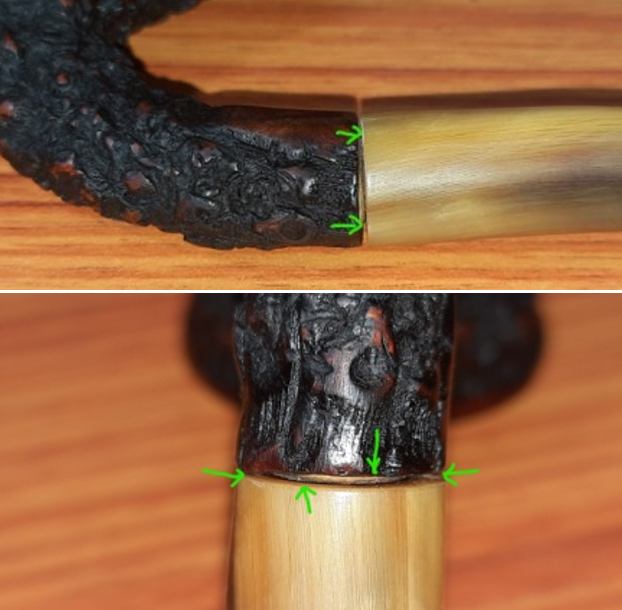
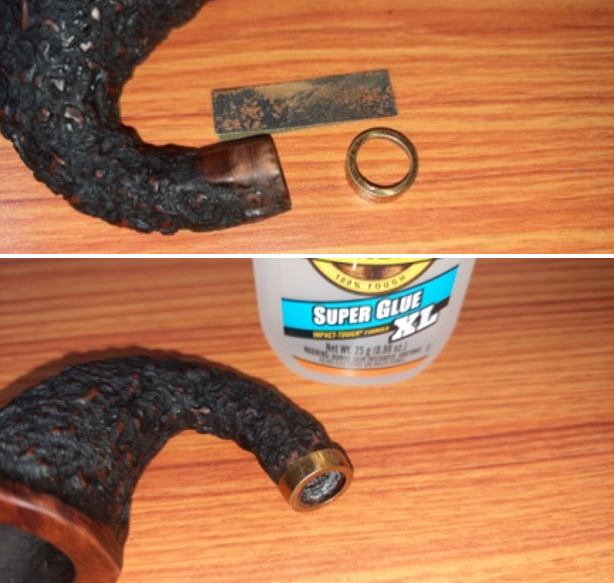
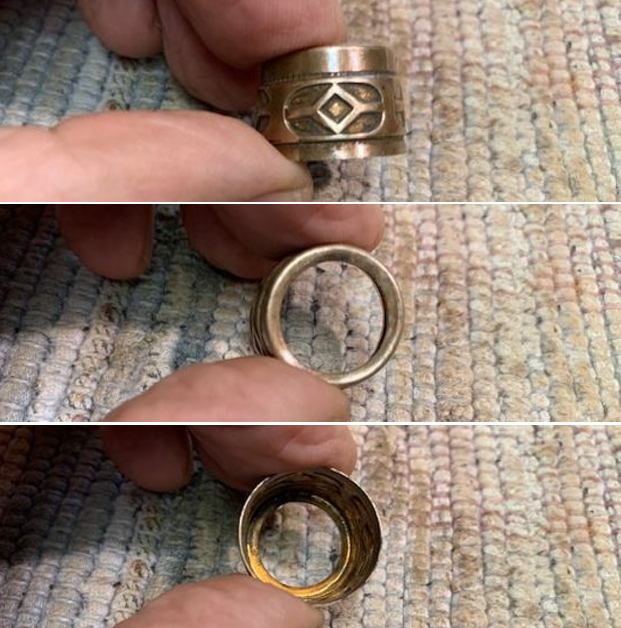
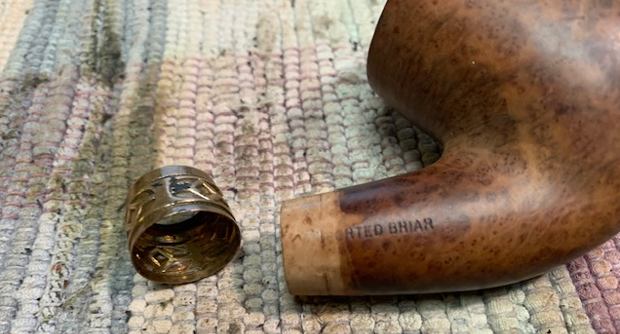
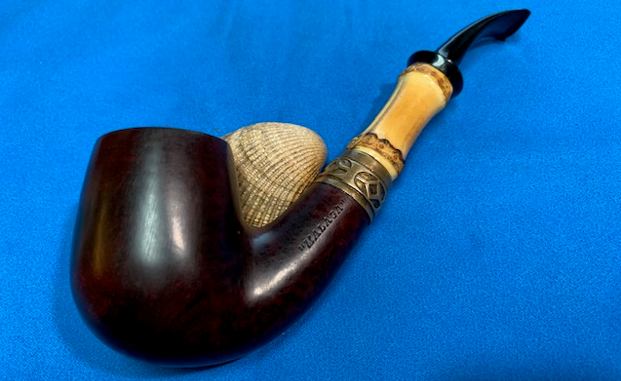
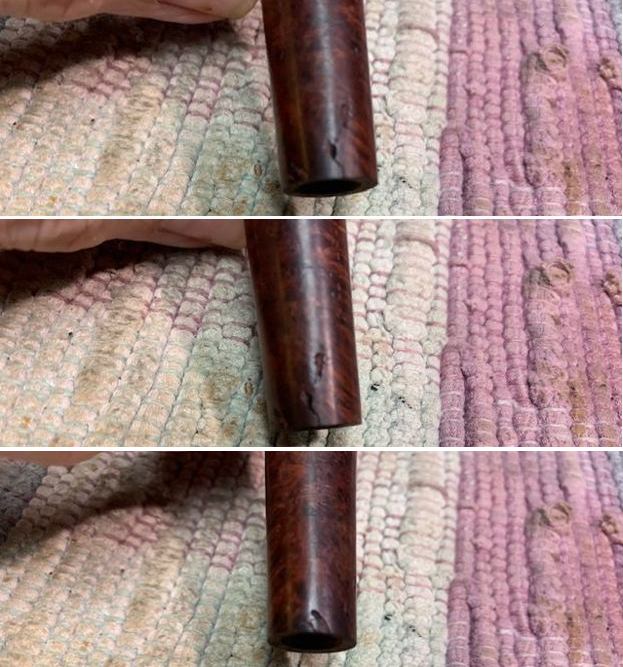
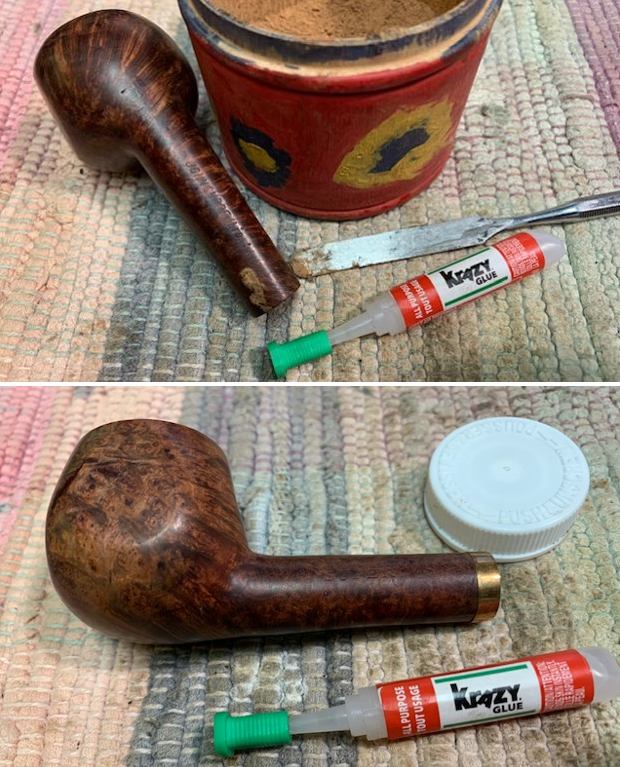
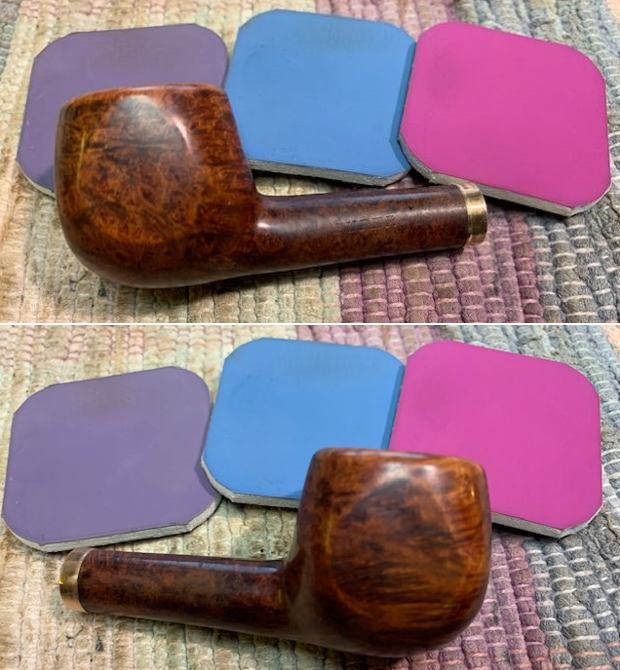
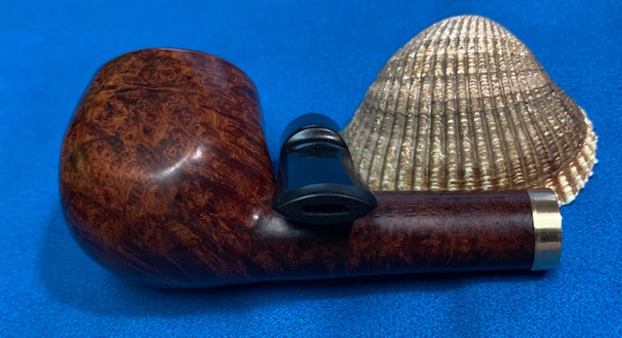
 Then it was off for a trip to the buffer. A dose of White Diamond and a few coats of carnauba wax were just what this pipe needed. Now that the wood was looking all spiffy, I had to circle back and complete the repair on the crack in the shank. It needed a tight-fighting band to ensure that the crack would never open up again. I went to my jar of bands and picked one that looked good. I heated it up and then messed it up! See the photos. I did not apply even pressure as I was attaching the band, so it went mush. Fortunately, I had more bands and I did a much better job of getting the next one on. I glued it in place and let that set. It looked very dapper.
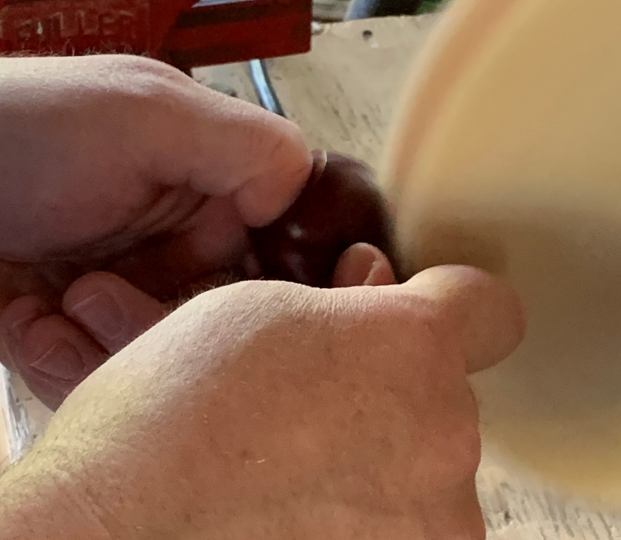
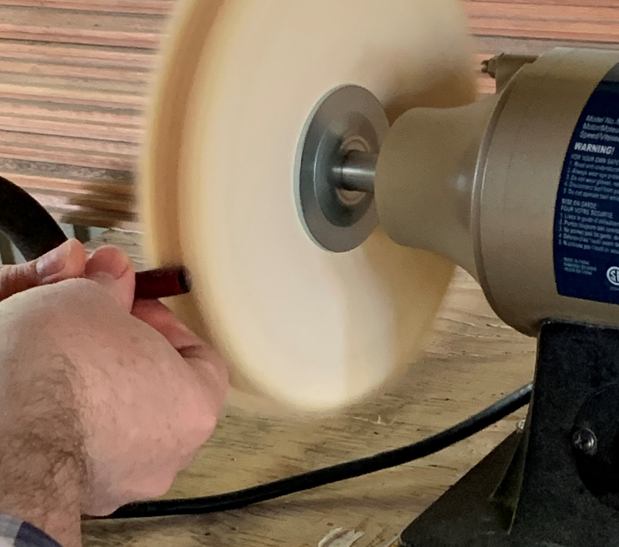
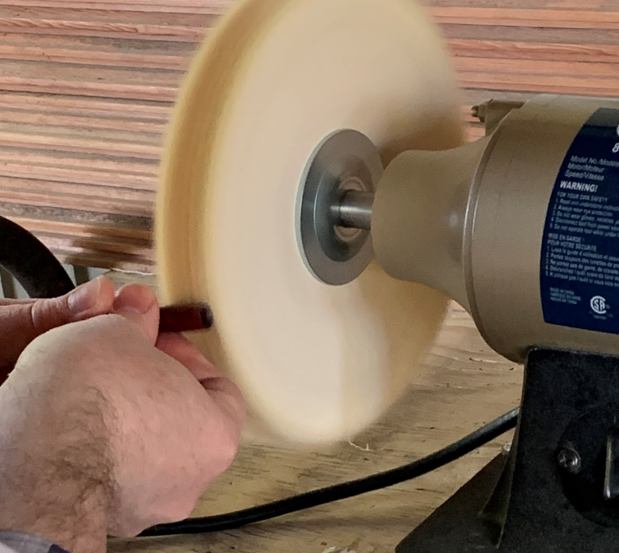
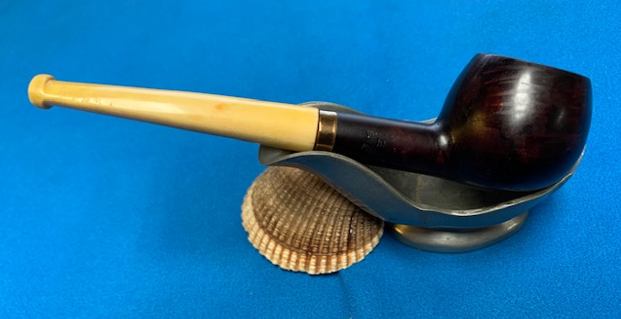
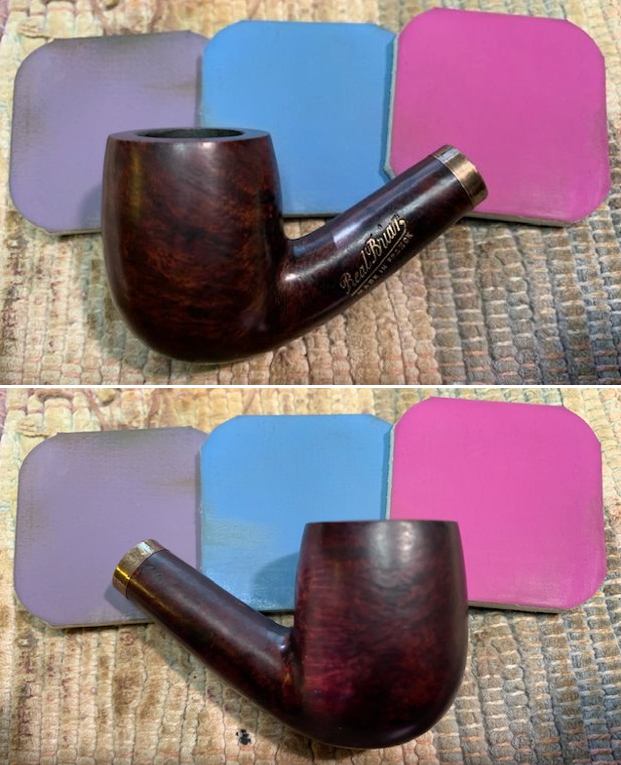
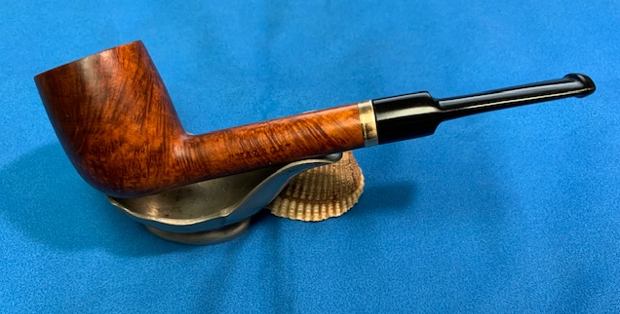
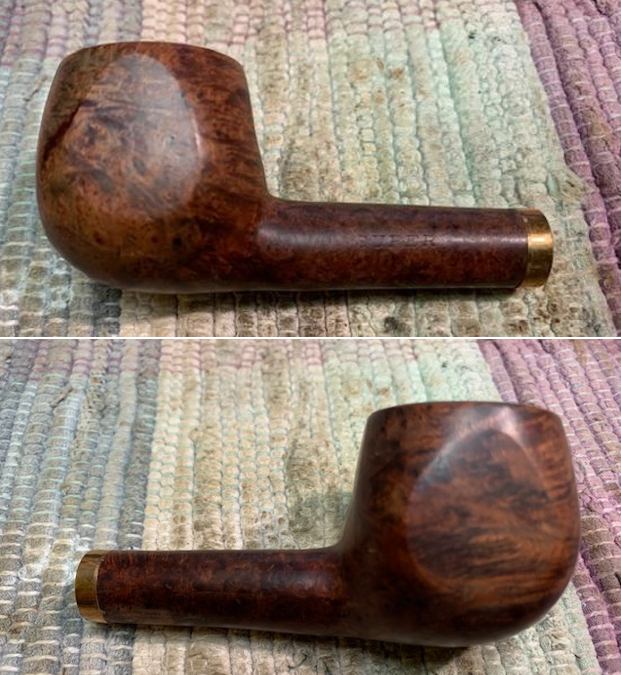
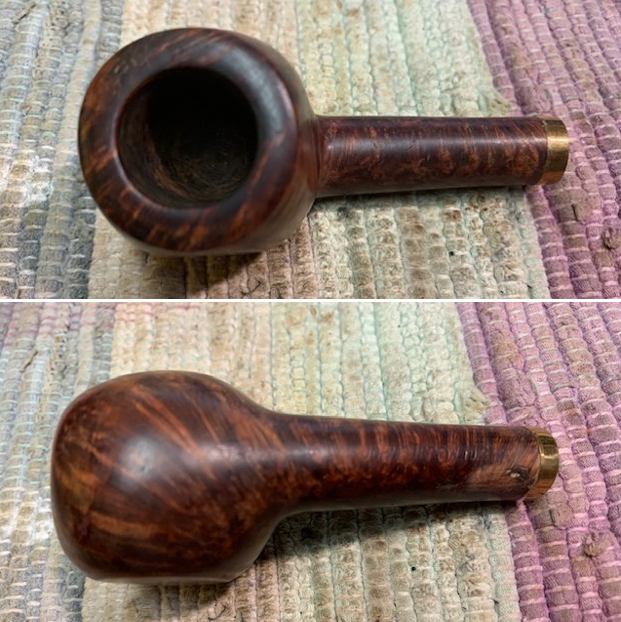
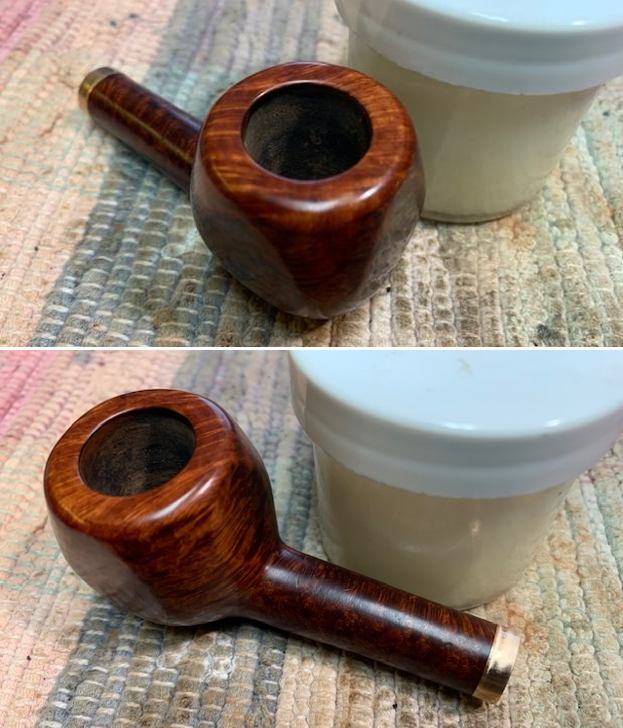
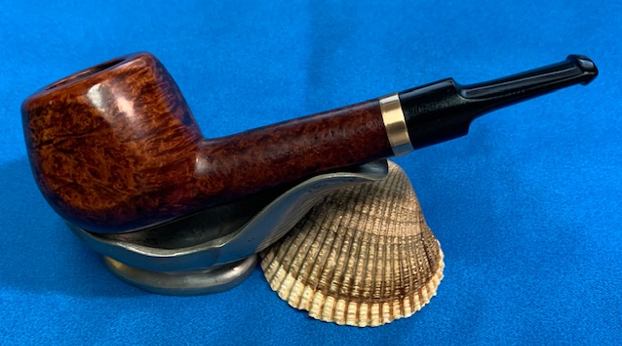
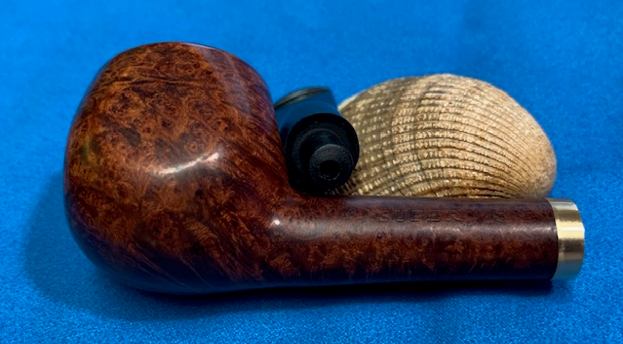
 I polished up the band with a 12,000-grit MicroMesh pad. I also went back to the buffer with both the stem and stummel, gave them a final application of White Diamond and carnauba wax, and brought out that lovely shine.
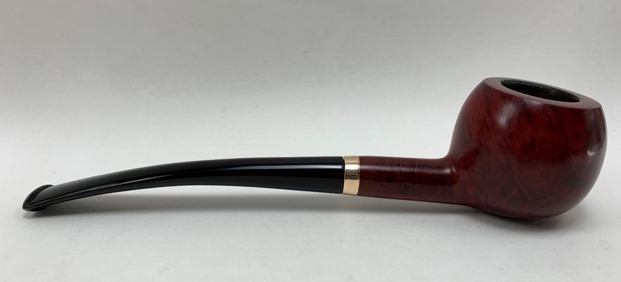
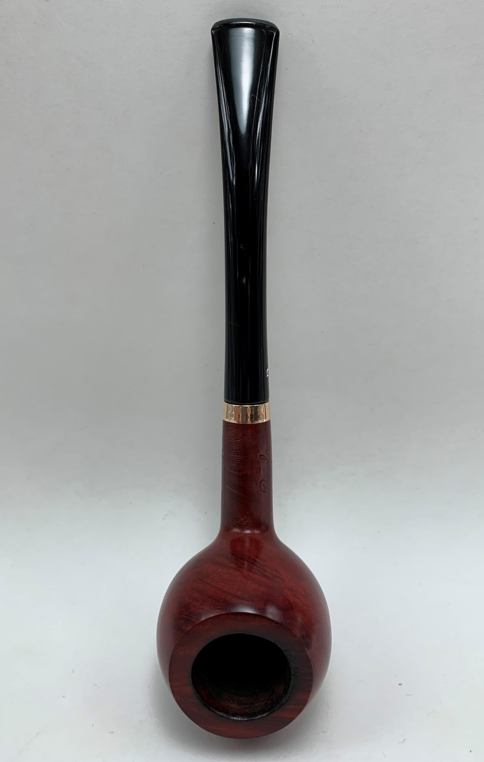
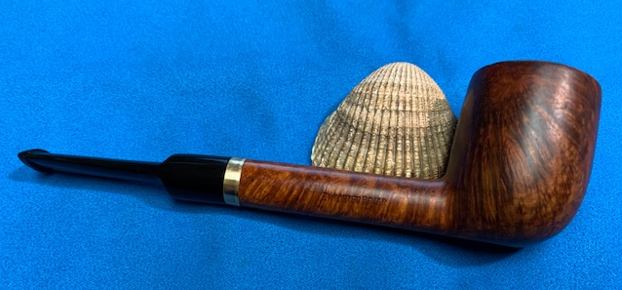
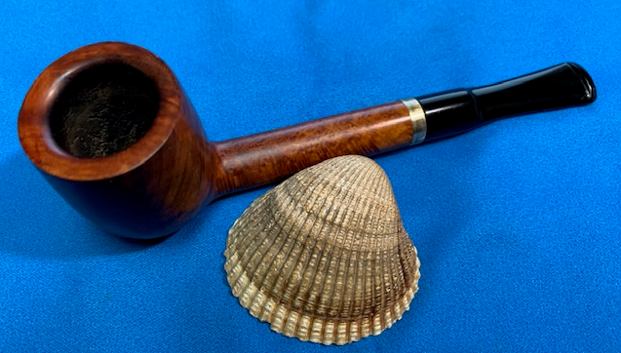
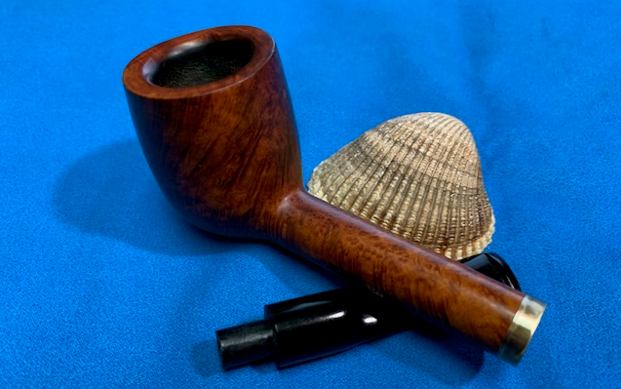
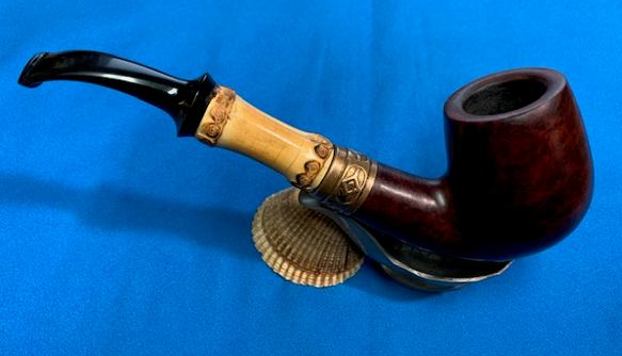
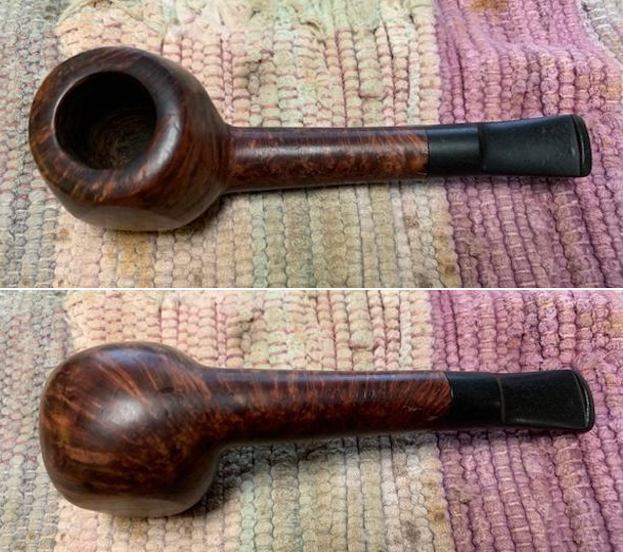
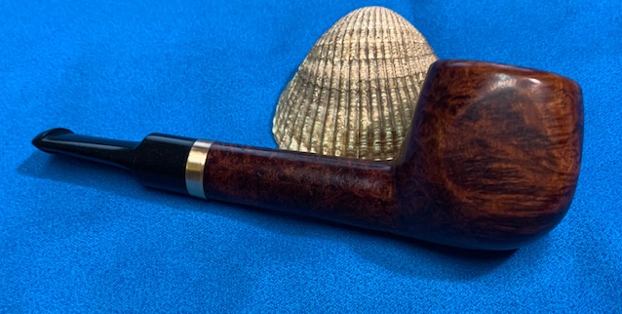
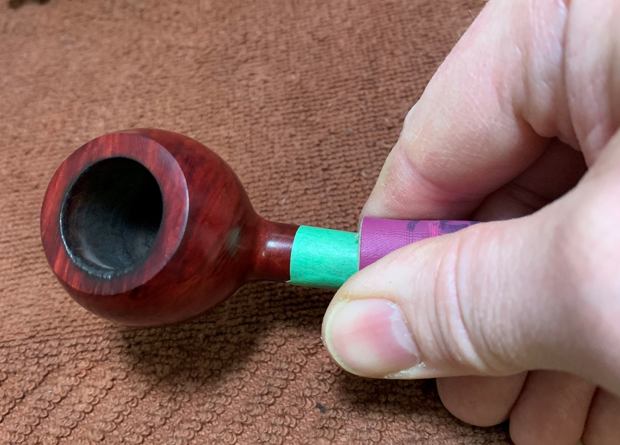 In the end, what a beauty this pipe is! It is an elegant pipe, from a very fine maker. It obviously meant a great deal to its owner, and I was delighted to bring it back to life. Once the pipe was returned to its owner, he told me that it looked better than when it was new! Although I am not sure I agree with that, I am very pleased that he is very pleased. As I mentioned before, the prince is one of my favourite shapes and it was great fun to work on this one. I hope you enjoyed reading the story of this pipe as much I as I did restoring it. If you are interested in more of my work, please follow me here on Steve’s website or email me directly at kenneth@knightsofthepipe.com. Thank you very much for reading and, as always, I welcome and encourage your comments.


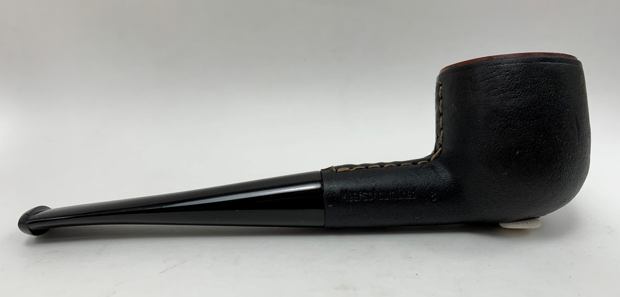
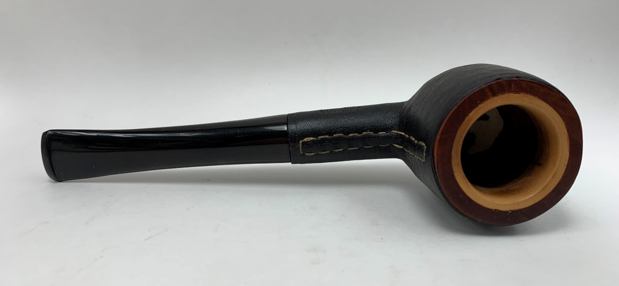
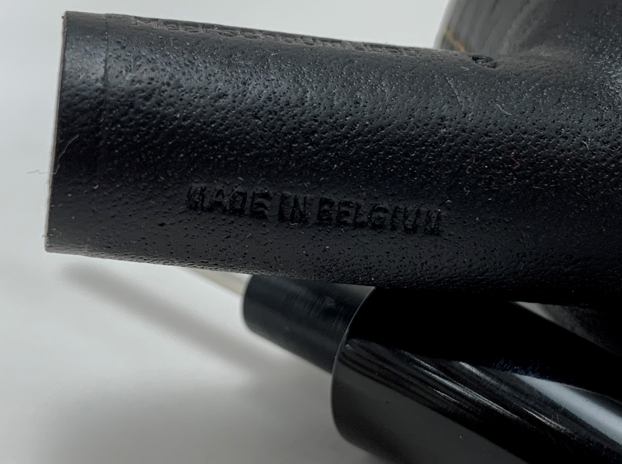
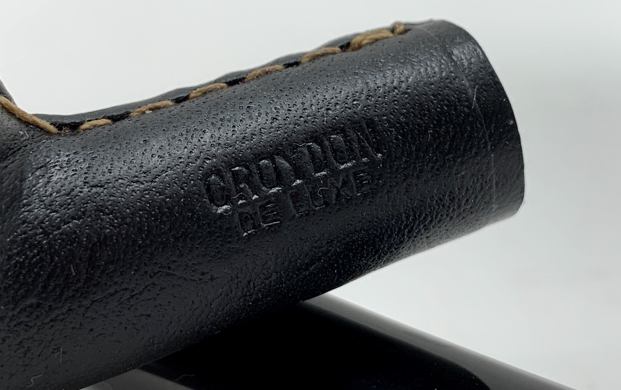
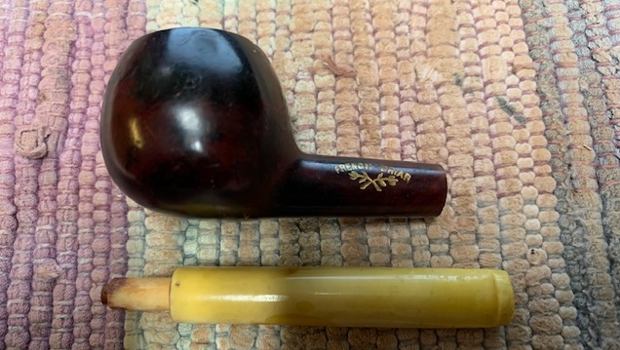
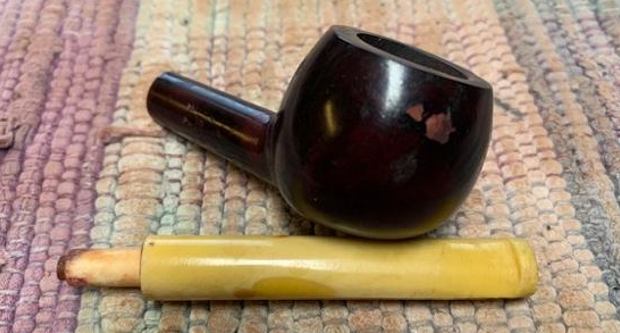
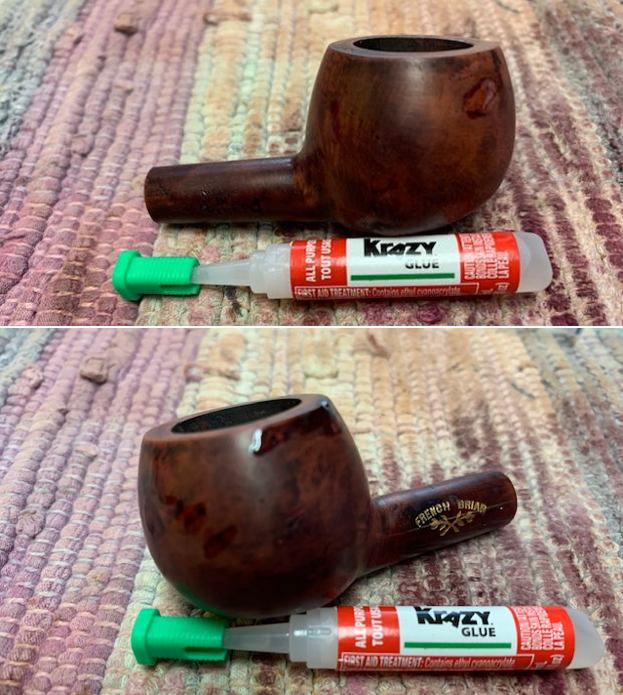
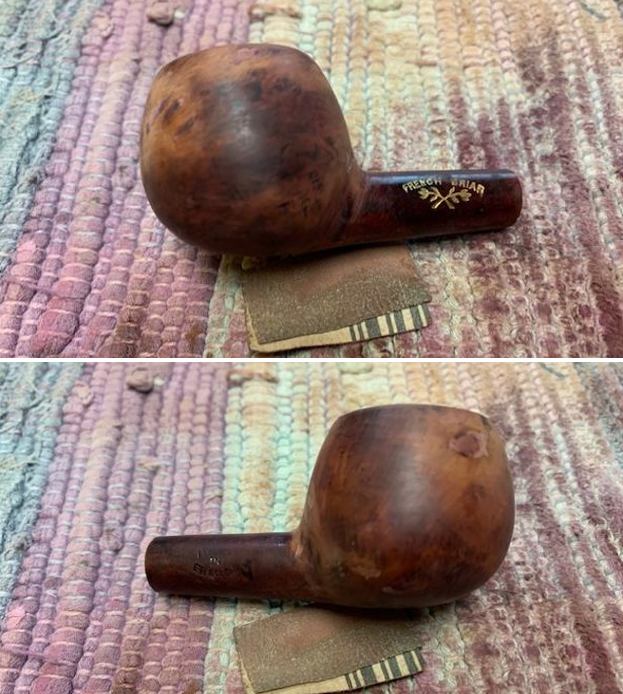
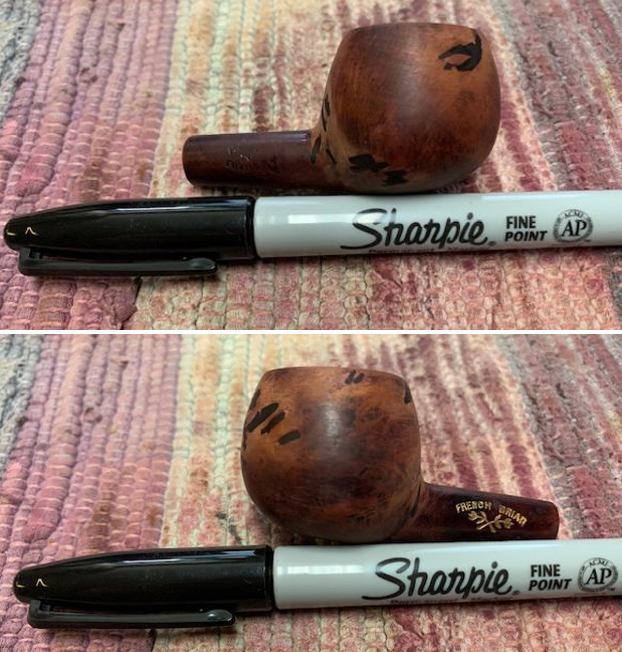
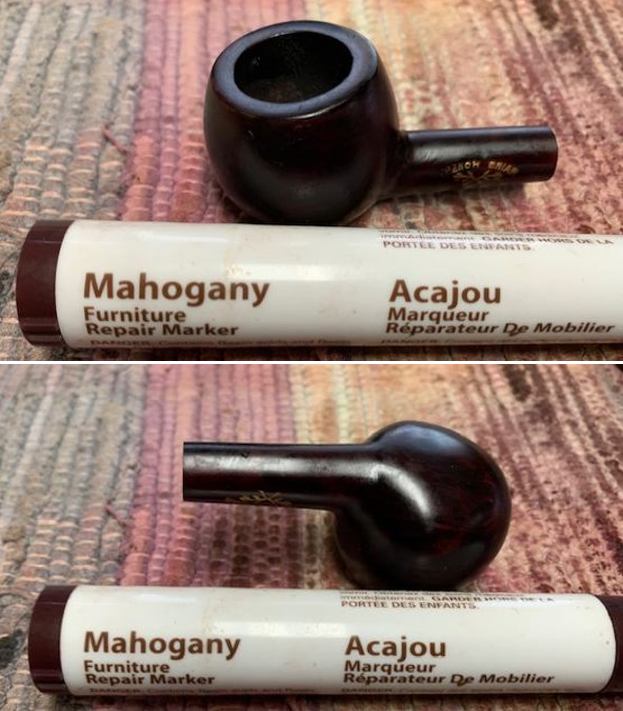
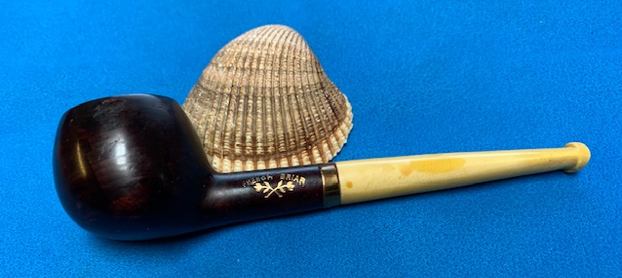
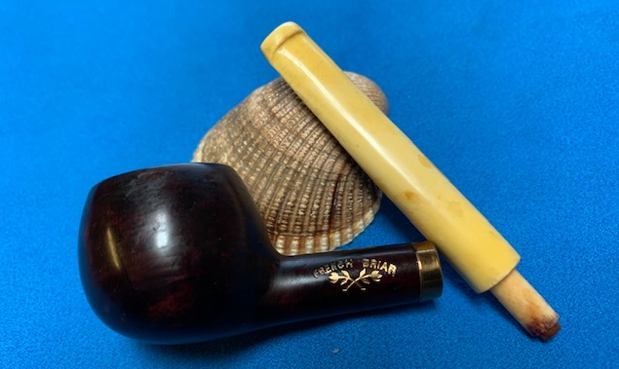
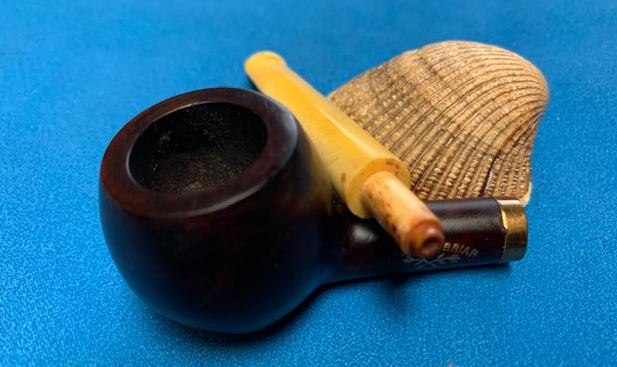
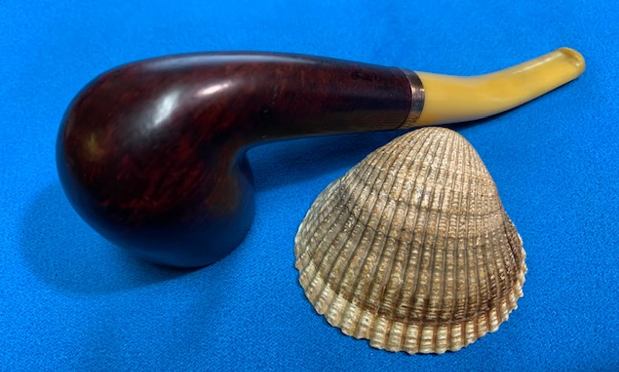
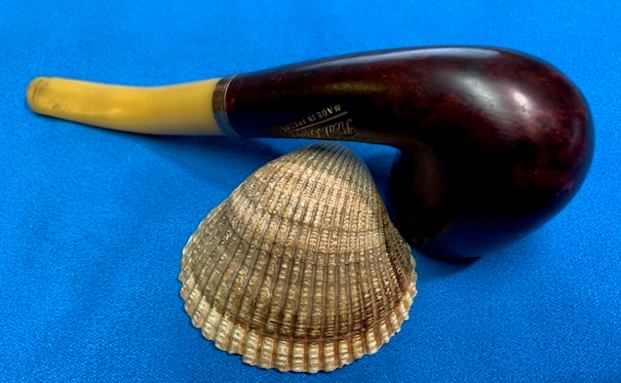
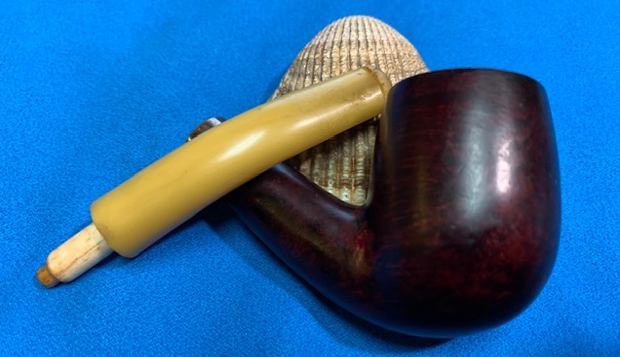
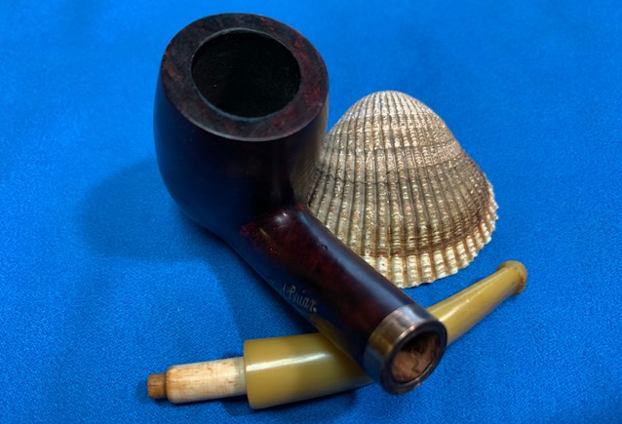
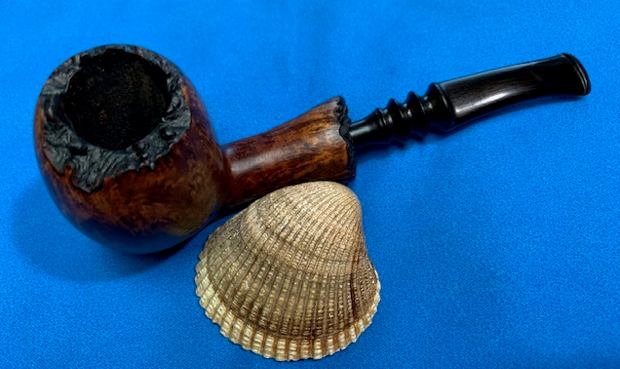
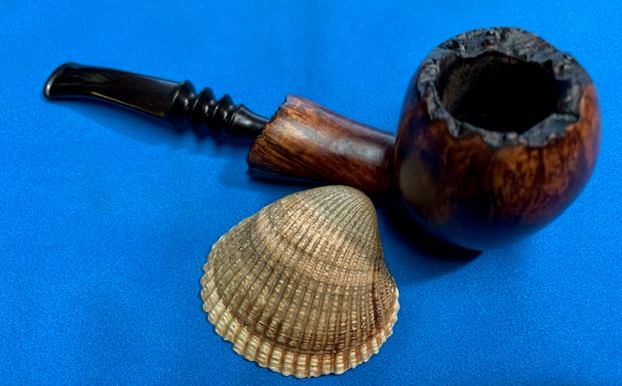
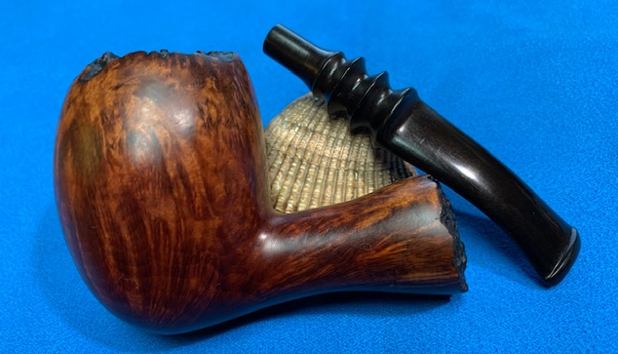
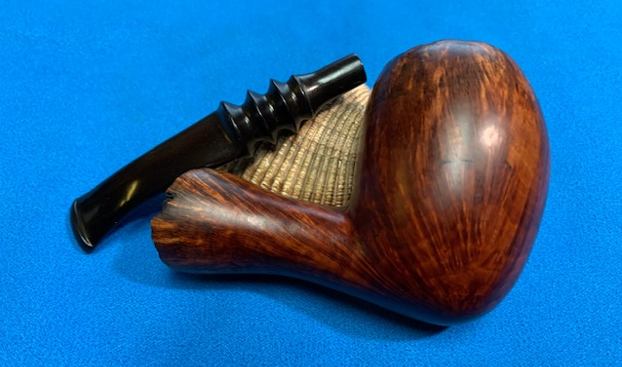
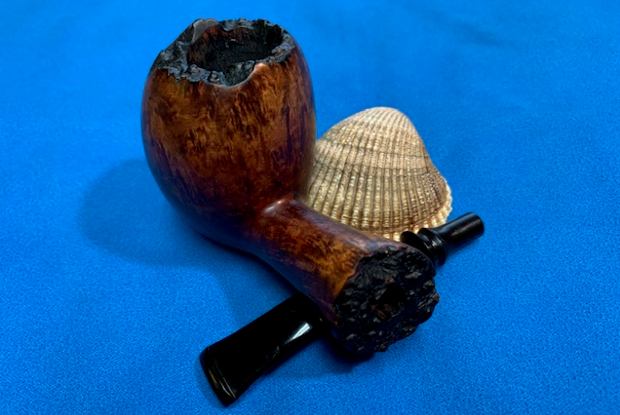
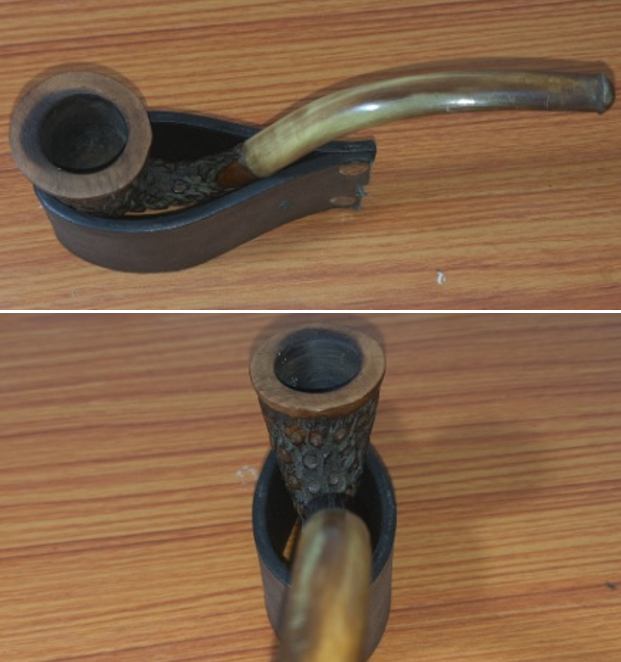
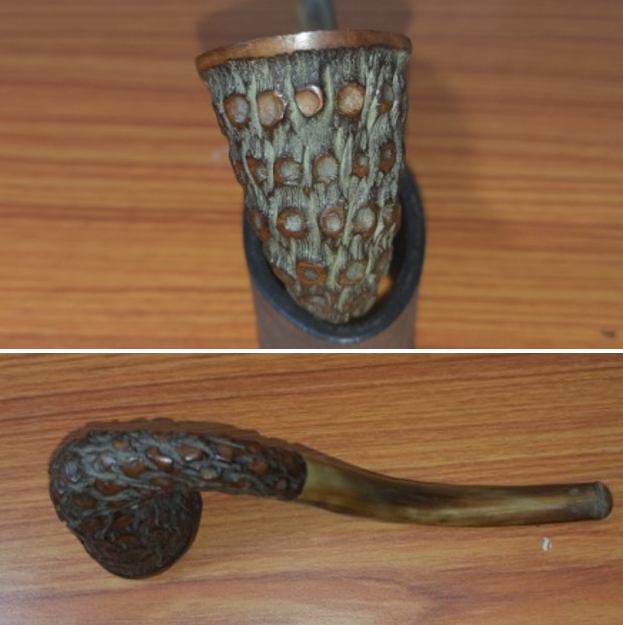
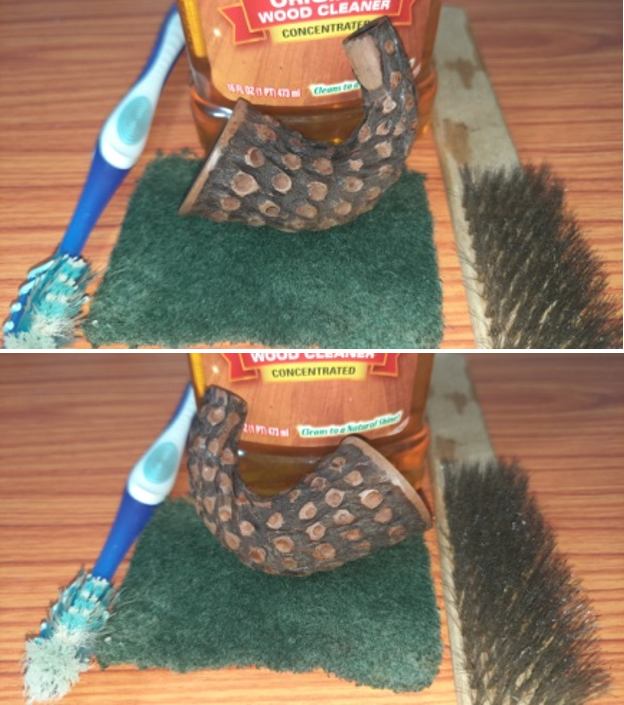
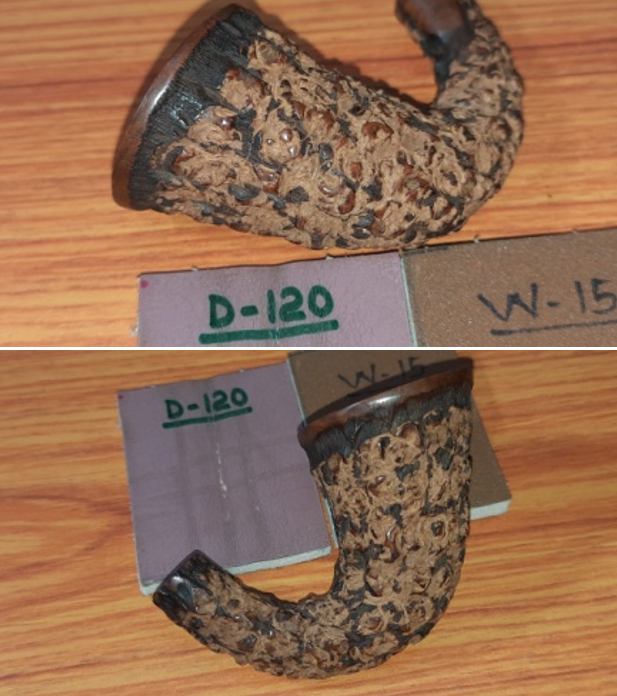
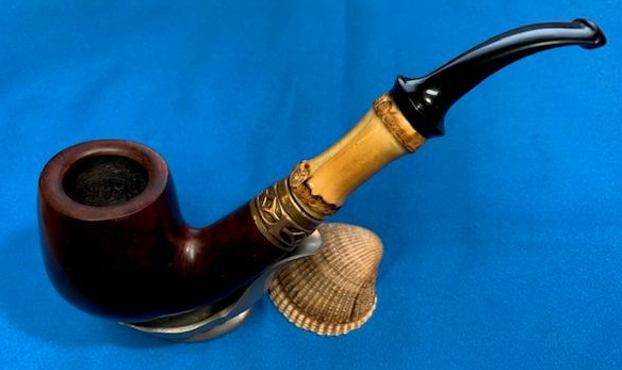
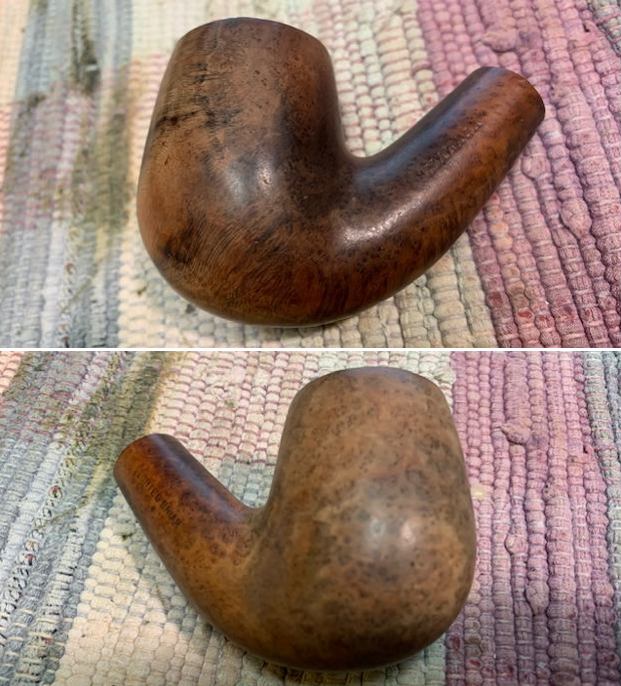
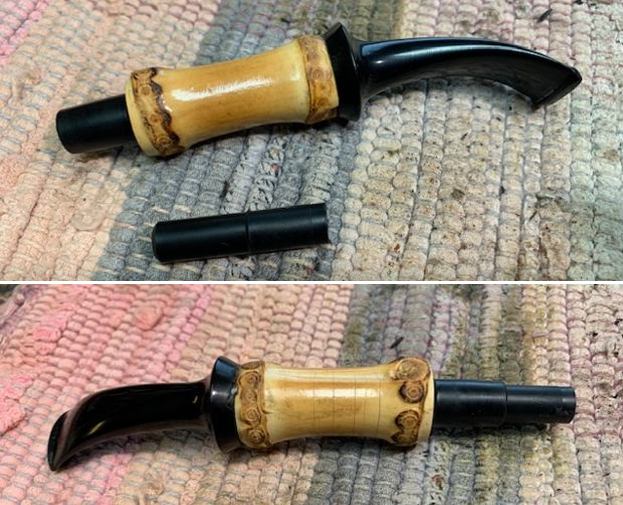
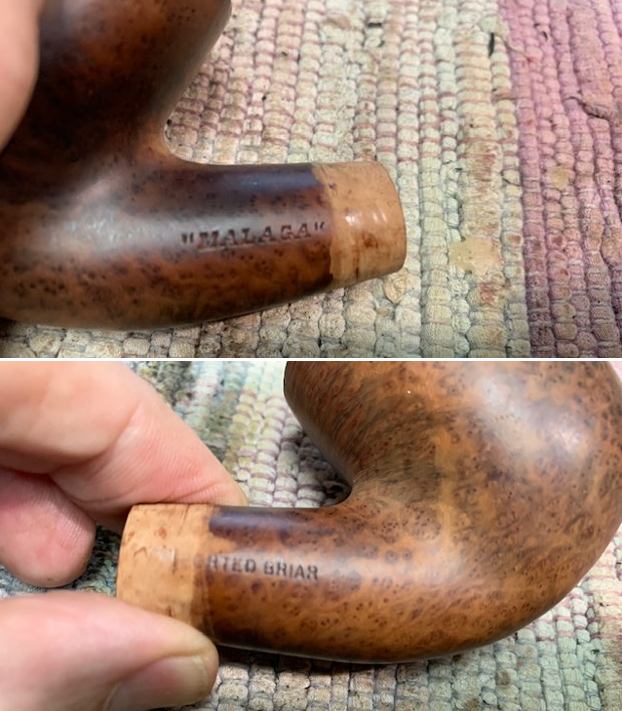
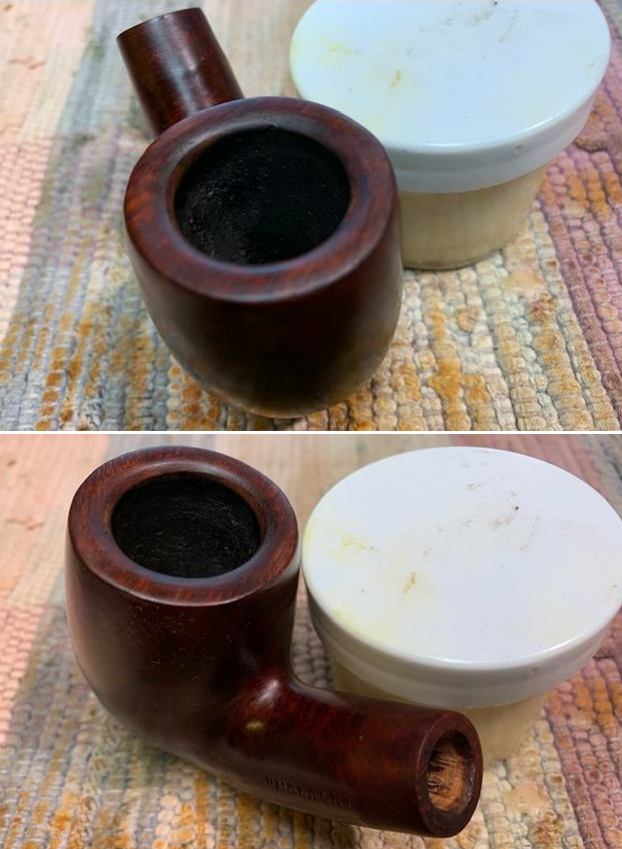
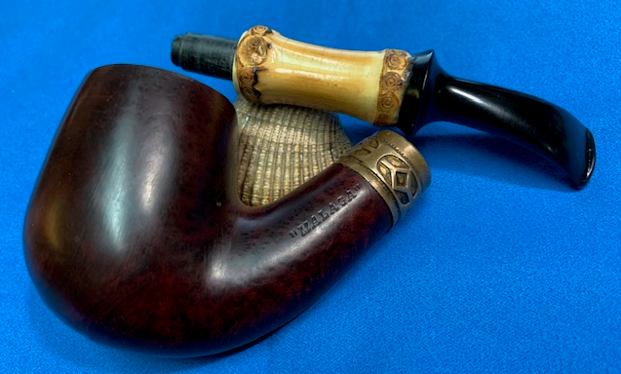
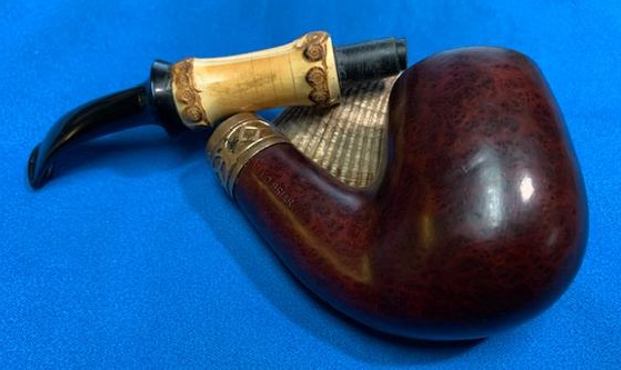
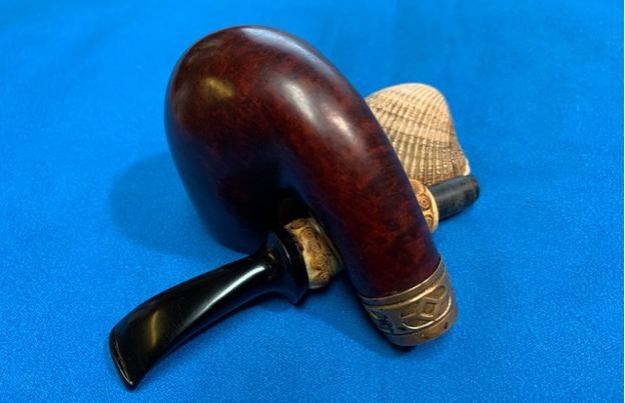
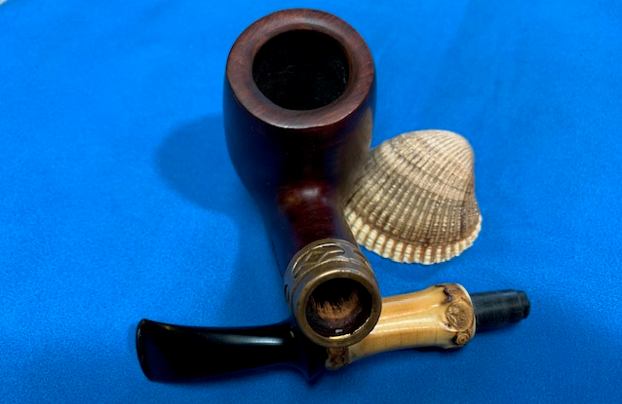
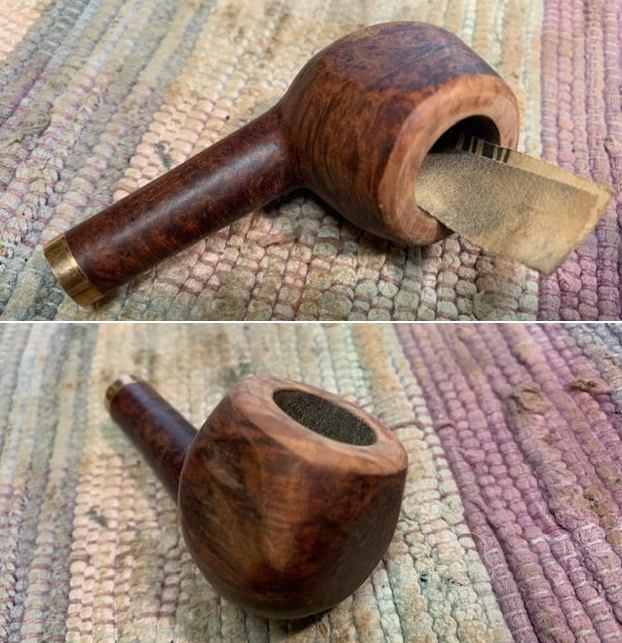
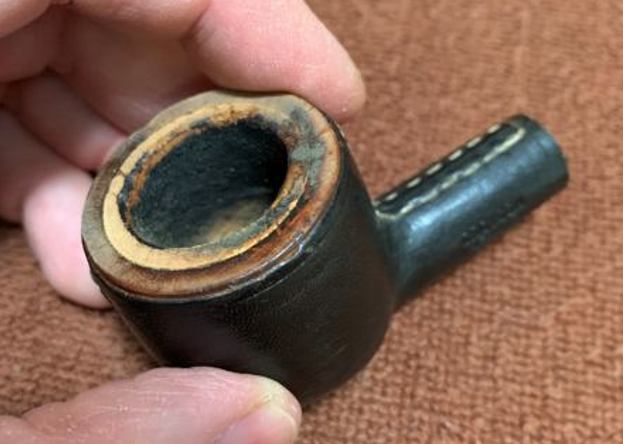 A friend of mine wanted this pipe – somehow, it spoke to him – so I was happy to bring it back to life for him. The pipe was in decent enough shape: the stem was well-used but not damaged, the leather was sound, the rim was a bit of a mess, and the bowl looked as though it had been reamed with a boat hook. Although it is difficult to make out in the photos, the bottom of the bowl was quite badly gouged and I wondered whether I should fill in the gouge or leave it as is. Steve had told me in the past about making a paste of egg white and chalk dust. Something for me to consider…
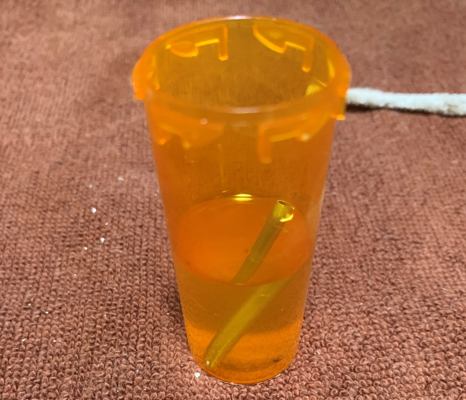
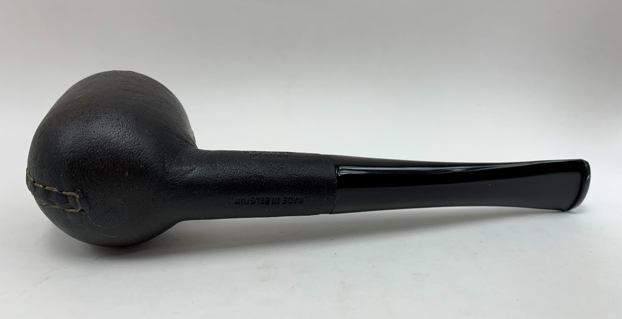
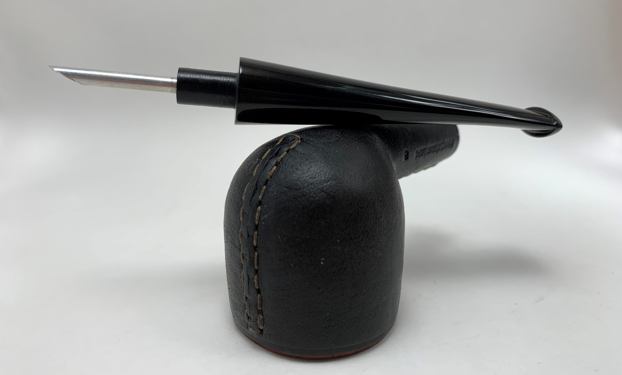
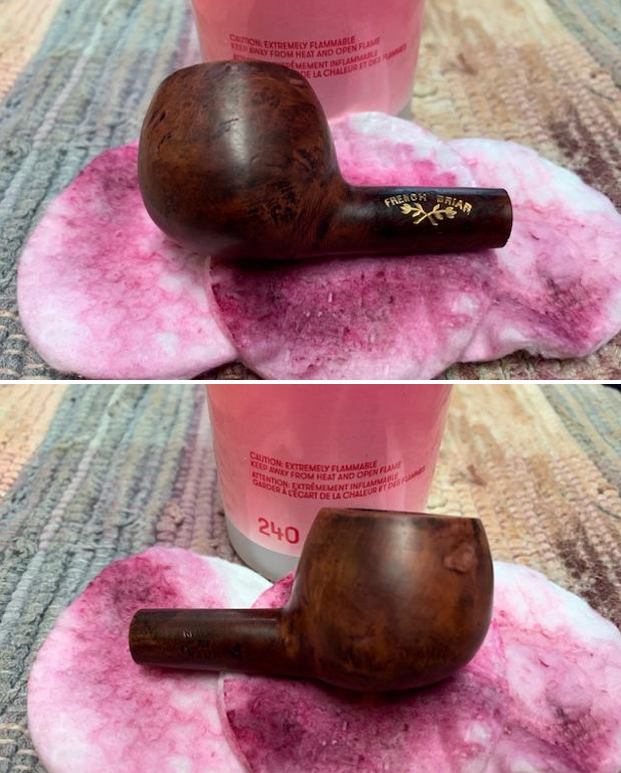
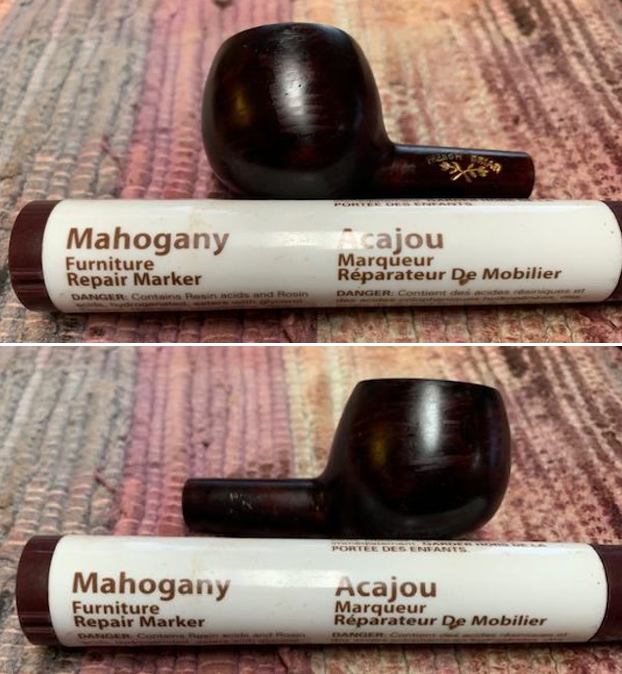
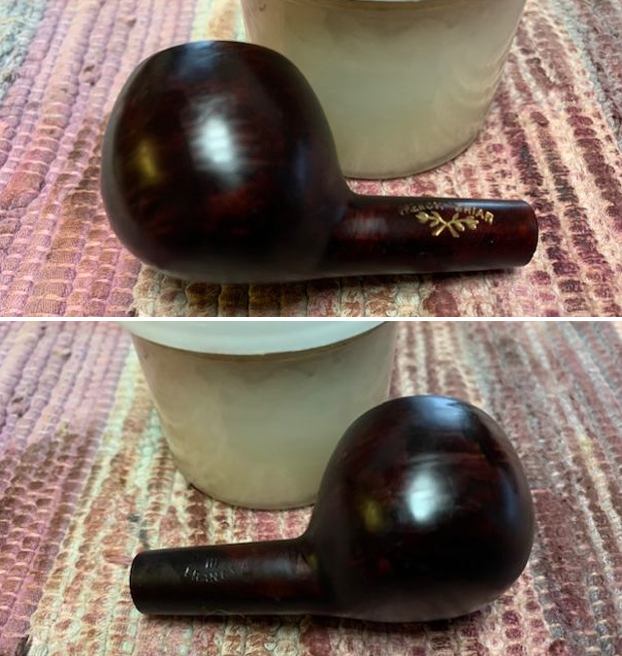
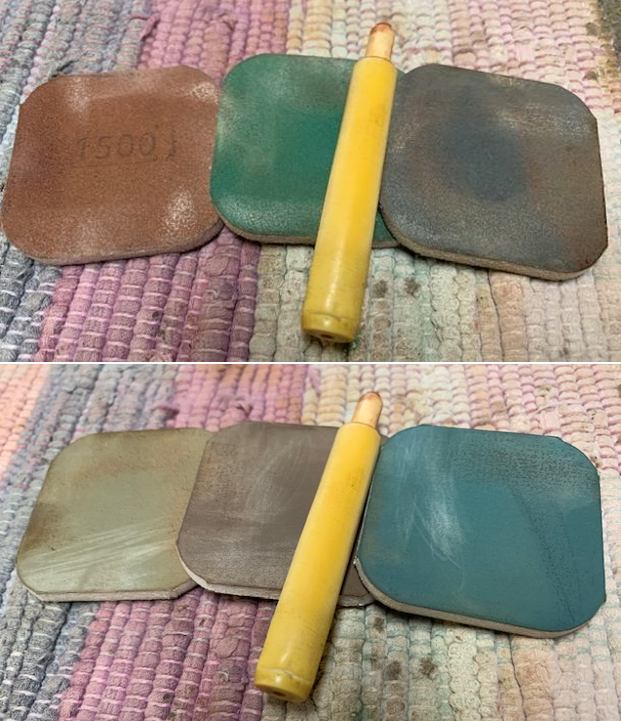
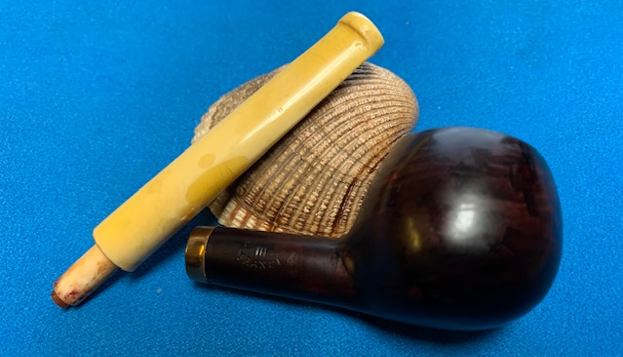
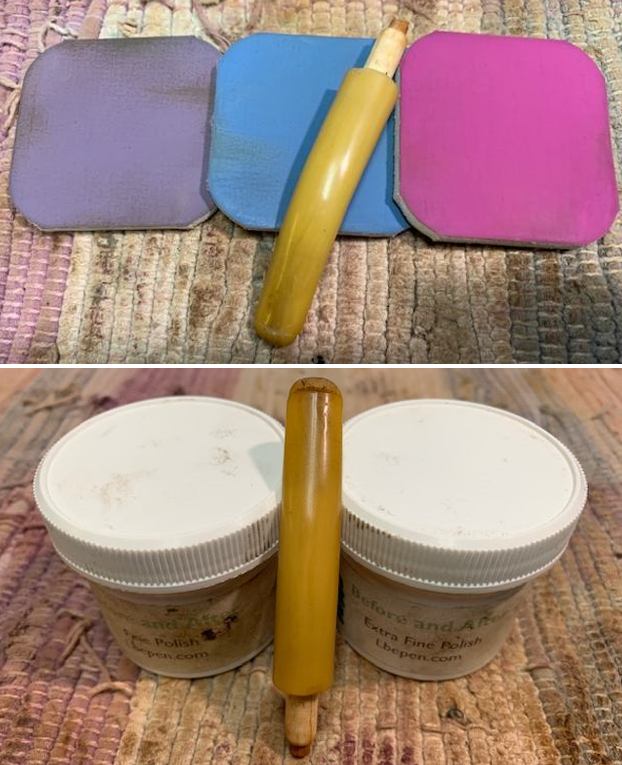
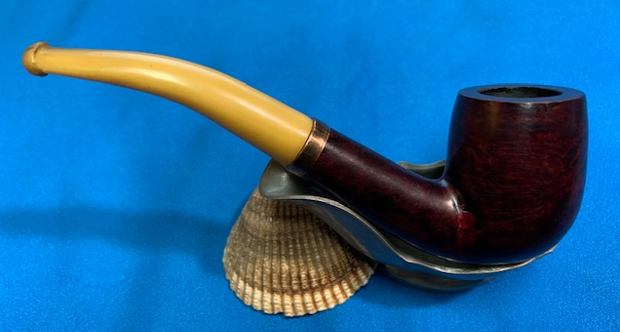
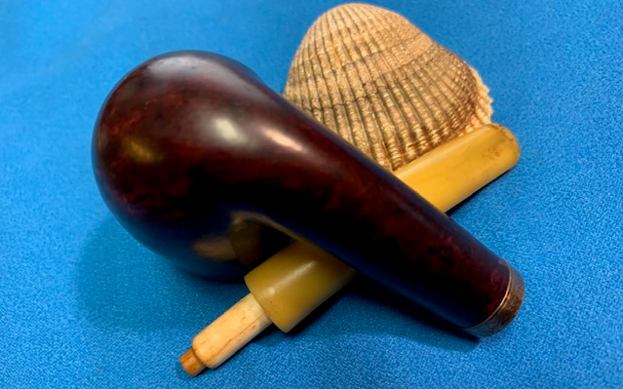
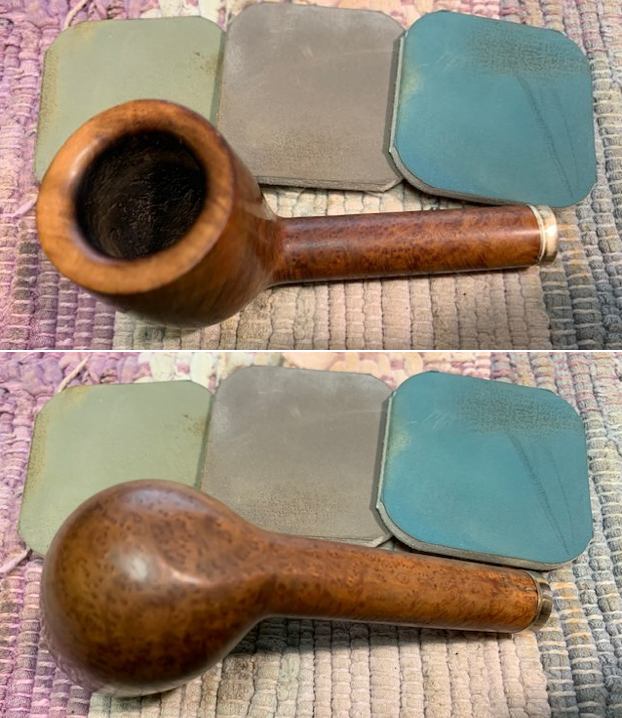
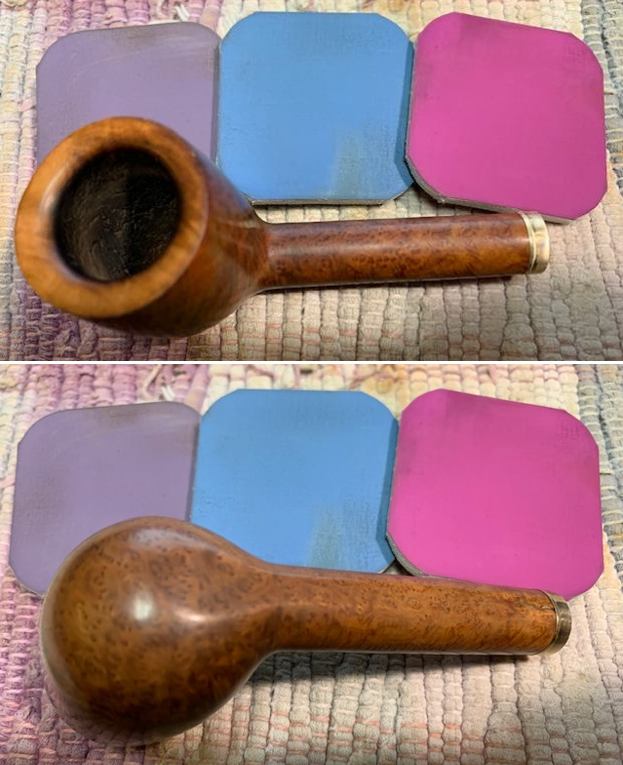
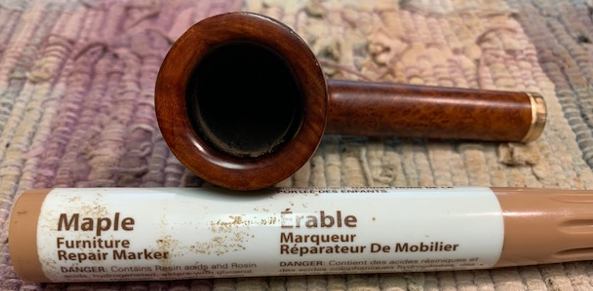
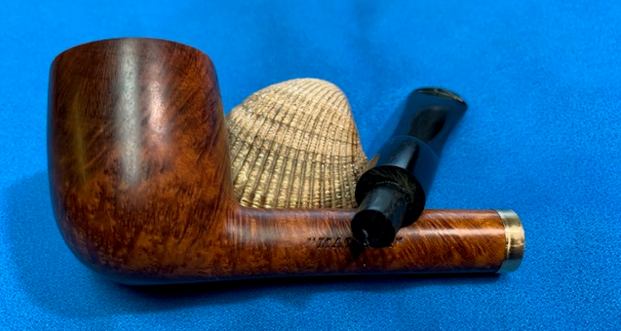
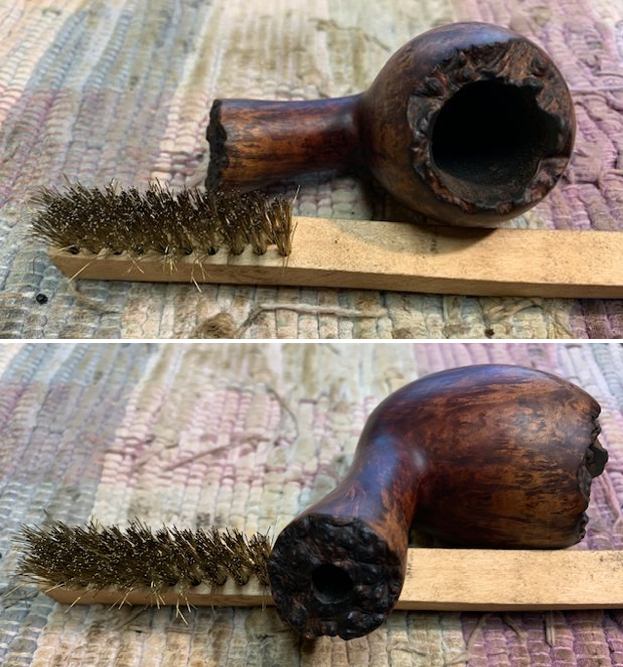
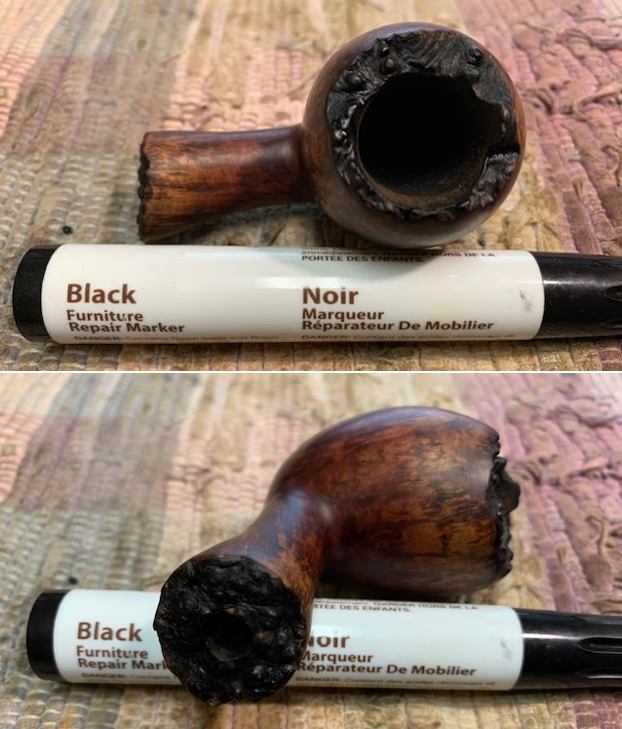
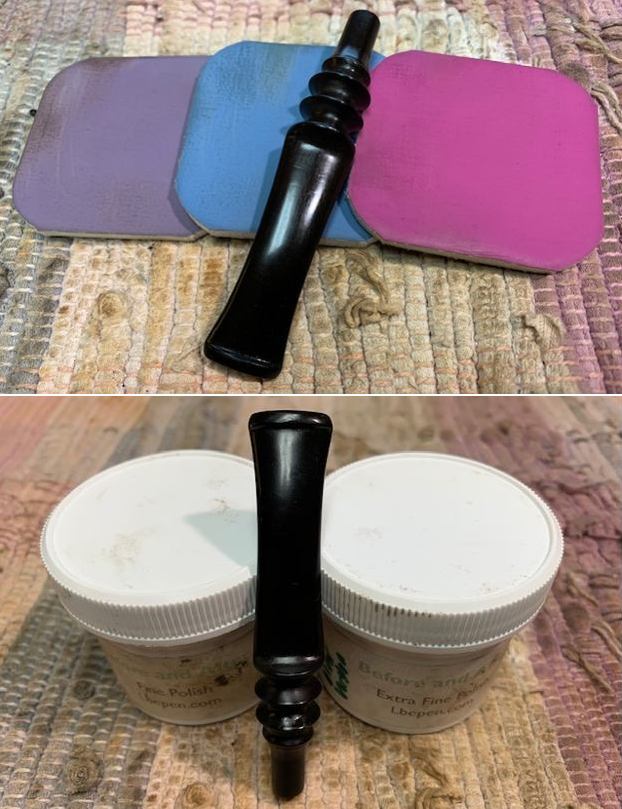
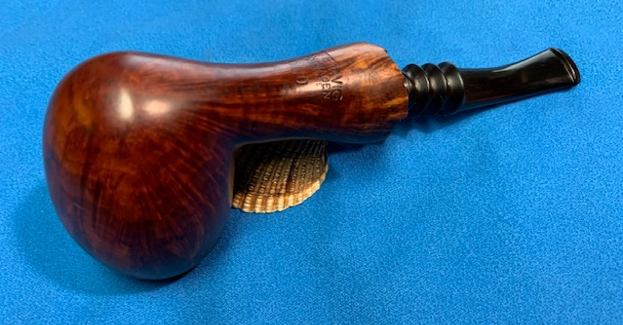
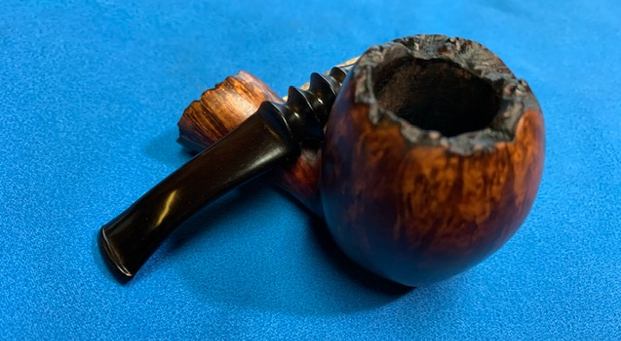
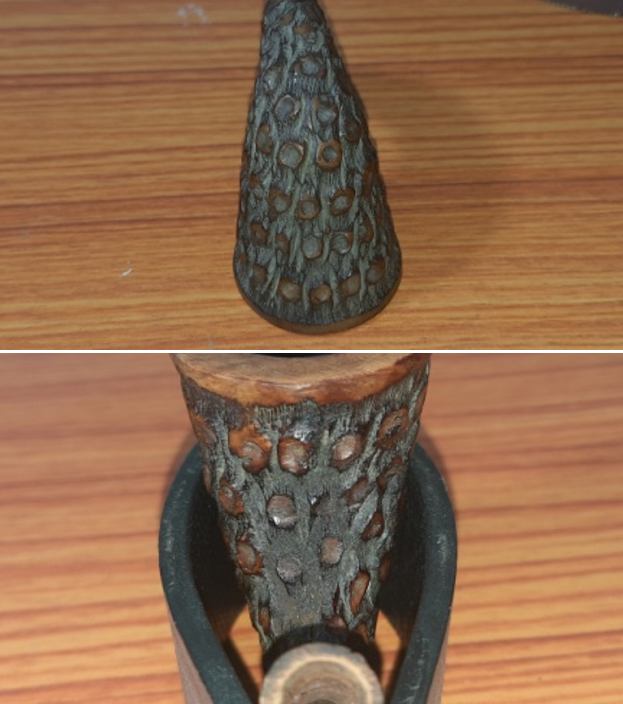
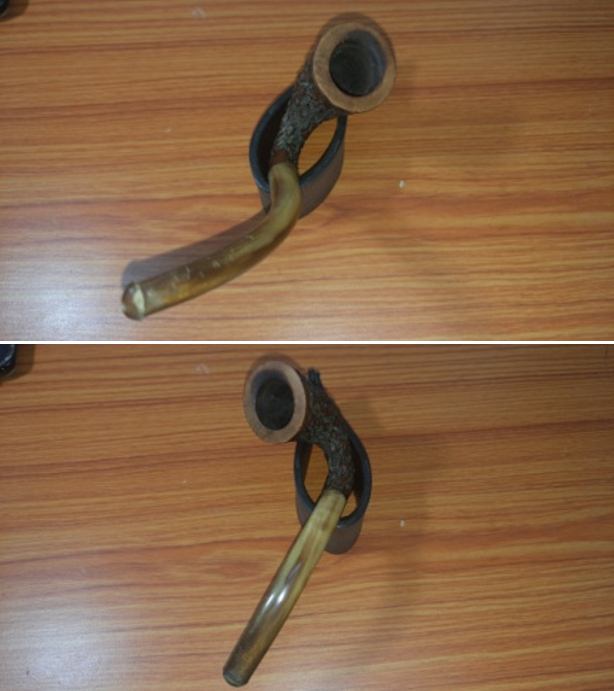
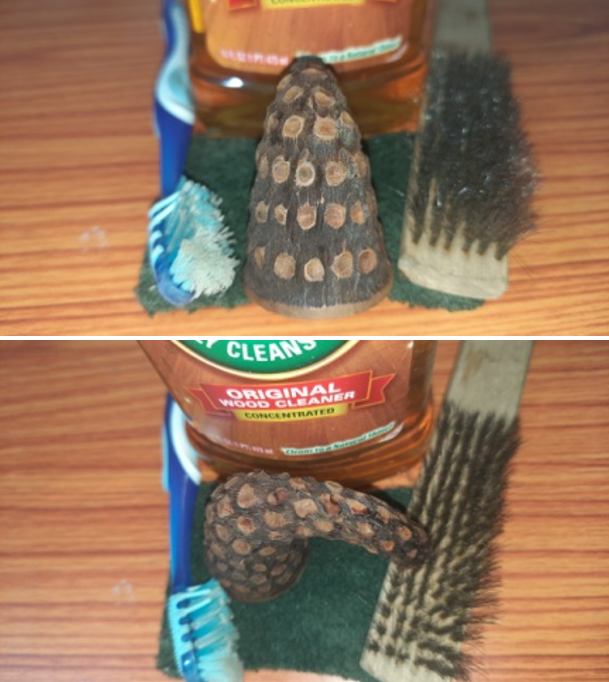
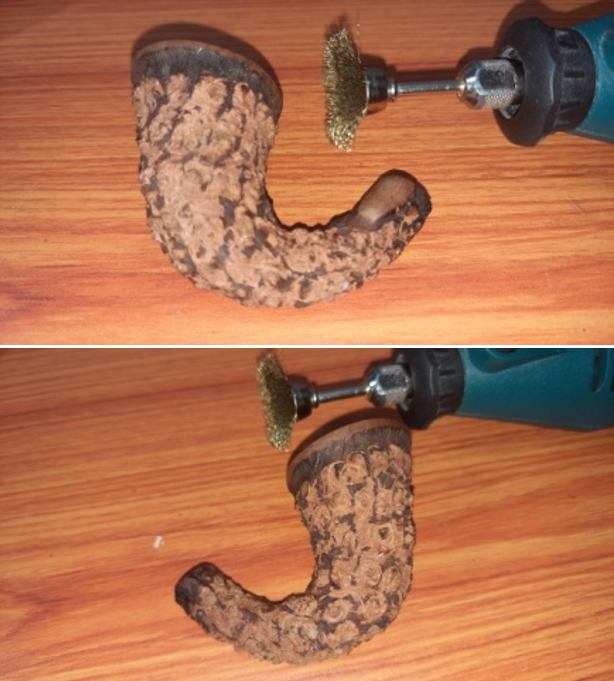
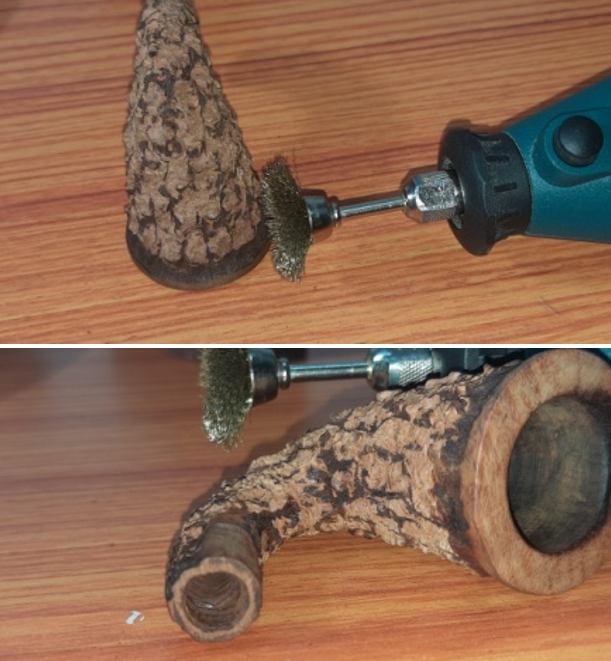
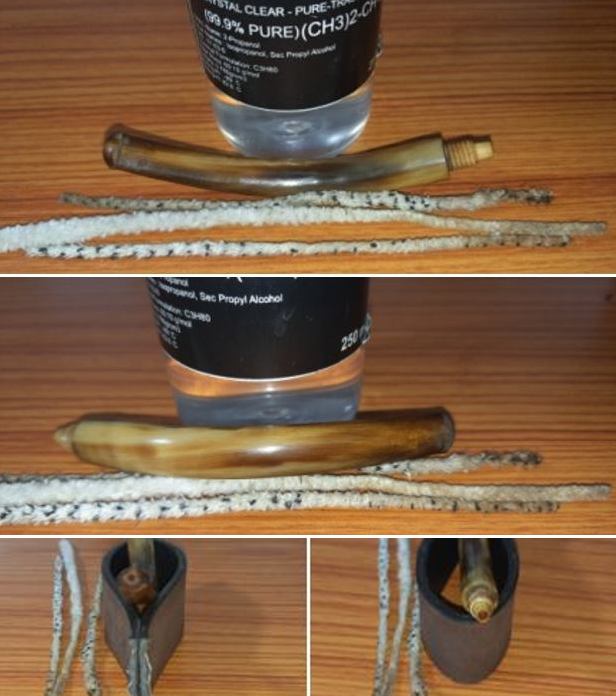
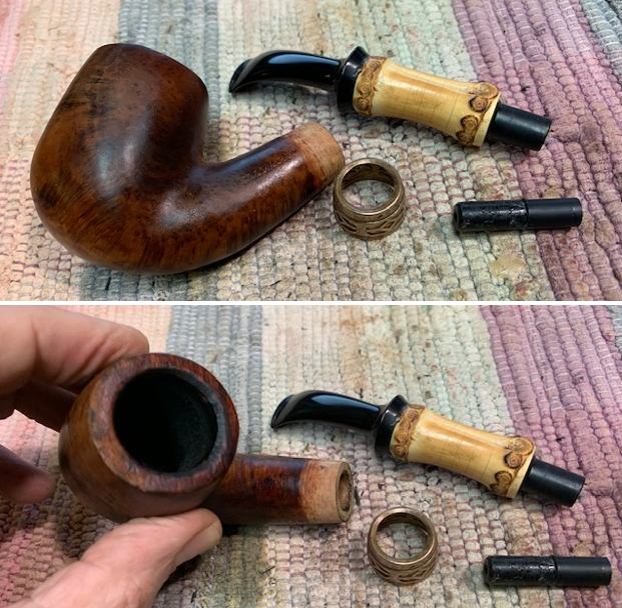
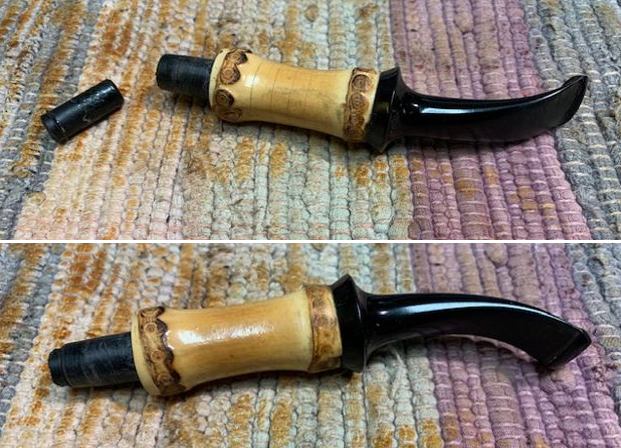
 Anyway, I began with the stem and inner tube, which I resolved fairly quickly. The leather enveloping the bowl was quite clean and in good shape, so that was also a quick fix. I then moved on to the rim of the pipe. As the photos show, it was filthy and slightly damaged. I “topped” the pipe – that is to say, I gently and evenly sanded down the rim on a piece of 220-grit sandpaper. This was done with even greater care than usual, as I did not want to scuff the leather. I finished up the top with all nine of the MicroMesh pads to make a lovely surface and then used one of my furniture pens to liven up the colour of the rim.
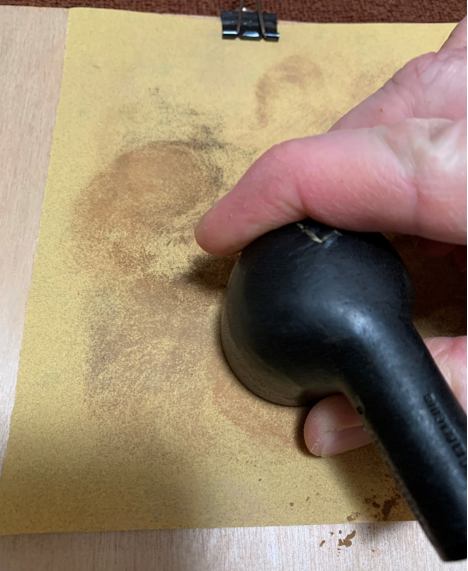
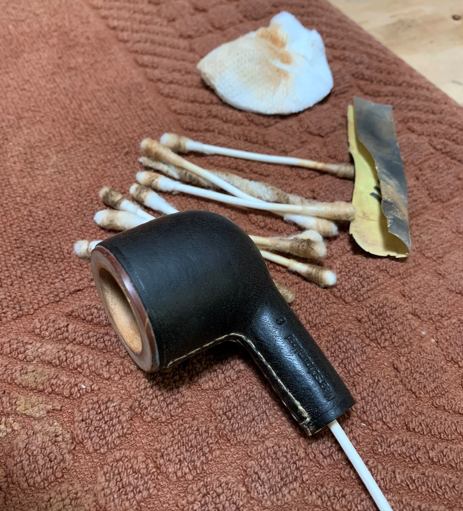

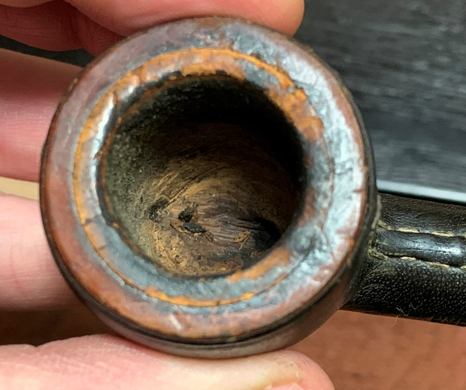
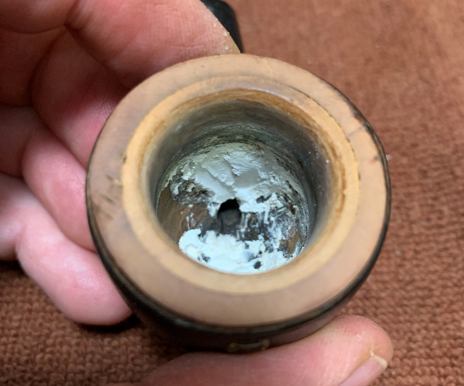
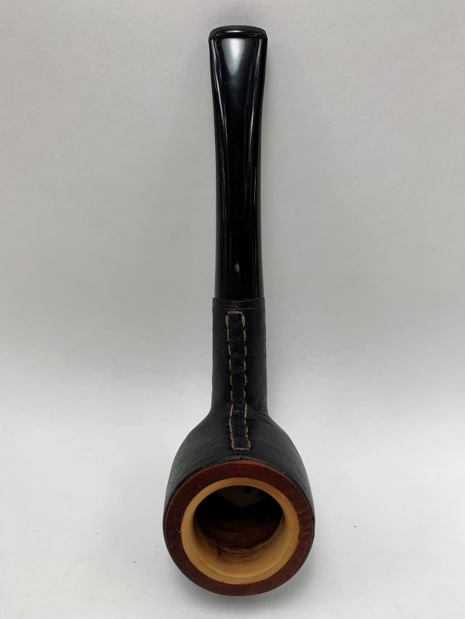
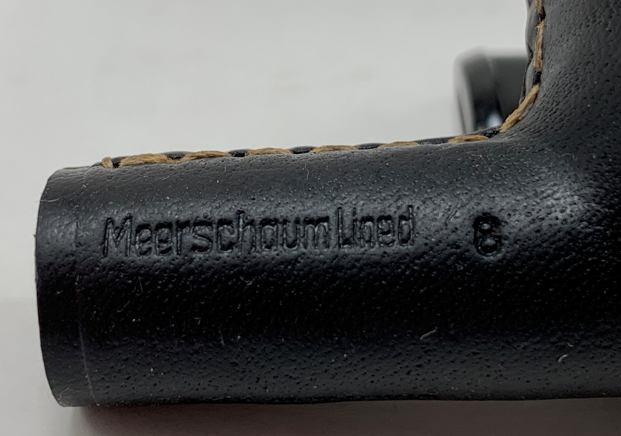
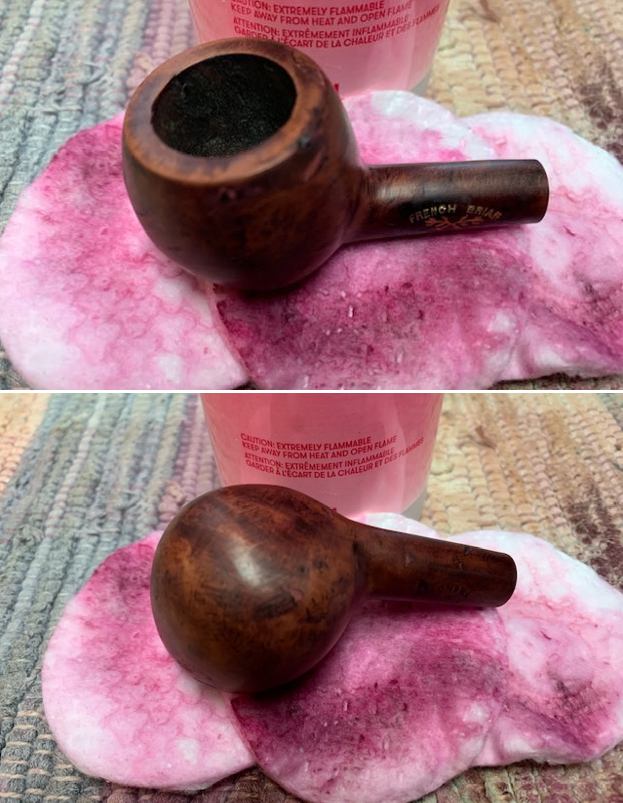
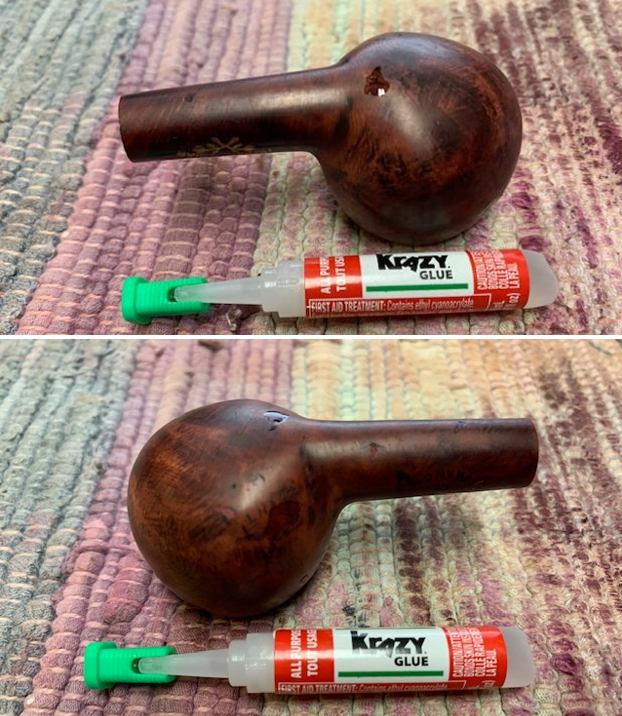
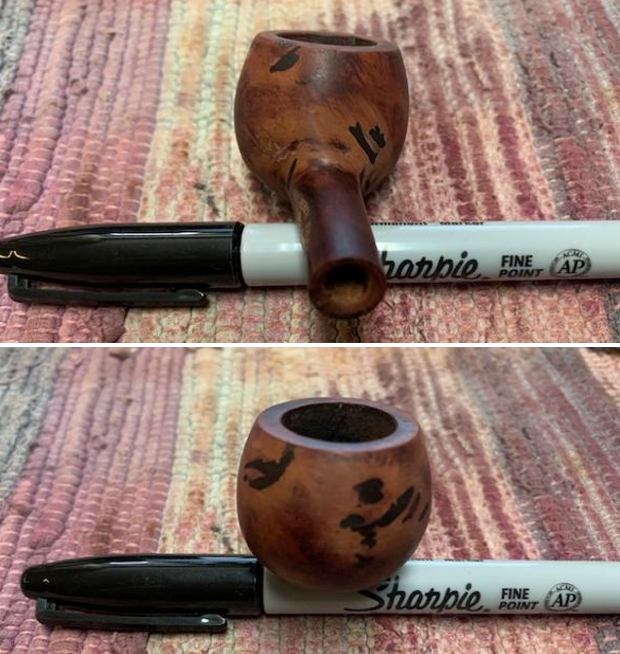
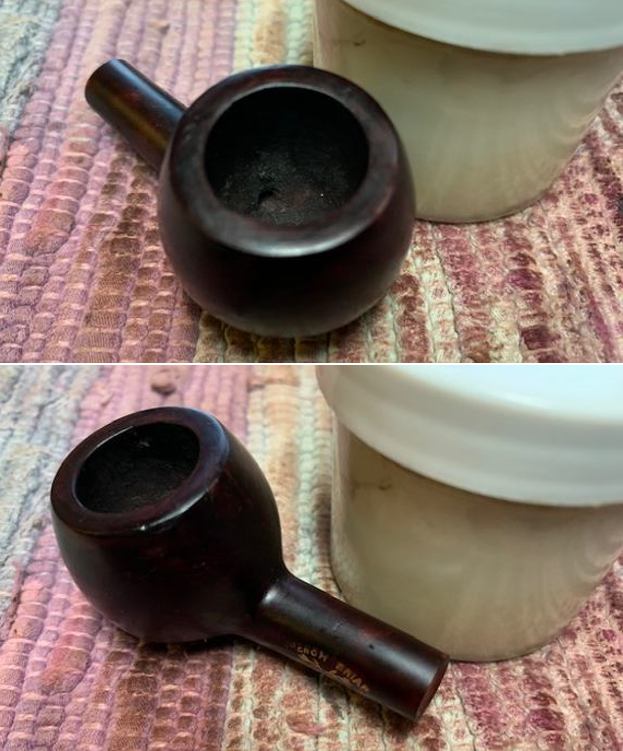
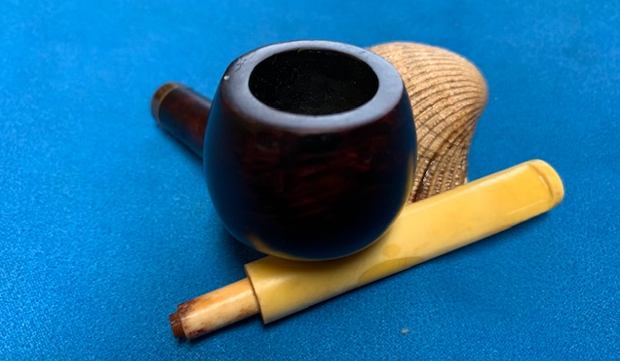
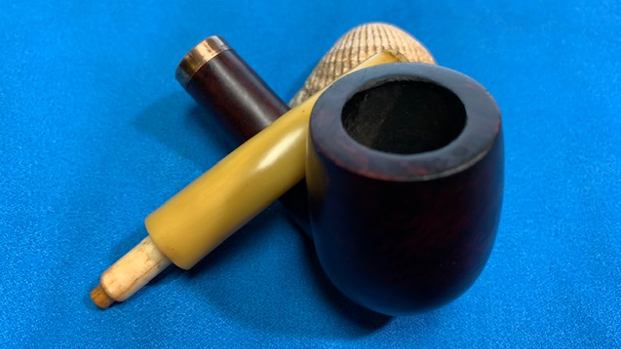
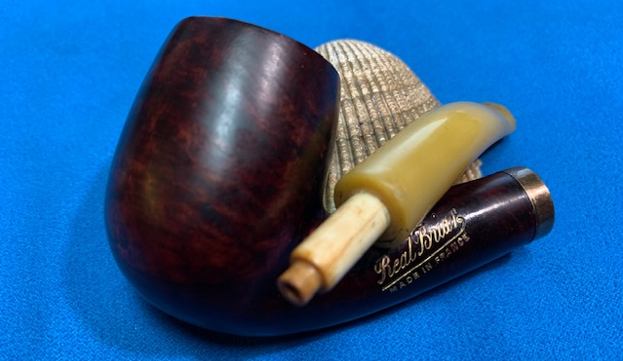
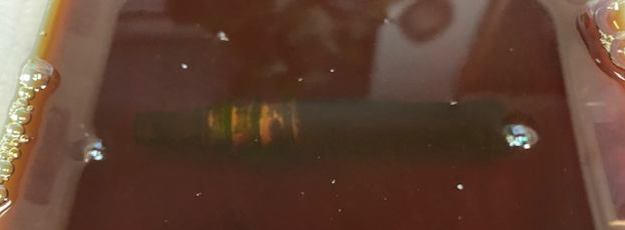
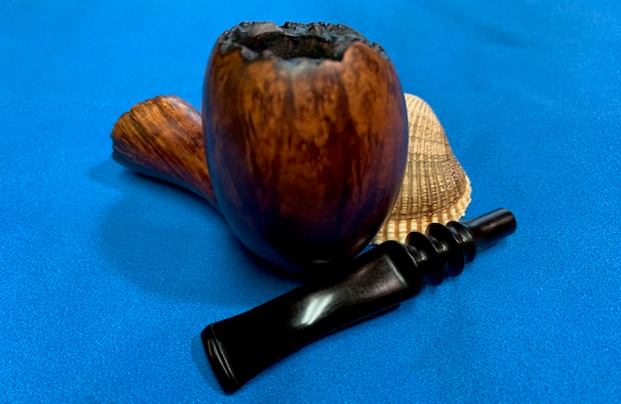
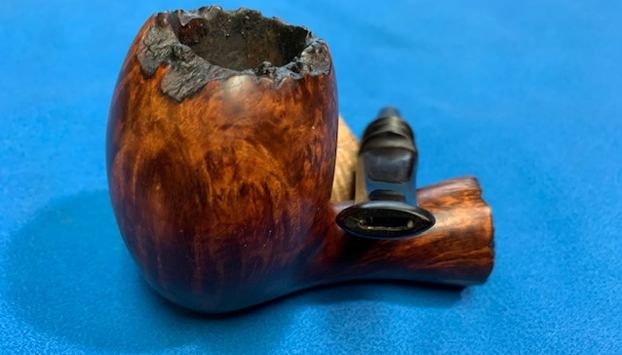
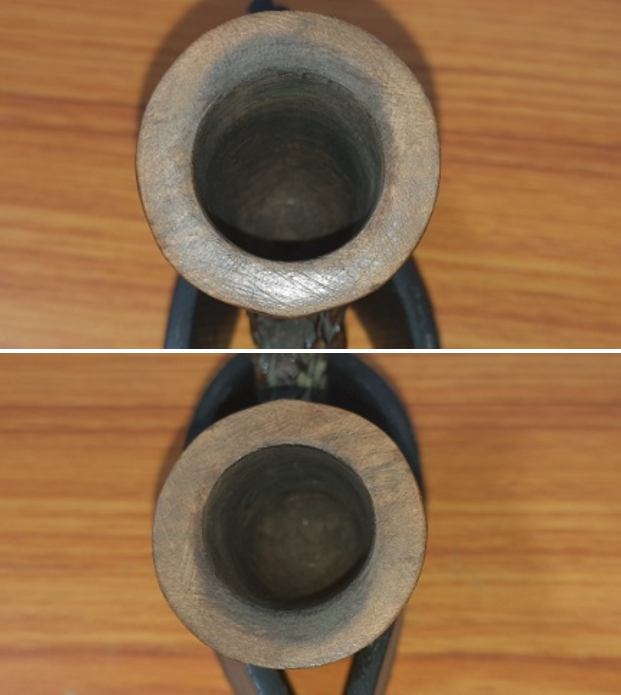
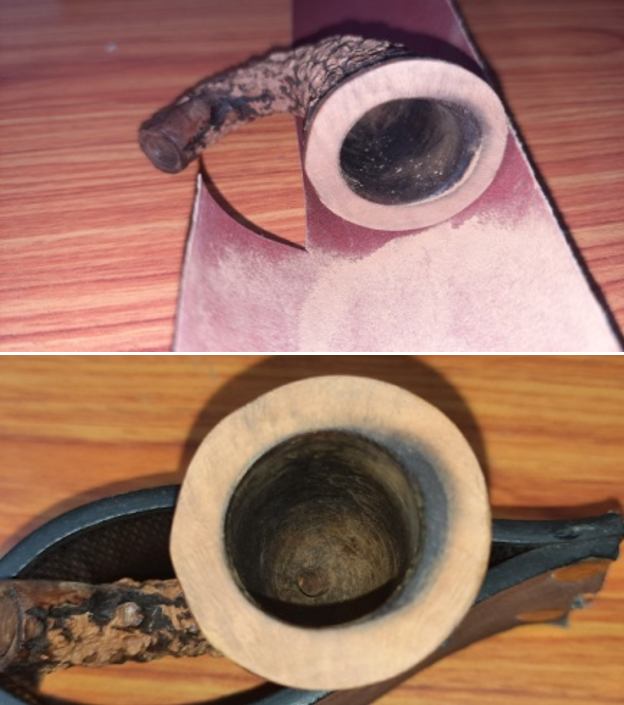
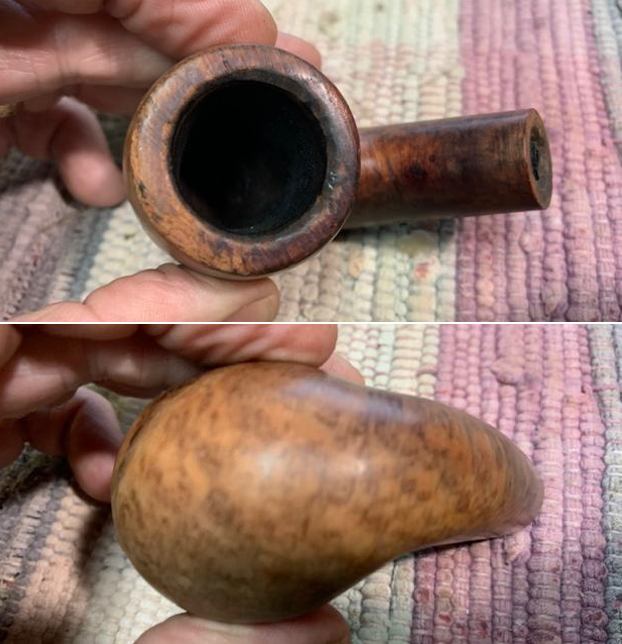
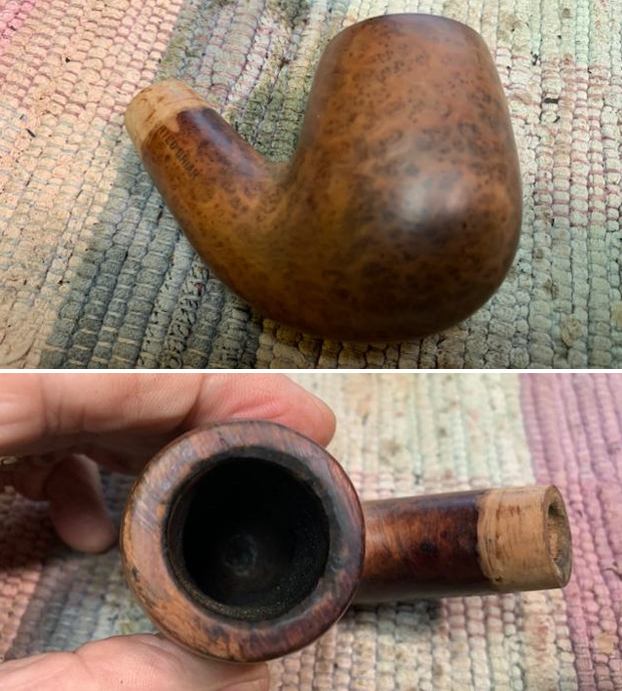
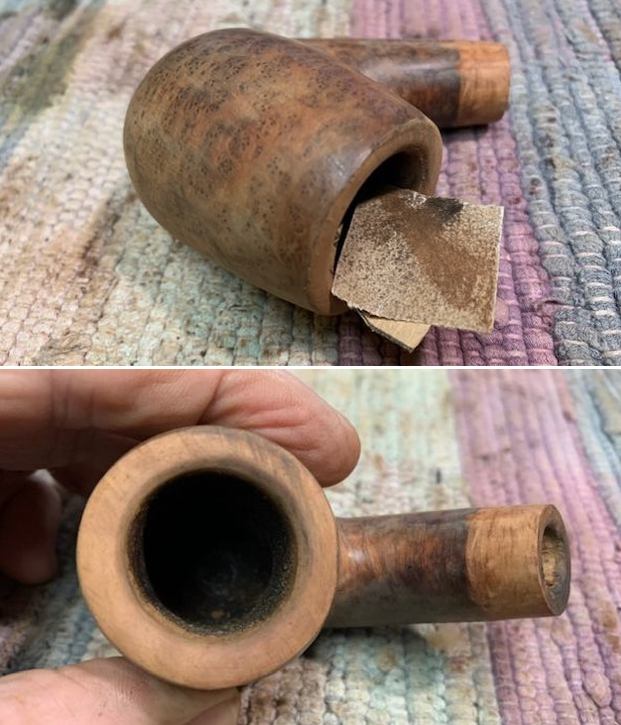
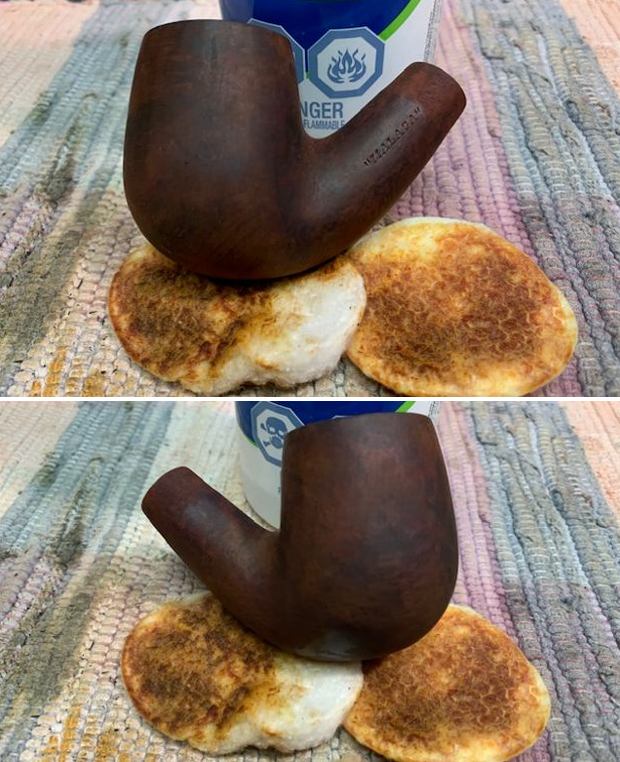
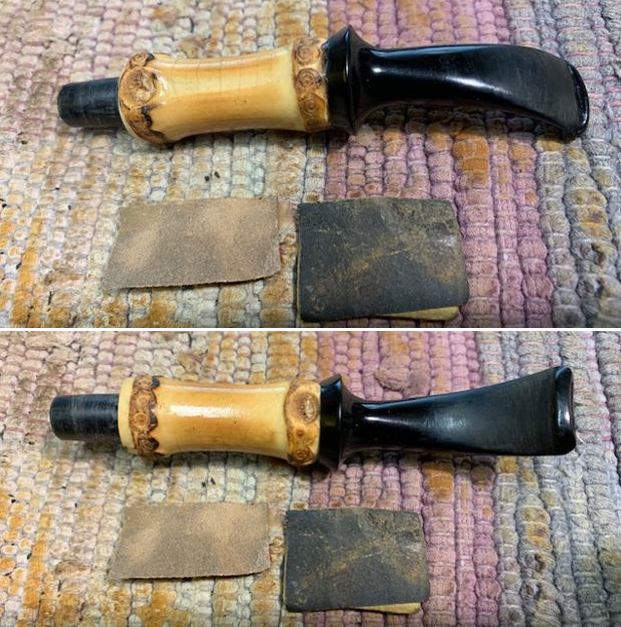
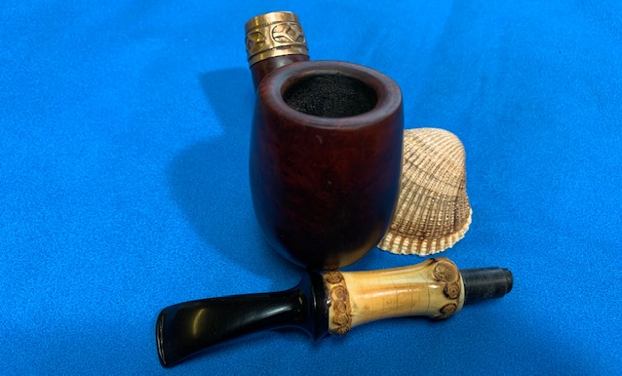
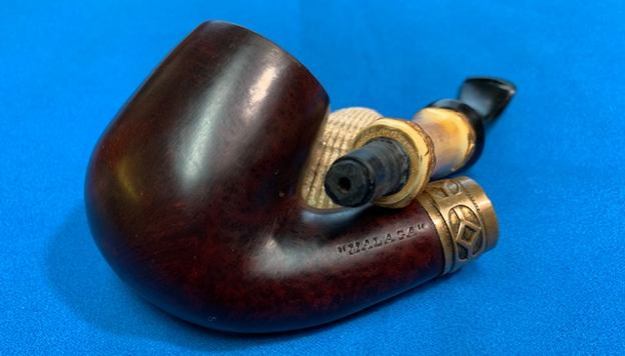
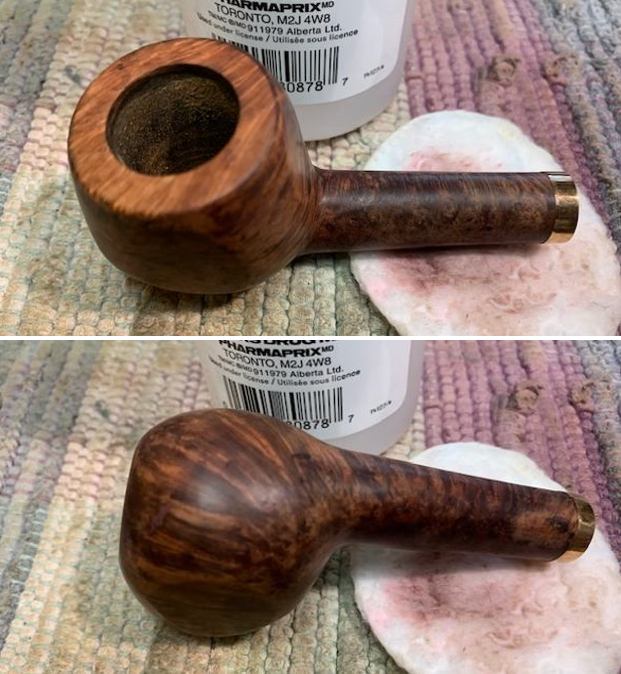
 That done, I moved on to the inside of the bowl. Meerschaum does not do well with traditional reaming processes – it needed to be sanded. This was required – not just to clean things up – but also as there was a distinct aromatic ghost left behind. Well, I went sanding away happily, when – lo! and behold – a flaw or cavity appeared in the wall of the meerschaum bowl. Yikes!
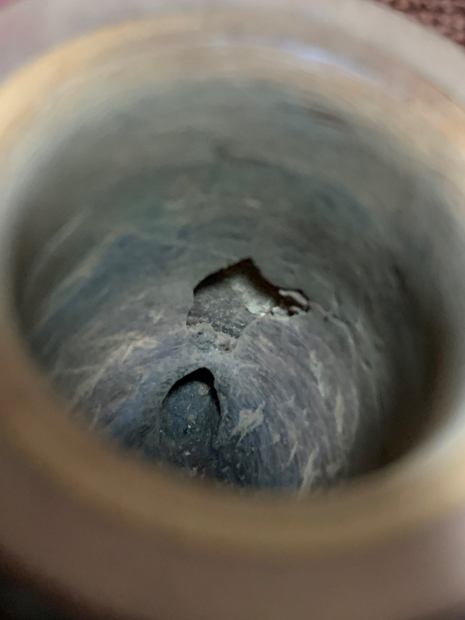
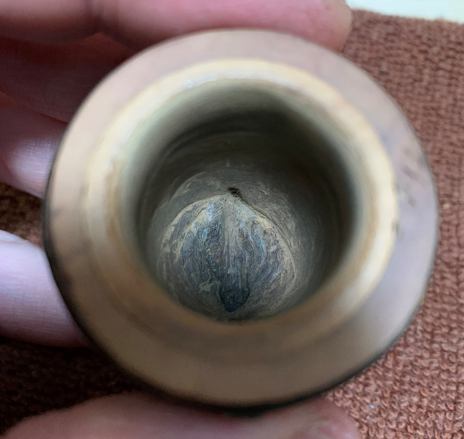 This is obviously a serious concern for this pipe. One is tempted to wonder: was there a manufacturing flaw? Not sure. Did I sand too hard and cause the breakage? Definitely not. Could there be other flaws? Not as far as I could tell, but it was difficult to be sure.
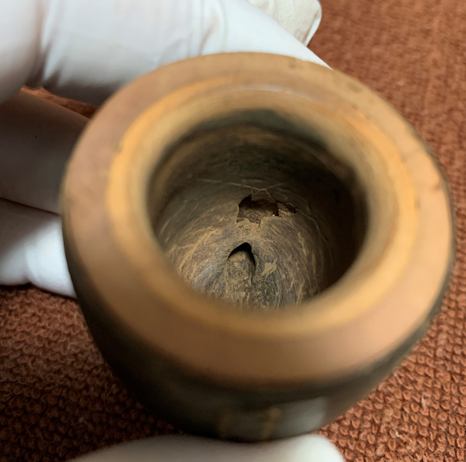
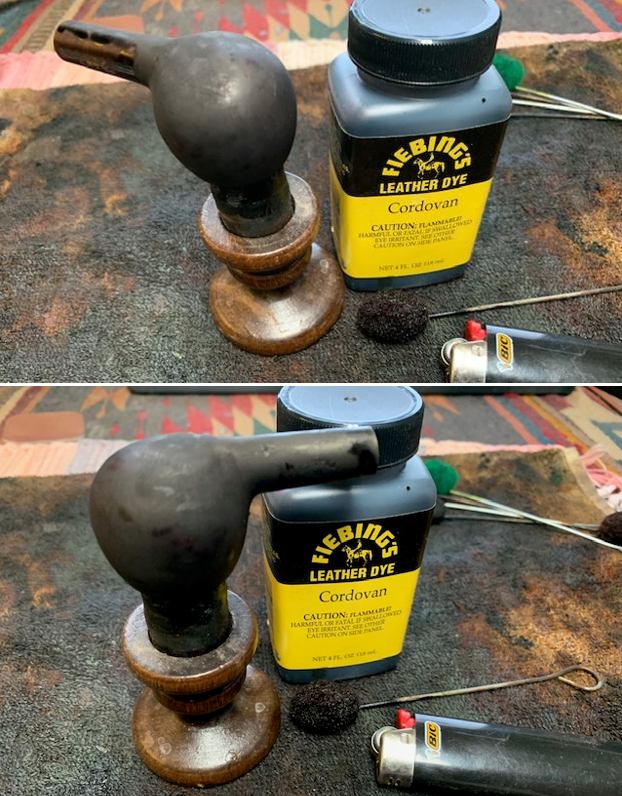
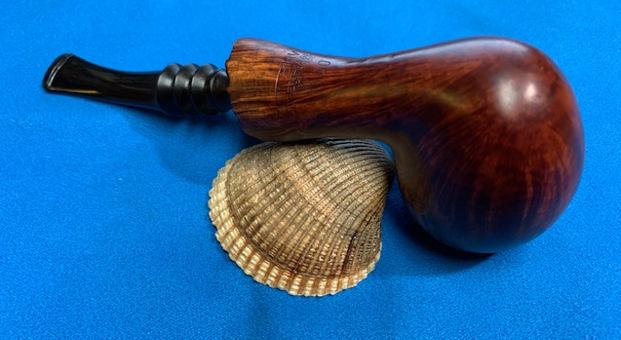
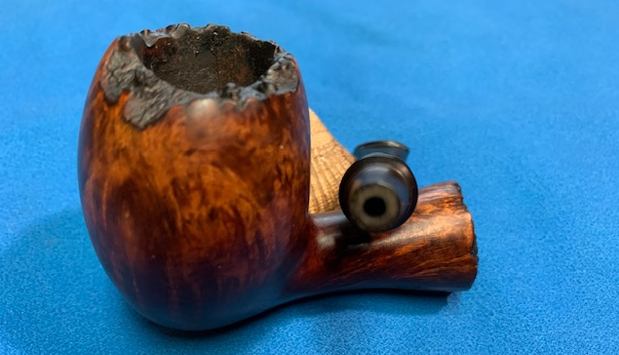
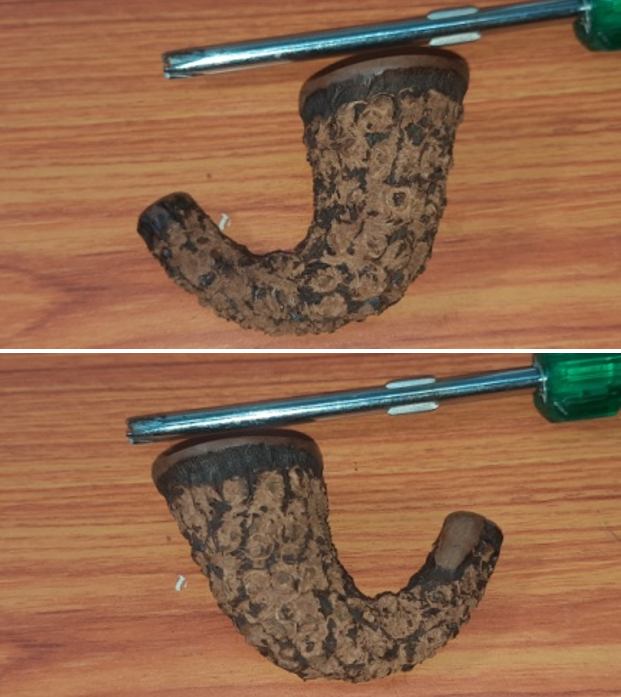
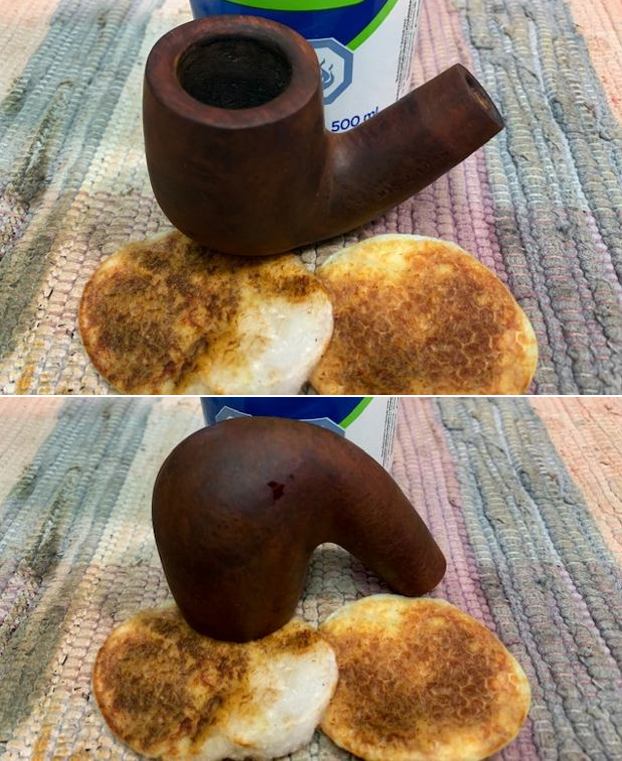
 This repair was going to need something more than egg white and chalk dust. After consulting with Steve, his recommendation was to repair both the gouge in the heel and the wall cavity with plaster of Paris. I agreed since plaster of Paris has the virtues of binding well to the meerschaum, resisting heat nicely, and (best of all) drying rock hard. I rushed out to buy some and started making my mix. In order to ensure that it works correctly in this context, the plaster of Paris must be much thicker than usual. Normally, the consistency would be something like thick pancake batter, whereas the mix I made was closer to cream cheese.
 As you can well imagine, actually applying the plaster of Paris properly to the inside of the bowl was a bit of a challenge. I used a dental spatula, which made the job much easier. First, I placed the plaster carefully in the gouge at the heel of the bowl. Next, I delicately filled in the cavity on the wall by inserting as much plaster as possible behind the intact areas of meerschaum. This would provide added strength and support to the repair. Finally, I filled in the hole itself and let all of the plaster harden overnight.
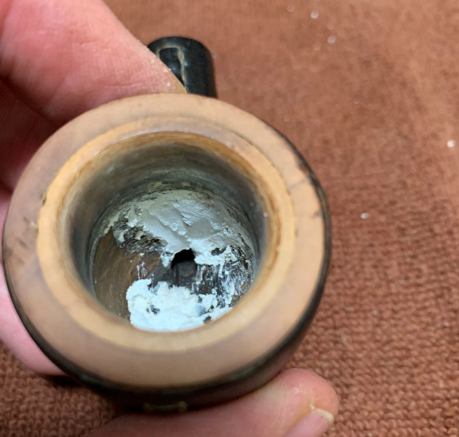
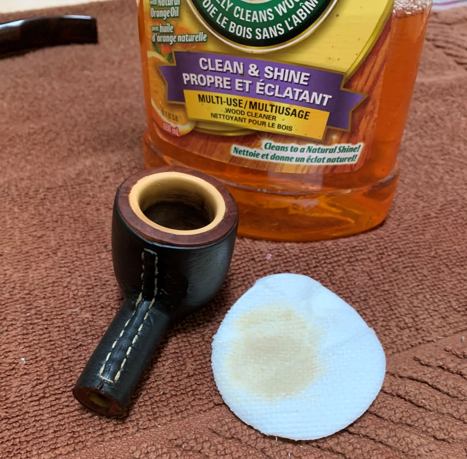
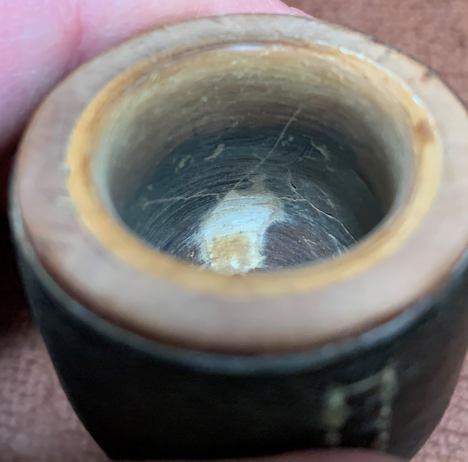
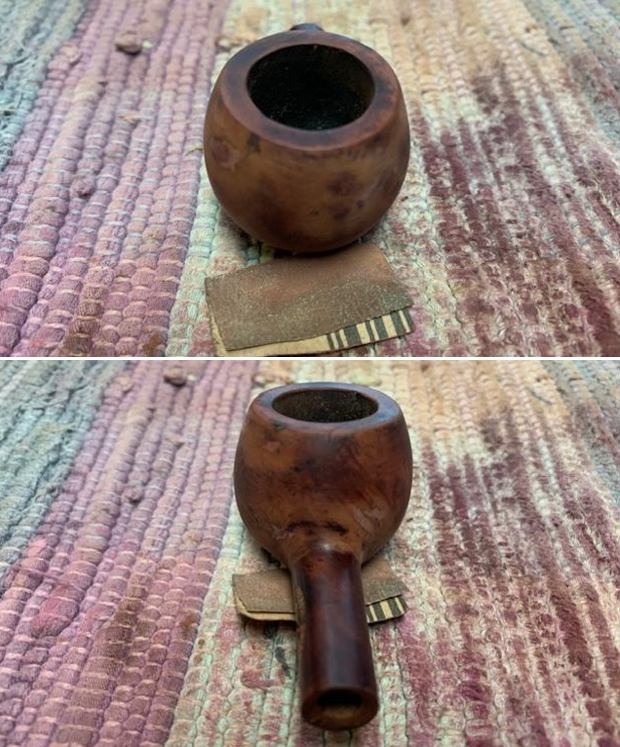
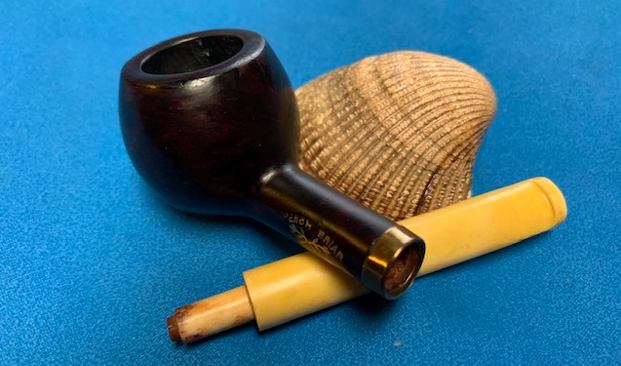
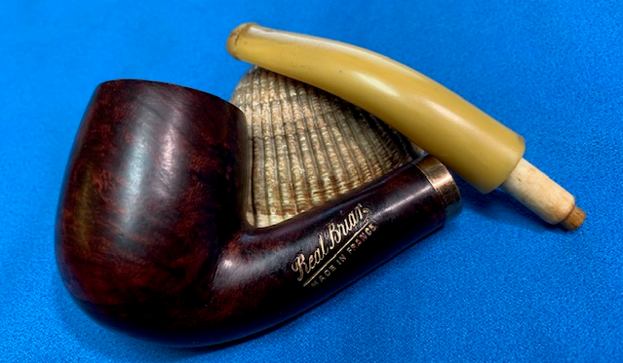
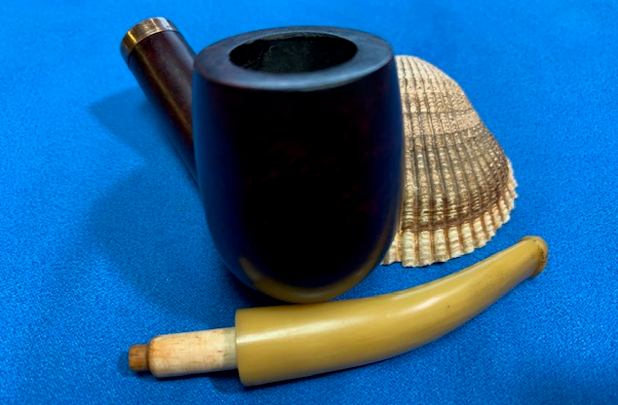
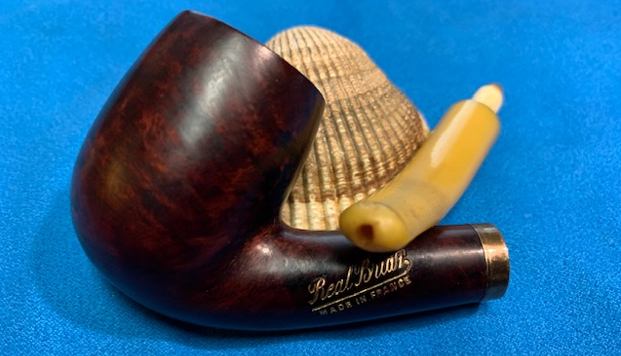
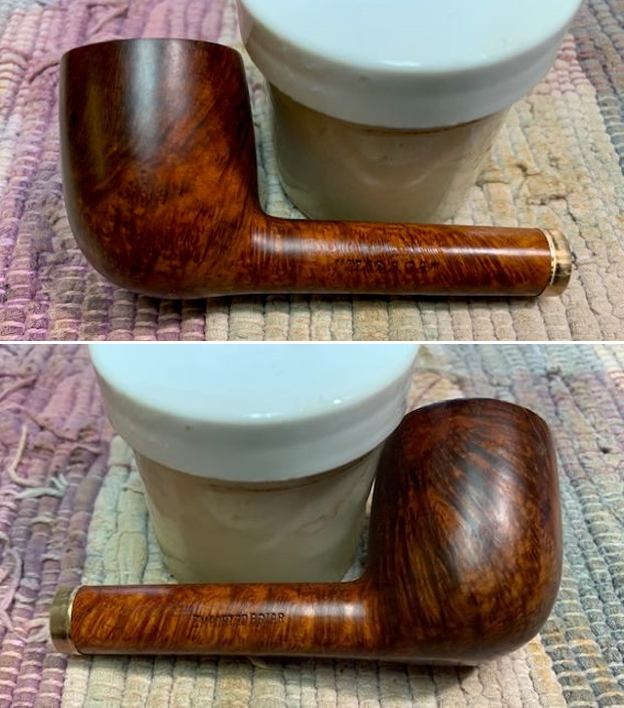
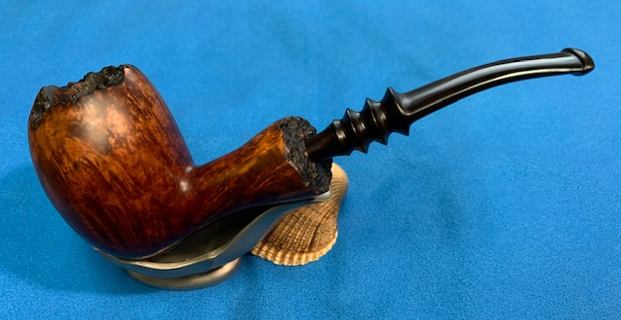
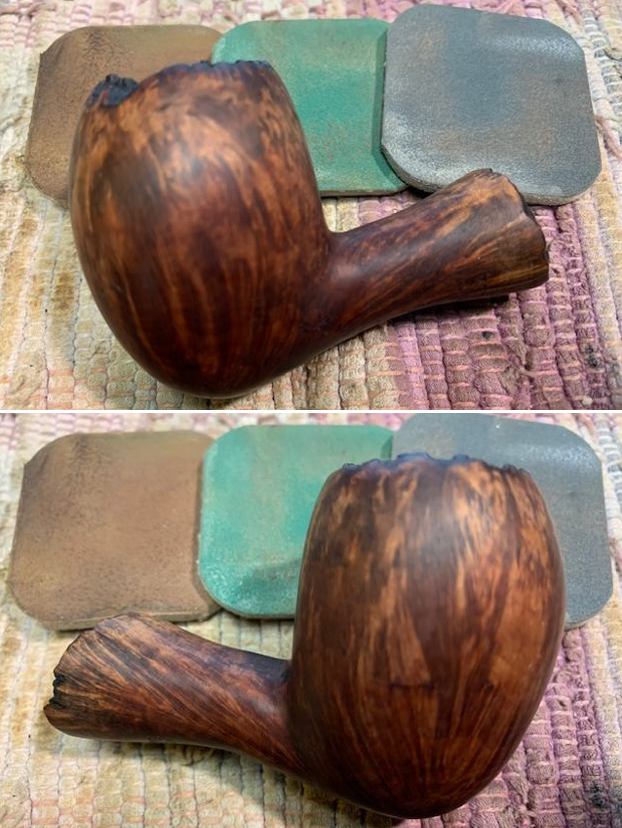
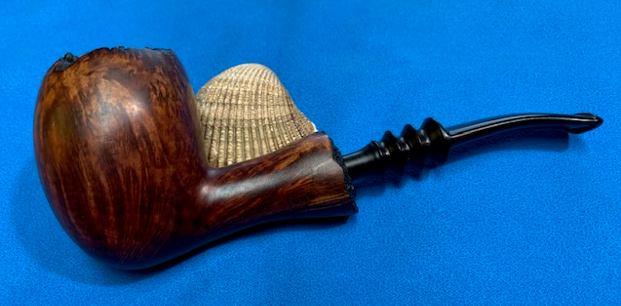
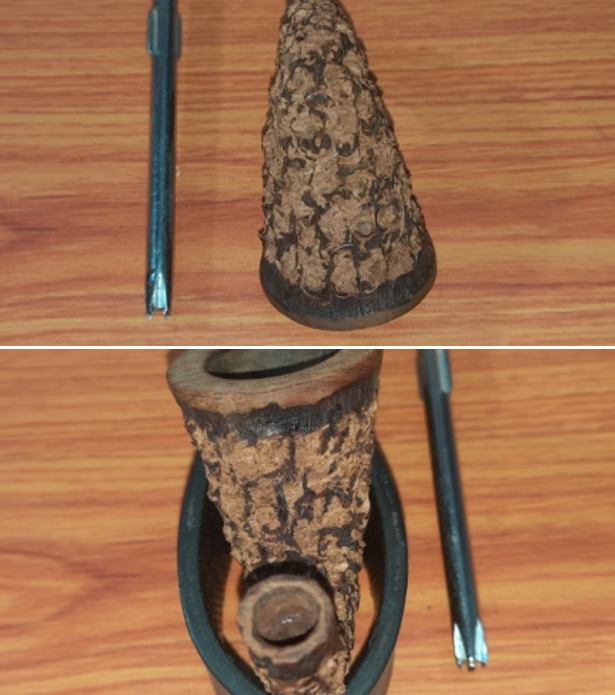
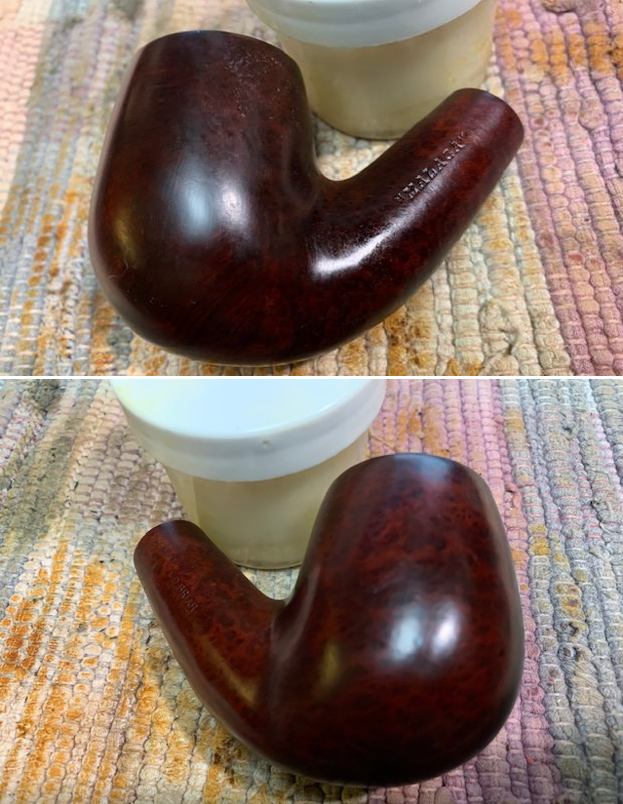
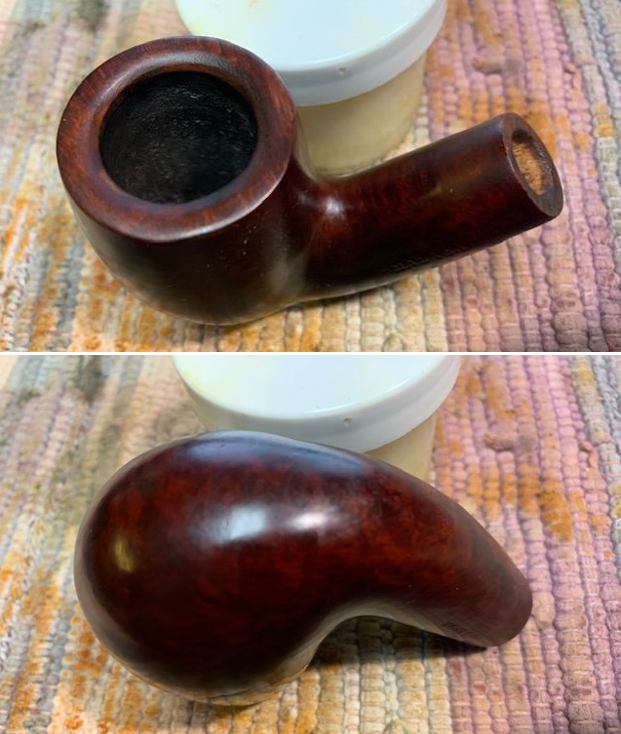
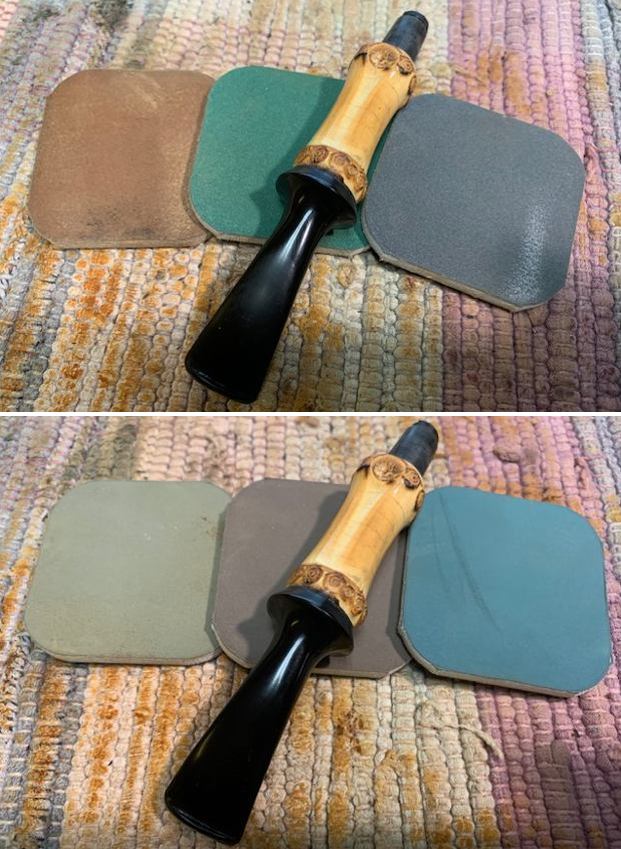
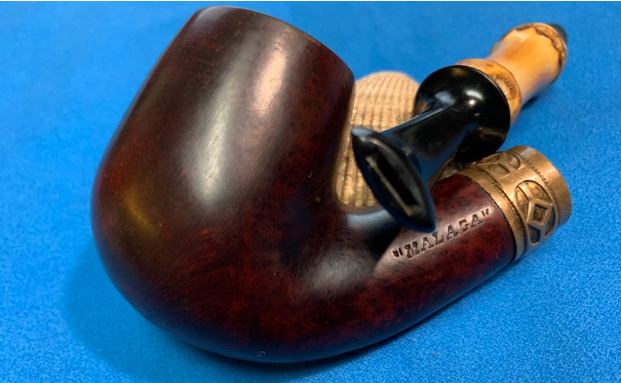
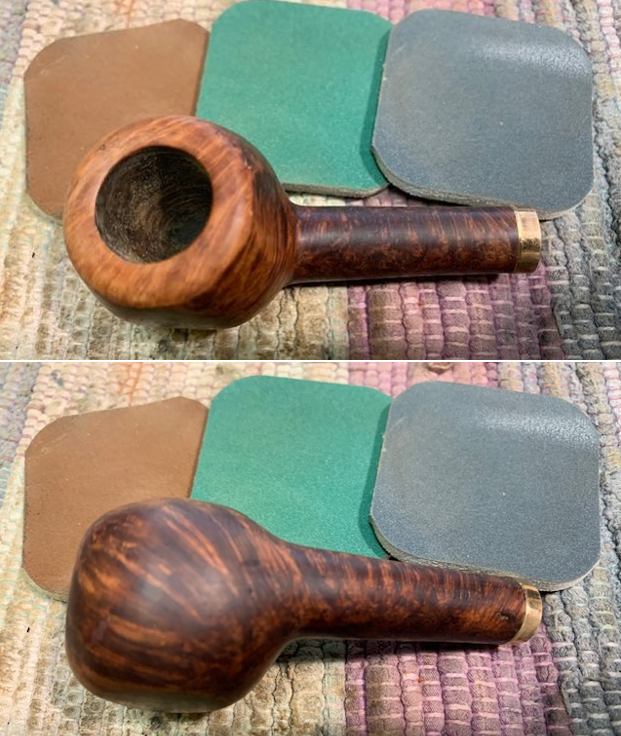
 On the morrow, the repair looked sound. The next step was to sand the plaster of Paris down to make it smooth and even with the surrounding meerschaum-lines bowl. I used 200- and 400-grit sandpaper to make this happen. I was very pleased with the way it looked in the end. As the photographs show, the plaster and meerschaum merged very well. I should add that the craze lines that you can see were also addressed, but I neglected to take a photo of that.
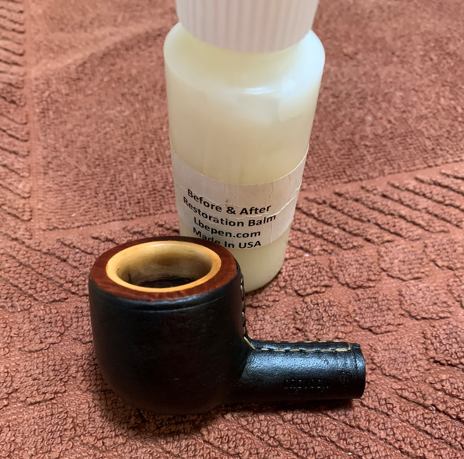
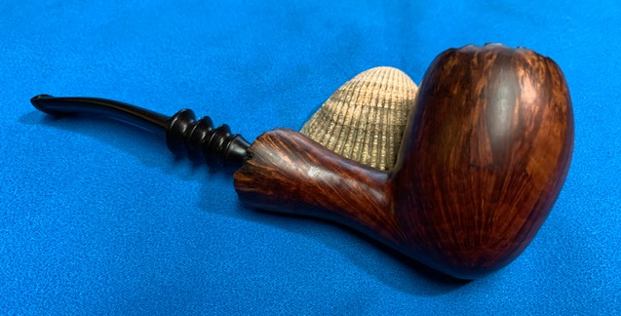
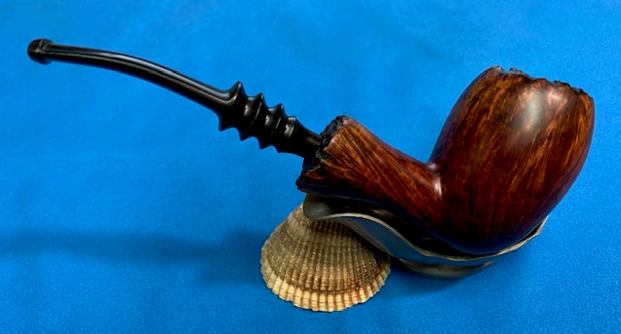
 In the end, the pipe was successfully restored and, what looked at first to be a fatal flaw in the meerschaum, turned out to be an educational and enjoyable repair. I was originally tempted to call this blog post “I got plastered in Paris”, but that seemed too cheeky in the end. It is a nice pipe and its new owner is very pleased with the results. I hope you enjoyed reading this first installment of Pipe Incident Report – I look forward to writing more. If you are interested in my work, please follow me here on Steve’s website or email me directly at kenneth@knightsofthepipe.com. Thank you very much for reading and, as always, I welcome and encourage your comments.
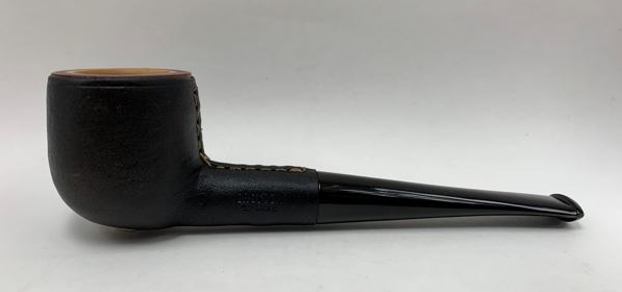


