Tag Archives: correcting an overturned stem

Resurrecting A Dreary No Name Briar Calabash Shaped Pipe


Blog by Paresh Deshpande

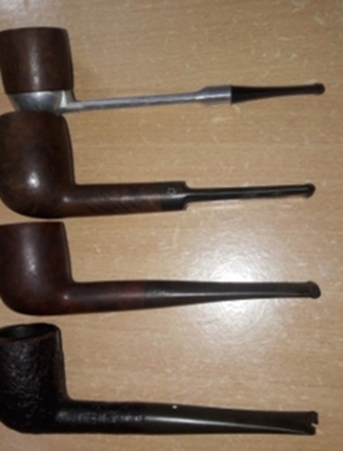
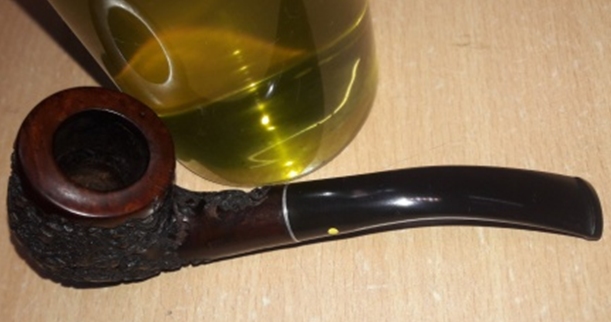
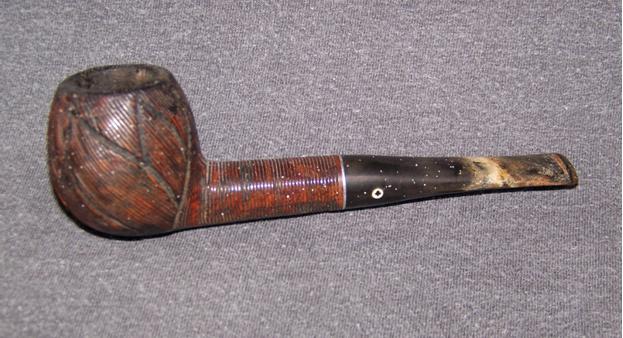
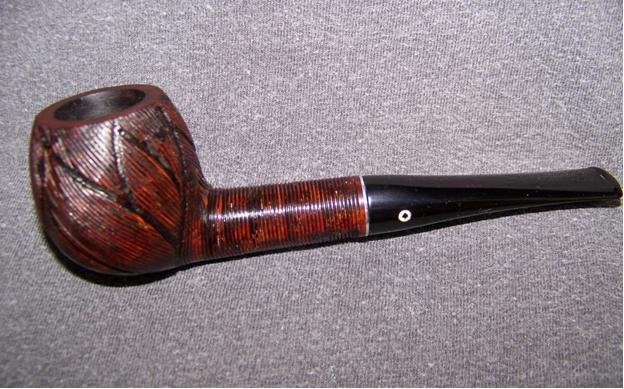
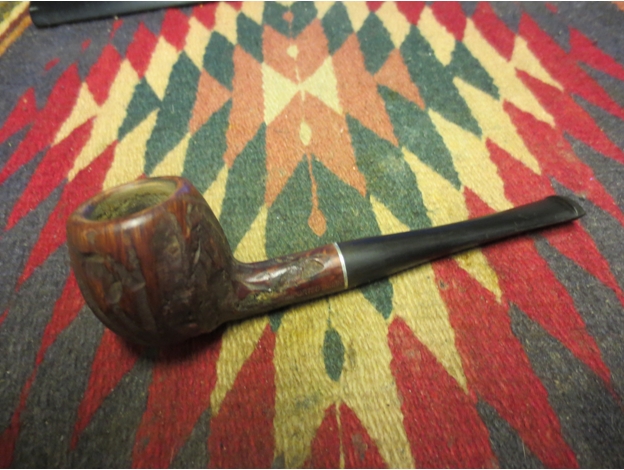
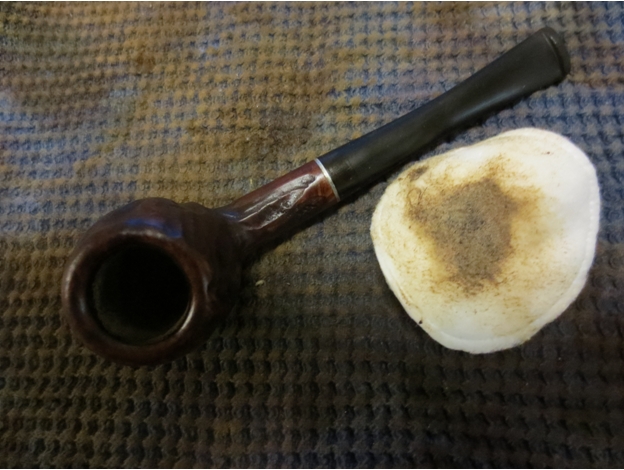
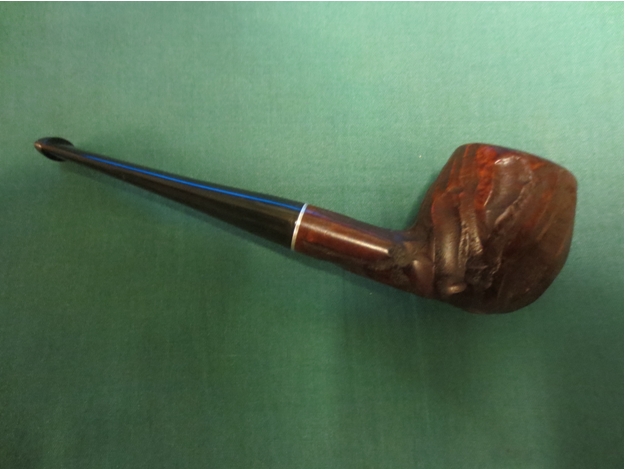
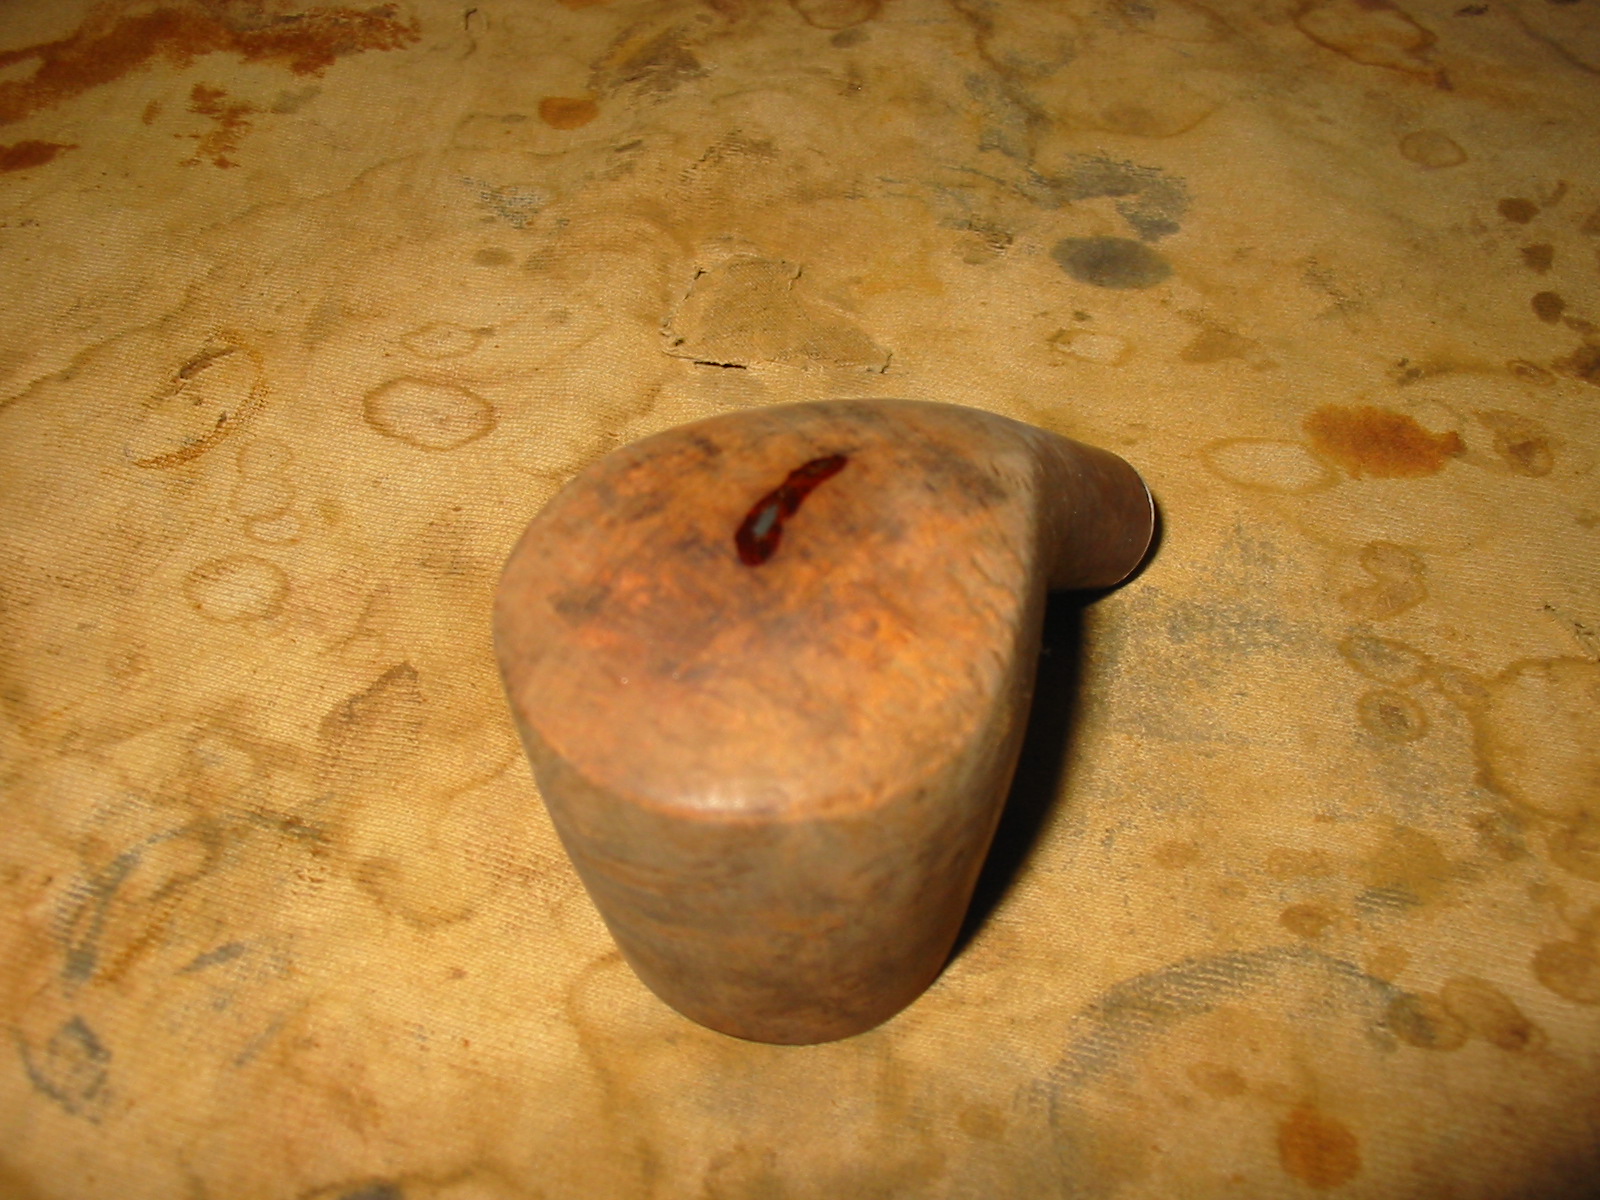
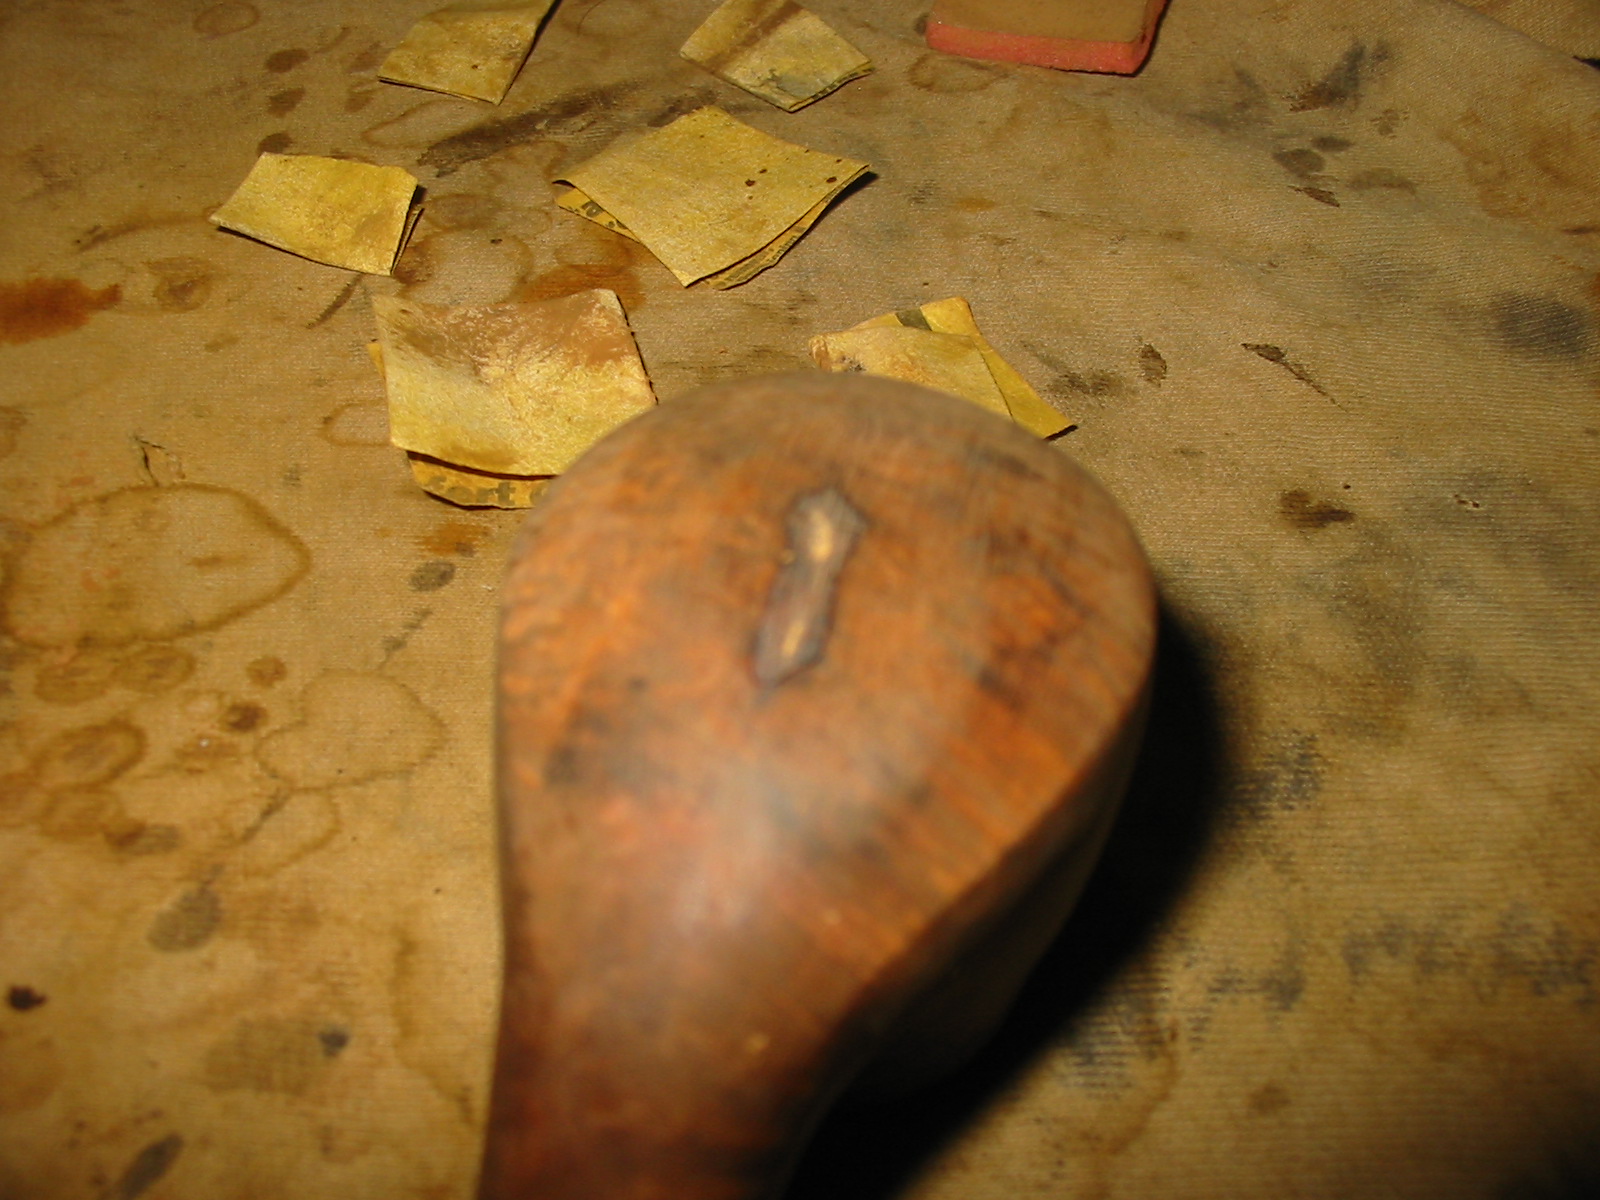
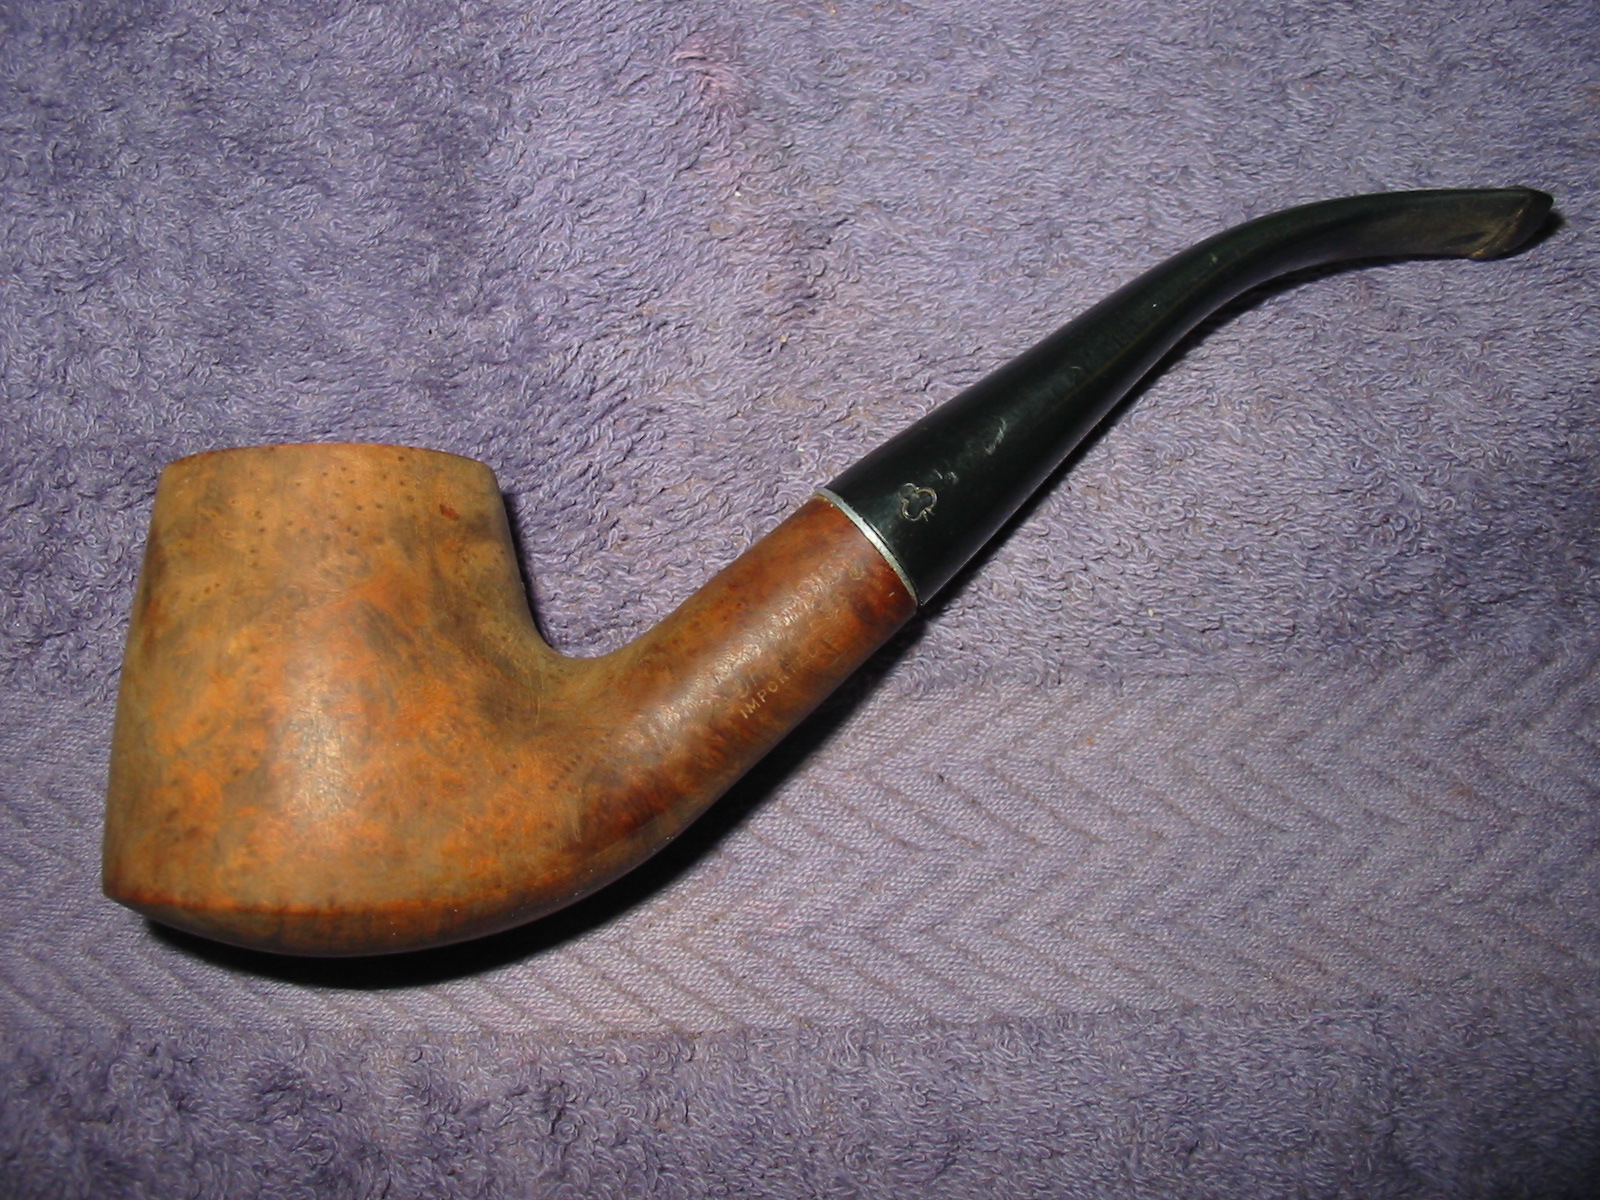
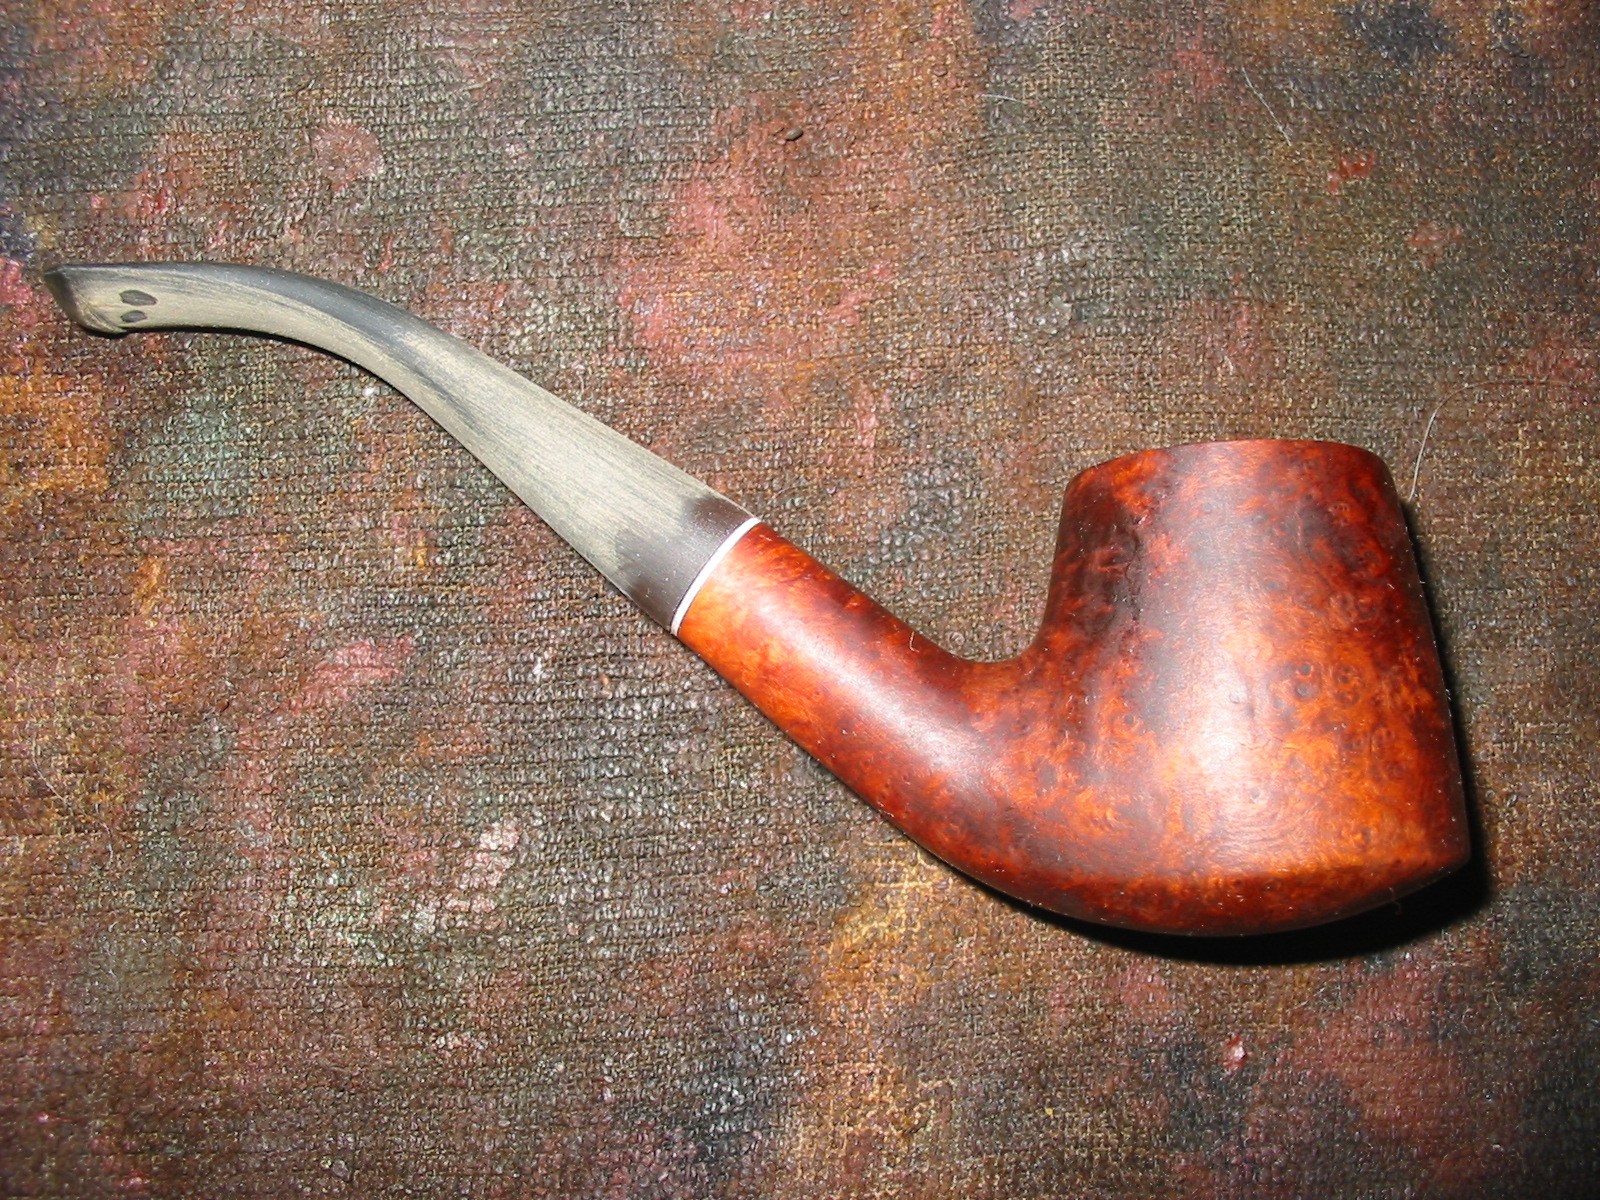
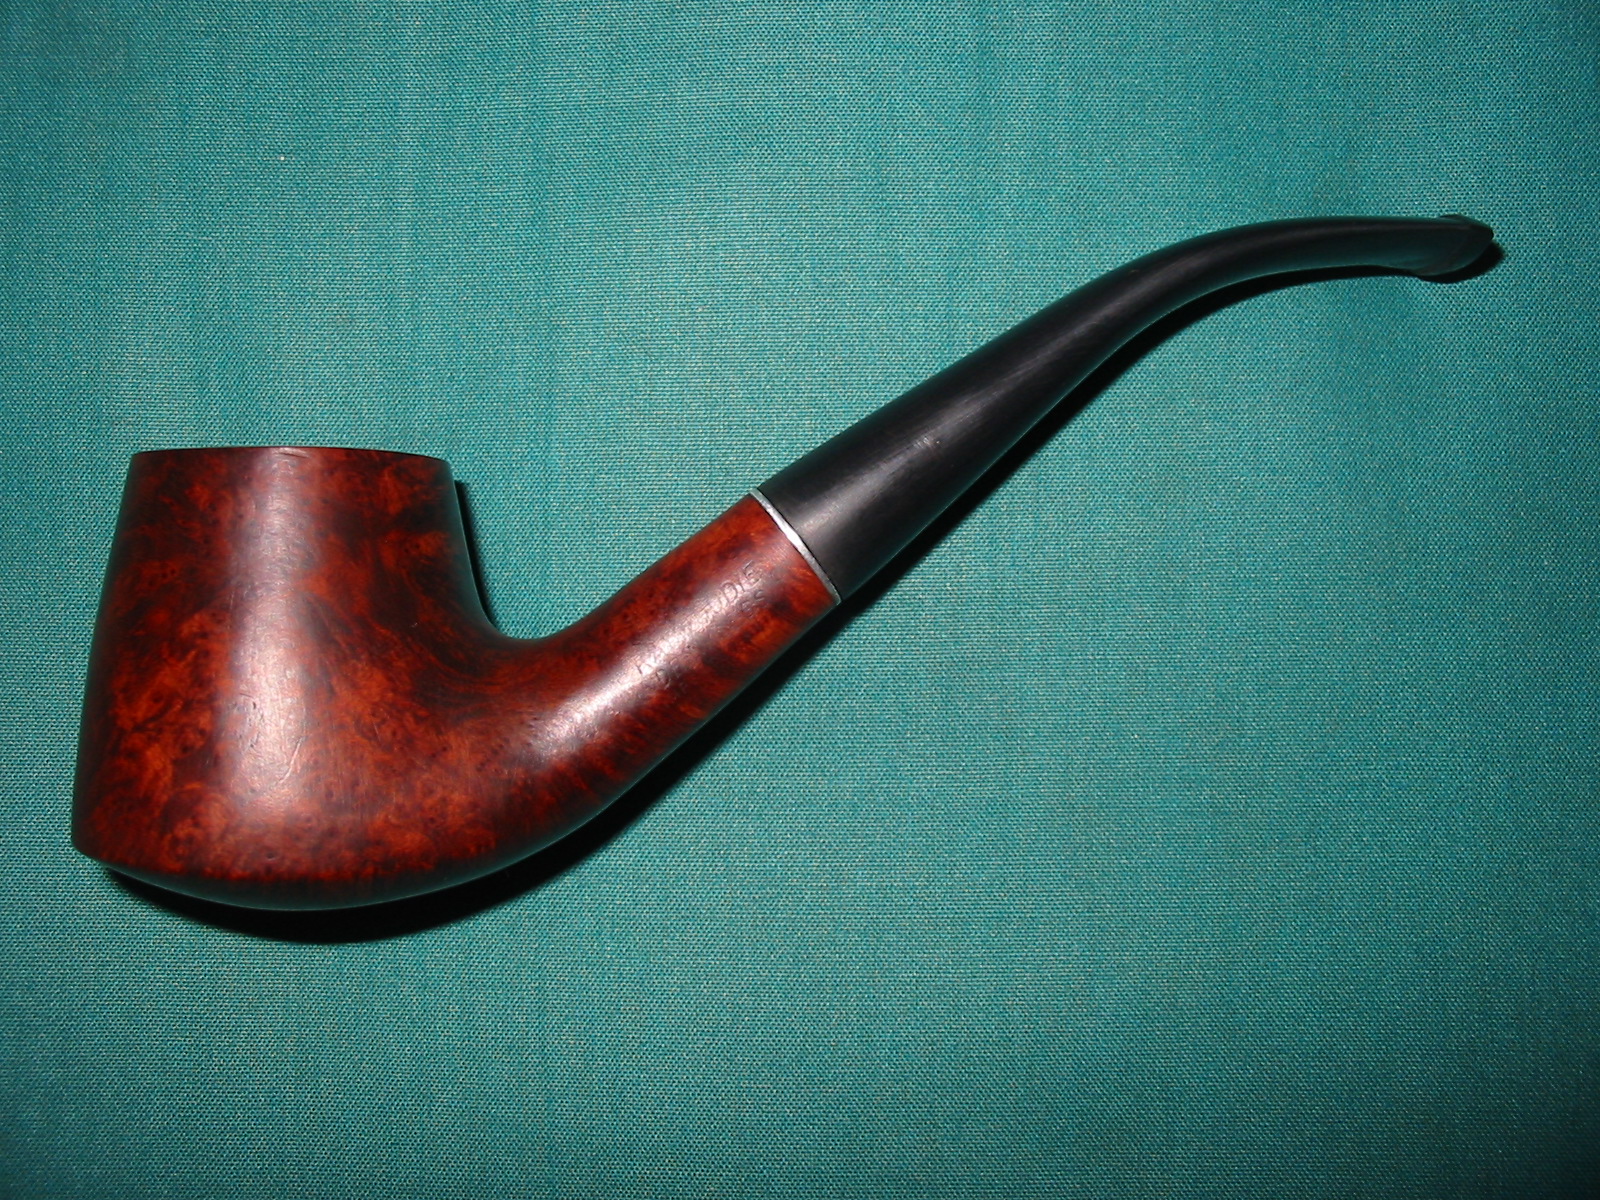
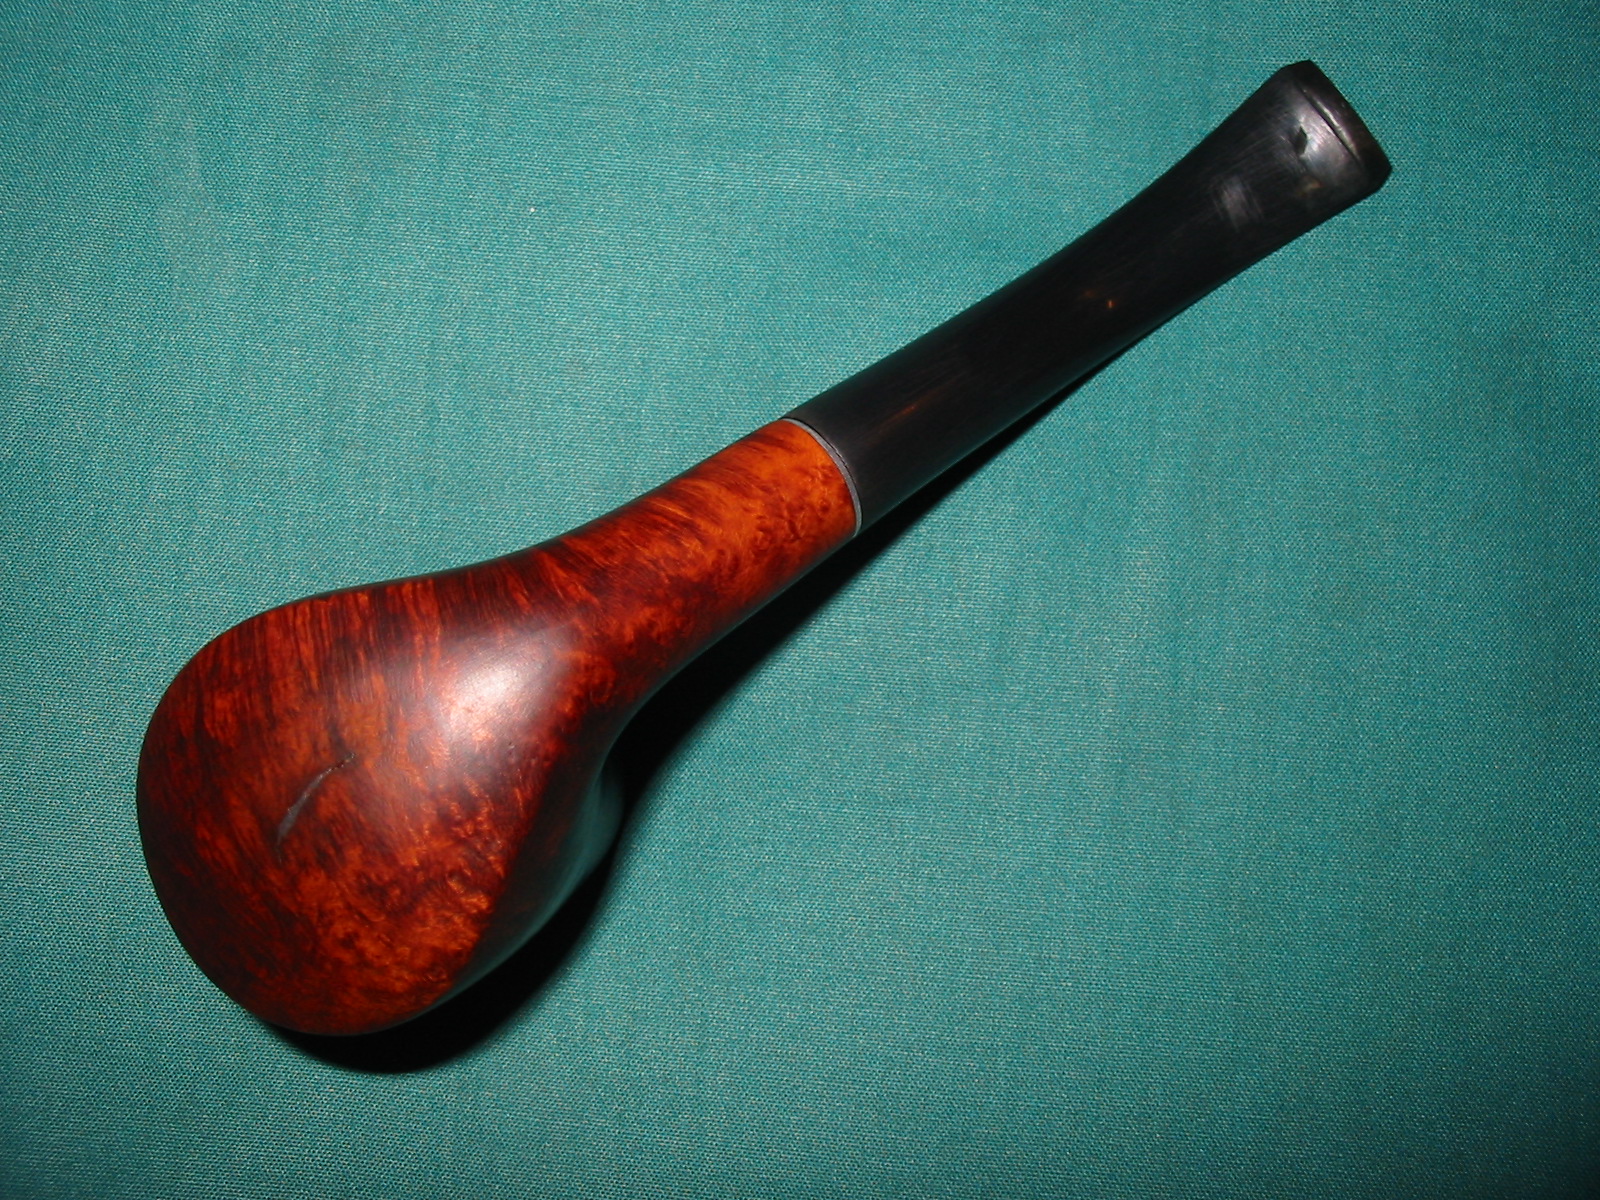
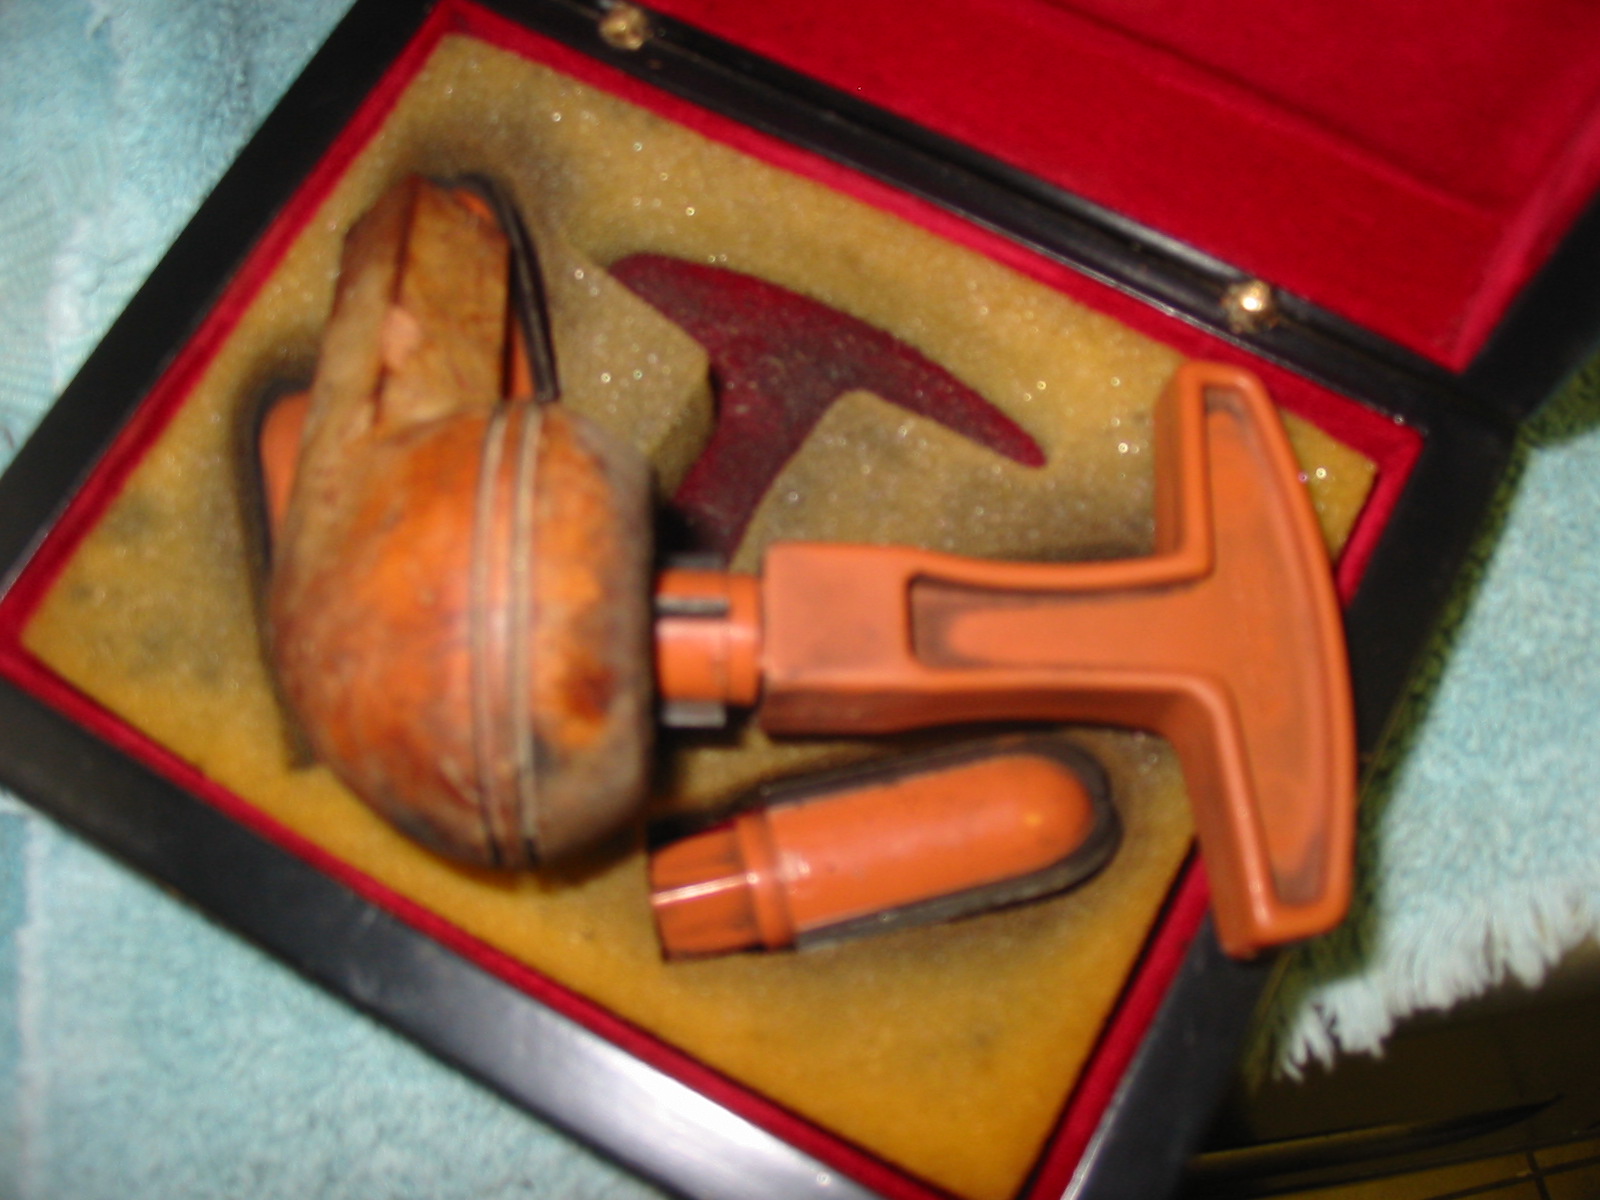
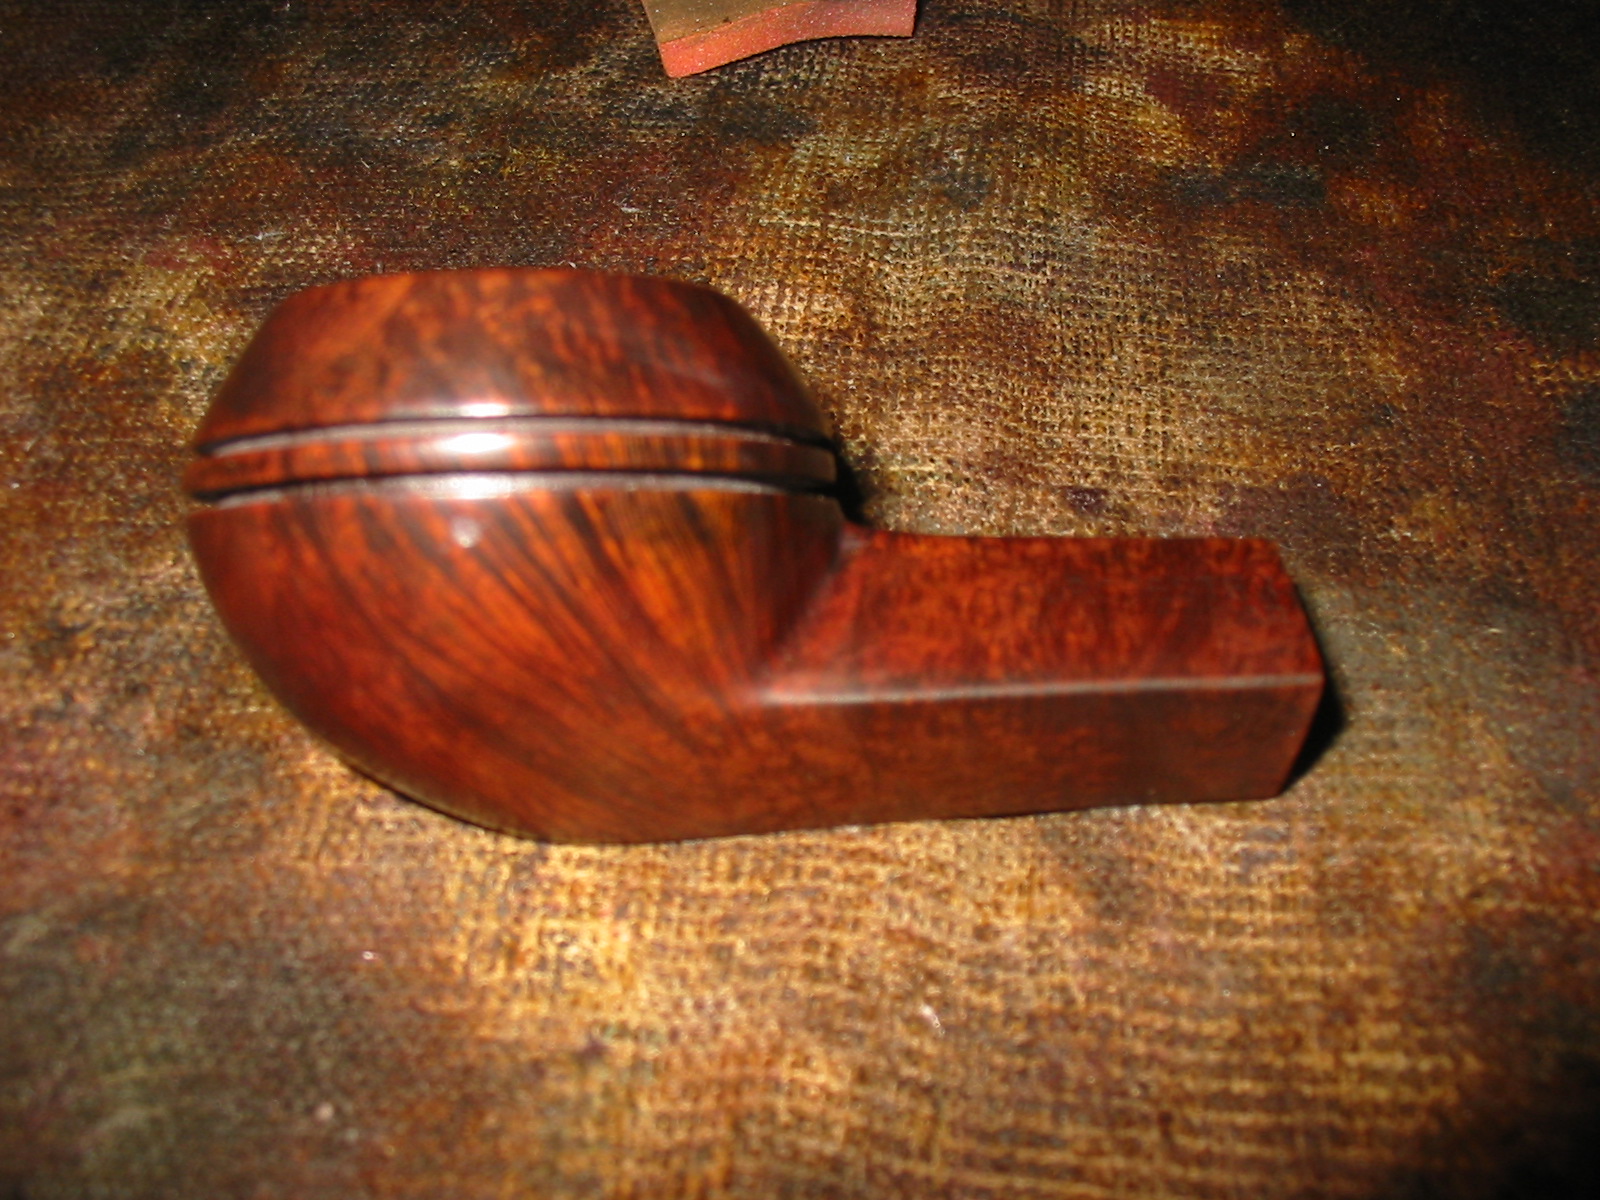
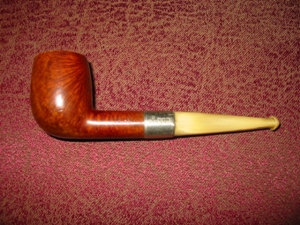
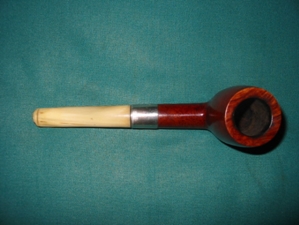
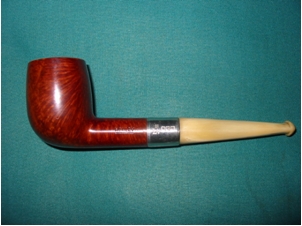
While surfing eBay for estate pipes, I came across this one ‘no name’ pipe with a horn stem and beautiful flowing calabash shape. The beautiful curvy shape apart, the pipe had some really hideous (IMHO) rustication on the stummel surface, a semblance of widely spaced scales with thin vertical lines. The perfect shape and spacing of the scales over the stummel surface points to machined and not hand crafted rustications. Notwithstanding the rustications on the stummel, I fell in love with the pipe and had already chalked out a plan for its transformation even before I had won the auction. As I had expected, there was only a couple of other bids and the pipe soon made its way to me. A month and a half later, the pipe had reached me and now it is on my work table.

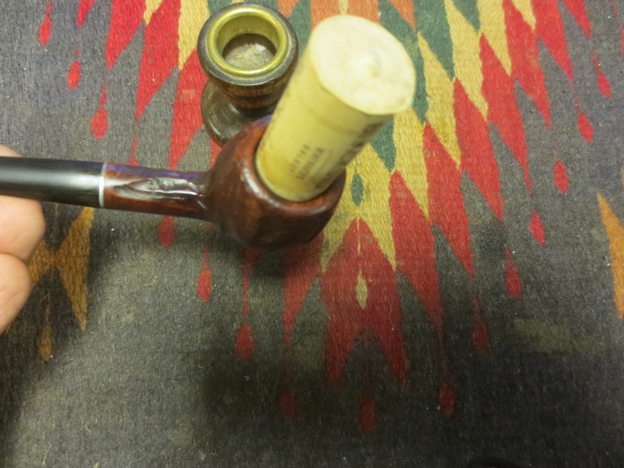
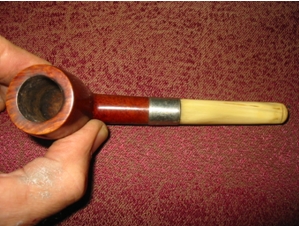
As mentioned by the seller, the stummel and the stem are devoid of any stampings and there is absolutely no clue for me to establish the provenance of this beautiful pipe. However, the threaded bone tenon, horn stem and round orifice are indicative of this pipe being from the period 1900s to 1950s. It would be interesting if further light could be shed on this pipe as regards its origin, vintage etc by the esteemed readers of rebornpipes.

Initial Visual Inspection
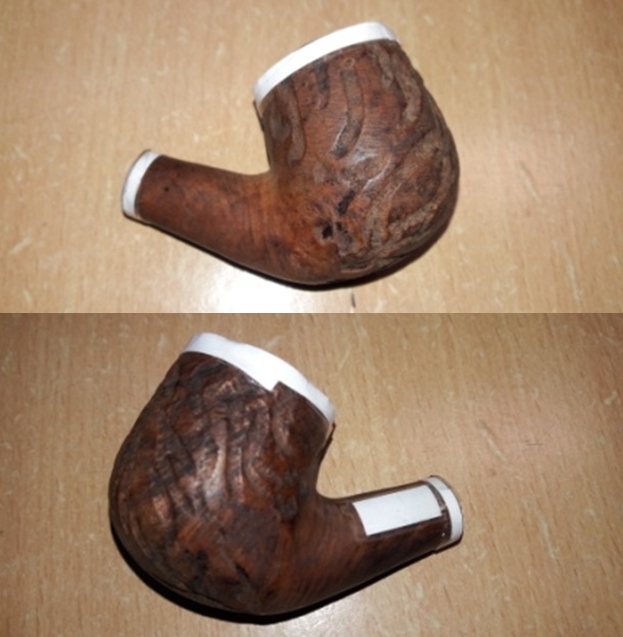
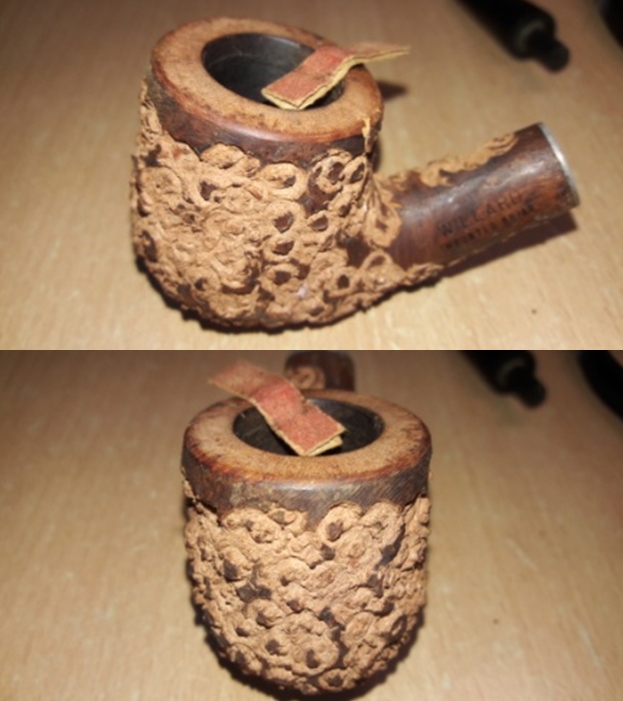
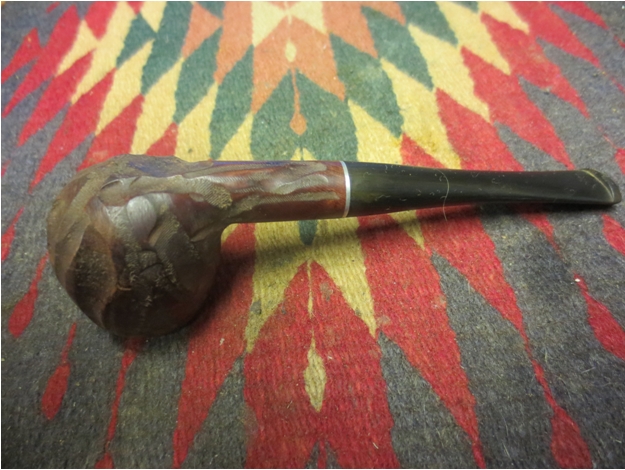
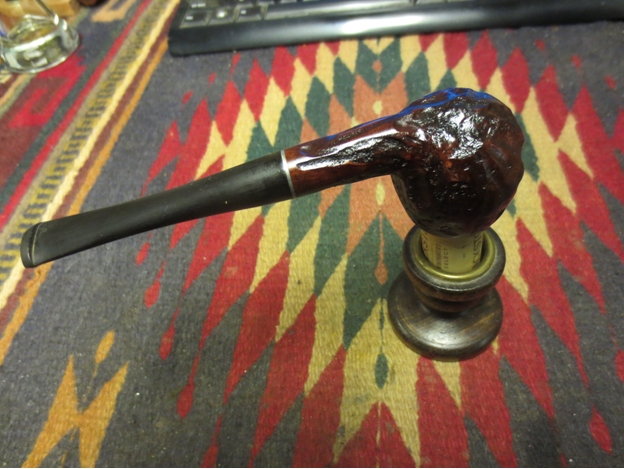
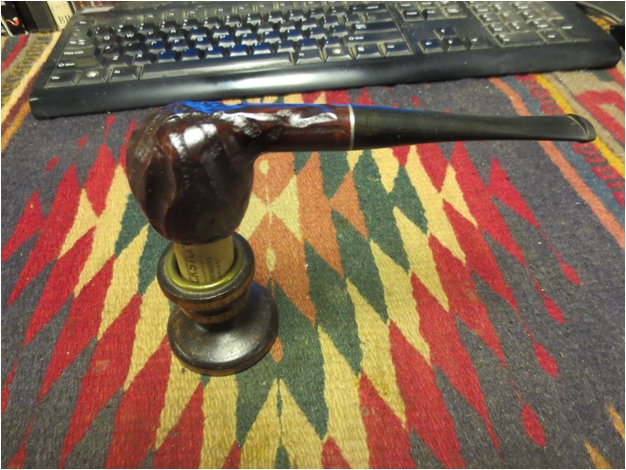
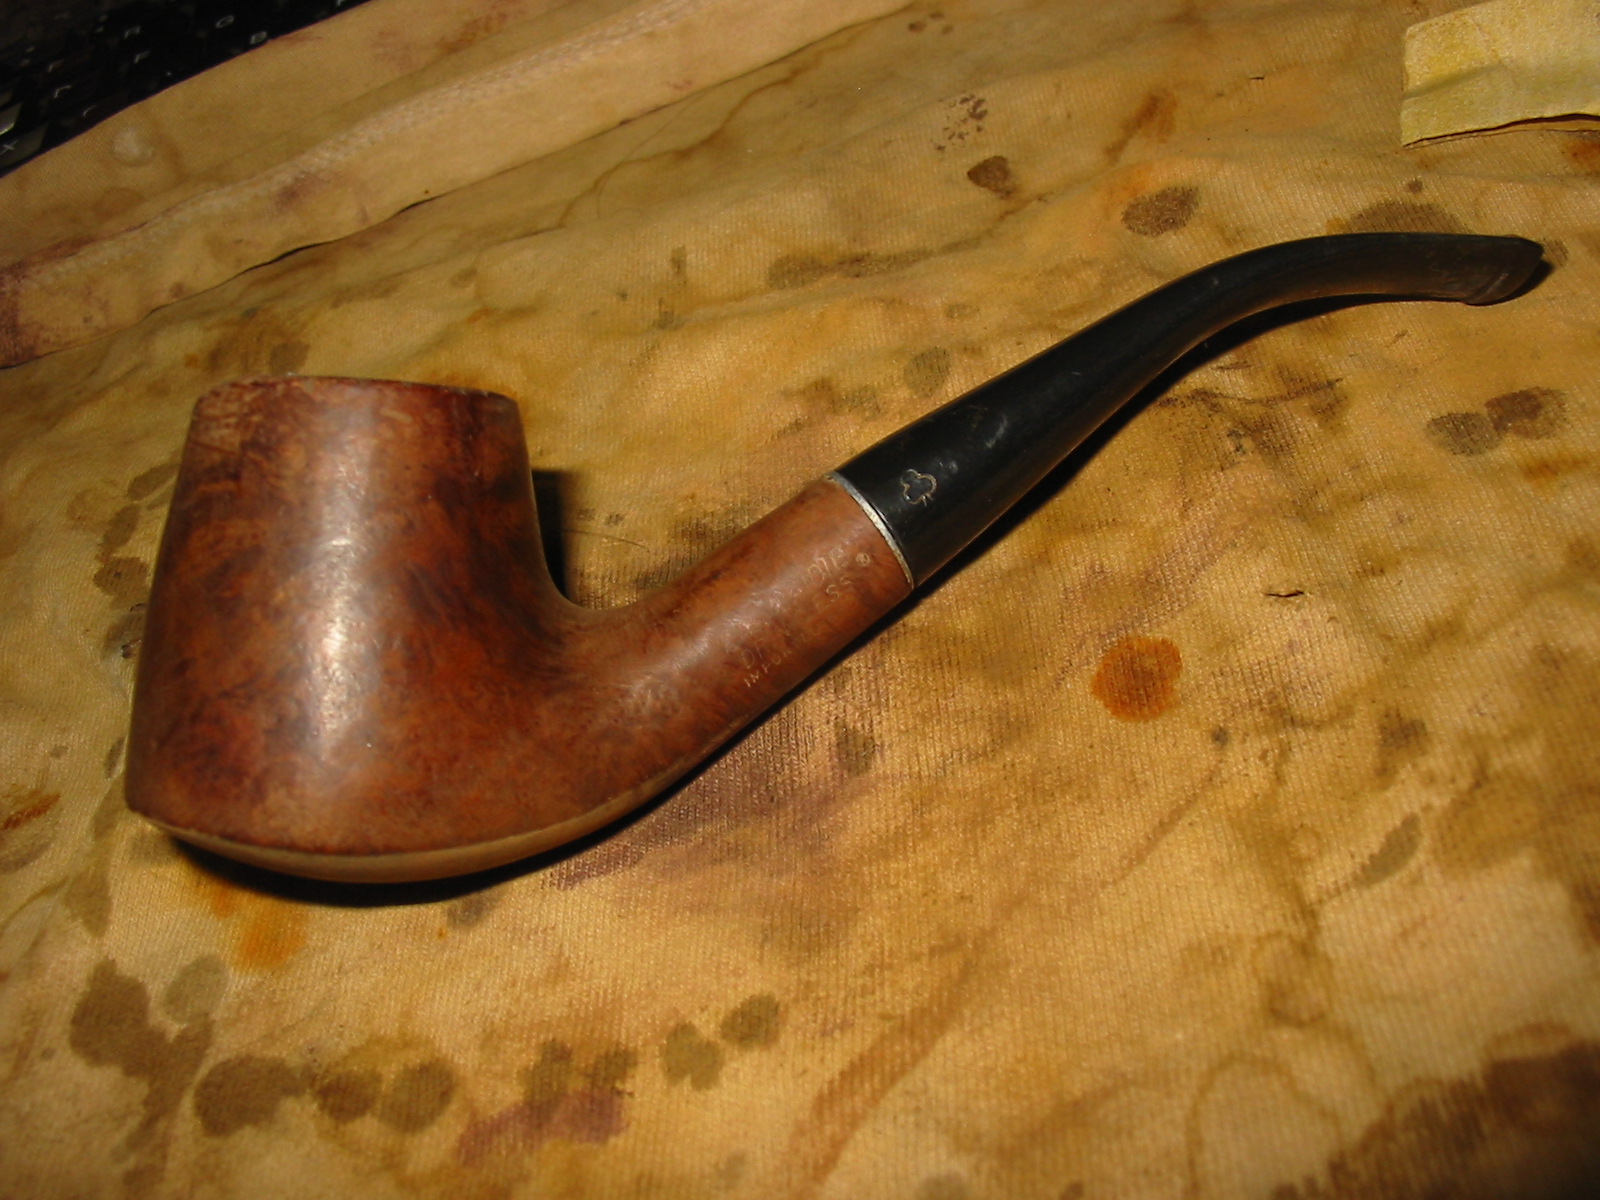
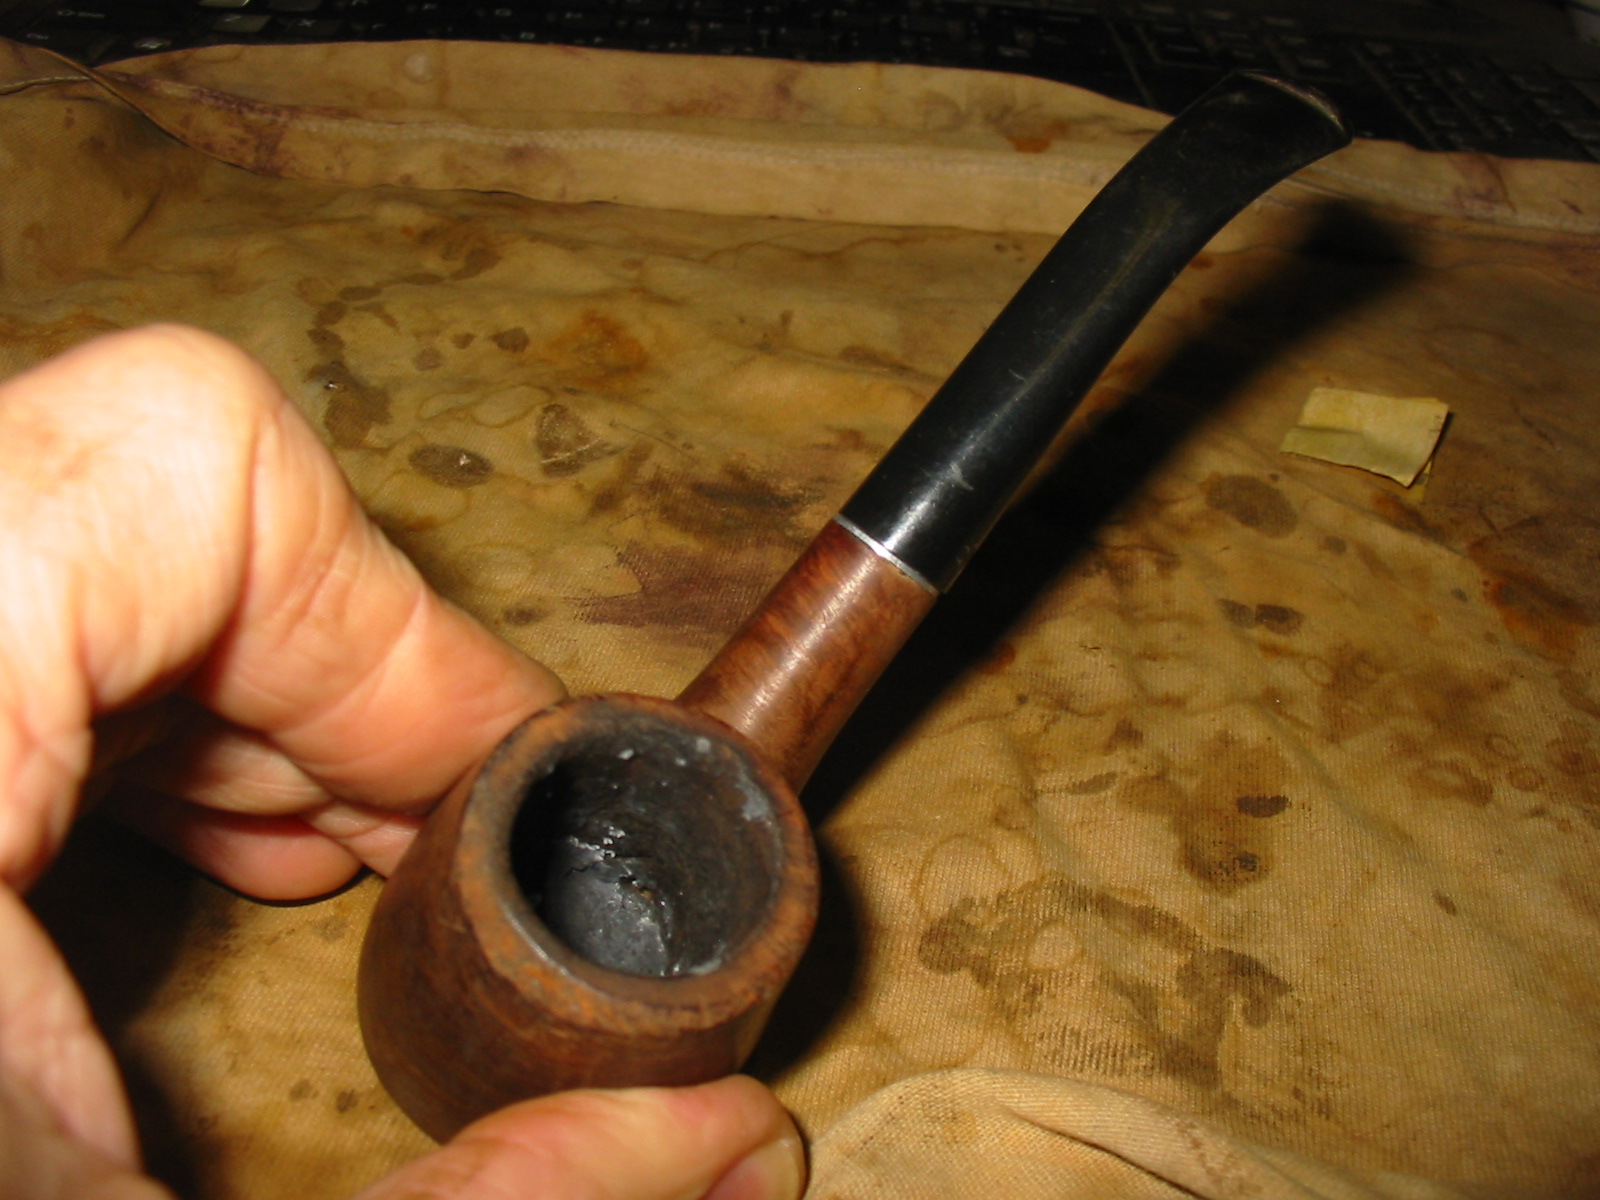
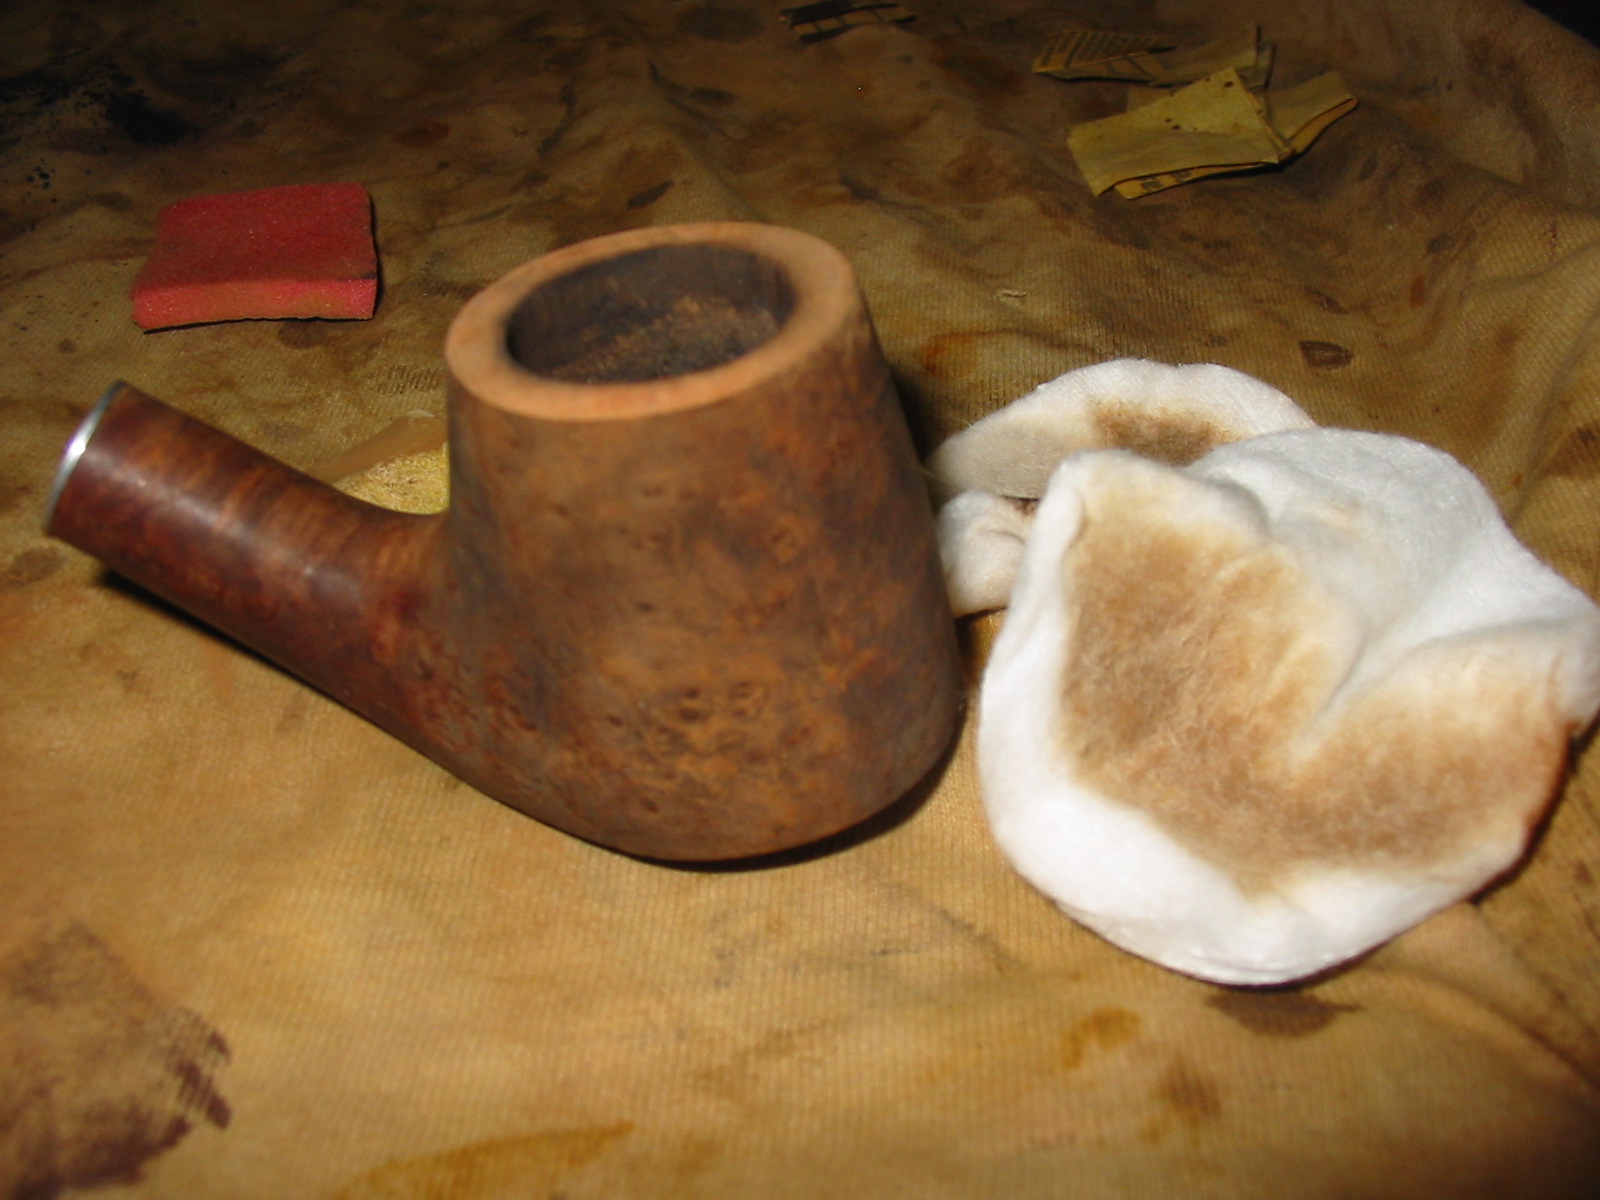
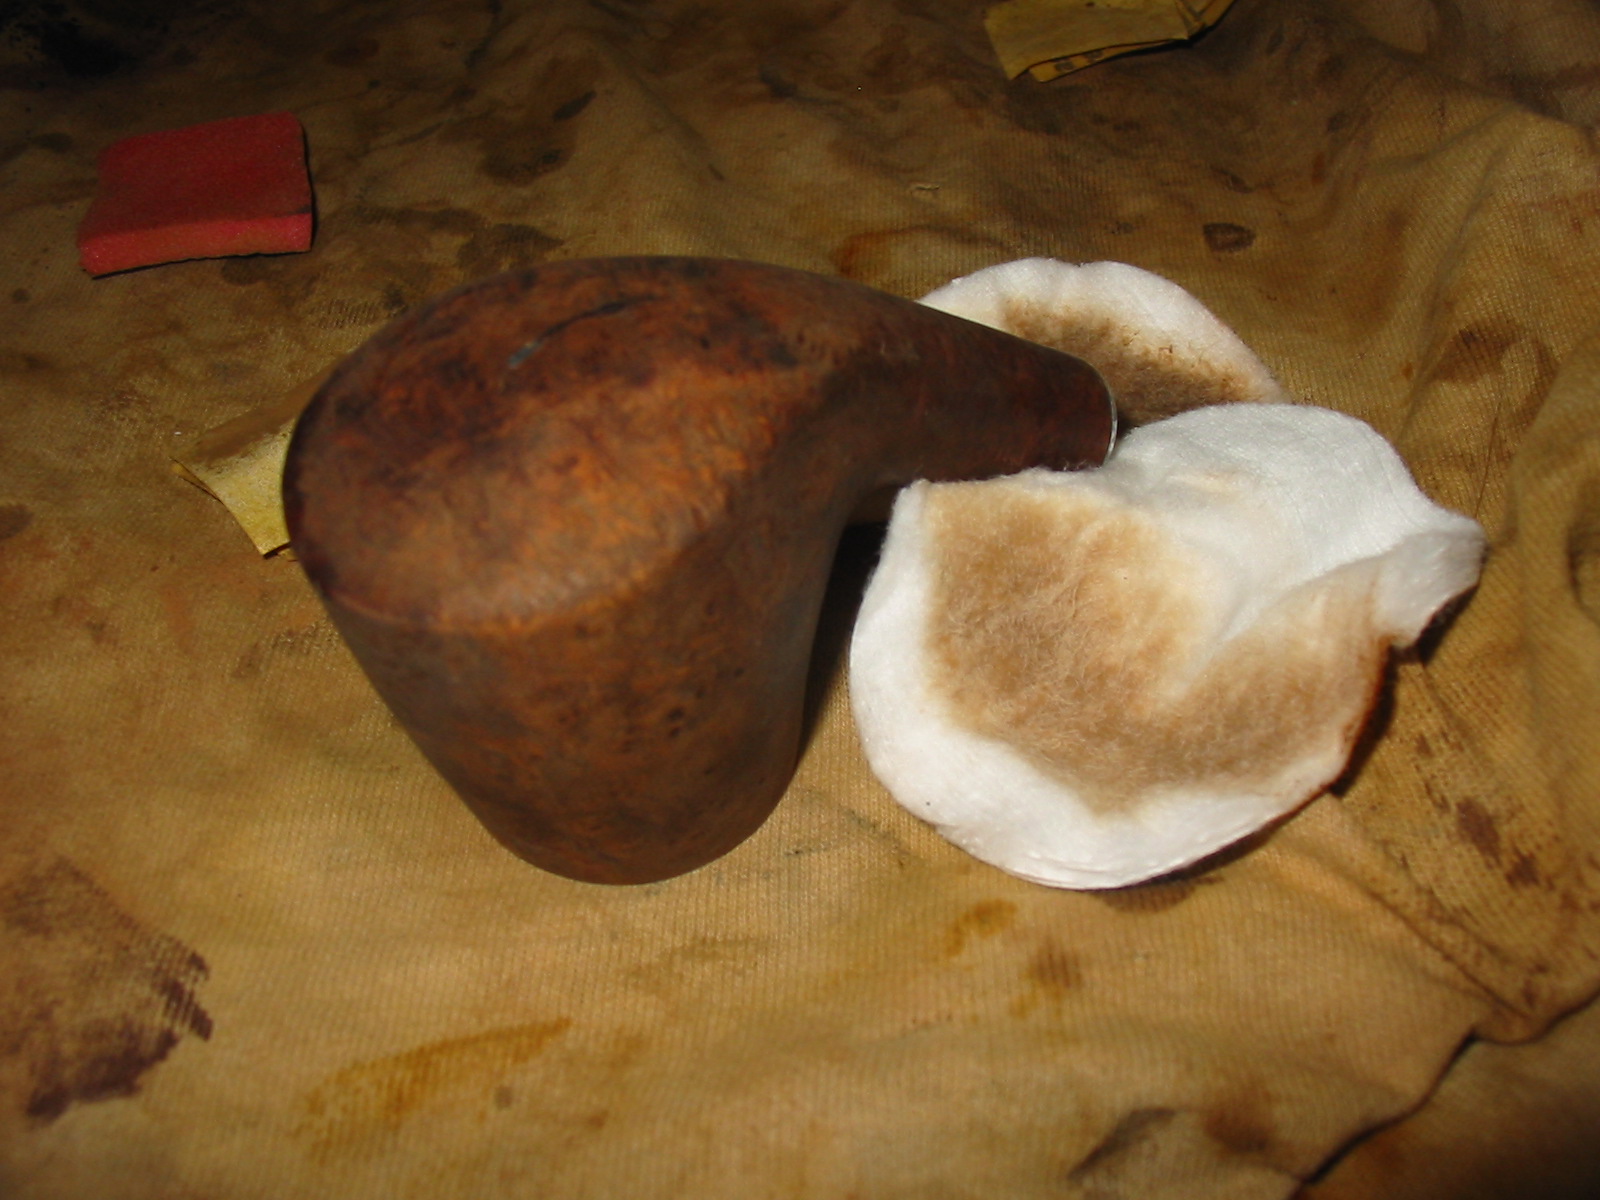
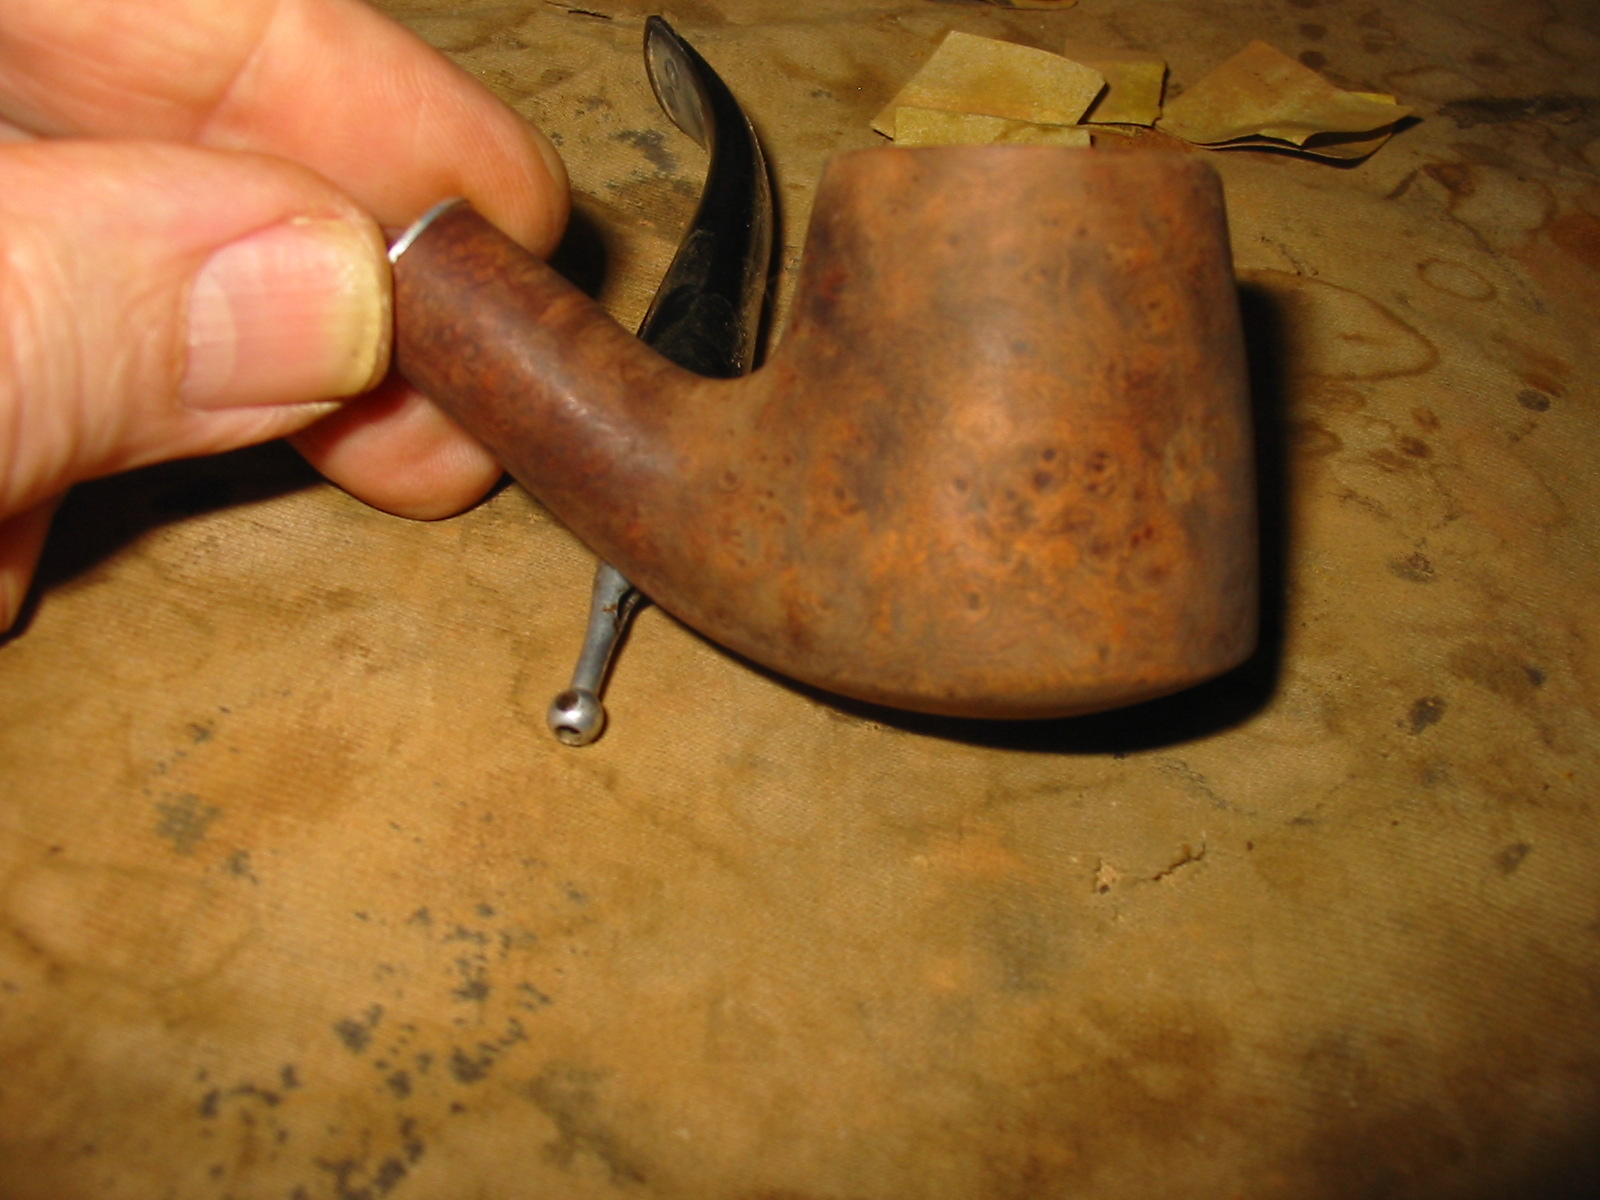
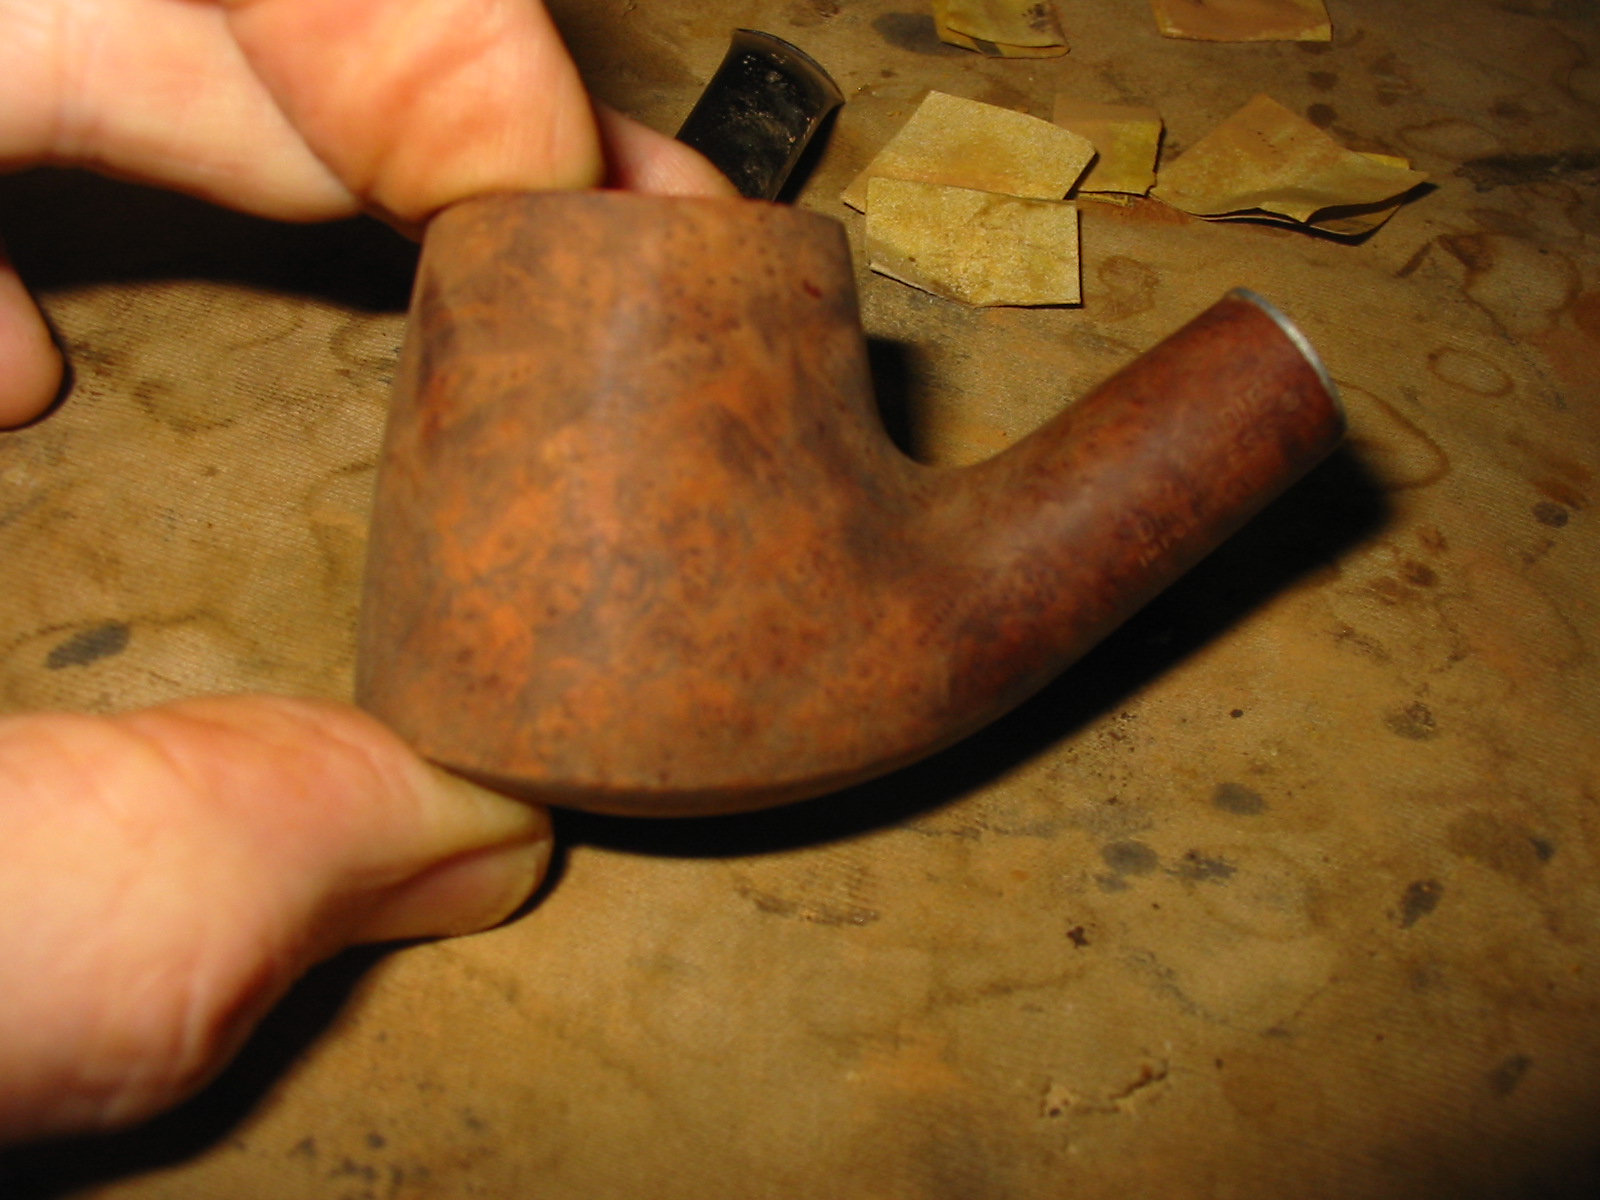
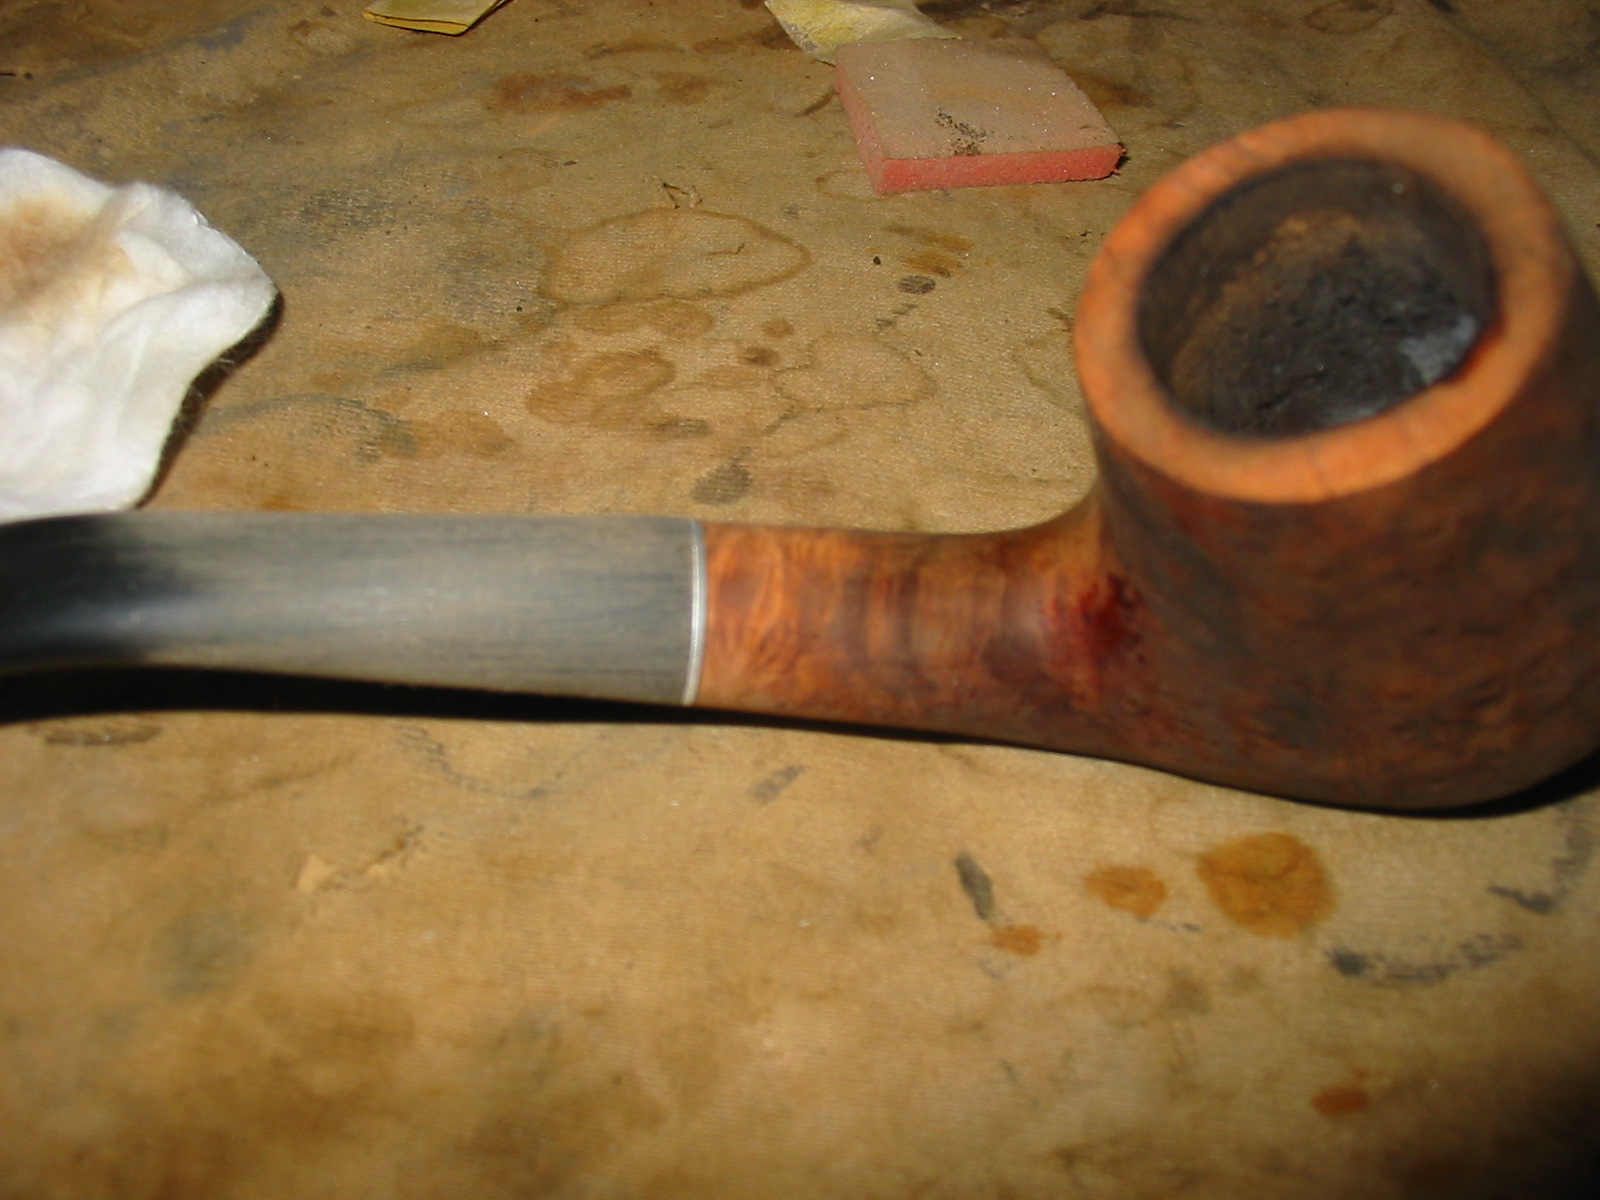
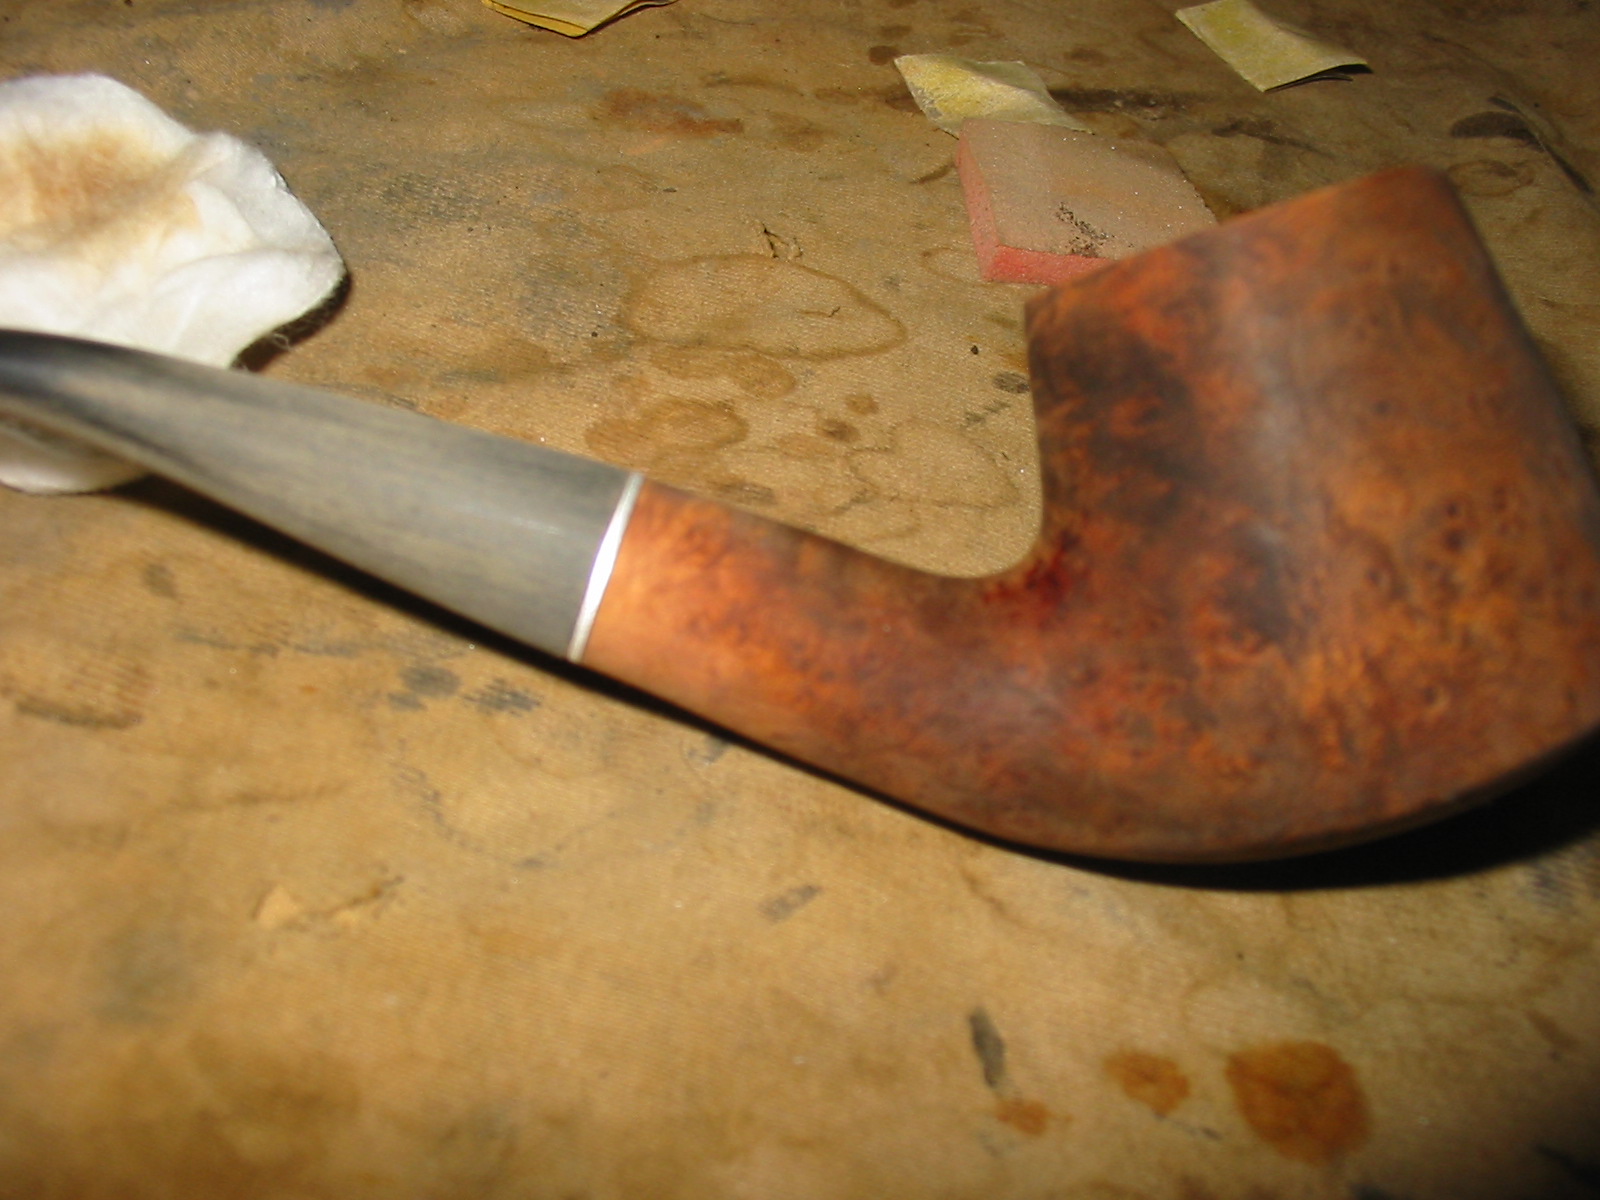
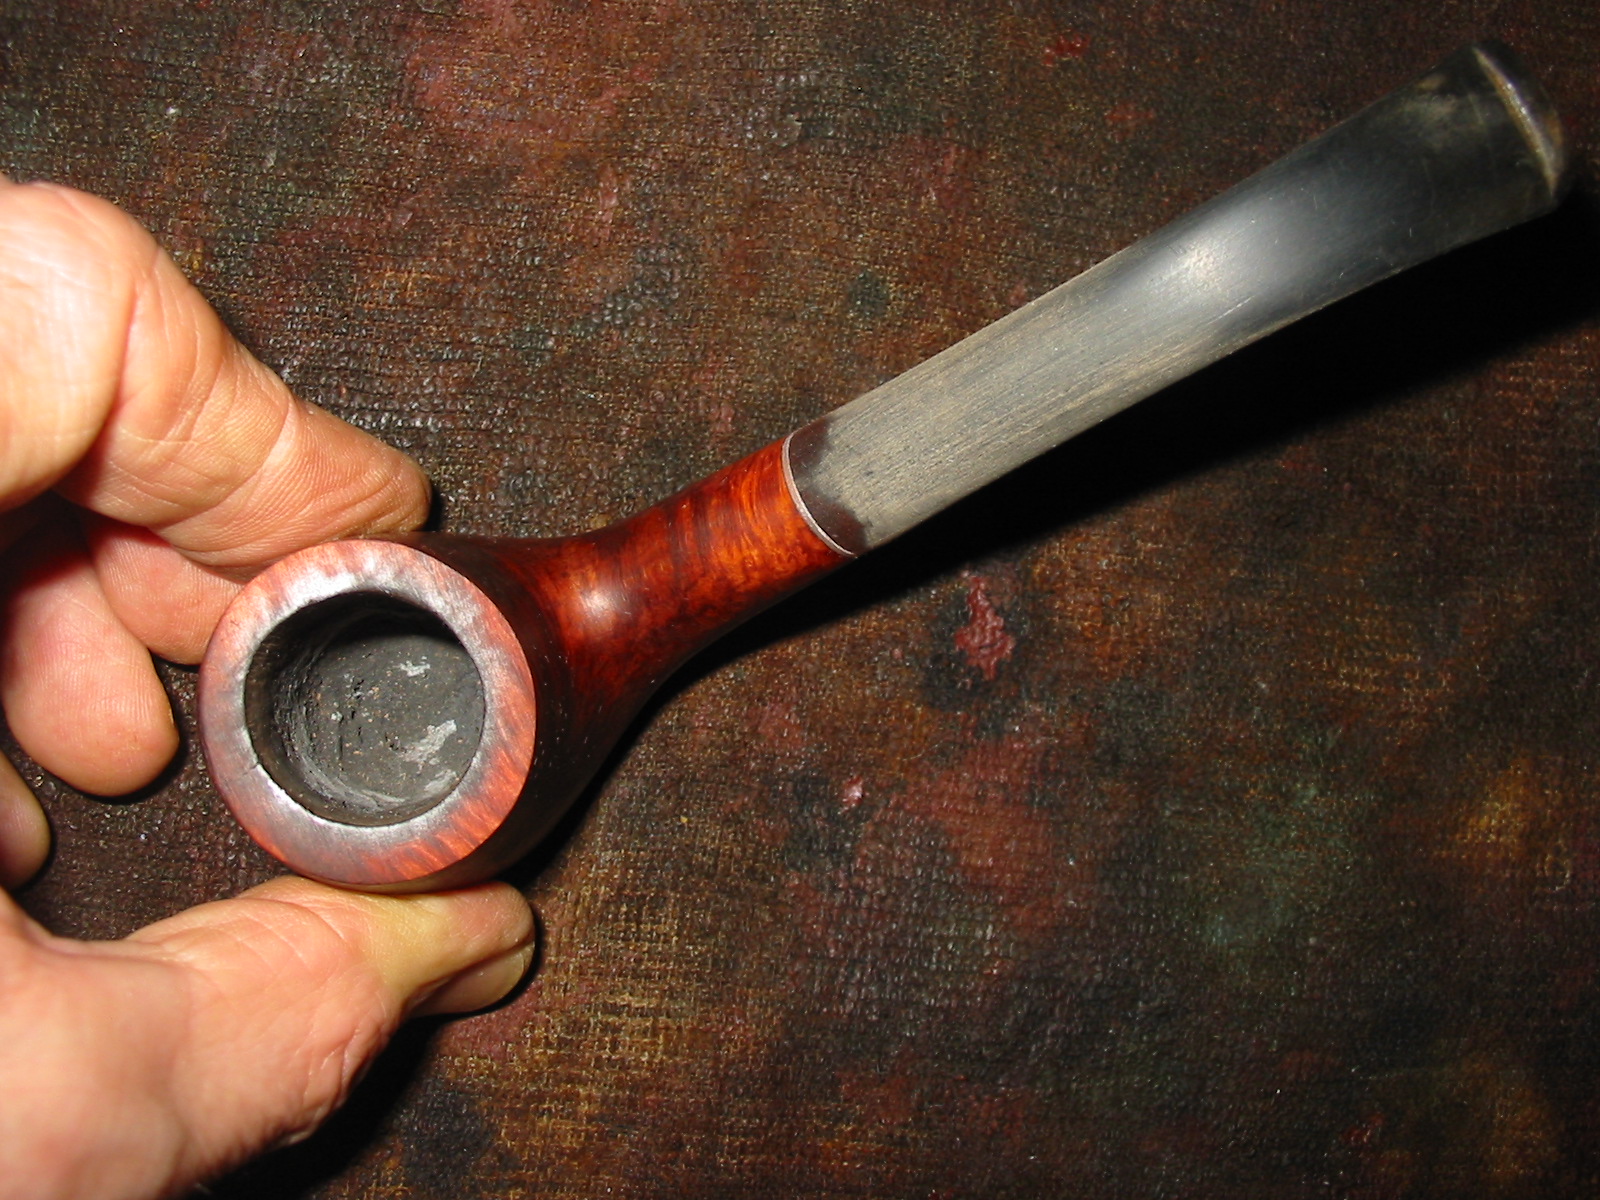
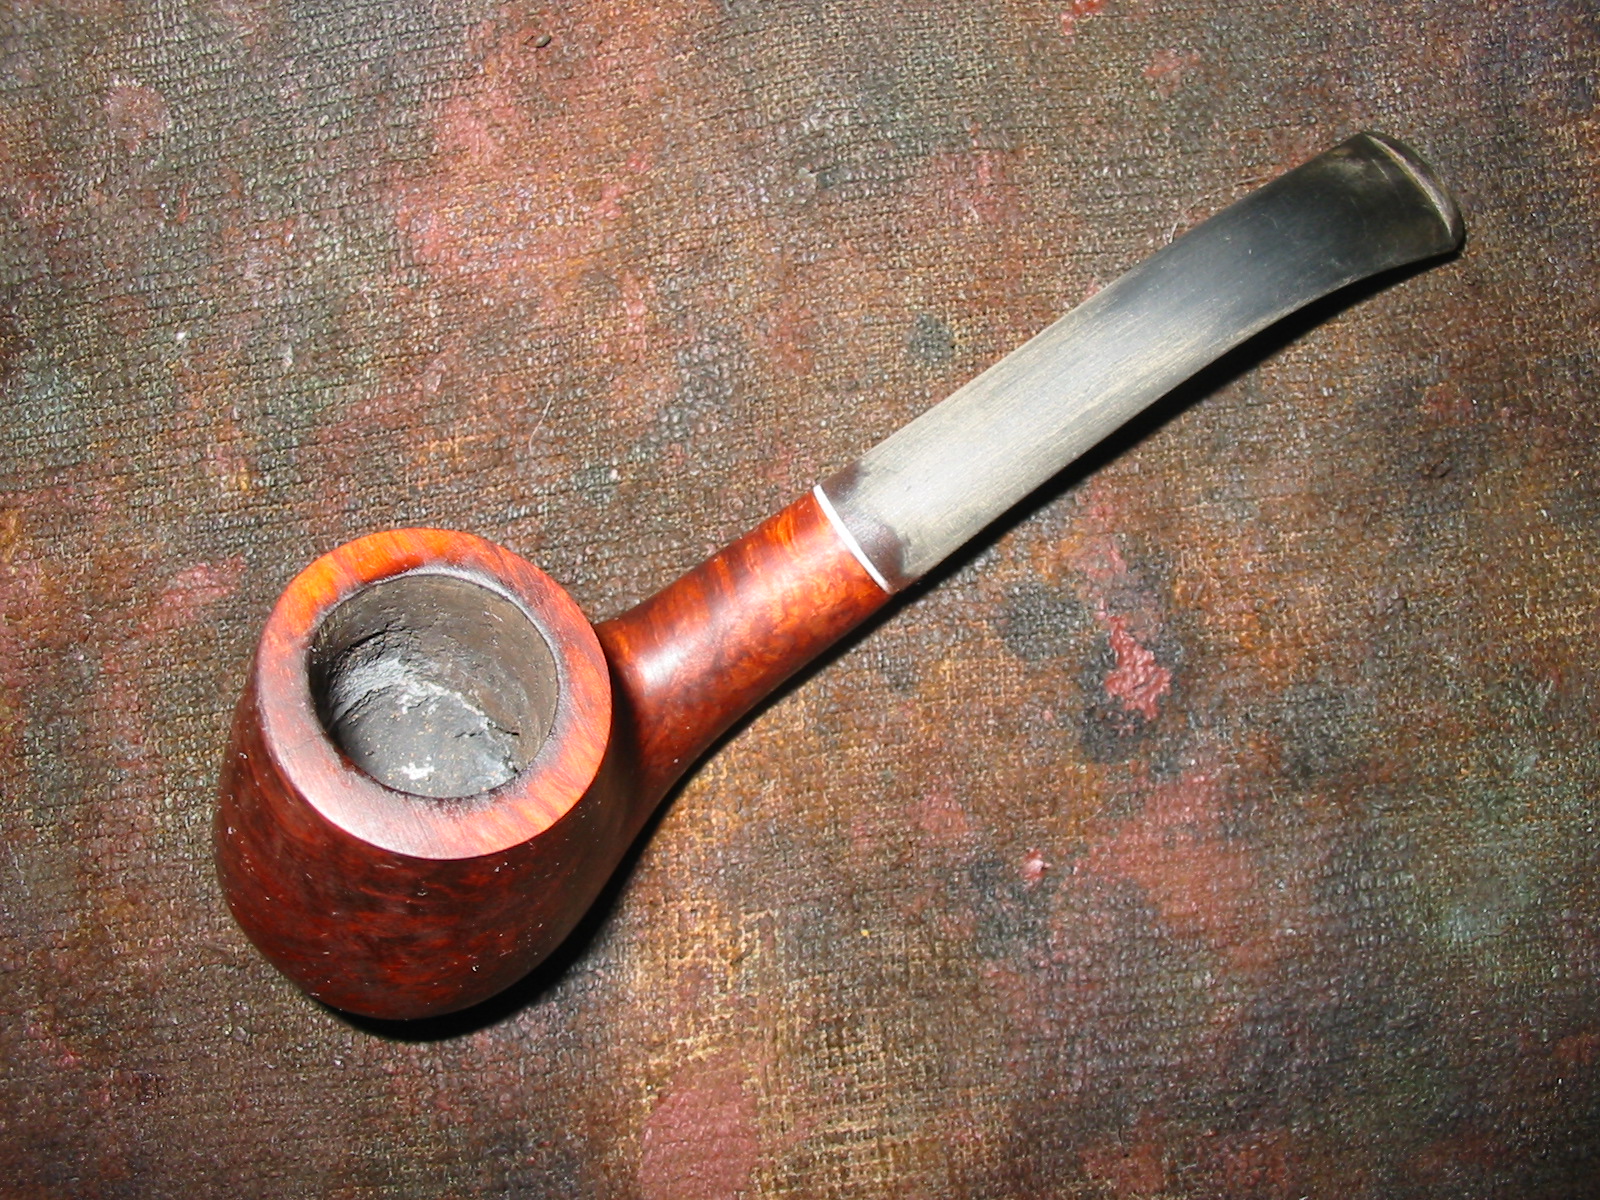
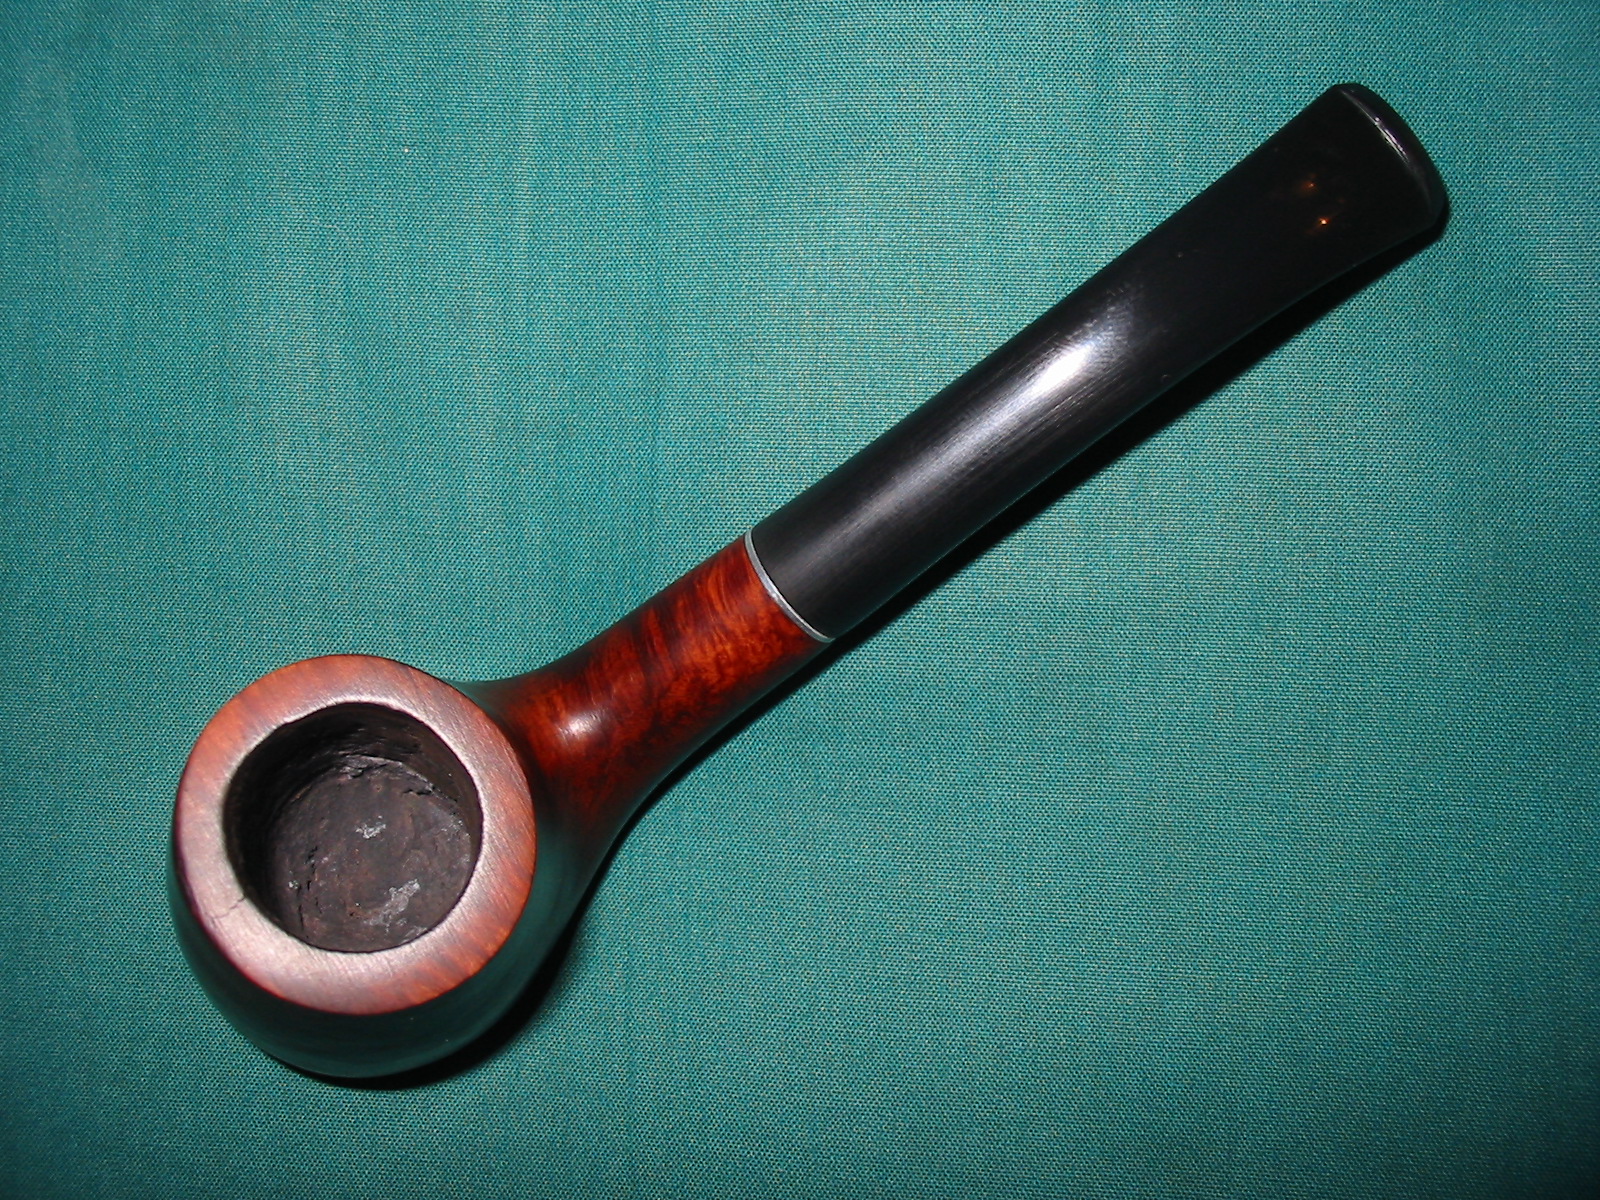
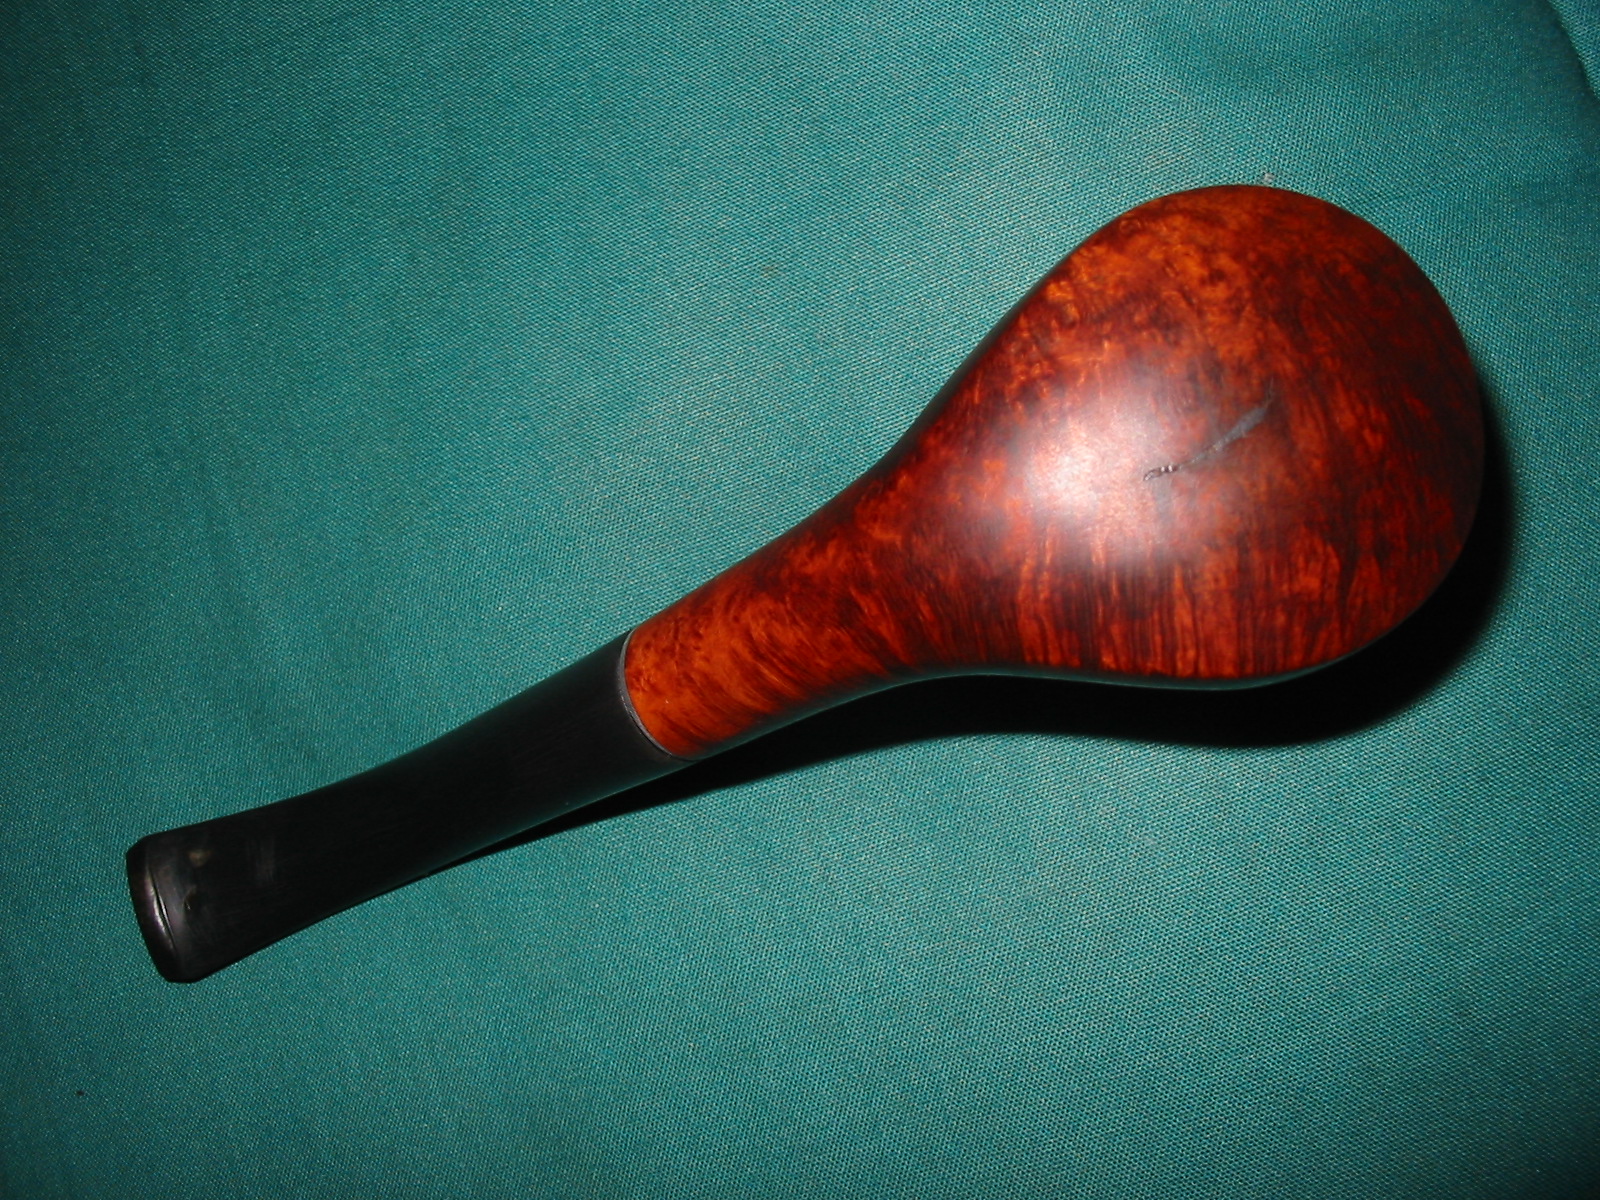
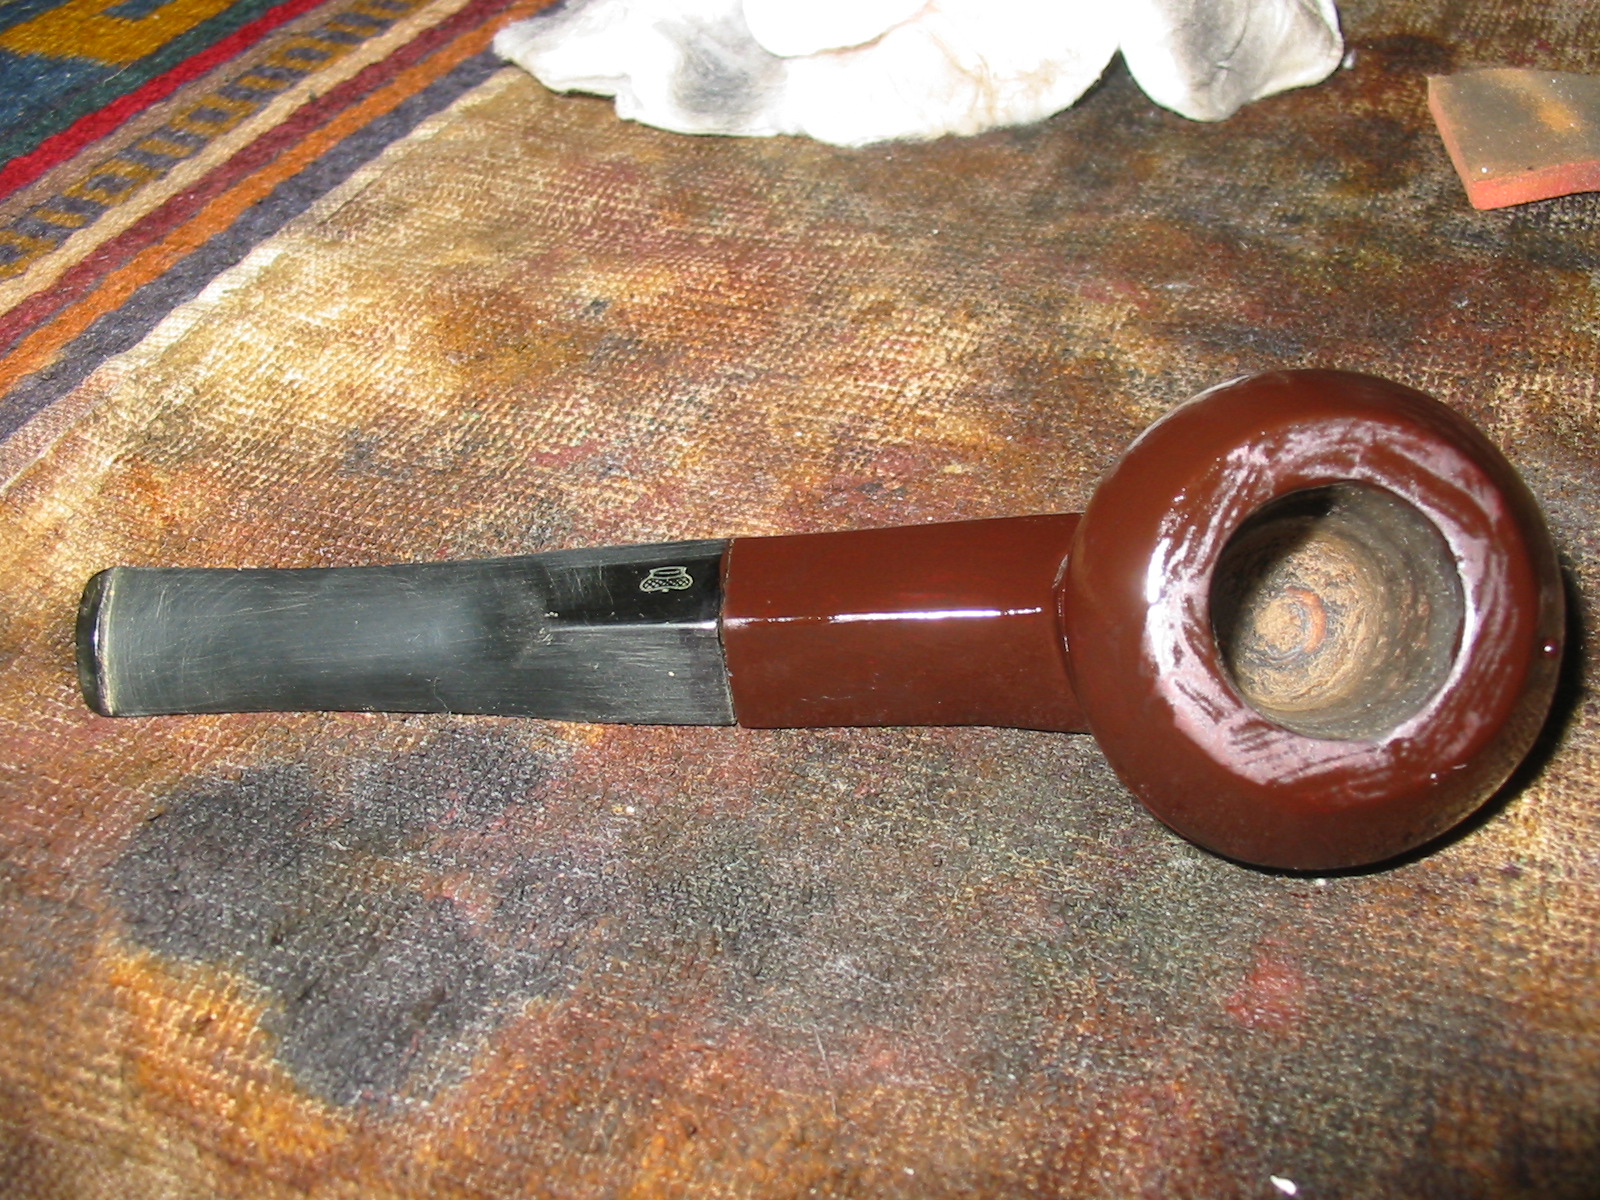
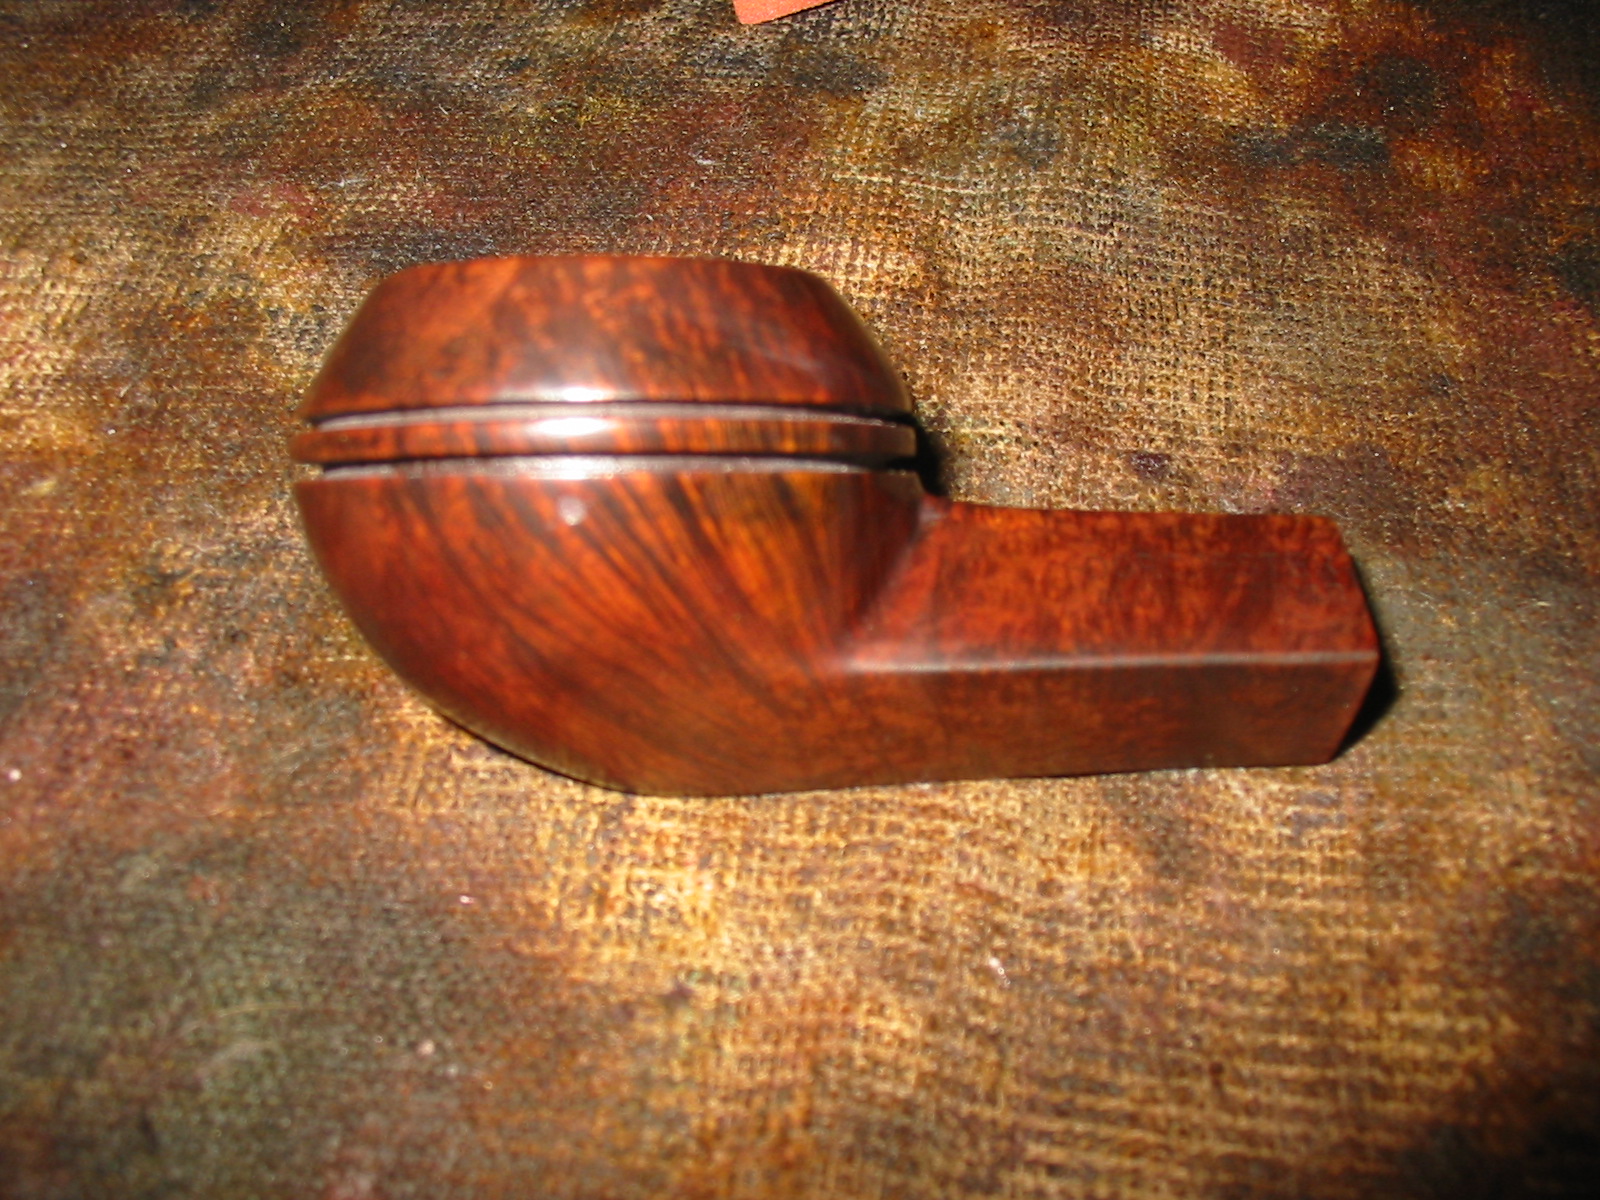
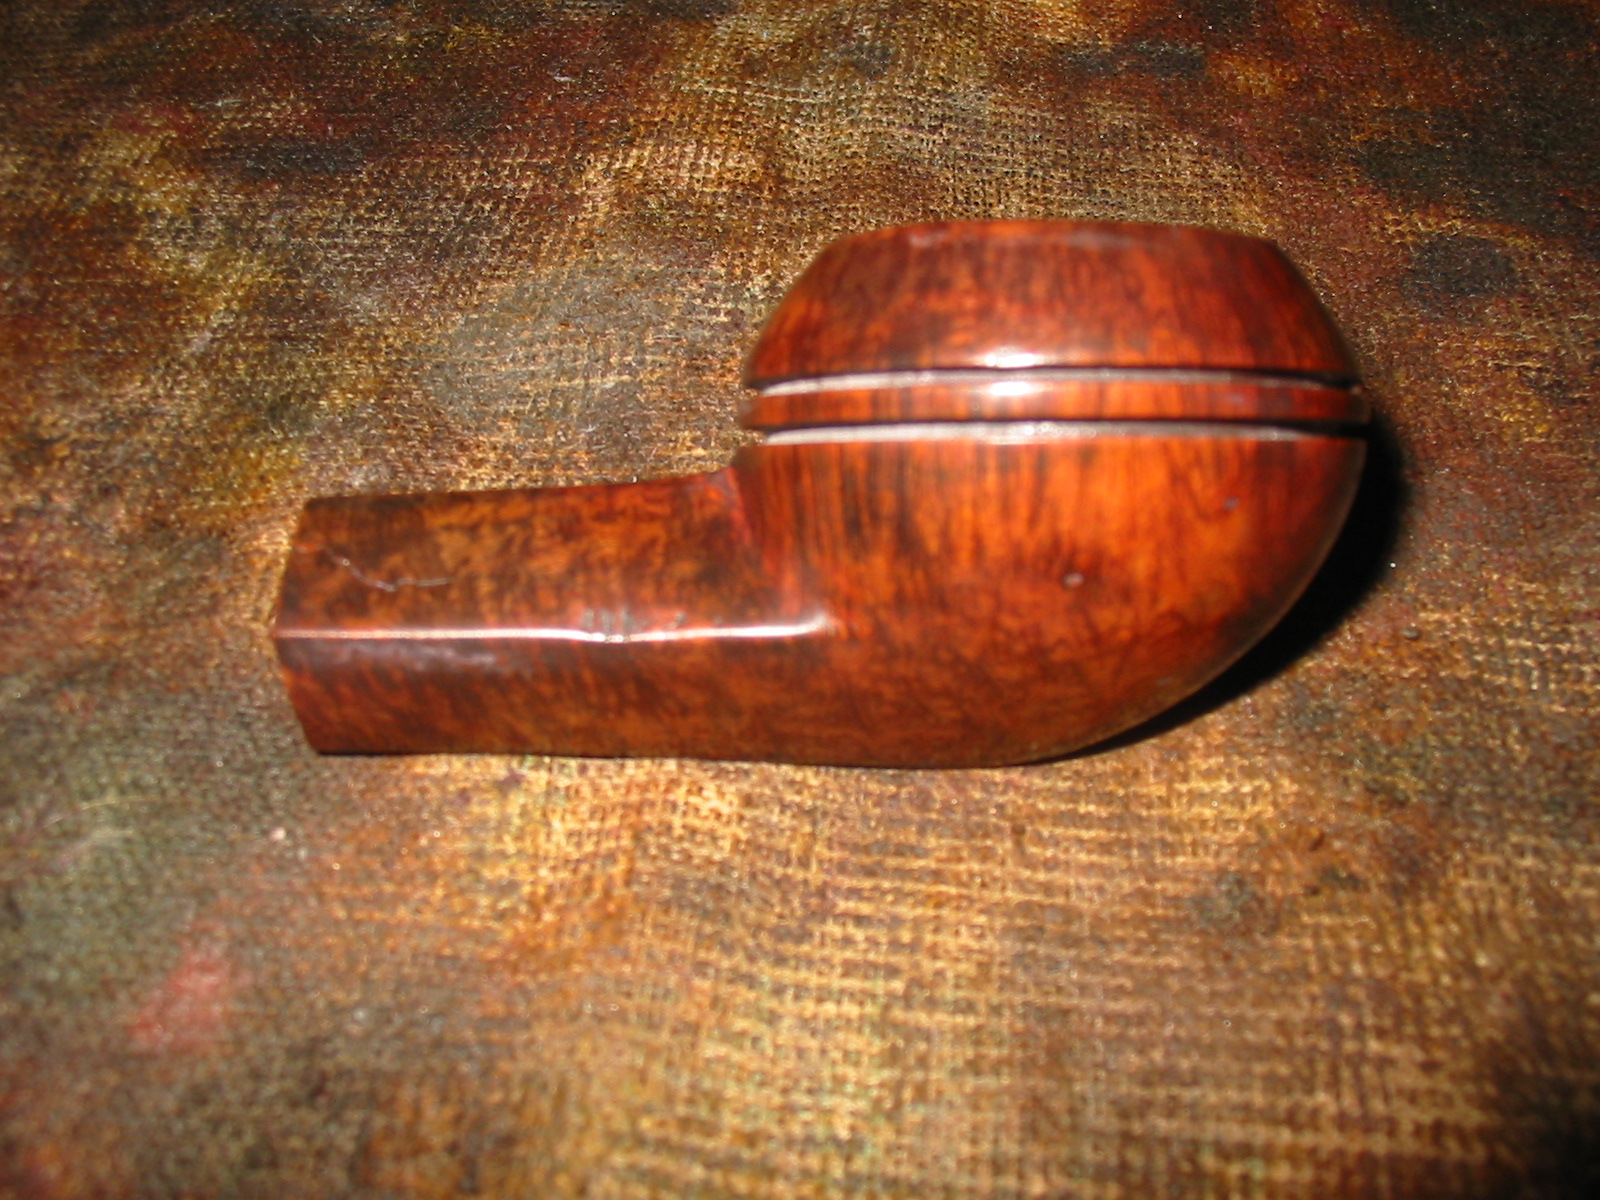
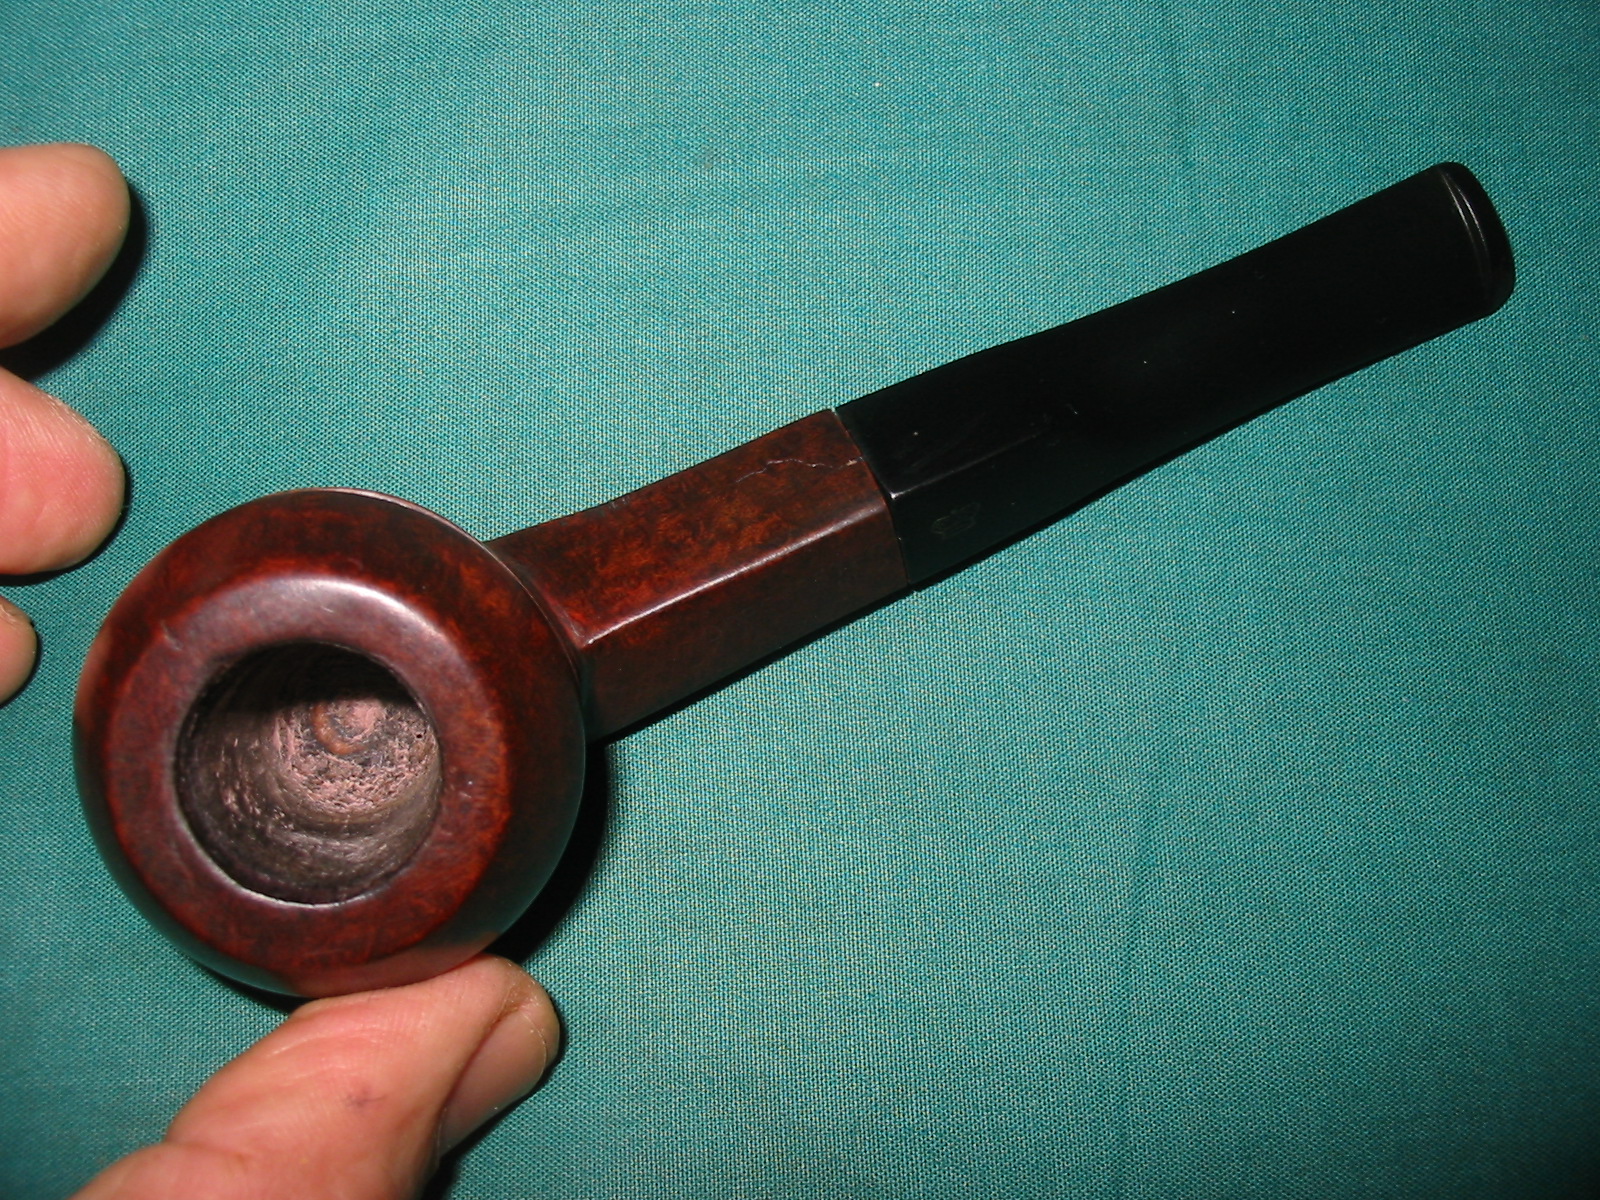
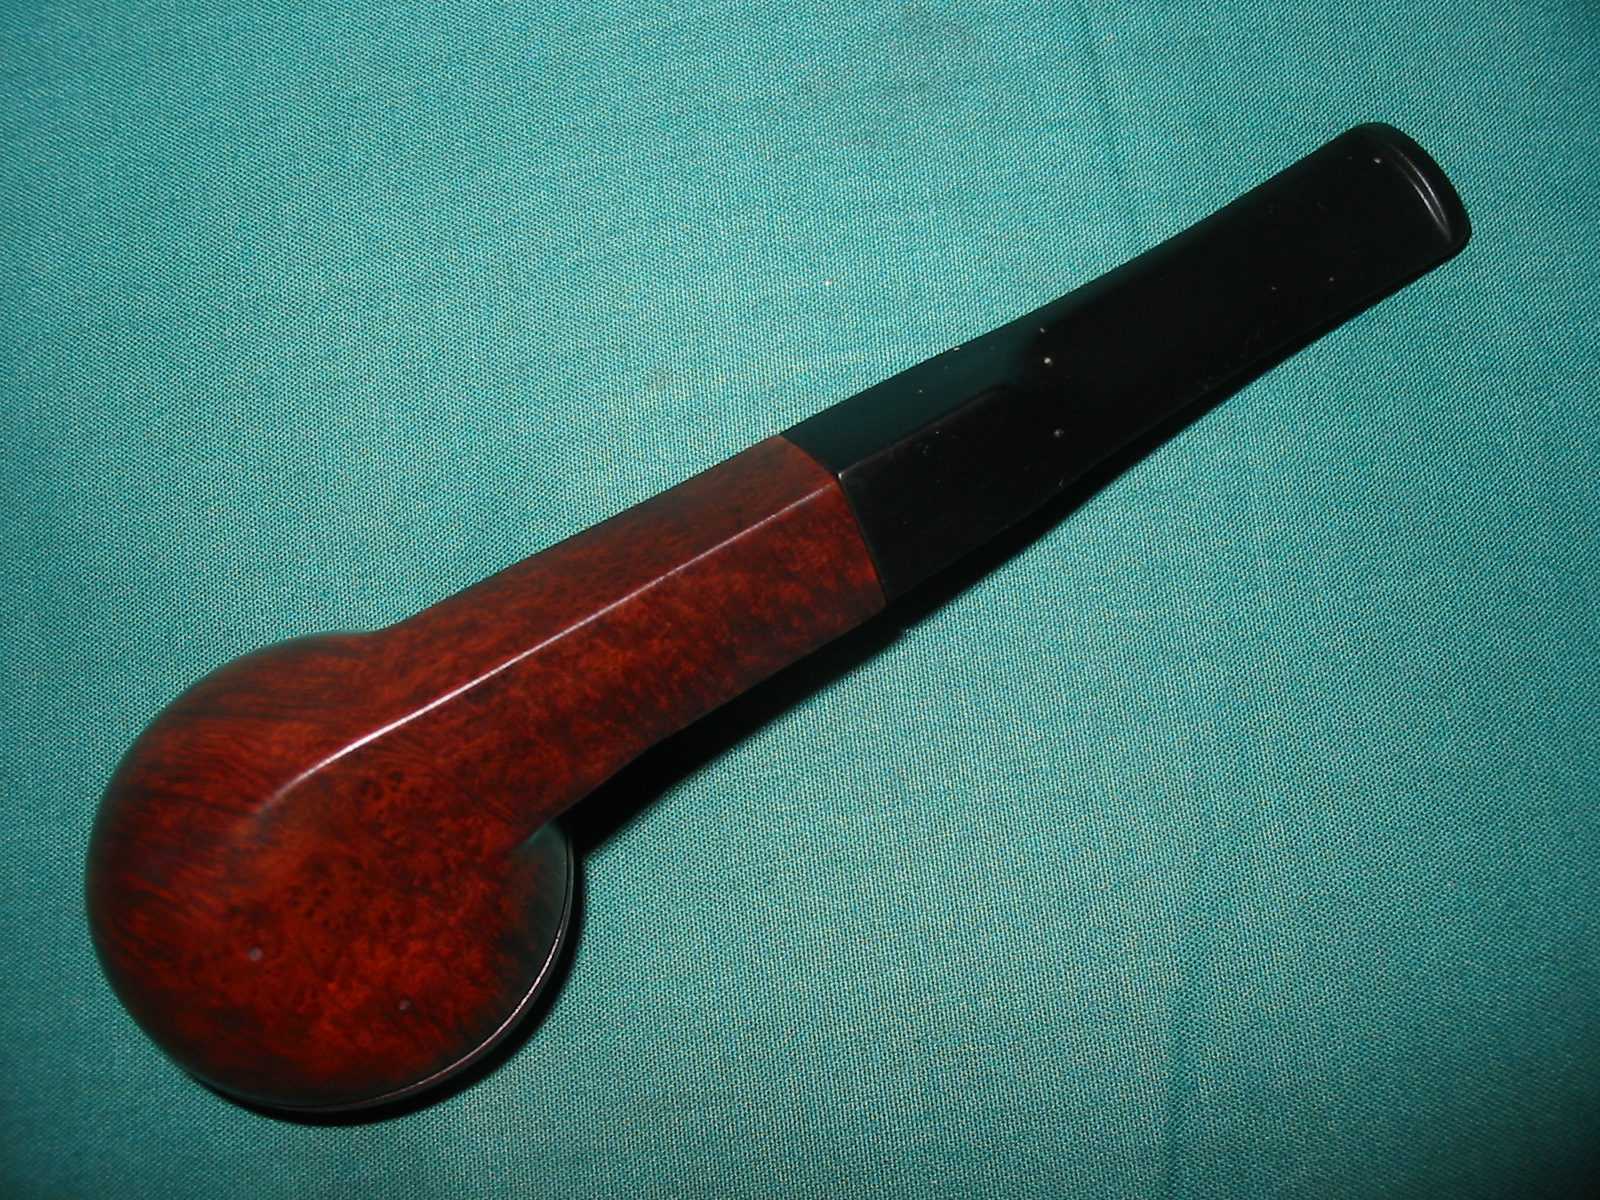
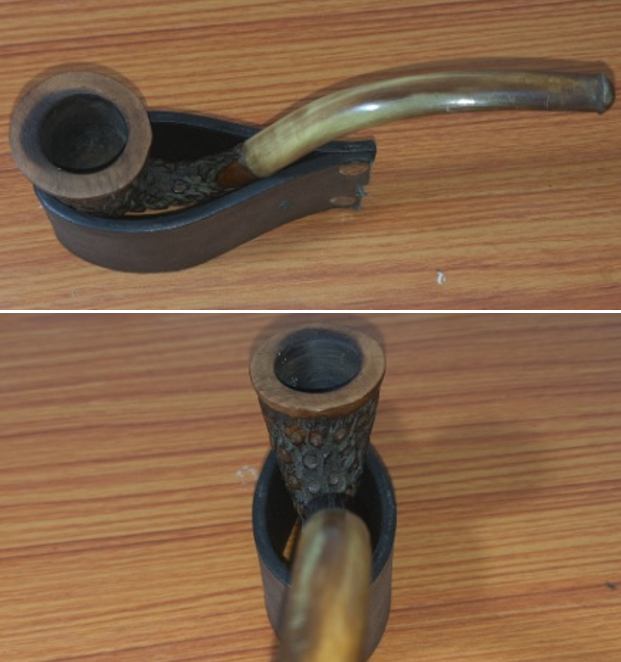
The first thing one can notice is the lovely shape of the pipe and the second is its ultra light weight. The chamber has been neatly reamed and the rim top surface is devoid of any lava overflow. There is severe charring to the inner edge in 12 o’clock direction. There are a couple of minor tooth indentations in the bite zone of the otherwise pristine stem. The stem is overturned to the right and not in alignment with the shank/ stummel. The stummel is dirty, dull and lifeless to look at. Overall, it is in decent condition as can be seen from the pictures below. Dimensions Of The Pipe
(a) Overall length of the pipe: –          5 3/4 inches.

(b) Bowl height: –                               1.5 inches.

(c) Inner diameter of chamber: –         0.7 inches

(d) Outer diameter of chamber: –        1.3 inches

Once The Pipe Is On My Work Table……
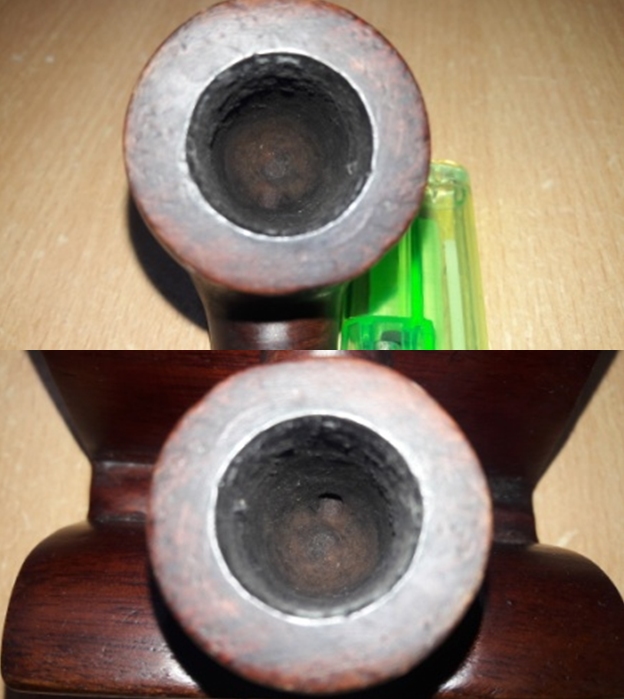
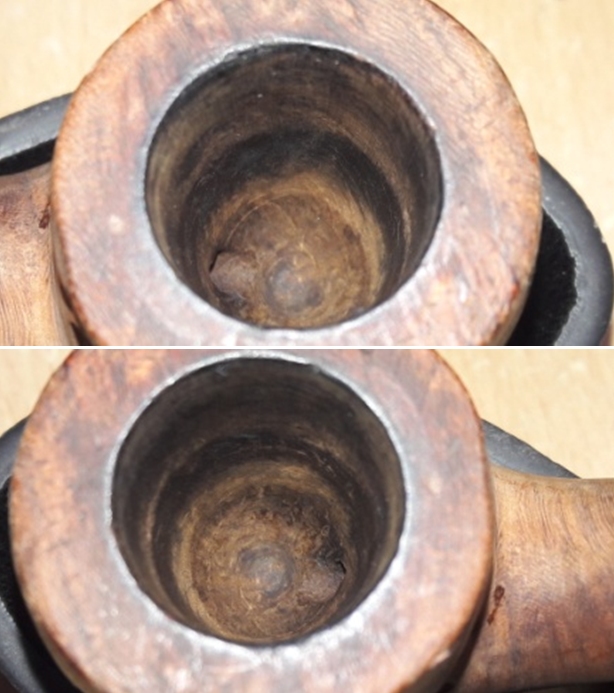
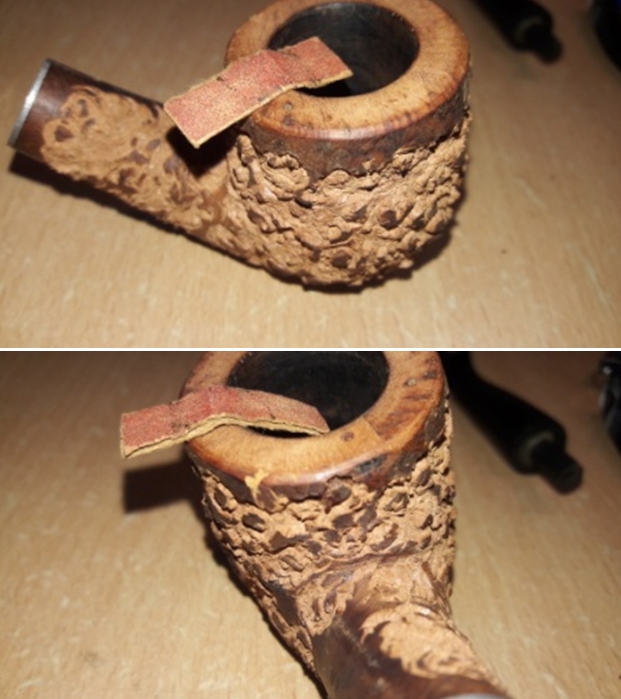
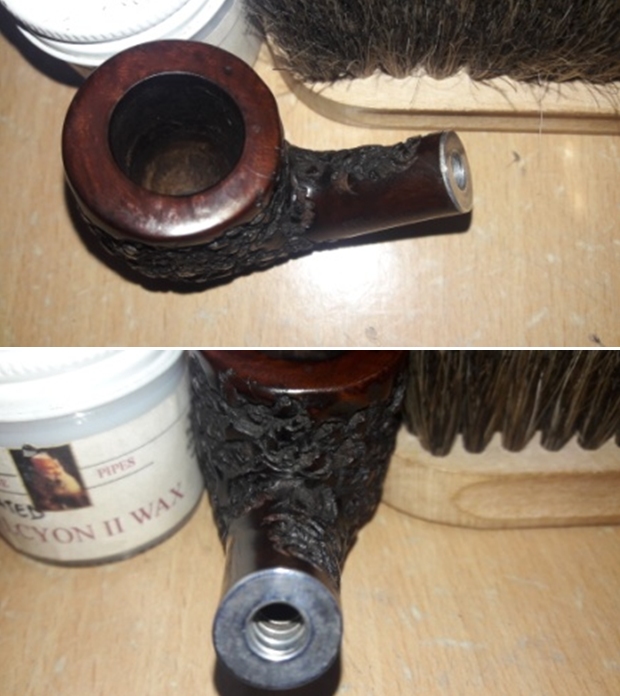
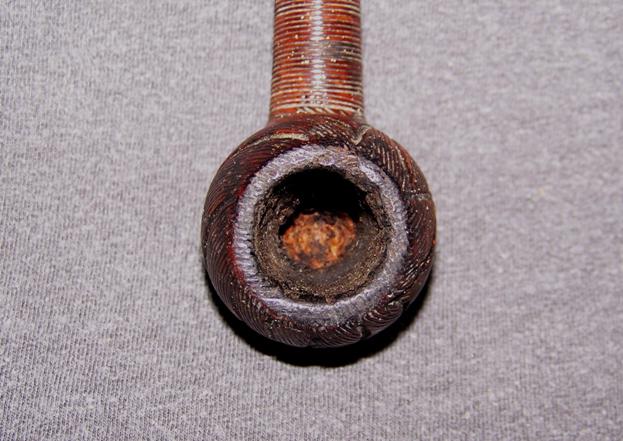
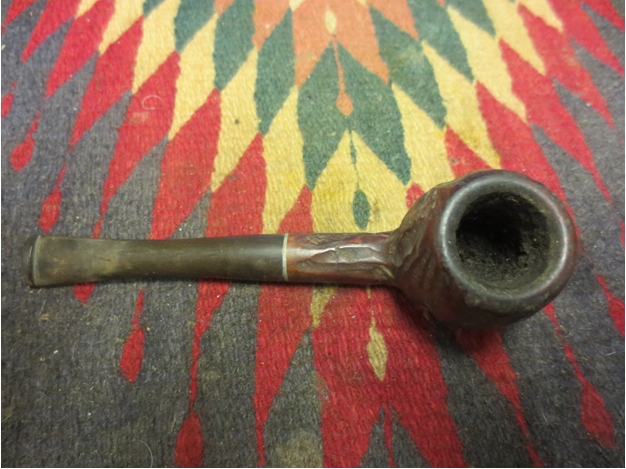
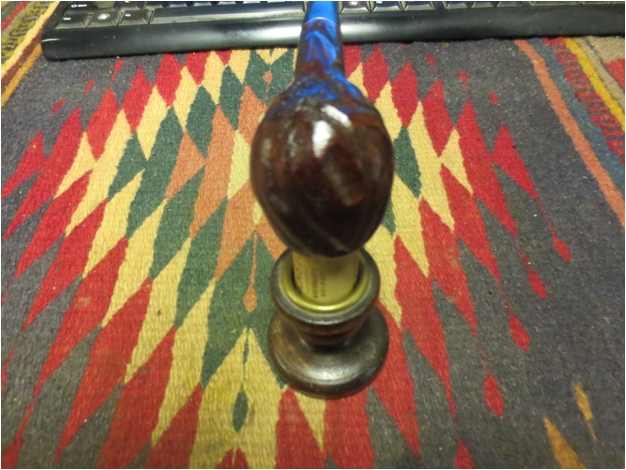
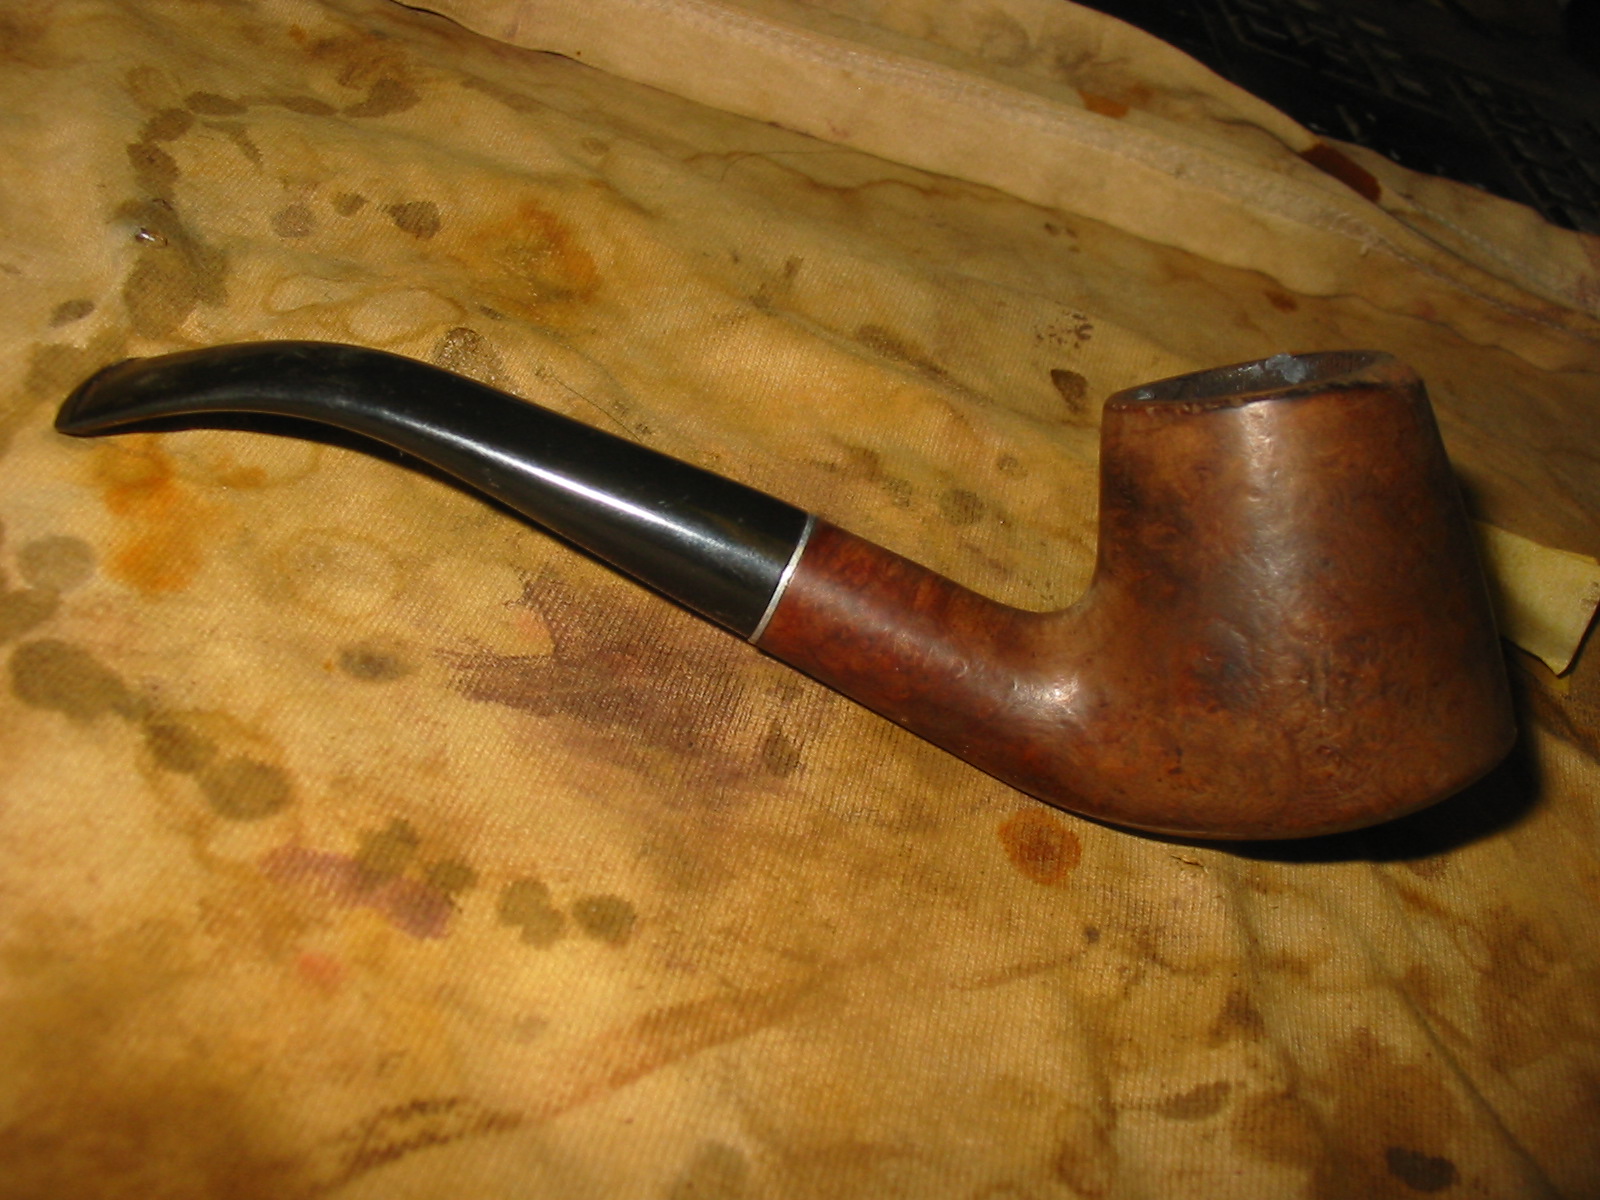
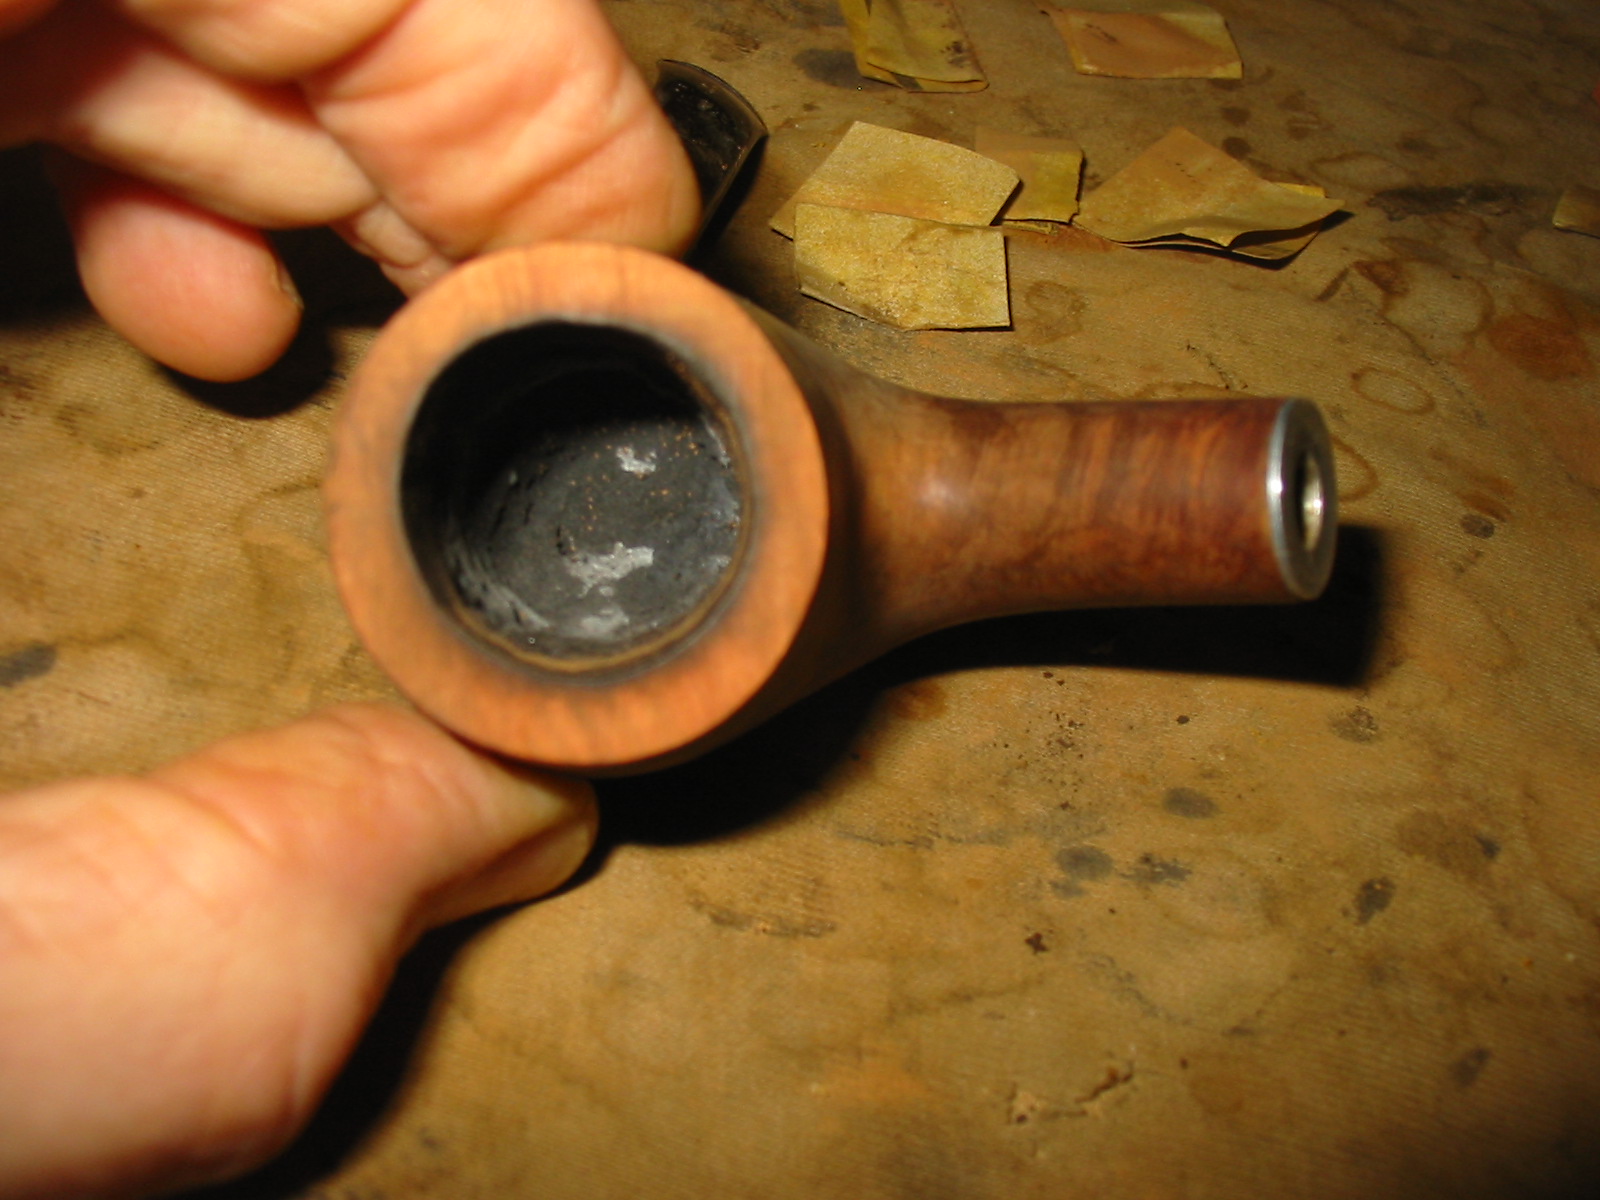
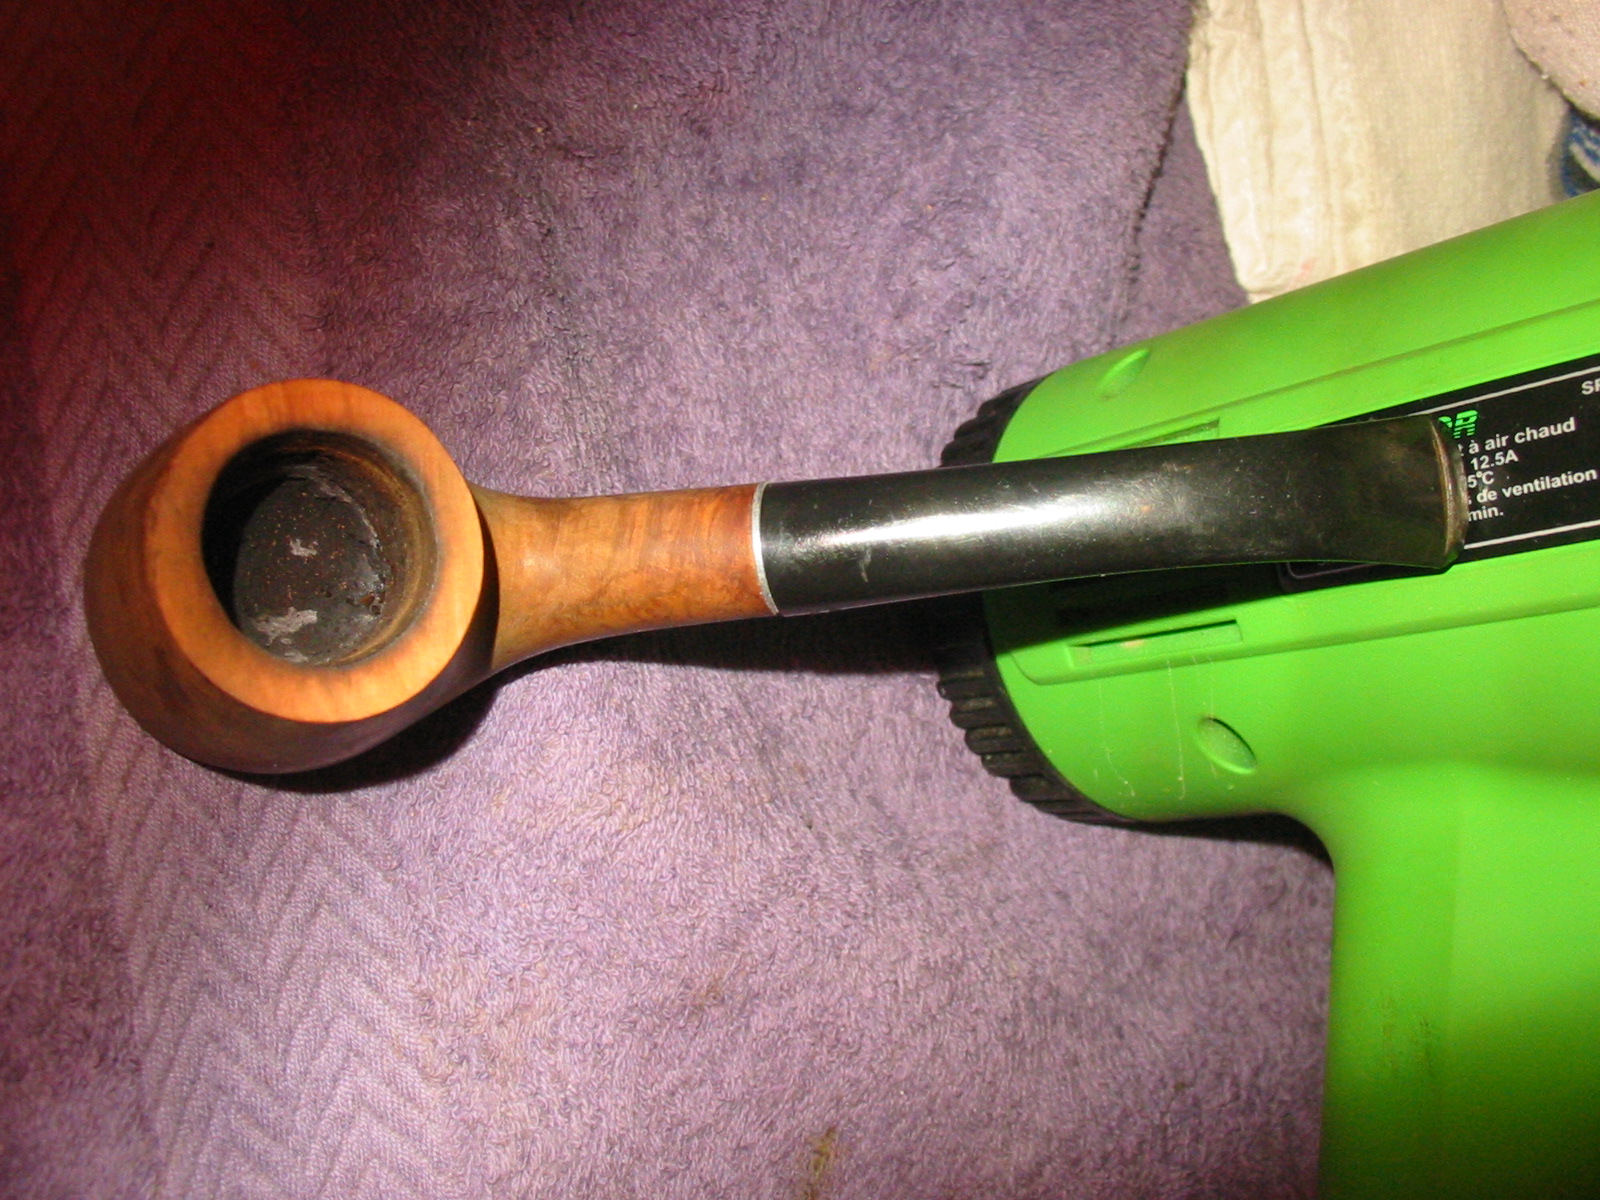
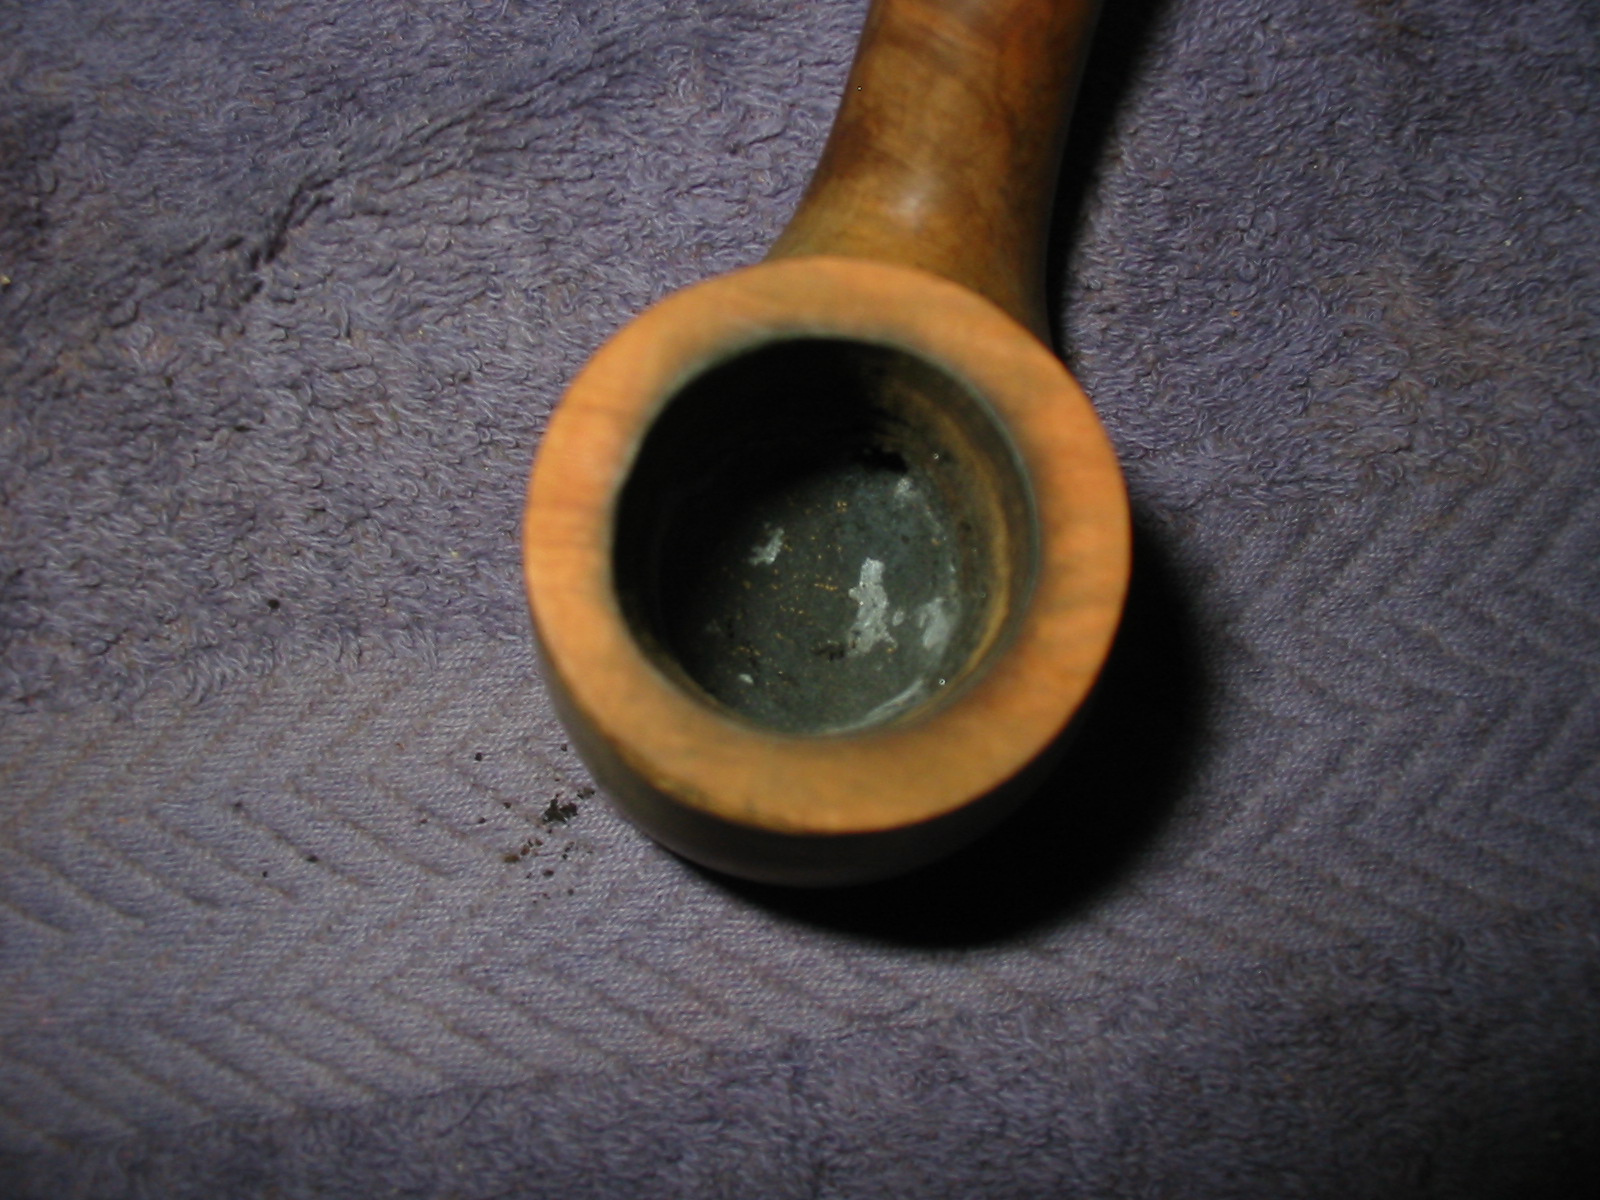
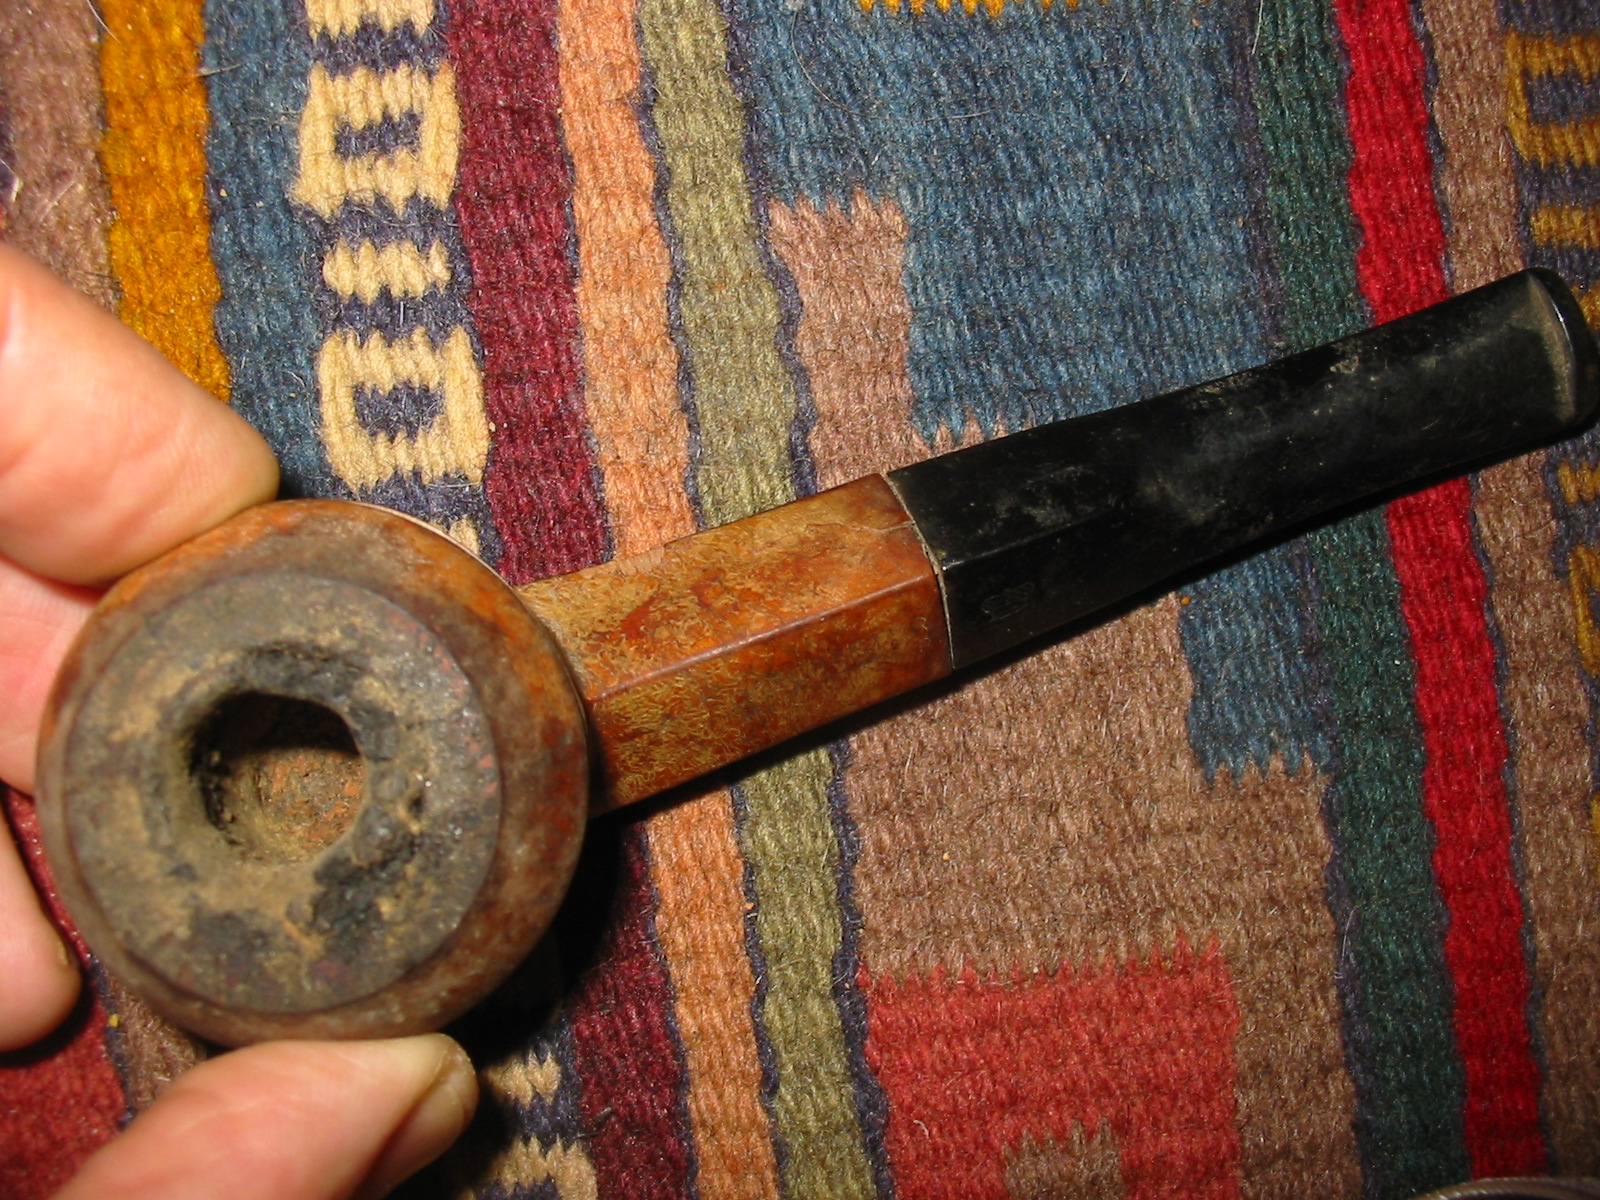
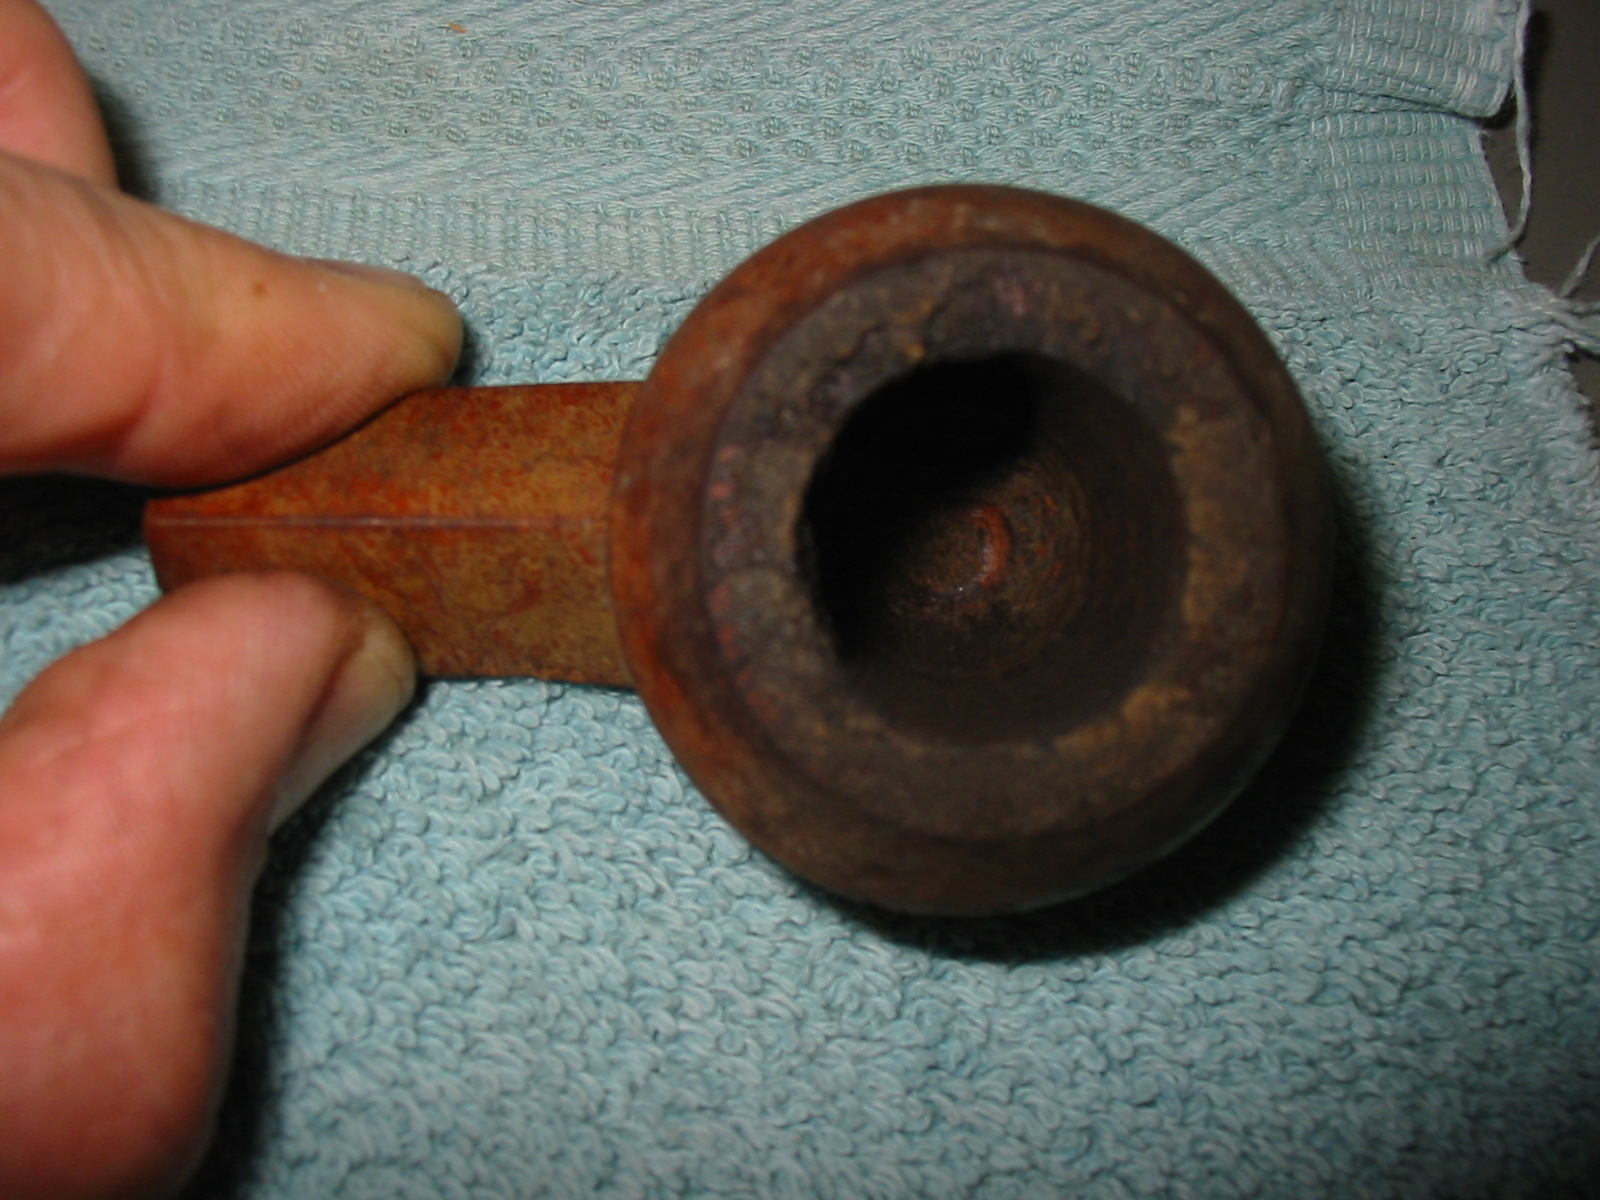
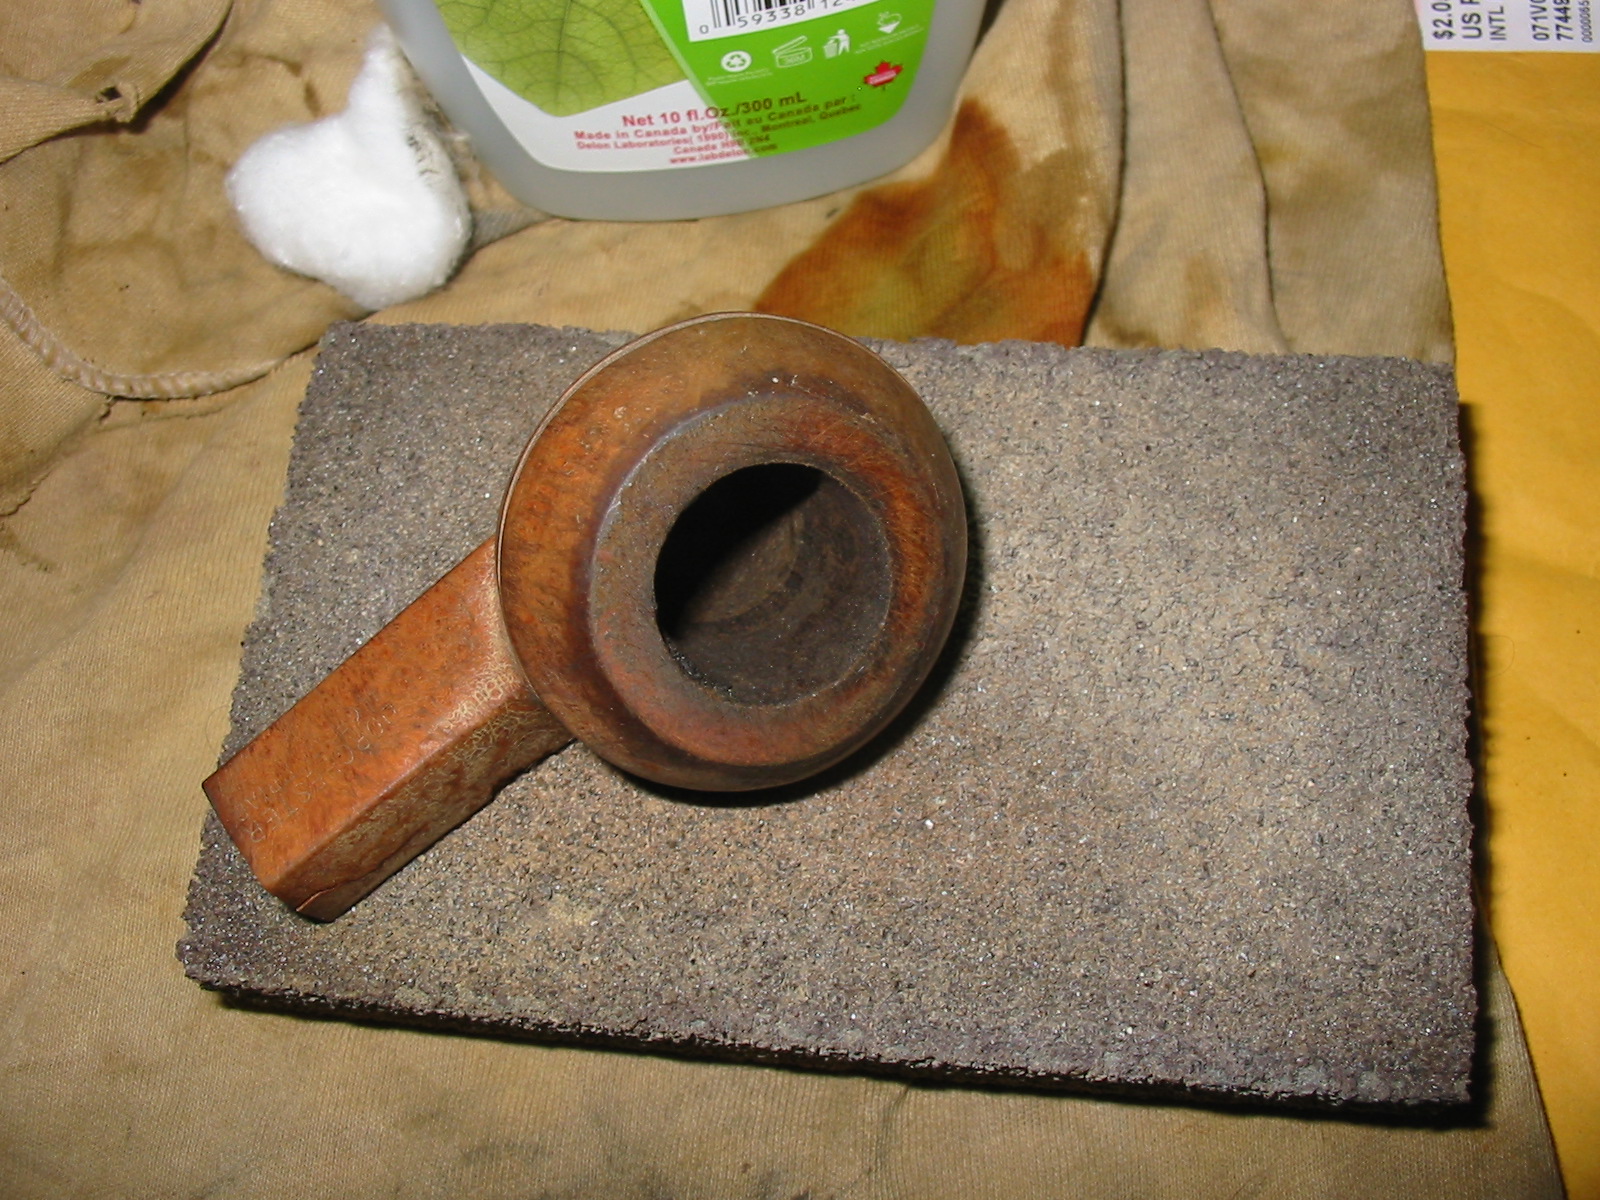
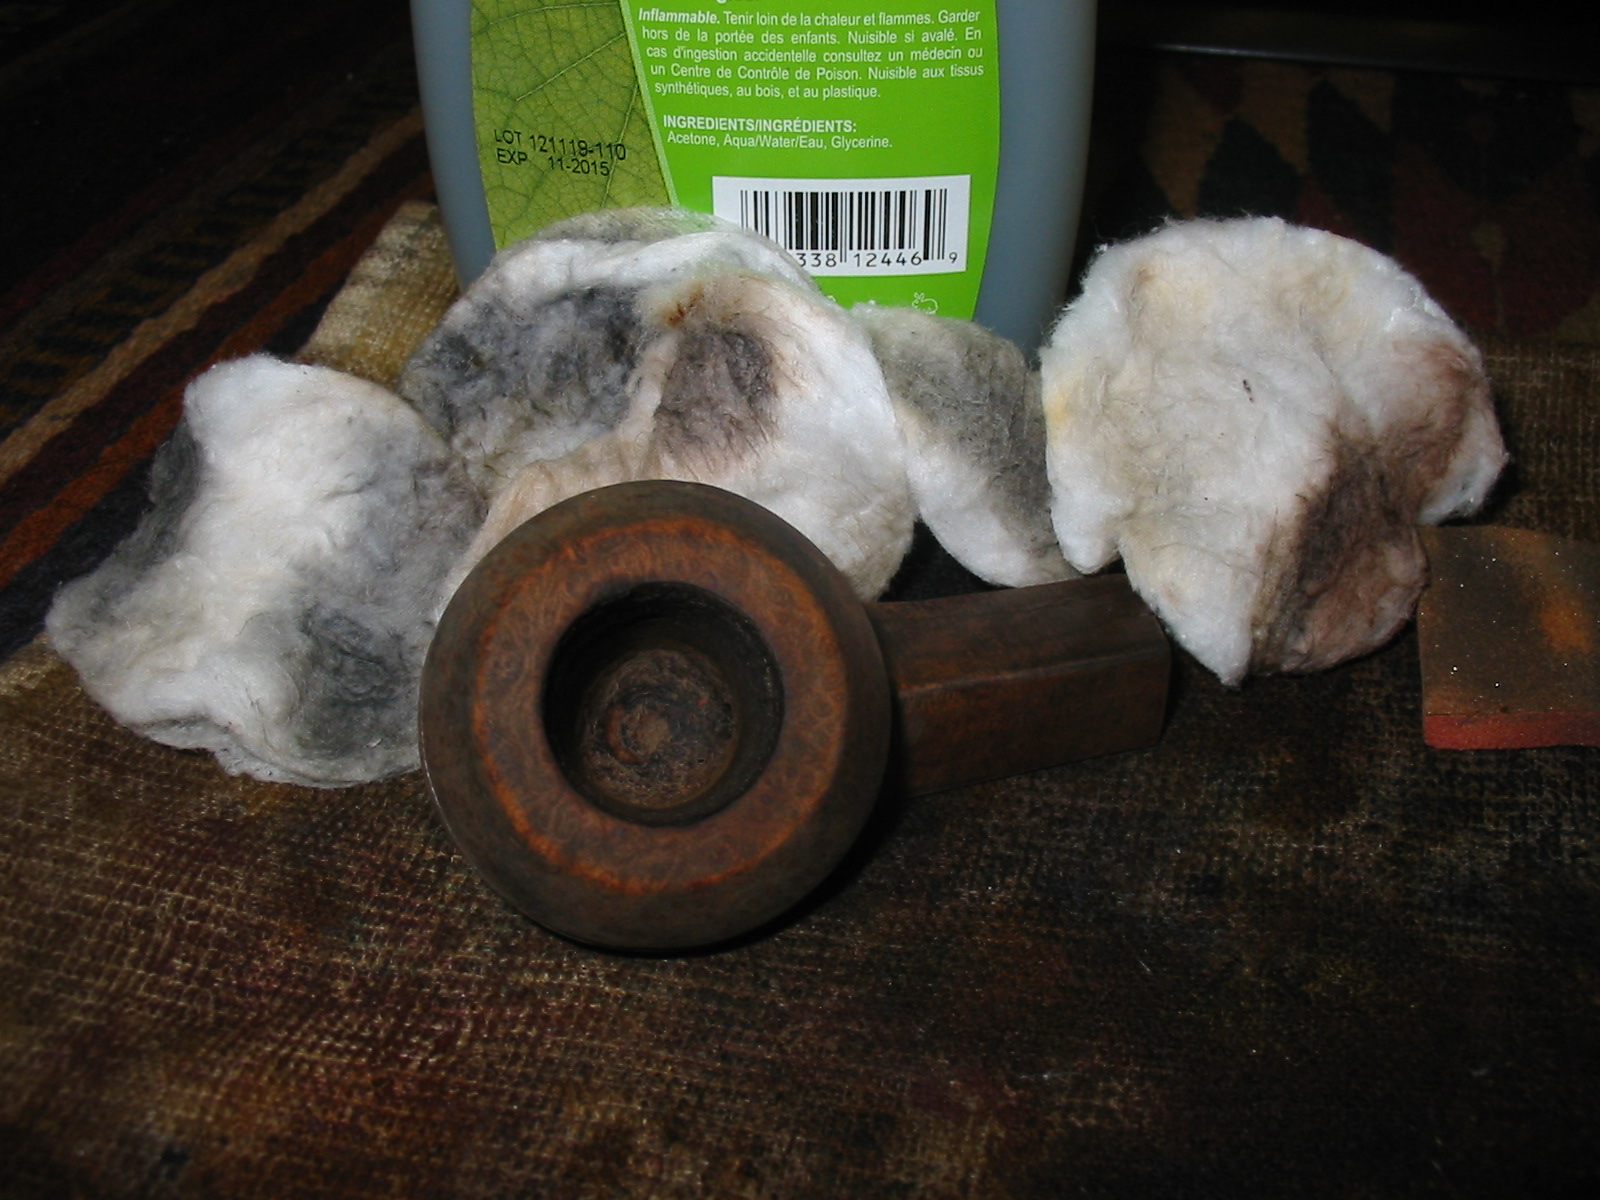
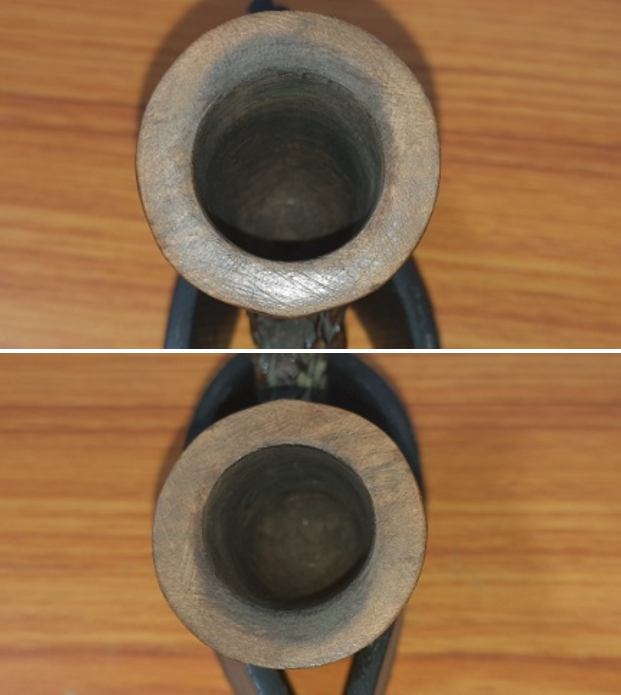
It appears that an attempt has been made to refurbish this pipe, but for reasons best known to the previous restorer, it was abandoned. Save for a little dust and soot, the chamber is nicely reamed back to the bare briar. The chamber walls, though not very thick, are without any heat fissures or pits and that’s a big relief. The rim top surface is peppered with numerous minor hairline scratches. The inner rim edge shows severe charring at 12 o’clock direction (encircled in yellow) and it extends over more than half way towards the outer edge. There is a smooth band of briar wood below and adjoining the outer rim edge. There are no ghost smells in the chamber. Addressing the charred inner rim edge is going to be tricky as the topping required would be extensive to the extent that the profile of the stummel and pipe as a whole, would be considerably altered. I would top the rim surface well within the limits of the smooth briar band below the outer rim edge and up to the point where I reach solid, albeit darkened briar. I would, thereafter polish it and attempt to blend the darkened areas by a applying a dark stain to the rest of the rim top surface. 
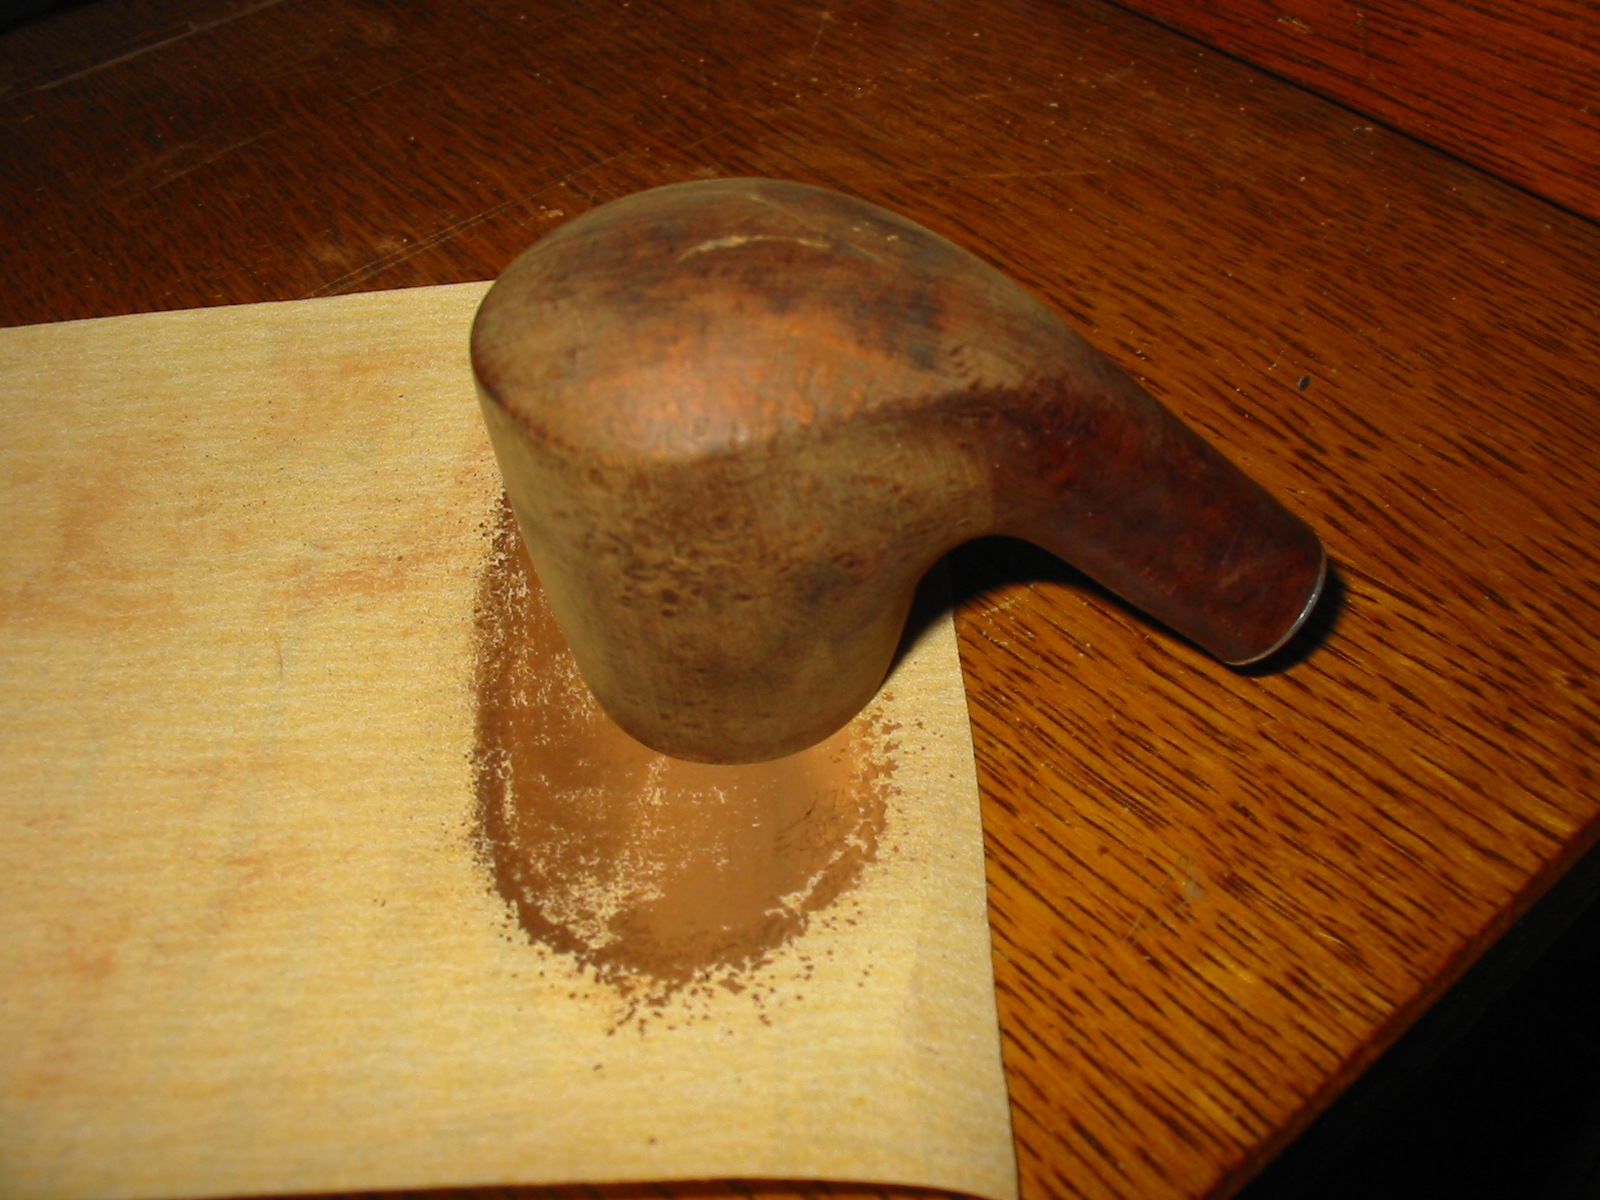
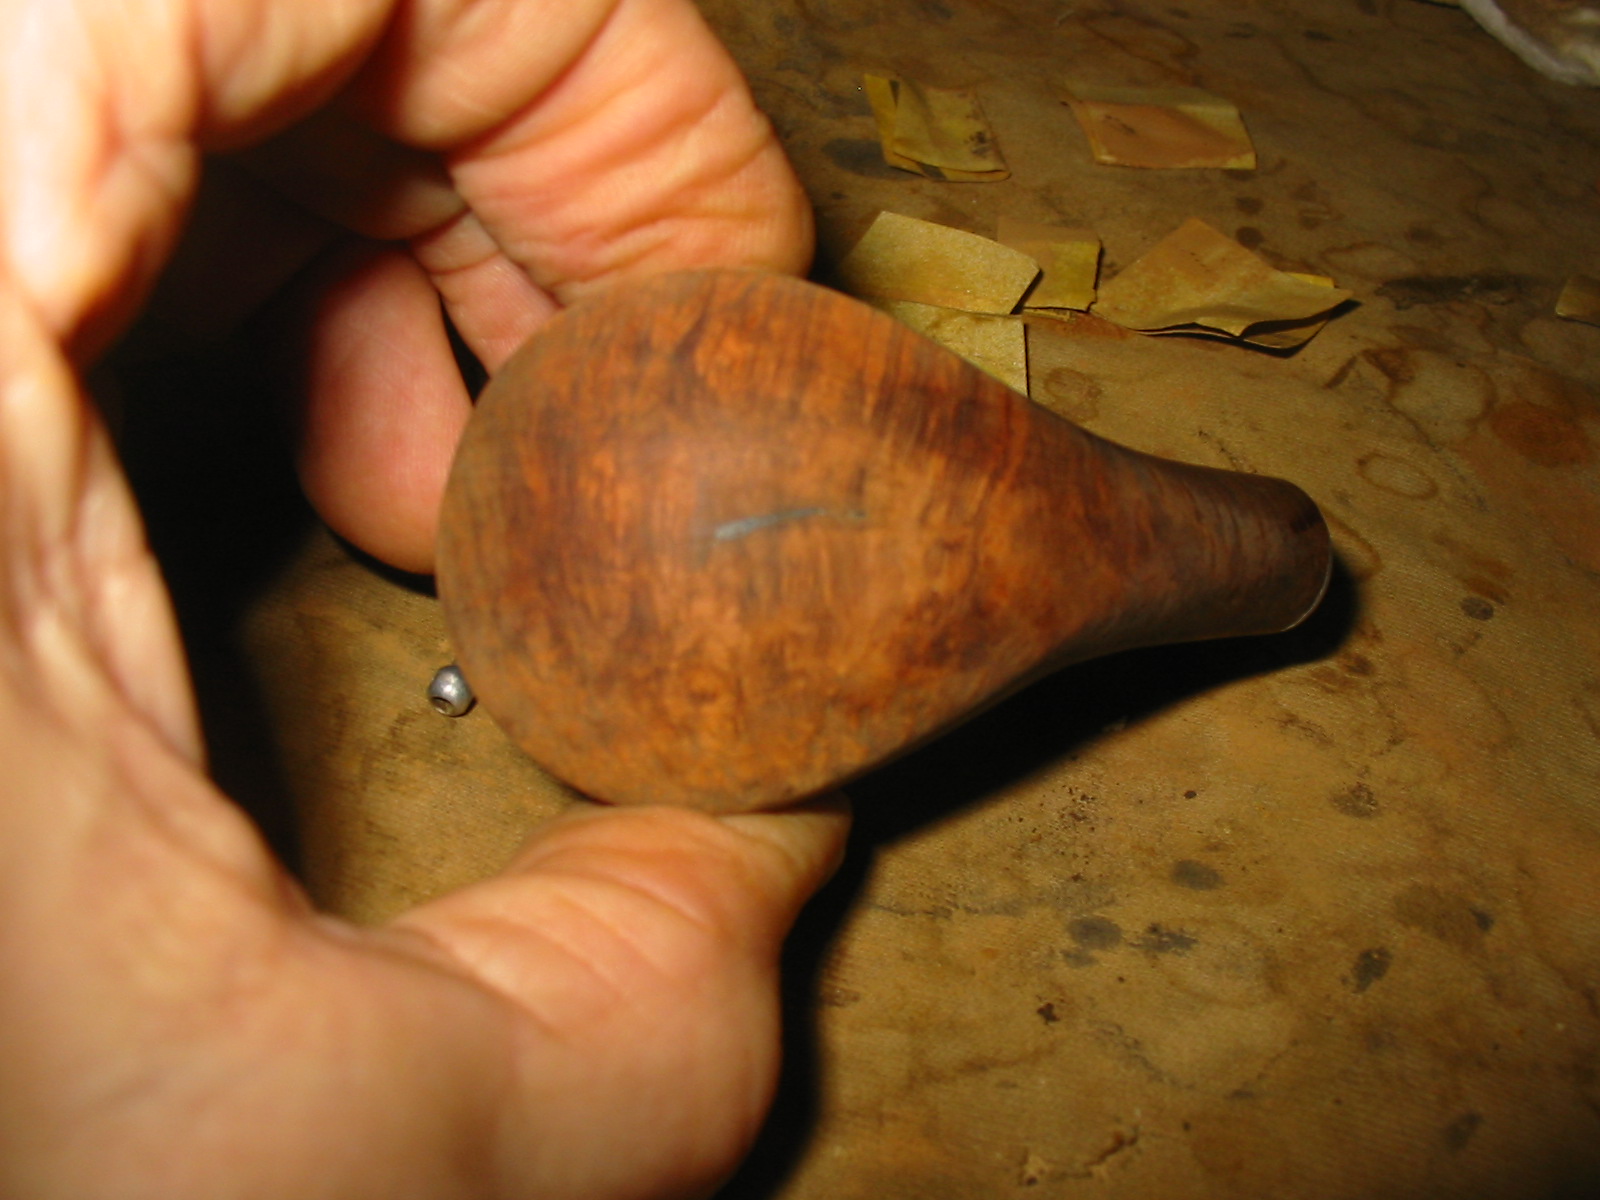
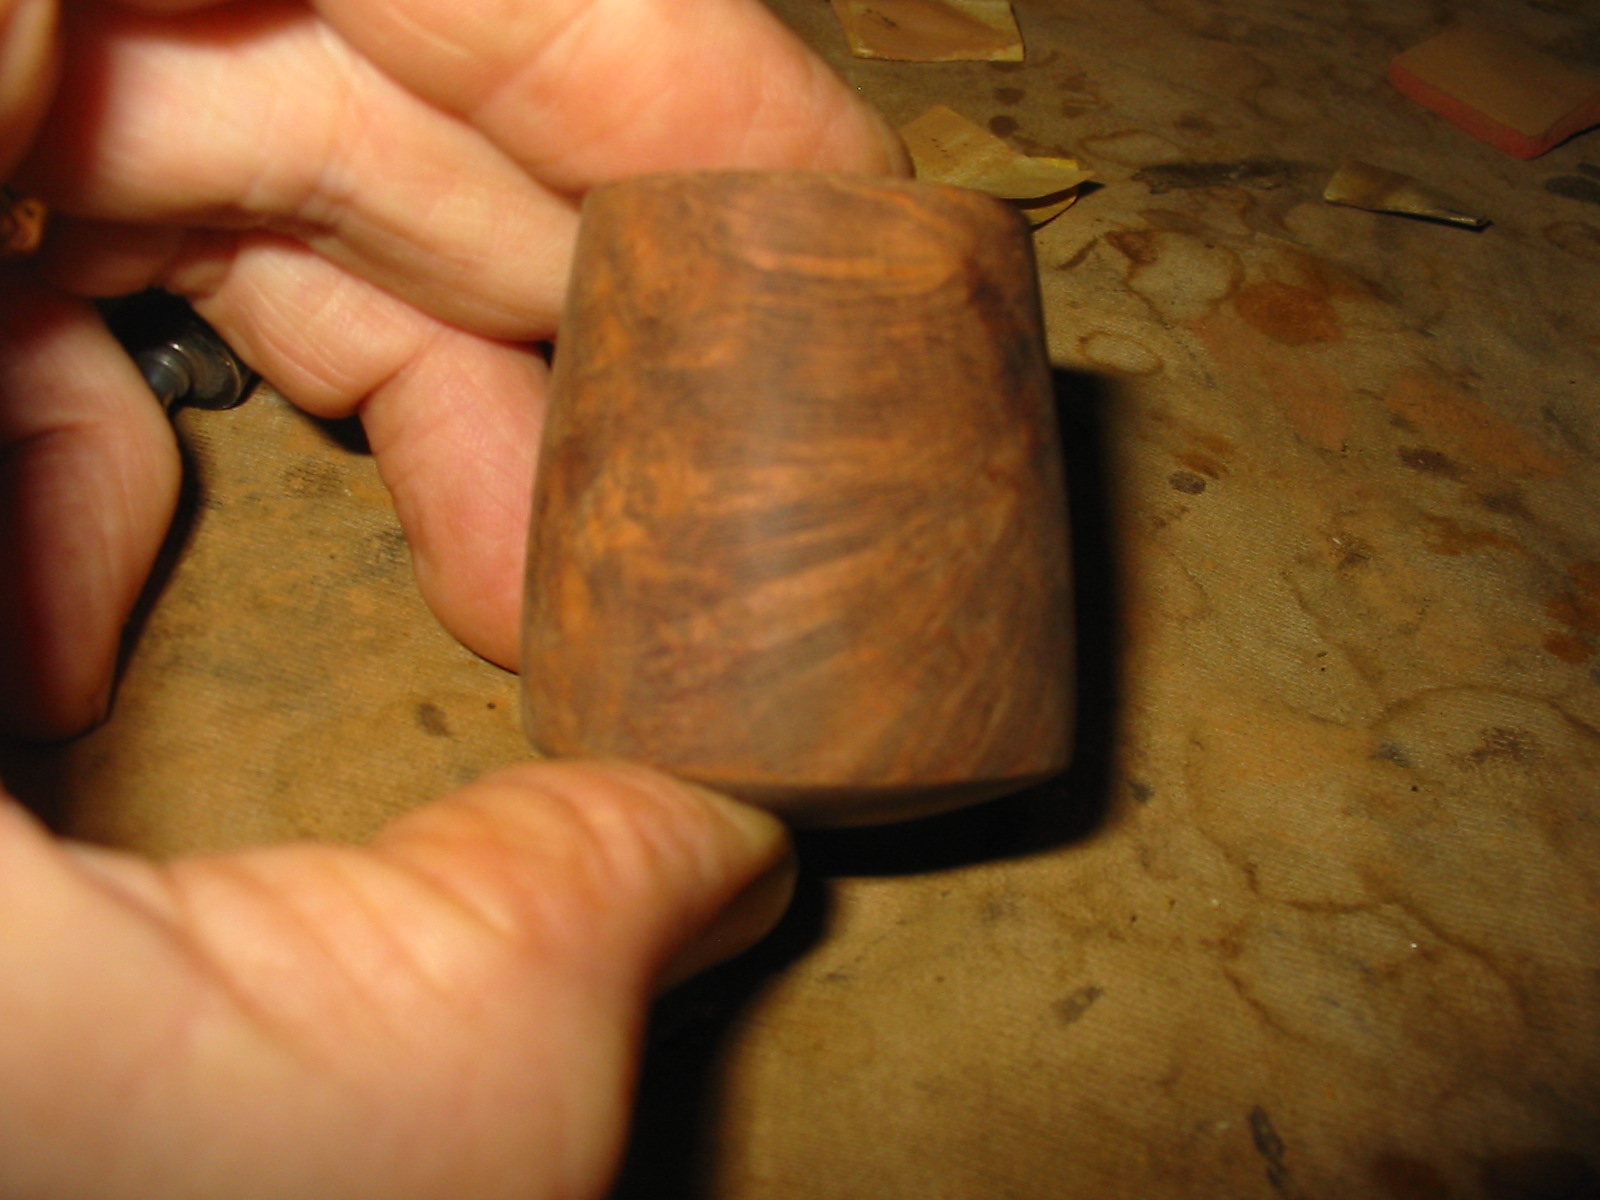
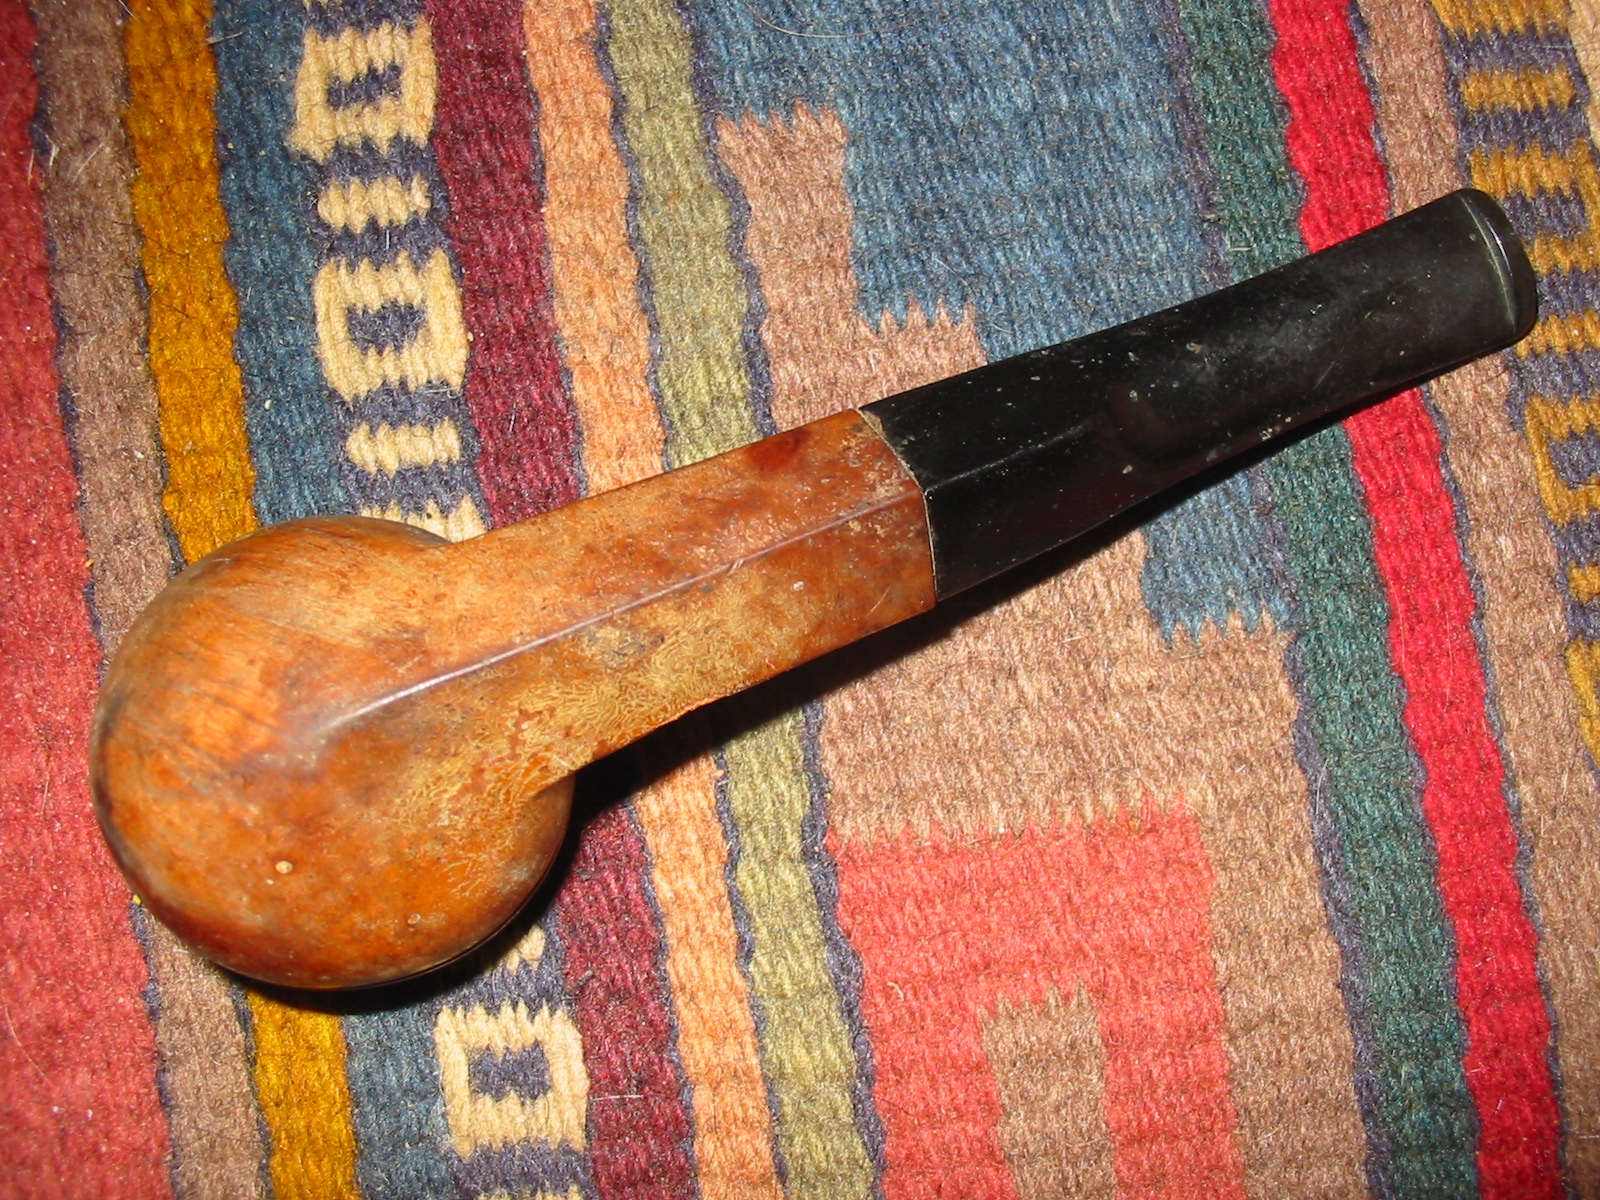
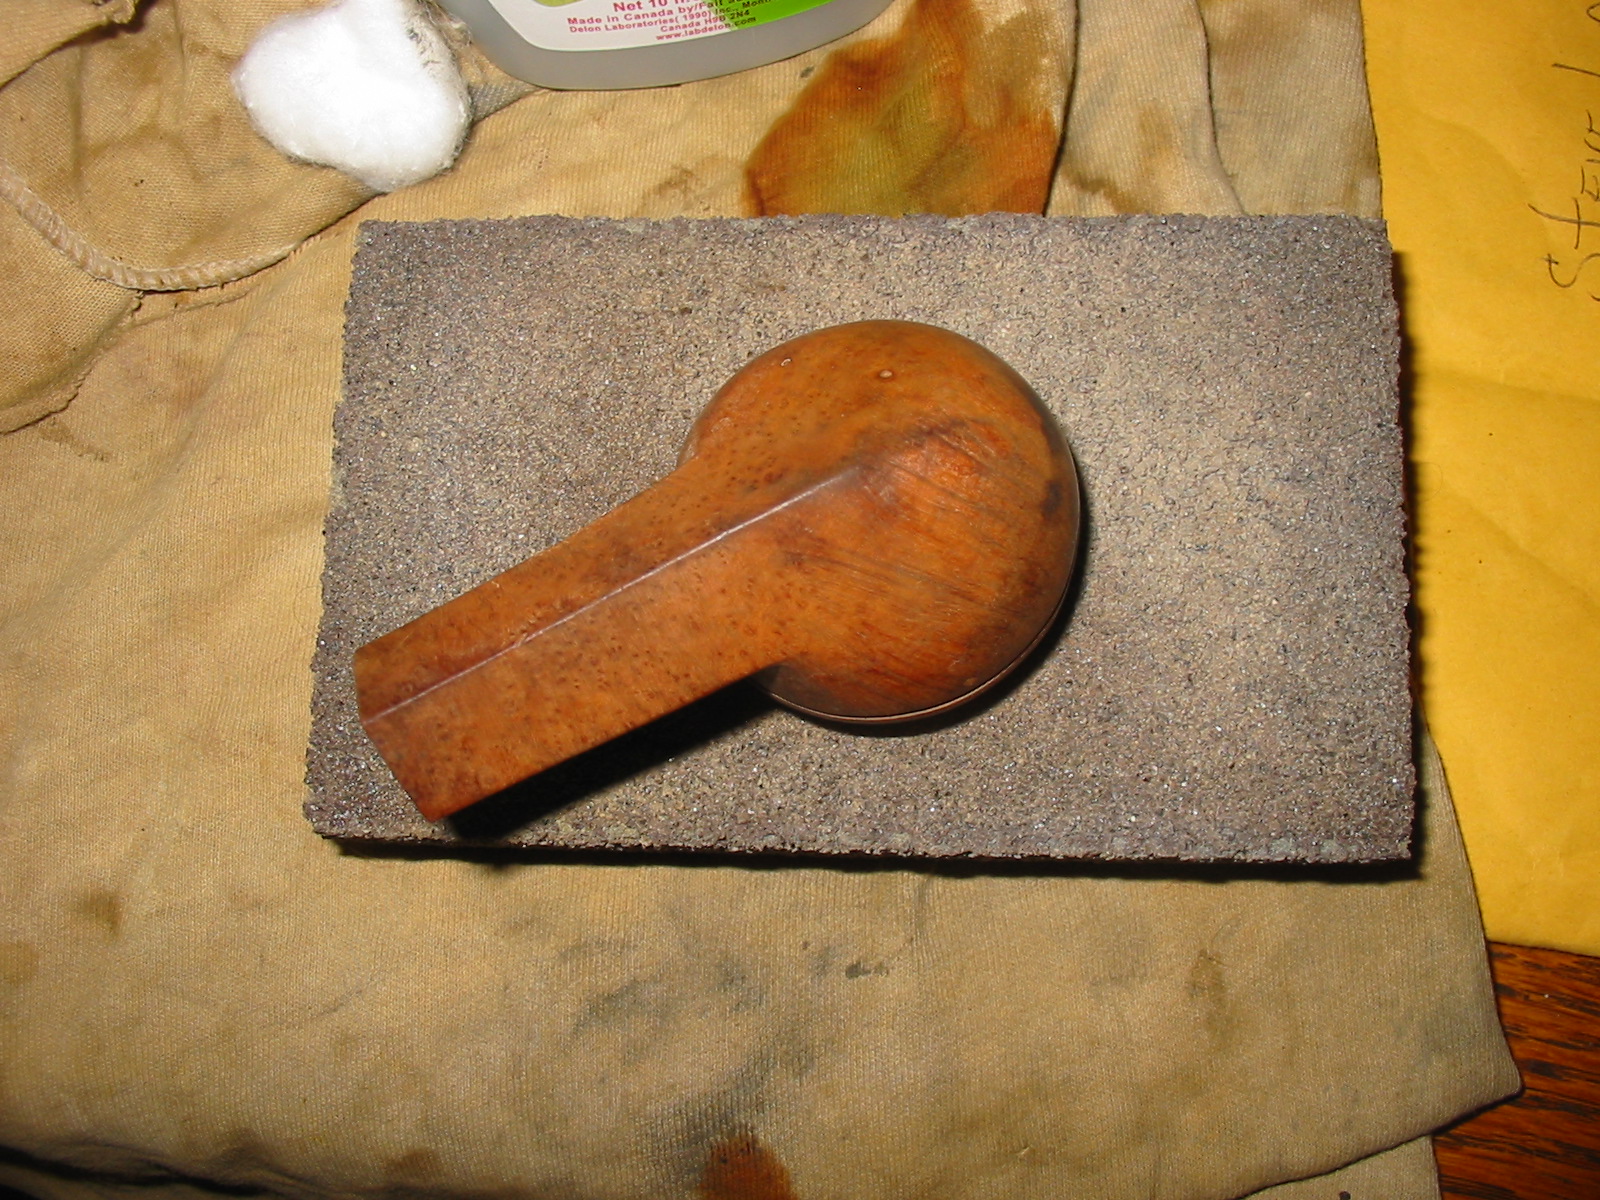
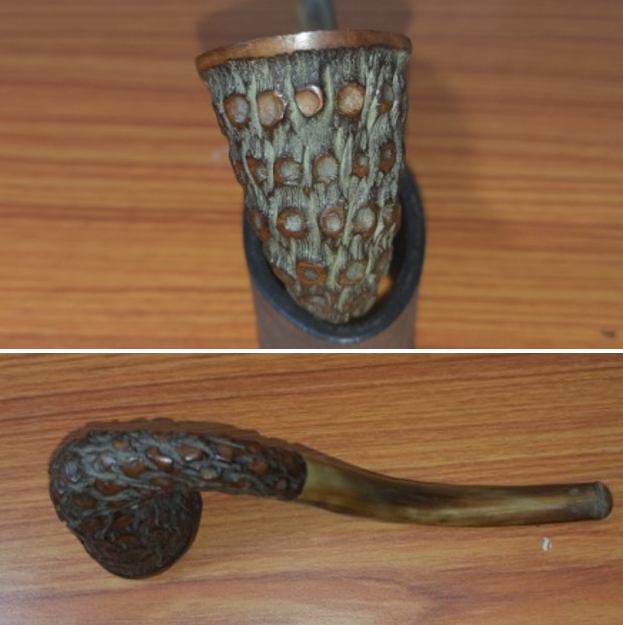
The stummel surface is without any damage. There is dust and dirt embedded in to the rusticated nooks and crannies giving the briar an old and lifeless look. The patterned scaled rustications also do not help in the overall appearance of the stummel. The mortise is threaded into which seat the threaded bone tenon of the stem and appears to be clean. I plan on complete rustication of the stummel and thereafter contrast staining with black and brown stains. The only issue I need to keep in mind is that the walls of the stummel are not very thick and thus I need to be cautious least I end up gouging too deep into the chamber wall. 
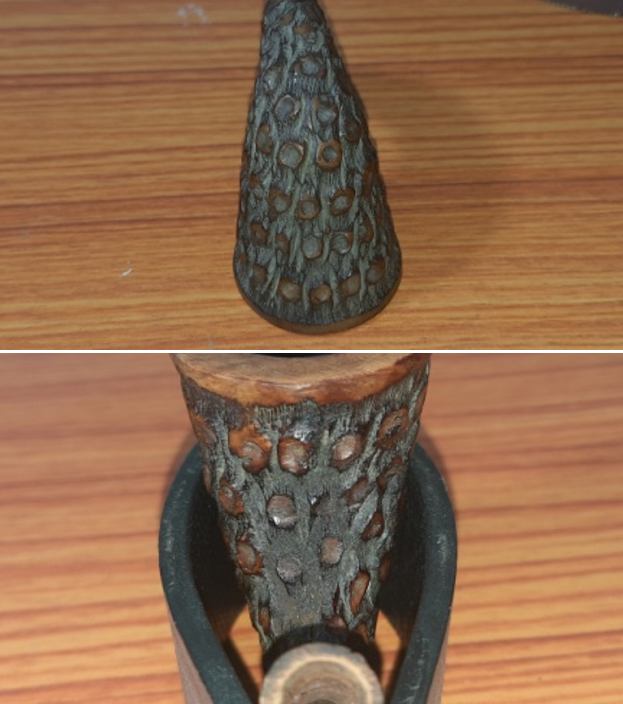
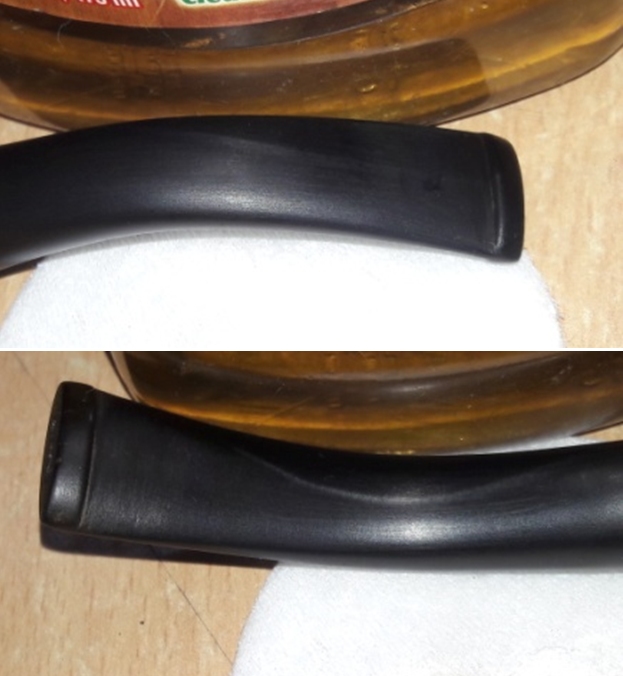
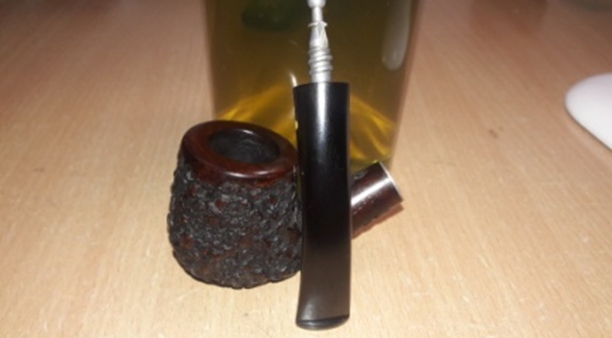
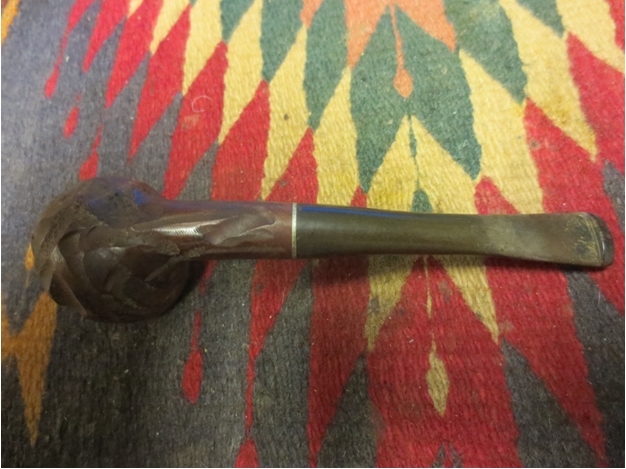
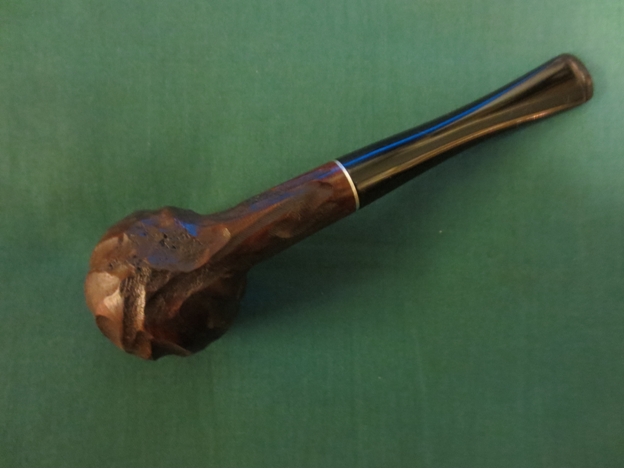
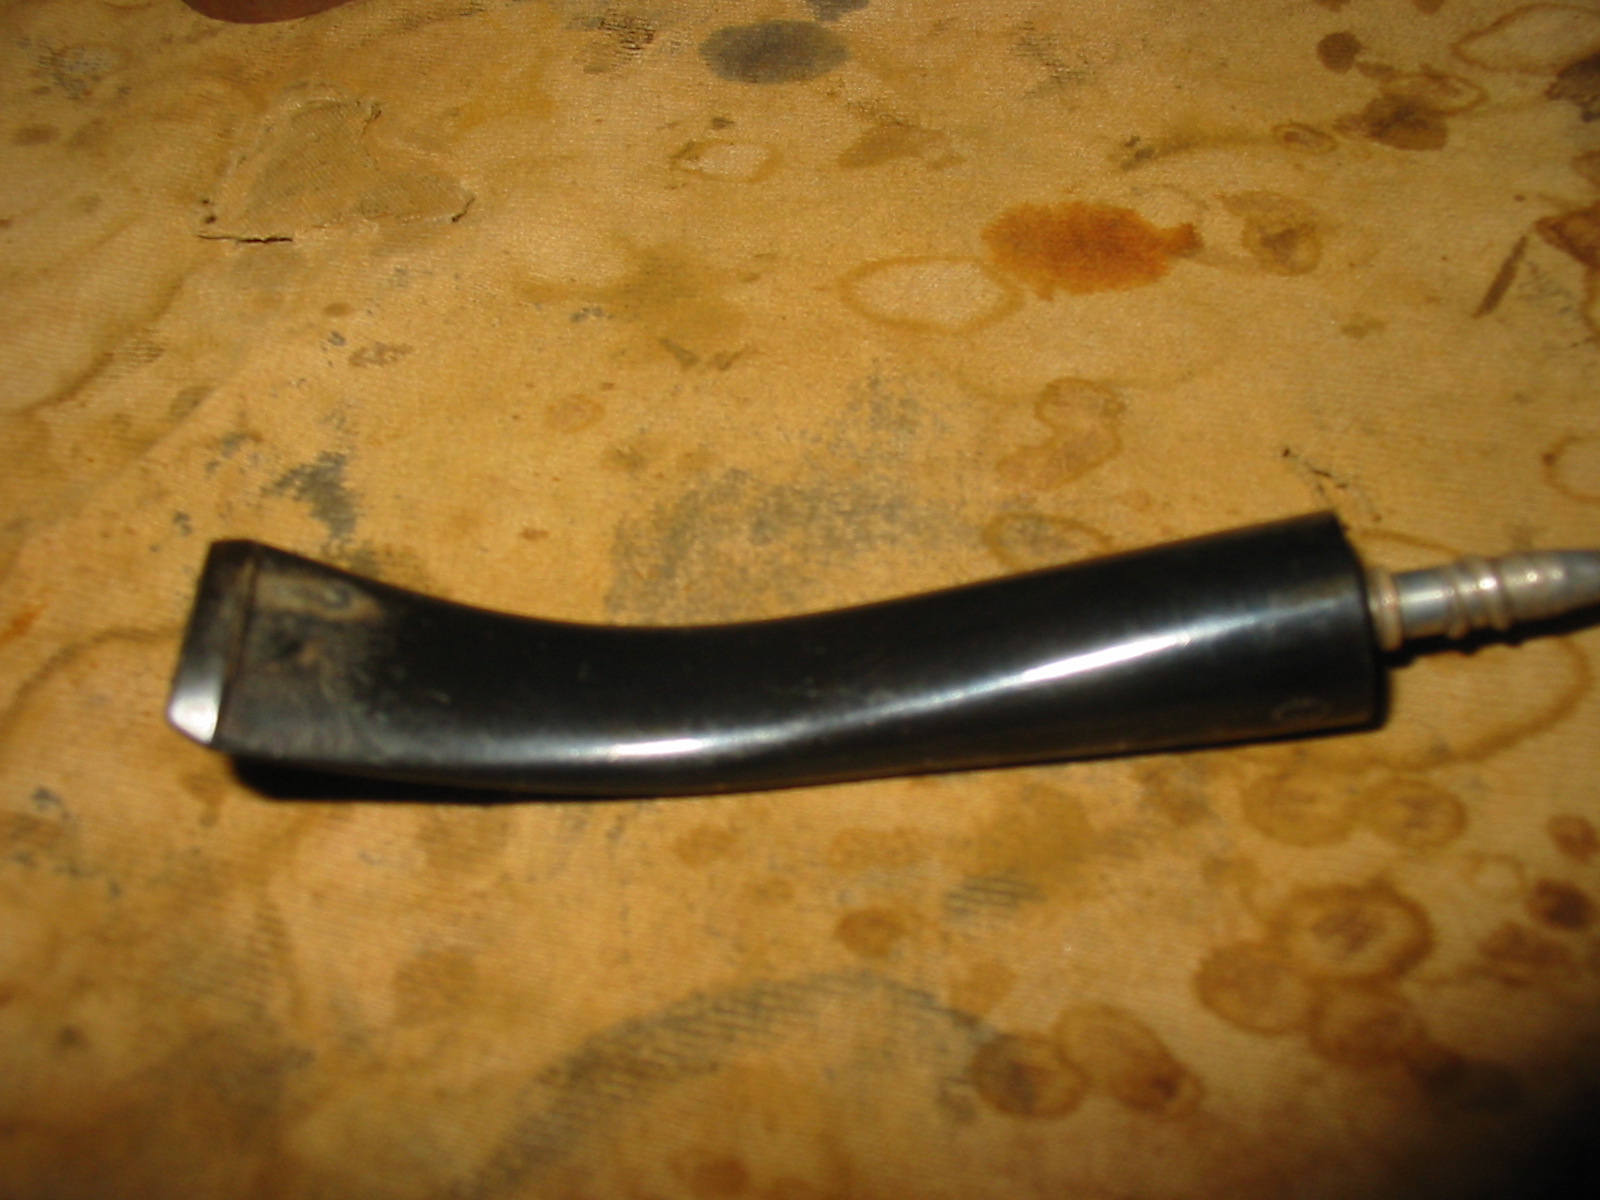
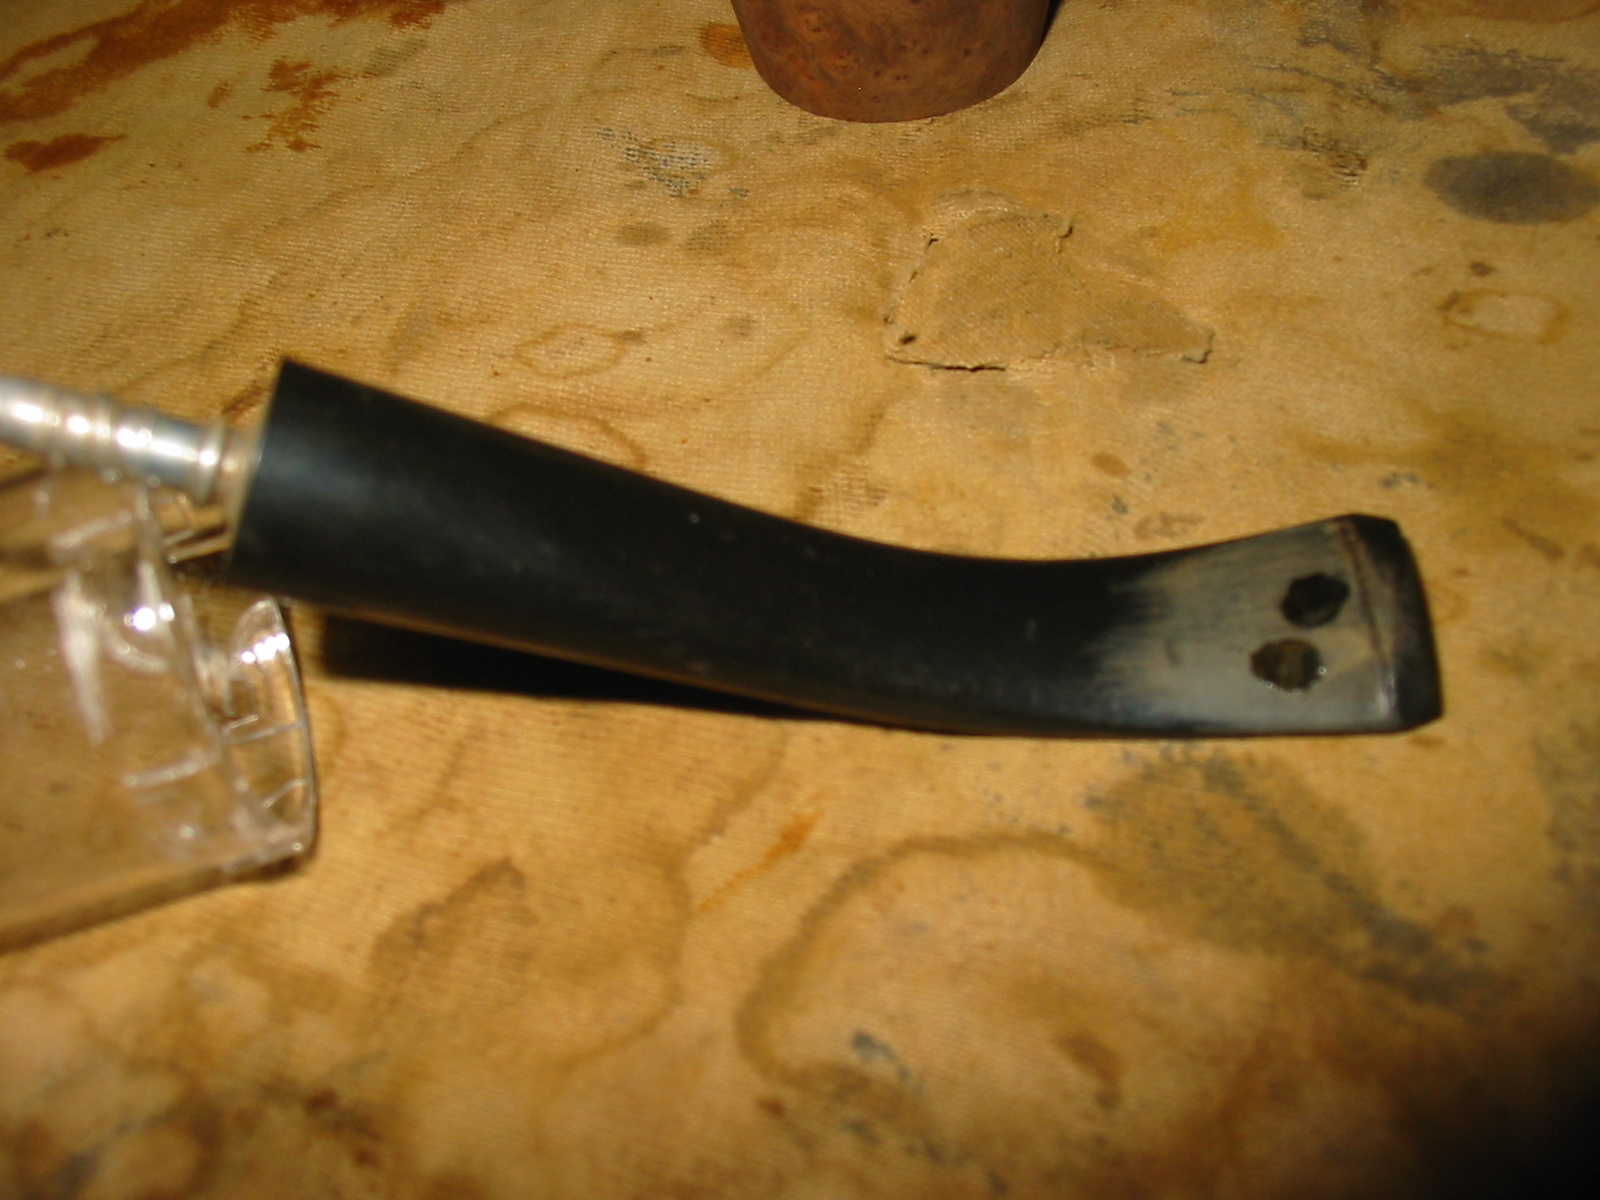
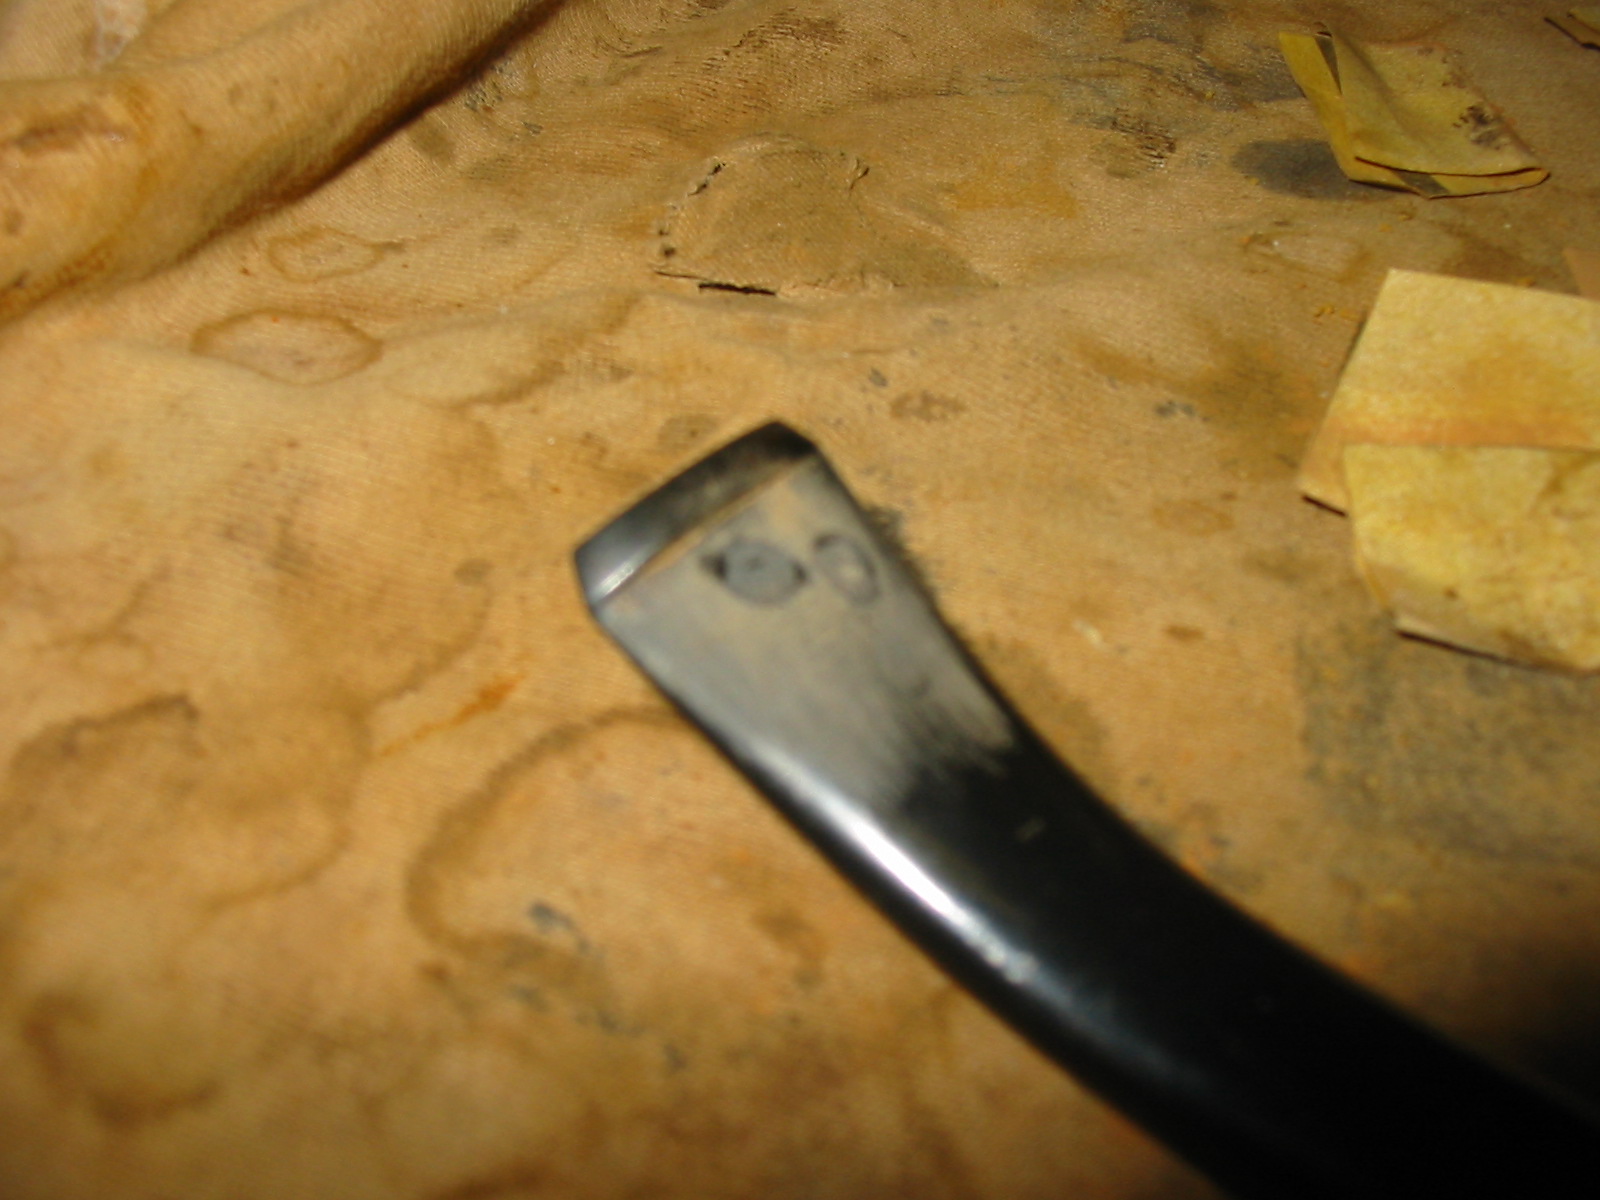
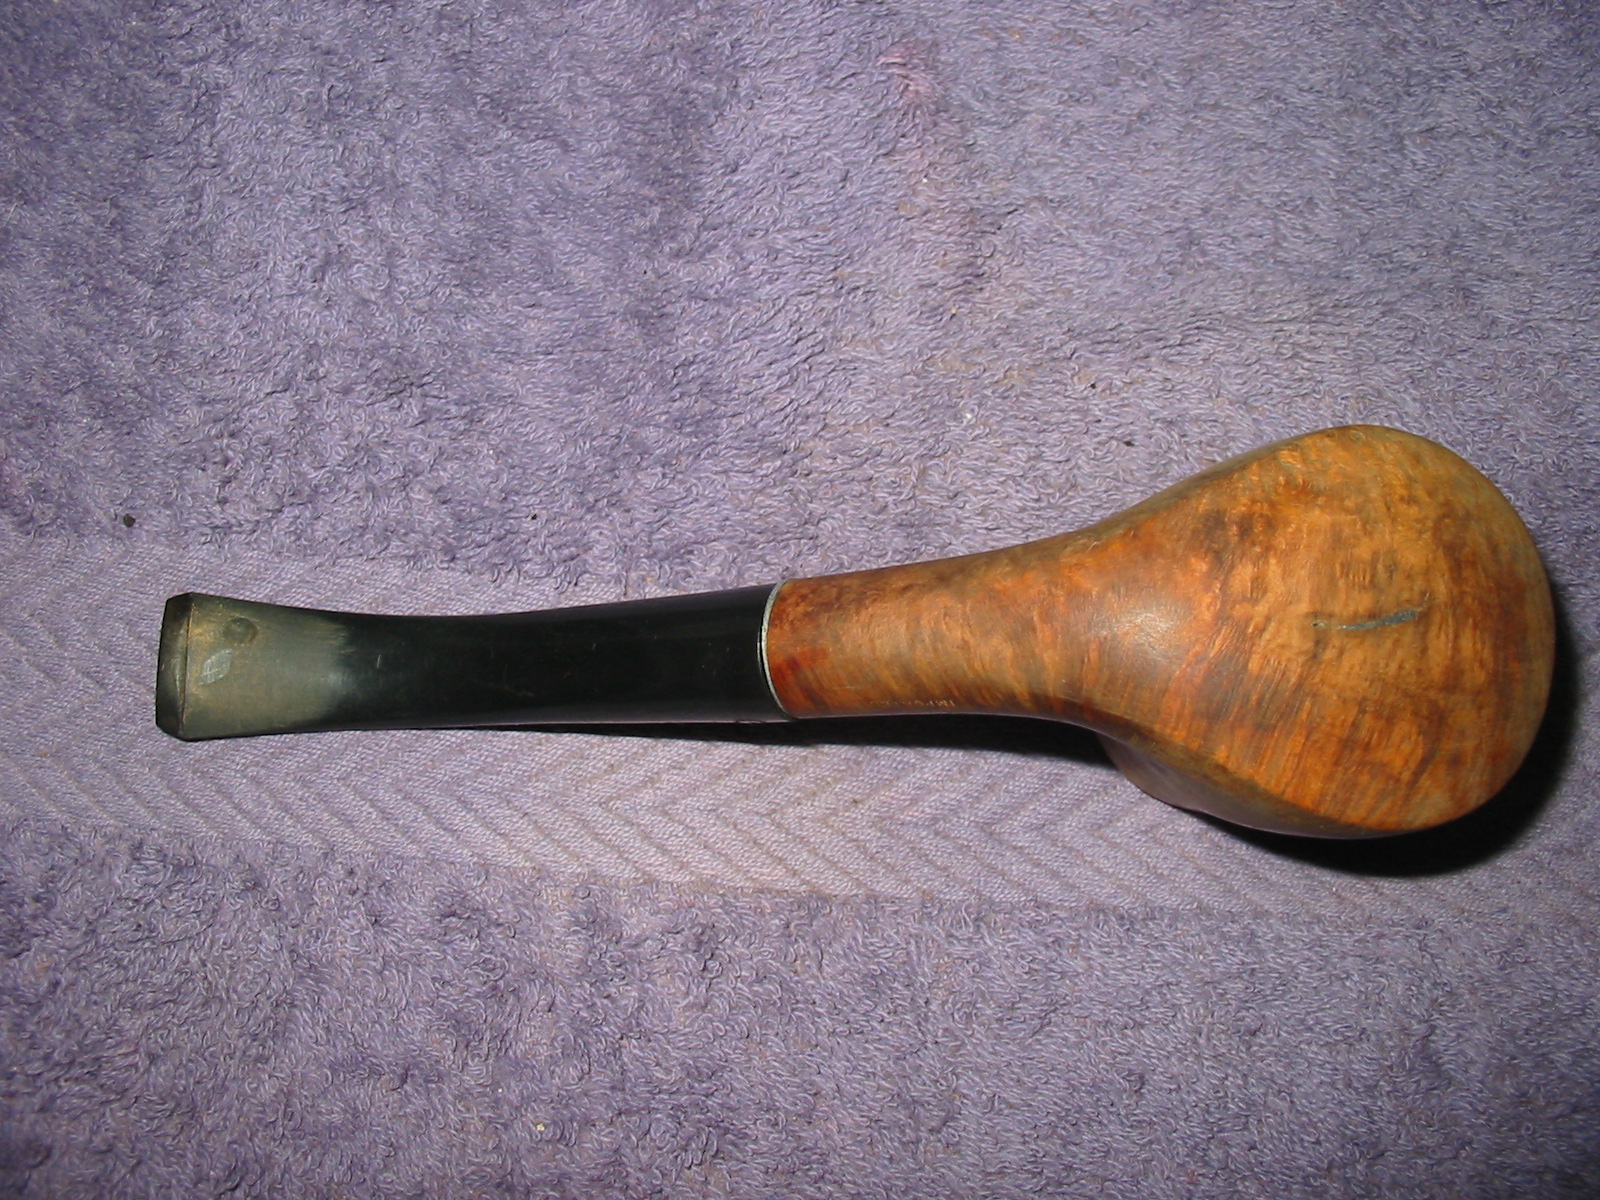
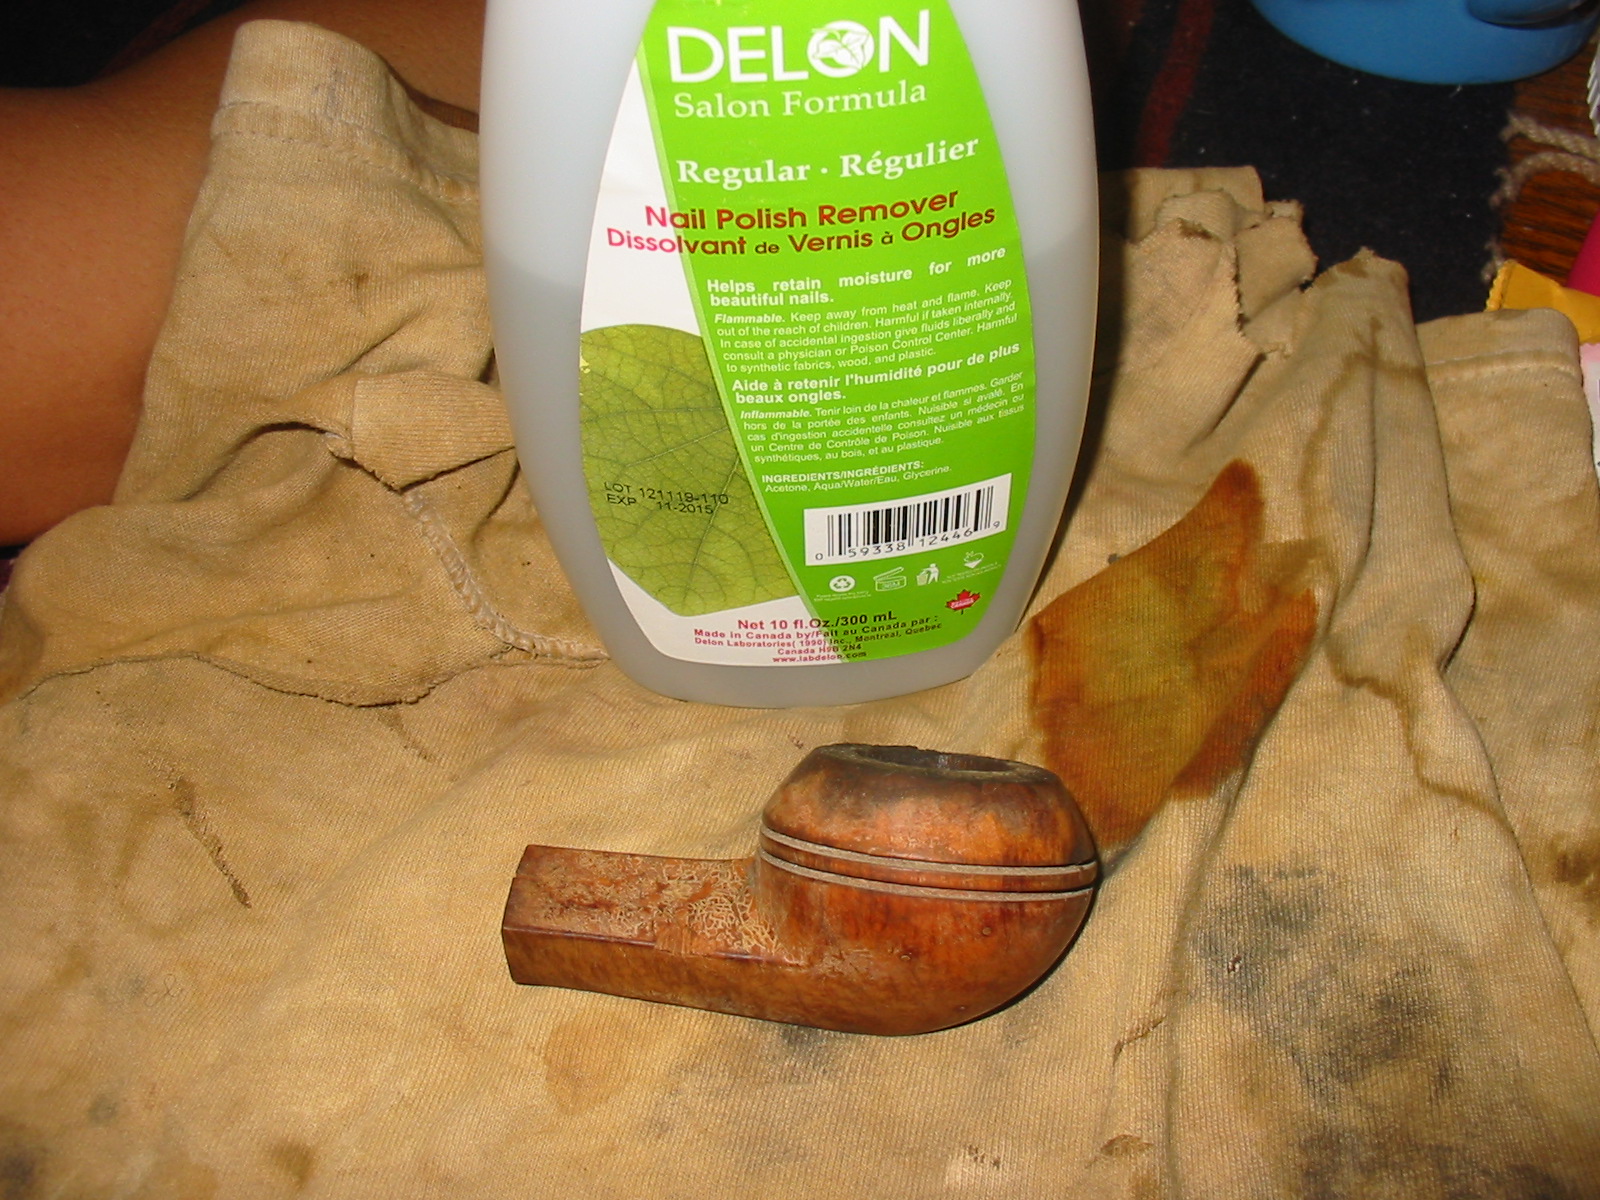
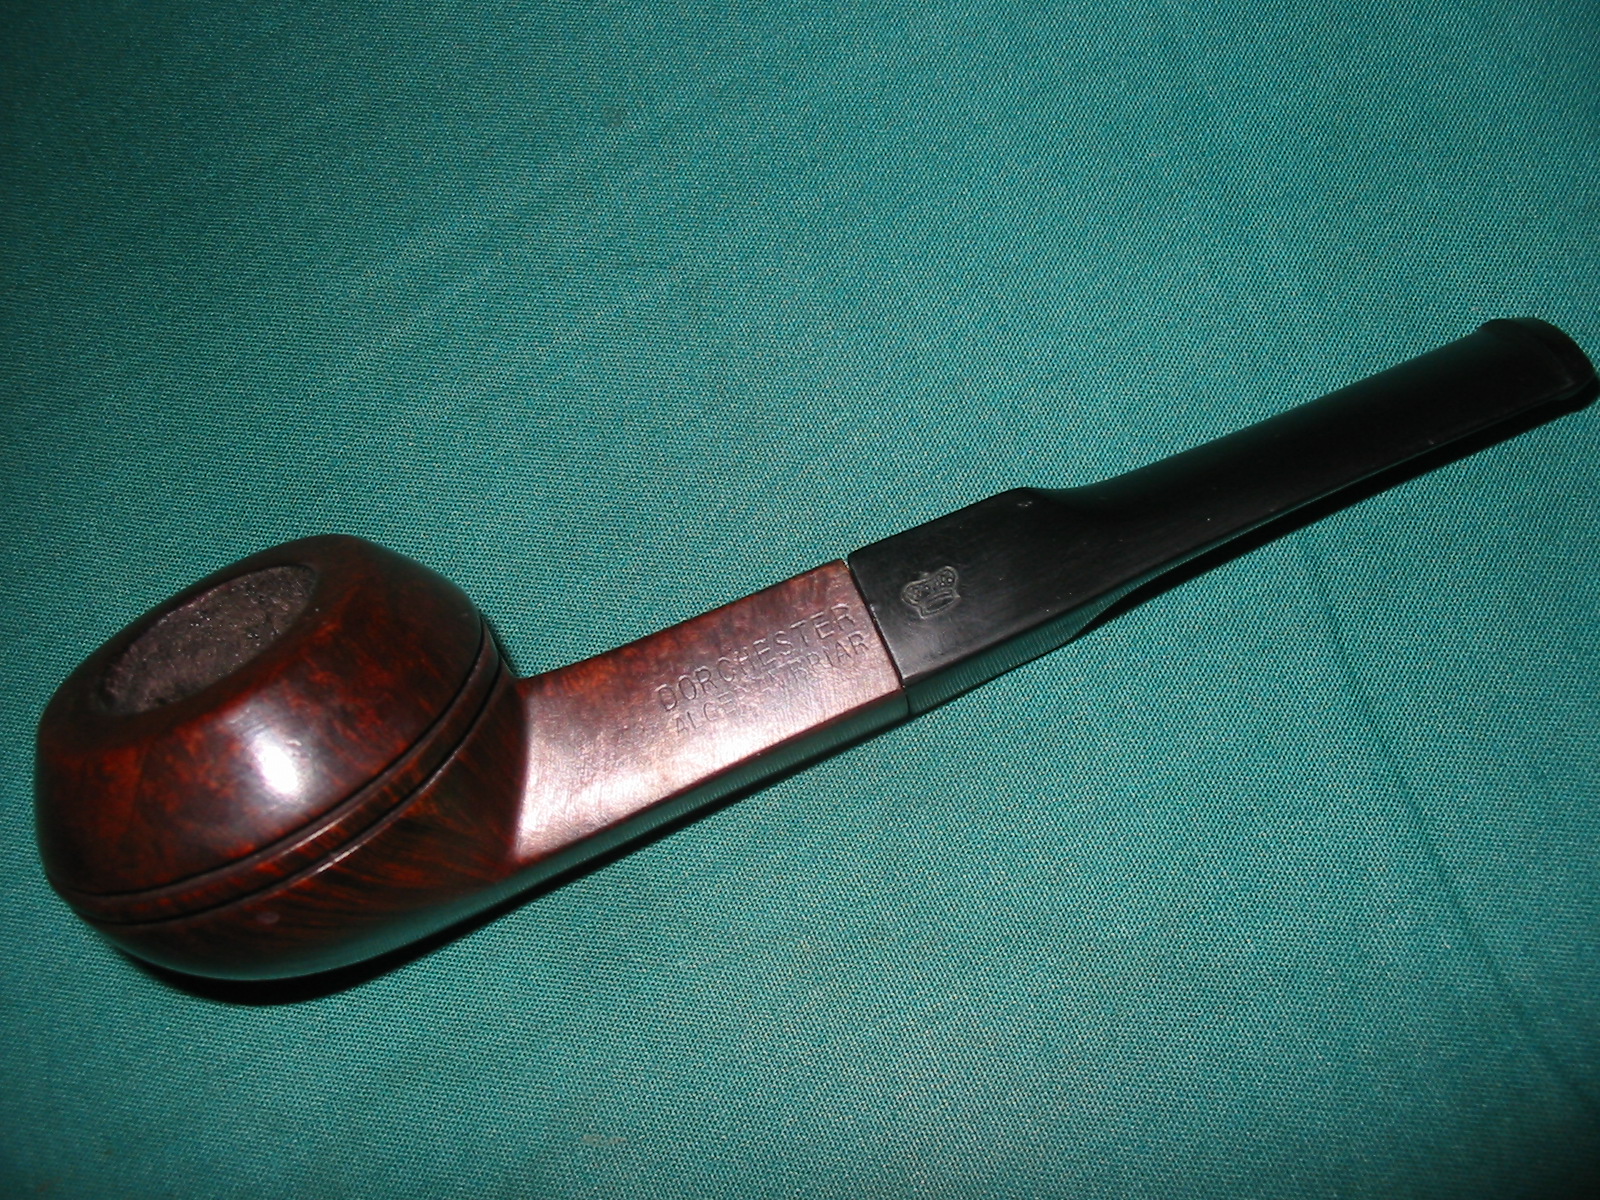
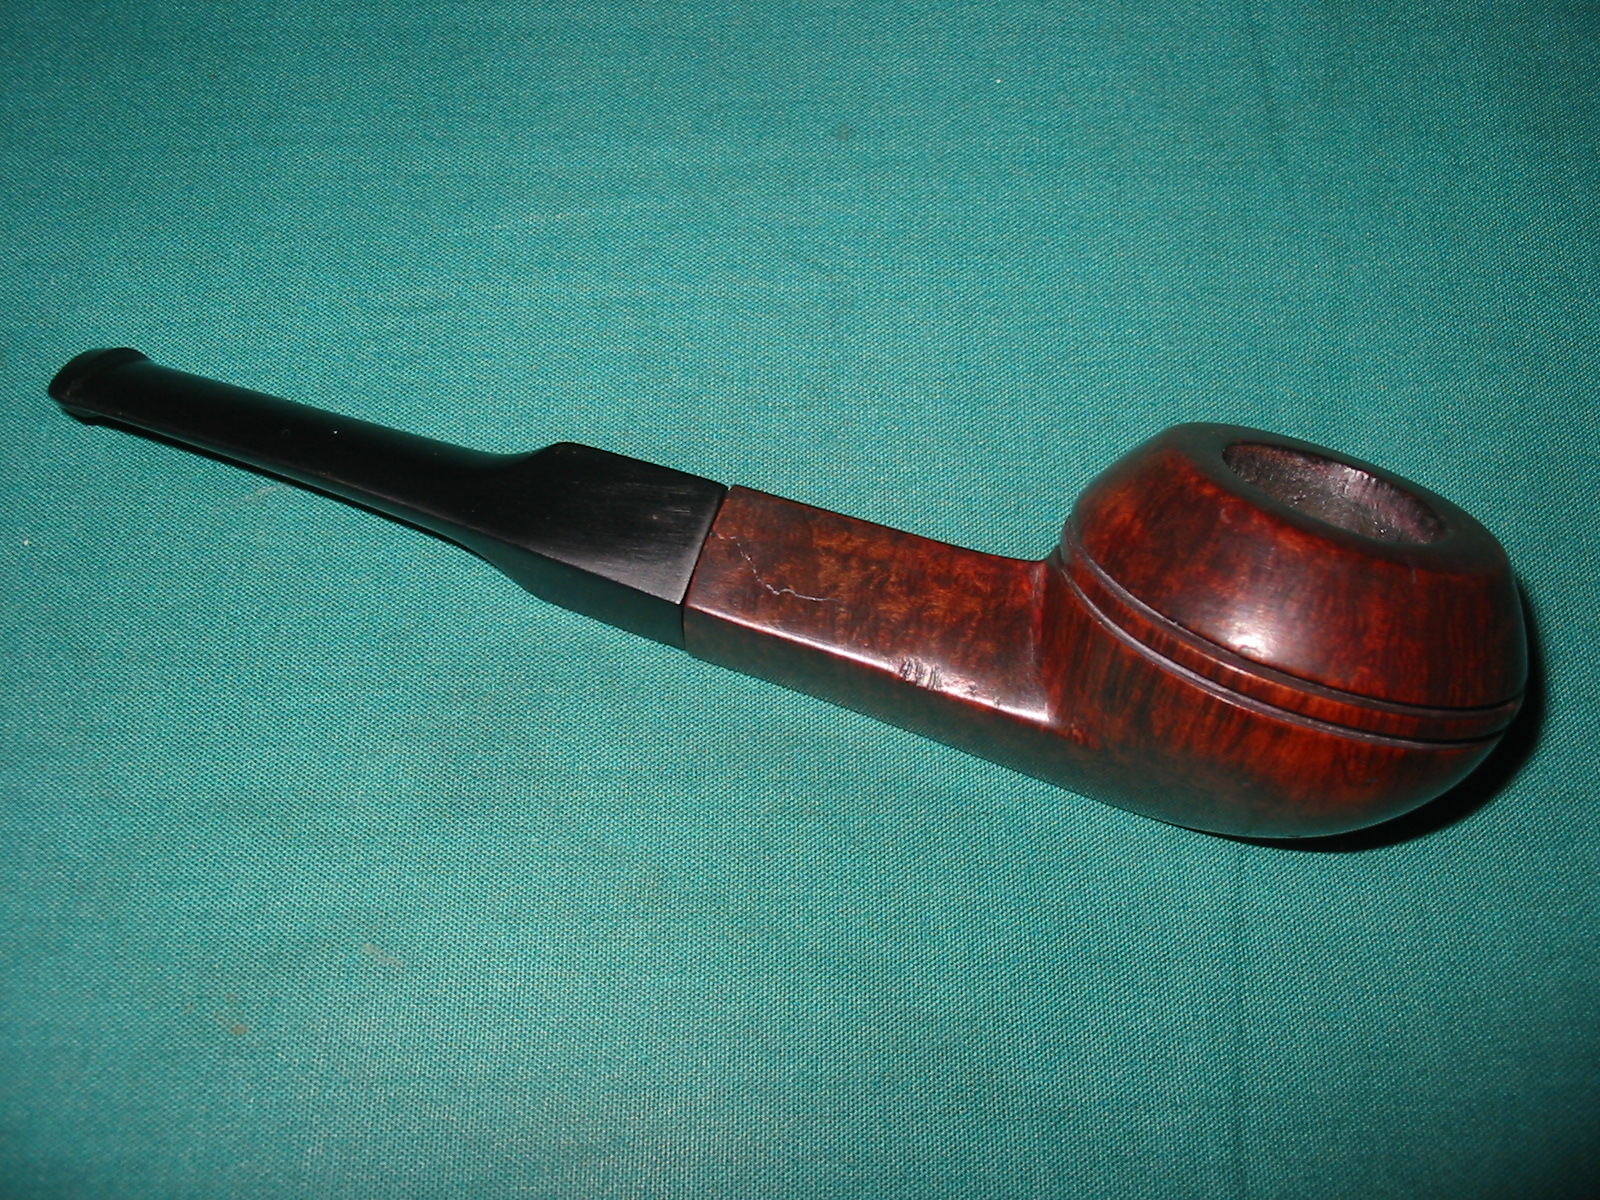
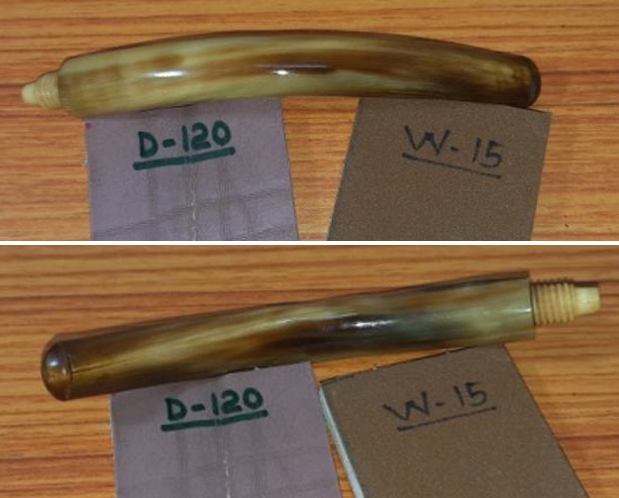
The tapered horn stem is clean with no major issues. The upper stem surface has a couple of minor bite marks at the base of the button and also over the button edge. The lower surface has some minor tooth indentations in the bite zone. The button edges on both the surfaces need to be sharpened. The round orifice and the tenon end are clean.
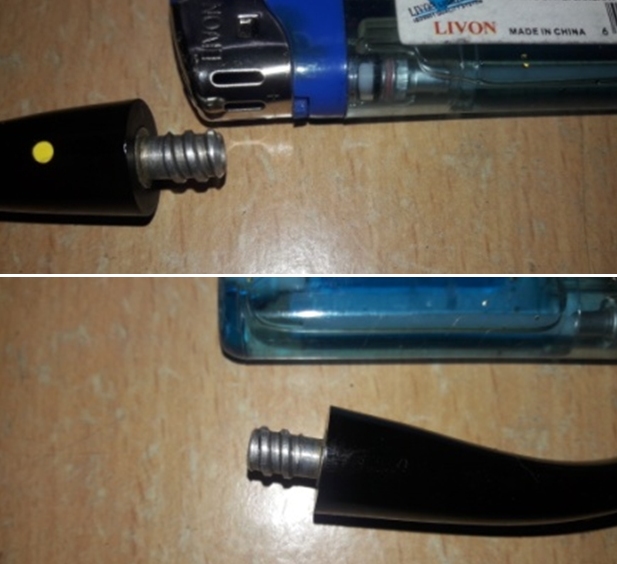
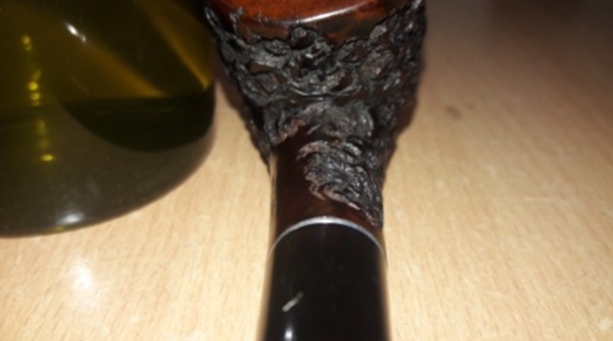
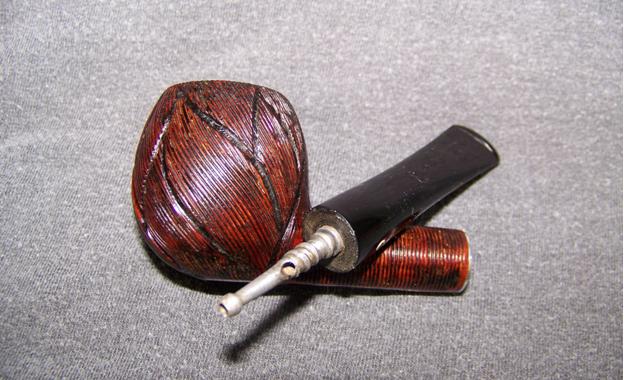
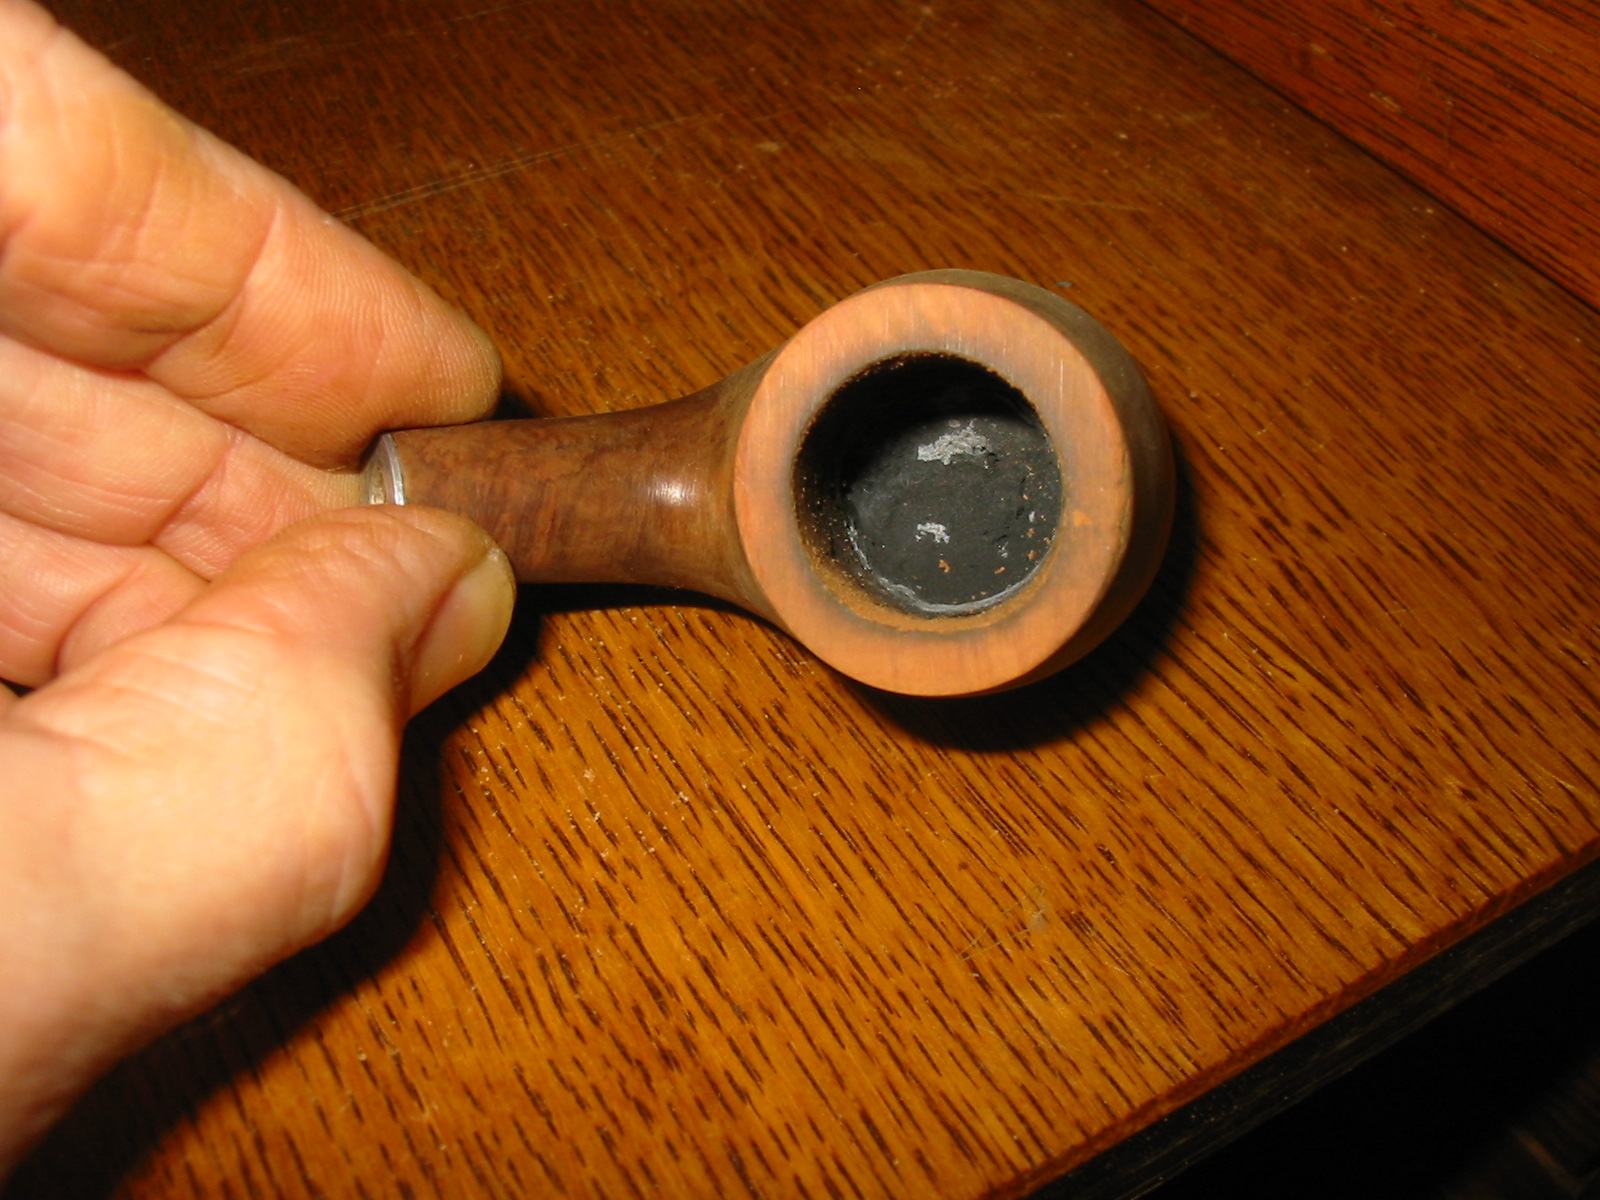
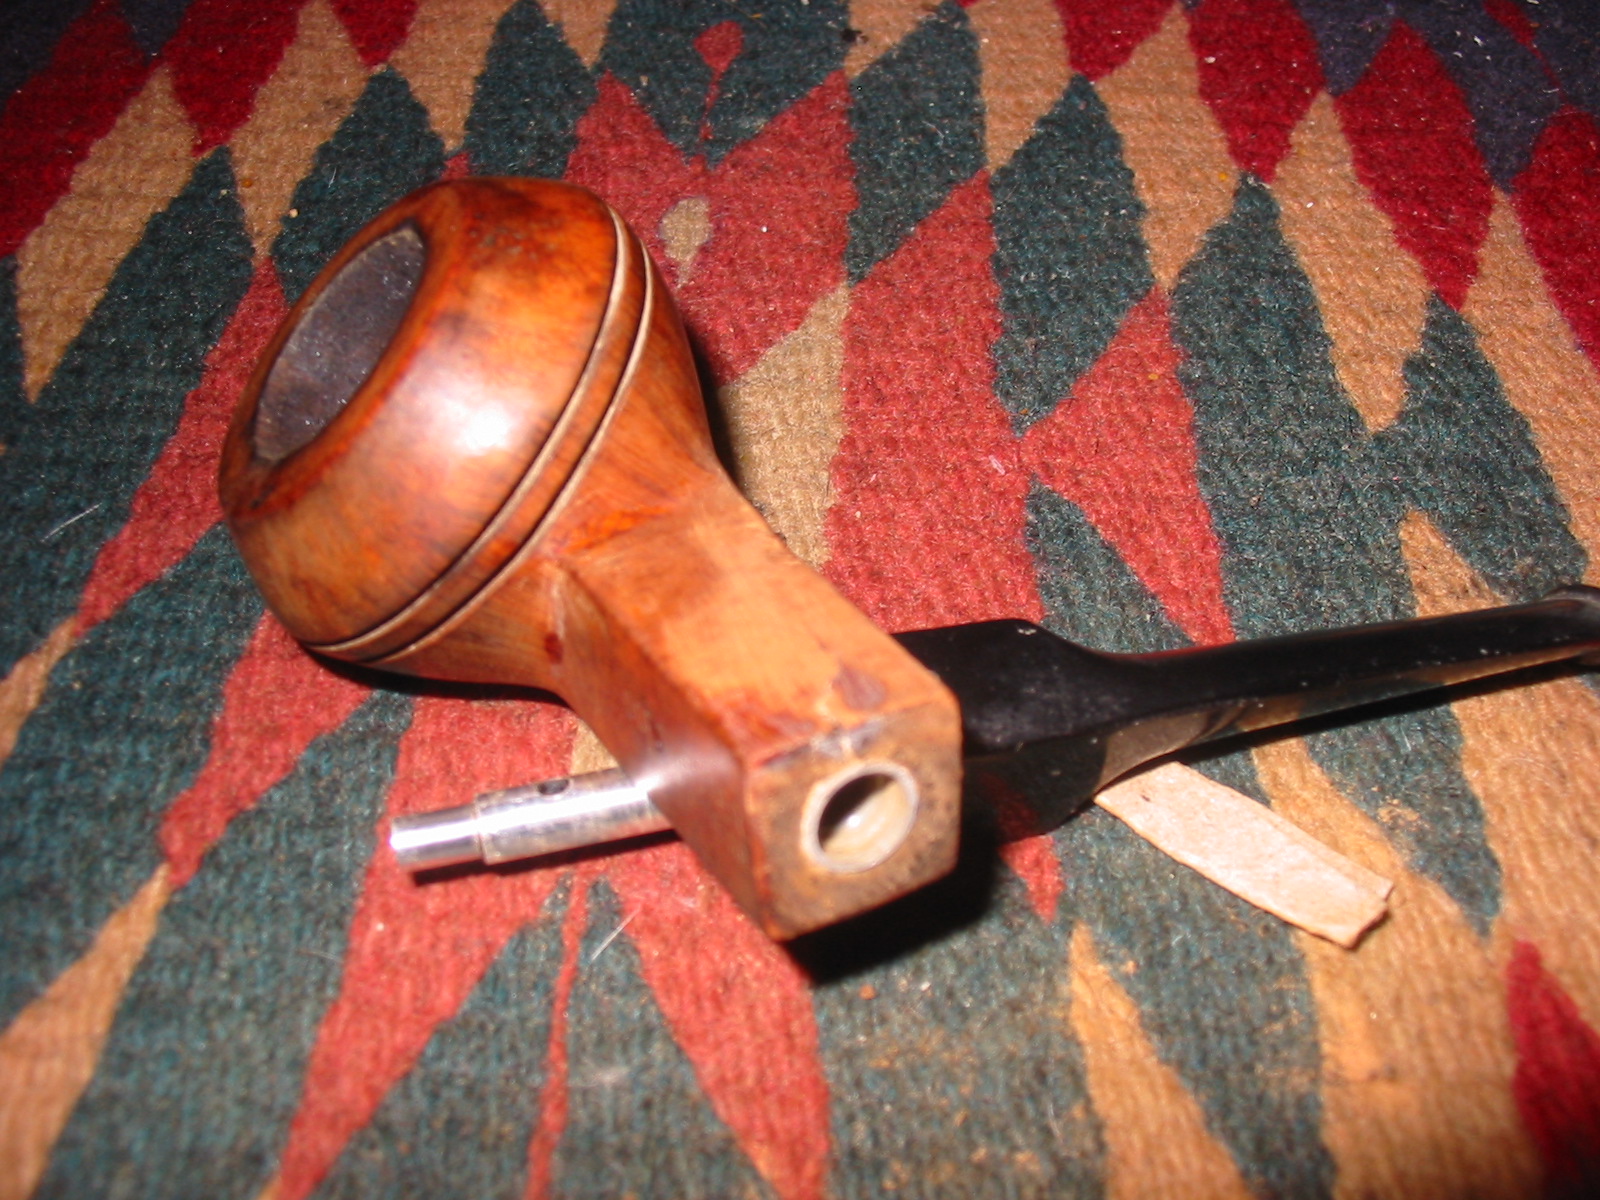
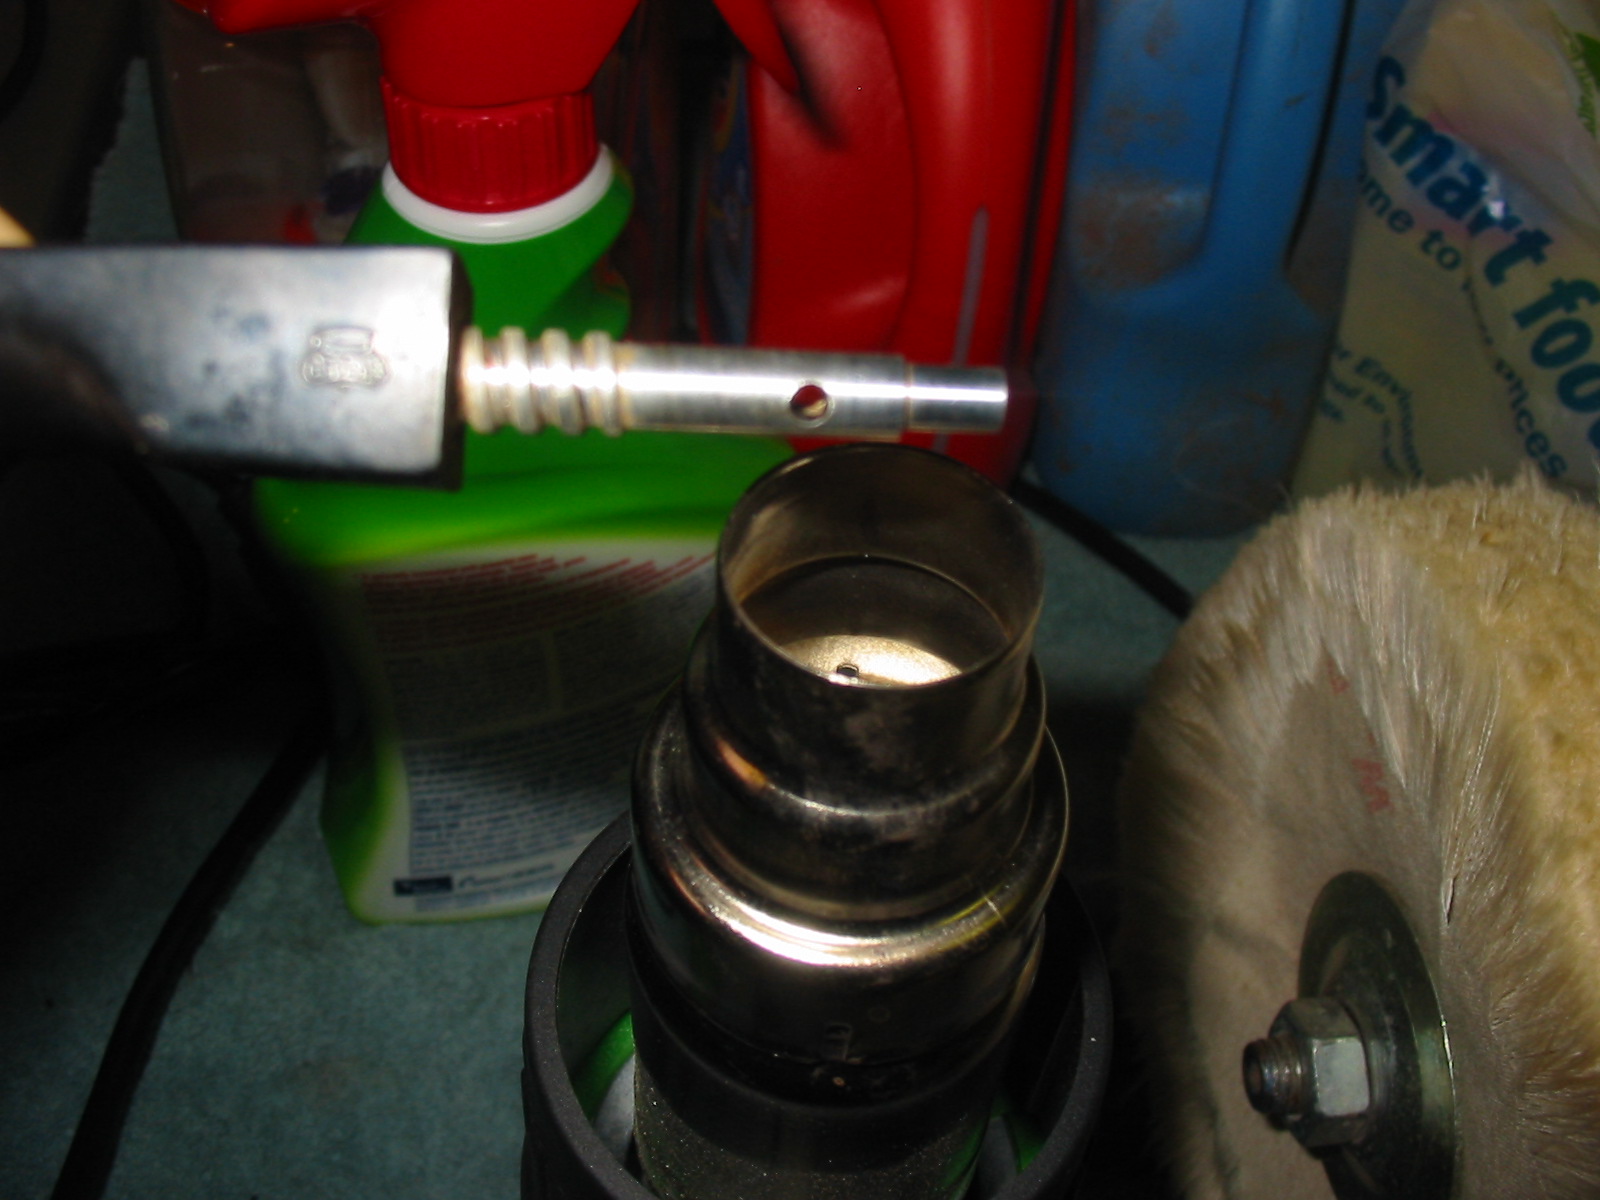
The seating of the stem in to the mortise is overturned to the right by a huge margin and is very loose. This would need something more permanent than the clear nail polish coat application. The following pictures will give the readers a correct perspective of the issue.
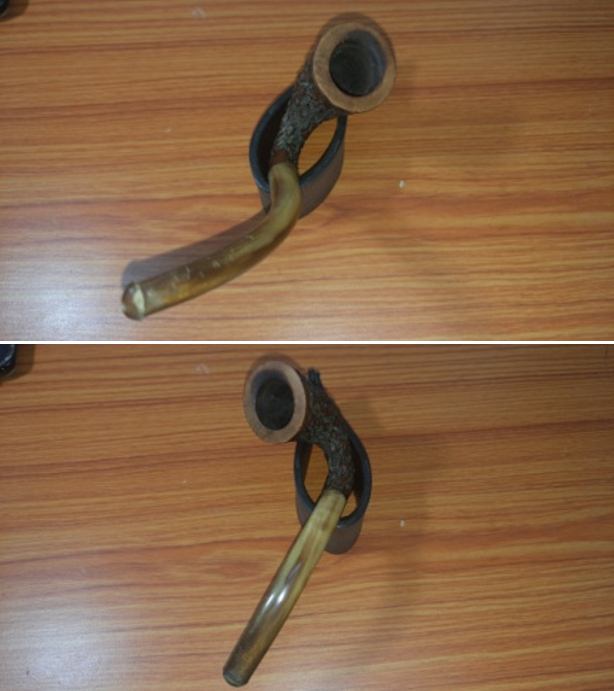
The Process
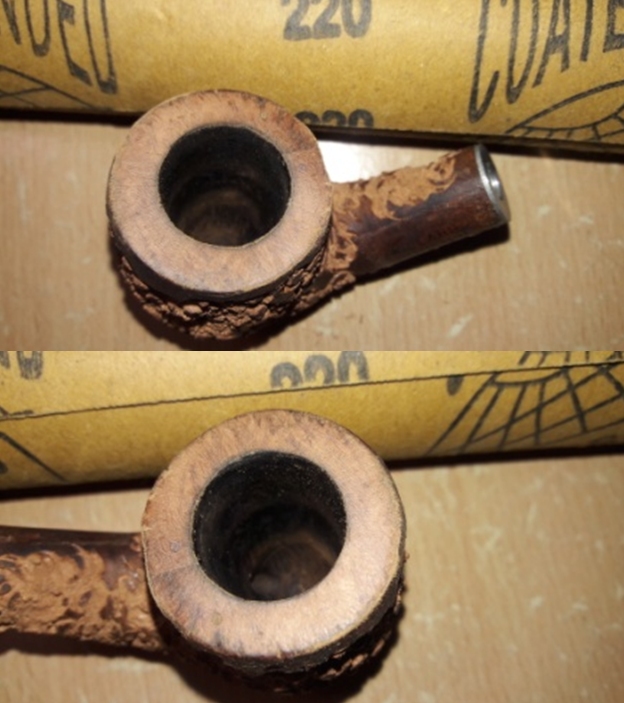
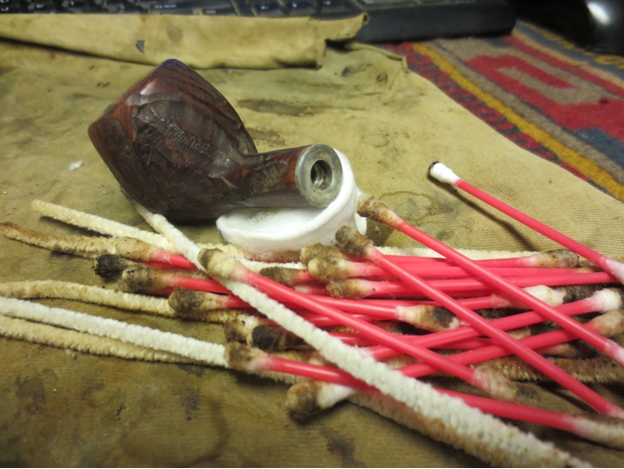
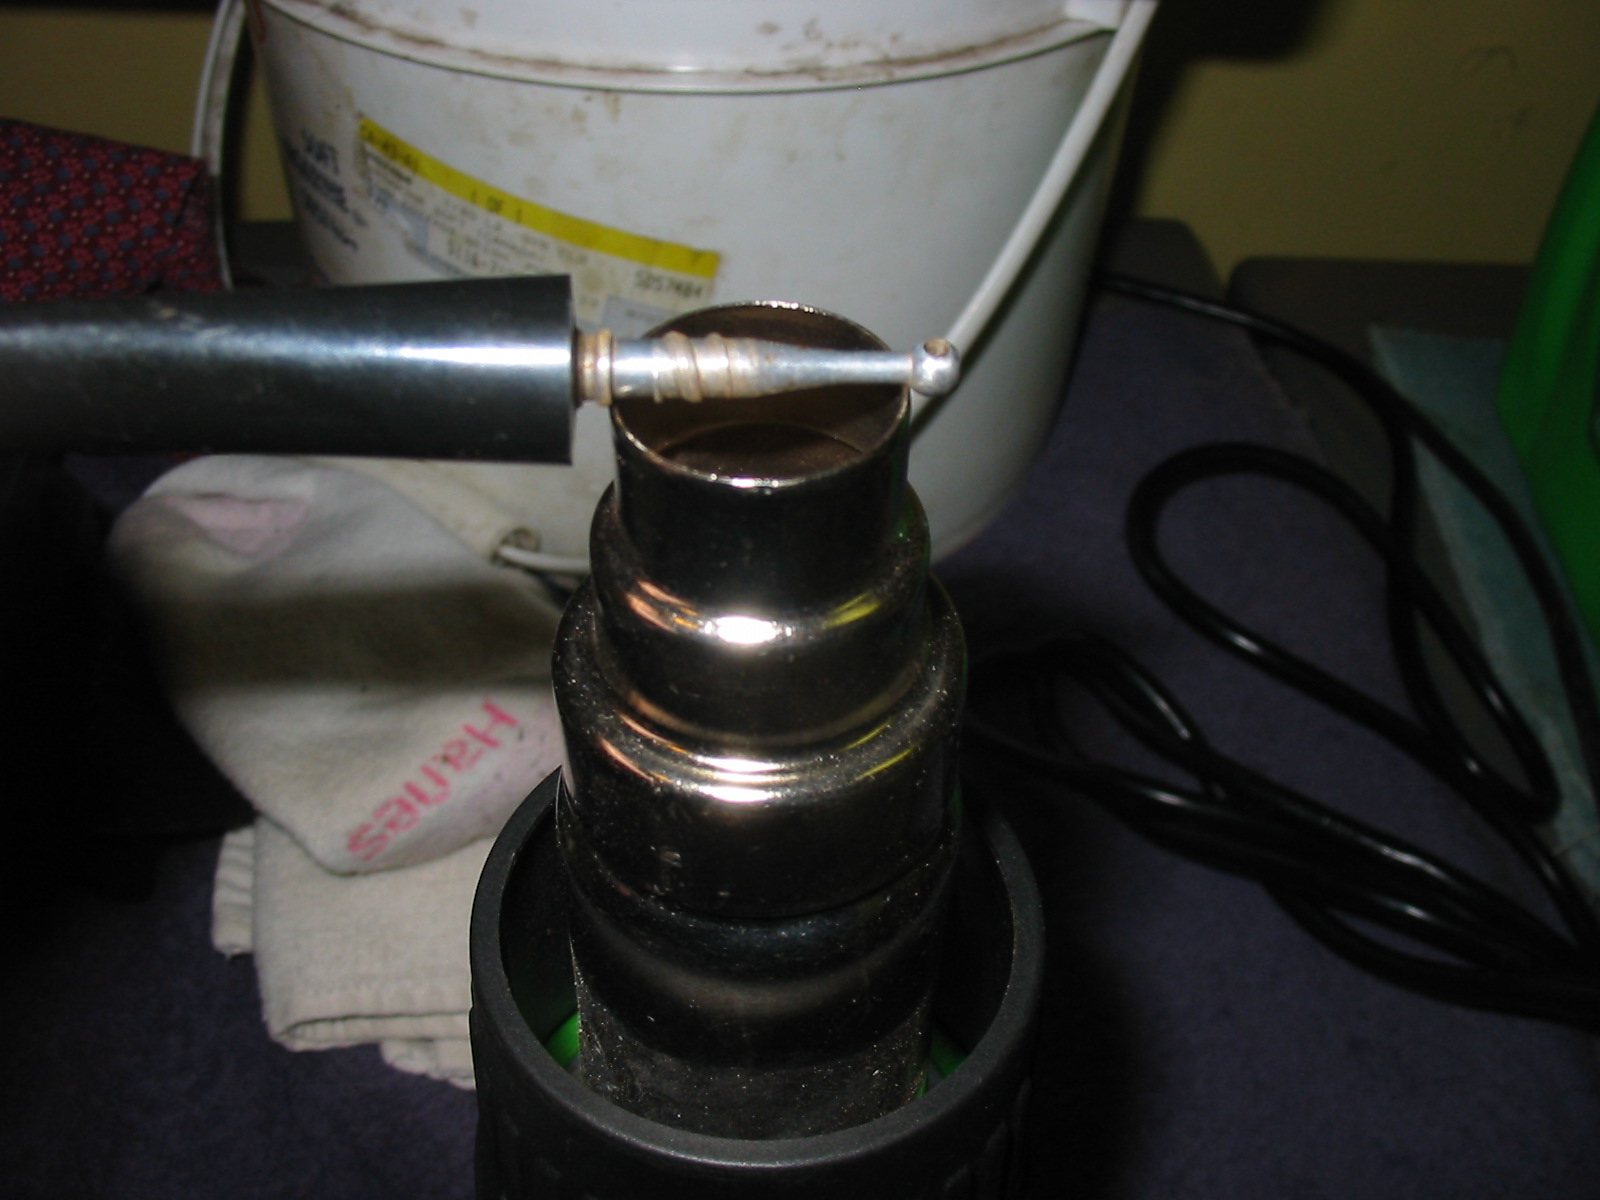
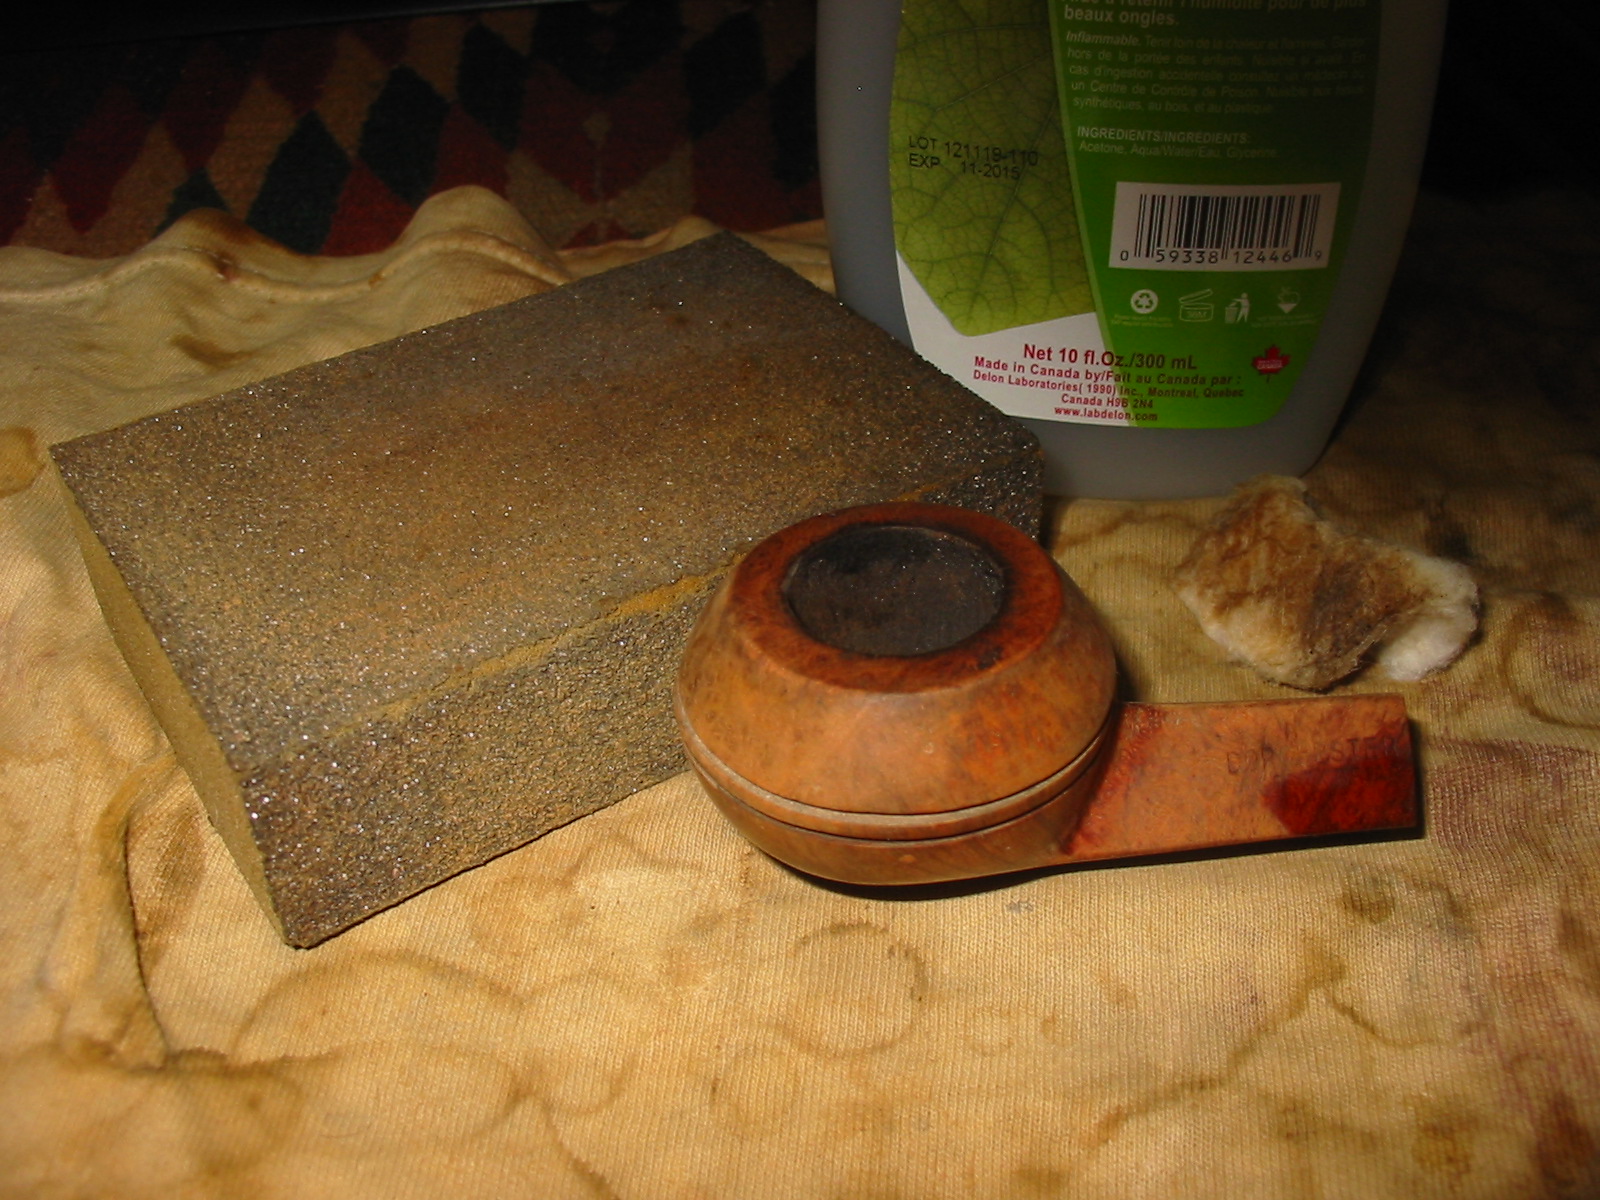
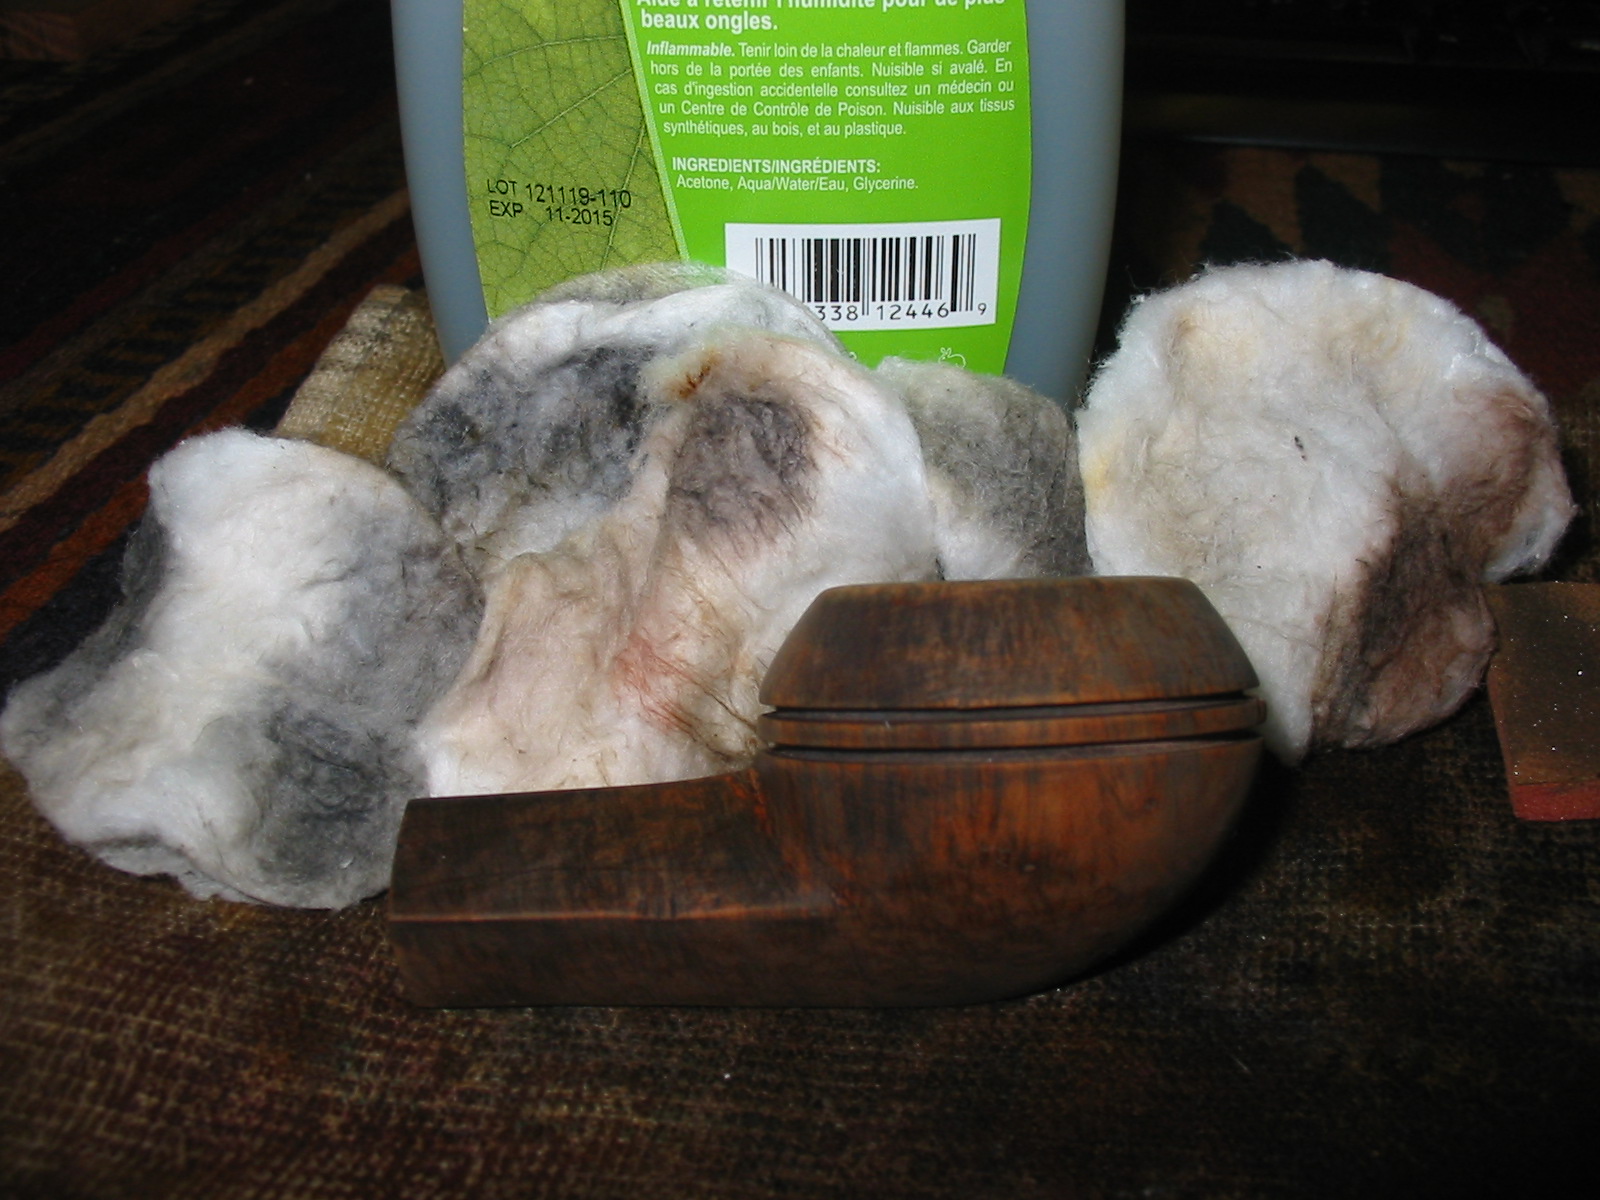
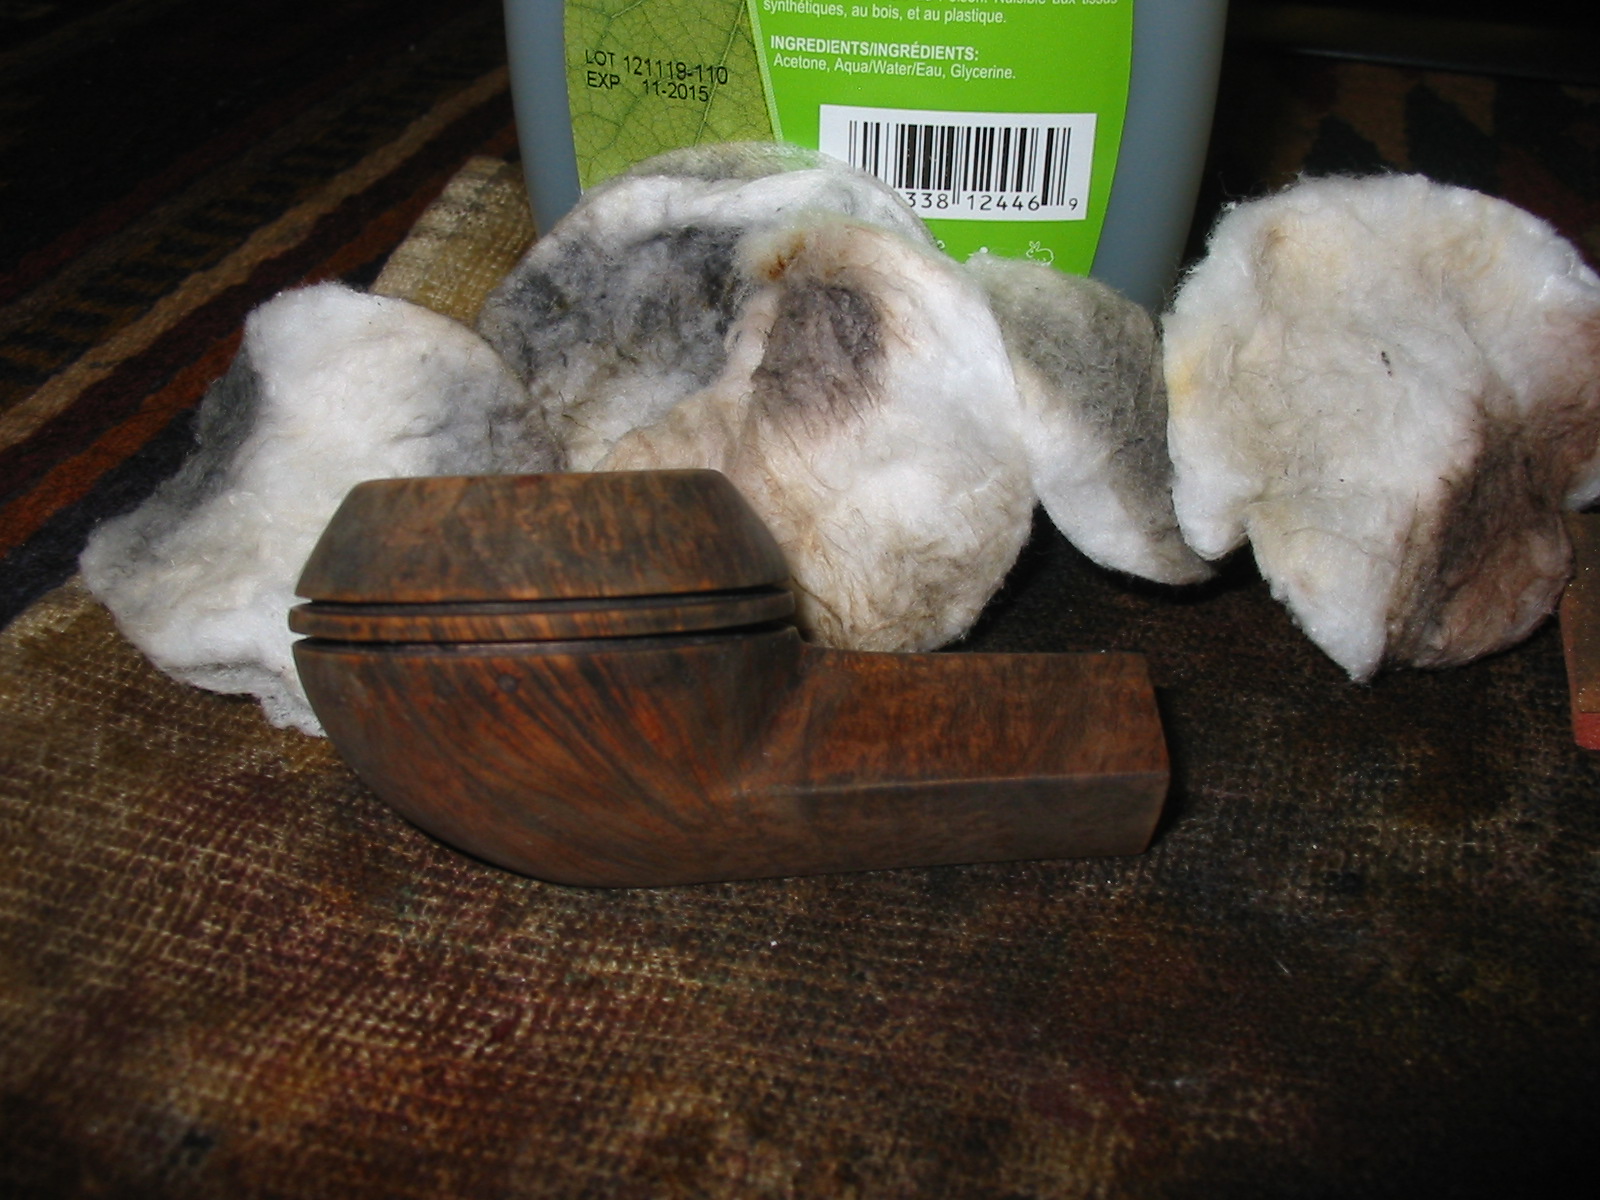
The process of transforming this pipe began with cleaning the chamber that had been reamed and cleaned before it reached me. With my fabricated knife, I completely removed the dust and little residual carbon from the walls of the chamber. I further cleaned the walls with a folded piece of 220 grit sand paper to completely remove the carbon from the walls and wiped the chamber with a cotton pad and alcohol. The charred surface at the inner rim edge was also gently scraped with the knife and sandpaper to remove the burnt briar till I reached solid briar underneath. 
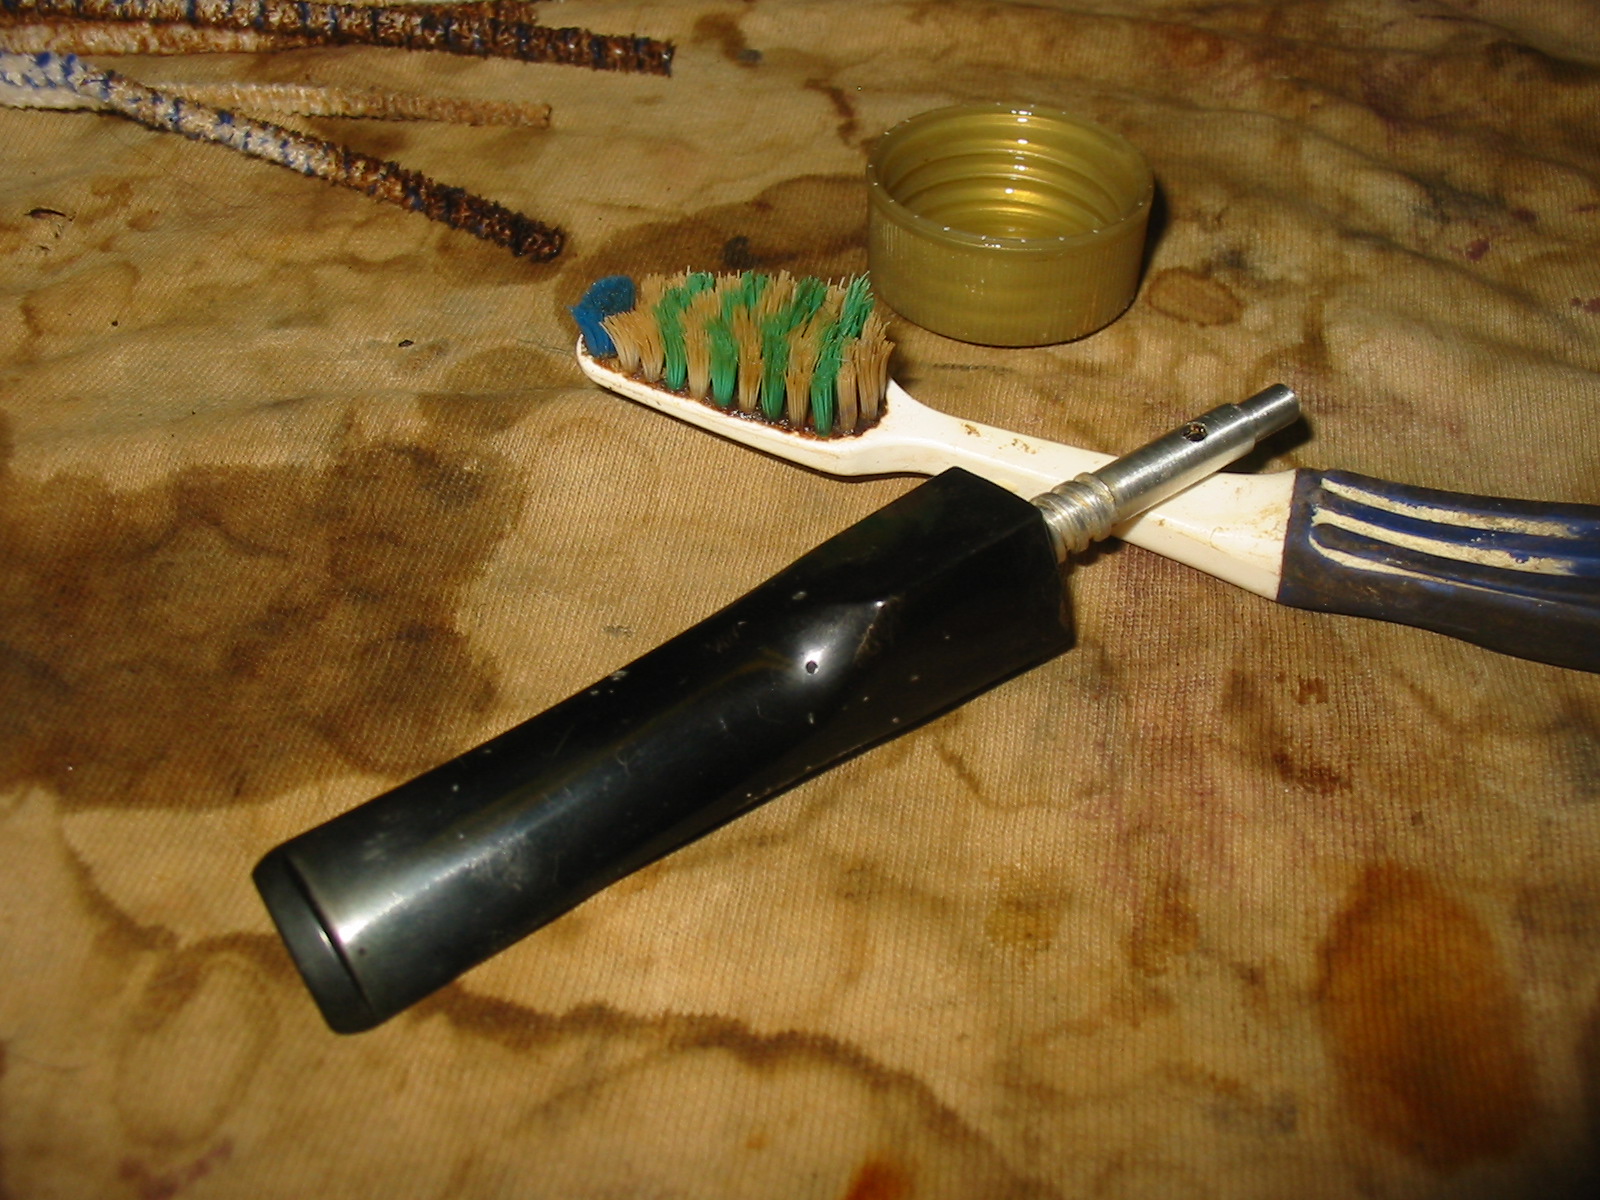
Next, I cleaned the mortise and shank with regular and bristled pipe cleaners dipped in alcohol. At first I just could not get the pipe cleaner to pass through the mortise and out through the draught hole. I then inserted the pipe cleaner through the draught hole and with some efforts; it came out through the mortise dislodging some dried gunk from the air way as it came out. Other than the stuck dried gunk, the mortise was clean and just a couple of pipe cleaners were put to use. I was particularly deliberate in cleaning the threads in the mortise in preparation of further repairs to improve the seating of the threaded tenon, the process for which will be covered subsequently.
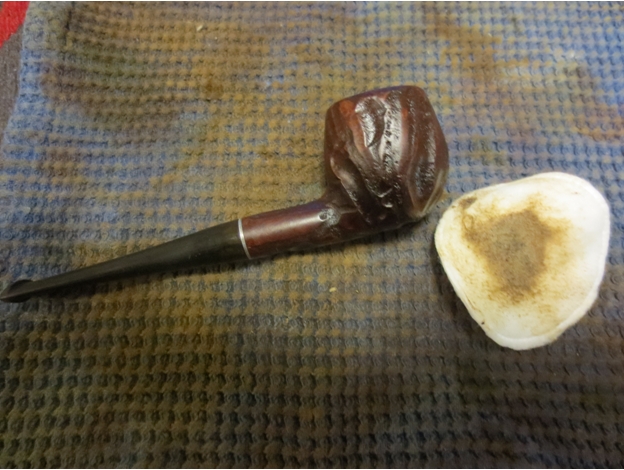
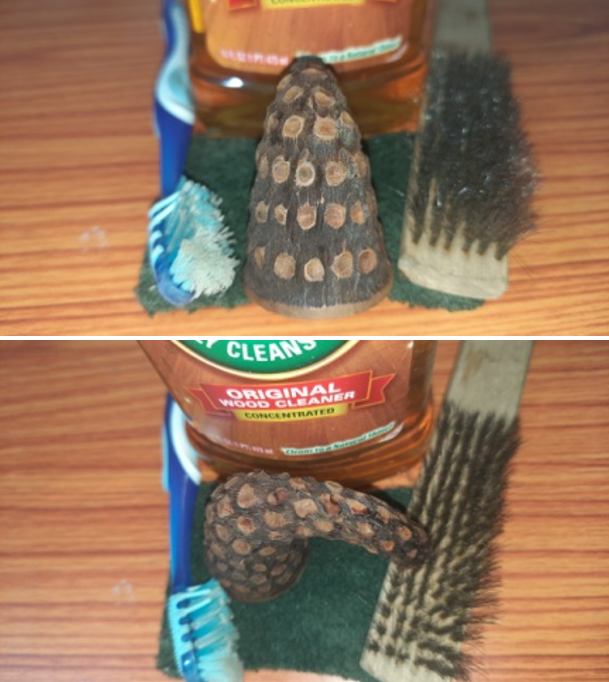
After I was done with the internal cleaning of the stummel, I cleaned the external surface. I generously applied Murphy’s oil soap with a hard bristled tooth brush and scrubbed the stummel and rim top with the soap. I washed the stummel under running warm water with anti oil dish washing detergent and brass wired brush till the stummel surface was clean and dried it using paper towels and soft cotton cloth. The rim top surface was deliberately cleaned with a Scotch Brite pad to further remove the charred wood from the rim edge. I simultaneously cleaned the shank internals with the detergent and hard bristled shank brush. The stummel surface has cleaned up nicely with the scaly and thin lined rustication plainly visible. Truth be told, the stummel now appear more dull and unattractive to my eyes! 
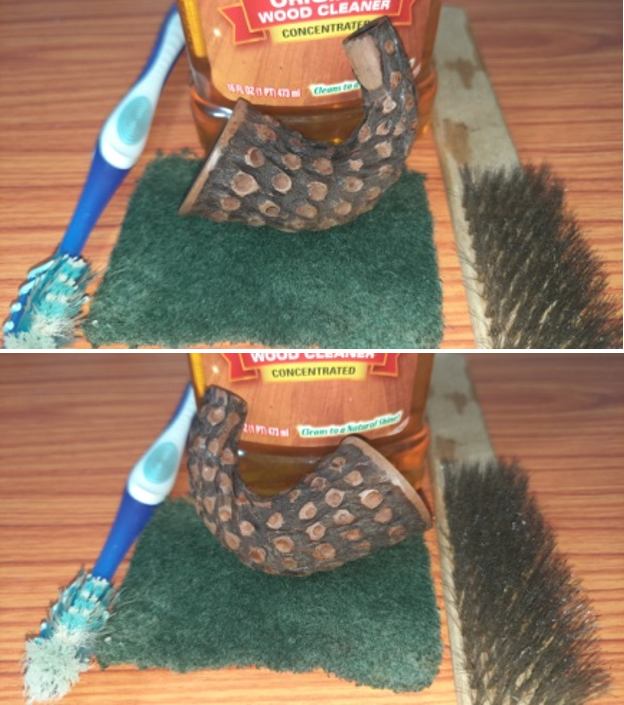
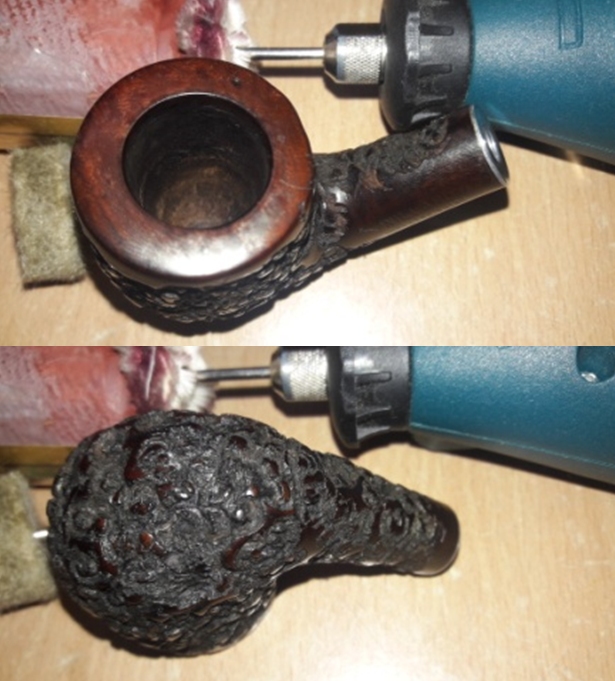
Once the internals and the external surface of the stummel had been cleaned, I progress to rusticating the stummel. To rusticate, I firmly held the stummel in my left hand and using my right hand began gouging out the briar with my fabricated rusticating tool. The technique is to firmly press the pointed four prongs of the modified Philips screwdriver into the surface, rotate and gouge out the removed chunk of briar. I worked diligently till I was satisfied with the rustications and the appearance of the stummel. I was careful to avoid gouging too deep as the walls are not very thick and I feared that deep rustications will lead to further thinning of the walls and subsequent burn out. As I reviewed the rusticated stummel, the rustication is prominent while the thickness of the wall is not compromised at all. I am very pleased with the progress thus far. 
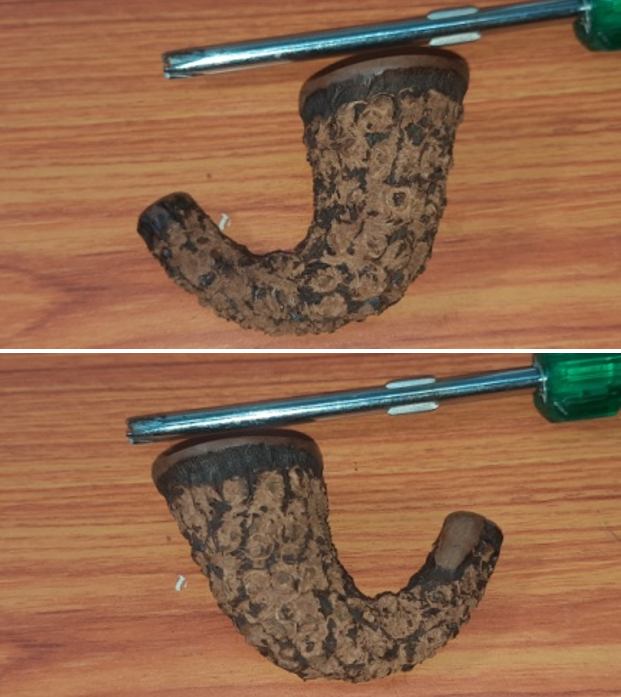
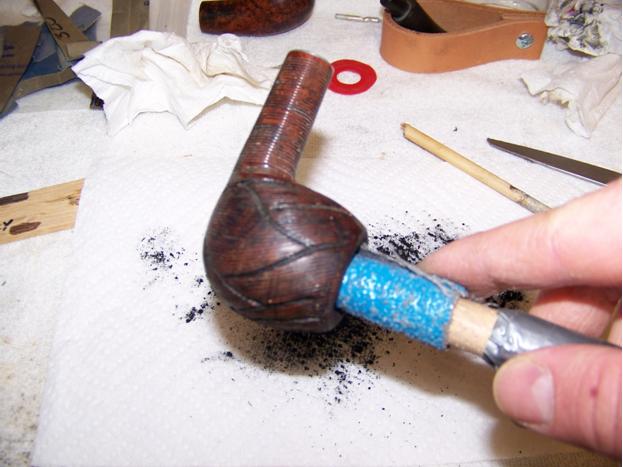
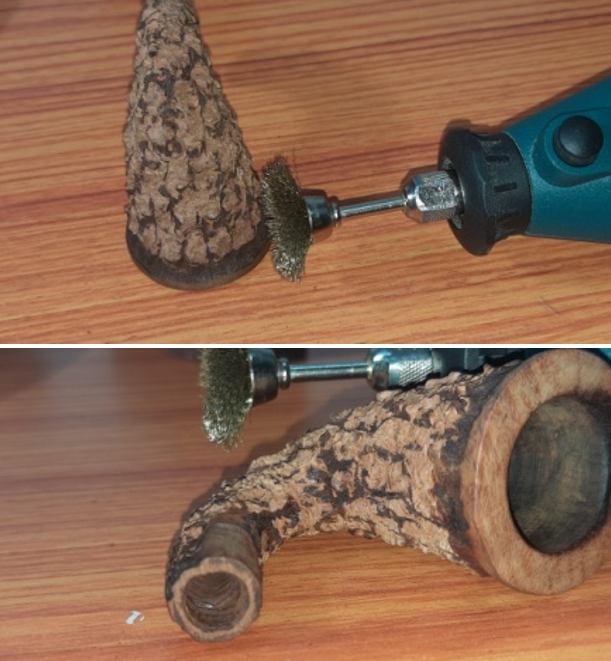
I cleaned the stummel surface with a brass wired wheel brush mounted on a handheld rotary tool. While cleaning the surface of all the debris, this rotating brass brush wheel also creates subtle patterns of its own and this adds an additional dimension to the appearance of the stummel. 
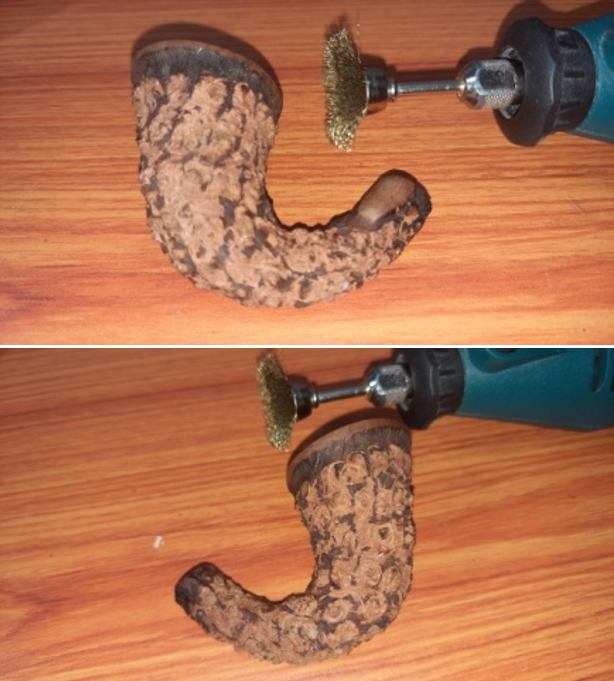
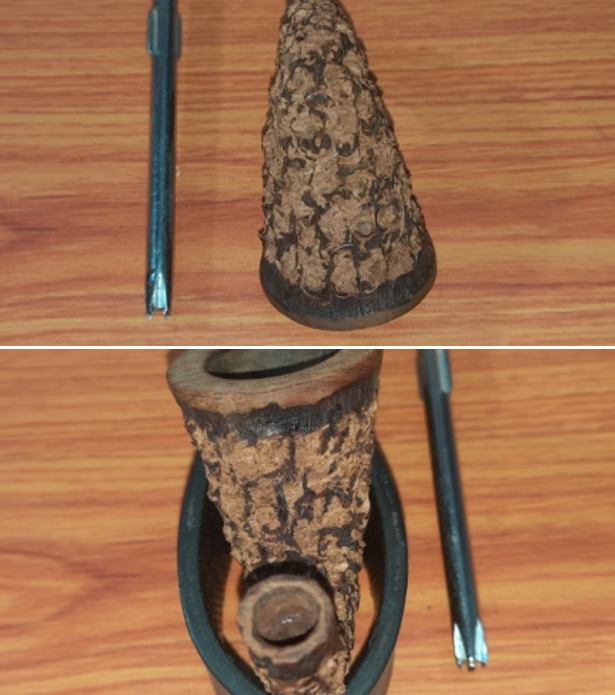
I sanded down the jagged high points in the rustication to a smooth and even surface using a worn out piece of 150 grit sand paper without compromising on the tactile feel to the hand.
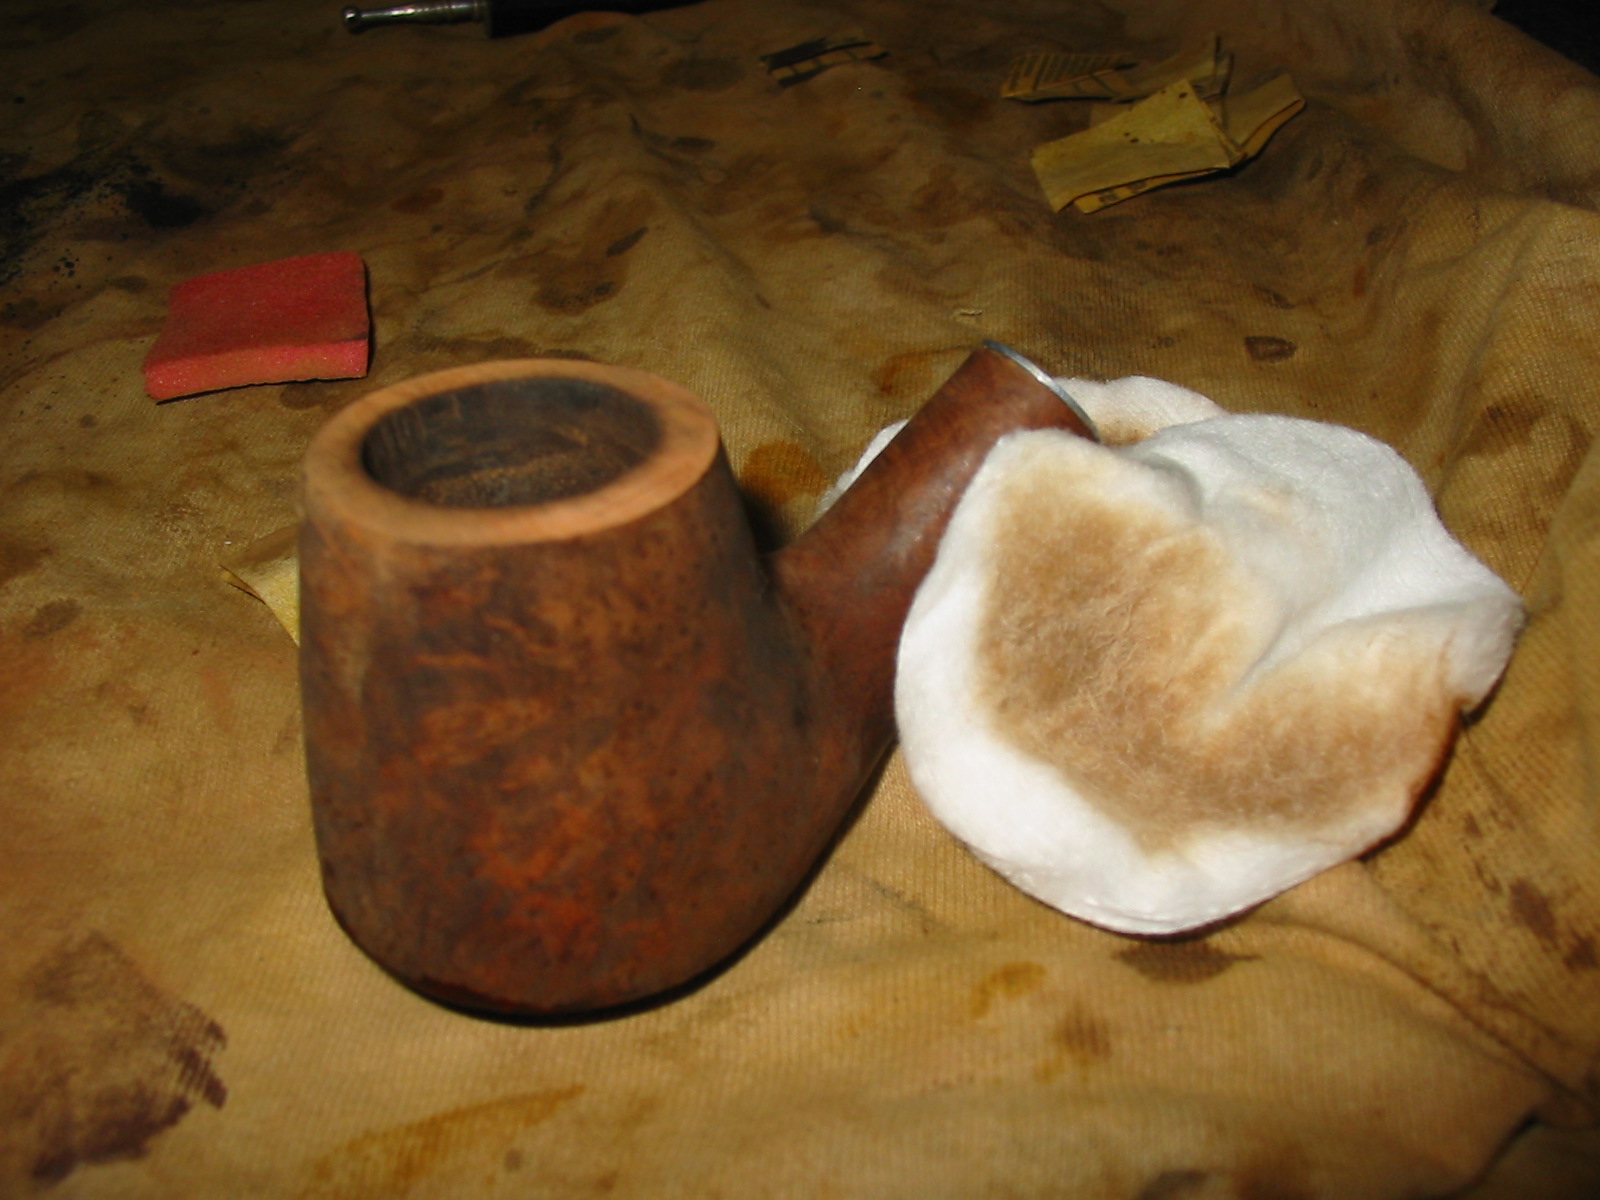
Next I decided to work on the damage to the rim top and inner rim edge. I topped the rim on a piece of 220 grit sand paper, checking frequently till I was satisfied that the darkened surface is addressed to an acceptable extent without compromising on the stummel profile and the rim top surface is nice, smooth and even. The darkened rim is still evident but the briar in this area is nice and solid and so I shall leave it be. 
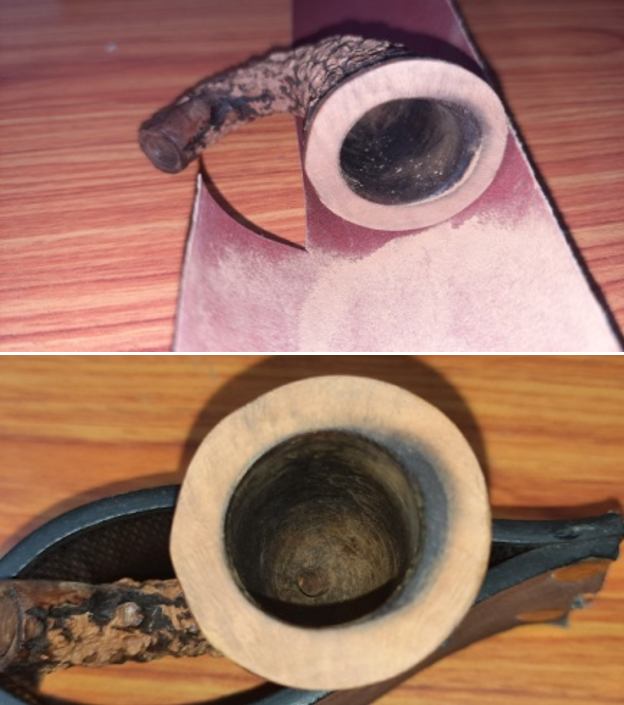
All this while that I was working on the stummel, Abha quietly worked on the stem. She cleaned the stem internals with regular and bristled pipe cleaners dipped in alcohol. It didn’t take many pipe cleaners to get the stem air way clean.
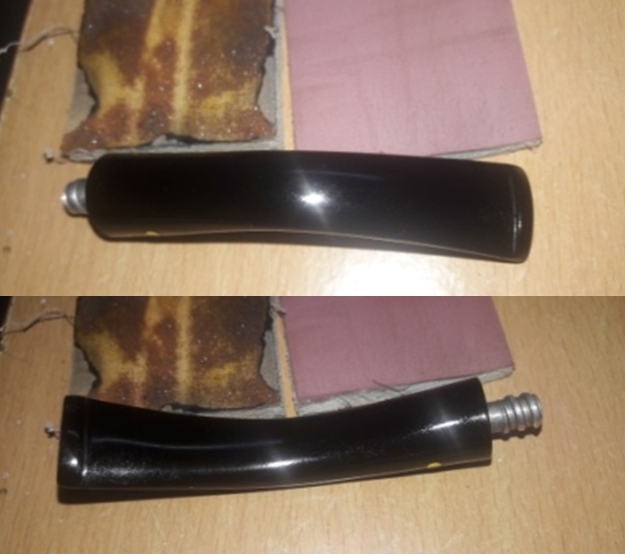
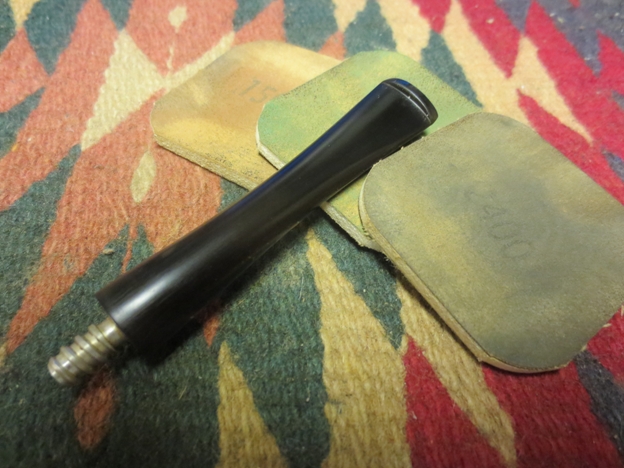
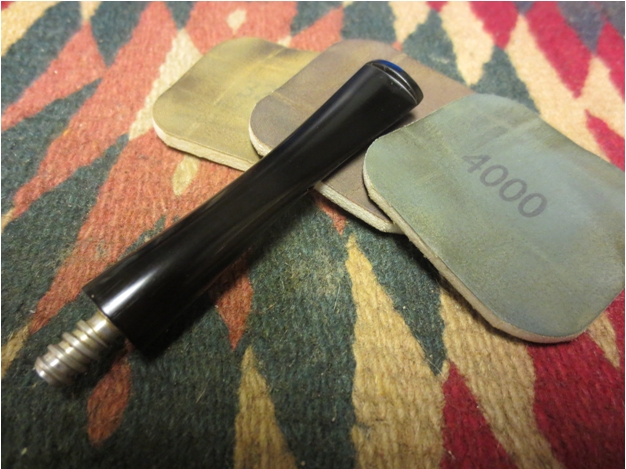
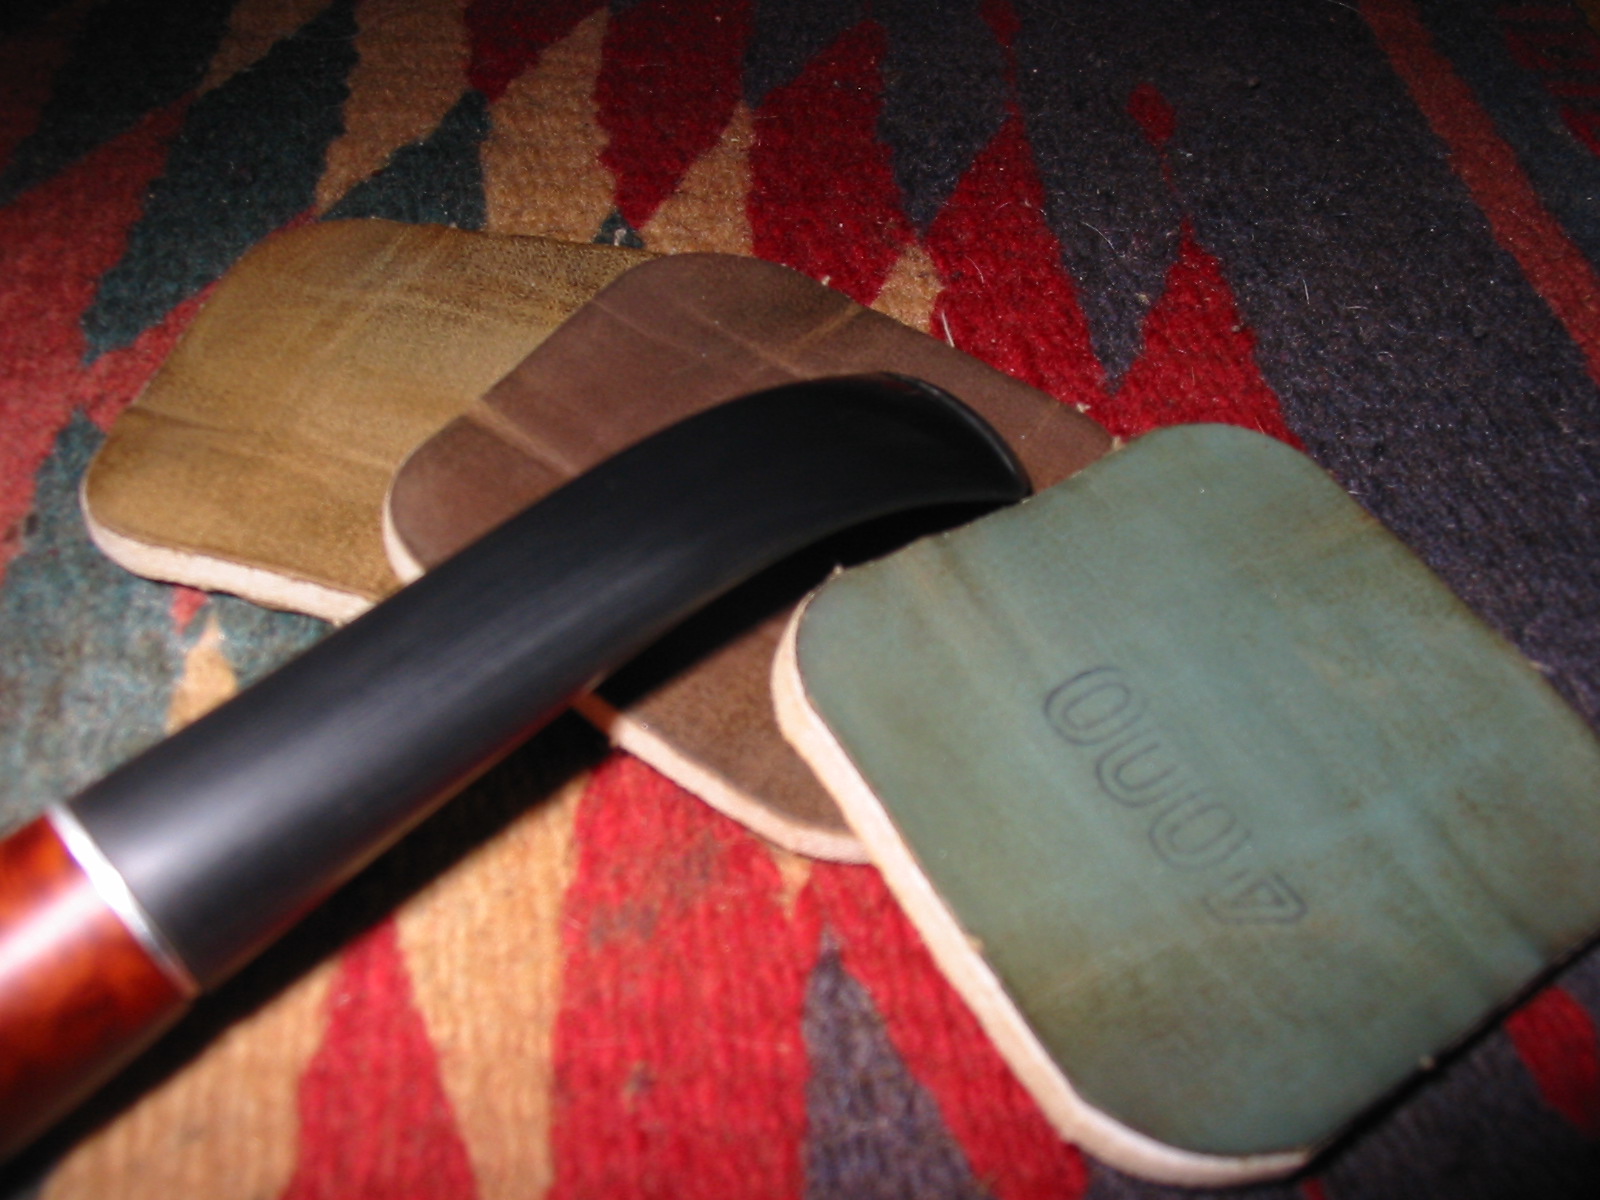
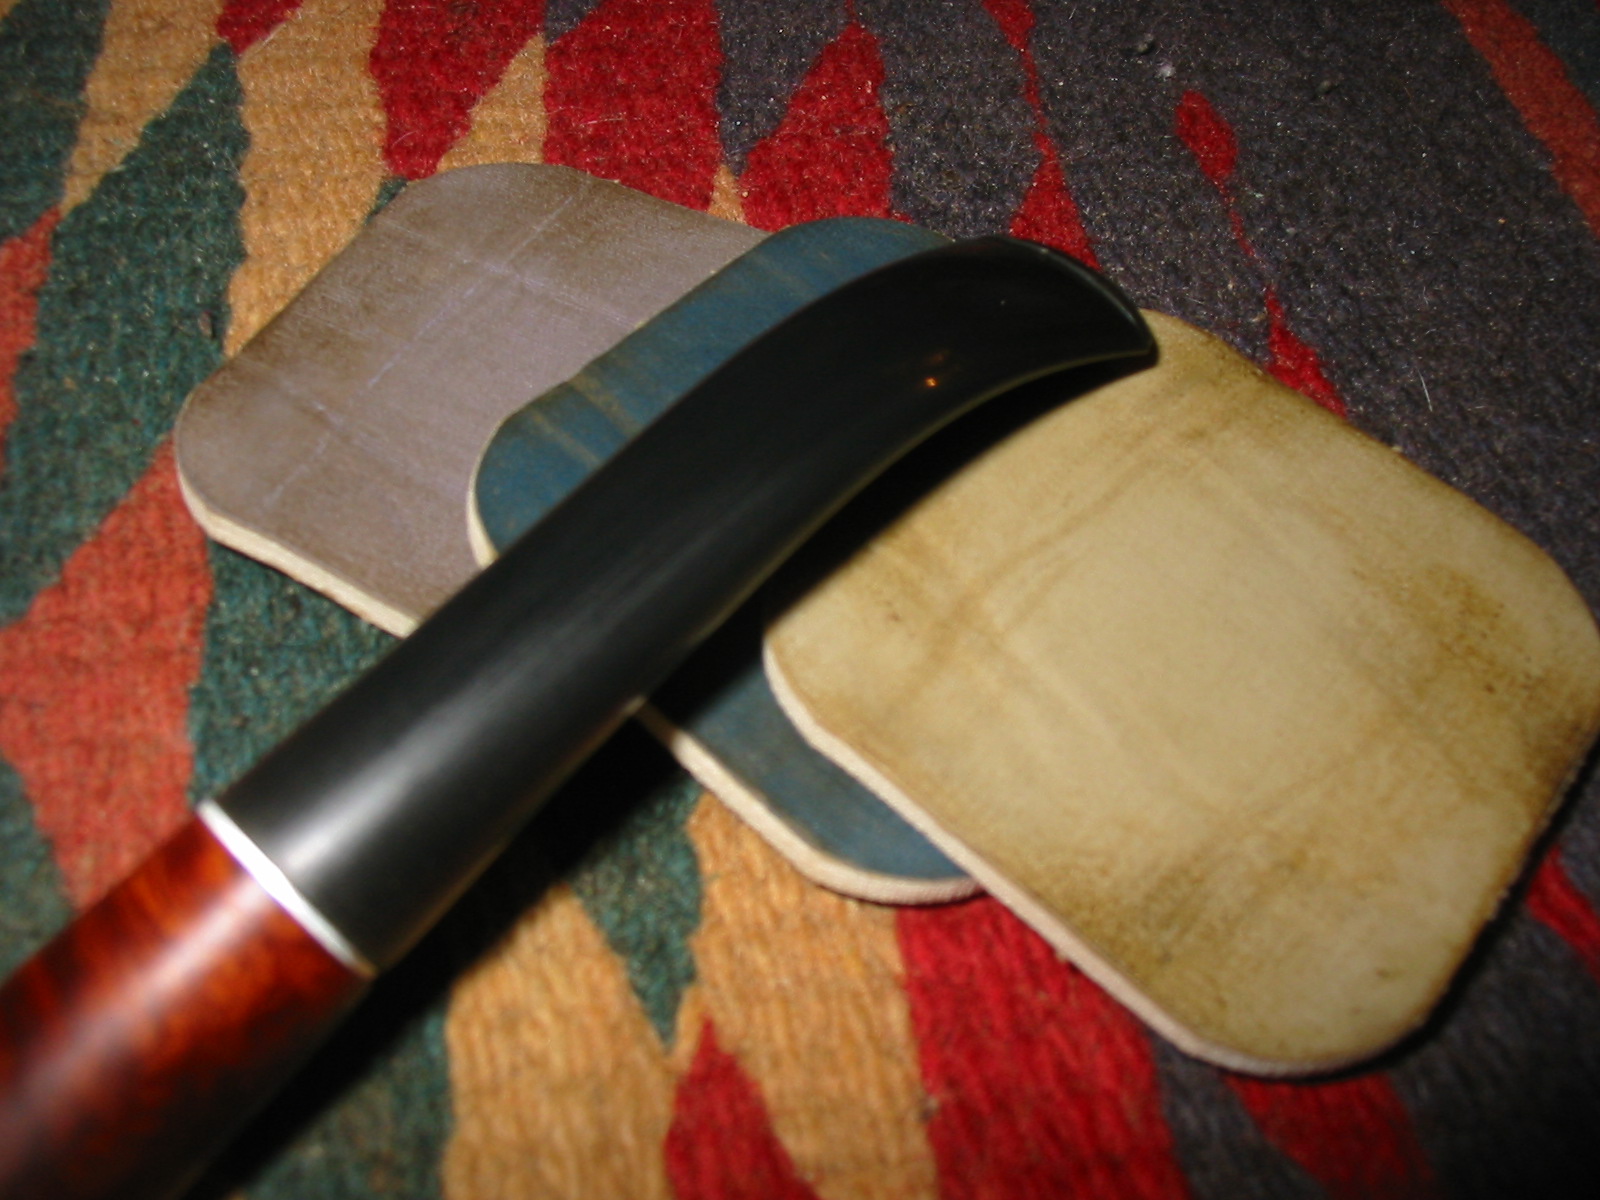
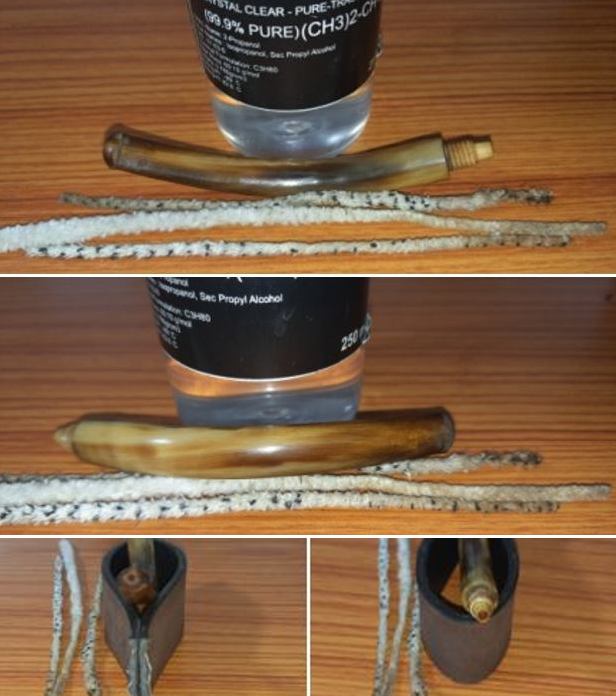
Next she sanded the stem surface with a 320 grit paper. This addressed the minor tooth indentations and bite marks on either surface in the bite zone. She progressively moved to polishing the stem through 400, 600, 800 and 1000 grit sand paper. She finished the stem refurbishing by wet sanding the stem with 1500 to 12000 grit micromesh pads. She rubbed a little Extra Virgin Olive oil into the stem surface to hydrate it and set it aside to be absorbed into the bone. 
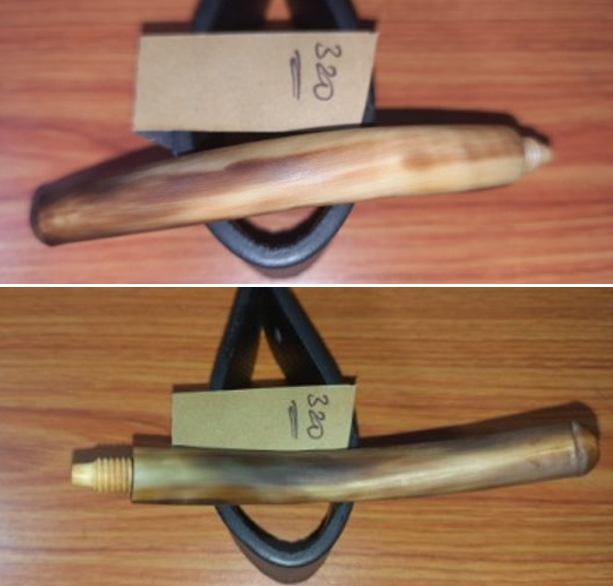
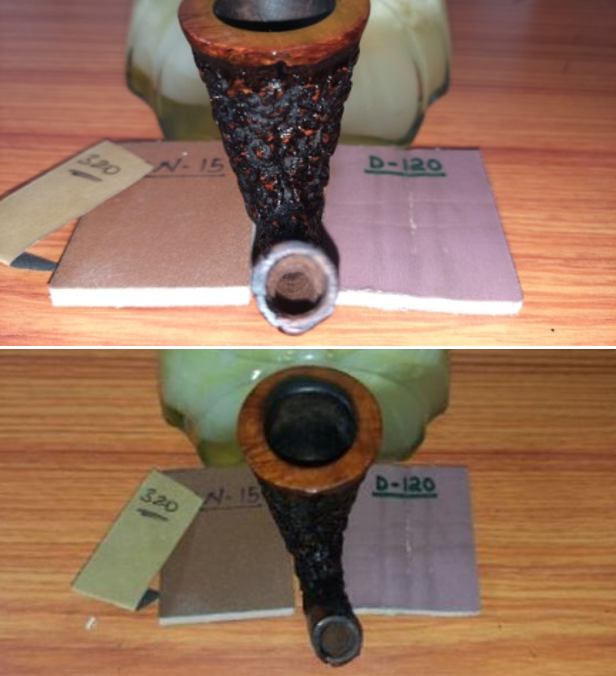
Next I polished the rim top and the high spots in the rustication using micromesh pads, wet sanding with 1500 to 12000 grit pads. I wiped the bowl with a moist cloth after each pad to clean the surface. I am happy with the appearance of the stummel at this point in the restoration. The stummel is now ready for a fresh coat of stain.
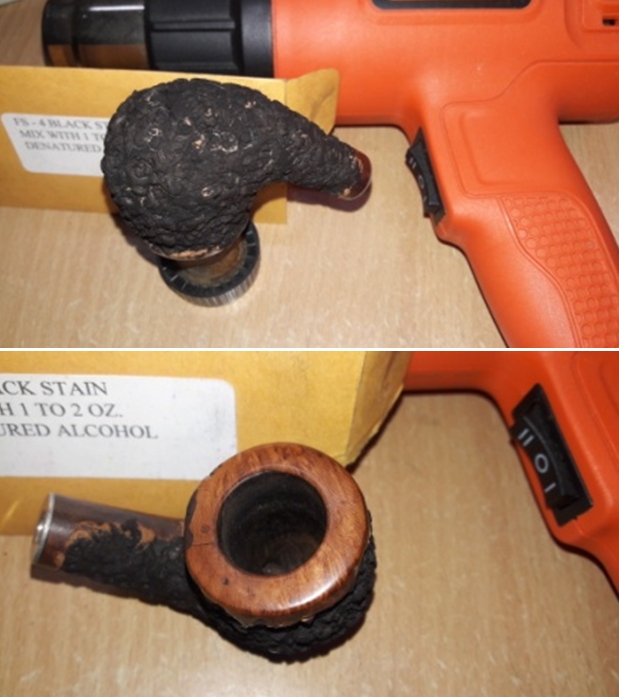
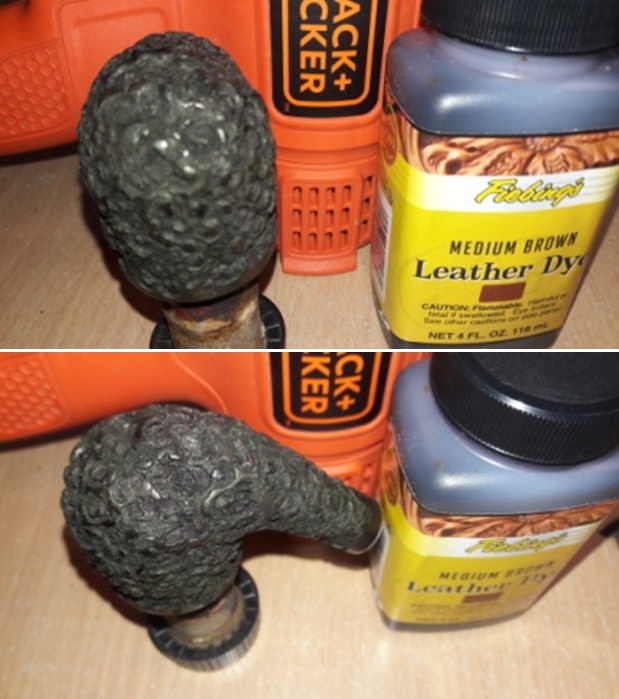
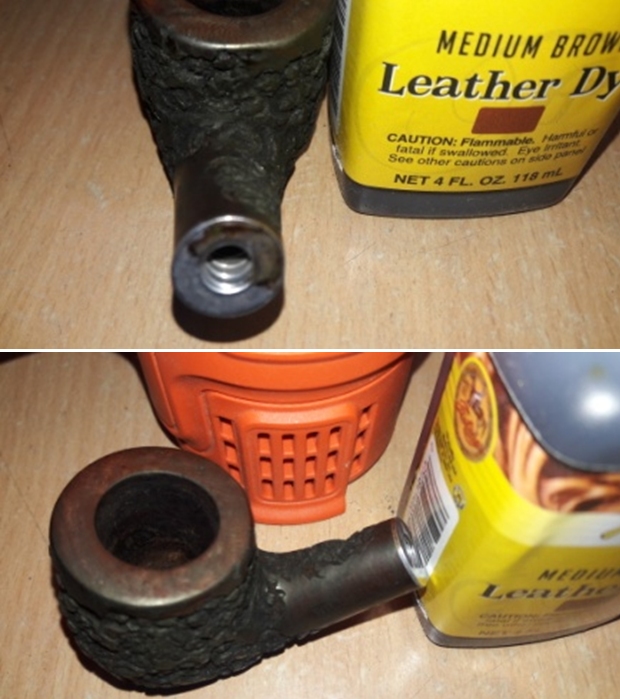
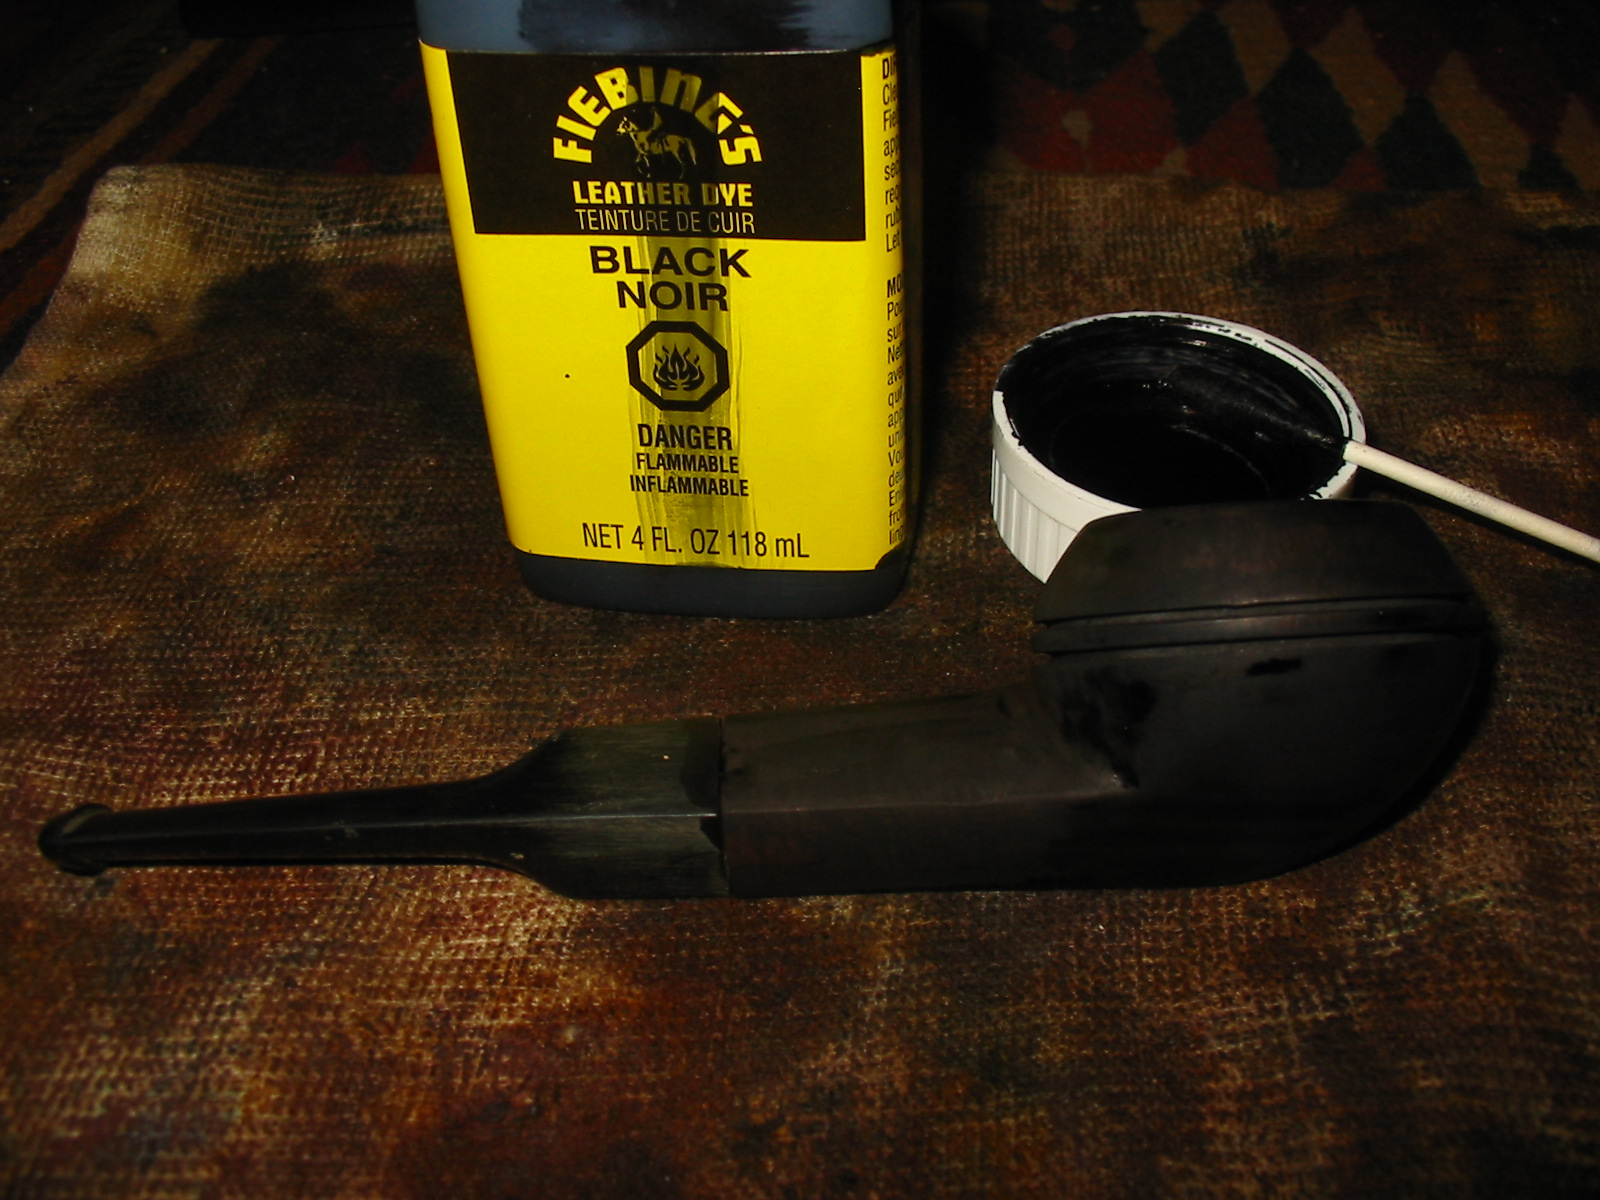
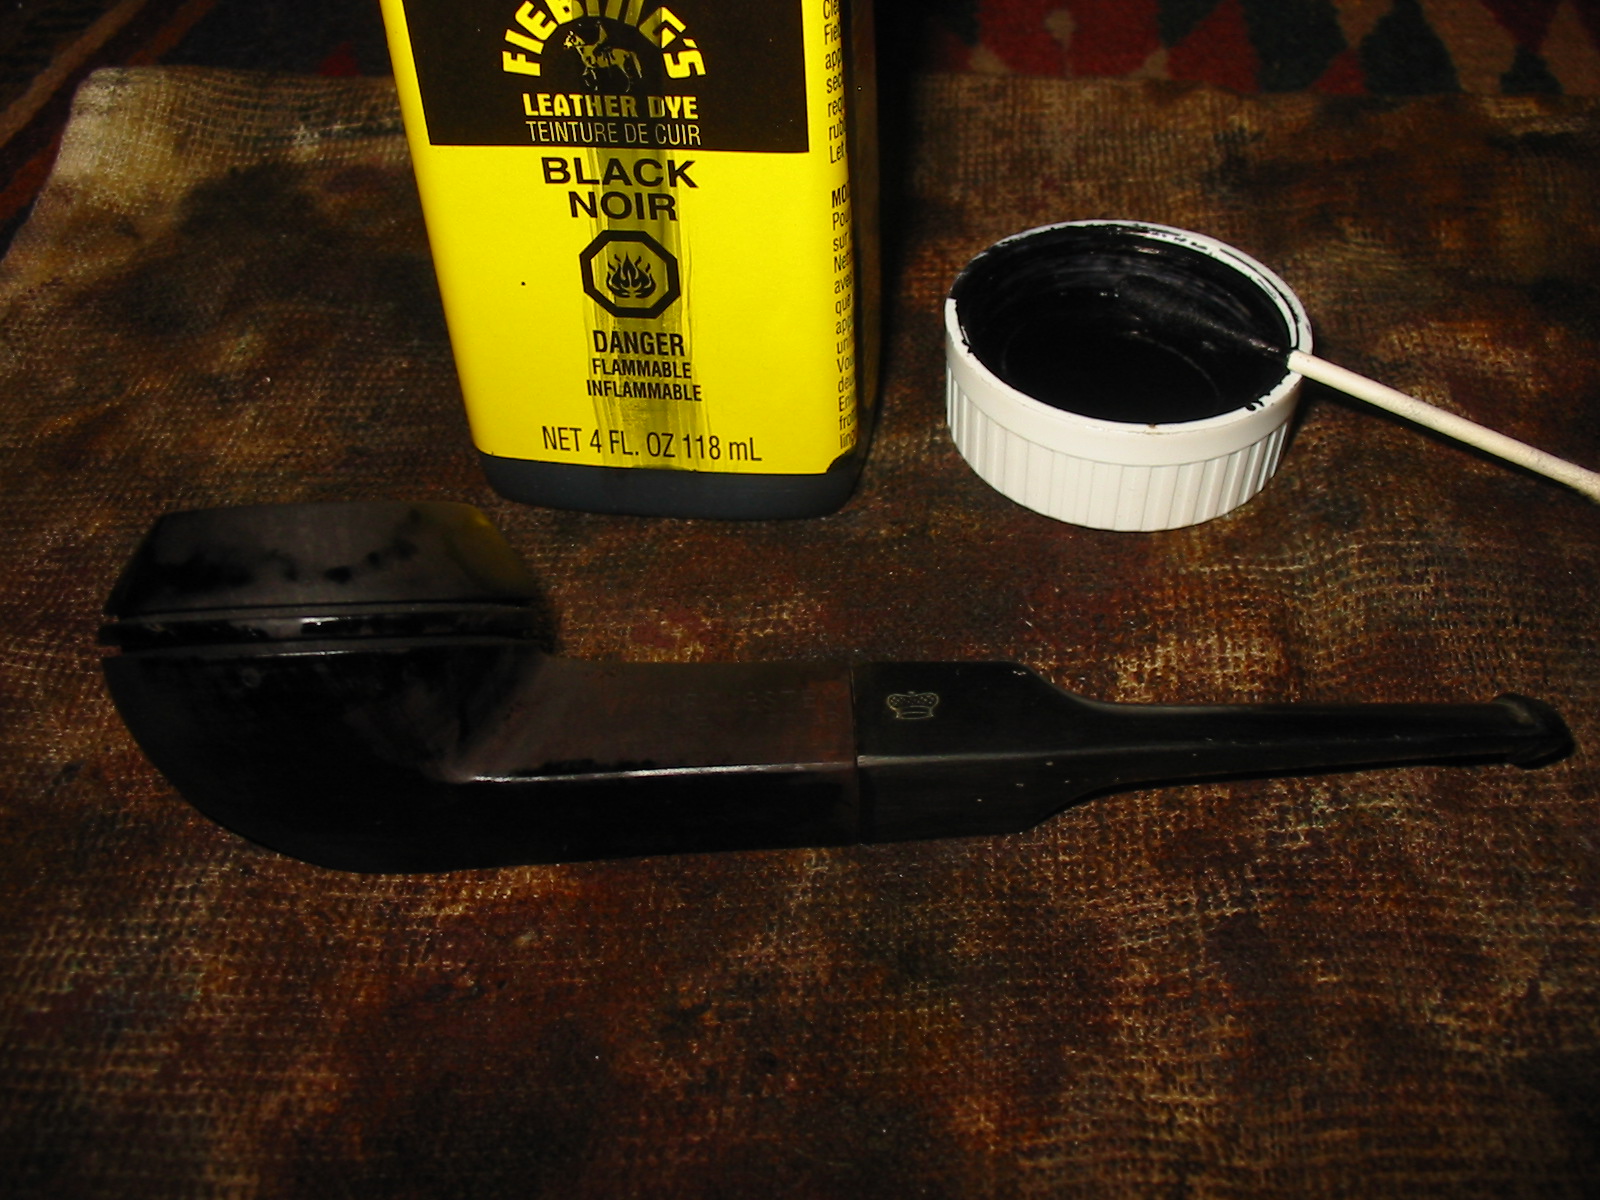
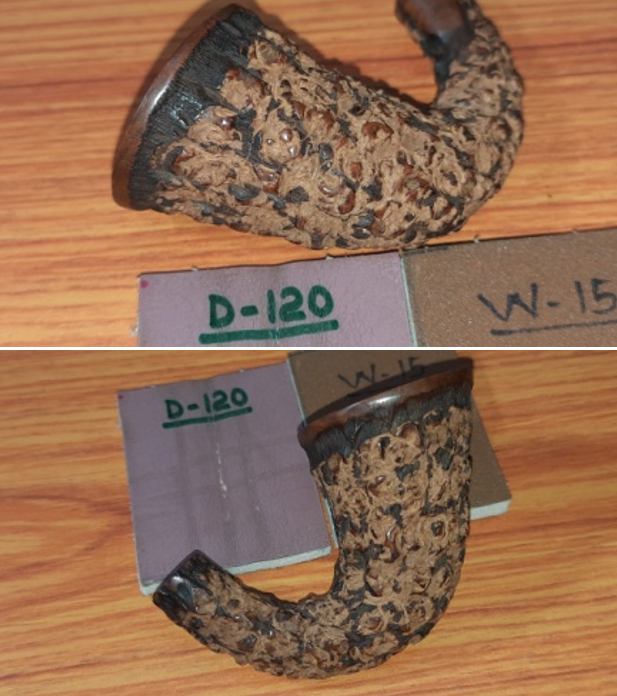
I wanted to highlight the difference between the rusticated and the smooth stummel surface. I decided to stain the rusticated surface with a black dye which would contrast beautifully with the browns of the rim top and the raised knobs of the rustications. I heated the rusticated portion of the stummel surface with my heat gun to open up the pores on the stummel so that the stain is well absorbed. I used Fiebing’s Black Leather dye and liberally applied it over the heated surface, flaming it with a lighter as I went ahead to different self designated zones on the surface. This helps in the setting of the stain in the grain of the briar. I ensured that every inch of the rusticated surface is coated with the dye. I immediately followed it by wiping the raised portions of the rustication with cotton pad and alcohol to lighten the knobs. Once polished, these will contrast with the black of the rest of the stummel surface. I set the stummel aside overnight for the dye to set into the briar surface.  
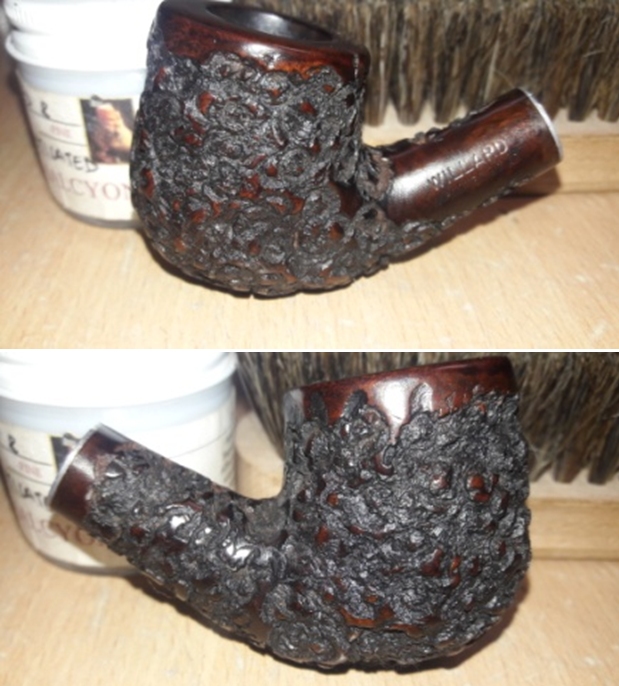
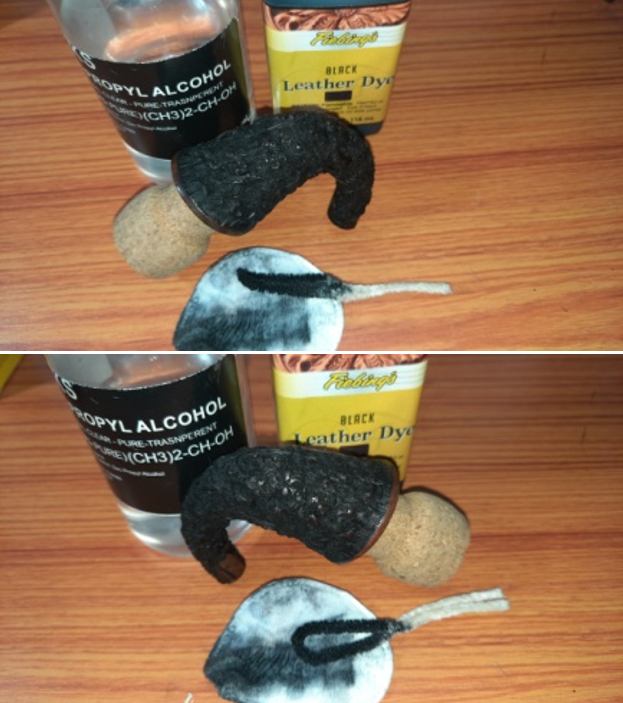
The following day, I again wiped the stummel with a cotton swab and alcohol to remove any excess stain and followed it up by sanding the raised rustication with a folded piece of 320 grit sand paper. This was followed up by careful dry sanding of the entire stummel, especially the raised rustications with 1500 to 12000 grit micromesh pads. This lightens and highlights the high spots in the rustications. Next, I rubbed a small quantity of “Before and After Restoration Balm” in to the briar with my finger tips, working it deep into the rustications and let it rest for a few minutes. The balm almost immediately works its magic and the briar now has a nice vibrant appearance over the smooth surface with the beautiful rusticated patterns on full display. I further buffed it with a horse hair shoe brush. 
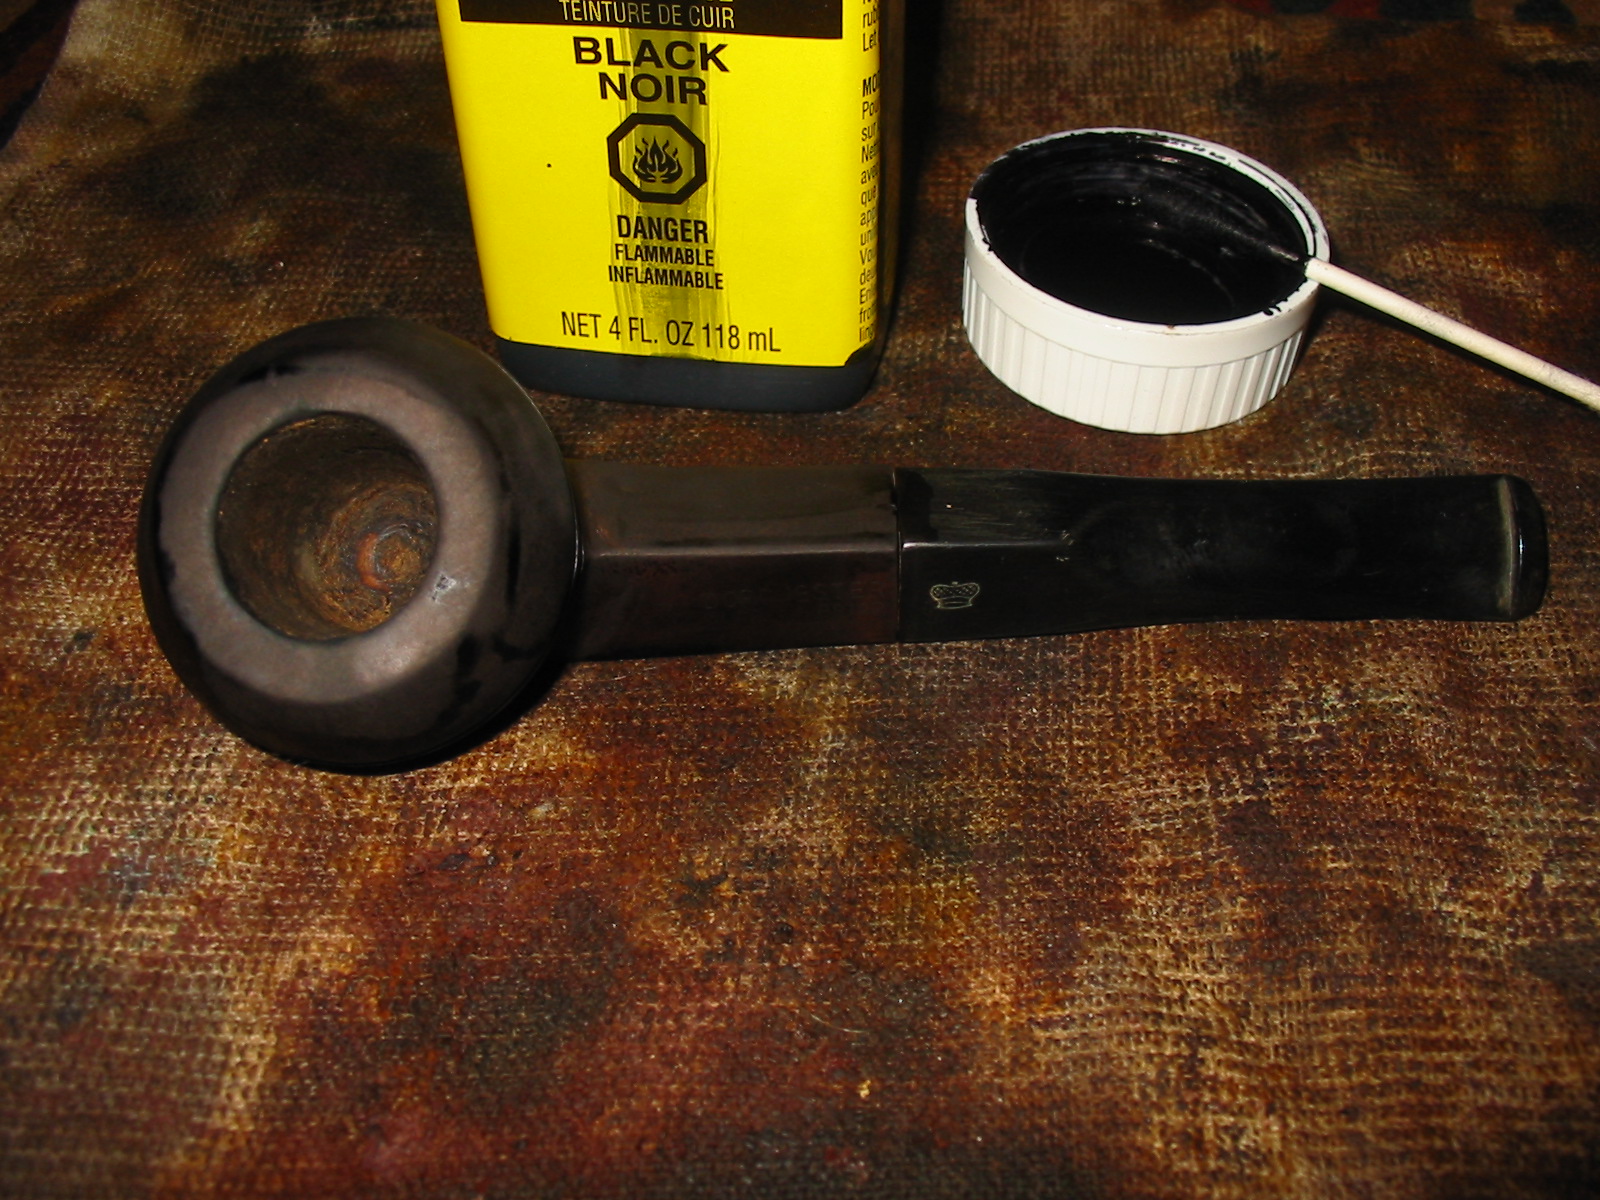
The only issue that remains unaddressed at this stage is the issue of loose and overturned seating of the stem into the mortise. I had the option of using the clear nail polish to tighten the seating but that would have been a temporary solution as the threaded bone tenon was way too loose fitting in to the mortise and no amount of smoking would have tightened the mortise to the required extent and hence was dropped. I decided on using CA superglue for the purpose. I applied a coat of superglue over the threads of both the mortise and tenon and let it set for a few seconds.  Thereafter, I threaded the tenon in to the mortise till the stem was perfectly aligned and again held it in place for a few seconds for the superglue to take the shape of the threads. I repeated the process once over and achieved a perfectly aligned and snug seating of the stem in to mortise. 
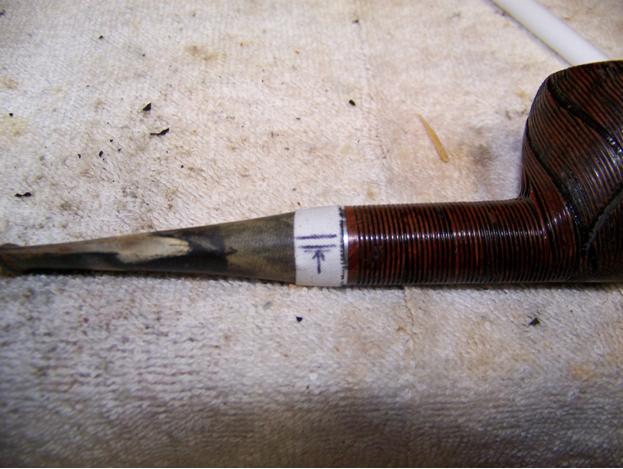
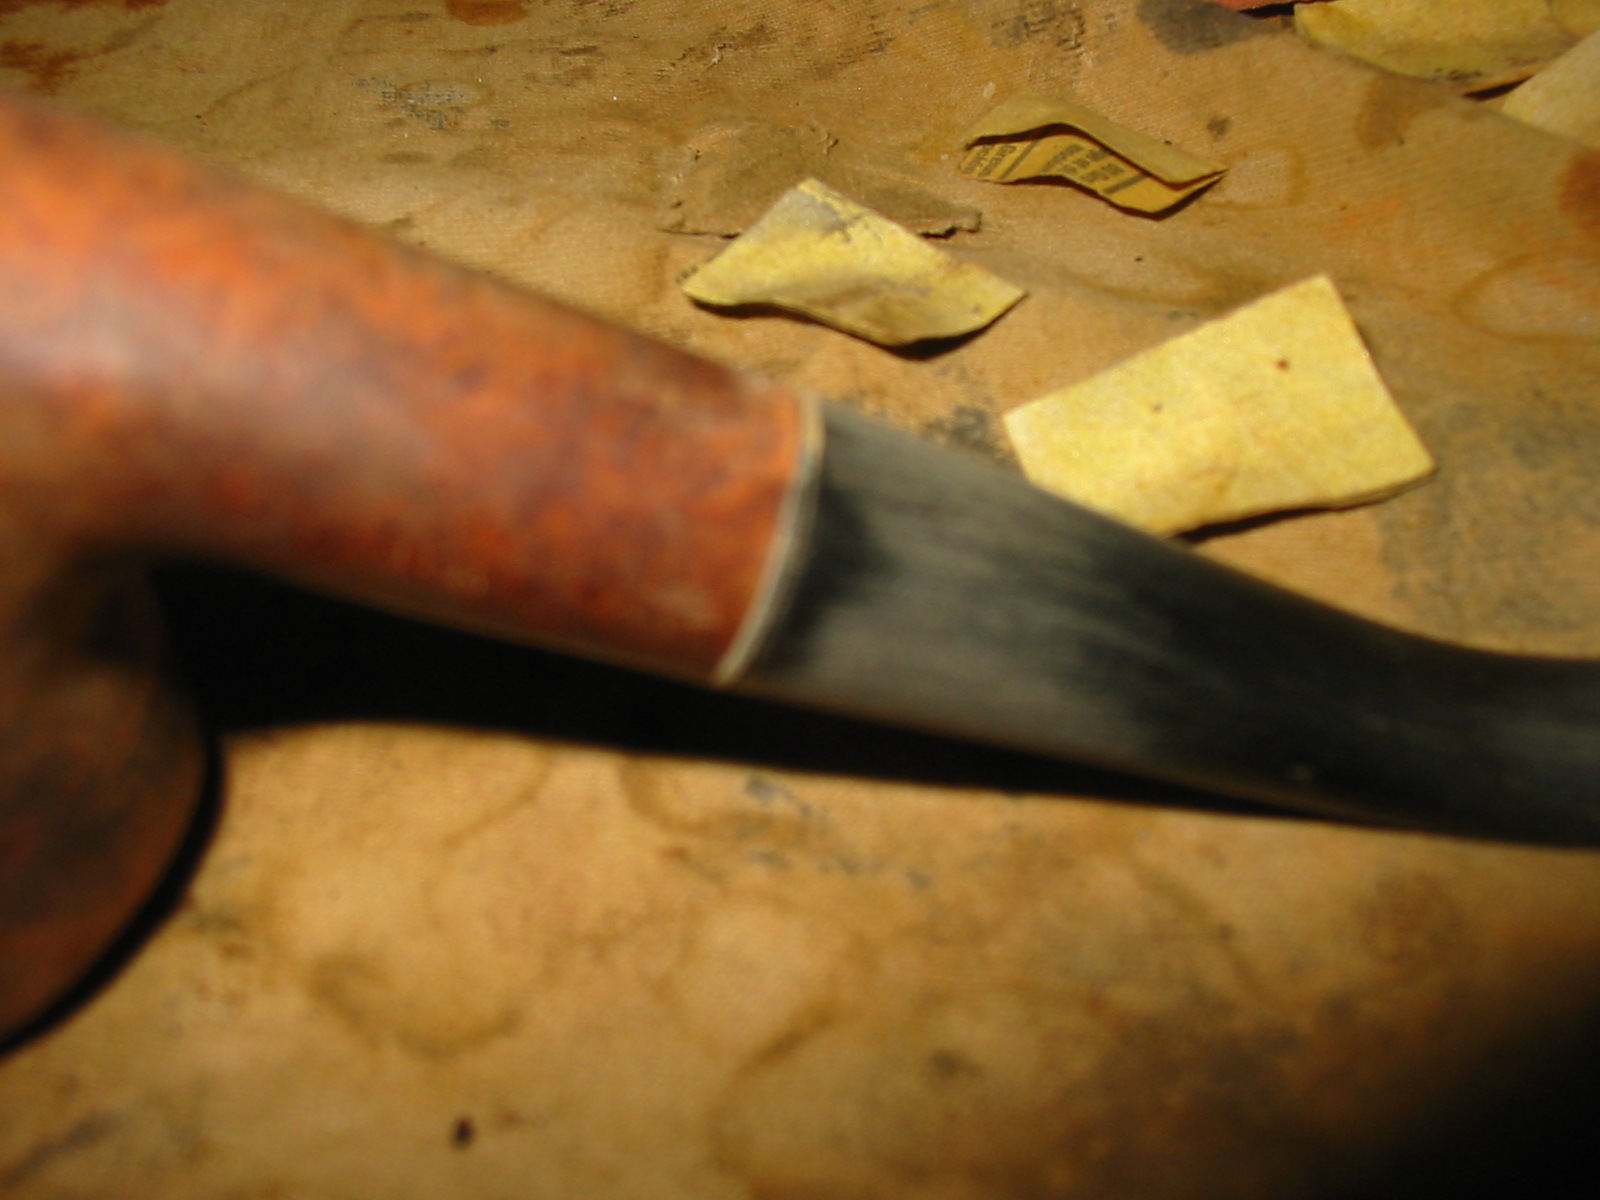
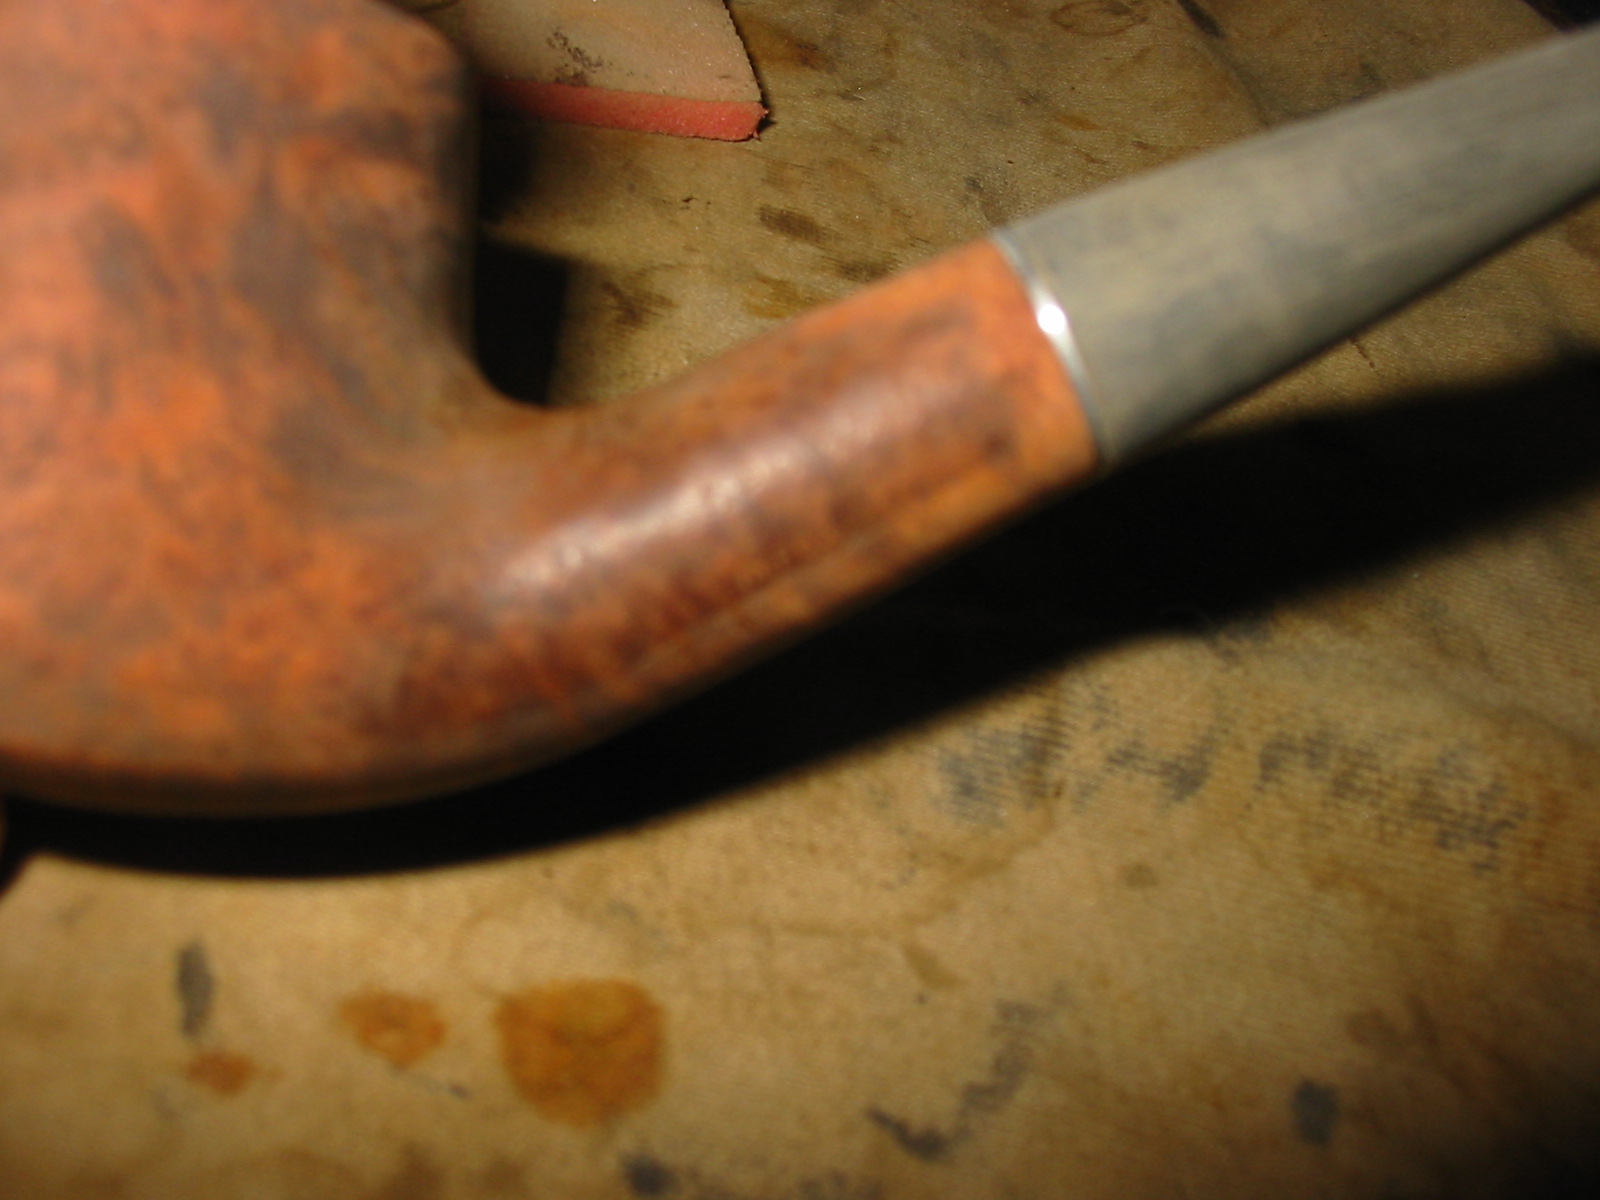
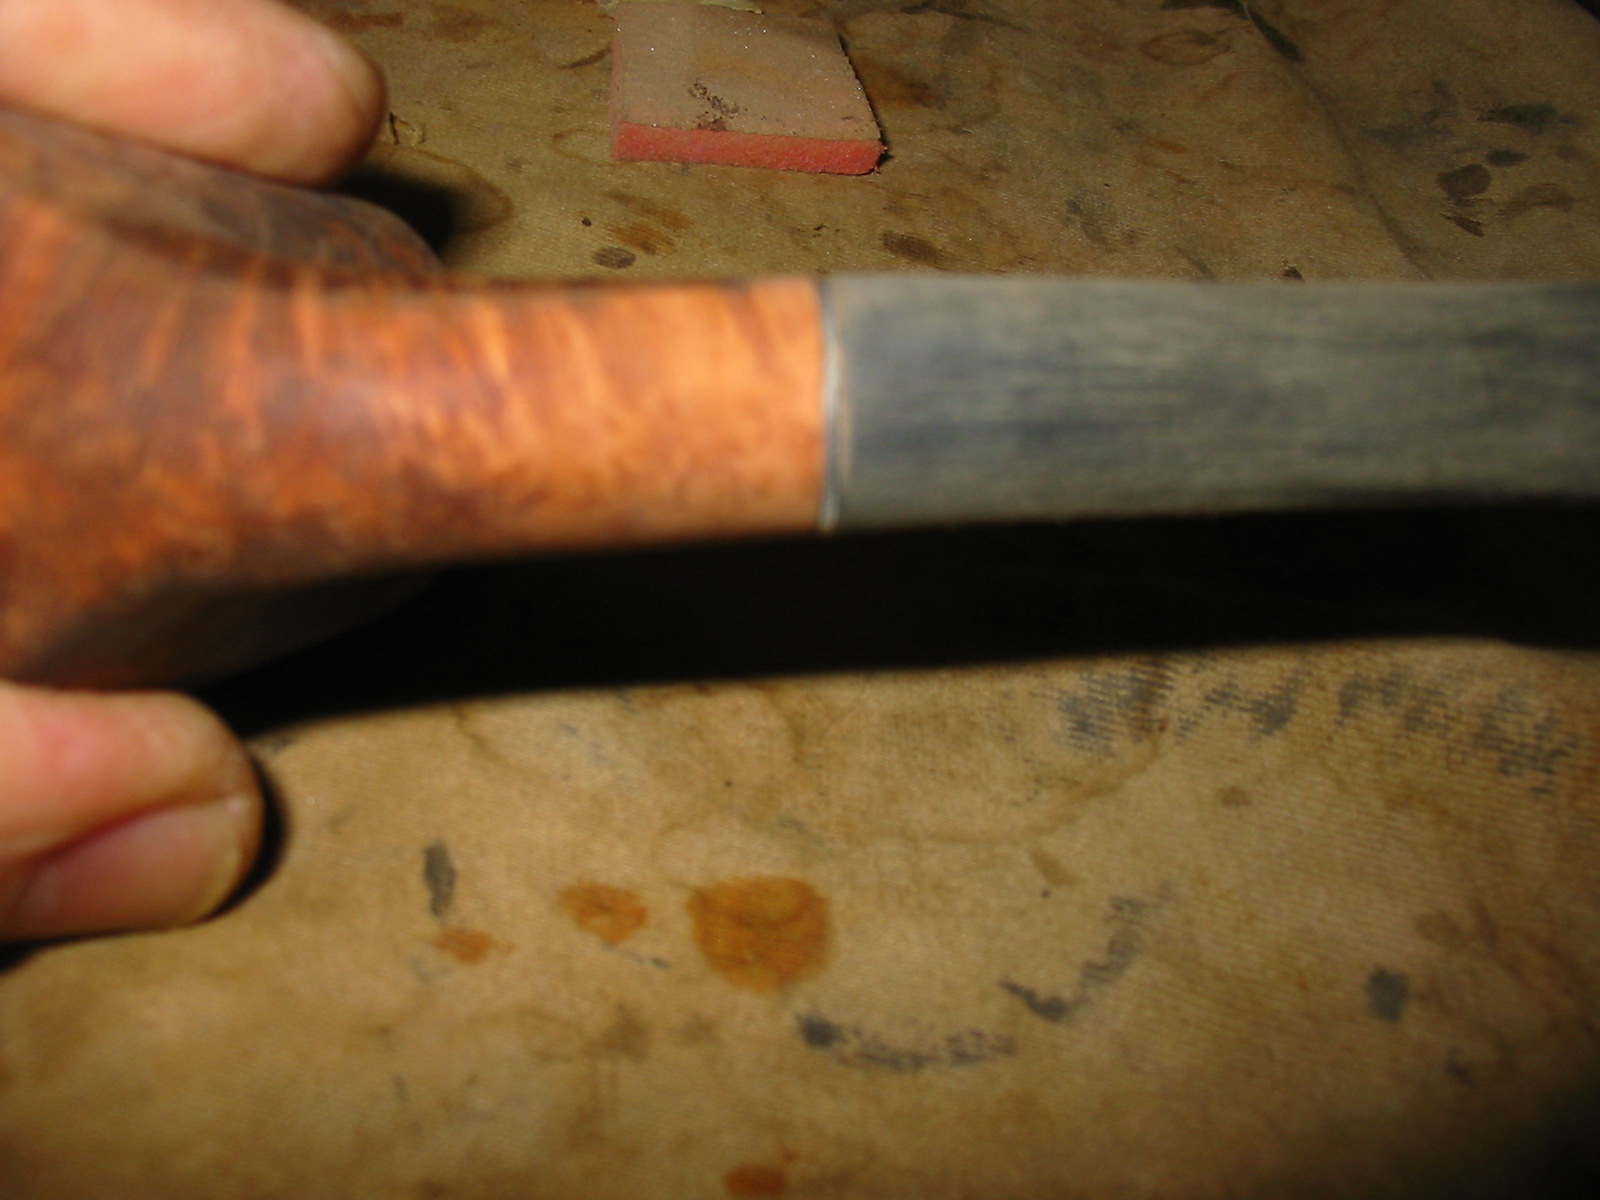
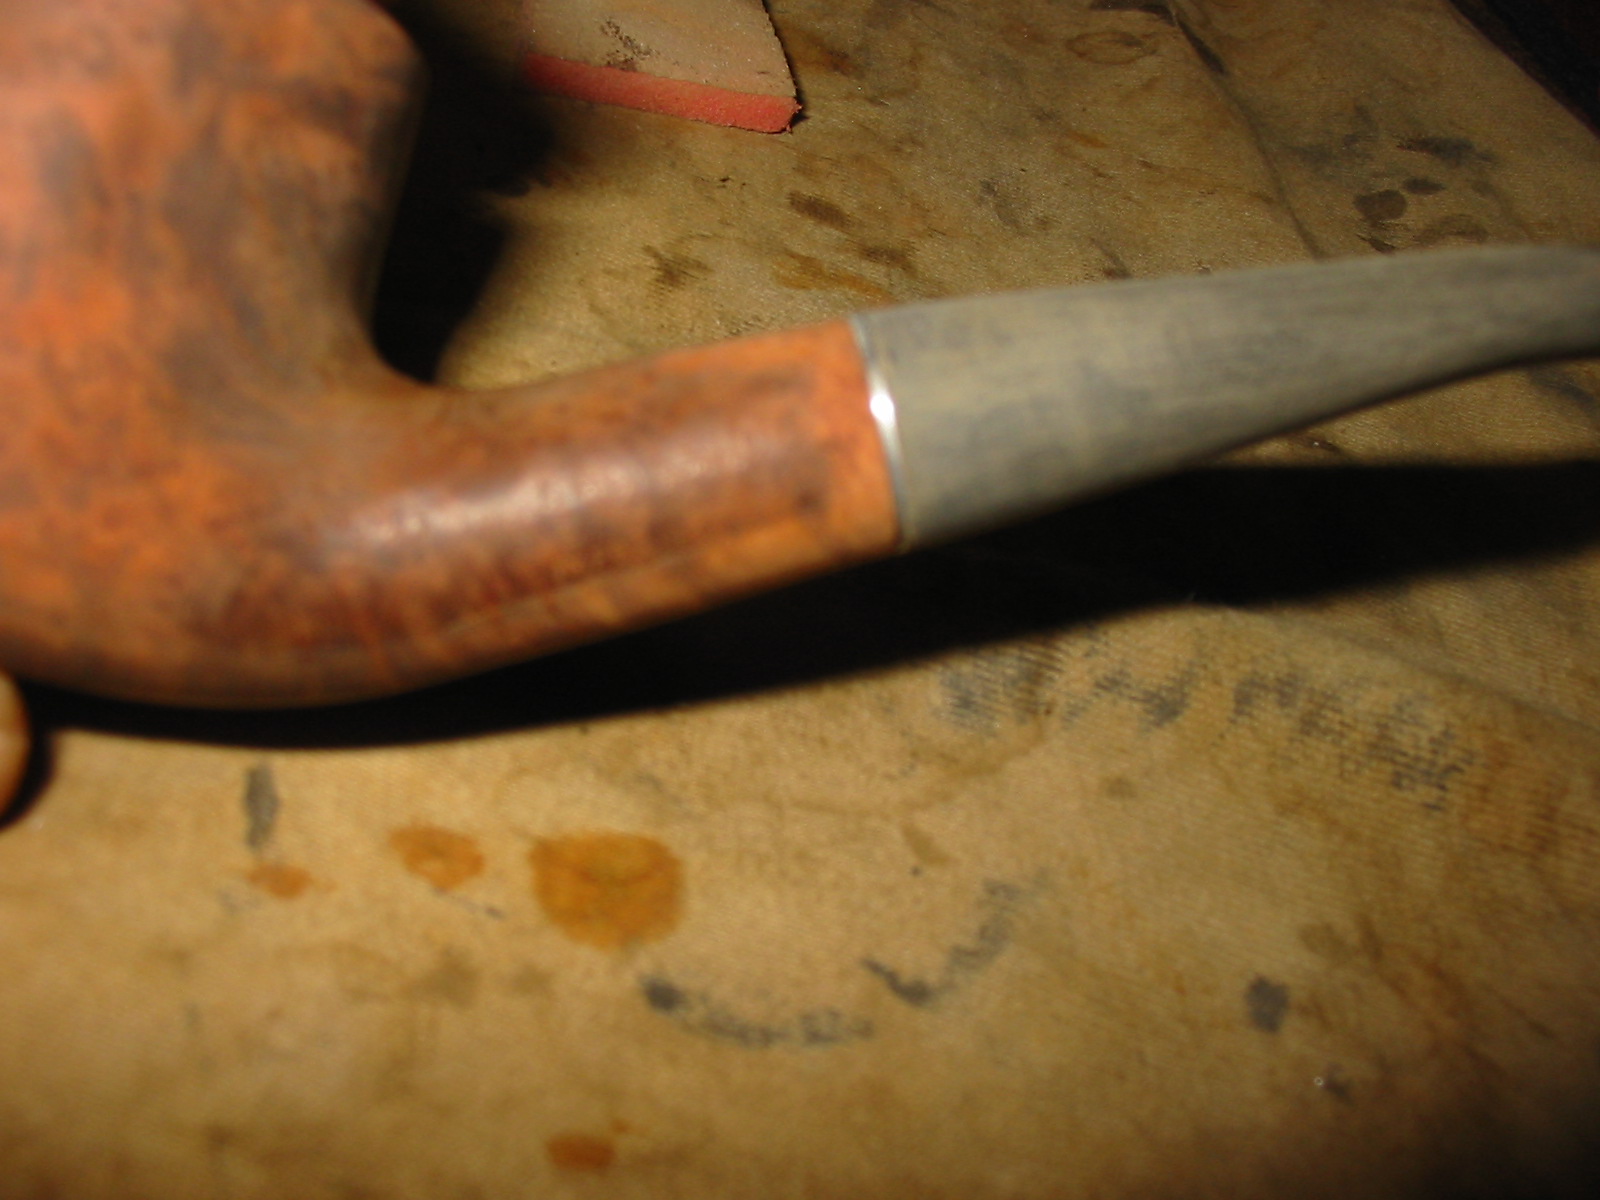
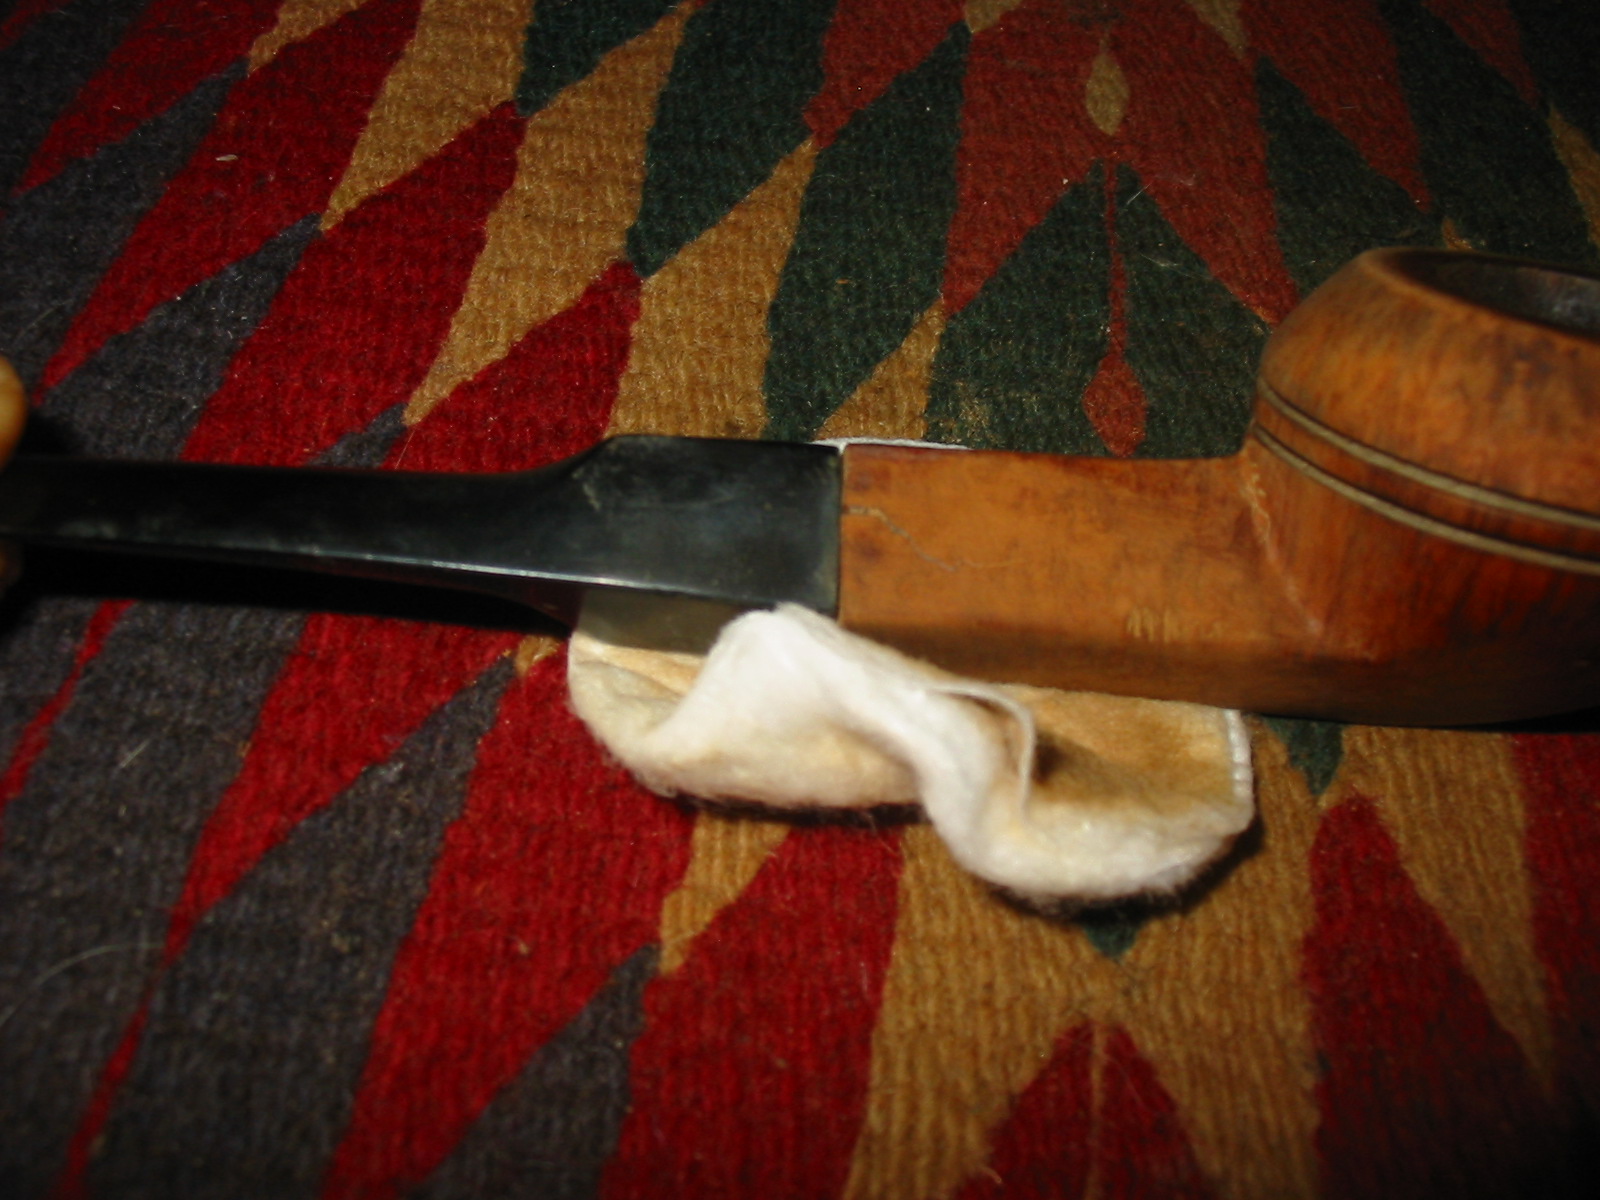
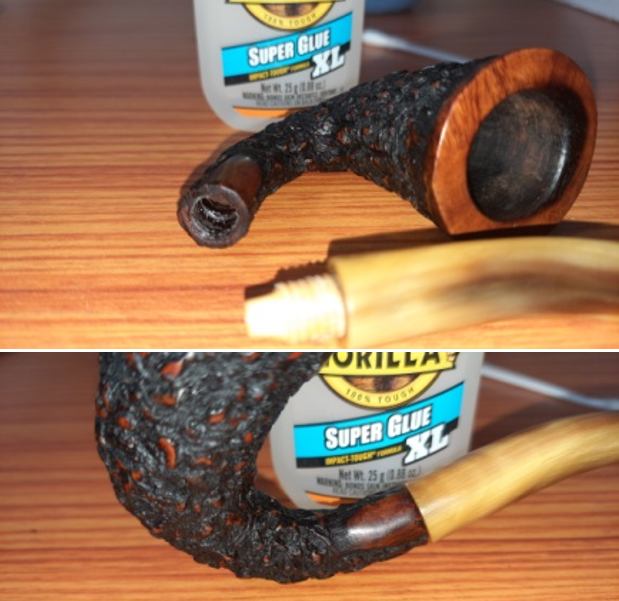
It was at this juncture that a new issue came to the fore as I was taking pictures of the stem and shank junction under magnification. The green arrows tell the story!
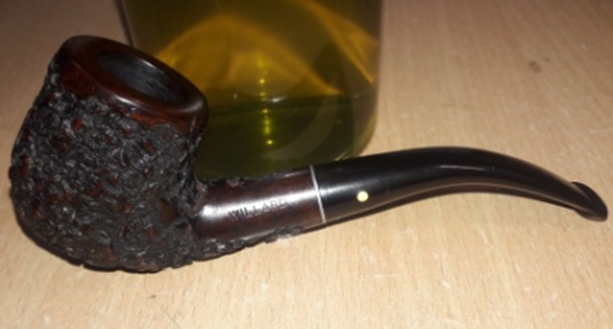
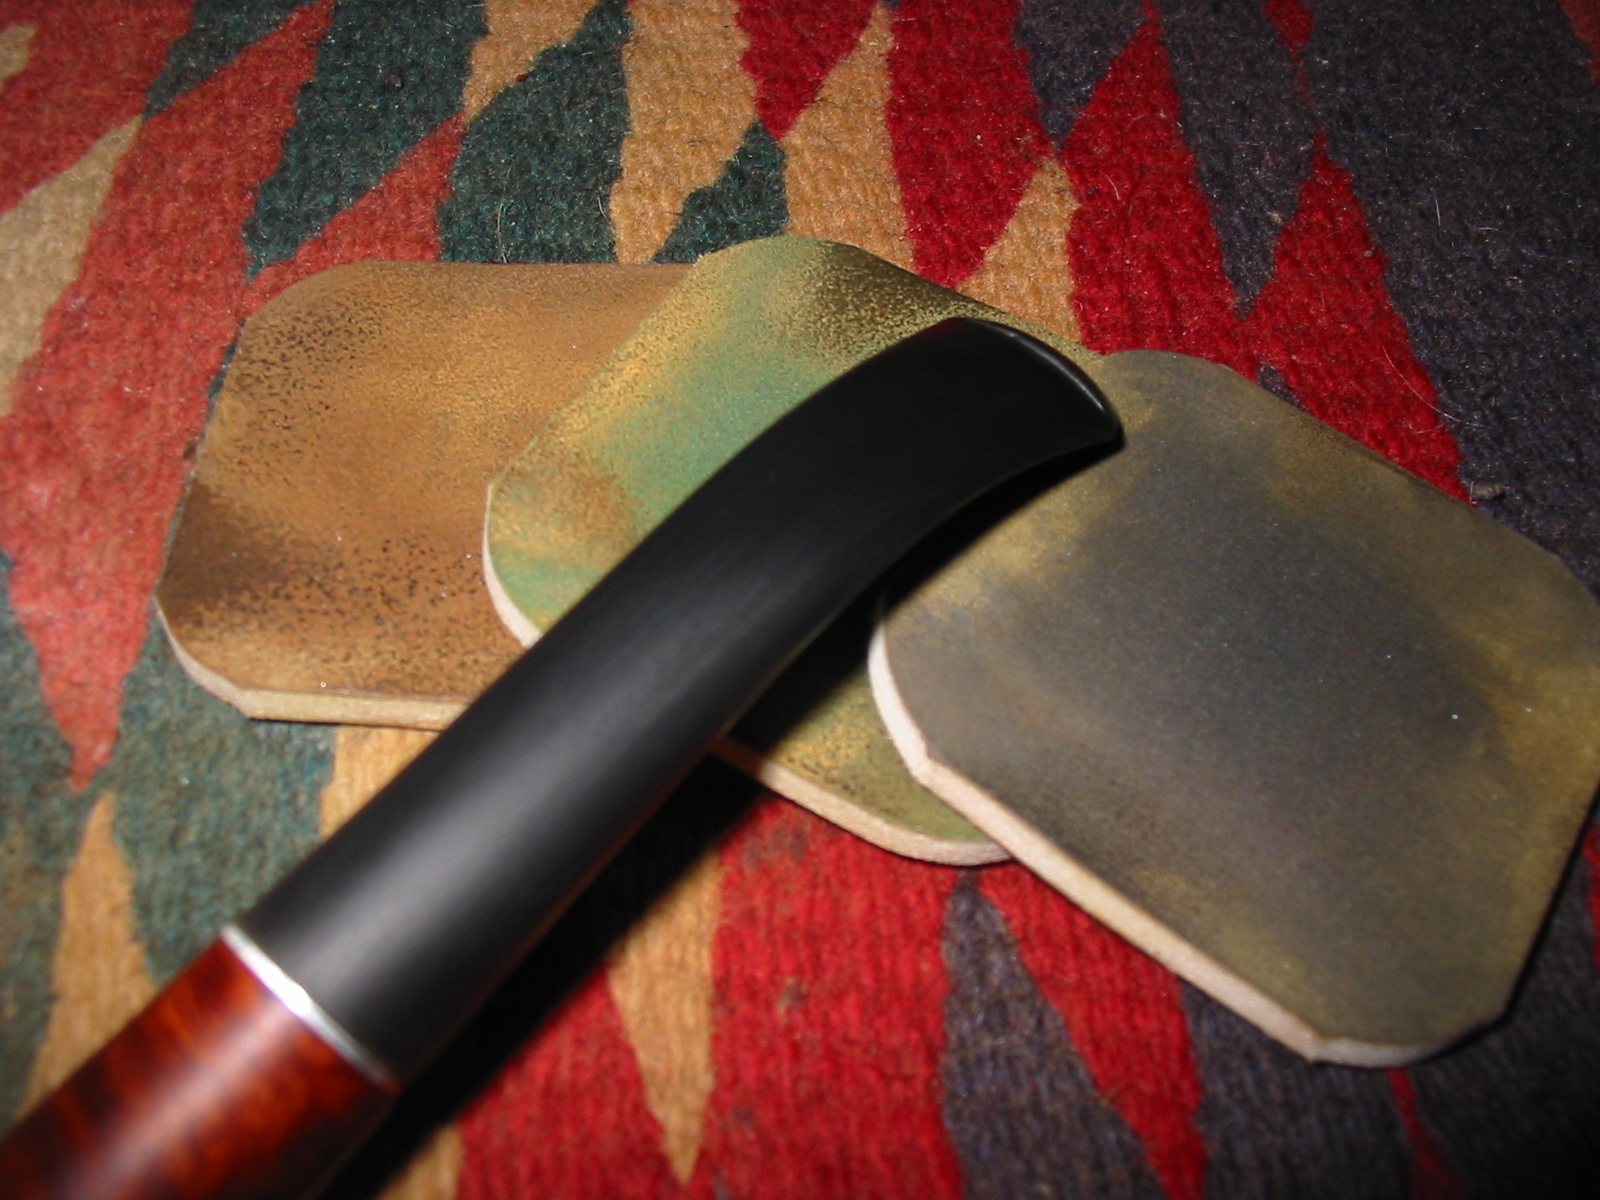
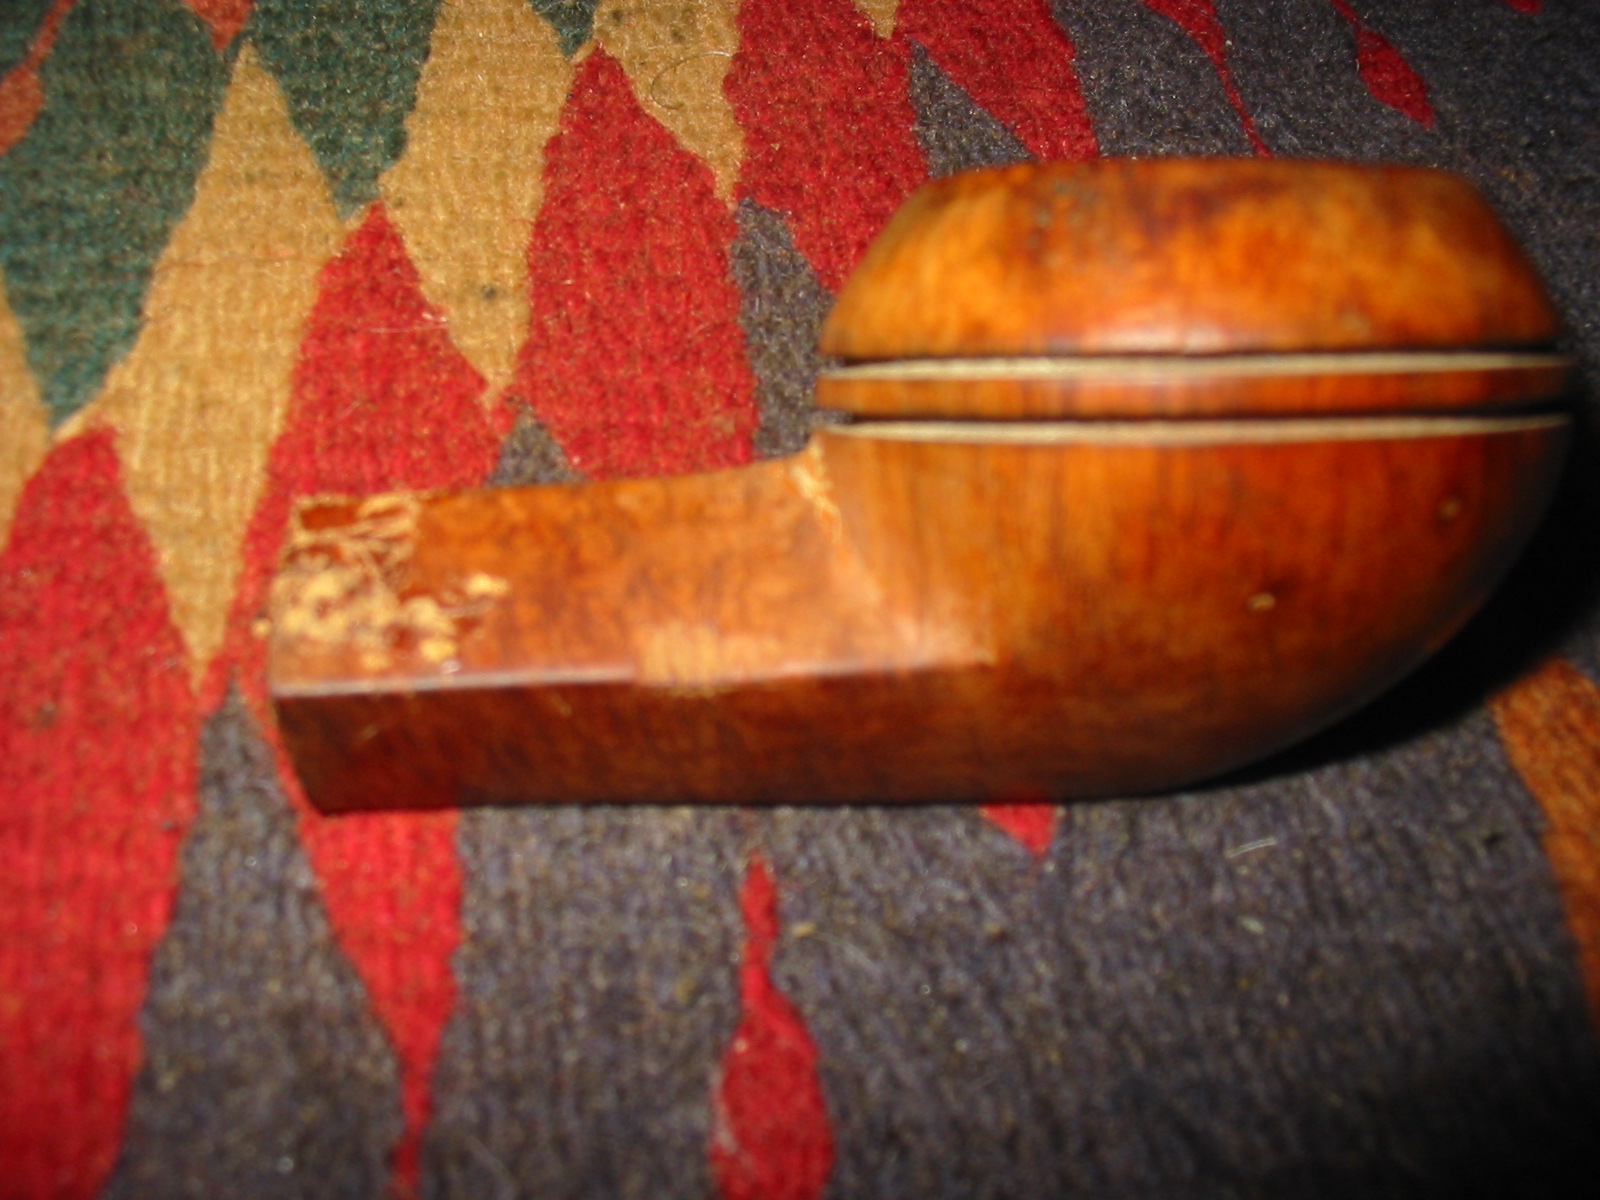
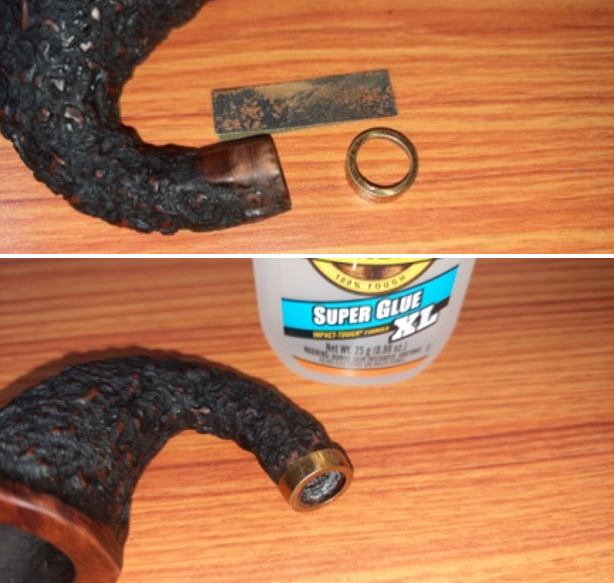
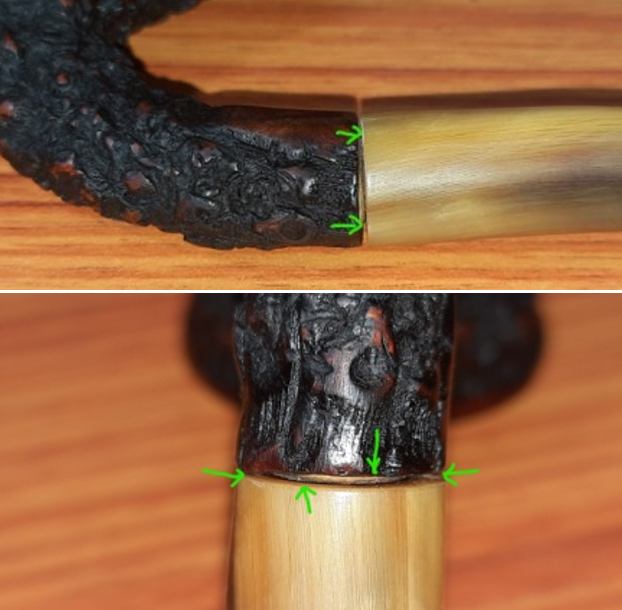
Closer inspection revealed that the cause of this gap was the uneven shank end and the tenon was not flush with the stem face (which by the way is also not perfectly shaped). The gap was more on the lower surface than the upper. To address these issues, I firstly topped the shank face on a piece of 220 grit sandpaper till it was even. I was extremely careful while topping so that there was minimum loss of briar as the tenon was already slightly long and I had no desire to increase this gap any further. Secondly, I bridged the gap between the shank face and stem by using a brass band. This also added a nice touch of bling to the entire pipe. I like the way the pipe has shaped up. 
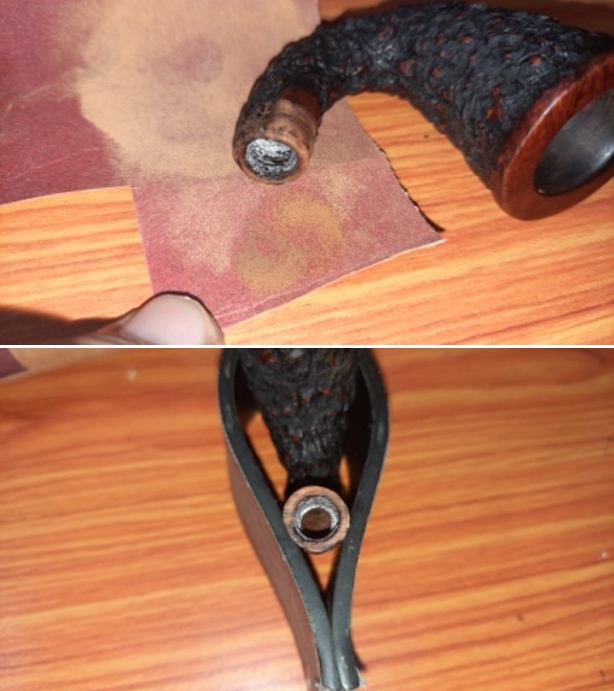
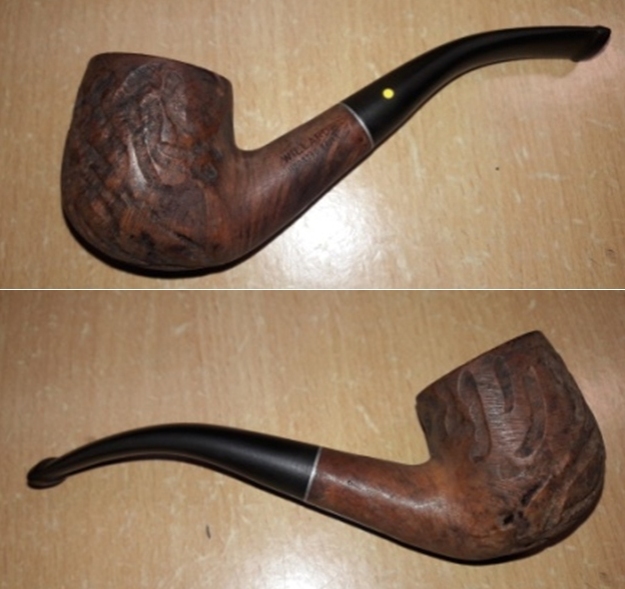
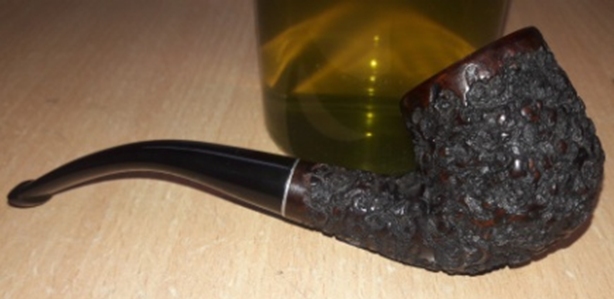
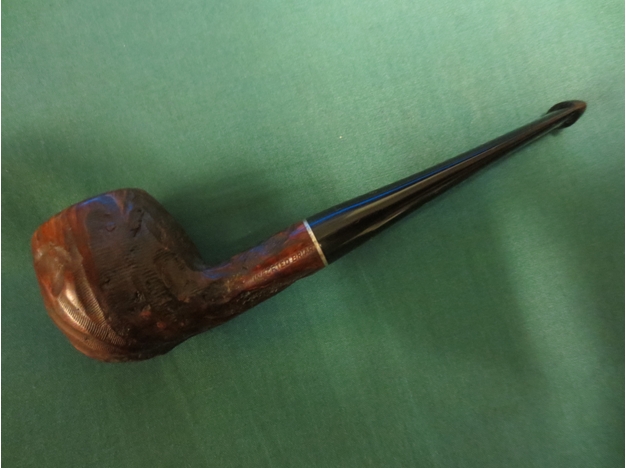
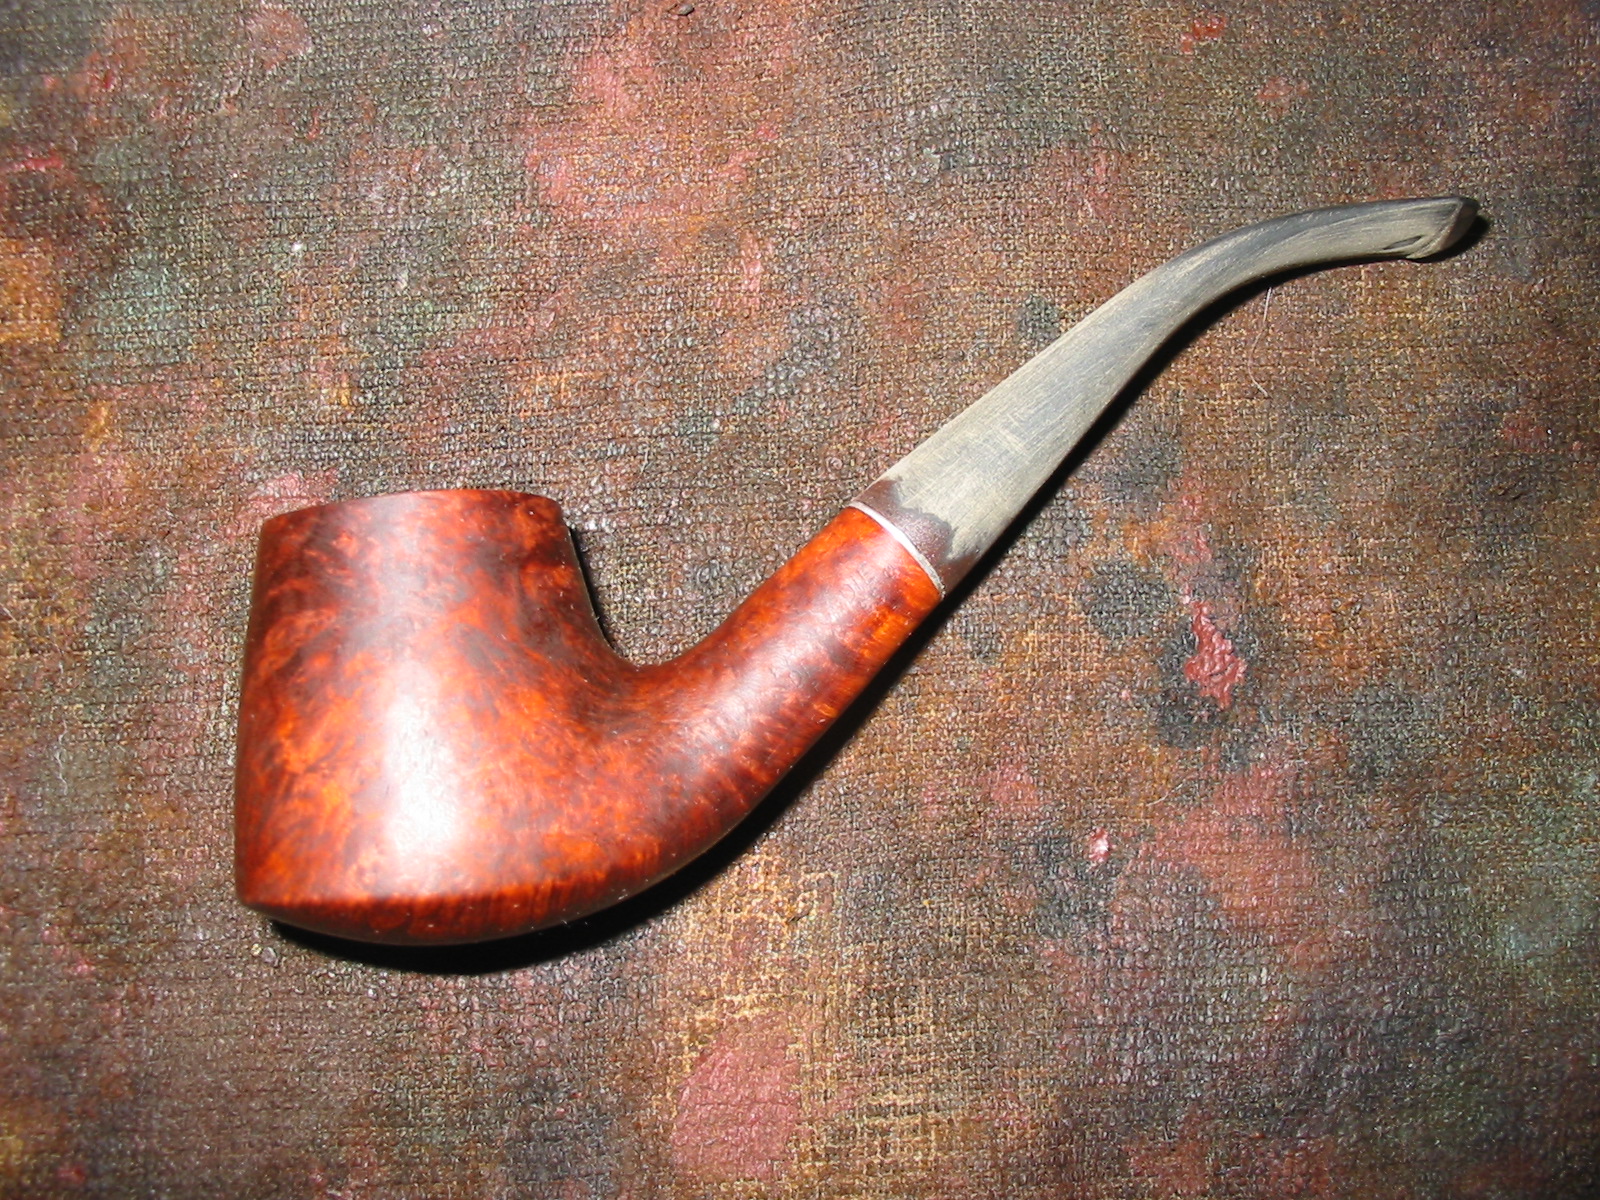
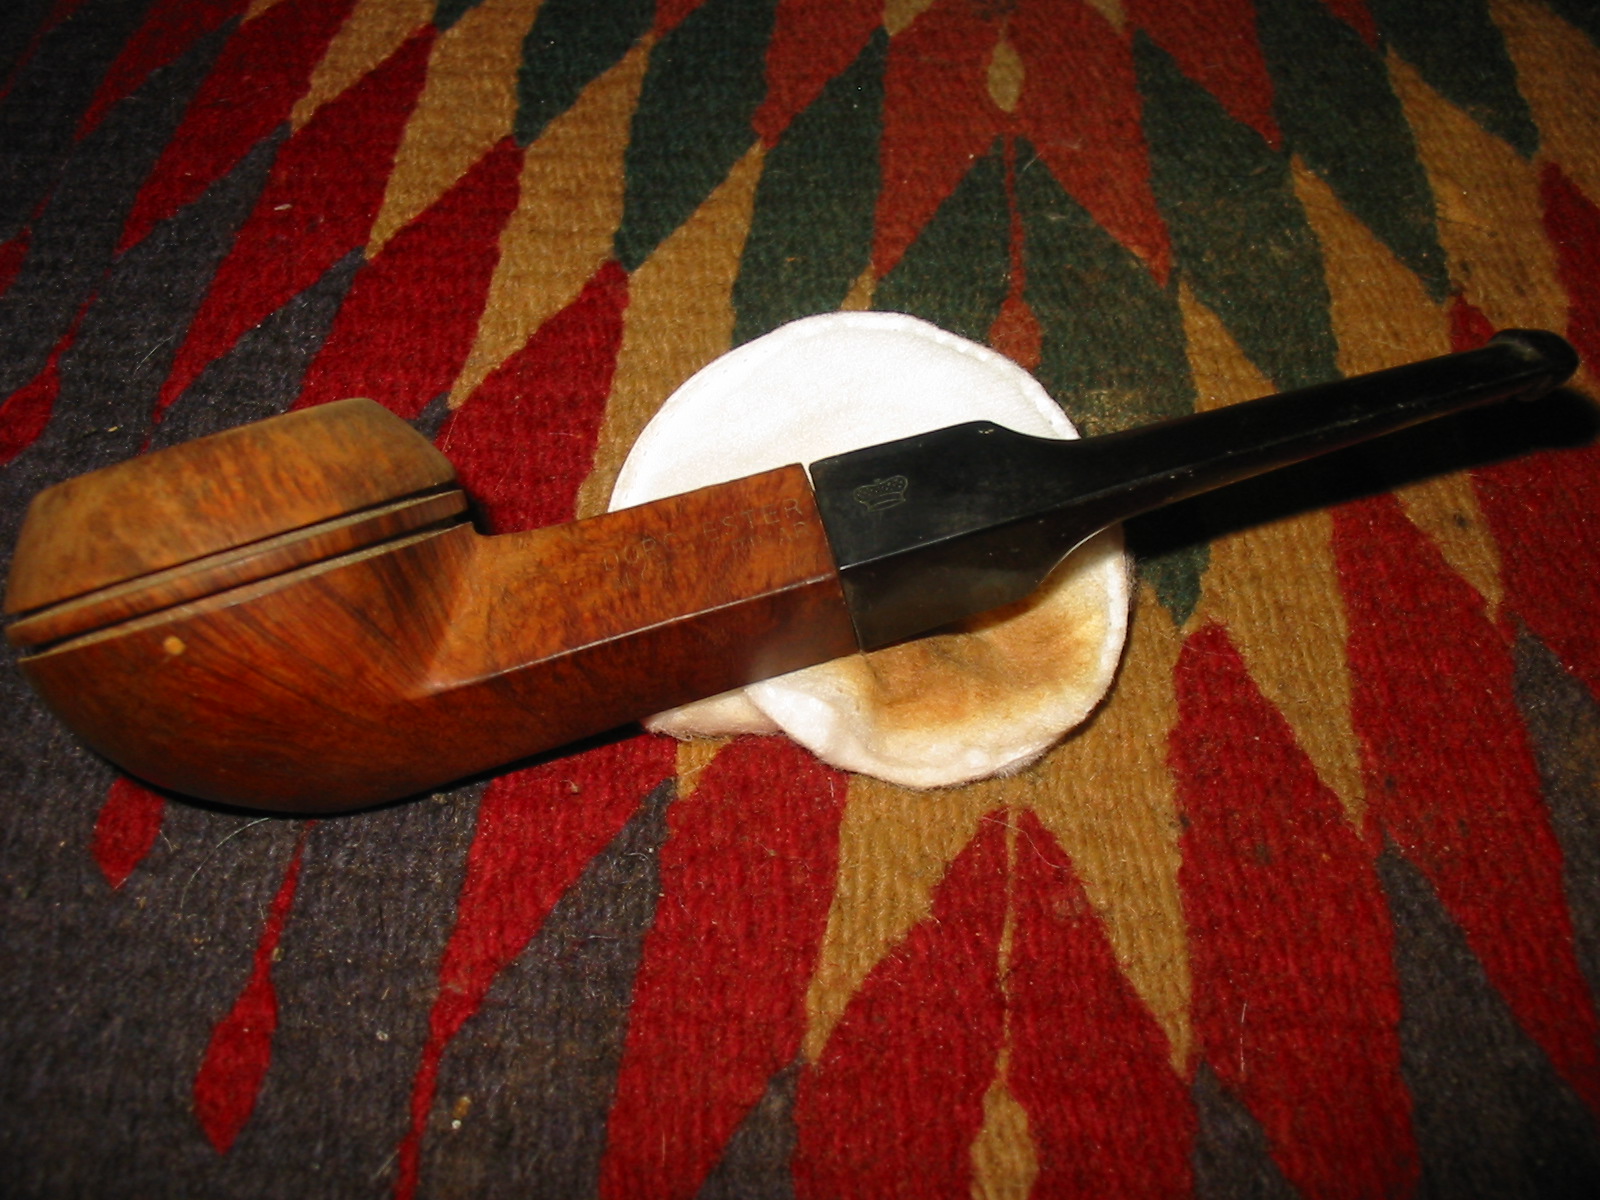
To complete the restoration, I first mounted a cotton cloth buffing wheel that is dedicated for use with Blue Diamond, onto my hand held rotary tool.  I set the speed at about half of the full power and polished the stem. The Blue Diamond compound helps to erase the minor scratches that are left behind even after micromesh polishing cycle and followed it by applying several coats of carnauba wax with a cotton cloth buffing wheel dedicated to Carnauba Wax. I finished the restoration by giving the entire pipe a rigorous hand buffing using a microfiber cloth to deepen the shine further. The finished pipe looks amazingly beautiful and has undergone quite a transformation. With its perfectly balanced weight, a nice full bent shape and light weight, this is a perfect pipe for clenching while working. This is one pipe that will I feel will not disappoint either aesthetically or functionally. In case this beauty calls out to you, please let me know and we shall work out a mutually beneficial deal. I wish to thank our esteemed readers for sparing their valuable time to read through and any input or advice is always welcome. And how can I not thank Abha, my wife for her patient efforts in imparting glass like finish to the stem and rim top surface!

Praying for the safety and well being of you and yours…stay home, stay safe and get your vaccines please.

Rusticating A Willard That Was A Gift For My Colleague…


Blog by Paresh Deshpande

My job involves a lot of transfers and frequent shifting of our household to a completely new place. At times, it is we who move to our work place alone while our families stay back for children’s education or when accommodation is not available or when the new place is in a remote area and fraught with risks. I moved to my present place of work alone. Here, I had a very fine set of colleagues with whom I gelled well. As time went by, these colleagues got transferred and new colleagues joined. However, when the last of my old colleagues got his transfer orders, I wanted to gift him a pipe as he has started to enjoy pipes more than his cigars.

Abha, my wife, had sent me one lot of 40-45 pipes that she had cleaned up and all ready for my part of restoration process. From this lot of the pipes that I had earmarked as for sale/ gifting, he selected a pipe that had come to me as part of my Mumbai Bonanza.

For those readers who have missed out on how I came to purchase this lot, here is the background story….

I was fortunate enough to have heeded the advice of my dear friend and mentor, Steve, and struck a deal with a junk collector from Mumbai. He did not know what he was selling and I did not know what I was buying as we reside in different cities!! The argument that Mr. Steve presented was that if not anything, I shall at least have some spares and this was logical. I struck a deal and here are pictures of the pipes that I received in this lot.    This lot contains some very nice collectible pipes, a few well known brands and some mediocre brands. Overall, with seven Dunhill pipes, a Preben Holm #1 FH, a couple of “Made in England” Pete System pipes, a couple of  Charatan’s Belvederes, Custom-Bilt, Stanwell and other assorted pipes, I would say that I had struck a decent deal!! This is indeed my “Mumbai Bonanza”.

The pipe selected by my colleague and now on my work table from this find (sixteenth pipe being restored) is a bent billiard pipe with flame shaped worm rustications, a poor imitation of worm rustications as seen on Custombilts from the Wally Frank era! It is indicated in yellow arrow in the picture below. It is stamped on the left side of the shank as “WILLARD” in block letter over “IMPORTED BRIAR” again in block letter. The right side of the shank is devoid of any stamping. The stem bears a “Dot” logo in Yellow, embedded on the left side of the stem. Now coming to the research of this brand and line/model in specific, I referred to pipedia.org. Though there are no reams of information on this brand or model, the information provided gives a clear perspective of this brand and its aim. Here is the link (https://pipedia.org/wiki/Willard).

“The Willard pipes were made by Sparta Industries in Sparta, N.C from 1963 to 1975 (about 60,000 pipes per week). Some were distributed by the Post and Base Exchanges that serviced the military during the Vietnam War. Others were produced for R. J. Reynolds Tobacco. (preceding content from the “Pipes” website http://www.pipephil.eu/index.html)

Lord Abbott was either a sub-brand or a series produced by Willard —Dgillmor 22:42, 10 May 2012 (CDT)”

From the above information, it is evident that the pipe currently on my work table is from the period 1963-75. With this input on the vintage of this pipe, I move ahead with the restoration of this 42 plus years old pipe!

Initial Visual Inspection
The stummel is covered in dust and dirt giving it a dull appearance. The Custombilt like worm rustications are uneven, without any finesse and filled with dirt and grime. There are a couple of fills that are plainly visible. These will need to be refreshed, if needed. It’s a matter of personal choice; however, I could not help but wonder what it was that attracted my colleague to this pipe in the first place!! I got my answer the next day when he said that he liked the shape and lightness of this pipe. Thus, it was not the grains (which were zero!) or the worm rustication that he was interested in and could be done away with to make it more attractive. With this input from him, I decided to rusticate the stummel as I was not very happy with the appearance of this pipe at this stage. A thick layer of cake can be seen in the chamber. The smooth rim top surface is covered in dirt, dust and grime with a few dents and dings thrown in for good measures. The condition of the inner walls of the chamber will be known once the cake has been taken down to the bare briar. The inner rim condition appears to be in good condition with no burn/ charred surfaces. Even the outer rim edge appears to be in a decent condition. Only once the stummel has been thoroughly cleaned that I can be sure of my initial appreciation. In spite of the thick cake, the chamber odor is surprisingly not strong, yet I shall be subjecting it to a salt and alcohol treatment to freshen it up for him.The shank end has a metal band and this metal band extends inside the shank with threads, over which the threaded stinger is seated in to the mortise. Thankfully, the band and threads are all intact. The mortise is blocked with dried gunk, adversely affecting the airflow. The metal band is dull and dirty in appearance.The vulcanite stem is oxidized and has calcification deposits towards the button end. The lower and upper stem surface is peppered with tooth chatter. The button edges also need to be sharpened. The stinger opening and the horizontal slot is covered in accumulated oils and tars. The alignment of the stem and shank is skewed with the stem being overturned to the right. Initial Cleaning By Abha…
The initial cleaning on this pipe was done by Abha, my wife (she has cleaned up around 40-50 pipes and these have now reached me for further restoration). She reamed out the complete cake and further smoothed out the chamber walls with a folded piece of 220 grit sand paper. She further cleaned out the internals of the shank with pipe cleaners and alcohol and cotton buds. She followed the internal cleaning of the shank with external cleaning of the stummel using Murphy’s Oil soap and hard bristled tooth brush and dried it with paper napkins and cotton cloth.Next she cleaned out the internals of the stem air way and immersed it in “Before and After Deoxidizer” solution (pipe is marked in indigo blue arrow) along with the stem of other pipes in line for restoration. Once the stem had soaked overnight, she cleaned the stem under running warm water and scrubbed the raised oxidation from the stem surface using Scotch Brite pad. She further removed the oxidation by scrubbing the stem with 0000 grade steel wool and applied a little olive oil to rehydrate the stem.Once The Pipe Is On My Work Table…
The cleaned up pipe presents a very clear picture of what needs to be done to restore this pipe to a decent and smoke worthy condition. I really cannot thank Abha, my wife, enough for all the help and support that she extends in my pursuance of this hobby. I proceed to carry out my appreciation of the work that needs to be done on this pipe to restore it. The cleaned up pipe, as I received it, is shown below. The chamber walls are without any heat fissures or pits and that’s a big relief. The rim top surface is peppered with dents and dings. The inner rim edge shows slight darkening all round and should be easily addressed with a couple of turns of a piece of 220 grit sand paper along the edge. There are some minute chipped spots on the outer edge. The condition of the chamber is good and will not require much repair work. There are no ghost smells in the chamber. The stummel surface is nice and clean. The worm rustications, though clean, are still not visually pleasing. There are a large numbers of fill now plainly visible (only larger ones are enclosed in yellow circle). The mortise is clean and air flow is smooth. The metal spacer ring is also clean and intact. The vulcanite stem had cleaned up nicely. The upper stem surface has a couple of deep bite marks at the base of the button and also in the bite zone. The lower surface has some minor tooth chatter in the bite zone. The button edges on both the surfaces need to be sharpened. The aluminum stinger is clean.The seating of the stem stinger in to the metal threaded mortise is off center. The stem is overturned to the right and will have to be readjusted to perfectly align with the shank and the stummel.The Process
The first issue that I addressed in this project was that of the stem repairs. I painted both surfaces of the stem with the flame of a lighter to raise the tooth chatter and bite marks to the surface. This also helps in loosening minor oxidation from the stem surface. I sand the entire stem surface with a folded piece of a 220 grit sand paper to remove the loosened oxidation. I wiped the stem with a cotton swab and Murphy’s oil soap to further clean the surface. Even though most of the tooth indentations have been eliminated by heating the damaged stem portion, one deep indention is still seen on upper surface in the bite zone and a minor bite mark is seen on the button edge on the lower stem surface. I filled the tooth indentation in the button edge on lower and upper stem surface with a mix of activated charcoal and CA superglue and set it aside for the fill to cure.With the stem fills set aside for curing, I decided to work the stummel. The other day during a Face Time video call with Steve, we discussed the best way to transform this stummel. The long and short of the discussion was that it was decided to rusticate the stummel. This would help to mask the fills and provide a very tactile feel while smoking. It would also provide me an opportunity to practice rustication. With this decision finalized, I proceed with rusticating this stummel.

Now, this would not be my first attempt at rustication as I had rusticated one a few months back, here is the link to the write up (https://rebornpipes.com/2019/08/02/gifting-my-mentor-and-dear-friend-steve-an-alexander-zavvos-hygrosystem-pipe/).

I referred to the above write up and other subject write ups on rebornpipes to understand the mistakes committed and decide on the look/pattern of rustications over the stummel surface. I decided to maintain a smooth ring atop the rustication below the outer edge of the rim and also at the shank end. I used a transparent tape to demarcate the area that I wanted to keep smooth that is the rim top and about quarter of an inch below the rim outer edge and a thin band at the shank end. Similarly, I covered whatever little that remained of the stamping. From my experience, I knew that this is a very essential step as I realized during rusticating that it is very easy to lose track and transgress over the areas and stampings which you wish to preserve.To rusticate, I firmly held the stummel in my left hand and with my right hand and began gouging out the briar. The technique is to firmly press the pointed four prongs of the modified Philips screwdriver in to the surface, rotate and pull out the removed chunk of briar. I worked diligently till I was satisfied with the rustications and the appearance of the stummel. I cleaned the stummel surface with a brass wired brush to clear all the debris from the rustications. I decided to take a break from further rusticating the surface as the process is tiring and painful. This makes me want a better and efficient rusticating tool. While giving my right hand a rest from this task, I decided to work on the damage to the rim top and edges. I start by addressing the rim top surface damage. I top the rim on a piece of 220 grit sand paper, checking frequently till I am satisfied that the darkened surface is addressed to a great extent and the rim top surface is nice, smooth and even. The inner and outer edges are still uneven, though much better than before topping, and shall be addressed subsequently.With a folded piece of a 220 grit sand paper pinched between my thumb and forefinger, I create a slight bevel on the inner and outer edges of the rim top surface. This helps to mask and address the minor dents and dings that had remained on the rim edges after topping. I am careful so as not to alter the profile of the stummel by excessive topping or creation of the bevels. I am pretty pleased with the appearance of the rim top and edges at this stage. I cleaned the stummel with pure acetone and cotton swab to remove the old stain completely in preparation for the polishing and subsequently, a new stain. After the cleaning, I set the stummel aside to dry out naturally. I turn my attention back to the stem. The fill has cured nicely and with a flat head needle file, I sand the fill to achieve a rough match with the surrounding surface. To achieve a perfect match, I sand the stem with a 220 grit paper, progressively moving through to finish with a 1000 grit sand paper. As expected, a clean and neat looking stem stared back at me. I rub a little Extra Virgin Olive oil into the stem surface to hydrate it and set it aside to be absorbed in to the vulcanite.I polish the rim top and the smooth surfaces of the stummel using micromesh pads, wet sanding with 1500 to 12000 grit pads. I am happy with the appearance of the stummel at this point in the restoration. The stummel is now ready for a fresh coat of stain. I heat the stummel surface with my heat gun to open up the pores on the stummel so that the stain is well set. I mix black stain powder with isopropyl alcohol and liberally apply it over the heated surface, flaming it with the flame of a lighter as I went ahead to different self designated zones of the surface. This helps in the setting of the stain in the grain of the briar. Once the stain has set in well, I again warm the stummel with my heat gun. This helps the stain to be absorbed and set further into the briar. I mount a felt cloth buffing wheel on my rotary tool and gently buff the entire stummel surface to remove the stain crust. I wipe the stummel with a cotton swab and alcohol to remove any excess stain and follow it up sanding the raised rustication with a folded piece of 220 grit sand paper. This is followed up by careful dry sanding of the entire stummel, especially the raised rustications with 1500 to 12000 grit micromesh pads. This not only lightens and highlights the rustications, but will also provide a smooth surface for the next coat of stain. Here is how the stummel appears at this stage. I buff the stummel with a horse hair shoe brush to remove any sanding dust resulting from the micromesh sanding. I apply a small quantity of “Before and After” restoration balm to rehydrate and rejuvenate the briar and set it aside for some time. Thereafter, I buff and clean the stummel with a microfiber cloth. I apply a second coat of Medium Brown stain over the stummel and the shank extension, going through the same method as described above and set them aside for the stain to set. With the stummel set aside for the stain to set, I turned my attention to the stem polishing. Using the micromesh pads, I complete the polishing cycle by wet sanding the surface with 1500 to 12000 grit pads. The stem looks great with the fills nicely matched with the rest of the surface. I rub a little quantity of Extra Virgin Olive oil in to the stem surface and set it aside to be absorbed by the vulcanite.Coming back to the stummel, once the stain is set I wipe it down with a cotton swab and alcohol to remove any excess stain and lighten it from the raised rustications. Mounting a felt cloth buffing wheel on my rotary tool, I go about removing the crust formed by the stain over the raised rustication. The second coat of brown stain has added another layer of texture to the appearance of the stummel. Next, I rub a small quantity of “Before and After Restoration Balm” in to the briar with my finger tips, work it deep in to the sandblasts and let it rest for a few minutes. The balm almost immediately works its magic and the briar now has a nice vibrant appearance with the beautiful rusticated patterns on full display. I further buff it with a horse hair shoe brush. I rub a small quantity of Halcyon II wax into the surface and immediately wipe it with a microfiber cloth. The only issue that remains unaddressed at this stage is the issue of the overturned stem. With the flame of a lighter, I heat the aluminum stinger to a point where the stem is just about able to rotate on the stinger. I reattach the stem to the shank while the stinger was still warm, and turned it till the alignment was as perfect as I desired and set it aside to cool down.To complete the restoration, I mounted a cotton cloth buffing wheel on to my hand held rotary tool.  I set the speed at about half of the full power and applied several coats of carnauba wax. I finished the restoration by giving the entire pipe a rigorous hand buffing using a microfiber cloth to raise the shine further. The finished pipe looks amazingly beautiful and quite a transformation it was. It is now ready for its long second innings with my colleague. I wish that he enjoys his pipe and remembers our association for a long time to come. I wish to thank our esteemed readers for sparing their valuable time to read through and any input or advice is always welcome.


Bringing to Life a Unique Kaywoodie Natural Burl 33 – Another Legacy Pipe of a Great Grandfather


Blog by Dal Stanton

This is the second of 3 of Paw’s pipes that Joe sent to me from Athens, Greece, where he and his wife, Hannah, live and work.  Paw is Hannah’s great grandfather who left behind several pipes that Joe has asked me to restore for the family.  Paw, also known as, ‘2-Page Sam’ by those who knew him as a salesman of over 40 years of the tobacco giant, Brown & Williamson Tobacco, Corp, has a fascinating story that was described in an article in B&W’s company magazine that I included in the write up of Paw’s Medico Apollo Brylon, which I just completed that turned out well (See: Another Legacy Pipe of a Great-Grandfather: Challenges Working with ‘Brylon’ on a Medico Apollo).  Next, two Kaywoodies remain to be restored – a Kaywoodie “500” and the one on my worktable now, a Kaywoodie Natural Burl 33.  Here are pictures to take a closer look. The nomenclature is on the underside of the shank’s smooth briar panel with ‘KAYWOODIE’ (as most of it is not legible as the upper half of ‘Kaywoodie’ bleeds into the craggy rusticated landscape) [over] ‘Natural Burl’ in fancy cursive script. To the left of the nomenclature is stamped the Kaywoodie shape number of 33.  In Pipedia’s listings of Kaywoodie shape numbers, 33 is listed as: “Large apple, rounded top” that was used as a shape designator from 1937 to 1972.The dating indicators of this Kaywoodie are good.  The Natural Burl has a 4-holed stinger which were phased out at the end of the 1950s, though they still show up some in the 60s according to Pipephil.eu’s discussion about Kaywoodie’s stinger evolution.  The inlaid white shamrock also points to an earlier period.I found nothing specific in Pipedia or Pipephil.eu about Kaywoodie’s ‘Natural Burl’ line.  Expanding my search, I did find very helpful anecdotal information in a February, 2013, thread by ‘kwguy’ on a Kaywoodie discussion group on Tapatalk.com:

Natural Burls are in the catalogs from 1957 to 1962. They were $4.00 when they first came out and $5.00 by the time they were discontinued.  They were basically a stained version of the Coral White Briar, which also debuted in 1957.  The overall rough texture was described in the catalogs as having a rough texture like the outside of the burl.  The rough texture in theory would create more surface area for a cooler feeling bowl.  Carving of this type was done on bowls of less desirable grain and with excessive surface imperfections.  On the lower side of the quality scale, Natural Burls would have had the white cloverleaf.  There may have been the occasional higher grade pipe that was downgraded during production and hence would have the round logo, but I think you’ll mostly see them with the white logos.

Based upon the information of this thread, the Natural Burl Apple before me dates from 1957 to 1962, when they were featured in Kaywoodie catalogs. I looked for a catalog during this period online, but unfortunately, I was unable to find one.  The rusticated or carved surface theoretically provides a cooler feeling bowl.  This pipe fits Sam’s low budget approach to his pipes.  When the Natural Burl Apple first hit the market, it was in a working man’s modest budget range, $4!  I’m hopeful that after I’ve completed working on Paw’s vintage Kaywoodie it will look like a million bucks!

The above thread from ‘kwguy’ also mentions that the ‘Natural Burl’ line was featured in Kaywoodie catalogs from 1957 to 1962.  There are Kaywoodie catalogs and adds referenced on Pipedia and the Chris Keene Directory of Pictures, but I could find nothing in these ‘go-to’ places for catalogs or listing between 57 and 62.  Emails to Steve and rebornpipes contributor, Al Jones, also came up empty.  However, Al encouraged me to reach out to Bill Feuerbach, the current president of S.M. Frank with Kaywoodie production in New York.  Al said that Bill had always been helpful and had seemed to enjoy providing info.  Nothing like going to the top of the pipe food chain!  I sent a note to Bill through the S.M. Frank website as well as to the ‘kwguy’ in the Natural Burl thread with the hope of getting a response and perhaps a historical Natural Burl add!

Al’s suggestion to me paid off!  In a few days I received a response from Bill Feuerbach, president of S.M. Frank since taking over the role from his father in 1990 as the fourth generation of Feuerbachs overseeing the company.  Bill’s note to me:

Dal 

I’d love to be able to help you out with that. I’ve looked through what I have at the shop and most of those catalogs are later 60’s to later 70’s.  I’m sure I’ll have those older catalogs from that range at home.  I’ll try and check tonight.

Best regards

Bill

After arriving home that night, Bill sent an additional note that he hadn’t found anything at his home and would redouble his efforts the following day at the shop to find the sought after ’57 to 62’ catalog pages.  Then, this note came in and the treasure hunt ended with success!

Dal

Success!!  I found the catalogs at home.  They were in a storage tub in the downstairs closet. Funny I don’t remember putting them there. It’s probably been 4 years since I referenced them. It is hell getting old, CRS is kicking in.

Anyway, I’ve attached three images from the 1958, 1960 and 1962 catalogs.  I was only using my phone to take pictures and it was difficult not to get any flash or glare.  Are they ok?  You can tell the year by the retail prices for the Natural Burl.

1958- $4.00

1960- $5.00

1962- $5.95

Let me know when you’ve posted this and the link. I’d like to take a look.  If you have any other questions let me know. If in the future you need other images from the catalogs, let me know.

Best regards

Bill

The images Bill sent were great depicting the Kaywoodie presentation of the Natural Burl line.  Both the 1960 and 1962 pages, second and third below, showcase the Large Apple on my worktable.  The pictures and descriptions are great helping to wrap Paw’s pipe in its historical context! I appreciated the help of Bill Feuerbach, president of the S. M. Frank Co. & Inc. based in New Windsor, New York.  The Frank website not only showcases the Kaywoodie, Yello-Bole and Medico brand lines, but has other interesting information as well.  In my email response to Bill, I offered to digitize the ‘treasure tubs’ of Kaywoodie catalogs and adds if I only lived a bit closer to his neighborhood!  Oh my….

As I was waiting for word from Bill before he found the catalogs, I reread the Pipedia article on the S.M Frank Co. and discovered at the bottom of the article a reference to Brian Levine’s interview of Bill on the Pipes Magazine Radio Show.  I tuned in to learn more about Bill and the Kaywoodie name.  I was interested to hear in the interview that not only is Bill the CEO of the company, but he is an accomplished freehand pipe maker himself, likes single malts and owns and enjoys pipes in his rotation other than Kaywoodies!  It was a great interview and I encourage readers to tune in too!

The name for this Kaywoodie series, ‘Natural Burl’, harkens back to a pipe’s origins – or at least its bowl.  The Natural Burl adds above from Bill describe the ‘rugged, weather-carved briar’ that breathes more because of the increased surface of the bowl.  Briar comes from a bush-like plant that grows in arid lands.  The Kaywoodie motif focuses on the rough state of the burl in its natural form sporting rusticated or carved bowls to emulate a natural harvested burl.  The burl is the base of the briar bush that is cut into blocks, each becoming the raw material for fashioning each unique bowl. I found this example online of the burl texture which looks very much like the pipe on my worktable! This interesting information was added about the process at the WorthPoint site:

The mother of briar is Erica Arborea, an evergreen bush / tree, that grows in all forests of the Mediterranean area, preferring acid soils (Cyprus, Greece, Italy, Spain, France, Portugal, Morocco, Algeria- these are the countries where it is found). The bush has a typical height of 3 – 12 feet. But not the visible parts are the wanted ones, the ball-like roots are the pipe makers desire. These are the raw material for the briar wood, which is cut in blocks (plateaux and ebauchons) by real specialists. After a long process of boiling them in clear water and drying periods, these briar blocks will be ready for the experienced hands of a pipe maker.

With a deepened understanding and appreciation for Paw’s Kaywoodie on my worktable, I look more closely at the issues it brings from its years of service. As one would expect, the craggy Burl bowl is full of grime.  The chamber has thickening cake as you go down toward the floor.  This needs to be cleaned out as well to inspect the chamber wall and to give the briar a fresh start. The rim has evidences of Sam’s penchant for knocking the stummel on the back side of the rim.  It is worn and tapers away from the chamber. The rim was fashioned to be somewhat rough complementing the craggy bowl motif, but there is a large chip or divot out of the rim that will need to be filled and then blended. The bowl itself, along with the rim, is faded and skinned up.  I suspect that the original finish bent toward a light brown, but it is now thin and will need refreshing with new dye to blend the rim and bowl.  The 1962 add above describes a ‘2-tone brown finish’ characterizing the ‘Natural Burl’ line.  This is helpful information that hints at the depth of the final finish.The stem is in rough shape.  The oxidation is thick and deep.  The bit has calcium caked on it and some lower tooth compressions – not as bad as I’ve seen on Paw’s previous pipes! The stem orientation is also over-clocked which is a normal phenomenon with Kaywoodie screw in stems that happens over years of use with repeated loosening and tightening.  This will need to be adjusted as well. I begin the restoration of Paw’s Kaywoodie Natural Burl Large Apple by addressing the severe oxidation in the stem.  Before placing the stem in a soak of Before & After Deoxidizer, I get a head-start on removing the oxidation by pre-sanding the stem.  I use both 240 grade sanding paper and 000 grade steel wool to sand the stem to remove as much oxidation and caked calcium as possible.  The nickel 4-hole stinger also is cleaned up with the steel wool.After the sanding, the stem joins other pipes in the queue in a soak of Before & After Deoxidizer. After a few hours, the Kaywoodie’s stem is extracted from the Deoxidizer and after draining, I squeegee the liquid off the stem with my fingers.  I then run a pipe cleaner wetted with isopropyl 95% through the airway to clear the Deoxidizer.  Using a cotton pad and alcohol, the stem is wiped to remove the raised oxidation resulting from the soak.After cleaning the stem, paraffin oil is applied to help condition the vulcanite.  I put the stem aside to absorb the oil.  The stem looks great compared to where it started. It’s cleaning up nicely.Next, I turn the attention to the stummel.  I begin by reaming the Kaywoodie’s chamber to remove the cake.  Using the Pipnet Reaming Kit, I use two of the four blade heads available in the Kit.  I don’t know how long this cake has been waiting to be removed, but it is as hard as a brick.  I’m careful not to force the blades beyond their torque endurance level – simply allowing the scraping action to wear away the brick cake.  When both blades do what they can, the Savinelli Fitsall Tool continues the scraping of the chamber walls. Finally, to remove the last remaining carbon remnants, a 240 grade sanding paper is wrapped around a Sharpie Pen to sand the chamber getting down to fresh briar. After wiping the chamber with a cotton pad wetted with alcohol, and inspection reveals a perfectly healthy chamber.  The picture on the 10th floor Man Cave balcony where I’m working, does not allow a very good picture of the chamber, but it looks good.  Moving on.Next, using undiluted Murphy’s Oil Soap, I go to work on the wonderfully craggy but grime-filled surface of the Natural Burl bowl.  I use a cotton pad a bit, but transfer to using a bristled toothbrush which gets into the nooks and crannies of the landscape much more effectively.Next, after transferring the bowl to the kitchen sink, I continue to clean the surface and use shank brushes and liquid anti-oil dish soap and warm water to work on the internals.  After rinsing thoroughly, back on the worktable I take some pictures of the results.  The cleaning has totally removed what was left of the old finish – not unexpected.  The cleaning reveals some white fills on the right side of the stummel which are fully embraced in the craggy landscape cover and seem to be solid after testing them with a sharp dental probe.Next, I focus again on the internal cleaning using pipe cleaners and cotton buds wetted with isopropyl 95%.  Cleaning Kaywoodie pipes tends not to be easy.  Working through the threaded metal shank facing makes access to the mortise difficult.  Along with pipe cleaners and buds, the full arsenal added the use of shank brushes, and a dental spoon to scrape the mortise walls.  After quite a bit of time and effort, the buds start to emerge lighter and a cease fire is called. I’ll continue the cleaning later with a kosher salt and alcohol soak to work through the night to further clean and freshen the internals of the Kaywoodie stummel.Turning now to the rim, the next step is to fill the divot, or perhaps, the crater on the rim.  I go along with the ‘rough’ motif of this Kaywoodie Natural Burl.  The rim is rough and the only repair I plan for the stummel is this divot.  The damage of Paw’s knocking will remain – it simply adds to the rough rustic look and will be a remembrance of Paw when it is put into service by the family.I place a small mound of briar dust on the mixing palette that I’ve covered with scotch tape for ease of cleaning.  Next to the briar dust a small amount of BCI Extra Thick CA glue is puddled.Using the toothpick, briar dust is pulled into the glue and mixed as it is added.  As more is added, the resulting briar dust putty thickens.  When it reaches the thickness of molasses, with the toothpick the putty is troweled to fill the rim divot.With the briar putty applied, I place the stummel aside for several hours for the putty to cure.Turning now to the stem, the upper bit is in good shape after the ‘pre-sanding’ that was done before putting the stem into the Deoxidizer.  The lower bit, pictured below, has some compressions and a button bite compression that need addressing.I start by using the heating method with a Bic lighter.  Using the flame of a Bic lighter, I paint the bit using a back and forth motion heating the vulcanite.  As the vulcanite heats, it also expands to regain the disposition of the stem before the compressions were made by Paw.  The picture below is after the heating and the process has helped the bit compressions so that only sanding should be needed to remove the damage.  However, the button is still in need of additional steps.To fill the button lip bite, after wiping the area with alcohol to clean it, I spot drop black CA glue on the compression and put the stem aside for the patch to cure.The patch on the rim is now ready for filing.  I use both the flat and half-rounded needle files to remove the excess putty and to shape the internal curve of the rim. I put a stop on sanding and further cleaning the rim because the hour is late, and through the night I want to use a kosher salt and alcohol soak to advance the cleaning of the internals of the stummel.  I first fashion a cotton ball into a ‘wick’ by pulling and twisting it.  It is then inserted down the mortise into the airway with the help of a stiff wire. The wick helps to draw out the latent residue of tars and oils.The bowl is then filled with kosher salt, which leaves no aftertaste as with regular iodized salt.  After placing it in the egg carton to keep it stable, I then fill the chamber with isopropyl 95% until it surfaces over the salt. After a few minutes, as the alcohol is drawn into the stummel, the alcohol is topped off and it is set aside to work through the night. The next morning, the salt and wick are slightly soiled which hopefully means that the internals are already clean from earlier. After dumping the expended salt and wiping the bowl with a paper towel, I blow through the mortise to make sure all the salt crystals have been dislodged. To make sure that the internals are clean, and nothing has been left behind after the soak, I use only one pipe cleaner and cotton bud as confirmation of the cleaning. Moving on.I return now to the rim.  I plan to apply a fresh color to the stummel and the only preparation for applying the new stain to the stummel is on the rim.  I plan to leave it in the rough motif of the Natural Burl line, but I want the rim cleaned.  I lightly sand the internal rim edge as well as lightly around the rough external rim edge as it transitions into the Burl landscape.  I’m looking for ‘rough’ and ‘rustic’ but ‘fresh’ to give this unique Kaywoodie a fresh start.I follow the 240 paper with 600 grade paper with the same approach – keep the rustic but refresh the rim.Before moving to the next step, I notice that the nickel shank facing after the cleaning had not been spruced up.  A quick revolution of 000 steel wool takes care of this.  This is the only bling this Kaywoodie has and I’m making the most of it!As I think about applying a fresh color to Paw’s Kaywoodie, I have only one picture of another Natural Burl online and it is no help in hinting at the original 2-toned brown coloring Kaywoodie used.  The best clue I have is on Paw’s pipe. The smooth briar panel on the underside of the shank holding the nomenclature holds a clue.  To guard the stamping on the panel I’ve not sanded it – only cleaned with the rest of the stummel.  I’m guessing that the coloring of the panel leans toward a light brown.  I’m thinking that Kaywoodie’s approach was straightforward with this less expensive line of pipes.  Yet, the craggy surface now is so dry and bare, showing pristine briar, that applying even a light brown dye will probably darken considerably as the thirsty briar drinks it in.Looking at the craggy landscape in the picture above brings the next question in my mind about applying a new finish.  My normal way of staining with aniline dye is to flame it to combust the alcohol which encourages a deeper embrace of the dye by the briar grain.  My normal follow-up to this is then to apply compounds to remove the crusting the combustion creates and to further shine the surface with the fine abrasives of Tripoli and Blue Diamond compounds.  The roughness of this stummel causes me to question my normal approach.  My concern is that if compounds are used on this craggy rough surface, I will forever be trying to clean out the compound residue lodged in the rough surface!  I think I can utilize buffing wheels on the Dremel without too much problem, but without compounds.  I decide in the end to apply a dye wash instead of flaming the dye because of this concern.

After wiping the stummel down with a cloth and alcohol to clean it the best I could, the stummel is heated with the hot air gun to open the briar.Then, with the use of a folded pipe cleaner, the surface is painted with Fiebing’s Light Brown Leather Dye.  I make sure the dye is getting into all the cracks, crevasses, nooks and crannies.  The rim also receives the dye.After the dye is applied, the stummel is set aside to rest for several hours before continuing with the next steps of finishing.  This ‘rest’ helps the new dye to stabilize in the briar.Turning back to the stem, the patch applied to the lower button lip is cured and I use a flat needle file to remove the excess patch material and to shape and refresh the button lip.  I also file the bit area to remove any residual tooth compression.Flipping over to the upper bit, I file residual compressions as well as refresh the button lip.  Refreshing the button lip is helpful to allow a better ‘hang’ grip of the pipe without biting and clenching, and extreme chewing!Continuing now with 240 grade sanding paper on the upper side, the file scratches are removed, and the button is smoothed further.  The same is done on the lower bit and to further blend the button patch.   I expand the 240 sanding to the entire stem to make sure that residual oxidation has been addressed. Following the 240 sanding, I wet sand the entire stem with 600 grade paper and follow with applying 000 steel wool. The nickel stinger is also a benefactor of the steel wool polishing again.Moving on, the full regimen of 9 micromesh pads are applied by first wet sanding with pads 1500 to 2400 and dry sanding with pads 3200 to 4000 and 6000 to 12000.  Between each set of 3 pads, Obsidian Oil is applied to condition the vulcanite and to guard against oxidation. I love the glossy pop of newly micromeshed vulcanite! I had observed earlier that the Kaywoodie screw in stem was over clocked a few degrees.  This happens over time with tightening and loosening.To correct this problem and to bring the stem back to an accurate orientation, a Bic lighter is used to heat the nickel 4-hole stinger.  Since the stinger is gripped by the vulcanite of the stem, the goal is to warm the stinger so that the vulcanite gripping the stinger heats and loosens its grip allowing the stinger to rotate. After heating the stinger, I quickly re-screw the stem into the threaded shank facing and when it tightens to the orientation pictured above, I continue to apply clockwise pressure and the heated vulcanite releases its grip and it allows me to turn the stem one full revolution to line it up correctly.  I had to heat the stinger twice as the first try did not loosen the grip.  After lining the stem orientation correctly, I leave the stem in place and as the vulcanite cools, the grip on the stinger is re-engaged holding the stem again in the proper orientation.Time to address the dyed stummel.  It has been resting for several hours to help stabilize the dye in the briar.I use a cotton pad wetted with alcohol to wipe down the dyed stummel.  I do this to remove excesses of dye on the surface and to lighten and blend the new dye.Next, I mount a cotton cloth buffing wheel onto the Dremel and simply buff the stummel.  I do not use any compounds so that the compound dust does not fowl up the surface getting lodged in the plethora of hiding places on the Burl surface causing me to have to clean it!  The Dremel is a great tool for getting into the nooks and crannies of the Natural Burl landscape. I’m able to rotate and move up and down ridges and to reach into crevasses.  The newly dyed surface responds well to the buffing wheel.  The coloring of the wheel shows that new dye is leeching out of the surface.  The more I’m able to remove now, less likely to come off on hands later!Next, I use the 1500 grade micromesh pad and lightly sand over the Burl surface.  The aim is to ‘scalp’ the peaks of the mountain tops on the craggy surface to lighten them.  The lightening of the peaks creates more contrast and depth definition to the landscape.  I follow the scalp sanding by running the Dremel’s buffing wheel over the surface again.  This, I believe, achieves the ‘2-toned’ look of Kaywoodie’s design for the ‘Natural Burl’ line.In the homestretch – next, I mount another buffing wheel onto the Dremel setting the speed at about 40% full power.  After reuniting the Kaywoodie’s stem and stummel, Blue Diamond compound is applied to the rim and smooth briar surface on the underside and end of the shank.  The compound is also applied to the stem.  After applying the Blue Diamond compound, the pipe is buffed with a felt cloth to remove the compound dust from the areas on the stummel and from the stem.  Next, another cotton cloth buffing wheel is mounted and set at the same speed and carnauba wax is applied to the entire pipe.  I’m careful to apply with a very light touch of wax to the Natural Burl surface not to allow wax to build up in the crannies.  Wax is applied to both stummel and stem and then the pipe receives a rigorous hand buffing with a microfiber cloth to raise the shine.

Wow!  I’m very pleased with how this Kaywoodie Natural Burl Apple shaped up.  The brown craggy finish is flecked with shade differences that give it a depth and warmth – a rustic knobby feel.  I always enjoy the contrast nuances that the coalescing of rough and smooth briar creates. The smooth briar underside and shank ring alongside of the Burl texture is nice.  I’m amazed that this pipe occupied the lower shelf on Kaywoodie’s offerings back in the day when Sam chose it and added it to his rotation of pipes.  The TLC it has received has enhanced the briar presentation with this unique Natural Burl finish. I appreciate the collaborative help from Bill Feurbach who even as the president of the S.M. Frank Co., was not hindered from helping with the recommissioning of this one vintage Kaywoodie – a pipe man at heart.  Thanks, Bill!  I like the Natural Burl a lot and I trust that Joe likes it too.  Paw’s Kaywoodie Natural Burl 33 – Large Apple, that was put into production in the mid-50s/early 60s, is a venerable 60-year-old(!), and is starting a new lifetime in the loving care and stewardship of Paw’s family.  Adding frosting to the Kaywoodie cake, Joe’s commissioning of this restoration of Paw’s Natural Burl also benefits the Daughters of Bulgaria – women and girls who have been trafficked and sexually exploited.  Thanks for joining me!

Kaywoodie Fine Line


Blog by Aaron Henson

I was in the neighborhood of our second-hand stores a couple of months back so I thought I would stop into one that typically has estate pipes. While browsing the shelves I found three Kaywoodie pipes together in an old coffee cup. None of them were particularly eye-catching: a straight bulldog, a medium pot and this large apple – Fine Line carved. I didn’t have any Kaywoodie pipes in my collection and priced as they were ($11 for the three), I could not pass them up. Besides, I needed some more restoration practice.

The first of the three that I took on was the Fine Line. It reminded me of the Dr. Grabow Wire Carved pipes I had seen, just not as rustic – if you like that sort of thing.Aaron1 The flat bottom of the shank was stamped with: “Kaywoodie” over “Fine Line ®” and the left hand side of the stem had the black clover in a white dot.Aaron2 The stem was in great shape. There was some mild oxidation, a little build up of crud and just a minor amount of chatter around the button. The stinger was also in good shape with the expected build up of tars. The stem was over clocked by about 10 degrees and after a little research I came to understand that this is a common problem with Kaywoodie pipes. Fortunately, it is an easy problem to correct.Aaron3 It looked like someone had been rolling out paint on a wall or ceiling near the pipe because there were small droplets of white paint all over the stem and stummel (perhaps they were smoking while painting?). The stummel was dirty but there was no damage that I could see. A thick cake lined the bowl and the lines in the rim where full of char and other gunk, but otherwise it too was in good condition.Aaron4 I began by soaking the stem in an alcohol bath to loosen the tars inside and to help lift the crud and paint from the surface. While the stem soaked, I went to work on the stummel with Murphy’s Wood Soap and a soft bristled tooth brush. The dirt and grime came off easily as did most of the paint droplets. I had to employ a soft wood tooth pick to remove more stubborn droplets that were caught in the grooves of the carving.

After rinsing the stummel with fresh water – being careful to keep the water out of the bowl and shank – I started reaming out the bowl. Not having a reamer, I use a ½” dowel with a rounded tip wrapped in 40 grit sand paper. This method has worked reasonable well for me on several pipes, even with thick caking.Aaron5

Aaron6 Next, I cleaned the inside of the shank with cotton swaps and isopropyl alcohol. This was a laborious process. The metal sleeve that receives the stinger prevents good access to the inside of the shank. I wanted to preserve as much of the original stain as I could so I choose not to soak the whole stummel in an alcohol bath. So, in an effort to loosen the tar build up, I dripped alcohol into the shank between bouts of swabbing. Eventually the swabs started coming out clean.

The char around the rim of the bowl was not cleaning up well. I had hoped that I could keep the carved lines on the rim but I made the decision to top the bowl and finish the pipe with a smooth clean rim. I freshened up the stain with a coat of light brown Feibing’s leather stain and flamed the stain to set the color.

Returning to the stem, I found that the alcohol bath succeed in loosening the tars inside and few passes with pipe cleaners got it clean. I was able to pass a cleaner from the hole in the stinger and out through the button without and troubles. I lightly hit the outside of the stem with 220 grit sand paper to remove the remaining foreign material and then cleaned the stinger with 0000 steel wool. I addressed the minor tooth marks by lightly flaming them with a lighter to raise the vulcanite then finished them off with the 220 grit paper.

Everything was going quite smoothly up to this point. Little did I know that I was about to get a refresher course in chemistry. Wanting to clean up the oxidation I dropped the stem into a bath of 50/50 bleach and water. Fortunately, I had cause to check on the stem in about 30 minutes and I realized my error. Chlorine (Cl) and aluminum (Al) react to form aluminum chloride (AlCl3). I found a large growth of aluminum chloride crystals on the stinger.

I wish I had had the forethought to document the mistake with a picture or two. But in truth, I was so caught up in cleaning the bleach off the stem and removing the crystals that photos were very far from my mind. All in all there was no real harm done. The aluminum chloride cleaned up easily but left the stinger rough to the touch and it needed to be polished again. Heating up the stinger with a butane lighter melted any of the aluminum chloride that built up inside and it drained out of the stinger holes.

While I had the butane lighter out heating up the stinger, I thought I would take care of the over clocked stem. I wrapped the stem with some cloth tape and made a couple of reference marks to indicate which direction and how much to twist the stinger. I waited until the heat loosened the glue between the stinger and stem and then twisted the stinger with a pair of soft jawed pliers to align it with the stummel.Aaron7 Before I finished the stem and polished everything I thought I would run the pipe through the alcohol retort. I was not confident that I had thoroughly cleaned the inside of the shank and after the aluminum chloride incident, I thought that some hot alcohol vapor though the stinger would hurt. I use 95% isopropyl alcohol for my initial cleaning and soaking but I prefer using Everclear for final rinsing and retort. In my limited experience it seems that the Everclear leaves fewer ghosts in the finished pipe.

The remainder of the restoration was uneventful. I followed the typically stem polishing practices, wet sanding the stem with 400-4000 grit paper, stopping every few sets of paper to lightly coated the stem with mineral oil. I dry polished with 6000 and 12000 grit paper then took the pipe to the buffing wheel, applying red diamond compound, working the buffer with the carved lines of the pipe. I finished with 3 coats of carnauba wax buffing between each coat. I had to take a tooth pick to some of the wax that built up in the lines but the final product was a vast improvement from where I had started.Aaron8

Aaron9

Aaron10

Aaron11

Got Today’s Apple! Restoring an Imported Briar Apple


Yet another gift pipe bowl that I had in my box was a no name Imported Briar Apple. It had a threaded tenon and I just “happened” to have a stem that fit it perfectly in my can of stems. (One day I need to get the stems sorted and organized more. Currently I have a can of round stems and a can of everything else stems. This necessitates emptying the entire can on the work table each time I need them and sorting through to find what I need.) The stem was a used Grabow stem that was missing the stinger but the tenon was intact. It was oxidized and dirty but very functional. There were no tooth marks or bite marks on the surface. When twisted onto the pipe it was slightly overturned. IMG_2015 IMG_2016 The bowl had an interesting finish in that the briar was smooth around the rounded rim and down the bowl. Then there were grooves or what I call worm trails cut vertically down the sides of the bowl and horizontally on the shank. The all culminated in rusticated pattern on the bottom of the bowl. The finish was shot and the worm trails had all nature of detritus packed into them. The grooves were full in some places. The stain was present but worn. If there had ever been a varnish coat it too was gone. The aluminum mortise insert was well oxidized. The bowl had a thick buildup of cake and loose pieces of tobacco handing on the sides. The rim was dirty but did not have any damage. IMG_2017 IMG_2018 I heated the tenon with a Bic lighter and straightened the overclocked stem. I reamed the bowl with a PipNet pipe reamer and then scrubbed the bowl down with Murphy’s Oil Soap and a tooth brush. I rinsed it with lukewarm water and dried it off. I scrubbed the buildup on the rim with a cotton pad and saliva and then used isopropyl alcohol on a cotton pad until I had broken through the tough outer coat. I used a medium grit sanding sponge to sand off the rest of the buildup and then wiped it down again with alcohol. IMG_2019 IMG_2020 I wiped down the exterior of the bowl and shank with acetone on cotton pads to remove the remaining finish. IMG_2022 I sanded the stem with 220 grit sandpaper to remove the oxidation and the calcification buildup at the button. I worked in the creases with a sanding stick. Once I had cut through the oxidation I sanded the stem with a medium and a fine grit sanding sponge.IMG_2026 IMG_2027 IMG_2028 IMG_2029 Once I had removed the finish and did the initial sanding on the stem I cleaned out the shank and stem with cotton swabs, pipe cleaners and alcohol until they were clean. IMG_2024 IMG_2025 I sanded the aluminum mortise insert with medium and fine grit sanding pads. I stained the bowl with a Danish Oil Walnut stain. IMG_2030 IMG_2031 IMG_2032 After I had stained the pipe I put a cork in the bowl and set it aside in an old candle stick holder to dry while I worked on the stem. IMG_2033 IMG_2034 IMG_2035 IMG_2036 I sanded the stem with my usual array of micromesh sanding pads – wet sanding with 1500-2400 grit pads and dry sanding with 3200-12,000 grit pads. I rubbed it down with Obsidian Oil between each set of three sanding pads and gave it a final coat of the oil after sanding with the 12,000 grit pad. I took it to the buffer and buffed it with White Diamond. IMG_2037 IMG_2038 IMG_2040 When the stain on the bowl had dried I put the stem on the pipe and then gave the entire pipe another buff with the White Diamond and then gave it multiple coats of carnauba wax. I finished by buffing it with a soft flannel buff to raise the shine on the bowl and stem. The finished pipe is shown below. The stem actually looks like it is the original stem and the pipe looks as good as new. It is ready for a long life in the hands of the next pipeman who takes it home to join his/her rack. IMG_2041 IMG_2042 IMG_2046 IMG_2048

Restoring a Kaywoodie Drinkless Volcano


I was gifted this Kaywoodie Drinkless Volcano with a three hole stinger by Andrew, a reader of the blog. He wrote me an email about the pipe as follows:

Steve, I have this Kaywoodie Volcano shape with a 3 hole stinger, so probably 70’s or newer. It was burned out when I got it. I ended up slopping some fireplace cement in the bottom of it trying to fix it but it didn’t come out well as I was trying to form it with a pipe tool and it is rough. The stem is over turned as well. I figure this might “challenge” you as far as trying to bring it back to life somehow. Is this is something you might be interested in trying to some how to fix? — Andrew

I wrote back that would gladly see what I could do with it so he sent it out to me to work on. When it arrived I saw that he had begun the work on it already and had reamed and cleaned the bowl. He had mentioned that when he bought it there was a small burn out area on the bottom of the bowl. When I got it the inside of the bowl was actually quite alright. His repair looked quite good. A little cleanup of the bowl would bring things in order. The fireplace cement needed to be cleaned off the walls and rounded a bit in the bottom of the bowl but it was not bad.

Besides the obvious damage to the bowl there was some other damage to the pipe as well. The outer edge of the rim was damaged on the front and the inner edge was slightly out of round. The external bottom of the bowl had a half-inch long crack that had been cleaned out and repaired but there was still a slight groove in the crack. The sides of the crack had been joined and repaired so what remained was cosmetic. The stem was overturned and slightly out of round in comparison to the round metal insert in the shank. The stem had a partial stamp of the KW cloverleaf but was in bad shape in terms of appearance.
IMG_4899

IMG_4900

IMG_4901

IMG_4903

I set up my topping board and topped the bowl of the pipe to remove the damaged portion of the inner and outer edge of the rim. I sanded the top of the bowl, pressing it against the board and turning it in a clockwise direction until the damaged briar was removed. I used a PipNet reamer with a cutting head that fit the bowl diameter and turned it against the cement until it was removed from the sides of the bowl and the bottom of the bowl had a slight indentation.
IMG_4904

IMG_4905

IMG_4906

I wiped down the bowl with acetone and cotton pads to remove the remaining finish on the bowl and to clean up the partial repair to the bottom crack. I continued to wipe it down until the briar on the bowl was almost the same colouration as the sanded rim of the pipe.
IMG_4907

IMG_4908

IMG_4909

I scratched out the surface of the crack with a dental pick and packed in some briar dust that I had left from sanding the rim of the pipe. I tamped it and then dripped some superglue into the briar dust until it formed a bubble over the crack. I always overfill the crevices and fills to make sure that when they dry they do not shrink and make a second fill necessary. When the glue had dried I sanded it with 220 grit sandpaper and also with a medium and fine grit sanding sponge to smooth out the bubble and blend it into the surface of the bowl.
IMG_4910

IMG_4915

IMG_4916

On the bottom of the stem there were also two very deep tooth indentations that would not lift when heated with a heat gun. I sanded the area around the dents and dripped clear superglue into the dents. I chose clear superglue as the stem did not appear to be vulcanite. When I sanded it the dust was grey rather than brown. I have found that the clear glue blends very well on this material. When it dries and is sanded it blends in quite well to the surrounding stem material.
IMG_4911

IMG_4913

IMG_4917

I wiped down the bowl again with acetone and sanded the whole bowl with a medium and fine grit sanding sponge.
IMG_4918

IMG_4919

IMG_4920

IMG_4921

IMG_4922

The overturn on the stem is something that is easily corrected. I heated the stinger with a heat gun until the glue holding it in place was softer and then turned it in the metal inserted mortise until it lined up correctly with the bowl. I was almost a quarter turn to the right so I needed to turn it all the way around. Once it was aligned I laid it aside to cool. The final photo gives a clear view of the inside of the bowl. The repaired bowl bottom with the minor adjustments I had made with the PipNet reamer are visible.
IMG_4923

IMG_4924

IMG_4925

IMG_4926

IMG_4927

IMG_4928

With the stem aligned it was evident that the diameter of the stem was different than that of the shank. In looking at the stem from the stinger end I could see that the left side was slightly larger than the right side. There was an overhang passed the metal insert in the shank. The next photos show that the left side would need to be sanded to fit properly.
IMG_4929

IMG_4930

I sanded the stem and shank with 220 grit sandpaper folded and was careful to not sand the stamping on the left side of the shank. I wanted the transition to be perfectly smooth to the touch. I sanded it with medium and fine grit sandpaper to smooth out the scratches left behind by the sandpaper.
IMG_4932

IMG_4933

IMG_4934

IMG_4935

IMG_4936

IMG_4937

I stained the bowl with an aniline oxblood stain. I applied it and flamed it and reapplied it and flamed it again until I had a good even coverage across the bowl. I hand buffed the finish with a soft cloth.
IMG_4938

IMG_4939

IMG_4940

IMG_4941

IMG_4942

I sanded the stem with medium and fine grit sanding sponges and then followed up with my usual array of micromesh sanding pads – wet sanding with 1500-2400 grit pads and dry sanding with 3200-13,000 grit pads.
IMG_4943

IMG_4944

IMG_4945

I rubbed the stem down with Obsidian Oil and then sanded it a final time with the 4000-13,000 grit pads. I lightly buffed the stem with White Diamond. I screwed the stem back into the shank and then buffed the entirety with White Diamond and then gave the pipe multiple coats of carnauba wax. I buffed it with a clean flannel buff for the final shine and protection. The finished pipe is pictured below and is ready for more years of service. The bowl repair done by Andrew provides a solid base in the bowl and the external repair and stem repair makes the pipe cosmetically more pleasing. Thanks Andrew for a good challenge. The pipe is ready for its inaugural smoke. I am sure it will last far longer than I do!
IMG_4946

IMG_4947

IMG_4948

IMG_4949

IMG_4950

IMG_4951

It appeared to be a hopeless case, but was it really?


Blog by Steve Laug

This pipe was posted on Smokers Forums as one that was in rough shape. http://www.smokersforums.co.uk/showthread.php?273-Whew! As soon as I saw it I thought it would be fun to take on as a challenge and see what could be made of it. It was truly in very rough shape. So I put in a low bid on EBay and it was mine. Only the wait remained before I would see what I got myself into.

Worchester Dog

When it arrived I opened the box and took it out to see what I had to deal with on it. The stem was stuck in the shank and it was off center. I made a guess that it was a screw in stem – metal tenon and some kind of condenser. The finish was absolutely ruined. There was an opaque film all over the bowl and shank of varnish that had gone bad. There were crackles in the finish. The shank was crack badly and the shank was no longer square – the crack had expanded away from the angles of the pipe. The rim was invisible and the bowl was caked with a thick cake but upon examination it was full of cracks and crevices rather than a hard cake of carbon. Looking at what I could see of the inner edge of the rim it seemed like it was not damaged – at least not by reaming! There were several burn spots on the outside of the bowl around the rim and left side of the bowl from laying the pipe in an ash tray with a cigarette. It would indeed be a challenge and one that I wondered seriously about for a few moments.

I immediately put it in the freezer for a half an hour to see if I could loosen the stem from the shank. Once I took it out I was able to twist off the stem and remove it from the shank. I took it to my work table and examined it to see what I had to work with. I was quite happy to see that the shank had a metal tube inside that was threaded to receive the tenon. The tube extended into the shank about an inch. This would make a repair on the crack quite simple and not require that I band the pipe. The stem was overturned and the tenon would need to be heated until it was loose and then realigned on the shank. The insert in the shank extended further than the end of the shank and kept the stem from seating correctly against the shank. I also noted that the stamping did not read Worchester as the seller had listed it but that it read Dorchester and underneath that Algerian Briar. There was also damage on the shank near the bowl on the right side where the edge was pretty chewed up by what looked like a pair of pliers used to try and remove the stem from the shank. The slot in the button was clogged with oils and tars so I was assuming that insides were the same way. The stem had white spots on it that at first appeared to be paint but were actually pits in the stem. It appeared to be made of something other than vulcanite. I was not sure what it was but it was not rubber. All of the issues with this pipe, and they were many, but it was very repairable.

IMG_1583

IMG_1584

IMG_1585

IMG_1586

I reamed the bowl with a PipNet reamer using the smallest cutting head first and gradually working up to the diameter of the bowl. I wanted to ream the pipe back to bare briar to give a fresh start and be able to see if there were any burn out issues in the bowl. There were none.

IMG_1588

IMG_1589

IMG_1590

With the bowl reamed and the cake gone it was time to clean the exterior of the bowl and rim. I wiped it down with acetone to remove the finish and break up the crackled varnish that is visible in the above photos. I also lightly topped the bowl with a sanding block to remove the crumbly build up on the rim. I was guessing from my examination that the rim itself was not damaged so a light topping to remove the buildup would be all I would need to do. The next series of photos show the process of wiping down the bowl, topping it and wiping it down a second time after topping. While most of the varnish finish was gone, not all of it would come off with the acetone wash. So in the last picture below you can see the crackly finish on the shank and at the bowl junction.

IMG_1591

IMG_1596

IMG_1595

IMG_1594

IMG_1593

IMG_1592

I decided to drop the bowl in my alcohol bath to soak while I worked on cleaning up the stem. I use an alcohol bath to soak the pipe bowl and get underneath the varnish coat. Once it comes out of the bath it is relatively simple to wipe off the remaining finish. While it soaked I scrubbed the stem with Everclear and a soft bristle tooth brush. I scrubbed off the surface grit and grim and also worked on the button and slot to loosen the grit. I scrubbed the condenser as well with the Everclear and also used 0000 steel wool to polish it. I cleaned out the inside of the stem with thick and bristle pipe cleaners. Once it was clean it was time to take the bowl out of the bath.

IMG_1600

IMG_1601

I removed the pipe from the bath and scrubbed it with the tooth brush. I worked on the grooves in the bowl and also at the shank bowl junction. I dried it off and prepared it for work on the cracked shank. The crackled finish was finally gone and the pipe was clean.

IMG_1602

IMG_1603

IMG_1604

I scrubbed the area around the crack in the shank and picked out dust and particles with a dental pick. I dripped clear superglue into the crack and packed in briar dust with a dental pick. I clamped the cracked area and set it aside to cure for about a half hour.

IMG_1613

Once I removed the clamp the crack was sealed and the shank was returned to its original shape. I sanded the shank area to remove the excess superglue and the briar dust that was on the surface. The photo below gives a clear picture of the end view of the repaired shank and how it was squared up.

IMG_1614

The next step in the repair process was correcting the overturned stem. I removed the stem and sanded the metal end of the mortise insert flush with the shank end. Then I heated the tenon over a heat gun and when it was warm screwed it on to the shank and turned it until it lined up well with the shank.

IMG_1615

IMG_1616

IMG_1617

With the stem and shank aligned I sanded the shank area to clean up the damage to the right side where the marks were from someone’s pliers. I also sanded the stem shank junction and the repaired crack with a sanding block until the sides were all smooth in their transition from stem to shank. I wiped it down with an acetone wet cotton pad to remove the sanding dust and prepare it for staining. I used a black permanent marker to cover the fills in the bowl. I have found that when I follow the grain pattern with the marker before restaining the stain works well to mask the fills.

IMG_1618

IMG_1619

IMG_1620

IMG_1621

I chose to do a contrasting stain on this pipe, a black understain and an oxblood/mahogany top stain. I heated the briar and then applied a black aniline stain to the pipe. I applied it with a cotton swab and flamed it with a lighter. I reapplied the stain and also flamed it again to set the stain in the briar.

IMG_1622

IMG_1623

IMG_1624

I wiped the bowl down with acetone to lighten the black stain and make the grain stand out on the pipe. I also sanded it with a fine grit sanding sponge.

IMG_1625

IMG_1626

IMG_1627

From the above photos you can see the coverage of the black stain and the way in which the black permanent marker blends into the grain of the pipe. I wiped the pipe down repeatedly until it was the colour I wanted before I put on the next coat of stain. For the top coat I chose to use an oxblood or mahogany coloured aniline paste stain. I rubbed it on with cotton swabs and wiped it off with a soft cloth.

IMG_1628

IMG_1629

IMG_1630

IMG_1631

IMG_1632

IMG_1634

At this point I wiped the bowl down a second time with acetone wetted cotton pads and lightened the reddish finish. The fills are slightly visible but once the pipe is buffed and polished they will be blended in better. I buffed the bowl with White Diamond to remove more of the excess stain and help the contrasting under stain to show. I sanded the stem with a fine grit sanding pad, and then with micromesh sanding pads from 1500-12,000 grit until it shined. I then gave it a rub down with Obsidian Oil and finally with multiple coats of carnauba wax. Here is the finished pipe. It is ready to smoke and will in all likelihood last longer than I will. The lightweight aged Algerian briar evidently made this a great smoking pipe for the previous owner and it will remain that I am sure for the owners to come.

IMG_1636

IMG_1637

IMG_1638

IMG_1639

A Nice, Older Henley Billiard Restored


This old Henley Billiard was made by Masta Pipe Company of England and came to me in pretty clean condition. It is older and the Bakelite stem has an orifice button/airway. You can see from the picture below that the bowl was a little out of round and a small burn on the rim near the shank. It also had an overturned bone tenon. The stem had several gouges and deep scratches. Other than the finish was in great shape and in need of a polish and buff.

I heated the bone tenon as I have described in other blog articles by heating it in a bowl of boiling water. I heated it and screwed it back into the shank and tried to twist it. I repeated the process until it freely turned. I lined it up straight and then ran cold tap water over it to cool it and set the glue again. I cleaned up the dents and gouges with heat to raise them as far as I could and then sanded and filled them with a small amount of clear super glue. Then I sanded them with 400 and 600 grit wet dry sandpaper until they were smooth and polished the stem using micromesh pads up to 4000grit.

I cleaned and reamed the bowl and cleaned the shank with cotton swabs, pipe cleaners and alcohol. I used a folded piece of sand paper to even out the inner edge of the bowl and bring it back into round. I did this carefully so as not to scratch the finish. When I had it back to round it was time to polish it. I put the stem back on the pipe and the entirety was taken to the buffer for a final buff with White Diamond. This one was in relatively good shape other than the stem.

ImageImage

Here is the finished pipe, ready to load and smoke.

ImageImageImage

Correcting an overturn on screw mount stem


Blog by Steve Laug

In years past I remember posting on a variety of pipe forums I have been a part of regarding correcting an overturned stem with a screw mount. I have had old Kaywoodies and others that have this kind of stem and inevitably they were overturned so that the stem did not line up. It was semi tolerable on round stems but even then it was bothersome for me. The worst was on a bulldog with a diamond shank and stem. To not have the diamonds line up just bugged me. I knew there had to be a fix for this but I had no idea what it could be. I used various paper washers to help with the process. I used cardboard and even thin leather. All of these were less than satisfactory. Besides I am a bit anal about that kind of thing and I want it as it should be not half way there.

I don’t remember who posted the help for me or if I picked it up in talking with folks but I have been using this method for a long time now. I have seen others ask on various forums for a method for correcting the problem and have often typed out a response for them. Today I had a few moments to spare so I thought I would write up the procedure and share it with you.

My procedure is actually quite simple. I have a small microwavable bowl that I fill with enough water to cover the metal tenon and about a quarter inch of the stem when it is placed in the bowl. My bowl has a 2 ½ inch diameter so I can lay the stem in it at an angle with the button over the edge. Care should be taken as the water can and will bring out oxidation on the stem and it can be a pain to remove. I try to not allow the water to climb too high on the stem to minimize the work. I also place the stem in with the bend down on a bent stem. Vulcanite has memory and will straighten with heat so I have found that placing the stem with the outer bend in the bowl aids in keeping the bend.

Once the stem is placed in the water I place the bowl in the microwave and set it on high heat for 2 minutes. This generally gets the water boiling or just under boiling. If you worry about the metal causing trouble with your microwave you can heat the water without the stem and stick the stinger/screw mount end in the boiling water once it is removed. Once it is hot I let it stand in the water for another 2 minutes and then reinsert in the shank of the pipe. The glue should be softened enough to turn the stem until it is in the correct position. Once I get it straight I set it aside and let it cool and the fix is finished.

I have used one other method with good success as well and that is a heat gun as the source of the heat. For me it is a bit more labour intensive as you have to keep the stem moving so as not to burn the vulcanite. It does work well though and you do not have to fight the oxidation. Once it is heated use the same procedure as above to straighten the stem and fit. Let cool and you have it finished.

If the stem does not turn easily you have not heated it enough. Give it some more heat with the gun or the water until it is easily turned on the shank. I have used this method on all pipes with the screw mount tenon/stem and had good success.

Because it worked so well with the metal screw mounts I decided to give it a try with a bone screw tenon on a couple of older meerschaum pipes and an old deco Bakelite pipe. The pipes I chose to try the method on were pipes of little value so that if it did not work it would not be a loss. I put a cup of water in the microwave and stood the stem in it tenon down and set the timer for two minutes (time to boil a cuppa in my microwave). I took it out at a minute and gave it a try and it was better. I put it back in the water and let the two minutes finish. I don’t know if the tenon loosened or if it swelled but it is certainly fixed.

On these old timers my two concerns with the microwave were integral damage to the bone tenon from the heat moving from the inside out and secondly to the Bakelite stem. I did not want it to become brittle from the same process. I tried to minimize that by putting it in the water. I have learned on the metal ones to insert the stem and tenon while the water heated in the microwave for maximum effectiveness. I decided to do that as well. I have been smoking these pipes now for several months and taking them apart to clean them without any problems. It seems that they have not been compromised.

I have yet to try it on amber as I have not had an amber stem to sacrifice. I now know that it works on Lucite, vulcanite, Bakelite and on older bone tenons. I continue to experiment with these older pipes to learn what I can in terms of restoration. If you have suggestions or ways in which you have worked with this issue let me know.