Blog by Kenneth Lieblich
Today, I thought I would try something a bit different. This is the first installment of what I am arbitrarily calling, Pipe Incident Report. My idea is to provide a brief write-up – focusing on a particular pipe-related problem and/or solution, rather than an entire restoration story. These reports will be intermittent and, hopefully, instructive. Please let me know what you think.
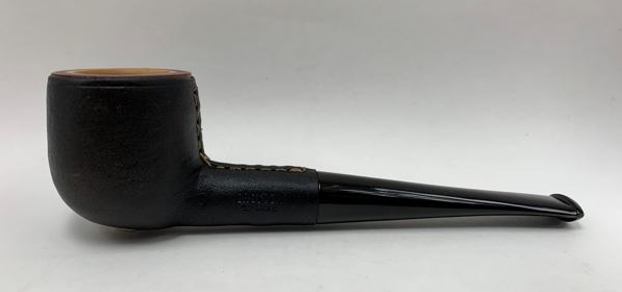
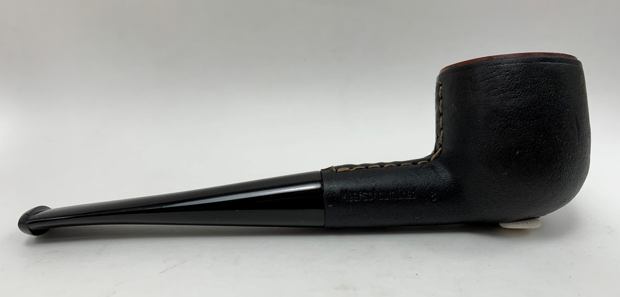
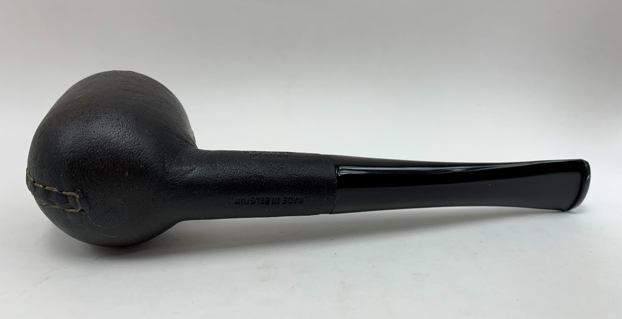
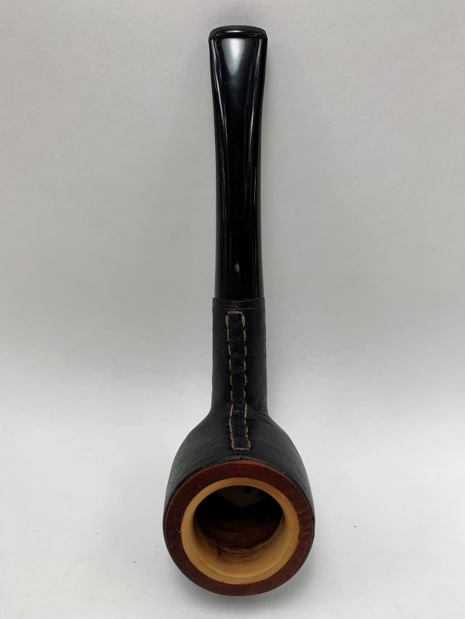
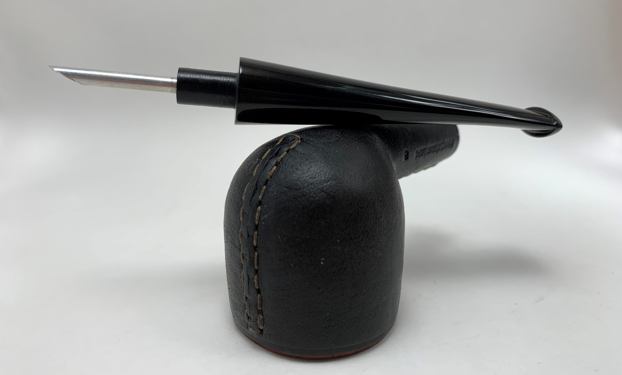
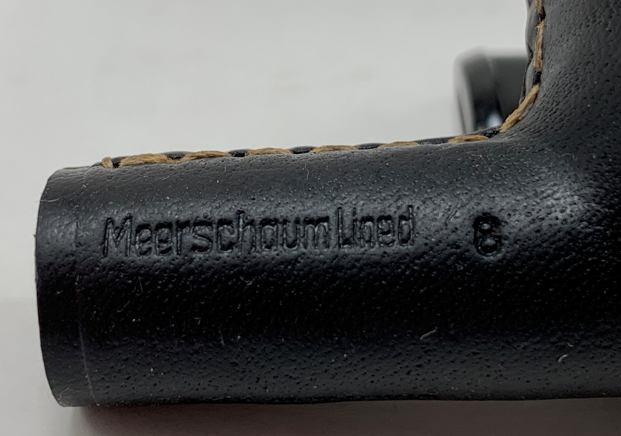
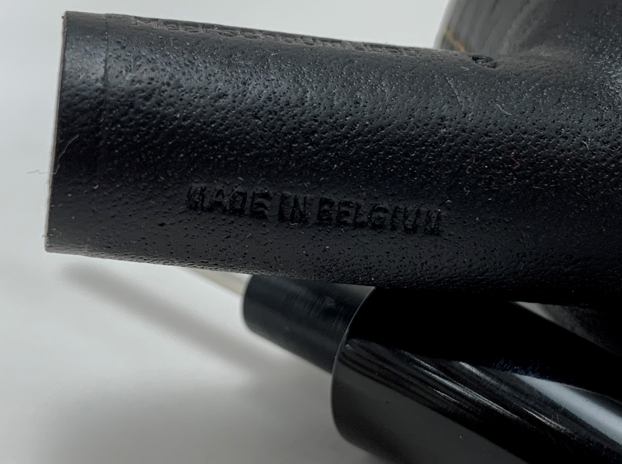
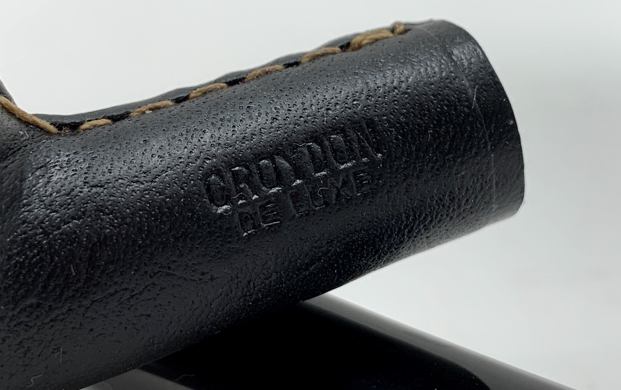
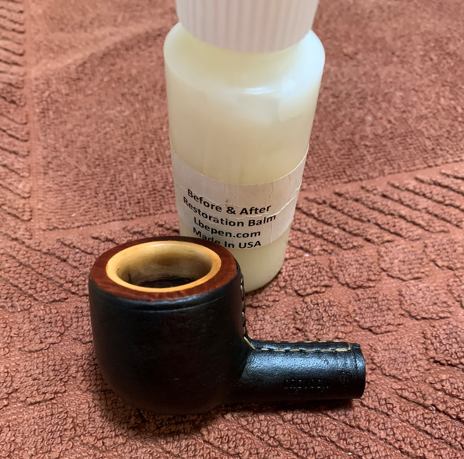
The pipe in question today is a leather-wrapped, meerschaum lined, pot billiard by Croydon. The pipe was made in Belgium, but, other than that, there is not a whole lot of information to be had about this company. Steve has restored a few over the years (and I checked his previous posts), but he had not gleaned any significant information either. The “incident” we will address in this report is some unexpected damage to the inside of the meerschaum bowl. We will get to that shortly – first some background.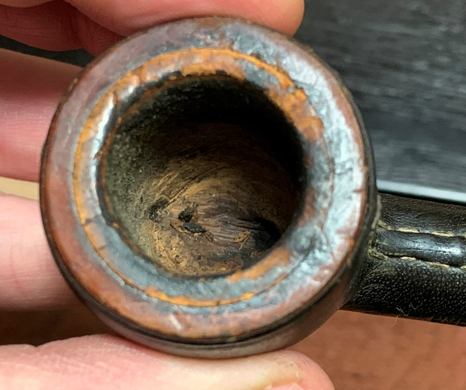

 A friend of mine wanted this pipe – somehow, it spoke to him – so I was happy to bring it back to life for him. The pipe was in decent enough shape: the stem was well-used but not damaged, the leather was sound, the rim was a bit of a mess, and the bowl looked as though it had been reamed with a boat hook. Although it is difficult to make out in the photos, the bottom of the bowl was quite badly gouged and I wondered whether I should fill in the gouge or leave it as is. Steve had told me in the past about making a paste of egg white and chalk dust. Something for me to consider…
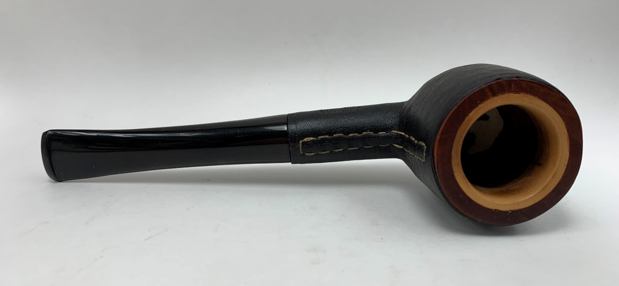
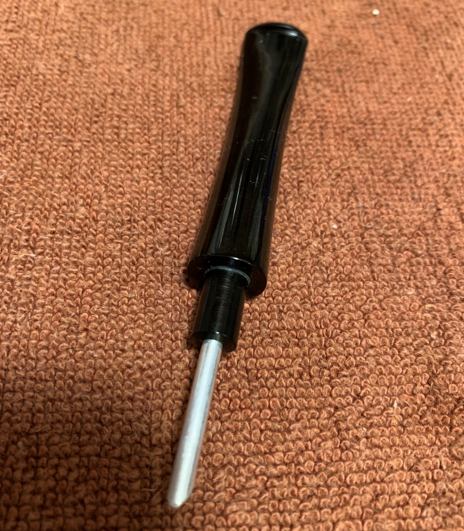 Anyway, I began with the stem and inner tube, which I resolved fairly quickly. The leather enveloping the bowl was quite clean and in good shape, so that was also a quick fix. I then moved on to the rim of the pipe. As the photos show, it was filthy and slightly damaged. I “topped” the pipe – that is to say, I gently and evenly sanded down the rim on a piece of 220-grit sandpaper. This was done with even greater care than usual, as I did not want to scuff the leather. I finished up the top with all nine of the MicroMesh pads to make a lovely surface and then used one of my furniture pens to liven up the colour of the rim.
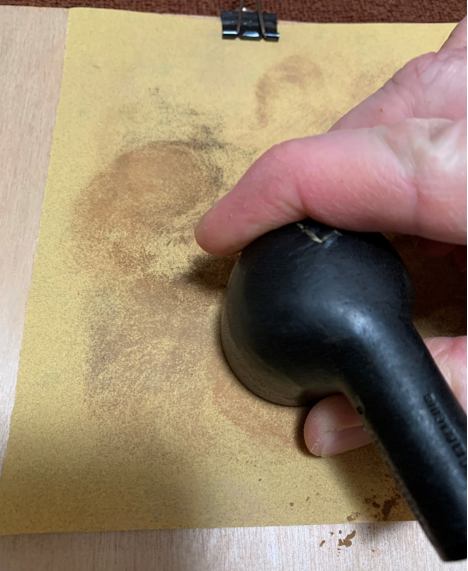
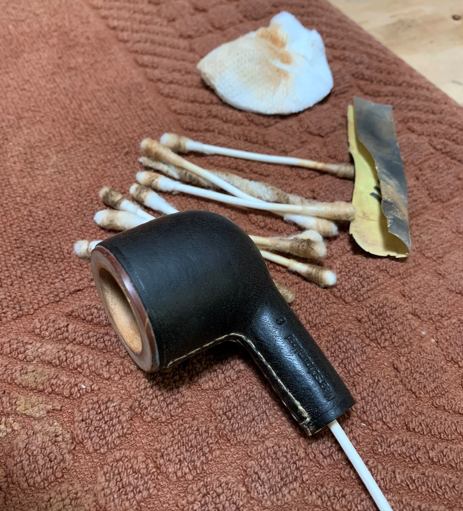

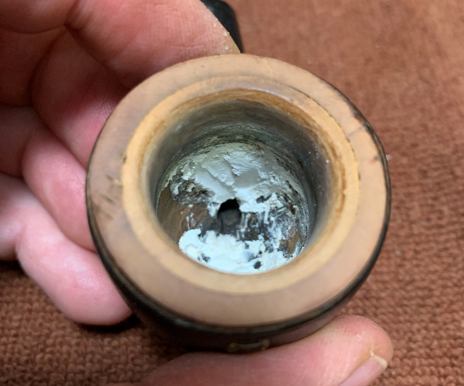
 That done, I moved on to the inside of the bowl. Meerschaum does not do well with traditional reaming processes – it needed to be sanded. This was required – not just to clean things up – but also as there was a distinct aromatic ghost left behind. Well, I went sanding away happily, when – lo! and behold – a flaw or cavity appeared in the wall of the meerschaum bowl. Yikes!
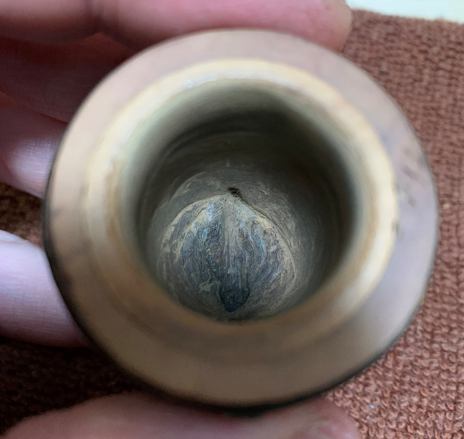 This is obviously a serious concern for this pipe. One is tempted to wonder: was there a manufacturing flaw? Not sure. Did I sand too hard and cause the breakage? Definitely not. Could there be other flaws? Not as far as I could tell, but it was difficult to be sure.
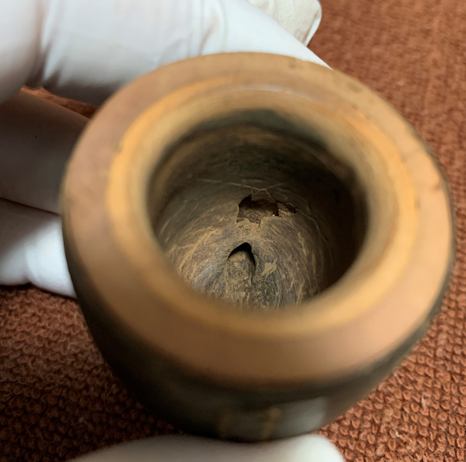
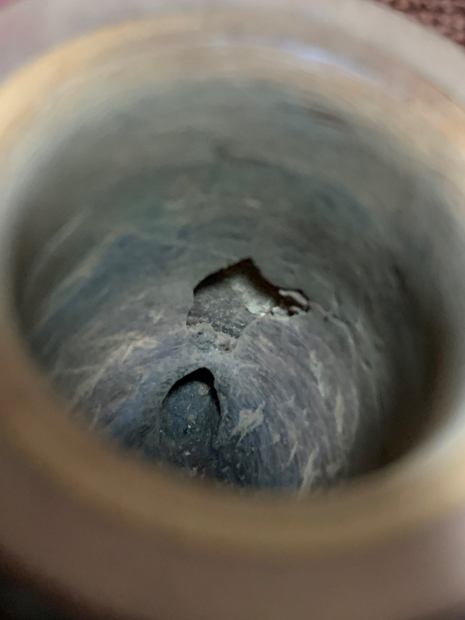 This repair was going to need something more than egg white and chalk dust. After consulting with Steve, his recommendation was to repair both the gouge in the heel and the wall cavity with plaster of Paris. I agreed since plaster of Paris has the virtues of binding well to the meerschaum, resisting heat nicely, and (best of all) drying rock hard. I rushed out to buy some and started making my mix. In order to ensure that it works correctly in this context, the plaster of Paris must be much thicker than usual. Normally, the consistency would be something like thick pancake batter, whereas the mix I made was closer to cream cheese.
 As you can well imagine, actually applying the plaster of Paris properly to the inside of the bowl was a bit of a challenge. I used a dental spatula, which made the job much easier. First, I placed the plaster carefully in the gouge at the heel of the bowl. Next, I delicately filled in the cavity on the wall by inserting as much plaster as possible behind the intact areas of meerschaum. This would provide added strength and support to the repair. Finally, I filled in the hole itself and let all of the plaster harden overnight.
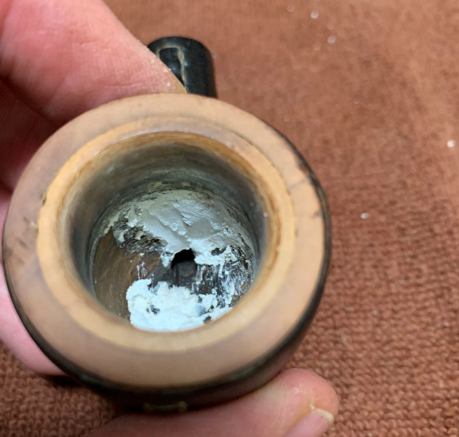
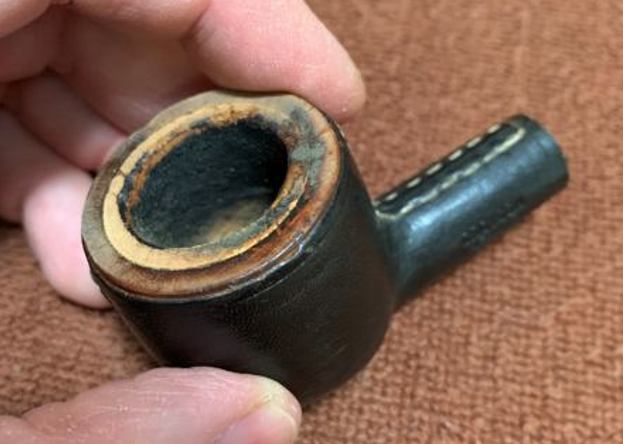
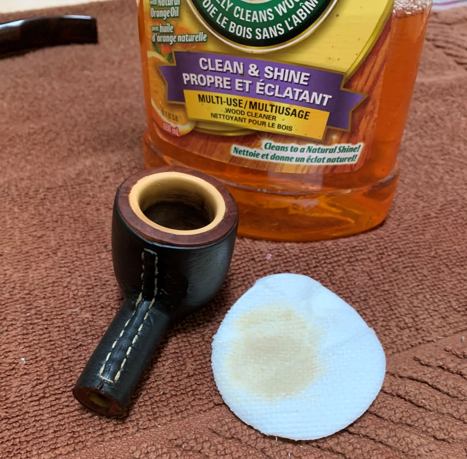
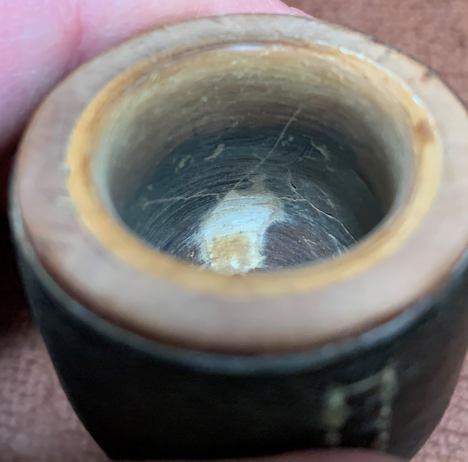
 On the morrow, the repair looked sound. The next step was to sand the plaster of Paris down to make it smooth and even with the surrounding meerschaum-lines bowl. I used 200- and 400-grit sandpaper to make this happen. I was very pleased with the way it looked in the end. As the photographs show, the plaster and meerschaum merged very well. I should add that the craze lines that you can see were also addressed, but I neglected to take a photo of that.
 In the end, the pipe was successfully restored and, what looked at first to be a fatal flaw in the meerschaum, turned out to be an educational and enjoyable repair. I was originally tempted to call this blog post “I got plastered in Paris”, but that seemed too cheeky in the end. It is a nice pipe and its new owner is very pleased with the results. I hope you enjoyed reading this first installment of Pipe Incident Report – I look forward to writing more. If you are interested in my work, please follow me here on Steve’s website or email me directly at kenneth@knightsofthepipe.com. Thank you very much for reading and, as always, I welcome and encourage your comments.