Tag Archives: removing tooth marks

Cleaning up an Edward’s European Collection Apple


Blog by Steve Laug

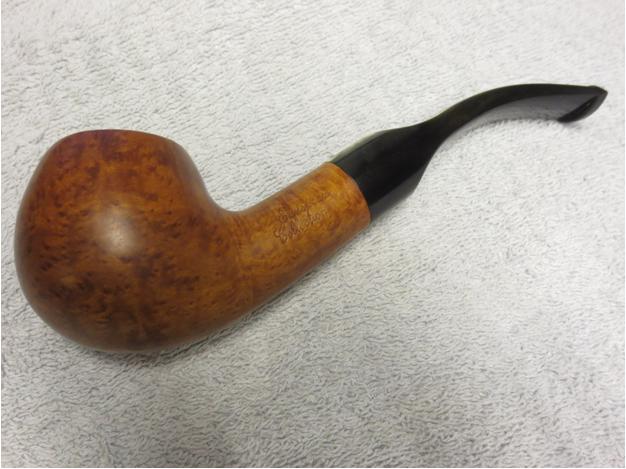
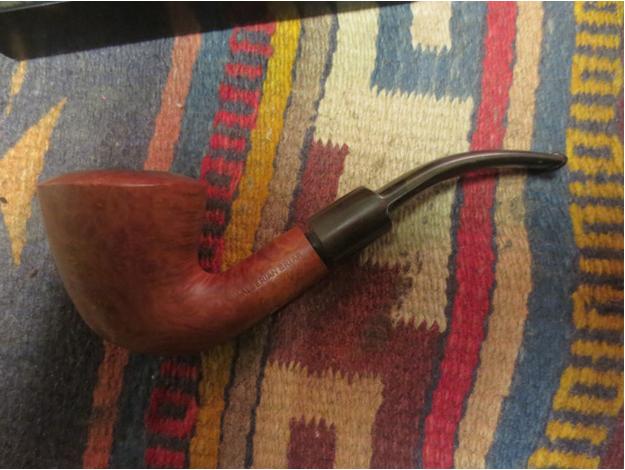
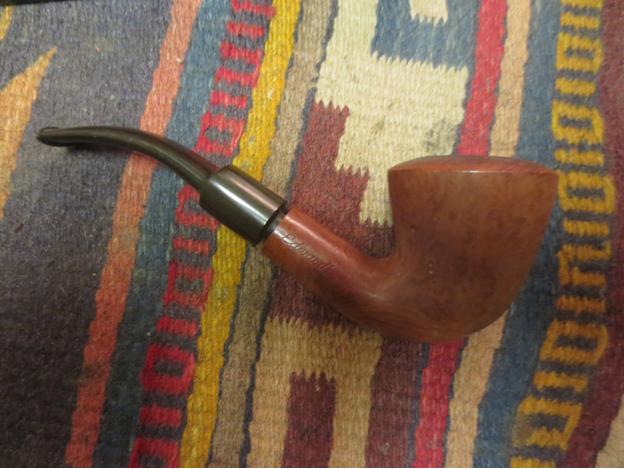
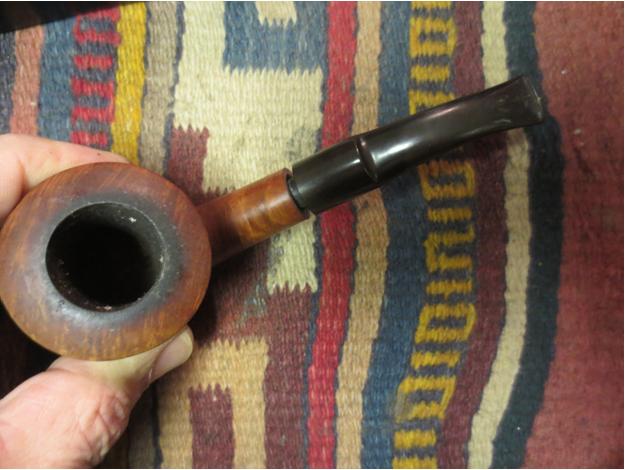
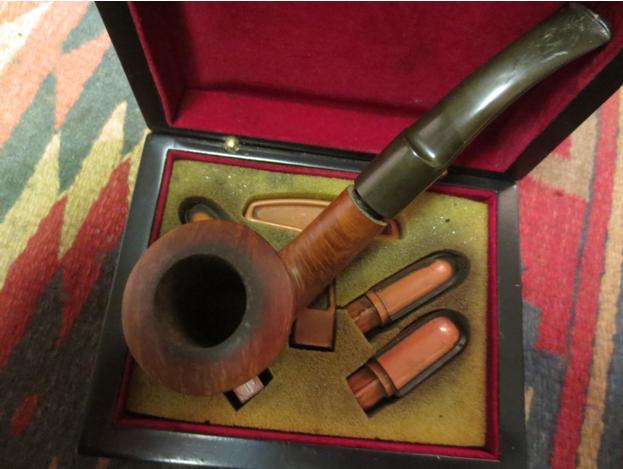
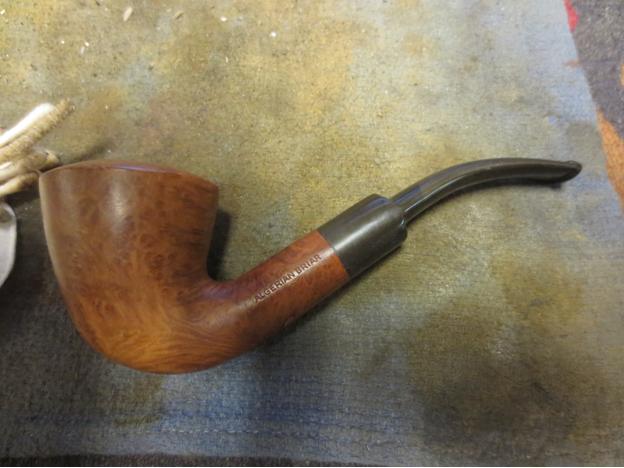
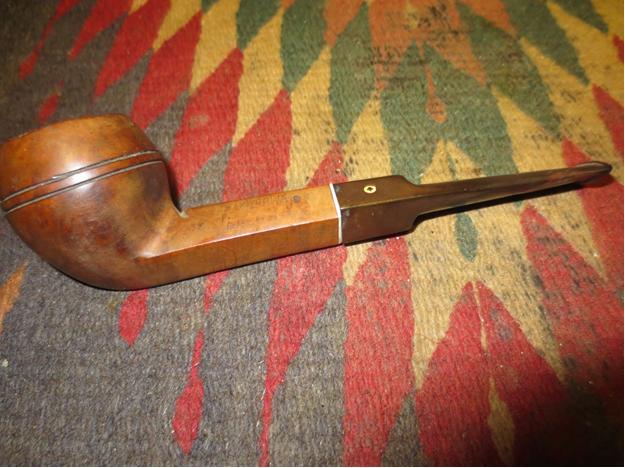
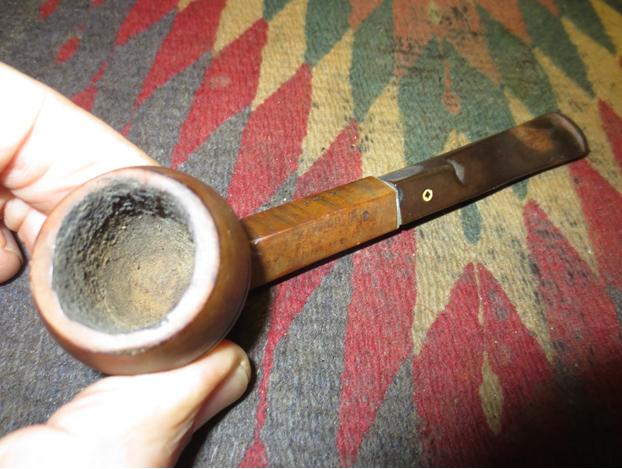
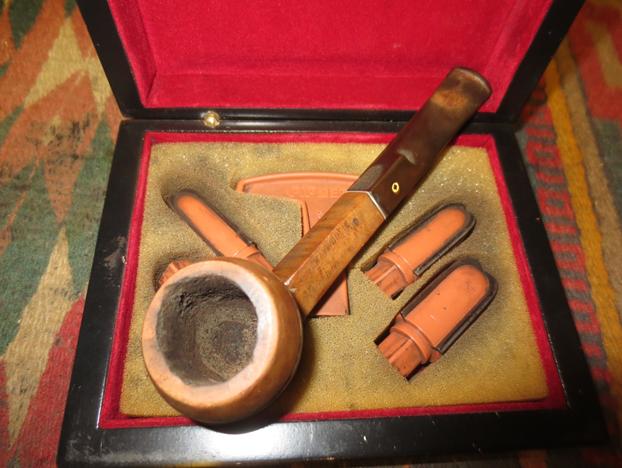
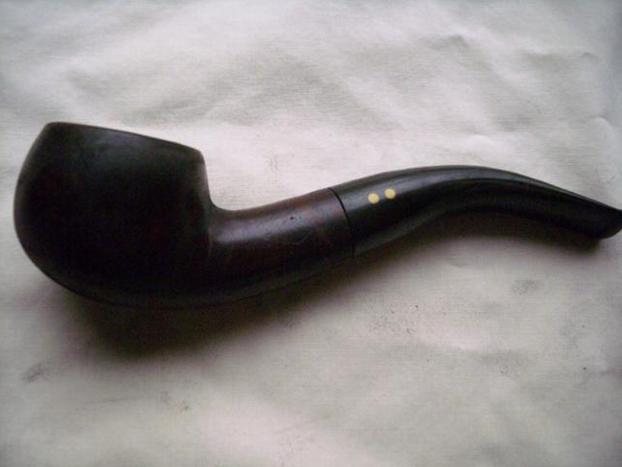
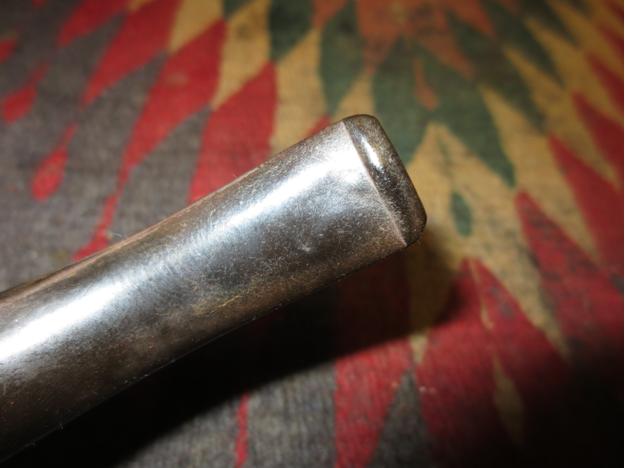
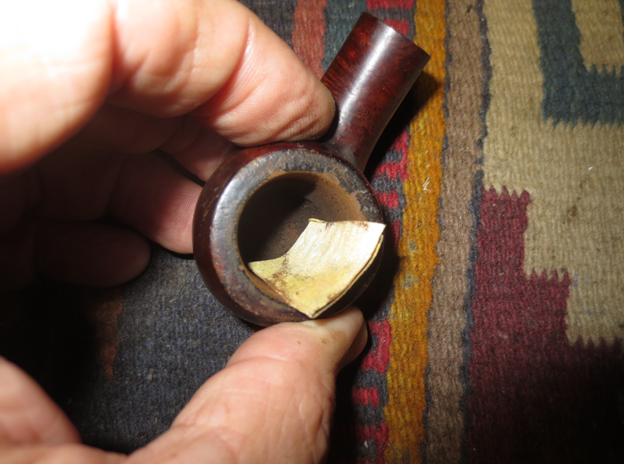
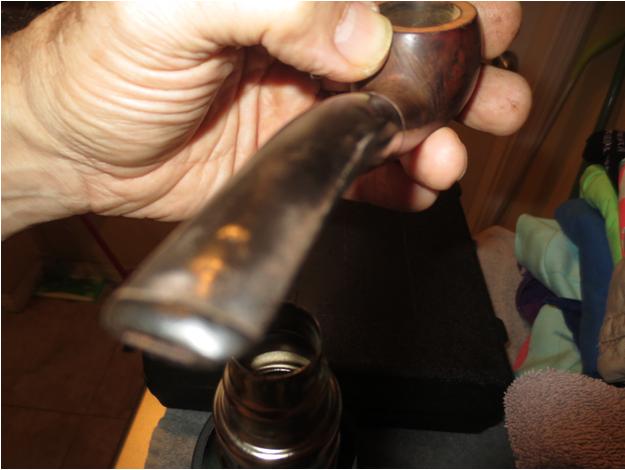
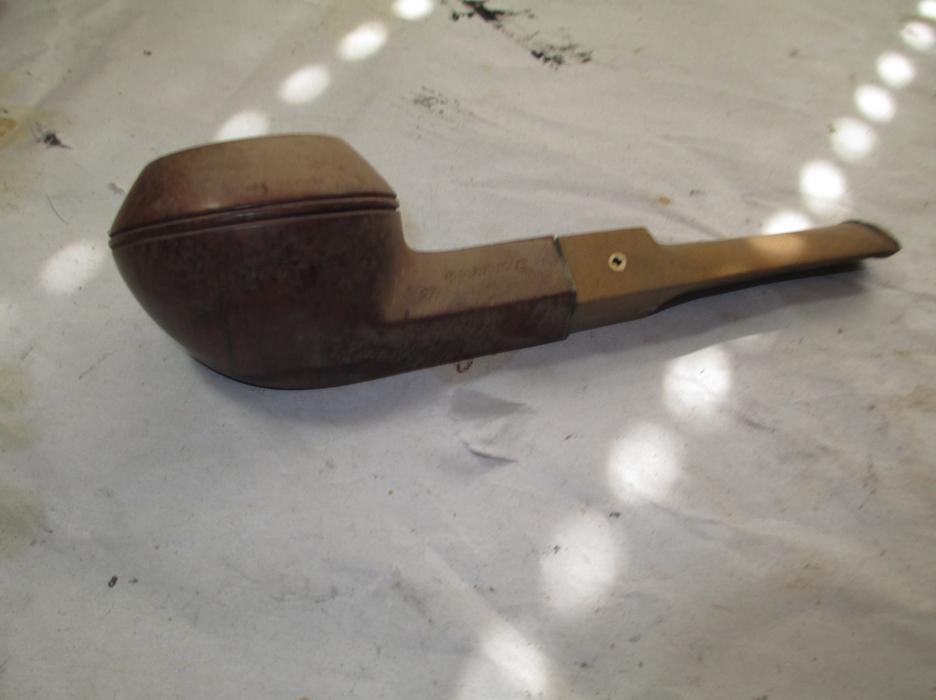
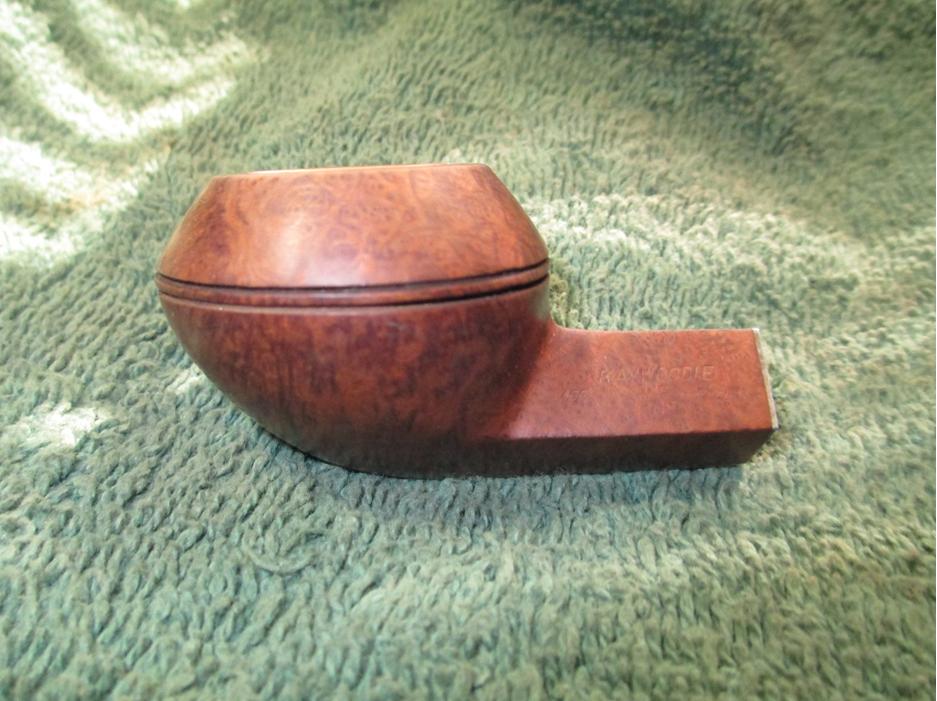
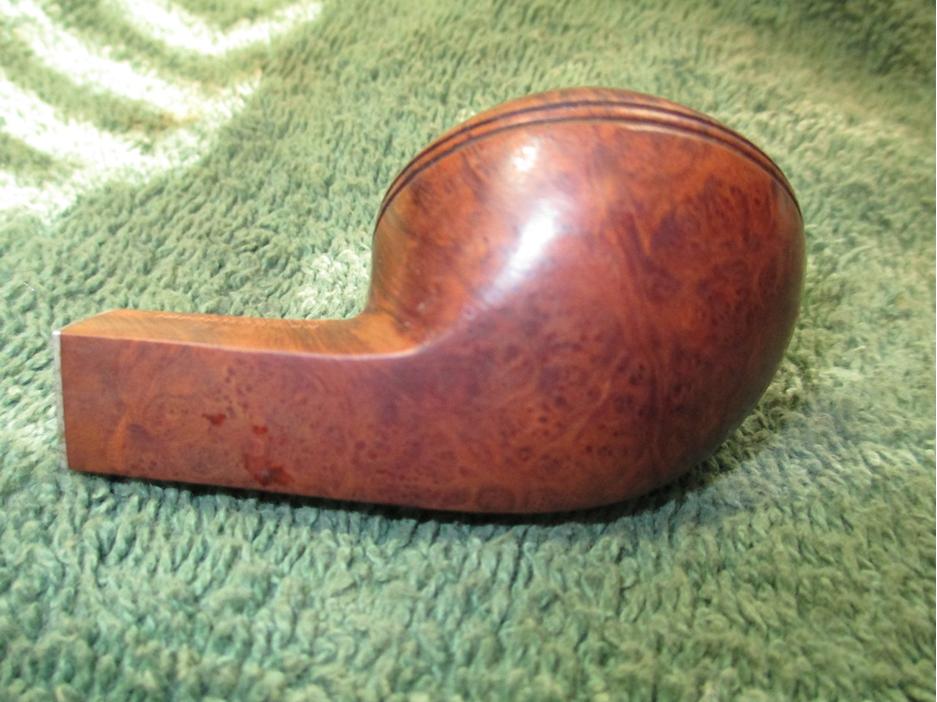
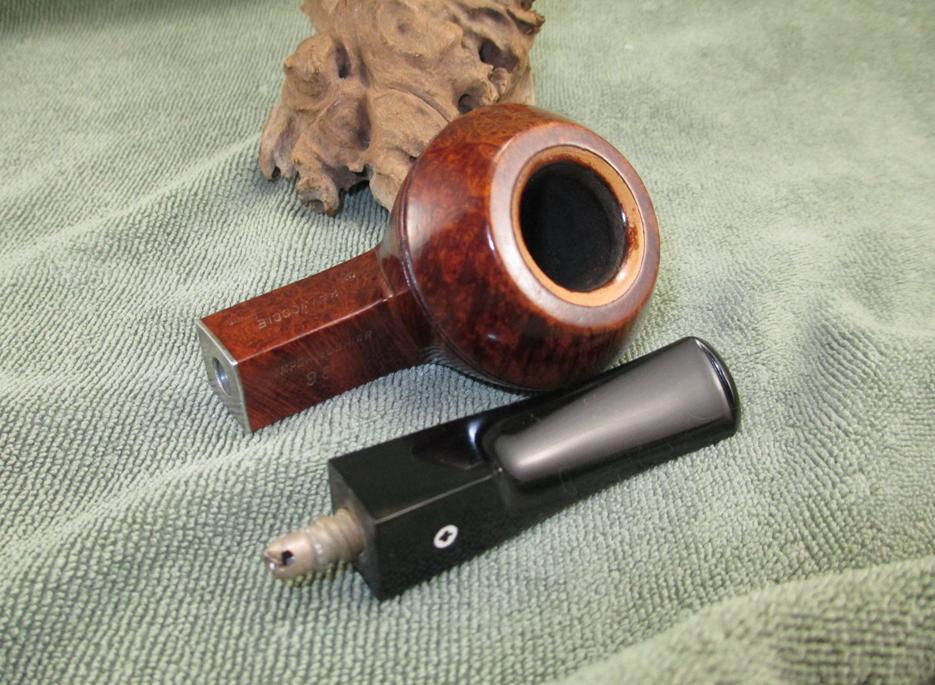
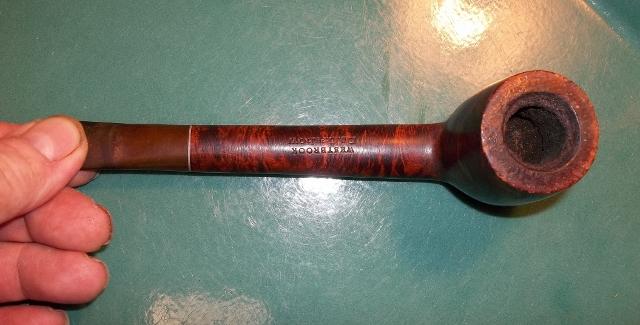
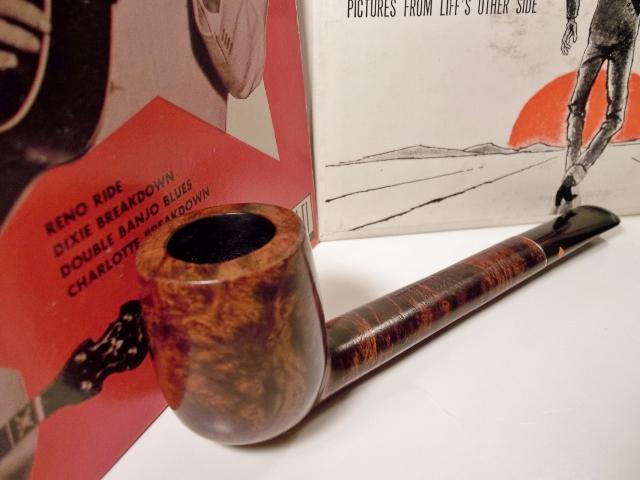
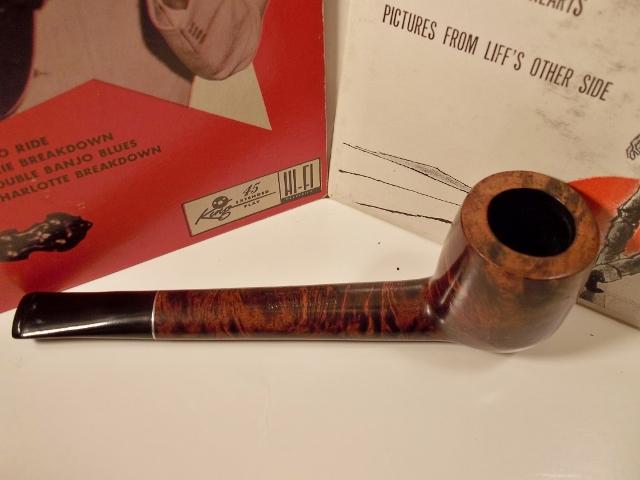
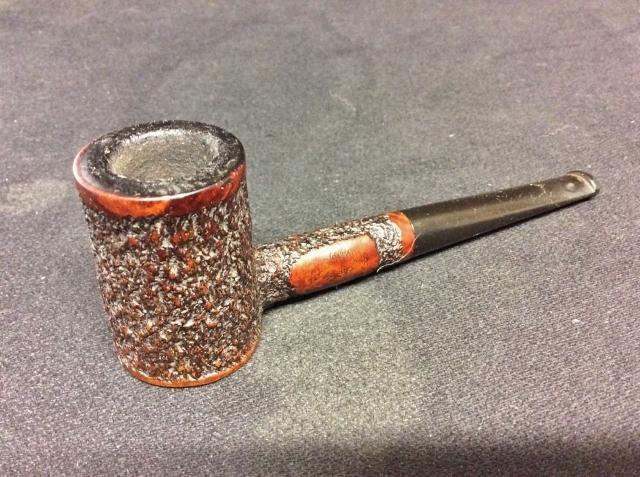
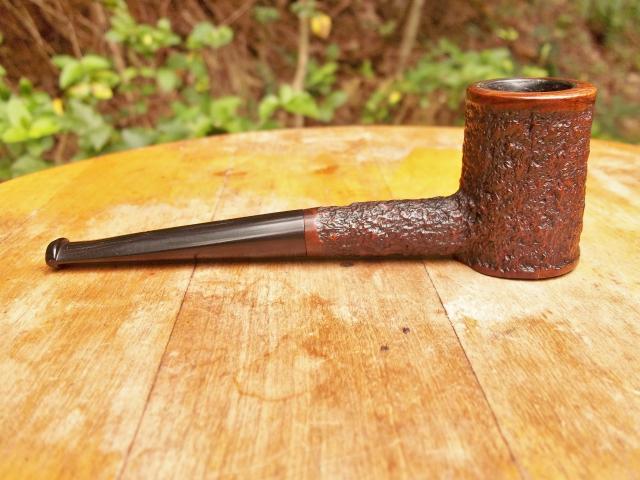
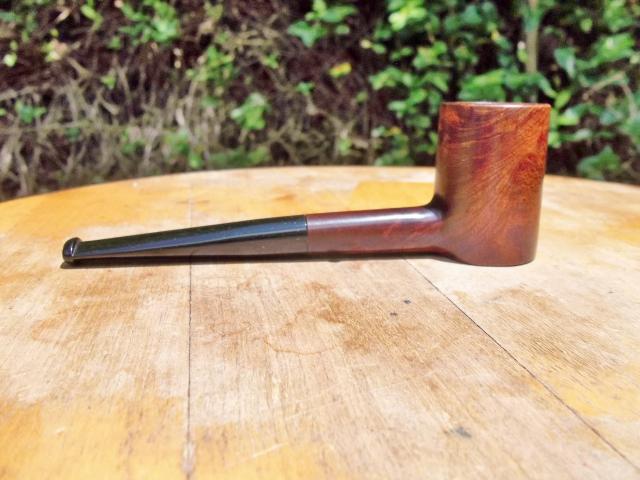
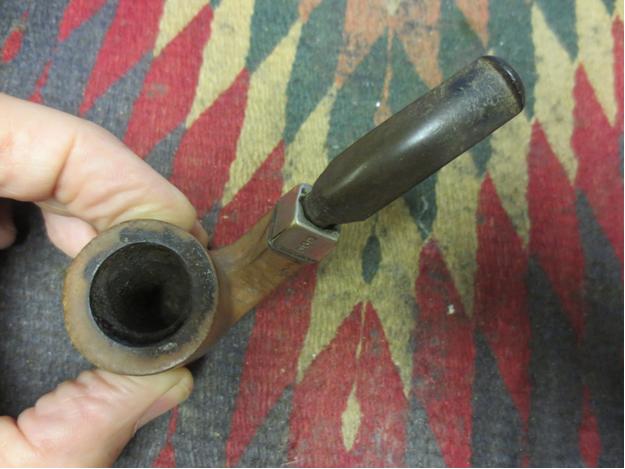
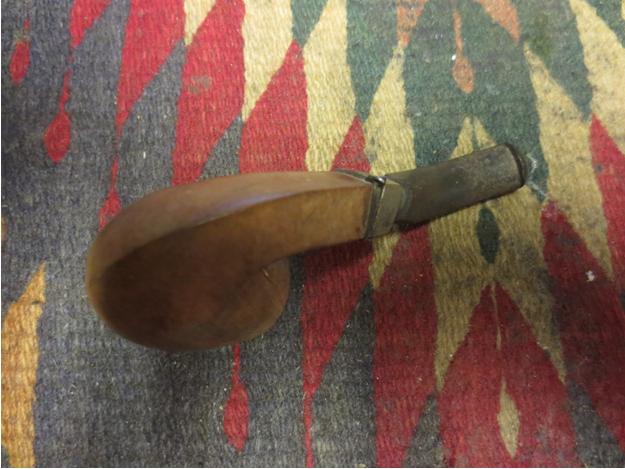
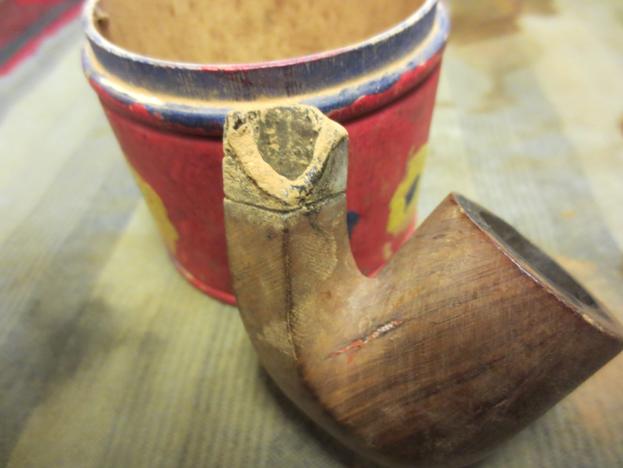
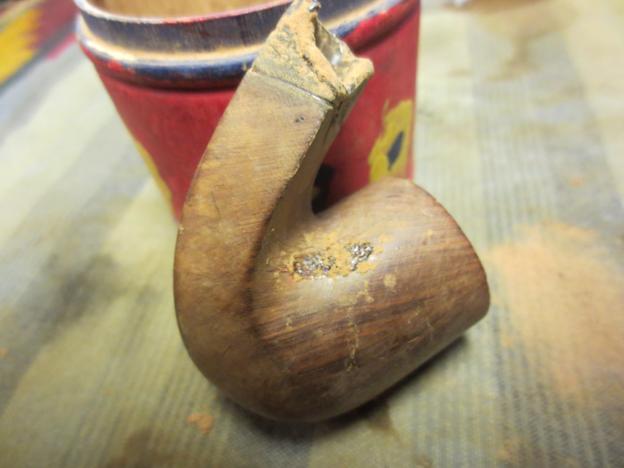
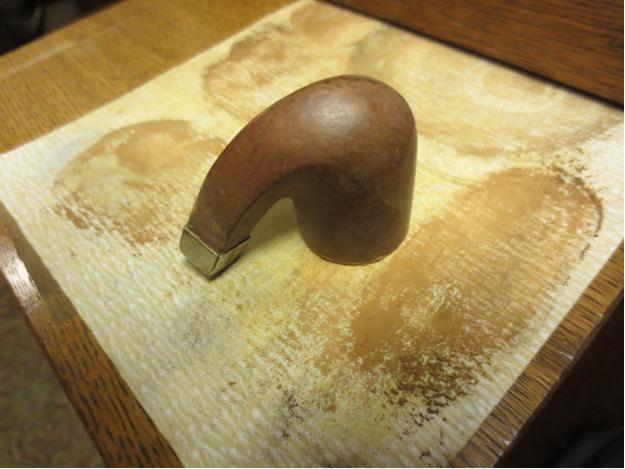
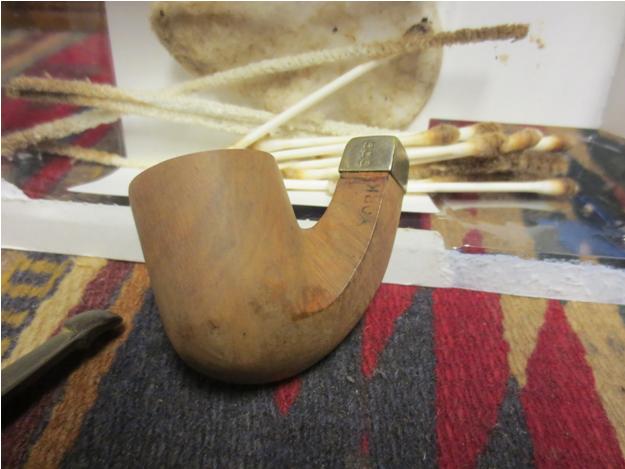
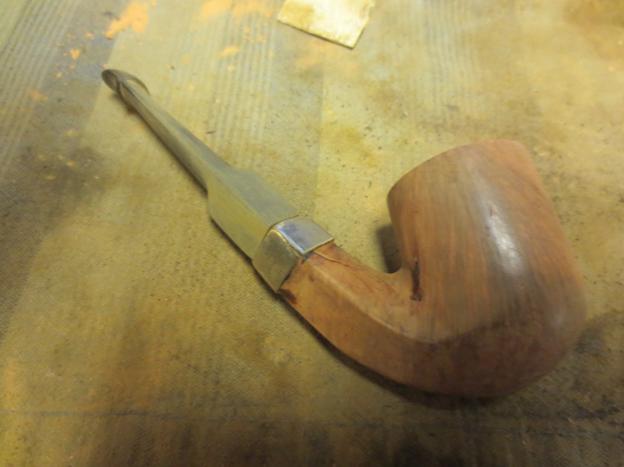
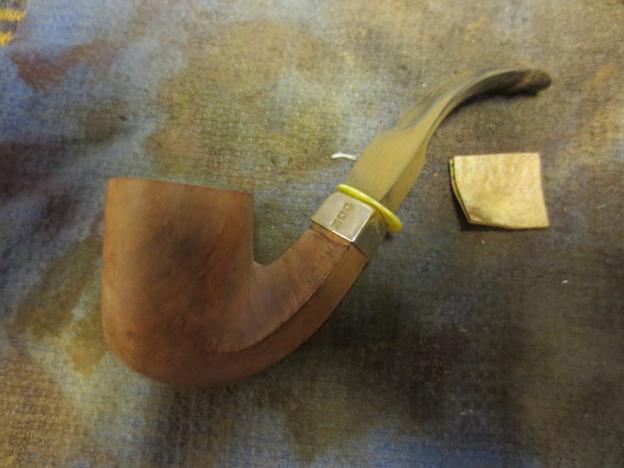
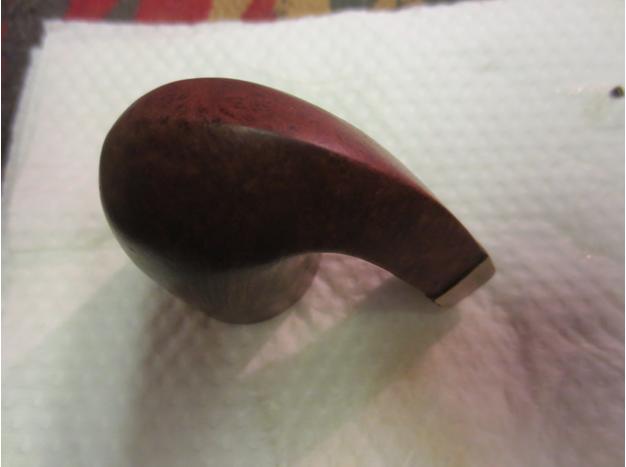
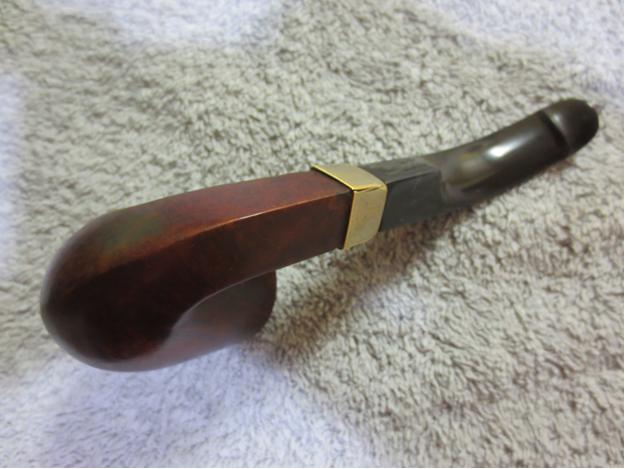
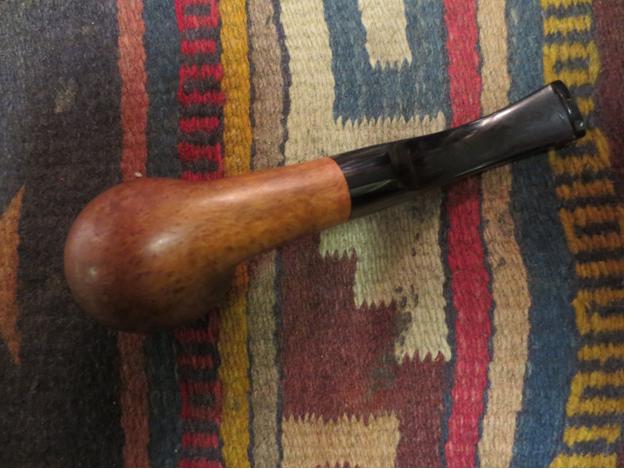
The second Edward’s pipe from the box I received to clean up and sell to support Smokers was a beautiful smaller sized apple with an acrylic/Lucite stem. It is stamped Edwards in script on the right side of the shank and European Collection on the left side. There is no shape number on this pipe. The finish was dirty, the rim had less lava overflow than others that came with this collection but it was present. The bowl had a thick crumbly cake. All of these pipes tended to have stickiness to the cake that makes me think that the pipes were used for aromatics. The shank was dirty with tars and oils. The stem is black acrylic with dark green swirls throughout that are accentuated in the light. It is a bit thick which leads me to believe that the pipe came from the 70’s or 80’s era. It is a saddle stem with an integral tenon turned from the Lucite. It was dull from the oils and disuse. It would be interesting to see the colours once it was shined up.Paddy1

Paddy2

Paddy3

Paddy4 
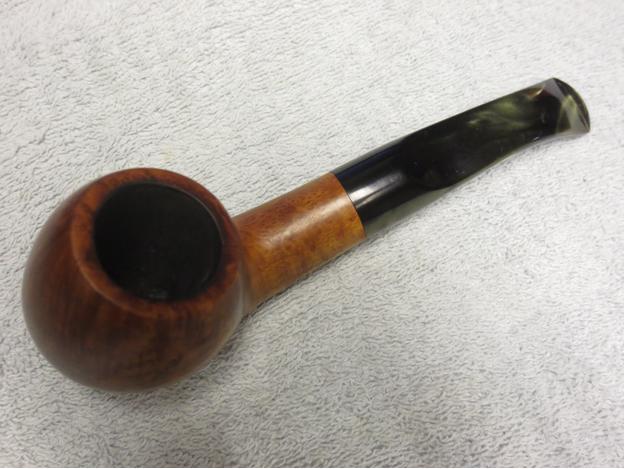
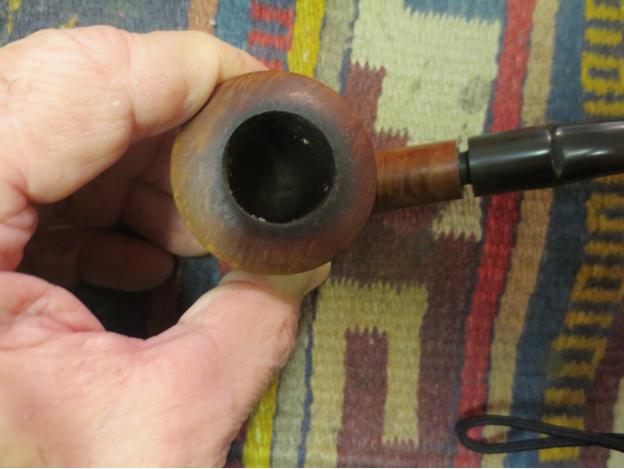
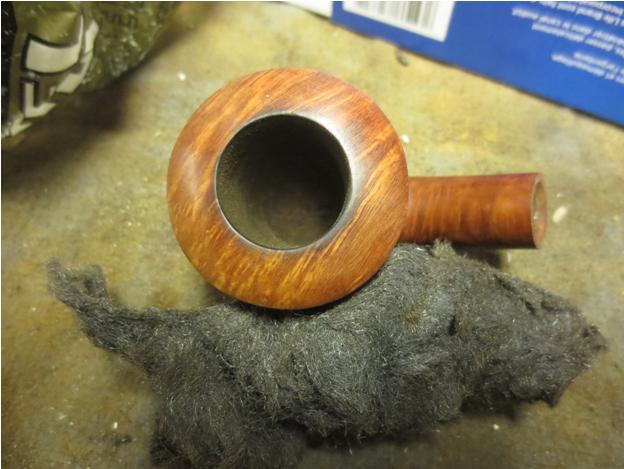
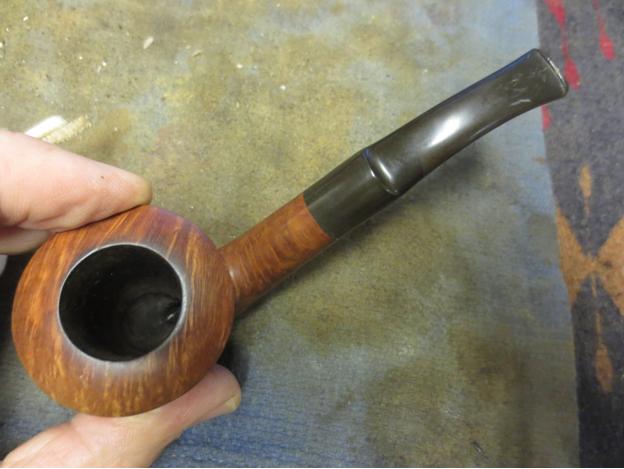
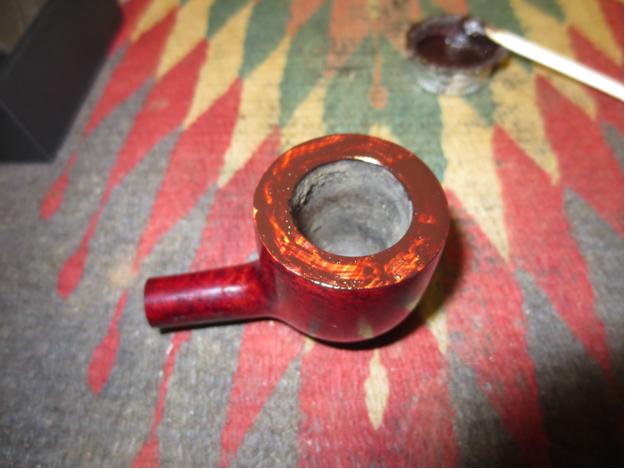
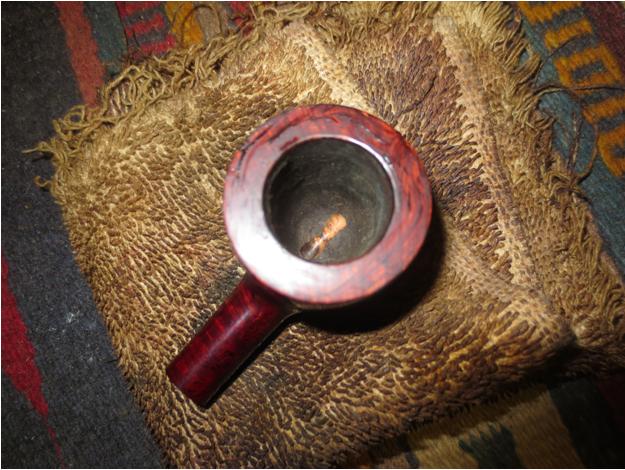
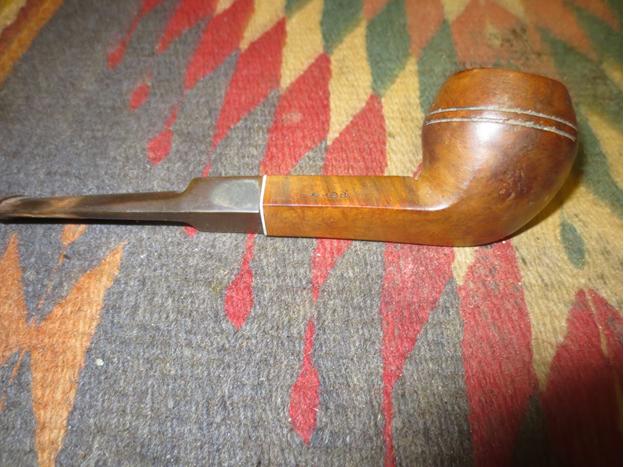
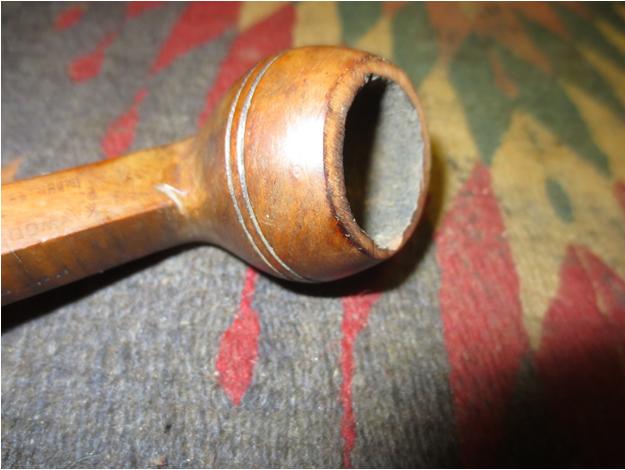
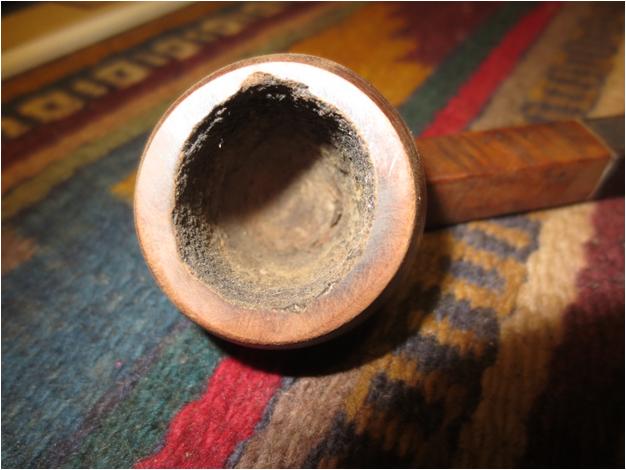
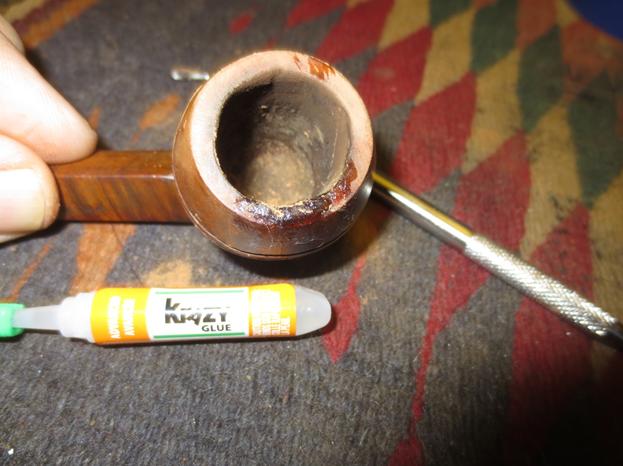
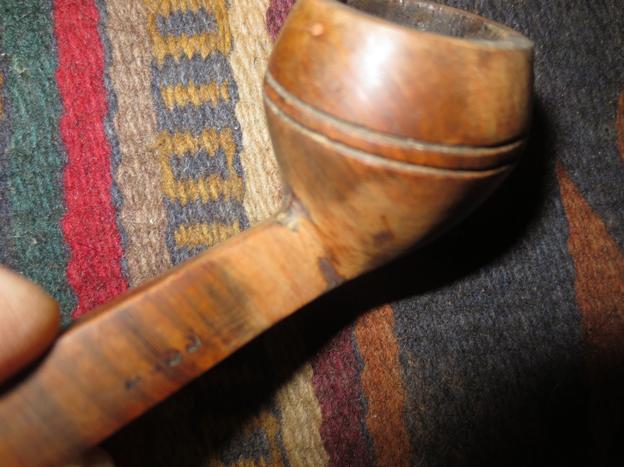
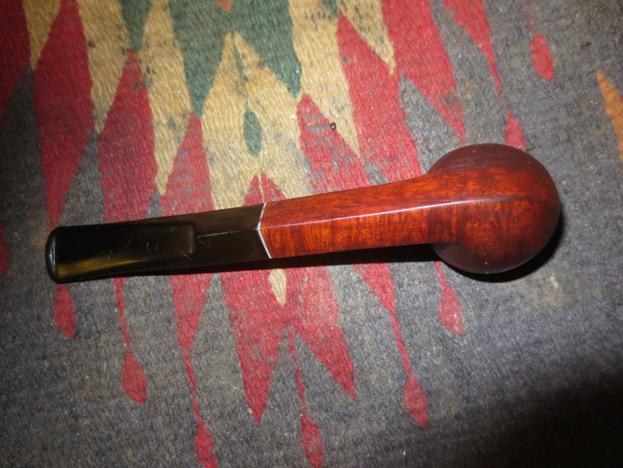
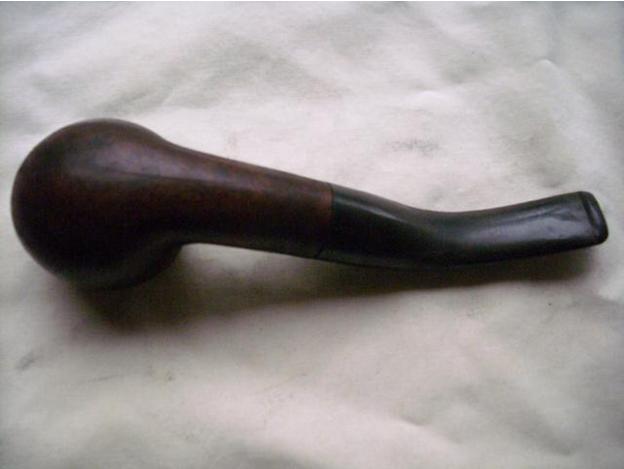
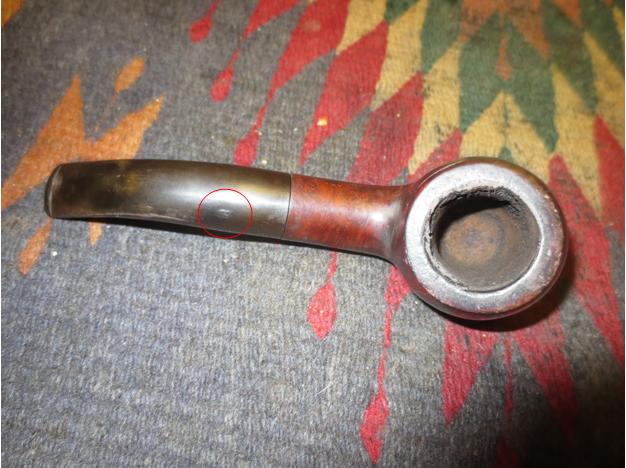
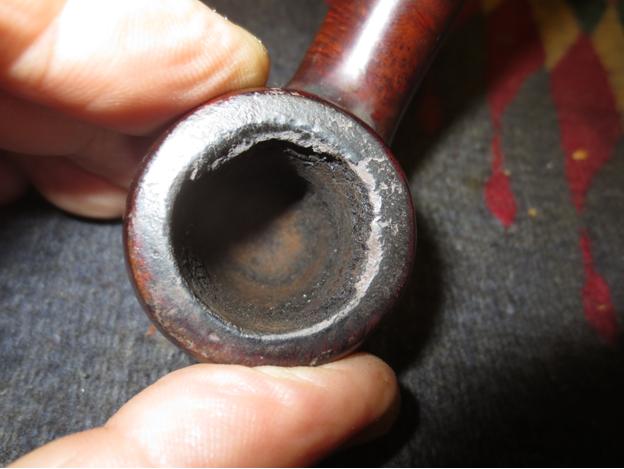
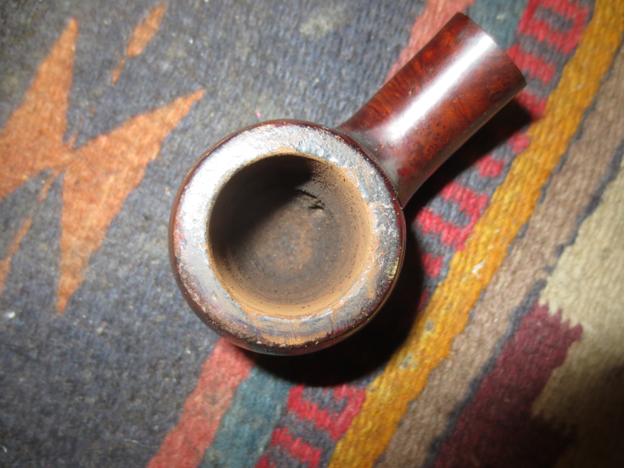
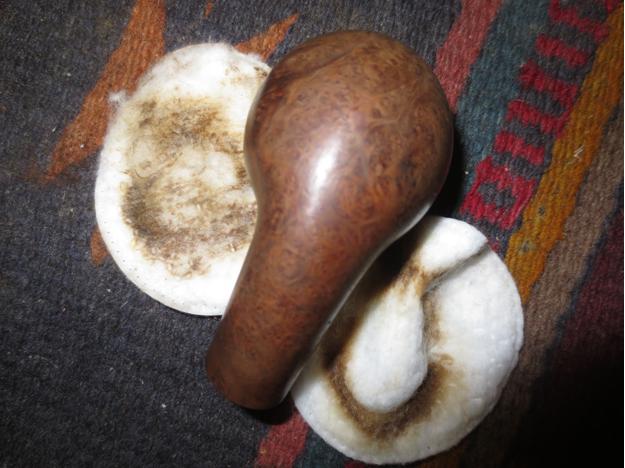
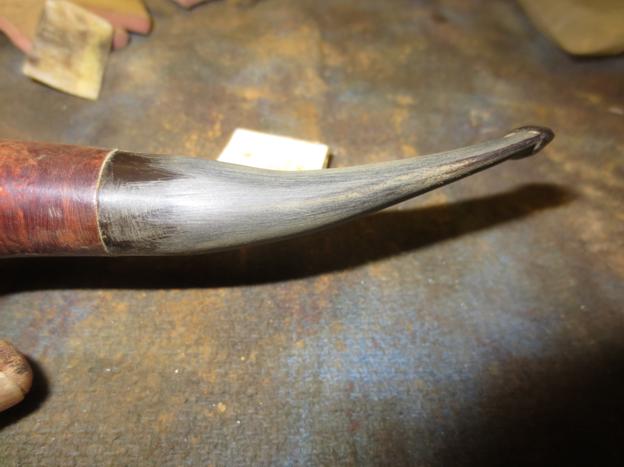
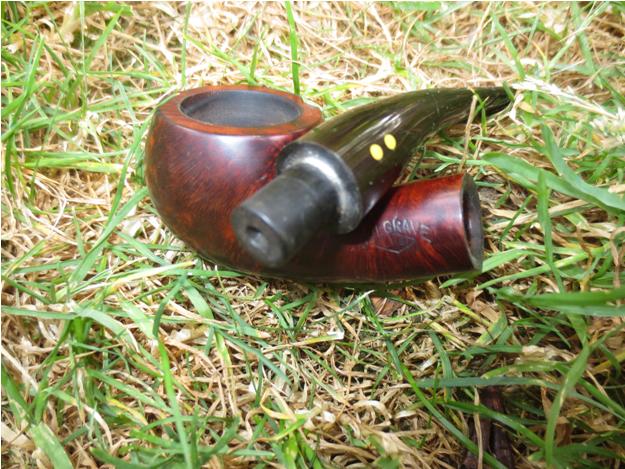
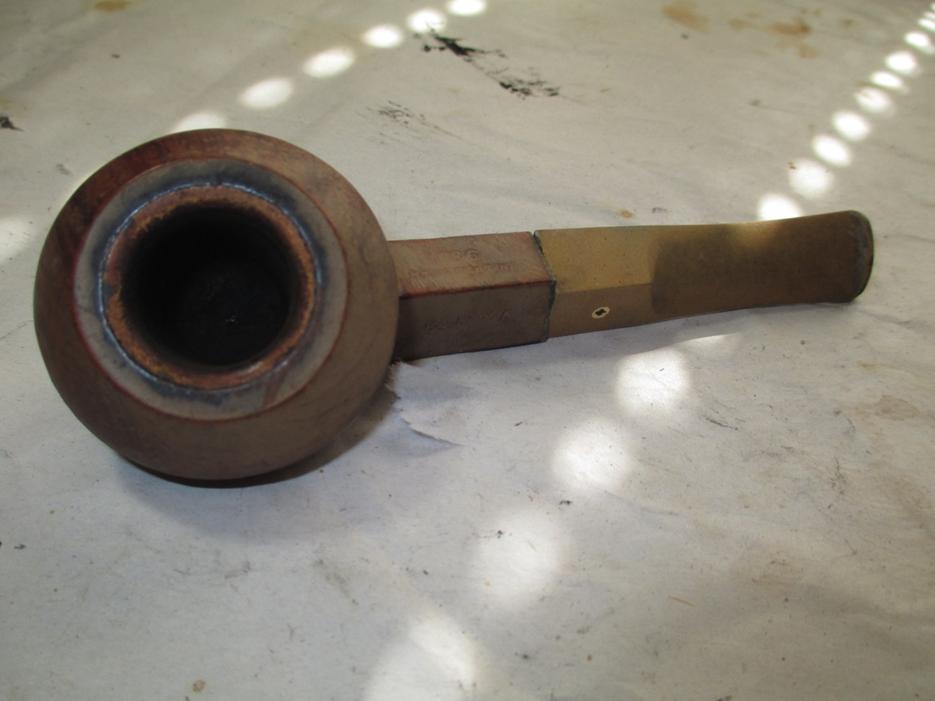
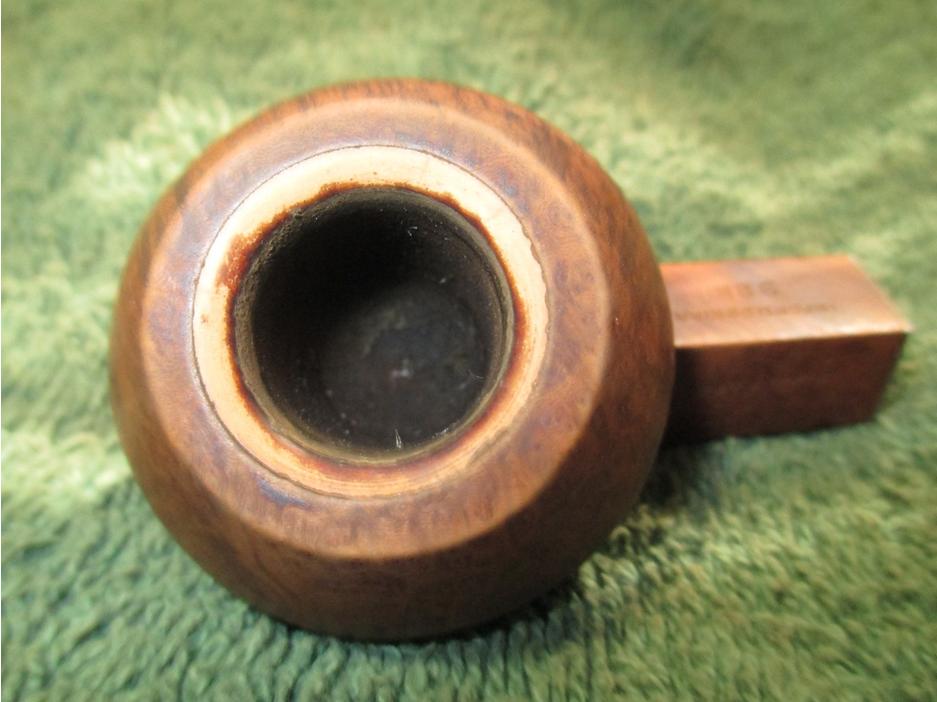
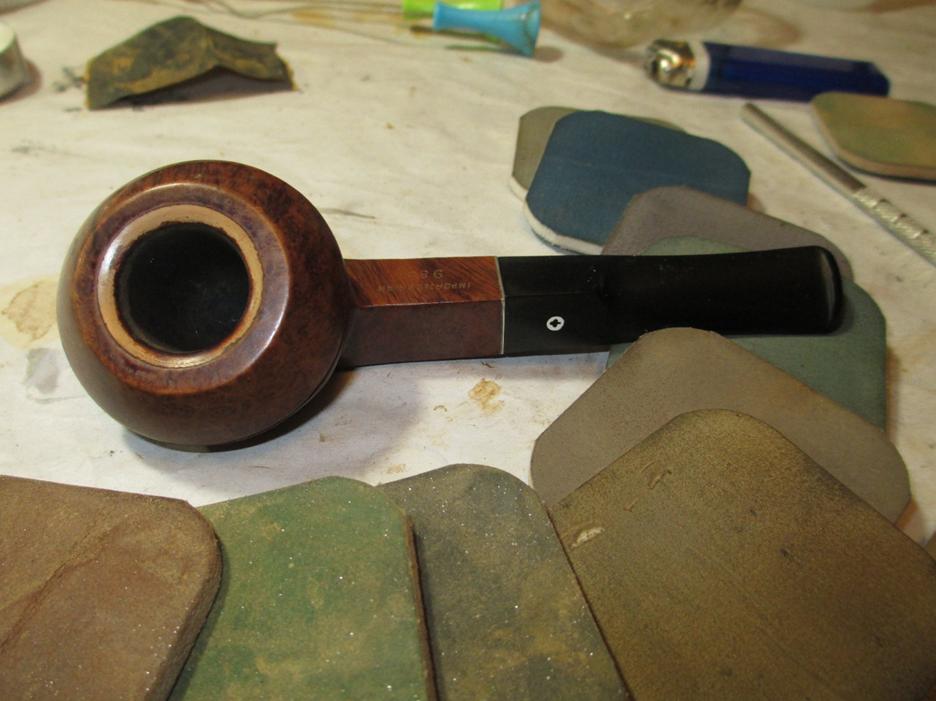
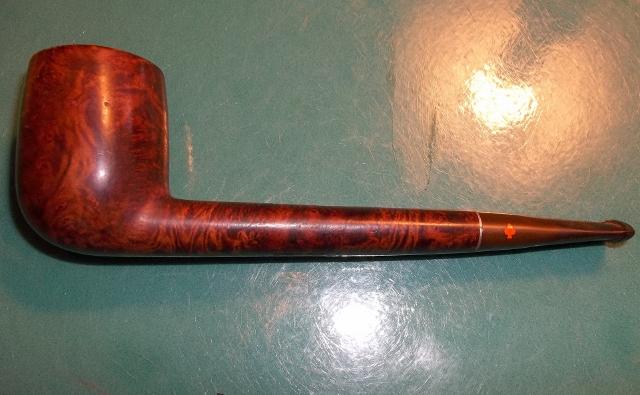
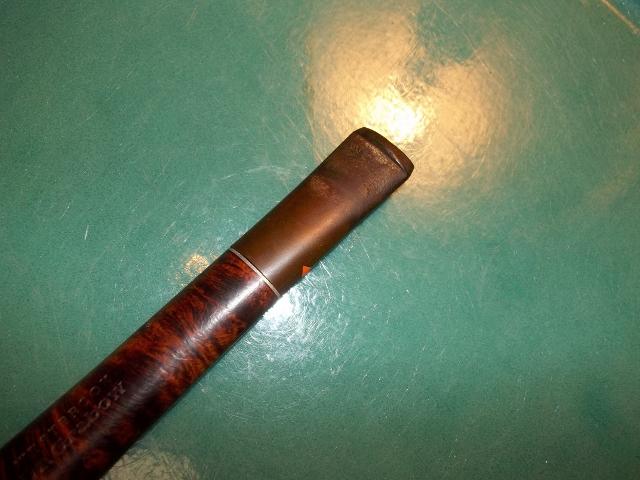
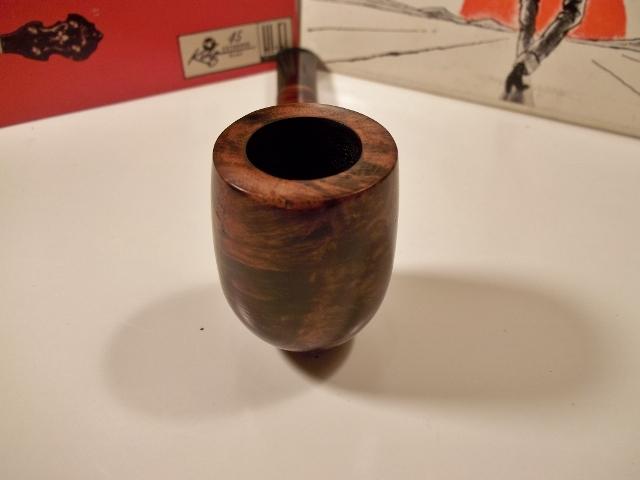
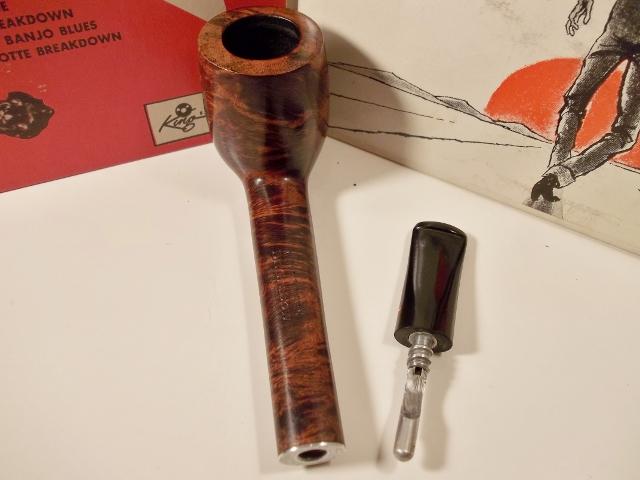
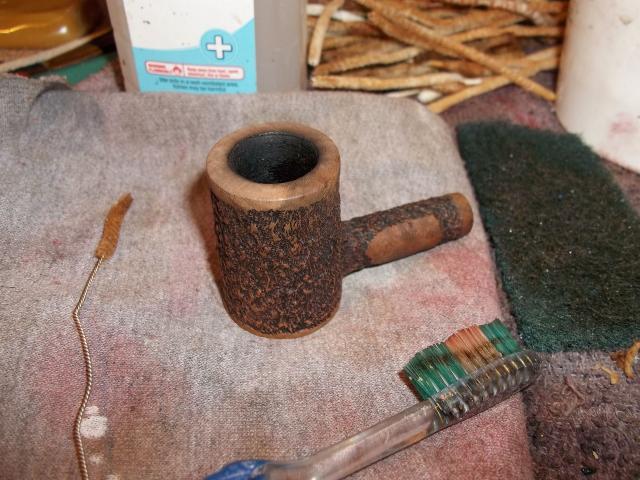
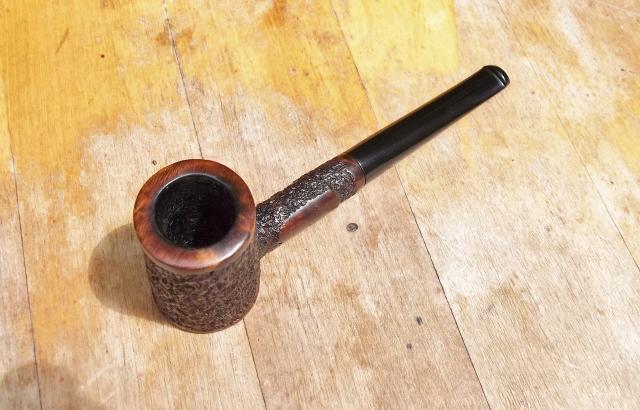
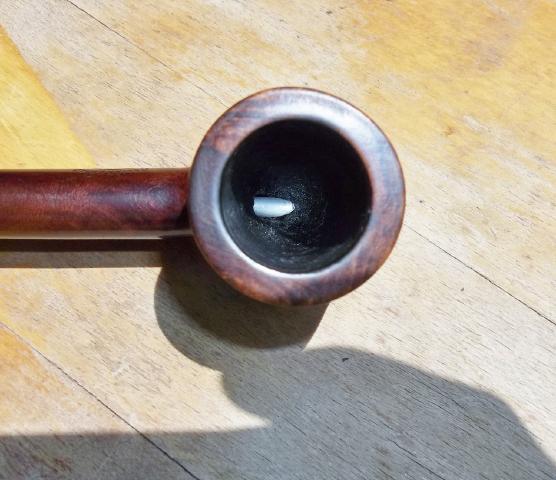
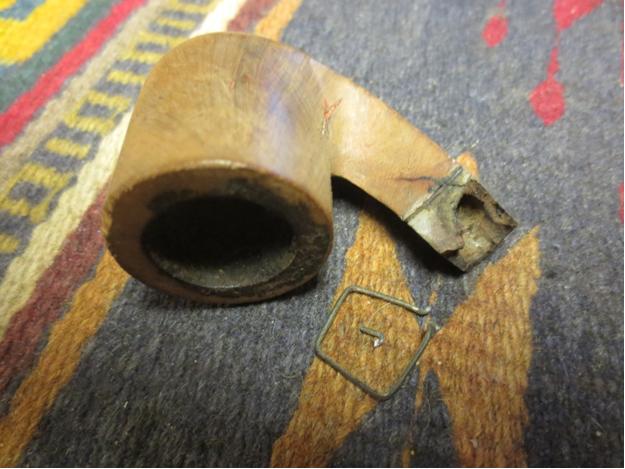
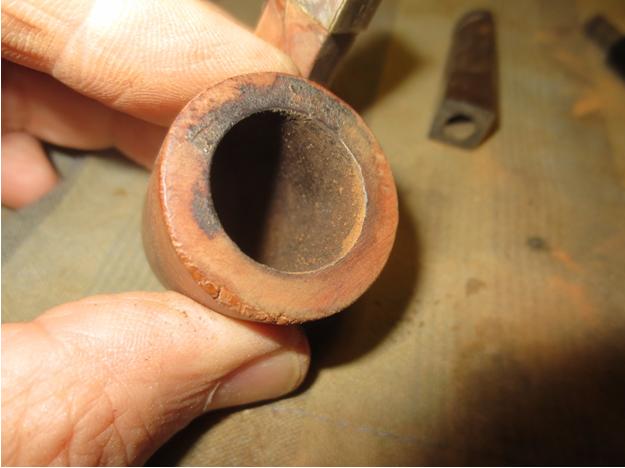
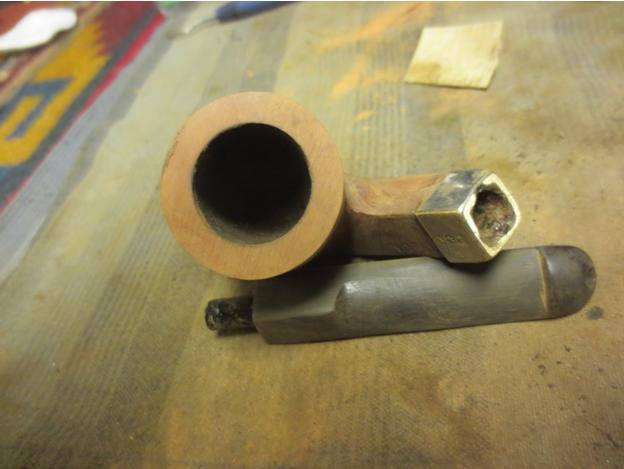
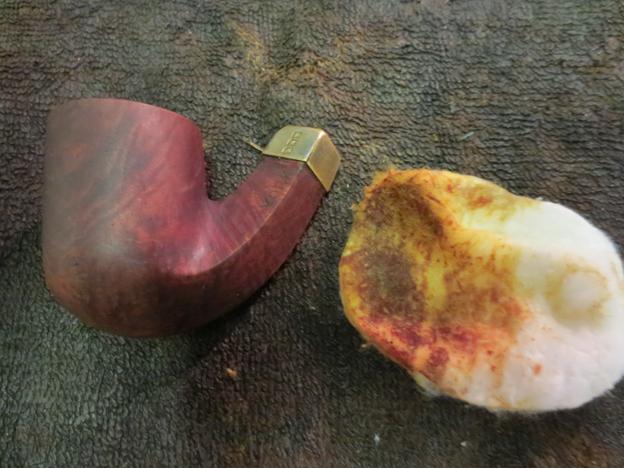
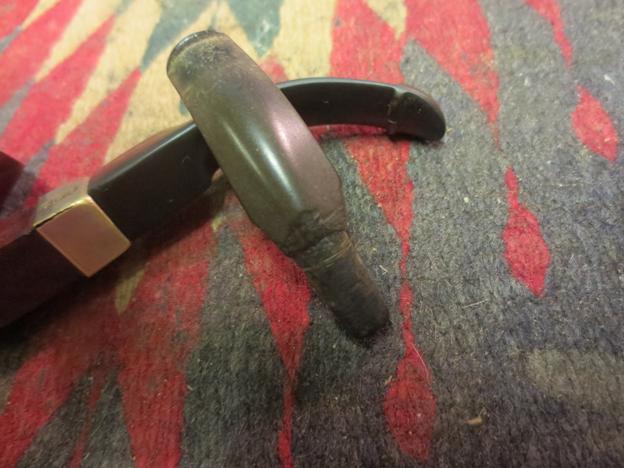
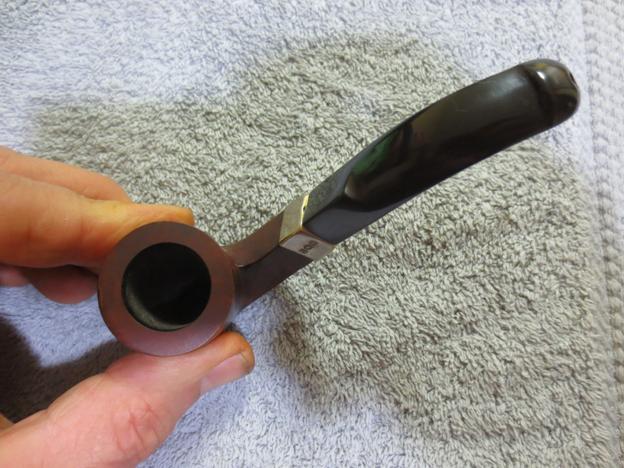
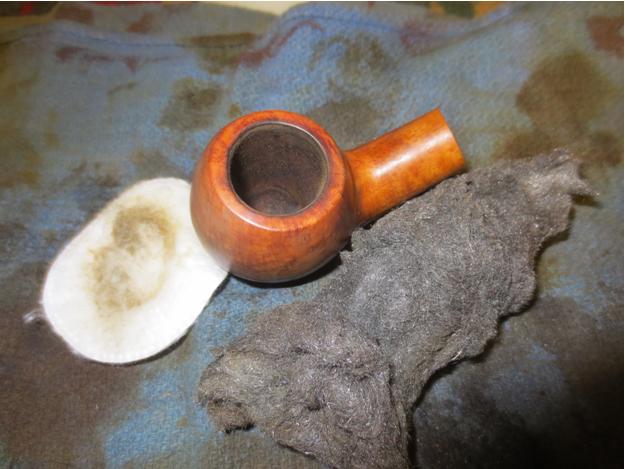
I took a close-up photo of the bowl to show the cake and the state of the rim. Fortunately the rim had no damage on the outer or inner edge.Paddy5 
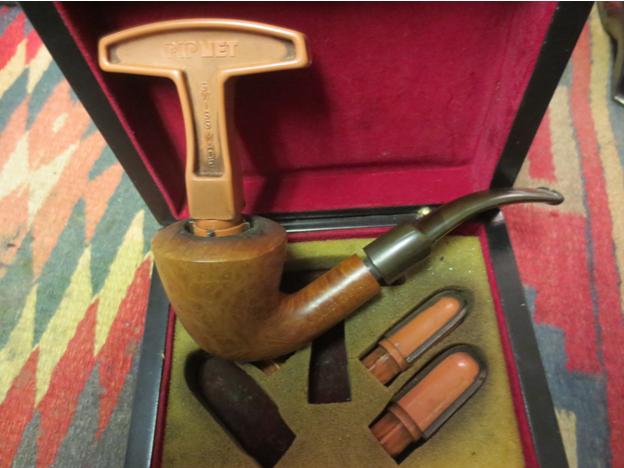
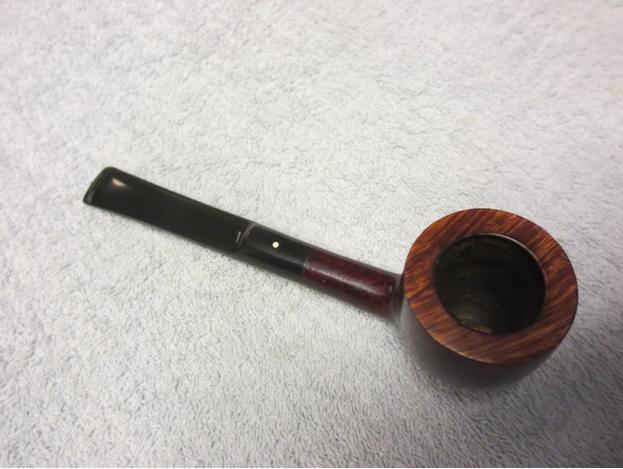
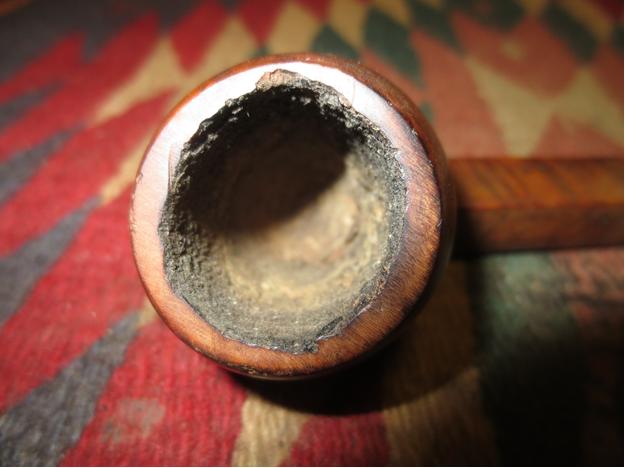
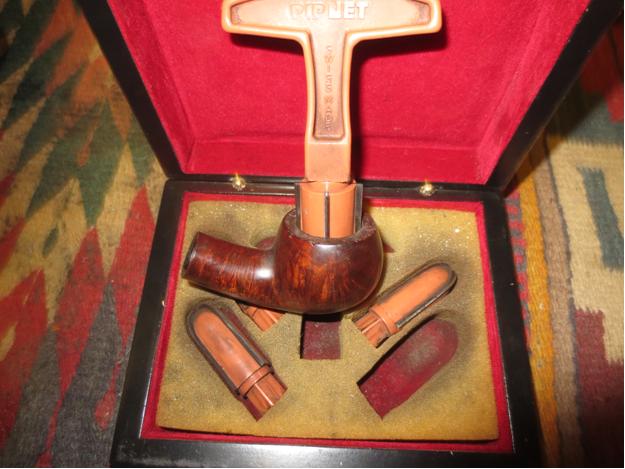
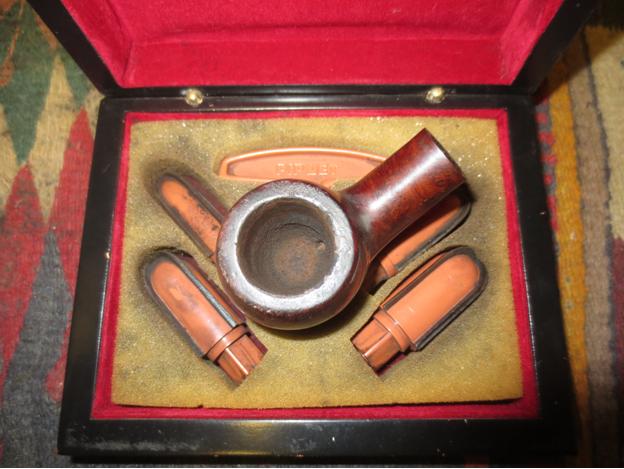
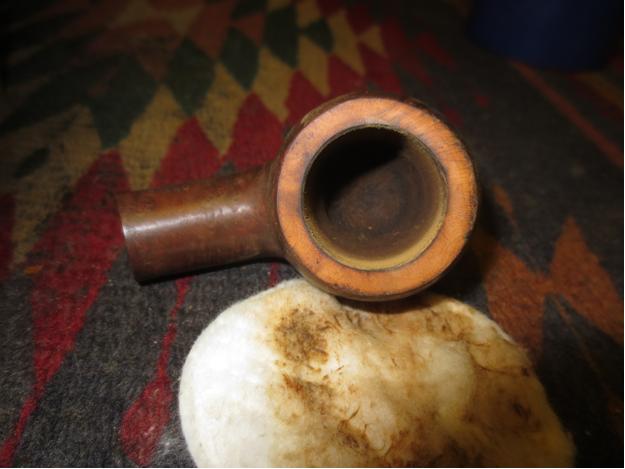
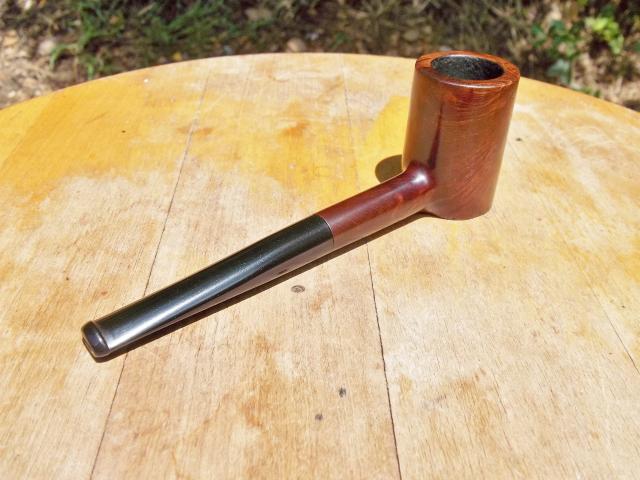
I reamed the bowl with the PipNet pipe reamer and took the cake back to bare wood. Whatever the previous tobacco was the cake was soft and crumbly.Paddy6

Paddy7 
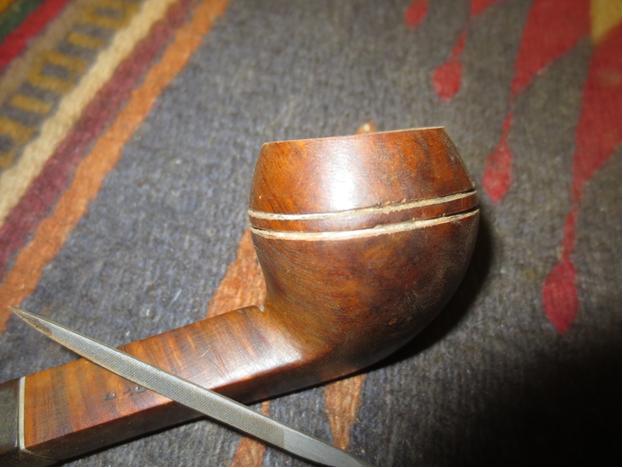
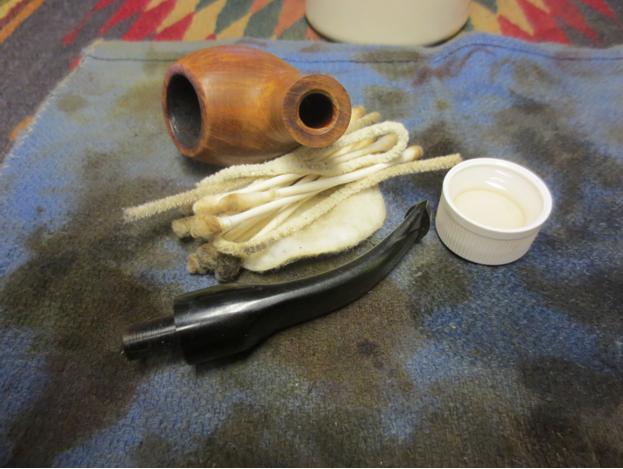
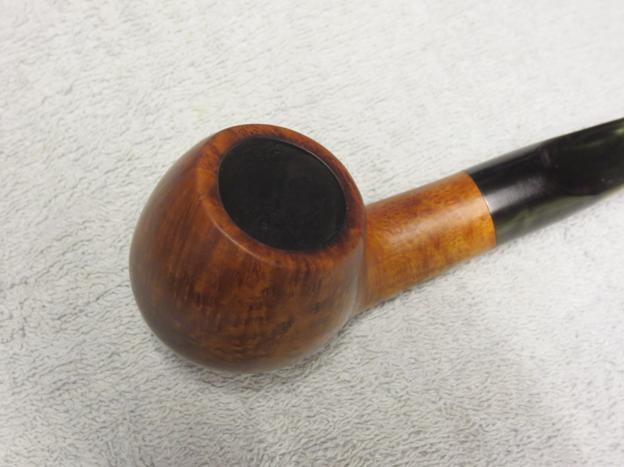
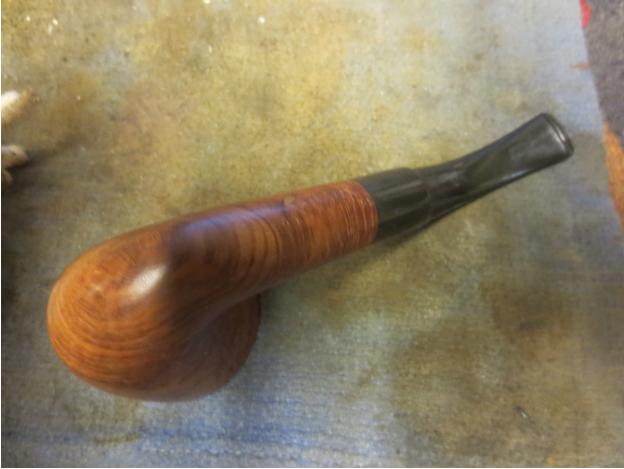
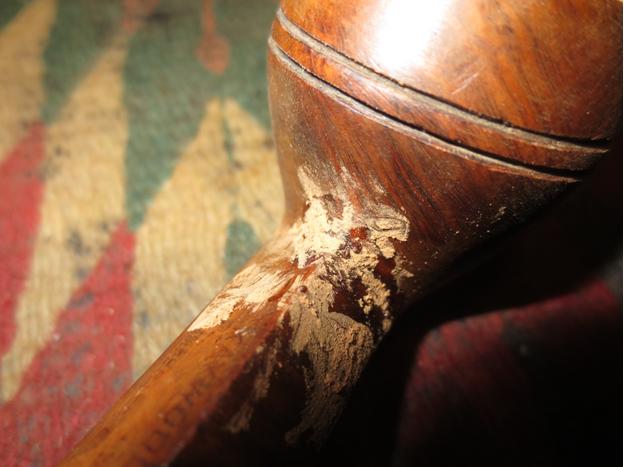
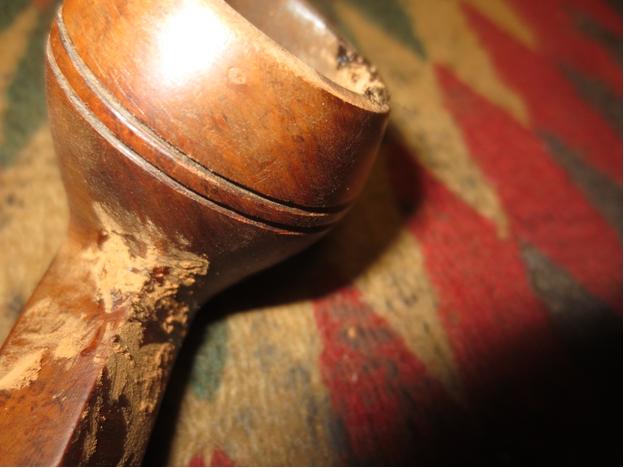
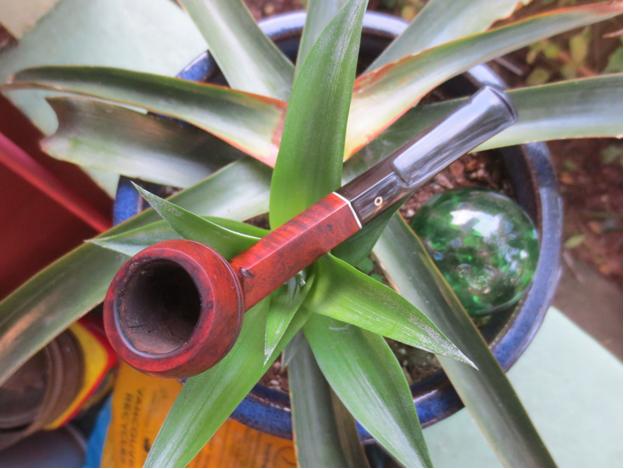
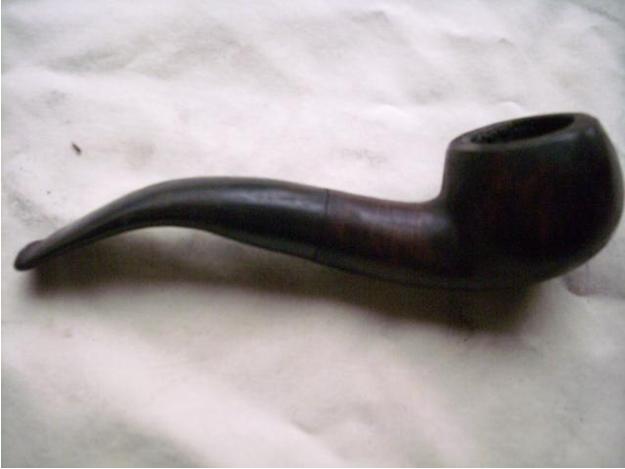
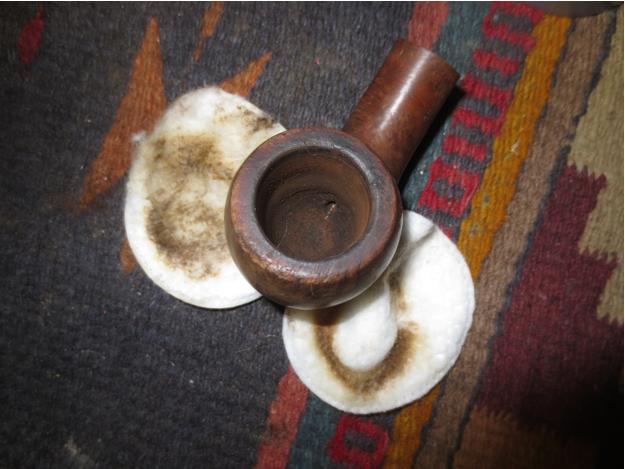
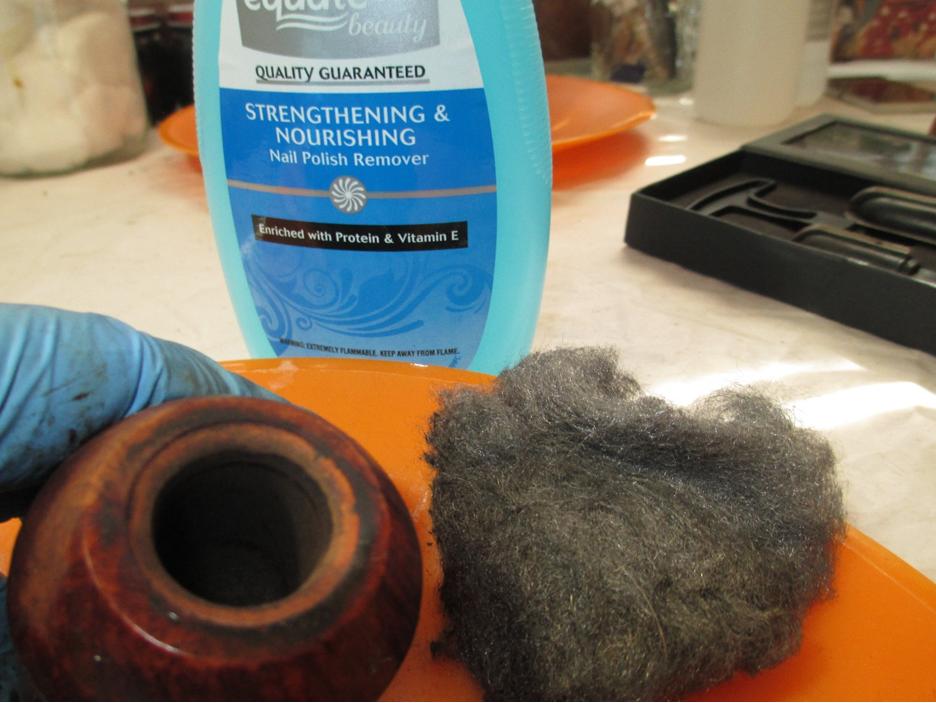
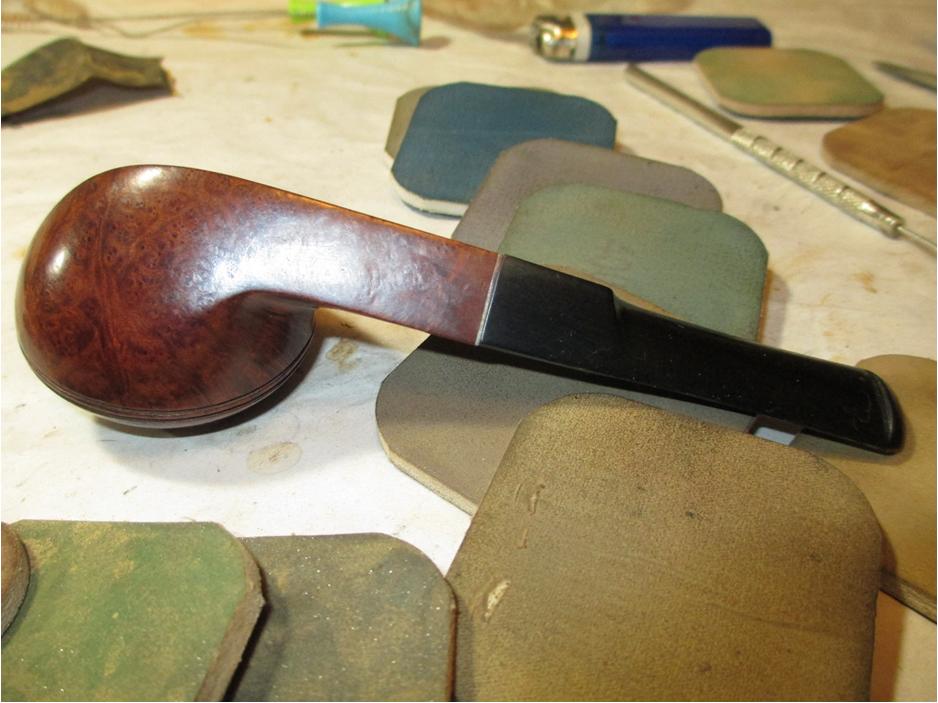
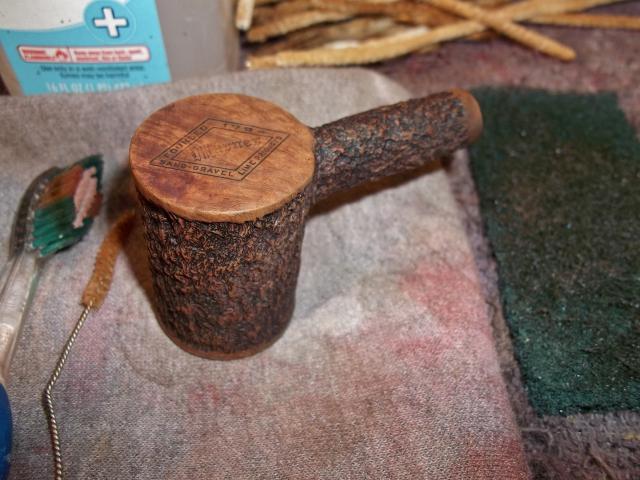
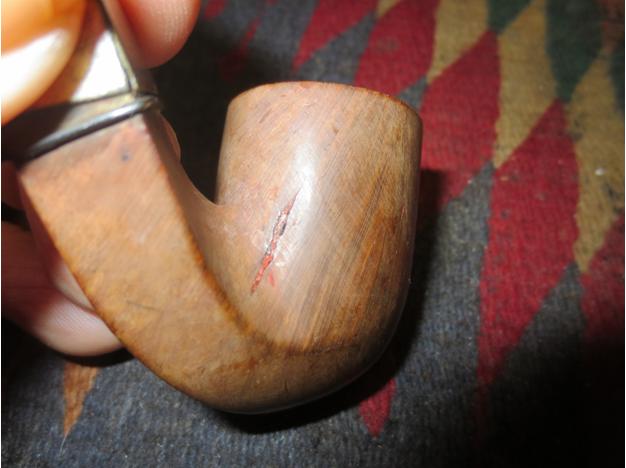
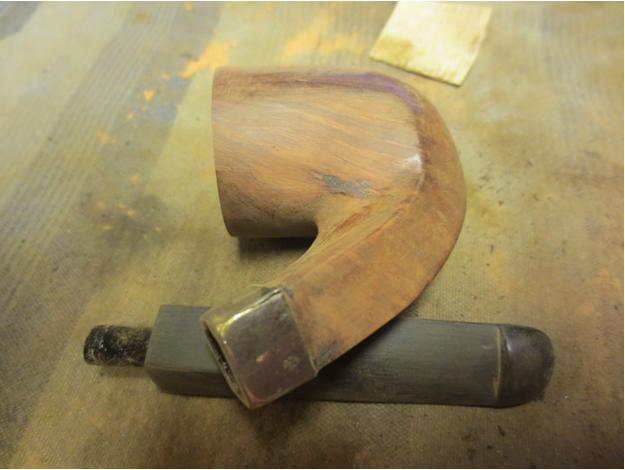
I dampened the rim and scrubbed it with 0000 steel wool to remove the lava that was on the top edges. It worked really well and the rim was clean in no time at all. I wiped down the bowl with alcohol on a cotton pad to remove the grime and oil that was in the finish. It took off all of the grim and left me with some beautiful mixed grain around the bowl.Paddy8

Paddy9 
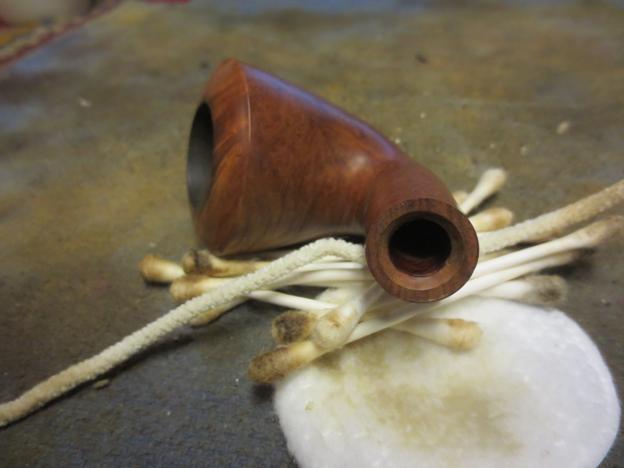
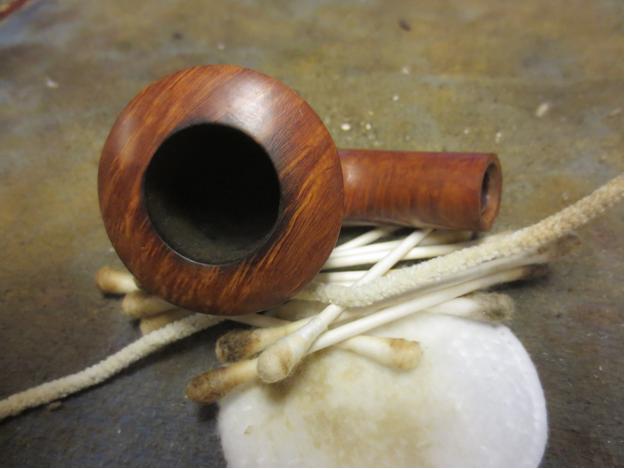
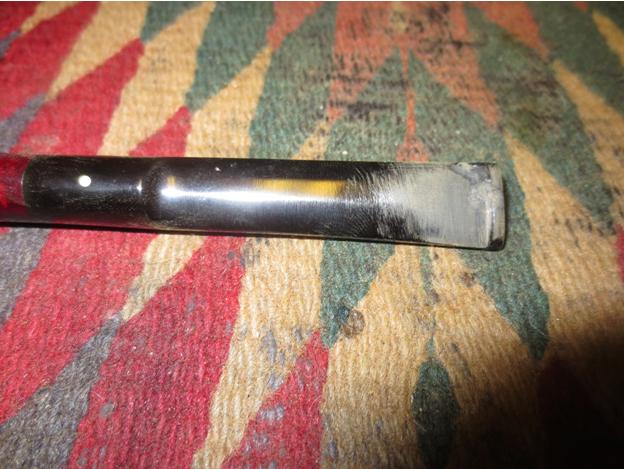
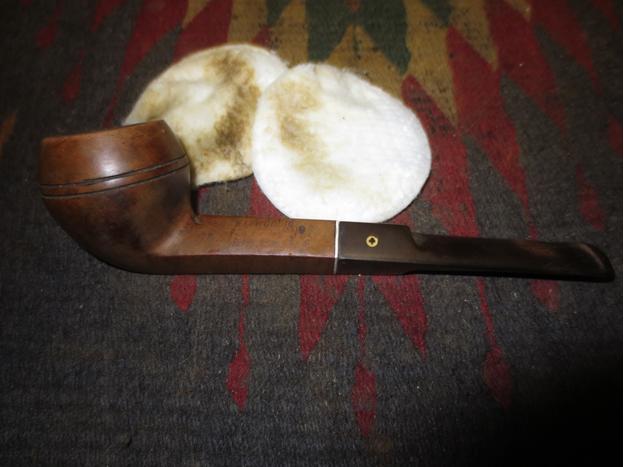
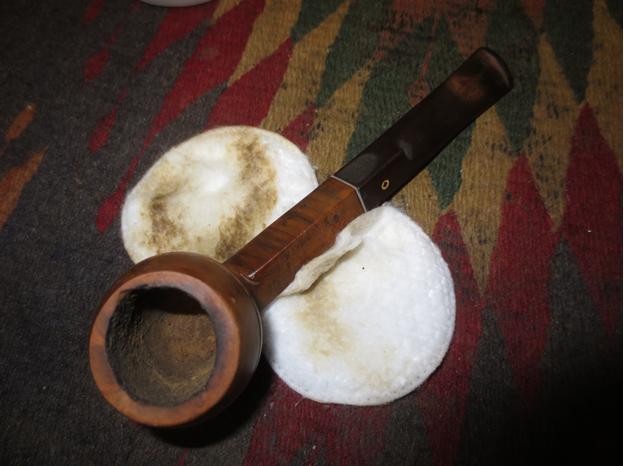
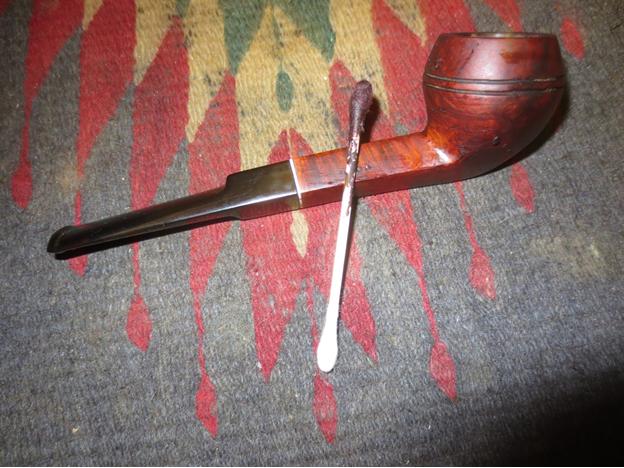
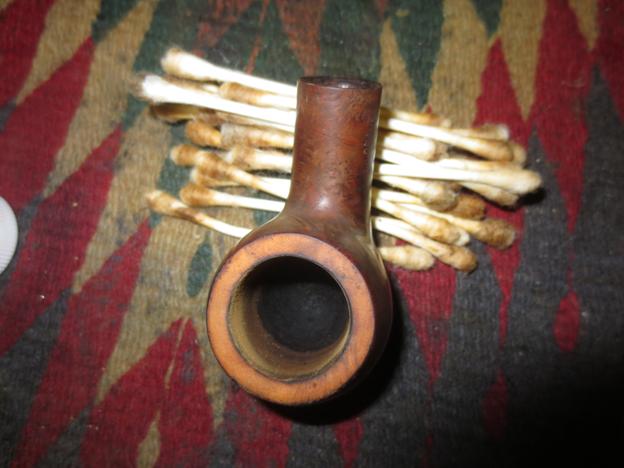
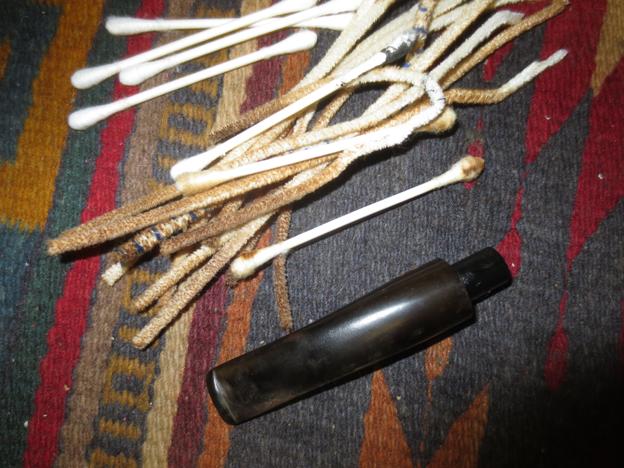
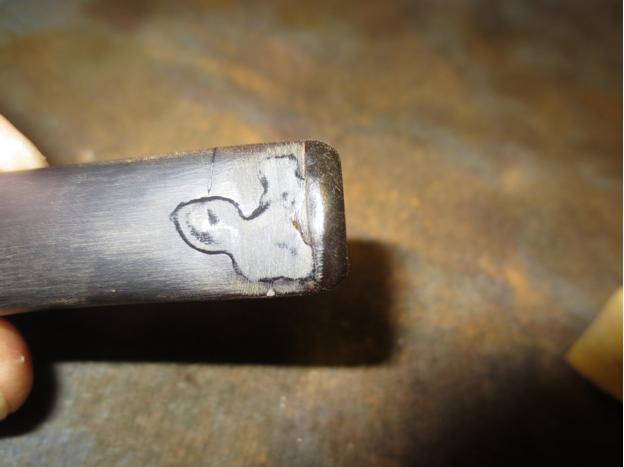
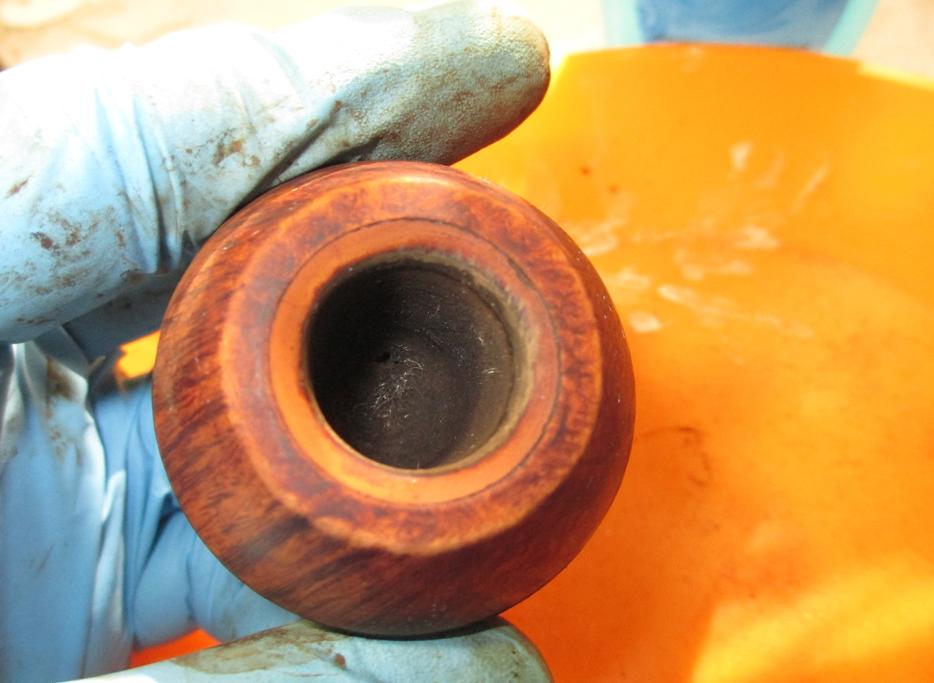
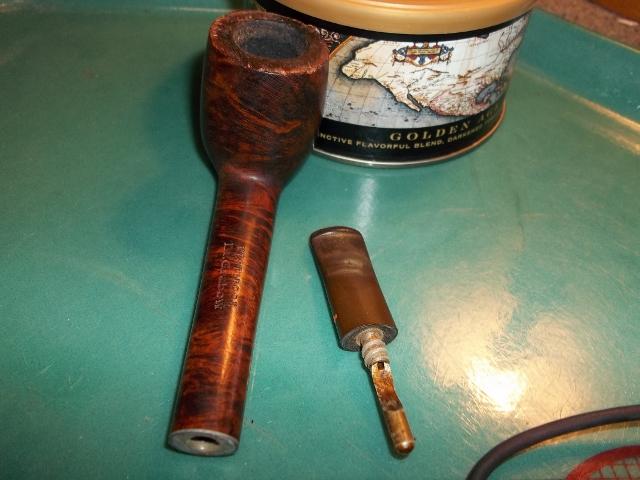
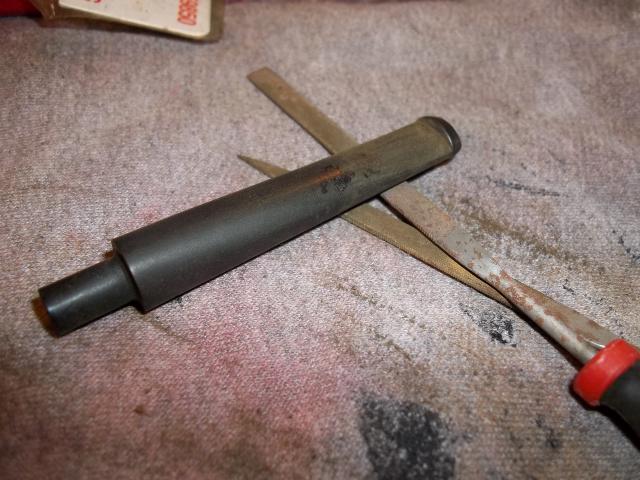
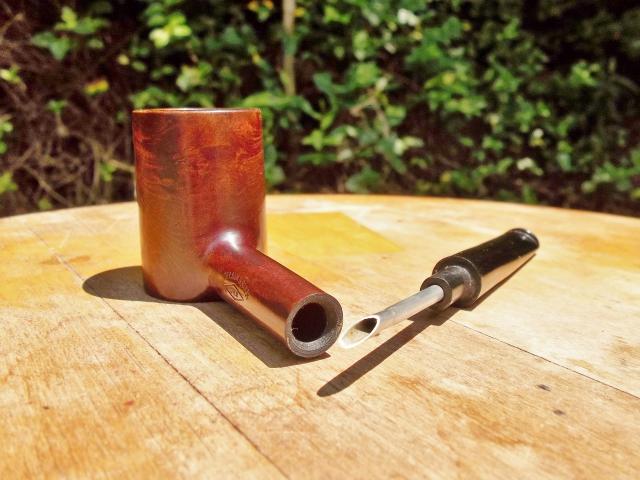
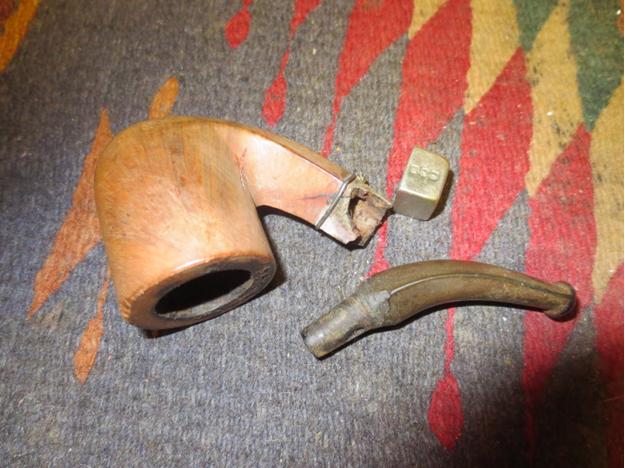
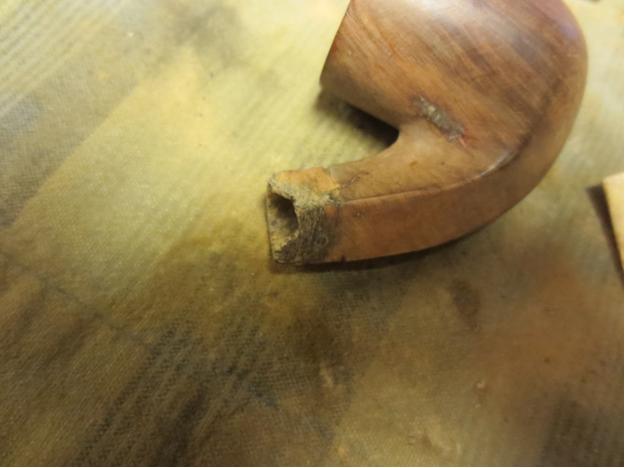
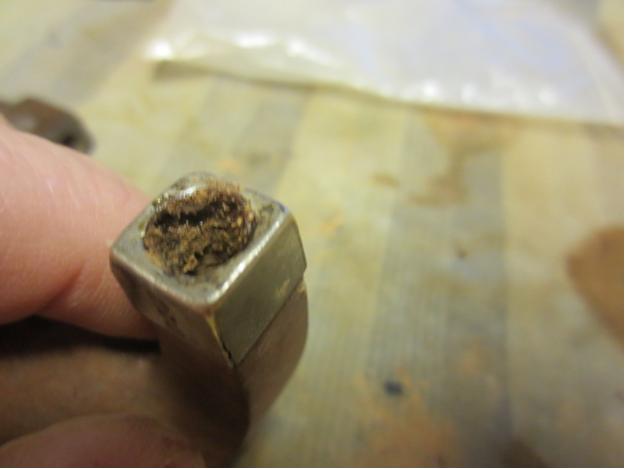
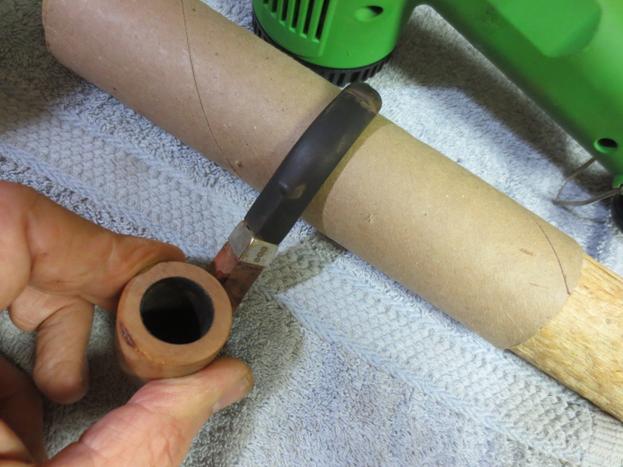
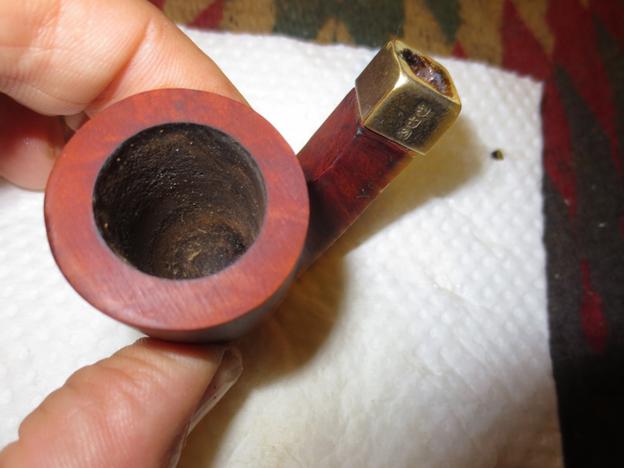
I scrubbed out the interior of the bowl and the shank with pipe cleaners, cotton swabs and alcohol to remove the tar and oil. I did the same with the stem and the chamfered tenon end.Paddy10

Paddy11 
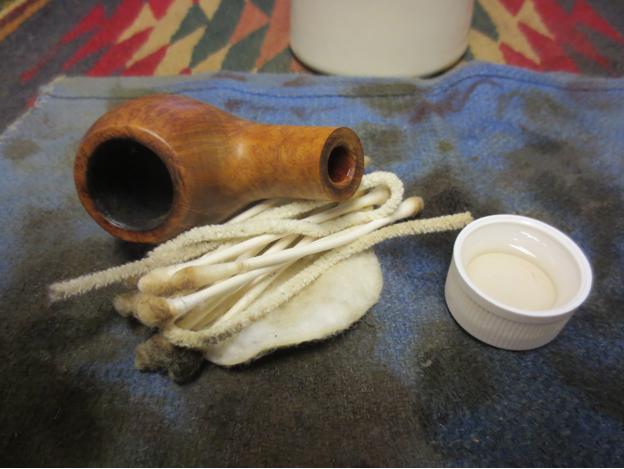
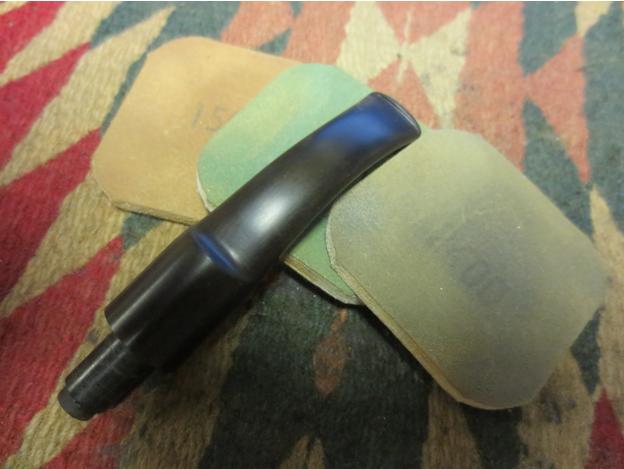
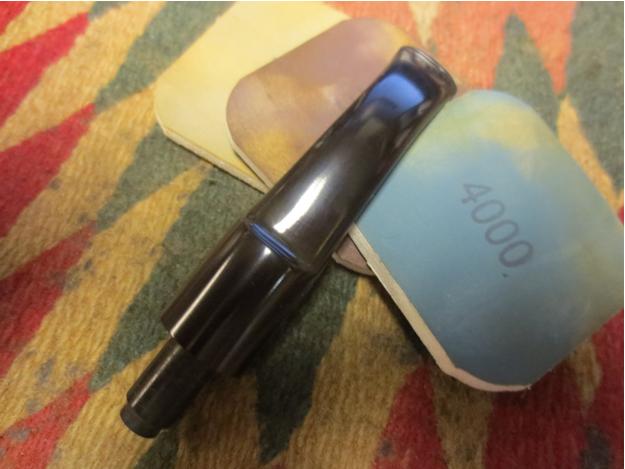
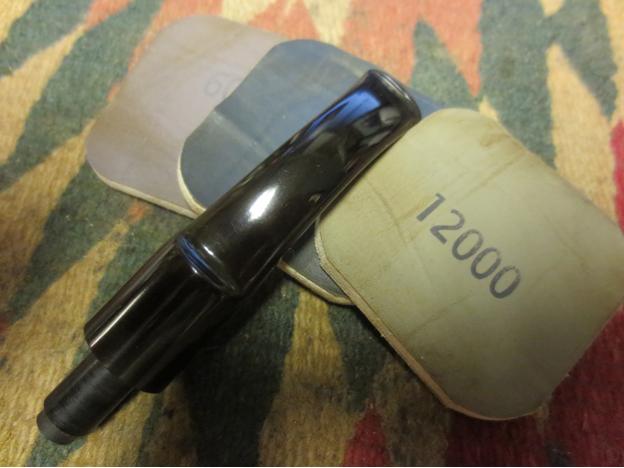
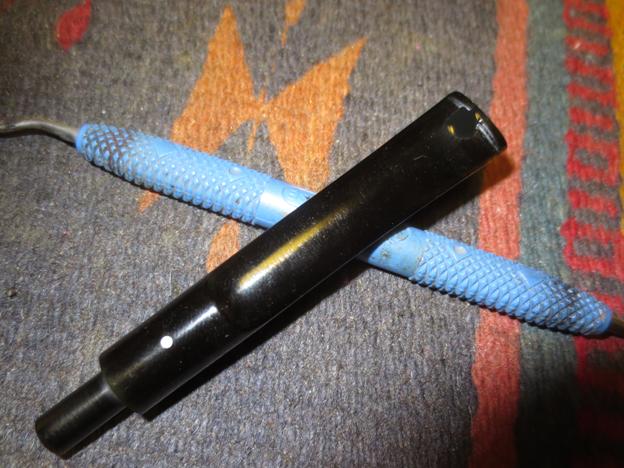
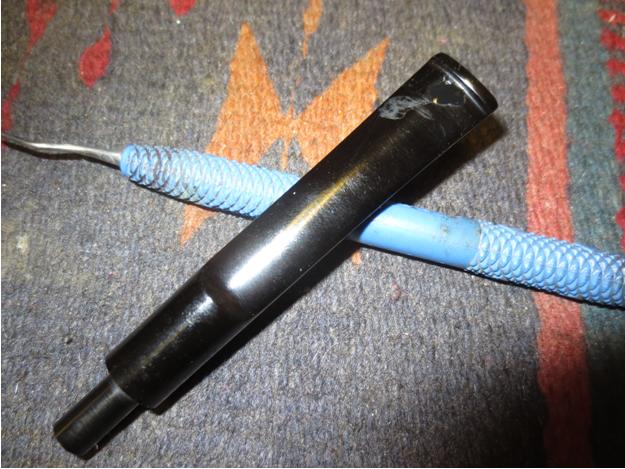
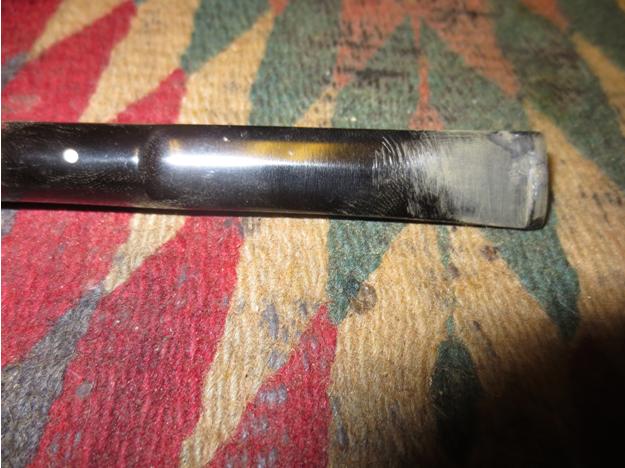
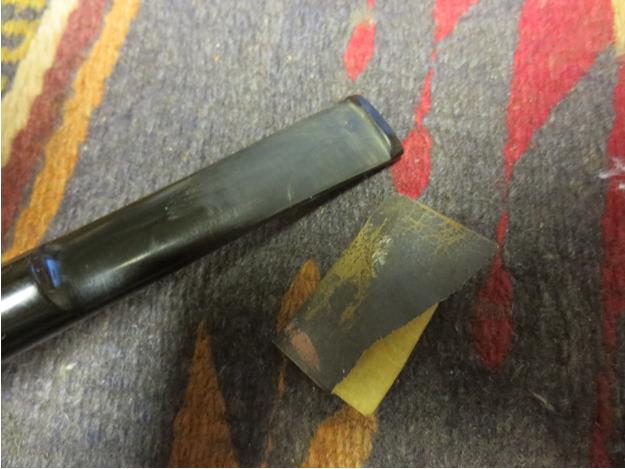
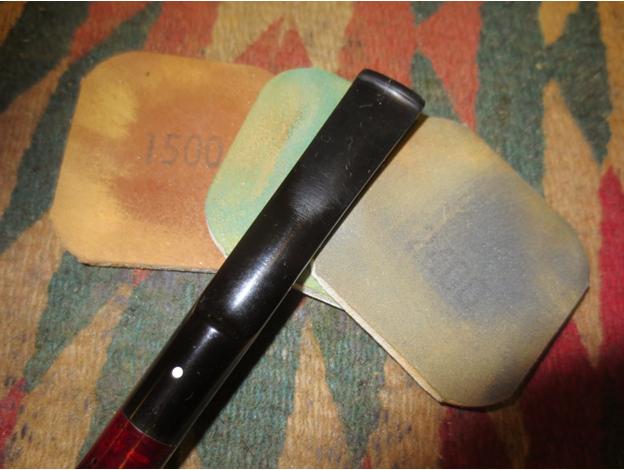
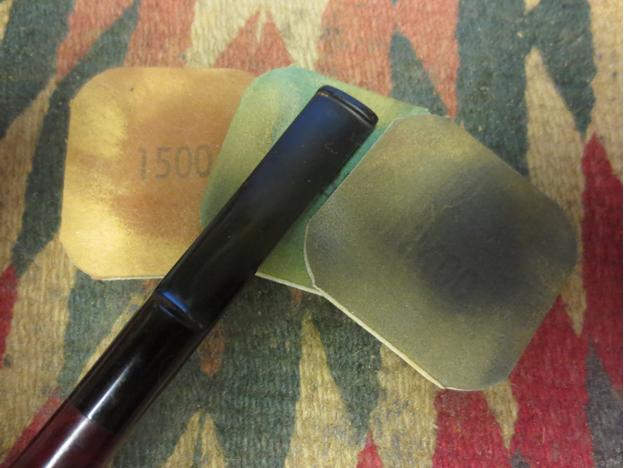
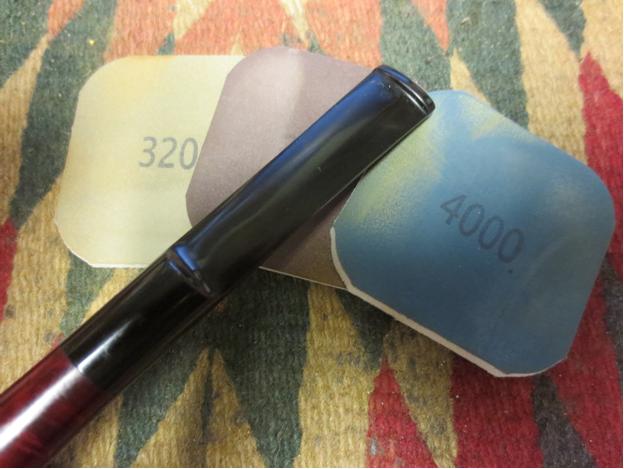
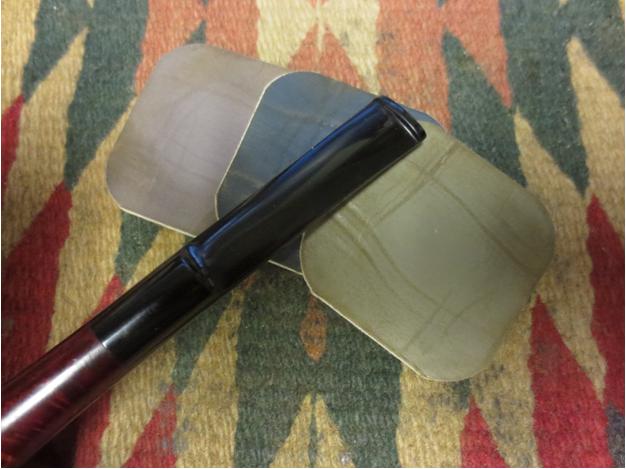
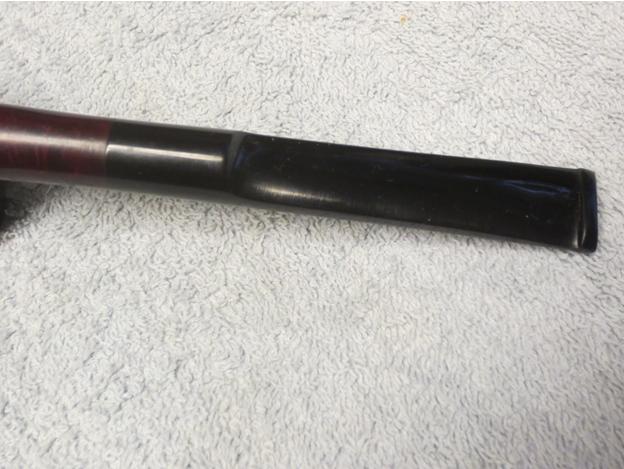
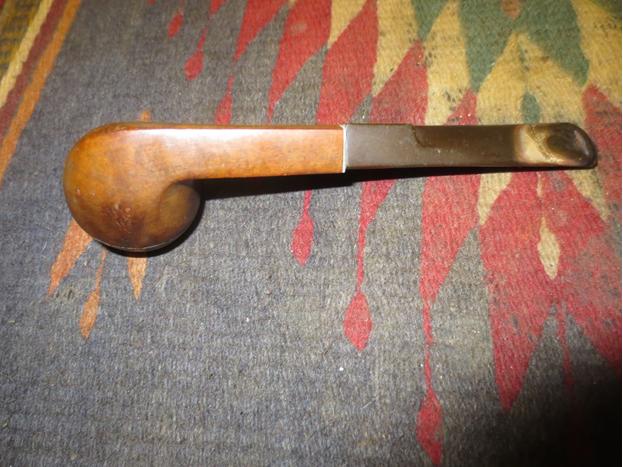
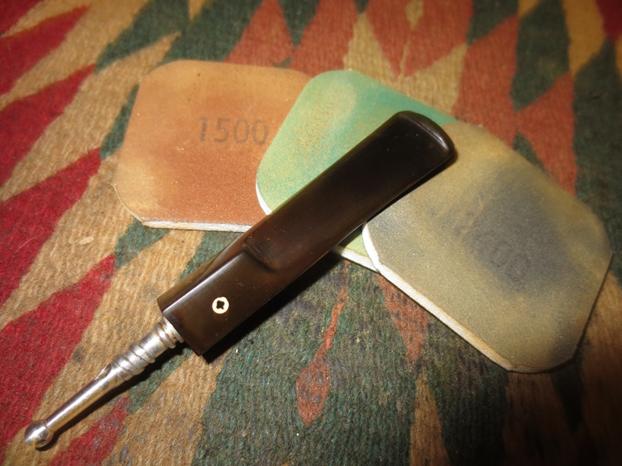
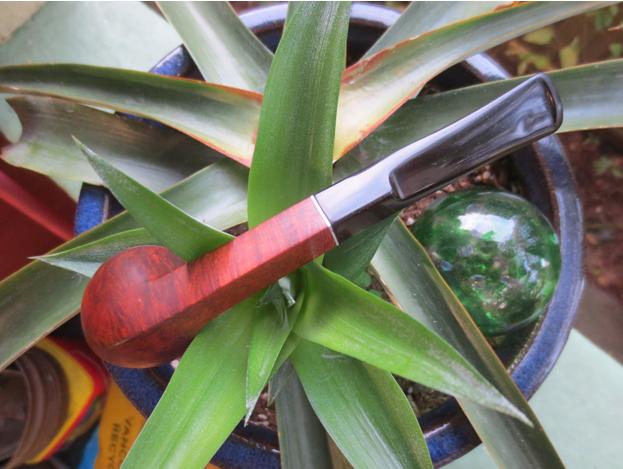
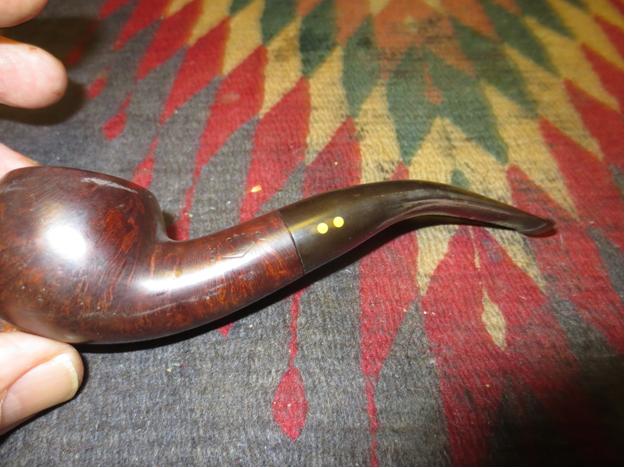
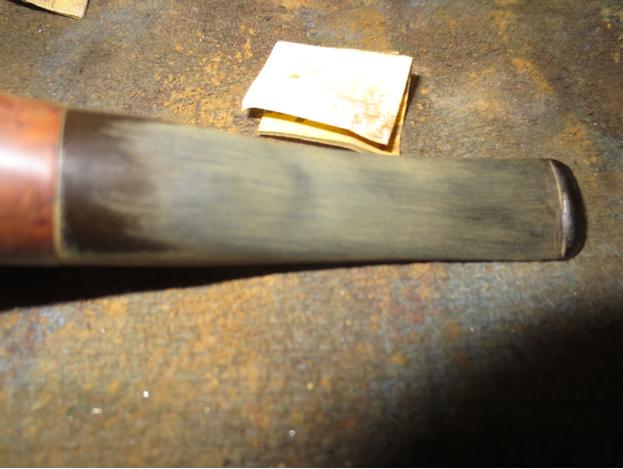
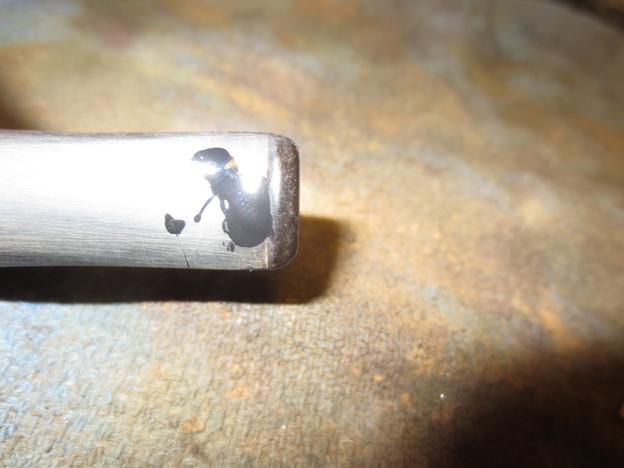
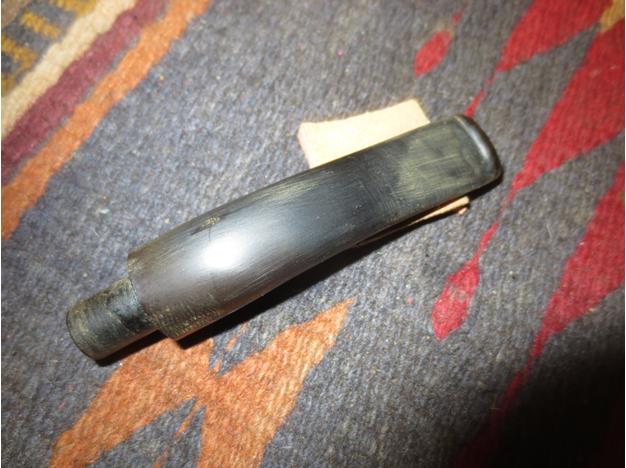
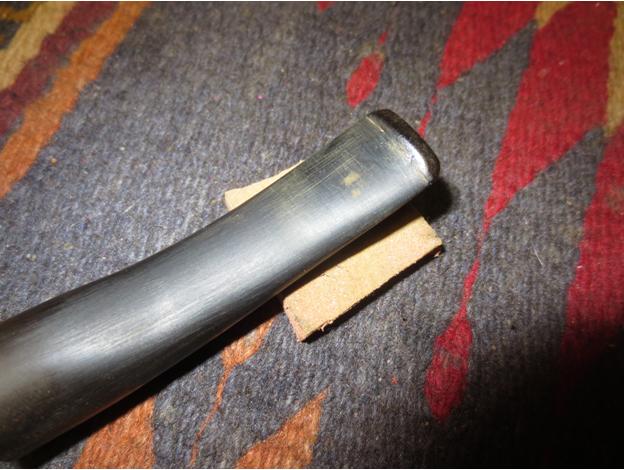
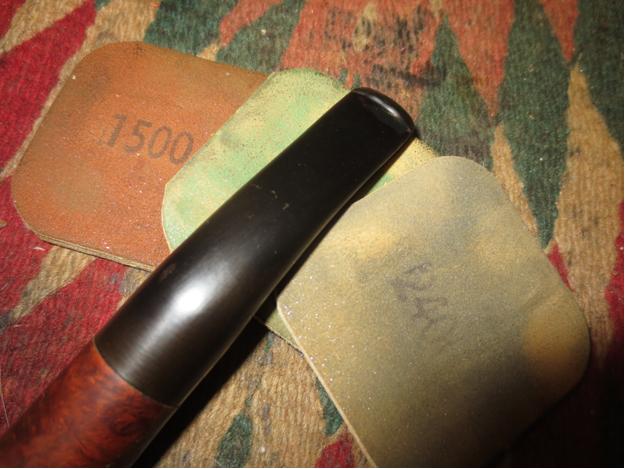
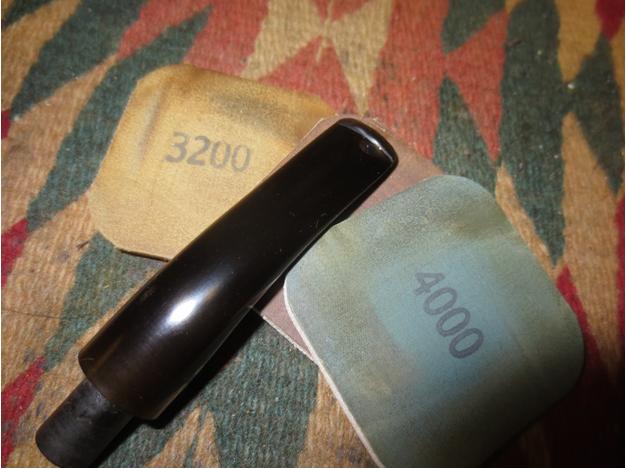
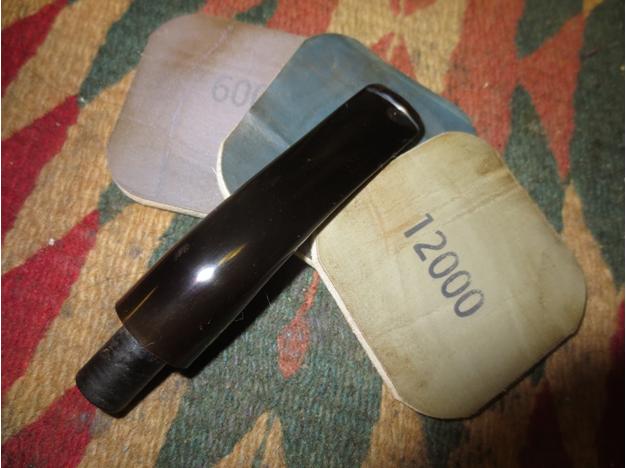
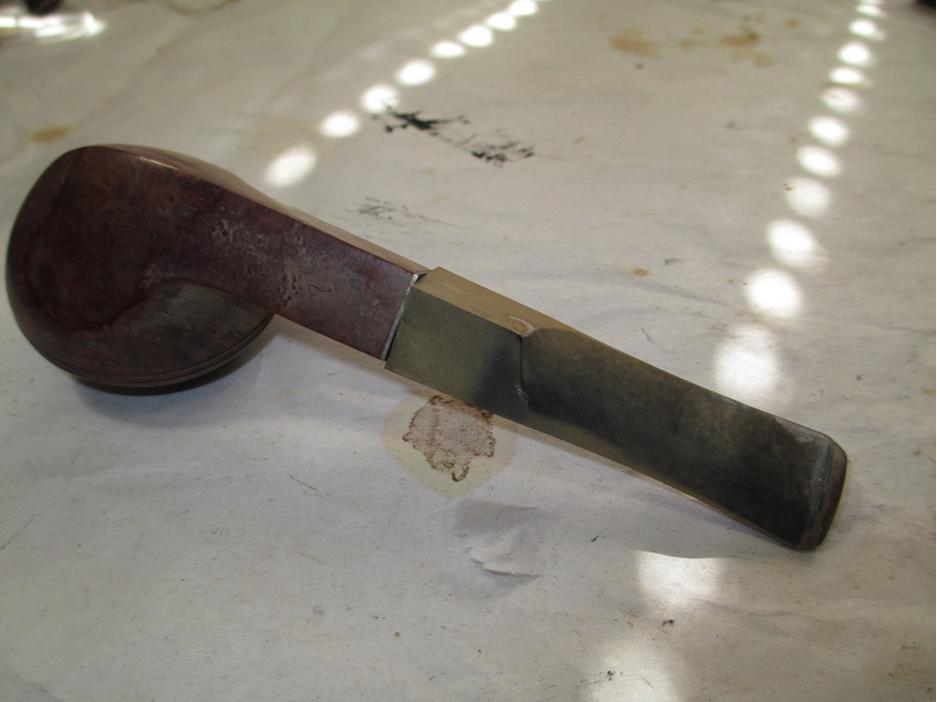
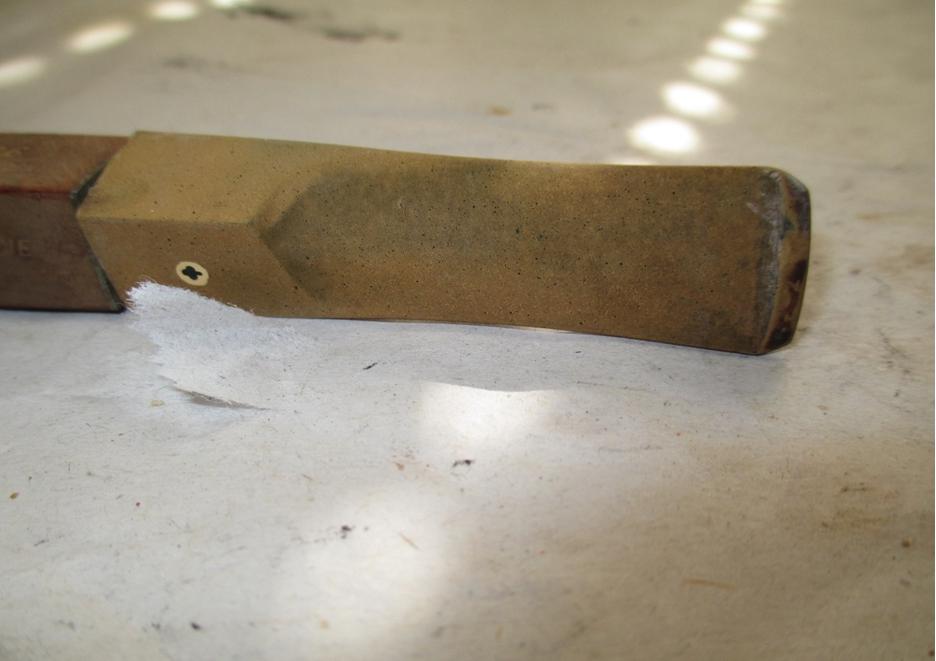
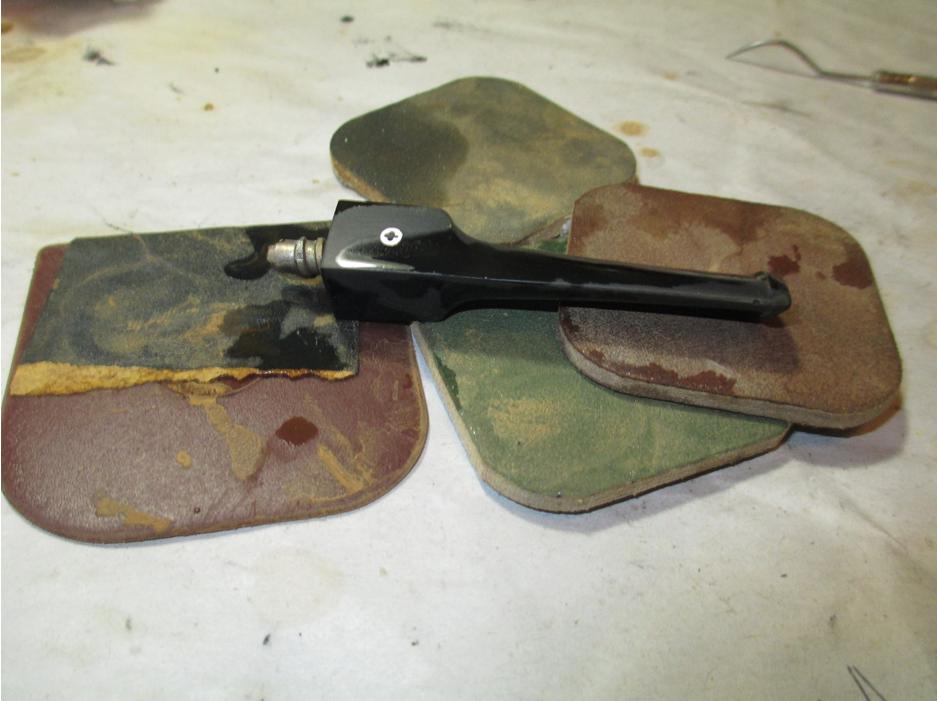
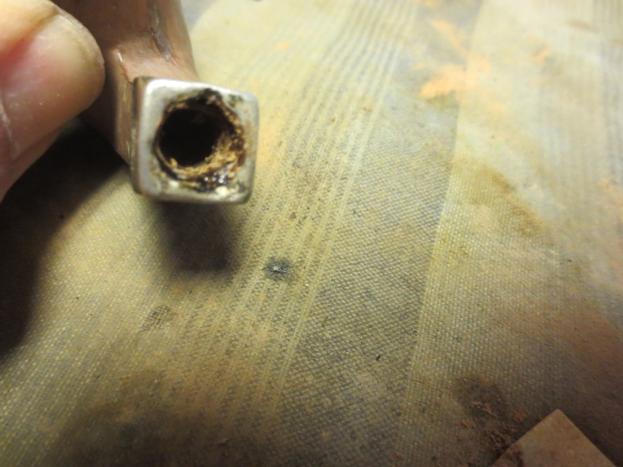
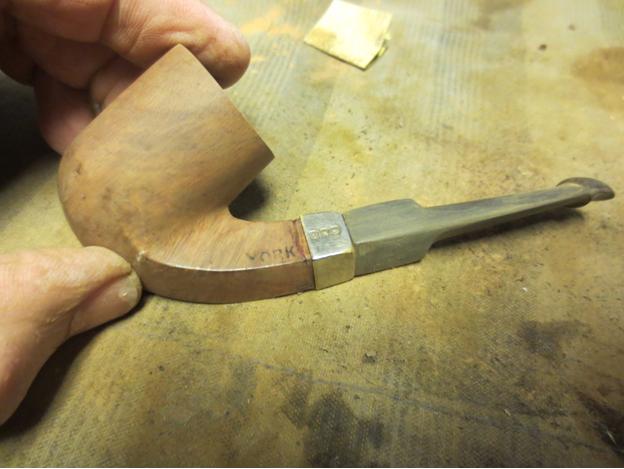
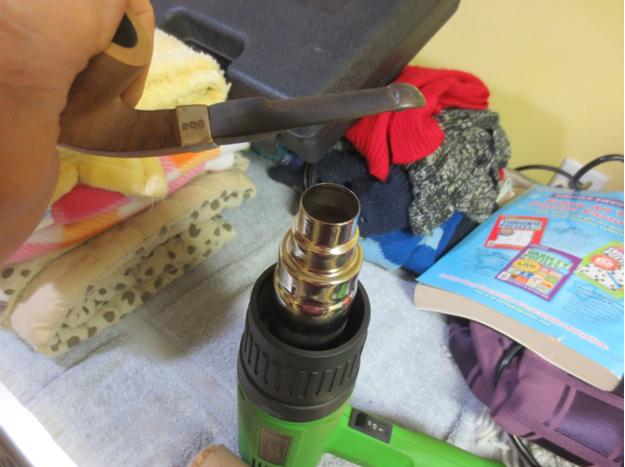
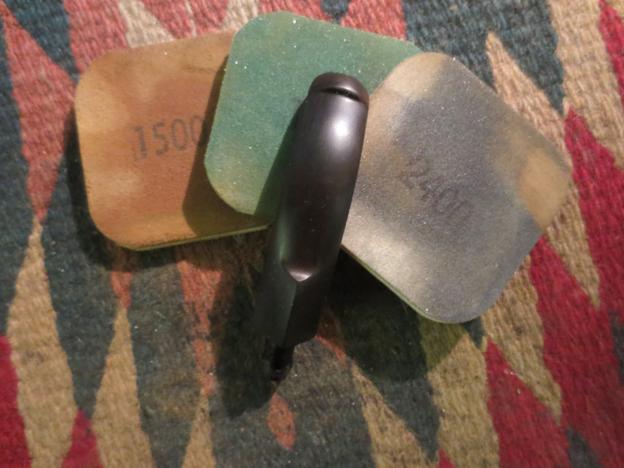
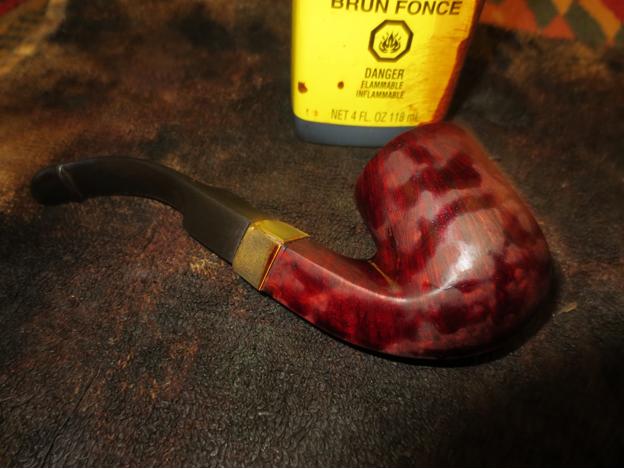
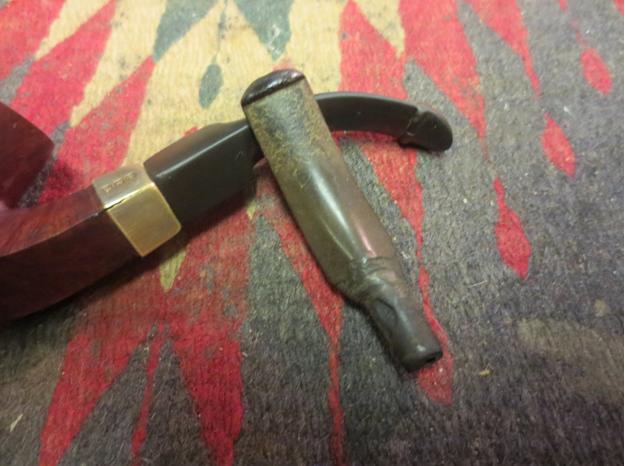
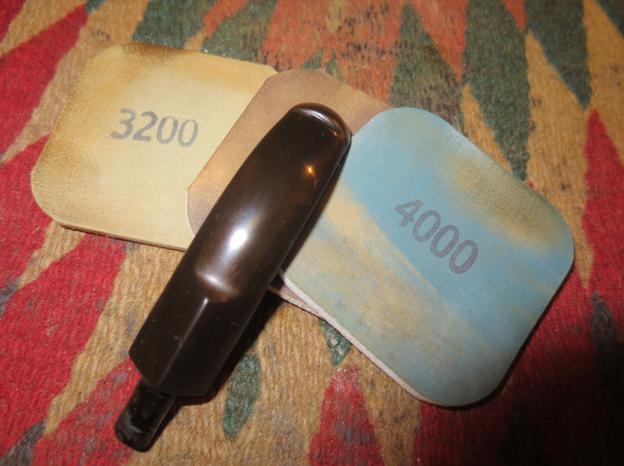
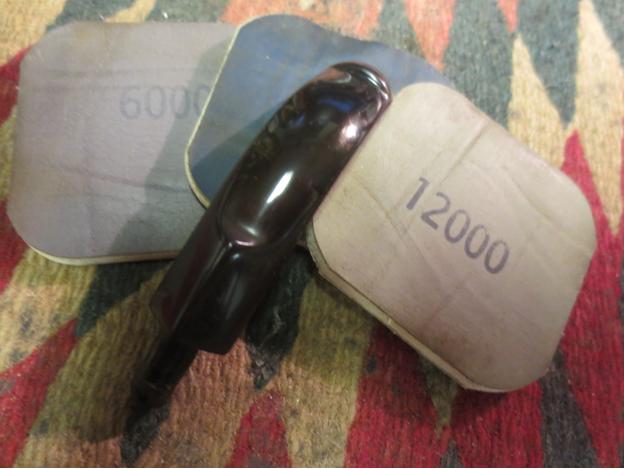
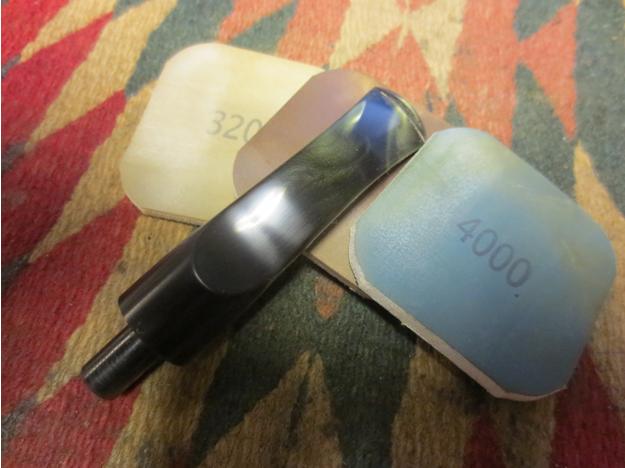
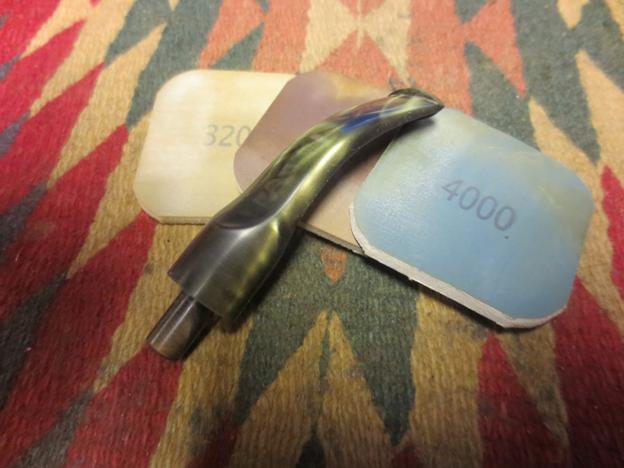
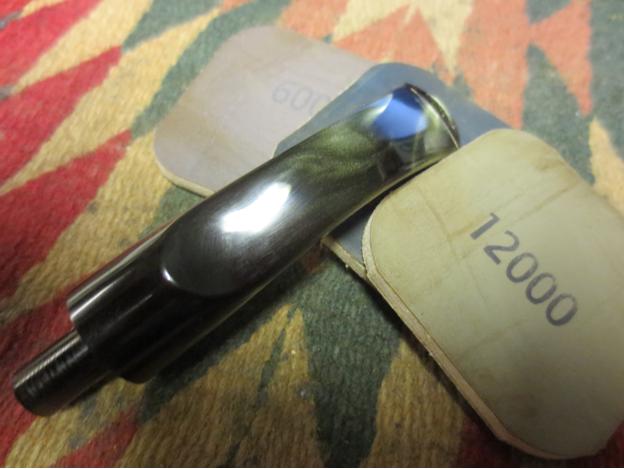
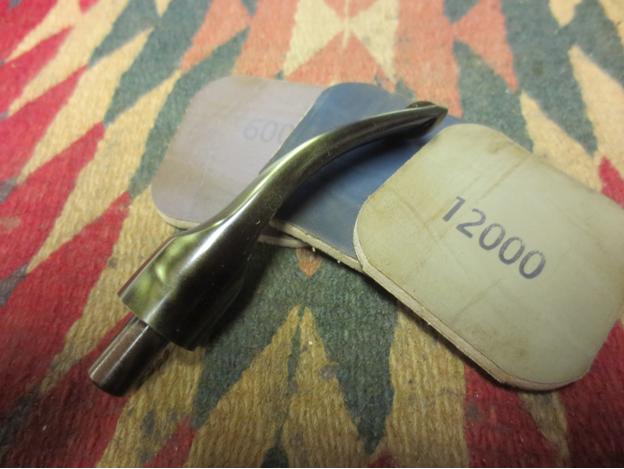
With the interior clean I turned my attention to the acrylic/Lucite stem. It had some light tooth chatter on the top and underside but was in pretty decent shape. The finish was dull and no longer smooth to the touch. I worked on it with micromesh sanding pads – wet sanding with 1500-2400 grit pads and dry sanding with 3200-12000 grit pads. I buffed it with Tripoli and White Diamond after I finished with the 4000 grit pad and then finished with the last three pads. As I polished it with the pads you could begin to see the colours come through the stem. It is a beautiful piece of Lucite.Paddy12

Paddy13

Paddy14

Paddy15

Paddy16

Paddy17 
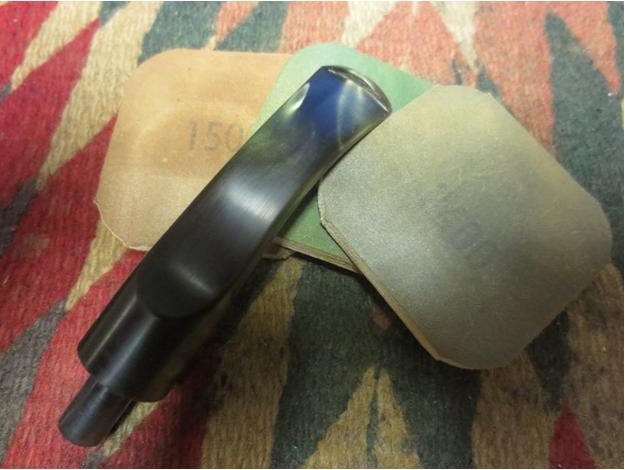
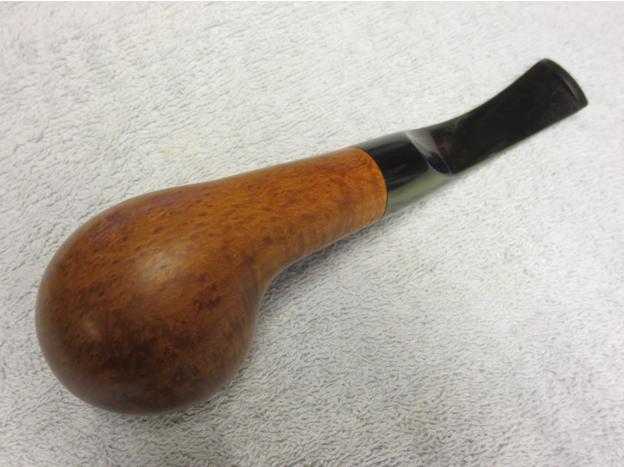
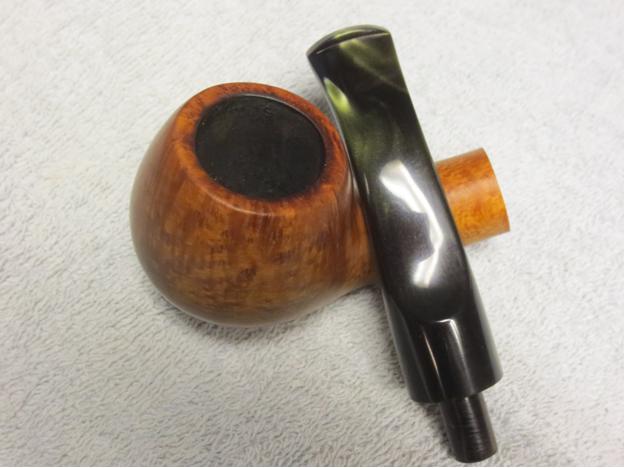
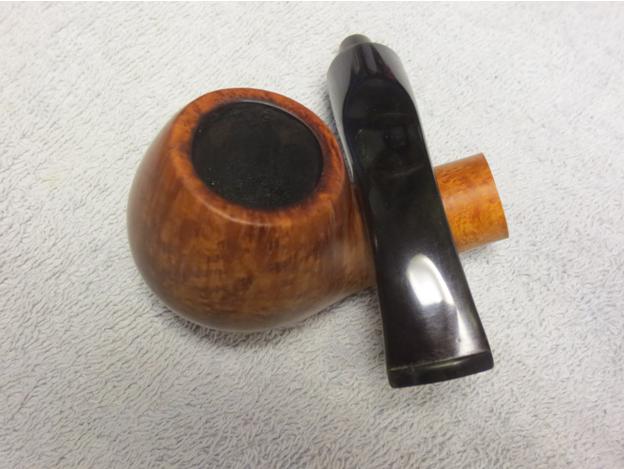
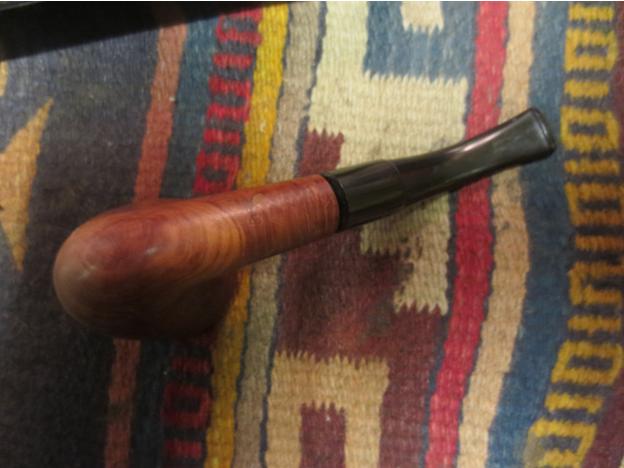
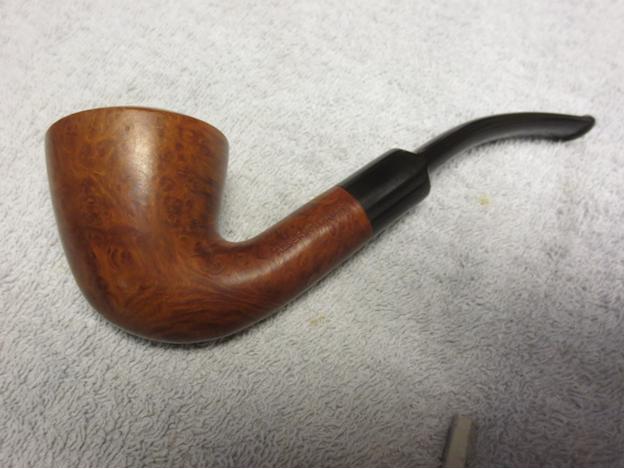
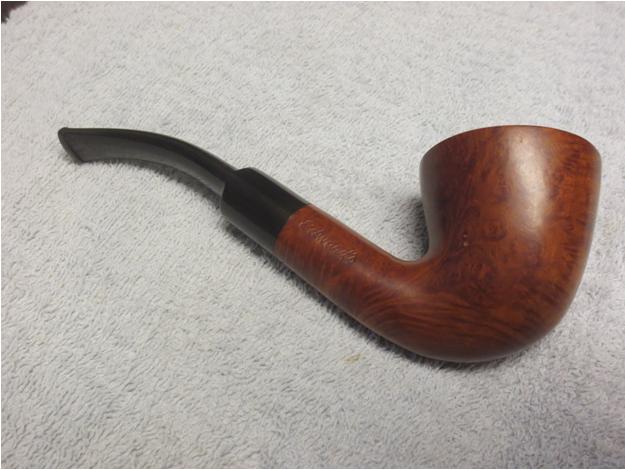
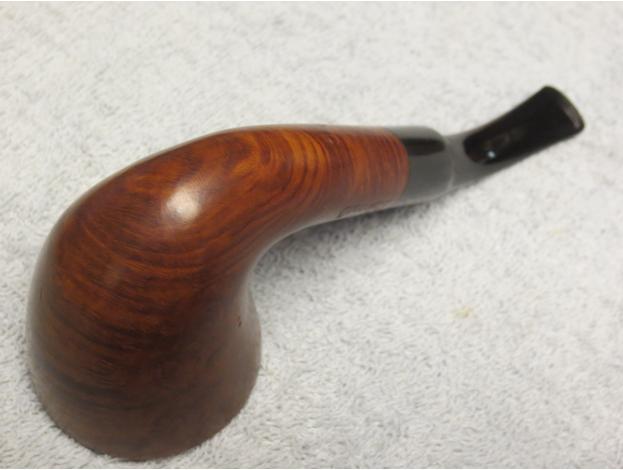
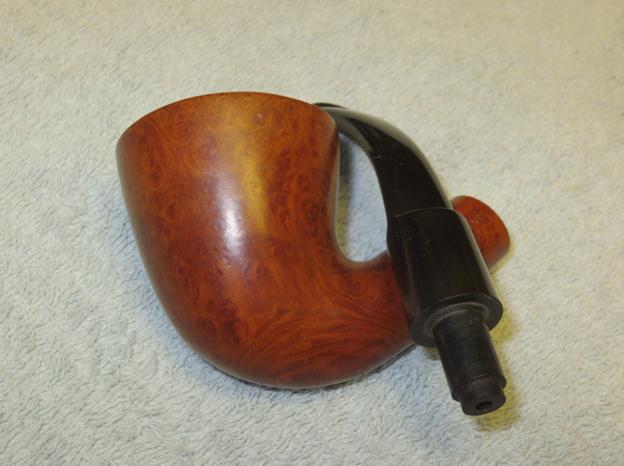
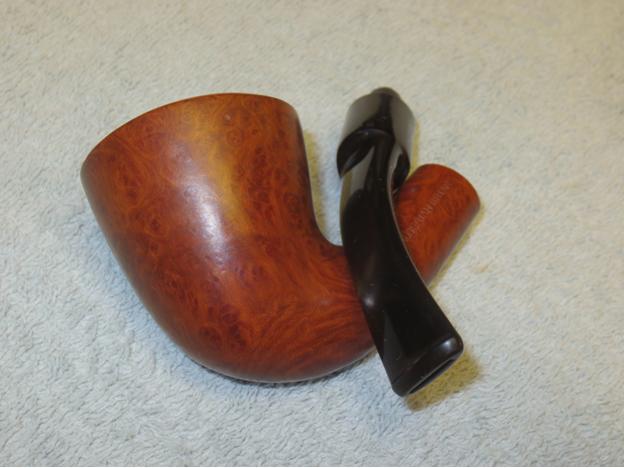
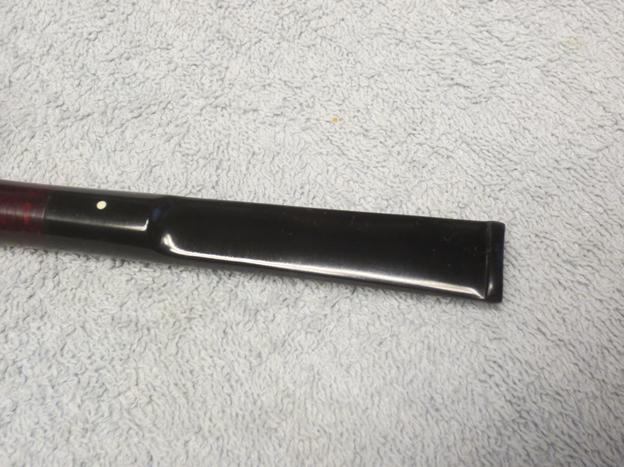
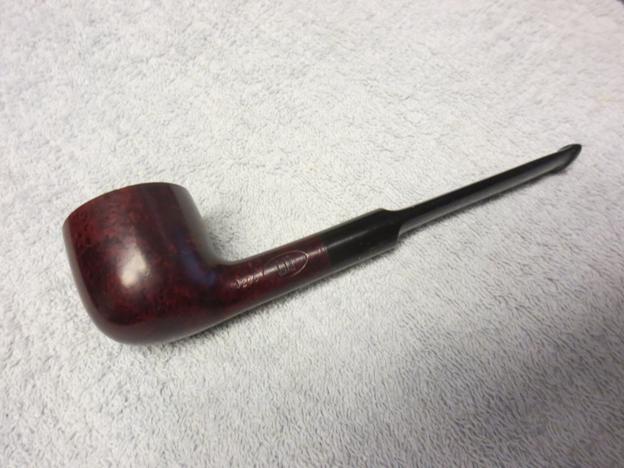
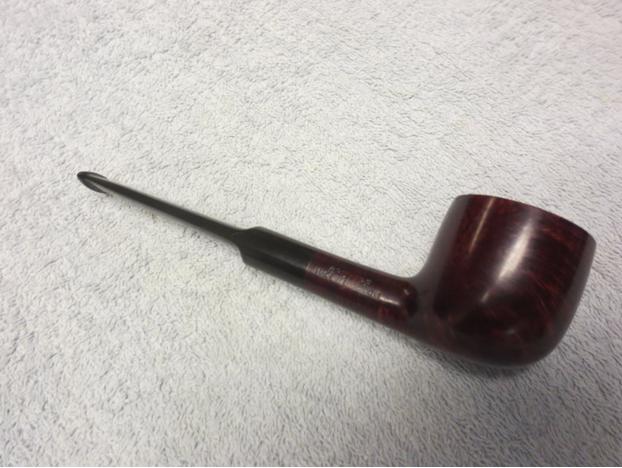
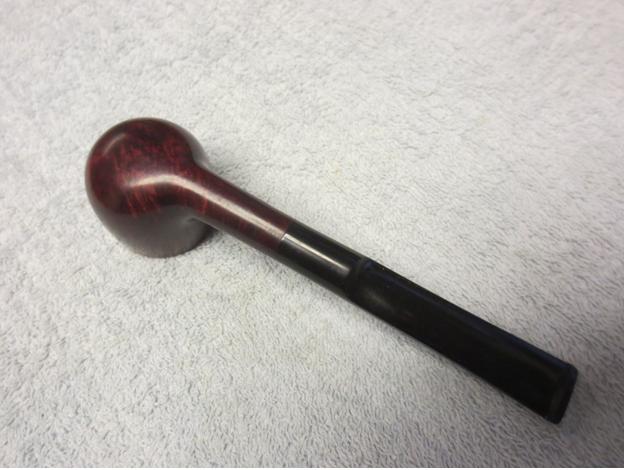
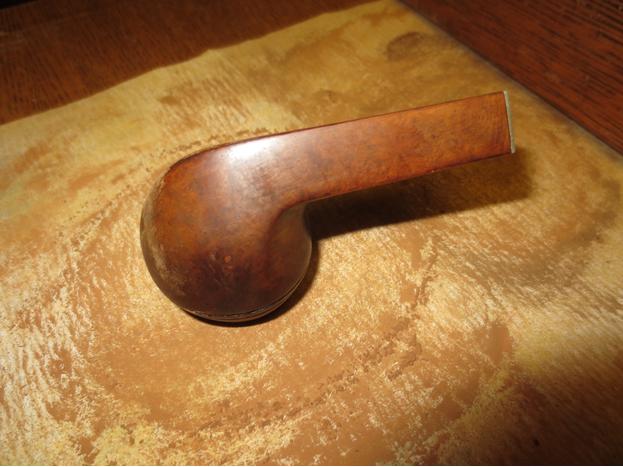
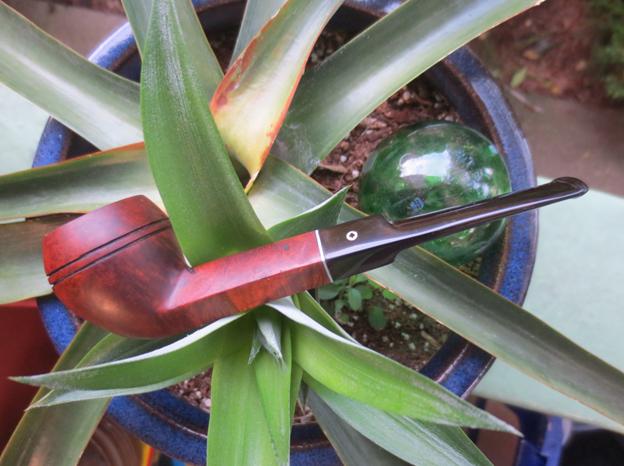
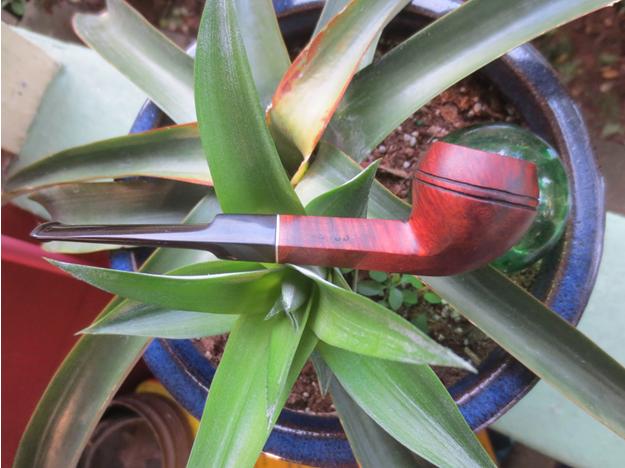
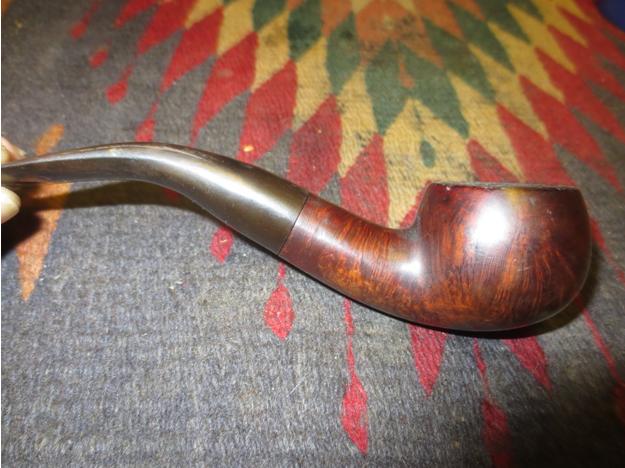
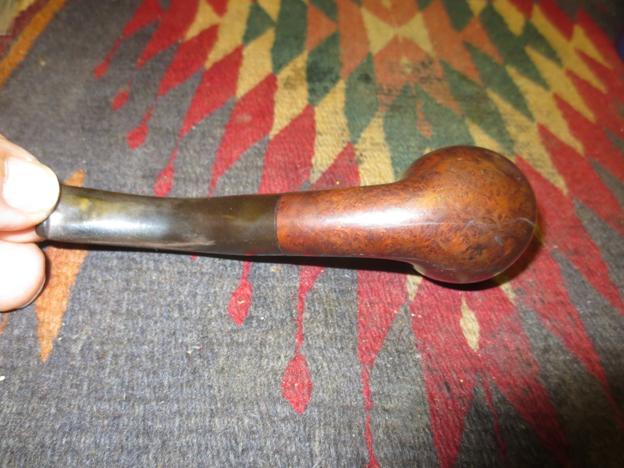
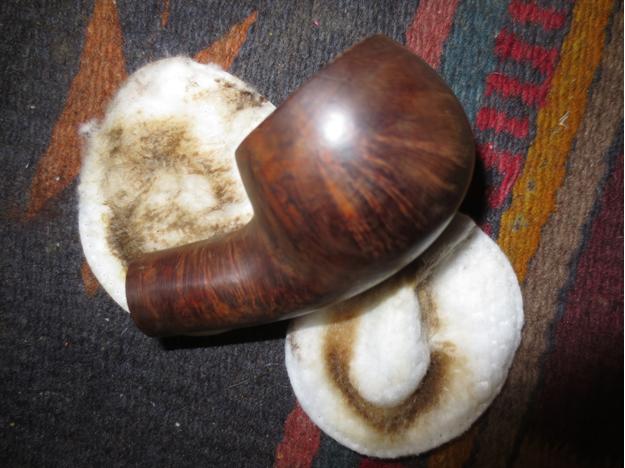
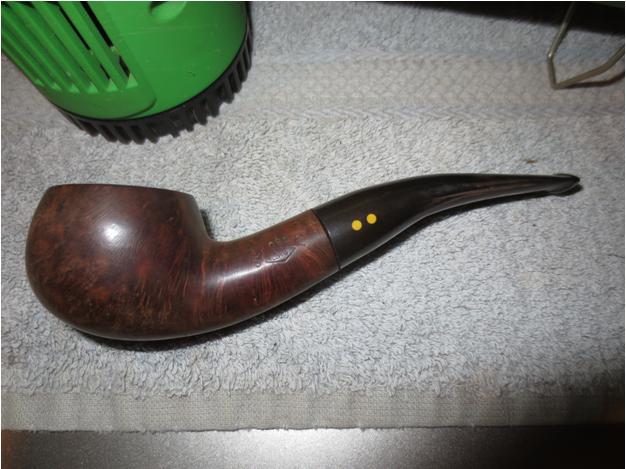
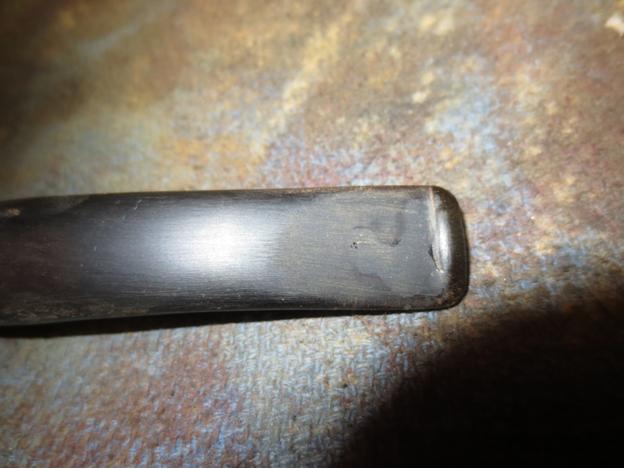
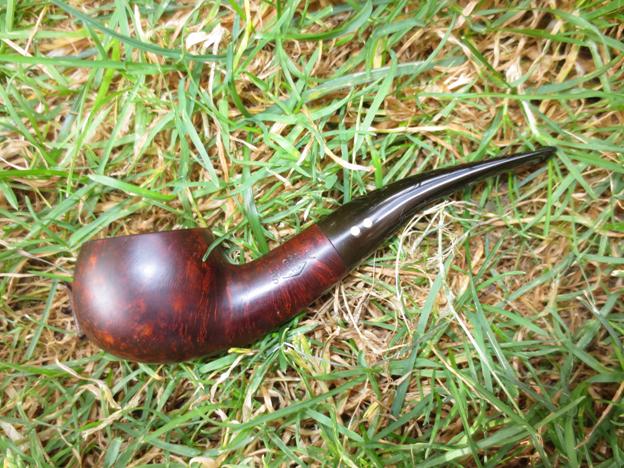
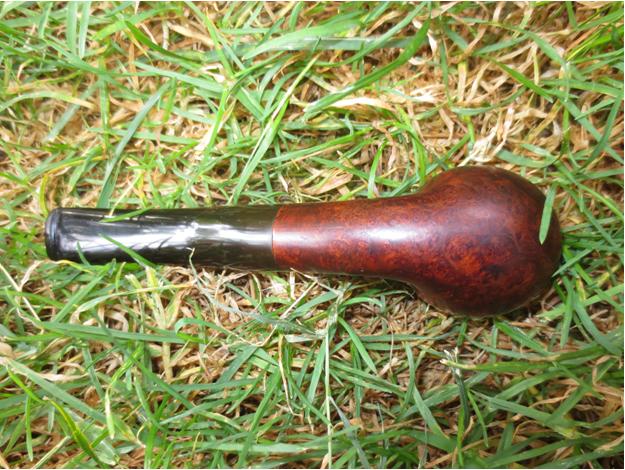
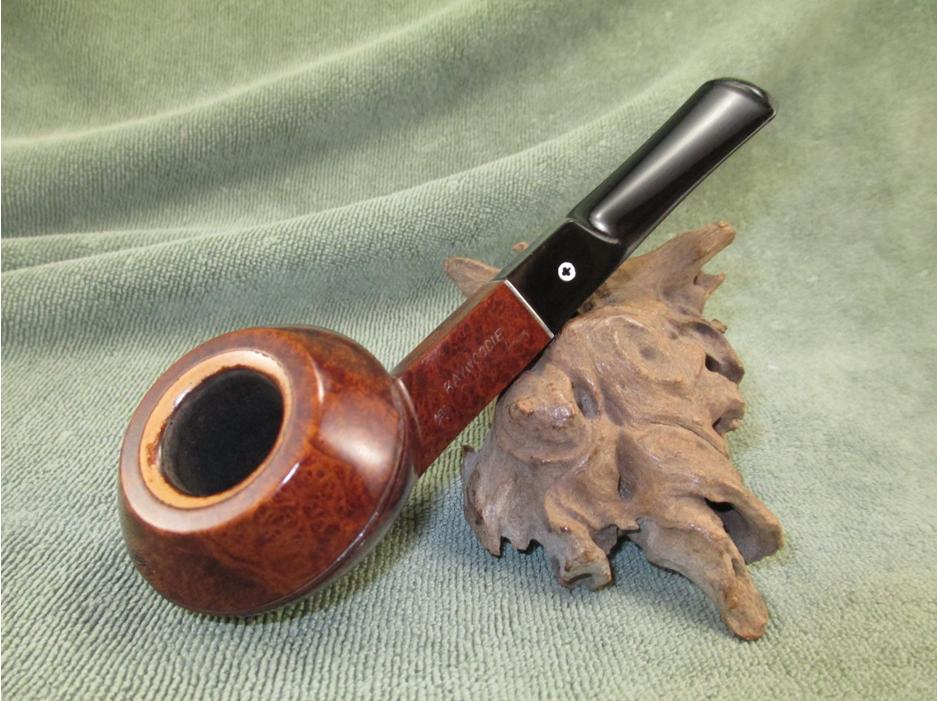
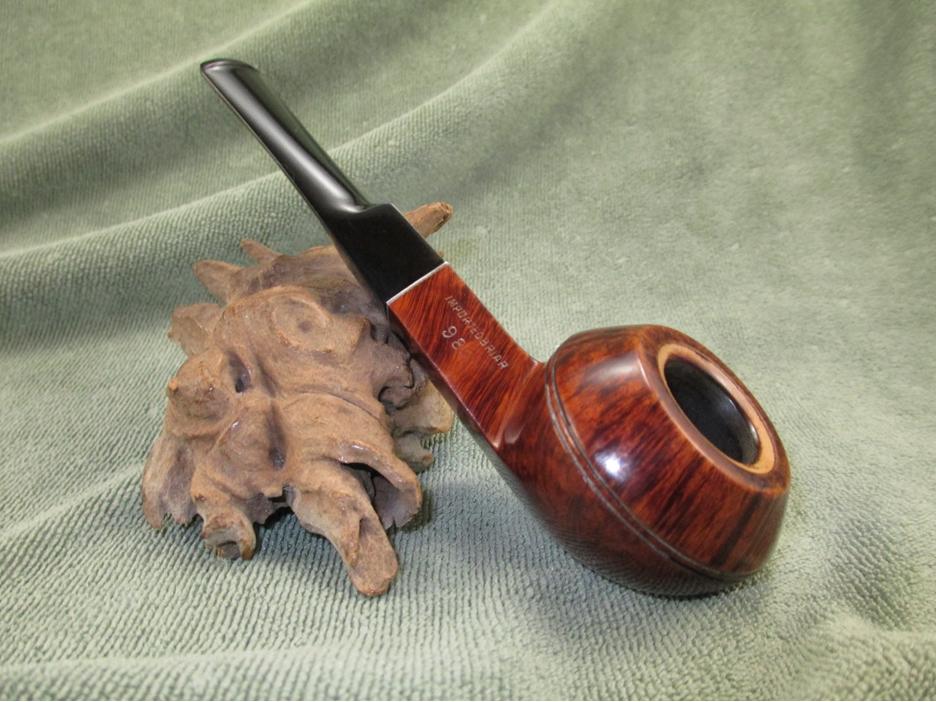
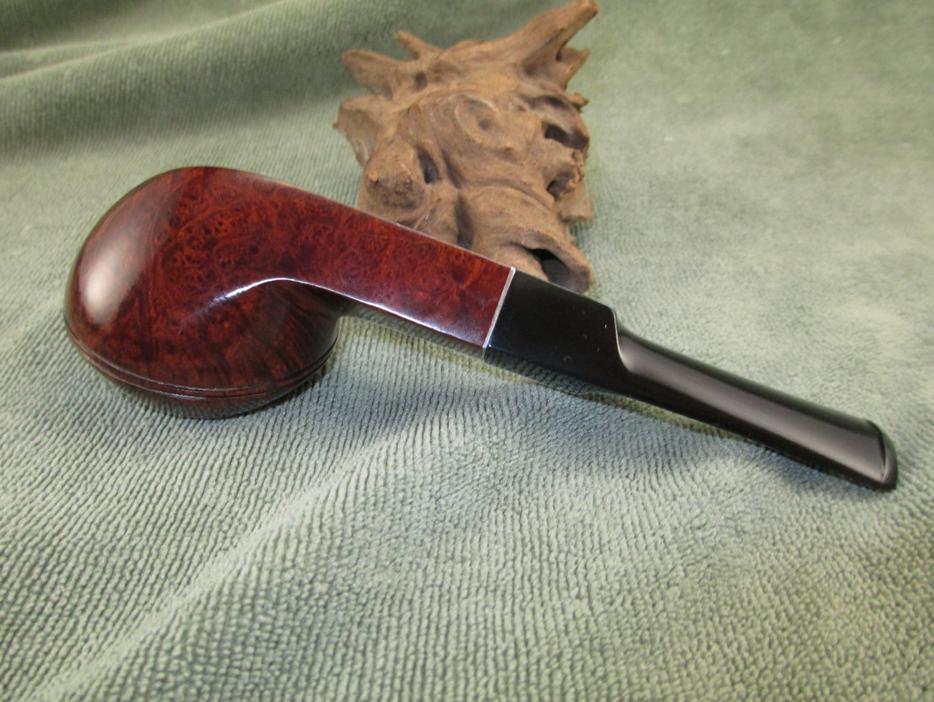
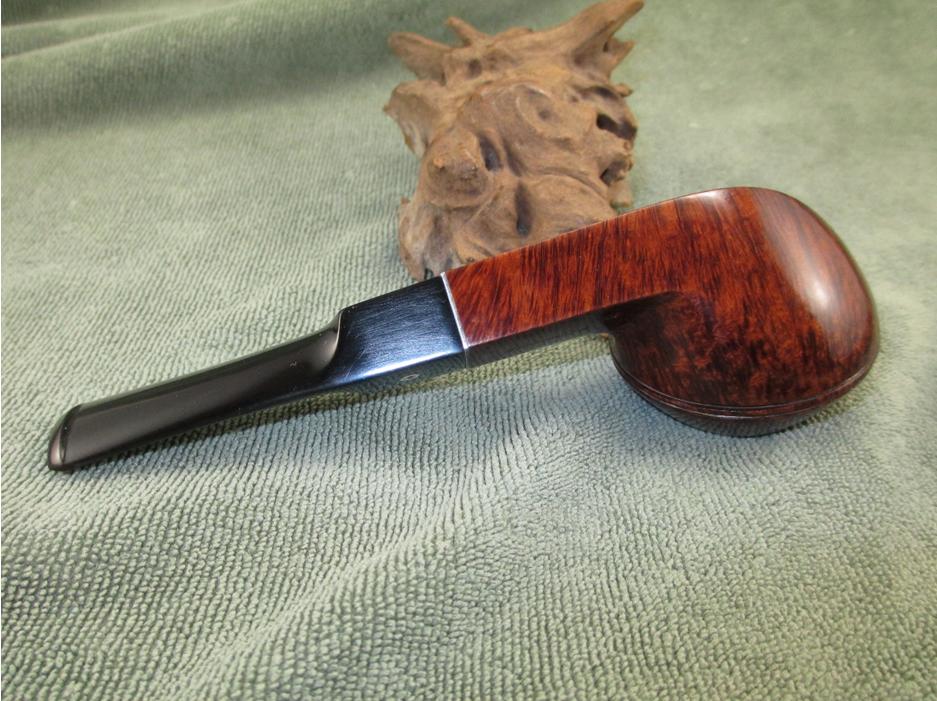
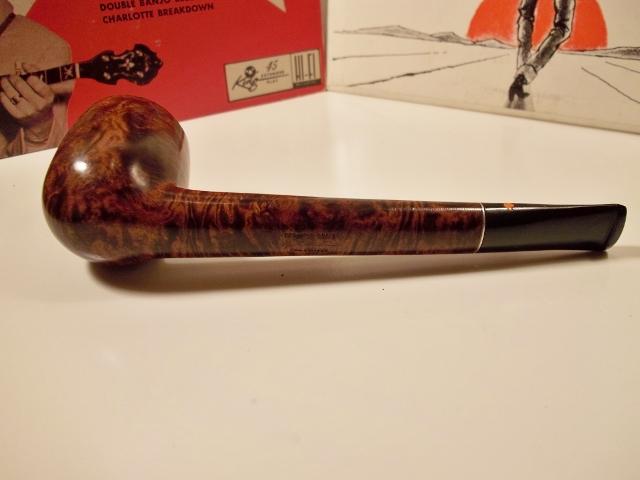
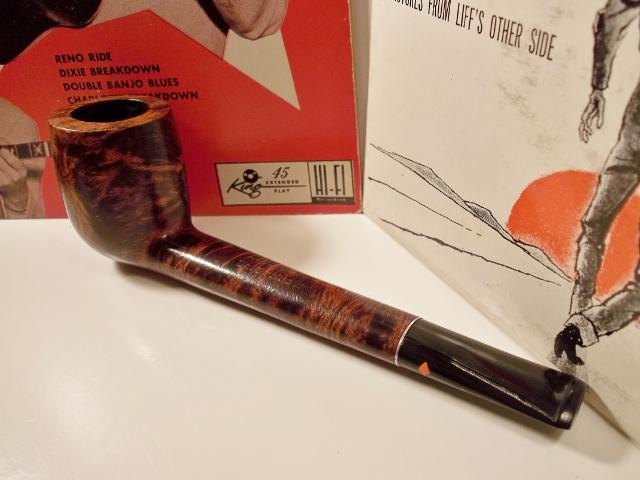
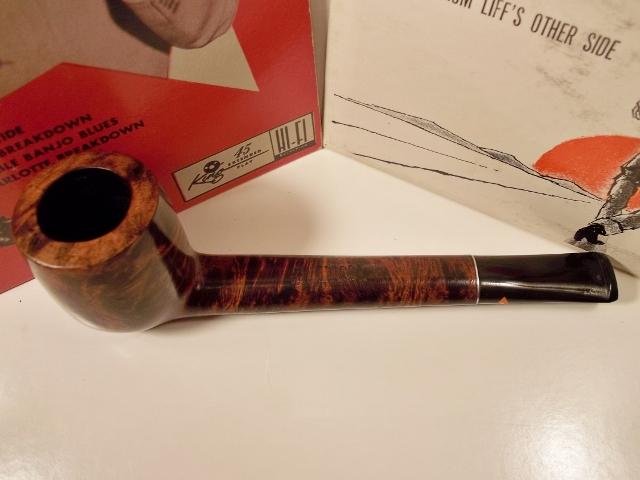
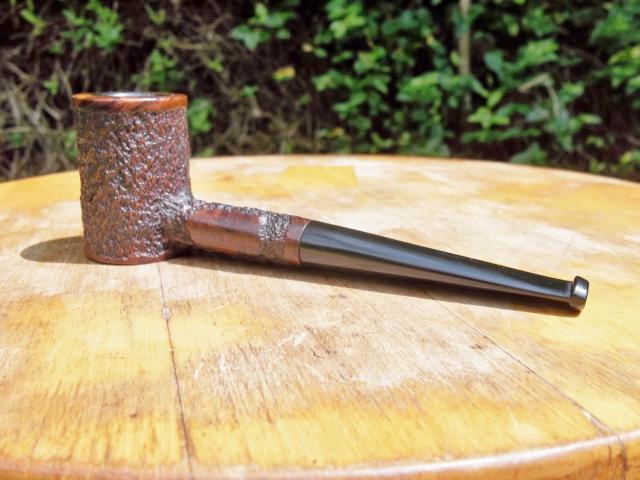
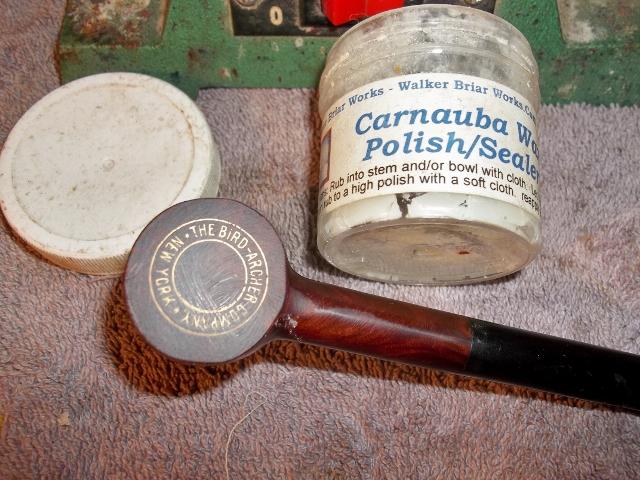
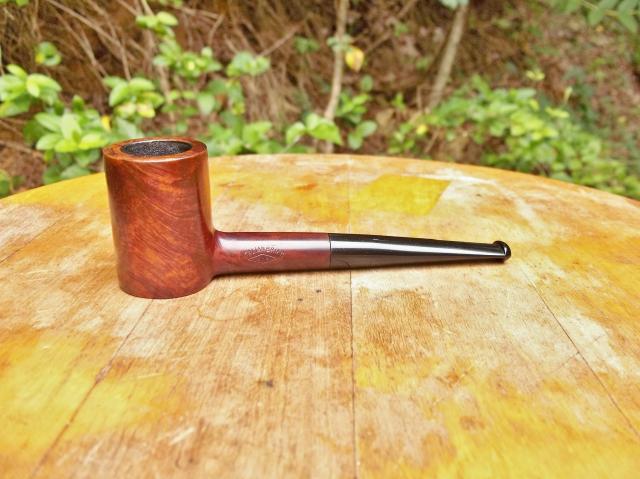
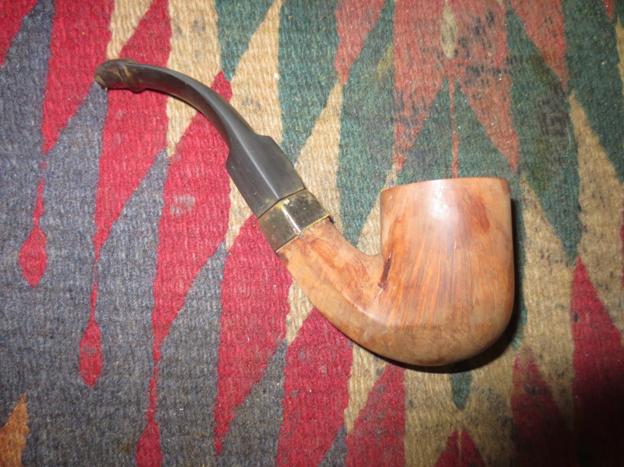
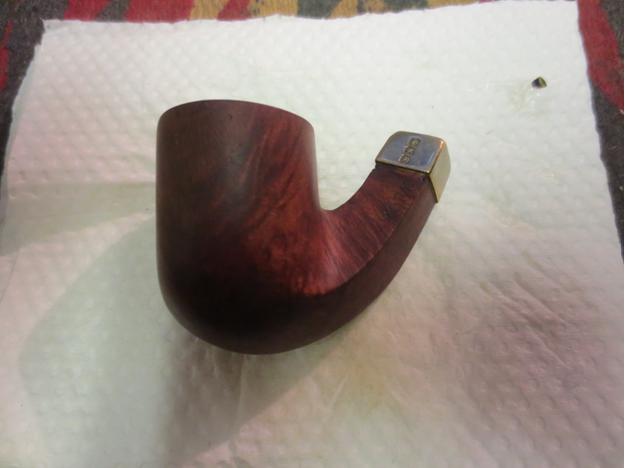
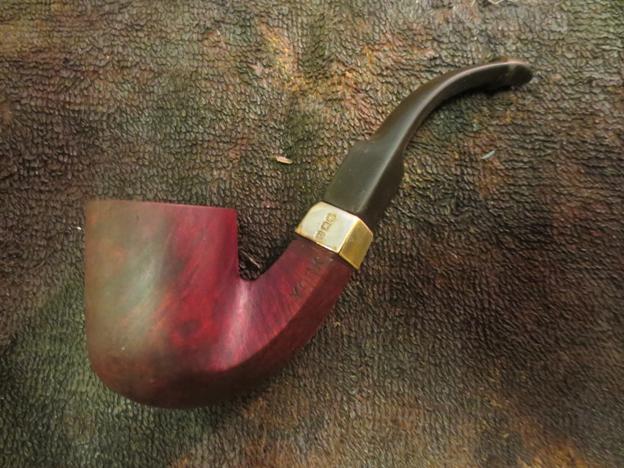
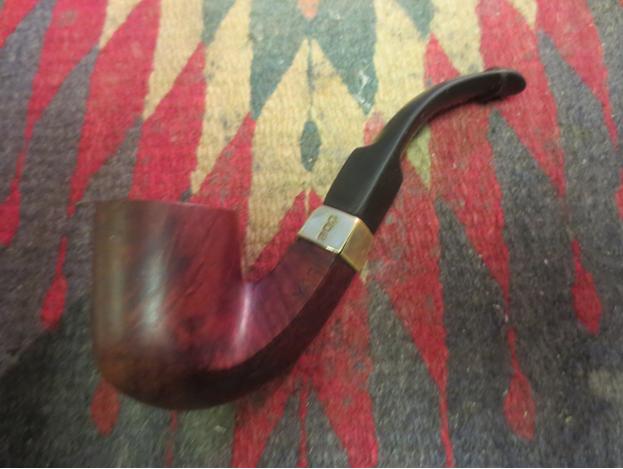
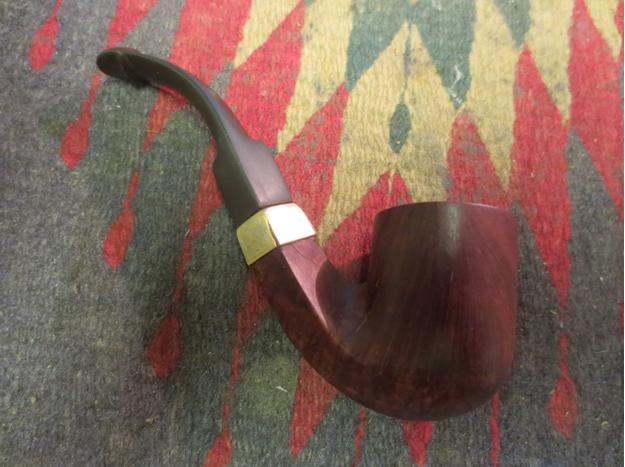
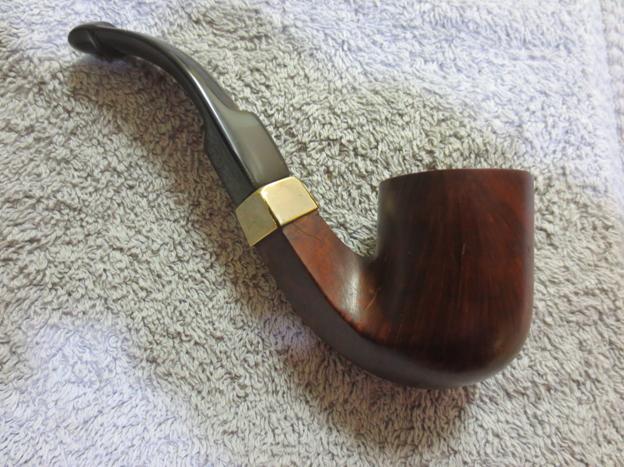
I buffed the bowl and the stem with Blue Diamond Plastic polish on the wheel and was amazed at the shine. I then gave the bowl and stem several coats of carnauba wax to protect it and give it a shine. I buffed it with a clean flannel buff and then hand buffed it with a mircrofibre cloth to raise depth to the shine. The finished pipe is shown in the photos below. I have to tell you that so far I really like the two Edward’s pipes that I have cleaned up out of this lot. They seem to be ringing all of my bells. It will be hard to part with either of them 😉Paddy18

Paddy19

Paddy20

Paddy21

Paddy22

Paddy23

Paddy24

Cleaning up a Lovely Edward’s Algerian Briar Bent Dublin that came across my table


Blog by Steve Laug
Label Logo_mediumI received this pipe in the mail with a box of 11 others and it is the first one that caught my eye. The shape was well executed. The bowl had a round crowned rim. The bend of the shank and the curve of the stem looked elegant. The bowl had a thick, sticky and crumbly cake that needed to be removed. The rim was covered with a thick coat of lava that had overflowed the bowl. The finish was a typical Edward’s natural briar – I think that they must have used a light tan/brown stain at one point that highlighted the grain but did not mask it. The grain was mixed with cross grain on the front right and back left. There was birdseye on the sides of the bowl and swirling circles of grain on the underside and up the shank. There were two small fills on the right side of the bowl near the shank bowl junction – almost two dots one above the other. There was also a larger fill on the underside of the shank. The pipe is stamped Algerian Briar in block text on the left side of the shank and Edward’s in script on the right side. On the underside mid shank it is stamped with a large 5. On the end of the shank next to the stem it is stamped with a 31. The large 5 is the bowl size and 31 is the shape number, though current production shows the shape as a 731. The stem was lightly oxidized and would not push all the way into the mortise. The fit was very tight. The inside of the shank had a thick coat of tar and oil on the walls of the mortise.Ed1

Ed2

Ed3

Ed4 One of the packing peanuts was jammed into the bowl so I used the dental pick to remove. It left some crumbling pieces in the sticky aromatic cake in the bowl. In the first photo below you can see the tars on the rim of the bowl and the generally dull finish of the bowl.Ed5 I reamed the bowl with a PipNet reamer and took the cake back to bare briar. I wanted the new owner to be able to build a cake of their own choosing.Ed6

Ed7 I scrubbed the rim with 0000 steel wool to remove the lava on the top of the rim. I had seen Troy use that several times in his refurbs so I thought I would give it a go with this bowl. It worked extremely well. I wet the rim with a bit of water and then scrubbed it until the rim was clean.Ed8 I scrubbed out the interior of the bowl and the shank with pipe cleaners, cotton swabs and alcohol. Ed9

Ed10 I scrubbed down the exterior of the bowl with the steel wool and also wiped it down with alcohol on a cotton pad. I removed the wax and grime from the finish. Once the shank was dry the stem fit snuggly in the mortise. The stem had some light tooth chatter at the button that would clean up quite easily. With the stem fitting well I took the next four photos to show what it was about the pipe that caught my eye.Ed11

Ed12

Ed13

ED14 The stem did not need a lot of work to clean off the oxidation. I wet sanded the stem with 1500-2400 grit micromesh sanding pads. I rubbed it down with Obsidian Oil after the third pad and then continued to dry sand the stem with 3200-4000 grit pads. I rubbed it down again with another coat of oil and let it dry.Ed15

Ed16 I finished sanding it with 6000-12000 grit pads and then gave it a final coat of oil. I set it aside to dry. I buffed the stem with Tripoli and with White Diamond to remove the remnants of oxidation.Ed17 I buffed the stem and bowl with Blue Diamond Polish on the buffing wheel and then gave the pipe several coats of carnauba wax and buffed it with a soft flannel buffing pad. I took it back to the work table and hand buffed it with a microfibre cloth. The finished pipe is shown below.Ed18

Ed19

Ed20

Ed21

Ed22

Ed23

Repairing a stem on a beautiful little Dunhill Bruyere 3206 Pot


Blog by Steve Laug

On the work table at the moment is a beautiful little Dunhill Bruyere pot. It had some serious gnaw marks on the stem. There were tooth dents that were deep on the top and the bottom sides of the stem. Fortunately they did not penetrate the airway. The pipe is in great shape. The finish was in excellent shape. The rim was clean but had been lightened quite a bit. It had hardly been smoked so I am wondering if somewhere along the way it had been used as a prop and the individual had just bitten down hard!

I removed the stem from the bowl and gave the rim a quick clean and then a coat of an opaque aniline based oxblood stain that matches the Bruyere finish. I flamed it and set it aside to dry while I turned my attention to the damaged stem (unfortunately I was in grand rush to work on the stem and the pipe and forgot to take photos of the pipe when I received it. Instead you will have to trust the descriptions and look through the repairs).Dun1

Dun2 I used a dental pick to clean out the debris in the deep dents and the crack along the edge of the button. I used the heat gun to raise the dents as much as possible but sadly they were of the nature that the heat did not do much to raise them. I then wiped down the dents and crack with alcohol to remove any debris in the area to be repaired. I filled in the dents on both sides of the stem with black super glue. You can see in the next two photos the bubble of super glue next to the edge of the button. I decided to let it cure rather than use an accelerator so I set it aside to do so.Dun3

Dun4 Once the repair had cured (several hours later) I sanded the patches with 220 grit sand paper to blend them into the surface of the stem. I sanded the repair to the button as well to blend it in without changing the profile of the end of the stem.Dun5

Dun6 I sanded it with a medium and a fine grit sanding sponge to minimize the scratches left behind by the sandpaper and to further blend in the repair. I used a needle file to sharpen the edge of the button and then sanded it with 400 grit wet dry sandpaper and a little bit of water. You can see from the next two photos that the patches are blending into the stem nicely.Dun8

Dun9 I moved on to wet sanding the stem with 1500-2400 grit micromesh sanding pads. The scratches are disappearing and the patches are blending in to the point that if you did not know where they are you would not see them. I rubbed the stem down with Obsidian Oil before going further with the micromesh pads.Dun10

Dun11 I wet sanded the repairs with 3200-4000 grit micromesh pads to further blend in the repaired areas. I spent extra time working on the repair to the small crack on the top of the button. I wanted that spot to blend in well and be smooth to the touch.Dun12

Dun13 The repair to the top of the button and along the top side of the button needed a little more work to get them to be less visible and more blended. The repair on the underside was really looking good. I cleaned up the repair on the button and then used some clear super glue applied with the tip of a dental pick. Once it cured I sanded it with 220 grit sandpaper and then the same set of wet dry sandpaper and micromesh pads that I commented on above. Finally the repair blended well.Dun14

Dun15 I buffed it with Blue Diamond and gave it several coats of carnauba wax. I buffed it with a clean flannel buff and then hand buffed it with a microfibre cloth.Dun16

Dun17 The finished pipe is shown below. The darkening of the stain on the rim and the repaired stem are finished and the pipe is almost ready to send back to the owner.Dun18

Dun19

Dun20

Dun21

Extending the Life of a Hard Used Kaywoodie Bulldog


Blog by Steve Laug

In the box of pipes that a friend sent for me to fiddle with, was a tired old Kaywoodie Bulldog. The stamping was worn off and with a loupe I could read that it was stamped Kaywoodie on the left side of the shank with something illegible below that followed by an R in a circle. On the right side of the shank was the remnant of a shape stamp the looked like it had four digits ending with the bottom curve and tale of an S. The pipe was in rough shape. The bowl was reamed out of round with the rim having taken a beating. The right side of the inner edge was very thin and had been scored down toward the bottom of the bowl. The rings around the bowl were rough and damaged. There was a cut mark on the top of the shank where it joined the bowl and a small crack above the shank insert on both the top and the bottom of the shank. The junction of the stem and shank showed damage as well from what appeared to be pliers. The stem was overclocked. It had some tooth damage on the top and bottom surfaces and was oxidized. KW1 KW4 KW3 KW2 I looked at the pipe as it sat in the box and removed it and turned it over in my hand many times during the past three months since it arrived. I just was not sure that I could salvage it. I figured it might make a good delegate to cannibalize for parts or for another Frankenpipe but I was not sure it was redeemable. I took the next close up photos of the rim and the gouge in the shank to give you an idea of what I needed to deal with if I tackled this pipe as a project.KW5 KW6I spent quite a bit of time looking at the pipe and decided it would be worth a try to see if I could improve it and make it functional. It would never be a pipe of beauty but the old warrior deserved another lease on life. I could certainly make it look better. So with that resolve I heated the metal stinger and tenon with a lighter to loosen the glue so that I could re-clock the stem. It did not take too much heat or time to loosen and then adjust the fit of the stem to the shank. I set it aside to cool and set the glue once again.KW7I decided to top the bowl to even out the height of the bowl around the rings. Currently it was taller in the front than the back and taller on the right than the left side. I worked to take off that excess and minimize some of the damage to the rim as well.KW8 KW9 KW10I used a knife blade needle file to redefine the twin rings around the bowl and to sharpen up the definition on the top and the bottom of each line.KW11With all of the adjustments done I wiped down the bowl with acetone on cotton pads to remove the remaining finish and the ground in grime that was on the bowl.KW12 KW13 KW14I reamed the cake back to bare wood so that I could see the extent of the damage to the walls of the pipe. I used a PipNet reamer to take back the cake.KW15 KW16I cleaned up the remaining cake with a sharp pen knife to clean off all of the debris. I then sanded the rim with 220 grit sandpaper to smooth out the damage and prepare it for the plan I had for it. I wiped it down with alcohol and then packed briar dust into the rim damage. I place drops of super glue on the briar dust to form that patch. While I did that repair I also repaired the gouge in the shank bowl junction.KW17 KW18 KW19I sanded the cured patch with 220 grit sandpaper to remove the excess and to level out the surface with surface of the bowl and shank. The first two photos below show the repaired shank damage and the third photo shows the repaired rim.KW20 KW21 KW22I set the bowl aside at this point and worked on the stem. I sanded it with 220 grit sandpaper and then with a medium and a fine grit sanding sponge. Then I sanded it with micromesh sanding pads – wet sanding with 1500-2400 grit pads and dry sanding with 3200-4000 grit pads. I rubbed down the stem with Obsidian Oil between each successive grit to give the micromesh pads more traction as I used them.KW23 KW24I buffed the stem with White Diamond and Blue Diamond on the buffing wheel to raise the shine. Then it was time to stain the bowl. I decided to use an opaque oxblood aniline stain. It is a stain that is thicker in consistency to the Feibings and gives good coverage on damaged briar repairs. I applied the stain and flamed it. It gave the old warrior some life while not hiding the repairs that it would wear proudly over the years ahead to witness to its hard life.KW25 KW26 KW27 KW28I buffed off the excess stain once it was set with a quick buff of Blue Diamond polish on the buffer. I then worked some more on the stem working back through the previous grits of micromesh to reduce the stubborn oxidation on the stem. I used a lighter flame to paint the surface of the stem to burn off the oxidation as well. I finished by sanding it with 6000-12000 grit micromesh pads and then buffed the entirety with Blue Diamond on the buffer.KW29I gave the bowl and stem multiple coats of carnauba wax and buffed it to a shine with a clean flannel buff. I hand buffed it with a microfibre cloth to give it some depth. The finished pipe is shown in the pictures below. While the pipe certainly is not a thing of beauty there is some restored dignity that will serve it well in the years ahead. It should serve the pipeman whose rack it graces with a good solid smoke for a good long time.KW30 KW31 KW32 KW33

Breathing New Life into an LHS Sulgrave


Blog by Steve Laug

I have become a fan of older LHS pipes and restored quite a few of them lately. I am always on the lookout for different LHS lines that I have not seen. Recently I picked up this LHS Sulgrave from a fellow on the Dr. Grabow Collectors Forum for $15. It is a line that I had not heard of before. He described it as a lightly smoked briar pipe. When I saw it I wanted it as it was my kind of shape. Never sure what to call this shape – bent banker, squat apple – not sure but I like it. He gave the following description in the sale listing. The shank is stamped Purex Sulgrave arched over LHS in a Diamond on the left side. The stem has two light coloured dots on the left side. The pipe is 5 1/8 inches long from the bottom of bowl to end of bit. The bowl chamber diameter is 7/8 inch and bowl depth is 1 1/4 inch. There is light caking in bowl. There is light tooth wear on end of the stem near the button. It has normal wear and tear (dings, oxidation and scratches) for an estate pipe. Nice overall shape and condition. Here are the photos that he included when I emailed him for details.LHS1

LHS2

LHS3

LHS4 When the pipe arrived I was not disappointed. The shape was perfect. The description was accurate and the only variation that I could see was that the stamping did not include PUREX on the shank. Not a big deal in my book. The bowl was unevenly caked and appeared to have been reamed. The back side of the bowl had a thicker portion of cake that gave the inside wall on the back side an uneven and out of round look. I was pretty certain that with a good reaming and a light sanding the rim would look better. The stem was over bent and there was a slight crease on the underside of the bend. There was a coat of wax or some kind of coating on the stem and bowl. The stem was oxidized. In the first photo below you can see slight imperfection in the vulcanite stem. I have circled it to highlight it in the photo below. It is not a hole or worn spot, it is actually a thread of cord in the rubber. Its presence gives some idea of the date of manufacture as recycled rubber was used in WWII pipes.LHS5

LHS6

LHS7

LHS8 The stem also had a lot of tooth dents and chatter along both top and bottom with some very deep marks on both. I tried to capture them in the next two close-up photos but they are still not very clear. The odd thing was that the dents went up the stem over an inch. The slot in the button was not centred and appeared to have left the factory that way. The dents were deep enough that I was concerned regarding the thinness of the stem surface over the airway. The mortise and airway in the shank were dirty and the end of the mortise was chipped away. It looked as if there had originally been a stinger in the tenon but it was no longer with the pipe.LHS9

LHS10 I also have included the next close-up photo of the rim and the bowl interior to show the cake that gave the bowl an out of round appearance.LHS11 I reamed the bowl with a PipNet pipe reamer using the largest cutting head. I took the cake back to bare wood to even out the inner edge of the bowl. I wanted to get rid of the cake so that I could smooth out the edge.LHS12

LHS13 I folded a piece of 220 grit sandpaper to smooth out inner edge. It took a little effort remove the inner edge damage and clean up the roundness of the bowl.LHS14

LHS15 I wiped down the bowl with acetone on cotton pads to remove the tars and the wax coat on the briar. With them removed the outer edge of the bowl showed damage as well. The bowl had been knocked about on the front edge particularly. The grain on this pipe was lovely.LHS16

LHS17

LHS18

LHS19 To minimize the outer edge damage I topped the bowl with 220 grit sandpaper on a topping board. I sanded it to remove the damage to the top of the bowl and clean up the outer edge of the bowl.LHS20

LHS21 I cleaned out the shank and the bowl with pipe cleaners, cotton swabs and alcohol to remove the grime inside. It took quite a few of both to clean out the shank but finally they came out clean.LHS22 I heated the stem with a heat gun to try and lift some of the dents to the surface and to also take out some of the bend. I also wanted to smooth out the sharpness of the bend on the bottom side.LHS23

LHS24

LHS25 I cleaned out the airway in the stem with pipe cleaners, cotton swabs and alcohol.LHS26 The heat had raised most of the dents significantly. The ones that were left in the stem needed to be sanded out and then filled to take care of them. I used 220 grit sandpaper to smooth out the surface. I also worked on the curve on the underside of the stem to make it less sharp looking.LHS27

LHS28

LHS29

LHS30 The dents in the stem needed to be filled to bring the surface back to smooth flowing condition. I used a black super glue to fill the surface and set the stem aside to dry for several hours. Once dry, I sanded the fills with 220 grit sandpaper and then used a medium and a fine grit sanding sponge to feather them into the surface of the stem.LHS31

LHS32

LHS33

LHS34

LHS35

LHS36 I used a needle file to clean up and sharpen the edge of the button and give it more definition. I sanded the sharp edge with sandpaper and then sanded it with micromesh sanding pads. I wet sanded the stem with 1500-2400 grit micromesh pads and dry sanded with 3200-12,000 grit pads. I rubbed the stem down with Obsidian Oil between each set of three pads and then let it dry after sanding with a 12,000 grit pad.LHS37

LHS38

LHS39 I buffed the pipe with White Diamond and Blue Diamond on the buffing wheel to polish and remove the slight remnants of oxidation that had come to the surface. I gave it multiple coats of carnauba wax and buffed it with a clean flannel buffing pad. I brought it back to the table and hand buffed it with a microfibre cloth. The finished pipe is shown in the photos below.LHS40

LHS41

LHS42

LHS43

LHS44

LHS45

LHS46

Rescuing a Kaywoodie Flame Grain Meerschaum Lined Doggie


Blog by Andrew Selking

To paraphrase Samuel Clemmons, reports that I’m no longer messing with pipes are greatly exaggerated. Between a cross country move, a new house, renovations to said house, and trying to figure out what I want to be when I grow up, I have not spent as much time working on pipes as I would like. I did manage to squeeze in this nice Kaywoodie Flame Grain Meerschaum lined doggie.

According to a Kaywoodie brochure from the era, Flame Grain pipes were made from “200 to 400 year-old briar burls…the last of their kind to be found in the world.” The meerschaum inlaid Flame Grain is a “superb Flame Grain Kaywoodie with an inlaid inner bowl of imported Turkish meerschaum. This pipe combines the outstanding qualities of the two best materials in the world in which to smoke tobacco.” This pipe represents the pinnacle of American pipe making. As a point of reference, in 1947 this pipe would sell for $12.50 while Dunhill pipes started at $10.00.

As you can see, it took some imagination to see a pipe that might compete with a Dunhill.KW1

KW2

KW3

KW4 The stem was under-clocked and heavily oxidized. The bowl had very thick cake and a buildup of tar on the rim. There was some kind of protective finish on the bowl that left a film after the alcohol bath. Additionally, the stinger was cut. On the plus side, I could see some really nice grain and the stem was virtually unmolested.

The first thing I did was soak the bowl in alcohol. I was hesitant to do that, because I was afraid the alcohol would cause the meer lining to deteriorate. At the same time I was also worried that if I didn’t soften the cake first, just using the reamer might damage the lining as well. I compromised and soaked it for about two hours and the cake came out nicely.

While the bowl was soaking, I used Oxyclean and warm water to soak the stem. Since it was missing the end of the stinger, it was easy to get the worst of the gunk out with a pipe cleaner. As I mentioned, the stem was under-clocked. To fix this problem I usually heat the stinger with my heat gun until I can easily rotate back into place. As the tip of the stinger heats up it transfers heat into the stem and loosens the glue. The whole heat transfer thing wasn’t working very well with this pipe, so I stuck a small nail in the stinger.KW5 That worked like a charm.

Next I did a retort on the bowl and stem.KW6

KW7 After scrubbing the insides with brushes, q-tips, and pipe cleaners, it was time to tackle the exterior issues. I used 0000 steel wool with acetone to remove the tar build up on the rim.KW8

KW9 I continued with the 0000 steel wool over the rest of the bowl to remove the film on the finish. After cleaning the bowl, I used 3200-12000 grit micro mesh to polish the bowl. This is what it looked like afterwards.KW10

KW11

KW12 I used 400 grit wet/dry with water to remove the oxidation from the stem, followed by 1800-2400 grit micro mesh with water.KW13 I finished the stem with a progression of 3200-12,000 grit micro mesh.KW14

KW15

KW16 I set up my buffer and polished the bowl with white diamond and carnauba wax. I used my variable speed rotary tool with white diamond and carnauba wax for the stem. Here is the finished pipe. Thanks for looking.KW17

KW18

KW19

KW20

KW21

Refurbishing a Dr. Grabow Westbrook 84L Smooth Canadian


Blog by Troy Wilburn

I got this pipe in a trade. I was pleasantly surprised when it showed up it was an 84L and not a regular 84. The stampings are crisp. The rim did have some dings so I had to lightly top it and restain it. There are still some very light dings on pipe but I let them go as the factory finish and color was excellent. So I just cleaned and buffed it other than rim. The stem still has some teeth marks I could not get out fully. The old bowl cake came out easy and the shank was not that dirty and I’m glad because these Canadian shanks are a pain to clean lol. It has zero fills too, which on that much briar was a nice surprise. All and all I’m very happy with it.

Here is the pipe when it arrived.West1

West2

West3

West4

West5 I took pics of it after I had finished restoring it with a couple of my favorite 45 EPs .

After: West6

West7

West8

West9

West10

West11

West12

West13

West14

West15

West16

West17

West18

A Very Simple Cleanup on a Dr. Grabow Regal Dublin


Blog by Steve Laug

This pipe came to me in a box of pipes that a friend brought by for me. He was getting rid of a bunch of the pipes that he no longer smoked and thought I might enjoy cleaning them up. This one is stamped on the left side Regal over Dr. Grabow and on the right side, Imported Briar over Adjustomatic over Pat. 2461206. When I took it out of the box it had a half stem. The rest of it had been broken off and it was about 1 ½ inches long. I took it off and put the bowl back in the box. I have no idea what I did with the old stem; I have looked for it for a while now as I wanted to pirate the Adjustomatic tenon from the stem. It will show up when I least expect it and I will deal with it then. Yesterday I took the bowl out of the box and was looking it over. It was in very decent shape. The finish was clean. There were some lighter marks on the back right outside edge of the rim but other than it was clean. There was no cake in the bowl. It was worth a little time to see what I could do with it.

I went through my can of stems and found a Dr. Grabow stem that was the proper diameter. It was in decent shape. There were tooth marks on the top and underside of the stem next to the button. The button itself had some tooth dents. There was some calcification on the surfaces as well. The tenon and stinger were black with tars and oils but would clean up easily enough. The only thing with this stem and tenon is that it was not an Adjustomatic stem but it would do.Dr1

Dr2

Dr3

Dr4

Dr5 I cleaned out the shank and mortise with cotton swabs, pipe cleaners and alcohol. The shank was pretty clean and it did not take much to remove the little that was there. I removed the stinger and cleaned out the stem with alcohol. It too was not in to bad of shape on the inside. I cleaned the stinger and tenon with alcohol and 0000 steel wool.Dr6

Dr7 I heated the stem and raised the tooth dents as much as possible and then sanded them smooth with 220 grit sandpaper. One of the divots was a little too deep to raise so I filled it with a small batch of black super glue and sanded it smooth.Dr8

Dr9 I used a needle file to redefine the sharp edge of the button and make a clean line on both sides of the stem.Dr10 I sanded it with a medium and a fine grit sanding sponge to remove the scratches from the vulcanite and then wiped the stem down with Obsidian Oil.Dr11 I sanded the stem with micromesh sanding pads – wet sanding with 1500-2400 grit pads and then wiping down the stem with Obsidian Oil. I dry sanded with 3200-4000 grit pads, gave it another coat of oil and then continued with 6000-12000 grit pads. Each successive grit of pad made the patch disappear and blend into the surface of the stem. I gave the stem a final rub down with Obsidian Oil and let it dry.Dr12

Dr13

Dr14 I buffed the pipe with Blue Diamond polish on the wheel and then gave it multiple coats of carnauba wax. I buffed it with a clean flannel buff on the wheel and then hand buffed it with a microfibre cloth for a final deep shine. The following photos show the finish pipe. It should work well for many years to come. This one is for sale should anyone wish to add it to their rack. Email me and let me know.Dr15

Dr16

Dr17

Dr18

Dr19

Preserving Two LHS Advertising Pokers


Blog by Troy Wilburn
Troy originally posted this to the Dr. Grabow Collectors Forums. You can read the original post and the responses to his work at the following link: http://drgrabows.myfreeforum.org/sutra129300.php#129300

I picked up both of these rare early 20th Century (I would guess just after WW1 to mid-20’s) LHS pokers made for companies to advertise their services and goods. I imagine few of these survived as they were given away to the public and most likely company employees. They were smoked until they were worn out or broken and then thrown away.

The first poker model is one that I have seen before on an old post from 2010 on Tamp and Puff (http://tampandpuff.com/viewtopic.php?f=9&t=1119). I have drooled over that for a couple of years now hoping to find one and I did . Mine is not as nice as that one but happy to have it just the same. I have not found any more pictures of or posting of another before or since. When this one came on EBay I knew I had to have it. Luckily there wasn’t much interest because of the way the seller posted it.

The first poker is marked Warner Sand Gravel Lime Products Est 1794. The shank is stamped Italian Briar (mine is double stamped) with LHS logo.LHS1

LHS2 More pics of the pipe as it arrived to me. Worst condition problems of pipe were bad tooth marks on the stem and shank’s stampings are worn. It was also really greasy and dirty but not caked up and in otherwise good shape with no major damage.LHS3

LHS4 It’s missing its unique stinger that luckily was still in the other poker I acquired. With the rarity of the pipe I decided to preserve what I had and do little more than just a good cleaning. The pipe really had a lot of grime and greasy feel. I gave it a good cleaning inside and out and removed most of the rim scorching with Oxy Clean and Scotch Brite pad. It could have used a slight topping but I decided not to as I’m preserving the pipe not restoring it. Plus I was afraid it would mess up the symmetry of the pipe rim design. I also gave the rest of the bowl several scrubbings with mild detergent and a soft bristle tooth brush. Wiping it down after with paper towels till the paper towels wiped clean afterwards.LHS5

LHS6 I gave the stem a good scrubbing as well Oxy Clean and water as I dipped the end of the tenon in alcohol to test it and it acted like it would melt the rubber. After cleaning I dipped the button end of stem in very hot water to raise the tooth marks best I could. I then filed the stem to get rid of almost all the tooth marks without compromising the structure of it.LHS7 After wet sanding stem to sand out file marks I sanded rim and stem with 2500 grit and mineral oil and wiped rest of pipe down with mineral oil as well.LHS8 After some light buffing and wax.LHS9

LHS10

LHS11

LHS12

LHS13

LHS14

LHS15 The second Poker is marked Bird Archer Co. NY. It’s a company that sold chemicals that was used in water for steam locomotives. They were in business from around start of 20th century till end of WW2. Shank stamped same as other – Italian Briar over LHS logo.LHS16

LHS17

LHS18 This one has the unique stinger. I can tell you it made cleaning the shank and stem a breeze as most all the tar was in the stinger. It runs from the bottom of the bowl to about center of the stem.LHS19 The pipe pretty much got the same cleaning treatment as the above pipe with less work on the stem as there were not bad tooth marks. When I buffed the pipe I did not use the buffer on the embossed stampings but instead hand buffed to avoid causing any damage to them.LHS20 Finished Bird Archer pipe.LHS21

LHS22

LHS23

LHS24

LHS25

LHS26

LHS27

LHS28 I had been looking for an all original LHS poker for a long time and to find both of these original ones at once was very lucky.

Repairing and Restemming a York (KBB) Diamond Shank Bent Billiard


Blog by Steve Laug

When I was traveling in Idaho my brother and I took the family for a trip to Jackson Hole, Wyoming. On the way we stopped in a little town called Victor, Idaho. There was an antique shop there in the town and I found four more old pipes. The first of these reminded me of an old WDC Diamond shank billiard that I have. This one was stamped YORK on the left side of the shank and from research it may have been made by KBB. It was in rough shape. The shank had been cracked and repaired with glue and a piece of twisted wire. The stem obviously had a broken tenon and the previous owner had carved it down to fit in the shank anyway. The bowl had a thick cake and the finish was gone. The rim was damaged on the front outer edge and there was some tar on the rim.York1

York2

York3

York4 On the right side of the bowl near the shank junction there was a pink putty fill that was coming out. Most of the putty had fallen out of the briar. This would need to be repaired.York5 When I got back home I took the pipe out of the bag to have a look. The silver end cap had some hallmarks but they were the faux hallmarks that I have found on older American made pipes to give them a touch of class. All four edges of the band were split. I removed the stem and looked inside the mortise and could see that a major part of the briar was missing on the right side of the shank under the cap. With little effort I removed the cap and sure enough a huge chunk was missing out of the briar. In fact the whole right side under the cap was gone. There was a small crack that had been repaired earlier. There was a small hole in the shank to stop the crack and the crack was glued and clamped with the wire. This was going to take a bit of work to bring it back from the brink of destruction. York6 I clipped the wire with a pair of wire cutters so that I could work on repairing the broken portion of the shank. This repair would take some careful and time consuming work to rebuild the missing portion of briar.York7 I reamed the bowl to clean out the thick cake. It was crumbling so I wanted it removed so that the repair of the shank would be less dirty. I use a PipNet reamer to take the cake back to the bare briar.York8

York9 The first step in rebuilding the broken area was to clean up the damaged ends of the remaining briar. Once it was clean I put clear super glue on the raw edge of the broken spot and tamped the end into some briar dust. I repeated the process until the edge was repaired as much as possible with this method.York10

York11 During the process I also picked out the broken putty fill and replaced it with briar dust and super glue.York12 I sanded the flat surface of each of the four sides of the diamond shank smooth with 220 grit sandpaper until the cap slid easily over the shank. I also faced the end of the shank on the topping board.York13

York14 The next step in the process of rebuilding the shank and the mortise was a little more difficult than the briar dust and super glue rebuild. It involved working on the internals of the shank. I glued the end cap in place with wood glue and clamped it in place to take care of small splits in the edges of the metal cap. Once that dried and set, I mixed white wood glue with briar dust to make putty. I tamped the mixture into the remaining areas of the shank with a dental pick and dental spatula until the area was filled solid looking once again. The next two photos show the rough repair on the inside of the mortise and shank. The broken area is gone! The holes are filled in and the repair is complete. Once the glue set I would have to clean up the mortise and make the walls smooth. The edges of the metal cap, looking at it from the end are damaged and I will not be able to repair them.York15

York16 While the shank repair cured I worked on the rim. There was a thick tar build up that was like rock on the back edge and the front edge of the rim had been knocked against something hard and was rough.York17 I decided to top the bowl to remove the rock hard tar and also minimize the damage to the front of the bowl. I used a topping board with 220 grit sandpaper and worked the rim against the sandpaper until the damage was minimized. Once I had it smoothed out I put some briar dust and super glue on the remaining divot on the front edge of the bowl as a fill. When it dried I sanded it smooth and lightly topped the rim once more to even out the repair with the rest of the rim. (That picture will be shown shortly.)York18 The stem that came with the bowl was damaged beyond repair. It had been repeatedly been cut off by the previous owner and hacked at until it fit in the damaged tenon. It was not a stem I would use again on this pipe. I went through my can of stems and found a faux p-lip stem – the airway came out the end of the button rather than on the top. It was old enough to work on this pipe and with some modification I thought it would look just right. The problem was that it did not have a tenon. When I found it the tenon was missing and the end of the stem had been drilled out to receive a replacement tenon. I am currently out of Delrin tenons so I used a thin vulcanite stem as the sacrificial tenon. I glued the tenon on the donor stem in place in the diamond shaped stem with super glue and then cut off the stem with a hacksaw. I left a piece of vulcanite that was longer than necessary so that I could work it to a proper fit in the repaired shank.York19

York20 The next photo shows the repaired stem and tenon and the topped bowl before I put the two parts together. I used a Dremel to remove the excess material on the new tenon and shortened it to the depth of the mortise in the shank.York21 The next photo shows the repaired fill on the bowl side with another photo of the new stem.York22 Once the shank repair was dry I used a needle file to clean up the rough areas and smooth out the inside of the mortise. I gave it several more coats of glue and briar dust to buildup the areas that had shrunk as the glue dried. I continued to work it with the files and sandpaper until the fit was correct. I cleaned out the airway to the bowl and the inside of the mortise with alcohol, cotton swabs and pipe cleaners in preparation for putting the new stem in place.York23 The next two photos show the newly fit stem. There was still work to do to fine tune the flow of the diamond stem sides to match the flow of the diamond shank but the look is clear at this point in the process.York24

York25 I sanded the stem with 220 grit sandpaper and with a medium and a fine grit sanding sponge to fine tune the fit. When I had it the way I wanted, it was time to bend the stem. I used my heat gun to do the work. In this case I quickly set it up on the dryer in our laundry room (shh don’t tell my wife I did this) and heated the stem. I bent it over an old rolling pin that I use for this purpose until the bend in the stem matched the curve of the bottom of the bowl. I set the bend by holding the stem under cool running water.York26

York27 The next two photos show the newly bent stem and give an idea of how it will look with the pipe once it is finished.York28

York29 With the easiest part of fitting a stem completed I went on to do the laborious and tedious part of sanding and more sanding to get the fit just right. To do this without rounding the edges of the stem at the shank stem junction I use a plastic washer placed between the two areas. I sanded the stem with 220 grit sandpaper to smooth out the transition and make the angles square (or at least as square as possible on these old pipes where every side has a different angle and width).York30 When I had the fit of the stem correct it was time to polish it. I wet sanded with 1500-2400 grit micromesh sanding pads and rubbed the stem down with Obsidian Oil.York31 I needed a break from the stem work so I turned my attention to the bowl. I rubbed it down with a light coat of olive oil to highlight the grain. I took a few photos to show what it looked like at this point. It is certainly looking far different than it did when I started working on it. There is a deep richness in the red tones of the briar.York32

York33

York34

York35 I decided to highlight those tones with a dark brown aniline stain thinned by 50% with some isopropyl alcohol. I applied it and flamed it to set it in the grain.York36 I hand buffed it with a cotton cloth to get an idea of the coverage. It was still too dark to my liking so I would need to address that.York37

York38 I wiped the bowl down with some acetone on a cotton pad to remove some of the stain and make the grain show through better.York39

York40 I buffed the bowl with White Diamond and then gave it the first of many coats of carnauba. I don’t know about you but by this point in a long refurbishment I get a bit anxious to see what I have accomplished. It always seems that it is going to go on forever so I rewarded myself by putting the stem in place and taking a few photos to see what I had achieved.York41

York42 For comparison purposes I took the next two photos of the pipe with the old stem next to the new one. You can see how badly hacked the vulcanite was from the previous owners salvage work on his broken pipe. The pipe is beginning to look like a very different pipe than when I started. That always encourages me!York43

York44 Now it was time to finish up with this long project and get the stem done. I dry sanded it with 3200-4000 grit micromesh sanding pads and then rubbed it down with Obsidian Oil once again. I then dry sanded it with 6000-12000 grit pads and gave it a final coat of oil and let it soak into the vulcanite.York45

York46 I buffed the stem and bowl with Blue Diamond and then gave them both multiple coats of carnauba wax. I buffed them with a clean soft flannel buff to raise the shine and then hand buffed the pipe with a microfibre cloth to finish. The completed pipe is shown below. It has come a long way from the pipe I started on this morning. I had a quiet day at home and between reading and napping finished the work on this old timer. From what I can find out in my research and from Who Made That Pipe, the pipe may well be from the old KBB pipe works. Thanks for looking.York47

York48

York49

York50

York51

York52