I have often written on the blog that good refurbishing begins with observation of the work at hand. I never fail to spend time looking at a pipe and noting areas of concern before I work on it. That is probably why it is pretty simple to record the work I have done on the pipe after the fact. In the old Barling bent, who’s refurbishment is recorded in the following post, I chose to post the notes from my observations. Enjoy!
At Smokers Forums a friend and I have exchanged ideas and thoughts through pm’s, emails and phone calls for several years now. Our talks have covered much ground but seem to also involve at least a fair amount of chatting about refurbishing estate pipes. A couple of weeks ago he contacted me with an idea of somehow collaborating on a refurb. He had an old timer he wanted me to look at and talk over with him. It came in the mail and I gave him a call with what I saw as I handled the pipe and took it apart. The list below gives some of my observations about the pipe as I checked it out carefully.
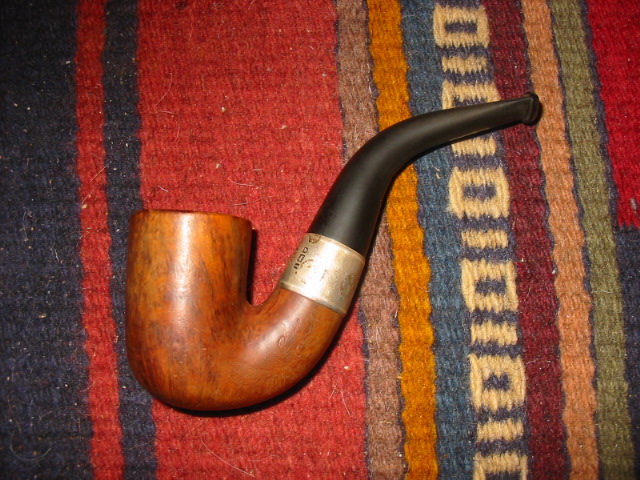
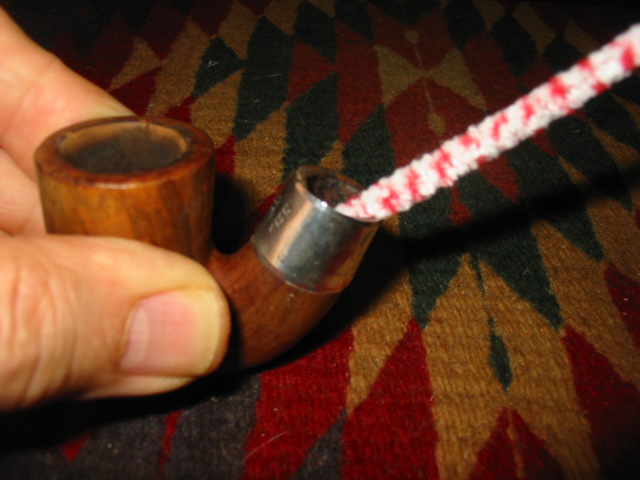
- The band is crooked and turned on the shank. It may take heating the band to it to loosen it.
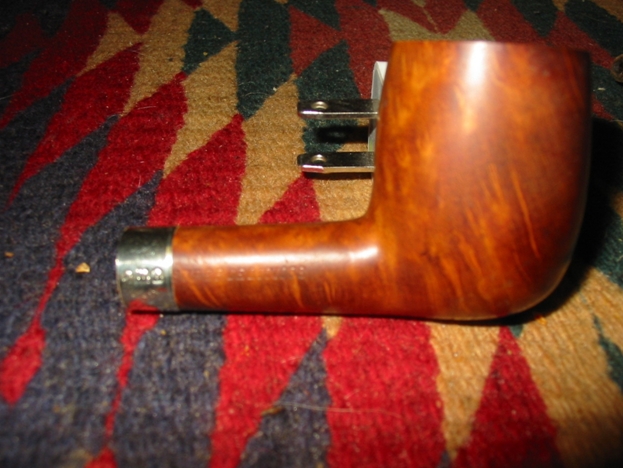
- The silver hallmarks are an anchor, lion and a shield. The shield should have a letter in it to identify the year but it is worn away. The band is made in Birmingham, England, and it is Sterling Silver. As for the year, the best I can do is estimate; it lies within a 20 year period – 1876-1895. We would need to check the dates on Barlings made in the 1800s, to see when it fits into their history. That could narrow it down. It also may be an aftermarket band that was added to repair the shank.
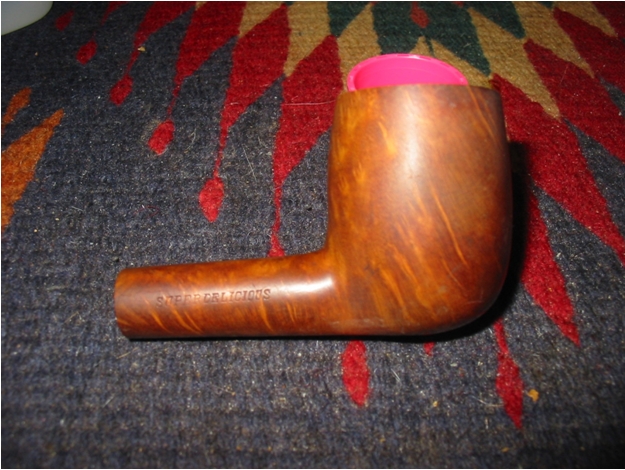
- The only stamping is Barling in script. I cannot see an “s” on it and certainly no apostrophe. That should also help date it. The tail on the “g” hooks or curls under several other letters.
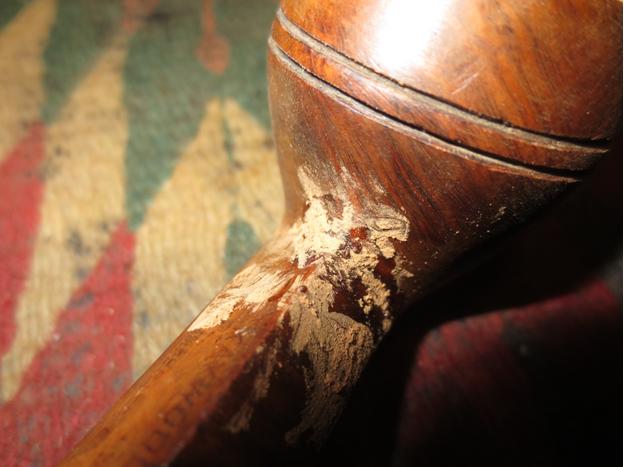
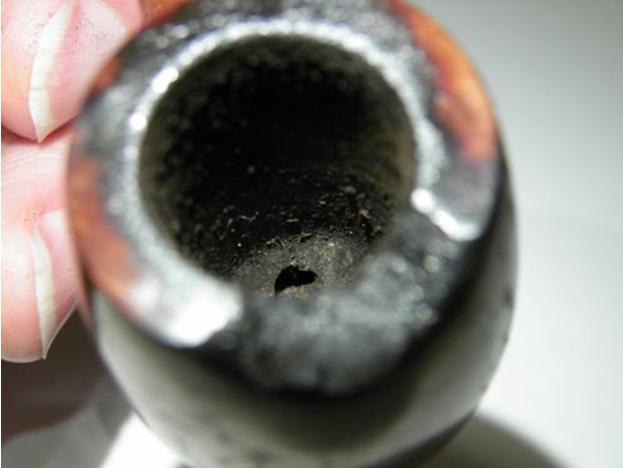
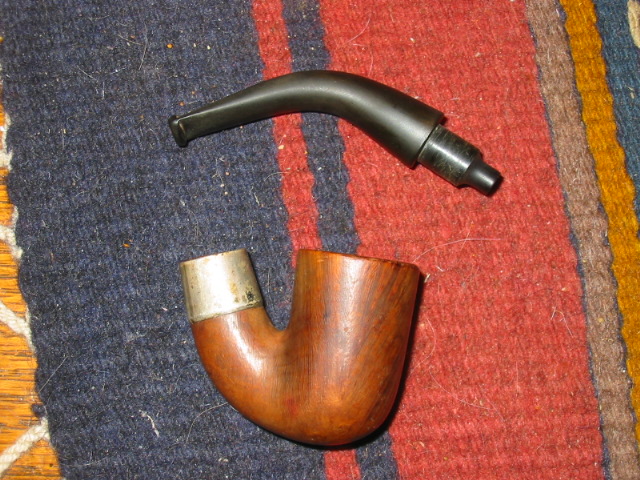
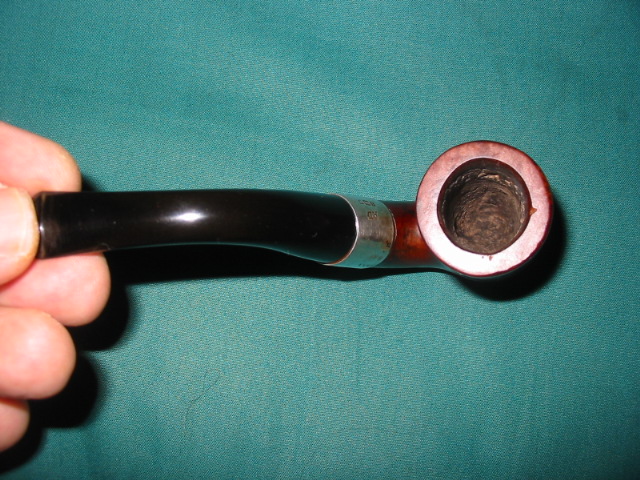
- The divot in the bottom edge of the shank, for lack of a better word, is not a worn spot in the shank – interestingly once I cleaned the shank I lined up a pipe cleaner in the centre of the divot and it is perfectly aligned with the drilling of the airway. With the pipe cleaner in place (think drill bit) the divot is gone and the walls are all equal. I am thinking this is the divot that is often found in Oom Paul or bent shapes to drill the airway straight to the bowl. I am going to give that a bit more thought before I step in with a repair to the shank. I may get away with building up the tenon instead.
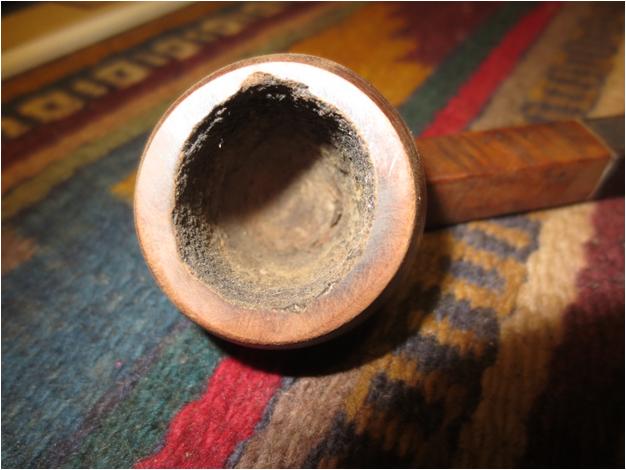
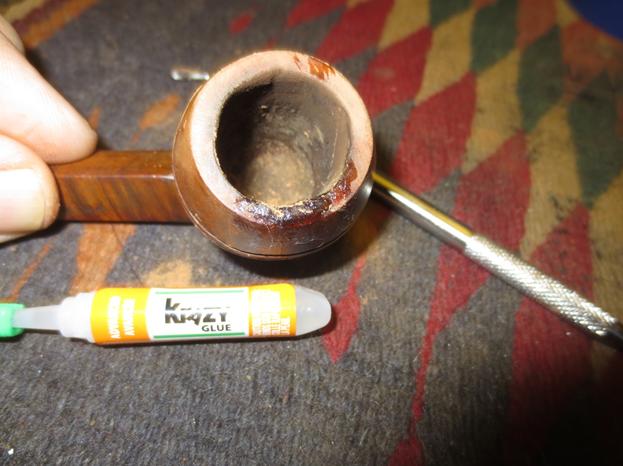
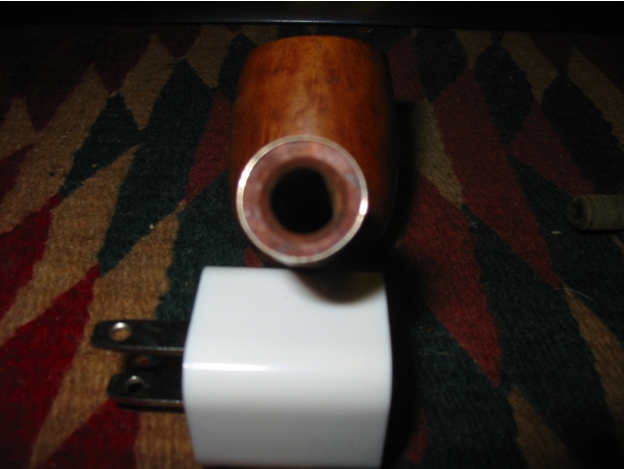
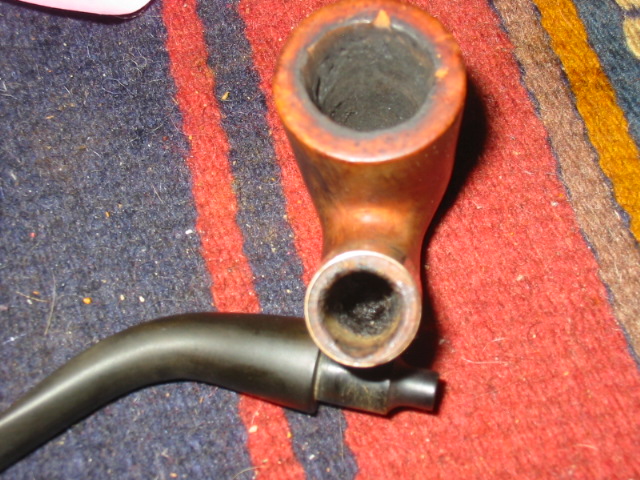
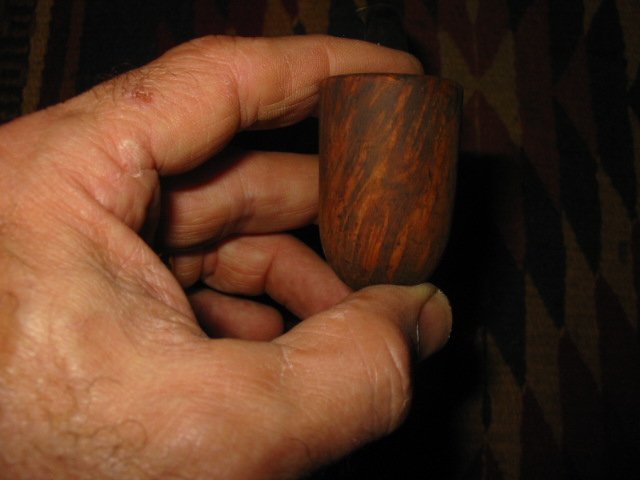
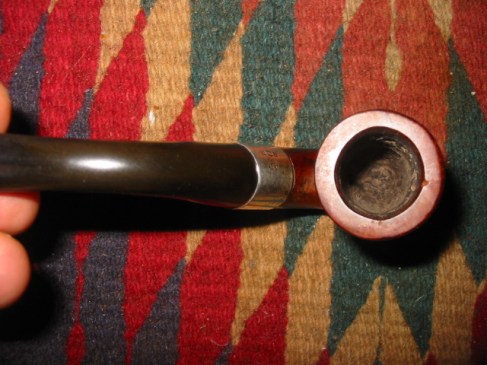
- The bowl is in very good shape. I cleaned it out and the walls are all sound and the bottom of the bowl is also sound – no sign of damage to the briar; though the airway comes out a little high on the side of the bowl. I may need to smoke a cigar to make some pipe mud to raise the bowl bottom a bit!
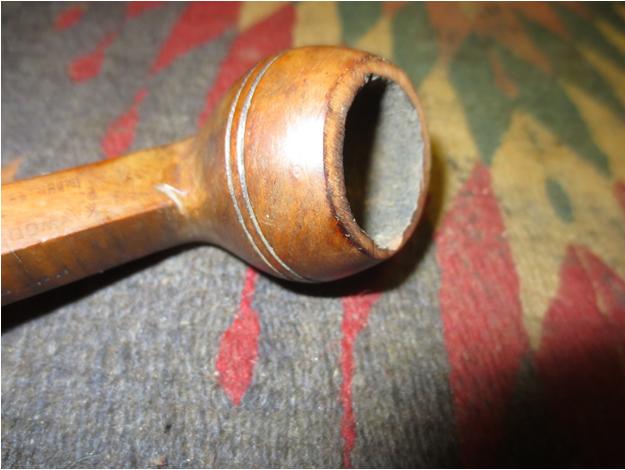
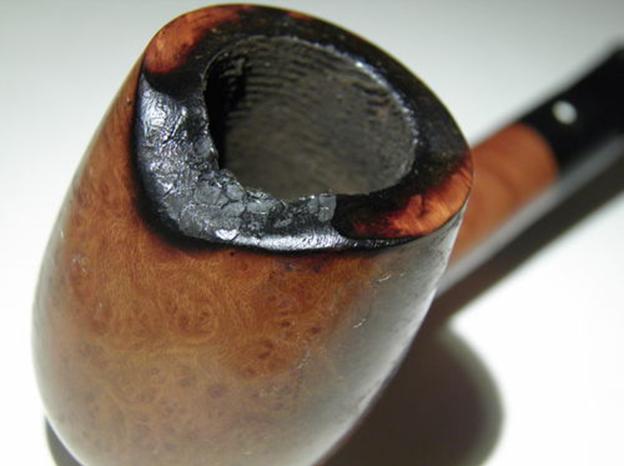
- There is a little damage to the front outer edge of the rim but it has been rounded with time. The inner rim was damaged by a reaming with a knife and is slightly out of round. I have already remedied that with sandpaper.
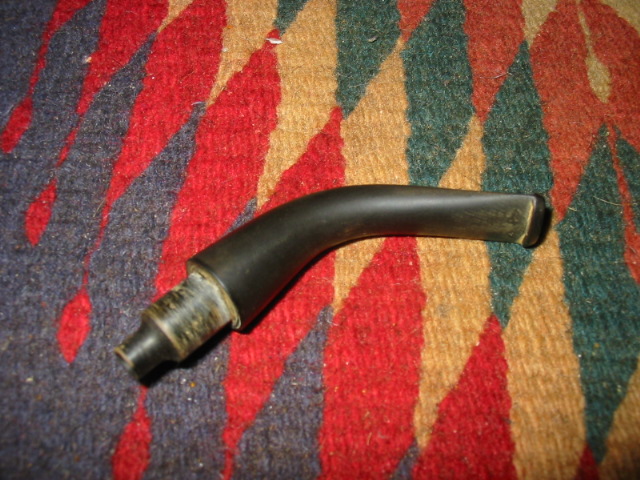
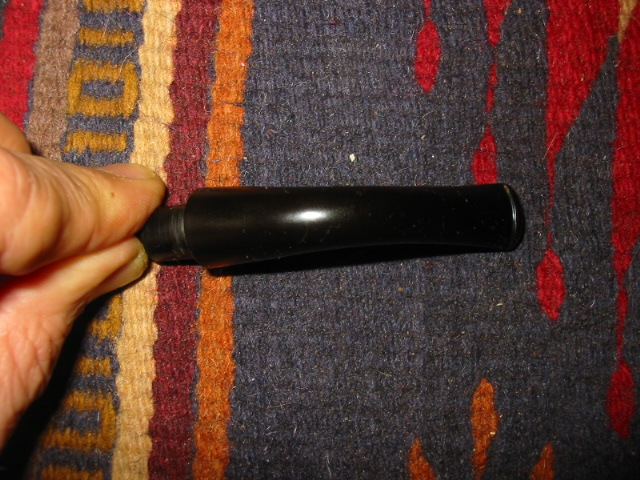
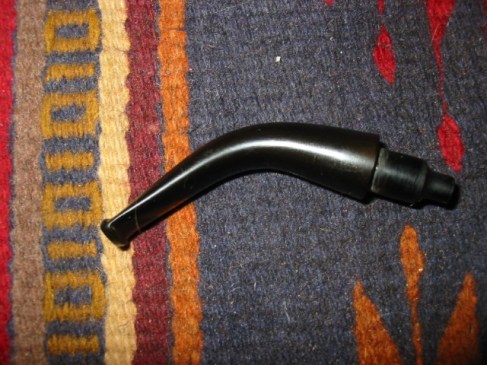
- The design of the tenon is very interesting. It is almost a reverse funnel (think inside of a funnel). The curvature at the tenon and step down is such that it provides a bit of a cooling chamber in the sump of the pipe almost like those new fangled calabash things that are hitting the market now.
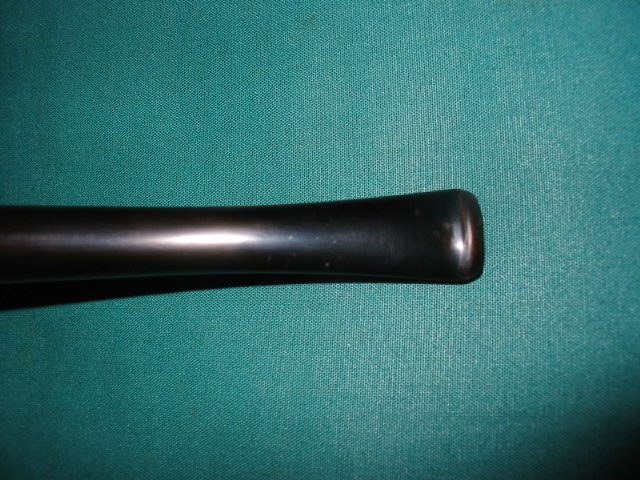
- The vulcanite is very hard and does not seem to show any oxidation. I have seen that before on these old timers – they use a very good quality of rubber and maybe less sulfur in the mix to vulcanize it. Not sure but for some reason they hold the black colour without any browning.
- The stem has a few tooth marks – 2 on top and two on the bottom. Some minor tooth chatter as well.
- The silver band is also angled like it was put on crooked after it was misaligned. The hallmarks should be on the side but seem to be on the top.
- It appears that there is a crack in the shank that was repaired and then banded.
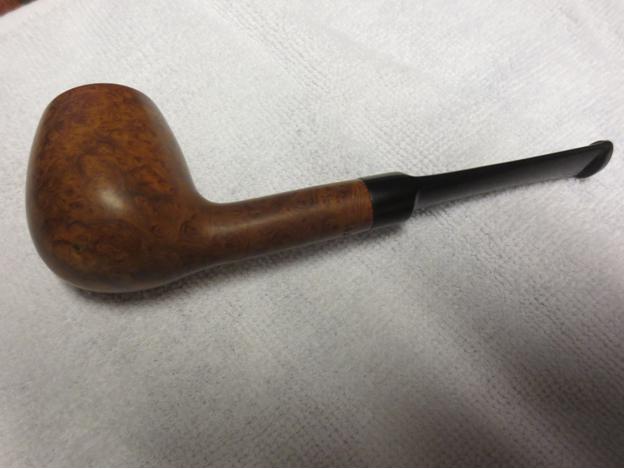
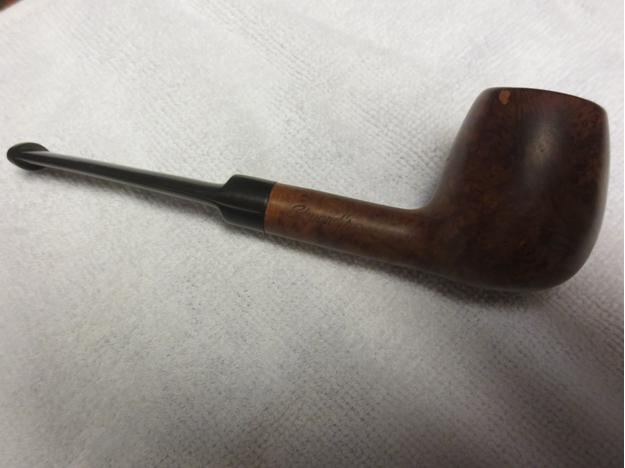
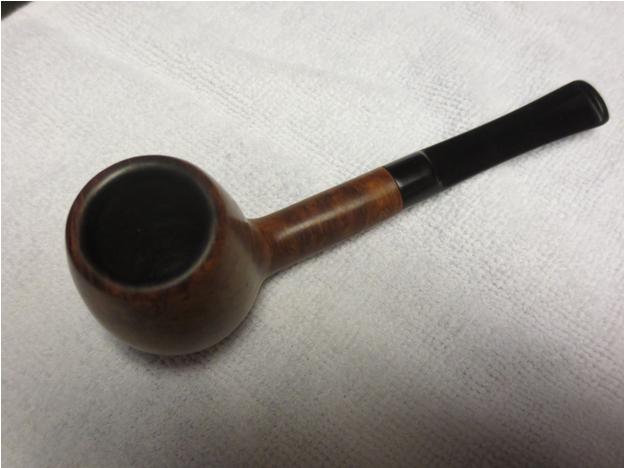
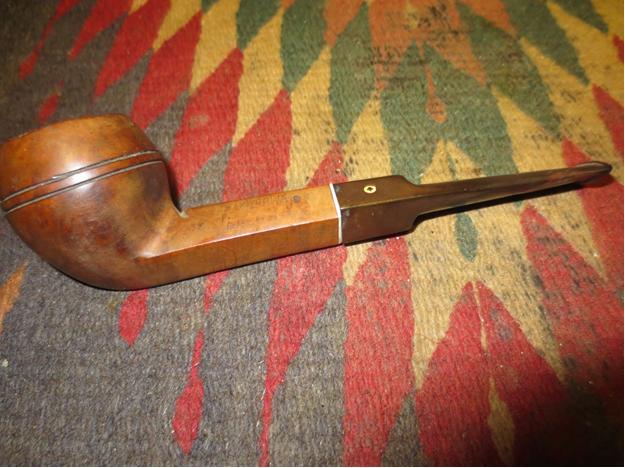
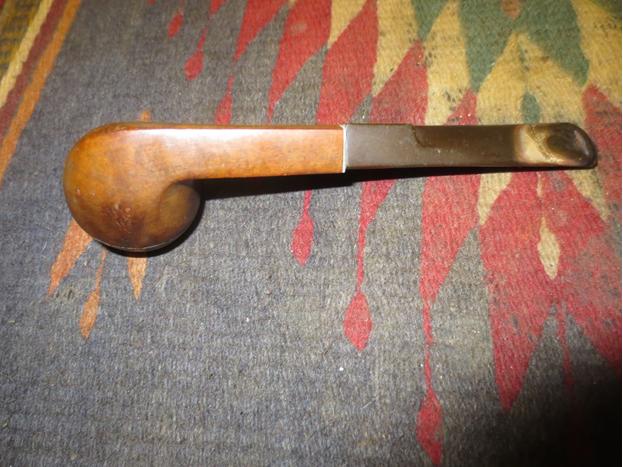
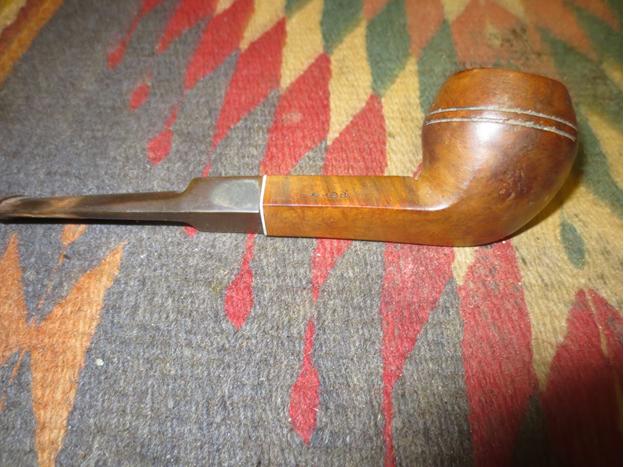
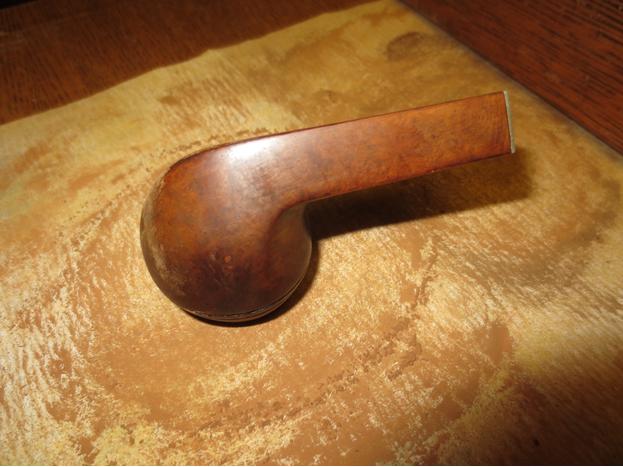
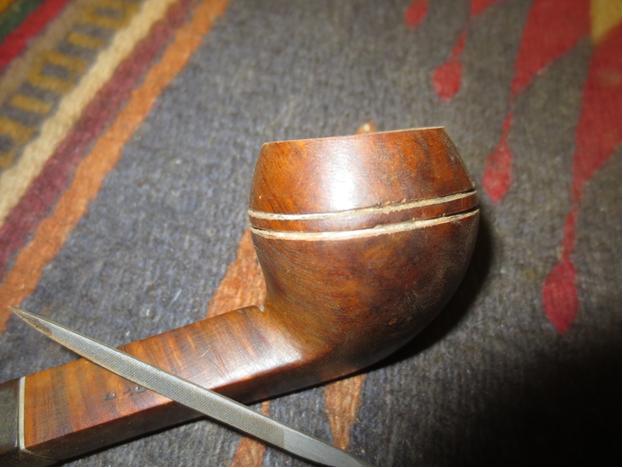
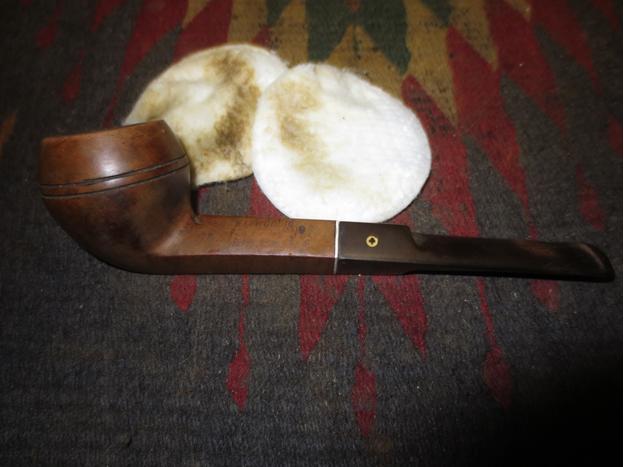
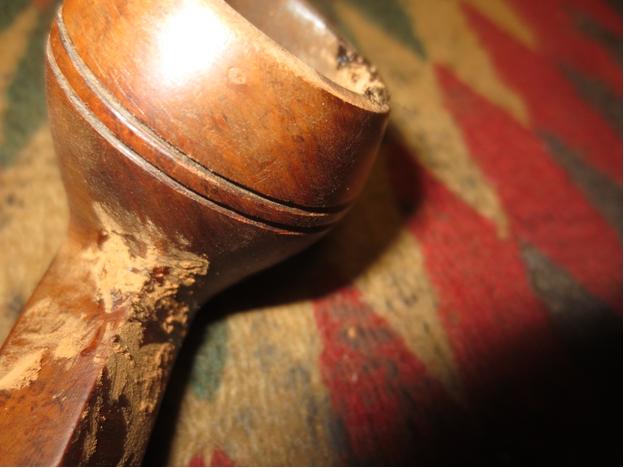
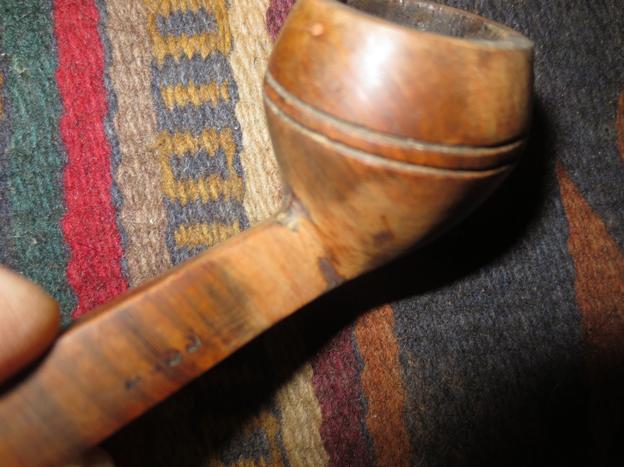
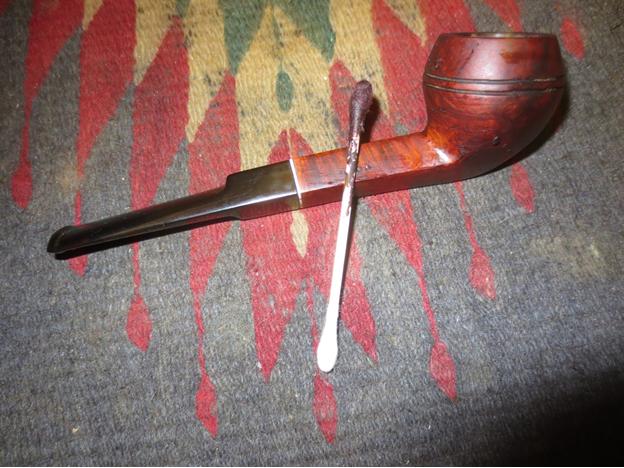
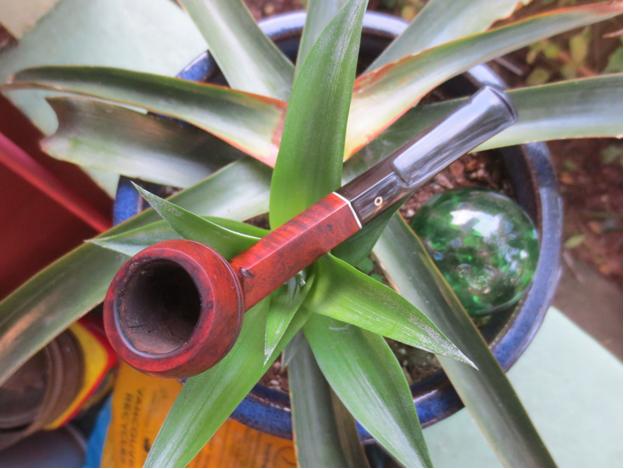
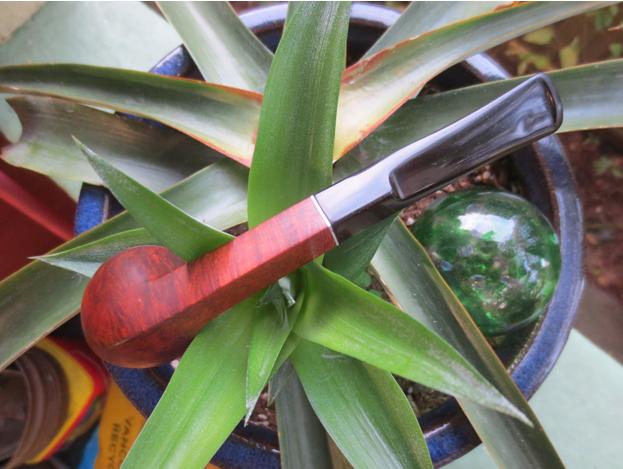
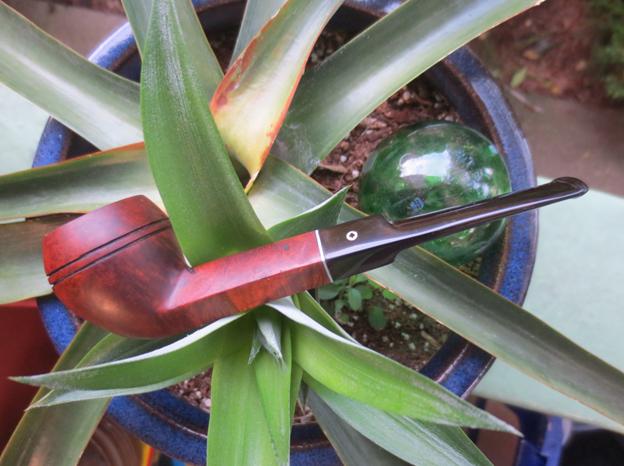
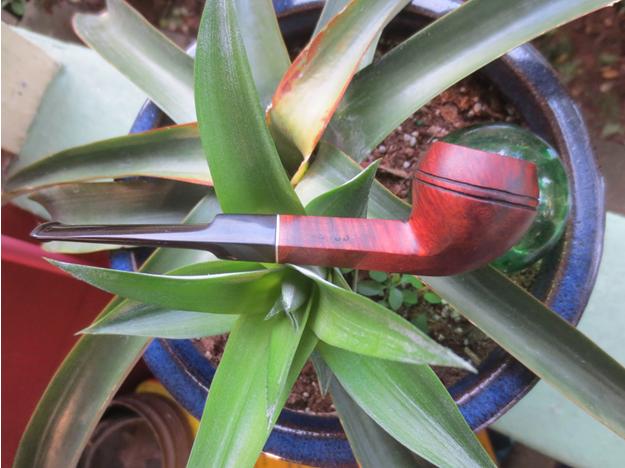
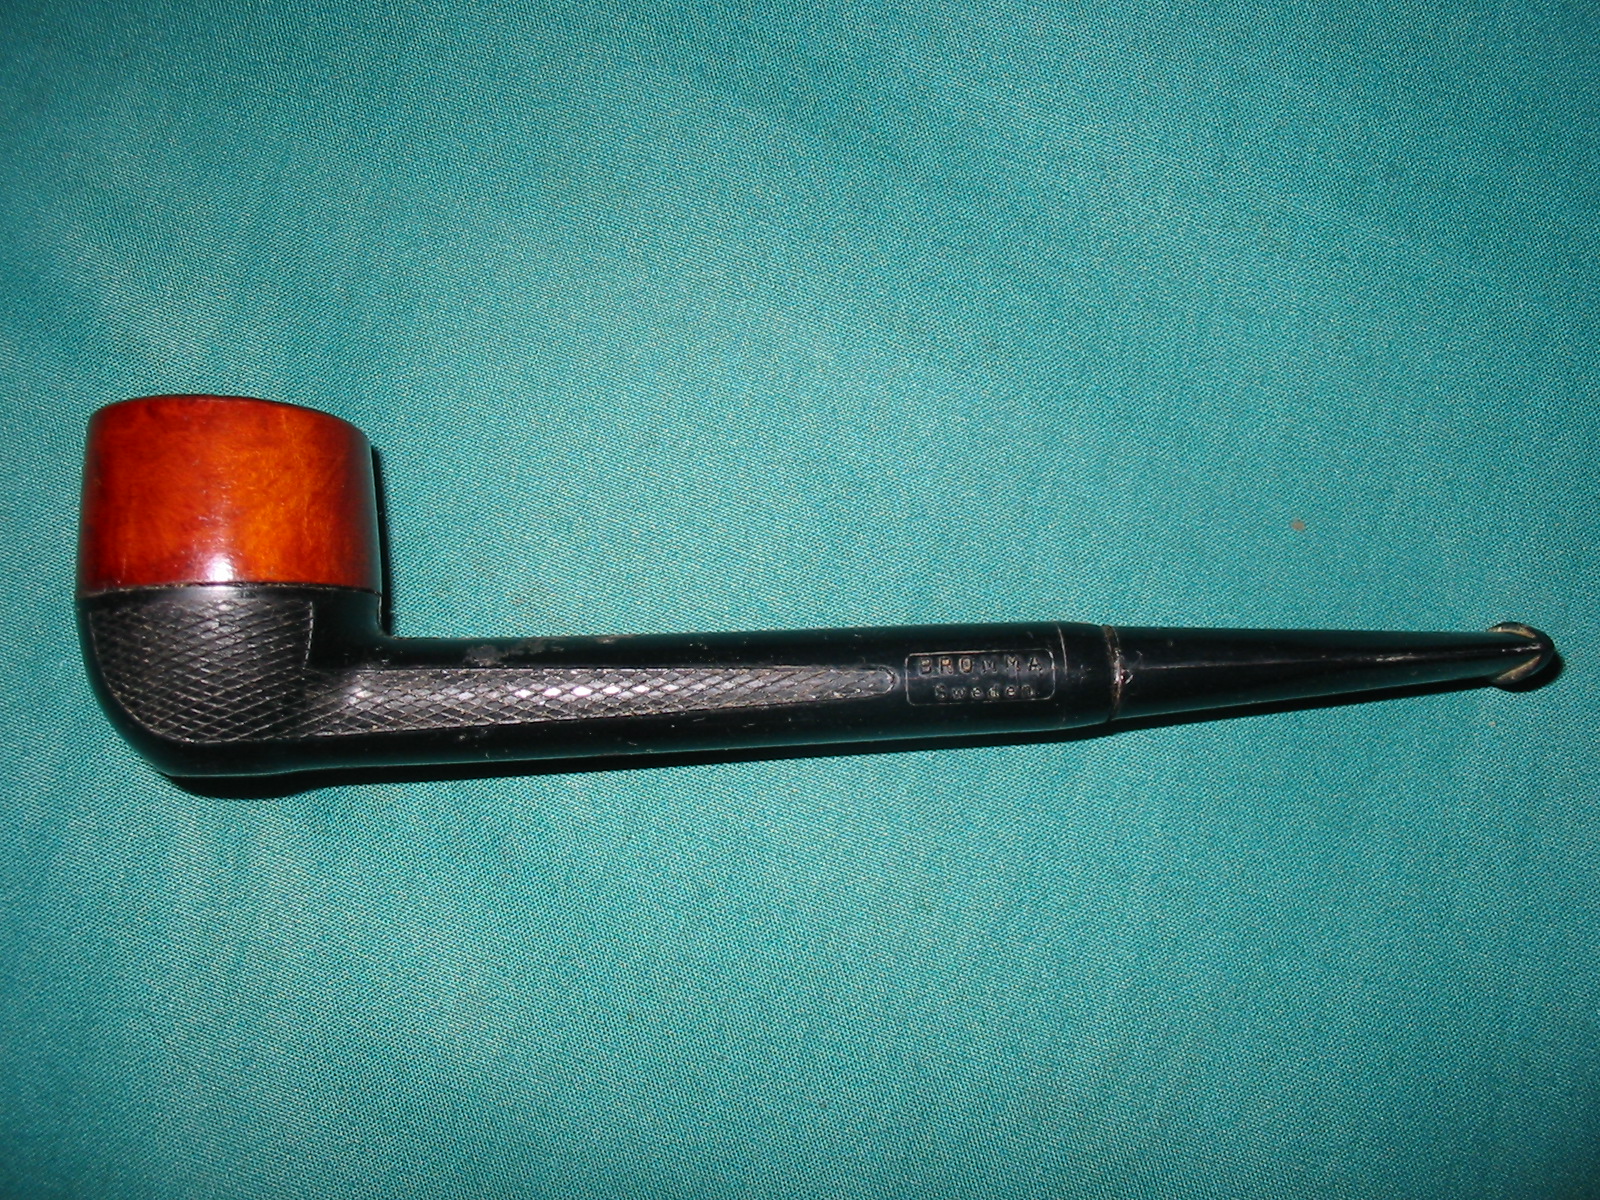
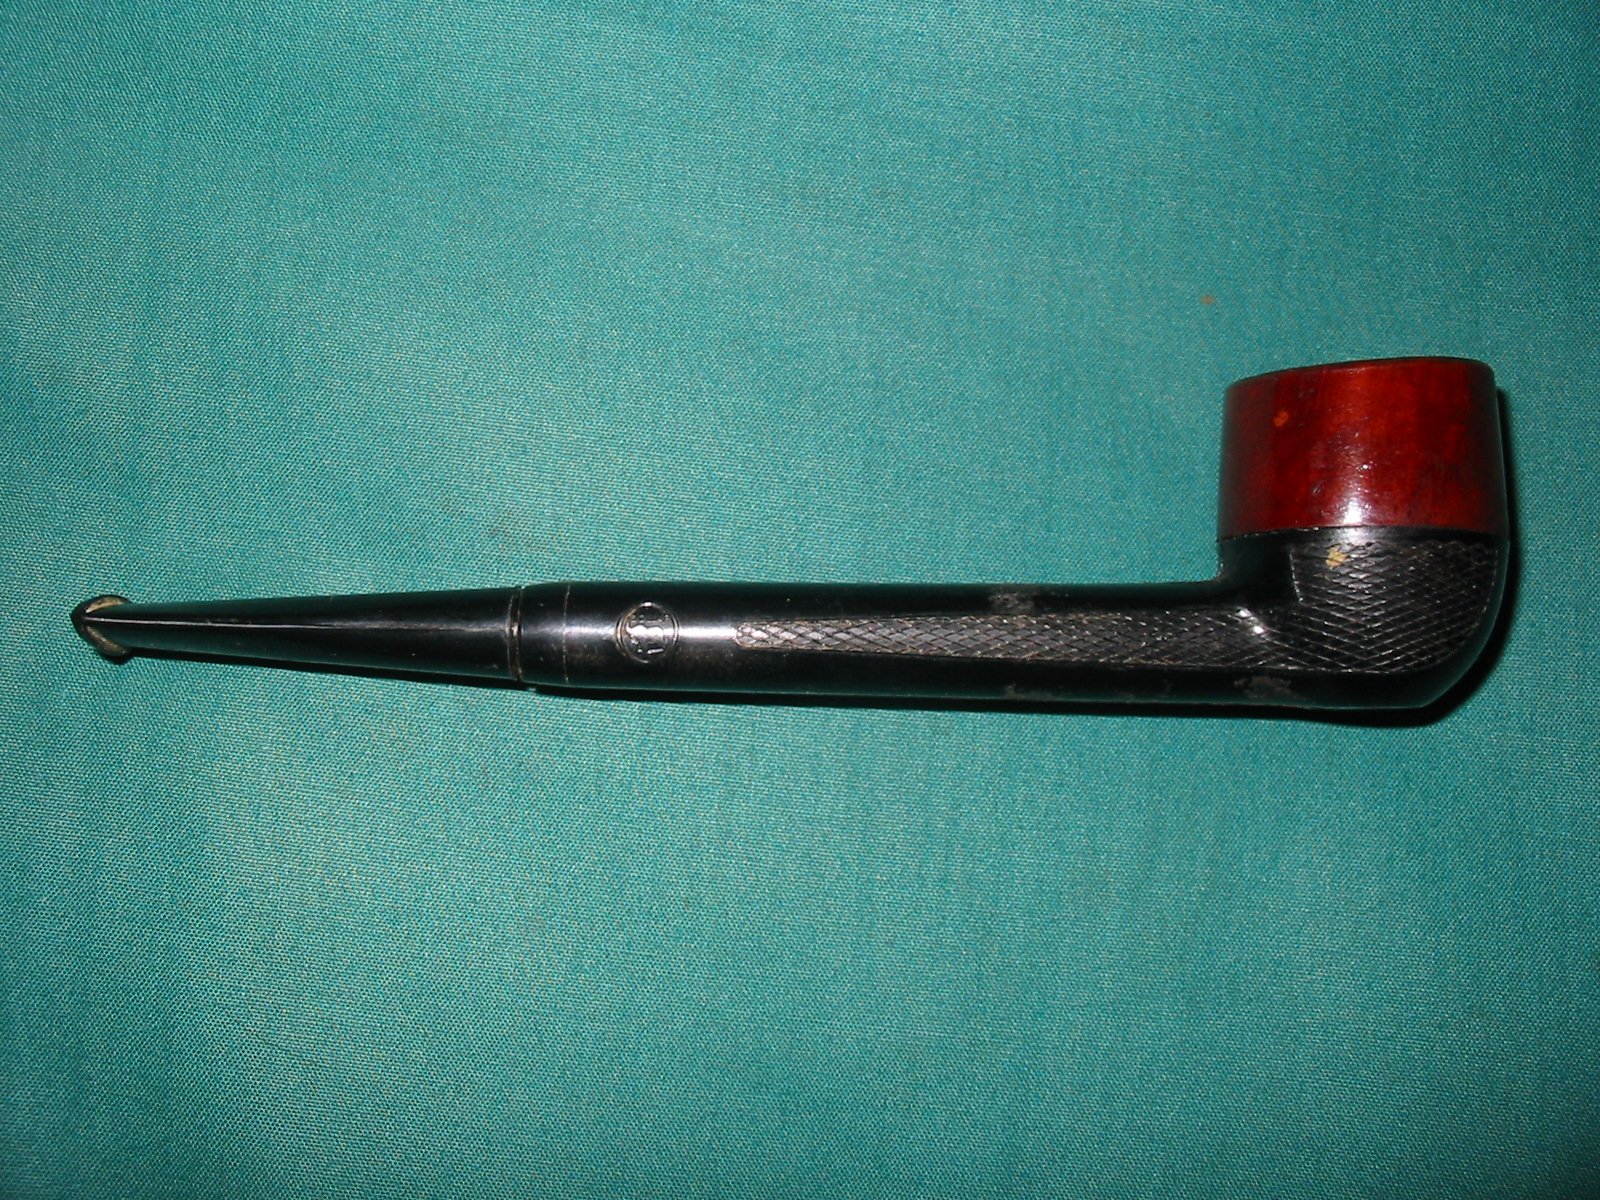
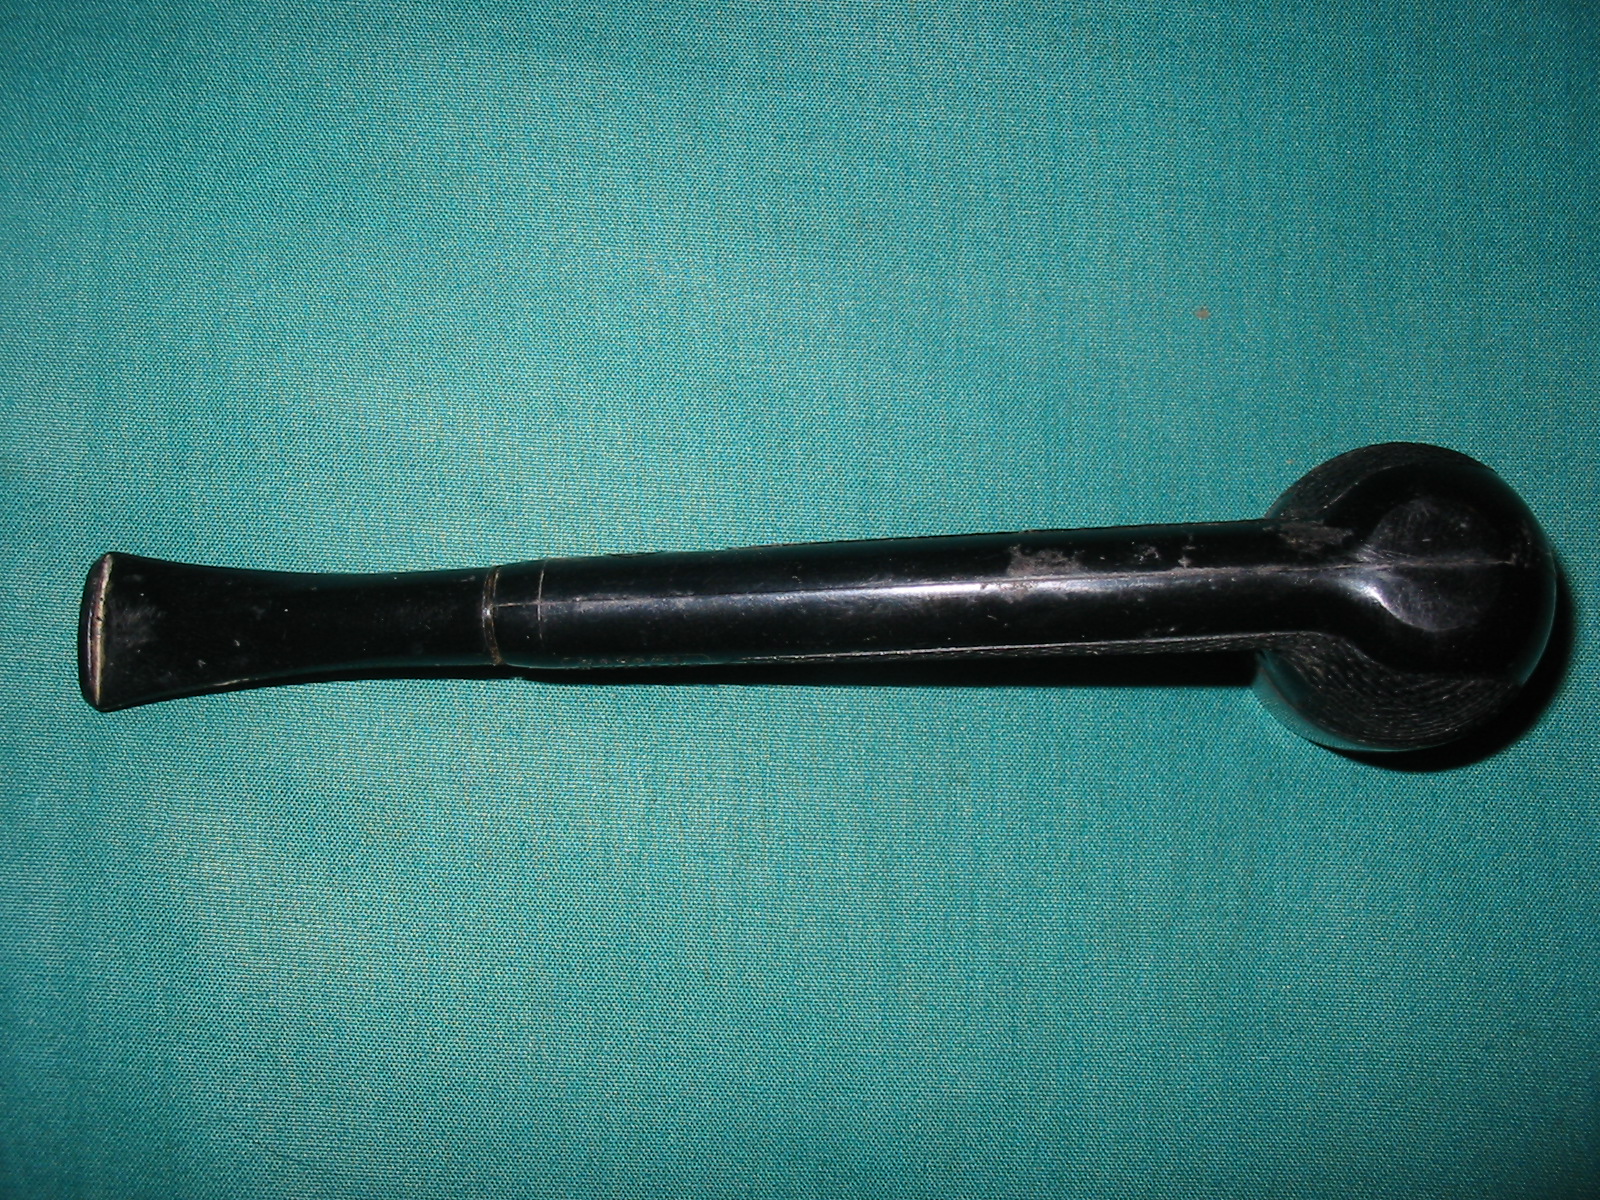
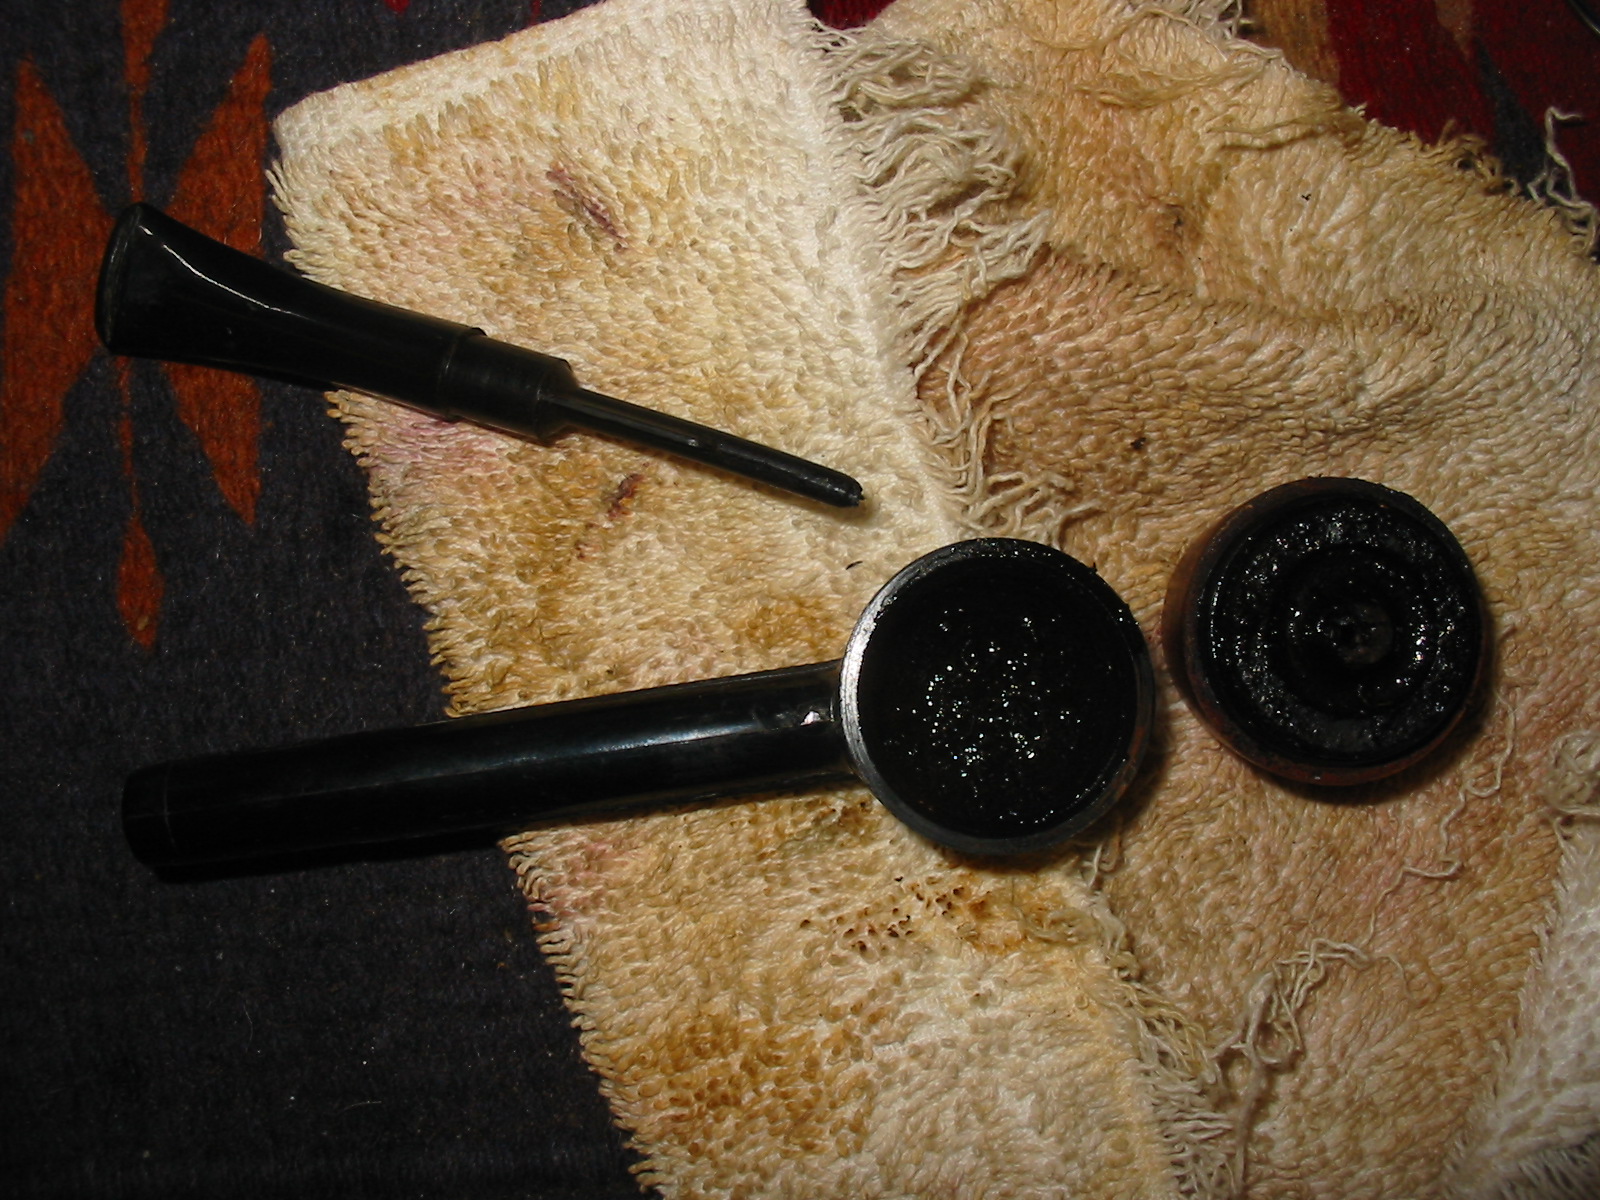
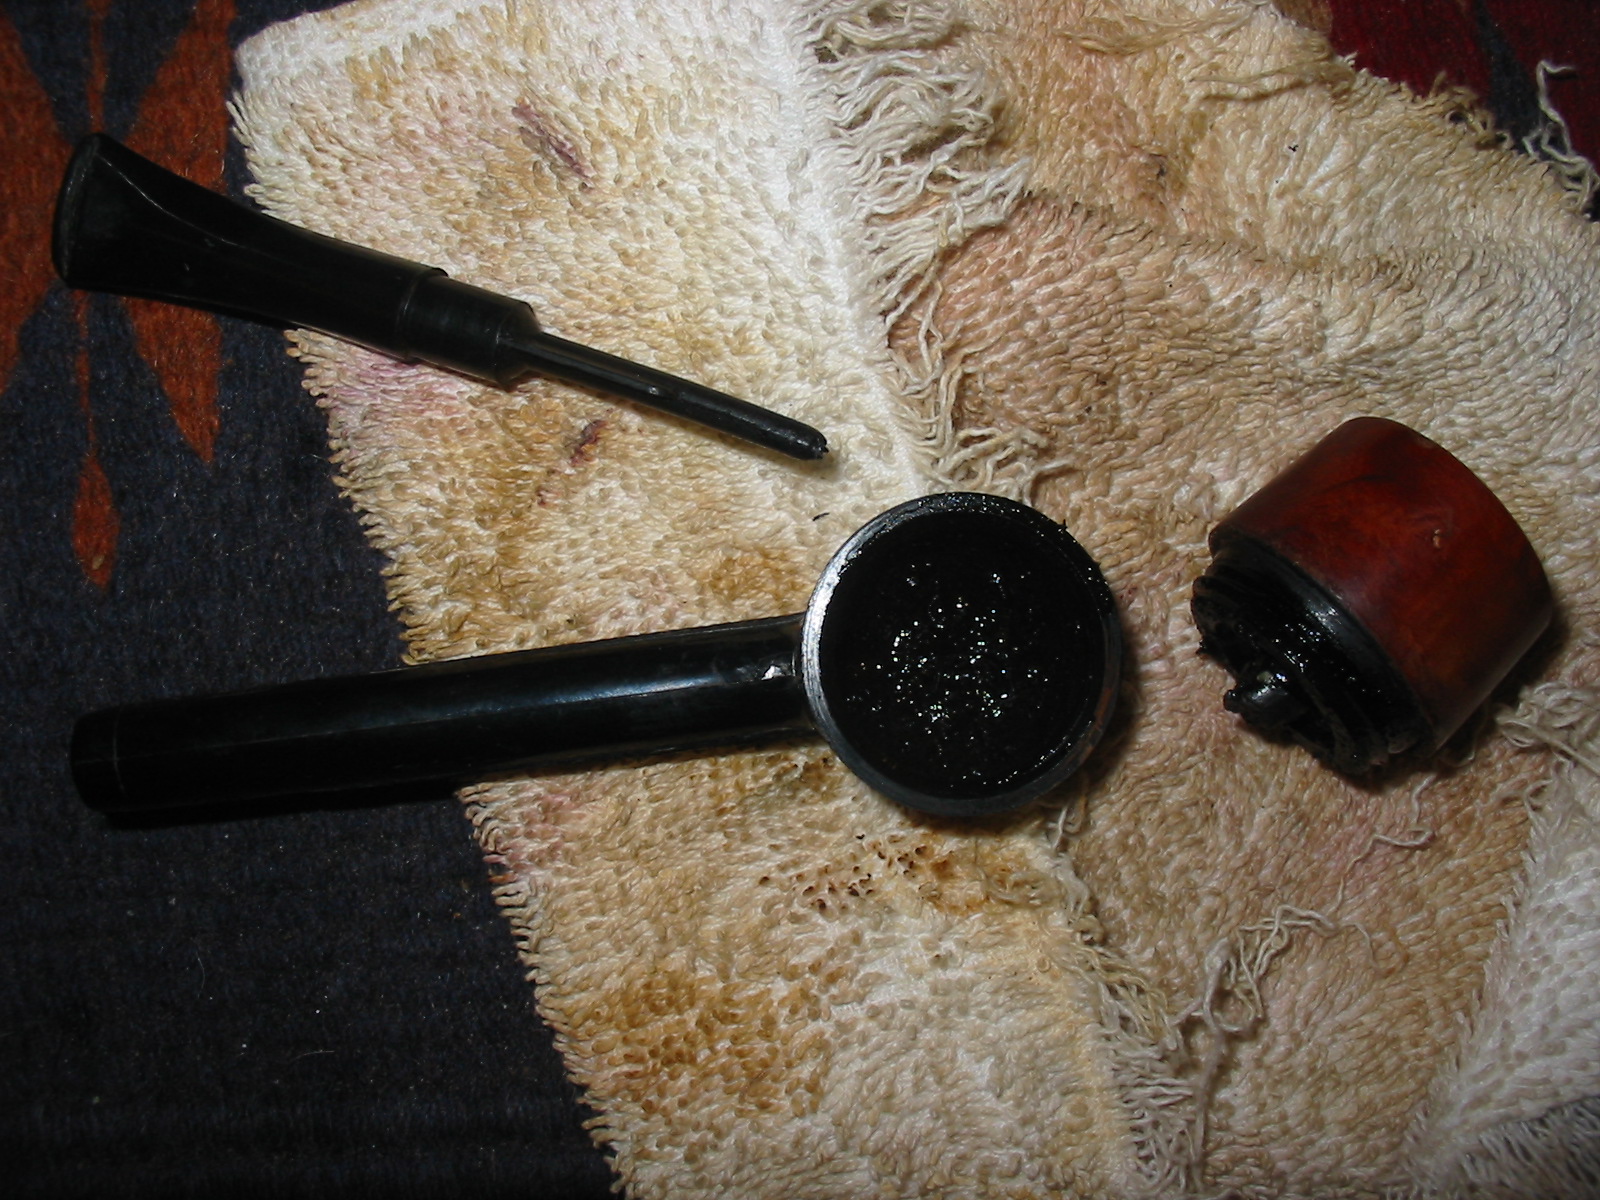
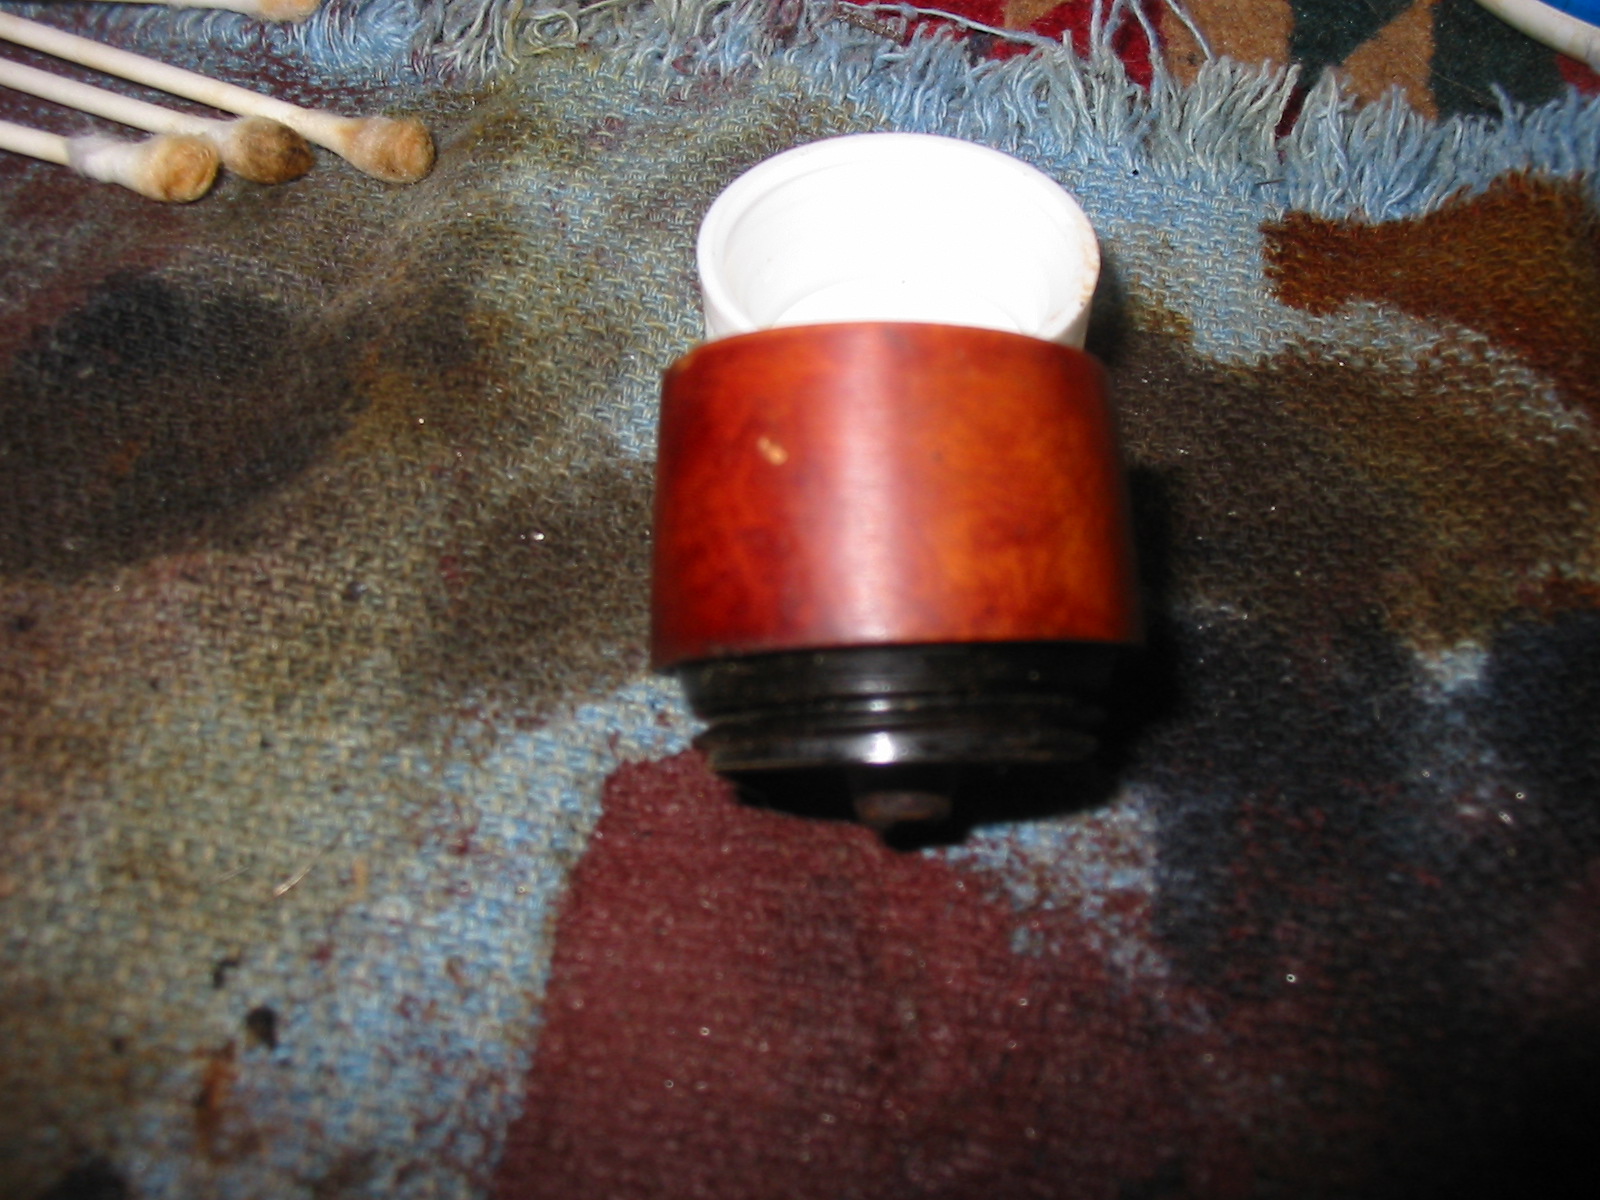
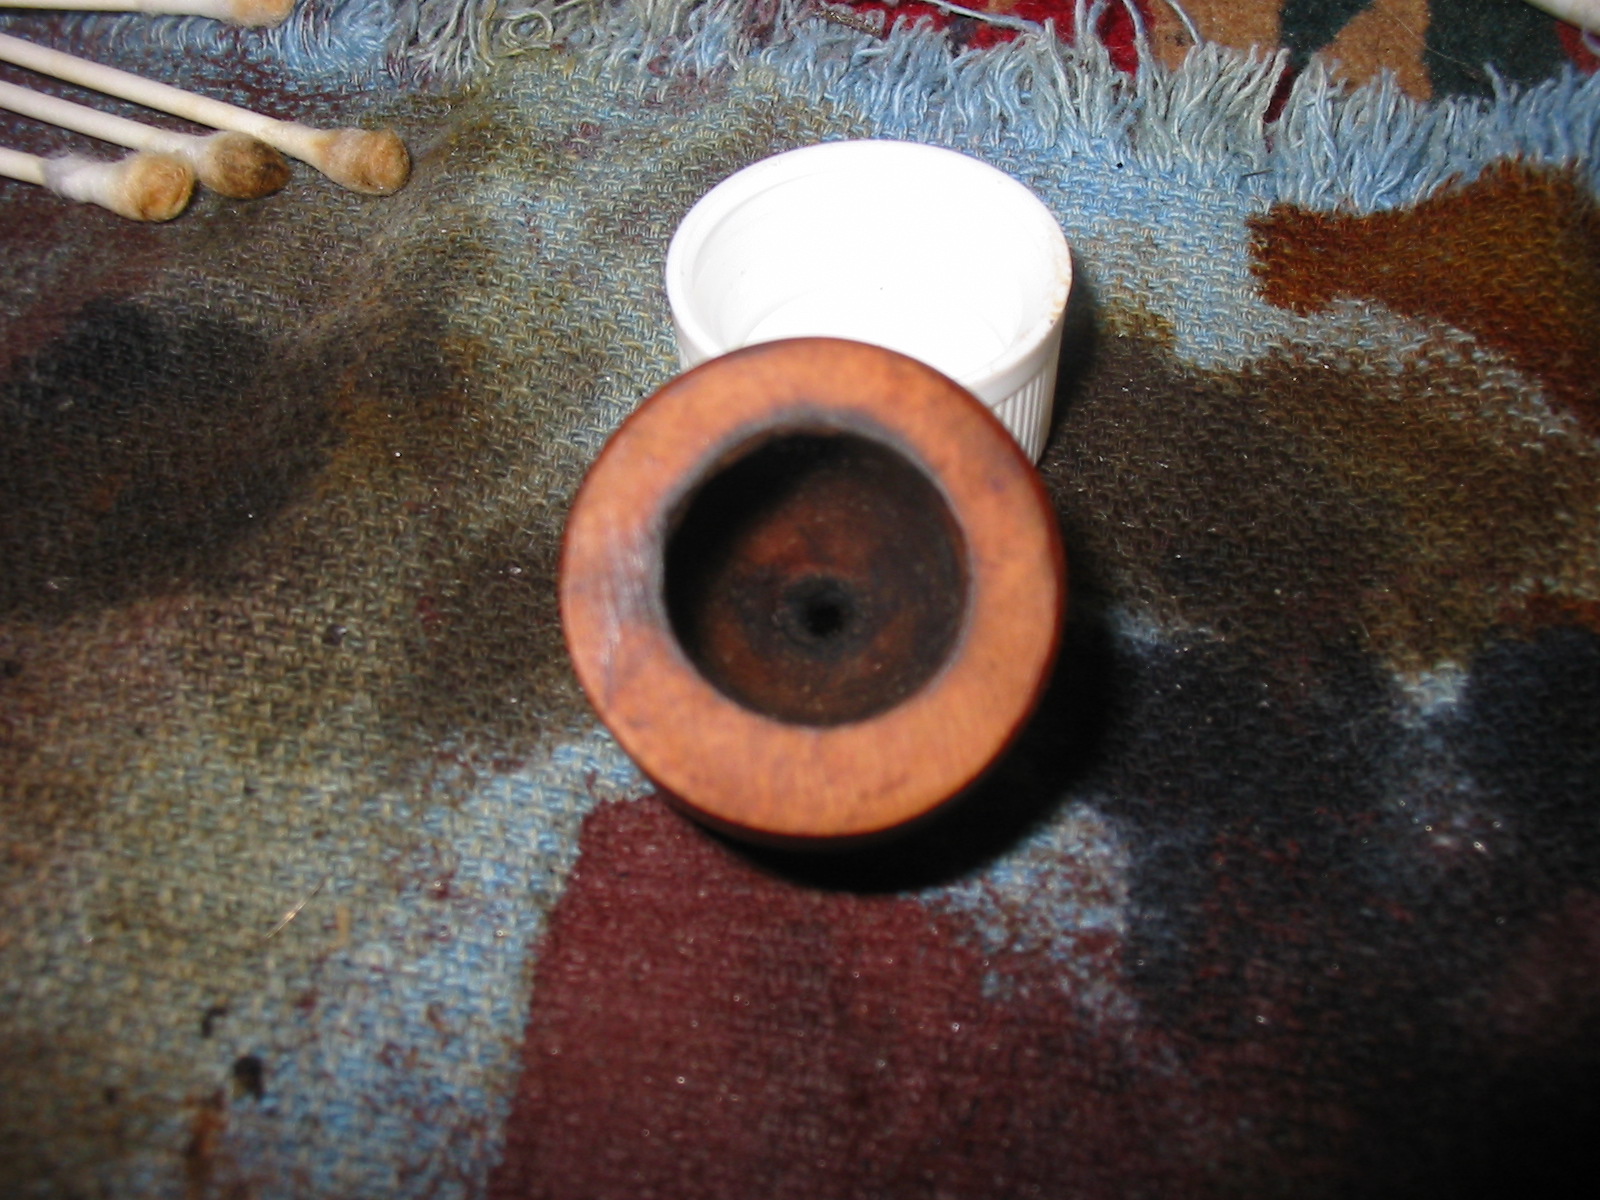
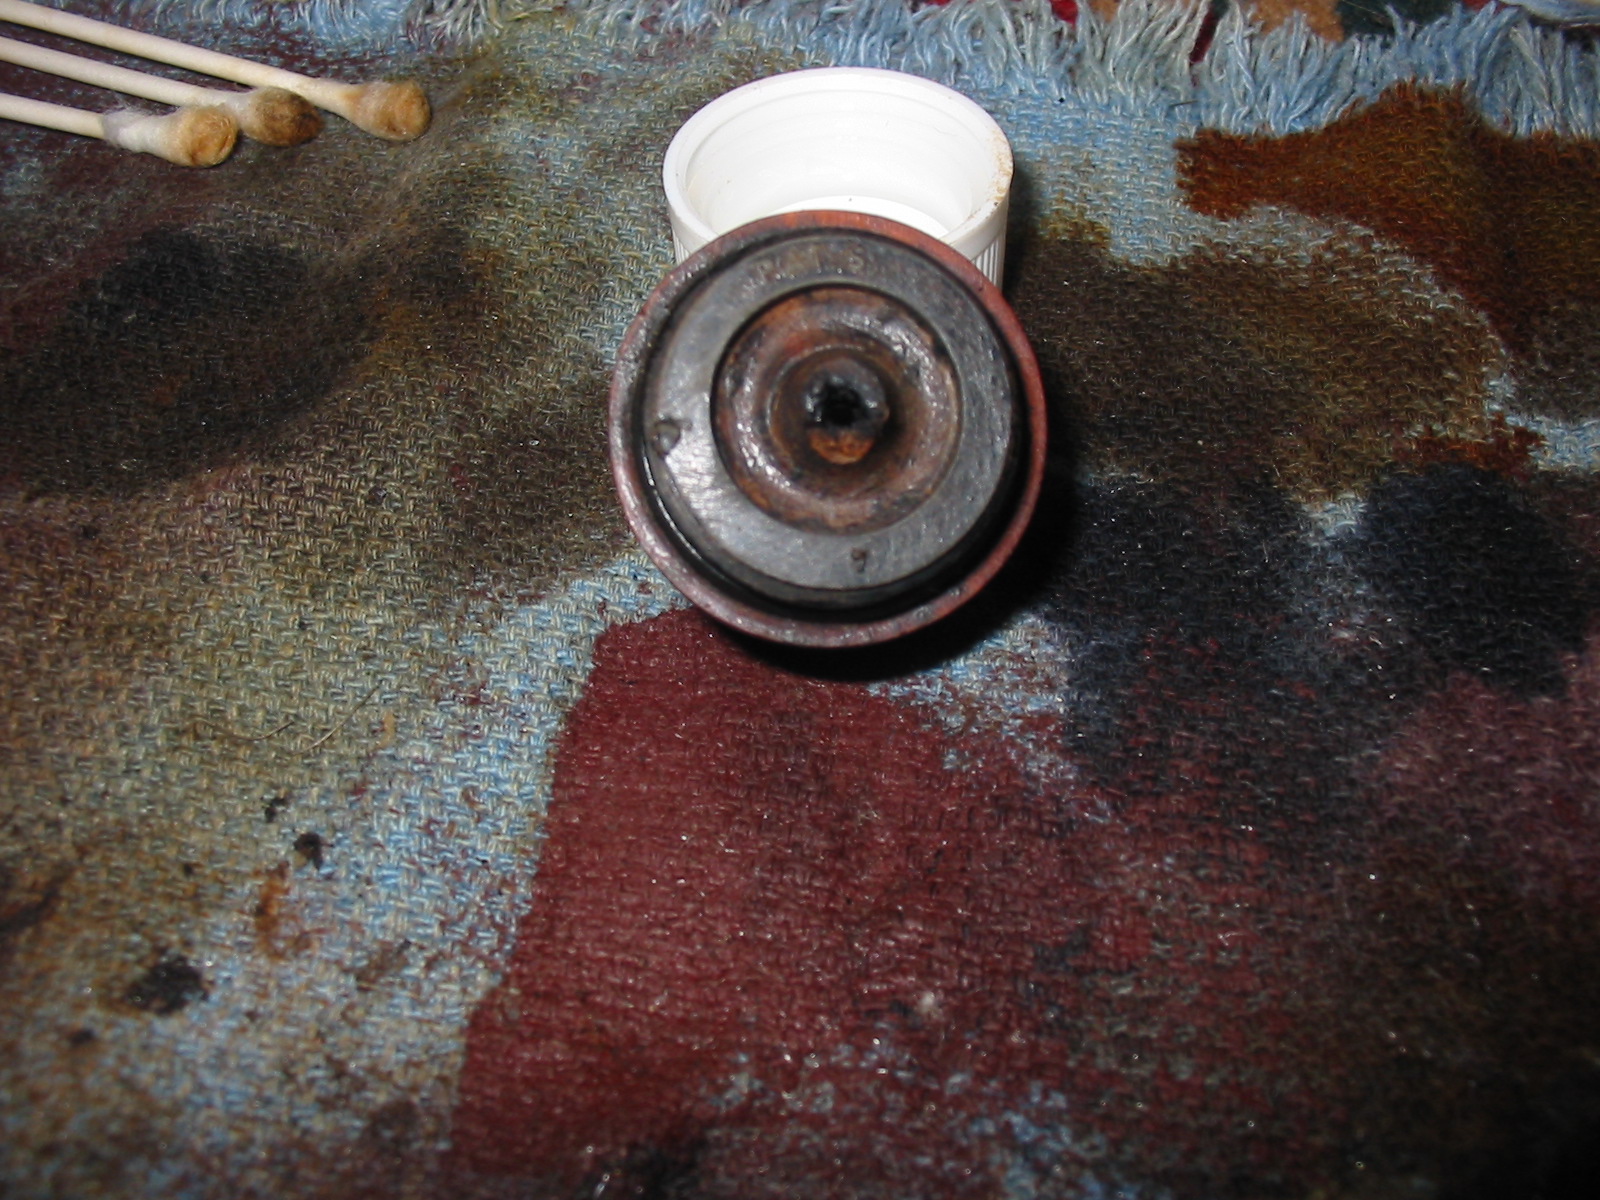
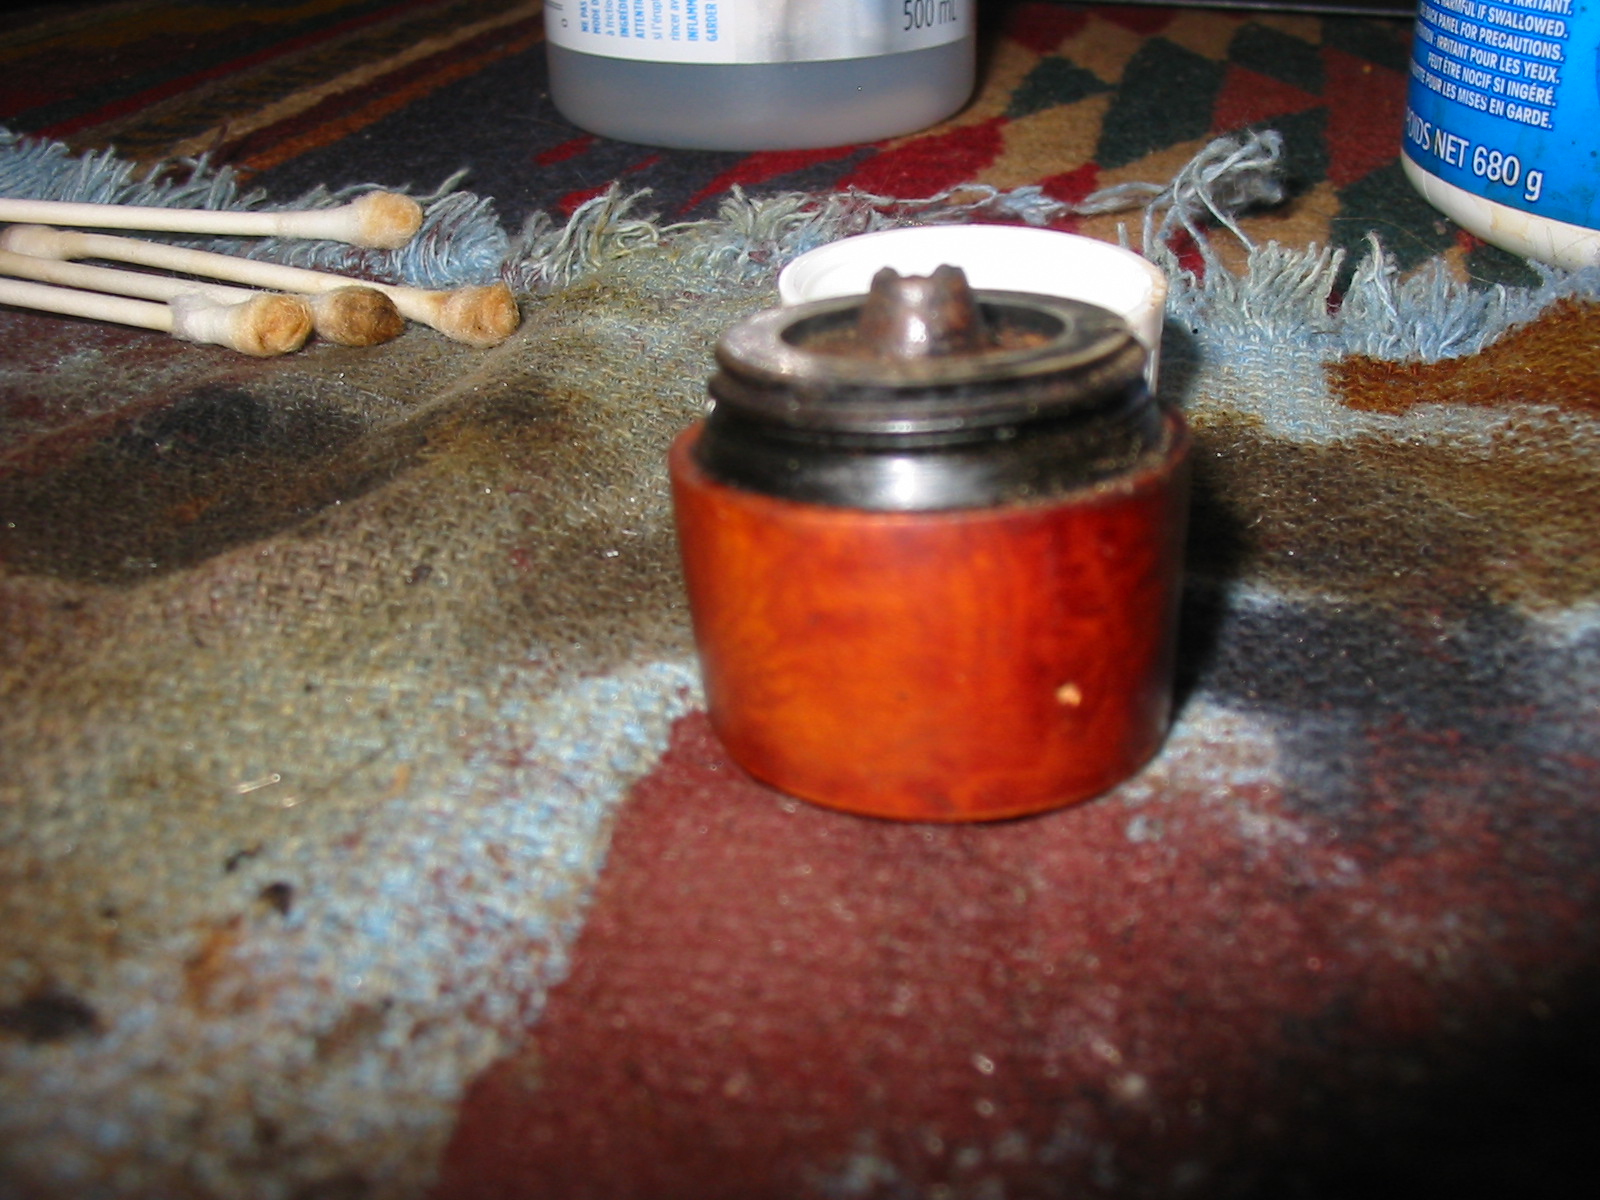
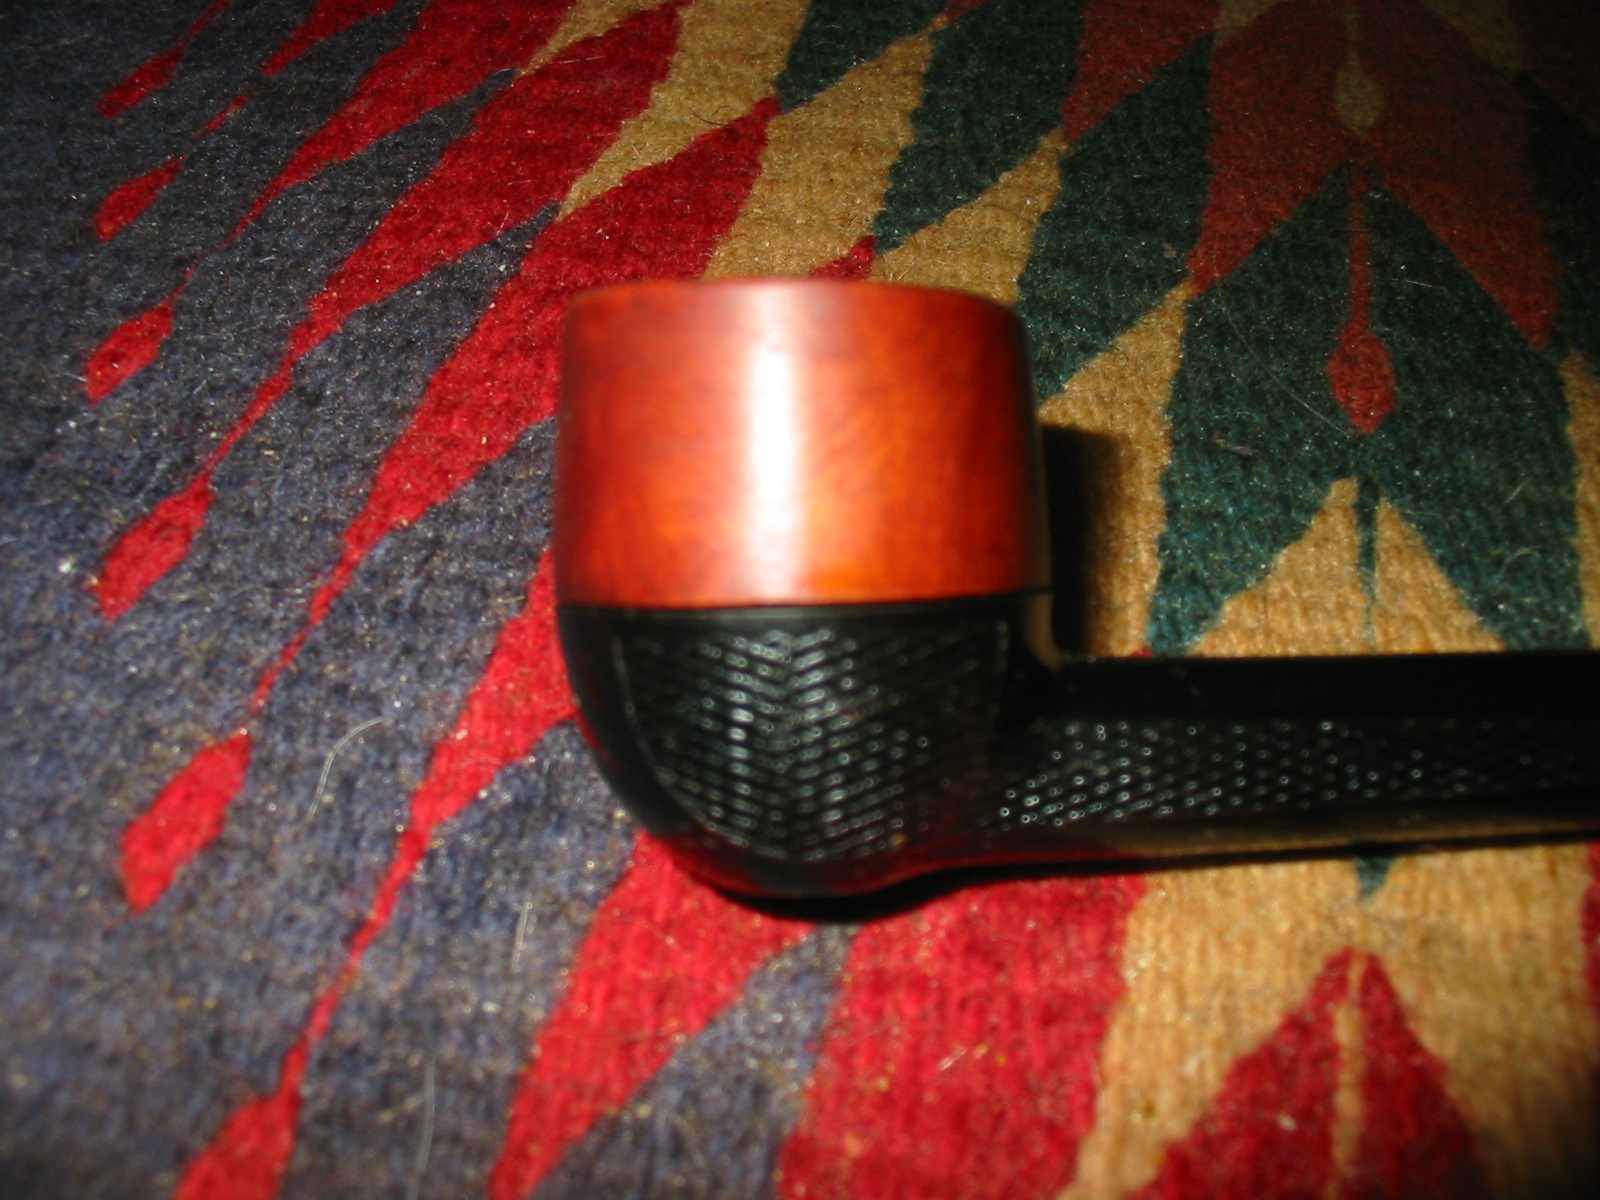
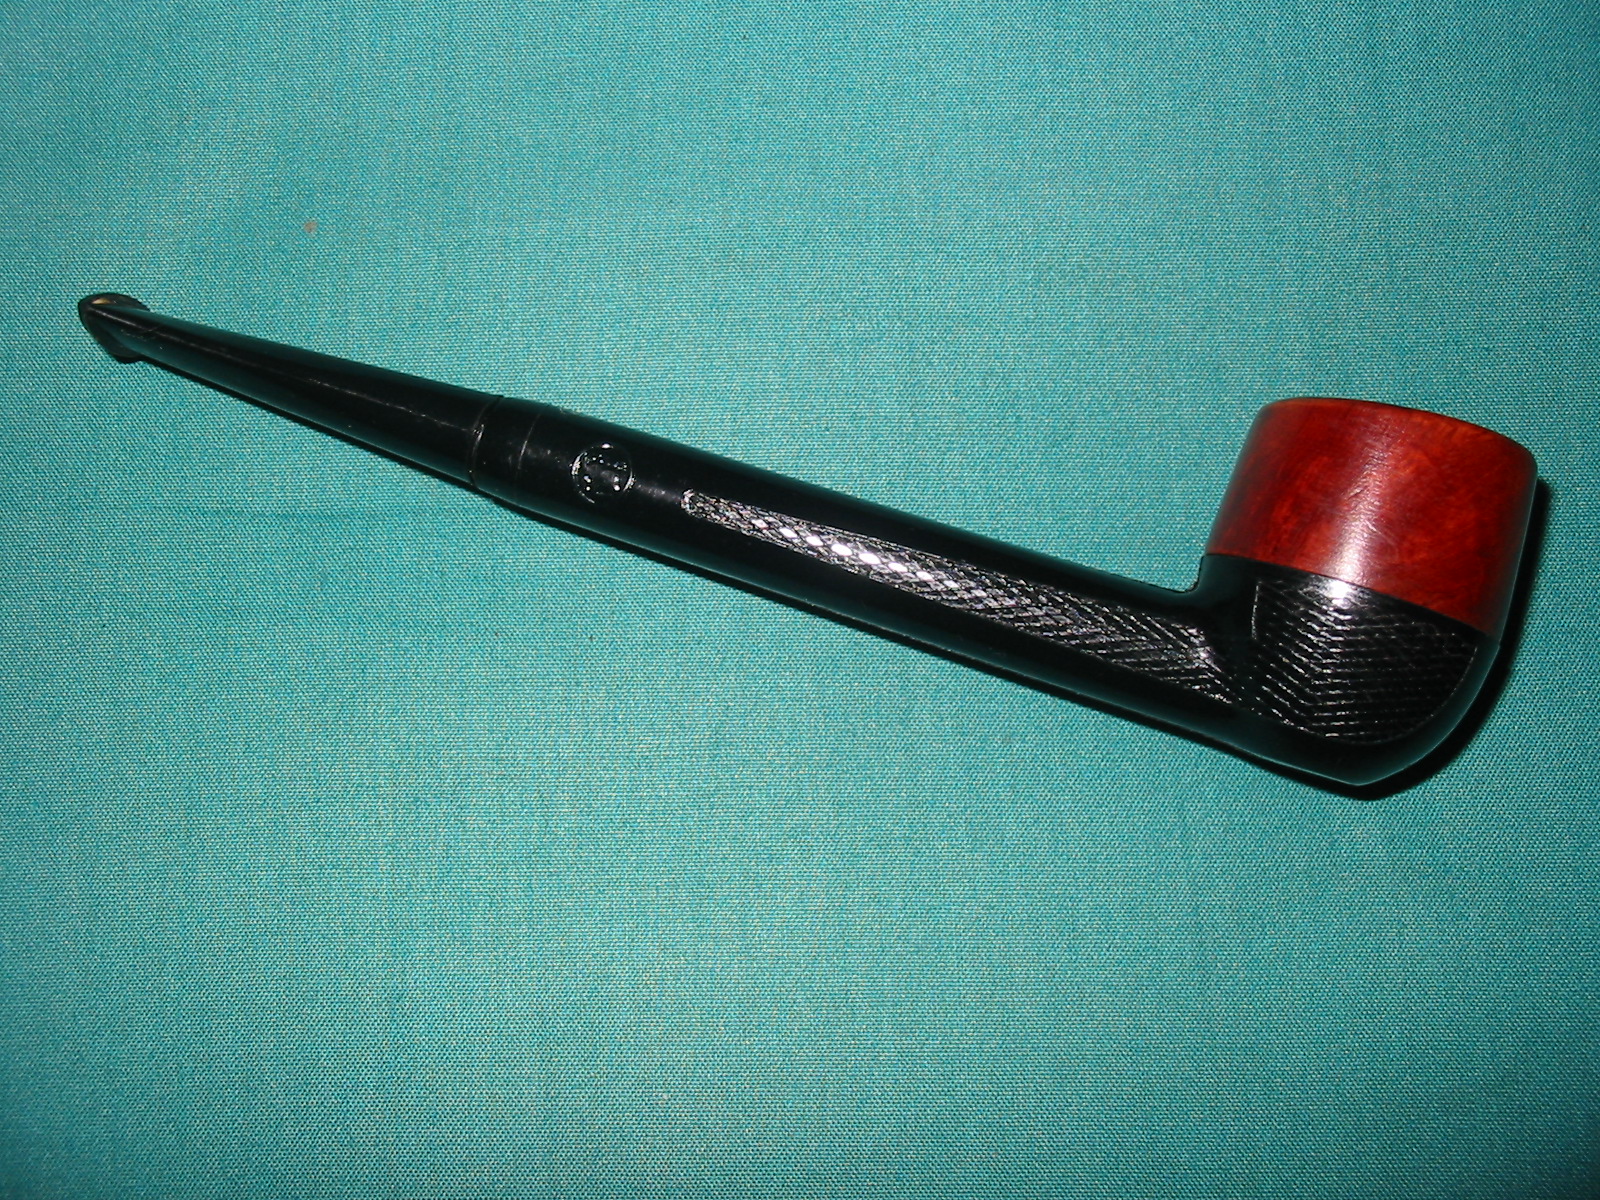
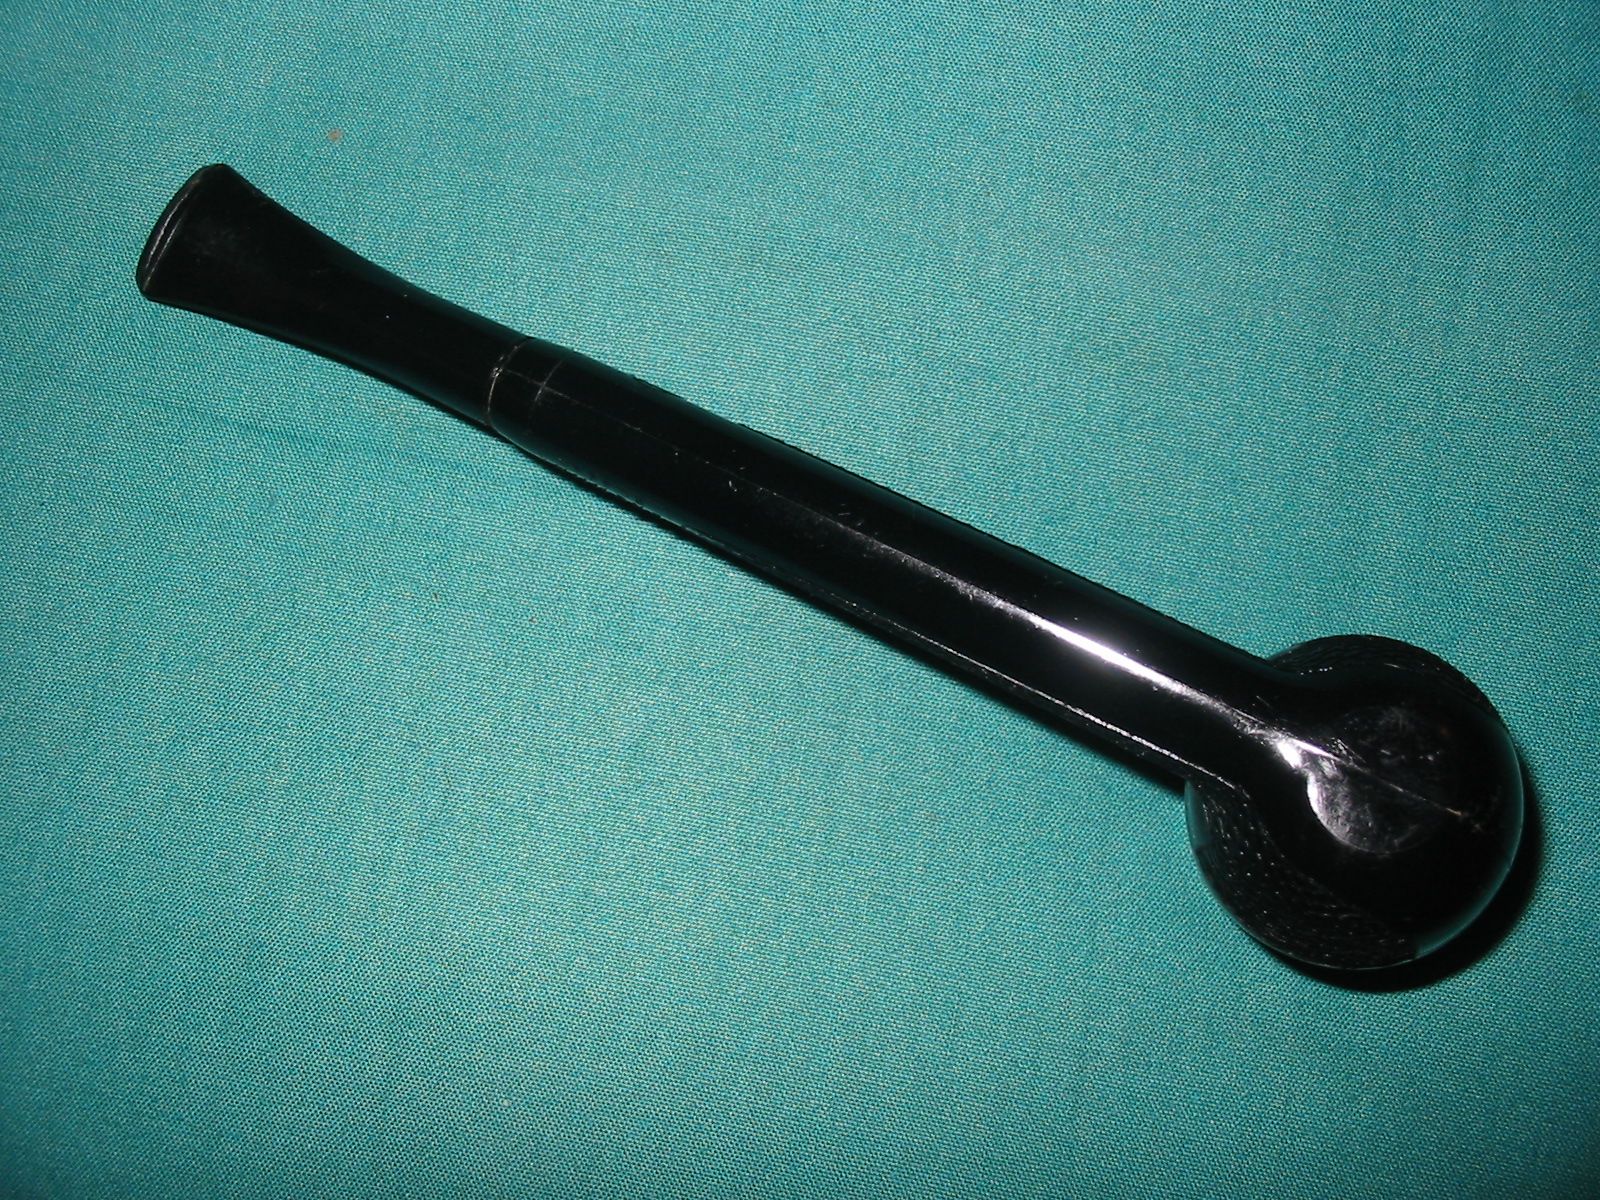
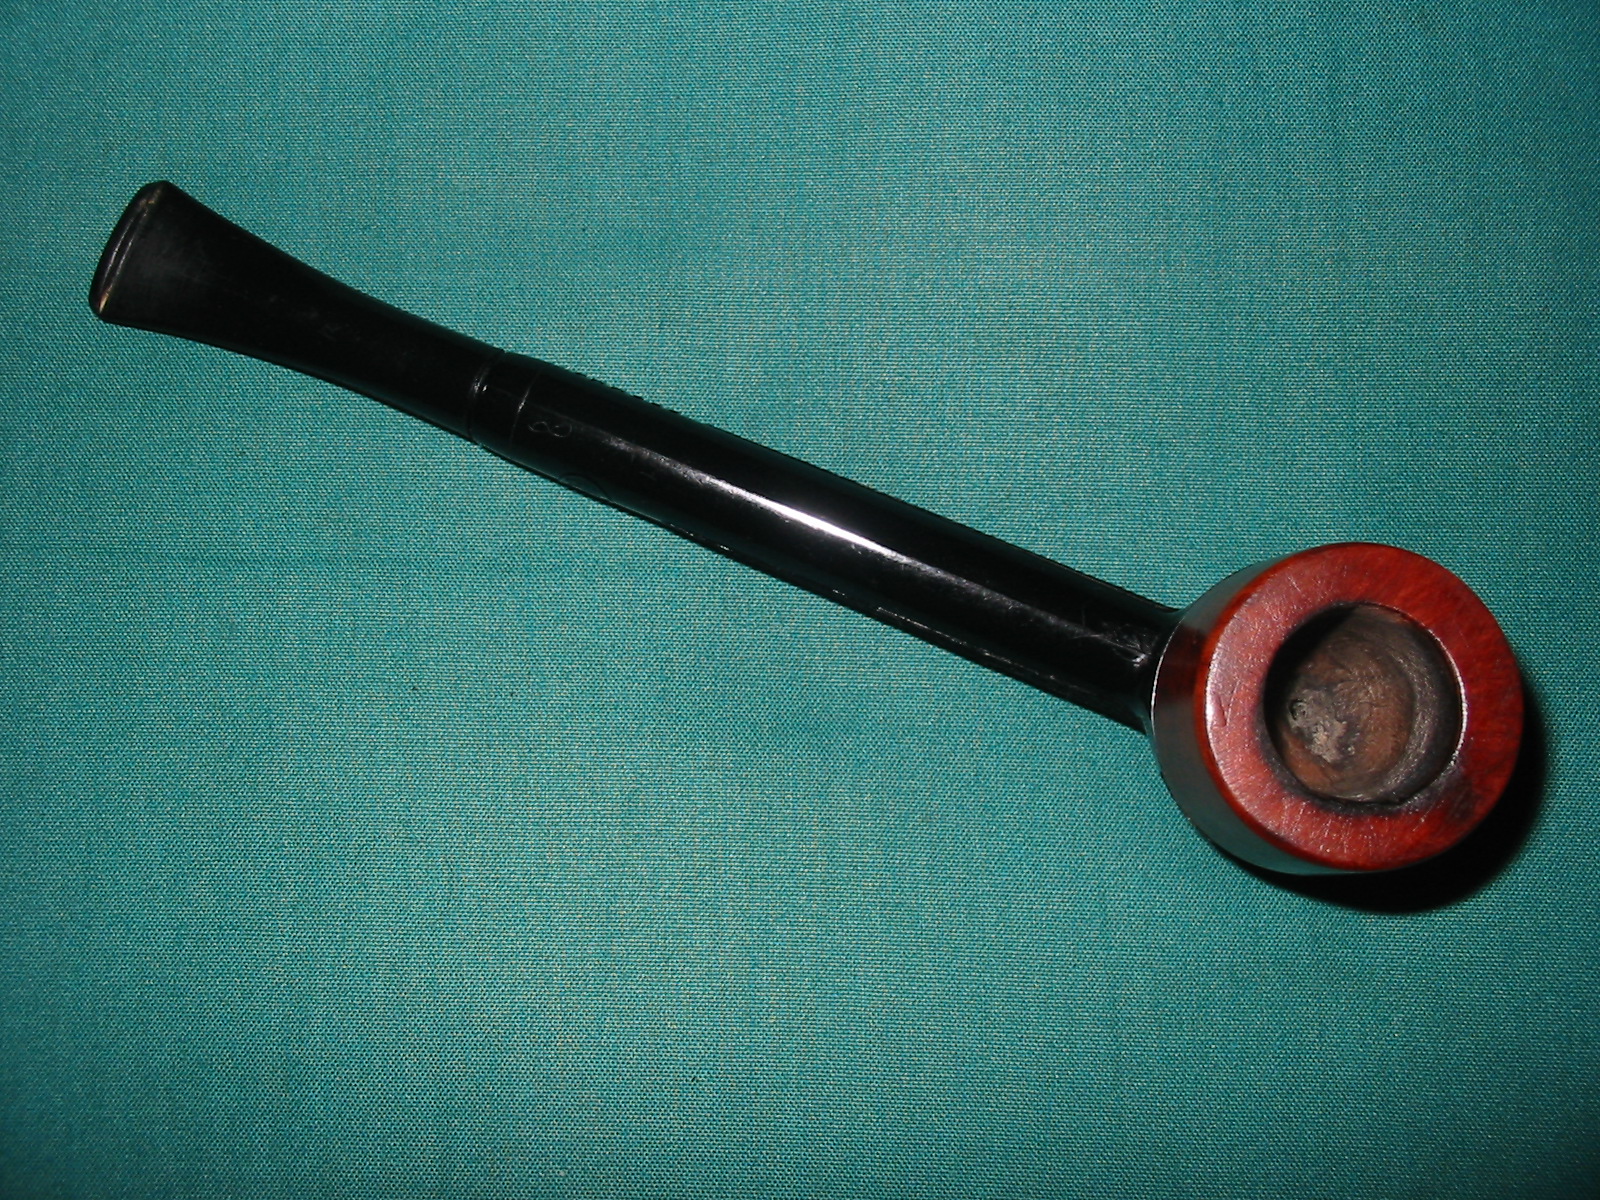
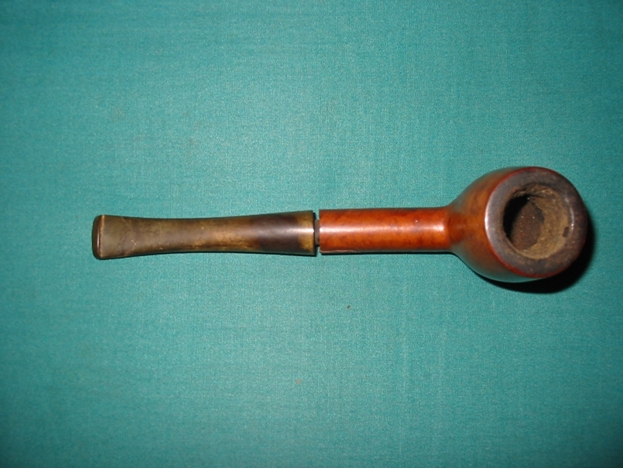
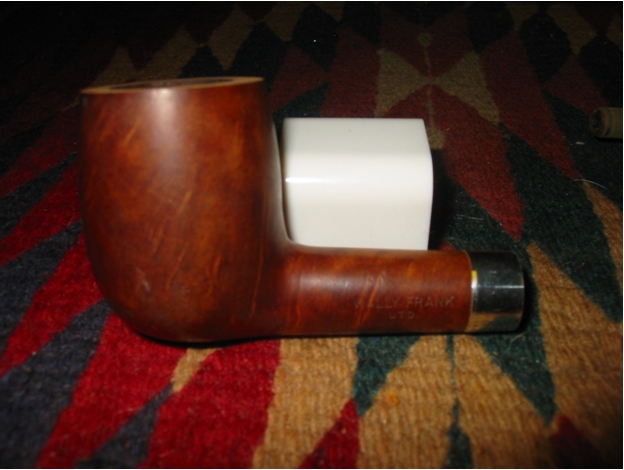
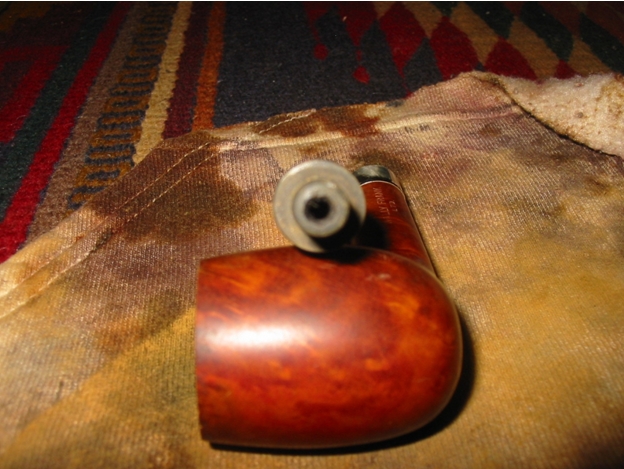
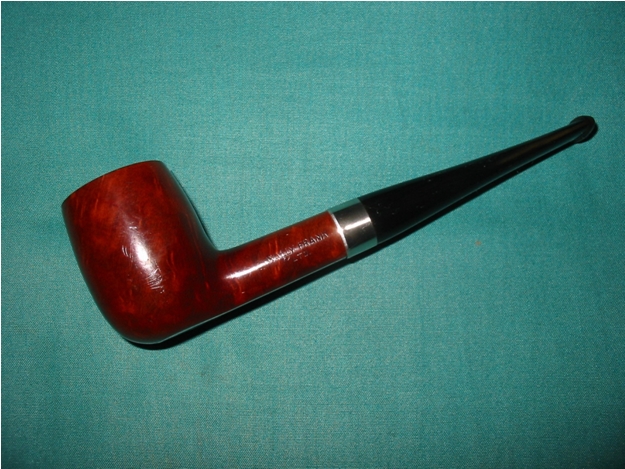
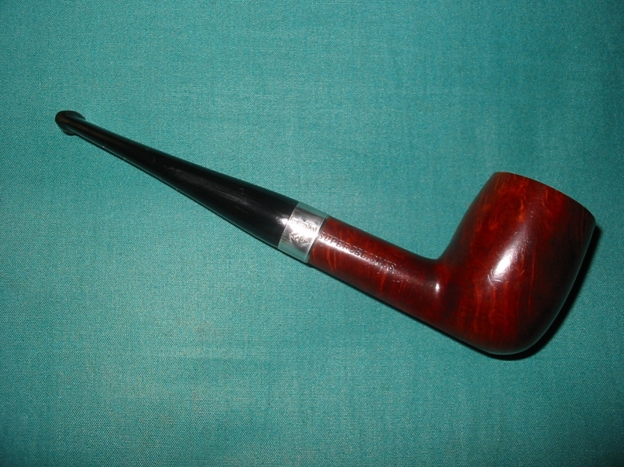
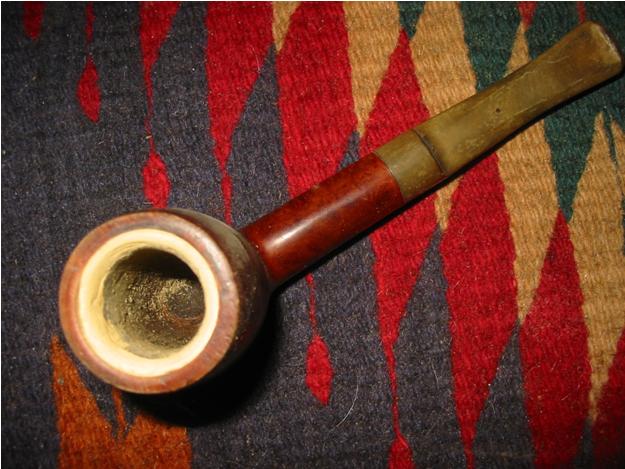
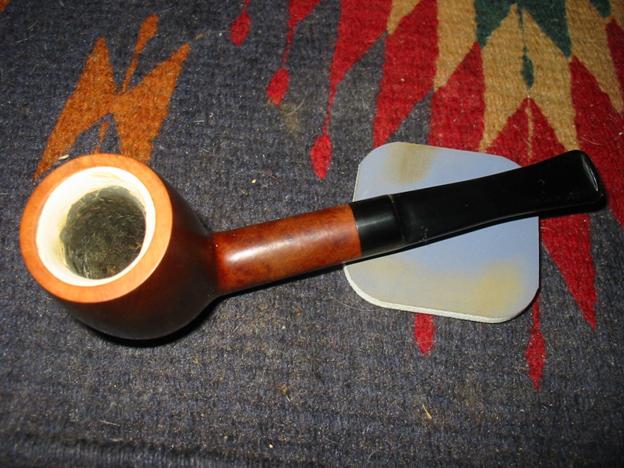
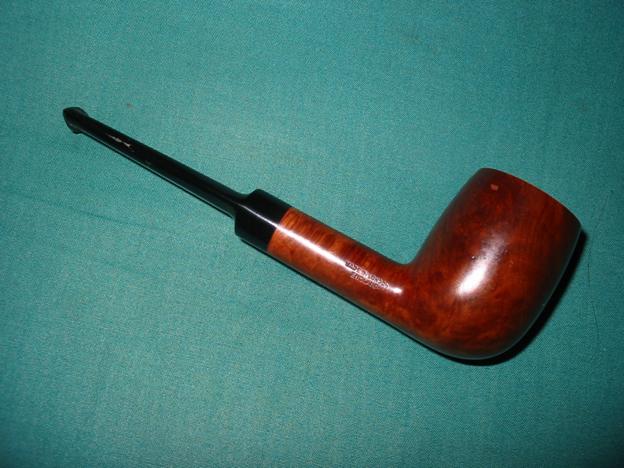
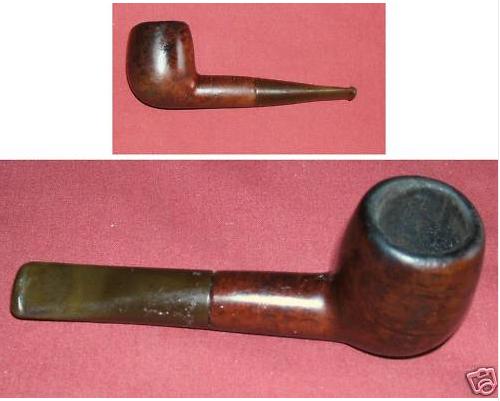
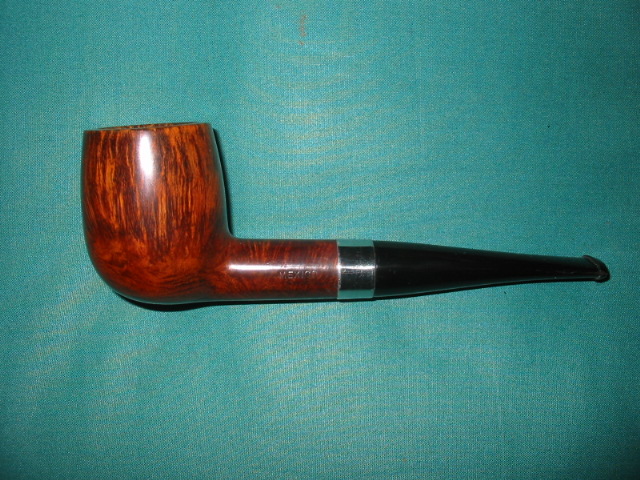
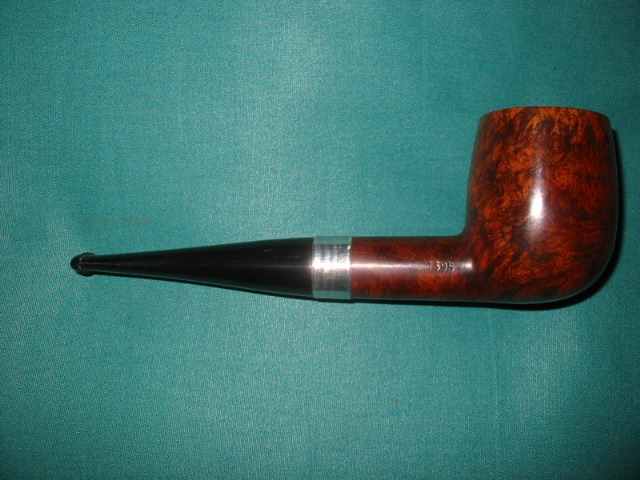
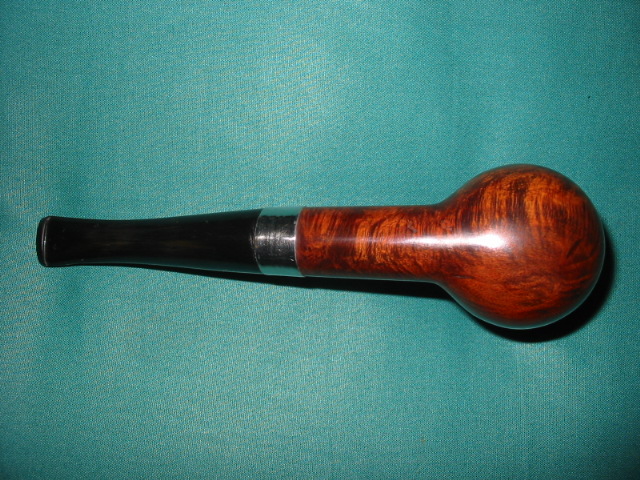
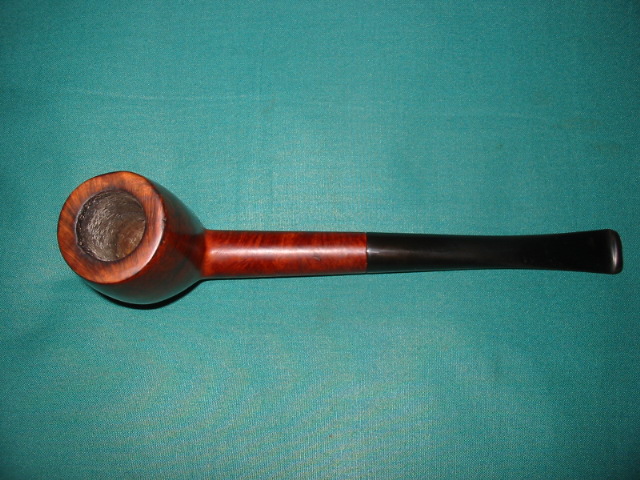
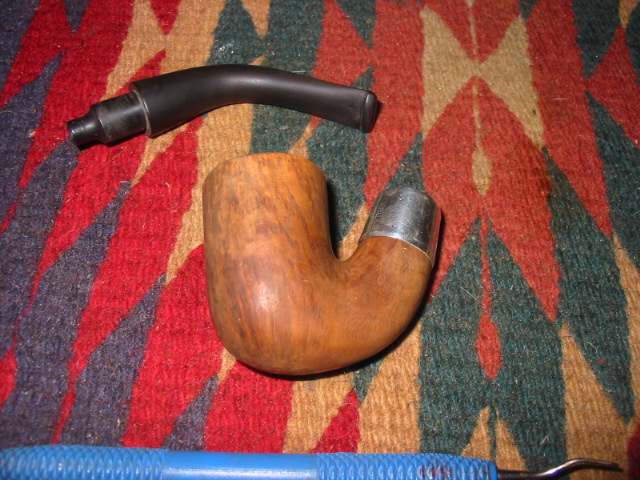
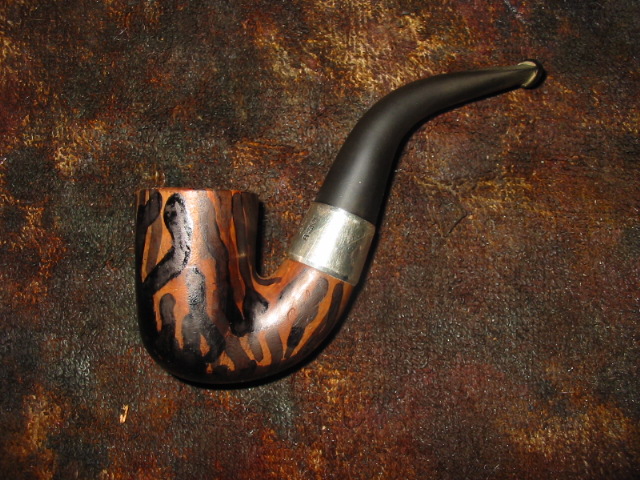
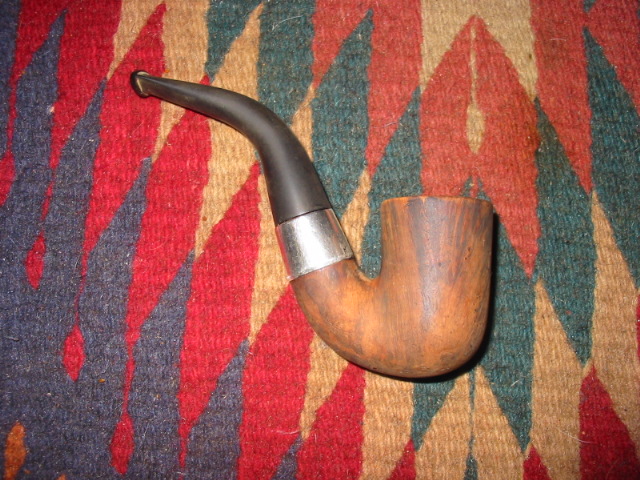
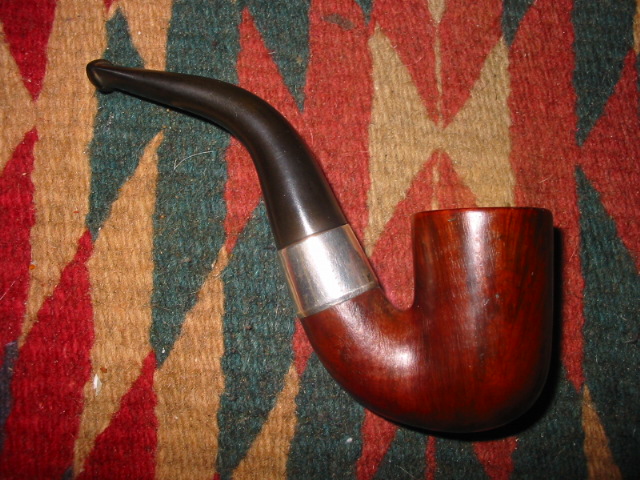
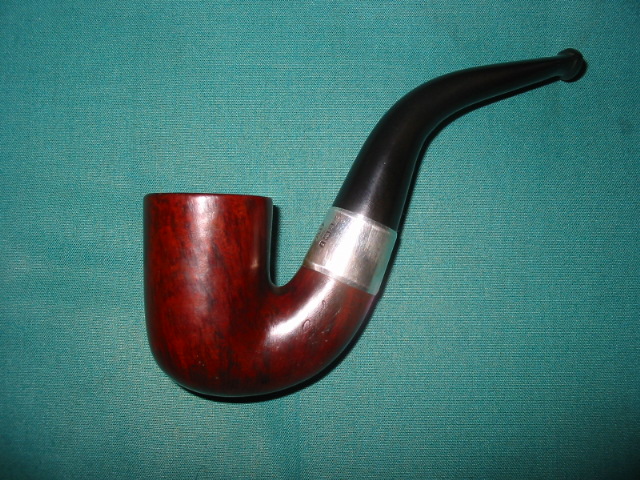
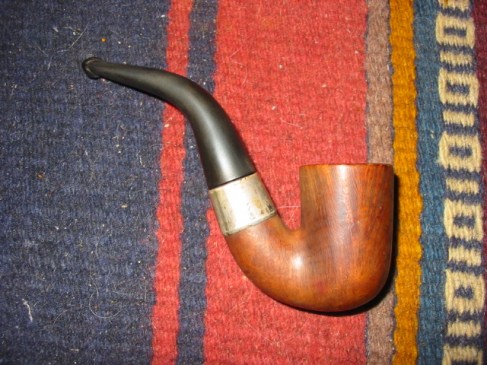
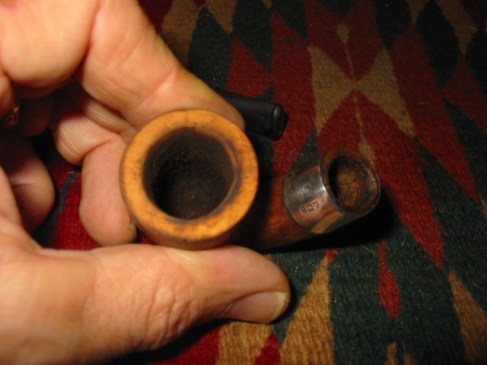
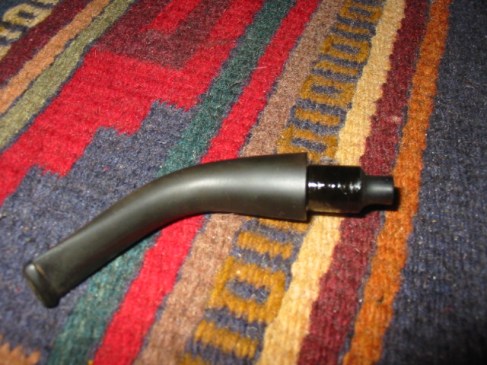
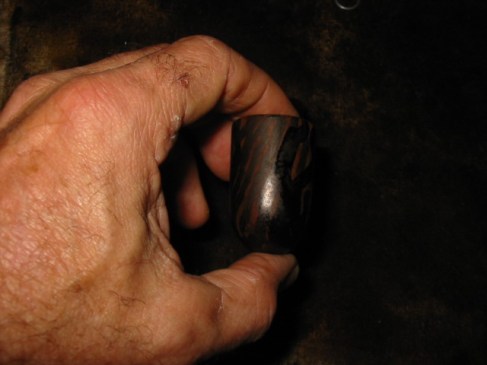
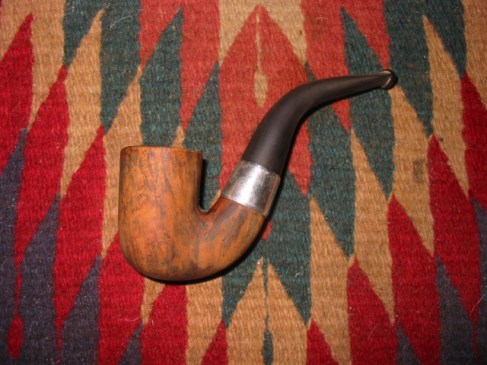
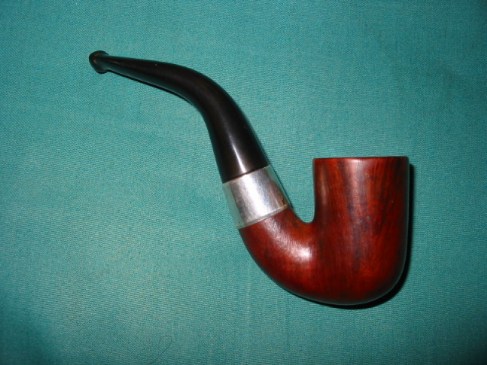
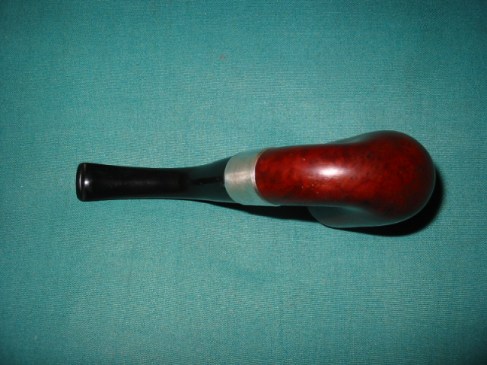
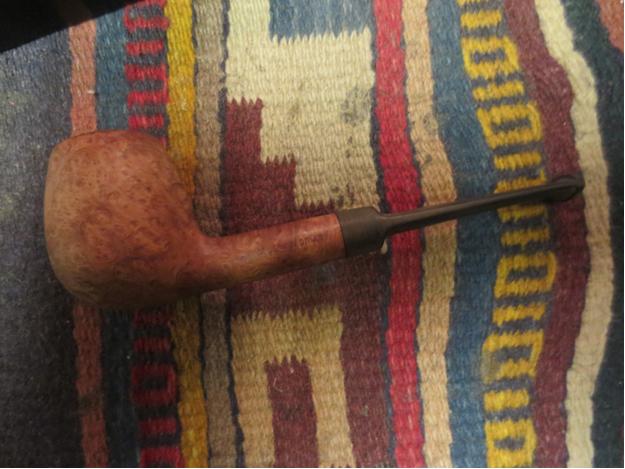
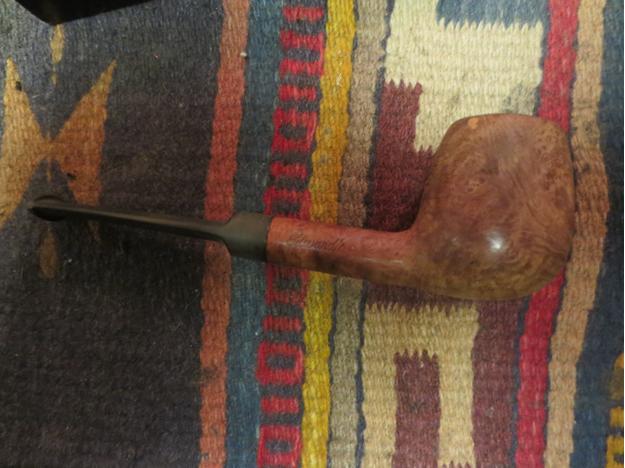
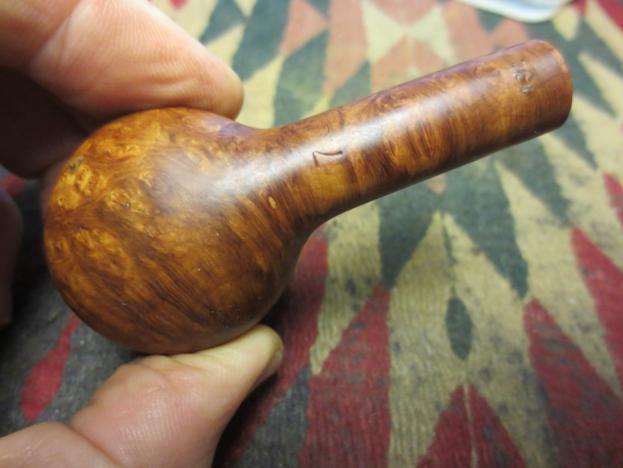
Chuck and I talked through this list a bit on the phone and then through pms on Smokers Forums and he left it to me to see what I could do with the old pipe. Here are some pictures of the pipe when it arrived. The finish was pretty much gone but there was some great looking grain underneath. The issues I pointed out above will be clearly visible by looking at the photos in the first series of three. All of the external issues are visible in these photos.

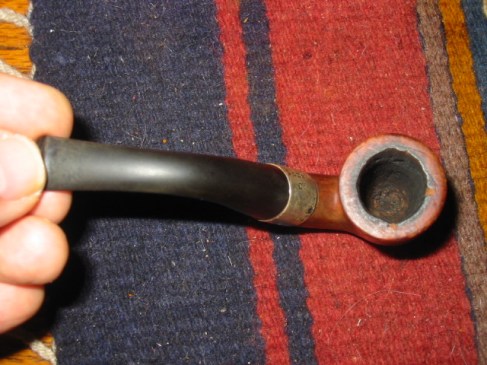
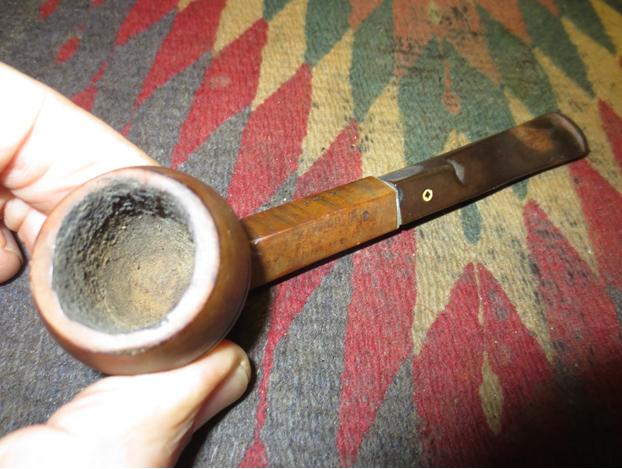
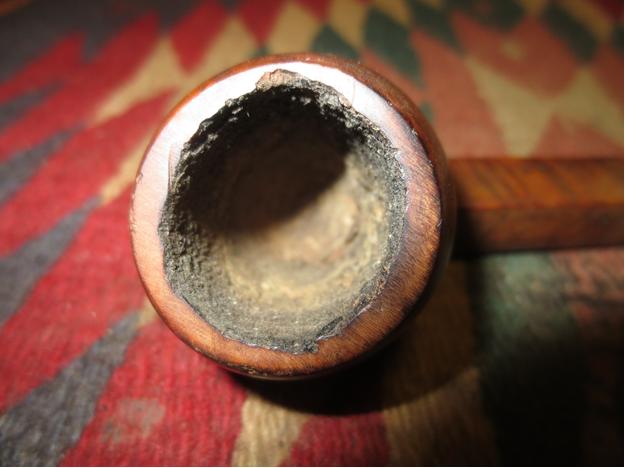
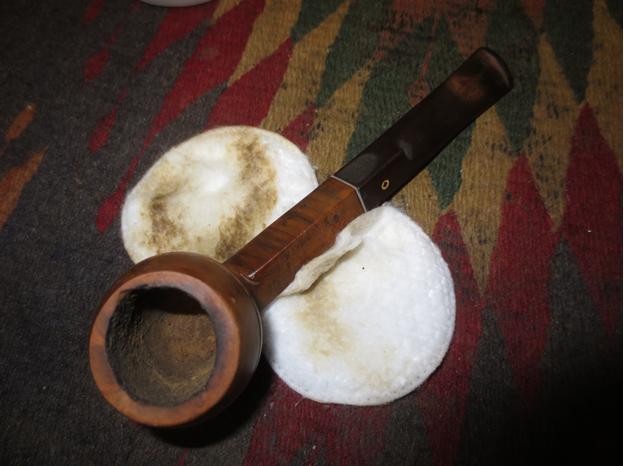
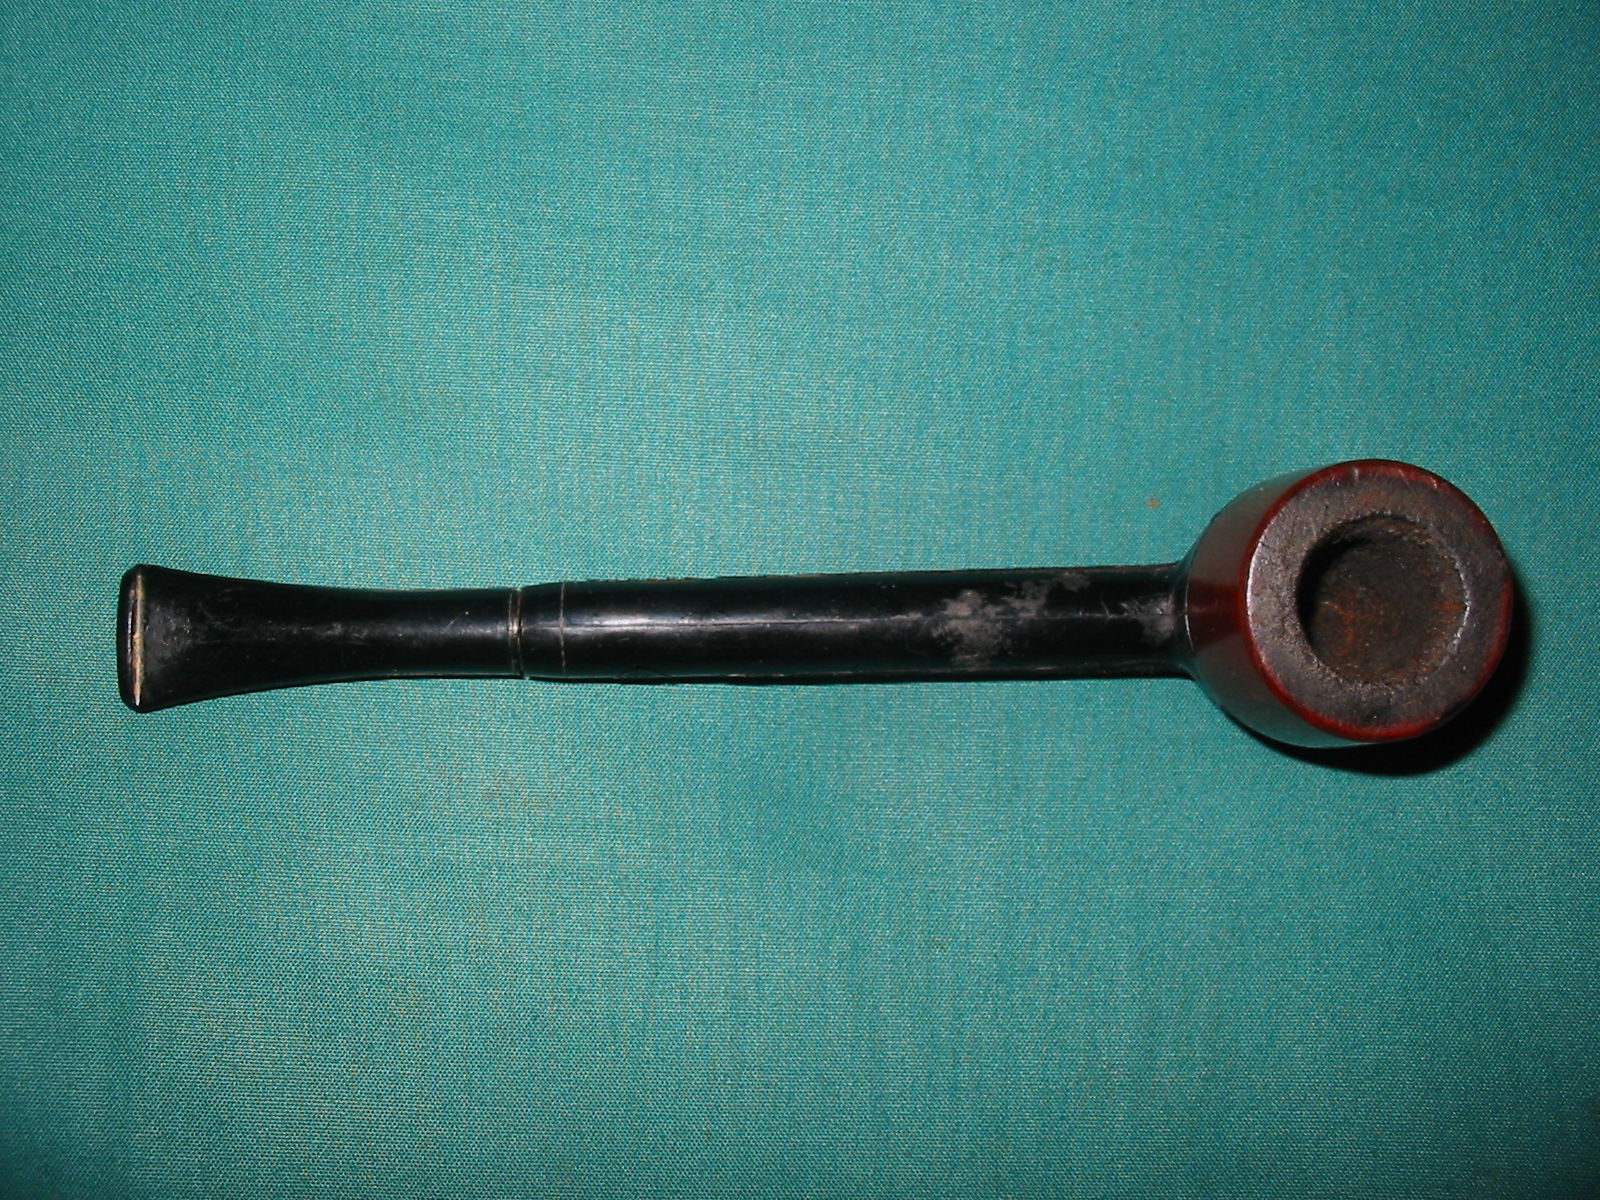
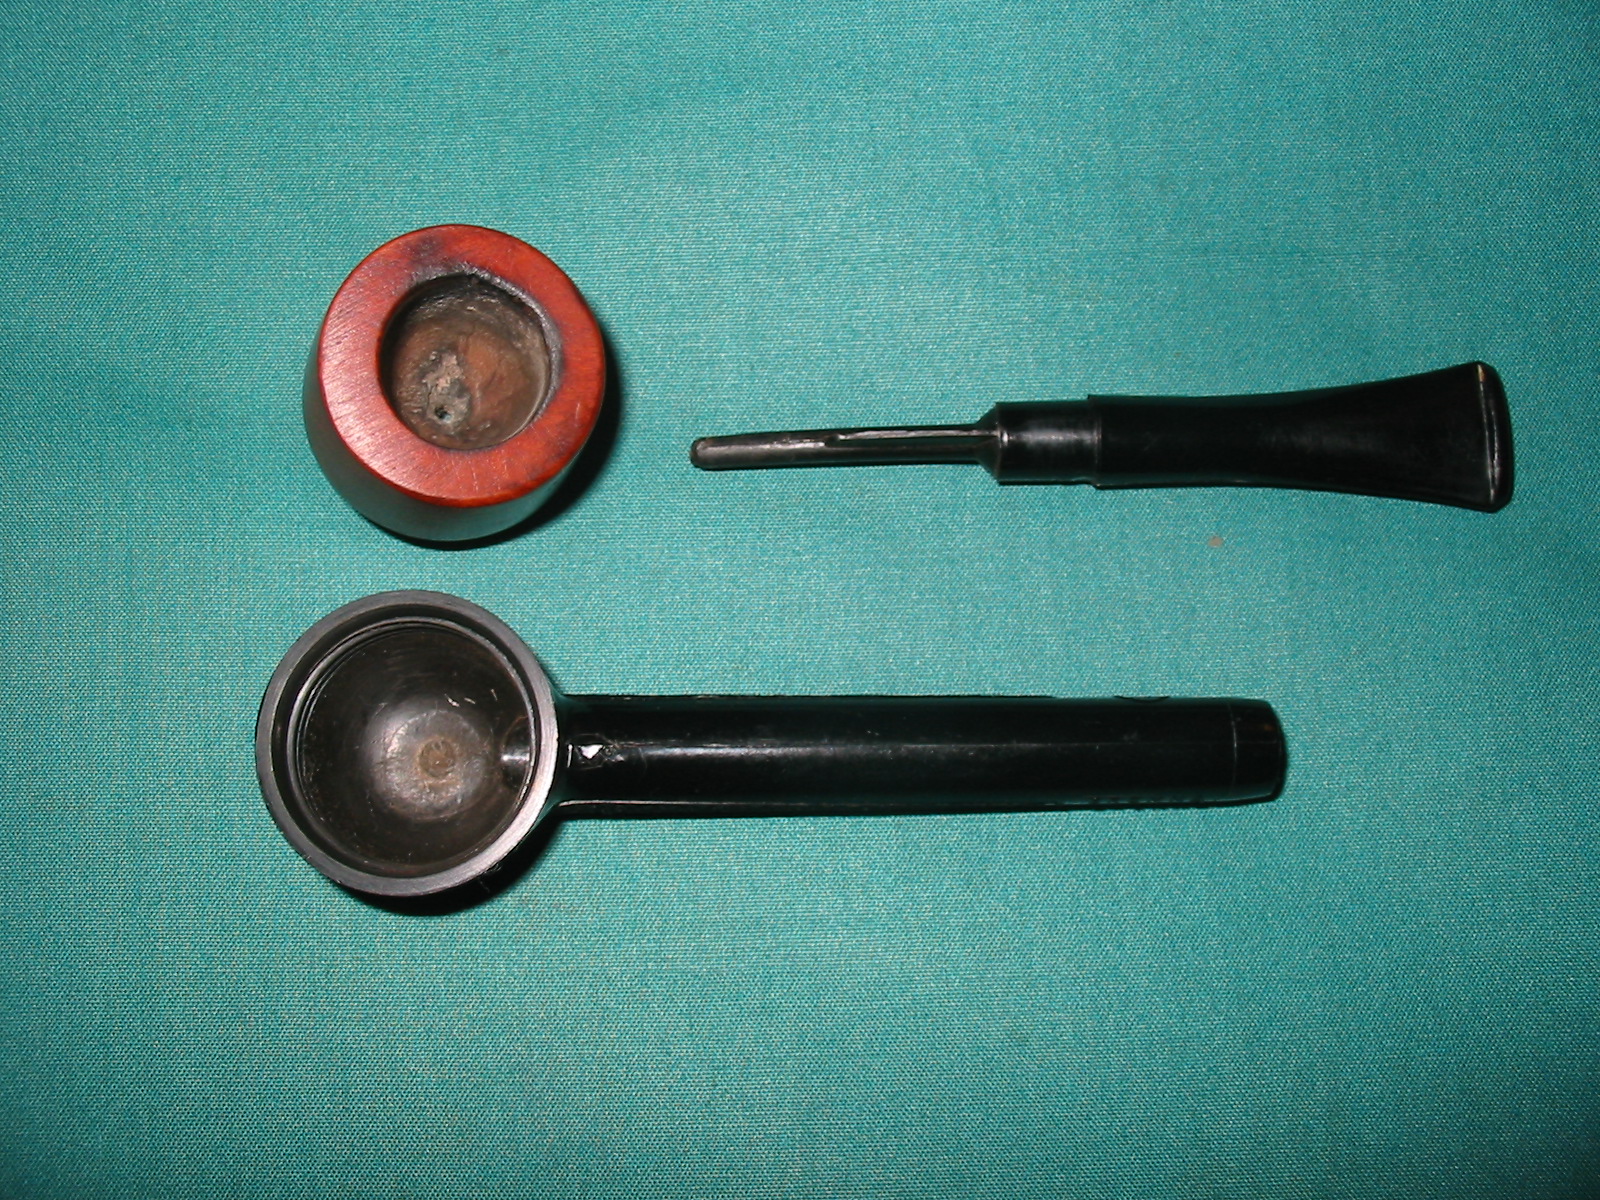
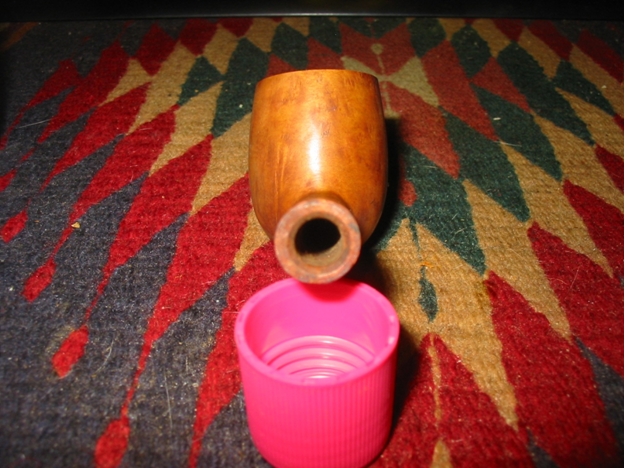
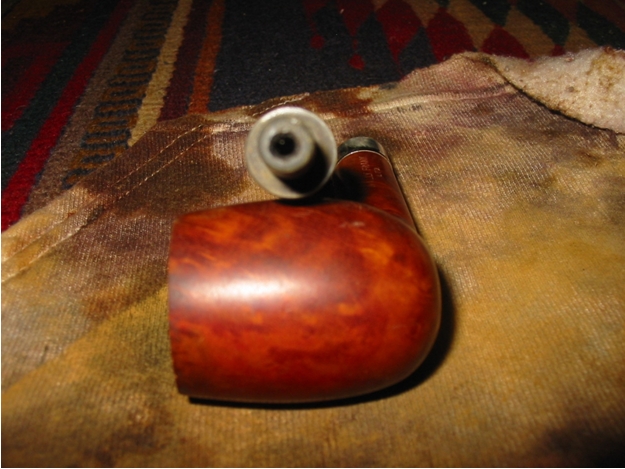
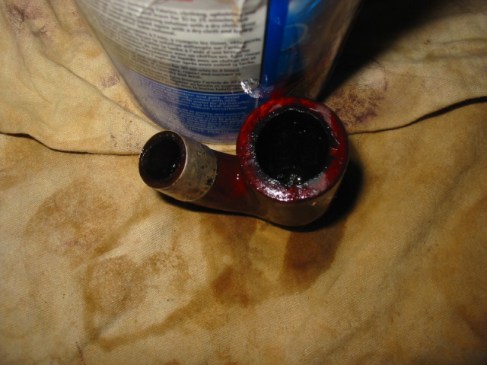
Once the stem was removed from the pipe several other issues became apparent. The biggest one that we discussed was the way the mortise was worn and out of round. You can see the dip or divot in the bottom of the shank that makes the mortise almost oval. Inside the mortise you can also see the tar buildup where the step down end of the tenon sat. It has the reverse of the shape of the step down. Where it had a curved shoulder between the tenon and the step down, the mortise had the reverse. The tars were built up to the point that the tenon step down sat firmly in place. The rest of the tenon was loose in the mortise as years of use had worn away a part of the mortise. The question we were left with once the pipe was cleaned was how to address the wear in the mortise and tighten up the fit of the tenon. The options were two:
- Build up the inside diameter of the mortise – this could be done by inserting briar and redrilling it or by using a build-up of glue and briar dust.
- Build up the outer diameter of the tenon – there are several ways of doing this including the use of clear nail polish or superglue applied to the tenon and then sanded to fit correctly.
Each method had a few issues involved in using them.
– To build up the mortise with an inserted piece of briar would be difficult in that the mortise was no longer round and once the mortise was redrilled the walls of the briar plug would be very thin. Also the stem itself was cut to fit the out of round shape of the shank and mortise so it would have to be reshaped.
– To build it up with glue and briar dust would work but be a bit hard to control the amounts and if it was built up too much removing it and sanding it would be difficult to control.
– To build up the tenon with nail polish is a temporary fix and would need to be repeated over time and use. To use the superglue is more permanent but are there any long term effects from the use of the glue on the inside of the pipe. Even if, as in this case the tenon is not in contact with the mouth. The glue would only be used on the upper portion of the tenon and not on the step down portion.


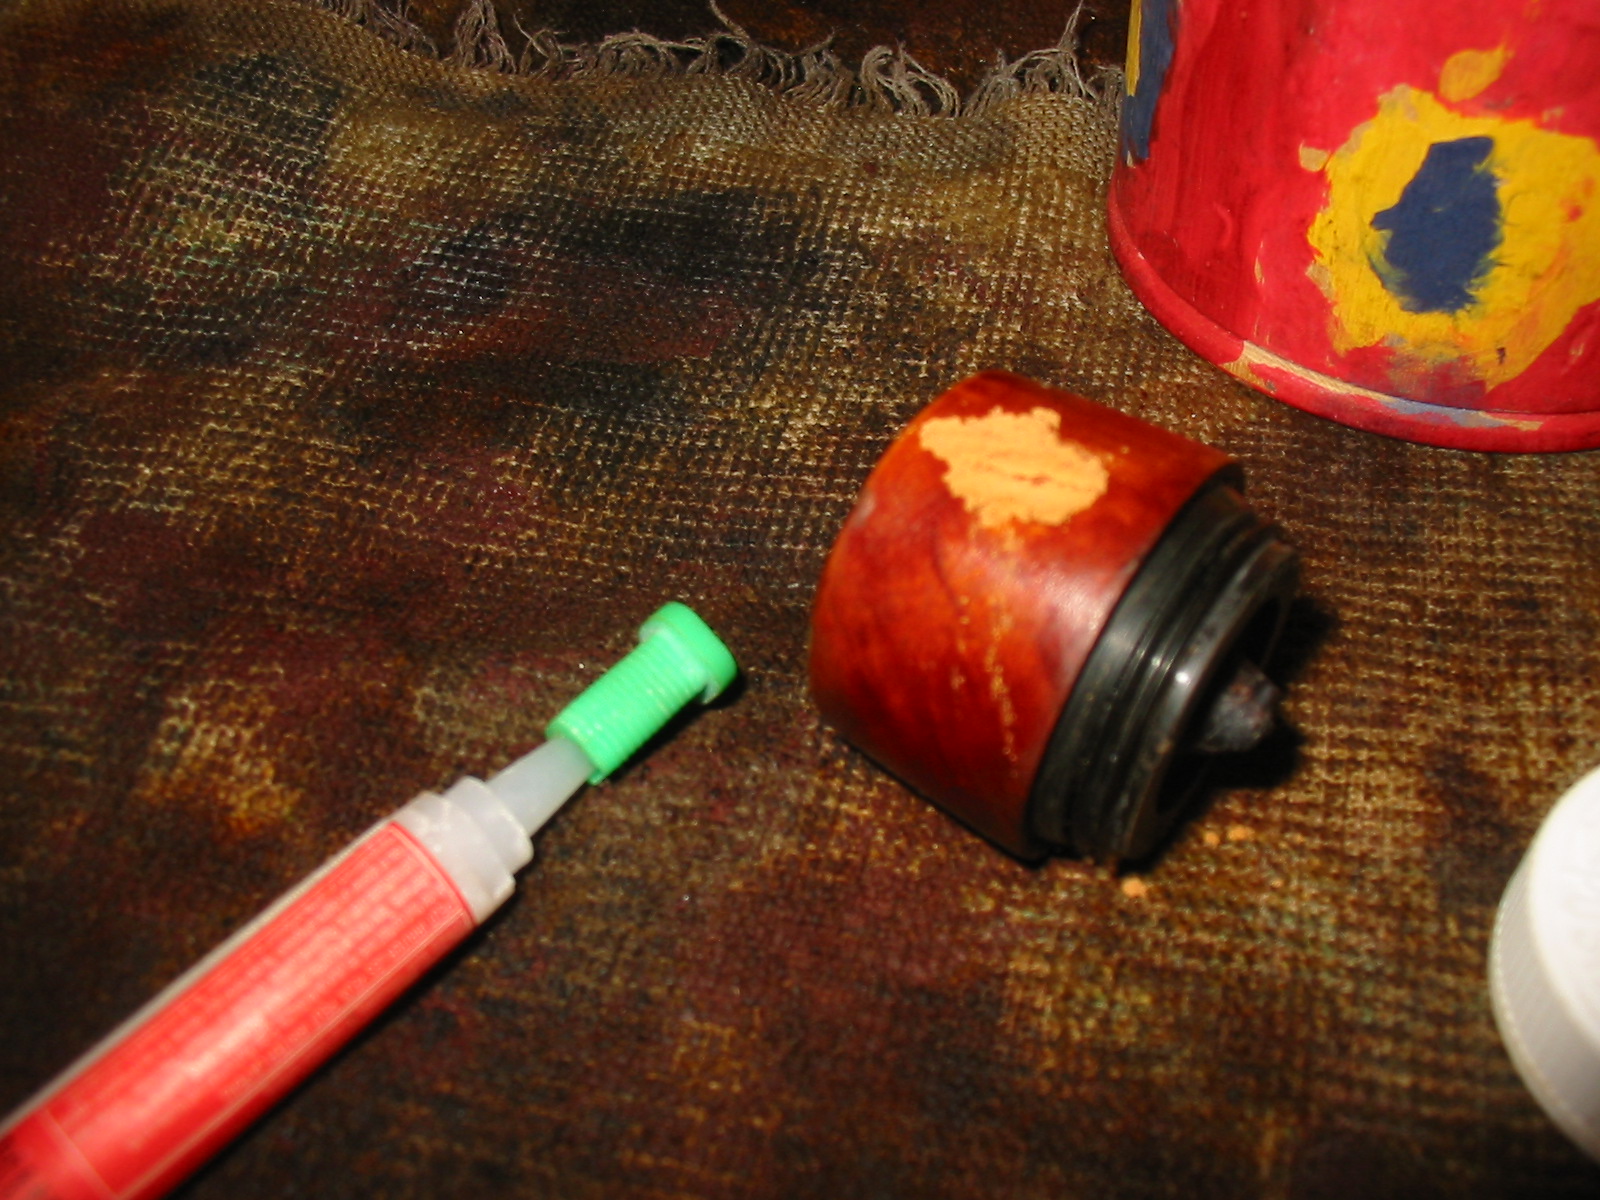
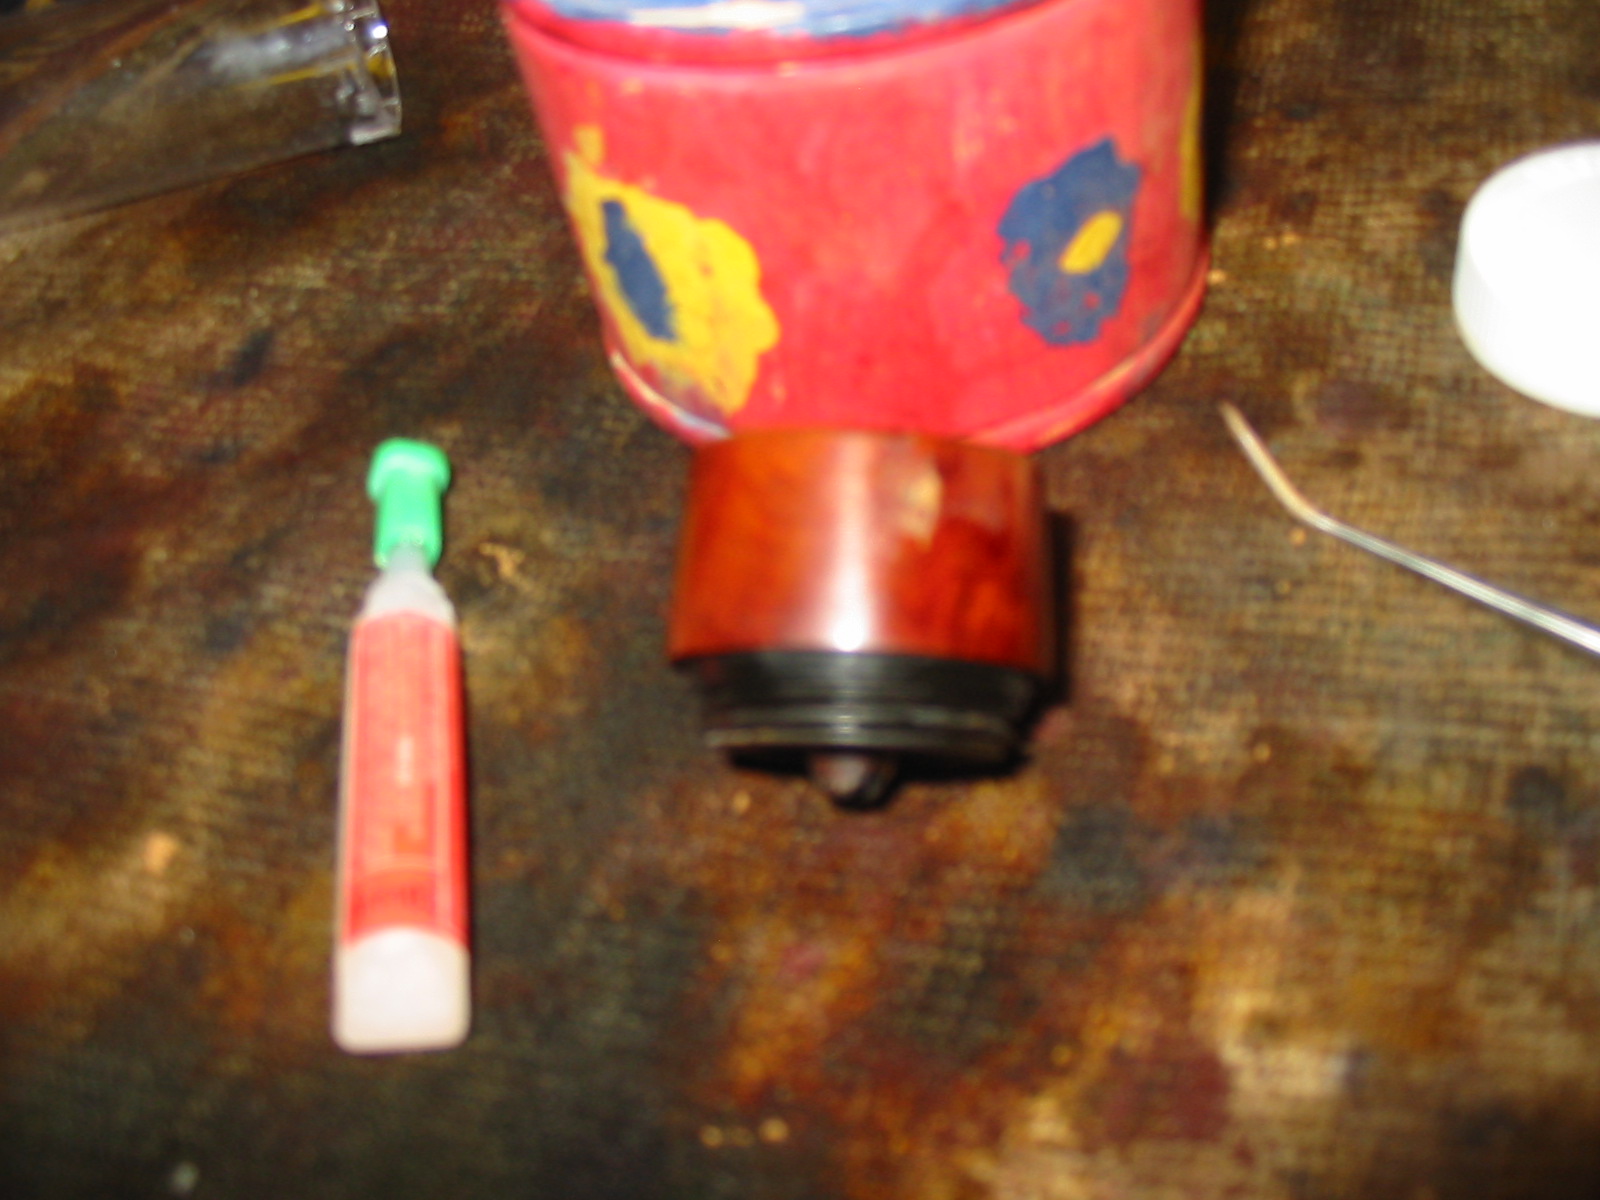
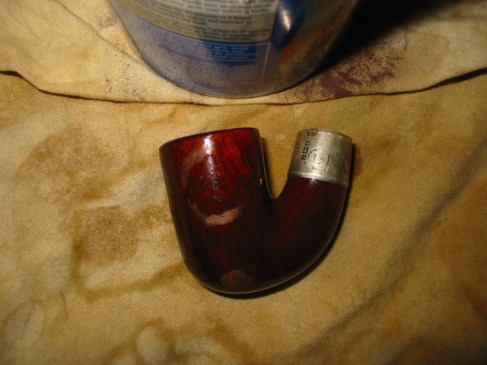
Chuck and I discussed these options and issues and he left it to my judgment to choose one. I thought about it and laid aside the pipe for the night and came back to it in the morning. I examined the tenon and mortise once again to get another view of the problem before I worked on it. I inserted a pipe cleaner at the angle of a drill bit from the shank through the airway to the bottom of the bowl to see where the edge would land. The drilling of the shank matched the notch in the bottom of the mortise. It had been enlarged due to the age of the pipe and its use but it matched exactly. This influenced my decision where to go with the repair. Once that was decided it was time to work on the finish of the pipe and the internals. I dropped the bowl in the alcohol bath to let it soak and remove the grit, grime and old finish. I was hoping that the soak would also loosen the glue on the band so that I could turn it into the correct position on the shank. It soaked for about an hour and a half while I did other things. I removed it from the bath and laid it on my work table. The pictures below show it before I dried it off.
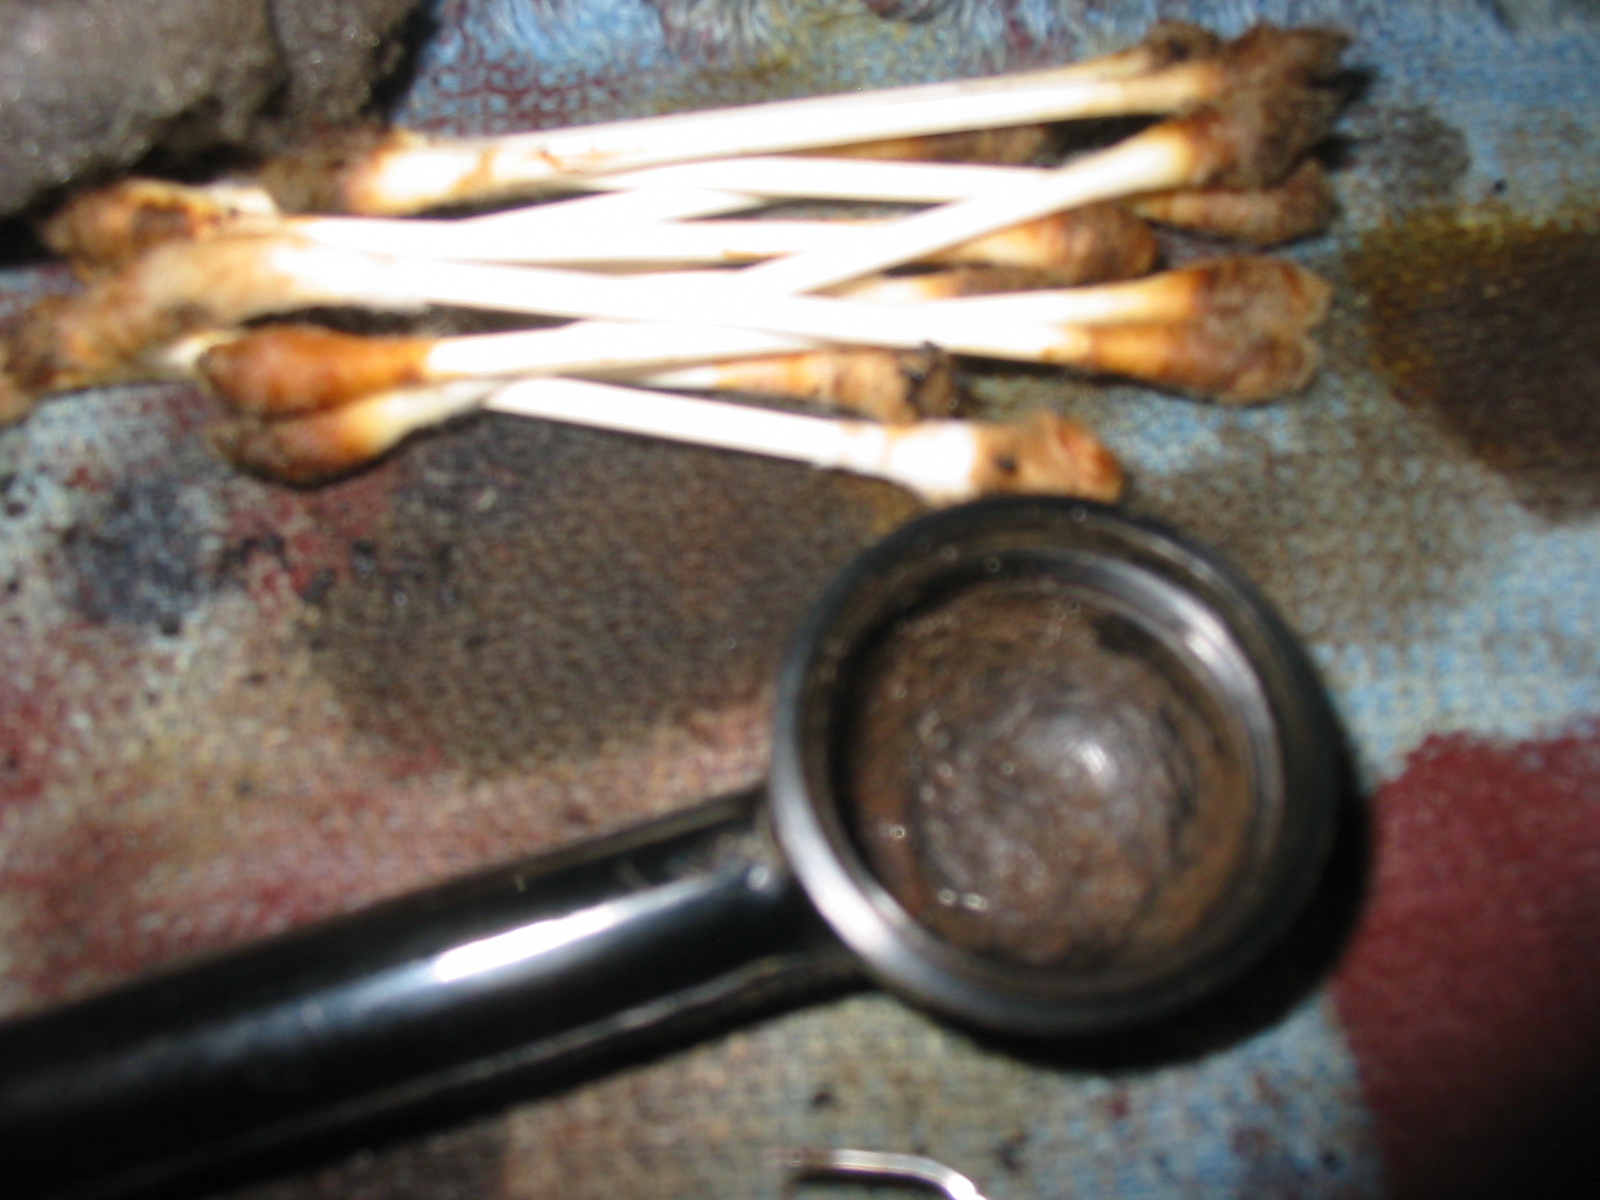
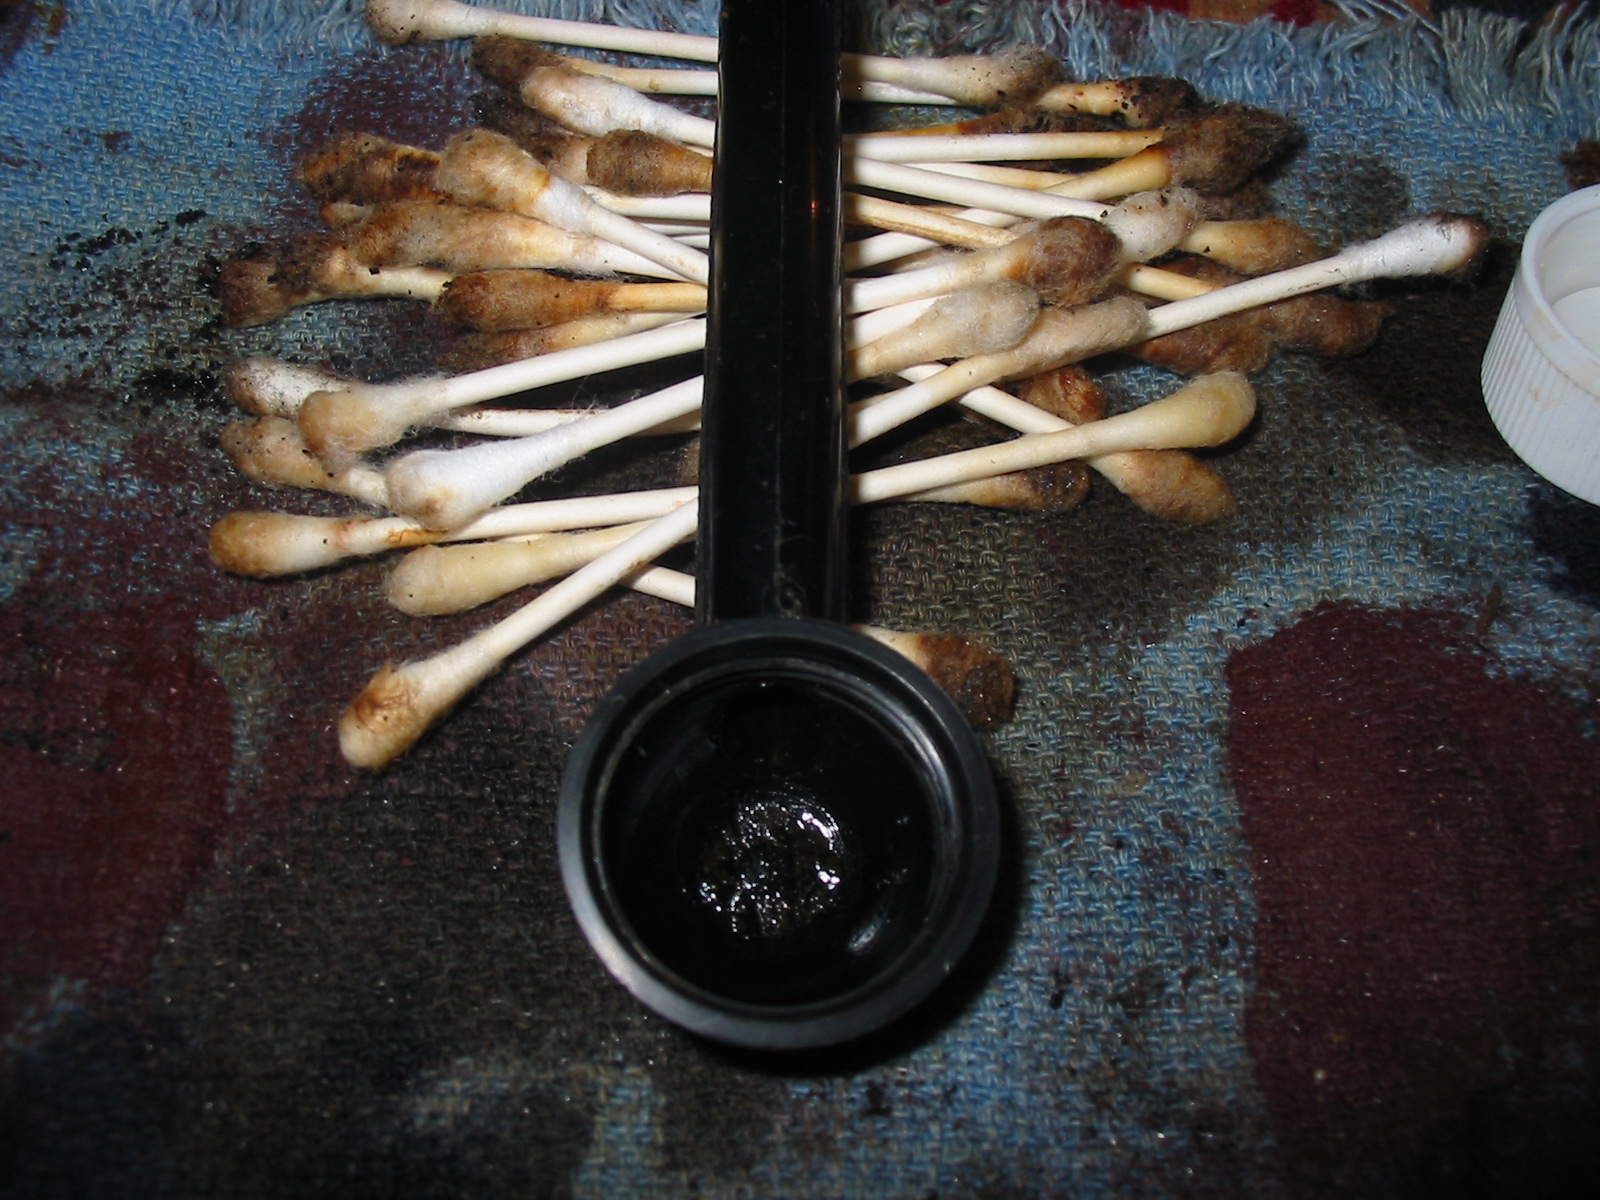
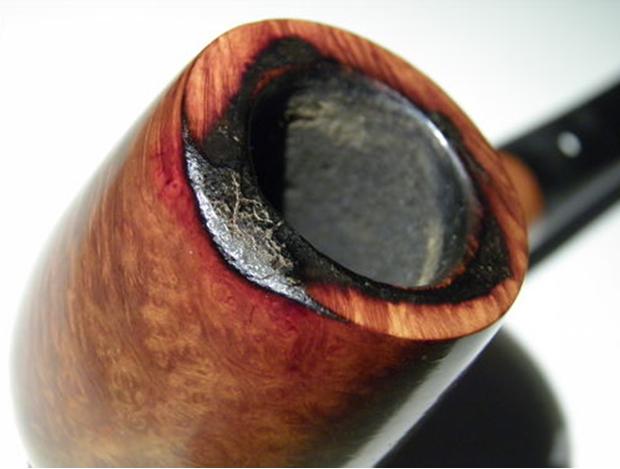
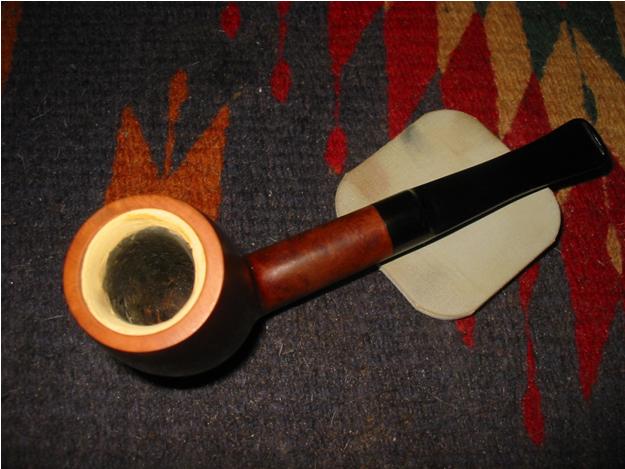
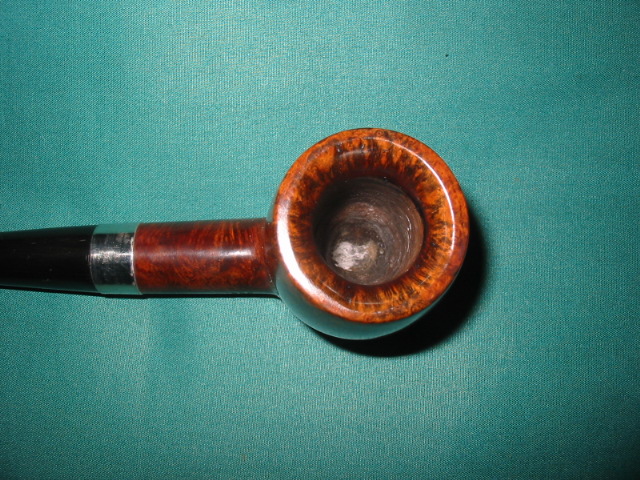
I steamed the dents on the top and also sanded out the remnants of them on the surface. I wiped down the bowl with acetone to remove any remaining finish on the bowl. I picked the thick tars in the sump of the shank and tapped out the crud that came loose. It took a lot of detailed picking to get the surface free of the build up. I then cleaned out the sump of the shank with many cotton swabs until they were clean. The picture below shows the pipe after the cleaning and wiping down with acetone. The second picture shows the rim with the dents removed and the roundness of the bowl restored.

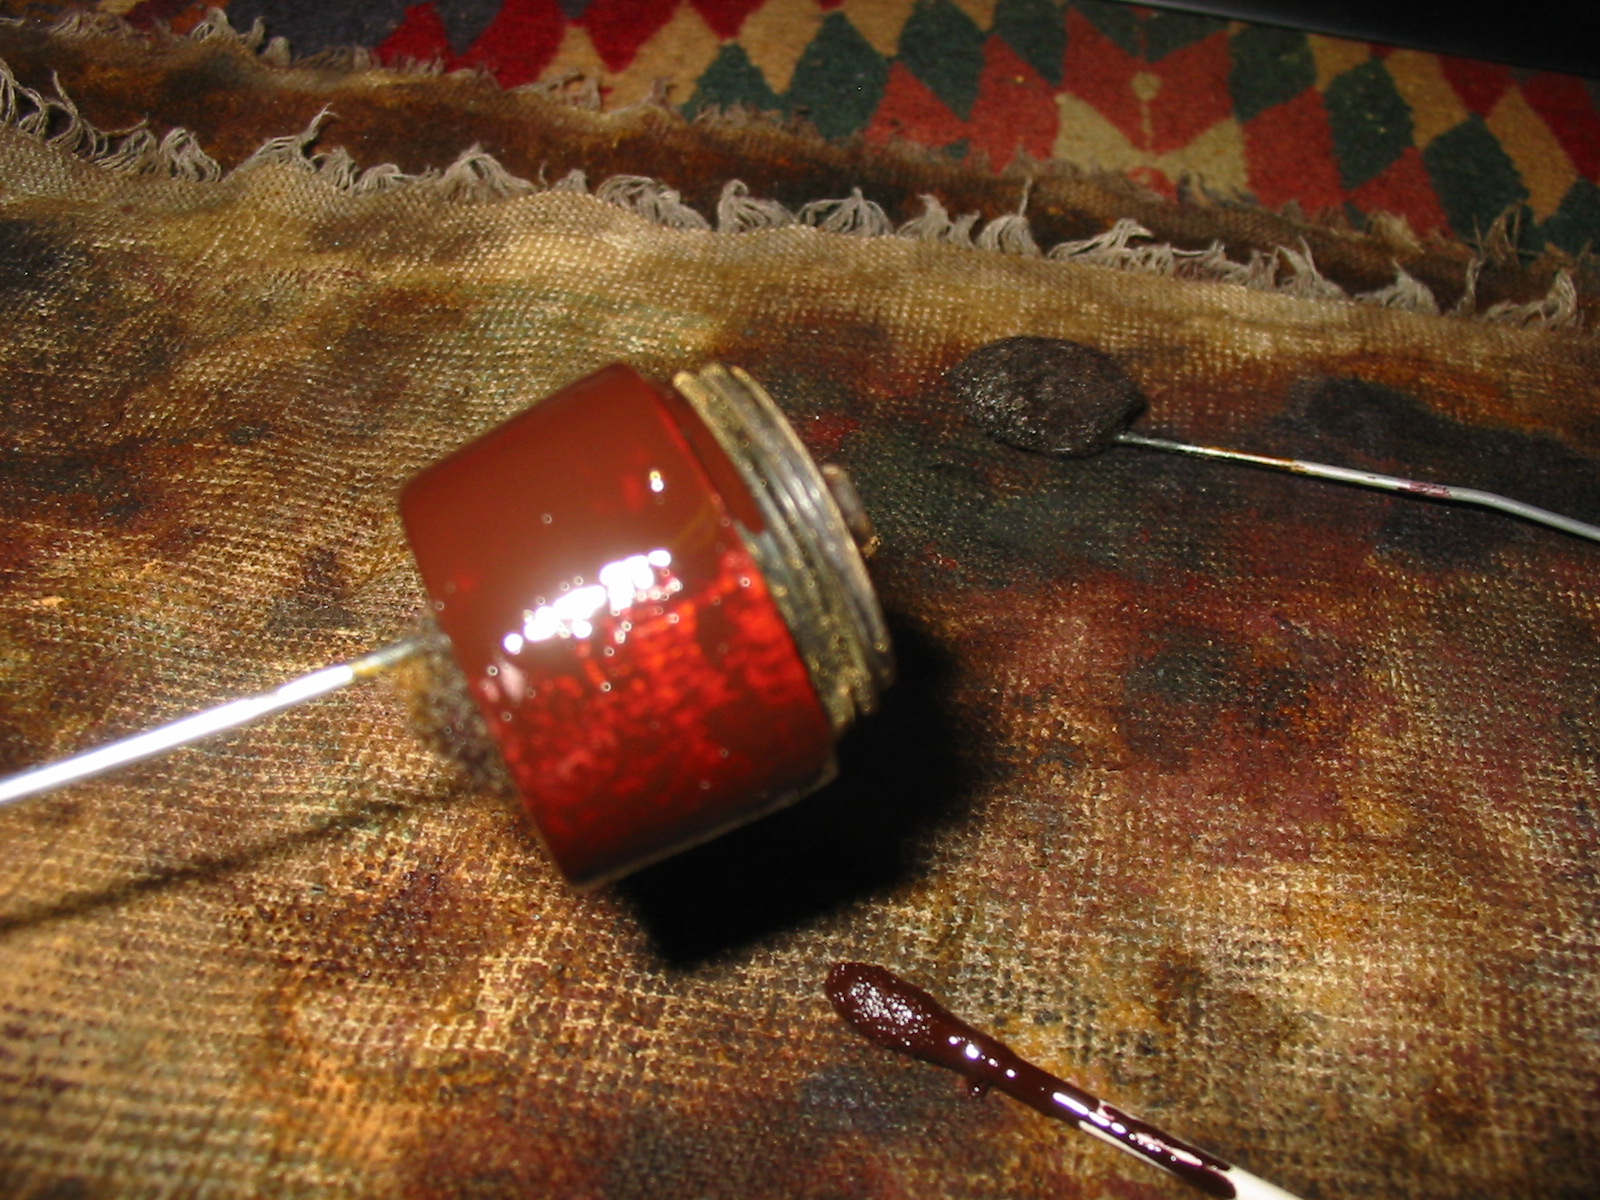
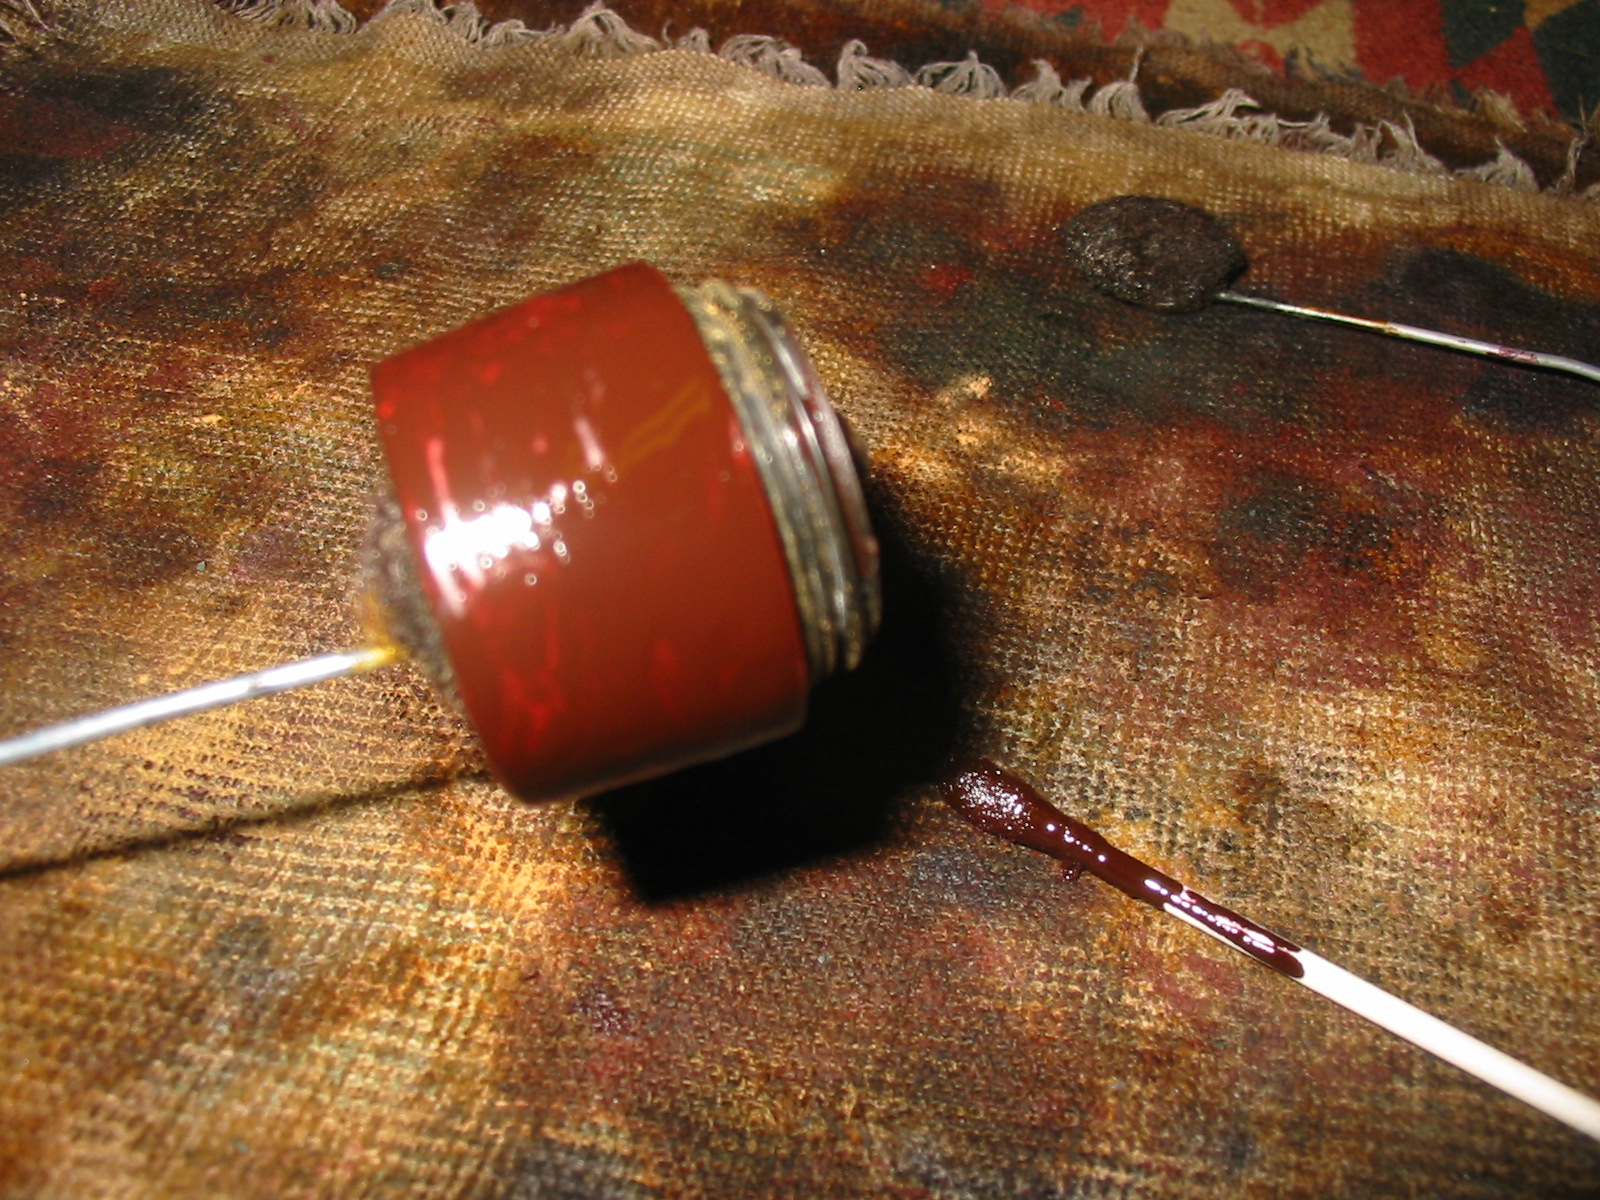
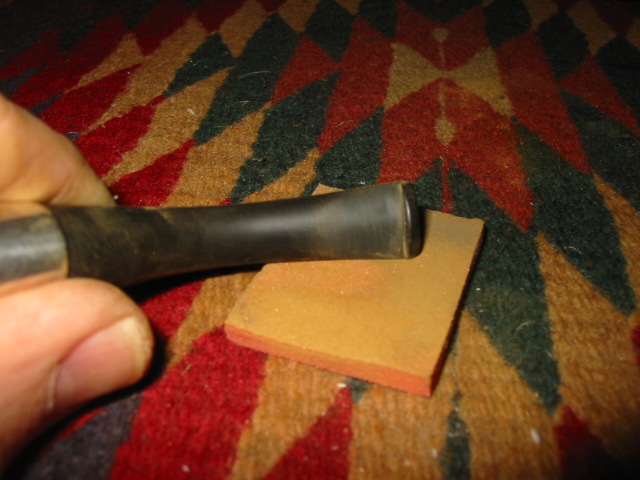
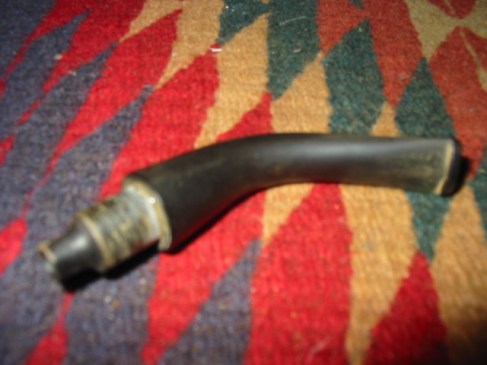
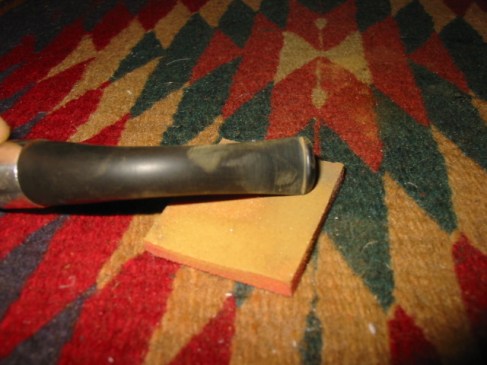
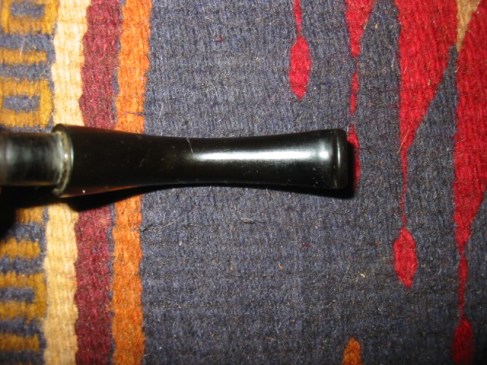
After thinking through the options on the shank and the mortise situation I decided that the best way of dealing with this old war horse was not to build up the mortise and cause problems with the fit of the stem and shank but to work on the tenon on the stem. I had read elsewhere of the use of super glue to build up the tenon so I gave it a coating. The best way I have found it to work for me is to drip it on the tenon and turn it as it drips. The fluid thus gives the entire tenon an even coating. The first two pictures below show the tenon after the application of the layer. Once it was dry the tenon was obviously too big so I sanded it, while repeatedly checking for the fit. The third picture shows the tenon as it is now – a perfect snug fitting stem on the Barling this morning!

To highlight the beautiful grain in the pipe I used a brush dipped in black stain to follow the grain patterns on the bowl. I applied it with an art brush to give it a good coverage. Before applying the stain to the bowl I warmed the briar to open the pores in the wood to receive the stain deeply. The pictures below show the bowl after staining with the brush. It looks odd and actually less than charming but the process works as will be seen in the next series of photos.

After stain dried I sanded it with a fine grit sanding foam that allows me to follow the curves. I was careful around the faint stamping on the shank. Here is the pipe after it has been wiped cleaned with Isopropyl alcohol after sanding. The grain is highlighted well. The final picture below shows the grain on the front of the bowl.


I set aside the bowl for awhile and dealt with the tooth marks on the stem. After steaming them to raise them I sanded with 240 grit sandpaper to remove the remaining signs of the tooth marks and the tooth chatter. I then sanded with fine grit foam sanding pads to work out some of the scratches in the surface.

I did some more sanding with the micromesh sanding pads on the pipe bowl to get the black stain tamed a bit so that when I put the overstain on it would show through but not dominate. I wanted to get a stain on the pipe that fits the older Barling pipes that I have here so I thinned down some oxblood stain for the overstain. I applied it and flamed it. Then I took it to the buffer and with a light touch removed the excess and left a nice top coat of rich reddish brown stain with the black shining through to highlight the amazing grain on this old pipe. The three pictures below show the pipe with the stem on but the stem was not finished as it still showed some of the browning of oxidation.

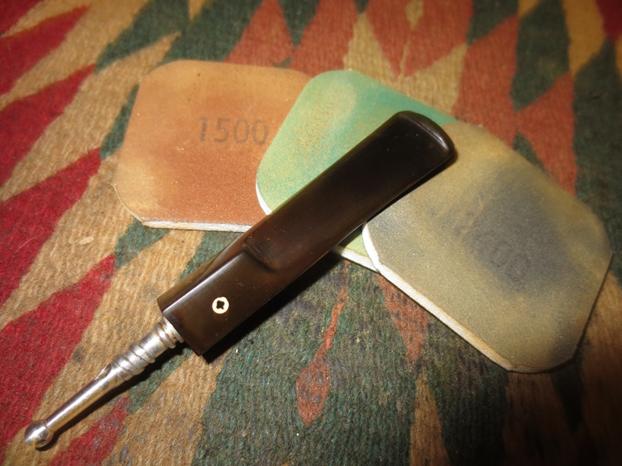
From there I removed the stem again and sanded it with 400 and 600 grit wet dry sand paper and water. I finished the stem with 1500-6000 grit micromesh pads dipped in water to give bite to the sanding disks as I polished it. The way I use the micromesh is to dip it in water and then sand, dip again and sand again through the various grits until I am finished and the stem has some depth to its blackness. I coated the stem with several coats of Obsidian Oil and then a coating of wax by hand.

I put the stem back on the pipe and took it to the buffer. I buffed the whole thing with White Diamond and then cleaned the silver band with silver polish and polished the entire pipe with multiple coats of carnauba wax.


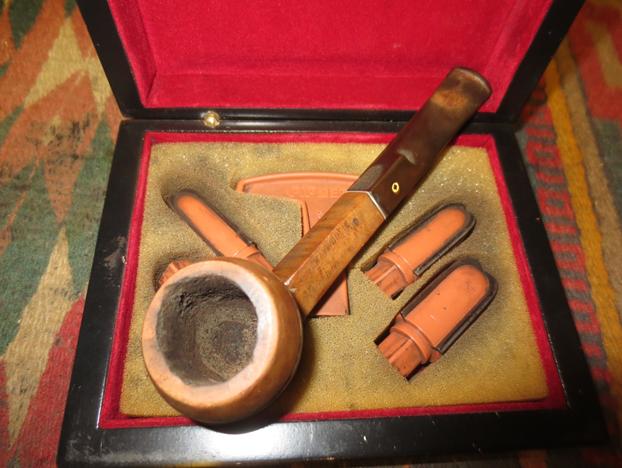
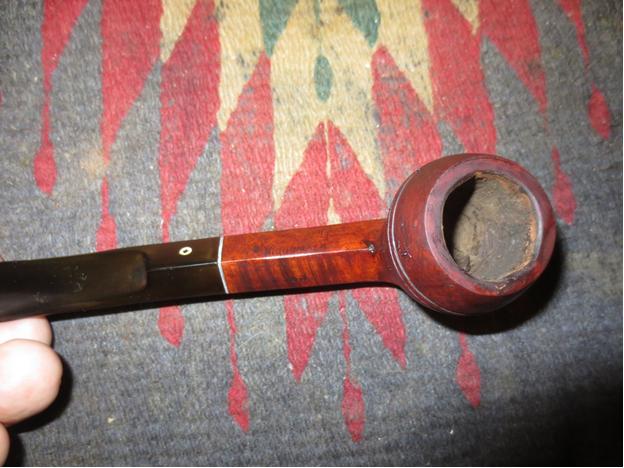
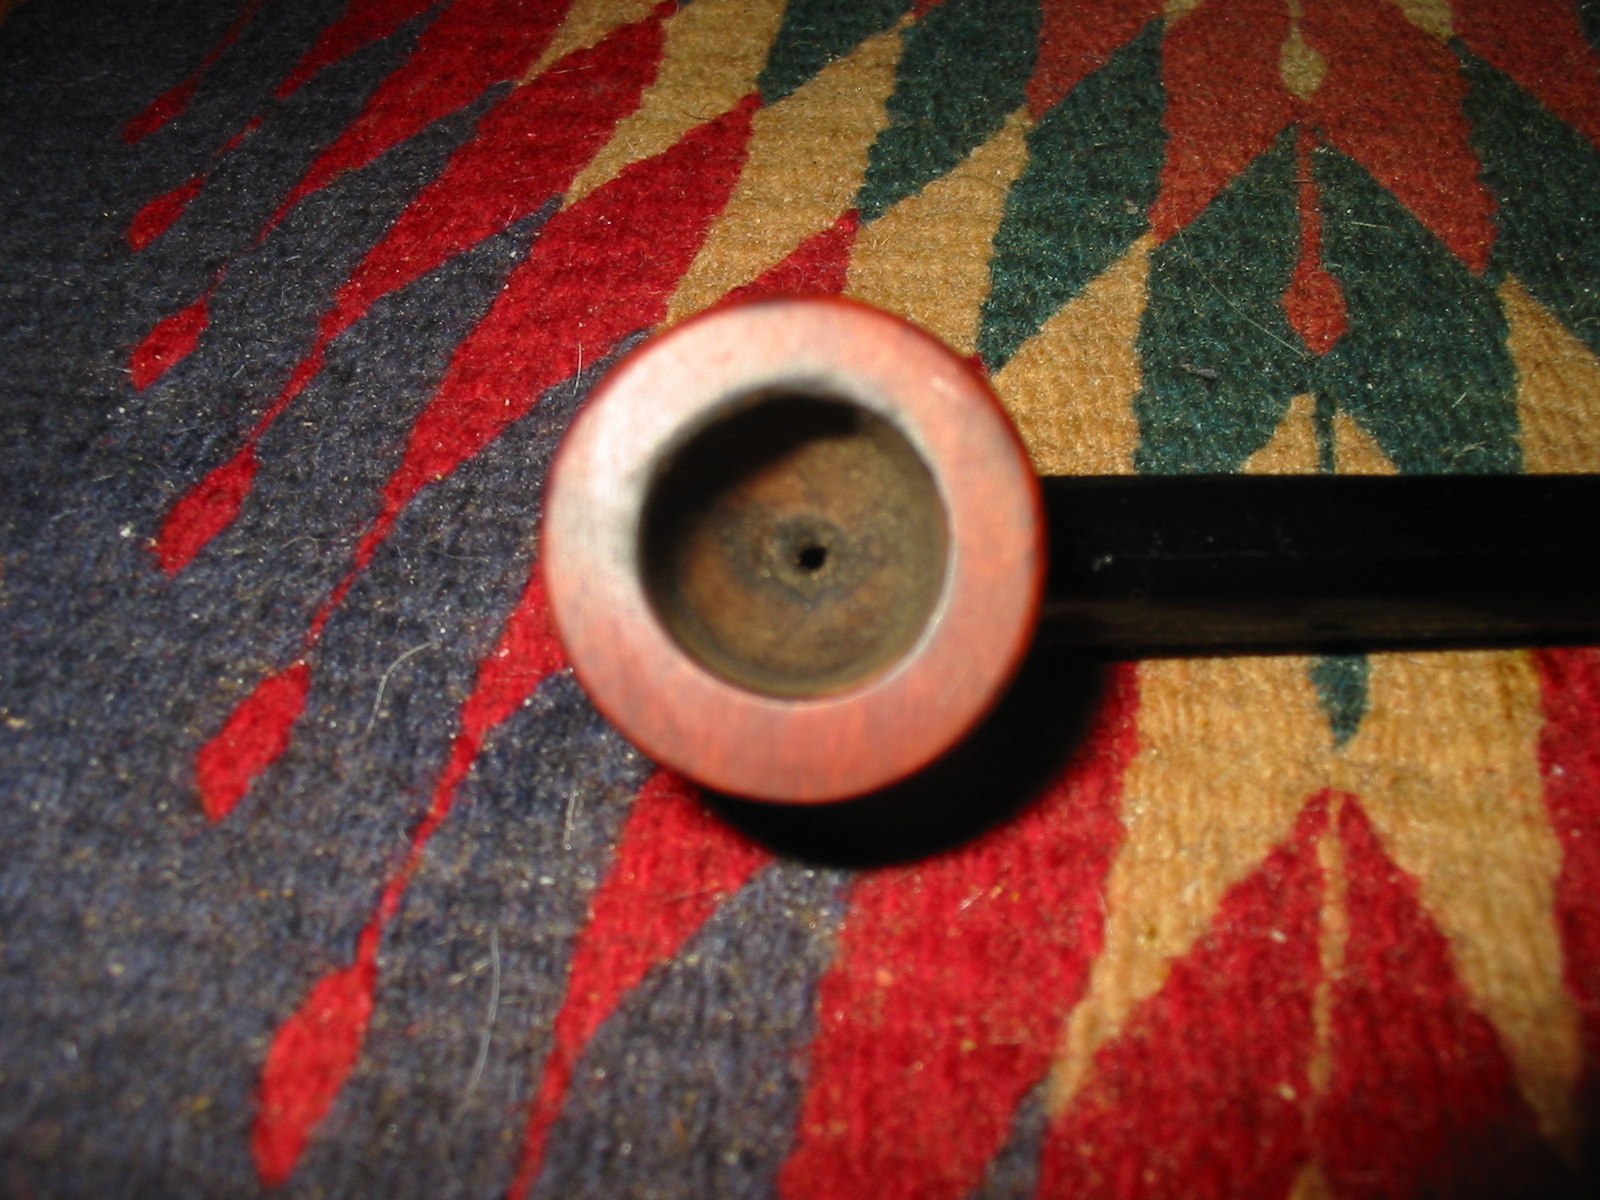
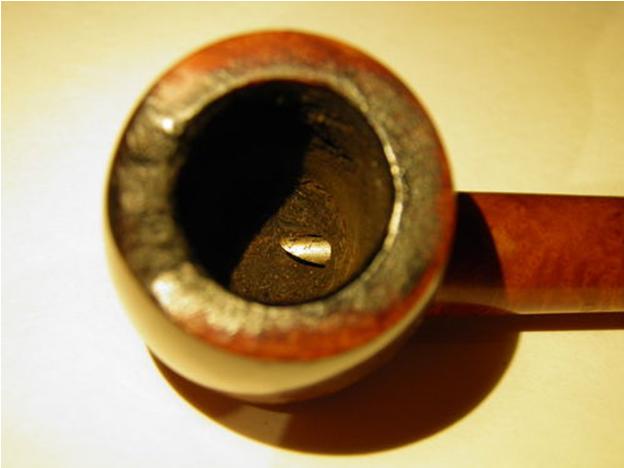
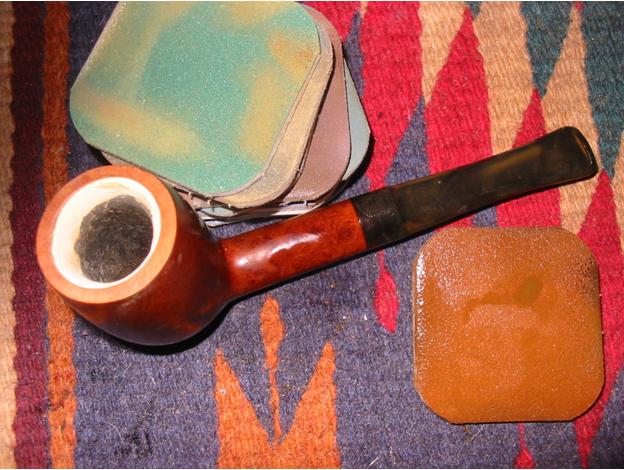
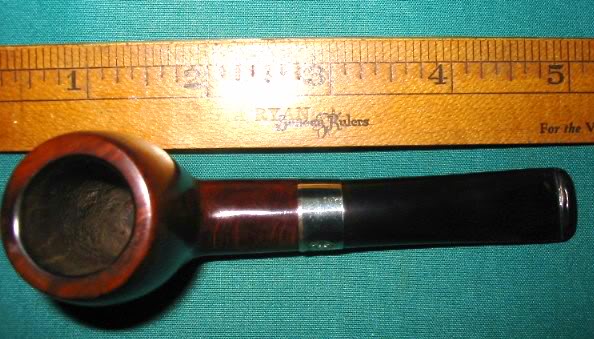
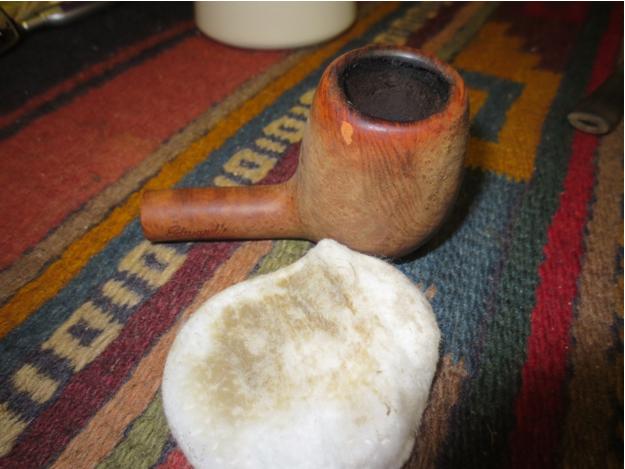
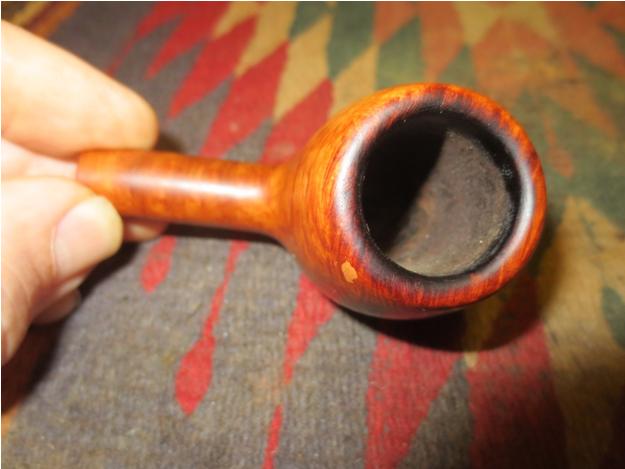
 I took a close-up photo of the bowl to show the build up on the rim and also the odd configuration of the cake.
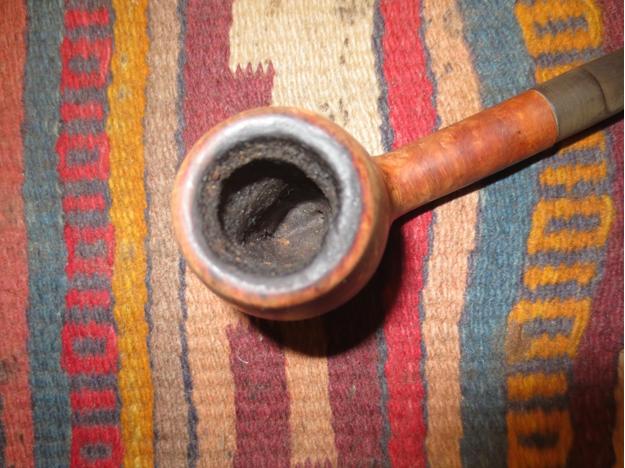
 I reamed the bowl with a PipNet pipe reamer and started with the smallest cutting head and worked my way up to the head that was the same diameter as the bowl. I reamed it back to bare wood and cleaned out the debris that was left with a pen knife.
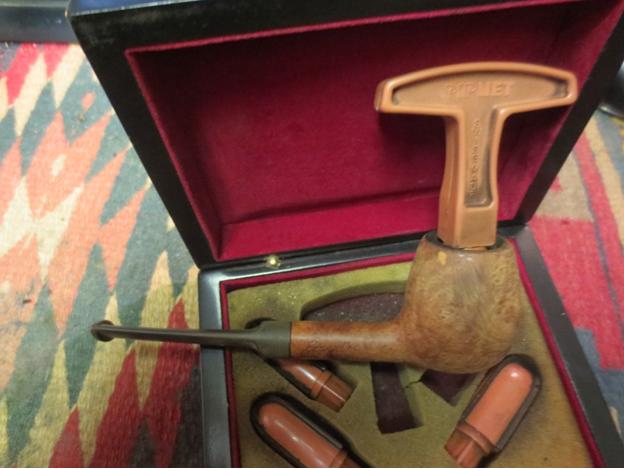
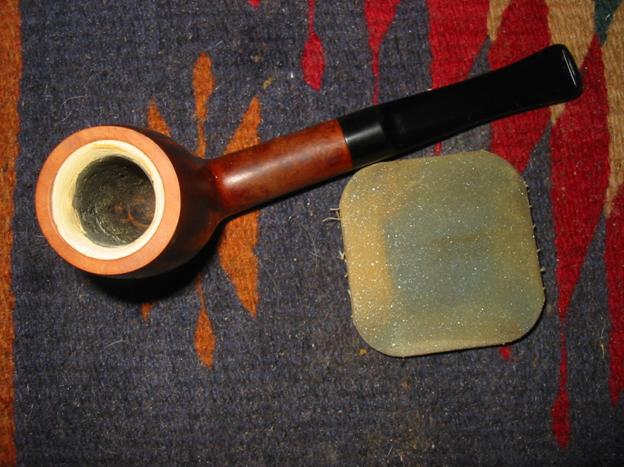
 I scrubbed the rim with 0000 steel wool to remove the lava overflow that had hardened on the rim. I have used the steel wool on the last two pipes and I am impressed with how easy it makes this process. Of course it helps that the bowl is a natural finish so I am not damaging any of the original finish on the bowl with the steel wool.
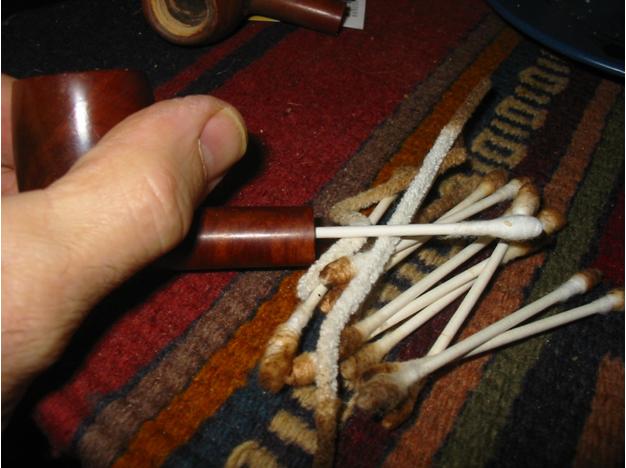
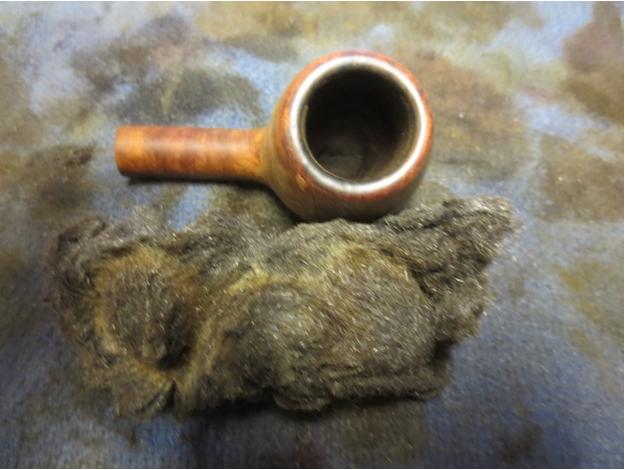 I cleaned the internals with pipe cleaners, cotton swabs and alcohol until the inside was clean and sweet smelling. I swabbed out the bowl with a cotton swab and alcohol to clean up any of the dust left behind by the steel wool.
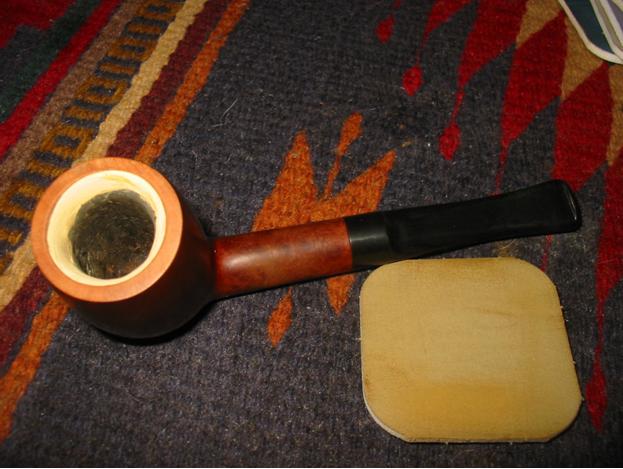
 I scrubbed the exterior of the bowl with acetone on cotton pads to remove the ground in grime in the finish. I scrubbed it until the finish was clean and lifeless looking.
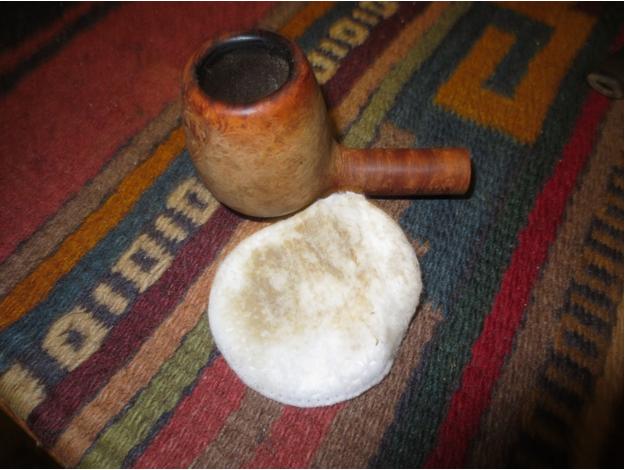

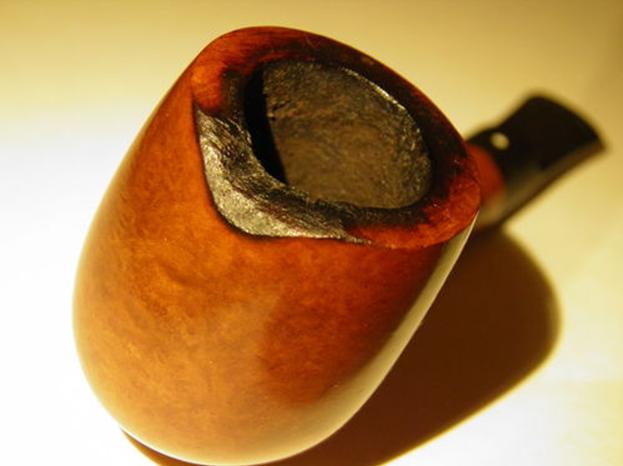
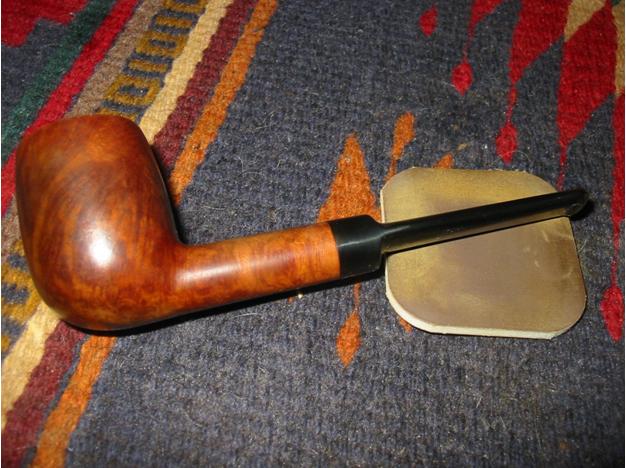
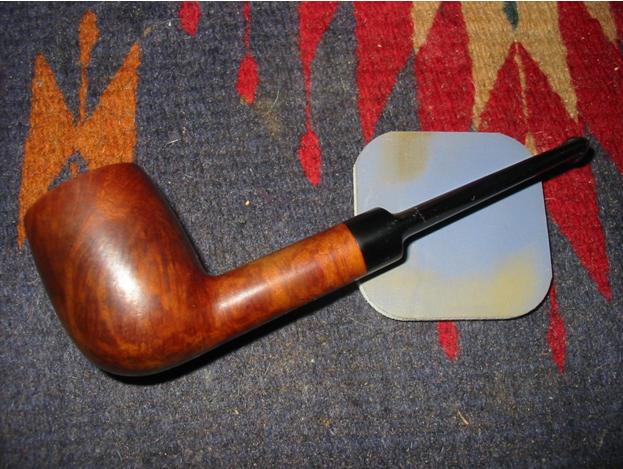
 I gave the bowl a light coat of olive oil and rubbed it in to bring some of the original colour back to the briar and give it a little life. The photos below show the bowl after this treatment. It has some awesome grain – along with a few sandpits and fills.
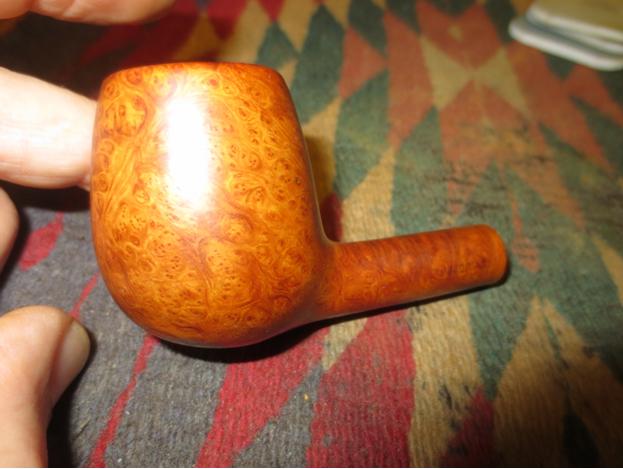
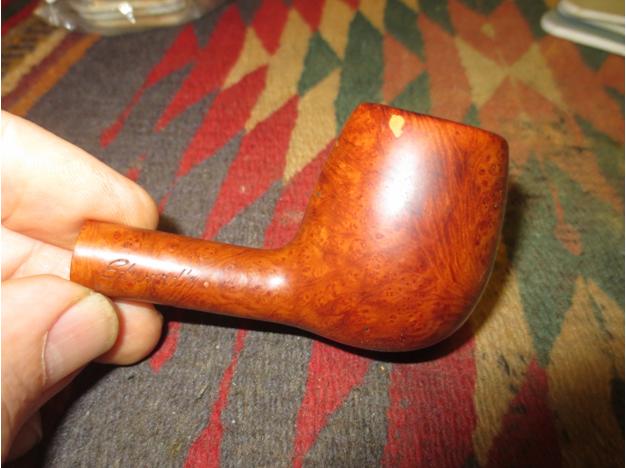
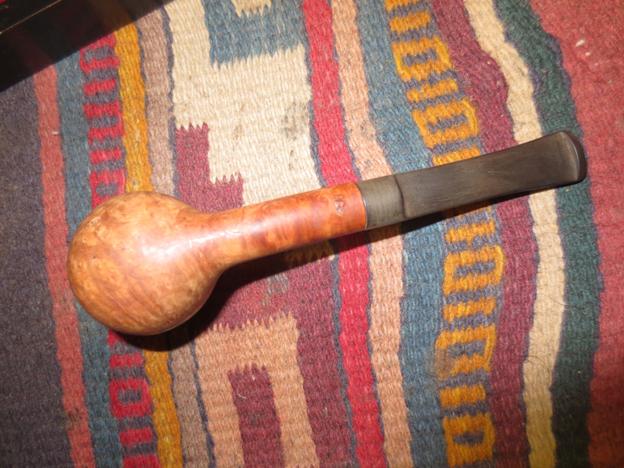
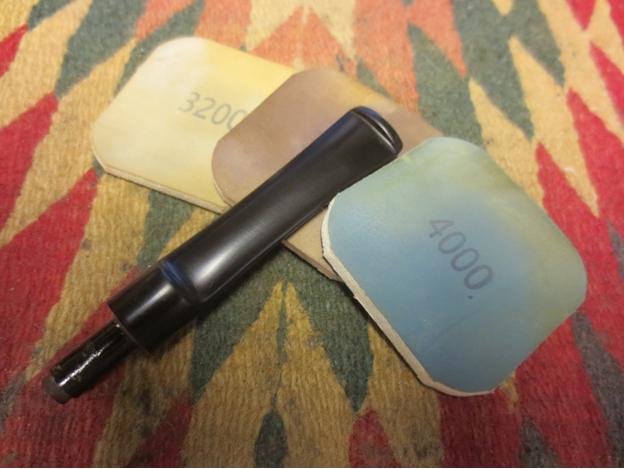
 With the bowl finished it was time to work on the stem. I am pretty certain that this is a replacement stem as the fit is not quite right and according to the charts it was supposed to be a taper stem. However, I decided to go with the stem that came with it in the box I received and clean it up and make it fit as best as possible. I sanded the stem with a medium and a fine grit sanding sponge and then went on to sand with micromesh sanding pads. I wet sanded with 1500-2400 grit pads and then rubbed the stem down with Obsidian Oil. I went on to dry sand it with 3200-4000 grit pads and gave it another coat of oil.
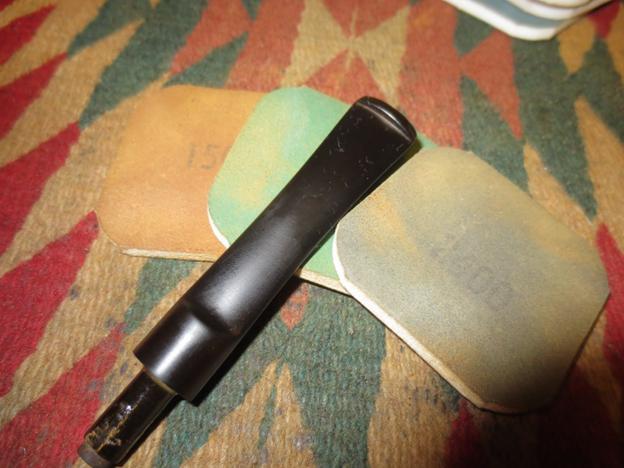
 I buffed the stem with Tripoli and then White Diamond before sanding it with the final three grits of micromesh – 6000-12000 grit.
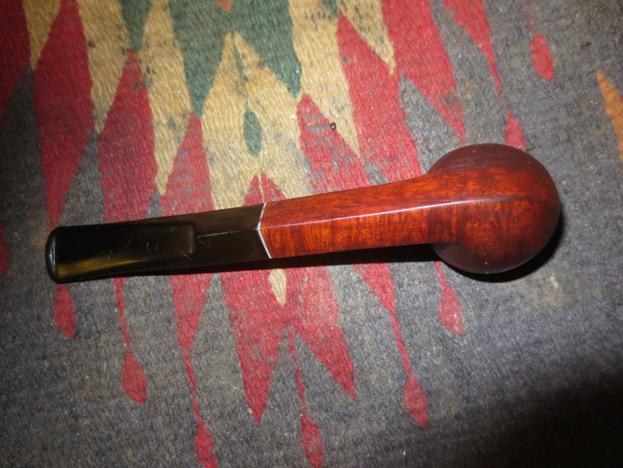
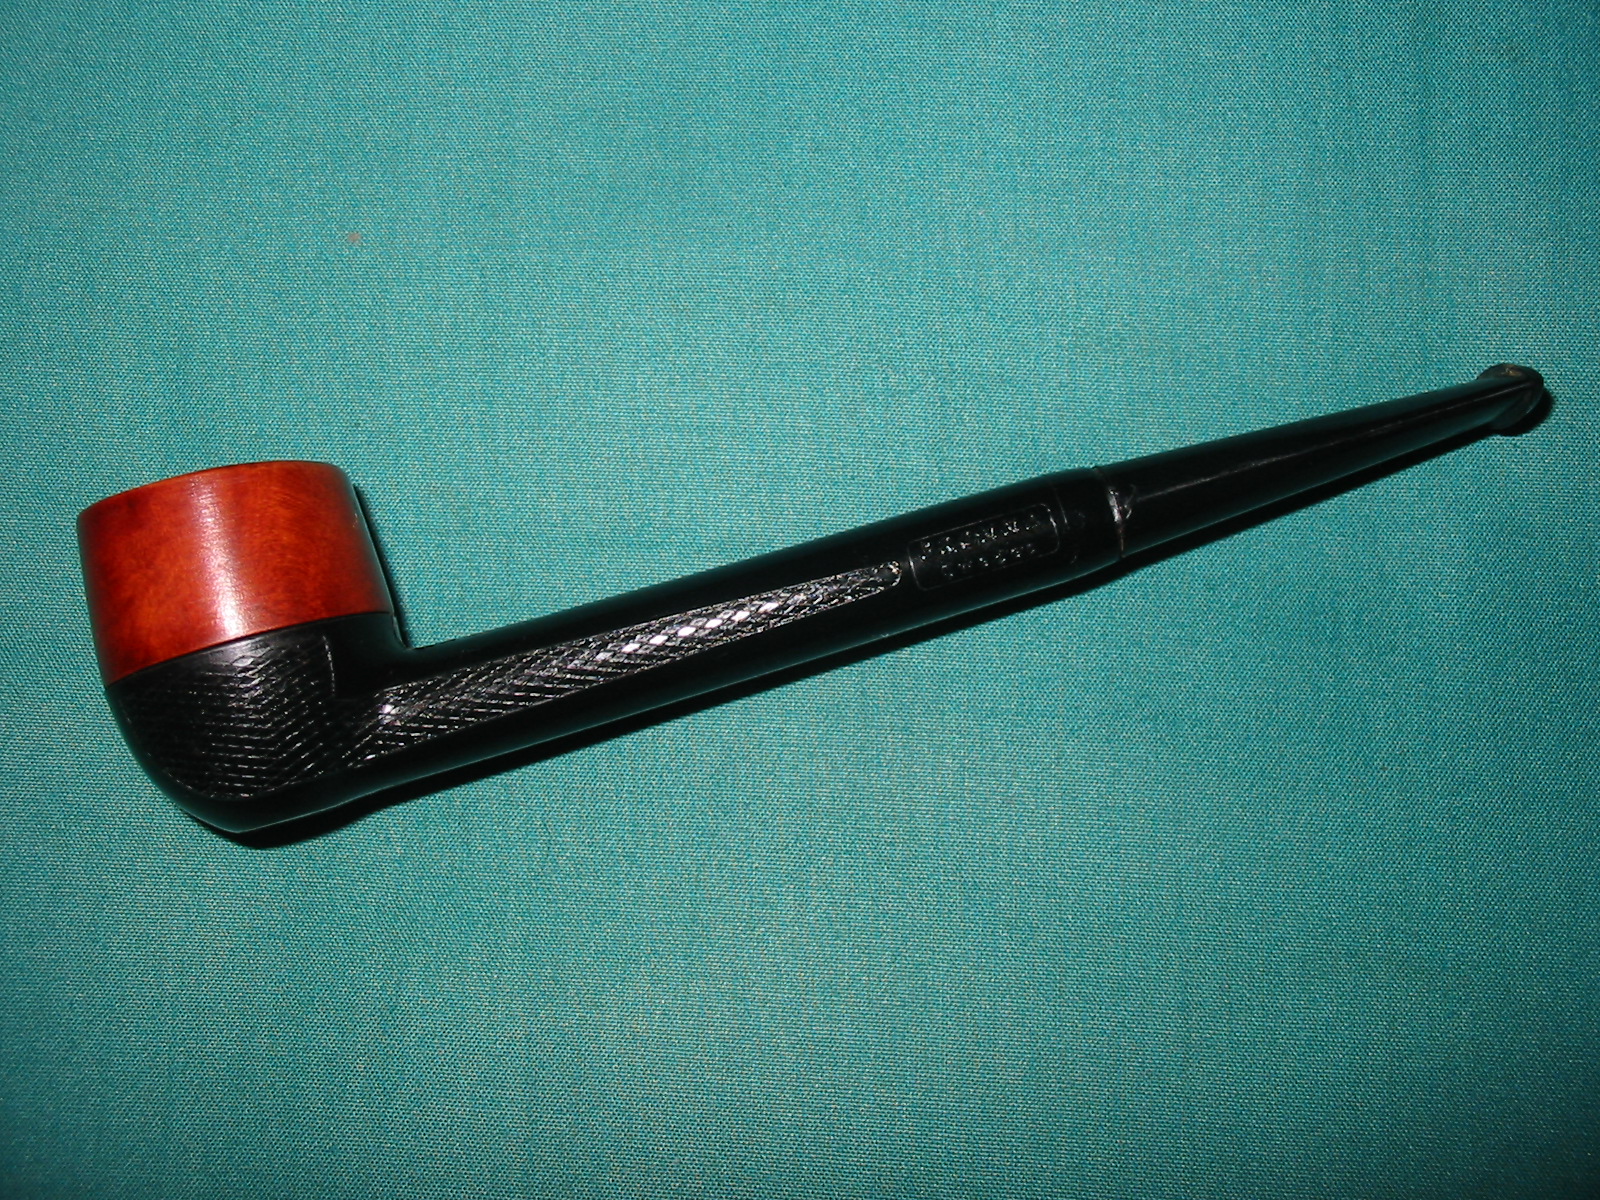
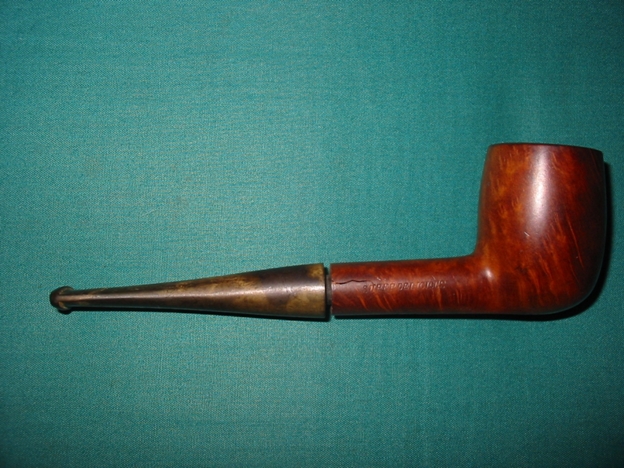
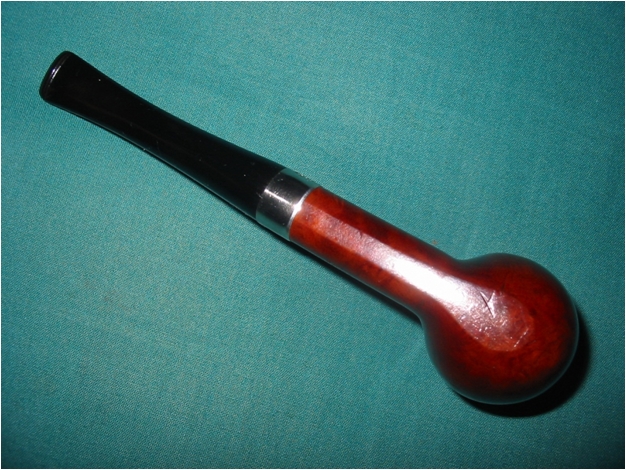
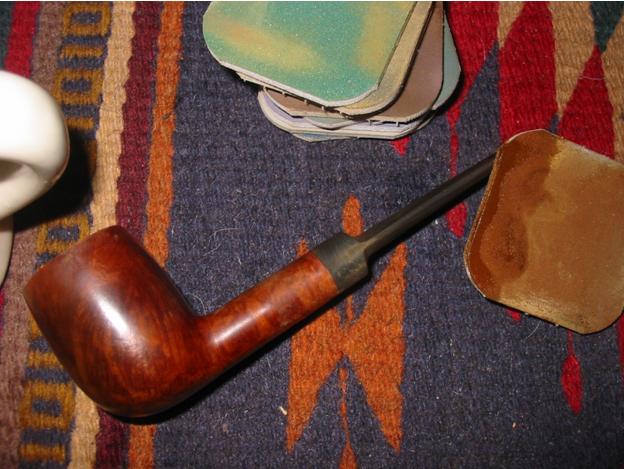
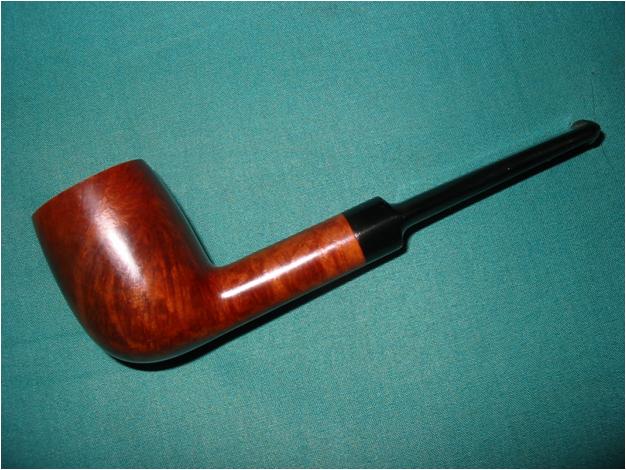
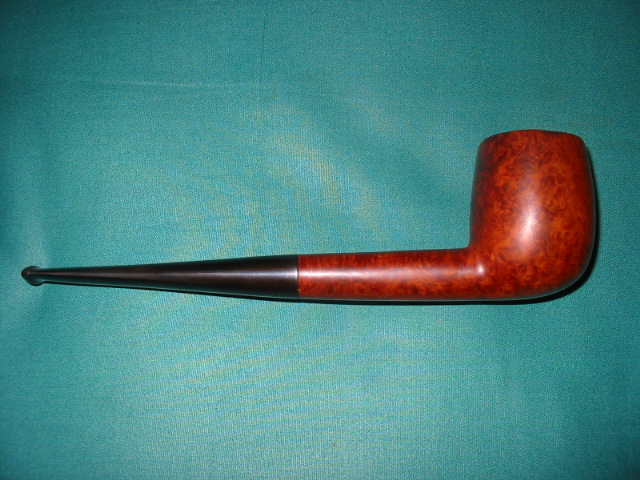
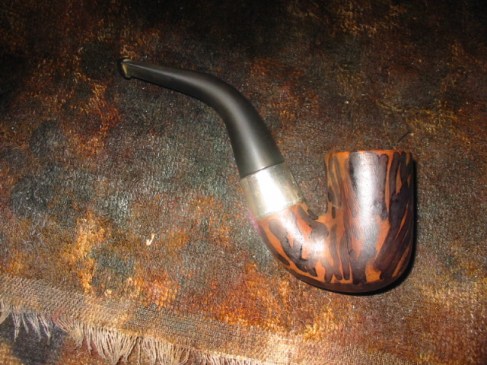
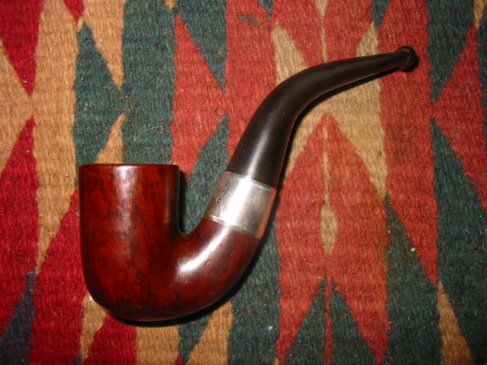
 I buffed the pipe with Blue Diamond Plastic polish on the wheel and then gave bowl and stem multiple coats of carnauba wax. I buffed it with a clean flannel buff and then took it back to the table and hand buffed it with a microfibre cloth. The finished pipe is shown below. I kind of like the saddle stem as it gives the pipe a bit of an English flair.