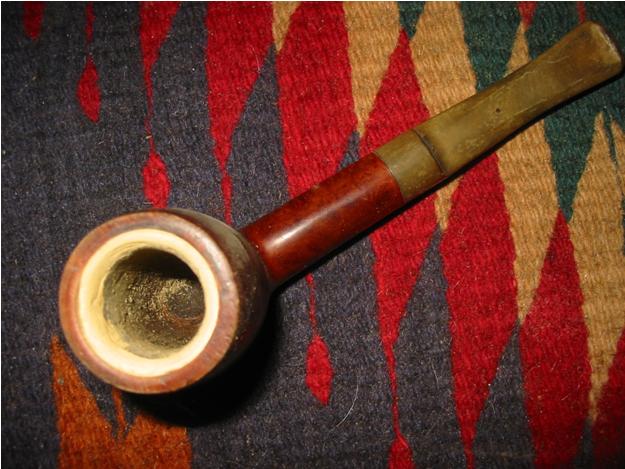
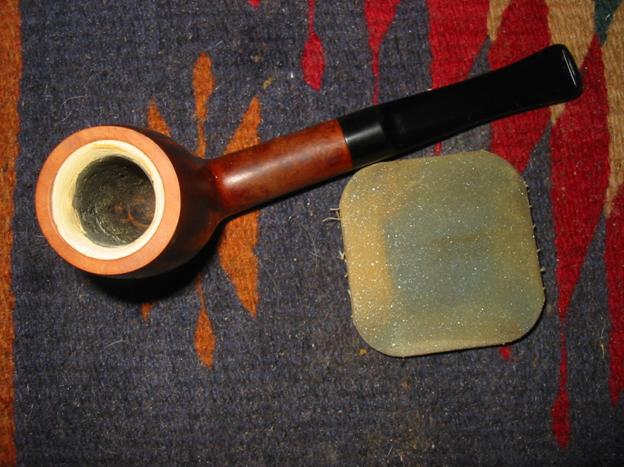
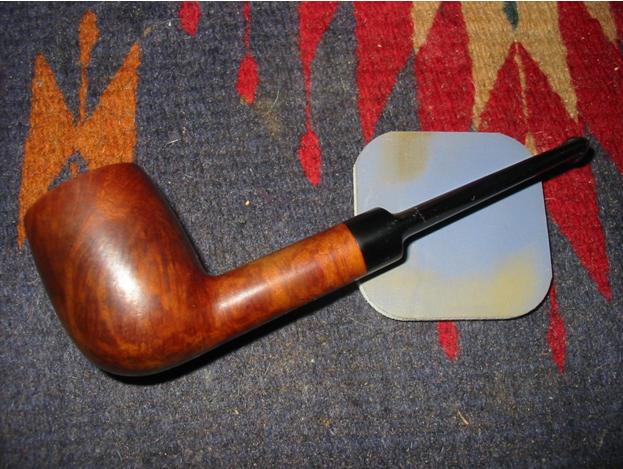
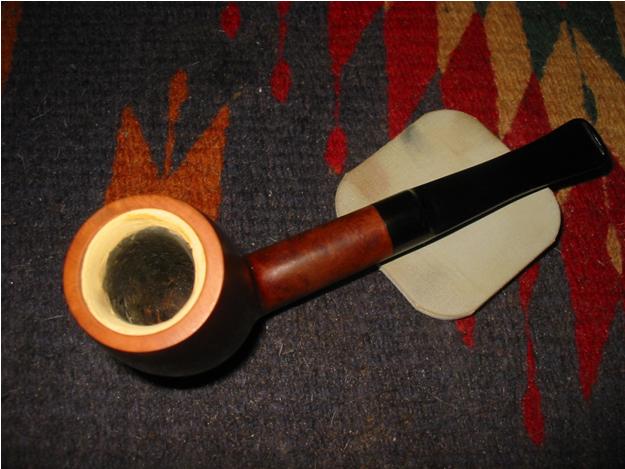
I have had this old meerlined billiard in my box for refurbishing for quite awhile. The stamping on it says Made in London England on the right side of the shank. On the underside of the shank it is stamped Wally Frank Limited. The finish on the bowl was cloudy from many coats of wax and there was a gummy substance on the front of the bowl from a sales label. The rim was dented and the inner edge of the meer lining was damaged. There was a heavy buildup of cake on the meer. The stem was badly oxidized.


 I decided to work on the interior first so I used a plumbers wire brush (used for smoothing the edges of a newly cut pieces of pipe or tubing). It is a ¾ inch brush (see the photo to the left of this text) and I have found that if it is used carefully it is good at removing the initial cake build up on the interior of a meerlined bowl. I say carefully because too much and the brush scratches the meer lining. In this case I ran it through one time and then dumped out the ash and carbon buildup. The two photos below show the brush inserted in the bowl and give an idea of the tool itself.


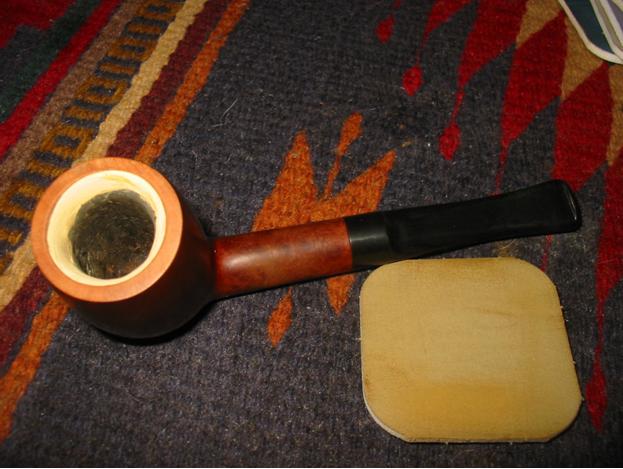
Once the brush has done its work I use a blunt edge letter opener/knife to smooth out the rest of the cake that is still present. The next photo gives a clear picture of the pipe bowl after I have used the brush in it and just inserted the knife. There was still some stubborn cake left that I used the knife to scrape away. The second photo below shows the bowl after I have finished with the knife. Once the bowl was at this point it was time to use sandpaper in the bowl to smooth out the edges and rough spots.

The next photo shows the bowl after the initial sanding on the cake. I had lots more to sand at this point but I wanted to document the process. At this point in the process I removed the stem and put it in a jar of Oxyclean to soak and soften the oxidation while I continued to work on the bowl.
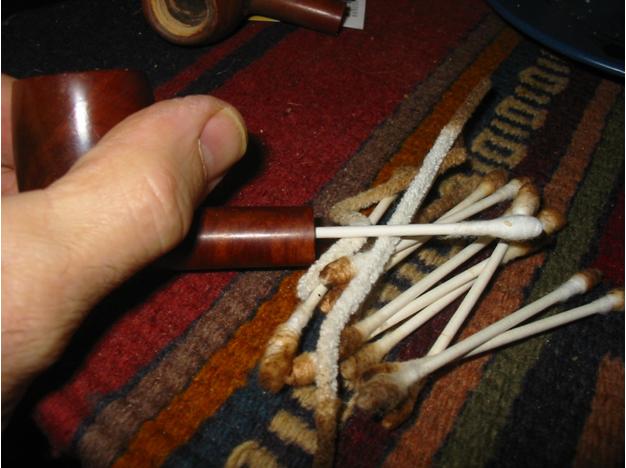
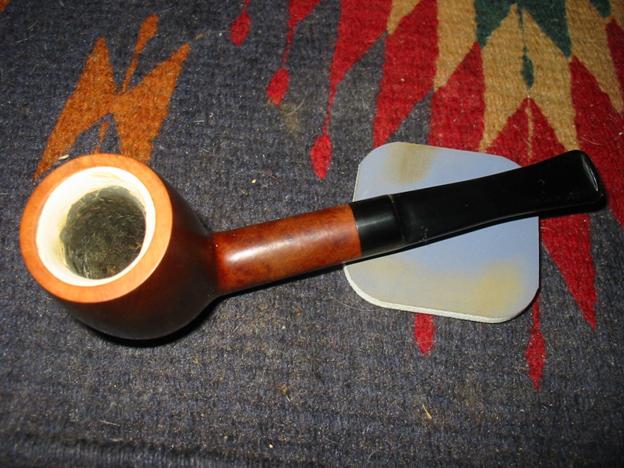
I used many cotton swabs on the inside of the bowl to remove the sanding dust and to clean out the inside of the shank once the stem was removed. The mortise had a thick coating of tars and the airway into the bowl was constricted with tars as well. It took many swabs and about the same number of pipe cleaners to get the interior clean. I dipped the swabs and pipe cleaners in 99% Isopropyl alcohol and washed out the inside. The first swabs came out almost black with the tars. I did some more sanding on the rim and the inner edge of the rim and meer lining. The rim was quite dented and had some chunks missing so I topped it lightly using the methods I have written about in other articles on the blog. I also used a folded piece of sandpaper to bevel the edge of the meer lining inward to take care of the damaged edge of the meer.
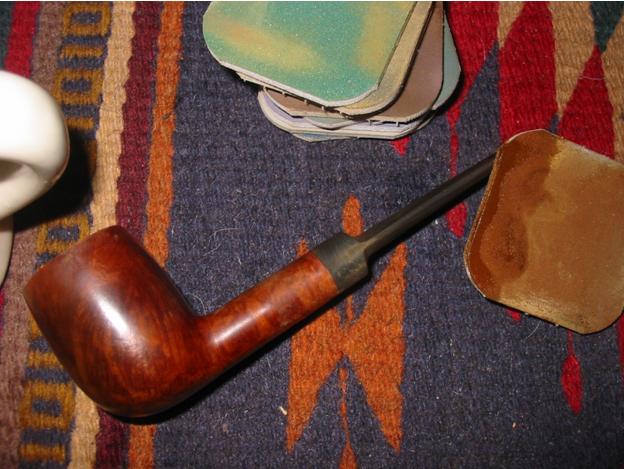
Once the bowl was finished I wiped it down with some acetone on a cotton pad to remove the wax buildup and give me a clean surface to work with. I took the stem out of the soak and went to work on it. I wiped it down with a soft cotton cloth to dry it and to remove the softened oxidation. I then filled a cup with warm water and began to work on the stem with the micromesh sanding pads 1500-12,000. I took pictures of each successive micromesh pad and the result of using it to show the progression of the polishing.
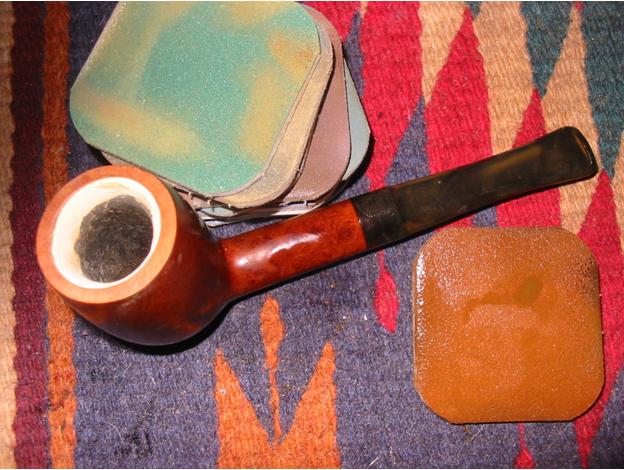
The first four pictures below show the stem after wet sanding with the 1500 rust coloured sanding pad. You can also see the inner rim and bowl top after my work on them as well. The first sanding took what remained of the majority of the oxidation off the stem and gave it a dull matter finish. I wet the sanding pad down and sanding with it wet. I repeated the sanding of the stem repeatedly until the oxidation was gone. Then I wiped it down before the picture to show the progress.


Once I was satisfied that the majority of the oxidation was gone I move on to the green 1800 grit micromesh sanding pad. I also used this pad with water and wet sanded the stem repeatedly. You can see the remaining oxidation still showing up on the wet sanding pad in the two photos below. The two photos show the stem after multiple sanding. I wiped it down with a soft cloth to dry it off and wipe away the grime left behind by the wet sanding. The stem is beginning to take on a bit of a shine. The matte finish of the 1500 grit is getting a polish.


The next two photos show the 2400 grit micromesh disk (grey coloured). I used this pad without water to polish and shine away some of the scratches. I found on the left side of the stem near the button there was a fairly deep scratch on the edge. I used some 280 grit sandpaper to remove this scratch and then repeated the 1500 and 1800 grit micromesh sanding. Once finished I gave the entirety of the stem a sanding with the 2400 grit pads to smooth out the finish. I also used the pad to sand the top of the bowl and the edge of the meer lining.

A 3200 grit micromesh pad (tan coloured) was used next. I also dry sanded the stem with this one the first few times I sanded it. The last time I wet sanded the stem. The next two photos show the stem after the sanding. I wiped it down with a soft cotton cloth to remove the dust and residue from the wet sanding.

Once I got to this point I decided to try some Mequiar’s Scratch X 2.0 fine scratch and blemish remover that I picked up at an auto parts store. It is used to polish headlight lenses. I applied the polish to the stem and let it dry a short time before wiping it down and polishing the stem with the cotton cloth. The first two photos show the application of the white polish. The last two show the result of the polish on the stems at this point in the process.


At this point in the process I decided to continue with the micromesh sanding pads. I wanted to take them through the 12,000 grit pad and document the progressive shine that comes alive in the stems. The next two photos show the wine/brown 3600 grit sanding pad and the results. I sanded the entirety of the stem repeatedly before wiping it down for the photos below. I dry sanded with this grit pad and also with the remaining micromesh pads.

A 4000 grit Teal coloured micromesh pad was next. I also dry sanded with this pad. The next two photos show the shine starting to come alive on the stem.


A 6000 grit Purple coloured micromesh pad was next. I dry sanded with this pad as well. The next two photos show the shine after I repeatedly sanded the stem.
An 8000 grit Royal Blue micromesh pad was the next in line to be used. The difference in shine between the 6000 and the 8000 grit is quite remarkable. The shine takes on a depth that the early grits did not bring out in the vulcanite. The next two photos show the stem after sanding several times with this grit pad.


The final micromesh pad to be used was the Grey coloured 12,000 grit pad. I also dry sanded with this pad. I sanded the stem several times until the vulcanite shine had a depth that was visible. The two photos below show the result of the final sanding.

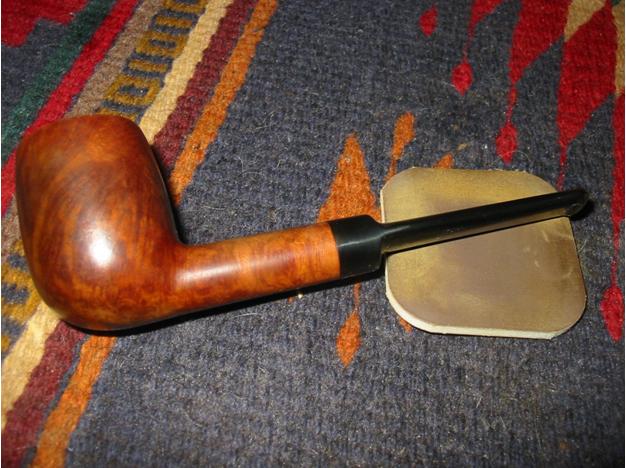
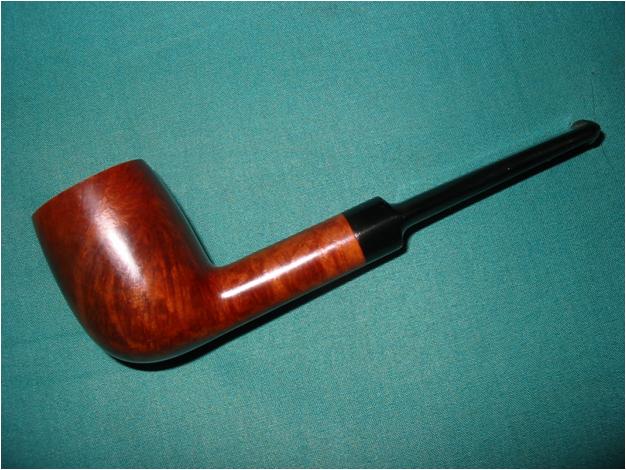
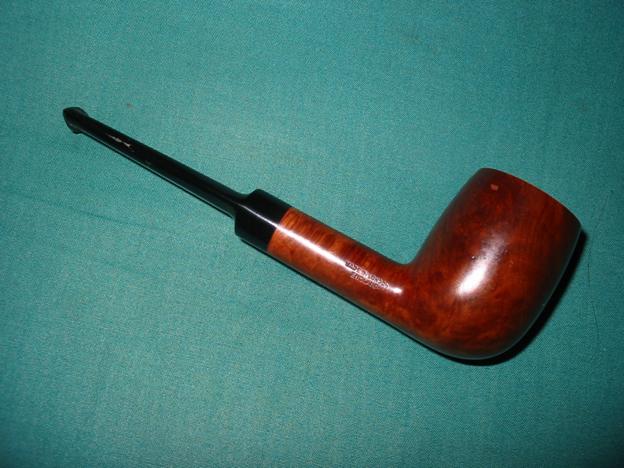
At this point in the process I once again wiped the stem down with the Meguiar’s polish and buffed it off by hand with a soft cotton cloth. I then took it to the buffer and gave it several coats of carnauba wax. I also buffed the bowl with White Diamond and then carnauba wax as well. The finished pipe is in the four photos below.


Yea Steve, good you mention the plaster of Paris. I have used it too on meer lined bowls in my falcon pipe collection. I know you hate these pipes as I picked up a comment in the pipe collector you made earlier this year. LOL
I was to chicken to mention the Plaster as I thought I was the only one using this method……. I believe it is super soft but as soon as it chars it is good and solid!
Cool beans bro!
LikeLike
Brilliant!
I have some of those here in a box. Most of them are really messed up down at the draft hole. This is most interesting indeed. I really like the detailed description along with the pics. Well done.
Silly question…… how do you deal with the ghost in them meer lined pipes?
LikeLike
Thanks Piet. I have used pure tile grout or even plaster of Paris to repair cracks and holes in the meer lining in the past. I wipe the inside bowl down with a damp alcohol soaked paper towel twisted into the bowl and then just smoke it. The ghosting does disappear.
LikeLike
Great Refurb,Thank You For All Yuor Interesting Tips,I Find Step By Step Very Informative(Great Photos)Hope To See More,I Simpily Find Your Web-Site,And Your Information Truly Invalueable.
LikeLike
Nice job with the pix and work!
LikeLike
Thanks Al. I keep working on the pics to try and get them more clear… one day!
LikeLike
Bravo.. I so love a good Wally Frank pipe.. You went above and beyond.. What a good post of how you did it.. I am impressed with your patience.. What a beauty reborn indeed..
LikeLike
Thanks Chuck, this Wally Frank has the shape of an English Comoy or a GBD or the like. it is a nice piece of wood.
LikeLike
A friend of mine just emailed me one of your articles from a while back. I read that one a few more. Really enjoy your blog. Thanks
LikeLike