Blog by Dave Whitney and Steve Laug
I wrote Dave Whitney for permission to use his material in this post. He wrote back granting that permission and asked that I credit it as coming from OLD BRIAR by Dave Whitney. Thanks Dave for allowing this information to be posted here. What follows is taken from correspondence with Dave that later became the article in his book.
Over the years I have had several Kirsten pipes of different ages and different composition. I have always found it difficult to tell the difference between the various pipes in terms of their age. I have ordered replacement parts from Kirsten in Seattle and I have also cannibalized older ones that I have here that are not useable. From these I have traded and bought others. One of the early ones I had stumped me in terms of the markings and stampings on the barrel and the bowl. I wrote to a fellow on one of the online pipe forums (I now know that it was Dave Whitney as I have since found an article by him on Kirsten pipes that I have read and have written to him. I kept the information he gave me and finally got around to editing it and putting it on the blog.) My questions to him revolved around how to tell age of Kirsten I had in my hands.
He replied with the below information. I found it very helpful and have not found other places to get this info so I thought I would post it here for all to use. (Since writing this I have found that Dave has developed the material in his book Old Briar – it should be consulted for more information).
“Kirsten’s are fun to try and figure out, especially when trying to buy then on eBay. Years ago, when I first started, I finally got a hold of a fellow who “Restored” Kirsten’s for quite a long time. He taught me about the Generation system, and it immediately made life easier. I could ask the seller to take the pipe apart and tell me about the O-rings. I could even call the company and refer to the Generation parts I wanted, and at that time they knew exactly what I was asking for…the last time I called was three years ago, so who knows now. This is all from memory……”
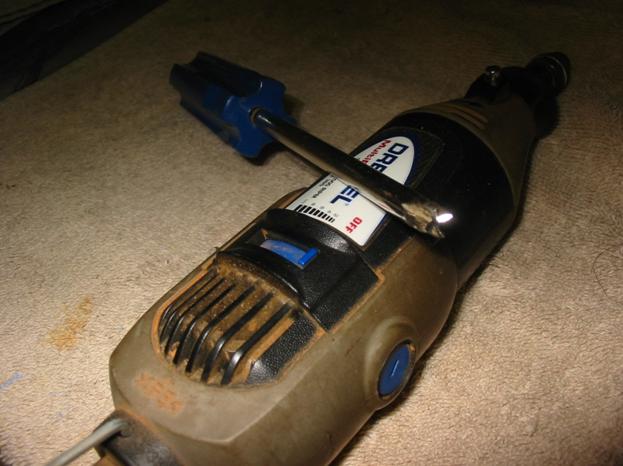
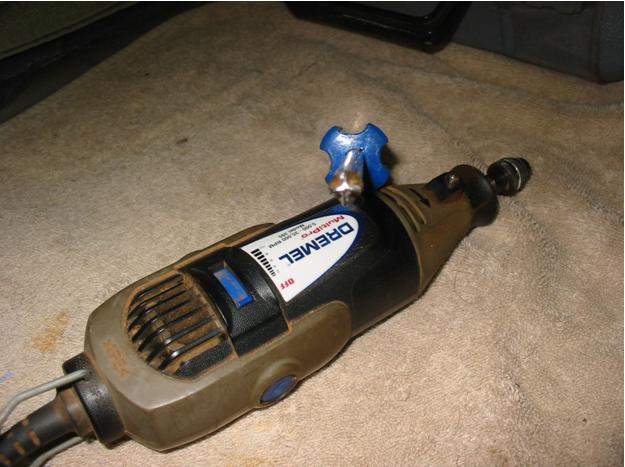
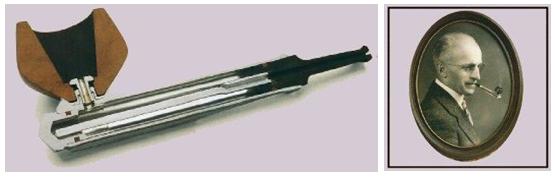
All Kirsten pipes are made up of five basic components – mouthpiece, radiator body or barrel, valve, bowl and bowl screw (a sixth component, the bowl ring, is found in many Kirstens. They were originally designed in 1936 by Professor Frederick Kirsten – the man who invented Boeing’s first wind tunnel – after he has been advised by his physician to stop smoking. Kirsten was looking for a way to trap the tars and moisture from tobacco and the Kirsten pipe was his solution.
Generation 1 – 1936-1958
The wooden bowl on this generation connects directly to the metal barrel and there is no metal cup spacer. It is a pretty flush fit that goes flat against the barrel. On the underside of the metal barrel it is stamped with one or more of the following “Pat. Appl. For” (1936-38) and “Pats. & Pats. Pending” (1938-1958) over “Made in USA” – S” (or applicable size – S, M, L). There are no O-rings on the bit or metal shank insert. They came in the following models:
Straights
Companion First edition in rough finish.
S Standard 1st generation with full-length cooling fins
M Medium
L Large
A Aristocrat Extra large 1st generation
Generation 1.5 – transitional period – mid to late 50’s
This was an experimental stage. Kirsten realized that the bit and insert were prone to seizure as the condensate dried. This model always has O-rings on the metal insert, and later models can have O-rings on both. Same markings, as I remember it. There is no metal cup spacer under the bowl. This generation has O rings either on the valve or mouthpiece but no O rings on the other end. This transitional period is stamped “Pat. Pending” and “Pats. & Pats. Pending” some with “Made in U.S.A. It seems like the company was using surplus parts to combine into this series of pipes. They came in the following models:
Straights
K Companion
M Medium
L Large
They came in a polished finish and later white Heritage finish. There were a few other Transition Models:
Thrifty – a nice early model with black offset valve that works in reverse. There is an O ring on valve but none on the stem
No Letter/No Name – This one is an unmarked short pipe with a different valve and O ring. There is not an O ring on stem
Generation 2 – 1958-1985
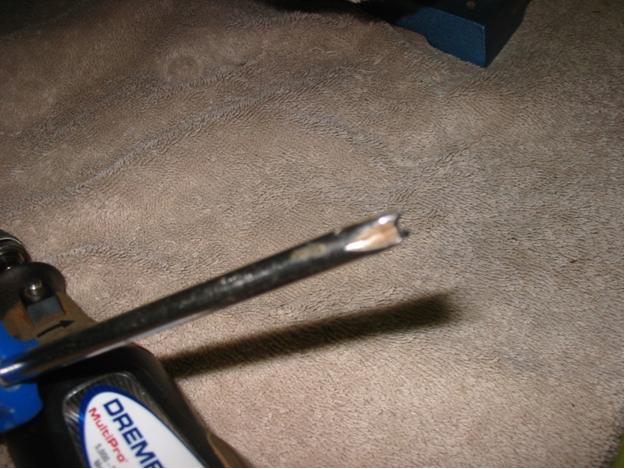
Markings on underside of metal shank “Made in USA XL” (or app. size) and “Pat. & Pats. Pending”. The presence of O rings on both the valve and the mouthpiece and the metal cup spacer under bowl are the biggest thing that separates the Generation 1 from the Generation 2 pipes. These O rings help provide a tighter seal when the stem and apparatus are inserted into the radiator stem. Instead of “O” rings, the machining of the Generation 1 pipes was so precise the fit was exact. This generation came in the following models:
Straights
K Companion
G Gem
S Sportsman
SX Sportsman Brass
M Mariner
MB Mariner Black
L Lancer
Quarter-Bents
A Aladdin
V Vagabond
CX Cavalier Brass
T Tyrolean
Full bents
W Westerner
B Beau Geste
P Premier
F Firesider
Generation 3 – 1985 to the present
All current models stamped “Made in U.S.A.” and all have O rings on both the valve and stem. They come in the following models:
Straights
JX Jewel Brass
M Mariner
L Lancer
Quarter-Bents
RX Regent Brass
H Horizon
Full bents
EX Esquire Brass
DX Designer Brass
FOOTNOTE ON VARIATIONS IN LETTER DESIGNATIONS: Generally speaking, the X added to a model letter like “S” stands for brass tone finish, i.e., “SX.” There is one exception to this: In the 1960s Kirsten made a brass tone model with an “Eternalum” finish that gave the brass tone an antiqued look. They were marked with a “X” designation following the model letter. The B added to a model letter like “M” stands for black finish, i.e., “MB.”
He ended his answer to the questions with this great note: “Now the fun part….this is how they came from the factory. What people did to them after they got them is what makes it an inexact science. Parts for the different sizes are not interchangeable, except for the bowls. I have a Gen 1 – M and -S…nothing interchanges but the bowls. If you get a Gen 1 that has been badly abused, you can end up losing either the bit or metal insert, or both, no matter what you do or how long you try.”
References used:
Whitney, Dave (2009) Old Briar – Pipe smoking on a budget. pipesbywhitney
http://www.kirstenpipe.com/