Tag Archives: removing oxidation

Repairing a Broken Shank on an LHS Park Lane DeLuxe — Lovat 12


Blog by Steve Laug

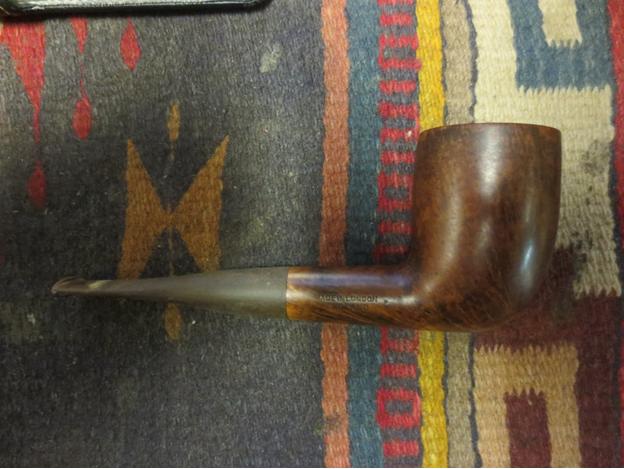
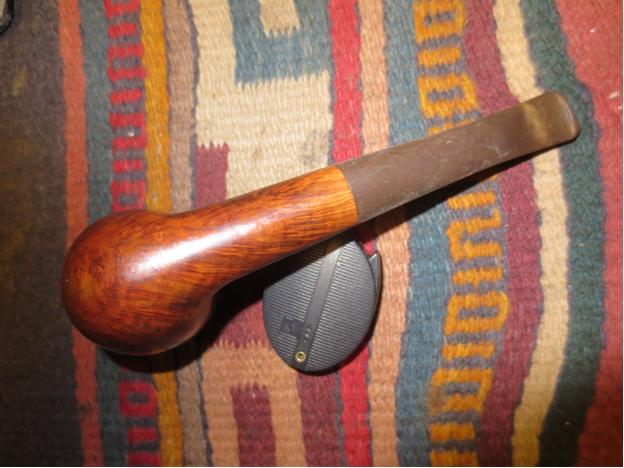
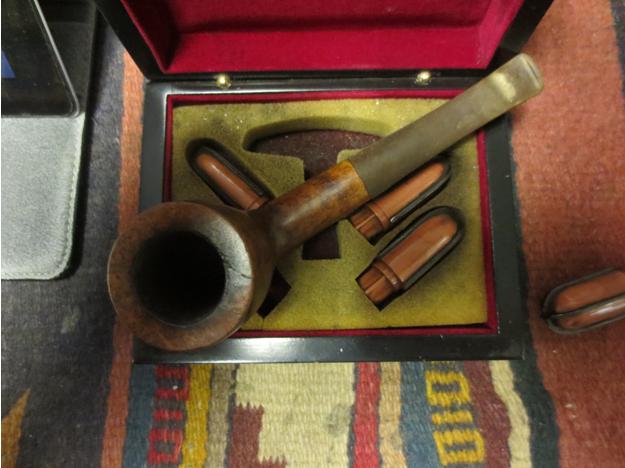
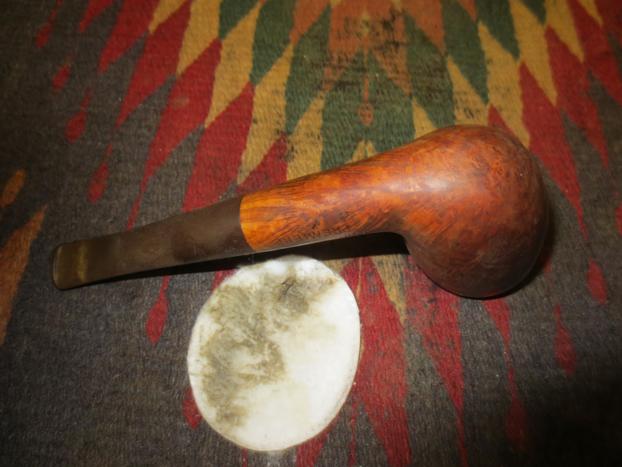
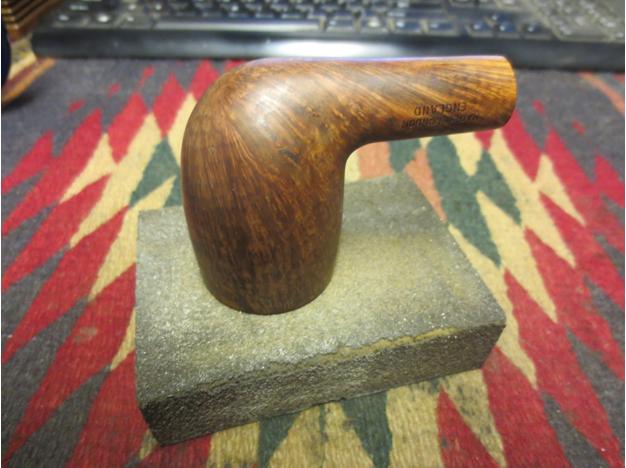
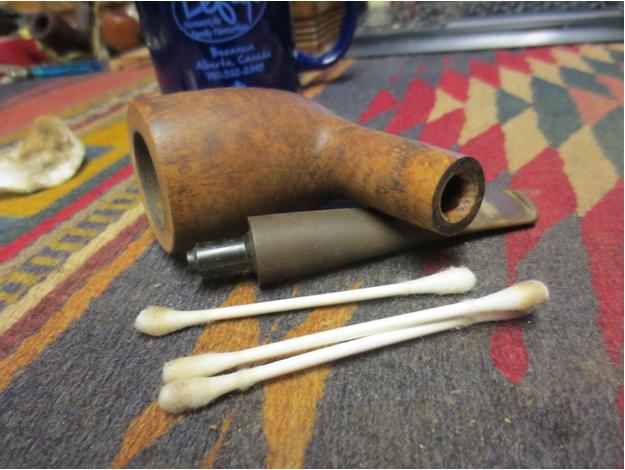
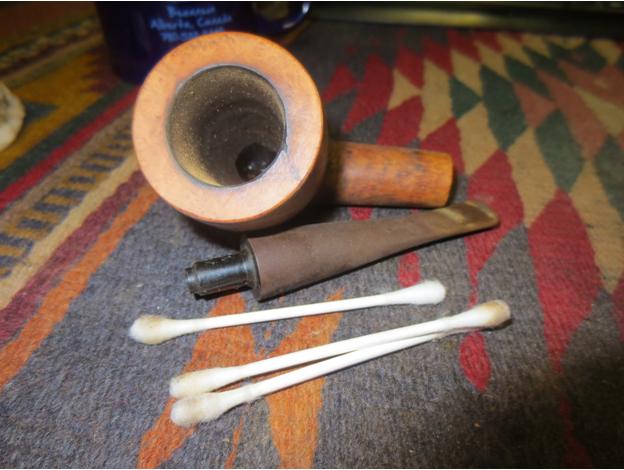
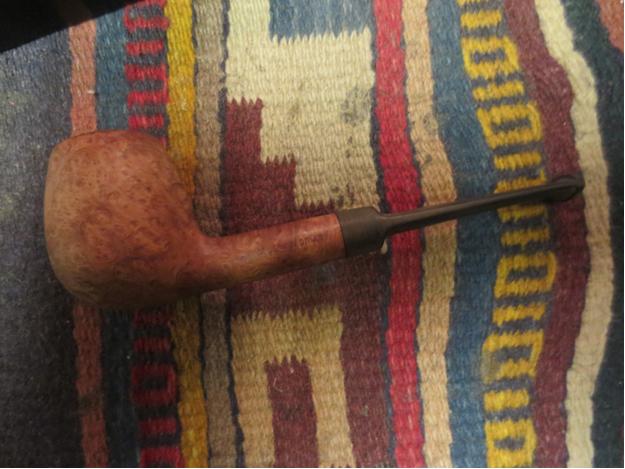
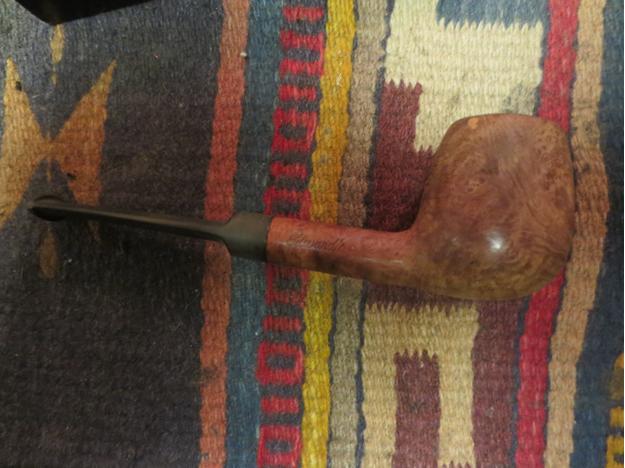
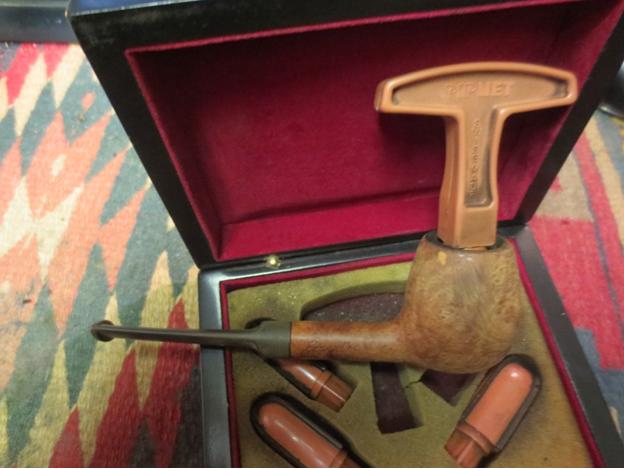
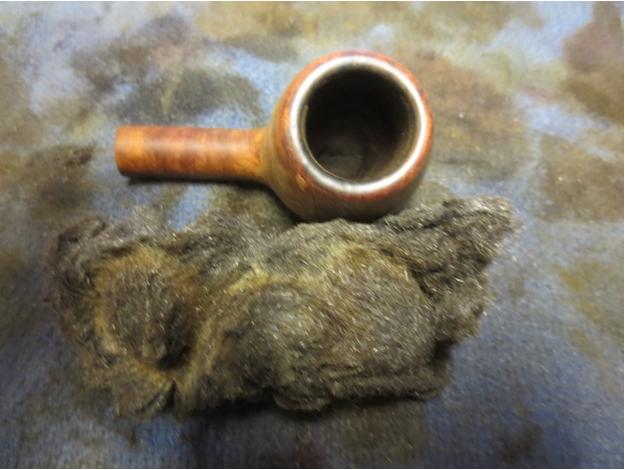
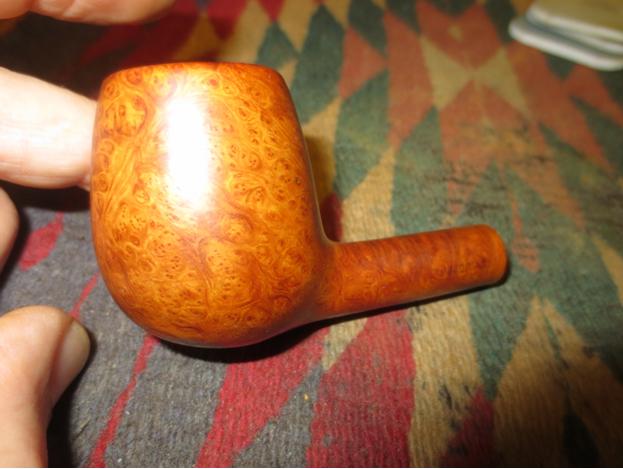
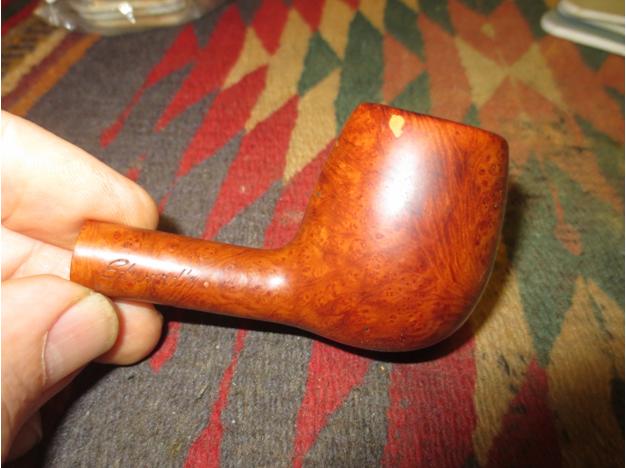
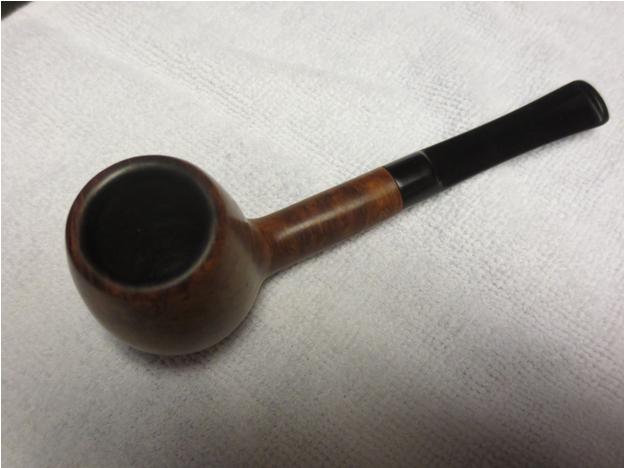
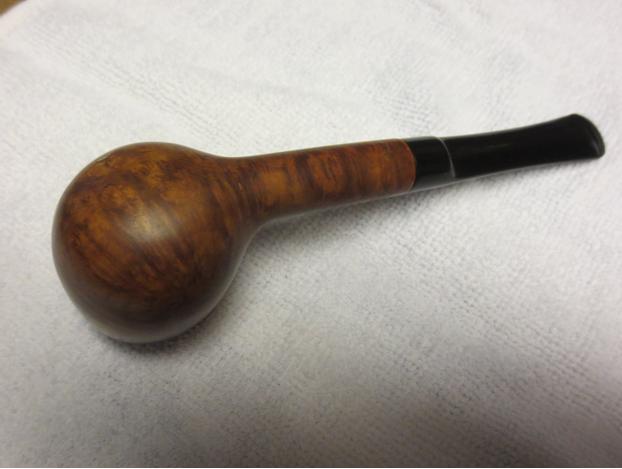
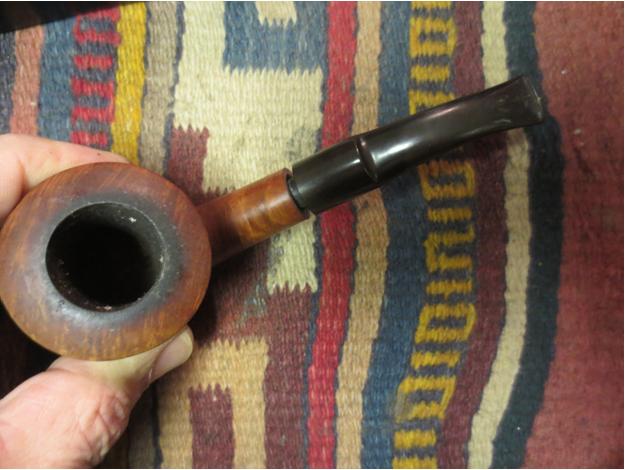
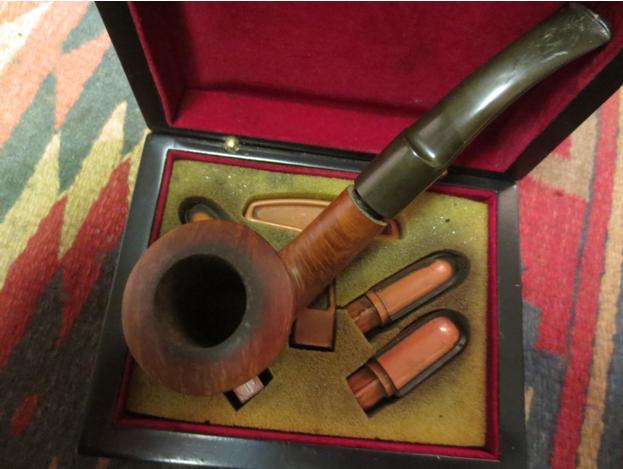
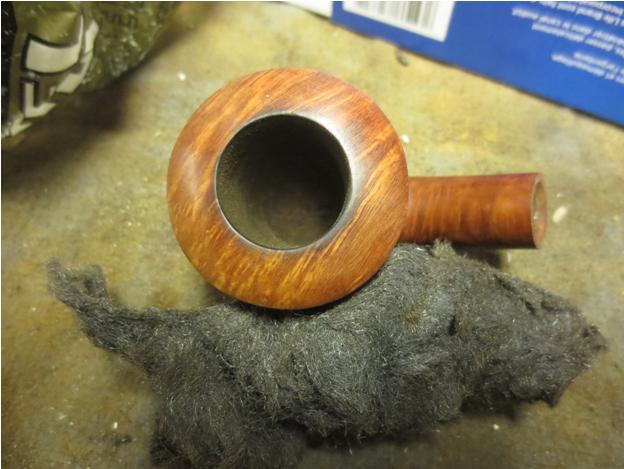
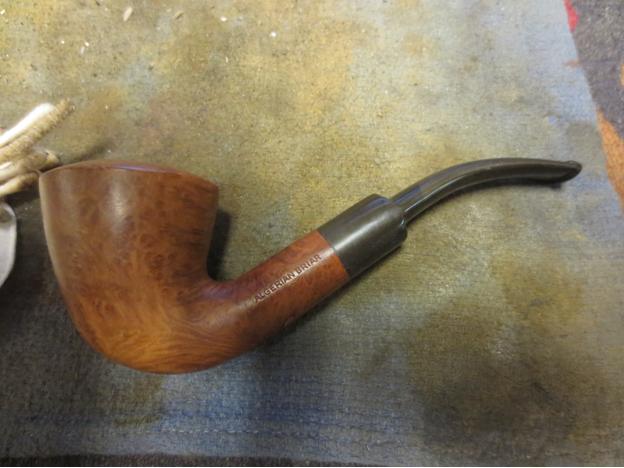
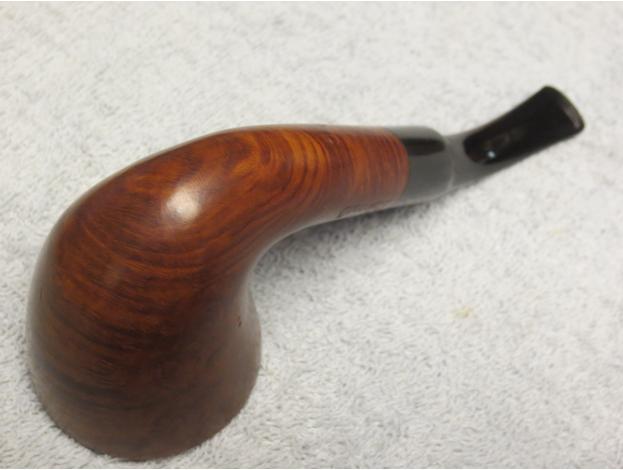
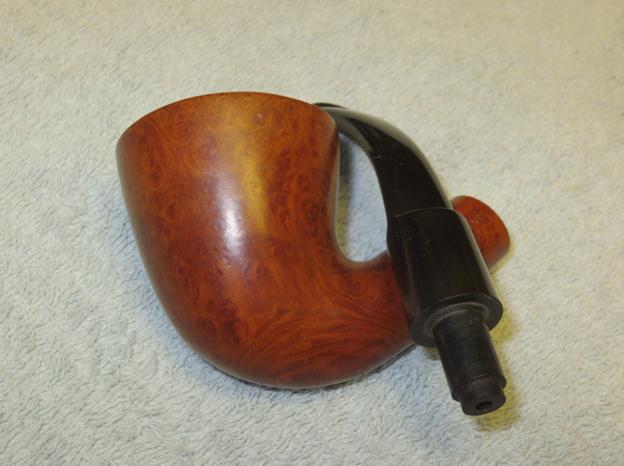
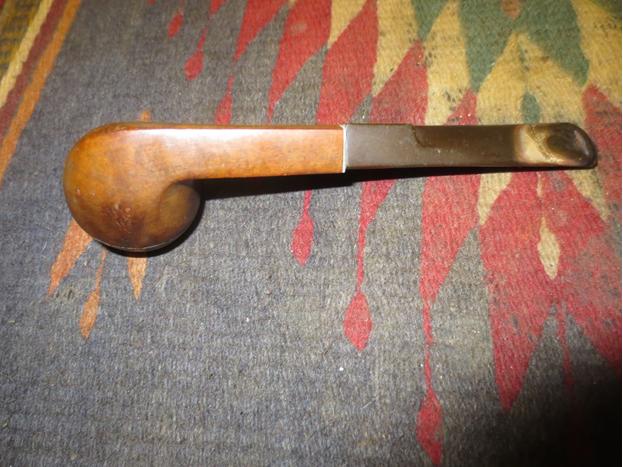
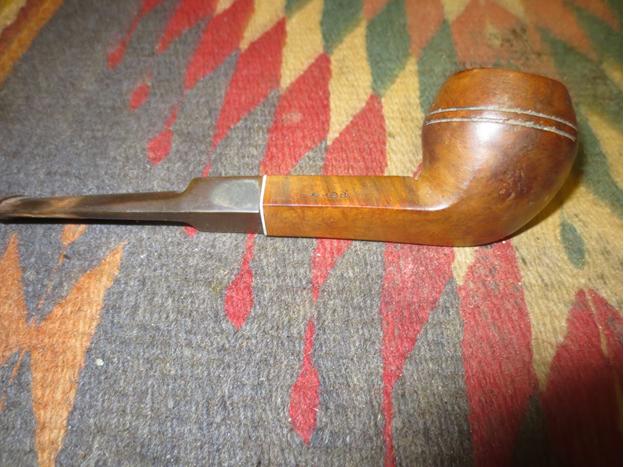
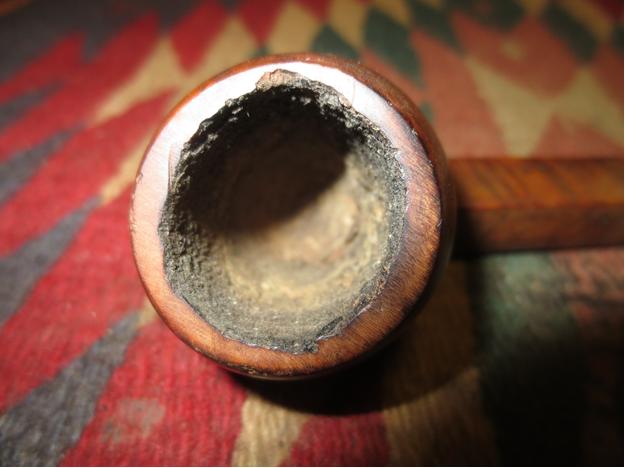
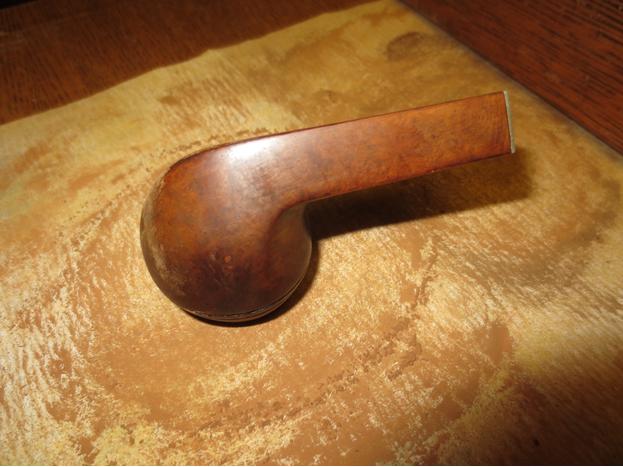
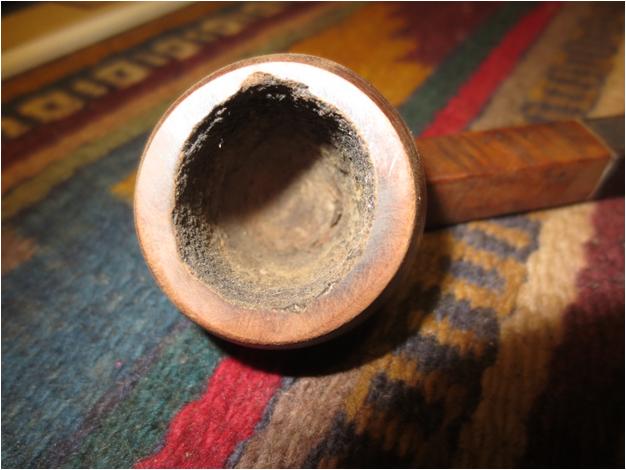
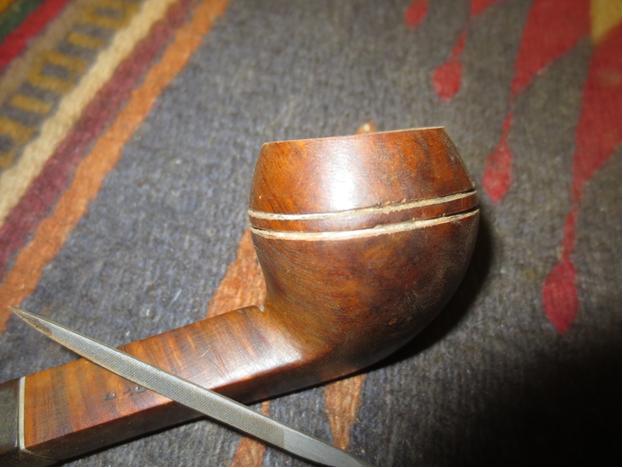
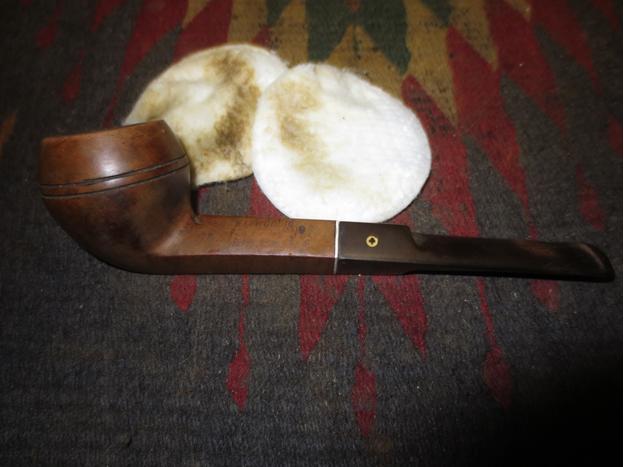
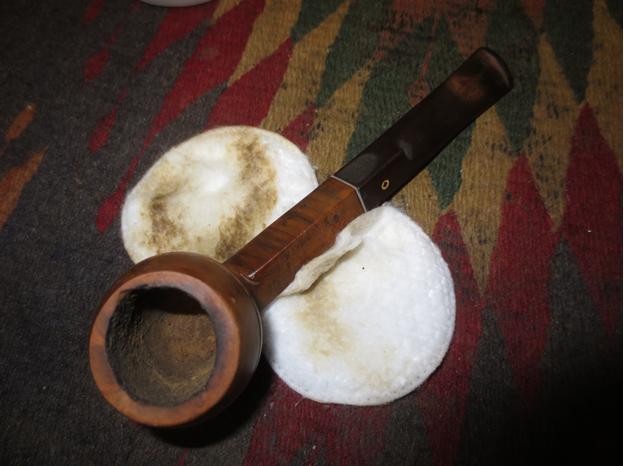
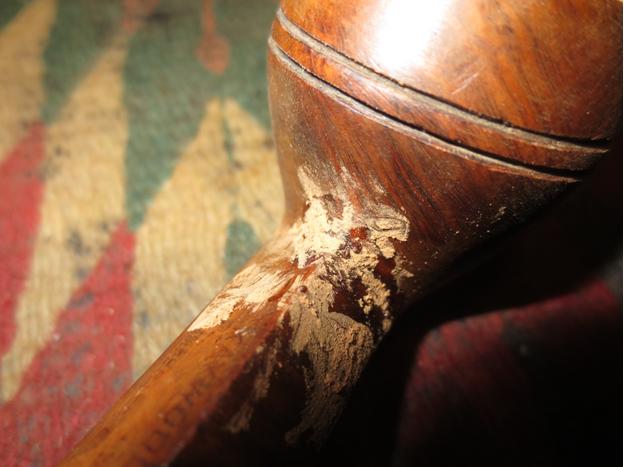
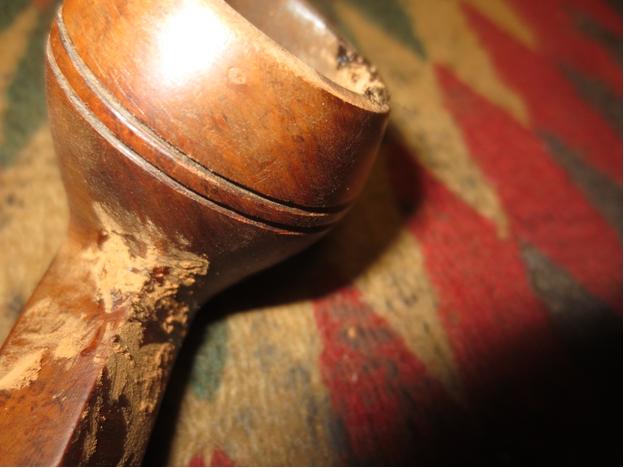
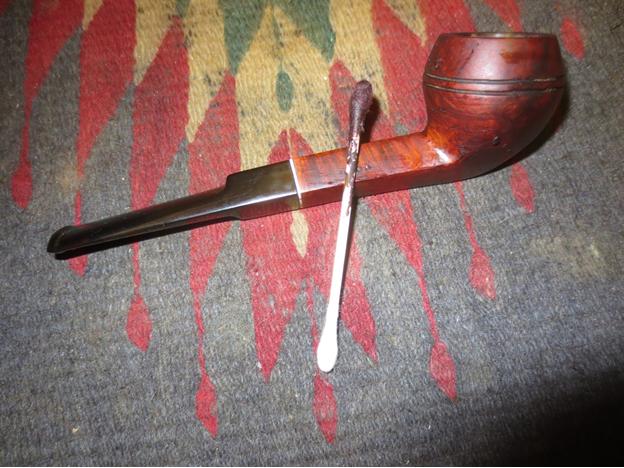
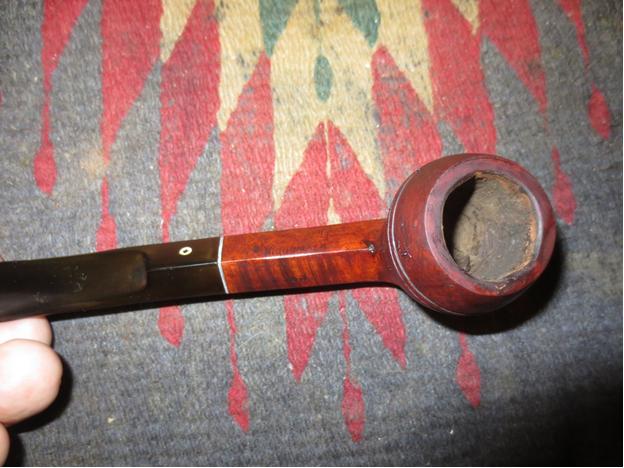
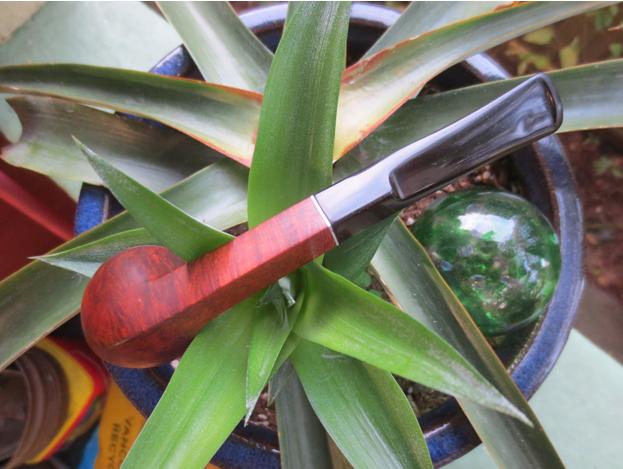
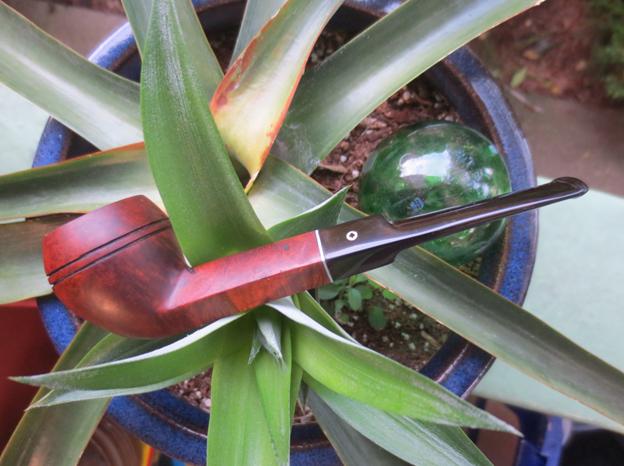
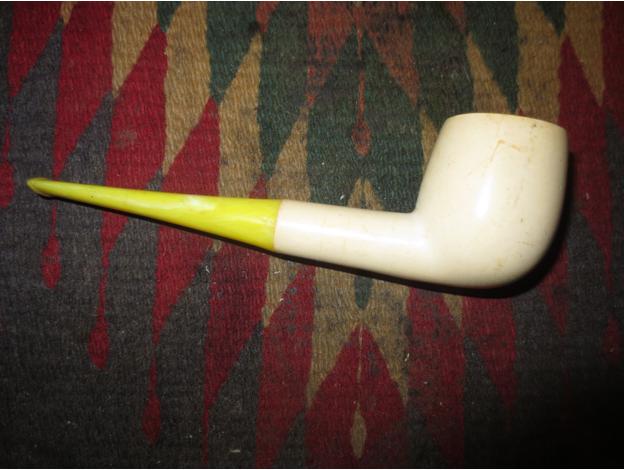
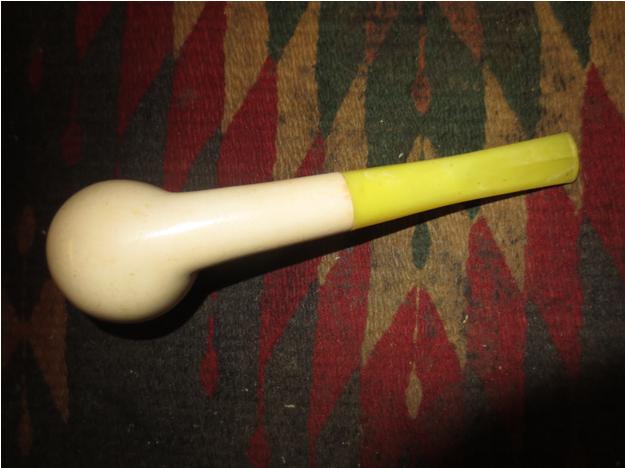
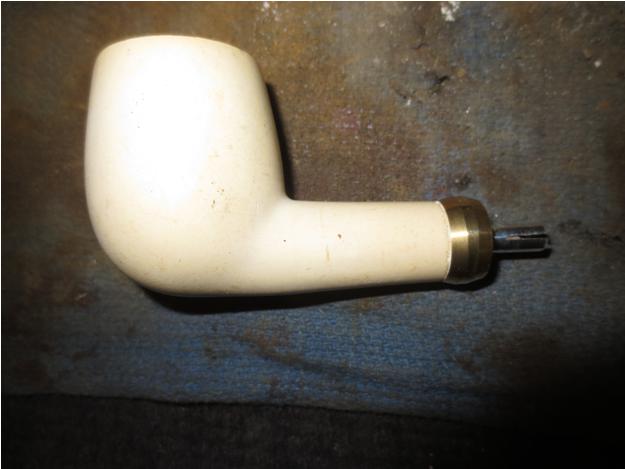
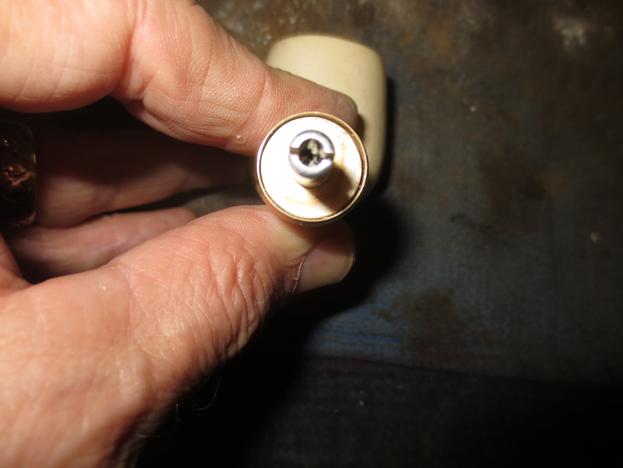
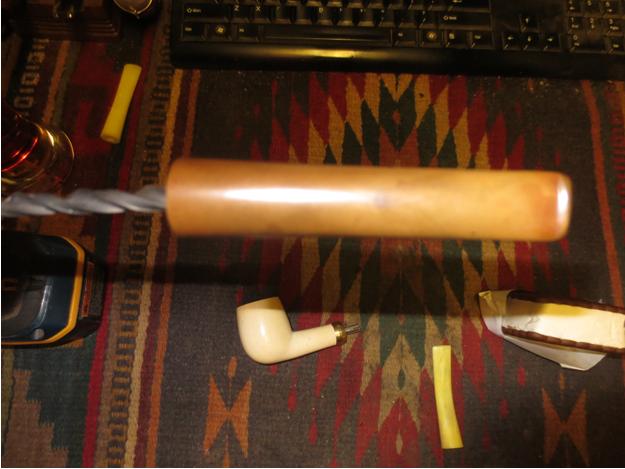
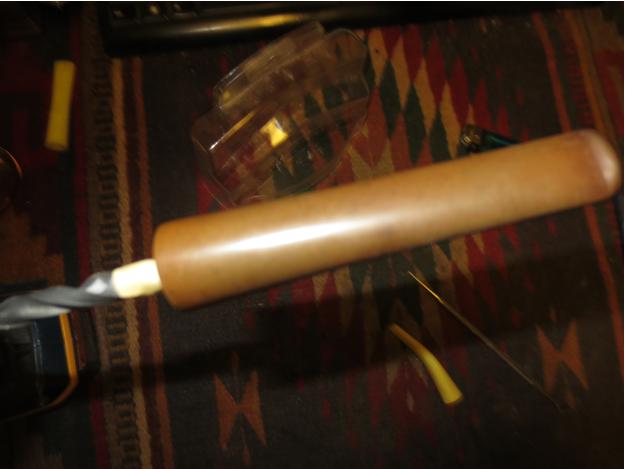
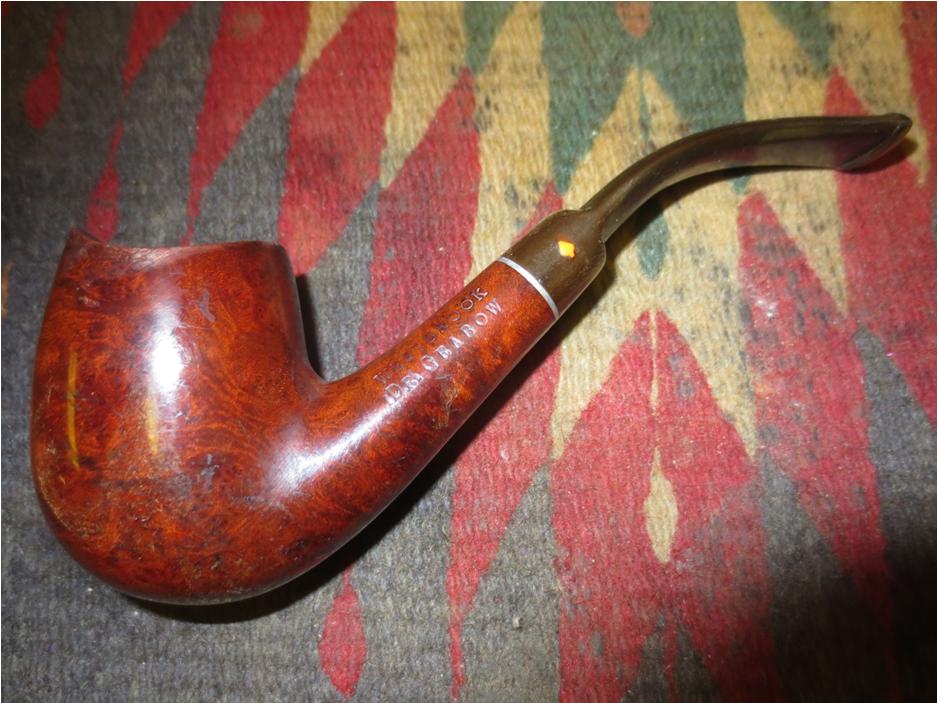
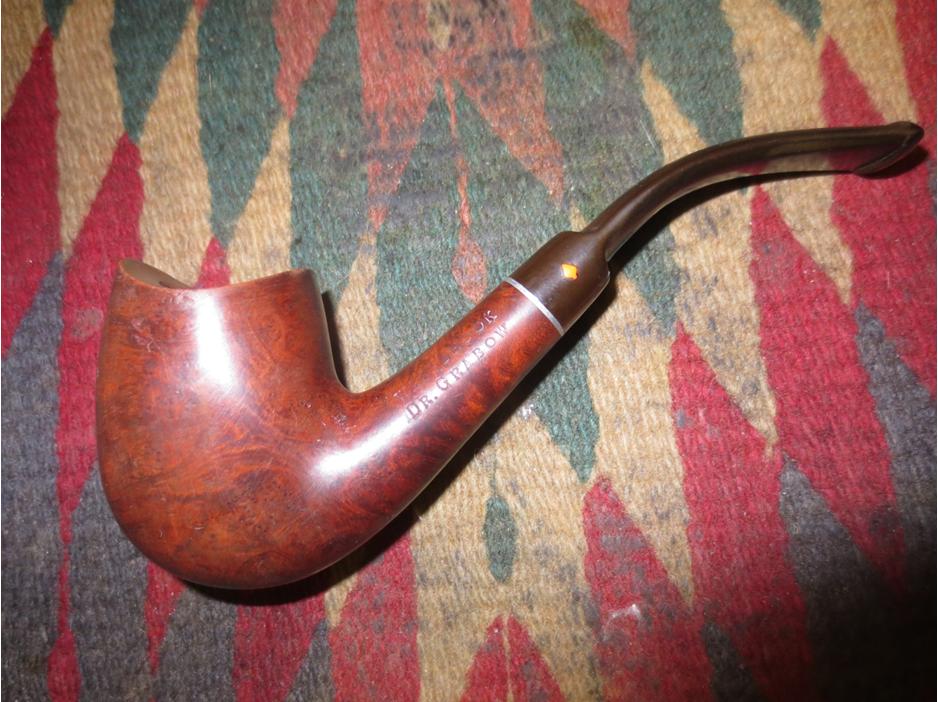
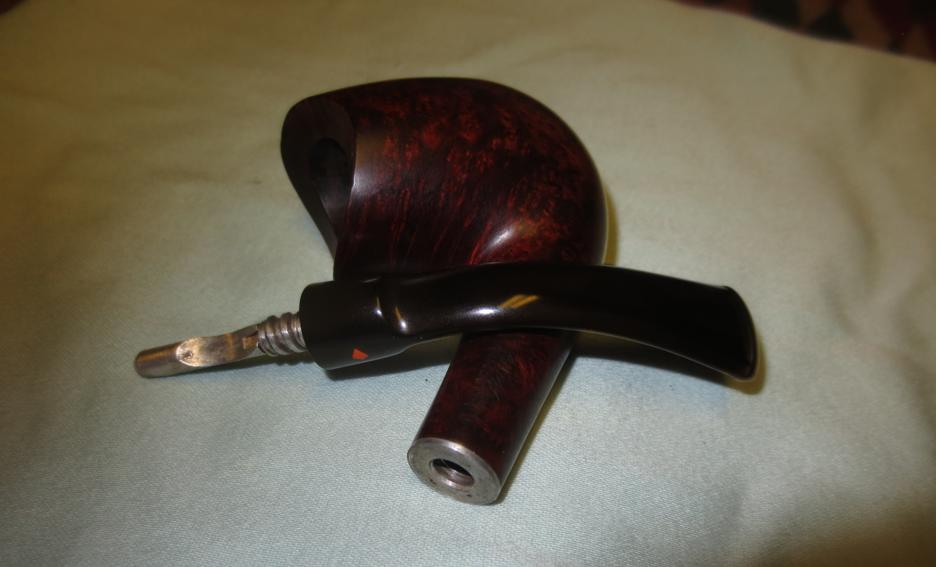
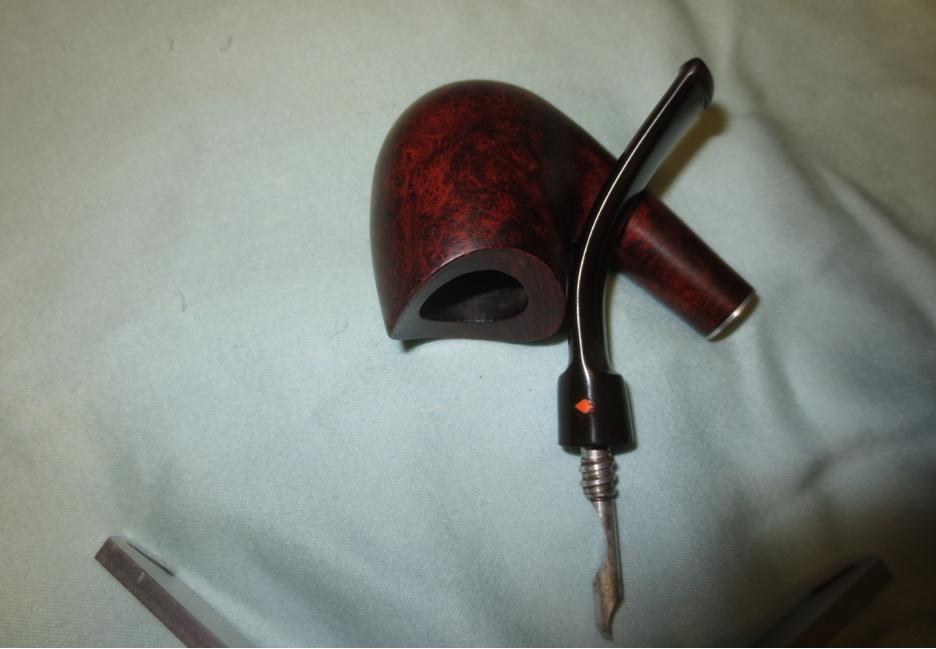
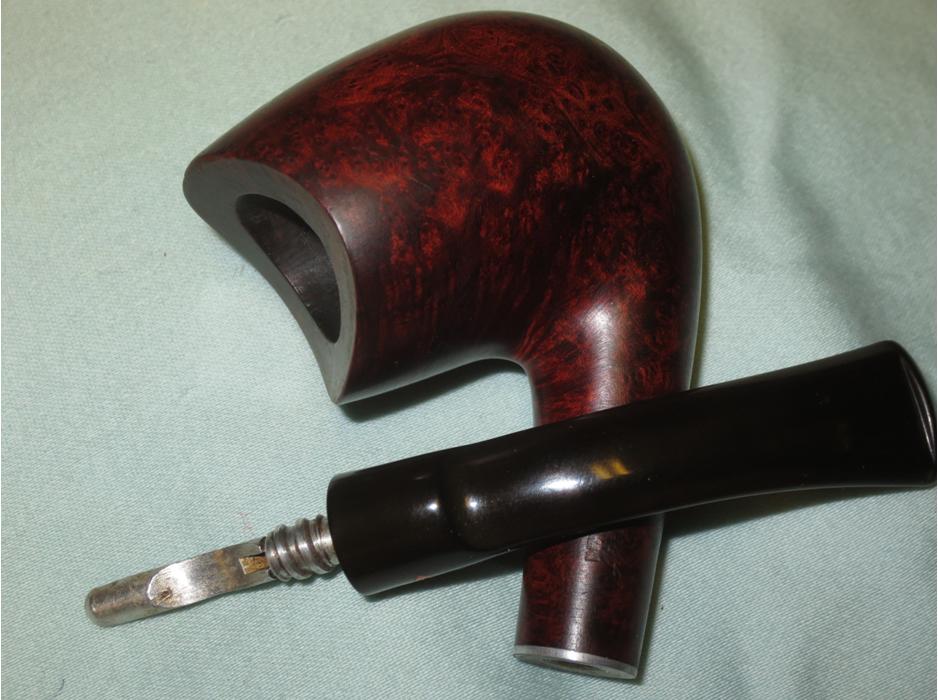
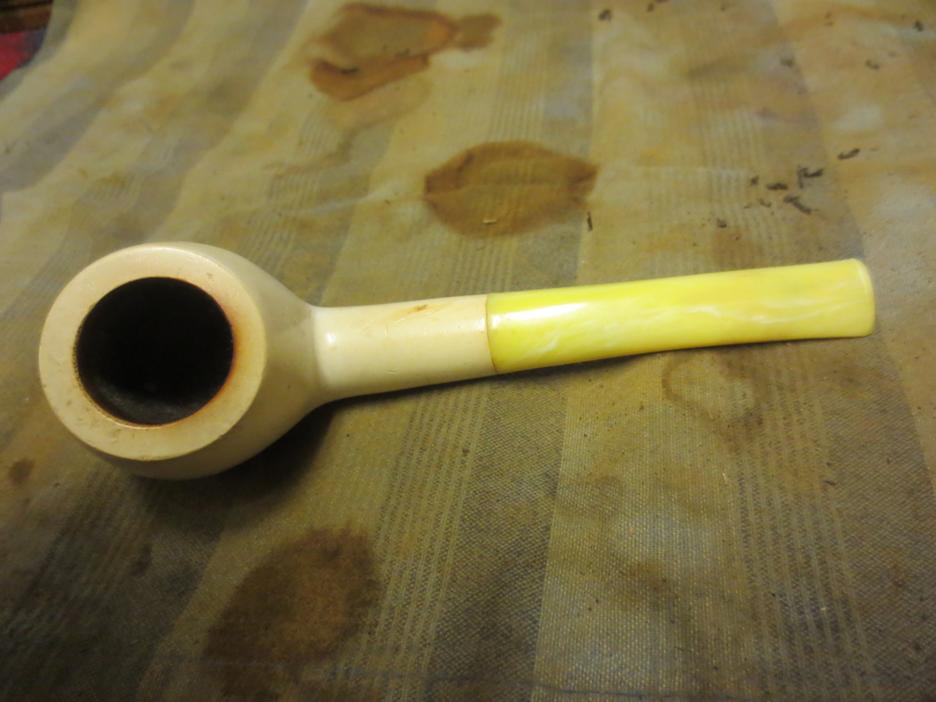
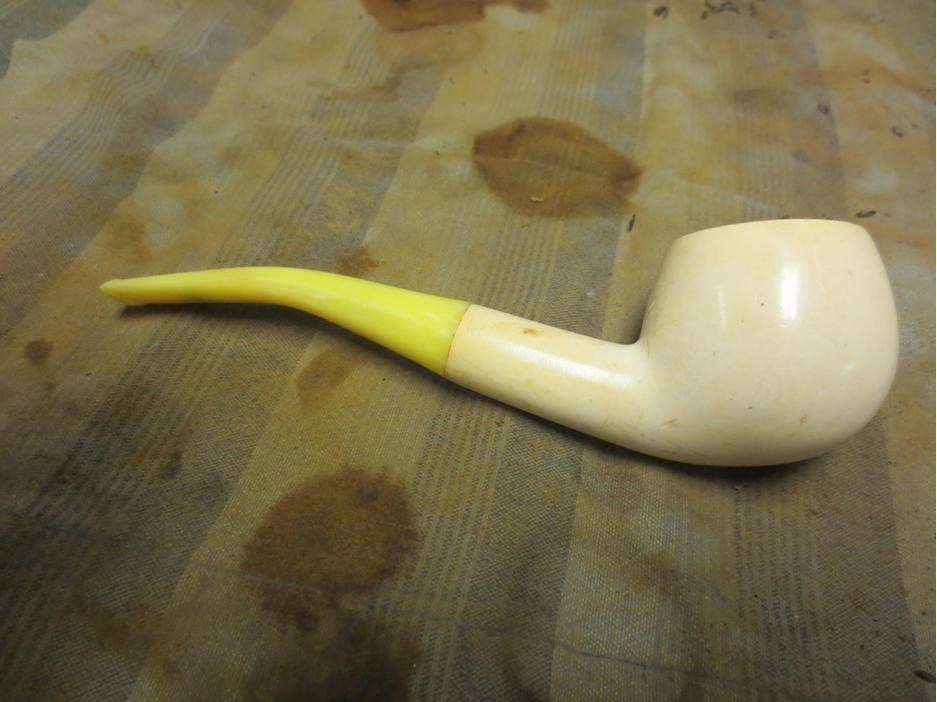
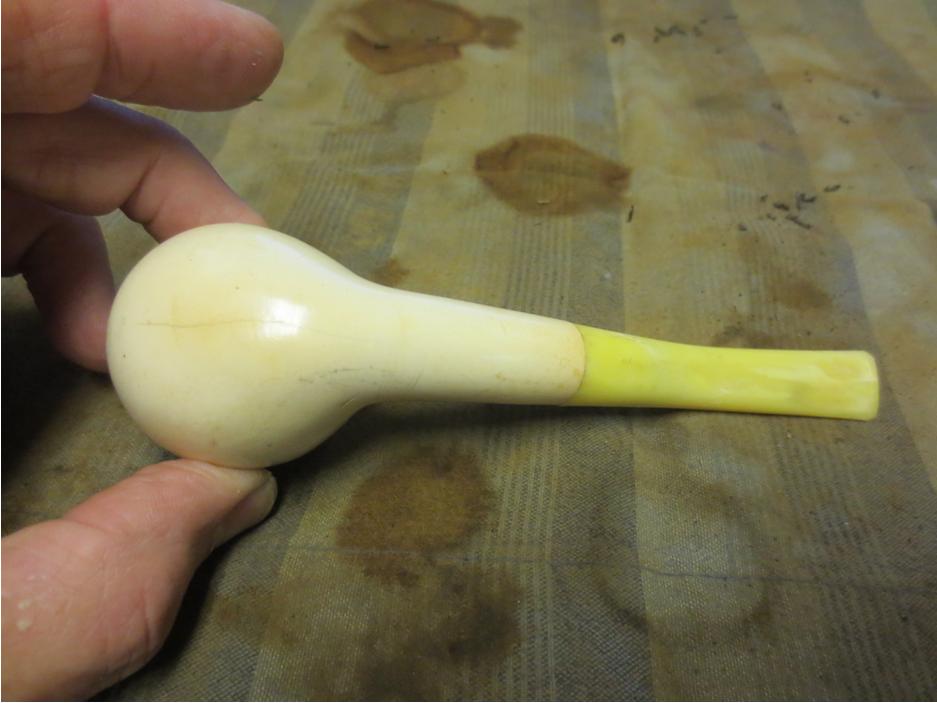
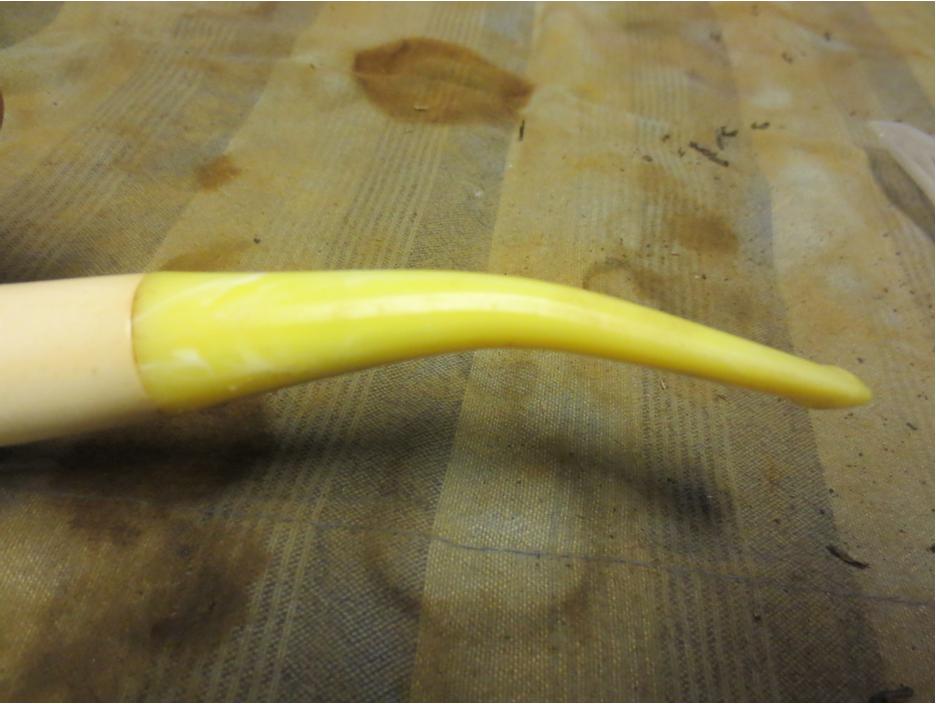
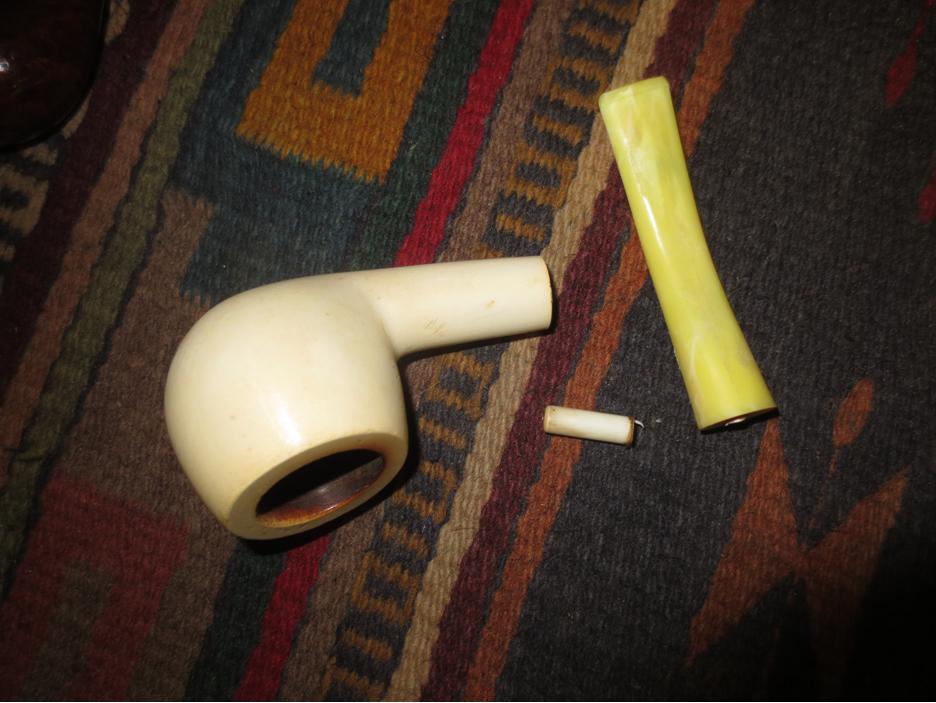
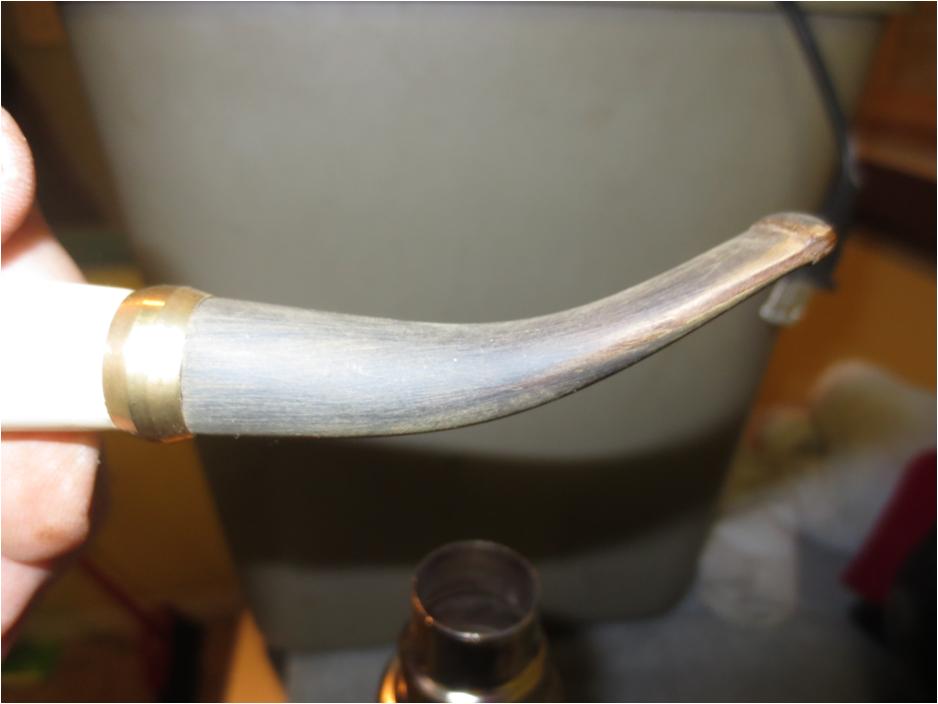
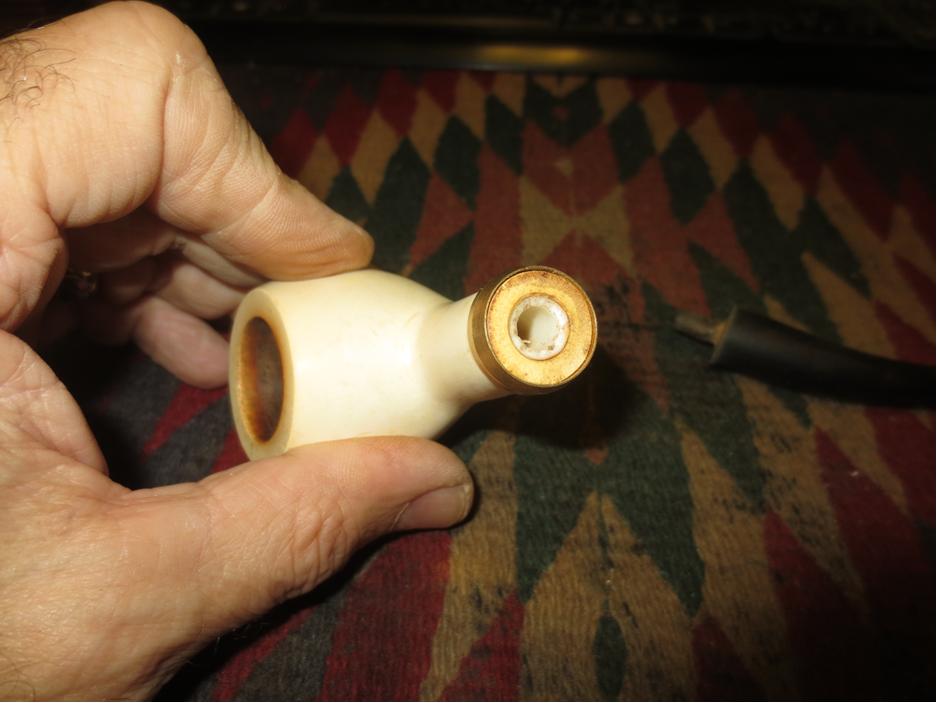
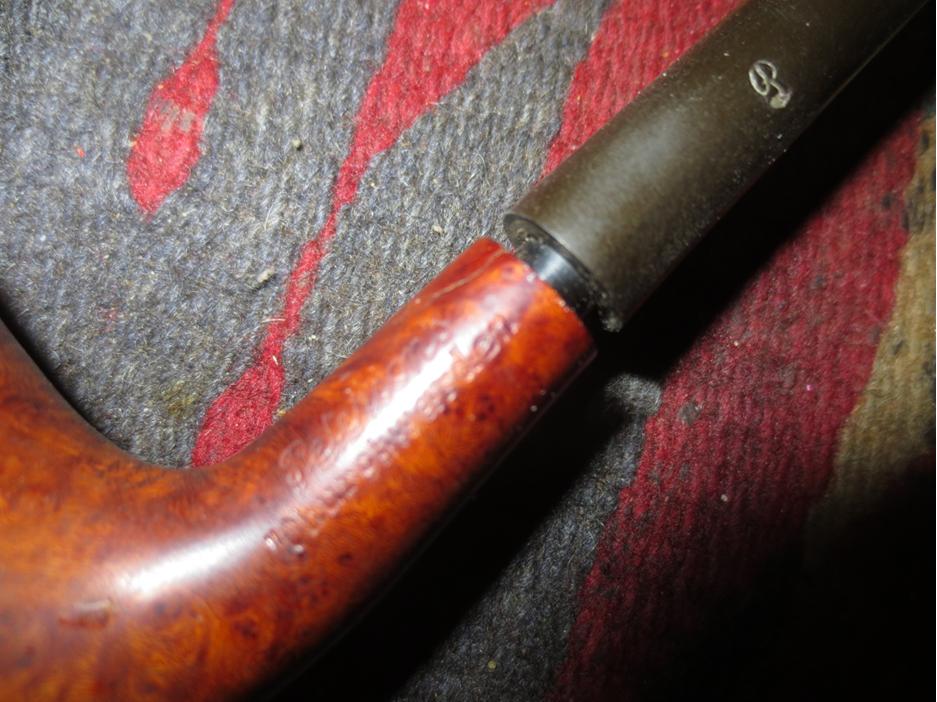
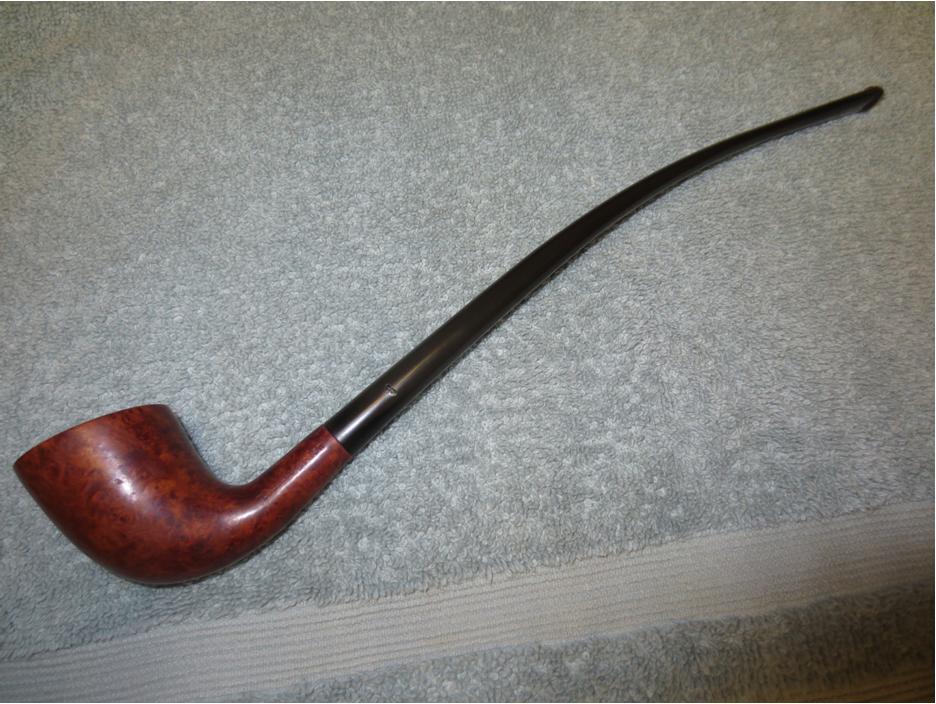
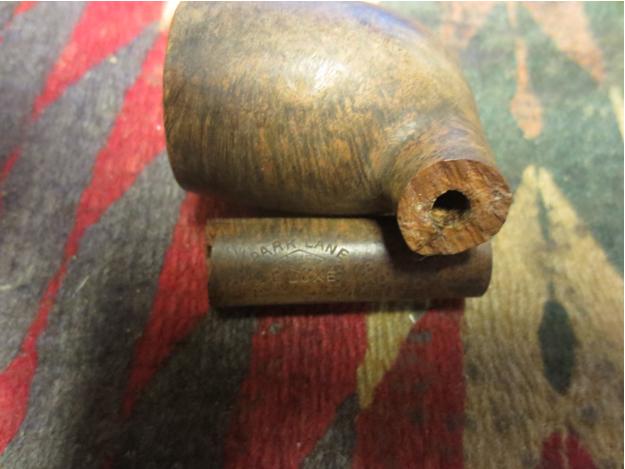
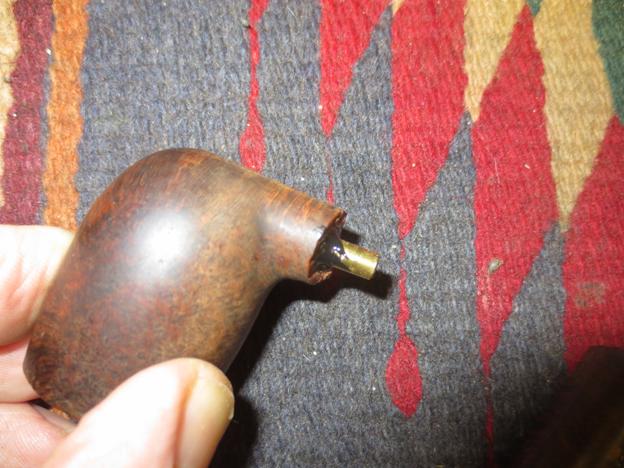
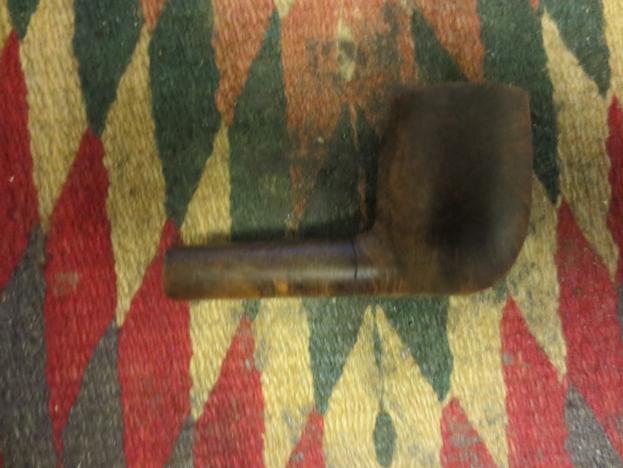
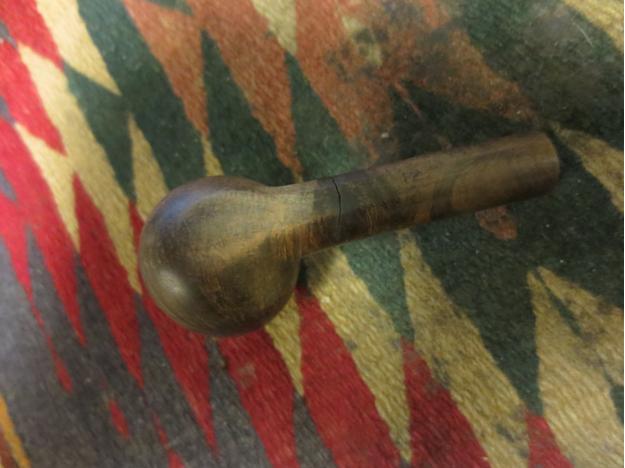
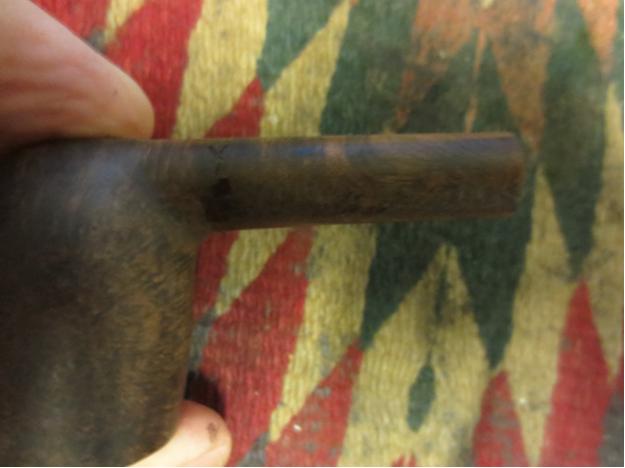
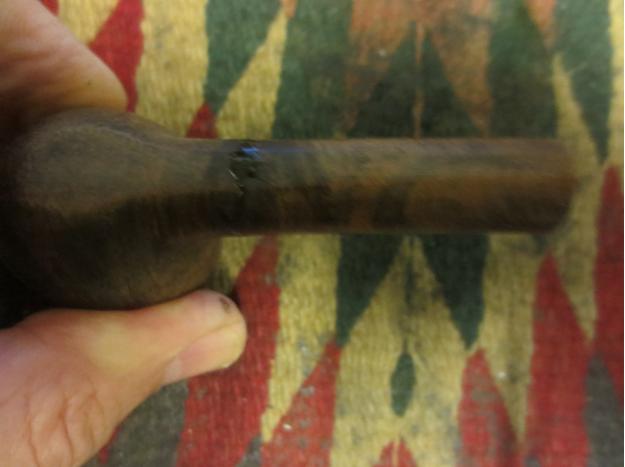
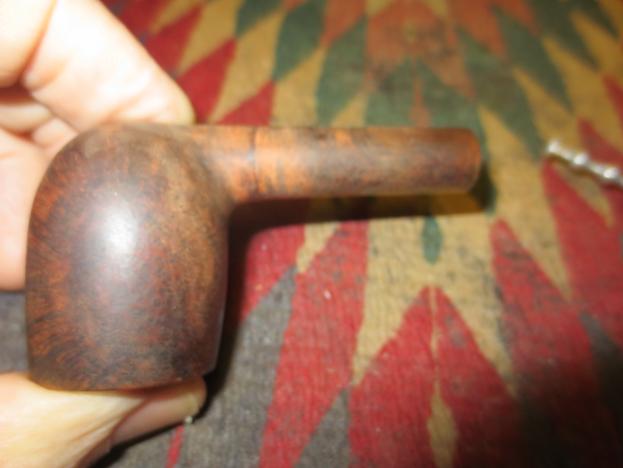
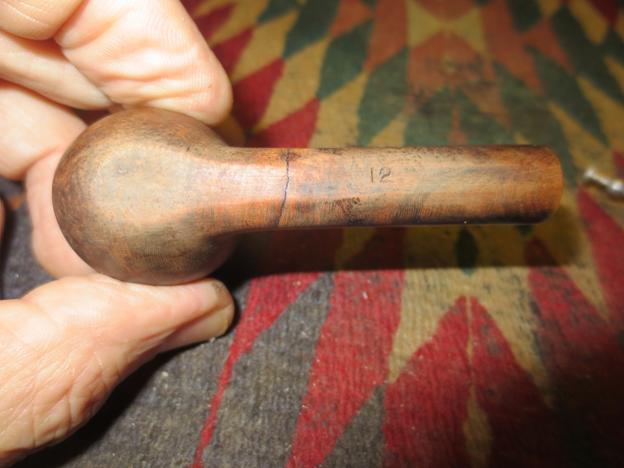
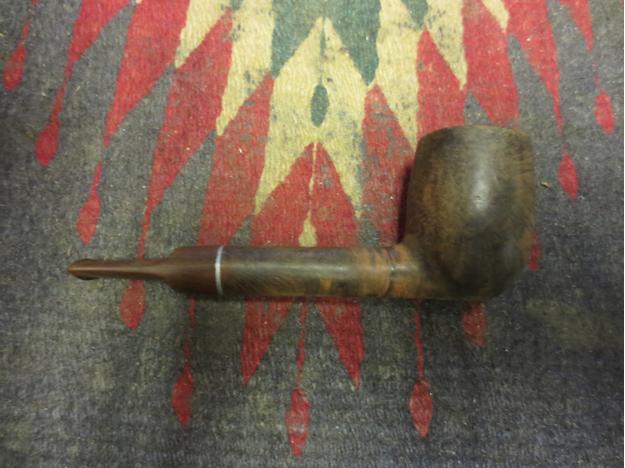
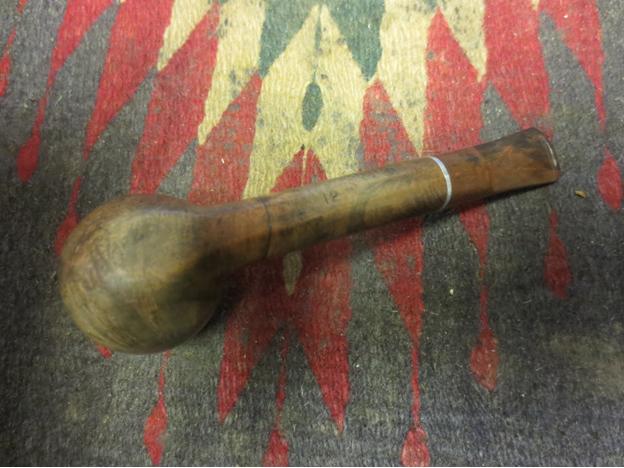
I came home from a two-week work trip to Berlin and Budapest to find a package from Troy Wilburn waiting for me. It contained a beautiful little LHS Park Lane De Luxe Lovat shape 12 that we had been speaking about before the trip. I am a sucker for LHS pipes and really like the Park Lane series as they have a quiet elegance about them. The shank on this one had broken near the bowl. Fortunately it was a clean break and not splintered or chipped. The repair on these has become pretty straight forward for me. I have learned a few tricks in joining the parts of a broken shank together from the Frankenpipes that I have crafted. That was their purpose and their schooling has paid off on quite a few of these shank repairs for me. The Park Lane had a Bakelite stem (at least I think it is Bakelite as it feels and acts different from Cumberland). The next two photos show the snapped shank.LHS1

LHS2 
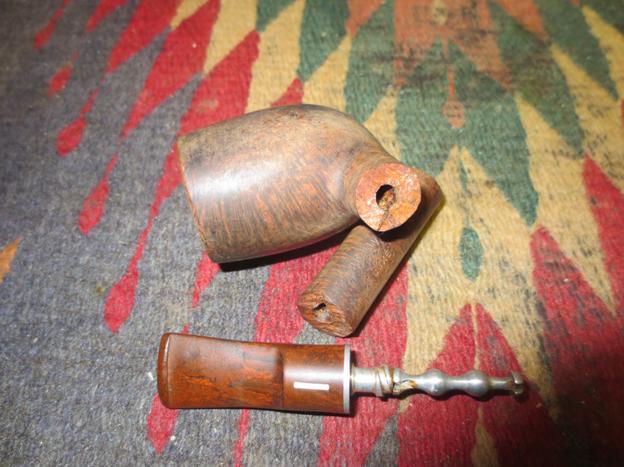
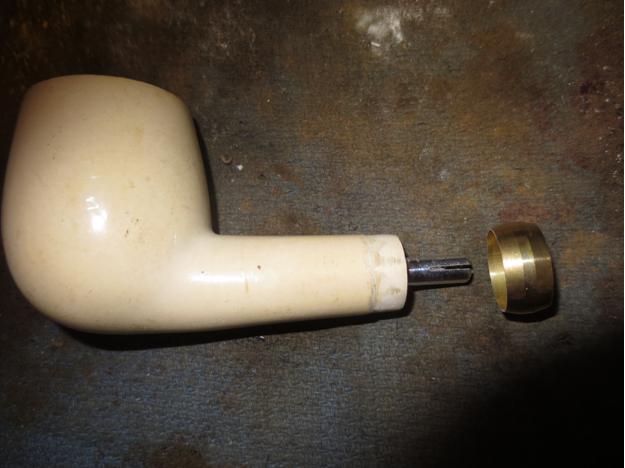
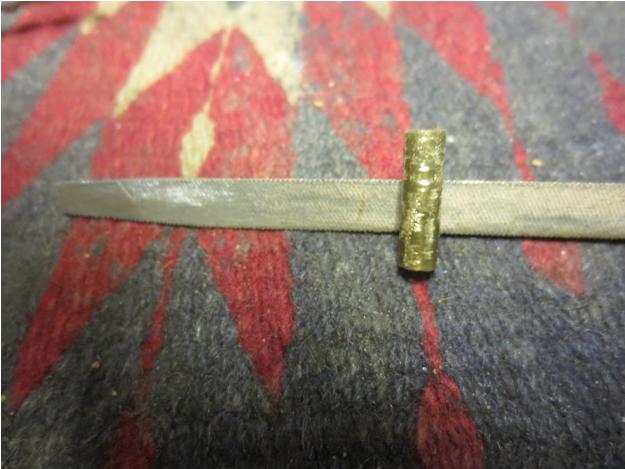
Just as I suspected I had a piece of brass tubing that was the perfect size and fit for the repair. I used a file to cut grooves into the tube and to roughen the surface for the glue to have something to hold onto when I glued it in the shank.LHS3

LHS4 
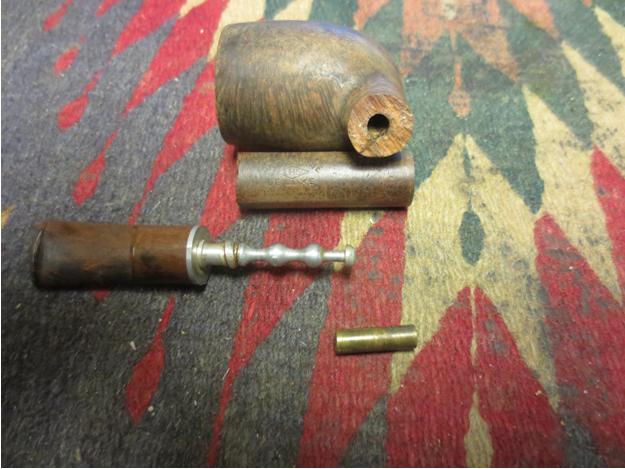
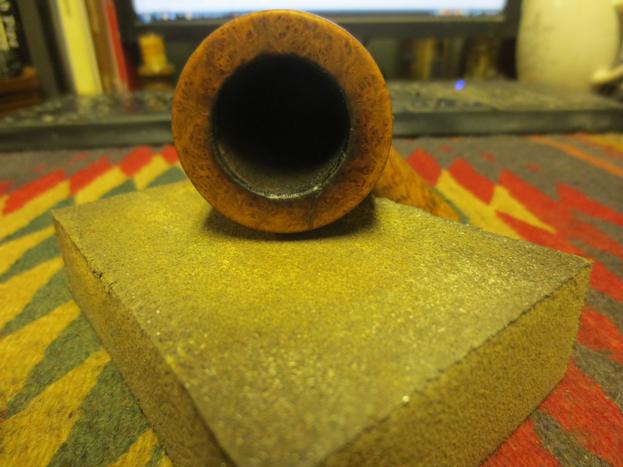
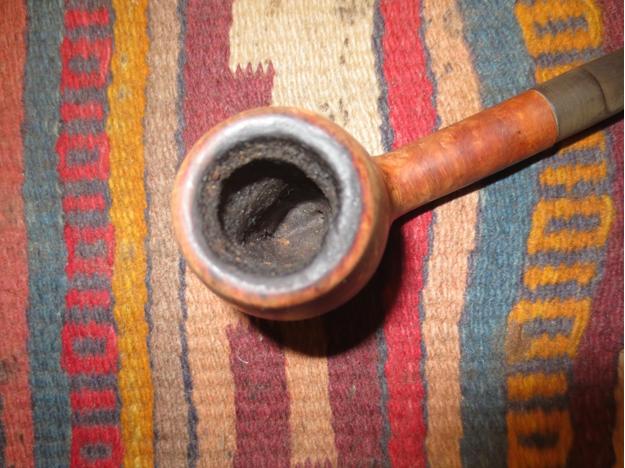
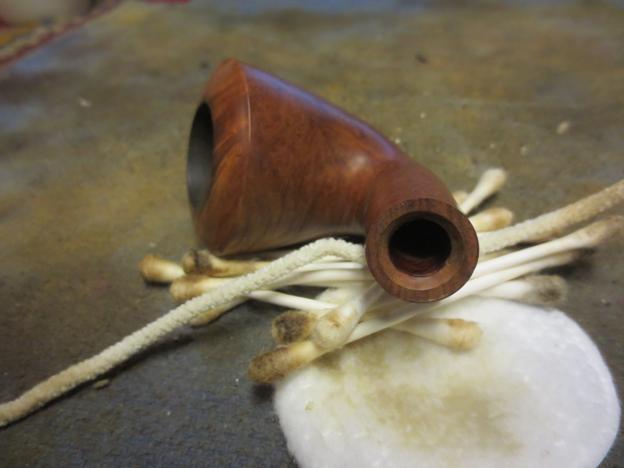
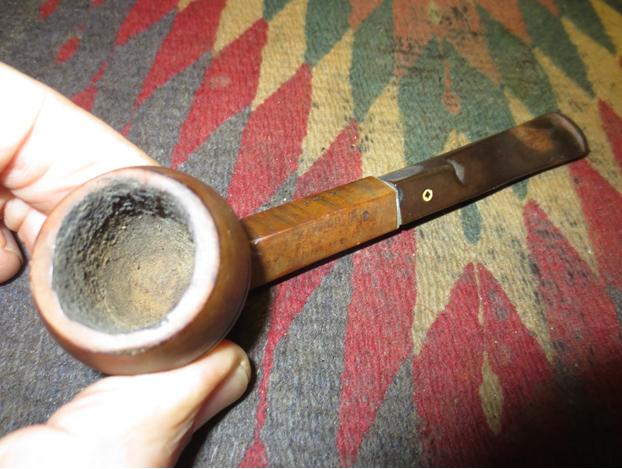
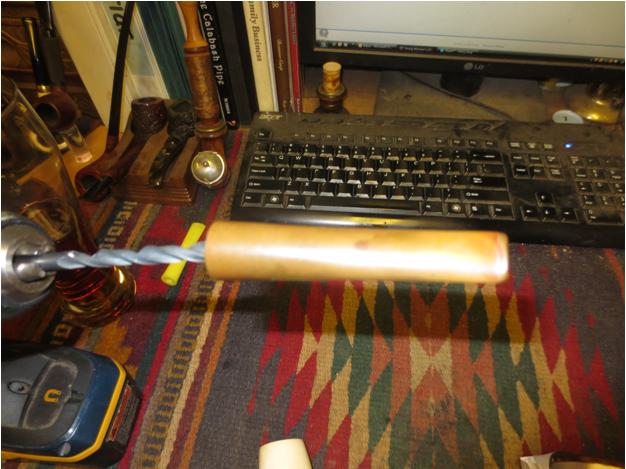
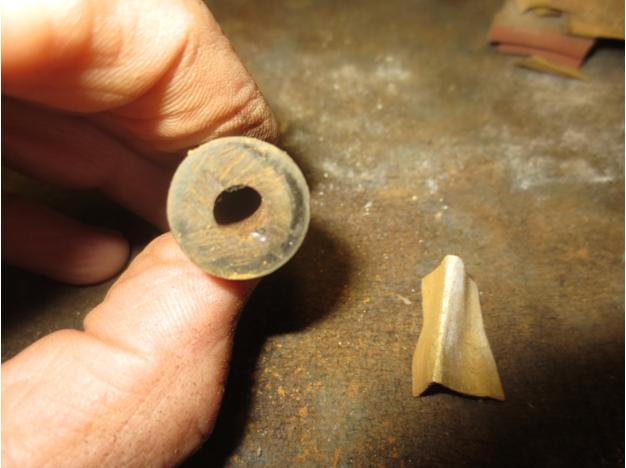
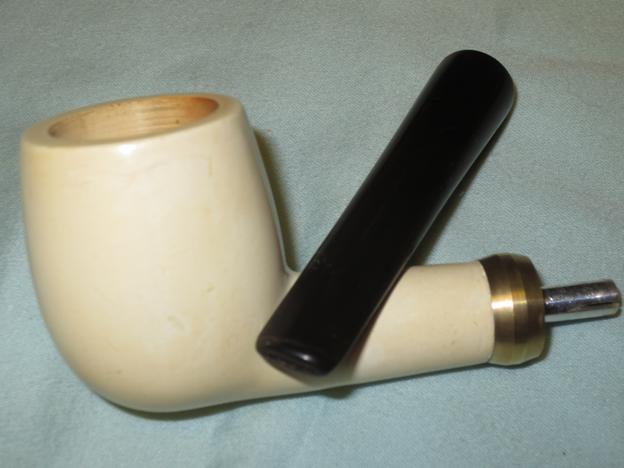
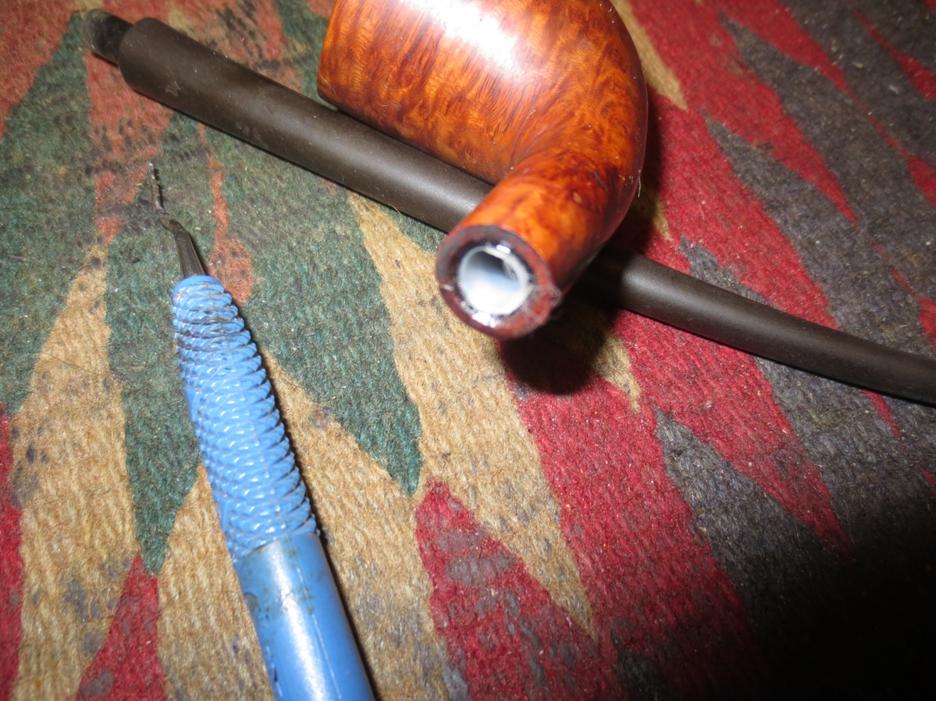
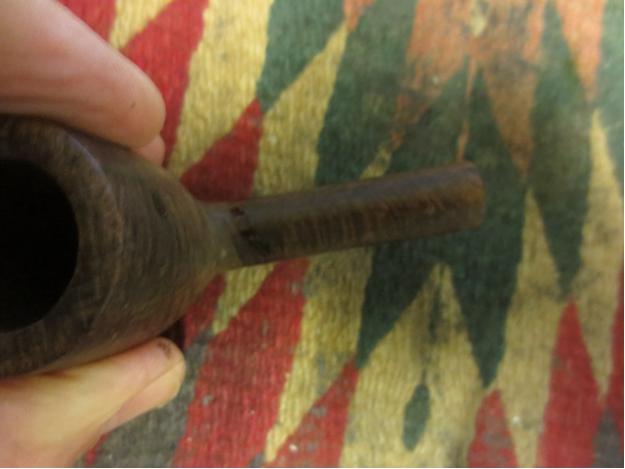
I cleaned out the airway on both sides of the broken shank to remove debris and to give a good clean surface for the glue to bond with. To check the size and the fit of the tube in the two parts of the shank I inserted it in the bowl end of the break and then twisted the shank end onto it. The fit was perfect and once glued the repair should be solid.LHS5 
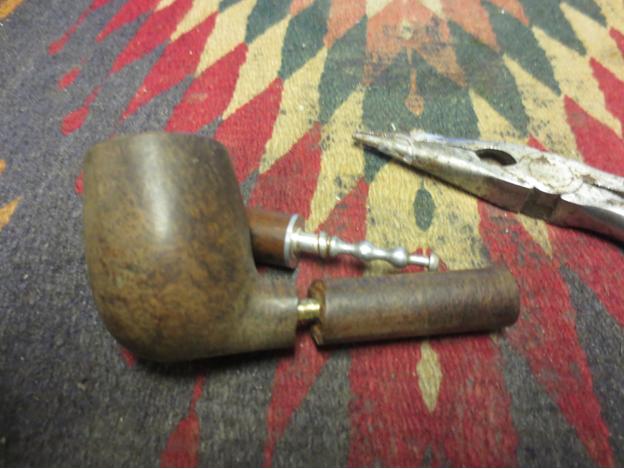
I mixed some epoxy and applied it to the metal tube being careful to not get any inside of the airway. I inserted it into the bowl side of the break. I left slightly over half of the tube extending so that when I put the shank piece in place there would be enough of the metal tube to strengthen the repair on that end.LHS6

LHS7 
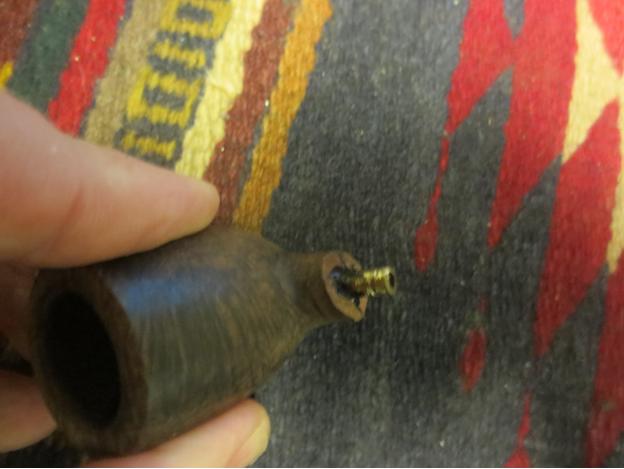
When the epoxy set and the tube was solidly in place I painted some more of the epoxy on the opposite end of the tube and a little on the briar surface of each side of the break. I have learned not to overdo the glue on the briar as it is a pain to remove from the wood when it dries. I twisted the shank piece in place, lined it up and pressed it in place against the bowl side. I held it firmly until the quick set epoxy set and that portion of the repair was finished.LHS8

LHS9

LHS10

LHS11 
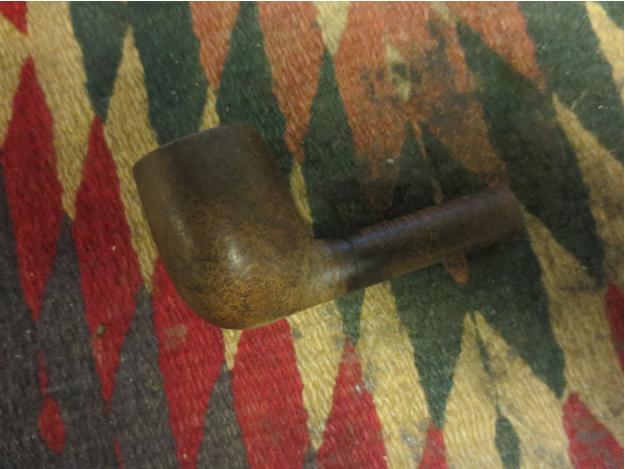
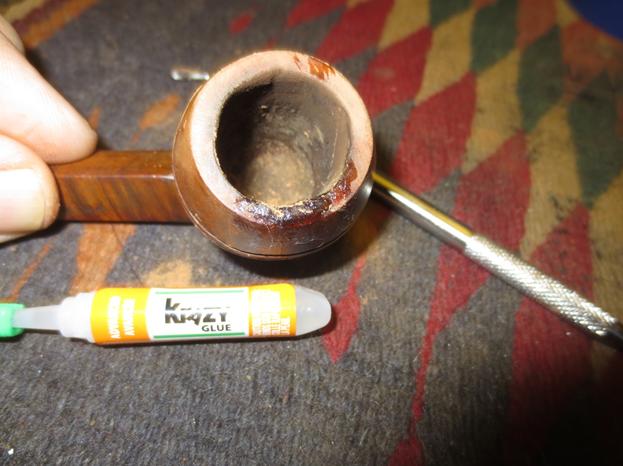
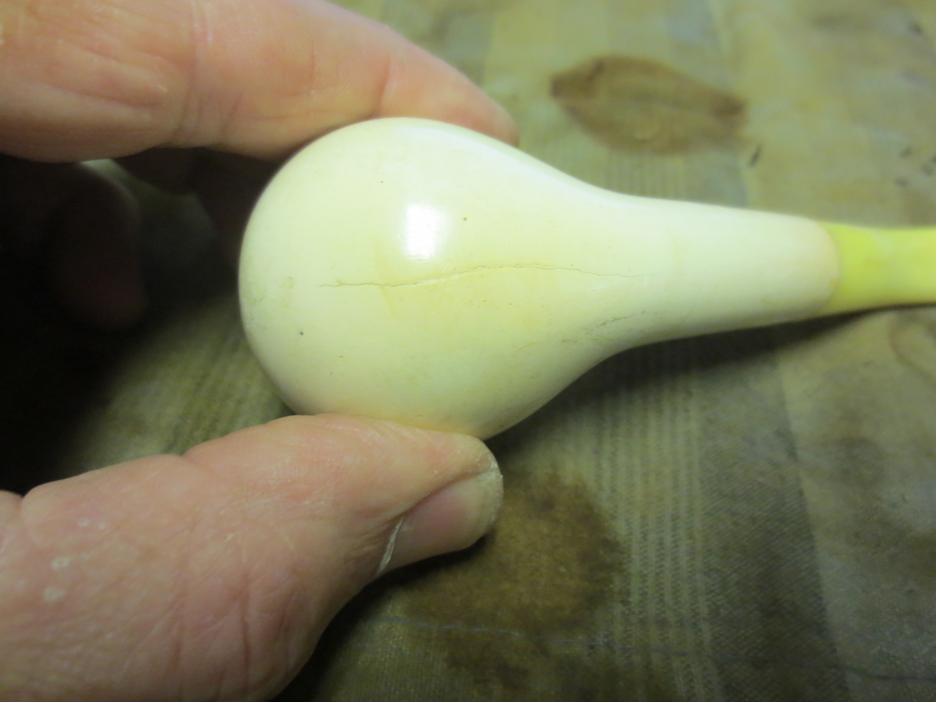
I pushed some fine briar dust into the small space that remained around the surface of the crack and then filled it with clear super glue. I applied it with the point of a dental pick so as not to get too much glue on the briar.LHS12

LHS13

LHS14

LHS15 
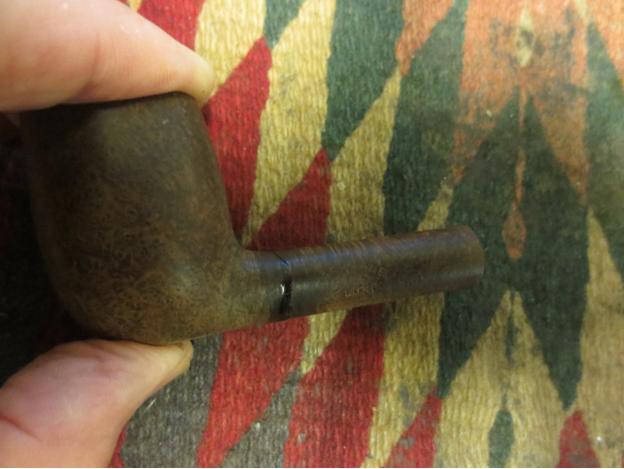
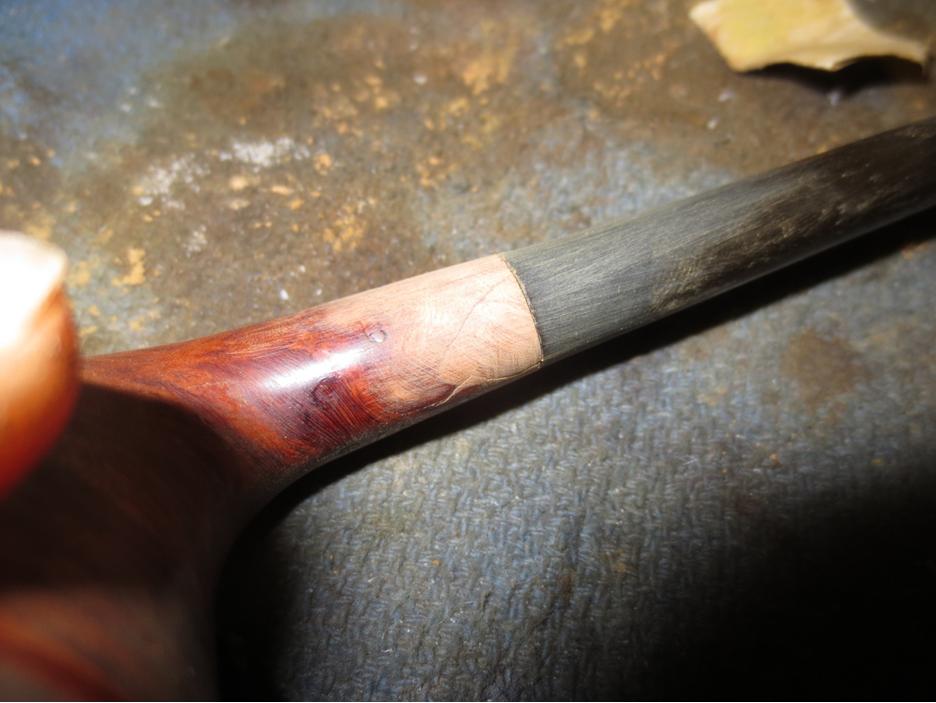
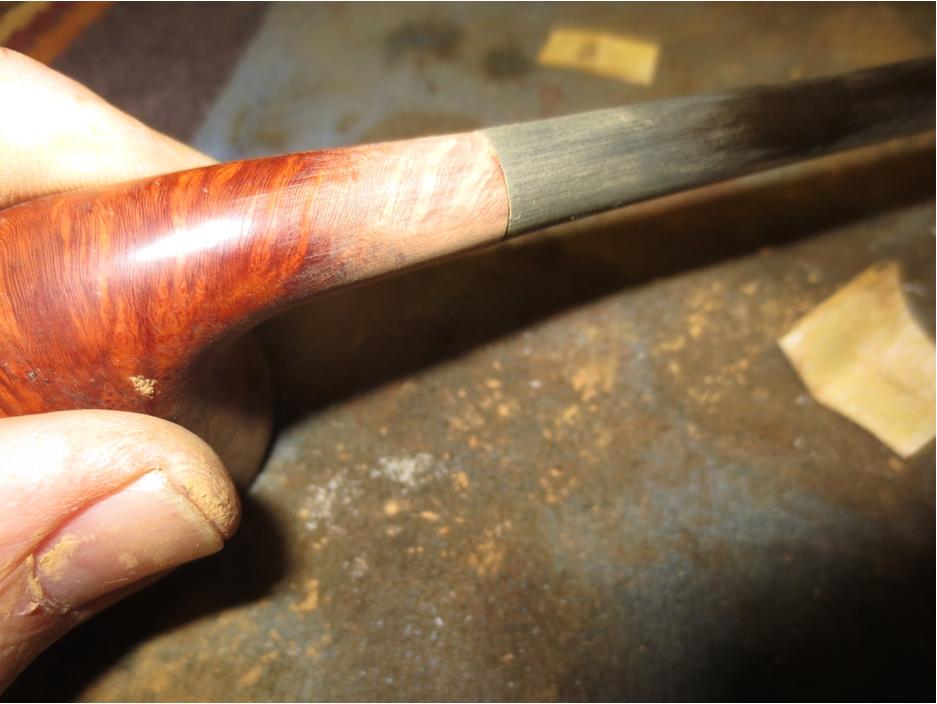
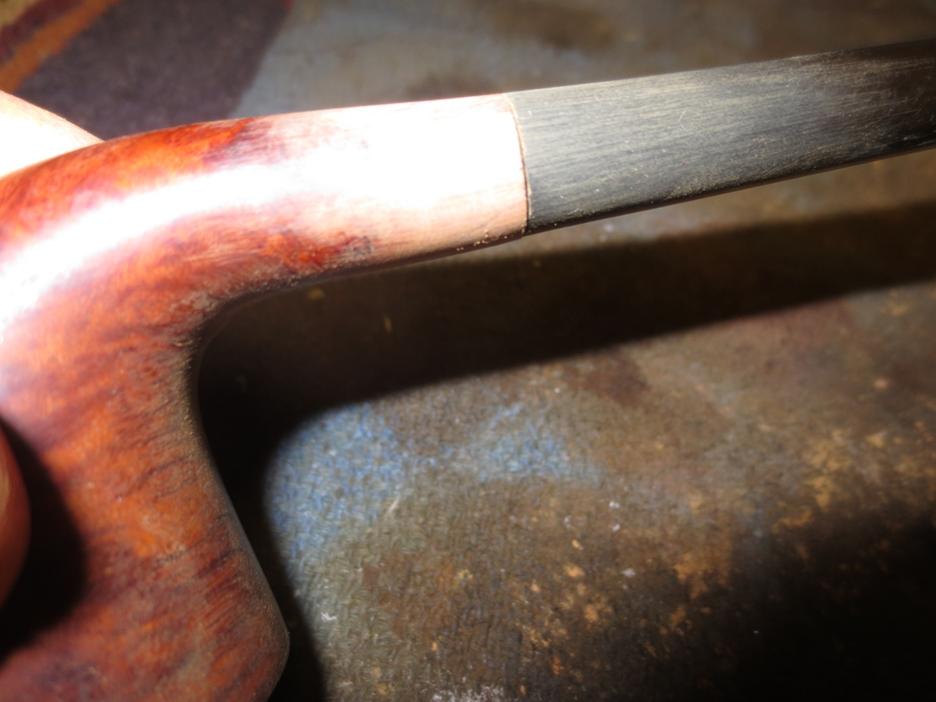
I sanded the repaired area carefully with a folded piece of worn 220 grit sandpaper to remove the excess glue and briar dust from the patch. Then I sanded with a fine grit sanding sponge to remove the scratches. I used a medium brown coloured stain pen to touch up the sanded area around the patch. I cleaned out the shank with a pipe cleaner to make sure that there was no glue in the tube.LHS16

LHS17

LHS18

LHS19 
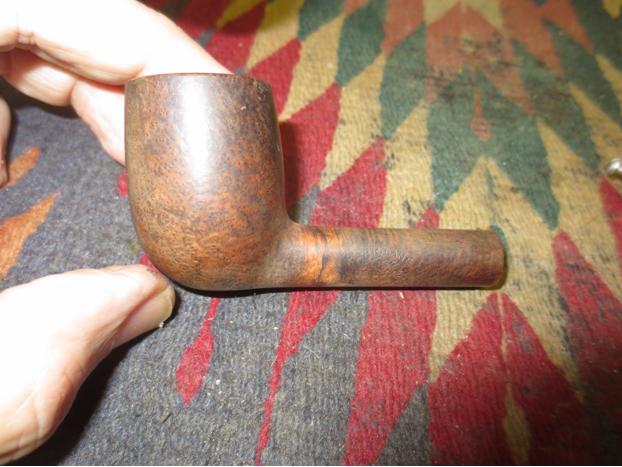
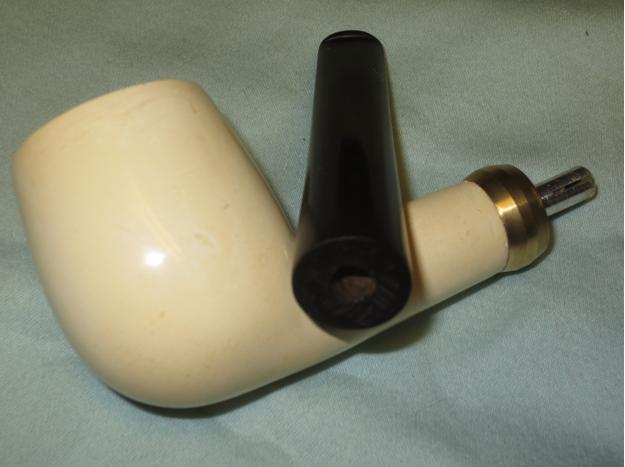
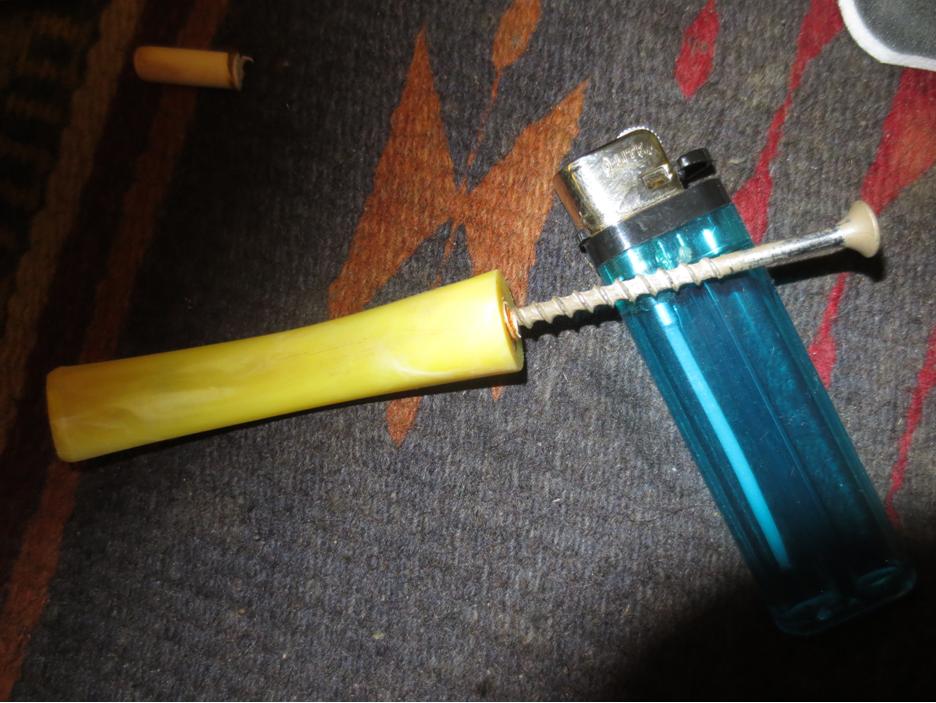
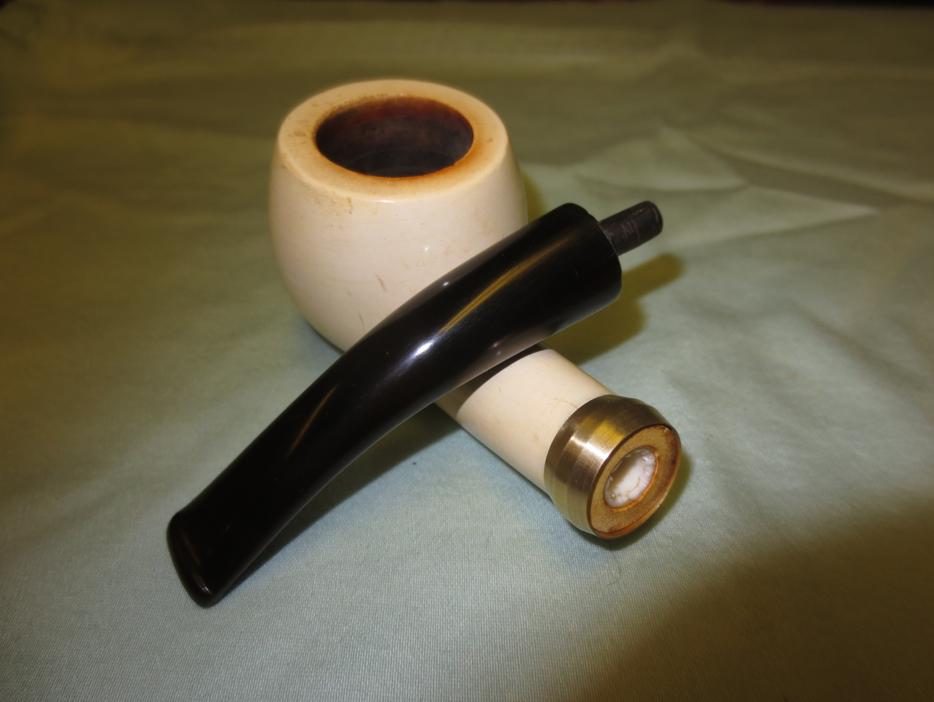
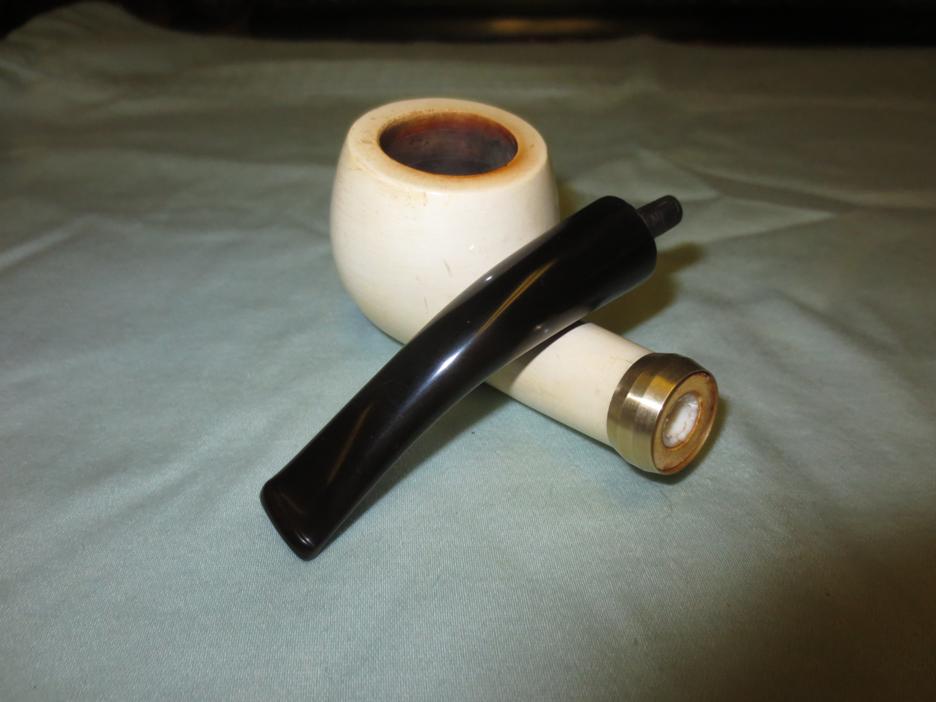
The stem was slightly under clocked. I heated the stinger with a lighter until the glue in the stem softened and then carefully screwed it into the shank while holding the shank. I was able to align it perfectly with the shank.LHS20 
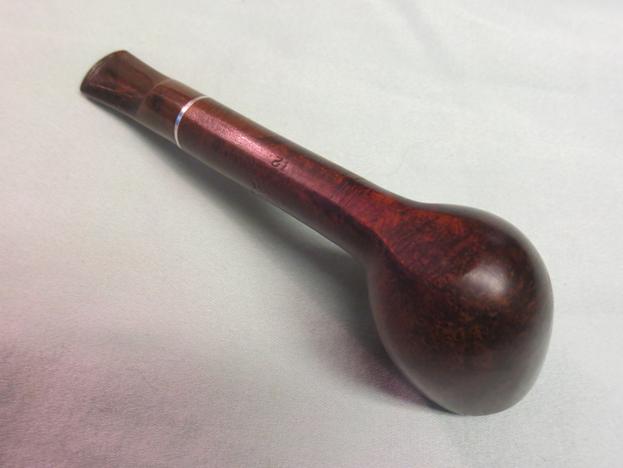
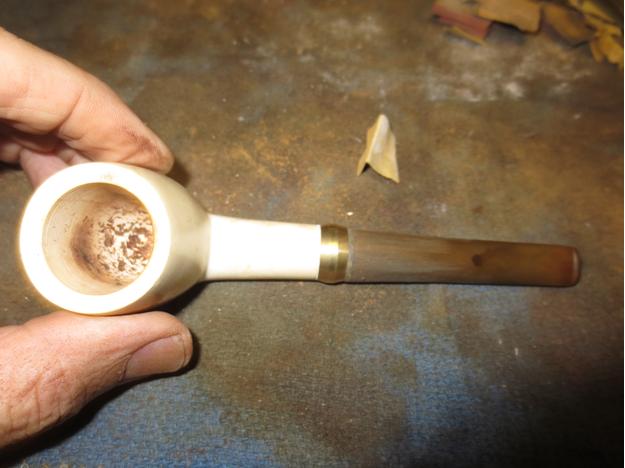
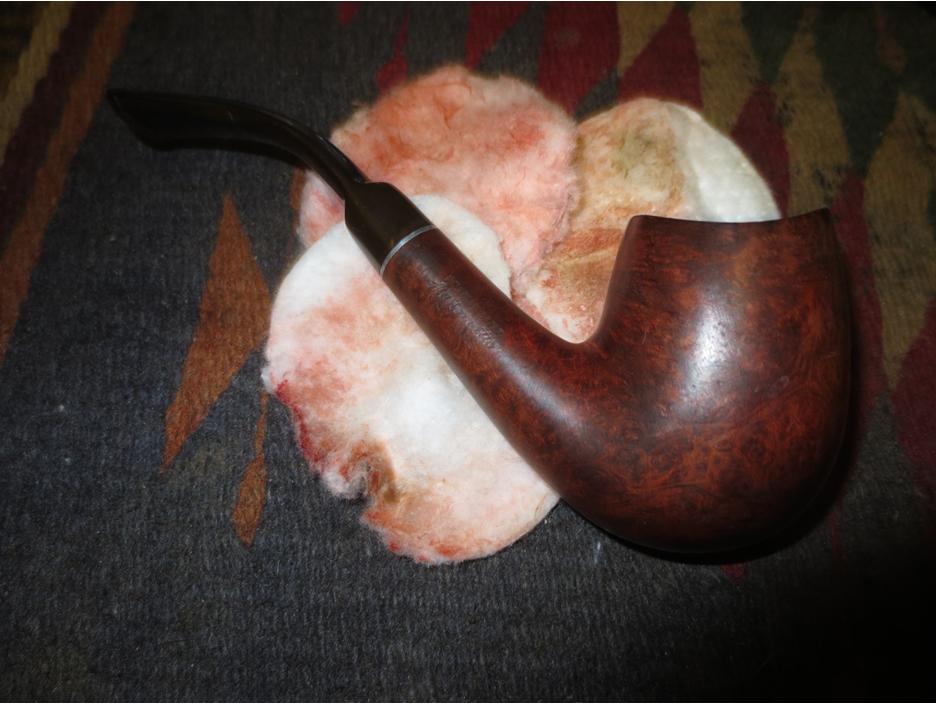
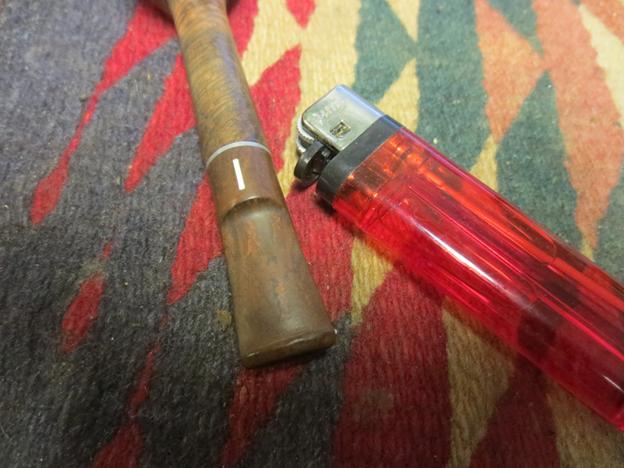
With that completed, the repairs to the pipe were finished. The stem was in the right position. The cracked shank repaired and strengthened with an inner tube. All that remained was to clean up the surface of the pipe and give it a coat of stain to blend in the sanded areas around the repairs. I also needed to do some work on the stem with micromesh to raise the shine and polish the Bakelite. (I rarely use the buffer on these older LHS stems as I do not want to risk it. I would rather polish them by hand than damage them.)LHS21

LHS22 
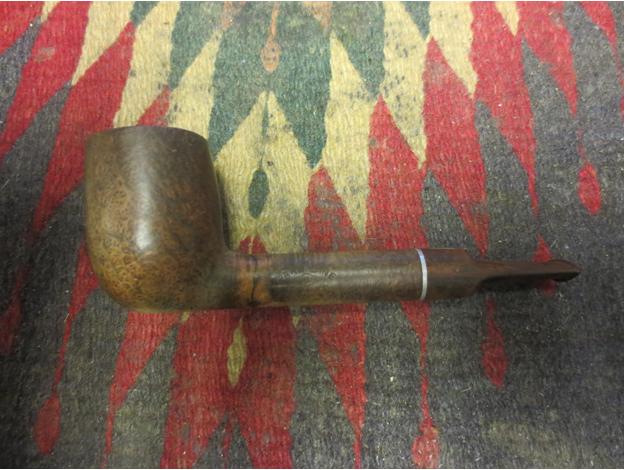
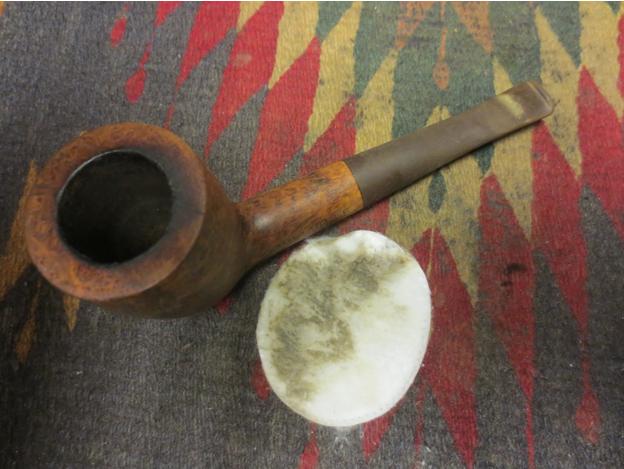
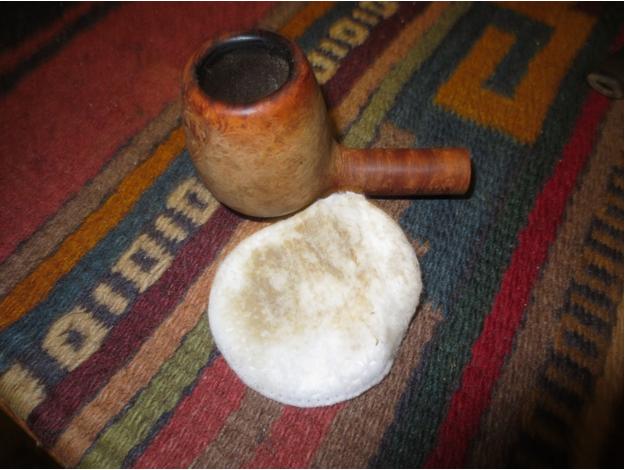
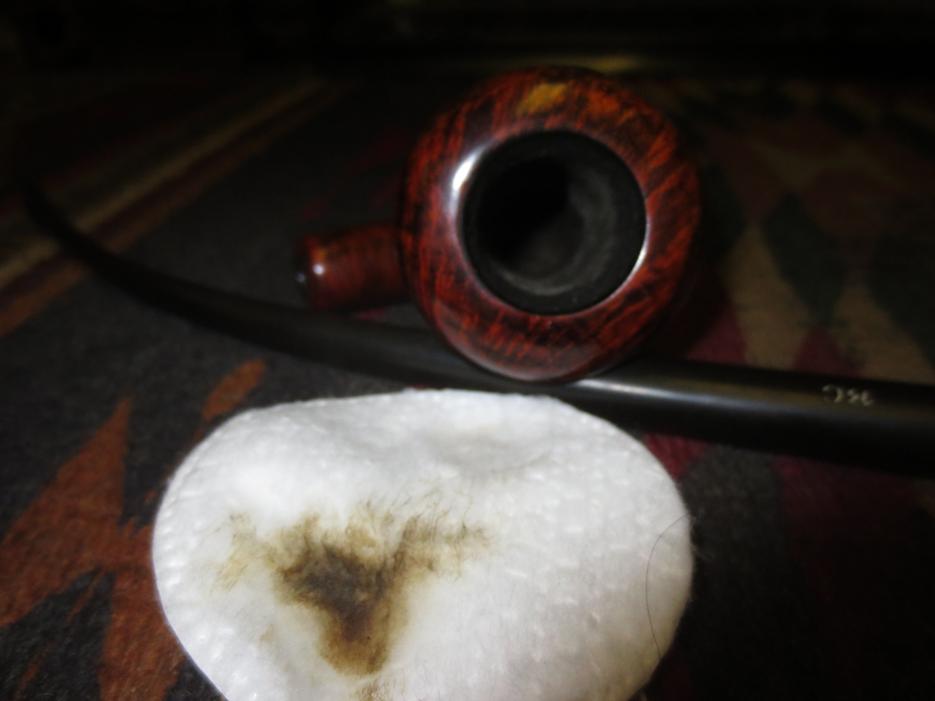
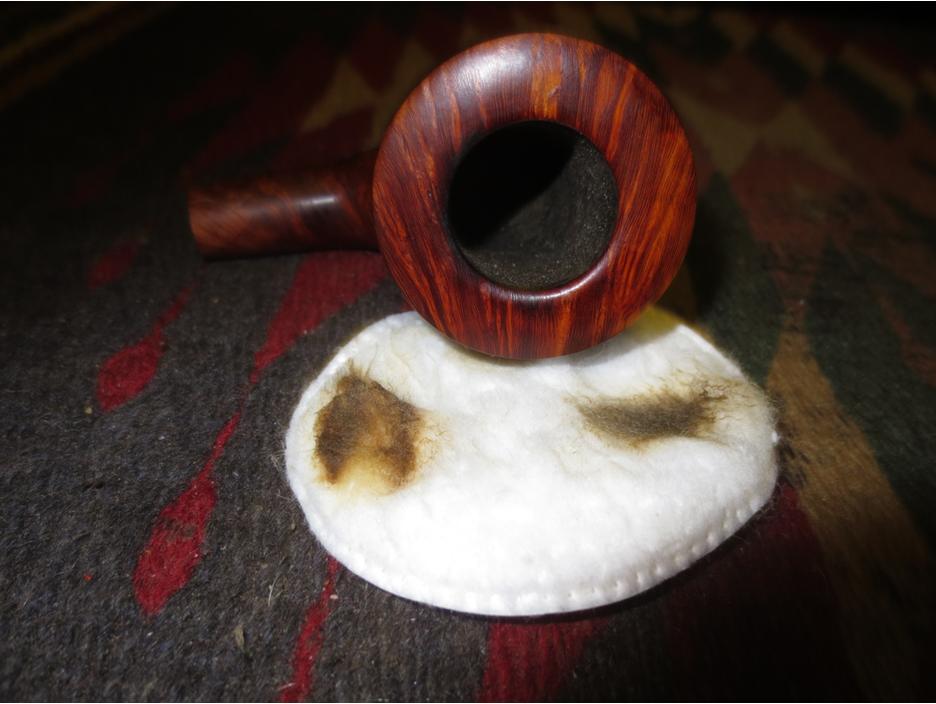
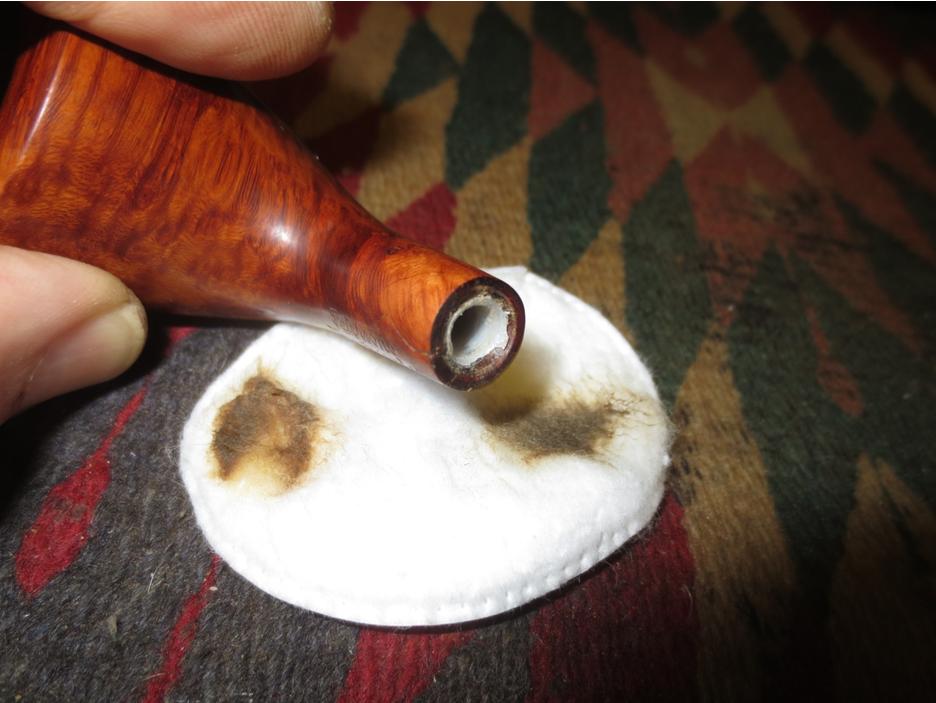
I wiped the bowl and shank down with alcohol on a cotton pad to remove the grit and grime on the surface of the bowl and to remove the remaining finish.LHS23

LHS24 
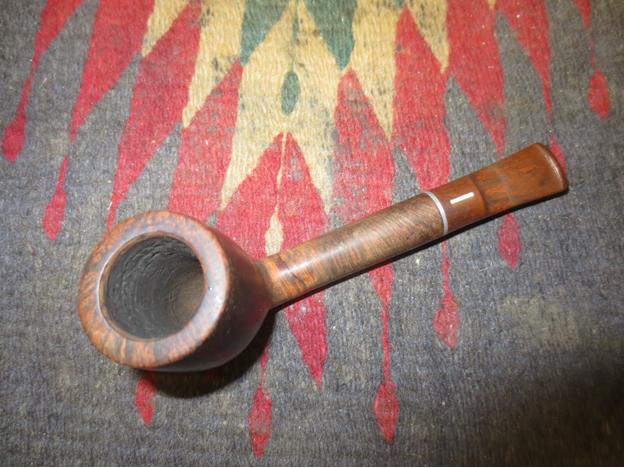
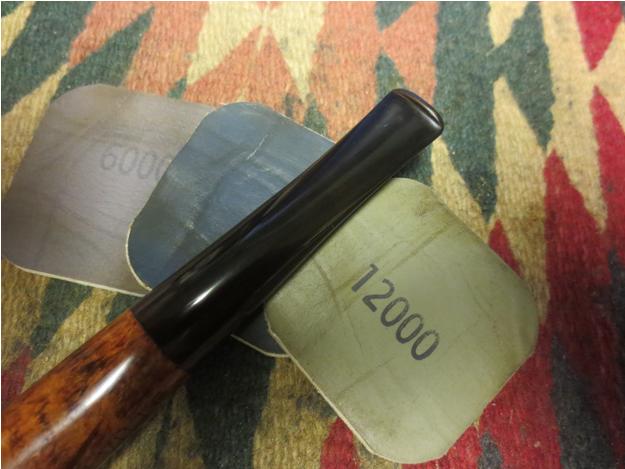
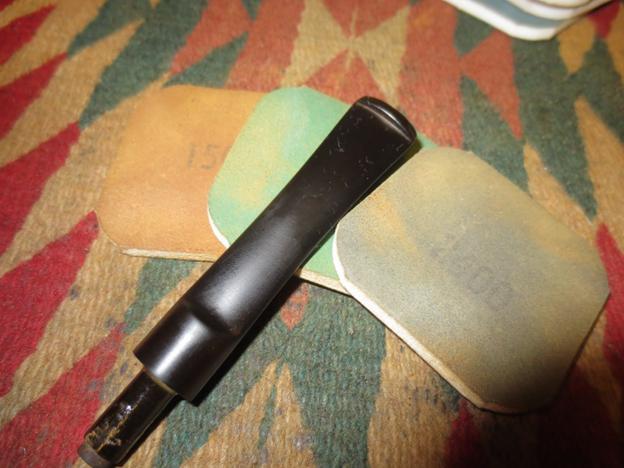
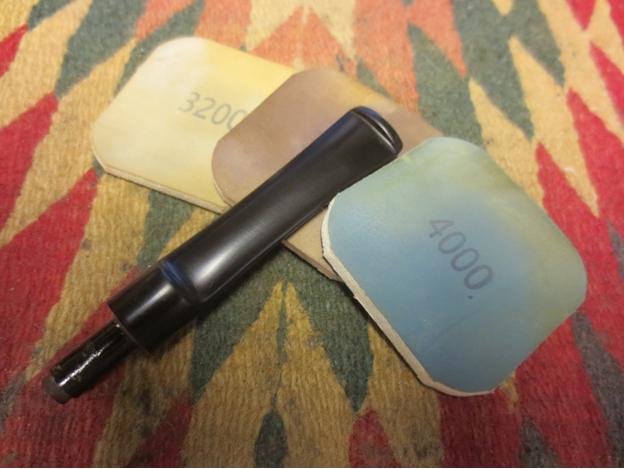
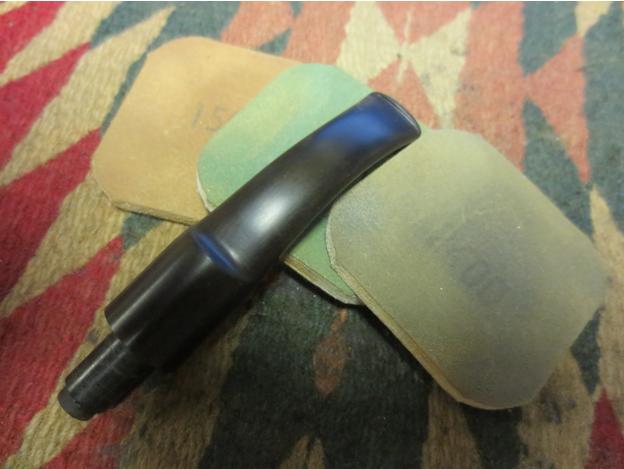
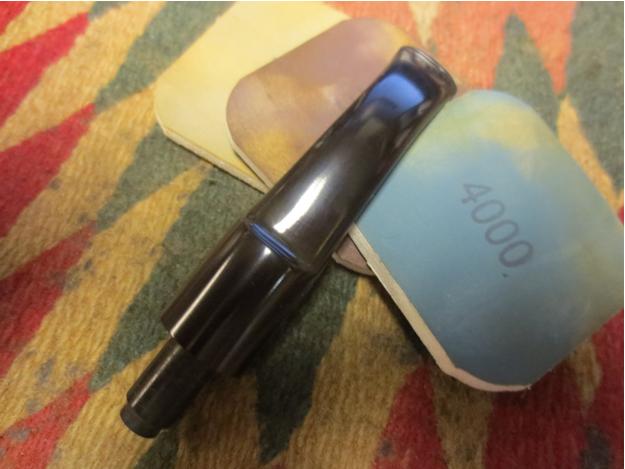
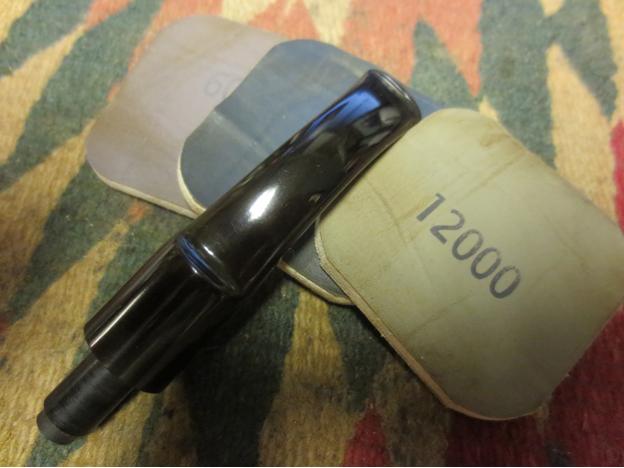
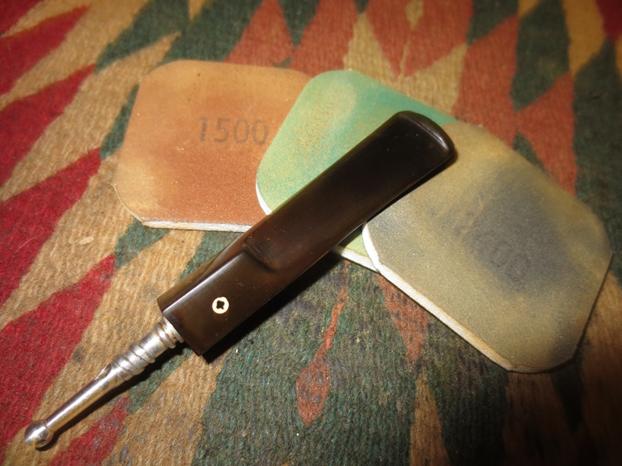
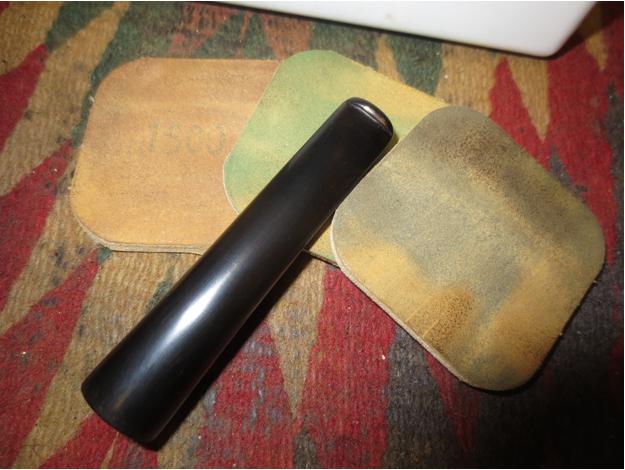
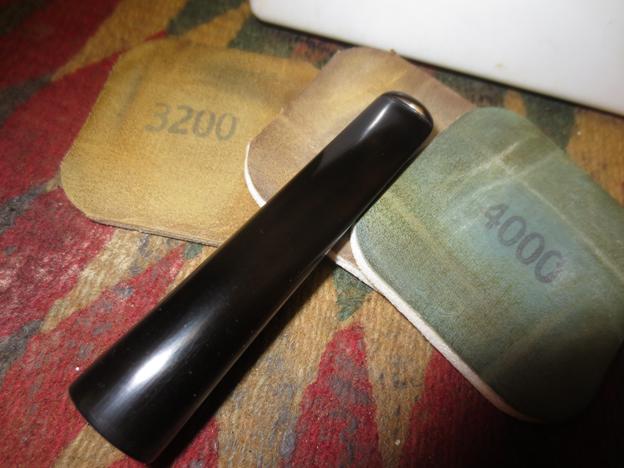
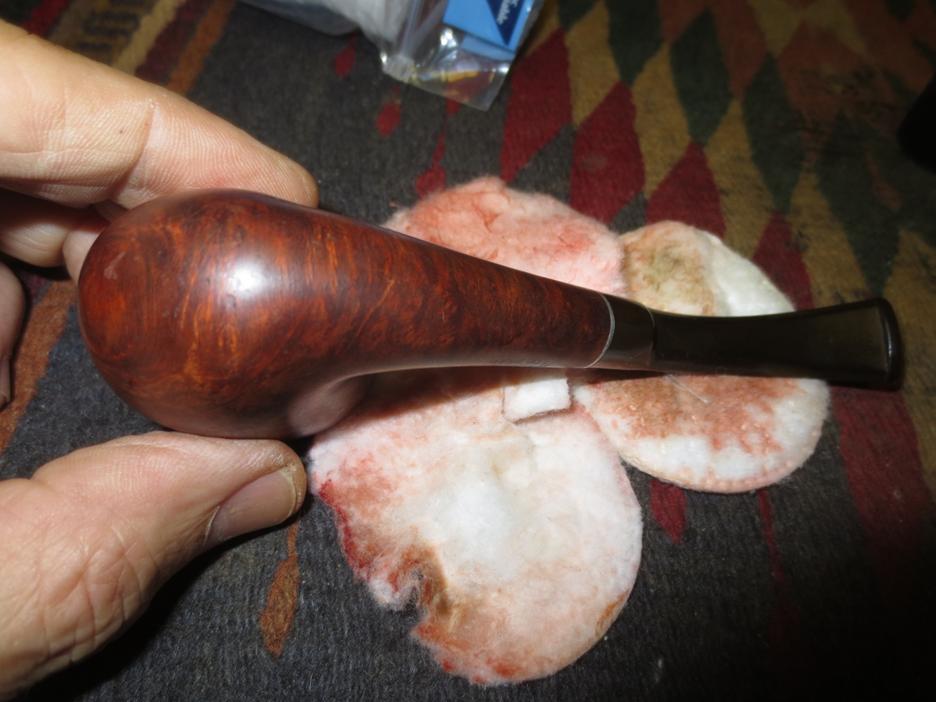
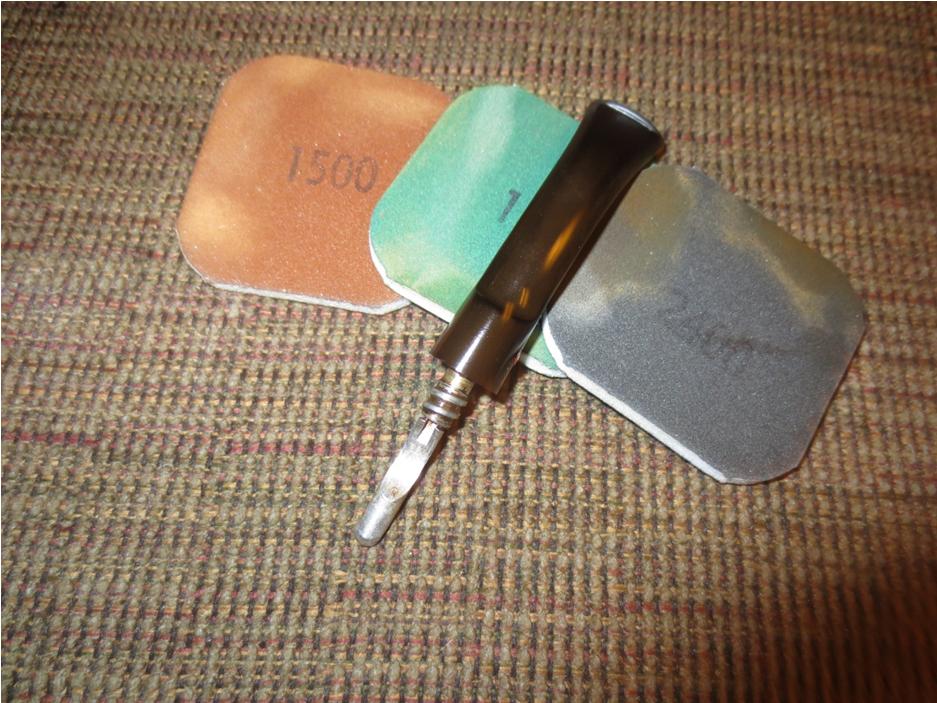
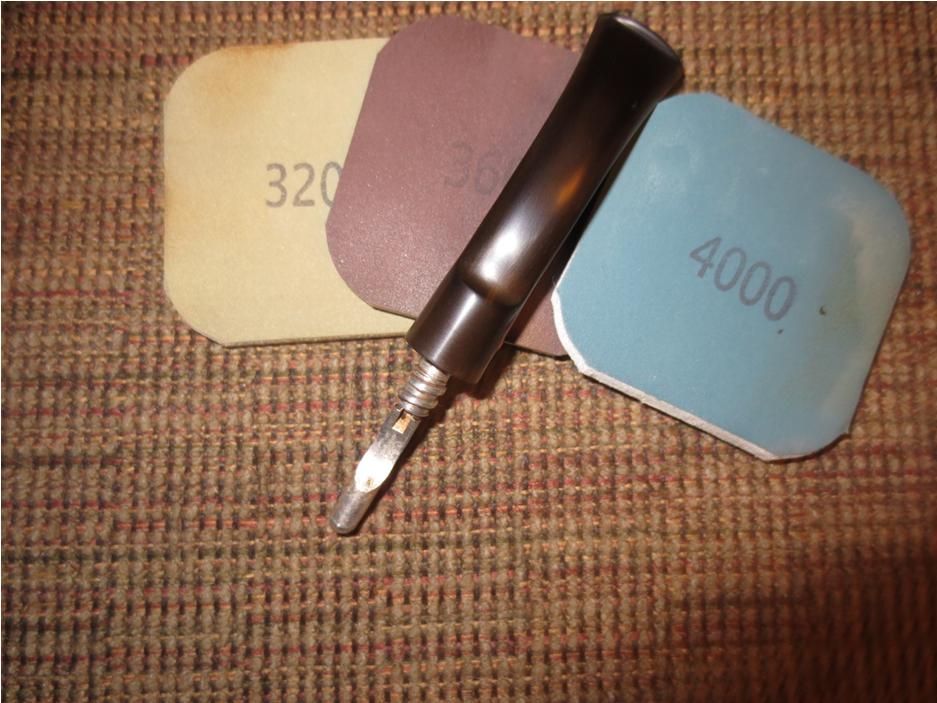
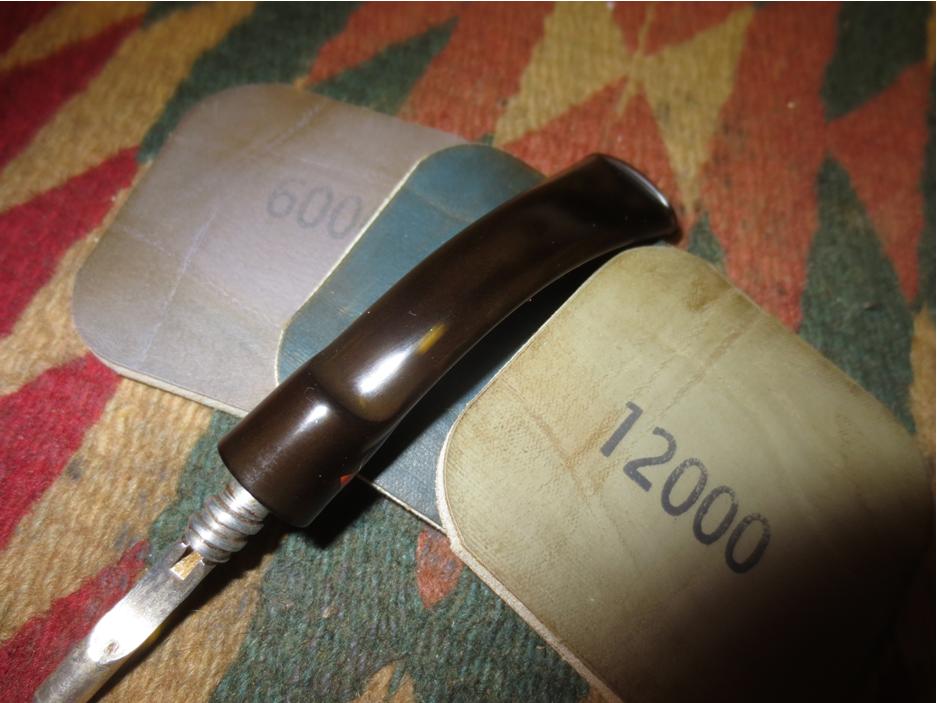
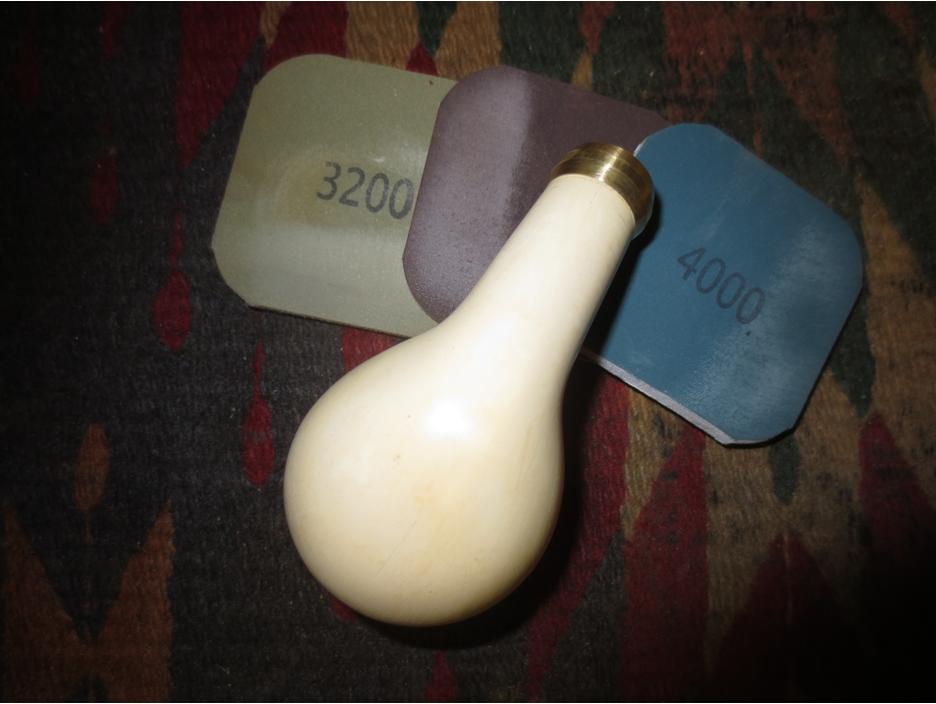
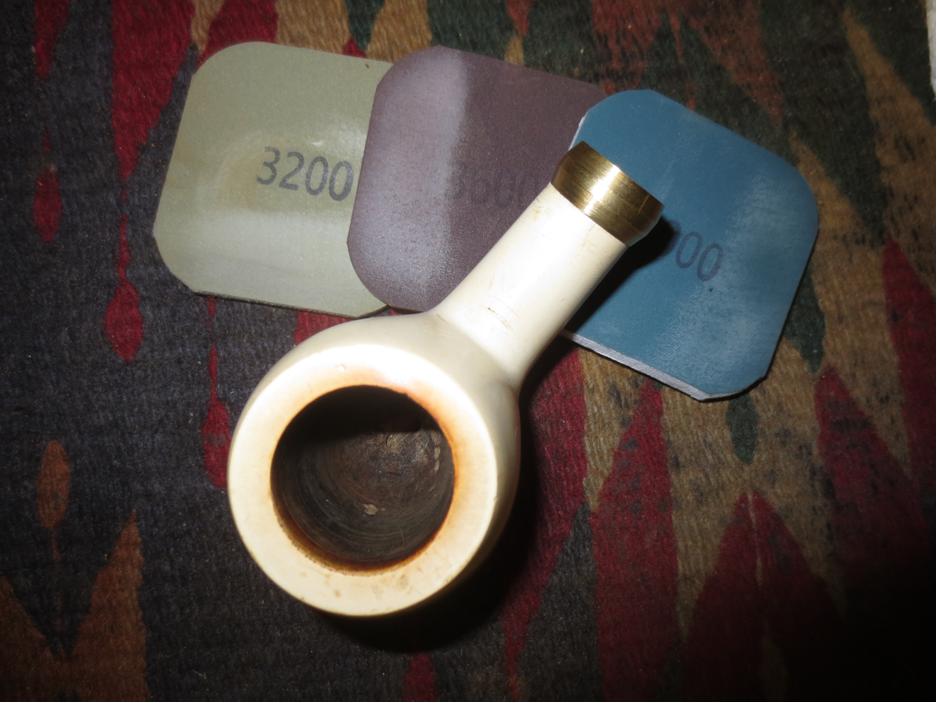
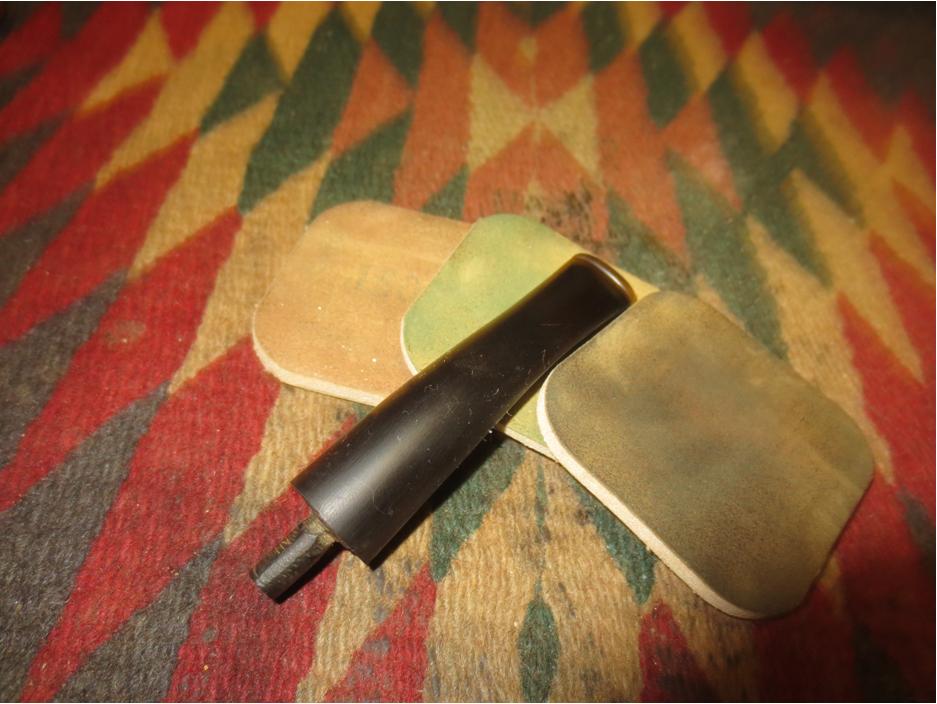
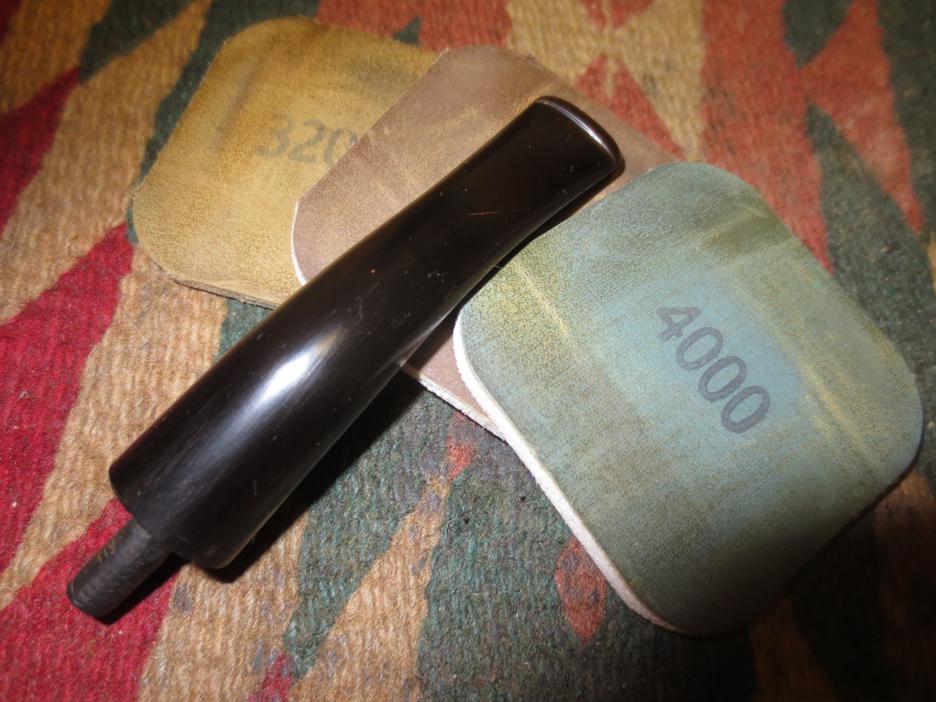
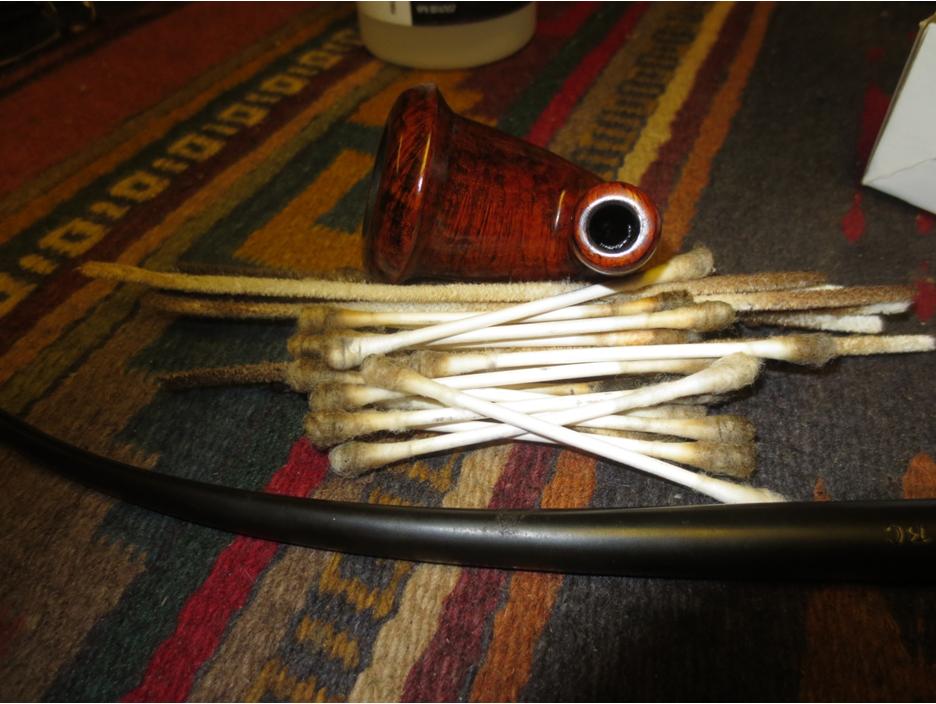
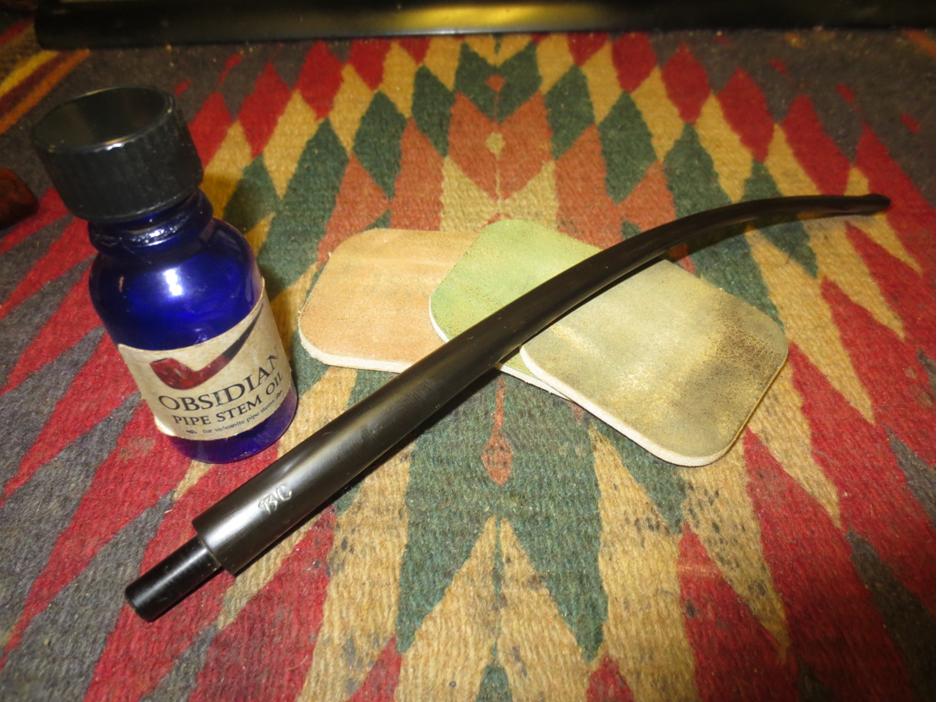
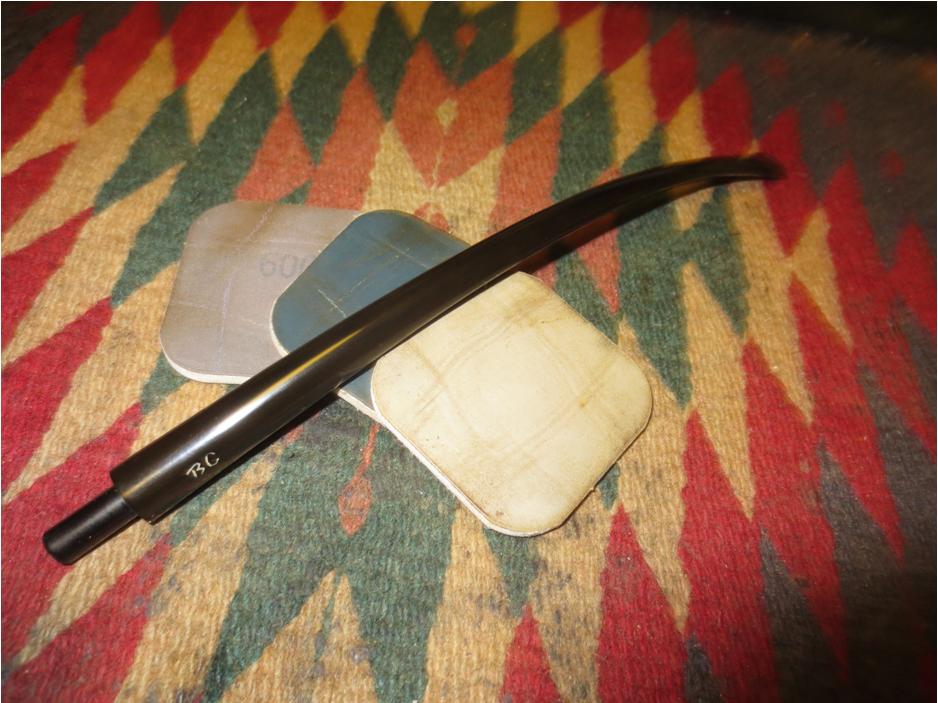
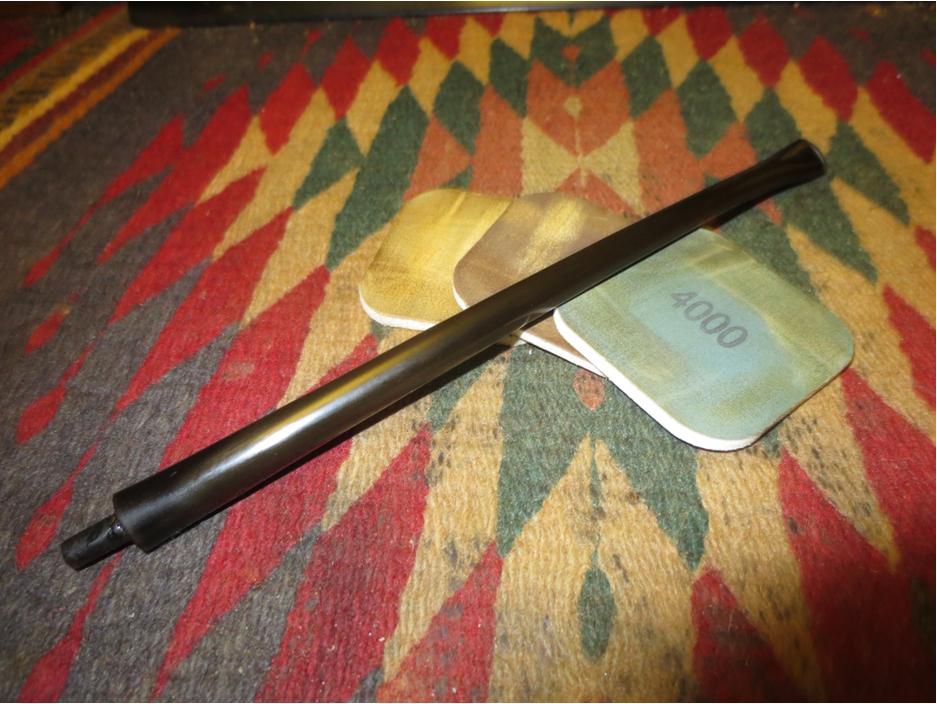
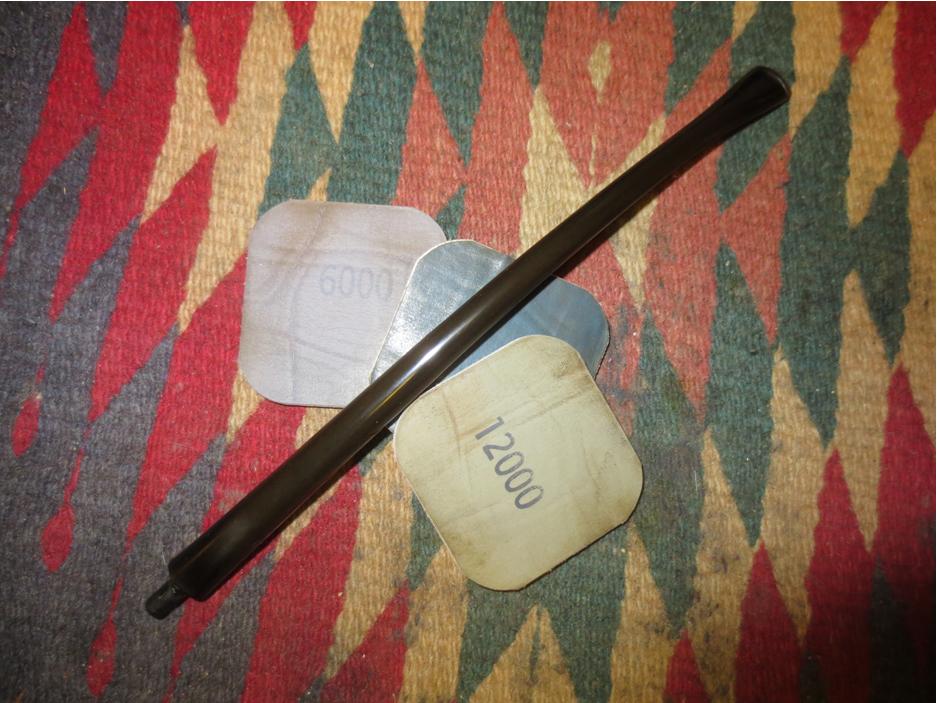
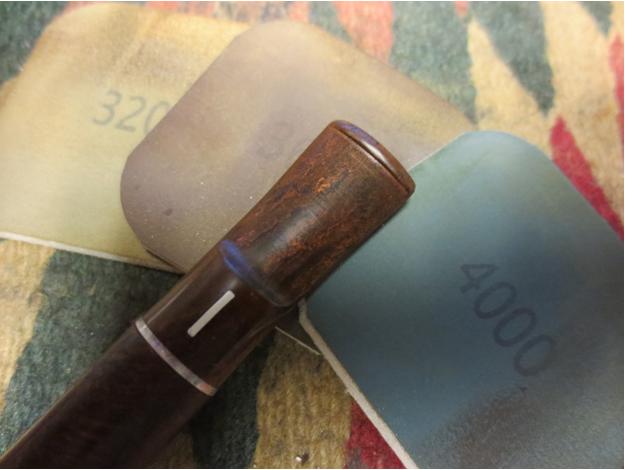
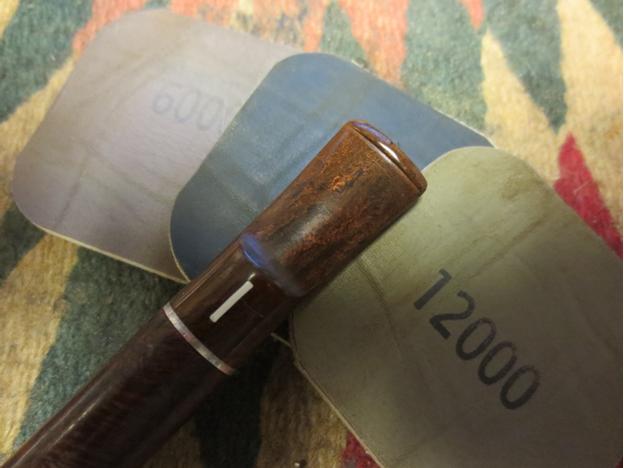
I cleaned off the tars on the stinger with 0000 steel wool. I wet sanded the stem with 1500-2400 grit micromesh sanding pads and then rubbed it down with Obsidian Oil. I continued to dry sand the stem with 3200-4000 grit pads and then gave it another coat of oil. I finished with the final three grits of micromesh – 6000-12000 – and gave it a final coat of Obsidian Oil. Once the oil dried I gave the stem some coats of Paragon Wax and hand buffed it with a microfibre cloth.LHS25

LHS26

LHS27 
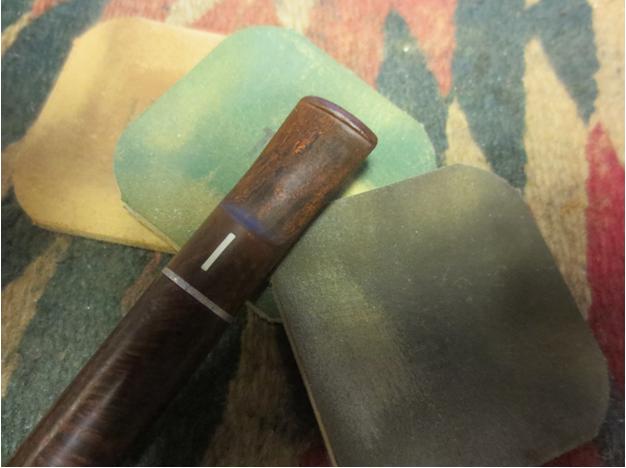
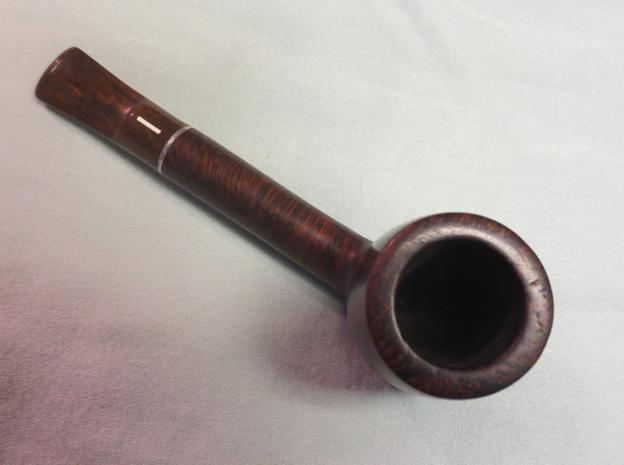
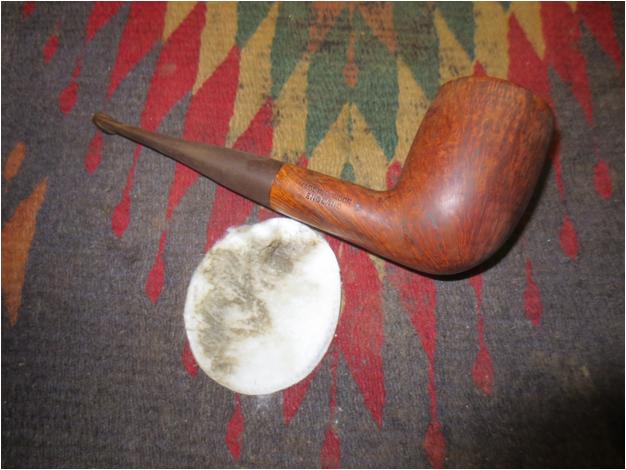
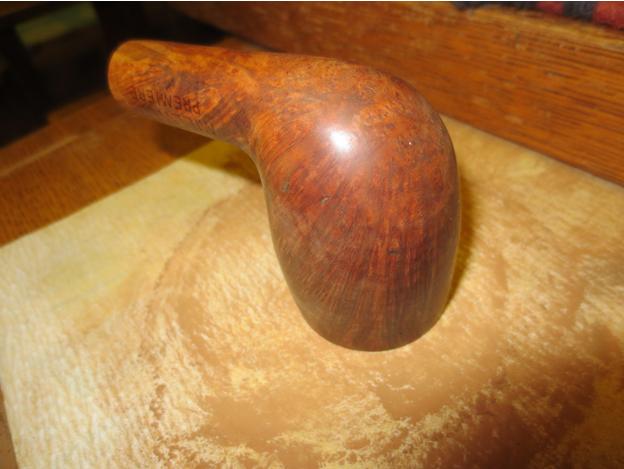
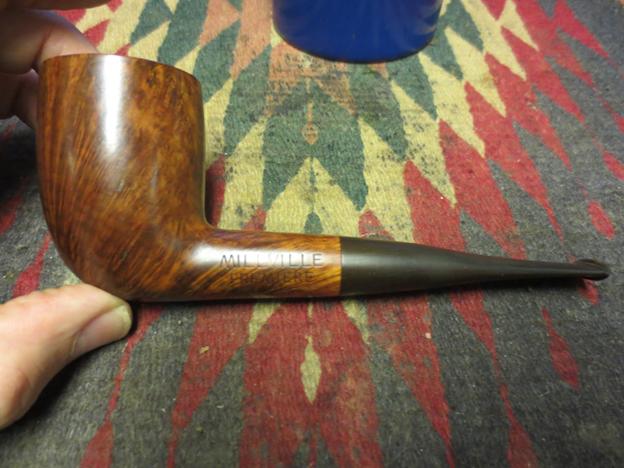
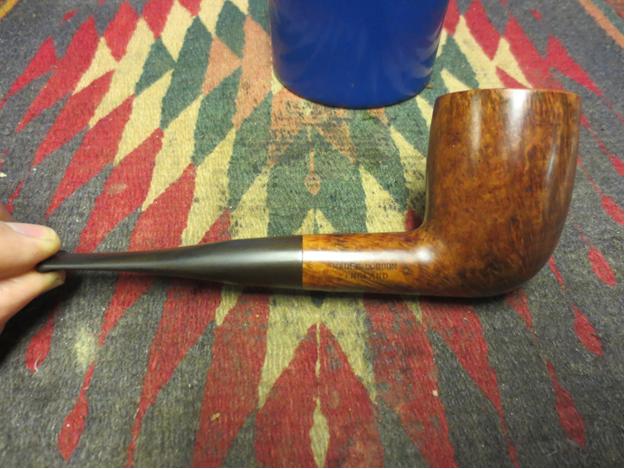
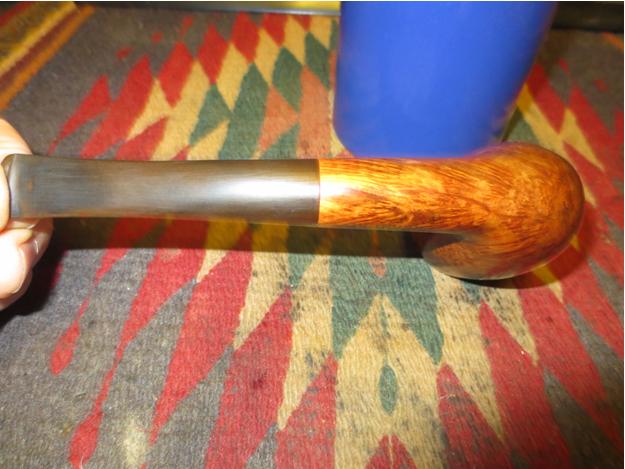
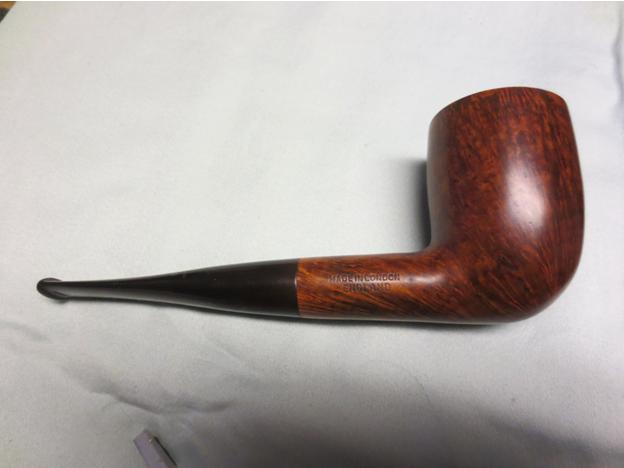
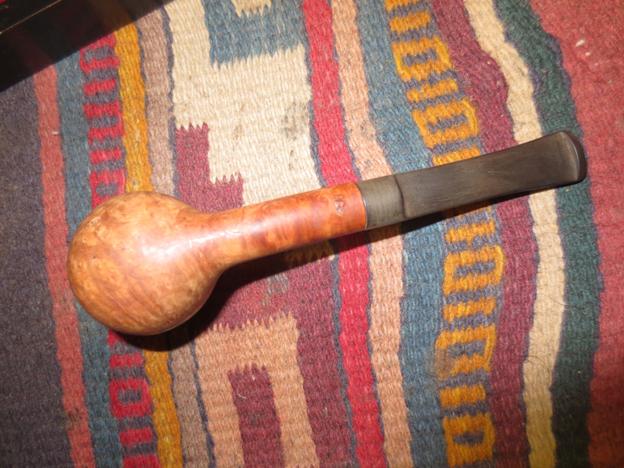
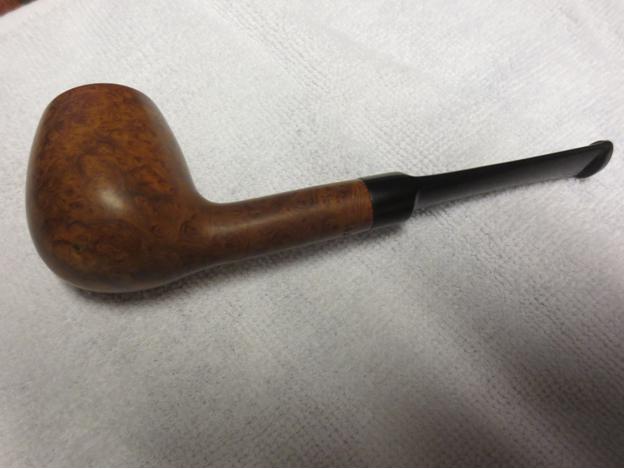
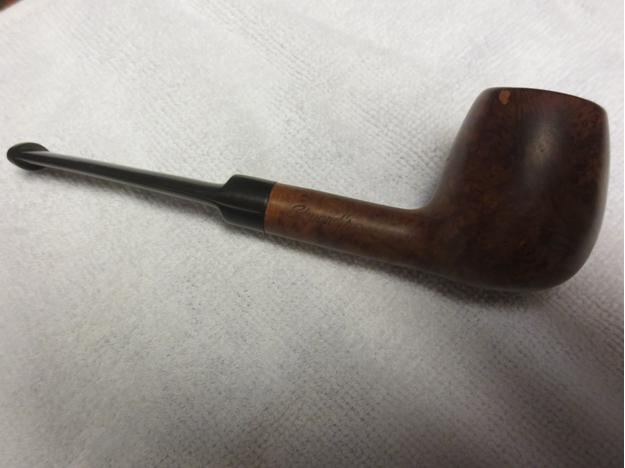
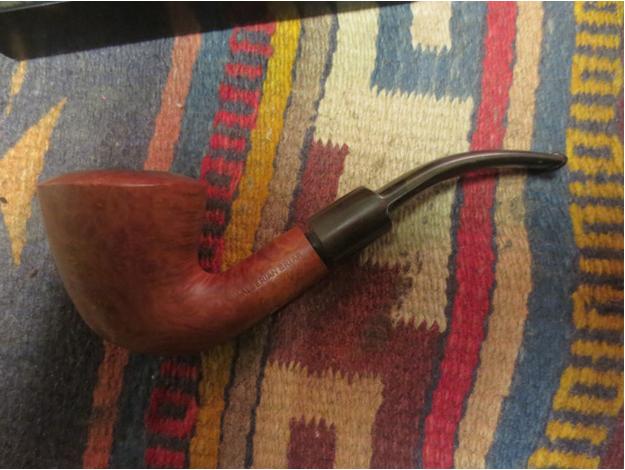
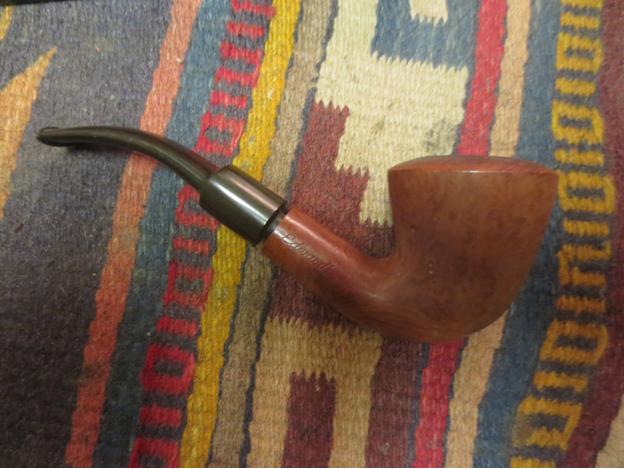
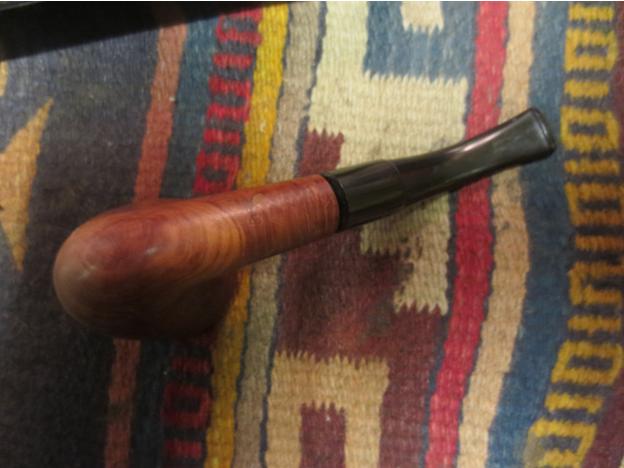
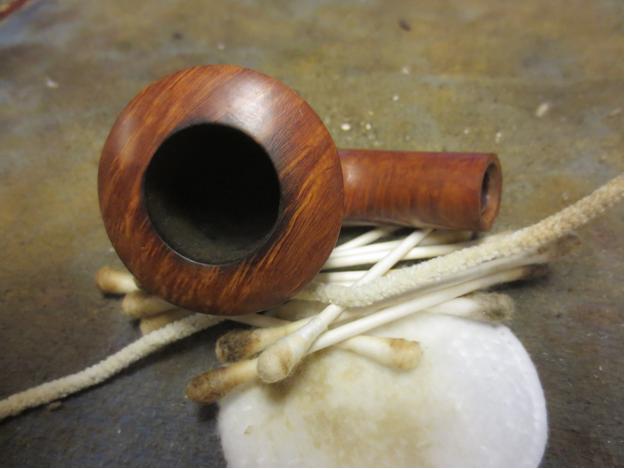
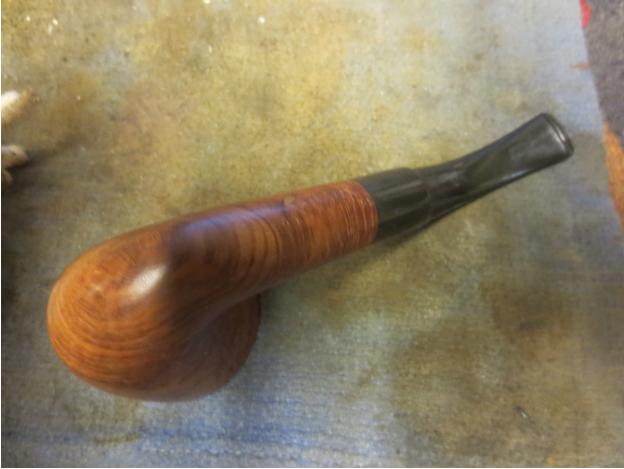
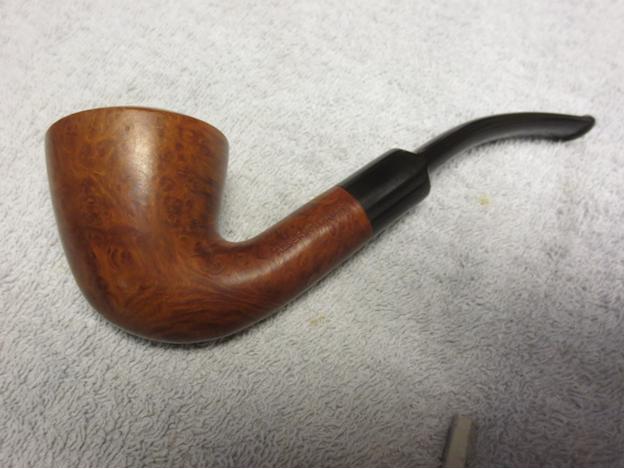
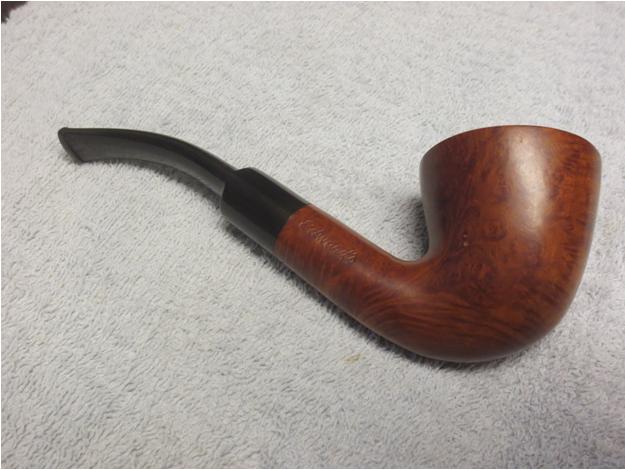
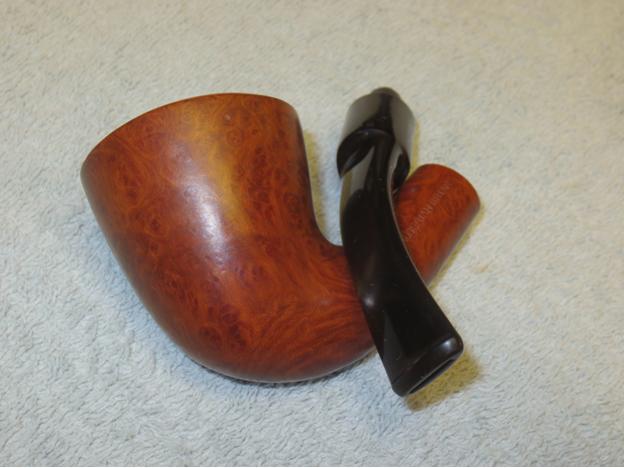
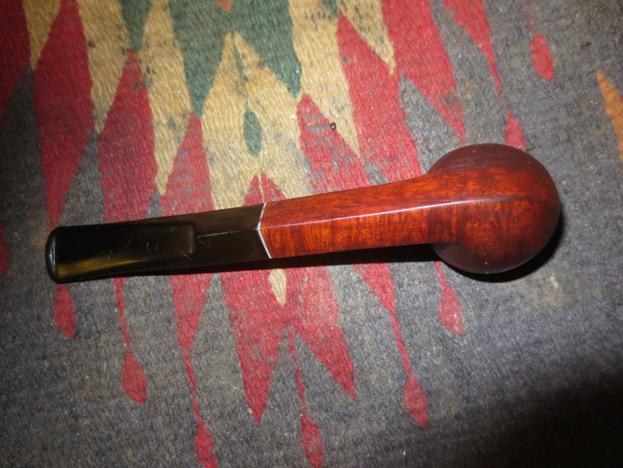
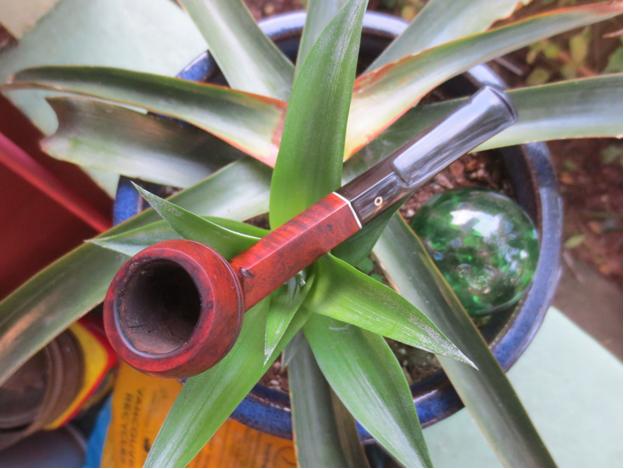
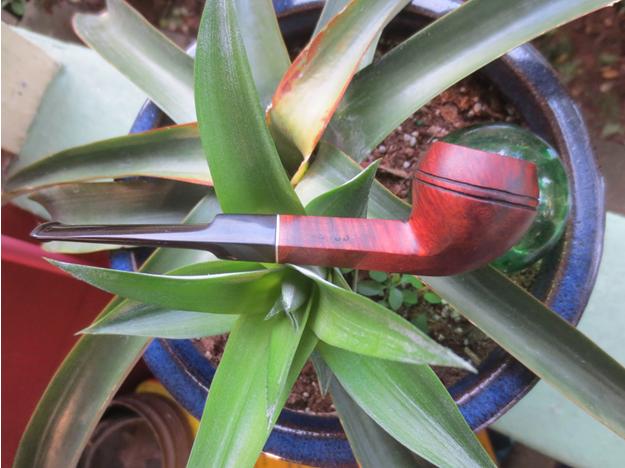
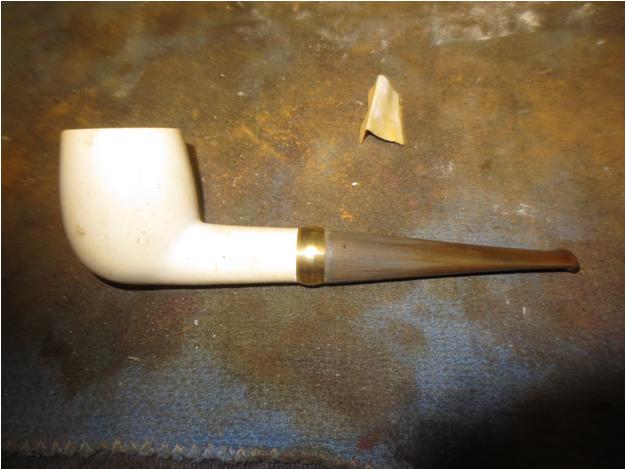
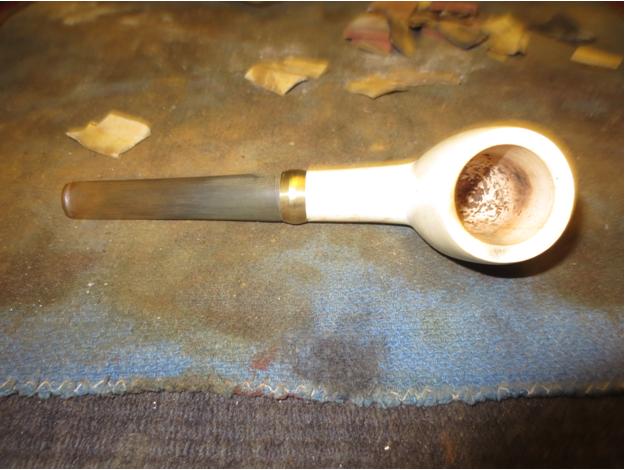
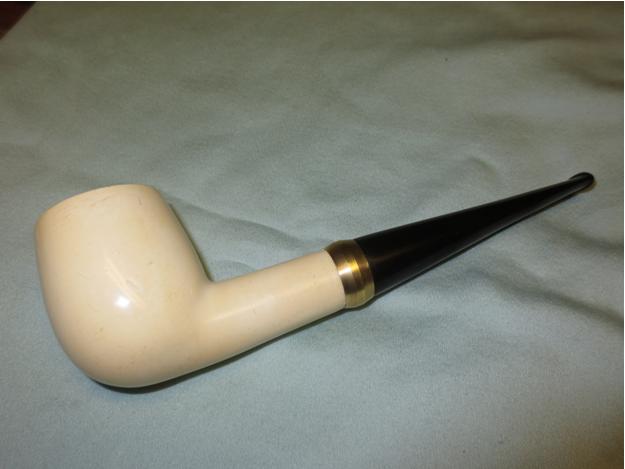
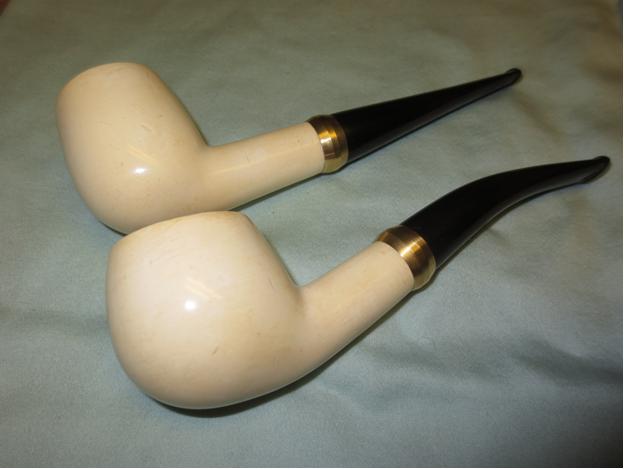
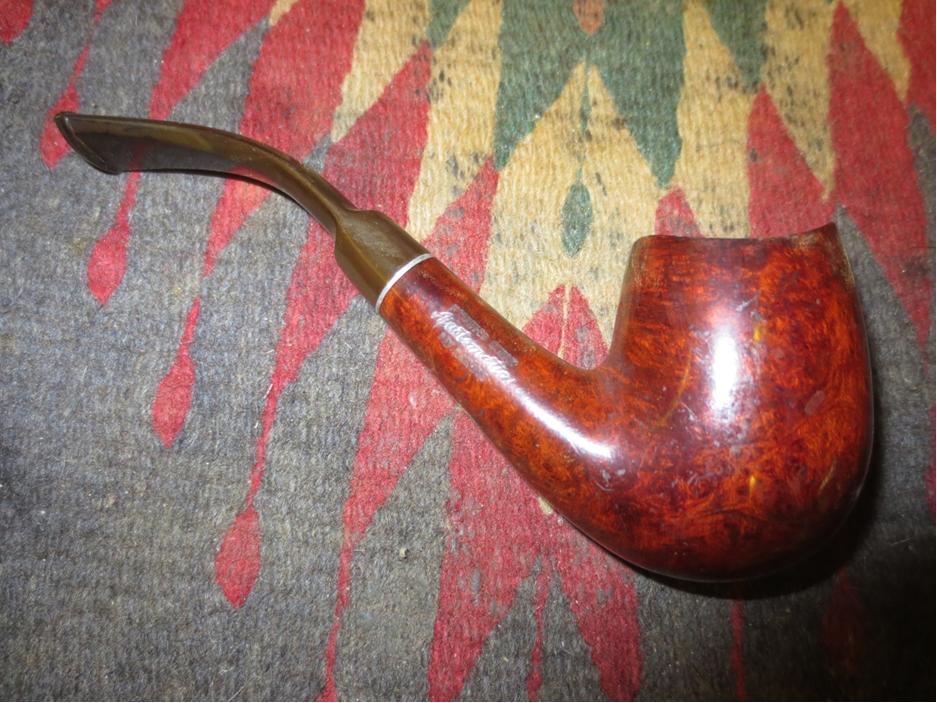
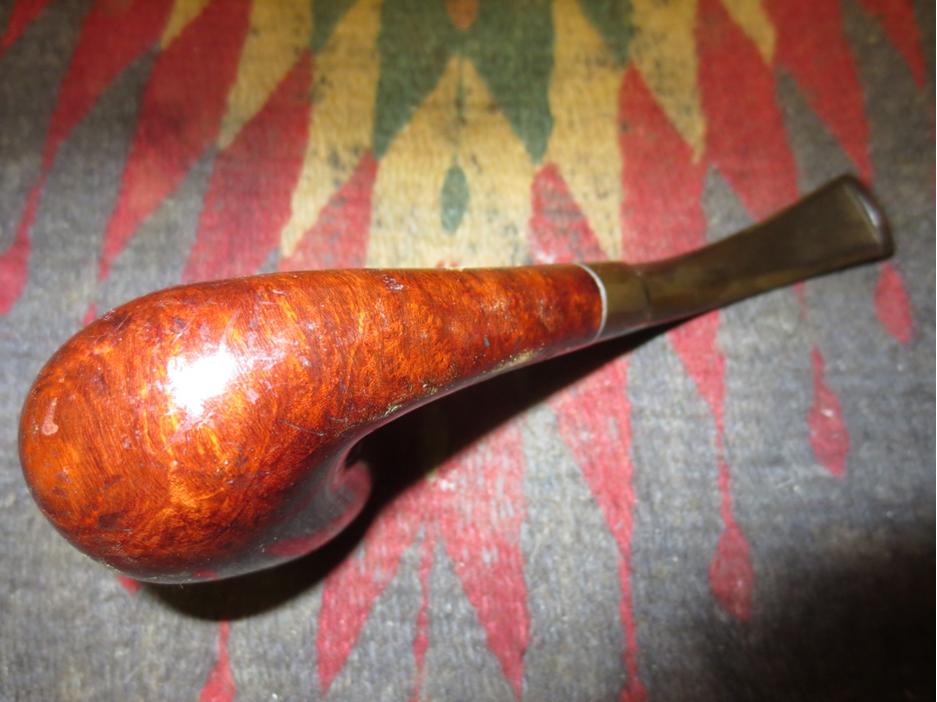
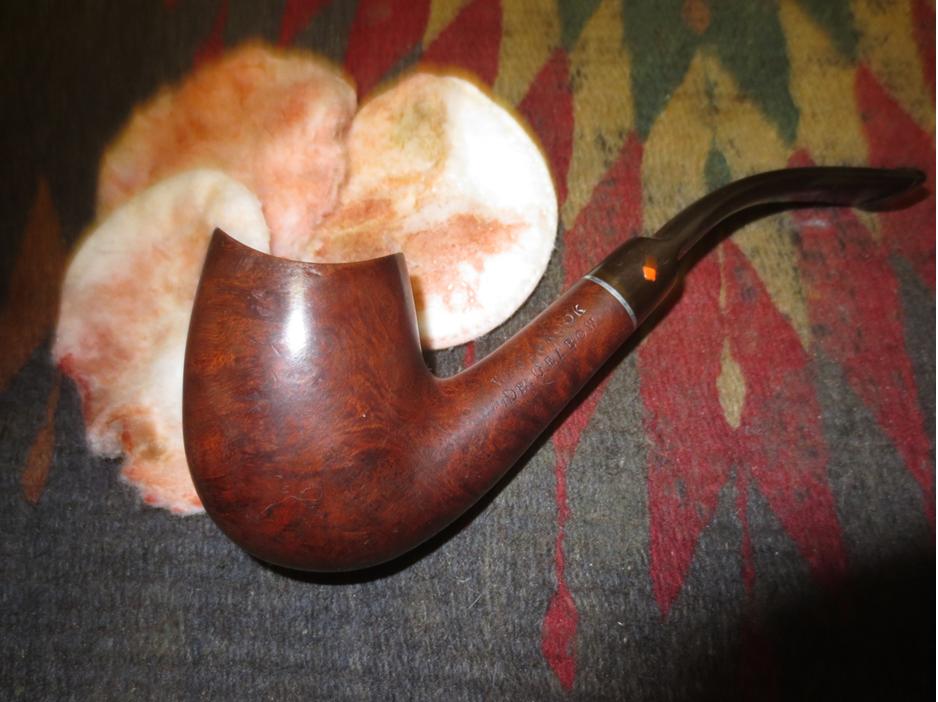
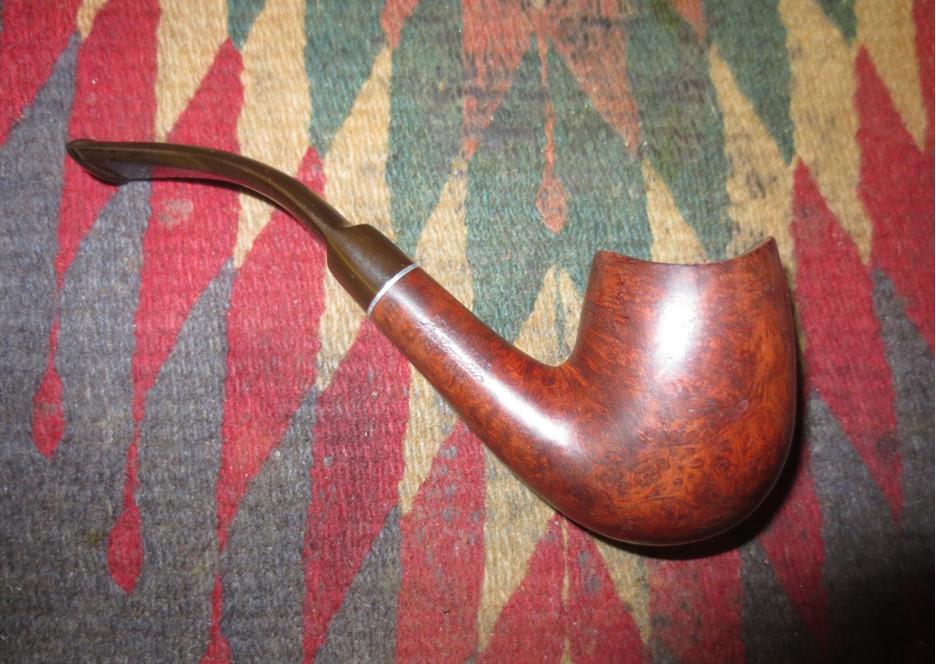
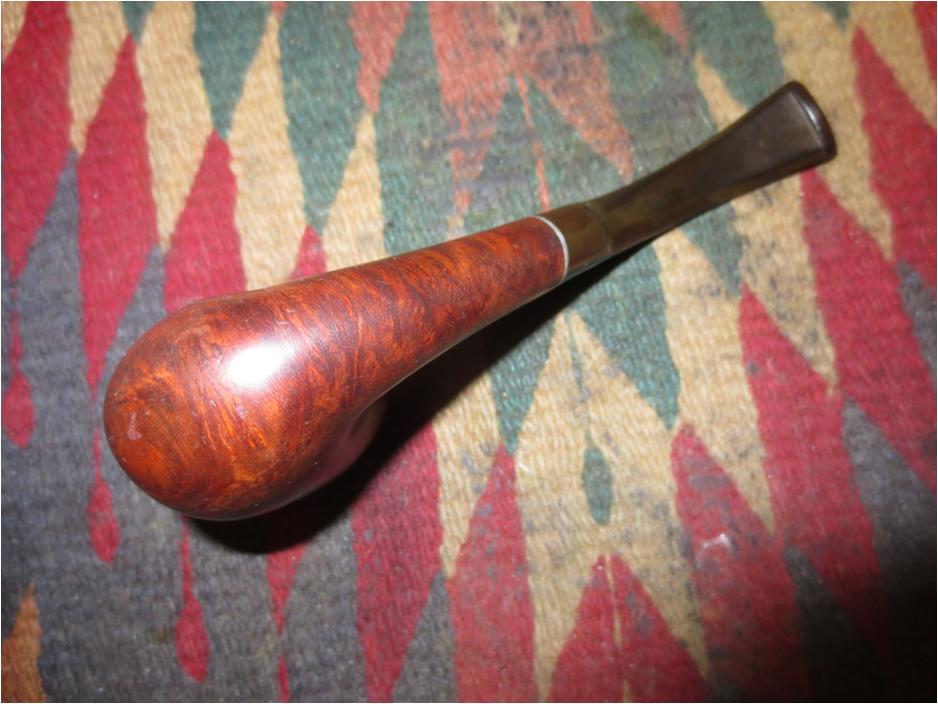
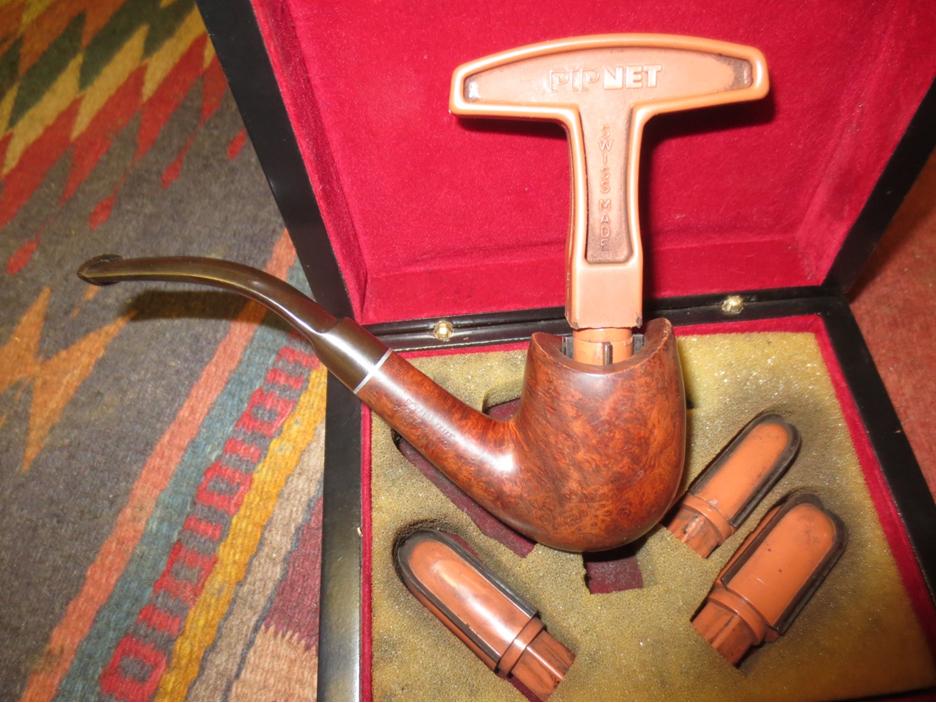
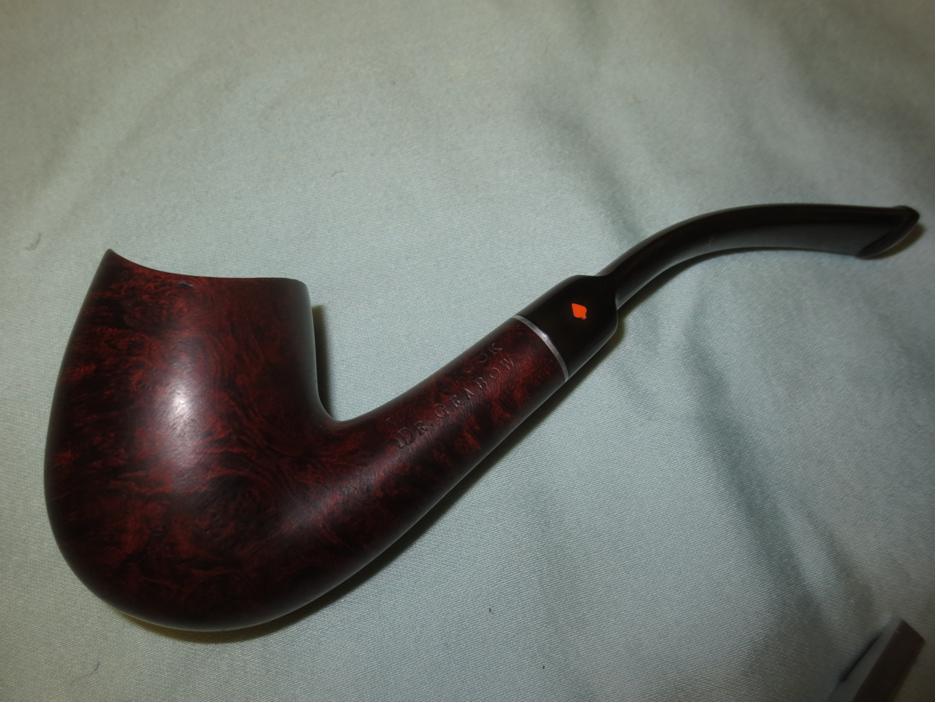
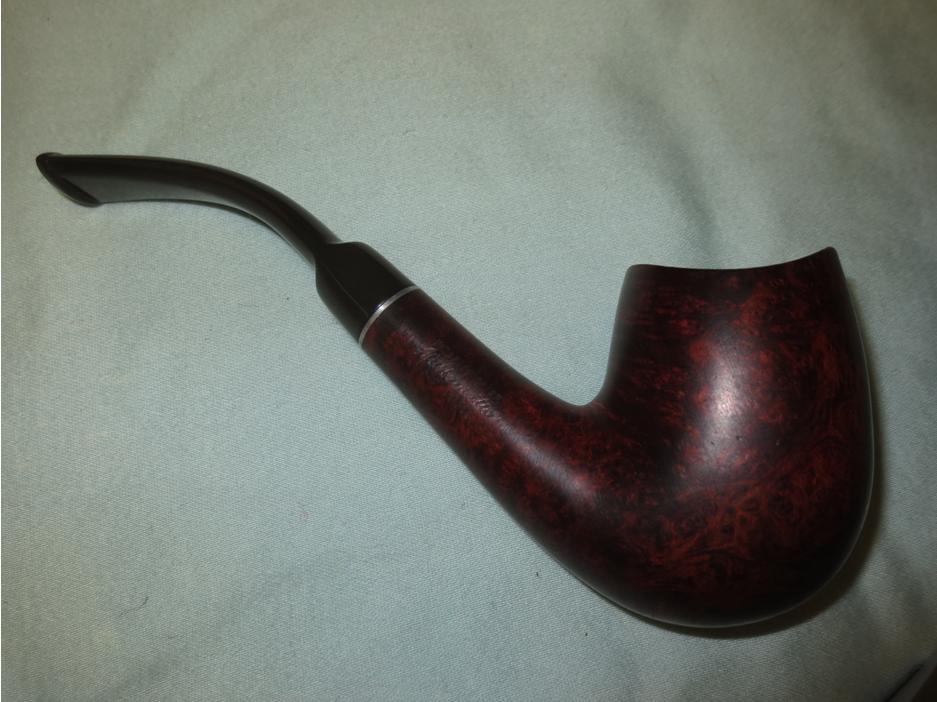
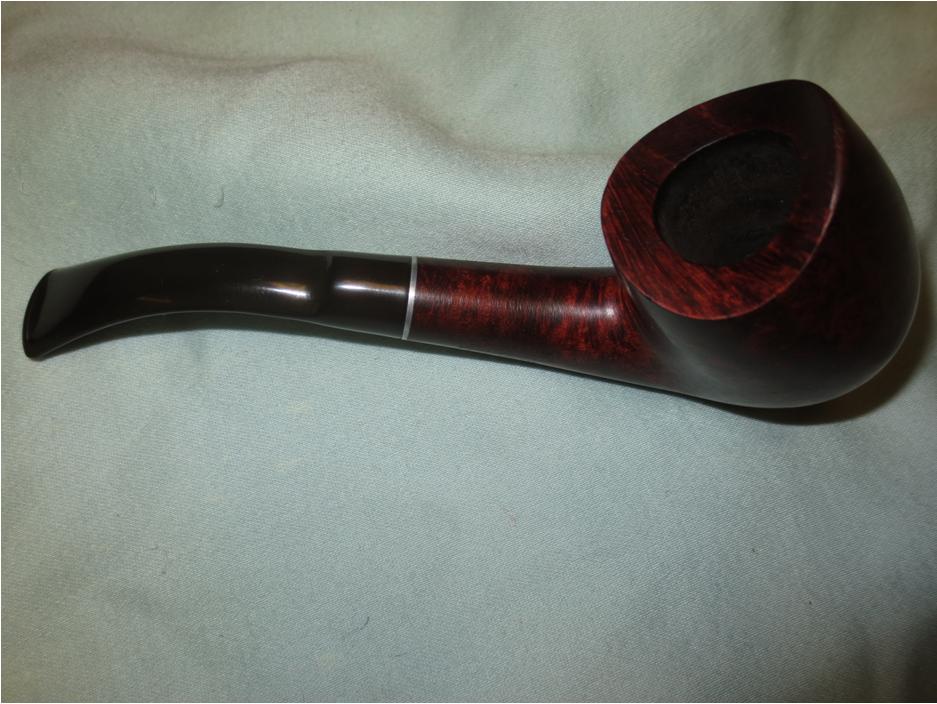
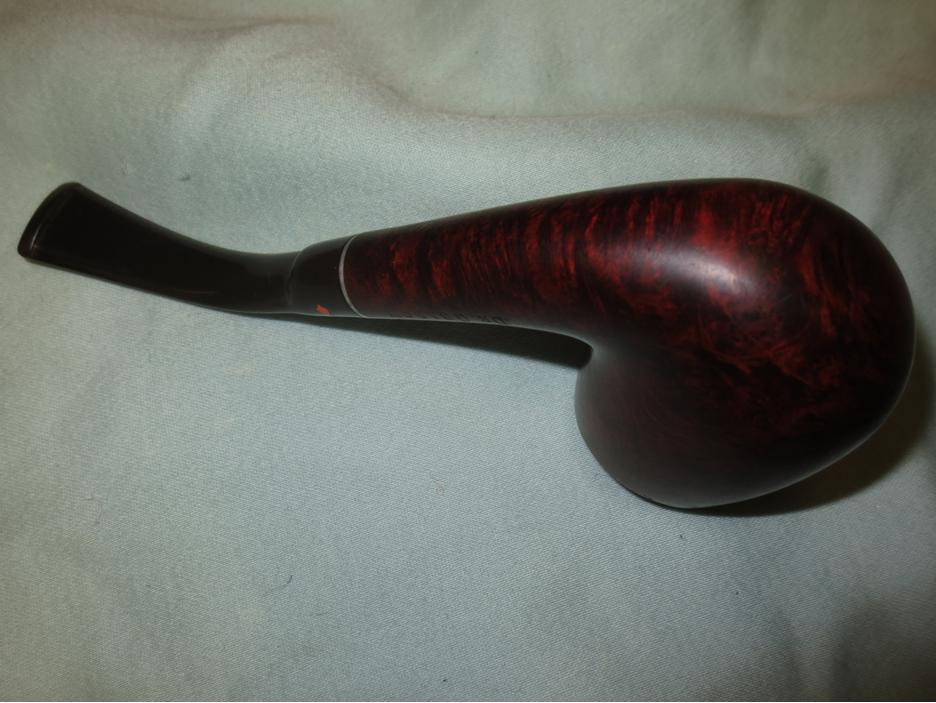
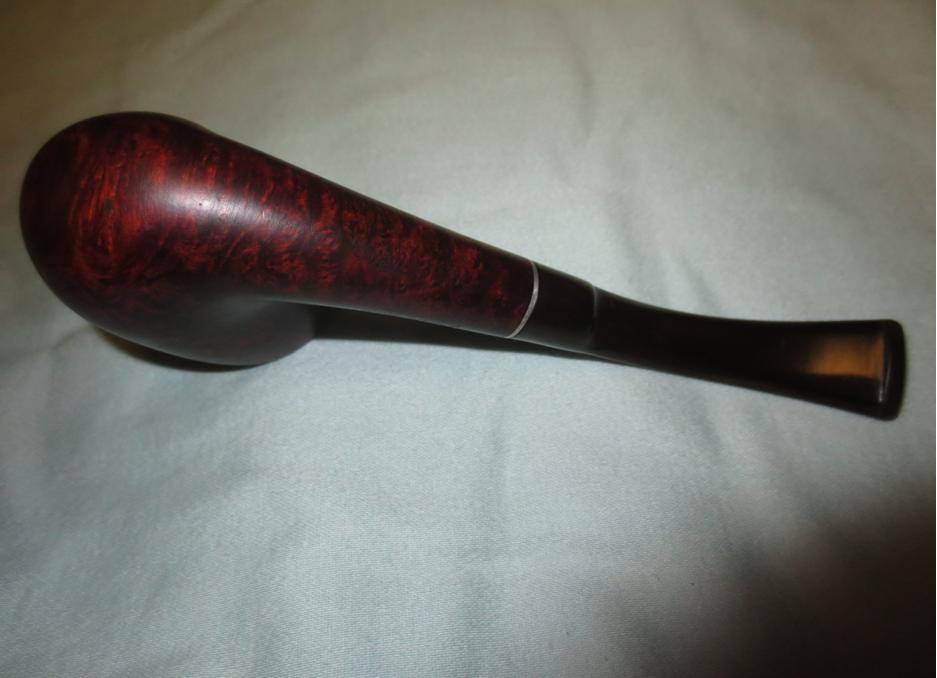
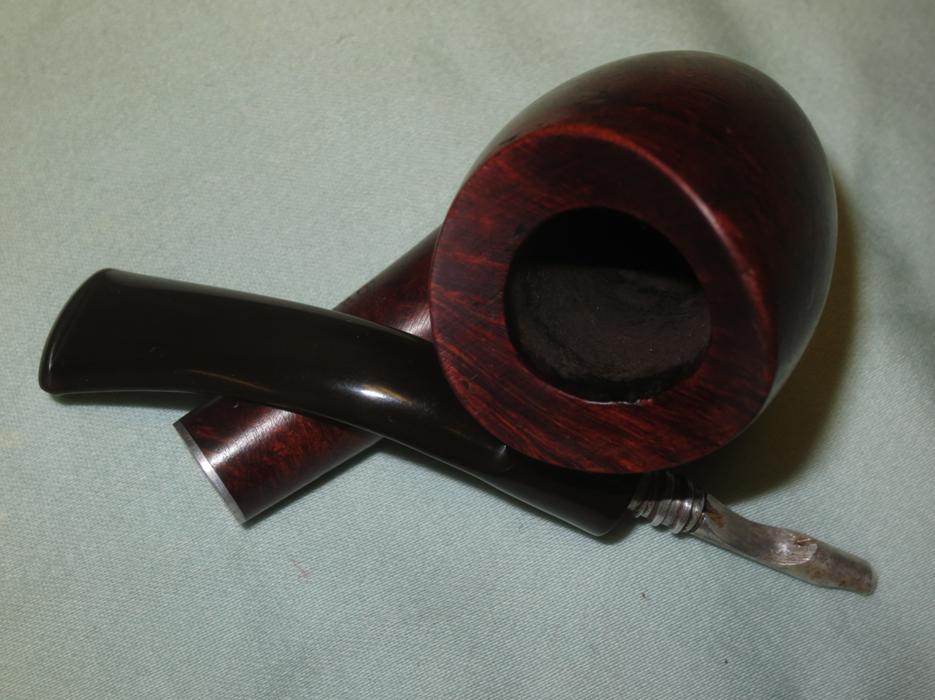
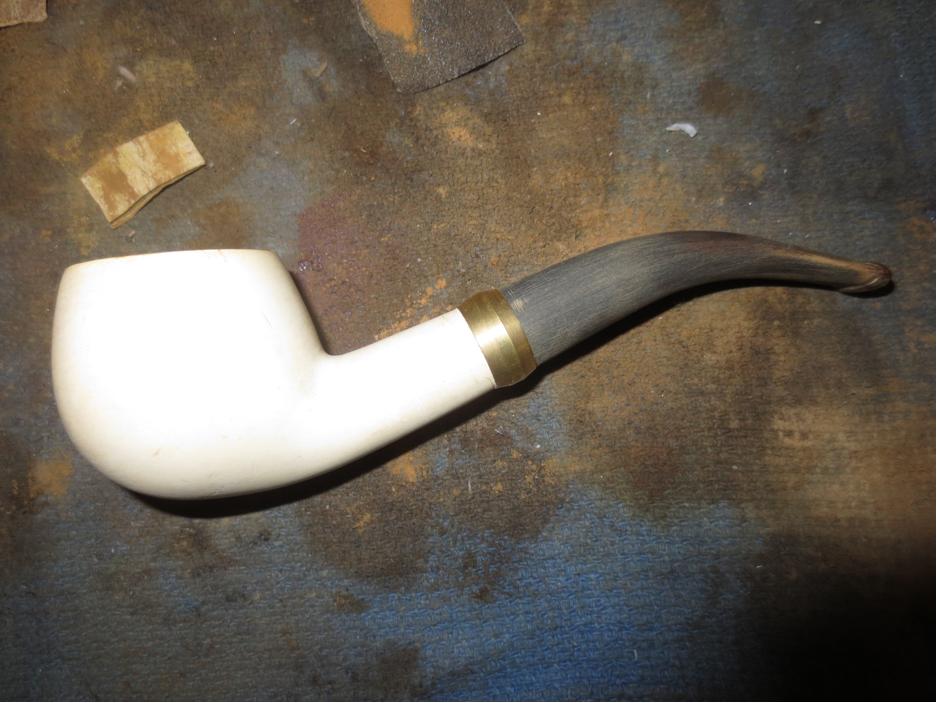
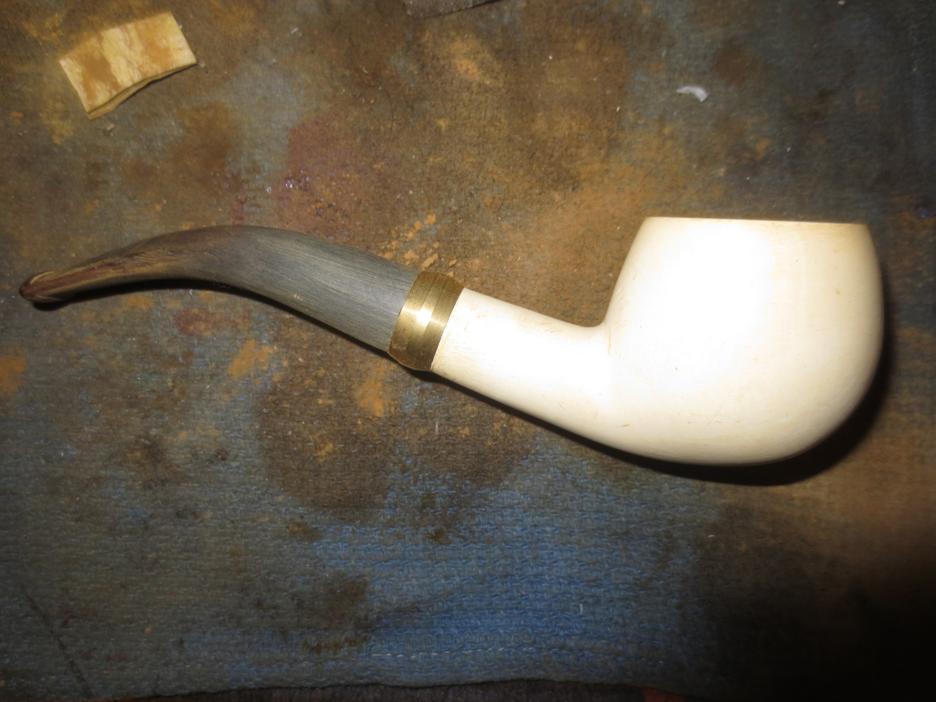
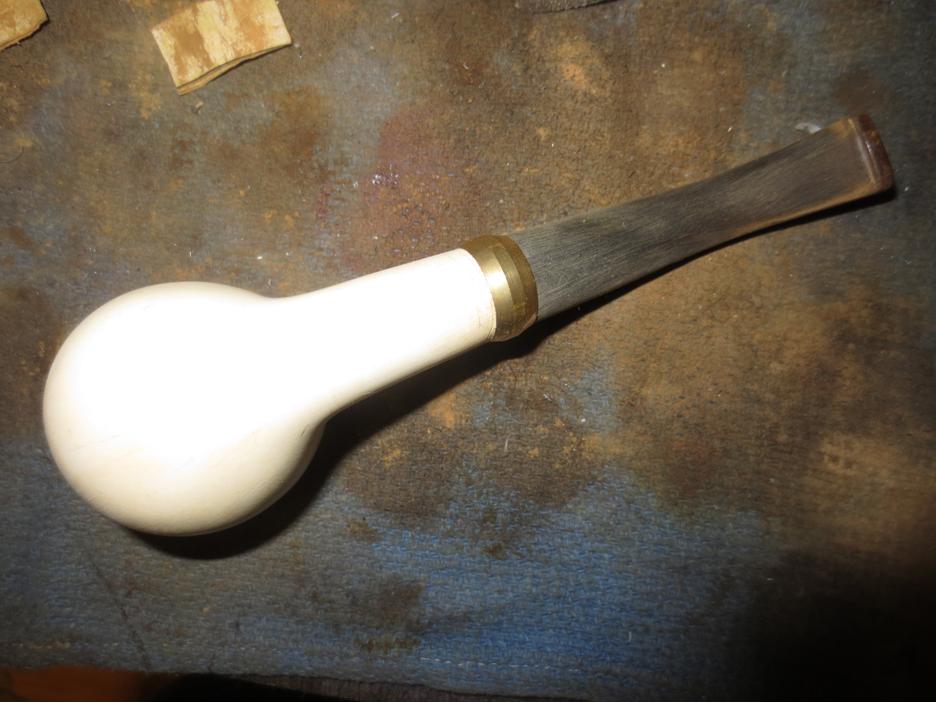
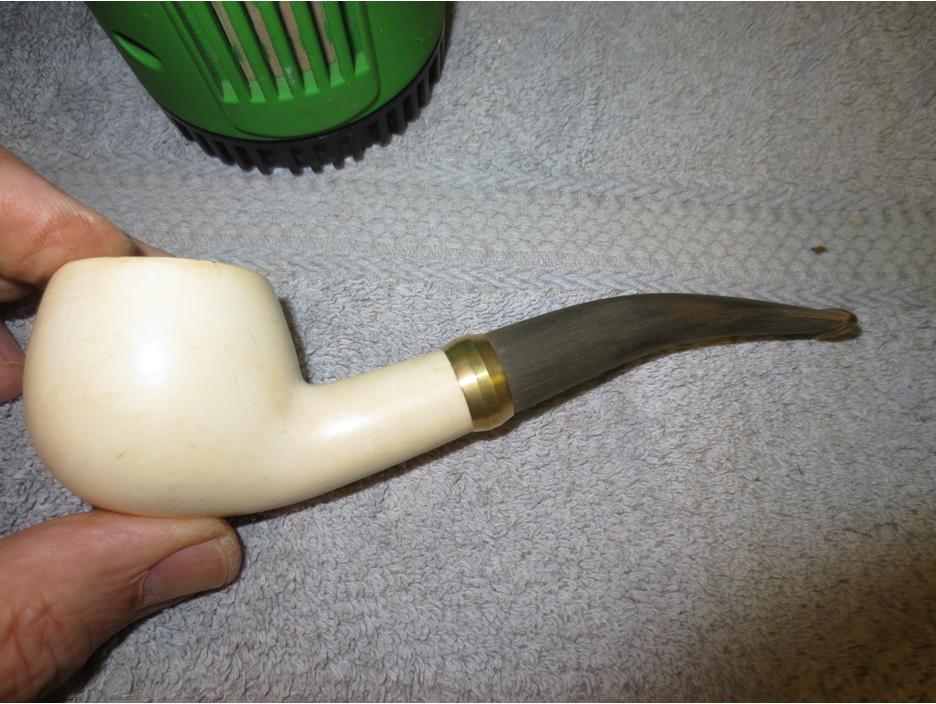
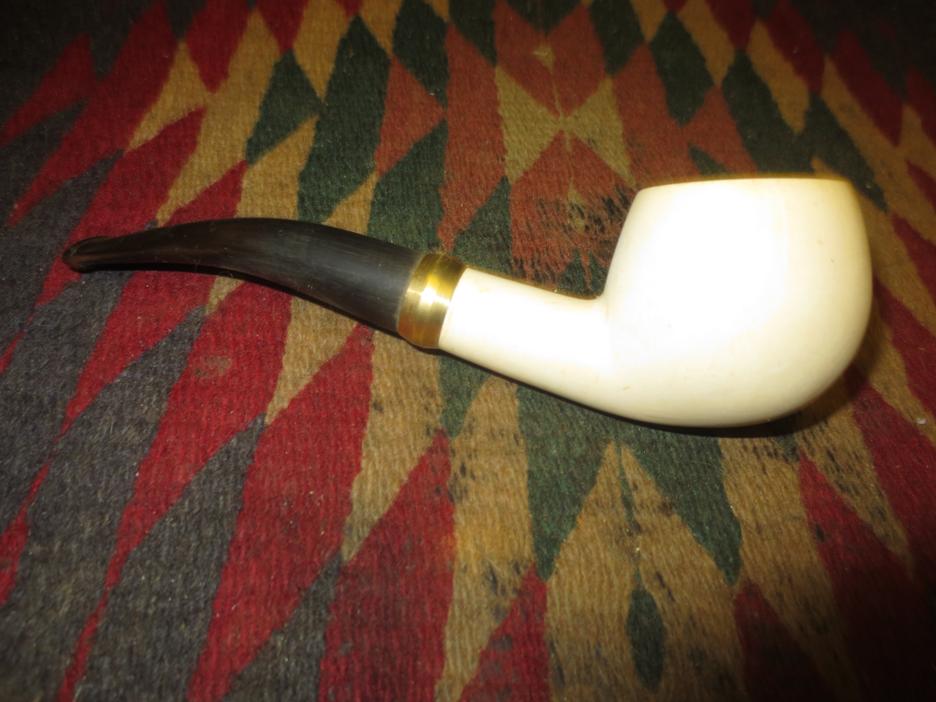
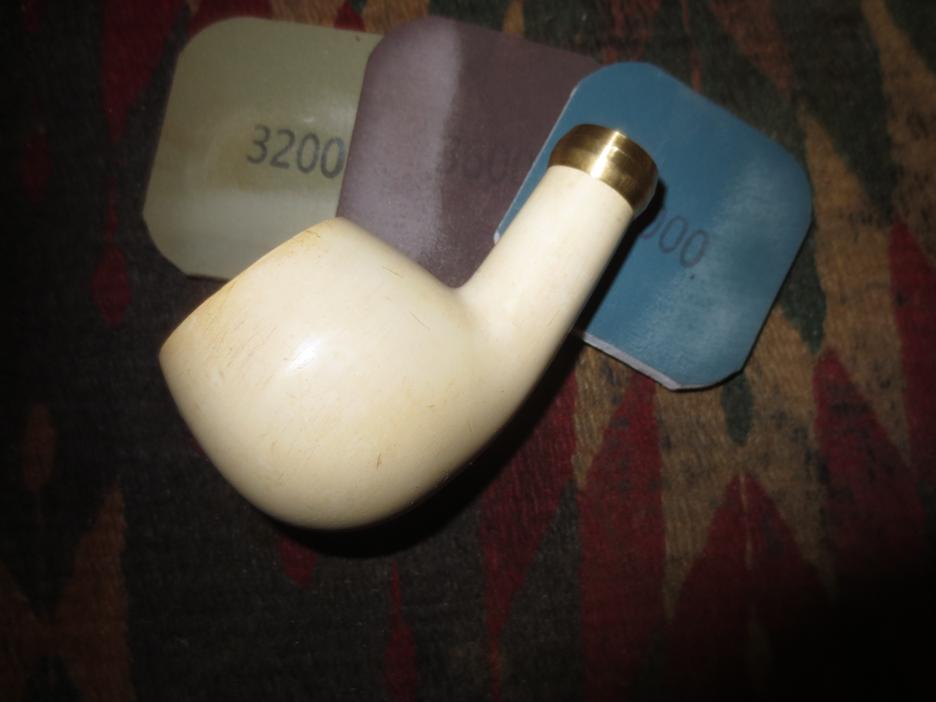
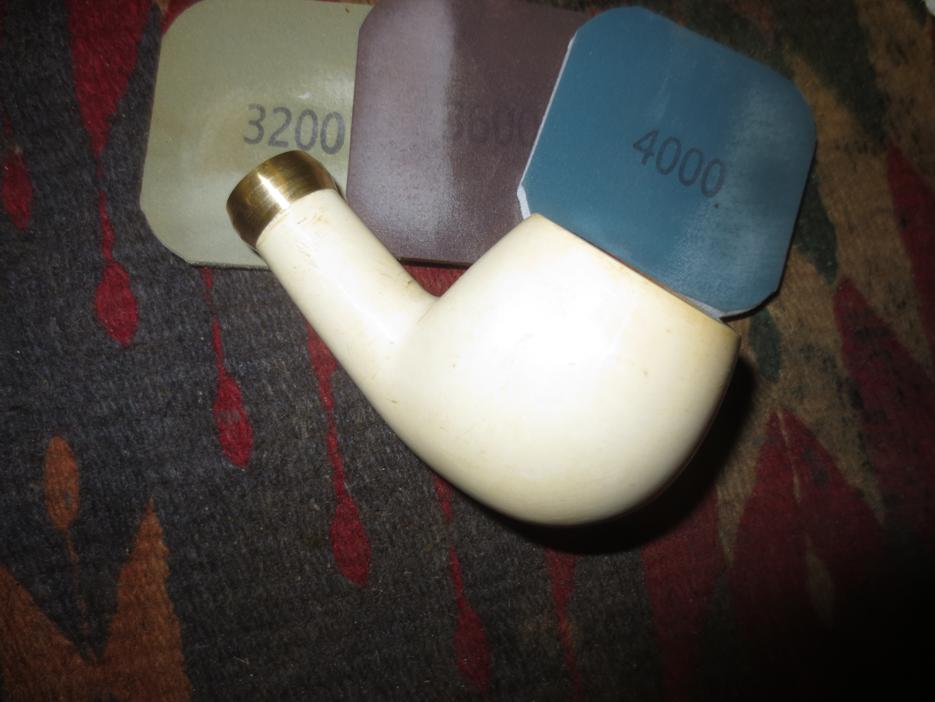
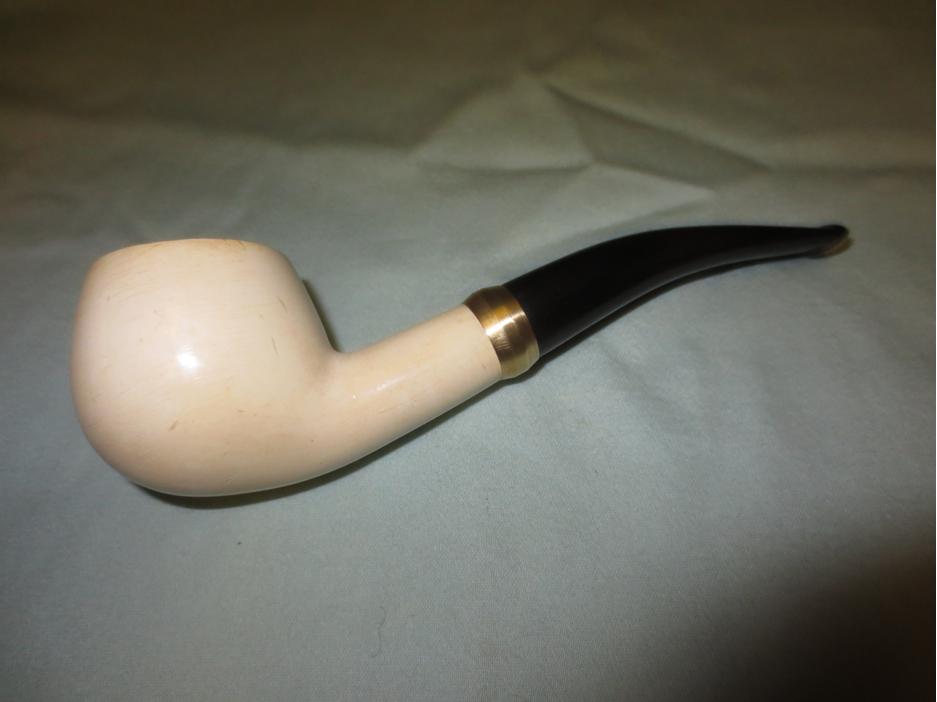
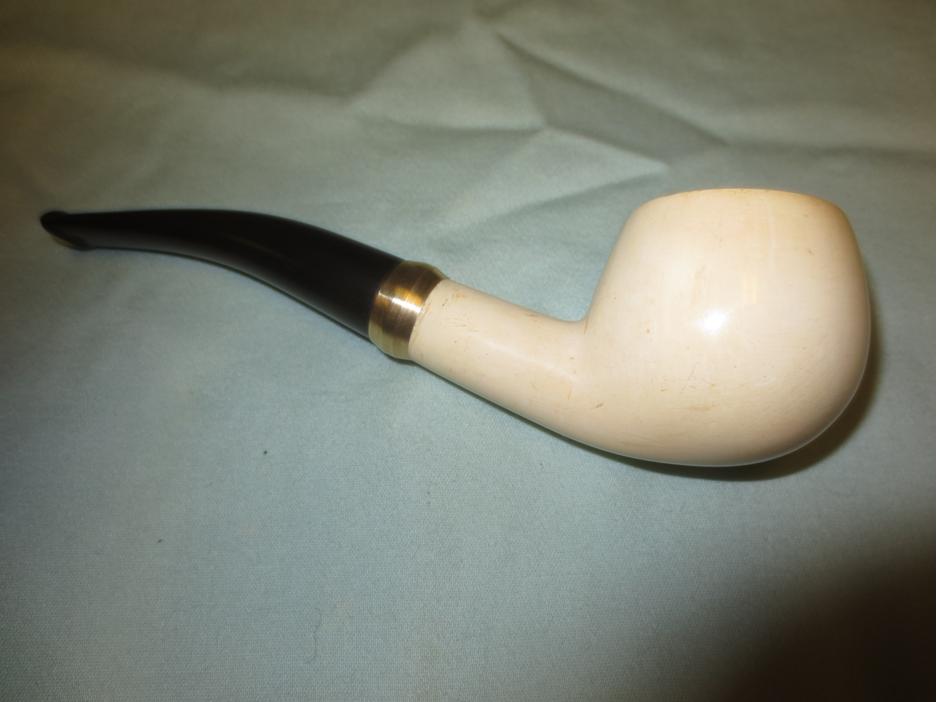
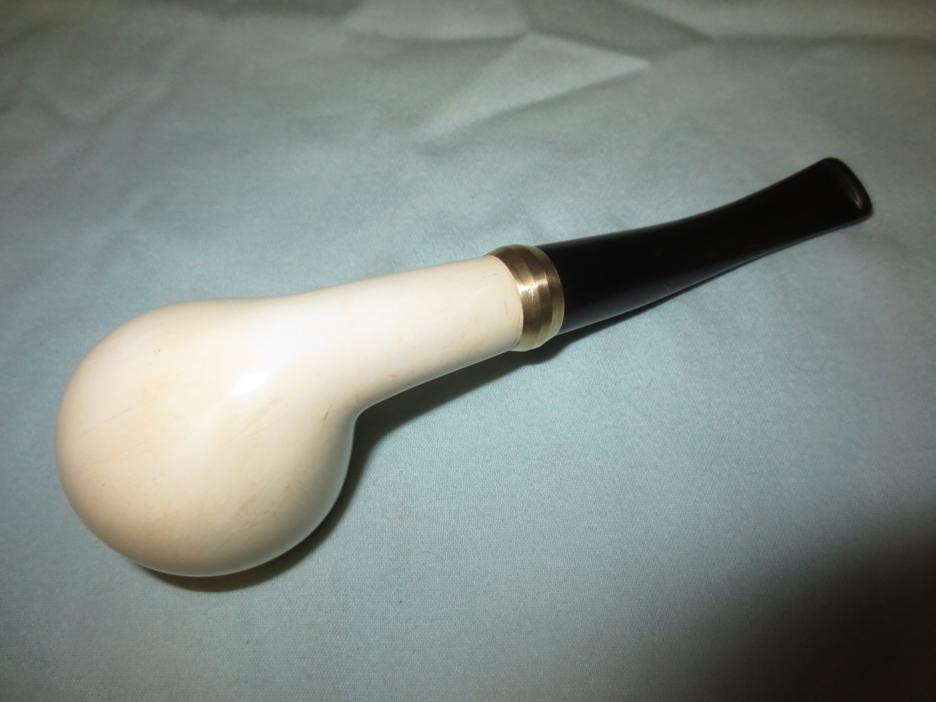
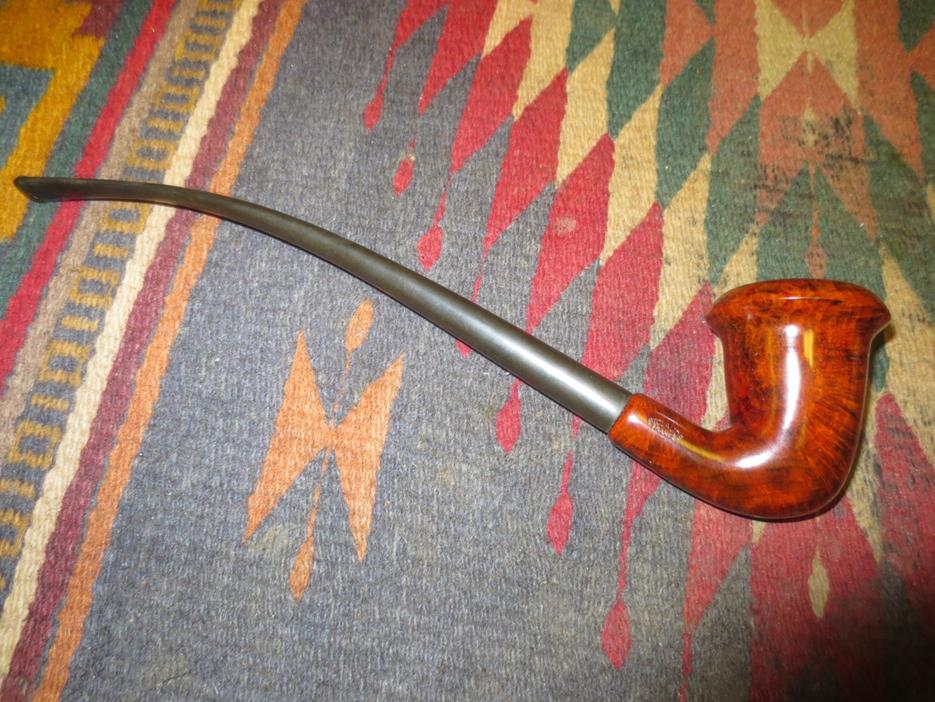
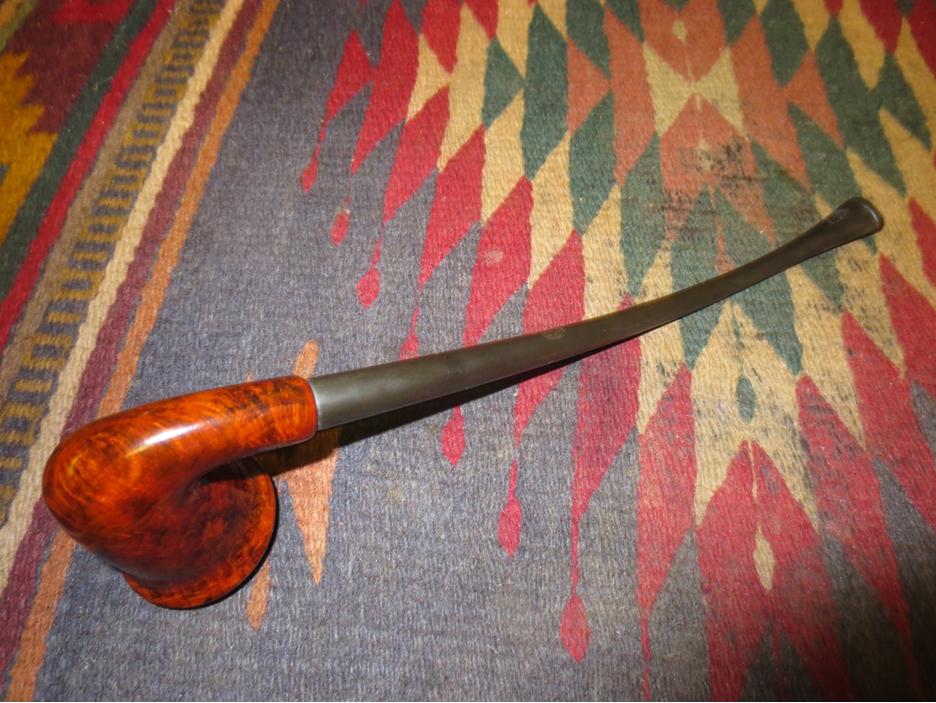
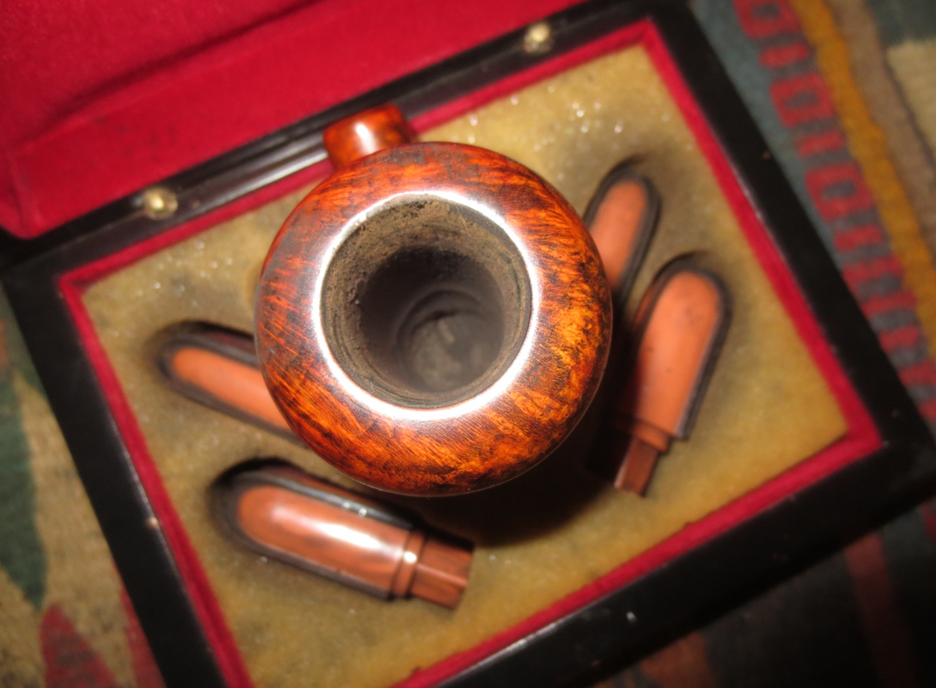
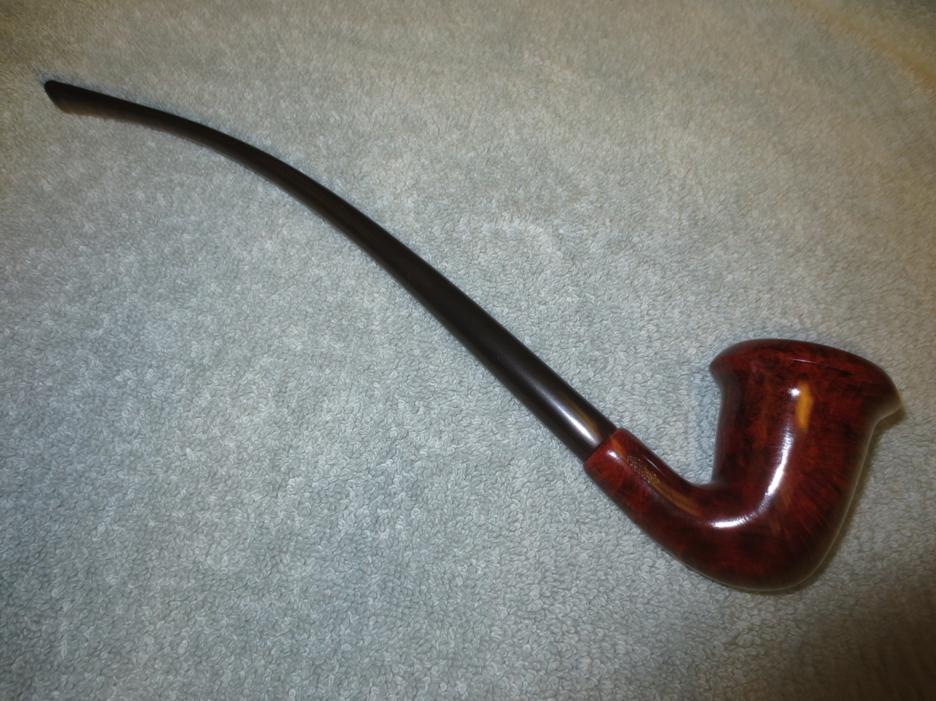
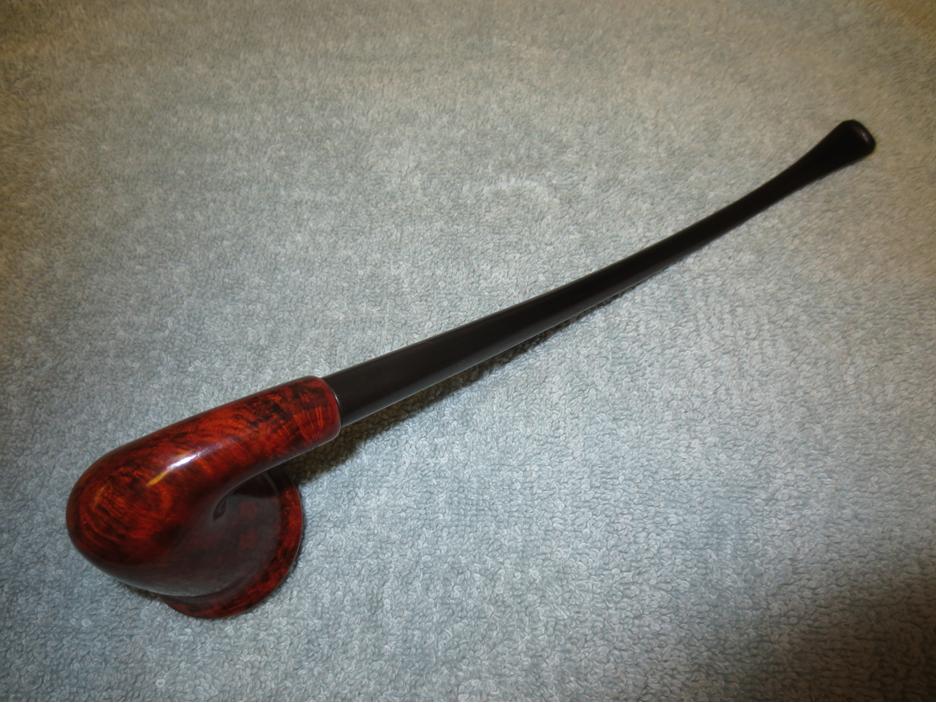
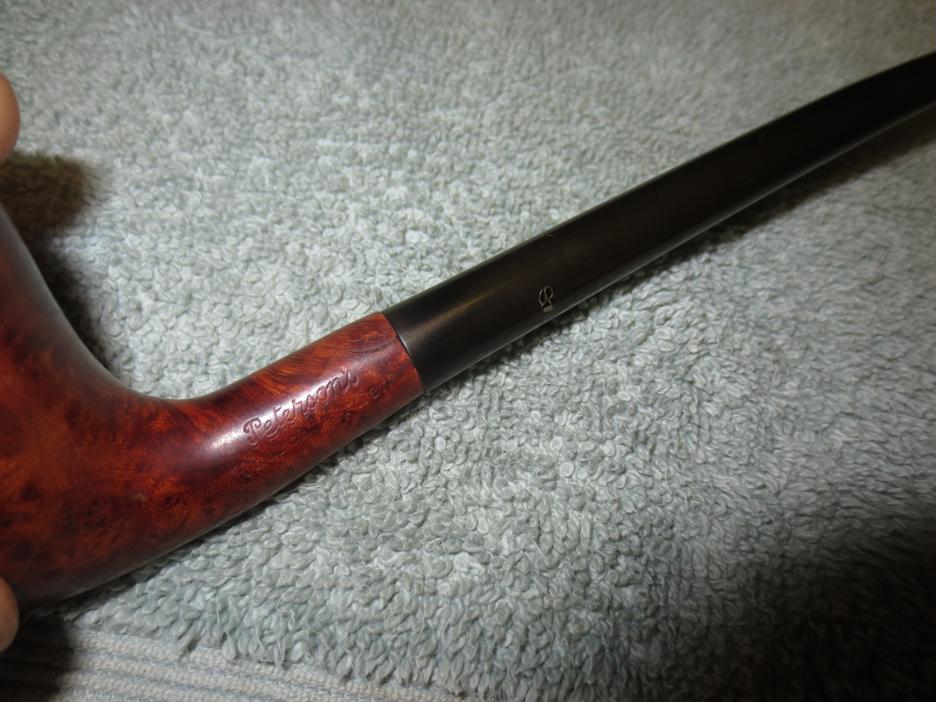
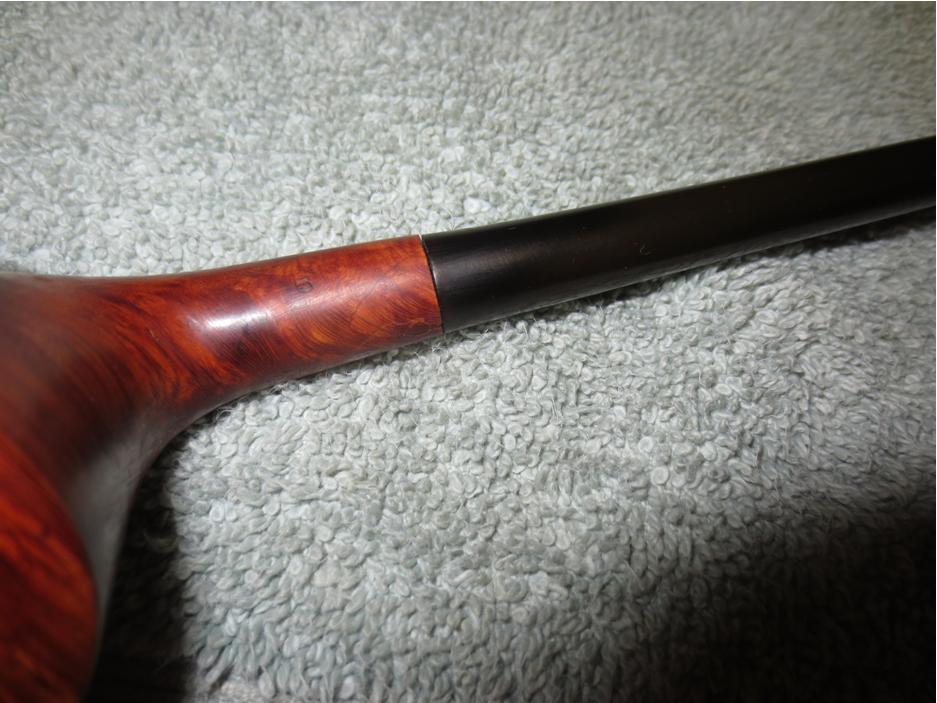
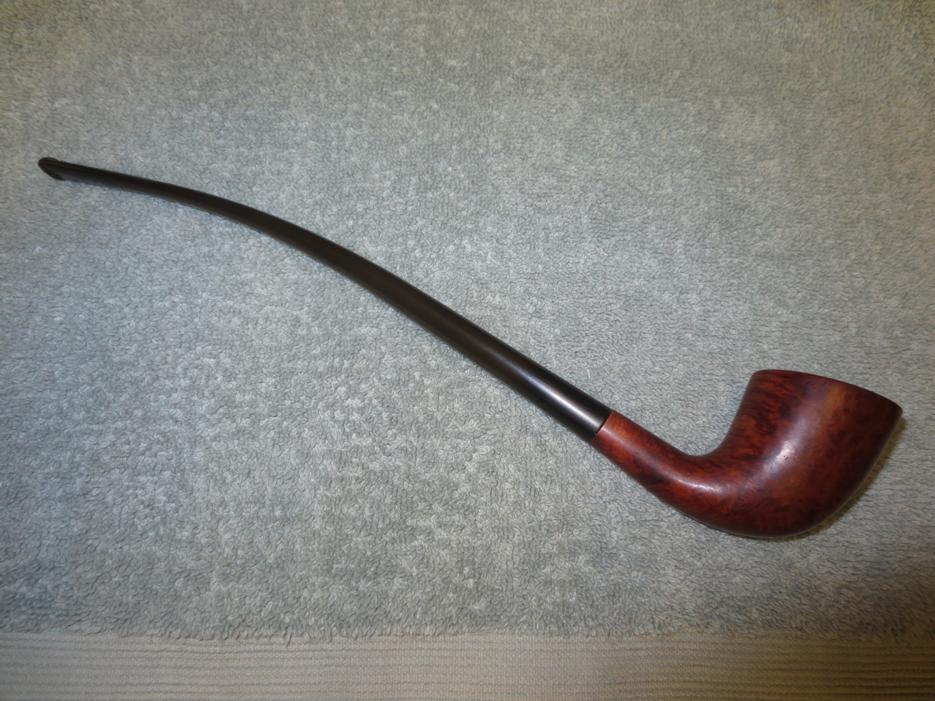
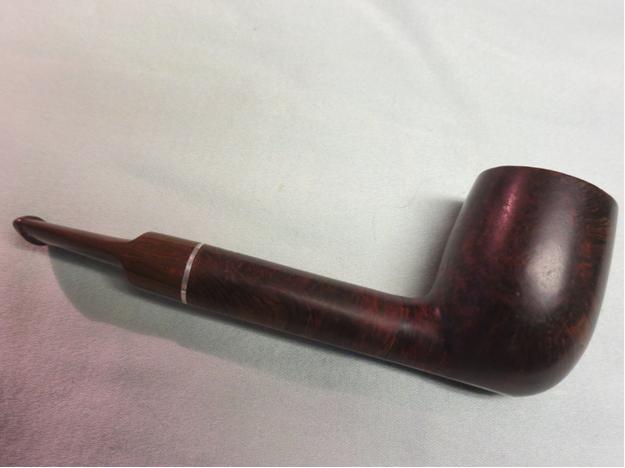
I gave the bowl a rubdown with some olive oil and then buffed it out. I touched up the light areas of the stain on the repaired shank with a dark stain pen and then rubbed a little more oil onto the shank. I buffed the pipe with Blue Diamond and then gave it several coats of carnauba wax. I buffed it with a clean flannel buff and then hand buffed it with the microfibre cloth. The finished pipe is shown below. I am hoping to put it in the mail later today or tomorrow to get it back to Troy.LHS28

LHS29 
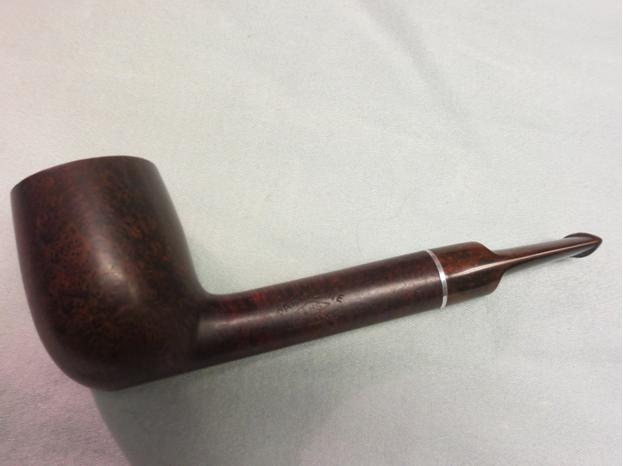
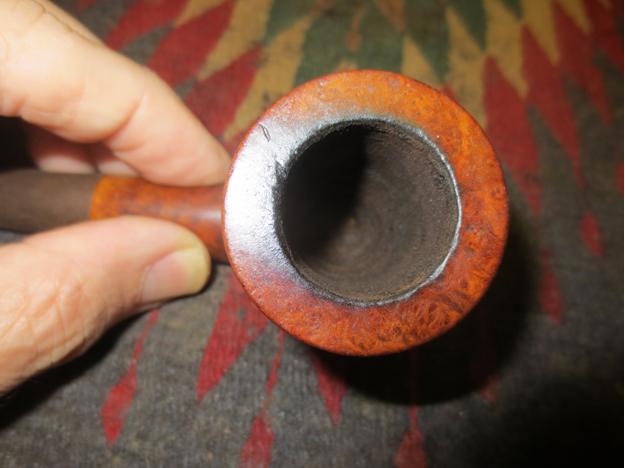
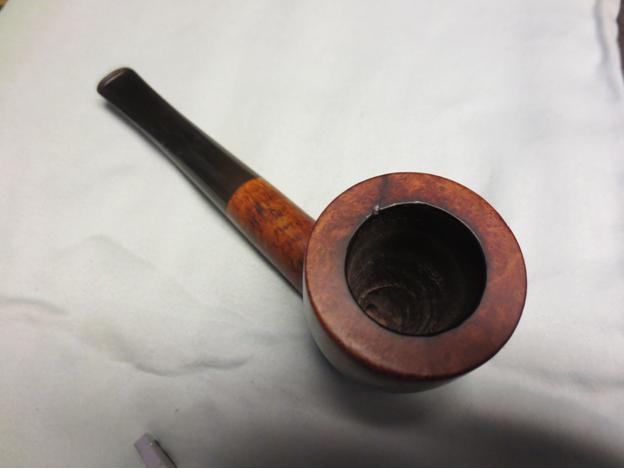
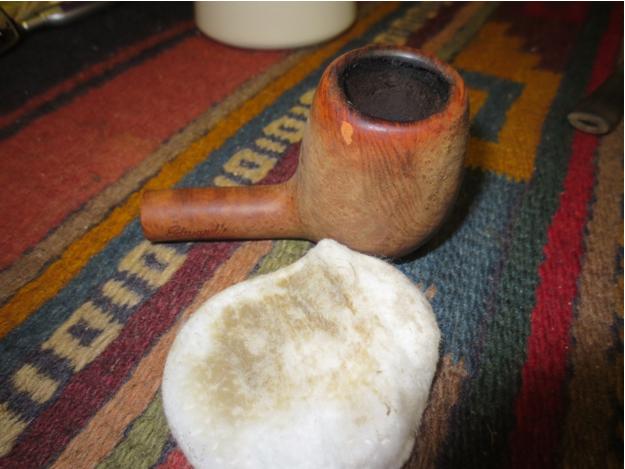
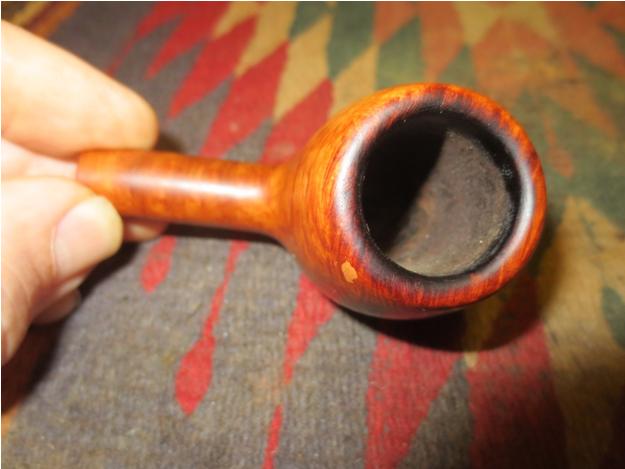
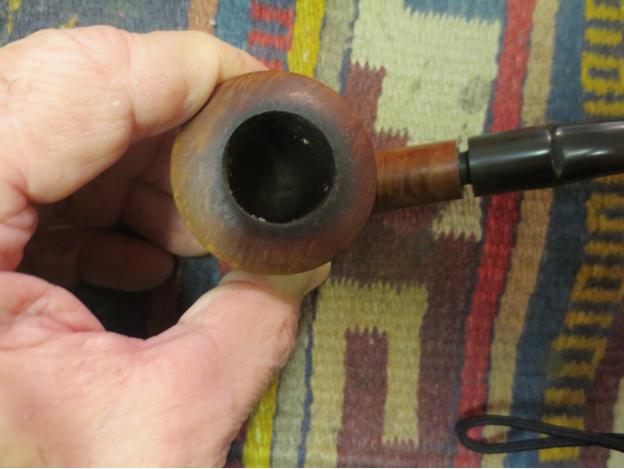
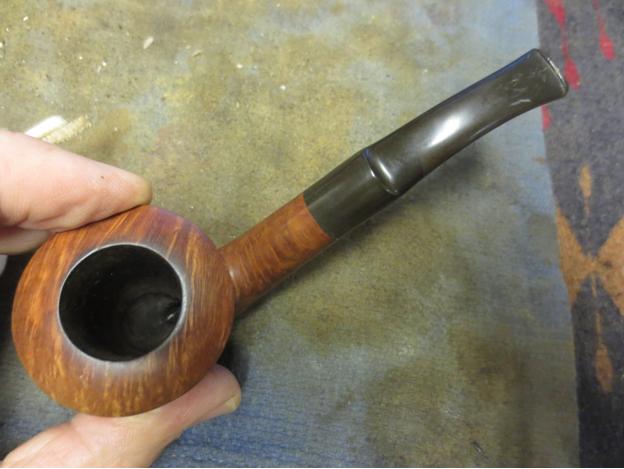
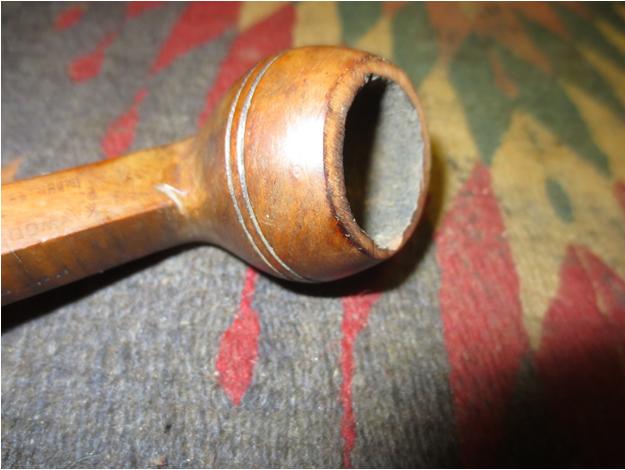
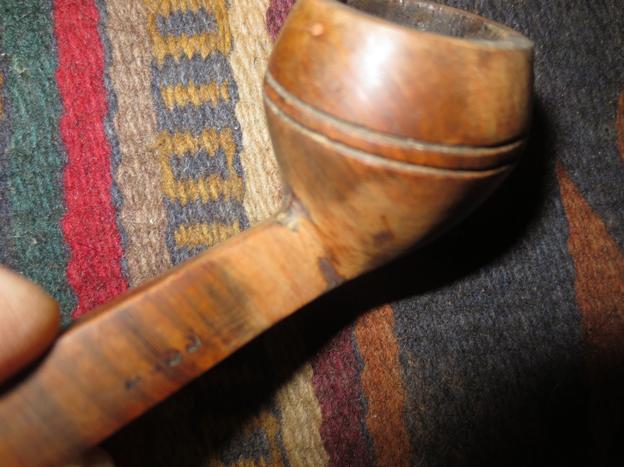
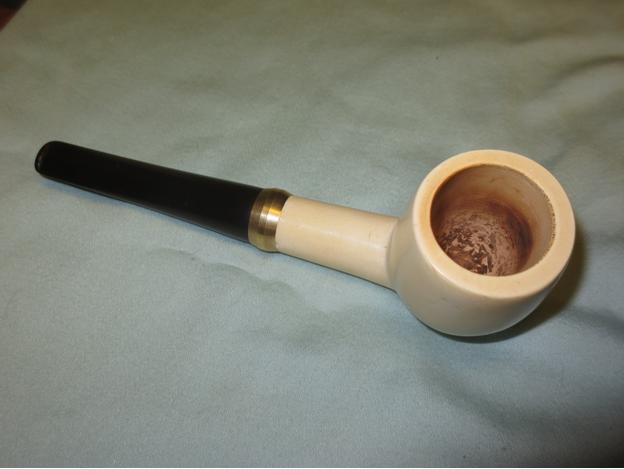
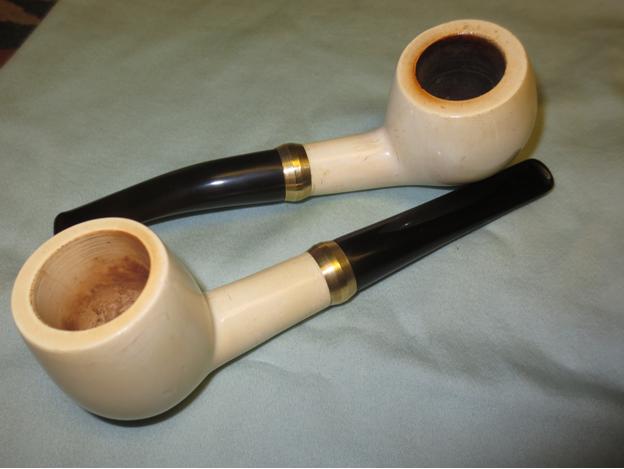
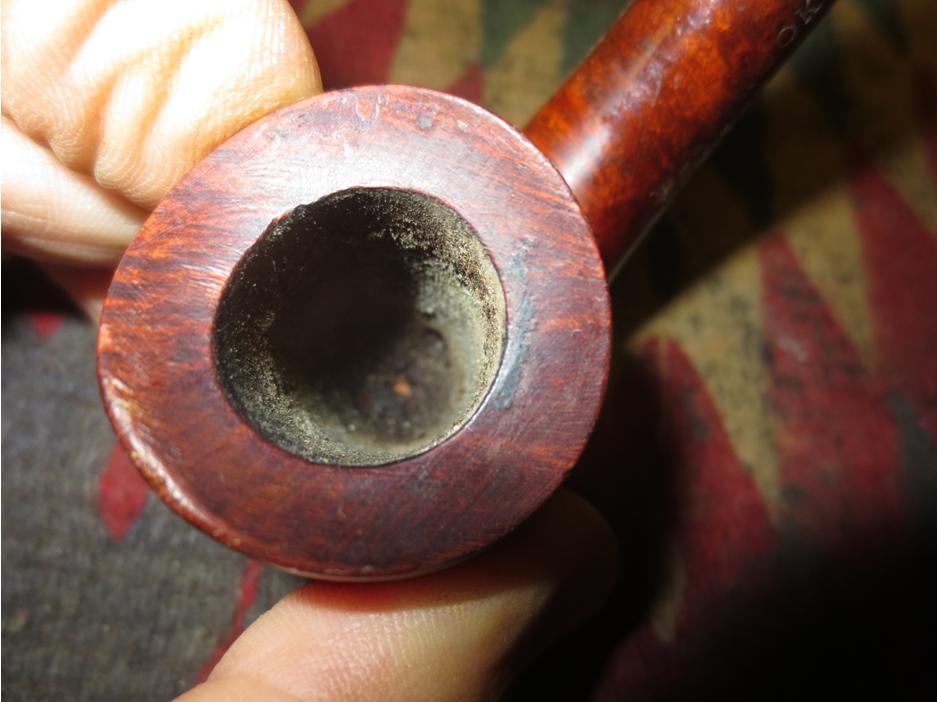
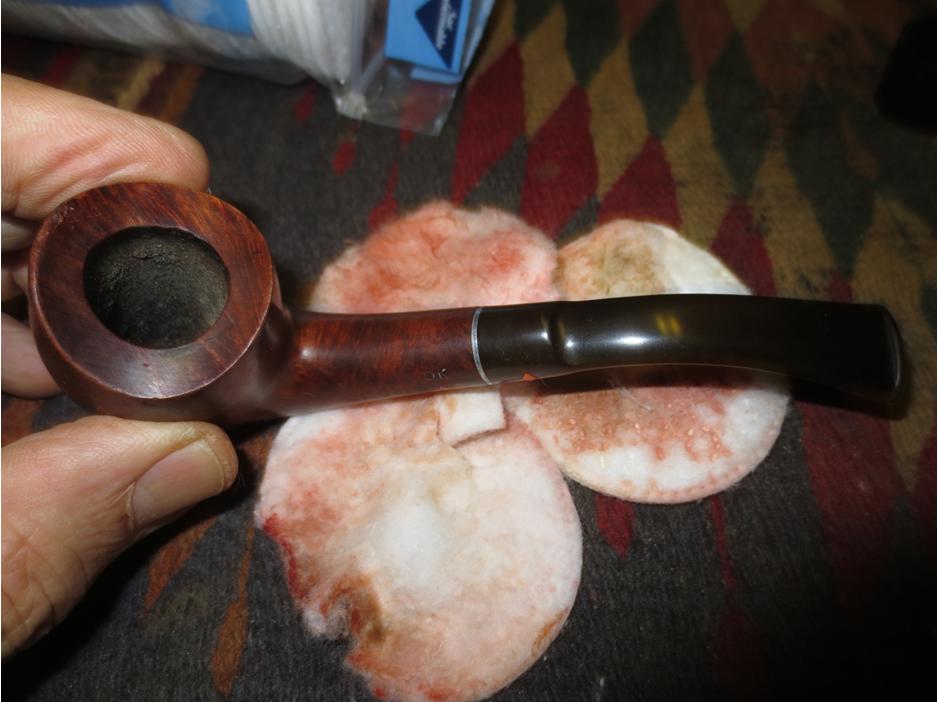
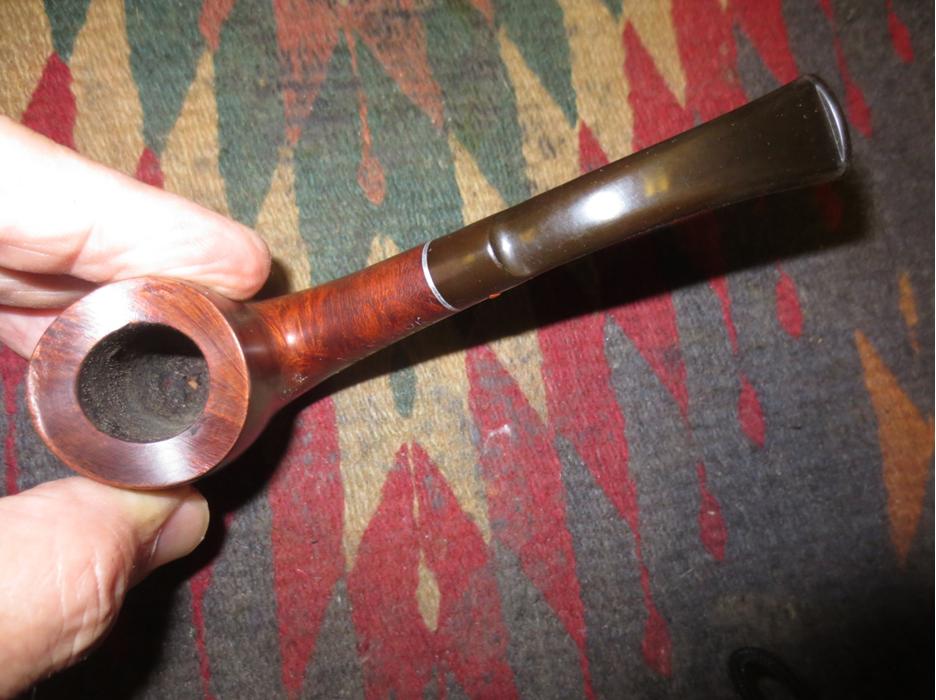
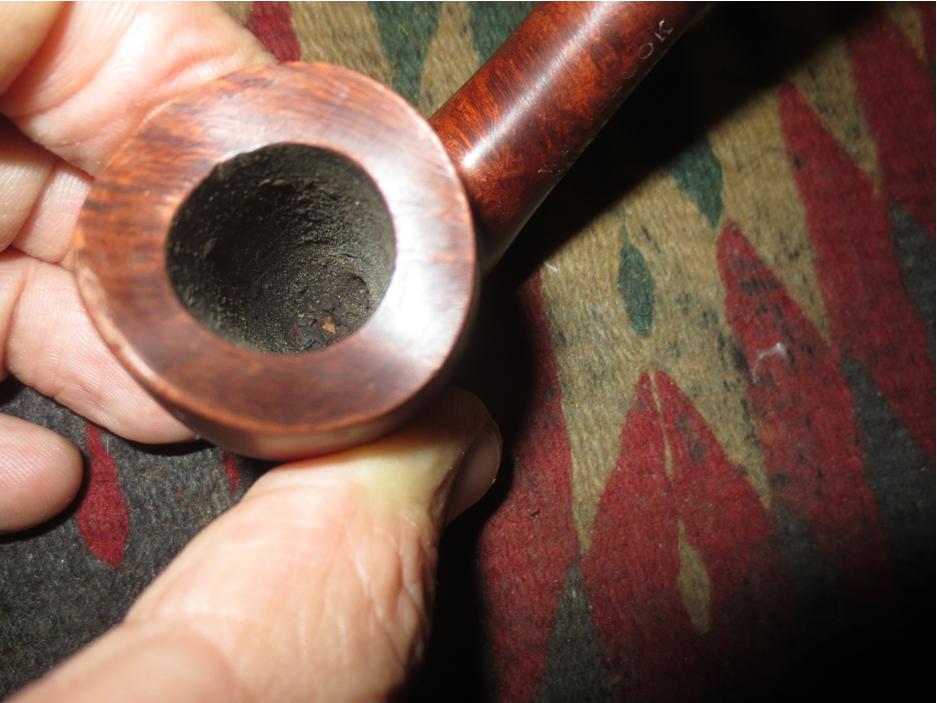
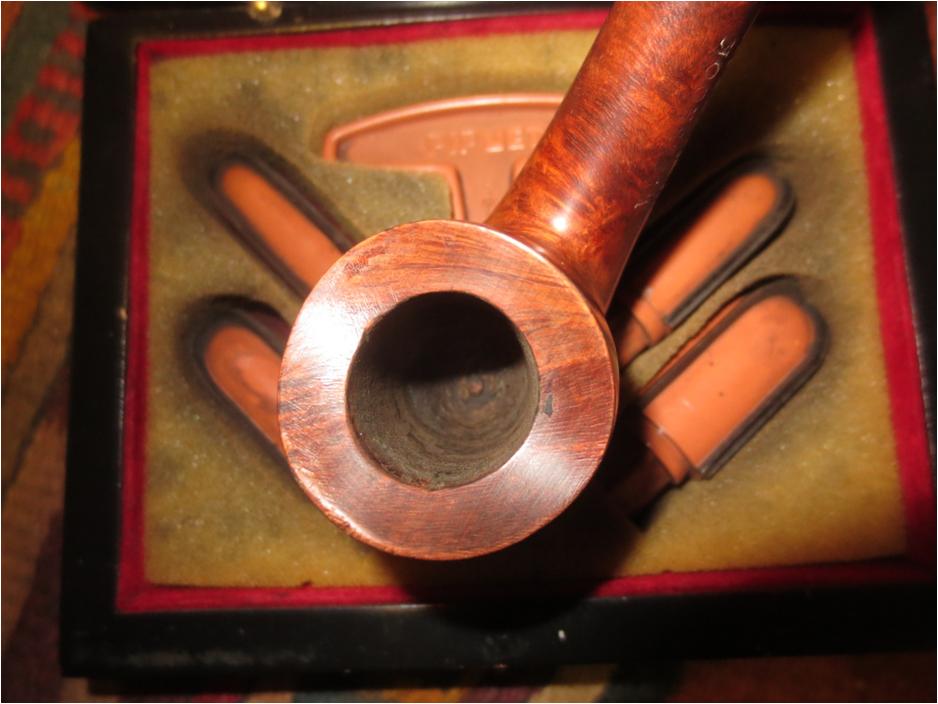
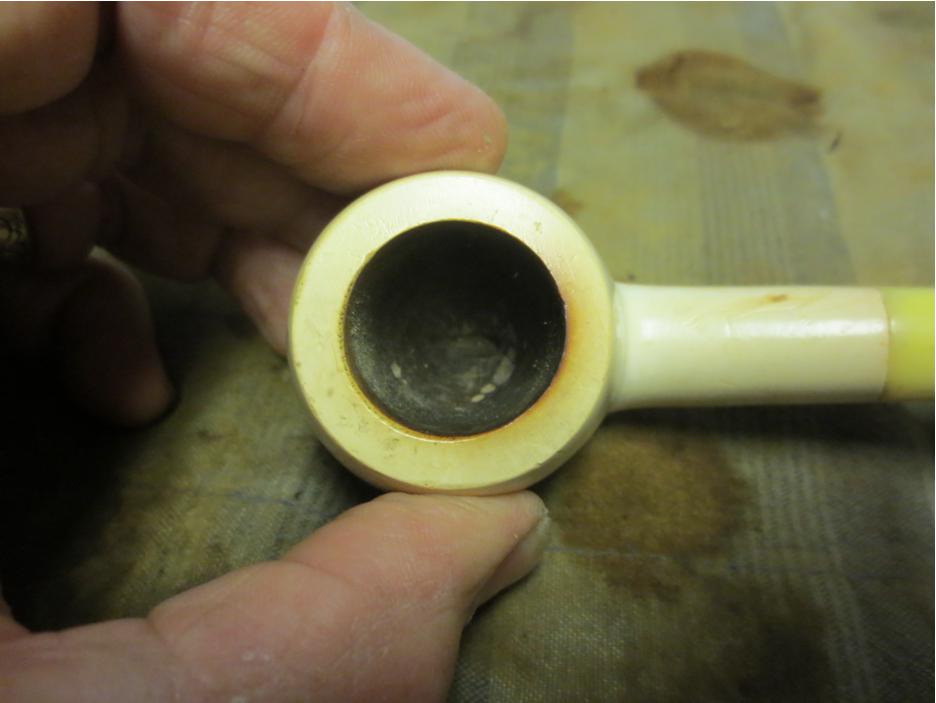
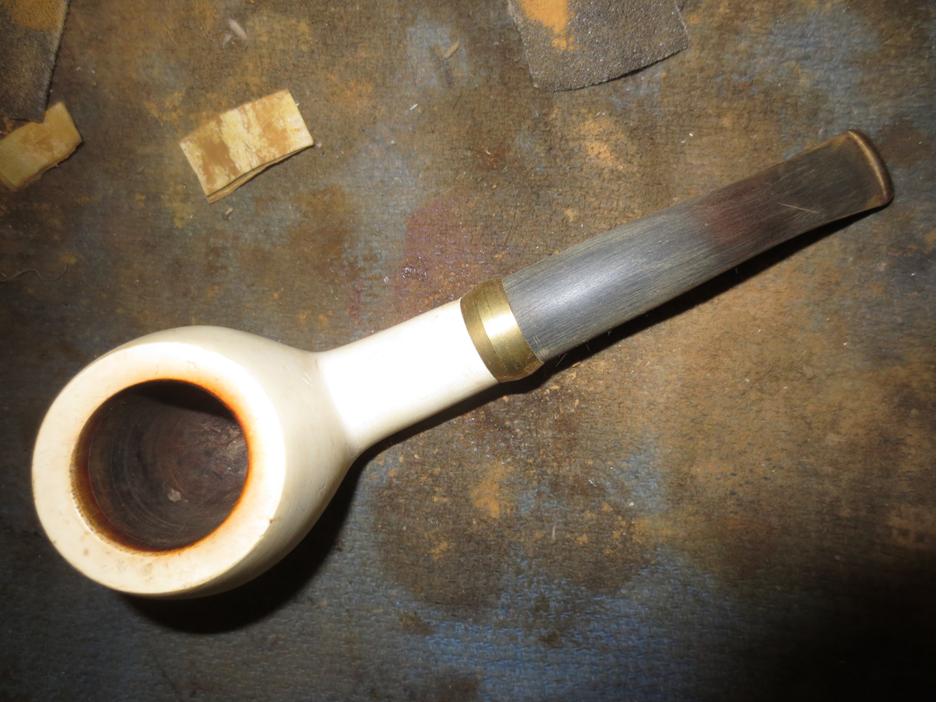
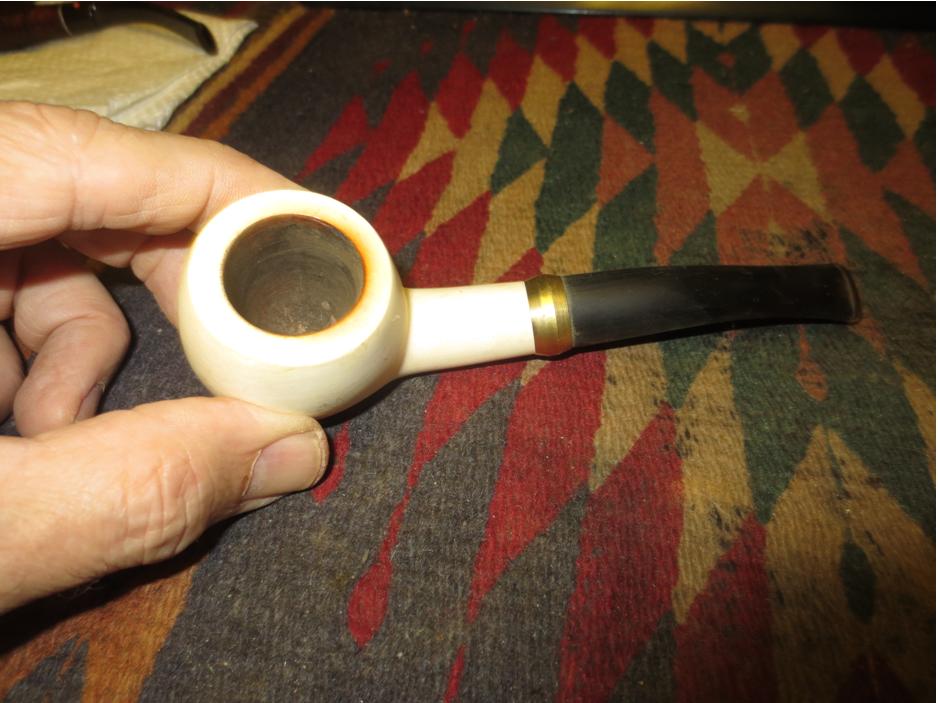
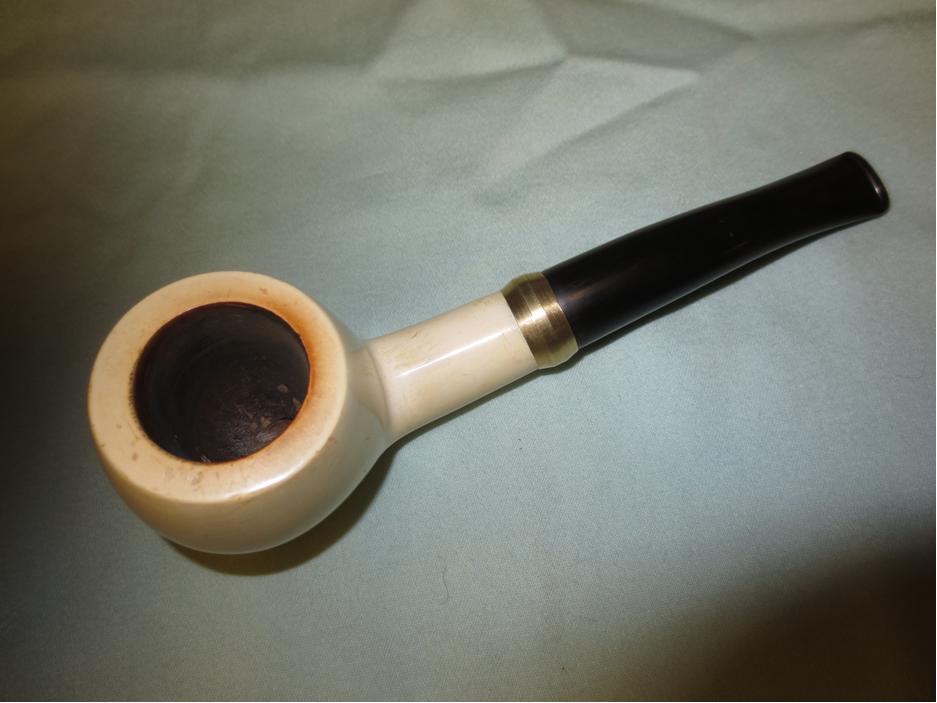
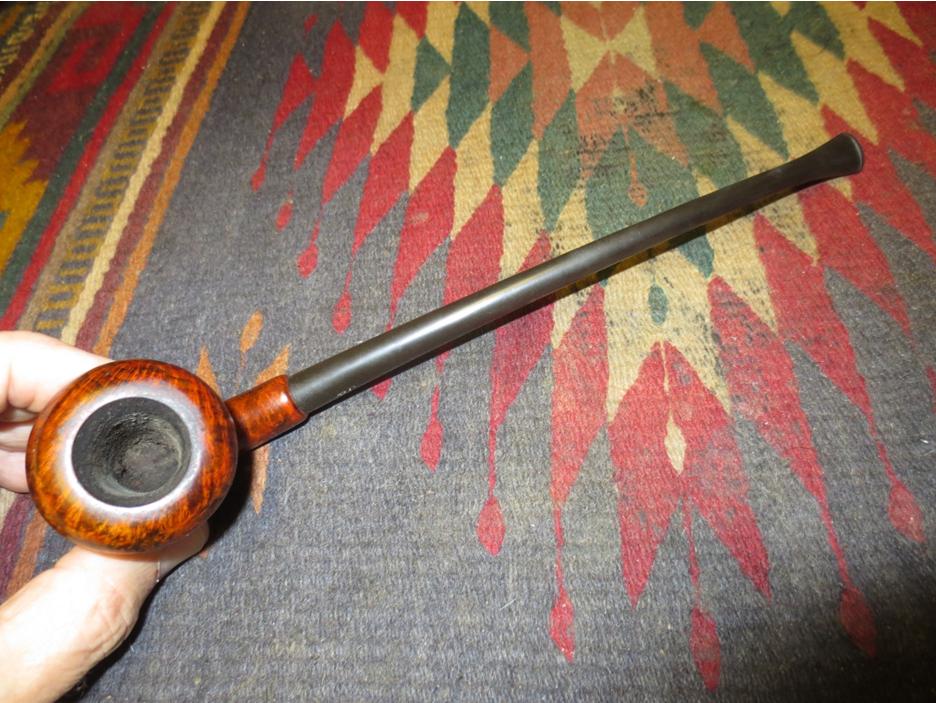
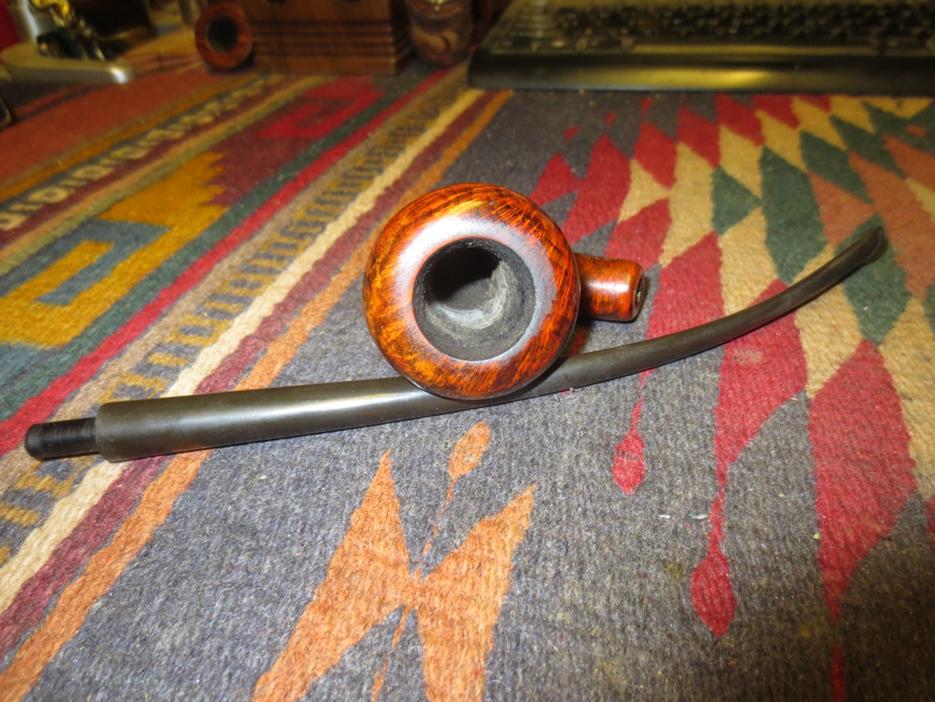
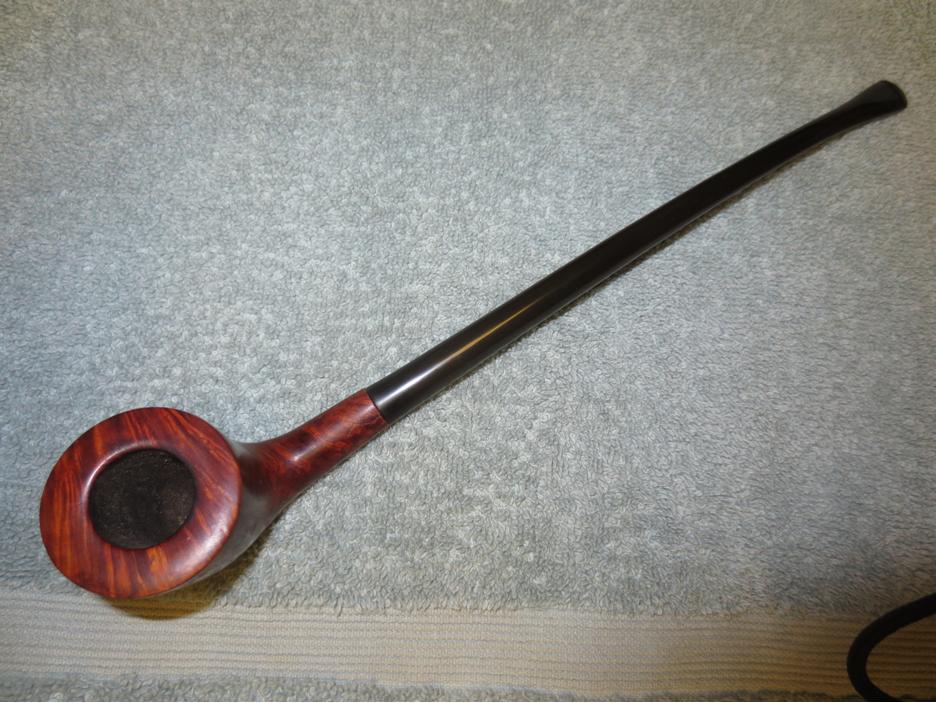
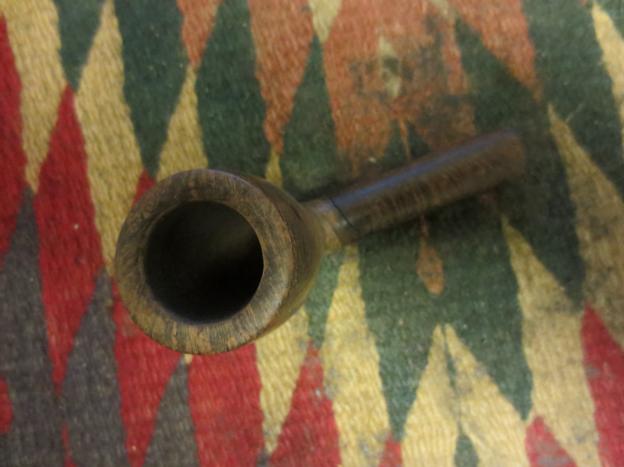
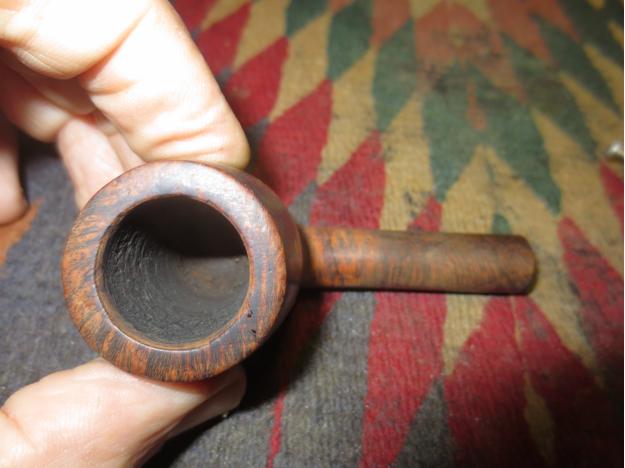
There was some light damage to the rim surface. I decided to leave it alone as it was not enough to top the bowl. It gives character to this old pipe.

LHS30

LHS31

Restoring a Millville Premiere Large Billiard


Blog by Steve Laug

The next pipe on the worktable is another that will be for sale for the benefit of Smokers Forum online community. It is a truly beautiful piece of briar that is stamped Millville Premier on the left side of the shank and Made in London over England on the right side. I have had a few Millville pipes come across my table over the years but this is by far one of the most stunning. The grain on it is beautiful. When I got it the finish was dirty and the grain did not stand out clearly. The stem was rough and porous feeling and was oxidized. There seemed to have been a softee bit in place at one time on the stem as it had left behind the characteristic calcification on the vulcanite. There were two light tooth marks on the top and bottom of the stem near the button. The fit of the stem is perfect to the shank and there is a very faint characteristic M that graces this brand of pipe. It is almost gone from over-buffing but I am hoping it will still show when I have finished cleaning up the pipe. The finish was lightened at the shank stem junction and would need to be darkened. The rim had what appeared to be a gouge across the top surface at the backside of the bowl.

I wanted to know more about the brand so I did a bit of searching on the web to see what I could find out about Millville pipes. Dennis Marshall started the brand in 1980. He had worked for Barling and Charatan for many years. His son John now makes all of the Millville pipes as Dennis is retired. Their pipes still very closely follow the artistic, freeform designs and grading of the old Charatan lines. The pipes are sold almost exclusively in Piccadilly, London in a stall in the market in front of St. James’s Church. Though you can sometimes find them online at British pipe sellers such as Bond’s of London. According to Pipedia the prices of their pipes “start at about 20 £ – hardly the price of a cheapish Stanwell. These were made from pre-turned bowls. The better pipes, entirely hand-made freehands in the old Charatan style, are made from a stock of very old briar, as John stresses. They use several grades like “Unique” or “Executive”. A “Bamboo” can make it up to 500 £.”

Below are some photos of the pipe when I received it. It is a beauty that needed some TLC but it would soon be shining again.Mill1

Mill2

Mill3

Mill4 I reamed the bowl with a PipNet pipe reamer to take the cake back to the briar. I wanted to clean up the inner edge of the rim before I worked on the mark on the surface.Mill5

Mill6 I took the next photo to show what appeared to be a gouge in the top of the rim. It went at an angle from the inside of the bowl across the back surface of the rim.Mill7 I used some alcohol on a cotton pad to scrub down the surface of the briar. Once the grime was removed you can see the stunning grain on this beauty!Mill8

Mill9

Mill10

Mill11 I spent some time examining the rim with a loupe to check how deep the gouge went and if I could steam it or if I would need to sand it to repair it. To my surprise I found that it was not a gouge at all but rather a fill. Somehow along the way the fill had shrunken and left the divot in the surface of the rim. I decided to top the bowl and see if I could minimize the divot. I started with a medium grit sanding sponge to see if that would do the job. I hate to use the extreme of topping the bowl with a full topping.Mill12

Mill13 While it worked to some degree it did not remove the dip in the surface of the bowl. I decided to lightly top the bowl with the sandpaper on the topping board.Mill14 In the next photo you can clearly see the fill in the rim. I was able to flatten the surface of the rim so that it is smooth to touch.Mill15 I sanded the inner edge of the rim with a folded piece of 220 grit sandpaper to smooth out the nick in the rim. Then it was time to clean out the bowl, shank and stem. I used pipe cleaners, cotton swabs and alcohol to remove the tars and oils in the pipe. It did not take a lot of scrubbing before the pipe was clean.Mill16

Mill17 To smooth out the rough texture of the stem and remove the oxidation I sanded it with 220 grit sandpaper and then with a medium and a fine grit sanding sponge.Mill18 For a change of pace, I turned my attention to the bowl finish. I used a stain pen to touch up the lighter areas of the finish at the stem shank junction and on the rim that I had topped. I blended two of the stain pens – the medium and the dark stain pen – to get the colour to match the bowl. I then buffed the bowl with White Diamond on the wheel to smooth out the blend. I would also need to use the micromesh sanding pads in the higher grits to bring the finish to a nice blend.Mill19

Mill20

Mill21

Mill22 I worked on the stem with micromesh sanding pads – wet sanding with 1500-2400 grit pads and then rubbed the stem down with Obsidian Oil. I dry sanded with 3200-4000 grit pads and gave it another coat of oil. This time I let the oil dry on the stem before I took it to the buffer.Mill23

Mill24 I buffed the bowl and stem with White Diamond and then finished sanding with 6000-12000 grit micromesh sanding pads. I gave the stem a final coat of Obsidian Oil and let it dry.Mill25 I buffed the pipe with Blue Diamond and then gave it multiple coats of carnauba wax. I buffed it with a soft flannel buffing pad and then hand buffed it with a microfibre cloth to add depth to the shine. The finished pipe is shown in the photos below.Mill26

Mill27

Mill28

Mill29

Mill30

Mill31

Cleaning up an Edward’s Brandy Shaped pipe


Blog by Steve Laug

Label Logo_mediumThe third Edward’s pipe that came to me in the box of pipes to clean up and sell for the support of Smokers Forums is stamped Algerian Briar in block print on the left side of the shank and on the right side Edward’s in script. There is a large 7 toward the bowl end of the underside of the shank. Near the shank it is stamped 13L which according to Edwards shape charts generally has a 7 as the first number. I think this is the same age as the previous pipes I have been working on and it only has the two digits and the letter L. That numbering is called a large apple. On the original pipes it appears that the pipe originally had a taper stem. That would explain why this stem is slightly loose and does not perfectly match the diameter of the shank.

It is about the same size as the Dublin and the apple that I just finished restoring. It has similar grain. The back and front of the bowl are cross grain and the sides are birdseye grain. The top and the bottom of the bowl and the shank are cross grain as well. The finish on the bowl was in rough shape. The briar was dry and lifeless looking. The surface of the pipe was dirty and grimy. The rim was covered with an overflow of lava like the other pipes in the lot. The bowl had a thick cake that had the same sticky and crumbling consistency as it had in the other bowls. The stem was oxidized and had some tooth chatter on the top and the bottom of the stem. The internals of the stem and the shank were very dirty and covered in a thick tar. There were quite a few fills in the bowl. There was a large on the back right side near the top of the bowl. There were several smaller fills on the front of the bowl and on the underside at the bowl shank junction. There were also some small sandpits that were not filled. Like all of the Edward’s pipes that I have worked on this one was natural briar. Once it was cleaned up it would have a rich natural look that would darken over time and use.Brandy1 Brandy2 Brandy3I took a close-up photo of the bowl to show the build up on the rim and also the odd configuration of the cake.Brandy4 Brandy5I reamed the bowl with a PipNet pipe reamer and started with the smallest cutting head and worked my way up to the head that was the same diameter as the bowl. I reamed it back to bare wood and cleaned out the debris that was left with a pen knife.Brandy6 Brandy7I scrubbed the rim with 0000 steel wool to remove the lava overflow that had hardened on the rim. I have used the steel wool on the last two pipes and I am impressed with how easy it makes this process. Of course it helps that the bowl is a natural finish so I am not damaging any of the original finish on the bowl with the steel wool.Brandy8I cleaned the internals with pipe cleaners, cotton swabs and alcohol until the inside was clean and sweet smelling. I swabbed out the bowl with a cotton swab and alcohol to clean up any of the dust left behind by the steel wool.Brandy9I scrubbed the exterior of the bowl with acetone on cotton pads to remove the ground in grime in the finish. I scrubbed it until the finish was clean and lifeless looking.Brandy10 Brandy11 Brandy12I gave the bowl a light coat of olive oil and rubbed it in to bring some of the original colour back to the briar and give it a little life. The photos below show the bowl after this treatment. It has some awesome grain – along with a few sandpits and fills.Brandy13 Brandy14 Brandy15 Brandy16With the bowl finished it was time to work on the stem. I am pretty certain that this is a replacement stem as the fit is not quite right and according to the charts it was supposed to be a taper stem. However, I decided to go with the stem that came with it in the box I received and clean it up and make it fit as best as possible. I sanded the stem with a medium and a fine grit sanding sponge and then went on to sand with micromesh sanding pads. I wet sanded with 1500-2400 grit pads and then rubbed the stem down with Obsidian Oil. I went on to dry sand it with 3200-4000 grit pads and gave it another coat of oil.Brandy17 Brandy18I buffed the stem with Tripoli and then White Diamond before sanding it with the final three grits of micromesh – 6000-12000 grit.Brandy19I buffed the pipe with Blue Diamond Plastic polish on the wheel and then gave bowl and stem multiple coats of carnauba wax. I buffed it with a clean flannel buff and then took it back to the table and hand buffed it with a microfibre cloth. The finished pipe is shown below. I kind of like the saddle stem as it gives the pipe a bit of an English flair.Brandy20 Brandy21 Brandy22 Brandy23 Brandy24 Brandy25

Cleaning up a Lovely Edward’s Algerian Briar Bent Dublin that came across my table


Blog by Steve Laug
Label Logo_mediumI received this pipe in the mail with a box of 11 others and it is the first one that caught my eye. The shape was well executed. The bowl had a round crowned rim. The bend of the shank and the curve of the stem looked elegant. The bowl had a thick, sticky and crumbly cake that needed to be removed. The rim was covered with a thick coat of lava that had overflowed the bowl. The finish was a typical Edward’s natural briar – I think that they must have used a light tan/brown stain at one point that highlighted the grain but did not mask it. The grain was mixed with cross grain on the front right and back left. There was birdseye on the sides of the bowl and swirling circles of grain on the underside and up the shank. There were two small fills on the right side of the bowl near the shank bowl junction – almost two dots one above the other. There was also a larger fill on the underside of the shank. The pipe is stamped Algerian Briar in block text on the left side of the shank and Edward’s in script on the right side. On the underside mid shank it is stamped with a large 5. On the end of the shank next to the stem it is stamped with a 31. The large 5 is the bowl size and 31 is the shape number, though current production shows the shape as a 731. The stem was lightly oxidized and would not push all the way into the mortise. The fit was very tight. The inside of the shank had a thick coat of tar and oil on the walls of the mortise.Ed1

Ed2

Ed3

Ed4 One of the packing peanuts was jammed into the bowl so I used the dental pick to remove. It left some crumbling pieces in the sticky aromatic cake in the bowl. In the first photo below you can see the tars on the rim of the bowl and the generally dull finish of the bowl.Ed5 I reamed the bowl with a PipNet reamer and took the cake back to bare briar. I wanted the new owner to be able to build a cake of their own choosing.Ed6

Ed7 I scrubbed the rim with 0000 steel wool to remove the lava on the top of the rim. I had seen Troy use that several times in his refurbs so I thought I would give it a go with this bowl. It worked extremely well. I wet the rim with a bit of water and then scrubbed it until the rim was clean.Ed8 I scrubbed out the interior of the bowl and the shank with pipe cleaners, cotton swabs and alcohol. Ed9

Ed10 I scrubbed down the exterior of the bowl with the steel wool and also wiped it down with alcohol on a cotton pad. I removed the wax and grime from the finish. Once the shank was dry the stem fit snuggly in the mortise. The stem had some light tooth chatter at the button that would clean up quite easily. With the stem fitting well I took the next four photos to show what it was about the pipe that caught my eye.Ed11

Ed12

Ed13

ED14 The stem did not need a lot of work to clean off the oxidation. I wet sanded the stem with 1500-2400 grit micromesh sanding pads. I rubbed it down with Obsidian Oil after the third pad and then continued to dry sand the stem with 3200-4000 grit pads. I rubbed it down again with another coat of oil and let it dry.Ed15

Ed16 I finished sanding it with 6000-12000 grit pads and then gave it a final coat of oil. I set it aside to dry. I buffed the stem with Tripoli and with White Diamond to remove the remnants of oxidation.Ed17 I buffed the stem and bowl with Blue Diamond Polish on the buffing wheel and then gave the pipe several coats of carnauba wax and buffed it with a soft flannel buffing pad. I took it back to the work table and hand buffed it with a microfibre cloth. The finished pipe is shown below.Ed18

Ed19

Ed20

Ed21

Ed22

Ed23

Extending the Life of a Hard Used Kaywoodie Bulldog


Blog by Steve Laug

In the box of pipes that a friend sent for me to fiddle with, was a tired old Kaywoodie Bulldog. The stamping was worn off and with a loupe I could read that it was stamped Kaywoodie on the left side of the shank with something illegible below that followed by an R in a circle. On the right side of the shank was the remnant of a shape stamp the looked like it had four digits ending with the bottom curve and tale of an S. The pipe was in rough shape. The bowl was reamed out of round with the rim having taken a beating. The right side of the inner edge was very thin and had been scored down toward the bottom of the bowl. The rings around the bowl were rough and damaged. There was a cut mark on the top of the shank where it joined the bowl and a small crack above the shank insert on both the top and the bottom of the shank. The junction of the stem and shank showed damage as well from what appeared to be pliers. The stem was overclocked. It had some tooth damage on the top and bottom surfaces and was oxidized. KW1 KW4 KW3 KW2 I looked at the pipe as it sat in the box and removed it and turned it over in my hand many times during the past three months since it arrived. I just was not sure that I could salvage it. I figured it might make a good delegate to cannibalize for parts or for another Frankenpipe but I was not sure it was redeemable. I took the next close up photos of the rim and the gouge in the shank to give you an idea of what I needed to deal with if I tackled this pipe as a project.KW5 KW6I spent quite a bit of time looking at the pipe and decided it would be worth a try to see if I could improve it and make it functional. It would never be a pipe of beauty but the old warrior deserved another lease on life. I could certainly make it look better. So with that resolve I heated the metal stinger and tenon with a lighter to loosen the glue so that I could re-clock the stem. It did not take too much heat or time to loosen and then adjust the fit of the stem to the shank. I set it aside to cool and set the glue once again.KW7I decided to top the bowl to even out the height of the bowl around the rings. Currently it was taller in the front than the back and taller on the right than the left side. I worked to take off that excess and minimize some of the damage to the rim as well.KW8 KW9 KW10I used a knife blade needle file to redefine the twin rings around the bowl and to sharpen up the definition on the top and the bottom of each line.KW11With all of the adjustments done I wiped down the bowl with acetone on cotton pads to remove the remaining finish and the ground in grime that was on the bowl.KW12 KW13 KW14I reamed the cake back to bare wood so that I could see the extent of the damage to the walls of the pipe. I used a PipNet reamer to take back the cake.KW15 KW16I cleaned up the remaining cake with a sharp pen knife to clean off all of the debris. I then sanded the rim with 220 grit sandpaper to smooth out the damage and prepare it for the plan I had for it. I wiped it down with alcohol and then packed briar dust into the rim damage. I place drops of super glue on the briar dust to form that patch. While I did that repair I also repaired the gouge in the shank bowl junction.KW17 KW18 KW19I sanded the cured patch with 220 grit sandpaper to remove the excess and to level out the surface with surface of the bowl and shank. The first two photos below show the repaired shank damage and the third photo shows the repaired rim.KW20 KW21 KW22I set the bowl aside at this point and worked on the stem. I sanded it with 220 grit sandpaper and then with a medium and a fine grit sanding sponge. Then I sanded it with micromesh sanding pads – wet sanding with 1500-2400 grit pads and dry sanding with 3200-4000 grit pads. I rubbed down the stem with Obsidian Oil between each successive grit to give the micromesh pads more traction as I used them.KW23 KW24I buffed the stem with White Diamond and Blue Diamond on the buffing wheel to raise the shine. Then it was time to stain the bowl. I decided to use an opaque oxblood aniline stain. It is a stain that is thicker in consistency to the Feibings and gives good coverage on damaged briar repairs. I applied the stain and flamed it. It gave the old warrior some life while not hiding the repairs that it would wear proudly over the years ahead to witness to its hard life.KW25 KW26 KW27 KW28I buffed off the excess stain once it was set with a quick buff of Blue Diamond polish on the buffer. I then worked some more on the stem working back through the previous grits of micromesh to reduce the stubborn oxidation on the stem. I used a lighter flame to paint the surface of the stem to burn off the oxidation as well. I finished by sanding it with 6000-12000 grit micromesh pads and then buffed the entirety with Blue Diamond on the buffer.KW29I gave the bowl and stem multiple coats of carnauba wax and buffed it to a shine with a clean flannel buff. I hand buffed it with a microfibre cloth to give it some depth. The finished pipe is shown in the pictures below. While the pipe certainly is not a thing of beauty there is some restored dignity that will serve it well in the years ahead. It should serve the pipeman whose rack it graces with a good solid smoke for a good long time.KW30 KW31 KW32 KW33

Another dressed for the Prom… maybe the Prom King – Cheap Meer Given a New Look


Blog by Steve Laug

In the box of pipes to experiment with and refurbish as I can I had the mate to the little meerschaum apple that I restored a few days ago. https://rebornpipes.com/2015/08/28/prom-night-dressing-up-a-cheap-meerschaum-apple/ This one is a Meerschaum billiard. It had the same plastic (nylon) stem (it is not acrylic – way too soft). It had been smoked about the same amount as the other one – in fact the detritus in the bowl was identical. The stem had a crack on the underside from the button forward about 1 ½ inches. The finish had some dings and scratches in the surface but was very redeemable. I thought since I had to restem it anyway I might as well make it a match to the apple.Bill1

Bill2

Bill3

Bill4 I took the next close-up photo to show the fit of the stem to the shank and also the crack in the underside.Bill5 The next series of photos show the brass band that I chose to put on this one to match the other. It is a pressure ferrule and I have used them a lot in the past as they make a great looking band. Sometimes I grind out the rings and other times I leave them as I did in this case. Note the different tenon set up on this stem. The other stem had been drill out and the shank had a Delrin insert to accommodate a push stem. This one has a stainless steel tube glued solidly in the shank of the pipe. I heated it and pulled it but I am not able to remove it so I decided to leave it alone.

To make the shank ready for the band I needed to sand it back the width of the band. I used 220 grit sandpaper and carefully worked it back evenly to make fitting the band simpler. My normal pressure fit method of pressing a band would need to be modified on this one because of the metal tenon locked in the shank. It would still work but just need modification. I heated the band with a lighter and then pressed in place a little bit at a time working my way around the tenon.Bill6

Bill7

Bill8 With the newly banded shank finished it was time to work on a new stem. I toyed with the idea of using the nylon one from the other pipe. It did not take me long to put that idea aside. I had a stem in my can of stems that would do the job – an old taper vulcanite with a very straight profile would look great on this meer billiard. I used the Dremel and sanding drum to take back the existing tenon and flatten it against the face. I forgot to take a photo of the stem to begin with so I stopped mid stream after I had removed about half of it to take the photo below.Bill9 Once I had removed the tenon I needed to drill out the airway to accommodate the metal tenon. I would in essence make a reverse tenon set up on the stem. I started with a drill bit slightly larger than the airway and hand twisted the stem onto the bit. I have found this is far safer that using a power drill to do this finicky work. I worked my way up to a bit the same diameter as the tenon and hand turned the stem onto the bit. I put a piece of tape on the bit so I would know when to stop turning the stem. That marked the depth of the tenon. Once I got to that place the stem would push onto the tenon flush against the shank end in the band.Bill10

Bill11

Bill12 The next photo is an end view of the newly drilled airway. It is a little rough and will need to be sanded smooth to remove all of the scratches.Bill13 I pushed the stem in place on the pipe to get an idea of the final look of the newly dressed prom king. The photos below show the stem before I did the final adjustments to the diameter and flow.Bill14

Bill15

Bill16

Bill17 I liked the new look a lot. It had the same touch of class as the meerschaum apple does. It would come out looking pretty slick once it was finished. I sanded the diameter of the stem with the Dremel and sanding drum to take off a fraction so that it would sit flush in the band with no gap around the edges. I then hand sanded it with 220 grit sandpaper to further fine tune the fit.Bill18

Bill19

Bill20 I sanded the newly fit stem with a medium and a fine grit sanding sponge to clean up the vulcanite and remove all of the scratches from the sanding drum and 220 grit sandpaper. I sanded it with micromesh sanding pads – wet sanding with 1500-2400 grit pads and dry sanding with 4000-12000 grit pads. I rubbed it down with Obsidian Oil between each set of three pads and then after the 12000 grit pad I let it dry before going to the buffer. I also sanded the bowl with the micromesh pads to polish the meerschaum.Bill21

Bill22

Bill23 I buffed bowl and stem with Blue Diamond and then gave the stem multiple coats of carnauba wax. I buffed it with a clean flannel buff to raise a shine and then hand buffed it with a microfibre cloth to put on the final touches. The finished pipe is shown below.Bill24

Bill25

Bill26

Bill27 The next two close up photos show the detail of the stem. They also show the way the air hole has been opened to accommodate the metal tenon.Bill28

Bill29 The final two photos show the two meers, dressed and ready to head out to the Prom. They look like royalty – maybe Prom King and Queen. Ah well so much for an old guys memory of things long past in the recesses of the high school years file.Bill30

Bill31

Restoring a Dr. Grabow Westbrook 42


Blog by Steve Laug

In a box of pipes I was gifted there was a pipe stamped WESTBROOK over Dr. Grabow on the left side of the shank. On the right side it is stamped Imported Briar over Adjustomatic over PAT. 2181833. I did some searching on the web and found that it was a shape number 42. I found plenty of photos of wire carved Westbrook 42s but only one of a smooth alongside of the wire carved. This pair was pictured on the Dr. Grabow Collectors Forum and belongs to Troy Wilburn. Mine is similar to the smooth one but the look of the stem is more of a true saddle like the wire carved one.Doc1 The grain on it was beautiful under the peeling varnish finish. There was a lot of birdseye and swirls with some mixed flame and straight grain. There were small nicks on the left side near the rim and on the front edge of the rim. The stem was oxidized but otherwise clean. The internals were pretty clean. The bowl had some slight carbon build up. The stinger apparatus was missing but I have one thanks to Troy that will fit perfect.Doc2

Doc3

Doc4

Doc5

Doc6 I scrubbed the bowl with acetone on cotton pads to remove the bubbled and peeling varnish or lacquer coating. It took some elbow grease but it came out pretty well. With that coat gone you can begin to see the grain on the sides, top and bottom of the bowl.Doc7

Doc8

Doc9

Doc10 I wiped it down a final time with isopropyl alcohol and took the next photos to show the grain on this little beauty! It is a great piece of briar and what appeared to be fill were not but rather just chips of varnish that came off.Doc11

Doc12

Doc13

Doc14 The front edge of the rim and the left side nicks would need to be sanded to smooth them out. The entire bowl would also need to be sanded with micromesh to remove the bits of varnish stuck on the briar and also smooth out some of the scratches in the briar.Doc15 I reamed the bowl with a PipNet reamer and took the cake back to just a thin coating. I left a little on the sides and bottom of the bowl to protect the bowl. I cleaned out the bowl and shank with pipe cleaners, cotton swabs and alcohol to remove the grime.Doc16

Doc17 I sanded the rim of the bowl and bowl sides with micromesh sanding pads. I smoothed out the damage on the front of the bowl and on the side. I also worked on the stem. I wet sanded it with 1500-2400 grit pads and dry sanded with 3200-12000 grit pads. I rubbed it down with Obsidian Oil in between each set of three pads. I cleaned the metal threaded tenon with steel wool and then added the spoon stinger in the tenon to make the pipe complete.Doc18

Doc19

Doc20 The oxidation on this one was tough to get off the stem. I took it to the buffer and use some Tripoli, White Diamond and then Blue Diamond and I finally beat it. I took it back to the work table and sanded it again with the last three grits of micromesh – 6000-12000 grit. I rubbed it down again with Obsidian Oil and then gave both the bowl and stem multiple coats of carnauba wax. I buffed it with a clean flannel buff and then hand buffed it with a microfibre cloth. The finished pipe is shown below.Doc21

Doc22

Doc23

Doc24

Doc25

Doc26

Doc27

Doc28

Doc29

Prom Night – Dressing up a Cheap Meerschaum Apple


Blog by Steve Laug

I was given a batch of pipes from a friend on one of the forums that he had lying around a long time. He was pretty certain that they were not worth much but he thought they might be fun for me to fiddle with. One of them was a meerschaum apple-shaped pipe with a plastic stem. The draw on it was awful, like sucking air through a coffee stirrer. The bowl had a few issues at first glance. There were some gouges in the meer on the sides of the bowl and the shank. There were some small cracks in the shank from the end forward near the top. There was a Delrin sleeve so these may or may not be a problem. The tenon itself was small and rough. The stem had some damage from what appeared to be melting at some point in its life. But it was barely smoked and there was something about it that caught my eye. I could see some promise in it so it would be worth the fiddle.band1

band2

band3 On the bottom of the exterior of the bowl there looked like there was a crack that ran for the length of the bowl. I examined it with a lens and it turned out to be a gouge in the surface of the meerschaum. It may be a crack but it did not go deep in the material so it was salvageable.band4

band5 I took a close-up photo of top and inside of the bowl. You can see that it is barely smoked and the crack does not appear to go into the bowl.band6 The plastic stem just bugged me. I could find nothing redeeming in the shape of it at all. The taper was wrong and it was pinched at the shank joint. The faux amber look of it was really fake looking. The material was very soft and I could scratch it with a fingernail.band7

band8 Everything about the way the pipe looked when it arrived made me think it would be one that I would clean up, polish and turn around and get rid of. I probably would not sell it but would pass it on to someone wanting a meerschaum pipe. I cleaned the inside of the bowl with a cotton swab and water. I cleaned out the airway in the shank and stem with cotton swabs, pipe cleaners and alcohol. I had finished the cleaning and had lightly sanded the bowl with 400 and 600 grit sandpaper to minimize the scratches and dings in it. I was done with the pipe and took it to the buffer to lightly polish the stem and bowl.

It has been a long time since a pipe got away from me when buffing but this one did. The Blue Diamond polishing wheel is a bit touchy and it grabbed the plastic stem and took the pipe out of my hand. It hit the tile floor right in front of the buffer and the stem snapped off at the shank. The tenon was stuck in the shank and the other end was glued in the stem. I was very fortunate as the pipe hit directly on the stem and not on the meer bowl or it might have been ruined. As it was it meant I had a good excuse to throw away the plastic stem and make a vulcanite one. I pulled the tenon out of the shank with a screw. It came out easily. I tried to pull the glued end out of the stem but putting in a screw and heating the screw but the glue held. I put the stem away and went on a hunt in my stem can for a suitable vulcanite stem for the pipe.band9

band10 I found just the right donor stem. It was a bent round stem that came from an old-timer somewhere along the way. It was thick and the diameter was close to that of the shank. I took the tenon down with the Dremel and sanding drum and finish it by hand with sandpaper to make a snug fit in the Delrin sleeve in the shank. I used the Dremel and sanding drum to take off the excess diameter of the stem and then hand sanded it with 220 grit sandpaper to make the shank and stem match. While I was working on it I examined the two small cracks in the shank. They bothered me. While they would not go anywhere as the Delrin sleeve was glued and held them together, they still bothered me. I used a small micro drill bit on the Dremel and put a hole in the end of both cracks on the shank. I put a drop of super glue in the holes to seal them. I then remembered that I had some brass plumbing pressure fittings that make interesting bands. I heated the brass with a lighter and pressed it onto the shank to cover the cracks and give the pipe a little more bling.

I finished shaping and fitting the stem and took the photos below to give an idea of what the pipe would look like when finished. The bend in the stem is a little too much at this point and I would need to take some of the bend out. The bowl looks good with the brass fitting and the stem length works with this bowl.band11

band12

band13 I was able to sand out the gouge on the bottom of the bowl and it looks smooth and fresh now. I will need to sand the entire bowl with micromesh to polish the meerschaum and give it a shine.band14 I heated the stem with a heat gun to take out some of the bend. When the stem was flexible I pressed it against table surface with a towel to take out some of the bend. I cooled it with water to set the new bend. The second photo below shows the newly bent stem.band15

band16 I sanded the stem with a medium and a fine grit sanding sponge to take out the scratches and work on the oxidation that was deep in the edges of the button.band17

band18

band19

band20 You can see in the photos above that the stem did not quite seat properly in the shank. I used a sharp knife to bevel the inner edge of the mortise so that the stem would sit properly against the shank.band21 I sanded the bowl and shank with 3200-4000 grit micromesh sanding pads to minimize the scratches.band22

band23

band24

band25 I wet sanded the stem and the tenon with 1500-2400 grit micromesh pads and then rubbed them down with Obsidian Oil. I continued by dry sanding the stem with 3200-4000 grit micromesh pads and the giving it another coat of oil. I finished by sanding with 6000-12000 grit pads and gave it a final coat of Obsidian Oil. When it dried it was ready to buff.band26

band27

band28 I buffed the bowl and stem with Blue Diamond Plastic polish on the wheel and then gave the stem several coats of carnauba wax. I gave the bowl two coats of white beeswax and the buffed it as well. I buffed both with a clean flannel buff and then by hand with a microfibre cloth. The finished pipe is shown in the photos below.band29

band30

band31

band32

band33

band34

band35

A Straight Forward Rejuvenation on a Butz Choquin Calabash Churchwarden


Blog by Steve Laug

This pipe came to me from a friend who wanted me to sell it for him and give a donation to the SA Foundation’s work in Kathmandu, Nepal. Having just come home from there I thought it was time to work on this one. I have a buyer for it already so it is just a matter of cleaning it up and then sending it off. It is a Butz-Choquin Calabash Churchwarden and it is in pretty decent shape. It is stamped Butz-Choquin over Calabash on the left side of the shank and St Claude arched over France on the right side. The finish was quite nice and just had some build up and oils on the surface. The bowl had a thin cake that was running over the rim. The finish while dirty was in decent shape. The stem was stamped with the BC logo and was lightly oxidized. It would not take a lot of time or energy to clean up and get it ready for its new owner.BC1

BC2

BC3

BC4

BC5

BC6 I scrubbed down the rim with saliva and cotton pads until it all came off and left the surface fresh. I gave the bowl a coat of carnauba wax and buffed it lightly by hand.BC7 I reamed the bowl with a PipNet reamer and took the cake back to a very thin coat (almost nothing) as it will give the new owner the opportunity to build his own cake.BC8

BC9 I cleaned out the bowl and shank with pipe cleaners, cotton swabs and alcohol to remove carbon from the wall of the bowl and the tars and oils that were trapped in the shank and airway. I also cleaned out the airway in the stem at the same time.BC10 I sanded the stem down with a medium and a fine grit sanding sponge and then wet sanded it with 1500-2400 grit micromesh sanding pads. I rubbed it down with Obsidian Oil before progressing to dry sanding with 3200-4000 grit pads. I gave it another coat of oil and then finished with 6000-12,000 grit micromesh pads. I gave it a final coat of Obsidian Oil and let it dry.BC11

BC12

BC13 Once it was absorbed into the vulcanite I buffed it with White Diamond and then Blue Diamond to polish it and remove any remaining oxidation. I gave it several coats of carnauba wax and then buffed with a clean flannel buff. I finished by hand buffing the pipe with a microfibre cloth to raise the shine. The finished pipe is shown in the photos below. Tomorrow it will be mailed out to the new owner. I think he will enjoy this long stemmed pipe. It is truly a beauty.BC14

BC15

BC16

BC17

Crafting a Interior Shank Repair for a Cracked Shank Peterson Churchwarden


Blog by Steve Laug

A friend of mine stopped by with a pipe he wanted me to take a look at. It was a beautiful Peterson Churchwarden with a shapely long bent stem. The Dublin shaped bowl was perfect for this pipe. He showed me the issue – a cracked shank. Now that is typically an easy repair – just drill a pin hole at the end of the crack, glue and band the shank. But John being who he is does not like bands or bling on his pipes so he wanted me to see if I could band it from the inside! I thought it would be worth a try as I had done it before using a Delrin tube glued inside the shank to stabilize the cracks and then super glue into the cracked area and clamp until it sets. The issue with this crack was not as straight forward as the two photos below show. It was actually cracked in two places on the top of the shank – about a half-inch apart. The two cracks joined and if I had wanted to I could have removed a triangular piece of briar from the shank. The good news with this was that the joining of the two cracks had stopped the crack from going further up the shank so a repair would be straightforward.CW1

CW2 Now the challenge begins. I did not have any Delrin tenons that I could repurpose so I looked in my parts box and found the shank end of a replacement push tenon insert for meerschaum pipe repairs. Long ago I had used the stem end for something else and saved the shank insert knowing that one day I would be able to use it. Today was the day. I used my Dremel and sanding drum to sand off the edges of the thick end and to take down the threads on the insert. When I was finished sanding I had a rough surfaced tube insert that would sit in the shank of the Peterson with little effort.CW3 I opened the crack in the shank and put clear super glue into the opening. I pressed it together until it set. Then I coated the exterior of the tube with viscous super glue that was slow drying and pressed it into the shank. I set it aside to dry while I worked on the diameter of the tenon to reduce it enough to fit in the repaired shank. To me this is always the tricky part. I was sure I could take the tenon down some without weakening the strength of the tenon too much. With the size of the airway I only had one chance to get it right.CW4 When the insert was set, I used a drill bit and turned it into the shank to remove excess thickness and maximize the room for the tenon. I also used a knife to bevel the end of the tube insert and flare it to fit the bevel of the briar. I put the stem in place and the fit was good! I sanded the shank to clean up the repair glue. I sanded carefully around the nomenclature so as not to harm it but I wanted it to blend with the rest of the shank.CW5

CW6

CW7

CW8 Once I had the shank/stem fit the way I wanted it I stained it with a medium and dark stain pen to blend it in with the rest of the briar. I also scrubbed the rim with saliva and a cotton pad to remove the tars on the surface. I buffed the bowl with Blue Diamond and then gave the bowl several coats of carnauba wax.CW9

CW10 Though still visible on the exterior of the shank the crack is sealed and repaired. I worked on the stem to give it a polish. I sanded it with micromesh sanding pads – wet sanding with 1500-2400 grit pads and dry sanding with 3200-12,000 grit pads. In between each set of three pads I rubbed the stem down with Obsidian Oil. After the final sanding with the 12,000 grit pad I let the oil soak into the vulcanite before buffing the stem with Blue Diamond.CW11

CW12

CW13 I buffed the stem with Blue Diamond polish on the wheel and then gave the bowl and stem multiple coats of carnauba wax. I polished it with a clean flannel buff and then rubbed it down by hand with a microfibre cloth to give it a final shine. The finished pipe is shown below.CW14

CW15

CW16

CW17

CW18

CW19