Tag Archives: removing oxidation

Breathing New Life into an LHS Sulgrave


Blog by Steve Laug

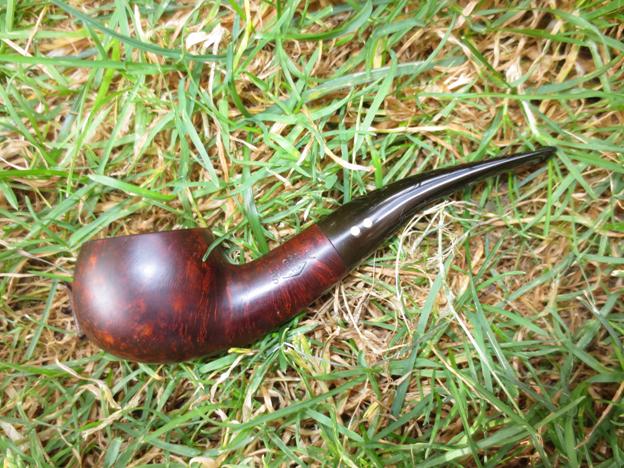
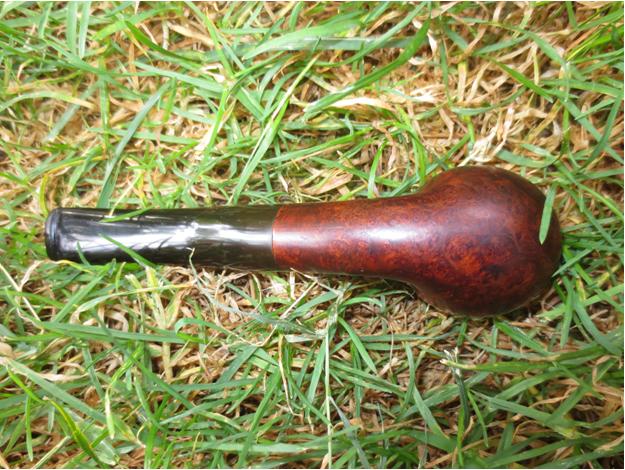
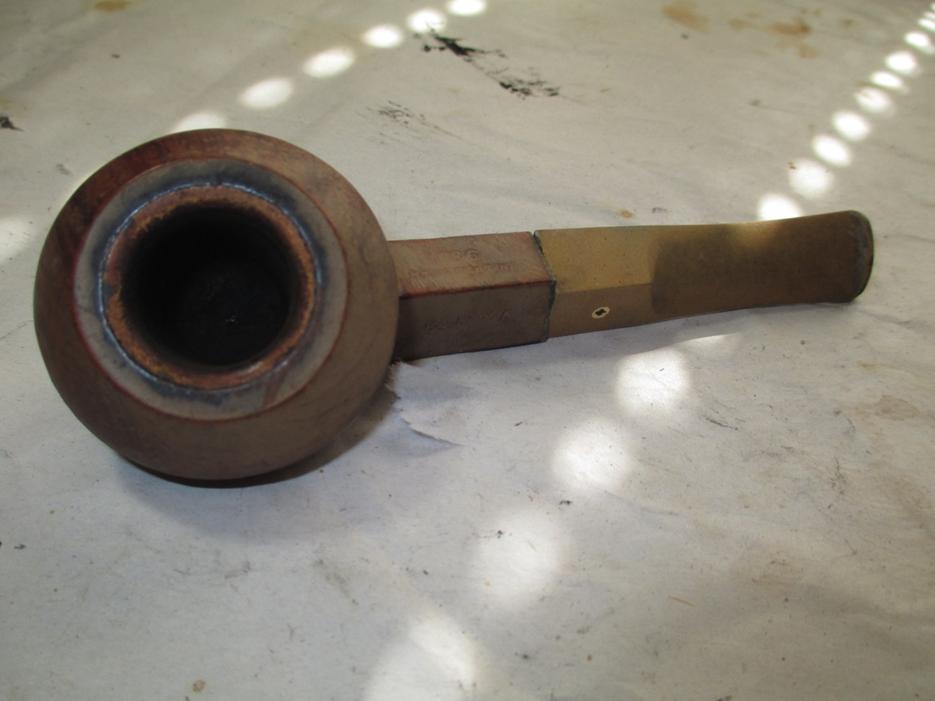
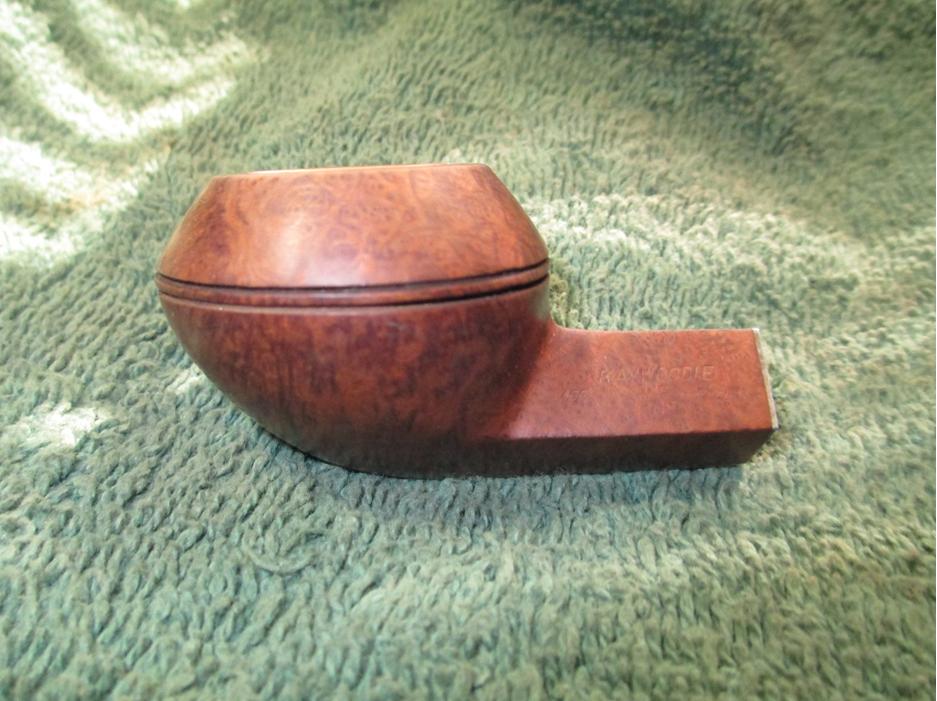
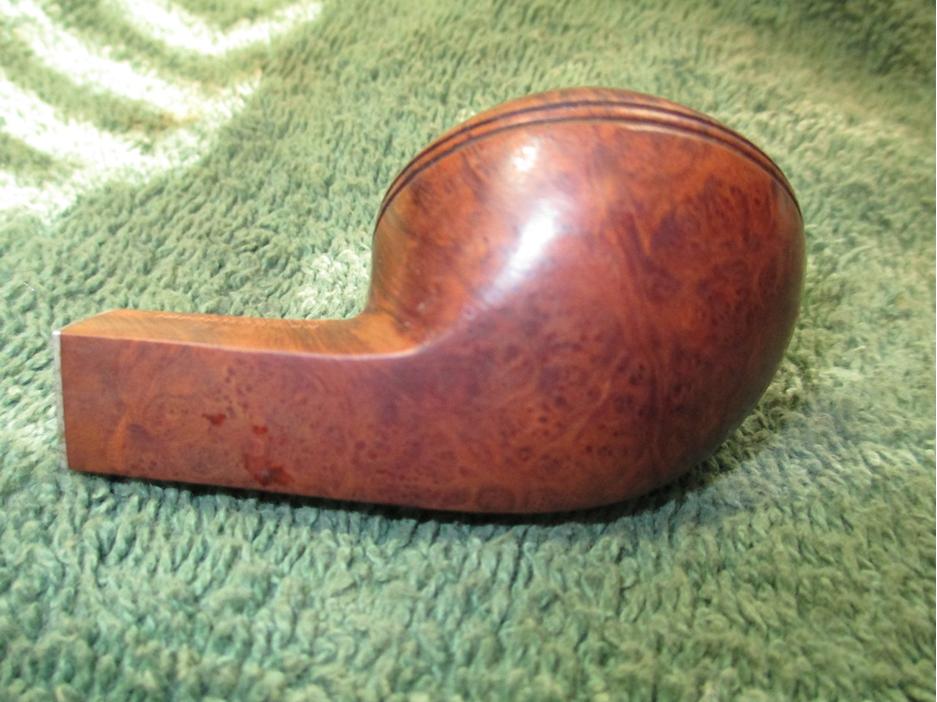
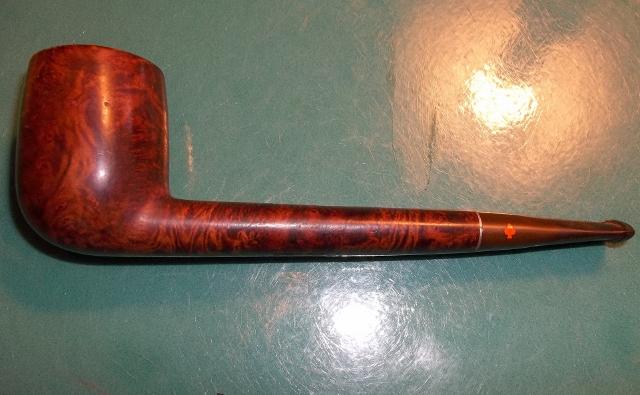
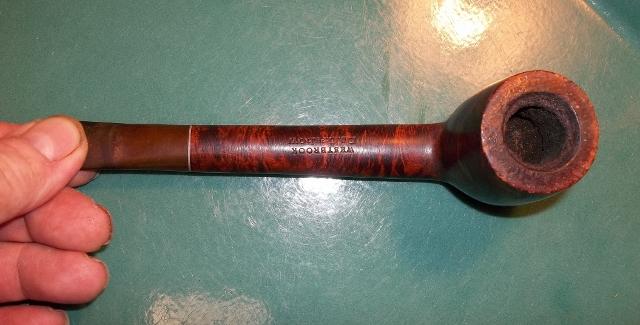
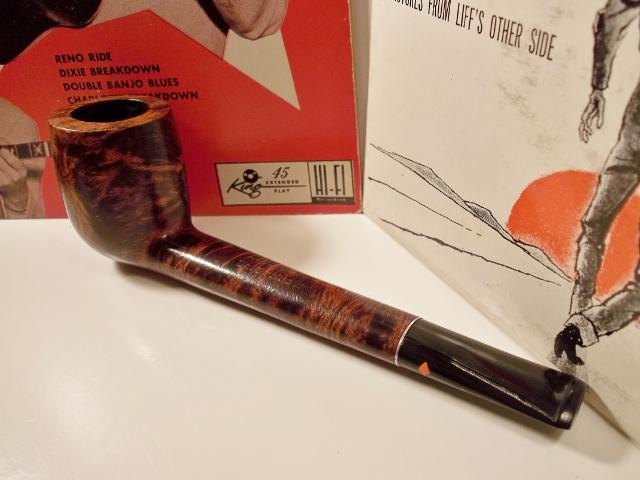
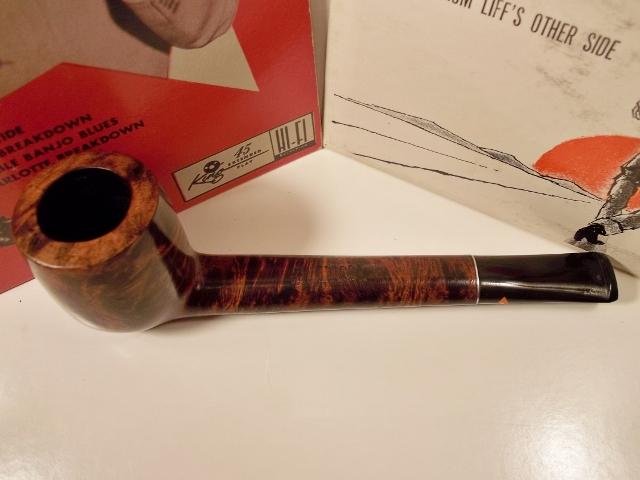
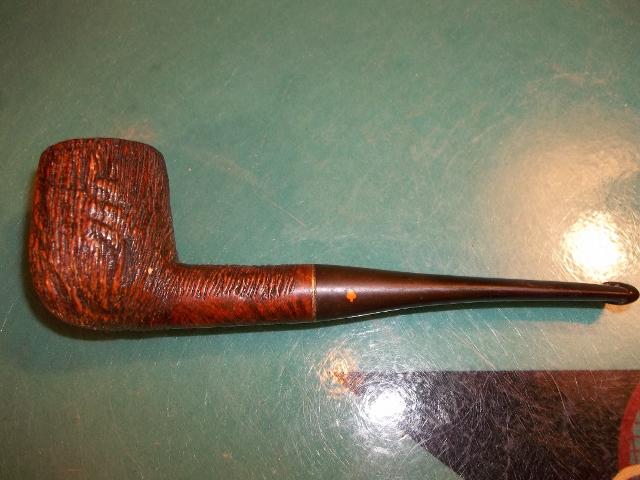
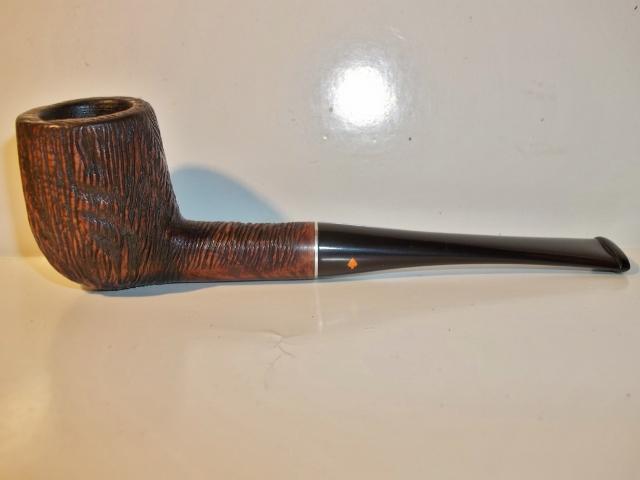
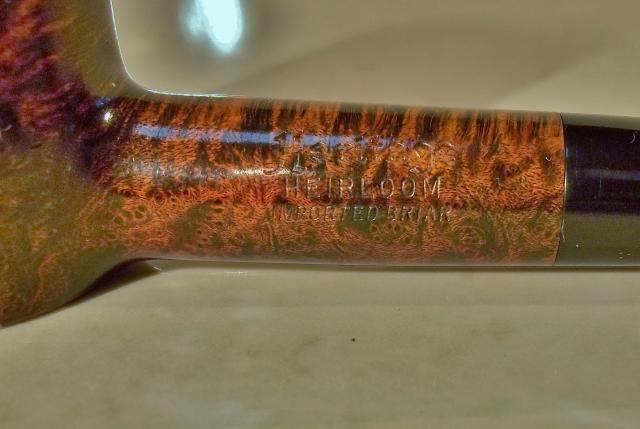
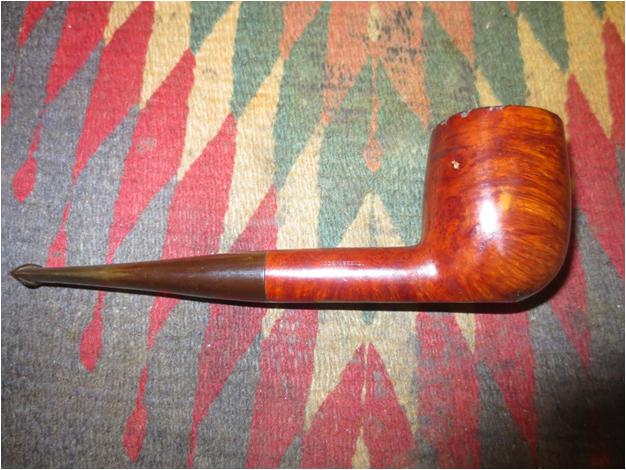
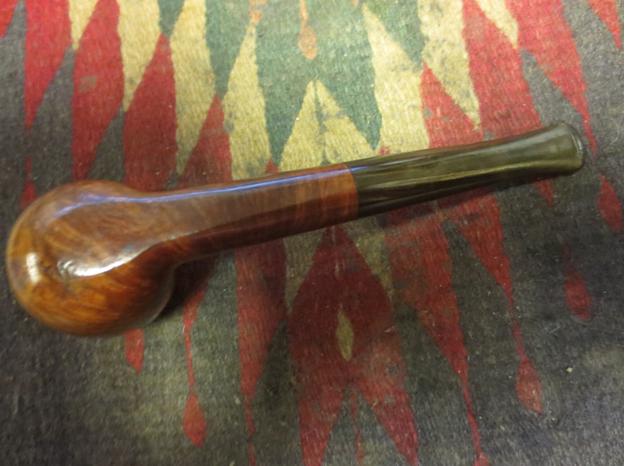
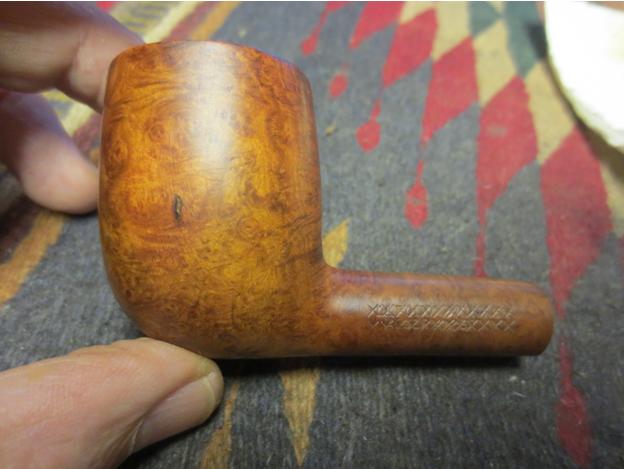
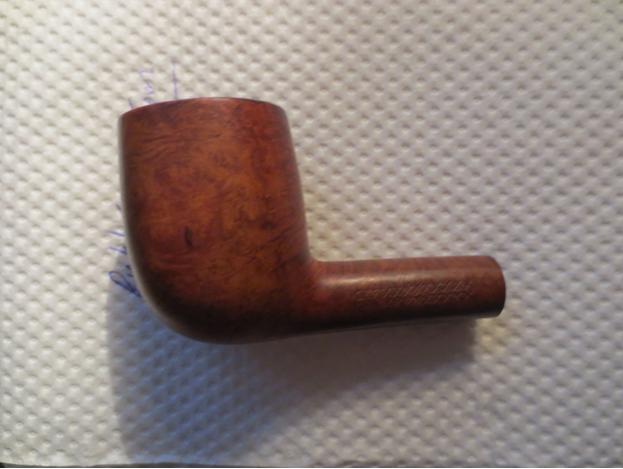
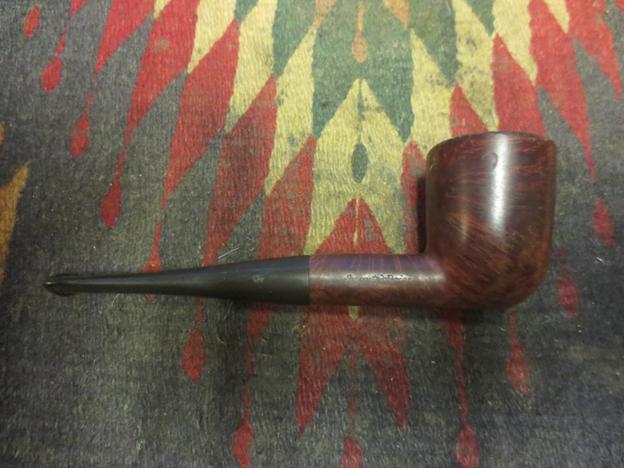
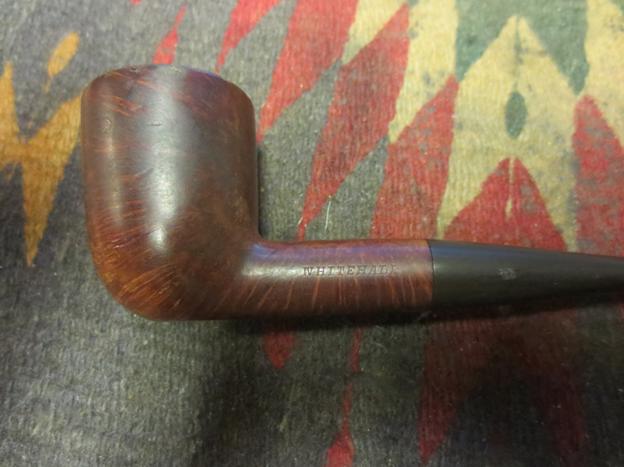
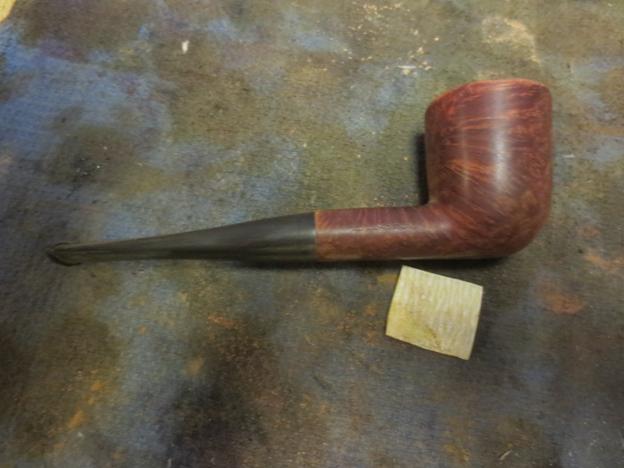
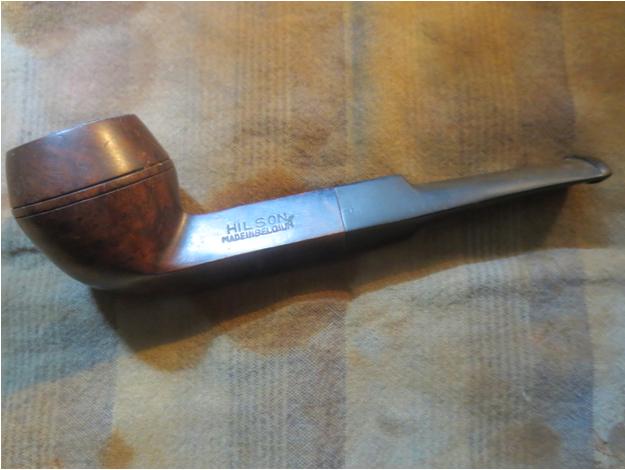
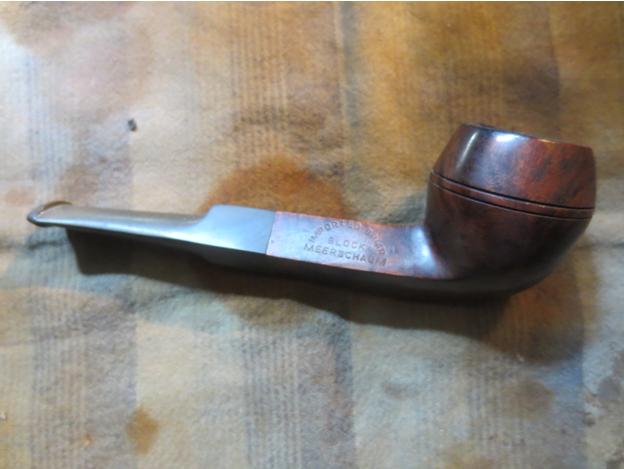
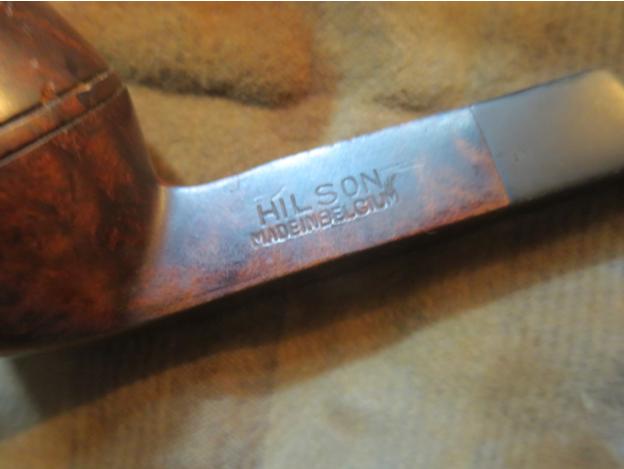
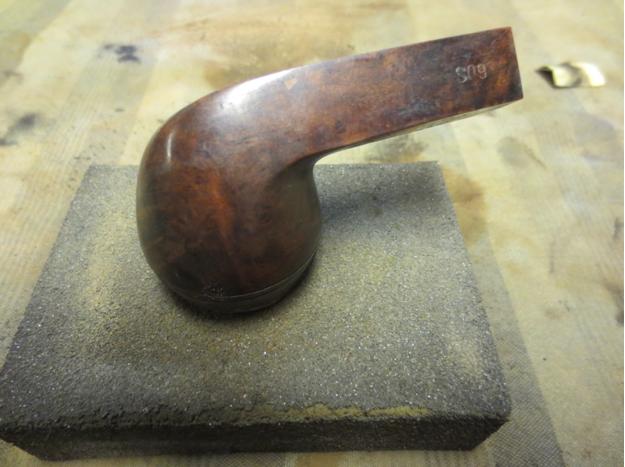
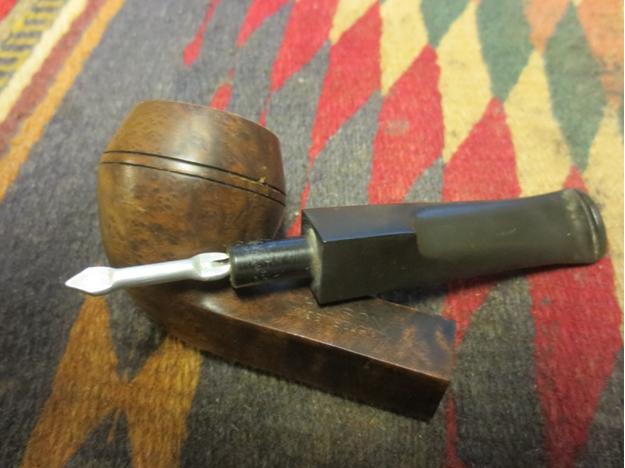
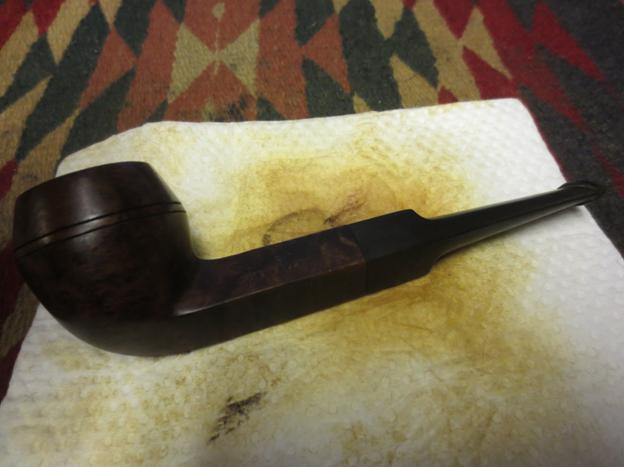
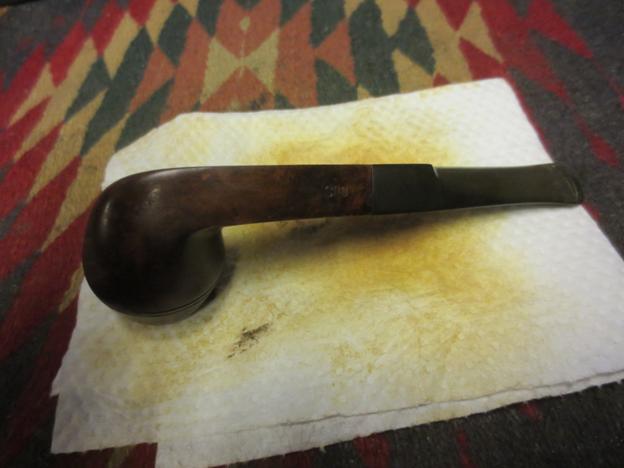
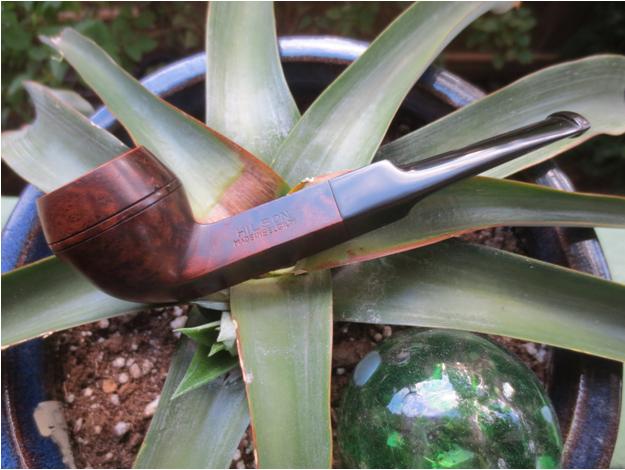
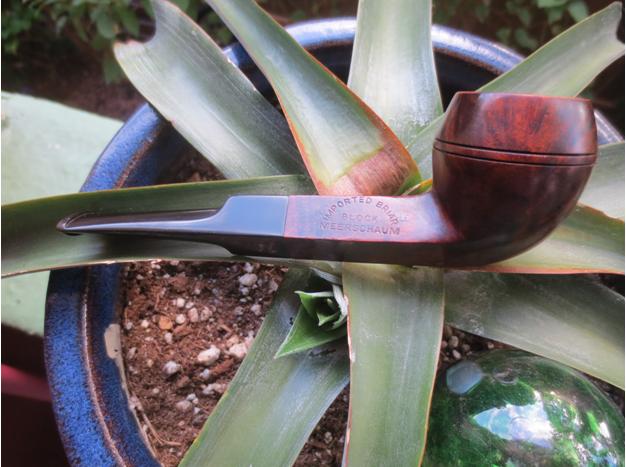
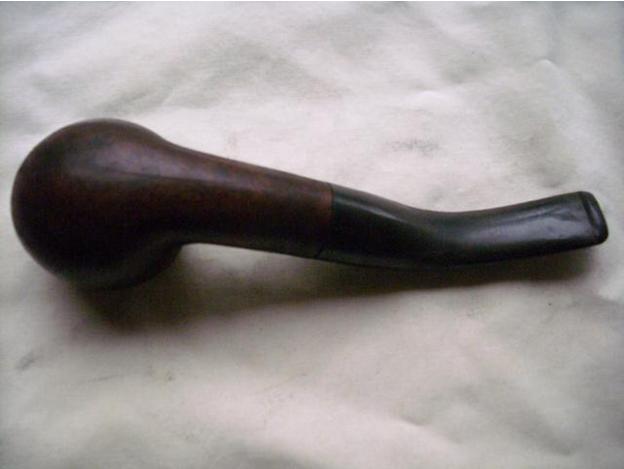
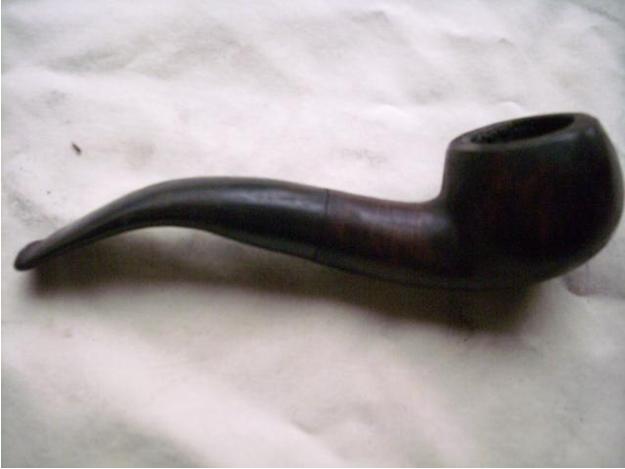
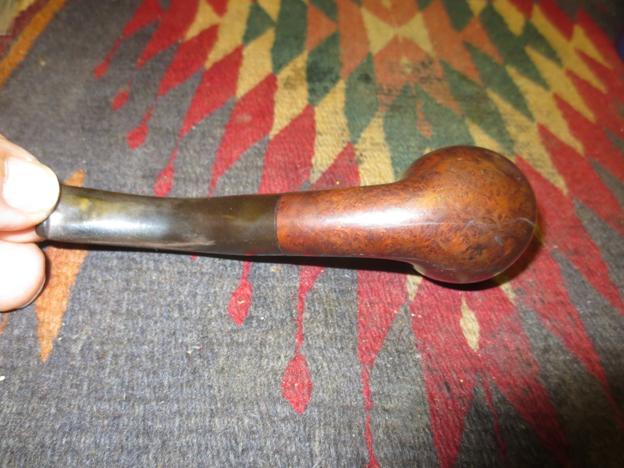
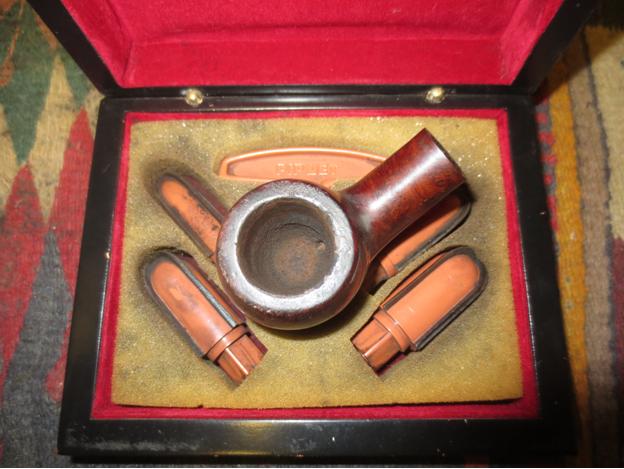
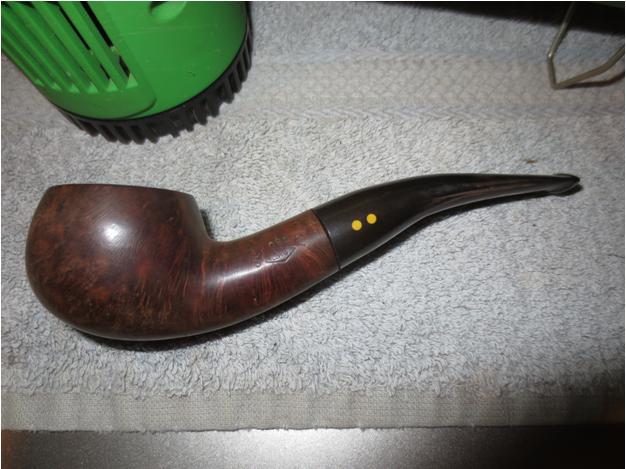
I have become a fan of older LHS pipes and restored quite a few of them lately. I am always on the lookout for different LHS lines that I have not seen. Recently I picked up this LHS Sulgrave from a fellow on the Dr. Grabow Collectors Forum for $15. It is a line that I had not heard of before. He described it as a lightly smoked briar pipe. When I saw it I wanted it as it was my kind of shape. Never sure what to call this shape – bent banker, squat apple – not sure but I like it. He gave the following description in the sale listing. The shank is stamped Purex Sulgrave arched over LHS in a Diamond on the left side. The stem has two light coloured dots on the left side. The pipe is 5 1/8 inches long from the bottom of bowl to end of bit. The bowl chamber diameter is 7/8 inch and bowl depth is 1 1/4 inch. There is light caking in bowl. There is light tooth wear on end of the stem near the button. It has normal wear and tear (dings, oxidation and scratches) for an estate pipe. Nice overall shape and condition. Here are the photos that he included when I emailed him for details.LHS1

LHS2

LHS3

LHS4 
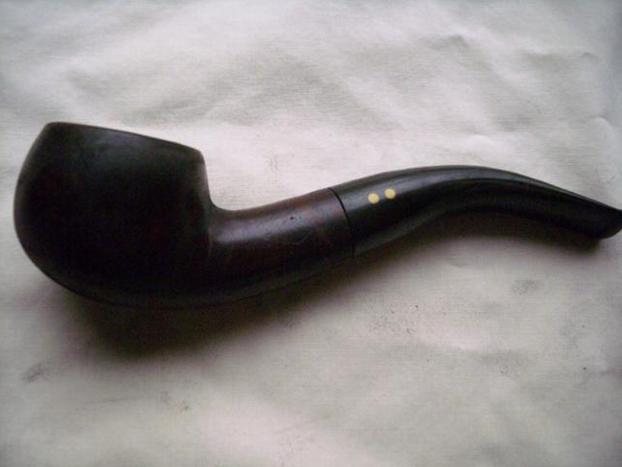
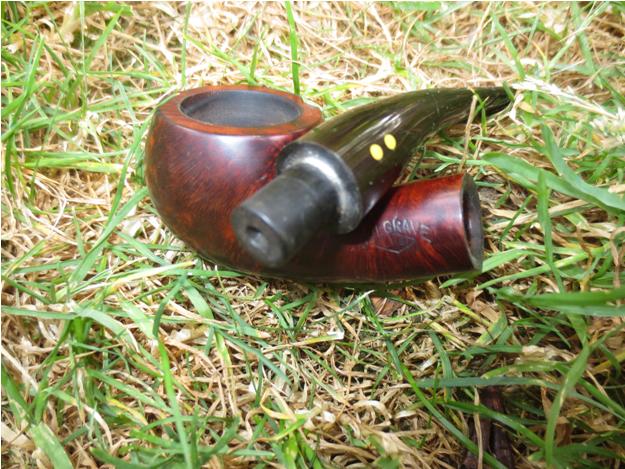
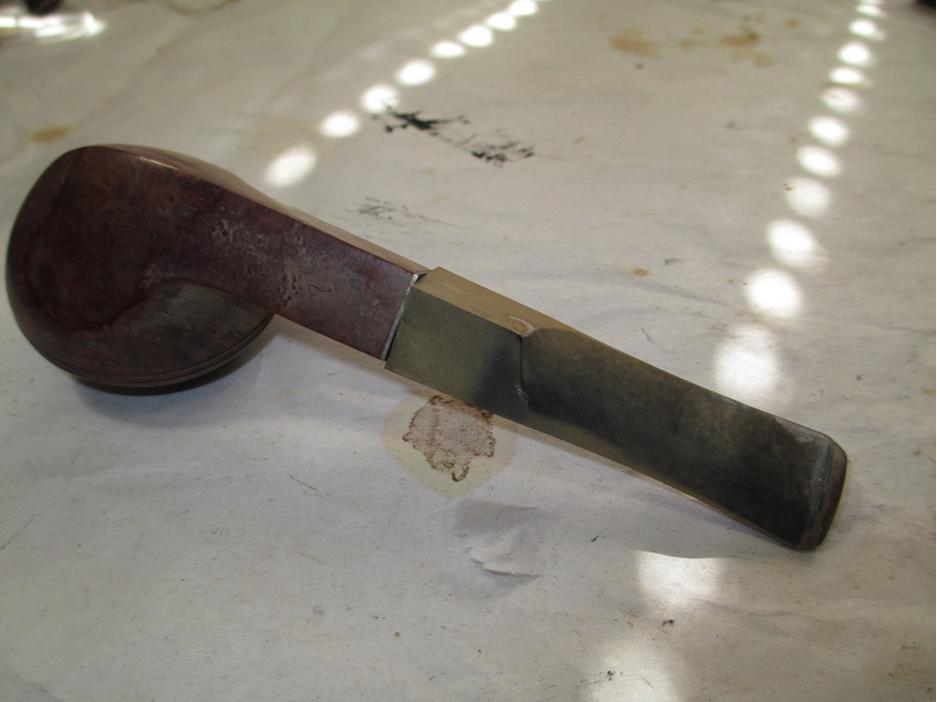
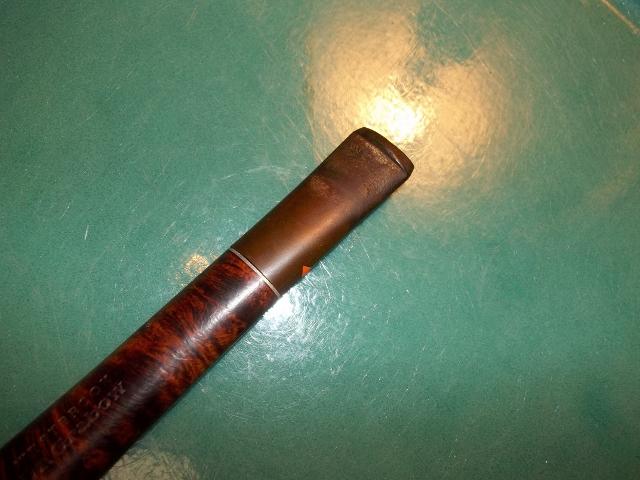
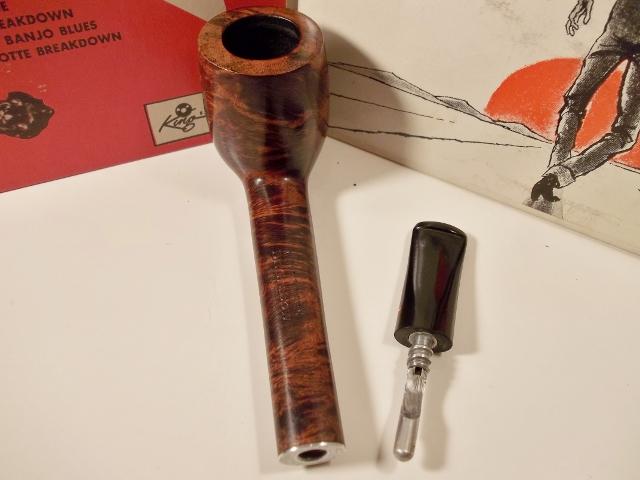
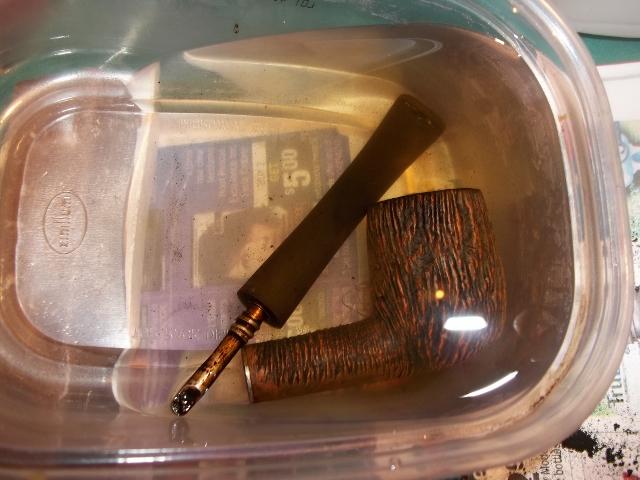
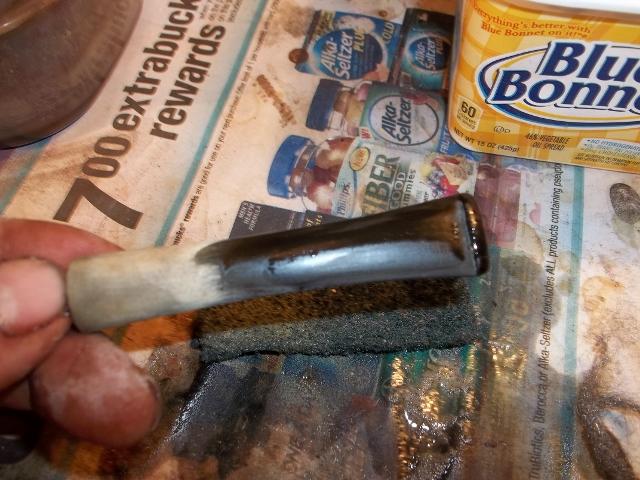
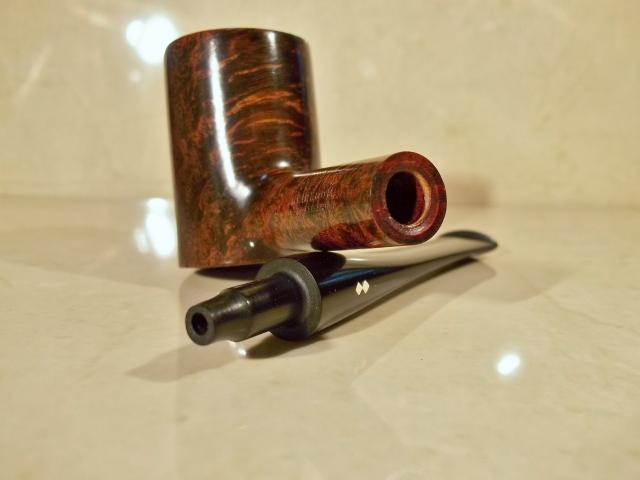
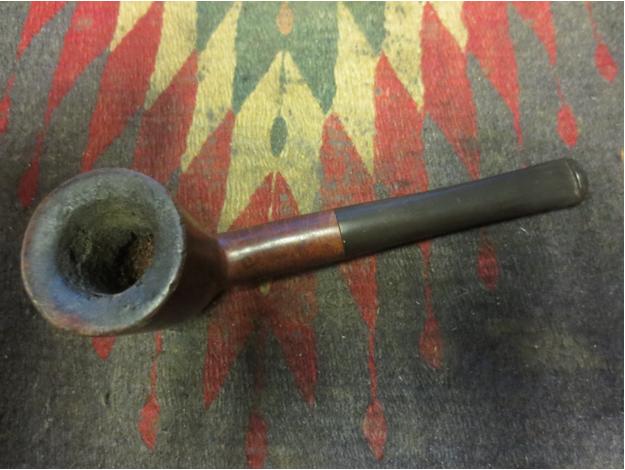
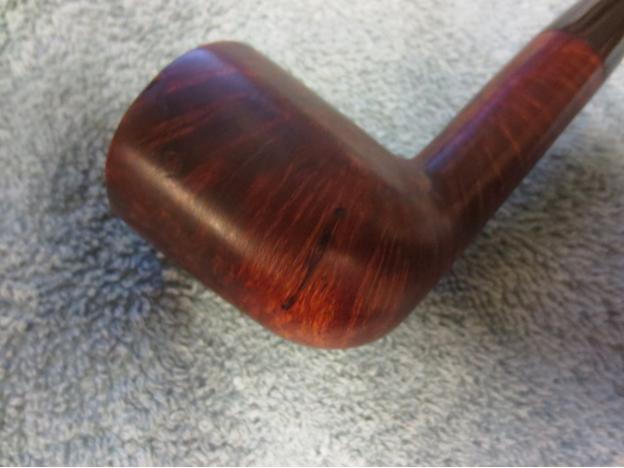
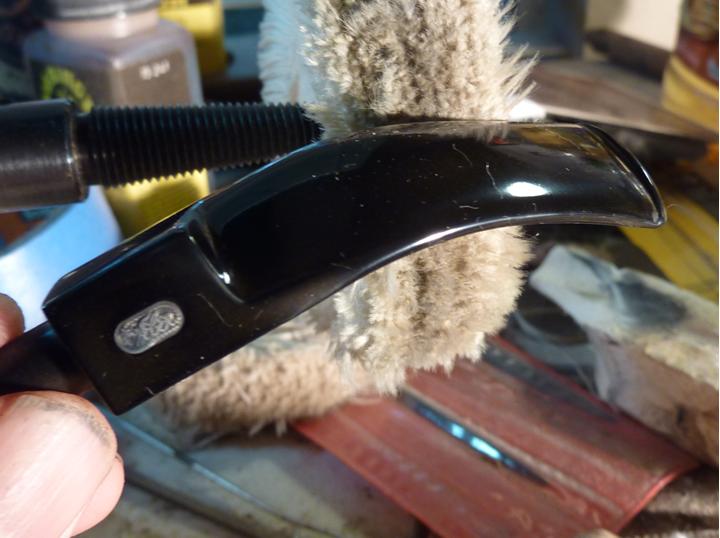
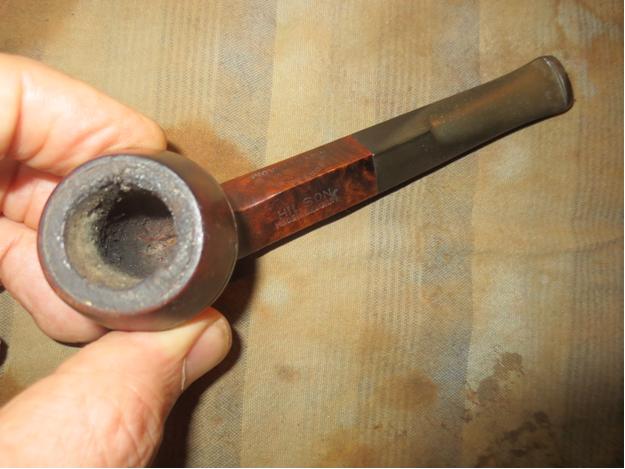
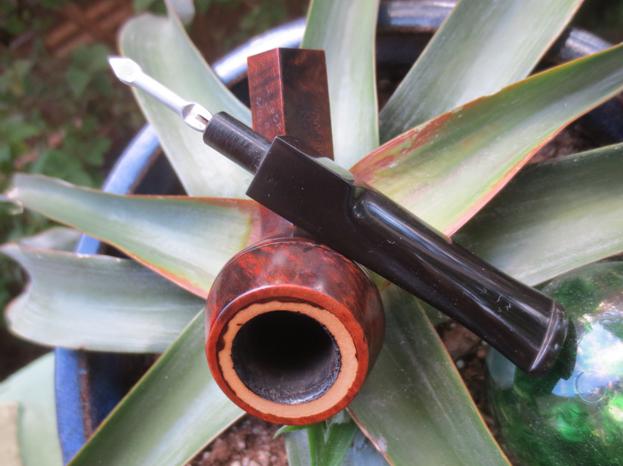
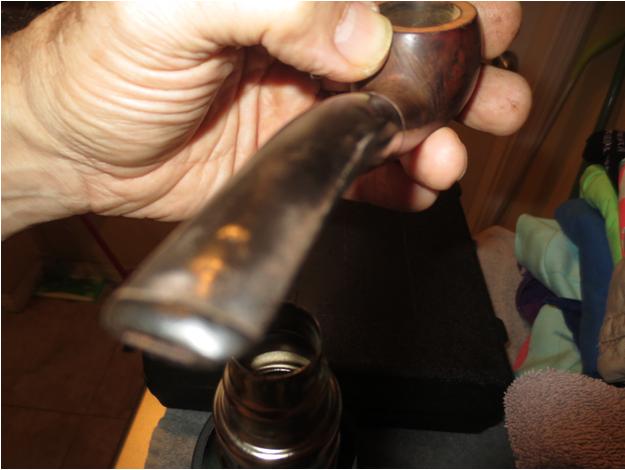
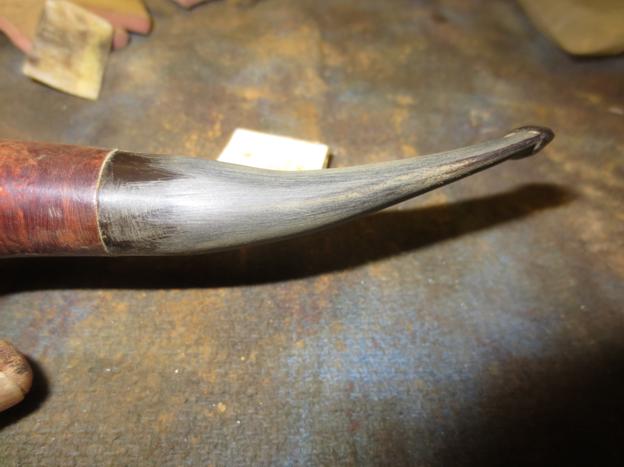
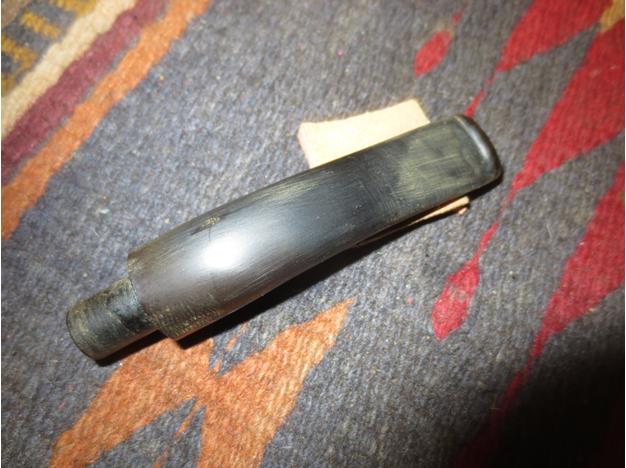
When the pipe arrived I was not disappointed. The shape was perfect. The description was accurate and the only variation that I could see was that the stamping did not include PUREX on the shank. Not a big deal in my book. The bowl was unevenly caked and appeared to have been reamed. The back side of the bowl had a thicker portion of cake that gave the inside wall on the back side an uneven and out of round look. I was pretty certain that with a good reaming and a light sanding the rim would look better. The stem was over bent and there was a slight crease on the underside of the bend. There was a coat of wax or some kind of coating on the stem and bowl. The stem was oxidized. In the first photo below you can see slight imperfection in the vulcanite stem. I have circled it to highlight it in the photo below. It is not a hole or worn spot, it is actually a thread of cord in the rubber. Its presence gives some idea of the date of manufacture as recycled rubber was used in WWII pipes.LHS5

LHS6

LHS7

LHS8 
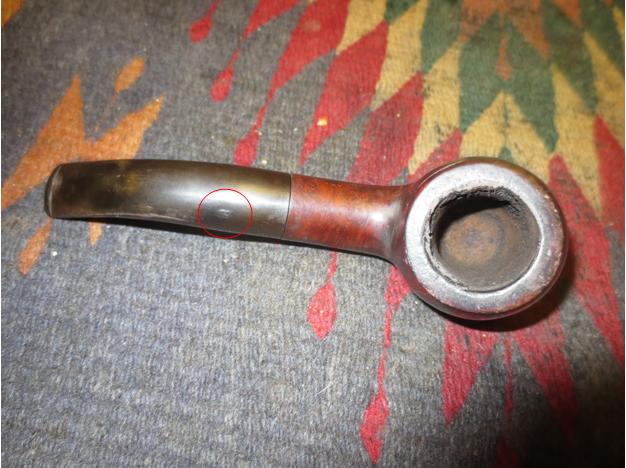
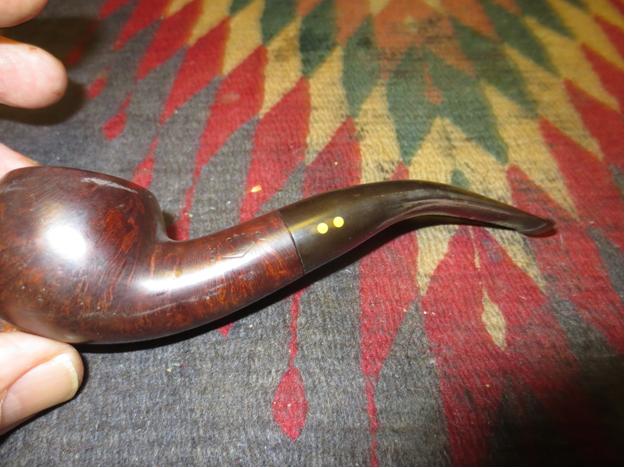
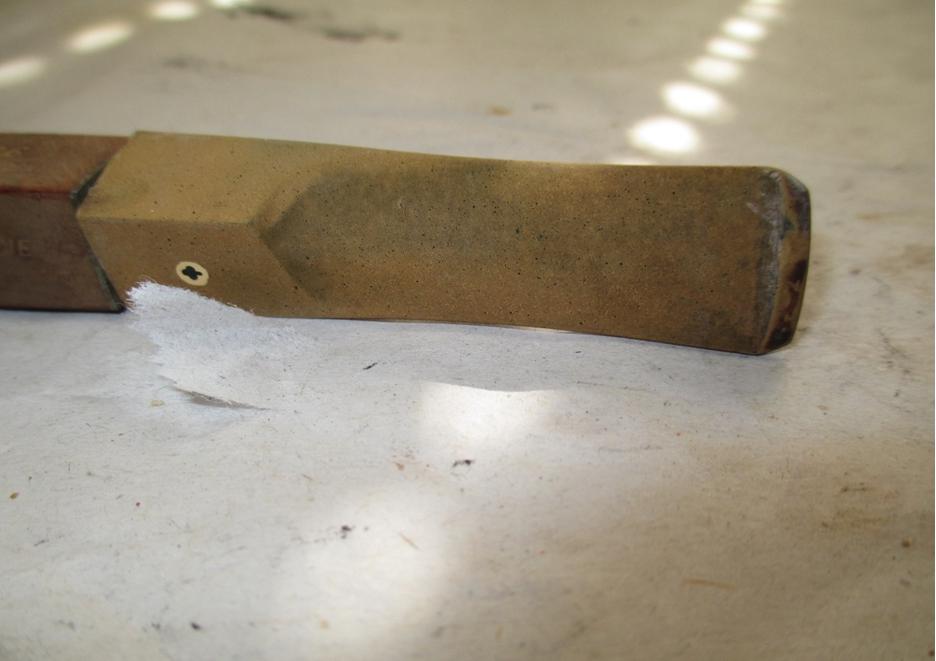
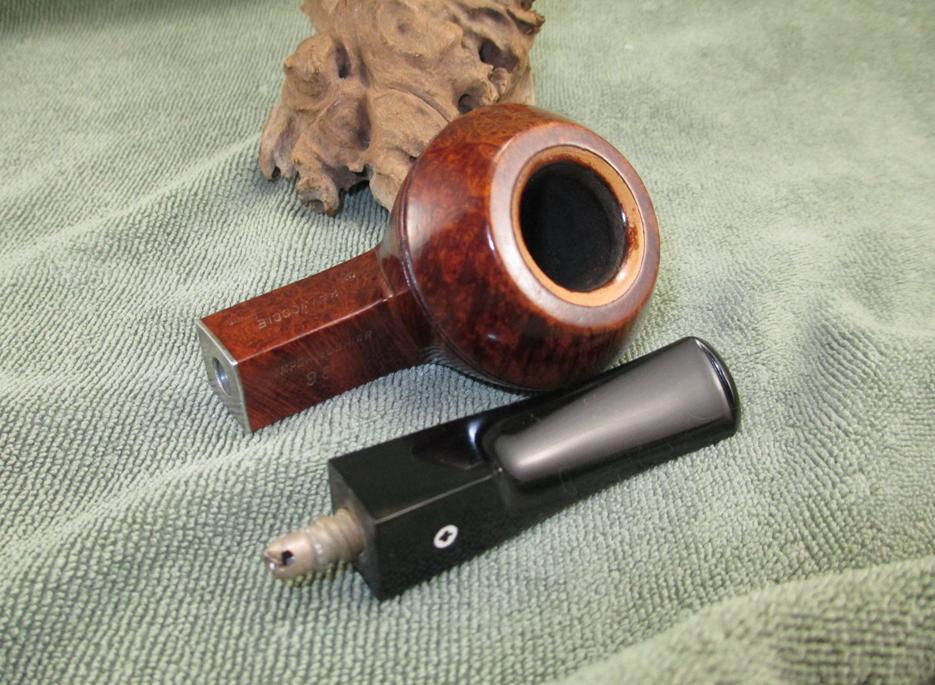
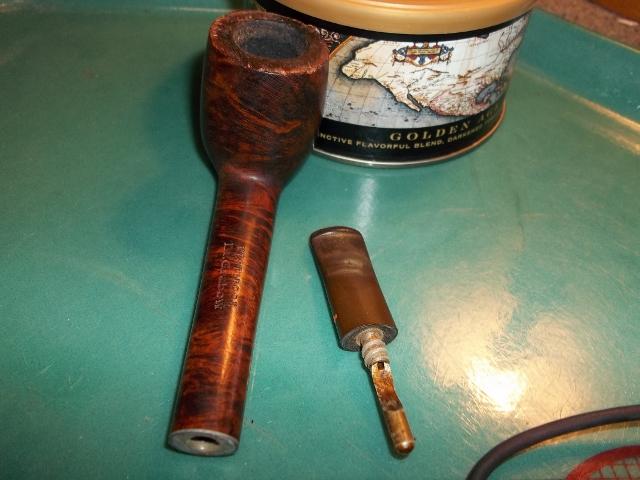
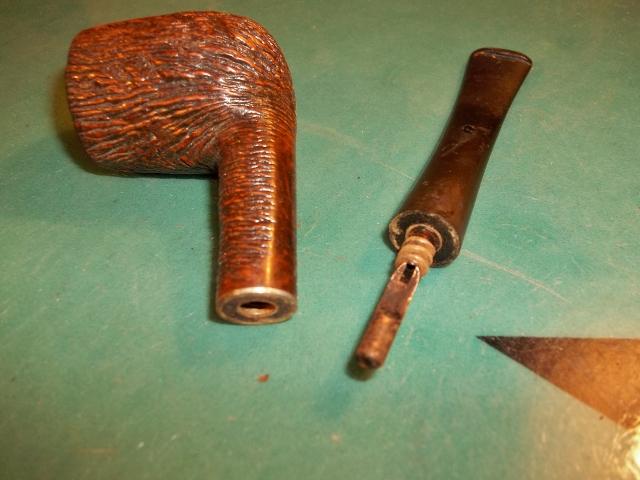
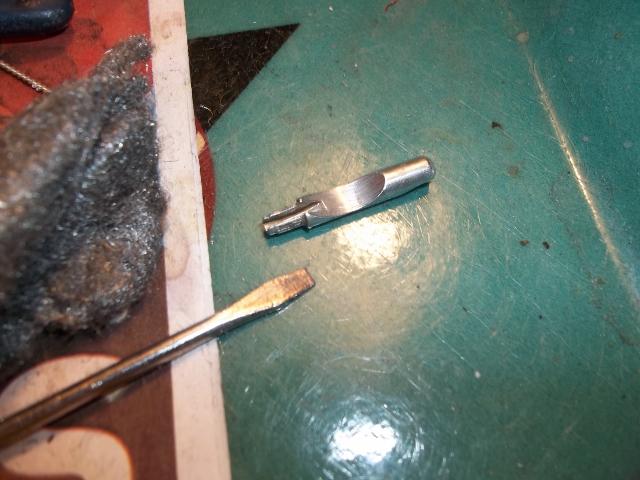
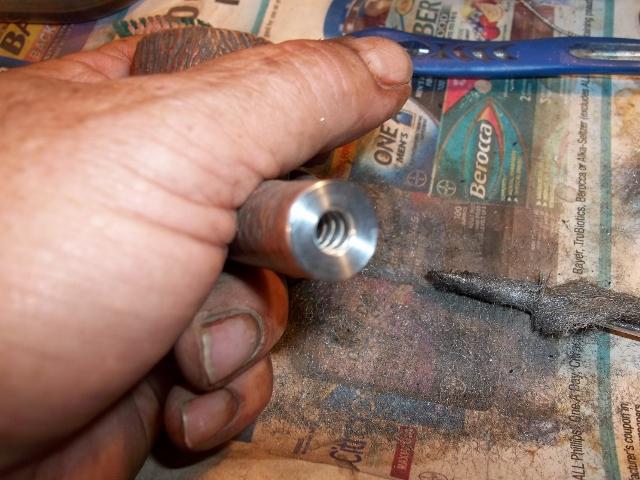
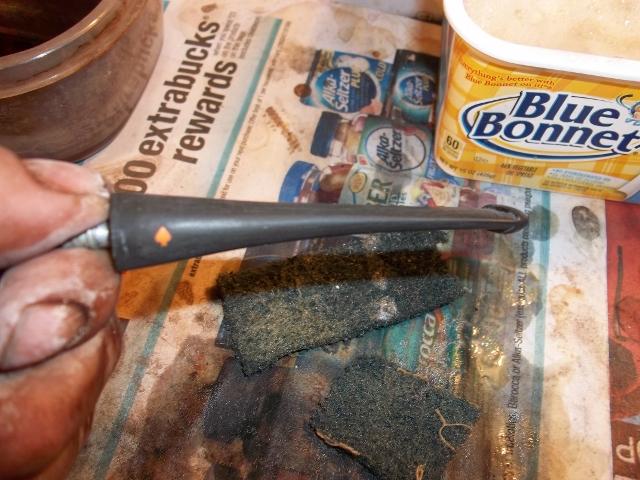
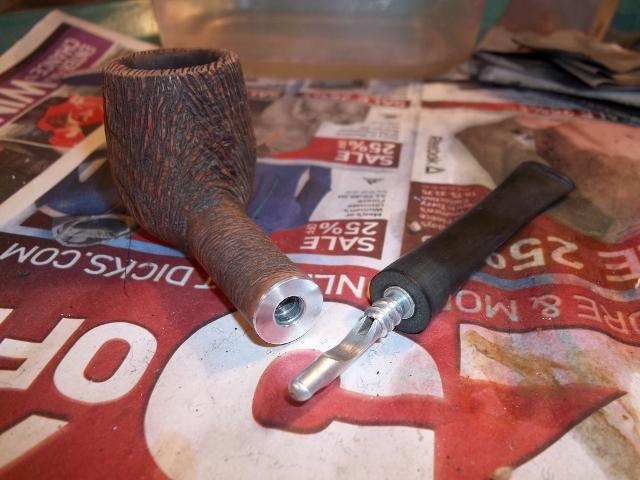
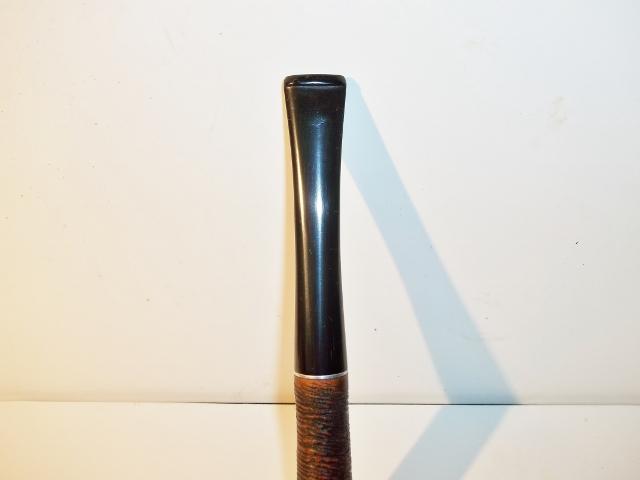
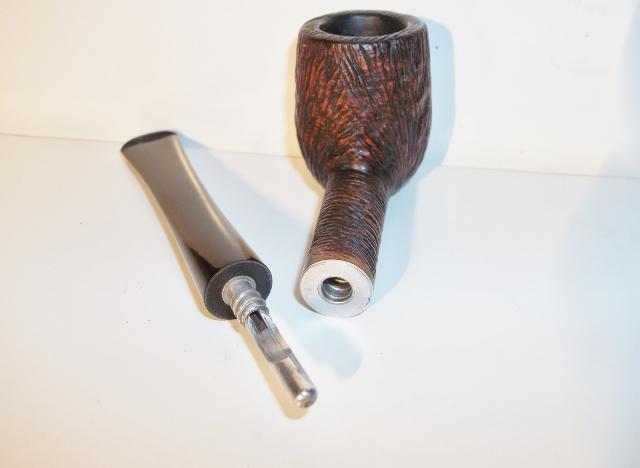
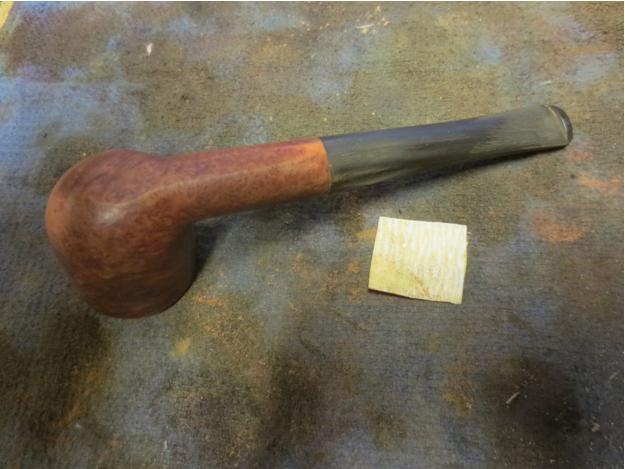
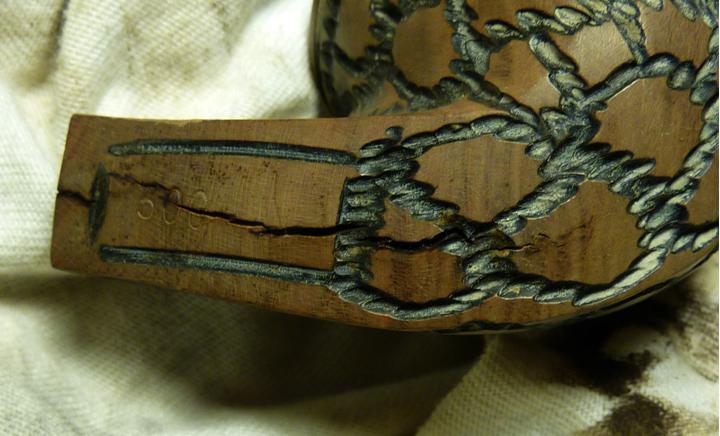
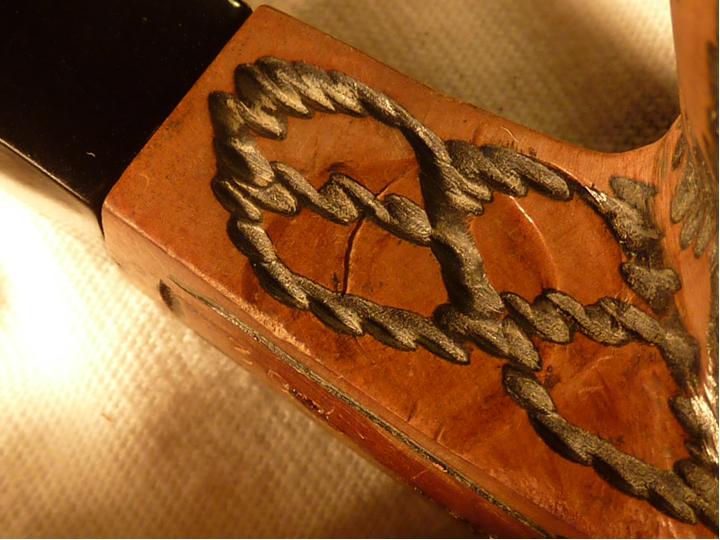
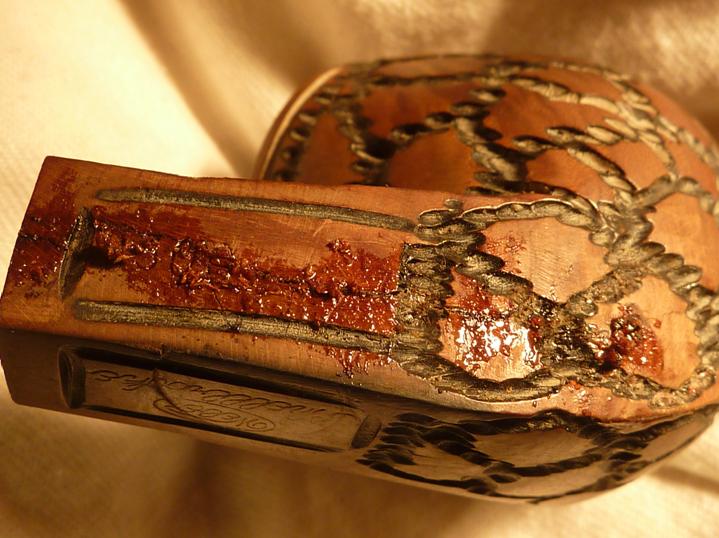
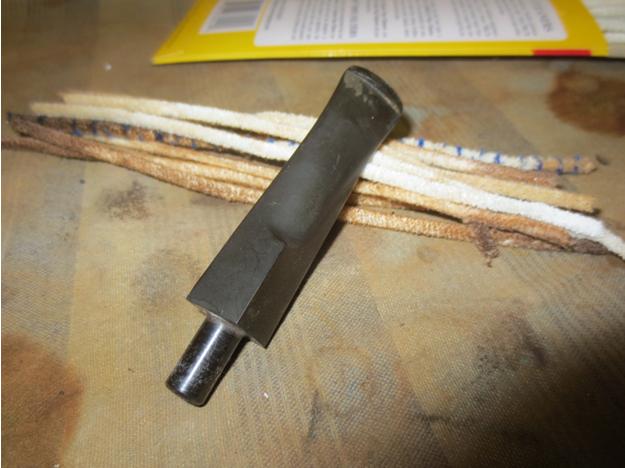
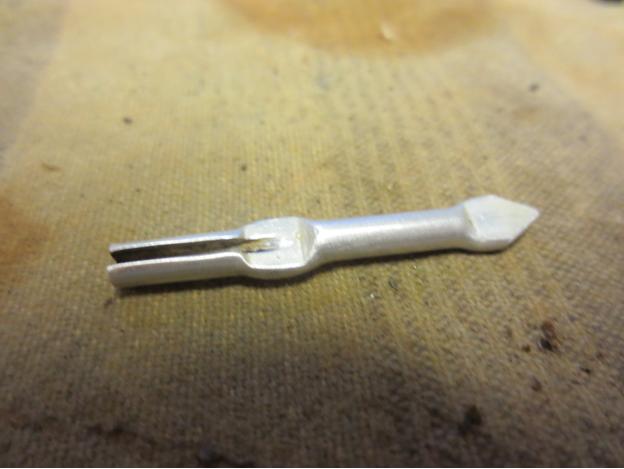
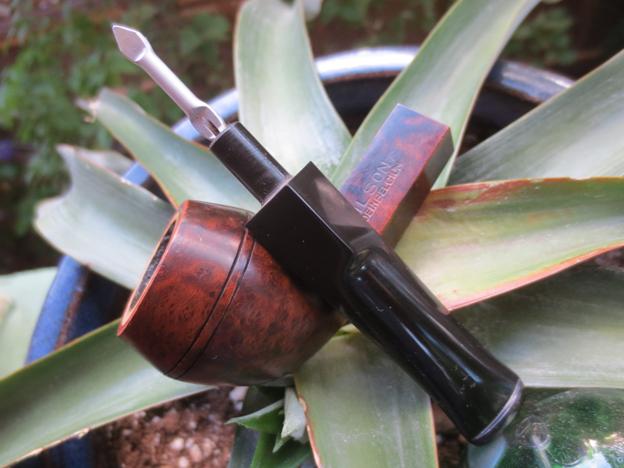
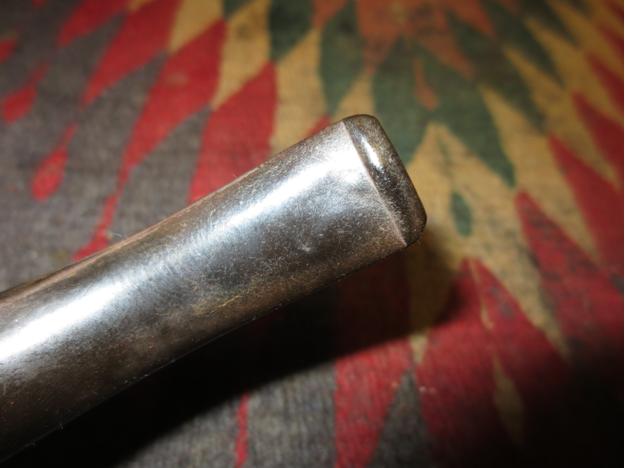
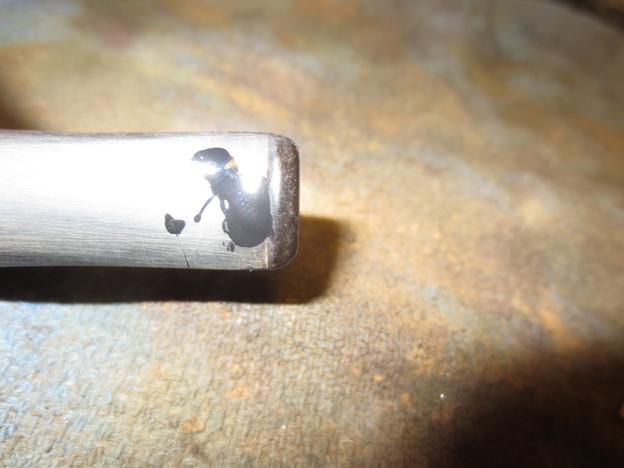
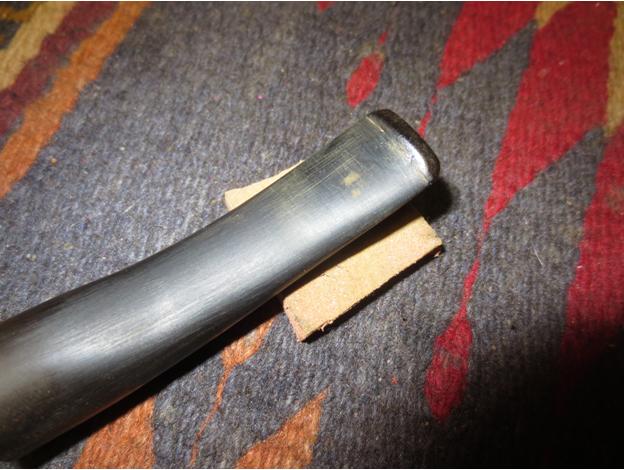
The stem also had a lot of tooth dents and chatter along both top and bottom with some very deep marks on both. I tried to capture them in the next two close-up photos but they are still not very clear. The odd thing was that the dents went up the stem over an inch. The slot in the button was not centred and appeared to have left the factory that way. The dents were deep enough that I was concerned regarding the thinness of the stem surface over the airway. The mortise and airway in the shank were dirty and the end of the mortise was chipped away. It looked as if there had originally been a stinger in the tenon but it was no longer with the pipe.LHS9

LHS10 
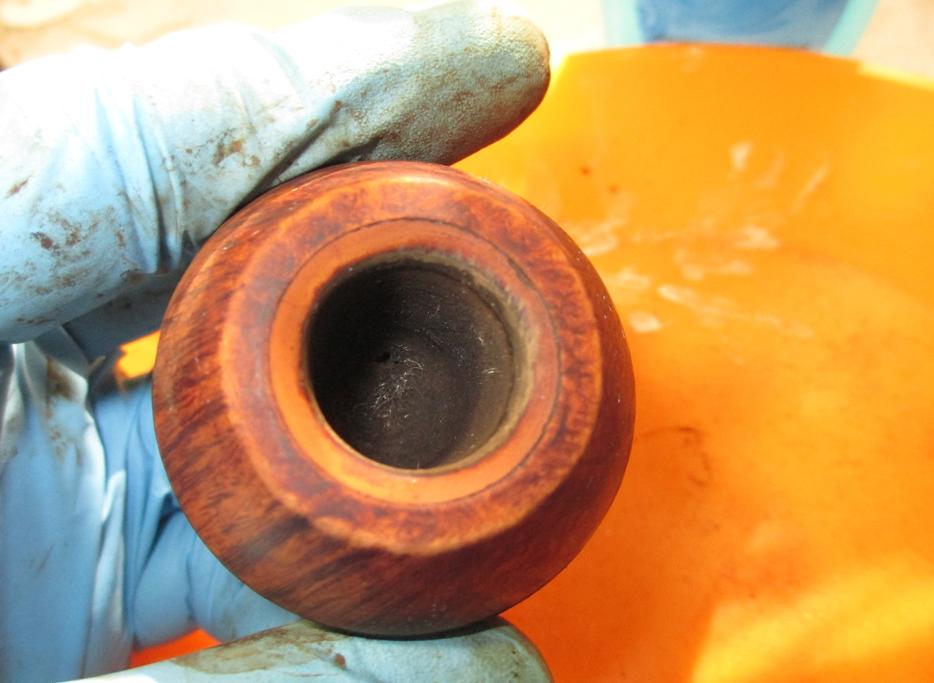
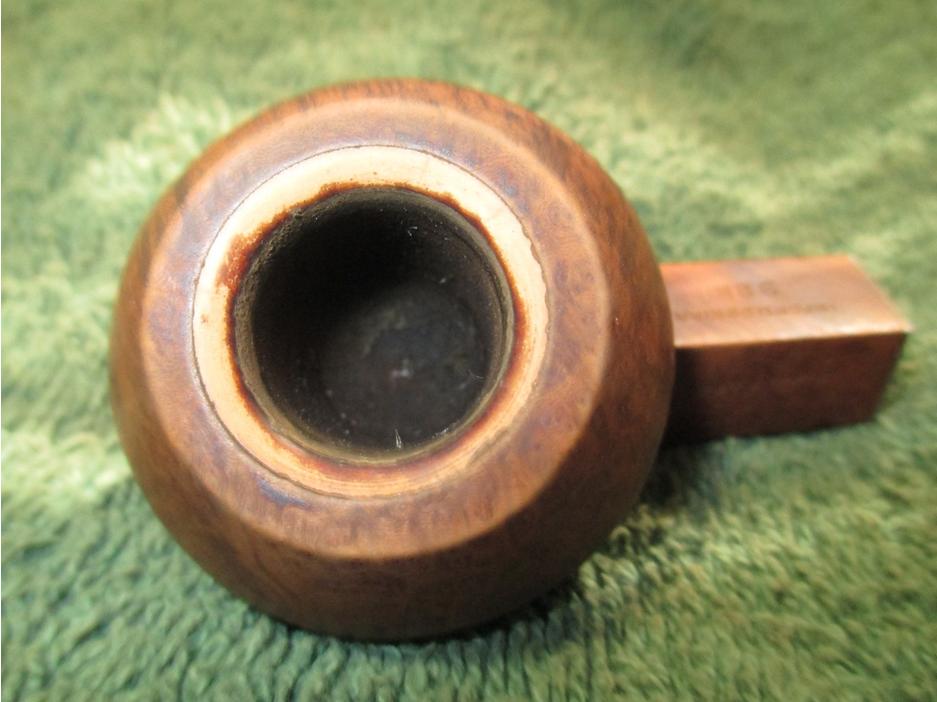
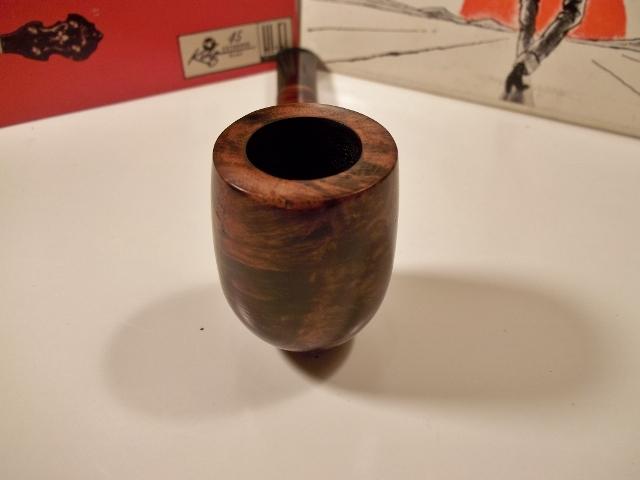
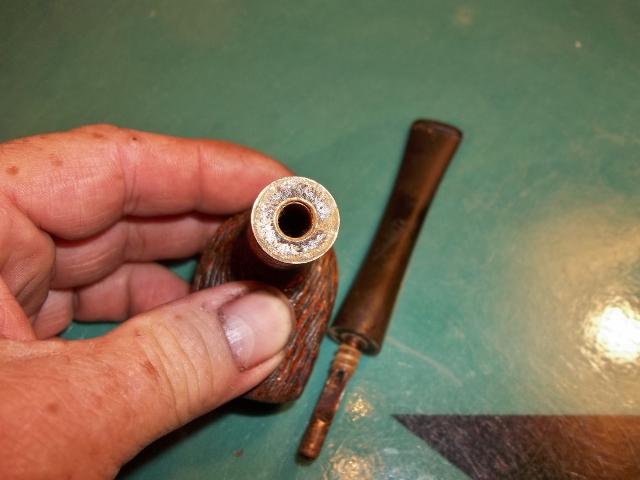
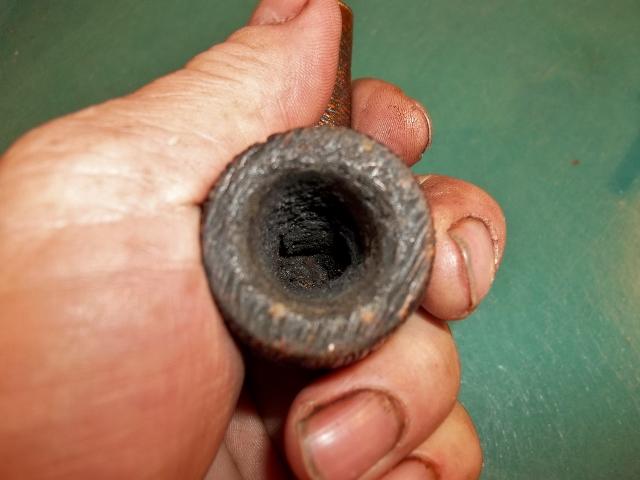
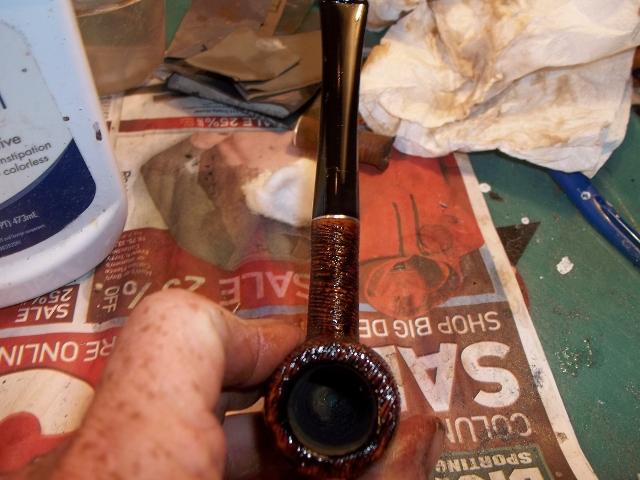
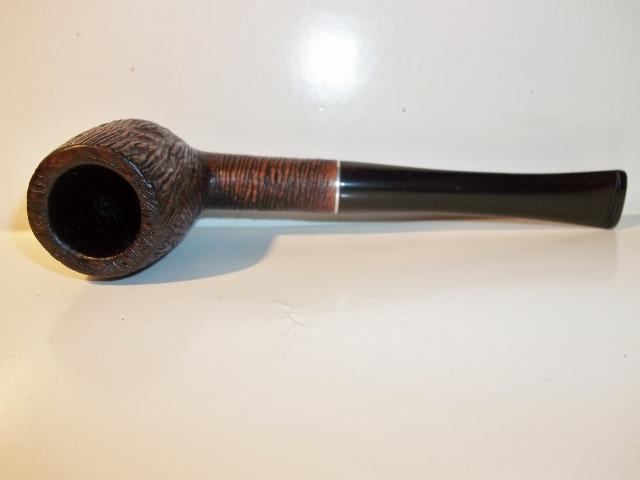
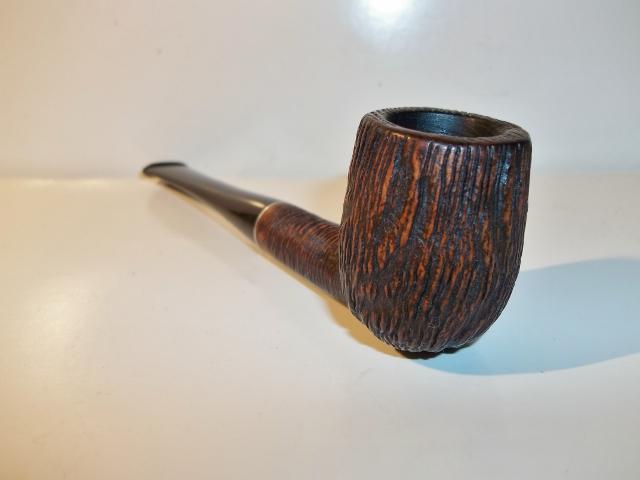
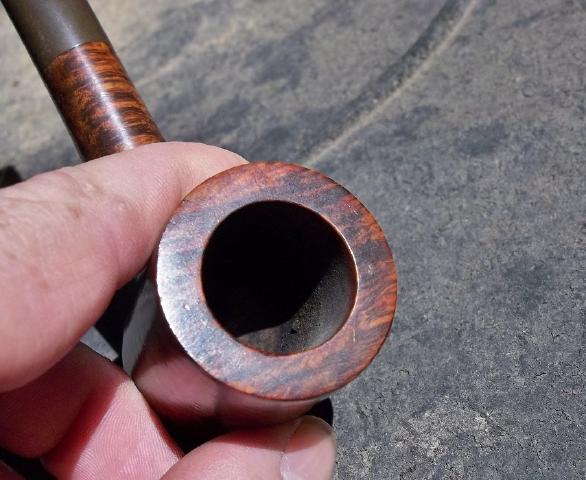
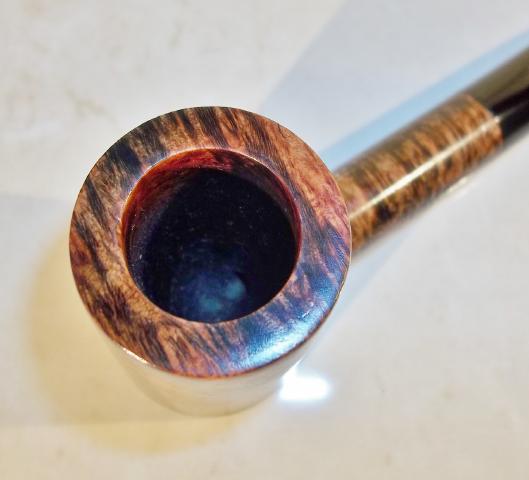
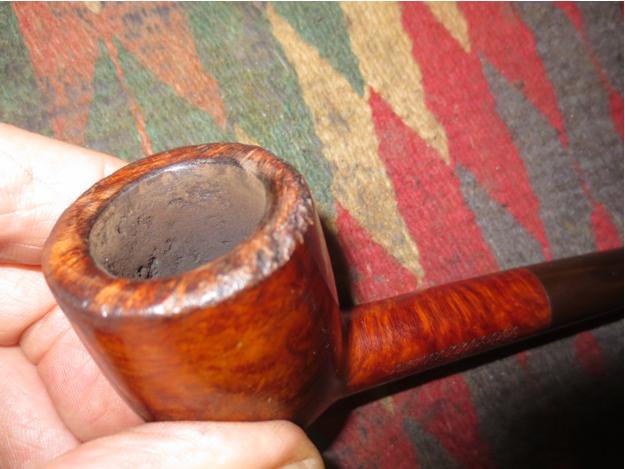
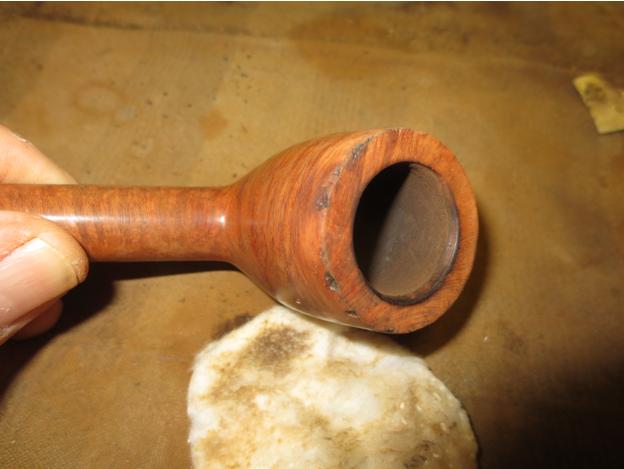
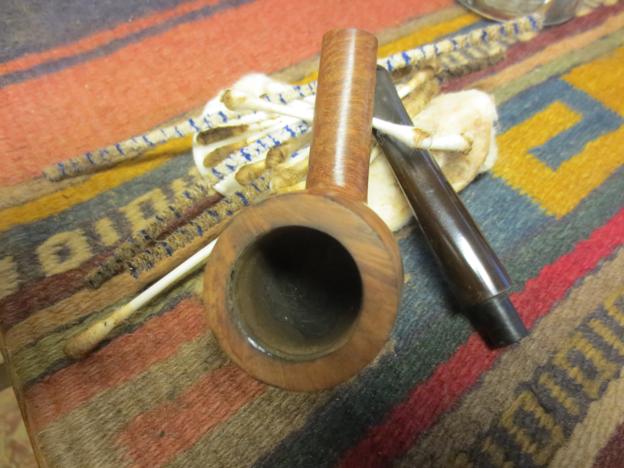
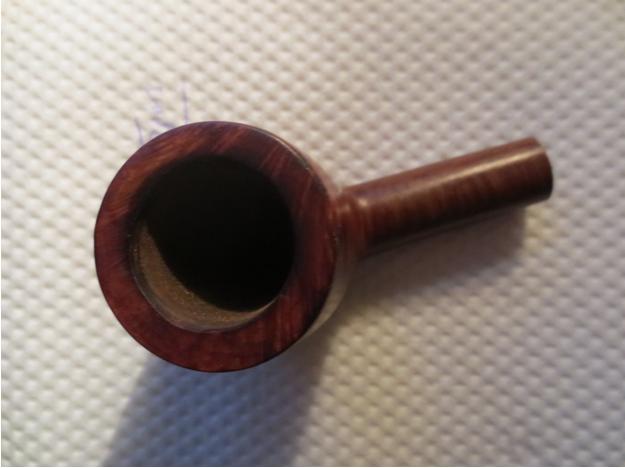
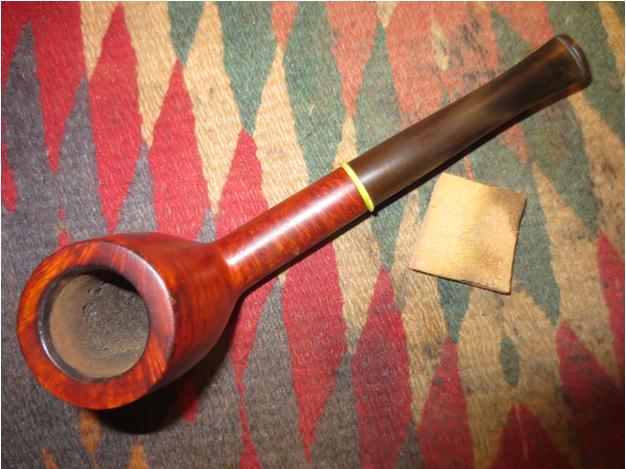
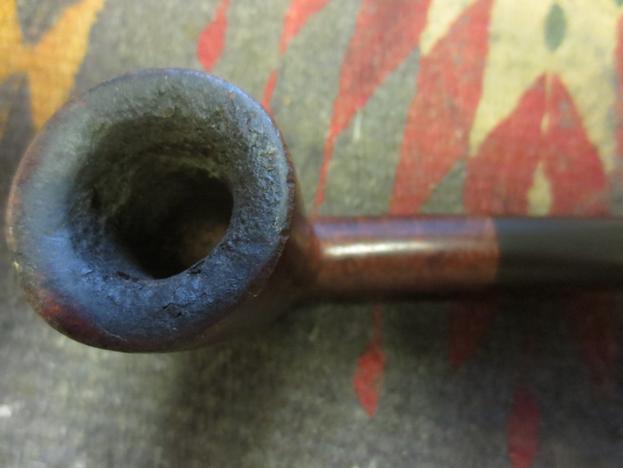
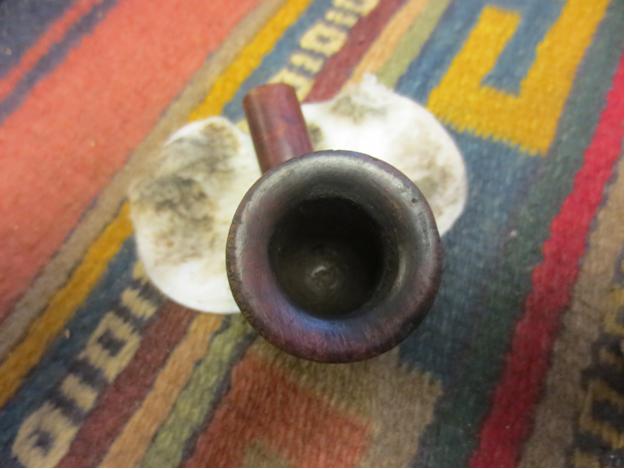
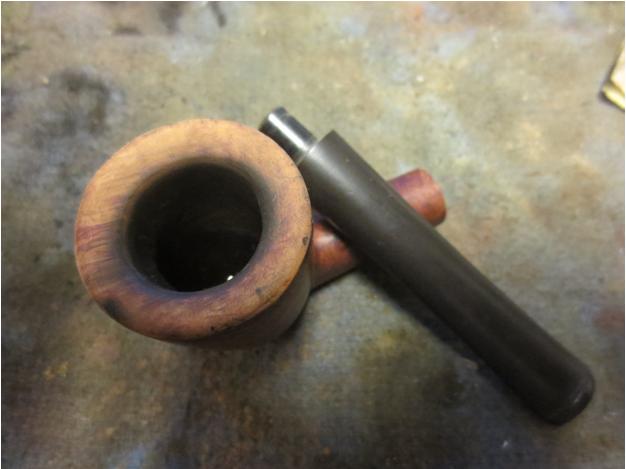
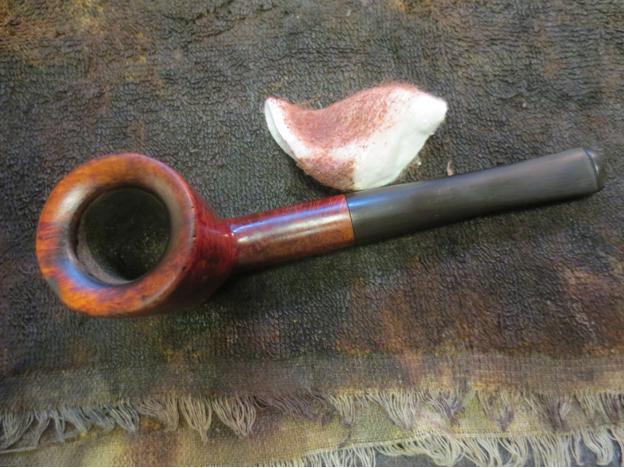
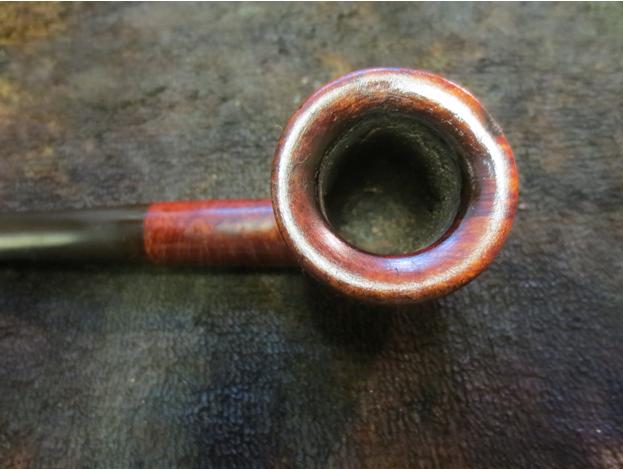
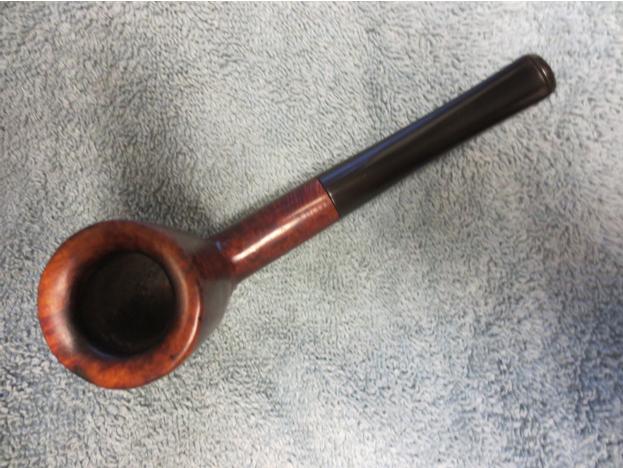
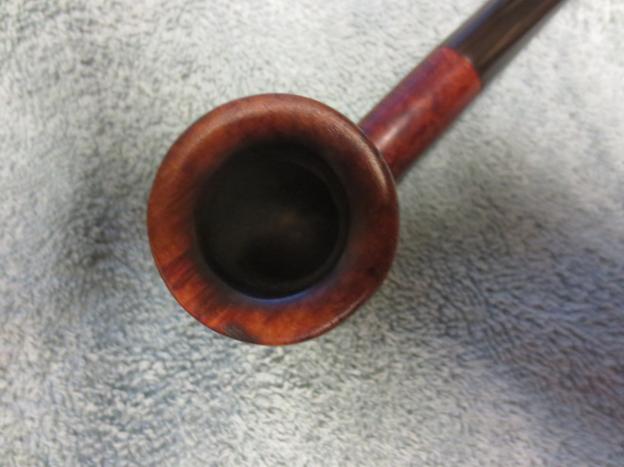
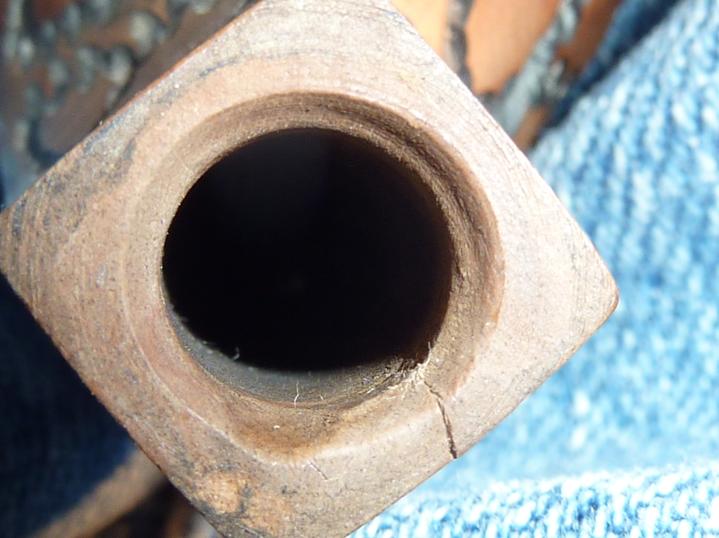
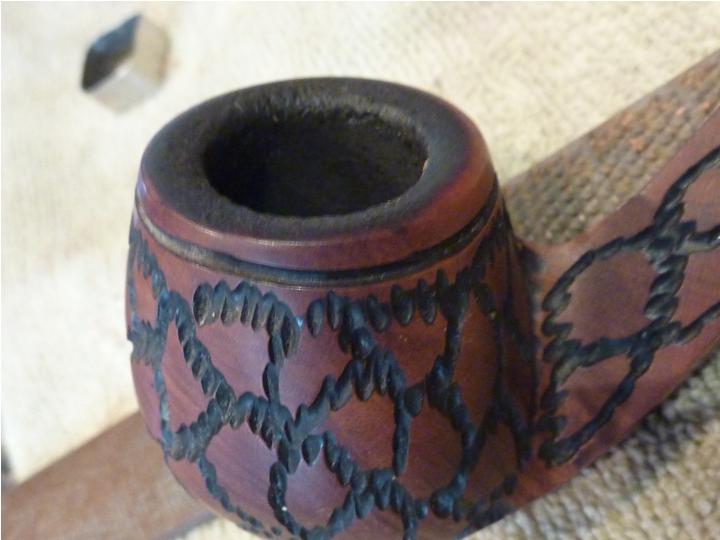
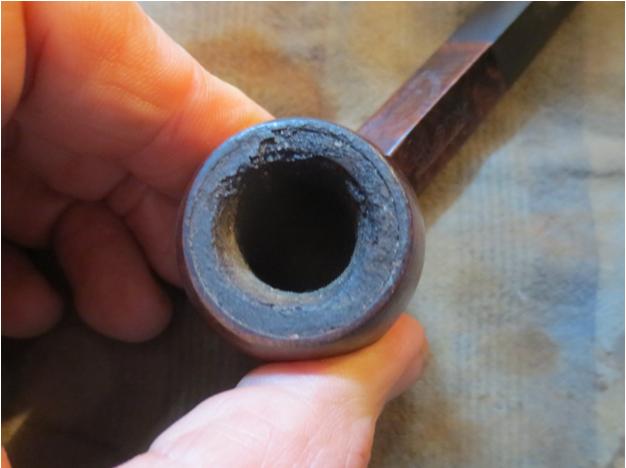
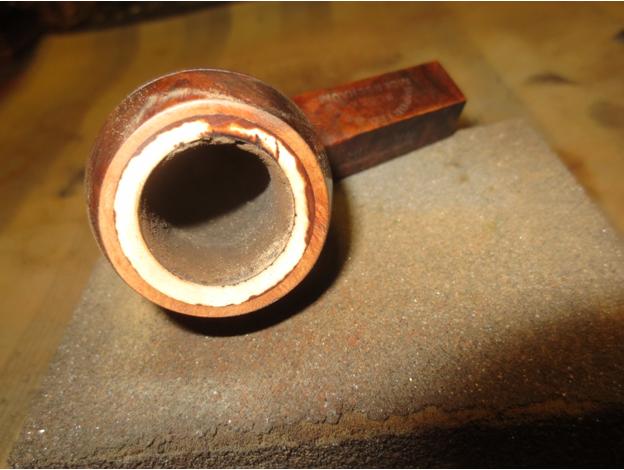
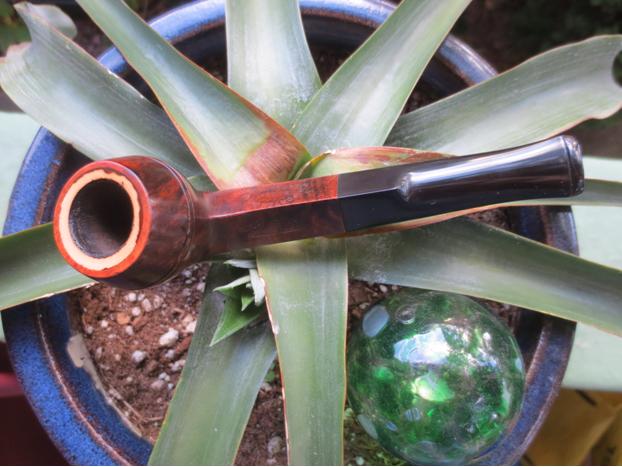
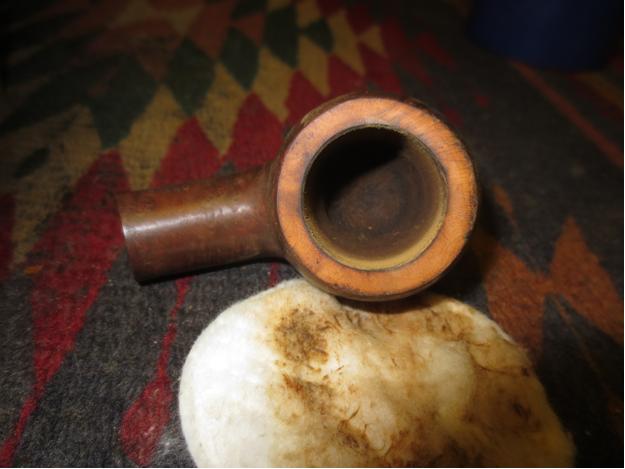
I also have included the next close-up photo of the rim and the bowl interior to show the cake that gave the bowl an out of round appearance.LHS11 
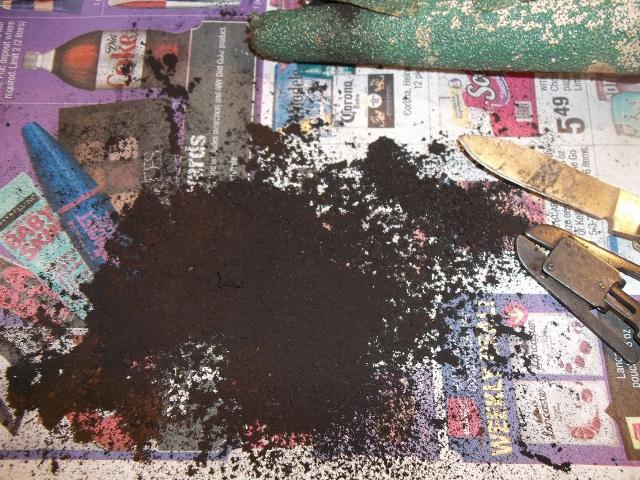
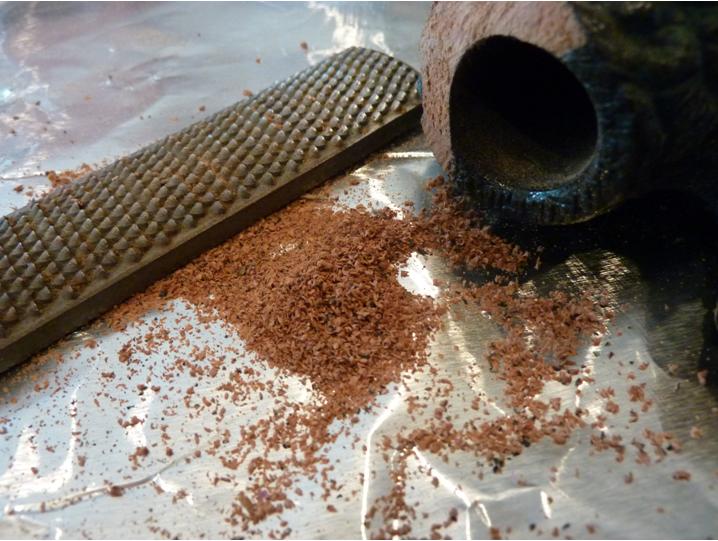
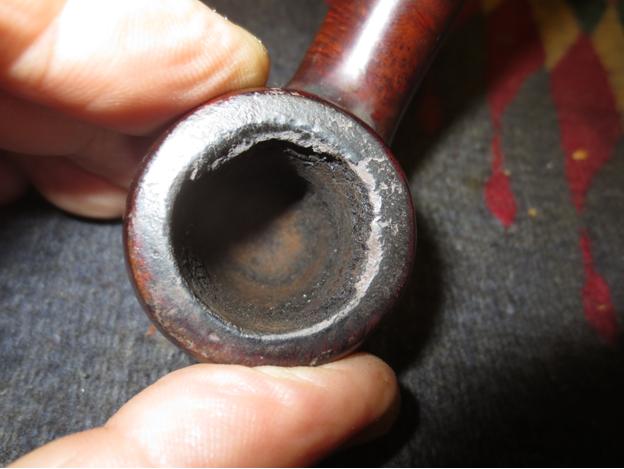
I reamed the bowl with a PipNet pipe reamer using the largest cutting head. I took the cake back to bare wood to even out the inner edge of the bowl. I wanted to get rid of the cake so that I could smooth out the edge.LHS12

LHS13 
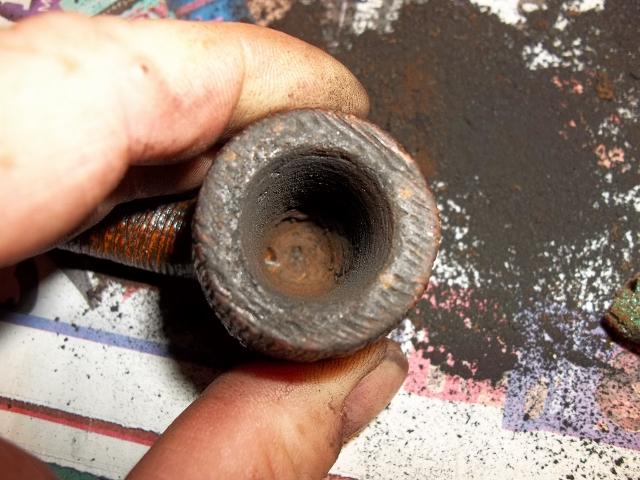
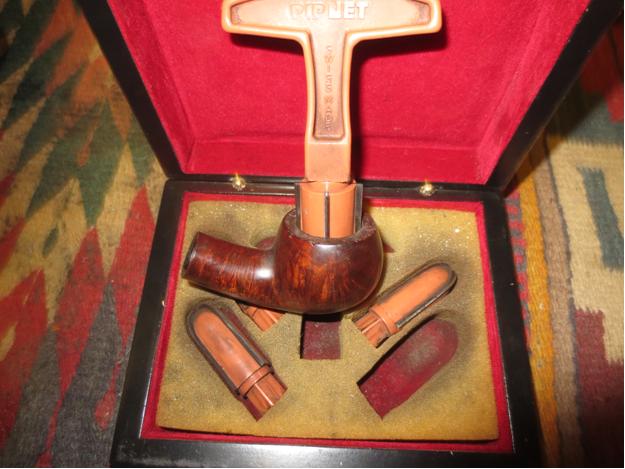
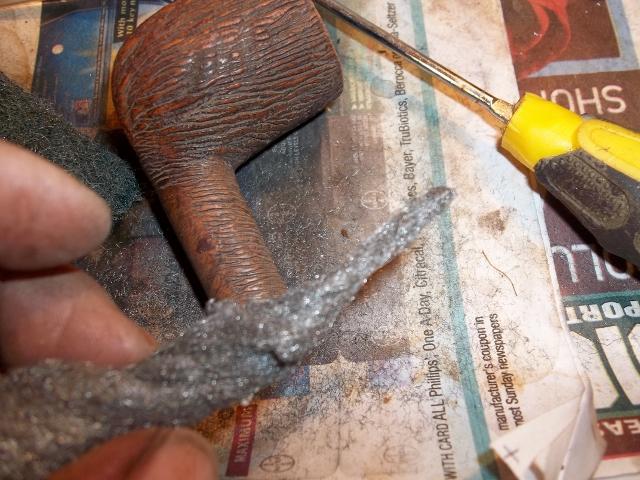
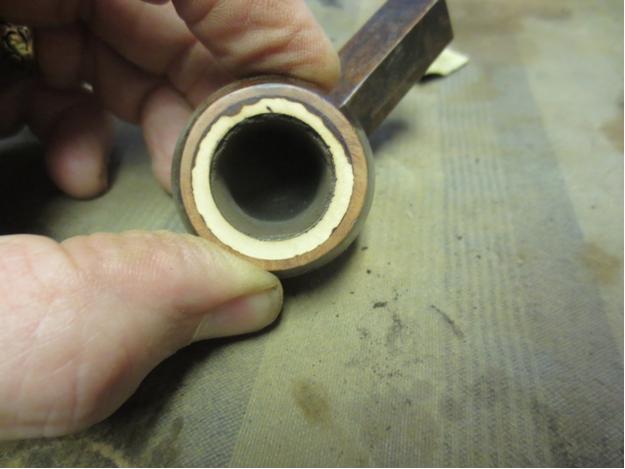
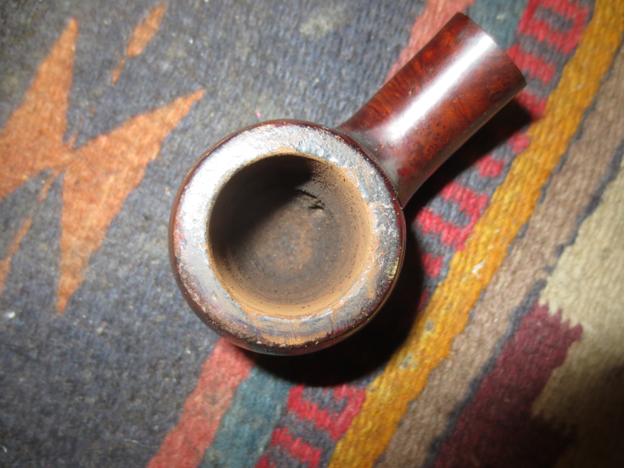
I folded a piece of 220 grit sandpaper to smooth out inner edge. It took a little effort remove the inner edge damage and clean up the roundness of the bowl.LHS14

LHS15 
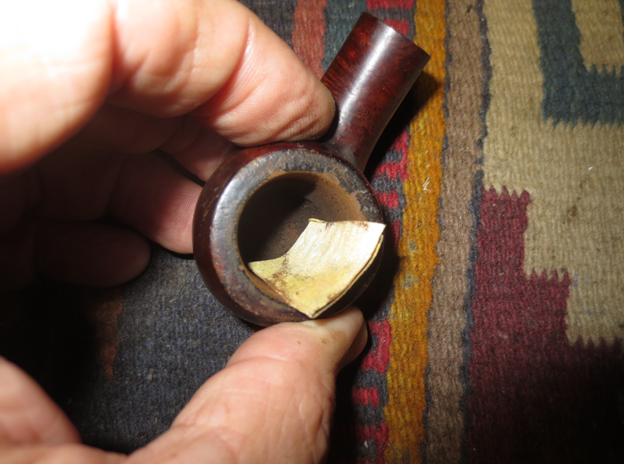
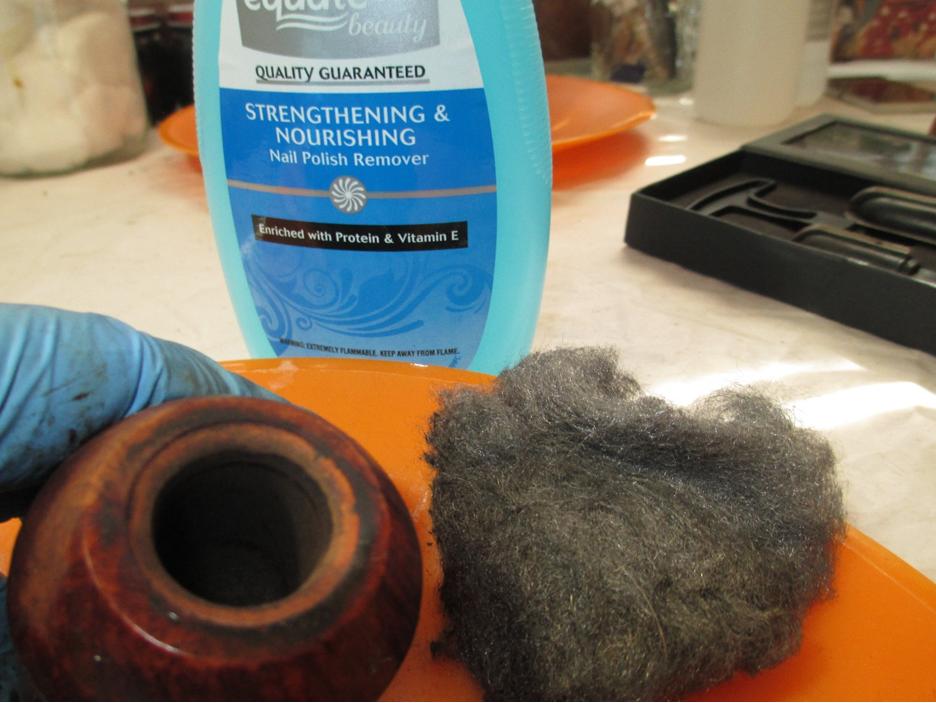
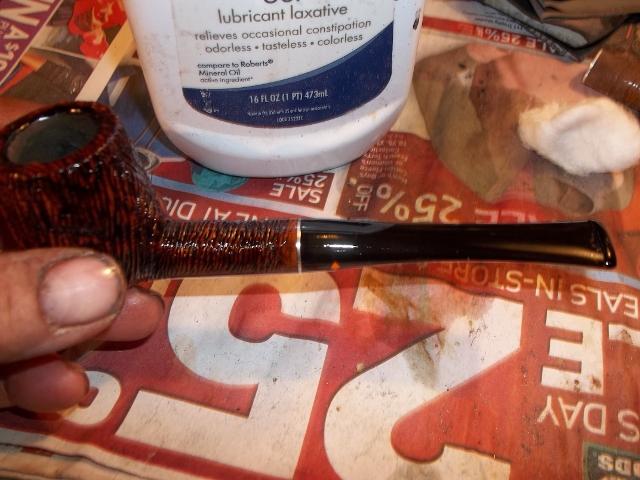
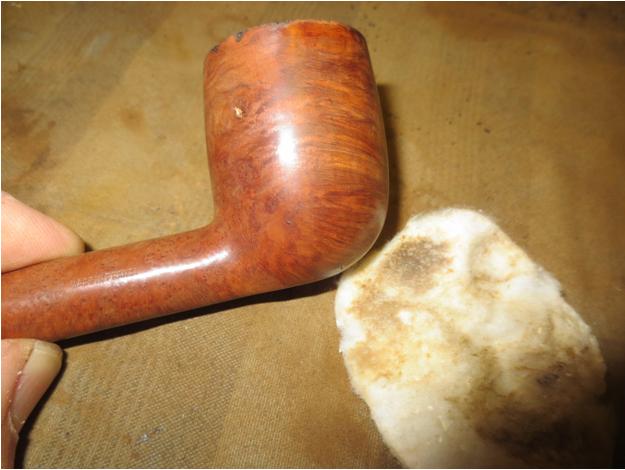
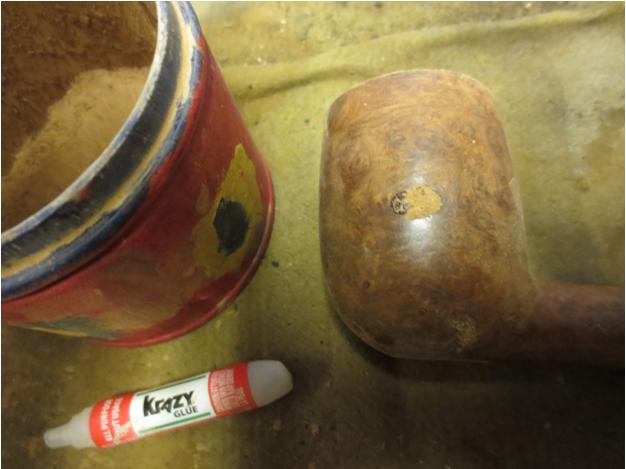
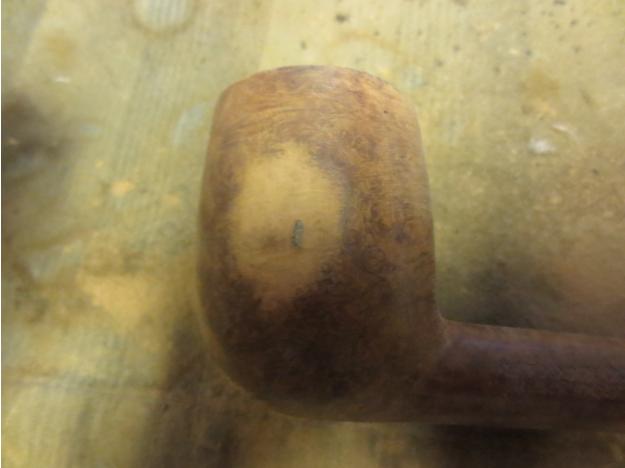
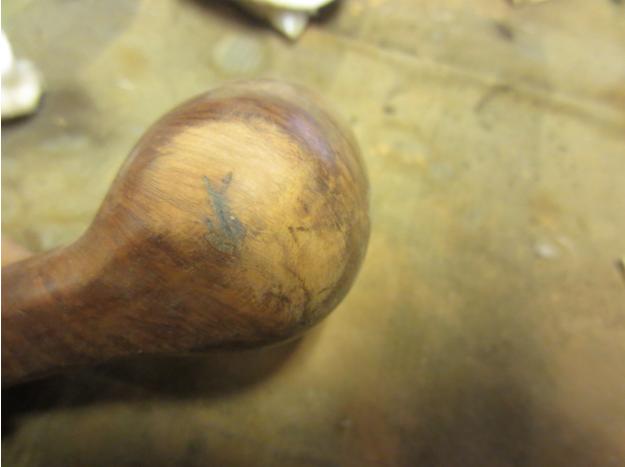
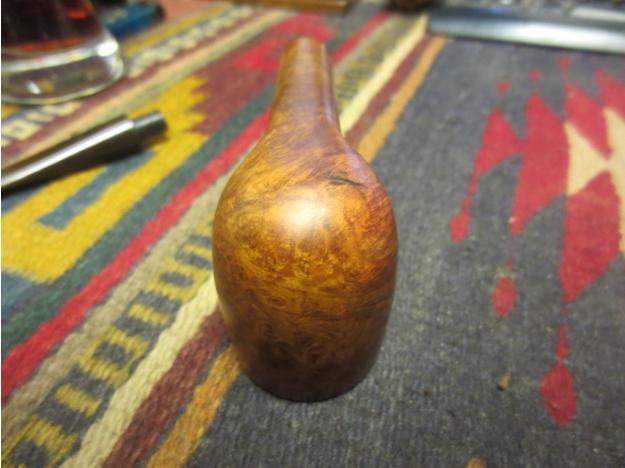
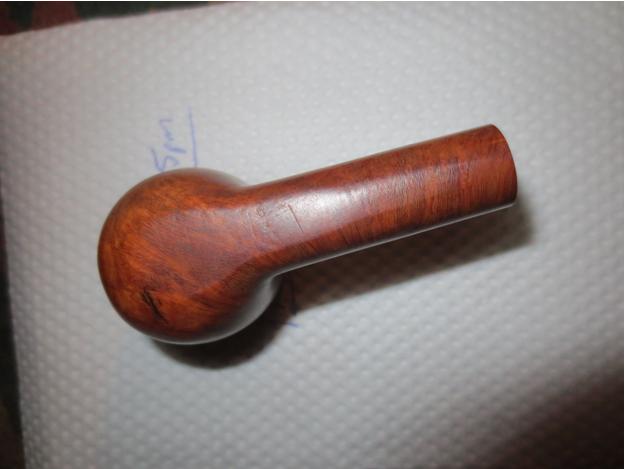
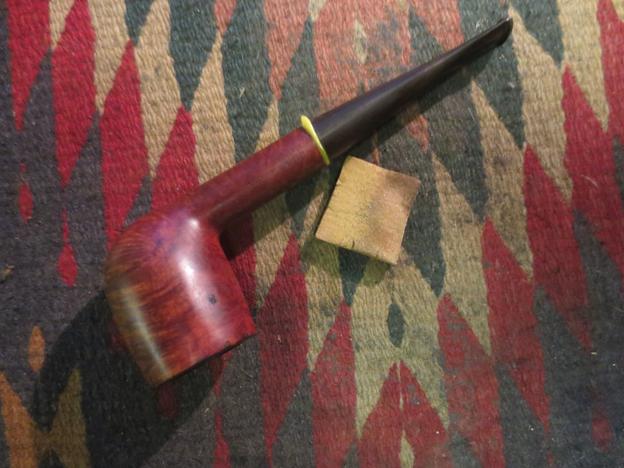
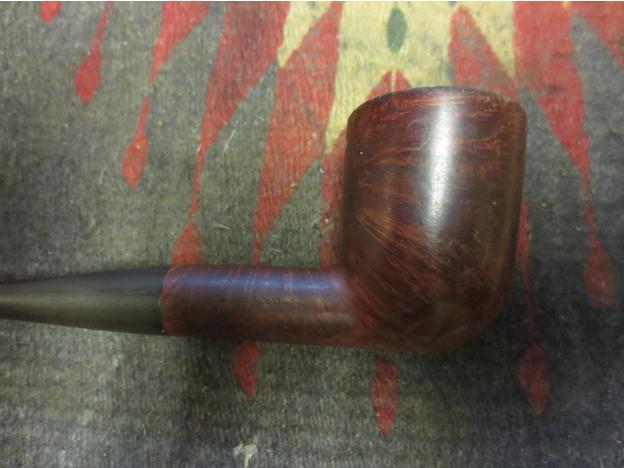
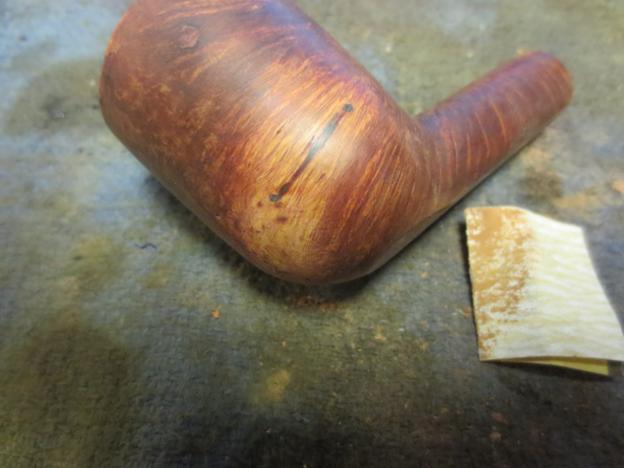
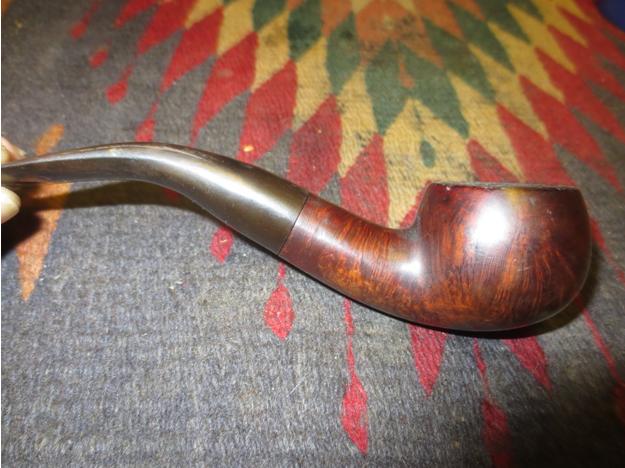
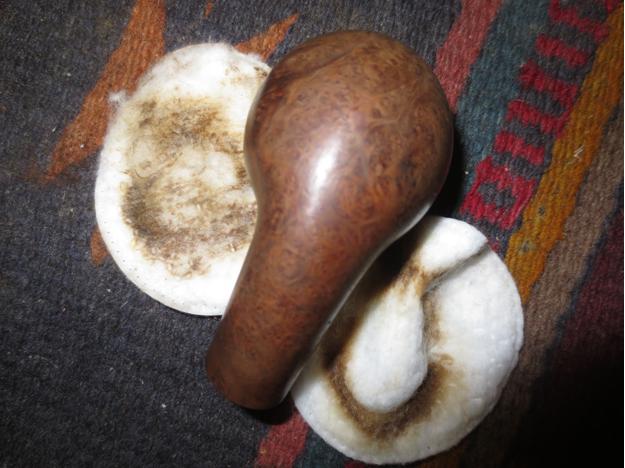
I wiped down the bowl with acetone on cotton pads to remove the tars and the wax coat on the briar. With them removed the outer edge of the bowl showed damage as well. The bowl had been knocked about on the front edge particularly. The grain on this pipe was lovely.LHS16

LHS17

LHS18

LHS19 
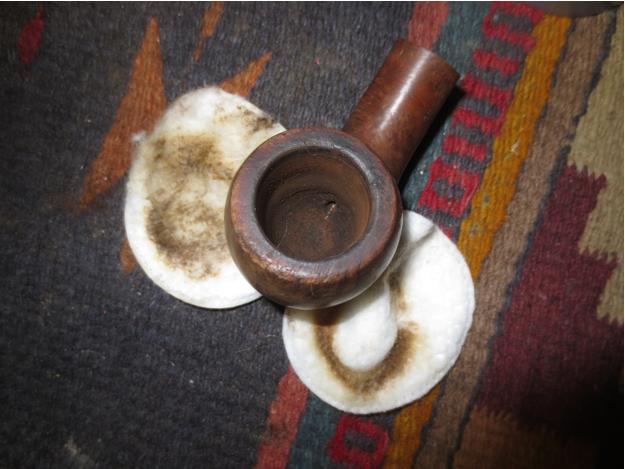
To minimize the outer edge damage I topped the bowl with 220 grit sandpaper on a topping board. I sanded it to remove the damage to the top of the bowl and clean up the outer edge of the bowl.LHS20

LHS21 
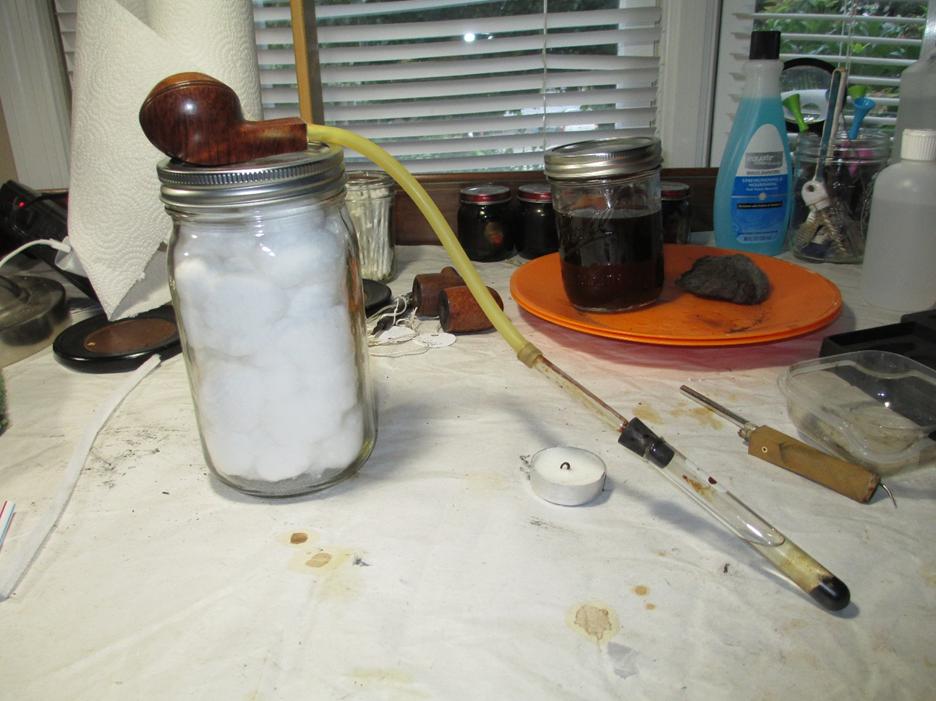
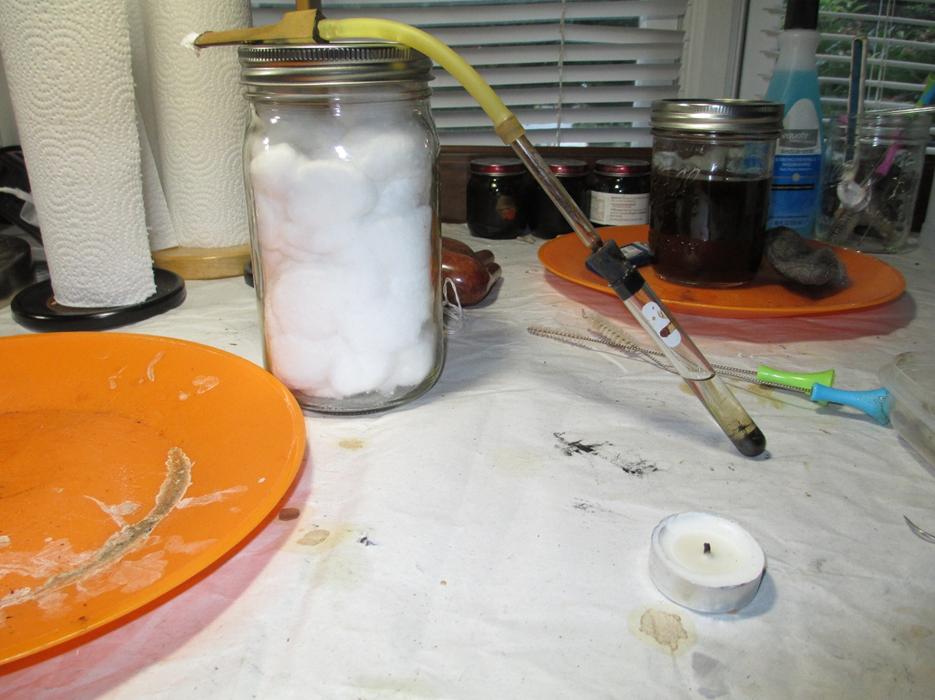
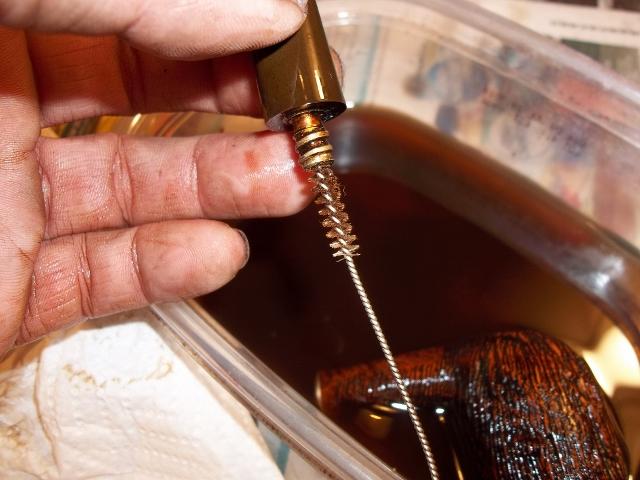
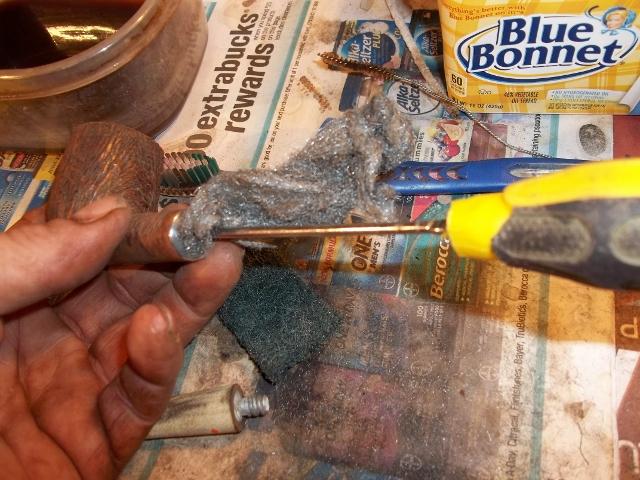
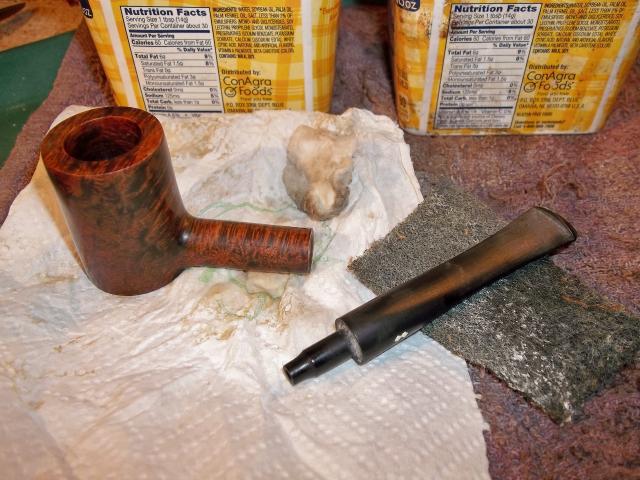
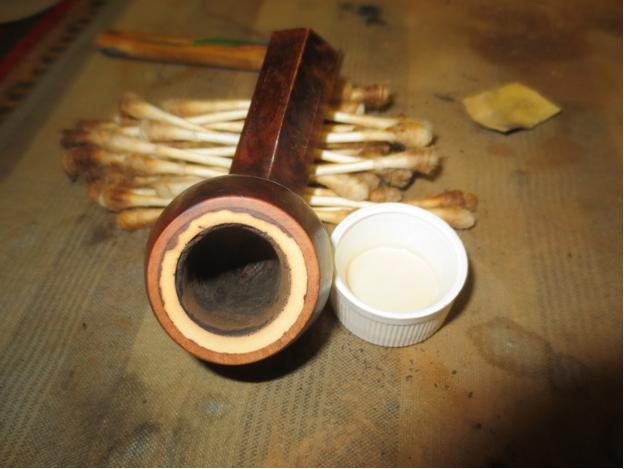
I cleaned out the shank and the bowl with pipe cleaners, cotton swabs and alcohol to remove the grime inside. It took quite a few of both to clean out the shank but finally they came out clean.LHS22 
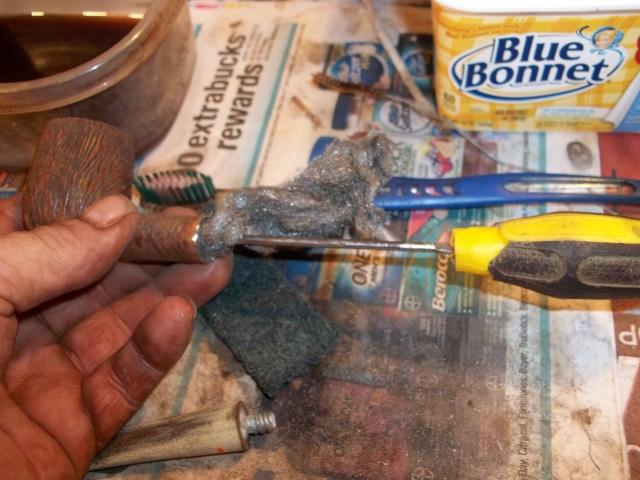
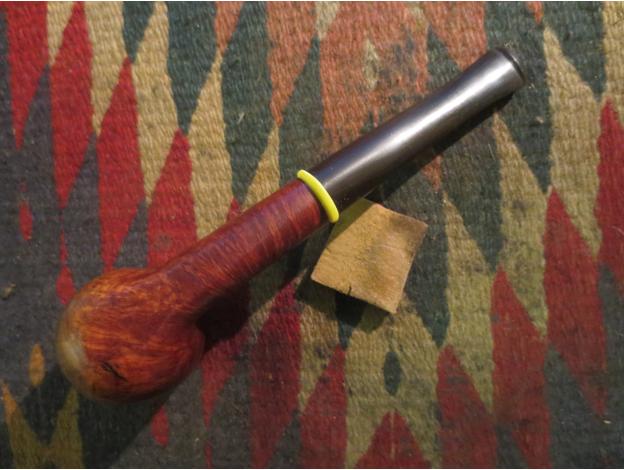
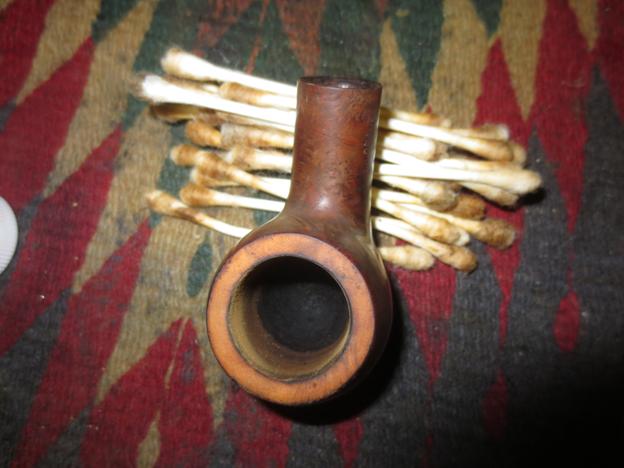
I heated the stem with a heat gun to try and lift some of the dents to the surface and to also take out some of the bend. I also wanted to smooth out the sharpness of the bend on the bottom side.LHS23

LHS24

LHS25 I cleaned out the airway in the stem with pipe cleaners, cotton swabs and alcohol.LHS26 
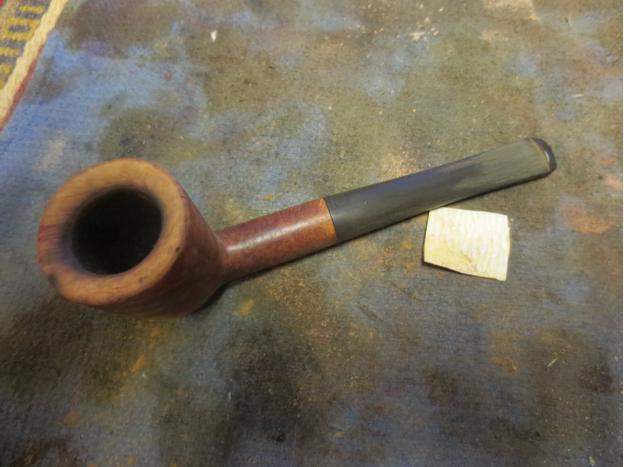
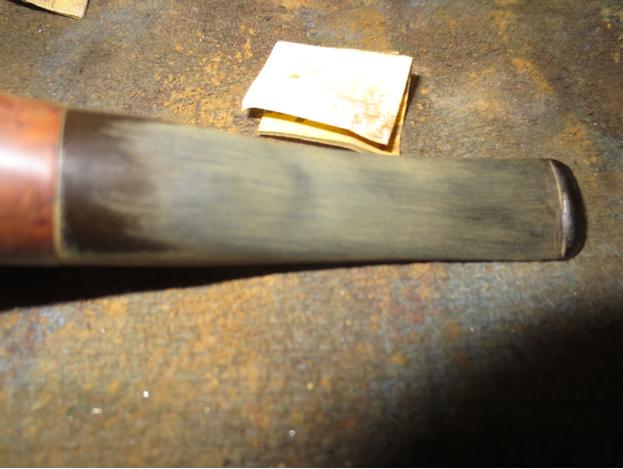
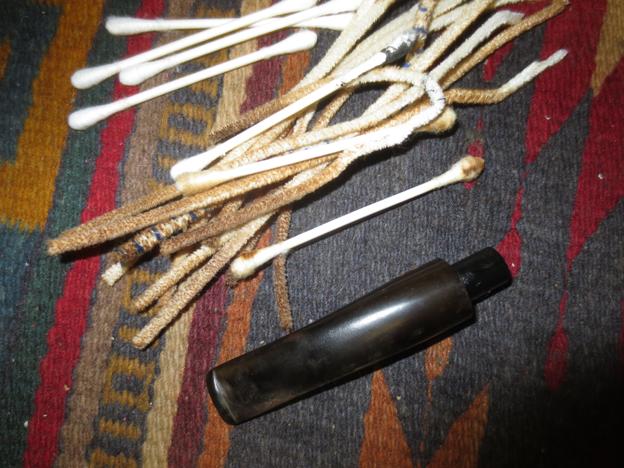
The heat had raised most of the dents significantly. The ones that were left in the stem needed to be sanded out and then filled to take care of them. I used 220 grit sandpaper to smooth out the surface. I also worked on the curve on the underside of the stem to make it less sharp looking.LHS27

LHS28

LHS29

LHS30 
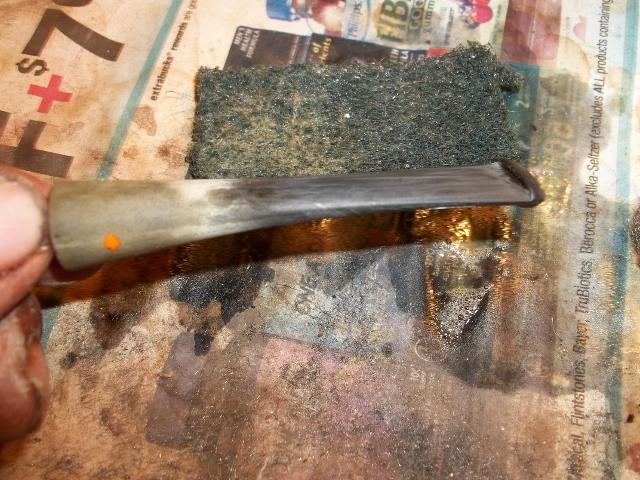
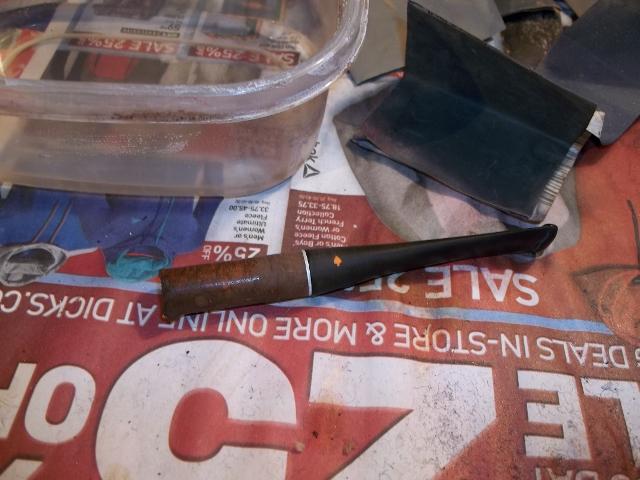
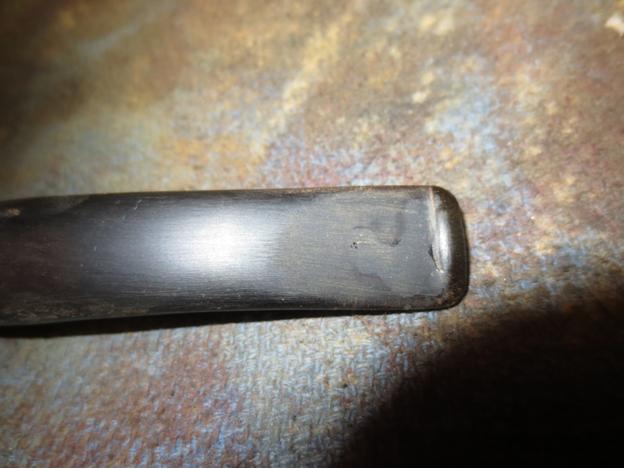
The dents in the stem needed to be filled to bring the surface back to smooth flowing condition. I used a black super glue to fill the surface and set the stem aside to dry for several hours. Once dry, I sanded the fills with 220 grit sandpaper and then used a medium and a fine grit sanding sponge to feather them into the surface of the stem.LHS31

LHS32

LHS33

LHS34

LHS35

LHS36 
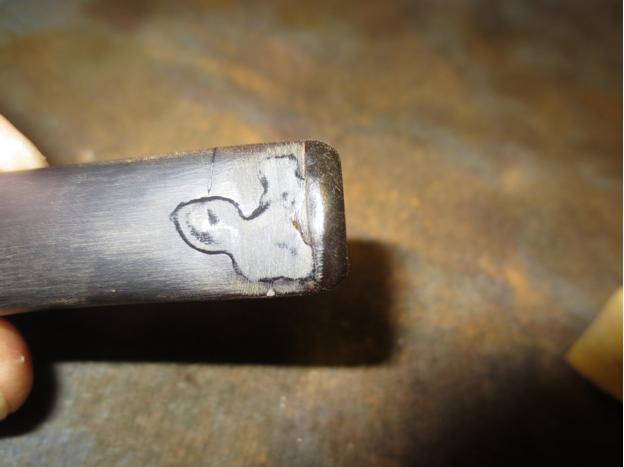
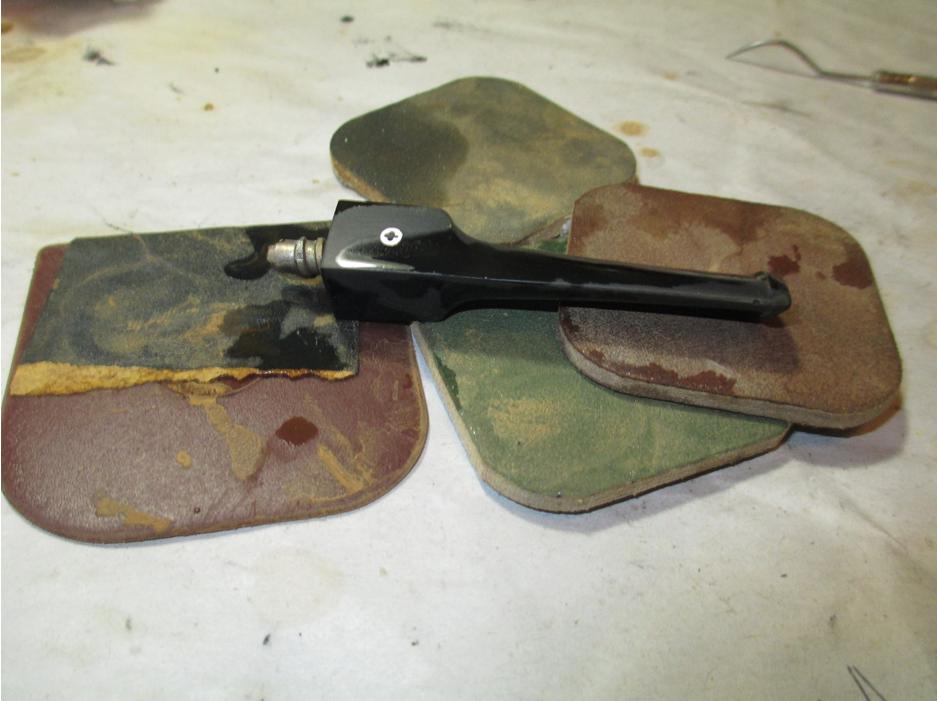
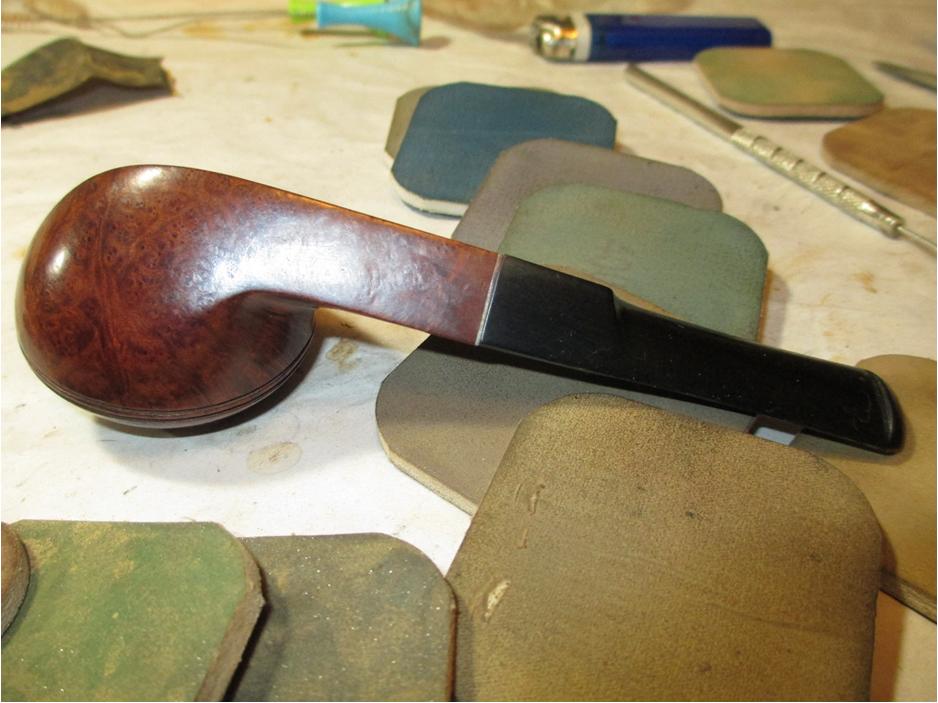
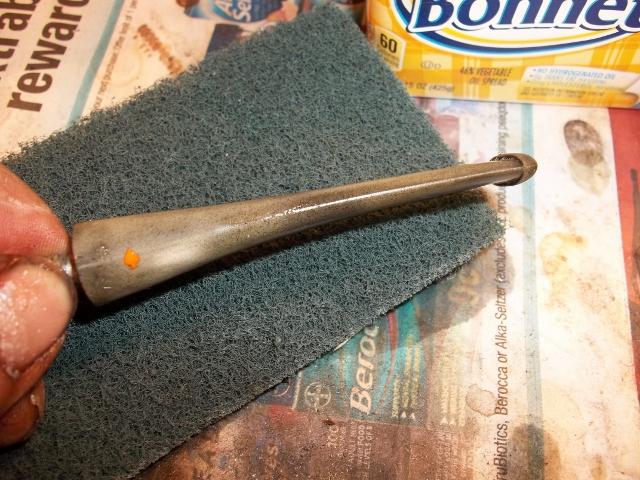
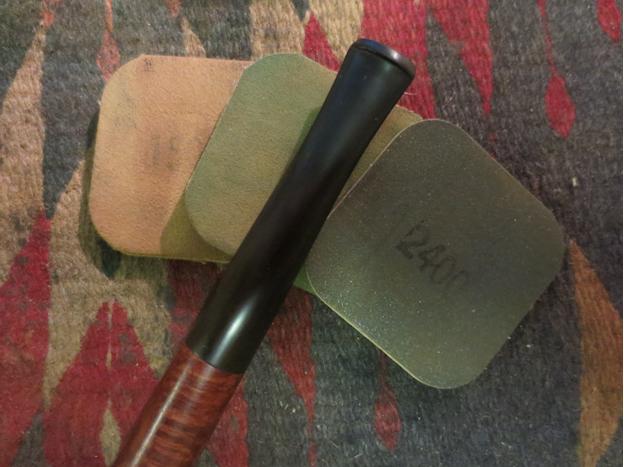
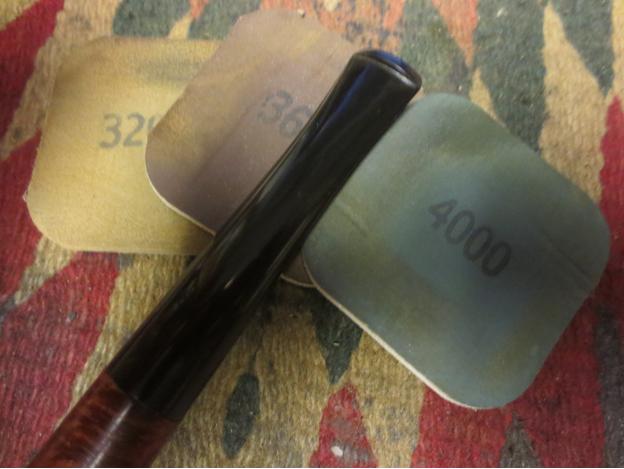
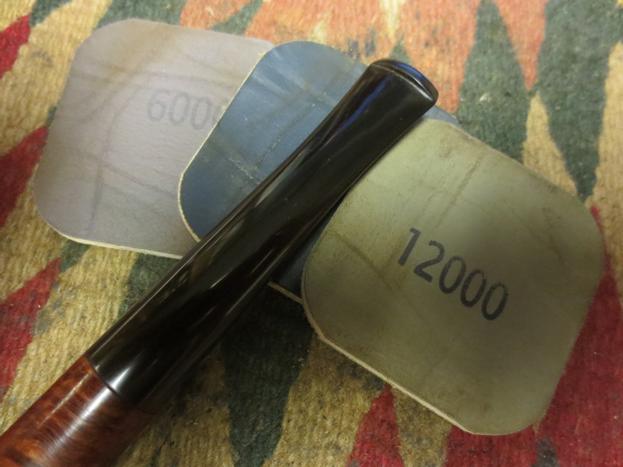
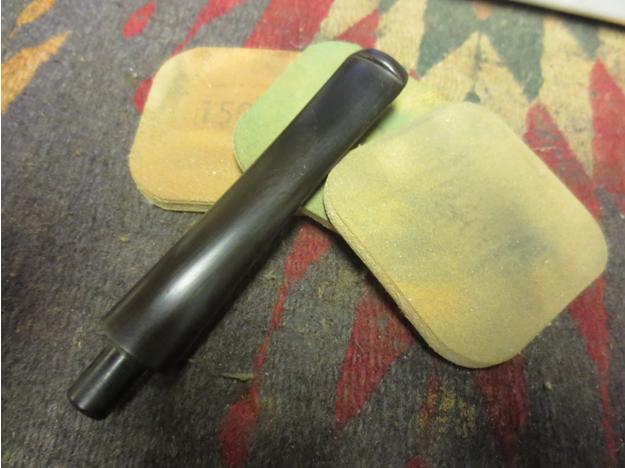
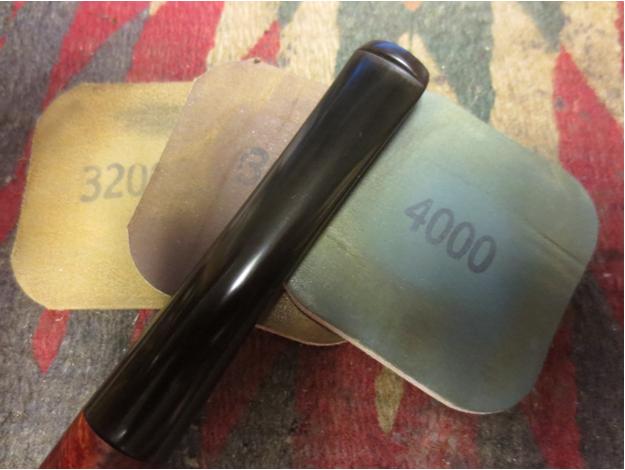
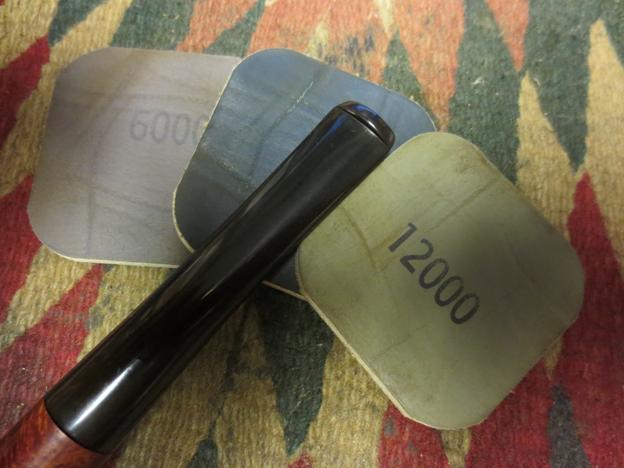
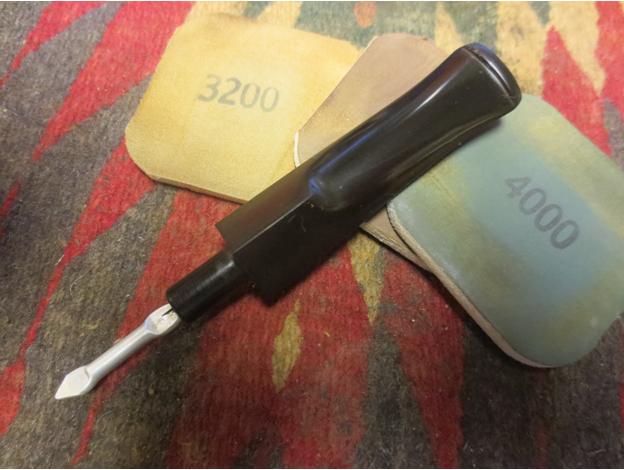
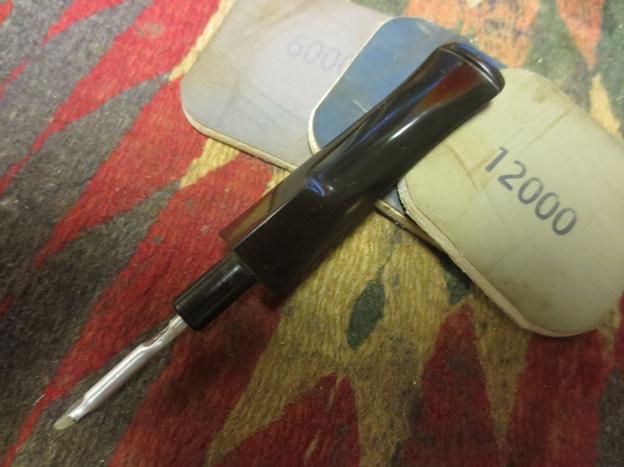
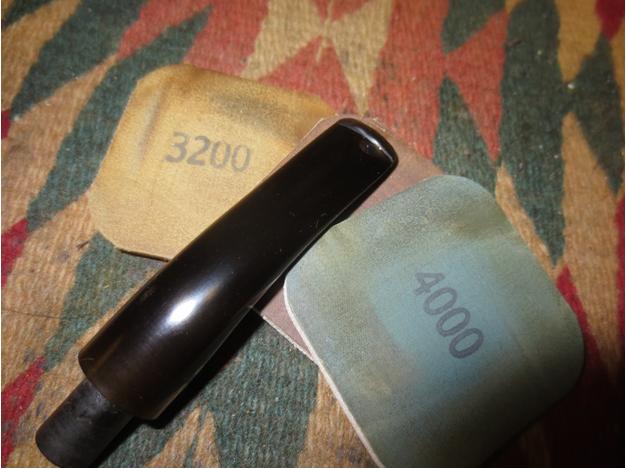
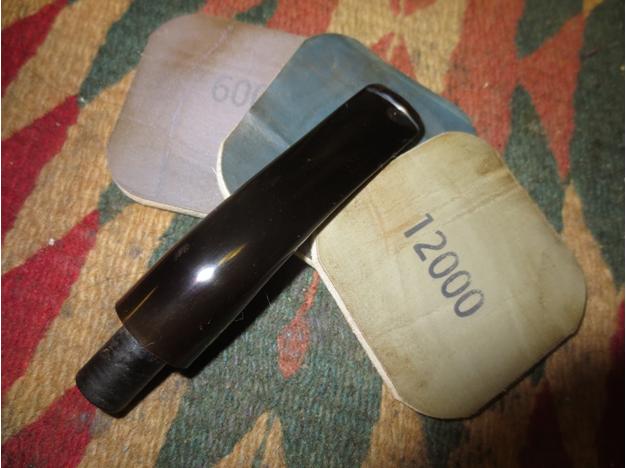
I used a needle file to clean up and sharpen the edge of the button and give it more definition. I sanded the sharp edge with sandpaper and then sanded it with micromesh sanding pads. I wet sanded the stem with 1500-2400 grit micromesh pads and dry sanded with 3200-12,000 grit pads. I rubbed the stem down with Obsidian Oil between each set of three pads and then let it dry after sanding with a 12,000 grit pad.LHS37

LHS38

LHS39 
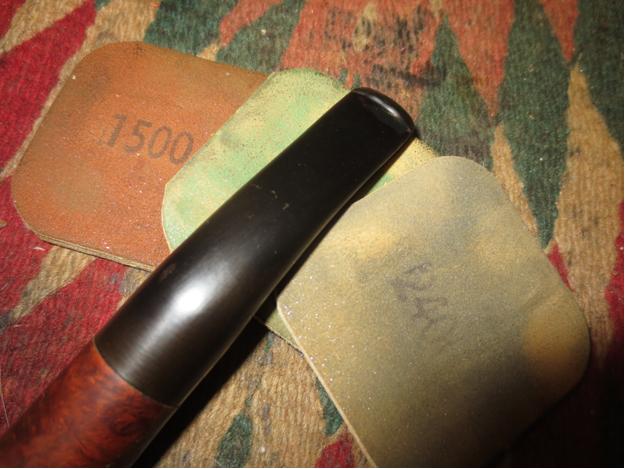
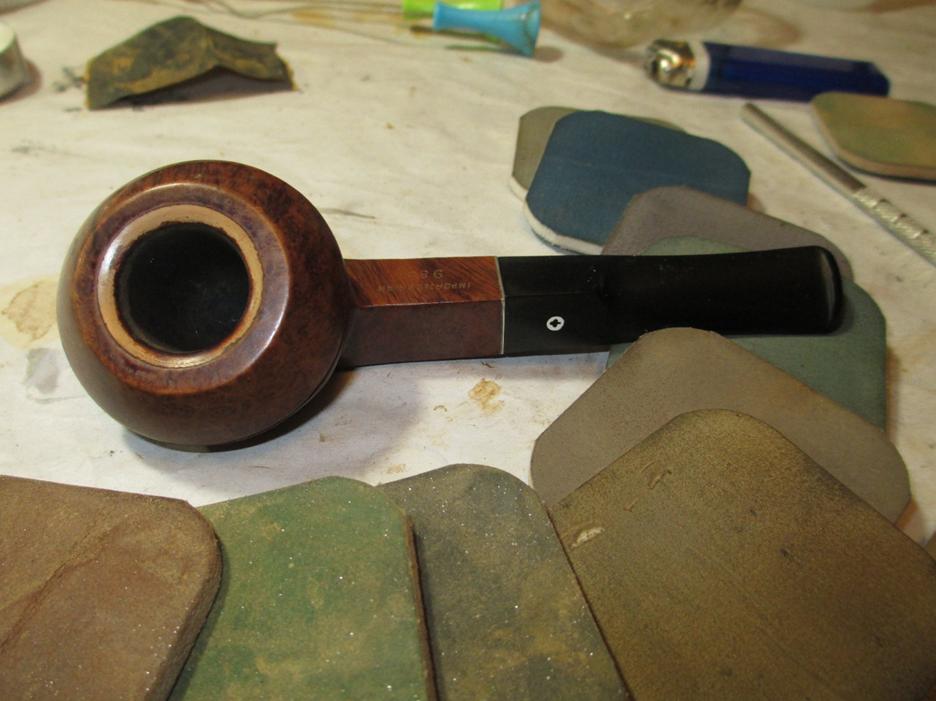
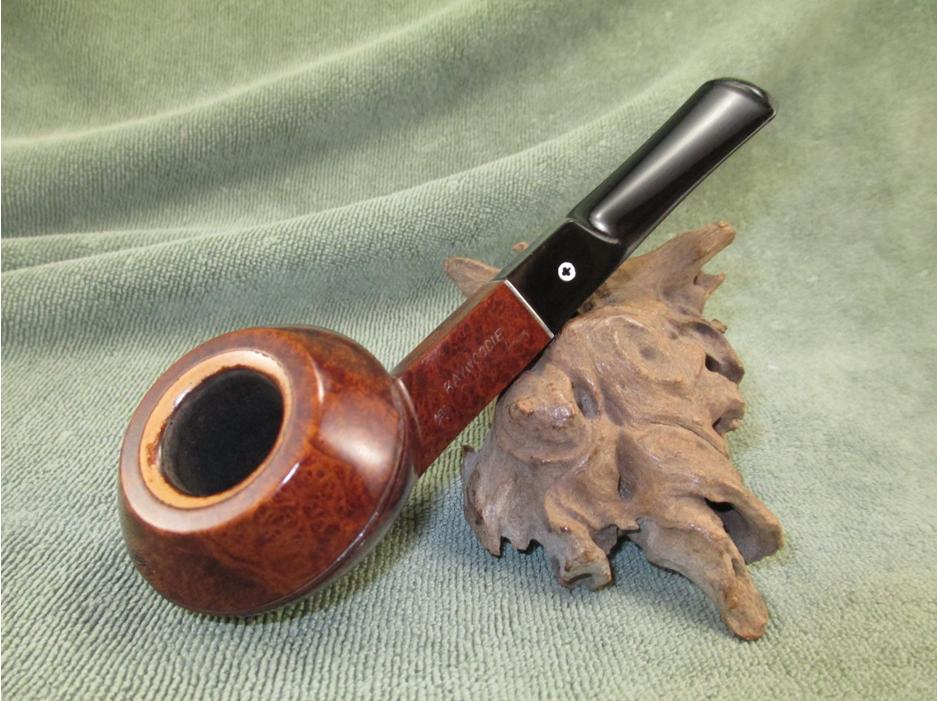
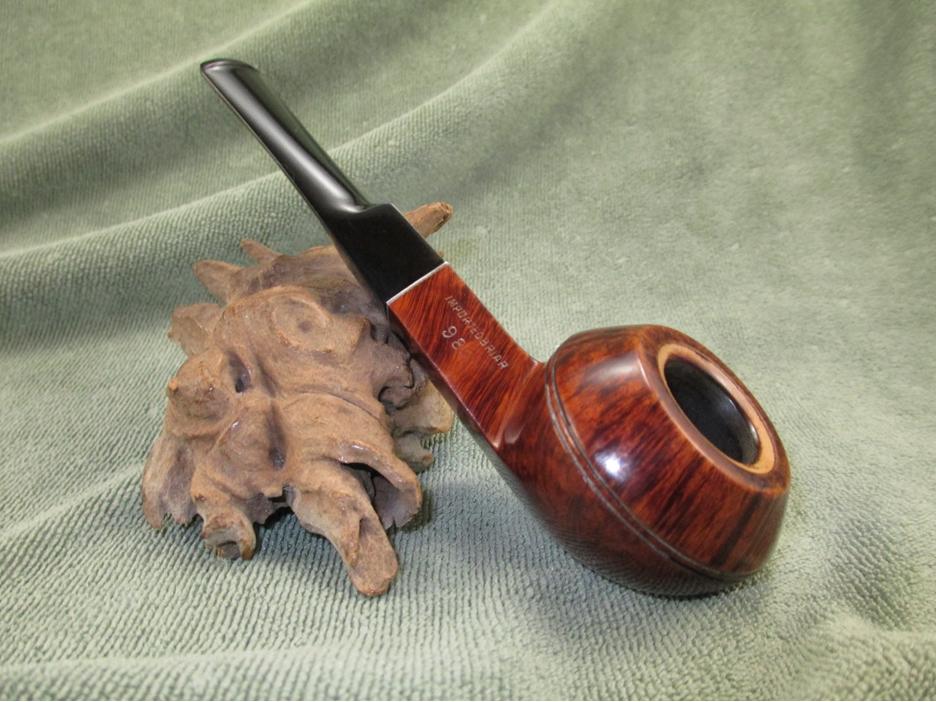
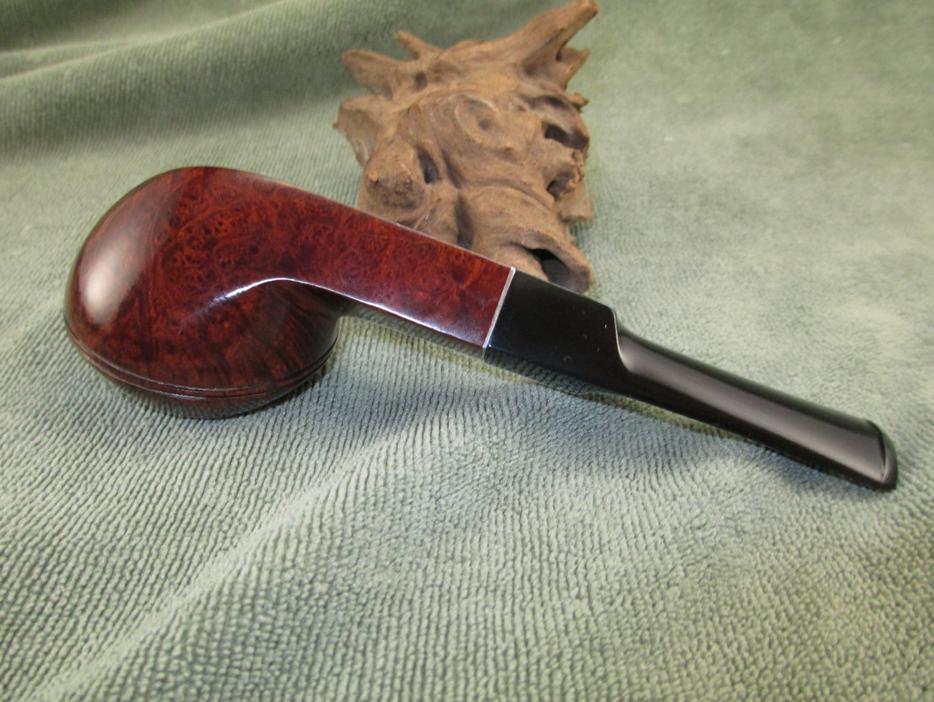
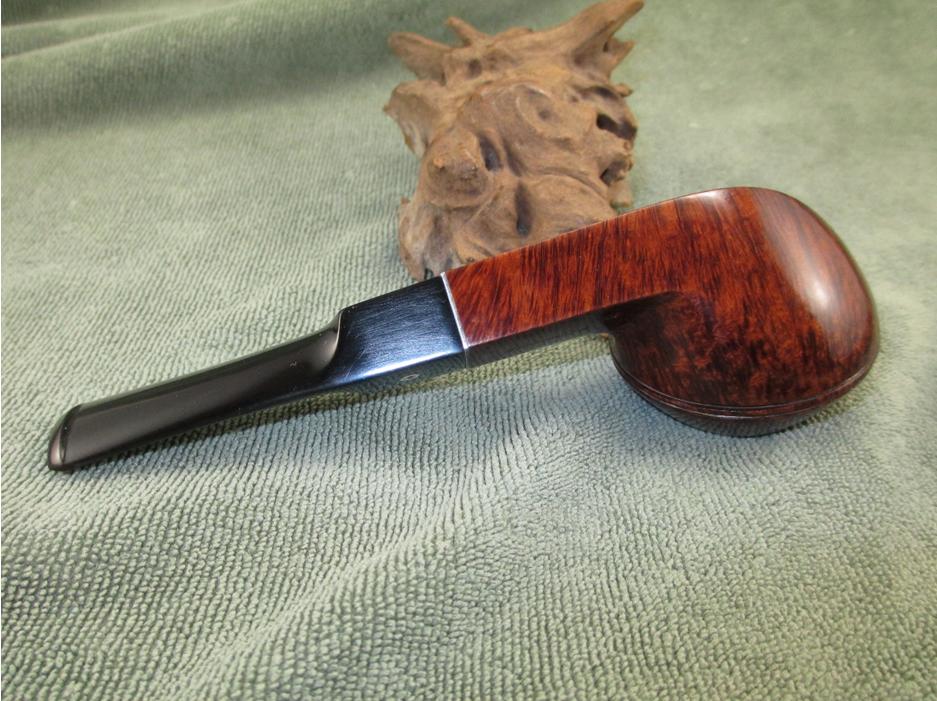
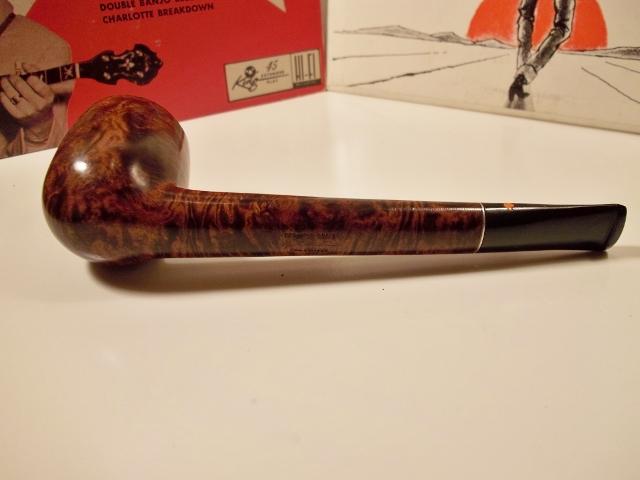
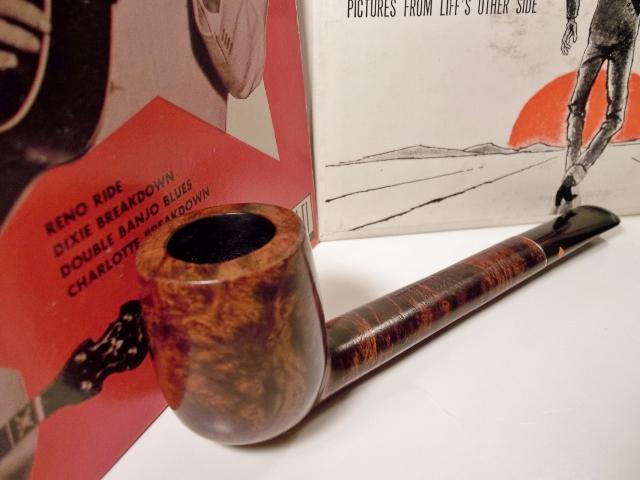
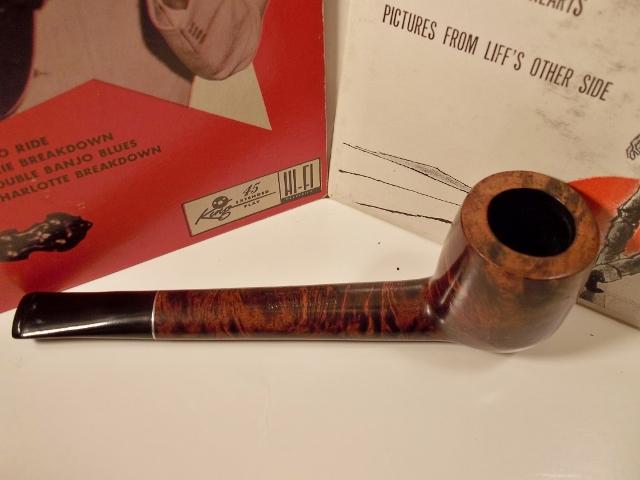
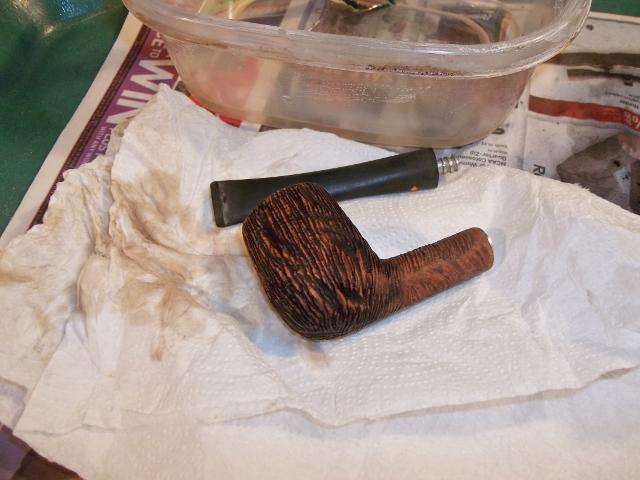
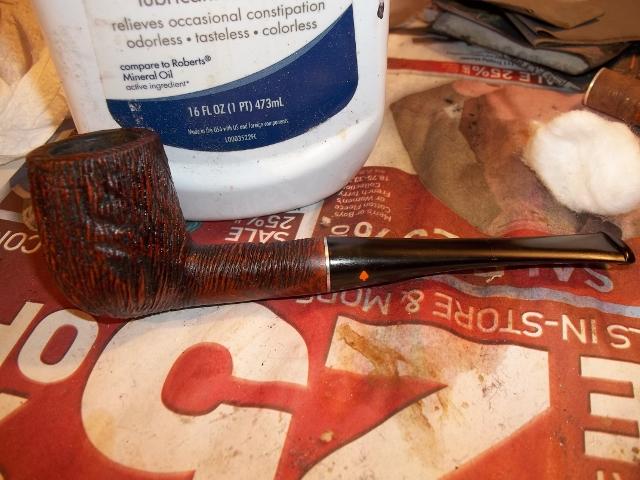
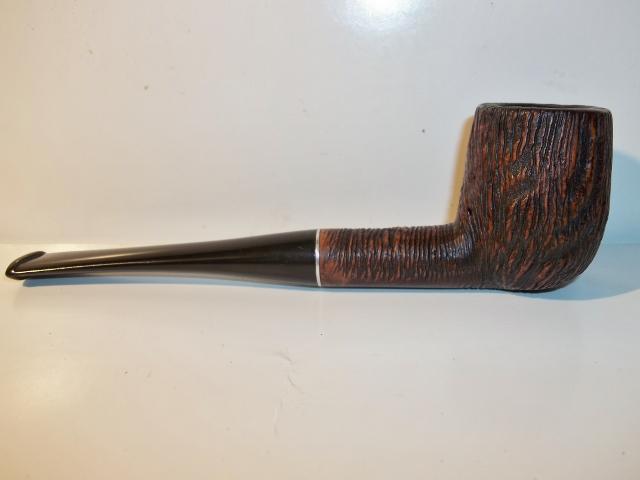
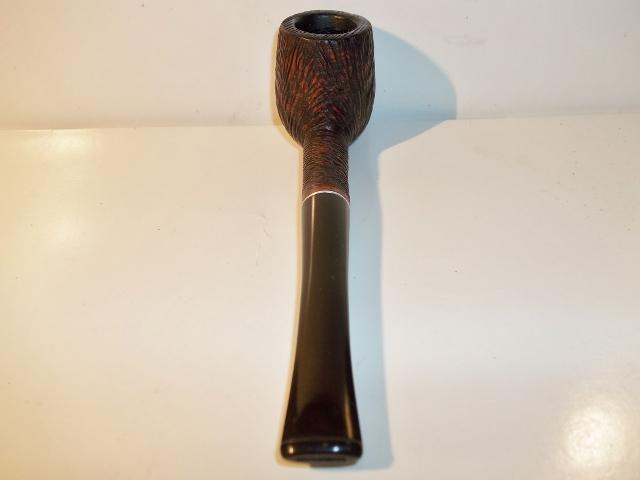
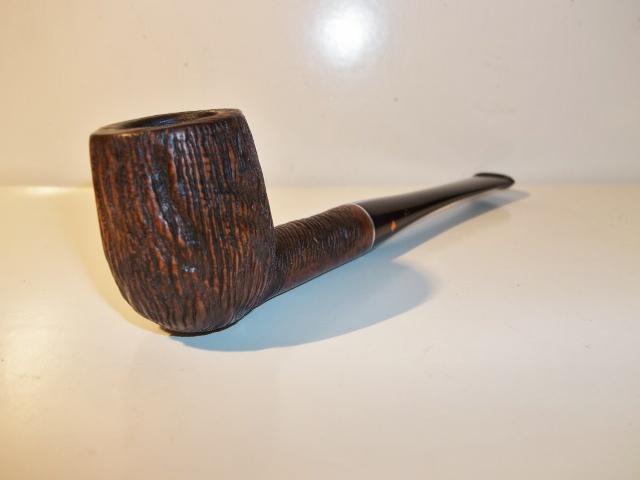
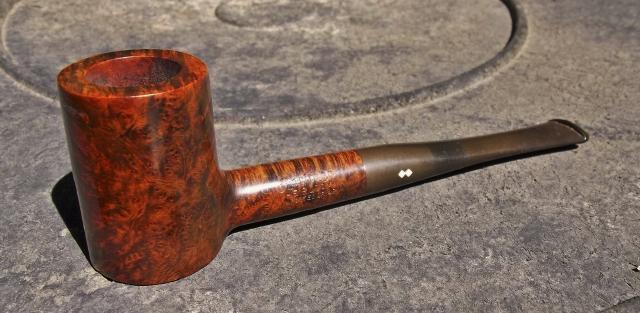
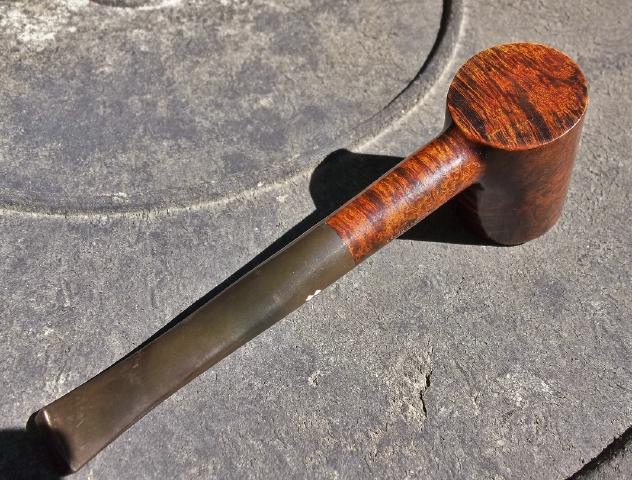
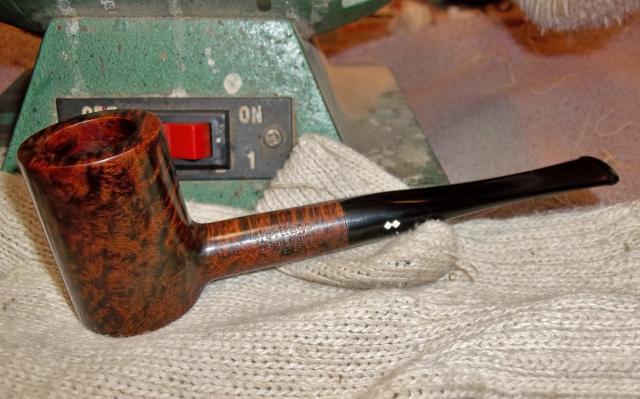
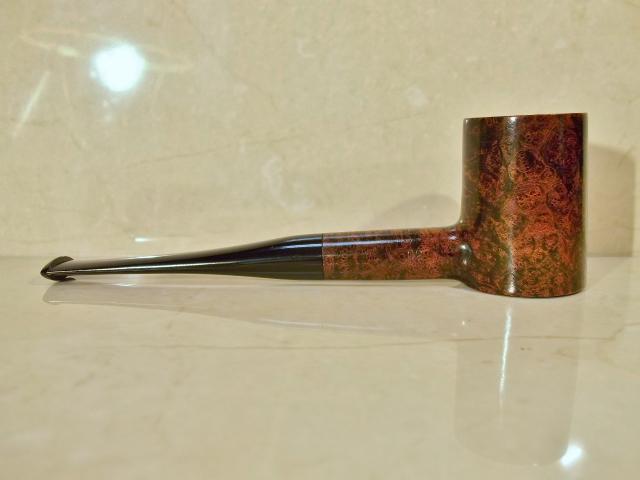
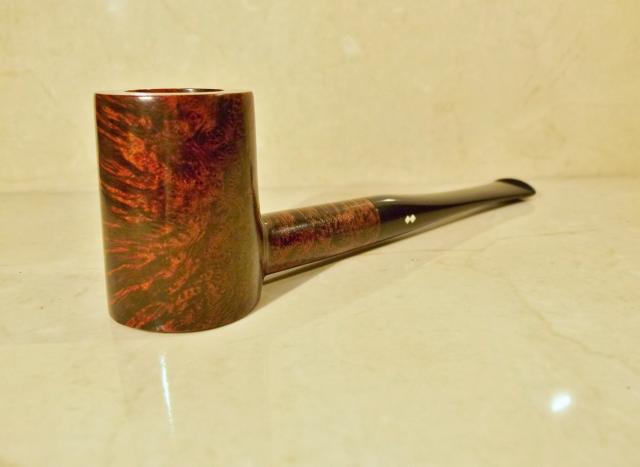
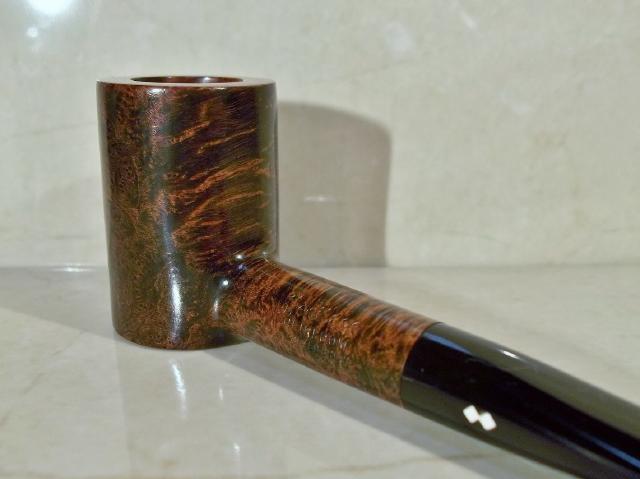
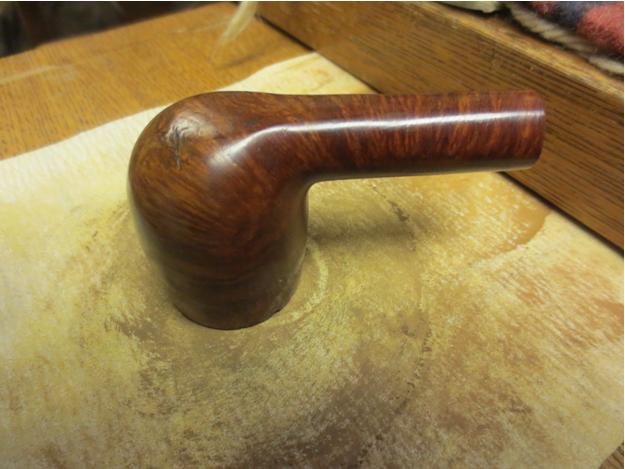
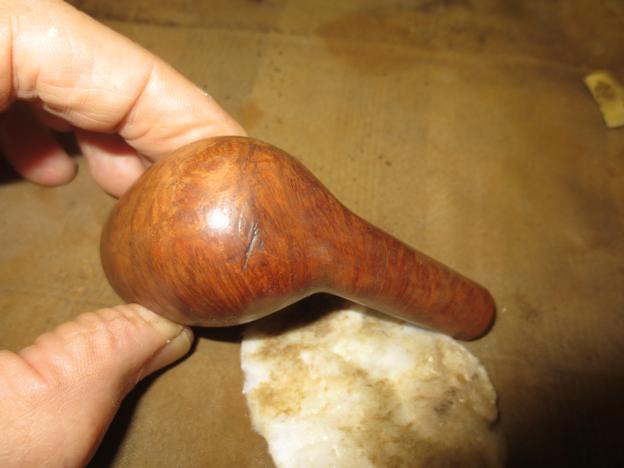
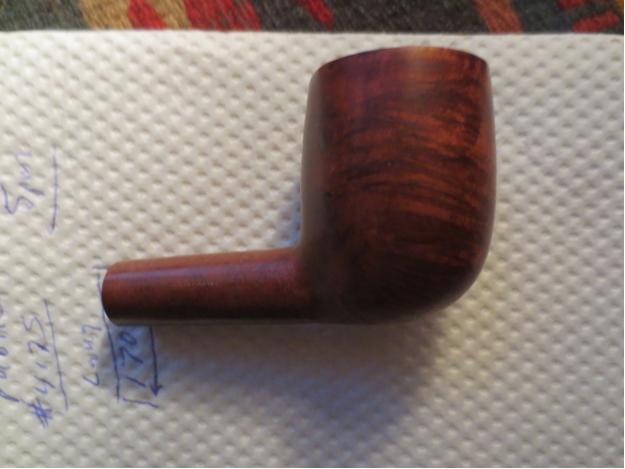
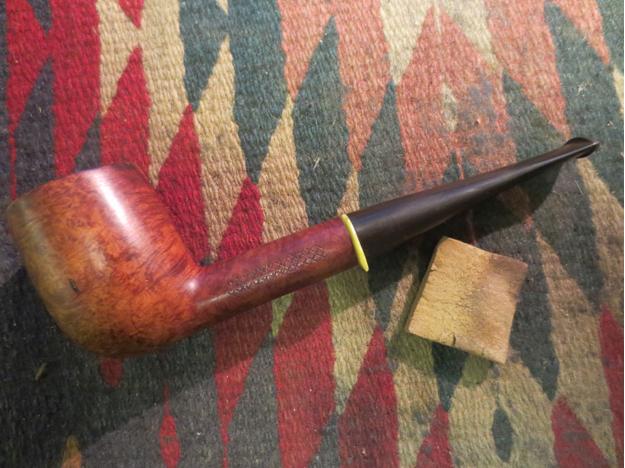
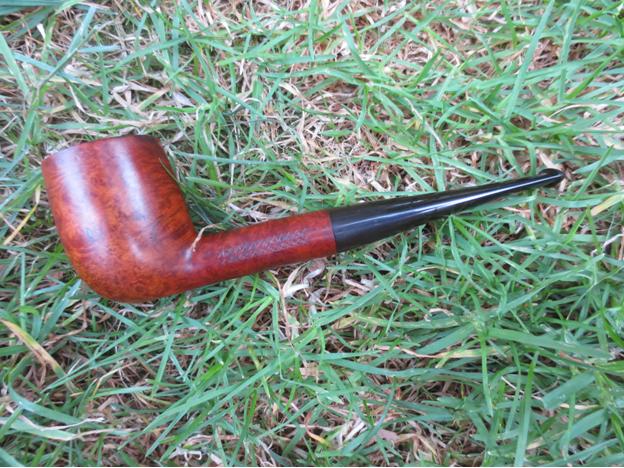
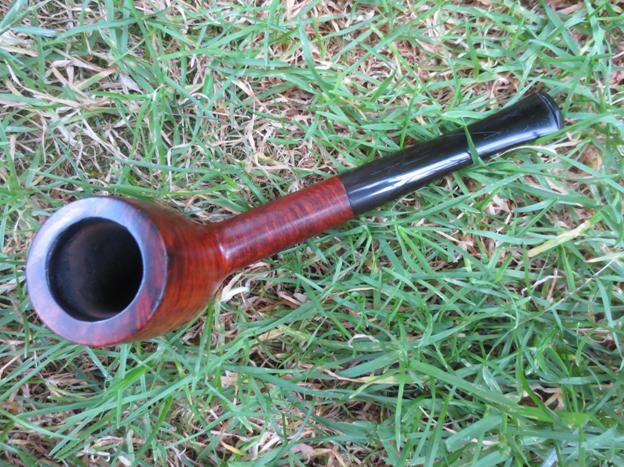
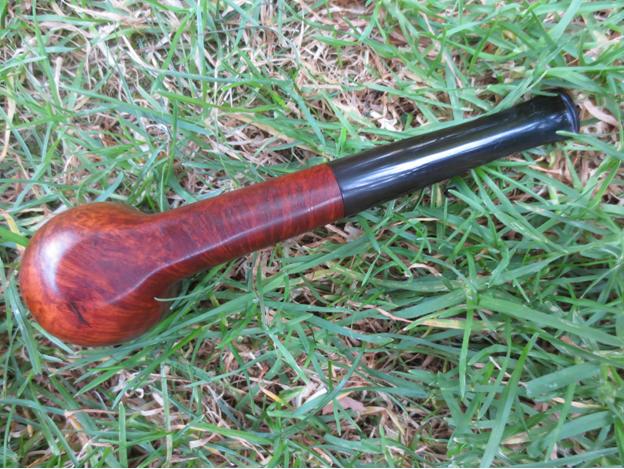
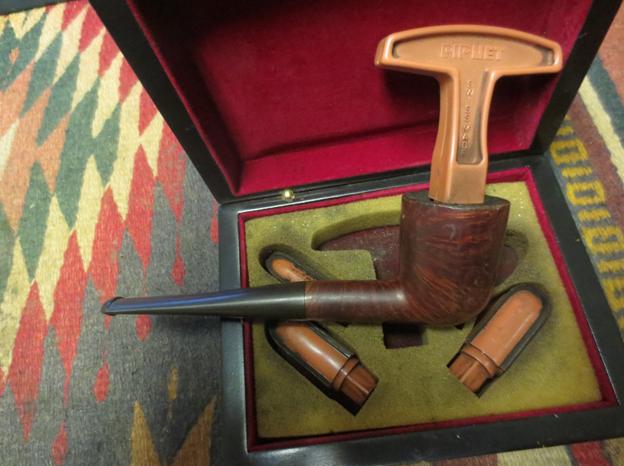
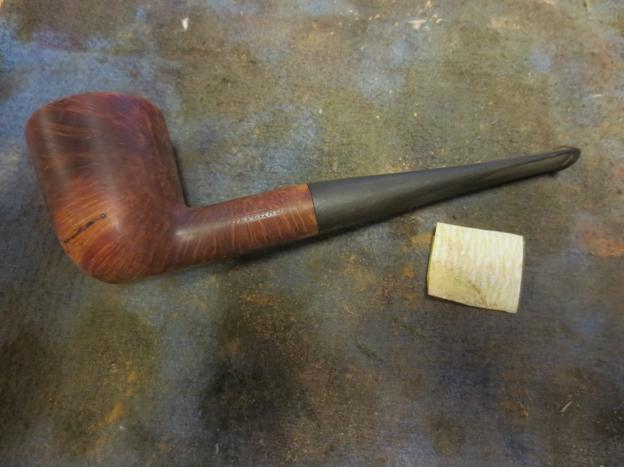
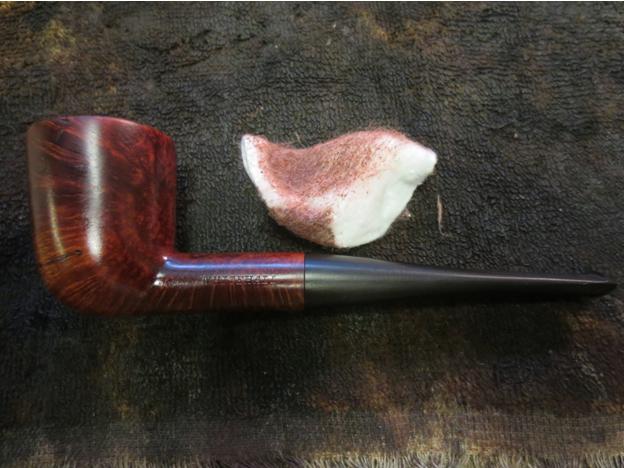
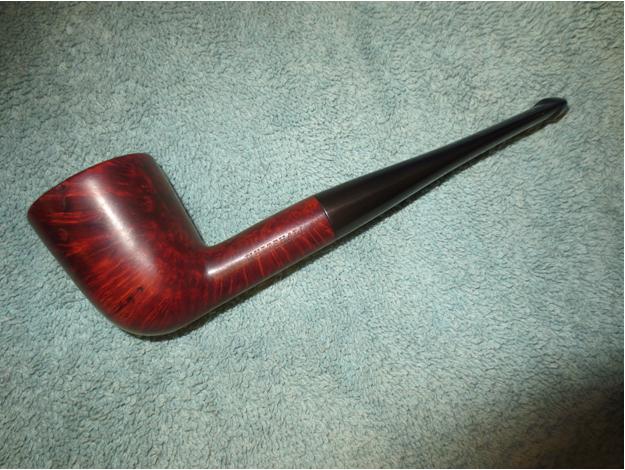
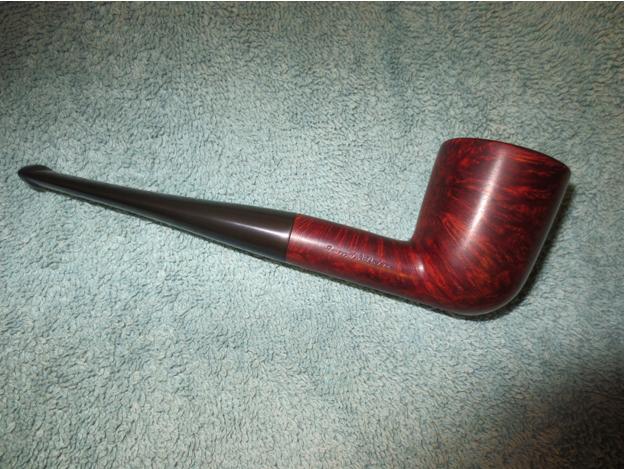
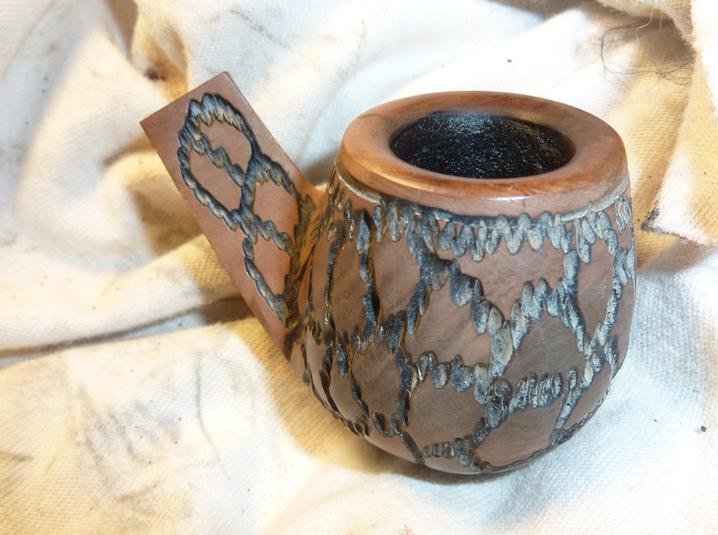
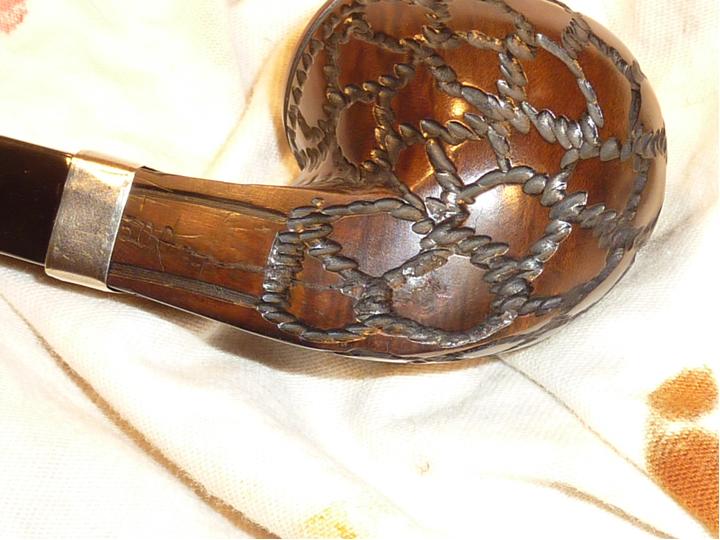
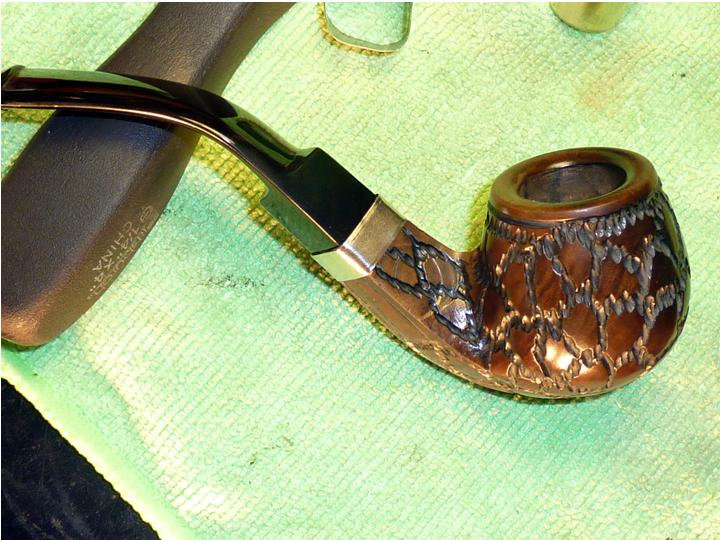
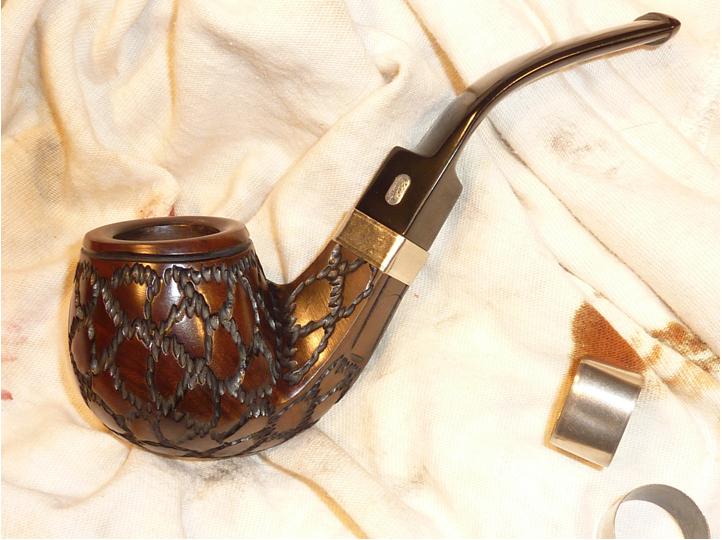
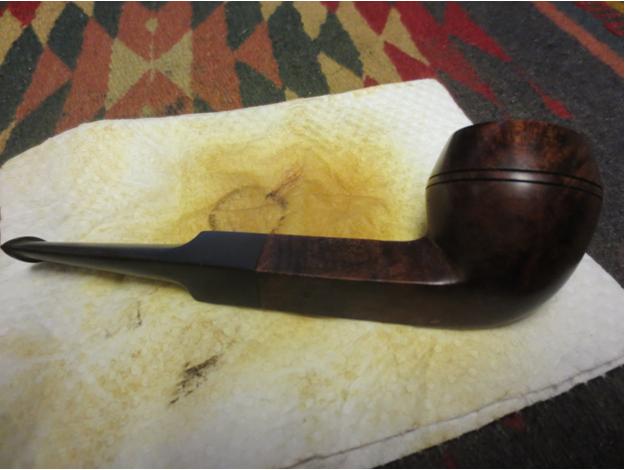
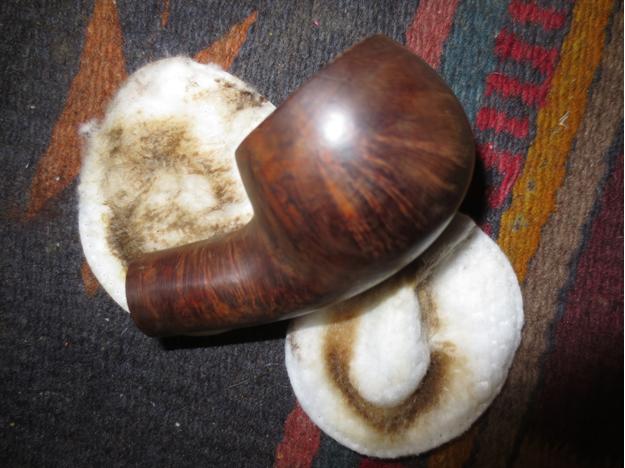
I buffed the pipe with White Diamond and Blue Diamond on the buffing wheel to polish and remove the slight remnants of oxidation that had come to the surface. I gave it multiple coats of carnauba wax and buffed it with a clean flannel buffing pad. I brought it back to the table and hand buffed it with a microfibre cloth. The finished pipe is shown in the photos below.LHS40

LHS41

LHS42

LHS43

LHS44

LHS45

LHS46

Rescuing a Kaywoodie Flame Grain Meerschaum Lined Doggie


Blog by Andrew Selking

To paraphrase Samuel Clemmons, reports that I’m no longer messing with pipes are greatly exaggerated. Between a cross country move, a new house, renovations to said house, and trying to figure out what I want to be when I grow up, I have not spent as much time working on pipes as I would like. I did manage to squeeze in this nice Kaywoodie Flame Grain Meerschaum lined doggie.

According to a Kaywoodie brochure from the era, Flame Grain pipes were made from “200 to 400 year-old briar burls…the last of their kind to be found in the world.” The meerschaum inlaid Flame Grain is a “superb Flame Grain Kaywoodie with an inlaid inner bowl of imported Turkish meerschaum. This pipe combines the outstanding qualities of the two best materials in the world in which to smoke tobacco.” This pipe represents the pinnacle of American pipe making. As a point of reference, in 1947 this pipe would sell for $12.50 while Dunhill pipes started at $10.00.

As you can see, it took some imagination to see a pipe that might compete with a Dunhill.KW1

KW2

KW3

KW4 The stem was under-clocked and heavily oxidized. The bowl had very thick cake and a buildup of tar on the rim. There was some kind of protective finish on the bowl that left a film after the alcohol bath. Additionally, the stinger was cut. On the plus side, I could see some really nice grain and the stem was virtually unmolested.

The first thing I did was soak the bowl in alcohol. I was hesitant to do that, because I was afraid the alcohol would cause the meer lining to deteriorate. At the same time I was also worried that if I didn’t soften the cake first, just using the reamer might damage the lining as well. I compromised and soaked it for about two hours and the cake came out nicely.

While the bowl was soaking, I used Oxyclean and warm water to soak the stem. Since it was missing the end of the stinger, it was easy to get the worst of the gunk out with a pipe cleaner. As I mentioned, the stem was under-clocked. To fix this problem I usually heat the stinger with my heat gun until I can easily rotate back into place. As the tip of the stinger heats up it transfers heat into the stem and loosens the glue. The whole heat transfer thing wasn’t working very well with this pipe, so I stuck a small nail in the stinger.KW5 That worked like a charm.

Next I did a retort on the bowl and stem.KW6

KW7 After scrubbing the insides with brushes, q-tips, and pipe cleaners, it was time to tackle the exterior issues. I used 0000 steel wool with acetone to remove the tar build up on the rim.KW8

KW9 I continued with the 0000 steel wool over the rest of the bowl to remove the film on the finish. After cleaning the bowl, I used 3200-12000 grit micro mesh to polish the bowl. This is what it looked like afterwards.KW10

KW11

KW12 I used 400 grit wet/dry with water to remove the oxidation from the stem, followed by 1800-2400 grit micro mesh with water.KW13 I finished the stem with a progression of 3200-12,000 grit micro mesh.KW14

KW15

KW16 I set up my buffer and polished the bowl with white diamond and carnauba wax. I used my variable speed rotary tool with white diamond and carnauba wax for the stem. Here is the finished pipe. Thanks for looking.KW17

KW18

KW19

KW20

KW21

Refurbishing a Dr. Grabow Westbrook 84L Smooth Canadian


Blog by Troy Wilburn

I got this pipe in a trade. I was pleasantly surprised when it showed up it was an 84L and not a regular 84. The stampings are crisp. The rim did have some dings so I had to lightly top it and restain it. There are still some very light dings on pipe but I let them go as the factory finish and color was excellent. So I just cleaned and buffed it other than rim. The stem still has some teeth marks I could not get out fully. The old bowl cake came out easy and the shank was not that dirty and I’m glad because these Canadian shanks are a pain to clean lol. It has zero fills too, which on that much briar was a nice surprise. All and all I’m very happy with it.

Here is the pipe when it arrived.West1

West2

West3

West4

West5 I took pics of it after I had finished restoring it with a couple of my favorite 45 EPs .

After: West6

West7

West8

West9

West10

West11

West12

West13

West14

West15

West16

West17

West18

Restoring a Westbrook 36 – A Long & Detailed Explanation for New Refurbishers


Blog by Troy Wilburn

Troy originally wrote this simple step by step methodology for refurbishing pipes for the Dr. Grabow Collectors Forum. Troy’s method is straight forward and he gives great photos to help along the way. I thought it might be helpful for those who are just starting in this hobby of ours. It also may give pause for thought to us who have been doing this for a long time. I firmly believe that there is always something new to be learned from each other as we work to restore old pipes and give them new life. Thanks Troy for this great how to piece. – Steve

I’ve had a few PMs by the newer member asking questions on refurbishing pipes. So I decided to make a more detailed way of what I do on refurbing pipes. Now this is what I prefer and what works for ME. Everyone has their own twist and preferred methods.

The first thing is to pick the right pipe. This to me is very important especially when doing your first pipes. You want one that’s inexpensive and an easy clean up. So ones with holes in stems and rims that look like they were used to hammer walnuts with might be ones to pass until you get a few under your belt. Not having to sand it a lot and restain is a plus.

Now we are not making a show pipe or restoring a rare pipe that you want to keep original. We are going to bang out a good clean pipe for smoking pleasure. I can do a pipe like this in good condition in 2 hours or less start to finish. This pipe will be smoked and smoked a lot so it doesn’t need to be so glossy you need to put sunglasses on to pick it up. Just a good dependable pipe for low cost. The lower the cost the more pipes you can get .

Ok so the pipe I picked is a good old trusty Westbrook Billiard, still a plentiful pipe, easy to refurbish and can be found cheap. They are good quality, tough as nails and extremely fine smokers.

I got this one for 5 dollars and with shipping; I got right under 10 dollars in this pipe. The seller wanted 9.99 but after watching it for a while I took advantage of the best offer and got it for the 5 bucks. It was in good shape from pictures with no stem damage and bowl not banged up. Once cleaned it will smoke just as good as any new pipe you can get today from 20-100+ dollars. I do like to drill out my pipe shanks a little larger diameter so that will help the smoking of it some.

OK now on to the pipe. This is a #36 Westbrook Double Carved coupon pipe.

Before…. The pipe is dirty and has plenty of cake in bowl.Grabow1

Grabow2

Grabow3

Grabow4 The refurbish
Not getting too detailed about how to clean out bowl. All you need if you don’t have a reamer is a dull pocket knife and some coarse sandpaper. I used to use salt baths and or soak them overnight with cotton balls soaked in alcohol (91%), but is not necessary if you do the way I’m going to show you. Be careful not to get over zealous in this as you don’t want to dig gouges in the inner walls of pipe. Just light scrapes to get out biggest part of cake. Most of the time the heavy build up pops right out. After this just roll up your coarse sandpaper in a tight funnel shape and work it up and down and around in bowl. Check progress often as to not take out too much of inner bowl.

Bowl cleaned to right amount and cake removed. Leave a thin coat still in bowl.Grabow5

Grabow6

Grabow7 Cleaning out shank and stem. My advice is to buy a few of those shank brushes as they will save you a small fortune in pipe cleaners.Grabow8 Soak stem and bowl in some 91 % ISO (if it’s a smooth and you want to save finish then don’t soak bowl just clean it with a Scotch Brite pad with 91% very lightly). With these Westbrook double carved you don’t have to worry about as you can just buff them with no staining and they will look fine. Plus I like to soak the bowls on these deep carving to get rid of years of handling with someone else hands. It’s hard to tell what has accumulated in the recess of them carving over the years. Run the shank brush through the shank and stem until (soaked in 91%) until it stops coming out black and gunky.Grabow9 Rinse out the bowl while it is soaking and a good brushing with an old tooth brush over everything including inside bowl. Also rub the bowl with a Scotch Brite pad as it will take off old wax and grime but not so rough you have to sand behind it. After this is done just keep running pipe cleaners in shank and stem with clean ISO until they are coming out clean. I use a combination of the coarse cleaners and regular pipe cleaners. After a good brushing with shank brushes it shouldn’t take too many.

After this I usually place stem in oxy clean and warm water (about half to full scoop that provided in container) and let soak for about 30-40 minutes. It can soak while I work on cleaning the stinger and Adjustomatic female shank.Grabow10 I put the old stinger in an old stem I have to help hold it after it soaked in ISO with bowl and stem. Take some 000 steel wool and just rub it briskly getting into every little part. Take a small screwdriver to use it to push it through the small air trench.Grabow11 Take some steel wool and make it into a long skinny shape.Grabow12 Run it up in shank a little way then take a small screwdriver and run it up alongside. Then twirl the bowl as it will screw the 000 into the threads. Then unscrew it, most of times it will come out but sometimes it will break apart and you will have to push it out with a cleaner or a stiff piece of wire. A small long screwdriver will work also.Grabow13

Grabow14 You might have to do this a couple of times to get it good and clean. Be sure to blow out all the fine pieces of steel wool afterwards.Grabow15 Now we can take the stem out of Oxy Clean bath.Grabow16 Take a Scotch Brite pad and dip into the oxy water and rub the stem. I know people say use Magic Erasers but to me this is much easier and cheaper. It’s a lot less rubbing and faster. Work smarter not harder is what I was taught :). Here it is half done, took maybe 5 seconds.Grabow17

Grabow18 All oxidation that oxy clean bought to the surface is scrubbed off now. Took like a minute.Grabow19 After the oxy bath I take clean water and wipe off bowl and stem with clean water and tooth brush or ISO 91%, your choice, to remove any residue left from the alcohol and oxy clean. I use water because it’s cheaper.Grabow20 Go ahead and run a few pipe cleaners through stem with ISO to remove any debris and residue left behind from oxy bath. The stem is ready for wet sanding. As this stem is in such good shape it won’t take long to wet sand. If it had tooth marks and or heavy scratches you need to sand it more of course. I’m going to use 400, 600, 800 and 1200 grit sandpaper. Any finer grit to me is overkill for this pipe as I said it’s a daily working pipe and not a show pipe. Sand it lightly with each grit of sandpaper, being careful not to over sand it and make it not register with the shank properly. Being ultra careful where the stem goes into the shank as not to take off too much material. As most all the oxidation has been removed it doesn’t need to be sanded too much as we are just trying to make it smooth. Just a few light strokes with the coarse paper is all you need then using the finer grit a little more will do the trick. I have a piece of an old shank that broke off a bowl to use as a holder for Adjustomatic stems. It makes holding them during sanding a lot easier.Grabow21 Ok the pipe bowl is cleaned and scrubbed and the stem sanded.Grabow22 At this point I like to rub the pipe down with Mineral Oil. Some like to use olive oil but Mineral oil is odorless and tasteless. It doesn’t have the danger of turning sour like a type of vegetable oil can. Plus it helps to bring out grain in wood.

Any defects and or oxidation (brown spots in stem) will show up and allow you the luxury of fixing it before you apply wax. I apply the oil with a cotton ball and take a tooth brush and get into all the recesses. It will also show you pretty much what the color of the pipe will look like after buff and wax.Grabow23

Grabow24

Grabow25 The photo below shows the pipe after the Mineral Oil has been wiped and dry, ready for buffing.Grabow26 I use a buffing wheel and compounds but I know some who read this do not have this. I will not get into this as it will take too long and I’m still learning myself. I used to do all hand buffing. At this point you can just apply hand coats of various waxes you can buy that come in paste form and it will look fine.

Well I hope this can be a help to anyone that wants to start refurbing their own pipes. It’s a lot of fun and can save you a lot of money. Dave Whitney also sells a book that I would suggest getting it is called “OLD BRIAR” and it is a book on restoring and trading estate pipes. It is available via Amazon for Kindle.

Here is after pics.Grabow27

Grabow28

Grabow29

Grabow30

Grabow31

Grabow32

Grabow33

Grabow34

Grabow35 After about a 24 hour rest to let the alcohol evaporate out it will be ready for smoking. This is my favorite combination for breaking in a refurbed pipe: 50% Carter Hall and 50% 5 Brothers. It will be build cake fast and burn out any reminisces of a ghost left behind. It is a strong burley combination and has a good nicotine hit so be warned.Grabow36 Now you don’t have to pick a Westbrook as this is just a guide to help you get started. But I would suggest starting on rusticated pipes as they seem to be an easier pipe to refurbish to me. You can always add your own twist to the pipes you do. Now on occasion a problem does pop up like a frozen Adjustomatic or a stuck stem etc…. That’s pretty rare occurrence from the pipes I’ve done. But if it happens, just post your questions here on the Dr. Grabow Collectors forum (or even here on rebornpipes for that matter). Help and advice is something our forum is not lacking in . Or you can just send me an email and I’ll help you best I can or send you in the right direction to someone who can.

Heritage Heirloom 02 Poker


Blog by Troy Wilburn

My latest addition to my American factory made poker collection is a Heritage Heirloom made by Kaywoodie. They were made during the 1960’s and production stopped in 1970. Heritage Heirlooms were Kaywoodie’s high end pipes headed up by an ex-Dunhill employee name Stephen Ogdon. Something like only 1 in over 300 pieces of briar was good enough to use in the Heritage Heirloom line. They used top of the line Para rubber on the stems and all briar was seasoned well, before being made into a pipe. Here is part of a brochure about it.heritage2_zps0d4dc760 Here is another part of the same brochure with the 02 poker shape shown.heritage4_zpsdc6295ef I purchased the Heritage Heirloom from a fellow member of the Dr. Grabow Collectors Forum. The pictures I saw of it truly did not do it justice. When I got it in hand I was amazed at the excellent condition the pipe was in. Other than the stem being oxidized I could not see any issues at all with the pipe.Heritage3

Heritage4 The pipe was barely smoked and still had raw briar showing in the bowl. It looks as though someone stated breaking in the pipe with quarter bowl increments and stopped after the second bowl.Heritage5 The pipe needed very little work. There was not heavy tar to clean out of the stem or shank so just a light swab with a pipe cleaner was all that was needed. I soaked the stem in OxyClean then scrubbed the top layer of oxidation with a green pad and wiped the bowl down with a cotton ball damp with Dawn soap and warm water. I wiped it dry with a clean paper towel.Heritage6 I gave the stem a light sanding.Heritage7 Afterwards I gave the pipe a good wipe with mineral oil and wiped it dry with a clean cloth for the next step of a light buff and wax.Heritage8 Here is the finished pipe.Heritage9

Heritage10

Heritage11

Heritage12

Heritage13

Heritage14

Heritage15

Heritage16

Heritage17

Heritage18

Heritage19 I have smoked a full bowl out of it since I finished it and it’s a very fine smoking pipe that will only get better with some more seasoning and cake.Heritage20

A Very Simple Cleanup on a Dr. Grabow Regal Dublin


Blog by Steve Laug

This pipe came to me in a box of pipes that a friend brought by for me. He was getting rid of a bunch of the pipes that he no longer smoked and thought I might enjoy cleaning them up. This one is stamped on the left side Regal over Dr. Grabow and on the right side, Imported Briar over Adjustomatic over Pat. 2461206. When I took it out of the box it had a half stem. The rest of it had been broken off and it was about 1 ½ inches long. I took it off and put the bowl back in the box. I have no idea what I did with the old stem; I have looked for it for a while now as I wanted to pirate the Adjustomatic tenon from the stem. It will show up when I least expect it and I will deal with it then. Yesterday I took the bowl out of the box and was looking it over. It was in very decent shape. The finish was clean. There were some lighter marks on the back right outside edge of the rim but other than it was clean. There was no cake in the bowl. It was worth a little time to see what I could do with it.

I went through my can of stems and found a Dr. Grabow stem that was the proper diameter. It was in decent shape. There were tooth marks on the top and underside of the stem next to the button. The button itself had some tooth dents. There was some calcification on the surfaces as well. The tenon and stinger were black with tars and oils but would clean up easily enough. The only thing with this stem and tenon is that it was not an Adjustomatic stem but it would do.Dr1

Dr2

Dr3

Dr4

Dr5 I cleaned out the shank and mortise with cotton swabs, pipe cleaners and alcohol. The shank was pretty clean and it did not take much to remove the little that was there. I removed the stinger and cleaned out the stem with alcohol. It too was not in to bad of shape on the inside. I cleaned the stinger and tenon with alcohol and 0000 steel wool.Dr6

Dr7 I heated the stem and raised the tooth dents as much as possible and then sanded them smooth with 220 grit sandpaper. One of the divots was a little too deep to raise so I filled it with a small batch of black super glue and sanded it smooth.Dr8

Dr9 I used a needle file to redefine the sharp edge of the button and make a clean line on both sides of the stem.Dr10 I sanded it with a medium and a fine grit sanding sponge to remove the scratches from the vulcanite and then wiped the stem down with Obsidian Oil.Dr11 I sanded the stem with micromesh sanding pads – wet sanding with 1500-2400 grit pads and then wiping down the stem with Obsidian Oil. I dry sanded with 3200-4000 grit pads, gave it another coat of oil and then continued with 6000-12000 grit pads. Each successive grit of pad made the patch disappear and blend into the surface of the stem. I gave the stem a final rub down with Obsidian Oil and let it dry.Dr12

Dr13

Dr14 I buffed the pipe with Blue Diamond polish on the wheel and then gave it multiple coats of carnauba wax. I buffed it with a clean flannel buff on the wheel and then hand buffed it with a microfibre cloth for a final deep shine. The following photos show the finish pipe. It should work well for many years to come. This one is for sale should anyone wish to add it to their rack. Email me and let me know.Dr15

Dr16

Dr17

Dr18

Dr19

Breathing New Life into a La Fond’s Vintage, Algerian Briar Reject Billiard


Blog by Steve Laug

This old pipe came to me in a lot that was a gift from a friend and it was in very rough shape. The bowl covered in varnish and the rim had been used to hammer nails. There was not one smooth surface on the rim of the pipe. The outer edge of the bowl was very rough particular on the backside with chunks of briar missing. There were several fills on the bowl – on both sides that were missing and there were large deep scratches on the bottom of the bowl.LaFond1

LaFond2

LaFond3

LaFond4 I have included a close-up photo of the rim to show the extent of the damage.LaFond5 I also took some close-up photos of the stamping to give an idea of what that looks like. The shank is stamped on the right side with the words MADE IN FRANCE. On the left side it is stamped with a double line of XXXX’s. I interpret that as the stamping that a pipe company uses to declare a pipe a REJECT. Some of the English companies actually stamp the pipe reject while others X out the stamping. In this case I was able to read through the X’s and see that underneath it was stamped La Fond’s Vintage on the first line and below that it read Algerian Briar. There is not a shape number on the shank.LaFond6

LaFond7 I looked in Who Made That Pipe to see if I could find any information on the brand. The book listed that the brand was unknown but was English made. I looked on pipephil’s site, Pipes: Logos and Markings and found the listing below http://www.pipephil.eu/logos/en/logo-l1.html. The left side of the shank on the pipe I am working on is stamped identically to the one in the photo. The right side of mine says Made in France instead of Made in England. There is also no shape number on the one I have.LaFond8 I think that an educated guess can be made regarding the company behind this brand of pipe. Looking at the shape of the pipe and the shape number on the pipe in the photo it looks to me that the brand may well have been a sub brand of GBD. Certainly the 9436 shape number matches the same shape number that GBD stamped on that shape pipe.

As I have been doing lately, I reamed the bowl with a PipNet pipe reamer to take the cake back to bare briar. I wanted to see if there was any significant damage to the inside walls of the bowl considering the damage everywhere else. After reaming I would need to sand the inside of the bowl as the cake was both crumbly in some places and hard and pitted in others.LaFOnd9

LaFond10

LaFond11 The rim damage made it necessary to top the bowl to remove as much of it as possible. I used the topping board and 220 grit sandpaper to do the work.LaFond12 I removed as much of the top of the rim as possible without changing the overall appearance of the pipe. I was able to remove the majority of the damage. There were still some missing chunks of briar on the back side of the bowl near the top edge that I would need to address in a different manner.LaFond13 I wiped the bowl down with acetone on cotton pads to remove the varnish coat that covered the bowl and shank. Fortunately it came off quite easily. At least they did not coat the bowl with urethane or some other modern plastic coat. I worked on the damaged areas and the missing fills to make sure that I was able to get the grit and grime out of the holes.LaFond14

LaFond15

LaFond16

LaFond17 I picked out any pieces of debris in the divots and wiped it down one final time. I filled the holes with briar dust and then dripped clear super glue on top of the briar dust. I added more briar dust and more glue until I had the surfaces built up and repaired.LaFond18

LaFond19

LaFond20 I sanded the repairs with 220 grit sandpaper to blend the patches into the surrounding briar. It took a bit of sanding to smooth things out and leave the patches only in the holes that needed to be repaired and not on the surface of the bowl. Once the surface was smooth I sanded the areas with a medium and fine grit sanding sponge to remove the scratches.LaFond21

LaFond22

LaFond23 I sanded the inside of the bowl and then scrubbed out the bowl, shank and stem with pipe cleaners, cotton swabs and isopropyl alcohol. I scrubbed until the shank was clean.LaFond24 I used the stain pens to blend in the sanded areas with the colour of the rest of the bowl. I used it on the rim and the repairs around the bowl. I blended light brown and dark brown stain pens to get the colour to match. I sanded the bowl and rim with a fine grit sanding block to feather in the stained areas.LaFond25

LaFond26

LaFond27

LaFond28

LaFond29 After sanding I rubbed the bowl down with a light coat of olive oil and buffed it into the briar.LaFond30

LaFond31

LaFond32

LaFond33 I would need to wax and polish the bowl once I had finished with the stem but it was done for the time being. I turned to the stem and sanded it with 220 grit sandpaper to remove the ripples in the vulcanite on the top and bottom of the stem from the button toward the bowl for about 1 ½ inches. It was obvious and ugly in my opinion. I finished smoothing out the stem surface and then sanded it with a medium and a fine grit sanding sponge to smooth out the scratches.LaFond34

LaFond35

LaFond36

LaFond37 There was some oxidation on the stem that needed some more work so I repeated the process until the oxidation was removed. I wet sanded the stem with 1500-2400 grit micromesh sanding pads. I rubbed the stem down with Obsidian Oil and then dry sanded it with 3200-4000 grit pads and gave it another coat of oil I finished sanding with the micromesh pads dry sanding with 6000-12000 grit. I gave the stem a final coat of Obsidian Oil and let it dry.LaFond38

LaFond39

LaFond40 I buffed the pipe with Blue Diamond on the buffing wheel and then gave it multiple coats of carnauba wax. I buffed it with a clean flannel buffing pad and then took it back to the work table and hand buffed it with a microfibre cloth. Dave Gossett wrote about doing that several blogs ago and I have been doing it ever since. It seems to add depth to the shine that a buffer alone does not give. The finished pipe is shown in the photos below. I took the photos outside in the waning light of the day. I really like the look of the pipe in the grass. The green sets off the colours of the briar and the black of the stem. This old timer is ready for a long life ahead of service to whoever takes it home to their rotation. Thanks for looking.LaFond41

LaFond42

LaFond43

LaFond44

Rejuvenating and Repairing a Whitehall Dublin


Blog by Steve Laug

This old Whitehall pipe came to me from the antique shop in Victor, Idaho, a small town on the way to Jackson Hole, Wyoming. On a recent trip to Idaho my brother and his family and my daughters and I visited Jackson Hole. On the way home, we stopped in Victor to stretch our legs and wander a bit. I went into the antique shop and struck up a conversation with the owner. Eventually a tin of five pipes and some parts came out from under the counter. I bought all of them. They traveled back to Vancouver with me and will one day all be refurbished.

This Dublin shaped pipe is stamped Whitehall on the left side of the shank – though the stamping is faint. On the right side it is stamped Imported Briar (also faint). It has a flat bottom and sits well on that. The finish was very worn but was a rich oxblood colour under the grime. The bowl sides have some great cross grain. There were some small fills near the top of the bowl on the left side. The rim was damaged on the outer edge and very caked from the bowl over the rim top. The inner edge of the rim was still round and did not show signs of damage under the thick cake. The stem appeared to be a poor fit but as I looked at it I realized that it was upside down. The flattened bottom of the bowl had not been continued on the stem so it sat wrong.Dublin1

Dublin2

Dublin3

Dublin4 I took some close-up photos of the rim and sides of the bowl. The rim photo shows the tarry buildup and the side photos show the stamping.Dublin5

Dublin6

Dublin7 I generally ream the bowl when I start a clean up to remove the cake so I can examine the pipe thoroughly to check for inside wall damage and potential issues. I reamed it with a PipNet reamer and took the cake back to bare briar.Dublin8 While I was at it I scrubbed the rim with alcohol and cotton pads to remove some of the tars. I had to use a sharp blade to gently scrape away the thick coat of tars while I was scrubbing. The photo below shows the initial cleanup of the rim and newly reamed bowl.Dublin9 I sanded the rim with 220 grit sandpaper to further remove the tars and to minimize the outer edge damage. There was a burn mark on the front left of the rim that I was able to reduce but not remove altogether.Dublin10 I scrubbed out the shank and the bowl with alcohol, cotton swabs and pipe cleaners.Dublin11 I wiped down the exterior with alcohol and cotton pads to remove the finish and to clean it up. In doing so I found that there was a small shallow crack/flaw toward the bottom of the bowl on the left side. In the photo below the dental pick is at the close end of the crack and the dark spot is the far end.Dublin12 I picked out the crack with the dental pick, drilled two small holes – one on each end of the crack to stop it from going further. Interestingly this crack followed the pattern of the grain on the side of the bowl. Once I had it cleaned out I wiped it down with alcohol a final time. I pressed briar dust into the crack, dripped super glue into it and then pressed more briar dust on top of the glue. The photo below shows the repaired crack. Fortunately the crack was not deep and did not affect the interior of the bowl. It did not go all the way through and appeared to be more of a flaw in the briar than damage.Dublin13 I sanded the repair with 220 grit sandpaper to remove the excess patch and blend it into the surface of the briar. I sanded it with a medium and a fine grit sanding sponge to remove the scratches in the briar and feather out the surface. I sanded the entire bowl and rim with the same sanding sponges and sandpapers.Dublin14 I aligned the stem and sanded it with 220 grit sandpaper to smooth out the rough surface and then flatten the bottom to match the bottom of the shank.Dublin15

Dublin16

Dublin17

Dublin18 I wiped down the bowl with alcohol and then stained it with an oxblood alcohol based stain. I put the stain on heavy around the sanded areas on the shank and the bowl repair. I also darkened those areas with a dark brown stain pen following the pattern of the grain. I lightly buffed the pipe by hand and took the pictures below to show how the newly stained pipe looked at this point.Dublin19

Dublin20

Dublin21

Dublin22 I darkened the rim with the stain pen and gave it another top coat of the oxblood stain. I flamed it and buffed it lightly.Dublin23 With the bowl finished I worked on the stem. I wet sanded it 1500-2400 grit micromesh sanding pads. I rubbed it down with Obsidian Oil. I continued by dry sanding it with 3200-4000 grit pads, rubbed it down again with oil and then finished by dry sanding with 6000-12000 grit pads. I gave it a final coat of Obsidian Oil and let it dry.Dublin24

Dublin25

Dublin26 I buffed the bowl and stem with Blue Diamond on the buffing wheel, gave it multiple coats of carnauba wax and then buffed it with a clean flannel buff. I brought it back to the work table and then hand buffed it with a microfibre cloth. The finished pipe is shown below. It looks better than it did when I started, in my opinion. The rich oxblood colour helps to hide the repair and the burn mark on the rim. It should be a great smoking pipe if the amount of cake buildup that was there when I started is any indication. It should continue to provide great service to whoever ends up with it in their pipe rotation. Thanks for looking.Dublin27

Dublin28

Dublin29

Dublin30

Dublin31

Dublin32

Repairing a Cracked Shank on A Weber Shelbrooke


Blog by Mark Irwin
mark@afinemess.org
29 July 2015

It is a pleasure to have Mark Irwin write a blog for us here on rebornpipes. Many of you may know Mark from his own blog on WordPress called “Peterson Pipe Notes”. Click on the following link if you are unfamiliar wit it: https://petersonpipenotes.wordpress.com. Mark has written several books on pipe enjoyment – The Five Laws of Pipe-Companioning, Pipe Smoking in Middle Earth and contributes a blog to the Neatpipes site. He is also co-authoring a book on the history of Peterson Pipes that will come out through Briar Books Press. He has become a good friend and I correspond with him often. I only wished that lived in closer proximity. Somehow the distance between Vancouver, BC Canada and Texas where Mark is make visiting prohibitive for me. Thank you Mark for your contribution. Welcome — Steve Laug

Mark1 Like a lot of pipemen, part of my introduction to pipe-smoking was through my Dad, who in the late 1960s and early 1970s would occasionally indulge in a bowl of Half & Half. In fact, my first pipe was one of his—a wonderful Kaywoodie bulldog replete with stinger. He had two other pipes that I recall, a white Kaywoodie and this Weber Shelbrooke 300.Mark2 When I was over at his house a few weeks back, he said the Shelbrooke, though a good smoker, had not only become wet and sour over the past few months, but developed a split on the shank as well as a tiny hairline crack at the mortise, and he wondered if anything could be done about it.

The first problem—the wet, sour smoke—seemed to have two causes: first, over the past few years, my Dad’s reduced the number of pipes in his collection to about half a dozen, but he’s smoking them several times a day in fairly heavy rotation. The Shelbrooke might just not be handling its workload.

A look into the mortise with a flashlight revealed a substantial gap between its end and the tenon. And it was, sure enough, wet. In addition to giving the pipe a little more rest, it might be that Dad needs to consider adding another pipe to his rotation.Mark3 The second problem, the crack in the shank and the resulting loosening of the stem, was a more serious problem. I wrote Steve Laug, who said to drill a small hole at the end of the crack to prevent it from spreading further. After that, he said, glue the crack with epoxy, clamp it, then put band the pipe to keep the reglued crack from opening and keep the tenon/mortise tight.

As my D-I-Y restorations are usually confined to Peterson estates, a band had to be ordered online. I did find a supplier on the internet, and, measuring the widest part across the stummel (the radius?), ordered one. I thought I’d be extra cautious and order a size up and a size down as well.

As anyone with any math knows, that was not the way to order a band. All three were far too large. So I went to a math teacher I know, who happens to live here in the same house, for her advice. First she told me measurement is never exact. Hmm. Well, I needed something a little better than what I’d done, obviously. Here’s the formula she showed me:

C = 2 π R

To get C (the circumference), I added up the perimeter of the diamond shank—13.85 x 2 and 18.8 x 2 for a perimeter (circumference) of 55.3. I’ve got all the math on a legal pad, and if you want an explanation, ask a math teacher. In the end, the radius came out to be 8.80 for a circumference of 17.6. I bought 16.5, 17 and 17.5 mm rings, and as it turned out, the 16.5 was the best fit.

While waiting for the bands, I decided to clean up the bowl and stem.Mark4

Mark5 The bowl soaked overnight in an alcohol bath. When it was removed the following morning, I was pleasantly surprised to discover the carbon on the top rim could easily be wiped off with a cotton cloth, leaving it clean. The alcohol soak lightened the stain and removed much of the blackening in the rustication, left the bowl with a sweet, clean scent. I’ve done this with Peterson Systems for quite a while, with spectacular results—and they’ve got the added complication of a reservoir. I’ve been told that an alcohol soak can sometimes cause old wood to split. The crack did seem a tiny bit longer afterwards, but not much.Mark6 The stem was in remarkably good condition, but I thought it might as well be cleaned up since I had it. It was plopped into a small tub of warm Oxy-Clean solution to soak, then forgotten about! Oops. When I remembered to retrieve it eight hours later, it had almost completely whitened. Hmm. Just great, I thought.

It still felt relatively smooth (unlike the roughening-up a bleach-soak does), so I thought I’d try a spin on the Foredom lathe with some Tripoli on the wheel, just to see where things stood and whether it would need the 12-pad Micro Mesh route. It took a few minutes on the wheel, but to my surprise, the Tripoli cut all the haze off, and in a fraction of the time I usually spend with the pads by hand.Mark7 I didn’t remove the dental marks, just as I wouldn’t on a beloved pipe from my own rotation, because those indentations are what give the pipe its comfort-factor to its owner, making it easy to clinch—remove them, and he has to start breaking it in all over again.

I like to use an Ott-Lite to see just how “back-to-black” the stem really is, because I’ve bought far too many estate pipes, and restored too many stems myself, that when viewed under the Ott show an underlying brown, gray or green haze. The stem on such a pipe may look good in a photo, but get it under decent light and you can see it wasn’t properly restored at all.

An additional pass with the buffing wheel and Tripoli was made on a few hazy areas that I caught on the camera but couldn’t see with the naked eye. After that, the stem received a coat of Obsidian Oil to give it some UV protection.Mark8 Coming back to the crack in the shank, I used my countersink drill bit (which I also use to chamfer or “graduate” draft holes in tenons) to create a saucer-shaped hole. I was surprised when it slid right through into the draft hole!

While I couldn’t juxtapose my camera’s flash to give you a photo, it turns out there is a reservoir in the Shelbrooke. It goes considerably deeper than the draft hole, and was obviously an intentional part of the pipe’s design. But the size of the reservoir made for a thin mortise wall, as I found out. Was it for a stinger device? It certainly explains the wet smoke my Dad was experiencing—the smoker would need to swab out the well after the pipe has cooled before smoking it again or suffer the consequences, as uninformed Peterson System users have found to their dismay. As many Weber pipes and catalogs as there seem to be on the estate market, I couldn’t find much just trolling the internet.Mark9 I let the epoxy drizzle off a tooth-pick into the cracks, hoping it would slide down into it. If the epoxy got inside the cracks, I believed it should hold in combination with the nickel band. Then I clamped the crack as well as I could, but as you can see from the pictures, the crack didn’t close up entirely.

Here I made my first mistake—and one I shouldn’t have, because I’ve seen my Dad avoid this kind of thing in carpentry projects we’ve done together. Instead of letting the clamp actually meet the walls of the shank like I did here (which impressed the wood), I should have use some small wooden squares over the clamp to prevent it from biting into the shank. Live and learn.Mark10 I had already used a rattail file to make some briar shavings from an old bowl (thanks Mark Domingues for this tip!), so I mixed those with the epoxy and plugged the hole I’d previously made to stop the crack from lengthening.

Taking off the clamps the following day, I was dismayed to see the briar had been impressed on one side by their pressure. Some of the indentations lifted with the application of passing a flame from my lighter over them, and more would doubtless have been lifted had I used the old hot-knife-covered-by-a-wet-rag technique. I was fully intending to do this, and then—just forgot!Mark11 After letting the epoxy harden for 24 hours, the flat of an X-Acto knife was used to scrape off the excess. But the hole needed to be topped, so mixing up another briar shavings-epoxy mixture; I not only topped the hole, but went over the crack as well.Mark12

Mark13 After another 24 hours had passed to allow the epoxy to harden, I used 500 grit to go over the bump caused by filling the hole. I was concerned not to obliterate the “300” shape stamp, which I now think was probably a mistake. (Looking at the finished pipe, I now think I should have sanded down the abrasions caused by scraping with the X-Acto knife and not worried about the shape number stamp.)

Next I needed to re-blacken the rustication lines, which had washed out in the alcohol bath. These were large enough that a Sharpie Fine Point could be used to good effect. I got this tip from Steve Laug when I was restoring a Peterson B35. The ink in some Sharpies seems to color out a dark bronze, while it’s actually black in others. Micron makes some good archival ink pens (I used them in creating the illustrations for Pipe Smoking in Middle Earth), but these were simply too fine to do the job on the Shelbrooke.Mark14 Having restained the rustication marks with the Sharpie, I restained the pipe. And this resulted in a second disappointment. The Shelbrookes I’ve seen are a light brown, to allow the black rustication lines to stand out in relief. I thought I’d mixed a very light glaze of medium brown Fiebing’s—maybe 1 part dye to 5 parts alcohol? I wiped it on and then flamed it. It came out a great deal darker than I’d hoped. I tried rubbing it off with a wet alcohol cotton pad, which helped, but didn’t bring out the lighter color I’d originally wanted. I think that the Sharpie ink may have “bled” into the alcohol solution, darkening the bowl. A better solution—now that I know the Sharpie ink will bleed—would have been simply to buff the bowl with carnuba.Mark17 Now it was time to put the band on. I used the smallest of the three, a 16.5mm, creasing one corner of it like Steve Laug has shown in two of his blogs here on this site. Then it was simply a matter of working it onto the pipe and bending each side with my fingers. I did heat the band with the heat gun set on low. I also used a small hammer to help knock the band into alignment, as each of the sides of the shank is slightly different.Mark15

Mark16 All in all, I’m fairly satisfied with the job. The proof, of course, will be in the smoking.

Cleaning up a Hilson Made in Belgium Meerlined Bulldog, Shape S60


Blog by Steve Laug

This is another pipe from the Idaho Falls antique mall. The funny thing is I went back another day to show my daughters some of the antique jewelry and did not think much of looking for more pipes as I had already cleaned out the ones I had an interest in. One of my daughters called me over to a display case where there was a pipe rest with a golden Cocker Spaniel on it. She thought it would be a great memory piece for me. I looked in the case and there on the bottom shelf was a pipe that I had not seen on the previous day. It was a nice straight Bulldog pipe. The bowl looked like it was a mess but the briar and stem looked to be in pretty good shape. I had the clerk pull it out and was surprised by the stamping on it. It read Hilson over Made in Belgium on the upper left side of the shank and Imported Briar in an arch over Block Meerschaum on the upper right side of the shank. There were some other letters underneath the arch that ran in a straight line but I could not read them without a lens. Of course I had to have the old pipe. I knew that it at least was made before Gubbels Pipe Factory in Holland bought out the Hilson brand in 1980 because of the Belgium stamping.Hilson1

Hilson2 When I got home I looked at the shank under a bright light using a lens and could see more clearly some of the marks under the arch. The arch appeared to be over stamped and underneath on the left of arch it read S and the other letters faded out. On the right side of the arch it read TYLE. I am wondering if it originally read S60 (which is the shape number that has been more recently stamped on the underside of the right side of the shank) BLOCK STYLE in a straight line over MEERSCHAUM (the center and bottom words in and under the arch). If so then when it left Belgium and headed to the USA it must have been over stamped with the arched IMPORTED BRIAR which is stamped with a slightly smaller font. I also examined the stem and found that on the underside of the right side it had a small stamped M and what looked like part of an E. All of that will remain a bit of a mystery but it makes this old pipe interesting.

The briar portion of the pipe was in pretty decent shape. I was not sure about the briar on the rim as it was pretty covered with an overflow of tars that had come up out of the bowl and over the rim. The meerschaum bowl was invisible at this point in the process. It was somewhere inside the mess but how far down I was not sure. I had no idea of the thickness of the Hilson bowls in comparison with others. The other Hilson Meerlined pipe I had did not have the lining and the briar was very thin so I was thinking that this one would be like that. The finish was dirty on the rest of the bowl but did not have any damage. The briar looked pretty decent other than a few small fills on the underside of the shank. The stem was dirty and lightly oxidized. The pipe and the stem smelled awful! The bowl smelled like old cigarettes left in an ashtray in the rain. The stem smelled like old tires with a hint of sulfur. It would take a bit of work to clean up this one without damaging the meerlined bowl.Hilson3

Hilson4From a bit of research on the web I found that the company was originally started in 1846 by a German named Jean Knödgen who produced clay pipes in Belgium. According to a note on the Pipephil website it seems that in the late 19th century Jean Hillen married into the Knödgen family and later took over the company. He changed the company from a clay pipe producer to a factory able to manufacture briar pipes. Jean Hillen had 2 sons: Jos Hillen was responsible for sales and Albert Hillen was responsible for the production. After WWII his son Albert founded the HILSON brand which was a combination of Hillen and Son and exported his pipes all over the world. The brand did very well in the 1960s and 1970s and the brand was sold throughout Germany and Europe. In 1980 the company ran into financial difficulties and was bought by the Royal Dutch Pipe Factory owned and operated by Gubbels who still makes the Big Ben pipe.

Hilson meerschaum-lined briar pipes were manufactured in Belgium at the original Hilson factory in the 1970’s and used Block Meerschaum to make the inserts for their pipes. This was much better quality than most meerschaum lined pipes. Usually the lining was made of pressed meerschaum which was made from ground up meerschaum. Block Meerschaum is carved from the meerschaum as it is mined. High quality meerschaum pipes are always made from block meerschaum.

I took the next three close-up shots to give an idea of the state of the bowl when I started. There is a hint that it is a meerschaum lined bowl when you see the line on the edge of the bowl just inside of the briar. The thick coat of carbon built up on the rim and down into the bowl made it hard to see. I was glad that this was a block meerschaum insert rather than a compressed one because there was some hope that the bottom of the bowl had not begun to disintegrate of break up. The second and third photos below give an idea of the stamping on the shank of the pipe.Hilson5

Hilson6

Hilson7 The next photo shows the stinger apparatus in the tenon of the pipe. Most of the other Hilson pipes that I have worked on have an inner tube extension rather than a tenon so this was a new one to me. It is also unique among the stingers that I have seen.Hilson8 I decided to top the bowl to remove all of the carbon build-up and see what was happening with the top of the meerschaum insert and the briar rim. I knew that the cake in this one was out of control but I wanted to see if I could see the original inner line before I dealt with the cake.Hilson9 The next photo shows the topped bowl. Once I had it topped I folded a piece of sandpaper and worked at the inner edge to remove the cake. I wrapped the sandpaper around my finger after the initial sanding and went as deeply into the bowl as I could reach. There was some staining around the back and right side of the meerschaum lining where it came in contact with the briar. I think some of the tars and oils wicked into the meerlining and stained it.Hilson10 The surface of the rim was scratched from the 220 grit sandpaper so I used a medium and a fit grit sanding block and cleaned up the rim.Hilson11 The next two photos show the rim and the bowl after reaming. I reamed what I could not reach with a sharp pen knife and removed all of the cake in the bowl.Hilson12

Hilson13 I removed the stinger from the tenon. I always twist the tenon rather than just pull it in case it is threaded. In this case it came out easily enough.Hilson14 I was going to use the retort to clean this pipe but thought better of it as I did not want to soften or damage the meer liner with the alcohol. So, I resorted to the old tried and true method of cotton swabs and alcohol to clean out the shank and wipe down the inside of the bowl. It took a lot of swabs to get the shank clean. The mortise ran the length of the shank to accommodate the long stinger.HIlson15 The stem took a lot less work. After just a few pipe cleaners and alcohol the pipe cleaners came out clear.Hilson16 I scrubbed the stinger with alcohol and 0000 steel wool to remove the tars that had stained the aluminum.Hilson17 I wiped down the bowl with alcohol on cotton pads and then took the following picture to show the state of the pipe thus far. It is going to be a beautiful pipe.Hilson18 I wiped the bowl and shank down with a light coat of olive oil to enliven the briar and bring out the grain. The birdseye grain on the sides of the bowl were stunning. It is hard to see with the freshly oiled bowl but in later photos it will stand out.Hilson19

Hilson20

Hilson21

Hilson22 The stem was cleaned and ready to polish. I wet sanded it with 1500-2400 micromesh sanding pads and then gave it a coat of Obsidian Oil. Before the oil dried I dry sanded it with 3200-4000 grit pads and gave it another coat of oil and then sanded it with 6000-12000 grit pads to finish the shine. I gave it a final coat of Obsidian Oil and let it dry. Once dry I buffed it with White Diamond on the wheel.Hilson23

Hilson24

Hilson25 I buffed the finished pipe with Blue Diamond Polish on the wheel and then gave it multiple coats of carnauba wax. I buffed it with a clean flannel buff and then again by hand with a microfibre cloth to bring depth to the shine. The finished pipe is shown in the photos below. Other than the stain around the back and right side edge s of the meerschaum lining the pipe looks like new. It should offer many more years of service.Hilson26

Hilson27

Hilson28

Hilson29

Hilson30

Hilson31