Blog by Steve Laug
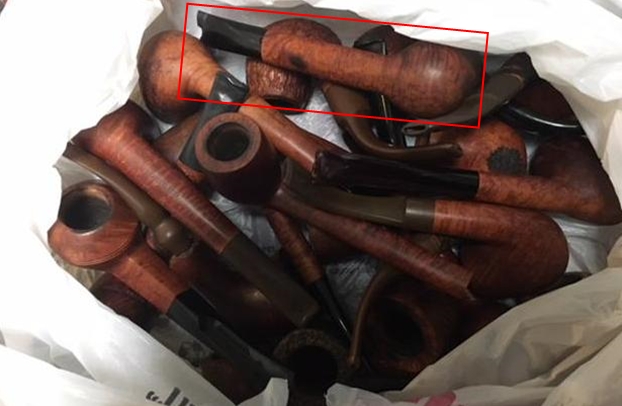
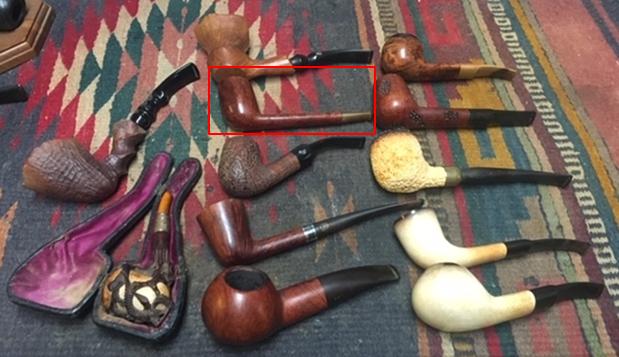
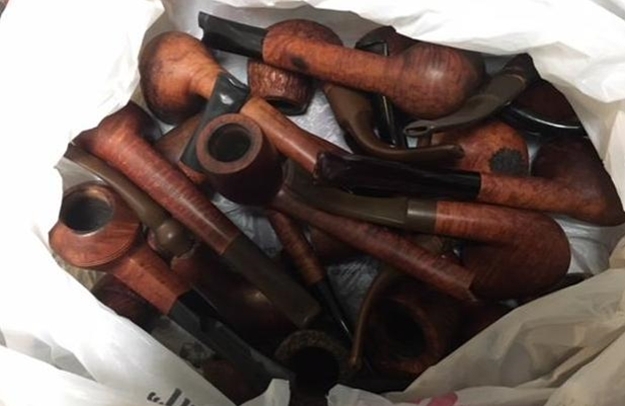
I have been working on a lot of different estate pipes and selling them for different families. This morning I was looking through the bag of pipes that I have left from George Koch’s estate. There are only three of them and all were in pretty rough shape. The rims were well knocked about and the stems were either chewed off or through and really would need to be carefully worked over and have new stems fit to them. The third of these three Malaga pipes that need a lot of attention was the next one I picked up this morning. It is a Billiard with a chewed through acrylic stem. Of the three was the least beat up of the three. The rim top had some damage on the flat surface and the inner edge. But sides of the bowl had great looking flame and mixed grain that was fascinating. It is the last of the three Malaga pipes needing restemming that came to my brother and me in several shipments of pipes from George’s daughter Kathy. Alex had gone through the bag and had passed on these three. Jeff unwrapped the pipes when they came to him and took the following photo to give an idea of the volume of the pipes that we purchased. 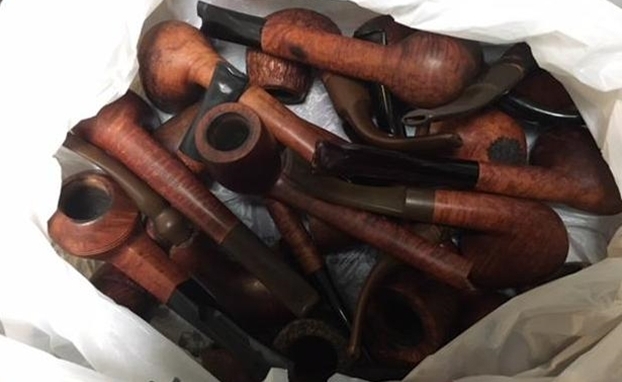 In each of the previous blogs that I have written on the restoration of George’s pipes I have told his story. If you have followed the restorations you will have read the information and the background piece that Kathy did on her father. Here is a link to one of the previous blogs on his Malaga pipes where I included her tribute in full (https://rebornpipes.com/2019/01/26/back-to-kathys-dads-pipes-restoring-a-%c2%bc-bent-malaga-author/). You can also read the bio on her Dad, George Koch. It is an interesting read and one that shows just how far our pipe collecting passion can go when we find a brand of pipes that we enjoy. I am going to only include the portion on the Malagas at this point. If you wish to read the rest follow the link above.
 Kathy writes…We lived in Livonia, and that’s where his love for Malaga pipes began. After a few years he returned to Allis Chalmers and we moved back to Springfield. I remember that when we went back to Michigan to visit friends, Dad had to go to the Malaga store and acquire a few new pipes. Many a year I wrote to Malaga and they picked out a pipe for me to purchase that I could give Dad for a Christmas or birthday present. He was always pleased. His favorites were the straight stemmed medium sized bowl pipes, but he liked them all.
He had some other pipes, but the Malagas were his favorites. I remember him smoking them sitting in his easy chair after work, with feet up on the ledge by the fire burning in the fireplace. Growing up it was my job to clean them and he liked the inner bowl and stem coated with Watkins vanilla, leaving a little of that liquid in the bowl to soak in when I put them back on the rack…I’m very happy they are being restored by you and your brother and hope they find homes who enjoy them as much as Dad did. Thank-you for your care and interest. — Kathy, the oldest daughter
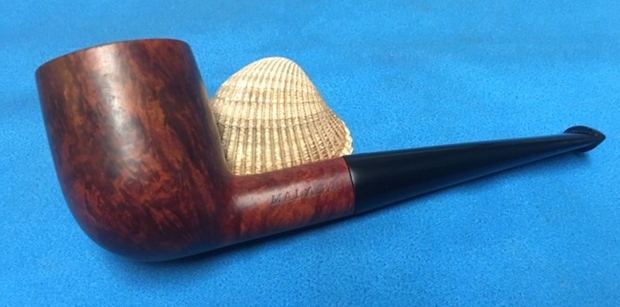
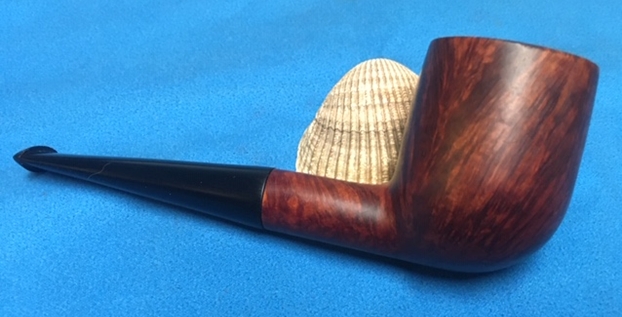
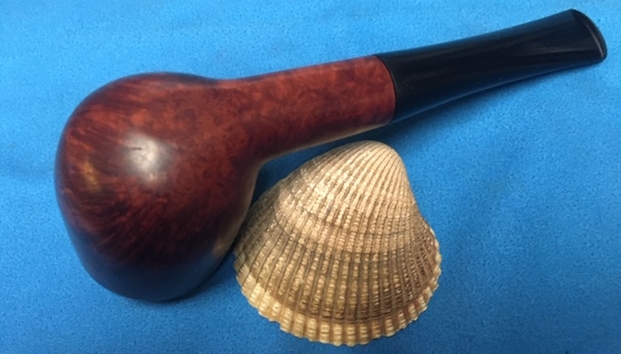
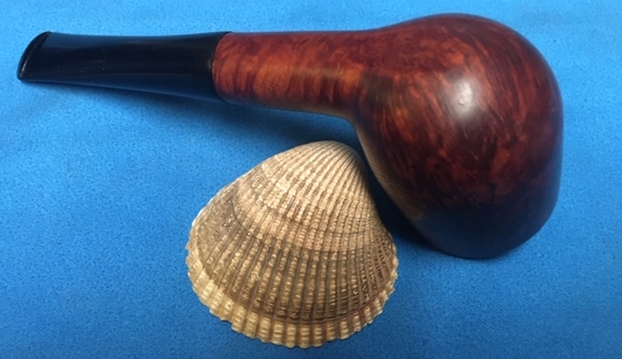
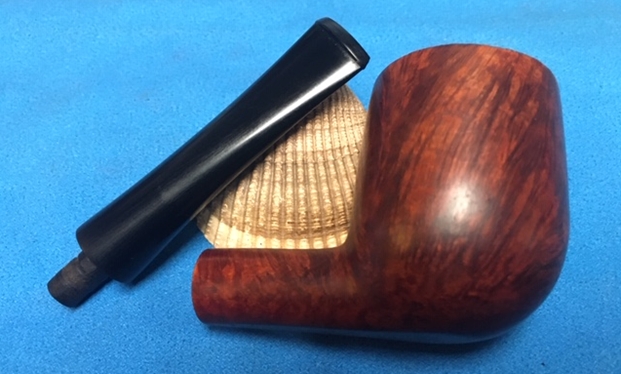
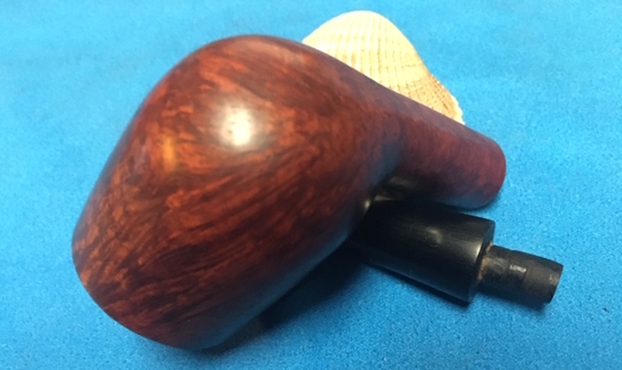
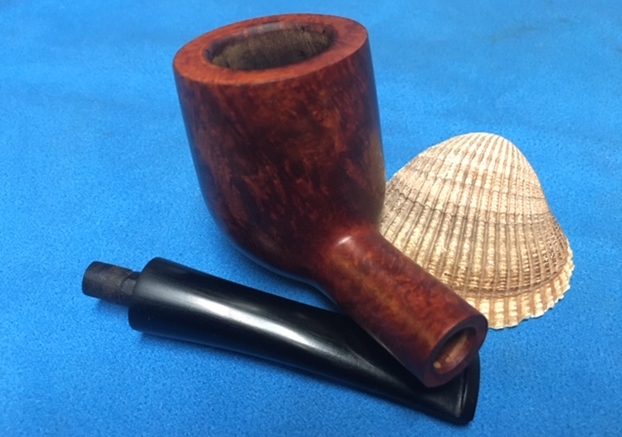
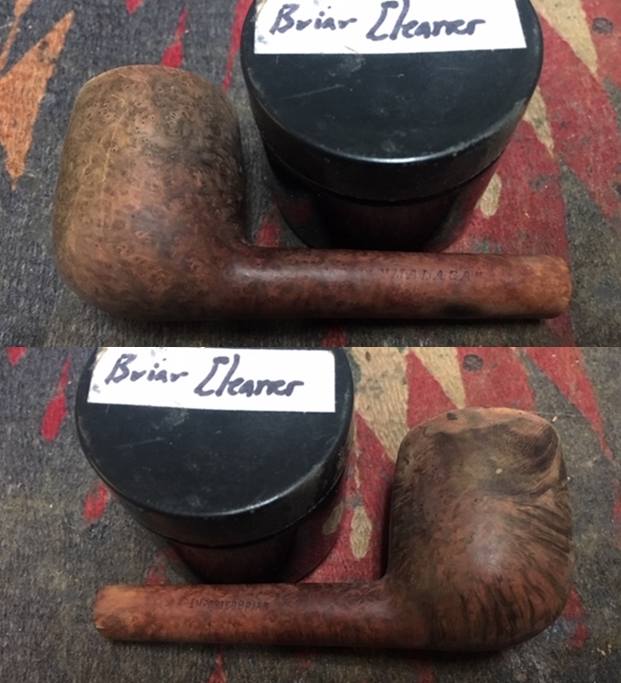
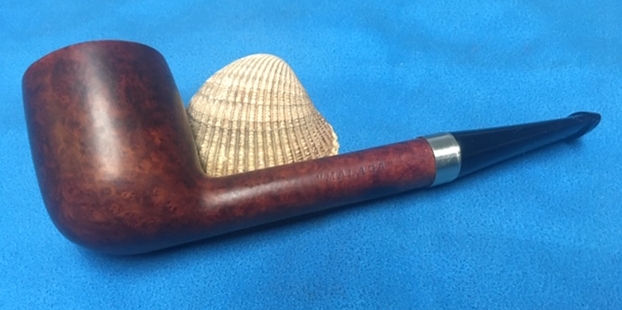
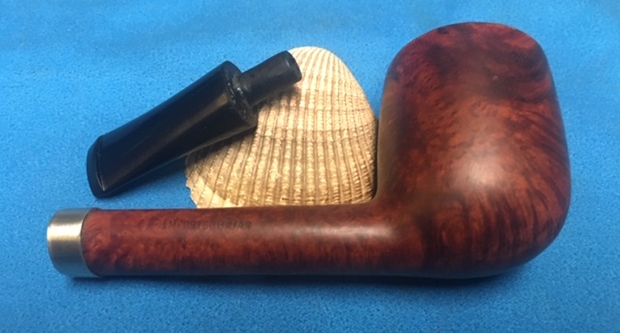
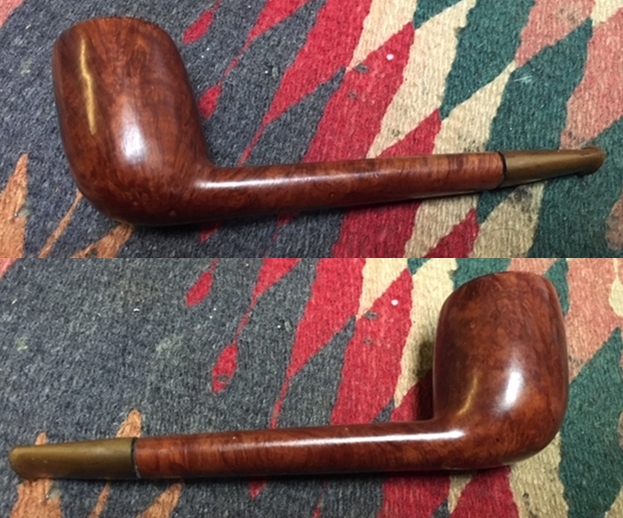
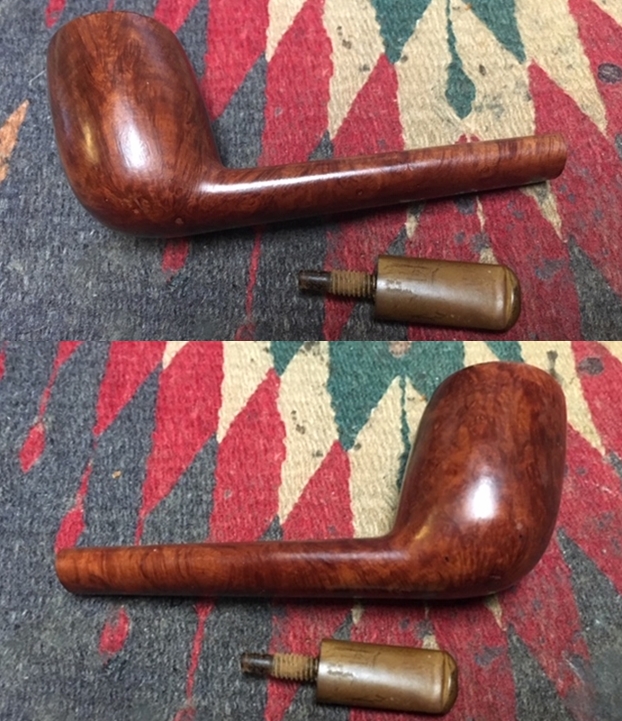
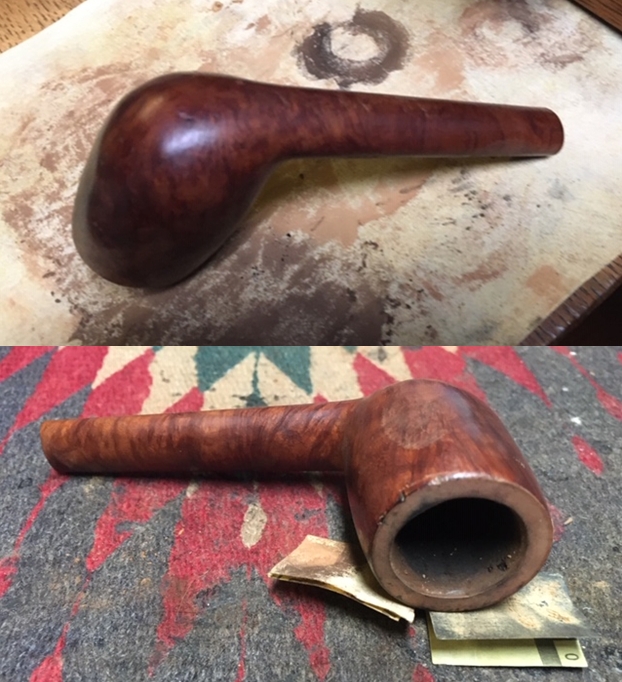
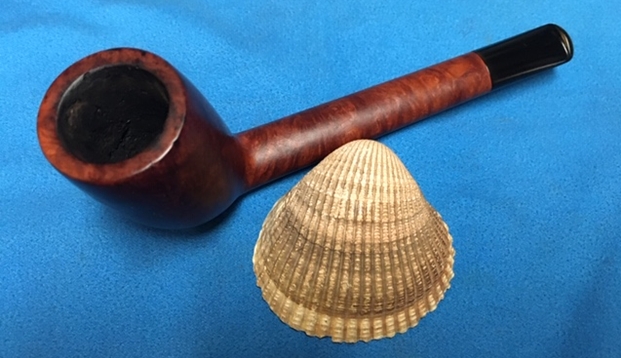
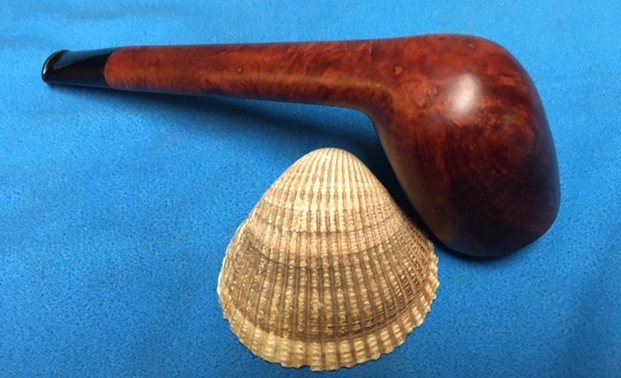
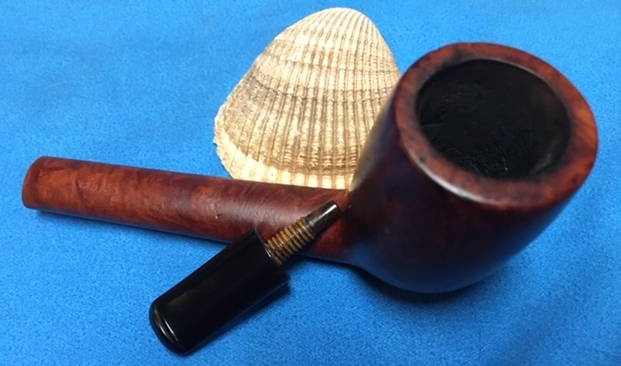
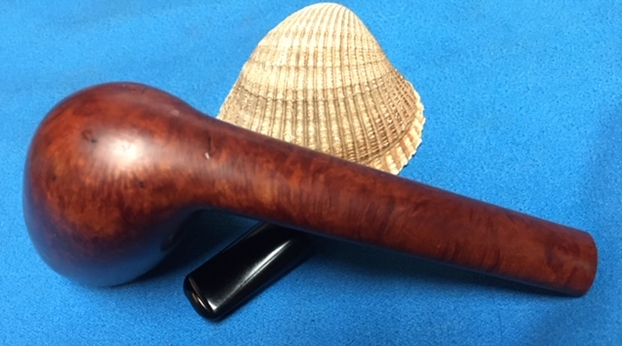
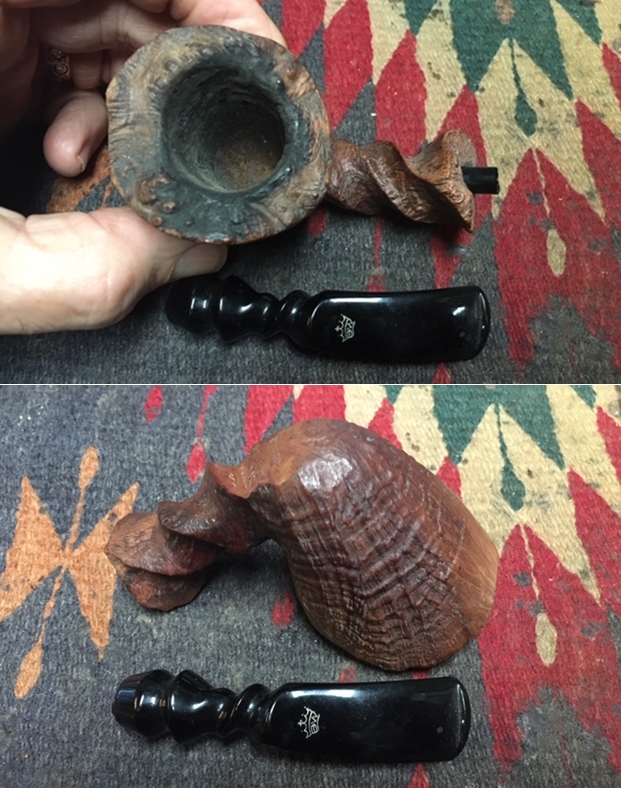
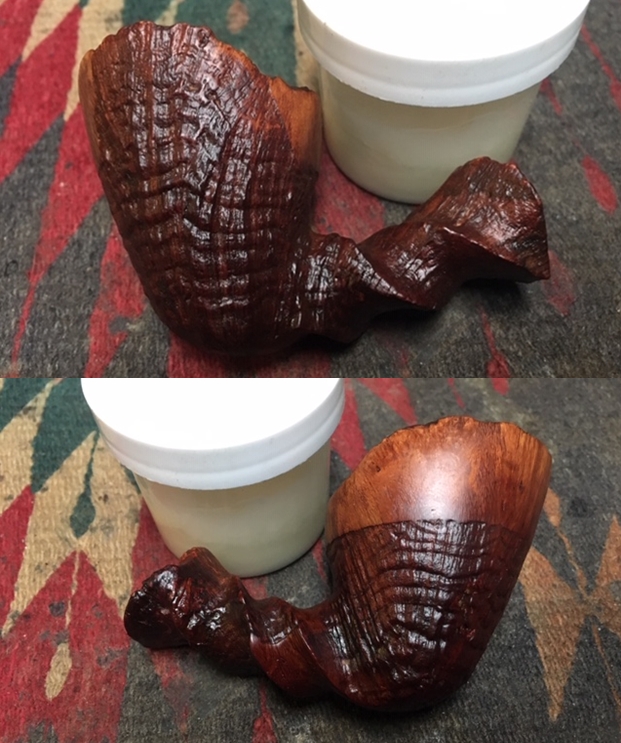
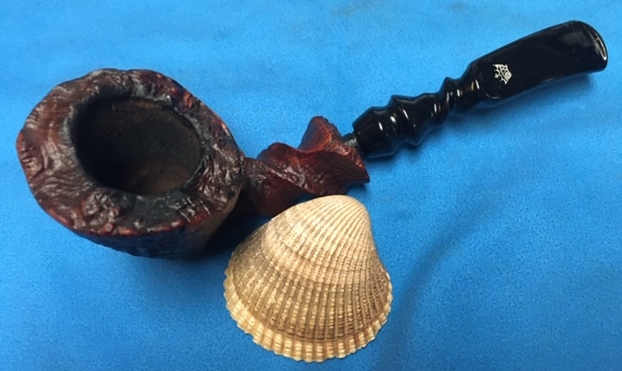
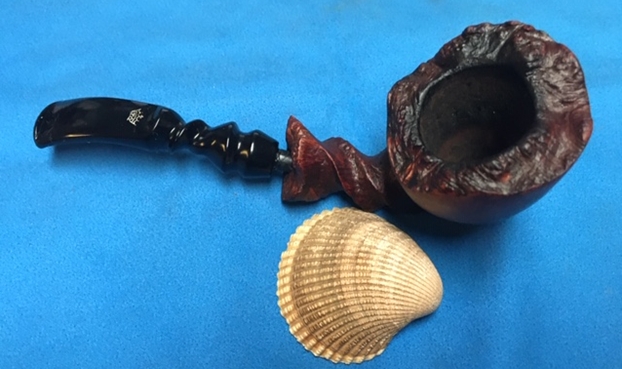
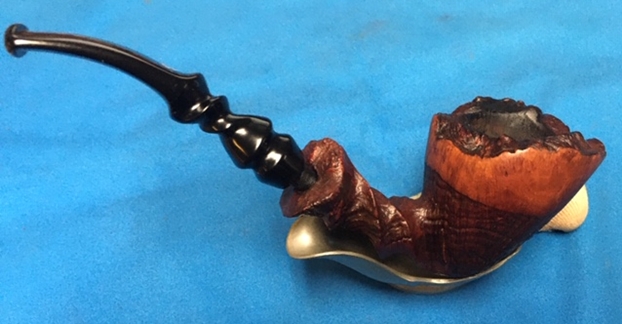
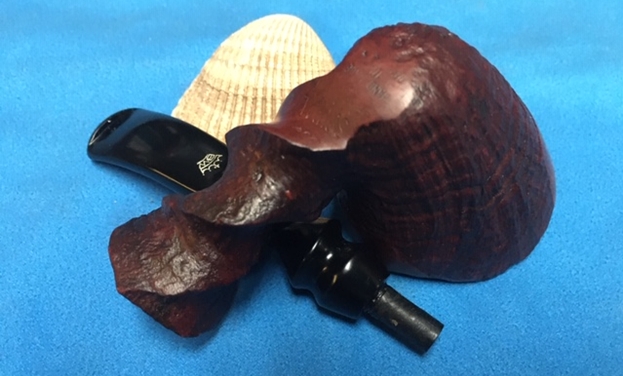
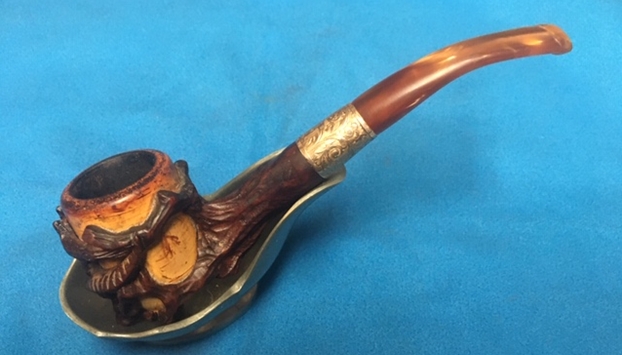
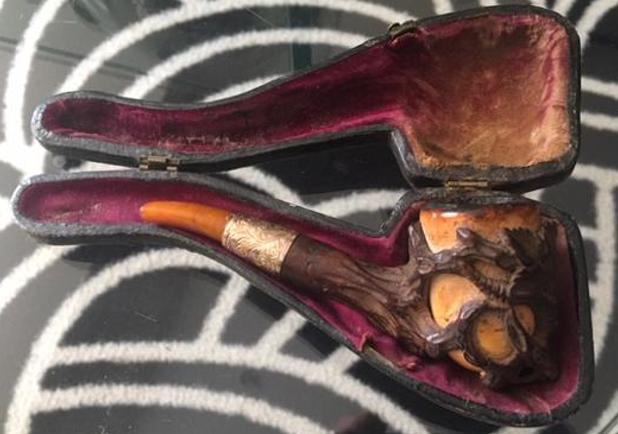
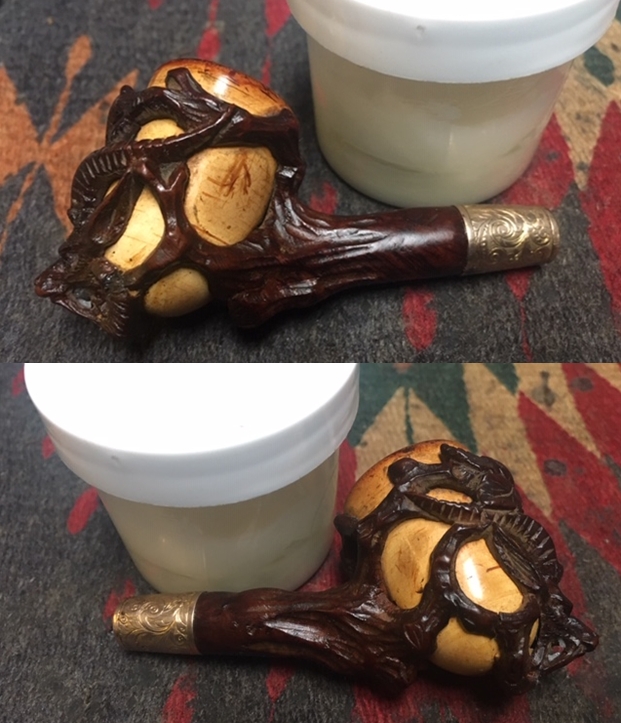
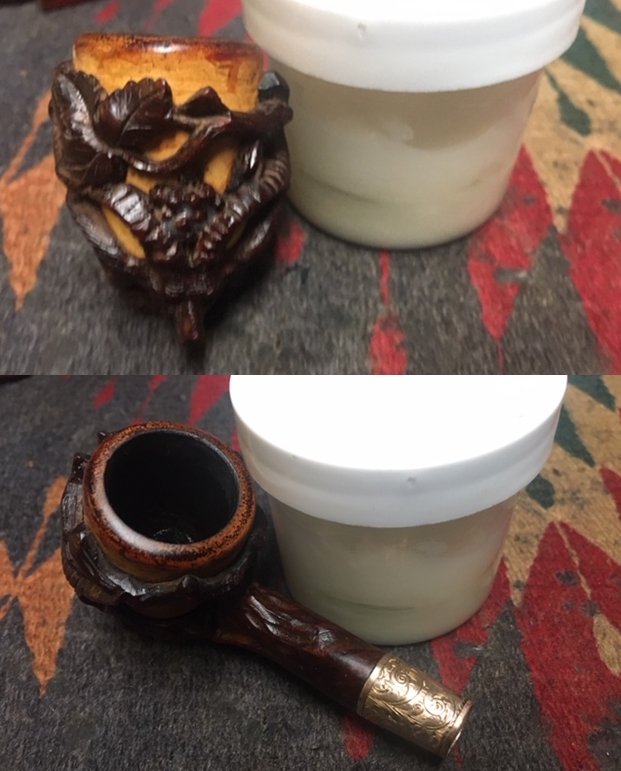
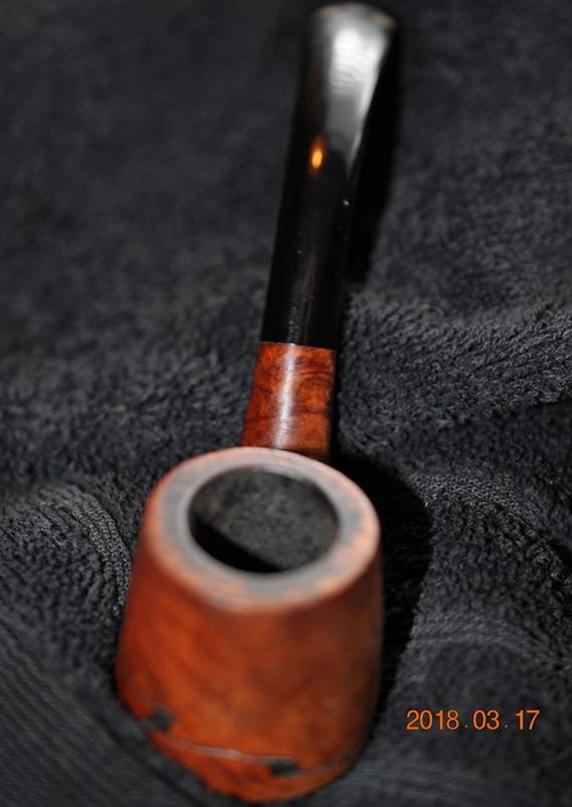
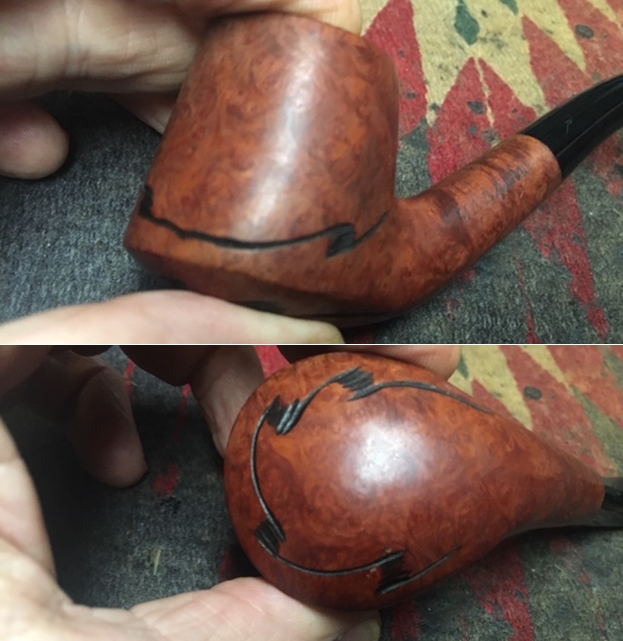
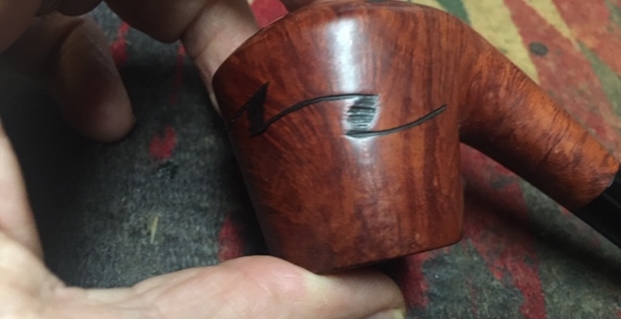
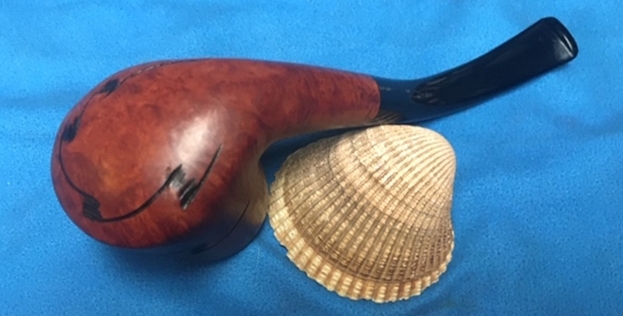
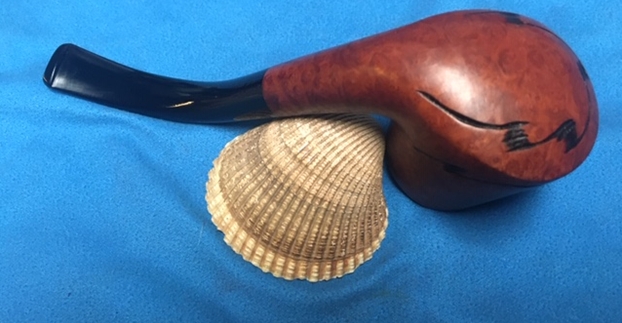
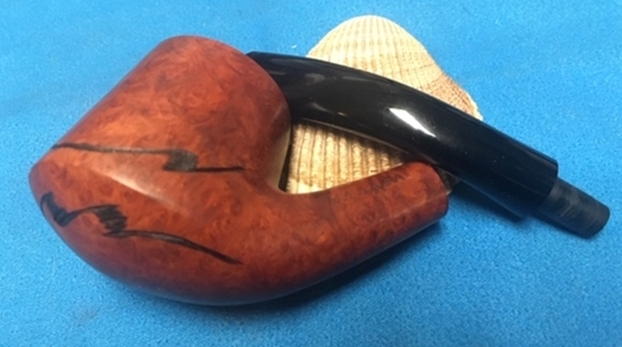
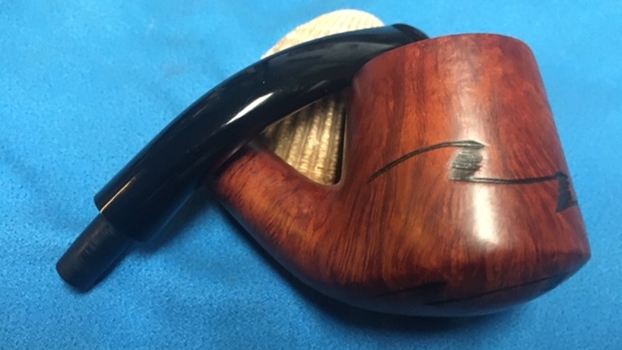
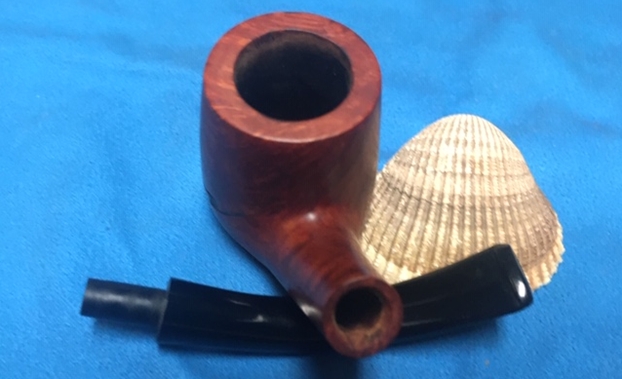
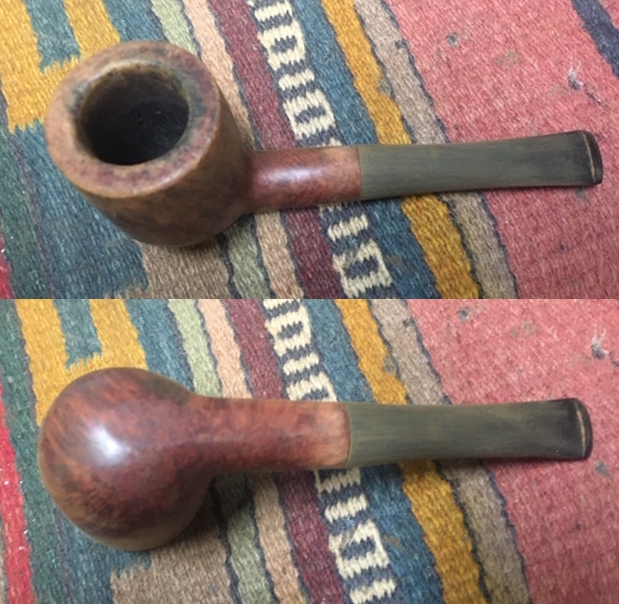
This second “Malaga” Billiard on the table is the least damaged of the three. Under the damage and dirt I can see the great grain on the briar. There were some scratches and nicks in surface of the rim top. The large bowl, round shank and chewed through acrylic stem give a clear picture of what the pipe must have looked like when George bought it at the shop. Again, I did not bother Jeff for the pre-cleanup photos because really it was obvious what the pipe must have looked like. From the condition of the bowl and rim post cleanup I could see that it originally had a thick cake that overflowed with lava onto the rim so that there was damage on the inner edges. The rim top had been knocked hard against rough surfaces to knock out the dottle and left damage. The sides of the bowl and shank are very dirty with grime and oils from prolonged use. The stamping on the left side of the shank read MALAGA. The acrylic stem had been gnawed through leaving a useless stem that would need to be replaced. Since Paresh is not here in Canada this is another that will be replaced rather than rebuilt! 😉 I took photos of the pipe before I started my work. The condition of the pipe will be shown in the photos below.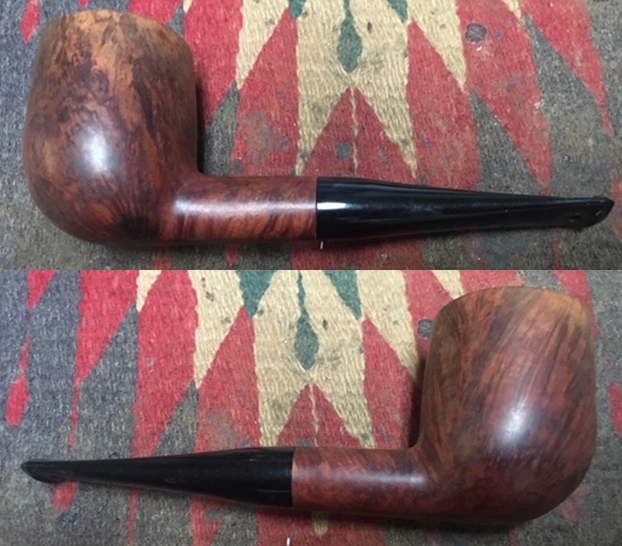
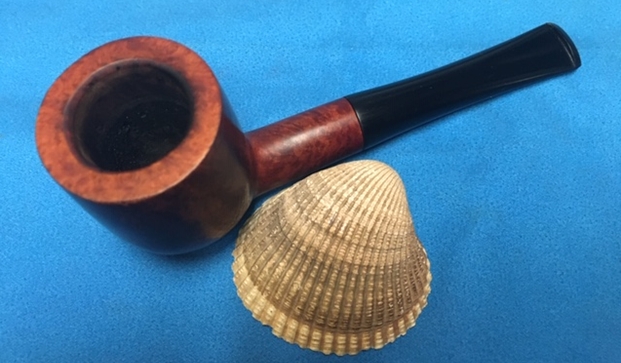
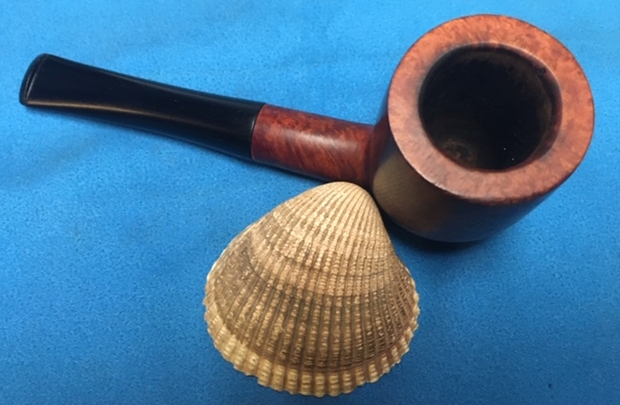
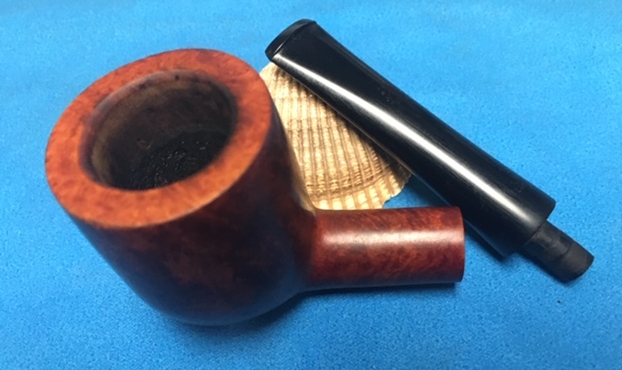
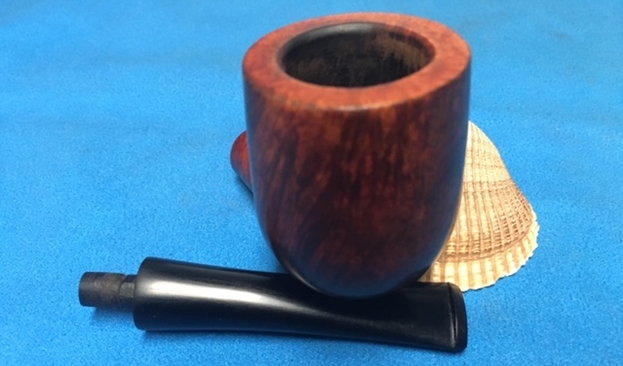
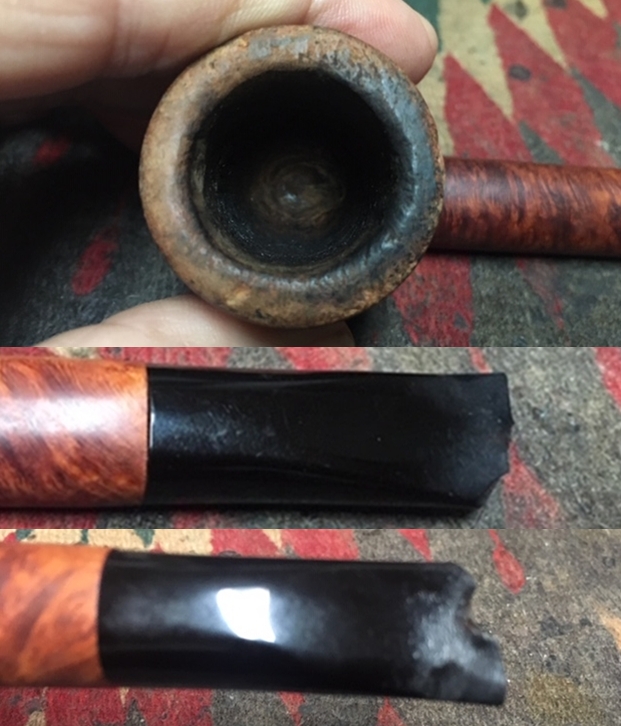
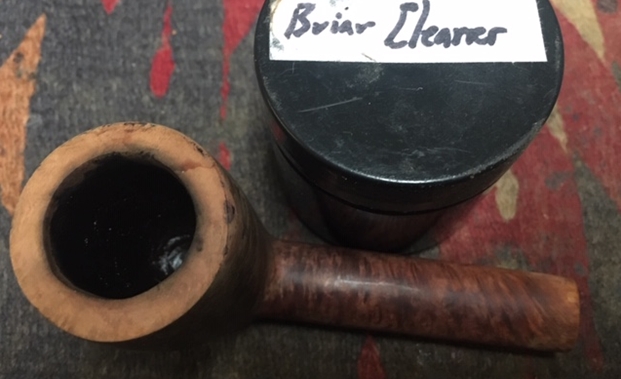
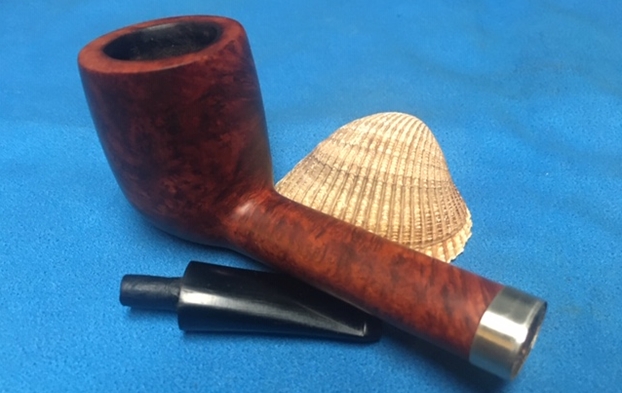
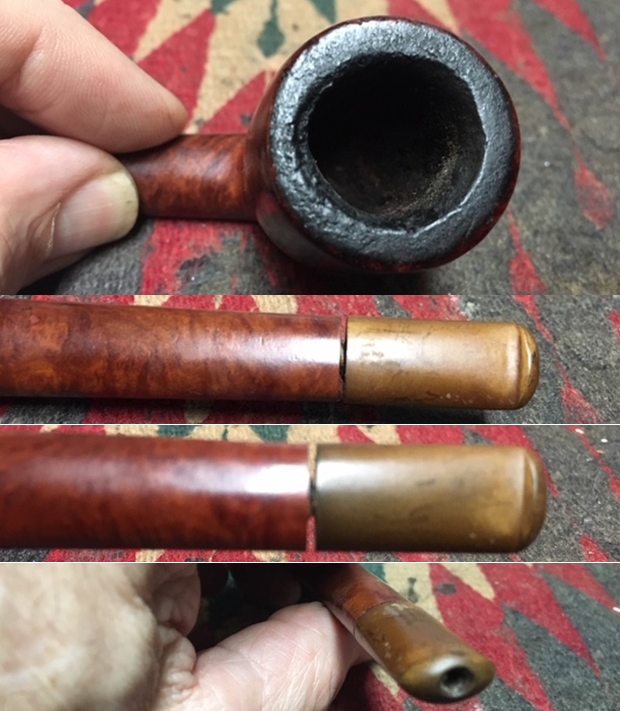
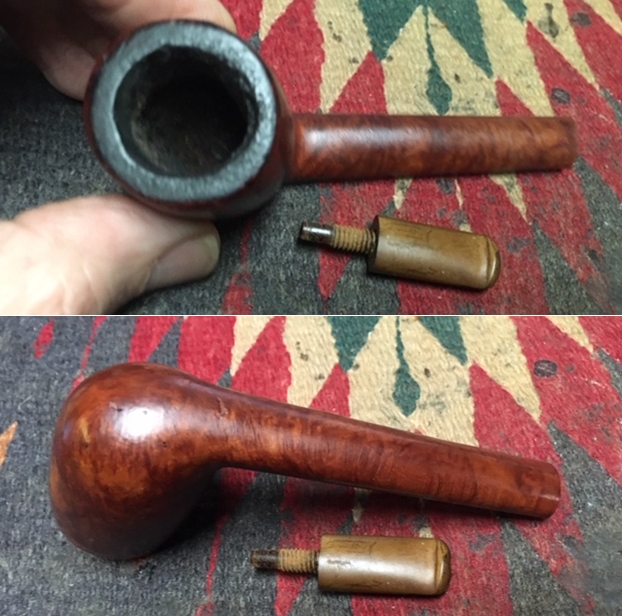
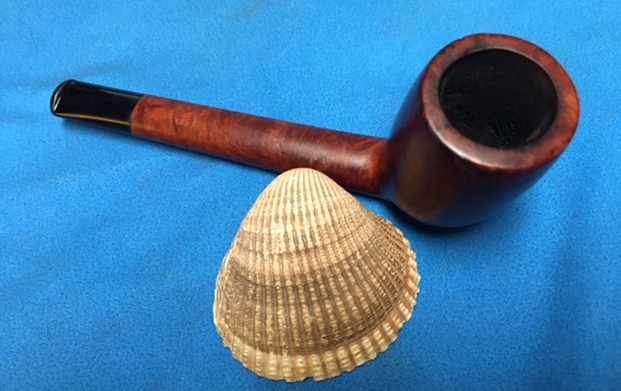
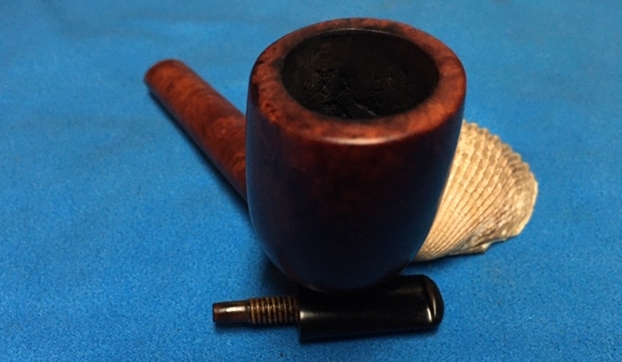
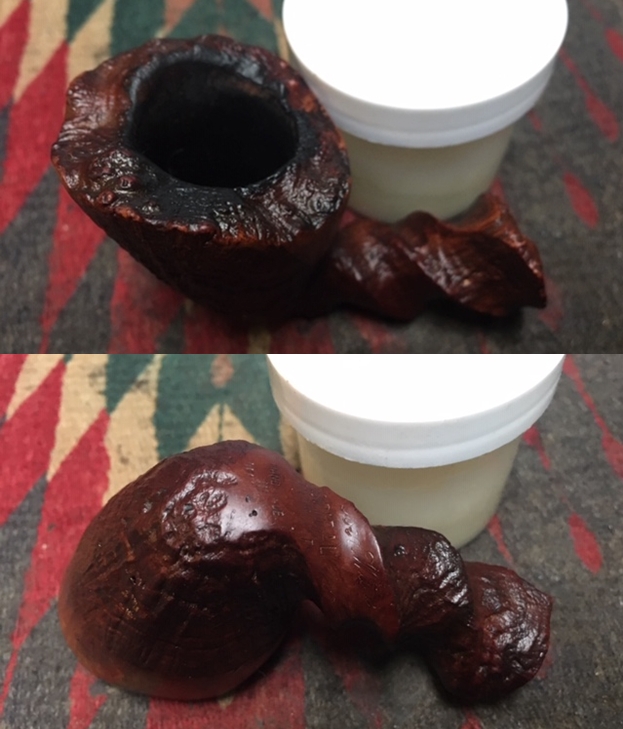
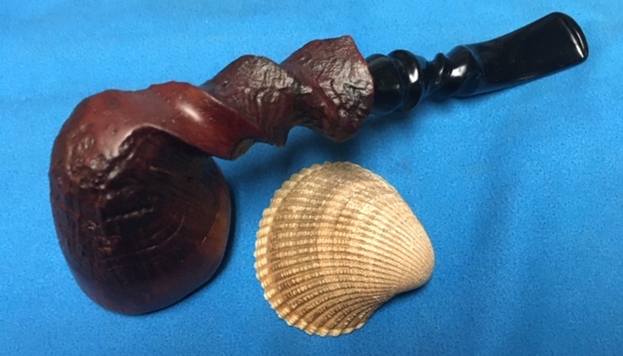
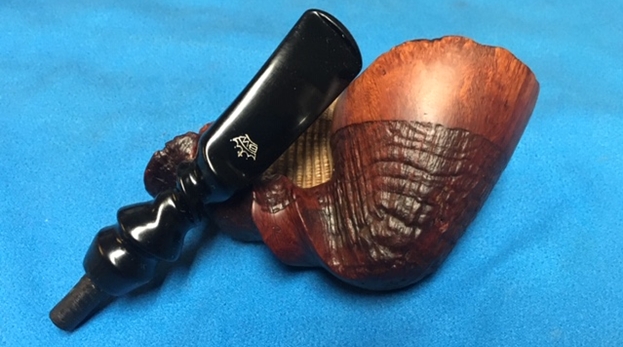
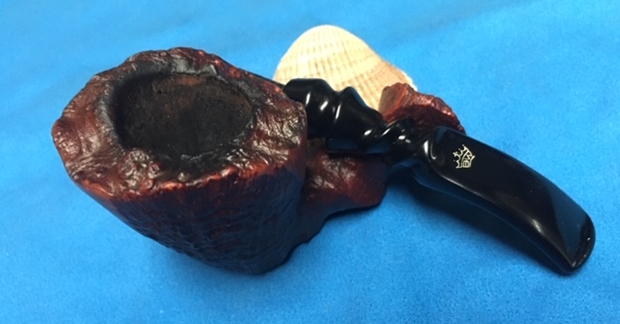
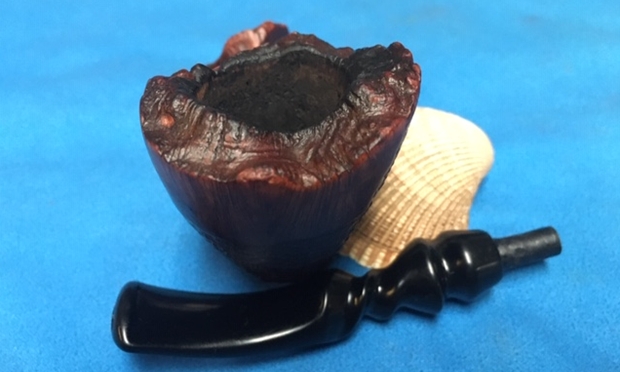
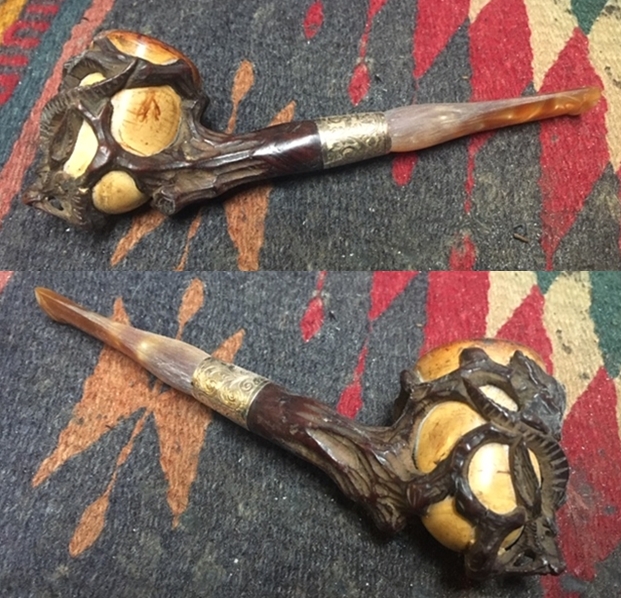
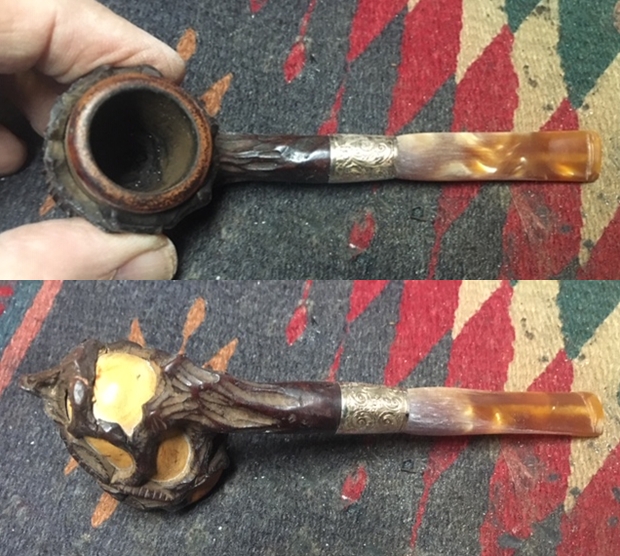
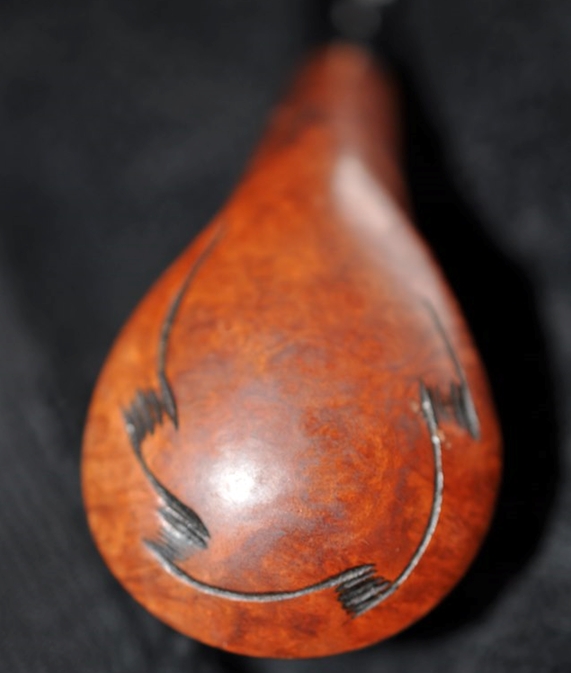
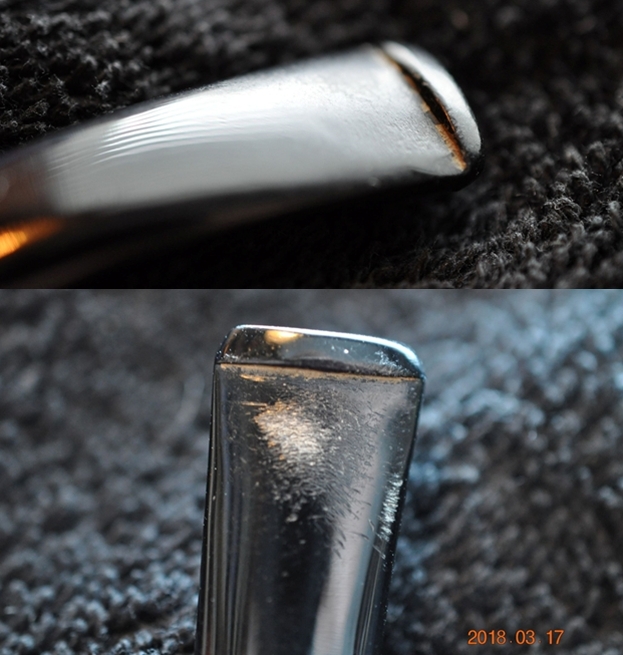
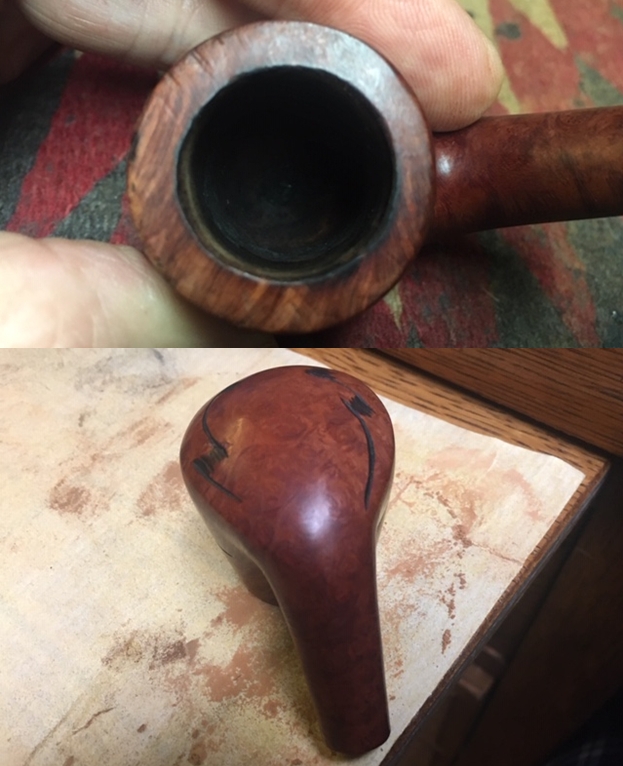
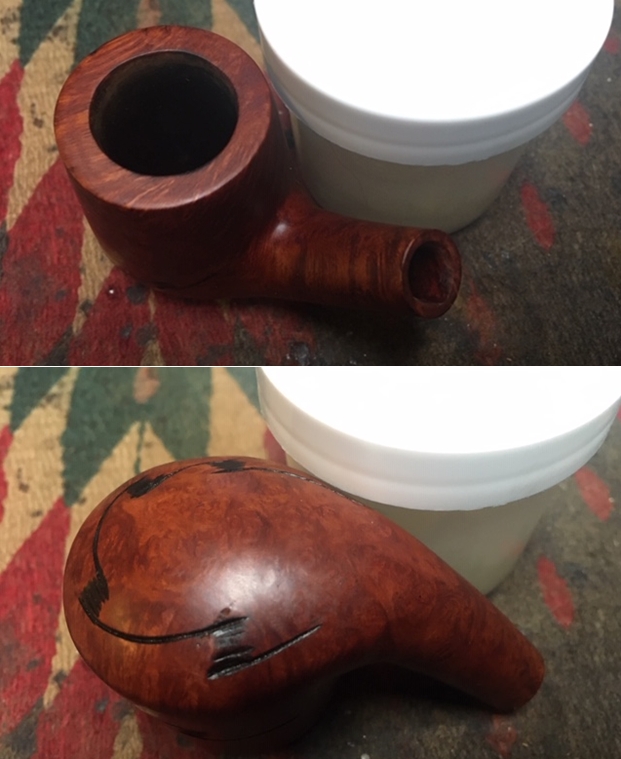
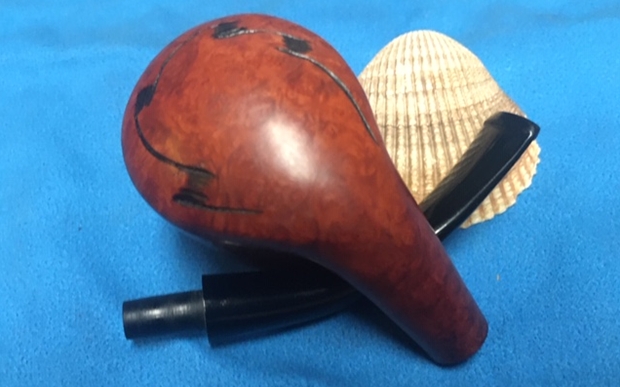
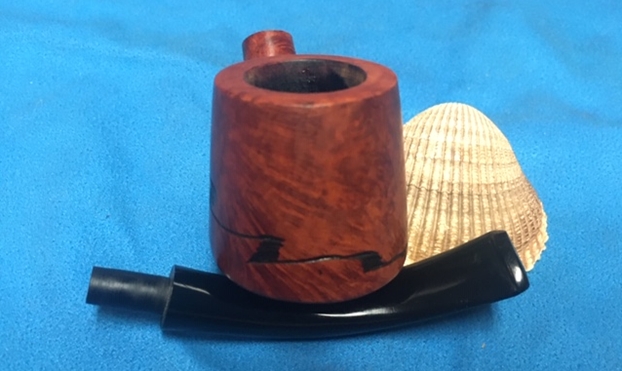
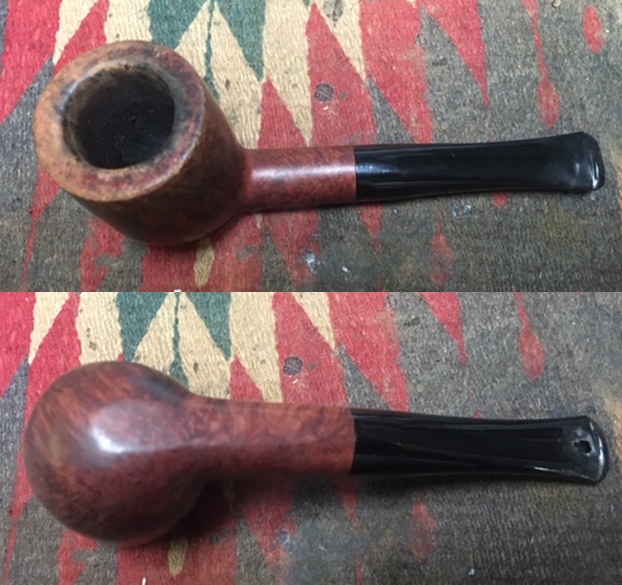 I took a photo of the rim top and bowl to show the condition of the pipe. You can see why I said it was used as a hammer – though less than the others. The surface of the rim is very rough. The inner and the outer edge have some damage. There is some darkening on the back inner edge, bevel and surface of the rim top. I think that this pipe must have been another shop pipe or knock about pipe for George as it was very well smoked! I took photos of the stem to show the broken and chewed condition it was in. Remember this is hard acrylic so it took some real gnawing to do this to it!
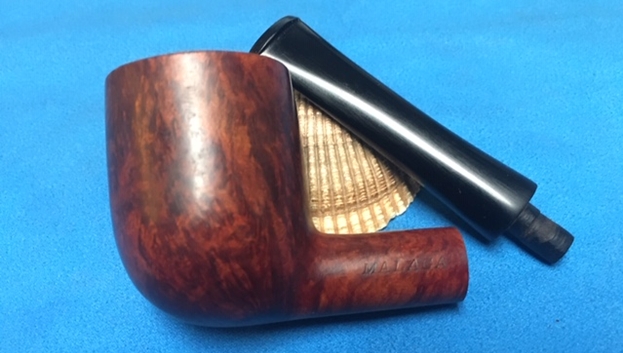
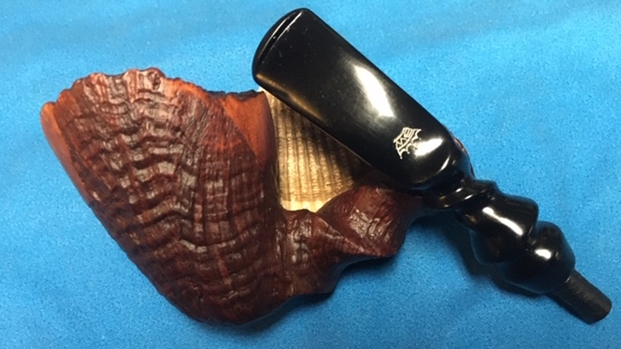
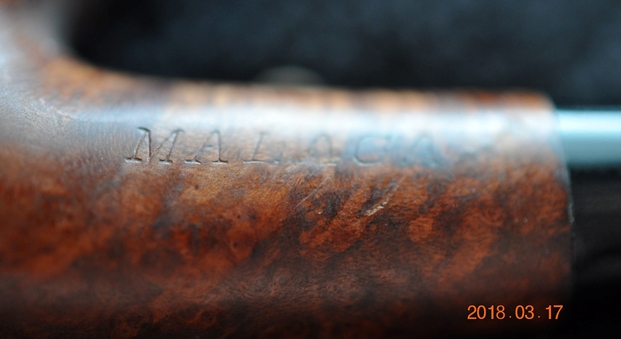
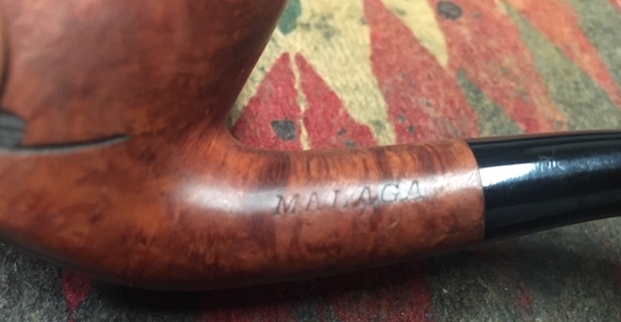
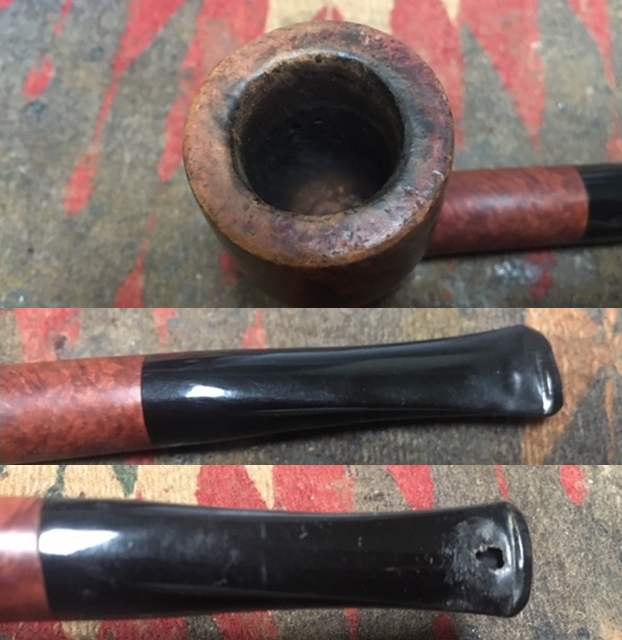 I took a photo to capture the stamping on left side of the shank. The photo shows the stamping MALAGA and is very readable.
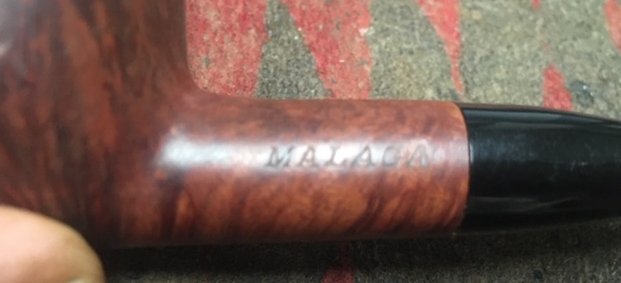
 I am also including the link to a blog that I wrote that gives some of the history of the Malaga brand and the Malaga Pipe Shop in Royal Oak, Michigan in the USA. I have written an earlier blog to give a little history of the Malaga Brand and the pipemaker, George Khoubesser. Here is the link – https://rebornpipes.com/tag/malaga-pipes/.That blog also includes links to a catalogue and the history of the pipemaker George Khoubesser. Follow the link to get a feel for the brand and the pipemaker.
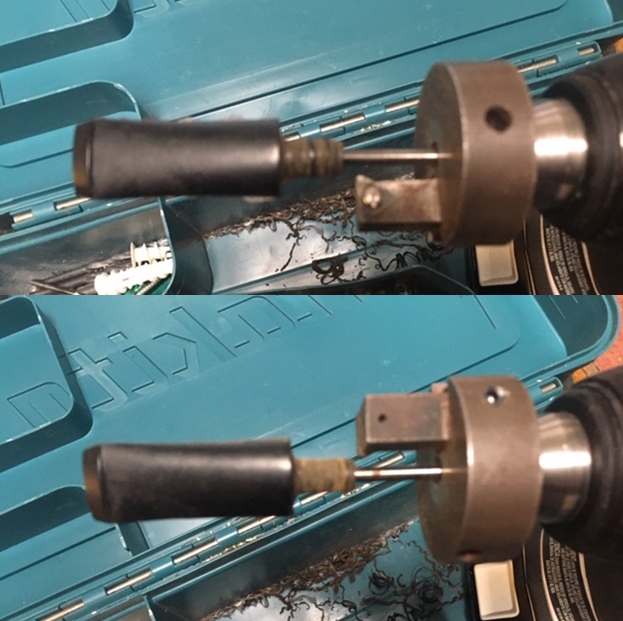
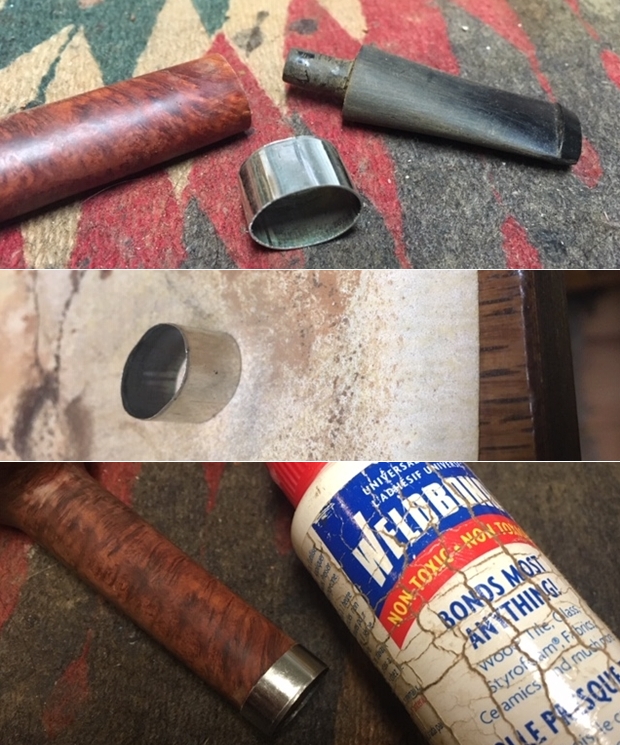
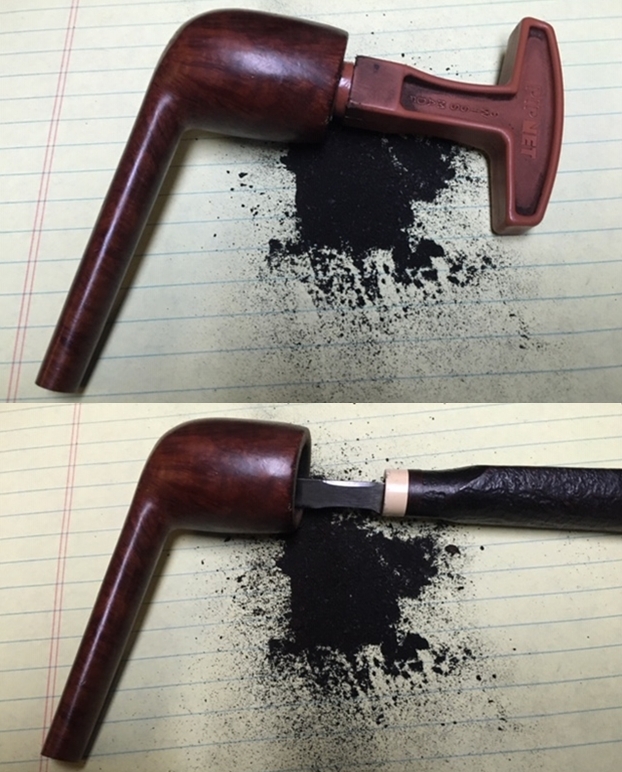
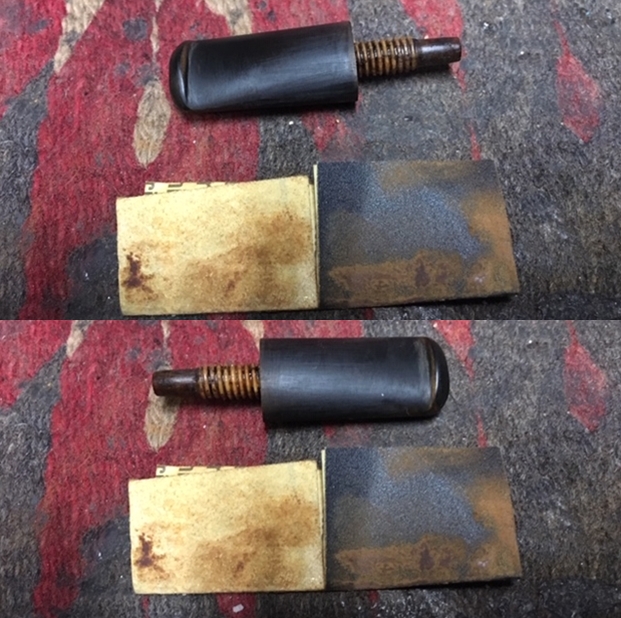
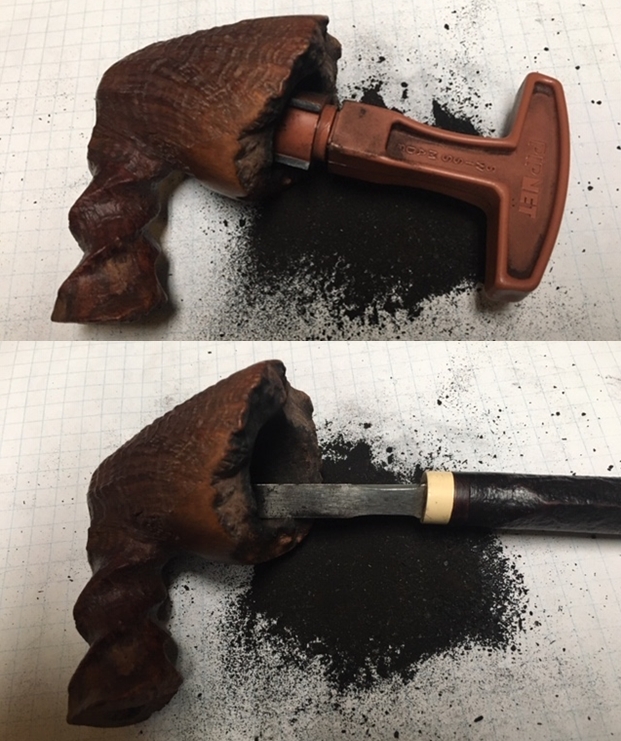
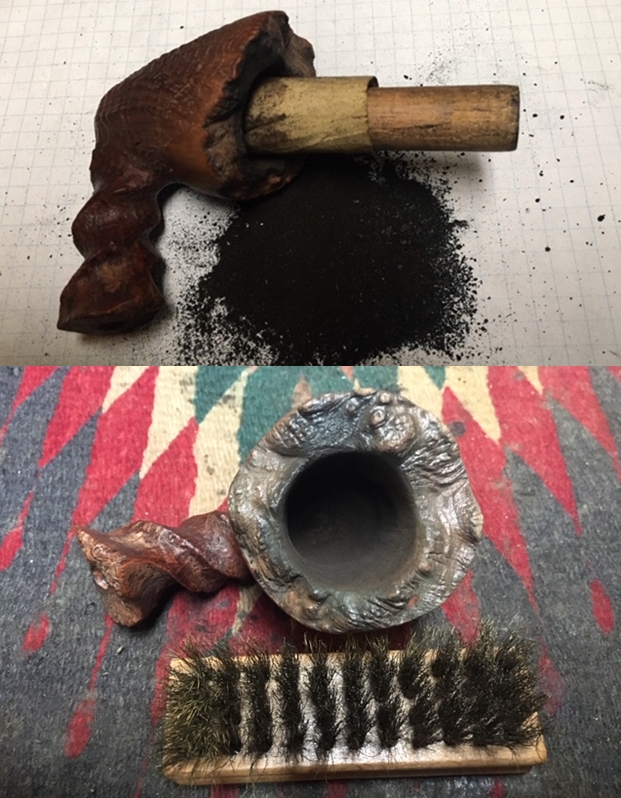
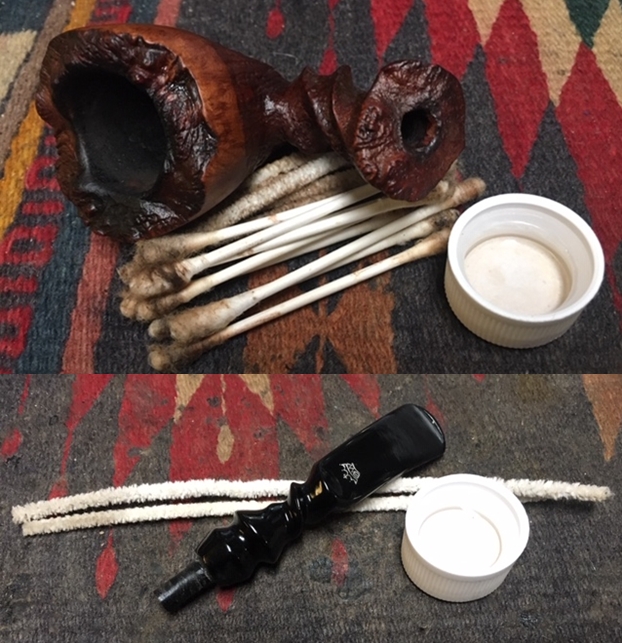
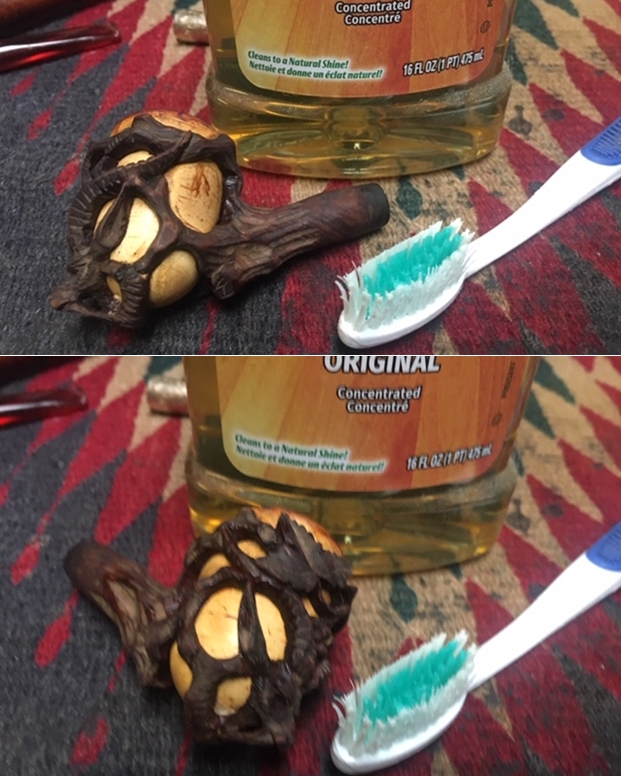
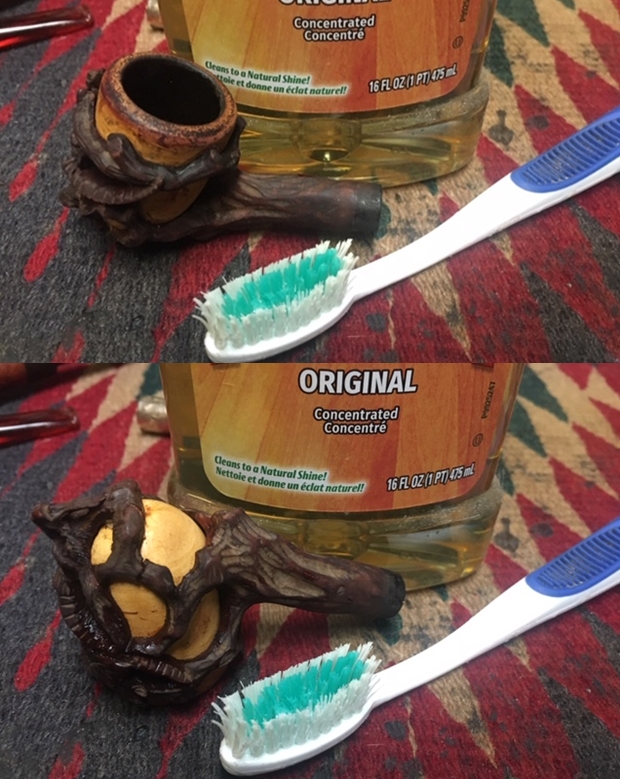
Jeff had gone to the trouble to ream the bowl with a PipNet pipe reamer and followed up with a Savinelli Fitsall pipe knife to remove the cake. He scrubbed out the mortise and the airway in the shank and the stem with alcohol, cotton swabs and pipe cleaners. He scrubbed the exterior of the bowl, rim, shank and stem with a tooth brush and Murphy’s Oil Soap to remove the oils and tars on the rim and the grime on the finish of the bowl. He rinsed it under running water. He dried it off with a soft cloth. All of his work gave me a clean pipe to work on to say the least. I decided to start with the new stem. I went through my collection of stems to find one that was the same dimensions as the ruined stem. I found one in my can that would fit the bill.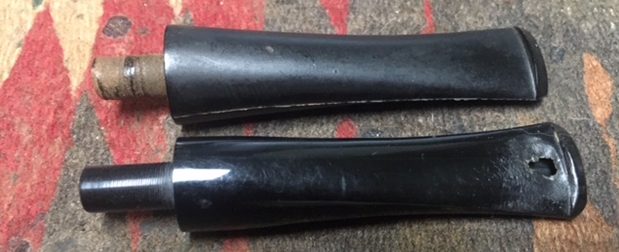 I set up my cordless drill with the PIMO Tenon Turning Tool in the chuck and started turning the tenon on the new stem back to match the broken one. I usually do the turning in several passes, adjusting the depth of the blade between each cut. In this case I did it in three passes. I got it close and finished the fit with my Dremel and sanding drum.
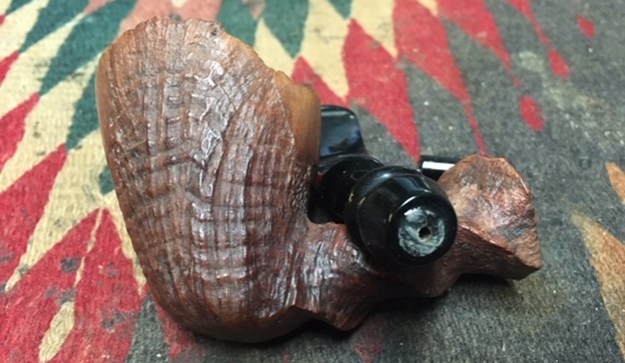
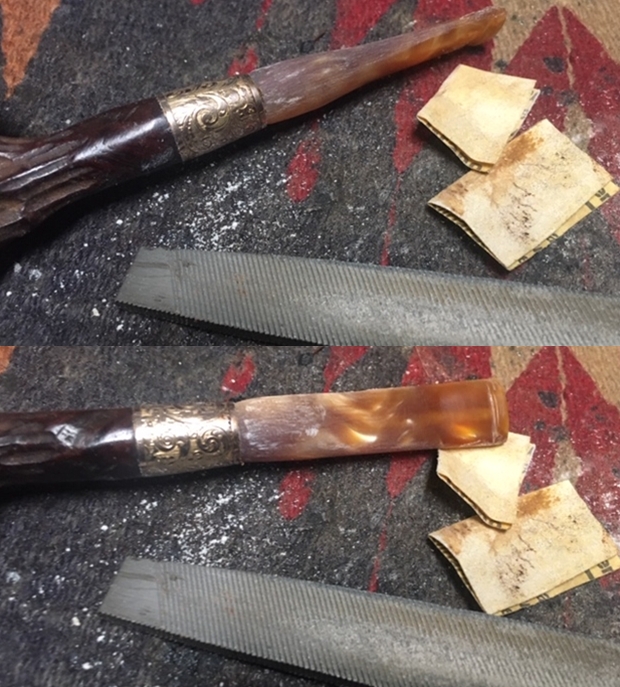
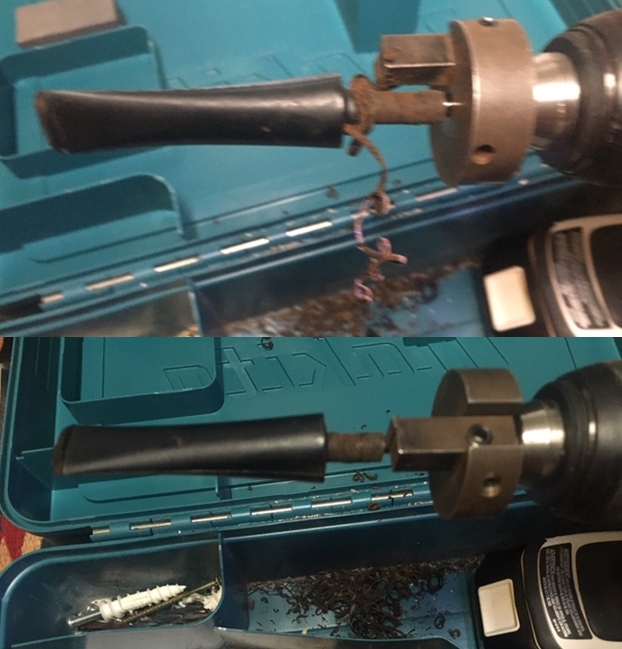 I sanded off the castings on the sides and slot end of the stem with the Dremel and sanding drum and did a few turns on the tenon with the sanding drum. You can see from the first photo below that it was a good snug fit. The diameter of the stem was larger than the shank do I would need to remove the excess material to get a solid fit.
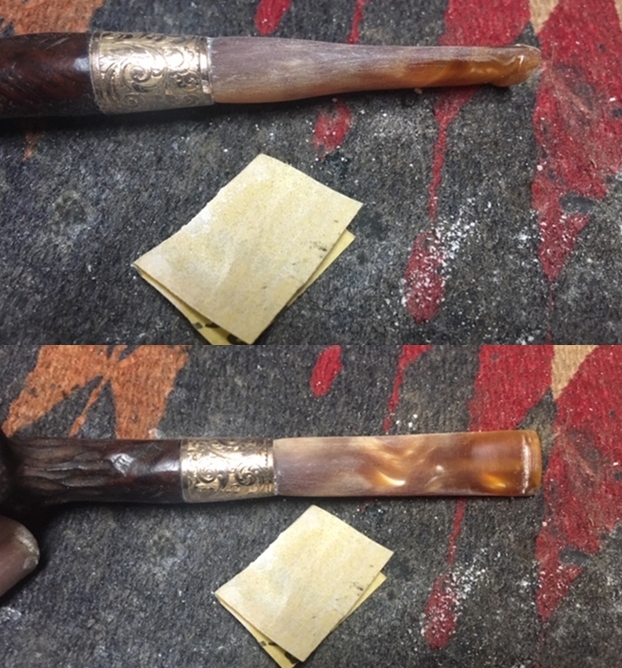
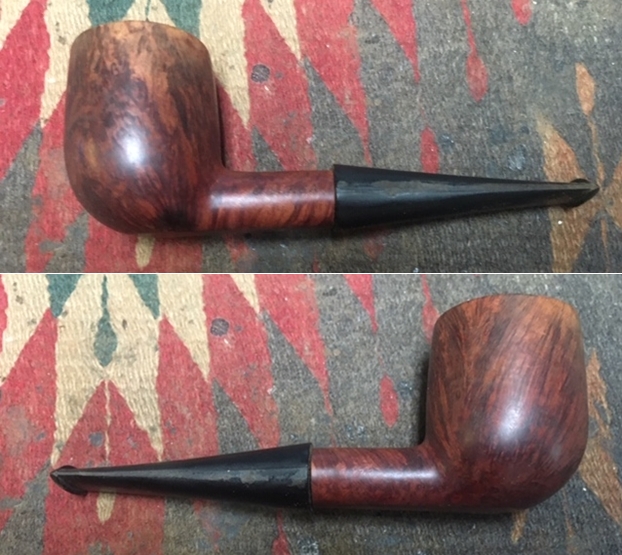 I used a Dremel and sanding drum to remove the excess material from the stem and get it close to the diameter of the shank. I worked over the diameter with a folded piece of 220 grit sandpaper to smooth out the stem. It still has a ways to go before it was finished but it was getting pretty close.
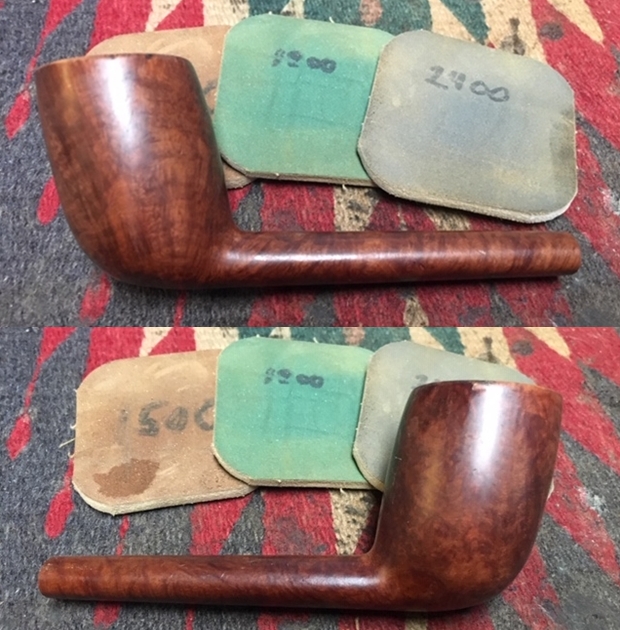
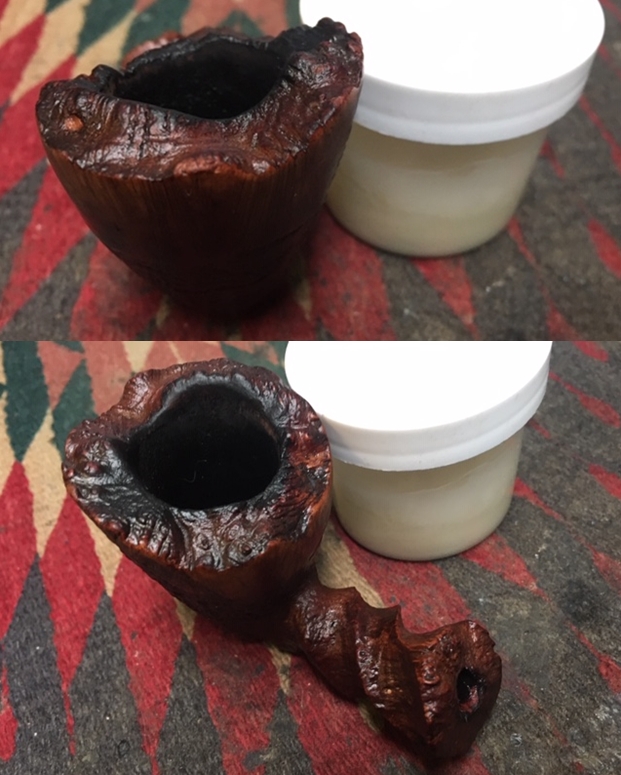
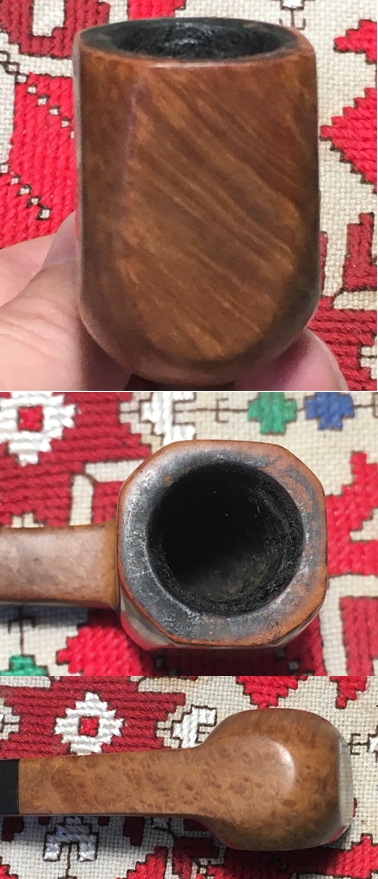
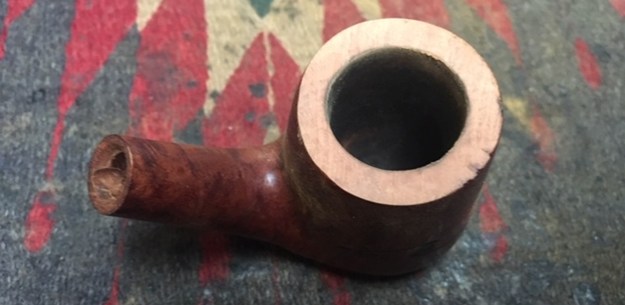
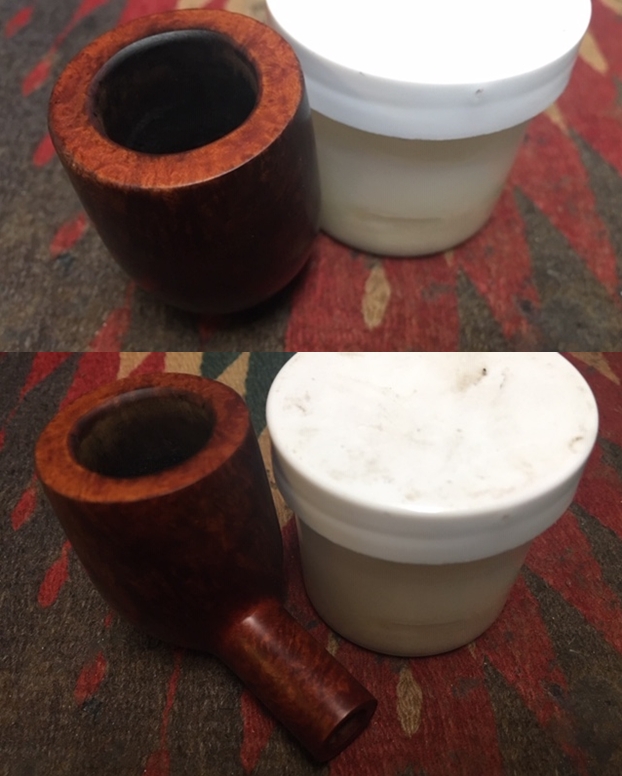
 I set the stem aside and turned my attention to the bowl. I topped the bowl with 220 grit sandpaper on a topping board. I removed the damaged areas on the rim top. I did not need to remove too much to bring it back to smooth condition and the outer edge was still clean.
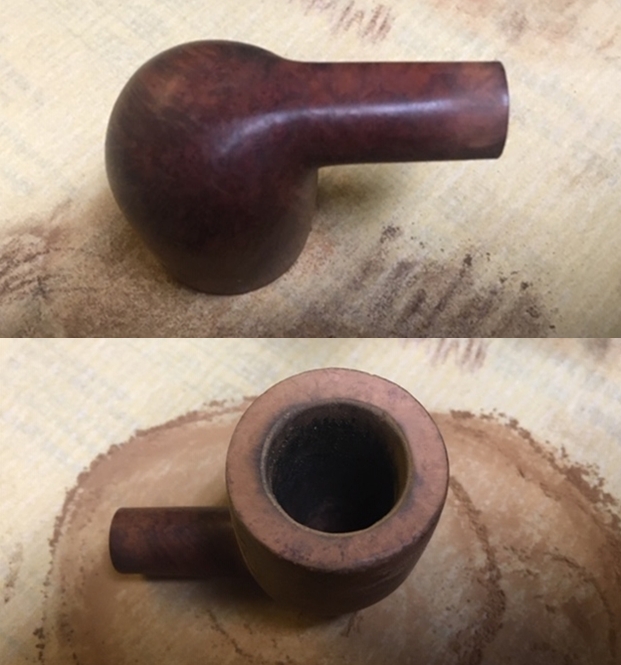 I used a folded piece of 220 grit sandpaper to clean up the inner bevel of the bowl. I worked it at an angle to clean up the edge and to give it a smooth bevel.
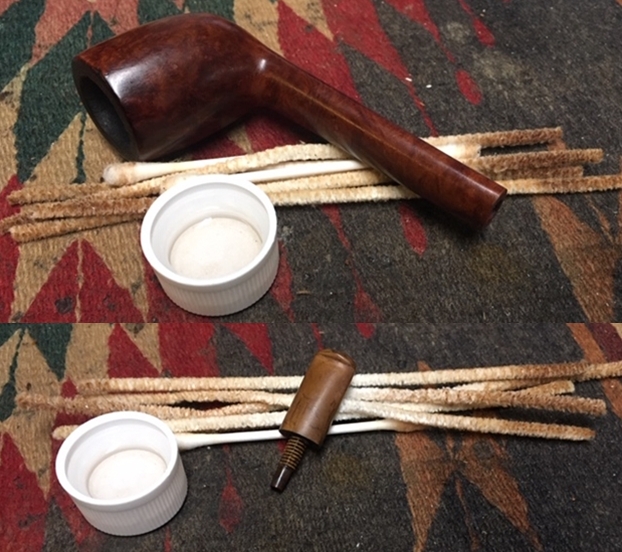
 I scrubbed the briar with Murphy’s Oil Soap and a tooth brush. I rubbed it into the surface of the briar with my finger tips and let it sit for about 10 minutes then rinsed it off with running water. I dried it off with a soft cloth.
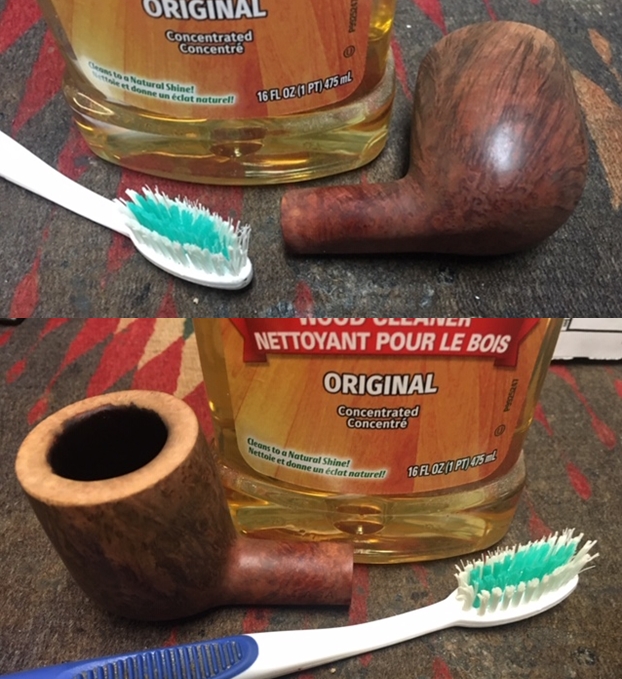
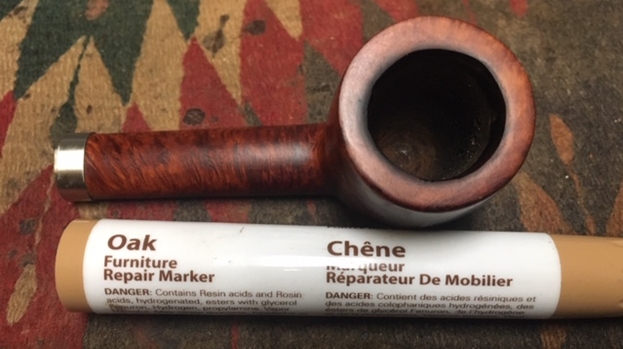
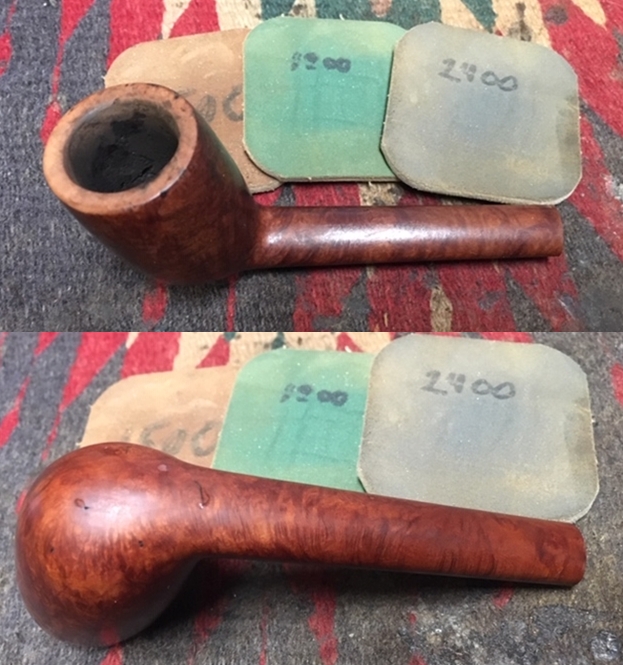
 I used an Oak Stain Pen to stain the carvings on the rim top to blend all of the darkening together and make it stand out. I buffed it with a clean buffing pad. You can see from the photo below that I was able to blend it into the rest of the bowl.
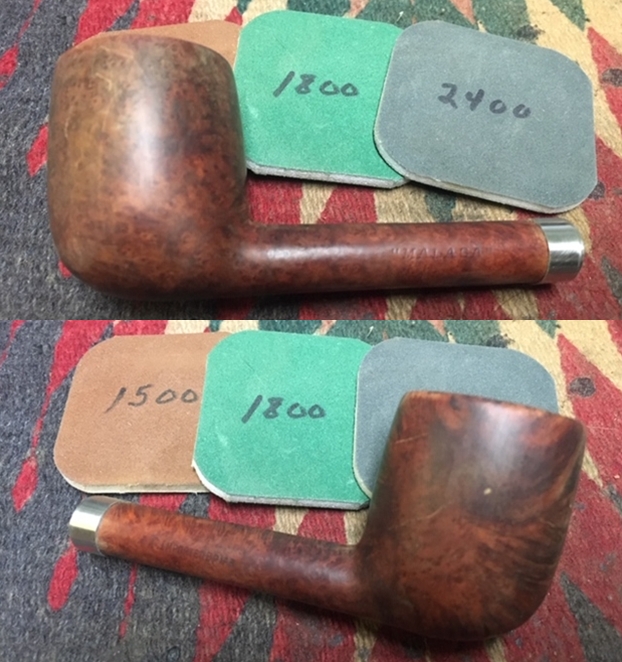
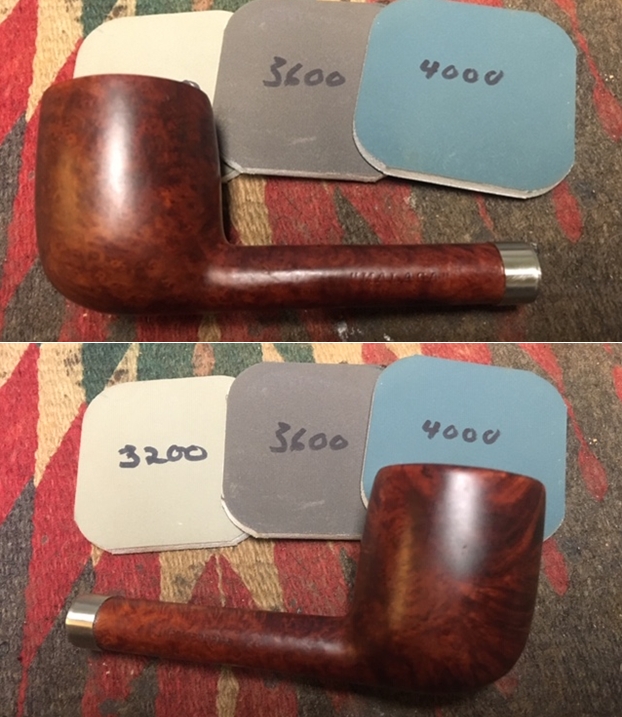
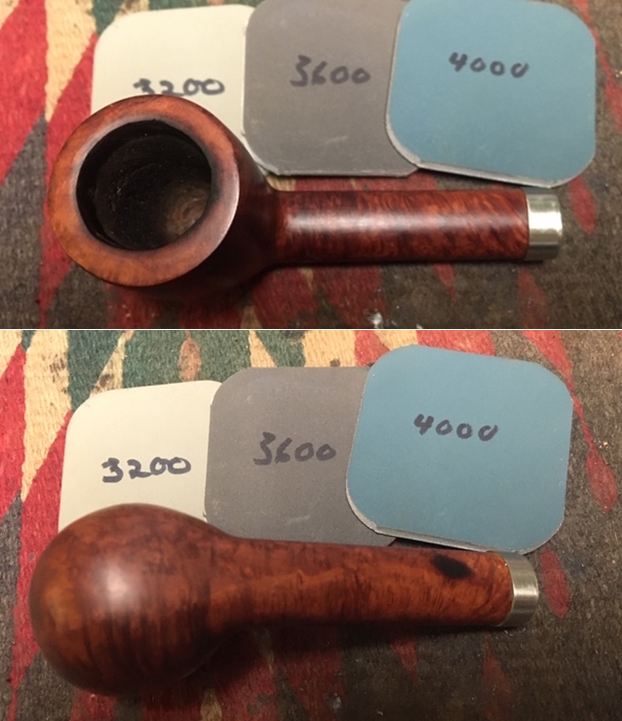
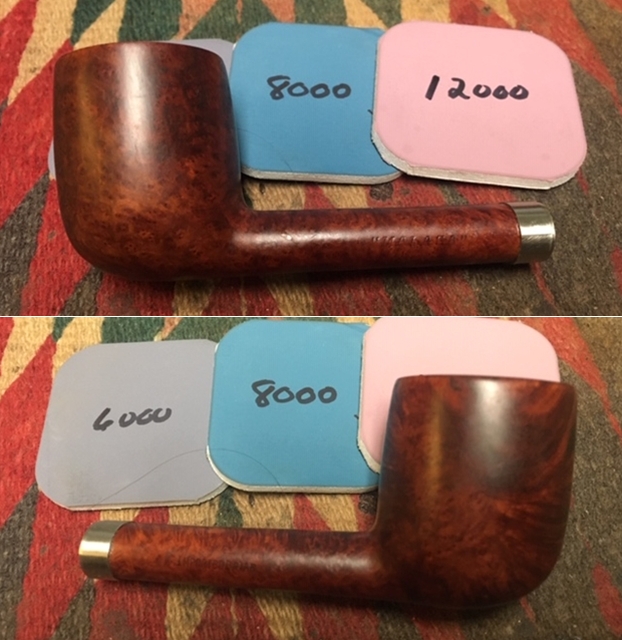
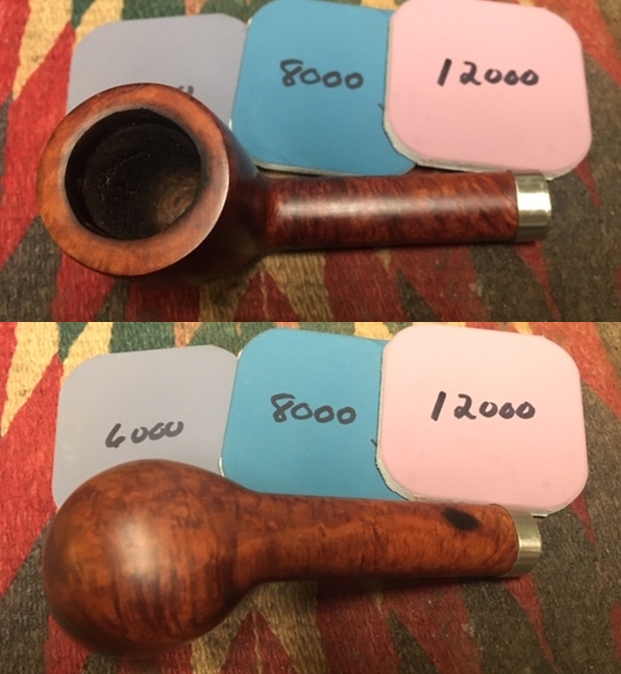
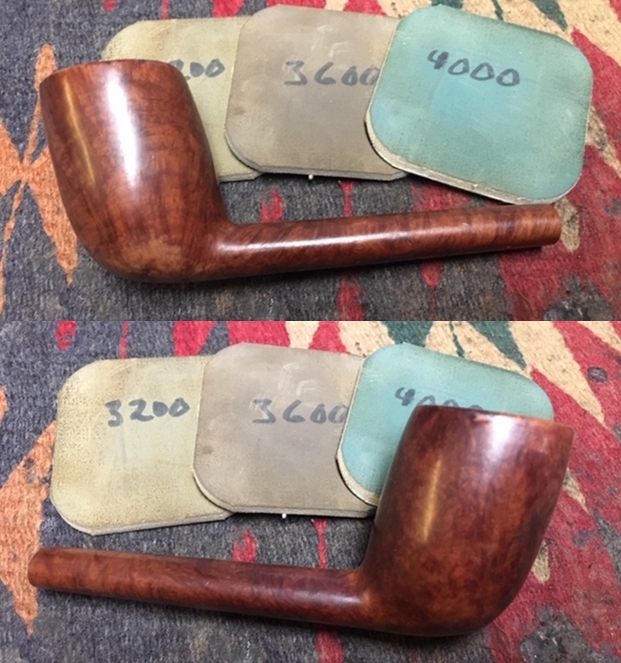
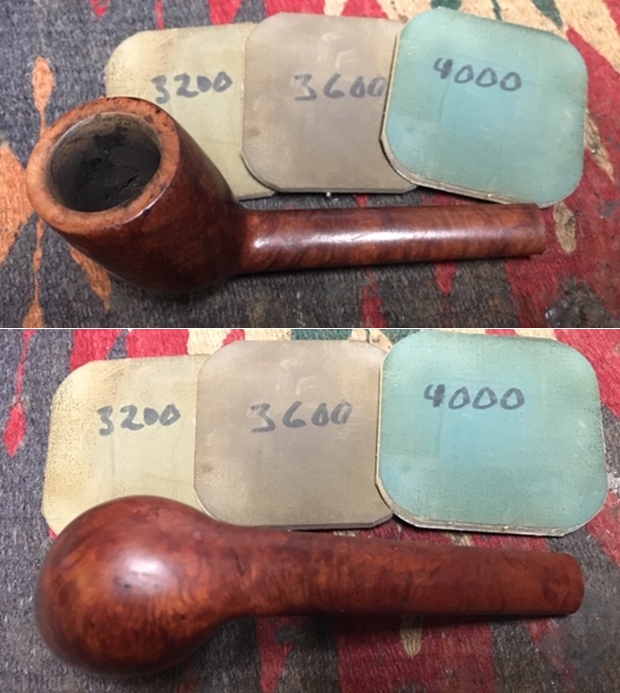
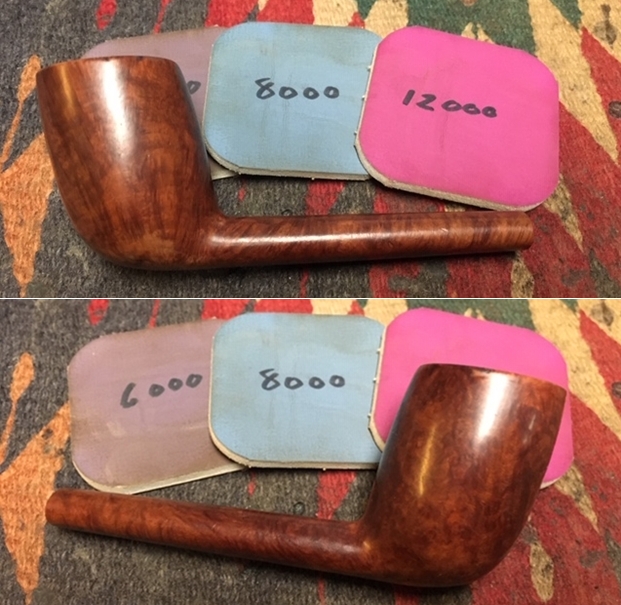
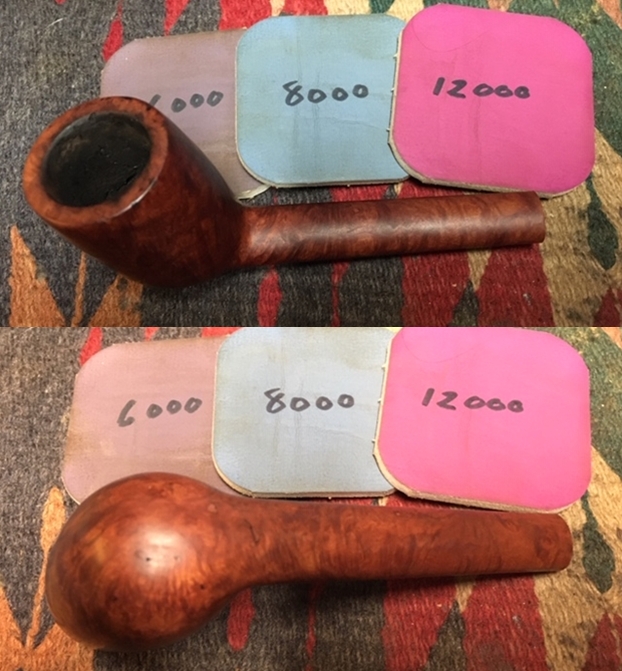
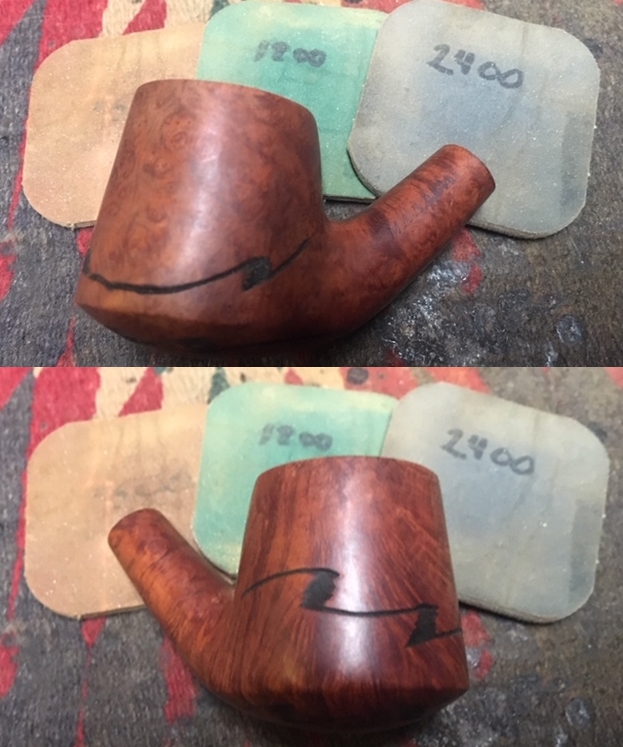
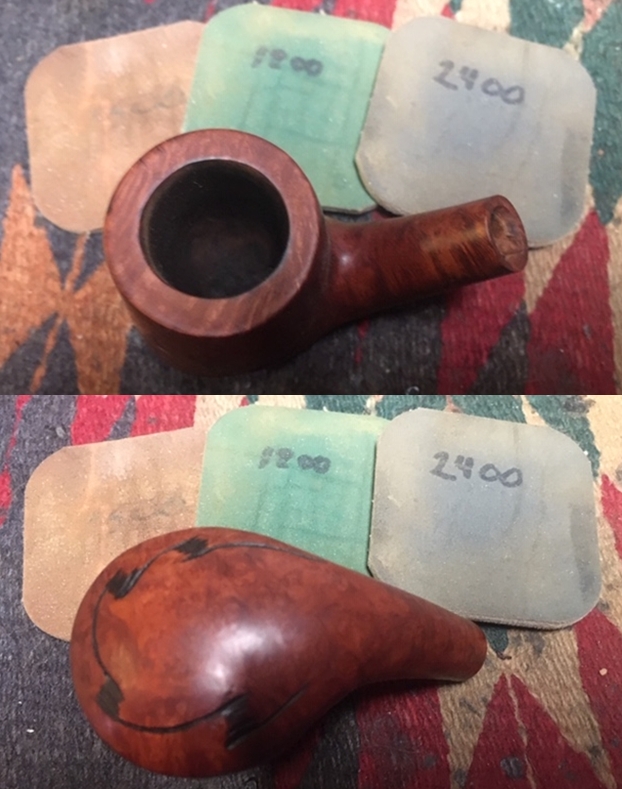
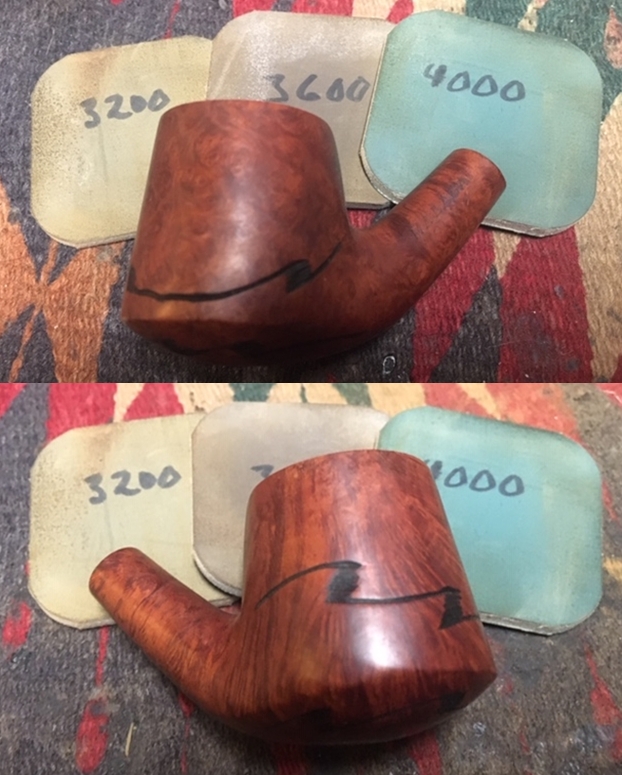
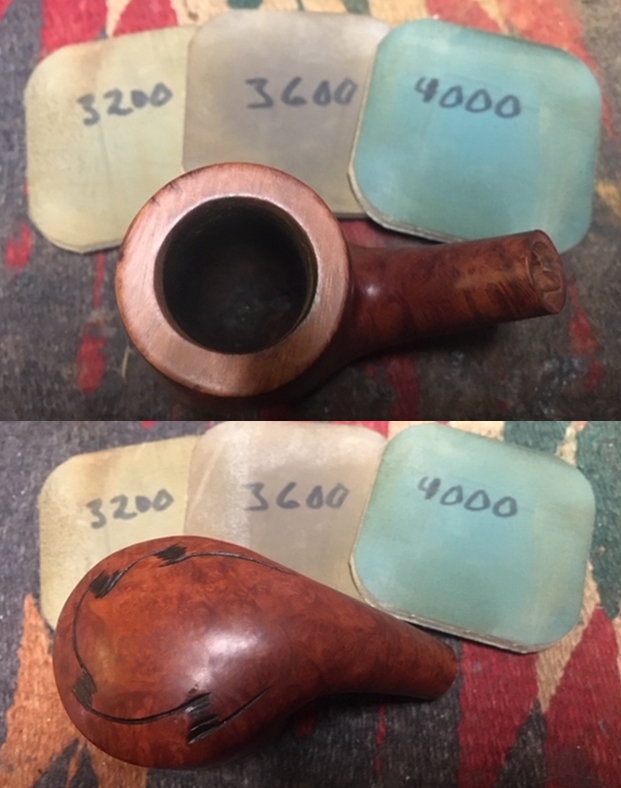
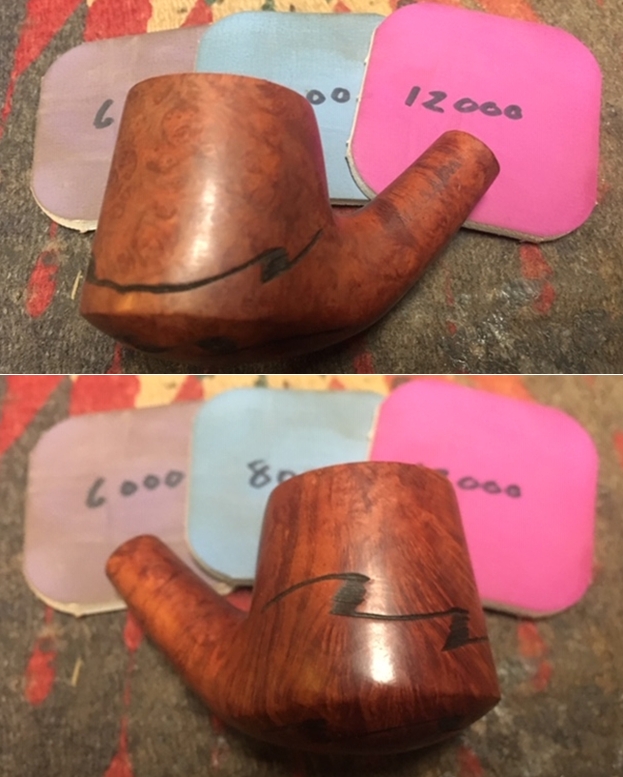
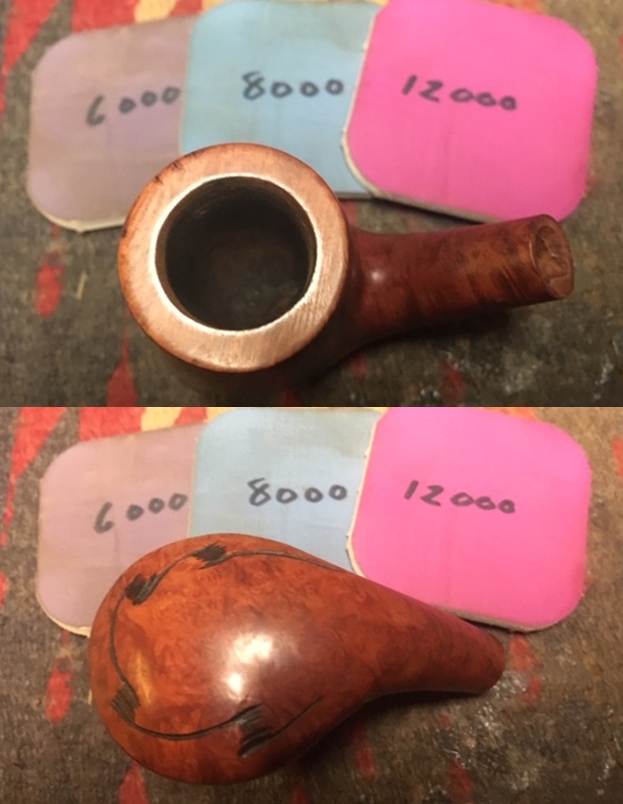
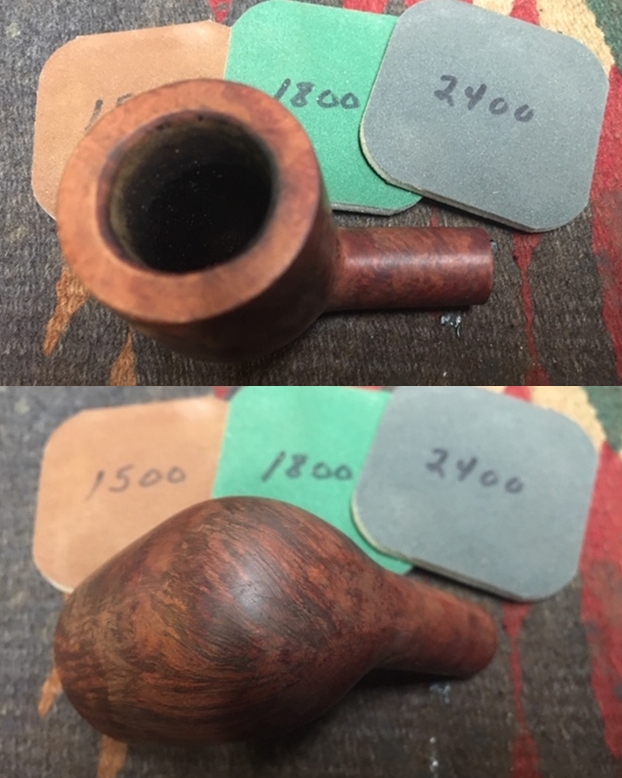
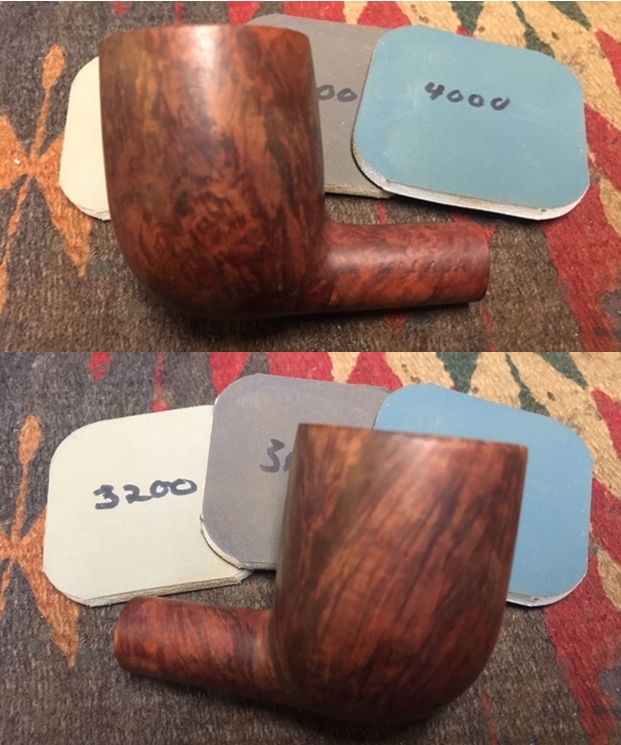
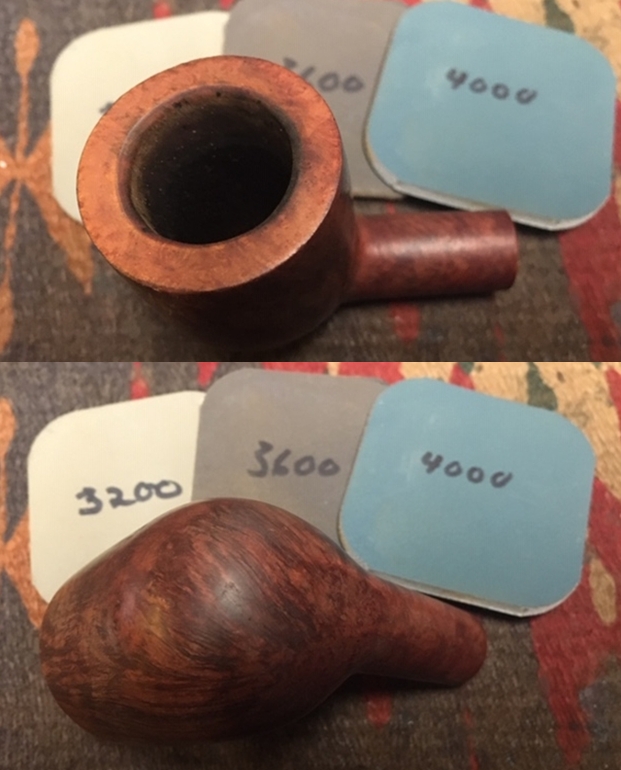
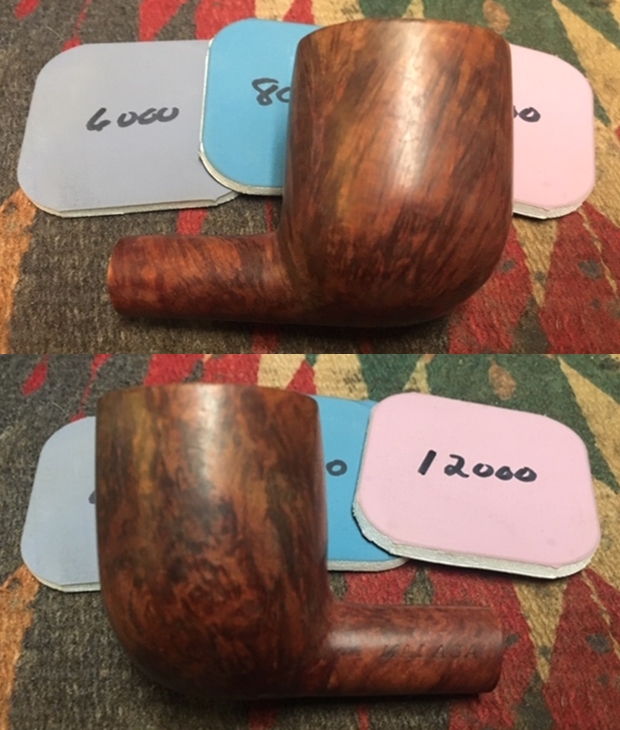
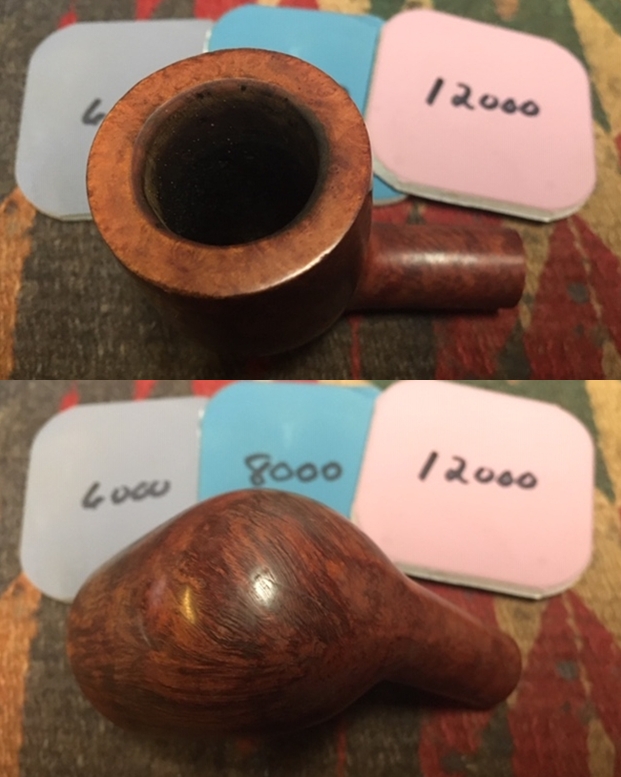
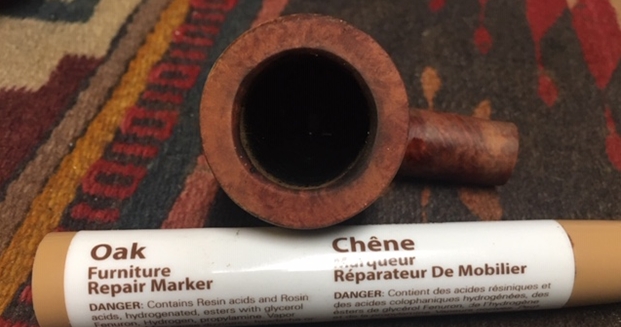 I polished the bowl with micromesh sanding pads to smooth out the rim edge repairs and the nicks in the bowl sides. I wet sanded with 1500-12000 grit pads and wiped the bowl down with a damp cloth after each pad. The photos show the progress.
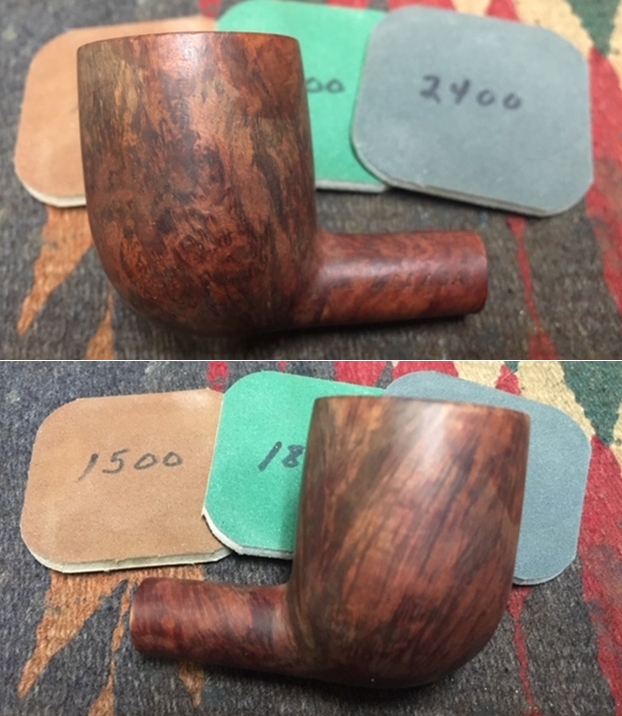
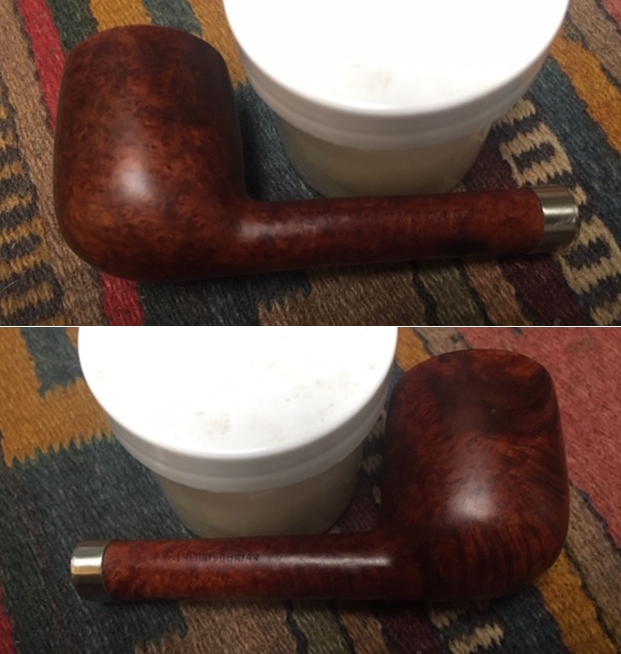
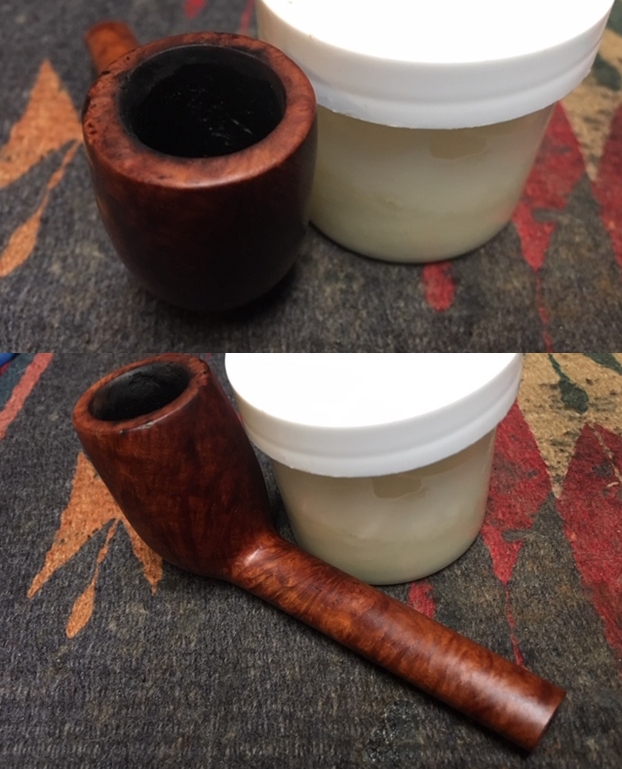
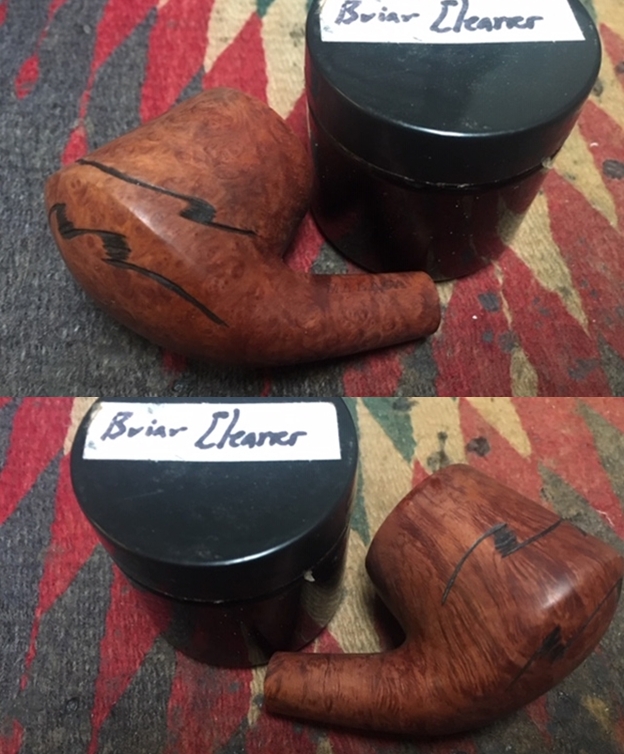
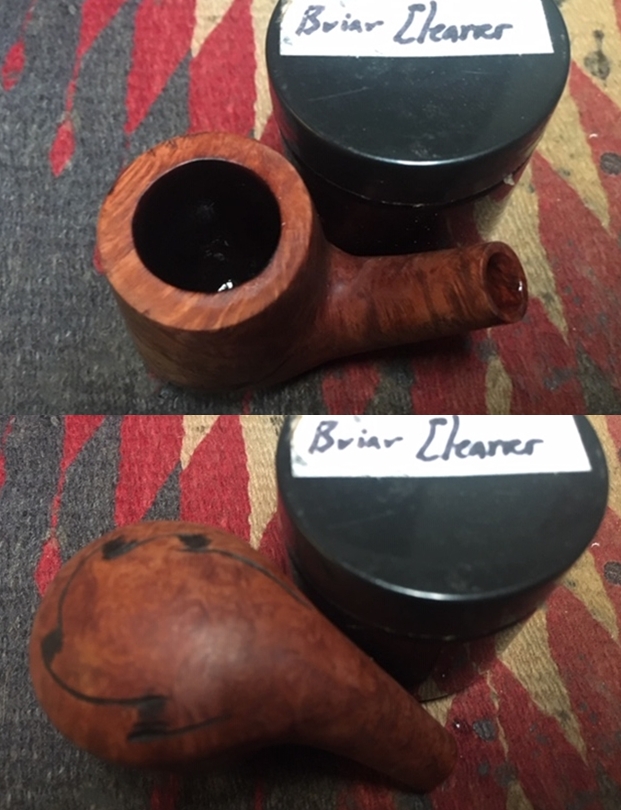
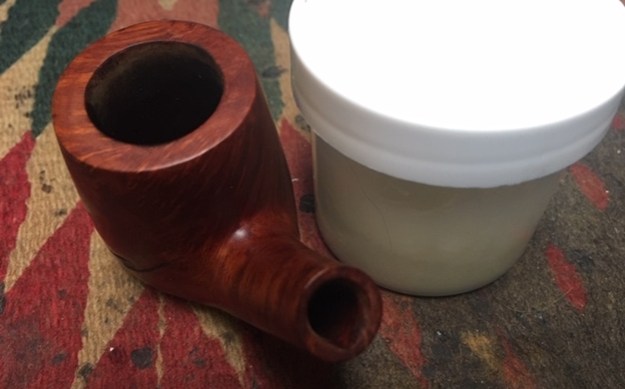
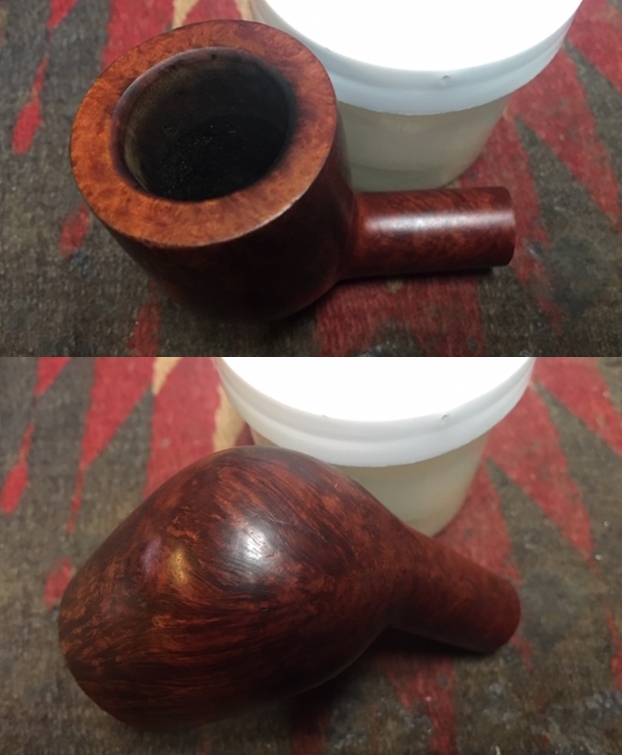
 I worked some Before & After Restoration Balm into the surface of the briar with my fingertips to clean, enliven and protect it. I let the balm sit for a little while and then buffed with a cotton cloth to raise the shine. The following photos show the bowl at this point in the restoration process. I am very happy with the results.
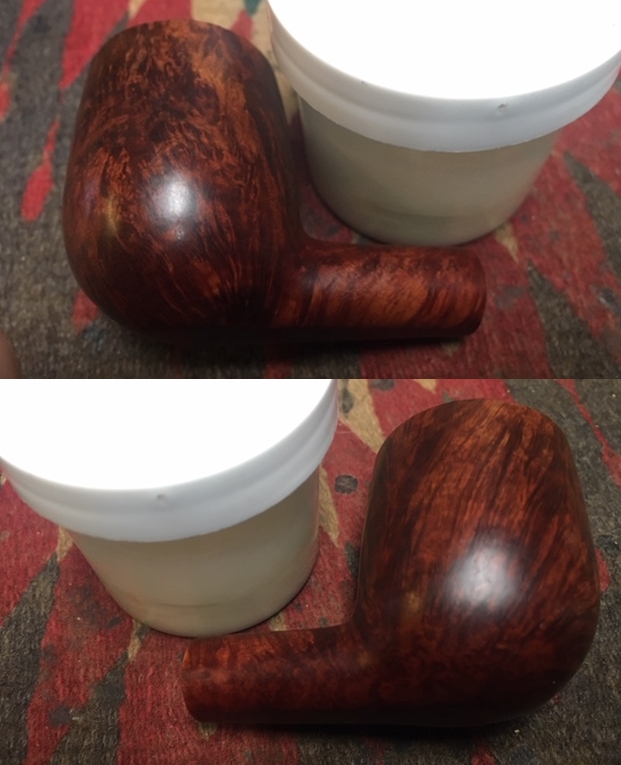
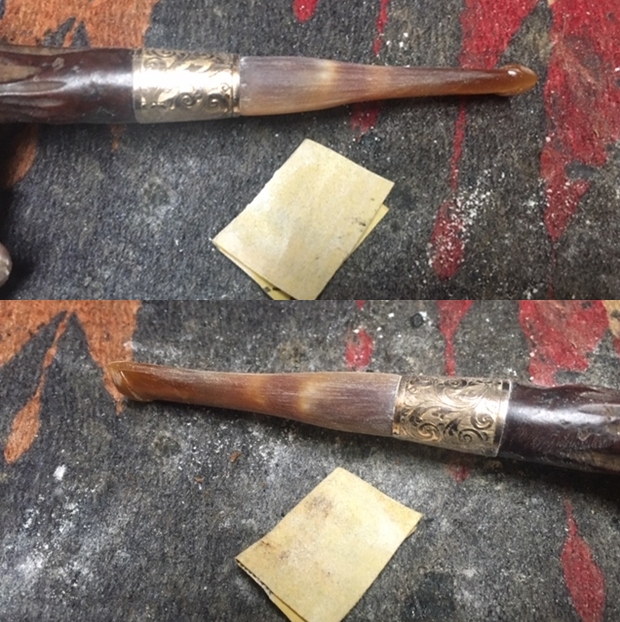
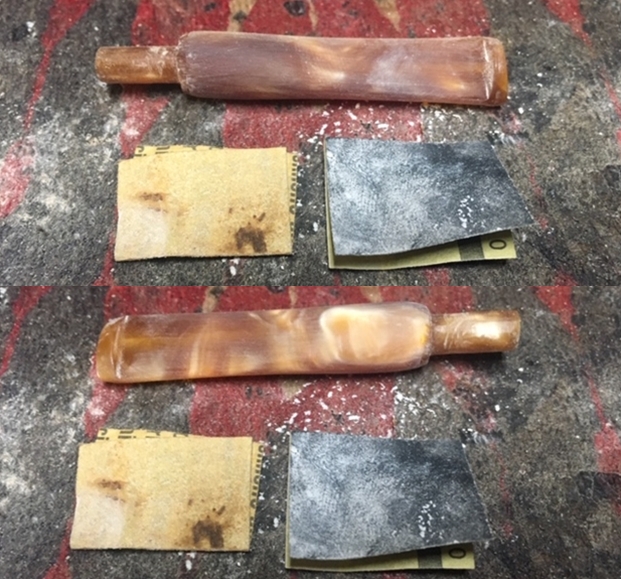
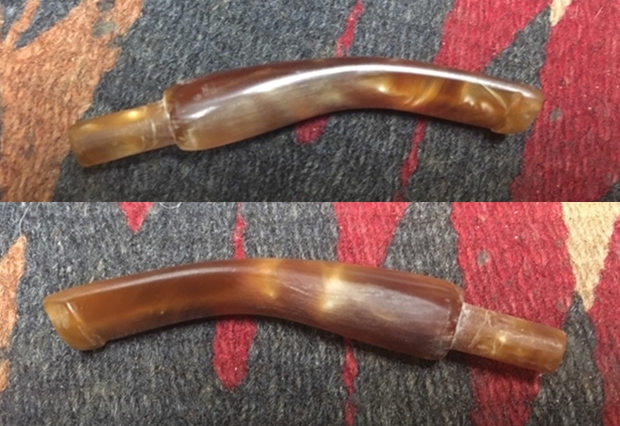
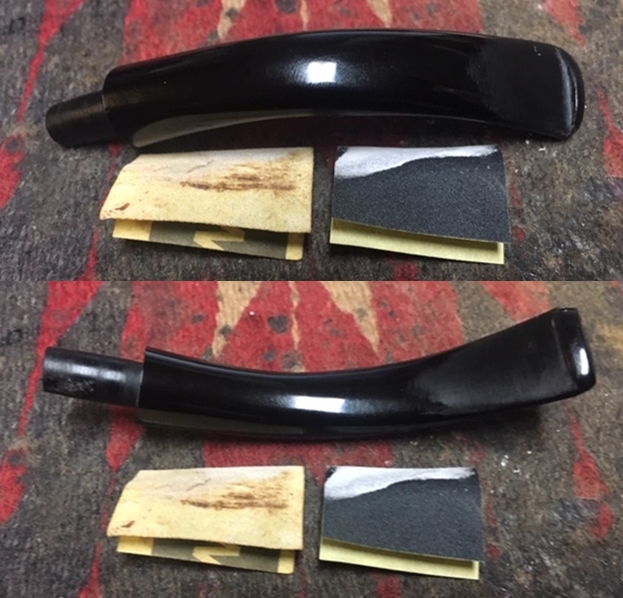
 I turned to the stem and started by sanding the surface. I wanted to smooth out the surface of the vulcanite to remove the castings and the sanding marks. I sanded it with 220 grit sandpaper and 400 grit sandpaper to clean up the stem.
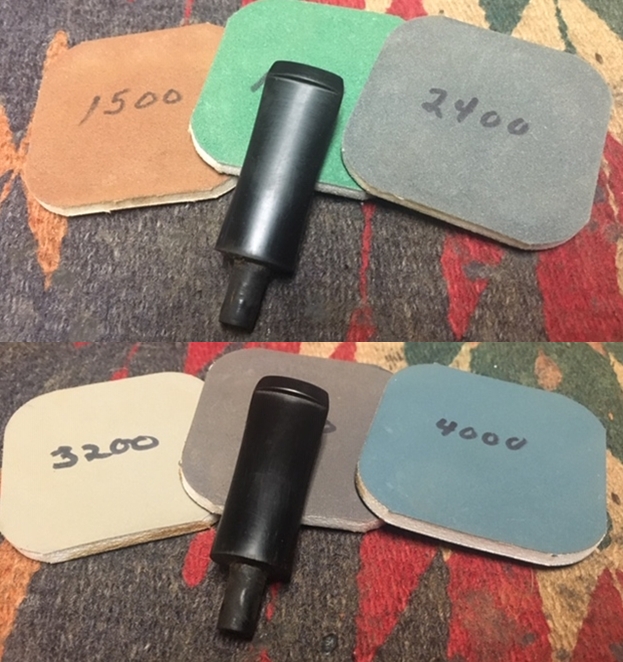
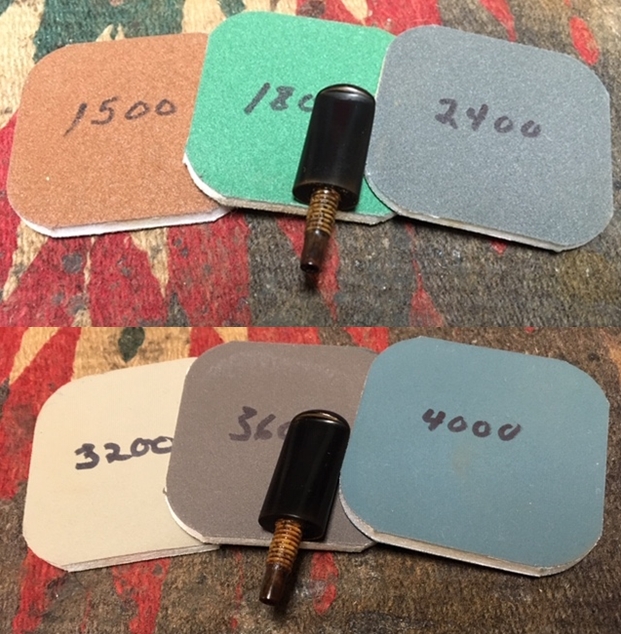
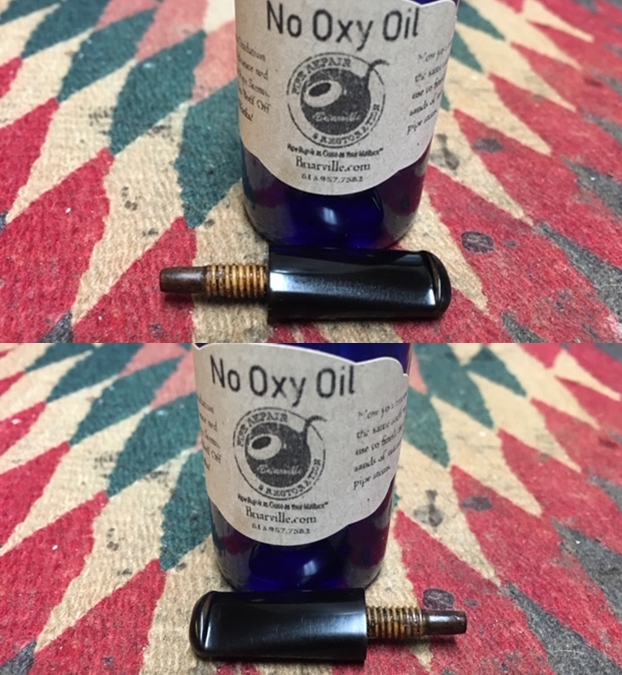
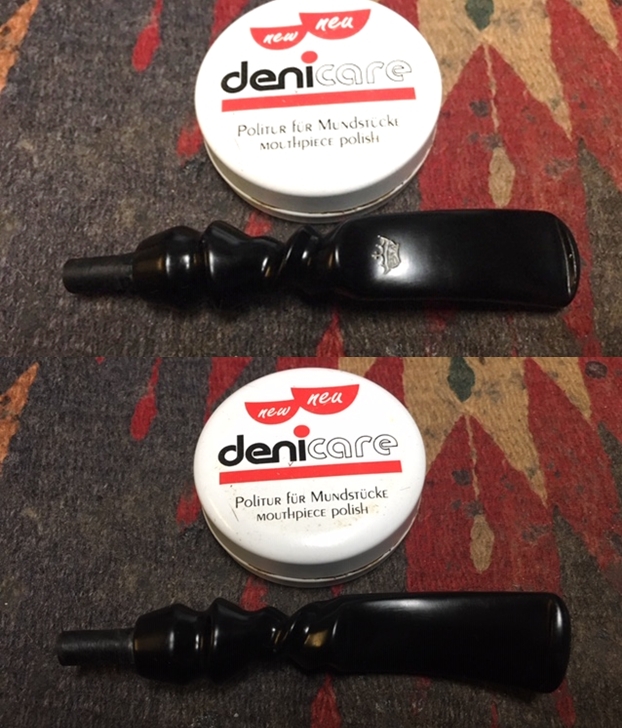
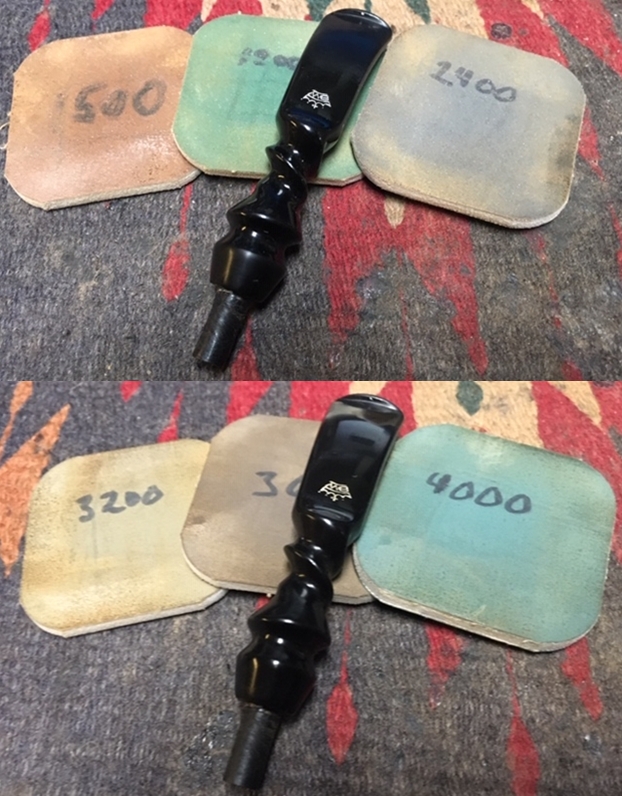
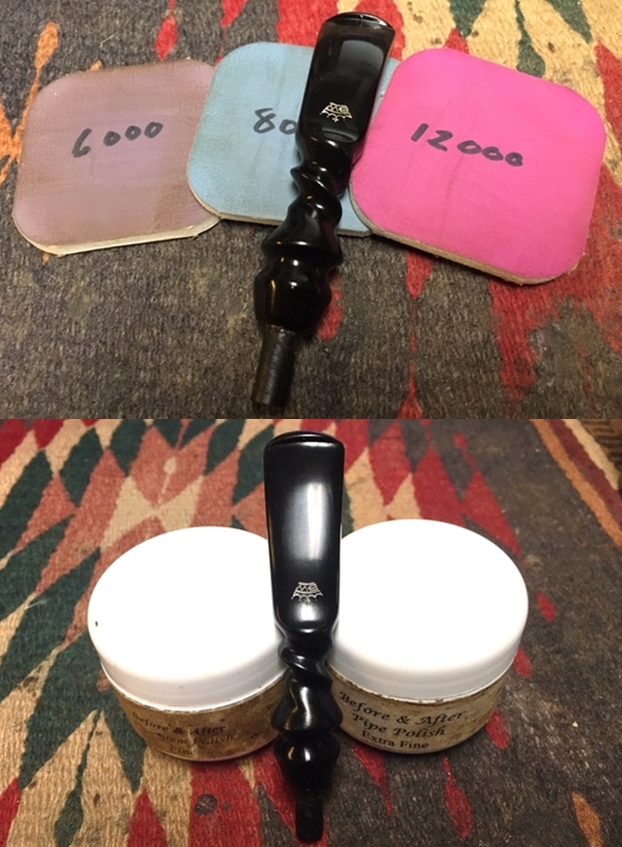
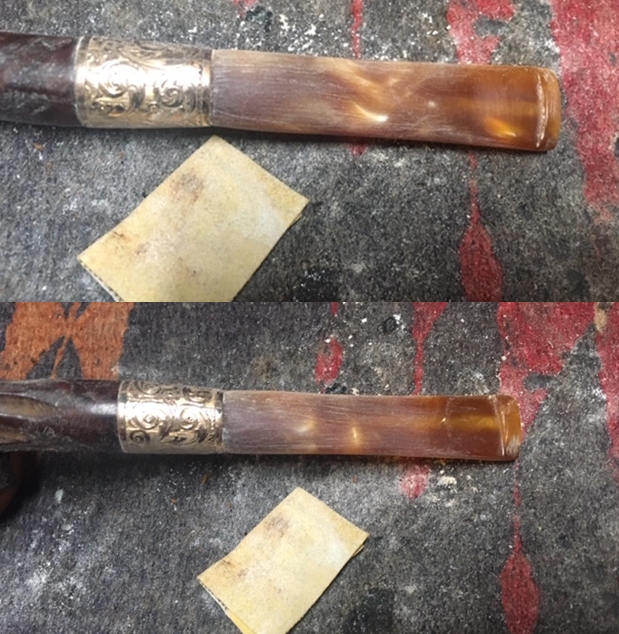
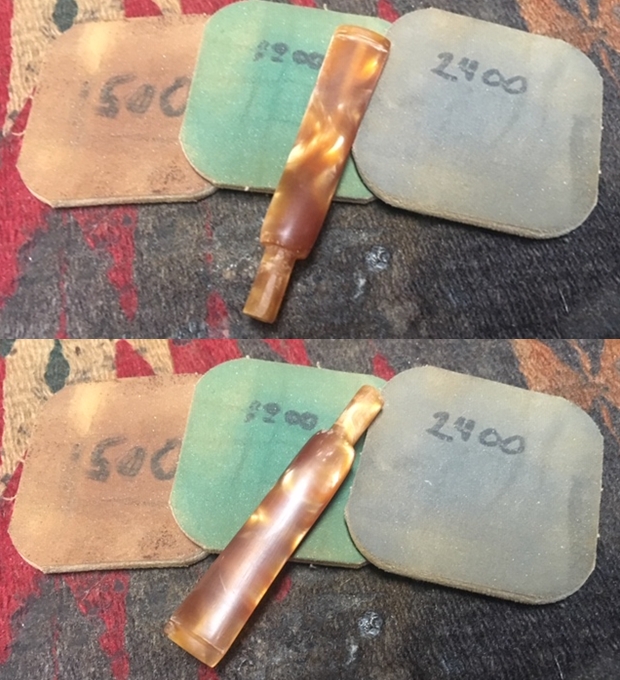
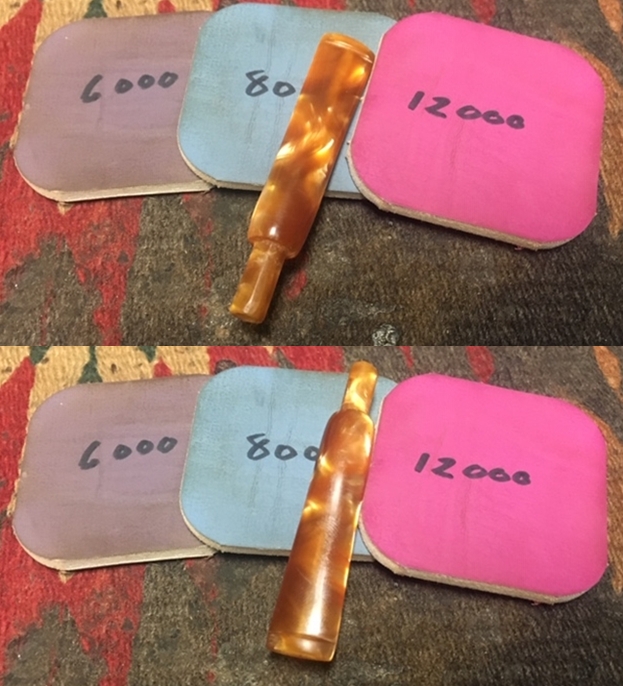
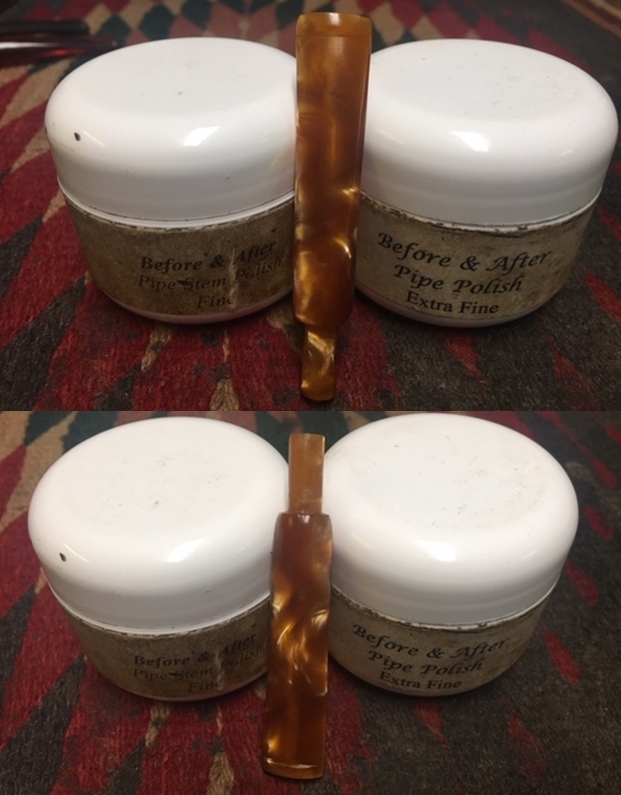
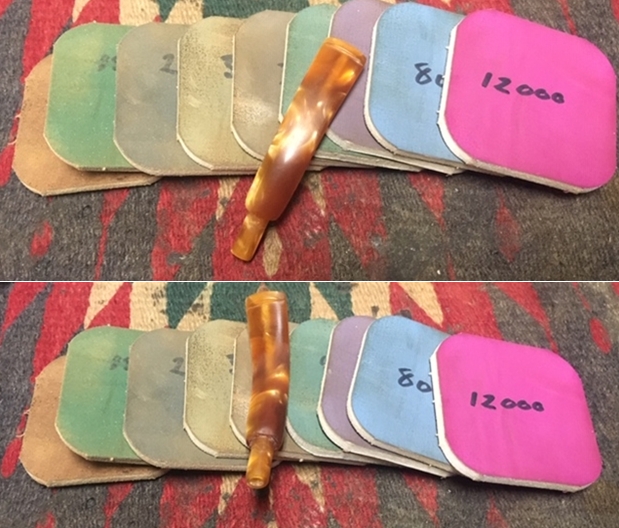
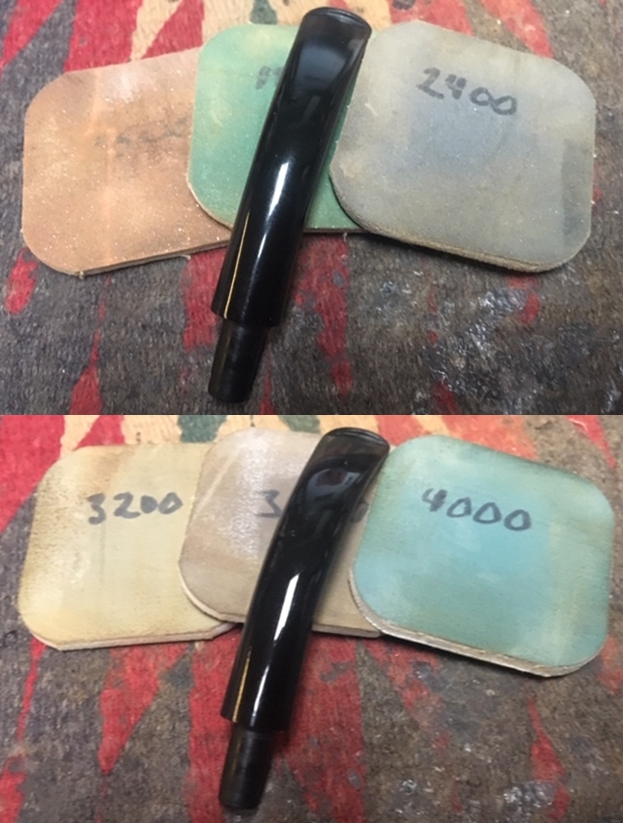
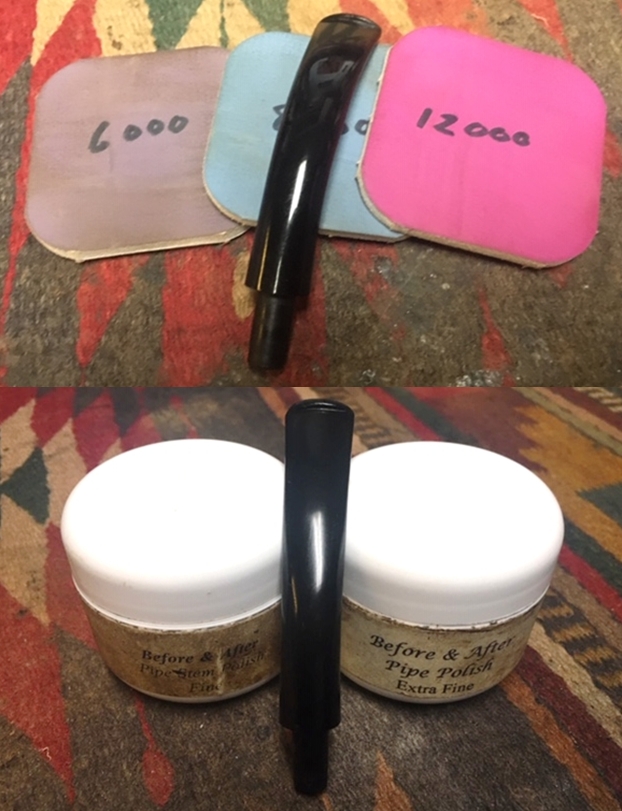
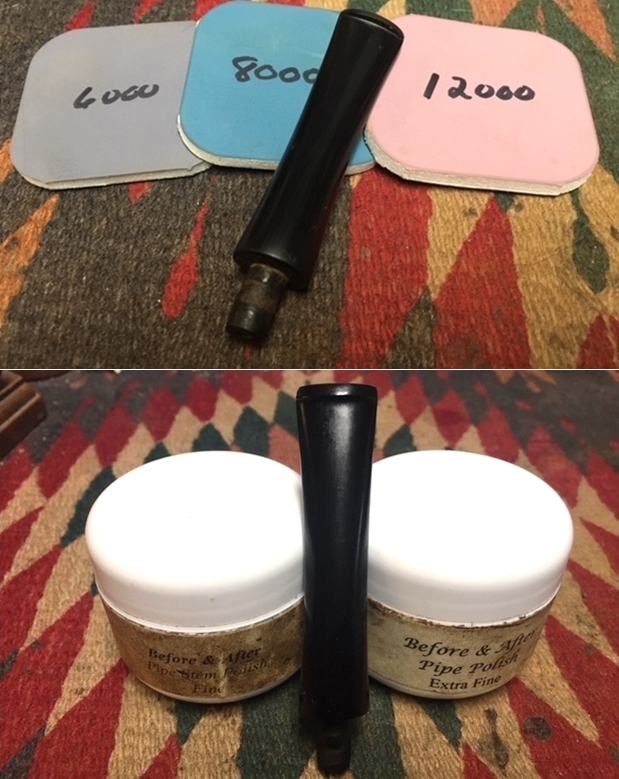
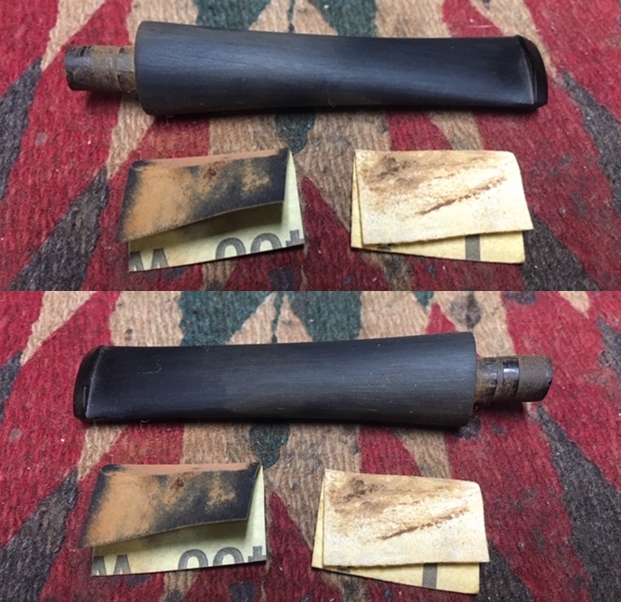 I polished the stem with micromesh sanding pads – wet sanding with 1500-12000 grit sanding pads. I wiped it down after each sanding pad Obsidian Oil. I finished by polishing it with Before & After Pipe Stem Polish both Fine and Extra Fine and then wiped it down with a final coat of Obsidian Oil.
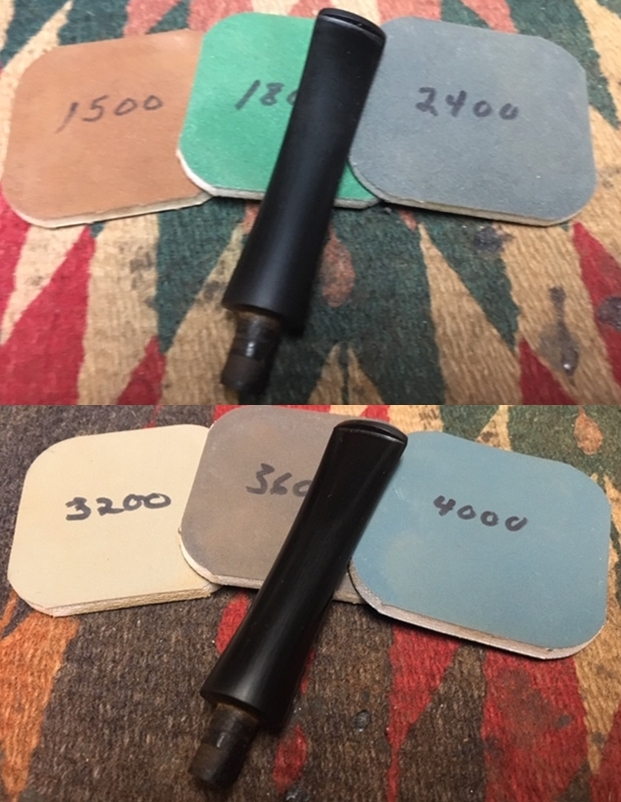
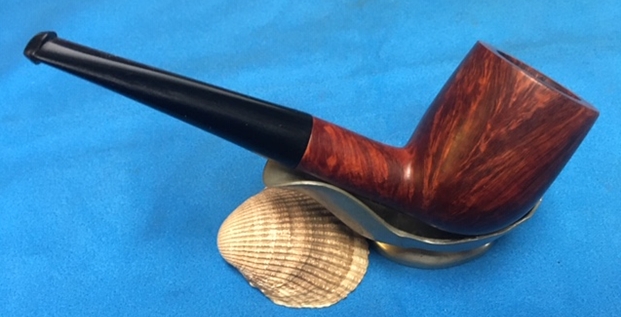
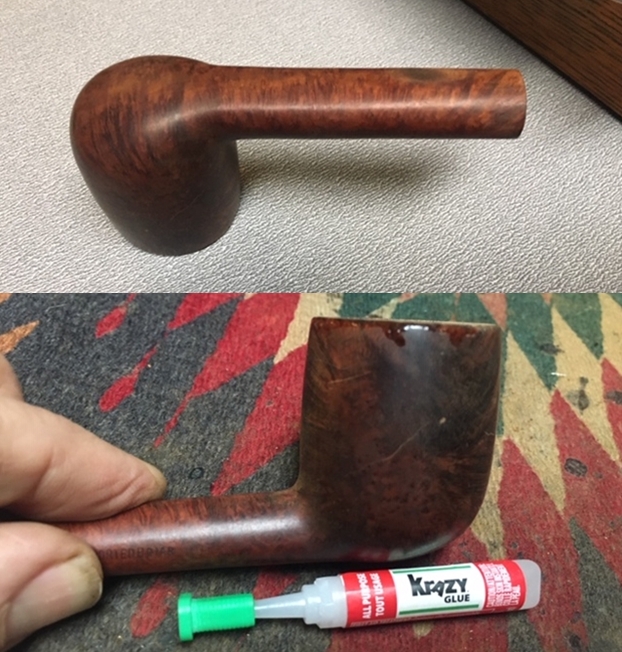
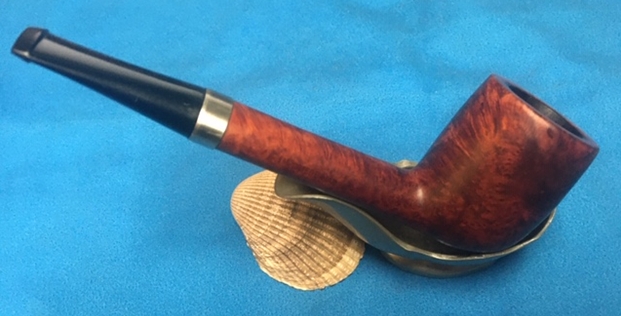
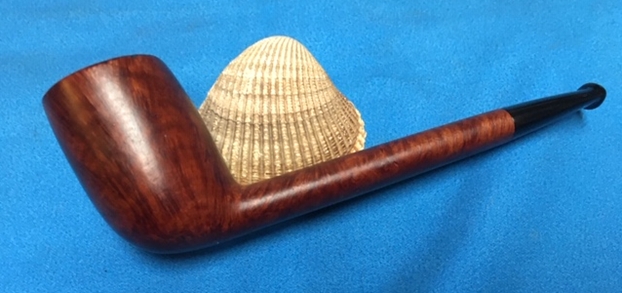
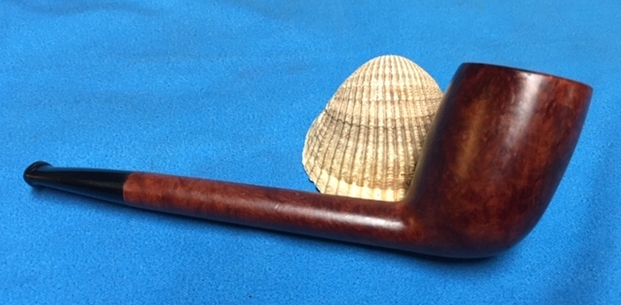
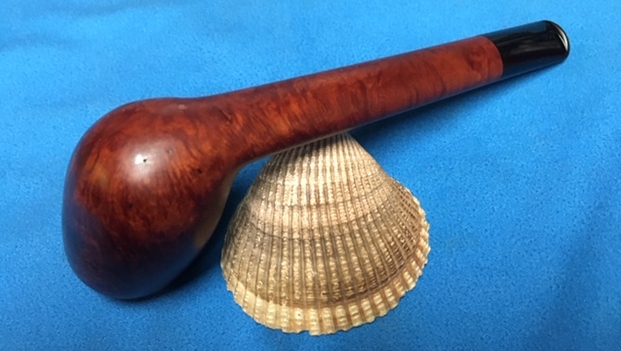
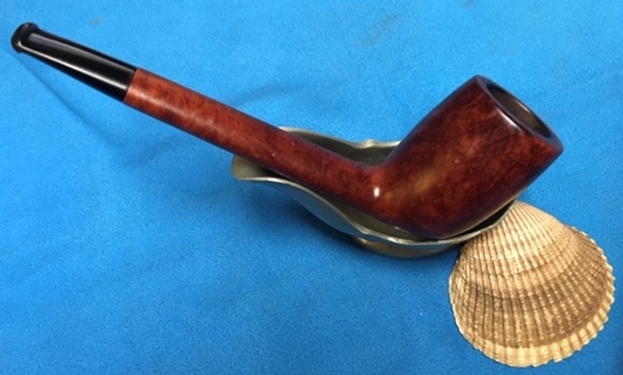
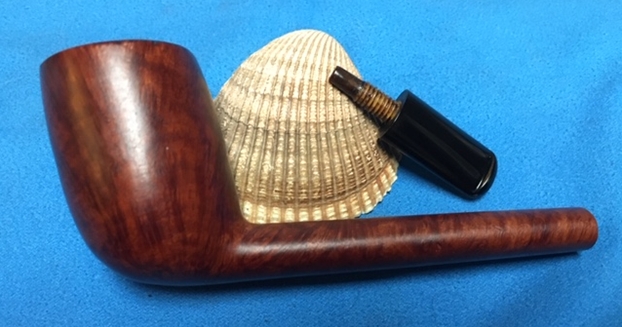
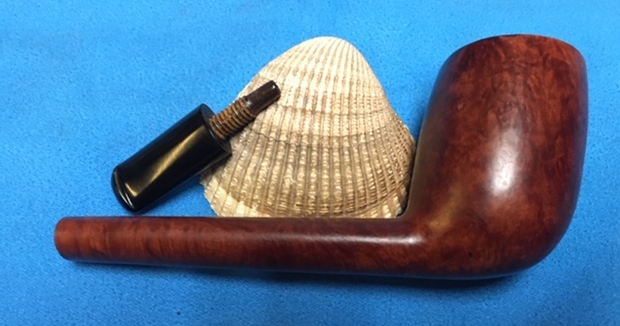
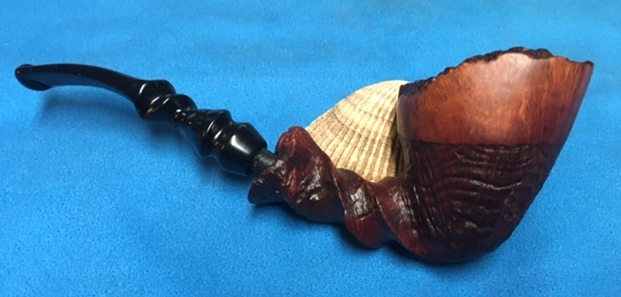
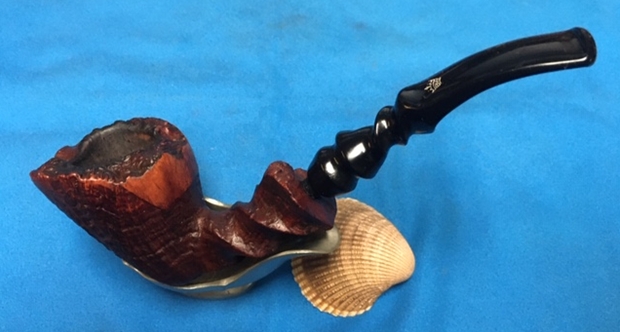
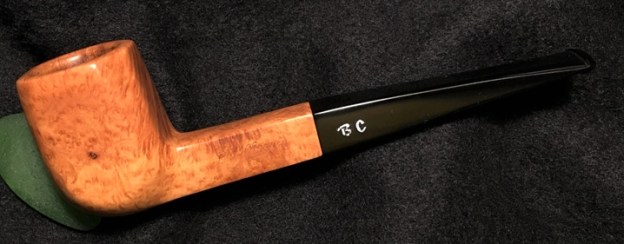
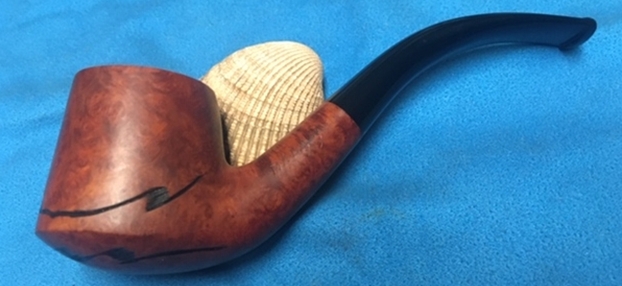
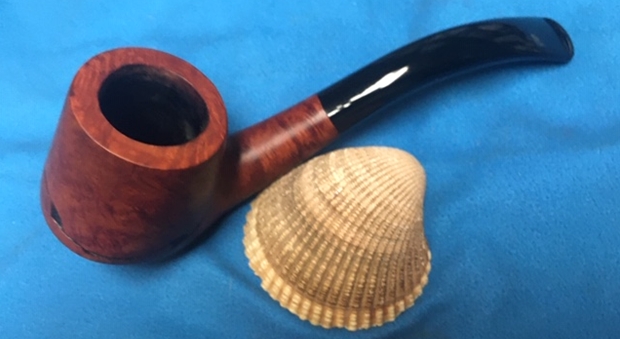
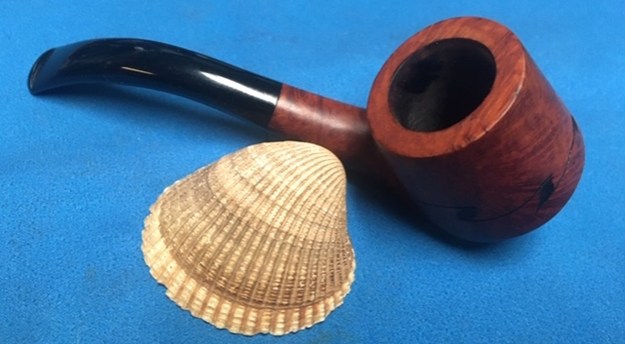
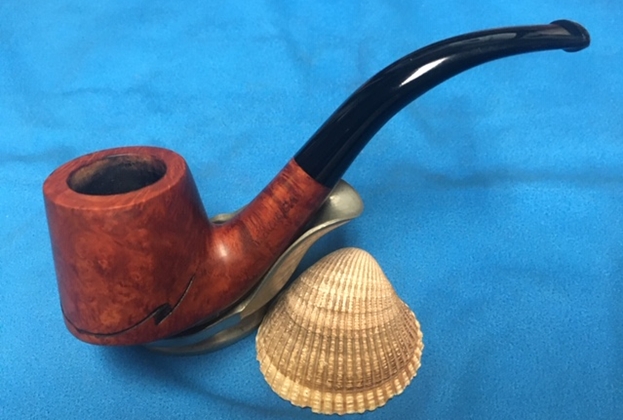
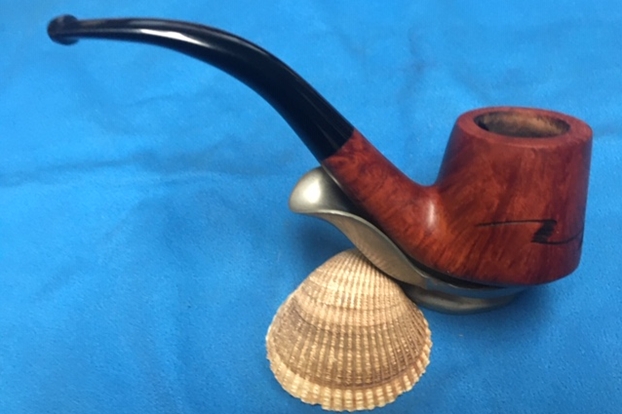
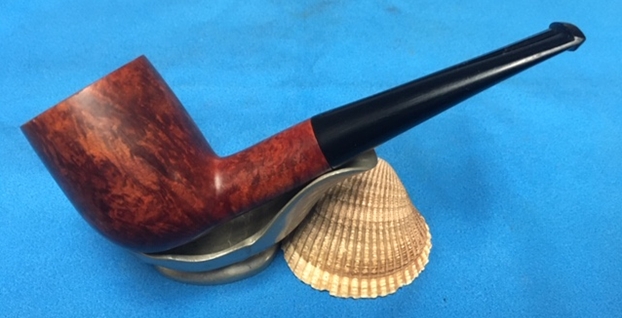
 This is a restemmed and restored Malaga Billiard with a vulcanite tapered stem. The new black vulcanite stem looks good in place of the black chewed acrylic stem. It has a great look and feel. The shape of the bowl, the reshaped and repaired rim top and the cut of the briar work well to highlight the grain around the bowl sides. I polished stem and the bowl with Blue Diamond polish on the buffing wheel. I gave the bowl and the stem multiple coats of carnauba wax. I buffed the pipe with a clean buffing pad to raise the shine. I hand buffed it with a microfiber cloth to deepen the shine. The pipe polished up pretty nicely. The grain took on life with the buffing. The rich oil cured colour works well with the polished vulcanite stem. The finished pipe has a rich look that is quite catching. Have a look at it with the photos below. The shape, finish and flow of the pipe and stem are very well done. The dimensions are Length: 5 ¼ inches, Height: 2 inches, Outside diameter of the bowl: 1 ½ inches, Chamber diameter: ¾ of an inch. I will be adding the pipe to the finished Malaga pipes that I have completed. I am looking forward to a new pipeman picking up this pipe and will carry on the trust for George Koch. Thanks for walking through the restoration with me as I worked over another one of Kathy’s Dad’s Pipes.