Kaywoodie SuperGrain Streamliner 66


Blog by Aaron Henson

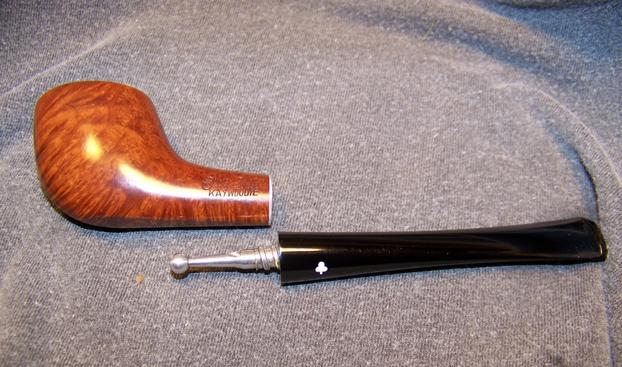
In June of 2016, Steve posted a great restoration of a Kaywoodie 61 by Lance Leslie.  Lance referred to the 61 as “the circus pipe”, a name his Grandfather had given it, no doubt because of the unique shape and the oval bowl.  At the time, I thought Lance had done a great restoration but I was not moved by the shape of the pipe.  Little did I know that in about a month’s time I would stumble upon its cousin, the 66, in a second hand store in Dallas.

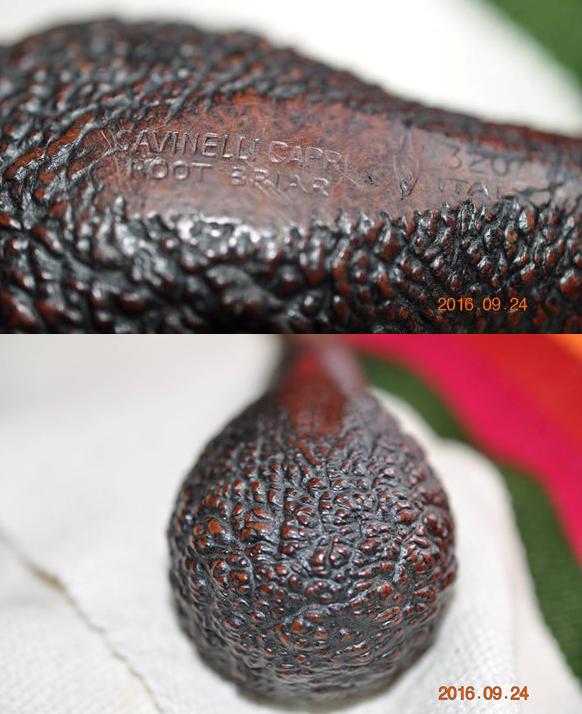
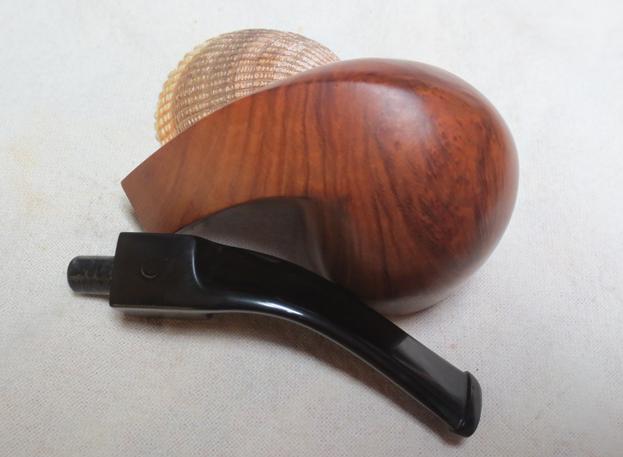
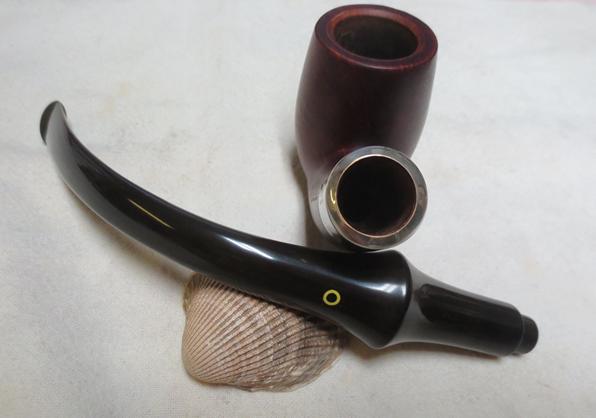
The Kaywoodie shapes 61, 64 and 66 are EZ-set pipes (flat bottom) that are known as “Streamliner” shapes (pipedia).  I assume that the ‘streamline’ name comes from the oval shaped bowl that gives the pipe a slim profile and made it easy to fit into a vest pocket.  Although Kaywoodie had several other shapes that were “vest pocket” shapes, only the 61, 64 and 66 were called Streamliner shapes.

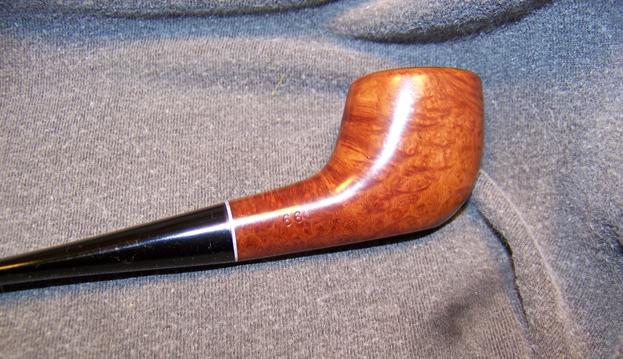
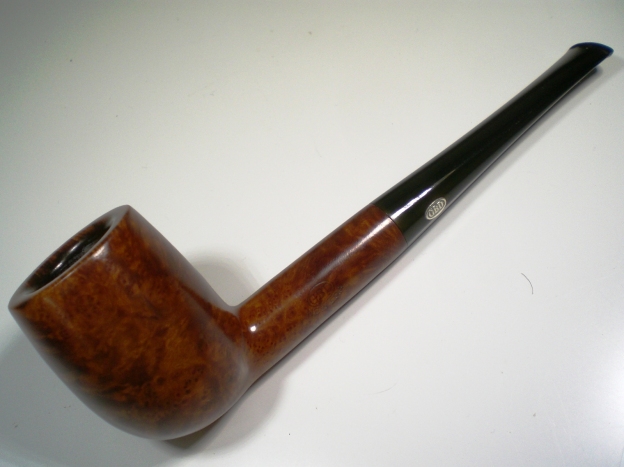
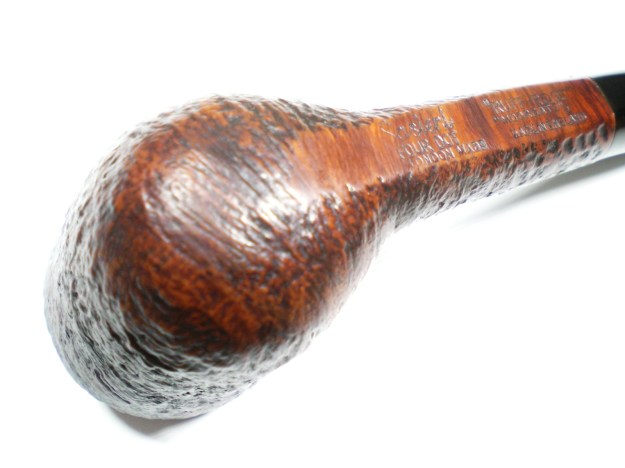
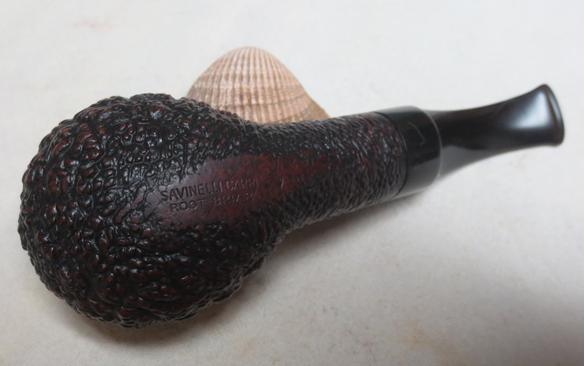
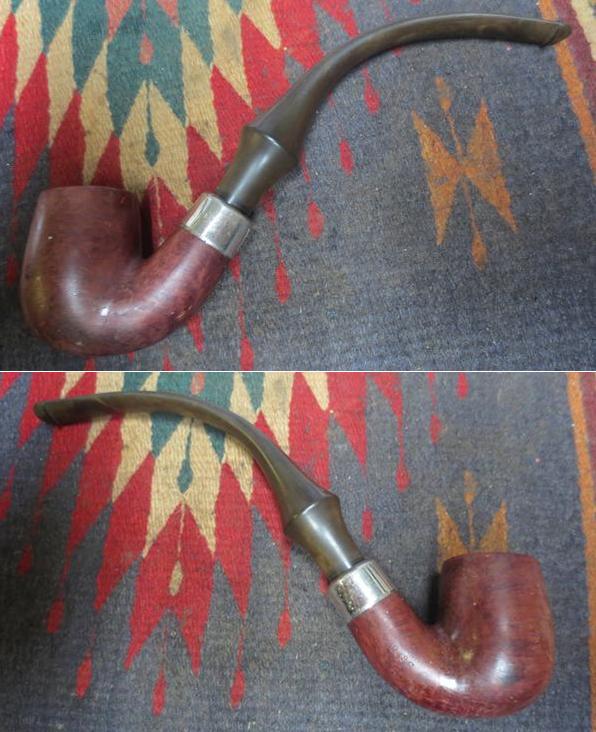
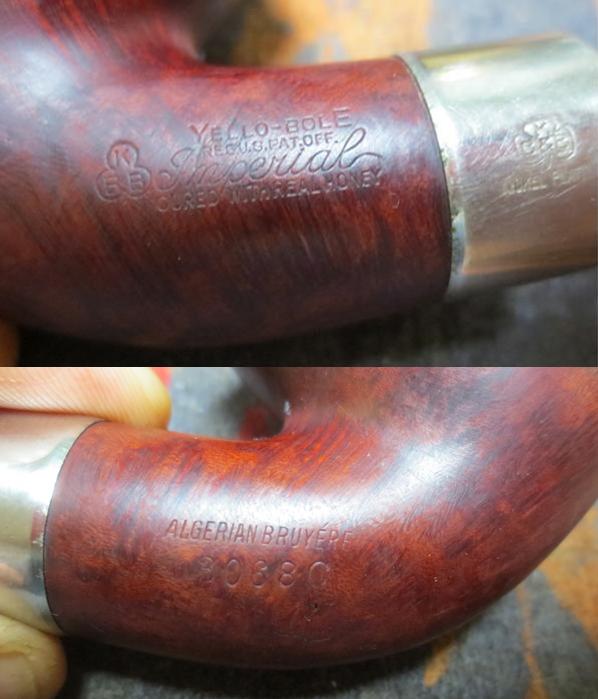
The Kaywoodie shape list further describes the 66 as a “forward leaning apple” and indicates that this shape was manufactured during the following two periods: 1935-1937, 1952-1960.  I was not able to pin down the manufacturer date any closer but based on its condition, I suspect it to be in the latter, post war, time period.

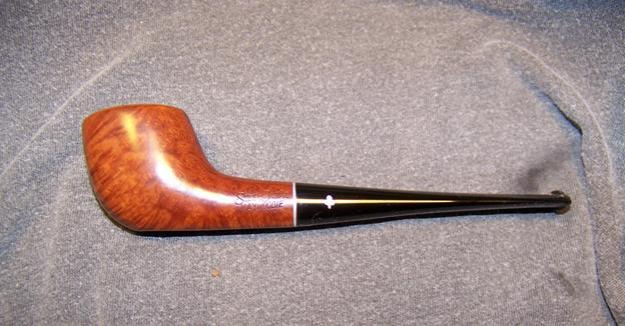
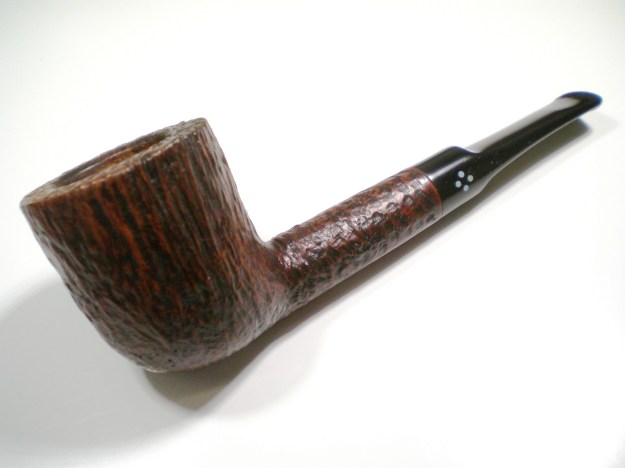
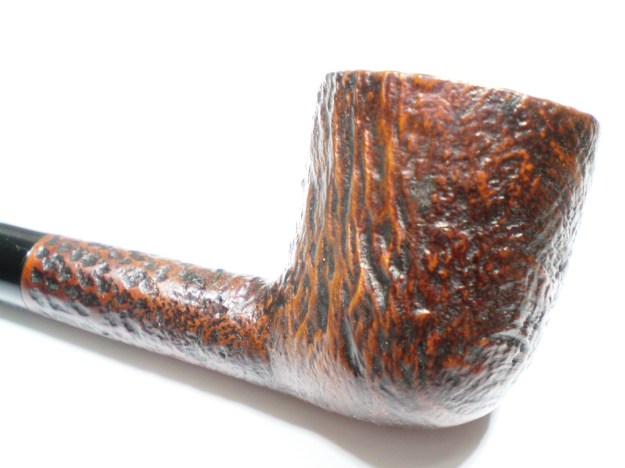
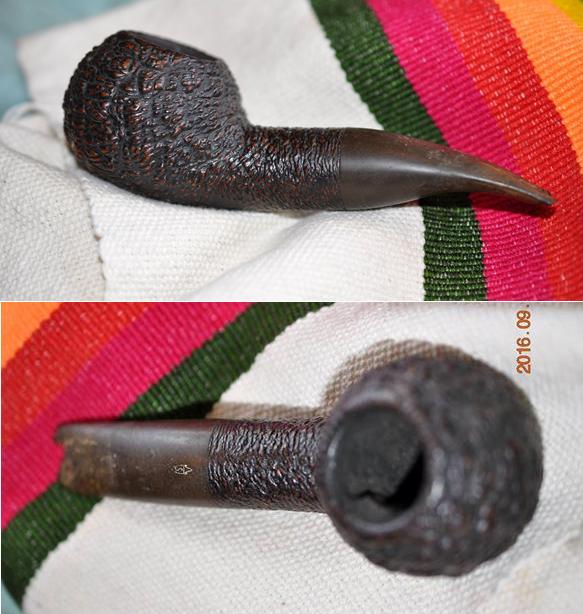
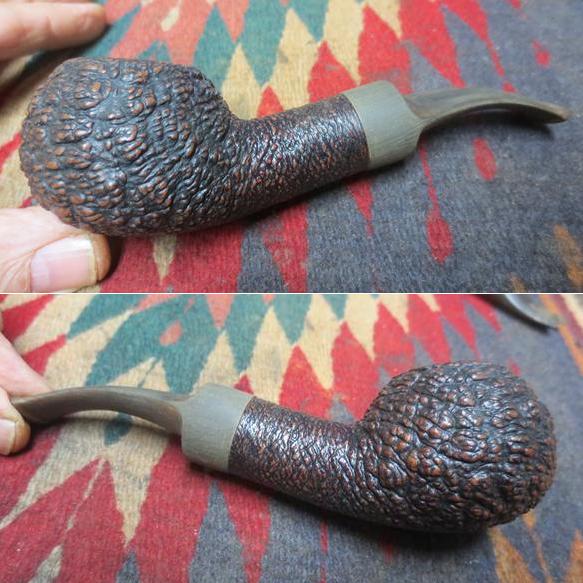
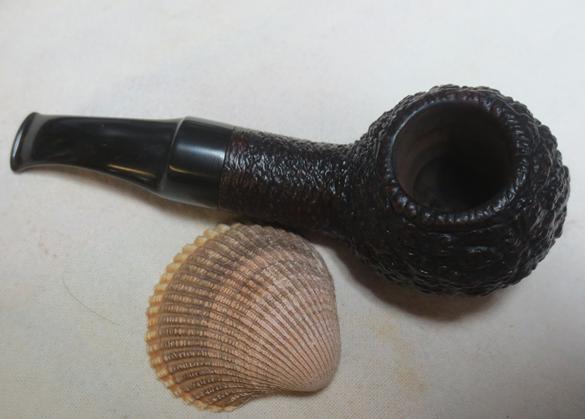
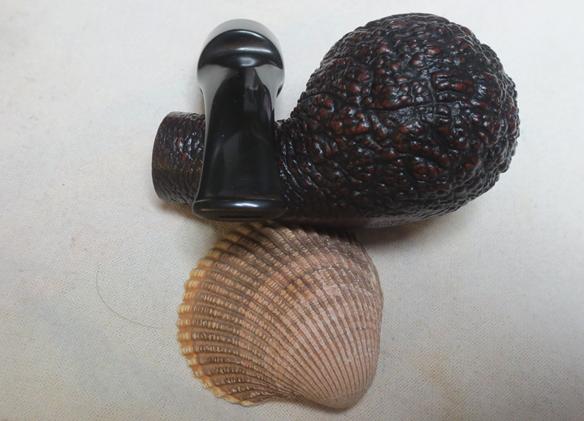
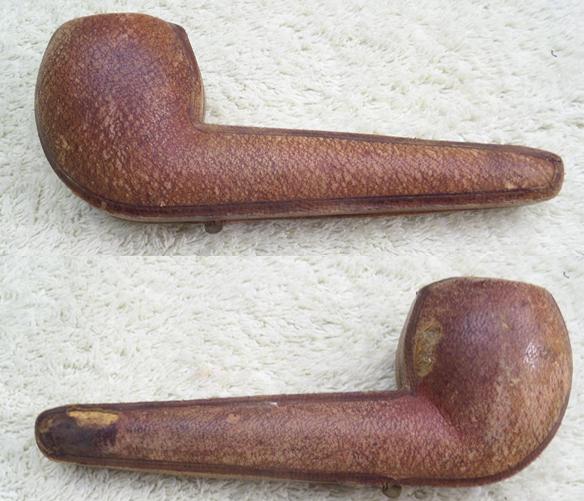
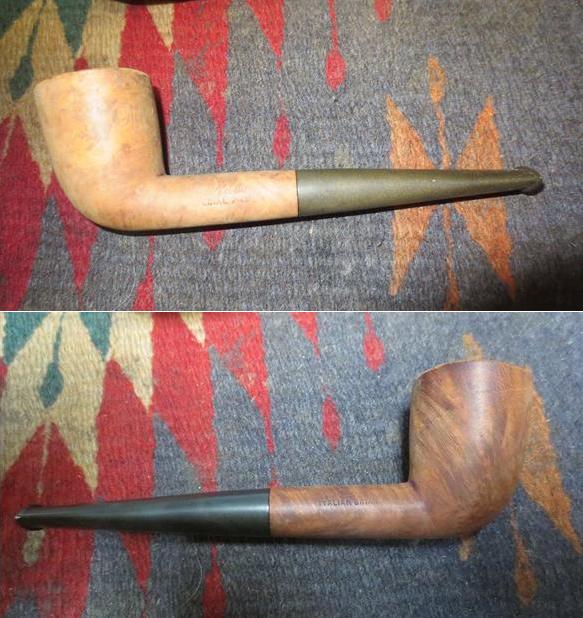
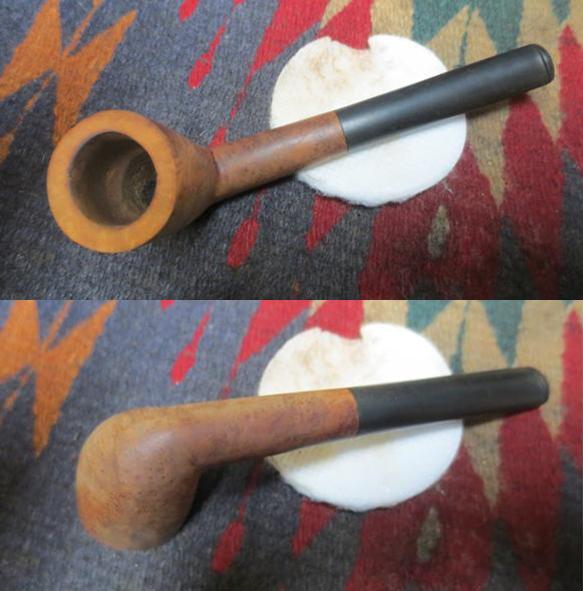
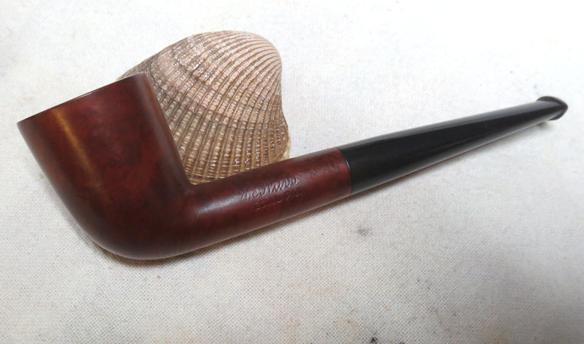
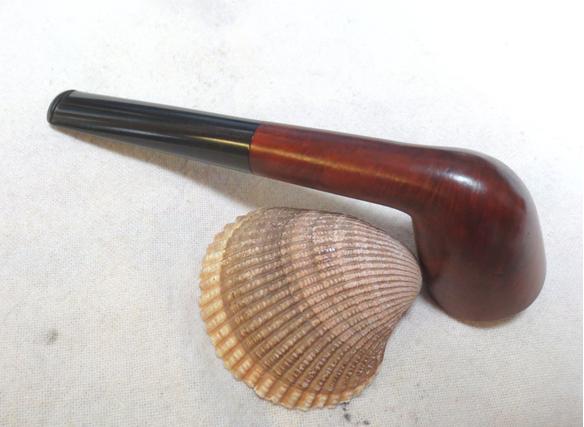
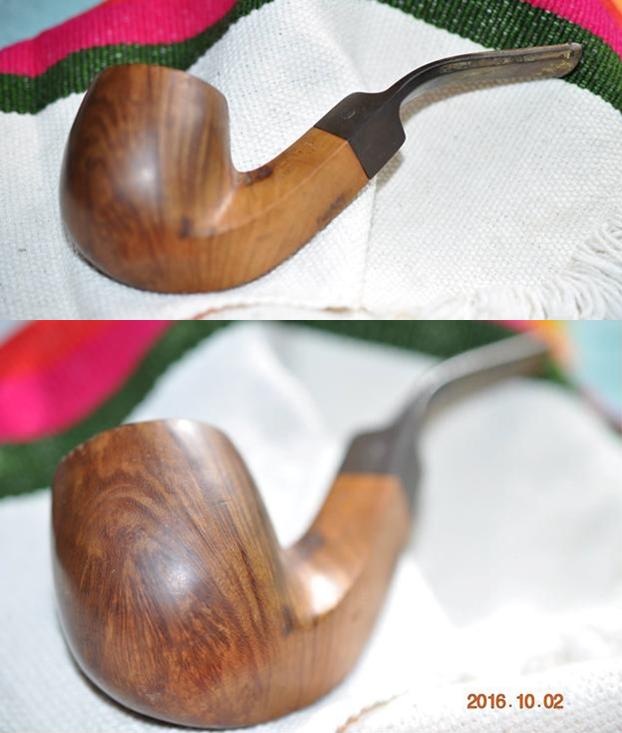
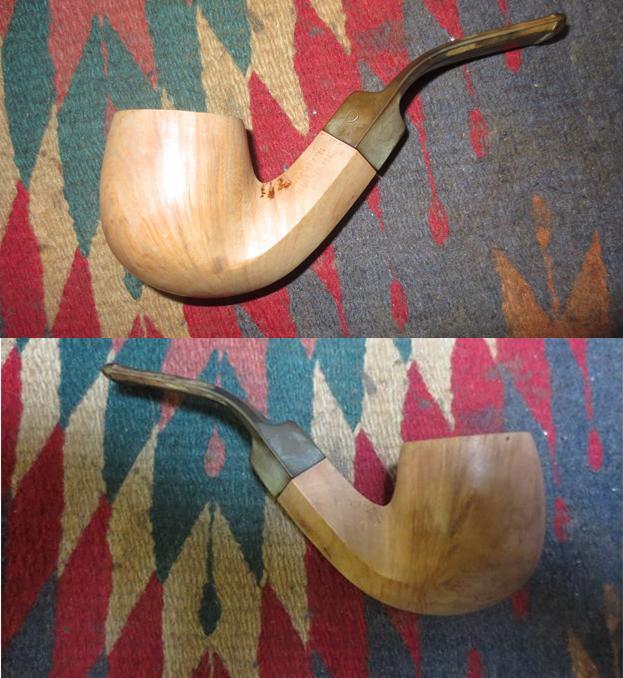
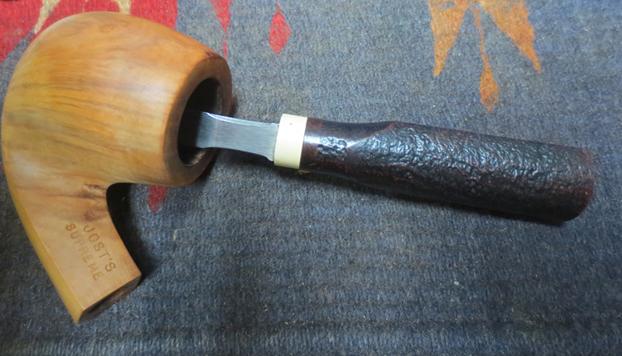
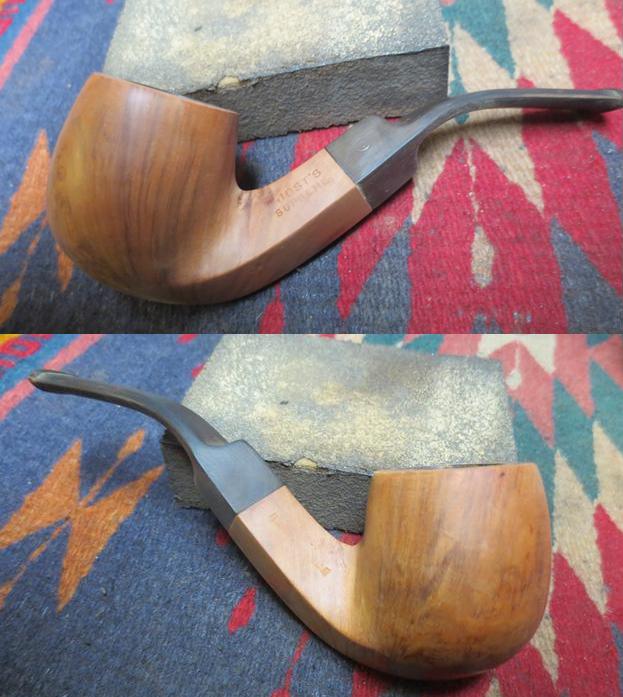
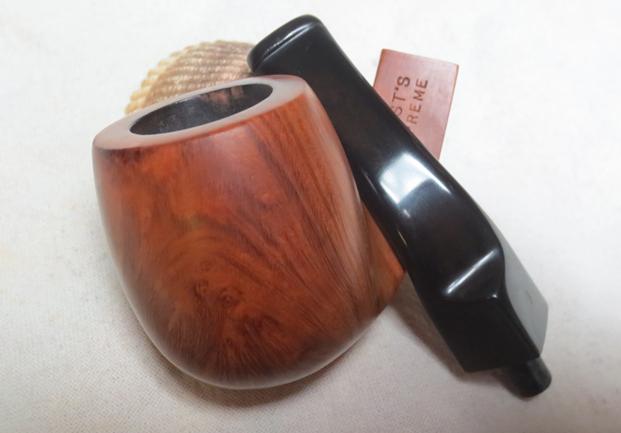
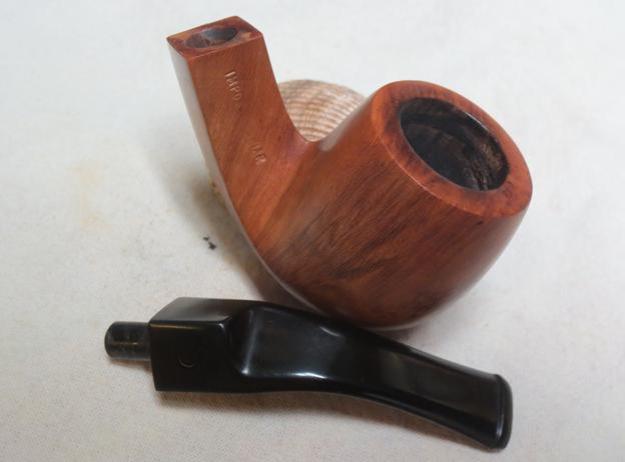
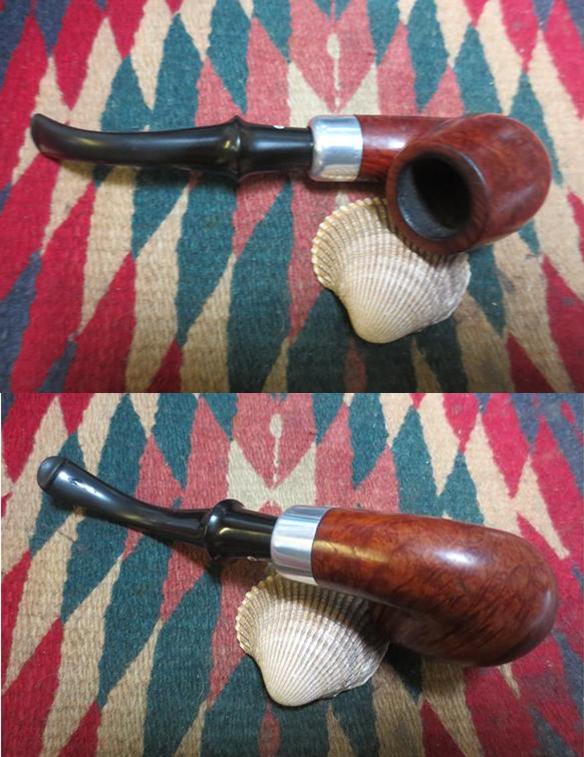
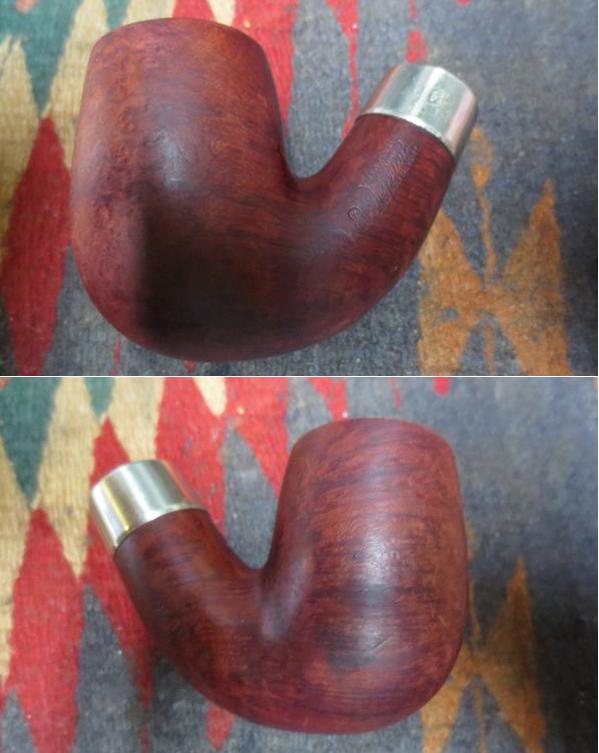
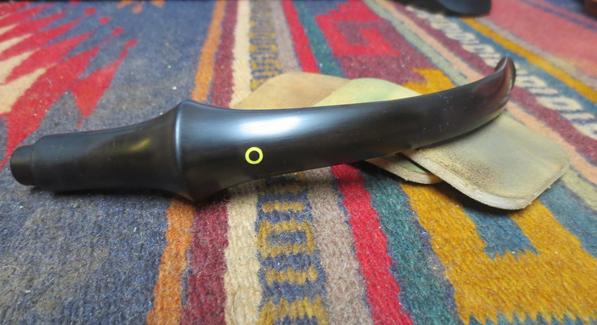
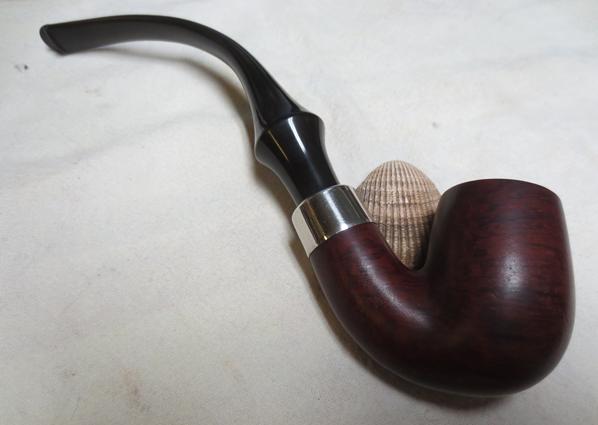
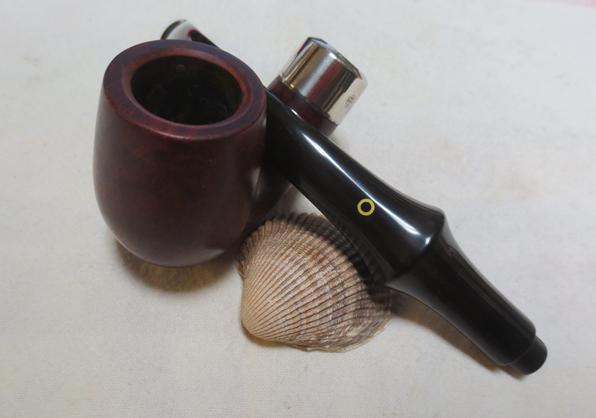
Once I had the pipe in hand I was drawn to it unique shape; kind of a boat shape with a curved prow.  Although a little odd feeling in the hand, I found it appealing.  Additionally, I could see that the quality of the briar under the grime was fantastic.  Of course, the pipe came home with me.kw1 kw2
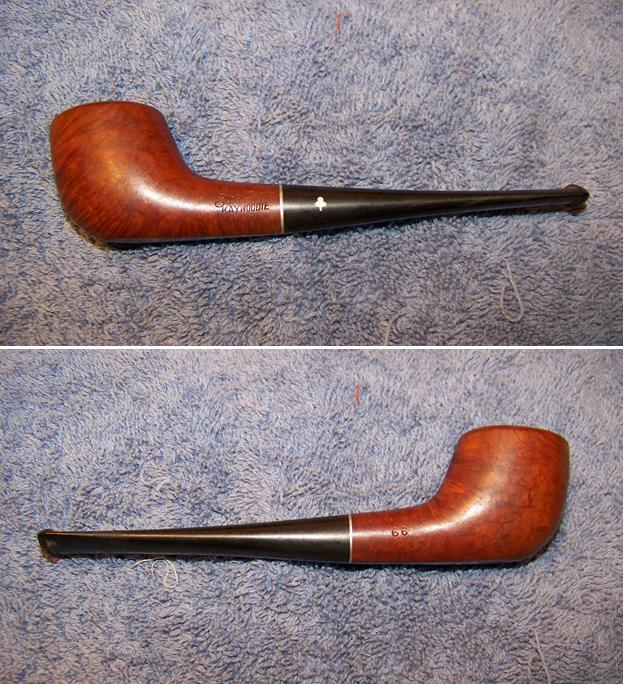
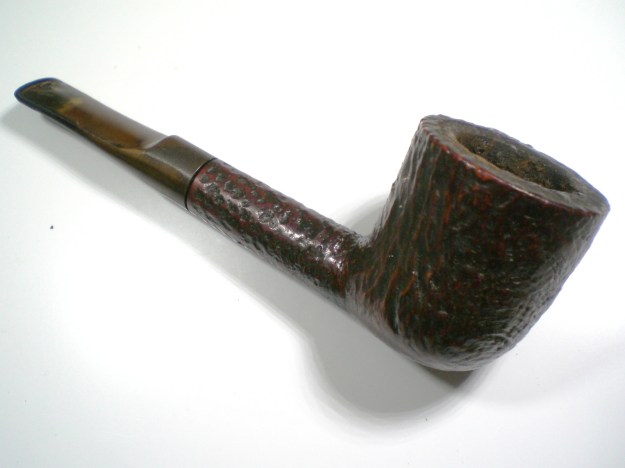
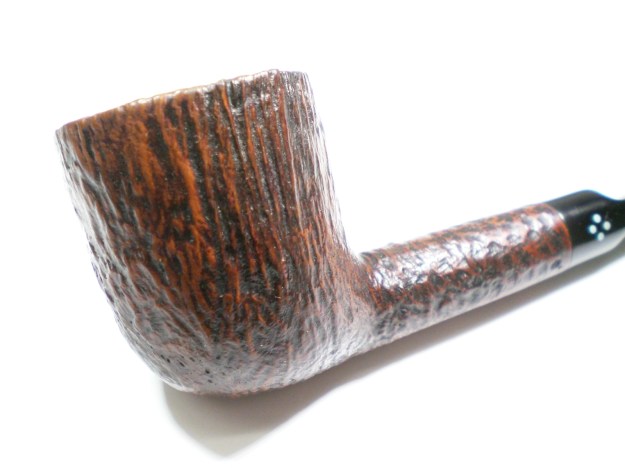
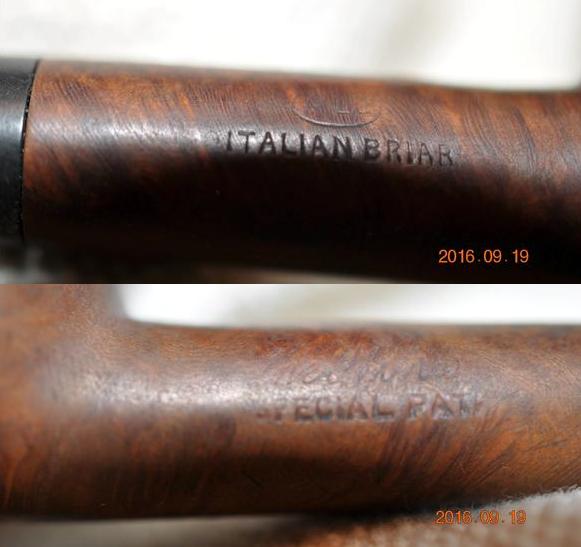
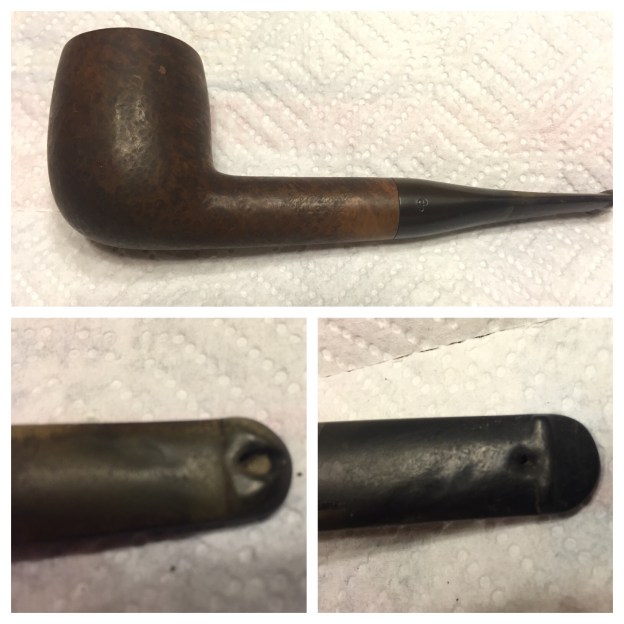
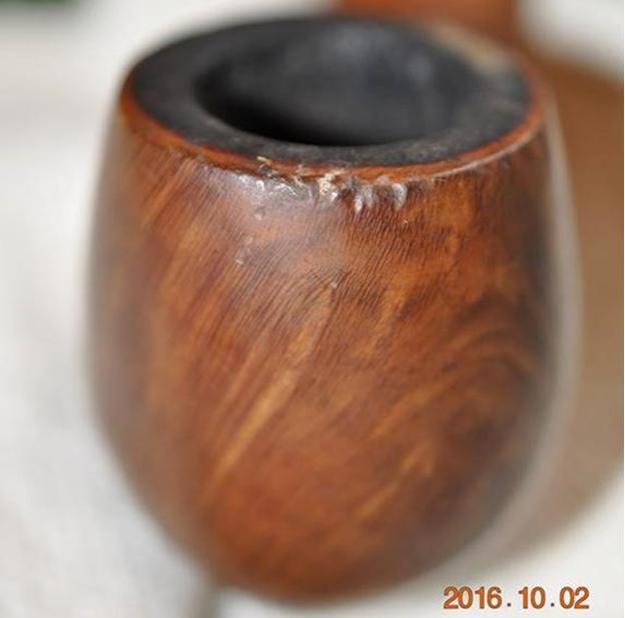
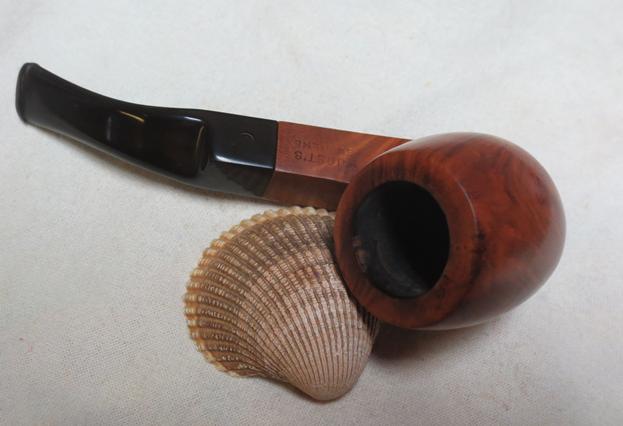
Inspecting the pipe at the workbench, there was a light build up on the rim with some under laying burn marks.  There was a medium cake formed in the bowl but it was not overly hard.  The stummel had some handling dings and scratches but none were very deep.  I looked for fills but found none and confirmed that the grain was superb.kw3
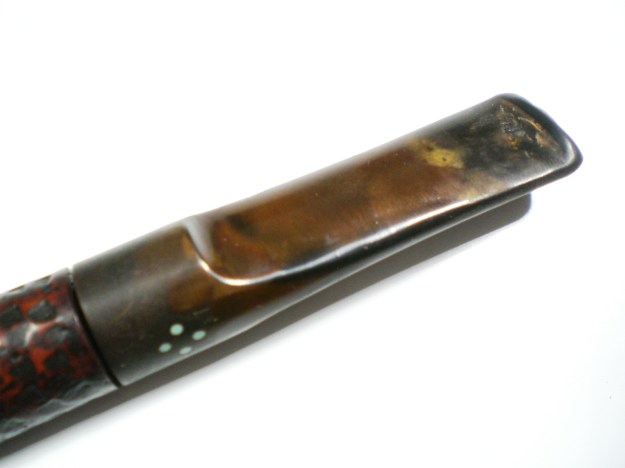
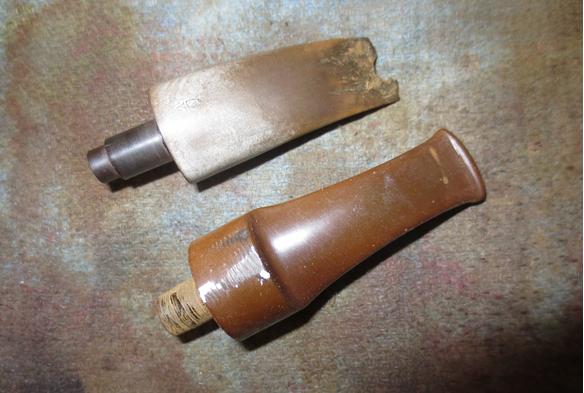
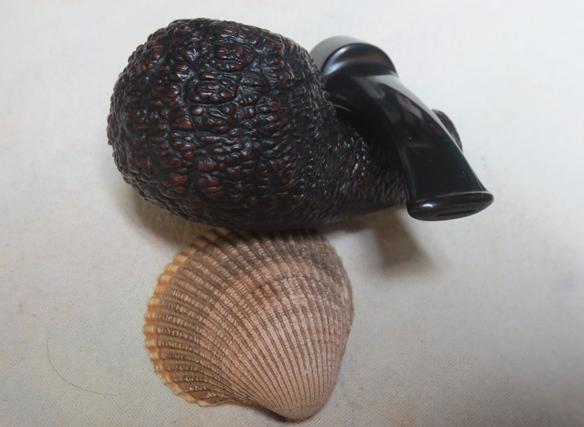
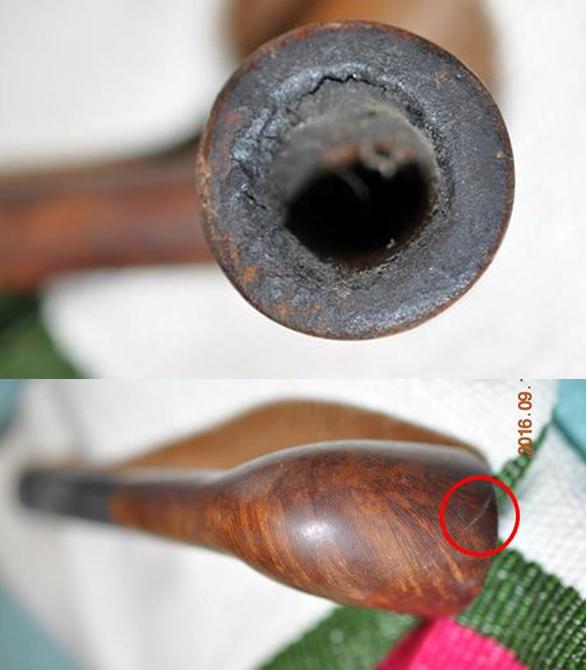
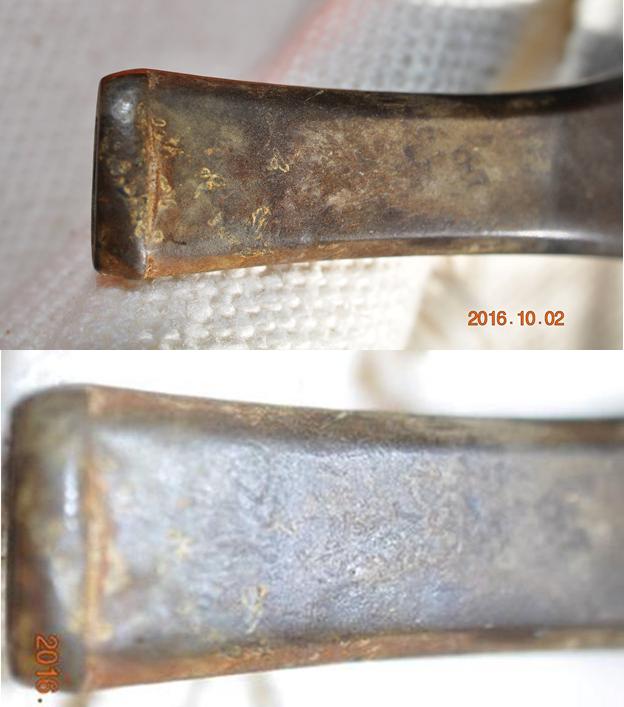
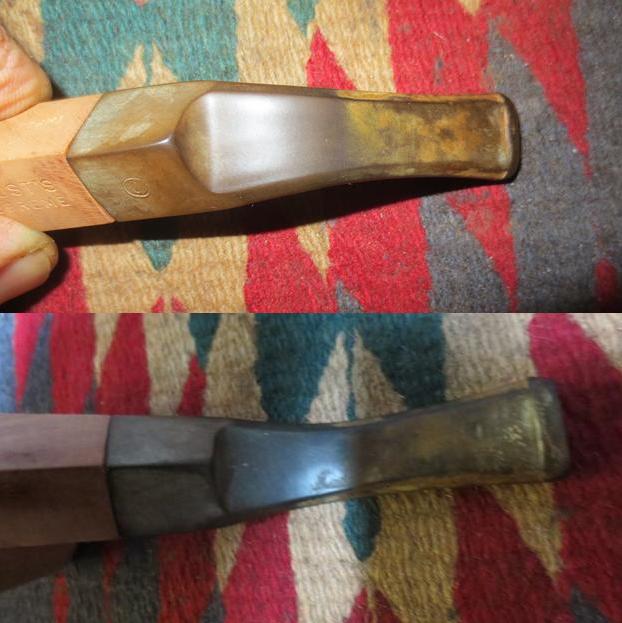
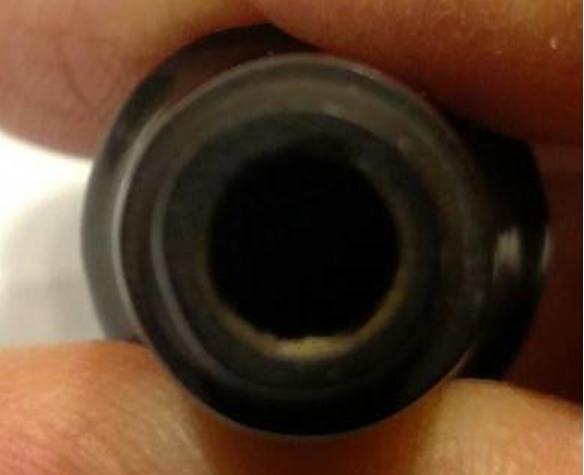
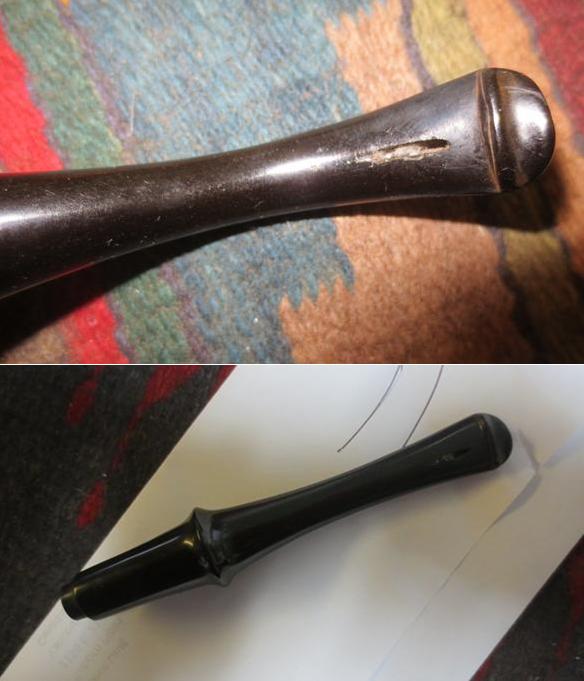
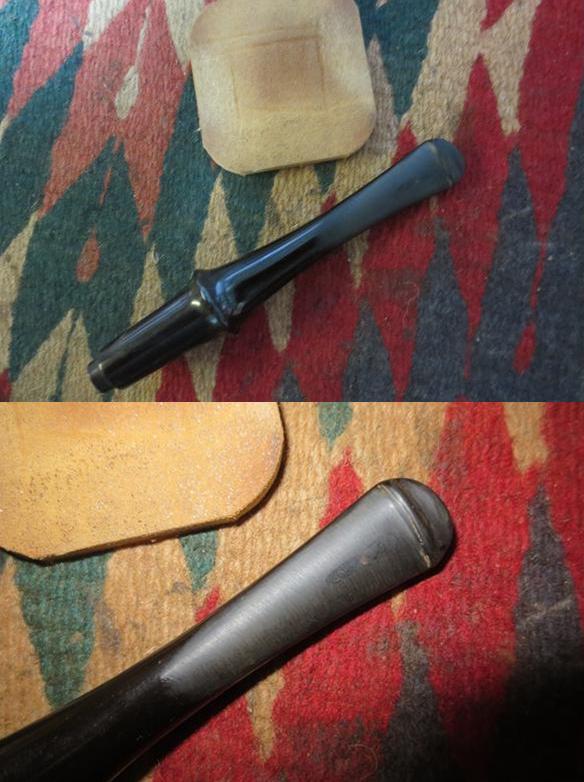
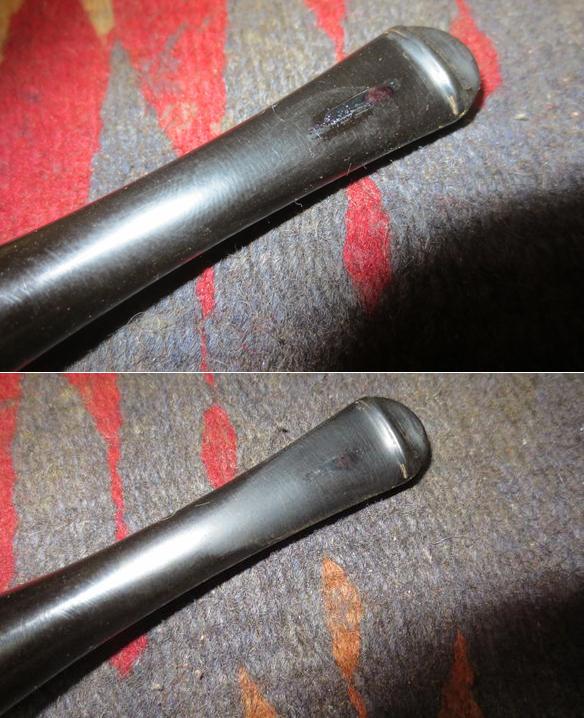
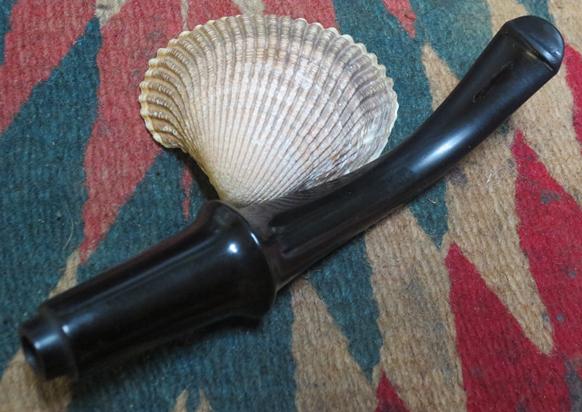
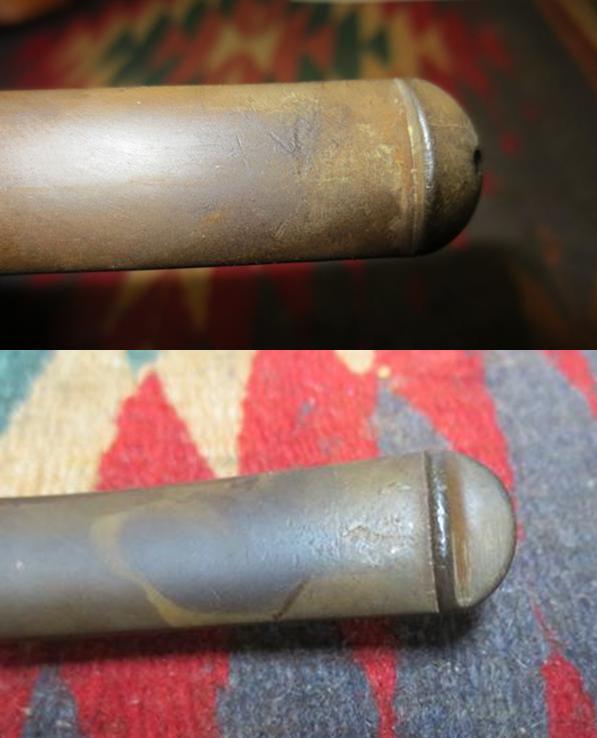
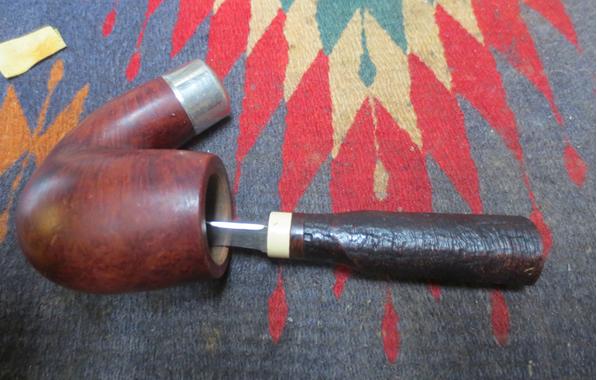
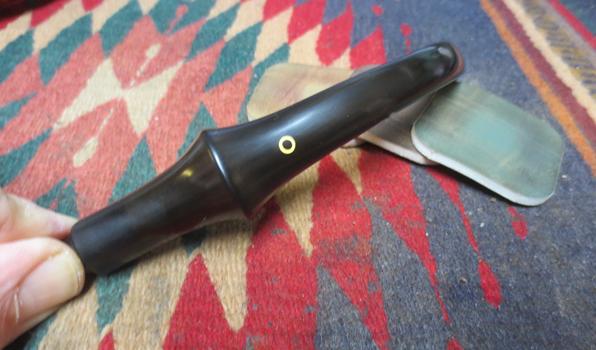
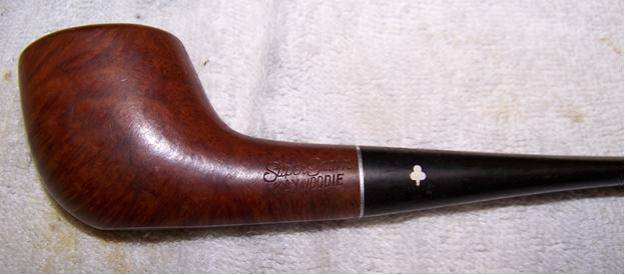
The stem had a light amount of oxidation and a deep scratch about halfway down in the underside.  There was a little chatter around the button and a moderate tooth dent in the bottom side of the stem.  Removing the stem revealed the threads and the aluminum stinger to be in good condition, albeit covered in dried tars.kw4
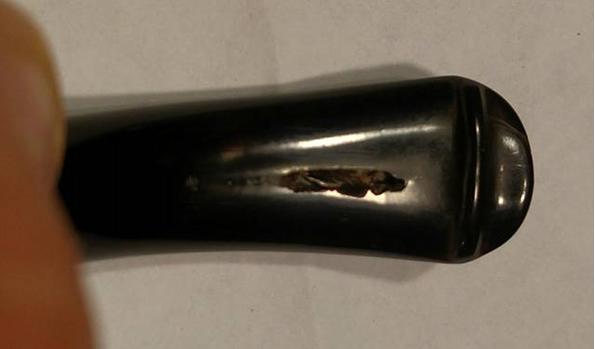
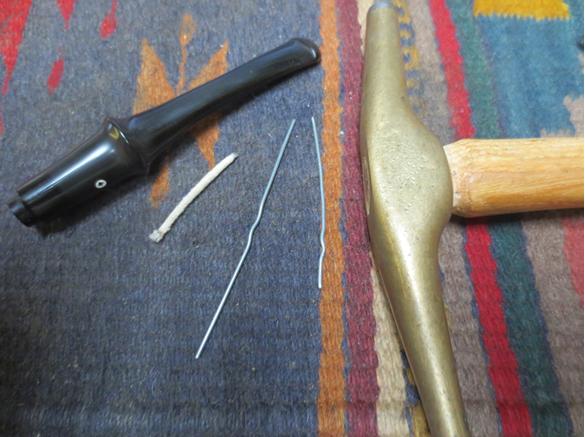
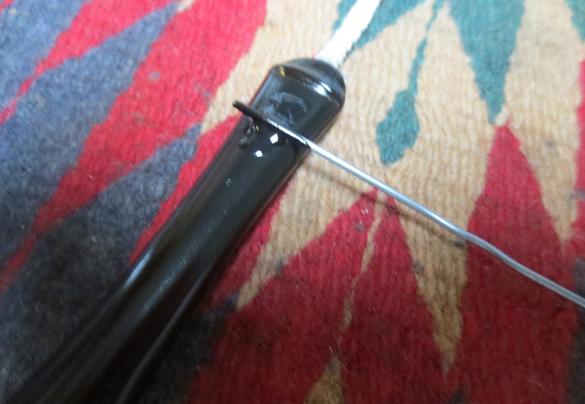
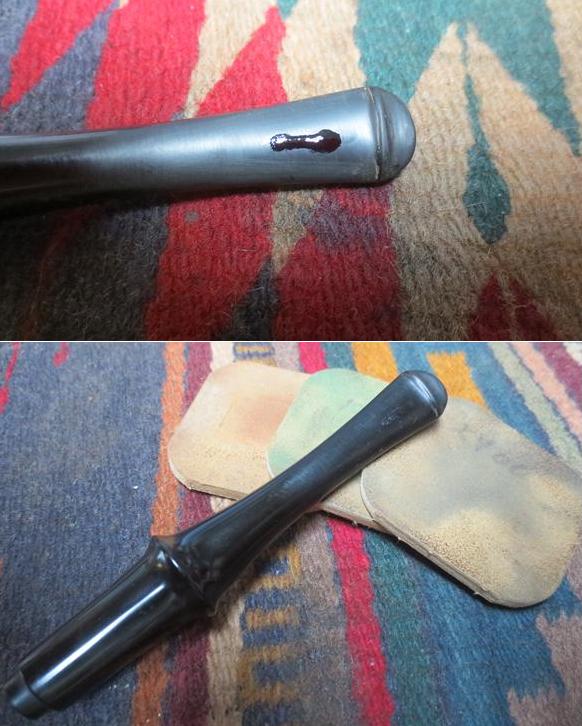
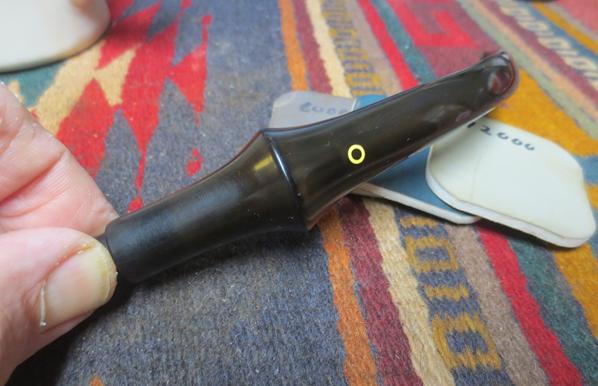
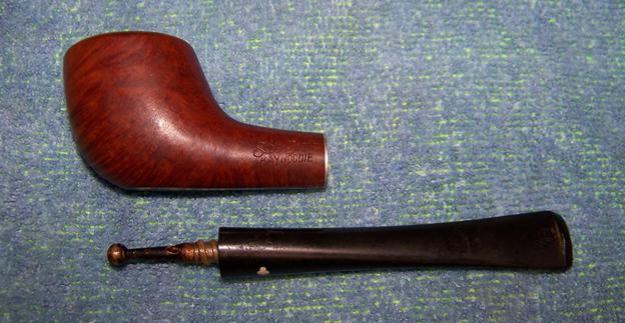
I began working on the stem by applying heat from a lighter to raise dent and even out the tooth chatter.  This was very effective but had the added effect of bring out some oxidation around the bit.  I set the stem to soak in a mild Oxi-clean bath and turned my attention to the stummel.

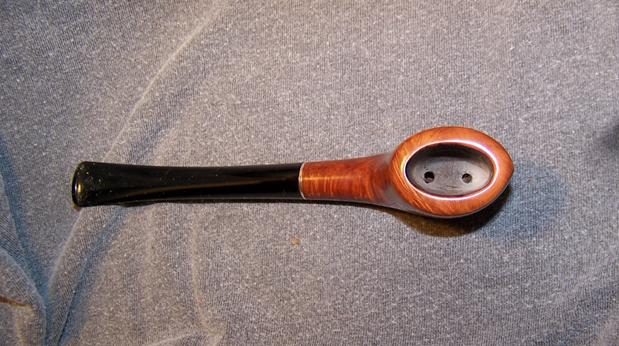
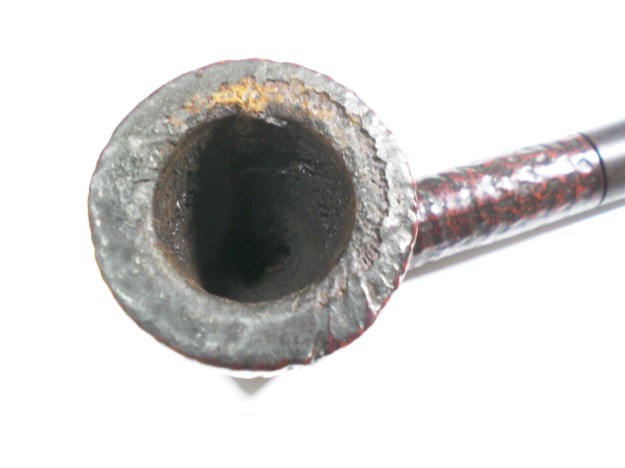
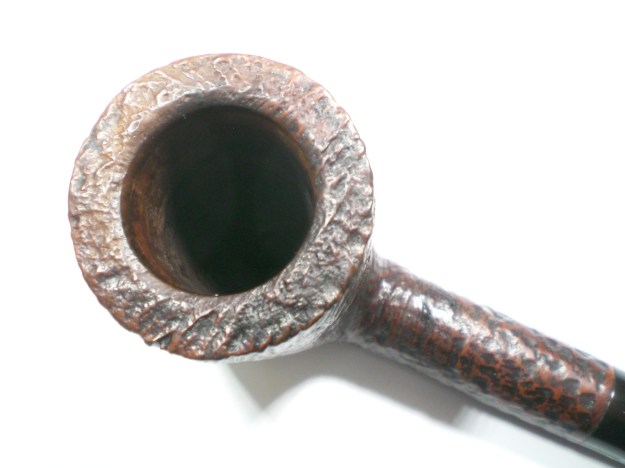
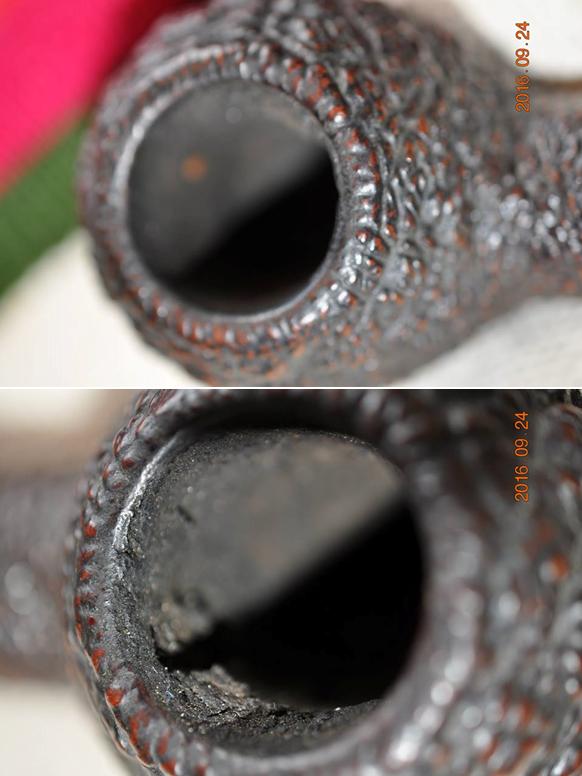
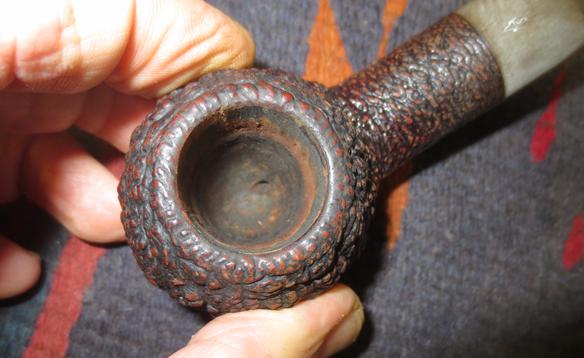
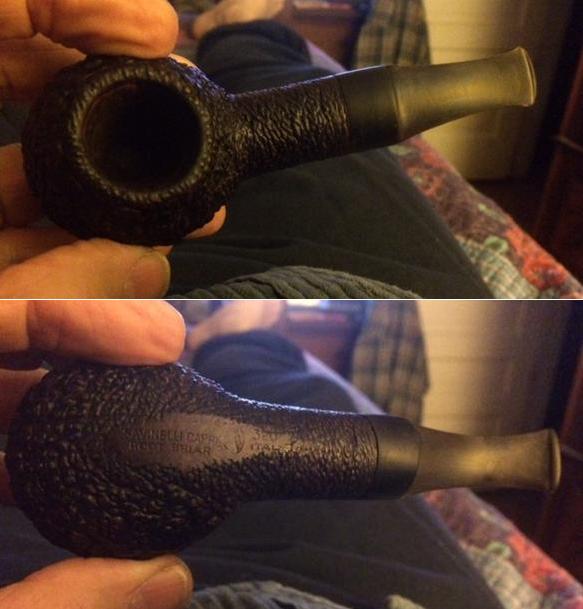
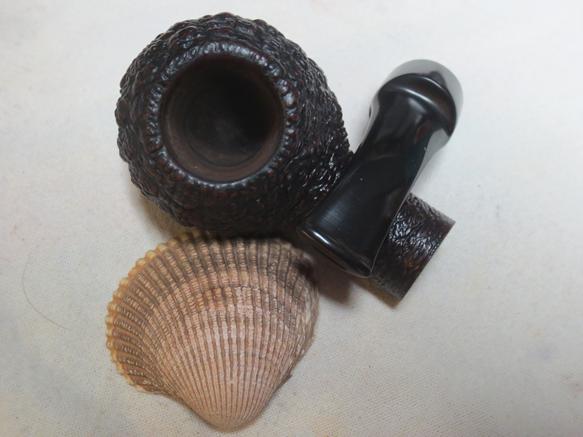
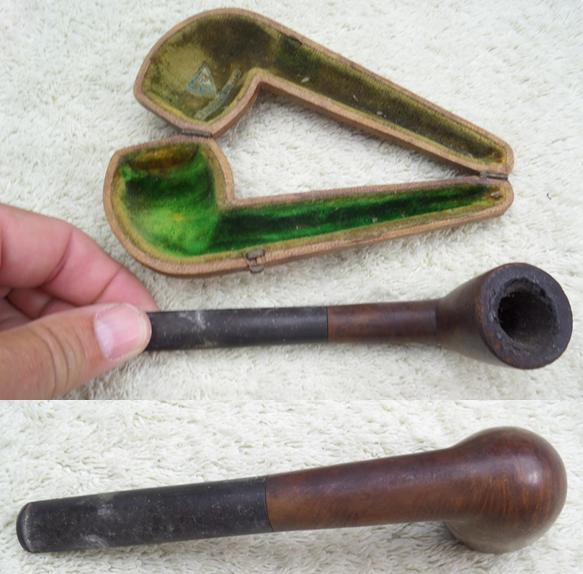
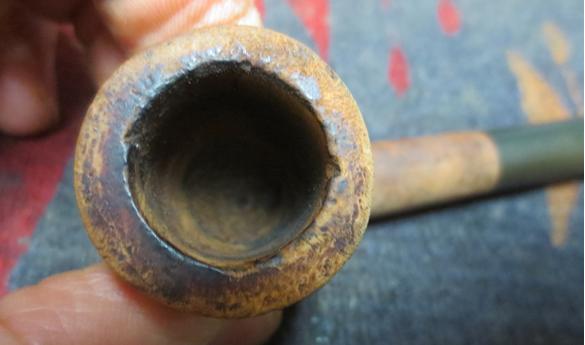
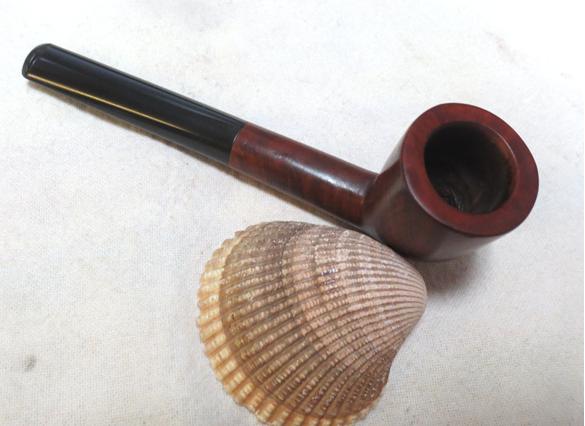
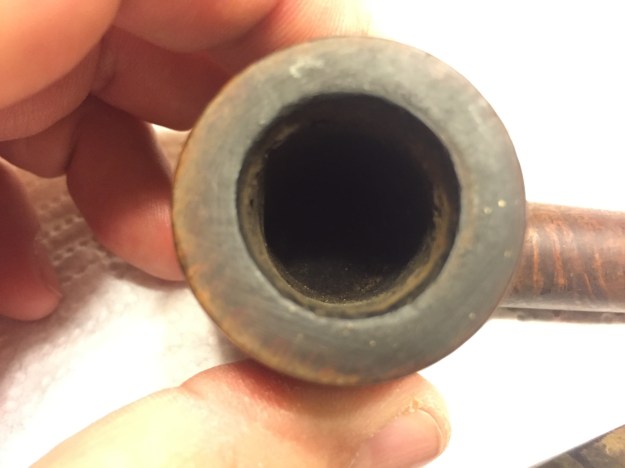
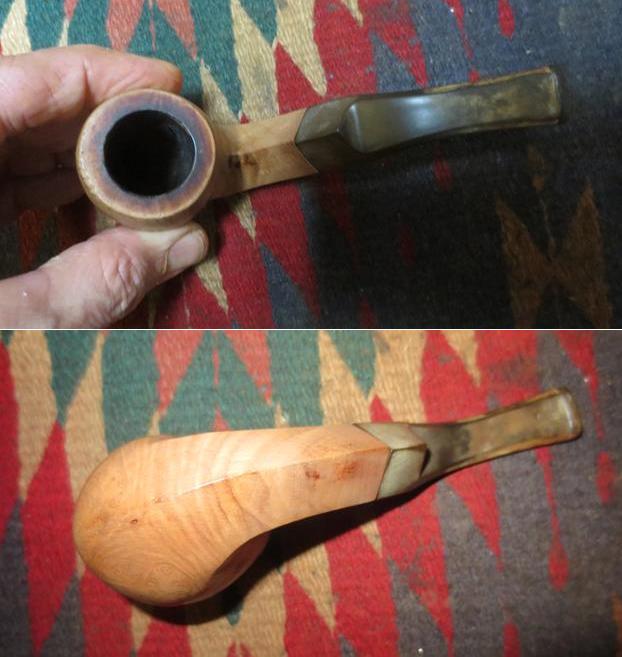
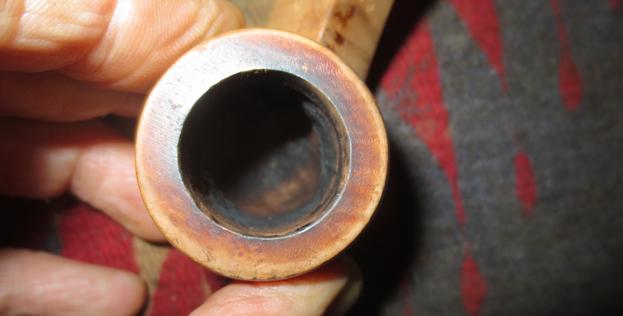
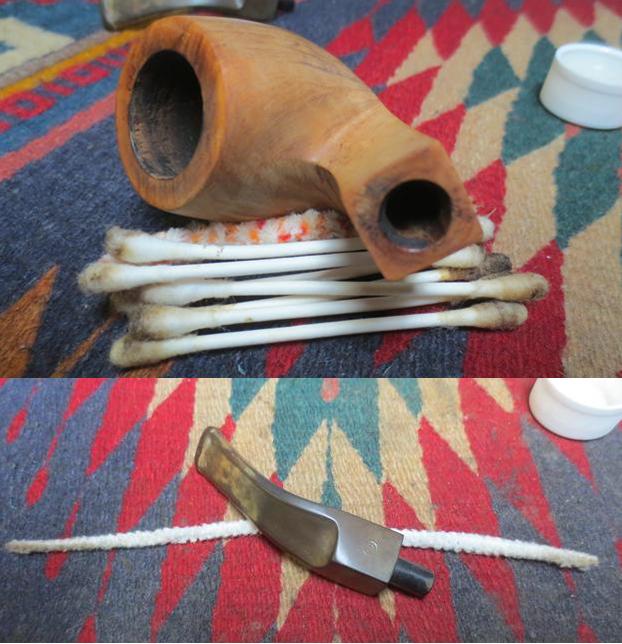
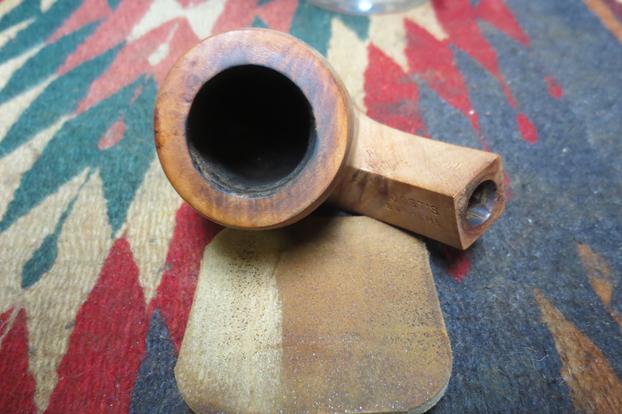
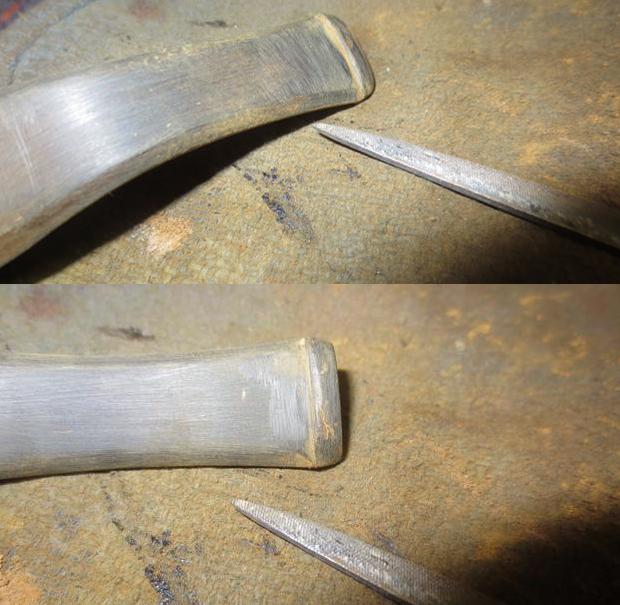
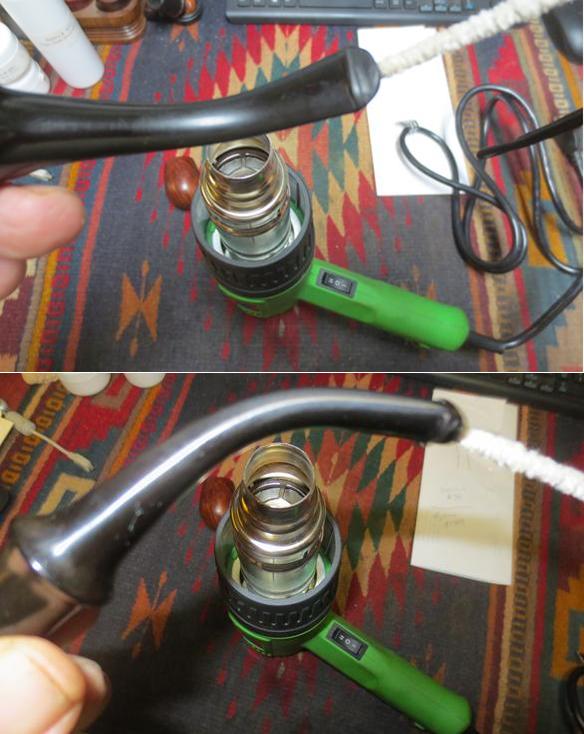
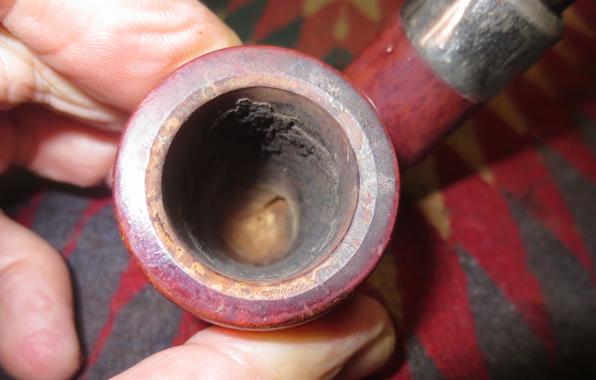
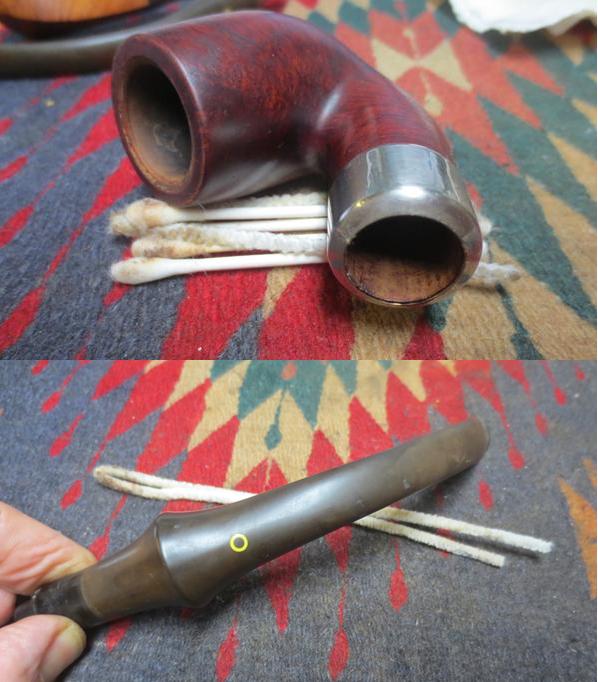
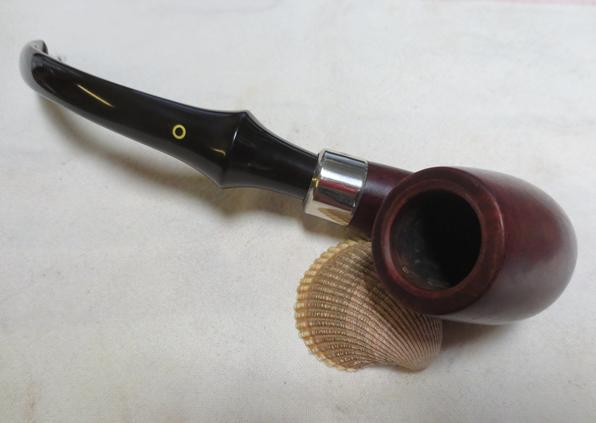
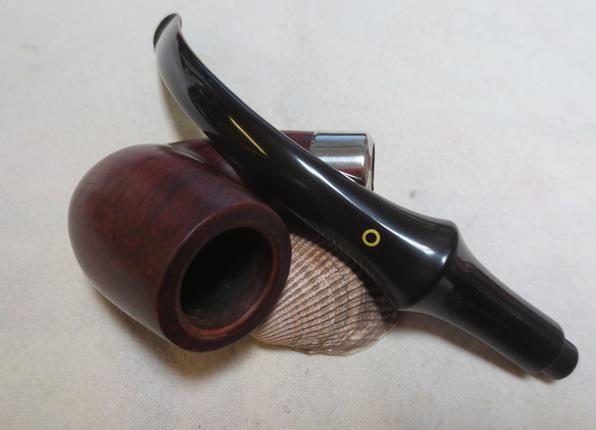
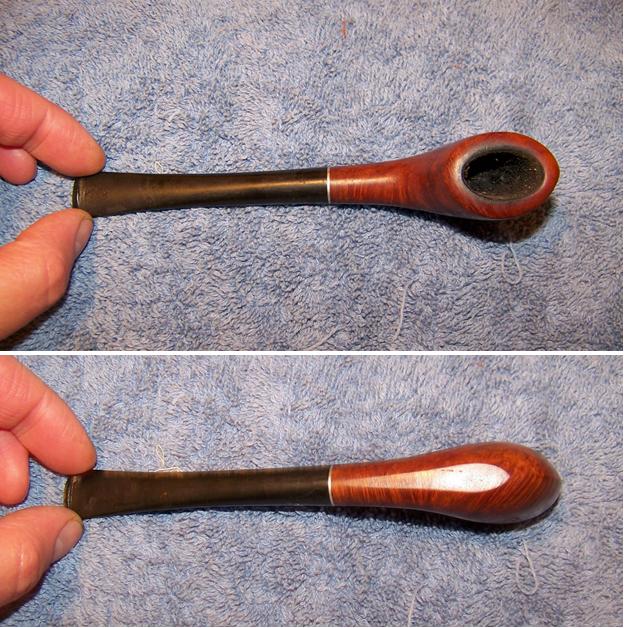
The first thing I like to do is clean out the bowl.  This gives me a good feel for the true condition of the briar.  Because of the narrow oval shape, I could not get any of the Castleford reamer heads to fit.  So I resorted to carefully scraping out the cake with a dull jackknife and finishing with a rolled piece of 80-grit sand paper.kw5
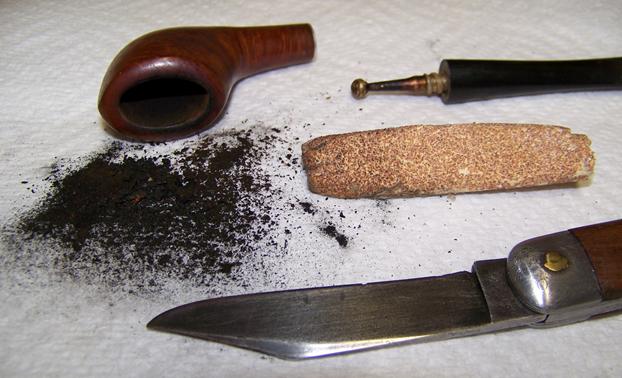
With the cake gone, I discovered something that I was not expecting.  There were two air holes in the bottom of the bowl; one at either narrow end of the oval.  Inserting a pipe cleaner into the shank I could see that the airway extended straight under the bowl and both holes opened down into it.kw6
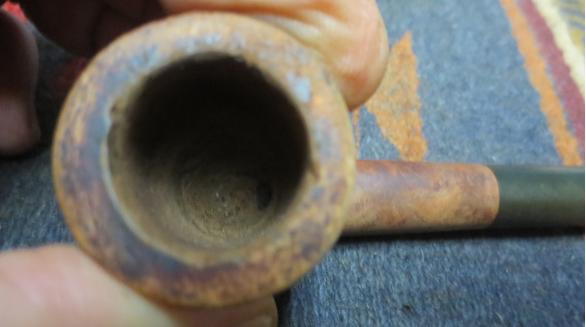
Using a cotton pad and alcohol, I scrubbed the rim and was able to remove most of the tar.  I was happy to see that the much of what I thought was burn came off with the alcohol pad.  The burn marks that remained were on the inside of the rim and not very deep.kw7
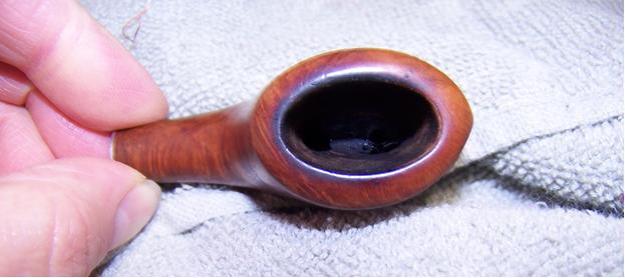
Before doing any other work on the stummel I wanted to try to lift any handling damage with steam.  I laid a clean, damp terry cloth rag over the wood then applied at clothes iron on high to the damp cloth.  The resulting steam will often lift the dents and shallow scratches that comes with handling or rattling around in a box or drawer.  It will also lift and remove the manufacturer’s stamps so be careful around those.

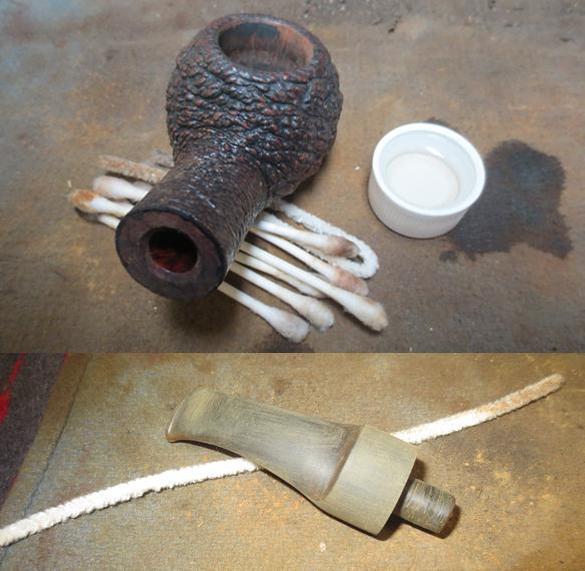
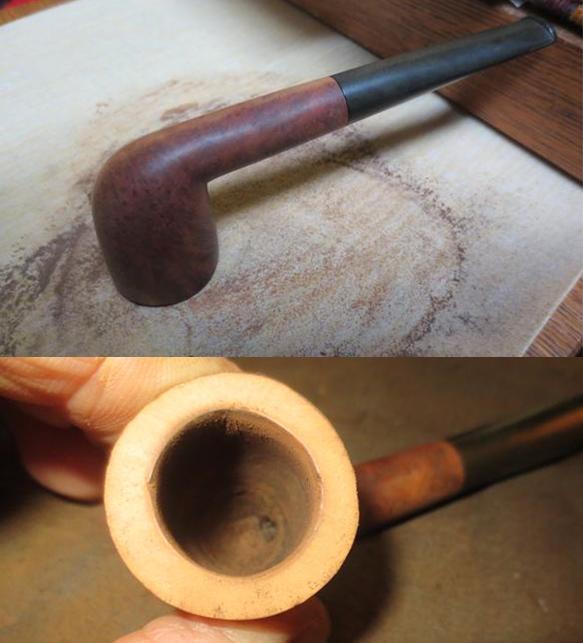
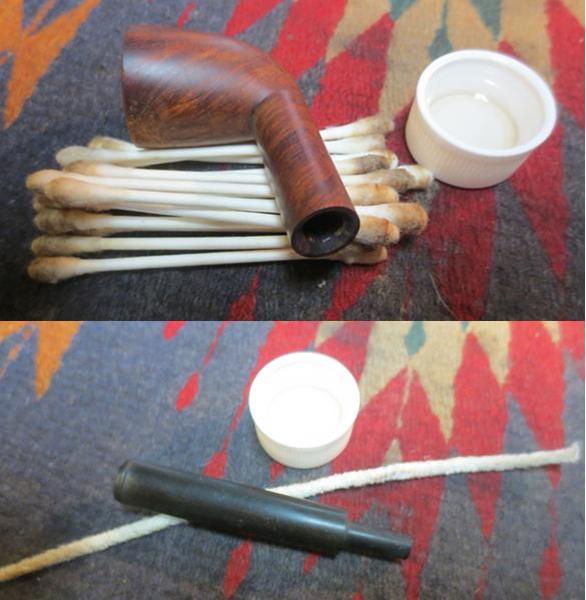
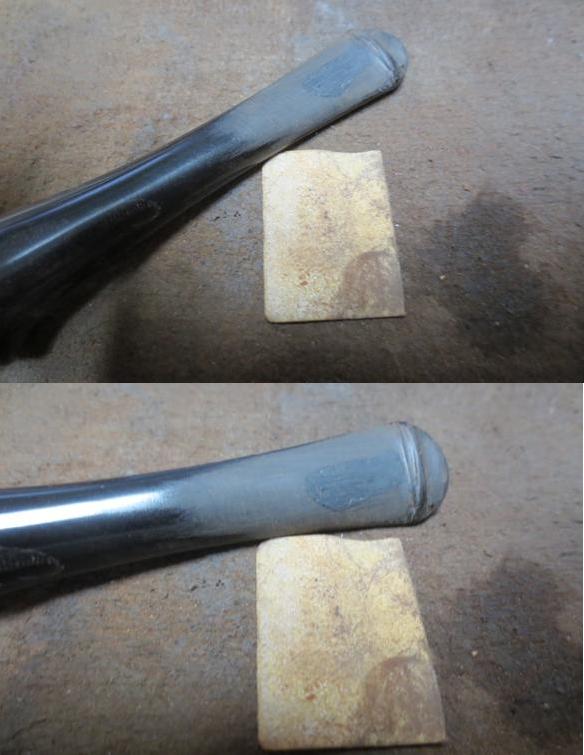
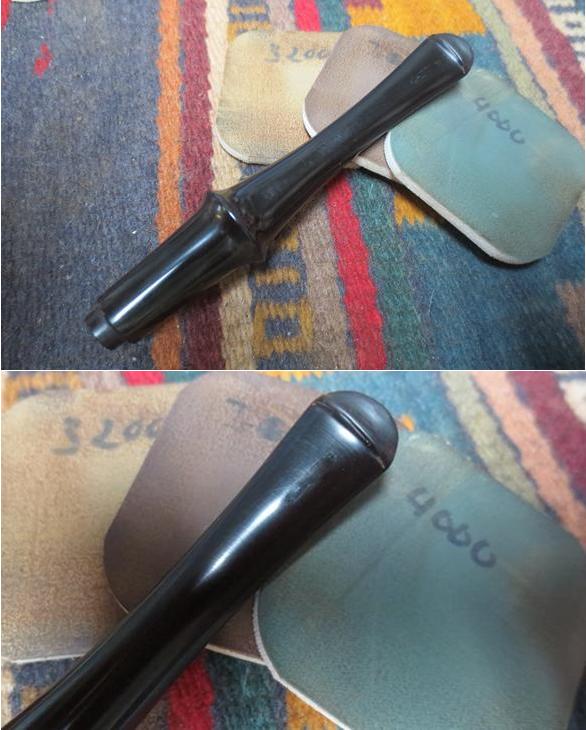
After steaming I used 320 grit paper I carefully sanded the rim trying to keep the original rounded shape while removing the burn marks.  Then I scrubbed the internals of the shank with cotton swabs until the swabs came out clean.kw8
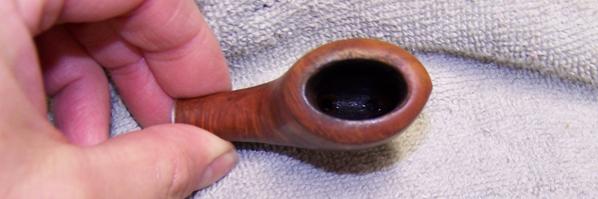
I wanted to sweeten the bowl and remove any ghosts of the former owner’s tobacco so I decided to do a bowl soak.  I plugged the shank with a cotton swab and packed the bowl with a cotton ball.  Then I filled the bowl with Isopropyl alcohol.  The alcohol draws out the old tobacco oils trapped in the briar from the briar and they in turn get trapped in the cotton.  While the bowl soaking, it was time to work on the stem.kw9
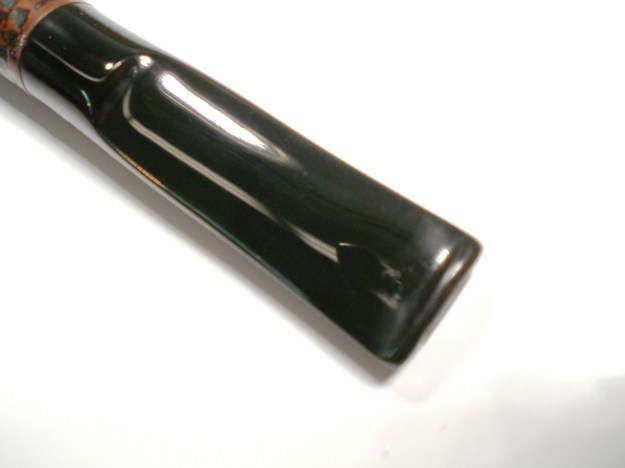
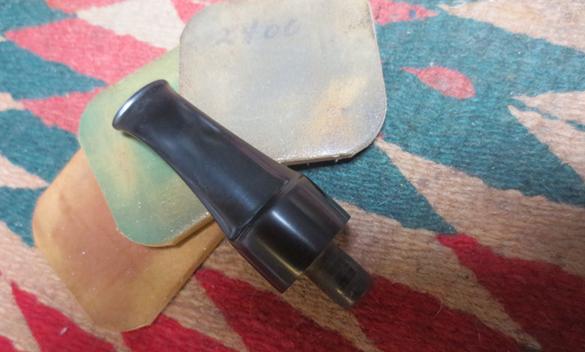
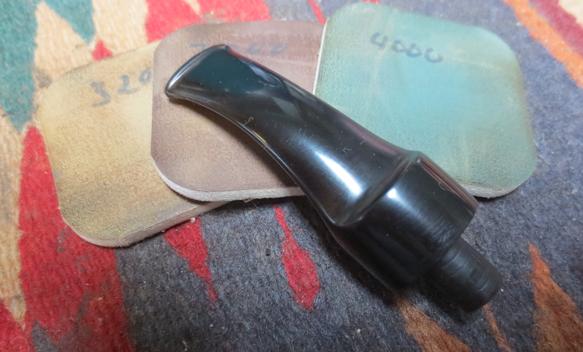
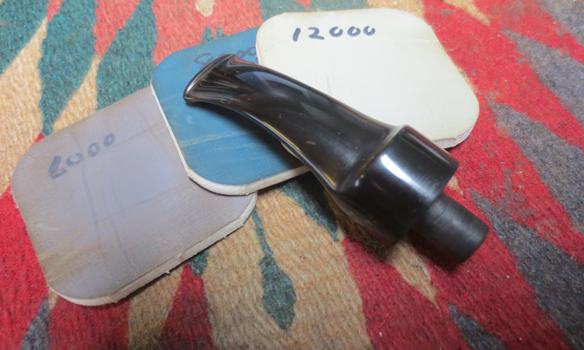
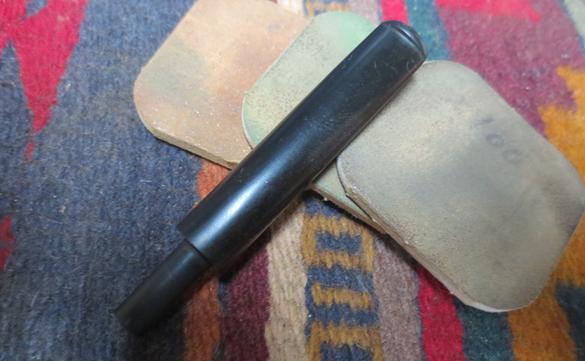
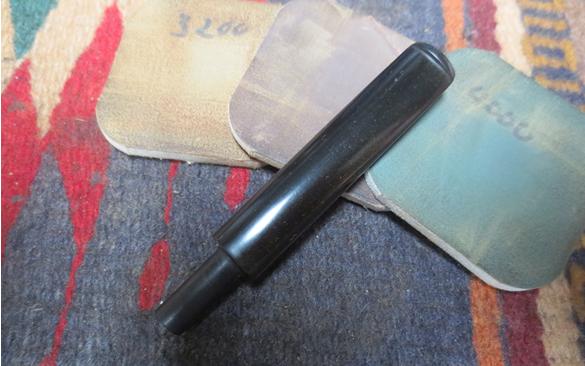
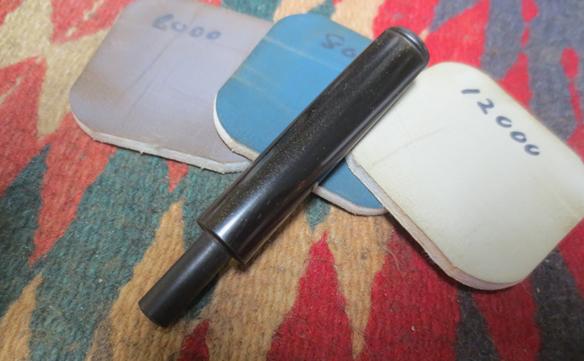
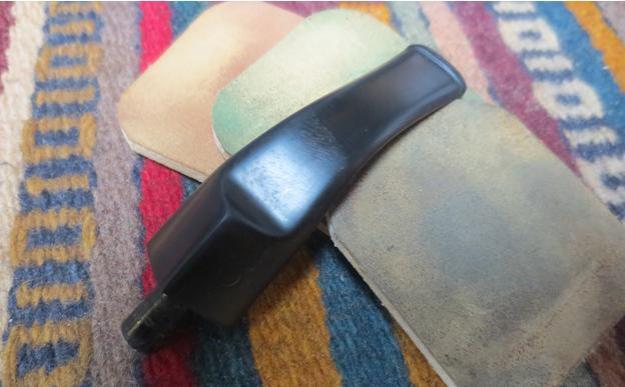
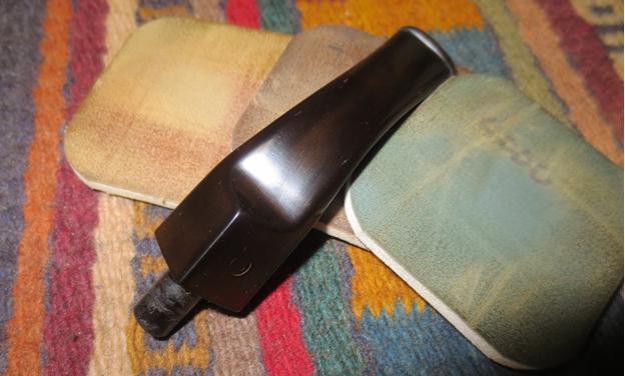
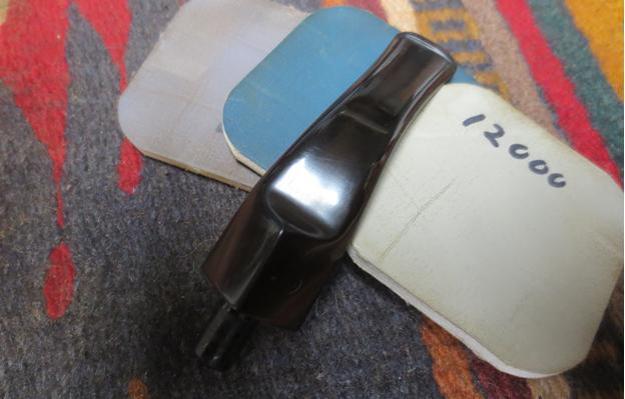
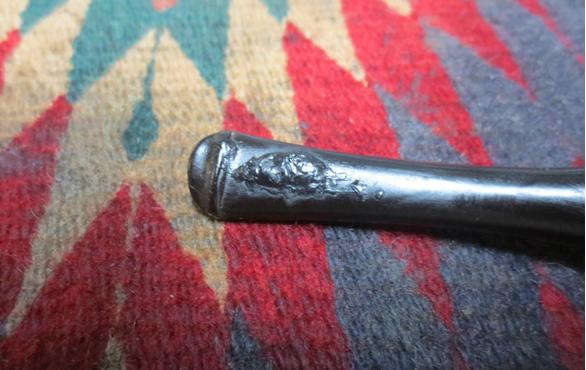
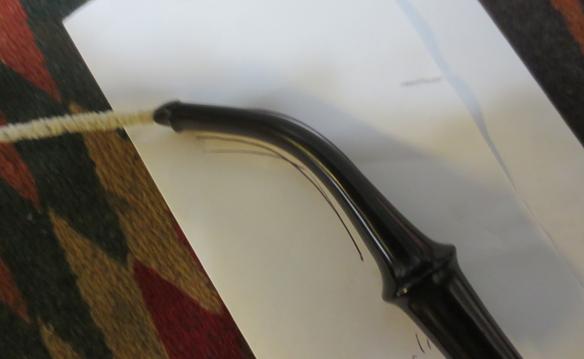
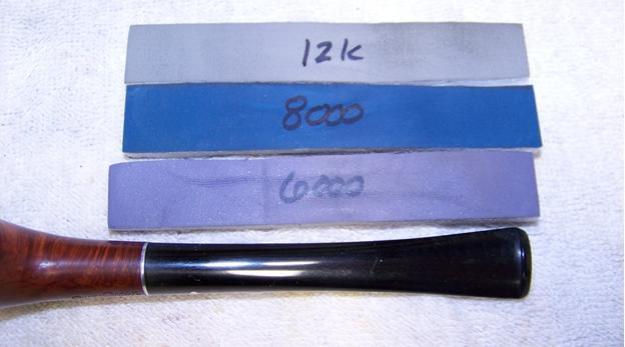
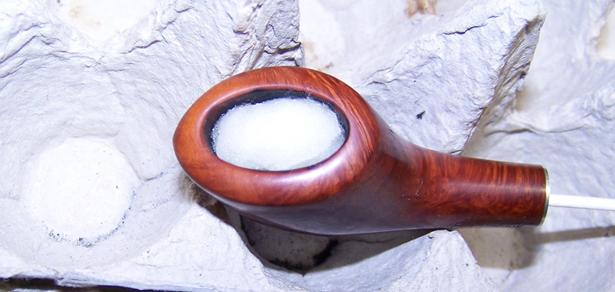
Taking the stem out of the Oxi-clean bath I lightly sanded the stem with 500 then 1000 grit paper to remove the remaining oxidation and to smooth out the remaining tooth marks.  I cleaned the stinger with some 0000 steel wool and ran pipe cleaners through the internals until all was cleaned.  I polished the stem with the full range of micro mesh pads.  I apply a bit of mineral oil to the stem every few pads. This seems to help in the polishing process.kw10 kw11 kw12
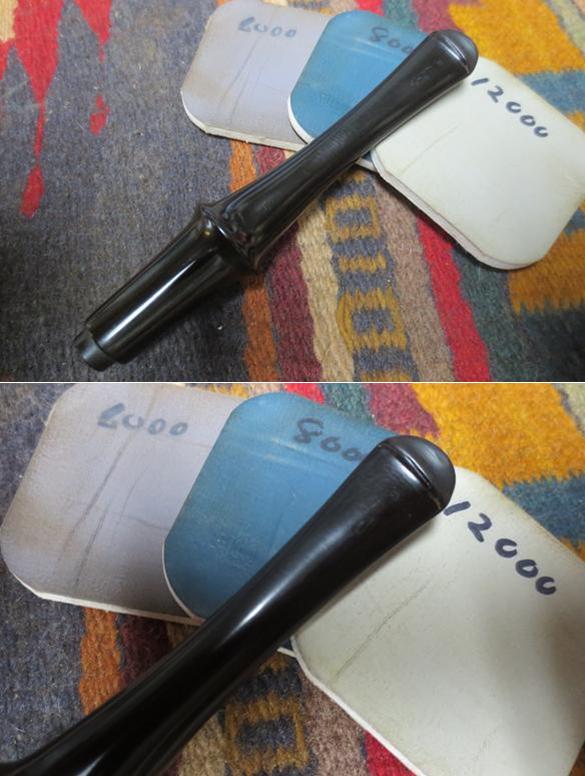
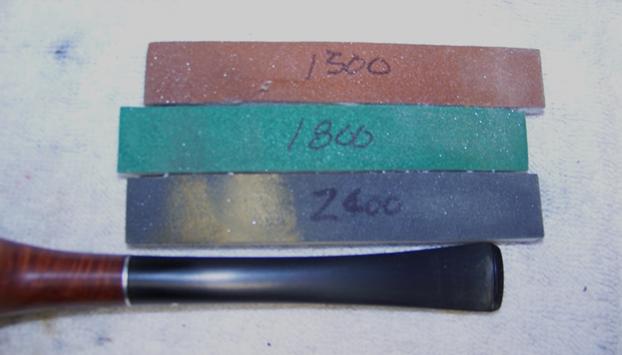
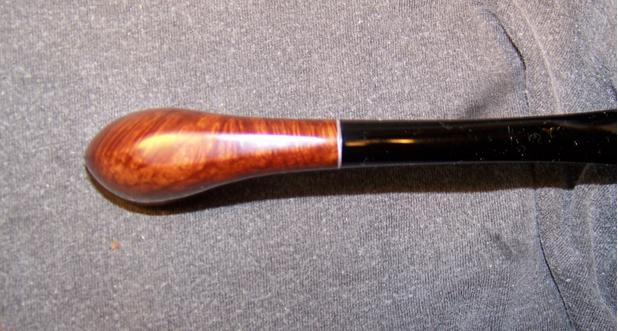
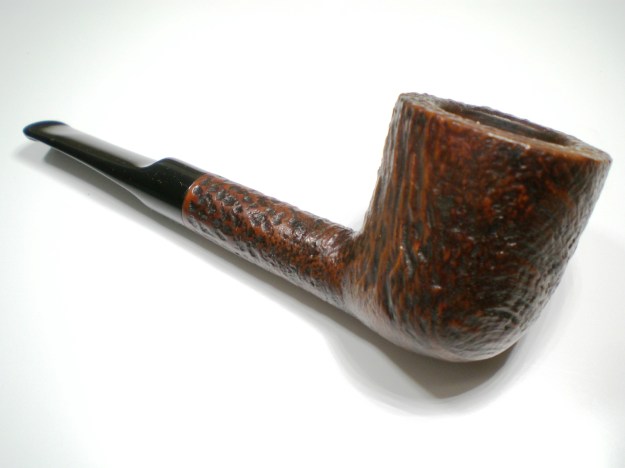
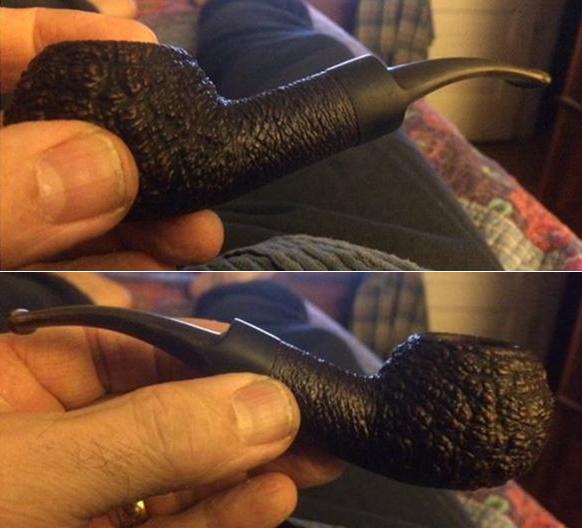
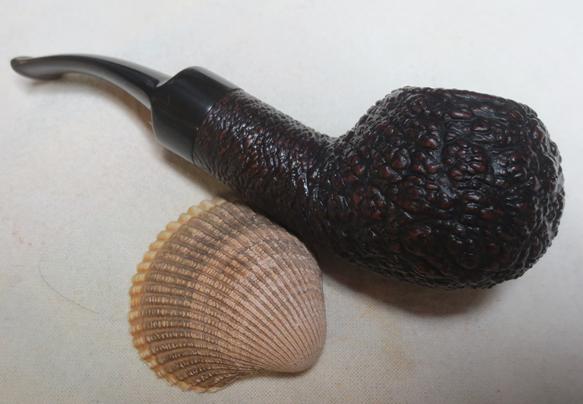
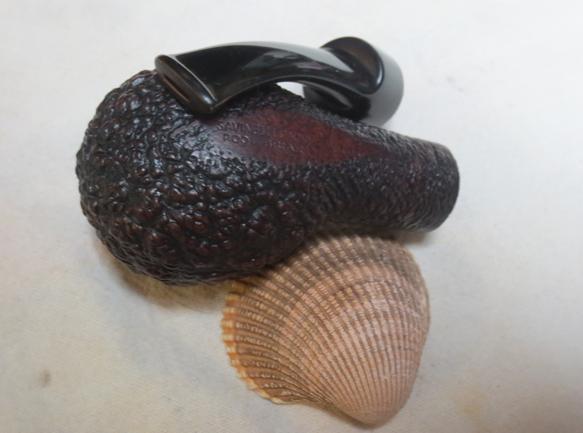
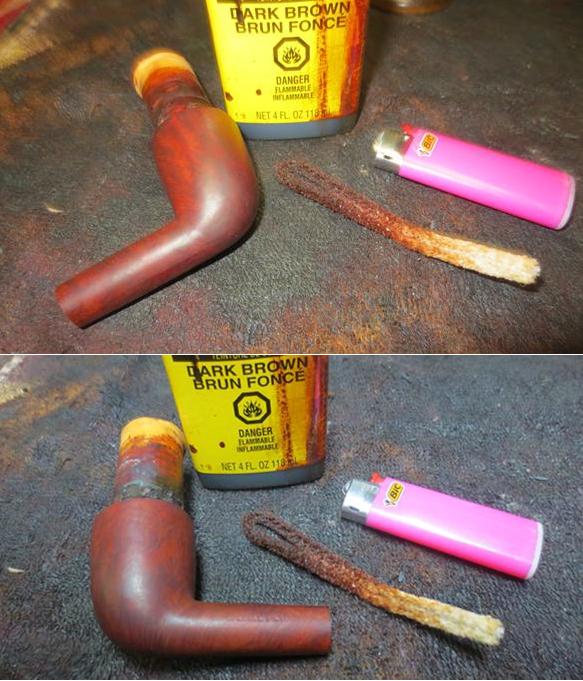
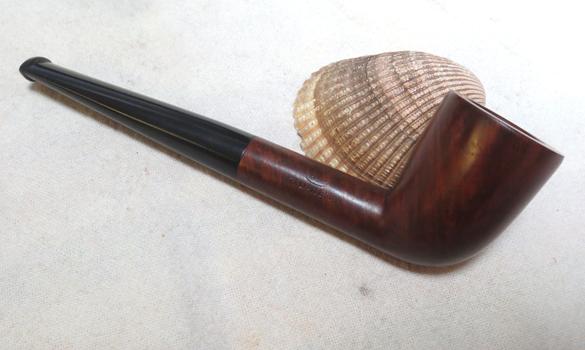
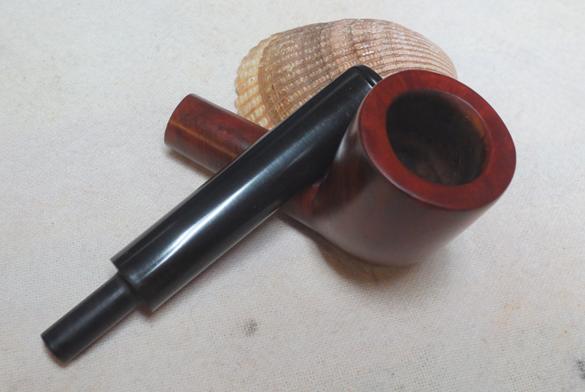
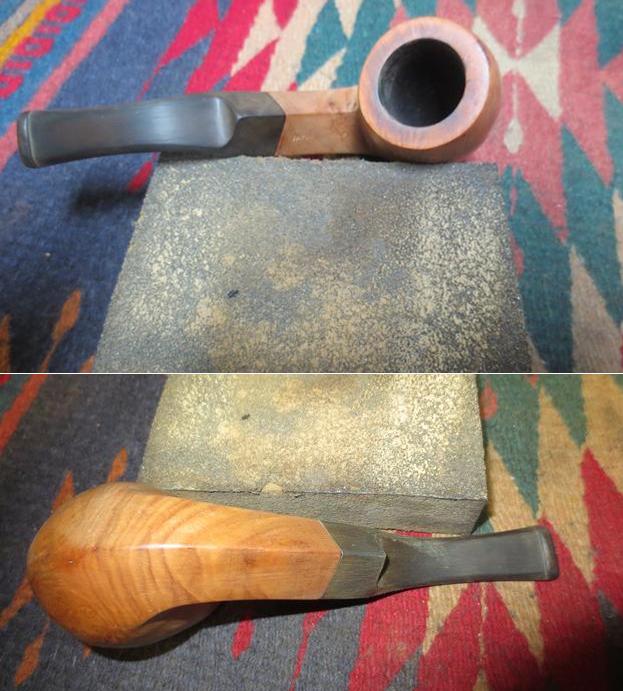
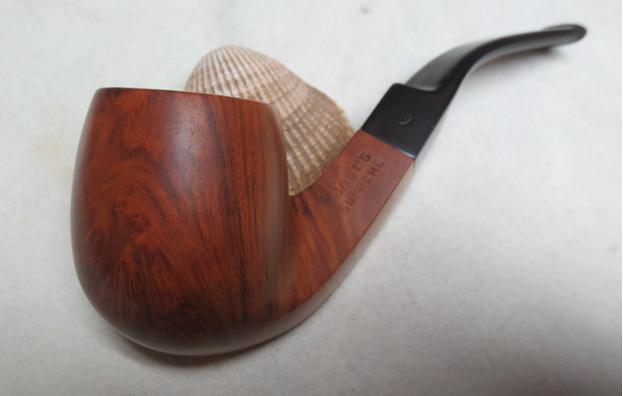
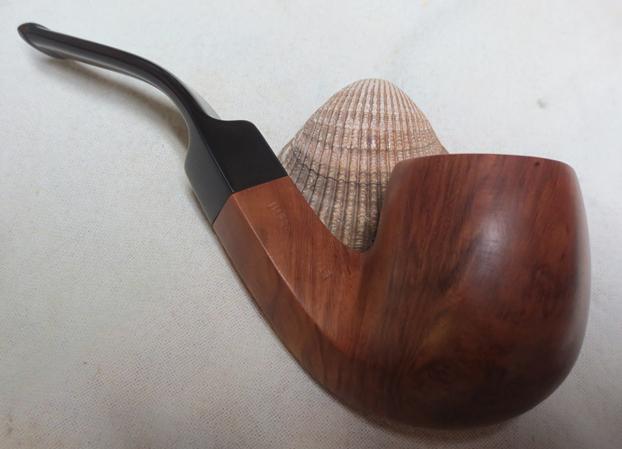
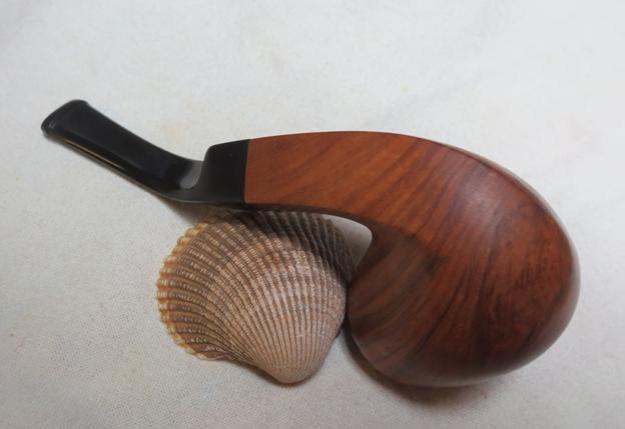
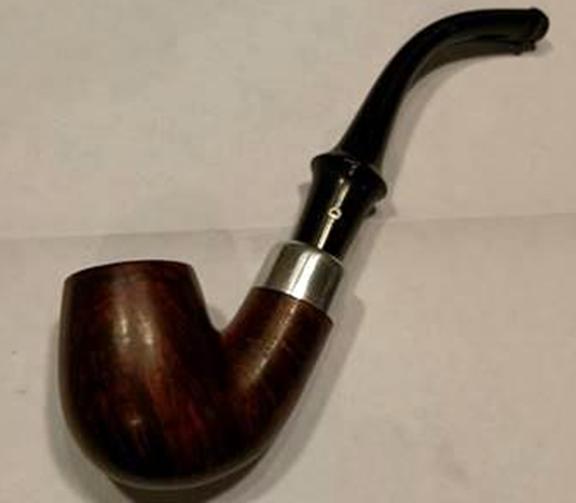
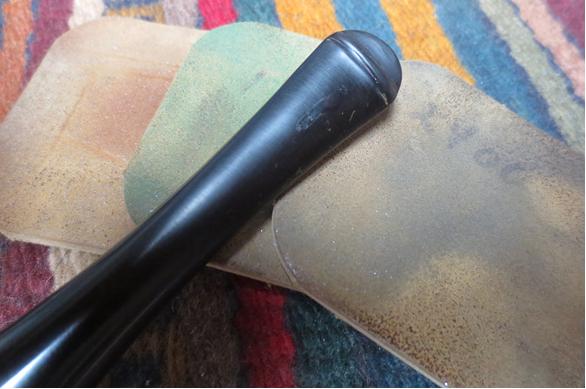
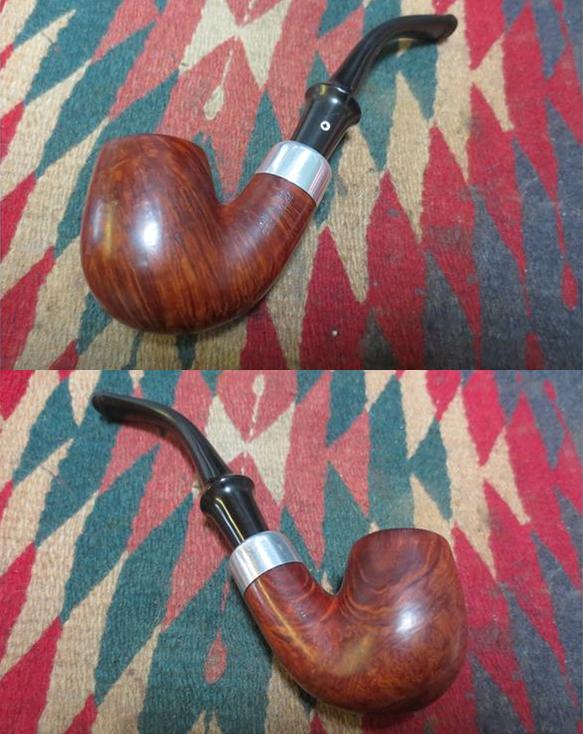
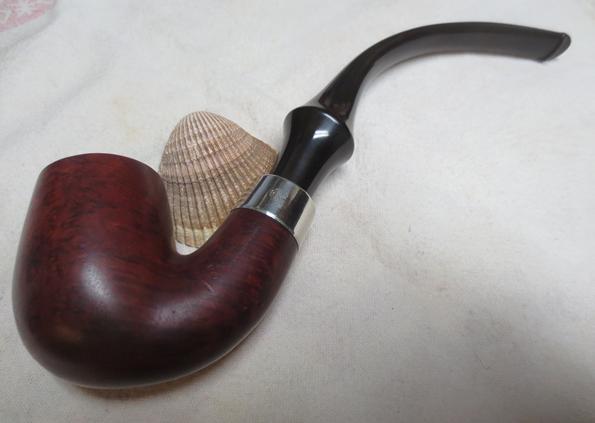
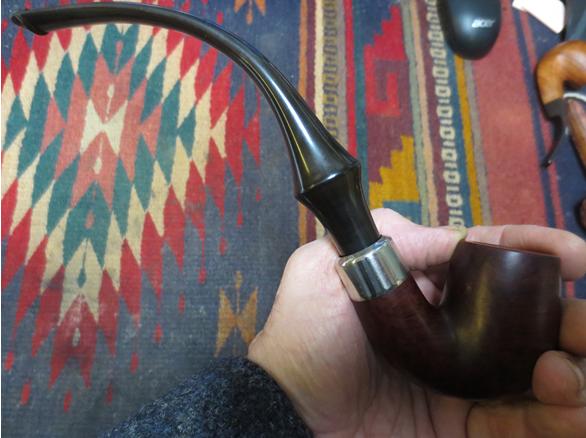
I finished the stummel by sanding with 1500 – 4000 micro mesh pads then wiped everything down with a light coat of mineral oil and let it set over night.  The next day, after work, I took the pipe to the buffing station and finished the polishing with red diamond compound.  Wiping off the excess rouge with a cotton cloth I changed buffing pads and sealed the pipe with three coats of carnauba wax.

Overall this was another easy cleanup, but I am very happy with the results. The more I worked on the 66 the more I came to like the shape.  Thank you for taking a look!kw13 kw14 kw15 kw16 kw17


GBD New Era 133 Restoration


By Al Jones

I love finding GBD “New Era” pipes, they are a definite step up the quality ladder, in contrast to the more commonly seen “New Standard” grade. This one is a Shape 133. It looked in decent condition, but held a few surprises. When the pipe was delivered, I discovered that a previous owner had filed the bottom flat to make it a sitter. There was also an issue with the button. The other issues were minor and typical of an estate pipe – bowl top build-up and an oxidized stem.

gbd_133_ne_before-1

gbd_133_ne_before-4

gbd_133_ne_before-2

gbd_133_ne_before-3

gbd_133_ne_before-5

The pipe was reamed and soaked with alcohol and sea salt. The stem was soaked in a mild Oxy-Clean solution. I used a cloth and warm water to rub off the majority of the build-up on the bowl top. The rim was slightly darkened, but I was able to lighten it with some 2000 grit wet paper. I buffed the bowl with White Diamond and several coats of carnuba wax.

The stem had a few dents that I was able to raise with some heat from a lighter. There was one sharp tooth impression that under magnification, showed it was a crack that went up into the edge of the button. I used some black Super-glue with accelerator to fill the tooth mark and over the top of the button. That was sanded flush with 800 grit paper, followed by 1,000 and 2,000. I removed the oxidation from the stem with with 800 grit, than working thru 1,000 and 2,000 grades. The final prep was with 8,000 and 12,000 grade micromesh followed by buffing with White Diamond and Meguiars Plastic Polish.

Below is the finished pipe. You can see from the tenon, that on New Era pipes, GBD spent a little more time on that detail as well.

gbd_133_ne_finish-1

gbd_133_ne_finish-4

gbd_133_ne_finish-3

gbd_133_ne_finish-5

gbd_133_ne_finish-6

gbd_133_ne_finish-7

gbd_133_ne_finish-2

gbd_133_ne_finish-8

gbd_133_ne_finish-12

?

?

?

?

Sasieni Moorgate S Ruff Root Restoration


By Al Jones

This is the 2nd Sasieni Moorgate shape to cross my work bench.  This one is in the sandblasted Ruff Root finish.  The stem was oxidized, with a few dents and there was some heavy build-up on the bowl top.  Build-up inside the shank prevented the tenon from a flush fit.

sasieni_moorgate_s_ruff-root_before-1sasieni_moorgate_s_ruff-root_before-5sasieni_moorgate_s_ruff-root_before-3sasieni_moorgate_s_ruff-root_before-2


The bowl was reamed and I used a cloth and warm water to rub off the heavy top layer. I then used a worn piece of scotchbrite to carefully remove the rest.  I was very pleased with the results. The stain was lightened slightly aI h alcohol and sea salt.  At the same time, the stem was soaked in a mild Oxy-Clean solution, with a dab of grease over the blue dots.

I then used a lighter to lift the dents on both sides of the stem.  A bristle brush dipped in alcohol was used to clean inside the shank.  I then mounted the stem and used 800 grit wet paper to remove the heavy layer of oxidation, followed by 1,000 and 2,000 grade paper.  The stem was finished with 8,000 and 12,000 grade micromesh paper and then buffed with White Diamond and Meguiars Plastic Polish.  Sometimes the dots are faded on Sasieni stems, but the dots on this one were a lovely shade of robins egg blue.

The briar was hand polished with Halycon II wax.

Below is the finished pipe.

sasieni_moorgate_s_rr_finish-1sasieni_moorgate_s_rr_finish-5sasieni_moorgate_s_rr_finish-2sasieni_moorgate_s_rr_finish-6sasieni_moorgate_s_rr_finish-7sasieni_moorgate_s_rr_finish-8sasieni_moorgate_s_rr_finish-3sasieni_moorgate_s_rr_finish-4

sasieni_moorgate_s_rr_finish-web11

?


Savory’s Agryll Shape 189 Restoration


By Al Jones

This pipe belongs to my buddy Dave, who has a knack for picking up unusually great pipes. This one is a Savory’s Agryll, shape 189. Surprisingly, I found out very little about the Savory’s brand. Pipepedia doesn’t have a section on this maker and only states that the brand was created in 1885 by H.L. Savory & Co.; London and Oxford. At some unknown point, it was acquired by Dunhill. Via pipe forums, the consensus is that the Savory’s was a quality step below Parker and Hardcastle. This example, to my eye has some fantastic details and I’d say it is on par with my 1961 Dunhill Shape 120 which it greatly resembles, although on a slightly larger scale. The bowl on this one is 2 1/4″ deep and it is over 6″ in length. I don’t believe there is any way to determine the age of the pipe, there are no number stamps like Dunhill uses.

Below is a Savory’s Catalog page showing the Shape 189. This shape number was also used by Parker.

savorys_catalog_shapes

The pipe as received was dirty with some heavy oxidation on the stem, but it was relatively bite-mark free.

savorys_argyll_before-1

savorys_argyll_before-2

savorys_argyll_before-3

savorys_argyll_before-4

savorys_argyll_before-5

I reamed the slight cake from the pipe and soaked it with sea salt and alcohol. The stem was soaked in a mild Oxy-Clean solution. Following the soak, I cleaned the briar with some warm, mild soapy water. The briar was buffed by hand with Halycon II wax.

I mounted the stem and removed the heavy layer of oxidation with 400, then 800 grade wet paper, being careful to stay away from the stamped “S” logo. Next up was 1,000 and 2,000 grade paper, followed by 8,000 micromesh. The stem was then buffed with White Diamond and then Meguiars plastic polish.

The stem polished up brilliantly and the overall quality, button, tenon & fitment seems equal to my Dunhill pipes.

Below is the finished pipe.

savorys_argyll_finish-1

savorys_argyll_finish-3

savorys_argyll_finish-2

savorys_argyll_finish-4

savorys_argyll_finish-5

savorys_argyll_finish-7

savorys_argyll_finish-6

savorys_argyll_finish-8

savorys_argyll_finish-10

Restemming a Savinelli Capri Root Briar 320 and giving it a new look


Blog by Steve Laug

I have always liked the looks of the Savinelli 320 shape. I have one of them here and it is a 320EX so it is quite large. When my brother Jeff sent me photos of one that he was looking at I was interested. He bid on it and won. It is stamped on the underside of the shank on a smooth spot with the words Savinelli Capri over Root Briar. Next to the stamping was the Savinelli shield and to the right of that it reads 320 over Italy. The finish on the bowl looked really good. I really like the Capri rustication and the roughness of the feel in the hand.sav1My brother sent me the photos above as well as these close up photos. The rim was actually in very good shape, surprisingly. The there was a thick rough ca,e in the bowl and some of the lava had overflowed on to the rim top grooves.sav2The underside of the shank was in excellent shape though there were some scratches on the smooth area. The pebble cut rustication was in excellent condition. The contrast stain on the pebble finish other than being dirty was undamaged.sav3The real issue with the pipe lay with the stem. The stem had been gnawed to the point that there was almost an inch or more of the stem missing. It was missing a large portion of the vulcanite on the top and the underside of the stem. It is ironic that the stem logo was the only thing about the stem that was left undamaged.sav4 sav5My brother is getting really good at his cleanup process and this pipe was no exception. I am getting spoiled when I get a pipe that I have to ream and clean. When he sends them they have been reamed, scrubbed with Murphy’s Oil Soap on the exterior and cleaned thoroughly with alcohol, cotton swabs and pipe cleaners on the inside. I took some photos of the pipe to show the condition it was in when it arrived in Vancouver. You can see that the finish is clean and you can see the horrible damage to the stem.sav6 sav7I took a close up photo of the rim and the bowl. He had reamed back the cake to bare briar and also scrubbed the rustication on the rim and removed all of the tars and oils that had filled in portions of it on the back side of the bowl.sav8The original stem was a lost cause at this point. To shorten and reshape a new button I would have had to cut off almost another ½ inch. To my mind that would have made the pipe too short for my liking. I went through my can of stems and found a stem that had potential. The diameter of the stem at the tenon end was slightly larger than the Savinelli stem but it had room for adjustments. It had some file marks on the top and the tenon was a little large in diameter for the shank of the 320 but with a little work it would work. It had some paint on the top of the saddle and was deeply oxidized. There was not any tooth chatter or tooth marks on it. It would certainly work for the 320 but it would change the appearance. Once I had finished the fit I would take some pictures and make a decision.sav9I scraped out the mortise with a dental spatula to remove the hard tarry build up that had accumulated there. Once I had scraped it clean I scoured out the inside of mortise and airways in the shank and the stem with alcohol, pipe cleaners and cotton swabs.sav10I sanded the tenon with a Dremel and a sanding drum to fine tune the fit in the shank. I also adjusted the diameter of the saddle with the Dremel and sanding drum until it was a close fit to the diameter of the shank. I fine-tuned the fit with 220 grit sandpaper until the saddle portion was free of the sanding marks left behind by the Dremel. I sanded the tenon with 220 grit sandpaper to adjust the fit in the mortise. I finished by sanding the remainder of the stem as well to break up the oxidation.sav11Once the fit in the mortise and to the shank was correct I pushed the stem in place and took photos of the new look of the pipe. Part of this was to mark the progress but it was also an opportunity for me to see it from the eye of the camera and assess whether I would keep working on the stem or just wait until I came across another Savinelli tapered stem. As I studied the photos I was pleased with the look. There was something catching about the new slim stem flowing from the saddle. I liked the looks of it.sav12 sav13I sanded the stem with the 220 grit sandpaper until I had removed the oxidation and then rubbed the bowl down with a light coat of olive oil to rejuvenate the briar. I rubbed the stem down with Obsidian Oil and took the next set of pictures. The pipe was beginning to look really good.sav15 sav16I polished the stem with micromesh sanding pads – wet sanding with 1500-2400 grit pads and dry sanding with 3200-12000 grit pads. I rubbed the stem down with Obsidian Oil after each set of three pads. I gave the stem a final coat of Obsidian Oil after the last micromesh pad and set it aside to dry.sav17 sav18 sav19I buffed the stem with Blue Diamond polish on the buffing wheel to polish it further. I gave the stem multiple coats of carnauba wax and gave the bowl several coats of Conservator’s Wax. I buffed the bowl and stem with a clean buffing pad to raise the shine. I finished the pipe by buffing it by hand with a microfibre cloth. The finished pipe is shown in the photos below. It took some work to fit the new stem to the shank but the new look of the saddle stem gives this pipe a fresh appearance to me that works well with the pebble rustication of the Capri Root Briar finish.sav20 sav21 sav22 sav23 sav24 sav25 sav26 sav27


An interesting “The Nuvo” MLC Italian Briar hidden in a WDC Case


Blog by Steve Laug

When we saw this older case and pipe for sale on eBay we were under the assumption that the pipe in the case was an older WDC pipe. The age of the case and the pipe appeared to match in the photos posted by the eBay seller. The case was in decent shape on the left side and the right side had a ripped part missing near the stem end. The covering on the case was leather. The hinge and clasp mechanism were in good condition. The green velvet lining looked worn. The stamp on the inside the top of the case was readable but worn. It read WDC in the triangle and over Genuine Briar. mlc1The finish on the briar was worn looking and the stem looked like it was covered with white calcification over the length of the stem all the way around.mlc2 mlc3The bowl was thickly caked with a thick coat of lava overflowing onto the rim. It was so thick that it was hard to tell if the outer and the inner edges of the rim were in good condition. Underneath it may well have a lot of nicks and the bowl could easily be out of round.mlc4The seller included some close up photos of the stamp on the inside cover of the case. You can see the WDC triangle logo over Genuine Briar. They also included close up photos of the stamping on the left and right sides of the shank. It is very hard to read the lettering in the photos. It looks like the left side is stamped with something over Special Pat. On the right side what is readable is Italian Briar. The rest of the stamping was not readable in the photos.

mlc5 mlc6When the pipe arrived in Idaho my brother took photos of the pipe before he cleaned it up. The finish was certainly a mess and there was a lot of grime and build up on the bowl and the shank. There also appeared to be some nice grain peering through the grime.mlc7He took some close up photos of the rim and the front of the pipe. The overflow of lava and the cake in the bowl was very thick. The outer edge of the rim was rounded and showed some damage. The frontal photo shows a dent at the front top of the bowl that goes diagonally across the bowl. I have circled it in red to show the location of the dent.mlc8He also took photos of the stamping for me. On the right side of the shank there appeared to be an oval with the letters stamped MLC in the centre. On the left side it seems to read “The Nuvo” over Special Pat.mlc9The closes up photos of the white substance on the stem surface show the condition of the stem and looks almost crystalline.mlc10I took some photos of the pipe when it arrived in Vancouver and I brought it to the work table to begin the restoration. My brother had done an amazing job cleaning up the dirty finish and the white on the stem. He had reamed the bowl clean of the thick cake. He also removed the thick lava on the rim top.mlc11 mlc12 mlc13I took a close up photo of the bowl and rim to show the condition. My brother had been able to remove all of the cake and the tar. The outer edge of the rim was rounded and had dents. The inner edge was missing chunks and the bowl was out of round. The top of the rim had nicks and dents and was also in rough shape.mlc14The stem looked to be in decent condition. The high quality rubber of the stem was pitted and lightly oxidized. The style of the button added to my idea that I was dealing with an older pipe.mlc15I was able to clearly read the stamping on the pipe once I had it in hand. It read “The Nuvo” over Special Pat. on the left side of the shank. On the right side it was stamped with an MLC in an oval over Italian Briar. I was not familiar with th name on the pipe or the Oval MLC stamp. I looked my copy of “Who Made that Pipe” and found that The Nuvo was made by M. Linkman Company in 1914. The MLC logo in the oval stood for M. Linkman Company.

I looked the brand up on Pipedia (https://pipedia.org/wiki/M._Linkman_%26_Co) and found that M. Linkman Company name was said to stand for Mary Linkman & Company. Mary Linkman was the mother of Louis B. Linkman, originator of the Dr. Grabow pipe. This Chicago company produced both meerschaums and briars. I also looked on the PipePhil Logos and Stampings site (http://www.pipephil.eu/logos/en/logo-l4.html) and found that the M. Linkman and Co. was established by Louis B. Linkman and August Fisher in 1898. The company closed down in the 1950s and the Dr Grabow branch was sold to Henry Leonard and Thomas Inc. There was also a note that early Linkman’s pipes were stamped MLC in an oval.

I now knew that the pipe I had in hand was an early Linkman’s pipe rather than one made by WDC. That meant that the case and the pipe did not match.

I decided to try to clean up the inside edge of the bowl before I topped it. I wanted to remove as much of the damage to the inner rim as I could to better see how much of the rim top I would need to remove with the topping action. I used a rolled piece of 220 grit sandpaper wrapped around my finger to sand the inner edge of the bowl.mlc16When I finished sanding the edge there were still some deep gouges in the edge of the rim at the back and the front of the bowl. The bowl was also out of round and seemed to be thinner on the right side than the rest of the bowl.mlc17I topped the bowl rim on a topping board with 220 grit sandpaper. I worked on it until I had removed all of the damage to the rim top and also removed the damage to the outer edge of the rim and also what was on the inner edge. In the second photo you can see that much of the damage to the inner edge of the rim was removed. I still needed to bevel that edge to smooth out the damage.mlc18I used a folded piece of 220 grit sandpaper to sand the edge of the bowl. I worked it over until I had removed the damaged areas on the front and the back side of the rim edge. I also worked to make the bowl round once again.mlc19I sanded the rim edges and the top of the rim with 1500-4000 grit micromesh sanding pads once i had the bowl in round. I scraped the inside of the mortise with a dental pick to remove the hard chunks of tar that were collected on the inside walls of shank. Once I had removed all of the hardened buildup I scrubbed out the mortise and the airways in the shank and the stem with pipe cleaners, cotton swabs and alcohol until the oils and tars were gone.mlc20I wiped down the exterior of the briar with acetone on a cotton pad to remove all of the residual dirt and grime from the topping and cleaning. I wanted the surface to be clean and oil free in preparation for the new stain coat that I would give it.mlc21 mlc22I thinned some dark brown aniline stain by 50% with isopropyl alcohol (need to put in an order for more stain). I applied it to the bowl with a folded pipe cleaner. I flamed the stain to set it and repeated the process until the coverage on the bowl and shank were an even medium brown colour.mlc23 mlc24I set the bowl aside to let the stain cure and turned my attention to working on the stem. I sanded it with 220 grit sandpaper to remove the light oxidation and smooth out the pitted surface of the stem. I polished it with micromesh sanding pads – wet sanding it with 1500-2400 grit pads and dry sanding it with 3200-12000 grit pads. I rubbed the stem down with Obsidian Oil after each set of three sanding pads. I gave it a final coat of oil after the third set of pads and set it aside to dry.mlc25 mlc26 mlc27I put the stem back on the pipe and buffed it with Blue Diamond on the buffing wheel. I took precaution to not buff the stamping on the shank sides. I gave the bowl and stem multiple coats of carnauba wax to protect it. I buffed it with a clean buffing pad to raise a shine. I hand buffed it with a microfibre cloth to deepen the shine. The finished pipe is shown in the photos below. I am happy with the way it turned out. The look and finish of the pipe turned out very well. Thanks for walking with me through the process.mlc28 mlc29 mlc30 mlc31 mlc32 mlc33 mlc34 mlc35


Peterson Kildare Marathon Restoration


This year has been a roller coaster ride for me; between added responsibilities of watching our new grandson, health issues, and a flair up of my spinal stenosis that put me down for almost two months, I have been unable to do any of my hobbies. Unfortunately this has put a couple of friends that I have pipes to work on in a state of limbo waiting on me. They are not easy clean-ups and they knew going in I am slow – but still I feel badly about it.

This Peterson Kildare 106 billiard had been in my possession for ages it seems to me at least. I have worked on it off and on, loosing track if my progress (and many of my notes and photos) of the process. It went out in the mail today I am happy to say (and the owner is probably happier to hear!).

I knew the pipe needed stem work mostly but when it arrived at my home it was in worse condition than I had anticipated. The stem was really badly gnawed on, with an extra hole bitten through on the bottom. The pipe was very dirty and there was a fill that had partly fallen out; that didn’t really bother the owner, as I recall, but it made me nuts! Here is a look at what the pipe looked like when I got it.

I began cleaning the internals which weren’t bad as it turns out. I cleaned the stummel with alcohol and cotton pads, removing the grime, exposing the missing fill even worse; I knew I had to deal with that as I went along. But first I began to ream the bowl while the stem soaked in an OxiClean bath. img_5027

The OxiClean bath and a scrubbing in clean, warm water with a green Scotch pad left the stem clean and free of oxidation. The amount of work the stem needed was even more apparent now; not only did the bit need a lot of work, there were some very large dents in the stem. I tried to raise the dents with heat but that really made no difference. So I decided to start the process of building the bit up (P-lip, a new for me repair) and filling in the dents with black CA glue and charcoal powder. This took many layers over many days (which turned into months); I had to raise, shape, repeat, over and over to get the P-lip back and to fill the extra hole in the bottom of the stem and the deep divots.

During the interim times I worked on the fill that was partly gone and one other dent that stream wouldn’t raise. I used coarse briar dust from filing not sanding (which I think takes dye better and is less apt to just be a black spot) and CA glue to fill the two spots (the worst one is visible in the very first photo in this post). I accidentally over did the fill, costing myself a lot of extra time. However the patch ended up blending in great in the end. After a lot of working the patch to blend I stained the pipe with a diluted Brown Fiebing’s leather dye, two coats, flamed on, if I remember right. After buffing with brown-Tripoli the stummel looked nice but too dark to see the really nice grain (birds eye and flame) so I wiped it down with alcohol on a cotton pad until it let the gain show through and re-buffed with brown-Tripoli. Now the stummel looked good to me. Back to the stem…

This P-lip drove me to the brink of insanity! Not having a P-lip on hand to compare it to made it more difficult. Filling the bottom hole (that wasn’t supposed to be there) was easy but shaping that top and bottom lip/ridge was a chore. The deep divot just did not want to be filled; the patch shrunk over and over. The huge, dented  draft hole on the top of the stem was a bother, too; I can’t tell you how many times I glued it shut trying to get that button rebuilt! In the end it came out pretty good; there are some tiny scratches visible if you look real close. But all things given, the owner was happy with that, especially since with the holidays and even more babysitting duties for me on the horizon, who knows when I would be able to finish it (again).

After finally getting the work done I finished the pipe off with a few coats of carnauba wax. I want to mention that I followed the instructions, more or less, for Dremel buffing for the stem and the waxing of the stummel. I currently can’t use my buffer so I wanted to give this option a try and am very pleased with the results. Mine is a variable speed Dremel and I used 5,000 RPM for the compounds and 10,000 RPM for the wax.

Hopefully with the new Dremel techniques I’ve learned (thanks again, Dal and Steve) and with some luck (and no small amount of “okay” from my wife) I will find a way to down size my work-needs to be able to work from my kitchen instead of my basement workshop, allowing me to work more when my mobility issues keep me from the stairs.

Restoring the fourth Classic Find – a Jost’s Supreme Diamond Shank bent billiard


Blog by Steve Laug

I written about the estate lot that my brother and I purchased from an estate sale in Pocatello, Idaho. There were a lot of great pipes in the lot. I have written about the pipes we picked up in a previous blog: (https://rebornpipes.com/2016/10/07/a-good-day-hunting-orchestrated-between-british-columbia-and-idaho/). I also wrote of how my brother had stopped at an antique shop and found four amazing pipes. These included a Four Dot Sasieni Pembroke with a patent number, Pat.No. 150221/20, a Dunhill Root Briar Canadian EC 4R, a Charatan’s Make Canadian Sandblast 0121 and finally a Jost’s Supreme Diamond Shank bent billiard. I have restored and written blogs on three of the four pipes he found – Sasieni, Dunhill and the Charatan’s Make. Here are those links: (https://rebornpipes.com/2016/11/05/restoring-a-classic-find-a-sasieni-four-dot-london-made-pembroke/ ; https://rebornpipes.com/2016/11/06/restoring-another-classic-find-a-dunhill-4r-root-briar-canadian-ec/ ; and https://rebornpipes.com/2016/11/06/restoring-the-third-classic-find-a-charatans-make-0120-canadian/.  I am now finished with the fourth pipe that –  the Jost’s Supreme diamond shank bent billiard.

In earlier blogs I have written about restoring another Jost’s pipe that I found. When I restored that pipe it was a brand I had heard of but was unfamiliar with. I researched the web to find some information about the brand. Here is a link to the blog I wrote on the Jost’s Olde English Deluxe: https://rebornpipes.com/2016/09/03/josts-olde-english-de-luxesupreme-overstamped-j214-bent-billiard/. I am quoting several of the paragraphs that summarize what I learned about the brand.

I looked up Jost’s pipes on the pipephil site and found a pipe that had the same stamping on the left side of the shank as the one I was working on. The right side had slightly different stamping in that it had the classic COM stamp circle where the one I had was two lines Made in over England. It also had a picture of the circle J stamp on the stem. There was a note there the tobacco shop proprietor was Mrs. Henry A. Jost. Her resident carver was Harvey Raspberry.”

I also found a blog that is called ClassicPipeShop that even had a catalogue of the pipes made by the Jost’s Shop or were imported by them for their store. I quote that blog once more as it places the new pipe that I am working on now.

“I did some more hunting online and I found a blog that did a great write up on Jost’s Pipe Shop and gave some definitive information on the brand and grades of the pipes. Here is the link if you wish to read a well written history of the brand and also some interesting details about shop blends of tobacco. http://classicpipeshop.blogspot.ca/2015/03/josts-pipe-shop-201-north-6th-street-st.html

 “I have included the section of the blog on the pipes. It covers a lot of information regarding the source of the pipes and the levels/grades of pipes. Remember that the one I am working on is a De Luxe/Supreme. I quote:”

“Jost’s Pipes are closely tied to Comoy’s. Many of Jost’s pipes have the standard Comoy’s shape number and the “Made in England” in a circle. If the Jost’s pipe doesn’t have the “Made in England” it is probably made by Harvey Raspberry.”

jost“If the pipe has a shape number that is preceded by a “J” that is a Comoy’s product without question.  Typically these will have the words “Made in London England” on the reverse side of the shank from where the Jost stamp is made.  There are always exceptions to the rule but 95% of the time, this is accurate.”

“Many different levels of pipes were offered by Jost’s Pipe Shop.  From a 1950s catalog I have the following available:”

Jost Old English De Luxe: $85.00

These were typically of the highest… Grain is stunning and the briar is flawless.  These are the grade you should look out for as they are great smokers.

*Jost Old English Supreme: (no pricing available)

The majority of the Old English version pipes you see are marked Supreme.  These are stained in a darker color and are presumably from the same Algerian aged Briar as the De Luxe brothers.  These are also of the highest quality available. *(The current pipe I am working on is stamped Jost’s Supreme on the left side of the shank with no shape number and no Made in London England stamp.  If I read the information correctly it was one that was made by Harvey Raspberry, who was the shop pipe maker.)

Jost Virgin Briar Supreme: $35.00

Don’t see too many marked as Virgin Briar Supreme but you will often find “Supreme” Jost pipes on the second hand market (see above).  Excellent quality briar and displays the lighter toned finish of the De Luxe above.  Grain is not as flashy or desirable as the De Luxe model.

Jost Thames Briars: $25.00

I’ve seen these offered as blasted / rusticated pipes and look quite nice.  Most of the smooth finish Thames pipes are riddled with fills.  Good smokers but not much to look at (smooth).

Jost Sandblast Briars: $25.00

These are a great value.  The shop made sand-blasted pipes are usually quite large and snapped up very quickly by collectors.  The Comoy’s versions (with J shape #s) are of excellent quality and typically rather small compared to the shop-made variety.

Dukes Briars: $15.00

These come up very rarely.  The two I’ve seen in recent years are rather small in size.  Smooth finish with light / honey stain color.  Not sure what the story is behind these.

From my research and rereading of the information on the brand it appears that my brother had found yet another good pipe. Using the information from the blog and the web I was able to learn a lot about the particular pipe I had in my hands. The stamping told me it was a pipe made by the Jost’s Pipe Shop in-house pipe maker, Harvey Raspberry. The pipe was stamped Jost’s Supreme on the left side of the shank. In all likelihood it is a Jost’s Old English Supreme. The majority of the Old English version pipes are marked Supreme. The pamphlet quoted above from the blog said that these pipes were stained in a darker color and were presumably from the same Algerian Aged Briar as the De Luxe. The pipes were of the highest quality available. I was not able to determine the age of the pipe.

My brother took the photos that follow. They show the pipe before he cleaned it up and sent it to me. It has some nice looking briar under the grime and dirt of the years. It looks to me like it had a natural finish on the bowl rather than the dark stain mentioned above.jost1The next photos clearly show the stamping on the shank. The left side is stamped Jost’s over Supreme. The right side is stamped Imported Briar.jost2The bowl and shank had a sticky black substance on the top of the grain. It looked as if it may have come from sticky labels used by the antique shop where the pipe was sold.jost3The next close up photo shows the state of the cake in the bowl and the thick lava overflow on the top of the rim. It is hard to tell if the inner edge of the rim is damaged or not because of the thick cake. The second photo shows the nicks and cuts in the front top edge of the bowl and extending onto the rim.jost4 jost5The stem was badly oxidized and there were a lot of tooth marks and chatter that had rounded the sharp edge of the button. The tooth marks and chatter were covered with calcification. The vulcanite was pitted and worn.jost6My brother did an amazing job cleaning up the pipe. He scrubbed the sticky surface and all of the tars and oils on the bowl and the rim. He scrubbed it with a tooth brush and Murphy’s Oil Soap and removed the soiled finish on the bowl and much of the rim top lava. He reamed the bowl with a PipNet reamer and took the cake back to bare briar. He scrubbed the mortise and the airway in the shank with pipe cleaners, cotton swabs and alcohol. I took the following photos when the pipe arrived in Vancouver before I started refurbishing it.jost7 jost8I took a close up photo of the rim top. He had gotten almost all of the lava off of the rim and all that remained was some slight rim darkening. I also took photos of the stem to show how much of the buildup had been removed before I got the pipe. There was a deep oxidation in the vulcanite.jost9 jost10I used a Savinelli Fitsall Pipe Knife to clean up the reaming of the bowl. I smoothed out the remaining cake at the bottom edges of the bowl and smoothed out the inner edge of the rim.jost11I used a dental pick with a slight spatula to scrape out the hard deposits of tar on the inside of the mortise. It took a little extra work but it cleaned up the buildup and made the stem fit against end of the mortise snugly.jost12I scrubbed out the mortise and the shank and stem airways with pipe cleaners, cotton swabs and alcohol to remove the debris from my scraping work in the mortise. It did not take too many before the pipe was clean on the interior.jost13I sanded the rim with 1500-4000 grit micromesh sanding pads to remove the slight rim darkening that remained. I was able to polish the rim. I used clear super glue and briar dust to fill in the deep nicks and gouges in the front face and top edge of the bowl. I sanded the bowl front with 220 grit sandpaper to smooth the surface and to blend it in with the surrounding briar. I polished bowl at the same time as I did the rim with the micromesh sanding pads.jost14I used a needle file to sharpen the edge of the button and make it more defined. I sanded the stem with 220 grit sandpaper to remove the scratches on the stem left behind by the file and the oxidation in the surface of the vulcanite.jost15I sanded the bowl and the stem with a medium and a fine grit sanding pad to remove the scratches and to polish the briar and the stem.jost16 jost17With the majority of the oxidation removed and the scratches in the briar I worked on polishing the stem. I wet sanded it with 1500-2400 grit micromesh sanding pads and dry sanded it with 3200-12000 grit pads. I rubbed the stem down with Obsidian Oil after each set of three pads. After rubbing the stem down with a final coat of oil after the last set of pads I set it aside to dry.jost18 jost19 jost20I buffed the stem with red Tripoli to further remove the light oxidation that remained in the vulcanite. I buffed both the bowl and stem with Blue Diamond on the buffing pad to polish it. I gave them multiple coats of carnauba wax and buffed it to a shine with a clean buffing pad. I hand buffed the finished pipe with a microfibre cloth to deepen the shine. The finished pipe is shown in the photos below. I really like the way it turned out. The grain of the briar really stood out. The natural finish looked really good and the contrast in the flame and straight grain with the underlying briar is quite stunning. Thanks for walking through this journey with me.jost21 jost22 jost23 jost24 jost25 jost26 jost27 jost28 jost29


This Poor Old Kaywoodie Chesterfield had seen better days


Blog by Steve Laug

I received an email from Jim, the same fellow who sent me the Yello-Bole that I refurbished for him. I wrote about it in an earlier blog (https://rebornpipes.com/2016/11/10/breathing-life-into-a-huge-kbb-yello-bole-3068c-bent-billiard/). I have included the gist of his email and the photos he sent me because any of us who try our hand at pipe repair have found ourselves in similar situations. One simple thing going wrong can quickly compound into a second and a third thing going wrong and leave you with a mess on a pipe that at first glance should have been a simple cleanup.

“So I have a Kaywoodie Chesterfield pipe – the first pipe I ever obtained – and it is in need of serious attention.  I bought it at Barclay’s in Upper Arlington, Ohio from their Estate Pipe display, and I really like the pipe.  However, about three days ago, I was cleaning it, and got a tapered pipe cleaner stuck in the bit.  As I was pulling the cleaner through, the thicker end jammed itself well inside the bit as I attempted to draw the thinner end through the lip.  I apparently pulled too hard, and the end of the pipe cleaner broke off, leaving the remainder of the cleaner fully trapped in the bit.  In my idiocy, I tried various strategies to dislodge the cleaner which eventually led to my doing further damage to the bit in the form of a split down the center of the underside of the stem latitudinally.”

“…I know this particular pipe is not terribly valuable or even rare.  However, I am kind of a sap, and the pipe has a measure of sentimental value in that it is the first pipe I got, and I picked it because it reminded me of the pipes my dad smoked when I was a kid.  I am hoping you can give me some good news in the form of a means to remedy my stupidity.”

He sent the next three photos to show me his pipe and his travail. The first is one of the overall view of the pipe. Though it is hard to see in this photo the bowl has some very nice grain. I will take some pictures of the bowl and the finished pipe once I have finished the repair.chest1He took a photo of the end of the shank. His caption read: “You cannot see the thicker end of the pipe cleaner because it’s stuck way in there…” Indeed the pipe cleaner was stuck in the stem. It was jammed in the stem 1 ½ inches from the button with a bit showing through the jagged split in the stem and about two inches in from the shank end of the stem.chest2The last photo he sent shows the underside of the stem with this caption: “….And this is what you get when a dummy tries to ameliorate a situation that is beyond his ken.” It was a jagged split that looked awful in the photo below.chest3I had him send the pipe to me so that I could see what could be done. A stem repair in its own right that large is a fair bit of work but it could be done. The pipe cleaner jammed in the airway was an altogether different issue. I needed to have a look to see what I could come up with to remove the jam from the airway in the stem. I could not be sure until I saw it and tried.

The package arrived in Canada a few days ago and I opened it to find he had included the large Yello-Bole that I mentioned above and the damaged Chesterfield. The Chesterfield is actually a stunning pipe. The grain on the bowl, the finish and the nickel ferrule all combine to make a beautiful pipe. The bowl was in great shape and required no cleaning or repairs – just a buff to polish it. I can certainly see why Jim was attached to it. He was willing to have a new stem fit to the shank but I really wanted to see if the original Kaywoodie stem could be salvaged.

I took the next series of photos to show the damage to the stem underside. I needed to straighten the stem out to properly work on it. I traced the angle of the curve on the back of the letter that Jim sent along with the package so that I could recapture it once I finished the repair. I used a dental pick and tweezers to pull as much of the pipe cleaner and wire out of the damaged area on the stem. I found as I worked on the damaged area that several chunks of a small drill bit also fell out giving testimony to one of the ways Jim had tried to remove the jammed pipe cleaner. I was hoping to be able to pull all of it out this way but it continue to break and come out in small pieces until I was unable to reach any more with the pick and the tweezers.

I used a drill bit on my cordless drill and turned the straightened stem onto the bit from the shank end. My thought was that perhaps the drill bit would seize a piece of the pipe cleaner when I backed it out of the stem. It worked to a degree but it would not bring out the last 1 ½ inches of broken pipe cleaner. I was stuck. I needed some time to think through my options and try to figure out how to address the problem. I laid the stem aside and worked on the Yello-Bole while I pondered my next moves with the stem.chest4While I was working on the Yello-Bole I had a thought that maybe putting the stem in the freezer for a bit might work. My thinking was that when I removed it the contraction and expansion of the vulcanite and that of the pipe cleaner would be different enough that the pipe cleaner would drop out of the shank. At least that is what I dreamed would happen. A few days went by and I had some late nights at work and the stem sat in the freezer for a lot longer than I had anticipated. Needless to say when I finally took it out of the freeze it appeared to have made no difference. The pipe cleaner did not simply fall out of the airway as the stem warmed.

I laid it aside for the night and went to sleep. I woke up early this morning with an idea. I straightened a length of paper clip that I used as a punch. I slid it into the button end of the stem carefully past the damaged underside until it hit the jammed pipe cleaner. I used a small furniture tack hammer to tap on the bit of paper clip extending above the button. I tapped it maybe four or five times and I felt it begin to give. Encouraged, I tapped it several more times and the pipe cleaner bit fell free of the shank end of the pipe. You can see the broken piece of pipe cleaner below the stem in the next photo. I plugged the damaged area with my thumb and blew through the stem to clear out debris left behind by the pipe cleaner bits. The airway was finally free.chest5I mixed a batch of charcoal powder and black super glue on a patch of cardboard until I had a thick paste. I use activated charcoal capsules for the finely ground charcoal and a medium viscosity super glue for the mixture. I greased a pipe cleaner with Vaseline and slid it into the stem filling in the area on both ends of the damaged spot. I applied the mixture of super glue and charcoal powder to the damaged area with a length of straightened paperclip. I smoothed out the repair with the edge of a paper clip. I sprayed the repair with an accelerator and slid the pipe cleaner out of the airway. I blew through the shank end of the stem and the airway was clear of blockage. I used a clean pipe cleaner to remove the excess Vaseline from the inside of the stem.chest6I used the rest of the mixture to build up the repair and spread it over the surface of the stem, bonding the patch to the solid vulcanite on both sides of the damaged area. The patch was thick and large but I would be able to sand it smooth.chest7Once the patch dried I sanded it with 220 grit sandpaper to smooth it out and blend it with the surrounding vulcanite. The next two photos show the repaired area at this point in the process.chest8I polished the stem with micromesh sanding pads – wet sanding with 1500-2400 grit pads and dry sanding with 3200-12000 grit pads. As I worked over the repaired area some of the air bubbles in the mixture of charcoal powder and the glue came to the surface. I have never found them to be big deal as they only need to be lightly filled with clear super glue. I repeated the super glue and sanding process until the patch was smooth. I sanded it with micromesh pads until it shone and after each set of three pads I rubbed the stem down with Obsidian Oil. I gave it a final coat of oil after the last set of three pads and set it aside to dry. The following photos show process of how the repaired area gradually smoothed and blended into the rest of the vulcanite.chest9 chest10 chest11 chest12 chest13 chest14Once the repair was finished and polished I set the stem aside to cure for several hours. I wanted to make sure that the charcoal and black super glue patch was hard. I had visions of it dropping out when I heated the stem and applied pressure to bend it. Once it had hardened bending it was not a problem. I slid a small pipe cleaner into the stem from the button end to keep the airway from collapsing when I bent it. I heated it over a heat gun until the vulcanite was pliable. I bent it to match the pattern on the paper and then cooled it with running water. I repeated the process until I had the right curve to the stem.chest15 chest16I buffed the stem and bowl with Blue Diamond polish on the buffing wheel to raise a shine and polish out the scratches. I gave the bowl and stem multiple coats of carnauba wax. I buffed it with a clean buffing pad on the wheel and hand buffed it with a microfibre cloth. The repair to the underside of the stem is solid and smooth. While the repair is visible under bright light it did not stand out while looking at it with the naked eye. Along with that the repair was fortunately on the underside of the stem in the curve. I think Jim will appreciate the repair and the pipe should serve him well. I look forward to hearing what he thinks of the repair once he has the pipe in hand. Thanks for walking with me through the process.chest17 chest18 chest19

Breathing Life into a Huge KBB Yello-Bole 3068C Bent Billiard


Blog by Steve Laug

A good friend of rebornpipes, Jim emailed me about a pair of pipes that he had that he wanted me to have a look at. The first of them is on the work table and it is going to take a bit of work to bring back to life. The second is the one I just finished and it is a beautiful pipe. It is a Yello-Bole like none I have seen before and I have worked on many of them over the years. This one is a large KBB Yello-Bole bent billiard similar in style to the WDC Wellington big pipes. This one is 10 inches long and 2 ¼ inches tall. The bowl is 7/8 inches in diameter and 1 ¾ inches deep. The stem was in decent shape other than oxidation and light tooth chatter on the top and bottom sides near the button. The button itself was very clean with a few tooth marks but the airway was in perfect condition. The stem has the older style inlaid Yello-Bole logo of the yellow circle on the top side. The stem appears to be a P-lip but it is the faux P-lip that has the airway coming out straight at the end of the P.

The finish on the bowl was dirty and the varnish coat was peeling away and flaking off around the bowl. There was a deep, rich oxblood colour to the stain underneath the peeling finish. The rim was dirty but otherwise it was pretty clean with no dents, dings or nicks in the surface or in the inner or outer edges of the rim. In the photos it appears that the bowl was meerschaum lined but I assure you that it was not – it is merely coated with the famous Yello-Bole Honey Curing yellow mixture. The bevel on the rim shows the yellow as does the bottom of the bowl. In fact, though the pipe was smoked it appears that it was never smoked all the way to the bottom of the bowl and the lower 1/4th of the bowl still shows the yellow bowl coating. There was a light cake that was spotty around the inside of the bowl but it was not thick of overflowing onto the rim.

The stamping on the left side of the shank reads KBB in a cloverleaf/club and next to it Yello-Bole over Reg. U.S. Pat. Off. Under that it is stamped Imperial in script and below that the fourth line of the stamp reads Cured With Real Honey. The nickel ferrule on the shank end is stamped with the KB&B Cloverleaf and underneath reads Nickel Plated. It is interesting to me to see this stamping on the band. Typically the Yello-Bole pipes bore the KBB stamp without the ampersand (&) between the two “b’s” which is true on the logo on the left side of the shank. It simply reads KBB in the leaf. On the band however the logo has the KB&B stamp which is usually reserved for the better quality Kaywoodie pipes of the time. The right side of the shank is stamped Algerian Briar over 3068C which I assume is the shape number.

I took the photos below to show what the pipe looked like when it arrived and I had unpacked it on my work table.yb1 yb2I took some close up photos of the bowl, rim and stem to show the condition of those areas when I received the pipe. You can see the clean bevel on the rim with the slight darkening of the yellow bowl coating and the light, uneven cake in the bowl. You can also see the yellow bowl coating on the bottom portion of the bowl. The stem shows the oxidation and the light tooth chatter on the top and underside near the button. You can also see the airway exiting the stem at the end rather than the top of the “P-lip”.yb3 yb4I reamed the bowl with the Savinelli Fitsall Pipe Knife to clean the cake back to bare briar. I used that tool as I wanted to leave the yellow bowl coating intact in the bowl to leave it as original as possible.yb5I scrubbed off the peeling finish with cotton pads and acetone (fingernail polish remover) until the surface of the briar was smooth and the oxblood stain coat shone through. I used 1500-2400 grit micromesh sanding pads to work on the rim top and the inner bevel of the rim until they also were clean.yb6 yb7Once I had removed the varnish coat there were a lot of dings and dents in the rim and the sides of the bowl. I used a hot butter knife and a wet cloth to steam out the dents. It took some time but I continued to steam the dented areas on the bowl until I had removed all but the small nicks on the bowl. I took photos of the bowl after I had steamed it and you can see from the photos that the briar looked far better after steaming.yb8 yb9I took some close up photos of the stamping on the shank and the nickel ferrule to show what I talked about in the earlier paragraphs. The nickel-plated ferrule had a lot of scratches in the surface of the nickel. You can also compare the KBB stamp on the shank with the KB&B stamp on the ferrule in the photos.yb10 yb11I polished the nickel ferrule with micromesh sanding pads to remove the scratches. I started with 1500 grit and worked my way up to 12000 grit. It removed the scratches and also polished the nickel. I cleaned out the interior of the mortise, the sump at the bottom of the shank and the airways in the shank and the stem with alcohol, pipe cleaners and cotton swabs. The first photo below shows the clean briar in the shank.yb12I sanded the stem with 220 grit sandpaper to remove the oxidation on the surface of the stem. I scrubbed it with the Before & After Pipe Stem Deoxidizer to lift more of the oxidation. I wet sanded the stem with 1500-2400 grit micromesh sanding pads and dry sanded with 3200-12000 grit pads. After sanding with each set of three pads I rubbed the stem down with Obsidian Oil. After sanding with 12000 grit micromesh I gave the stem a final coat of the oil and set it aside to dry.yb13 yb14 yb15I buffed the bowl and stem with Blue Diamond on the buffing wheel to further polish the bowl and the stem. I was seeking to remove even the micro scratches left behind in the vulcanite by the micromesh sanding pads and the remaining scratches in the briar as well. I gave the pipe multiple coats of carnauba wax to protect the pipe. I buffed it with a clean buffing pad on the wheel and raise a shine. I personally do not like the high gloss look of a pipe when it first comes off the wheel so I hand buff it with a microfibre cloth to deepen the shine and give it a rich look. The finished pipe is shown in the photos that follow. I look forward to hearing from Jim as to his thoughts regarding this “rare to me” older KBB Yello-Bole. Thanks for walking with me through the process.yb16 yb17 yb18 yb19 yb20 yb21 yb22 yb23

ADDENDUM:

Andrew commented below regarding the size of the pipe. I have added this photo of the pipe in my hand to give an idea of the size.yb1