Blog by Steve Laug
I received an email from Jim, the same fellow who sent me the Yello-Bole that I refurbished for him. I wrote about it in an earlier blog (https://rebornpipes.com/2016/11/10/breathing-life-into-a-huge-kbb-yello-bole-3068c-bent-billiard/). I have included the gist of his email and the photos he sent me because any of us who try our hand at pipe repair have found ourselves in similar situations. One simple thing going wrong can quickly compound into a second and a third thing going wrong and leave you with a mess on a pipe that at first glance should have been a simple cleanup.
“So I have a Kaywoodie Chesterfield pipe – the first pipe I ever obtained – and it is in need of serious attention. I bought it at Barclay’s in Upper Arlington, Ohio from their Estate Pipe display, and I really like the pipe. However, about three days ago, I was cleaning it, and got a tapered pipe cleaner stuck in the bit. As I was pulling the cleaner through, the thicker end jammed itself well inside the bit as I attempted to draw the thinner end through the lip. I apparently pulled too hard, and the end of the pipe cleaner broke off, leaving the remainder of the cleaner fully trapped in the bit. In my idiocy, I tried various strategies to dislodge the cleaner which eventually led to my doing further damage to the bit in the form of a split down the center of the underside of the stem latitudinally.”
“…I know this particular pipe is not terribly valuable or even rare. However, I am kind of a sap, and the pipe has a measure of sentimental value in that it is the first pipe I got, and I picked it because it reminded me of the pipes my dad smoked when I was a kid. I am hoping you can give me some good news in the form of a means to remedy my stupidity.”
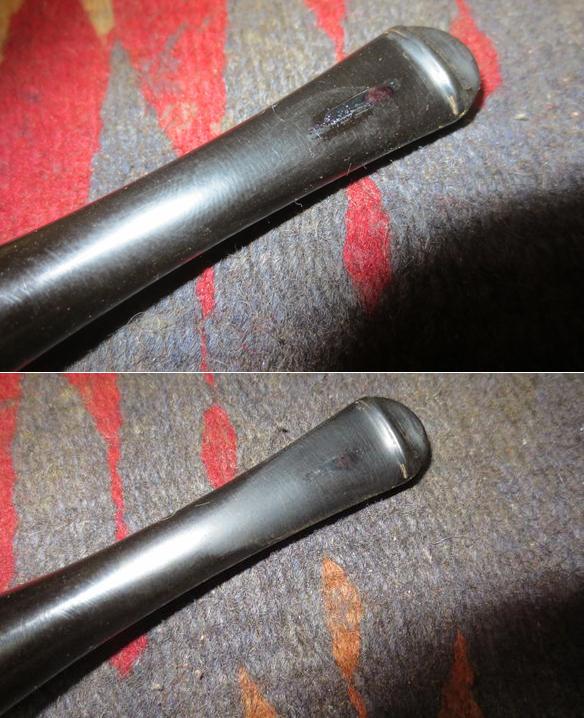
He sent the next three photos to show me his pipe and his travail. The first is one of the overall view of the pipe. Though it is hard to see in this photo the bowl has some very nice grain. I will take some pictures of the bowl and the finished pipe once I have finished the repair.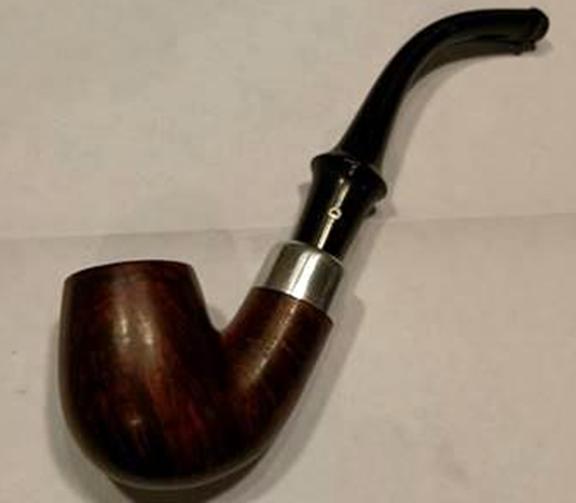 He took a photo of the end of the shank. His caption read: “You cannot see the thicker end of the pipe cleaner because it’s stuck way in there…” Indeed the pipe cleaner was stuck in the stem. It was jammed in the stem 1 ½ inches from the button with a bit showing through the jagged split in the stem and about two inches in from the shank end of the stem.
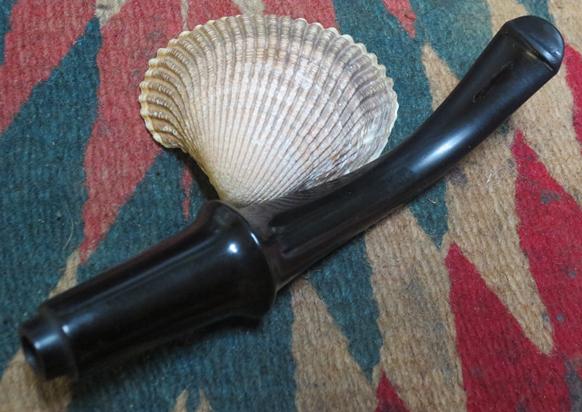
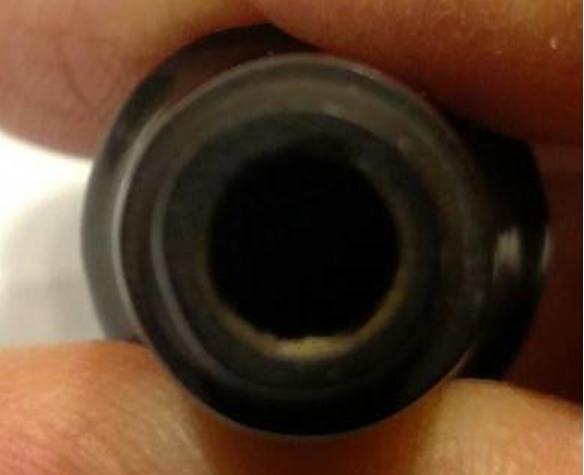 The last photo he sent shows the underside of the stem with this caption: “….And this is what you get when a dummy tries to ameliorate a situation that is beyond his ken.” It was a jagged split that looked awful in the photo below.
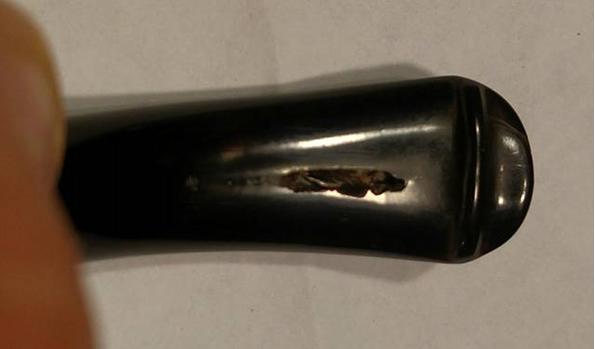 I had him send the pipe to me so that I could see what could be done. A stem repair in its own right that large is a fair bit of work but it could be done. The pipe cleaner jammed in the airway was an altogether different issue. I needed to have a look to see what I could come up with to remove the jam from the airway in the stem. I could not be sure until I saw it and tried.
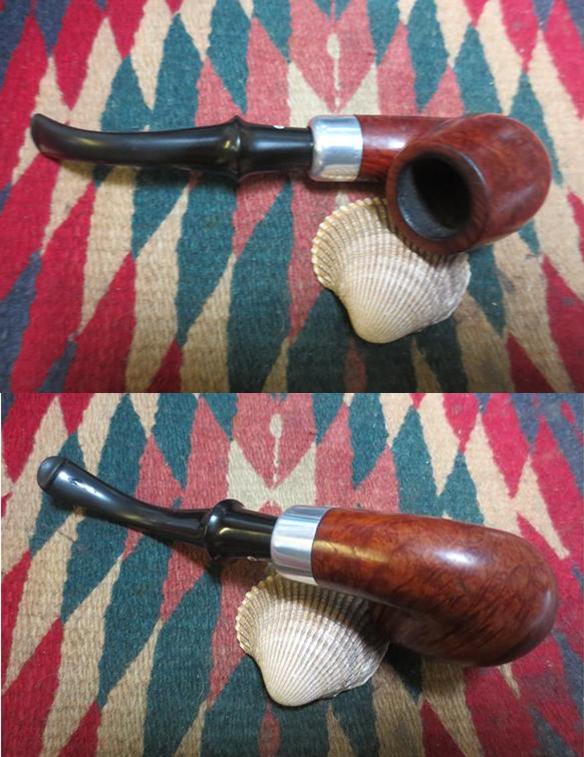
The package arrived in Canada a few days ago and I opened it to find he had included the large Yello-Bole that I mentioned above and the damaged Chesterfield. The Chesterfield is actually a stunning pipe. The grain on the bowl, the finish and the nickel ferrule all combine to make a beautiful pipe. The bowl was in great shape and required no cleaning or repairs – just a buff to polish it. I can certainly see why Jim was attached to it. He was willing to have a new stem fit to the shank but I really wanted to see if the original Kaywoodie stem could be salvaged.
I took the next series of photos to show the damage to the stem underside. I needed to straighten the stem out to properly work on it. I traced the angle of the curve on the back of the letter that Jim sent along with the package so that I could recapture it once I finished the repair. I used a dental pick and tweezers to pull as much of the pipe cleaner and wire out of the damaged area on the stem. I found as I worked on the damaged area that several chunks of a small drill bit also fell out giving testimony to one of the ways Jim had tried to remove the jammed pipe cleaner. I was hoping to be able to pull all of it out this way but it continue to break and come out in small pieces until I was unable to reach any more with the pick and the tweezers.
I used a drill bit on my cordless drill and turned the straightened stem onto the bit from the shank end. My thought was that perhaps the drill bit would seize a piece of the pipe cleaner when I backed it out of the stem. It worked to a degree but it would not bring out the last 1 ½ inches of broken pipe cleaner. I was stuck. I needed some time to think through my options and try to figure out how to address the problem. I laid the stem aside and worked on the Yello-Bole while I pondered my next moves with the stem.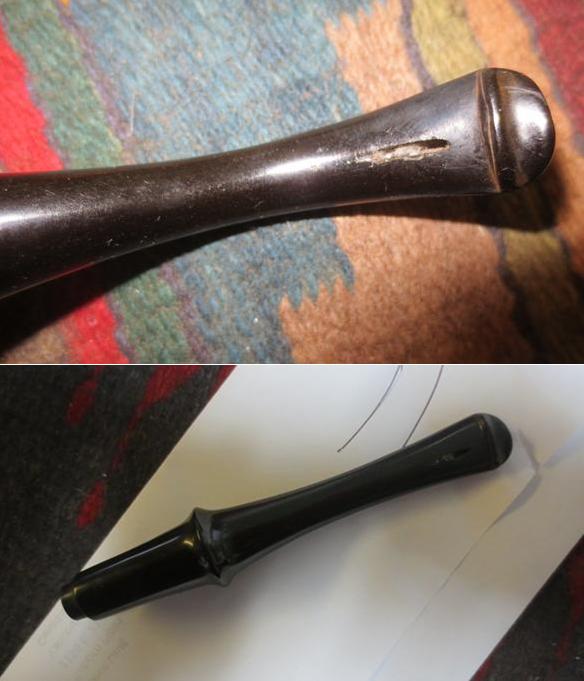 While I was working on the Yello-Bole I had a thought that maybe putting the stem in the freezer for a bit might work. My thinking was that when I removed it the contraction and expansion of the vulcanite and that of the pipe cleaner would be different enough that the pipe cleaner would drop out of the shank. At least that is what I dreamed would happen. A few days went by and I had some late nights at work and the stem sat in the freezer for a lot longer than I had anticipated. Needless to say when I finally took it out of the freeze it appeared to have made no difference. The pipe cleaner did not simply fall out of the airway as the stem warmed.
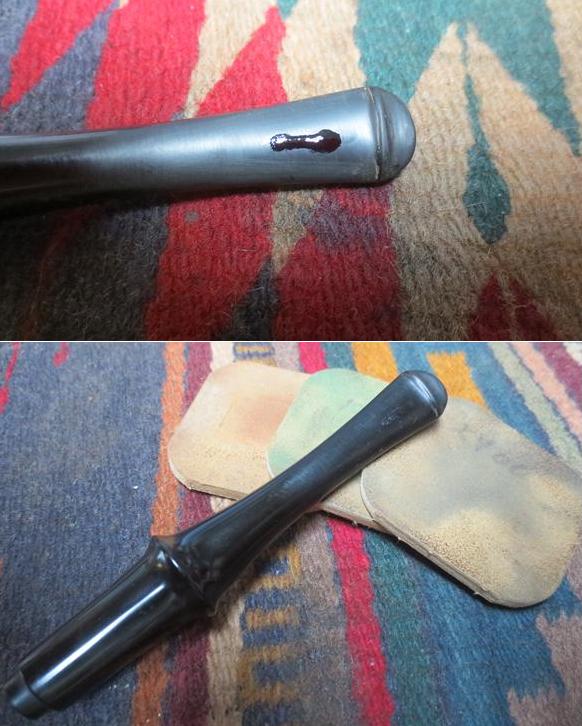
I laid it aside for the night and went to sleep. I woke up early this morning with an idea. I straightened a length of paper clip that I used as a punch. I slid it into the button end of the stem carefully past the damaged underside until it hit the jammed pipe cleaner. I used a small furniture tack hammer to tap on the bit of paper clip extending above the button. I tapped it maybe four or five times and I felt it begin to give. Encouraged, I tapped it several more times and the pipe cleaner bit fell free of the shank end of the pipe. You can see the broken piece of pipe cleaner below the stem in the next photo. I plugged the damaged area with my thumb and blew through the stem to clear out debris left behind by the pipe cleaner bits. The airway was finally free.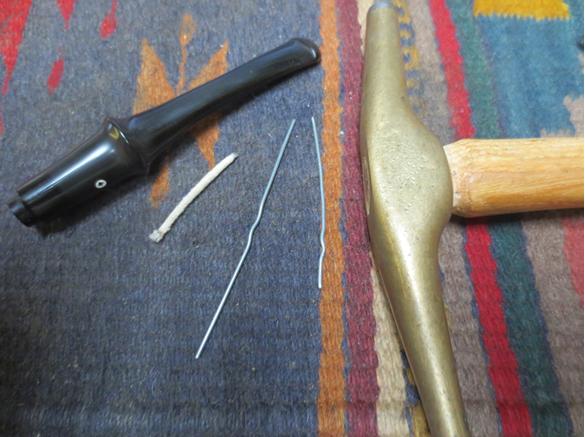 I mixed a batch of charcoal powder and black super glue on a patch of cardboard until I had a thick paste. I use activated charcoal capsules for the finely ground charcoal and a medium viscosity super glue for the mixture. I greased a pipe cleaner with Vaseline and slid it into the stem filling in the area on both ends of the damaged spot. I applied the mixture of super glue and charcoal powder to the damaged area with a length of straightened paperclip. I smoothed out the repair with the edge of a paper clip. I sprayed the repair with an accelerator and slid the pipe cleaner out of the airway. I blew through the shank end of the stem and the airway was clear of blockage. I used a clean pipe cleaner to remove the excess Vaseline from the inside of the stem.
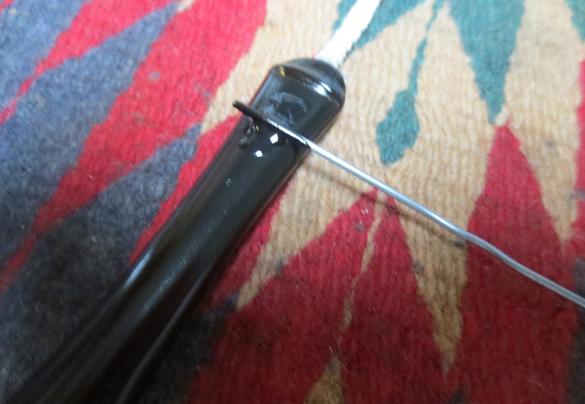 I used the rest of the mixture to build up the repair and spread it over the surface of the stem, bonding the patch to the solid vulcanite on both sides of the damaged area. The patch was thick and large but I would be able to sand it smooth.
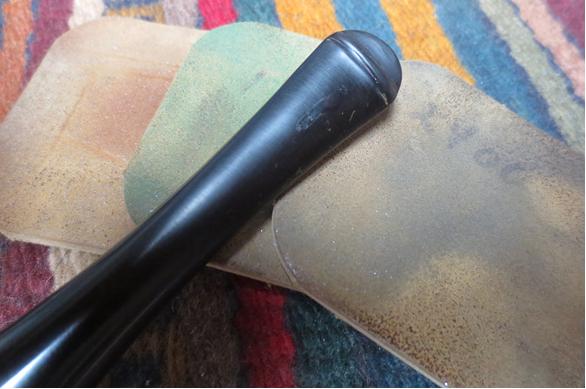
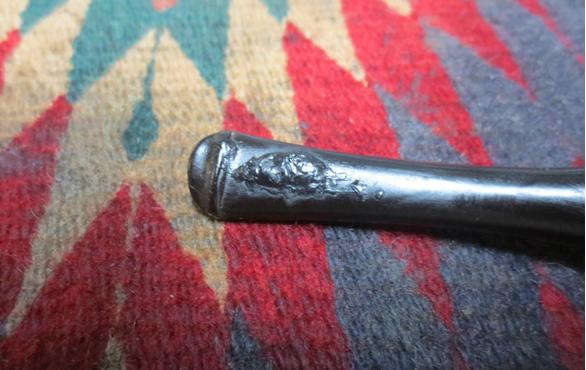 Once the patch dried I sanded it with 220 grit sandpaper to smooth it out and blend it with the surrounding vulcanite. The next two photos show the repaired area at this point in the process.
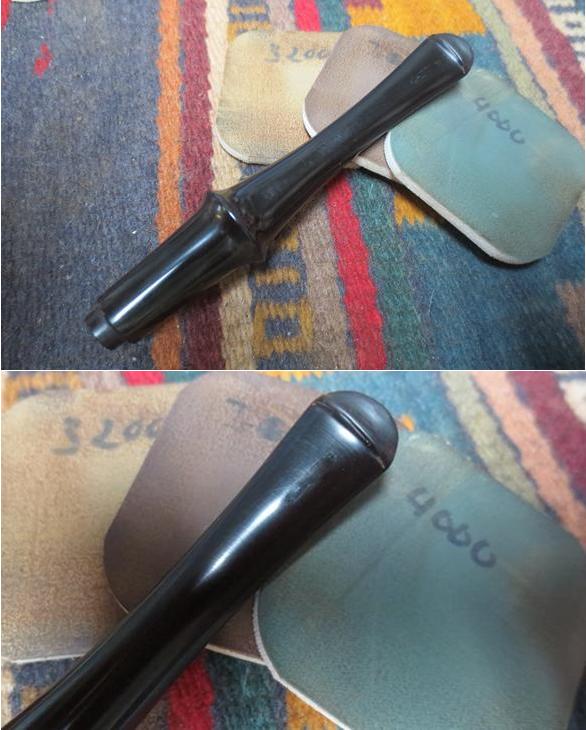
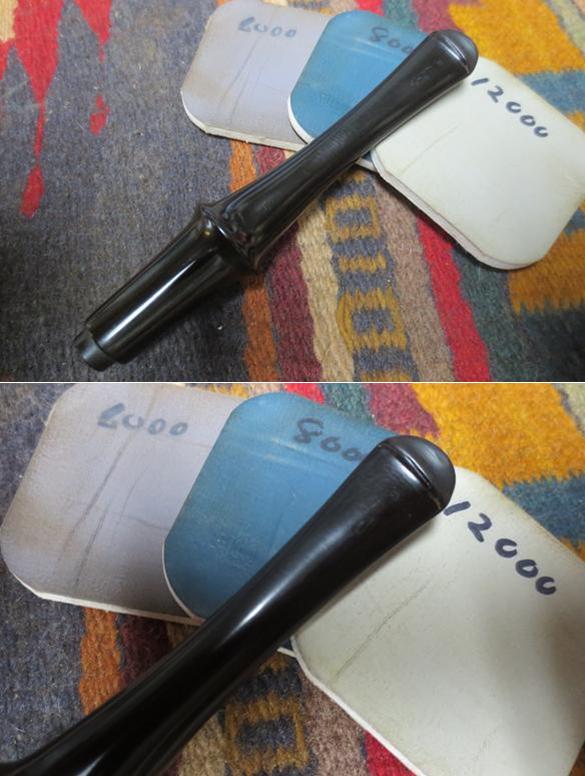
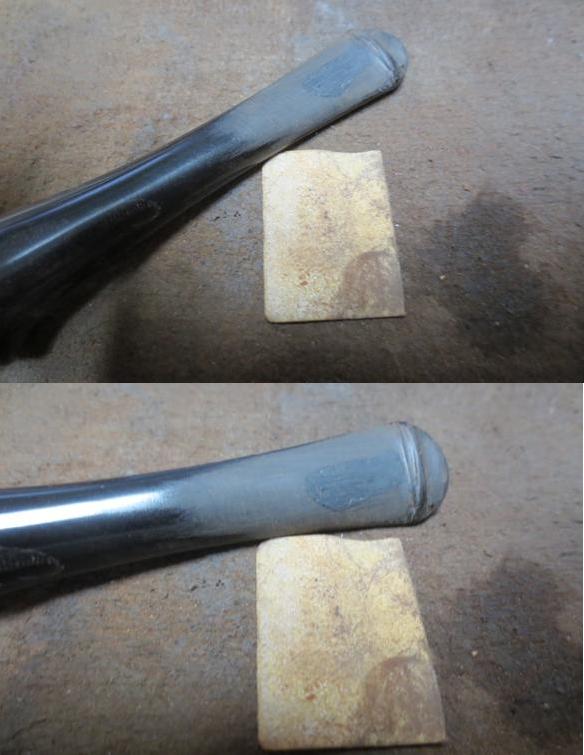 I polished the stem with micromesh sanding pads – wet sanding with 1500-2400 grit pads and dry sanding with 3200-12000 grit pads. As I worked over the repaired area some of the air bubbles in the mixture of charcoal powder and the glue came to the surface. I have never found them to be big deal as they only need to be lightly filled with clear super glue. I repeated the super glue and sanding process until the patch was smooth. I sanded it with micromesh pads until it shone and after each set of three pads I rubbed the stem down with Obsidian Oil. I gave it a final coat of oil after the last set of three pads and set it aside to dry. The following photos show process of how the repaired area gradually smoothed and blended into the rest of the vulcanite.
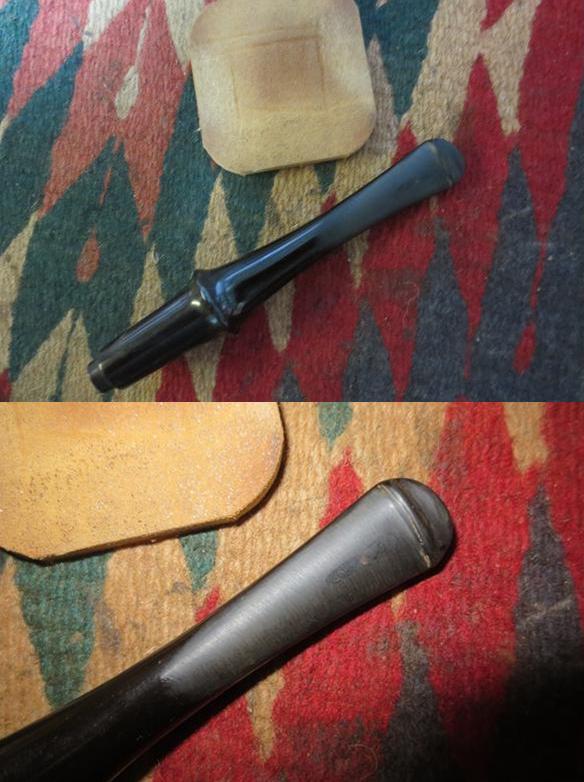
 Once the repair was finished and polished I set the stem aside to cure for several hours. I wanted to make sure that the charcoal and black super glue patch was hard. I had visions of it dropping out when I heated the stem and applied pressure to bend it. Once it had hardened bending it was not a problem. I slid a small pipe cleaner into the stem from the button end to keep the airway from collapsing when I bent it. I heated it over a heat gun until the vulcanite was pliable. I bent it to match the pattern on the paper and then cooled it with running water. I repeated the process until I had the right curve to the stem.
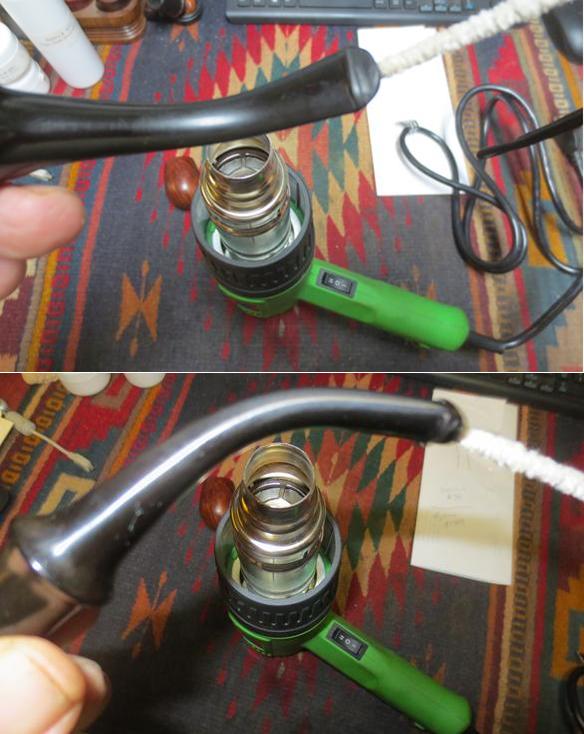
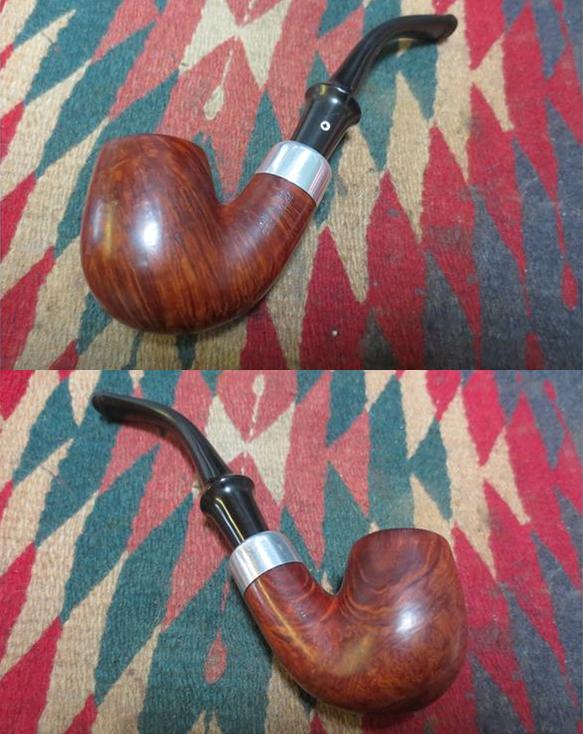
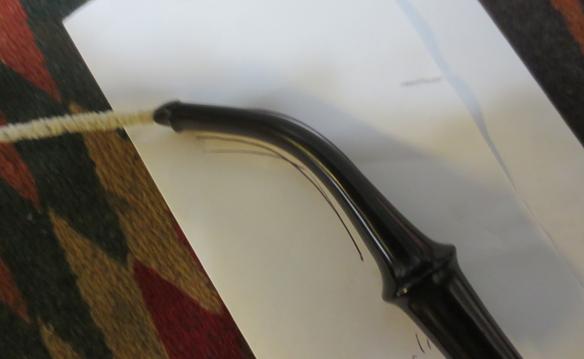 I buffed the stem and bowl with Blue Diamond polish on the buffing wheel to raise a shine and polish out the scratches. I gave the bowl and stem multiple coats of carnauba wax. I buffed it with a clean buffing pad on the wheel and hand buffed it with a microfibre cloth. The repair to the underside of the stem is solid and smooth. While the repair is visible under bright light it did not stand out while looking at it with the naked eye. Along with that the repair was fortunately on the underside of the stem in the curve. I think Jim will appreciate the repair and the pipe should serve him well. I look forward to hearing what he thinks of the repair once he has the pipe in hand. Thanks for walking with me through the process.