Blog by Steve Laug
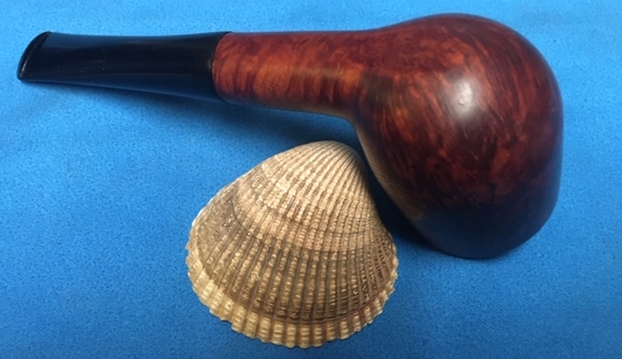
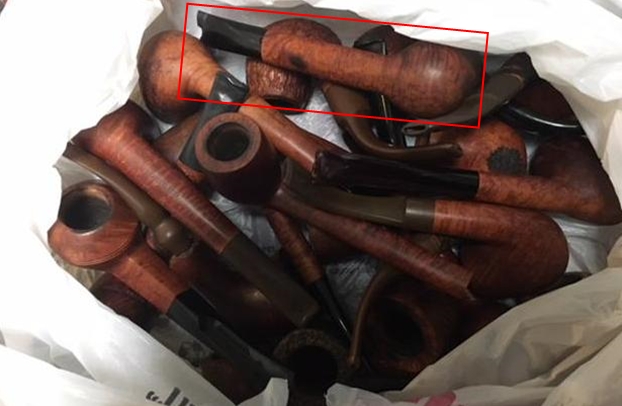
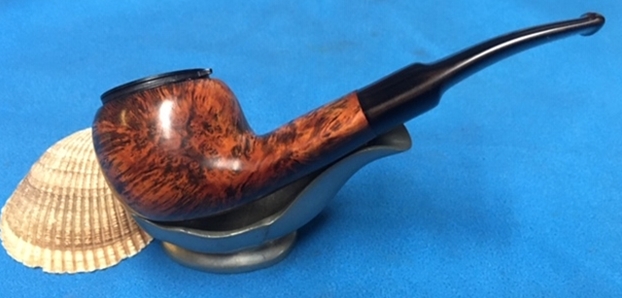
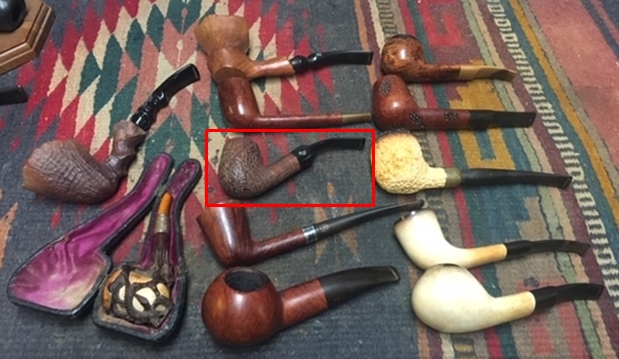
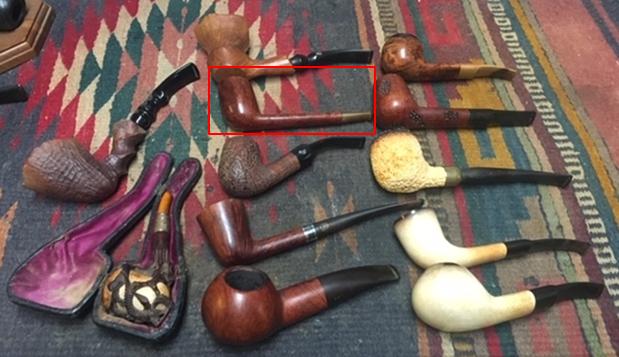
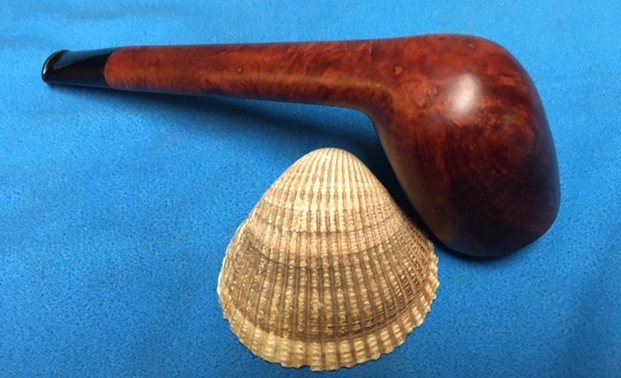
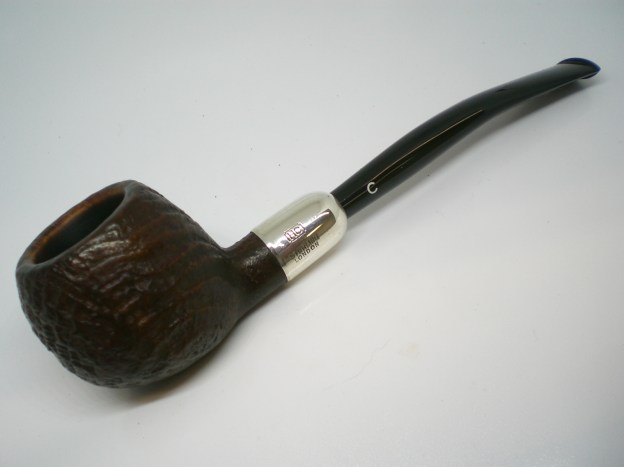
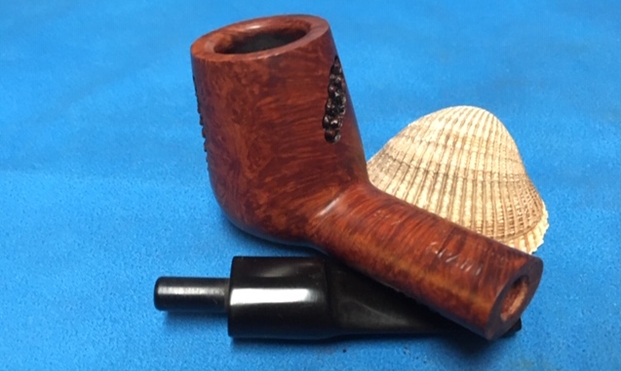
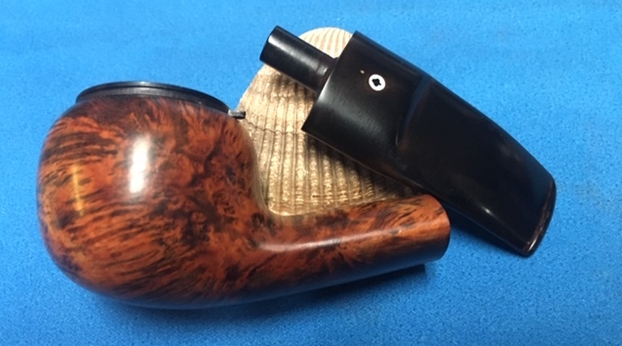
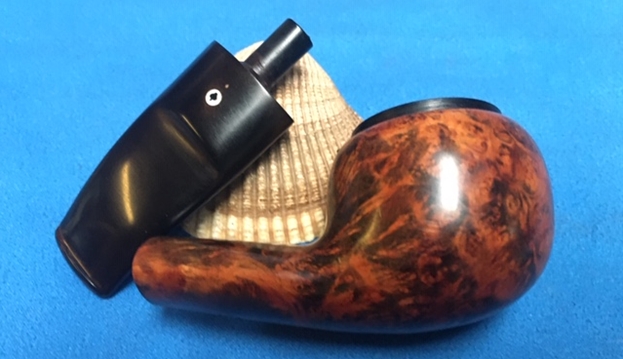
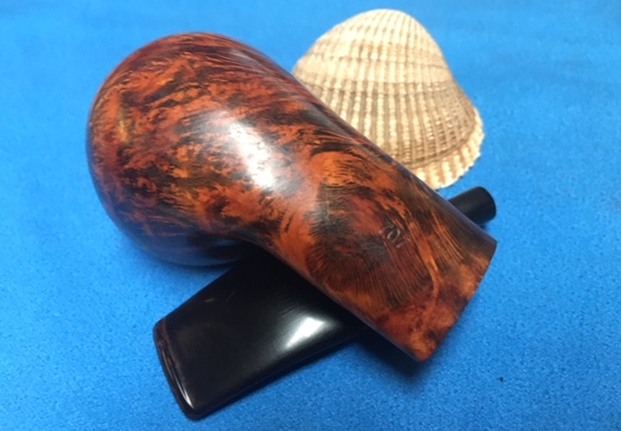
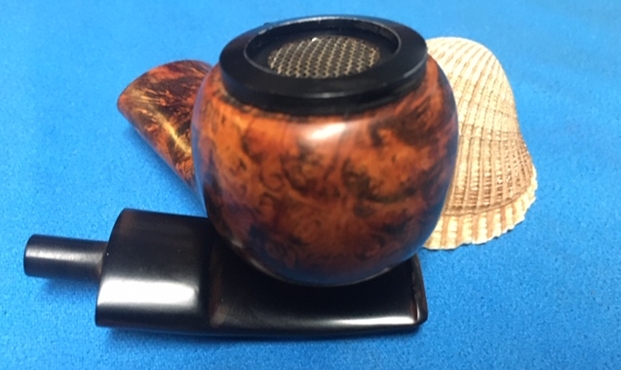
On our recent trip to Alberta we picked up quite a few pipes that were really nice. Some of them were brands we were familiar with and some were pipes that were unknown and unidentifiable. But if you are a pipe hunter you know the feeling when you are holding a particular pipe, no matter what the brand and it just speaks to you. That is what happened with this next pipe. It was in a display case at an antique mall in Edmonton. The shape of the pipe, the wind cap that was an integral part of the rim top and the interesting staining that highlighted some unique grain called my name. The stamping on the top of the shank read Kaywoodie over Air-way and on the underside it was stamped London, England and the shape number 707. It was a shape I had not seen before and the wind cap mechanism was a new one for me as well. The fact that it was an English made Kaywoodie also insure that it was going home with me. I have drawn a red box around the pipe at the top of the column on the right. The grain under the dirty finish was unique and the finish was interesting. The diplomat shape is one that I enjoy smoking and it has a good feel in the hand. The rim top was truly unique. The wind cap was fascinated on the rim top and the screen can be swiveled to the left to open the bowl. The bowl itself had a think cake in the bowl and the inside of the bowl and rim edges looked very good. The finish was dirty but still in good condition under the grime. The vulcanite stem was so heavily oxidized that it was butterscotch colour. It had some tooth marks and chatter on both sides near the button. There were some small cracks and the slot was slightly collapsed on the left side. The Kaywoodie club logo on the top of the saddle stem was a white circle with a black club inside.
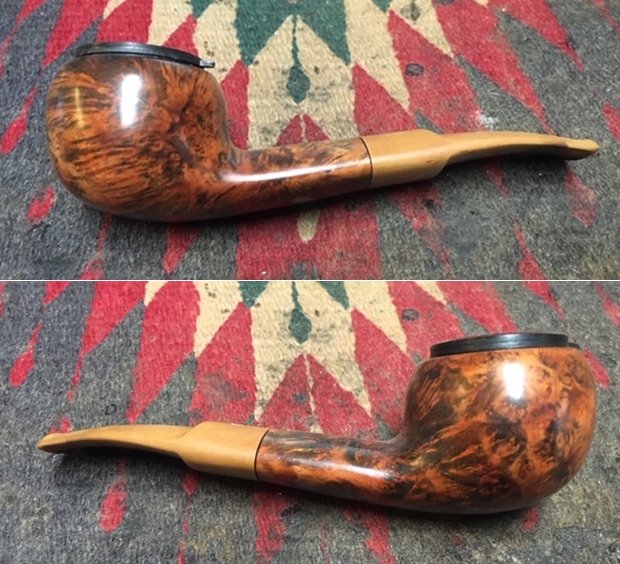
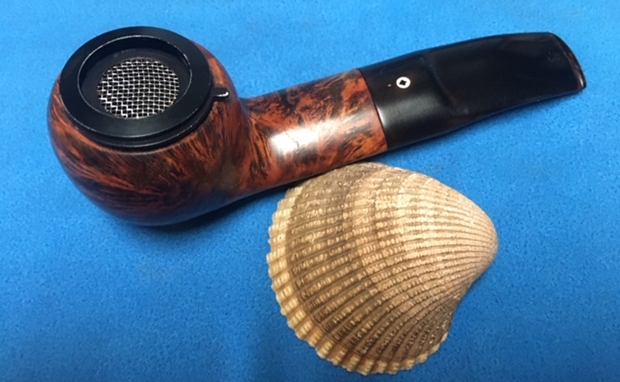
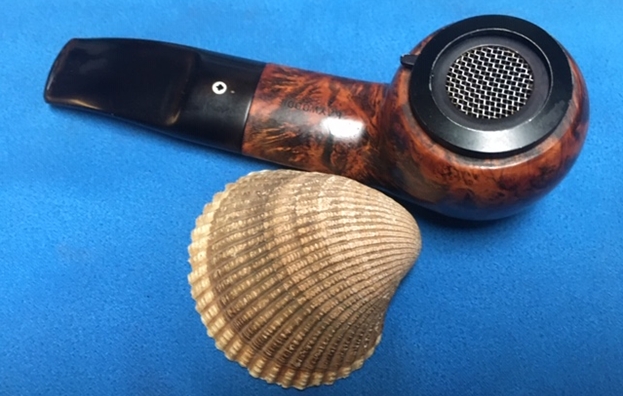
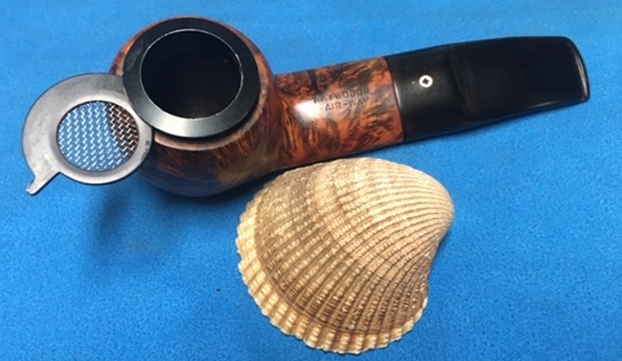
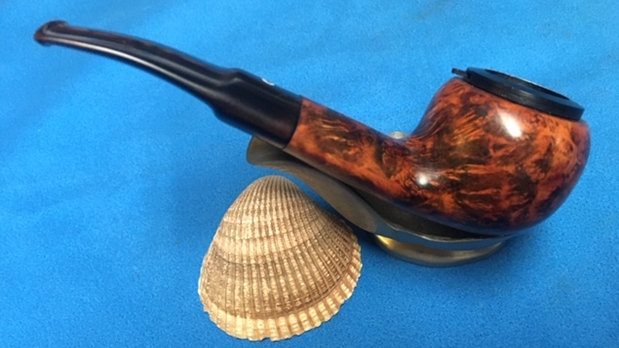
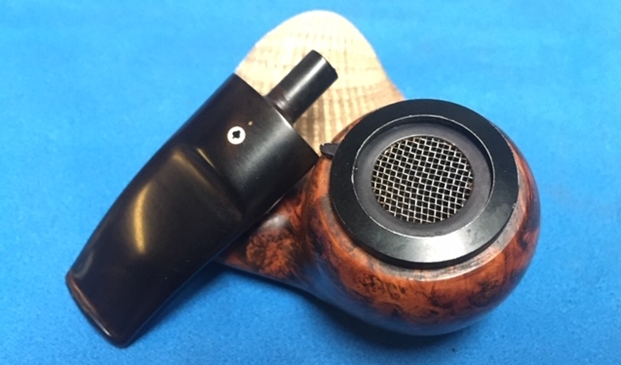
 I took close up photos of the wind screen mechanism on the rim top with it open and closed to show how it worked. You can see the condition of the bowl in the second photo below.
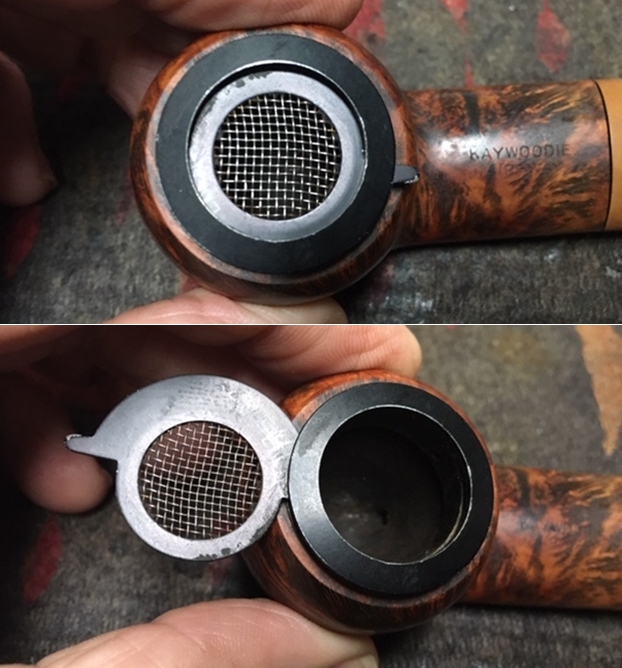 I took photos of the stem showing the deep oxidation and tooth chatter on both sides near the button. You can also see the small cracks on the top side of the button. It is thin so it easily was chipped and cracked when clenched.
 I took some photos of the stamping on the shank. The first photo shows the Kaywoodie Air-Way stamp and the white circle/black club insert on the stem top. The second photo shows the London, England and shape number 707 on the underside of the shank.
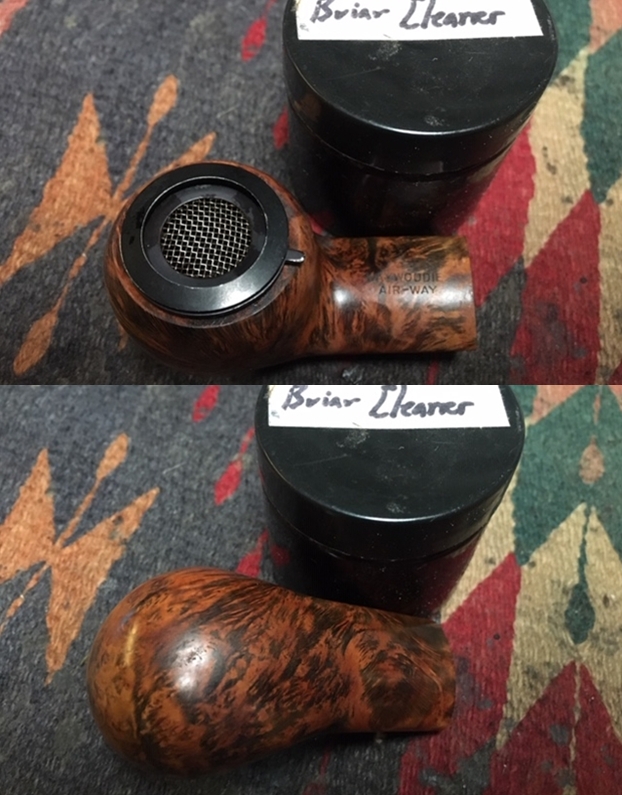
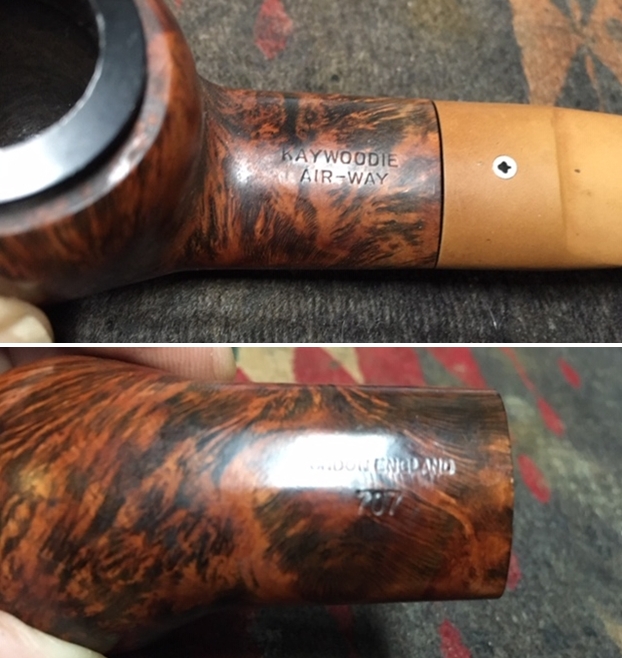 I took a closer look at the inside of the bowl and took a photo. It was dirty but very lightly caked.
 I took a photo of the pipe with the push stem removed from the shank. The stinger was different from the usual Kaywoodie stinger. It had a ball on the end of the stinger but no holes in it. There was a ring around the stinger just above the tenon insert and a slotted hole.
 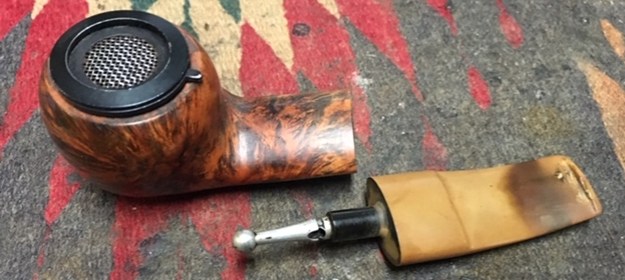 Before doing cleanup work on the pipe I decided to do some research on the pipe. I looked first on the Pipephil website and found some information on the white circle/black club stamp on the top of the stem. I did a screen capture of the pertinent information on the logo itself
  (http://www.pipephil.eu/logos/en/logo-kaywoodie.html). From there I learned that the logo was used first in 1937 and up until the late 1940s for the higher grade pipes. Also until the late 40s early 50s the logo was on top of the stem.
There was no other information on the Air-way line on the site and nothing under the section on the London/British made Kaywoodie pipes. That meant I would need to turn elsewhere to find that information. This would be an interesting hunt and restoration.
I turned to Pipedia (https://pipedia.org/wiki/Kaywoodie) and read the section on the rough outline on the history of the brand that links the brand with the English section of the company. I quote:
Again, demand for KBB pipes and especially Kaywoodie prompted another move for both the manufacturing facilities and the corporate offices. In 1930 the corporate office moved into the Empire State Building on Fifth Avenue in New York. By 1935, the manufacturing operations moved from Union City to 6400 Broadway in West New York, New Jersey which, at the time, was touted as the largest pipe making facility in the world. At the height of production, there were 500 employees producing up to 10,000 pipes per day.
The corporate offices were relocated in 1936 to the International Building, Rockefeller Center, 630 Fifth Avenue, New York. The invitation to visit the new office reads, “Kaywoodie is now on display at the world’s most famous address – Rockefeller Center. Here Kaywoodie takes its place among the leaders of industry and commerce.” The move to Rockefeller Center coincided with The Kaywoodie Company’s emergence as a subsidiary of KBB. All of the pipes manufactured by KBB including the Yello-Bole line were also on display here. By 1938 Kaywoodie had opened an office in London to meet worldwide demand. Kaywoodie of London was jointly owned with another famous pipemaker, Comoy’s of London.
I am also including a screen capture of a picture of a pipe that is the same shape as the one that I am working on. Thanks to Doug Valitchka for the photo. From there I turned to a link on the article to a section called Guide to Kaywoodie Pipes (https://pipedia.org/wiki/Collector%27s_Guide_to_Kaywoodie_Pipes#NOTES_ON_.22OTHER.E2.80.9D_KAYWOODIE_PIPES). It gave some pertinent information on the Air-way line. I quote two sections from that article below. I have highlighted the Air-way brand name in the second paragraph.
English Kaywoodies. All of the catalogs reviewed in this research contained the following copyright notification: Printed in U.S.A., Kaufmann Bros. and Bondy, Inc., New York and London. Kaywoodie Pipe cases and smoker’s accessories were also marked with “New York and London”. The catalogs, however, do not present any information concerning Kaywoodie’s London operations, or how the English Kaywoodies might have differed from those manufactured and marketed in the U.S. Lowndes notes that he has several English Kaywoodies acquired in
Vaduz and Zurich. English Kaywoodies are now made by Oppenheimer pipes. Lowndes notes that English Kaywoodies with the “screw-in bit” come in Ruby Grain, Custom Grain, Standard, and Relief Grain grades. The traditional push-bit models come in Continental Plain and Relief, London Made, Minaret, Air-way Polished No. 707, and Lightweight grades. Prices in 1985 ranged from 9.50 (pounds) to 26.00 (pounds). Lowndes notes that the Super Star was a special edition English Kaywoodie made of finest briar with a handmade silver band. Lowndes has two: one from Zurich with a large white-outlined logo, and beautifully cased; and one in walnut finish with the black-in-white logo. A recent catalog shows the Super Star without a band and the ordinary small white logo. A 1985 letter from Oppenheimer states that the black-in-white logo has been discontinued and only the regular white logo is now used.
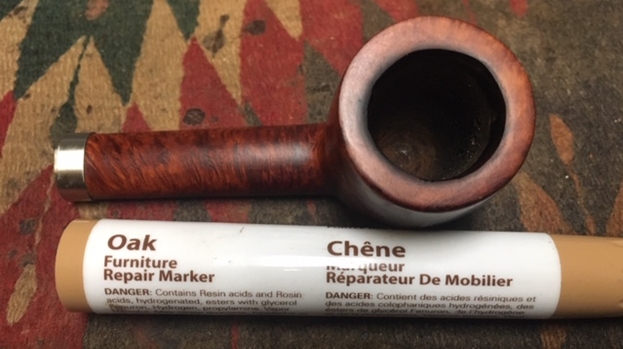
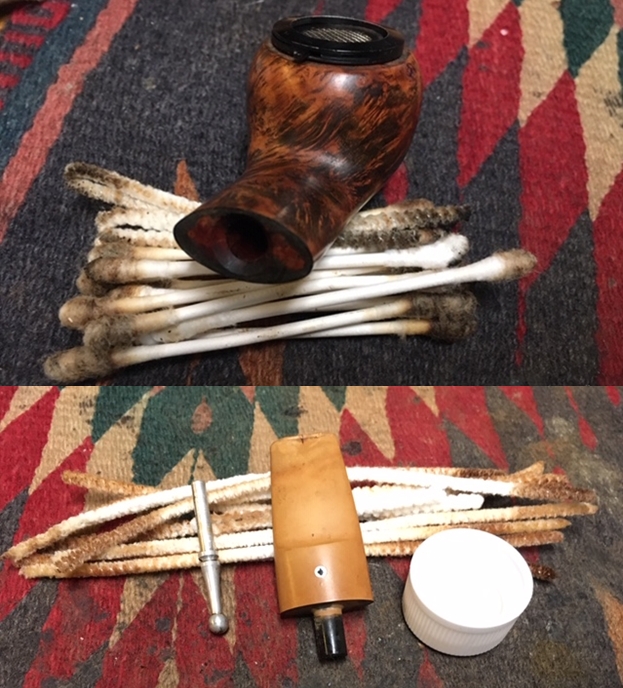
From that information I now knew that the pipe in hand was made prior to 1985 in London by Oppenheimer. It had a traditional push-bit rather than the threaded screw in bit. After 1985 Oppenheimer discontinued the black in white logo. It was time to work on the pipe now. I scraped the shank with a pen knife to remove the tarry buildup that did not allow the stem to seat properly. I cleaned out the mortise and the airway in the shank and the stem with alcohol, cotton swabs and pipe cleaners.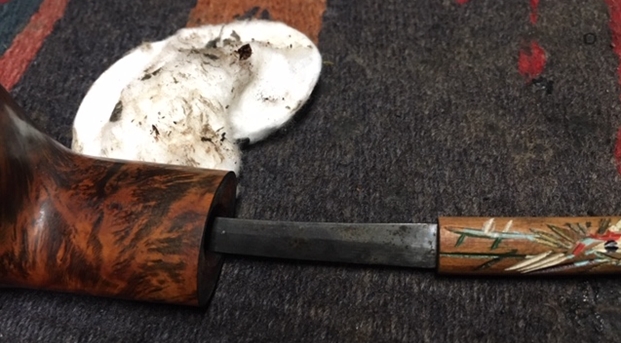
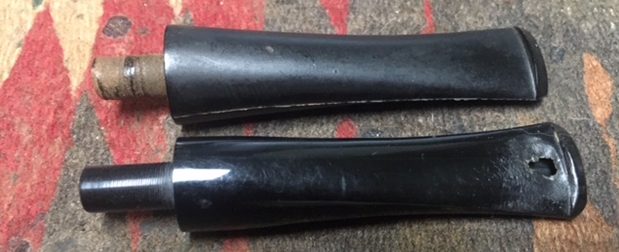
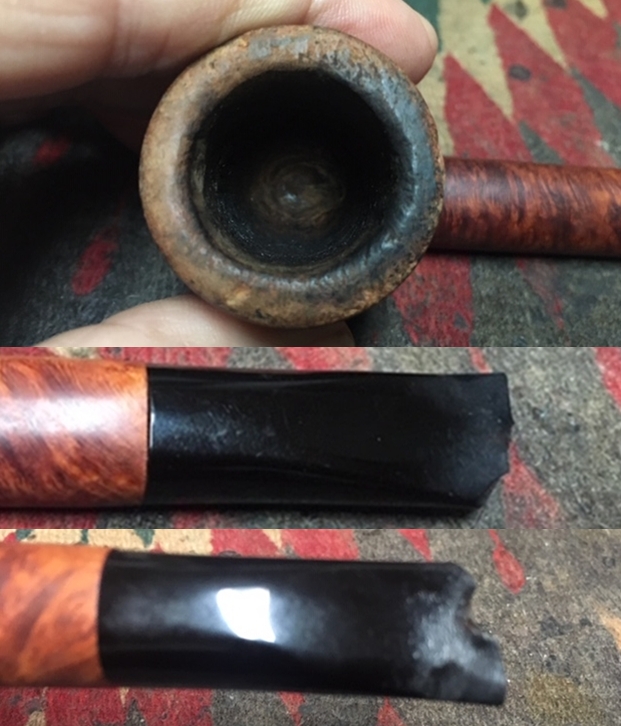
 I took some close up photos of the cleaned button and slot to show how it had a crack and had been collapsed slightly on the left side of the top.
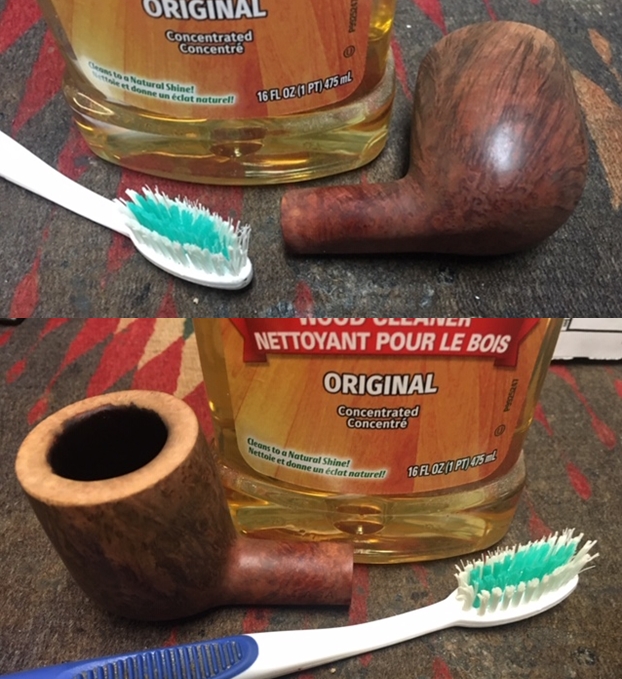
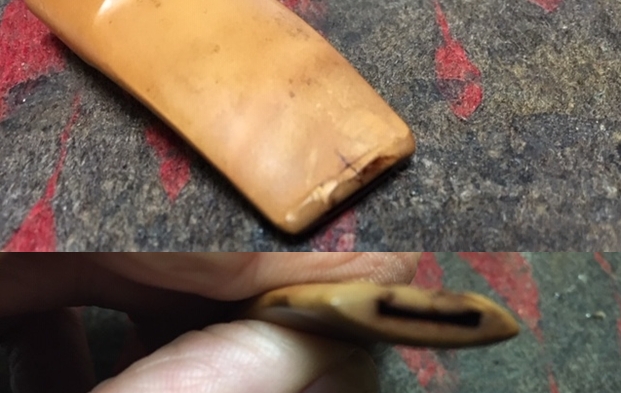 I scrubbed the exterior of the bowl with Before & After Briar Cleaner. I worked it into the surface of the briar with my finger tips and let it sit for a short time to absorb the grime. I rinsed it down under warm water to remove the grime debris that was collected in the cleaner. At the same time I used a tooth brush to scrub out the inside of the bowl and rinsed it. I dried the bowl off with a soft cotton cloth and lightly polished it.
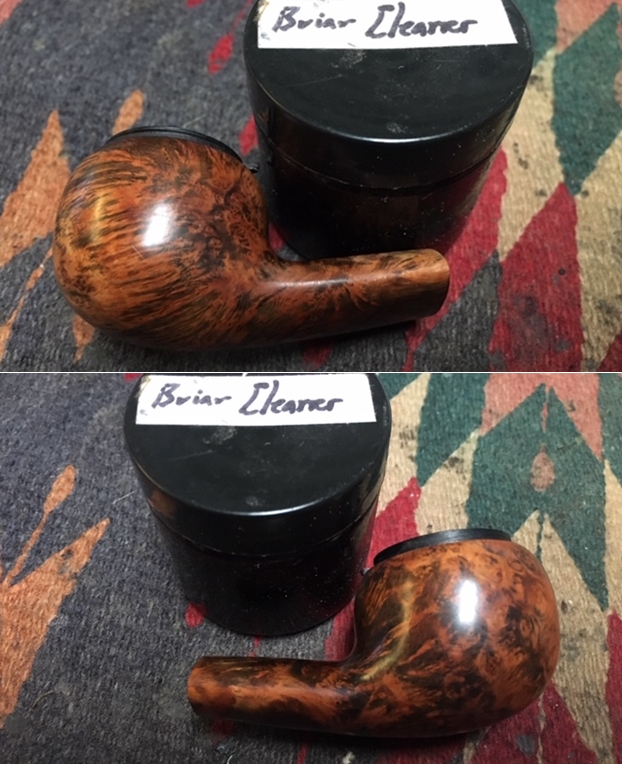
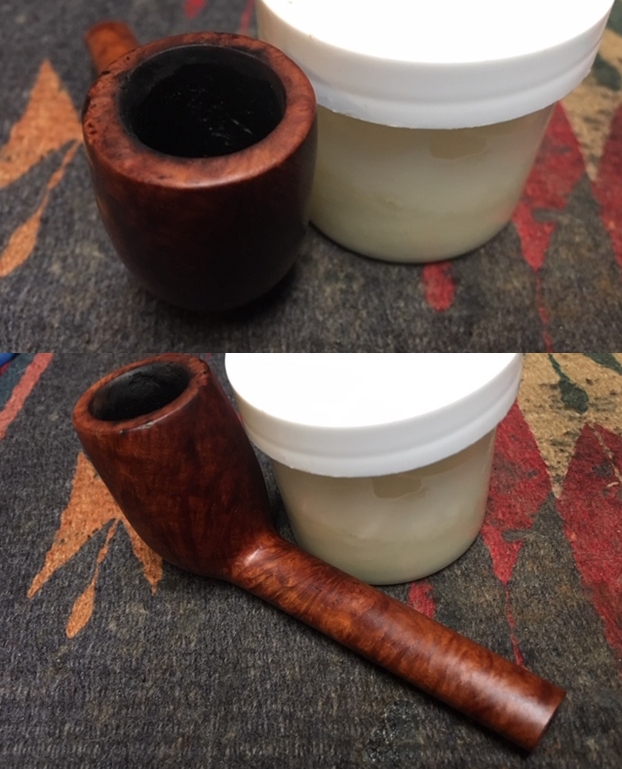
 I worked some Before and After Restoration Balm into the surface of the briar. I rubbed it into the briar to restore, preserve and polish the briar. I let it sit on the bowl for about 10 minutes and buffed it off with cotton cloth.
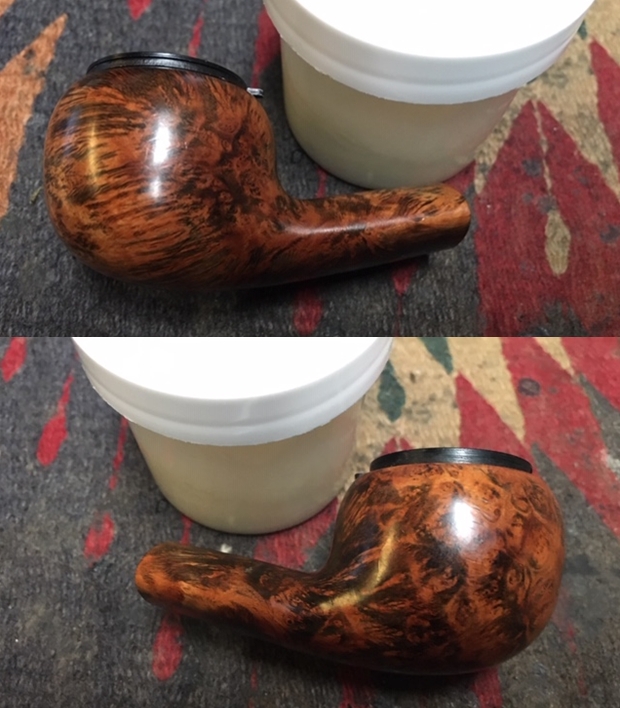

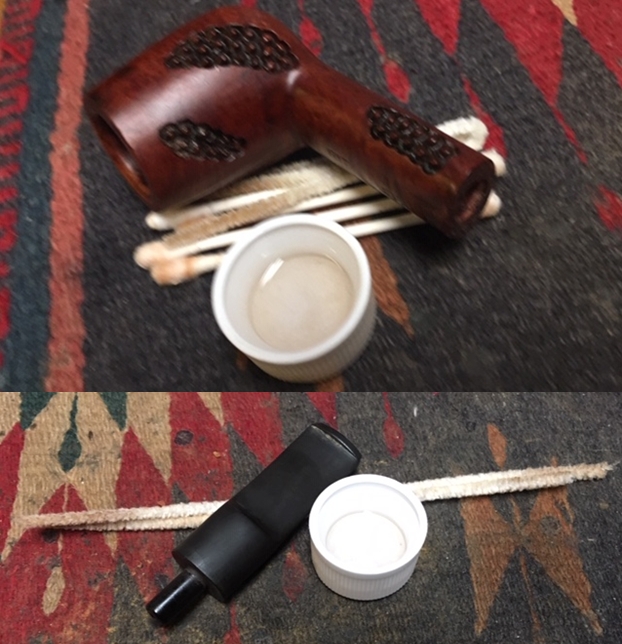
 It was getting late so I set the polished bowl aside for the night and put the stem into a bath of Before & After Pipe Stem Deoxidizer to soak overnight. In the morning I would take it out and start working on the stem.
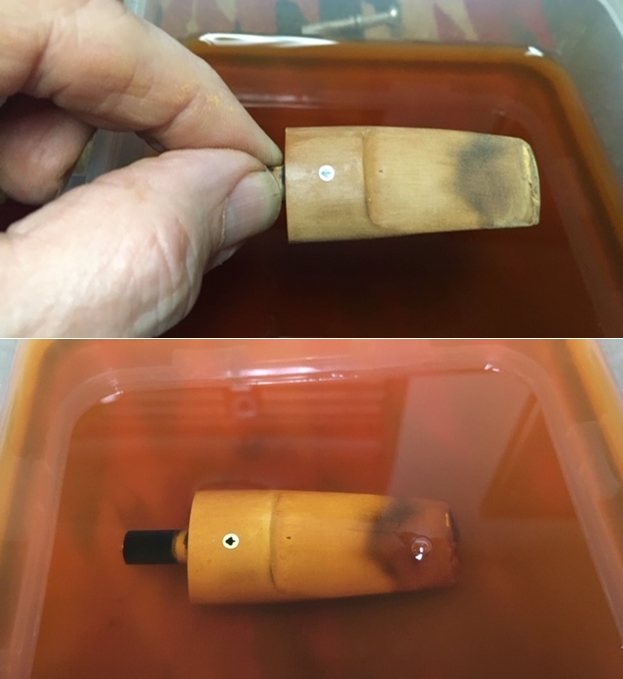 I took it out of the bath in the morning and wiped it down with a microfiber cloth. Much of the oxidation on the surface came off. I used a Scotch Brite pad to scrub off the oxidation. You can see from the photos that some still remained.
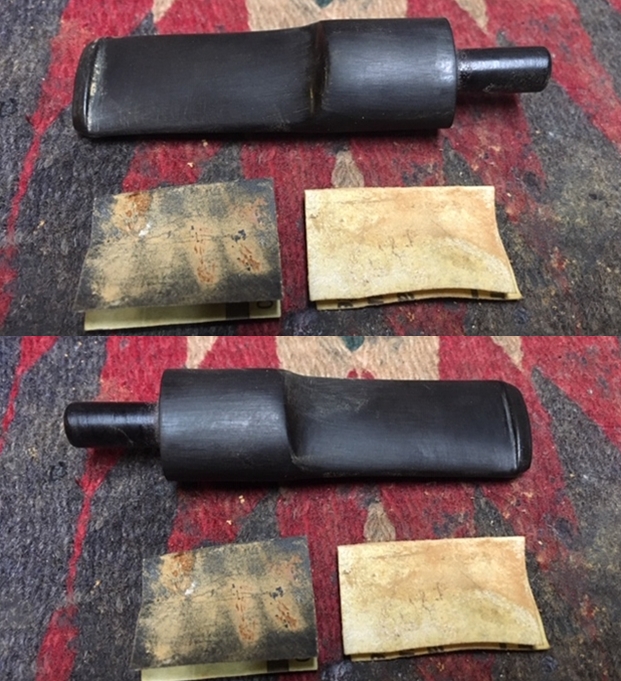
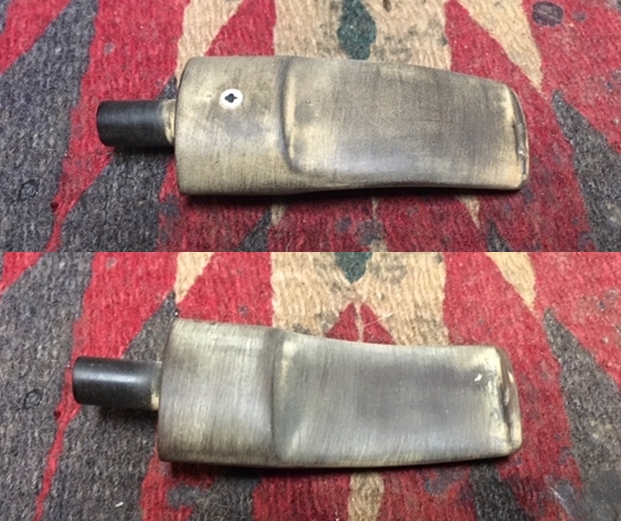 I put it back in the bath overnight again to see what would happen. When I took it out it looked better but there was still a lot of work to do with it.
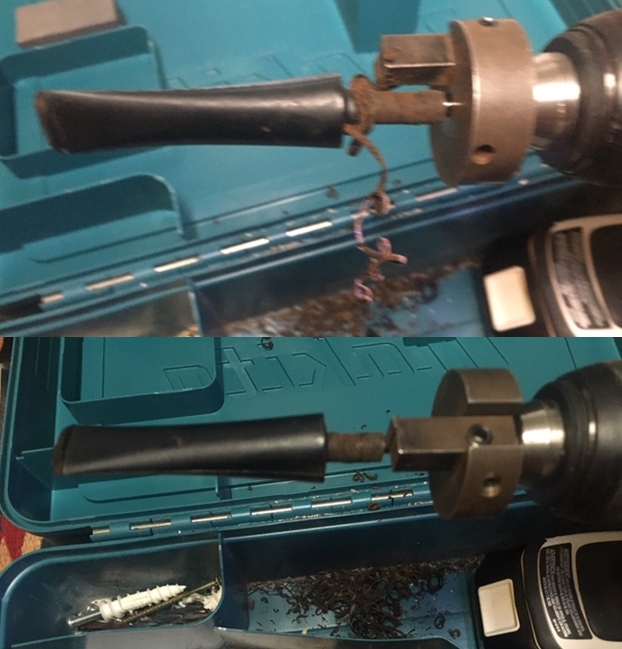
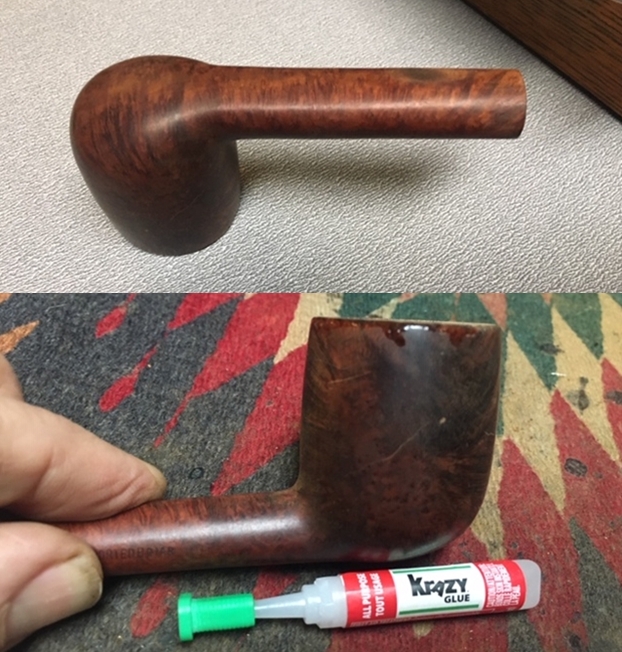
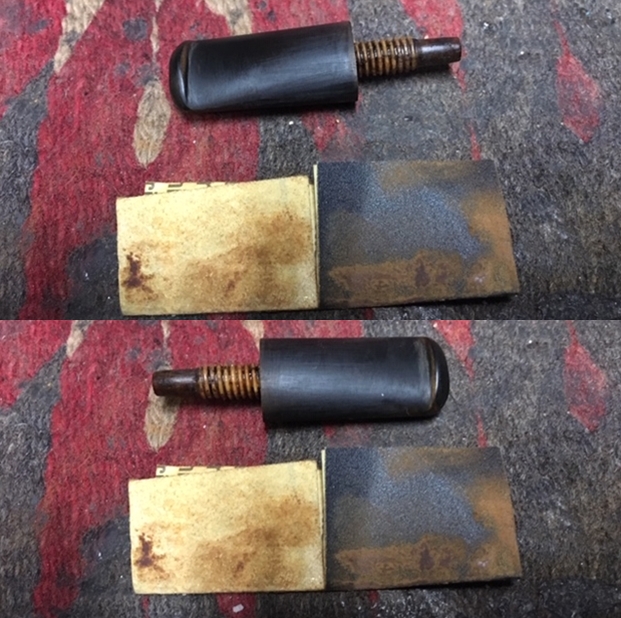
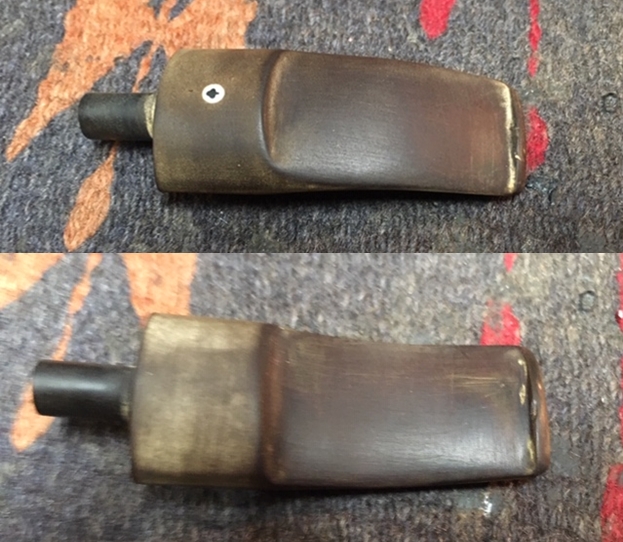 I decided to address the damaged button on the top edge. The top edge of the button had collapsed partially into the slot. There were small cracks on the surface. I have used clear super glue in the past to address this but I had an idea for an experiment. I heated the blade of a dental spatula and inserted it into the slot. I repeated the process several times until I had the slot opened and lined up. I touched the heated blade to the cracks on the top of the button and stem and to the tooth mark on the underside. The tooth marks disappeared and the cracks were sealed with the heat welding the pieces together. Whereas before the repair I could not insert a pipe cleaner, I now could slide it in and out with ease.
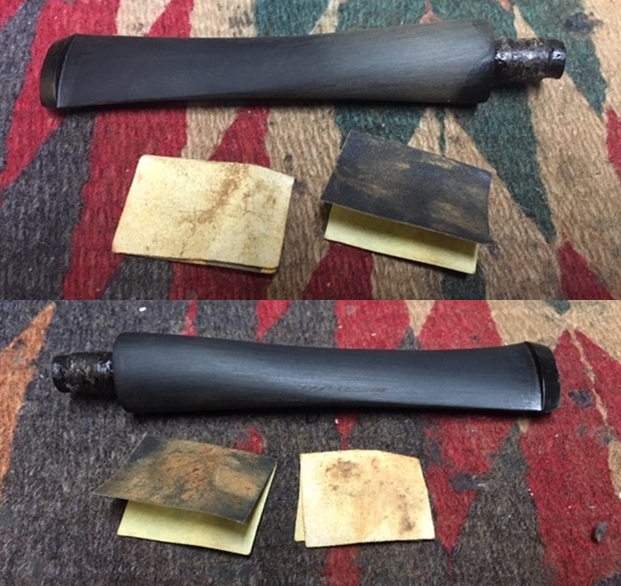
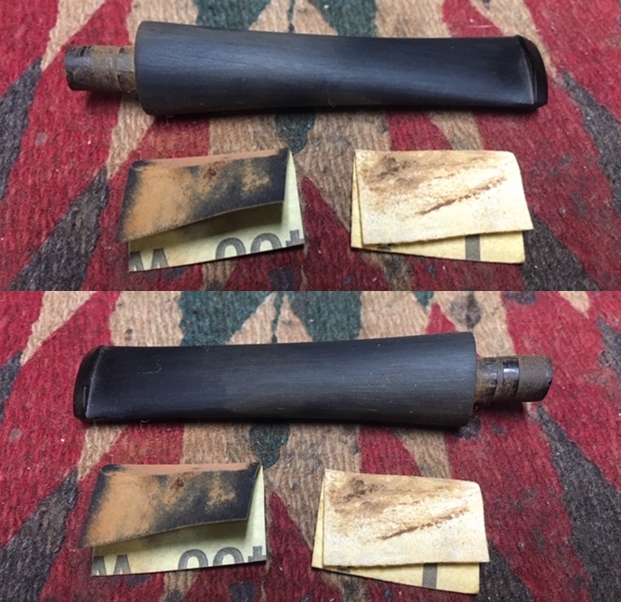
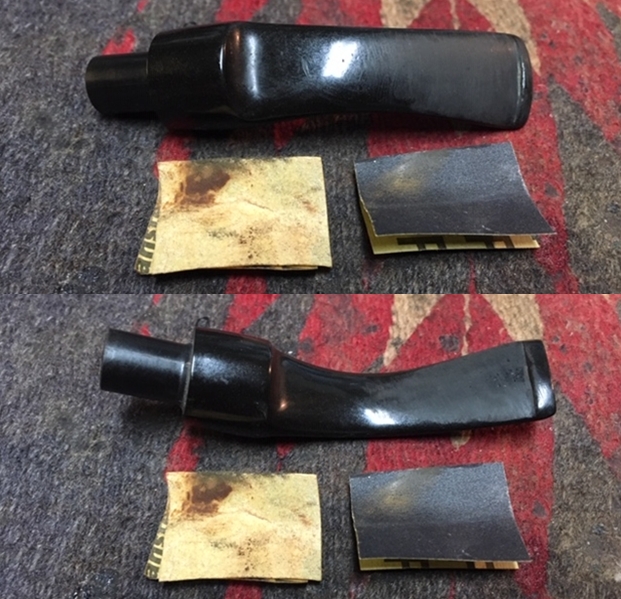
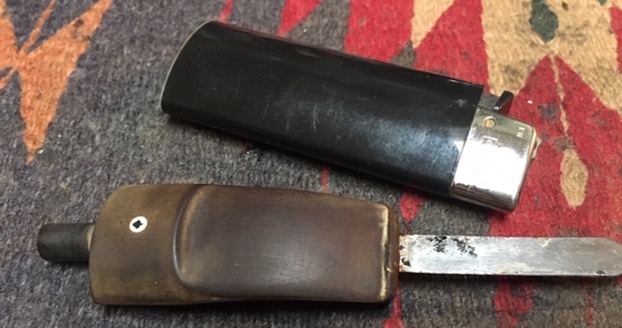 I sanded the stem surface with 220 grit sandpaper to remove the oxidation and tooth chatter. I started polishing it with 400 grit sandpaper to remove the scratches.
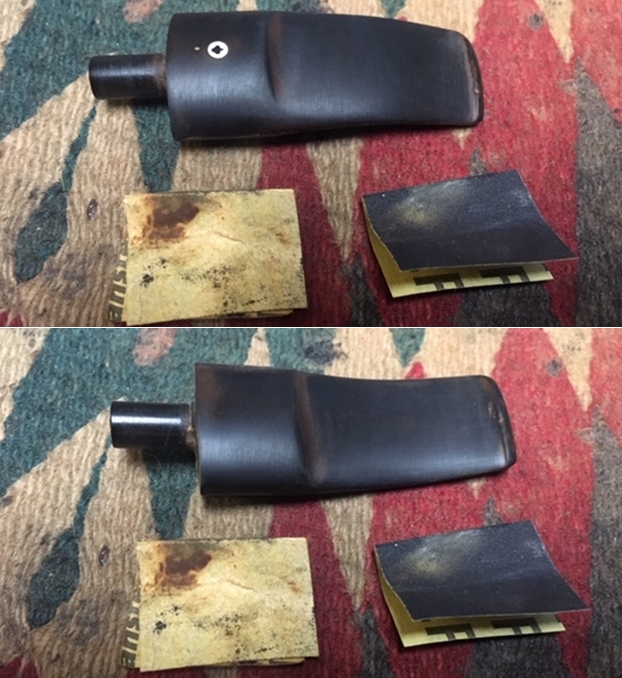 I polished the stem surface with Denicare Mouthpiece Polish to polish out the scratches left behind by the sandpaper. It also works well to remove stubborn oxidation in the saddle and along the edge of the button. It worked really well to remove the oxidation and leave the stem looking far better.
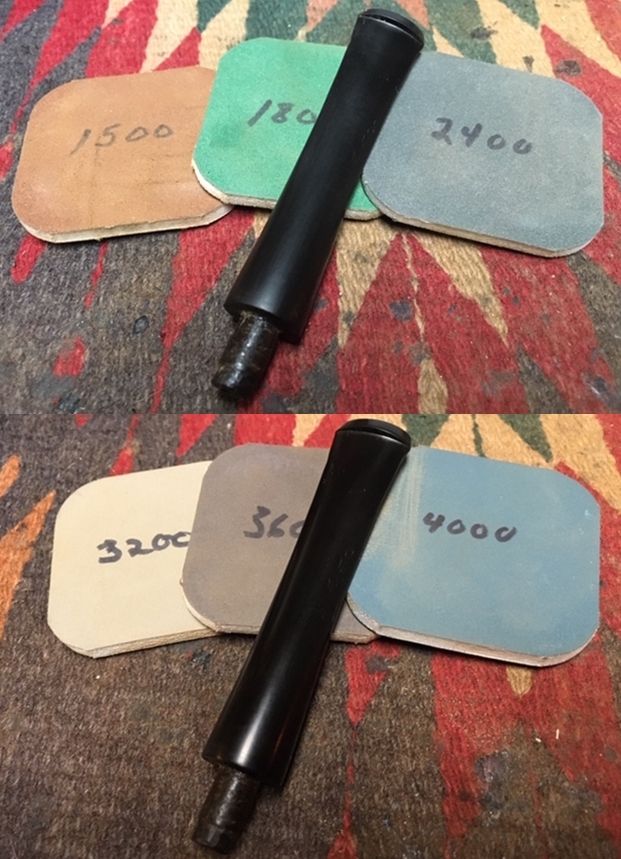
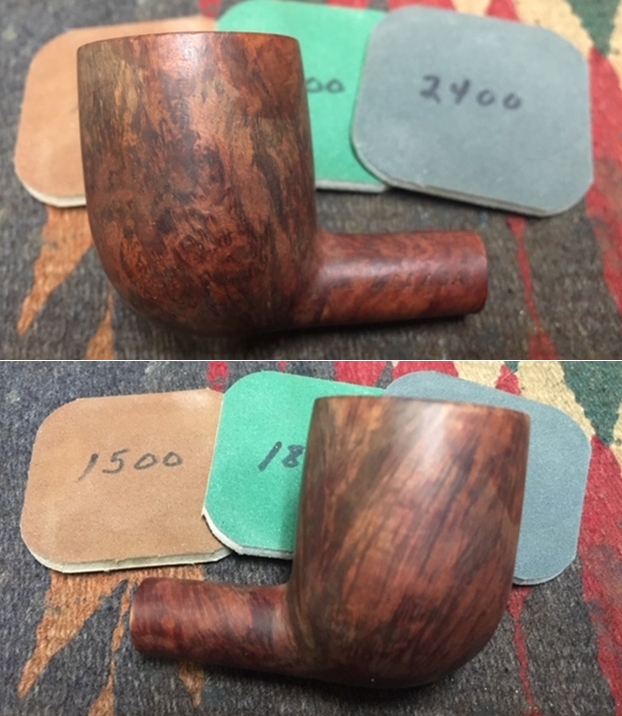
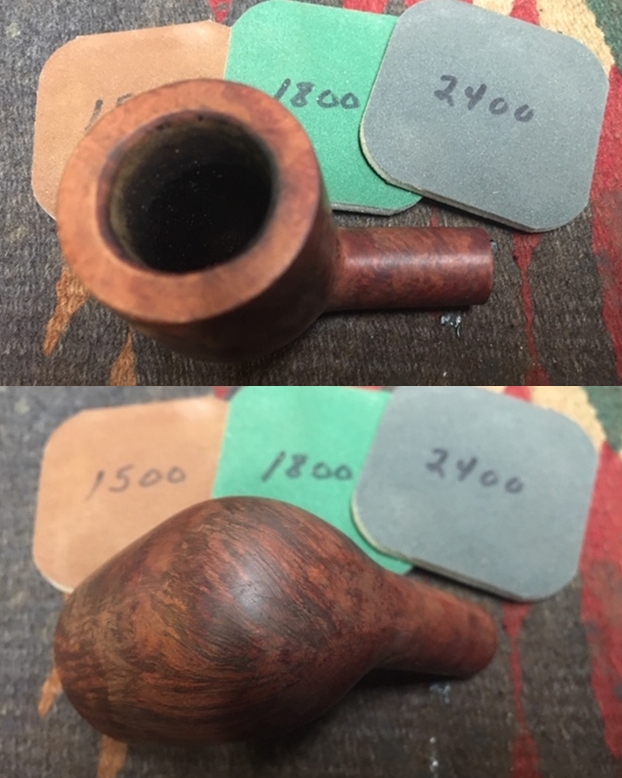
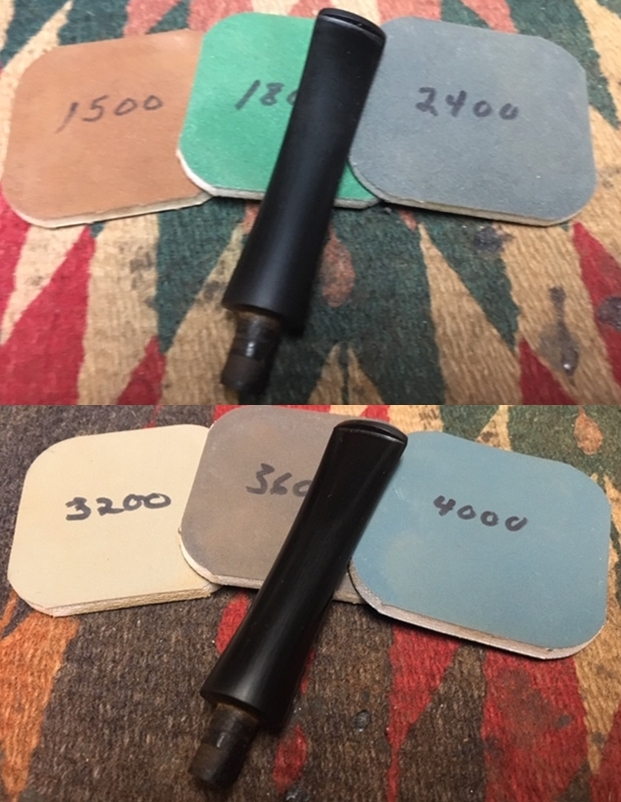
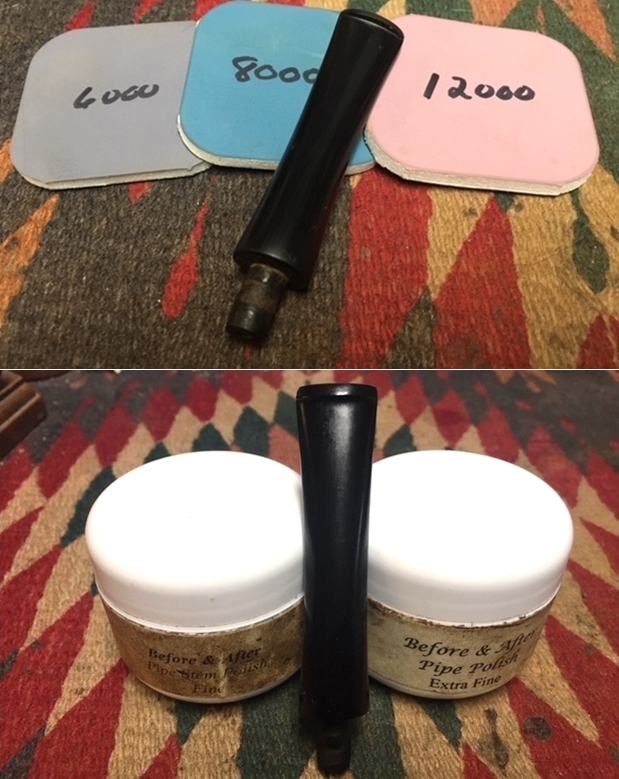
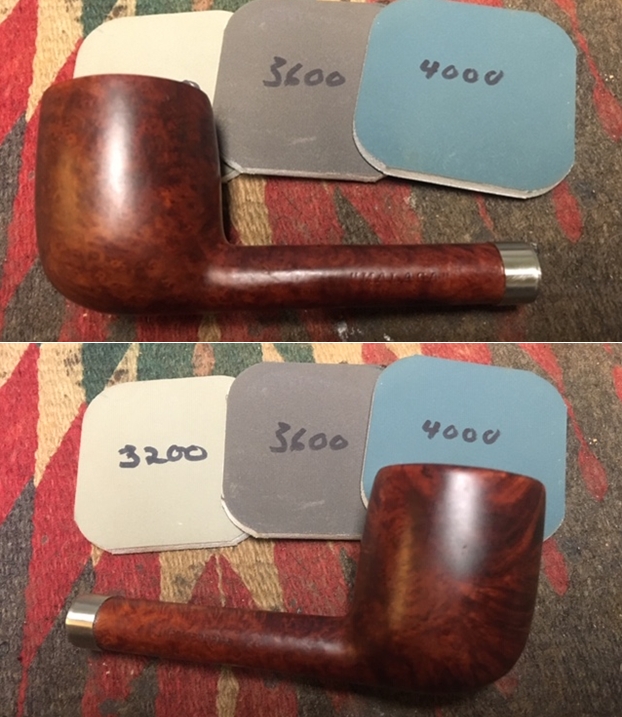
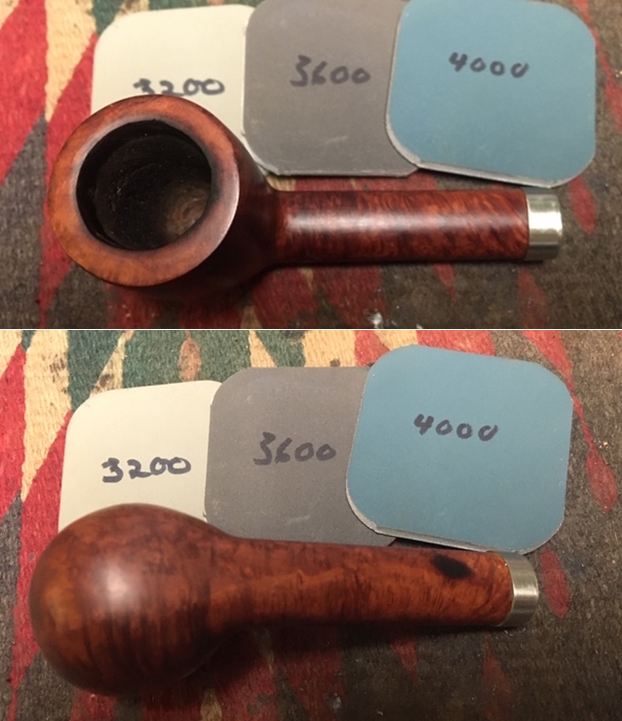
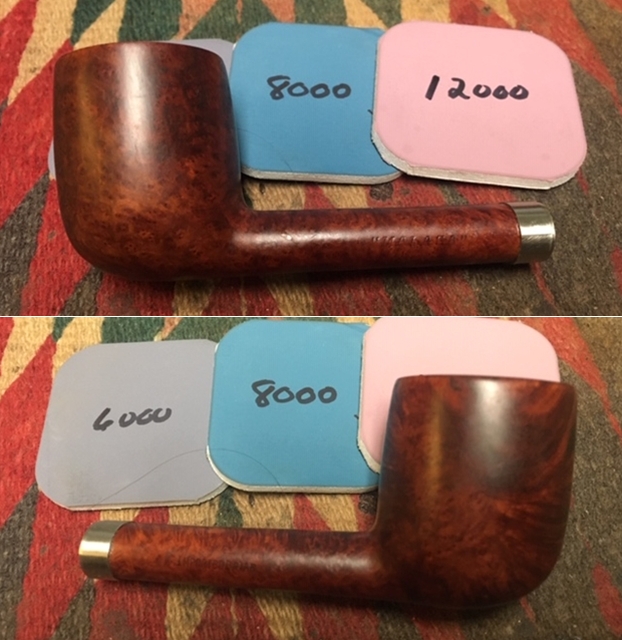
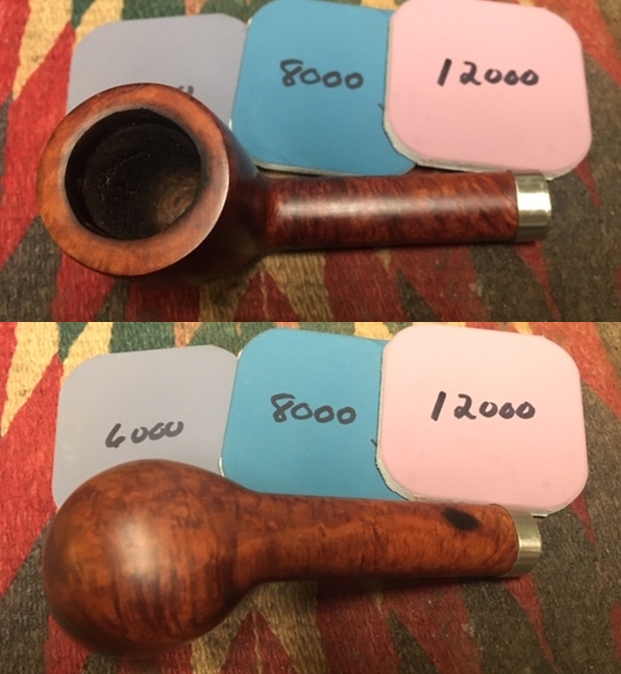
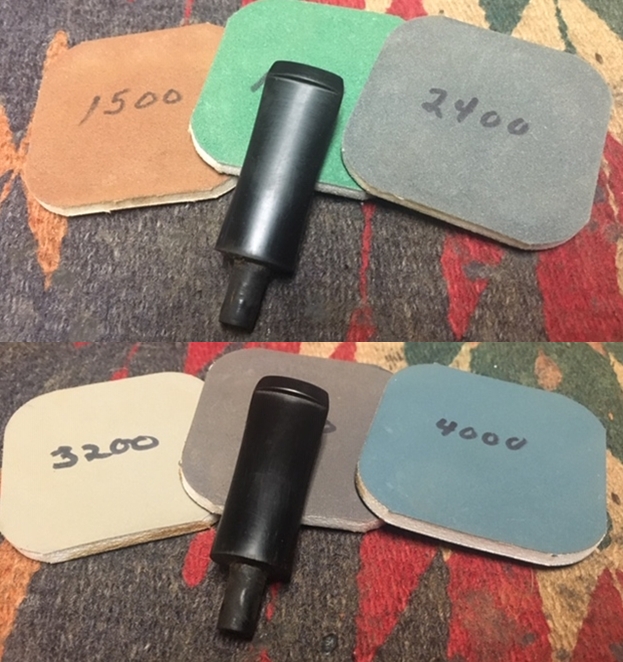
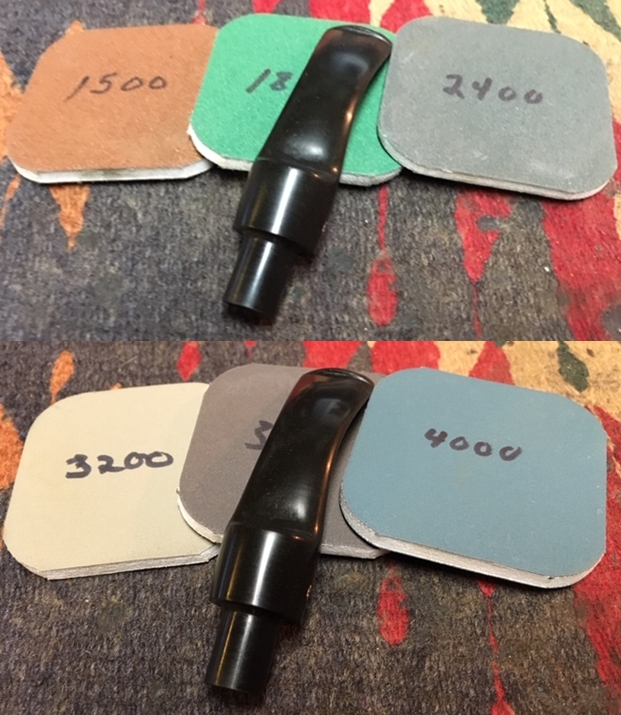
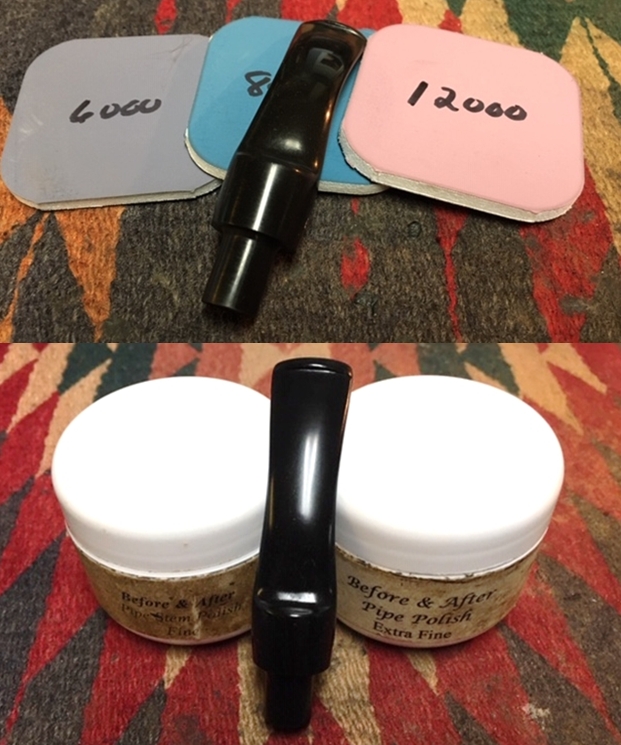
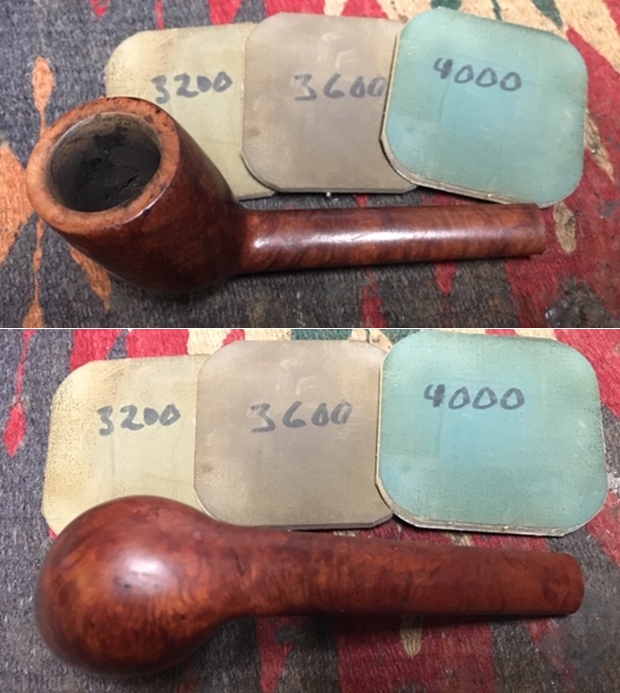
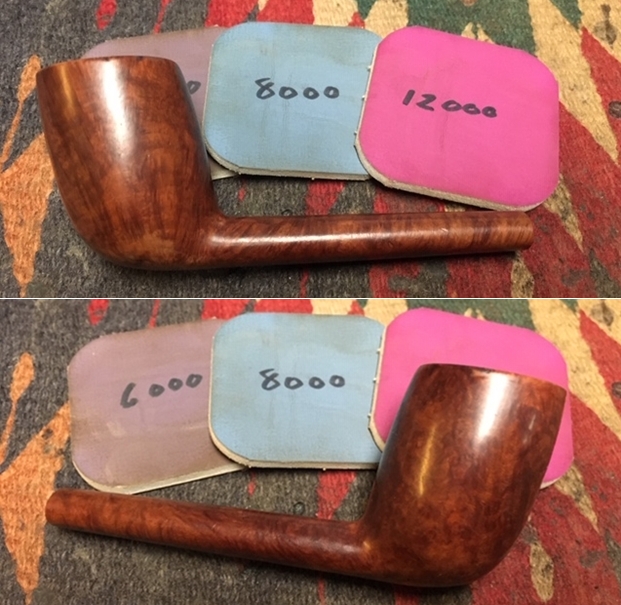
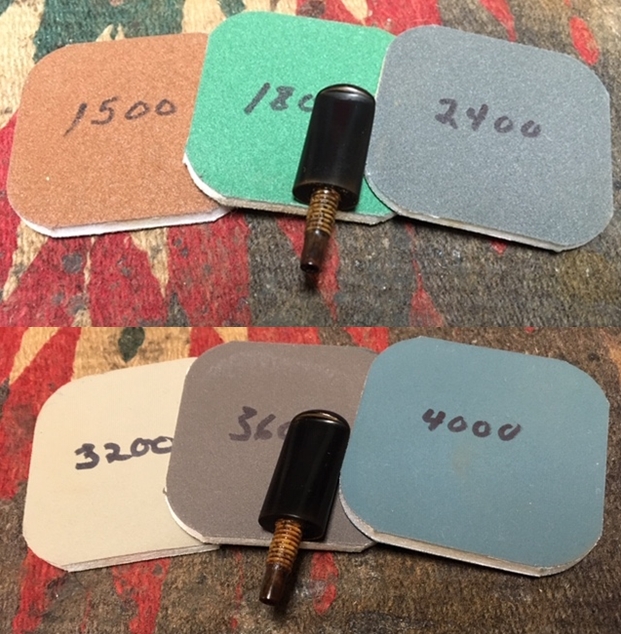
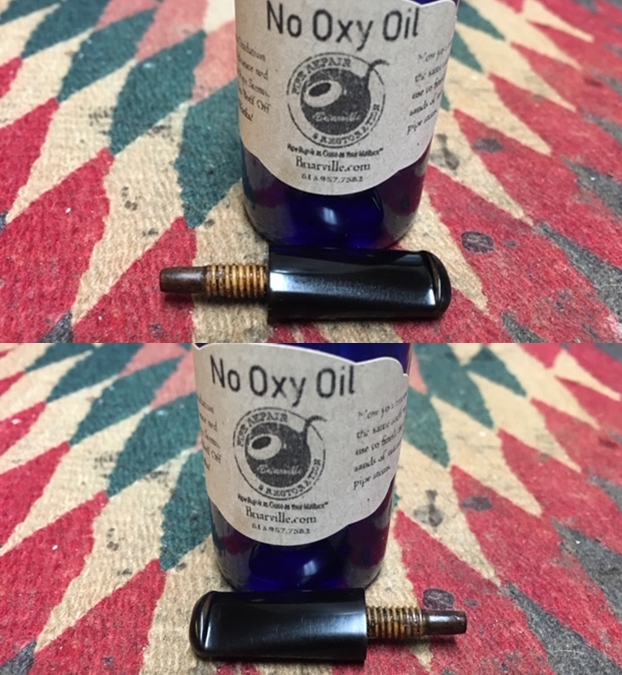
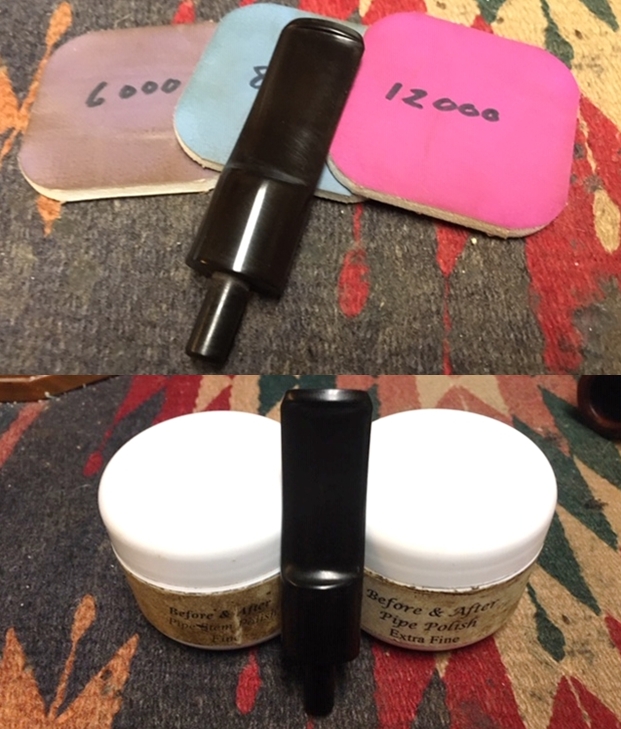
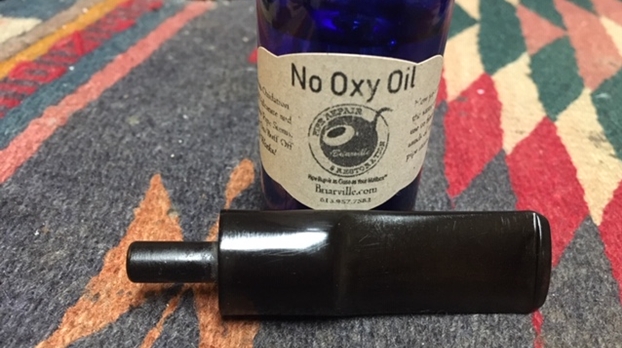
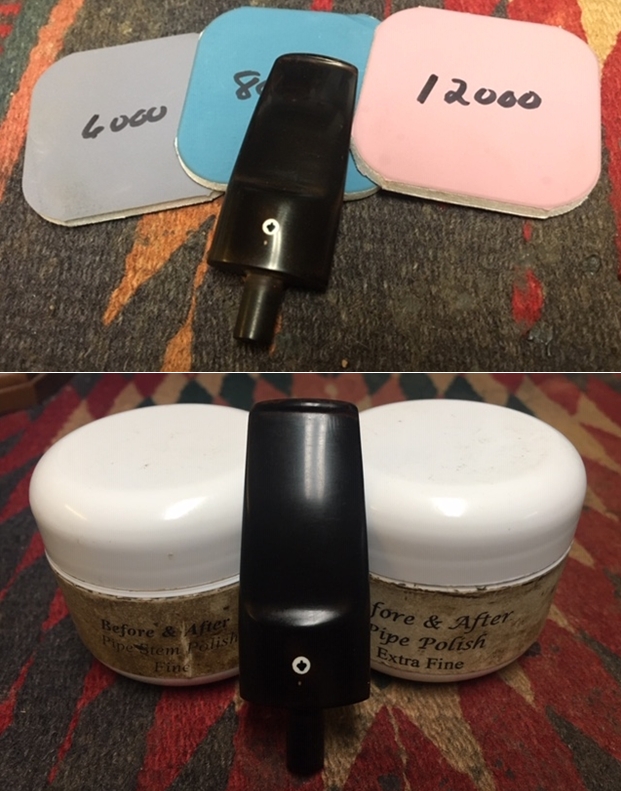
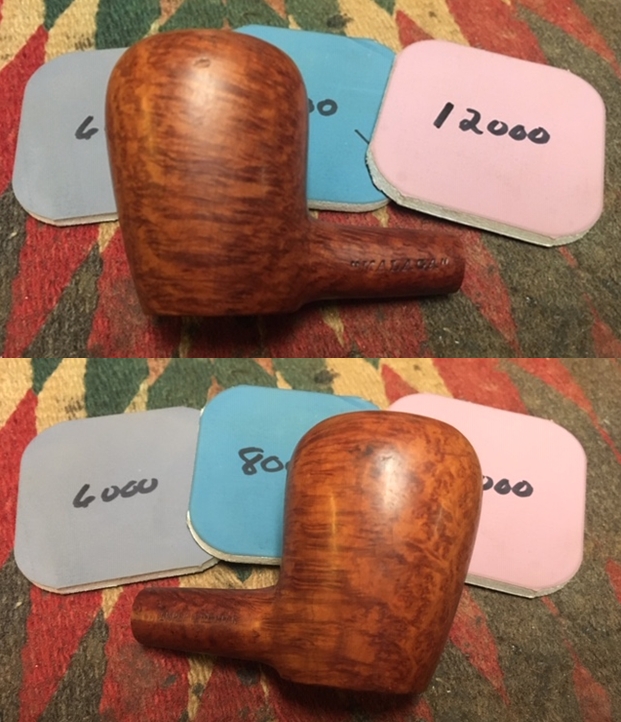
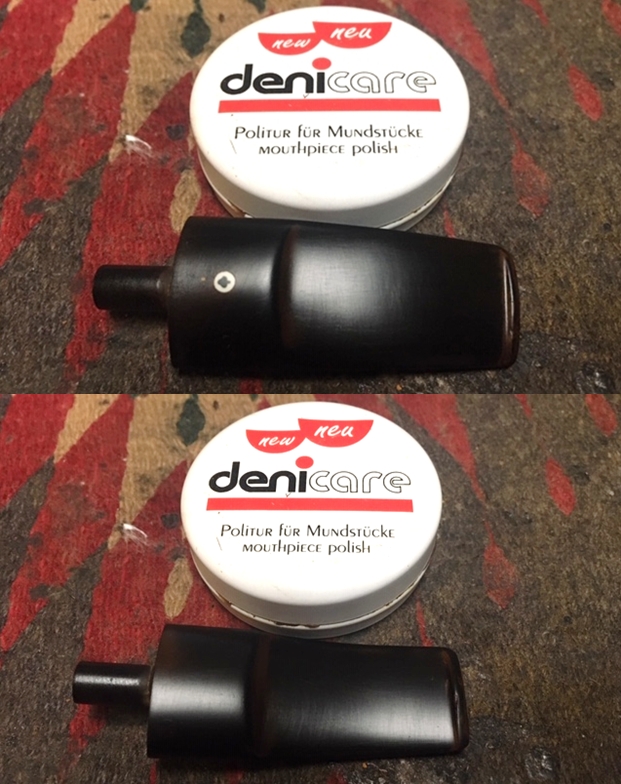 I polished out the remaining scratches in the stem material with micromesh sanding pads. I wet sanded with 1500-12000 grit sanding pads. I wiped down the stem after each pad with some Obsidian Oil. Once I used the last pad – 12000 grit – I polished the stem with Before & After Pipe Stem Polish, both Fine and Extra Fine. I used a new product I am trying for Briarville called No Oxy Oil to give the stem a final wipe down and polish.
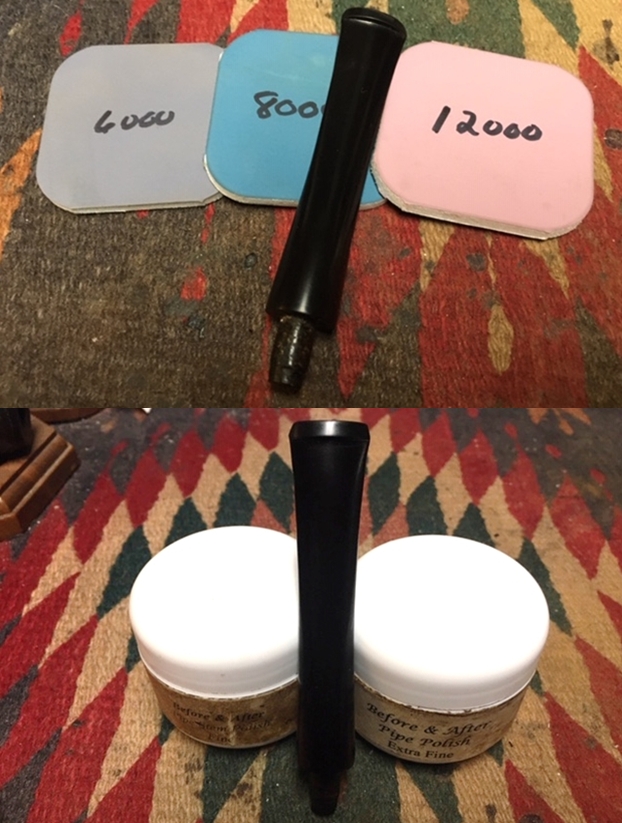
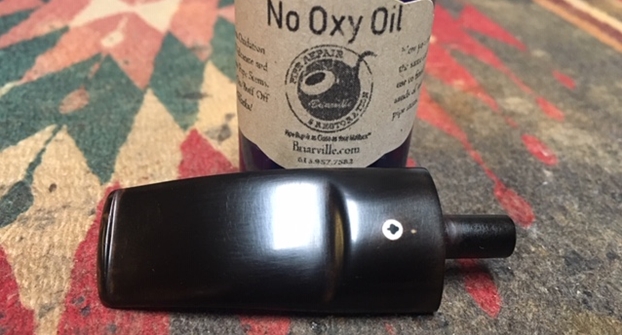
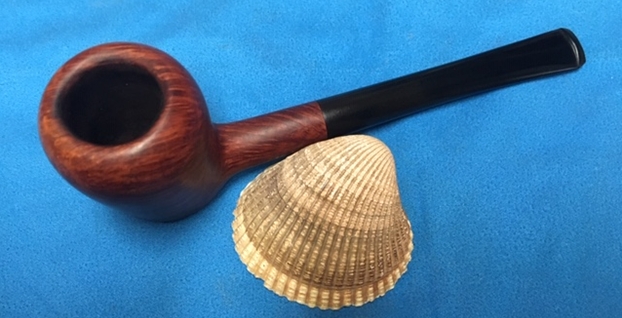
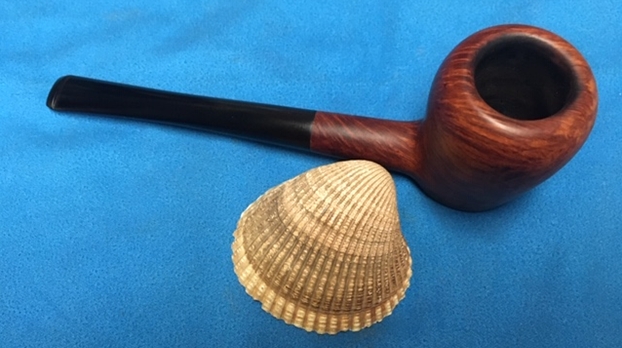
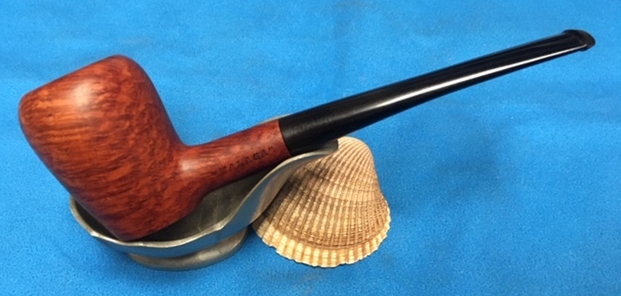
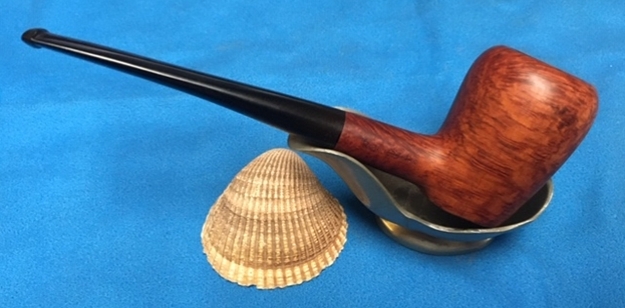
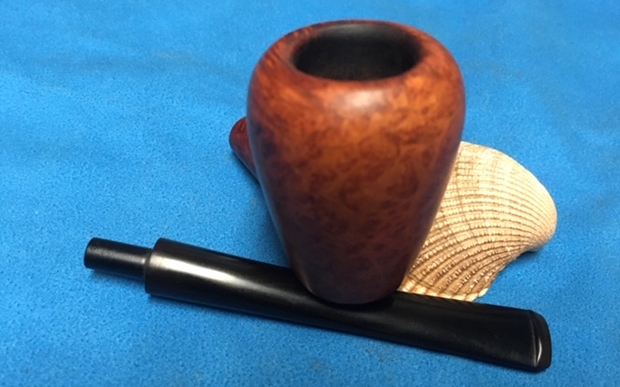
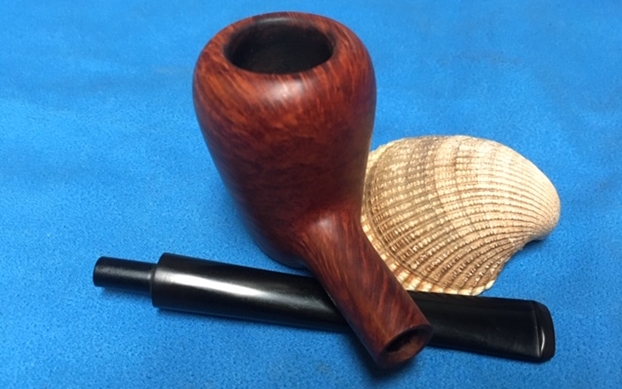
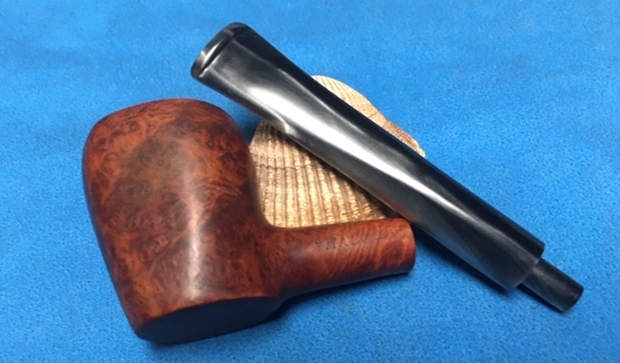
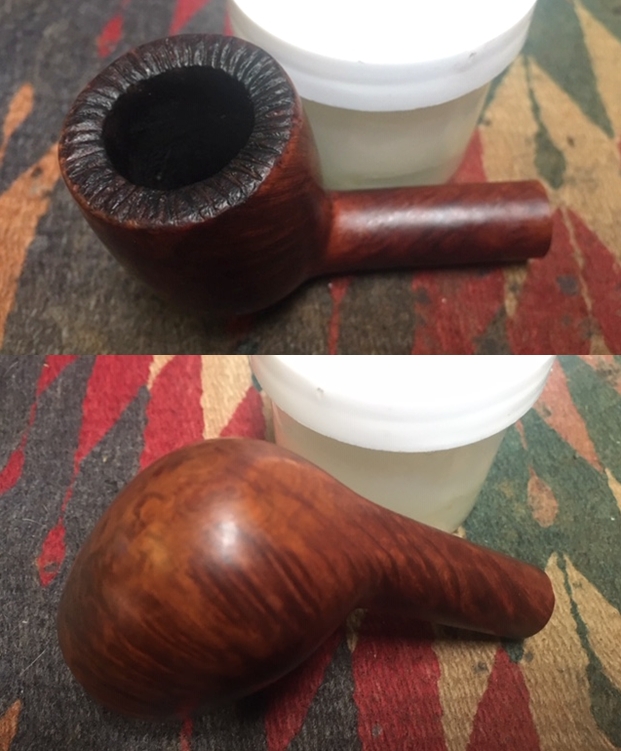
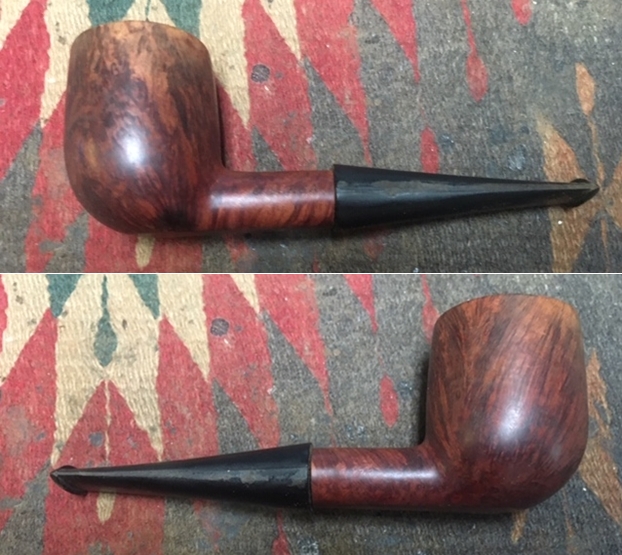
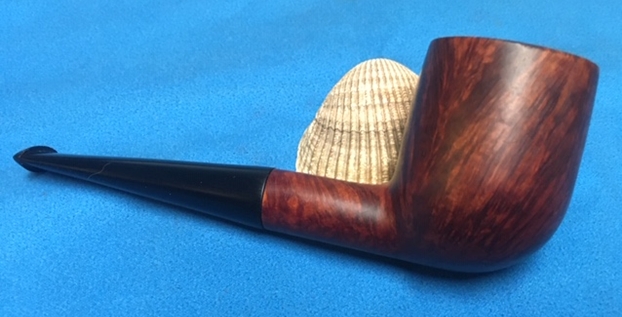
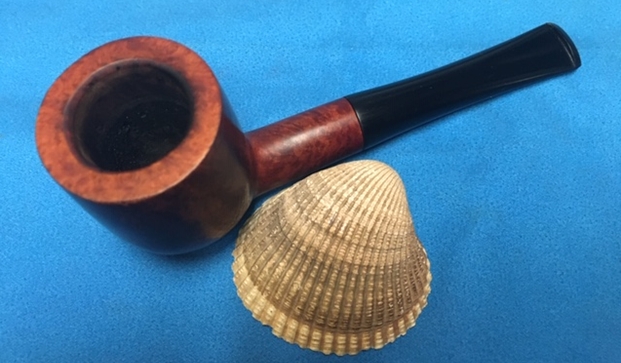
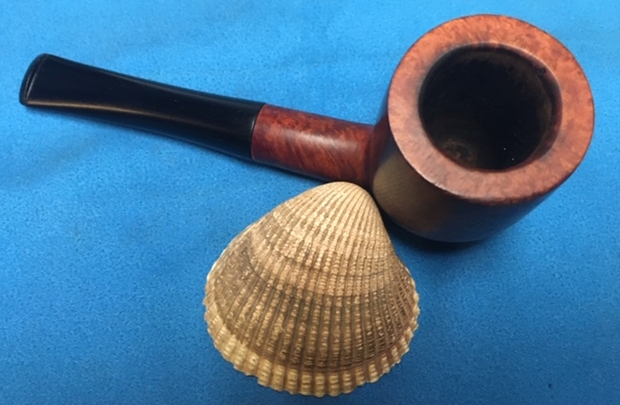
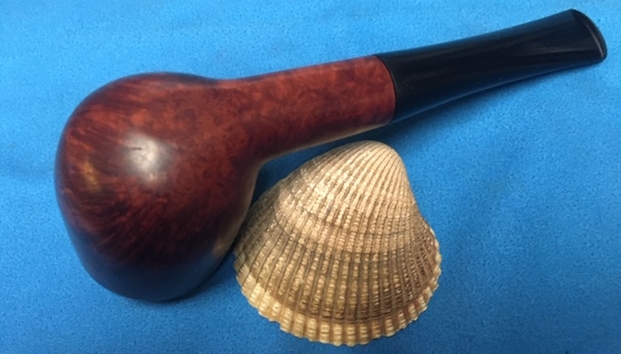
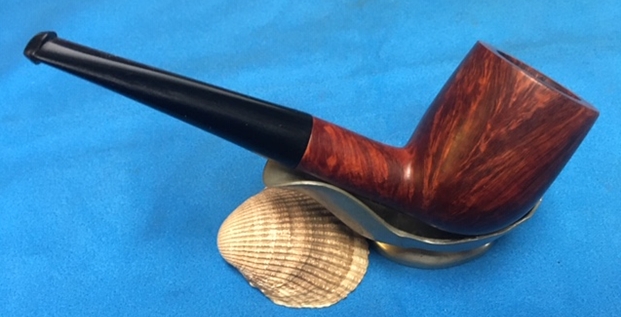
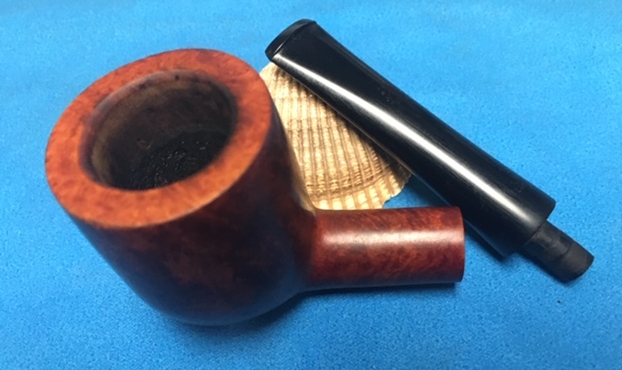
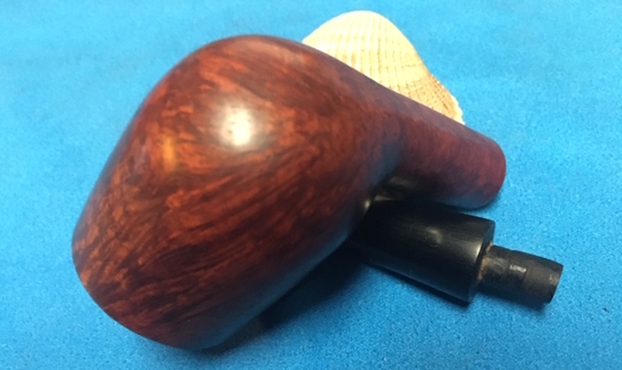
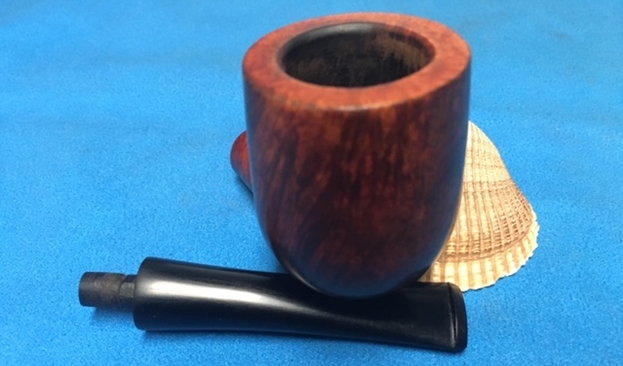
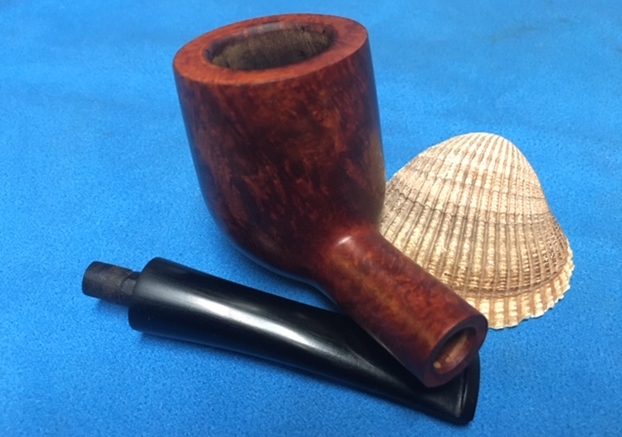
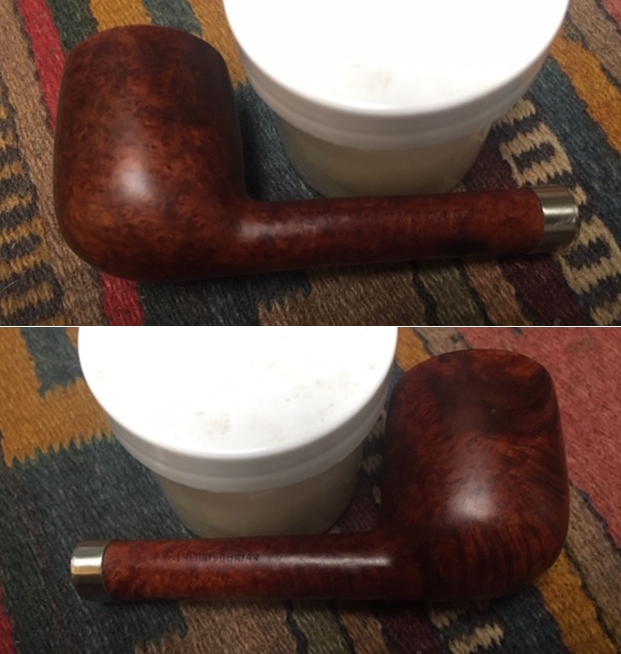
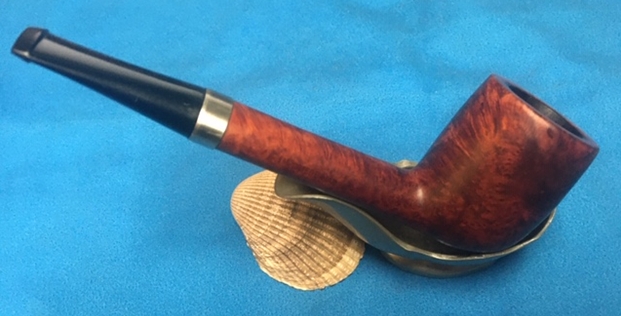
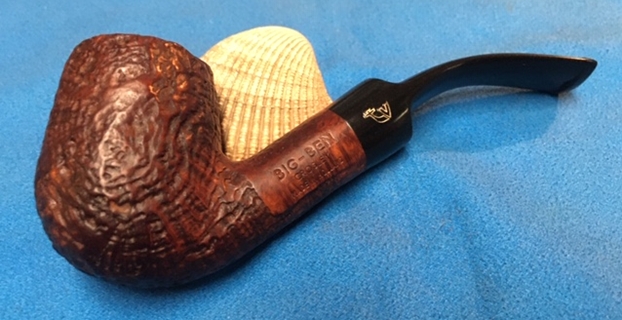
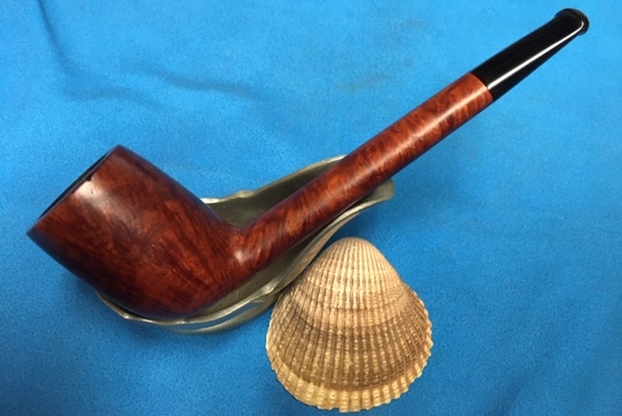
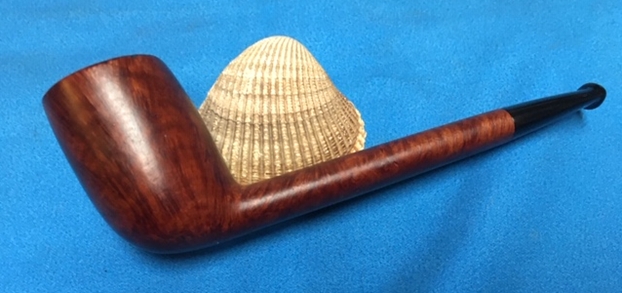
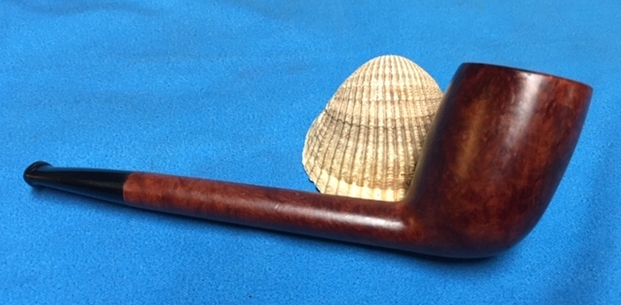
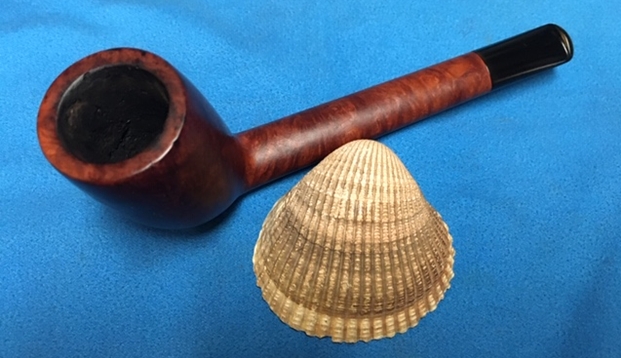
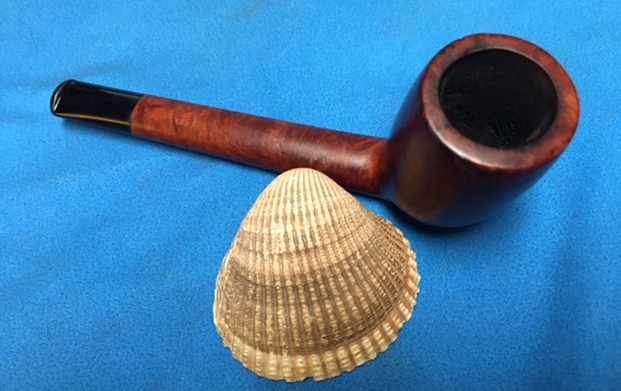
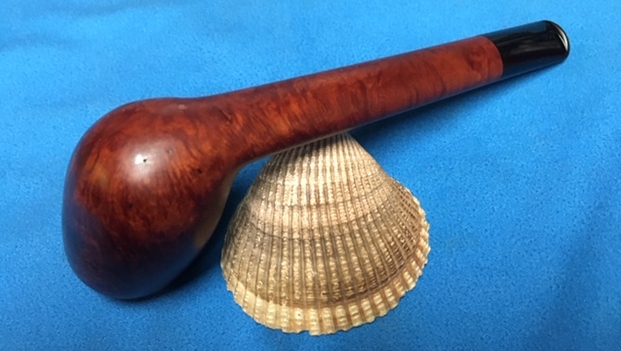
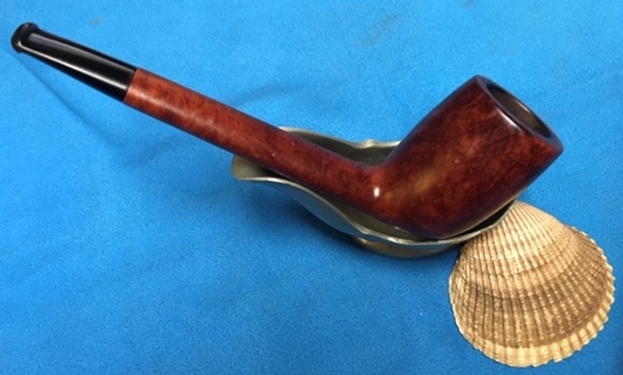
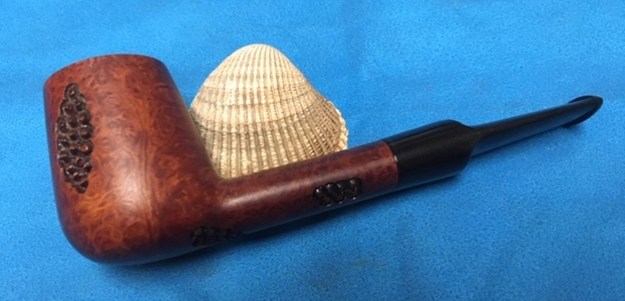
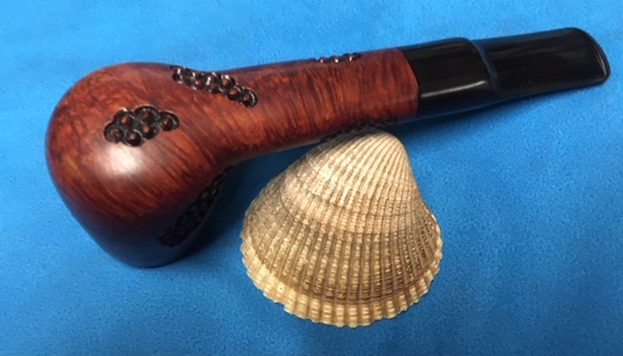
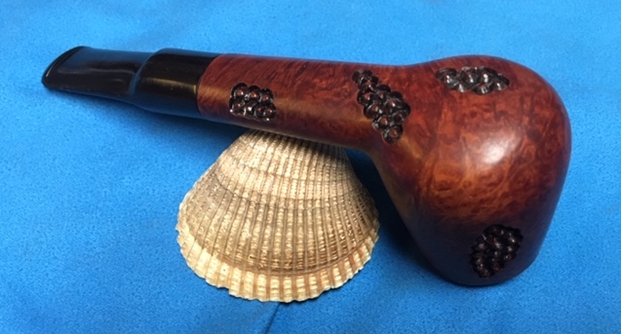
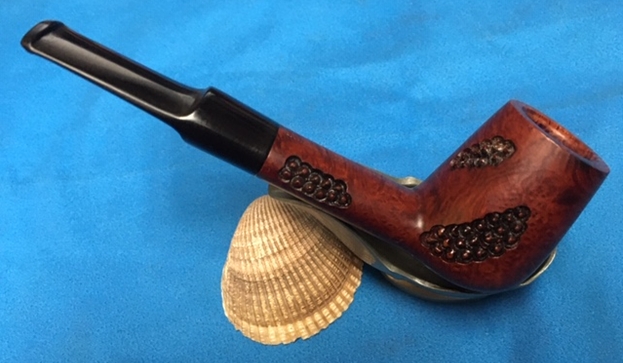
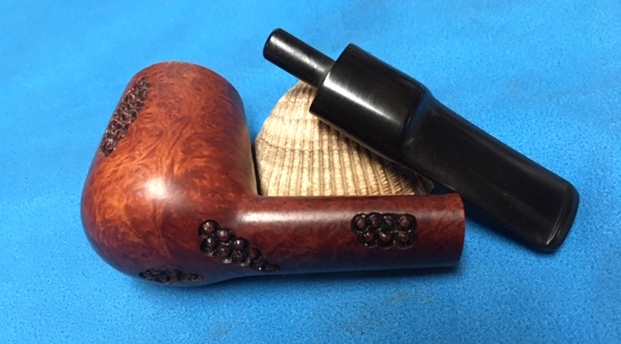
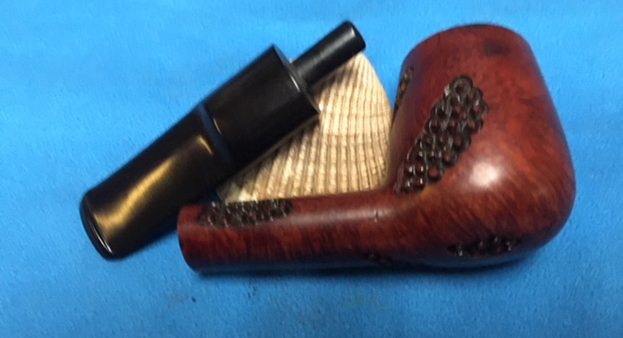
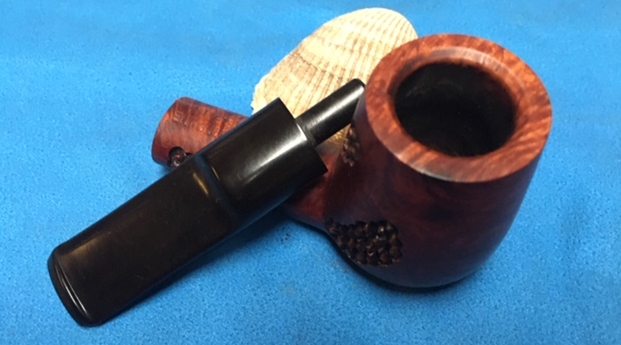
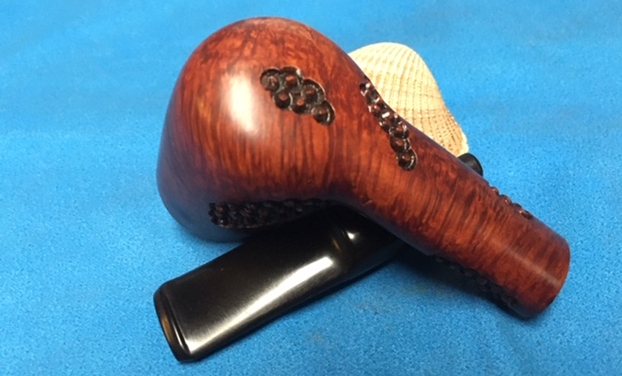
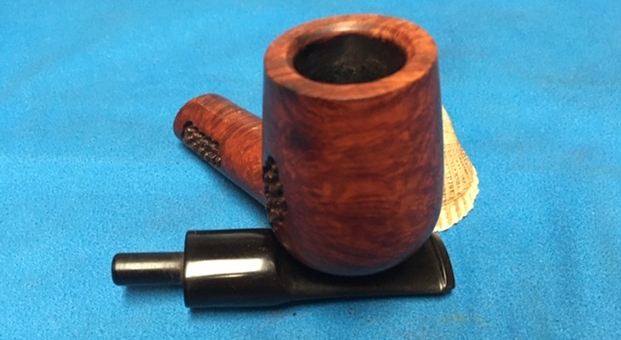
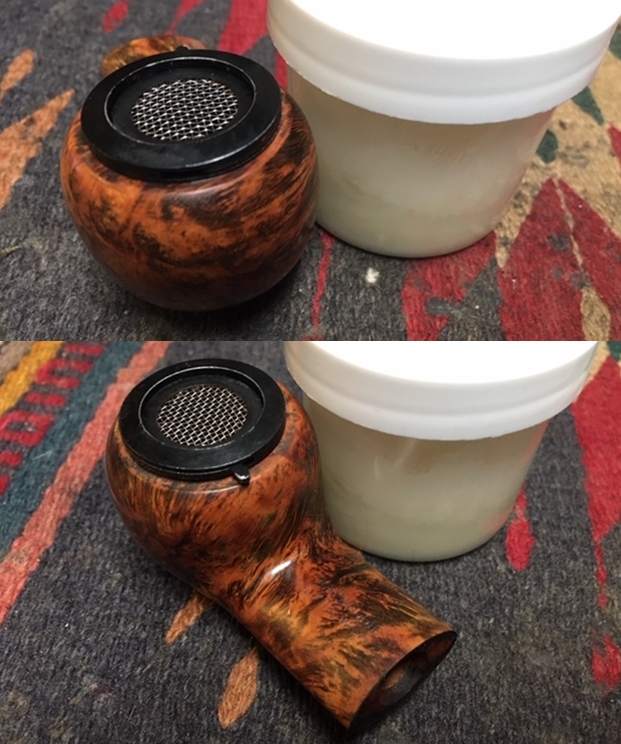
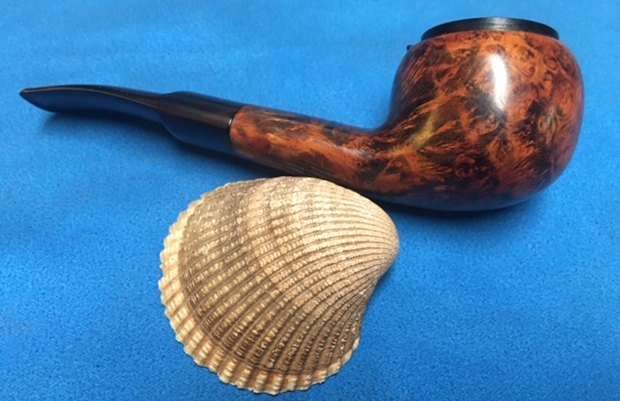
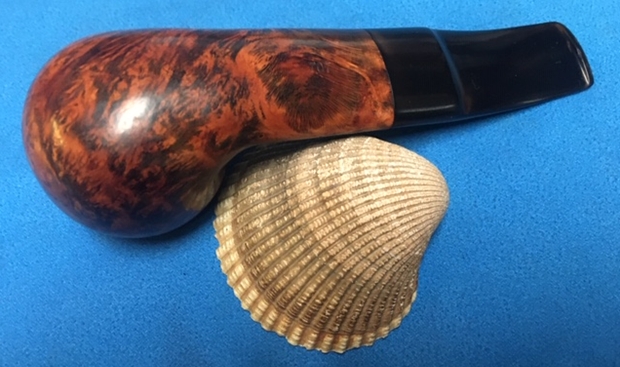
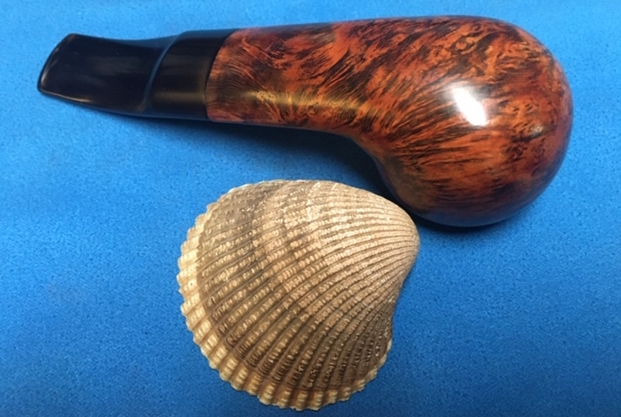
 I put the stem back on the pipe and polished both pipe and stem with Blue Diamond on the buffing wheel. I avoided the wind screen with the buffing wheel. I gave the pipe several coats of Carnauba Wax and buffed it with a clean buffing pad to raise a shine. I hand buffed it with a soft cotton cloth to deepen the shine. The finished pipe is shown in the photos below. The original stain looks really good and the polishing brought the grain back to life. The contrasting rich brown finish highlight the grain and contrasts well with the black vulcanite stem. The Air-way Diplomat is a beautiful pipe that really has the look of an English made pipe. The tie to Oppenheimer is clear in looking at the shape of the pipe and the finish. The black metal wind screen with the flip screen cover is unique and seems very functional. The dimensions of the pipe are – Length: 4 ¾ inches, Height: 1 ½ inches, Outside diameter of the bowl: 1 ½ inches, Chamber diameter: ¾ of an inch. I left the stinger out of the shank because I plan keeping this unique English made Kaywoodie for my own collection. It tics all the boxes for me – shape, finish, grain, etc. I am looking forward to loading a bowl in it and enjoying a great smoke. I will carry on the legacy! Thanks for reading the blog.
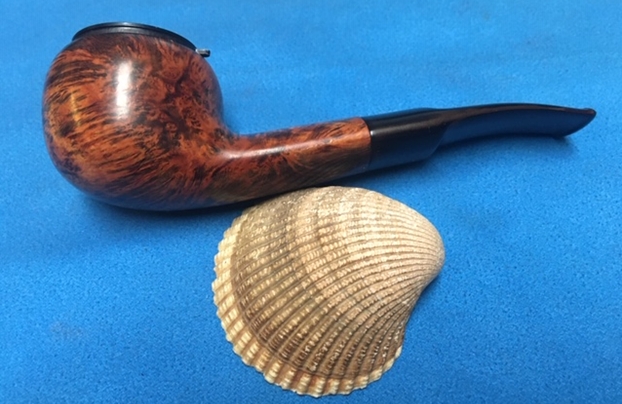


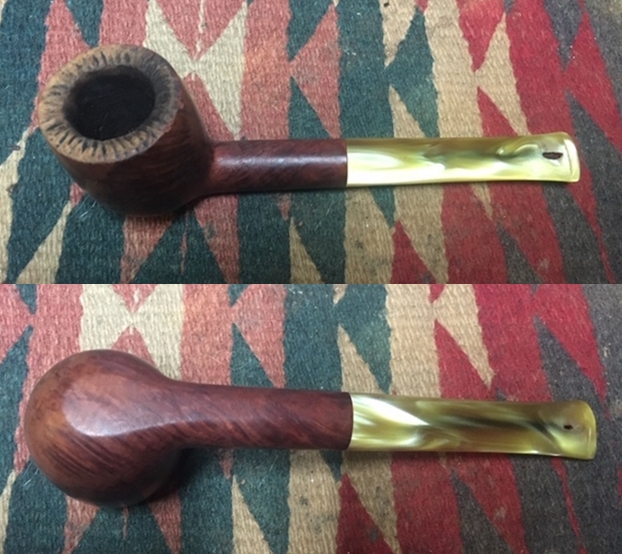
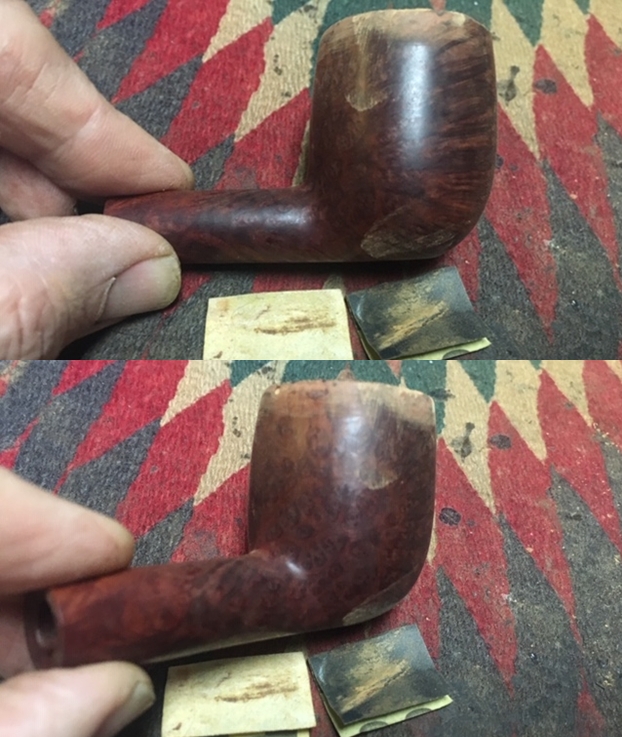
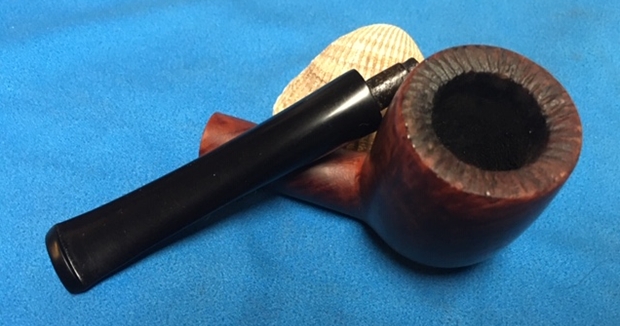
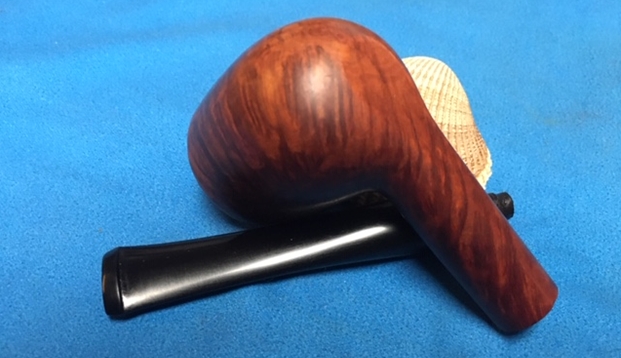
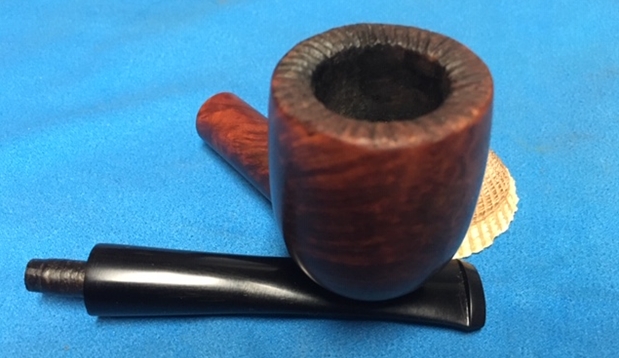
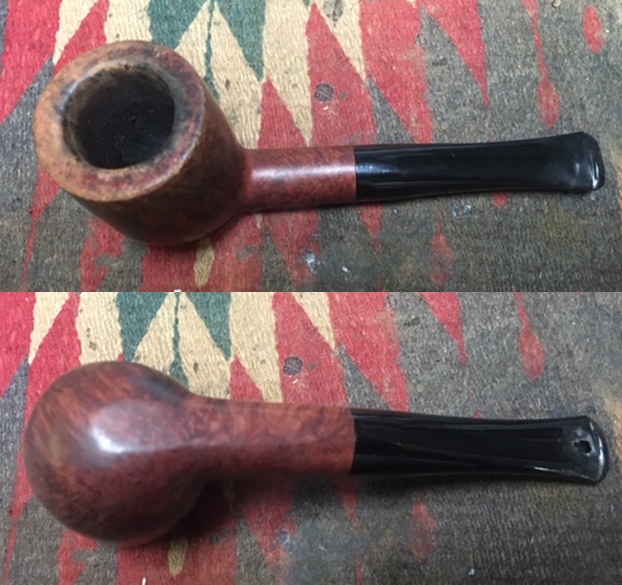
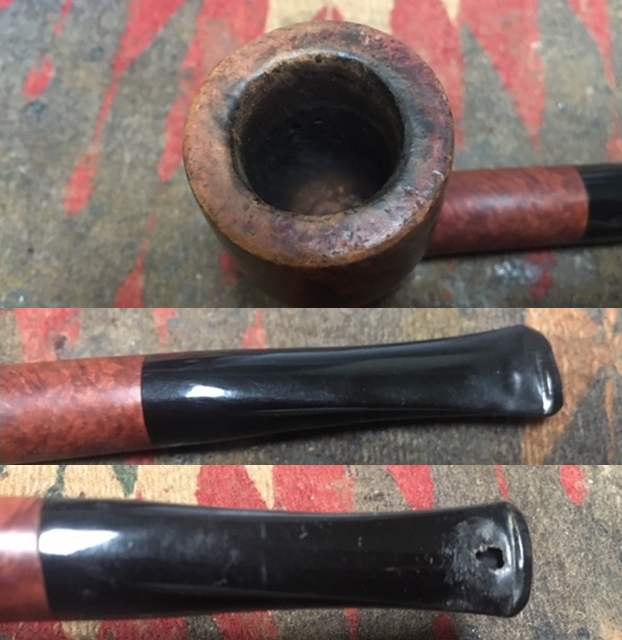
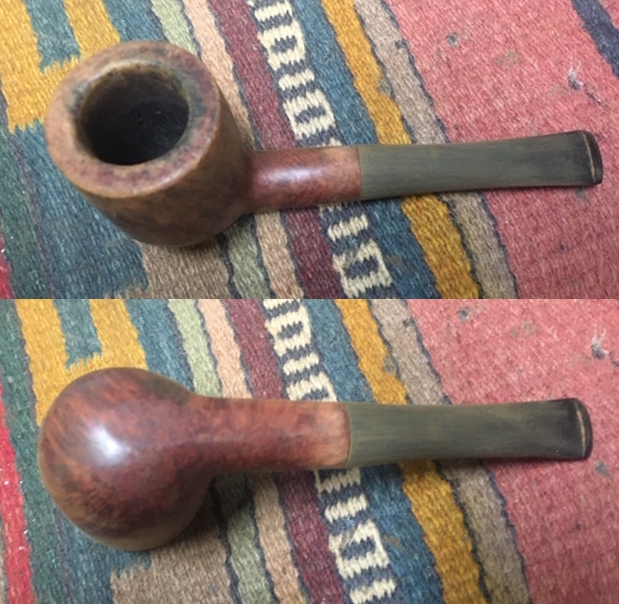
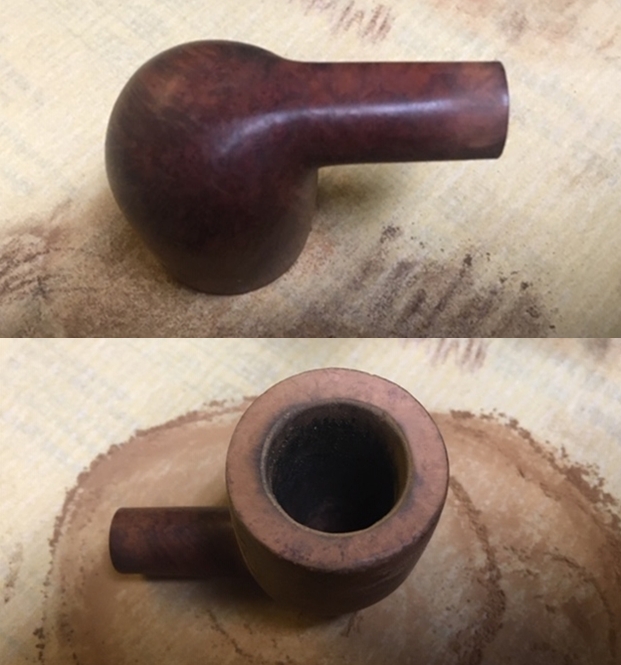
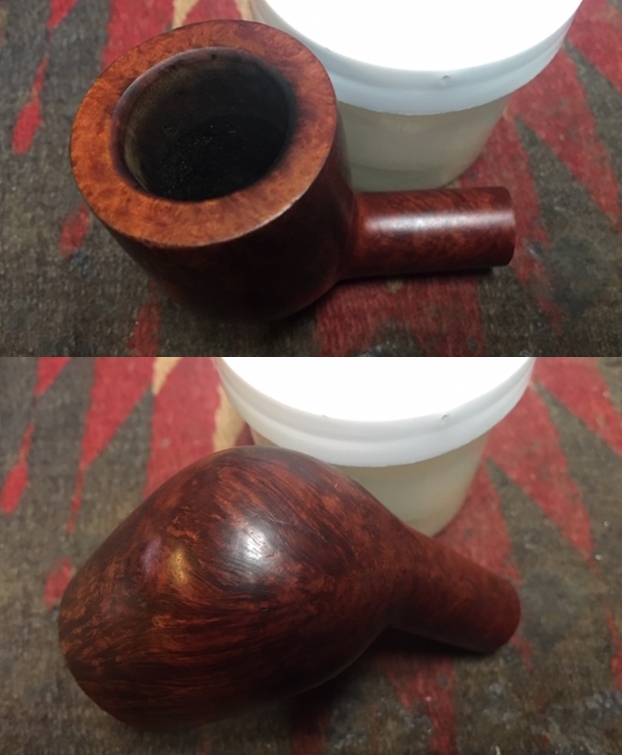
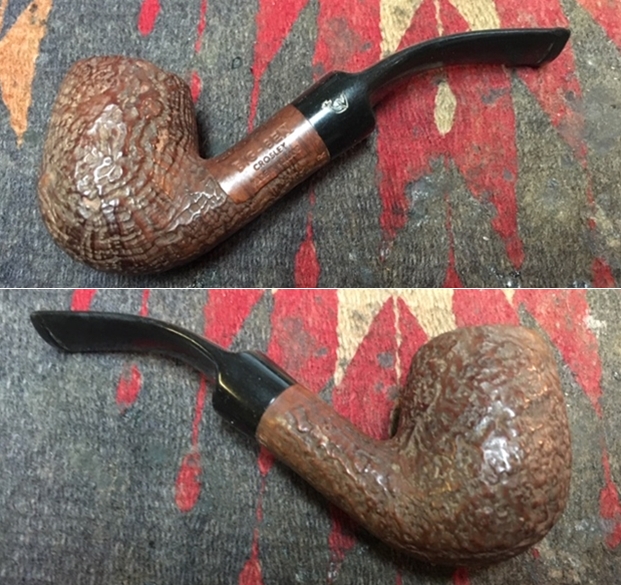
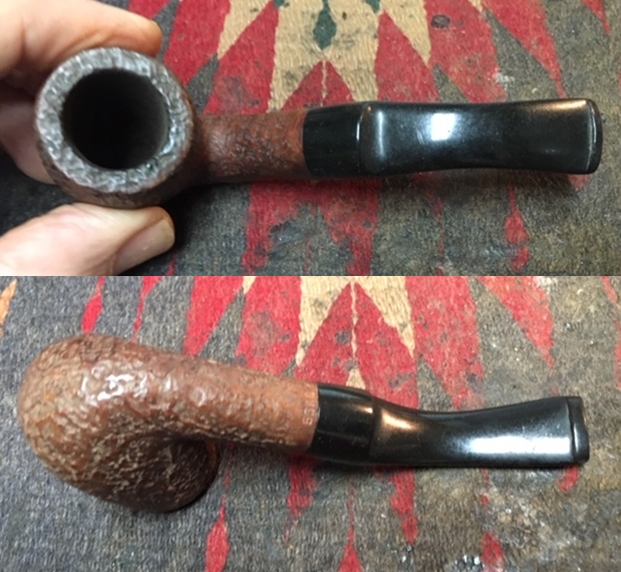
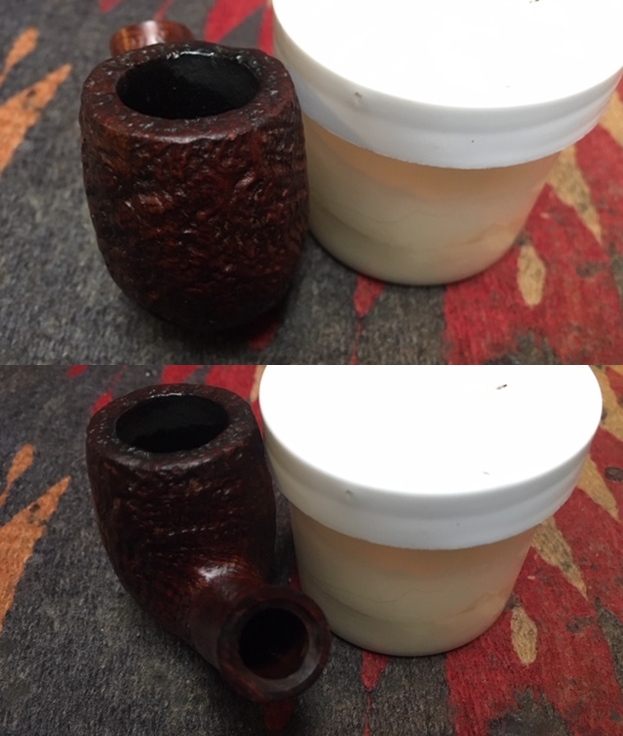
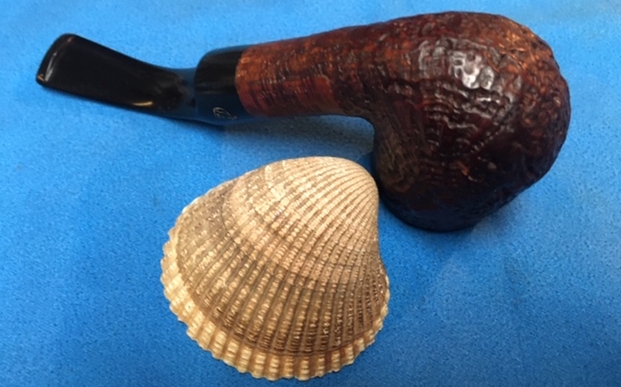
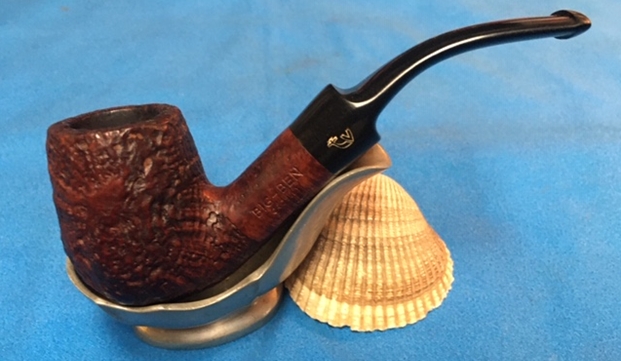
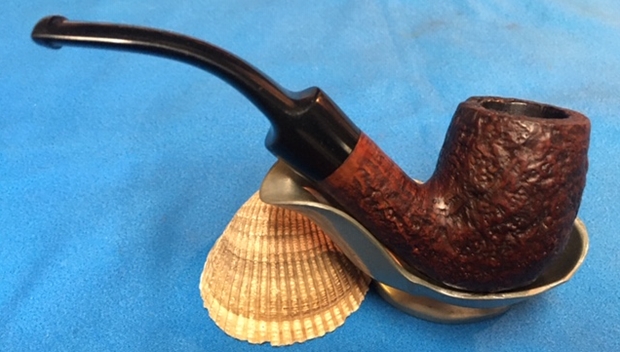
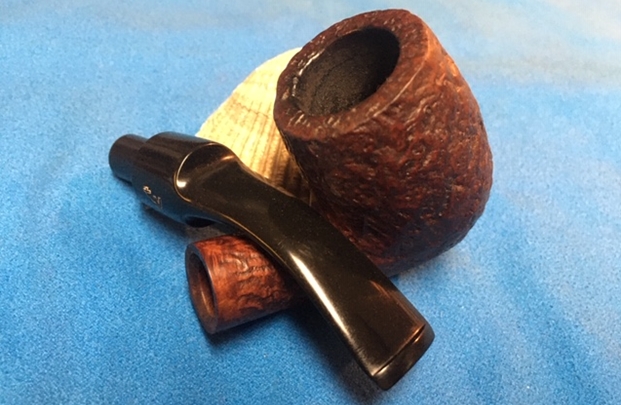
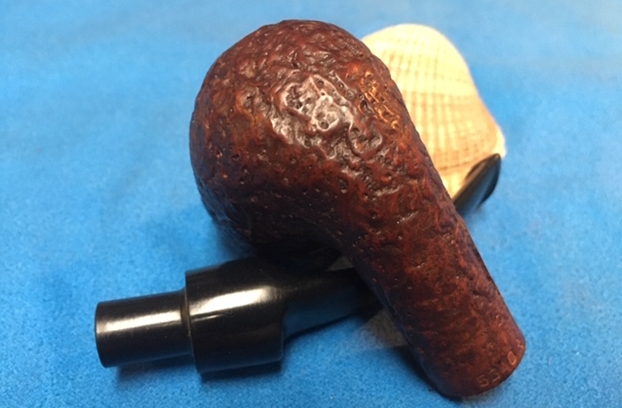
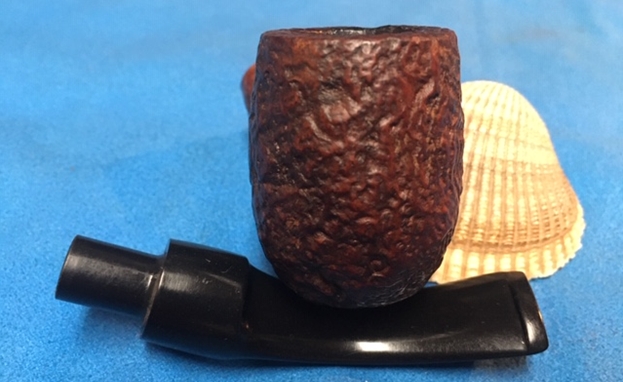
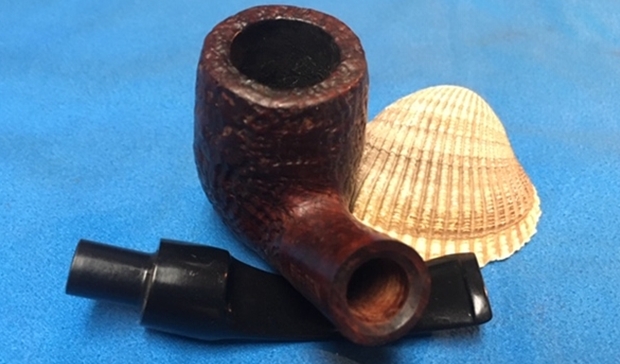
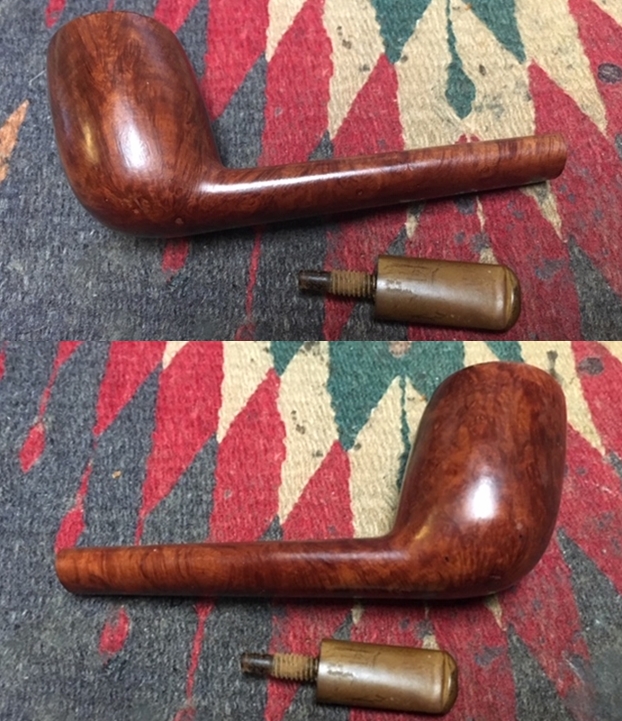
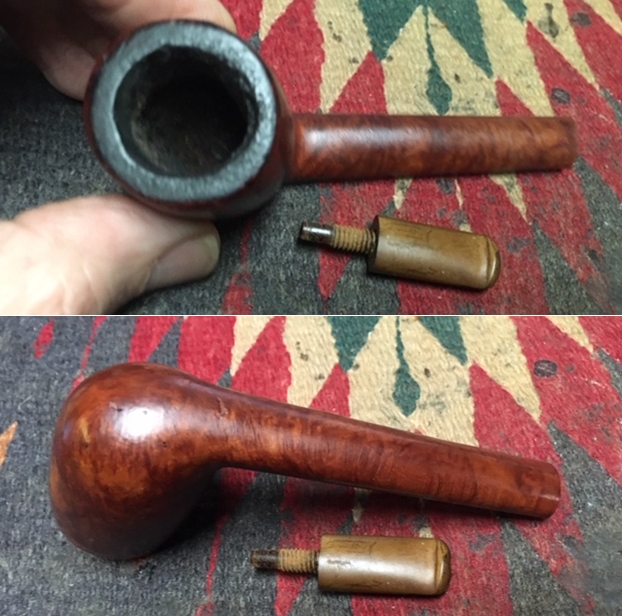
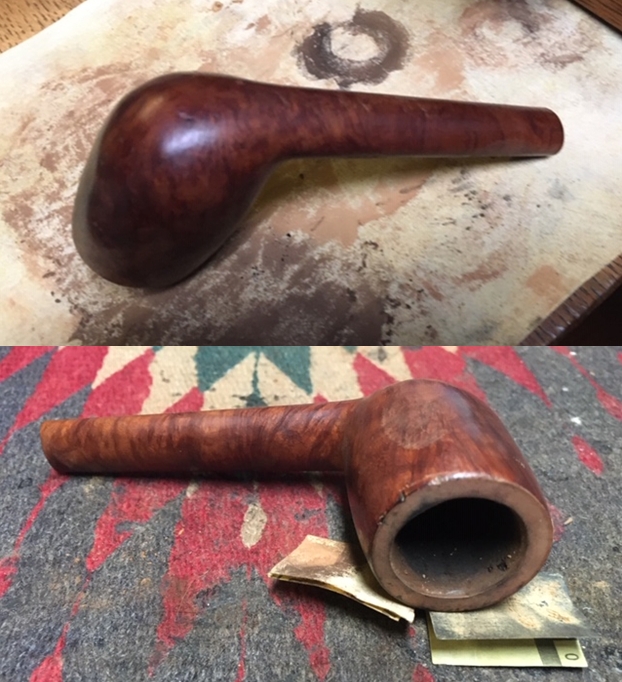
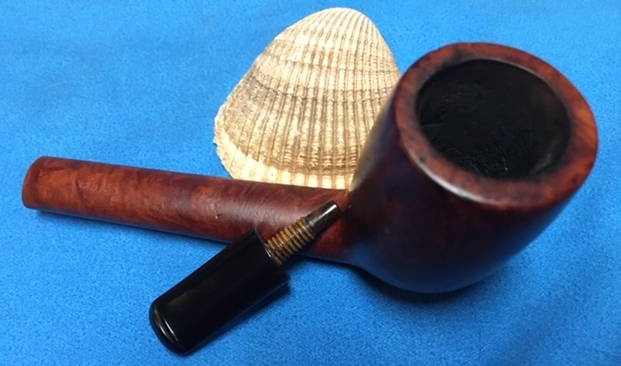
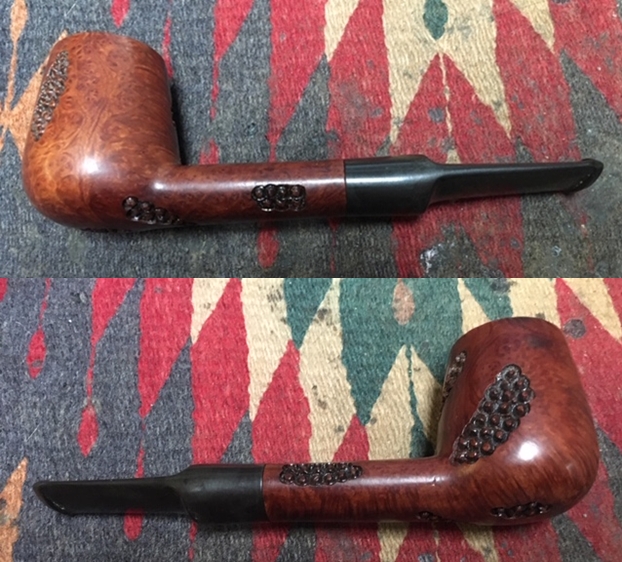
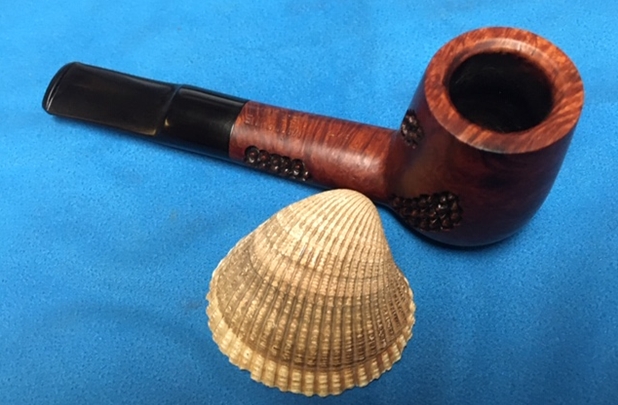
 I took close up photos of the bowl and rim to capture the condition of the pipe before I started my cleanup work. The rim top had some light lava and darkening on the front and back edge. The inner edge was slightly bevel and was darkened. Other than being so dirty it was in great condition. There was a light hard cake in the bowl interior. The stem was dirty and there was tooth chatter on the top and underside near the button. The stem was also lightly oxidized.
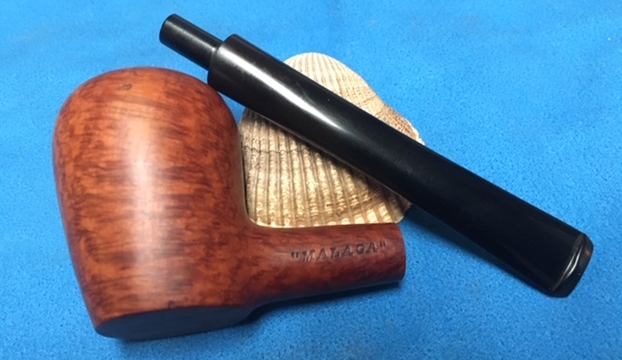
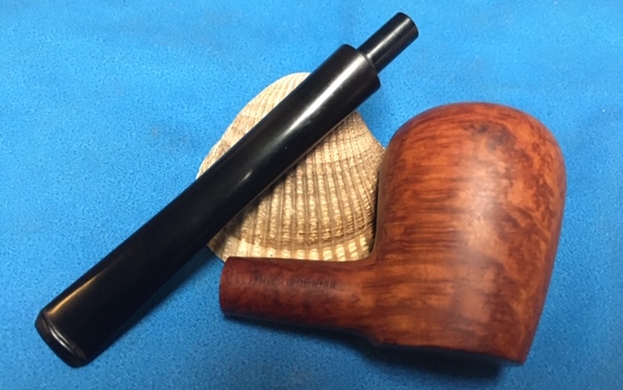
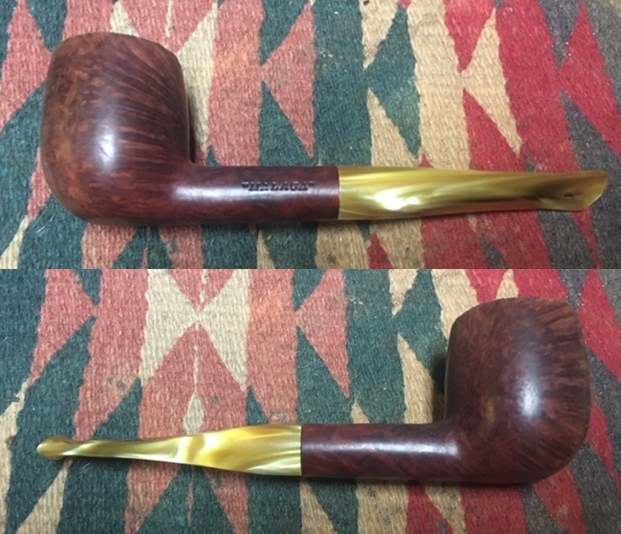
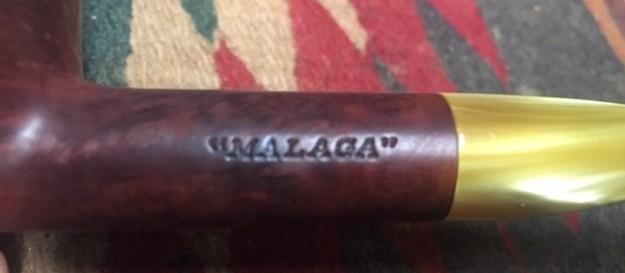
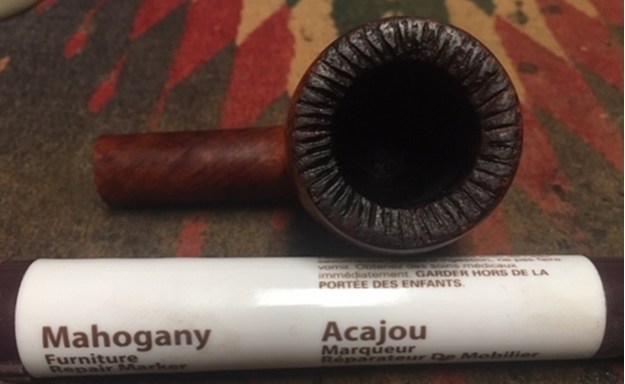
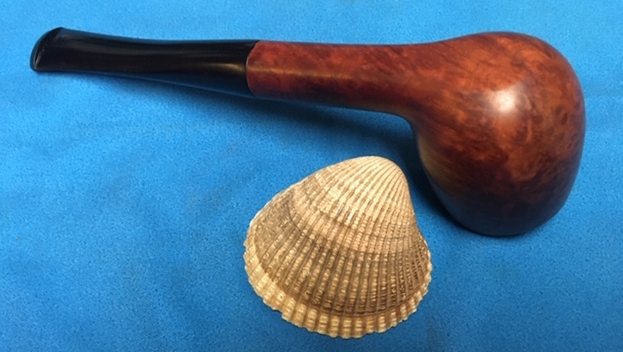
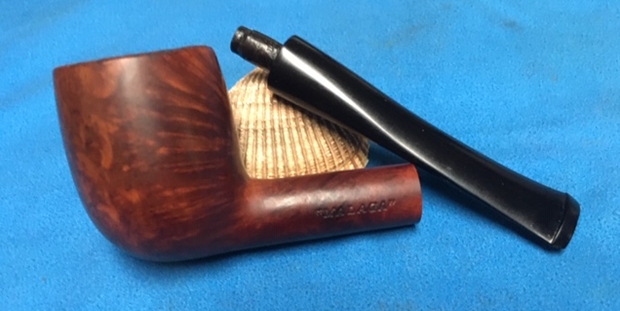
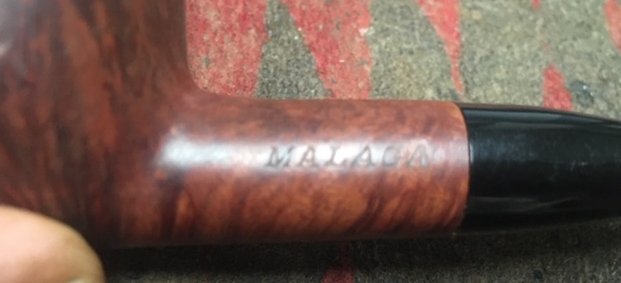
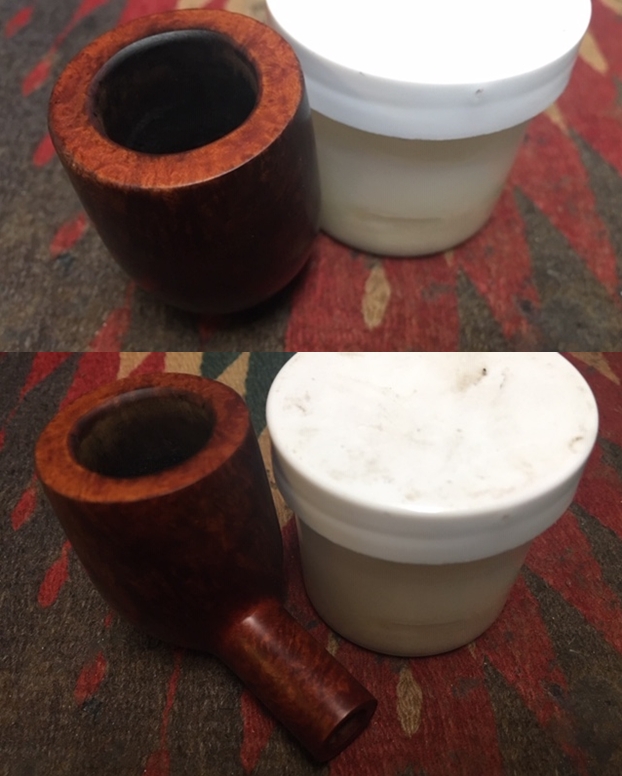
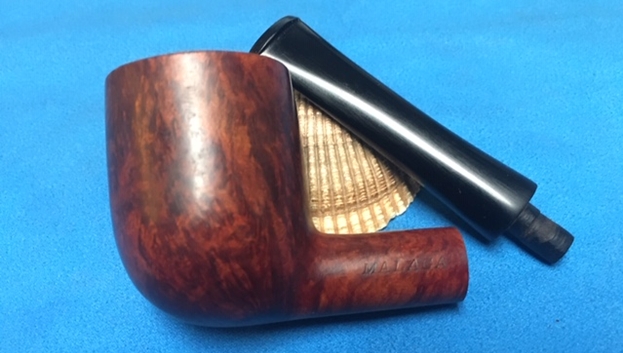
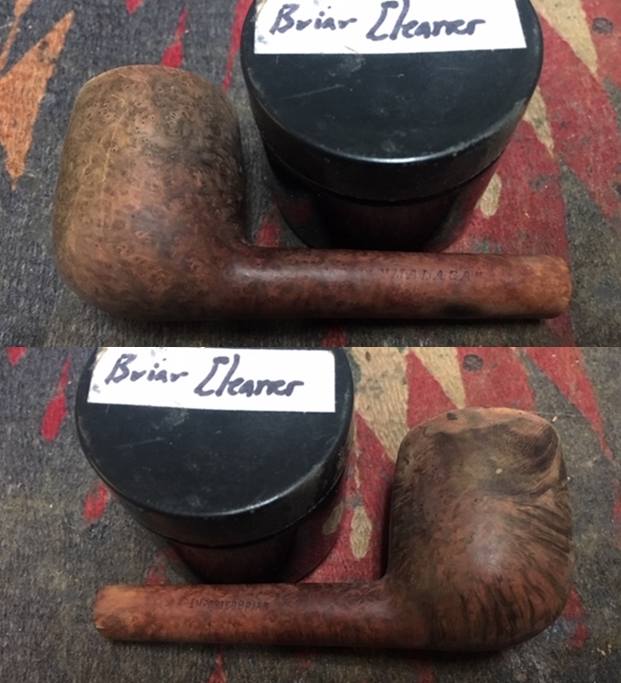
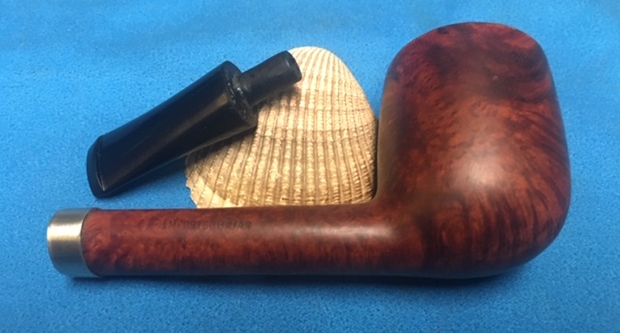
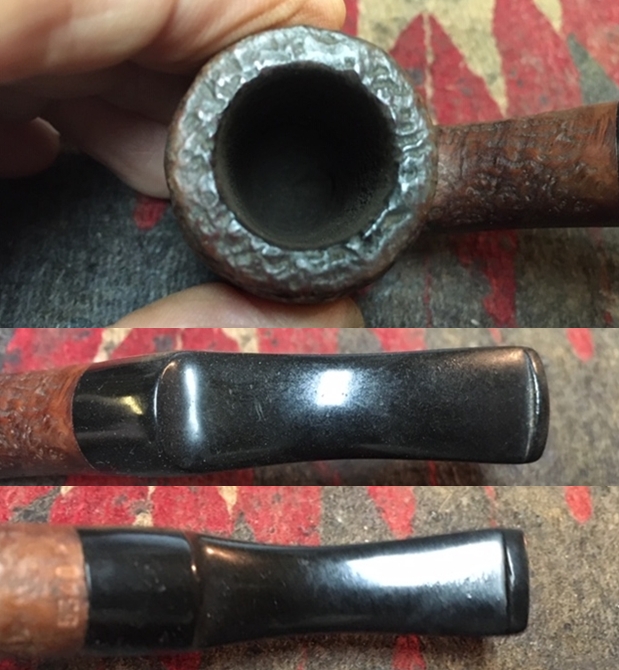
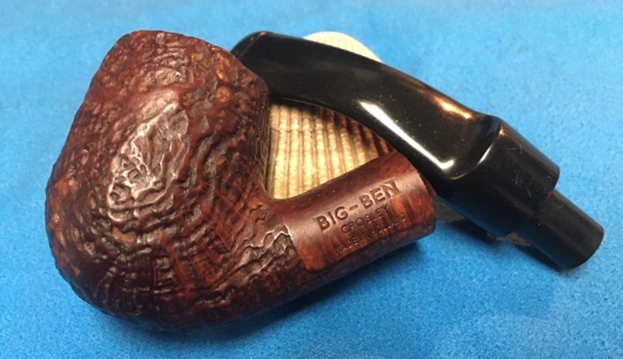
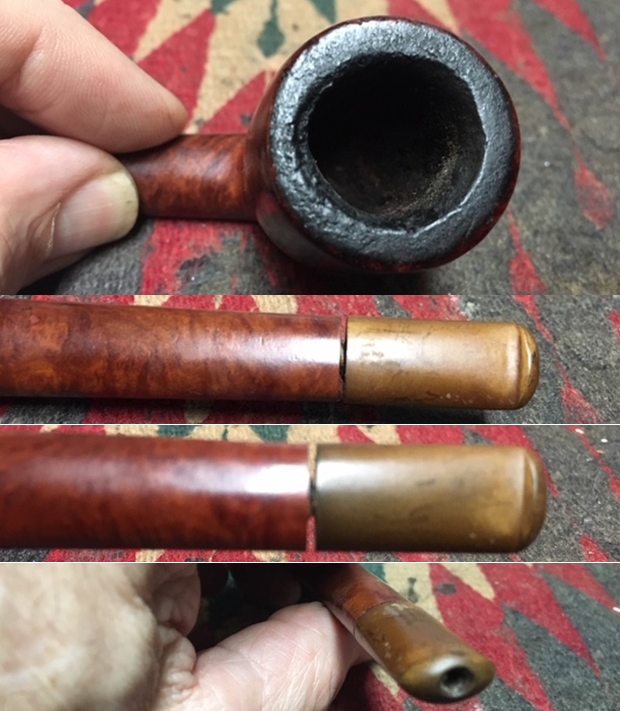
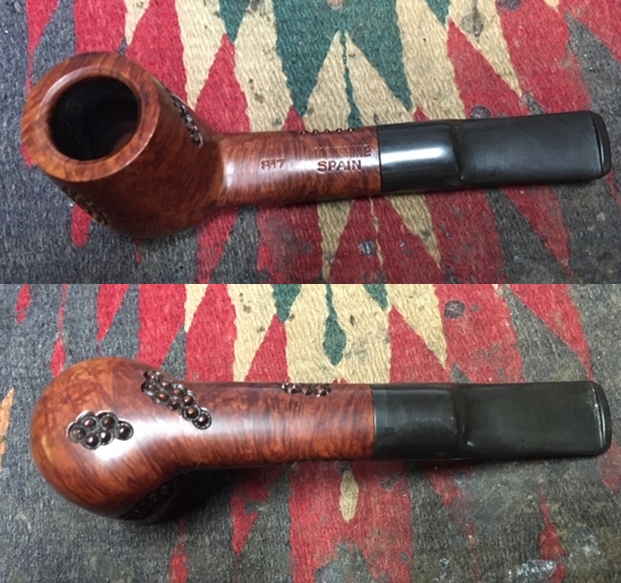
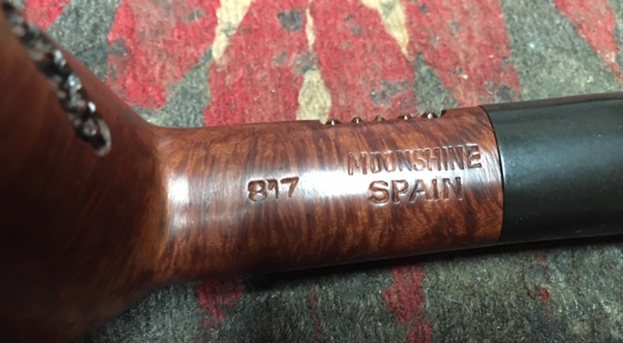
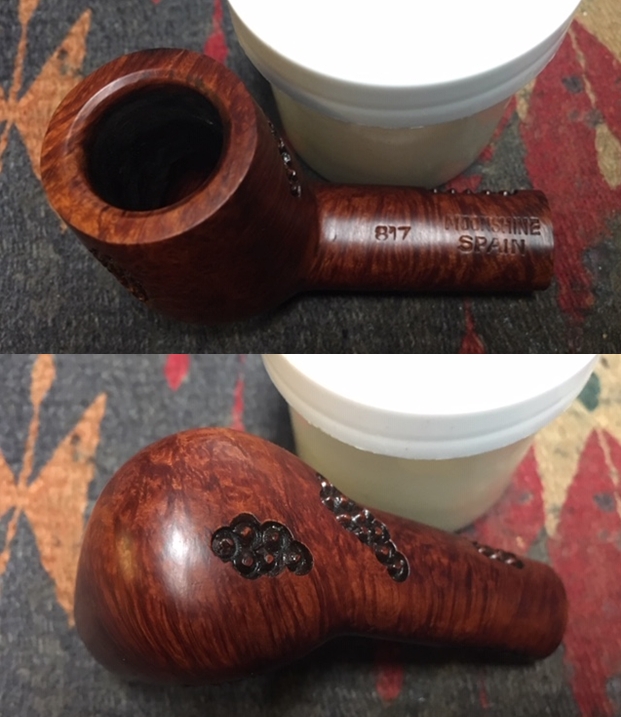
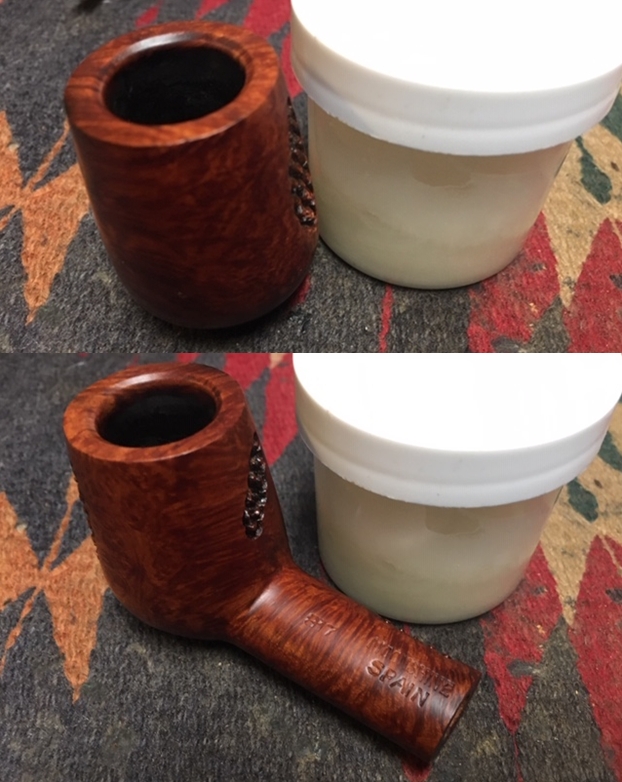
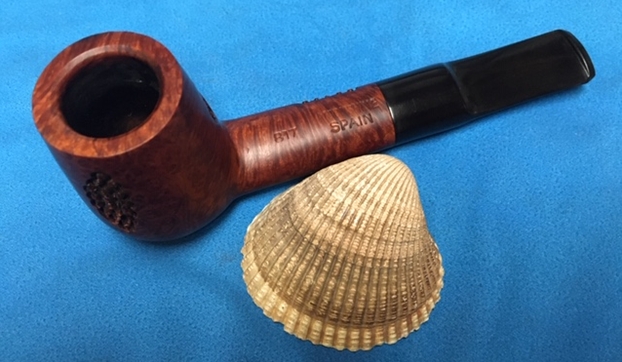
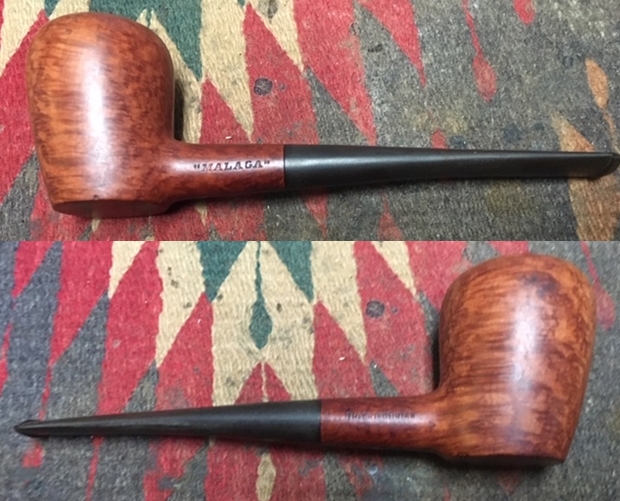
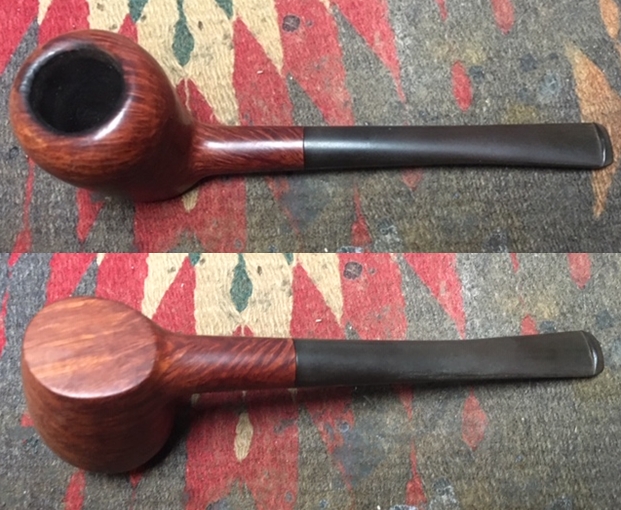
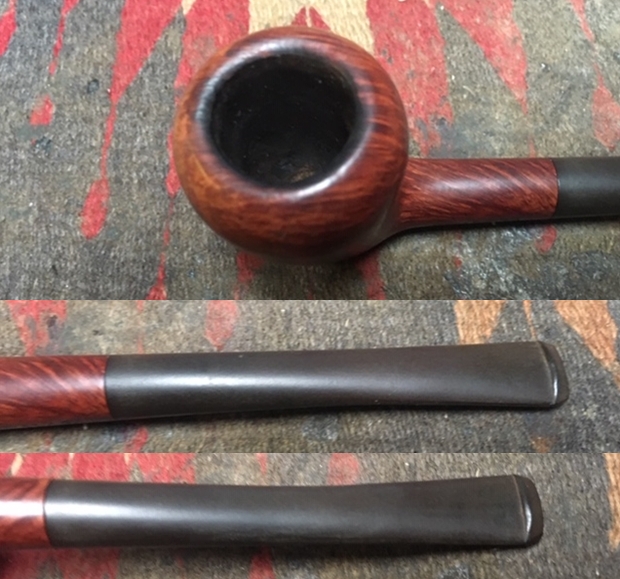 I took a photo to capture the stamping on the shank. The first photo shows the stamping “MALAGA” on the left side of the shank is very readable. The second photo shows the stamping Imported Briar on the right side.
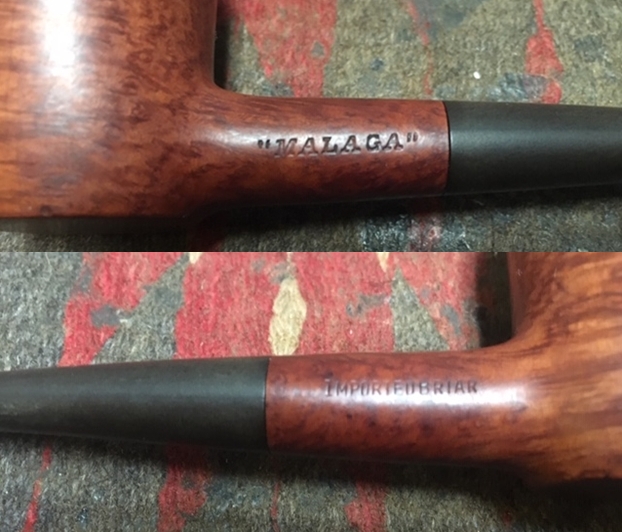
 If this is the first of the Malaga restorations that you have read about then you should know the backstory of the brand. I am including the link to a blog that I wrote that gives some of the history of the Malaga brand and the Malaga Pipe Shop in Royal Oak, Michigan in the USA. I have written an earlier blog to give a little history of the Malaga Brand and the pipemaker, George Khoubesser. Here is the link – https://rebornpipes.com/tag/malaga-pipes/.That blog also includes links to a catalogue and the history of the pipemaker George Khoubesser. Follow the link to get a feel for the brand and the pipemaker.
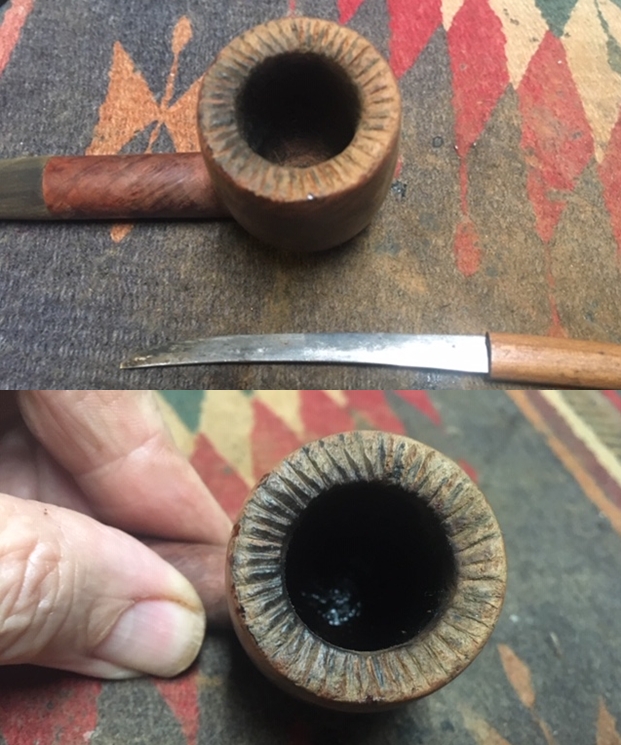
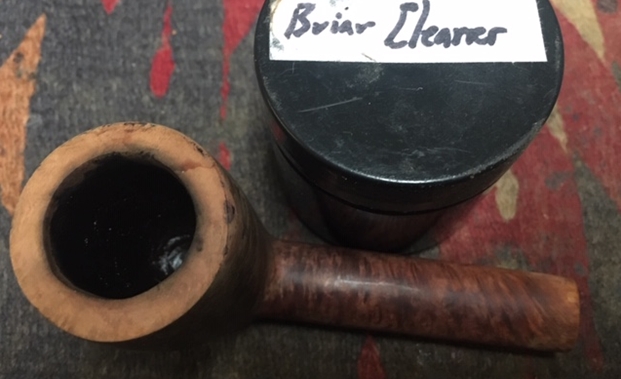
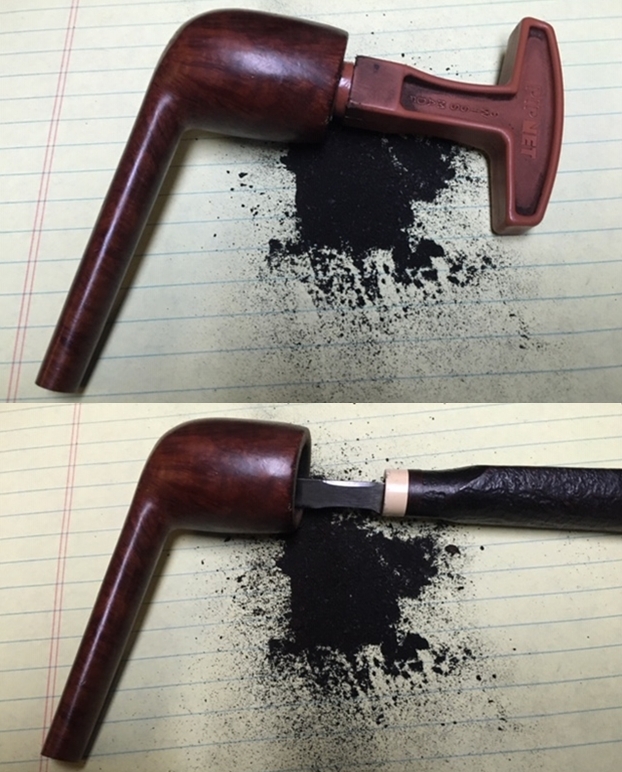
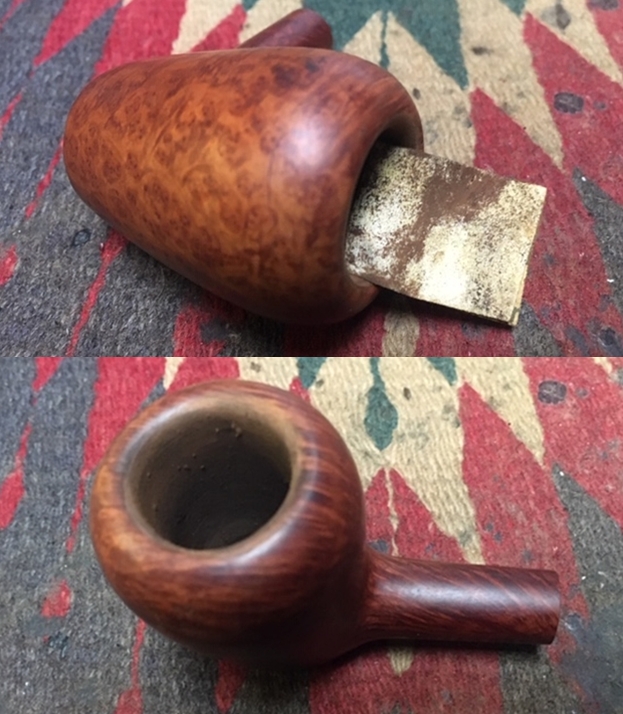 I followed Jeff and my regular regimen for cleaning estates. I reamed the light cake in the bowl with a Savinelli Fitsall pipe knife to remove the cake. I sanded the bowl with 220 grit sandpaper wrapped around a piece of dowel to smooth out the inside walls of the bowl.
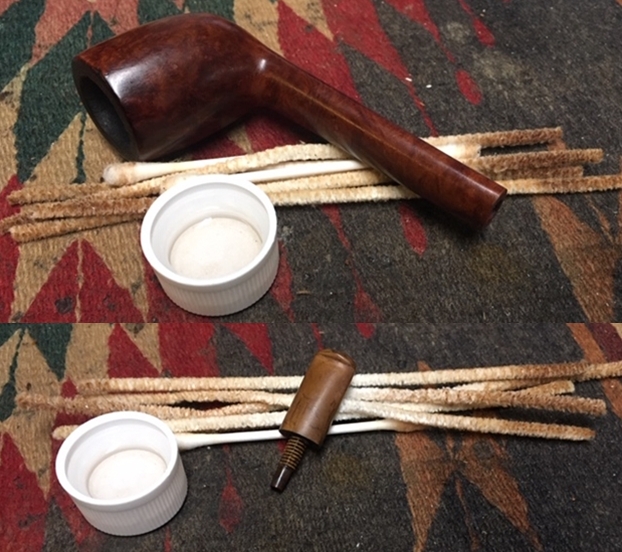
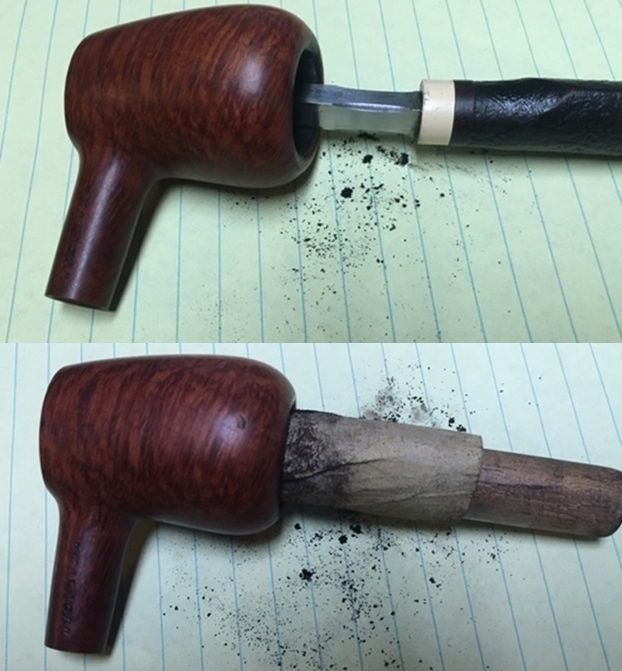 I scrubbed out the mortise and the airway in the shank and the stem with alcohol, cotton swabs and pipe cleaners.
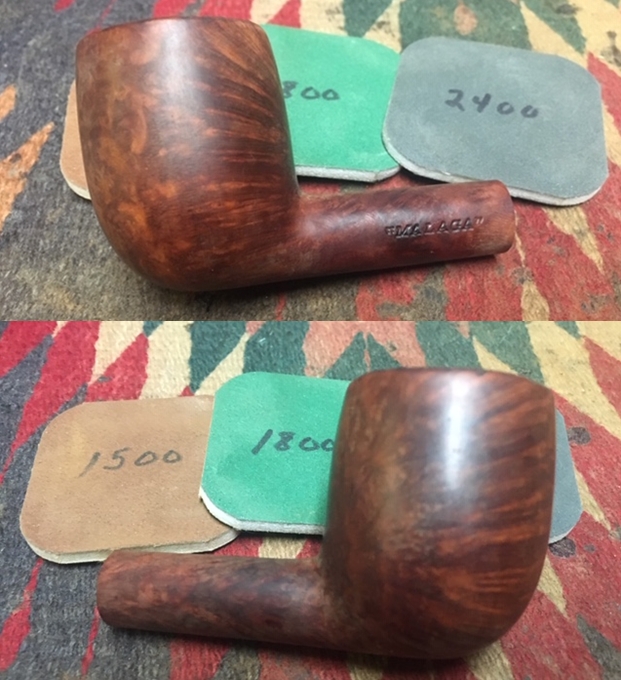
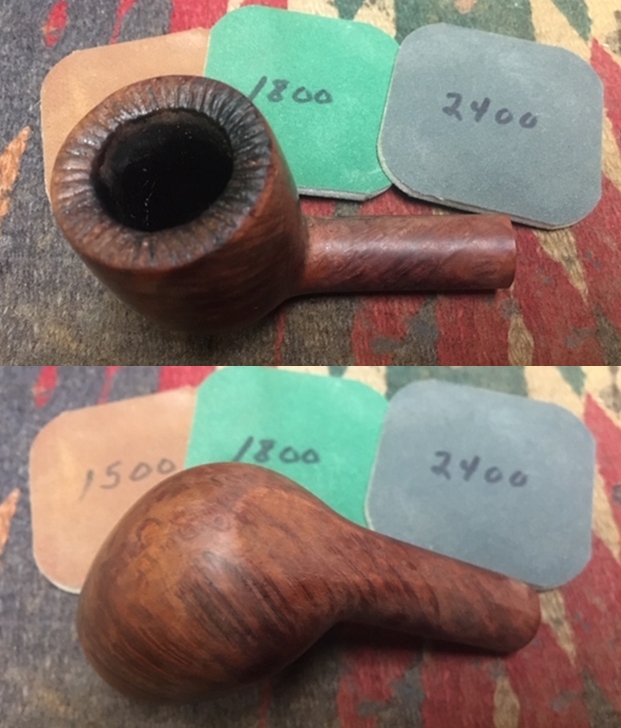
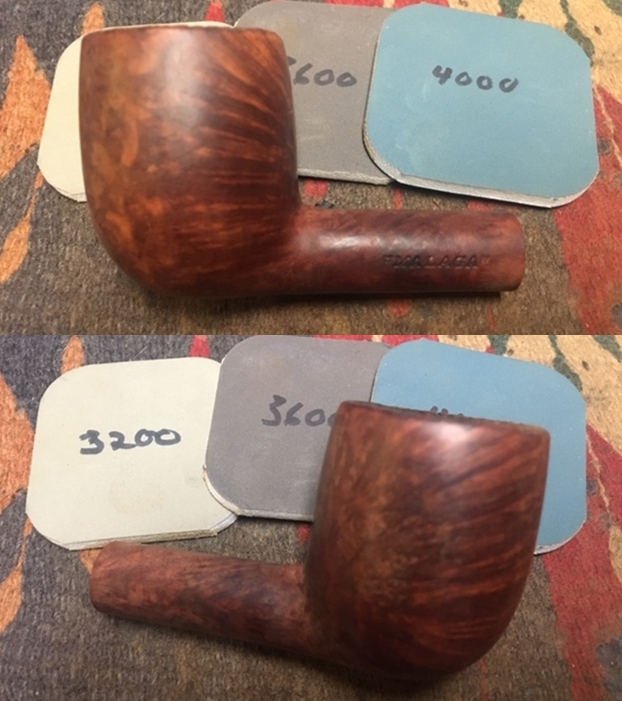
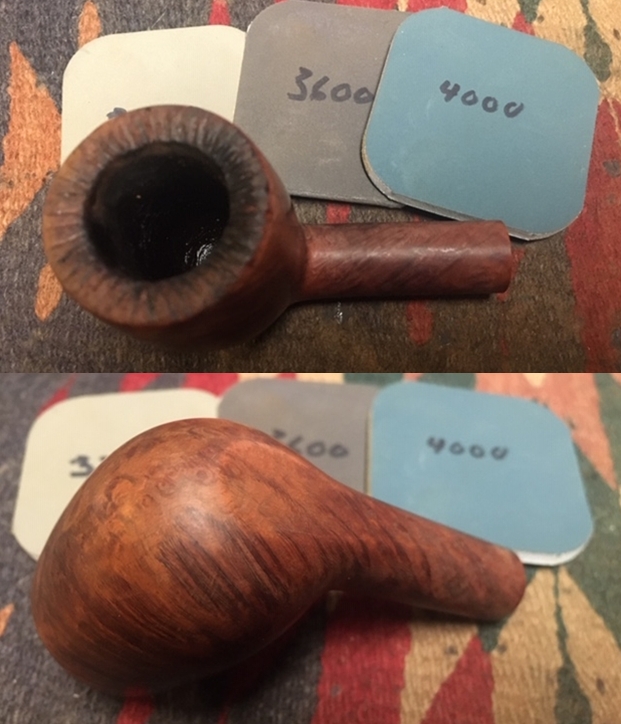
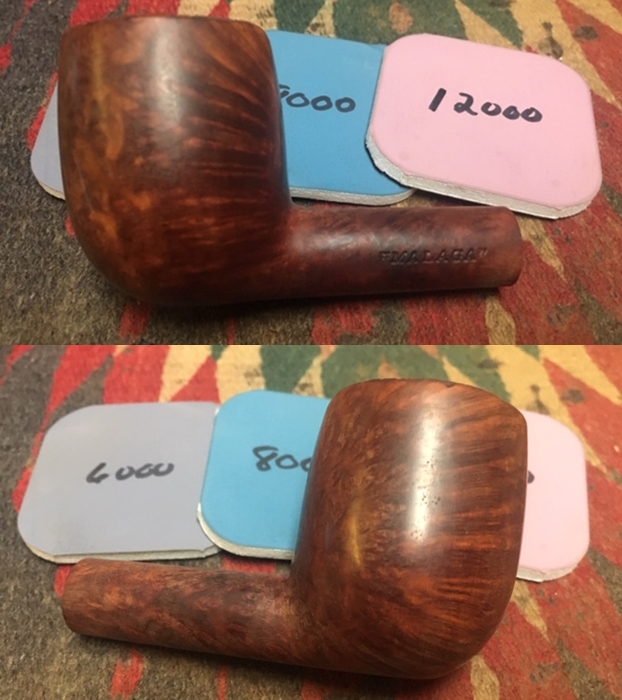
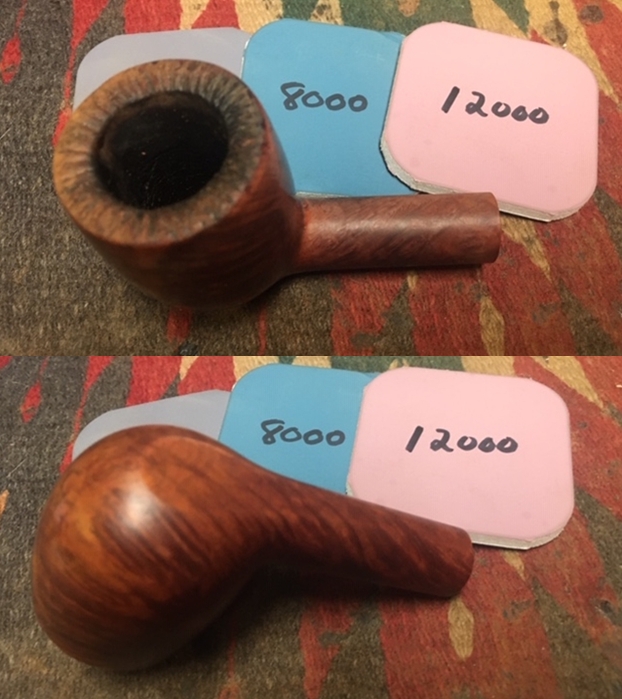
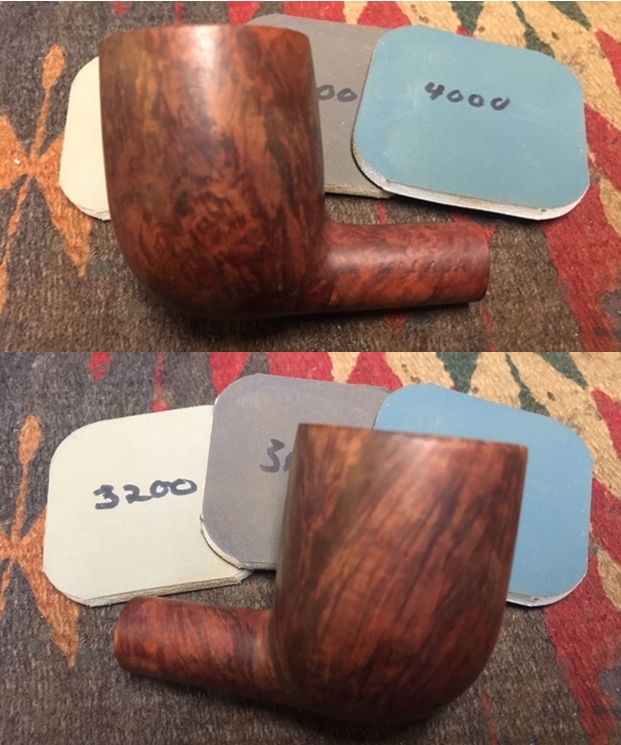
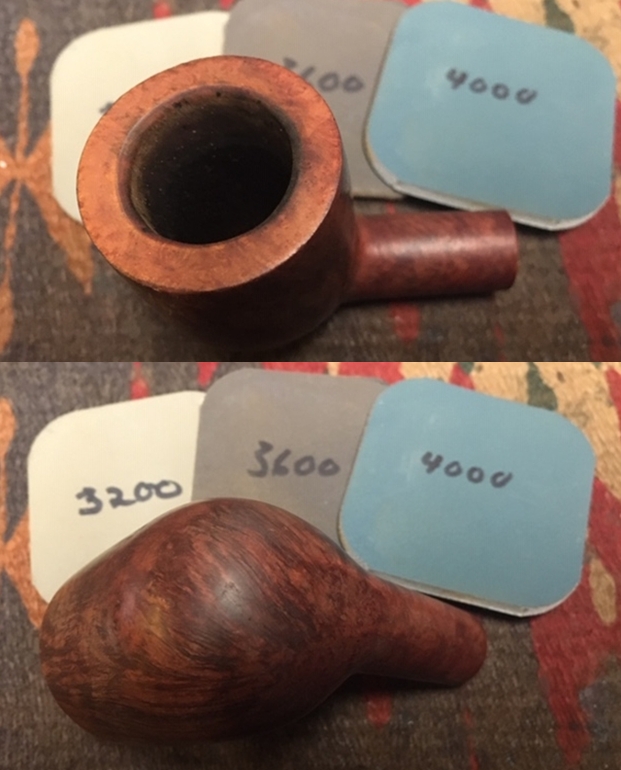
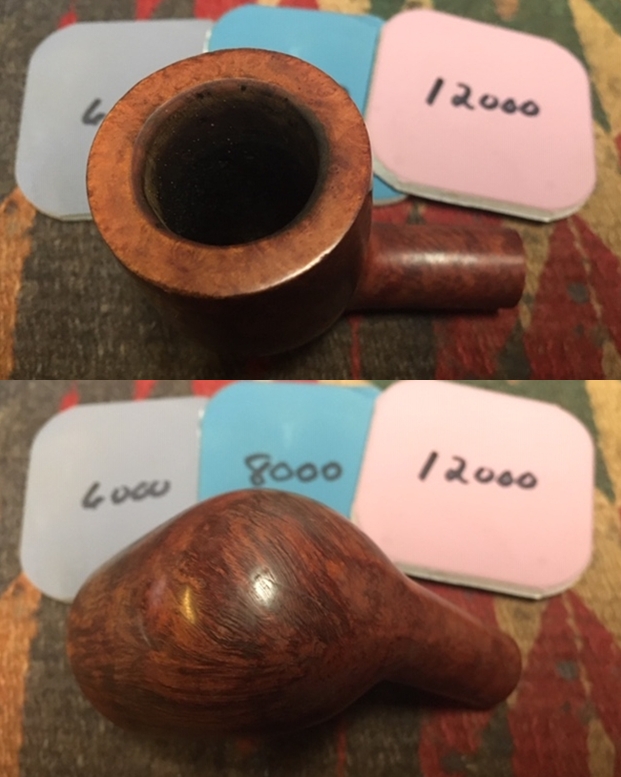
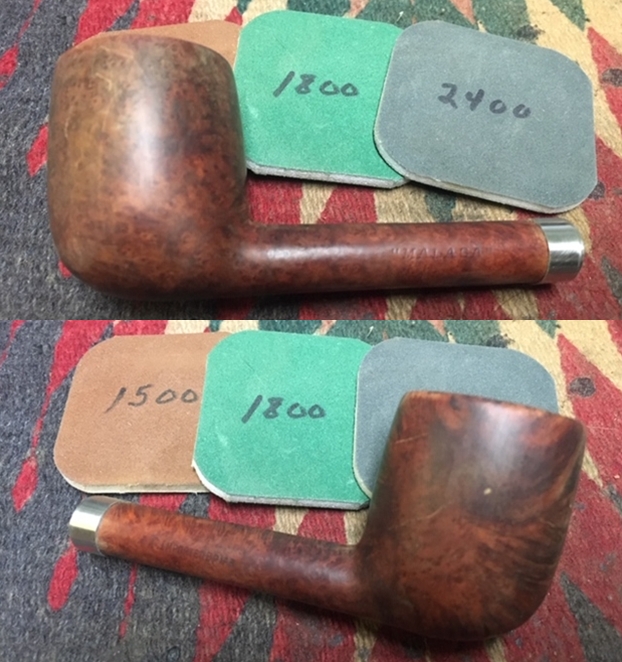
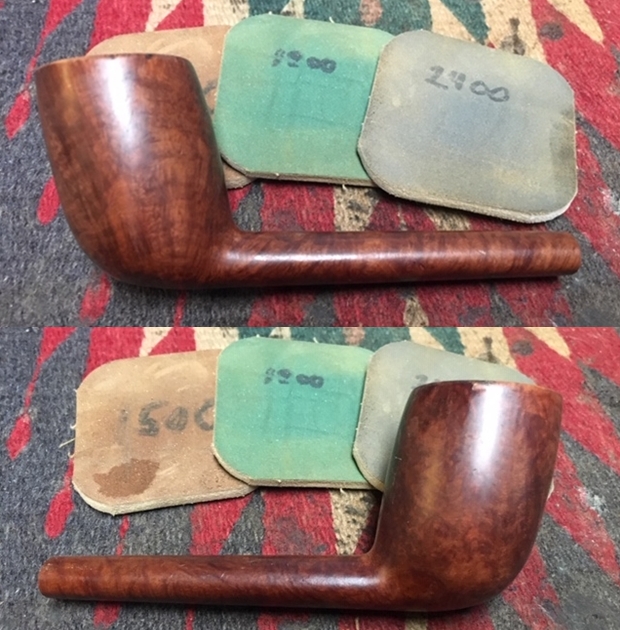
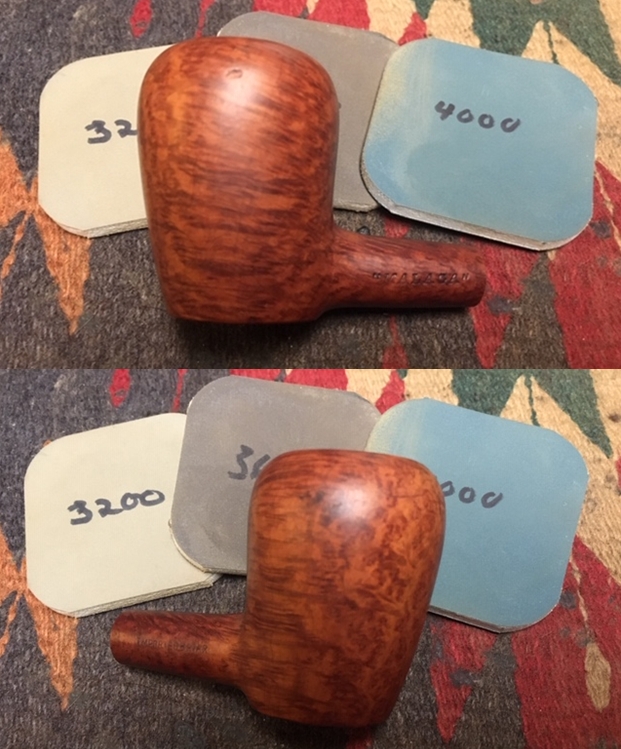
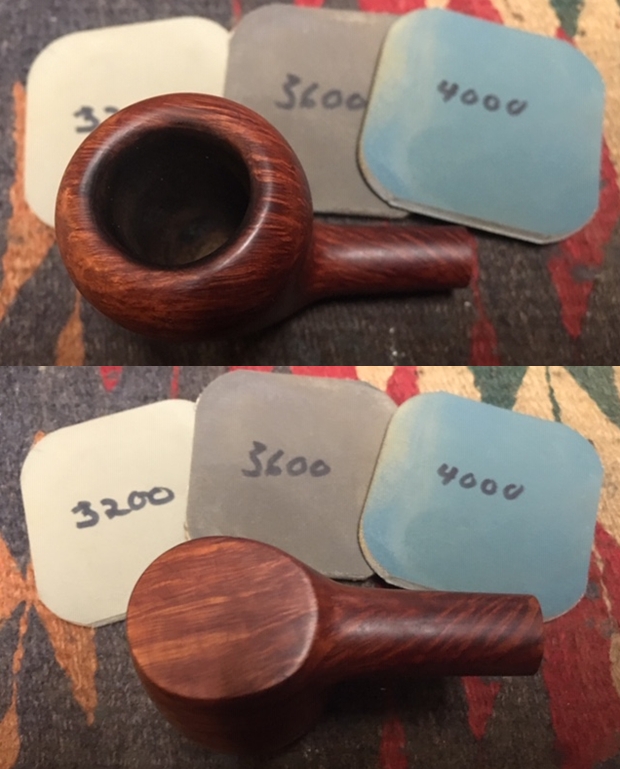
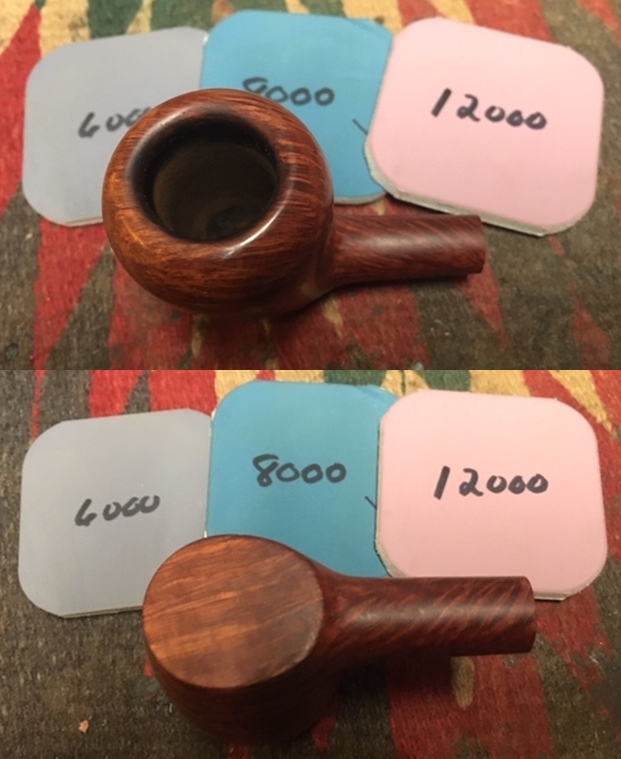
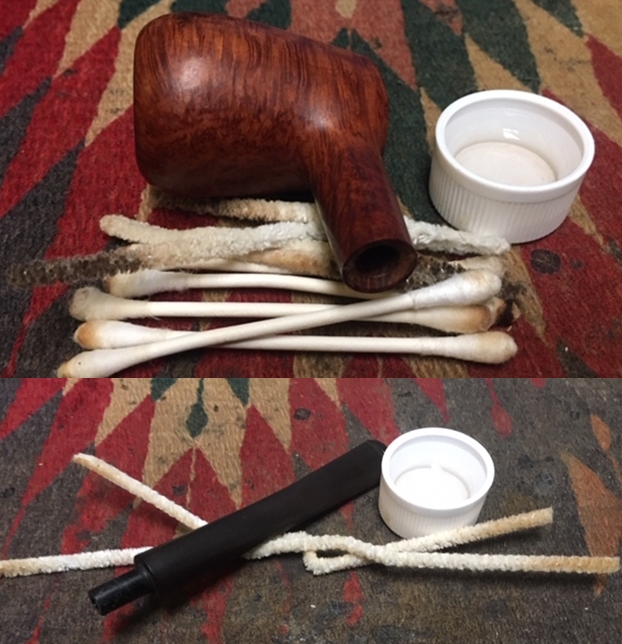 I polished the briar with micromesh sanding pads – 1500-12000 grit pads. I wiped the bowl down after each sanding pad with a damp cloth to wipe of the dust.
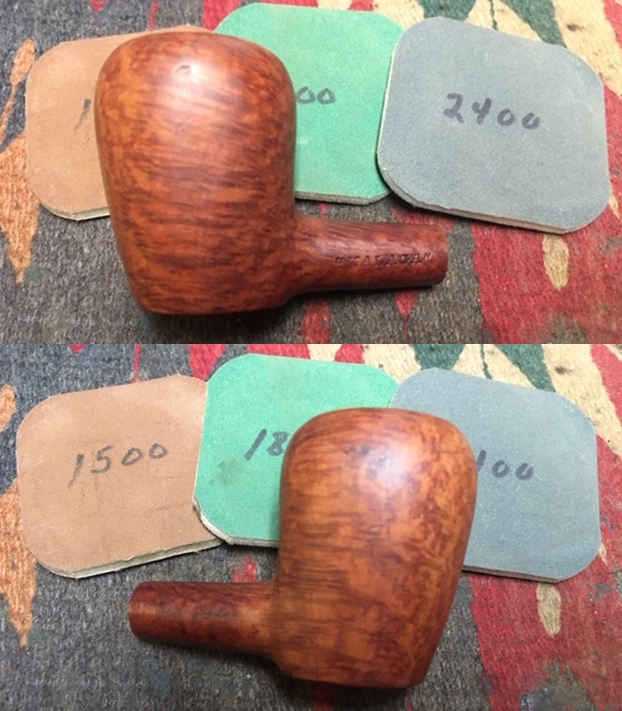

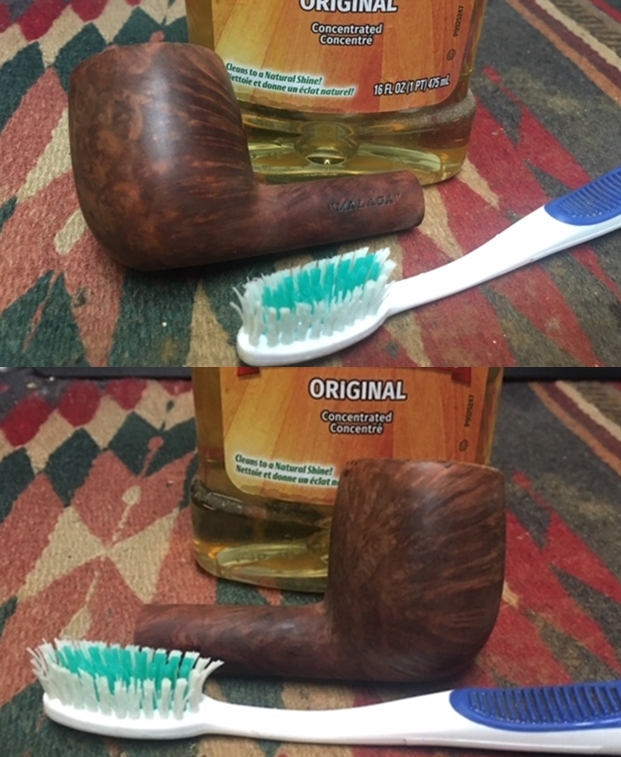
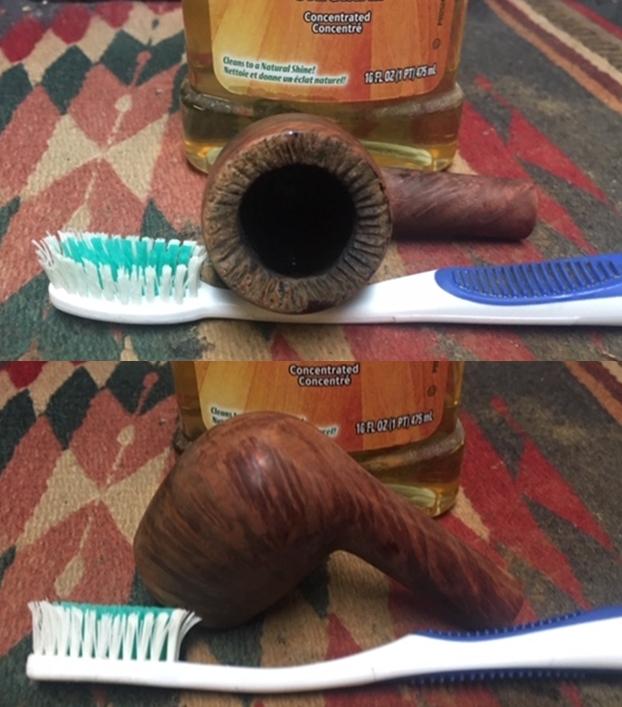
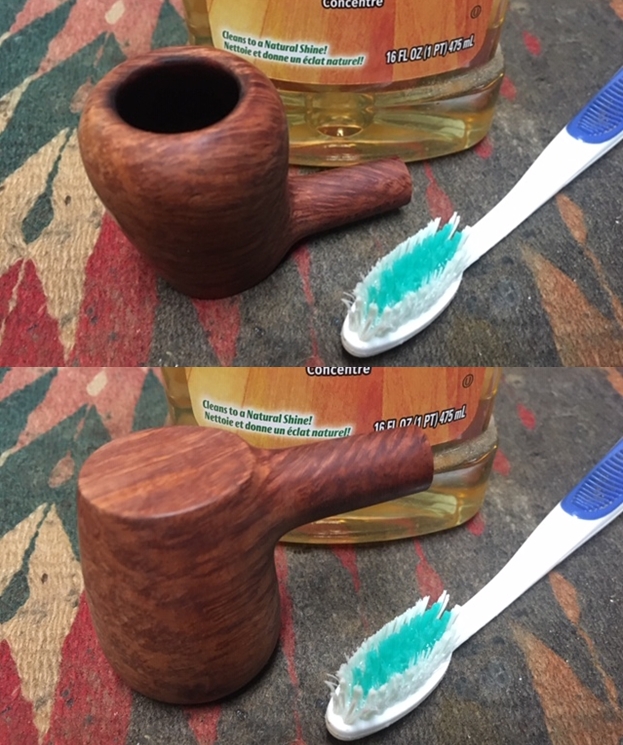
 I scrubbed the briar with Murphy’s Oil Soap with a tooth brush. I scrubbed it off with running water to remove the soap and the grime on the bowl. I dried it off with a soft cloth.
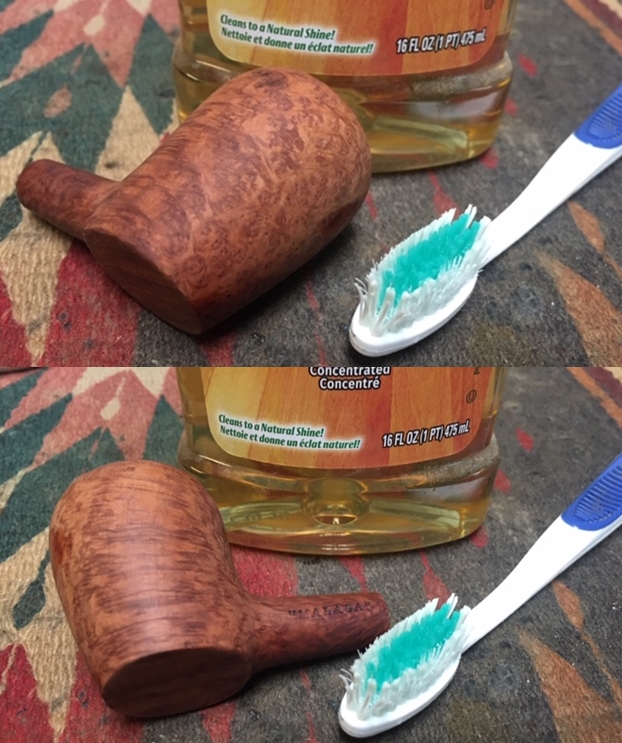
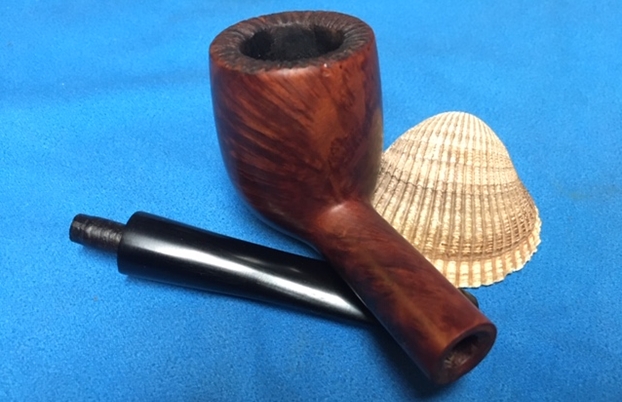
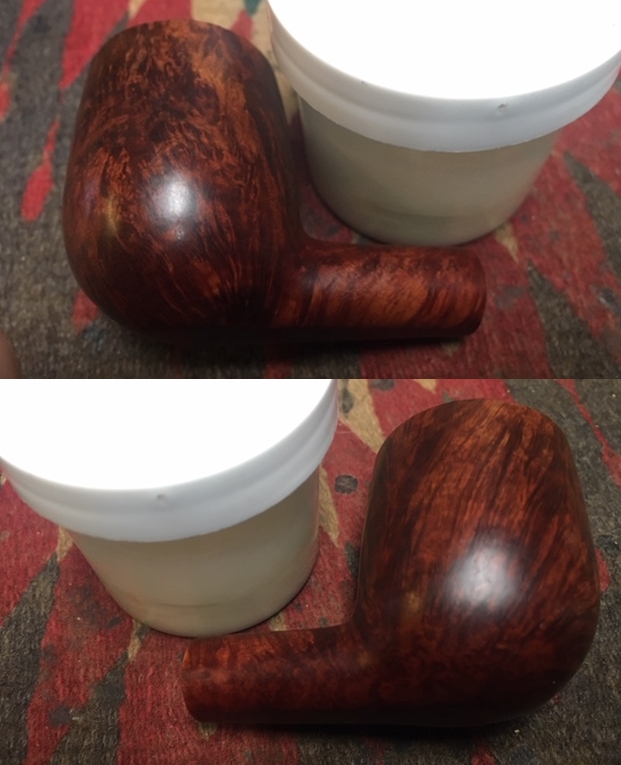
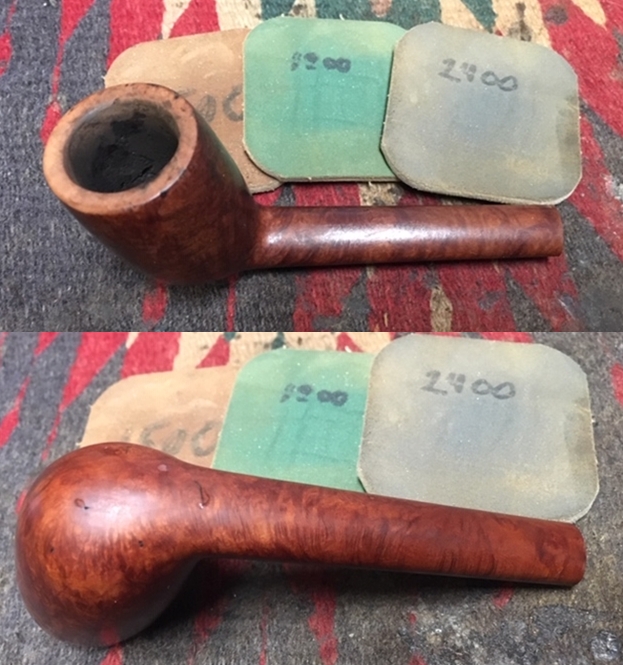
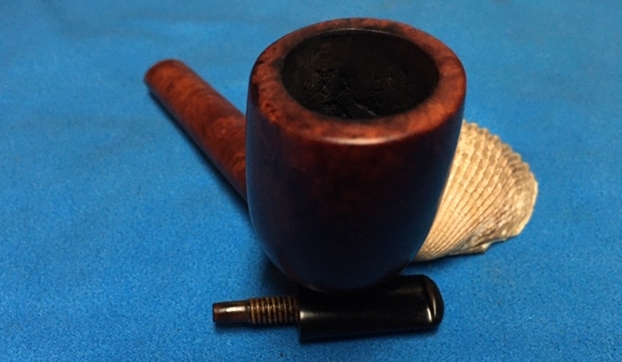
 I worked some Before & After Restoration Balm into the surface of the briar with my fingertips and a horsehair shoe brush to clean, enliven and protect it. I let the balm sit for a little while and then buffed with a cotton cloth to raise the shine. The photos show the bowl at this point in the restoration process.
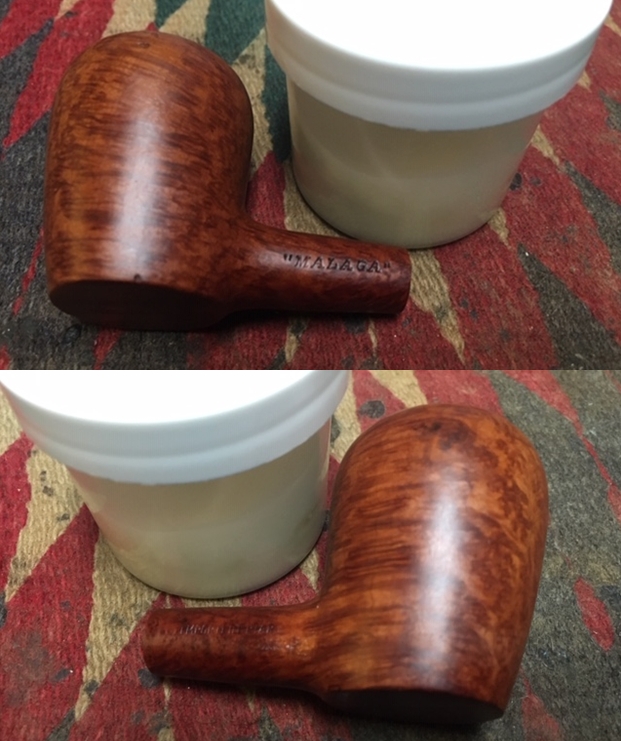
 I set the bowl aside and turned my attention to the stem. I sanded out the tooth chatter with 220 grit sand paper and started to polish it with a folded piece of 400 wet dry sandpaper. Once it was finished it the tooth chatter and oxidation was gone and it began to shine.
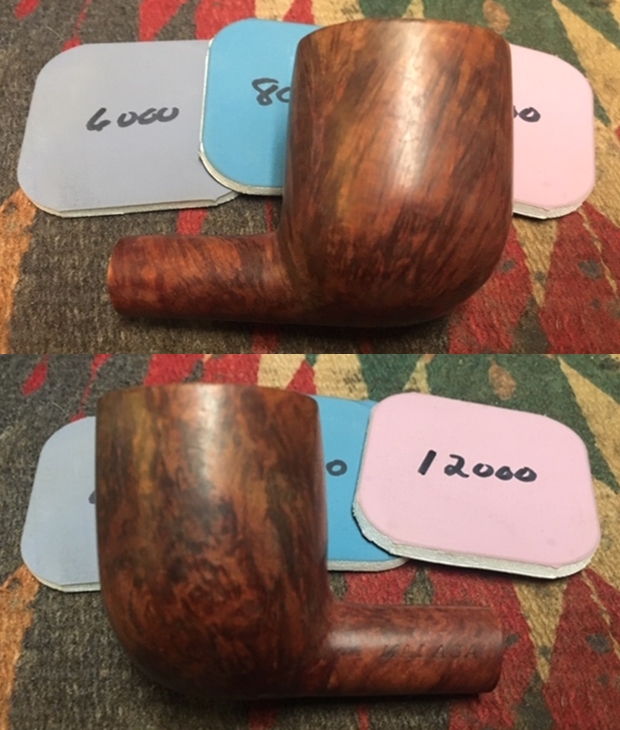
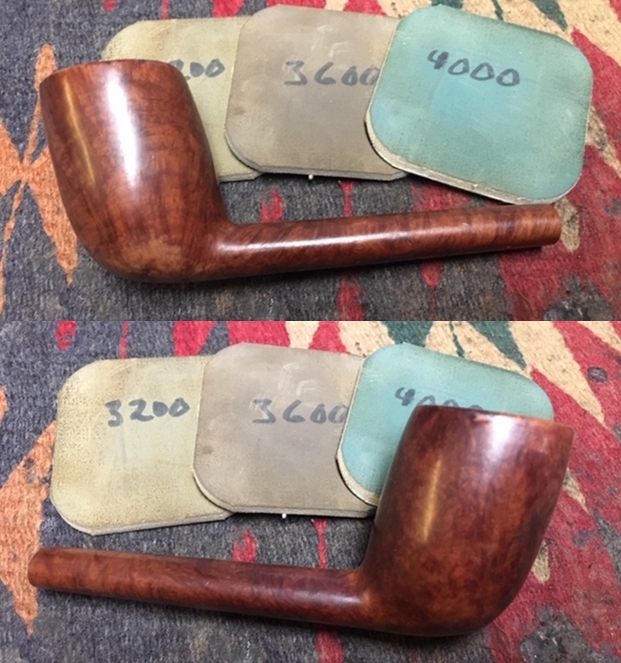
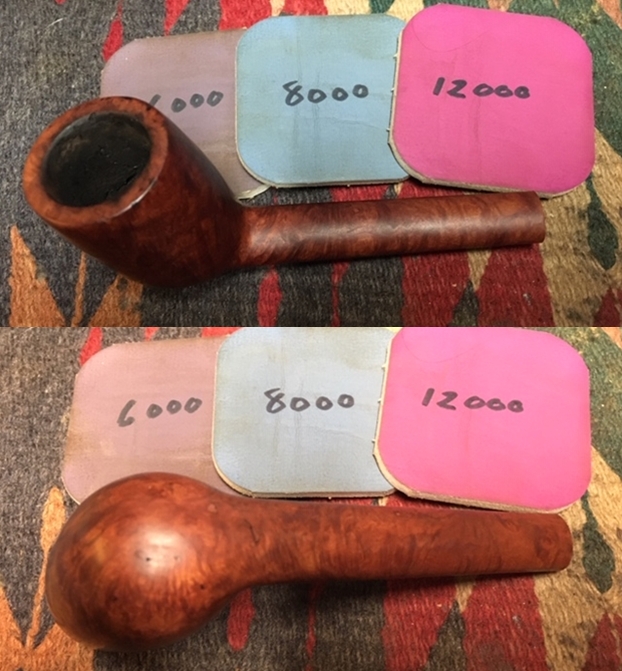
 I polished the stem with micromesh sanding pads – wet sanding with 1500-12000 grit sanding pads. I wiped it down after each sanding pad with Obsidian Oil. I polished it with Before & After Pipe Stem Polish – both Fine and Extra Fine and buffed it off with a final coat of Obsidian Oil.
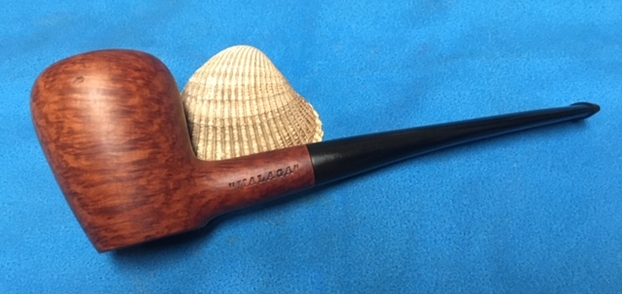
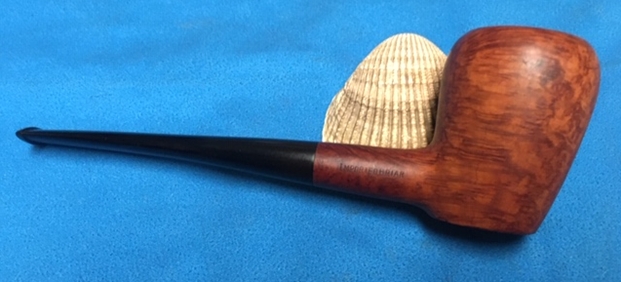
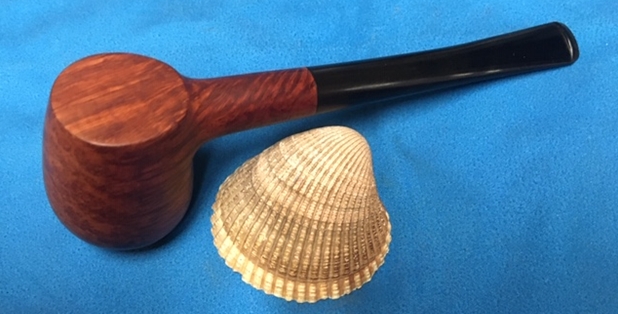
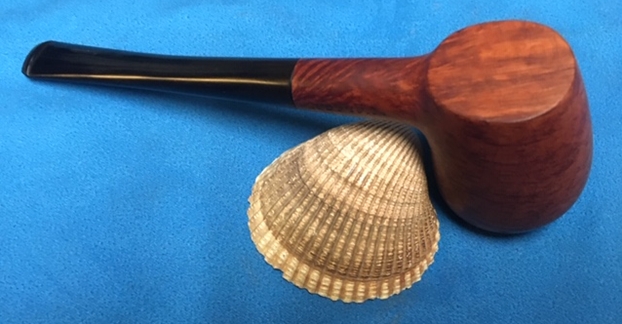
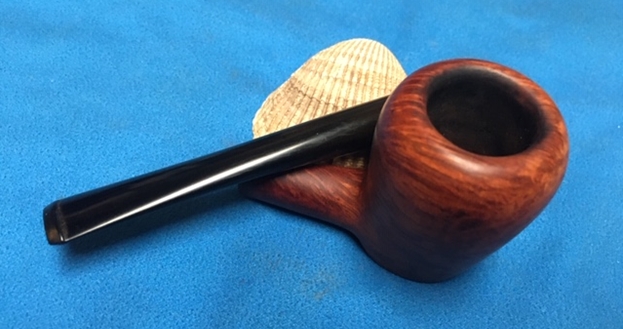
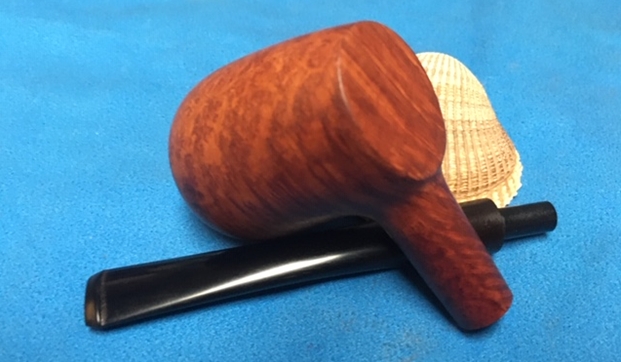
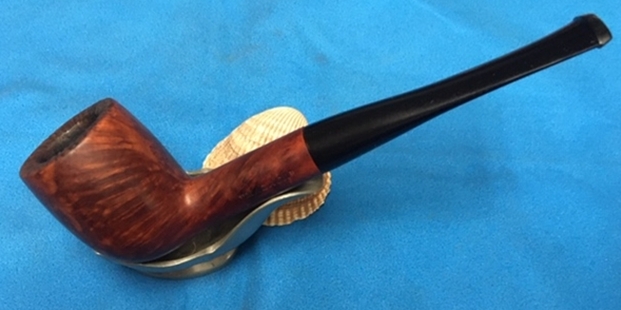
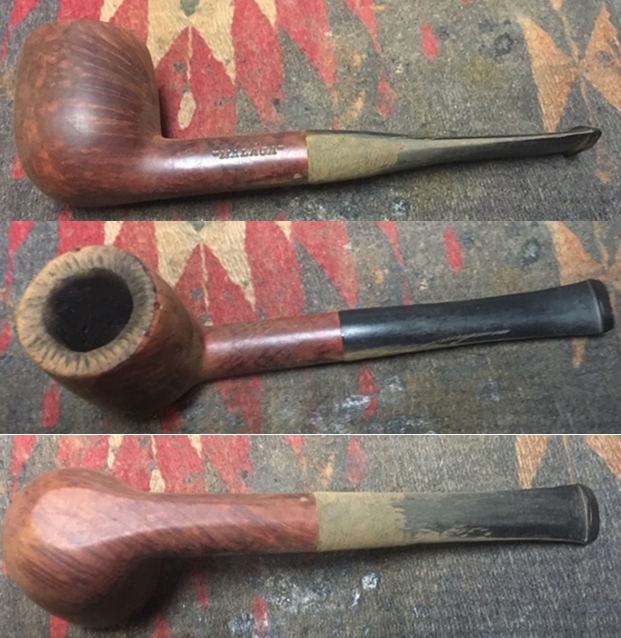
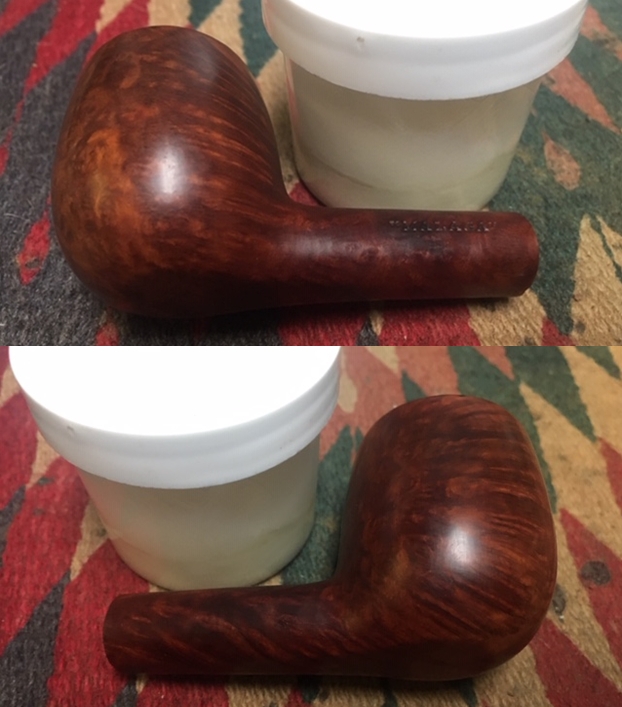
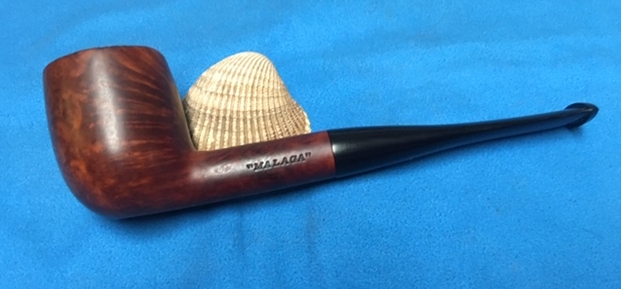
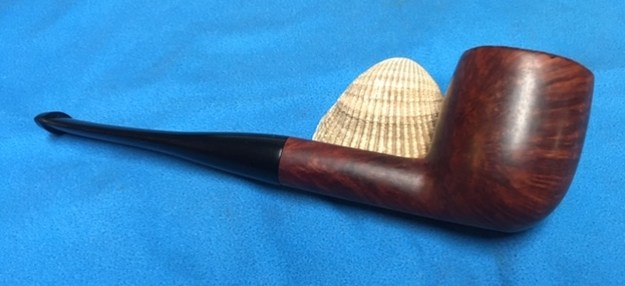
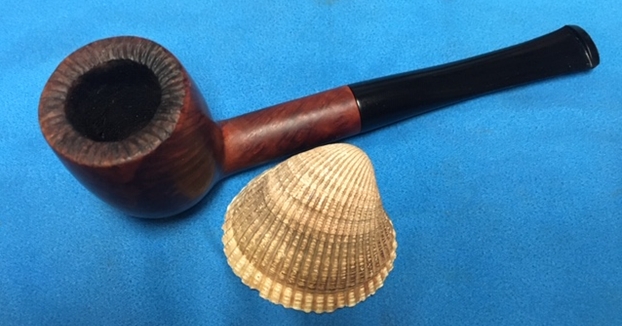
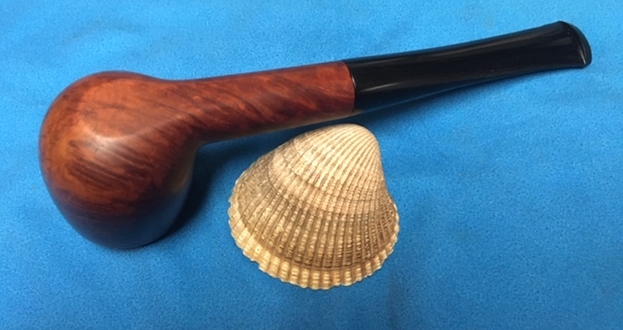
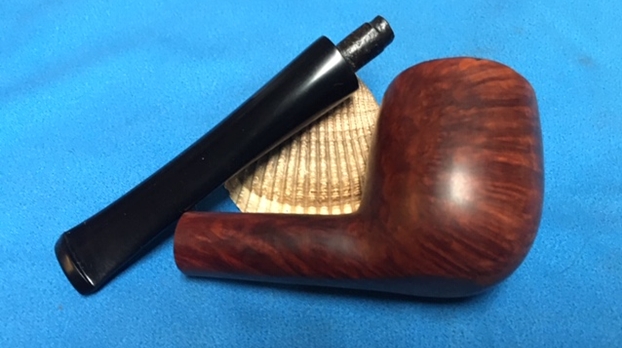
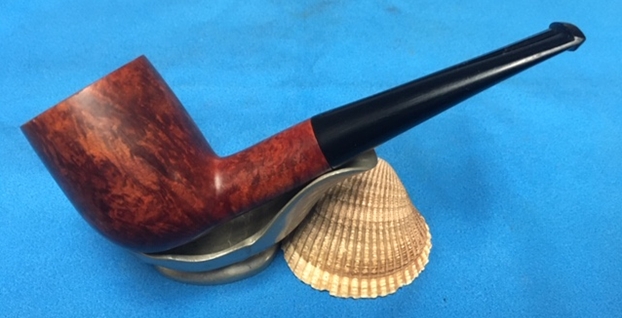
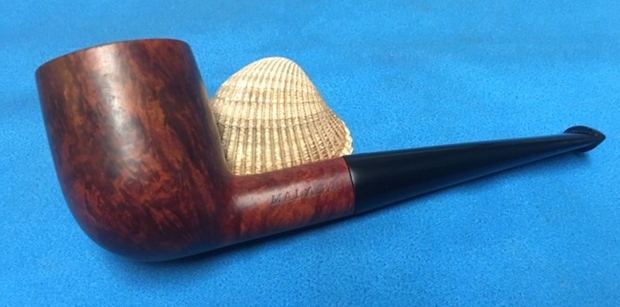
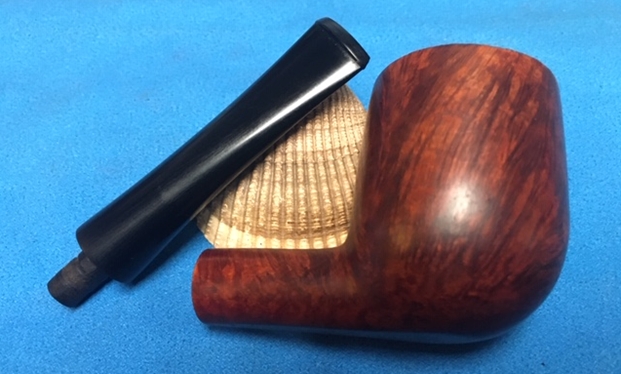
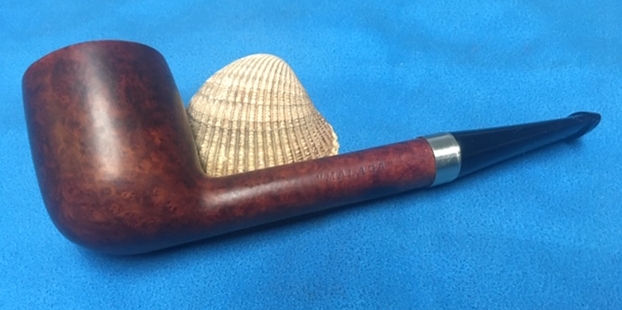
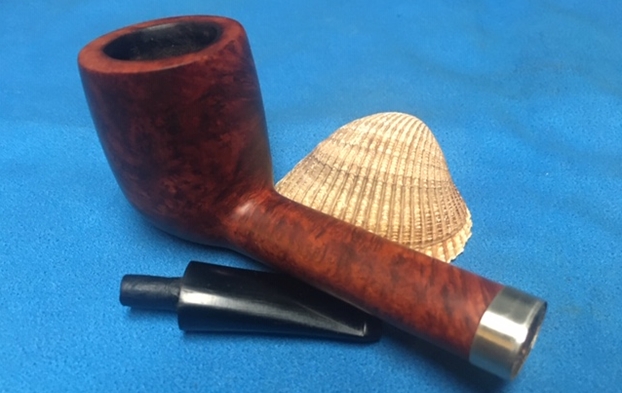
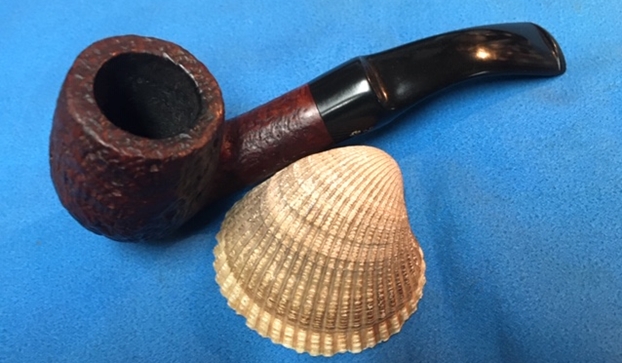
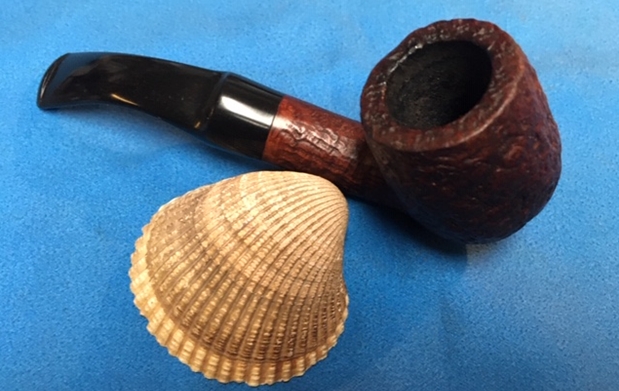
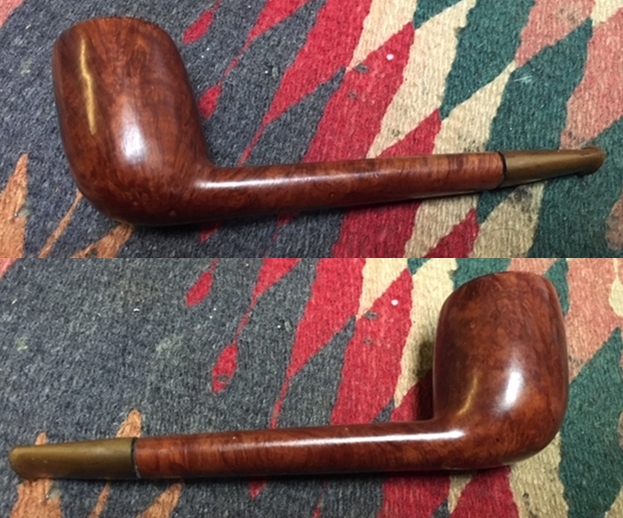
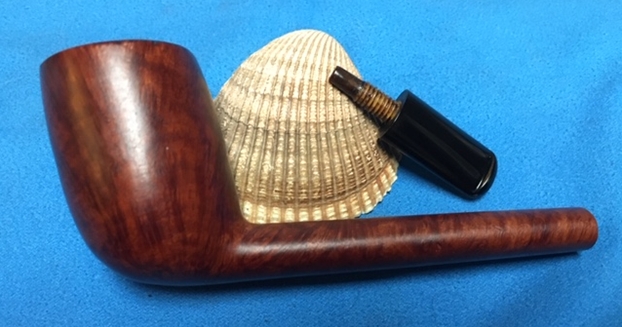
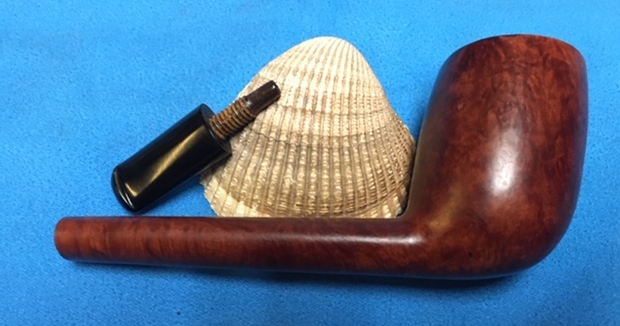
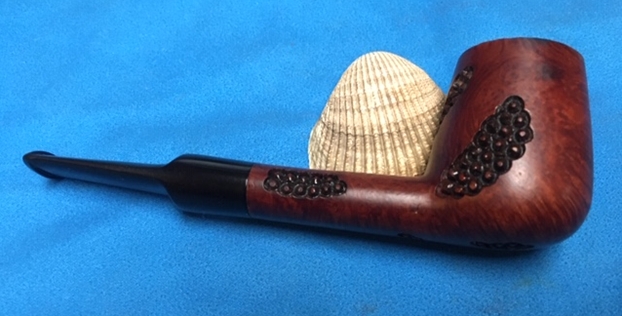
 This is a beautiful “Malaga” Imported Briar Poker Sitter with a tapered black vulcanite stem. It has a great look and feel. The shape fits well in the hand and sits on the desk when you are resting. The grain makes it a real beauty. I polished stem and the bowl with Blue Diamond polish on the buffing wheel. I gave the bowl and the stem multiple coats of carnauba wax. I buffed the pipe with a clean buffing pad to raise the shine. I hand buffed it with a microfiber cloth to deepen the shine. The pipe polished up pretty nicely. The rich oil cured briar took on life with the buffing. The rich brown colour of the briar works well with the polished vulcanite stem. The finished pipe has a rich look that is quite catching. Have a look at it with the photos below. The shape, finish and flow of the pipe and stem are very well done. The dimensions are Length: 6 inches, Height: 2 inches, Outside diameter of the bowl: 1 ½ inches, Chamber diameter: ¾ of an inch. I will be adding the pipe to the finished Malaga pipes that I have set aside for Alex. This will be a great addition to his collection of Malaga pipes. Thanks for walking through the restoration with me as I worked over another Malaga.