Tag Archives: waxing a stem

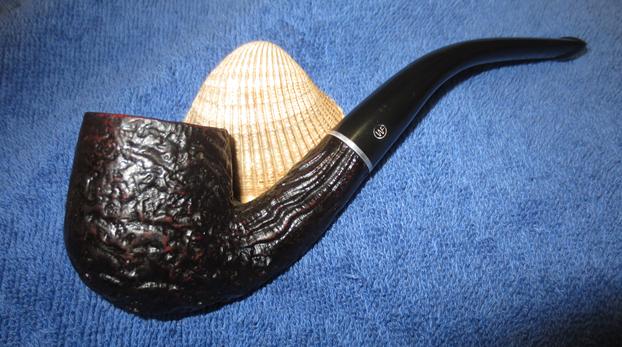
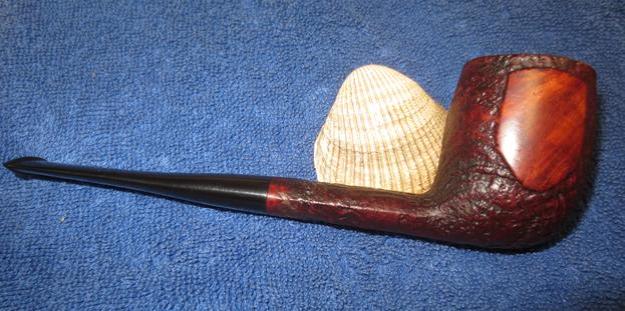
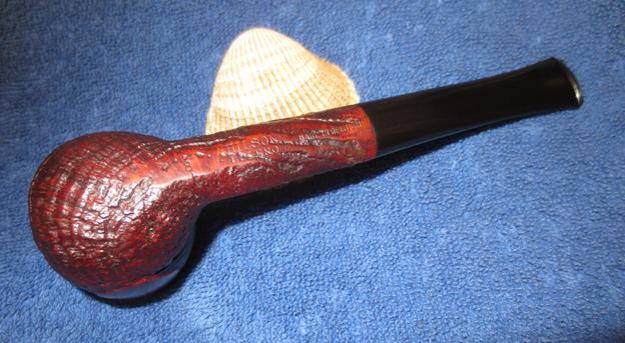
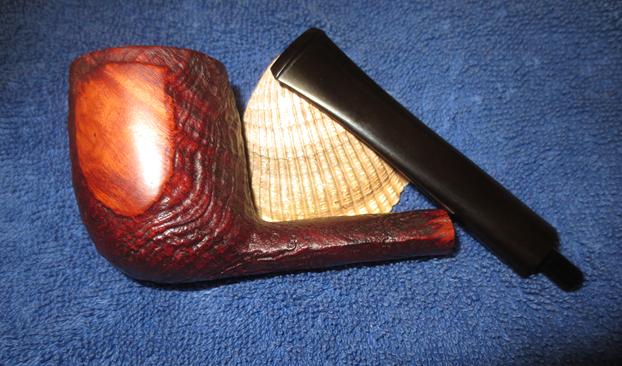
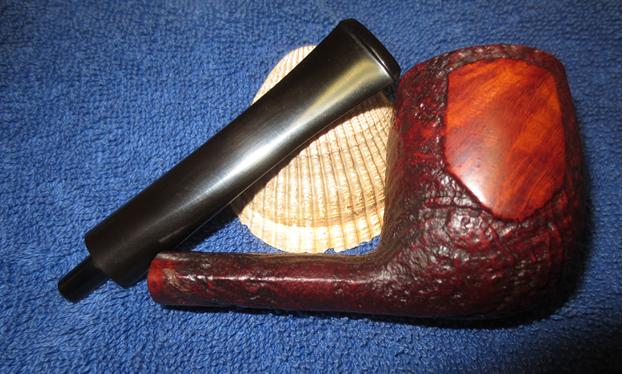
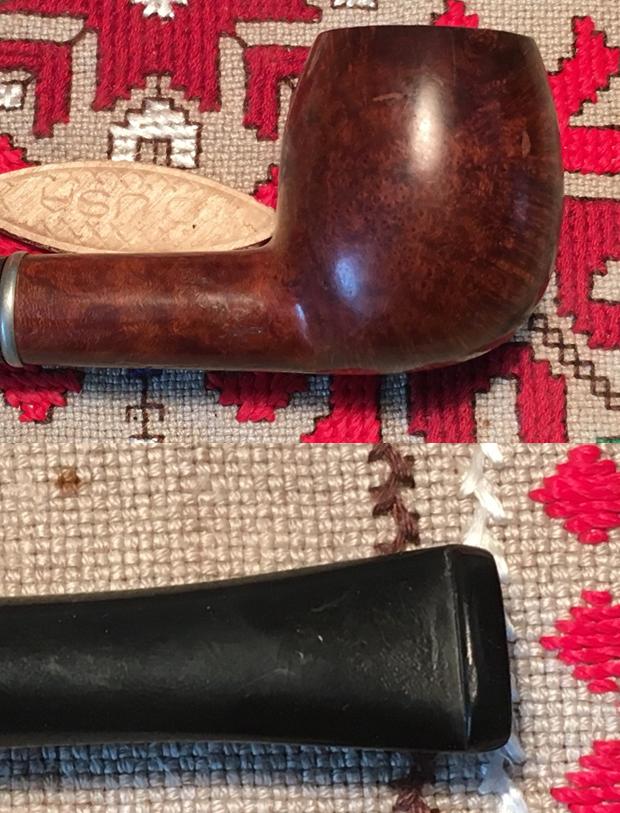
Restoring an older Wally Frank Sandblast Bent Billiard


Blog by Steve Laug

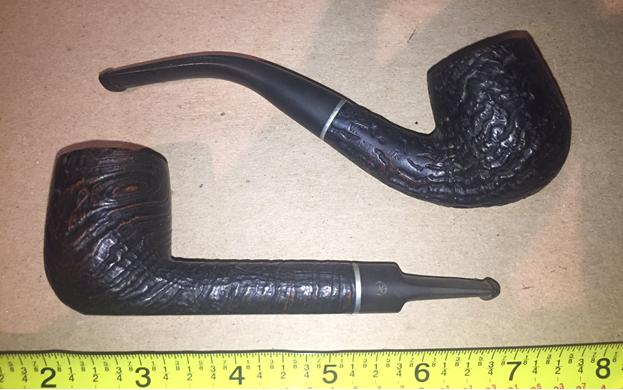
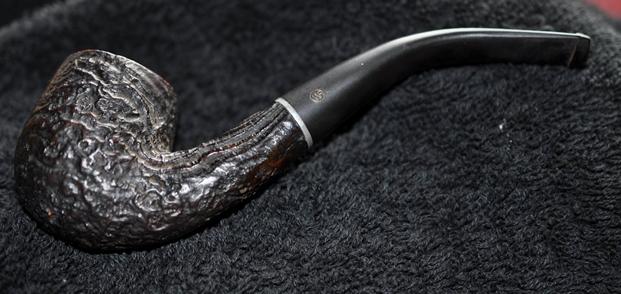
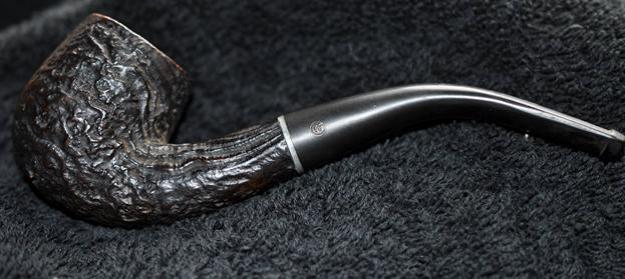
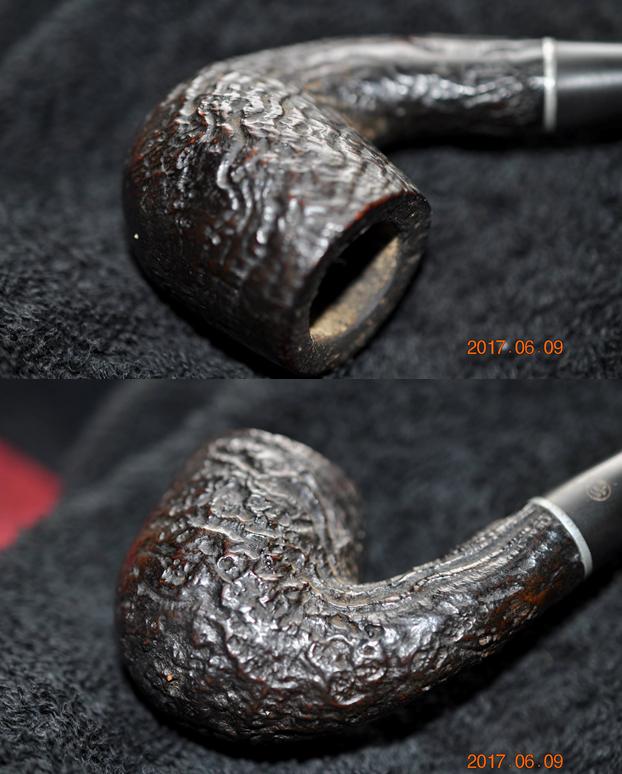
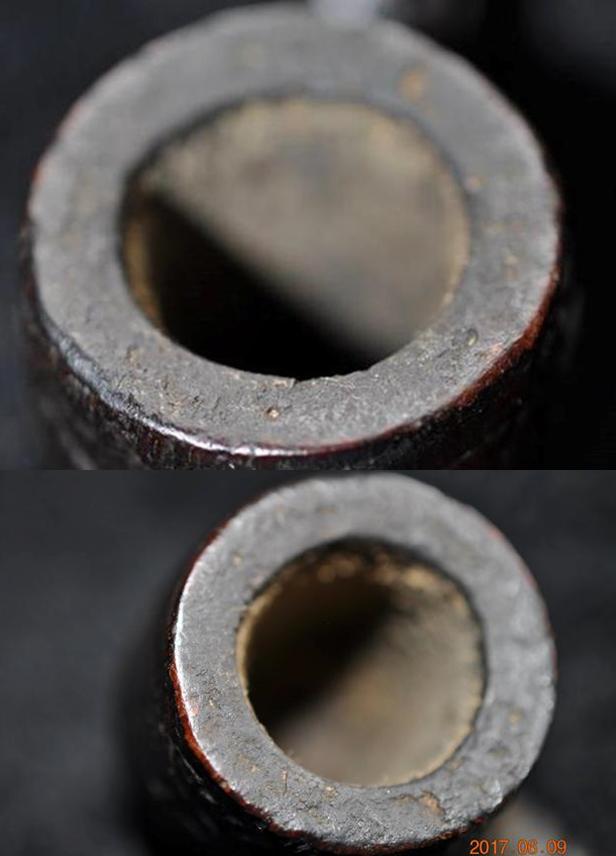
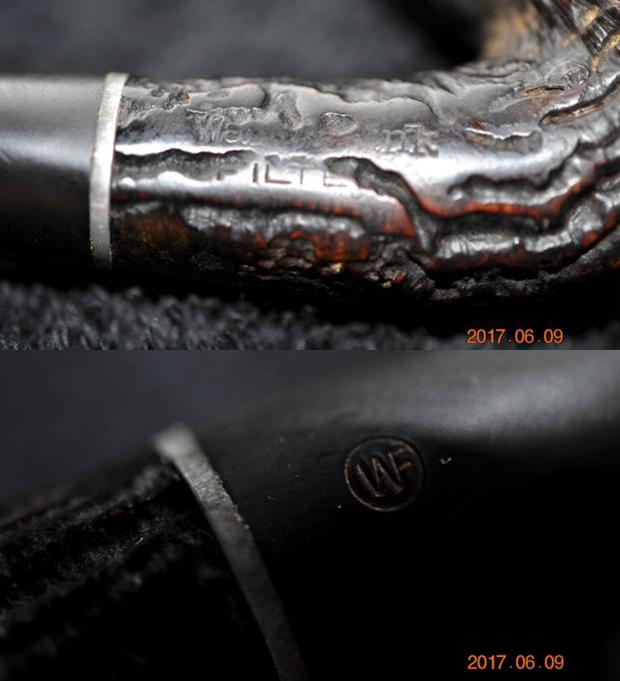
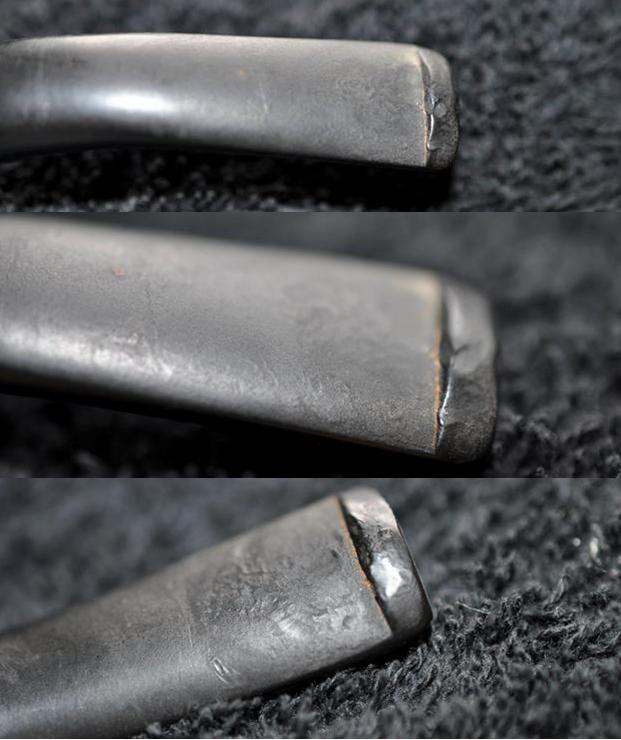
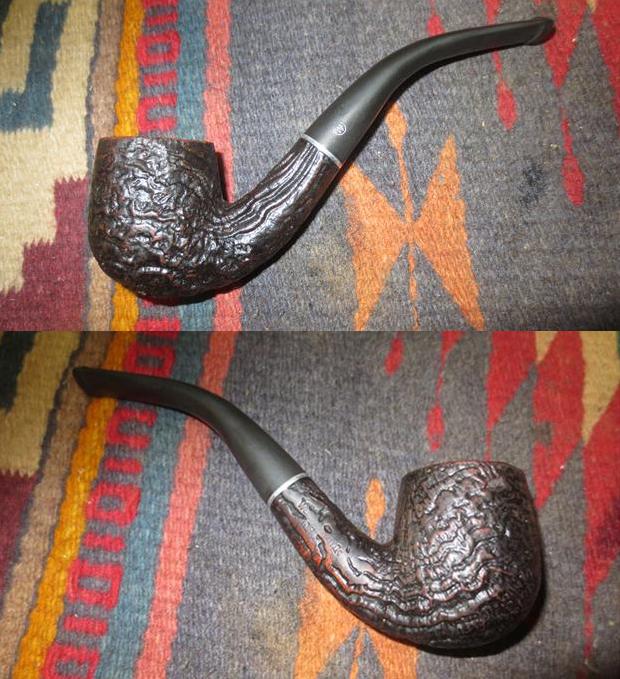
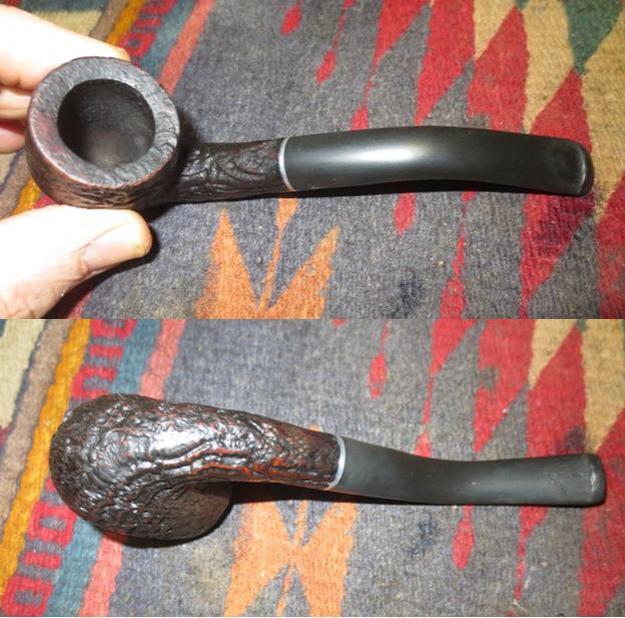
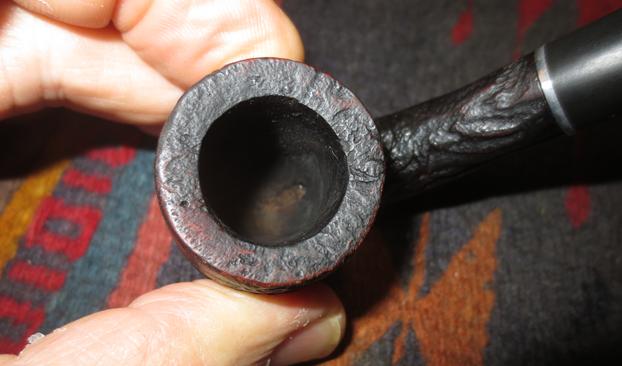
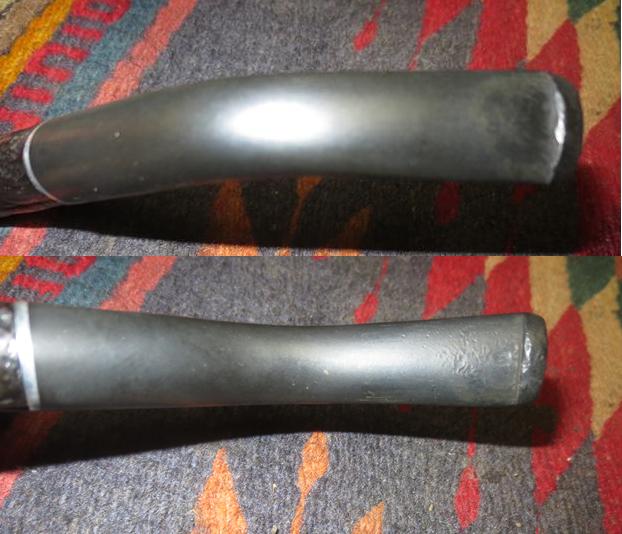
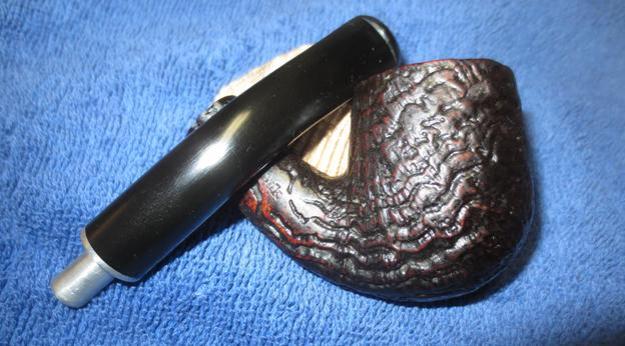
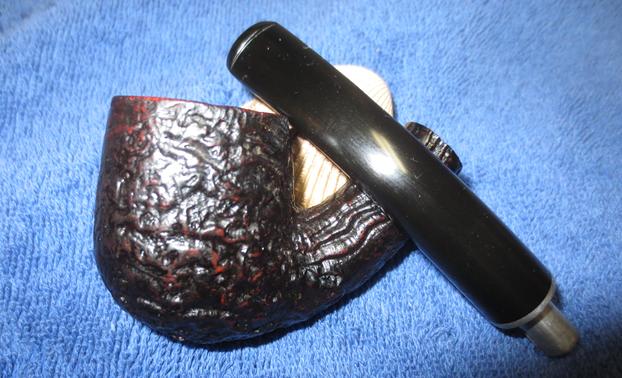
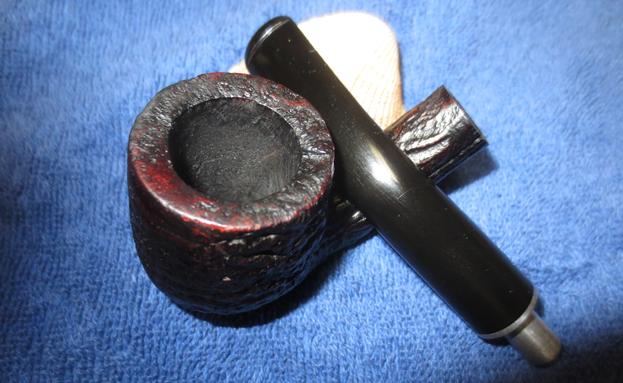
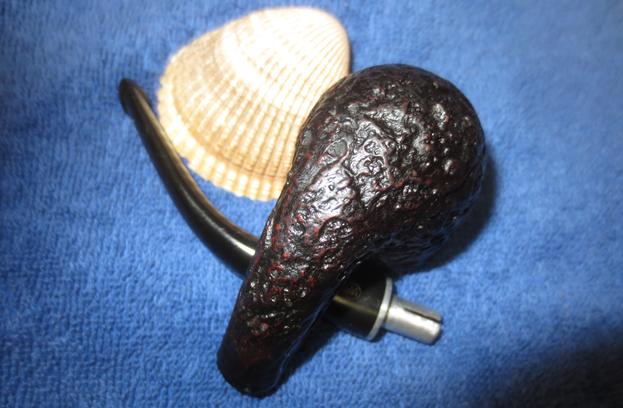
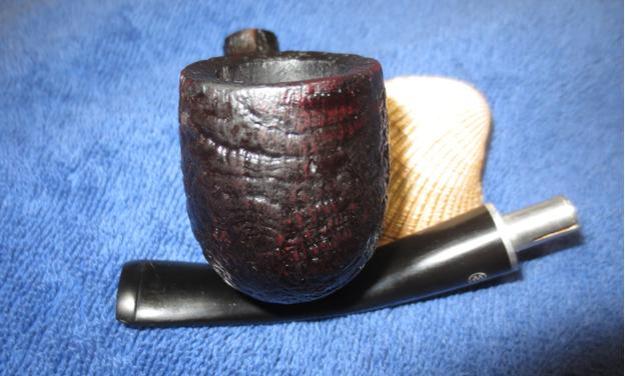
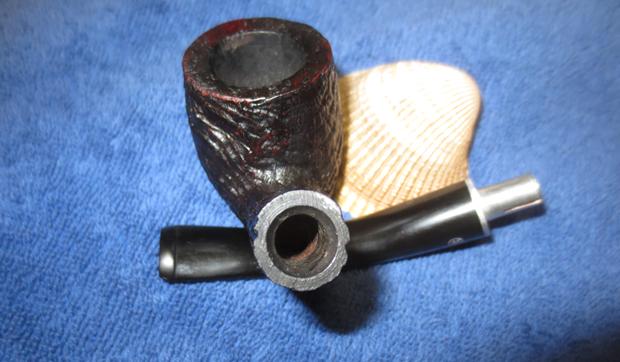
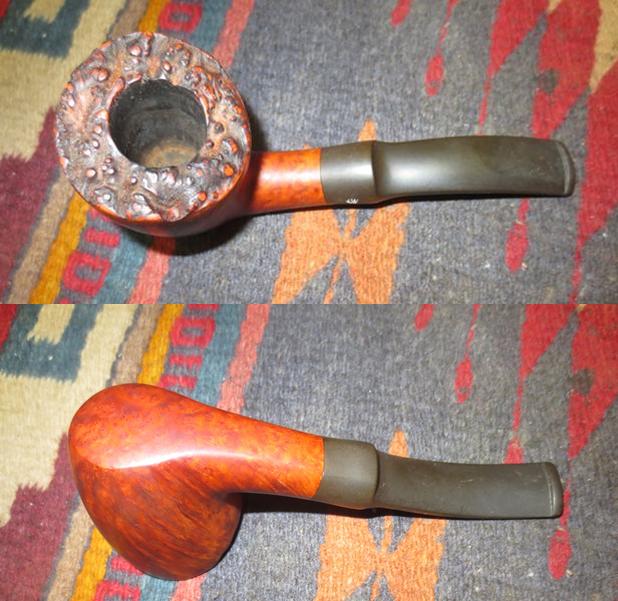
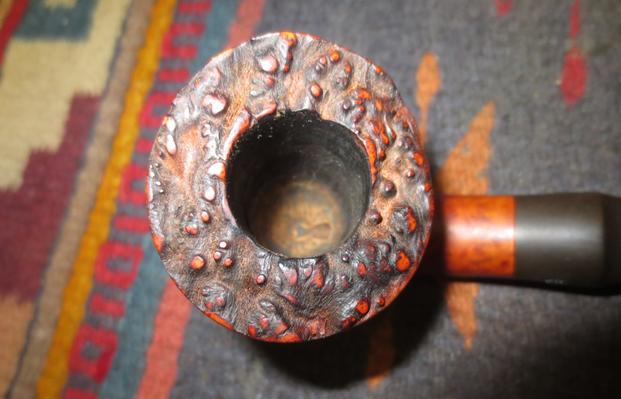
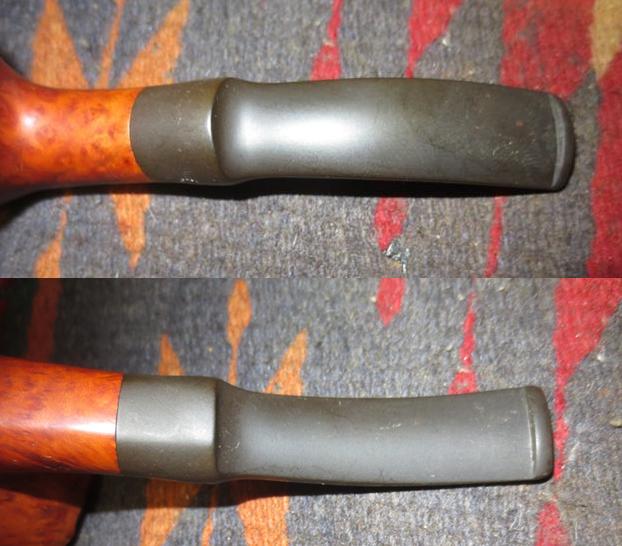
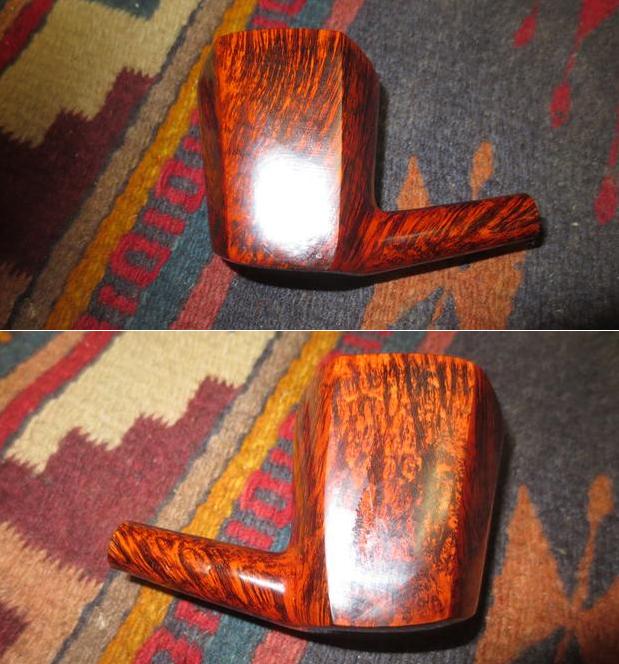
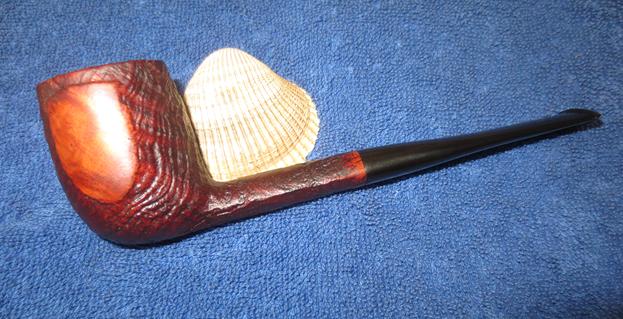
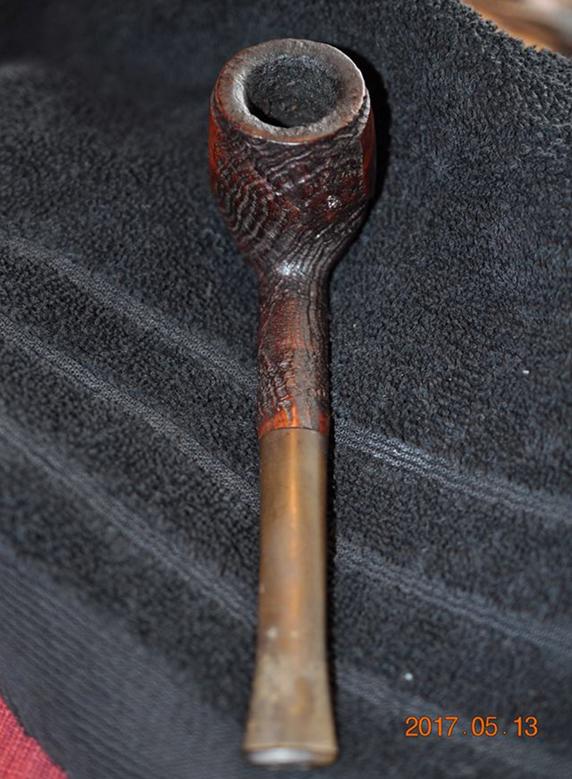
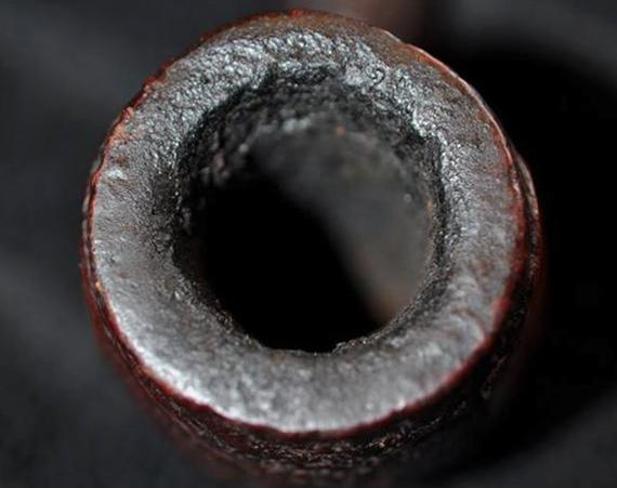
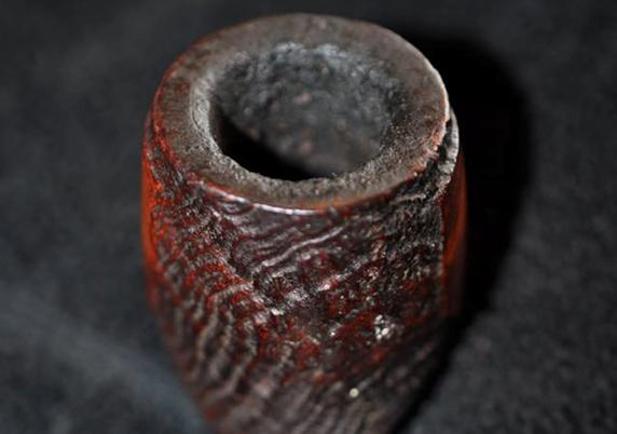
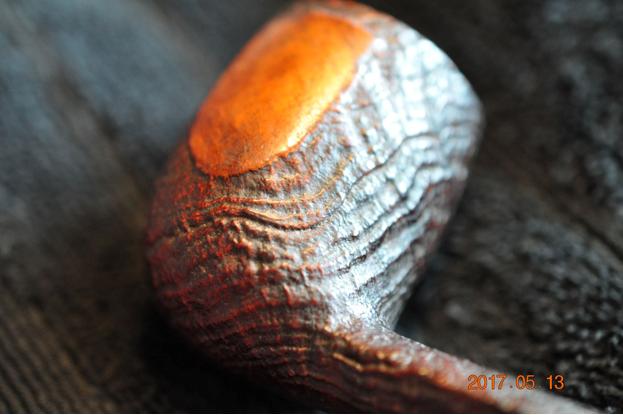
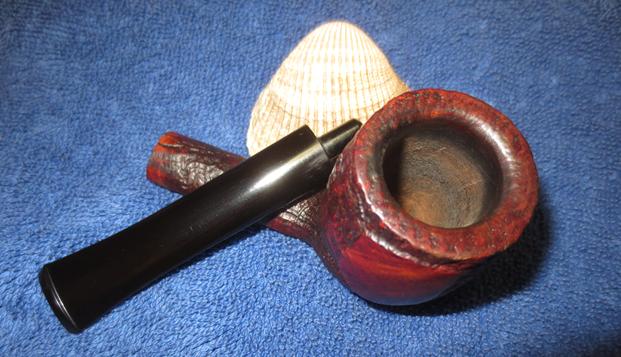
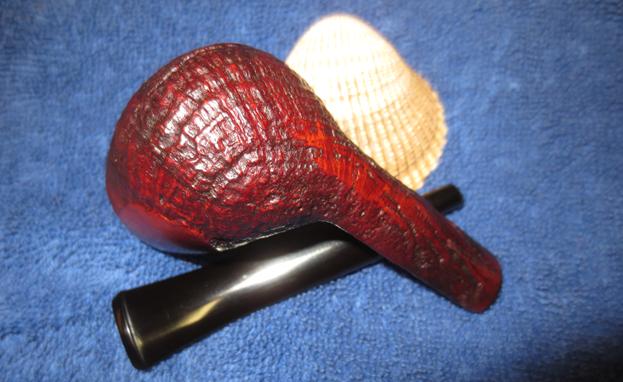
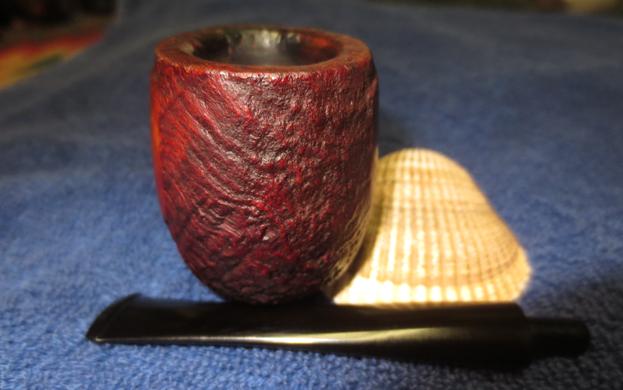
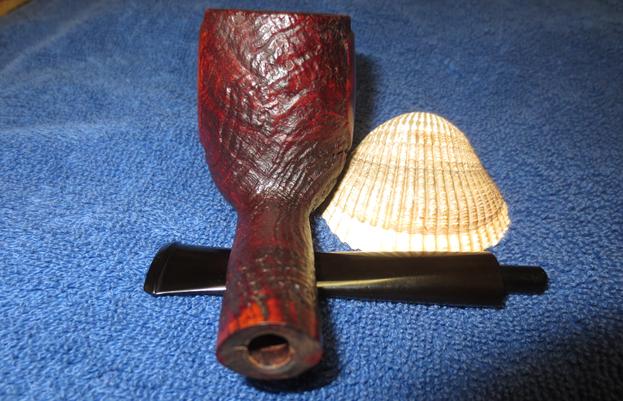
In the late spring I received and email from Josh (misterzippo), a reader of the blog that he had some pipes that he thought I might be interested in. He sent me photos of the pipes so I could have a look at them. A few caught my eye so it did not take long to make a deal. The first of them that I liked was the Malaga Bulldog with a twist in the carving and a scoop in the top of the bowl that I restored earlier. The next two pipes that caught my eye were a pair of sandblast Wally Frank pipes shown in the photo below. Josh sent this photo and it shows the overall condition and appearance of both pipes. The shapes and the deep ridges of the sandblast finishes intrigued me. The pipes were dirty but had good bones. The grooves in the sandblast on both were filled in with grit and grime and almost sticky to touch. The rims were caked with overflow of tars from the bowl and the grooves were filled in to the point that they almost were invisible. The stem on the bent billiard was in good shape with light oxidation and some tooth marks on both sides near the button. The stem on the Lovat was missing a large chunk out of the underside that would need repairing. The tape measure in the photo shows that the billiard is about 5 ½ inches long with a taper stem and the Lovat is 5 inches long with a saddle stem.I chose to work on the bent billiard first as it was in relatively good shape. The Lovat would take more work and will be dealt with on the weekend. I took some more time to evaluate the condition of the little bent billiard. It was very dirty and the cake and lava overflow were thick. The finish was worn around the outside edge of the bowl while it looked like the thick cake had protected the inner edge. The rim top covering also protected it from damage to the flat portion. The shank was in good shape, the deep sandblast on the bowl sides was stunning, and the tactile feel of it would be very good when the bowl heated during smoking. The stem was stamped with the WF in a circle logo that was on all of the pipes. The stem was a good quality vulcanite and the oxidation on the surface was minimal. The stem had tooth marks and chatter on the top and underside near the button and there was wear to the surface of the button as well. My brother took the next photos of the pipe before he started his clean up work. The slightly different angles of the first two photos really show the depth and contours of the sandblast finish on the left side of the bowl. The next two photos give a contrasting view of the two sides of the bowl and the difference in grain pattern on both. It is a really interesting looking pipe.The top of the rim is very dirty and the thick coat of lava will need to be removed to assess the inner and outer edges completely.The shank is stamped on the right side with the faint words Wally Frank over Filter. The circle WF stamp on the left side of the stem is very readable at this point. The aluminum band that separates the shank and the stem is an integral part of the stem. The tenon on the stem is aluminum and looks comparable to those found on Medico pipes. It was designed for a disposable paper filter.The tooth marks on the button and the chatter on the surface of the stem are very visible. They do not appear to be too deep in the surface of the rubber so I am hoping that will be easy to deal with.I quickly Googled Wally Frank, Ltd. online to refresh my knowledge of the history of the brand. I found information in multiple spots from Pipedia, to PipePhil, and in several of the books that I have on my desk. I confirmed that the company was one of America’s oldest and most respected names in pipes and tobaccos, beginning in the early 1930’s. Wally Frank operated a chain of tobacco stores in New York City (the flagship store was in Lexington Avenue) and had a vast catalog business for pipes and pipe tobaccos. Their numerous private-label pipes were made by many makers, including Charatan, Sasieni, Weber, and many others. Wally Frank, Ltd. also owned the Pioneer brand of meerschaum pipes, made from both Turkish and African meerschaum. In addition to importing pipes, they had many pipes made with the Wally Frank name and also employed pipemakers like Peter Stokkebye, Svend Bang, and Ed Burak (who later became the owner of Connoisseur). As a result, each Wally Frank pipe must be individually evaluated on its own merit. They also ran “The Pipe of the Month Club” where each member received a new pipe in the mail once a month.

Being reminded that various companies and individuals made Wally Frank pipes was helpful. As I turn the pipe over in my hands, I wonder if this pipe and the Lovat were made by Weber because of the similarity to the sandblast on the Weber Blackthorn. Or maybe there were made by S.M. Frank because of the split metal tenon that looks like the one on S.M. Frank made Medico filter pipes. I don’t know if I will ever be certain but they are an interesting pair of pipes that are well worth the effort of restoration.

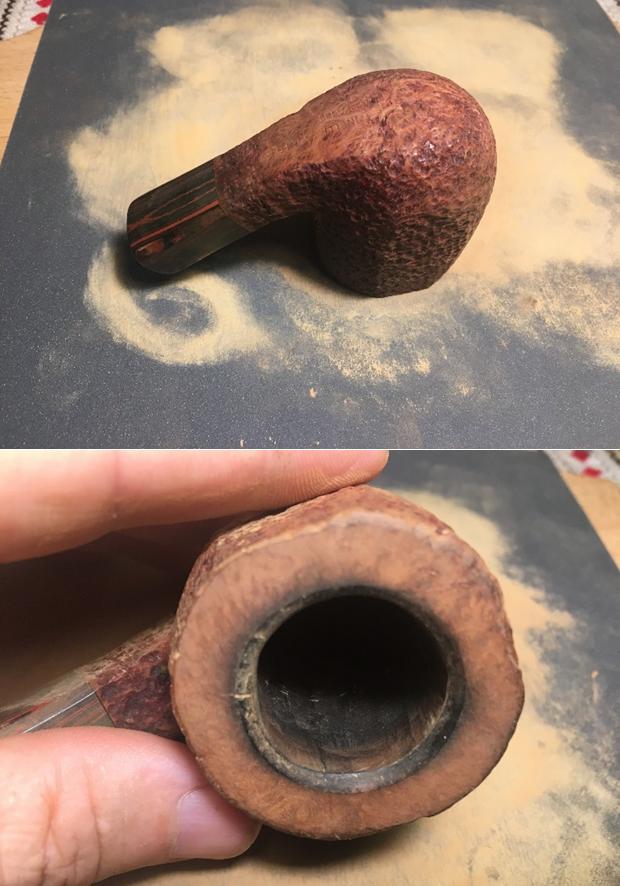
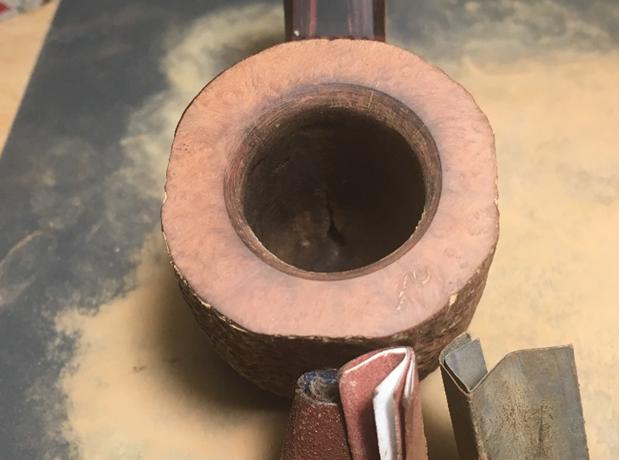
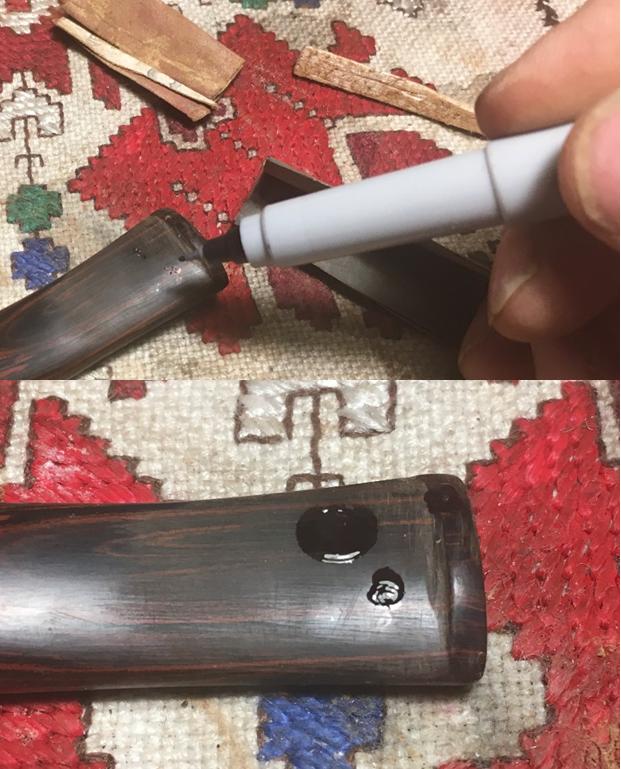
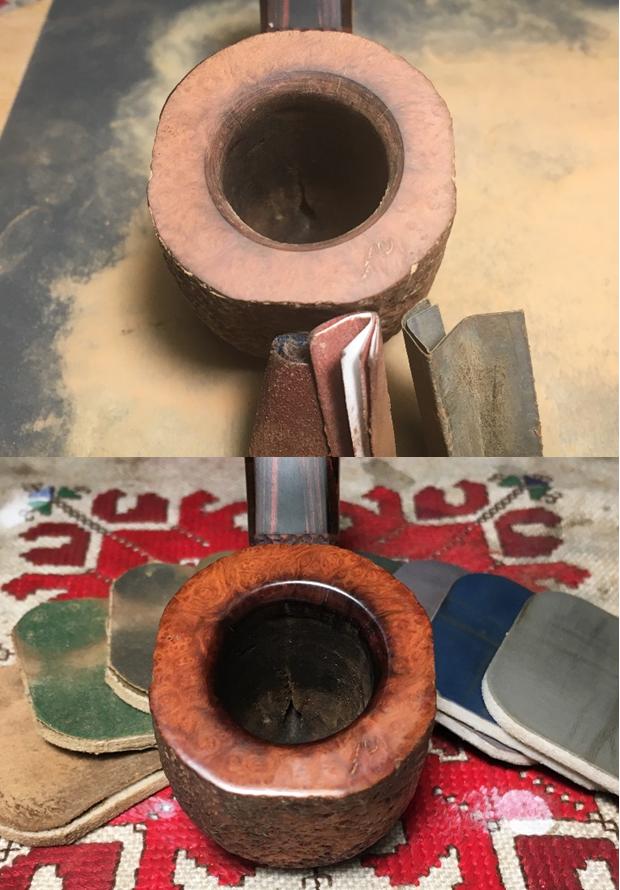
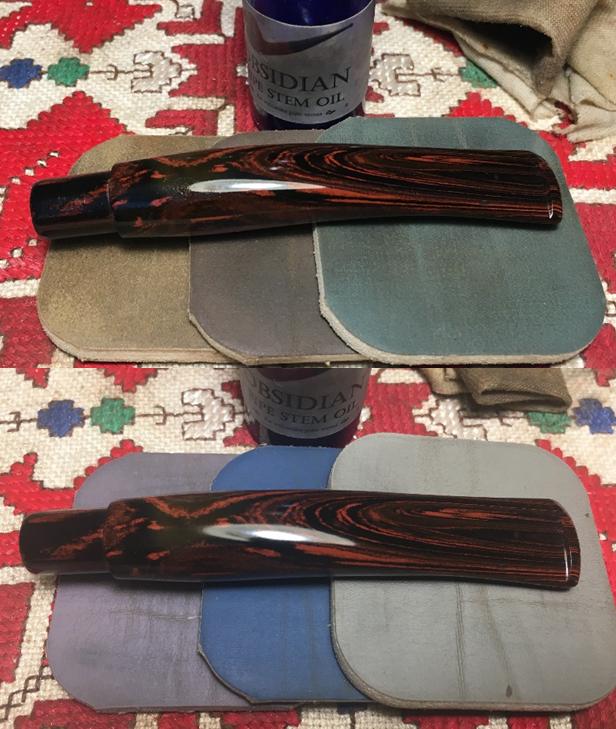
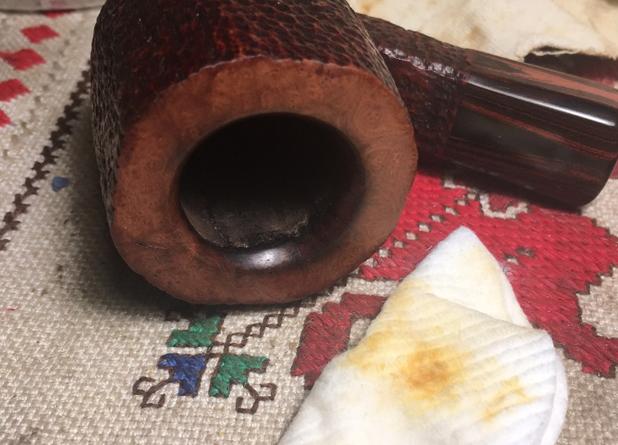
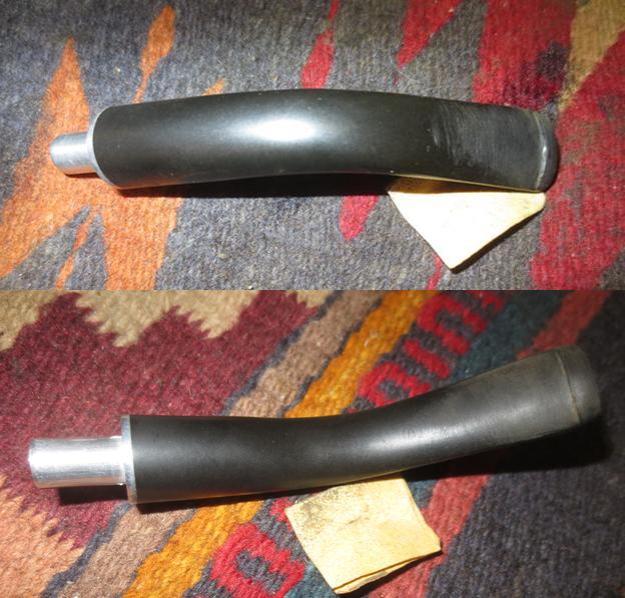
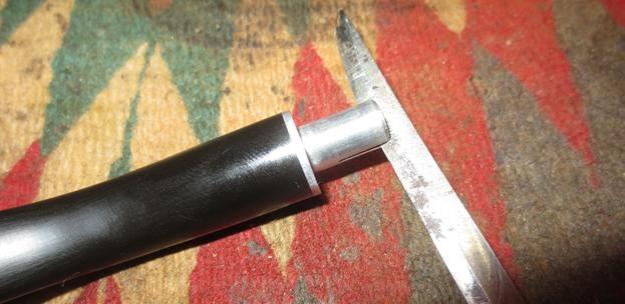
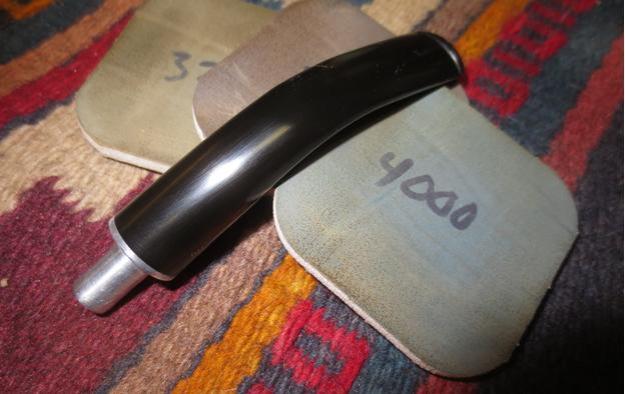
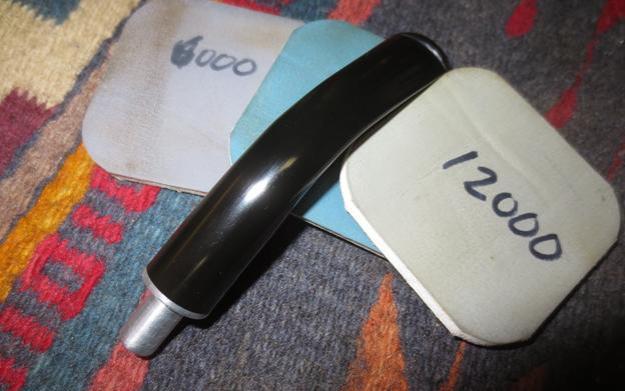
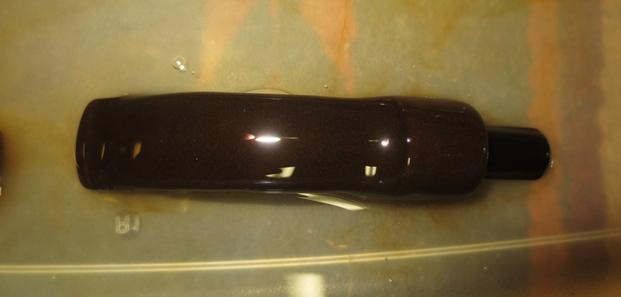
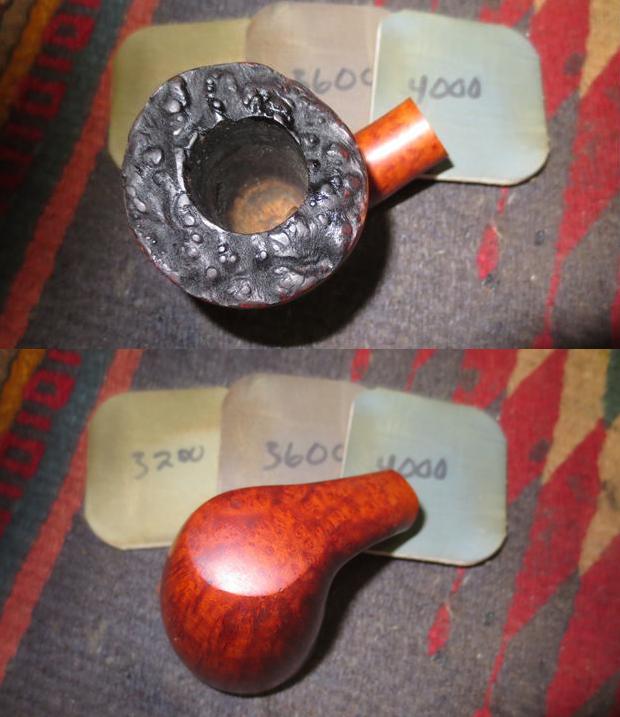
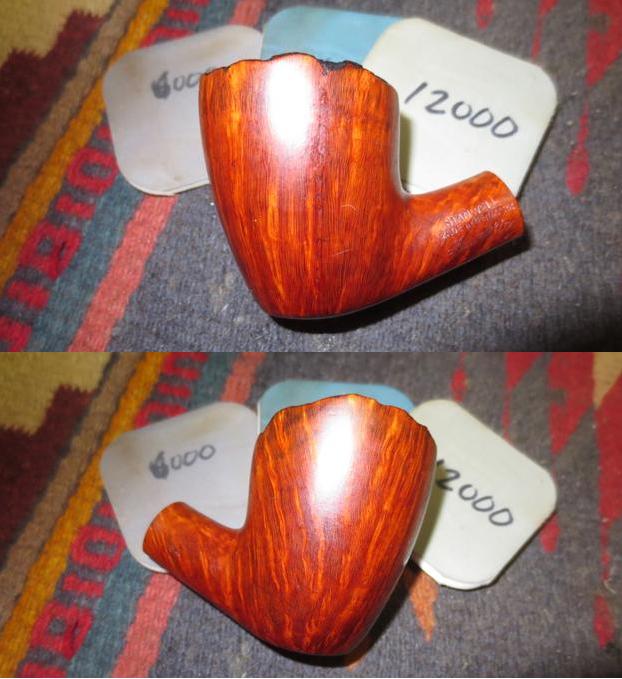
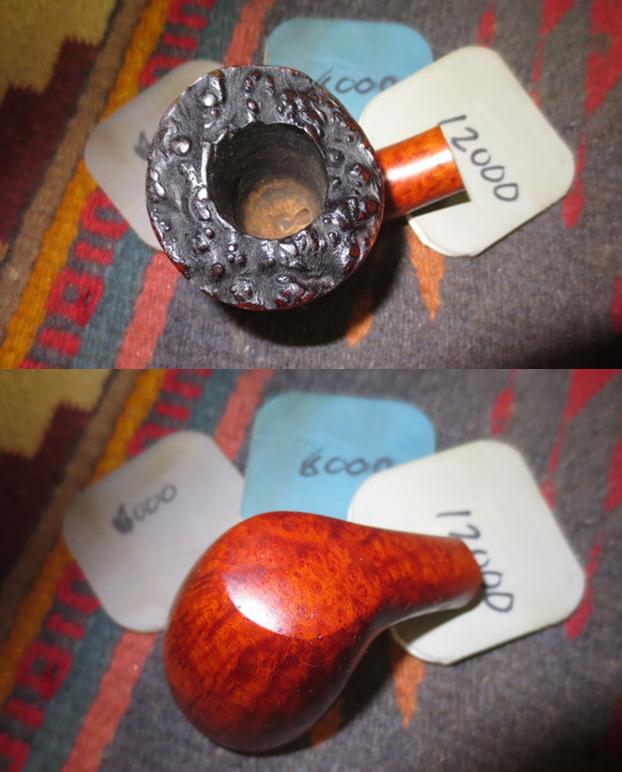
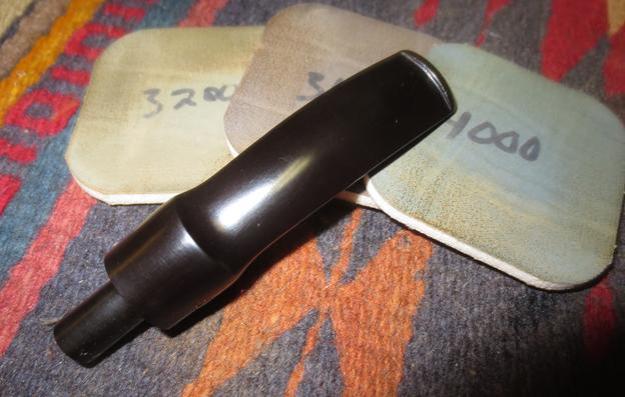
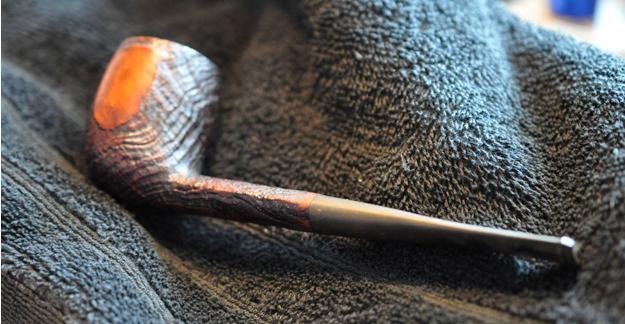
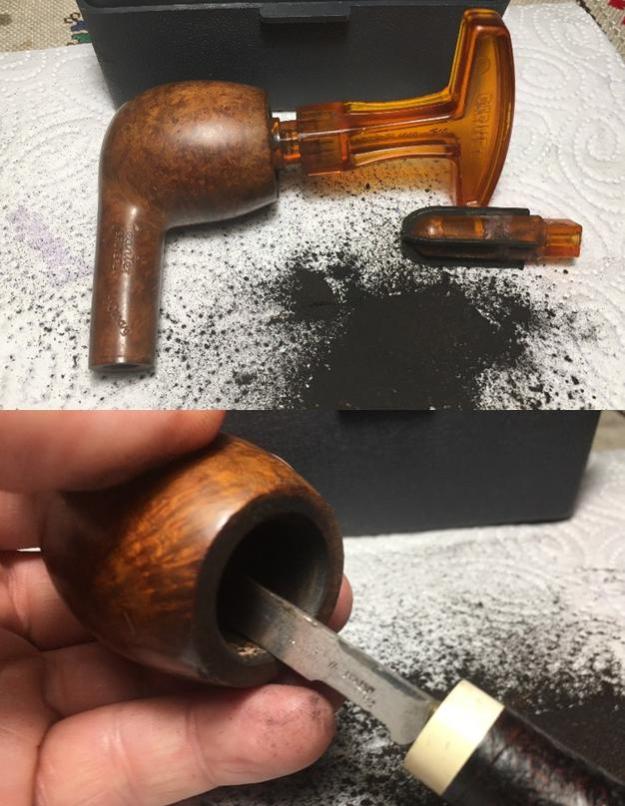
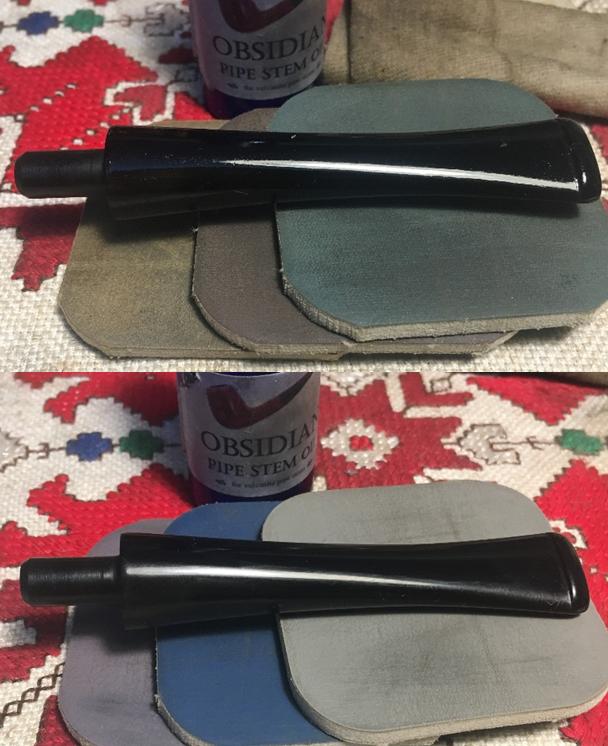
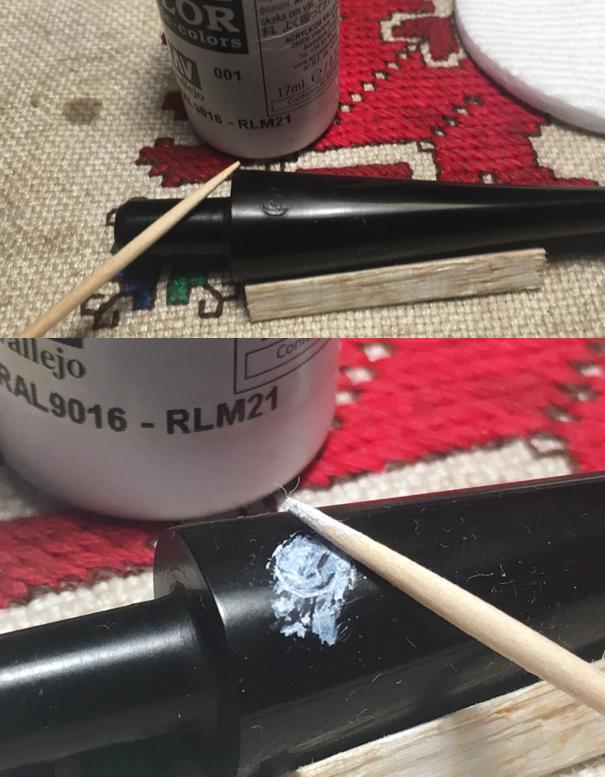
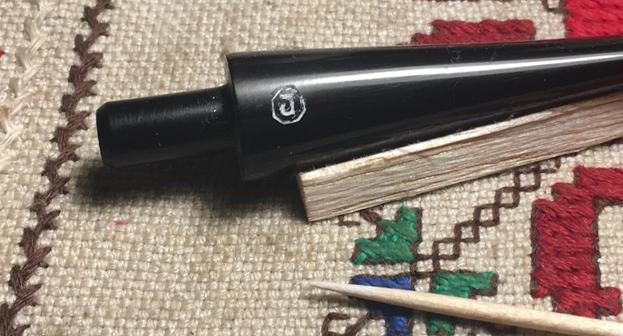
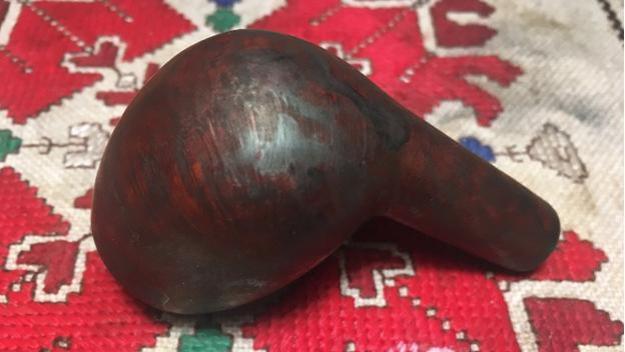
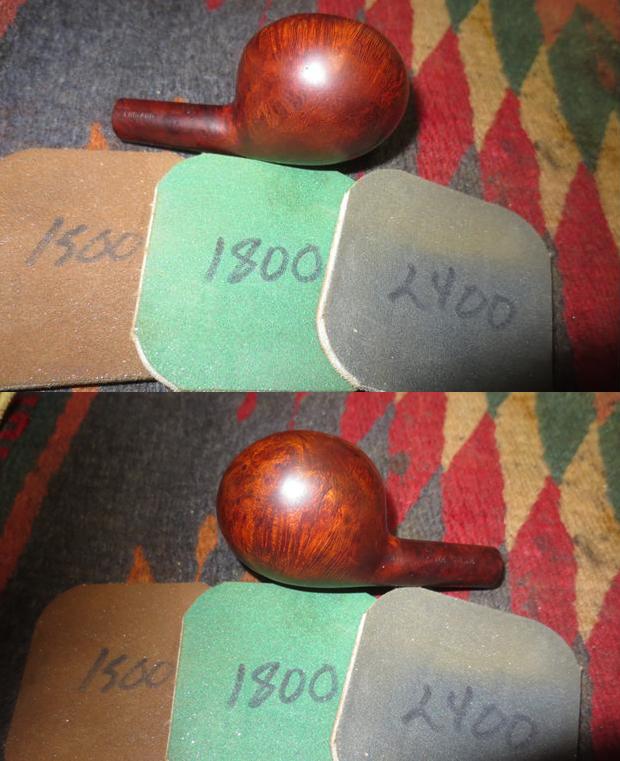
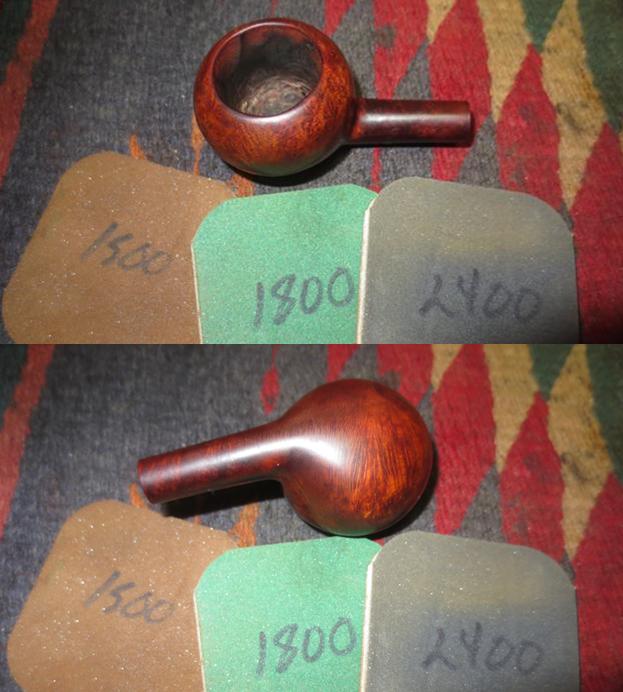
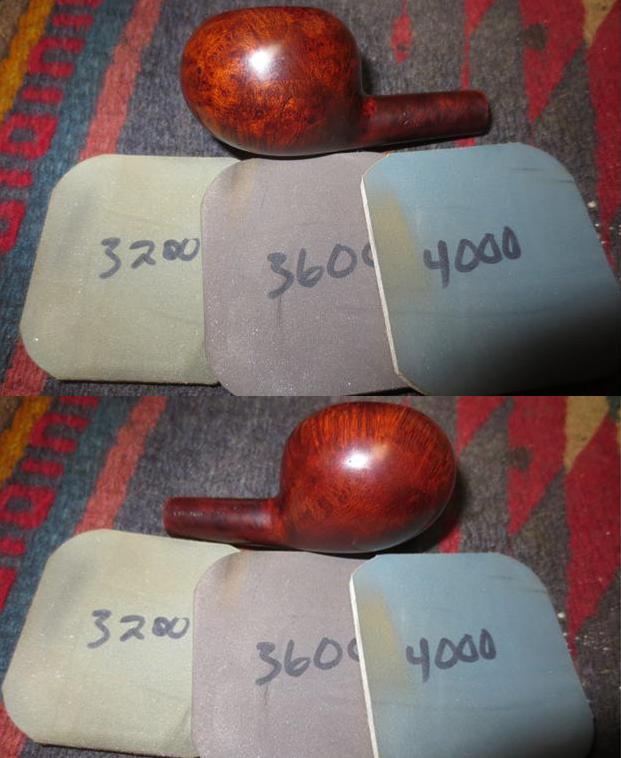
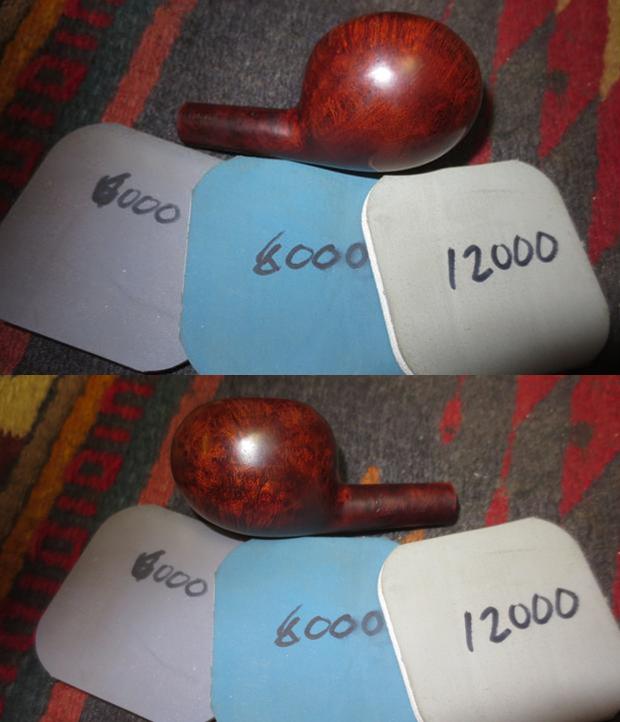
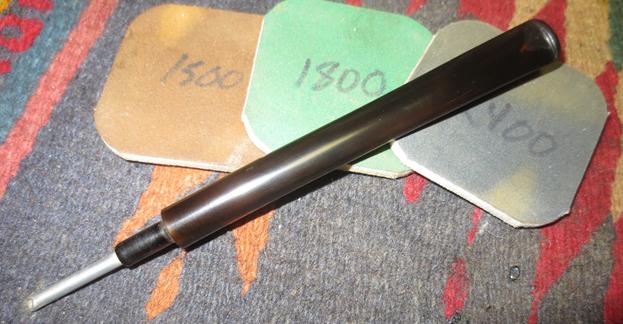
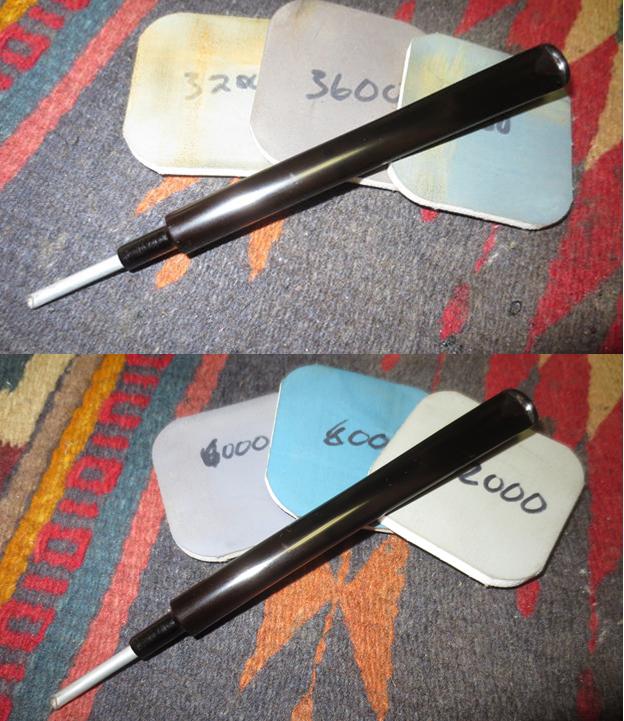
I can’t begin to tell you how nice it to have the pipes I work on reamed, cleaned and ready for the refurbishing process that follows that. My brother does a seriously great job preparing the majority of the pipes I work on. In fact, on a recent trip to visit him I took along a box of pipes for him to process for me. I know I am spoiled but it is great to have him willing and able to help me with this part of the process. He cleaned up this pipe with his usual methodical thoroughness. He generally uses a PipNet and a Savinelli Fitsall reamer to ream the pipes he works on. He reamed the bowl clean with the two reamers. He scrubbed internals with alcohol, pipe cleaners and cotton swabs leaving the airways in the shank, mortise and stem very clean. He scrubbed the externals with Murphy’s Oil Soap to remove the grime and the old waxes on the bowl and rim. He soaked the stem in OxyClean to bring the oxidation to the surface of the vulcanite. When the pipe arrives in Vancouver it is ready for me to do my part. I brought the pipe to the work table and took the following photos. The rim top looked very good after the cleanup. Both the inner and outer edges of the rim were undamaged. The finish was spotty on the flat surface and around the edges.The soak in OxyClean did not bring much oxidation to the surface. The little that was there before was now on the surface. The tooth marks and chatter were clearly visible now and needed work.I decided to start with the stem and bring it back to a shine. I sanded the tooth marks and chatter on both sides of the stem with 220 grit sandpaper and was able to remove all of them. I reshaped the button with the sandpaper at the same time and removed the damage on the button surfaces.The stem was loose in the shank so I inserted a thin blade I the slot in the tenon and wiggled it to expand the tenon slightly. It did not take too much expansion for the stem to fit snug in the shank.I polished the stem with micromesh sanding pads – wet sanding with 1500-2400 grit pads and dry sanding with 3200-12000 grit pads. I rubbed the stem down with Obsidian Oil after each sanding pad. After the 12000 grit pad I gave it a final rubdown with the oil and set it aside to dry. I touched up the logo stamp on the left side of the stem with acrylic white paint applied with a small brush. I put the paint on the logo and let it dry then wiped and rubbed the excess paint off.I buffed the pipe with Blue Diamond on the buffing wheel to polish the last of the minute scratches on the vulcanite and lightly buffed the briar. I gave the stem multiple coats of carnauba wax and buffed it with a clean buffing pad. The stem really shone after the buffing. I hand waxed the bowl with Conservator’s Wax and buffed the bowl with a shoe brush to raise the shine. The contrast in browns on the briar and the black stem really give the pipe a classic look. I hand buffed the entirety with a microfibre cloth to deepen the shine. The aluminum tenon is cleaned and polished. The dimensions of the pipe are Length: 5 ½ inches, Height: 1 ¾ inches, Bowl diameter: 1 ¼ inches, Chamber diameter: ¾ inches. The pipe is ready for the next steward to carry on the trust. I will be putting it on the rebornpipes store soon. If you are interested in adding it to your collection send me an email to slaug@uniserve.com or a message on Facebook. Thanks for looking.


A Goliath Among Giants – Releasing a Savinelli Goliath 619EX Italy


Blog by Dal Stanton

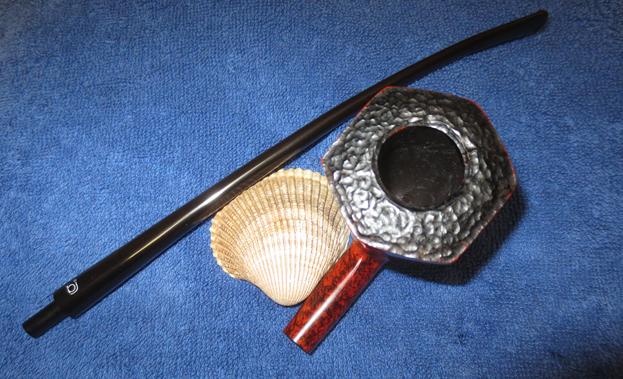
Have you ever trolled through the 1000s of “Vintage Estate Pipe” offerings on eBay’s auction block and then, one pipe seizes your attention, and you know that you will be bringing it home?  When I saw the Savinelli Goliath, I saw the pipe – not the Savinelli name, nor the condition information offered by the seller.  I could tell it was a huge pipe – I like big pipes not just sitting in my palm, but occupying it.  I also saw the rustification beautifully textured across the paneled (octagon shaped) Billiard landscape.  Lastly, but not with waning attention, I saw the Cumberland vulcanite swirl – not just the stem but also the shank extension.  The Cumberland display was like frosting on the cake.  Here are a few pictures I saw from the seller in California.This Savinelli Goliath 619EX of Italy may represent my last restoration for several months as my wife and I return to the US from Bulgaria to reconnect with family and friends. Our organization here in Bulgaria, is a ‘not-for-profit’ so we also spend time reconnecting with the generous, dedicated people who provide their resources to enable our efforts in Bulgaria to happen.  Before my wife and I head to the US, we will spend one last bit of time on the Black Sea coast enjoying the sun and sand, and I wanted to restore a pipe from my own personal collection’s “Help Me!” basket.  So, this big boy will not be going into The Pipe Steward’s Store Front for a new steward to adopt and hence, benefiting the Daughters of Bulgaria, one of our important activities, helping women and girls who have been sexually exploited and often trafficked.
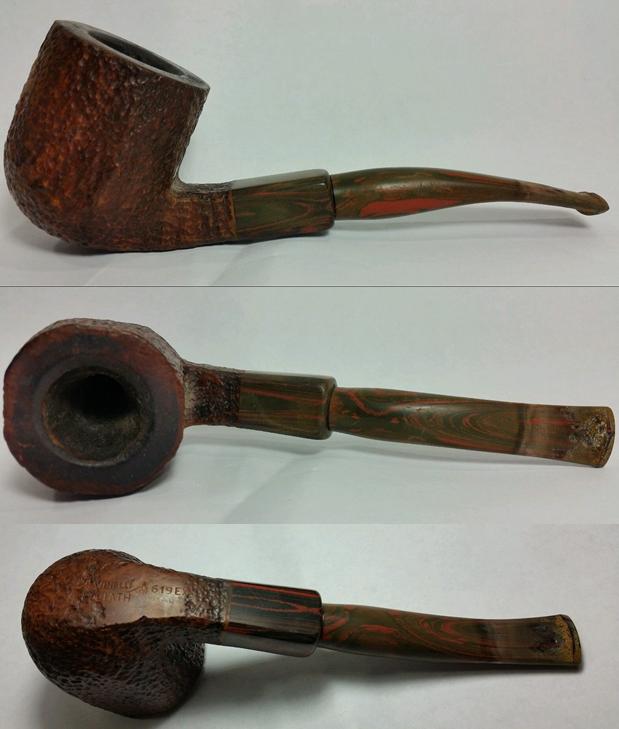
The Savinelli name needs almost no introduction as one of the most well-known Italian pipe houses and whose pipes are highly sought after (See the TobaccoPipes Link for Savinelli’s History).    The Goliath line is no longer produced by Savinelli.  Eric Squires, from SmokingPipes.com, observes,
I’ve only seen a few Savinelli Goliaths, but between the name and the fact that those few I’ve seen have all been “EX” sized pipes, I would presume the entire series was all-EX. Finish-wise they look much like the Hercules line, with the significant difference being the presence of Cumberland ferrules and stems.

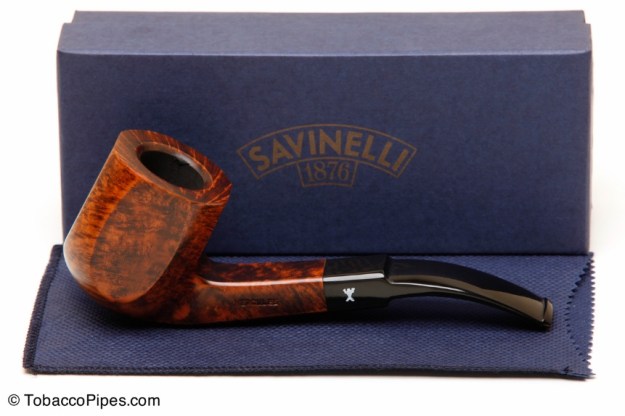
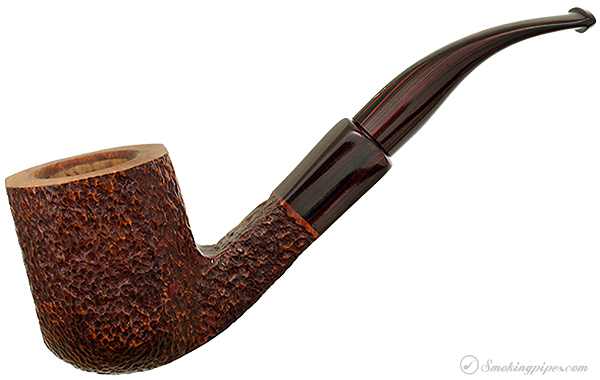
The Savinelli Hercules line is still produced and examples of the differences between the former Goliaths and current Hercules offerings can be seen in the Hercules shape 619EX also from Smoking Pipes.  It looks like my Goliath without the Cumberland stem and shank extension.The following now defunct Smoking Pipes ad for the Savinelli Goliath 619EX does all the work for me regarding description of this massive pipe.  I find Andrew Wike’s description spot on.
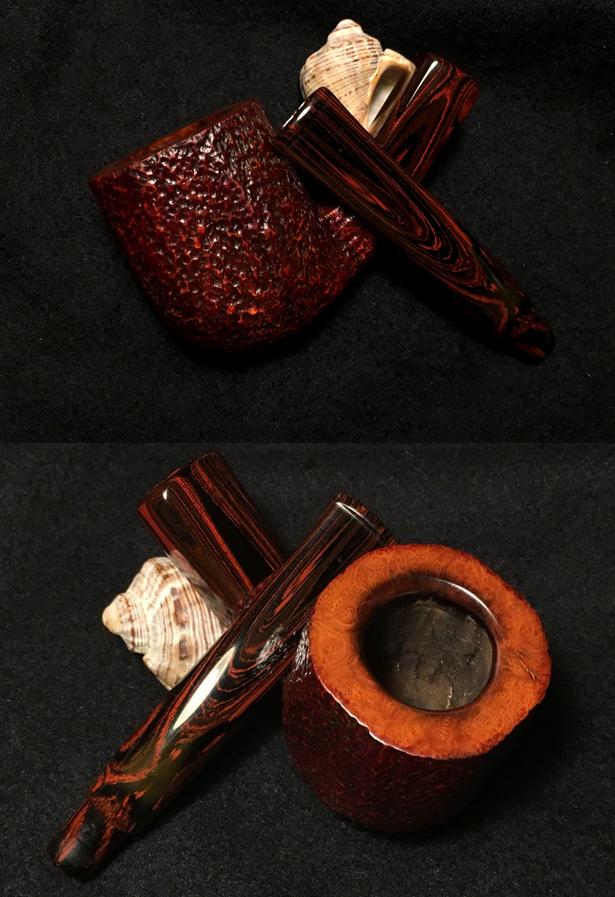
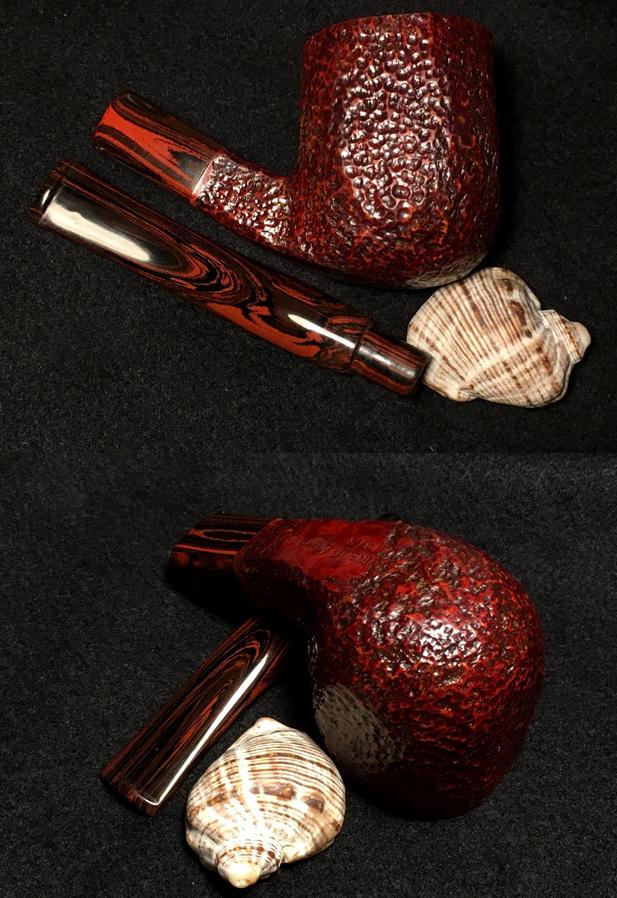
Savinelli’s Goliath line is aptly named, presented some of their classic shapes in extra-large, EX proportions and topped them with Cumberland mounts and stems. Here we see the “619” bent Foursquare rendered positively massive. It’s finished in a crisp, uniform rustication, offering plenty of texture in hand, without compromising the paneled shape’s clean lines. Length: 6.19 in./157.23 mm.
Weight: 2.50 oz./70.87 g.

Bowl Height: 2.12 in./53.85 mm.

Chamber Depth: 1.80 in./45.72 mm.

Chamber Diameter: 0.89 in./22.61 mm.

Outside Diameter: 1.65 in./41.91 mm.

Stem Material: Vulcanite

Filter: 9mm

Shape: Panel

Finish: Rusticated

Material: Briar

Country: Italy

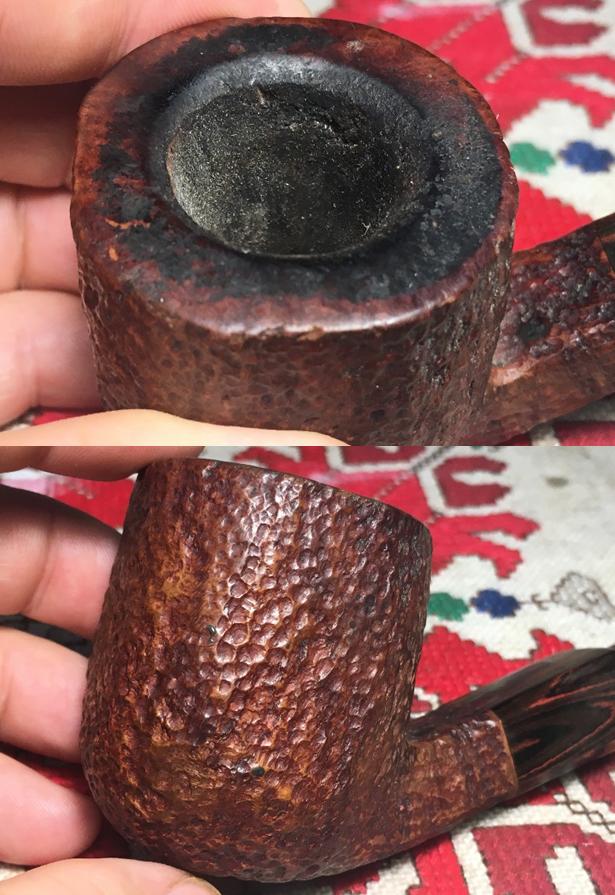
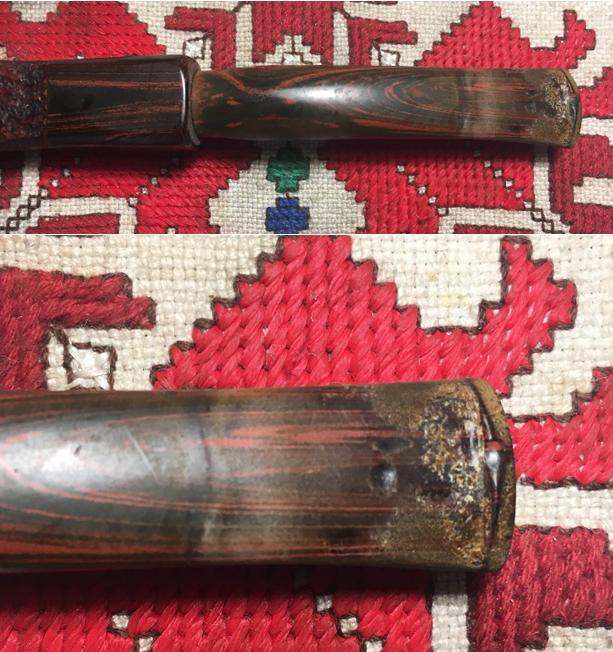
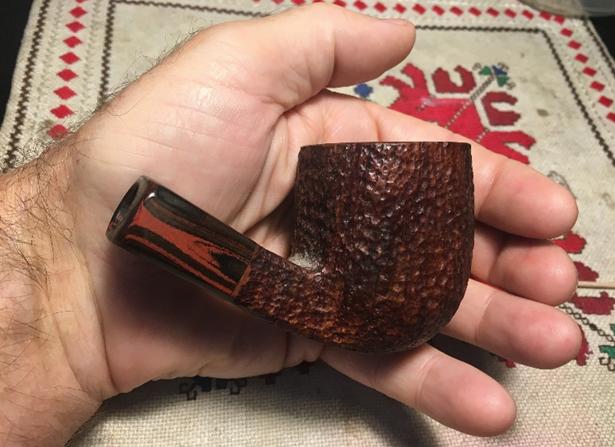
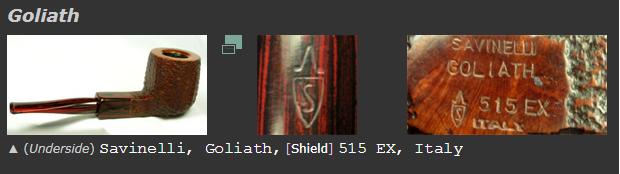
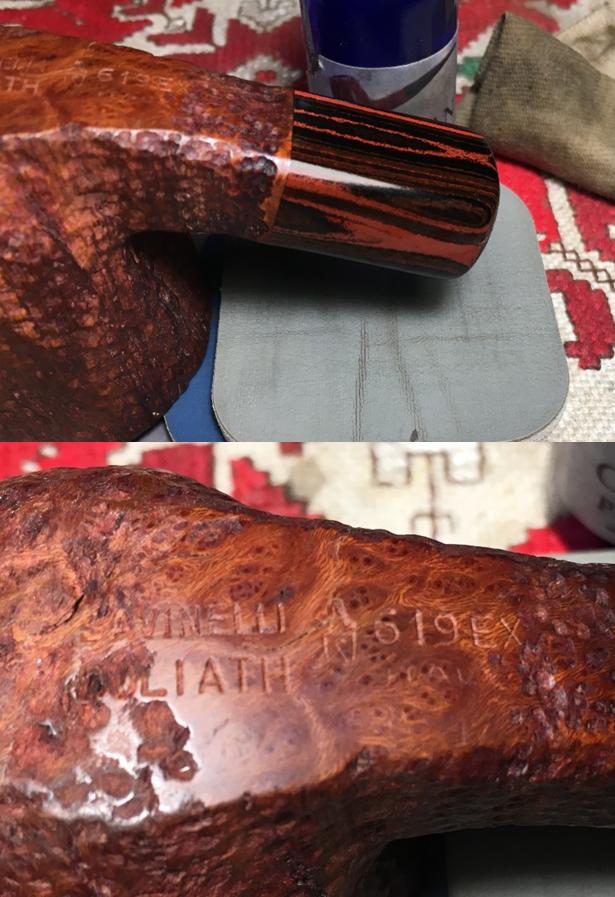
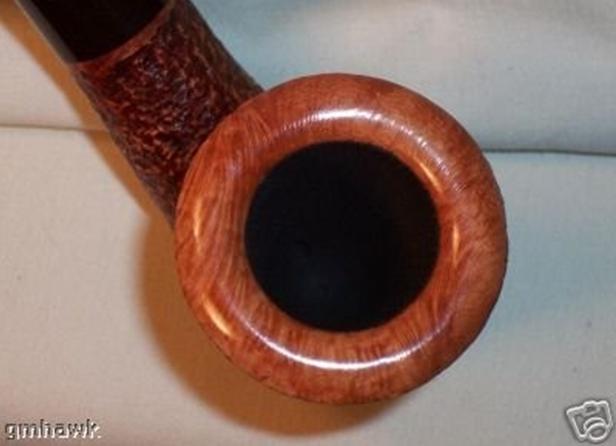
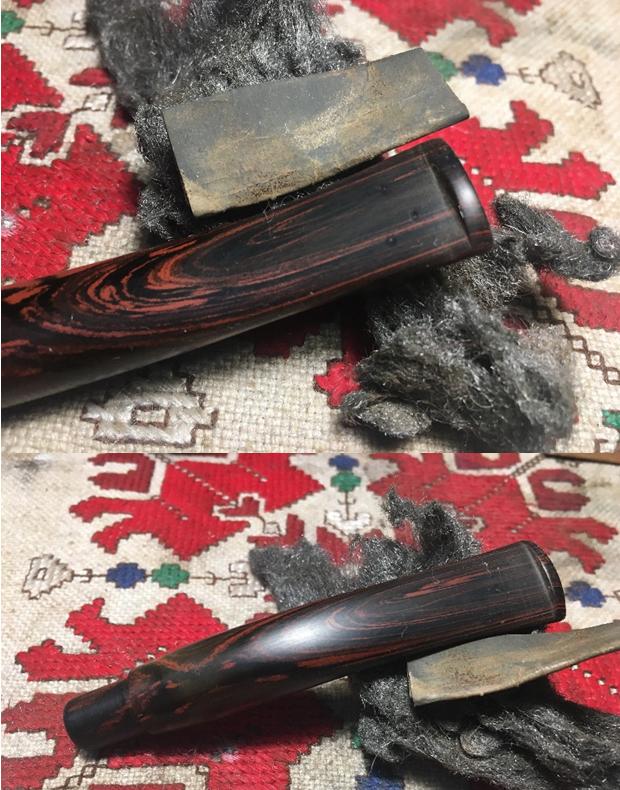
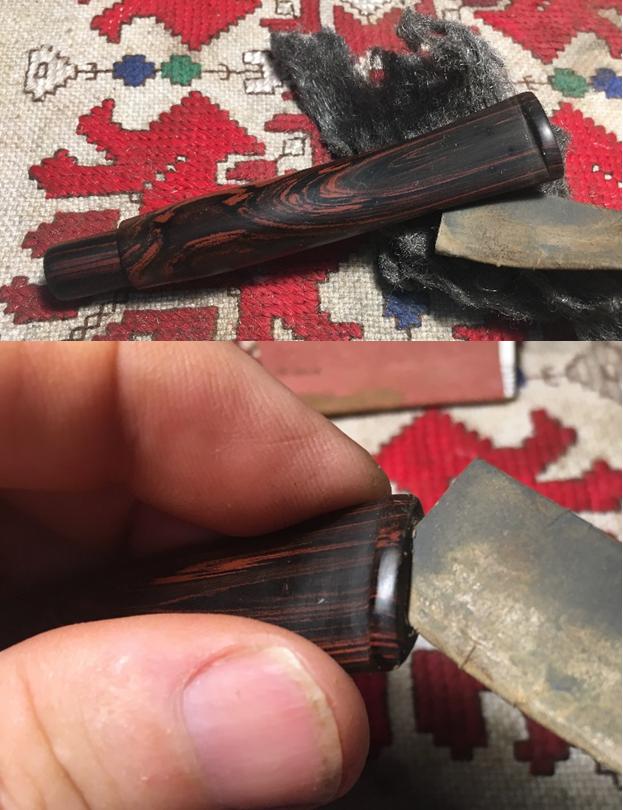
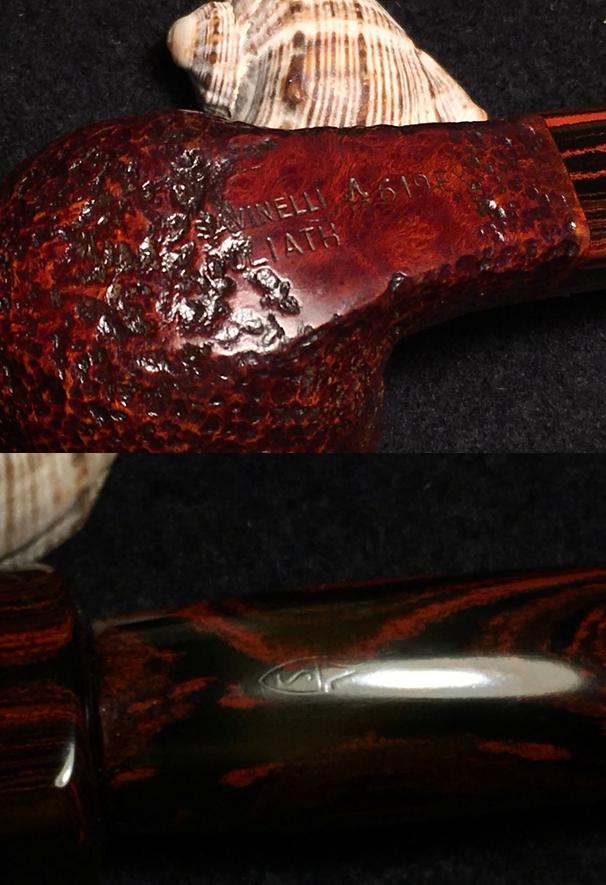
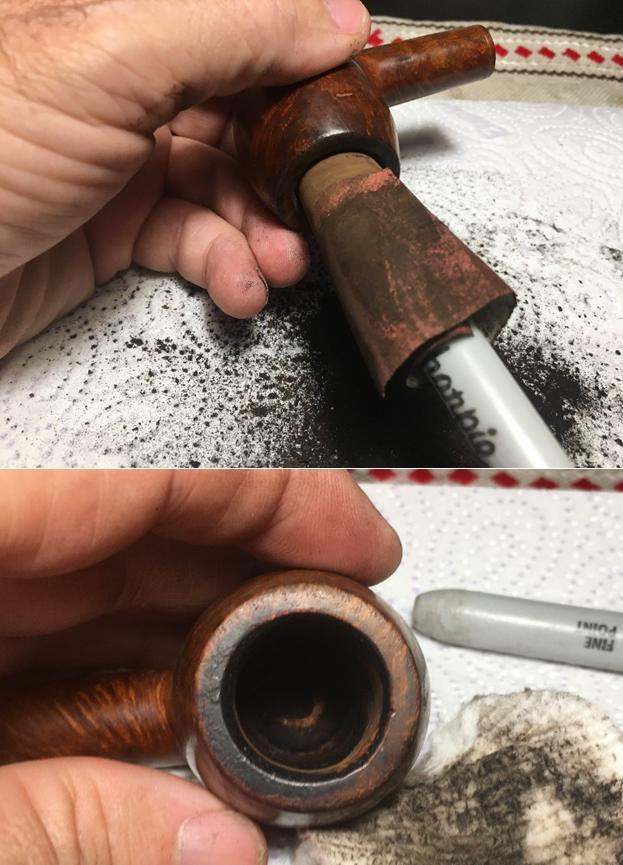
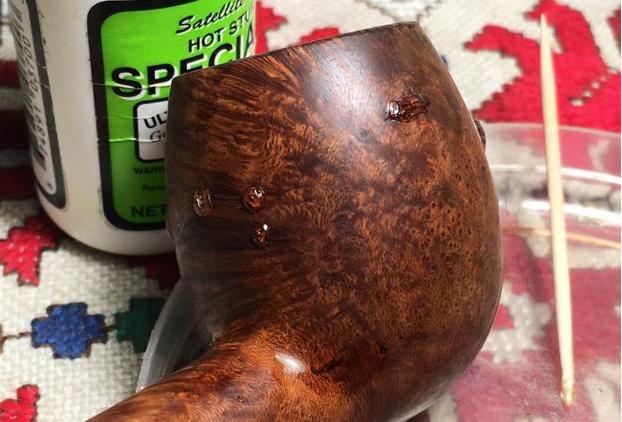
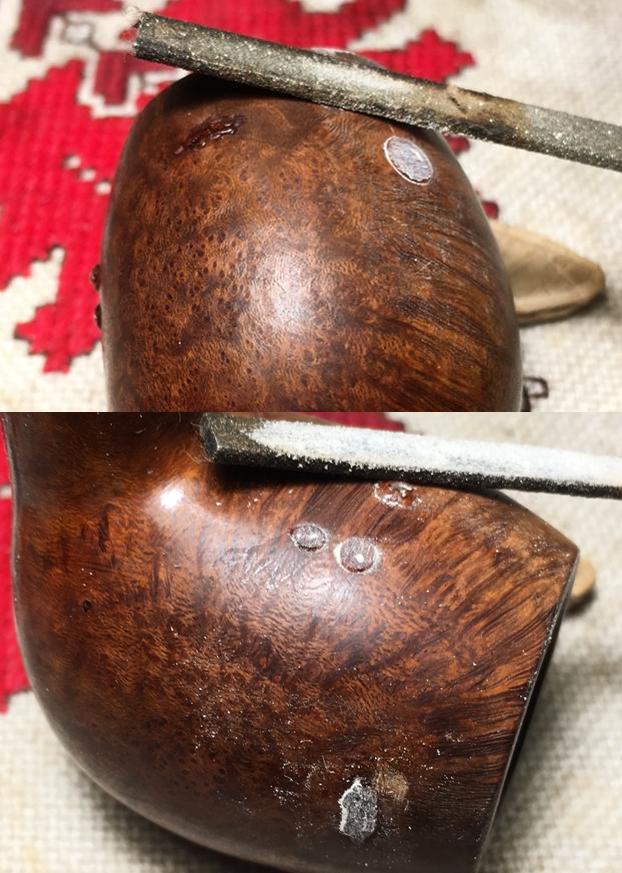
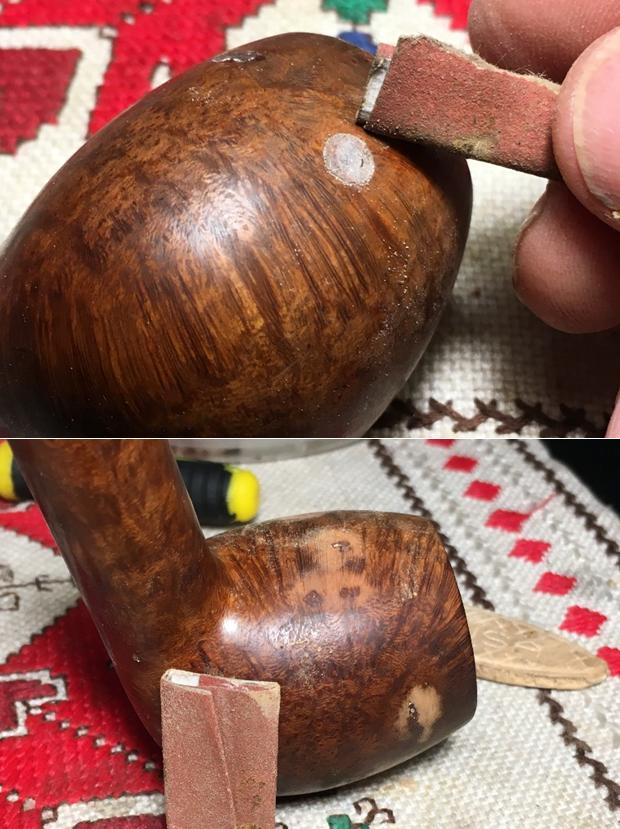
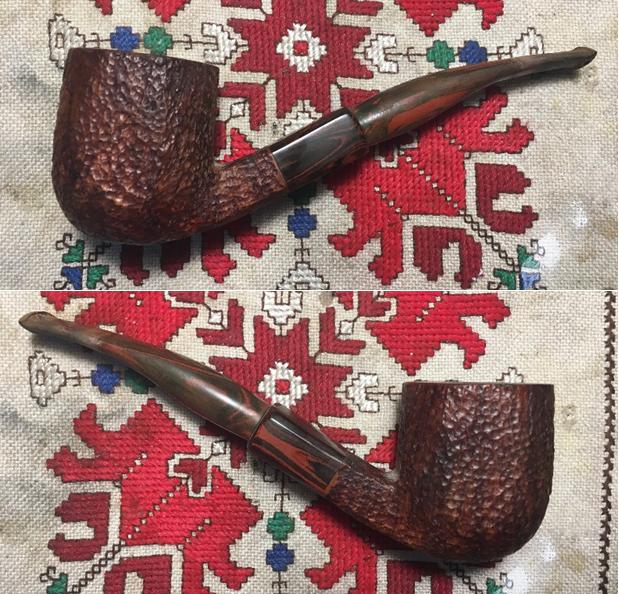
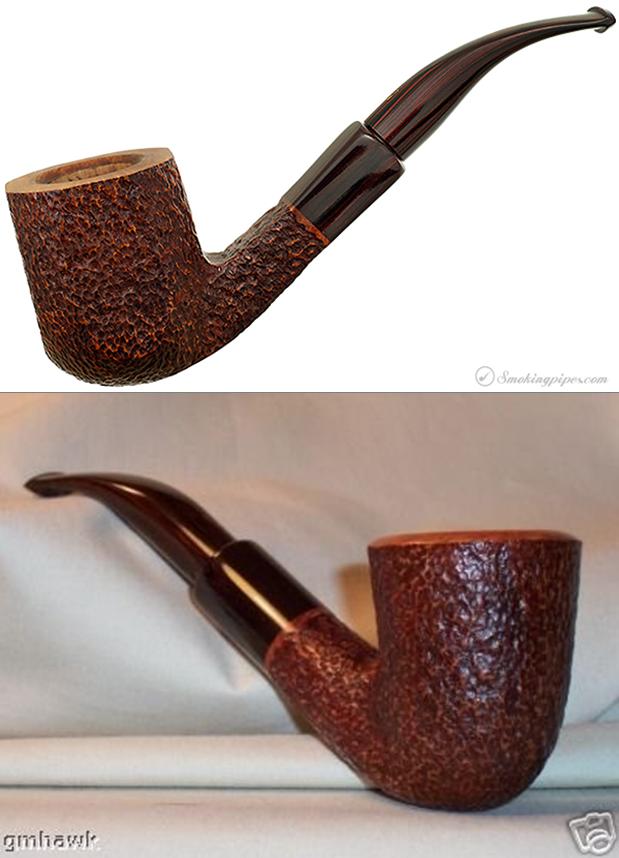
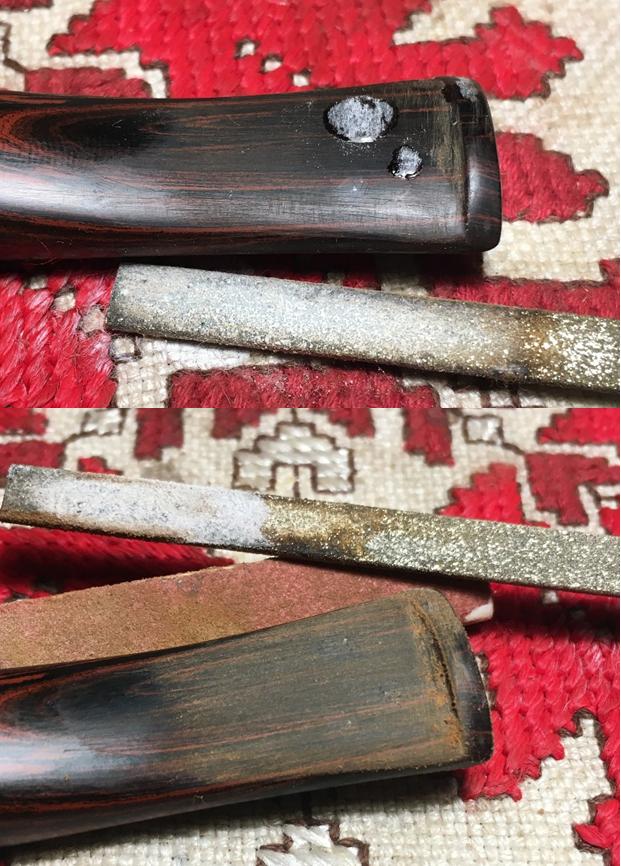
These pictures that I take of the Savinelli Goliath 619EX from the worktable here in Sofia, Bulgaria, form the starting planks of rebuilding the bridge from where this massive pipe is now and the pristine picture depicted above.  I don’t have huge hands, but just to give a sense of the size of the stummel, I conclude with a ‘palm shot’ where I’m imagining this Goliath in my rotation! The nomenclature is located on the underside of the shank.  To the left is stamped ‘SAVINELLI’ [over] GOLIATH.  To the right of this, is stamped the Savinelli logo followed by ‘619EX’.  Without success, I look through several catalogues featuring Savinelli lines and I am unable to unearth the Goliath to try to date the production history.  I sent the question to Savinelli’s current ‘Contact’ page in their website to see if someone might fill in those details – I’m not holding my breath.  I find this nice example of a Goliath, slightly different shape, at Chris’ Pipe Pages and I discover something that I had totally overlooked.This example provides pictures of a stem stamping on the topside of the Cumberland stem!  Looking more closely at my Goliath’s stem, I discover the faintest shadows of the stamping.  Now that I know it’s there, I’ll do my utmost to protect it!  I take a picture of the phantom.I’m anxious to recommission this Savinelli Goliath and introduce him to the other pipes in my rotation!  He needs some work.  The stummel has plenty of grime in the rustified surface.  The cake in the chamber is thick and it needs to be removed to expose fresh briar.  The rim has lava flow and crusting.  The Cumberland stem has heavy oxidation and the former steward of this Goliath was a definite clencher – the bit/button area is pocketed with chatter and dents.  The button lip also has damage.  We have some goliath challenges, but I’m glad to start the restoration.  The first thing I do is cover the phantom stem mark with petroleum jelly and put the Cumberland stem in the OxiClean bath to soak and to raise the oxidation. With stummel in hand, the first thing is to ream the ample chamber removing the thick accumulation of cake on the chamber wall.  Using the Pipnet Reaming Kit, I use the full array of 4 blades available to me, starting with the smallest blade. After putting paper towel down to minimize clean up I go to work.  The cake is hard as a brick and it takes more effort than normal.  I wonder if this bowl has ever seen the likes of a reaming blade before.  As I continue to work with the first, smallest blade, images of oil drilling come to my mind….  I’ve never taken a progress picture of a reaming project before, but I do drilling down into the deep recesses of this Goliath.  The first picture shows the starting point.  The second picture shows the shape of the smaller blade as it makes progress down the throat of the carbon cake – maybe just past the halfway point.  The cavern beyond is visible.  The last picture shows the break-through to the floor of the chamber.  Now, the next larger blade, blade number 2.  That blade worked through to the floor and then to blade #3, the next larger. I was just thinking that I seldom worked on a pipe requiring blade #3, let alone #4.  I was also just thinking, “Let the blade do the work, and don’t put a lot of torque on it.  The Pipnet system is made of heavy duty plastic.  Not long after those fleeting thoughts, blade #3 had a major failure and the extending blade part broke off from the insert part, stuck in the hand turning tool.  Ugh!  I gently coax the parts out of the stummel and tool, and put them aside for potential repair! Unyielding, I mount blade #4 and coax it gently down the chamber, overtaking the short-comings of blade #3.  I record the completion of the Pipnet progress, clean the carbon dust which is much.  The chamber looks good, but I’ve yet to finish. I finish up the reaming, which is no perfunctory job this time, using the Savinelli Pipe Knife, which more accurately is the Savinelli Fitsall Pipe Reamer (See: Savinelli site).  I found it on eBay sometime back after Steve bragged so much about his during many of his restorations on Reborn Pipes!  It did not come cheap, but I have enjoyed its talent to finetune a reaming project. After using the Fitsall Pipe Reamer to remove more carbon in hard to reach places, I take 240 grit paper, wrap it around a Sharpie Pen and sand the chamber wall clearing out the last remaining deposits of carbon cake and presenting fresh briar for a new start.  To finish the internal cleanup, I use cotton swabs and pipe cleaners wetted with alcohol to clean the mortise.  I also employ the long, wired bristle brushes for the cleaning.  The mortise is cleaning up well.  Later, I will give the bowl a Kosher Salt/alcohol soak to clean further and freshen it. I let the stem soak overnight in the OxiClean bath.  I take it out and with thumb firmly over the phantom stem stamp, I work on removing the oxidation by wet sanding with 600 grit paper then with a buffing with 0000 grade steel wool. I like working on clean stems.  I use pipe cleaners dipped in isopropyl 95% to work on the internal airway of the stem. I use cotton swabs to clean the filter bay. With the condition of the chamber, bit and grime on the stummel, I expected some gunk deposits in the stem and filter bay.  I was not disappointed, but after several courses of pipe cleaners and cotton swabs and alcohol, the gunk gave way to a state of cleanliness.Turning now to the rustified surface of the Goliath, I use undiluted Murphy’s Oil Soap with cotton pads and a bristled tooth brush to scrub the grime off the surface as well as the rim.  After scrubbing, I rinse the stummel with warm tap water without flooding the inside with water.  The grime has come off, but the finish has as well for the most part.  The rim is still a bit dark, but that’s not a problem.  I want to reestablish a very smooth and perhaps a bit lightened rim, as I’ve seen exemplified with newer Goliaths and the Hercules series.  To reestablish a crisp rim and remove the dings, scratches and darkened briar, I will lightly top it.  There is already an internal rim bevel which will be re-sharpened as well.  With the chopping block serving as my topping board, I put a sheet of 240 grit paper on it and rotate the stummel in circles over the paper.  I don’t need to remove much – my goal is cleaning and crisper lines and to remove the scorched briar on the internal ring.  After the 240 grit paper, I put 600 grit paper down and repeat the process.  The rim plateau looks good, but the black ring is now more distinct.  To address the blackened ring, I use a piece of rolled 120 grit paper and recut the bevel.  After this, I smooth the bevel more with 240 grit paper rolled tightly and then with 600 grit paper.  After the beveling, I again put the stummel on the topping board with 600 grit paper to give a finishing touch to the bevel lines.  I still see a hint of the dark ring but I’m satisfied with where the rim is.Switching from the rim, I now want to work on the Cumberland shank extension.  To break up oxidation and remove scratching, I lightly sand the surface with 240 grit sanding paper.  I follow this using 600 grit paper then 0000 grade steel wool.  The Cumberland shank extension looks good. Now, back to the stem and to address the bit repairs needed.  Up to this point, I’ve only dealt with the oxidation in the stem.  Next, I will use the heating method to expand the vulcanite to minimize the dents on the upper and lower bit.  There are dent compressions on the button lips as well.  I take fresh pictures of the upper and lower bit area to mark the starting point.  It is apparent, based upon how far forward the tooth dents are on the stem, the former steward smoked the Goliath without hands at times.  To counter the weight of the stummel, one would have to clench the stem toward the center. Using a butane lighter, I pass the stem through the flame, ‘painting’ the damaged areas with the heat.  I do this several times until it appears that I’ve reached maximum benefit of the heating method.  The deepest dents and compression points remain, but are tighter and more defined by the expansion of the vulcanite. Now, I use 240 grit paper and a flat needle file to sand down the area more.  I work primarily on the lower button lip area with the flat needle file to redefine the edge of the lip.  After sanding and filing, I’m left with the areas needing patching. I wipe and clean the bit, upper and lower, with a cotton pad and alcohol to prepare it for the drop-filling with CA Glue.  I use transparent Hot Stuff Special ‘T’ to do the filling, by applying it with a toothpick. For the deep fills on the lower bit, I allow ample glue to fill the area. I spray the patches with an accelerator to shorten the curing time.  Starting with a flat needle file I remove the excess CA glue to bring the mounds down close to the stem surface as well as shape the buttons working off the excess glue.  After the file, I use 240 grit paper to sand the patch mounds down to the vulcanite surface, removing the excess CA and blending as much as 240 paper allows.  Then, I follow the 240 with 600 grit paper which fine tunes the patch surfaces and blends further.  At this point, I used a method for the first time.  Note the first picture below – this is the upper bit and what transpired which I didn’t picture, I’ve pictured in the second picture, of the lower bit.  As often is the case, CA glue patches after curing will have air pockets which are addressed by painting the patch area with thin CA glue which fills the small pocket holes and after dried, removing the film of excess glue with sanding.  I notice that the patch areas, where the air pockets emerge, were whiteish.  Often this is vulcanite dust lodged in the pockets.  I wipe off the patch areas with a cotton pad and alcohol but pockets remained white as in the second picture.  The white is the cured CA glue itself which I’ve seen before.  What I also have seen before is that if you paint the white again with CA to fill the air pockets, the white spot is also sealed by the transparent CA glue and will show.  What I do, for both the upper (which is not shown above) and the lower bit (which is shown below) is to darken the whitened patch material using a black fine point Sharpie Pen.  After this, I paint with the thin CA glue to fill the pockets.  Black blends much better than white does on vulcanite – or in this case, a black/red swirl of a Cumberland stem.  After the CA glue cures, I will file/sand it down in the same manner as the upper bit.Turning again to the stummel, before I stain the stummel, I continue sanding the rim plateau with the full array (9) of micromesh pads 1500 to 12000.  Since I forgot to take a start picture, I brought this picture forward again for comparison.Now, also using the micromesh pads, I work on the Cumberland shank extension first using pads 1500 to 2400, then 3200 to 4000, then finally, 6000 to 12000.  After each set of 3, I apply Obsidian Oil to the shank to revitalize the vulcanite.  What can I say?  I love Cumberland vulcanite!  With each iteration of micromesh pads and Obsidian Oil, my anticipation of recommissioning this Savinelli Goliath with a bowl full of my favorite blend, Lane BC, is growing!  For the last 6 micromesh pads, I also polished the smooth briar on the lower shank that holds the Savinelli nomenclature – pictured below.  Since I cleaned the stummel with Murphy’s Oil Soap (a few days ago!) and the finish dulled significantly, I have been thinking about how to finish this Savinelli Goliath keeping it within the original Savinelli framework when it was initially commissioned.  For a ‘tenderfoot’ (former Boy Scouts will understand) restorer, here are the questions that come to my mind.  The color – there is a subtle reddish lean to the rustified surface.  How do I emulate it?  The rustification – the texture of the rustification in the picture below shows the rising and falling definition of the color tones over the contoured rustified landscape.  How do I emulate this so that the stummel color doesn’t turn out one dimensional?  And finally, the Rim Plateau.  I call it a plateau – it’s too massive simply to be a rim!  Goliath’s Plateau!  I’ve seen pictures of Goliaths and the cousin series, Hercules, that leave the rim ‘plateau’ lighter or perhaps, left natural – leaving a striking relief between stummel and rim.  An example from Worth Point in pictures 2 and 3 below – though the rounded rim is not wanted for the Goliath.  Should I stain the plateau or leave it as is?  Questions. Question 1 – Color of stain. After consulting with my wife, and a lot of going back and forth, I’ve settled on a dye mixture of 3 to 1 – 3-parts Fiebing’s Light Brown Leather Dye to 1-part Fiebing’s Oxblood.  Question 2 – Rustification contouring.  After I apply the stain and unwrap it after firing, I will experiment with lightly applying a 1500 grit micromesh pad to the ‘peaks’ of the rustification which creates the different tones in the color – peaks and valleys.  I did this once before when I restored another Italian – a rustified Lorenzo Rialto full bent Egg.  And, question 3: Goliath’s Plateau.  I’ve decided to leave as is initially but TRYING to avoid applying dye to the rim.  I’ll look at the results and then decide whether to go ahead and apply the dye afterwards.  Thinking done – time for action!
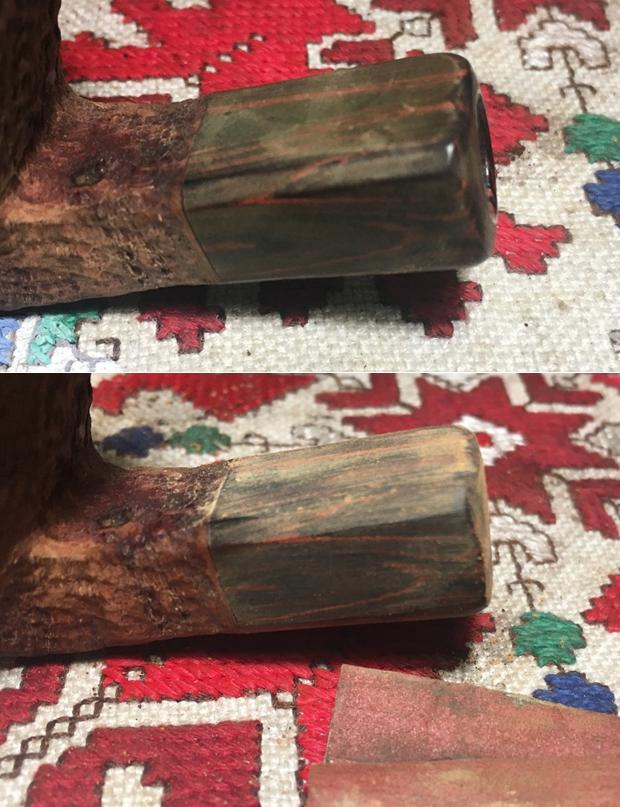
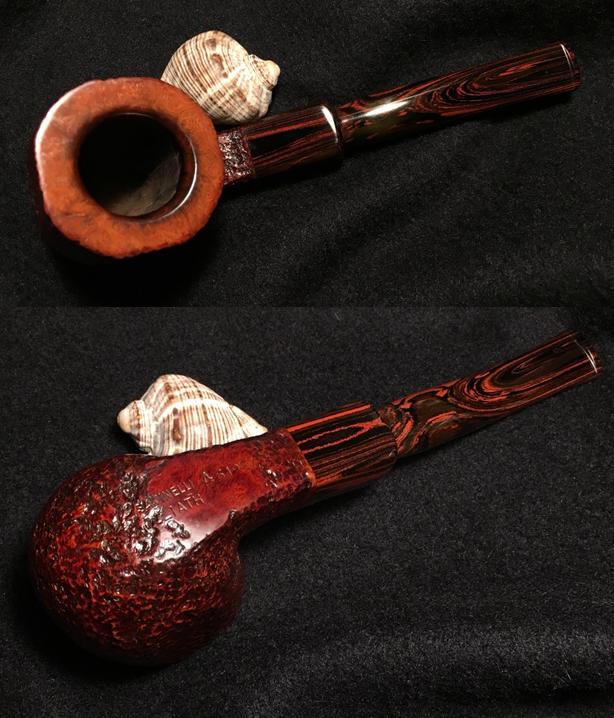
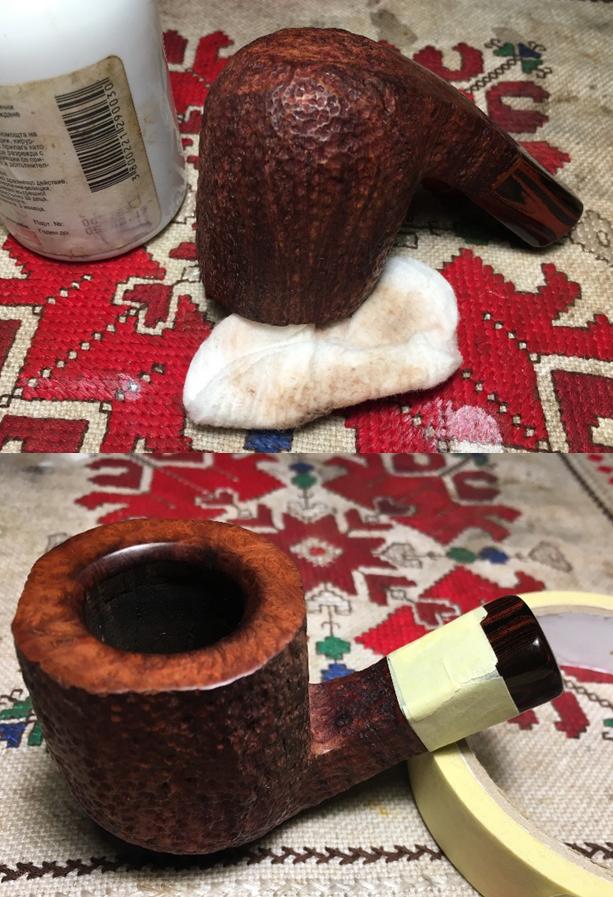
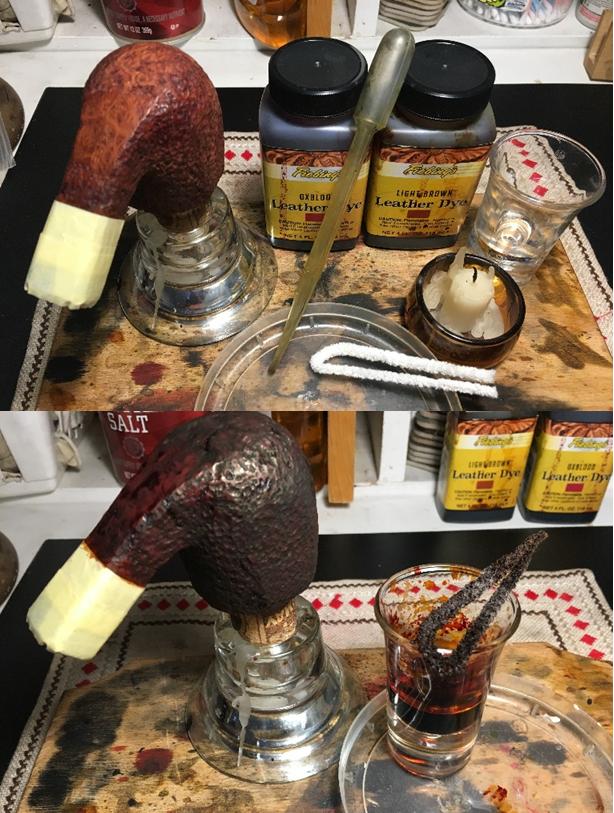
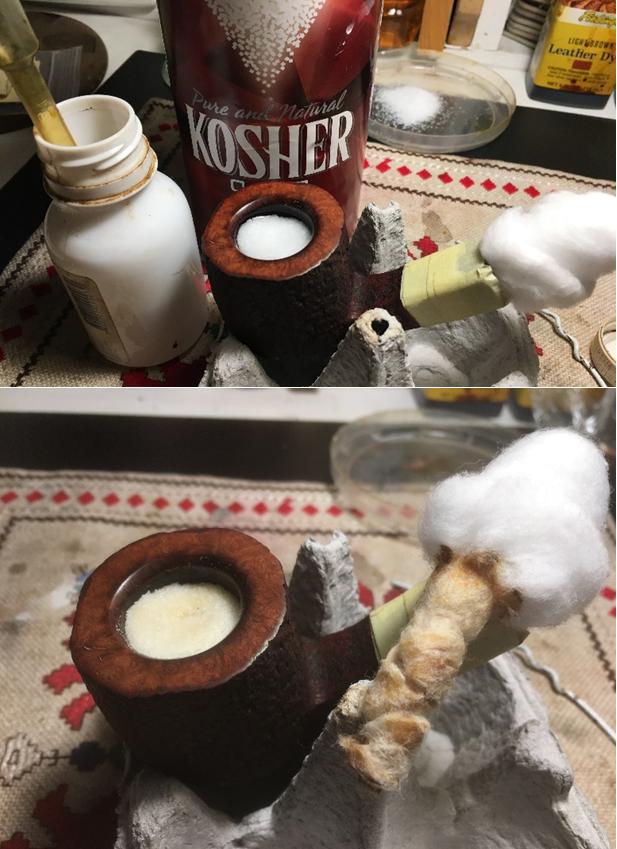
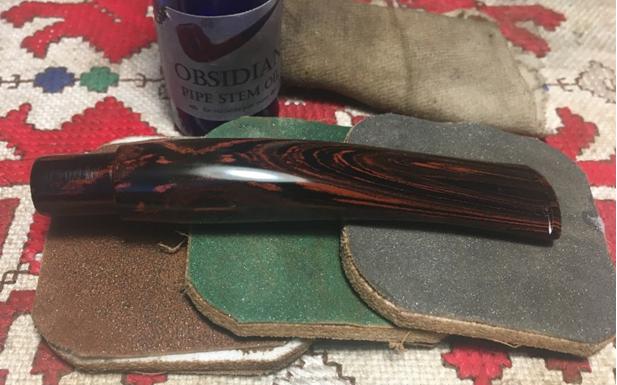
The first thing I do to prepare the stummel is to clean it thoroughly with isopropyl 95% and a cotton pad.  Then, to protect the vulcanite Cumberland shank extension from the dye, I tape off the shank with masking tape.  I mix the dyes, 1-part Oxblood to 3-parts Light Brown.  I use a large eye dropper to do the mixing.  At the last minute, before I added the Oxblood to the Light Brown, I decide to add a small bit of alcohol to the Light Brown – to lighten it.  We’ll see how that works!  Using the hot air gun, I warm the stummel to expand the briar to help its receptivity to the dye.  After warmed, I use a folded over pipe cleaner to apply the dye mixture.  Instead of covering the whole stummel and then firing it, I did a portion of the stummel at a time – panel by panel, firing it, and moving on.  This seems to have worked well for this large stummel and for the fact that the rustified surface was absorbing the dye quickly.  After applying 2 coats of dye, I set the stummel aside to rest.  The pictures show the progress. With the stummel resting, I finish the repairs to the Cumberland stem.  Now on the lower bit, I file down the patch mounds with a flat needle file, further sanding with 240 grit paper to bring the patch flush with the vulcanite surface.  Then finally, I finish the sanding and blending with 600 grit paper and 0000 grade steel wool over the entire surface (but protecting the Savinelli stem logo). The patches on the lower bit are still visible to the informed eye, but I’m hoping that micromesh process will continue to blend and hide the patches.  I finish by cleaning up the slot with 600 grit paper. With my day closing, while the stummel is resting, I’ll give it a bath, or rather a kosher salt and alcohol soak.  The work order of this soak is not ideal with the new stain, but I’m careful to pour the salt into the bowl, and insert into the shank a stretched and twisted cotton ball to act as a wick to draw the oils out of the mortise. I then add isopropyl 95% to the bowl with a large eye dropper until it surfaces over the kosher salt.  I then put the stummel aside to continue its rest and soak for several hours.  Again, careful not to disturb the externals, the next morning, I dump the expended salt and wick which had darkened somewhat, and finish cleaning the mortise with cotton swabs and pipe cleaners dipped in alcohol.  The internals are now declared cleansed! Time to continue work on the Cumberland stem.  I begin by wet sanding using micromesh pads 1500 to 2400, then dry sand with pads 3200 to 4000 and 6000 to 12000.  After each set of 3 I apply Obsidian Oil which revitalizes the vulcanite.  The swirling colors of the Cumberland stem are revitalized!  I’m liking what I see! I’m now ready to unwrap the fired crust on the rustified stummel to see what we have.  I mount a cotton cloth buffing wheel on the Dremel, speed set at 40%, and apply Tripoli compound, a more abrasive compound, to the surface.  The cotton cloth buffing wheel is better able to work the crevices of the rustification than the felt wheel, which I use for smooth briar during the Tripoli phase. After unwrapping the stummel with the Tripoli compound, I want to lighten the stain some so I use a cotton pad and alcohol and wipe it down.  After wiping the stummel with alcohol, I load another cotton cloth buffing wheel on the Dremel, at the same speed, and apply Blue Diamond compound not only to the stummel, but to the Cumberland shank extension and stem.  I attempt to rejoin the stem but discover that during the restoration process, the stem loosened up a bit and I’ll need to tighten the fit with the mortise.  After I complete the application of the Blue Diamond compound, I give the stummel, stem and shank extension a buffing with a felt cloth to remove the compound dust from it. At this point, as I mentioned before, I hope to create more color texture in the rustified surface.  I do this by using a 1500 grit micromesh pad and rubbing it gently over the surface of the rustification – aiming to nip the peaks of the contoured rustified briar.  This will remove the finish on the peaks and lighten them.  After I do a few runs at gently applying the micromesh pad to the peaks, I then do a follow-up buffing with the Blue Diamond wheel on the Dremel.  I am very pleased with what I’m seeing emerge.  I’m seeing the color texturing but what I didn’t anticipate, but has happened, is that the lightened peaks are tying in the unstained rim – I had decided to leave the rim plateau the bare, natural briar to form (I had hoped) an appealing, eye catching, contrast with the rustified stummel.  With the smooth grain-showing rim plateau and the rustified bowl – the best of both worlds is captured.  I’m liking the decision not to stain the rim so I will leave it the natural briar.  As I look at the rim, I notice just a few places where the staining did veer a very small bit onto the rim plateau.  I remedy this by wetting a cotton pad with acetone and carefully wiping the rim and removing the stain.  It looks good – no, looks great!My day is coming to an end, but I want to do one more thing.  To tighten the tenon insert in the Cumberland shank extension, I paint the tenon/filter sleeve with thick CA glue applying it around the base of the tenon with a manicure brush.  I let it cure overnight and I will see how it fits tomorrow.  Tomorrow arrived and I work further on fitting the stem.  I sand the CA glue that I painted around the base of the tenon with 240 grit paper.  I follow with 600 to smooth and blend it.  I try the fit several times, sanding slowly – not wanting to sand too much.  With patience, the stem is fitting much more snugly and the repair is invisible! For the final push, I mount a cotton cloth buffing wheel on the Dremel dedicated to carnauba wax and I apply several coats of the wax to the rustified stummel, rim plateau, Cumberland shank extension and stem.  After applying the wax, I give the entire pipe a rigorous hand buffing with a microfiber cloth to bring out the shine even more.
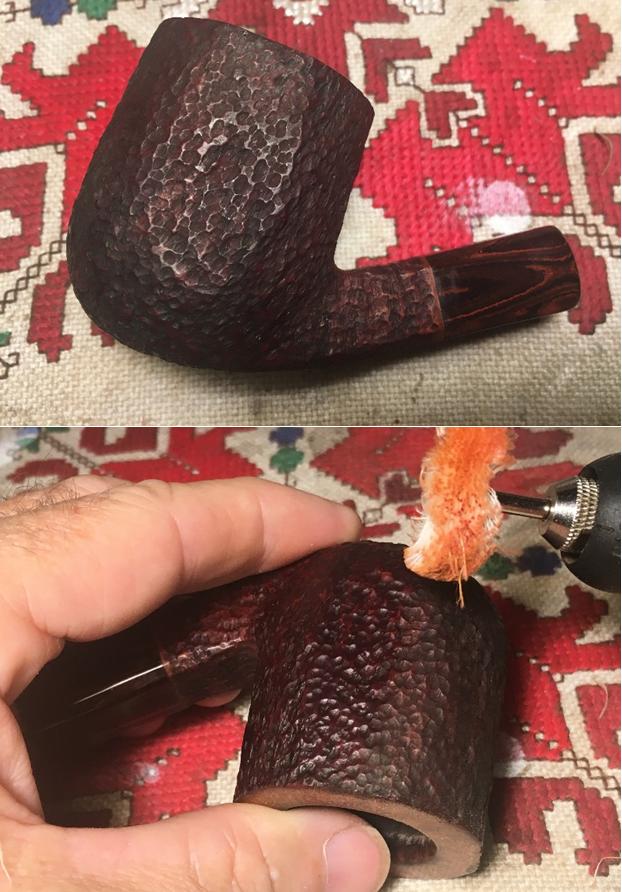
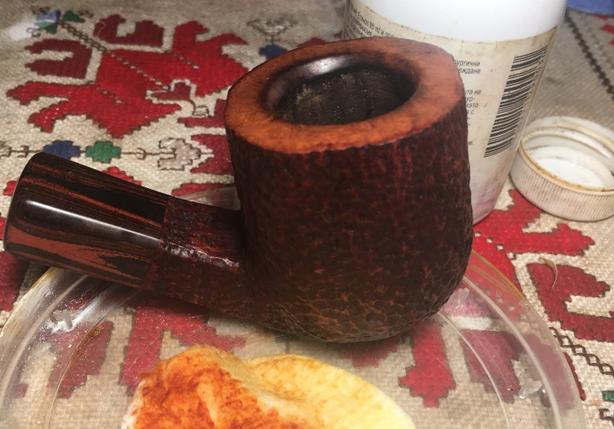
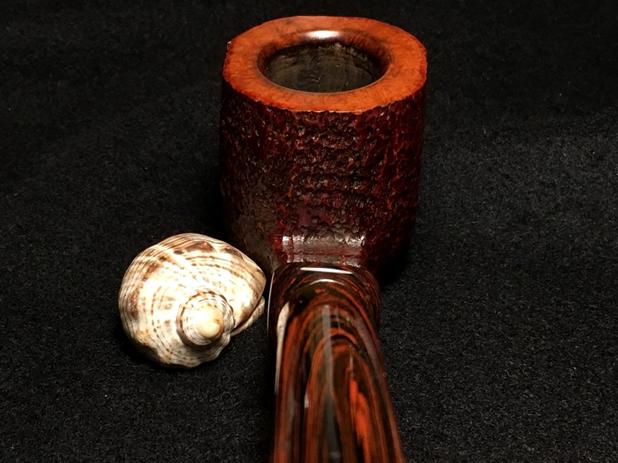
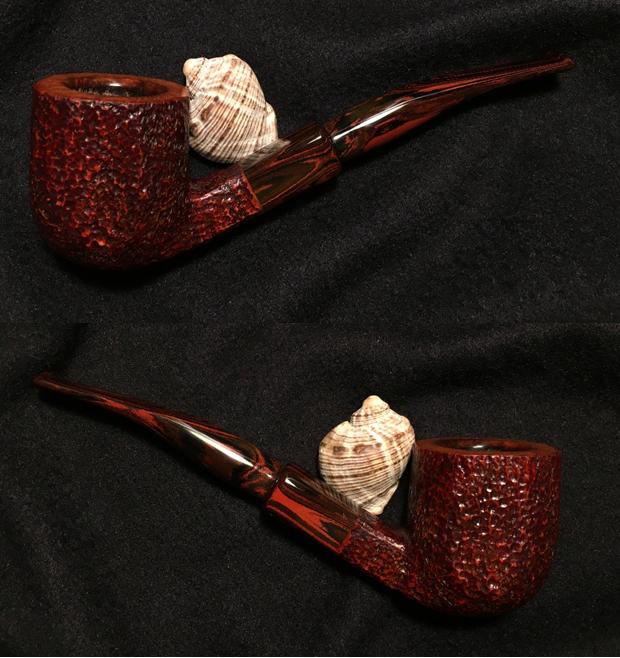
What can I say?  I am proud of the results of this Savinelli Goliath 619EX.  The interplay of the natural briar of the rim plateau with the rustification flecks on the peaks and the deep red tones of the briar pulling at the swirls in the Cumberland shank extension and stem – all coalescing together are striking.  Then, when one adds the staggering size and presence of the bowl….  Oh my.  I can say that this Pipe Steward is happy that this Sav is going to the Black Sea coast in a few weeks to enjoy the sand, surf and yes, a few bowls of my favorite blend!  Even though this Savinelli Goliath will be joining my personal collection, check out my blog, The Pipe Steward for other pipes available in the store.  These pipes benefit the Daughters of Bulgaria, our work with women and girls who have been sexually exploited and trafficked.  Thanks for joining me!
Refreshing a Beautiful, Danish Made Stanwell Majestic 64 Freehand


Blog by Steve Laug

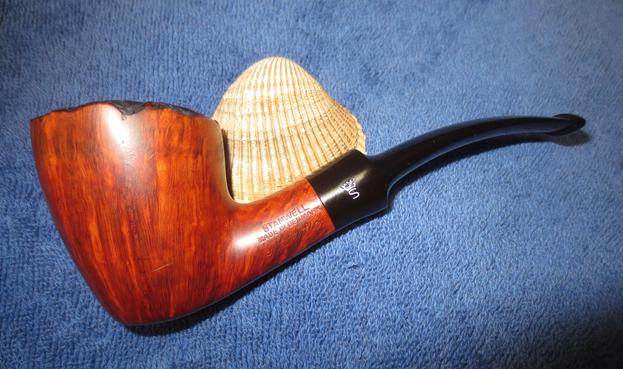
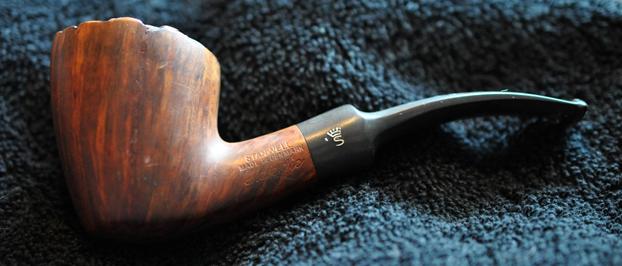
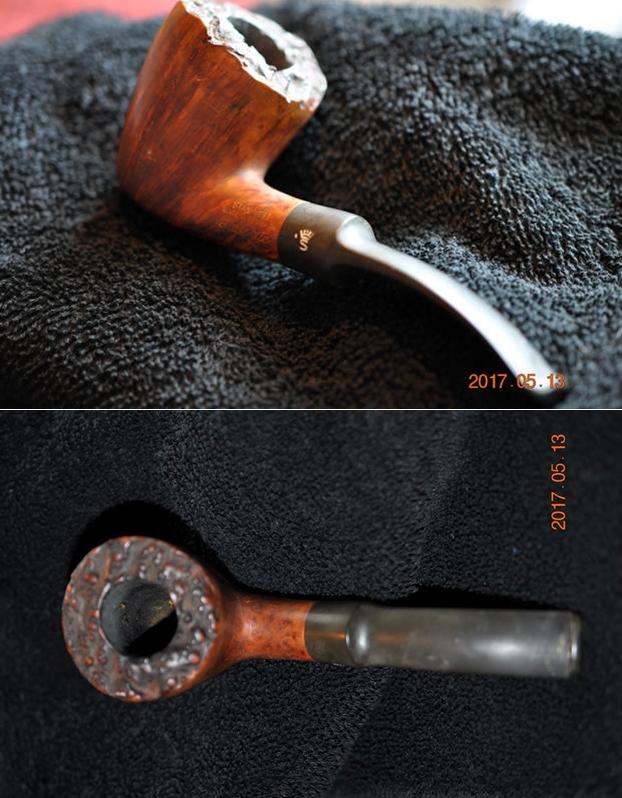
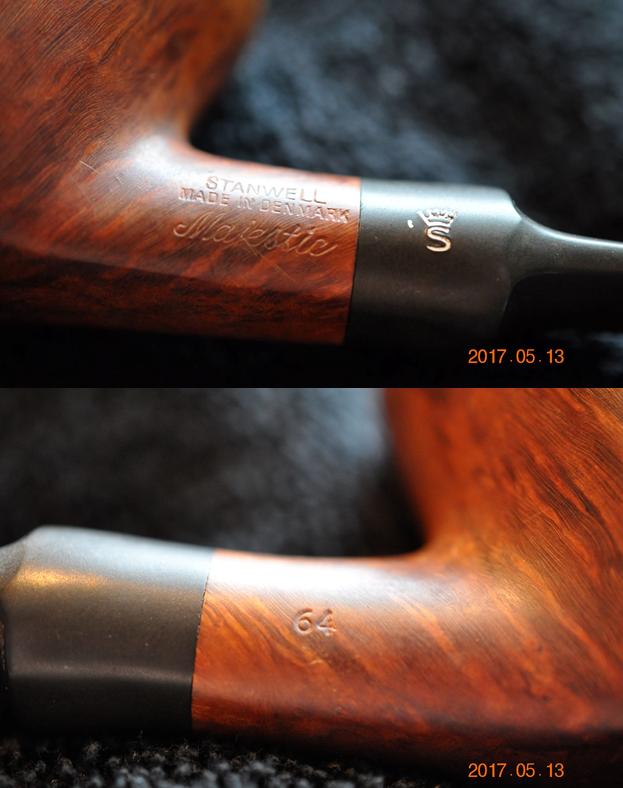
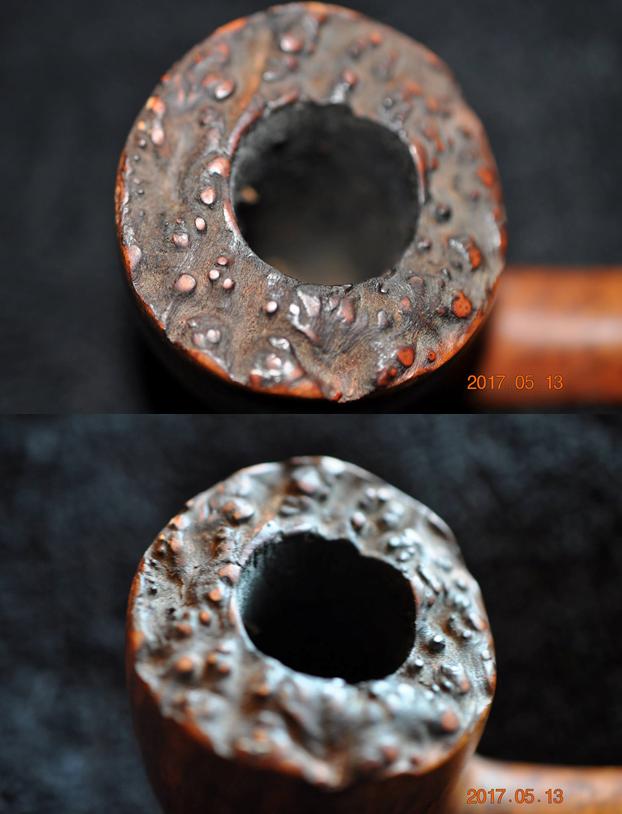
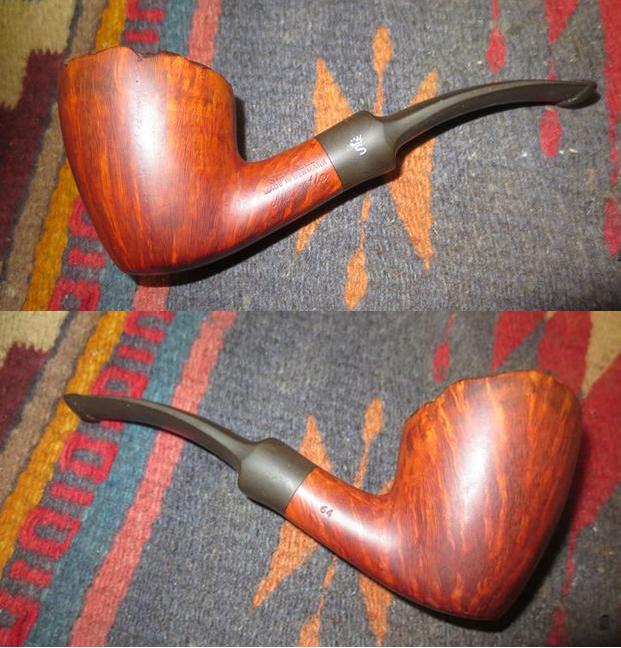
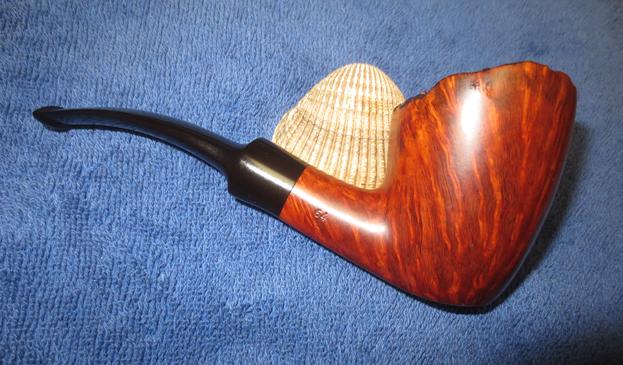
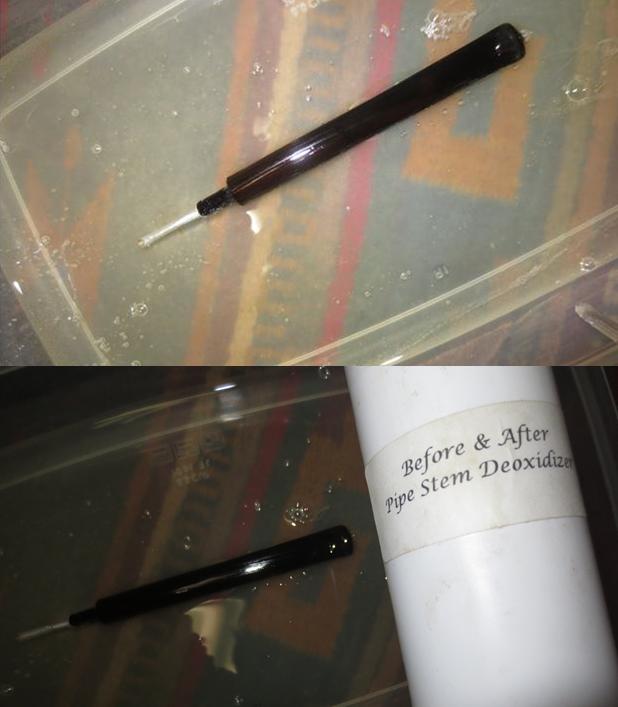
Today was a good day in the shop. I brought the third pipe to the work table today. It is a Stanwell Majestic shape 64 with a nice plateau top. The briar itself was in good shape. There were a lot of small nicks and dents in the sides of the briar. Other than being faded, the finish was in great shape. The plateau on the rim was faded and you could see remnants of tars and oils in the nooks and crannies of the rim top. The inner and outer edges of the bowl were undamaged. The pipe was stamped on the left side of the stem with the words Stanwell Made in Denmark over Majestic. On the right side it was stamped with the shape number 64. There was no other stamping on the pipe. The stem was oxidized and there was tooth chatter on the top and underside near the button. Jeff sent me these photos of the pipe before he started his cleanup process.The late Bas Stevens was the master at identifying Stanwell shapes tying the shape number to the designer. The shape 64 came in two variations – a Freehand with a saddle stem and a bent billiard with a full taper stem. This one is clearly the Freehand variation having a plateau top and a saddle mouthpiece. It was designed by Sixten Ivarsson (https://rebornpipes.com/tag/shape-numbers-and-designers-of-stanwell-pipes/).The stamping on the pipe is very readable. The left side of the shank is stamped Stanwell over Made in Denmark over Majestic. The Stanwell Crown S is stamped on the left side of the saddle stem. The right side of the shank bears the 64 shape number stamp.The rim top looked to be in good shape – dirty but sound.The lightly oxidized stem had tooth chatter on the top and underside. It did not appear to be deep in the vulcanite and should clean up easily.Jeff cleaned up this beautiful pipe with his usual methodical thoroughness. He reamed the bowl clean with a PipNet reamer and touched it up with a Savinelli Fitsall pipe knife. He scrubbed internals with alcohol, pipe cleaners and cotton swabs leaving the airways in the shank, mortise and stem very clean. He scrubbed the externals with Murphy’s Oil Soap to remove the grime and the old waxes on the bowl and rim. He soaked the stem in OxyClean to bring the oxidation to the surface of the vulcanite. When the pipe arrived in Vancouver I took the following photos. The rim was very clean and faded. They were generally black or at least dark with the high spots on the plateau showing through with the same brown as the rest of the stummel. The nooks and crannies were black and the high spots brown. The inner and outer edge of the bowl were in perfect condition.The stem was lightly oxidized and surface of the vulcanite on the topside was pitted with small holes and nicks. It was hard to capture that issue with the photos but it was there and would need to be addressed if I was to polish the stem to a rich shine. I put the stem in the Before & After Pipe Stem Deoxidizer and left it to soak overnight. I keep the mixture in a flat plastic tray with a cover. I dropped the stem into the mixture and made sure that it was completely covered with the mixture. I put the lid on the tray and set it aside to soak. I have referred to the latest use of this product in the past three blogs because I am putting it through its paces to see how the product delivers. I was skeptical when I first started using it but I have to admit that I am becoming less skeptical the more I use it. If you are interested in trying the product, I purchased the Deoxidizer from a guy on Facebook. His name is Mark Hoover and he is on the Gentlemen’s Pipe Smoking Society Group on Facebook. He has a pen making site where you can email and order the deoxidizer and the polishes (http://www.lbepen.com/). While the stem soaked I began my work on the bowl. I restained the plateau top on the bowl with a black aniline stain that I applied with a cotton swab making sure to get the stain deep in the grooves. I use a cotton swab because it enables me to keep the stain off of the sides of the bowl. I let the stain dry for a few moments and sipped a hot coffee.Once it had basically dried I polished the bowl with micromesh sanding pads – wet sanding with 1500-2400 grit pads and dry sanding with 3200-12000 grit pads. I wiped the bowl down with damp cotton pads after each sanding pad. When I finished with the 12000 grit pad I wiped the bowl down with olive oil on a paper towel to enliven the briar and highlight the colour. The next morning I removed the stem from the Deoxidizer and dried it off with a paper towel. I let the excess deoxidizer drip off into the tray before wiping it down. The oxidation came off and stained the paper a dark brown. The top surface of the stem was pitted near the button. I filled in the pits with clear super glue. Once it had dried I sanded it with 220 grit sandpaper to blend in the repair to the surface of the stem. Once I had smoothed out the repairs it was time to polish the stem. I polished it with micromesh sanding pads – wet sanding with 1500-2400 grit pads and dry sanding with 3200-12000 grit pads. I rubbed the stem down with Obsidian Oil after each sanding pad. After sanding with the 12000 grit pad I gave it a final coat of oil and set it aside to dry. I buffed the pipe with Blue Diamond polish on the buffing wheel. I worked over the bowl sides and the stem to polish out the last of the scratches in the surface of both. I gave the bowl and stem with multiple coats of carnauba wax to protect the briar and the vulcanite. I buffed it with a clean buffing pad to raise the shine on the pipe. I used a microfiber cloth to hand buff it and give it a deeper shine. The finished pipe is shown in the photos below. It is a beautiful example of the Stanwell Freehand shape 64. The dimensions of the pipe are Length: 5 ½ inches, Height: 2 inches, Outer diameter: 1 ¾ inches, Chamber diameter: ¾ inches. I will be posting this on the rebornpipes store so if you would like to add it to your collection you can wait until I add it or you can email me at slaug@uniserve.com or message me on Facebook. Thanks for walking with me through this restoration.

Restoring an Unusual Malaga Carved Bulldog


Blog by Steve Laug

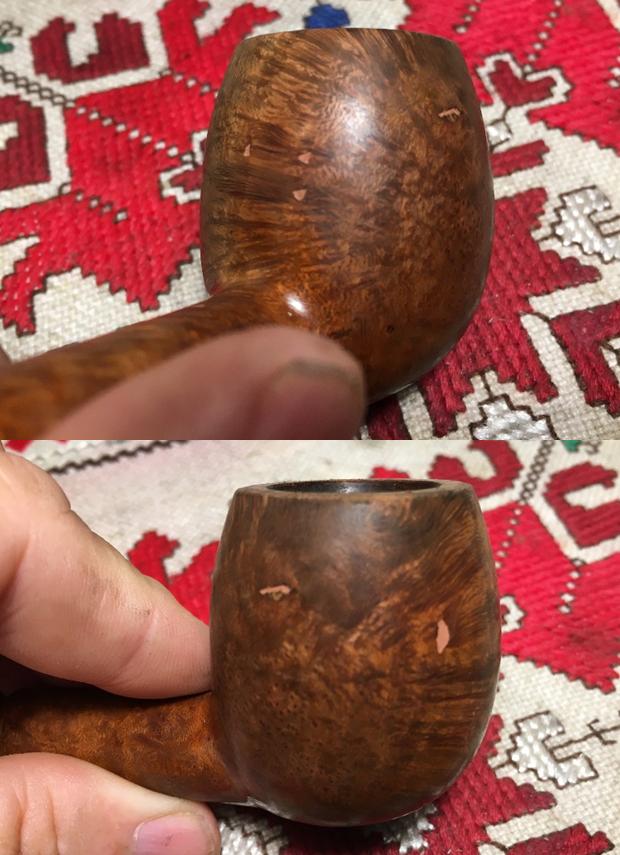
In the late spring I received and email from Josh (misterzippo), a reader of the blog that he had some pipes that he thought I might be interested in. He sent me photos of the pipes so I could have a look at them. One of the pipes that interested me was a Malaga Bulldog with a twist in the carving and a scoop in the top of the bowl. The first picture he sent shows the overall condition and appearance of the pipe. The shape intrigued me – the diamond shank and stem with twists carved in the bowl, shank and down the stem as well. The pipe was dirty with the finish having thick sticky build up around the bowl and shank in all of the carved areas. The groove around the cap of the bowl was very dirty. The stem had oxidation and some heavy calcification. All of that was visible in the first picture. The tape measure in the photo shows that the pipe is about 5 ½ inches long with a saddle stem.That first picture set the hook for me, but it did not prepare me for what the next photos would reveal. The briar had white paint flecks all over the bowl sides. Under the dirt and sticky grime there appeared to be some nice grain on the pipe. There was a large burn mark on rear left side of the cap where it looked like the pipe had been set in an ashtray and a cigarette had burned a spot. There were also some burn marks along the outer edge of the bowl on the front and the rear.The cake in the bowl was incredibly thick and it was hard as a rock. The cake had overflowed the bowl onto the rim leaving behind a thick hard lava coat. Looking at the bowl I have no idea how the previous owner had ever been able to smoke it in this condition – maybe he smoked it until it hit this spot and then laid it aside. Looking to the bowl is like looking down into a dirty chimney that needed the attention of a chimney sweep.The stamping on the left side of the shank read “MALAGA” and looked like it had either a burn mark on the MAL or possibly just a lot of tarry build up. Only having in hand would I be able to really know what I was dealing with.

We struck a deal and I picked up a few of Josh’s pipes to work on. I was really intrigued with the shape of that little Malaga as I have worked on a few of them over the years but never one with this kind of shape. Here is a link to a blog I wrote on a beautiful little Malaga Lovat (https://rebornpipes.com/2016/02/27/a-beautiful-malaga-lovat-came-my-way/).

George Khoubesser (picture to the left) started Malaga Briar Pipe Company and located it in Royal Oak, Michigan in the USA in 1939. It closed its doors for the last time in 1999 after 60 years in business. I have an old Malaga Catalogue that I scanned and put on the blog (https://rebornpipes.com/2013/02/09/george-khoubesser-and-malaga-pipes/). The catalogue describes the manufacture of the pipes as follows:

Painstaking caution is exercised in selecting flawless, perfect briar wood for the purpose of making and Curing of the “Malaga.” You can be certain of this fact, because none other than the choicest and finest select briarwood will withstand the “Malaga” Curing process. Other than the choicest quality and grain, will split wide open in the Curing vats… The Curing method renders all “Malaga” pipes, light in weight… Most all “Malaga” Senior pipes are left in their natural state; except for a skillful waxing which brings out the rich beauty of the virgin grain. No artificial polishing stain, shellac or varnishes are added.

Malaga closed in 1999 after 60 years in business.

I had Josh ship it to my brother Jeff. I figured he would have a good time cleaning it up. I could not wait to hear what he thought of it. When it came he showed it to me over Facetime. The condition was dirty for sure – exactly like the photos Josh sent me. But it was in decent shape so it would be a fun one to bring it back to life. The finish was dirty and had some stickiness to the sides of the bowl and shank. The stem fit far better than the photos showed. The bowl indeed was as thickly caked as the photos Josh sent had shown but it was softer than I expected. The lava on the rim was thick but it was flaky so it would come off easier than I thought. The stamping on it read “MALAGA” on the left side of the shank as noted above but it also was stamped Imported Briar on the right side of the shank. Jeff took the follow photos of the pipe before he worked his magic doing the cleanup.The close up photos Jeff took of the rim top and bowl show just how thick and dirty this pipe was when he received it in Idaho. Looking at it I am glad that he did the cleanup work because it looked like a bear to work on.The next photos show the grain poking through the grimy finish on the sides of the bowl. It really was hard to see what was grime and what might be burn marks on the briar of the bowl and shank.The next photos show the stamping on the top left and right angle of the carved diamond shank of the pipe. You can still read the stamping. You can see the marks on the first letters of Malaga on the shank and it is not clear if it is damage or grime. The stem appeared to be in rough shape. Not only was it heavily oxidized and had thick clacification around the first inch of the stem from the button forward, but the button was worn and had tooth marks in the top and underside. The calcification and the tooth marks on the button made me wonder if the pipe had sported a Softee Bit before coming to me. I was looking forward to what the pipe would look like when Jeff had finished putting it through his cleaning process. He reamed it with a PipNet Reamer and took the cake back to bare briar. He cleaned up the little remnants of cake with a Savinelli Fitsall Pipe Knife. He scrubbed out the internals of the pipe – the airways in the shank, mortise and stem using alcohol, pipe cleaners and cotton swabs. He scrubbed the exterior of the briar and stem with Murphy’s Oil Soap and a tooth brush to remove all of the thick grime. He rinsed it under tap water and dried it off with a towel. He soaked the stem in OxiClean to bring the oxidation to the surface and soften it. The burn marks on the front outer edge of the bowl and the back left inner and outer edge – both moving onto the rim top. There was a burn spot on the left side on the cap where the bowl had been set in an ashtray and burned. I was not sure that I would be able to remove that. When the pipe arrived I was excited to have a look at it. Here is what I saw once it arrived. I took a close up photo of the rim top to show the burn damage to that part of the bowl and also of the left side of the bowl. I would need to see what I could do to minimize these marks without changing the profile of the bowl. Jeff had gotten the thick cake cleaned out and the inner edge of the bowl look to be in good shape.The oxidation on the stem was pretty heavy but it was on the surface. The calcification was gone. Underneath where it had been there were tooth marks and chatter that had been hidden.I decided to use the Before & After Pipe Deoxidizer again. I keep it in a flat plastic tray with a cover. I put the stem in the mixture and made sure that the stem was completely covered with the mixture. I put the lid on the tray and set it aside to soak for the day. I purchased the Deoxidizer from a guy on Facebook. His name is Mark Hoover and he is on the Gentlemen’s Pipe Smoking Society Group on Facebook. He has a pen making site where you can email and order the deoxidizer and the polishes (http://www.lbepen.com/). I have to admit I becoming less skeptical than I was at the beginning.I set the tray aside to let it soak for the day and turned my attention to the bowl. I took some photos of the bowl to capture the grain and the interesting shape of the carving. The photos also clearly show the damage to the side of the bowl and the rim top. I sanded the burned areas on the left side of the bowl and the rim top with 220 grit sandpaper. I was careful to sand all the way around the cap and the rim to keep things smooth. I wanted to remove the damaged areas on the edges of the bowl and rim as well as some of the nicks on the rim top. I wiped down the bowl with acetone on cotton pads to remove the grime from the sanding and the debris from around the damaged areas. I was able to remove much of the damage on the rim top and edges. The burn mark on the left side of the cap looked better but I would not be able to remove it much more than I already had. I laid the pipe aside and my daughter Sarah and I decided to go out for lunch. We caught the bus and headed down town to try a new place. We were gone for three hours including lunch and transit. When I returned I took the stem out of the Deoxidizer and wiped off the excess mixture. I dried off the stem with a clean rag. I took the following photos to show how well the soak had worked to remove the oxidation.I took some photos of the tooth marks on the top and underside of the stem near the button.I sanded the surface of both sides of the stem with 220 grit sandpaper to remove the tooth marks and reshape the button.The stem was loose in the mortise so I heated and awl with a Bic lighter and inserted it in the airway in the tenon. This caused the tenon to expand and correct the looseness in the shank.I polished the stem with micromesh sanding pads – wet sanding it with 1500-2400 grit pads and wiping the stem down after each pad with Obsidian Oil. I dry sanded the stem with 3200-12000 grit pads and repeated the rub down with oil. After the final coat of oil following the 12000 grit pad I set the stem aside to dry. I then polished the briar with micromesh sanding pads – wet sanding it with 1500-2400 grit pads and wiping it down after each pad with a damp cotton pad. I dry sanded the briar with 3200-12000 grit pads and wiped it down after each pad with a damp cotton pad. The dark spot of the burn mark really bugged me. I have been hunting for ways to minimize it without doing damage to the integrity of the briar. I googled and found a recipe that was supposed to remove burn marks or heat marks. I thought I would try it and see what happened. Here is the recipe.

Mix a generic baking soda and a non-gel variety of toothpaste in a small bowl until it is a sticky paste. Put the paste over the heat mark and give it a few minutes to set. After about five minutes, the heat mark should wipe away with a clean rag. Be sure to wipe away any remaining residue from the paste as well.

I took photos of bowl with the mixture on the burn marks. I applied the paste with my finger and rubbed it into the burned areas. I repeated the treatment twice this morning. It worked to some degree as shown in the photos below. It definitely removed the lighter burn marks on the rim top and took out a small spot on the front of the cap. It also lightened the burn mark on the front outer edge of the rim and the large mark on the left side. On advice from Mark Domingues I also tried to spot dab the darkest part of the burn with bleach, being careful to not get it on the rest of the surrounding area. It lightened it a little more but did not completely remove it. I think that probably the burn was too deep to actually remove all of it.I wiped the bowl down with a little olive oil on a paper towel and hand buffed it so that the oil would be absorbed. I buffed the pipe with Blue Diamond on the buffing wheel and then gave it multiple coats of carnauba wax. I buffed it with a clean buffing pad (many people do not do this step but it is critical to get a good shine). I hand buffed it with a microfiber cloth to deepen the shine. The finished pipe is shown in the photos below. Even though the burn mark bugs me it does give the pipe character and reflects on its previous history. I have to always remember that we hold our pipes in trust – we are stewards as Dal Stanton calls it. Our task is to take good care of the pipe while it is in our hands and to leave it in good condition to pass on to the next steward. Thanks for looking.

A Light Restore of a NOS Danish Made Bjarne Handmade 15 Churchwarden


Blog by Steve Laug

Courtesy Doug Valitchka on Pipedia

My brother found this beautifully grained Bjarne Hand Made Churchwarden pipe on EBay listed by a seller in Kentucky. The seller said that the pipe looked as if it was unsmoked. Those of you who buy pipes on EBay have heard that before only to find that you bought a dog of a pipe that was smoked to death. But this one actually looked good and even if it was smoked it was worth a risk.

The pipe is a six sided sitter with the long churchwarden stem. The top is rusticated while the panels are all smooth. The flat bottom of the bowl is also smooth. The shank is almost pencil like, thin and round with a slight taper back to the stem. The grain on the smooth sides was beautiful and a mix of straight and birdseye. The grain on the shank was birdseye and was amazing. The stain colour was perfect for the highlighting the grain. The rim was rusticated with divots but had been smoothed out slightly to give it a soft rusticated look. It was stained black and really contrasted with the smooth grain on the rest of the bowl. It is stamped on the underside of the shank next to the stem/shank junction. It reads Bjarne over Handmade Denmark over 15. The 15 is a shape number.

The finish is in perfect condition – no dents or nicks. The bowl was polished to a shine when my brother received it. The black rim top was in excellent condition. The bowl had a bowl coating that was put in to protect the pipe through the break-in period. It was indeed unsmoked! The seller had been correct contrary to many of my previous experiences on EBay. The stem was oxidized all the way around. It seemed like the right side and underside were less oxidized than the left which led me to conclude that the pipe had been kept on a display board and the light of the display and perhaps a window had led to the oxidation. I could not wait to receive it and clean up the oxidized stem.

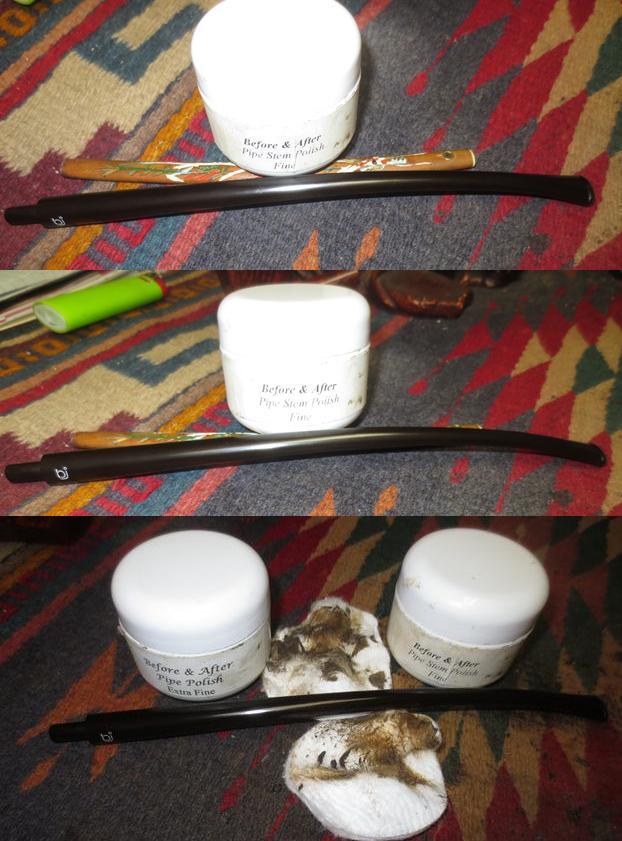
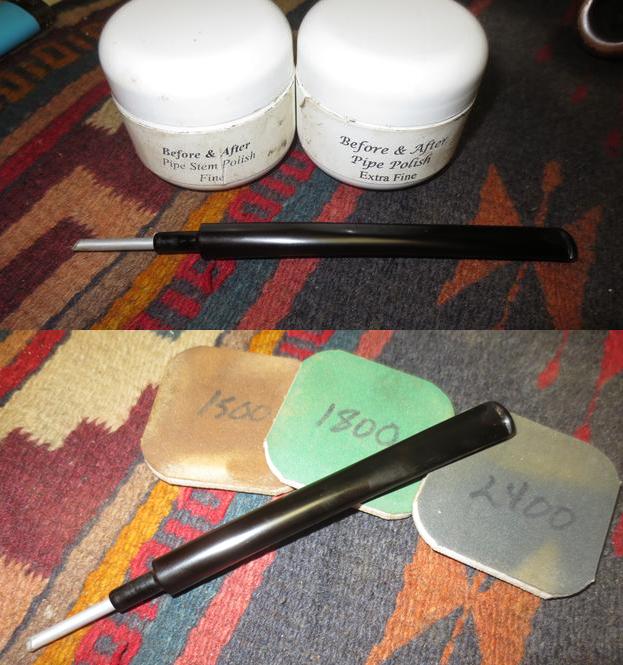
I took a trip to Idaho to meet with my brothers and our aging parents to talk through some decisions that we had to make. In the process I loaded a suitcase with the pipes that my brother had purchased for us. This Bjarne was one of those pipes. It came with its own black leather pipe bag with a draw string top. I took the following photos of the pipe displayed on its leather bag to show the condition of the stem when I brought it to my worktable. I took this close up photo of the rustication on the rim top. I really like the look of the way Bjarne did the rustication and gave it an interesting texture.The next photos show the difference in the oxidation on the top and underside of the stem.The Bjarne logo was stamped in white on the left side of the stem and was in perfect condition. There was no wear or tear and it was crisp and legible.I wiped down the bowl with a bit of olive oil on a cotton pad to remove the slight grime on the bowl sides and bottom. I also wiped down the rim top with the oil as well. I let it absorb into the briar and buffed it with a microfiber cloth. While I worked on the bowl I put the stem in the Before & After Pipe Stem Deoxidizer that I have referred to in previous blogs – the one on the Borlum and the Hilson. I purchased the Deoxidizer from a guy on Facebook named Mark Hoover. He is on the Gentlemen’s Pipe Smoking Society Group there. Mark has a pen making site where his Before & After products are available. You can email and order the deoxidizer and the polishes directly from Mark on that site (http://www.lbepen.com/). After the initial two uses of the Deoxidizer I have become less skeptical. I let the stem soak overnight and the product does its work and leaves the stem oxidation free. I forgot to take a photo of the stem in the mixture. The photo below shows the oxidation floating in the container I let the stem soak in.The next morning I dried off the stem with a soft cloth and rubbed the stem clean of the remnants of oxidation that remained on the surface. The cotton pads that I used were dark brown with oxidation and the stem was quite clean. The next photos show the condition of the stem after wiping it down after removing it from the soak.I decided to use Mark’s entire system this time in the cleanup. I used his Before & After Pipe Polishes – both fine and extra fine to polish the vulcanite. I skipped the process of micromesh sanding pads on this stem. The soak did not damage the logo stamp on the side of the stem. It came out of the bath looking clean and fresh.I buffed the pipe with Blue Diamond on the buffing wheel to polish and begin to give it a richer shine. I gave it multiple coats of carnauba wax and buffed it with a clean buffing pad to raise the shine from the wax. I hand buffed it with a microfiber cloth to complete the polishing. The dimensions of the pipe are length: 11 inches, height: 2 ¼ inches, outer diameter: 2 inches, chamber diameter: ¾ inches. This beautiful pipe will be on the rebornpipes store shortly. If it is something you would like to add to your collection send me an email at slaug@uniserve.com or a message on Facebook. Thanks for looking.

A Simple Refresh on a Belgian Made Hilson Bolero Oval Shank Billiard


Blog by Steve Laug

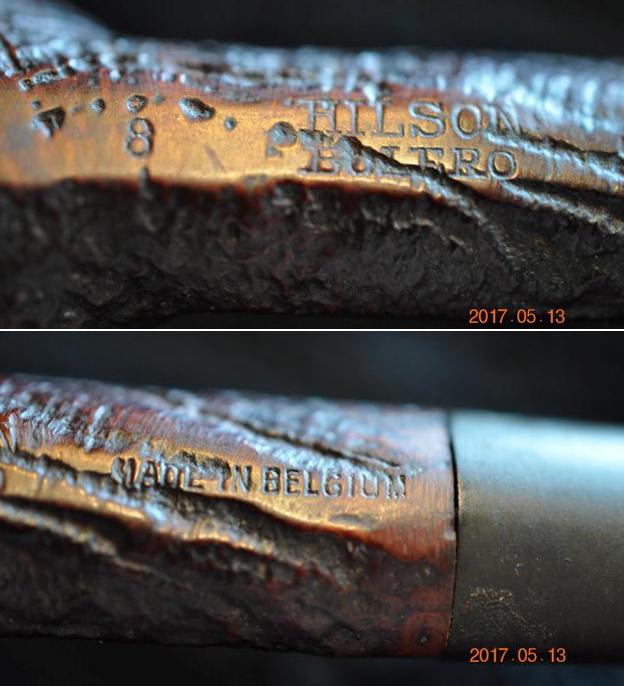
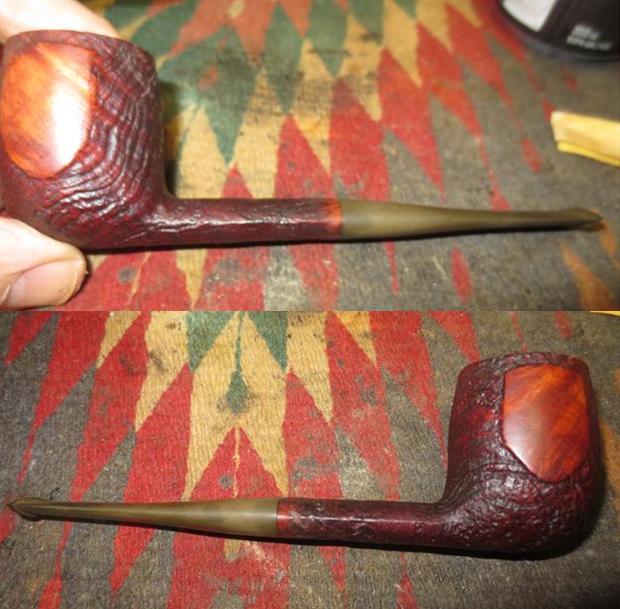
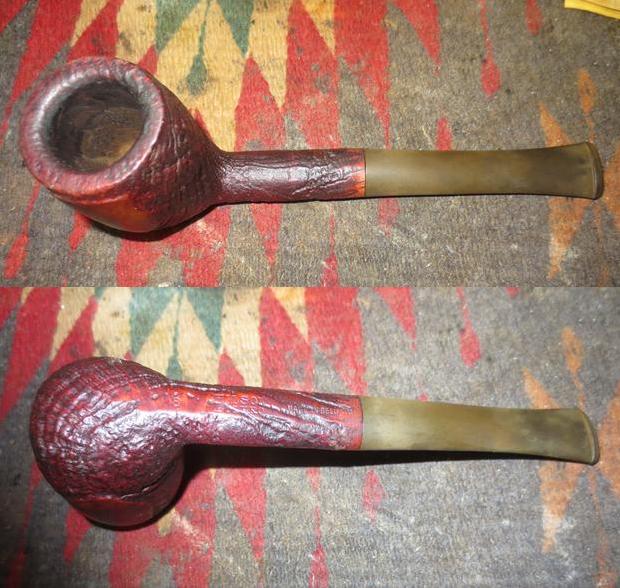
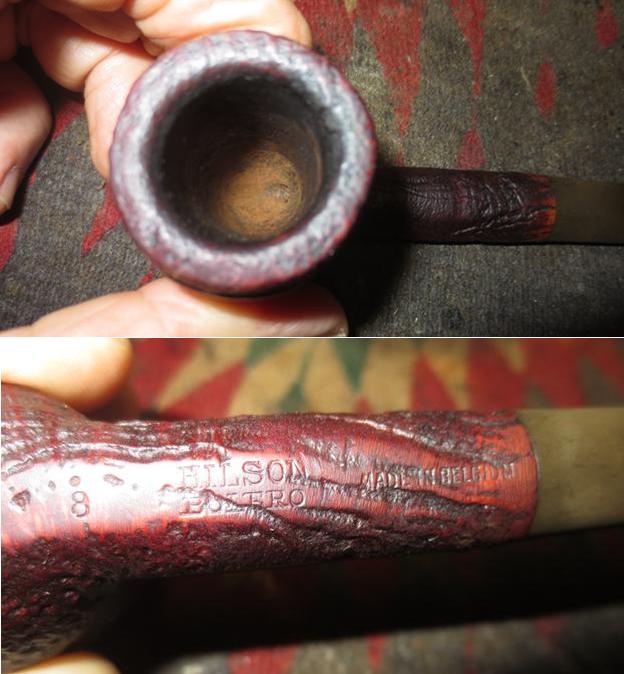
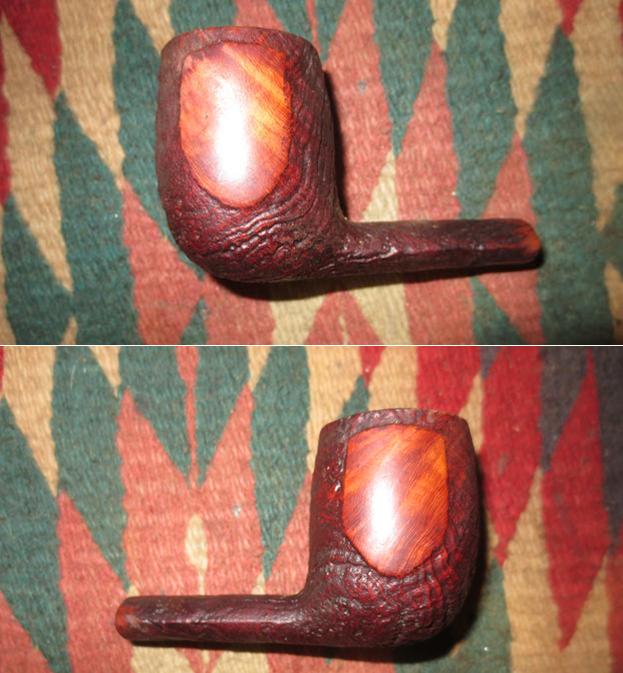
Sometimes it seems like I get lucky and get a pipe from my brother that needs very little work. After Jeff has reamed and cleaned it, I receive it and a simple refresh brings it back to a new looking pipe. It does not happen very often and when I look at them in the pre-clean photos it is somewhat unpredictable what lies beneath the sheer filth and ugliness. You can guess a little bit from the condition of the edges of the bowl and the stem. You can get a feel from the thickness and composition of the cake what kind of tobacco had been smoked in the bowl and the smell of the pipe usually confirms the feeling. In this case the pipe that surprised me was a Hilson Bolero oval shank Billiard. In the photos it appeared to be in far worse condition that it was once Jeff cleaned it up. The photos below show what the pipe looked like when Jeff brought it home from our virtual pipe hunt in Montana.It was definitely newer than many of the pipes we found that day. The photos tell the story of its condition but I will summarize it here. The bowl had a fairly thick cake with lava overflowing onto the rim. It had a nice sandblast finish that makes me think of Stanwell pipes that must be from the same time period. The finish appeared to be in good shape other than the dirt and grime of the years in the grooves and grain of the blast. The stem was slightly oxidized and there was tooth chatter on both the top and underside of the stem near the button. The next two close up photos of the bowl show the cake and the lava buildup on the rim top. It appeared that the inner and outer edges of the bowl were in good condition. No glaring damage to those spots showed in the pictures. The pipe has some nice grain that is highlighted by the sandblast. There are two smooth panels – one on each side of the bowl providing a nice contrast. The difference adds a visual and tactile variation on the pipe.The pipe is stamped in a smooth section on the underside of the oval shank. On the left end it reads 8 which is the shape number. That is followed by the brand name Hilson over the line name Bolero. To the right end of the shank near the shank/stem junction it reads made in Belgium. The photos below show that the stamping is very clean and readable. The sandblast cuts through portions of the stamping but does not ruin it.The stem was rough to the touch but the issue was mainly oxidation on the surfaces. There was some visible tooth chatter on the stem, but it is quite easy to address. I was very glad that it was in good condition.Before I started the refresh of the pipe, I did a quick review of the history of the brand because I like having that information in mind when I work on a pipe. I remembered at some point Hilson had been sold to Gubbels who made the Big Ben pipe. At that time, it moved from being a Belgian made pipe to being made in the Netherlands. I turned to Pipedia and read the entry on Hilson there (https://pipedia.org/wiki/Hilson) and to Pipephil’s site to read what he had for information (http://www.pipephil.eu/logos/en/logo-h3.html). I have combined and summarized the pertinent information from the two sites.

In 1846 a German named Jean Knödgen started to produce clay pipe in Belgium. In the late 19th century Jean Hillen who married into the Knödgen family took over the company and changed the firm in order to manufacture briar pipes. Jean Hillen had 2 sons: Jos Hillen was responsible for sales and Albert Hillen was responsible for the production. After WWII Albert founded the HILSON brand (Hillen and Son) and exported his pipes all over the world.

…In the 1960’s and still throughout the 1970’s the brand Hilson of Broers Hillen B.V. (Hillen Bros. Co.) was quite successful in many European countries. They produced large numbers of machine made pipes covering the whole range of shapes and finishes. The pipes were well respected for good quality and craftsmenship at very moderate prices.

…in 1980 Hillen faced major financial problems. After having gone bankrupt, the Belgian brand from Bree (Limburg) was taken over by the Royal Dutch Pipe Factory. The owner, Elbert Gubbels used the favour of the hour and bought the company…The Hillen plant in Bree was closed down shortly after and ever since then Hilson pipes are manufactured in Roermond, NL.

Given that the plant in Bree, Belgium closed around 1980 after Gubbels had purchased the company, I knew that the pipe I was working on had been made prior to that time. The Made in Belgium stamp on the underside of the shank gave that information. I am not sure that I can get any closer in terms of a date for the pipe.

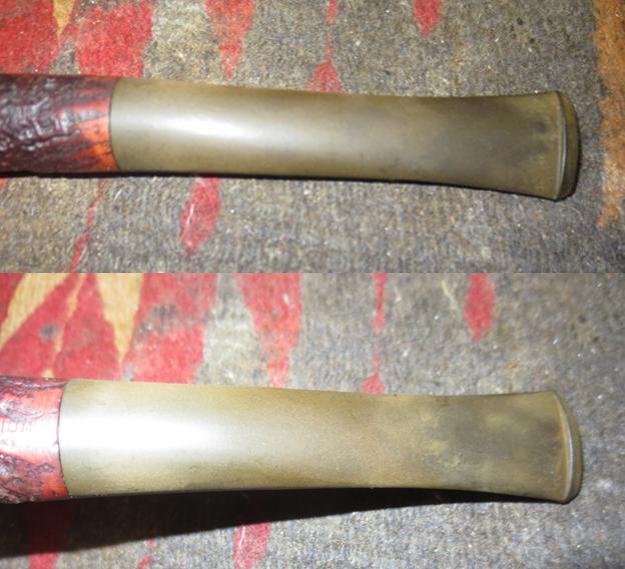
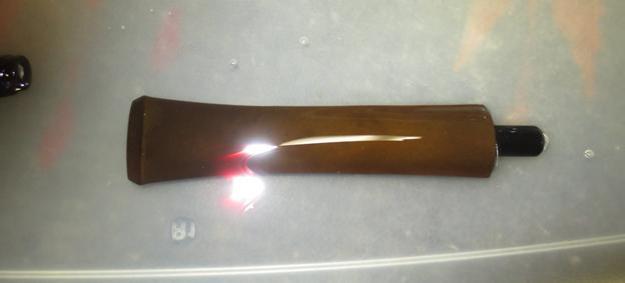
On this pipe, my brother’s cleanup work was the lion’s share of what needed to be done to revitalize it. He reamed the bowl with a PipNet reamer to remove the cake and cleaned up after the reaming with a Savinelli Fitsall pipe knife. He scrubbed the finish with a tooth brush and Murphy’s Oil Soap to remove the grit and grime. He scrubbed the rim top and was able to loosen the debris that had built up there. He rinsed the bowl under running water and dried it off. He soaked the stem in OxiClean to raise the oxidation to the surface. He scrubbed out the airway in the bowl, shank and stem with pipe cleaners, cotton swabs and alcohol. When I received the pipe I was amazed at how good it looked. The stem would need some attention but that was about it. The bowl could be waxed and buffed with little other work. Jeff had done a great job. I took photos of what the pipe looked like when it arrived in Vancouver. I took a close up photo of the rim to show the condition. There was a spot on the inner edge of the back portion of the rim that looked damaged. I would need to work that spot over to ensure that it was cleaned up. I also took a photo of the underside of the shank to show the stamping on that portion of the pipe. You can see how the stamping that I mentioned above was laid out on the shank bottom.I took photos of the stem to show its general condition as well. The stem was oxidized but there were no tooth marks on either side. It was clean other than the oxidation.I put the stem in the Before & After Pipe Stem Deoxidizer solution that I spoke of in the previous blog on the Borlum pipe. I purchased the Deoxidizer from a guy on Facebook. His name is Mark Hoover and he is on the Gentlemen’s Pipe Smoking Society Group on Facebook. He has a pen making site where you can email and order the deoxidizer and the polishes (http://www.lbepen.com/). This is the second time that I have used like Mark suggested. I immersed the stem in the Deoxidizer to soak. The Deoxidizer will do its work and leave the stem oxidation free. I have to admit I was a little less skeptical than I was before set the stem in the container of solution to soak overnight.I turned my attention to the bowl. I used a small piece of sandpaper and a brass bristle brush to clean off the charred build up on the back inner edge of the rim. I then rubbed the bowl down with some olive oil on a paper towel and set it aside to soak in overnight. I called it an evening and went to bed. In the morning I took the stem out of the Before & After Pipe Stem Deoxidizer soak and wiped off the excess fluid. It is quite sticky so it is a bit of work to wipe it free and dry off the stem. Once I got it dried off I rubbed it down with Obsidian Oil and let it dry for a few moments.Once it had dried I began the polishing of the stem with micromesh sanding pads. I wet sanded it with 1500-2400 grit pads and rubbed it down with Obsidian Oil. I dry sanded it with 3200-12000 grit pads and wiped it down after each micromesh sanding pad. I buffed the pipe with Blue Diamond on the buffing wheel to polish out the scratches in the vulcanite and give a shine to the sandblast finish. I worked on the inner edge with the buffer and the Blue Diamond and cleaned up the damaged area to blend it in more with the rest of the rim edge. I gave the bowl and stem multiple coats of carnauba wax and buffed it with a clean buffing pad to raise the shine. I hand buffed it with a microfiber cloth to deepen the shine. The finished pipe is shown in the photos below. The dimensions of the pipe are length: 6 inches, height: 2 inches, bowl diameter: 1 3/8 inches, chamber diameter: ¾ inches. I will be posting it on the rebornpipes store if you are interested in adding this beauty to your rack. You can email me at slaug@uniserve.com or send me a message on Facebook. Thanks for looking.


Refreshing a French Jeantet D’Orsay Billiard Found in Burgas


Blog by Dal Stanton

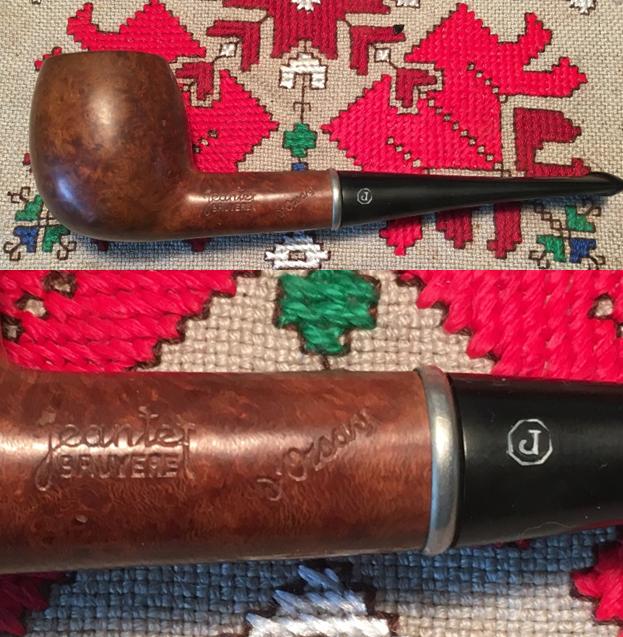
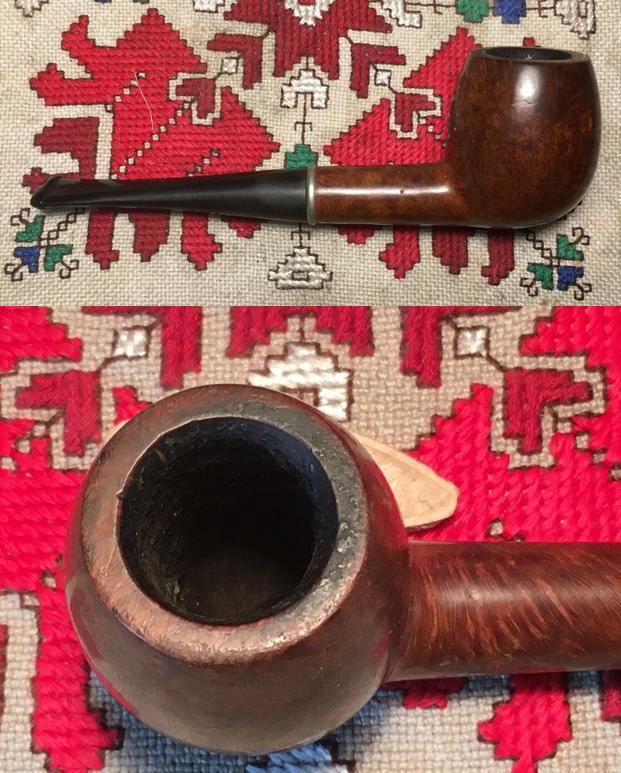
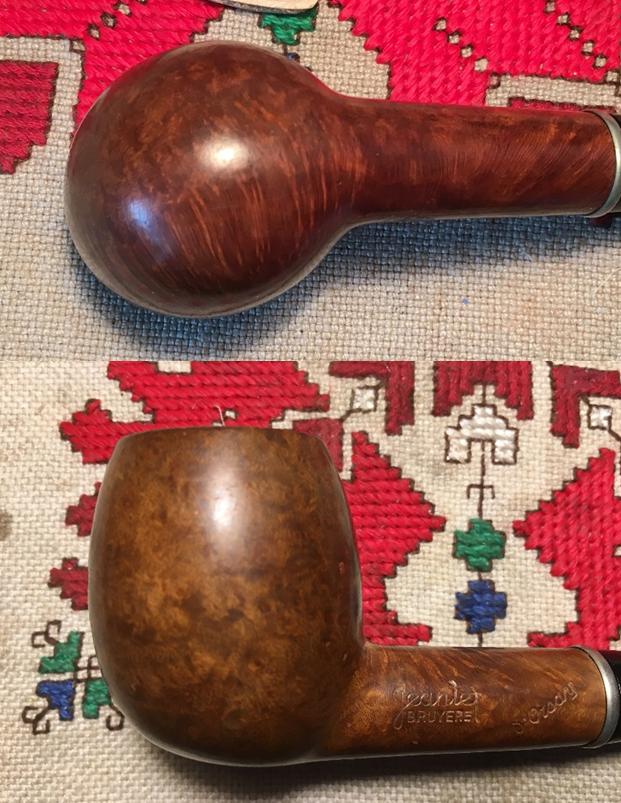
The first time I saw the Jeantet D’Orsay was looking at a picture of it on my iPhone 6s.  My fellow colleague, Gary, who also lives and works here in Bulgaria, was with his wife on the Black Sea coast strolling down the main walking street of Burgas.  Gary has previously culled pipes for me during his travels as he keeps his eyes open and sends pictures of possibilities.  Gary also is my main supplier of ‘quality’ cigar ash which is the main ingredient in making ‘Pipe Mud’ to coat the inside of bowls.  The picture he sent was of two pipes, the Jeantet (top in picture below) and a nice hefty bent Billiard marked only with Bruyere [over] Garantie.  My primary interest was the product of Saint Claude, France, the Jeantet, but I encouraged him to do a bundle deal which landed both in my ‘Help Me!’ basket.  Thank you, Gary!I’ve not been restoring pipes long, but among my earliest restorations were French made and I enjoyed those initial forages of discovery of a pipe’s heritage and the geopolitical significance of the name.  My first restoration of a Jeantet was a Fleuron and it was discovered at my favorite antique shop, dubbed, The Hole in the Wall, here in Sofia.  It was then I discovered the historical importance of Saint Claude, the pipe production center in Europe for much of the 1800 and in the 1900s until pipe production peaked in the 1960s, causing many corporate closings and consolidations (See Pipedia’s article on Jeantet).  Saint Claude became the a center for pipe production and the place many prominent pipe houses called home, not because of the accessibility of briar, but it was where industrious monks and artisans turned their abilities from making toys and religious paraphernalia to pipe making after briar pipes first started being mass produced (See: fumerchic.com) when briar was discovered to have heat resistant qualities.   The Jeantet D’Orsay now on my worktable enjoys a part of this heritage, though most likely produced toward the closing chapters of Jeantet’s history.  On my worktable, I take more pictures of the Jeantet D’Orsay to fill in the gaps. The nomenclature is stamped on the left side of the shank, with ‘Jeantet’ (in fancy script) [over] ‘BRUYERE’, and to the right of this is ‘D’Orsay’ (in diagonal fancy script).  The stem bears the ‘J’ ensconced in a heptagon.  As I research the D’Orsay line, I have found a dearth of information as I’ve looked for and through catalogues trying not only to ID the D’Orsay, but even finding any systematic information on Jeantet pipes in general is a challenge.  If there is any clue in the name ‘D’Orsay’, I’m not sure what it is.  Today, Orsay is a smaller suburb of Paris, primarily known as a center in the development of technology with different educational institutions based there.  Historically, this Wiki article is informative:

There has been a village called Orsay on this site since 999, and the first church there was consecrated in 1157. From the sixteenth century, the town and surrounding area were owned by the Boucher family, and it was in honour of this family that Louis XIV gave the quai d’Orsay its name. This is the reason that the Musée d’Orsay is not in Orsay. In the eighteenth century, the family of Grimod du Fort bought the land and received the title of comte d’Orsay. In 1870, during the Franco-Prussian war, Orsay was occupied by the Prussian army. 88 young “Orcéens” were killed in the First World War.

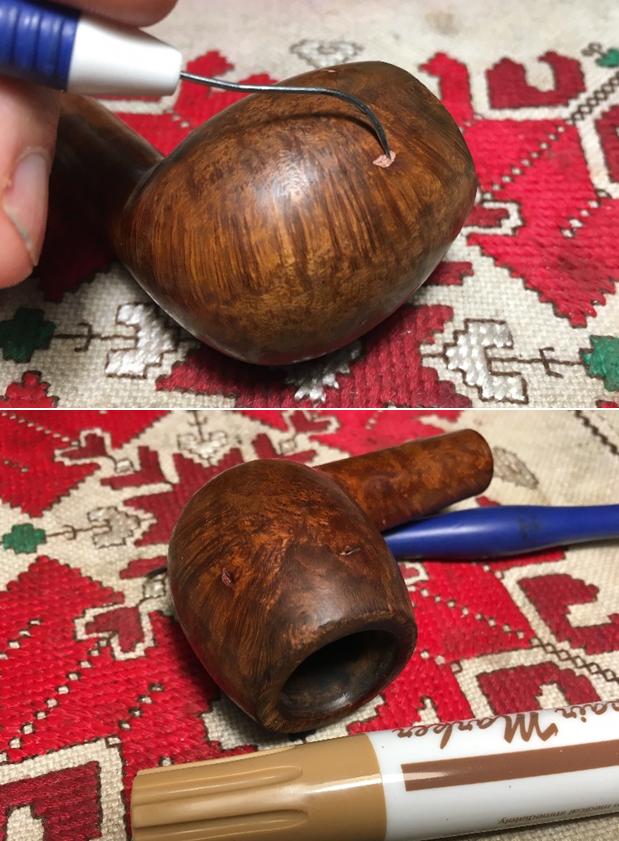
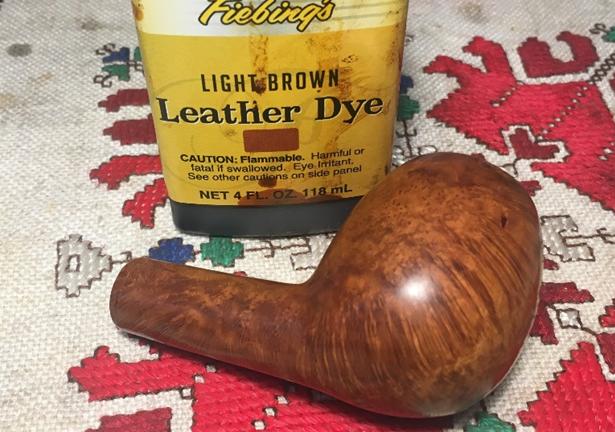
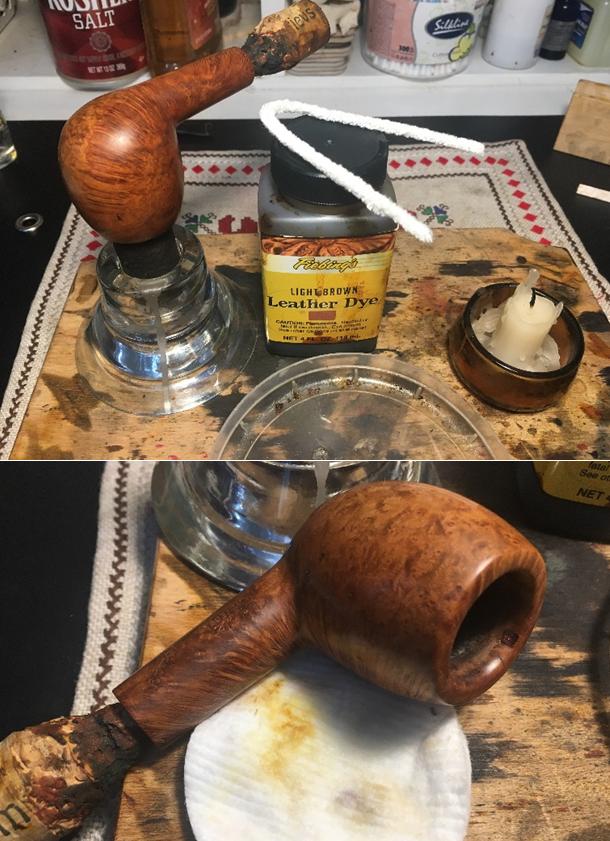
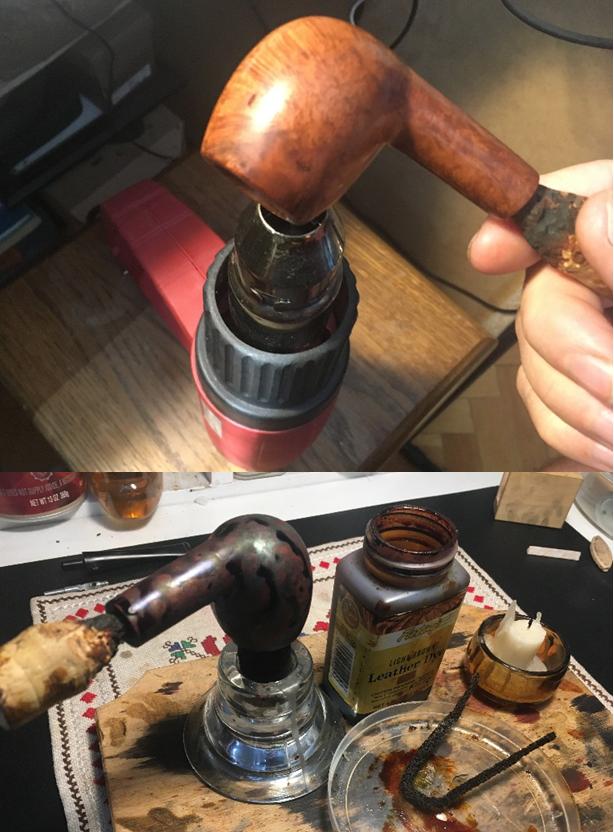
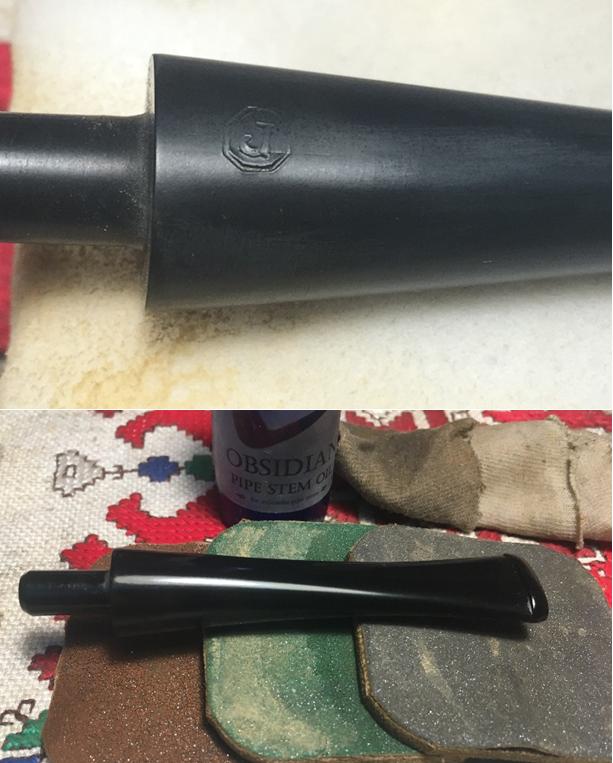
Interesting, but not too helpful regarding the heritage of this French made pipe.  Generally, the pipe is in great condition.  The chamber has moderate cake.  The rim has trace amounts of lava and grime – not too much to clean.  The stummel has nice grain, but many very small fills to be examined. Not much in the way of oxidation or tooth chatter on the stem.  Of interest to me is the long stinger system which reaches all the way to the draft hole – visible looking down the chamber.  I will keep the stinger since it’s such a goliath.  Perhaps it does help deliver the dryer, cooler smoke which has been the holy grail in pipe technological innovations.  The cleanup and recommissioning of this Jeantet begins with placing the stem in the OxiClean bath after covering the ‘J’ stamp with petroleum jelly to protect it.  Even though it has little oxidation, I’ll let it soak.  I also easily remove the stinger as I discover that it is threaded and unscrews with a little help.  The nickel divider band also comes off. I use the Pipnet Reaming Kit to address the moderate cake.  Starting with the smallest blade, I remove the cake, bringing the fire chamber to fresh briar.  I use two of the four blades available.  To fine tune the reaming, I switch to the Savinelli Pipe Knife and scrape the chamber wall further.  Then, wrapping a piece of 240 grit paper around a Sharpie Pen, I sand the bowl removing the vestiges of carbon.  Finally, I wipe the chamber with a cotton pad wetted with alcohol.  The chamber looks good – no problems that I see. Next, using undiluted Murphy’s Oil Soap and a cotton pad, I scrub the external briar surface and rim.  I also use my pin knife to scrape the crusting on the rim.  I do this by dragging the blade over the surface rather than pushing the blade to not cut into the briar.  Afterwards, I rinse the stummel in tap water.  Examining the stummel more closely, the cleaning reveals a gouge on the internal rim lip.  I also picture several of the small fills in the surface.  I use a sharp dental probe to test the strength of the fills to see if they need replacing.  What I discover is mixed news – some need more attention than others.  I dig out the weaker fills and will need to refill them.  I will simply use clear CA glue to fill them, but first I will darken the pits with a dye pen to improve blending.  I use Special ‘T’ CA glue and spot drop on each pitted fill using a toothpick.  I place a bit of glue on the toothpick and gravity pulls it to the tip and I apply it to the pit.  I spray them with an accelerator to quicken the curing time.  In all, 6 fills were patched.  The pictures show the progress. Using a flat needle file, I bring each of the CA glue patches down near to the briar surface.  Then I use 240 grit sanding paper to bring the patch flush with the briar surface.  I try as much as possible with both the file and sand paper to file/sand only on the patch footprint.  The second picture below shows a ‘slip’ off the footprint by the lower patch – ugh.  The pictures show the progress. Turning now to the rim gouge mentioned earlier.  There was already an internal bevel on the rim.  To erase the damage, using 240 grit paper then 600 grit paper, I recut the bevel.  That does the job. With the stummel repairs completed, I take a medium grade sanding sponge and apply it to the surface to remove surface nicks and to start blending the fill patches.  I follow with a light grade sponge.Before I proceed further on the external surface, I need to address the internal unpleasantness.  I’m curious what collects in the mortise with the tenon extending right to the draft hole?  Unless, its design is to bypass all the sludge.  Well, it didn’t take long to discern the latter to be the case!  With cotton swabs, alcohol and a bit of scraping the edge with a needle file the mortise started cleaning up.  Later, I will still utilize a Salt/Alcohol soak to clean and freshen further for the new steward of this classic Billiard.The stem has been soaking in the OxiClean bath and I take it out to start removing the light oxidation on the vulcanite.  After reattaching the stem with the stummel, divided by my separation disk, I wet sand using 600 grit paper followed by 0000 grade steel wool.  I’m not sure how I did it but it looks like I nicked the Jeantet ‘J’ circle during the sanding – that is a grand bummer.  I’ll try to fix it later.  The tooth chatter was removed by the 600 grit and steel wool.  The pictures tell the story. Before moving further on the external sanding, I need to clean the internals.  Using bristled and smooth pipe cleaners and isopropyl 95%, I do the job – the internals take more effort than I was expecting.  I also use a long, wired, bristled brush to work on the stinger.  In the end, I soak it in alcohol to make sure it’s clean. Turning back to the stummel, I plunge into the micromesh sanding by wet sanding with pads 1500 to 2400, then dry sanding with 3200 to 4000, finishing with 6000 to 12000.  With the completion of the micromesh process on the stummel, my work-day here in Bulgaria will soon demand my full attention.  Before heading out the door, I want to give the bowl a Salt/Alcohol soak through the day.  I pour kosher salt, leaving no aftertaste, into the bowl until almost full.  Then I twist and stretch a cotton ball to act as a wick in the mortise – drawing out the remaining tars and oils.  I palm the top of the bowl and shake it causing the salt to settle into the internals and set the stummel in the egg carton.  Then, with a large eye dropper I fill the bowl with isopropyl 95% until it surfaces over the kosher salt.  I wait a few minutes as alcohol is absorbed, and then I top the bowl off again.  I set the egg carton aside and let the alcohol and salt do their thing – off to work!  Back from work!  The salt has darkened a bit, but not much.  This means that the job of cleaning was well along the way. After cleaning away the expended salt with paper towel and a bristled bush in the mortise, I put a cotton swab into the mortise to make sure and it came out clean.  Clean as a whistle – nice! After the salt/alcohol soak, I see a fill on the inner rim lip that I did not see earlier.  After digging it a bit with a dental probe, I drop fill it with ‘T’ CA glue, let it cure, file it down with a half-circle needle file, sand it with 240, 600 and then the full spectrum of micromesh pads – all these focused on bringing this patch up to the speed with the rest of the stummel! The Jeantet D’Orsay Billiard’s stinger was soaking in alcohol.  I take it out and the alcohol had cleaned it up.  I buff it with 0000 grade steel wool.  While I was at it with the steel wool, I also buffed up the nickel band divider to clean and shine it.I love the classic leather brown look on work-horse Billiards.  To blend the fills overall, I use Fiebing’s Light Brown Leather Dye to do the job.  I set up my staining workstation and take a picture of it.  I wipe the stummel down with a cotton pad wetted with alcohol to clean dust off the surface.  I use a whittled cork in the stummel as a handle and I warm the stummel using a hot air gun to expand the grain helping it to be more receptive to the dye.  When warm, I use a folded-over pipe cleaner to apply liberally the dye to the stummel – I want full coverage.  Then, with a lit candle, I fire the stummel – burning off the alcohol in the dye which sets the pigment in the grain.  I repeat this process after a few minutes, then I put the fired stummel aside to rest for several hours. With the dyed stummel resting, I turn to the stem.  Earlier, I was using MagicEraser on the Jeantet’s ‘J’ stem stamp and I noted then that the paint was readily coming off because of it.  I decide to go ahead and remove the paint and clean the stamp with the MagicEraser with the view to refreshing the ‘J’ stamp later.  I then wet sand the stem – mindful of the ‘J’ stem stamp, with micromesh pads 1500 to 2400.  Then I follow successively with pads 3200 to 4000 and 6000 to 12000, and applying Obsidian Oil after each set to revitalize the vulcanite stem.  I’m hoping that there is enough tread left in the Jeantet ‘J’ stem stamp to hold new paint.  Using white acrylic paint, I dab paint onto the area of the stamp.  Instead of waiting for it to dry, I gently wipe the excess off while wet.  Then I dab a little more wet where it is thin, and gently wipe off the excess. After some time has elapsed, it’s time to ‘unwrap’ the fired, dyed stummel.  After mounting the felt buffing wheel on the Dremel, setting the speed to slow – 20%, I buff off the crust by applying Tripoli compound.  The second picture below shows the contrast and progress. After the application of the more abrasive, Tripoli compound is completed (1st picture), I wipe down the stummel using a cotton pad and isopropyl 95% to both lighten the stain and blend it.  The alcohol wipe leaves a cloudy film on the stummel.  I remove this by going to the next compound, Blue Diamond.  I mount a cotton cloth buffing wheel on the Dremel and increase the speed to 40% and buff the briar surface.  During this buffing, the grain starts to come out more distinctly and I like the deep rivers of grain that divide the stummel like a watermelon rind. I use a little CA glue and reattach the nickel band divider to the shank.  I then use the Blue Diamond compound on the stem and band as well.  The pictures show the progress. After completing the Blue Diamond buffing, I hand buff the stummel and stem with a felt cloth to remove the compound dust before waxing.  I mount a cotton cloth buffing wheel on the Dremel, also at 40% speed, and apply a few coats of carnauba wax to both the bowl and stem.  Completing the restoration, I give the pipe a rigorous hand buffing with a microfiber cloth to heighten the shine and distinctiveness of the briar grain.

When I started this restoration, I saw a classic straight Billiard that had potential.  The Jeantet D’Orsay that Gary found for me in the antique store in Burgas, on the Black Sea, has proven to be a very attractive pipe with the light brown leather-look finish.  The grain pops.  I like the band divider – it’s not a precious metal but it provides a nice accent.  This Jeantet D’Orsay is ready for a new steward!  If you are interested in adding this pipe to your collection you can check it out in The Pipe Steward ‘Store Front’.  All the pipes I restore benefit the Daughters of Bulgaria – women and girls we work with here in Bulgaria who have been trafficked and sexually exploited.  Thanks for joining me!

Salvaging a Kaywoodie All Briar Rhodesian 50B with a Serious Issue


Blog by Steve Laug

I have reworked a lot of stems over the years – from cutting them back in my early days and reshaping a button on the gnawed and damaged end to rebuilding a chewed button with charcoal and super glue. I have fit stem blanks on shanks to replace damaged and what were at that time in my assessment, irreparable stems. Today I am more conservative and lean towards rebuilding the stem as best as I can. That being said there are even challenges to that work. The pipe on my worktable now is a challenge to my current bent. It is an All Briar Rhodesian. I have only refurbished one other All Briar pipe in the past – a beautiful LHS Purex Bullmoose. It was in excellent condition other than being dirty and worn. I had heard nightmare tales of gnawed and chewed all briar stems and what a pain they are to work on. However, until this pipe came to my attention in a recent pipe hunt with Jeff I had never seen such a badly gnawed briar stem up close. Jeff took photos of the pipe’s condition before he cleaned it up. I have included those photos in the first part of this blog.I have read a lot of information in the past on other Kaywoodie pipes I have worked on and spent time on the Kaywoodie Collectors Forum to help educated myself on the various lines and historical periods of Kaywoodie production. On Pipedia.org there is a helpful summary of the history of the brand that has been condensed in one place. It is called the Collectors Guide to Kaywoodie Pipes (https://pipedia.org/wiki/Collector%27s_Guide_to_Kaywoodie_Pipes). I found the All Briar line of pipes included in the section of the Guide for 1955. I quote here the pertinent sections with the references to the All Briar pipe underlined and highlighted in bold.

The line-up of pipes in the 1955 catalog (Table 3 below) was more extensive than in previous years. The catalog presented an expanded line of meerschaum pipes and introduced a 4-pipe set of Matched Grain Pipes, as well as several pipes with “special features”. The number of shapes available… was not substantially different from the number offered in the 1947 catalog…

The Twin-Bowl Kaywoodies were available in an all-meerschaum model (two removable inner bowls of meerschaum) and a meerschaum and Flame Grain model (outer bowl of flame grain briar and removable inner bowl of meerschaum). Other meerschaum pipes presented in the 1955 catalog included the Gourd Calabash; the Coral (“dimpled”) Meerschaum; the All Briar (briar bit) and Flame Grain pipes with inlaid meerschaum bowls; and the “Doctor’s” pipe…Included in the guide was a helpful list of pipe grades and prices. I have included the list below and noted the pipe I am working on by highlighting it in bold print and underlining the reference. It is in this list that I found confirmation that Kaywoodie made an All Briar with a meerschaum bowl insert and an All Briar without the meerschaum insert. The All Briar I am working on is not meerschaum lined. It is fascinating for me to see that the addition of a meerschaum bowl was only $2.50 in 1955.

Table 3. 1955 Kaywoodie Pipe Grades and Prices

    Meerschaum Character Pipes: $100.00

    Block: 15.00-50 (According to size)

    Meerschaum Twin Bowl: $35.00

    Meerschaum/Flame Grain Twin Bowl: $25.00

    Sandblasted “Doctor’s” Pipe: $25.00

    Centennial: $25.00

    Coral Meerschaum: $20.00-25 (According to size)

    Gourd Calabash: $15.00-25 (According to size)

    Ninety-Fiver: $20.00

    Oversize: $10.00-25(According to style and finish)

    Connoisseur: $15.00

    All Briar w/Meerschaum Inlaid Bowl: $12.50

    Flame Grain (Meerschaum Inlaid) $12.50

    Export Pipes: $5.00-15 (According to grade)

    All Briar (Briar Bit): $10.00

    Flame Grain: $10.00

    Fit Rite: $10.00

    Silhouette: $10.00

    Carburetor: $7.50

    Relief Grain: $7.50

    Chesterfield: $5.00-15 (According to grade)

    Chinrester: $5.00-10 (According to grade)

    Stembiter: $5.00-10 (According to grade)

    Streamliner: $4.00-10 (According to grade)

    Super Grain: $5.00

    Carved Super Grain: $5.00

    White Briar: $5.00

    Standard: $4.00

    Filter Plus: $4.00

    Drinkless pup: $3.50

    Drinkless Tuckaway: $3.50

    Drinkless In-Between: $3.50

    Two-Pipe Companion Setsb: $10.00-25 (According to grade)

    Matched Grain Set (4-Pipes): $50.00

    Matched Grain Set (7-Pipes): $125.00

Further reading on Pipedia under the general listing for Kaywoodie Pipes provided me with a magazine advertisement that included the All Briar pipes. It is a great Father’s Day Ad and the bottom items in the ad show the All Briar line. I have included both the link and a copy of the ad for your reading pleasure (https://pipedia.org/wiki/Kaywoodie).Jeff sent me some close up photos of the pipe so I could see what it looked like when he started his clean up. The bowl had a thick cake that had overflowed onto the rim top with a thick coat of lava. The two photos below give two different views to show the condition of the both. You can see the flaking lava on the rim and the hard cake in the bowl. This pipe had been smoked hard and was obviously someone’s favourite.The finish on the bowl and shank was worn. There was a thick varnish coat that was peeling on the bowl sides and bottom that would take some work to remove.The stamping on both sides of the shake is faint but readable in the next photos. The pipe is stamped ALL BRIAR over Kaywoodie on the left side of the shank. On the right side it is stamped All Imported Briar over 50B (the shape number) and underneath that the letter C.The all briar stem has an inlaid black cloverleaf in a white circle on the left side. It is in decent shape and should polish out nicely.When it comes to the stem it is a serious issue. Making a new vulcanite stem for the pipe would certainly be an option but to me that would cause the pipe to lose its charm and detract from it being an All Briar pipe. I would need to do something different to bring it back to life or salvage it. It appeared to me that I had only one serious option on this pipe but I would make the final decision once it arrived.The stem had a screw in/threaded tenon with a four hole stinger. The stinger was stamped Drinkless as shown in the photo below. On Pipedia in the Kaywoodie article, there was a great advertisement for the Drinkless style of stinger so I have included that here as well. I decided to look on my other go to site – PipePhil (http://www.pipephil.eu/logos/en/logo-kaywoodie-1.html) to see what added information I might garner from his site. Under the Kaywoodie All Briar listing it said that the pipe had a twin-bore stem, meaning that instead of a slot in the button there were twin holes that formed a Y with the airway in the stem itself. The pipes were made between 1952 – 1955. It included a series of pictures of a typical briar Kaywoodie stem that showed a vertical hole near the button that was an innovation that they called Stembiter to prevent a stem biter from gnawing through the stem. Evidently, the pipe I am working on had that kind of set up on the mouthpiece as nothing is left of that portion of the stem. The Stembiter innovation came out in the early 1950s as well so now I had confirmation of the period when the pipe was made. I have included an advertisement for the Stembiter innovation following the photo below. I know that at present I will not be able to reproduce this feature on the stem when I rework it. Jeff continued using his established process of thoroughly cleaning the pipes he sends to me. He did not vary in his procedure just because of the briar stem on this one. He reamed the bowl with a PipNet reamer and touched it up with a Savinelli Fitsall Pipe Knife. He scrubbed out the mortise and the airway in the shank and the stem with pipe cleaners, cotton swabs and alcohol and cleaned the exterior of the threaded tenon and four hole stinger with cotton swabs and alcohol. He scrubbed the exterior of the pipe with Murphy’s Oil Soap to remove the grime and grit on the bowl. Sadly it did not even touch the thick varnish coat on the bowl. He worked over the rim and removed the heavy lava overflow. He scrubbed it with a tooth brush and the oil soap until he removed the buildup. His cleaning of the top cut through the varnish coat on that part of the bowl. He cleaned up the gnawed end of the stem so that at least it would be clean when I began my work on it. I took photos of the pipe to show the condition it was in when it arrived in Vancouver. Jeff cleaned up the rim really well – the tars and buildup were gone and fortunately so was much of the varnish coat. There were just a few shiny spots on the rim that would need to go. The bowl had been reamed back to bare briar.The stem while clean was an absolute disaster. It had been gnawed back through the stembite protection and the entire end of the stem was missing. I am guess that there was probably about 3/8 to ½ inch of the stem missing and the button was totally missing.I started the restructuring work on the stem with a Dremel and a sanding drum. I took the damaged areas back until I had some solid briar to work with. I did not want to remove too much of the stem material. The twin airways in the stem were very close to the surface in the stem at this point so I would need to do something a little different from the standard recutting a new button on the existing material.I started the rebuilding the end of the stem with clear super glue. I wanted to fill in the small divots in the surface of the stem on both sides and make the stem smooth and the end crisp. I built up the area where the new button would be with clear super glue first to stabilize the gnawed stem and begin with a solid edge. I put briar dust on top of the super glue and layered the dust and the glue until I had a workable portion on the stem surface. I needed enough of the new material to be able to reshape a button. In the second set of photos you can see the button area beginning to take shape. I used a needle file to recut the edge of the button and square it off with the surface of the stem. I wanted a sharp delineation from the button surface to the stem surface. I also reshaped the button surface as well with the files. The new button is beginning to be visible at this point.I filled in the air bubbles on top and underside surface of the button with clear super glue to make it smooth. I sanded the areas in front of the button on both sides of the stem with 220 grit super glue to blend it into the rest of the stem surface.I used a needle file to open the twin bore airways and smooth them out. I began to polish the stem and button with micromesh sanding pads – wet sanding the button and stem area with 1500-2400 grit sanding pads. I wiped the stem down with a damp cotton pad to see what the progress looked like. I dry sanded with 3200-4000 grit pads and then stained the stem with a Medium Brown Stain pen. I finished polishing the stem with 6000-12000 grit pads and wiped it down after each grit pad to keep the work surface clean. While the button is definitely darker than the stem body at this point it is still looking pretty good in my opinion and it feels good in the mouth. I sanded the bowl with 220 grit sandpaper to remove the varnish finish. It was spotty and peeling in places so it had to go. Once I had the finish removed I wiped the bowl down with acetone to remove any of the finish that remained. Then I used the same regimen to polish the bowl as I had used on the briar stem. I wet sanded it with 1500-2400 grit micromesh sanding pads and wiped it down with a damp cloth. I dry sanded it with 3200-12000 grit micromesh and wiped it down after each pad. Each grit pad brought more of the grain to light. There is a great mix of birdseye and cross grain on the bowl and shank. It is a beauty. I decided to not stain the bowl. The medium brown I put on the stem made the stem and bowl match so I was pleased with that. I put the stem in place on the bowl and buffed it with Blue Diamond to polish out any remaining scratches from my sanding and polishing. I gave the bowl and stem multiple coats of carnauba wax to protect it from damage and to preserve the briar. I buffed it with a clean buffing pad to polish the briar. I hand buffed it with a microfiber cloth to deepen the shine. The finished pipe is shown in the photos below. The repair and rebuilt button, though darker than the briar, works well and the pipe is fully functional again. The small amount of length I had to remove does not visibly change the overall look of the pipe. Thanks for walking with me through this restoration. It was one with challenges but it was a fun one to work on.


Restoring a Long Stem Mini Churchwarden Imperial 15 Prince


Blog by Steve Laug

The next pipe on the worktable is a mini churchwarden prince shaped pipe. It has a delicate look to it and is very lightweight. It is petite with a length of 6 ¾ inches, height of 1 1/8 inches, bowl diameter of 1 ½ inches and a chamber diameter of 7/8 inches. The pipe is stamped on the left side of the shank Imperial in script with a flourish underneath. Below the flourish it reads De Luxe. On the right side of the shank it is stamped Made in London over England with a shape number 15. The next photos of the pipe show what it looked like before my brother did his clean up work.The pipe was in rough shape. The finish was worn and crumbling. There were some small sandpits on the bottom left and right sides. The underside of the bowl had a spot of glue and the remnants of something that the pipe had been glued to. I wonder if it had not been in a display box of some sort before being liberated and sold. The bowl had a thick cake but the rim had an overflow of lava on the top and the inner edge was damaged to the point that the bowl was no longer in round. There was an inner tube extending into the bottom of the bowl. The original slant on the tube was ruined and the end of the tube was chewed and damaged. The stem was oxidized and there were deep tooth marks on the top and underside near the button. The underside tooth marks had a small hole that broke through into the airway in the stem. Jeff took some photos of the bowl and rim to show the condition of both. You can see the cake in the bowl and the lava overflow down the sides of the bowl from the surface of the rim. The fact that the bowl did not have a flat rip to but a rather rounded/thin rim top allowed the flow downward on the bowl.The next photo shows the bottom of the stummel and the thick glue/paper coat that is stuck to that part of the bowl. It appears to me that someone had the pipe stuck to some fibre board in a display case of pipe shapes. Possibly, it was a shadow box of “dad’s” or “grandpa’s” and this one was a centerpiece. Following that photo are three different pictures of the inner tube that sat in the bottom of the bowl. The end on these is usually slanted with the longer edge sitting on the bottom of the bowl and the shorter edge ending at the entrance of the airway into the bowl.The bowl has some amazing grain running up the sides of the bowl and I am sure that underneath the debris that is glued to the bottom there will be some nice bird’s eye grain. The finish was worn but the grain popping through the grime.The stamping was readable but it was faint. Care would need to be taken in the clean up so as not to damage it further.The stem had some issues – there were deep tooth marks on both sides from the button forward. On the topside there were nicks mid stem and near the shank/stem junction. The button also seemed worn and there was a possible crack on the underside mid button.I have read different bits of history on the Imperial pipes and trying to put them together is an interesting puzzle. From Pipes, Artisans and Trademarks, by Jose Manuel Lopés’ I found that t he Imperial Tobacco Co. (Imperial Tobacco Ltd.) was founded in 1901 through the merger of several British tobacco companies. In 1902 it went into partnership with the American Tobacco Company to found the British American Tobacco Company. This information was also cited on https://pipedia.org/wiki/Imperial_Tobacco_Co.

I looked further on Pipedia under The Civic Company https://pipedia.org/wiki/Civic. This lead came from a price list/catalogue that I had found in researching information on an earlier Imperial pipe I was working on. Here is the link https://rebornpipes.com/2014/05/11/civic-company-1921-trade-list/. The Pipedia article says Civic was formed in 1921out of the Imperial Tobacco Co. (Fancy Goods Department) Ltd which was located in Fulham Palace Road Hammersmith. The article went on to give a bit more information on the The Imperial Company itself. It repeat that it was formed in 1901 but that it was formed in response to an aggressive take over raid in Britain by American Tobacco and involved the pooling of tobacco retail outlets including closely related items such as briar pipes. Here is the additional information that was not included in Lopés’ – in 1902 Imperial purchased the Salmon & Gluckstein retail empire, which included a section that finished briar pipes, originally made in France, for sale in Britain. It was this unit that became the fancy goods department within Imperial and, ultimately in 1921, the Civic Company. In 1928 Civic was a key element in the merger with other producers and retailers that formed Cadogan Investments, which still trades today.

I did some further searching on Google to try to pin down more information on the brand. I found lots of repetitive information in bits and pieces but nothing that added to what I already knew. I did find confirmation of the above information in a discussion on the pipesmagazine online pipe forum. It contained no new information but it gave the same data I had quoted above.  http://pipesmagazine.com/forums/topic/need-help-to-identify-this-pipe-1.

Jeff has established his own process of thoroughly cleaning pipes for me and he did not vary in his procedure here. He reamed the bowl with a PipNet reamer and tidied it up with a Savinelli Fitsall Pipe Knife. He scrubbed out the mortise and the airway in the shank and the stem with pipe cleaners, cotton swabs and alcohol and cleaned the exterior of the threaded bone tenon with a cotton swab and alcohol. He scrubbed the exterior of the pipe with Murphy’s Oil Soap to remove the grime and grit on the bowl. The top took some special work because of the heavy lava overflow. He scrubbed it with a tooth brush and the oil soap until he removed the majority of the build up. There was still some minor buildup that would need to be dealt with when I worked on the out of round bowl. I took photos of the pipe to show the condition it was in when it arrived in Vancouver. The grain really was quite stunning. I took a close up photo of the rim top and bowl, to show how well he was able to remove the buildup around those areas and down the bowl sides.He had soaked the stem in OxyClean so when it arrived it was clean and the oxidation sat on the surface of the stem. The tooth marks were very evident.The damage to the inner tube was visible and it was ragged and torn. I would need to rework it to smooth things out and restore the angle.I used a Dremel and sanding drum on low speed to sand and shape the angled end of the inner tube and remove the damaged areas. I put a slot on the tube end to match other inner tubes I have on hand and fit the bottom of the bowl once the stem was in place.The next series of photos show the process of repairing the out of round bowl. I used a folded piece of 180 and 220 grit sandpaper to smooth out the inner edges of the bowl and repair the top edge. Once I sanded it smooth I wiped it down with a cotton pad and alcohol to clean off the sanding debris and darkening on the surface. There was still polishing to do but the major portion of the repair was finished. I repaired the two small sandpits on the bottom sides of the bowl with super glue and sanded them smooth with 220 grit sandpaper once the repairs had cured.With all the repairs and reshaping on the rim and bowl finished it was time to stain the pipe. I decided to use a dark brown aniline stain that I mixed 50/50 with isopropyl alcohol to make it more transparent. It will still have the dark stain in the grains but once I wipe it down and sand it with micromesh it will be a rich brown tranparent overcoat with dark highlights. I applied the stain with a dauber and flamed it with a lighter to set it in the briar. I repeated the process until I was pleased with the coverage on the bowl and shank.Once the stain dried I wiped the pipe down with alcohol on cotton pads to remove the thick topcoat and make the stain more transparent. It significantly lightens the colour at this point but the grain won’t stand out until I polish it with micromesh pads. I polished the briar, being careful around the stamping on the shank, with micromesh sanding pads – wet sanding with 1500-2400 grit pads and dry sanding with 3200-12000 grit pads. I wiped the bowl down after each girt with alcohol and cotton pads. With the bowl finished I directed my attention to the stem. I cleaned out the damaged areas with a dental pick and sandpaper and filled them in with black super glue. The photos below show the repairs on both sides of the stem. The third photo shows the repairs further up the topside of the stem.When the glue had cured I used a file to bring the thickness of the repairs down to the surface of the stem. I used to do all this with sandpaper but figured out that the file actually sped things up a bit. I sanded the stem surface and repairs with 180 grit sandpaper after the file to smooth out the surface and remove more of the oxidation. I would need to sand it with higher grits to remove the scratching but it was at least getting better. I used a needle file to reshape the edge of the button and the top and underside surfaces of the button. I sanded the repairs smooth with 220 grit sandpaper and then polished them with 1500-2400 grit micromesh sanding pads. I took a photo of the stem at that point in the process and the oxidation showed up clearly in the bright light of the flash. I poured the Before & After Stem Deoxidizer into a flat container and put the stem in to soak while I worked on other pipes. I removed it from the soak after about 2 hours and polished it with Before & After Pipe Polish. It looked much better than it did when I put it in the bath. I decided to continue polishing it with micromesh sanding pads. I wet sanded it with 1500-2400 grit pads and rubbed it down with Obsidian Oil. I dry sanded it with 3200-12000 grit pads and rubbed it down again with the oil after each pad. I gave it a final rub down with the oil and set it aside to dry. I polished the bowl and stem on the buffing wheel with Blue Diamond to take out the last minute scratches in the briar and vulcanite. I gave the bowl and stem multiple coats of carnauba wax and buffed it with a clean buffing pad to raise a shine. I hand buffed it with a microfibre cloth to deepen the shine. The finished pipe is shown in the photos below. The pipe looks far better than it did when I started. The bowl looks round, the finish looks far better and the repairs on the stem though visible up close blend in well with the black of the vulcanite stem. The aluminum inner tube is shine and smooth with the reshaped angle of the tube looks like it must have when it left the factory. Thanks for walking with me through this refurbishing it was a fun one to work on. Cheers.
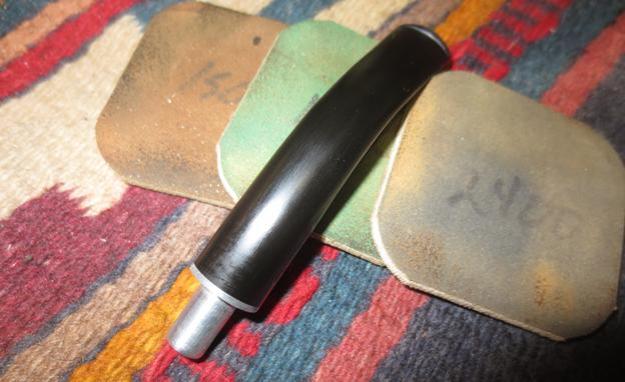


Enlivening a Mysterious Old Knobby, Oval Shank Meer Bowl


Blog by Steve Laug

My brother Jeff, sent this old meerschaum to me from our virtual pipe hunt. It was certainly unique and would be an interesting pipe to fit with a new stem. It was meerschaum with no stamping or markings on the shank to help identify it properly. It had knobs all about the bowl and shank and there was a transition of colour from dark on the shank to lighter at the top of the bowl. The bowl was caked and there was an overflow of the cake to the rim top. It was dirty and worn looking. The threaded metal tenon was anchored tightly in the shank and would take some work to remove and possibly even then it would not come out. Jeff took photos of the bowl before he cleaned it up. The first three photos give an idea of the condition and the charm of the pipe to both of us. When he showed me the pipe in our Montana virtual pipe hunt I wanted to see if I could find a stem that would work with it. There was something about it that made me want to give it a new life. He took some close up photos of the rim top and the bowl that show the cake and the lava build up on the top. The bowl did not have too much cake but enough that it was hard see if the inner edge of the rim was still round and undamaged.Jeff also took photos of the sides of the bowl and the shank end to give an idea of the colouration of the bowl and show that variation of the colours up the shank and the bowl. The silver band was unreadable but it appeared that there were some hallmarks under the tarnish on the surface of the band. I could not wait to see what they told us. It really was a pretty interesting looking old pipe. Jeff cleaned up the pipe with his usual regimen of thoroughness. He reamed out the bowl carefully with a Savinelli Fitsall Pipe Knife and took it back as far as he dared. He scrubbed the exterior of the rim and bowl with Murphy’s Oil Soap and a tooth brush to remove as much of the grime and dirt of age from the surface. He scrubbed out the internals with pipe cleaners and alcohol until they came out clean. He polished the band with soft scrub and a cloth until the hallmarks were visible.
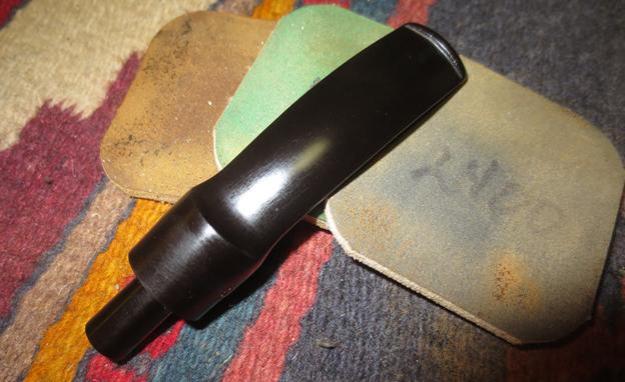
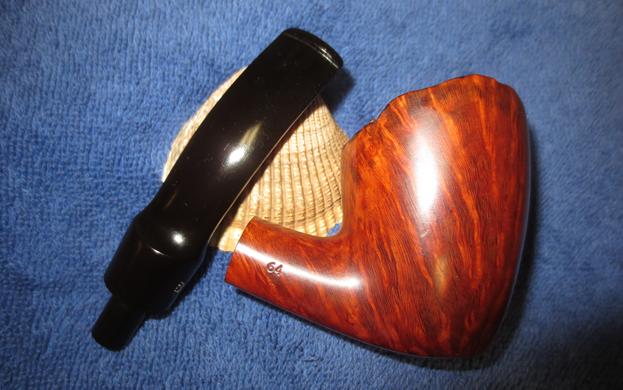
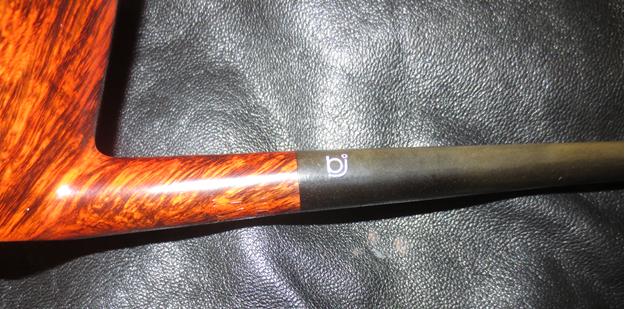
When it arrived I wanted to see if I could find out about the maker of the pipe and try to date it if possible. I had a feeling that the band on the shank may possibly give a clue as to its maker. On the left underside of the silver band it is stamped A.F. &Co. in an oval. Following that maker’s mark it is stamped with hallmarks – an anchor, a rampant lion and a cursive lower case “f”. The anchor hallmark tells me that the band was done in Birmingham, England. The rampant lion is the mark for .925 Sterling Silver. The “f” stamp had great promise in that it might well give me a date for the pipe (or at least the band).

I looked up the date hallmarks for Birmingham and copied the chart in the photo below. There were two likely candidates for a date that had the lower case “f” stamp. The first was 1803 in a shield cartouche and the second was 1905 in a square cartouche with rounded corners (I circled both options in red in the photo below). Under a bright light with a jeweler’s loupe I could see that the cartouche was square with rounded corners. Now I knew that the pipe was banded with a Sterling Silver band in Birmingham, England in 1905.Now I wanted to see what the stamp A.F. & Co. in an oval referred to. I turned to the internet and searched for A.F. &Co. I was led to a Dictionary of Tobacconists, Pipe Makers, Pipe Mounters and Silver Hallmarks (http://www.silvercollection.it/dictionarytobacconistA.html). There I found the stamping that was on the band of my pipe. The difference of course was the BBB Diamond logo on the one below. The A.F. & Co. in the chamfered rectangle was the same. The site identified the maker as Adolph Frankau & Co. LTD – London and Birmingham, England. I have worked on BBB pipes that had the same stamping on the band so I am wondering if there is not some link to BBB even for this old meerschaum. There could very well be a connection. They were known for their gold and silver works and had been founded in 1902.Now I knew not only the date but the company who did the silver work on the bowl. Amazing the information you can find with just a little bit of work. To me it is these kinds of details that give a restoration of an estate pipe depth and add colour to their story. It is these details that drive me forward in my restoration of the pipes I work on.

I took photos of the pipe when it arrived to give an idea of what it looked like before I started working on it further. Notice the small crack in the shank coming from under the band. I would need to repair that so it does not spread further.I had a stem in my can of stems that was Bakelite and had some age on it. It had a regular push tenon but had an orific button on the end. It was in excellent condition and it would work well with this old pipe. I sawed the tenon off with a hacksaw and used the Dremel and sanding drum to smooth out the remnants of the tenon.The airway was too small for the threaded tenon so I would need to drill it out and open it up. Before I did that I used a pair of pliers and carefully removed the tenon from the shank of the meerschaum bowl. I decided to repair the crack on the shank at the same time. I did it quickly and forgot to take photos. I cleaned the area and picked it clean with a dental pick. I used a black Sharpie Pen to colour in the crack so that it would not stick out through the repair. I filled in the crack with clear super glue and smoothed it out with a dental spatula. The clear glue let the colour underneath show through.I measured the diameter of the tenon and used a drill bit the same size to drill out the airway in the stem. I marked the depth of the tenon on the bit and hand turned it onto a stationary cordless drill. I drill the airways by hand with no power so as not to drill to deep or too quickly and damage the stem. I used a tap to thread the newly drilled airway and coated the tenon with amber super glue and twisted it in place in the stem. I checked the alignment to make sure that everything was straight and set the stem aside to let the glue cure.I turned my attention to the rim of the bowl. I used a folded piece of 220 grit sandpaper to smooth out the inner edge of the rim and bring the bowl back into round. I polished the top of the rim with micromesh sanding pads – wet sanding it with 1500-2400 grit pads. I wiped the rim down with a damp cotton pad. I gave the bowl and rim a thick coat of Clapham’s White Beeswax Polish and set the bowl aside until the wax dried. I hand buffed it with a microfiber cloth and took the following photos of the bowl at this point in the process. (Notice in the photo of the bowl rim and the top of the shank how well the repair blended in at the band.) I noticed in the photo of the rim top and bowl that there was still some light cake on the walls of the bowl. I used my Savinelli Fitsall Pipe Knife and cleaned up the remaining cake. The bowl was not smooth inside.With the bowl basically finished at this point I needed to work on the fit of the stem. I have learned in the past that sanding the older Bakelite often removes some of the patina and colour from the material. I decided to do so anyway to get a more flowing fit between the shank and the stem. I used a Dremel and sanding drum to remove the excess material from the top, bottom and sides of the stem and sanded the fresh areas with 220 grit sandpaper to smooth out the scratches. The colour did change slightly – it is funny in that the colour on the stem transitions much like the colour on the bowl. I am hoping that with use and time the sanded areas will darken and match the rest of the stem. I polished the stem with micromesh sanding pads – wet sanding with 1500-2400 grit pads and dry sanding with 3200-12000 grit pads. I rubbed the stem down after each pad with Obsidian Oil. I buffed the stem and bowl with Blue Diamond on the buffing wheel to get some shine in the meerschaum and the Bakelite. I gave the pipe multiple coats of carnauba wax to protect and help with colouration. I buffed the pipe with a clean buffing pad to raise the shine and hand buffed it with a microfiber cloth to deepen the shine. The finished pipe is shown in the photos below. I think it looks pretty good for its age. I am hoping that in my travels I will one day come across an oval amber stem to replace the Bakelite but until then this one will serve its purpose. Thanks for walking with me through the refurbishment of this 1905 pipe. I appreciate your reading my work. Cheers.