Blog by Steve Laug
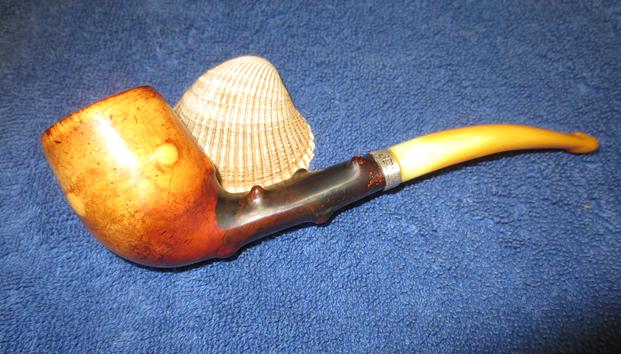
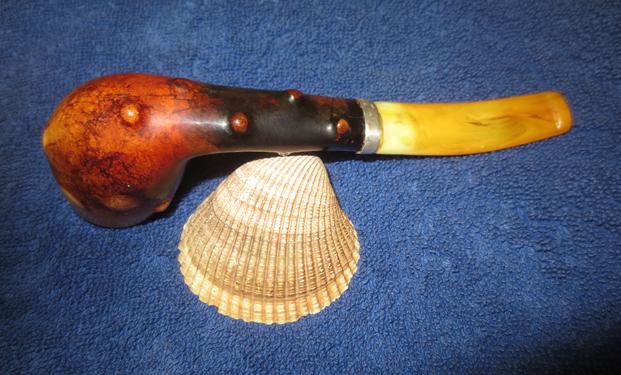
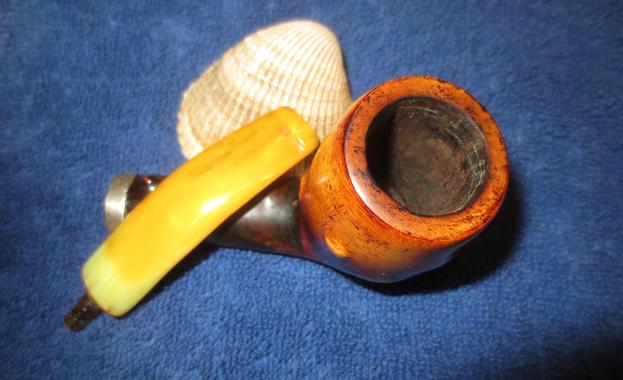
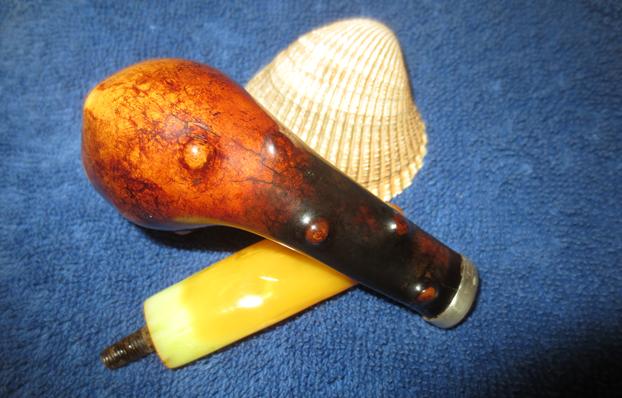
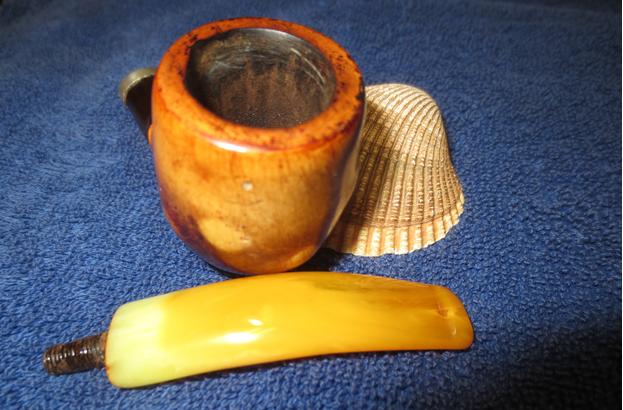
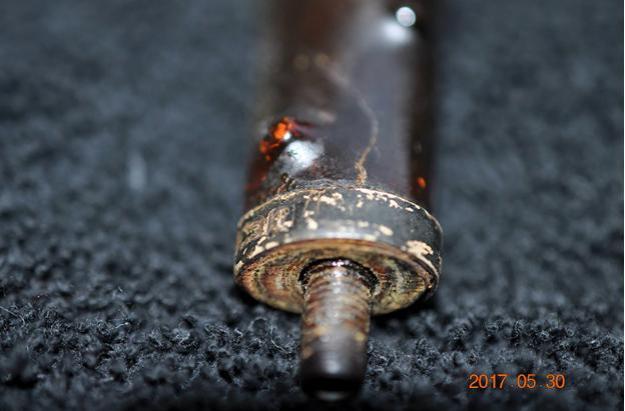
My brother Jeff, sent this old meerschaum to me from our virtual pipe hunt. It was certainly unique and would be an interesting pipe to fit with a new stem. It was meerschaum with no stamping or markings on the shank to help identify it properly. It had knobs all about the bowl and shank and there was a transition of colour from dark on the shank to lighter at the top of the bowl. The bowl was caked and there was an overflow of the cake to the rim top. It was dirty and worn looking. The threaded metal tenon was anchored tightly in the shank and would take some work to remove and possibly even then it would not come out. Jeff took photos of the bowl before he cleaned it up. The first three photos give an idea of the condition and the charm of the pipe to both of us. When he showed me the pipe in our Montana virtual pipe hunt I wanted to see if I could find a stem that would work with it. There was something about it that made me want to give it a new life.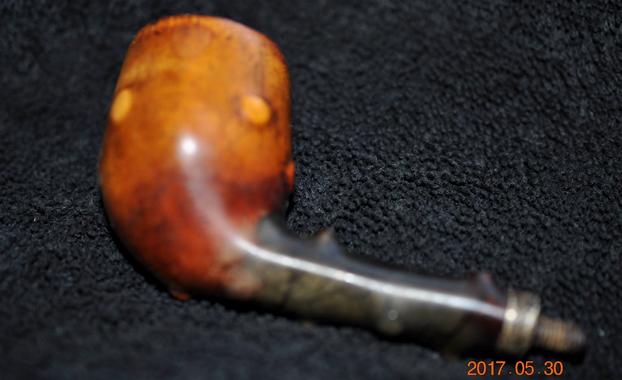
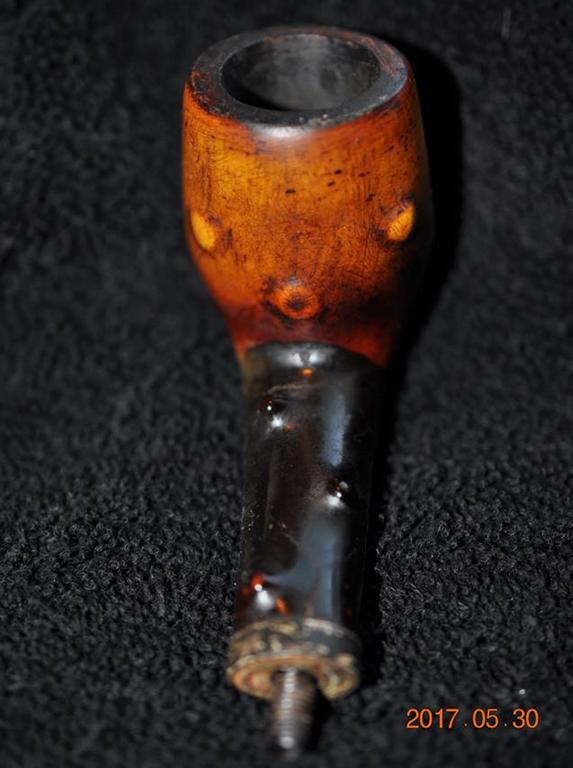
 He took some close up photos of the rim top and the bowl that show the cake and the lava build up on the top. The bowl did not have too much cake but enough that it was hard see if the inner edge of the rim was still round and undamaged.
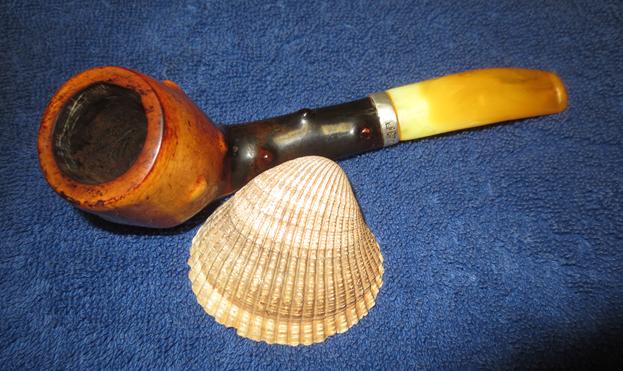
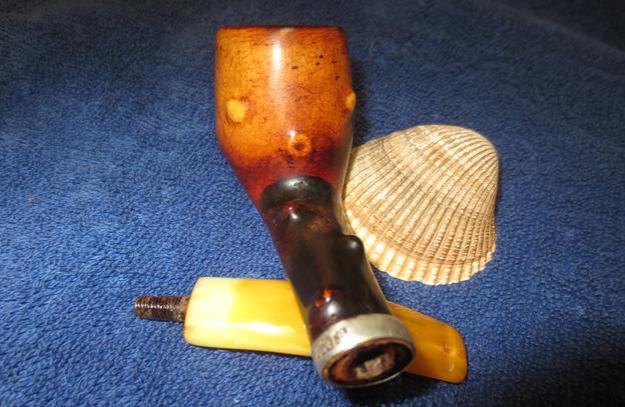
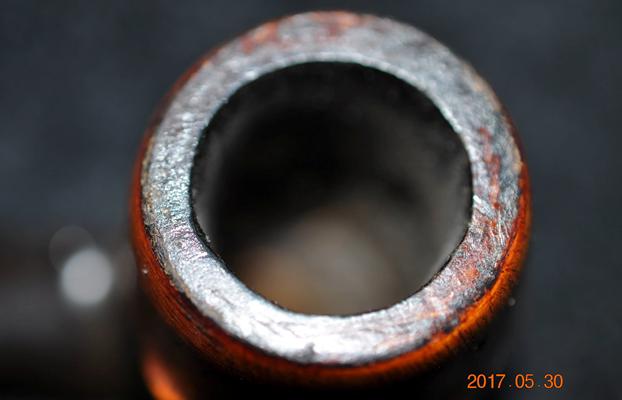 Jeff also took photos of the sides of the bowl and the shank end to give an idea of the colouration of the bowl and show that variation of the colours up the shank and the bowl. The silver band was unreadable but it appeared that there were some hallmarks under the tarnish on the surface of the band. I could not wait to see what they told us. It really was a pretty interesting looking old pipe.
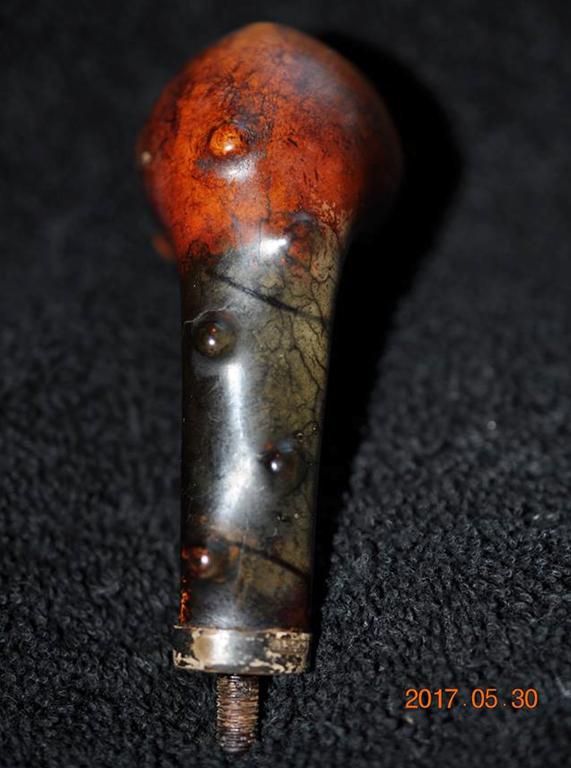
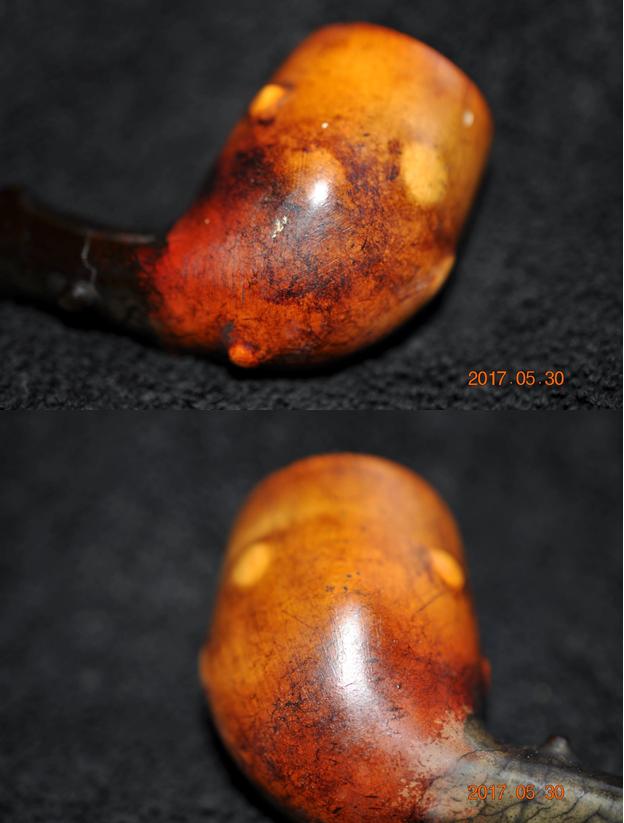
 Jeff cleaned up the pipe with his usual regimen of thoroughness. He reamed out the bowl carefully with a Savinelli Fitsall Pipe Knife and took it back as far as he dared. He scrubbed the exterior of the rim and bowl with Murphy’s Oil Soap and a tooth brush to remove as much of the grime and dirt of age from the surface. He scrubbed out the internals with pipe cleaners and alcohol until they came out clean. He polished the band with soft scrub and a cloth until the hallmarks were visible.
When it arrived I wanted to see if I could find out about the maker of the pipe and try to date it if possible. I had a feeling that the band on the shank may possibly give a clue as to its maker. On the left underside of the silver band it is stamped A.F. &Co. in an oval. Following that maker’s mark it is stamped with hallmarks – an anchor, a rampant lion and a cursive lower case “f”. The anchor hallmark tells me that the band was done in Birmingham, England. The rampant lion is the mark for .925 Sterling Silver. The “f” stamp had great promise in that it might well give me a date for the pipe (or at least the band).
I looked up the date hallmarks for Birmingham and copied the chart in the photo below. There were two likely candidates for a date that had the lower case “f” stamp. The first was 1803 in a shield cartouche and the second was 1905 in a square cartouche with rounded corners (I circled both options in red in the photo below). Under a bright light with a jeweler’s loupe I could see that the cartouche was square with rounded corners. Now I knew that the pipe was banded with a Sterling Silver band in Birmingham, England in 1905.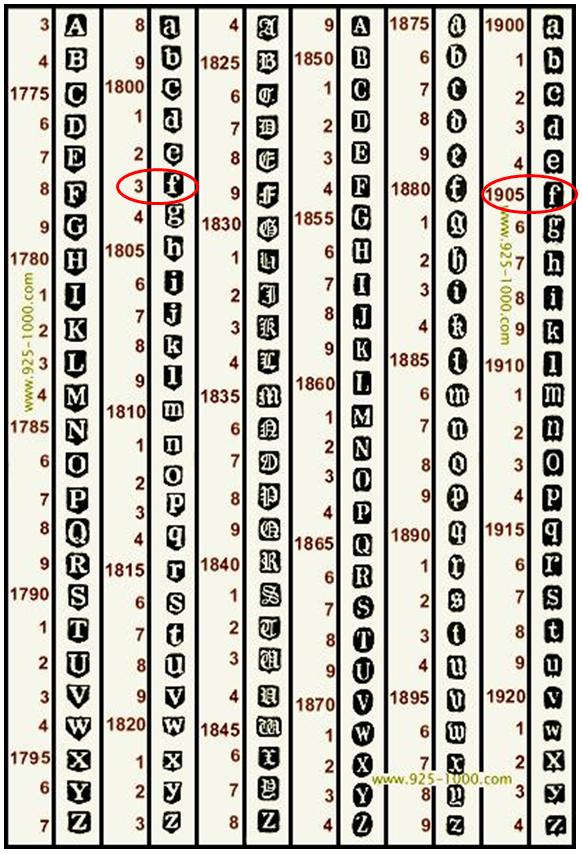 Now I wanted to see what the stamp A.F. & Co. in an oval referred to. I turned to the internet and searched for A.F. &Co. I was led to a Dictionary of Tobacconists, Pipe Makers, Pipe Mounters and Silver Hallmarks (http://www.silvercollection.it/dictionarytobacconistA.html). There I found the stamping that was on the band of my pipe. The difference of course was the BBB Diamond logo on the one below. The A.F. & Co. in the chamfered rectangle was the same. The site identified the maker as Adolph Frankau & Co. LTD – London and Birmingham, England. I have worked on BBB pipes that had the same stamping on the band so I am wondering if there is not some link to BBB even for this old meerschaum. There could very well be a connection. They were known for their gold and silver works and had been founded in 1902.
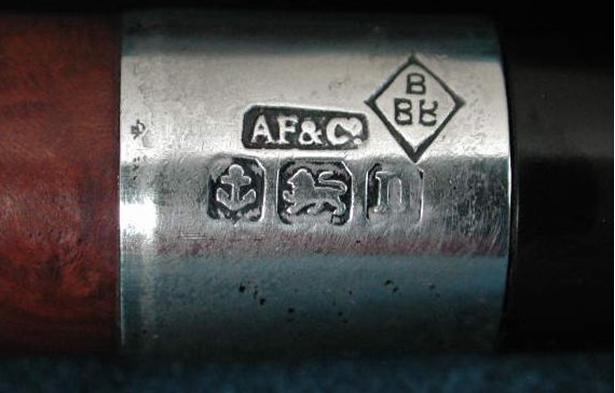 Now I knew not only the date but the company who did the silver work on the bowl. Amazing the information you can find with just a little bit of work. To me it is these kinds of details that give a restoration of an estate pipe depth and add colour to their story. It is these details that drive me forward in my restoration of the pipes I work on.
I took photos of the pipe when it arrived to give an idea of what it looked like before I started working on it further.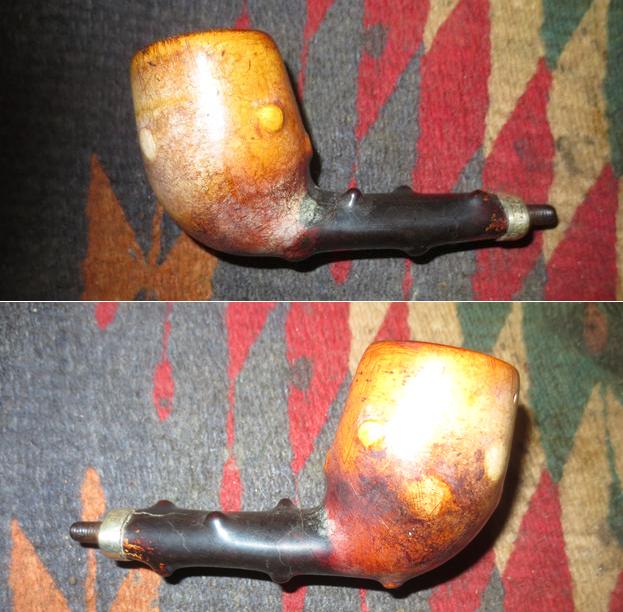
 Notice the small crack in the shank coming from under the band. I would need to repair that so it does not spread further.
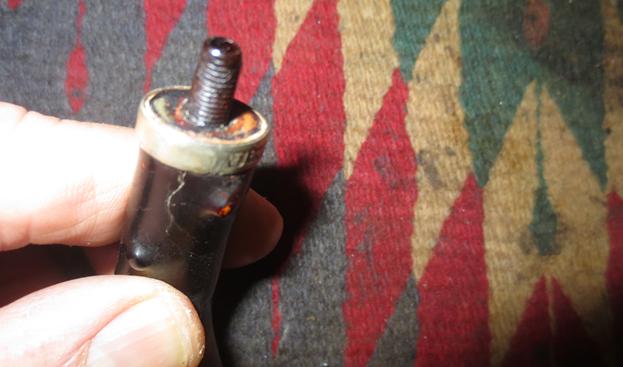 I had a stem in my can of stems that was Bakelite and had some age on it. It had a regular push tenon but had an orific button on the end. It was in excellent condition and it would work well with this old pipe. I sawed the tenon off with a hacksaw and used the Dremel and sanding drum to smooth out the remnants of the tenon.
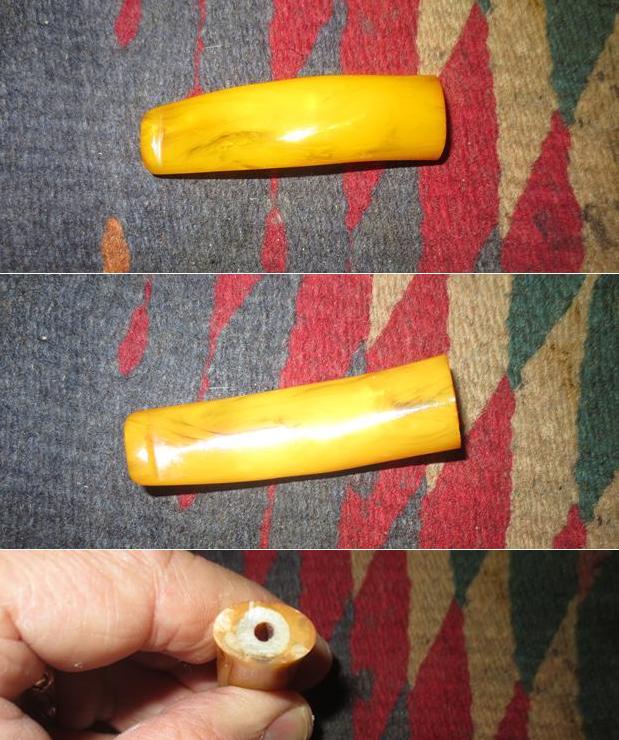 The airway was too small for the threaded tenon so I would need to drill it out and open it up. Before I did that I used a pair of pliers and carefully removed the tenon from the shank of the meerschaum bowl. I decided to repair the crack on the shank at the same time. I did it quickly and forgot to take photos. I cleaned the area and picked it clean with a dental pick. I used a black Sharpie Pen to colour in the crack so that it would not stick out through the repair. I filled in the crack with clear super glue and smoothed it out with a dental spatula. The clear glue let the colour underneath show through.
 I measured the diameter of the tenon and used a drill bit the same size to drill out the airway in the stem. I marked the depth of the tenon on the bit and hand turned it onto a stationary cordless drill. I drill the airways by hand with no power so as not to drill to deep or too quickly and damage the stem. I used a tap to thread the newly drilled airway and coated the tenon with amber super glue and twisted it in place in the stem. I checked the alignment to make sure that everything was straight and set the stem aside to let the glue cure.
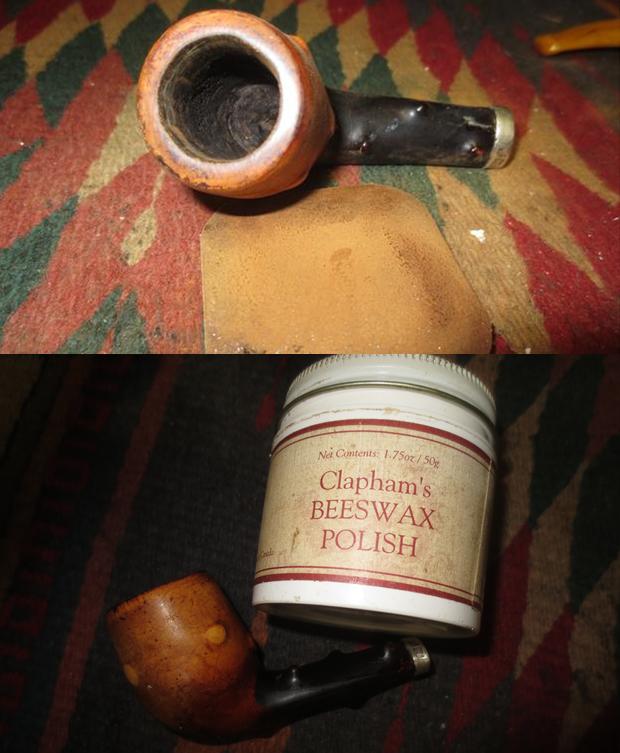
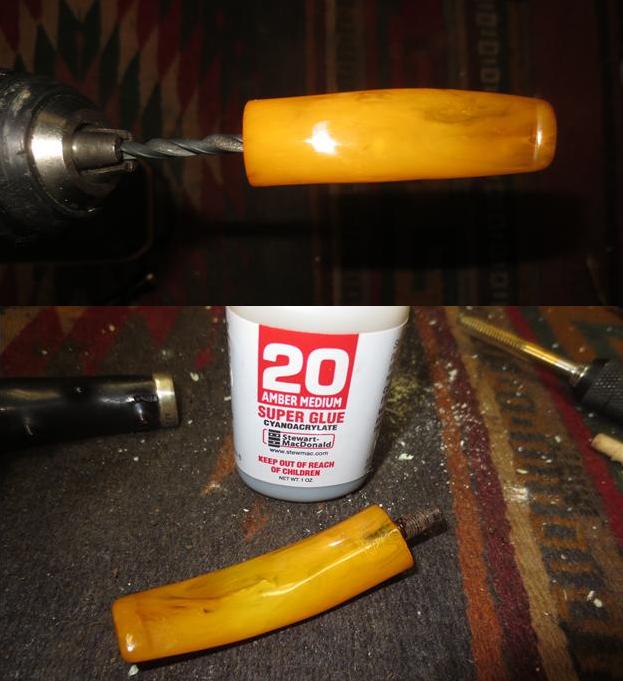 I turned my attention to the rim of the bowl. I used a folded piece of 220 grit sandpaper to smooth out the inner edge of the rim and bring the bowl back into round. I polished the top of the rim with micromesh sanding pads – wet sanding it with 1500-2400 grit pads. I wiped the rim down with a damp cotton pad. I gave the bowl and rim a thick coat of Clapham’s White Beeswax Polish and set the bowl aside until the wax dried.
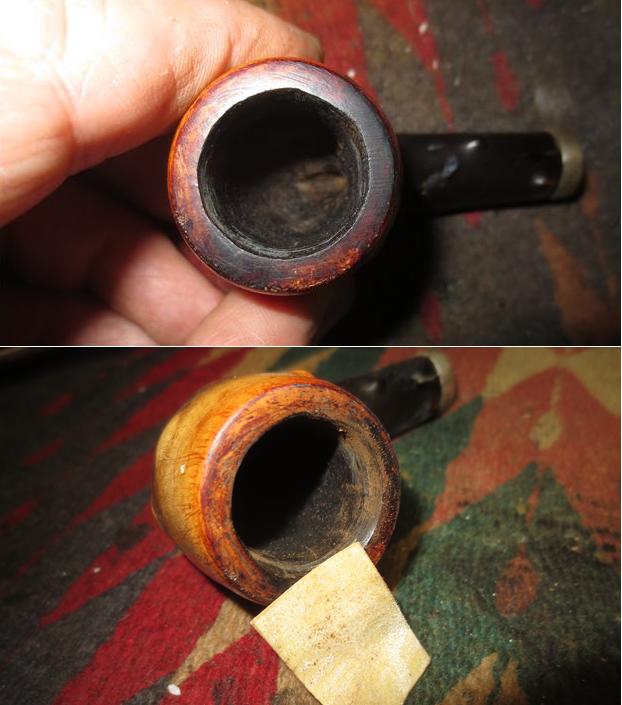
 I hand buffed it with a microfiber cloth and took the following photos of the bowl at this point in the process. (Notice in the photo of the bowl rim and the top of the shank how well the repair blended in at the band.)
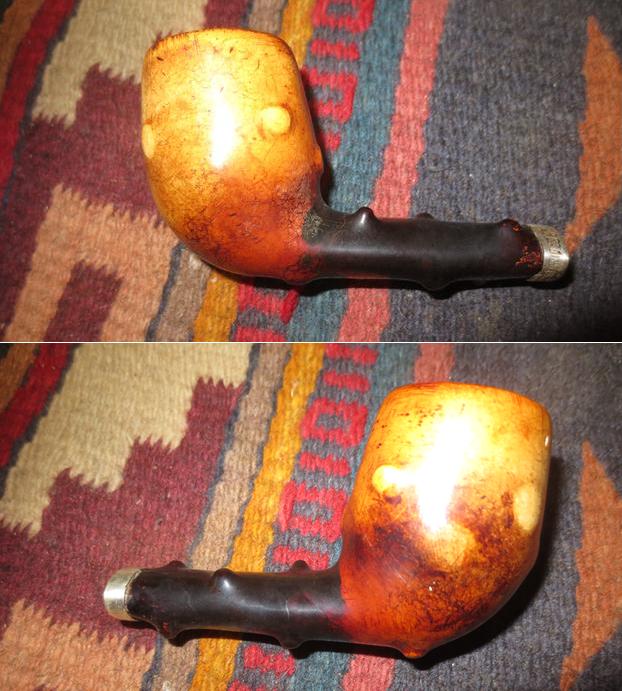
 I noticed in the photo of the rim top and bowl that there was still some light cake on the walls of the bowl. I used my Savinelli Fitsall Pipe Knife and cleaned up the remaining cake. The bowl was not smooth inside.
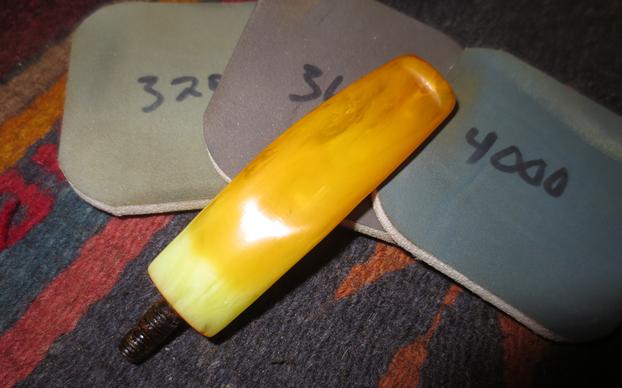
 With the bowl basically finished at this point I needed to work on the fit of the stem. I have learned in the past that sanding the older Bakelite often removes some of the patina and colour from the material. I decided to do so anyway to get a more flowing fit between the shank and the stem. I used a Dremel and sanding drum to remove the excess material from the top, bottom and sides of the stem and sanded the fresh areas with 220 grit sandpaper to smooth out the scratches. The colour did change slightly – it is funny in that the colour on the stem transitions much like the colour on the bowl. I am hoping that with use and time the sanded areas will darken and match the rest of the stem. I polished the stem with micromesh sanding pads – wet sanding with 1500-2400 grit pads and dry sanding with 3200-12000 grit pads. I rubbed the stem down after each pad with Obsidian Oil.
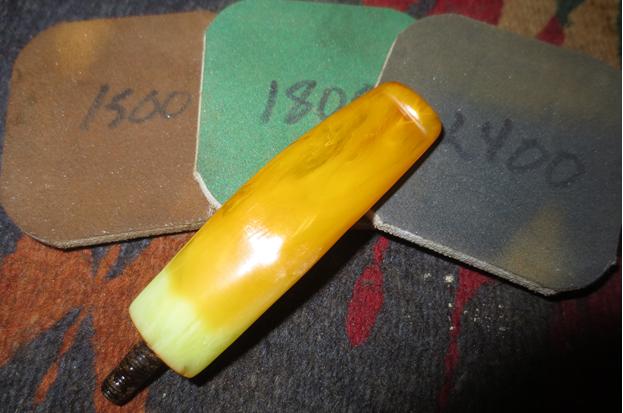
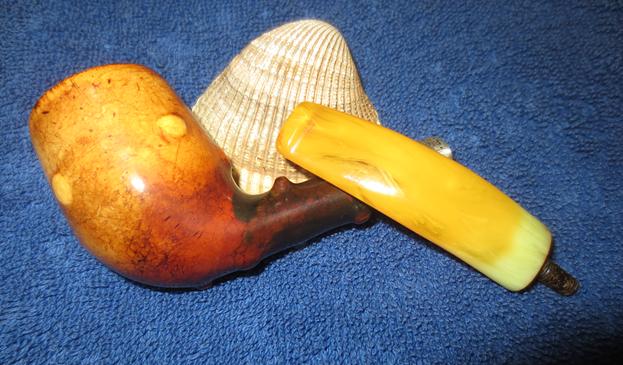
 I buffed the stem and bowl with Blue Diamond on the buffing wheel to get some shine in the meerschaum and the Bakelite. I gave the pipe multiple coats of carnauba wax to protect and help with colouration. I buffed the pipe with a clean buffing pad to raise the shine and hand buffed it with a microfiber cloth to deepen the shine. The finished pipe is shown in the photos below. I think it looks pretty good for its age. I am hoping that in my travels I will one day come across an oval amber stem to replace the Bakelite but until then this one will serve its purpose. Thanks for walking with me through the refurbishment of this 1905 pipe. I appreciate your reading my work. Cheers.