Blog by Steve Laug
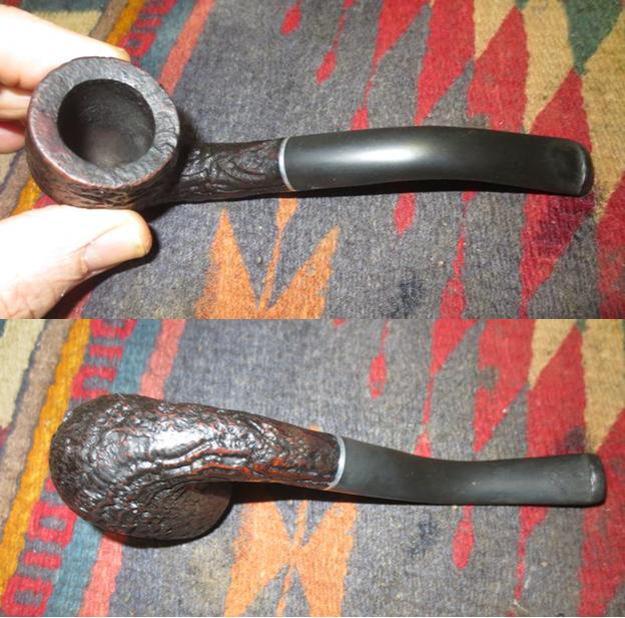
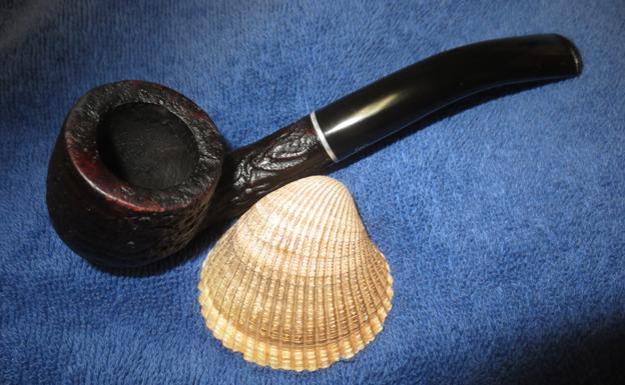
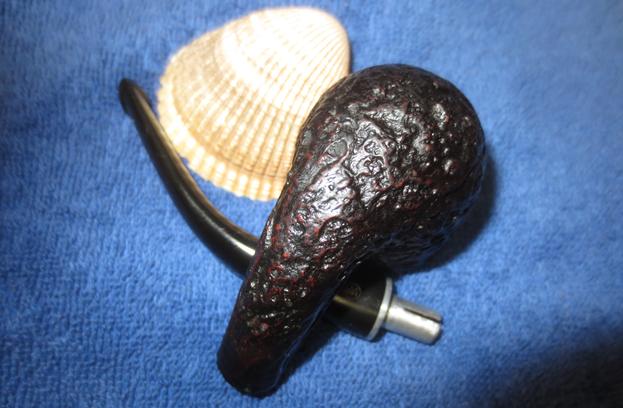
In the late spring I received and email from Josh (misterzippo), a reader of the blog that he had some pipes that he thought I might be interested in. He sent me photos of the pipes so I could have a look at them. A few caught my eye so it did not take long to make a deal. The first of them that I liked was the Malaga Bulldog with a twist in the carving and a scoop in the top of the bowl that I restored earlier. The next two pipes that caught my eye were a pair of sandblast Wally Frank pipes shown in the photo below. Josh sent this photo and it shows the overall condition and appearance of both pipes. The shapes and the deep ridges of the sandblast finishes intrigued me. The pipes were dirty but had good bones. The grooves in the sandblast on both were filled in with grit and grime and almost sticky to touch. The rims were caked with overflow of tars from the bowl and the grooves were filled in to the point that they almost were invisible. The stem on the bent billiard was in good shape with light oxidation and some tooth marks on both sides near the button. The stem on the Lovat was missing a large chunk out of the underside that would need repairing. The tape measure in the photo shows that the billiard is about 5 ½ inches long with a taper stem and the Lovat is 5 inches long with a saddle stem.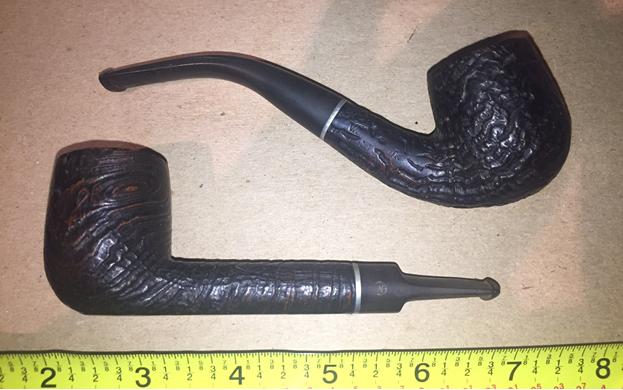 I chose to work on the bent billiard first as it was in relatively good shape. The Lovat would take more work and will be dealt with on the weekend. I took some more time to evaluate the condition of the little bent billiard. It was very dirty and the cake and lava overflow were thick. The finish was worn around the outside edge of the bowl while it looked like the thick cake had protected the inner edge. The rim top covering also protected it from damage to the flat portion. The shank was in good shape, the deep sandblast on the bowl sides was stunning, and the tactile feel of it would be very good when the bowl heated during smoking. The stem was stamped with the WF in a circle logo that was on all of the pipes. The stem was a good quality vulcanite and the oxidation on the surface was minimal. The stem had tooth marks and chatter on the top and underside near the button and there was wear to the surface of the button as well. My brother took the next photos of the pipe before he started his clean up work. The slightly different angles of the first two photos really show the depth and contours of the sandblast finish on the left side of the bowl.
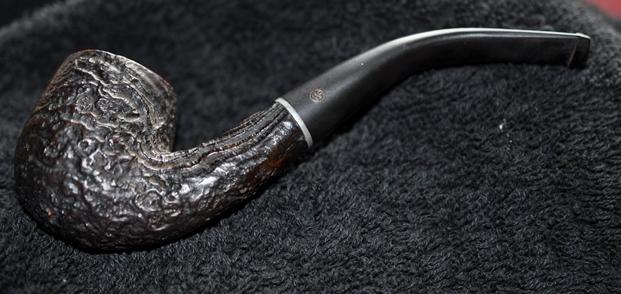
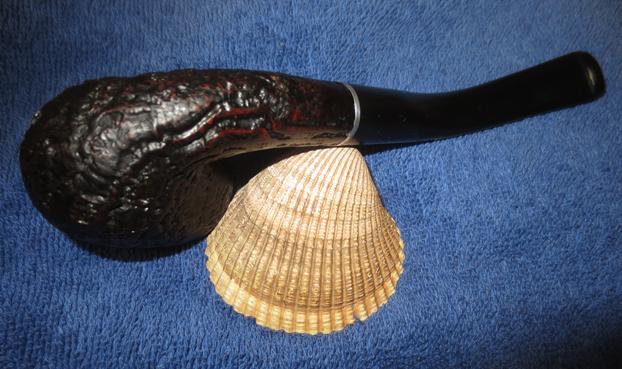
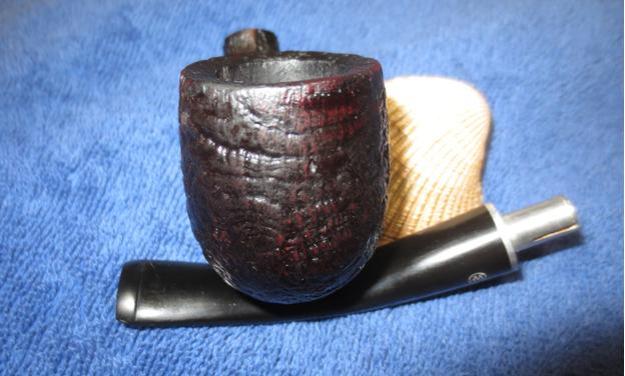
 The next two photos give a contrasting view of the two sides of the bowl and the difference in grain pattern on both. It is a really interesting looking pipe.
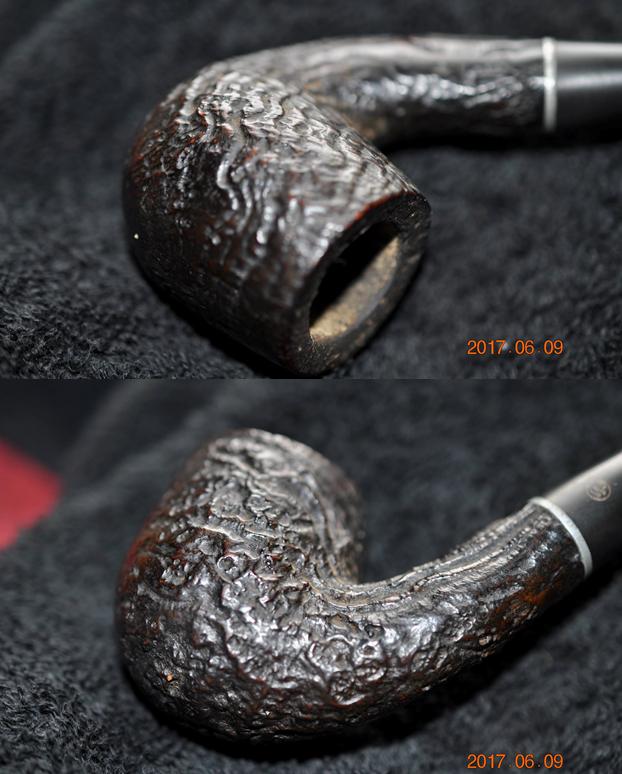 The top of the rim is very dirty and the thick coat of lava will need to be removed to assess the inner and outer edges completely.
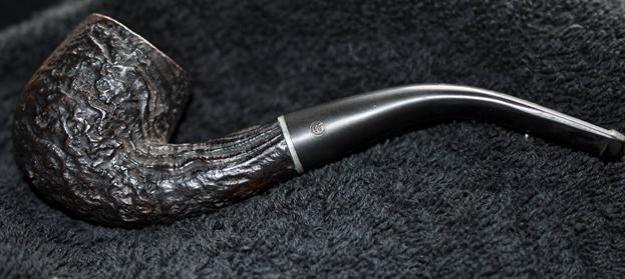
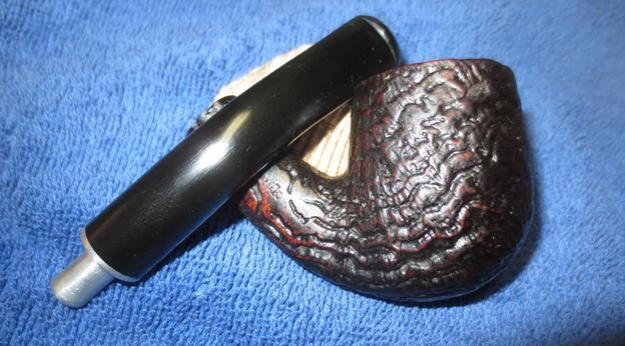
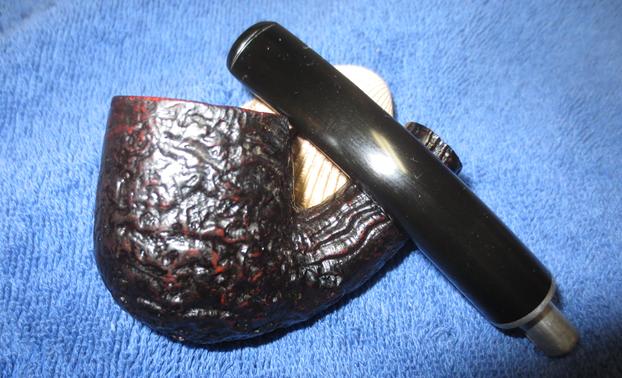
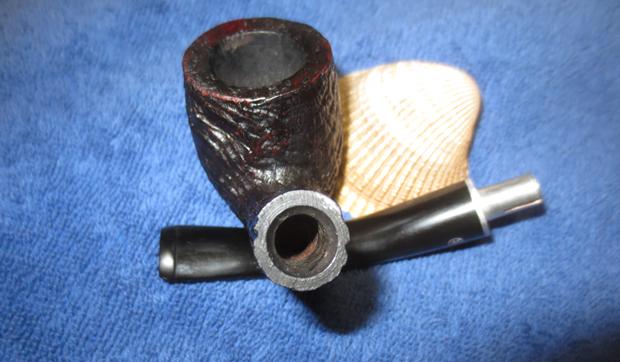
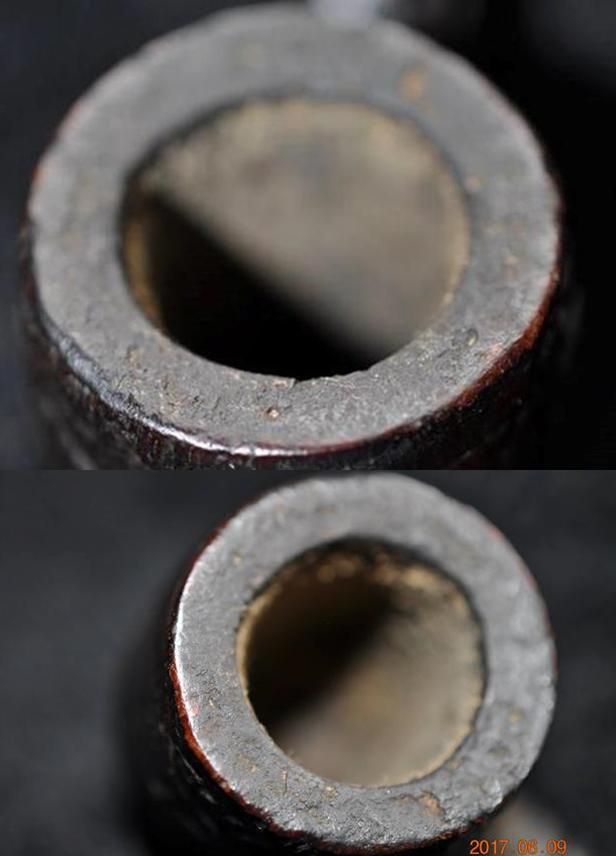 The shank is stamped on the right side with the faint words Wally Frank over Filter. The circle WF stamp on the left side of the stem is very readable at this point. The aluminum band that separates the shank and the stem is an integral part of the stem. The tenon on the stem is aluminum and looks comparable to those found on Medico pipes. It was designed for a disposable paper filter.
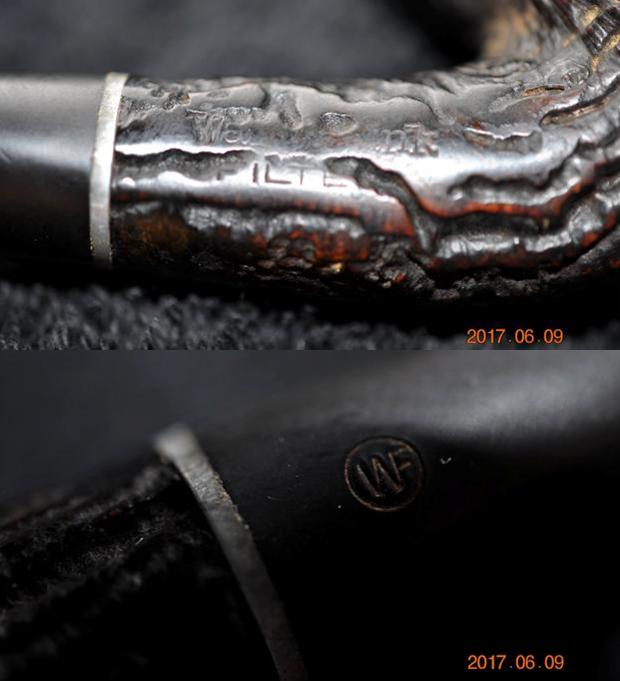 The tooth marks on the button and the chatter on the surface of the stem are very visible. They do not appear to be too deep in the surface of the rubber so I am hoping that will be easy to deal with.
 I quickly Googled Wally Frank, Ltd. online to refresh my knowledge of the history of the brand. I found information in multiple spots from Pipedia, to PipePhil, and in several of the books that I have on my desk. I confirmed that the company was one of America’s oldest and most respected names in pipes and tobaccos, beginning in the early 1930’s. Wally Frank operated a chain of tobacco stores in New York City (the flagship store was in Lexington Avenue) and had a vast catalog business for pipes and pipe tobaccos. Their numerous private-label pipes were made by many makers, including Charatan, Sasieni, Weber, and many others. Wally Frank, Ltd. also owned the Pioneer brand of meerschaum pipes, made from both Turkish and African meerschaum. In addition to importing pipes, they had many pipes made with the Wally Frank name and also employed pipemakers like Peter Stokkebye, Svend Bang, and Ed Burak (who later became the owner of Connoisseur). As a result, each Wally Frank pipe must be individually evaluated on its own merit. They also ran “The Pipe of the Month Club” where each member received a new pipe in the mail once a month.
Being reminded that various companies and individuals made Wally Frank pipes was helpful. As I turn the pipe over in my hands, I wonder if this pipe and the Lovat were made by Weber because of the similarity to the sandblast on the Weber Blackthorn. Or maybe there were made by S.M. Frank because of the split metal tenon that looks like the one on S.M. Frank made Medico filter pipes. I don’t know if I will ever be certain but they are an interesting pair of pipes that are well worth the effort of restoration.
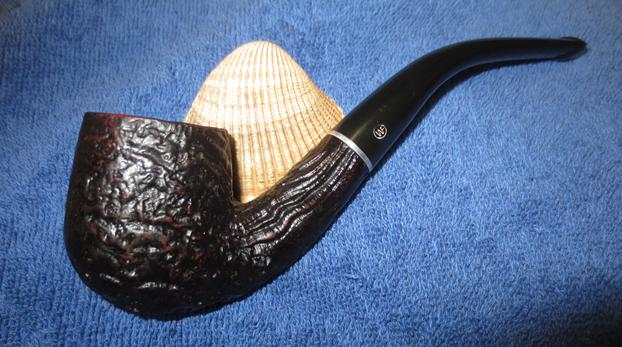
I can’t begin to tell you how nice it to have the pipes I work on reamed, cleaned and ready for the refurbishing process that follows that. My brother does a seriously great job preparing the majority of the pipes I work on. In fact, on a recent trip to visit him I took along a box of pipes for him to process for me. I know I am spoiled but it is great to have him willing and able to help me with this part of the process. He cleaned up this pipe with his usual methodical thoroughness. He generally uses a PipNet and a Savinelli Fitsall reamer to ream the pipes he works on. He reamed the bowl clean with the two reamers. He scrubbed internals with alcohol, pipe cleaners and cotton swabs leaving the airways in the shank, mortise and stem very clean. He scrubbed the externals with Murphy’s Oil Soap to remove the grime and the old waxes on the bowl and rim. He soaked the stem in OxyClean to bring the oxidation to the surface of the vulcanite. When the pipe arrives in Vancouver it is ready for me to do my part. I brought the pipe to the work table and took the following photos.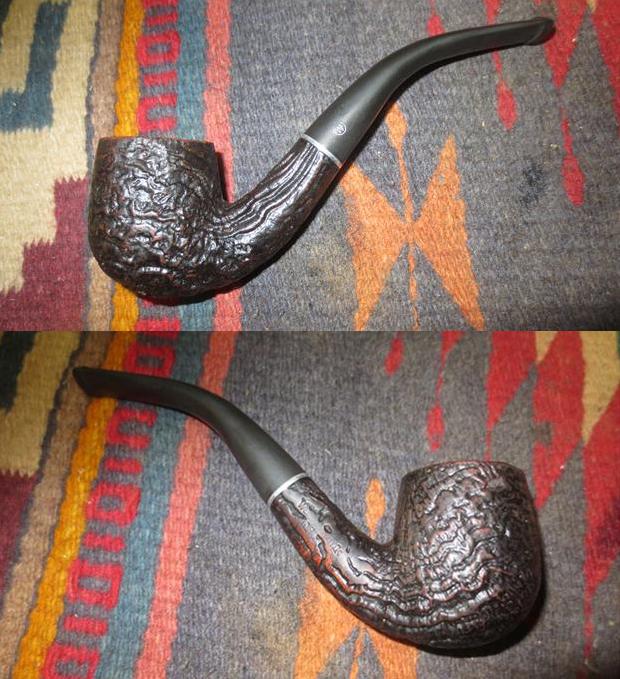
 The rim top looked very good after the cleanup. Both the inner and outer edges of the rim were undamaged. The finish was spotty on the flat surface and around the edges.
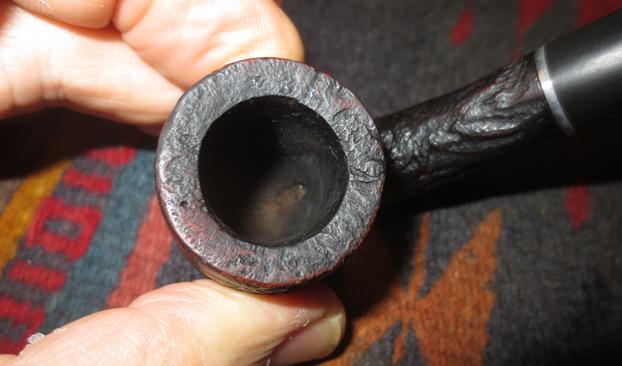 The soak in OxyClean did not bring much oxidation to the surface. The little that was there before was now on the surface. The tooth marks and chatter were clearly visible now and needed work.
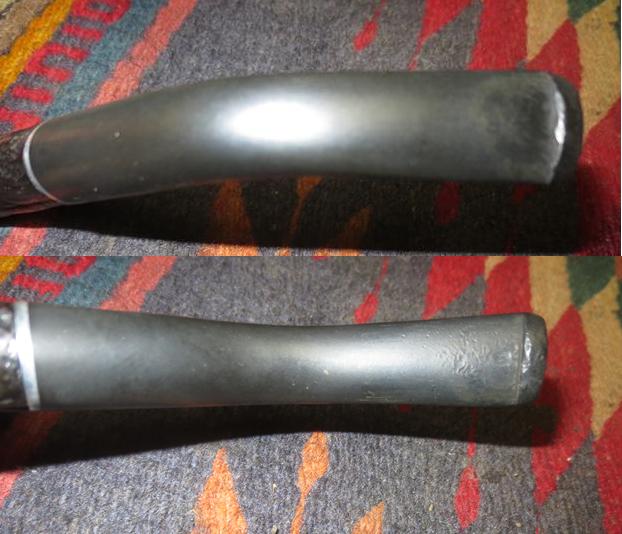 I decided to start with the stem and bring it back to a shine. I sanded the tooth marks and chatter on both sides of the stem with 220 grit sandpaper and was able to remove all of them. I reshaped the button with the sandpaper at the same time and removed the damage on the button surfaces.
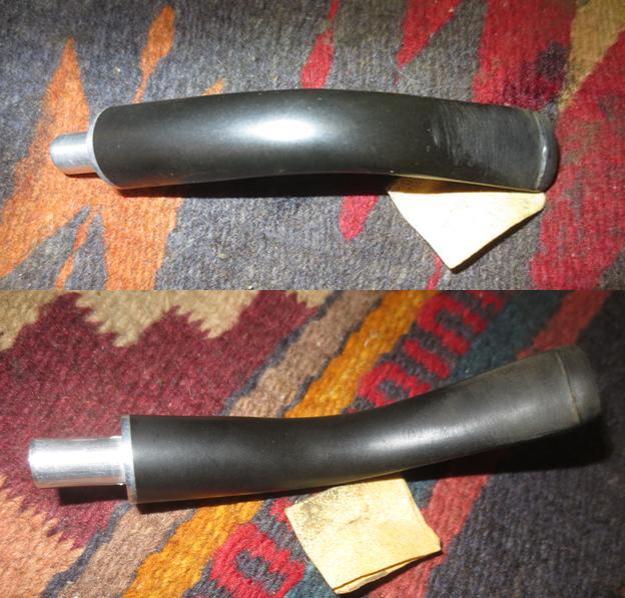 The stem was loose in the shank so I inserted a thin blade I the slot in the tenon and wiggled it to expand the tenon slightly. It did not take too much expansion for the stem to fit snug in the shank.
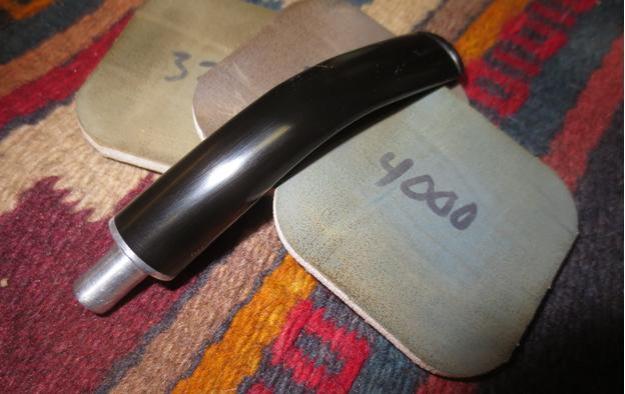
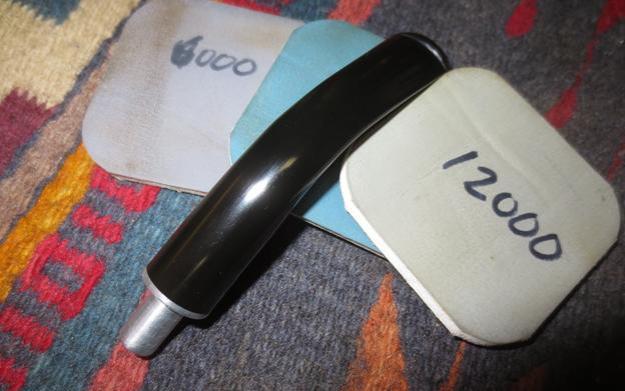
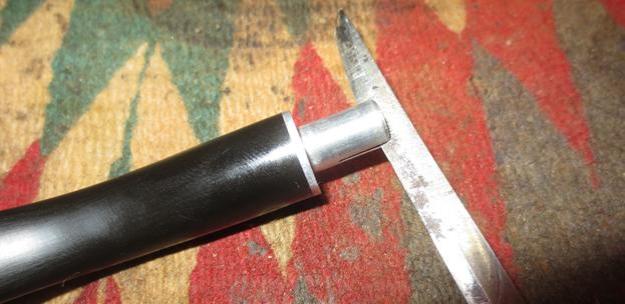 I polished the stem with micromesh sanding pads – wet sanding with 1500-2400 grit pads and dry sanding with 3200-12000 grit pads. I rubbed the stem down with Obsidian Oil after each sanding pad. After the 12000 grit pad I gave it a final rubdown with the oil and set it aside to dry.
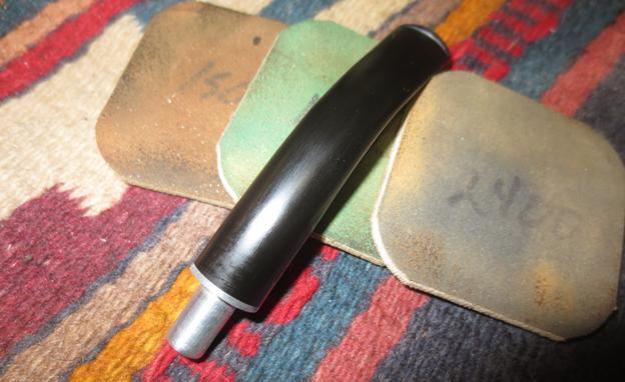
 I touched up the logo stamp on the left side of the stem with acrylic white paint applied with a small brush. I put the paint on the logo and let it dry then wiped and rubbed the excess paint off.
 I buffed the pipe with Blue Diamond on the buffing wheel to polish the last of the minute scratches on the vulcanite and lightly buffed the briar. I gave the stem multiple coats of carnauba wax and buffed it with a clean buffing pad. The stem really shone after the buffing. I hand waxed the bowl with Conservator’s Wax and buffed the bowl with a shoe brush to raise the shine. The contrast in browns on the briar and the black stem really give the pipe a classic look. I hand buffed the entirety with a microfibre cloth to deepen the shine. The aluminum tenon is cleaned and polished. The dimensions of the pipe are Length: 5 ½ inches, Height: 1 ¾ inches, Bowl diameter: 1 ¼ inches, Chamber diameter: ¾ inches. The pipe is ready for the next steward to carry on the trust. I will be putting it on the rebornpipes store soon. If you are interested in adding it to your collection send me an email to slaug@uniserve.com or a message on Facebook. Thanks for looking.


I think I need to find a Jeff to clean my pipes, Steve. Sometimes the cleaning is more than half the restoration! Interesting blast on this one.
LikeLike