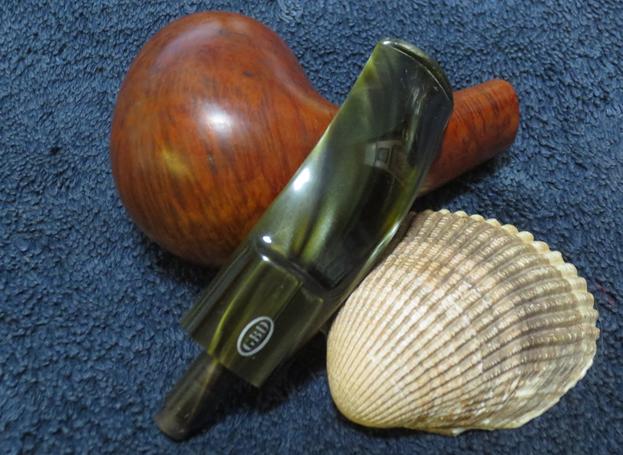
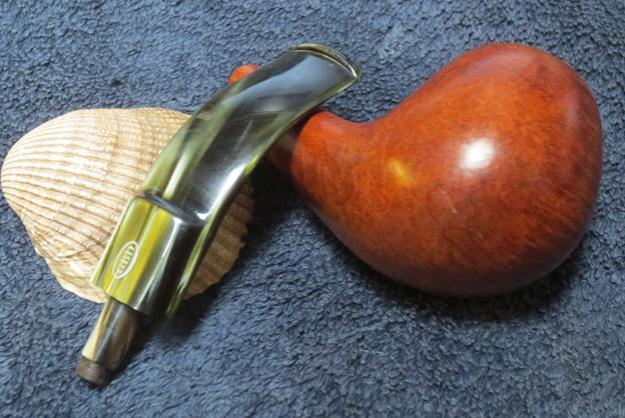
Tag Archives: Stem repairs

An Estate Sale Find – A Castello Sea Rock SC 54P Bulldog

Blog by Steve Laug

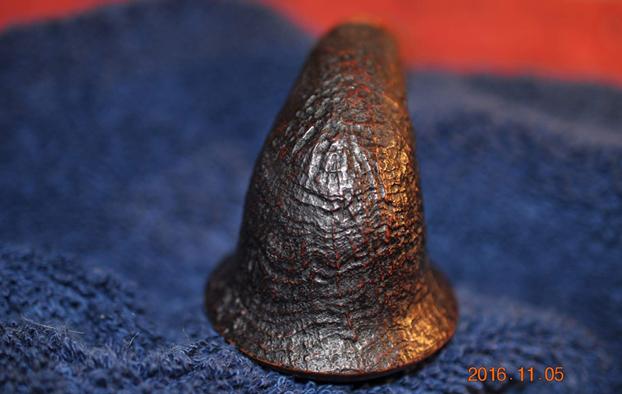
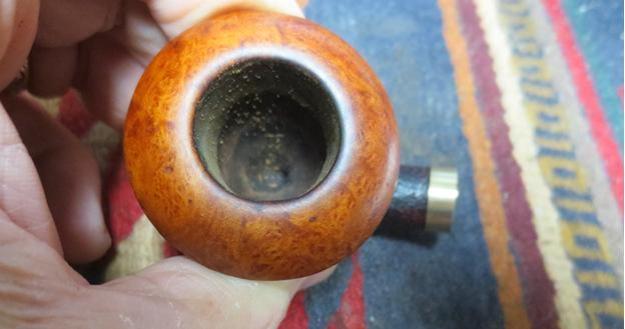
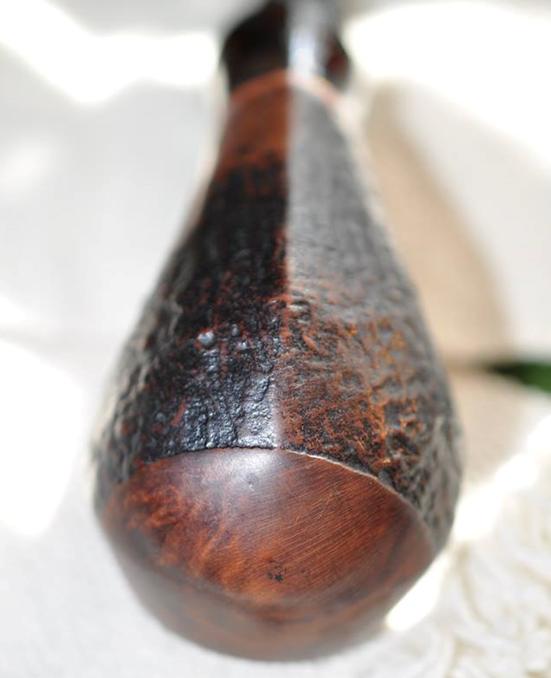
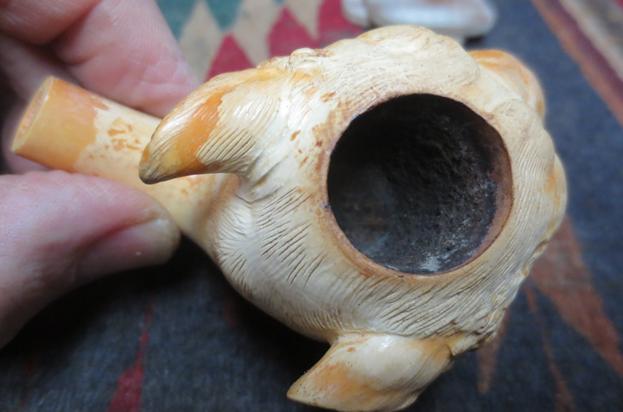
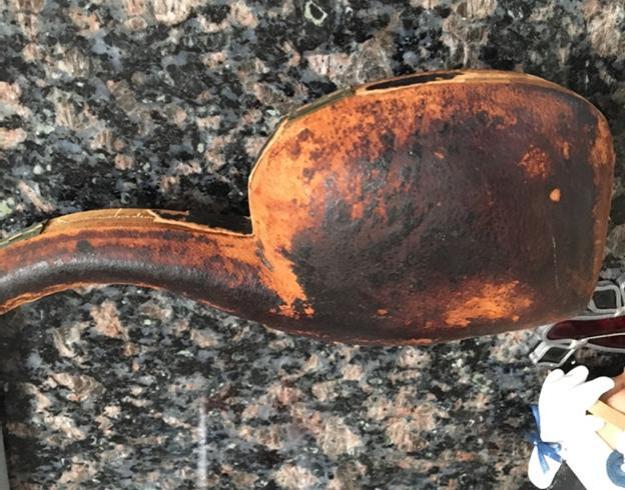
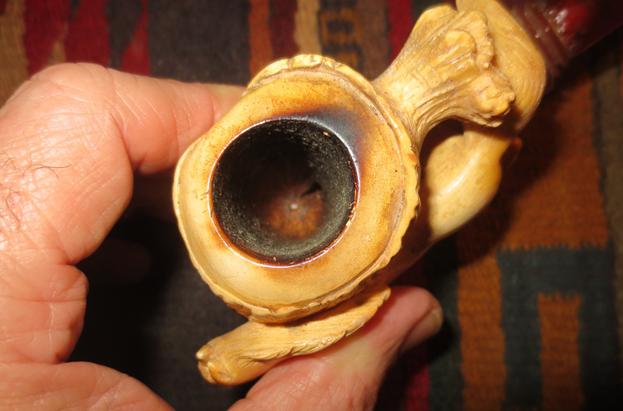
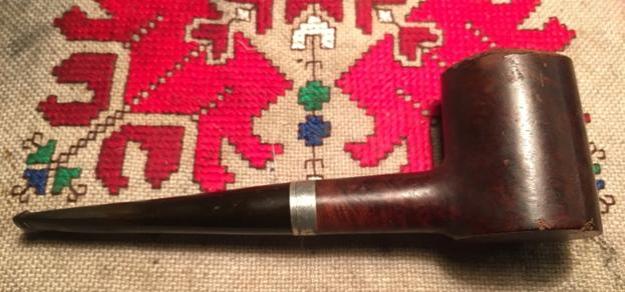
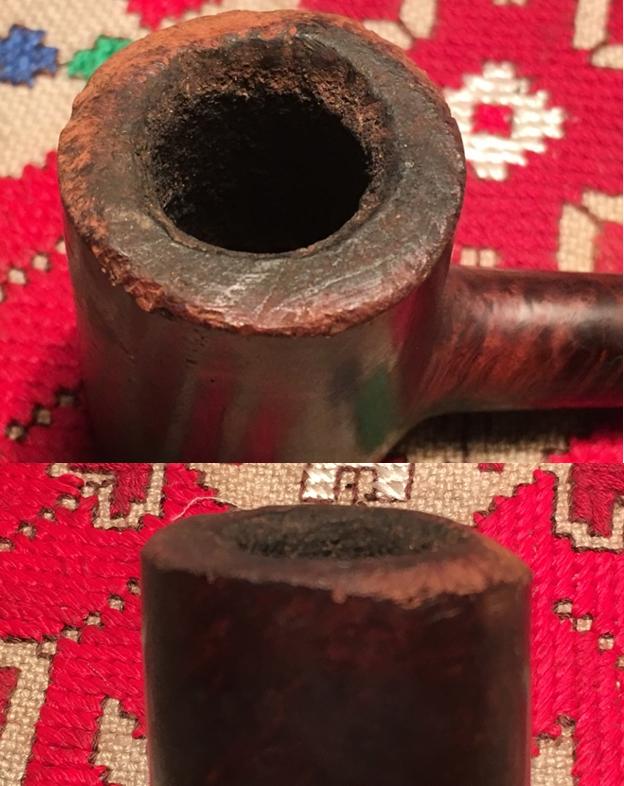
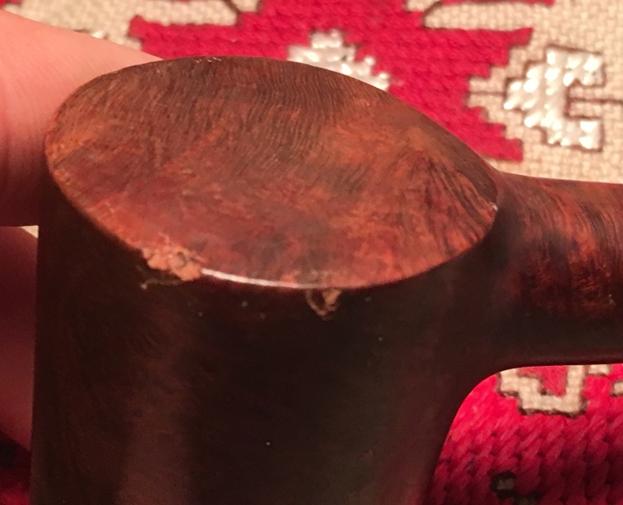
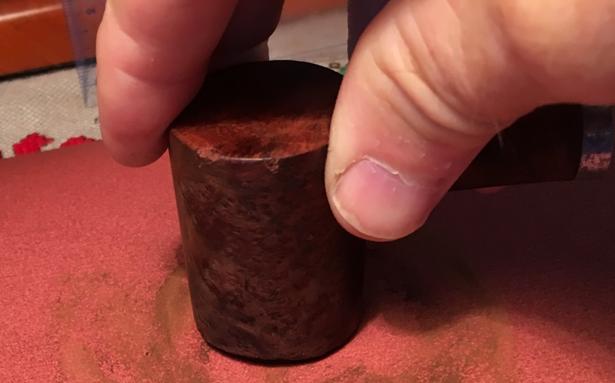
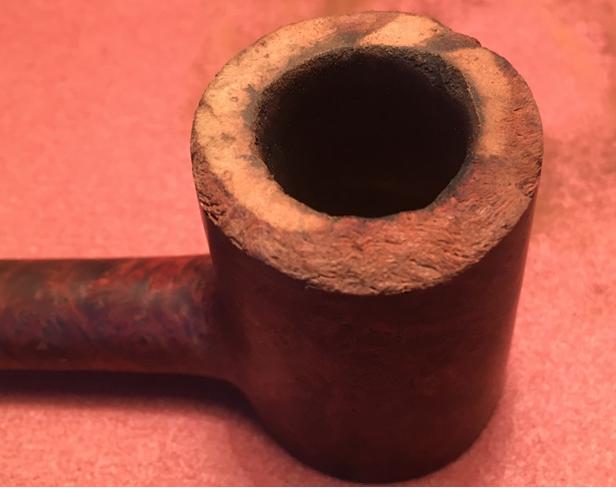
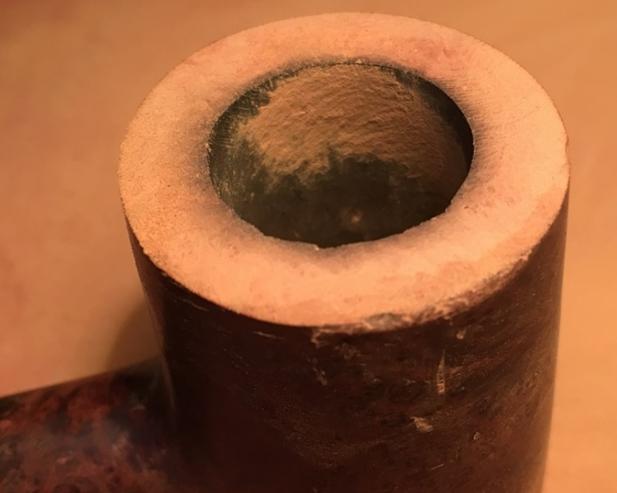
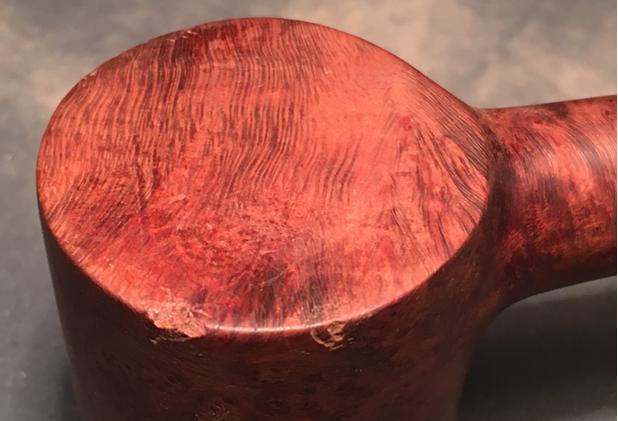
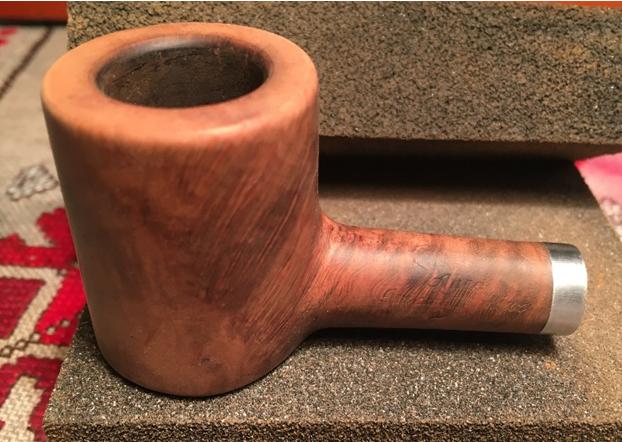
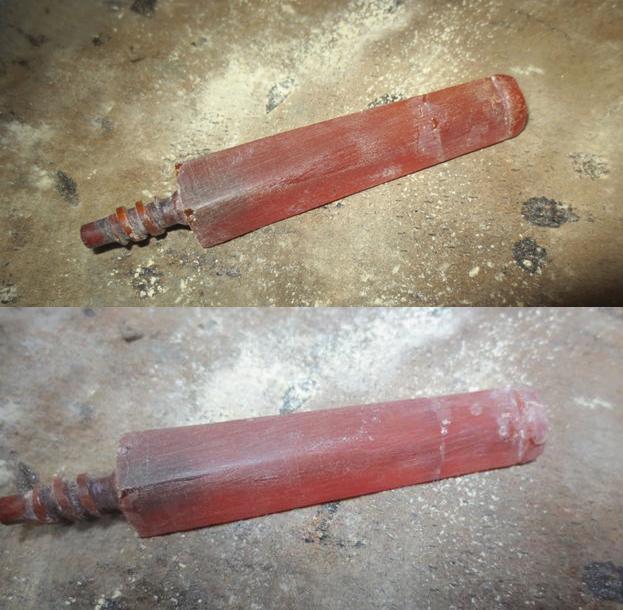
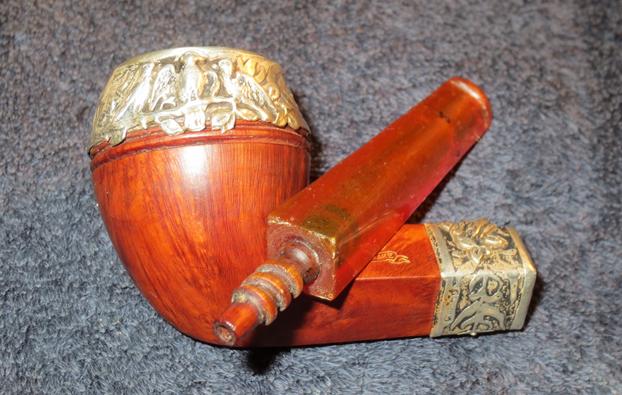
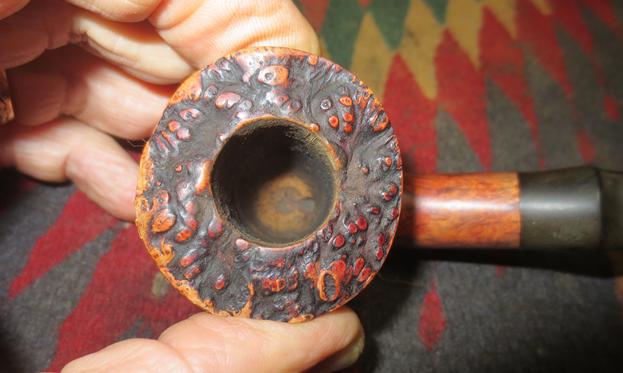
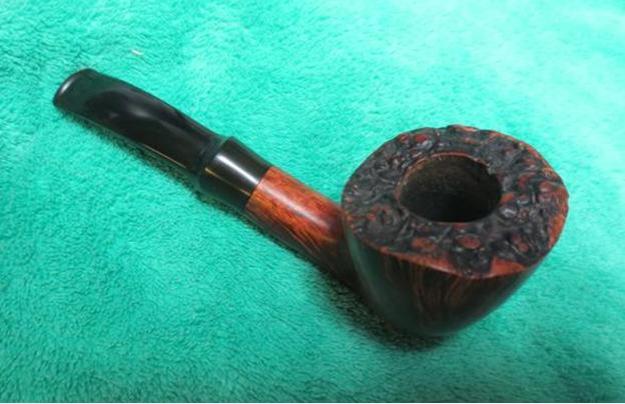
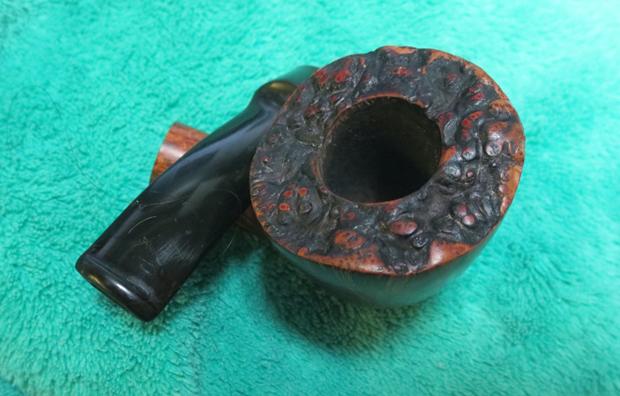
My brother Jeff is truly the king of estate sale, junque store and antique store pipe finds. He seems to have not only developed an eye for a good pipe but seems to have an uncanny ability to find them. A few months back now he messaged me from an estate sale he had gone to near Boise, Idaho. He had driven to the town the evening before so he was first in line for the sale. He found some great pipes in that sale and on that trip. I wrote about the finds he came home with on that trip in a previous blog (https://rebornpipes.com/2016/10/31/sometimes-you-just-get-lucky-an-amazing-pipe-hunt/). This little Castello Sea Rock 54P Bulldog came home with him on that trip. From his description and the photos that he sent along the pipe showed lots of promise. The Sea Rock Finish was dirty and the crevices had dust in them. The rim was tarred with overflow of cake from the heavily smoked bowl. The pipe seemed to sport an after factory band as there were no Castello marks on the silver. The stem was in good shape though it had tooth marks on the top and bottom sides next to the button. It had the diamond logo on the side of the saddle stem which I knew meant it was made for the United States market.castello1My brother took some close up photos of the rim top and the cake in the bowl to show what it looked like when he found it. You can see how thick the cake is and how much of the rim rustication has filled in with the overflow.castello2
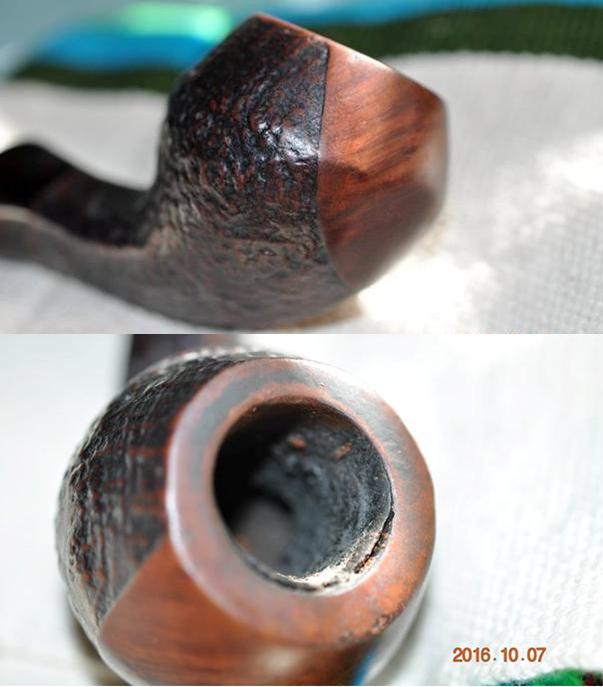
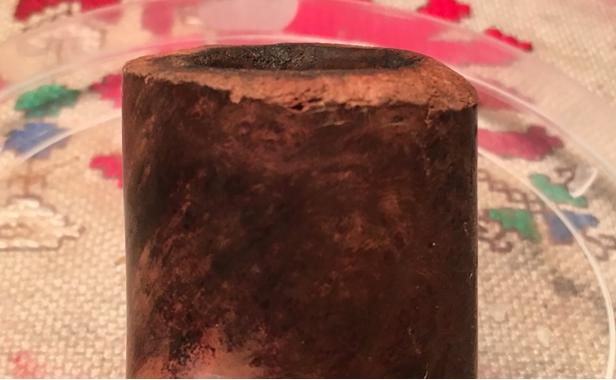
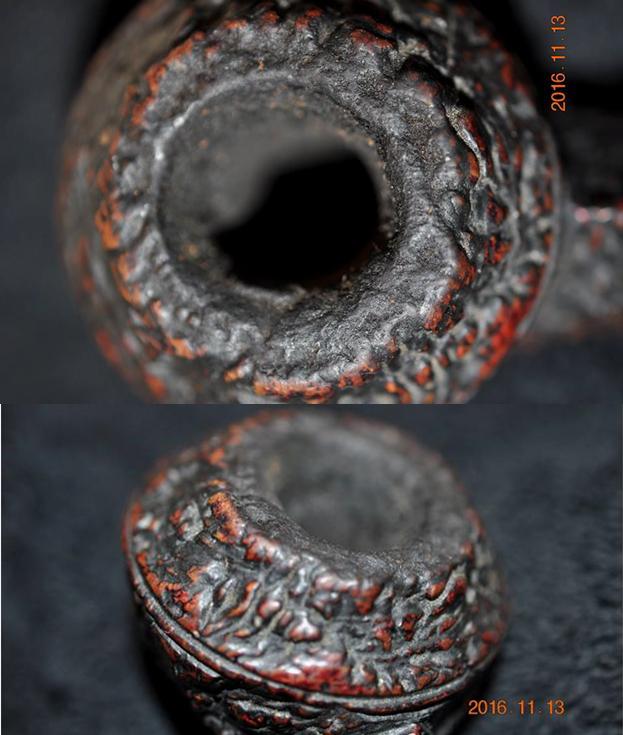
Other than being dirty, the finish was in very good shape. There were no chips of dings in the surface of the rim or on the bowl or the shank.castello3
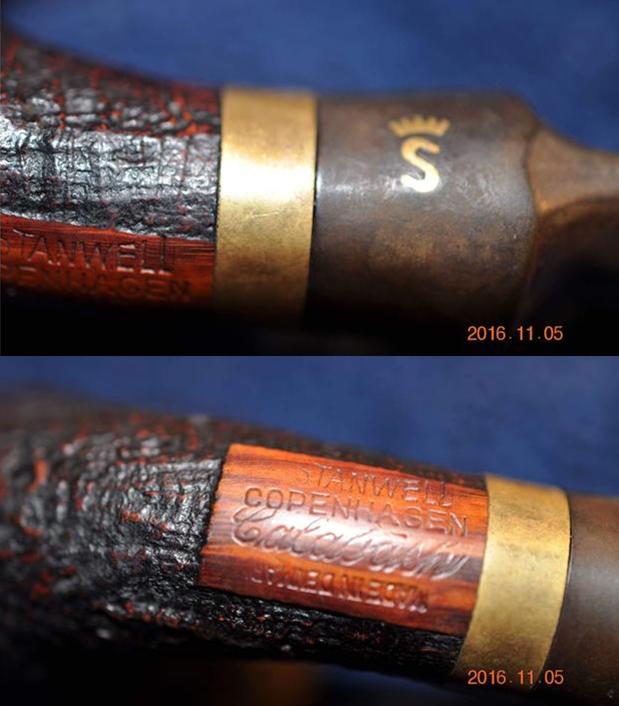
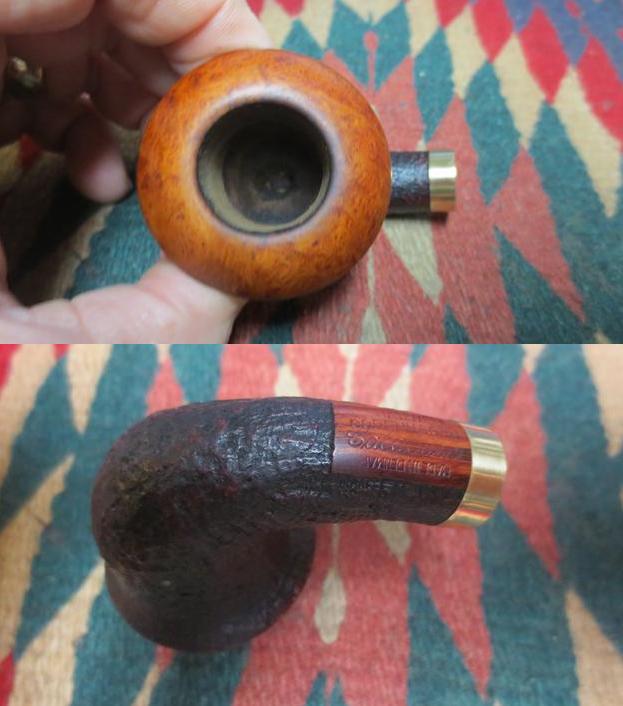
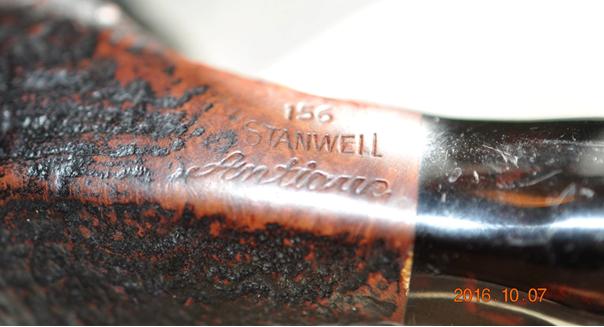
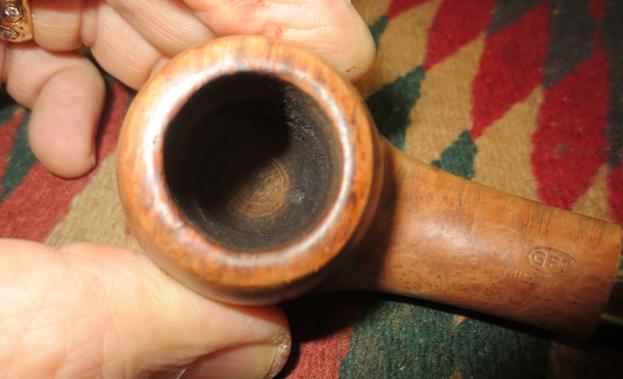
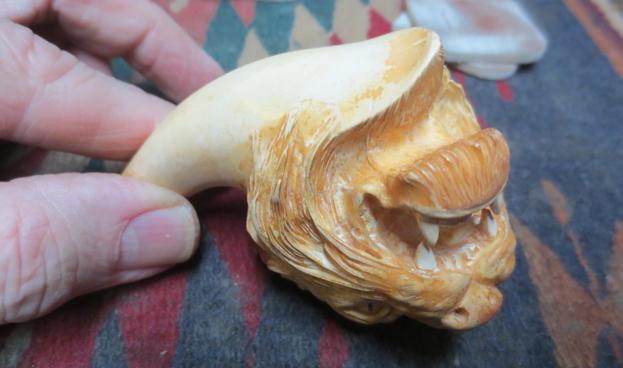
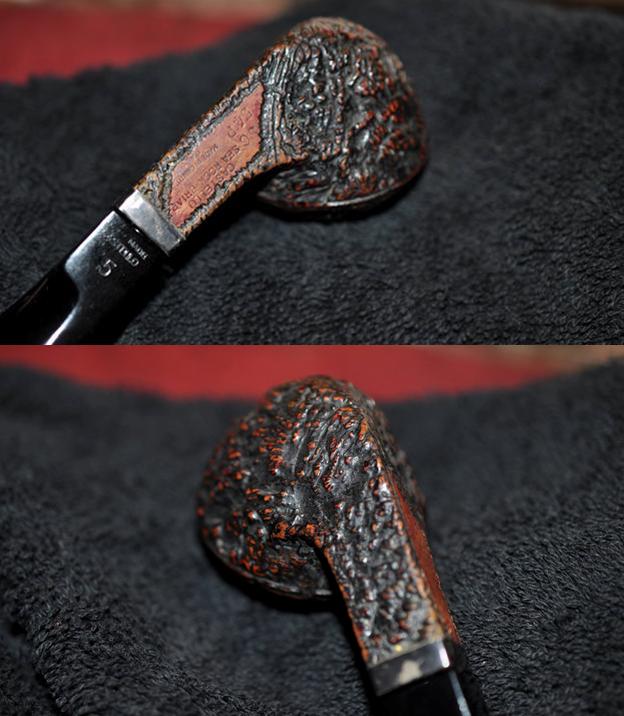
The silver band was tarnished and seemed to have some flaking on the surface. I am not sure if the silver plate is peeling or if it is just left over remnants of the sticky tag that had been there with the price. The stamping was very clear on a smooth patch on the left underside of the diamond shank and read Castello over SC Sea Rock Briar. Underneath that and to the left it read 54P (which is the shape number) and Made in Cantu over Italy. The underside of the left side of the Lucite stem also had stamping that read Hand Made over Castello and the number 5. The stamping of Hand is faint though it can be seen with a magnifying glass.castello4
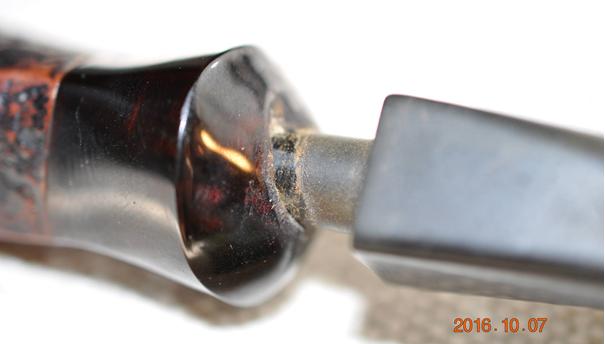
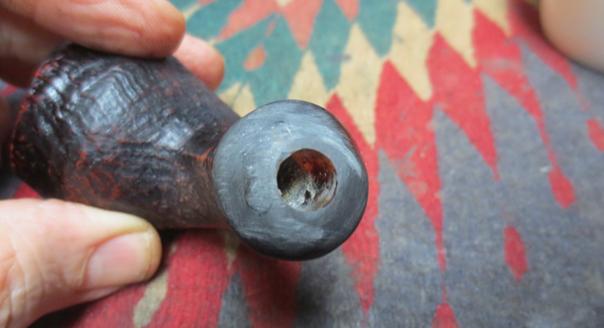
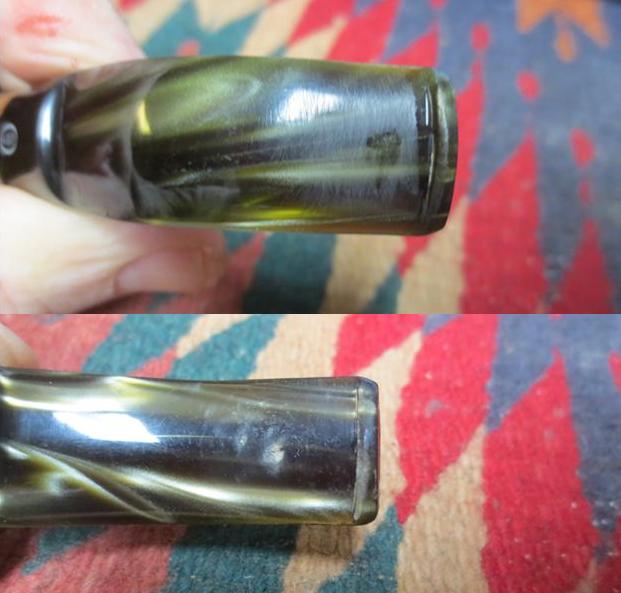
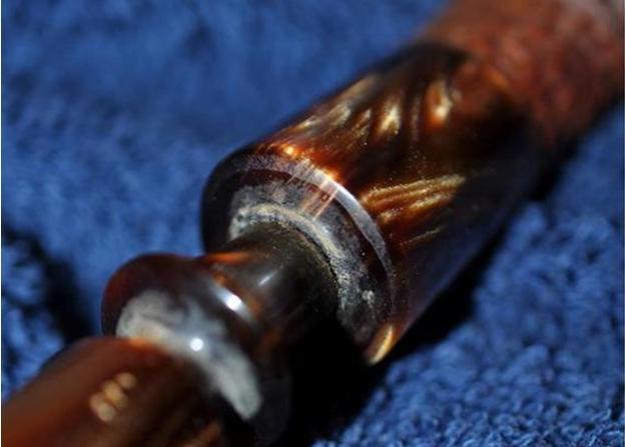
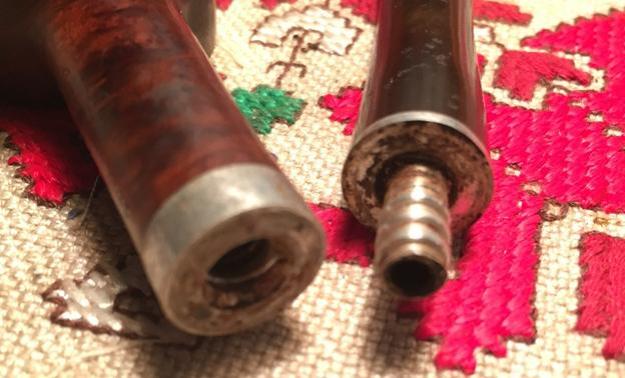
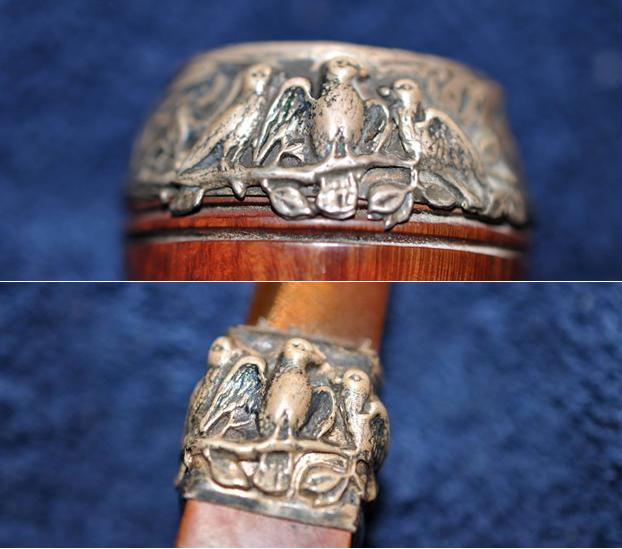
The fit of the stem against the shank was off – it looked as if the mortise was filled with oils and had pushed the stem out. It did not fit snugly against the shank. The faux diamond circle on the saddle portion of the stem is also visible in the photo below. The second photo below shows the debris on the silver band and the grime in the rustication of the shank.castello5
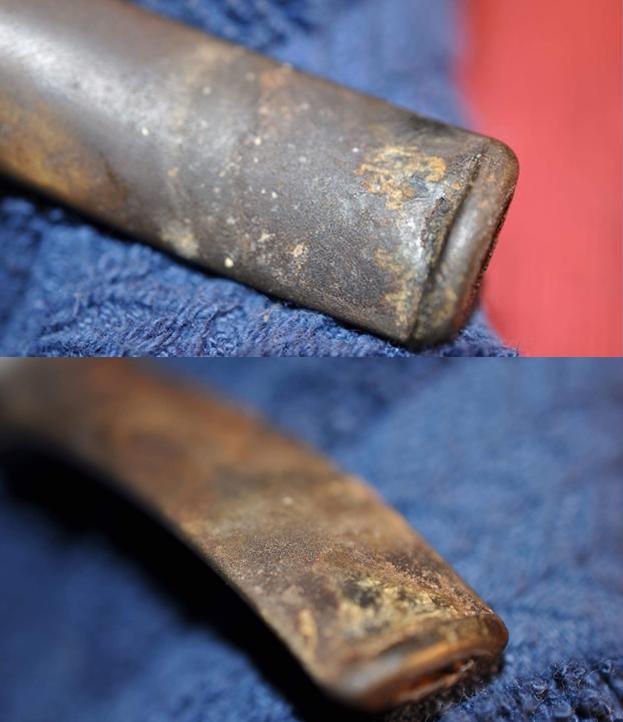
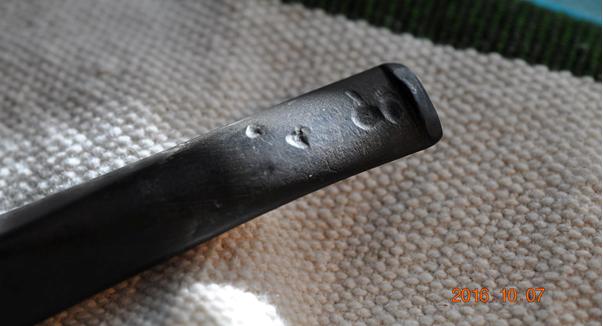
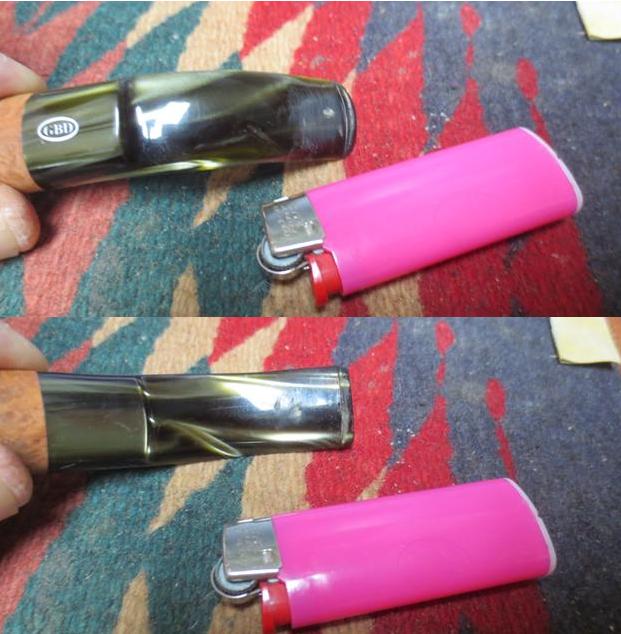
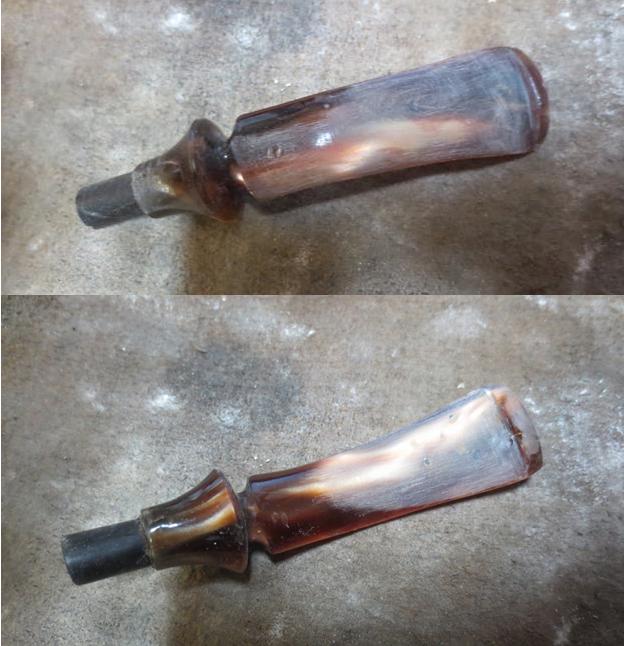
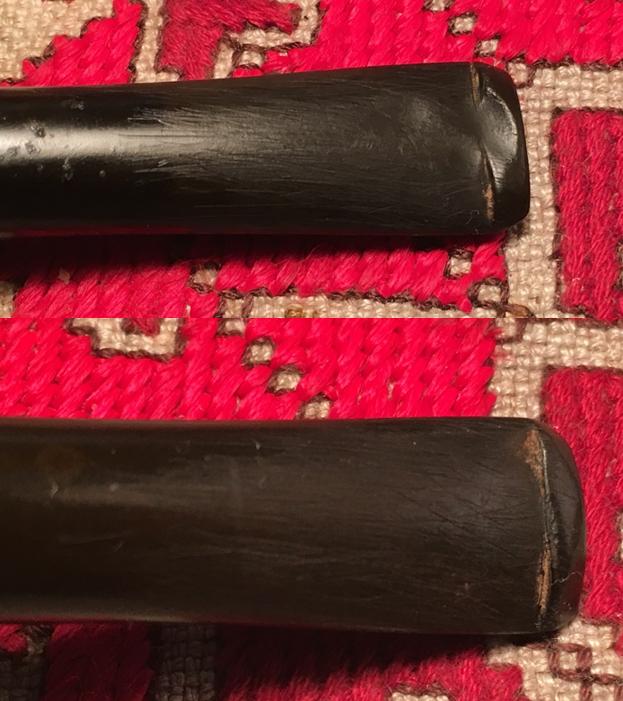
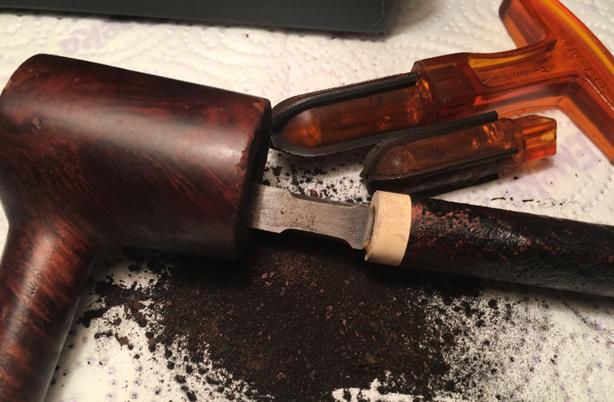
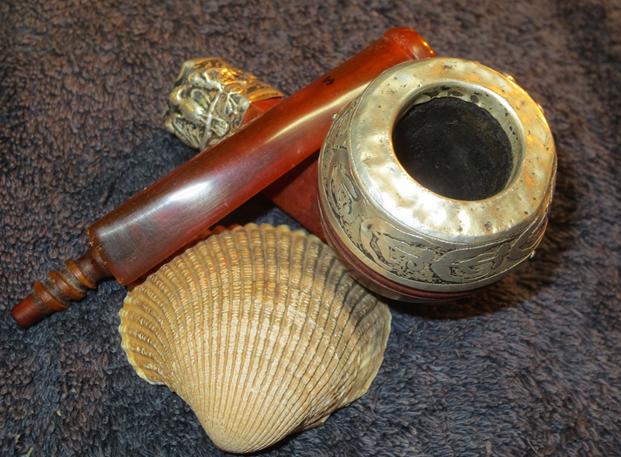
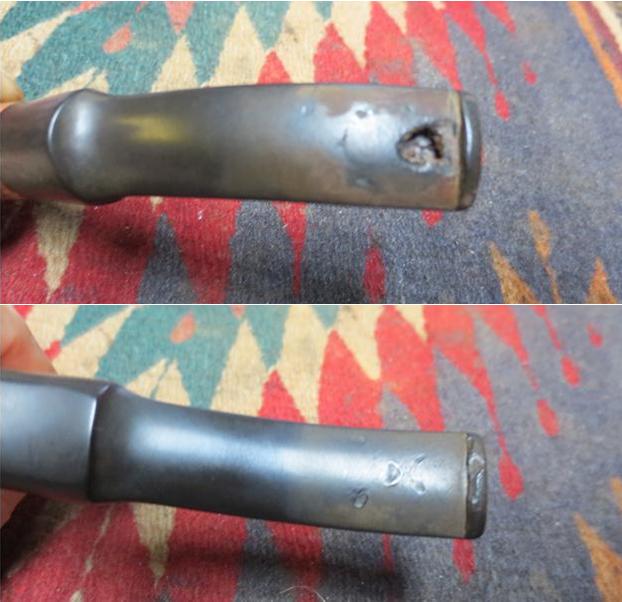
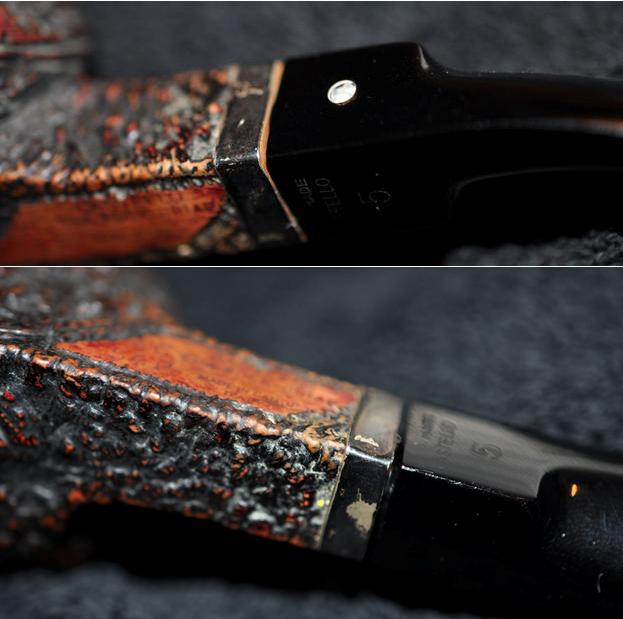
The last two photos that my brother sent show the condition of the stem. It is hard to see the tooth marks near the button on both sides of the stem but you can see the chatter on the underside and the “gunk” (technical term) that had built up in the corners of the slot in the button.castello6
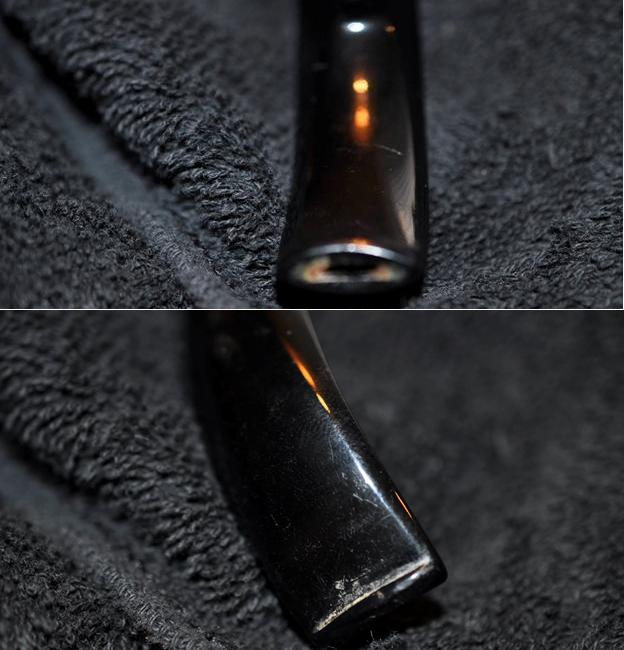
Before I worked on the pipe I wanted to do a bit of research to see if I could shed some more light on the pipe I had in hand. I learned from the pipephil website that the rhinestone logo was originally on pipes for the US market. There was no hint as to why that was done only that it was and that it is occasionally still used http://www.pipephil.eu/logos/en/logo-castello.html

I have an older article called PCCA’s Castello Grade & Style Guide. It was written by Robert C. Hamlin (c) 1988, 1992, 1994. Robert gathered some remarkable information on the Castello lines and I have often used his guide in the past to give me pertinent data. There I found more information regarding the shiny logo on the side of the stem.

“American logo’d Castello pipes use a small round “Diamond” (referred to and looking like, but it is NOT actually a diamond) inlaid into the mouthpiece. This was originally done so that the standard Castello white bar logo did not conflict with another brand and logo that was sold by Wally Frank called the “White Bar Pipe” (in the 1950’s).”

The above quote and the remainder of those following come from the same article by Robert Hamlin. You can read the full article at the following link: http://www.pipes.org/BURST/FORMATTED/196.016.html

I read further in the article to help me understand the stamping on the underside of the shank. My knowledge of Castello pipes is pretty limited so when I get one to restore I resort to this article and others to try to make heads or tails of the stamping. First of all I had no idea what the SC stamped ahead of the Sea Rock Briar stamping meant. I had seen Castello’s with the signature of Carlo Scotti on them but not this stamping. Robert gave me the information I needed.

“Older Castello pipes will usually include the “REG No.” and have the letters “SC” stamped as a part of the nomenclature. The SC stamp was for Scotti, Carlo (in Italy all names are listed last, first). Today the full name of Carlo Scotti, contained in a small oval, has replaced the SC stamp.”

I learned that the Sea Rock Briar stamp also signified something and told me more about the pipe. Robert pointed out:

“SEA ROCK [Carved Black or dark brown]: This is the lowest grade of the Castello line and is the most common in the USA. Sea Rocks are produced by taking a smooth bowl that has not been “final finished” and surface carving the finish with tools. This “carved” finish is then evened out using a steel wire brush, stained and then waxed. The Natural Vergin carved finish is left unstained and unwaxed as a rule, although we have seen waxed and partially waxed “Vergins”.” 

The remaining mystery for me was the meaning of the stamping on the stem. I of course understood the Hand Made and the Castello stamping but the number 5 was a mystery to me. I was not sure what it referred to. So once again Robert’s article gave me the information I needed to understand that last piece of the mystery.

“#2: All Castello standard shaped pipes have a number (3, 4, 5 or 6) stamped on the mouthpiece or sometimes on the lucite ferrule. What does this number mean? Not much really, it is the number of the size for the proper straw tube or reed that fits the shank and stem of the pipe. These straw tubes are rarely used in the United States. The Castello reed is considered superfluous and useless to most, but with this number you will always know which one fits (the different numbers have to do with length, not diameter).”

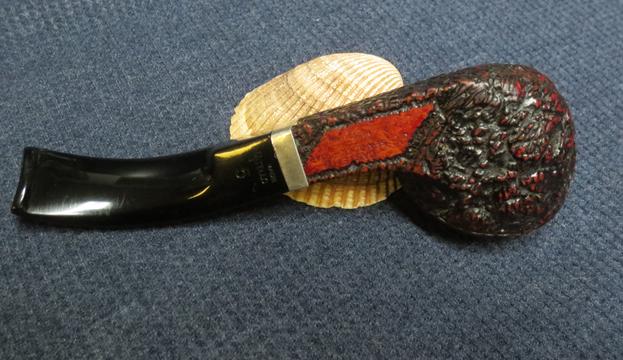
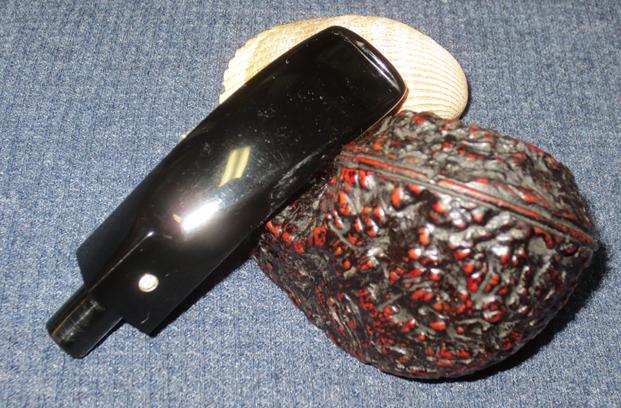
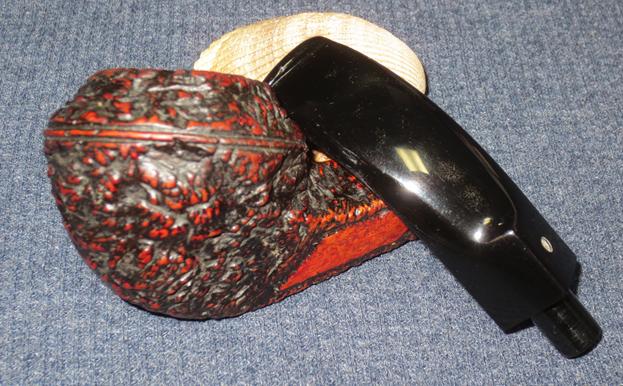
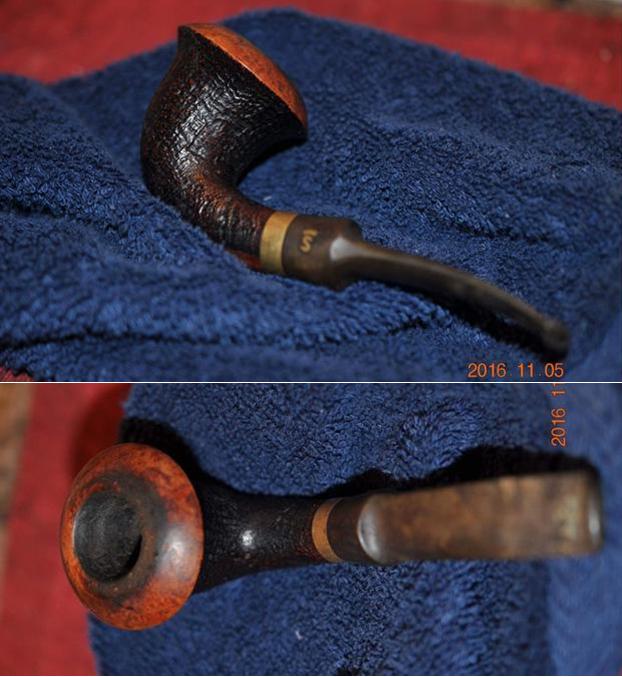
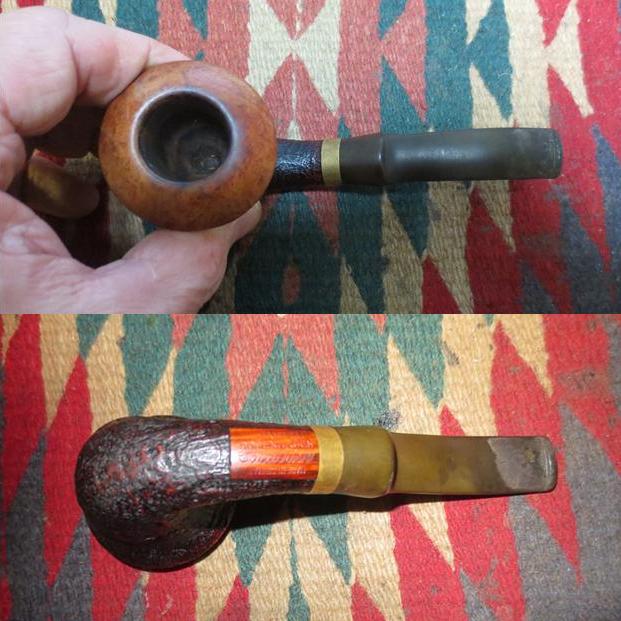
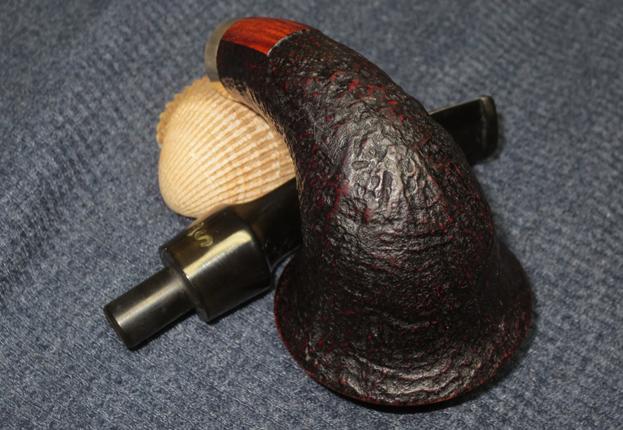
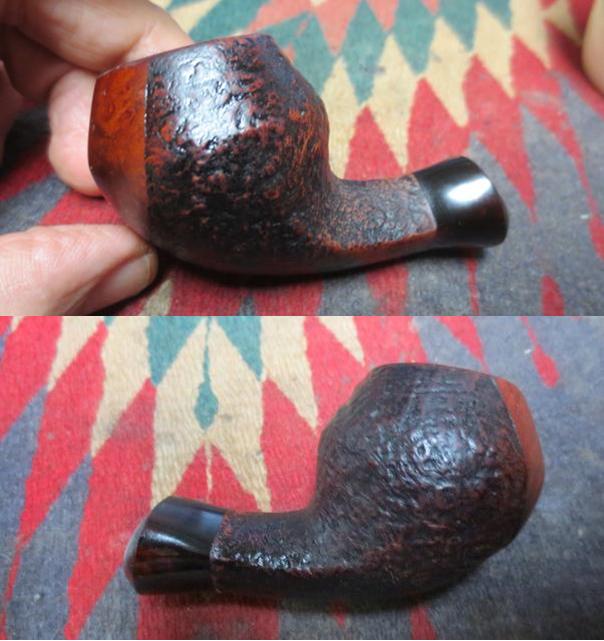
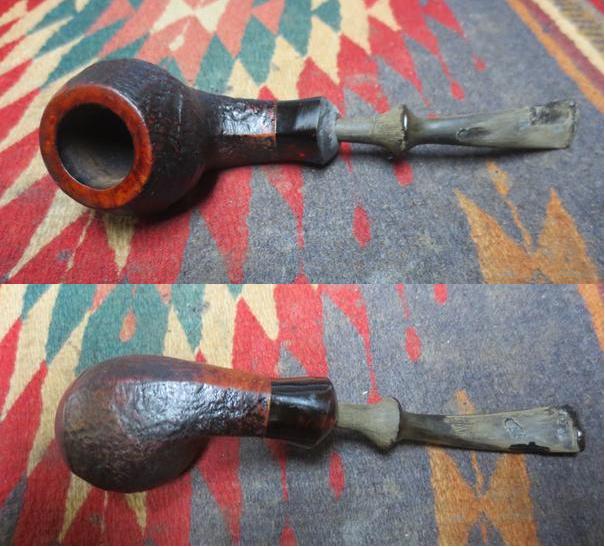
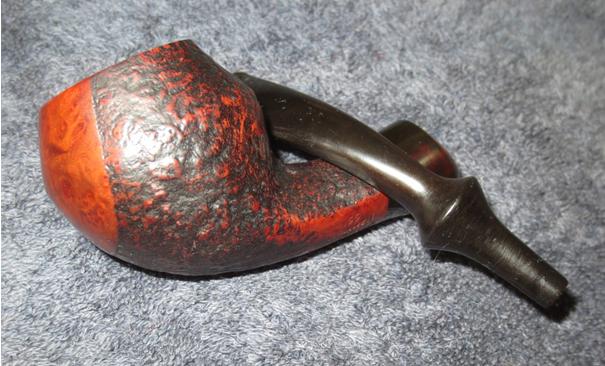
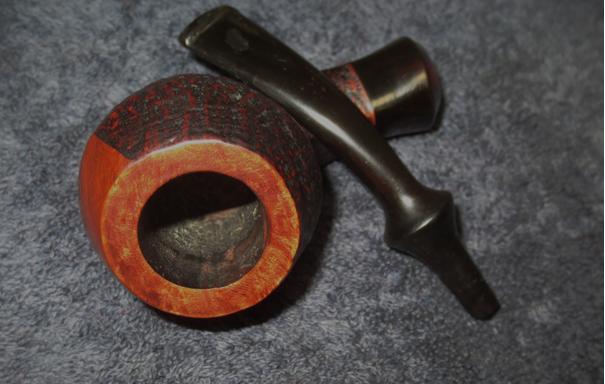
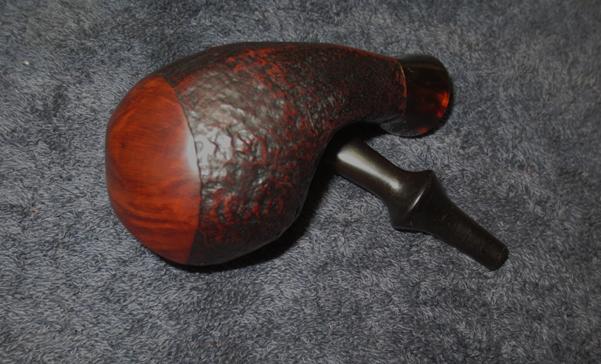
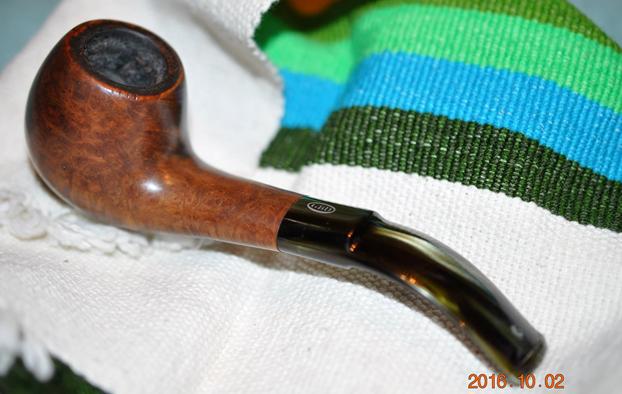
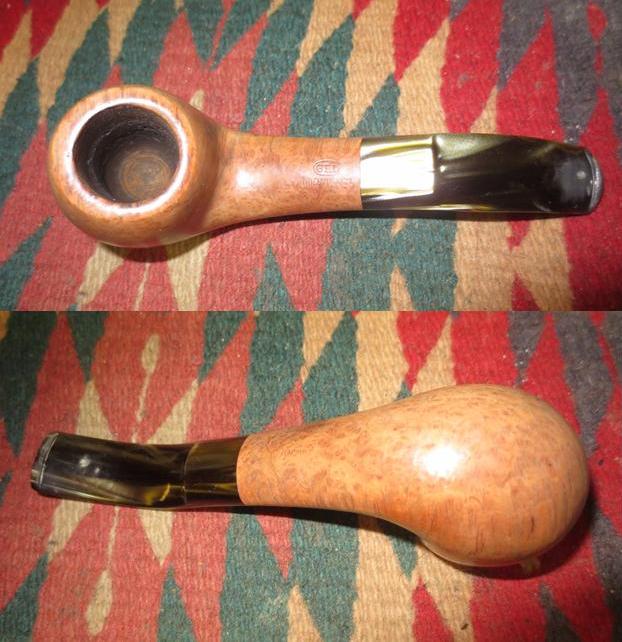
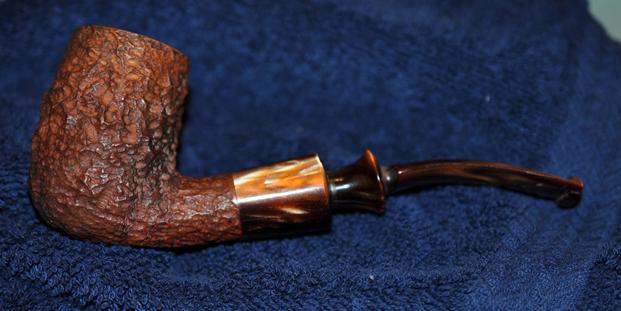
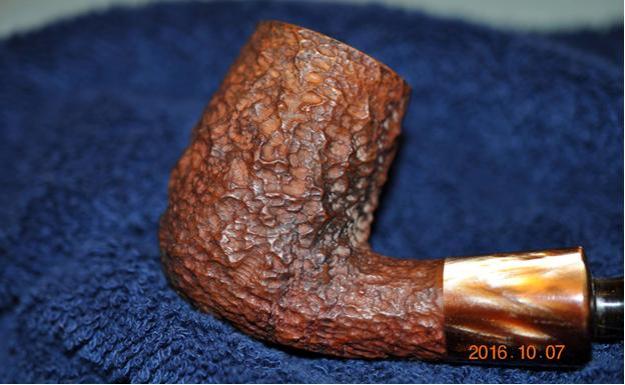
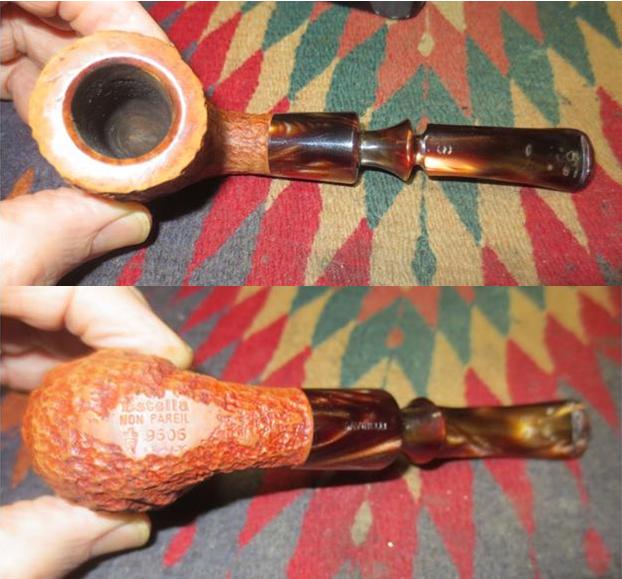
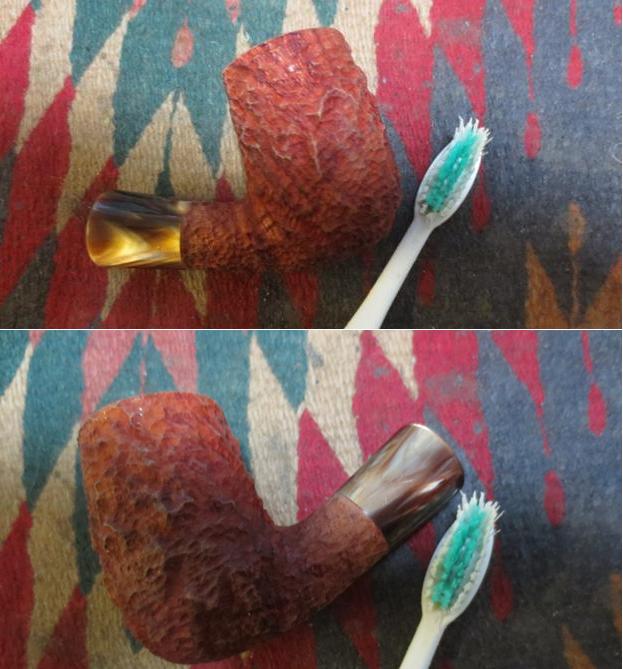
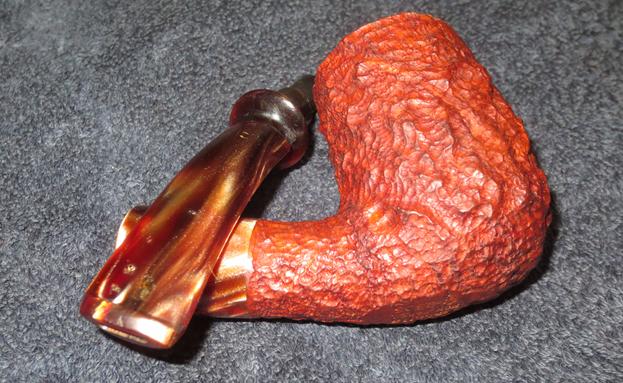
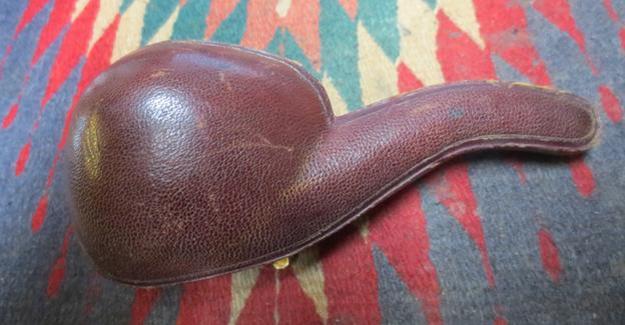
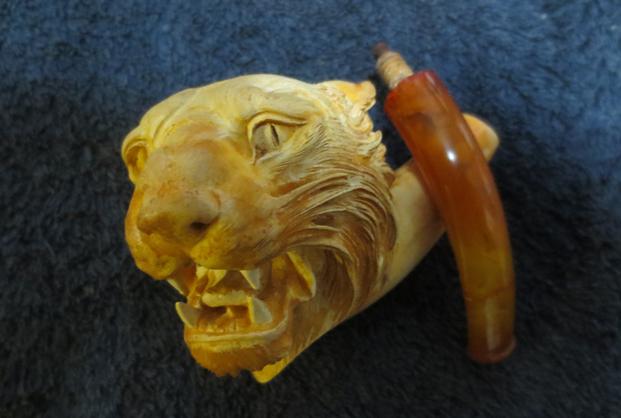
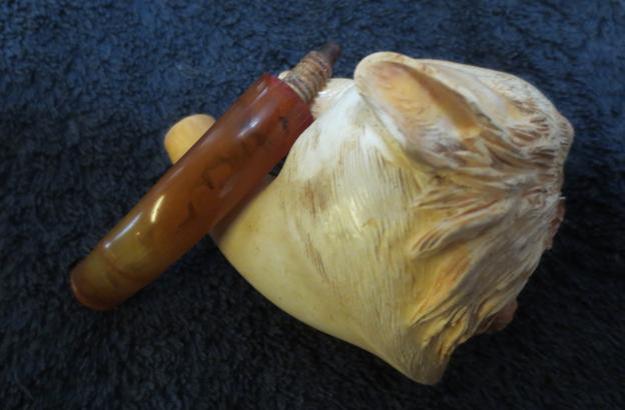
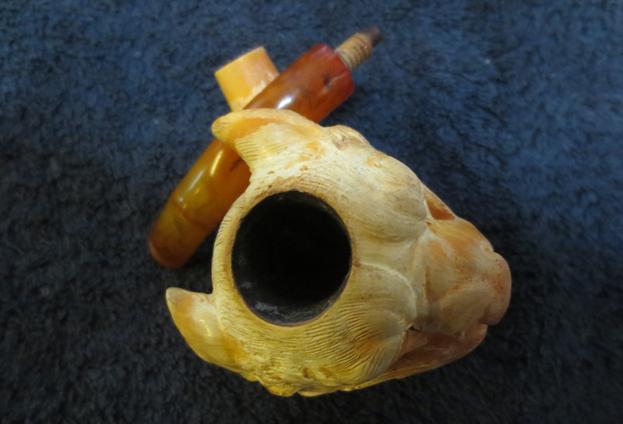
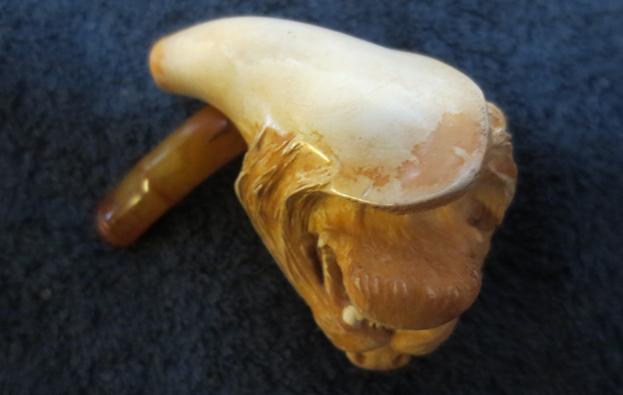
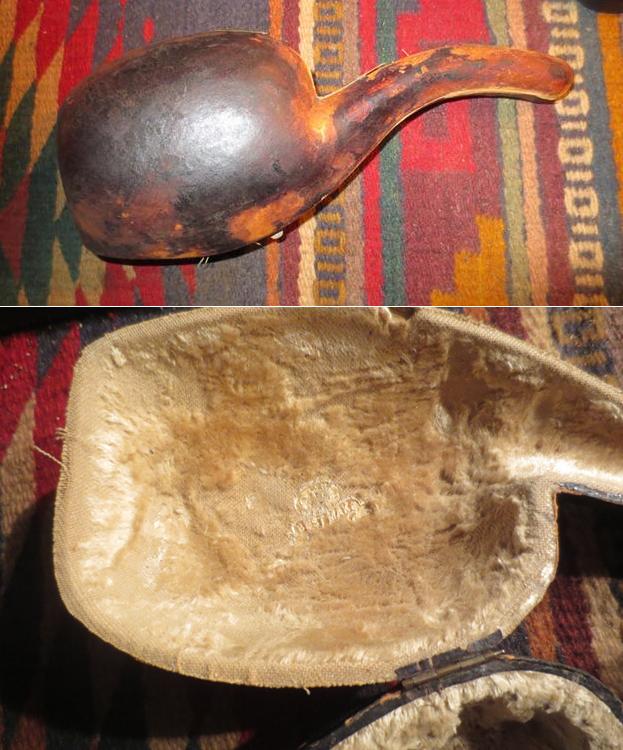
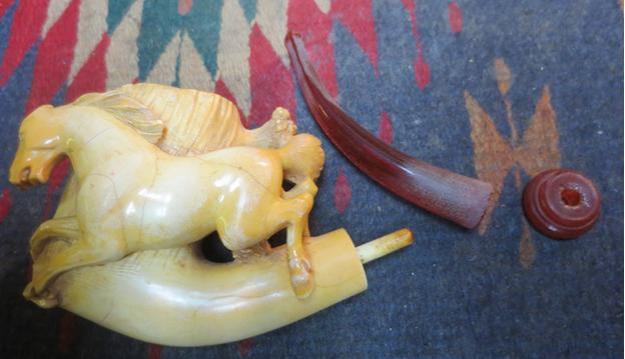
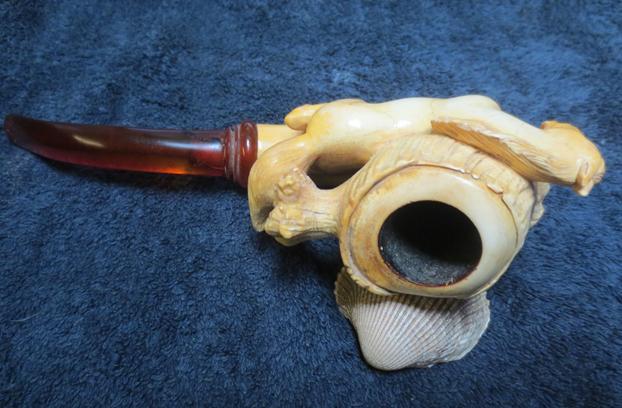
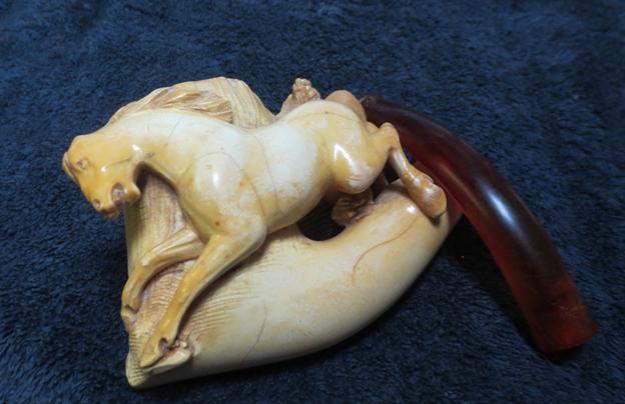
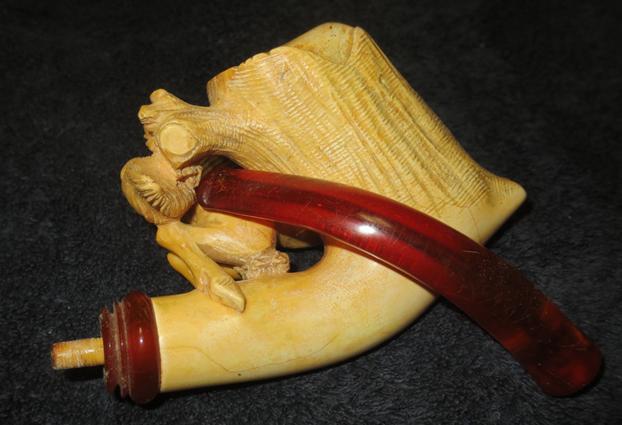
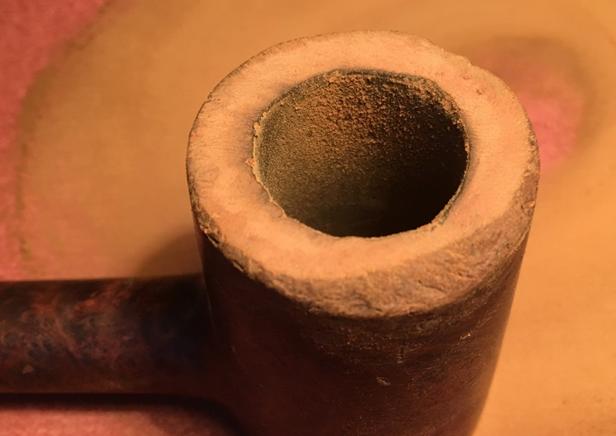
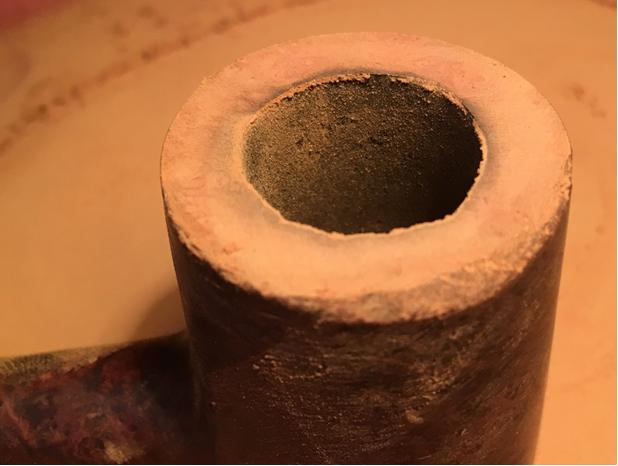
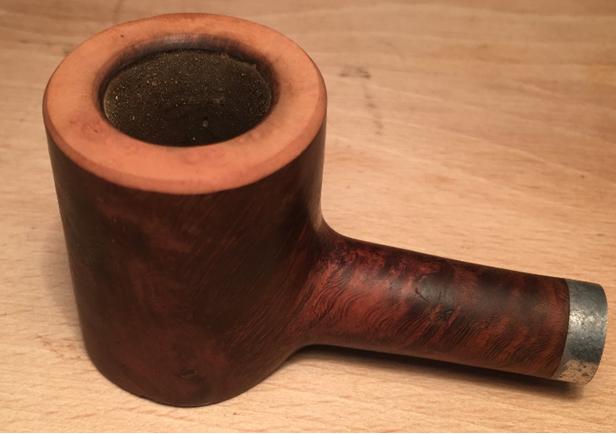
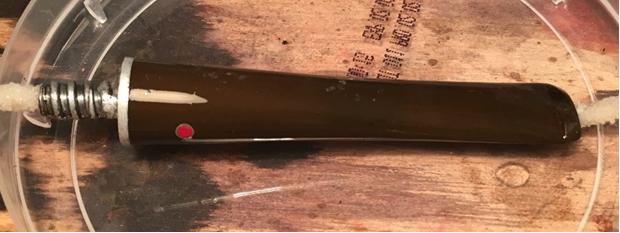
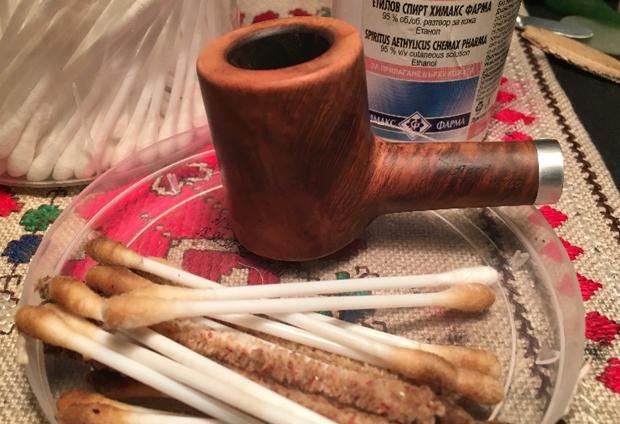
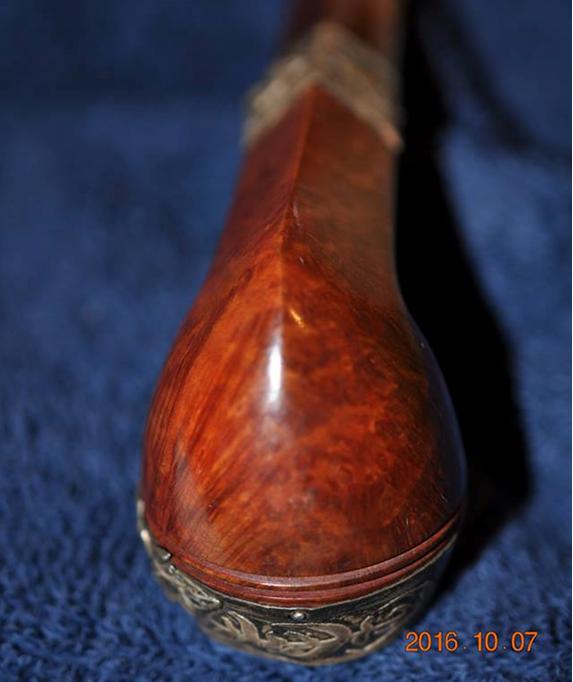
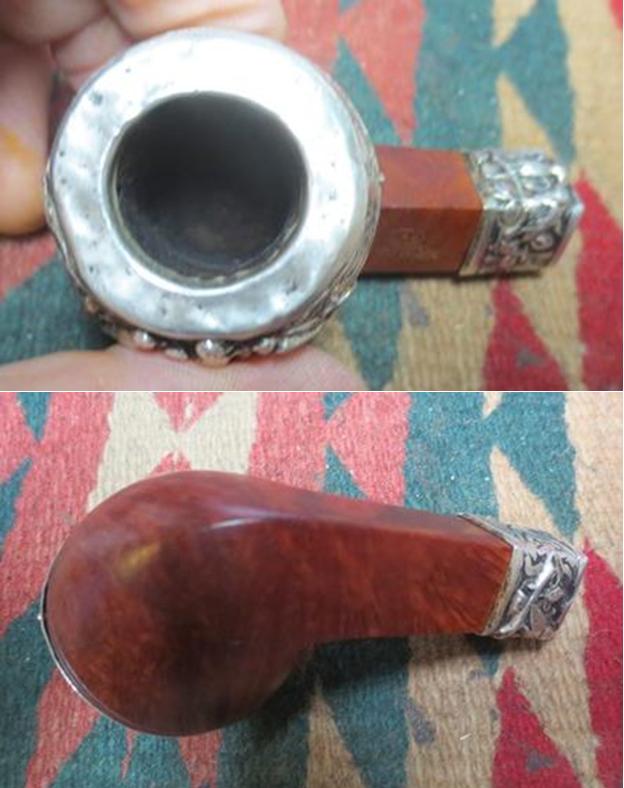
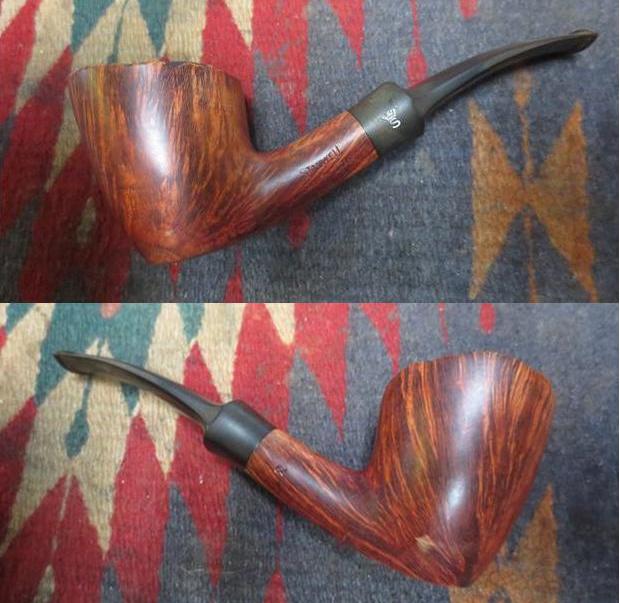
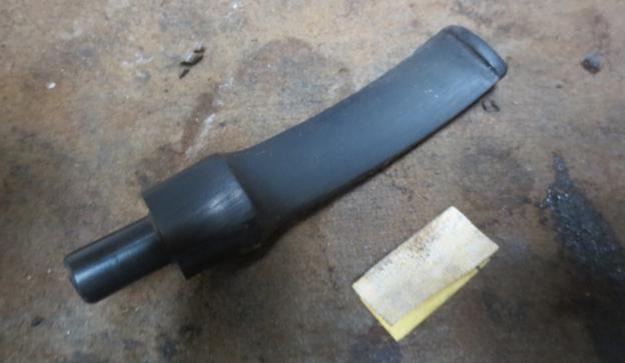
When the pipe arrived in Vancouver it was inside of a Castello suede bag missing only the drawstrings at the top. It bore the classic Castello Castle logo and reading Pipa Castello di Carl Scotti Cantu (Italy) stamped on the front in brown paint/ink. castello7
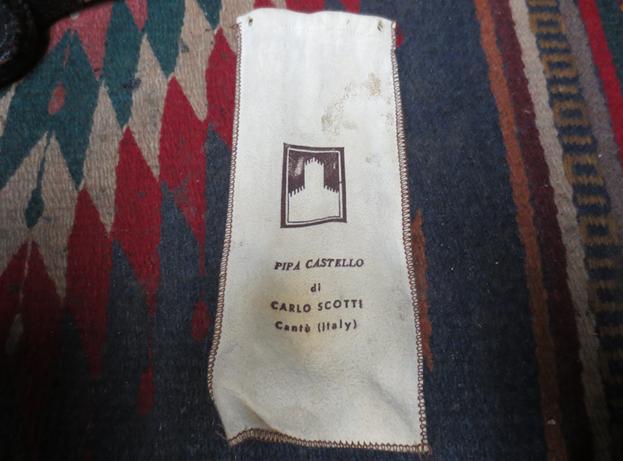
I tipped the pipe out of the bag to see what my brother had done with it. He had written and warned me that he had done a minimal clean up on the pipe as he did not want to damage it. I was not sure what I would see when I removed it from the bag. The four photos below show the state of the pipe when it arrived.castello8 castello9
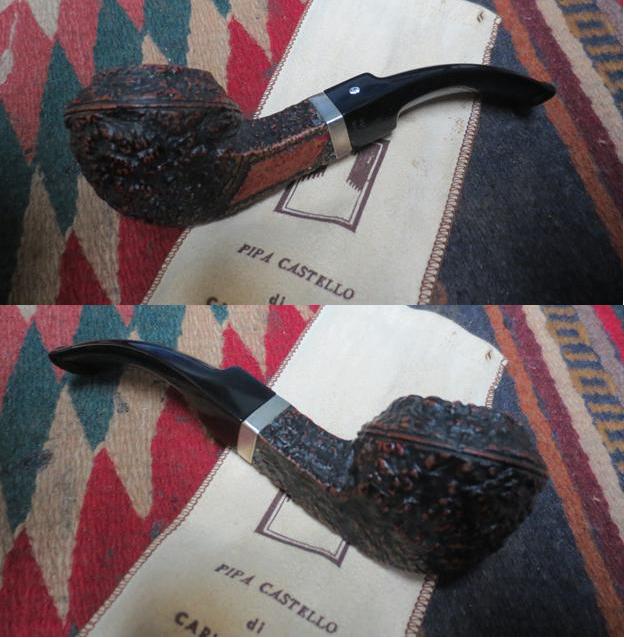
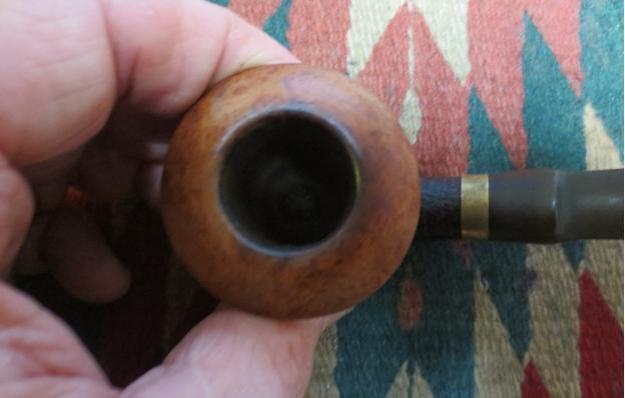
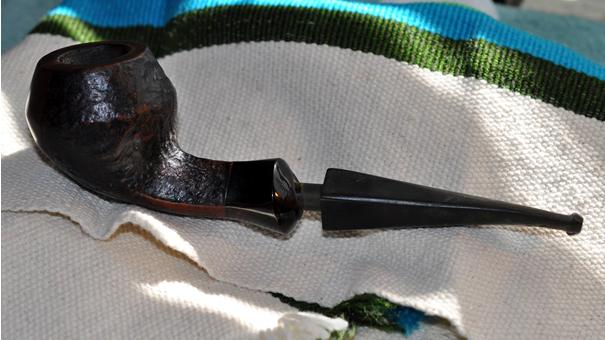
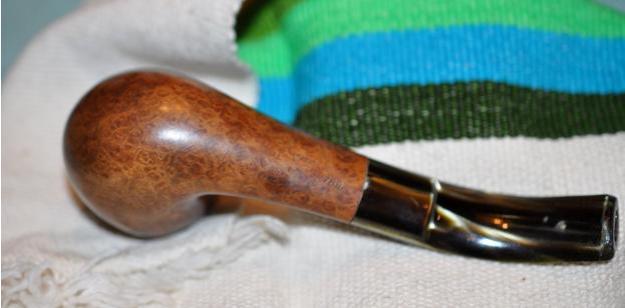
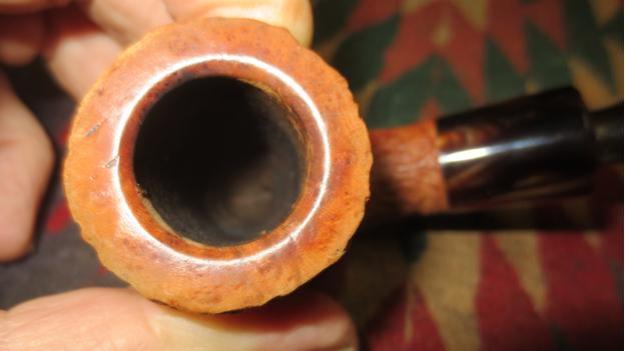
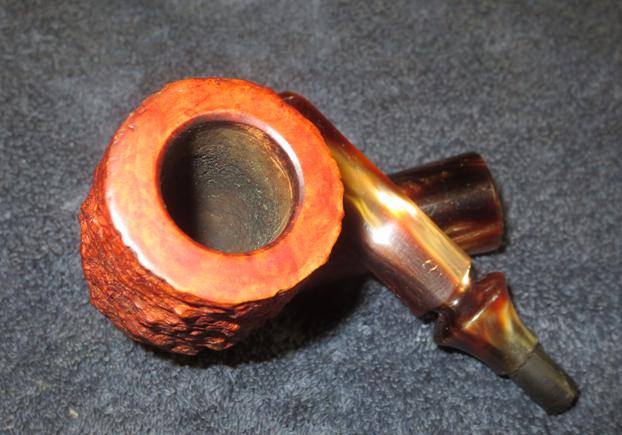
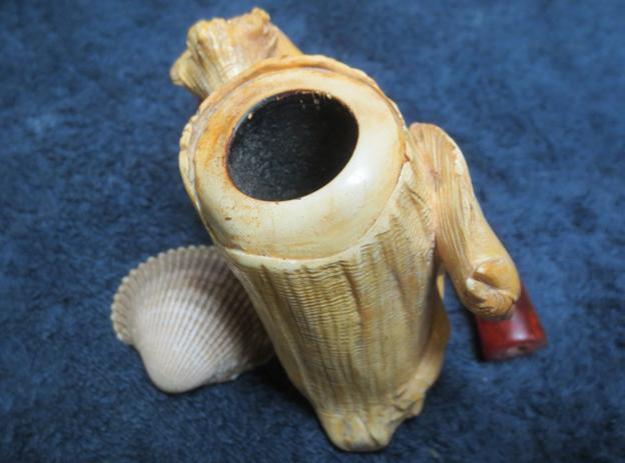
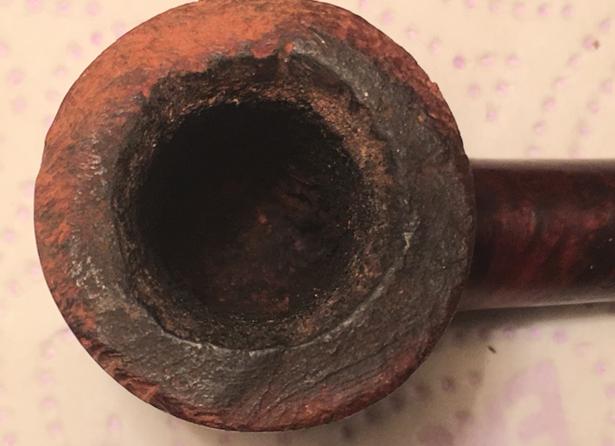
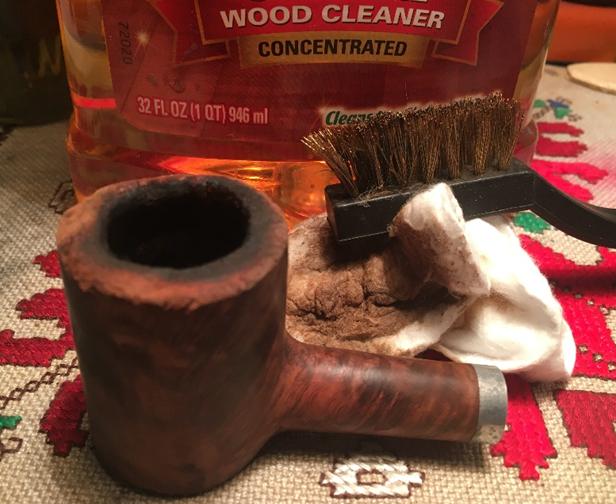
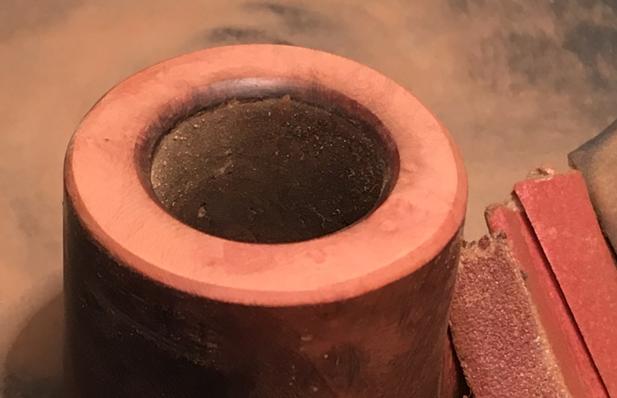
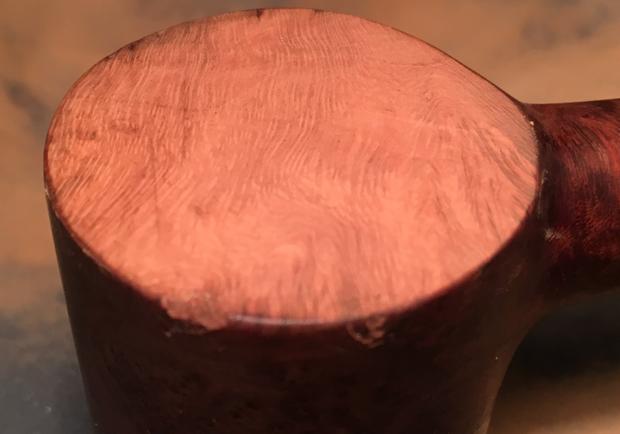
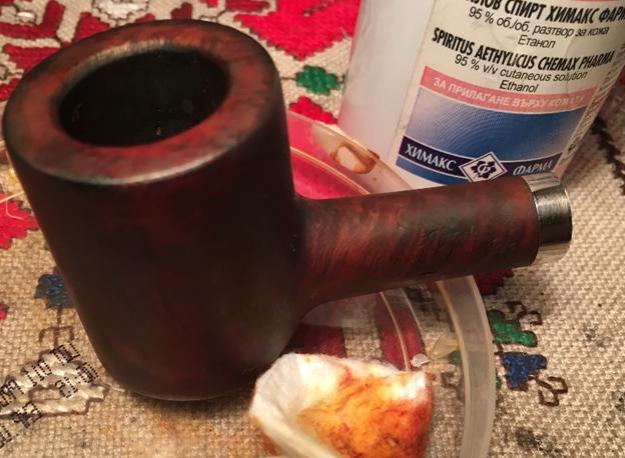
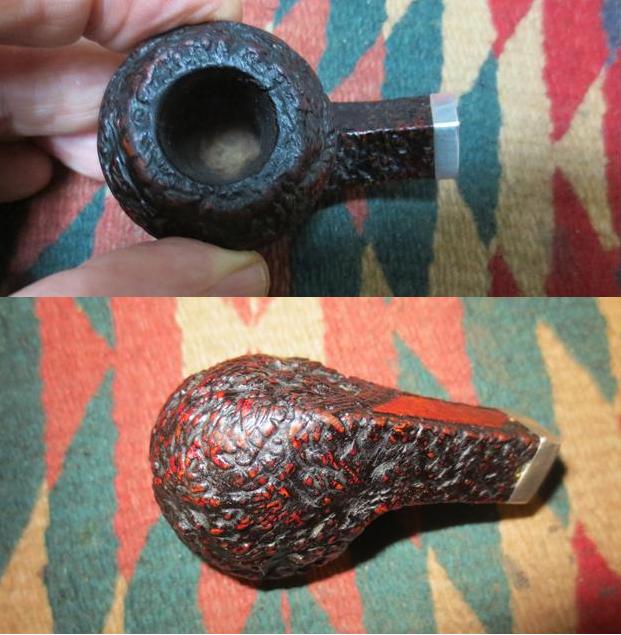
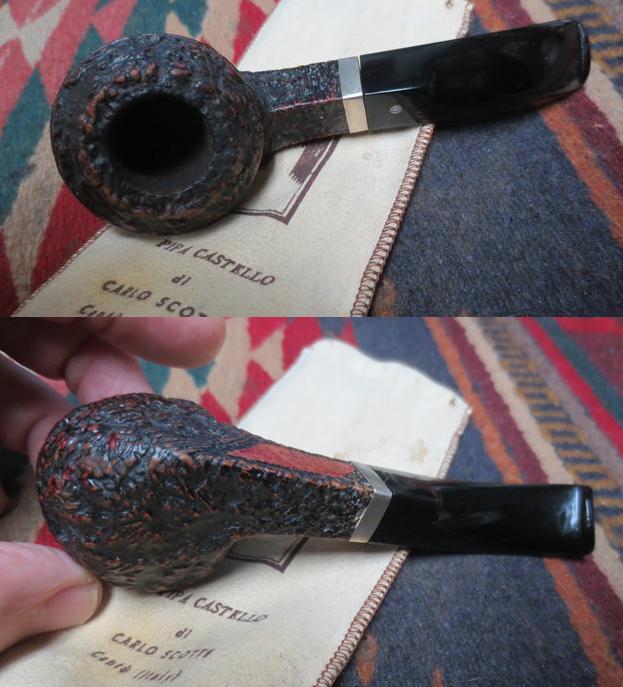
Examining the pipe closely I could see that he had reamed the bowl and cleaned up the rim to remove the tars and oils that had overflowed onto the top of the rim. He had also cleaned the finish on the pipe quite nicely. The internals were cleaner but would need some more work but the pipe looked pretty good.castello10
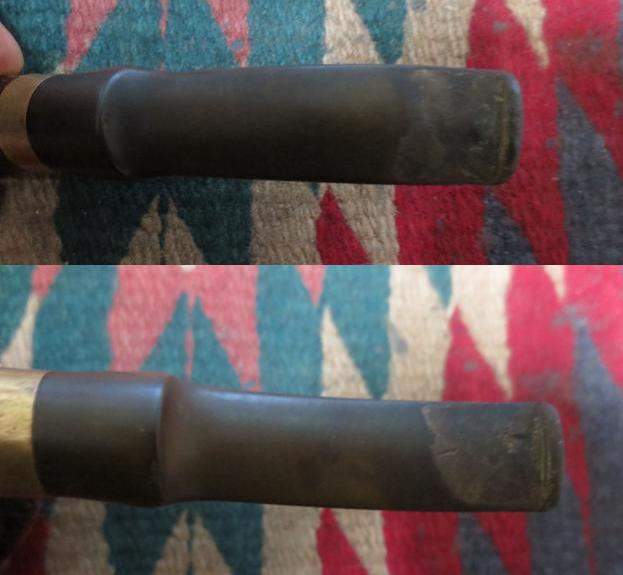
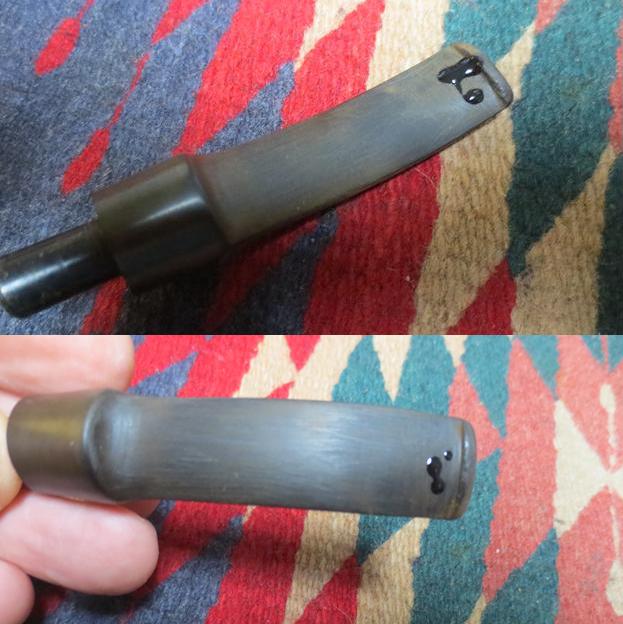
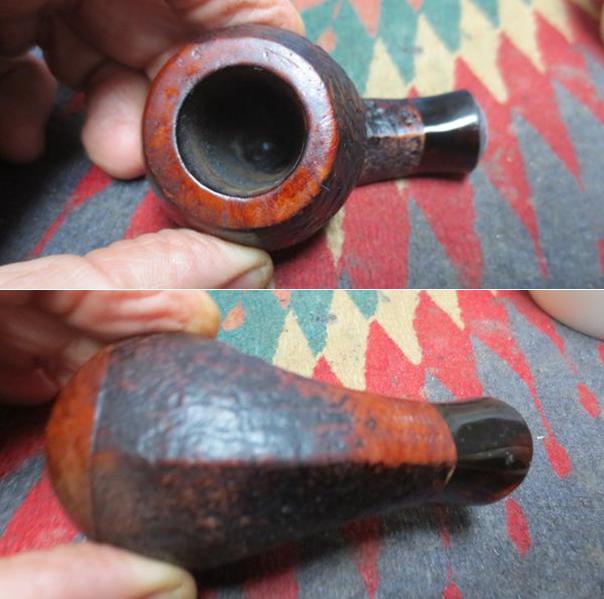
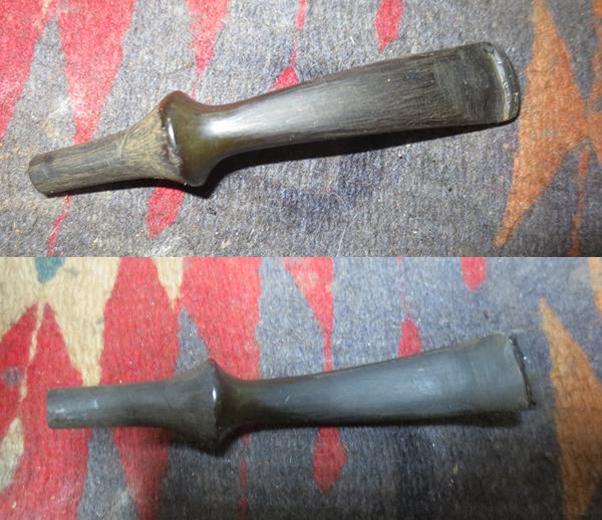
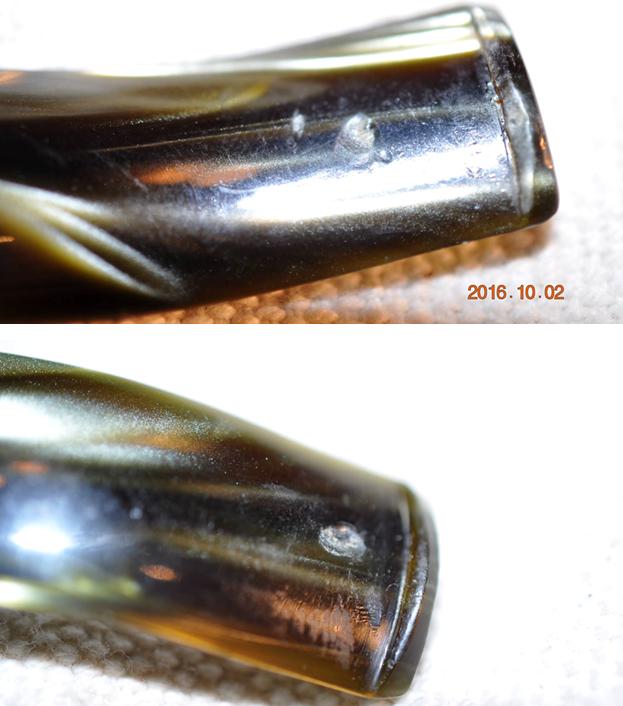
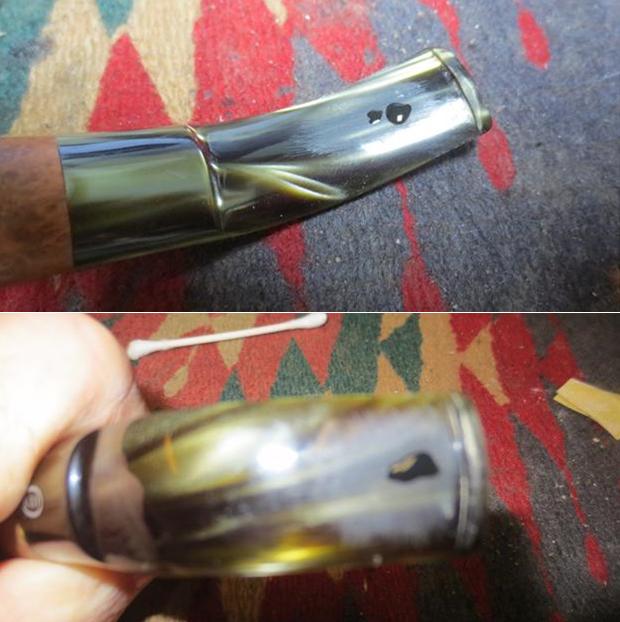
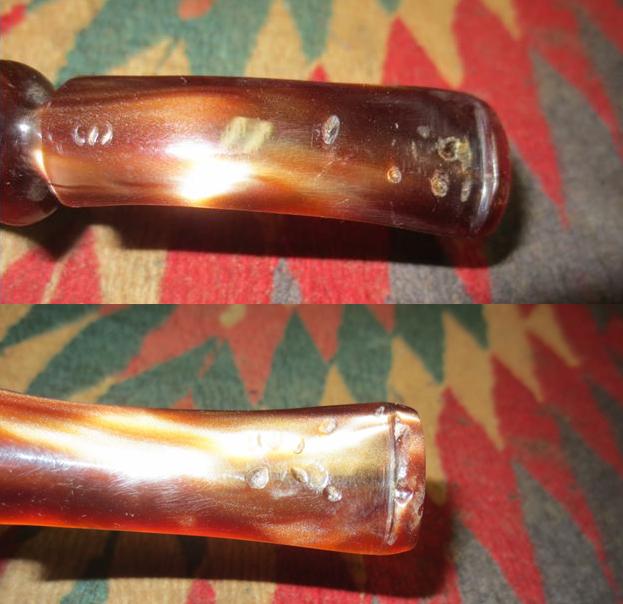
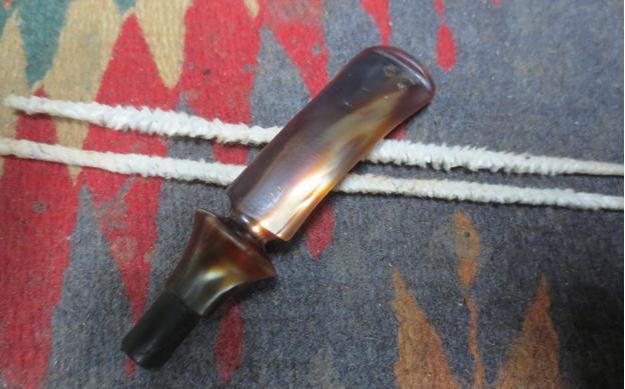
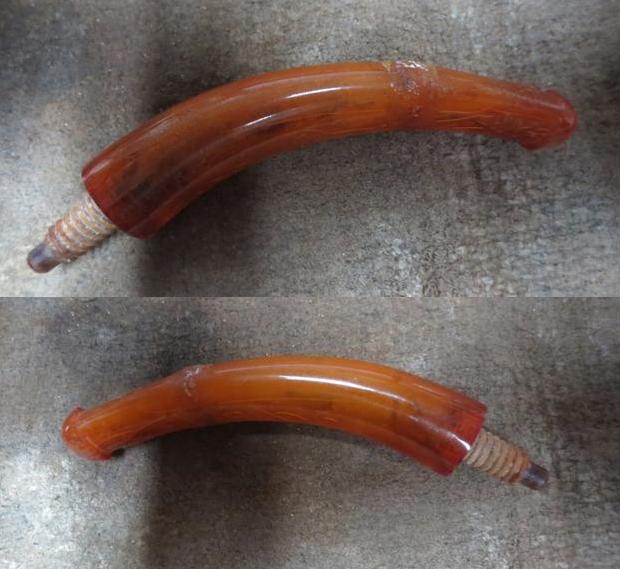
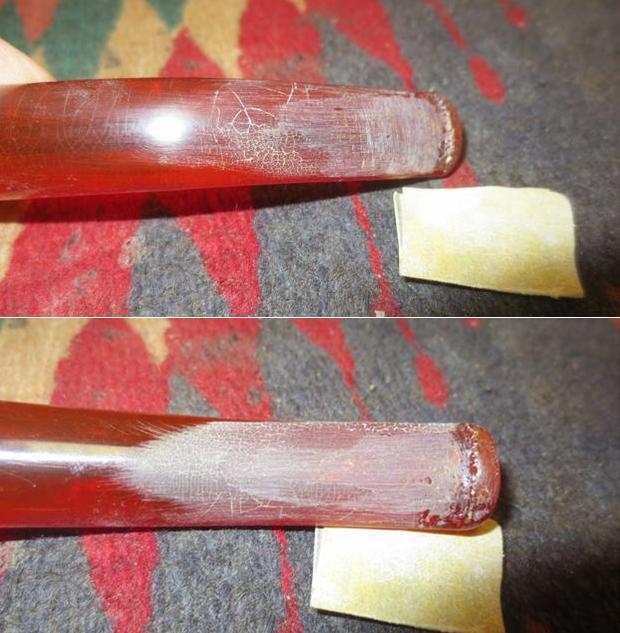
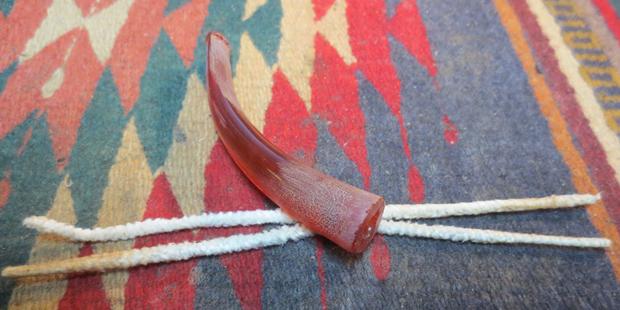
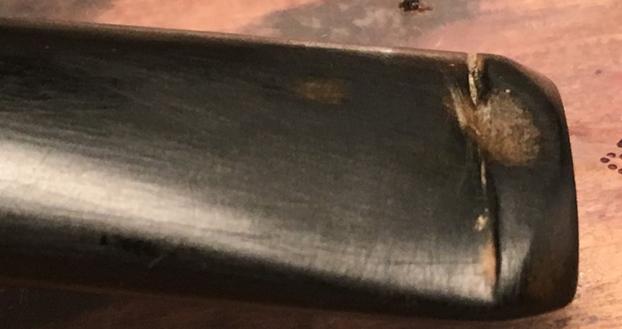
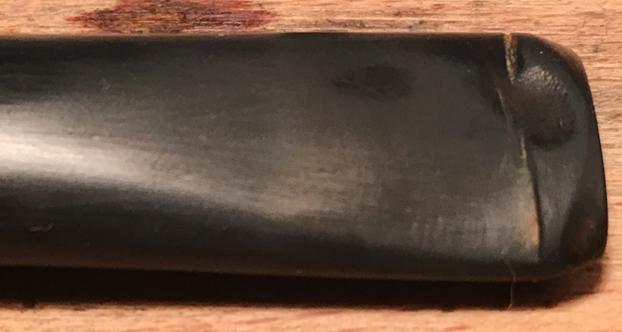
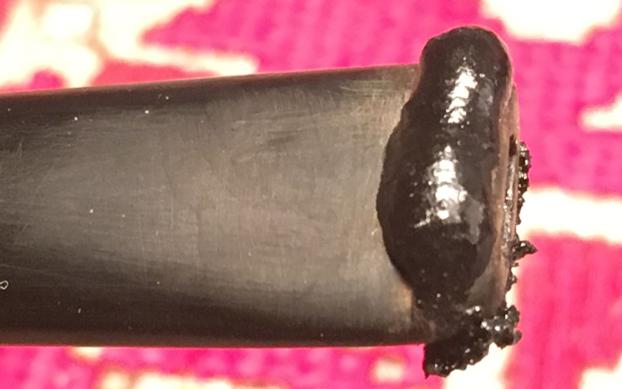
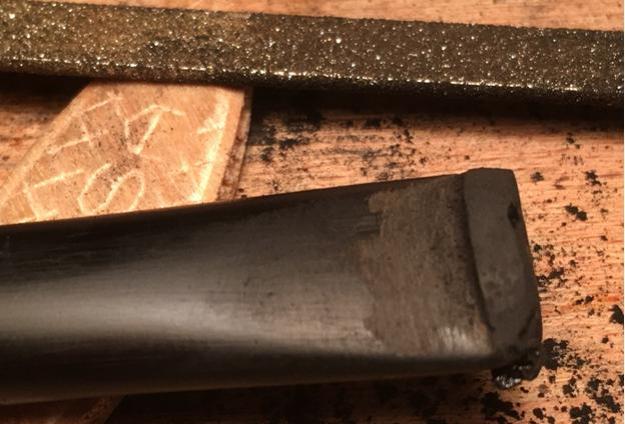
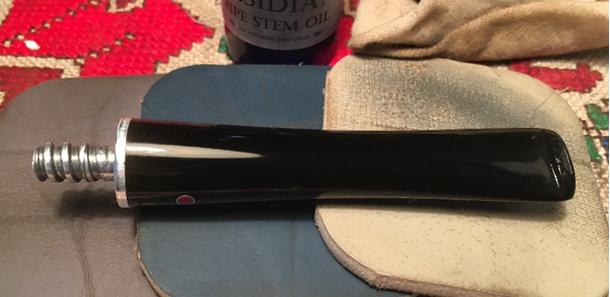
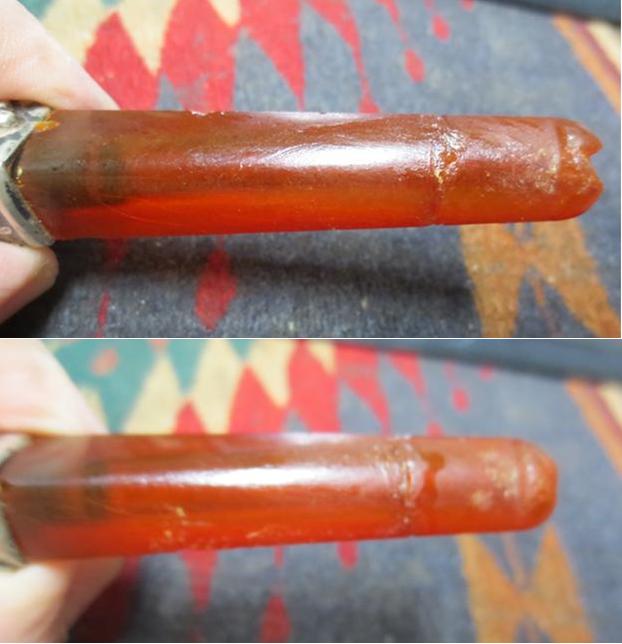
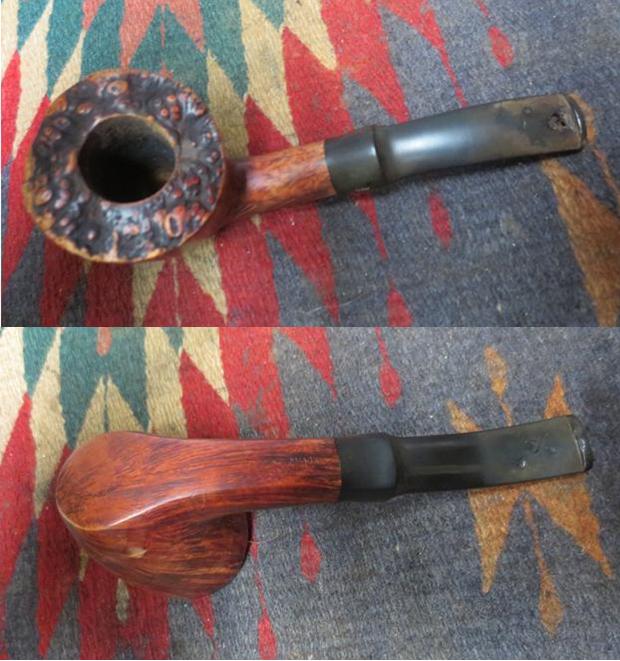
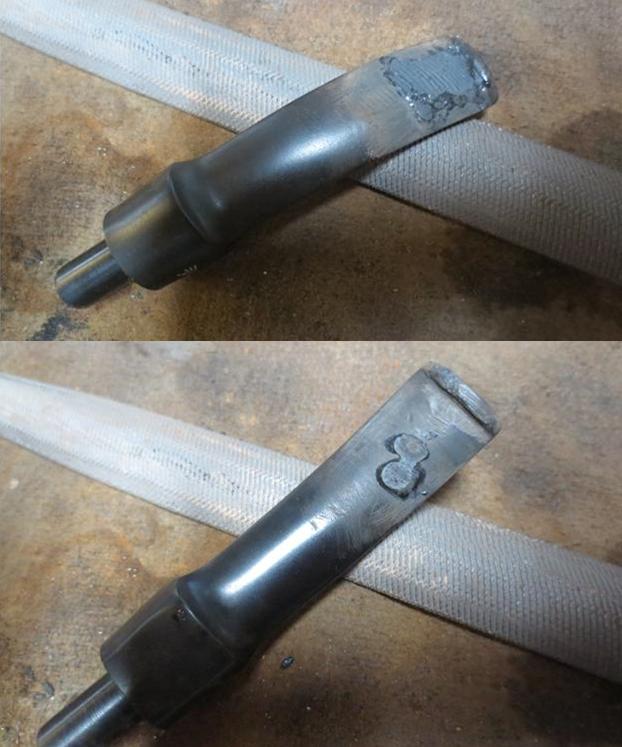
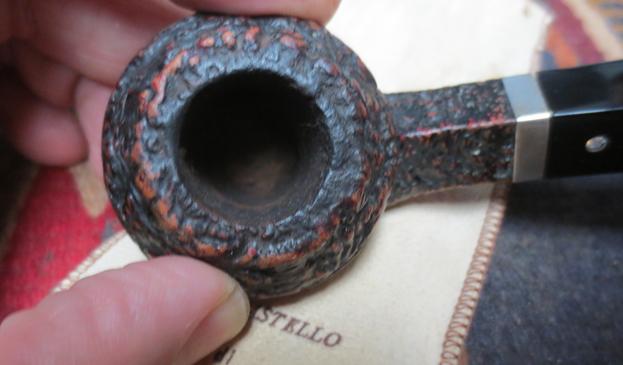
I took some photos of the stem to show the tooth marks on the top and underside near the button. In the first photo of the top, you can see the tooth mark neat the button and the one on the top edge of the button. In the second photo you can see the damage to the underside of the stem near the button and on the top of the button there as well.castello11
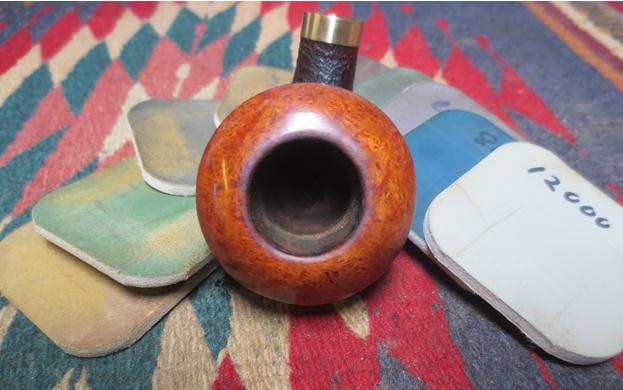
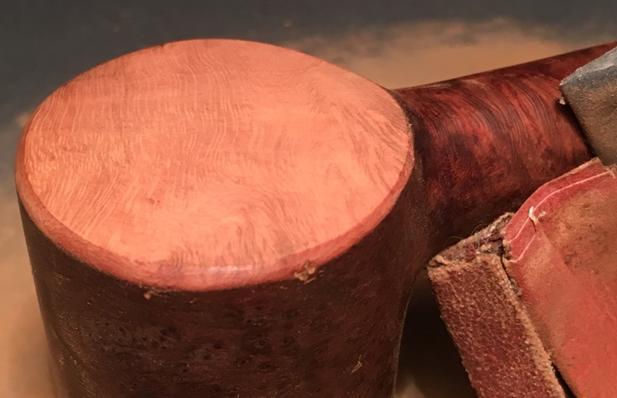
I used a brass bristle tire brush to clean up the small particles that still remained in the grooves on the rim of the bowl. It did not take too much to remove what was left and leave the rim clean.castello12
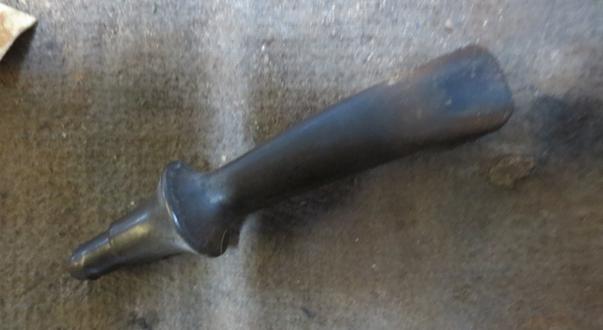
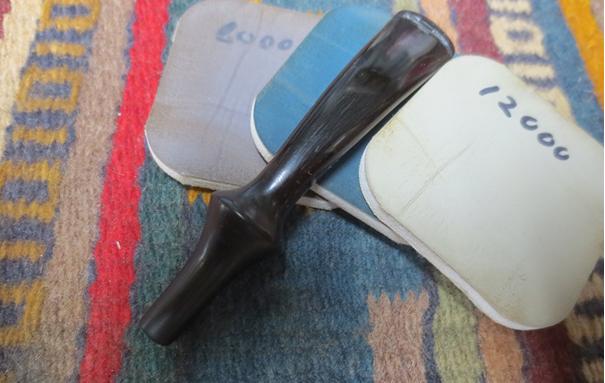
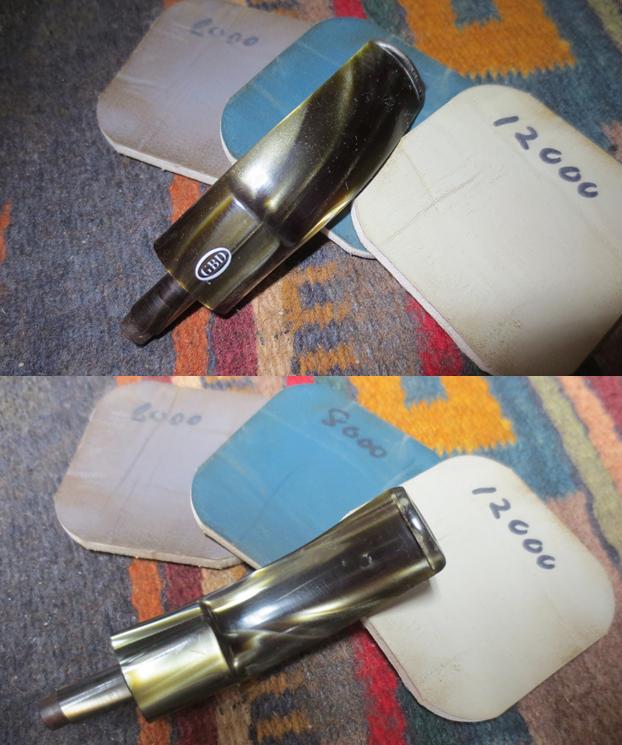
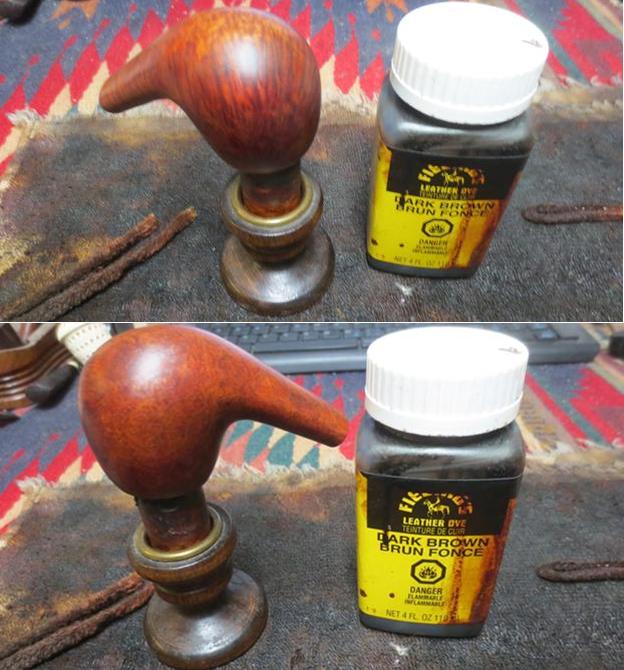
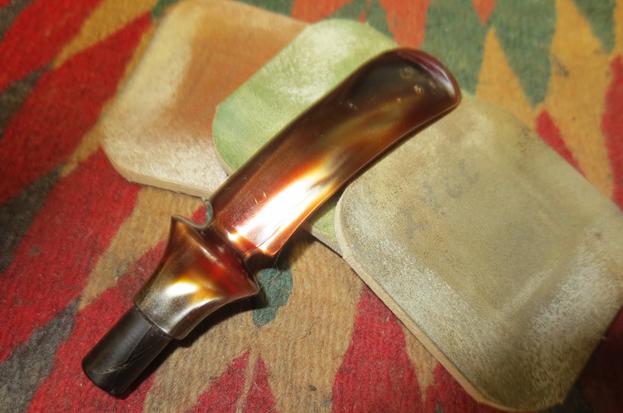
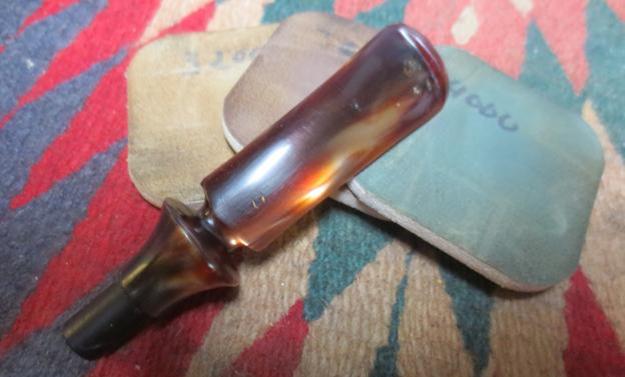
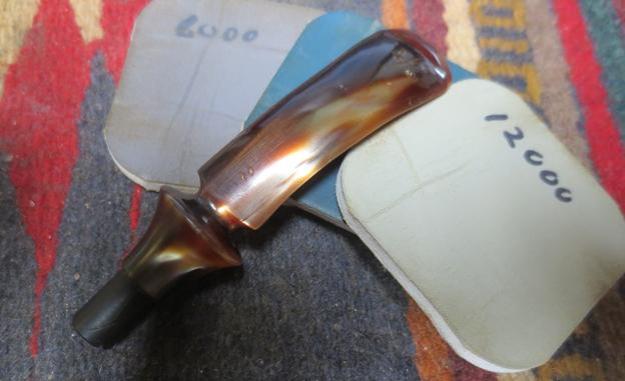
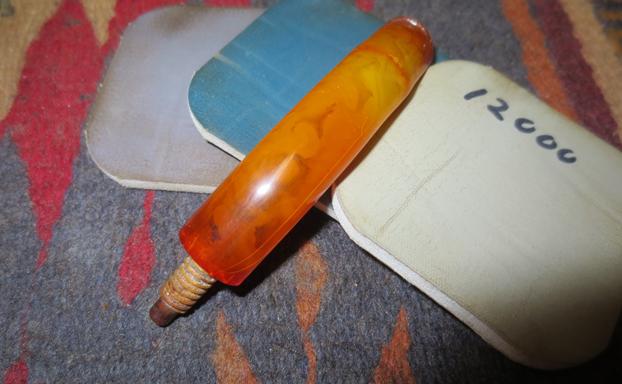
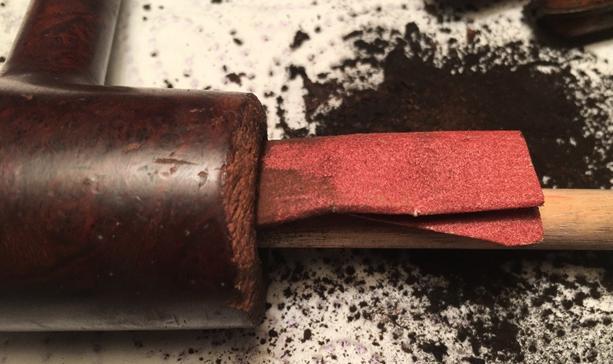
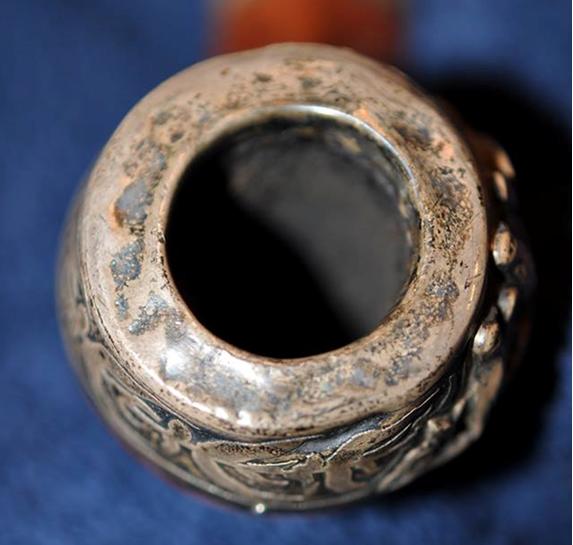
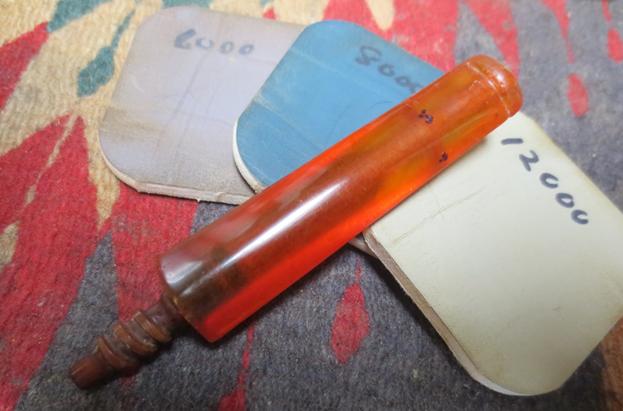
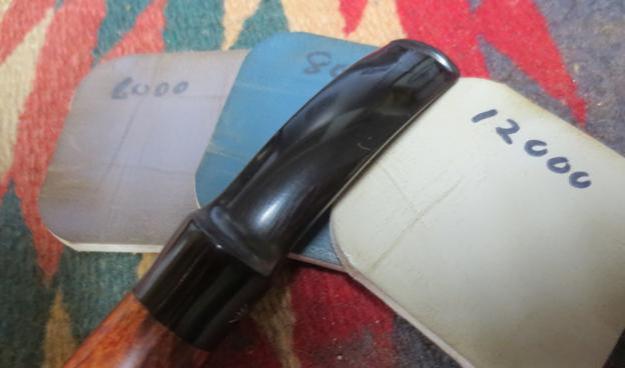
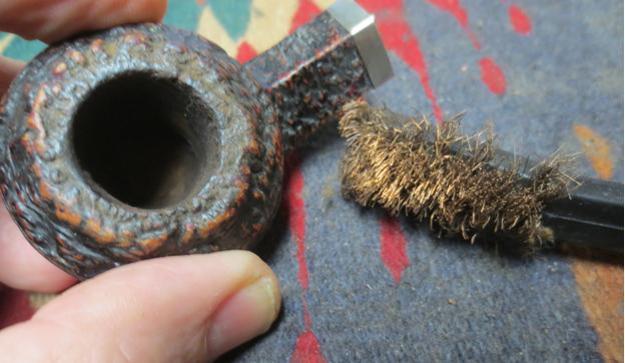
I wiped off the sticky spots on the silver band with a little alcohol on a cotton pad. I could see that the band had been stamping diagonally in several places with letters from the word silver but that none of them spelled it out completely. I was pretty certain from Robert’s article above that the silver band was after market and may be part of a repair to a cracked shank. Cleaning the pipe further would either confirm or deny that assumption on my part. I polished the band with micromesh sanding pads from 1500-12000 grit pads. The polished band is shown in the photo below.castello13
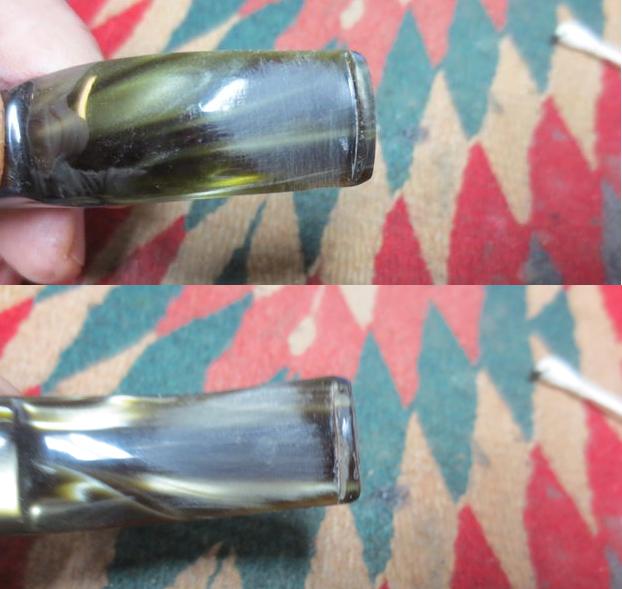
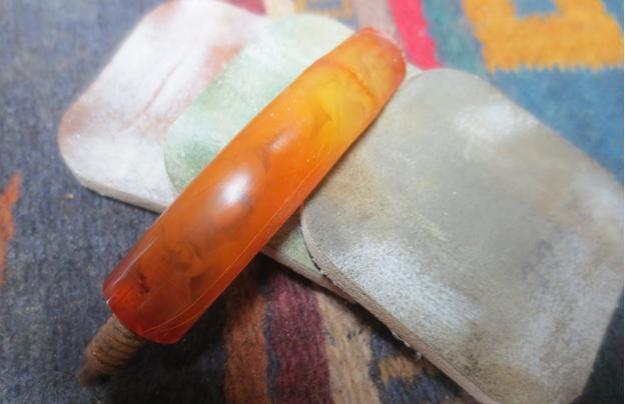
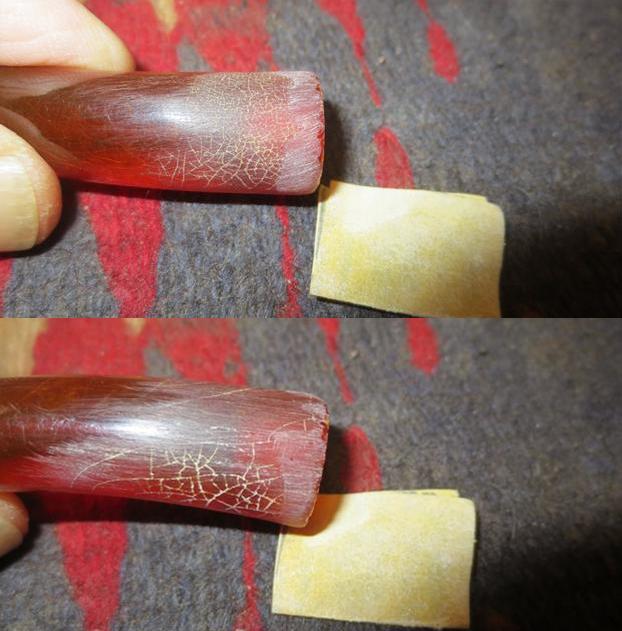
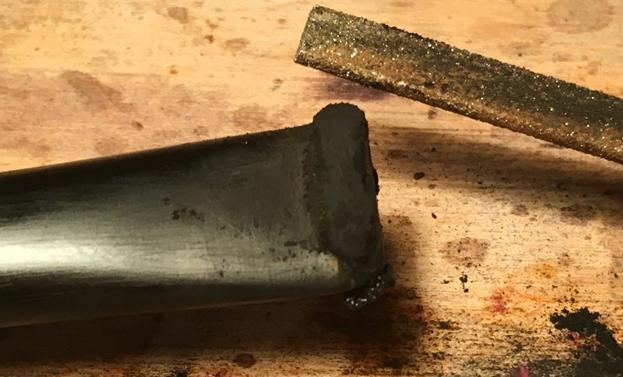
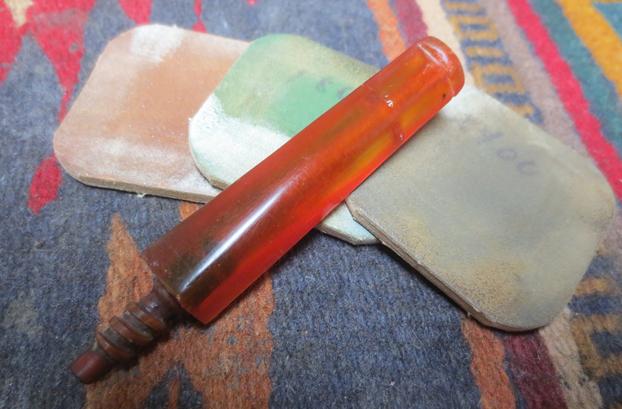
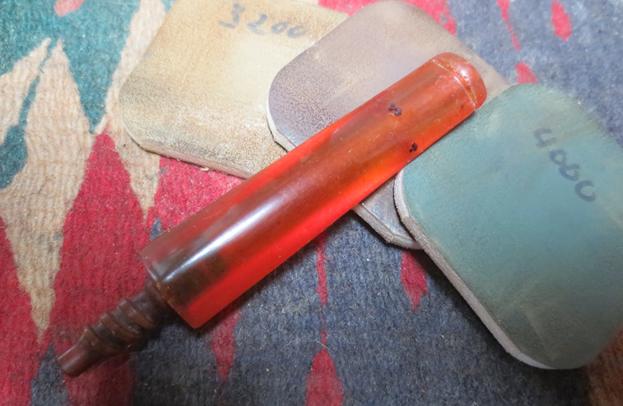
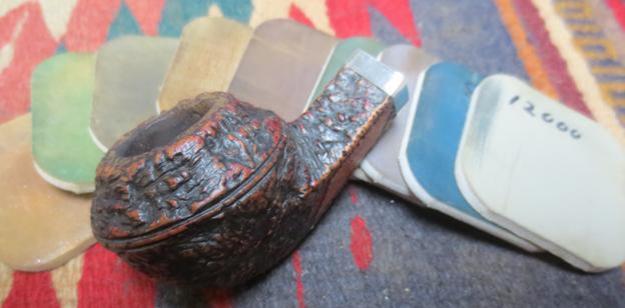
I sanded the tooth marks out on both sides of the stem at the button using 220 grit sandpaper and also sanded the damage to the button surface itself. There was also slight damage to the slot itself on the end of the button. I sanded the slot and cleaned up the damaged areas there. castello14
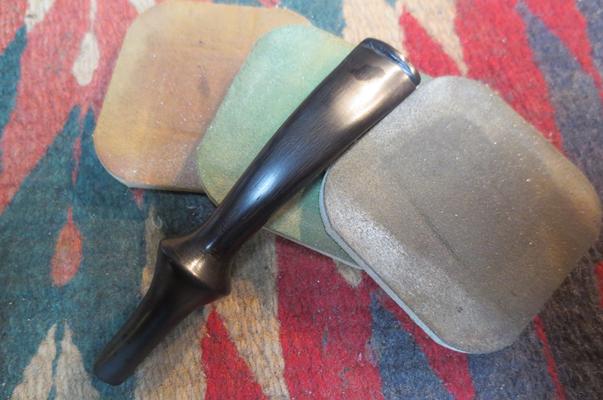
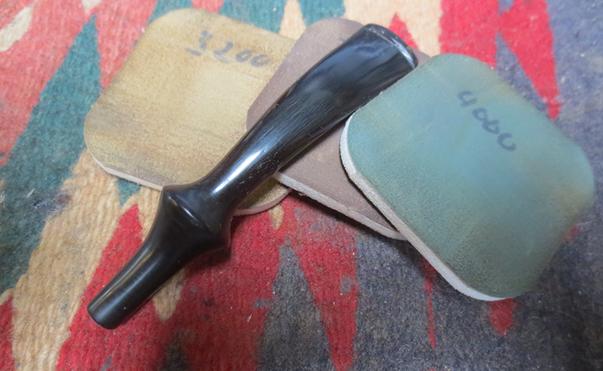
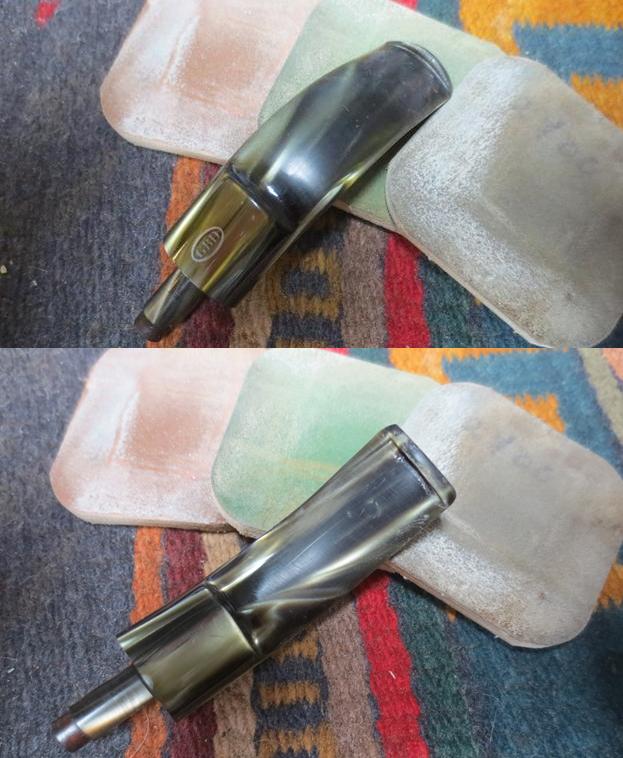
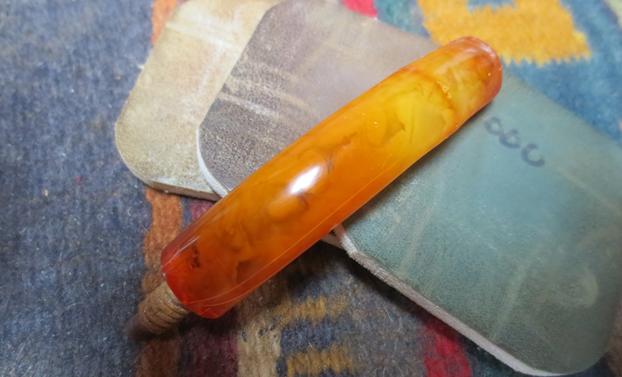
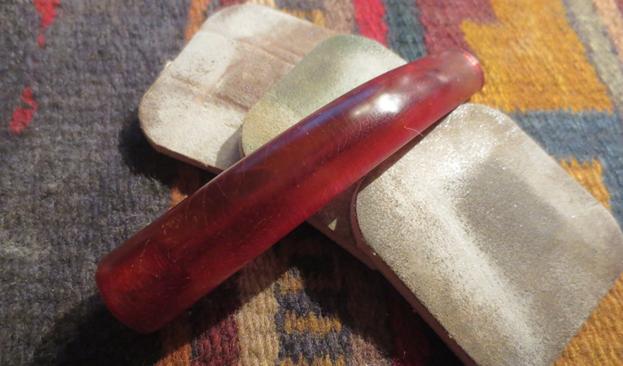
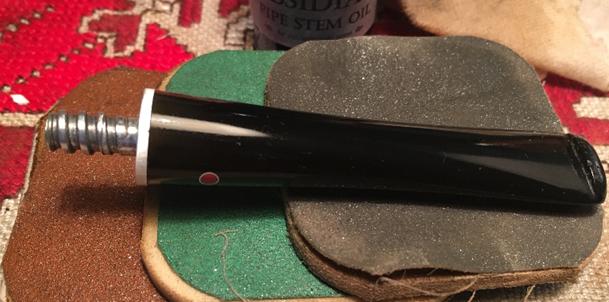
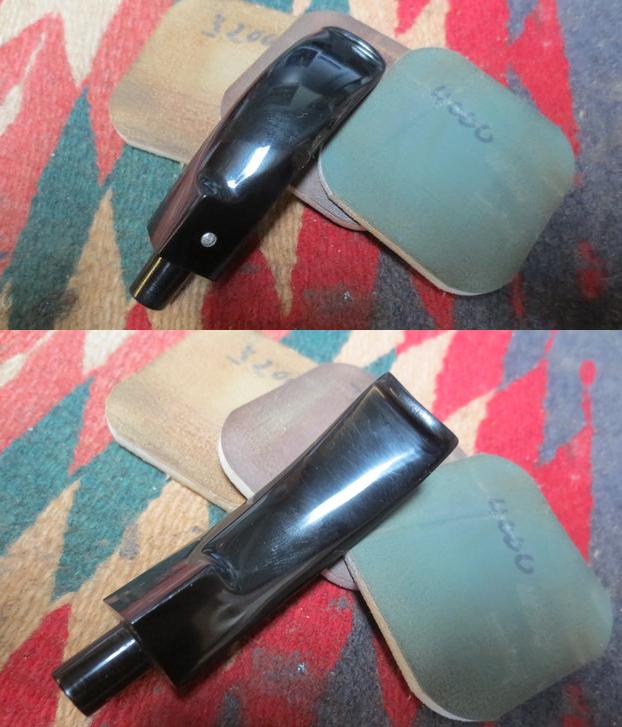
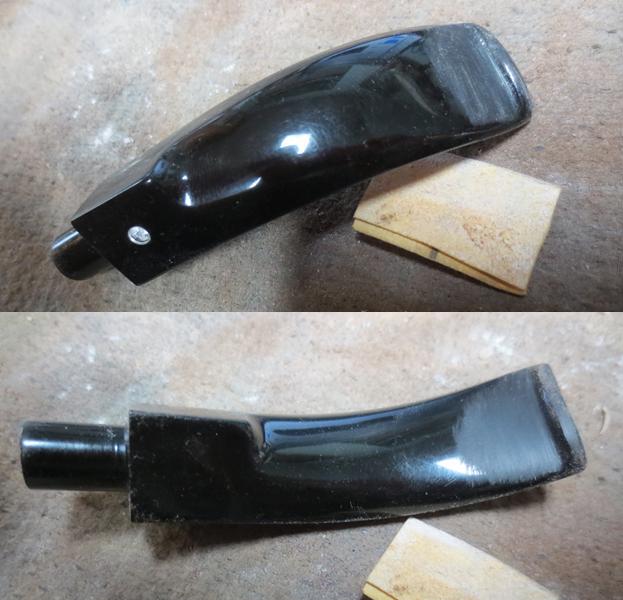
I used micromesh sanding pads to polish the newly sanded areas on the Lucite stem surface. I wet sanded with 1500-2400 grit pads and wiped the stem down with a damp cotton pad. I dry sanded it with 3200-12000 grit pads and wiped it down with the damp pad several times throughout the process. In doing so I was able to remove all signs of the damage to stem in those spots along the edge and top of the button.castello15 castello16 castello17
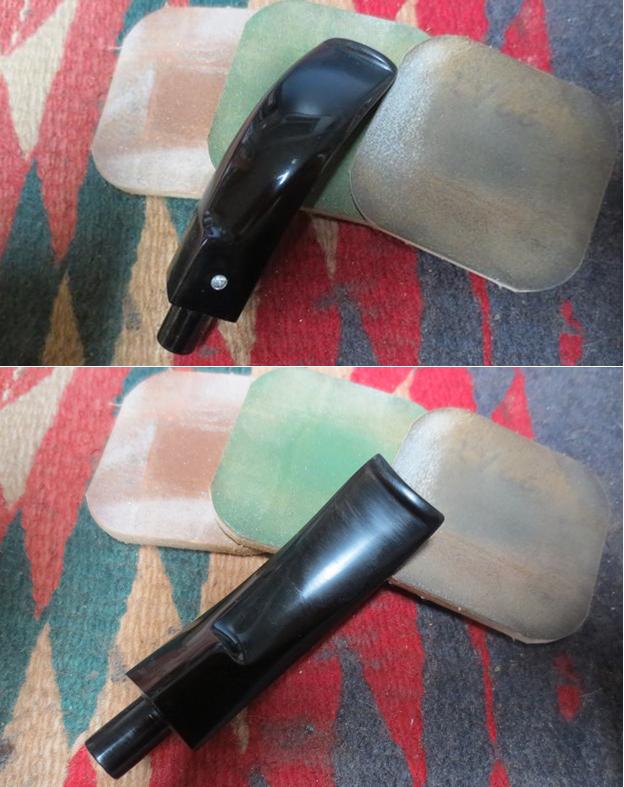
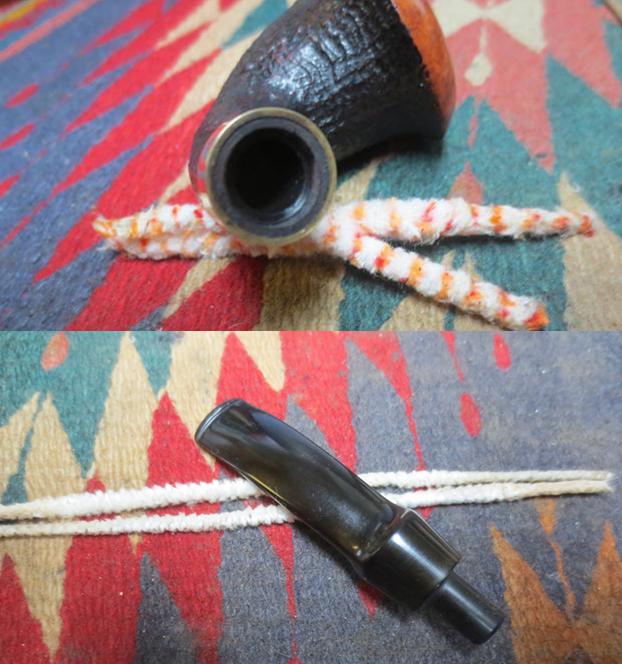
With stem exterior finished other than buffing I ran a pipe cleaner with alcohol through to remove any sanding debris from my clean up and sanding of the surface and the slot. It was remarkably clean.castello18
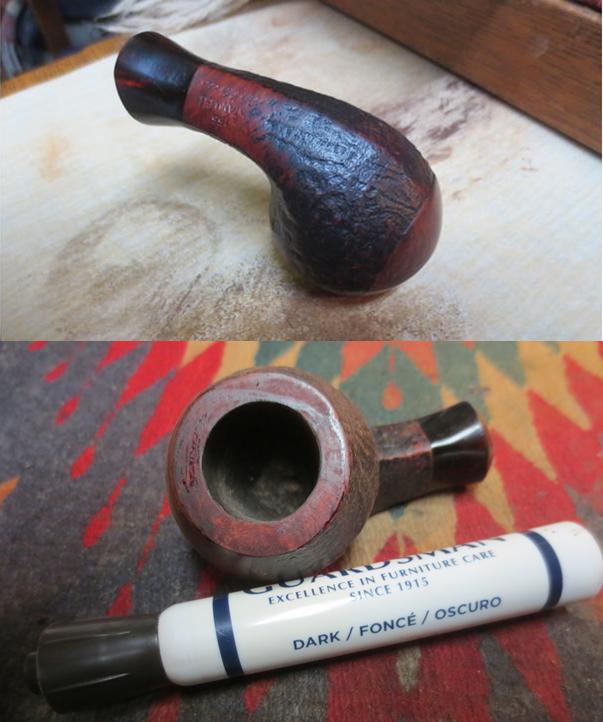
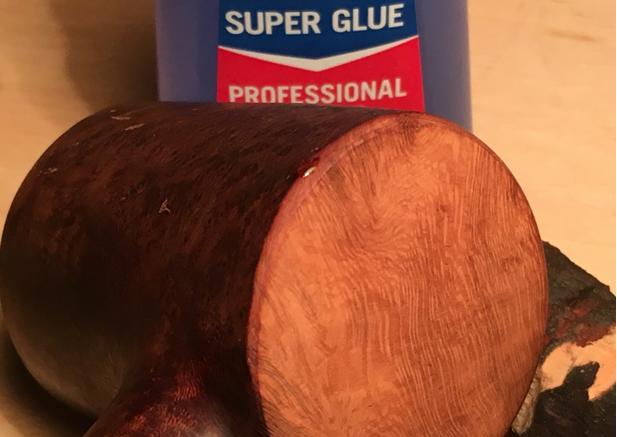
I cleaned out the shank with alcohol, pipe cleaners and cotton swabs to remove the tars and oils that kept the stem from properly seating against the end of the tenon. It was pretty thickly tarred and took some scrubbing to remove the grime. While I was cleaning the interior of the grime I found what I had surmised was under the band. The end and inside of the mortise revealed a small crack underneath the grime. It looked like it had been repaired somewhere along its life. The end of the crack on the shank end was the worst part of the damage. The hairline crack on the exterior of the shank – almost an underline of the word Cantu showed signs of having been glued and clamped until it sealed. That settled my question regarding the purpose of the aftermarket silver band on the shank.castello19 castello20
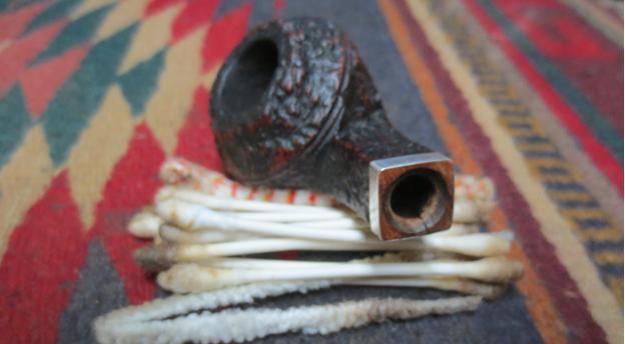
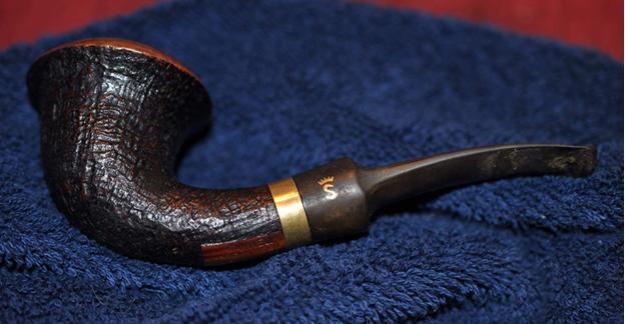
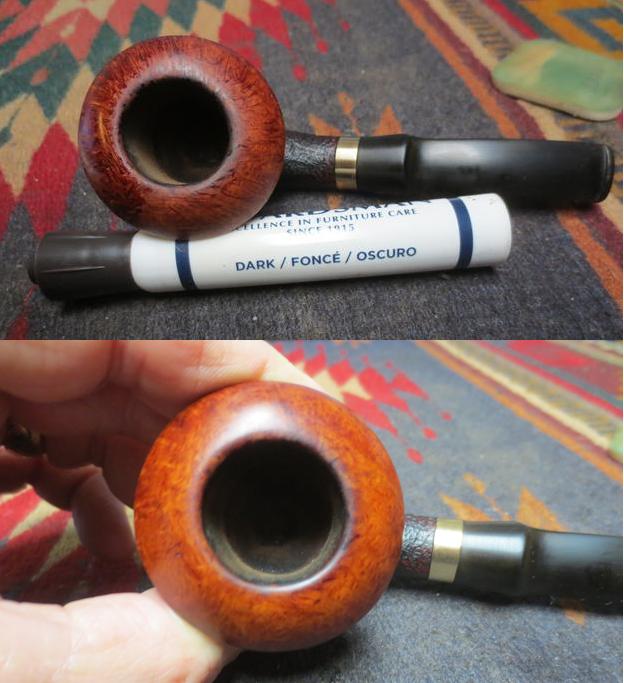
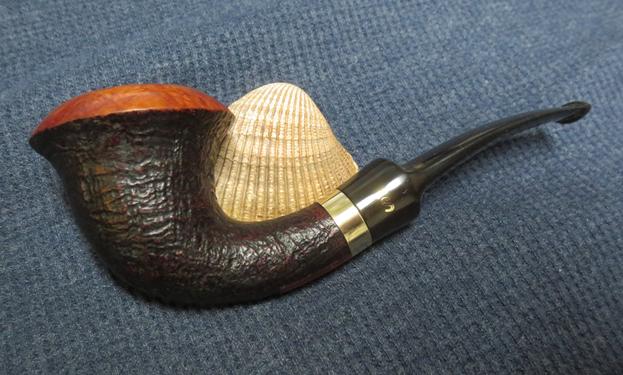
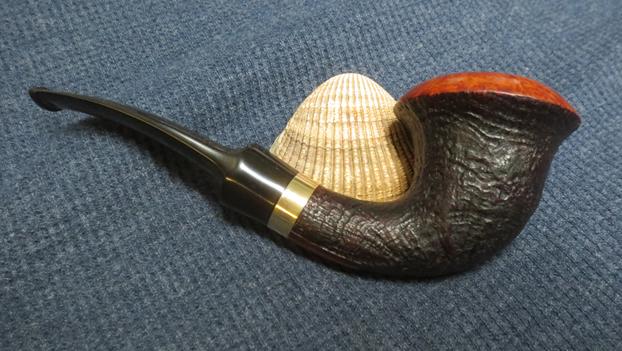
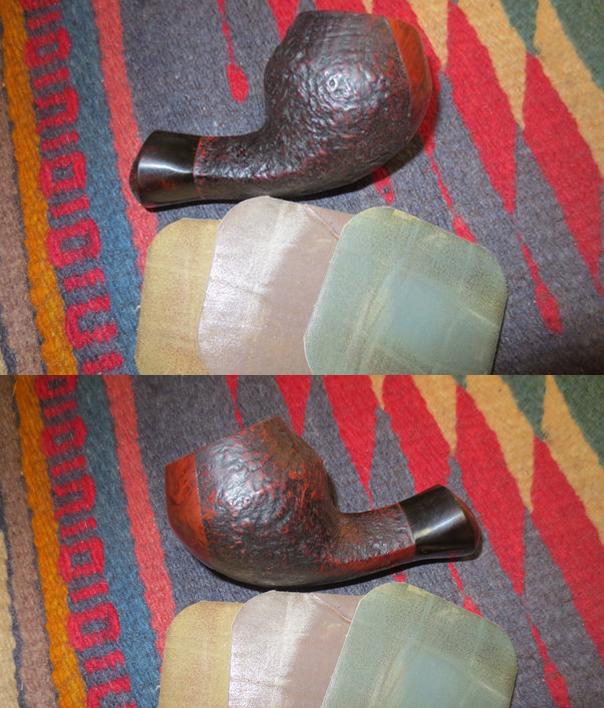
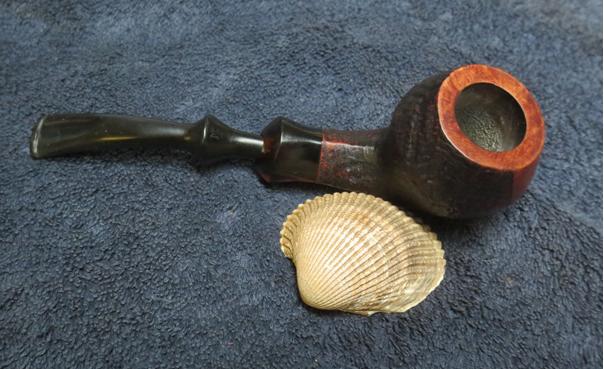
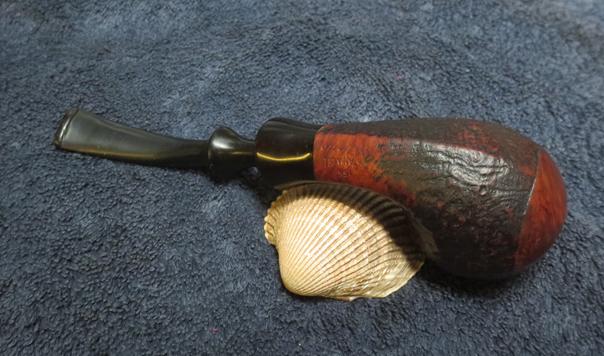
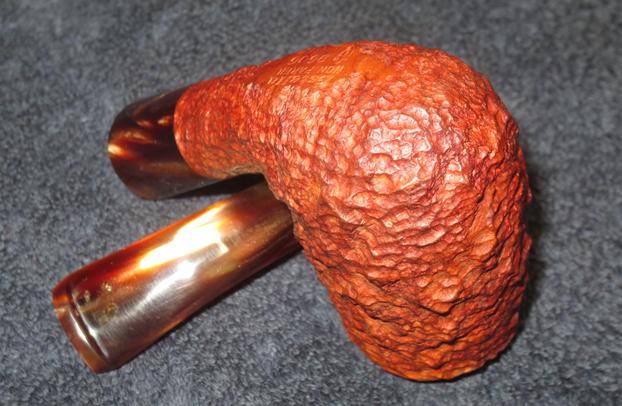
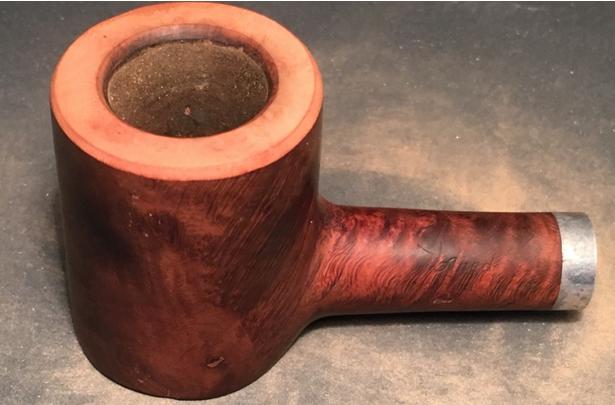
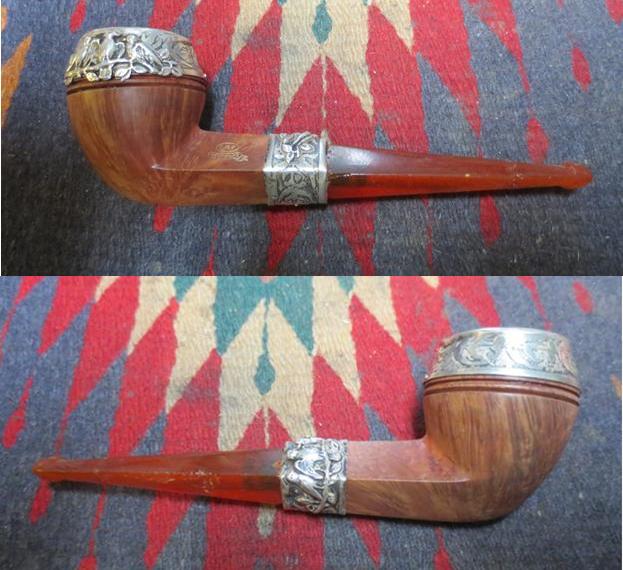
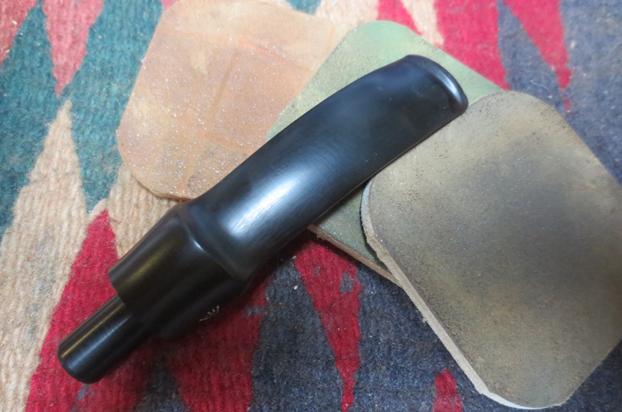
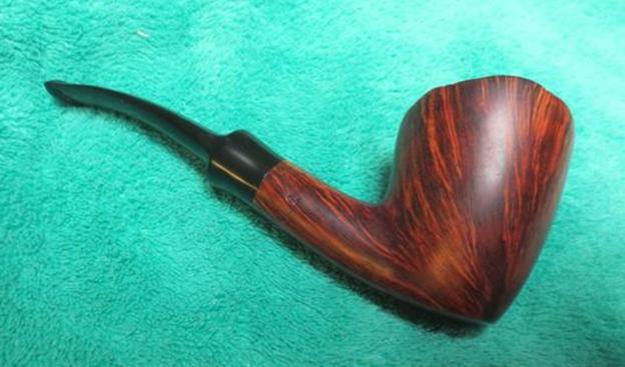
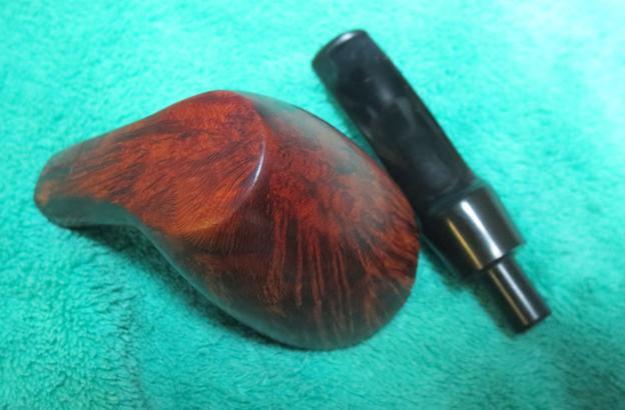
With the internals cleaned and the crack examined with a lens and deemed solid I polished the silver band with a jeweler’s cloth to further remove any remnants of tarnish and give it a deeper shine and protection. I hand waxed the bowl with some Conservator’s Wax and buffed it with a shoe brush to raise the initial shine on the briar. The photos below show the bowl after the waxing and polishing.castello21 castello22
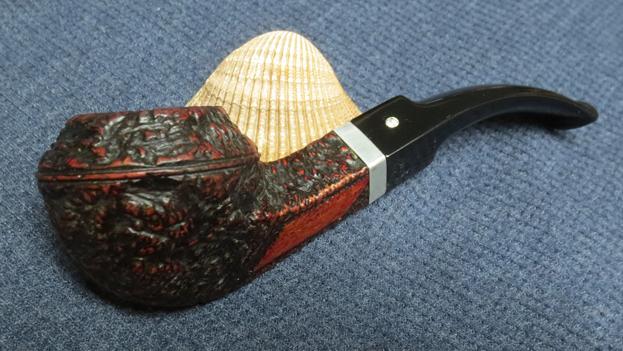
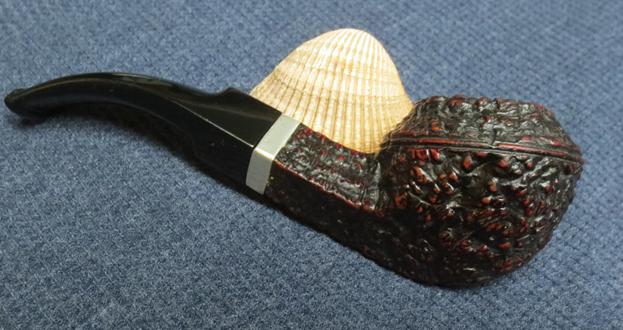
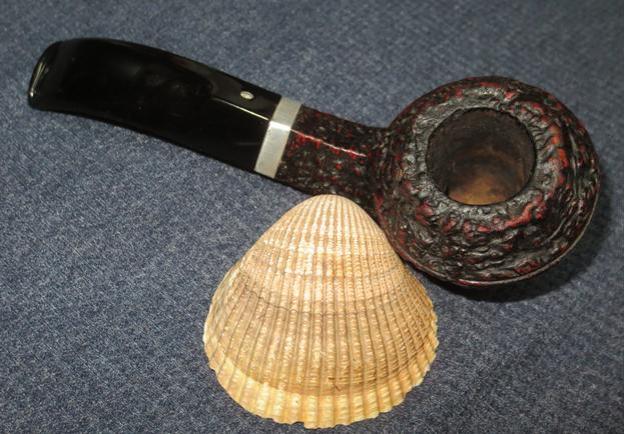
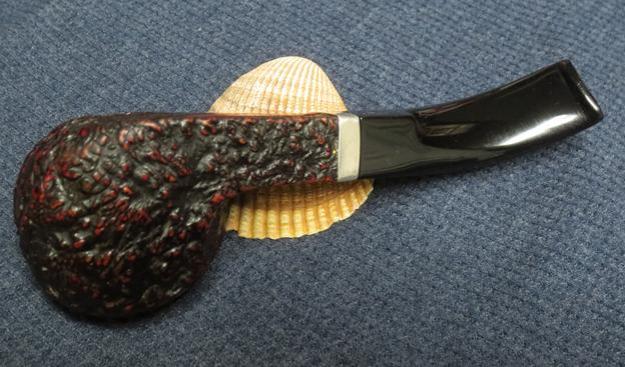
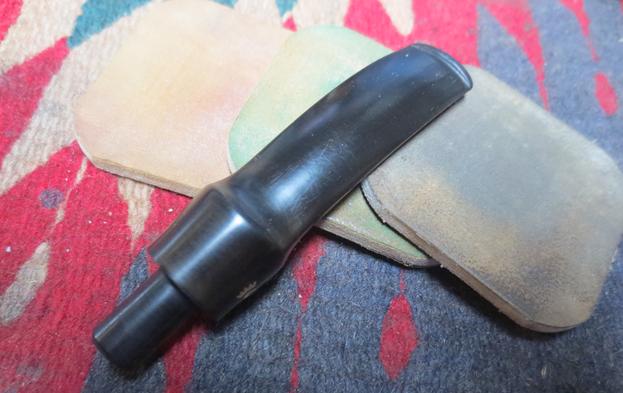
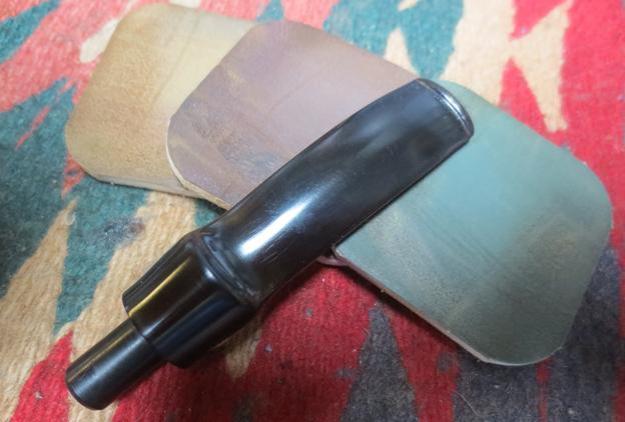
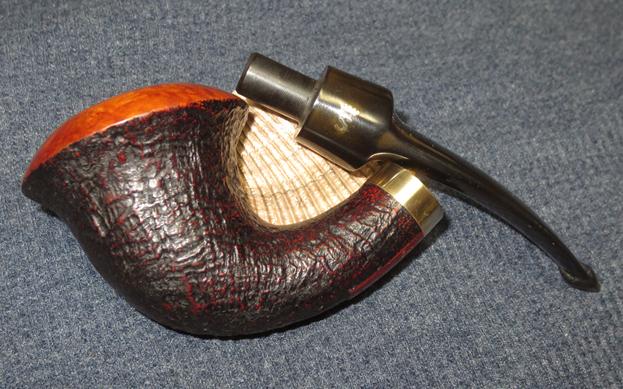
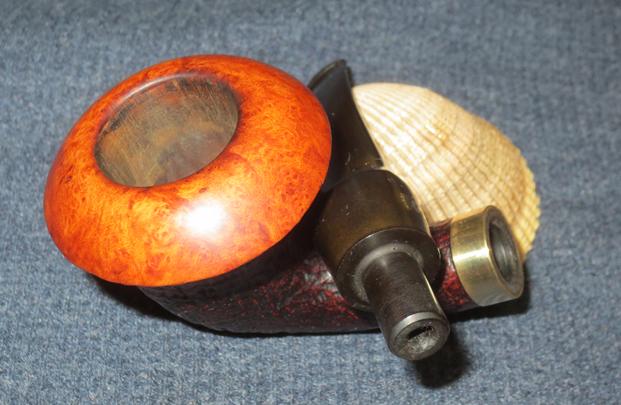
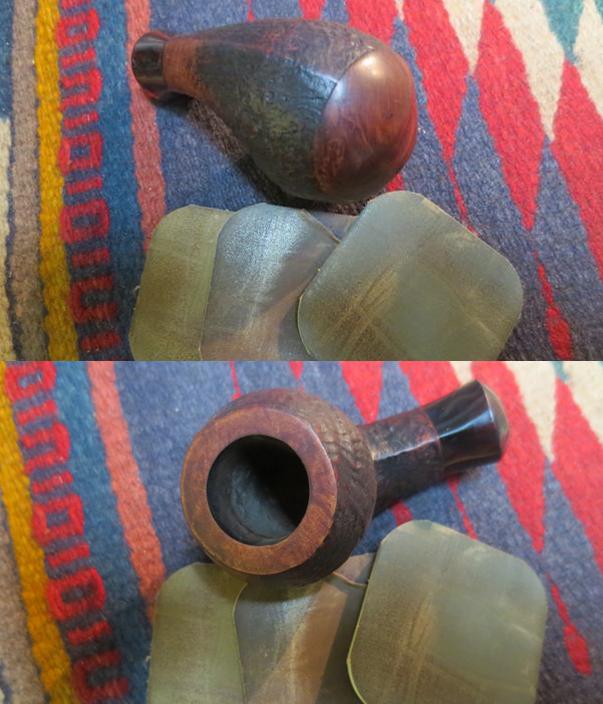
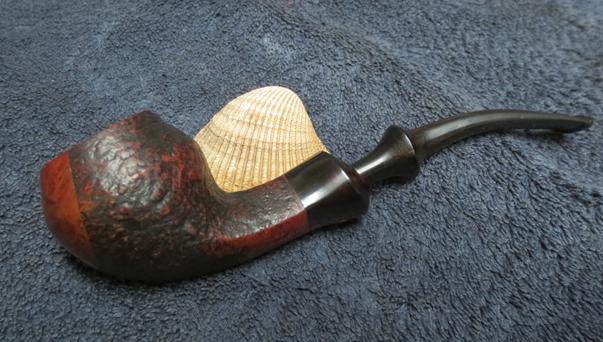
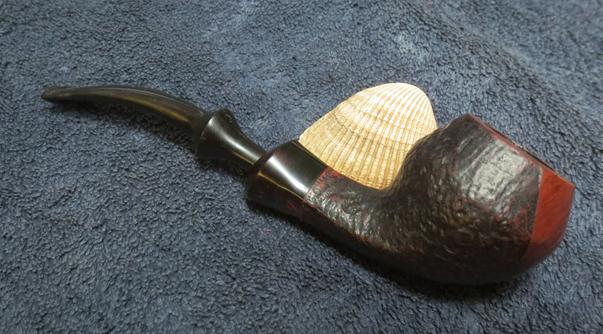
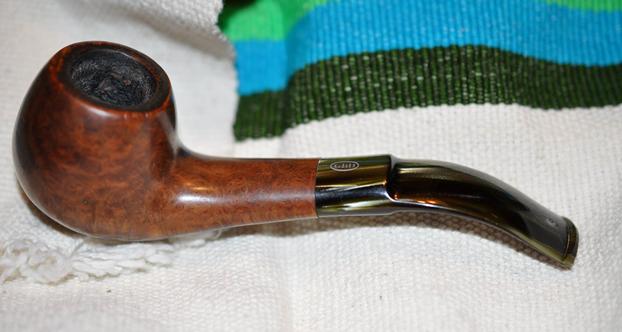
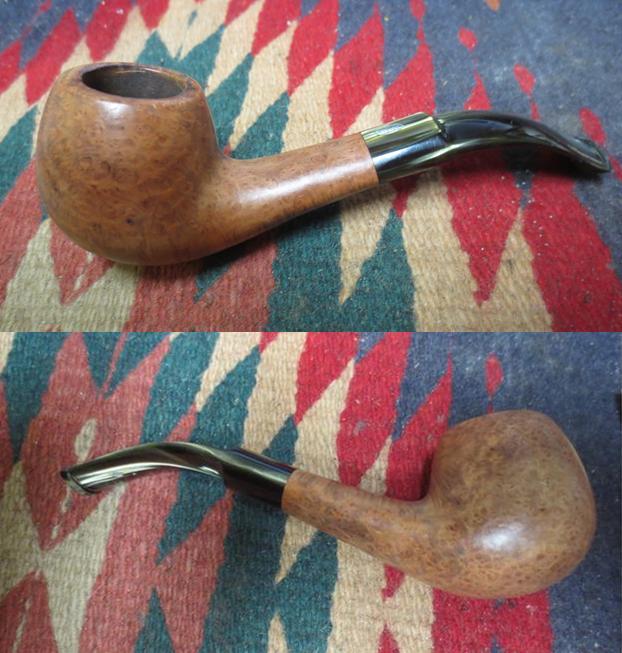
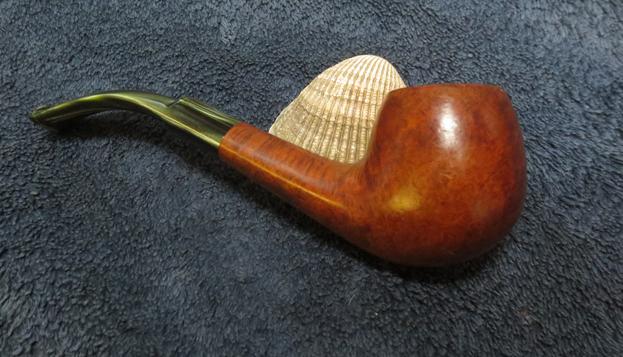
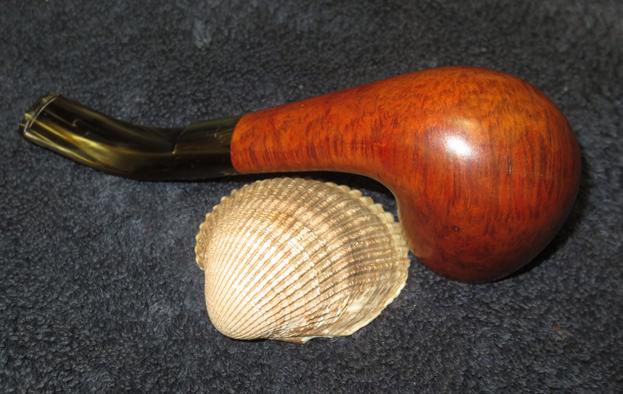
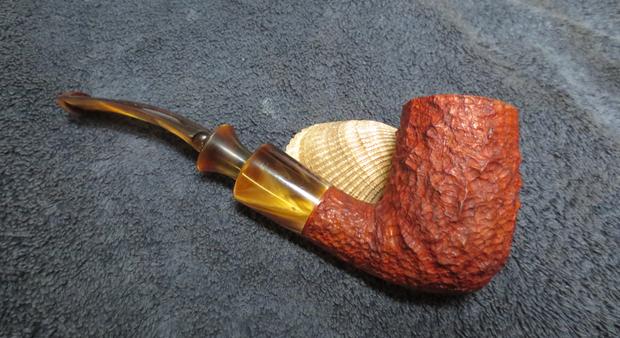
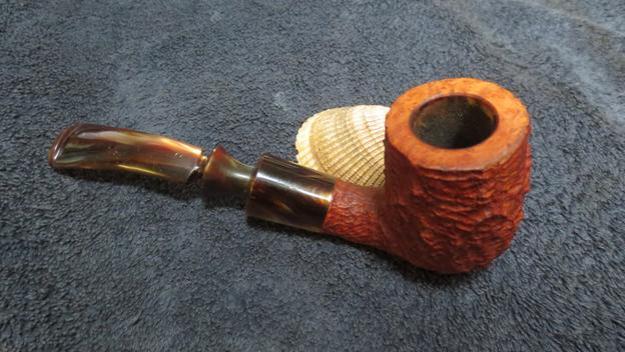
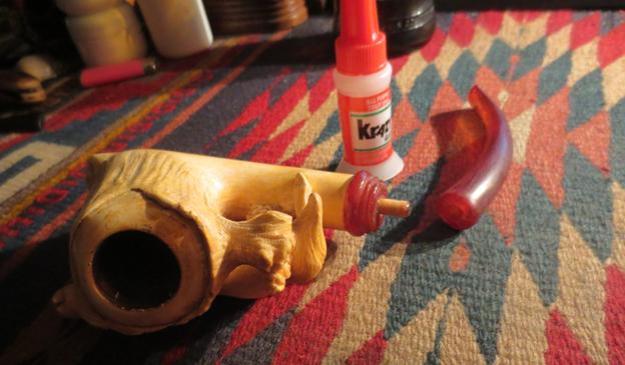
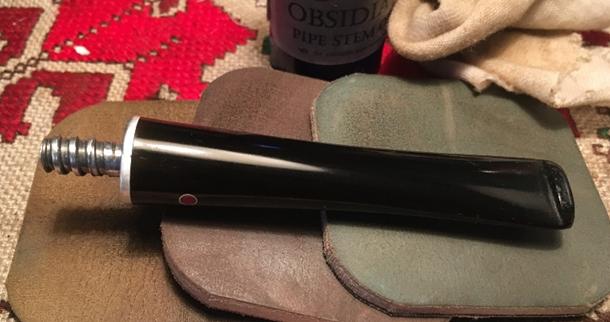
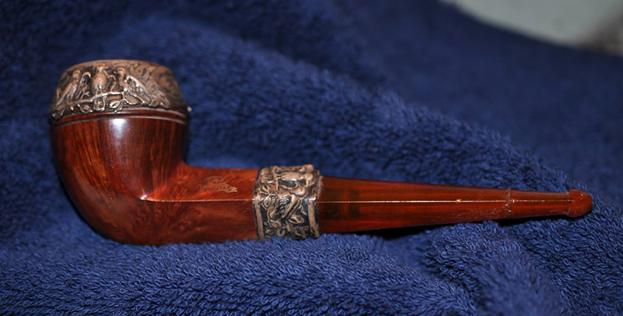
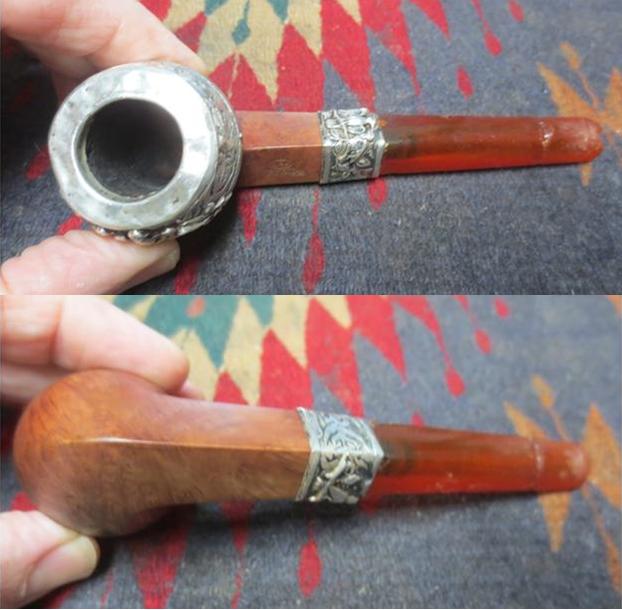
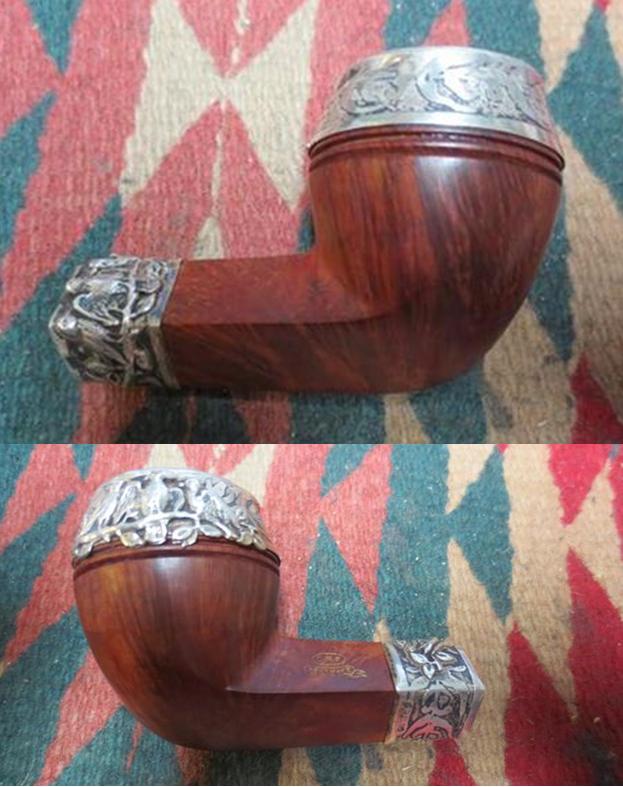
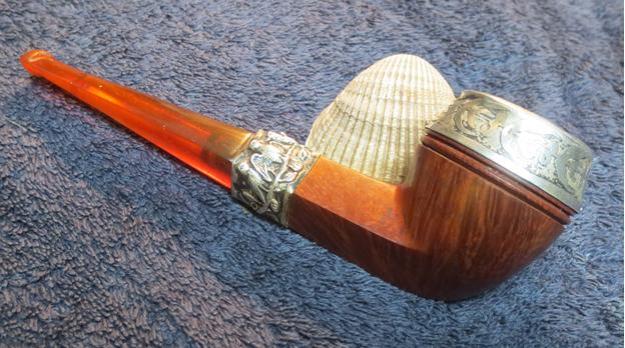
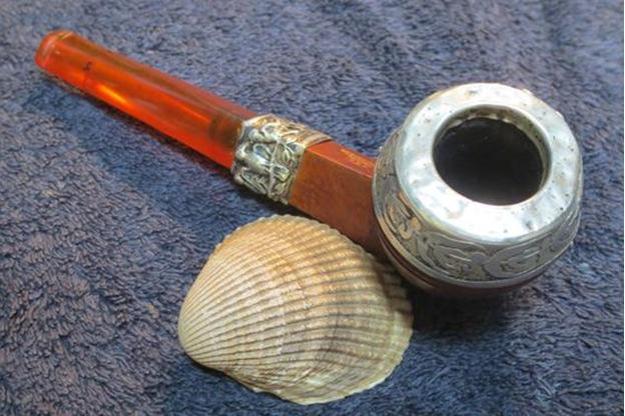
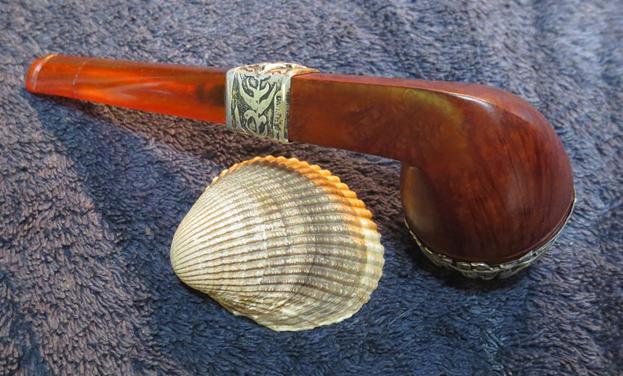
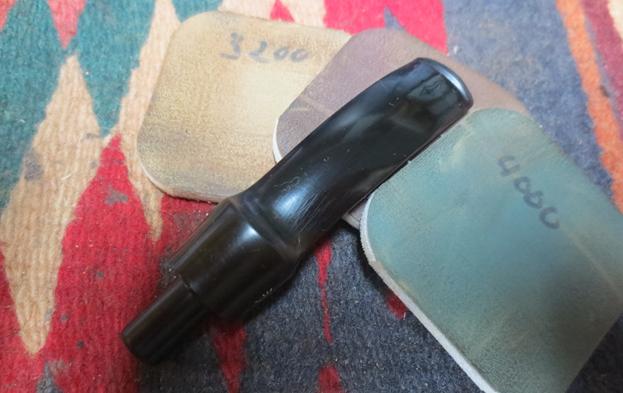
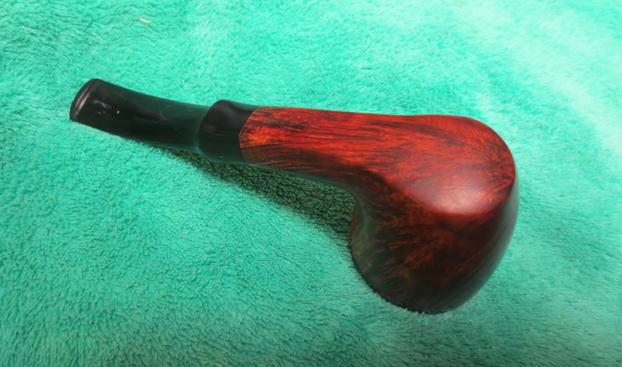
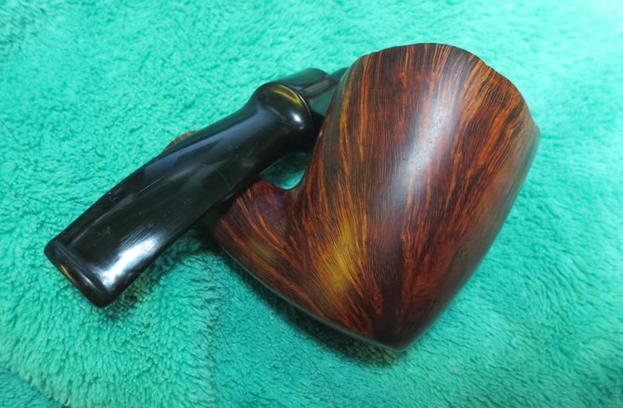
I put the stem in place in the shank. The fit was perfect and it sat snuggly against the end of the mortise as it did when it left Cantu. I buffed the stem with Blue Diamond polish on the buffing wheel avoiding the silver band and the briar. I waxed the stem with carnauba wax on the wheel and buffed the entire pipe with a clean buffing pad to raise the shine. I hand buffed it with a microfibre cloth to deepen the shine. The finished pipe is shown in the photos below. It is truly a beautiful little bulldog. The shape and the rustication make it a pleasure to hold in the hand. It fits snuggly with my thumb curled around the back of the bowl and the rest of the fingers holding the bowl. The finish is extremely tactile and should be interesting in hand as the bowl heats up during smoking. For me there is absolutely nothing lacking in the design and form of this old Sea Rock Briar and I think it will be one I hang onto. Thanks for walking with me through the restoration process.castello23 castello24 castello25 castello26 castello27 castello28 castello29 castello30 castello31

A Gold Banded Stanwell Copenhagen Calabash

Blog by Steve Laug

The next pipe on the work table is a striking Stanwell Calabash pipe with sandblasted body and smooth capped rim. The sandblast has exposed some wonderful ring grain around the bowl. The smooth wide rim typical of the calabash shape is wonderful birds-eye grain. The brass collar ring contrasts nicely with the dark stain of the sandblast shank. The gold crown S logo on the left side of the saddle stem combines with the other parts of the pipe to give this one a classic look. My brother Jeff found this Stanwell in an antique shop in Astoria, Oregon. It was on consignment by a widow who was selling her pipe collector husband’s collection. He bought a few of the pipes from her consignment and this is the second one that I have worked on. The first one was also a Stanwell – it was a shape 180 that was designed by Tom Eltang that I wrote about in an earlier blog (https://rebornpipes.com/2016/12/14/a-shape-you-gotta-love-a-stanwell-majestic-180/).cope1The finish on the sandblast portion was in great shape – just dirty with grit and grime. The rim cap however was another story. It had the overflow onto the top of the thick cake that was in the bowl. There was also some darkening of the inner edge of the rim. The brass band and the brass crown S logo on the stem were also dull and lifeless due to tarnishing. The stem was oxidized and had a buildup of calcification on both sides near the button. There were tooth marks and chatter on both sides of the stem and on the button. The slot in the button was nearly closed off with a thick tar.cope2My brother took two close up photos of the rim cap to show the condition of the inside of the bowl and the cap itself. There was a thick coat of tars and oils that is visible flowing over the back side of the cap. There were also several dings and dents in the cape itself though there was some nice birds-eye grain showing through the grime.cope3He also took a photo of the bowl bottom side up. The lovely bell shape of the pipe is visible from this view from the front.cope4The side view of the band and the shank/stem union shows that the connection is tight and clean. There is nothing wrong that a little polishing on the band and some elbow grease to remove the oxidation on the stem won’t take care of. The second photo below shows the stamping on the underside of the shank. It is very sharp and readable. It has the Stanwell stamp over Copenhagen over Calabash in script (it appears to have been double stamped). Beneath that it reads Made in Denmark (it is upside down in orientation to the rest of the stamping).cope5The next photos show the condition of the stem. You can see the tooth marks on the stem itself and the damage marks against the button on both sides. The calcification on the stem may have come for a Softee bit that the original owner had on the stem to protect it from more bite marks.cope6My brother Jeff again did a magnificent job cleaning up the pipe. He was able to get the grim out of the grooves and the majority of the buildup off the rim. He reamed and cleaned the interior of the pipe and stem with alcohol, cotton swabs and pipe cleaners. I took the following photos to show the condition of the pipe when I received. It was on its way to being clean.cope7 cope8I took a close up photo of the rim to show how much of the tars and oils he removed. It is pretty clean. There was some darkening on the inner edge of the rim on the back side that would need to be dealt with.cope9He also removed much of the calcification on the stem and some of the debris on the surface of both sides. The photos also show the tooth marks and chatter that was on the stem.cope10I sanded the stem to remove the rest of the debris and calcification and then wiped the stem down with alcohol on a cotton pad. I cleaned out the tooth marks with cotton swabs and alcohol and then filled them in with black super glue. I set the stem aside to let the repairs dry.cope11I sanded the inner edge of the bowl with 220 grit sandpaper to remove the darkening and then worked over the rim with 1500-1800 micromesh sanding pads to clean up the inner edge and begin polishing the rim cap. You can see the grain on the cap begin to pop and reveal the beautiful birds-eye grain.cope12When the glue had cured I sanded the patches smooth, blending them in with the surface of the stem using 220 grit sandpaper. I sanded the entire stem to work on more of the oxidation that was present on the surface. The photos below tell the story of the repairs and sanding to this point in the process.cope13I polished the bowl rim with 3200-12000 grit micromesh sanding pads and gave the sandblast bowl several coats of Conservator’s Wax. I buffed it with the shoe brush to raise the shine. The photos below show the bowl at this point.cope14 cope15I touched up the stain on the rim with a dark brown stain pen. I buffed it with a microfibre cloth and then polished it with micromesh sanding pads using 1500-12000 grit pads to polish and raise a shine.cope16 cope17I probably should have done this earlier in the process but my brother has been doing such a good job in his cleaning that I honestly forgot. I decided to give the internals of the stem and the mortise and shank a quick cleanup with pipe cleaners, cotton swabs and alcohol.cope18I polished the stem with micromesh sanding pads – wet sanding it with 1500-2400 grit pads and dry sanding it with 3200-15000 grit pads. I rubbed the stem down with Obsidian Oil after each set of three pads. I gave it the last coat of oil and set it aside to dry.cope19 cope20 cope21I polished the pipe and stem with Blue Diamond on the buffing wheel avoiding the sandblast portions of the bowl. I did not want to get the polishing compound in the grooves of the sandblast. It would be hard to get out of the grooves. I gave the sandblast portion several coats of Conservator’s Wax and buffed it with a shoe brush. I gave the stem and rim several coats of carnauba wax and buffed the entire pipe a clean buffing pad to raise the shine. I hand buffed it with a microfiber cloth. The finished pipe is shown in the photos below. It has come a long way from the pipe I started on in the first photos above. It is a classic looking calabash pipe with a great contrast between the smooth briar, the sandblast briar, the gold band and the vulcanite stem. (The brass is so shiny now that it is hard to get the vulcanite not to reflect the brass colour. In person the oxidation is gone and the stem is shiny black.) Thanks for walking through the process with me.cope22 cope23 cope24 cope25 cope26 cope27 cope28 cope29


Replacing a Stem on a Stanwell Antique 156 Bulldog

Blog by Steve Laug

The next pipe I brought to my work table is another Stanwell Antique. This one is stamped on the underside of the shank with the words Stanwell over the script Antique and over the top of them both is the number 156 which is the shape number. This one came in the same lot as the two victims of Jaws that I have already written about on the blog – the Estella and the GBD Midnight (https://rebornpipes.com/2016/12/06/jaws-and-an-estella-non-pareil-%c2%bc-bent-9606-stack-by-savinelli/ and https://rebornpipes.com/2016/12/09/another-jaws-victim-a-gbd-midnight-788-oval-shank-apple/). This Stanwell Antique Bulldog had a poorly fit replacement stem – a diamond shaped stem from a classic bulldog shape. The stem had many deep tooth marks on both the top and the underside of the stem. anti1The finish on the bowl was in decent shape though the rim had some tarry buildup and there was a thick cake in the bowl. The first photo shows the mixture of sandblast and smooth on this pipe was a nice contrast. The front of the pipe was smooth and joined the smooth rim. The second photo shows that the front outer edge had nicks and dents in it as did the surface of the rim. The close up photo of the rim shows the condition of the pipe when my brother received it.anti2The Lucite shank extension is amber coloured. The thickness of the extension makes it hard for the light to shine through it. The mortise had been damaged – it is my thought that whoever put the new stem in place redrilled the mortise and damaged the inner edge and the bottom of the mortise. anti3The stamping on the underside of the shank is better than the stamping on the previous Antique I just finished. The shape number is very clear and sharp. The Stanwell logo is lighter on the left side and the Antique stamping is also very clear and sharp.anti4The next photo shows the transition from the smooth front of the bowl to the sandblast on the rest of the bowl. You can see some of the grit in the grooves and crevices of the blast and the grime on the smooth portion.anti5The last photo that my brother sent me shows the bite marks on the diamond stem. They are identical in pattern to the ones on the previous two “Jaws” pipes.anti6My brother cleaned up the pipe with his usual thoroughness. When the pipe arrived in Vancouver the finish was clean and the grooves and crevices clean. The rim was better though it show the damage to the front edge and the dents to the top of the rim. He had reamed and cleaned the mortise and the airway in the replacement stem so the pipe was very clean and ready for me to work on.

I cleaned up the shank extension end and used clear super glue to rebuild the damage portion of the Lucite. I sanded it with 180 grit sandpaper and also with 220 grit sandpaper to smooth out the repairs. I cleaned out the shank with a cotton swab and warm water to remove the debris in the shank. I took photos of the bowl after I cleaned it up and scrubbed it with Murphy’s Oil Soap.anti7 anti8The rim shows some damage to the top and the back edge in the photo below.anti9The stem was an obvious replacement so I put it in my can of stems and looked for a stem that would be a good candidate for a replacement. I had one in a lot of stems that my brother sent me. It was a Danish looking freehand stem that had a long tenon and a step up toward the ring in the middle. I forgot to take a photo of the stem before I worked on it but I had another example of one that was similarly shaped that is shown in the next photo.anti10I sanded the stem with a Dremel and sanding drum to shorten and remove the step down area. I wanted to have a smooth transition from the tenon end to the mid ring. I also wanted to make the slope to the ring more abrupt that it was in the one above. The stem was in pretty rough shape. There was deep tooth mark on the topside of the stem from the damaged button forward. There was also some tooth damage on the underside of the stem in the middle and on one side. The button was also damaged on the underside. There was a missing chunk of vulcanite on the button edge. I filled in the damaged areas with black superglue to build them up. I let the glue dry and once it was dry I sanded it smooth to match the surface of the rest of the stem. I filled in the damaged button and built up the edge on the top and bottom sides. I sanded the button as well once it had cured and reshaped it.anti11I sanded the diameter of the tenon area on the new stem until the fit in the mortise was correct. The stem still looked a little long but I would take care of that shortly. I put it in the mortise and took photos of the pipe with the new stem.anti12 anti13I sanded the stem with 180 grit and 220 grit sandpaper to smooth out the repairs and reshape the stem to match the rest of the stem.anti14I polished the stem with micromesh sanding pads – wet sanding with 1500-2400 grit sanding pads and rubbed it down with Obsidian Oil and dry sanding with 3200-12000 grit sanding pads and rubbing it down with the oil after each set of three pads. After the final set I gave it a final coat of the oil and set the stem aside to dry.anti15 anti16 anti17To remove the damage to the front edge and the top of the rim I topped the bowl with 220 grit sandpaper on the topping board. I sanded it with 1500-6000 grit micromesh sanding pads to sand out the scratches in the rim surface. I restained the rim to match the front of the bowl using a dark brown stain pen. I buffed it lightly with a microfibre cloth.anti18I sanded the smooth portions of the bowl face and the rim with 1500-6000 grit micromesh sanding pads to polish them.anti19 anti20I buffed the rim and smooth part of the bowl and the stem with Blue Diamond polish on the wheel. I gave the stem multiple coats of carnauba wax and gave the bowl several coats of Conservator’s Wax. I buffed the pipe with a clean buffing pad and hand buffed it with a microfibre cloth to deepen the shine. The finished pipe is shown in the photos below. The repairs on the stem show under the bright lights of the flash but in person they are pretty well blended into the surface of the stem. Thanks for walking through the restoration with me.anti21 anti22 anti23 anti24 anti25 anti26 anti27 anti28

Another Jaws Victim – A GBD Midnight 788 Oval Shank Apple

Blog by Steve Laug

I love old GBD pipes no matter what era they come from. I gave my brother a list of pipes to keep an eye open for in his treasure hunts as he travels and on his eBay forays as well. GBD has been at the top of that list. He found a newer generation GBD recently and sent it my way. It is a nicely grained apple that is stamped GBD in the oval over MIDNIGHT on the top of the shank. On the underside it is stamped London England over 788 which is the shape number for an oval shank apple. The stem is a green swirled Lucite saddle shape with the GBD Oval stamped on the top of the saddle portion. The pipe was in decent shape. The finish was dirty and there was a buildup of cake in the bowl that had overflowed onto the rim. There were some dents in the outer edge of the rim on the back left side and some nicks and scratches on the left side of the bowl. The stem was another one that Jaws had gotten a hold of just like the Estella Non Pareil that I just finished and wrote about (https://rebornpipes.com/2016/12/06/jaws-and-an-estella-non-pareil-%c2%bc-bent-9606-stack-by-savinelli/). The top side had some deep dents and the underside had them as well. There were better situated in that they were in the blacker portion of the stem so blending in the repairs would be simpler.jaws1The photos my brother Jeff sent me really show the grain on the pipe. It has some stunning swirls of grain on the sides and some stunning birdseye on the top and the bottom of the shank and bowl.jaws2 jaws3The next photos show some close ups of the rim and the bowl bottom. The top of the rim was thickly coated with the overflowing cake in the bowl. The birdseye on the bowl bottom is stunning.jaws4The stamping on the shank and the stem was clear though lighter to the right edge on the topside of the shank. The fit of the stem to the shank was messy due to the build up of tars and oils in the shank and the mortise. I was pretty certain that once the pipe was cleaned up the fit would be back to normal.jaws5The next two photos show the work of Jaws on the Lucite. I can only say that I am thankful that the stem was not vulcanite or it would have been destroyed!jaws6My brother did his usual thorough clean up and was able to remove all of the tars and oils from the rim and the cake from the bowl. He scrubbed the grime and oils from the finish with Murphy’s Oil Soap and cleaned out the internals with alcohol, cotton swabs and pipe cleaners. The next four photos show the pipe when it arrived on my work table in Vancouver. I am getting spoiled by him doing all the grunt work of reaming and scrubbing. The pipes I get are all cleaned and reamed and ready to be restored. It is a great arrangement!jaws7 jaws8I took a close up photo of the bowl and rim to show how clean it was when it got to me.jaws9The tooth dents in the stem are shown in the next two photos. After the stem had been cleaned up they did not look as daunting as the ones in the Estella. The button had been worn down some as well by the chomper.jaws10I “painted” the dents in the stem with the flame from a Bic lighter. I was able to raise them quite a bit on this stem. On the top side only one deep tooth mark remained and on the underside there were three left.jaws11I sanded the dented areas with 220 grit sandpaper to smooth out the surface around the dents. I washed it down with alcohol on a cotton swab to make sure I did not leave any of the white sanding dust in the tooth marks. I decided to use black superglue to fill in the tooth dents as they were in the darker portion of the stem. I filled them in and let the glue dry.jaws12Once the glue had dried I sanded the patches smooth with 220 grit sandpaper to blend them into the surface of the stem. The patch on the topside disappeared into the dark green/black of the rest of the stem. The ones on the underside were a little more temperamental and showed some light areas on some small parts of the patches.jaws13I polished the stem with micromesh sanding pads – wet sanding with 1500-2400 grit pads and dry sanding with 3200-12000 grit pads. I wiped the stem down with a damp cotton pad after each set of three pads.jaws14 jaws15 jaws16I set the stem aside and worked on the bowl. I used 1500-2400 grit micromesh sanding pads to work over the nicks in the rim and on the left side of the bowl. I was able to minimise them so that they blended into the briar better. I stained the bowl with a dark brown aniline stain cut 50/50 with isopropyl alcohol and flamed it with a lighter. I repeated the process until the coverage was even on all sides of the bowl.jaws17I buffed the bowl and stem with Blue Diamond on the buffing wheel and gave the pipe multiple coats of carnauba wax to protect it. I buffed it with a clean buffing pad to polish the carnauba and give it a shine. I hand buffed the pipe with a microfibre cloth to deepen the shine. The finished pipe is shown in the photos below. The rich brown of the stain is a great contrast to the green of the Lucite stem. The overall look of the pipe is rich and the feel in the hand is perfect. This one will be available on the store in the days ahead. Thanks for journeying with me in this refurb.jaws18 jaws19 jaws20 jaws21 jaws22 jaws23 jaws24 jaws25

Jaws and an Estella Non Pareil ¼ bent 9606 Stack by Savinelli

Blog by Steve Laug

The next pipe on my work table is a Savinelli made Estella that my brother sent my way. It is stamped on the underside of the shank on a smooth oval – Estella over Non Pareil over 9606 with the Savinelli S shield next to that and Italy underneath. When my brother sent me the photos it appeared to be a good looking pipe. The rustication and the stain colour were very nicely done. The Lucite shank extension and the matching Lucite stem in brown and gold tones looked really good – from the side view. The finish on the bowl looked to be dirty or at least had darkening where the hand of the previous owner had wrapped around the bowl.estella1 estella2The cake in the bowl had overflowed on to the rim top and left behind a black and pitted mess. The right front outer edge of the bowl also had a large scrape from a drop or a badly chosen knock to remove the dottle. The close up photos of the rim and the side of the bowl show the condition of the pipe. In the last photo in this series you can see the darkening where the hand wrapped around the side of the bowl.estella3 estella4The next photo shows the stamping on the bottom of the bowl and the shank extension. Other than the S shield logo connecting the Estella and Savinelli the stamping on the Lucite certified the connection.estella5The mortise in the shank extension showed damage and wear as well. It appeared that the mortise was lined with a Delrin tube to go with the Delrin tenon on the stem.estella6Now I am ready to show you the meaning of the word Jaws in the title of this blog. The two photos after the portrait below show the tooth marks left behind by the “shark” who owned this pipe. Lucite stems are really hard material so for him to leave behind this kind of deep gouges in the stem he must have had quite a pair of choppers. Maybe the teeth were like those on one of the villains on James Bond known as Jaws.estella7Whatever then previous pipeman’s choppers were like they left behind a legacy of damage on both sides of this hard Lucite stem that needed a lot of work and would never really disappear.estella8My brother did his usual thorough clean up on the pipe. He reamed the bowl and scrubbed the externals with Murphy’s Oil Soap and a soft tooth brush. He was able to remove all of the buildup on the rim top. He cleaned the internals of the mortise and the airway in the shank and the stem with pipe cleaners and alcohol. He wiped down the stem so that when the pipe came to me it was ready to restore. The next four photos show the pipe when I brought it to my work table.estella9 estella10I took a close up photo of the rim top to show the pitting and the damage on the right front outer edge of the bowl.estella11I took close up photos of the chomped on stem. It was truly a mess and one that would be a challenge to blend in the repairs on the variegated browns and tans of the Lucite.estella12The stem had a partial stamp of an S on the topside near the saddle. Now the challenge began. I examined the tooth marks and saw clearly that they were sharp cuts in the material and not just dents. Heating the stem and trying to raise them would not work. I looked through my super glue options and I had clear and amber superglue that might work. My guess was that no matter what I used would stand out to some degree because of the striations in the browns of the Lucite. I cleaned out the divots with a cotton swab and alcohol to make sure there was no debris in them and put a drop of amber super glue in the divots on both sides of the stem.estella13Once the glue dried I sanded it with 220 grit sandpaper to smooth out the repairs to the surface of the stem. So far the topside was looking better than the underside.estella14I decided to see if I could remove more of the darkening around the spot where the hand of the previous owner clasped the bowl. I used some undiluted Murphy’s Oil Soap and scrubbed it with a tooth brush. I rinsed the pipe under running water avoiding getting water in the bowl. I was able to remove the remainder of the darkening.estella15 estella16To remove the nicks and gouges from the rim top and to remedy the rough outer edge on the front right I topped the bowl on a topping board until the damage was gone and the rough edge was minimized.estella17I cleaned off the exterior of the stem with a damp cotton pad and cleaned out the stem with a pipe cleaner. You can see the ghosts of the repairs in the variations of the colour in the stem material.estella18I polished the stem with micromesh sanding pads – wet sanding it with 1500-2400 grit pads and dry sanding it with 3200-12000 grit pads. After each set of three pads I wiped the stem down with the damp cotton pad to check the progress. The repairs certainly were smooth to the touch but nonetheless they were visible against the variations of the colour of the stem. I had been able to blend in the repairs on the upper portion of the stem but the closer I got to the button the more they seemed to stand out on both the top and the bottom sides.estella19 estella20 estella21I gave the bowl a coat of Conservator’s Wax and buffed it with a shoe brush. I buffed the stem with Blue Diamond on the wheel to see if I could further smooth and blend the repairs. I buffed the entire pipe with a clean buffing pad and then once again by hand with a microfibre cloth. The finished pipe is shown in the photos below. The bowl and rim look really good and the finish is clean and as good as new. The stem and shank extension have a rich glow and from the side they look amazing. The top and underside of the stem with the repairs is absolutely smooth to touch and has a glow. The repairs do show but only because of the swirls of the Lucite. It was a pain to repair but I am happy with the overall finished product. Thanks for journeying with me on this chomped stem and knocked about pipe.estella22 estella23 estella24 estella25 estella26 estella27 estella28 estella29


In With a Roar – A Lion’s Head Meerschaum

Blog by Steve Laug

In one of the boxes of pipes that my brother sent me there was a brown leather pipe case that was in good shape. There was some scuffing along the edges of the case but the latch and the hinges were in excellent shape. I love a good mystery and certainly this brown pipe case offered up a good one. Fortunately solving this mystery was very simple. All I needed to do was to press the latch on the front of the case and I would know what was inside. I was curious to see what was inside of the case. The shape hinted at a figural pipe and I was pretty sure it was a meerschaum.lion1I pressed the latch and the case popped open. Inside was a nicely carved lions head staring out at me. The head was turned toward me and the carving was well done. It looked at me the same time I was looking at it. It seemed to have a snarl coming out of its wide open mouth. The large curved fangs were opened and appeared to ready to bite my hand when I reached for it. The lion was well carved – the shape of the head, the open mouth, the fangs and the look of a roar were very realistic. The ear on the right side looked really good with no chips. The meerschaum was developing a patina on the jaws and the shank. It was beginning to darken. The stem looked to be amber but I was not sure at this point in the examination. The last inch of the stem to the button had been broken off and was still in the case.lion2I removed the pipe from the case along with the broken tip of the stem and took some photos of the pipe. My brother had cleaned up the externals and the airway in the shank and the stem. He had reamed the bowl and cleaned the soiled surface of the figural. There was a small chip missing from the bottom edge of the right ear. It is hard to see unless you are looking for it. The rim was clean and solid with no chips or dents. The inner edge of the bowl was also clean with no damage. The fur and whiskers on the big cat were also well carved and the patina was beginning to develop in the deeper grooves of the carving.

I examined the stem more closely. I looked at the edges on both sides of the break on the stem and I was sure that I was dealing with another Bakelite stem rather than an amber one. The break looked clean and there was no splintering like I have seen in broken amber stems. It also had a plastic like feel when I probed it with a dental pick. The feel of the material was definitely not amber. The stem could be made of “Amberoid” that was used in making stems before Lucite was invented. The last photo in the series below shows the pipe after I had taken it apart. A threaded bone tenon held the stem on the pipe when screwed into the threads in the end of the shank.lion3 lion4 lion5I wiped off both sides of the broken stem with a cotton pad that was dampened with alcohol. Once it was clean I used clear super glue to glue the two pieces back together. I then used the amber super glue to fill in the gaps around the repair. I also used it to fill in the tooth marks on the top and the underside of the stem. The next series of photos show the repaired stem before I sanded it smooth.lion6 lion7 lion8I cleaned out the inside of the airway in the stem to remove any debris from the repair and also to remove the last bit of darkening I had seen in the stem when it was apart. I used pipe cleaners and warm water so as not to damage the Bakelite with alcohol. I had learned the hard way long ago that alcohol can cause a Bakelite stem to craze – not always but it certainly did on the one I learned on.lion9I have a jar of Clapham’s Beeswax Polish in my restoration kit that I have used over the years to polish meerschaum figurals. It is a white beeswax paste that easy to work into all of the carved grooves in the meerschaum and polishes well. I applied the wax to the bowl with a qtip and my finger and once it was dry I buffed it with a shoe brush.lion10 lion11The next series of photos show the pipe after I buffed it with the brush. I love the frontal look of the lion’s head.lion12 lion13 lion14 lion15 lion16I sanded the stem repair with 220 grit sandpaper to remove the ridge that was over the repaired area. I sanded it until the repair blended into the surface of the stem on both sides. I polished the stem with micromesh sanding pads – wet sanding with 1500-2400 grit pads and dry sanding with 3200-12000 grit pads. I rubbed the stem down with Obsidian Oil after each set of three sanding pads. After the final set of three pads I gave it a final coat of the oil and set it aside to dry.lion17 lion18 lion19The finished pipe is shown in the photos below. I lightly buffed the bowl with a clean buffing pad and gave the stem multiple coats of carnauba wax. I also buffed the stem with a clean buffing pad to raise the shine. I hand buffed it with a microfibre cloth to deepen the shine on the meer. I have found that a newly waxed meerschaum will darken after the bowl has been smoked for a while. The spotty appearance of the finish will gradually blend into the patina of the bowl. Thanks for taking this journey with me.lion20 lion21 lion22 lion23 lion24 lion25 lion26 lion27 lion28


Against a Stump – A CPF Best Make Horse Meerschaum

Blog by Steve Laug

I was on a work trip in Alberta when I received an email from a woman named Nancy who picked up my email address from the blog. She wrote to tell me about a pipe that had come into a thrift store she worked at. Here is the first email I received.

Hello Steve, I volunteer at a thrift store & we received this pipe as a donation. I knew it was too old & precious to sell for a few dollars. It’s in pretty rough shape with cracks but still beautiful in its additional case. It is a horse leaning against a tree stump with a long stem that looks like Bakelite. Is this something you would want to have & restore? I can send pictures if you’ll give me an email. Thank you, Nancy

I wrote her back and asked to see the photos of the pipe. She immediately replied and sent me the following three photos. It looked like the pipe may be a CPF Best Make Meerschaum. The case appeared to have been the original for the pipe.cpf1 cpf2 cpf3After looking at the photos on my cell phone I wrote her back and made an offer on the pipe. She quickly responded with the following email:

Yes, that sounds good. The money will go to Assistance League of Yuma. We are a non-profit, all volunteer organization. There are 120 nationwide. We have Operation School Bell which provides 3 new outfits, shoes, books, hats, etc. Just to let you know where the money will go. 😍 I would love to see a picture of the pipe when you are done. I’m so glad to find a good home for it & that it will be restored. Thank you! Send me your address & I will get it ready to send. Thx, Nancy.

I finished the 2 week trip in Alberta and the day after I returned the pipe arrived. It was far bigger than I expected from the photos. Somehow in my mind it was a typical carved meerschaum pipe but when I opened the box it was quite large. It is 8 ½ inches long, 3 ½ inches tall, with an outer diameter on the bowl being 1 ¾ inches and the bowl itself being 15/16 inches in diameter and 2 ¼ deep. It is a handful.

The condition was better than I expected. The cracks in the meerschaum were on the surface of the horse and the right side of the shank. I was expecting more open cracks but these were tight and seemed to be almost a spidering from the spots where the carved horse was connected to the bowl. The center of the back had tiny cracks radiating down the front and rear haunches of the horse and the place where the rear hooves were connected to the shank had a crack radiating both directions. These cracks on the shank also continued around the bottom of the bowl and shank. Fortunately none of them were deep and really added to the aged look of the pipe.cpf4The left side of the shank and bowl (a carved stump) was in excellent shape with no cracks. The rim of the pipe had some darkening and a buildup of tars and oils on the top back side of the rim. There was a light cake in the bowl that would be easily removed with a pipe knife. There was some dust and debris in the grooves of the stump and the mane and tail of the horse.cpf5I took a close up photo of the top of the bowl to show the cake in the bowl and the condition of the rim top. On the back side of the bowl there is a branch extending toward the stem that has the horse’s tail attached to it.cpf6The condition of the Bakelite stem was a bit worse than I expected from the photos. It had a lot of tooth chatter and tooth marks that extended from the button for about an inch up the stem. It was rough on both sides of the stem. The button was also worn from tooth marks. There were a lot of tiny spidering cracks all over the surface of the stem that gave me some concern as I examined it. Time would tell if these would be more than a surface issue.cpf7The case was in rough shape though solid. The leather cover was worn off the wooden case but the hinges and clasp were still solid. The interior of the case had a worn faux fur lining that was almost worn away. I could still read the gold embossed logo in the top of the inside case – the CPF logo in an oval over an unfurled banner reading Best Make. The case was obviously made for the pipe so it gave me the needed information that this was a CPF meerschaum. Since I am a big fan of older CPF made pipes I was excited to see that this was one of them.cpf8I sanded out the tooth marks and chatter on the stem from the button forward. With the sanding dust present on the rest of the stem you can see the spidering cracks on the rest of the Bakelite stem.cpf9I sanded the shank end as well because there were chips missing from the edge of the stem where it sat against the shank. Again the spidering cracks are visible with the sanding dust.cpf10I cleaned out the airway in the stem and the shank with pipe cleaners and water. I also reamed the bowl with the Savinelli Fitsall Pipe Knife.cpf11There was a Bakelite spacer on the shank as well that I unscrewed and cleaned up. The threaded tenon is integral to the shank. The next photo shows the three parts of the pipe.cpf12The stem had been held in place on the tenon with a packing of twisted paper. The threads in the stem had been stripped and worn over the years. The threads were still present in the stem but were very worn. I built up the tenon end with some clear super glue to allow the stem to grip the threads on the tenon.cpf13I sanded the stem with 220 grit sandpaper to remove as much of the spidering cracks as possible. Many were just on the surface. I polished the stem with micromesh sanding pads – wet sanding with 1500-2400 grit pads and dry sanding with 3200-12000 grit pads. I rubbed the stem down with Obsidian Oil after each set of three pads and after the final set gave it a last rubdown and set it aside to dry.cpf14 cpf15 cpf16I carefully scrubbed the surface of the meerschaum with a soft tooth brush and warm water to remove the dirt and grime. I polished the meer with micromesh sanding pads. I started with 1500-2400 grit pads and was able to remove many of the surface scratches and blemishes as well as the tarry build up on the rim of the bowl. I continued to polish it with the remainder of the micromesh pads from 3200-12000 grit to bring a shine to the patina of the bowl.cpf17I buffed the bowl and stem with Blue Diamond on the buffing wheel carefully working around the horse. I lightly buffed the stem as well. I gave the bowl a rubdown of beeswax and hand buffed it with a shoe brush. The finished pipe is shown in the photos below. I am expecting that the coloration of the meer will come back to the surface once the pipe is smoked. Thanks for journeying with me.cpf18 cpf19 cpf20 cpf21 cpf22 cpf23 cpf24 cpf25 cpf26

Aged Imported Briar Poker with Red Dot

Blog by Dal Stanton

My wife and I were on Interstate 24 nearing Manchester, Tennessee, returning to the Atlanta area after the wedding of our daughter in Nashville.  The billboard beckoned and, of course, I responded by taking the next exit!  Madeline’s Antiques & Uniques had the look of a classic pipe picker’s paradise and I was not disappointed! I’m thankful for my wife’s patience and her eagle eye.  She helped ferret out hidden pipes in need of help and a new home.dal1 dal2 dal3In Palmetto, Georgia, I laid out the haul and recorded the picture above – including the six-pipe pipe stand!  The poker on the lower end is before me now on my work table back in Sofia, Bulgaria.  The left side of the shank has Aged over Imported Briar in a cursive script.  The other remarkable characteristics of this Poker are the red dot on the stem and the screw in tenon with a metal mortise receiver.  Always hopeful of identifying a pipe’s heritage I landed on a thread written in 2013 in Pipesmagazine.com (Link) of someone seeking information about a pipe with the exact nomenclature, dot and screw in stem, just a different shape, an Author shape instead of the Poker before me.  While pedigree is still inconclusive, one helpful comment in the thread summed up well the possibilities:

The “Aged Imported Briar” stamp suggests this is made in the U.S. The screw-in stem is typical of
Kaywoodie and perhaps Jobey which was made for a few years in the U.S. However the design and
shape of this pipe is not Jobey-like. I don’t know Reiss-Premier, but if it is a U.S. outfit, that could
be it. If I understand correctly, the “imported briar” stamp was typical of U.S. pipes at a certain period
when other woods were being used for pipe bowls and there was some misgiving about some of the
woods used. This was a reassurance that the pipe was good quality and safe.

The best guess is the US company, Reiss-Premier, as the source of this Poker because of the dot (See Pipephil.eu) identification.  Reiss-Premier had a factory in Chicago from 1930-1959 and was responsible for the term “Drinkless” which was well known with many Kaywoodie pipes (See Pipedia) which Reiss-Premier also produced.  If the clue about the authenticity verification of briar stated above is accurate, this Poker possibly dates back to WW II days (40s and 50s) when briar supply from Europe was scarce.  Notwithstanding, there is little doubt that this Aged Imported Briar Poker has seen better days and those days are many days ago.  On my work table I take some additional pictures to get a better idea of the challenges with this pipe.dal4 dal5 dal6 dal7 dal9 dal10 dal11The poker is an iconic shape – the name comes from the flat bottomed cylindrical shape of the stummel.  While men dealt hands of poker they could put their pipes on the table without fear of dumping ash on the winnings.  This Poker has heavy cake in the bowl and the rim is in rough shape – I’ll need to remove some valuable briar real estate to reestablish a flat top look, hopefully the Poker won’t turn into a Poker Pot shape in the process!  The stummel heel has some dents and scratches from doing what it was intended to do – sit.  The briar is all but concealed by the old clouded finish – but there is nice looking briar underneath!  I detect a small root branch knot in the grain pattern that will add to the ‘old school’ quaintness of the Poker.  There are signs of wear on the stummel, but I’ll not remove them all – signs of the paths and stewards this Poker has served along the way!  The stem has oxidation and the upper button lip looks like a 9 iron took a divot out of it.  The button will need rebuilding.

The first order of business is to clean the stummel starting with reaming the bowl and washing down the exterior with Murphy Soap to get a better perspective on the stummel condition.  I also plop the stem into an Oxi-Clean bath to start working on the oxidation.  I’m not sure what effects the bath will have on the red dot so I cover it with Vaseline before the plunge.  I take the Pipnet reaming kit and use 2 smaller of the 4 blades available.  I follow the reaming blades with the Savinelli pipe knife to fine-tune the ream and finish with wrapping 240 grit paper around a dowel rod and sand the chamber.  Using cotton pads and Murphy Oil Soap I scrub the exterior of the stummel and use a brass wire brush to work on the rim which loosens nicely the lava flow without scratching the wood.   The pictures show the progress. dal12 dal13 dal14 dal15I take another close-up of the rim damage from a lateral perspective to illustrate how much briar I will need to take off through topping to achieve a level lid to this Poker.  A bunch!  I take a chopping board covering it with 240 grit paper and carefully rotate the inverted stummel not leaning into the sloping angle of the damaged area.  I don’t want a slanted top!  I check the progress often and ‘free-stand’ the inverted stummel with the help of a right angle I try to keep things perpendicular.  The pictures show the progression of the topping. dal16 dal17 dal18 dal19 dal20When I arrive at a point where almost all damage is eradicated, I stop the topping with 240 grit paper and with 120 grit paper rolled up I shape a bevel on the inside and outside of the rim removing the remainder of rim damage.  After the 120 grit cuts the initial bevel I follow with 240 and 600 grit paper on the inside and outside of the rim.  Finally, I lightly top the stummel again but now with 600 grit paper over the chopping block.  I do this not only to smooth the rim surface, but it also serves to sharpen the circular bevel line around the circumference of the rim – inner and outer.  It gives the rim a very classy, finished look to me.  The pictures show the progress.dal21 dal22 dal23Since the heel of the stummel has scratches and edge damage as well, I repeat the process described above for the heel as well except for using only 600 grit paper to ‘top’ the bottom – not 240.  I only needed to clean and smooth the surface layer not remove real estate.  The bottom bevel utilized 120 then 240 then finally 600 grit sanding papers.  In the last picture of the set below, there remains a small damage spot that I fill with a superglue patch which I will smooth and blend later.  This Poker will be ready for any high-class card table!  The pictures tell the story!dal24 dal25 dal26 dal27 dal28With rim and heel repairs completed, I fish the stem out of the Oxi-Clean bath and it did the job of raising the oxidation out of the vulcanite.  I’ve started inserting a pipe cleaner into the stem before dropping it in the bath making it much easier to fish it out (picture 1 below).  I wet sand the stem with 600 grit sanding paper to take off the mother-load layer of oxidation raised on the stem, then I follow with 0000 steel wool.  After inspecting the stem, I see more oxidation around the button and shank areas – I use 240 grit paper on those more stubborn areas, then again 600, then 0000 steel wool.  In anticipation of doing the button rebuild, I want a clean stem so using pipe cleaners (bristled and non) dipped in isopropyl 95% I clean the stem internals.  It did not take much effort and now to the button repair.  The pictures show the progress.dal29 dal30 dal31I take a close-up of the upper button area to get another look.  It is apparent that the former steward of this Poker had a favorite hold to keep his (or her J) pipe in place while the cards were dealt and considered.  The dent on the button resembles compression damage more than biting or scissor action.  You can see just to the left of the button (up the stem) a bite mark.  My forensic opinion is that the bite is the eye tooth and the compression represents the work of the molar behind – the pipe being clamped on the side to keep the hands free for gathering new cards and tossing those less desirable aside.  I would guess the steward of this Poker was right handed, too – the compression being on the right side leaving most the stem toward the center of the mouth for puffing.  Nope, can’t tell how tall he was!  Yes, I do believe now it was a ‘he’ because a ‘she’ probably wouldn’t mouth-clamp the pipe but put in down on the table and then deal another round J.  Fun and forensics aside, I need to rebuild the upper button area.  First, I attempt to raise the ‘eye tooth’ bite with heat – I ‘paint’ the area with a candle flame.  It seems to have done the trick.  Then, taking 240 grit paper I rough up the button area and then clean the button area with a Q-tip dipped in alcohol.  I mix a batch of charcoal powder and ‘Extra Time Control’ super glue into a toothpaste thick consistency.  I put a mound of charcoal on an index card (so it can be tossed when done) and place a small puddle of super glue next to it and begin to mix – adding more charcoal a bit at a time until I reach the consistency needed to stay in place on the button.  I use a toothpick as a trowel and gradually build and mound over the button that later will be sanded and shaped with a needle file.dal32 dal33 dal34 dal35 dal36 dal37Setting the stem aside to allow the charcoal super glue putty to cure overnight, I turn back to the stummel.  I take medium and light weight sanding sponges and sand the surface, careful to avoid the Aged Imported Briar nomenclature on the shank.  The briar is beginning to emerge and the metal band/mortise is shining up nicely.  I realize that I was anxious to start on the external briar and forgot about the internal muck.  Taking pipe cleaners and Q-tips I clean the internals dipping them in isopropyl 95%.  Time to turn out the lights.dal38 dal39The next day has arrived and I’m anxious to work on the button rebuild that has cured overnight.  I take a picture to mark progress and using a flat needle file I file down the cured charcoal superglue gradually – patience.  The following pictures journal the shaping of the restored upper button that had the most compression damage.  I use the flat needle file to do the button shaping and then follow with 240 grit paper to fine tune and to remove the file marks from the vulcanite.  I’m pleased with the progress.dal40 dal41 dal42 dal43The lower button presented more challenges.  Pictured below I could detect two pockets in the charcoal superglue putty.  To avoid filing off too much of the new button build I elect to apply black superglue and charcoal mix to fill the pockets.  I’ll let these fills cure before sanding and finishing the button repair and then moving on to the stem restoration.dal44 dal45Putting the stem aside, I begin to micromesh the stummel in anticipation of applying a light brown stain.  I begin by wet sanding with micromesh pads 1500 to 2400.  I follow this with dry sanding using 3200 to 4000 then 6000 to 12000 – careful to avoid the Poker’s stampings on the side of the shank.  I enjoy watching the briar grain emerge.  The nickel (I think) band/mortise is shining up very well.  The pictures show the progress. dal46 dal47 dal48Oh my…here I go again.  I intended to apply Fiebing’s Light Brown Leather Dye to the Poker – I just brought it back to Bulgaria from the US and I wanted to give it a try.  The grain of this Poker bowl is very active with a mixture of dark and lighter grains.  I mentioned earlier a knot as well…. I’ll be thinking about this….  I thought and I will apply the light brown Leather Dye as originally planned.  I will see how it looks and I can use a cotton pad with alcohol to lighten the stain as needed.  This is one of the advantages of aniline stains and dyes – these I could not easily find here in Bulgaria.  I’m not sure if the staining will impact the metal band, but I decide to wrap it in masking tape just in case.  I wipe the stummel with a cotton pad and alcohol just to make sure the surface is clear of saw dust from sanding.  I use my air gun to warm the stummel before application of the dye.  I apply the dye with a folded pipe cleaner which I saw Steve do – it is much easier to use compared to a dauber that usually carries more dye than is needed and is messier.  At least this is my experience.  After applying the dye liberally over the entire bowl, I flame it by lighting it with a candle.  The alcohol base in the dye burns off very quickly and does not hurt the wood.  Then, I repeat the application again and flame it.  By doing this I assure that the entire surface has been covered.  I’ll wait until morning to unwrap the ‘package’ and look at the grain.  The picture shows the aftermath.dal49With the stain settling, the stem is ready for the home stretch.  The button super glue patch is cured, so I take 240 grip paper and finish smoothing and shaping the button.  I follow the 240 with 600 grit paper then 0000 steel wool over the entire surface of the stem.  Beginning with micromesh pads 1500 to 2400, I wet sand the stem and follow with an application of Obsidian Oil to the vulcanite.  Then with micromesh pads 3200 to 4000 then 6000 to 12000 I dry sand the stem following each set of 3 pads with an application of Obsidian Oil.  I like the polished vulcanite pop and the red dot stands out nicely.  The pictures show the progress.dal50 dal51 dal52 dal53 dal54Now to unwrap the stummel!  After staining the stummel with Light Brown Leather Dye I take a cotton pad with alcohol on it and wipe down the surface.  This smooths the stain and lightens it slightly.dal55 dal56Reattaching the stem and stummel, with the Dremel felt wheel set at the slowest speed (RPMs) I use Tripoli compound to begin fine tune polishing the surface.  I follow Tripoli with applying Blue Diamond with felt wheel, rotating it methodically over the surface, allowing the high speed of the wheel and the compounds to do the work.  Following the compounds, I wipe/buff the stummel with a cotton cloth to remove the powder residue from the compounds.  Switching to a cotton wheel, and increasing the speed of the Dremel by one number, I apply several coats of carnauba wax to both stummel and stem and finish the restoration of the Aged Imported Briar Poker with a brisk buff with a micromesh cloth.  This old Poker is looking great.  I’m pleased with the button work and the briar makes me smile – it is very active and I enjoy the root knots here and there.  This Poker will again make the card table a more enjoyable experience for some new steward who gives him a home.  Thank you for joining me!dal57 dal58 dal59 dal60 dal61 dal62 dal63 dal64 dal65


CPF Best Make Bulldog with a Silver Rim Cap and Ferrule

Blog by Steve Laug

This is yet another great old pipe that my brother picked up on eBay. It is a classic CPF Best Make Bulldog with what I believed to be a Bakelite stem. It is stamped C.P.F. in an oval over Best Make in an unfurled banner on the left side of the shank in gold filigree. The silver rim cap and ferrule on the shank are ornate, both cast with birds and branches which seem to be doves and olive branches. The band and cap were tarnished and dirty. The top of the rim cap was dented, tarnished and had a buildup of tars and oils. The bowl had some great grain under the grime on the briar. The stem was had been broken off at some time in its long life and been repaired with a clear glue – epoxy maybe. The glue had hardened and was really a mess with it “globbed” all over all four sides of the diamond shaped stem. The button on the stem was missing a large chunk on the top side leaving the top of the airway exposed. There were also some chips missing on the stem at the joint of the shank and the stem. The tenon was a bone threaded tenon and screwed into the shank. The alignment was very good. My brother took the next set of photos to show the state of the pipe when it arrived in Idaho before he did the cleanup work on it.cpf1 cpf2My brother Jeff took a close up photo of the rim and the bowl. The photo shows the damage to the silver rim top as well as the cake that is in the bowl. The second photo shows the bowl of the bowl. The diamond shank carries through to the bottom of the bowl in classic bulldog fashion.cpf3 cpf4The next series of three photos show the cast birds and branches on the rim cap and the ferrule. You can see the look of the birds that I think are doves and the branches that I think are olive branches making this a bit of a “peace pipe”. The third photo shows the stamping on the left shank of the pipe.cpf5 cpf6The next series of photos show the repair to the stem and the damage to the button on the top side. It was a solid repair despite the ugliness of the finished look. The first two photos show the damage to the button top and the airway into the stem. You can also see the repair line where the stem was glued in the second photo. The third and fourth photos show the top and the underside of the stem and the repair can be clearly seen in both photos.cpf7 cpf8I have written about the CPF brand in previous blogs including a blog on the historical background of the brand. You can read the whole article at the link that follows. https://rebornpipes.com/2013/04/14/some-reflection-on-the-historical-background-on-cpf-pipes/. I have also included a short portion of the blog to give a brief summary of the brand.

CPF stands for Colossus Pipe Factory. There is not much known about the Colossus Pipe Factory. I learned that by the mid 1890’s CPF was owned by Kaufman Brothers & Bondy (KB&B). They operated the factory at 129 Grand Street, in New York City, New York. I had a faint memory of some connection between CPF and Kaufmann Brothers & Bondy. But was unsure where I had heard or read that. In the process of reading information I came across this post by Bill Feuerbach on the Kaywoodie Forum: “About 10 years ago I picked up two original invoices from KB&B. One is dated February 5, 1884 and the other December 9, 1898. Both have the address as 129-131 Grand Street, which is in Soho, adjacent to the Bowery in New York City. The 1898 invoice has in the upper left hand corner the initials CPF and Trademark. So by 1898 KB&B was making it known to the trade that they owned the CPF trademark. The 1884 invoice does not have CPF on it. Therefore I think we can assume KB&B acquired or started the CPF line sometime between 1884 and 1898.”

I have also included a link to the blog that shows and old CPF catalogue that links KB&B to CPF – or Kaufmann Brothers and Bondy with Colossus Pipe Factory. https://rebornpipes.com/2014/03/05/an-old-kaufman-brothers-bondy-cpf-catalogue/

My brother did his usual thorough clean up on the pipe. He scrubbed the silver with a tooth brush and some dish soap and was able to remove the tarnish in the deep grooves of the castings. He scrubbed the rim cap and removed the tars and oils in the dents on the surface of the cap. He cleaned the briar with soap and a brush and rinsed it off. He reamed the bowl and cleaned out the inside of the shank and the airway in the stem. He cleaned up the threaded tenon and the threads in the shank. When it arrived in Vancouver I took photos of the pipe before I started to restore it.cpf9 cpf10I took close up photos of the rim cap, bowl and the stem to show the condition of the pipe when it arrived at my work table. The rim cap is dented but clean. The stem repair is visible and you can see the buildup of glue on the stem surface and the damage to the button and airway on the stem.cpf11 cpf12I sanded the stem repairs and stem surface with 220 grit sandpaper to remove the buildup of glue all around the stem. It took quite a bit of sanding to remove all of the thick dabs of glue. I worked on the chipped areas of the stem as well on the tenon end of the stem.cpf13I built up the chipped area on the top of the button with clear super glue until it was even with the rest of the button. I sanded it with 220 grit sandpaper to remove the excess and shape it. I used the topping board to flatten the end of the stem and a needle file to smooth out and shape the slot in the button.cpf14I filled in the small pits and crevices in the stem surface and the chips at the tenon end with clear super glue. I sanded the repaired areas on the surface of the stem to smooth it out blend it in with the rest of the stem. I shaped the button and rounded the edges of the button to slope it toward the slot on the stem end.cpf15I stained the briar with a dark brown aniline stain mixed 50/50 with isopropyl alcohol using a folded pipe cleaner to apply it around the rim cap and shank ferrule. I flamed the stain with a lighter and set it aside to dry.cpf16I gave the bowl several coats of Conservator’s Wax and buffed the bowl with a shoe brush and then lightly with carnauba and a clean buffing pad to raise the shine.cpf17 cpf18I polished the stem with micromesh sanding pads – wet sanding it with 1500-2400 grit sanding pads and dry sanding it with 3200-12000 grit pads. I rubbed it down with Obsidian Oil after each set of three pads. I gave it a final coat of oil after the last set of three pads. I set the stem aside to dry.cpf19 cpf20 cpf21I buffed the pipe with Blue Diamond on the buffing wheel, carefully avoiding the rim cap and the ferrule on the shank. I buffed the stem with the Blue Diamond to shine the finish on the stem. I gave the stem and bowl several coats of carnauba wax and buffed it with a clean buffing pad. I hand buffed the pipe with a microfiber cloth to deepen the shine on the pipe. The finished pipe is shown in the photos below. The old pipe has been given new life. The repaired stem has been smoothed out and though it still shows it is a solid repair and smooth to the touch. I really enjoy the look and the feel of these older CPF pipes and this one is no exception. Thanks for journeying with me in the process.cpf22 cpf23 cpf24 cpf25 cpf26 cpf27 cpf28 cpf29

A Stanwell Danish Star 64

Blog by Steve Laug

My brother sent me a nice looking Stanwell shape 64 with a nice plateau top. The briar itself was in good shape. There were no dents of nicks in the briar. The finish was in great shape. The rim was decent but the plateau was clean and in decent shape. The high spots were the same brown as the bowl and the nooks and crannies were dark brown or black. It was stamped on the left side of the stem with the words Stanwell over Danish Star. On the right side it was stamped with the shape number 64. On the underside of the shank it is stamped Made in Denmark. The stem was lightly oxidized and there were tooth marks on the top and underside near the button. The bite marks on the underside were deep but the ones on the topside was a bite through into the airway.danish1 danish2I took a close up photo of the top of the bowl. It shows the grooves, crevices and the high spots on the plateau top. It was dirty and there was dust in the grooves of the rim.danish3I took close up photos of the stem to show the condition of the top and bottom side of the stem. The photo of the top shows the bite through and the tooth marks that were further down the stem top. The photo of the underside shows the tooth marks there as well. The tooth marks were deep and large. There were also bite marks on the top and the bottom of the button.danish4I sanded the surfaces of the stem and cleaned out the dents in the surface with alcohol and cotton swabs. I greased a pipe cleaner with Vaseline and inserted it into the airway of the stem. I mixed a putty of charcoal powder and black super glue with a piece of straightened paper clips. I filled in the bite through with putty and the paper clip until it was thickly covered. I filled in the dents in the surface of the stem and built up the worn spots on the button edge. I sprayed the repairs with the accelerator to harden the repair.danish5 danish6 danish7When the glue had hardened and cured I used a file to smooth out the repaired spots on both sides of the stem.danish8I sanded the repaired areas with 220 grit sandpaper to smooth out the surface and remove the scratches left by the file. It took some time but I was able to sand out the scratches.danish9I filled in some of the air holes in the repair with clear super glue and sanded the surface with 220 grit sandpaper to smooth out the stem.danish10I polished the stem with micromesh sanding pads – I wet sanded it with 1500-2400 grit sanding pads and dry sanded it with 3200-12000 grit pads. I rubbed the stem down with Obsidian Oil after each set of three pads. I gave it a final coat of Obsidian Oil and set aside to dry.danish11 danish12 danish13The plateau top was in great shape. I used a black Sharpie pen to highlight the grooves and crevices in the rim top. I buffed the pipe and stem with Blue Diamond on the buffing wheel to raise a shine and remove the last of the scratches on the vulcanite. I buffed the bowl surface to polish out the light scratches in the briar. The Blue Diamond gave the finish on both the bowl and the stem a high shine. I gave the pipe multiple coats of carnauba wax and buffed it with a clean buffing pad to raise the shine. I hand buffed the pipe with a microfibre cloth to deepen the shine. The finished pipe is shown in the photos below. The colour of the stain on the pipe really makes the grain stand out clearly on the pipe. Thanks for having a look.danish14 danish15 danish16 danish17 danish18 danish19 danish20 danish21