Blog by Steve Laug
This is yet another great old pipe that my brother picked up on eBay. It is a classic CPF Best Make Bulldog with what I believed to be a Bakelite stem. It is stamped C.P.F. in an oval over Best Make in an unfurled banner on the left side of the shank in gold filigree. The silver rim cap and ferrule on the shank are ornate, both cast with birds and branches which seem to be doves and olive branches. The band and cap were tarnished and dirty. The top of the rim cap was dented, tarnished and had a buildup of tars and oils. The bowl had some great grain under the grime on the briar. The stem was had been broken off at some time in its long life and been repaired with a clear glue – epoxy maybe. The glue had hardened and was really a mess with it “globbed” all over all four sides of the diamond shaped stem. The button on the stem was missing a large chunk on the top side leaving the top of the airway exposed. There were also some chips missing on the stem at the joint of the shank and the stem. The tenon was a bone threaded tenon and screwed into the shank. The alignment was very good. My brother took the next set of photos to show the state of the pipe when it arrived in Idaho before he did the cleanup work on it.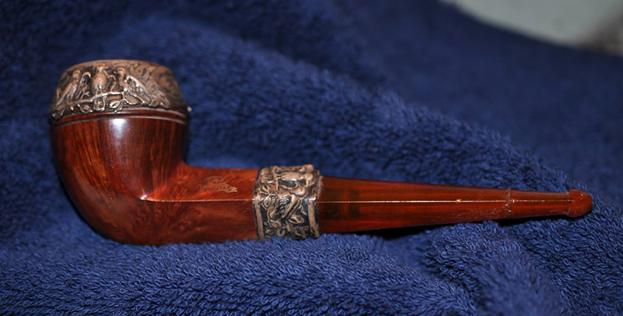
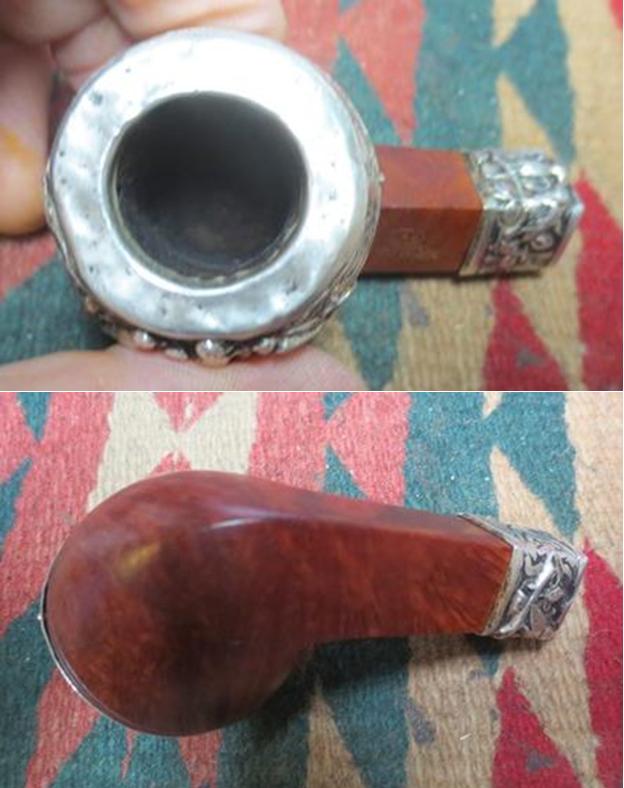
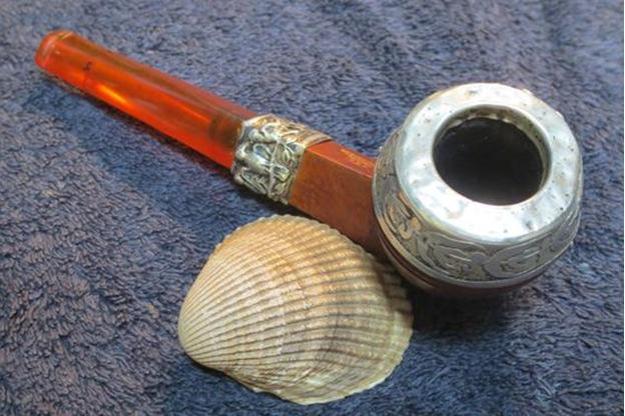
 My brother Jeff took a close up photo of the rim and the bowl. The photo shows the damage to the silver rim top as well as the cake that is in the bowl. The second photo shows the bowl of the bowl. The diamond shank carries through to the bottom of the bowl in classic bulldog fashion.
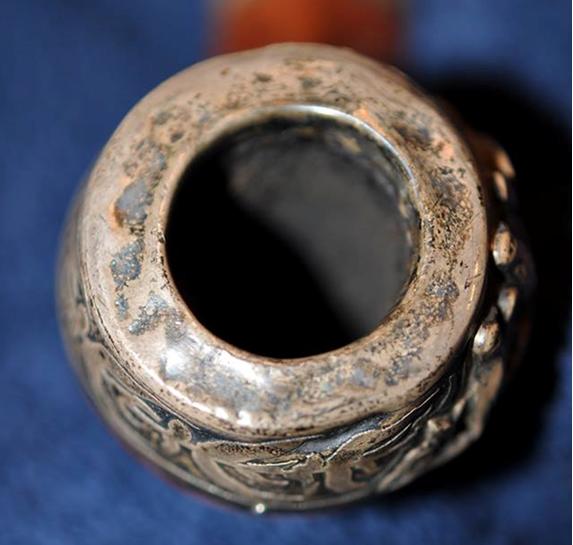
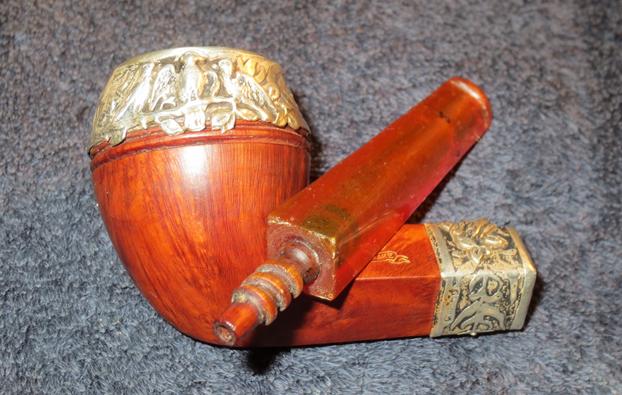
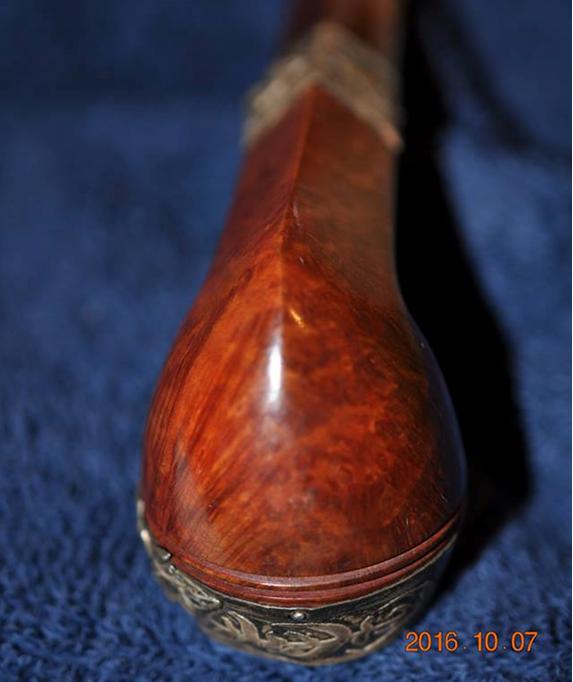 The next series of three photos show the cast birds and branches on the rim cap and the ferrule. You can see the look of the birds that I think are doves and the branches that I think are olive branches making this a bit of a “peace pipe”. The third photo shows the stamping on the left shank of the pipe.
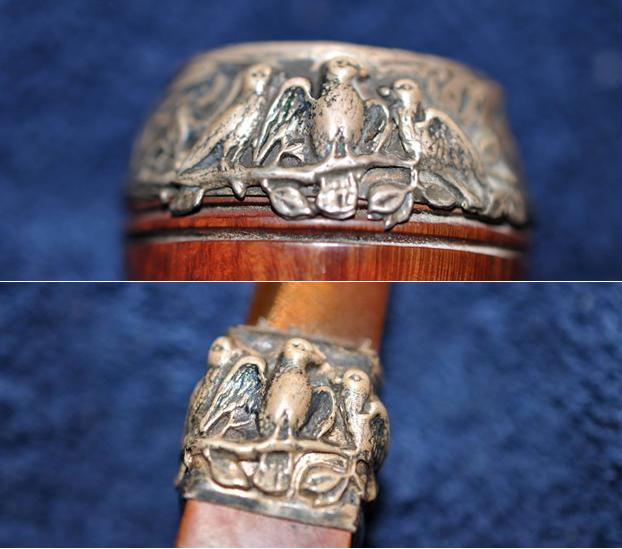
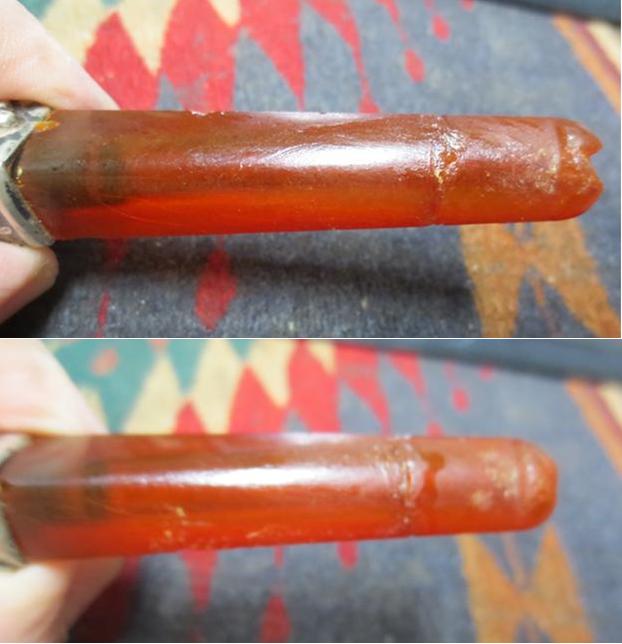
 The next series of photos show the repair to the stem and the damage to the button on the top side. It was a solid repair despite the ugliness of the finished look. The first two photos show the damage to the button top and the airway into the stem. You can also see the repair line where the stem was glued in the second photo. The third and fourth photos show the top and the underside of the stem and the repair can be clearly seen in both photos.
 I have written about the CPF brand in previous blogs including a blog on the historical background of the brand. You can read the whole article at the link that follows. https://rebornpipes.com/2013/04/14/some-reflection-on-the-historical-background-on-cpf-pipes/. I have also included a short portion of the blog to give a brief summary of the brand.
CPF stands for Colossus Pipe Factory. There is not much known about the Colossus Pipe Factory. I learned that by the mid 1890’s CPF was owned by Kaufman Brothers & Bondy (KB&B). They operated the factory at 129 Grand Street, in New York City, New York. I had a faint memory of some connection between CPF and Kaufmann Brothers & Bondy. But was unsure where I had heard or read that. In the process of reading information I came across this post by Bill Feuerbach on the Kaywoodie Forum: “About 10 years ago I picked up two original invoices from KB&B. One is dated February 5, 1884 and the other December 9, 1898. Both have the address as 129-131 Grand Street, which is in Soho, adjacent to the Bowery in New York City. The 1898 invoice has in the upper left hand corner the initials CPF and Trademark. So by 1898 KB&B was making it known to the trade that they owned the CPF trademark. The 1884 invoice does not have CPF on it. Therefore I think we can assume KB&B acquired or started the CPF line sometime between 1884 and 1898.”
I have also included a link to the blog that shows and old CPF catalogue that links KB&B to CPF – or Kaufmann Brothers and Bondy with Colossus Pipe Factory. https://rebornpipes.com/2014/03/05/an-old-kaufman-brothers-bondy-cpf-catalogue/
My brother did his usual thorough clean up on the pipe. He scrubbed the silver with a tooth brush and some dish soap and was able to remove the tarnish in the deep grooves of the castings. He scrubbed the rim cap and removed the tars and oils in the dents on the surface of the cap. He cleaned the briar with soap and a brush and rinsed it off. He reamed the bowl and cleaned out the inside of the shank and the airway in the stem. He cleaned up the threaded tenon and the threads in the shank. When it arrived in Vancouver I took photos of the pipe before I started to restore it.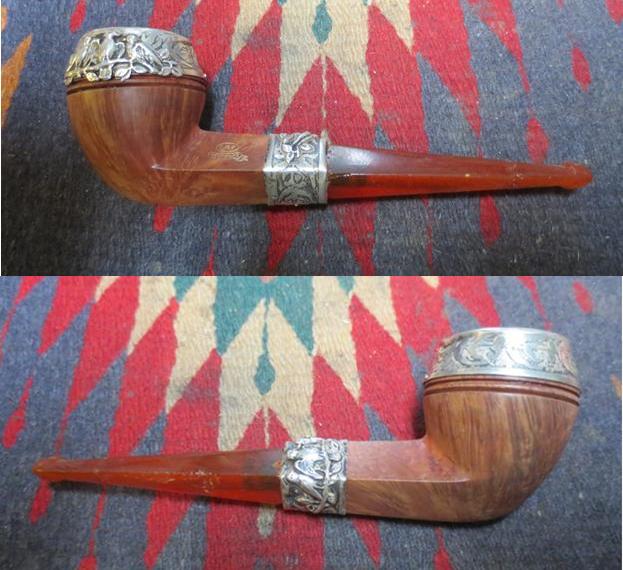
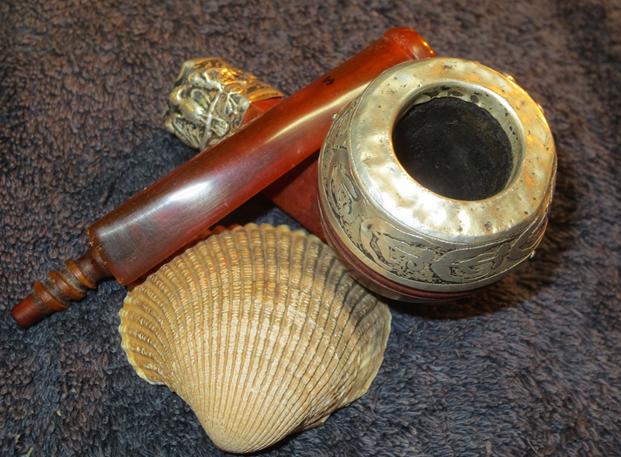
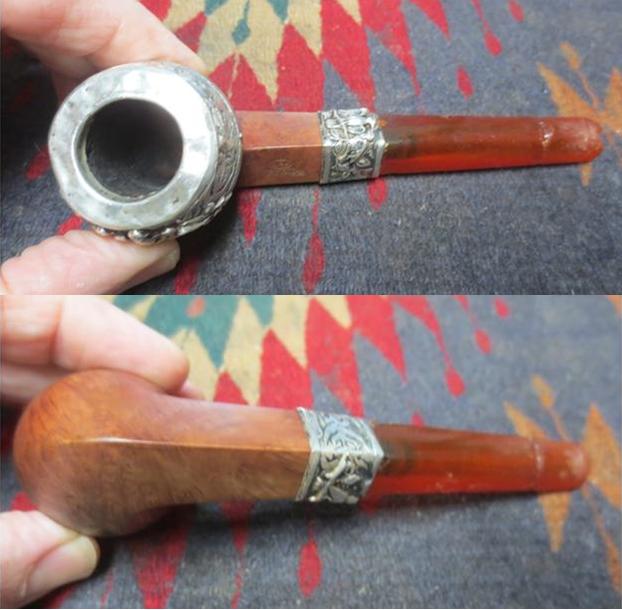 I took close up photos of the rim cap, bowl and the stem to show the condition of the pipe when it arrived at my work table. The rim cap is dented but clean. The stem repair is visible and you can see the buildup of glue on the stem surface and the damage to the button and airway on the stem.
 I sanded the stem repairs and stem surface with 220 grit sandpaper to remove the buildup of glue all around the stem. It took quite a bit of sanding to remove all of the thick dabs of glue. I worked on the chipped areas of the stem as well on the tenon end of the stem.
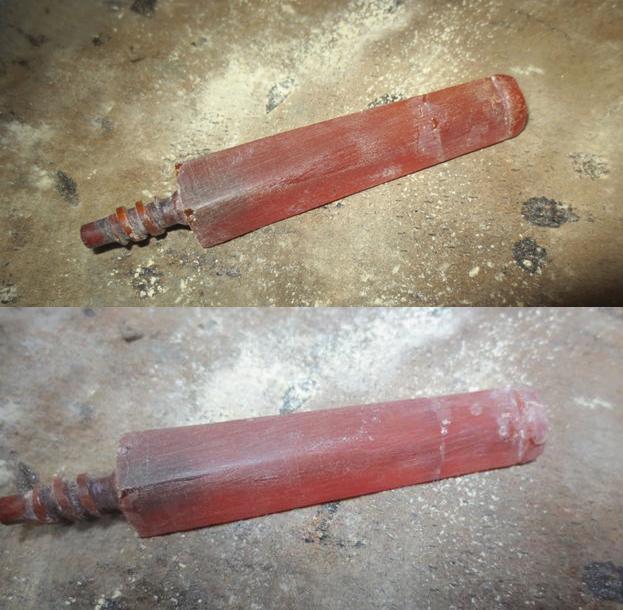 I built up the chipped area on the top of the button with clear super glue until it was even with the rest of the button. I sanded it with 220 grit sandpaper to remove the excess and shape it. I used the topping board to flatten the end of the stem and a needle file to smooth out and shape the slot in the button.
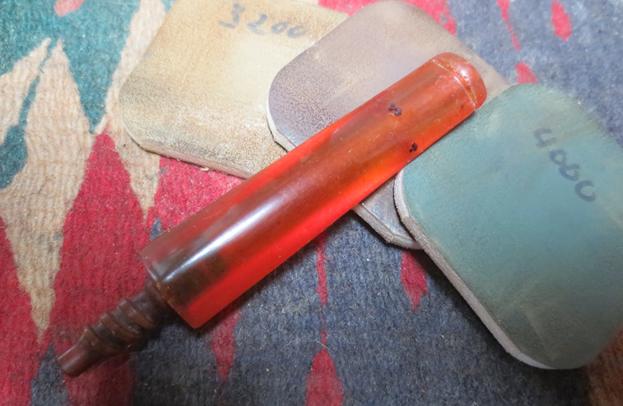
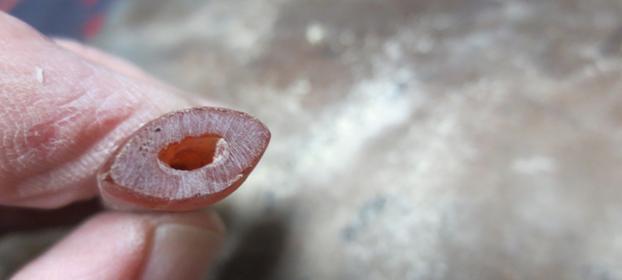 I filled in the small pits and crevices in the stem surface and the chips at the tenon end with clear super glue. I sanded the repaired areas on the surface of the stem to smooth it out blend it in with the rest of the stem. I shaped the button and rounded the edges of the button to slope it toward the slot on the stem end.
 I stained the briar with a dark brown aniline stain mixed 50/50 with isopropyl alcohol using a folded pipe cleaner to apply it around the rim cap and shank ferrule. I flamed the stain with a lighter and set it aside to dry.
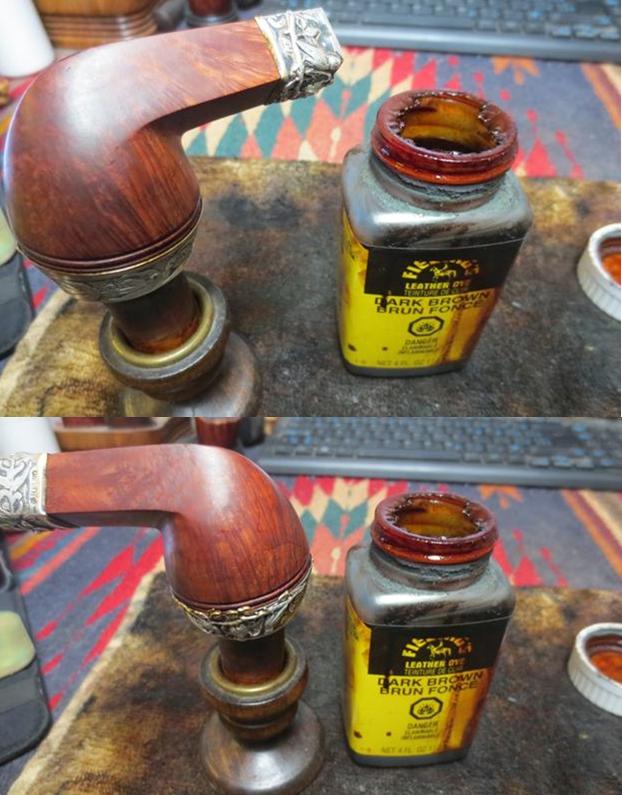 I gave the bowl several coats of Conservator’s Wax and buffed the bowl with a shoe brush and then lightly with carnauba and a clean buffing pad to raise the shine.
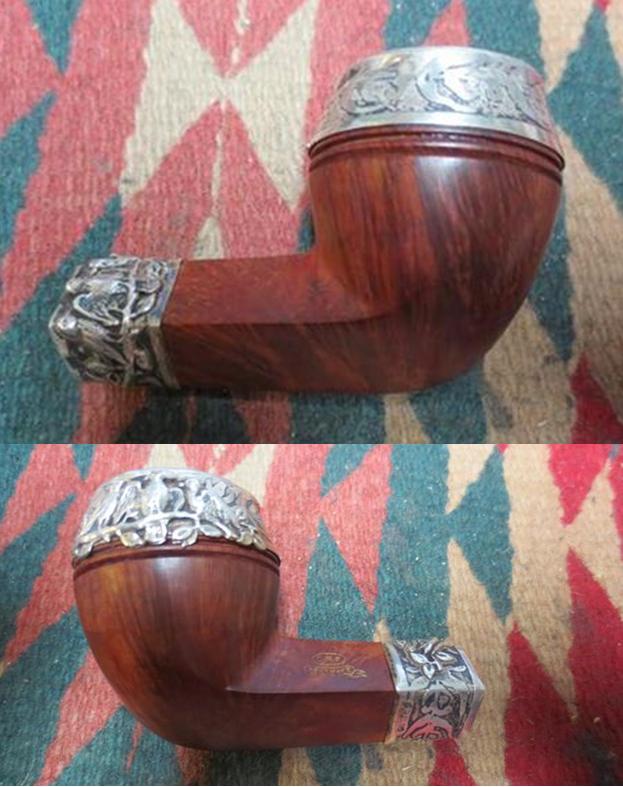
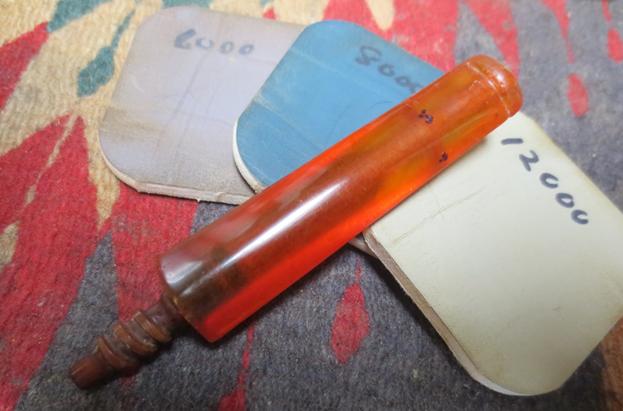
 I polished the stem with micromesh sanding pads – wet sanding it with 1500-2400 grit sanding pads and dry sanding it with 3200-12000 grit pads. I rubbed it down with Obsidian Oil after each set of three pads. I gave it a final coat of oil after the last set of three pads. I set the stem aside to dry.
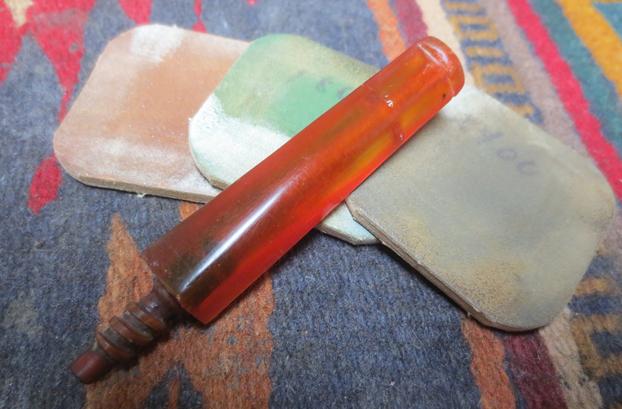
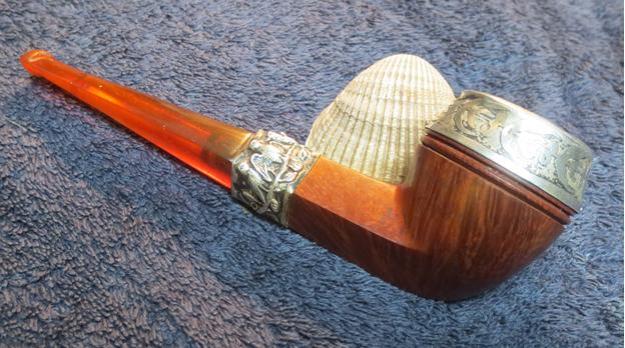
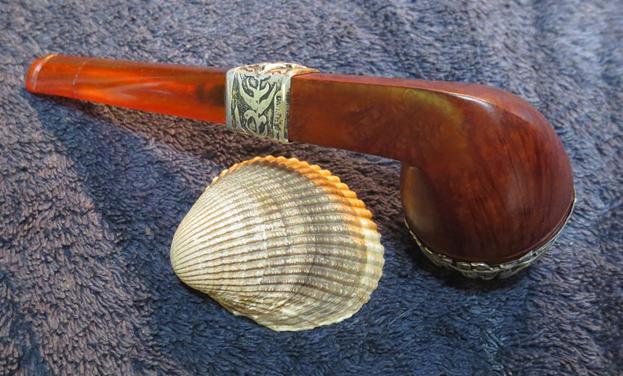
 I buffed the pipe with Blue Diamond on the buffing wheel, carefully avoiding the rim cap and the ferrule on the shank. I buffed the stem with the Blue Diamond to shine the finish on the stem. I gave the stem and bowl several coats of carnauba wax and buffed it with a clean buffing pad. I hand buffed the pipe with a microfiber cloth to deepen the shine on the pipe. The finished pipe is shown in the photos below. The old pipe has been given new life. The repaired stem has been smoothed out and though it still shows it is a solid repair and smooth to the touch. I really enjoy the look and the feel of these older CPF pipes and this one is no exception. Thanks for journeying with me in the process.


Pingback: Reflecting on a Few of my CPF pipes – Colossus Pipe Factory Pipes | rebornpipes
Marvelous restoration on a gorgeous pipe, Steve. Definitely a fine piece.
It is a small world. My grandfather had a business manufacturing pool tables that he opened in 1912 on The Bowery. After his death my father and uncle took over the business. It was moved further south to the intersection of The Bowery and Kenmare street, where it remained until it closed in the late1980s. I had worked there in my youth. It was just a few short blocks to Grand street where the CPF factory would have been. Had I only known!
LikeLike
Steve, very nice pipe restored to former glory. I was a little confused when I began to read the comment about your brother beginning the process but I could see the evidence of your bench in the later pictures. Then I caught up, or was that awoke? LOL. In all a very nice older pipe that the newer pipe makers would do well to learn how to do. It is a lost art worthy of renewing.
LikeLike
Such a transformation! When I first read the pipe’s condition I wondered if you’d fit a new stem. The old one was in bad shape, but you saved it!
LikeLike
I also would not have buffed the silver with something as aggressive as a polishing rouge. Perhaps some hand polishing or at the most the Red rouge? That grain is impressive. This must have been a special piece to have deserved such fine silver work. I wish this one could talk! Great job saving that stem.
LikeLike
Good day, Steve,
This is Jacek from Poland again; I have not been writing for long time but I read your blog with the same interest like years ago. As retired goldsmith and silversmith and restorer/conservator of old silver I would like to refer to the matter of cleaning and polishing elements of silver that there are sometime on pipes like in this case. When we deal with “tarnished” silver (to be precise: with alloy of silver with copper, the proportions are stamped on the object by special mark put by the maker or assay office) then we deal with two kinds of “dirt”: one is “normal”: dirt easy to be cleaned/removed, the more difficult is the copper oxide that silversmiths are familiar with. The simple procedure is to use water solution of acid – be it citric acid dissolved in water that should be easy to acquire in groceries. If the object can not be put into the vessel with such pickling solution, it is advisable to make lampoons of cotton of wool, soaked lampoon with this citric acid solution and put on tarnished silver elements for several hours, sometime days. The process should be monitored and when the “dirt” will be ready after some time we may easily remove it by soft piece of textile or cotton of wool. For polishing we use professional polishing materials like these used by goldsmiths or simple toothpaste applied by cotton of wool or soft clean piece of textile.
With kindest regards
As always
Jacek A. R.
LikeLike
As always very helpful Jacek. It is good to hear from you. I think of you often.
LikeLike
Beautiful pipe, Steve.
LikeLike
Steve I had a question that I forgot to enter before! You stated during the buffing with the Blue Diamond you avoided the cap and ferrule. Why did you do this? Thanks for the technical question!
LikeLike
I don’t buff them with a rouge on the buffer as I don’t want to damage the plating or smooth out the already smoothed parts of the casting.
LikeLike