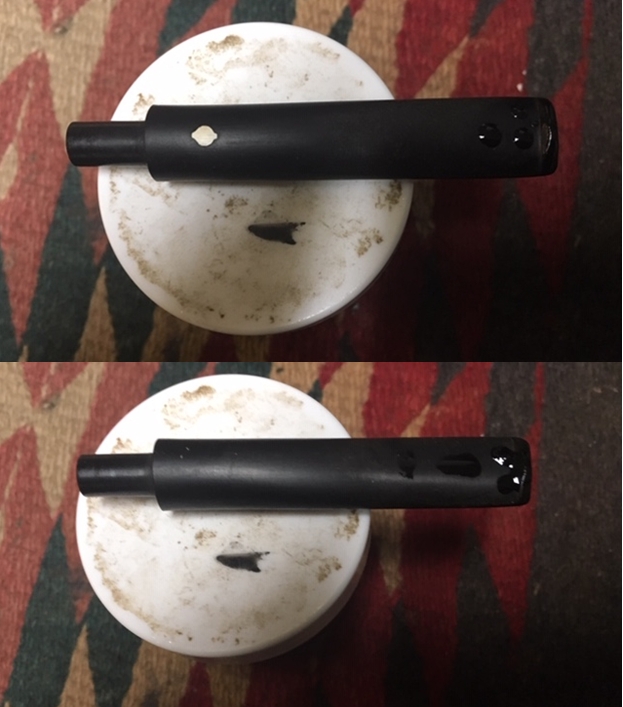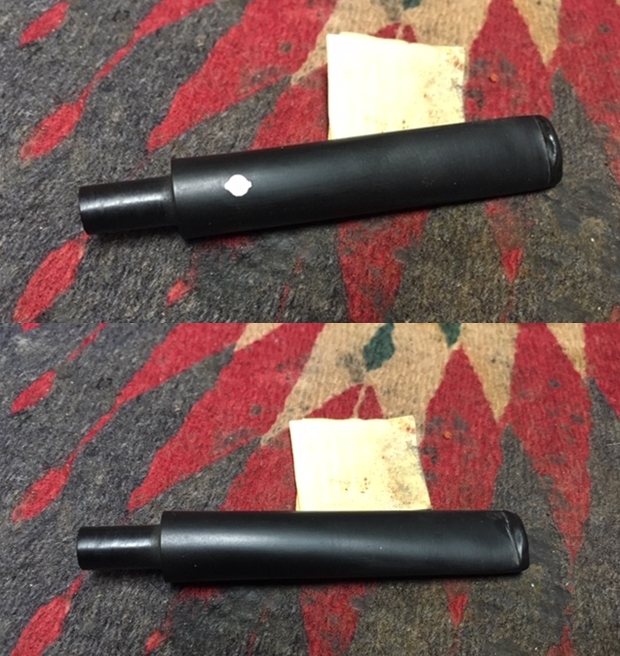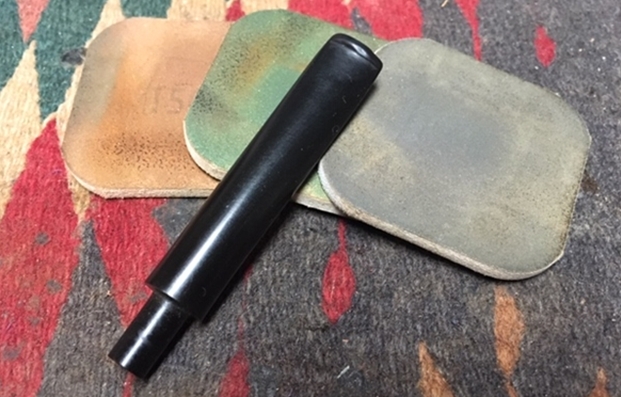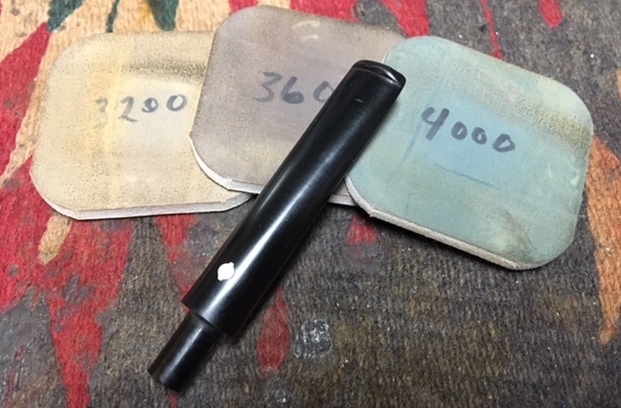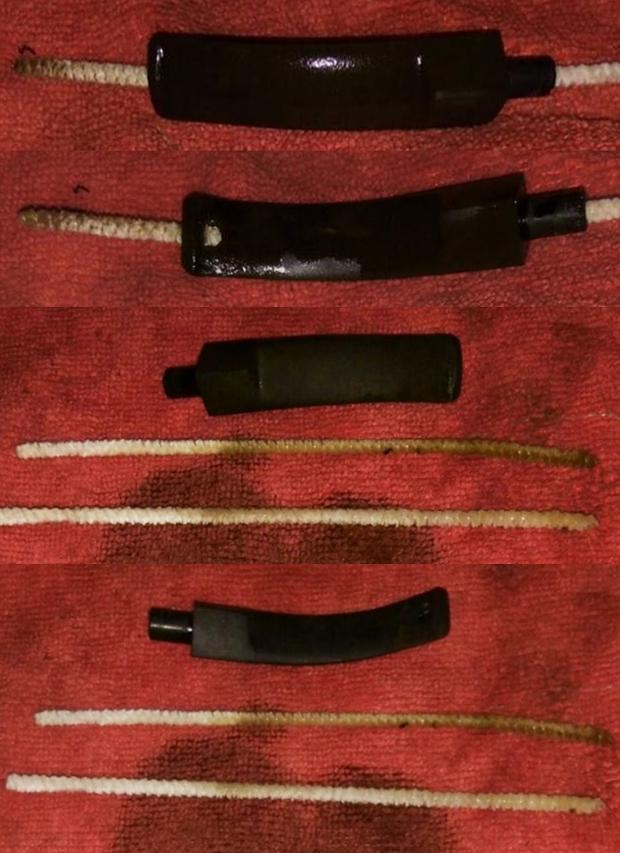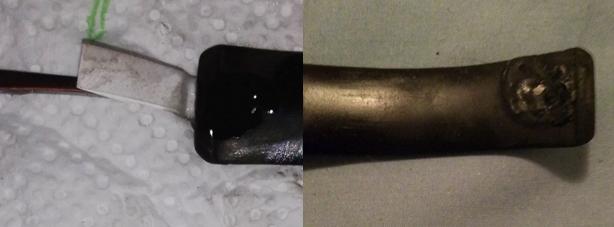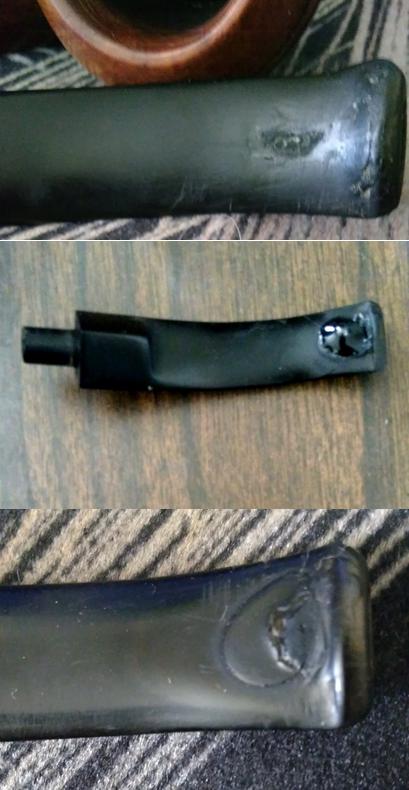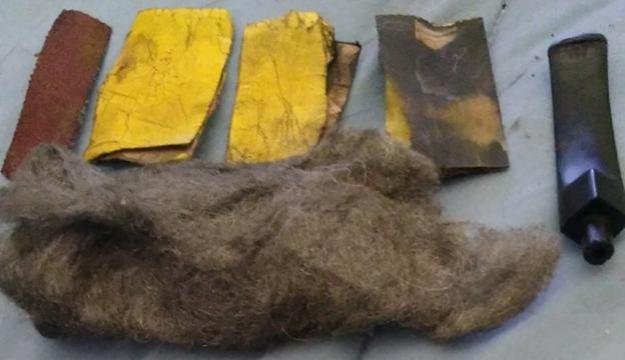
Tag Archives: shaping a stem

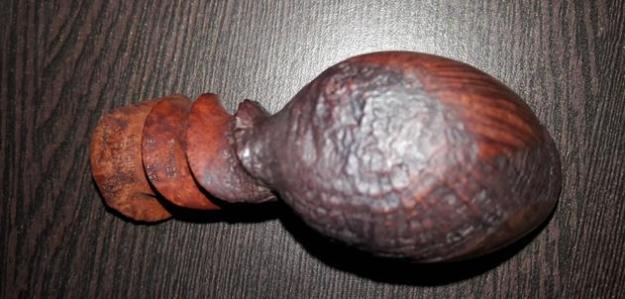
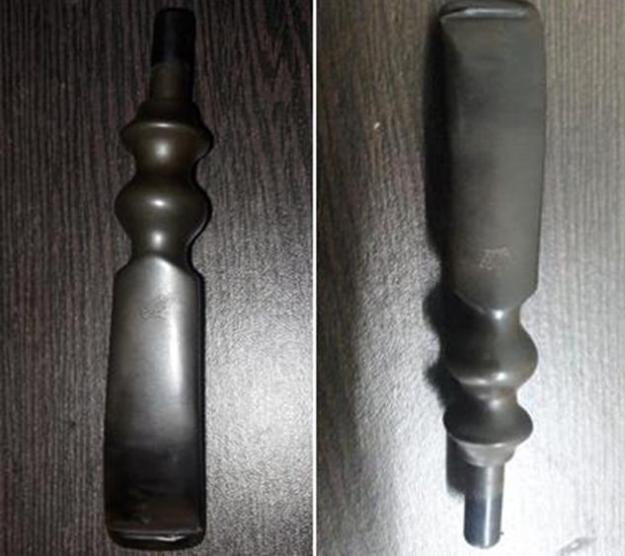
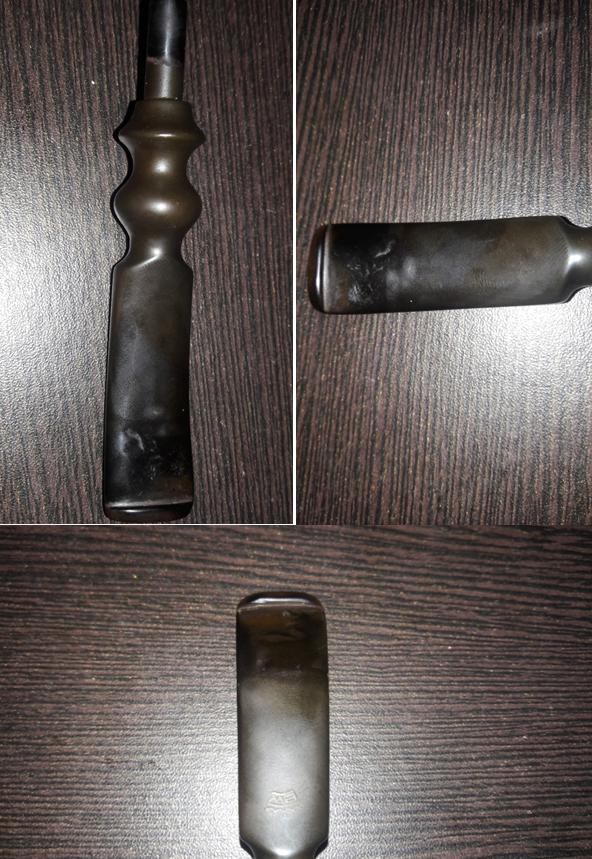
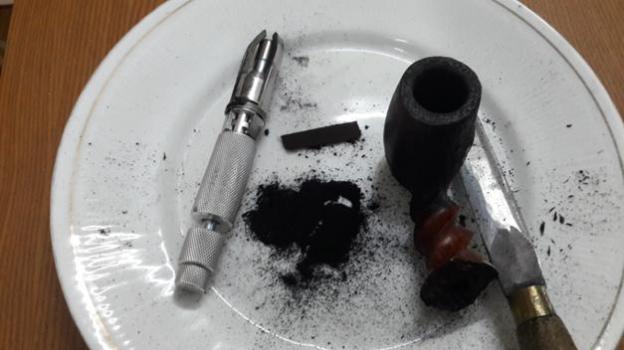
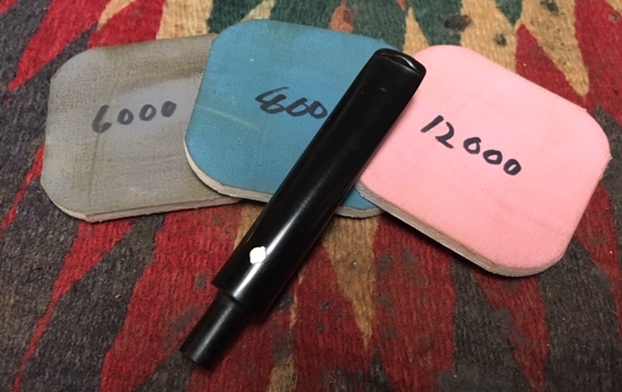
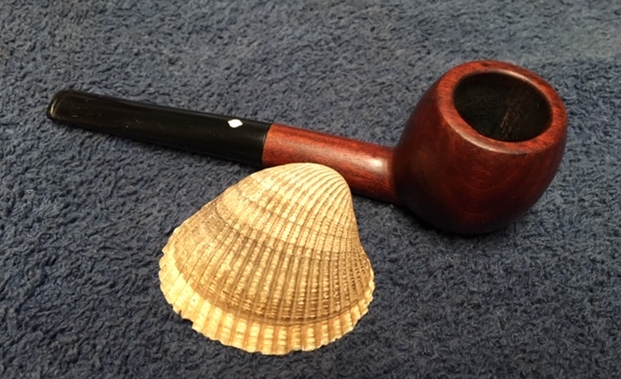
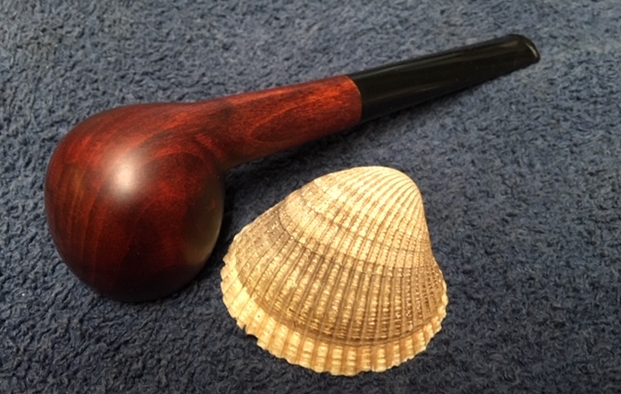
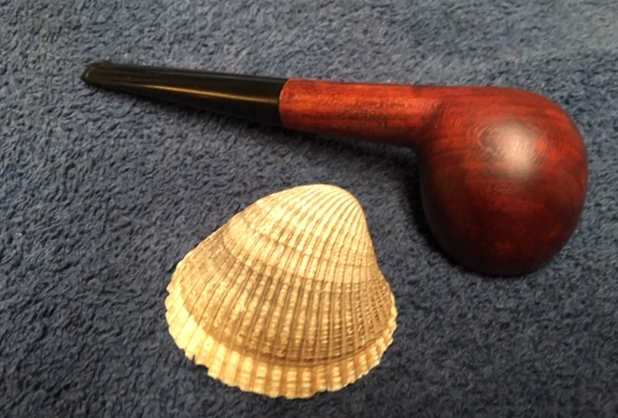
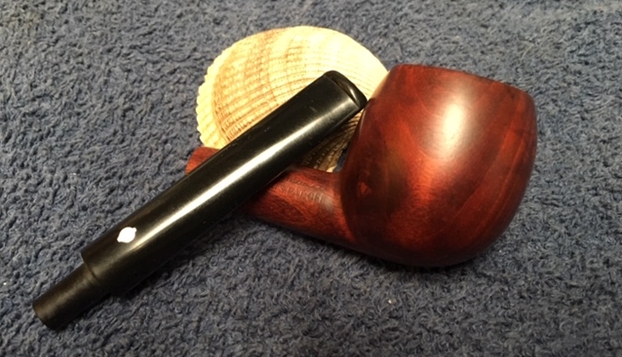
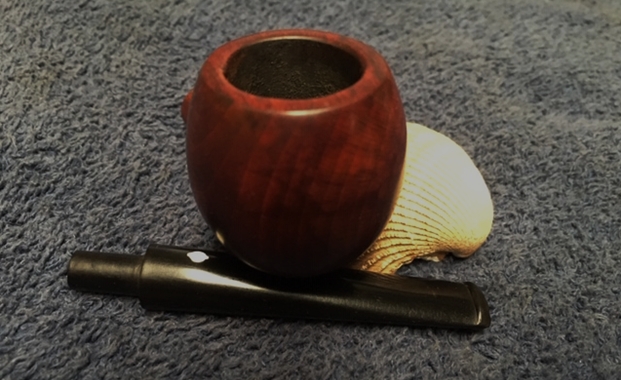
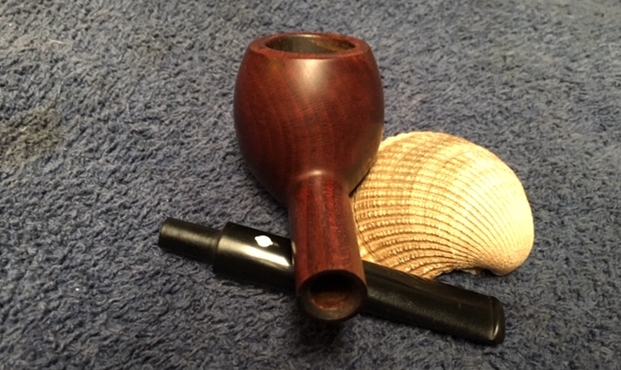
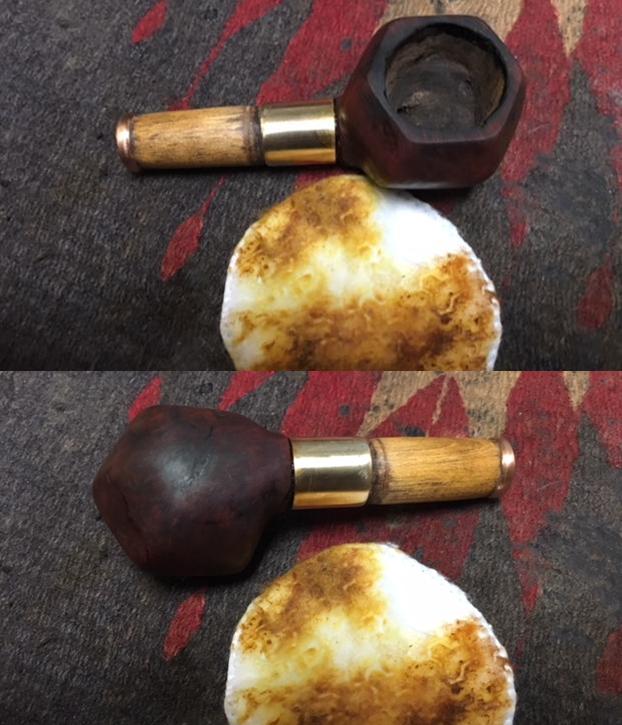
Finishing the Restoration and Restemming a Custom-Bilt Billiard


Blog by Steve Laug

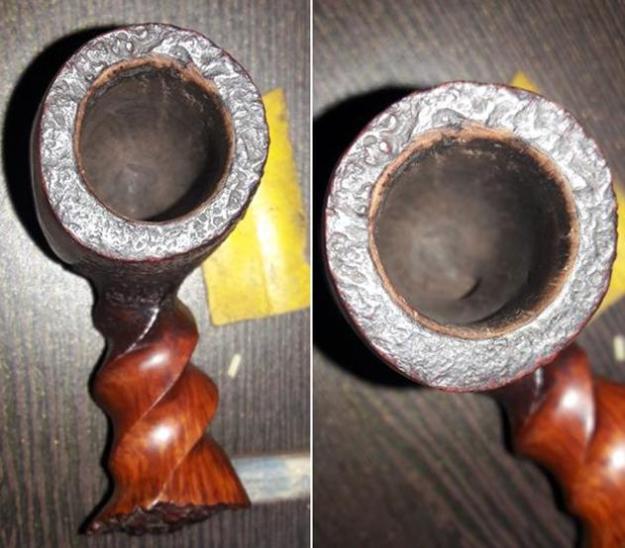
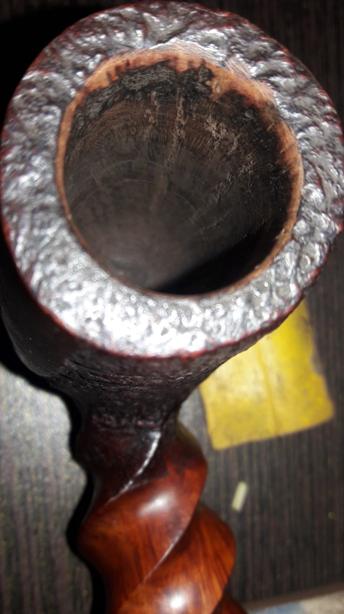
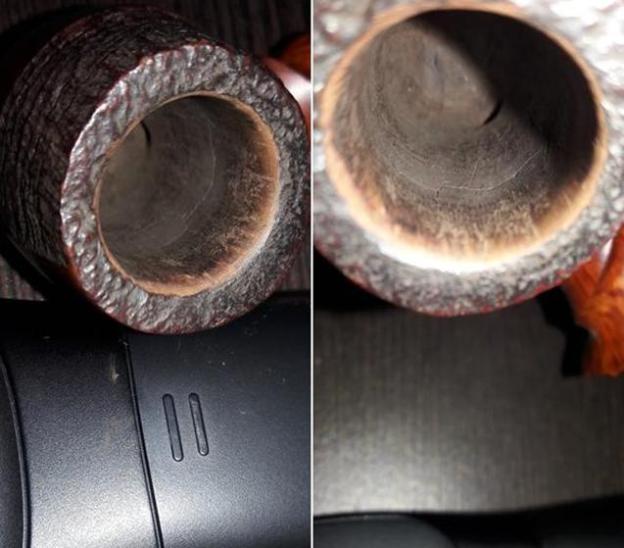
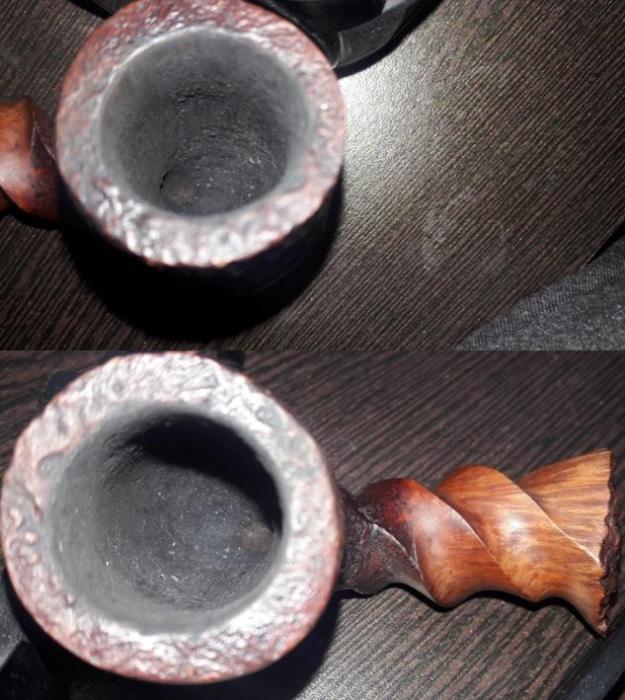
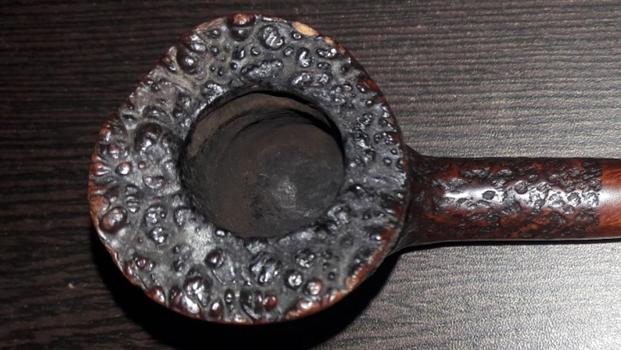
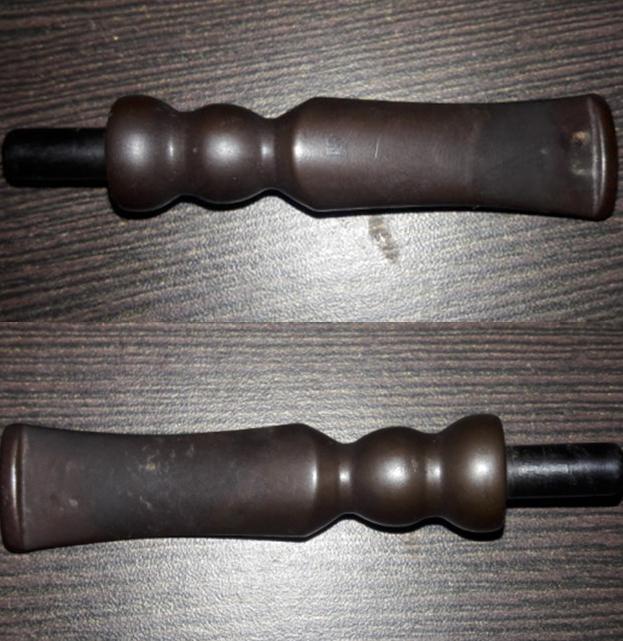
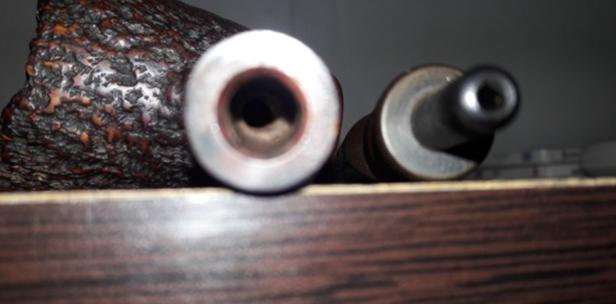
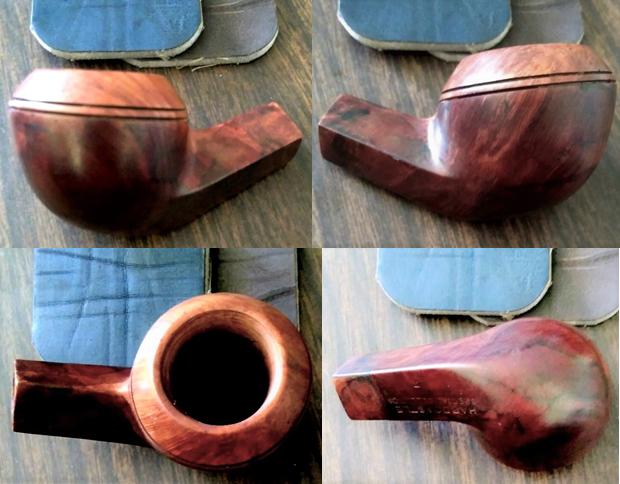
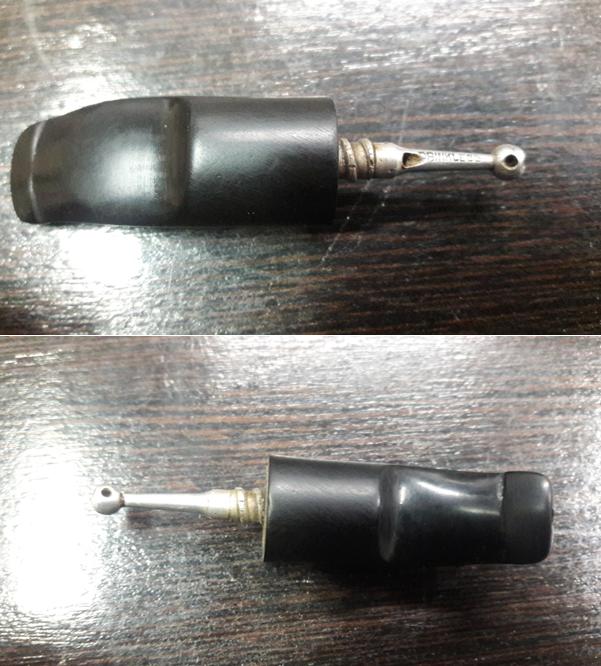
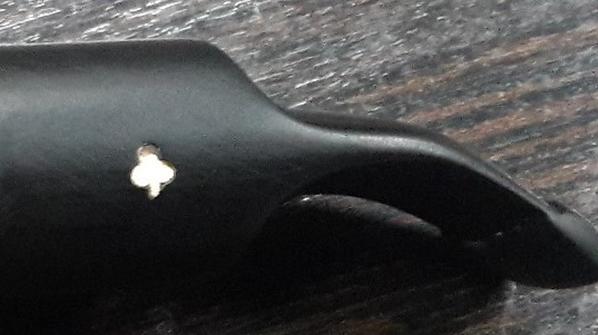
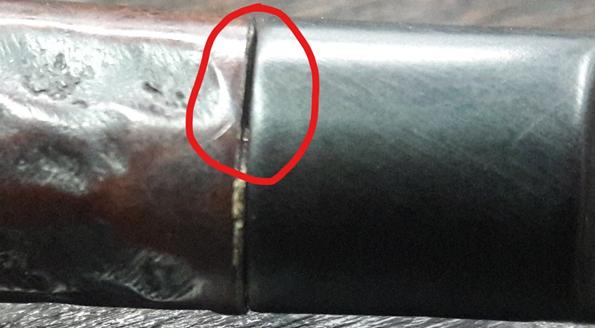
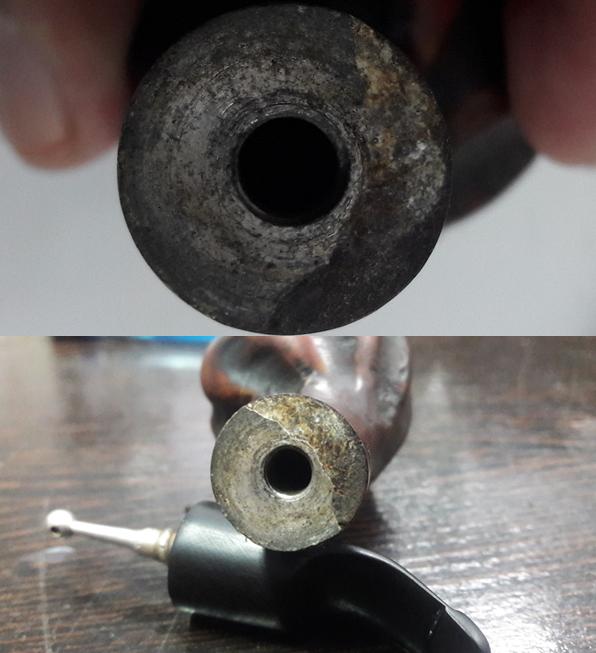
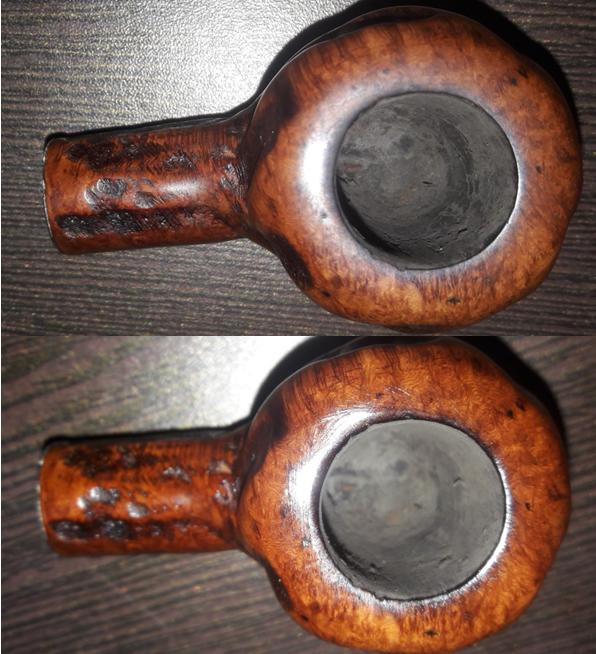
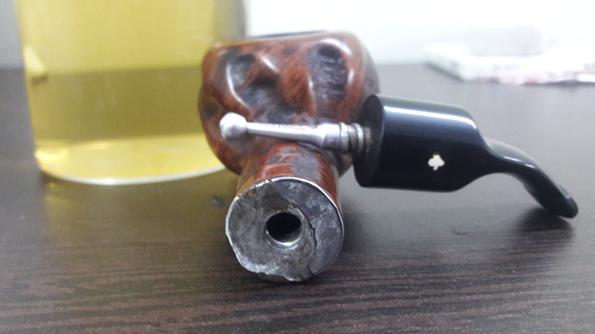
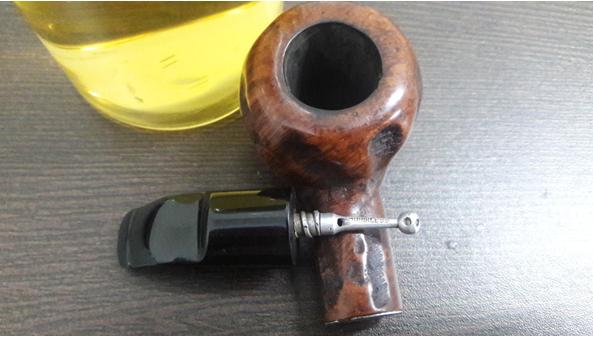
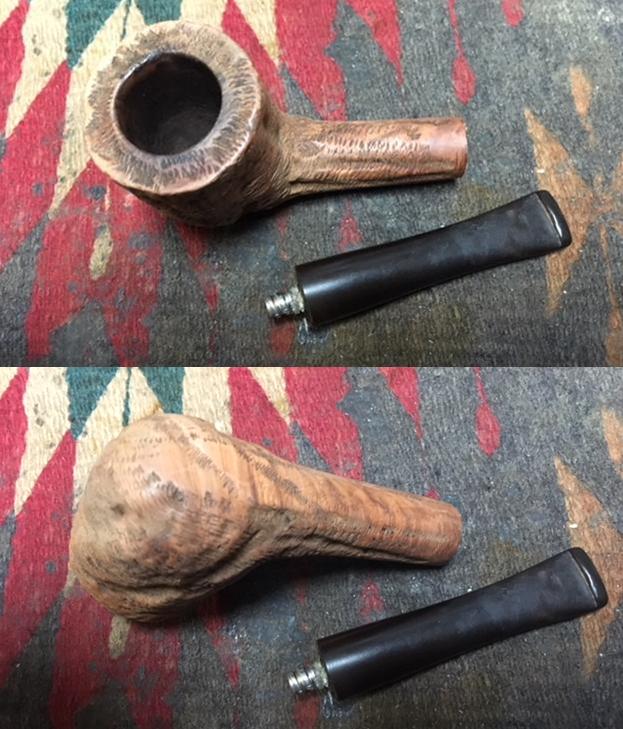
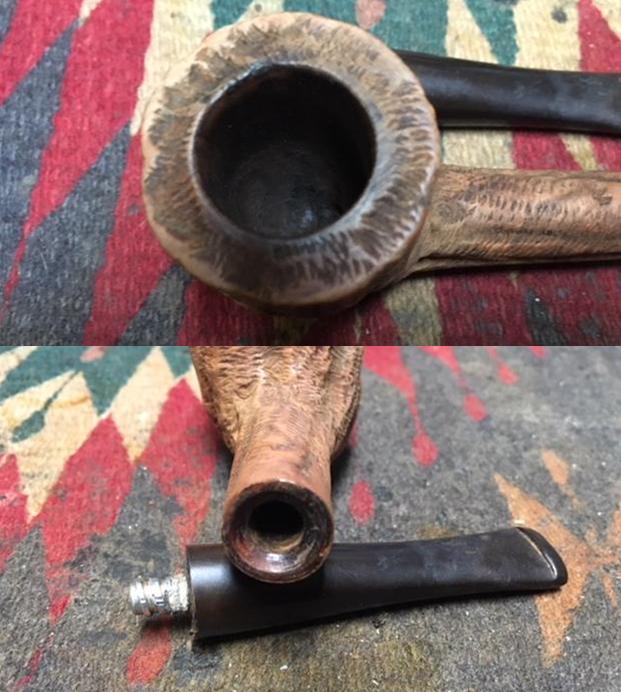
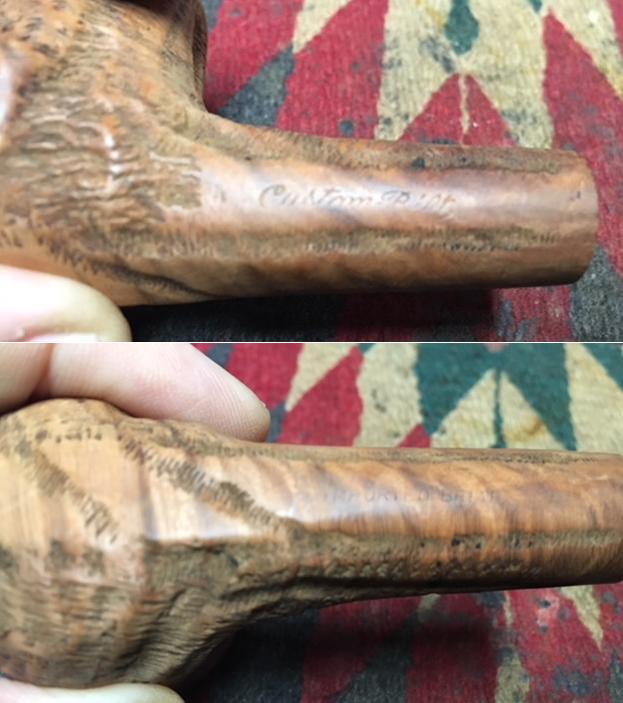
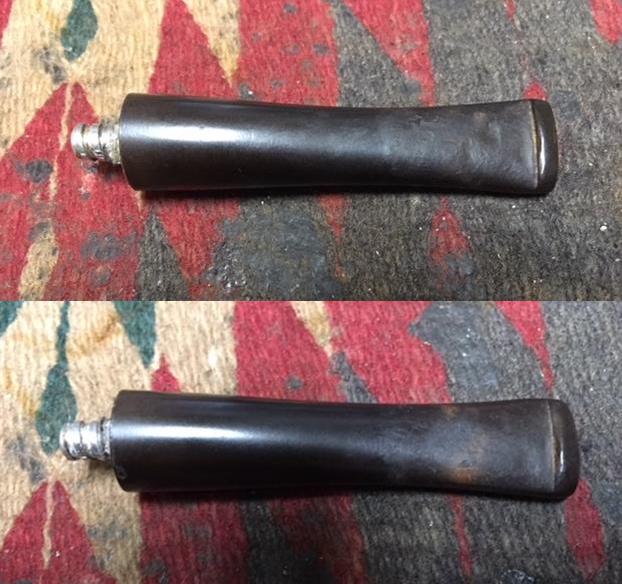
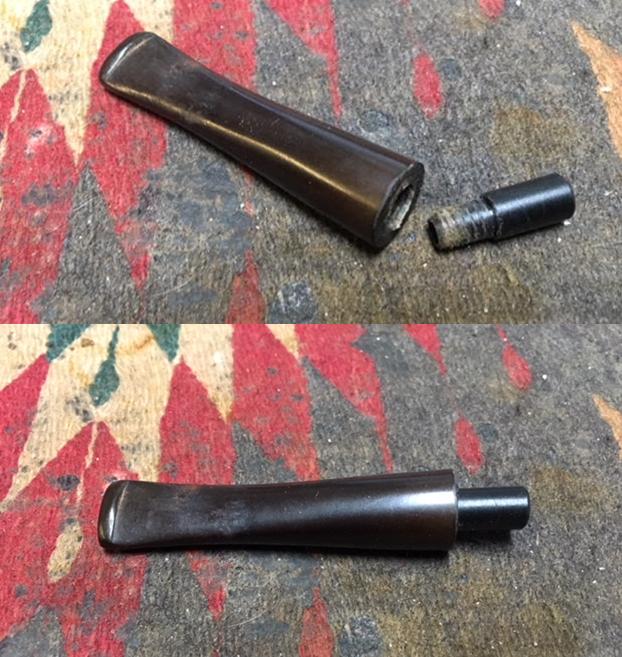
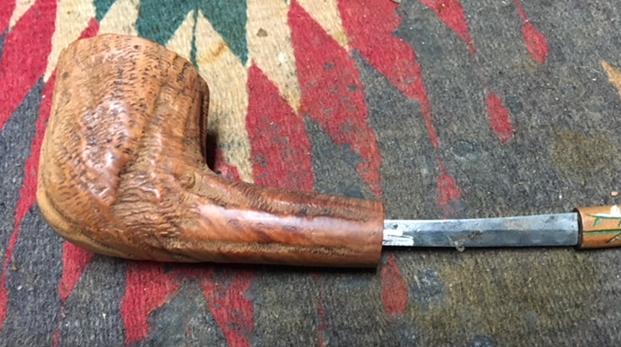
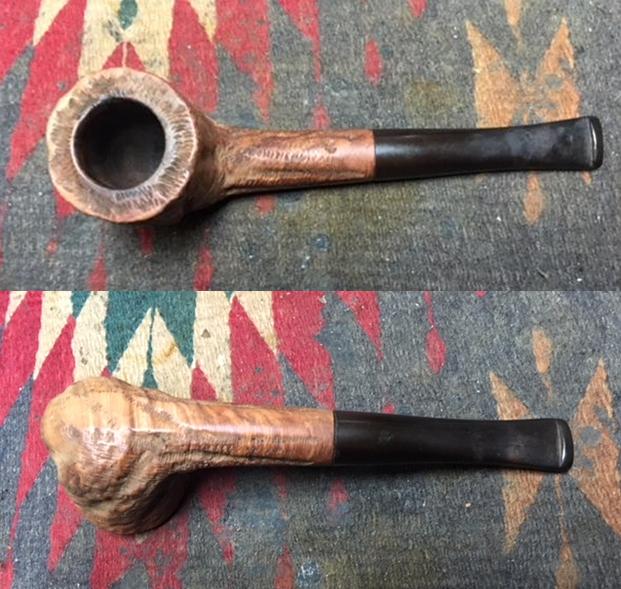
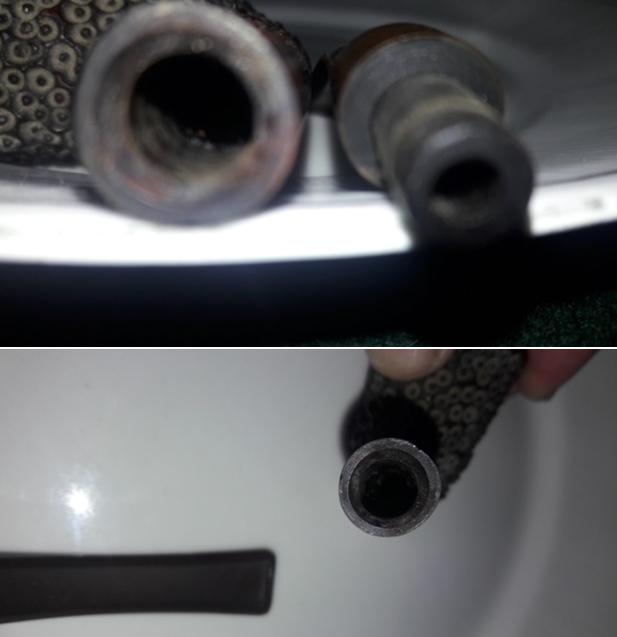
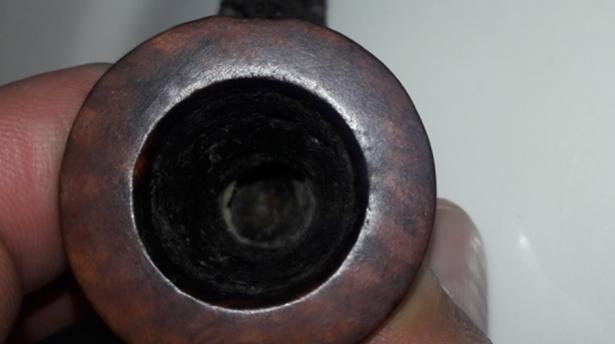
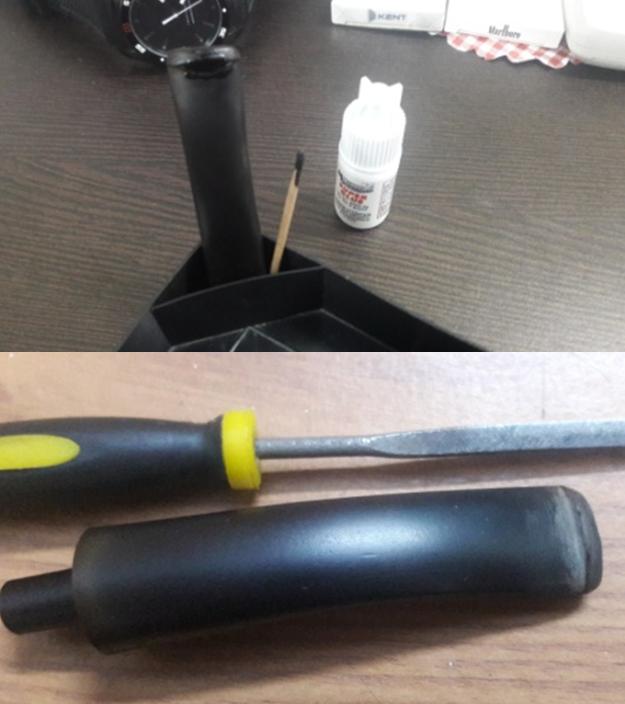
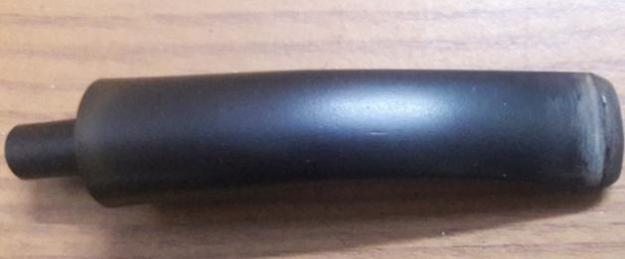
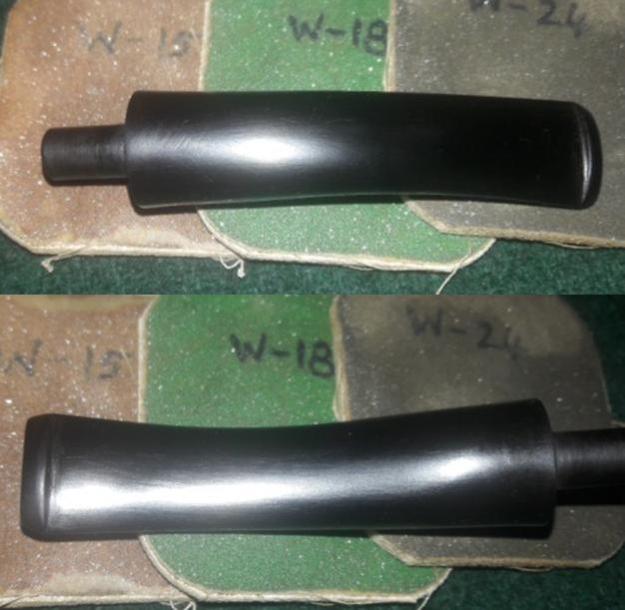
Not long ago I was speaking with Paresh and Abha on Facetime and they showed me a second pipe that they wanted me to finish for them. This one was a Custom-Bilt billiard that had come to him from the estate of his Grandfather. It had a threaded tenon stem and a shank that had no threads. I have never seen a Custom-Bilt with a threaded mortise and tenon so it was a fair assumption that the stem was not original. It had been wrapped with glue and tape to make it fit in the shank and the fit was awful. Paresh wanted me to fit a new stem on the pipe for him. Abha had done a magnificent job cleaning the pipe so it was really a simple restoration for me – just fit a stem and finish the bowl. The briar was clean and lifeless so it would need some attention to breathe life into it again. He wanted me to pick up where he had left off and finish the pipe for him. The pipe was stamped on the left side of the shank Custom-Bilt and on the underside it was stamped Imported Briar. It would be interesting to see what I could do with it. When the pipe arrived this is what it looked like. You can see the remnants of wrapping and glue on the metal threaded tenon. There were tooth marks in the surface of the vulcanite stem on both the top and underside near the button. The first photo below shows the rim top and the inside of the bowl. Both were very clean and the rustication was in great condition as were the inner and outer edges of the bowl. The second photo shows the end of the shank with the glue on the inside of the mortise and the lack of threads that would be present if the tenon that was on the stem would work with this pipe.I took some photos of the stamping on the left and underside of the shank. The left side reads Custom-Bilt and the underside reads Imported Briar.I took close up photos of the stem. You can see the metal tenon on the end of the stem. There is some oxidation and there are the tooth marks on the stem top and underside.I wanted to refresh my memory on the history of the brand. I knew that his one was one of Tracy Mincer’s pipes because of the hyphenated name stamp. I looked on Pipedia and read Richard Esserman’s write up on Bill Unger’s Book. He gives a great summary of the history there. I quote a section of it below. (https://pipedia.org/wiki/Custom-Bilt(Rich Esserman))Tracy Mincer started the original Custom-Bilt pipes it appears in 1934. Bill meticulously details the start of the Company, how it was financed, the changes in the original ownership, how the company distributed its product, the manufacturing process, certain patented items, and other interesting stuff.

Mentioned briefly in this chapter was the fact that Custom-Bilt was producing big, carved pipes using Algerian briar for production up to WW II. One important employee, Hetzer Hartsock, stated: I can tell you something about that rough texture that Custom-Bilt had. One reason rough textured was used was not only for looks but it could hide flaws in the briar. [The process gave] A very uncontrolled cut. Then he [Tracy] would buff it out. [page 25]

Custom-Bilt pipes retailed between $5.00 and $15.00 in the 1940s. According to an ad, standard Dunhill pipes were selling for $12.00 and $13.50, Parker pipes $7.50, GBD for $6.00 and Comoy’s $7.50. Not mentioned was that special Dunhills could retail up to $100 and certain Comoy’s up to $25.

In 1946, the name was changed to Custombilt after Mincer began an association with Eugene J. Rich, Inc. There were some big changes in advertising and distribution. The slogan “AS INDIVIDUAL AS A THUMBPRINT” began at this time as well.

In the early 1950’s, Tracy Mincer developed severe financial problems that caused him to stop making the Custombilt, and he lost the name. In 1953, Leonard Rodgers bought the company and emphasized tobacco pouches and butane lighters. (However, it appears Mincer was working on his new pipe, the Doodler.) In 1968, Rodgers sold the Company to Consolidated Cigars. In the early 1970s, Wally Frank Co. bought the Custombilt trademark and began to produce their version of the pipe in 1974 or 1975. Hollco Rohr owned the Weber pipe factory, located in New Jersey, and produced the Custombilt pipes there. In 1987, the pipes were made out of the Butz-Choquin factory (France) and then Mexico until the late 1990s. Currently, the Custombilt name is owned by Tobacalera of Spain.

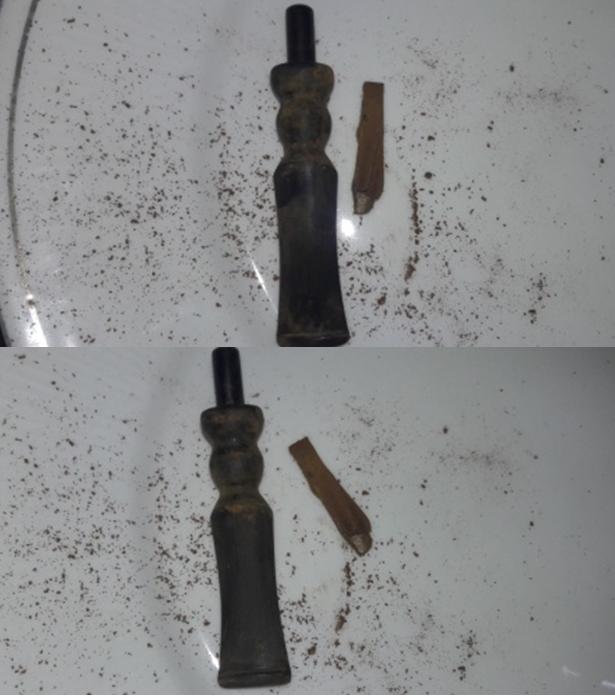
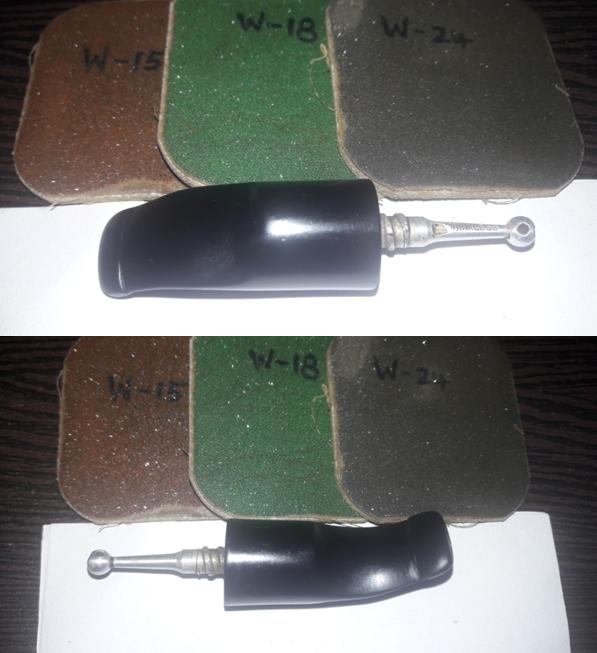
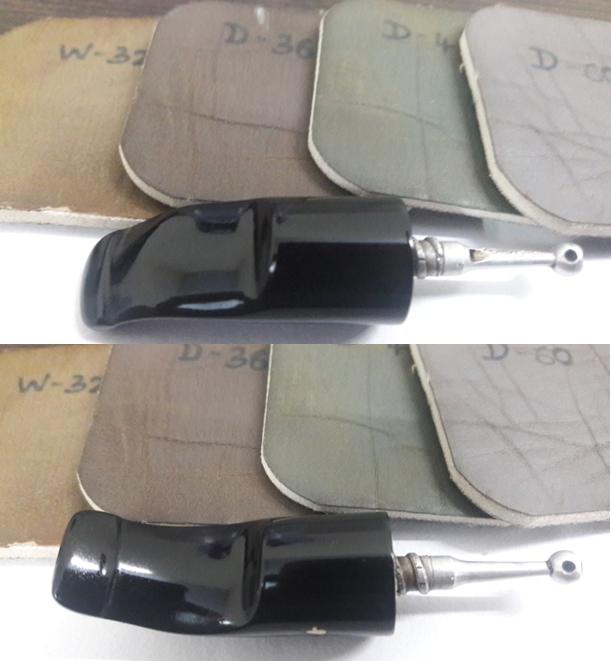
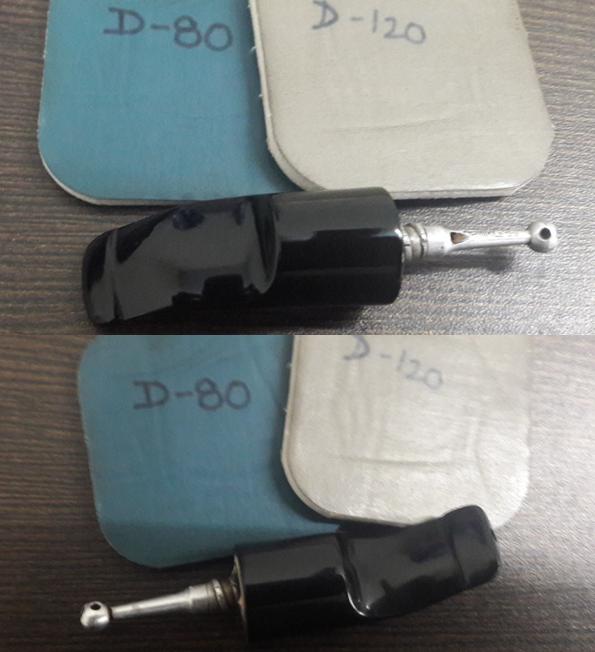
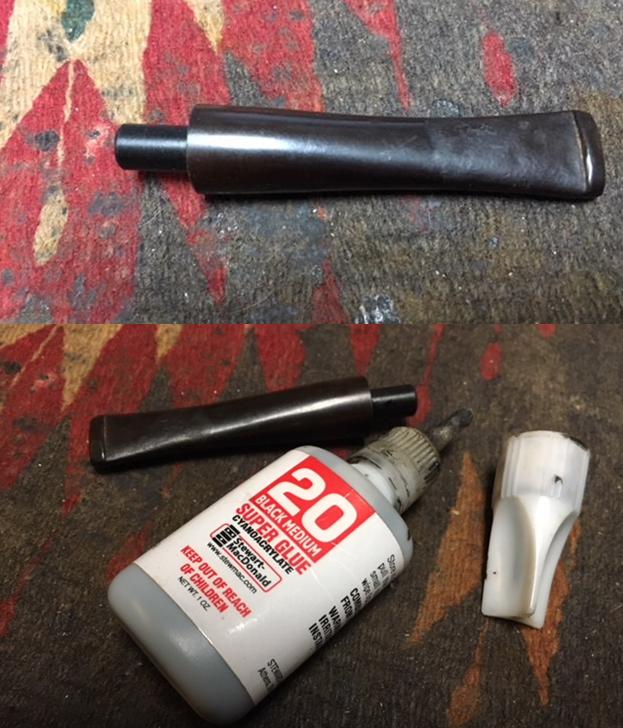
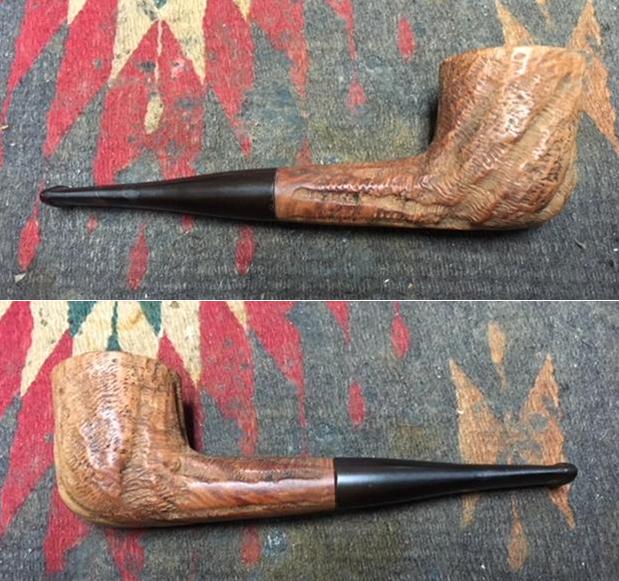
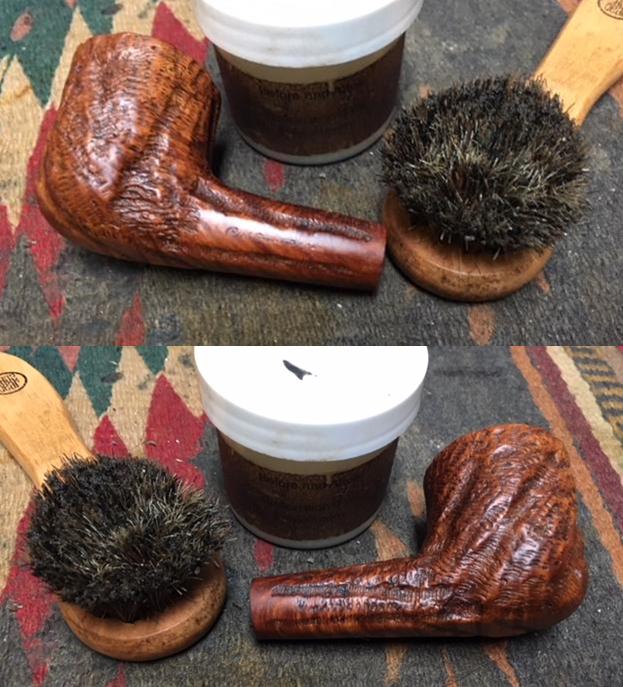
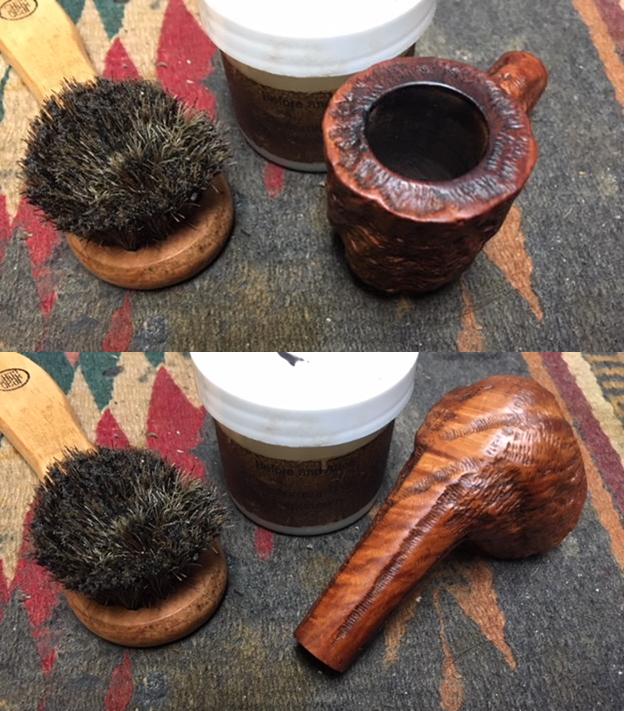
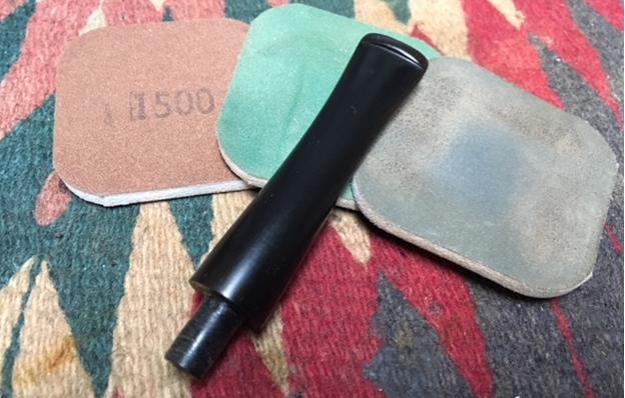
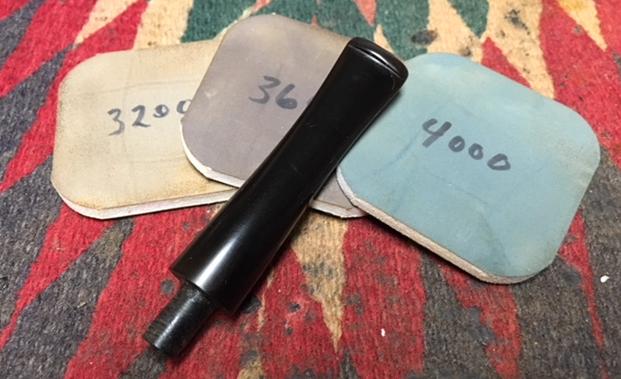
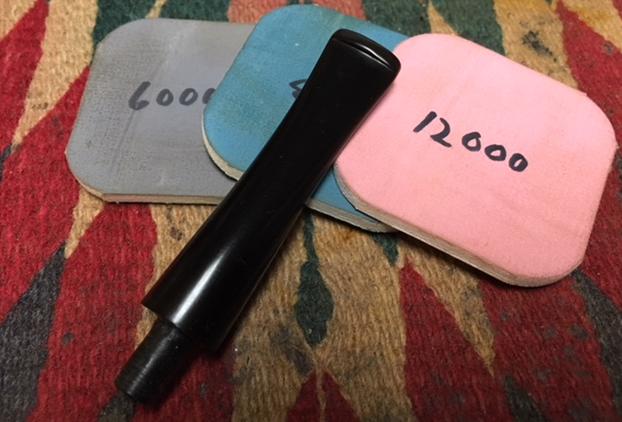
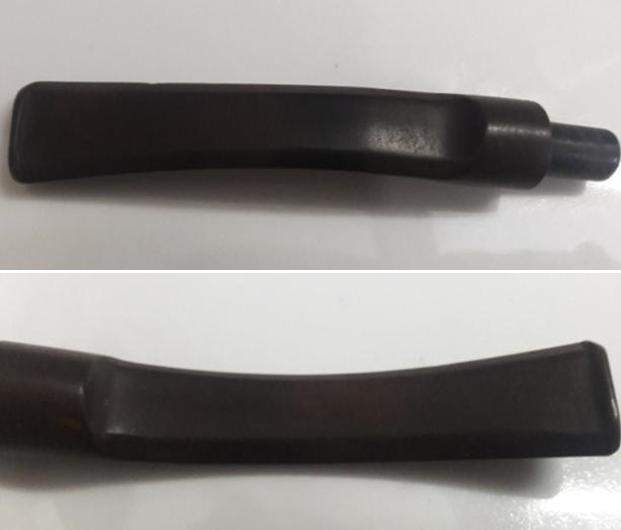
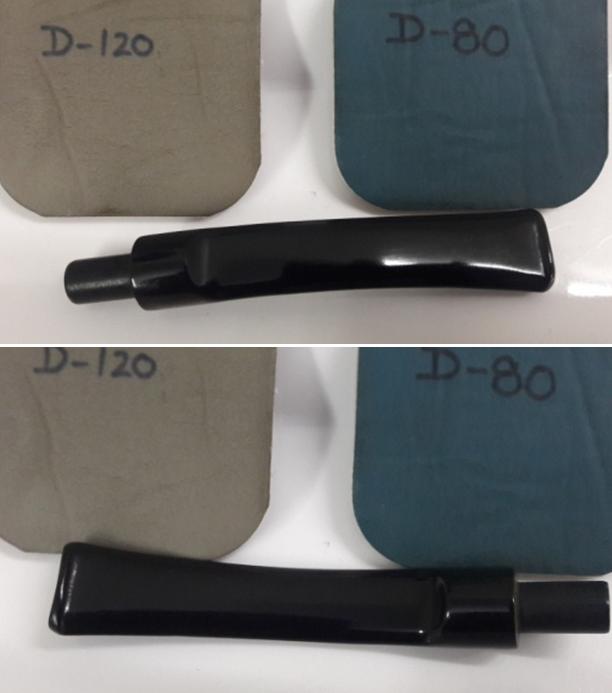
I set the bowl aside and decided to work on the stem. The diameter of the stem was perfect for the pipe so I needed to remove the metal threaded tenon and replace it with a Delrin tenon. I heated and scraped away all of the glue and tape on the threads of the tenon and those that bound it to the stem. I held it tight with vise grip pliers and turned the stem. It would not come out no matter how I turned or pulled on it. I decided I would have to use more drastic measures. Using the vise grip pliers as a vise I set up my cordless drill to drill out the tenon. I started with a bit slightly larger than the airway in the tenon and drilled it. I was hoping it would catch and pull the tenon out. First bit was a failure. I worked my way up to a bit slightly smaller than the diameter of the tenon and worked on it. The extended portion of the tenon broke off and I was left with the piece in the stem. I drilled it out with a bit and the bit grabbed the piece and it all came out.Once the metal was removed from the stem I cleaned out the hole in the stem with alcohol, cotton swabs and pipe cleaners to remove the debris. I smoothed out the threads to leave grooves in the tenon insert. Once I had it smoothed out enough I tried it in the stem. The fit was perfect. I cut deeper grooves in the tenon with a file and coated it with black super glue. I pressed it into the stem and lined it up so the fit was straight.  I set it aside to let the glue cure. While the glue cured I worked on the bowl. I scraped the glue out of the inside of the mortise using a pen knife. The glue had hardened so it took repeated scraping to get rid of it and bring the mortise back to bare wood.When the glue cured I tried the fit of the stem in the mortise. The stem fit well on the shank. I put it in place on the shank and took photos of the pipe at this point in the process. I rubbed down the briar with Before & After Restoration Balm. I worked it into the smooth surface of the briar with my fingertips and into the rustication patterns with a horsehair shoe brush to clean, enliven and protect it. I let the balm sit for a little while and then buffed the bowl with a cotton cloth to raise the shine. The following photos show the bowl at this point in the restoration process. The grain is really starting to stand out. I polished the stem with micromesh sanding pads – wet sanding with 1500-2400 grit pads and dry sanding with 3200-12000 grit pads. I wiped the stem down after each pad with Obsidian Oil to remove the sanding dust on the vulcanite. I wiped it down with a final coat of Obsidian Oil and set it aside to dry. I polished stem and bowl with Blue Diamond to polish out the remaining small scratches. I gave the bowl and the stem multiple coats of carnauba wax. I buffed the pipe with a clean buffing pad to raise the shine. I hand buffed it with a microfiber cloth to deepen the shine. The pipe polished up pretty nicely. The natural oil finish works well when polished to really highlight the variety of grains around the bowl and shank. The polished black vulcanite stem works together with the beautiful grain and worm trail rustication in the briar to give the pipe a rich look. The finished pipe is shown in the photos below. The shape, finish and flow of the pipe and stem are very well done. The dimensions are Length: 5 3/4 inches, Height: 1 3/4 inches, Outside diameter of the bowl: 1 1/2 inches, Chamber diameter: 3/4 inches. I will be sending the pipe back with the others that belong to Paresh. I have one pipe left to finish for him. Thanks for walking through the restoration with me as I worked over this well-made Tracy Mincer Custom-Bilt. 

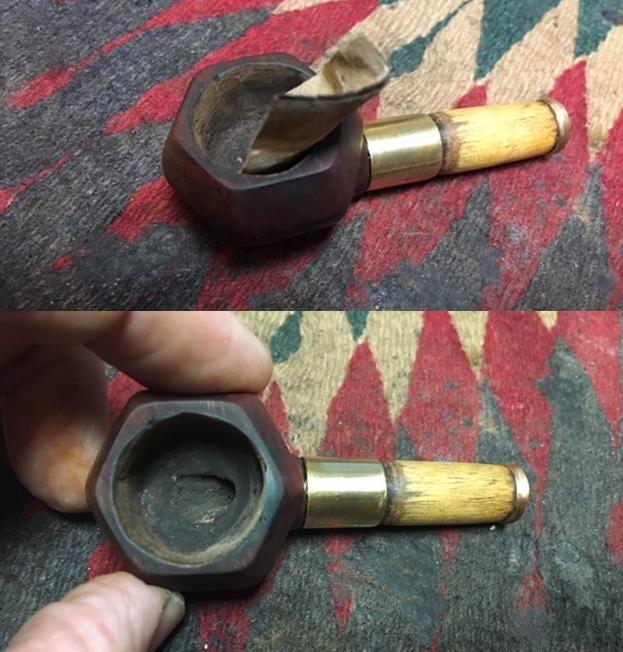
Whatever it takes to make a pipe usable – A Creative WWII Trench Repair


Blog by Steve Laug

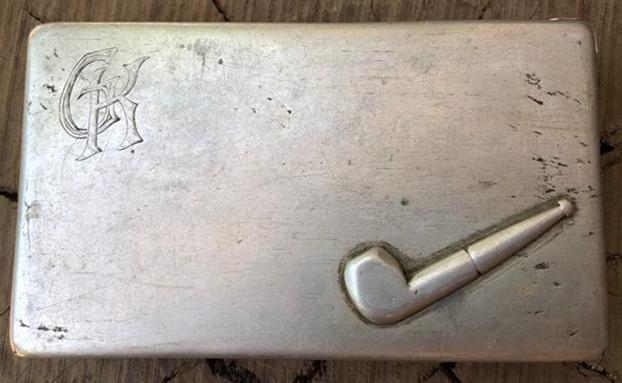
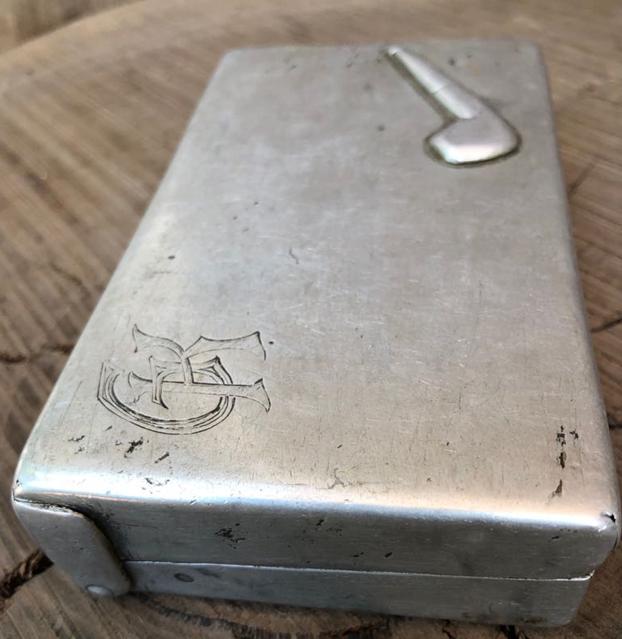
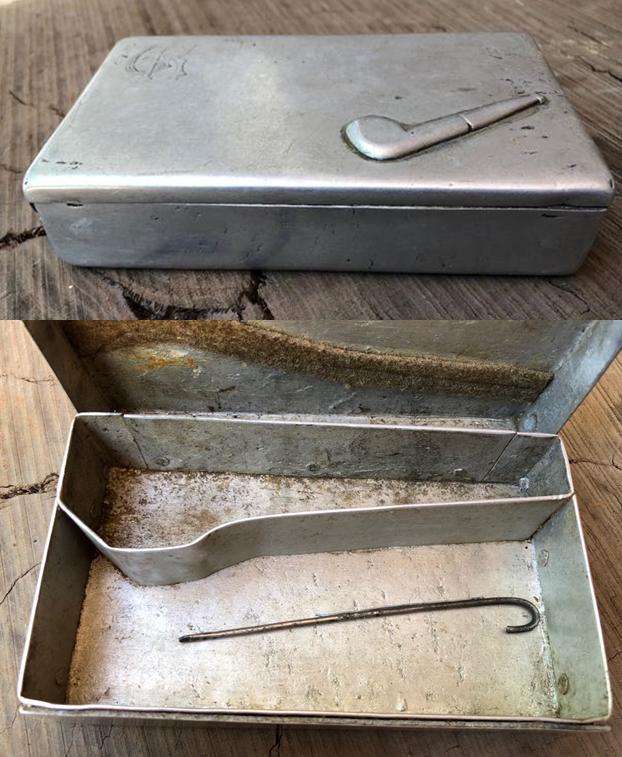
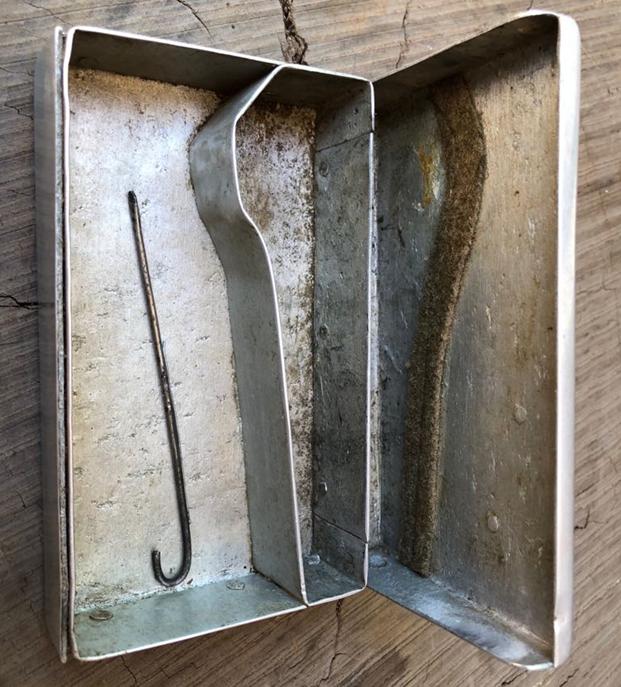
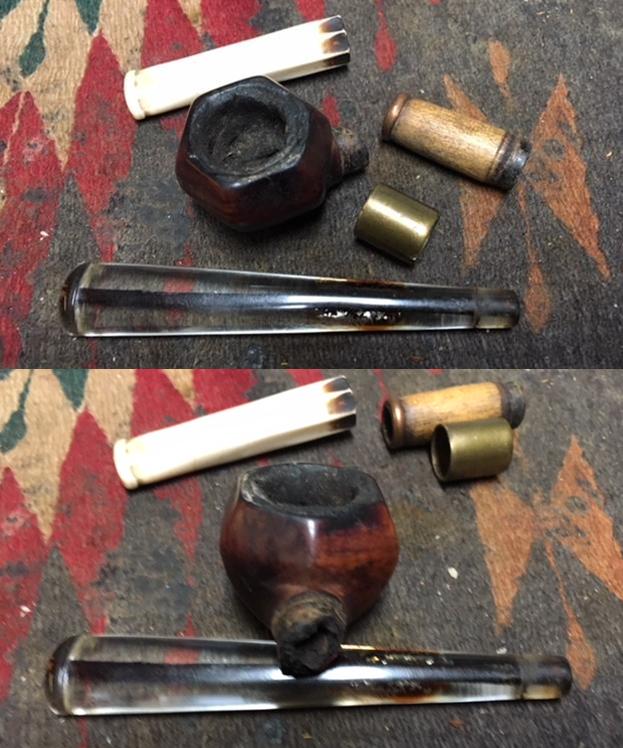
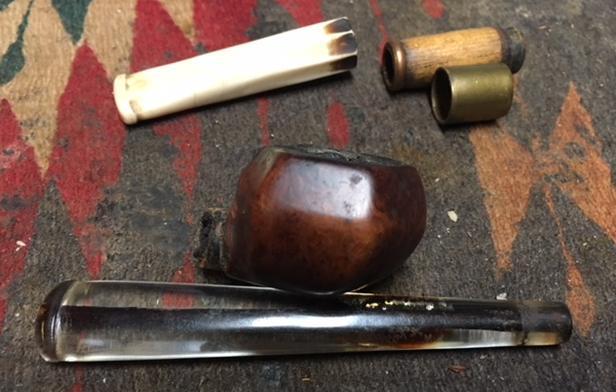
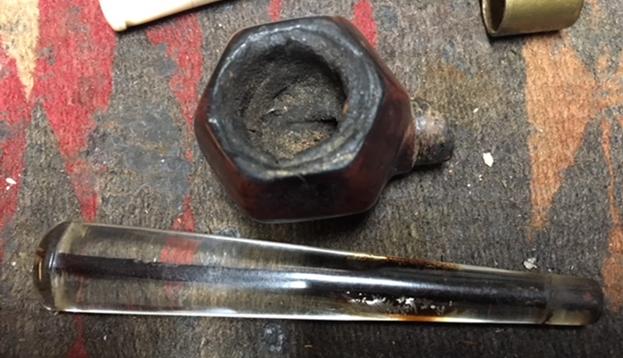
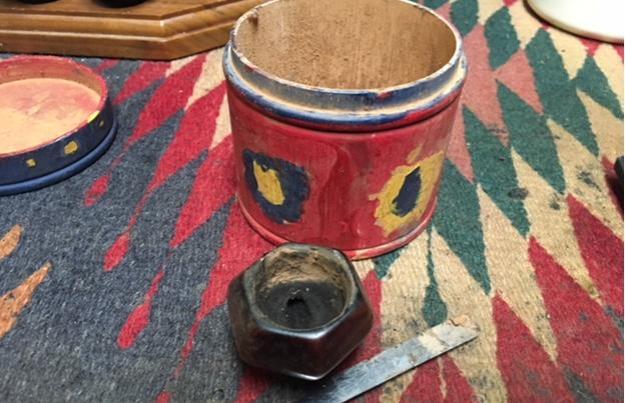
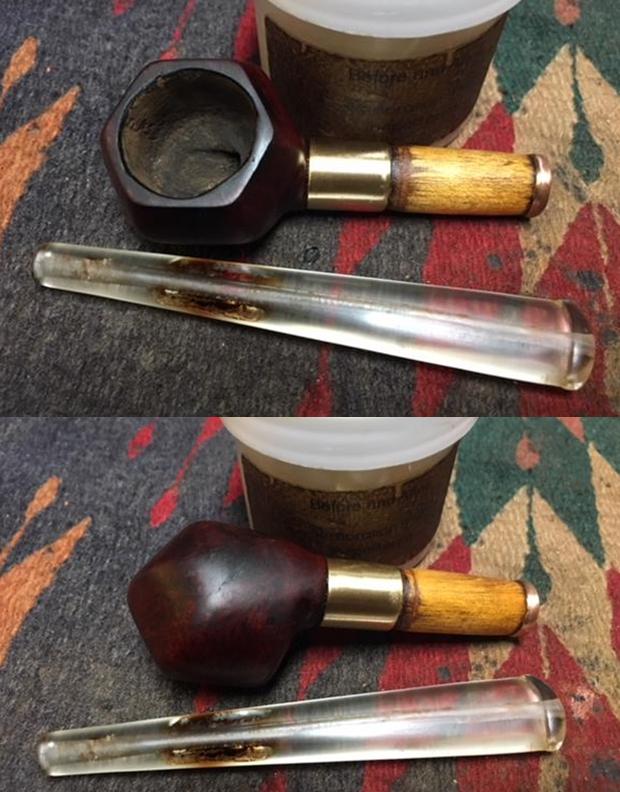
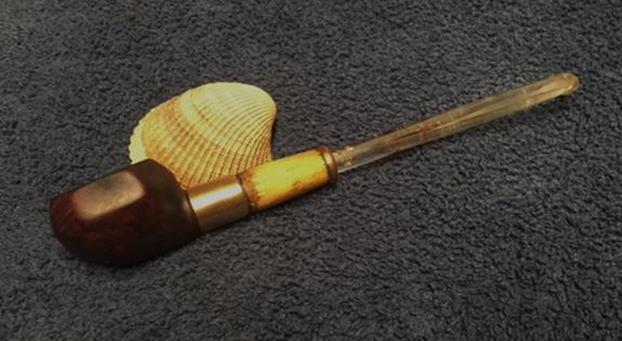
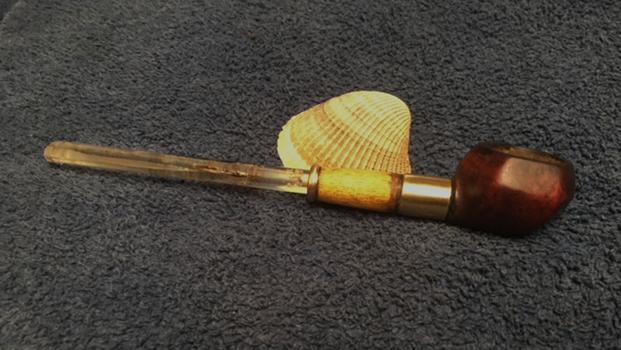
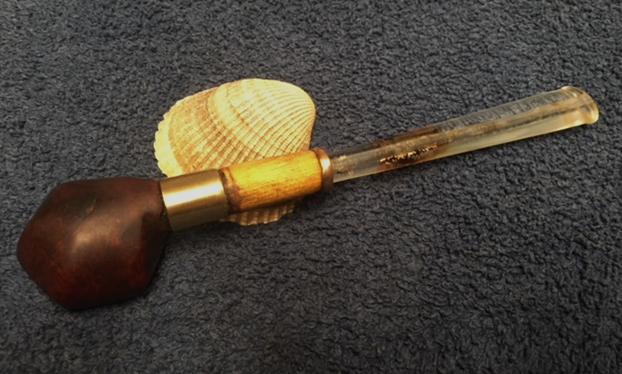
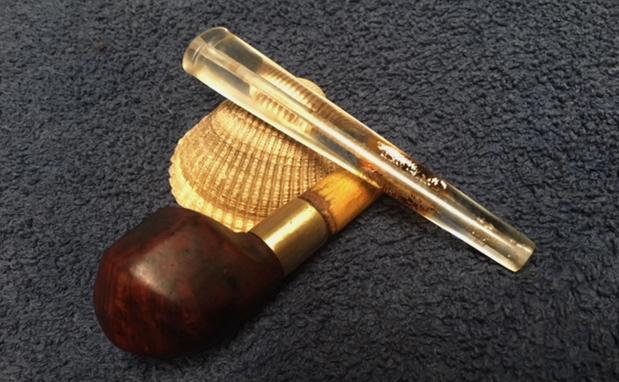
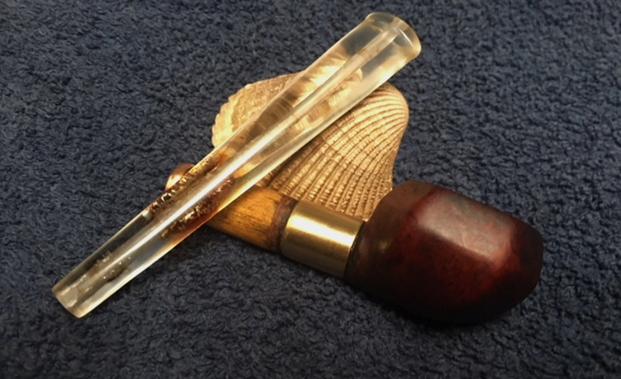
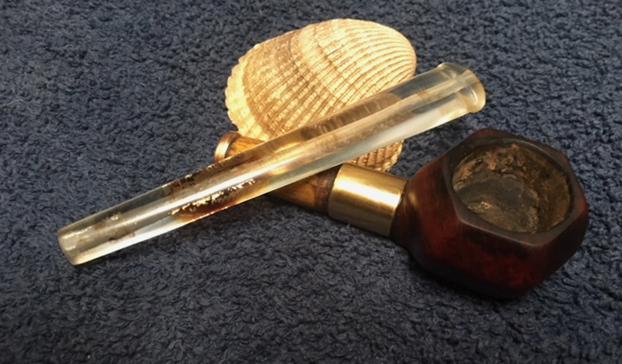
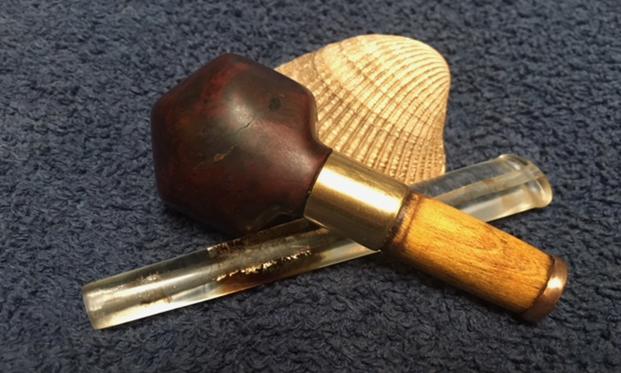
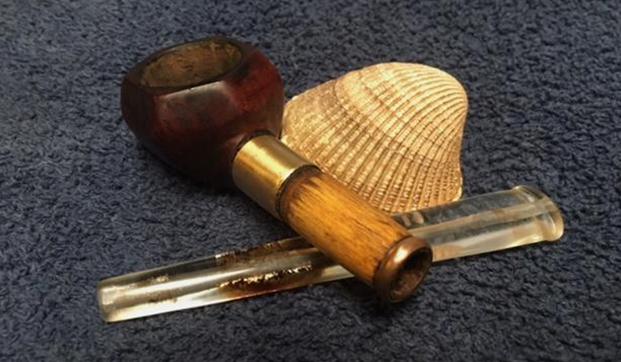
I was on Facetime recently with Paresh and Abha in India, talking about pipe restoration and what they were currently working on together. Paresh showed me some of the pipes that they were working on as well as several that he wanted to send to me to work on. One of them was a pipe that had come to him from a family friend who told him it came from WW2 and had belonged to a German soldier. He was not sure what to do with this one and almost felt that it was not worth working on. A piece with that kind of story attached is always interesting to me and I wanted to see it and also work on restoring it. Paresh brought the metal box that the pipe came to him in and the assortment of pieces that made up the pipe to the table to show me what was there. It had what looked like two stem options with it. The one that looked right was a Perspex stem. He was able to remove the brass shank extension from the bowl while were talking and thought he had broken it. I did not think so but underneath the brass there was a broken shank. The brass had been slipped over the broken shank as an extension. The pieces could all be combined to make a functional pipe. I was excited to get this pipe and work on it. Here are some photos of the pipe box. It bears the initials CK and a raise pipe on the cover. When the box was opened the pipe parts were scattered in the larger compartment. There was a bent wire in the box as well. I have a theory how that was used and will talk about it shortly. It is obvious that the box was made to fit a pipe in the upper compartment and tobacco and lighting material in the lower portion. There is a fabric piece fixed to the lid that keeps the pipe from moving around the box.Paresh kept the box in India and mailed the pipe parts to me to see what I could do with them. It took a long time for the pipe to arrive in Vancouver from India. I would have forgotten about it if Paresh had not sent me WhatsApp messages to see if it had made it here. Finally there was a parcel notice hanging on my door when I came home from work. The postie had written that a package was at the post office and I could pick it up the next day after 1pm. I picked it up the next day after work and brought it home. I carefully unwrapped the plastic sleeve that enclosed the box. I cut the tape that held the box closed. Inside were the pipes that Paresh wanted me to work on. The “War” pipe was in a plastic bag and wrapped in bubble wrap. I carefully took it out of the wrappings and put it on the desk. I took the following photos to show the condition of all the parts before I started the cleanup and restoration.I examined the pieces carefully to see if I could come to any conclusions about the provenance of the pipe as it now stood. The bowl was in rough condition but I thought it could be cleaned up to at least carry on the trust of a pipeman from the past. The brass was very interesting and had been cut off on one end. Each end had a different diameter. One end was the size to fit on the broken shank and the other fit the wooden extension. The wooden extension appeared to be oak or a like hard wood. The inside appeared to have been burned and was darkened on each end. It had a copper ring around the end where the stem went. The ring had been hammered smooth and worked onto the shank end to keep it from splitting when the stem was inserted. The two stems were interesting. The white one looked like a cigarillo holder to me and probably was the first stem to be used on the pipe. It could possibly fit over the wooden extension prior to the addition of the copper ring. That leaves me to assume that the clear stem was a later addition and the ring was added to make sure that it did not split the wood when inserted. All parts were very dirty but I could see how they went together to make a smokeable pipe. We talked about the background of the pipe on Facetime and also on WhatsApp several other times and he told me the story that had been passed on to him by the friend of his family. I wrote to Paresh and asked if he could give me a summary about the pipe – write down some of what he had told me in our conversations. This is what he wrote to me.

This WWII pipe was handed over to me by one of my best buddies who has a family tradition of serving in the Army. This pipe once belonged to his eldest maternal Uncle who had participated in WW II as a Sepoy (an Indian soldier serving under British or other European orders) and later during the war rose to become a Junior Commissioned Officer. He had participated in the Operations in North Africa as part of a British Indian Division. It was during one of the battles at El Agheila during November – December 1941 that he had picked this up this pipe with its case from one of the overrun German trenches as a souvenir and had been with him since…. – Regards, Paresh

That was the information that I was looking for about this pipe. It is one thing to assume that the pipe was a War Memorabilia but another thing to get the history behind it. Thanks Paresh. Now I knew that I was dealing with a German soldier’s pipe and pipe case that had been left behind either when he was killed or when he abandoned German trenches in haste fleeing the British Indian Division. His friend’s uncle had picked up the case from the trench as a souvenir. It had remained in the family in the case in parts since that time.

This is where my imagination took over and tried to figure out how the pipe had come to its current state. I wonder what was in the mind of the pipeman who put the pieces together. So I took what I could see and imagined the following scenario from the parts.

Somewhere along the journey of the soldier CK and his pipe he had broken the shank on what must have been his only pipe. It was broken and either could be thrown away as garbage along the way or perhaps he could rebuild it. The broken shank was the impetus for repairing the pipe and the way it was done was highly creative.

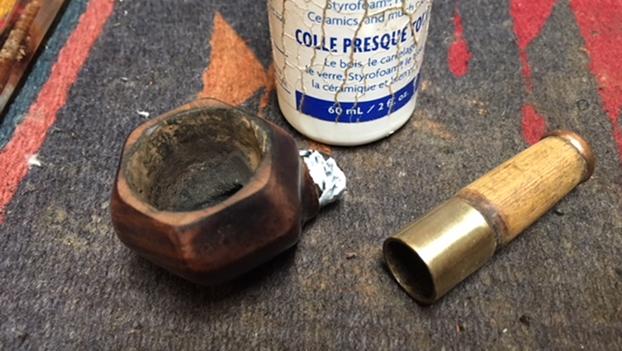
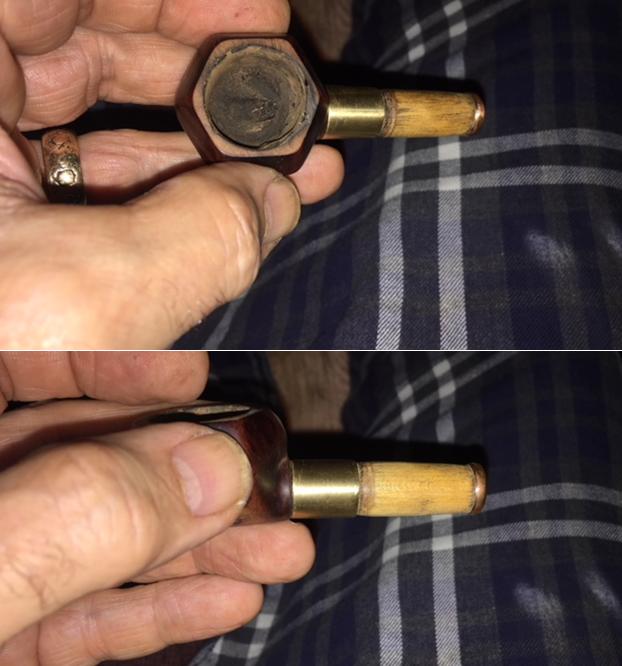
The remnant of the shank was carefully modified with a knife judging from the way the broken shank end was carved. The pipe man had used his knife to create a ledge around the broken part where it connected to the bowl. A brass shell casing was cut and modified to fit on the shelf that had been carved thus repairing and lengthening the shank. The shell casing was pressed onto the carved shank until it was almost flush with the back side of the bowl. A piece of wood – branch or an oak stick was “drilled out” by heating the bent wire in the box until it was red hot and then inserting it repeatedly down the middle of the wood branch until there was an airway burned into the center. You can still see the burn marks on the inside.

The one end of the shank was drilled out and inserted into the small diameter end of the shell casing. The other end, the shank end of the piece of was carved out with a knife to receive a stem. There was a hammered copper ring that had been crafted and pressed onto the stem end of the shank. The box contained two different stems with the pipe. The first was a cigarette or cigarillo holder that could have been fit over the top of the dowel. Not very pretty and not very functional as it did not fit well. The second stem was a Perspex stem that was quite long. It obviously was the one used with the pipe as the airway was very dirty. There was also some internal burning in the stem itself that is odd. I wonder if the soldier who fashioned the pipe did not put a burning wire up the stem to open it as well and damage the internals of the stem.

I probably will never know the story behind the pipe for sure but what I have imagined is certainly a very real possibility. Whatever the story is the pipe is a fascinating piece of WWII memorabilia.

With the imagination satisfied and combined with the story that came with the pipe I examined the pipe parts to see what I was dealing with. It was obvious that the pipe was smoked a lot. It was probably the soldier’s only pipe and it rarely sat unlit by the looks of it. The bowl was thickly caked and damaged the externals were worn. It appeared that the pipe had been dropped a few times as there were deep gouges in the briar on the heel of the pipe. The finish on the briar was worn out and dark but underneath there were remnants of what looked like nice grain. The rim top was damaged and the inner edge of the bowl was rough. The bowl appeared to have been repeatedly reamed with a knife. The airway entering the bottom of the bowl was also worn from the piece of wire in the pipe case. I would clean up the pipe and leave the character intact. Many would have left the pipe as it was but to me the work that the original pipeman did to keep the pipe useable made me want to carry on his legacy and give Paresh a chance to at least smoke it.

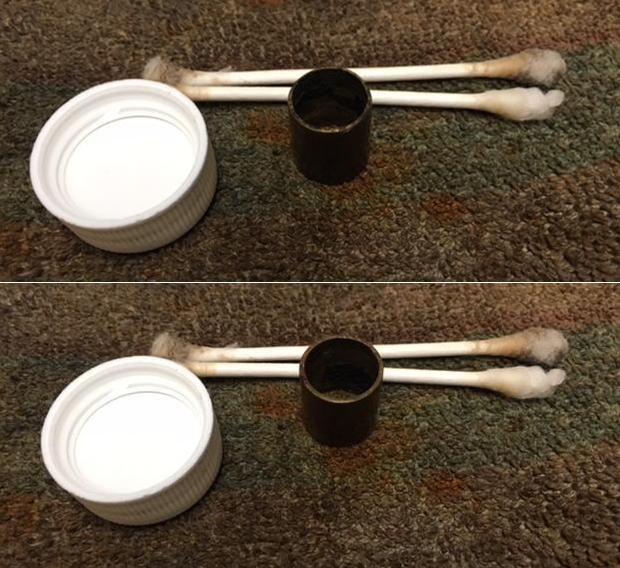
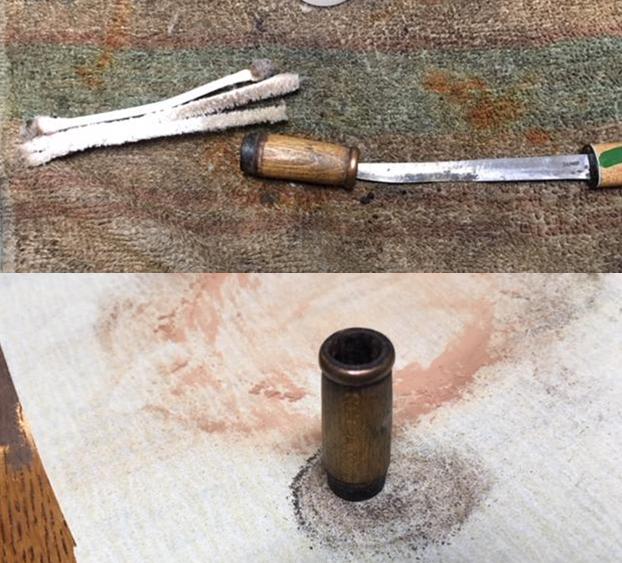
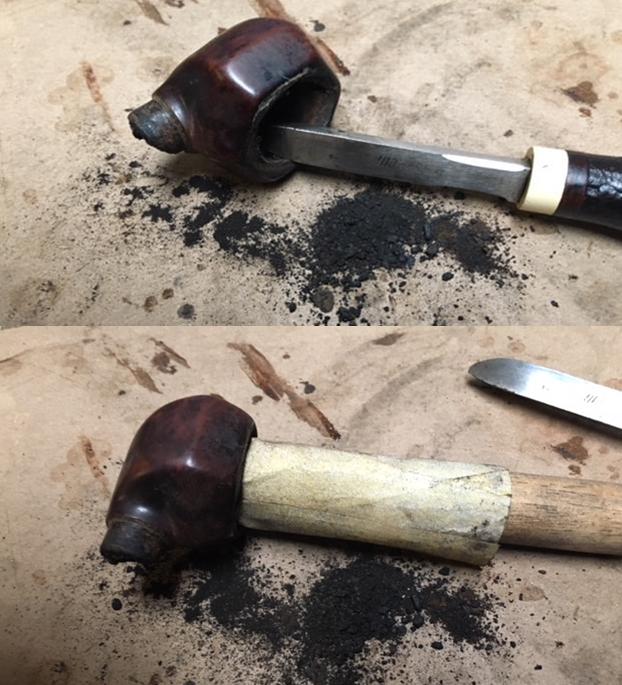
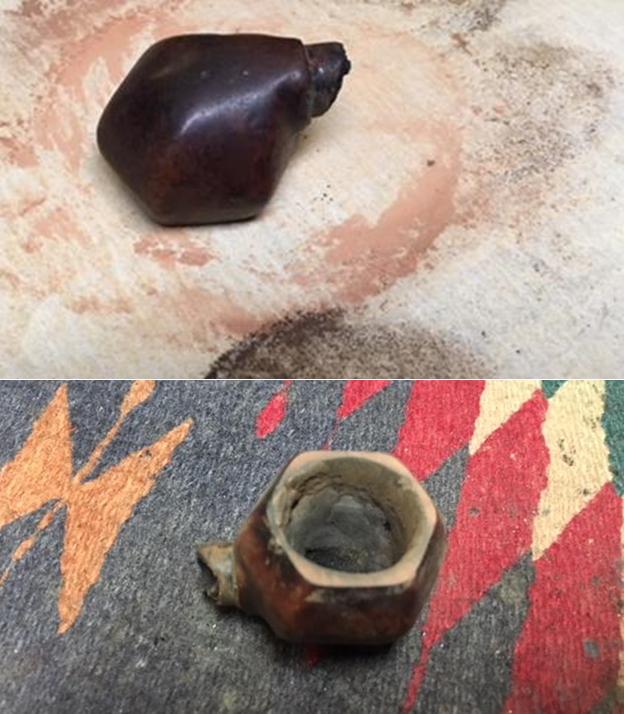
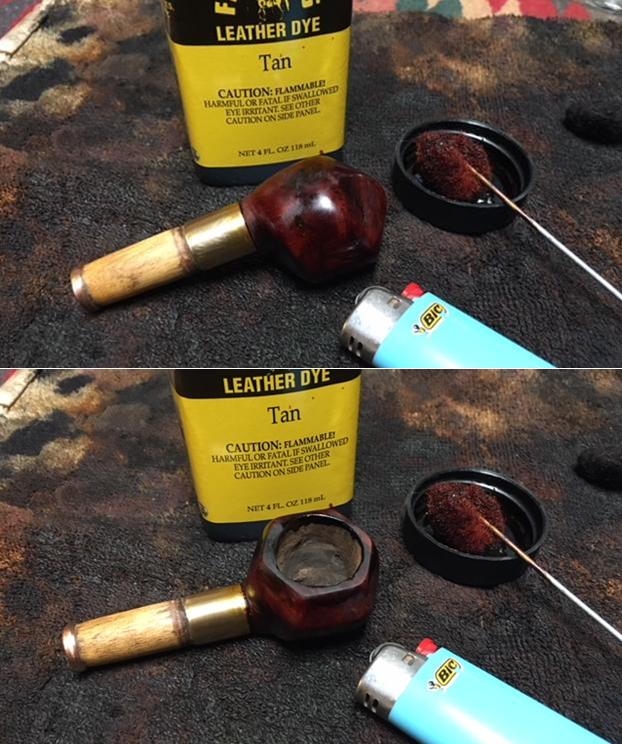
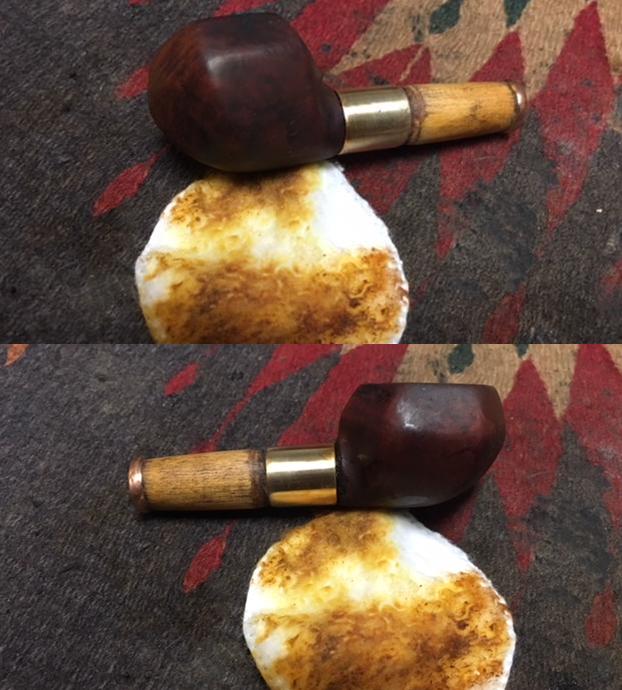
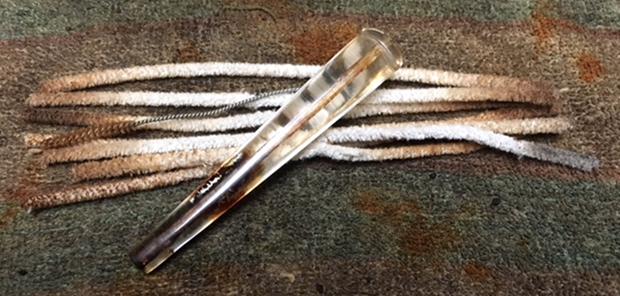
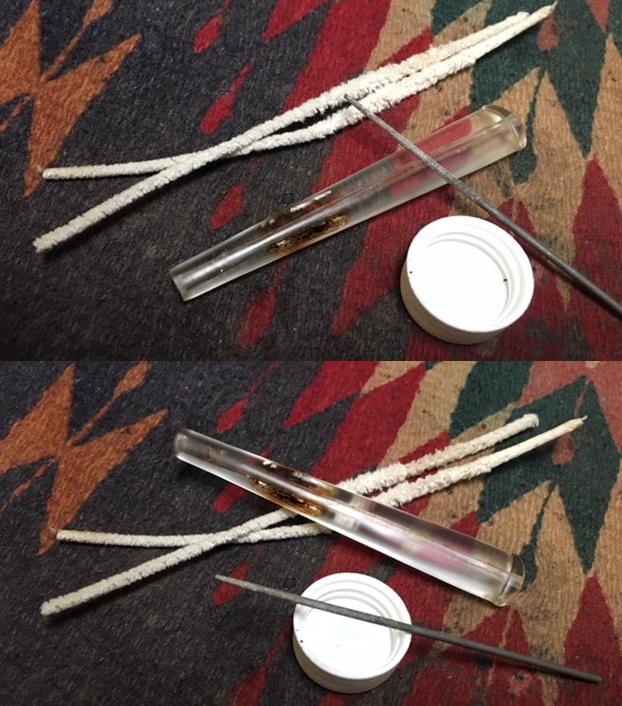
I decided to clean up all of the parts individually. I scraped out the brass shell casing with a small pen knife and then scrubbed the inside with cotton swabs and isopropyl alcohol until the inside was as clean as the shiny brass exterior. The first photo shows the cut edge that the wooden extension inserted into. The second photo shows smooth edge that sat on the carved ledge against the bowl and the other edge was the cut edge. I cleaned the wooden extension next, scraping the grit and tars that had built up on the inside. The end that fit toward the bowl had an airway drilled through from the other end. It looked to me that the airway had been burned through with a hot wire. It was darkened from being inserted into the brass and as it had oxidized it had coloured the wood. The end that held the stem was carved to receive the tenon. It had been banded with a copper ring to stabilize the wood. I used a pen knife to scrape the grime out of the extension and then cleaned it with pipe cleaners, cotton swabs and alcohol. I used the topping board and 220 grit sandpaper to smooth out the insert end and remove some of the damage to the wood.With the brass and wooden shank extensions cleaned it was time to clean the bowl. I took a photo of the bowl to show the thickness of the cake on the walls and the trough that had been carved in the bottom of the bowl to the airway leaving the bowl. It looks to me that the trough has been gouged out over time by cleaning the pipe with the wire that was in the box. The cake on bowl walls was thick and uneven all the way around. It was also quite crumbly and soft. The pipe smelled musty from the years that it had been sitting since the war. Once it was removed there would be work to be done to smooth out the walls of the bowl. There are spots that appear quite thin and there will need to be at least a bowl coating done to protect the bowl.I carefully removed the cake from the bowl with a Savinelli Fitsall Pipe Knife, scraping it from the walls. You can see from the photos how crumbly and soft the carbon chunks were. I wrapped some 220 grit sandpaper around a piece of dowel and sanded the walls to remove the remaining cake.I used a dental spatula to rebuild the inside back edge of the bowl rim with clear super glue and briar dust. This was just the first step in the process that would take a lot more work to bring it back to a useable condition.I lightly topped the bowl on a topping board with a piece of 220 grit sandpaper. I did not want to remove much of the briar, just smooth out the damage. The first photo shows the topping and the second the rim after topping.I filled in the divots in the bottom of the bowl and carefully repaired what looked like a crack in the briar with clear super glue and briar dust. Once the repair had cured I sanded the repair smooth with 220 grit sandpaper to blend it into the surface of the briar. I carefully sanded the bowl and rim with micromesh sanding pads. I set the bowl aside and worked on putting the parts of the shank extension back together. I heated the brass shell casing with a Bic lighter to expand it enough to be pressed on to the wooden shank tube. I scrubbed the tube with Before & After Pipe Balm and lightly sanded the extension with 220 grit sandpaper. I polished the brass and copper band with micromesh sanding pads.I cleaned out the inside of the newly reassembled shank with alcohol, pipe cleaners and cotton swabs. I cleaned out both ends of the new shank.I cleaned out the broken shank on the bowl with pipe cleaners, cotton swabs and alcohol in preparation for gluing on the shank extension. I dried it out and coated the shelf with white all-purpose glue. Once the glue was in place I pressed the shank extension onto the bowl. I wiped away the excess glue. Once the glue had set I took pictures of the pipe at this point in the process. To match the stain remaining on the bowl I used the mislabeled tan aniline stain. It is a reddish-brown almost cordovan coloured. I figured it would match the existing colour very well. I applied the stain with a dauber and flamed it with a lighter to set it in the grain. I repeated the process until the coverage on the bowl was even.I wiped the bowl down with alcohol on a cotton pad to even out the coverage and make the stain more transparent. I wanted the grain to show through the finish. I used a folded piece of 220 grit sandpaper to smooth out the inner edge of the rim and the inside of the bowl.I set the bowl aside and turned my attention to the stem at this point in the process. It was truly a mess. There were tars and oils lining the airway making it almost black and there was damage to the interior of the stem material around the airway. I started the cleaning process using liquid cleanser and pipe cleaners to remove some of the tars. I was able to get a lot of the stuff out of the airway.I used a small round needle file to further clean out the airway. I sanded the interior of the airway to smooth out the surface of the drilled area. I ran alcohol dampened pipe cleaners through after the files to clean out the dust. The stem was finally getting clean. I took some close up photos of the stem to show the airway after filing. The photos also show the internal damage to the stem from what looks like fire. I polished the stem with micromesh sanding pads – wet sanding with 1500-2400 grit pads and dry sanding with 3200-12000 grit pads. I wiped the stem down after each pad with Obsidian Oil. I rubbed down the briar and the oak shank extension with Before & After Restoration Balm. I worked it into the smooth surface of the briar and oak with my fingertips to clean, enliven and protect it. I let the balm sit for a little while and then buffed the bowl with a cotton cloth to raise the shine. The following photos show the bowl at this point in the restoration process. The grain is really starting to stand out. I polished stem and bowl with Blue Diamond to polish out the remaining small scratches. I gave the bowl and the stem multiple coats of carnauba wax. I carefully buffed the pipe with a clean buffing pad to raise the shine. I hand buffed it with a microfiber cloth to deepen the shine. The pipe polished up pretty nicely. The newly stained finish works well when polished to really highlight the variety of grains and mask the damage around the bowl and shank. The polished Perspex stem works together with the beautiful grain in the briar and the brass and oak shank extension to give the pipe a rich look. The finished pipe is shown in the photos below. The shape, finish and flow of the pipe and stem demonstrate the creativity of the German soldier CK who left it in the trenches of North Africa. The dimensions are Length: 7 inches, Height: 1 inch, Outside diameter of the bowl: 1 1/4 inches, Chamber diameter: 3/4 inches. The pipe is ready to head back to Paresh in India once I finish the other ones he sent to me. This pipe has really travelled – from Germany to North Africa to India to Canada and back to India. I wish it could tell its own story. Thanks for walking through the restoration with me as I worked over this interesting piece of memorabilia. 

Restoring an Old-Vic 8523


Blog by Paresh Deshpande

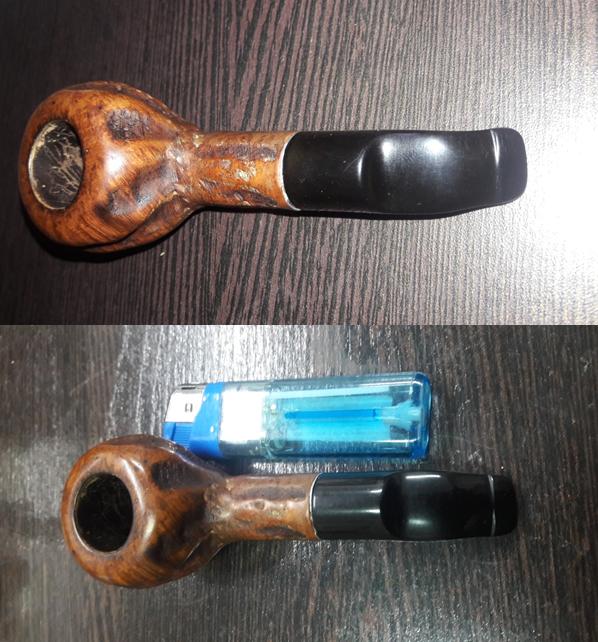
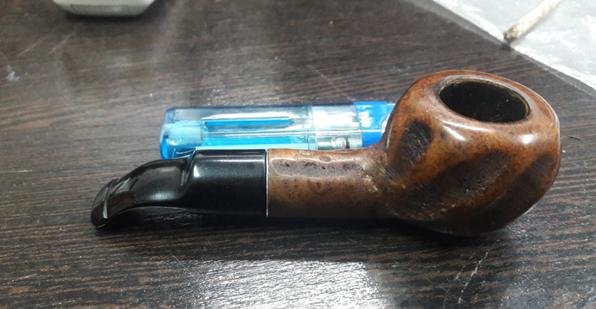
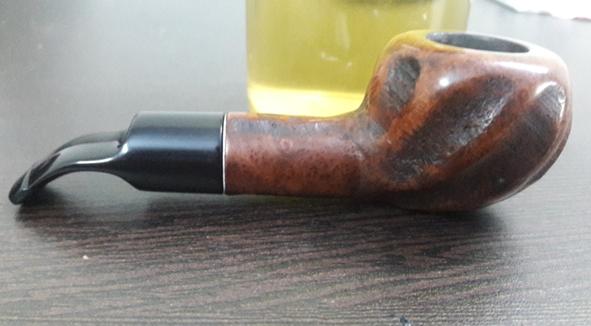
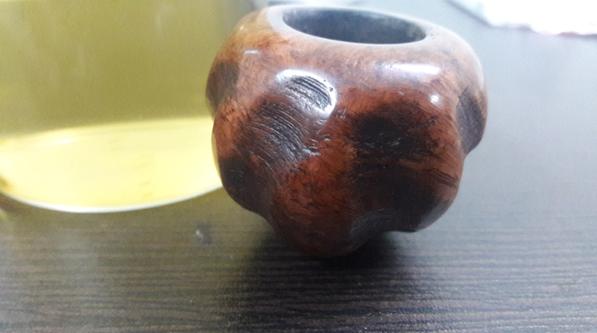
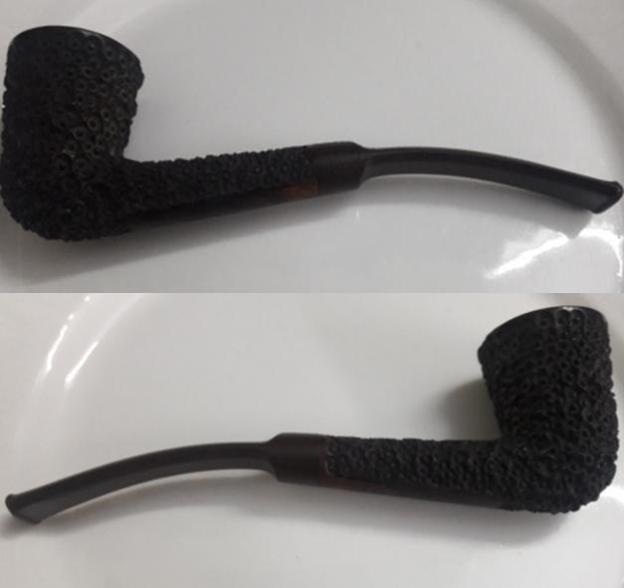
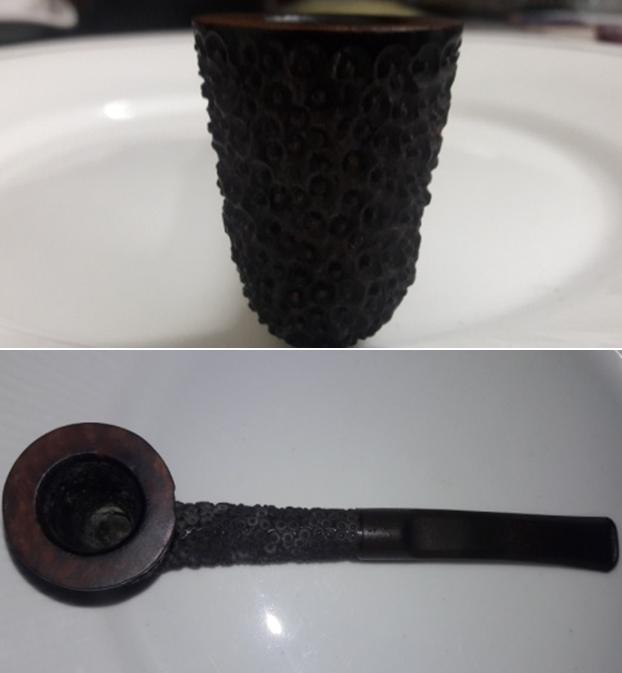
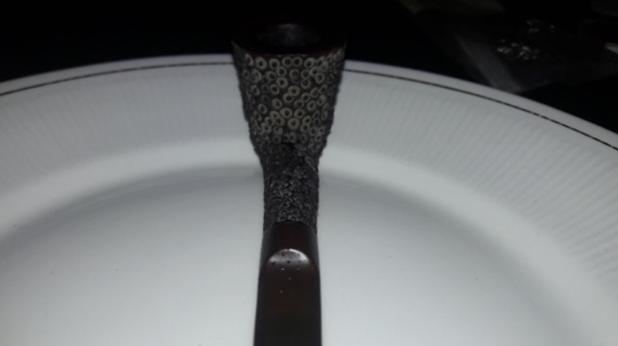
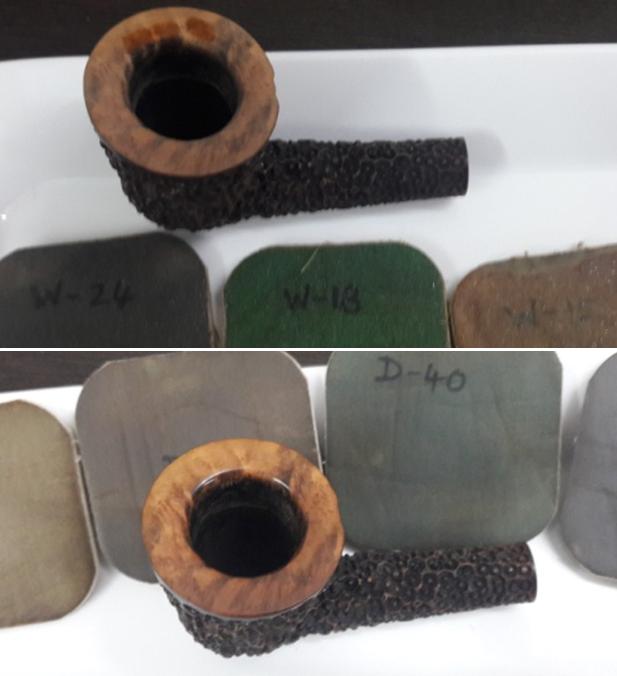
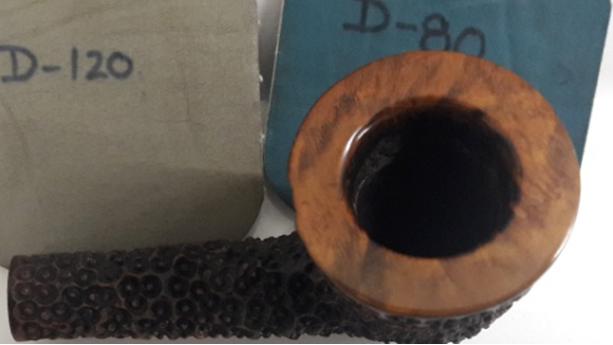
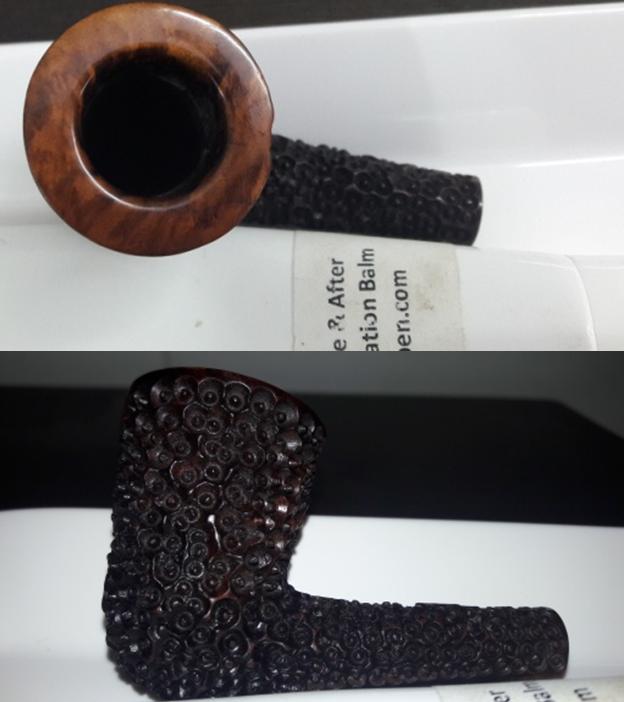
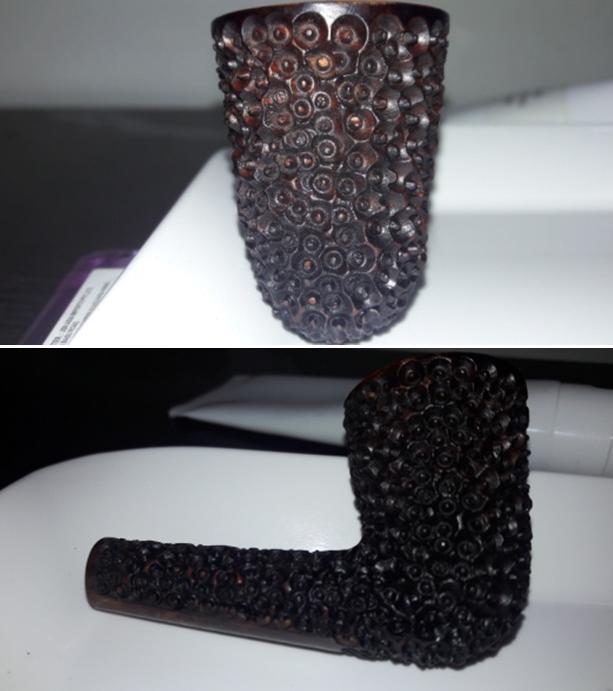
The next pipe that I decided to work on is a smallish beautiful bent Dublin shape with unique hexagonal  giving the appearance of a honey collection cell in a beehive. These are definitely not hand crafted rustication as the perfect geometry, details and alignment of these tiny hexagons is difficult to achieve by hand. But, nevertheless, it is one handsome looking pipe!!!!

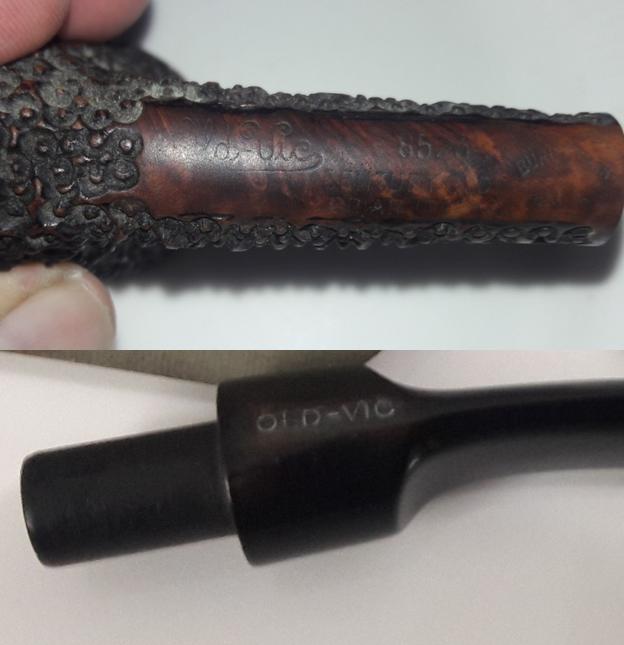
As described above, this dude has these rustication all over the stummel and over the round shank, save for a smooth portion on the bottom of the shank which bears all the identification marks of this pipe and the rim top which looks amazing. It is stamped on the left corner of the shank with “Old-Vic” in with old style curls. The end of the letter “c” curves back in a linear fashion and underlines up to the letter “d” in the name Old , before fading off gradually. Old-Vic is followed by “# 8523”. Just below the number and starting from the end of the letter “c” in Old-Vic, it is stamped as “CENTURY OLD” over “BRIAR ITALY”. Towards the right end of the shank and mid way, it bears the stamp “BURL GRAIN” in an arch over a very faint stamp which I could not make out. The vulcanite saddle stem is of high quality and is stamped on the left side of the saddle with “OLD-VIC”.Not much is known about this brand other than that these were made by LORENZO and hence the Italian connection. I have to concede that Italian pipes are very desirable looking with perfect proportions and beautifully crafted. I had even made an attempt to know more about this line of Lorenzo pipes by emailing Lorenzo’s American distributors, but have no response from them since last 15 days. Mr. Dal Stanton, if you are reading this piece, please enlighten me with your MANTRA for making these guys respond!!!!!!!!!!!

INITIAL VISUAL INSPECTION
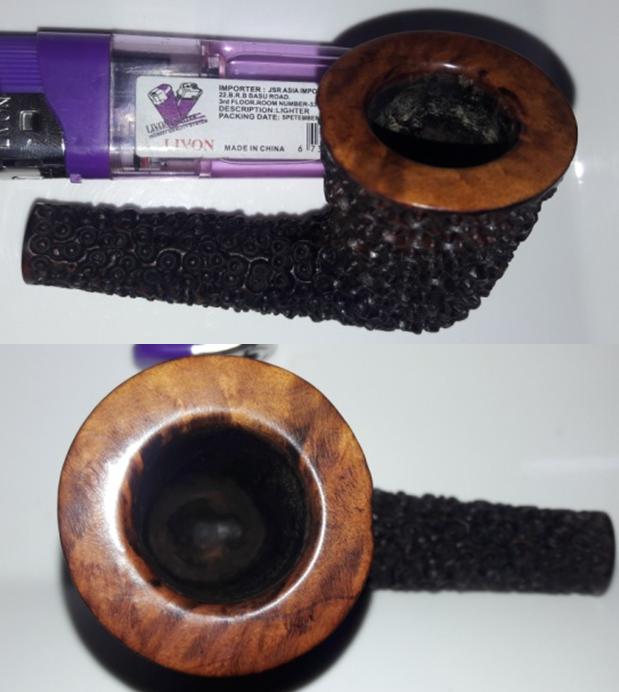
As is commonly seen on rusticated or sandblasted pipes with some serious age on them, the crevices in these are always filled with dust, dirt, oils, tars and grime from all the years of smoking and storage. This Old-Vic is no exception to this observation. The small hexagonal pockets are filled with dust while the smooth bottom of the shank is covered in dust and sticky grime. The fact that the hexagonal patterns are dirty and filled with dirt is accentuated more due to a very dark reddish brown stain on the stummel and the shank. The briar is looking lifeless and bone dry and has taken black hues. The bowl is narrow and tapers down towards the draught hole. The chamber is so filled with cake that I am unable to reach the bottom of the bowl with my little finger. The build-up of the cake is more heavy in the bottom half of the bowl. The mortise is full of oils and gunk and air flow is restricted. The rim top is smooth and the grains are accentuated with a lighter stain, which can be seen through the overflowing lava. The inner and outer edge of the rim is in pristine condition with no dings or dents. The vulcanite stem is so heavily oxidized that it appears brown in color!!!! Some light tooth chatter is seen on both surfaces of the stem towards the lip. This issue should not be a major headache to address. The lip edge on both side is crisp and without any damage. The quality of vulcanite is good. THE PROCESS
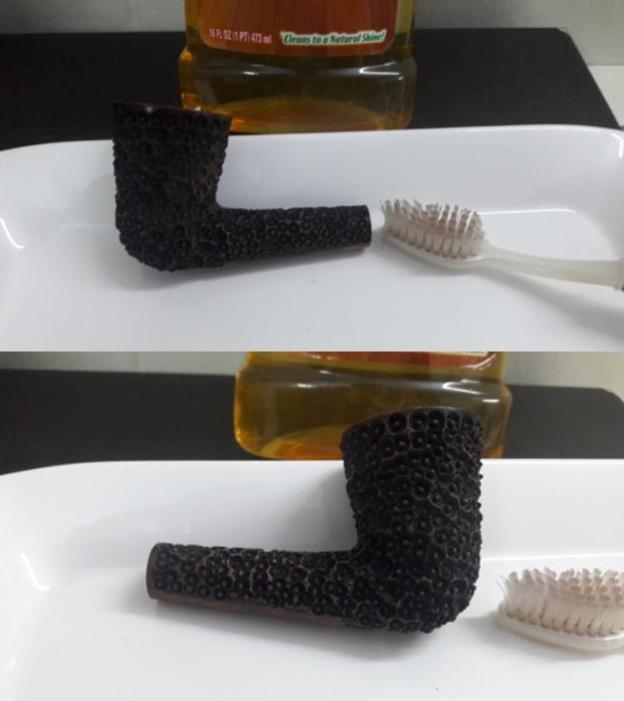
I started this project by removing the cake from the chamber and cleaning it. However, no sooner did I start, I realized that my Kleen Reem pipe reamer would not fit in the chamber. The cake was so densely packed and thick that my British Buttner reamer could get damaged. So, the only option left was my fabricated knife!!!!  It was laborious, but the task was accomplished. I found the chamber to be solid and without any heat fissures or cracks. To finish the chamber, I used a folded piece of 150 grit sand paper to sand the inner walls. This was followed by 220 and 400 grit sand paper and now we have a smooth and even surface on the walls of the chamber, ready for taking on a fresh layering of carbon cake!!!!! I wiped the rim top with a cotton pad dipped in isopropyl alcohol. This helped me to get rid of all the overflow of lava as well as the dirt and dust that had accumulated on the rim surface. This was followed by cleaning the mortise with cue tips, pipe cleaners and shank brush dipped in isopropyl alcohol. This further eliminated all the traces of old smells from previous usage. Now, it was the turn of the stummel to get cleaned up. Using a hard bristled tooth brush dipped in undiluted Murphy’s oil soap, I very deliberately scrubbed through all the hexagonal patterns, cleaning them thoroughly. I cleaned the rim too. The stummel and rim top was dried using paper napkins and soft cotton cloth. I set the stummel aside to dry out naturally.While the stummel was drying, I worked the stem. In order to address the minor tooth chatters, I flame the surfaces of the stem with a Bic lighter. This brings most of the tooth chatter to the surface. For a better blending, I further sanded the entire stem with 220 followed by 400 and 800 grit sand paper. This helps to reduce the sanding marks left behind by the more abrasive 220 grit paper. To bring a deep shine to the vulcanite stem, I went through the complete set of micromesh pads, wet sanding with 1500 to 2400 grit pads and dry sanding with 3200 to 12000 grit pads. I wiped the stem with alcohol after each pad and rubbed it down with Extra Virgin Olive oil. The internals of the stem was cleaned out using alcohol and pipe cleaners. The finished stem is shown below. I wanted to highlight the grains on the rim top as well as enhance the contrast with the rest of the pipe. To achieve this aim, I sand down the rim top using micromesh pads, wet sanding with 1500 to 2400 grit pads and dry sanding with 3200 to 12000 grit pads. The rim top now has a deep shine with grains popping out and now with a magnificent contrast with rest of the stummel. Once I was satisfied with the stem and rim top restoration, I started work on the stummel which has dried by now. I rub a small quantity of “Before and After Restoration Balm” in to briar and let it rest for a few minutes. The balm almost immediately works its magic and the briar now has a nice vibrant appearance. I further buff it with a horse hair shoe brush. To finish, using a cotton cloth and brute muscle power, I gave it a final polish. I re-attach the stem with the stummel. The completed pipe looks lovely, fresh and vibrant; the photographs speak for themselves. Thank you for having the patience to reach this far while reading the write up.
Tale of Two Somerset Brothers – Part 2


BENT RHODESIAN

Blog by Paresh Deshpande

I had finished the work on Somerset 8 Paneled Billiard and I was very pleased with the way it turned out. I have smoked this pipe and have to concede that it was one of the better smoking pipes in my current rotation, the draw is open and full and very smooth right up to the last morsel of tobacco. This is due to the perfect alignment of the draught hole, mortise and stem tenon. Very happy with this one, I must say!!!!!!

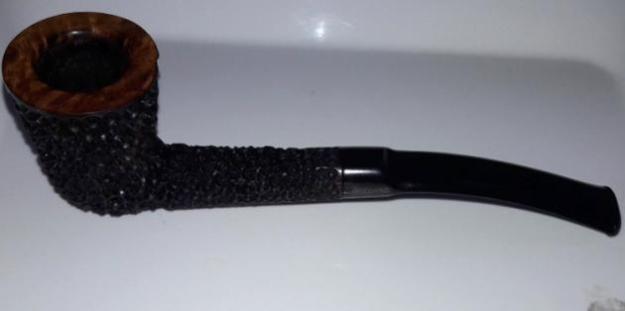
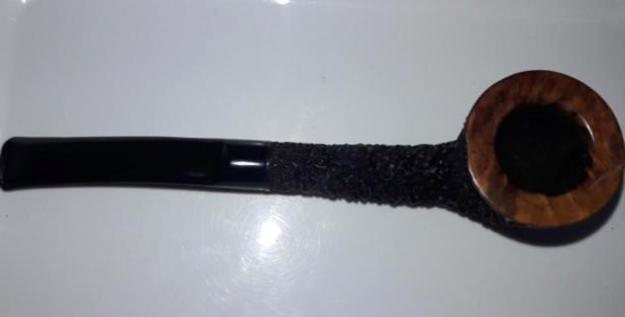
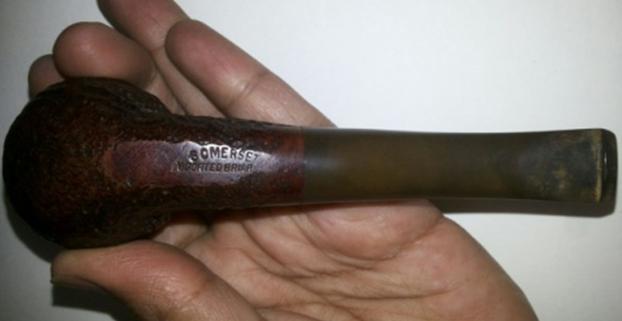
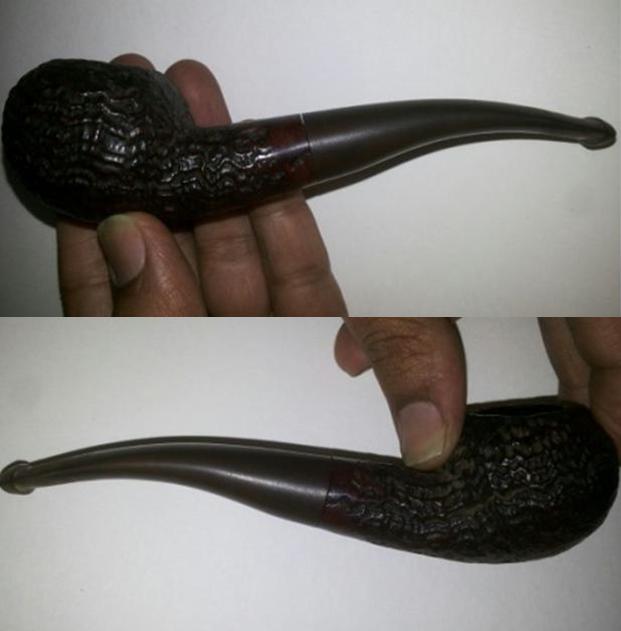
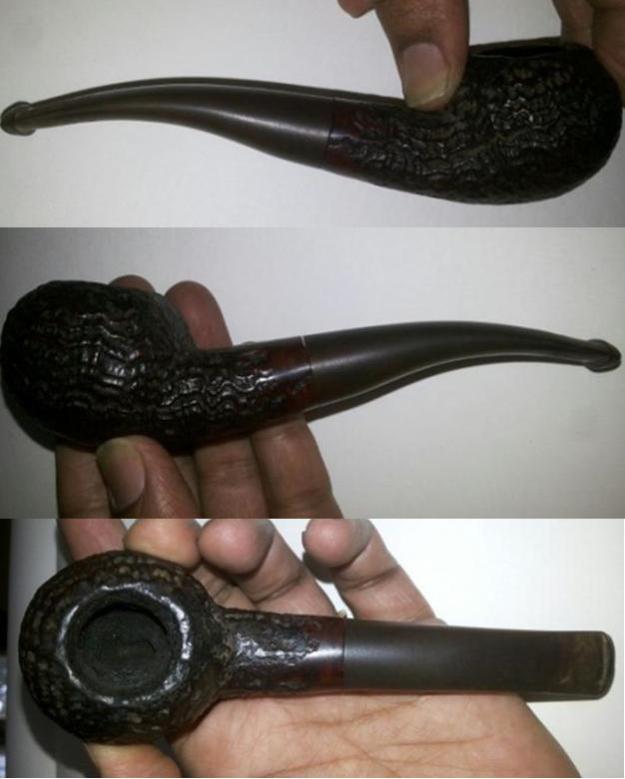
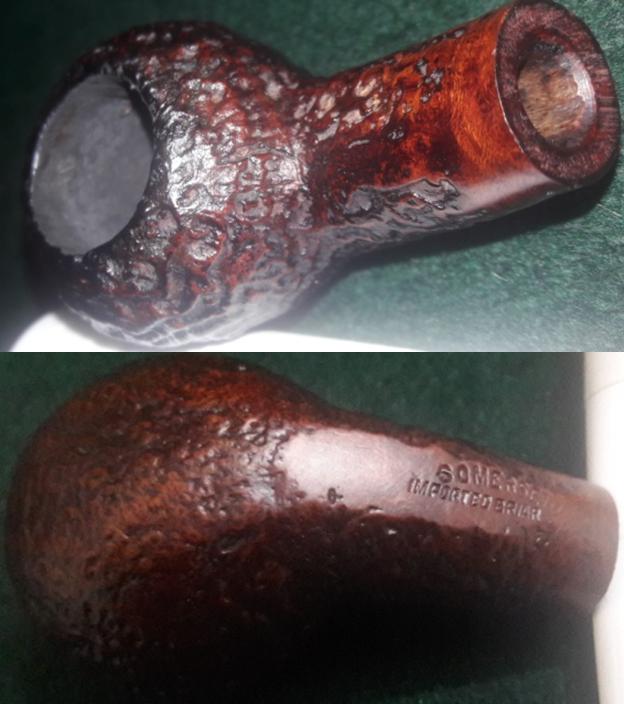
The sibling of the first Somerset Brother, now in my hand, is the Bent Rhodesian, and my favorite shape. The upper half of the bowl has beautiful wavy circular sandblast all round which extend to the round shank, while the bottom of the bowl has densely packed birdseye which is seen in the sandblast. Overall, this is one pipe with a beautiful sandblast patterns and as I have come to expect, the quality of the finish and vulcanite stem is par excellence. Like its paneled billiard sibling, this pipe too has a smooth and flat bottom surface and bears the only stampings seen on the pipe. It is stamped on the bottom as “SOMERSET” in a mild arch over “IMPORTED BRIAR” in straight line, all in capital letters. There is no other stamp on either shank or on the stem. The stummel and shank is stained with a very dark reddish/ maroon hue. The stem is high quality vulcanite without any stampings. As conceded in my write up on the Somerset Paneled Billiard, I have been unsuccessful in unearthing information about this brand and still remain a blind spot in my quest for knowledge on pipes. I sincerely request you to share any information you may have on this pipe.

INITIAL VISUAL INSPECTION
The sandblast on this pipe is covered in dirt, dust and grime and appears dull and lackluster. The bowl is heavily caked and there is overflow of lava on to the rim. This will have to be removed in order to ascertain the condition of the chamber walls. From my experience working on the paneled billiard, I won’t be surprised to find cracks and heat fissures on the walls of the chamber. There is a very strong sweet smell to the cake, which perhaps may vanish after the chamber has been cleaned.The mortise is filled with oils and tars and appears to be clogged. There is no free flow of air through the mortise. This will have to be cleaned. There is also a slight gap in the fitting between the stem and the shank. Maybe this will be resolved after a good cleaning of the mortise. The fitting of the stem in to the shank is very loose and just drops of when turned upside down.The stem is heavily oxidized and the edge of the lip on the top surface has been bitten out of shape. There is a bite mark close to the disfigured edge of the lip. These issues will have to be addressed.THE PROCESS
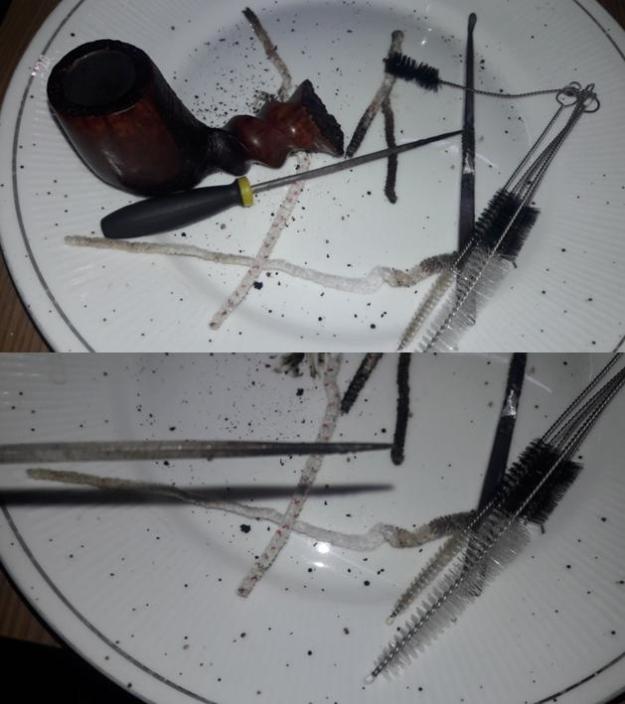
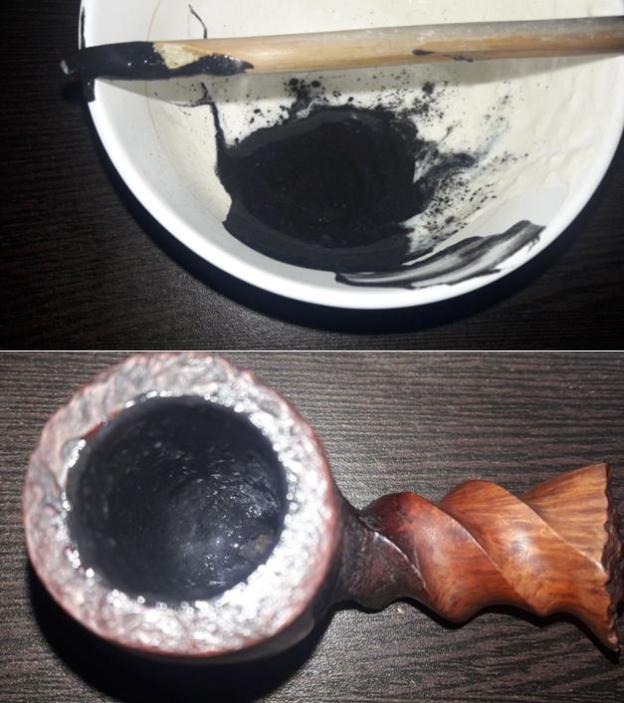
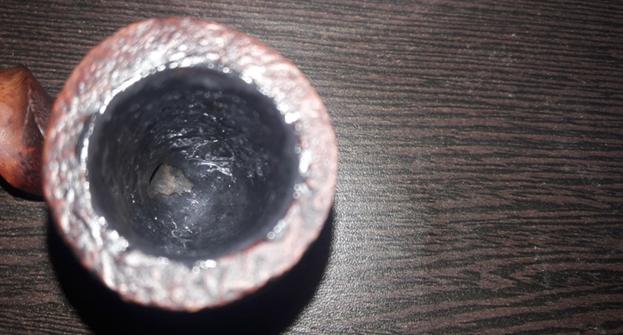
I reamed the bowl with a Kleen Reem pipe tool and with a knife; I further took the cake down to the briar. I have realized that the knife is best suited to remove the cake from the bottom of the chamber. As anticipated, the chamber walls did show the beginnings of a burn out!!!! With a 150 grit sand paper, the walls of the chamber were rid of all the remnants of the cake, presenting a clear picture of the extent of the damage. This pipe too had cracks at exactly same location as its sibling, though not as alarming. Since the pipe ash was still being collected, I cleaned the internals of this pipe with bristled and regular pipe cleaners dipped in isopropyl alcohol. Since the strong sweet smell did not diminish even after the cake had been removed, I decided to give it a salt and alcohol bath. I filled the bowl and shank with kosher salt up to just below the rim top and end of the shank respectively. I filled it up with isopropyl alcohol and set it aside over night to allow it to extract all the residual oils from the chamber and the shank. Next day, the salt and alcohol had done its job. I remove the darkened salts and clean the mortise with bristled pipe cleaners. I set it aside to dry. Once the internals were cleaned, I scrubbed the externals of the bowl with undiluted Murphy’s oil soap and dried it using paper towels and soft cotton cloth. I set it aside to dry. I cleaned the walls of the chamber with cotton pads dipped in isopropyl alcohol (since I was simultaneously working on the repair to the chamber of the Paneled Billiard, there is inescapable repetition of the process). Once cleaned, I inserted a folded pipe cleaner into the shank and up to the draught hole to prevent it from clogging. I made putty like paste of pipe ash and water. This paste was evenly applied to the entire inner surface of the chamber with a thin bamboo frond with shaved end to form a spatula, a bigger one at that, as compared to a regular one. I set it aside to dry out. The climate here being very wet and humid, it will take a long time to dry out.

The coating dried completely after about a week and I just gently scrapped the chamber with very light hands to check the layer. Alas, the complete coating just crumbled out leaving a very dry coat of ash through which all the cracks were easily discernible.

Fortunately, I had started collecting pipe ash and mixed it with yogurt. Using the same earlier method, I applied an even coat of pipe ash, yogurt and also added two capsules of activated charcoal. I set it aside to dry out, praying that the mixture bonds well and sticks to the walls of the chamber. A few days later, the mixture had completely cured and it did not crumble. The bonding appeared to be strong and durable. With a 400 grit sand paper, I sanded the inner walls very lightly to smooth the walls. Now the internal walls are looking solid and ready for duty again!!!! Once the issue of cracked chamber wall was addressed, I turned my attention back to the exterior of the stummel. I rubbed a small quantity of “Before and After Restoration Balm” in to briar and let it rest for a few minutes. The balm almost immediately works its magic and the briar now has a nice vibrant appearance. I further buff it with a horse hair shoe brush. Working the stem, with a Bic lighter, I flamed the surfaces of the stem to raise the tooth chatter and minor bite marks. To address the bite mark and repair the edge of the lip, I spot apply a drop of CA superglue and leave it over night to cure. The next evening, I shape the fill using flat head needle file and carve a crisp edge. To further blend in the fill, I sand the stem with a 220 grit sand paper. I sanded it down with 220, 400 and 800 grit sand paper. I wiped the stem with cotton pad dipped in alcohol to remove the resultant dust. I rubbed some extra virgin olive oil in to the stem and set it aside to be absorbed in to stem. I polished the stem with micromesh pads, wet sanding with 1500 to 2400 grit pads and dry sanding with 3200 to 12000. I rub a little extra virgin olive oil in to the stem after every three pads. I finish the polishing of the stem by rubbing a small quantity of Paragon wax and giving it a final polish with a soft cotton cloth. The stem is now nice, smooth and shiny. I cleaned the airway in the stem with pipe cleaners and alcohol. Here, I realized that the issue of loose stem was yet to be addressed. This issue was addressed by heating the tenon with a Bic lighter, constantly rotating the stem, till the tenon was slightly pliable. I gently pushed a rounded needle file in to the tenon to enlarge it and set it aside to cool down. Once cooled down, I wiped it clean with a cotton cloth soaked in cold water. I tried the fit, and the stem sat in the shank snugly, making all the right kind of noises. I was very pleased with the fit.To finish the pipe, I rubbed a small quantity of HALCYON II wax which is used for rusticated/ sandblasted surfaces and set it aside for a few moments. Thereafter I polished it with a horse hair shoe brush and a soft cotton cloth. These Somerset pipe are very well made and smoke fantastic. The quality of the vulcanite is high grade and feels good to clench. The finished pipe is shown below. Since the completion of this restoration, I have smoked this pipe and included it in my rotation. Believe you me, this pipe, like its sibling, smokes perfect with a nice, smooth draw right to the end. This leads me to think, is it only necessary to have Dunhill, Barling, Comoy’s etc, as fantastic smokers? Well, my personal experience with these two Somersets, is that while the above mentioned brands are excellent pipes, the lesser known ones do need to be looked at and not discarded outright!!!!!!!!!! Thanks for your patience and looking forward to inputs about this brand and the write up. Cheers…………
 

Kathy’s Dad’s Pipes – Restoring a Barontini De Luxe Brandy


Blog by Steve Laug

The next pipe on the work table is also from George Koch’s estate. It is a Barontini De Luxe Brandy shaped pipe with a quarter bend. The pipe was one of many that came to my brother and me in several shipments of pipes from George’s daughter Kathy. When Jeff got each box the pipes were well wrapped and packed. Jeff unwrapped them and took the following photo to give an idea of the volume of the pipes that we purchased. The Barontini came in mixed in a box of pipes much like the one below.In each of the previous blogs that I have written on the restoration of George’s pipes I have told his story. To me it is important to keep the story attached to the pipes that came from his collection. Each pipe I work on I remind myself of the man and in the work give a remembrance to the pipeman who owned these pipes. Having held a large number of his pipes in my hand and having a pretty good feel for the shapes, colour and stems that he liked, I can almost imagine George picking out each pipe in his collection at the Malaga shop in Michigan. I am including Kathy’s brief bio of her father and a photo of her Dad enjoying his “Malagas”. Here is George’s bio written by his daughter.

Dad was born in 1926 and lived almost all his life in Springfield, Illinois. He was the youngest son of German immigrants and started grade school knowing no English. His father was a coal miner who died when Dad was about seven and his sixteen year old brother quit school to go to work to support the family. There was not much money, but that doesn’t ruin a good childhood, and dad had a good one, working many odd jobs, as a newspaper carrier, at a dairy, and at the newspaper printing press among others.

He learned to fly even before he got his automobile driver’s license and carried his love of flying with him through life, recertifying his license in retirement and getting his instrumental license in his seventies and flying until he was grounded by the FAA in his early eighties due to their strict health requirements. (He was never happy with them about that.) He was in the Army Air Corps during World War II, trained to be a bomber, but the war ended before he was sent overseas. He ended service with them as a photographer and then earned his engineering degree from University of Illinois. He worked for Allis Chalmers manufacturing in Springfield until the early sixties, when he took a job at Massey Ferguson in Detroit, Michigan.

We lived in Livonia, and that’s where his love for Malaga pipes began. After a few years he returned to Allis Chalmers and we moved back to Springfield. I remember that when we went back to Michigan to visit friends, Dad had to go to the Malaga store and acquire a few new pipes. Many a year I wrote to Malaga and they picked out a pipe for me to purchase that I could give Dad for a Christmas or birthday present. He was always pleased. His favorites were the straight stemmed medium sized bowl pipes, but he liked them all. 

He had some other pipes, but the Malagas were his favorites. I remember him smoking them sitting in his easy chair after work, with feet up on the ledge by the fire burning in the fireplace.  Growing up it was my job to clean them and he liked the inner bowl and stem coated with Watkins vanilla, leaving a little of that liquid in the bowl to soak in when I put them back on the rack. Dad quit smoking later in life and so they’ve sat on the racks for many years unattended, a part of his area by his easy chair and fireplace. Dad passed when he was 89 years old and it finally is time for the pipes to move on. I’m very happy they are being restored by you and your brother and hope they find homes who enjoy them as much as Dad did. Thank-you for your care and interest. — Kathy, the oldest daughter

Each blog I have posted I thank Kathy for providing this beautiful tribute to her Dad. Jeff and I appreciate your trust in allowing us to clean and restore these pipes. We are also trusting that those of you who are reading this might carry on the legacy of her Dad’s pipes as they will be added to the rebornpipes store once they are finished.

The next the pipe is a nicely shaped Barontini Brandy with an acrylic stem. It has beautiful grain all around the bowl – straight, flame and birdseye that is highlighted by the rich reddish brown stain. The top of the bowl is had some burn marks and some damage. The stamping on the top side of the shank read Barontini over De Luxe. On the underside it has the shape number 702 and Italy at the shank/stem junction. The gold and brown, swirled, pearlized Lucite stem had light tooth dents and chatter on the top and the underside of the stem. The interior of the pipe was caked and had cobwebs. Jeff took these photos before he started the cleanup work on the pipe. Jeff took a close up photo of the bowl and rim to show the condition of the pipe before he started his cleanup work. The rim top had some light lava overflow and some darkening. There appeared to be some rim damage on the inner edge toward the front of the bowl. You can see the wear on the rim top, the cake and remnants of tobacco in the bowl. It also looks like there are some cobwebs in the bowl. The pipe is dirty but in good condition.  He also took photos of the sides and bottom of the bowl and shank from the side to show the grain on this pipe. The finish is very dirty but this is a beautiful pipe. Jeff took some photos to capture the stamping on the top and underside of the shank. The first photo shows the top side of the shank with the stamping Barontini De Luxe and the second shows the shape number 702 on the underside. The third photo shows the ITALY stamping on the underside near the stem. There is also a B stamped on the acrylic stem.The next two photos show the stem surface. There are tooth marks and chatter on both sides near the button. There is also some wear on the sharp edge of the button.I looked up some information on the brand on the Pipephil website to get a quick overview of the history (http://www.pipephil.eu/logos/en/logo-b2.html). I did a screen capture of the listing for the brand. The fascinating thing that I learned in this quick overview was the connection to the entire Barontini family and to other companies like Aldo Velani. It is interesting to see the breadth of the brand in the following screen capture. The  pipe I am working on it stamped like the third photo down – the Classica and the B on the stem is identical to that pipe’s stamping.Pipedia gives further history of the brand (https://pipedia.org/wiki/Barontini,_Ilio) under the listing for Ilio Barontini. I quote that article in full as it has the connection to the De Luxe pipe that I am working on.

Cesare Barontini, who was in charge of the Barontini company since 1955, helped his cousin Ilio Barontini to establish a pipe production of his own.

Ilio started to produce machine-made series pipes of the lower to the middle price categories. Fatly 80% of the pipes went to foreign countries, the bulk being produced for various private label brands. Some of the own lines like “de Luxe”, “Etna” or “Vesuvio” gained a certain popularity. Citation: “Next to excellent craftsmanship Ilio Barontini pipes offer a wood quality, that is almost unrivalled in this price category!”.

The pipes being around still there were some unconfirmed utterances that Ilio Barontini brand has been absorbed by Cesare Barontini or even Savinelli. Who knows?

Now I had some idea of the maker of this Barontini. It appears to be one of the machine made Barontinis in the De Luxe line. Fueled by that information it was time to get working on the pipe itself and see what I had to do with it.

Jeff had reamed the bowl with a PipNet pipe reamer and followed up with a Savinelli Fitsall pipe knife to remove the cake. He scrubbed out the mortise and the airway in the shank and the stem with alcohol, cotton swabs and pipe cleaners. He scrubbed the exterior of the bowl, rim, shank and stem with a tooth brush and Murphy’s Oil Soap to remove the oils and tars on the rim and the grime on the finish of the bowl. He rinsed it under running water. He dried it off with a soft cloth. The rim was thoroughly cleaned and the damaged areas were obvious. Without the grime the finish looked really good. The Lucite stem would need to be worked on but I really like the profile it cast. I took photos of the pipe to show its condition before I started my work on it.   I took close up photos of the bowl and rim top as well as the stem. You can see the condition of the rim top and bowl in the first photo. Jeff was able to remove all of the tar and oils but you can now see the damaged areas on the surface clearly. There are damaged spots on the front inner edge and the back inner edge. There are also some deep dents and nicks in the flat surface of the rim. The acrylic/Lucite stem had tooth chatter and some light tooth marks on the top and underside of the stem just ahead of the button. There was one deeper tooth mark on the underside near the button.I decided to address the damage to the rim top first. I topped the bowl on a topping board using 220 grit sandpaper. I removed the damaged surface of the rim and made it smooth once again.I used a folded piece of 220 grit sandpaper to smooth out the inner edge of the rim. The rim top is looking far better at this point.I polished the rim top with micromesh sanding pads – wet sanding with 1500-2400 grit pads and dry sanding with 3200-12000 grit pads. I wiped the rim off after each sanding pad to remove the dust. The rim really shone once it was polished. Once it was polished the rim was ready to be stained. I started by using stain pens. I used a Maple stain pen to match the colour of the bowl. It was the closest I could get to matching the bowl. Once it cured it was streaked and not quite a match. The first photo below shows the rim after the stain pen.I carefully wiped the rim down with some isopropyl alcohol to smooth out the stain. Once it was smooth I restained it with some Fiebing’s aniline stain. I used a tan coloured stain and flamed it once I had stained the rim. I repeated staining and flaming until the coverage on the rim matched the bowl sides. The second photo below shows the look of the rim after this staining. I rubbed down the briar with Before & After Restoration Balm. I worked it into the smooth surface of the briar with my fingertips to clean, enliven and protect it. I let the balm sit for a little wall and then buffed with a cotton cloth to raise the shine. The following photos show the bowl at this point in the restoration process. The rim matches well but still needs to be polished and buffed to raise a shine on it. There were some tooth marks and chatter on the top and more chatter and a deeper tooth mark on the underside of the acrylic stem at the button. I cleaned off the surface of the stem with alcohol and filled in the deep tooth mark with clear super glue. Once it cured, I sanded both sides smooth with 220 grit sandpaper to blend the tooth chatter and the repair into the surface of the stem. It did not take too much sanding to remove the marks and smooth out the stem surface. When it was sanded it was smooth and the marks were gone. I polished the acrylic stem with micromesh sanding pads – wet sanding with 1500-2400 grit sanding pads and dry sanding it with 3200-12000 grit sanding pads. I wiped it down after each sanding pad with a damp cloth. I the polished stem and bowl with Blue Diamond to polish out the remaining small scratches and raise the shine. I gave the bowl and the stem several coats of carnauba wax and buffed the pipe with a clean buffing pad to raise the shine. I hand buffed it with a microfiber cloth to deepen the shine. The pipe polished up pretty nicely. This turned out to be a beautiful pipe in terms of shape and finish. This is the thirteenth pipe that I am restoring from Kathy’s Dad’s collection. I am looking forward once again to hearing what Kathy thinks once she sees the finished pipe on the blog. The finished pipe is shown in the photos below. The dimensions are Length: 6 inches, Height: 2 inches, Outside diameter of the bowl: 1 3/8 inches, Chamber diameter: ¾ of an inch. Thanks for walking through the restoration with me as I worked over this Barontini Brandy from George’s estate. More will follow in a variety of brands, shapes and sizes. I will be adding it to the rebornpipes store shortly so if you are interested in adding it to your collection and carrying on the trust from her father send me an email or a message on Facebook. Thanks for looking.

Refreshing an Italian Gasparini M.G.M. Rock Briar 1912 with an Unexpected Encounter


Blog by Dal Stanton

Idian lives in Indonesia and sent me an email after trolling through The Pipe Steward electronic “Help me!” basket which I call, “For ‘Pipe Dreamers’ Only!” He inquired about commissioning two pipes, a Peterson and the Italian, Gasparini M.G.M. Rock Briar 1912.  He settled on the Gasparini and assured me that he was a patient man as I put his commissioned pipe in the queue behind quite a few other commissioned pipes.  I found this pipe along with 65 others in a Lot of 66 which has provided several pipes for my work table which have benefited our work with the Daughters of Bulgaria, helping women and girls who have been trafficked and sexually exploited.  This M.G.M. Rock Briar stood out to Idian and it also stood out to me not only because it’s a unique Freehand shape but also because the shank is chocked full of nomenclature information that I’ve looked forward to researching.  Here are the pictures that Idian saw. The heel of the shank is stamped with ITALY [over] BRIAR 1912 [over] M.G.M. [over] Rock in cursive script.  Below this is a stamp – a pipe partially ensconced in a circle with M.G.M. repeated under the circle. To the right of this, hugging the briar’s edge transitioning to the vulcanite ferrule is the number 25, which I’m assuming is a shape number.  The pictures above show the rondel with the pressed M for Mario, the patriarch of the Gasparini family. Much of Pipedia’s article about the Gasparini name came from the current Gasparini website, http://www.mgasparini.it/en/.  When reading the information, one gets the impression of the enterprise having deep family roots which continue today.  From the Pipedia article:

In 1938 Mario Gasparini, with his wife Ida, took his first steps into the world of the pipe. Today his daughter, Marisa Gasparini, sits at his desk; since 1977 Marisa and her husband, and now her daughter, carry on the tradition of her family. At the beginning of 1950’s, the building, that still today hosts the production department, was enlarged. In 1971 the offices and the warehouse were moved from Milan (where they were situated for marketing purposes) to Luvinate.

During those years the skilled workers and our direct partners have always followed the history of the Gasparini factory, becoming very fond of it and devoting themselves, with care and love, to the making of each pipe, with the personal fantasy and skills of the artist. We would like to take this opportunity to thank those artisans who, with their creativity, gave, and continue to give, life to the Gasparini Pipe factory.

The article also describes the Gasparini series, M.G.M. coming on-line in 1965 as a classical line with the initials standing for the founder’s name – Mario Gasparini Milano.  Pressing the research, the Pipephil.eu site offered more information.Of interest in the Pipephil information was the reference connecting the M.G.M. “Collectionist” series (marked by the circle/pipe stamp) with a comparison to ‘wax-drip pipes’.  I looked at that link and got a clue of what might be the considered shape of the M.G.M. Rock on my work desk: stummels fashioned to look like the ends of used candles.  Here is a clipping of three ‘high-end’ examples of this interesting shape:With these examples before me, I take another look at the M.G.M. Rock Collector on the table and it I believe that its possible it was fashioned in the ‘wax-drip’ manner with the ripples of melted wax shaped on the rim flowing down.Pipedia’s article included an older Gasparini brochure (courtesy of Doug Valitchka) – unfortunately no dating was given for the brochure, showing three pipes in the ‘Collector’ series.  The middle example is obviously the same shape style and stem as the pipe on my work table but with a squatter bowl – very much reminiscent of a ‘wax drip’ shape.  My guess is that the brochure is from the 60’s because it’s black and white and I would imagine that the stated pricing at that time would not be for a corner drug store pipe!  Unfortunately, this was the only page shown – I would love to have read the description for the ‘b.’ pipe!One more question dogged me in my research of the M.G.M. Rock – ‘Briar 1912’.  Briar 1912 was stamped on several examples I saw of Gasparini pipes on Pipedia and Pipephil.eu.  What did it refer to?  As I’ve done before with much success, I decide to go to the front door of the Gasparini house and knock and introduce myself.  On the ‘Contact’ page of the Gasparini website I find contact information and send an email with the 1912 question as well as a few other questions to confirm the shape number and dating.  We’ll see if they respond!  The description in the brochure gives a clue that I didn’t recognize until later – it states that the briar had been aged over 50 years!  If one does the math, if 1912 is when the aging process began – plus 50 years, lands us in the year 1962 – the decade the M.G.M. series was introduced and perhaps the ‘Collector’ series as well. It was only after discovering an August 2013 thread in Pipes Magazine Forum (LINK) concerning Gasparini pipes that I tied the 1912 with the aging of the briar – I know, I’m slow!  This clip from Doc Watson speaks very positively of the Gasparini named pipes:

I have a few Gasparini pipes. They are real sleepers IMO and are seldom talked about by collectors but believe me there are some magnificent Gasparini pipes out there. Here’s a photo of one that came from the late Jack Ehrmantrout (owner of Pipe Collectors International PCI) collection. It was one of his favorites that he never smoked. Some are stamped 1912 briar, which is indeed some old root. As most pipe companies/makers they make different lines, some higher grades than others but IMO if you find one you like, go for it. (Note from me: IMO = in my opinion)I love ‘Sherlocking’ the provenance of pipes not only to learn about the names of historic lines, but to more fully appreciate the value of what I’m handling and seeking to restore.  The picture above, along with several examples in the Pipedia article courtesy of Doug Valitchka, give me a good idea of the natural briar hue Gasparini used and I will shoot for this with the M.G.M. Rock on my table.
Well, my cup runs over!  I received a reply from M. Gasparini Pipes in Luvinate, Italy, but not from a desk employee.  Marissa Gasparini (picture from previously cited Pipedia article) responded to my questions, the daughter of Mario Gasparini, the founder of the Gasparini Pipe house in 1948.  She assumed control of the Gasparini Pipe interests in 1977 and I assume she continues in that role today.  I was honored that she wrote to me.  Here is her letter, switching to my native tongue and responding to my questions:

Dear Dal,
1) the 1912 is the year in which was born the briar that we used for making that serie of pipes so particular.
2) The circle with pipe in it was used only for some special  fancy serie like the Rock.
3) We begin to produce thise serie in the 1960 and finish in the 1965, and now we have left only few pieces, and you are lucky to have one.
4) The number 25 is the number of the shape and the pipe was waxed.
We hope  that our informations are o.k. for you and we thank you  and remain at your complete disposal,
with best regards,
Marisa Gasparini

Wow!  I love restoring pipes!  With Marisa’s letter as confirmation, the briar root aging process used for this M.G.M. Rock began in 1912, 106 years ago.  The Collector stamp was only used for special, fancy lines, which applies to this Rock.  This M.G.M. Rock was produced between 1960 and 1965 – which gives it an age ranging from 58 to 53 years.  The shape number perhaps points to the wax candle shape that I was guessing might be the case or the shape may simply be a freehand Rock.  She also said that I was ‘lucky’ to have one of these special collector series in my possession – I would call it blessed.  I responded to her gracious letter and ventured another question – to ask about the significance of the third letter, ‘M’ in M.G.M. moniker?  The first two letters are clear – the initials of her father.  The third letter, ‘M’ stands for Milano.  I asked her the significance of ‘Milano’?

A few hours later her reply arrived.  The M.G.M. – Milano was where the Gasparini family lived and produced their pipes 45 years ago – a special place in their memories.

This is a nice-looking pipe and I’m happy to call this a “Refresh” on the title of the blog. With a very quick cursory look at the chamber, stummel and stem I see no challenging issues.  There is a light cake in the chamber, the rim has minor discoloration from grime and oils, and the stummel surface appears to be in good shape.  The surface of the stummel has darkened and has become tired and needs some cleaning and spiffing up a bit.  The Military stem shows no perceptible oxidation and only minor scratches – no tooth chatter.  Maybe an easy restoration!

I begin the restoration by placing the stem in a soak of Before & After Deoxidizer along with other stems of pipes in queue for restoration.  Even though I see no oxidation, I’ll give it a soak to make sure.  Before putting the stem in the soak, I run a pipe cleaner dipped in isopropyl 95% through the airway to clean it first.  After soaking for several hours, I fish the stem out, drain it and wipe it down with a cotton pad wetted with mineral oil (light paraffin oil here in Bulgaria).  As I thought, very little oxidation was raised during the soak.Looking now to the M.G.M. Rock stummel, I begin by reaming the chamber to remove the moderate collection of carbon cake to provide a fresh start for the 106 year aged briar.  After putting down paper towel for easier clean-up, from smaller to larger, I use 3 of the 4 blade heads available to me in the Pipnet Reaming Kit.  After this, I employ the Savinelli Fitsall Pipe Tool to fine tune the reaming by reaching the more difficult angles at the floor of the chamber and by scraping the walls.  Finally, I wrap a piece of 240 grit paper around a Sharpie Pen and sand the chamber walls.  I then wipe the chamber with a cotton pad wetted with isopropyl 95% to clean the carbon dust left behind.  An inspection reveals a healthy chamber with no cracks or heat fissures.   The pictures show the process. Now, turning to the external surface cleaning, I use undiluted Murphy’s Oil Soap with cotton pads and a bristled tooth brush to reach into the rolls of the briar shaping.  I also use a brass wire brush on the small plateau to loosen the scorching around parts of the internal lip.  Following this, I gently scrape the scorching with a Winchester pocket knife edge to remove more of the damaged briar.  The cleaning and brushing made good progress. Preferring to work on a cleaned pipe, I now switch to the internals of the stummel by cleaning the mortise and airway with pipe cleaners and cotton buds dipped in isopropyl 95%. I also utilize different sized dental spatulas and scoops to excavate tars and oils by scraping the mortise walls and digging around the draft hole drilling deeper in the mortise.  I have learned over time that it shortens the clean up by excavating what you can and following with the cotton buds.  Last time I was in the US, I went to the US 1 Flea Market in Stuart, Florida, looking for pipes, of course.  I found a shop in the Flea Market that had absolutely everything and found an assortment pack of about 8 different dental tool accessories – sharp, flat and scooped.  These tools are very helpful in different phases of the pipe restoration process.  A good investment!  After excavating and swabbing, the internals are clean.  I move on!Back to the Military stem – it is in good shape with respect to the oxidation, but it has scratches and roughness around the bit that one expects to find through normal use.  The button also has compression marks to address. I first wet sand using 600 grade paper to find out if a mid-range grit is invasive enough to address the issues I see.  It does well, but it uncovers small tooth dents that I didn’t see before as well as the button being a bit compressed. I backtrack and use a flat needle file to give the button refreshed definition.  I then use 240 grit paper only in the bit area to remove the tooth dent and work on the button.To erase the 240 grit scratches, I again sand using 600 grit paper followed by sand/buffing the entire stem with 0000 grade steel wool.  I think the Military stem is looking pretty good.Pressing forward with the stem sanding, I wet sand using micromesh pads 1500 to 2400 followed by dry sanding with pad 3200 to 4000 then pads 6000 to 12000.  After each set of 3 pads, I apply a rich coat of Obsidian Oil which rejuvenates the vulcanite.  The stem’s looking great – I love the pop! I’ve been thinking as I’ve been working how I should approach the sanding/finishing of the ‘Wax Drip’ Rock shape?  As the tired finish is now, the pipe to me is one dimensional.  The darkened finish is uniformly non-expressive.  I look at it and I see the beautiful, unique shape, but I don’t see the beauty of 106-year-old briar grain standing on center stage of this presentation.  The great thing about micromesh pads is that they are flexible and hug the surface which I believe will aid me in adding some depth and contrast of shades in the briar’s presentation.  While sanding with the micromesh pads, there will be natural and unavoidable changes in the pressure and impact of the pads because of the contouring of the Wax Drip Rock shaped briar.  High points will naturally be lighter and lower points will be darker, providing (at least theoretically at this point!) contrast and shading through the briar landscape.  Ok, that’s the theory and the plan.  Time to march!  Using pads 1500 to 2400, I wet sand the stummel and vulcanite ferrule.  Following this, I dry sand using pads 3200 to 4000 then 6000 to 12000.  The pictures show the progress and I like what I see – theory becoming reality. Next, I mount the Dremel with a cotton cloth buffing wheel set at 40% full power and I apply Tripoli compound to the briar surface.  I’m able to reach more directly into the carved areas of the briar with this more abrasive compound.  After the Tripoli compound, I change to another cotton cloth buffing wheel, maintain the same speed and apply Blue Diamond compound to both stummel and military stem.  To remove compound dust from the pipe, I buff the pipe with a felt cloth. Before applying carnauba wax to the stummel, I apply Before & After Restoration Balm. I like using the Restoration Balm because it deepens and enriches the natural briar hues.  After squeezing some Balm on my finger, I apply it to the briar with my fingers working the Balm into the surface – making sure I work it into the carved areas.  As I work the Balm into the briar, it begins with a light oil consistency but thickens during the application to a wax-like ointment – the picture below shows this stage.  After letting the Balm settle for about 10 minutes, I wipe/buff off the Balm with a clean cloth. The final stage is to apply carnauba wax to the stem and stummel.  I mount another cotton cloth wheel to the Dremel, maintain the same 40% of full power, and apply a few coats of carnauba wax.  When I complete the waxing cycles, I give the pipe a rigorous hand buffing with a microfiber cloth to raise the shine even more.

Restoring this Gasparini M.G.M. Rock exceeded my expectations in important ways. The pipe was beautiful before I started.  Now, it’s a show stopper as the 106-year aged briar has retaken center stage and the Freehand shape with the dips, curves and swirls are a stellar supporting cast.  I can easily see the Wax Drip shape, but it could also be petals on a flower.  The Military style stem looks classy but unassuming as it joins the vulcanite ferrule with a contrasting ring of briar between ferrule and stem.  Another exceeded expectation was to understand better the Gasparini name and the value of family. My appreciation brimmed for Marisa Gasparini as she took the time to answer my questions – this was an honor.  This simple act revealed her pride in the Mario Gasparini heritage and her willingness to answer questions shows her concern for each pipe bearing the Gasparini name.

Idian commissioned this pipe with the understanding that the final valuing of the pipe would be after I researched and restored the pipe and published the write-up.  Then, as is the understanding for all the pipes that are commissioned, the commissioner of the pipe has the first opportunity to acquire the pipe in The Pipe Steward Store with the value determined.  If the price is not agreeable, he may pass, and I leave the pipe in the store for another steward to eventually add to his collection.  However, for this restoration, for this Gasparini M.G.M. Rock, the value for me is ‘priceless’.  I’ve invited him to join my collection and start pulling his own weight in the rotation – my first Gasparini, we’re happy.  I’m thankful to Idian for his understanding after letting him know – he was a bit disappointed but happy that the M.G.M. Rock was restored and continued in good hands.  Thanks for joining me!

Crafting a New Stem for a Cortina Factory Denmark 22 Freehand Stack


Blog by Steve Laug

The next pipe on the table was one that my brother Jeff picked up on an eBay auction from a seller in Franklin Tennessee almost two years ago. I know it seems like a long time ago and I suppose it is but I have boxes of pipes to refurbish here and this one came up today! It was in a box with the freehand pipes that I have been working my way through. It is an interestingly shaped sandblast pipe that is a stack. When I first looked at it I did not see any stamping on the shank. As I examined it today I found stamping on the thin band of smooth briar between the horn shank extension and the bowl. It stamped around the band and reads CORTINA FACTORY DENMARK with the shape number 22. The pipe looked pretty good when he got it from the seller. There was dirt and grime in sandblast finish on the bowl. The horn shank extension was oxidized and tired looking. There was a metal mortise inset in the horn to protect it from splitting. There was a light cake in the bowl and the inner and out edges of the bowl were in good shape. The contrast brown finish on the pipe was in excellent condition. I am not sure if the stem on the pipe was the original as the tenon was very long and the fit in the shank was snug but not deep. It was lightly oxidized but in decent condition. I think a stem with a shorter tenon and snug fit to the shank would work well. I would also see if I could shape one to follow the shape of the horn extension. I would have to see what I could find in the can of stems. Jeff took photos of the pipe before he started his cleanup up work. Jeff took photos of the stamping on the pipe. The first photo shows the shape number 22 on the smooth band. The second shows the CORTINA stamp on the smooth band. The third and fourth photos show the stamping Denmark Factory. The next photo shows the shank end – a mottled horn with the metal mortise insert. The stem is in place but you can see that the diameter of the tenon is smaller in diameter than the insert. The second photo below shows the striations in the horn shank extension. The stem was dented and worn. I wanted to replace it with a different stem than the replacement that came in it so I was not too concerned with the stem condition.Jeff had scrubbed the exterior of the bowl with Murphy’s Oil soap and removed the dust and grime that had accumulated there. The finish looked very good once it had been scrubbed. He lightly reamed the bowl with a PipNet reamer and cleaned it up with a Savinelli Fitsall Pipe Knife. He cleaned the interior of the mortise and the airway in the shank and the stem with alcohol, cotton swabs and pipe cleaners. The pipe came to me clean and ready to do the restoration and restemming. I took some photos of the bowl to show the condition at this point in the process. I took some photos of the horn shank extension. At first I thought it was acrylic but as I worked on it I was sure that it was real horn. It was a unique and pretty piece of polished horn. It need to be polished but it was unsplit and in good condition.As has become my practice when working on restoring pipes I did some research on the Cortina Factory Denmark brand name. Pipedia noted the brand but had no information to give in terms of the company or a time frame. I also looked on Pipephil’s site and found a listing for the brand. I have included a screen capture from that site (http://www.pipephil.eu/logos/en/logo-c7.html). The first pipe in the photo shows the Cortina brand and stamp that is the same as on the pipe I am working on. The second one is attached to the Georg Jensen brand and the stamping is actually very similar. It makes me wonder if the Cortina was not a line of pipes made by Georg Jensen. I have no proof of that other than the connection shown in the screen capture below.I started my restoration of the pipe armed with the little bit of information that I could find on the brand. I polished the horn shank extension with micromesh sanding pads – wet sanding with 1500-2400 grit pads and dry sanding with 3200-12000 grit pads. I wiped the bowl down with a damp cloth after each sanding pad to remove the sanding dust. Once I had finished with the last pad I wiped it down with Obsidian Oil to enliven the horn and preserve it. I turned from the horn shank extension to work on the sandblast briar of the bowl. I rubbed the bowl down with Before & After Restoration Balm to deep clean the briar bowl and the rim top as well as the briar shank. The product works to clean, enliven and protect the briar. I hand rubbed it with my fingers, working it into the exterior of the pipe. I worked it into the blast with a horsehair shoe brush. After it had been sitting for a little while I buffed it with a soft cloth to polish it. The pipe really began to have a rich shine. I took some photos of the bowl at this point to mark the progress in the restoration. I had a stem in my can of stems that had turned portions that as the shape of the shank extension on the pipe. Once the stem is cleaned up I will point out the shapes more clearly. I sanded the stem with 220 grit sandpaper to shape the tenon to fit in the mortise. I sanded the oxidation to remove it from the rest of the stem. I took a photo of the new stem next to the one that had come with the bowl. You can see the variation in the shape of the stem. The top one has a very long tenon that fit into the shank up to the spot where the oxidation begins. It is longer than the new stem and the shape is not quite right. On the new stem I have boxed in the shapes in red that parallel the shape of the shank extension.I polished the stem with micromesh sanding pads – wet sanding with 1500-2400 grit pads and dry sanding with 3200-12000 grit pads. I wiped the stem down after each pad with a damp cloth to remove the sanding dust on the acrylic. I polished the stem with Before & After Pipe Stem Polish – both Fine and Extra Fine and I set it aside to dry. I polished stem and bowl with Blue Diamond to polish out the remaining small scratches. I gave the bowl multiple coats of Conservator’s Wax and the stem multiple coats of carnauba wax and buffed the pipe with a clean buffing pad to raise the shine. I hand buffed it with a microfiber cloth to deepen the shine. The pipe polished up pretty nicely. The contrasting brown stain on the sandblast, the variegated swirls in the horn shank extension and the polished vulcanite stem worked together to give the pipe a unique look. The finished pipe is shown in the photos below. This is one of those interesting unknown Danish Pipes that I think could possibly lead back to Georg Jensen but we will probably never know for sure. The shape, finish and flow of the pipe and stem are very well done. The dimensions are Length: 6 1/2 inches, Height: 2 1/4 inches, Outside diameter of the bowl: 1 1/4 inches, Chamber diameter: 3/4 inches. This one will be added to the rebornpipes store soon. If you are interested in adding it to your collection send me an email to slaug@uniserve.com or send me a message on Facebook. Thanks for walking through the restoration with me as I worked over this piece of Danish pipe making history.

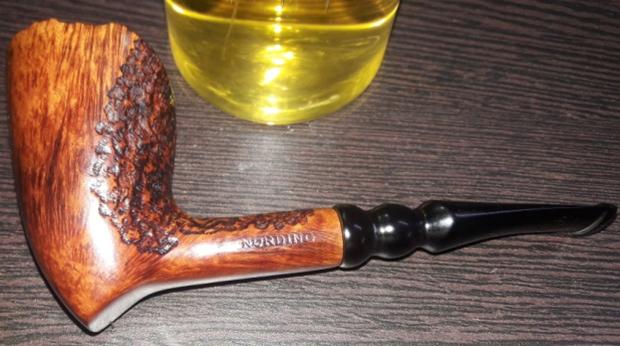
New Life for an Unusual Freehand pipe – a Granhill Signature 1 50


Blog by Steve Laug

I have been working my way through some freehand pipes that my brother Jeff picked up recently. There are some amazing freehand pipes among them. The one on the work table now is another Granhill Freehand. I have already restored a beautiful large freehand Granhill earlier this summer (https://rebornpipes.com/2018/06/09/another-large-and-unique-freehand-pipe-a-granhill-signature-1-100/). It was a Granhill Signature 1 100 where this new one is a Granhill Signature 1 50. The pipe looked pretty good when he got it. There was dirt and grime in the plateau on the rim top. The edges were clean and undamaged. The bowl had a pretty thick cake inside. The finish on the pipe was an oil finish on natural briar. There were some carved trails up the sides of the bowl and the shank that had been lightly sandblasted and had an interesting texture. The stem was a replacement stem of cast vulcanite. It was oxidized but in decent condition. The acrylic stem on the other Granhill made me want to put the same kind of stem on this one as well. We would have to see. Jeff took photos of the pipe before he started his cleanup up work. Jeff took photos of the rim top to show the grime and dirt in the crevices of the rim top. There was also some darkening around the inner edge of the rim top and some lava build up that was overflowing onto the inner edge.He also took a photo of the stamping on the shank. The stamping is very clear and readable.The stem was in decent condition. The surface of the vulcanite was pitted and oxidized. There was some light tooth chatter on both sides of the stem near the thin button.Jeff had cleaned the rim top and removed the debris in the plateau. He had scrubbed the exterior with Murphy’s Oil soap and removed the dust and grime that had accumulated there. The oil finish disappeared and there was natural unfinished briar and once it was scrubbed it was clean and unstained briar. He lightly reamed the bowl with a PipNet reamer and cleaned it up with a Savinelli Fitsall Pipe Knife. He cleaned the interior of the mortise and the airway in the shank and the stem with alcohol, cotton swabs and pipe cleaners. The pipe came to me clean and ready to do some light touch ups and polishing. The stem was cleaned but had tooth chatter on the top and underside near the button and on the surface of the button itself. I took close up photos of the rim top to show the condition of the plateau. It was very clean and there was no damage to the inner or outer edge of the rim. Jeff had been able to remove all of the tars and oils and lava coat on the edge of the bowl. The photos of the stem to give a clear picture of what it looked like before I cleaned it up. They also show the smooth shank end on this particular pipe. There was a slight bit of plateau on the top of the shank end in the second photo.In my earlier blog on the other Granhill I had done research on Pipedia to find information. I found two potential makers of the brand though they separated the name into two parts Gran Hill. The first possible maker was Michael V. Kabik with some of them stamped Made in Denmark. The spelling of the name was noted to come in other versions: Granhill, Gran-Hill. The second possibility comes from Lopes book where he states that the brand also was used by a Fargo Tobacconist, Lonnie Fay, who made freehands bearing this stamp in the 1970s. To me the similarity of the pipe to other Kabik pipes that I have worked on made me go with him as the maker of this pipe as well.
I went back to Pipedia and spent time reading about Michael Kabik (https://pipedia.org/wiki/Kabik). Here is a summary of what I found.

Michael Victor Kabik or Michael J. Kabik, now retired artisan and pipe repairman, was born in Annapolis, Maryland in 1950. As a student he was fascinated by science, but finally turned to the arts. In the early 1970s he started working as an artisan and designer for Hollyday Pipes Ltd., and when the company closed he set up in his own right.

Kabik writes as follows:

…In the 1960s, I had helped Jay build Jay’s Smoke Shop and was his first employee. Since that time, he had set up one of the very first freehand pipe-making operations in the U.S. along with his partner, Chuck Holiday, called CHP-X Pipes. The staff consisted of four full-timers actually making the pipes and perhaps another four in sales and office work. Chuck, who did the actual design and carving, had long since had serious disagreements with Jay and split. Chuck’s replacement from the staff was quitting, and Jay was in a bind. Jay offered me the job, and I gladly accepted. The fellow quitting was supposed to train me for two months but left after two weeks, leaving me with an awesome responsibility. I felt as though the future employment of all these people depended on me as the designer and cutter…and it did.

…Sadly, CHP-X closed its doors two years after my arrival, due primarily to distribution, sales force problems, and other issues to which I was not privy…In love with a medium that satisfied my creative impulses while, pretty much, paying the bills, I bought up the essential equipment and produced pipes on my own. I did this from a farm house my wife and I rented in Phoenix, Maryland. I produced pipes under the name KANE, Gran Hill and others I can’t remember as well as a private label line for a store in, I believe, South Dakota.

…In 1973, I was approached by Mel Baker, the owner of a chain in Virginia Beach called Tobak Ltd. Mel was interested in producing a freehand pipe line and was alerted to my product by Al Saxon, one of his managers and a former CHP-X employee. Mel wanted to relocate me to Virginia Beach, give me carte blanche, and recreate the CHP-X studio with, of course, a new name for the product. I’m sure my answer came very quickly.

…We decided on the name Sven-Lar. Why? Well, when I bought out CHP-X, I also got a small drawer full of metal stamps that were created for private-label work. The Sven-Lar name was conceived but never realized. Aside from having the stamp already made, there were other reasons we chose Sven-Lar. First, we were making a line of pipes in the Danish freehand tradition and also, sadly, we knew the difficulty American pipe makers had breaking the foreign market mystique barrier. The latter certainly played a big part in the demise of CHP-X.

After rereading the previous blog I was pretty certain that the pipe I was working on was another one made by Kabik. I turned my attention to restoring the pipe. I started with the clean bowl, I rubbed the bowl down with Before & After Restoration Balm to deep clean the briar bowl and the rim top as well as the briar shank. The product works to clean, enliven and protect the briar. I hand rubbed it with my fingers, working it into the exterior of the pipe. I worked it into the plateau top with a horsehair shoe brush. I wiped it off and buffed it with a soft cloth to polish it. The pipe really began to have a rich shine. I took some photos of the bowl at this point to mark the progress in the restoration. I wrapped a piece of dowel with 220 grit sandpaper and sanded out the inside of the bowl to smooth the walls. I removed all of the remaining cake on the walls of the bowl.I set the bowl aside and turned my attention to the stem. I looked over the replacement stem and decided to not use it. I went through my stem collection and found a nice brown swirled acrylic stem that I thought would look good with the pipe bowl.  It was very similar to the stem on the other Granhill I worked on so I decided to use it instead. I took photos of the two stems side by side for comparison.I sanded the tenon end with a Dremel and sanding drum and smoothed it out with 220 grit sandpaper to adjust the tenon to the same diameter as the tenon on the replacement stem. It did not take too much work to adjust the fit to the shank.I sanded out the tooth marks out of both sides of the stem with 220 grit sandpaper. I worked over the surface with sandpaper to remove the tooth chatter, marks and to smooth out the surface. There were tooth deeper tooth marks on the top side of the stem that I would need to fill in and work on. I filled in the dents with clear super glue. Once the glue cured I sanded them smooth with 220 grit sandpaper to blend them into the surface of the acrylic. I polished the stem with micromesh sanding pads – wet sanding with 1500-2400 grit pads and dry sanding with 3200-12000 grit pads. I wiped the stem down after each pad with a damp cloth to remove the sanding dust on the acrylic. I polished the stem with Before & After Pipe Stem Polish – both Fine and Extra Fine and I set it aside to dry. I polished the briar with micromesh sanding pads – wet sanding with 1500-2400 grit pads and dry sanding with 3200-12000 grit pads. I wiped the bowl down with a damp cloth after each sanding pad to remove the sanding dust. Once I had finished with the last pad I wiped it down with a light coat of olive oil to collect the dust and to give some depth to the finish. I polished stem and bowl with Blue Diamond to polish out the remaining small scratches. I gave the bowl and the stem multiple coats of carnauba wax and buffed the pipe with a clean buffing pad to raise the shine. I hand buffed it with a microfiber cloth to deepen the shine. The pipe polished up pretty nicely. The plateau on the rim top and the smooth natural oiled finish work very well with the swirled brown acrylic stem. The finished pipe is shown in the photos below. While I have worked on other Michael Kabik pipes (a CHIP-X) this is the second Granhill pipe of his that I have restored. It is well crafted and is very similar to the CHIP-X that I worked on in the past. The shape, finish and flow of the pipe and stem are very well done. The dimensions are Length: 6 1/2 inches, Height: 2 1/4 inches, Outside diameter of the bowl: 1 3/4 inches, Chamber diameter: 3/4 inches. This one will be added to the rebornpipes store soon. If you are interested in adding it to your collection send me an email to slaug@uniserve.com or send me a message on Facebook. Thanks for walking through the restoration with me as I worked over this Granhill freehand.


Transforming a Dr. Grabow “Omega”


Blog by Paresh Deshpande

“Mirror, mirror on the wall, who is the prettiest of them all?” asked this “Omega”, looking deeply into my eyes!!!!! How I wish I could have promptly replied that it was “YOU”…. but I could not get myself to say so!!!!! It was then that I decided to work on this pipe and make an attempt at its transformation.

This bent billiards has “OMEGA” stamped on the left side of the shank over “DR. GRABOW” in block capital letters while on the right side it is stamped “IMPORTED BRIAR”. A nickel ferrule adorns the end of the shank and is devoid of any stampings. An “ACE OF SPADES” on the left side breaks the monotonous black of the stem. I searched pipedia.com for information about the brand and try to place the period when this model was introduced by Dr. Grabow. The site has very detailed information about the brand and various models and is a highly recommended read. I have extracted only the relevant portions here:-

Dr. Grabow pipes are the quintessential American brand. Made with care in the Blue Ridge Mountains of North Carolina, this 60-year-old line of inexpensive tobacco pipes is a favorite among new pipe smokers for its consistency and good taste. The famous smoking pipe brand gets its name from the owner Dr Grabow, a general physician who lived in Chicago.

Made in America since the 1930’s, Dr. Grabow tobacco pipes were named after “the good doctor” to help polish the smudged image of smoking a pipe to newly tobacco-leery American public. The line of pipes bearing Dr. Grabow’s name have become one of the best known pipe brands in North America.

The Dr Grabow pipes first began with Louis B Linkman of the M.Linkman and Co of Chicago. The trademark “Dr Grabow” itself actually begun at about 1932 and had the US patent number 1.896,800.

The birth of the Dr Grabow smoking pipe is simple enough. It started off when Dr Grabow himself and his acquaintance Dr Linkman regularly visited the local pharmacist at Brown’s Drug Store in Lincoln Park Chicago.

Dr Linkman was on the lookout for a doctor’s name to Christian an innovative line of pipes in order to mellow out the smoking apparel’s smoggy image. He asked Dr Grabow to allow him to use his name to which he agreed and the name has stuck since then. Linkman continued to manufacture his Dr Grabow pipes until 1953. 

The earliest of these exclusive pipes were stamped both with Linkman’s and Dr Grabow. They included a propeller emblem that was white in color at the top of the mouthpiece.

In 1944 the white propeller emblem was replaced with a white spade, a move that heralded the introduction of Linkman’s new Dr Grabow pipes. All of the newer entries included most of the earlier favorites as well as “TRU-GRAIN” and “SELECT”. Later models of Dr Grabow pipes were described as Imported Briar.

I further searched pipedia.com and found detailed and comprehensive information on the various lines and models of Dr. Grabow through the years and was able to date this Omega to 1975. Here is the link; https://pipedia.org/wiki/Dr._Grabow_Models_(Series,Line)_Names_Through_the_Years

INITIAL VISUAL INSPECTION

The first thing that struck me like a jolt was the reddish brown/ very dark reddish purple, OMG!!!! I cannot even describe the color of the stain on this pipe; it was that unappealing to the eye to say the least. It just surprises me as to why my grand old man even bought it, if he had indeed bought it. You just feel like turning away from it. To add to its color woes, the stummel is covered in dust and grime of storage from all these years. The stummel has Custombilt like rustication emanating from the joint where the shank and stummel meet and move away from the bottom towards the rim top. Within this rustication we have very fine thin lines. The raised portion of these rustication have the same reddish brown coloration while within these rustication, it has dark color. The shank is plain and devoid of any rustication. There appears to be some kind of coat covering the entire stummel. All said and done, this coloration has to go!!!!! How am I going to do it, I really do not know, but IT HAS TO GO!!!!!! The chamber is lightly caked and has overflow of lava on the rim top. This will have to be cleaned and sanded down if the rim top surface is damaged underneath the overflowing lava. The inner and outer edge has minor dents and dings.The stem appears to be ebonite and has a plastic feel to it. The stem is a copy of the famed Peterson’s P-Lip button with the difference in the bore being dead center on the end of the button as opposed to being on the top surface. It has extensive damage to the upper and lower surface of the lip. It is peppered with tooth chatter and has one deep bite mark each on both the surfaces. This will have to be addressed.The mortise is relatively clean and air flows freely through the airway in the pipe and shank.The nickel ferrule has lost its shine and shows minor spots of corrosion. I think it will polish up nicely.THE PROCESS
I had made a promise to this pipe that I shall make it “the prettiest of them all…” (Well, actually it was like “TRY” really) and thus the first and most logical start point was to address the color of the stummel. To make this pipe attractive, I felt that I should attempt to do the following:-

(a) Highlight the rustications.

(b) Get some shine on the stummel.

(c) Attempt to reveal the grains on the smooth shank.

(d) Highlight the contrast between the raised portions of the rustication with that of within the rustication.

Having identified what needs to be done, I turned my attention to how it could be done. SWOT analysis dictated that I needed to adopt processes which did not require any stains or coatings of lacquer as I did not have any. Also since I do not have any mechanical equipment, I had to adopt simpler and manual techniques. I decided that the best and easiest course of action for me would be to get rid of the original stain.

I started by reaming the chamber with a Kleen Reem pipe reamer and fabricated knife. I removed the complete cake from the chamber. I further sanded down the walls of the chamber with a 220 grit sand paper to smooth the walls and took the cake back down to the bare briar. I gently scraped out the little overflow of lava from the rim top. I also cleaned out the mortise and the shank with cue tips and pipe cleaners dipped in alcohol.Once the chamber was cleaned, I turned my attention to the stummel and tried to get rid of the lacquer coating. I started by wet sanding with a 1500 grit micromesh pad and soon realized that it would not work. I tried sanding with 800 grit sand paper without any success. Soon I found myself sanding the stummel with 150 grit sand paper. The lacquer was very difficult to get rid off and after a considerable time, I was finally able to completely remove the lacquer coating. Believe you me, my fingers had started to hurt and sitting at the table for 3-4 hours at a stretch caused cramps in my back. But the end result was pleasing.

Then began the arduous and time consuming process of sanding the stummel with micromesh pads. I proceeded to sand the stummel with micromesh pads, going through wet sanding with 1500-2400 pads and dry sanding with 3200- 12000 grit pads. I was very pleased with the way the stummel had turned out. I decided that I liked this finish and after further cleaning and polishing, the stummel would look just beautiful. Once I was through with micromesh pads, I cleaned the stummel with undiluted Murphy’s oil soap and tooth brush. I paid special attention to the deep areas of the rustication, thoroughly cleaning it with the brush. I dried the bowl with cotton cloth and paper towels.I rubbed “Before and After Restoration balm” in to the stummel with fingers deep into the rustications and let it rest for a few minutes before I buffed it with a horse hair brush. Finally, I polished the stummel with a soft cotton cloth and muscle power!!!! I also polished the nickel ferrule with a jeweler’s cloth. Luckily, the corrosion was superficial and polished up nicely. Turning my attention to the badly damaged stem, I start by cleaning it with cotton pads dipped in isopropyl alcohol. I flamed the stem surface with a Bic lighter to raise the tooth chatter. The deeper tooth chatter and bite marks were filled with clear CA superglue. Thereafter began the time consuming process of curing, sanding with flat head needle file, 220 grit sand paper and finally by micromesh pads. In all, I had to repeat the fill and sand procedure thrice before resorting to final polish using micromesh pads. I also cleaned out the internals of the stem with pipe cleaners dipped in alcohol. To finish the pipe, I rubbed a small quantity of Halcyon wax II on to the stummel and gave it a nice polish. The pipe now does look stunning. I love the way the pipe has turned out and I can proudly reply back to this Omega “IT’S YOU!!!!!!” The finished pipe is shown below.

Stem Repair on a Savinelli Silver


Blog by Paresh Deshpande

I have been simultaneously working on the stem repair of CHACOM PANACHE #44 (https://rebornpipes.com/2018/08/26/chacom-panache-44/) and this SAVINELLI SILVER. Both the pipes had similar damage to their stems; a gaping hole in the stem exposing airway of the stem. As stated in my write up on the former, I had primarily purchased these pipes to gain hands down experience in major stem repairs and stem reconstruction. That both these pipes were beautiful was an added bonus!!!!!

This fancy Dublin Sav has beautiful mixed grain on the right side of the bowl while the left side has lovely birdseye grain. The front and back of the bowl, lower and upper surface of the shank has nicely packed cross grains. A sterling silver band adorns this Sav and is stamped on the upper surface with “925” in an elongated hexagon over “SAVINELLI”. On the lower surface, this band is stamped as “STERLING” over “MOUNTED”. All stampings are in block capital letters. On top of the oval shank, towards the shank end, it bears the stamp “SAVINELLI” over “SILVER” while at the bottom, it is stamped with Savinelli shield, followed by “915”, followed by size “KS” over “ITALY” in block capital letters. The saddle stem bears the Sav Shield logo on top of the saddle. History of Savinelli pipes is very well documented on pipedia.com, however, due to a very large line up, frequent changes to models, shapes and finishes, I came to a halt when I tried to date this Savinelli. I earnestly request all the knowledgeable veterans of pipe world to share any bits and pieces of information on this pipe.

INITIAL VISUAL INSPECTION

The stummel is covered in oils and tars giving a dull and lifeless appearance to the pipe. There is no heavy build up of cake in the chamber and also overflow of lava on the rim top. However, a slight darkening is seen on the right side of the rim. Some scratches are also seen on the rim top which will need to be addressed. It is the stem which has the maximum damage. A large hole can be seen on the upper surface of the stem near the button end, exposing that portion of the airway. There are two deep bite marks on the upper surface of the stem. The button on both surfaces of the stem has been chewed and will need to be reconstructed.The mortise shows some accumulation of previously smoked tobacco oils and tars, but it is nothing as compared to some pipes which I have seen.The airway is not clogged and will only require minor cleaning.

THE PROCESS

Since I had worked on the stem of the CHACOM simultaneously with that of this Sav, the process and difficulties were the same. I would request those interested in knowing the travesties I encountered and overcoming these, to please read the write up on the stem repair of CHACOM PANACHE #44 (https://rebornpipes.com/2018/08/26/chacom-panache-44/). Here are the progressive pictures of the restoration process. Having finished the stem repair (some imperfections are seen, but cannot be discerned in person), I turn my attention to the stummel. I reamed out the chamber using a Kleen Reem pipe reamer and fabricated knife. I removed the complete cake from the chamber. I further sanded down the walls of the chamber with a 220 grit sand paper to smooth the walls and took the cake back down to the bare briar. I gently scraped out the little overflow of lava from the rim top.I cleaned out the internals of the shank with pipe cleaners and cue tips dipped in isopropyl alcohol. I wiped the inside of the chamber with cotton swabs dipped in alcohol. There was very little amount of cake and the shank was pretty clean too. It appears that though the pipe was well smoked as is apparent from the stem condition, it was well cared for.I cleaned the stummel with undiluted Murphy’s oil soap and a tooth brush. I washed the stummel under running water and dried it using paper towels and soft absorbent cotton cloth. Once the stummel had dried, I felt that the bowl was still appearing dull and lackluster. The grains, though visible, needed to be highlighted. To achieve the desired results, I sanded the stummel with micromesh pads, wet sanding with 1500 to 2400 grit pads and dry sanding with 3200 to 12000 grit pads. The rim top was also sanded down with micromesh pads to remove/ reduce the darkened areas. I wiped the bowl with a moist soft cotton cloth to remove the sanding dust after each pad. The stummel now looks beautiful with the grains on full display. I finished the bowl by rubbing “Before and After Restoration Balm” with my hands and polished it with a soft cotton cloth. The bowl now appears to be alive and the grains pop out and are on display to be enjoyed. This pipe, along with the CHACOM, will always find a place of pride in my collection for being first major stem repair project. The finished pipe is shown below.