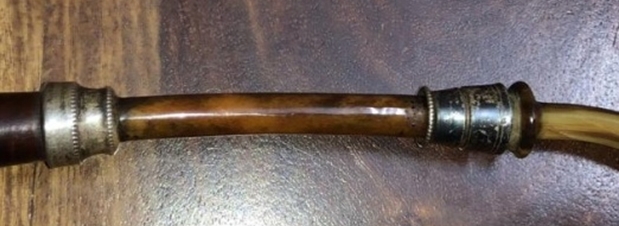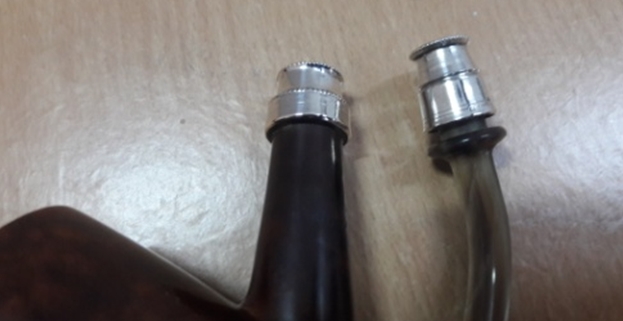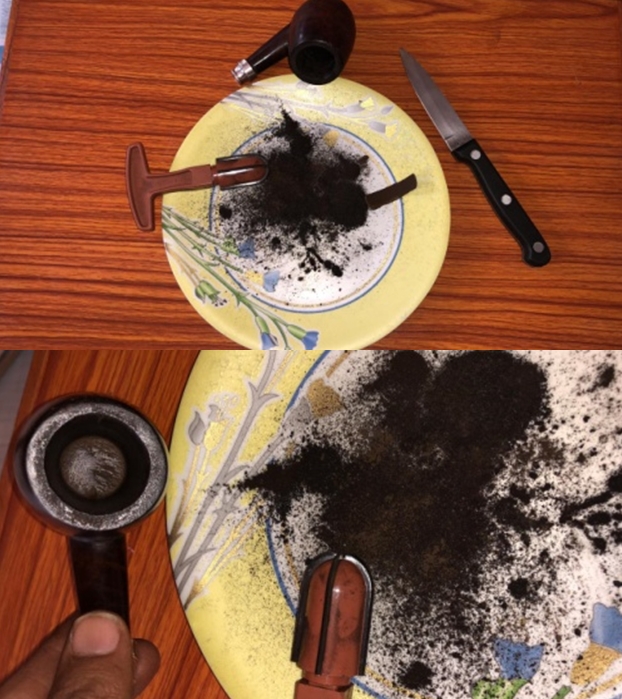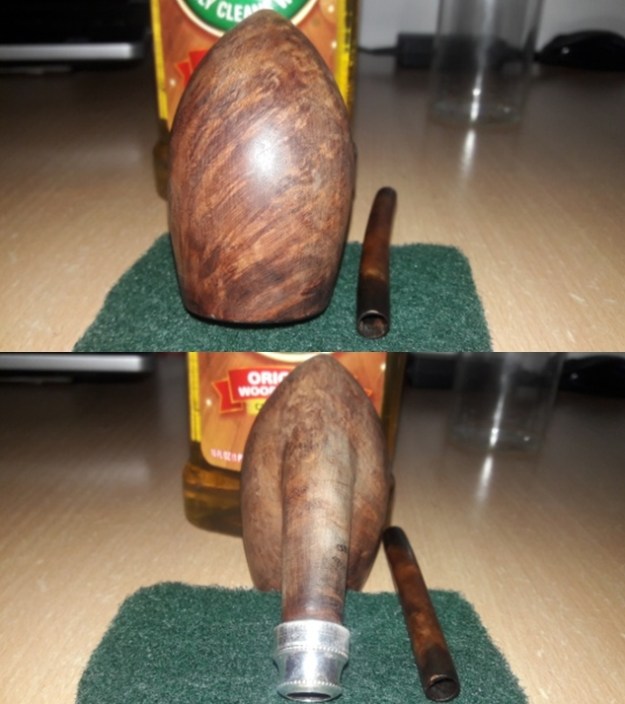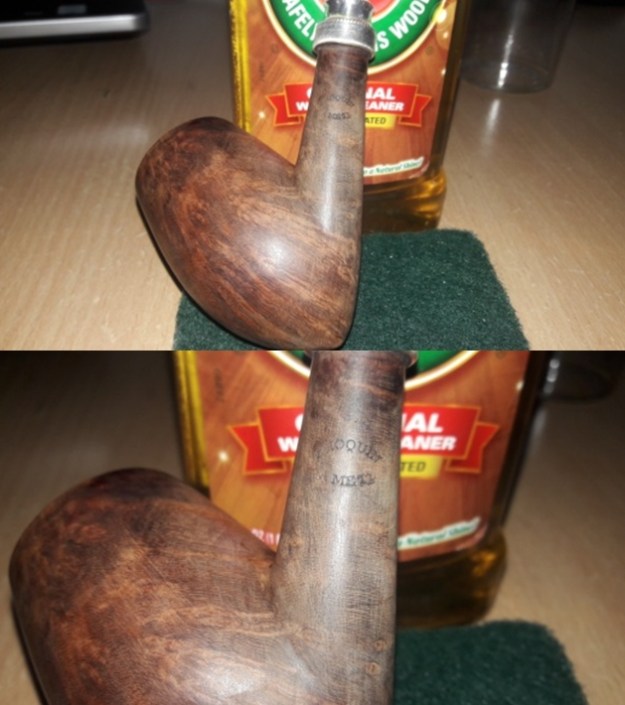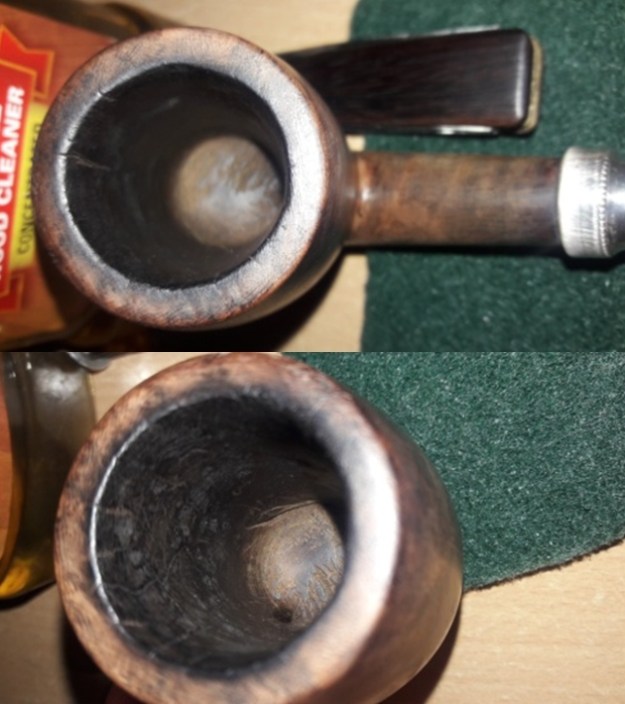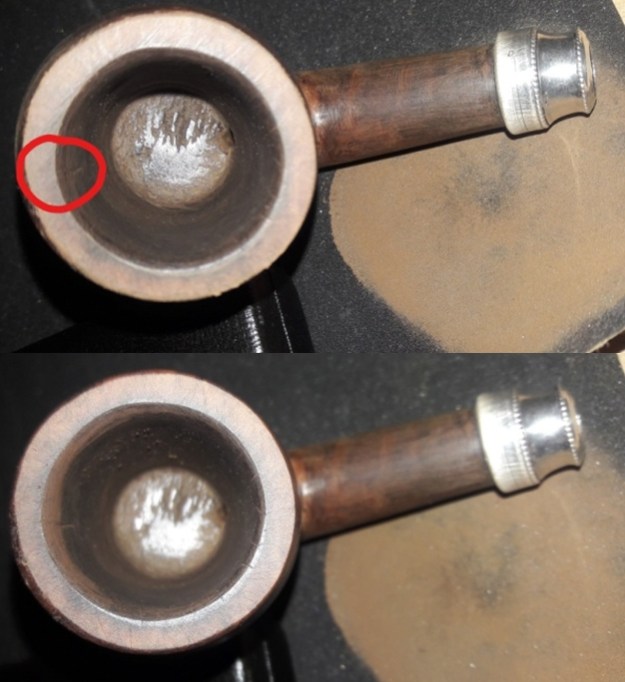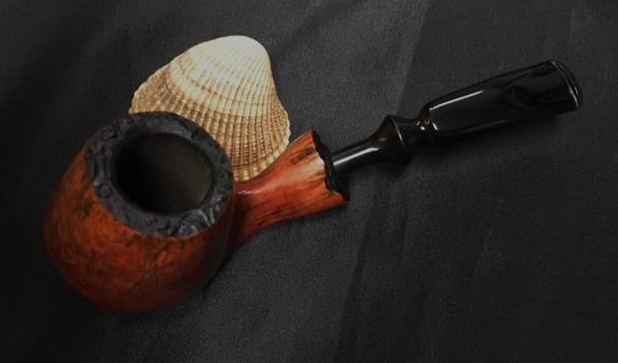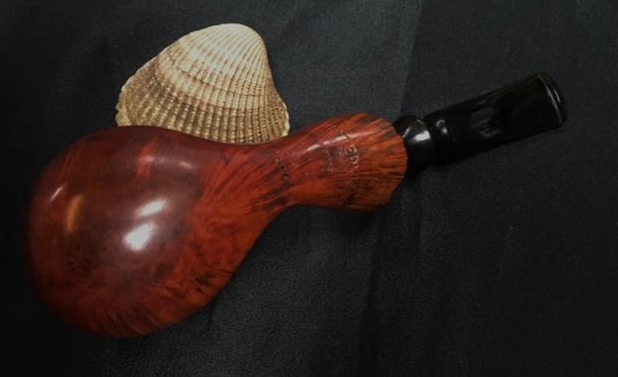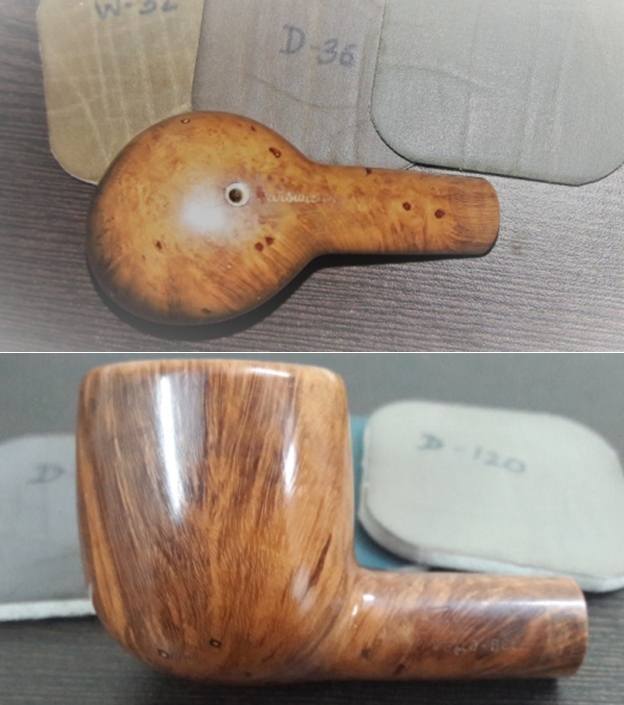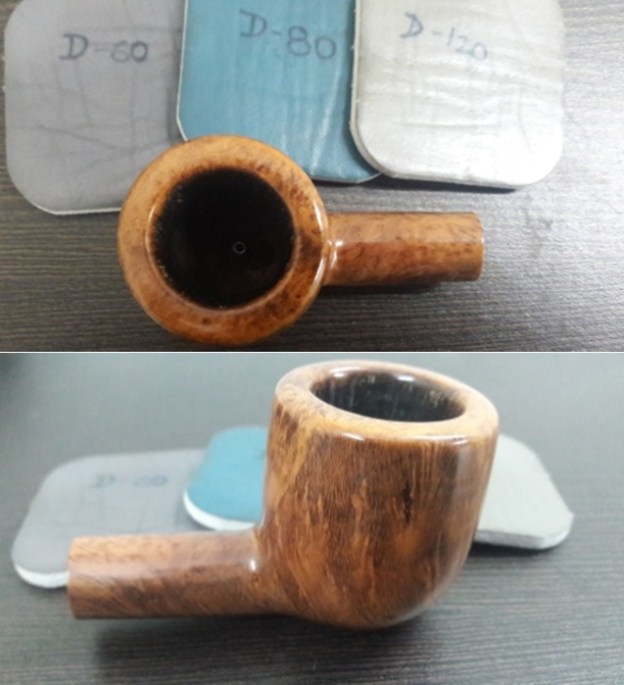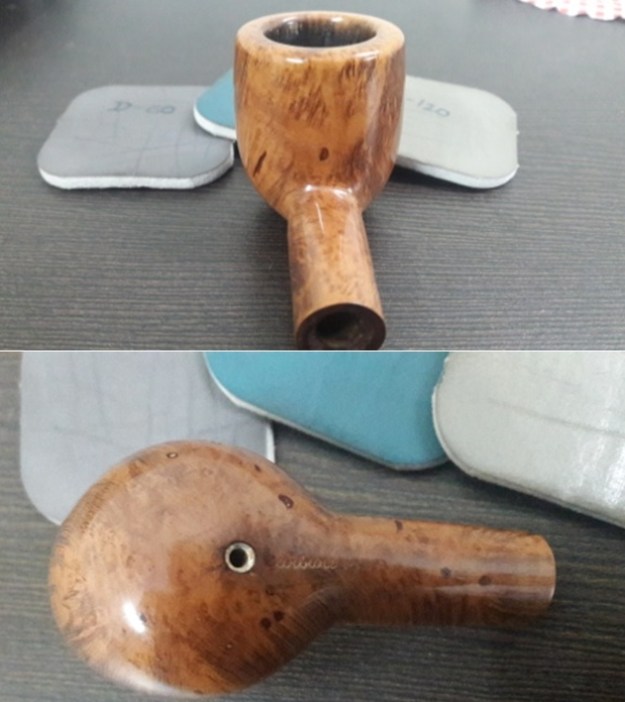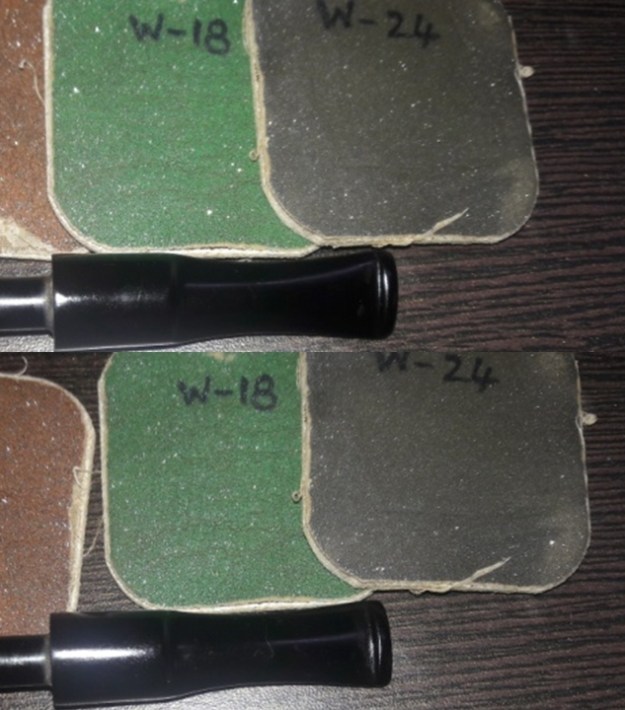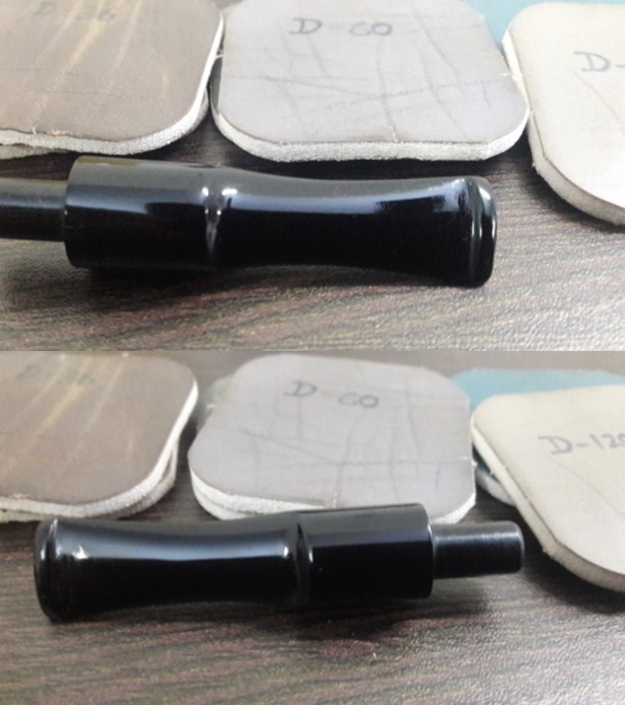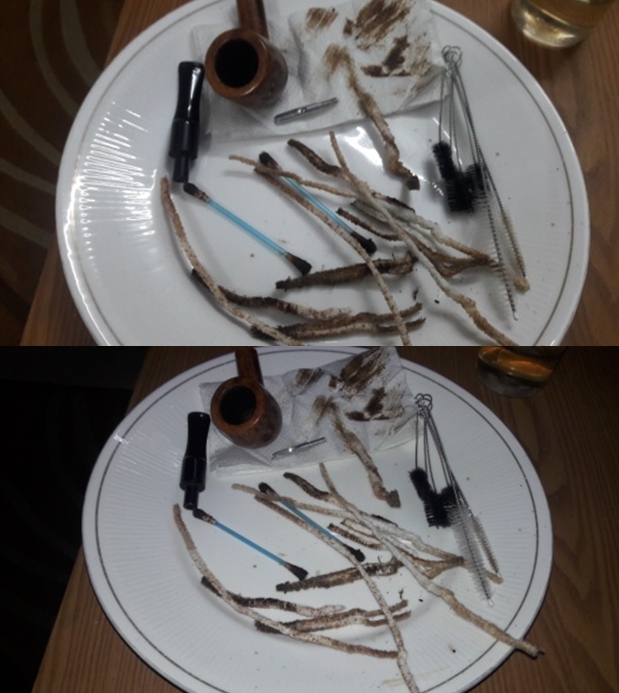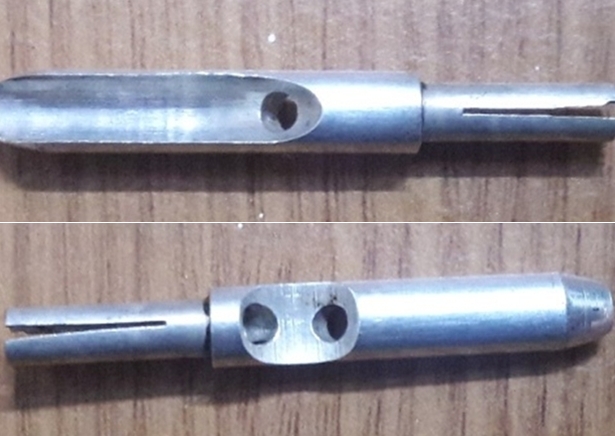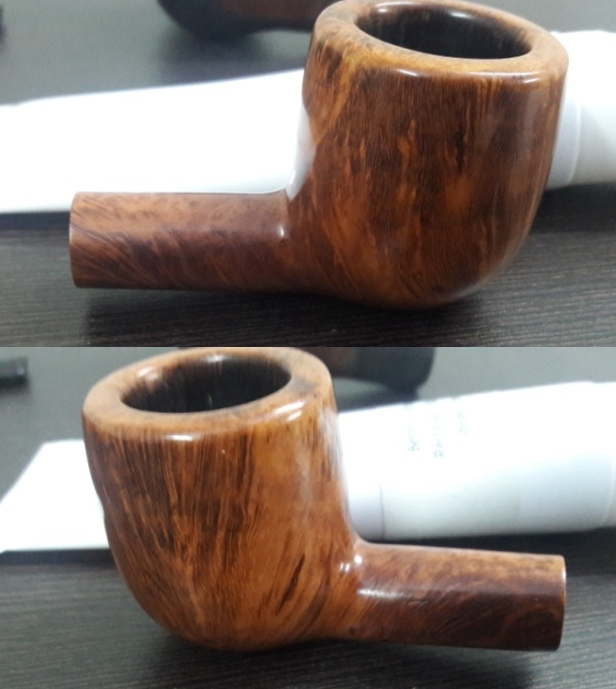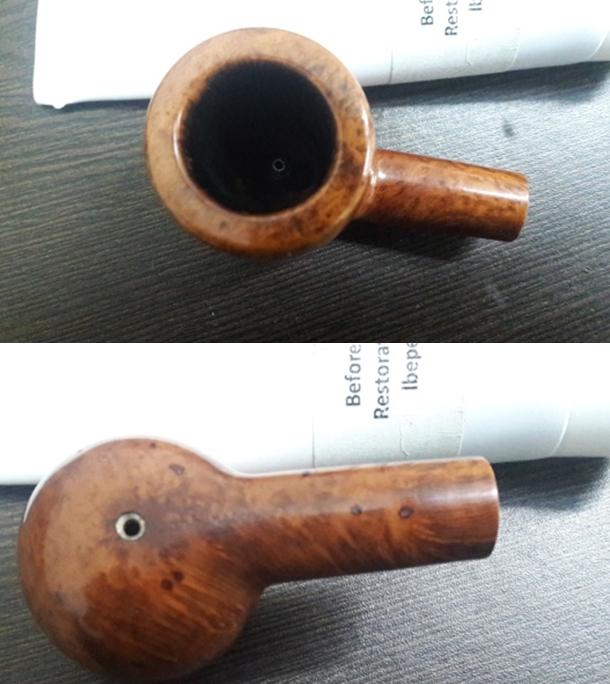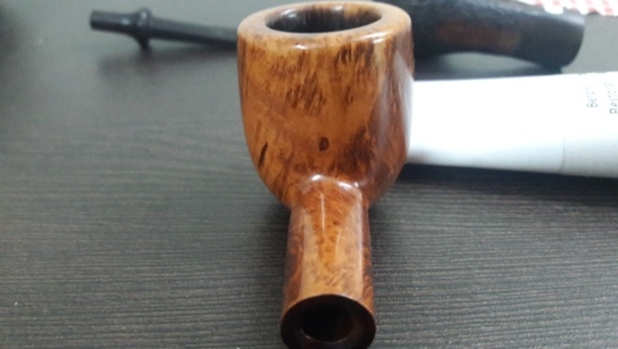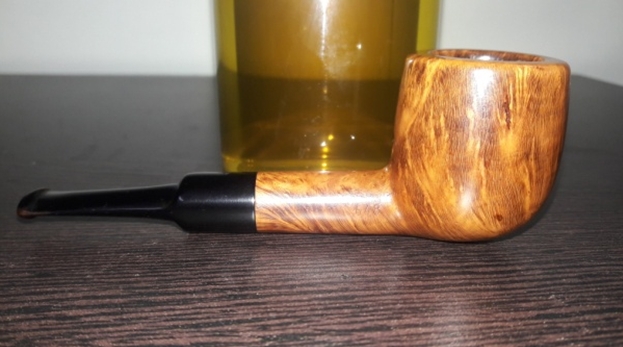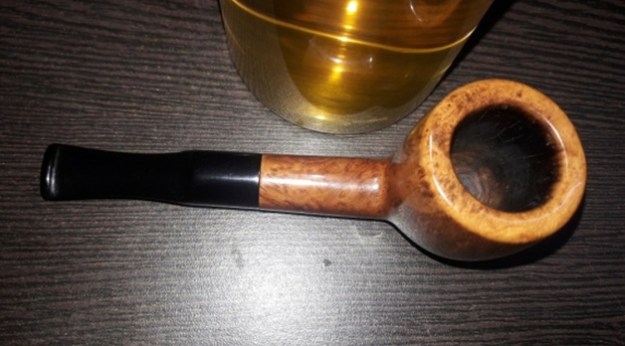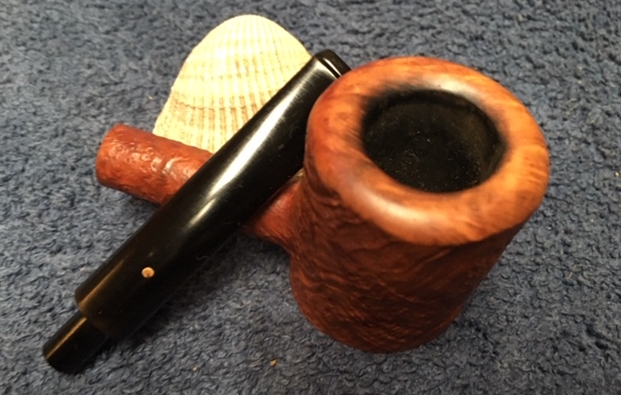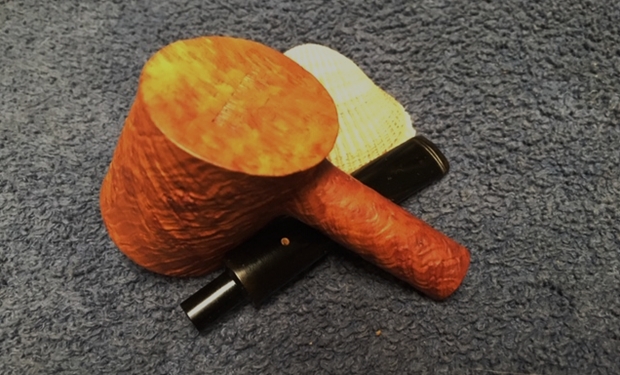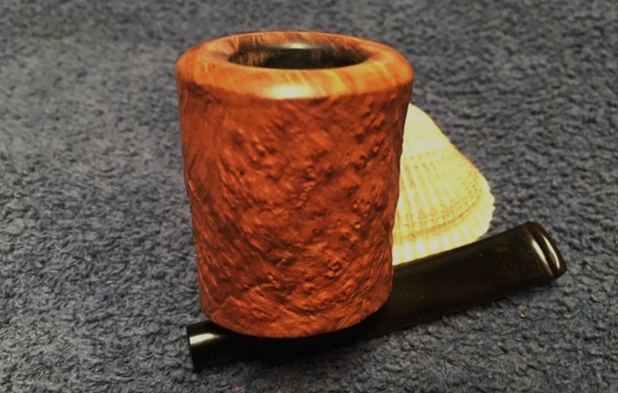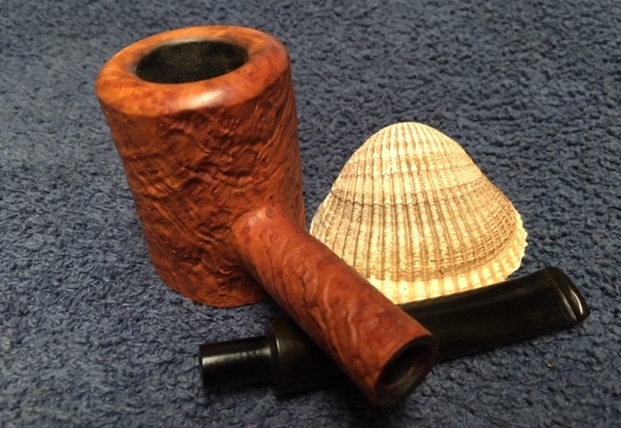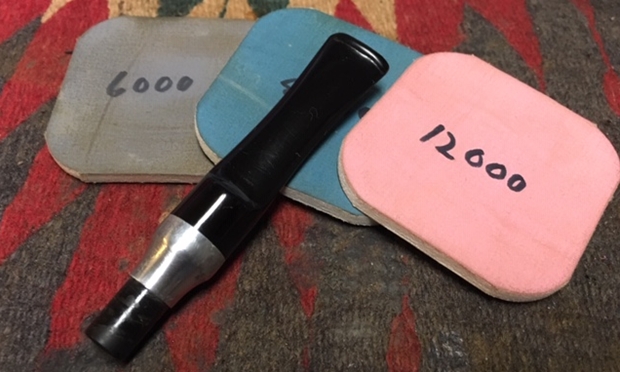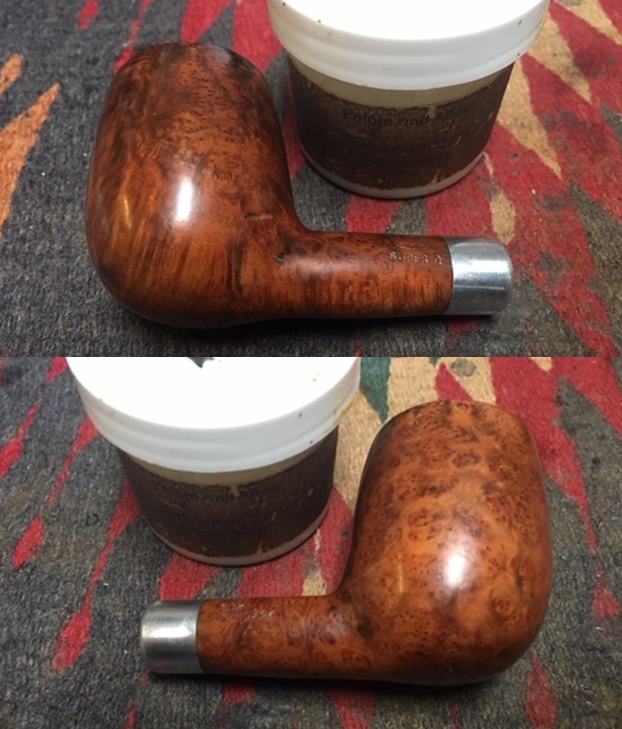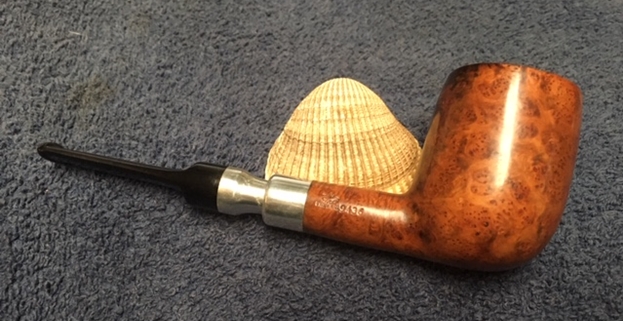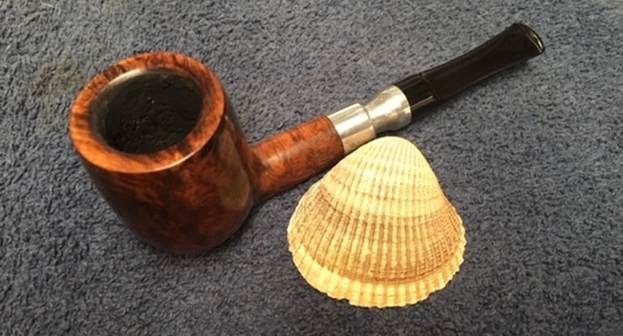
Tag Archives: shaping a stem

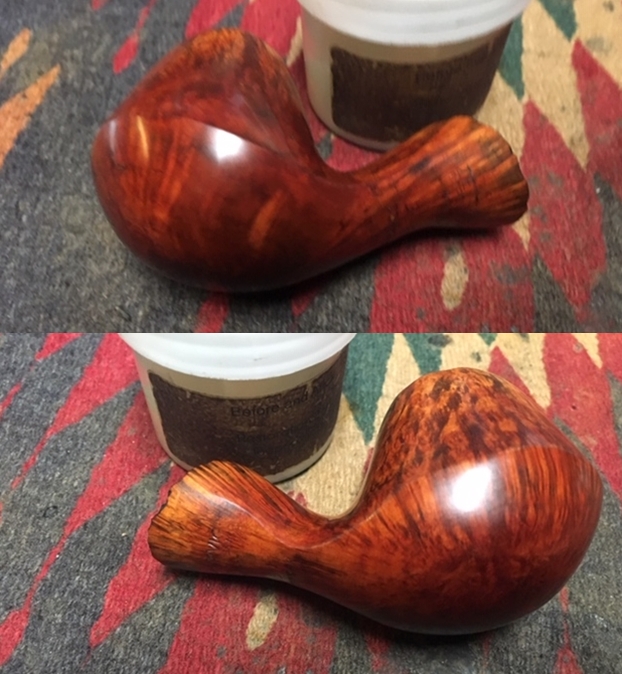
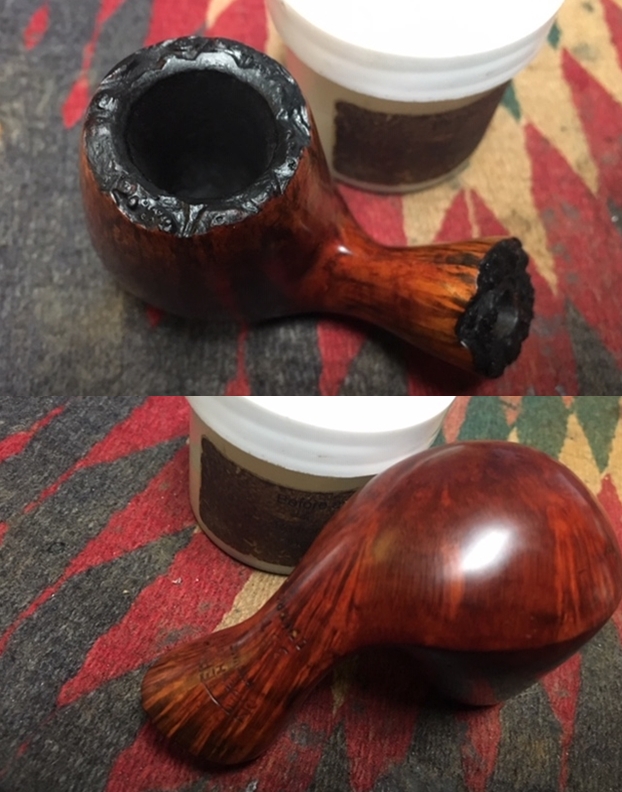
Restoring an Amazing 1963 Dunhill Tanshell Cherrywood 475


Blog by Steve Laug

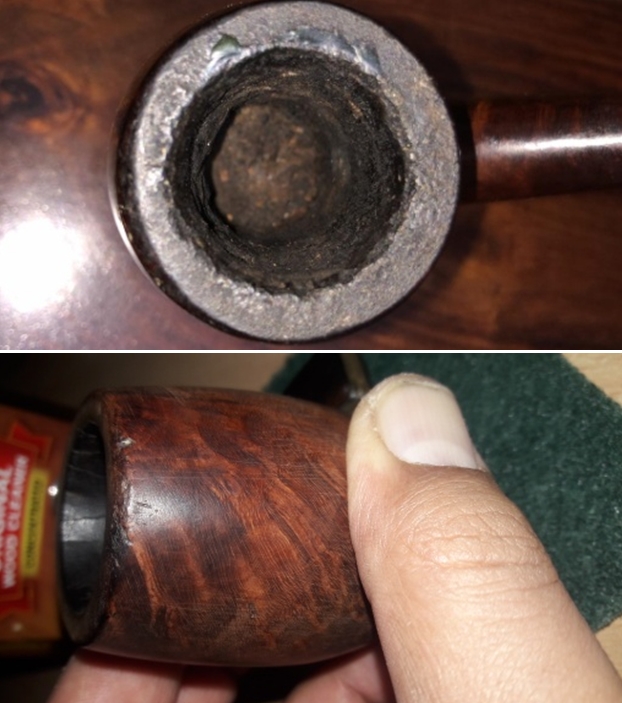
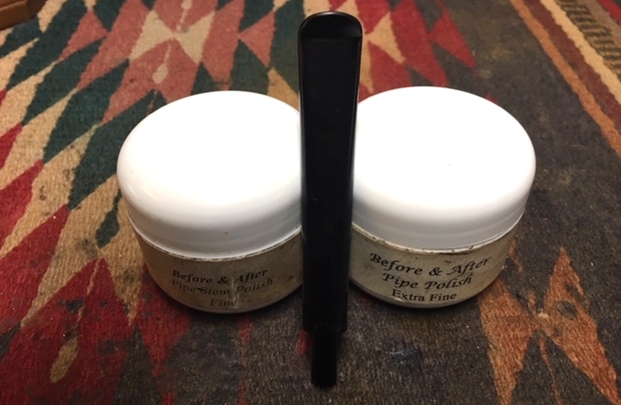
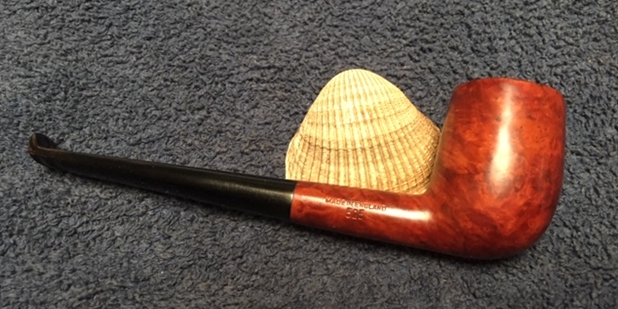
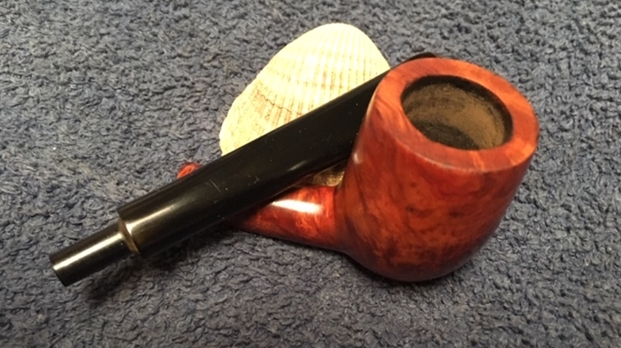
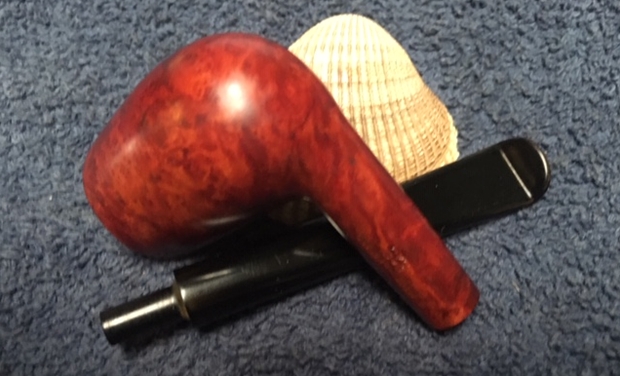
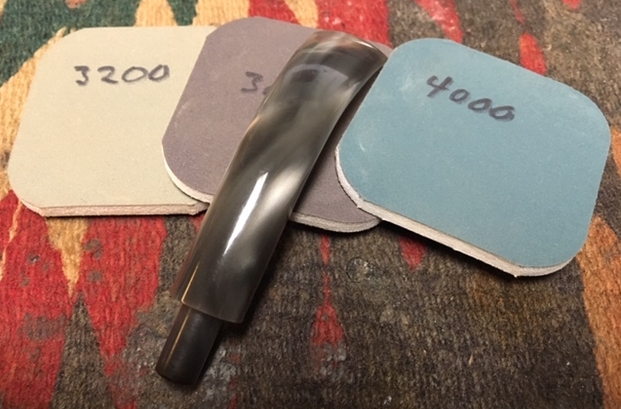
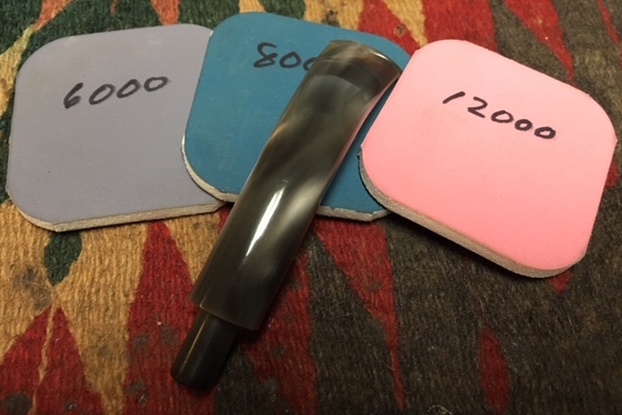
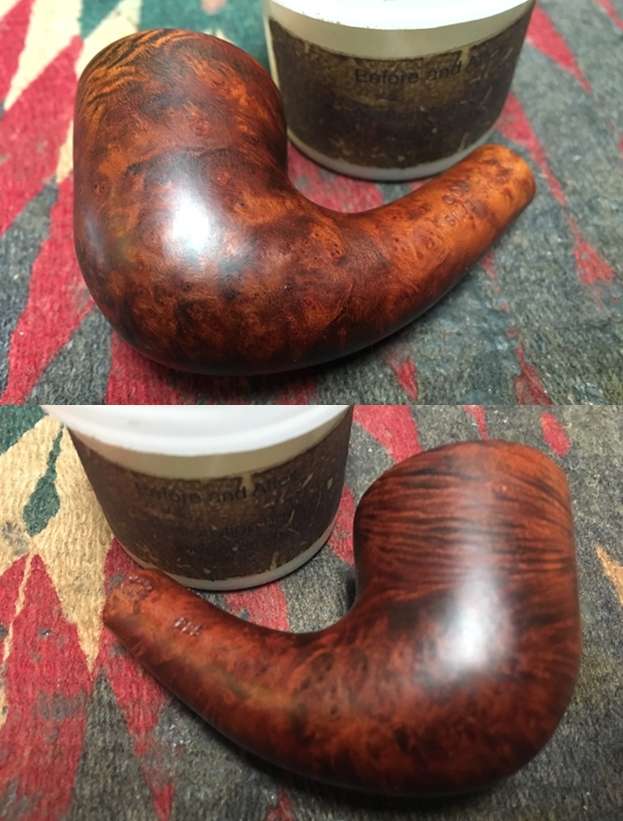
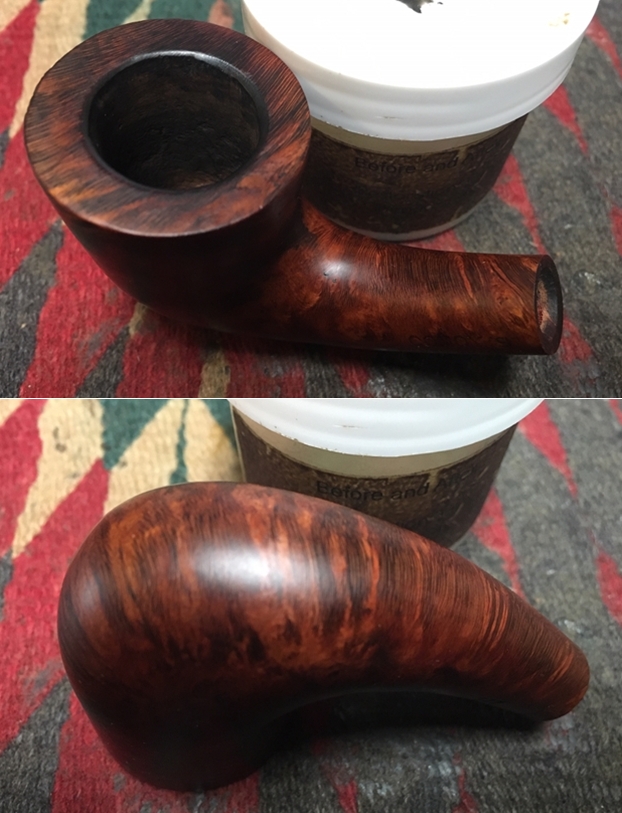
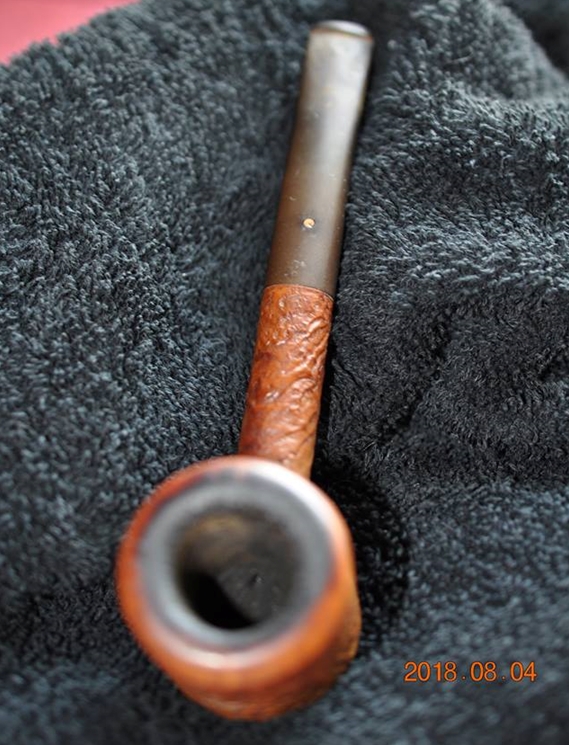
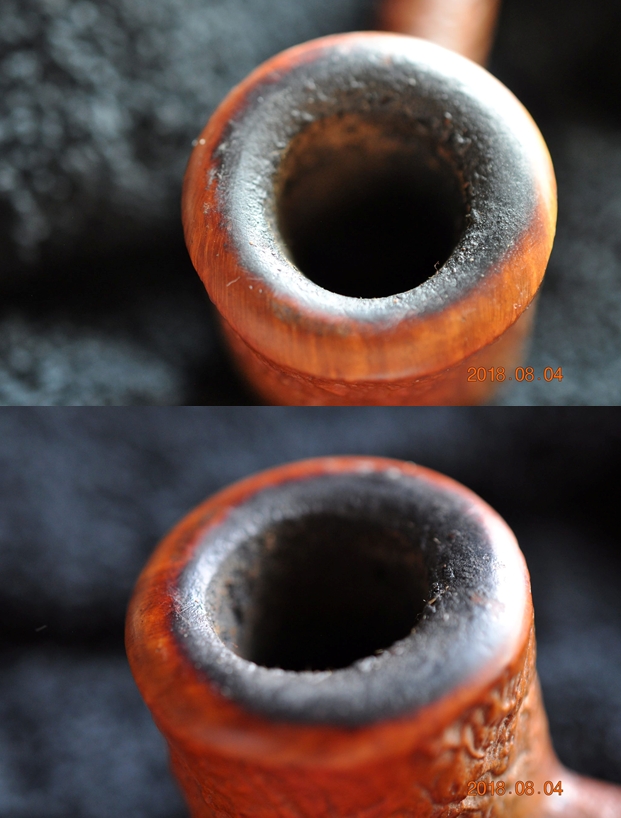
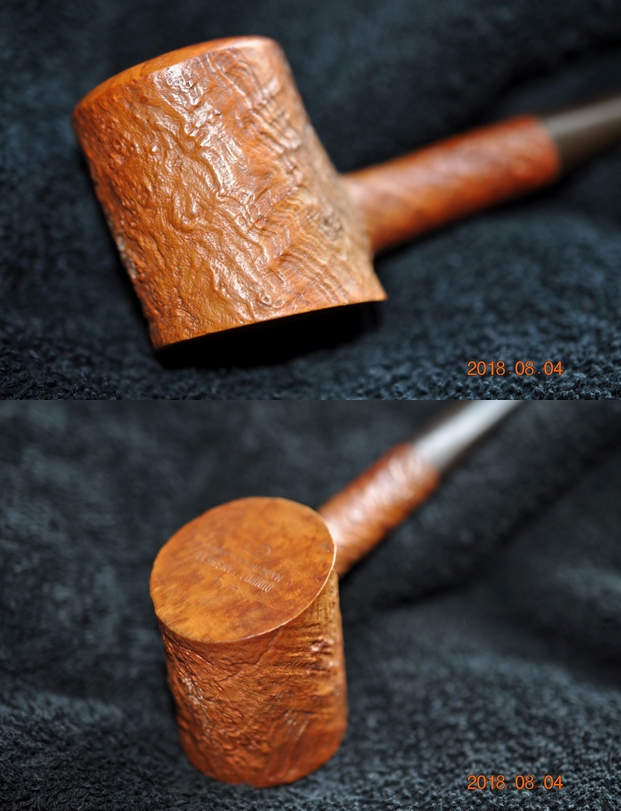
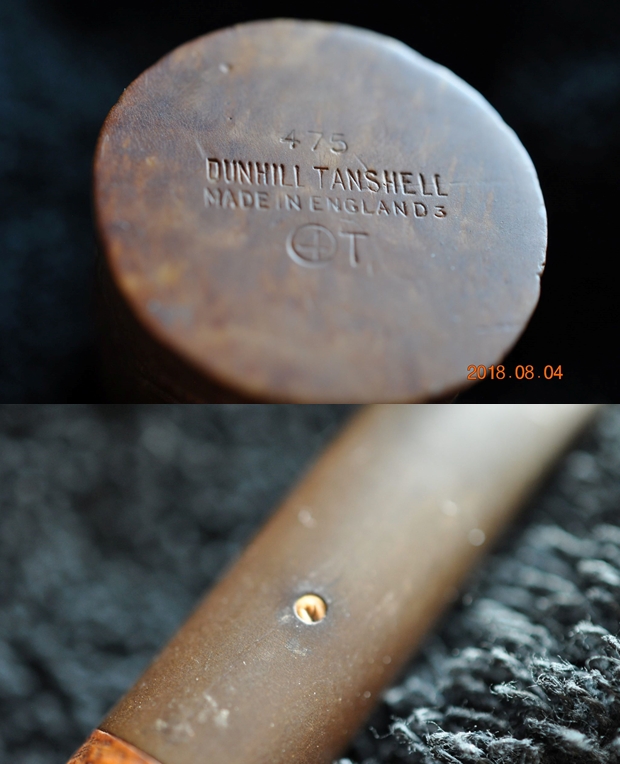
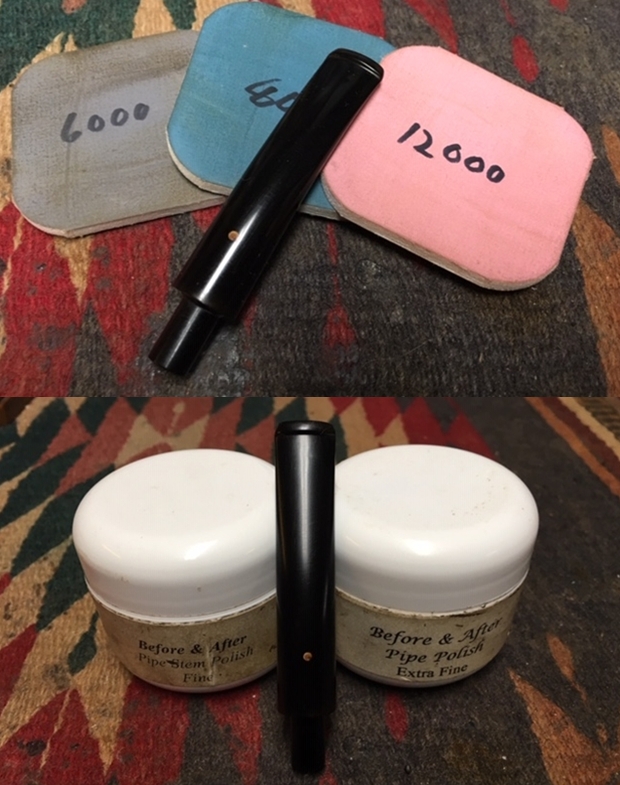
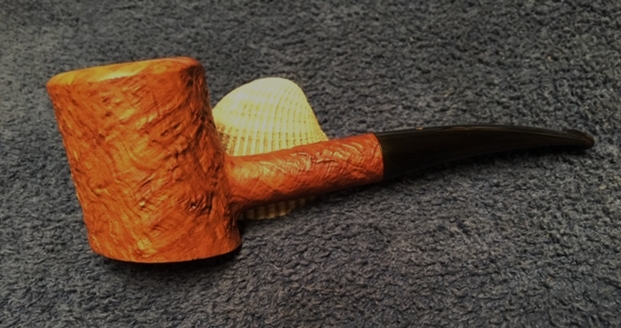
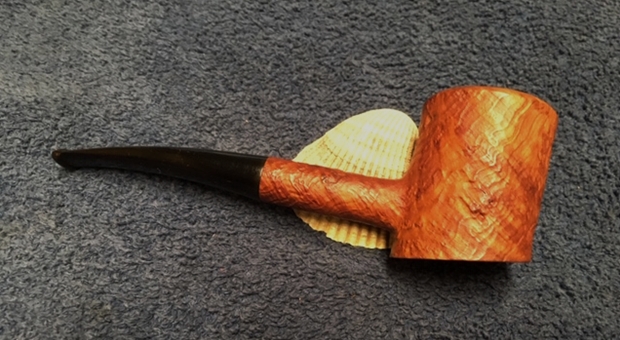
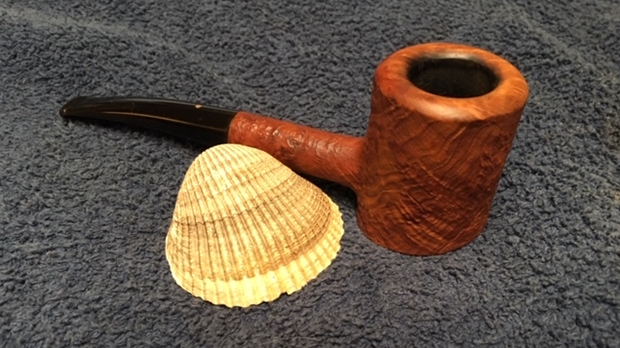
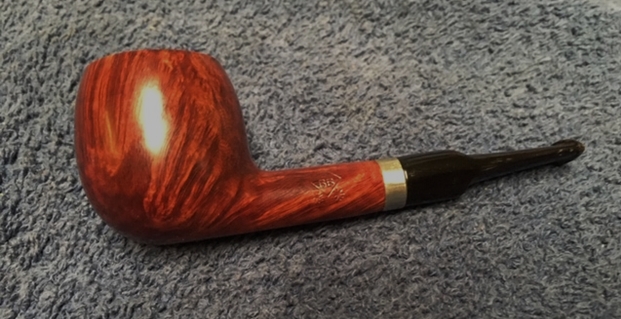
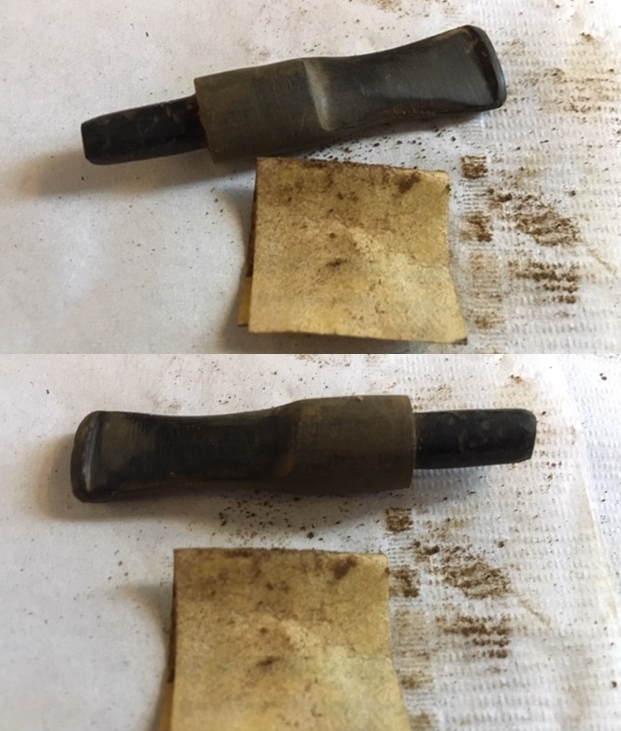
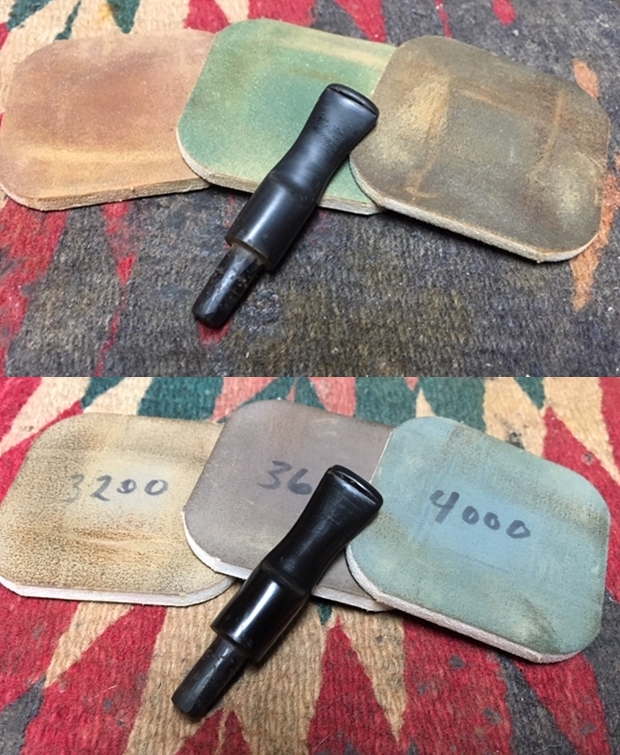
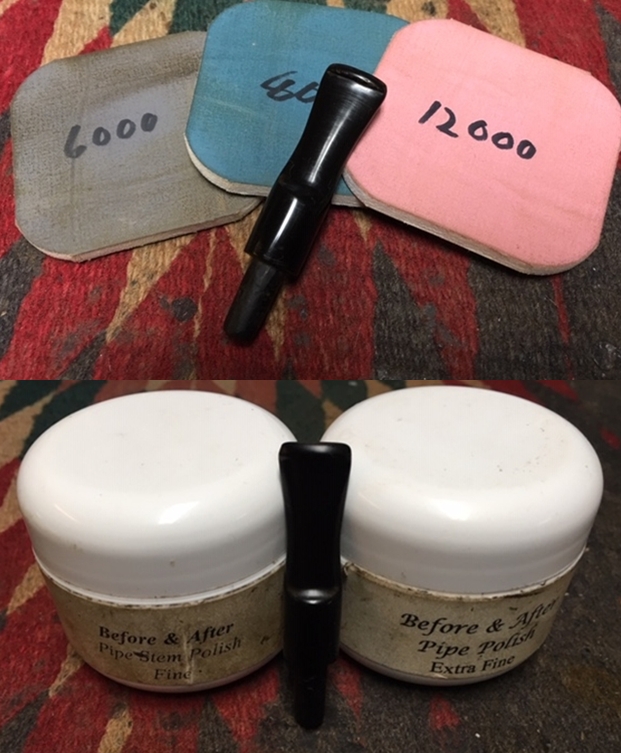
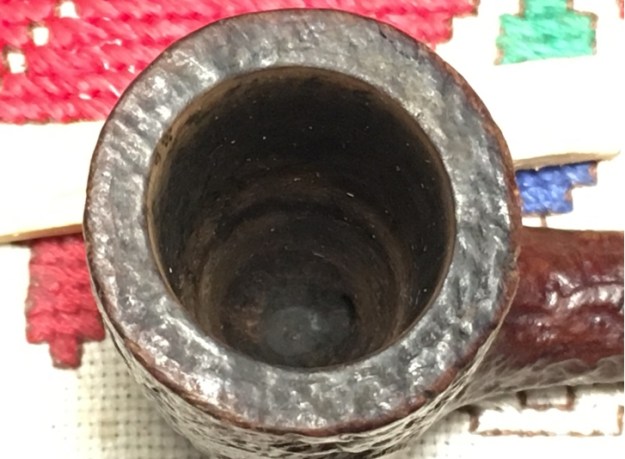
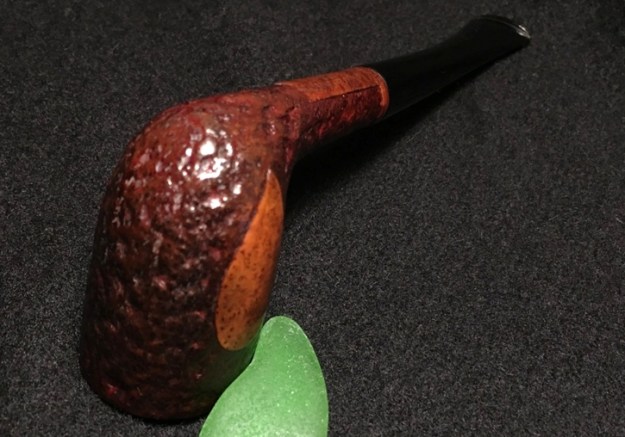
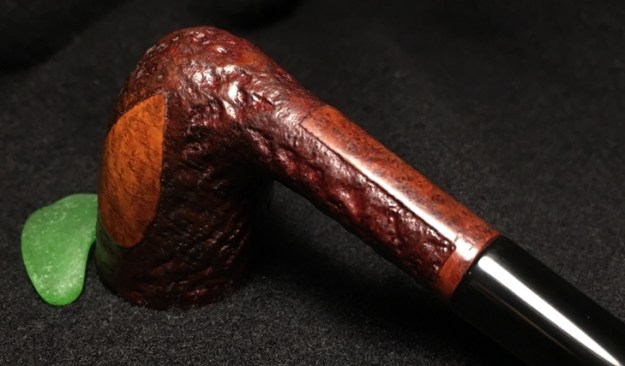
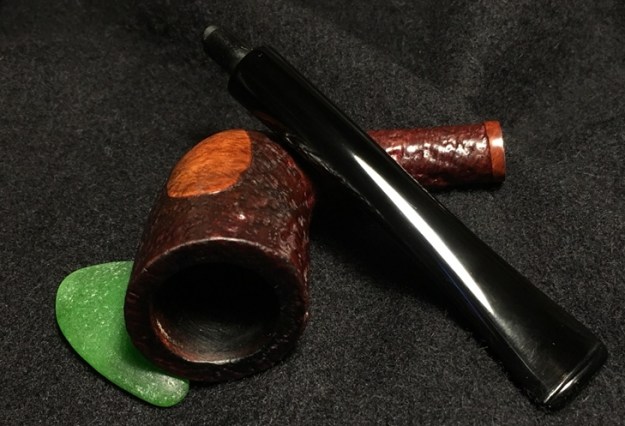
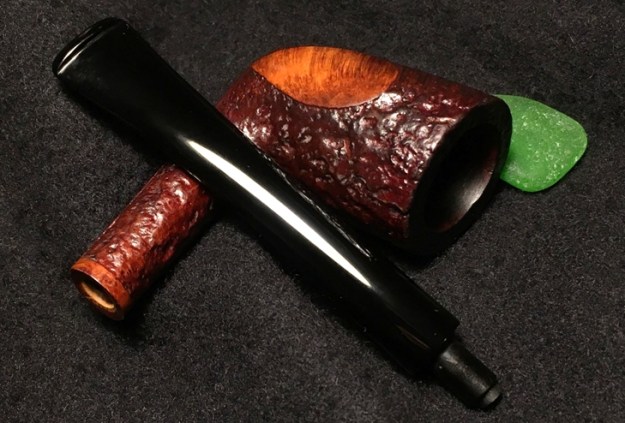
Jeff picked up a pair of Dunhill pipes somewhere on his journeys. He becoming a very selective Pipe Hunter and this twosome are really quite nice. I am working on the first one of those at this time. It is a Dunhill Sandblast in a Cherrywood/Poker shape. It has a nice rugged blast with a smooth, rounded rim top and bowl bottom. It is stamped on the bottom of the smooth bowl. It reads 475 (shape number) over Dunhill Tanshell. Under that is stamped Made in England followed by a 3. Underneath that it has a 4 in circle and a T next to that. The stamping tells me that the pipe is a Tanshell (both the name and the T). The 475 is the shape number (I wonder if the 4 on the front is the size). The circle 4 is the size of the pipe. The 3 following the England stamp tells me that the pipe was made in 1963. Jeff took the following photos to show the condition of the pipe. The finish is dirty as can be seen in this photo.The stem is oxidized and there was a chip missing out of the white spot. The finish is dirty as noted above. There is an overflow of lava on the crowned rim top and a thick cake in the bowl.He took two photos of the rim top to show the thick lava overflow on the inner edge of the rim and the top of the bowl itself. You can also see the thick cake in the bowl.The deep grooves of the sandblast are dirty and there is debris in the grooves and crevices of the finish.The stamping on the underside of the bowl is very readable and gives the information that is written in the opening paragraph of the blog. The photo of the stem shows the chip in the white spot on the top of the stem. The white spot was slightly yellowed.The stem showed tooth chatter, marks and wear on the button on both sides. Jeff had reamed the bowl with a PipNet pipe reamer and followed up with a Savinelli Fitsall pipe knife to remove the cake. He scrubbed out the mortise and the airway in the shank and the stem with alcohol, cotton swabs and pipe cleaners. He scrubbed the exterior of the bowl, rim, shank and stem with a tooth brush and Murphy’s Oil Soap to remove the oils, lava and tars on the rim and the grime on the finish of the bowl. He rinsed it under running water. He dried it off with a soft cloth. The rim was thoroughly cleaned and without the grime the finish looked really good.  The rim had some darkening around the inner edge of the bowl. The vulcanite stem would need to be worked on but I really like the profile it cast. I took photos of the pipe to show its condition before I started my work on it.  I took close up photos of the bowl and rim top as well as the stem. You can see the condition of the rim top and bowl in the first photo. Jeff was able to remove all of the tar and oils but you can now see the darkening around the inner edge. The vulcanite stem had tooth chatter and some light tooth marks on the top and underside of the stem both on the surface of the button and just ahead it. There was one deeper tooth mark on the topside near the button.I started my refurbishing work by addressing the darkening on the rim top and inner edge. I first lightly sanded it with a worn piece of 220 grit sandpaper. I find that using a bit more tired piece of sandpaper works wonders on the dark edge without scratching the rim surface like a new piece. I followed that by wet sanding it with 1500 grit micromesh.I rubbed down the smooth and the sandblast briar with Before & After Restoration Balm. I worked it into the smooth surface of the briar on the rim and the bottom of the bowl. I worked it into the nooks and crannies of the sandblast on the bowl and shank with my fingertips and with a horsehair shoe brush. I wanted to make sure that the balm got into the deep crevices to do its work. The balm works to clean, enliven and protect the briar. I let it sit for a little while and then buffed with a cotton cloth to raise the shine. The following photos show the bowl at this point in the restoration process. The rim looks much better than when I started but still needs to be polished and buffed to raise a shine on it. I sanded out the tooth chatter and tooth marks on the stem surfaces. I put a drop of clear superglue in the chip on the white spot and sanded it smooth.I polished the vulcanite stem with micromesh sanding pads – wet sanding with 1500-2400 grit sanding pads and dry sanding it with 3200-12000 grit sanding pads. I wiped it down after each sanding pad with Obsidian Oil. I polished it further with Before & After Pipe Polish – both Fine and Extra Fine polishes and gave it a final coat of Obsidian Oil and set it aside to dry. I the polished stem and the smooth portions of the bowl with Blue Diamond to polish out the remaining small scratches and raise the shine. I gave the stem several coats of carnauba wax and the bowl several coats of Conservator’s Wax then buffed the pipe with a clean buffing pad to raise the shine. I hand buffed it with a microfiber cloth to deepen the shine. The pipe polished up pretty nicely. This turned out to be a beautiful pipe in terms of shape and finish. This is a nice looking Dunhill Cherrywood pipe. The finished pipe is shown in the photos below. The dimensions are Length: 5 1/2 inches, Height: 1 3/4 inches, Outside diameter of the bowl: 1 1/2 inches, Chamber diameter: ¾ of an inch. Thanks for walking through the restoration with me as I worked this beautiful little Dunhill sandblast. It will soon be heading to India to join Paresh’s collection. Thanks for looking.

A Tiny 2 Star BBB 8881 Apple/Globe Provided An Interesting Challenge


Blog by Steve Laug

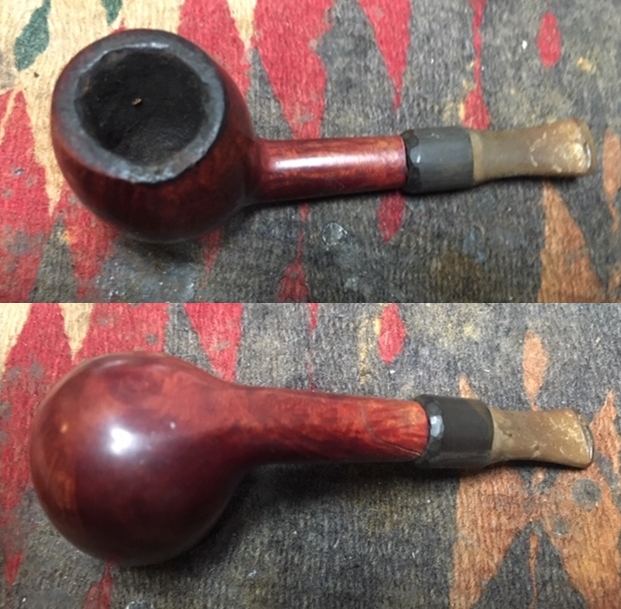
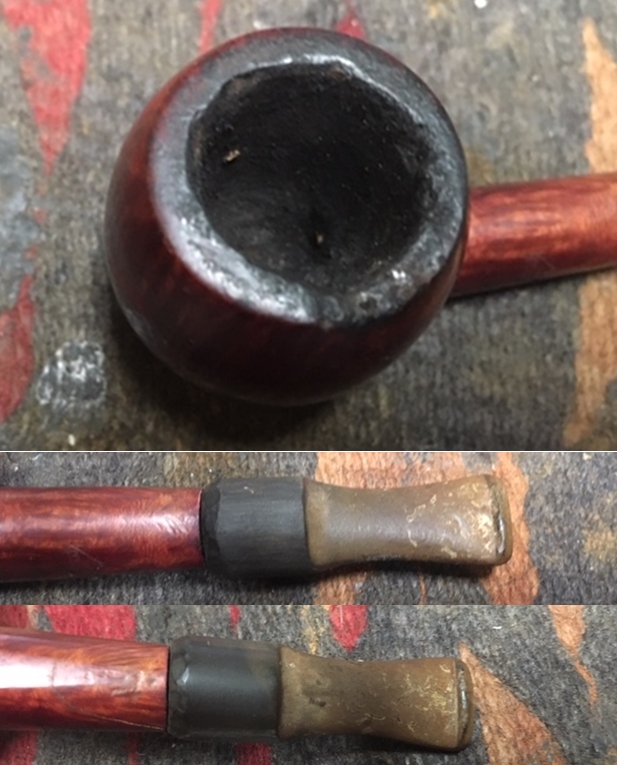
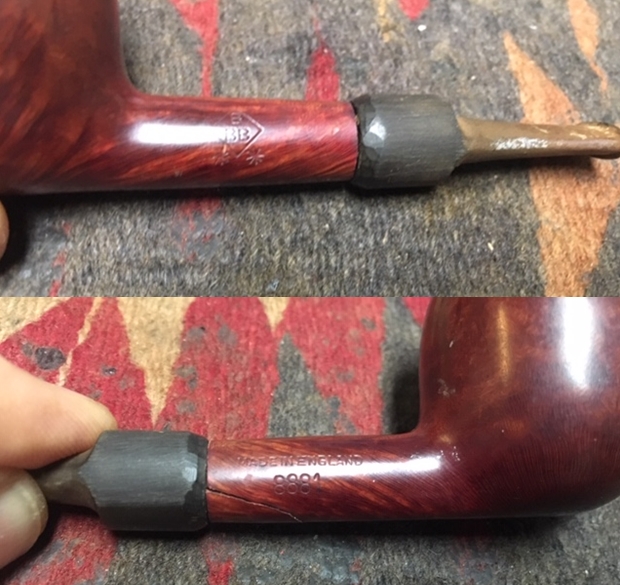
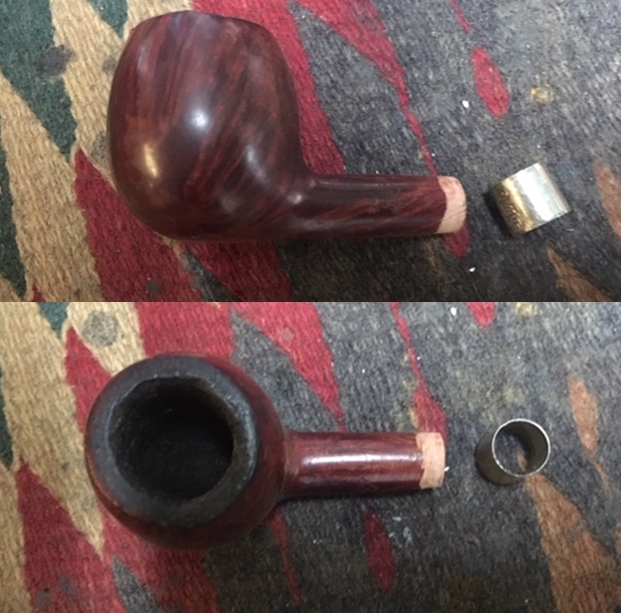
When I spoke with a fellow here in Vancouver who had a pipe that he wanted me to fix it sounded like a simple repair. He said that it had a very loosely fitting stem. He asked if he could drop by to show it to me and see if I could fix it. From past experience I have learned to never jump to conclusions about what sounded like an easy repair. When he arrived he showed me his GBD Faux Spigot. It turned out to need far more work than just tightening a loose stem. I wrote about that restoration in a previous blog (https://rebornpipes.com/2018/11/03/redoing-a-poorly-restored-ebay-gbd-super-q-9436/). We talked about his GBD for a bit and he made the decision to have me do a restoration on it. Then he reached into his pocket and pulled out a small plastic bag with a little BBB 2 Star apple of globe shaped pipe. It was stamped BBB in a diamond on the left side of the shank with two ** – one on either side of the diamond. ON the right side it was stamped Made in England over the shape number 8881. He said that he had found it at his parents’ house and really no one there knew where it came from.

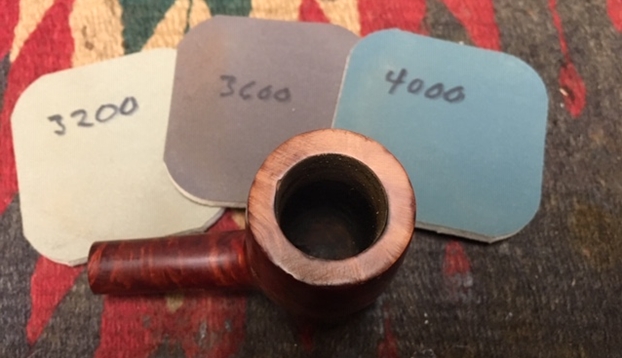
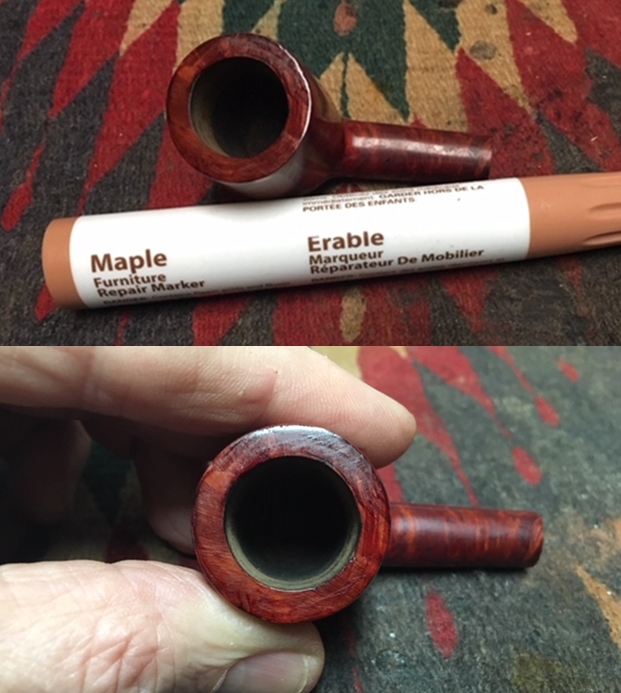
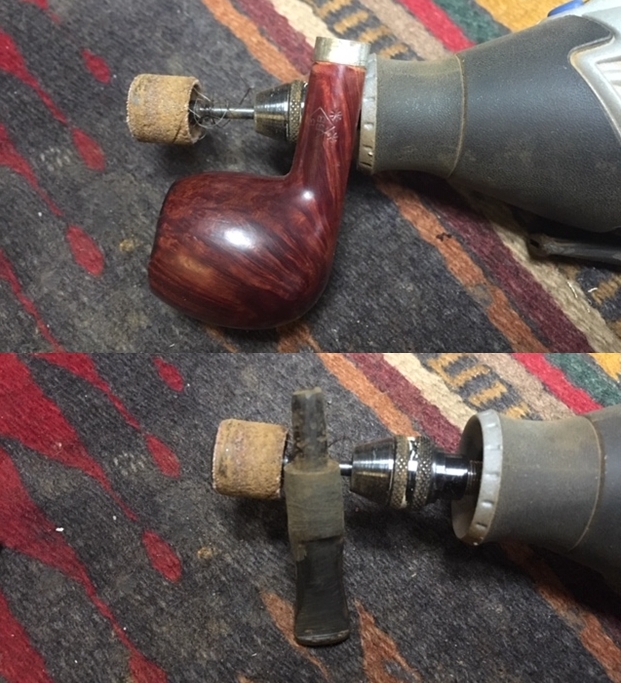
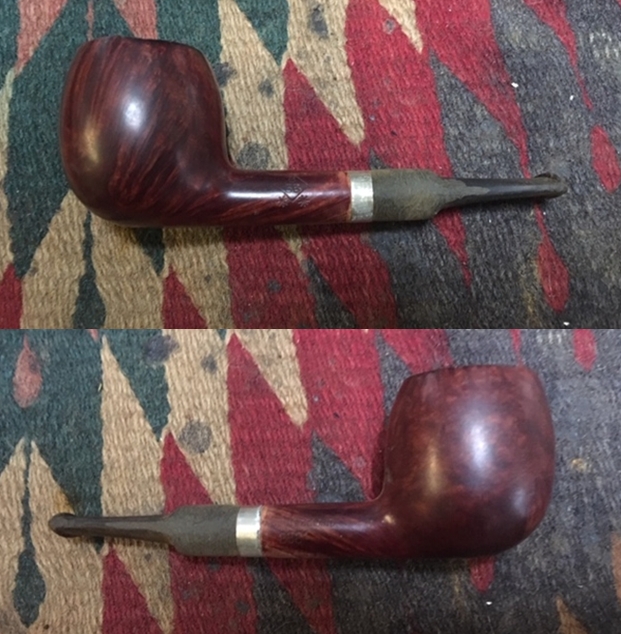
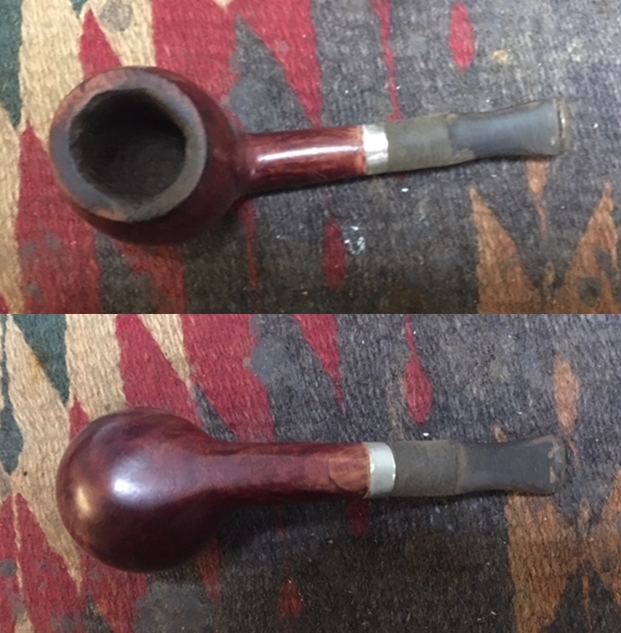
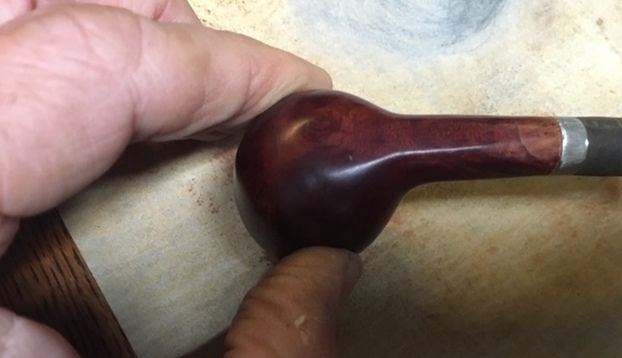
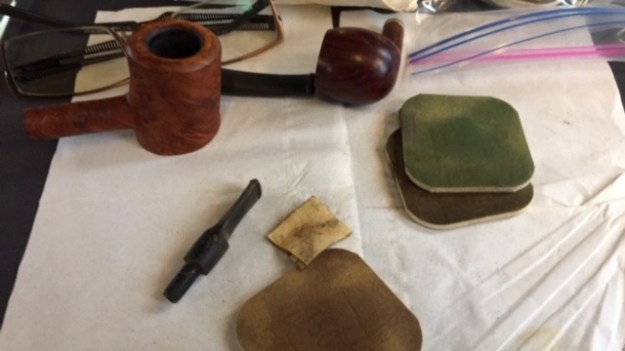
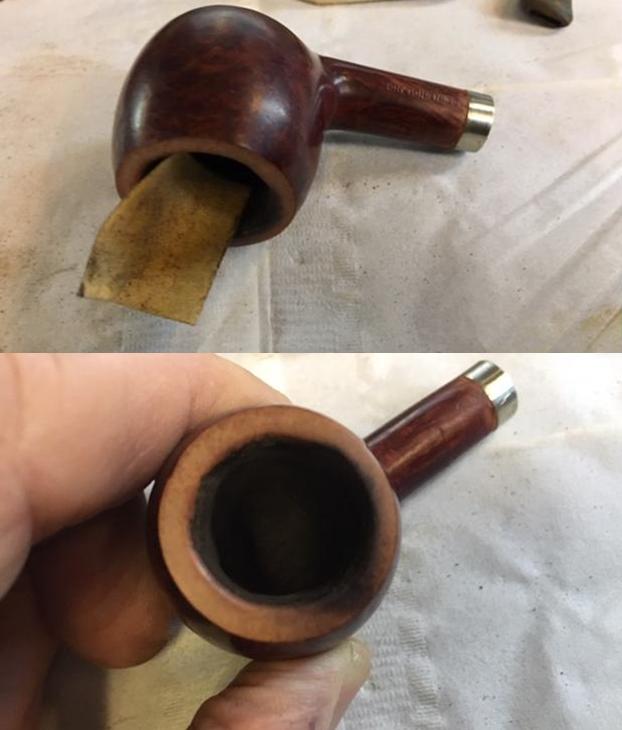
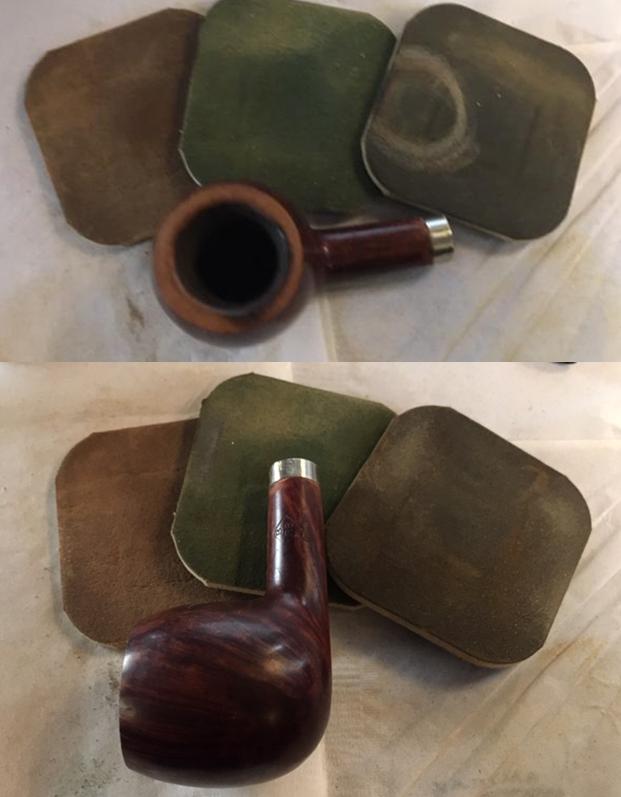
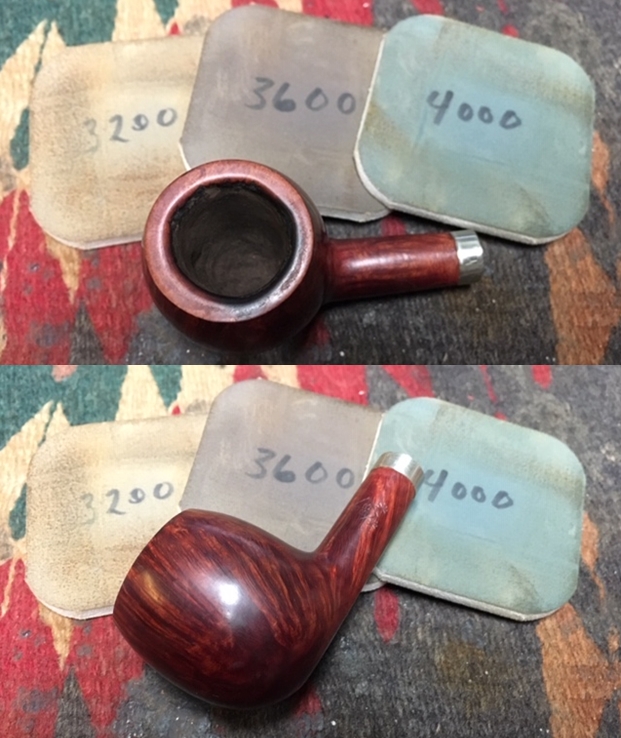
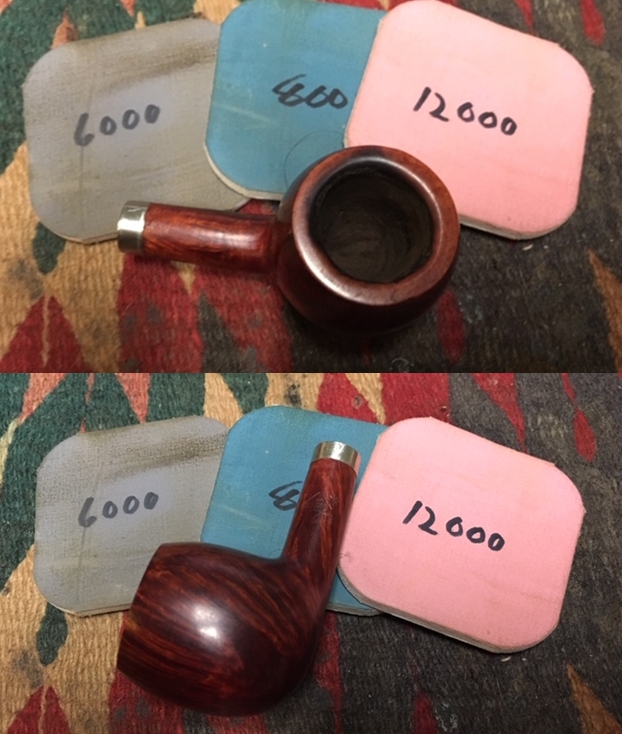
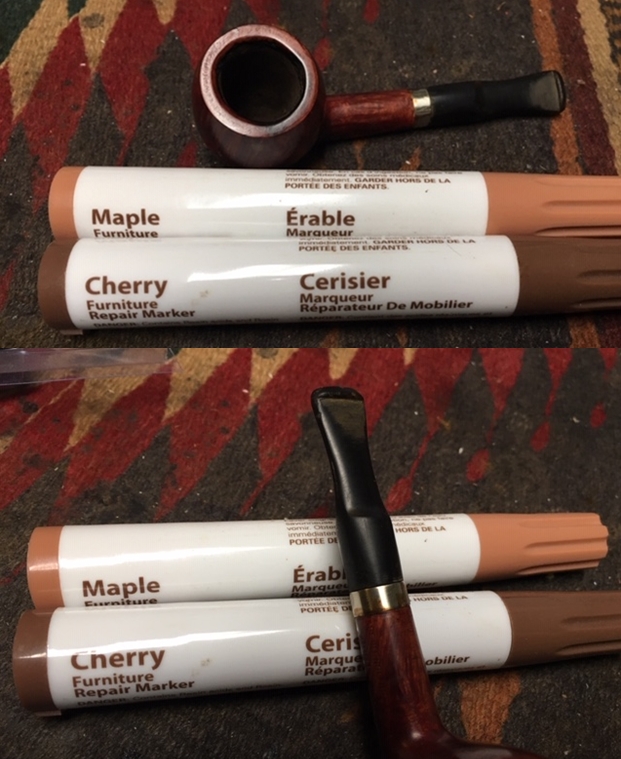
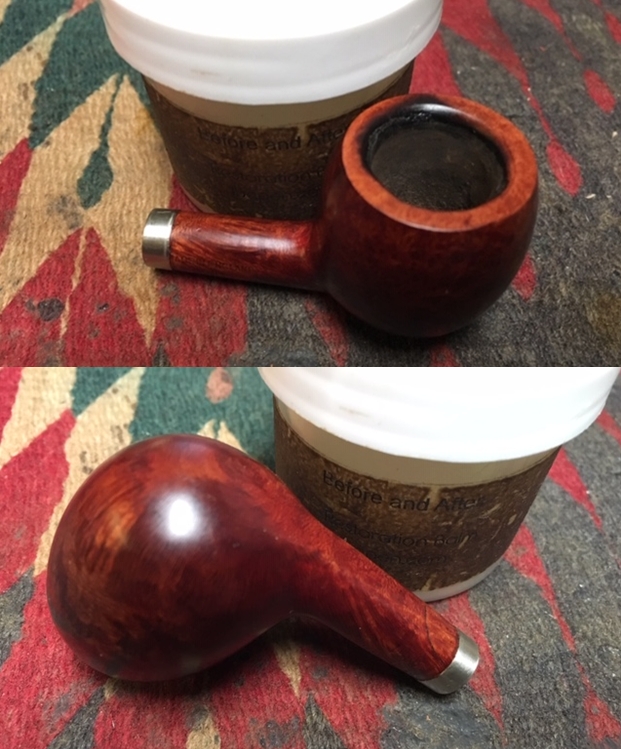
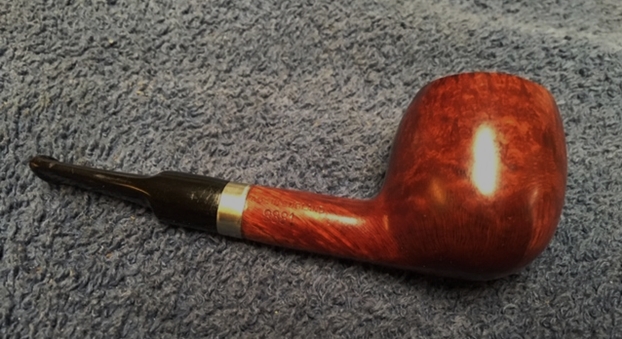
Here is what I saw. Starting with externals. The pipe was small – kind of a pocket pipe. The grain on the bowl was quite stunning – a mix of flame and birdseye all around the bowl and shank. The rim top was coated with a thick lava coat and it went into the bowl. The inner edge of the bowl was in rough shape having been hacked clean with a knife. There was a crack on the right side of the shank curving to the underside. It looked to me it was made by the poorly made stem being shoved into the shank. The stem was larger in diameter than the shank and had been rounded over with a file. There were deep bite marks on the surface ahead of the button on both sides. Moving to the internals. The end of the tenon was carved with a knife to make it fit the mortise in the small shank. The inside of the shank was dirty but less so than I expected. The inside of the bowl had a light cake but most of that was gone from the knife job that had left a wounded inner edge on the rim. Looking at the pipe I explained what I would have to do to bring it back to life and restore it to use. It would need, cleaning, reshaping on the rim, a band on the cracked shank that would leave the stamping readable, and a reworking of the stem to make it a fitting addition to the lovely briar of the bowl. The pipe was going to be a fun challenge. I took these photos to give you an idea of what I saw. The previous pipeman who had fit a new stem to an old favourite pipe had done a functional job but it looked rough. It was pretty clean on the inside so it was cared for. It must have been a great smoking pipe for him to fit a new stem and not give up on it when the previous one broke or was lost. It was smokable. I took a close up photo of the rim top to show the condition. It is hard to see but the rim top was not smooth. The lava build up was pretty thick and there were some deep nicks and chips in the flat top. The close up photos of the stem reveal the scratches in the vulcanite, the tooth marks and the worn and ill-defined button.  The oversized diameter – prettified to look nice is clear in the photos. I took photos from the side of the pipe to show the stamping on the shank and the prettified stem. In the second photo you can see the crack in the shank curving downward to the underside.I decided to address the cracked shank first. With the crack as large as it was and movable I did not want to further damage it when I worked on the stem and fit of the tenon. I knew that it needed to be banded but that would cover the stamping on the shank so adjustments would have to be made. I used a Dremel and sanding drum to reduce the size of the shank to fit the band I had chosen. I did not take of too much briar and I only damaged the M in Made In England as part of it would end up being covered by the band.I repaired the crack in the shank with super glue and pressure fit the band onto the shank to the point of the end of the sanded portion. I used a Dremel and sanding drum to cut back the band to the width that I wanted. Compare the photos above with the one below to see how much I took off of the band. I topped the band on a topping board with 220 grit sandpaper and smooth out the sharp edge with 1500 grit micromesh. I decided that since I was already working with the Dremel and sanding drum that I would take down the excess diameter on the stem as well. I reduced it to sit snugly against the band giving the pipe a classy look.I cleaned up around the inside edge of the band and edge on the shank with a folded piece of 2220 grit sandpaper to smooth things out and make the fit and transition smooth. I lightly sanded the blade portion of the stem and the area of the tooth marks next to the button with 220 grit sandpaper to remove the oxidation and clean it up. I fit the stem in the shank and took a photo of the pipe at this point in the process. It was beginning to look like a classic BBB to my eye. With the stem roughly fit to the shank it was time to address the bowl top. I topped it on a topping board with 220 grit sandpaper. At that point I called it a night. I had to catch a train down to the southern part of Washington from Vancouver in the morning so I thought I would bag up a couple of pipes I was working on and take them with me.I caught the train south from Vancouver, BC at 6:30am. Once we had our seats we were in for an 8 hour train ride. I figure it would be a good opportunity to work on these two pipes. You can see my work table in the photo below. I used the fold down table. It had a lip around it so I spread out a couple of napkins for the dust and went to work on the pipes.I started working on the BBB by addressing the damage to the inner edge of the rim. It was significant with cuts and burns. My topping worked had helped with the top damage and smoothed that out but I need to work on the rim edge. I used a folded piece of 220 grit sandpaper to smooth out the sharp edges and bring the bowl back to round. Once I had the rim as round as I could get it and smoothed out the damaged edge I polished it with micromesh sanding pads. I polished the bowl and the rim at the same time. I wet sanded with 1500-2400 grit micromesh sanding pads and dry sanded with 3200-12000 grit pads. I wiped the bowl down with a damp napkin after each pad. I touched up the stain around the front of the band and stained the rim top and inner edge with Maple and Cherry stain pens. Together the two stains matched the rest of the bowl.I rubbed down the briar with Before & After Restoration Balm. I worked it into the smooth surface of the briar with my fingertips to clean, enliven and protect it. I let the balm sit for a little wall and then buffed with a cotton cloth to raise the shine. The following photos show the bowl at this point in the restoration process. The rim matches well but still needs to be polished and buffed to raise a shine on it. I used a folded piece of 220 grit sandpaper to reshape the button and also to smooth out the marks left by the Dremel when reducing the diameter of the stem. I sanded the tooth marks near the button on each side of the stem to smooth them out.I polished the stem, tenon and metal work with micromesh sanding pads – wet sanding with 1500-2400 and dry sanding with 3200-12000 grit pads. I wiped the stem down with Obsidian Oil after each sanding pad. I was able to remove the damage on the tenon and polish out the dripping varnish on the metal adornment. The stem looked much better at this point in the process. I the polished stem and bowl with Blue Diamond to polish out the remaining small scratches and raise the shine. I gave the bowl and the stem several coats of carnauba wax and buffed the pipe with a clean buffing pad to raise the shine. I hand buffed it with a microfiber cloth to deepen the shine. The pipe polished up pretty nicely. This turned out to be a beautiful little pocket pipe in terms of shape and finish. The new nickel band adds a touch of class in my opinion and gives the pipe a new elegance. I look forward to hearing what the fellow who dropped it off for repair thinks of it once he has it in hand and is smoking it. The finished pipe is shown in the photos below. The dimensions are Length: 4 inches, Height: 1 3/8 inches, Outside diameter of the bowl: 1 inch, Chamber diameter: 3/4 of an inch. Thanks for walking through the restoration with me.

Refreshing a Jarl 1545 Made in Denmark Dublin


Blog by Dal Stanton

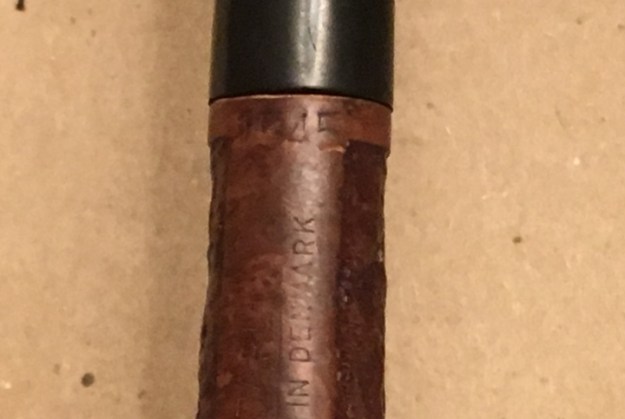
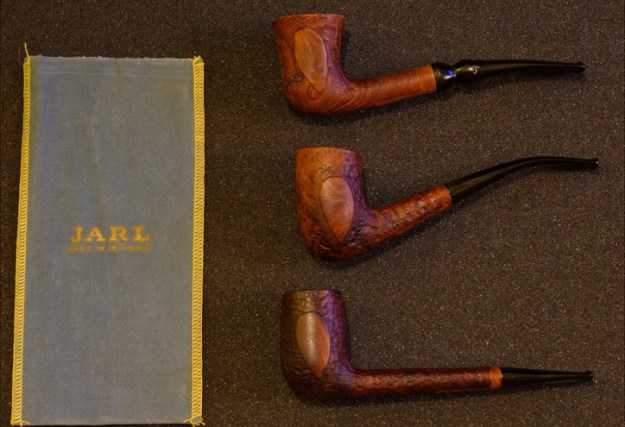
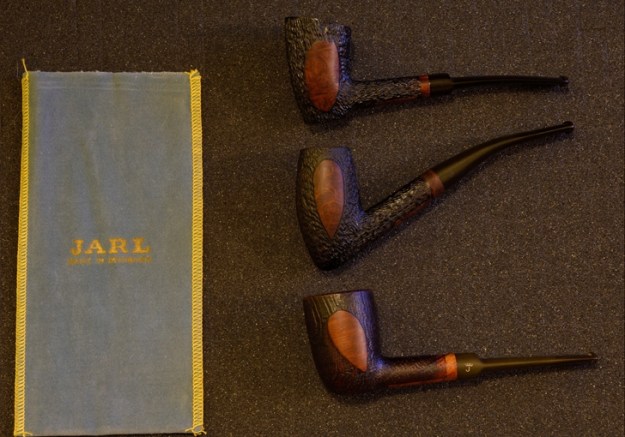
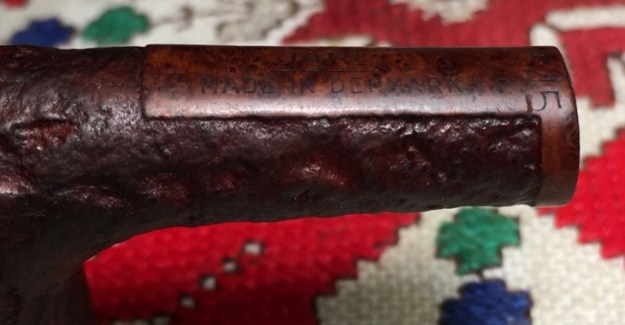
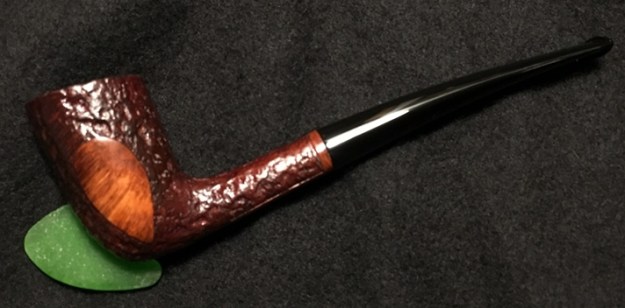
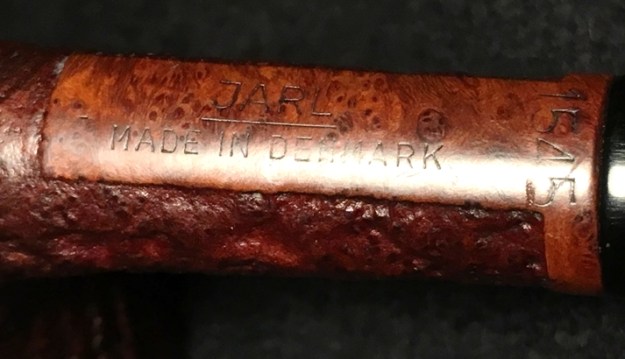
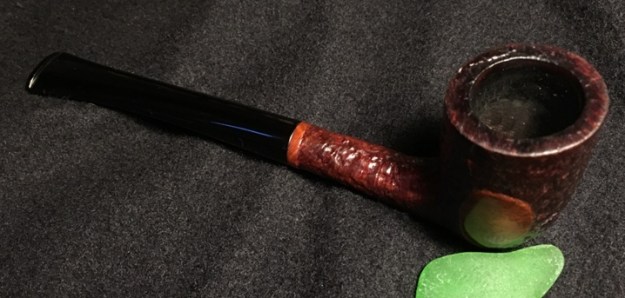
I acquired two Jarl of Denmark pipes in the Lot of 66 pipes I landed on the eBay auction block a couple of years ago.  When I first saw them, I liked the style of the blending of the blasting or is it rustification? – and the twin smooth panels on the sides of the bowl.  Both are marked on the underside of the smoothed shank portion.  The Billiard is marked ‘Jarl Chieftain’ 1511 with a ‘J’ stem mark and the Dublin is marked simply, ‘Jarl’ 1545.  Under each Jarl designation is the COM, Made in Denmark.  I will be adding nothing new to the scant information available on the internet for the Jarl name.  Pipedia’s only entry is brief:

In December of 2010 Ellen Jarl wrote that Jarl pipes were made by her grandfather, Niels Mogens Jørgensen in a little factory in the town of Bramdrupdam, just outside Kolding, Denmark. We have no reason to doubt that Niels Mogens Jørgensen is the maker of these pipes.

Cyrus, a friend who formerly was a Peace Corp worker here in Bulgaria, saw the Jarl Dublin in the For ‘Pipe Dreamers’ Only! section on ThePipeSteward website and commissioned him.  After doing research on these Jarls, I’m wondering if I might not regret pulling the Jarl Chieftain out of the Pipe Dreamers offerings to keep for myself!!  Here are the two Jarls in the Pipe Steward collection and more pictures showing the Jarl Dublin as Cyrus saw in Pipe Dreamers.I read through several blog threads containing anecdotal information about Jarl pipes and discovered a universal appreciation and love for this Danish line.  More than once, regret was expressed in not buying the Jarl one saw several years ago.  I enjoyed by far, a Jarl thread on Pipesmagazine.com by donjgiles, who had taken to collecting Jarls and had several pictures showing the collection.  The blending of rough/smooth briar seems to be a trademark of the Jarl motif.  If indeed, Niels Mogens Jorgensen made these pipes in a smaller operation, and he no longer does, the Jarl name will only become more difficult to find as it becomes more collectable.  Following are a few samples of the collection of Jarl pipes from Pipesmagazine.com: It is an interesting question.  Is the surface blasted or a result of rustification?  When talking to Steve Laug of rebornpipes, Steve described how it may be both.  ‘Blastification’ is a technique that may have been used that combined both blasting and rustification.  The Jarl surfaces shows both characteristics – but done so well that it looks natural.  Steve also mentioned that with Jarl pipes a special process was developed called ‘Oil Hardened’ that removed the sap and impurities from the briar that made the briar lighter and more resilient.  Some Jarl pipes are marked ‘Oil Hardened’ but Steve thought that all Jarl pipes were treated in this way.

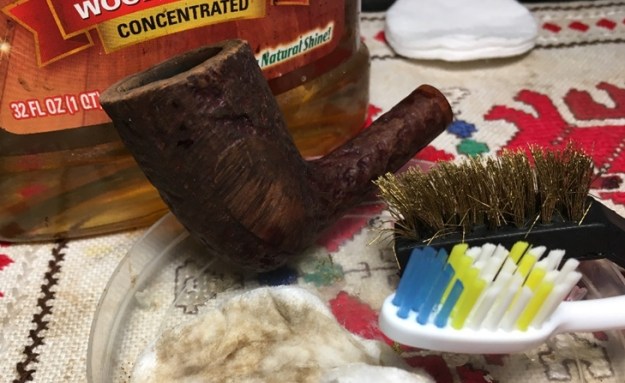
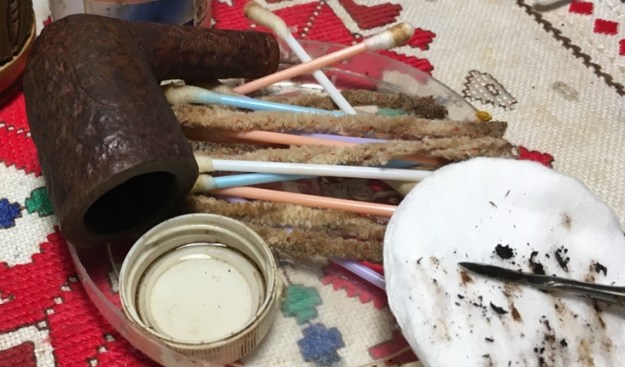
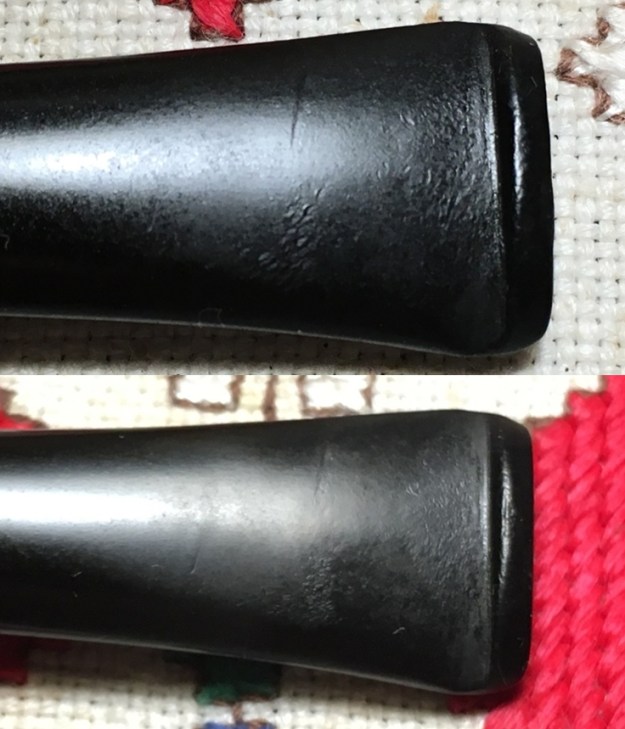
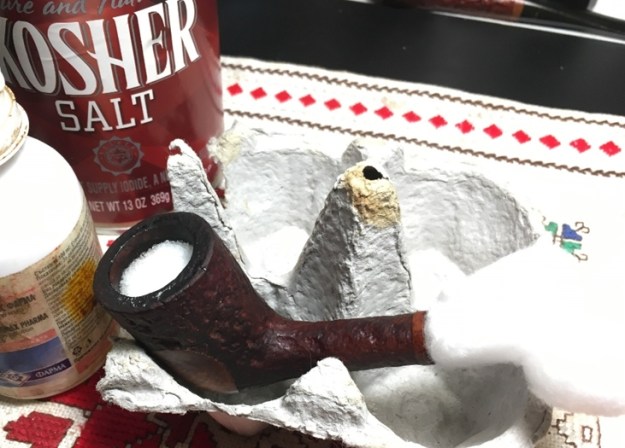
Looking at the Jarl Dublin now on my table, I don’t see any major issues and I’m hoping this Jarl cleans up quickly.  The chamber has cake that needs clearing and the ‘blastified’ stummel needs a good cleaning.  The smooth panels on both sides of the stummel have minor nicks and the entire stummel seems dull and dark.  The stem shows some tooth chatter on the upper and lower bit.  I begin the clean up by running a pipe cleaner wetted with isopropyl 95% through the stem and the adding the stem to a soak of Before & After Deoxidizer with other pipes in the queue.  After several hours, I fish out the stem and let the Deoxidizer drain off the stem.  I run another pipe cleaner through the stem to clear the Deoxidizer.  I then wipe off the raised oxidation using a cotton pad wetted with alcohol.  I follow by additionally wiping with a cotton pad wetted with light paraffin oil.  The Deoxidizer did a good job.  The pictures show the progress. Putting the stem aside, I next address the carbon cake in the chamber by reaming with the Pipnet Reaming kit.  To save on cleanup, I put paper towel on the work table. I use two of the four blade heads available starting with the smaller and working my way to the next larger.  I follow the reaming blades by scraping the chamber wall with the Savinelli Fitsall Pipe tool.  Finally, I wrap 240 grade paper around a Sharpie Pen and sand the chamber and finish the chamber cleaning by wiping it with a cotton pad wetted with alcohol.  After an inspection of the chamber, the wall shows no problems with heat fissures or cracks.  The pictures show the progress. To clean the external briar surface, I use undiluted Murphy’s Soap and cotton pads and a bristled tooth brush.  I scrub the blasted rustification to clean all the nooks and crannies.  Using a brass wire brush, I work on the rim as well, which is a little darkened from oils.Turning to the internals, I use pipe cleaners and cotton buds wetted with isopropyl 95%.  I also use a long shank brush to work on the mortise and airway as well.  Using a dental spatula, I also excavate tars and oils by scraping the mortise.  The cleaning is looking good.  Later I’ll continue the internal cleaning process with a kosher salt and alcohol soak.The stem has light chatter on the upper- and lower-bit area and some small bite compressions.  First, to lessen the chatter and dents, I use heat to expand the vulcanite.  Using a Bic lighter, I paint the vulcanite surfaces and the heating causes expansion, encouraging the rubber to find its original state.  The pictures are upper, before and after heating and lower, before and after, to show the changes through this method.  I follow by sanding with 240 grade paper and refreshing the button using a flat needle file.  The pictures show the process.

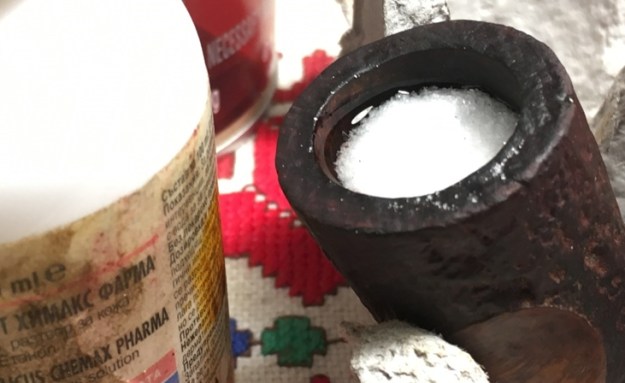
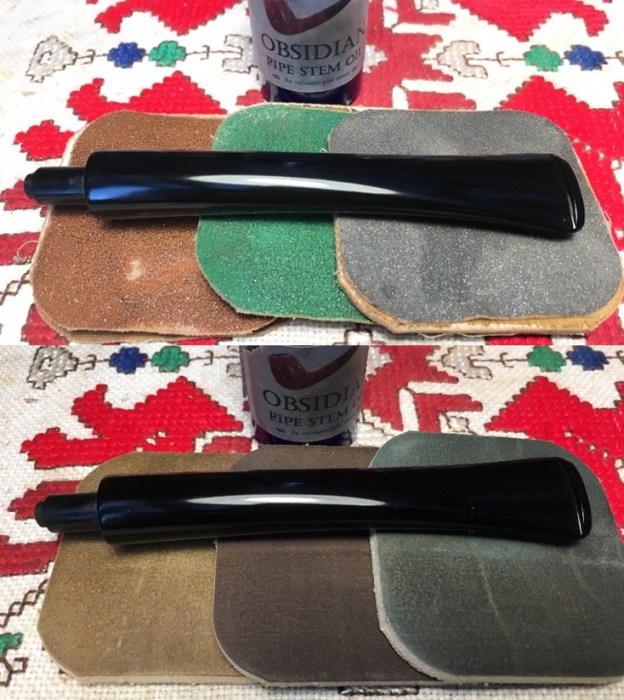
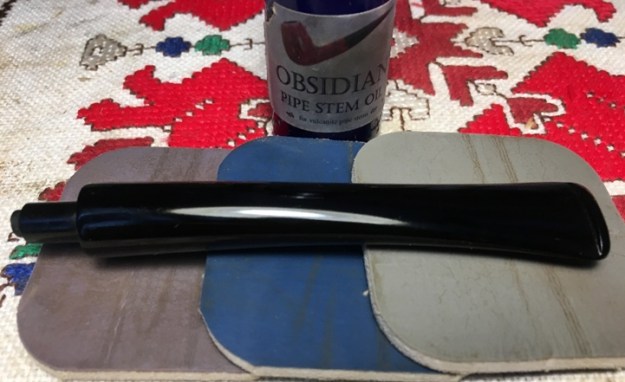
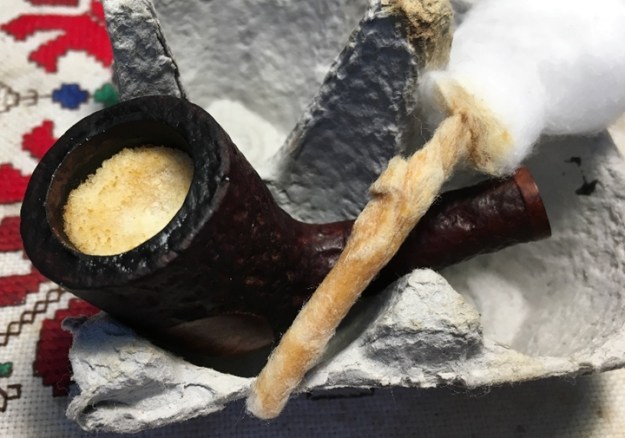
Upper, before and after and 240 grade paper: Lower, before and after, and 240 grade: I continue working on the stem by wet sanding with 600 grade paper followed by using 0000 grade steel wool over the entire stem. I put the stem aside and look at the stummel.  It’s difficult for me to tell if the rustified/blasted part of the stummel is simply in need of conditioning and wax or if it needs a fresh finish.  To sneak a preview of what the finish might look like pretty much as is, I wipe some light paraffin oil over the stummel.  I take a before (first 2 pics) and after (second 2 pics) the oil picture for comparison.  The rim briar (not showing in the pictures) is on the thin side, but overall the ‘blastified’ briar looks good.  The smooth briar panels on both sides have scratches from normal usage.  After looking at the ‘sneak peek’ using the light paraffin oil, the plan is formulated.  I’ll touch up the rim with a dye stick to darken the thin, bald patches.  I’ll sand the smooth panels to clear the scratching and to create more of a comparative ‘pop’ between the smooth and rough briar. Using a Mahogany dye stick, I color the rim and edge.  I then feather wipe it with a cotton pad wetted slightly with alcohol to blend the dye giving it more texture. Now, using micromesh pads 1500 to 2400, I wet sand both side panels.  I then follow by dry sanding the side panel with the remainder of the micromesh pads 3200 to 12000.  I also lightly sand the underside nomenclature panel and the ring at the end of the shank – only with the latter pads.  I do not want to cause further deterioration of the nomenclature.  I love the smooth briar panel pop!  The first two pictures show the starting point and then following the micromesh application. At this point I put the brakes on a bit with the stummel.  I continue the internal cleaning using kosher salt and alcohol.  I first create a wick by stretching and twisting a cotton ball and inserting it in the mortise and airway.  The wick acts to draw the tars and oils out of the mortise as the alcohol soaks.  I then fill the bowl with kosher salt and place it in an egg carton to keep it stable during the soak.  I then fill the chamber with isopropyl 95% until it surfaces over the salt.  After a few minutes I top off the alcohol again.  I put the stummel aside and let it soak for several hours. With the stummel on the sidelines for the time, I turn again to the stem.  Using micromesh pads 1500 to 2400, I wet sand the stem.  Falling this, I dry sand using pads 3200 to 4000 and 6000 to 12000.  Between each set, I apply a coat of Obsidian Oil to enrich and revitalize the vulcanite stem.  It’s looking great. The kosher salt/alcohol soak is next to address.  The salt has darkened, and the wick is very soiled demonstrating that the cleaning process had happened.  I clear the expended salt in the waste and wipe the chamber with paper towel to remove the left-over salt.  I also use a bristled shank brush in the chamber and a narrower one through the mortise to remove old salt.  I blow through the mortise as well.  To make sure all is clean, I run a pipe cleaner through the airway and a cotton bud in the mortise – both dipped in isopropyl 95%.  Each came out clean.  I like this final internal cleaning process to fully freshen the internals for the new steward. With the stummel cleaned and a stem waiting in the wings, I continue working on the external surface of the stummel.  I thought about how to approach the stummel earlier and decided that the blastification of the Jarl was in good shape but needed some conditioning.  After sanding the smooth briar panels, I treat the entire surface by applying Before & After Restoration Balm. I’m have been looking forward to using it and seeing how it turns out.  I take a picture of the stummel before starting for comparison.  I place some of the Balm on my fingers and work the Balm into the briar surface.  I’m careful to work the Balm well into the rough landscape of the blasting/rustification.  After working it in well, I wait for a few minutes for the Balm to absorb and do its thing.  I take another picture at this stage.  Then, taking a microfiber cloth, I wipe off the excess Balm and eventually begin to buff up the surface with the cloth.  I like what I see!  The Balm provides a deep, rich rendition of the natural color already there.  The pictures show the progress. Next, I reunite the stem with the stummel and mount a cotton cloth buffing wheel to the Dremel and set the speed at 40% full power. I then apply Blue Diamond compound to the entire pipe.  I work the cotton cloth wheel well into the blasted/rustified surface as I rotate the wheel methodically over the surface. I make sure I’m applying the compound into all the nooks and crannies.  After finishing with the compound, I rigorously buff the surface with a felt cloth primarily to remove the compound dust from the stummel in preparation for the waxing phase. After mounting the Dremel with another cotton cloth wheel, increasing the speed slightly to about 45 to 50% of full power, I apply carnauba wax to both the stem and the stummel.  I apply a few coats of carnauba then I follow by going over the entire surface again with a clean cotton cloth wheel.  I do this to be sure that the wax is spreading uniformly through the rustification and not gunked up in the nooks and crannies.  Finally, I finish the restoration by giving the Jarl Dublin a rigorous hand buffing with a microfiber cloth.  This not only raises the shine beautifully but gives one more pass over the surface to make sure of an even wax coverage.

This pipe is beautiful and gives credence to the Jarl lovers I read in the threads.  The tapestry of briar texture and presentation draws the gaze to look more closely the grain of smooth briar contrasted with the brown, reddish blastification.  The classic Dublin shape simply adds attitude to the overall look.  I like this pipe a lot and I’m sure Cyrus will too.  Since he first commissioned the Danish Jarl 1545 Dublin from the For ‘Pipe Dreamers’ Only! collection, he will have the first opportunity to acquire the Jarl in The Pipe Steward Store.  The best part is that this pipe also benefits the Daughters of Bulgaria, our effort here in Bulgaria to help women and girls who have been trafficked and sexually exploited.  Thanks for joining me!

Redoing a Poorly Restored EBay GBD Super ‘Q’ 9436


Blog by Steve Laug

Probably one of the most irritating parts of the art of pipe restoration is when a pipe comes to me from an EBay seller who sold it as fully restored and ready to smoke and it was not. The story of this pipe started with that description. On the weekend I received a call from a fellow here in Vancouver who had a pipe that had a very loosely fitting stem. He asked if he could drop by to show it to me and see if I could fix it. From past experience I never jump to conclusions about what sounded like an easy repair. When he arrived he showed me this GBD Faux Spigot. It had a nickel ferrule and a nickel adornment just above the Delrin tenon. The tenon was drilled out for a 6mm filter. The stamping on the bowl reads on the left side GBD in an oval over Super ‘Q’. On the right side it had a Made in London over England COM stamp with the shape number 9436 next to that. On the underside of the shank it has an M stamped next to the ferrule. I asked him where he had picked up the pipe and he said that he had picked it up on EBay. Knowing that, I began to look more carefully at the pipe.

Here is what I saw. Starting with externals. The rim and exterior of the pipe had been coated with a shiny varnish coat with some significant grime on the rim top under the varnish. The nickel had also been coated with the varnish and had run on the stem adornment. The stem also had some deep bite marks on the surface ahead of a very worn and ill-defined button on both sides. Moving to the internals. The end of the tenon had a lot of tarry buildup in it from smoking the filter pipe without a filter. Not much effort seems to have been made to remove it. The inside of the shank was also covered with a tobacco juice lacquer that was also gumming up the airway. When I blew through it, the draught was constricted. The inside of the bowl was another story. The bowl had been lightly reamed leaving behind a fairly thick cake that was checked and cracked giving the bowl interior a very fractured look. The bottom half of the bowl had not seen the blade of the reamer and was dirty. There was debris in the airway as it entered the bowl. I have to say that the pipe was a mess and the work that had been done would make my job harder.

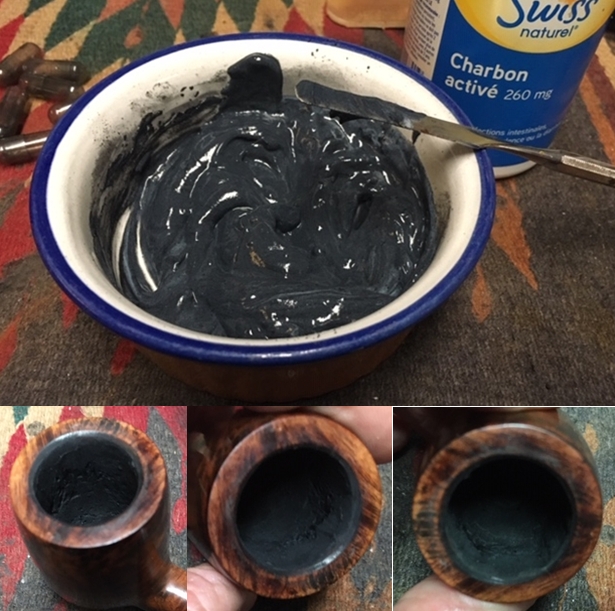
To say that it was restored and ready to smoke was an outright lie. If it had been cleaned and the only issue was the cake I would have been good with that. If the rim top had been cleaned before the shiny coat I would have been good with that. But to cover it up and make it shiny to hide a poor job is deceptive at worst and shoddy craftsmanship at best. I pointed out the issues with the pipe to the fellow who had stopped by and suggested that he have me clean it up for him the way I think that it should have been cleaned. He was game so the pipe stayed with me when he left. I took some photos of the pipe before I started my work to show the general condition. I took a close up photo of the rim top to show the condition. It is hard to see but the rim top is not smooth. There are chunks of grime/lava under the shiny top coat. The close up photos of the stem reveal the scratches in the vulcanite, the tooth marks and the worn and ill-defined button.  There is also some sagging shiny coat on the nickel stem adornment that is visible.I cleaned the internals of the shank and stem with pipe cleaners, cotton swabs and alcohol. The debris that came out was astonishing for a “restored” pipe. I scraped the walls of the mortise with a sharp pen knife to remove the lacquer build up there. When I finished the pipe smelled cleaner.I reamed the bowl back to bare briar with a PipNet pipe reamer. I cleaned up the debris with a Savinelli Fitsall Pipe Knife and sanded the walls with a piece of dowel wrapped in 220 grit sandpaper. I wanted to see behind all the cake what the walls looked like. Sadly they were as I expected – very checked with spidery cracks. I took a few photos of the damage to the inside of the bowl to give an idea of the extent of the checking and fissures on interior walls. This is typically caused by smoking too hot.To protect the bowl wall I mixed up a batch of charcoal powder and sour cream to make a paste. I pressed the mixture into the crevices and fissures on the walls of the bowl and painted a top coat of the mixture with a folded pipe cleaner. I set the bowl aside to cure and turned my attention to the damaged stem.I used a needle file to redefine the button on both sides of the stem and sanded the tooth marks out the surface of the stem with 220 grit sandpaper. I filled in the remaining deeper tooth mark with super glue and when it cured sanded it smooth to match the surface of the stem.I polished the stem, tenon and metal work with micromesh sanding pads – wet sanding with 1500-2400 and dry sanding with 3200-12000 grit pads. I wiped the stem down with Obsidian Oil after each sanding pad. I was able to remove the damage on the tenon and polish out the dripping varnish on the metal adornment. The stem looked much better at this point in the process. Once the bowl coating cured I worked on the rim top with micromesh sanding pads – 3200-12000 to remove the tarry deposits around the surface. I scrubbed the bowl down with Before & After Restoration Balm and after it sat for a short time I buffed it off with a cotton cloth. Here is what it looked like at that point. I the polished stem and bowl with Blue Diamond to polish out the remaining small scratches and raise the shine. I gave the bowl and the stem several coats of carnauba wax and buffed the pipe with a clean buffing pad to raise the shine. I hand buffed it with a microfiber cloth to deepen the shine. The pipe polished up pretty nicely. This turned out to be a beautiful pipe in terms of shape and finish. I am looking forward to hearing what the fellow who dropped it off for repair thinks of it once he has it in hand and is smoking it. The finished pipe is shown in the photos below. The dimensions are Length: 5 3/4 inches, Height: 2 inches, Outside diameter of the bowl: 1 1/2 inches, Chamber diameter: 7/8 of an inch. Thanks for walking through the restoration with me. Thanks for tolerating my rant at the beginning about redoing EBay “restored” pipes. Also if any of you have ever heard of the GDB Super ‘Q’ line let me know. Thanks for looking and thanks for any help you might give.

RESTORING A BEN WADE “SPIRAL”


Blog by Paresh Deshpande

The third of the four freehand pipes purchased on eBay and currently on my work table is the BEN WADE “SPIRAL”. This is a huge sized pipe and fills the hand nicely with its size, weight and heft. I was attracted to this pipe because of its size and the unique spiraled shank. Another factor was the fact that my inherited collection had quite a few numbers of Danish pipes like the Stanwells, Amphoras, Kriswells and SONs. Thus, when I first saw the pipe on eBay, the name Ben Wade sounded so British and when I read the description and the stampings of Made In Denmark, I was immediately interested and intrigued at the same time!!! I got this pipe fairly cheap and the excellent condition it was in when it arrived, further sweetened the deal. This appears to be a simple and straight forward cleaning job from the looks of it.

The stummel shows a combination of sandblasted and smooth surfaces. It shows smooth surface on the left side extending 2/3 way down from rim top towards the heel of the bowl and on the right side it extends from the base of the bowl to 1/3 way upwards towards the rim top.The shank has beautiful and evenly spaced 5 spirals, first half from the bowl end is sandblasted while the remaining half towards the shank end is smooth and bears the stampings “Ben Wade” over “SPIRAL” over “SANDBLAST” over “HAND MADE” over “IN” over “DENMARK”. These stampings are seen in the first and third spiral of the shank. The stem bears the Ben Wade logo of the initials in capital letters ensconced within a crown on the top surface of the stem near the tenon end. All the stampings are clear and crisp. There is some very interesting history on Ben Wade pipes which I got from pipedia.org. Some interesting snippets of information are reproduced below:-

The company was founded by Benjamin Wade in 1860 in Leeds, Yorkshire, where it was located for over a century. Ben Wade started as a pipe trader, but  in the 1860’s he established a workshop to produce briar pipes. The pipes were made in very many standard shapes – always extensively classic and “very British”. Many models tended to be of smaller dimensions. Ben Wade offered a very high standard of craftsmanship and quality without any fills. Thus the pipes were considered to be high grade and a major competitor to other famous English brands.

In the second World War the factory was destroyed by German air raids on Leeds. But the Ben Wade family decided to re-build it immediately after the war and pipe production was re-started soon and successfully linked to the fame from the pre-war years.

Before the second war Ben Wade clustered their offerings into three price points: “Ben Wade” included the higher end pipes (eg the Larnix, Super Grain, Selected Grain, etc), “BW” included the mid-level pipes (eg Statesman, Natural Grain, County, etc), and “BWL” were the least expensive (eg Hurlingham, Adelphi, Tense Grain). Champion was in the last group, and in the 1930s at least retailed for 2/6.

Ben Wade turns Danish

Young Copenhagen master pipemaker Preben Holm had made a meteoric career heading a pipe manufacture employing 45 people at the age of 22! But around the turn of 1970/71 he was in major financial difficulties. His US distributor, Snug Harbour Ltd. in New York City, left him in the lurch. Holm had three unpaid invoices on his desk and another large shipment was ready for the USA, when Snug Harbour’s manager told him on the phone that there was no money at all on the account to pay him.

So the Dane went to New York for an almost desparate search for a new distribution partner. He made contacts with Lane Ltd. and met Herman G. Lane in February 1971. Lane Ltd. had no interest in Holm’s serial pipes produced at that time but so much the more in the hand-carved freehands because the hype for Danish freehands and fancies in the States was still on its way to the climax then. The meeting resulted in an agreement to start cooperation. Lane insisted to improve the quality considerably and in return he assured to be able to sell essentially larger quantities.

Holm went back home to work on new samples with all-new designs and altered finishes for Lane. Both, Lane and Holm, agreed that it would be unwise to sell the pipes under Preben Holm’s name as long as Snug Harbour had a considerable stock of Preben Holm pipes and might sell them pipes at very low prices just to bring in some money.

So on Mr. Lane’s proposal it was determined to use the name Ben Wade belonging to Lane Ltd. Lane spend considerable amounts of money for advertising the new brand in the big magazines– the centerpiece being whole-page ads showing a very exclusive Seven Day’s Set.

The cooperation with Lane Ltd. proved to be an eminent business success for both partners. Within a very short time Ben Wade Handmade Denmark sold in much larger quantities and at higher prices than they had ever dreamed of. And the hype these freehands and fancy pipes caused went on unbroken long after Herman G. Lane deceased. Preben Holm – obviously much more brilliant in pipe making than in pipe business – was in major troubles again in 1986 and had to sack most of his staff. The Ben Wade production was significantly lowered but continued until his untimely death in June of 1989. Up to now Preben Holm made Ben Wade pipes are cult and highly sought for on the estate markets.

From the above information, I can say with some certainty that this line of pipes was made between the years 1971 to 1986.

INITIAL VISUAL INSPECTION
This Ben Wade has a huge size and fills the hand nicely and has a combination of smooth and sandblasted surfaces. The sandblasted areas are filled with dust and grime which can be easily seen in the crevices of the blast. The smooth surface is also covered in the tobacco oils and oils secreted by sweating palms giving it a dull and lackluster appearance. There are no blemishes in the briar of the stummel or the shank that can be seen. I surmise that a nice scrub with Murphy’s oil soap and a hard bristled toothbrush should suffice to clean the stummel and the shank. The rim top is sandblasted and is covered in overflow of lava, tars and grime. There is no apparent damage to the inner and outer edge of the rim that can be seen, like a charred rim or an out of round bowl or chips and dents. However, the condition will be ascertained once the chamber has been reamed and the overflow of lava is removed from the rim surface. The chamber shows uneven cake build up with a thicker build up at the bottom and progressively reducing towards the rim top. The condition of the walls will be ascertained once the chamber has been reamed and the cake has been taken down to the bare briar. However, the stummel feels solid to the touch with no soft briar anywhere which is indicative of the likelihood of a burnout or major heat fissures.The beautiful and unique spiral shank has crisp edges to the spirals and just needs to be cleaned for the straight grains to pop out in their complete splendor. The plateau shank end is filled with dirt, grime and will need to be cleaned. The airway in the shank shows a blockage during the blow test and should be an easy clean up.The high quality vulcanite fancy stem is oxidized and the “BW WITH CROWN” logo appears faded as it is covered in oxidation. This needs to be addressed and the preservation of the stem logo attempted.Deeper tooth chatter peppers both the upper and lower surfaces of the stem. However, the bite marks are more pronounced and numerous on the lower surface. I shall try to raise these to the surface by flaming with Bic lighter and the deeper ones will be filled with CA superglue. Buttons show light deformation due to bite marks and will need to be sharpened. It is interesting to observe that these tooth indentations are slightly more forward towards the tenon end rather than the button end!!! Probably, the huge size and the front heavy bowl necessitate clenching it forward for better balance.THE PROCESS
I started the restoration process by reaming the chamber with a Kleen Reem pipe reamer followed by scrapping the remaining cake from the chamber with my fabricated knife. The cake was hard and dry. I further removed the cake using a 220 grit sand paper and sanded the walls till the solid bare briar was reached. I wiped down the interiors of the chamber with a cotton swab dipped in alcohol to clean the chamber of all the carbon dust and inspect the inner wall condition. And there it was, a sight which every restorer, experienced or a novice silently prays is not seen…… the beginnings of a crack/ heat fissures!!!!! The following pictures show the extent of these fissures. I shall address this issue later after I have cleaned the stummel and the stem, both internally and externally. This was followed by cleaning the internals of the shank and the airway. I attempted to insert a hard bristled pipe cleaner dipped in isopropyl alcohol through the airway in the shank and realized that there was no give for the pipe cleaner half way through the mortise. The blockage called for a more aggressive method of cleaning!!! Using a fabricated (again…. I have modified and fabricated a number of tools which I find useful in my restoration processes as the sophisticated and designated tools are not easily available to me and those available are too expensive!!!) Dental spatula, I scraped all the grunge, oils and tars from the mortise. However, a pipe cleaner would still not pass through!! I shone a torch light in to the chamber and looking through the shank, I realized that the blockage was nearer to the draught hole as the light did not pass through. I addressed this issue by inserting a rounded needle file and dislodging the blockage. I further scrubbed the walls of the draught hole and the mortise with the rounded needle file. Once I was satisfied with the filing, I thoroughly cleaned the mortise and the airway using a shank brush, q-tips and pipe cleaners, all dipped in isopropyl alcohol, till the pipe cleaners and q-tips came out clean. I checked the draw and it was nice, smooth and full. With the insides of the stummel and shank cleaned and freshened up, I turned my attention to the exterior of the bowl. Using Murphy’s oil soap and a toothbrush, I cleaned the exterior of the bowl. I gave a very deliberate scrub to the bowl and into the rustications to remove all the dust, dirt and grime that had accumulated over the years. I purposefully avoided brass brush/ steel wool while cleaning so as not to damage the sandblast. Once the cleaning with the oil soap was done, I rinsed it under running tap water and wiped it dry with a soft cotton cloth. I took care that the water does not enter into the chamber and the shank. I wiped and dried the stummel with a paper napkin and a soft cotton cloth. The bowl now has a nice, beautiful, clean and robust look to it. I kept the bowl aside to dry out and turned my attention to the stem. Turning my attention to the stem, I cleaned the stem surface with Magic Clean sponge and followed it up by flaming the surface of the stem with the flame of a Bic lighter to raise the minor tooth chatter and bite marks to the surface. This was followed by the sanding with a 220 grit sand paper. This serves two purposes; firstly, it reduces the size of the fills as well as evens out the surface of the stem for the fill and secondly, it has been my experience that if the stem oxidation is removed before the fill, the end result is a nice black and shining finish and not the dirty brown spots wherever the stem has been filled. I followed it up with sanding the stem surface with a 600 grit sand paper. I spot filled the deeper bite marks with clear CA superglue and set it aside to cure overnight. I had covered the stem logo with a whitener in order to highlight the stem logo. The extent of highlight will depend on the depth remaining in the stamping. While the fills in the stem were curing, I decided to address the beginnings of the very minor issues of heat fissures in the chamber. I mixed an adequate quantity of pipe ash, activated charcoal with yogurt to form a thick slurry and applied it as evenly as possible all along the inner walls of the chamber. This too, was set aside to cure/ dry along with the stem.  The next day, once I was satisfied with the cure, using a flat head needle file, I sanded the fill to match it with the stem surface and also to sharpen the edges of the buttons on either surface. I further matched the fills and sharpened the buttons by sanding with 220, 600 and 800 grit sand paper. The stem was polished with micromesh pads, wet sanding with 1500 to 2400 grit pads followed by dry sanding with 3200 to 12000 grit pads. I rubbed a little extra virgin olive oil with my fingers in to the stem. After I was through with the last grit pad, I gave a final rub of extra virgin olive oil and set it aside to be absorbed by the stem. It had taken a couple of days for the coating of pipe mud to completely cure and dry out. I very lightly sanded the chamber coating with a 600 grit sand paper to even and smooth out the surface of the chamber.Once I was done with the chamber, I gave the external surface of the stummel a good clean up with a dry soft cloth to remove any dust/dirt that might have settled on the bowl overnight. Thereafter, I rubbed a small quantity of “Before and After Restoration Balm” into the bowl ensuring that it reaches the rustication also. I am truly amazed at the spread of this balm!  Just a small quantity quickly spreads and is sufficient to coat the entire bowl when rubbed with the fingers. The product was further rubbed into the rustication when buffed, using a horsehair shoe brush. I let it rest for a few minutes to let the balm work its magic on the briar. The transformation is amazing!! Once this was done, it was back to using muscle power to enhance the shine and beauty of the sandblast and the smooth surfaces by prolonged rubbing with a soft cloth followed by a microfiber cloth. I finished the pipe restoration by attaching the stem with the stummel and giving it a nice rub with a microfiber cloth. The pipe now has a nice and deep shine to it. The finished pipe is shown below. Thank you for sparing your valuable time in going through this write up.

Resurrecting a Tired and Worn 1937 Dr. Grabow Special 4914 Apple


Blog by Steve Laug

The next pipe on my restoration table is an interesting older pipe that appears to be made out of walnut or some other hard wood. It was tired and worn looking with the remnants of what appeared to be an oxblood stain in the wood. The stamping was dirty and worn but readable nonetheless. On the left side the pipe is stamped Dr. Grabow over Special and on the right side it is stamped with the shape number 4914 near the shank stem junction. That is followed by Pre-Smoked over Reg. US Pat. Off. The rim top was dirty and had some tar ground into it. The bowl had a light cake in it and there was a small nick on the inner right edge of the bowl. It had a hard rubber vulcanite stem with the white Linkman style propeller inset on the top of the stem. The rubber was quite hard and did not show signs of oxidation. There were tooth marks on the top and underside of the stem at the button. I took some photos of the pipe before I started my cleanup. I took some close up photos of the rim top and bowl to show its condition. The tar spots are on the surface. The nick is visible on the right side of the bowl. I also took photos of the stem to show the bite marks and wear on the stem.I took a photo of the stamping on both sides of the shank to show the condition. Interestingly once I cleaned the shank up and removed the stain the stamping was very readable.I looked up information on the Dr. Grabow Special 4914 pipe on Pipedia to see if I could identify the time period that the pipe came from. I had a hunch that it came out during the war years due to the alternative wood that had been used in its manufacture in place of the normal briar (https://pipedia.org/wiki/Dr._Grabow_Models_(Series,Line)_Names_Through_the_Years). Here is what I found out:

SPECIAL (or Special Italian Briar) post-1937, begins with 43, 49, maybe no number at all; DOLLAR DR. GRABOW 1937 or previous, may not be marked as such, begins with 43, 44, 49 Series 43 = Natural Finish (DG), c1937. Series 44 = Dark Finish (DG), c1937. Series 49 = Walnut Finish (DG), c1937.

Thus I knew that the pipe came out post 1937. I still had not confirmed the date of the pipe other than knowing that it was made after 1937. I did some more digging on Pipedia and found the following information that also helped pin down the date (https://pipedia.org/wiki/Dr._Grabow).

The production of the pipes started in 1930/31. In 1937 Linkman began calling his pipes “Pre-Smoked”. An ad dating from 1946 celebrates it as “America’s Most Wanted Pipes” and the text announced that each Dr. Grabow was broken in on the Linkman’s Automatic Smoking Machine with fine Edgeworth tobacco, reducing the need for the new owner to spend time breaking in his pipe. In 1949 the official name read Dr. Grabow Pipe Company Inc. with seat at W. Fullerton Avenue 1150, Chicago 14, Illinois. (Thus the Linkman factory.) Series: Special, De Luxe, Supreme, Tru’ Grain, Select Grain.

That helped to pin down when the first Pre-Smoked Pipes came out on the market. I have included a couple of advertisements from the 1940s on the Pre-Smoked pipes. The advertisements were on Pipedia courtesy of Doug Valitchka. I found a similar pipe for sale on eBay (https://picclick.co.uk/Lovely-Vintage-Dr-Grabow-Special-4914-Smokers-Pipe-372388011756.html). It could very well be a twin of the pipe that I am working on. It is also made from an alternative wood, rather than briar.

I started my restoration on the pipe by wiping down the bowl with acetone on a cotton pad to remove the remnants of the oxblood finish. I took photos of the bowl after the cleanup. I sanded the bowl with 220 grit sandpaper to remove the remaining stain. I sanded the rim top to remove the stain and tars there. I worked over the inner edge of the rim with 220 grit sandpaper to remove the damaged area on the right side. It did not take too much work to remove it. I polished the rim and bowl with micromesh sanding pads – wet sanding with 1200-2400 grit pads. The bowl began to have a rich shine.When I sanded the bowl a small red putty fill showed up on the back right side of the bowl. It was slightly pitted. I filled in the pits with clear super glue to remove the damage. I sanded it with 220 grit sandpaper and then with a 1200 grit micromesh pad.I polished the bowl with red Tripoli on the buffing wheel to smooth out the wood. I heated it and stained it with the “red” tan aniline stain. I flamed it with a lighter and repeated the process until the finish had good coverage. I also gave the bowl a coat of Danish Oil with Cherry stain to highlight the grain. I cleaned out the internals in the stem and the bowl with pipe cleaners, cotton swabs and alcohol. The shank was dirty and the debris and grime that came out made fit of the stem in the shank much tighter.I set the bowl aside and worked on the stem. I sanded the surface of the stem with 220 grit sandpaper to remove the tooth chatter and the lighter tooth marks. I cleaned it up a soft cotton pad to remove the debris. I filled in the deeper tooth marks with clear super glue to repair them. I set the stem aside to let the repairs cure. I sanded the hardened repairs with 220 grit sandpaper to blend them into the surface of the vulcanite.I polished stem with micromesh sanding pads – wet sanding with 1500-2400 grit pads and dry sanding with 3200-12000 grit pads. I wiped the stem down with Obsidian Oil after each pad. When I had finished polishing with the last pad, I gave it a final coat of Obsidian Oil and set it aside to dry. This small war era Dr. Grabow Pre-smoked apple is a unique alternative wood pipe. It has interesting swirled grain around the bowl and cross grain across the shank. The grain really is interesting. The rim top looks much better. The vulcanite stem is high quality and shined up well. I buffed the bowl and the stem with Blue Diamond polish to raise the shine on the briar and the vulcanite. I was careful to not buff the stamping and damage it. I gave the bowl and stem multiple coats of carnauba wax. I buffed the entire pipe with a clean buffing pad to raise the shine. I hand buffed it with a microfiber cloth to deepen the shine. The finished pipe is shown in the photos below. The rich oxblood stain allows the grain to really stand out while hiding the fill in the bowl side of this little pipe and it works well with the rich black of the vulcanite stem. The dimensions of the pipe are: Length: 5 1/4 inches, Height: 1 1/2 inches, Outside Diameter: 1 inch, Diameter of the chamber: ¾ of an inch. This little Linkman’s Grabow apple fits nicely in the hand and makes a great pocket pipe. Thanks for walking through the restoration with me.
Restoring a Nording “Pick Axe” Freehand Pipe


Blog by Paresh Deshpande

I had just finished restoring a 1940s-1960s Kaywoodie Bent Billiard with a 4 holed stinger, also from my grandfather’s collection. I am always fascinated by “Free Hand” pipes. I feel these freehand shapes let the creativity and imaginations of a carver run riot without the bindings of the exacting demands of a classical shapes and finish.

Over a period of time, I have collected a number of freehand pipes during my not-so-long journey in to the pipe world and have realized that these freehand pipes invariably have a nice hand fit, sitting snugly in to the hands of the smoker with a nice heft to them. The most fascinating aspect of a freehand, I feel, is the carver’s desire to highlight the grains in the briar block and shape the pipe accordingly to highlight these grains.

I was fortunate to come across four estate freehand pipes, one Soren, one Ben Wade Spiral, one Nording #4 and one Nording Pick Axe shaped pipe. I discussed with my mentor and guide, Mr. Steve Laug, and after his approval on the aspects of collectability and the price point at which they were available, I purchased them about a year back!!!! Since then, these were waiting for me to work on and now that I feel slightly more confident in doing justice to these lovely pipes, I decided to work on them. The first of these pipes that is now on my work table is the Nording Pick Axe shaped freehand.

This beautiful pipe has the classical pick-axe shape with a plateau rim top. The stummel has a smooth surface with densely flame grains extending from the mid way on right side and extending mid way on left side while the remaining surface on the stummel has beautiful rustication. The smooth portions extend to the sides such that when held in the palm, all the fingers are holding the stummel along the smooth surface and one can admire the fine delicate rustications on the back while sipping your favorite tobacco. Blissful!!!!!!!!! Similarly, the top surface of the shank is rusticated extending half way through on either side while the bottom is smooth with straight grains extending from the tip of the axe towards the end of the shank.  The only stamping, “NORDING” in block capital letters, is seen on the smooth portion of the shank. The stamping is clear, crisp and easily readable. The fancy stem has a slight bent towards the lip and helps the pipe to balance straight on a table. There is the letter “N” in block capital letter, stamped on the top surface. But it is faint and hidden under the heavy oxidation.I searched the internet for detailed information on Nording pipes and this pipe shape in particular shape. Though I did not find anything particularly about this pipe, it was interesting to read how young Mr. Nording got in to the business of pipe making. It makes for a very interesting read. We must not forget to thank one Mr. Skovbo, who had a major contribution in introducing Mr. Nording in to this business!!!!!!  I have a couple of SON pipes in my grandfather’s collection which I will restore at a later date since I now know about the historical importance of these pipes!!!!!!!!!!! Here is the link for easy reference of those interested: https://pipedia.org/wiki/Nørding 

INITIAL VISUAL INSPECTION
The stummel is covered in dust, oils and grime giving a dull and lackluster appearance to the bowl. The rustications on the back of the stummel are, likewise, filled with dust, dirt and grime. This will need to be thoroughly cleaned. On close scrutiny, I saw some minor superficial dents and dings on the smooth surface. Will I address it or keep it as it is as a characteristic feature of this pipe’s past life? Hell yes, I will address it!!!!! I want it to be as perfect as I can make it for its next innings with me!!!!!! The chamber is clean with a very uneven and thin layer of cake. The plateau rim top is covered with overflow of lava. The inner rim edge is crisp, even and intact. The chamber is odorless and dry to the touch. The inner wall condition of the chamber will be ascertained once the chamber has been completely reamed. However, I foresee no issues at all as the bowl feels solid to the touch.The fancy stem is heavily oxidized with tooth chatter and bite marks on both surfaces and some calcification can be seen towards the lip. There is a significant damage to the lip end in the form of a bite through hole on the upper surface and some deep bite marks on both upper and lower surface of the stem. The airway in the stem is slightly blocked. These issues will have to be addressed. On close observation, the upper surface of the stem bears the stamp “N” in block capital letter. However, this stamp is very faint and covered in thick layer of oxidation. I will attempt to restore and save this stamp.The shank, mortise and the airway is relatively clean and will only need to be sanitized.THE PROCESS
The first step that I usually follow is the reaming of the bowl. However, in this project, since the only significant damage appreciated is to the stem and would be a time consuming process to repair, I started this restoration by addressing the stem first by sanding the stem surface with a 220 grit sand paper followed by 1500 grit micromesh pad. This serves two purposes. Firstly, it evens out the surface for a fresh fill during stem repairs and secondly, I have experienced that any fill in a stem repair turns distinctly brown after micromesh sanding if the oxidation from the stem surface was not removed prior to the application of the fill. Once I was through with the sanding, I wiped the stem clean with cotton pad dipped in isopropyl alcohol. This was followed by flaming both the surfaces of the stem with a Bic lighter, concentrating more around the hole on the upper surface and the deeper bite marks on the lower surface. This helps in raising all the tooth chatter and dents to the surface.I inserted a pipe cleaner coated with Vaseline in to the stem airway before applying the fill. This helps in preventing the fill from entering and blocking the airway. I prepared a mixture of superglue and activated charcoal and applied it as evenly as possible over the hole and deep bite marks and set it aside to cure for 48 hours since the climate here is very wet and humid. While the glue was curing, I worked on the stummel, reaming out the cake with a Kleen Reem reamer, followed by a pipe reaming knife that I had fabricated. I brought the cake down to the bare briar. To further remove any traces of old cake and smooth the inner walls of the chamber, I sanded the inner wall surface with a 220 grit sand paper. As observed during initial visual inspection, I had decided to remove all the dents and dings in the stummel. I cleaned the stummel with Murphy’s oil soap, paying special attention to the plateau rim which was scrubbed with 000 grade steel wool to remove all the overflow of lava. Thereafter I sanded the smooth surfaces of the bowl with a 220 grit sand paper. Once all the dings and dents were evened out and the surface made smooth, this was followed by micromesh polishing pads, wet sanding with 1500 to 2400 grit pads. Again, I wiped the bowl with a moist cotton cloth after each pad. Thankfully there were no fills in the stummel. Once I was through with the wet sanding pads, I used the 3200 to 12000 grit pads to dry sand the stummel to a nice shine. I set the stummel aside to let it dry out naturally. I rubbed some “Before and After Restoration” balm deeply in to the stummel with my fingers. This balm helps in rejuvenating and protecting the briar wood. The immediate and incredible transformation that takes place is a worthy reward for all the efforts!!! The mixed grain can now be clearly appreciated. I let the balm be absorbed by the briar for about 15-20 minutes and then polished it with a soft cotton cloth. The bowl now looks fresh and attractive with the grains popping out any which way you look at the briar. Turning my attention to the stem, using a flat head needle file I sanded out all the fills to match the surface of the stem. I further matched the fills by sanding it with a 220 grit sand paper. I had to spot fill clear superglue into small fills which were exposed during the sanding and repeat the entire process twice. To finish the stem I went through the complete set of micromesh pads, wet sanding with 1500 to 2400 pads and dry sanding with 3200 to 12000 grit pads. I wiped the stem with a cotton swab dipped in alcohol after each pad and rubbed olive oil into the stem after every three pads. The stem looks crisp, shiny and like new. Having addressed the “appearance” aspects of this beauty, I turned my attention to the “performance” aspects to ensure that this beauty smokes as well as it looks. I thoroughly cleaned the shank internals using shank brush, pipe cleaners, qtips and isopropyl alcohol. The stem airway was cleaned using regular pipe cleaners and also bristled ones dipped in alcohol. The airway is now clean and the draw is full and open.To complete the restoration, I rubbed a minute quantity of PARAGON WAX on the smooth stummel and the stem and HALCYON WAX II on the rusticated surface. After a few seconds, using muscle power and a microfiber cloth, I polished the entire pipe to a lovely shine. The finished pipe is shown below. This one shall soon find a place in my rotation. Thank you for your valuable time spent in reading this chronicle of my journey.

Kathy’s Dad’s Pipes – Beautiful Grained Malaga Bent Billiard


Blog by Steve Laug

The next pipe on the work table is also from George Koch’s estate. It is a Malaga Semi Rusticated Bent Billiard. It has some great grain on the smooth portions and an interesting rustication pattern of spots around the bowl and shank. The rim top was beveled inward and looked very good.  The pipe was another one of many that came to my brother and me in several shipments of pipes from George’s daughter Kathy. When Jeff got each box the pipes were well wrapped and packed. Jeff unwrapped them and took the following photo to give an idea of the volume of the pipes that we purchased. The Malaga came in mixed in a box of pipes much like the one pictured below.In each of the previous blogs that I have written on the restoration of George’s pipes I have told his story. To me it is important to keep the story attached to the pipes that came from his collection. Each pipe I work on I remind myself of the man and in the work give a remembrance to the pipeman who owned these pipes. Having held a large number of his pipes in my hand and having a pretty good feel for the shapes, colour and stems that he liked, I can almost imagine George picking out each pipe in his collection at the Malaga shop in Michigan. He loved Malagas and the majority of his collection was Malaga pipes of various shapes, sizes and finishes. I am including Kathy’s brief bio of her father and a photo of her Dad enjoying his “Malagas”. Here is George’s bio written by his daughter.

Dad was born in 1926 and lived almost all his life in Springfield, Illinois. He was the youngest son of German immigrants and started grade school knowing no English. His father was a coal miner who died when Dad was about seven and his sixteen year old brother quit school to go to work to support the family. There was not much money, but that doesn’t ruin a good childhood, and dad had a good one, working many odd jobs, as a newspaper carrier, at a dairy, and at the newspaper printing press among others.

He learned to fly even before he got his automobile driver’s license and carried his love of flying with him through life, recertifying his license in retirement and getting his instrumental license in his seventies and flying until he was grounded by the FAA in his early eighties due to their strict health requirements. (He was never happy with them about that.) He was in the Army Air Corps during World War II, trained to be a bomber, but the war ended before he was sent overseas. He ended service with them as a photographer and then earned his engineering degree from University of Illinois. He worked for Allis Chalmers manufacturing in Springfield until the early sixties, when he took a job at Massey Ferguson in Detroit, Michigan.

We lived in Livonia, and that’s where his love for Malaga pipes began. After a few years he returned to Allis Chalmers and we moved back to Springfield. I remember that when we went back to Michigan to visit friends, Dad had to go to the Malaga store and acquire a few new pipes. Many a year I wrote to Malaga and they picked out a pipe for me to purchase that I could give Dad for a Christmas or birthday present. He was always pleased. His favorites were the straight stemmed medium sized bowl pipes, but he liked them all. 

He had some other pipes, but the Malagas were his favorites. I remember him smoking them sitting in his easy chair after work, with feet up on the ledge by the fire burning in the fireplace.  Growing up it was my job to clean them and he liked the inner bowl and stem coated with Watkins vanilla, leaving a little of that liquid in the bowl to soak in when I put them back on the rack. Dad quit smoking later in life and so they’ve sat on the racks for many years unattended, a part of his area by his easy chair and fireplace. Dad passed when he was 89 years old and it finally is time for the pipes to move on. I’m very happy they are being restored by you and your brother and hope they find homes who enjoy them as much as Dad did. Thank-you for your care and interest. — Kathy, the oldest daughter

Once again, I want to thank Kathy for providing this beautiful tribute to her Dad. Jeff and I appreciate your trust in allowing us to clean and restore these pipes. We are also trusting that those of you who are reading this might carry on the legacy of her Dad’s pipes as they will be added to the rebornpipes store once they are finished.

The next the pipe is a nicely shaped bent Billiard with a vulcanite stem. It has beautiful grain all around the bowl – birdseye on the sides of the bowl and cross grain on front and the back. The rusticated spots on the sides of the bowl and shank are black and have a tight rustication pattern. The rim top is beveled inward and has rich cross grain in the briar.  The reddish brown stain really looks good with the black spots around the bowl. There was a light cake in the bowl and some lava on the beveled rim top. The stamping on the top side of the shank read MALAGA with a line under it. The black vulcanite stem was deeply oxidized but here were no tooth dents and chatter on the top and the underside near the button. Jeff took these photos before he started the cleanup work on the pipe. Jeff took some photos of the bowl sides and rim to show the condition of the pipe and finish. The bowl really was in good condition other than general dirtiness.The rim top shows some lava build up on the rim toward the front of the bowl. The inside of the bowl has a light cake and shreds of tobacco on the walls of the bowl. The inside of the bowl was dirty.The left side of the shank is clearly stamped with an underlined MALAGA.The stem was oxidized, had some paint spots on it and tooth chatter and worn edges on the button. There were no deep spots so it was clean other thank oxidized. Jeff has picked up quite pipes of this brand over the past year along with the ones from Kathy’s Dad’s estate. All of the pipes were made by the Malaga Pipe Shop in Royal Oak, Michigan in the USA. The more I work on the brand the more I am impressed by the quality of the craftsmanship and beauty of the pipes that came from the shop. I have written an earlier blog to give a little history of the Malaga Brand if you are interested: https://rebornpipes.com/tag/malaga-pipes/. That blog also includes links to a catalogue and the history of the pipemaker George Khoubesser). Follow the link to get a feel for the brand and the pipemaker.

Jeff had reamed the bowl with a PipNet pipe reamer and followed up with a Savinelli Fitsall pipe knife to remove the cake. He scrubbed out the mortise and the airway in the shank and the stem with alcohol, cotton swabs and pipe cleaners. He scrubbed the exterior of the bowl, rim, shank and stem with a tooth brush and Murphy’s Oil Soap to remove the oils and tars on the rim and the grime on the finish of the bowl. He rinsed it under running water. He dried it off with a soft cloth. The rim was thoroughly cleaned and looked virtually undamaged. Without the grime the finish looked really good. The bowl looked very clean and also was unchecked or damaged. The tapered vulcanite stem would need to be worked on but I really like the profile it cast. I took photos of the pipe to show its condition before I started my work on it.  I took a close up photo of the bowl and rim top along with both sides of the stem to show the condition of the pipe after Jeff cleaned it up.I removed the stem and put it, along with two other stems to soak in a Before & After Deoxidizer bath. I left them in the bath for about 4 hours to soak and break through the oxidation. I took the stems out of the bath and rinsed them under running water and scrubbed them dry with a coarse piece of cloth. I took photos of the three stems before I continued my work. There was some residual oxidation on the stem surface so I sanded it out with 220 grit sandpaper. I worked on it until all the oxidation and the light tooth chatter was removed.I polished the stem with micromesh sanding pads – wet sanding with 1500-2400 grit pads and dry sanding with 3200-12000 grit sanding pads. I wiped the stem down with Obsidian Oil after each pad. I polished it with Before & After Pipe Polish – both Fine and Extra Fine and gave it a final coat of Obsidian Oil. I set the stem aside to dry. I rubbed down the briar with Before & After Restoration Balm. I worked it into the smooth surface and the rusticated patches on the briar with my fingertips to clean, enliven and protect it. I let the balm sit for a little while and then buffed with a cotton cloth to raise the shine. The following photos show the bowl at this point in the restoration process. I polished stem and the bowl with Blue Diamond polish on the buffing wheel. I gave the bowl and the stem multiple coats of carnauba wax. I buffed the pipe with a clean buffing pad to raise the shine. I hand buffed it with a microfiber cloth to deepen the shine. The pipe polished up pretty nicely. The grain really came alive in both the rusticated portions and the smooth panels with the buffing and works well with the polished black vulcanite stem. Together the pipe looks much better than when I began and has a rich look. The finished pipe is shown in the photos below. The shape, finish and flow of the pipe and stem are very well done. The dimensions are Length: 5 ¼ inches, Height: 2 1/8 inches, Outside diameter of the bowl: 1 ¼ inches, Chamber diameter: 3/4 of an inch. I will be putting this newly finished Malaga pipe on the rebornpipes store shortly if you are interested in adding it to your collection and carrying on the trust. Thanks for walking through the restoration with me as I worked over another one of Kathy’s Dad’s Pipes.

A Hardcastle Bulldog Run Roughshod over: The Original Restoration


Blog by Robert M. Boughton

Copyright © Reborn Pipes and the Author except as cited
https://www.roadrunnerpipes2k.com/
https://www.facebook.com/roadrunnerpipes/

Grace is neither gentleness nor fragility.  Grace is treating yourself, others and even inanimate objects with respect.
— Kamand Kojouri, Iranian-born novelist and poet

INTRODUCTION
A former roommate, one of Stephen King’s Constant Readers, once remarked with ridicule-tainted respect that I have always been attracted to needful things.  He was speaking of someone I met not long before then whose tragic life had left him wounded to the core, one of the results being his over-demanding, often verbally corrosive and manipulative treatment of me.  The roommate, who like almost everyone had plenty of his own flaws if less obvious and abusive, said my other acquaintance was no friend of mine.

“That may be true,” I replied, “but I’m his friend and the only one he seems to have, and I just can’t give up on him because that’s not what friends do.”

The physically and emotionally damaged person I undertook to help ended up becoming and remaining my genuine though stormy friend until he died at home 14 years later from an unusual and excruciating autoimmune disorder for which there is no cure.  He was 46.

My affinity for care-challenged pipes, therefore, should come as no surprise.  I try to avoid those with fatal flaws such as bad cracks or burnouts and for the most part reject any with serious holes in the stem, but as a restorer I prefer estate pipes that need some real attention to rehabilitate as opposed to the few I find ready to sell or to keep in my collection with minimal effort on my part.

I don’t even remember how the Hardcastle Special Selection #7 smooth bulldog came into my custody or why I chose to ignore the obvious void of vulcanite below the lip on the underside of the stem.  Other than that handicap, the pipe was nowhere near as mistreated as I’ve seen but was plagued enough by dings, scratches and other problems to keep me happy.

One final initial note: I repaired this bulldog to almost like-new condition more than a year ago but failed to blog it because of personal distractions that have left me with a large backlog.  I sold it for next to nothing to one of my present housemates who decided he wanted me to refinish it as a black dress pipe.  The same pipe is the subject of Part 2 of my series on that subject, and so I was going to include this original restoration in that blog.  But anyone who reads my harrowing account of the experience that could be called too much of a bad thing will understand why I broke the overall work into two blogs.

Intrigued by the atypical presence of a stinger in the Hardcastle, and an unusual one at that, I searched online for such phenomena with a faint hope of dating the bulldog.  Of course, at the top of the list was one of Steve’s blogs from 2014.  No other road I found led anywhere close to Rome, as it were.  Steve’s pipe is a Dental Briar brandy, bearing the Registered Design Number 857327, with a unique – or bizarre – dental stem, a system-type metal rod in the shank extending to the mortise hole, and a different short stubby little stinger of its own.  Here is the Dental Briar stinger before Steve’s restoration and the pipe after his usual fantastic work.Steve narrowed the date of manufacture to the Family Era and concluded his pipe was created from 1949-1967 using the National Registry link below.  However, looking at the same link, I see in Table 6.5 that designs numbered 548920-861679 were registered between 1909 and 1950 and suspect the 857327 might have been pre-1949 – no disrespect intended to the master!  Besides, he’s right to note that his Dental Briar could have been made at any time between its registration and 1967 when the family lost all control of the brand.  His pipe is also stamped MADE IN LONDON ENGLAND on the right shank.

I am not so fortunate.  The bulldog has no Registered Design Number or even the usual right shank nomenclature (London Made, British Made, Made in London England, Made in England).  This nomenclature is not faded, it’s just not there.  Only the left shank identifies it as a HARDCASTLE/SPECIAL SELECTION/7.  All I know for sure is that I tried it out after a basic sanitization, and it was quite good.

For a great synopsis of Hardcastle’s history, see Steve’s blog below.  Details are in the Pipedia link.

RESTORATION I would have removed the stinger anyway as useless, but it was also bent and more fragile than usual, and so I experienced even less than usual emotional distress heating the pointless thing with a Bic and twisting it out.Considering the appreciable grime, I started by swabbing the stummel first with purified water and then alcohol.  In hindsight, I should have skipped the water method that had little effect.  The blemishes stand out even more after the cleansing with alcohol.  The one shot below showing the minor rim damage, an unevenness being the only bad part, and decent chamber condition was taken with a flash and therefore looks pre-water and -alcohol cleaning.  I’m still having to do the best I can with a cell phone cam.  I used 150-, 220-, 320- and 400-grit papers to start shaping up those areas.After that I re-addressed the chamber and unevenness of the rim with a Senior Reamer and the blade from my Peterson’s Pipe Tool and made them a little better with 150-400-grit paper.I gave the shank a preliminary alcohol cleaning and retorted the pipe with a meerschaum stem that wasn’t crippled by a hole but somehow forgot to snap a pic of the latter.With 220- and 320-grit papers I was able to remove the dings and scratches as well as giving the chamber a semi-final what-fer.For some reason, the band popped off, and I still wasn’t happy with the color.  I decided to go at it once more with the 220.A full micro mesh buff made the old pipe begin to shine as it should.By now I should be somewhat known for fancying two-tones with bulldogs and Rhodesians where the top of the bowl above the two lines curves upward to the rim.  For the most part, at least, I’ve left this area lighter than the rest of the stummel, although on occasion I’ve dabbled in darkening it with, say, maroon stain.  This one screamed at me to lighten the top of the bowl as usual under these circumstances.  And so I stained the stummel below the lines with Lincoln brown leather dye, flamed it and after letting it cool took off the char and a little of the darker color with 8000 and 12000 micro mesh pads.  By the way, I was alarmed when I got a look at the first pic below and noticed what to every appearance seems to be a wicked and poorly repaired crack in the shank.  I assure everyone it’s a trick of the light or whatever, as the other pics prove. Gluing the band on again was a formality after buffing it on the electric wheel.Okeydokey, then.  There could be no more avoiding the chomped and degraded stem with its hole on the underside and other shortcomings. I had already given it an OxiClean soak, and it wanted repair.  Just to get an idea of what the stem would look like when finished, I gave it a quickie micro mesh rub.   I cut a little strip of card stock from the business leftover of someone with whom I didn’t care to do any more business and lubed it and a very small tweezers with a dab of petroleum jelly.  I inserted both into the mouth opening of the stem, with the cleaner behind the paper, until they were firmly in place inside the airway to a point just below the hole.  Finding my trusty old vulcanite stem that was long ago destroyed by another stem abuser, I shaved some fine flakes onto a small piece of paper with one side of a narrow, relatively smooth triangle rasp.
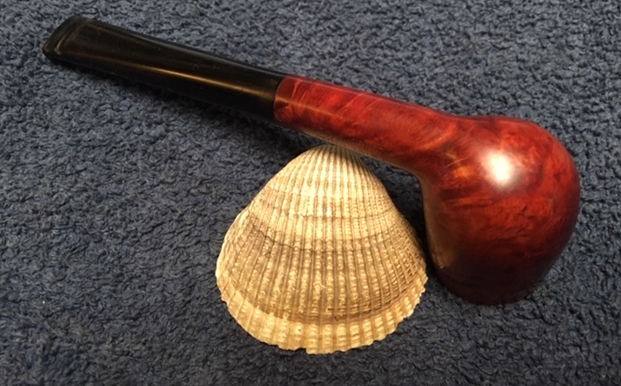
This was where I had to be prepared to act fast: I moved the flakes into a pile and added a few drops of black Super Glue, stirred the two into a gritty paste and scooped up a gob with the part of a three-piece pipe tool made for clearing tobacco from the chamber.  As fast as possible without making a mess, I slapped the goop liberally over the hole and set it aside to dry, removing the card stock and tweezers when the vulcanite mixture was dry on the inside but still a little wet on the outside.It’s a good thing I have an excellent recall of what I did in a particular restoration because the photographs I took of this project were more jumbled and duplicated than those from any other pipe on which I’ve worked.  I had so many of the same thing from alternate angles and differing clarity, for example, that I had to delete quite a few to make sense of it.  I concluded this was because of two things, trying different ways to get a good shot with my poor cell phone camera at the time and lack of sleep during the process.  It’s clear, excuse the pun, that some of the “best” are quite indistinct.  The following photos, as a result, are incomplete, but I always have the words to describe what I did.

For example, after the previous step, I started sanding with 150-grit paper and then smoothed it up with 220-, 320- and 400.  A common, less serious groove resulted, and I added more of the black Super Glue/vulcanite mix and let it dry again.  The mixture settled in well.That’s when I got serious with the sanding, using 150-, 220-, 320- and 400-grit paper and super fine “0000” steel wool.There’s still a small lump visible under the lip that I handled with as little abrasion as possible before the stem was done.  And that was it – for the bottom side.  I still had the top to do.  In every way other than the hole in the bottom, the top was worse, although it only needed a dab of black Super Glue/vulcanite solution to fill a small divot following the same initial OxiClean soak and a more vigorous sanding before filling a small divot with.  Considering again the top of the stem when I received it, close up, notice the wear below the square shank fitting before the rest of the work. The stem never quite fit the shank, which had been given a replacement band somewhere along the way, not to mention the band was damaged. After beginning to re-sand the bottom of the stem, the original hole caved in again.  Accepting defeat, I chose a new bulldog stem I had that needed serious filing at first and then sanding of the 9mm tenon to fit the shank. I bent the stem.  That required heating the stem – with a pipe cleaner inserted through the airhole – at 210° F. for about 15 minutes and bending the nice and pliant material over a complex tool.

Remembering the cell phone photos were atrocious and I had to edit them using every halfway adequate means of adjustment available with my so-called photo editor to show any similarity whatsoever to the actual result, here one last time is the stummel as it in fact looked when it was one step from completion before electric buffing.And these are the final photos of the pipe.  The most offensive discrepancies to me are the obscurity of the two-tone and the lack of shine the pipe had.  The bad twist on the stem in the fifth shot of the rear is all on me!

CONCLUSION
This blog being the occasion of my official announcement in this forum of my new webstore on  my own site, https://www.roadrunnerpipes2k.com/, is unfortunate in that the depictive presentation almost convinced me to give up any idea of writing the blog.  The poor quality and lack of photographs, as well as other stated reasons, were overwhelmingly opposed to the idea of even trying.  Then I thought of the work I put into the briar and the stem alone. In the end, I know how smooth, golden brown and at least hardly blemished the Hardcastle bulldog looked when I was done with it.  Whether anyone else does is of no importance to me.
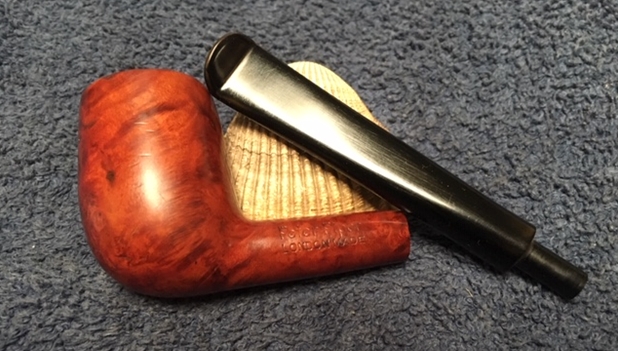
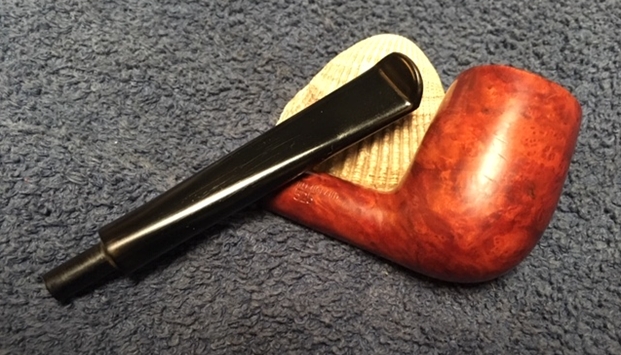
SOURCES
https://rebornpipes.com/2014/06/27/a-unique-piece-of-pipe-history-almost-lost-a-hardcastles-dental-briar-reg-design-no-857327/
http://www.nationalarchives.gov.uk/help-with-your-research/research-guides/registered-designs-1839-1991/
https://pipedia.org/wiki/Hardcastle

Restoring my Grandfather’s…what the…A Kaywoodie?????


Blog by Paresh Deshpande

Yes!! That is what exactly my thought was, when I looked closely at the small pipe in my hand that I had selected as my next project for restoration. Those who have read my previous write ups on pipe restoration would know that I have inherited a large number of pipes from my grandfather dating between the periods from 1940s to 1970s. I had not come across a single Kaywoodie pipe in the two boxes I had opened, one box still remaining unopened!!!

I have restored two Custom-Bilt pipes from this collection to date, one from 1938-41 era (https://rebornpipes.com/2018/06/02/restoring-my-grandfathers-custom-bilt-pipe/) and second from the Wally Frank era(https://rebornpipes.com/2018/07/20/restoring-a-wally-frank-era-custombilt-sitter-633/), the third Custom-Bilt billiard from 1938-41 era was sent to Mr. Steve of rebornpipes fame to sort out tenon issues and have fallen in love with Custom-Bilt pipes since thereafter!!!! I had picked this pipe assuming it to be a Custom-Bilt and it was only on close scrutiny was it reveled that this was a Kaywoodie!!!!! I deliberately rummaged through the pile again and sure enough, there was another Kaywoodie Bent Billiard with 4 holed stinger in relatively unsmoked condition. It seems my grandfather never took a liking for these Kaywoodie pipes!!!!!

This Kaywoodie Pocket Pipe, now on my work table, has similar large finger like vertical rustications with very thin horizontal lines ensconced within these large vertical rustications. These thick vertical rustications extend upwards and end short of the rim top, giving the rim top a flat smooth surface. These rustications can be seen extending all around the shank on top and bottom, save for smooth surfaces on either sides of the shank. The smooth surface on the left side of the shank bears the stamping “Handmade” over “Super Grain” in cursive hand, over “KAYWOODIE” in block capital letters. The right side of the shank bears the stamp “IMPORTED BRIAR”. All these stampings are thin, worn out but readable under bright light with a magnifying glass. The ¾ bent saddle stem bears the trade mark “Clover leaf” symbol.This pipe comes with a four-holed threaded stinger which screws into the shank. This stinger is stamped with “DRINKLESS”. There is an aluminum spacer ring separating the shank end from the stem end when threaded in. On closer observation, it can be seen that a portion of this spacer, closer to the mortise opening, extends into the mortise and is threaded which matches with the stinger threads.I took all these observation and searched pipedia.com for history of this brand, models and attempt at dating this pipe. This site has detailed information on Kaywoodie pipes, including the history of origin, about the owners of the brand and also various important links to “Collector’s Guide to Kaywoodie Pipes” and “Kaywoodie’s Logos and Markings: Clover variations since 1919”. Here is what was revealed as extracted from pipedia.com:-

Kaywoodie was the name a pipe offered by Kaufman Brothers & Bondy Company (KBB), first appearing in February of 1919. The Dinwoodie pipe, also by KBB, appeared in November of 1919. Sometime before 1924, the Dinwoodie had been discontinued and the Kaywoodie name was beginning to be used on an extensive line of pipes that ultimately would be the name of the company. The origin of the name Kaywoodie is a combination of the K from Kaufman and wood, as in briar. Not much is known of the original KBB company other than it was started in 1851 by the German born Kaufman brothers when they opened a small pipe shop in the Bowery section of New York City. In the back room of this shop, they made their first pipes. From this meager beginning, the Kaywoodie name and organization was to emerge.

When one of the men from the New York office got “gold fever”, he carried a large supply of pipes with him to California that he sold along the way. This early “national distribution” did much to build the reputation of KBB. By the late 1800’s, branches of KBB were opened in Chicago, Atlanta, San Francisco and St. Louis with family and friends acting as agents. The trademarks, for the inlaid cloverleaf and the cloverleaf with the KBB initials inside, were issued in 1881. KBB’s pipes became more popular and were in constant demand by the end of the century. Orders were streaming back east and KBB needed to move to larger manufacturing facilities. By 1915 the move was made to larger facilities in the old Union Hill section of Union City, New Jersey. The salesroom offices were located at 33 East 17th. Street, New York. When the Kaywoodie pipe was first introduced by KBB it came with a hand cut rubber mouthpiece fitted with an aluminum Inbore Tube. This device was to “assure a clean, cool smoke.” Other KBB pipes such as Ambassador, Heatherby and Melrose also had the Inbore tube. The early Drinkless Kaywoodies from 1924 through 1931 had push bit stems. In 1931, after three years of research, the new Drinkless Kaywoodies with the synchro-stem, (threaded drinkless screw-in mouthpiece) were introduced. The drinkless attachment was advertised as cooling the smoke from 850 degrees in the bowl to 82 degrees when it entered the mouth. By the mid 1930’s, all Kaywoodie’s came with the screw mounted Drinkless attachment. (Export Kaywoodies, available briefly from 1950-1955, had push bit stems and were available in all the same shapes and finishes as the drinkless versions.)

Throughout much of the 1940’s, 50’s and 60’s, the Kaywoodie family of pipes consisted of 11 basic grades of briar pipes; though new grades were frequently added to the line and some older grades were discontinued or downgraded. These 11 basic grades of pipes, listed in ascending order of quality, were:

  1. Drinkless
  2. Hand-made Super Grain
  3. Super Grain
  4. Relief Grain
  5. Flame Grain
  6. Silhouette
  7. Oversize Kaywoodies
  8. Meerschaum Inlaid Kaywoodies
  9. Connoisseur
  10. Ninety-fiver
  11. Centennial

Thus from the above, I can safely infer that this pipe was a higher grade Kaywoodie from the 1940s to 1960s.

INITIAL VISUAL INSPECTION
The finish looked a lot like the classic Kaywoodie take on Tracy Mincer’s Custom-Bilt pipes. The carved worm trails seen on the stummel and shank is filled with dust, dirt and grime of years of smoking and thereafter years of uncared for storage. The grime and dirt is so strongly entrenched in to these carved worm trails that it appears black and solidly smooth to the touch. I could see 3-4 small dings and dents on one of the fingers of the raised portion of the stummel. This will need to be addressed. There is a decent layer of cake inside the bowl which is dry and hard to the touch. The smooth rim top is clean and devoid of any apparent damage. The condition of the inner walls of the chamber can be ascertained after the cake has been reamed out. The inner edge of the rim shows minor uneven surface, however, the outer edge of the rim is clean and without dents or dings. The short ¾ bent saddle stem has smooth upper and lower surfaces without any tooth chatter or bite marks. This is unlike any other pipe stem I have seen that had belonged to my grand old man. The four holed stinger is clean, however, the holes appear to be clogged. This was confirmed as air did not flow when I tried to blow through the stem. May be that has been the reason that this pipe was not as extensively used by him. The inlaid white clover leaf is clean and prominent with a tiny portion of the top of the leaf missing!! But it is so tiny chip that it is not immediately visible. The lips are worn out and may need to be reconstructed; again I am not sure about this as there is no damage as such. There is an aluminum spacer between the stem and the shank which breaks the monotony of the pipe. However, it is broken on the right side leaving an ugly gap between the shank and stem. The remaining portion of the aluminum spacer was crumbling and breaks merely to the touch. This needs to be addressed. There is a circular band of white tape or some such material at the end of the stinger where it meets the stem. This is something which is not correct and the reason for it having been placed needs to be checked. THE PROCESS
First and foremost in any restoration of pipe, I start with reaming the chamber with a Kleen Reem pipe reamer. However, in this instance, the cake was dry, tightly packed and very hard. I feared breaking the reamer and resorted to the use of my fabricated knife. After a struggle, I was able to take the cake down to the bare briar. I sanded the inner walls of the chamber with 150, 220 and 600 grit sand paper to completely remove the remaining cake and smooth out the walls. Alas, I observed some superficial gouges on the wall surface due to the use of knife. I would need to address this by coating the chamber walls with pipe mud at a later stage. I cleaned the mortise and internals of the shank with cue tips, pipe cleaners and alcohol. Since the major challenge appreciated in this restoration project was the construction of a new aluminum spacer, I decided that is where I would start!!!! To address this issue, I identified three options, as under, which were available to me:

(a) Coat the entire spacer, including the broken portion, with superglue, building it up in layers and then sanding it to flatten it on a topping board. This coat of superglue will also stabilize the remaining original spacer.

(b) Fabricate an aluminum spacer out of a regular aluminum washer and replace only the broken portion of the spacer.

(c) Replace the entire spacer with the new fabricated aluminum spacer.

I discussed these options with my mentor, Mr. Steve Laug. As is his trademark style of tutoring, his suggestion was, “I would go with the first option”!!!!! He further clarified that the spacer also enters the mortise and has threads for the “synchro-stem” (threaded drinkless screw-in mouthpiece). Thus, I concluded that exercising the third option was best avoided if I wished to avoid ruining the pipe!!! That left me with following either first option or the second option. Any other sane student would have followed the advice of his mentor (which I had been doing up to this point!!!). However, I, for some reason, was convinced that the end result of exercising the second option would result in a better finish and thus embarked on the arduous journey of replacing only the broken portion of the original spacer with the fabricated aluminum washer.

I began the process by shaping the new aluminum washer to match the size, shape and thickness of the original spacer. I was not very meticulous about the size and thickness as the same would, in any case, have to be perfectly matched by sanding it down with needle files. The following pictures will tell the story of the entire process of constructing this spacer. However, what these pictures do not tell you is the long back breaking hours involved, the strain to which eyes were subjected, precise and controlled movements of the needle files and agony experienced whenever the needle file inadvertently scraped the crumbling original spacer, causing it to chip. When I was satisfied with the fit and finish of the new spacer, I applied an even coat of superglue over the entire surface and very painstakingly re-aligned all the broken pieces of the original spacer and also the new fabricated spacer over the coat of the superglue and set it aside to cure overnight. Next day I evenly applied another coat of superglue over the entire spacer and again set it aside to cure so as to stabilize the spacer repairs and even out the surface. Once the glue had sufficiently cured, I topped the surface on a topping board to even out the glue. To further smooth out the surface and ensure a transparent, even and smooth surface, I polished the surface with micromesh pads, wet sanding with 1500 to 2400 grit pads and dry sanding with 3200 to 12000 grit pads. I frequently wiped the surface with a moist cloth to remove the glue dust. I was able to maintain just sufficient thickness of the coat so as not to disturb the alignment of the stem with the shank while stabilizing and protecting the spacer. I was very satisfied with the results. Now with the spacer taken care of, I start working on the stummel. I thoroughly clean the stummel with undiluted Murphy’s oil soap and a hard bristled tooth brush scrubbing the rustications clean of all the lodged dirt, dust and grime. I had seen a few dents and dings on one of the fingers of the stummel rustication and wanted to address it. I began by sanding the stummel and raised portion of the rustications with a 600 grit sand paper followed by 800 grit sand paper. I had used very light hand so as not to lose too much briar (though at the end I realized that I should have used a bit more force since at the end of the process, these dents and dings were still very much visible!!!!!!). This sanding was followed by polishing with micromesh pads, wet sanding with 1500 to 2400 grit pads and dry sanding with 3200 to 12000 grit pads. I wiped the bowl down with a moist cloth after each pad to remove all the sanding dust. As I was going through the micromesh pads, I was thinking of adding some twist to the finish and remembered that Mr. Dal Stanton, a gentleman I often turn to for some interesting pipe related conversations and advice, had refurbished a Tom Howard rusticated tomato pipe for me. He had darkened the crevices of the rustications with a dark stain pen and the contrast was eye catching, to say the least. I wanted to have a pair of pipes with this finish and decided to give this Kaywoodie the same treatment. I discussed with Mr. Dal Stanton who wholeheartedly explained the technique of achieving this finish and also gave me some very fine and pragmatic advice which I shall cherish on this journey. I stained the crevices in the rustications with a dark brown stain pen and set it aside for the stain to set in to the crevices. After the stain had set, I rubbed a small quantity of “Before and After” restoration balm in to stummel and set it aside for a few minutes to let the balm work its magic on the briar wood. The balm works to bring back the shine and pours life in to the briar. I buff the stummel with a horse hair shoe brush followed by a nice hand polish with a soft cotton cloth. I liked the way the stummel has finished. To address the superficial gouges in the chamber created by use of knife during reaming, I prepared a mixture of pipe ash and yogurt of putty consistency and applied a coat to the inner walls of the chamber. Once the coating had cured, I gently sand the walls with a 220 grit sand paper to a smooth and even surface. With this, the stummel is all completed. Once the stummel had been finished and set aside, I turned my attention to the stem. There was not much work on this stem since it was sparingly used with only light signs of oxidation and no bite marks or tooth chatter. I start by sanding with micromesh pads, wet sanding with 1500 to 2400 grit pads and dry sanding with 3200 to 12000 grit pads. I wiped the stem with a cotton swab dipped in alcohol to remove the sand dust and rub a small quantity of Extra Virgin olive oil and allow it to be absorbed in to the stem. The stem is now nice and shiny. The next thing to address was the blocked stem. I tried cleaning the airway in the stem with pipe cleaners dipped in alcohol, but the pipe cleaner would not go in the complete distance. There was gunk and tars which had accumulated inside the airway and in the holes too!!!! Using a straightened paper clip, I probed and cleaned all the holes on the stinger. I tried to blow through the stem, but I realized that it was still blocked. I tried pushing the paper clip through the airway and then there was this small sound of a crack!!!!!! Aargh……..the upper lip now has a chip!!!!! Undaunted by this temporary setback, I continue with the clearing of the blocked stem. Finally, I am able to dislodge the block and now the air flows freely through the stem.To address this chip, I firstly insert a regular pipe cleaner coated with Vaseline in to the air way. This prevents the charcoal and glue mix from dribbling in to the air way blocking it. I mix a small quantity of activated charcoal and CA superglue and spot apply it over the chipped surface. Once I have ensured that the complete surface is coated with the mix, I set it aside to cure overnight. The next evening, I file the filling with a needle file and match it to the surface of the stem. To further match the filling with the rest of the stem surface, I sand the fill with a 220 grit sand paper followed by micromesh polish pads. The stem is now nice and shiny again with a free flow of air through the airway. I finished this restoration by applying a small quantity of Halcyon II wax and rubbed it deeply in to the stummel with my fingers. A few minutes later, I polished it with a soft cotton cloth using muscle power. The stummel now has a nice deep shine to it and the grains on the rim top and raise portion of the rustication can be seen in its full glory. I re-attach the stem and then relies that the stem is off center to the shank!!!! My God, this one was giving me a hard time. I removed the white sticky tape that was stuck around the stinger at the stem end and tried the fit. The fit had improved but it was still off centre. Again, to address this issue, I was presented with two options of either sanding the coating of superglue over the spacer till the off center was corrected or heat the stinger till the glue fixing the stinger in the stem was loosened and turn the stinger in to the mortise till the issue was addressed. I decided to go with the second option as I feared losing the coating of superglue over the spacer and thus exposing the brittle original to further chipping. I heated the stinger with the flame of a Bic lighter so that the glue holding the stinger would loosen a bit and fitted the stem in to the mortise, tightening it till the stem and shank were perfectly aligned. I let the stinger sit in this position till it had cooled down and the glue had hardened again. Now the fit of the stem and the shank is perfectly aligned. Here are the pictures of the finished pipe and hope that this long write up has been an enjoyable read. Thank you for walking with me through this restoration as I attempt to preserve the legacy of my beloved grand old man!!!!!