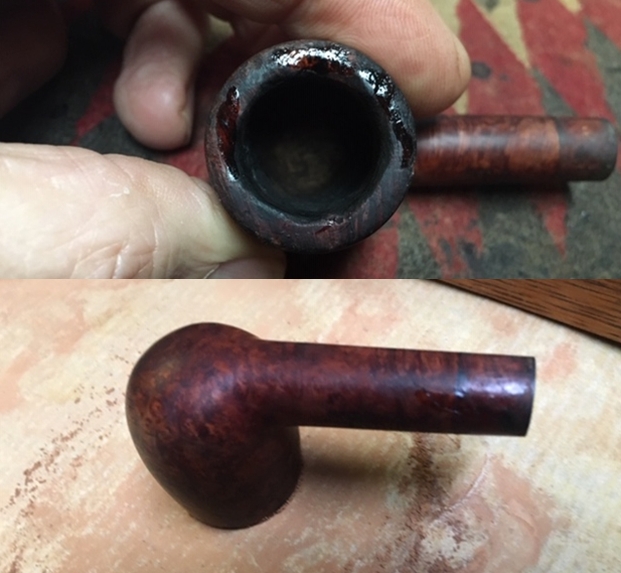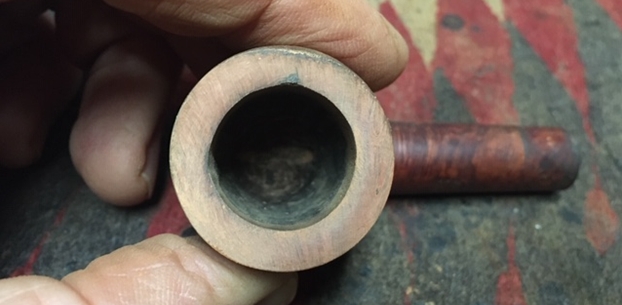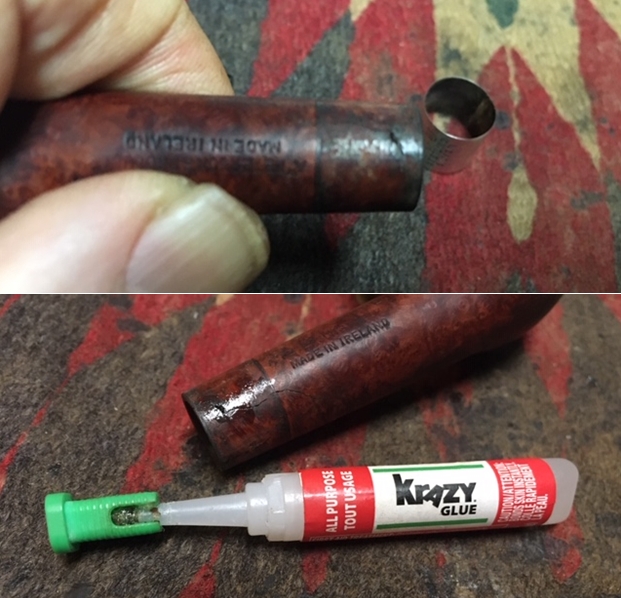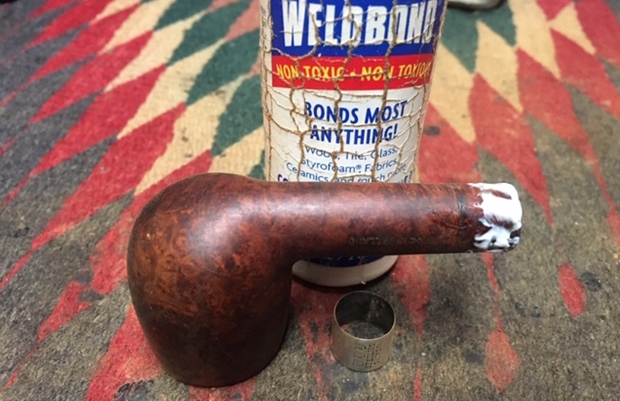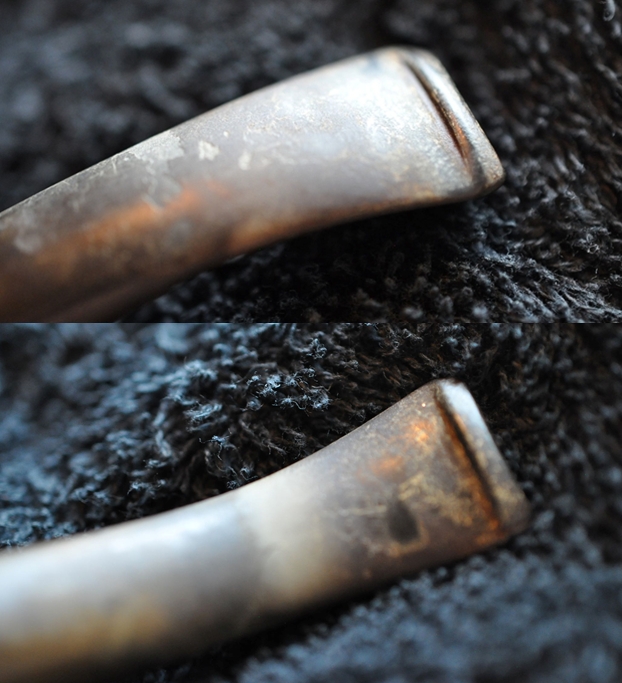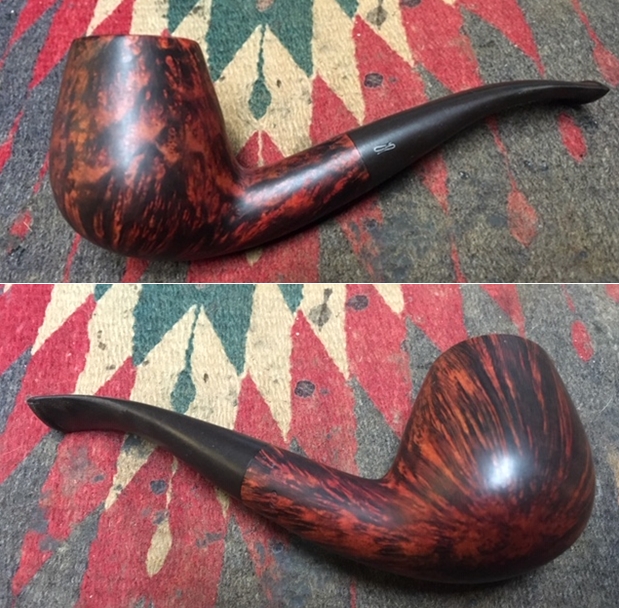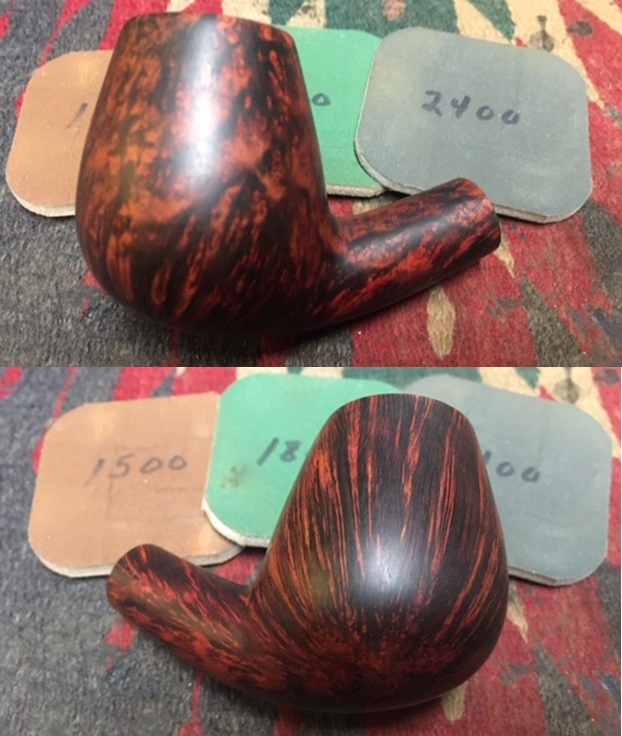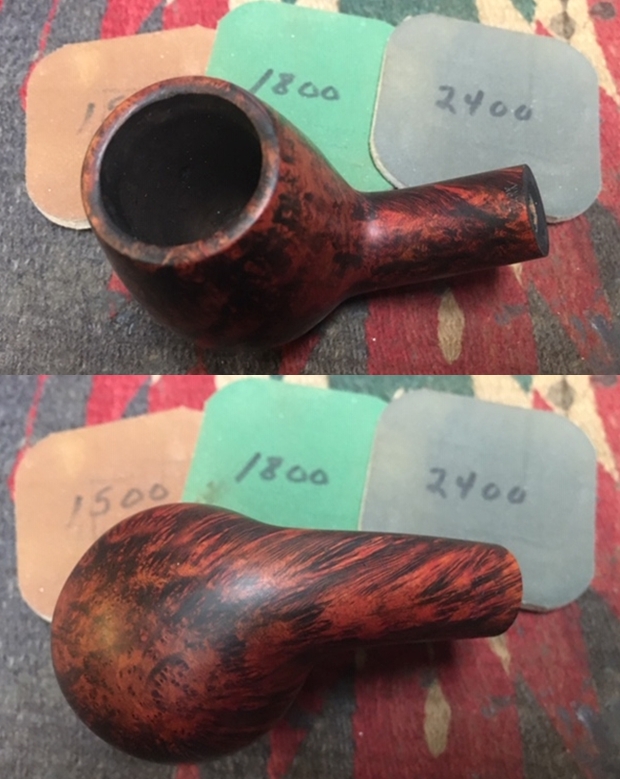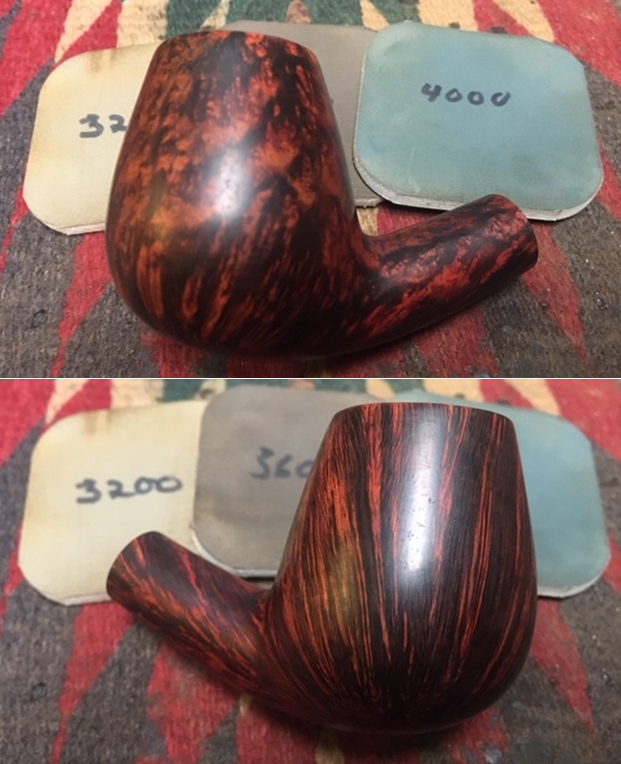
Tag Archives: shaping a stem

Restoring an Irish Made Peterson’s K&P Dublin 213 Billiard from Bob Kerr’s Estate


Blog by Steve Laug

I am working on another pipe from Bob Kerr’s estate, another one of his Petersons. It is different than the others as it is stamped “A Petersons Product” Made in Ireland. I have restored two of his pipes that were uniquely made Peterson’s pipes made specifically for import into the Canadian market – one was a Kapruf 54 sandblast bent billiard (https://rebornpipes.com/2019/08/09/back-to-bob-kerrs-estate-another-canadian-import-petersons-kapruf-a-54/) and the other was a Kapruf 9BC 56 (https://rebornpipes.com/2019/08/09/back-to-bob-kerrs-estate-linking-petersons-kapruf-9bc-with-the-56-shape-number/). These were interesting that they had a unique numbering system designed for Petersons pipes that were specifically brought to Canada by the Canadian importer, Genin, Trudeau & Co. of Montreal, Quebec. I have included the links on that company below. (https://rebornpipes.com/2016/09/13/petersons-pipes-brochure-from-genin-trudeau-co-montreal-quebec/). I restored an English Made Peterson’s System ‘0’ 1307 bent billiard a  (https://rebornpipes.com/2019/08/17/an-english-made-petersons-system-0-1307-bent-billiard-from-bob-kerrs-estate/) and a Republic Era Peterson’s Flame Grain Bent billiard with a fishtail stem (https://rebornpipes.com/2019/08/16/a-petersons-flame-grain-x220s-bent-billiard-from-bob-kerrs-estate/).

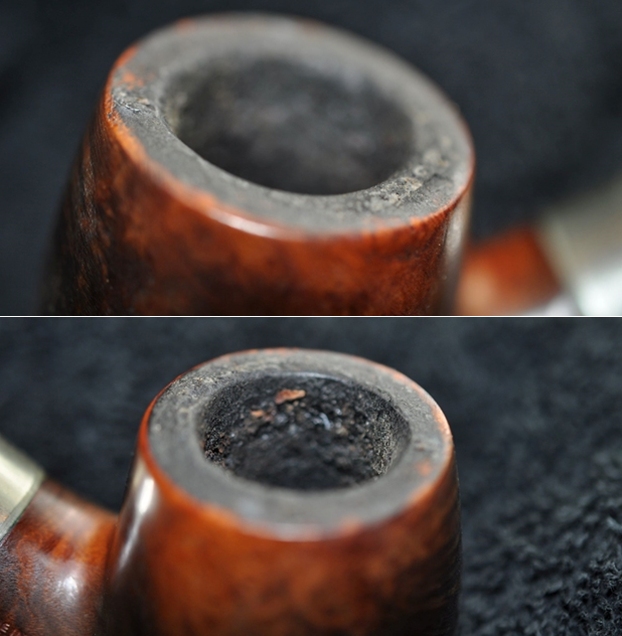
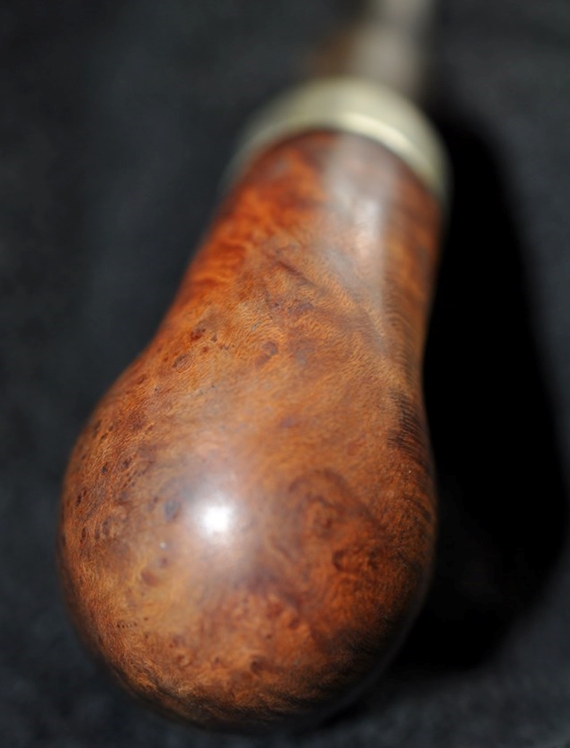
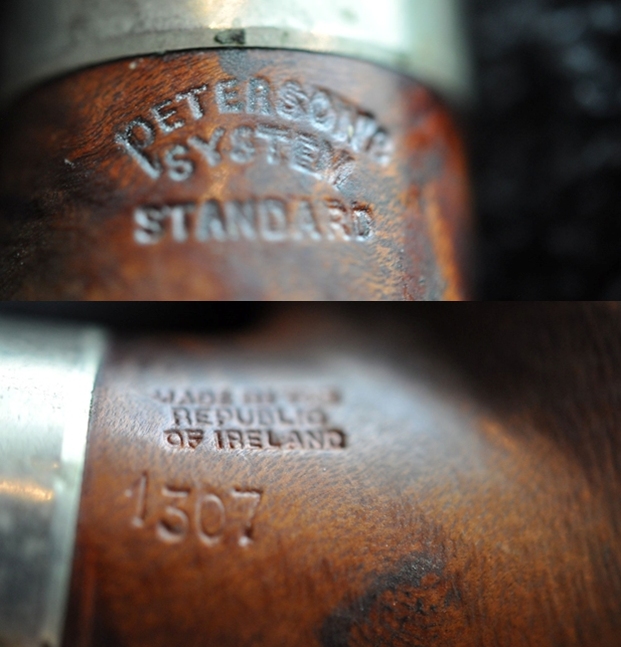
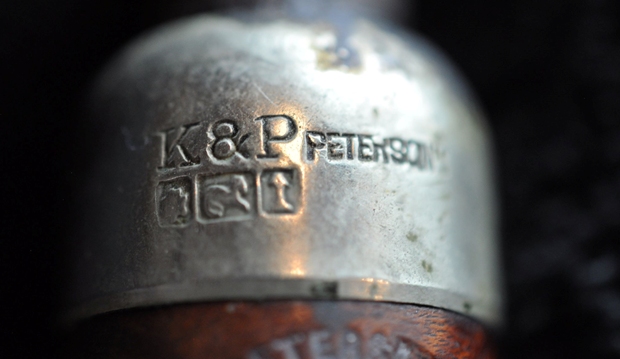
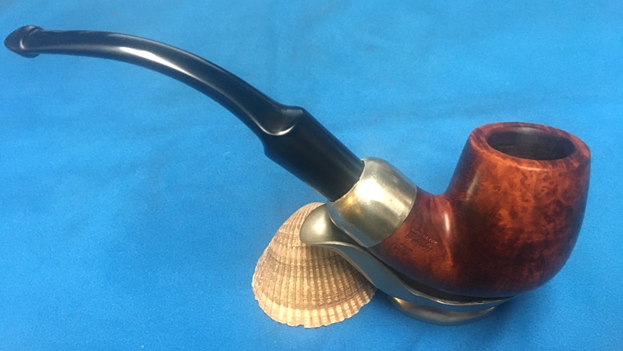
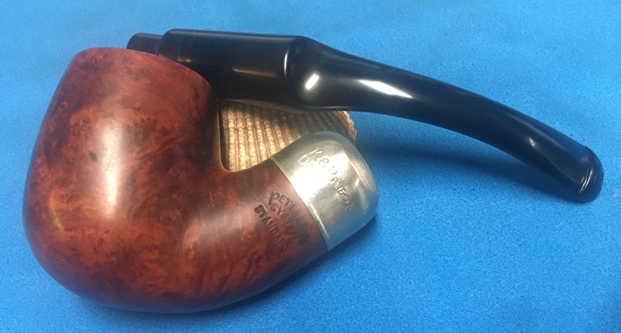
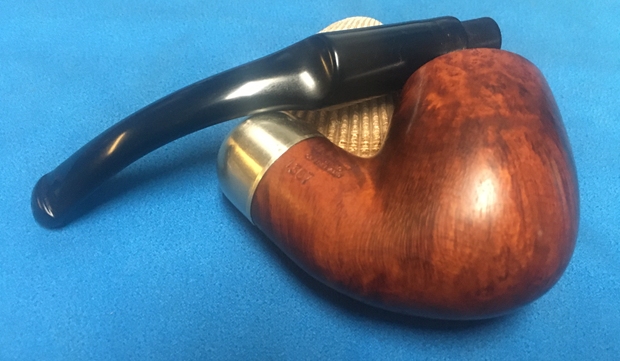
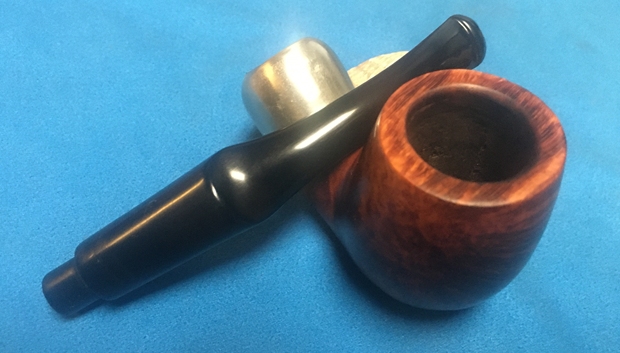
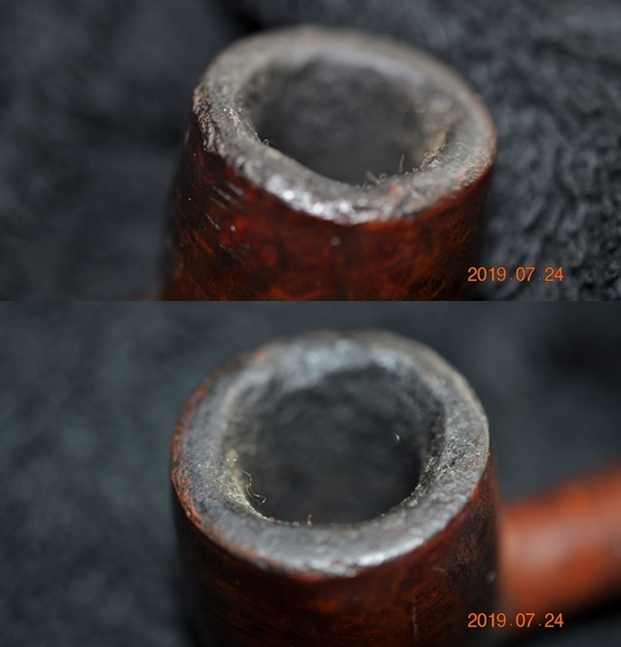
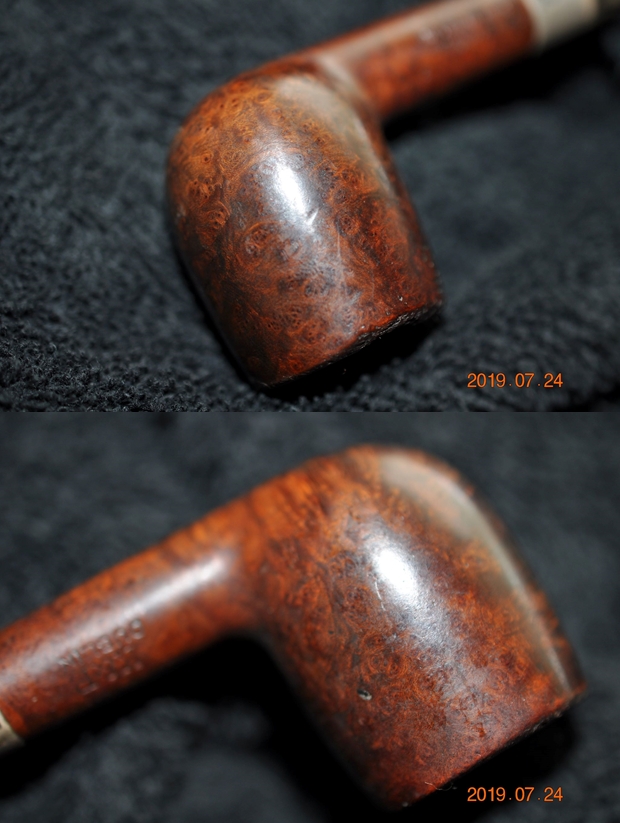
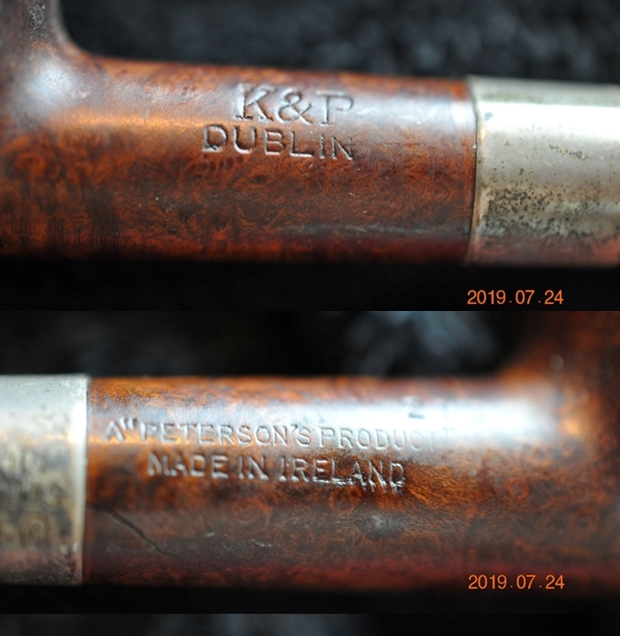
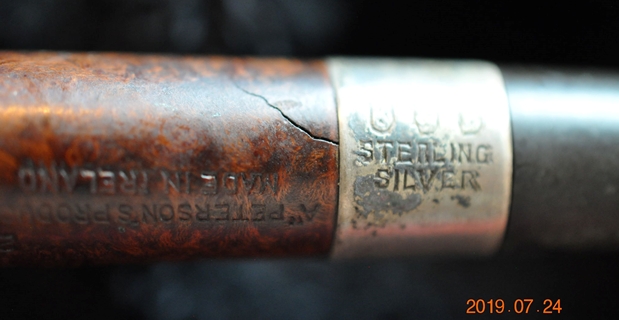
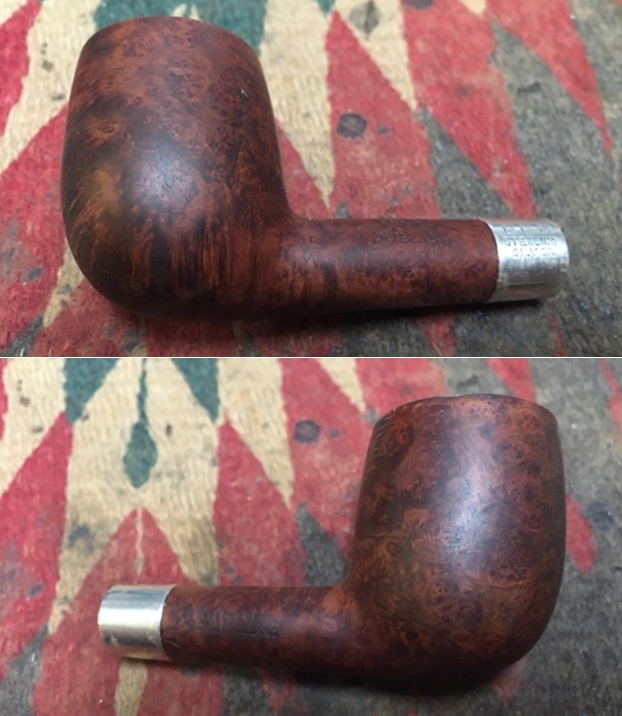
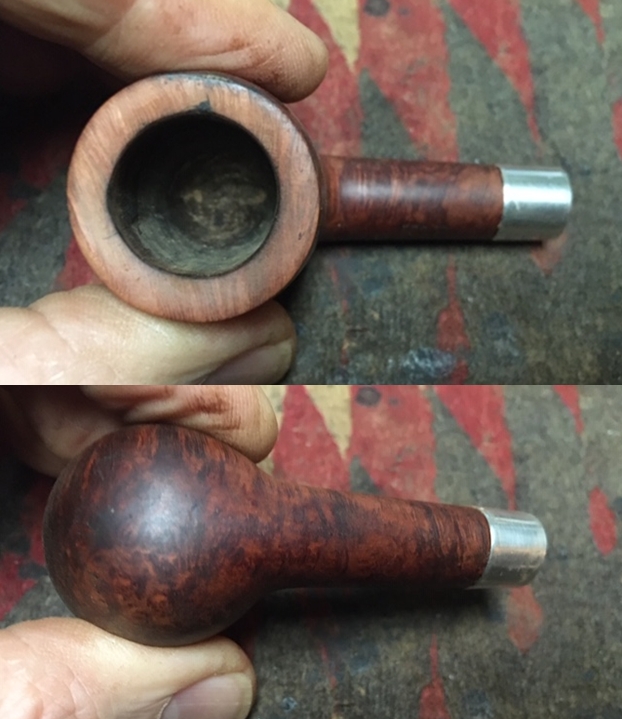
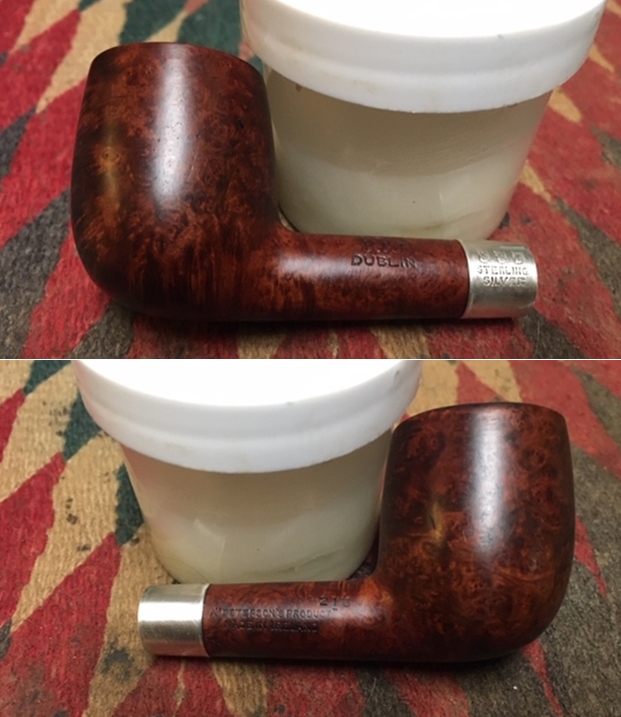
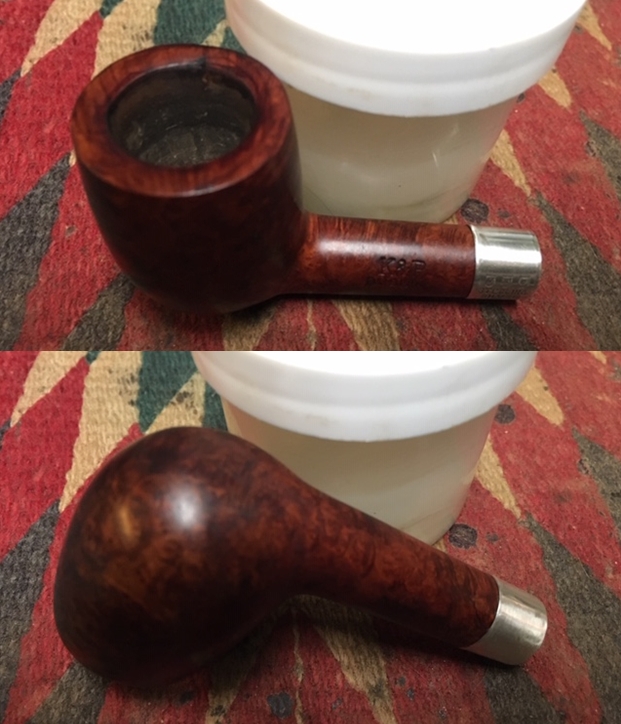
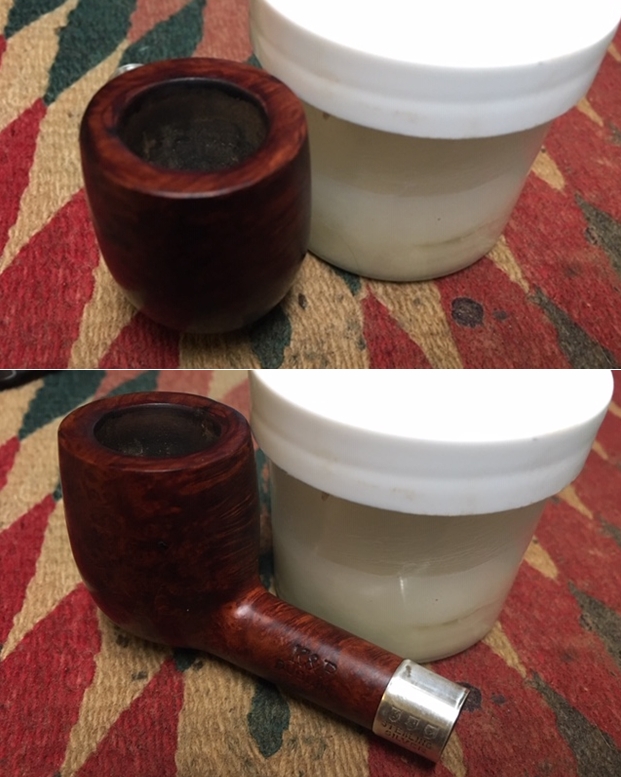
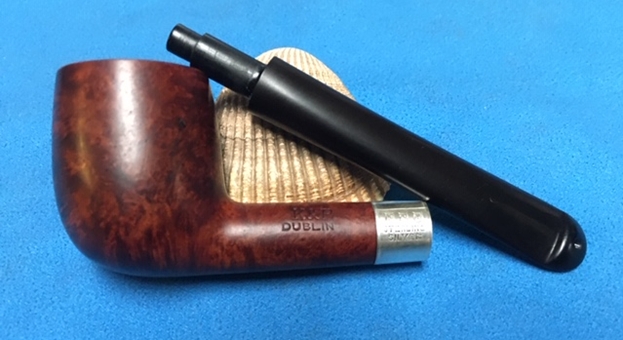
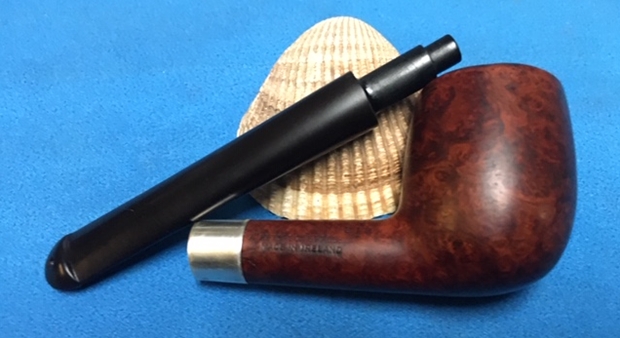
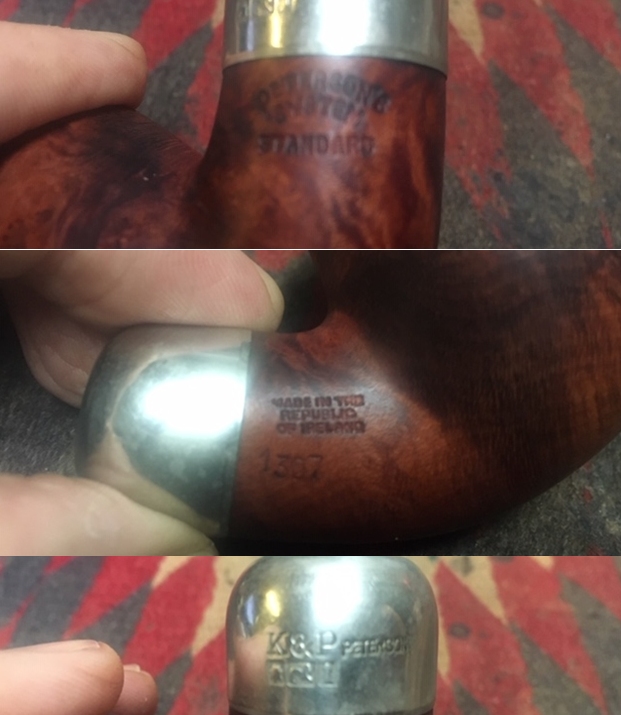
I have been enjoying working on the Peterson’s in the estate. When I took it out of the box of the pipes that Jeff had cleaned up and sent back to me, I could see that it was stamped K&P over Dublin on the left side of the shank and “A Peterson’s Product” Made in Ireland followed by the shape number 213 on the right shank. It has some stunning grain around the bowl and shank under the thick grime. There was a thick cake in the bowl with remnants of tobacco stuck on the walls. There was a fair lava overflow on the rim. The top and edges of the rim are damaged, beat up and very dirty. I think that there was a beautiful pipe underneath all of the grime and buildup of years of use. The band is stamped Sterling Silver with the K&P in chevrons above that. The stem was oxidized and calcified toward the end with some tooth chatter but surprisingly it did not have the deep tooth marks that I have come to expect from Bob’s pipes but the button edges were worn. Jeff took photos of the pipe before he started his cleanup work on it. Jeff took photos of the bowl and rim top to show the thick, hard cake in the bowl and the lava build up on the top of the rim and the edges of the bowl. The rim top had taken a beating and was chipped and worn down. It looked like Bob or someone had used if for a hammer. The inner and outer edges of the rim also sustained damage.   Jeff took photos of the sides and heel of the bowl to show the condition of the finish. You can see the beautiful mix of swirled, flame and birdseye grain underneath the dirt and debris of the years. The cross grain on the heel was beautiful.    Jeff took photos of the stamping on both sides of the bowl and shank. The stamping on the left side was readable as you can see from the photos. It read K&P Dublin. The stamp on the right side read A “Peterson’s Product” Made in Ireland followed by the shape number 213. You can see crack in the shank under the band on the right side. The third photo shows the crack clearly. Jeff took photos of the top and underside of the stem showing the tooth chatter, scratching and oxidation on the stem surface and wear on the edges of the button. I turned first to Pipephil’s site to reacquaint myself with the brand. Unfortunately there was no information to be found on this specific pipe. I then turned to Pipedia’s article on Peterson pipes to see what I could garner from that information. It is a great read in terms of the history of the brand (https://pipedia.org/wiki/Peterson). I have included a bit of the pertinent history here.
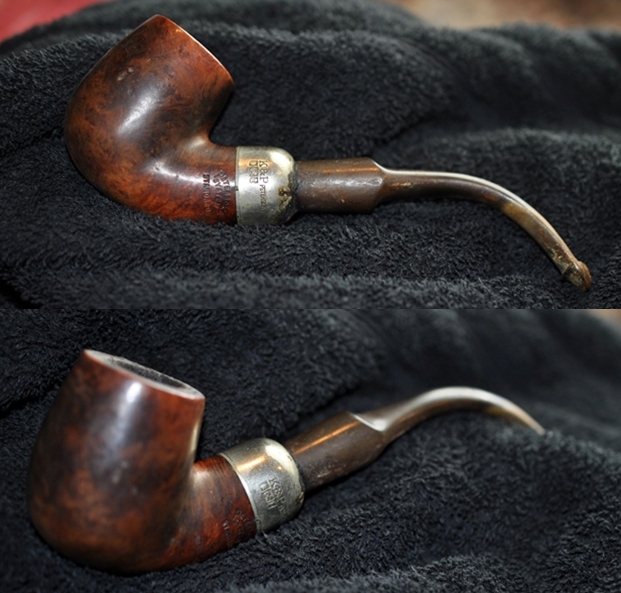
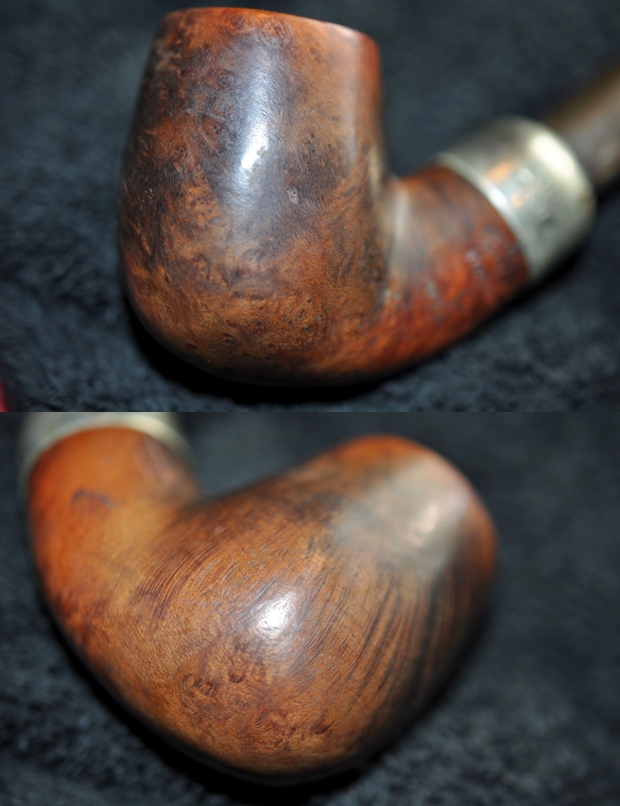
The Irish free state came into being in December 1922. The Free State Era was from 1922 through to 1937.  Peterson followed with a stamp of “Irish Free State” in either one or two lines, either parallel or perpendicular to the shanks axis and extremely close to the stem.

Ireland was a republic in all but name. Eventually the Irish people voted for a new constitution in 1937 and Ireland then formally became Eire (Ireland in Irish).

The Made in Eire era stamps were from 1938 through till 1941. Peterson now stamped their pipes with “Made in Eire” in a circle format with “Made” and “Eire” in a circle with the “in” located in the centre of the circle. This was used during the years of 1938 – 41. Later they stamped their pipes with “Made in Ireland” in a circle format 1945-1947 and still later with “Made in Ireland” in a block format 1947-1949. The “Made in Ireland” block format came in either one line or two lines. The Republic of Ireland was formed on 17 April 1949.

With that information in hand I knew what I was dealing with in terms of the stamping on the pipe. It is a 1915-1949 Pre Republic Period pipe. With that dating it is one of Bob’s earlier pipes. Now it was time to work on the pipe.

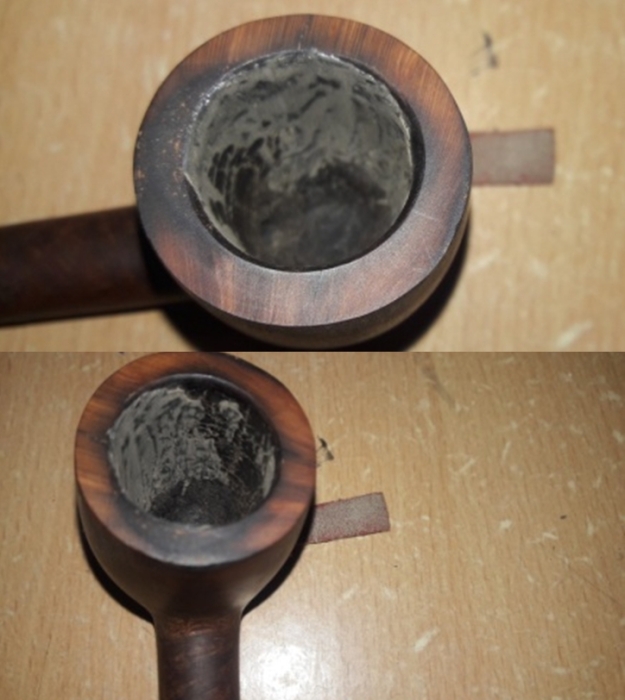
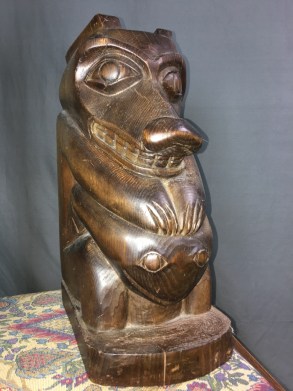
With over 125 pipes to clean from Bob’s estate I am very glad for Jeff’s help cleaning them. He cleaned this filthy pipe with his usual penchant for thoroughness that I really appreciate. This one was a real mess and I did not know what to expect when I unwrapped it from his box. He reamed it with a PipNet pipe reamer and cleaned up the reaming with a Savinelli Fitsall Pipe Knife. He scrubbed out the internals with alcohol, pipe cleaners and cotton swabs until the pipe was clean. He scrubbed the exterior of the bowl with Murphy’s Oil Soap and a tooth brush to remove the grime and grit on the briar and the lava on the rim top. The finish looks very good with great looking grain around the bowl and shank. Jeff soaked the stem in Before & After Deoxidizer to remove the oxidation on the rubber. When the pipe arrived here in Vancouver for the second stop of its restoration tour I was amazed it looked so good. I took photos before I started my part of the work. I took some close up photos of the rim top and also of the stem surface. I wanted to show what an amazing job Jeff did in the cleanup of the rim top. I also wanted to show that the damage to the rim top was as extensive as I had originally thought. The rim top was burned and darkened with nicks and notches around the top and inner edge. There was some darkening on the back portion of the rim top and inner edge on the front. The rim top was a nightmare of issues. The outer edge of the bowl was also damaged. I also took close up photos of the stem to show the lack of tooth marks and chatter on the stem surface. You can also see the wear to the button.   One of the things I appreciate about Jeff’s cleanup is that he works to protect and preserve the nomenclature on the shank of the pipes that he works on. The stamping on this one was very faint to start with so I was worried that it would disappear altogether with the cleanup. He was not only able to preserve it but it is clearer than shown in the earlier photos. I took some photos to show the clarity of the stamping. I have noticed that many restorers are not careful to protect the stamping in their cleaning process and often by the end of the restoration the nomenclature is almost destroyed. I would like to encourage all of us to be careful in our work to preserve this as it is a critical piece of pipe restoration!   Since this is another pipe Bob’s estate I am sure that some of you have read at least some of the other restoration work that has been done on the previous pipes. You have also read what I have included about Bob Kerr, the pipeman who held these pipes in trust before I came to work on them (see photo to the left). Also, if you have followed the blog for long you will already know that I like to include background information on the pipeman whose pipes I am restoring. For me, when I am working on an estate I really like to have a sense of the person who held the pipes in trust before I worked on them. It gives me another dimension of the restoration work. I asked Brian if he or his wife would like to write a brief biographical tribute to her father, Bob. His daughter worked on it and I received the following short write up on him and some pictures to go along with the words including one of Bob’s carvings. Once again I thank you Brian and tell your wife thank you as well.
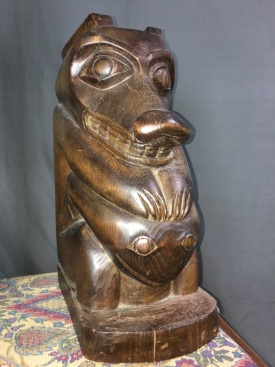
I am delighted to pass on these beloved pipes of my father’s. I hope each user gets many hours of contemplative pleasure as he did. I remember the aroma of tobacco in the rec room, as he put up his feet on his lazy boy. He’d be first at the paper then, no one could touch it before him. Maybe there would be a movie on with an actor smoking a pipe. He would have very definite opinions on whether the performer was a ‘real’ smoker or not, a distinction which I could never see but it would be very clear to him. He worked by day as a sales manager of a paper products company, a job he hated. What he longed for was the life of an artist, so on the weekends and sometimes mid-week evenings he would journey to his workshop and come out with wood sculptures, all of which he declared as crap but every one of them treasured by my sister and myself. Enjoy the pipes, and maybe a little of his creative spirit will enter you!

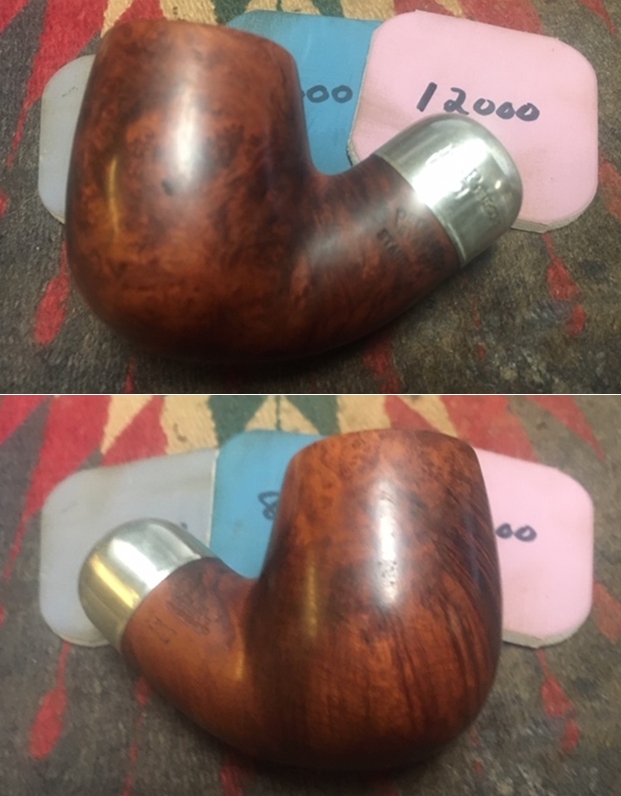
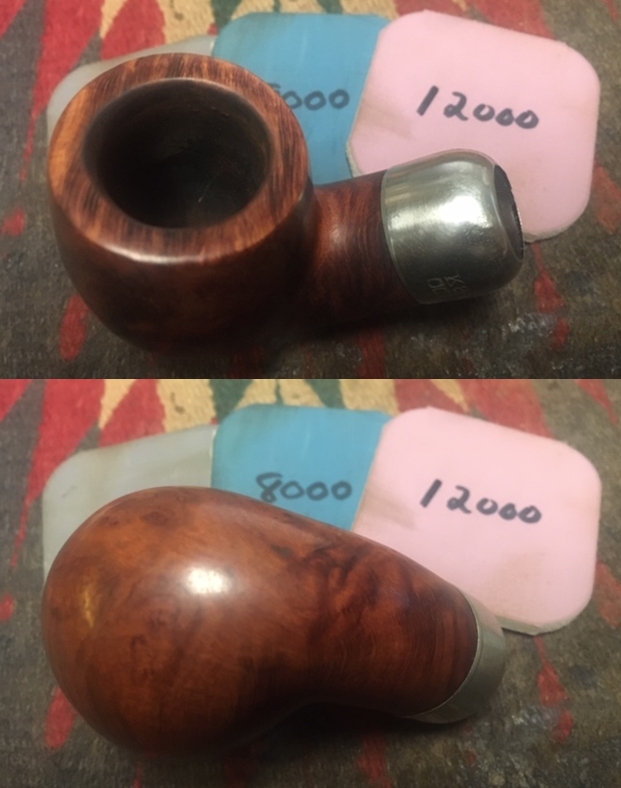
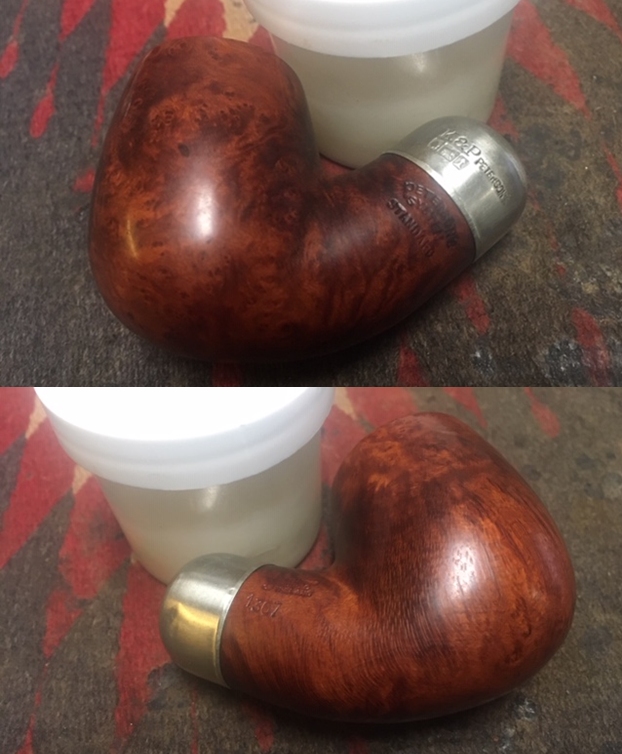
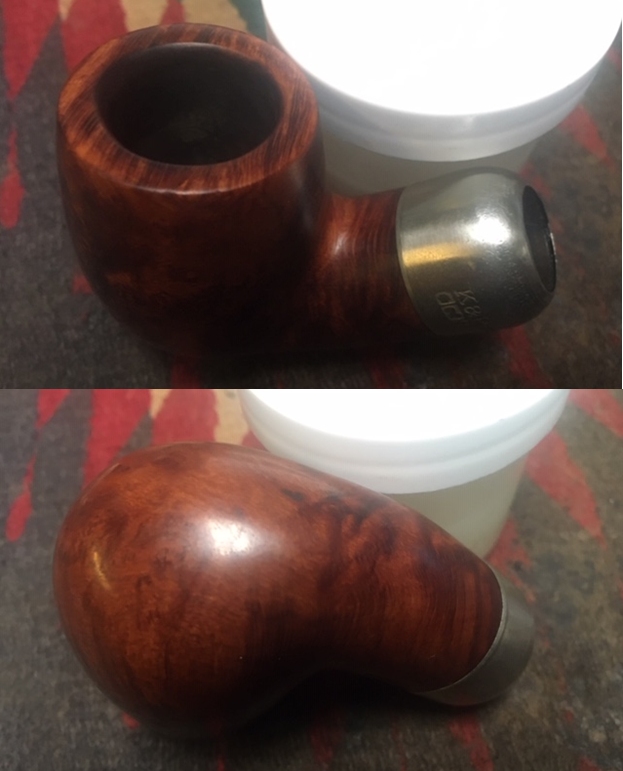
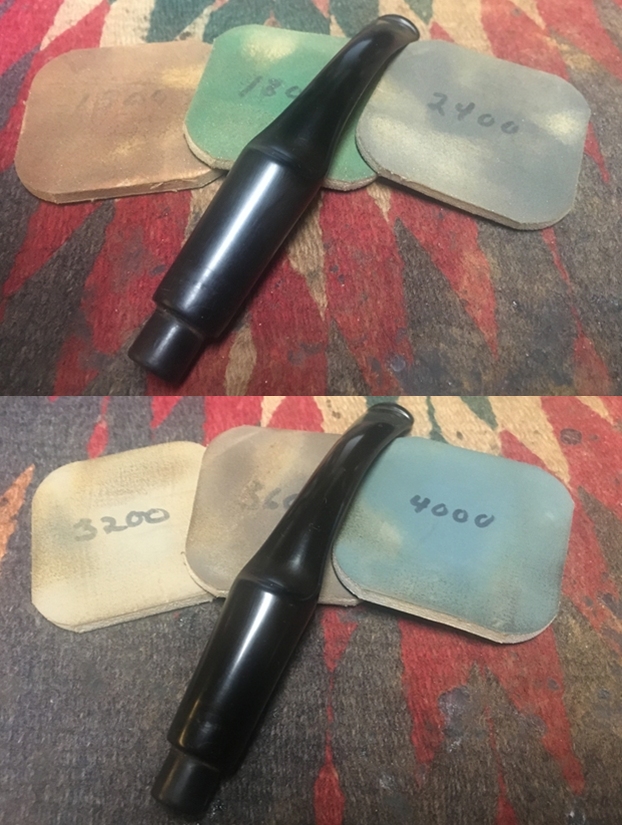
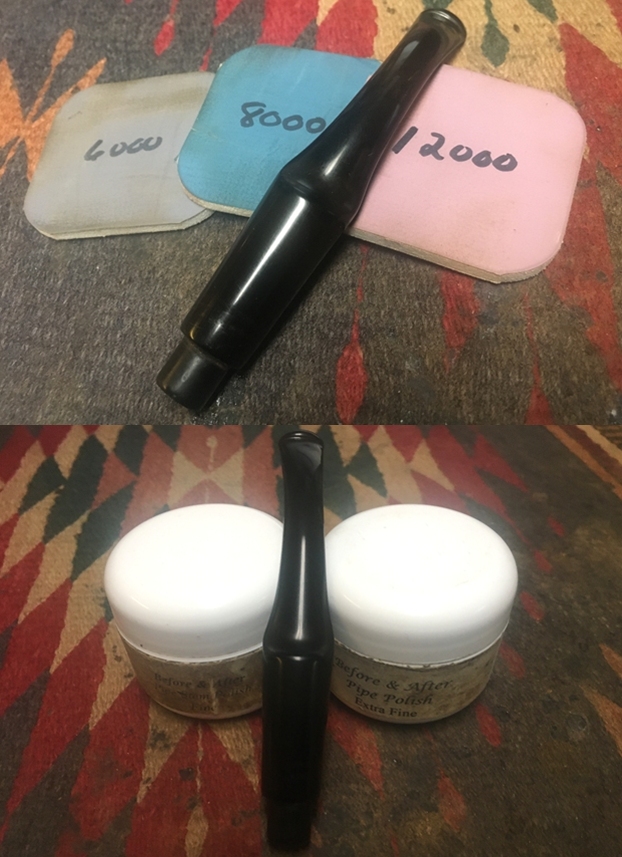
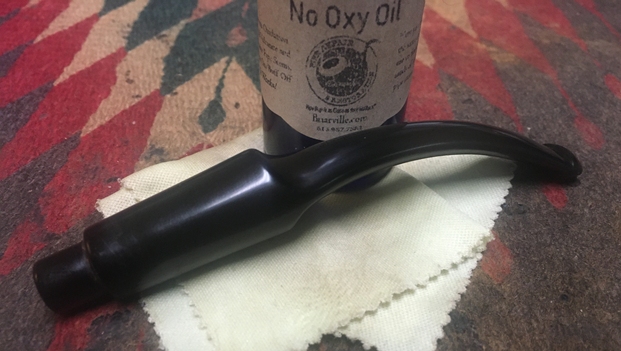
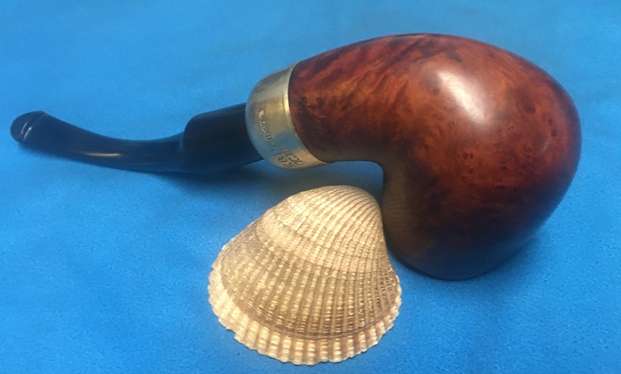
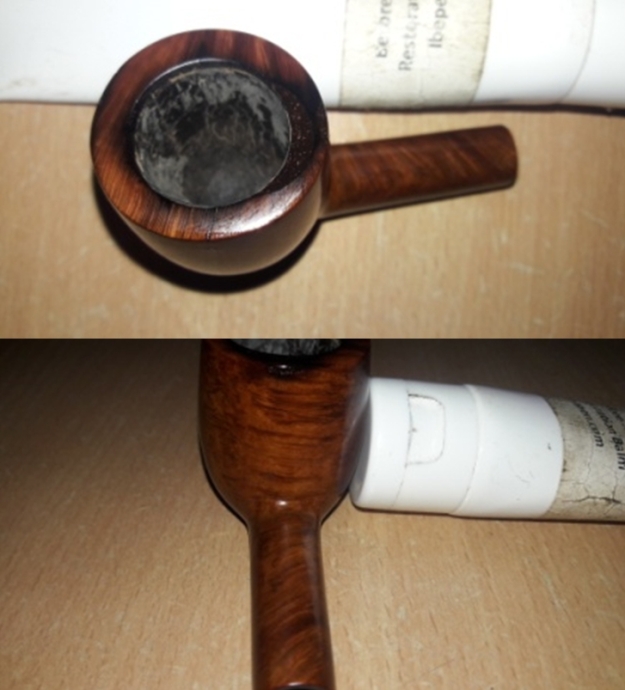
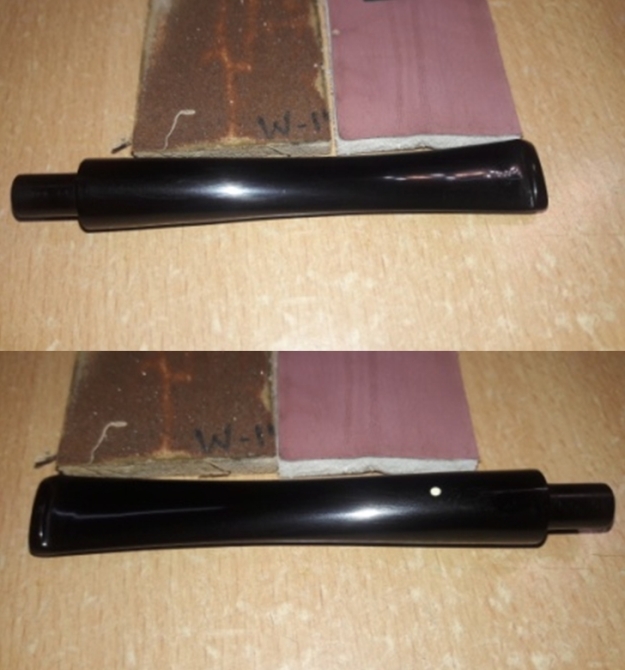
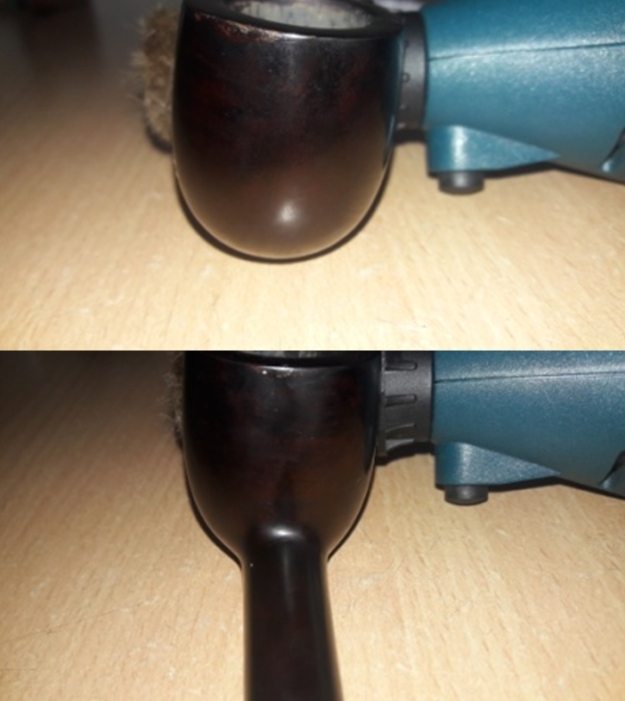
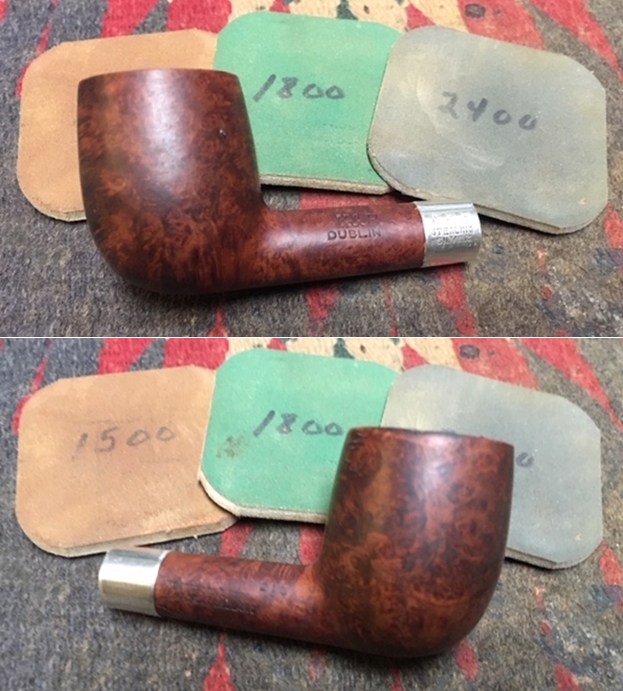
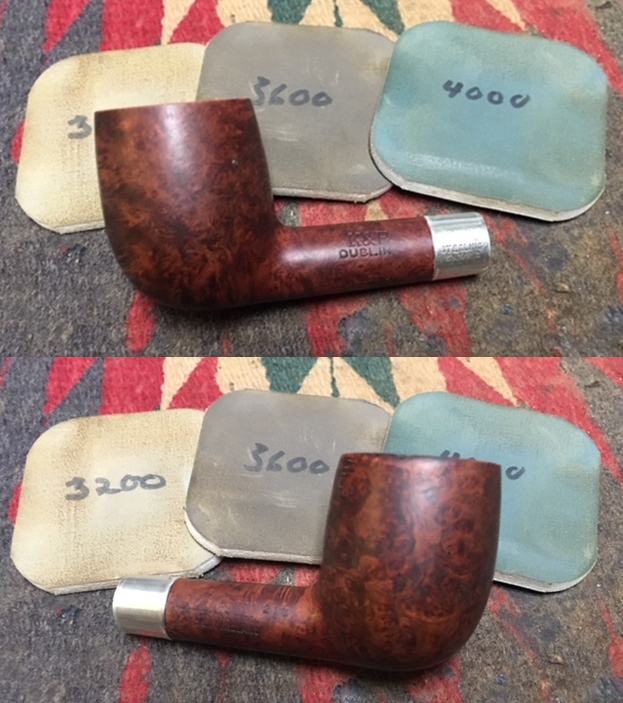
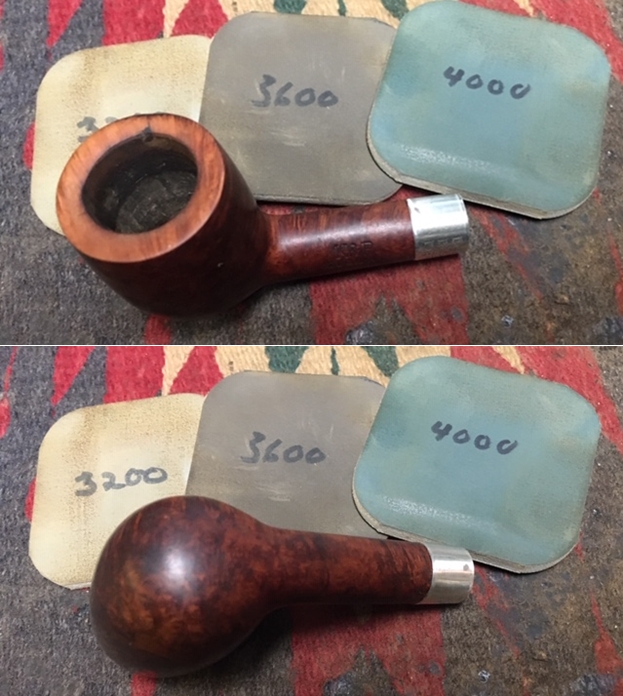
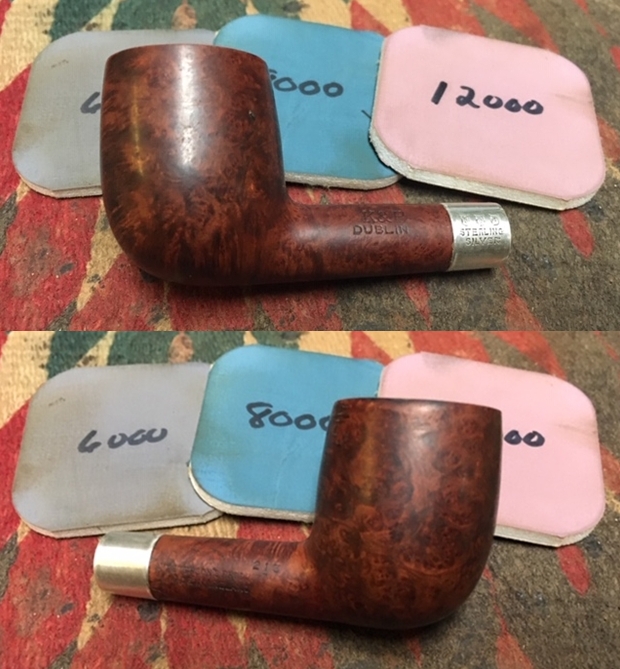
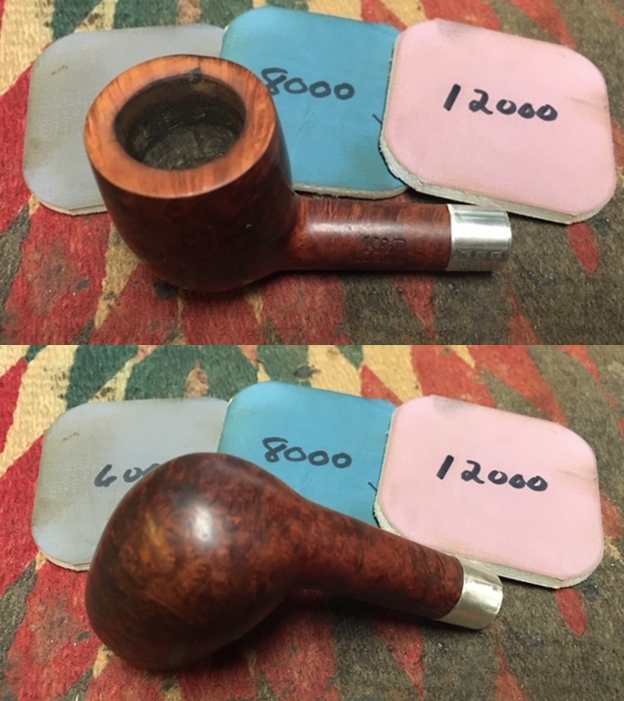
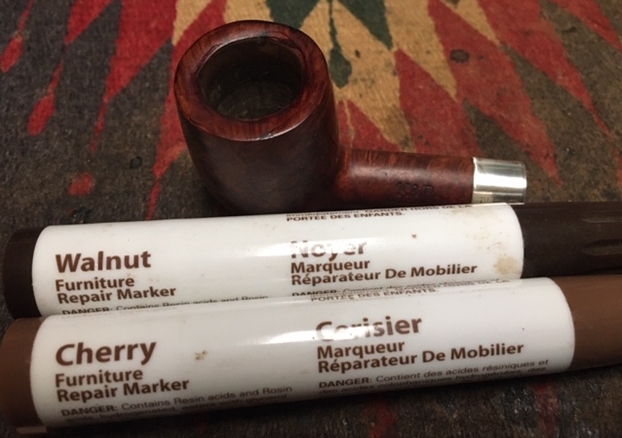
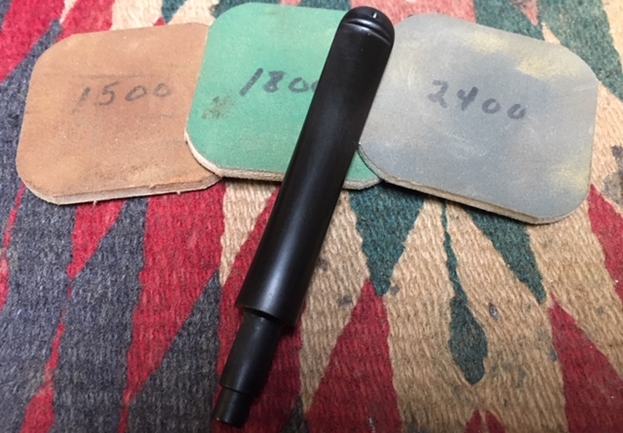
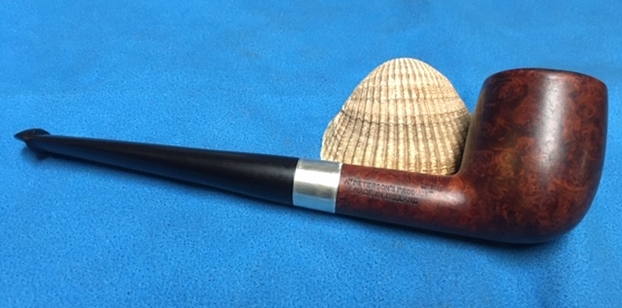
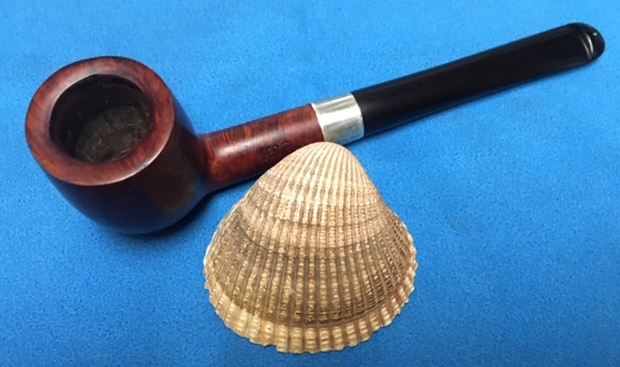
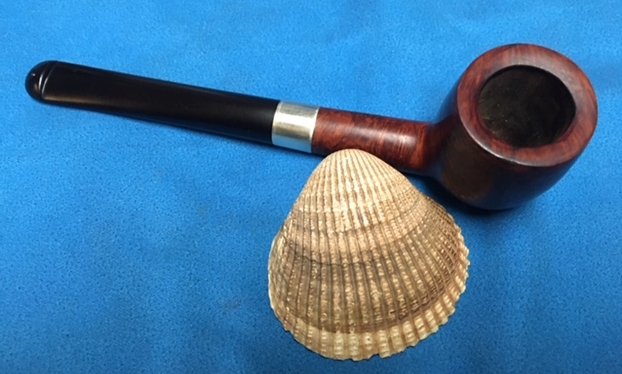
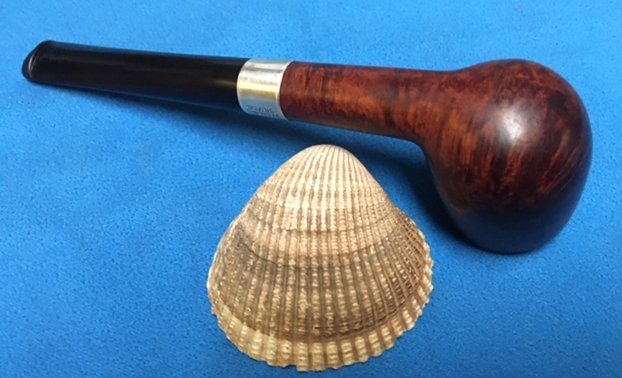
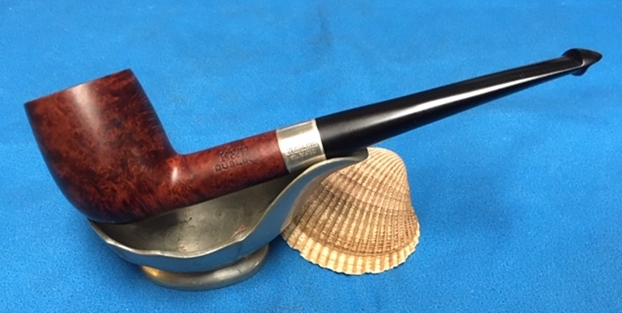
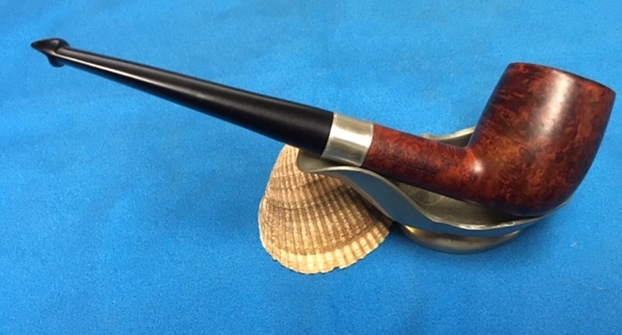
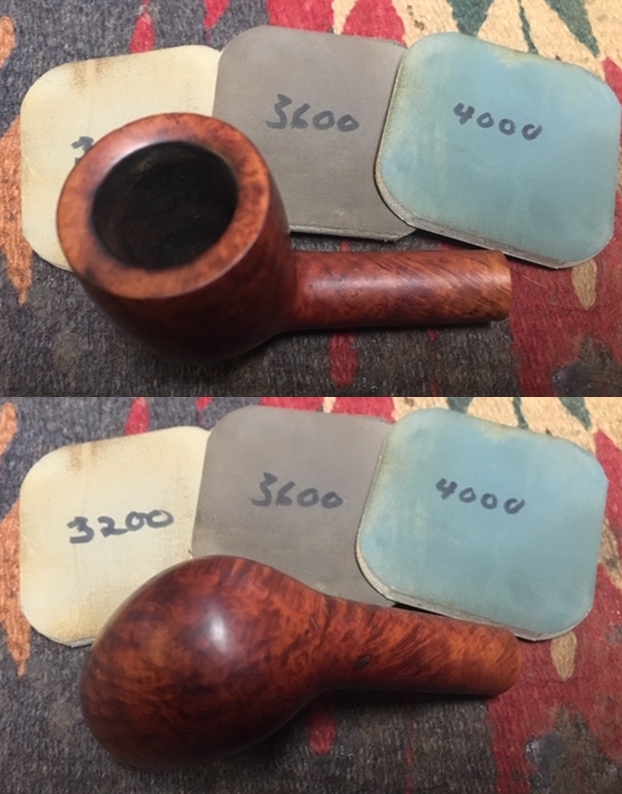
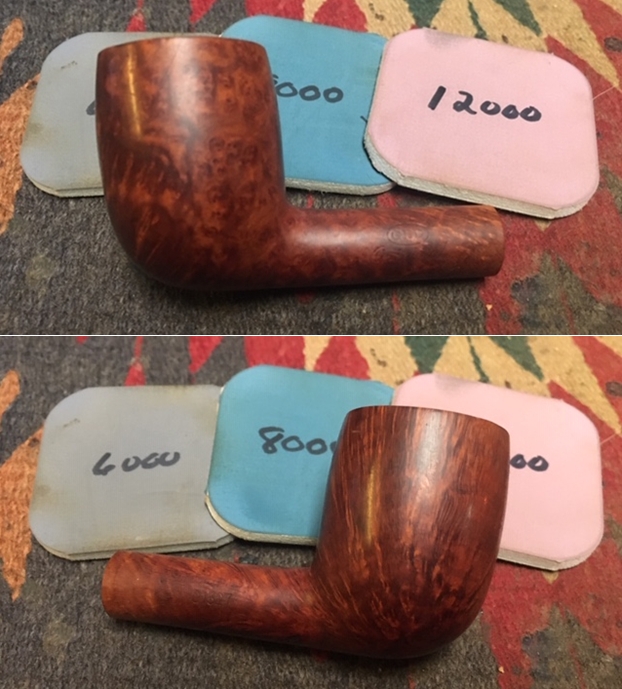
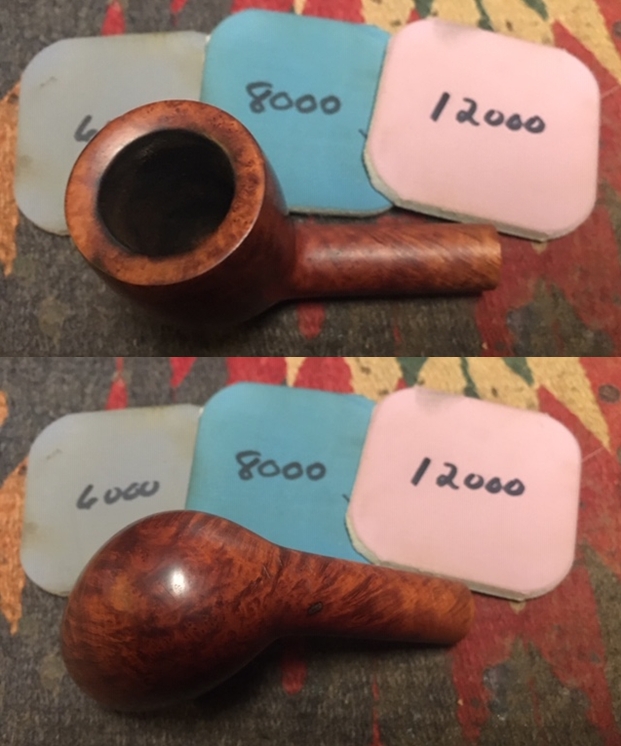
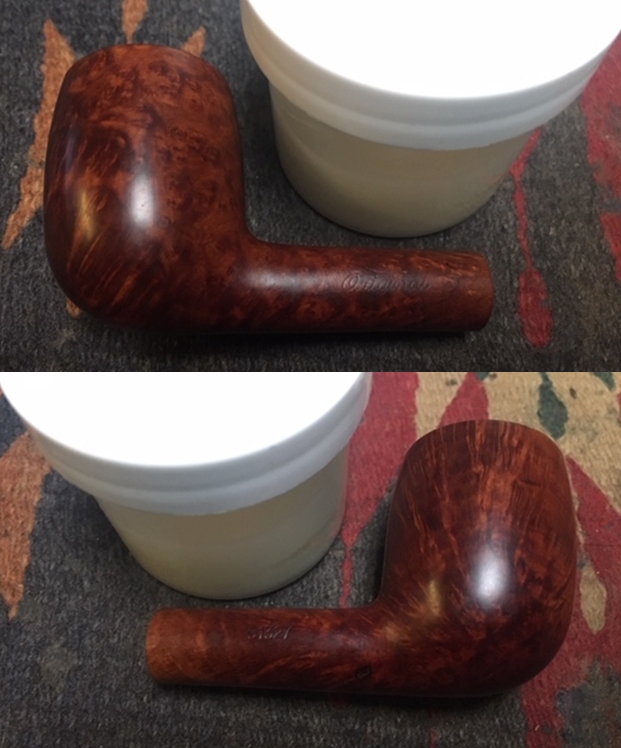
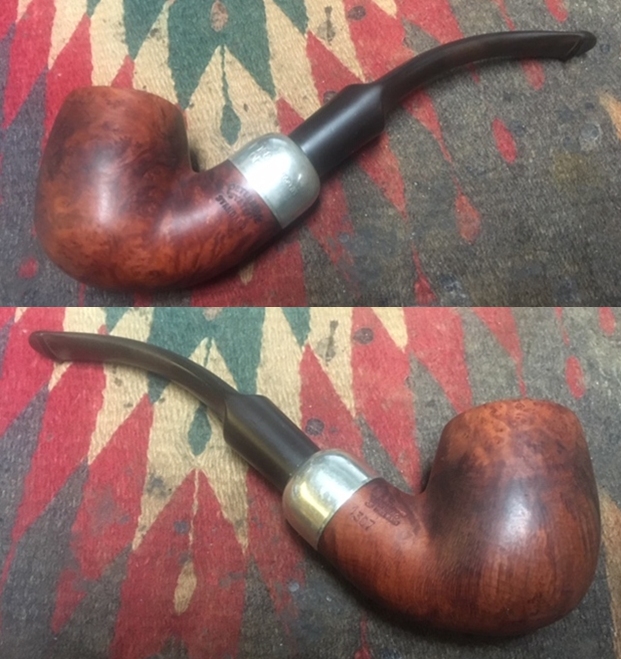
Now, on to the rest of the restoration of this beautifully grained “A Peterson Product” Made in Ireland 213 Billiard. It was great that I did not need to clean the pipe. I decided to start the process by addressing the damage to rim top and the inner edge. I removed the loose band from the shank before I started. From the extent of damage to the inner edge of the rim and the top of the bowl I decided to begin by filling in the damage in the deep chips on the rim top and edge with super glue. Once it cured I topped the bowl on a topping board using 220 grit sandpaper to remove as much of the damage as possible. I took photos to show the slow process of repairing that damage. The photos show the topping process and the rim top after I had topped it to an acceptable point where the condition of the top and edges was good.  I used a folded piece of 220 grit sandpaper to clean up the inner edge and give it a light bevel to take care of the damage. I polished it with 400 grit sandpaper.With the top finished I moved on to address the crack in the shank. In my examination I could see that the crack been repaired somewhere along the way. The crack itself had been filled in with glue. I topped up the filling with clear Krazy Glue to insure that the repair did not shift.     I painted the surface of the shank with Weldbond all-purpose glue and made sure that the crack was covered. I pressed the silver band on the shank and aligned the stamping on the band with the stamping on the left side of the shank. I took photos of the rebanded shank. The repair looks really good. I polished the briar with micromesh sanding pads – wet sanding it with 1500-12000 grit pads and I wiped the bowl down after each sanding pad with a damp cloth. The bowl began to take on a finished shine. I stained the rim top and edges with a Cherry and Walnut Stain pen to match the colour of the stain on the bowl. Once it was polished with the Before & After Balm and buffed with a microfiber cloth the stain would blend perfectly.After the stain had cured, I rubbed the bowl and rim down with Before & After Restoration Balm. I worked it into the surface of the briar with my fingertips to clean, enliven and protect it. I let the balm sit for a little while and then buffed with a cotton cloth to raise the shine. I really like watching the Balm do its magic and bring the briar alive.  I polished the stem with micromesh sanding pads – wet sanding with 1500-12000 grit pads. I wiped the stem down after each sanding pad with Obsidian Oil. I polished it with Before & After Pipe Stem Polish – both Fine and Extra Fine. Once I had finished the polishing I gave it a coat of a new product I am experimenting with from Briarville Pipe Repair. It is called “No Oxy Oil” and it is made to protect the stem from oxidizing. I set it aside to dry.   As usual at this point in the restoration process I am excited to be on the homestretch. I look forward to the final look when it is put back together, polished and waxed. I put the bowl and stem back together. I polished the bowl and stem with Blue Diamond to polish out the scratches in the briar and the vulcanite. I gave the bowl and the stem multiple coats of carnauba wax. I buffed the pipe with a clean buffing pad to raise the shine. I hand buffed it with a microfiber cloth to deepen the shine. The pipe polished up pretty nicely. The grain really pops with the wax and polish. The shiny black vulcanite stem is a beautiful contrast to the browns of the bowl. This Peterson’s K&P Dublin 213 Billiard was another fun pipe to work on thanks to Jeff’s cleanup work. The repair to the rim top and edges came out well. The original Sterling Silver Band covers the shank repair well and binds it all together. It really is a quite stunning piece of briar whose shape follows the flow of the briar. The pipe is comfortable pipe to hold in the hand. The finished pipe is shown in the photos below. The dimensions of the pipe are Length: 5 ¾ inches, Height: 1 ½ inches, Outside diameter of the bowl: 1 ¼ inches, Chamber diameter: ¾ of an inch. This beautiful pipe will be going on the rebornpipes store if you would like to add it to your collection and carry on Bob’s legacy. If not, I have a lot more of Bob’s estate to work on of various brands. Perhaps one of those will catch your attention. Thanks for reading this blog and my reflections on the pipe while I worked on it. This is an interesting estate to bring back to life.

A Unique Stanwell 33 Bulldog from Bob Kerr’s Estate


Blog by Steve Laug

The next pipe I chose to work on is another one from Bob Kerr’s estate and is part of his collection of Danish made pipes. It is their uniquely shaped Danish Bulldog. I have worked on the restoration of others in this collection which include a Stanwell Jubilee Shape 118 (https://rebornpipes.com/2019/08/11/another-bob-kerr-estate-a-stanwell-jubilee-1942-1982-shape-118/); a Stanwell de Luxe Shape 812 (https://rebornpipes.com/2019/08/10/back-to-bob-kerrs-estate-changing-up-and-working-on-a-danish-made-stanwell-de-luxe-812-billiard-regd-no-969-48/); a WO Larsen (https://rebornpipes.com/2019/01/13/restoring-pipe-17-from-bob-kerrs-estate-a-w-o-larsen-super-15-bent-stack/); a Danish Sovereign Bulldog variation (https://rebornpipes.com/2019/08/11/another-bob-kerr-estate-a-danish-sovereign-305-bulldog-variant/) and a Danmore Deluxe Volcano (https://rebornpipes.com/2019/08/20/restoring-a-petersons-dunmore-70-bent-apple-sitter-from-bob-kerrs-estate-2/).

To this list of Danish pipes I am adding the next – a unique Stanwell Bulldog shaped pipe. Like the others it is part of Bob’s estate that the family asked me to clean up and move out to others who will carry on the trust that began with Bob. In the collection there were BBBs, Peterson’s, Dunhills, Comoy’s and Barlings as well many others – a total of 125 pipes. This is the largest estate that I have had the opportunity to work on. I created a spread sheet to track the pipes, restoration and sales. This job would take a fair amount of time to clean up. I could not pass up the opportunity to work on these pipes and help the family.

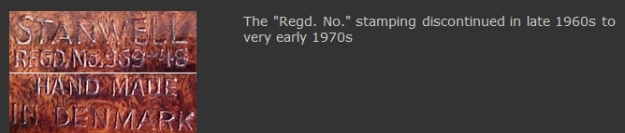
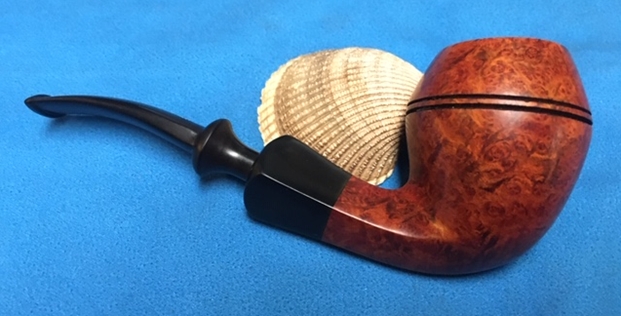
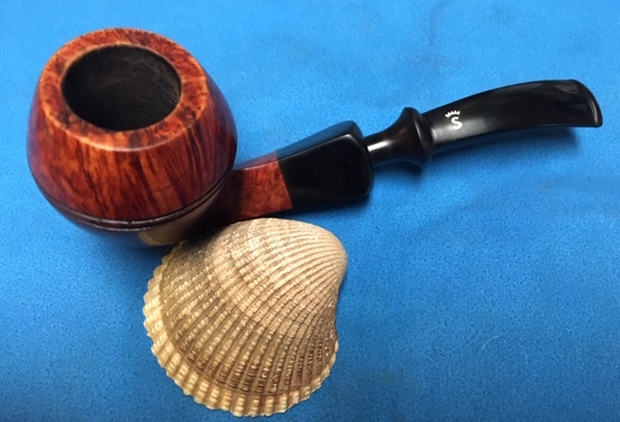
The pipe on the table is a Stanwell Bulldog stained with a rich brown stain with a vulcanite shank extension and a fancy saddle stem. The grain pokes through the dirty finish on the pipe. It was stamped Stanwell Regd. No. 969-48 Handmade in Denmark shape 33 on the left underside of the diamond shank. The finish was dirty like the rest of the pipes in this estate. There was a thick cake in the bowl with remnants of tobacco stuck on the walls. There was an overflow of lava on the rim. The top and edges of the rim were dirty. I could see a beautiful pipe underneath all of the grime and buildup of years of use. The stem was oxidized with tooth chatter on both sides. The Silver Crown S was on the topside of the saddle stem. Surprisingly it also had none of the deep tooth marks that I have come to expect from Bob’s pipes. Jeff took photos of the pipe before he started his cleanup work on it. Jeff took photos of the bowl and rim top to show the cake in the bowl and the lava build up on the edges of the bowl. It was thick and hard but hopefully it had protected the rim and edges from damage. The edges look pretty good. Jeff took photos of the sides and heel of the bowl to show the condition of the finish. You can see the grain on the sides of the bowl and the heel. There is a lot of dust and grime on the surface of the briar but the grain can be seen through the grime.    Jeff took a photo of the stamping on the left underside of the diamond shank. The stamping was readable as you can see from the photos. It read Stanwell over Regd. No. 969-48. To the left of that it had the shape number 33 and directly underneath it read Handmade in Denmark. The saddle portion of the stem had an inlaid silver Crown “S” on top behind the saddle. Jeff took photos of the top and underside of the stem showing the tooth chatter, scratching and oxidation on the stem surface and wear on the edges of the button. I turned first to Pipephil’s site to get a quick idea of the time period of the Regd. No. Stanwell pipes (http://www.pipephil.eu/logos/en/logo-stanwell.html). I quickly found what I was looking for. The pipes stamped this way were made until the late 60s or early 70s then the stamping was discontinued. I have included a screen capture of that information below.I also turned to Pipedia’s article on Stanwell and read some more about the history of the brand. It is a great read in terms of the history of the brand (https://pipedia.org/wiki/Stanwell). Once again there was no specific information about the pipe I have in hand. I did find however that the stamping with the Regd. No. 969-48 started after 1948 and continued until the late 60s and early 70s.

With that information in hand I had a sense of the history of this pipe. It had been made after 1948 and before the early 1970s. I could estimate that from the rest of Bob’s pipes this one was probably purchased between the 50s and late 60s and at the very latest the early 70s. I would guess that this pipe fits that time frame. Now it was time to work on the pipe.

With over 125 pipes to clean from Bob’s estate it was taking me forever to clean and restore them by myself. I enlisted Jeff’s help with the cleanup. He cleaned over half of the pipes for me. He cleaned up this pipe with his usual penchant for thoroughness that I really appreciate. It was a real mess and I did not know what to expect when I unwrapped it from his box. He reamed it with a PipNet pipe reamer and cleaned up the reaming with a Savinelli Fitsall Pipe Knife. He scrubbed out the internals with alcohol, pipe cleaners and cotton swabs until the pipe was clean. He scrubbed the exterior of the bowl with Murphy’s Oil Soap and a tooth brush to remove the grime and grit on the briar and the lava on the rim top. The finish looks very good with good looking grain around the bowl and shank. Jeff soaked the stem in Before & After Deoxidizer to remove the oxidation on the rubber. When the pipe arrived here in Vancouver for the second stop of its restoration tour it looked very good. I took photos before I started my part of the work. I took some close up photos of the rim top and also of the stem surface. I wanted to show the great job Jeff did on the cleanup of the rim top. The rim top looks good though there is some damage on the front inner edge on the left side. The finish is dull, but still is in great condition. The bowl looked very good. I also took close up photos of the stem to show the light tooth chatter and the remaining oxidation on the stem surface and the vulcanite shank extension.  One of the things I appreciate about Jeff’s cleanup is that he works to protect and preserve the nomenclature on the shank of the pipes that he works on. The stamping on this one was very readable though there are spots that are faint. He preserved the stamping as you can see. I took a photo to show the clarity of the stamping.Since this is another pipe Bob’s estate I am sure that some of you have read at least some of the other restoration work that has been done on the previous pipes. You have also read what I have included about Bob Kerr, the pipeman who held these pipes in trust before I came to work on them (see photo to the left). Also, if you have followed the blog for long you will already know that I like to include background information on the pipeman whose pipes I am restoring. For me, when I am working on an estate I really like to have a sense of the person who held the pipes in trust before I worked on them. It gives me another dimension of the restoration work. I asked Brian if he or his wife would like to write a brief biographical tribute to her father, Bob. His daughter worked on it and I received the following short write up on him and some pictures to go along with the words including one of Bob’s carvings. Once again I thank you Brian and tell your wife thank you as well.

I am delighted to pass on these beloved pipes of my father’s. I hope each user gets many hours of contemplative pleasure as he did. I remember the aroma of tobacco in the rec room, as he put up his feet on his lazy boy. He’d be first at the paper then, no one could touch it before him. Maybe there would be a movie on with an actor smoking a pipe. He would have very definite opinions on whether the performer was a ‘real’ smoker or not, a distinction which I could never see but it would be very clear to him. He worked by day as a sales manager of a paper products company, a job he hated. What he longed for was the life of an artist, so on the weekends and sometimes mid-week evenings he would journey to his workshop and come out with wood sculptures, all of which he declared as crap but every one of them treasured by my sister and myself. Enjoy the pipes, and maybe a little of his creative spirit will enter you!

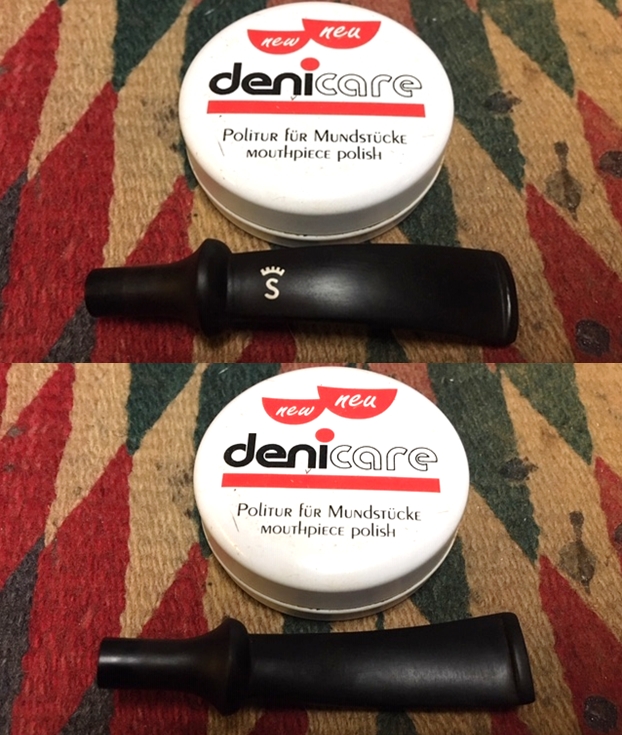
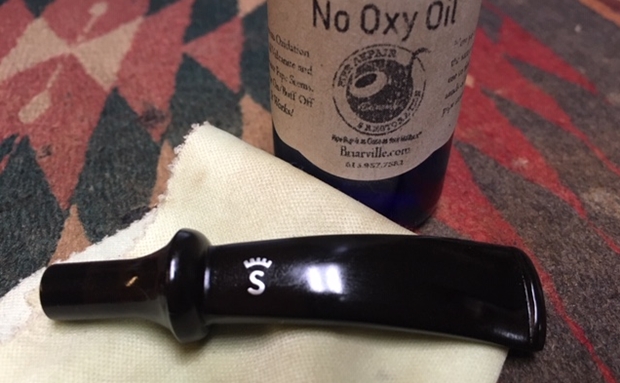
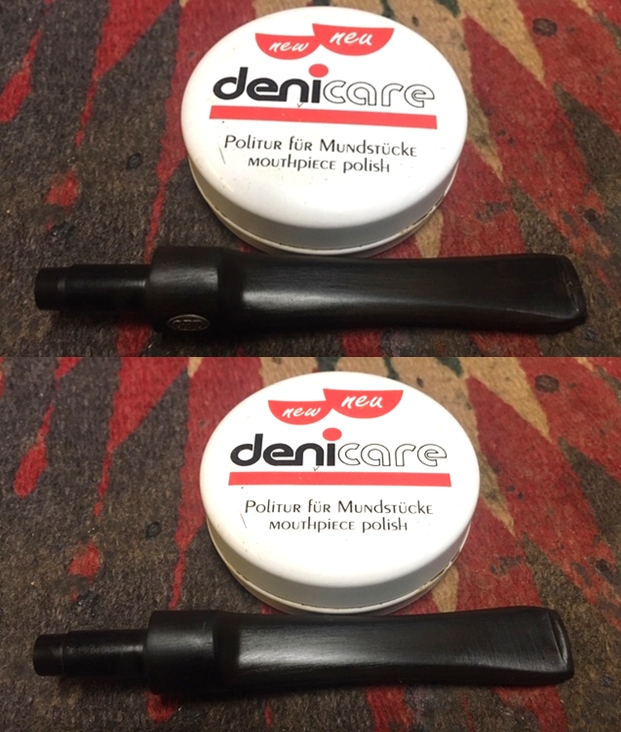
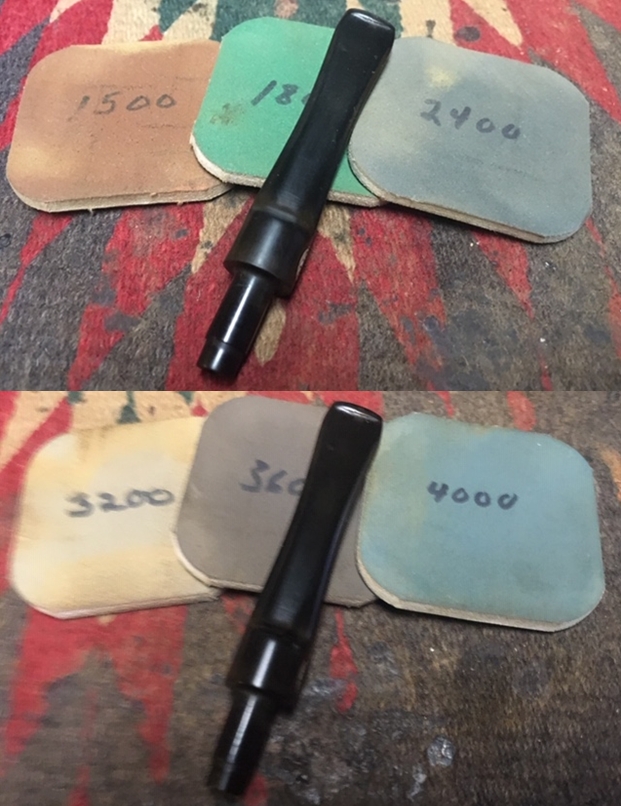
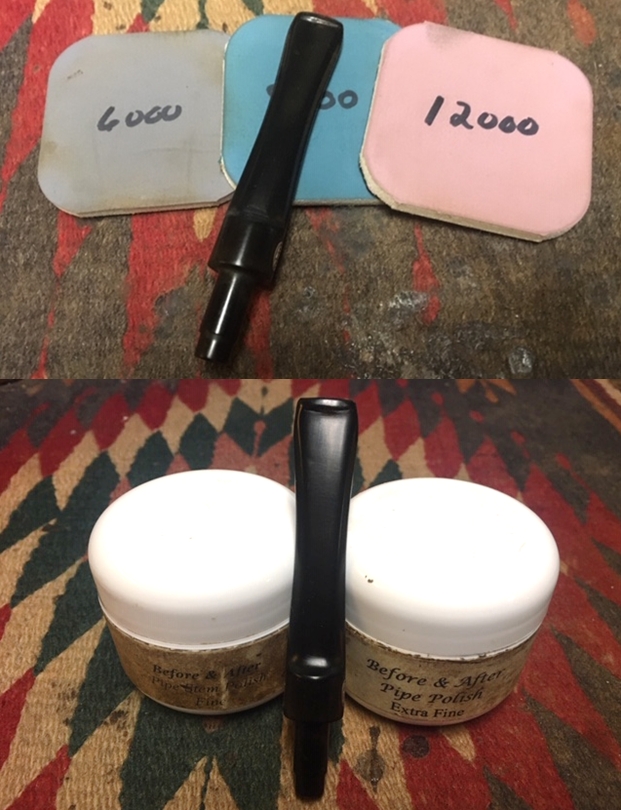
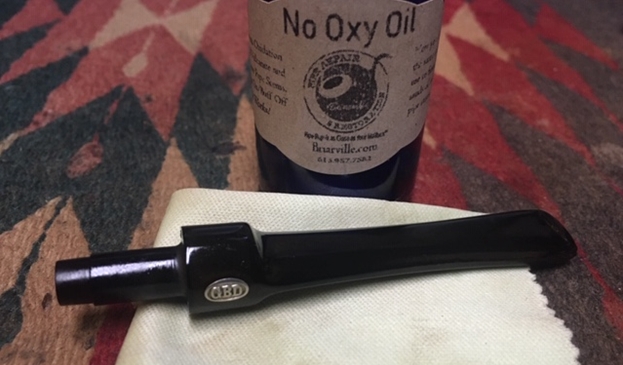
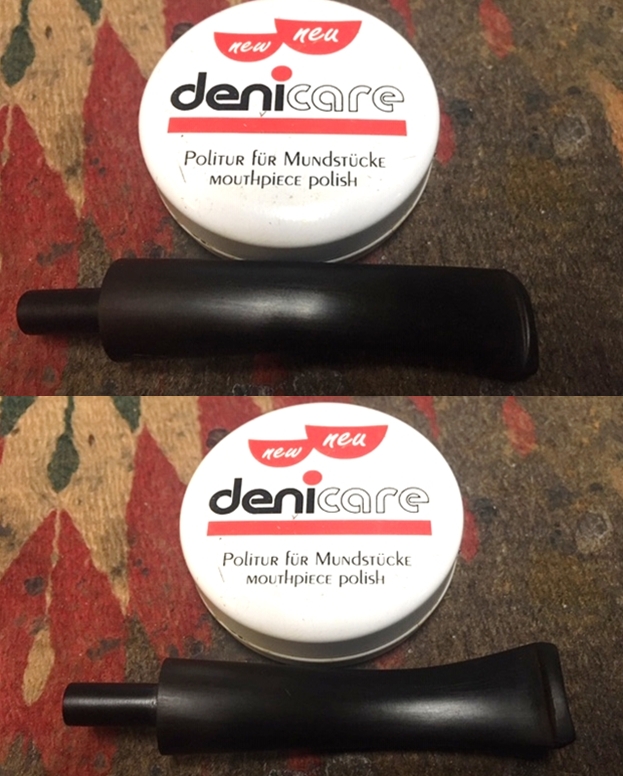
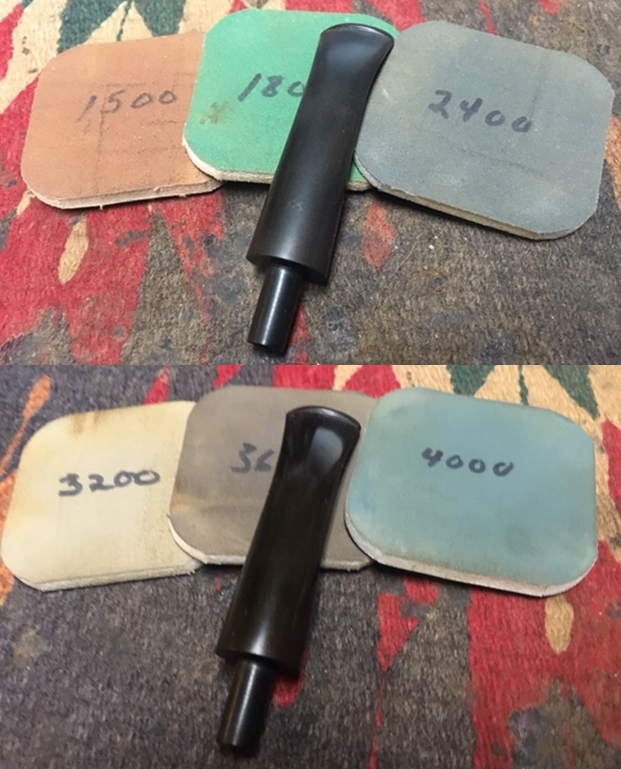
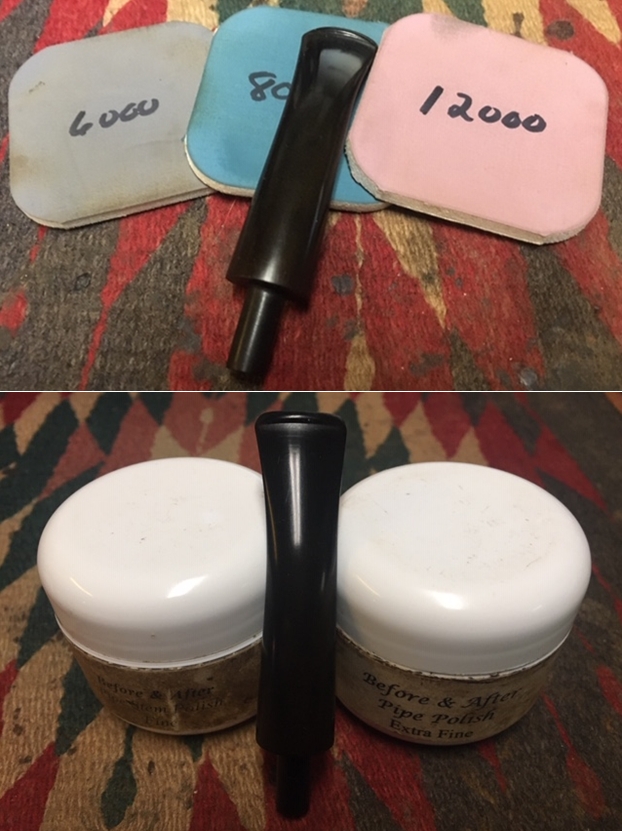
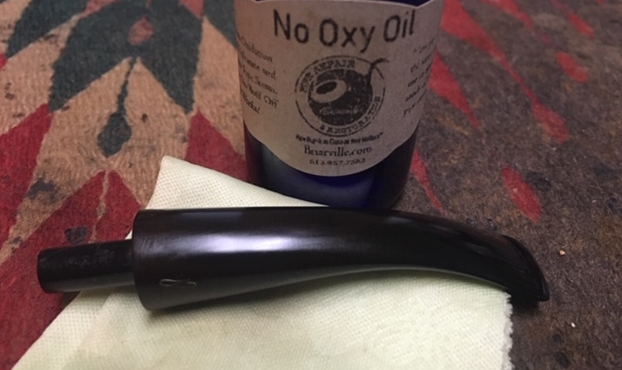
Now on to the rest of the restoration on this Regd. No. Stanwell Bulldog! I decided to begin the restoration of the bowl by cleaning up the rim damage on the inner edge of the bowl. I used a folded piece of 220 grit sandpaper to smooth out the roughness on the front left. The first photo shows the damaged area on the front inner edge of the bowl circled in red. The second and third photos show the cleaned up rim edge. The bowl looks better. I polished the briar and the vulcanite shank extension with micromesh sanding pads to blend in the stain and to polish the briar and remove the scratches in the surface of the bowl, heel and shank. I wet sanded with 1500-12000 grit pads and wiped the bowl down between each pad with a damp cloth.     I rubbed the bowl down with Before & After Restoration Balm. I worked it into the surface of the briar with my fingertips to clean, enliven and protect it. I let the balm sit for a little while and then buffed with a cotton cloth to raise the shine.    I sanded the stem with 220 grit sandpaper to break up the oxidation. I started the polishing with 400 grit wet dry sandpaper to remove the scratching. It is starting to look good. I carefully worked on the Crown S stamp. The Silver Crown is coming alive.     I rubbed the stem down with Denicare Mouthpiece Polish. I have a few tins of this laying around so I am trying to use them up. It does a pretty good job polishing the stem.   I polished the stem with micromesh sanding pads – wet sanding with 1500-12000 grit pads. I wiped the stem down after each sanding pad with Obsidian Oil. I polished it with Before & After Pipe Stem Polish – both Fine and Extra Fine. Once I had finished the polishing I gave it a coat of “No Oxy Oil” developed by Briarville. I am experimenting with this product on the pipes I am restoring.    I am excited to be finishing work on yet another one of Bob’s pipes. This is the part of the restoration part I look forward to when it all comes back together, polished and waxed. I put the bowl and stem back together. I polished the bowl and stem with Blue Diamond to polish out the scratches in the briar and the vulcanite. I gave the bowl and the stem multiple coats of carnauba wax. I buffed the pipe with a clean buffing pad to raise the shine. I hand buffed it with a microfiber cloth to deepen the shine. The pipe polished up pretty nicely. The medium brown stained bowl looks really good with the polished black vulcanite. This Stanwell Regd. No Danish Bulldog was another fun pipe to work on thanks to Jeff’s cleanup work. It really has that classic Danish look that catches the eye. The brown stain really makes the pipe look attractive. It is another comfortable pipe to hold in the hand. The finished pipe is shown in the photos below. The dimensions of the pipe are Length: 5 ½   inches, Height: 2 inches, Outside diameter of the bowl: 1 ¼ inches, Chamber diameter: ¾ of an inch. If you are interested in carrying on Bob’s legacy with this pipe send me a message or an email. I have a lot more to work on of various brands. Perhaps one of those will catch your attention. Thanks for reading this blog and my reflections on the pipe while I worked on it. This is an interesting estate to bring back to life.

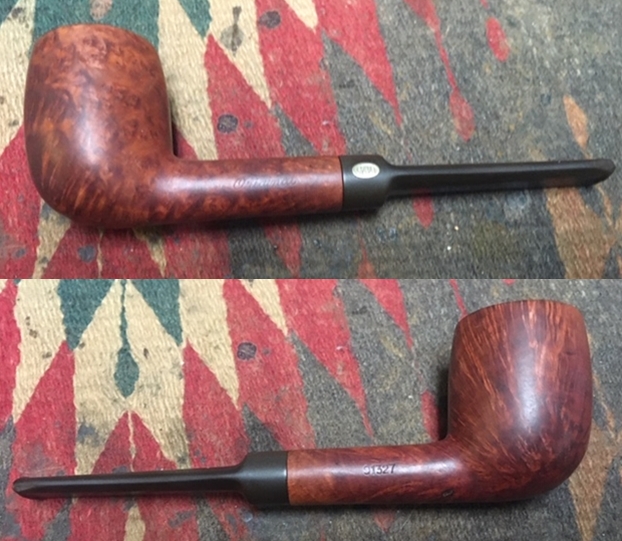
Working on a GBD Original 91327 Smooth Billiard from Bob Kerr’s Estate


Blog by Steve Laug

I am continuing to work through Bob Kerr’s estate. The next pipe on the table is a GBD Original Billiard, smooth bowl and shank a beveled rim top. It is an Original with a black vulcanite stem. I am continuing to cleanup Bob’s estate for his family and moving them out into the hands of pipemen and women who will carry on the trust that began with Bob and in some pipes was carried on by Bob. In the collection there were a total of 125 pipes along with a box of parts. This is the largest estate that I have had the opportunity to work on. I put together a spread sheet of the pipes and stampings to create an invoice. I was taking on what would take me a fair amount of time to clean up. I could not pass up the opportunity to work on these pipes though. They were just too tempting.

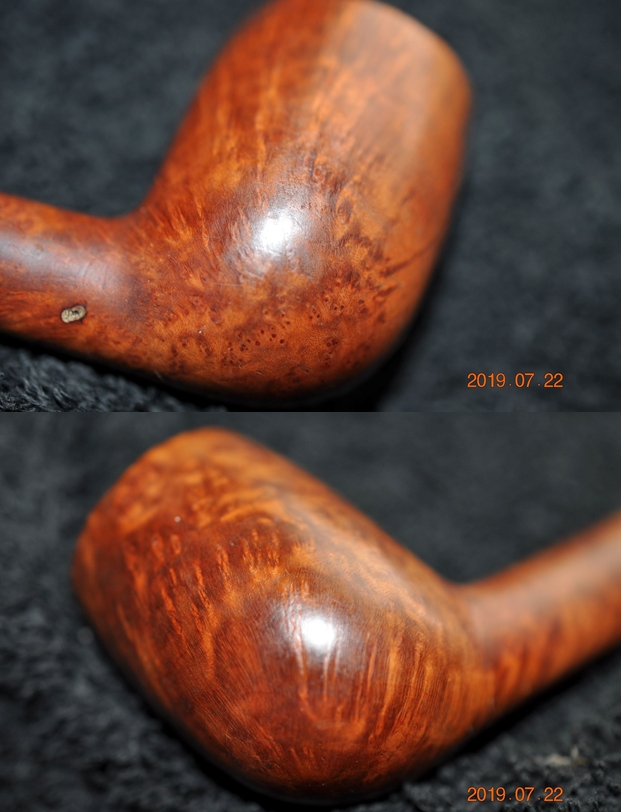
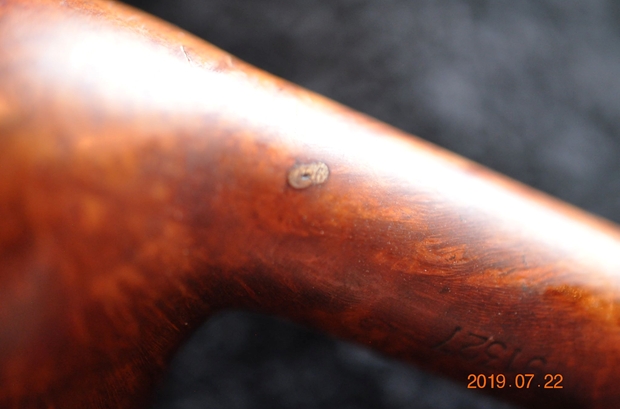
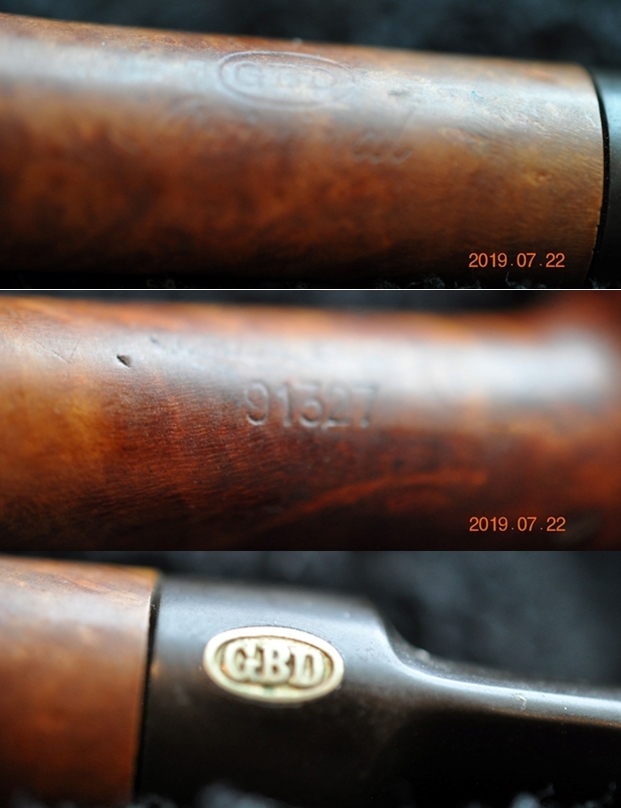
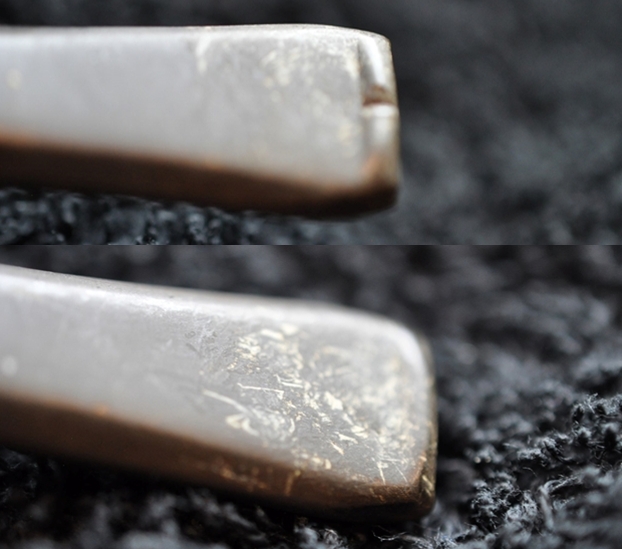
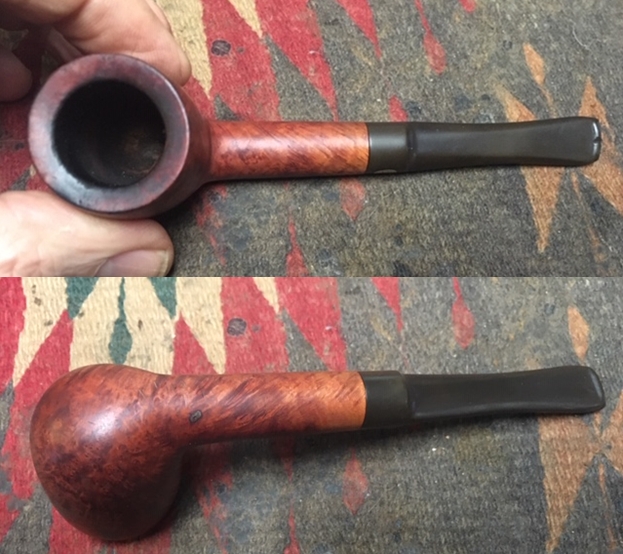
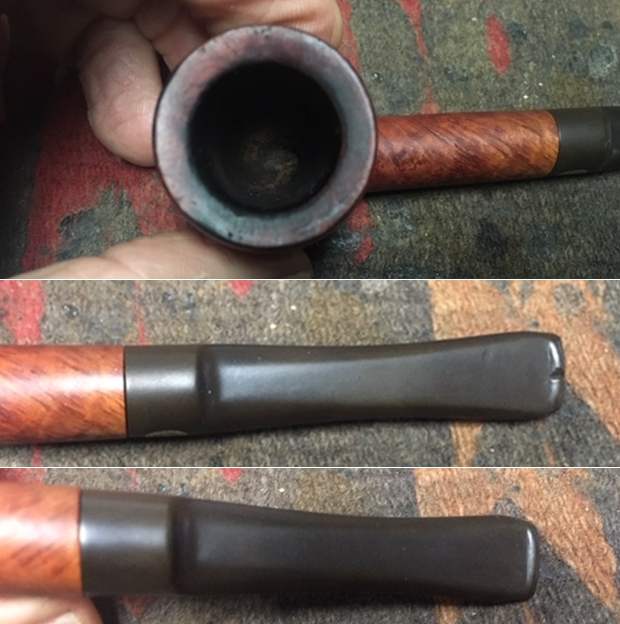
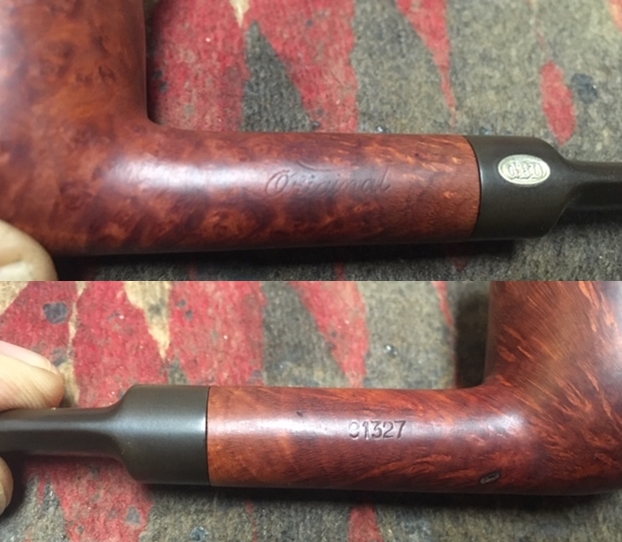
I have been collecting and restoring GBD pipes for as long as I have worked on pipes. This one also has a beautiful mix of grain under the grime on the finish. It is quite beautiful! The pipe is stamped GBD in an oval over Original on the left side of the shank. On the right side it is stamped London, England and the shape number 91327. It had a rich brown stain that does not look too bad. There was a thick cake in the bowl with remnants of tobacco stuck on the walls. There was a lava overflow on the rim. The inner edge of the rim and top are dirty and had a thick lava coat. The edges appear to have a bit of burn damage on the front inner edge and the front outer edge has a bit of wear damage. It was a beautiful pipe that was dirty and tired looking. The stem was oxidized and calcified toward the end. There seemed to be a chip or nick in the middle of the button on the top edge. Again, surprisingly did not have the tooth marks that I have come to expect from Bob’s pipes. Jeff took photos of the pipe before he started his cleanup work on it. Jeff took photos of the bowl and rim top to show the cake in the bowl and the lava build up on the edges of the bowl. It was thick and hard but hopefully it had protected the rim and edges from damage. There appears to be a little damage on the left front inner and outer edges of the bowl. Otherwise it looks pretty good.   Jeff took photos of the sides and heel of the bowl to show the condition of the finish. You can see the beautiful grain through the debris – both birdseye and cross grain. The finish was very dirty. There is a large putty fill on the right side of the shank near the bowl. Jeff took photos of the stamping on the sides of the shank. The stamping was readable as you can see from the photos. On the left side it read GBD in an oval over Original.  On the right side it was stamped London, England over the shape number 91327. On the left side of the saddle stem was an inlaid brass GBD rondel.Jeff took photos of the top and underside of the stem showing the tooth chatter, scratching and oxidation on the stem surface and wear on the edges of the button. There is a deep nick in the topside of the button.I turned to Pipedia’s article on GBD to see if I could find any information on the Historic line. I have heard of Original pipes but I have never seen one stamped with the five digit shape number like this 91327. The Pipedia article identifies the line as a French made pipe however, this one is stamped London, England thus contradicting the article that specifically says that the pipes were not made in England (https://pipedia.org/wiki/GBD_Model_Information).

I also turned to the reference page on the site for GBD shapes and numbers and could not find any information on that shape number (https://pipedia.org/wiki/GBD_Shapes/Numbers). There was nothing there with a five digit number so I checked the listing of the last 3 digits, 327 and did not find one. So once again there is a mystery on this one.

All of my research did not really help pin anything down. The shape number was a dead end and the line description was also a contradiction. I was dealing with a bit of anomaly – a French made saddle Billiard stamped London, England with a saddle stem. In terms of dating the pipe I can only guess that it fits in with the late 50s to late 60s of Bob’s other pipes but I cannot know for sure. Now it was time to work on the pipe.

With over 125 pipes to clean from Bob’s estate I am really appreciating Jeff’s help cleaning them up. Jeff cleaned the pipe with his usual penchant for thoroughness that I really appreciate. This one was a real mess and I did not know what to expect when I unwrapped it from his box. He reamed it with a PipNet pipe reamer and cleaned up the reaming with a Savinelli Fitsall Pipe Knife. He scrubbed out the internals with alcohol, pipe cleaners and cotton swabs until the pipe was clean. He scrubbed the exterior of the bowl with Murphy’s Oil Soap and a tooth brush to remove the grime and grit on the briar and the lava on the rim top. The finish looks very good with good looking grain around the bowl and shank. Jeff soaked the stem in Before & After Deoxidizer to remove the oxidation on the rubber. When the pipe arrived here in Vancouver for the second stop of its restoration tour it looked good. The stem still sported some deep oxidation but otherwise it was clean. I took photos before I started my part of the work. I took some close up photos of the rim top and also of the stem surface. I wanted to show what an amazing job Jeff did in the cleanup of the rim top. The rim top looks pretty good. There is some darkening on the top edge and a burn marks on the inner and outer edge. There is also some damage on the outer rim on the rim. The photos show a few small dents on the surface of the stem and the nick out of the top of the button on the topside. You can also see the remaining oxidation on the stem surface.     I am going to keep posting the next paragraph because of the importance of protecting the stamping/nomenclature.

One of the things I appreciate about Jeff’s cleanup is that he works to protect and preserve the nomenclature on the shank of the pipes that he works on. The stamping on this one was very faint to start with so I was worried that it would disappear altogether with the cleanup. He was not only able to preserve it but it is clearer than shown in the earlier photos. I took some photos to show the clarity of the stamping. I have noticed that many restorers are not careful to protect the stamping in their cleaning process and often by the end of the restoration the nomenclature is almost destroyed. I would like to encourage all of us to be careful in our work to preserve this as it is a critical piece of pipe restoration! Since this is another pipe Bob’s estate I am sure that some of you have read at least some of the other restoration work that has been done on the previous pipes. You have also read what I have included about Bob Kerr, the pipeman who held these pipes in trust before I came to work on them (see photo to the left). Also, if you have followed the blog for long you will already know that I like to include background information on the pipeman whose pipes I am restoring. For me, when I am working on an estate I really like to have a sense of the person who held the pipes in trust before I worked on them. It gives me another dimension of the restoration work. I asked Brian if he or his wife would like to write a brief biographical tribute to her father, Bob. His daughter worked on it and I received the following short write up on him and some pictures to go along with the words including one of Bob’s carvings. Once again I thank you Brian and tell your wife thank you as well.

I am delighted to pass on these beloved pipes of my father’s. I hope each user gets many hours of contemplative pleasure as he did. I remember the aroma of tobacco in the rec room, as he put up his feet on his lazy boy. He’d be first at the paper then, no one could touch it before him. Maybe there would be a movie on with an actor smoking a pipe. He would have very definite opinions on whether the performer was a ‘real’ smoker or not, a distinction which I could never see but it would be very clear to him. He worked by day as a sales manager of a paper products company, a job he hated. What he longed for was the life of an artist, so on the weekends and sometimes mid-week evenings he would journey to his workshop and come out with wood sculptures, all of which he declared as crap but every one of them treasured by my sister and myself. Enjoy the pipes, and maybe a little of his creative spirit will enter you!
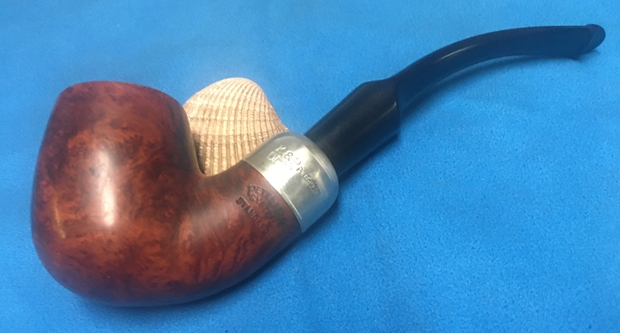
Now, on to the rest of the restoration on this GBD Original 91327 Saddle Stem Billiard. Since Jeff had done such an amazing clean up job on the bowl it was going to be a very easy job for me. There was some darkening and damage on the rim top, the inner and outer edges of the rim that needed to be addressed. I sanded it with a folded piece of 220 grit sandpaper to remove and minimize the damage to the top and the edges. I continued by starting to polish it with 400 grit wet dry sandpaper. I wiped the rim edge down with a damp cloth to remove the sanding dust on the briar. The first photo below shows the rim top when I started and the second one below shows it after the work. The finished rim top looked much better than when I started. I was able to minimize the damage on the front inner edge of the rim. It is still damaged but it looks considerably better. Once I clean it and stain it the rim edge will look better.  Some how the fill that was obvious in the first photos that Jeff took seem to have expanded and filled in and with the polishing and sanding it disappeared. I can see it but it was not worth repairing or replacing. I polished the rim top and sides of the bowl with micromesh sanding pads – wet sanding with 1500-12000 grit pads. I wiped the bowl and rim down with damp cloth after each sanding pad. The more I polished the rim top the more the rim blended in with the rest of the finish. I would not need to stain it.   I rubbed the bowl down with Before & After Restoration Balm. I worked it into the surface of the briar with my fingertips to clean, enliven and protect it. I let the balm sit for a little while and then buffed with a cotton cloth and shoe brush to raise the shine. I set the bowl aside and turned my attention to the stem. I filled in the divot on the top of the button on the top side and built up the edge on the underside with clear Krazy Glue.I sanded the stem with 220 grit sandpaper to break up the oxidation. I started the polishing with 400 grit wet dry sandpaper to remove the scratching. It is starting to look good.    I have one more tin of Denicare Mouthpiece Polish left from a few that I have picked up over the years. It is a coarse red pasted that serves to help remove oxidation. I polished the stem with that to further smooth out the surface of the vulcanite (and to be honest – to use it up).    I polished the stem with micromesh sanding pads – wet sanding with 1500-12000 grit pads. I wiped the stem down after each sanding pad with Obsidian Oil. I polished it with Before & After Pipe Stem Polish – both Fine and Extra Fine. Once I had finished the polishing I rubbed it down with “No Oxy Oil”, a product I am trying out from Briarville Pipe Repair. So far it is an impressive product that is very similar to Obsidian Oil. I will continue to experiment with it.  I can’t begin to tell you how great it feels to be moving through these 125 pipes – about 38 done so far! It is an overwhelming task that can only be achieved one pipe at a time. So each time I finish one of the pipes from Bob Kerr’s Estate I look forward to what it will look like when it is put back together, polished and waxed. I put the bowl and stem back together. I polished the bowl and stem with Blue Diamond to polish out the scratches in the briar and the vulcanite. I gave the bowl and stem multiple coats of carnauba wax. I buffed the pipe with a clean buffing pad to raise the shine. I hand buffed it with a microfiber cloth to deepen the shine. The pipe polished up pretty nicely. The rich medium brown smooth finish really popped with buffing showing the grain on the pipe. The polished thin black vulcanite saddle stem went really well with the colours of the bowl. This old GBD Original 91327 Billiard was another fun pipe to work on thanks to Jeff’s cleanup work. It really has the classic GBD Billiard shape that is very recognizable. The medium brown stain really makes the pipe look attractive. It is another comfortable pipe to hold in the hand. The finished pipe is shown in the photos below. The dimensions of the pipe are Length: 5 ½ inches, Height: 1 ¾ inches, Outside diameter of the bowl: 1 ¼ inches, Chamber diameter: ¾ of an inch. If you are interested in carrying on Bob’s legacy with this pipe send me a message or an email. I have a lot more to work on of various brands. Perhaps one of those will catch your attention. Thanks for reading this blog and my reflections on the pipe while I worked on it. This is an interesting estate to bring back to life.
Restoring a Svendborg Danish Handmade Bark 19 Brandy


Blog by Steve Laug

The next pipe I chose to work on is another one from Bob Kerr’s estate and is part of his collection of Danish made pipes. I have worked on the restoration of others in this collection which include a Stanwell Jubilee Shape 118 (https://rebornpipes.com/2019/08/11/another-bob-kerr-estate-a-stanwell-jubilee-1942-1982-shape-118/); a Stanwell de Luxe Shape 812 (https://rebornpipes.com/2019/08/10/back-to-bob-kerrs-estate-changing-up-and-working-on-a-danish-made-stanwell-de-luxe-812-billiard-regd-no-969-48/); a WO Larsen (https://rebornpipes.com/2019/01/13/restoring-pipe-17-from-bob-kerrs-estate-a-w-o-larsen-super-15-bent-stack/); a Danish Sovereign Bulldog variation (https://rebornpipes.com/2019/08/11/another-bob-kerr-estate-a-danish-sovereign-305-bulldog-variant/) and a Danmore Deluxe Volcano (https://rebornpipes.com/2019/08/20/restoring-a-petersons-dunmore-70-bent-apple-sitter-from-bob-kerrs-estate-2/).

To this list of Danish pipes I am adding the next – a Svendborg Danish Handmade Bark Brandy shaped pipe. Like the others it is part of Bob’s estate that the family asked me to clean up and move out to others who will carry on the trust that began with Bob. In the collection there were BBBs, Peterson’s, Dunhills, Comoy’s and Barlings as well many others – a total of 125 pipes. This is the largest estate that I have had the opportunity to work on. I created a spread sheet to track the pipes, restoration and sales. This job would take a fair amount of time to clean up. I could not pass up the opportunity to work on these pipes and help the family.

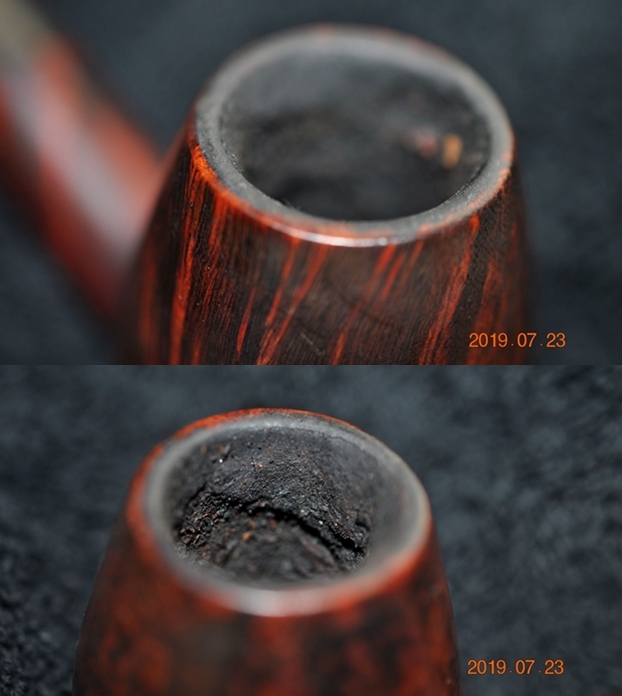
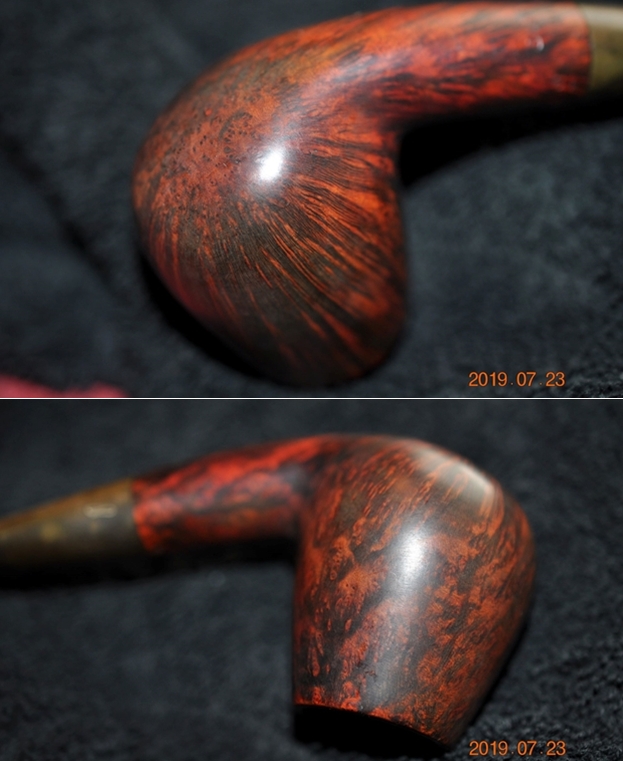
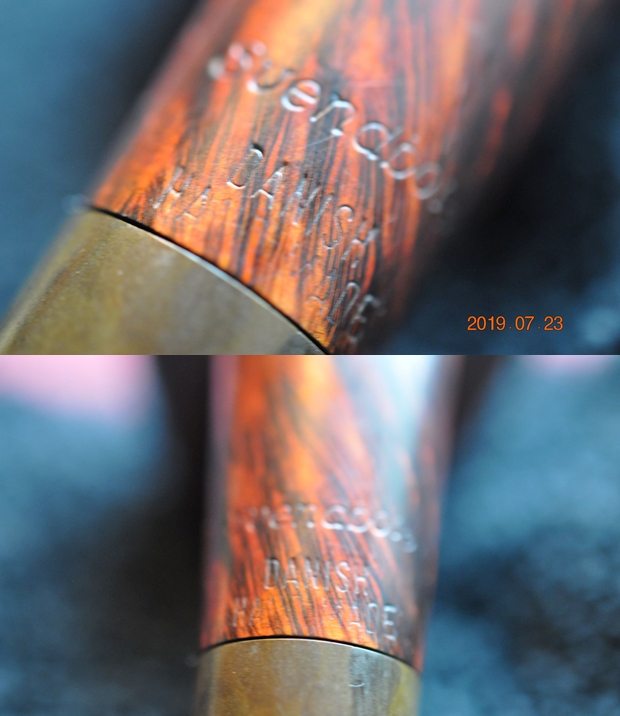
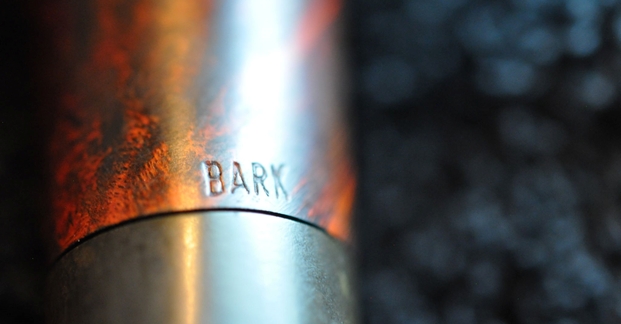
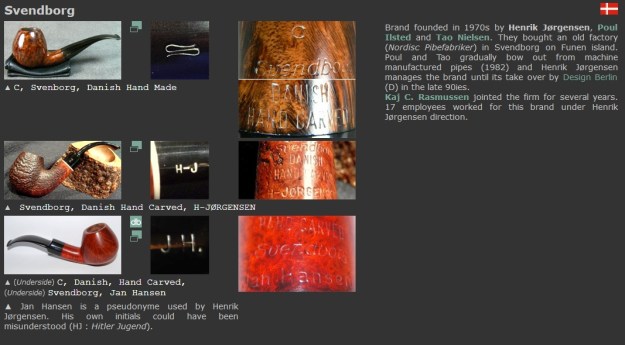
When I took Svendborg Brandy shaped pipe out of the box of cleaned up pipes that Jeff sent back I could see that it was a beauty. It was stamped Svendborg over Danish Handmade on the underside of the shank next to the stem. On the topside of the shank it was stamped Bark at the stem/shank junction. On the right side near the junction it was stamped with the shape number 19. It has swirls of straight, flame grain around the sides of the bowl and shank with birdseye on the heel and the top of the bowl. The finish was very dirty like the rest of the pipes in this estate. There was a thick cake in the bowl with remnants of tobacco stuck on the walls. There was an overflow of lava on the rim. The top and edges of the rim were dirty. I could see a beautiful pipe underneath all of the grime and buildup of years of use. The stem was oxidized with tooth chatter on both sides. There was an squat S shaped swirl on the left side of the taper stem. Surprisingly it had none of the deep tooth marks that I have come to expect from Bob’s pipes. Jeff took photos of the pipe before he started his cleanup work on it. Jeff took photos of the bowl and rim top to show the cake in the bowl and the lava build up on the edges of the bowl. It was thick and hard but hopefully it had protected the rim and edges from damage. The edges look pretty good.    Jeff took photos of the sides and heel of the bowl to show the condition of the finish. You can see the beautiful straight and flame grain on the side of the bowl and the swirls of the birdseye on the heel. There is a lot of dust and grime on the surface of the briar.   Jeff took photos of the stamping on the underside of the shank. The stamping was readable as you can see from the photos. It read Svendborg Danish Handmade. On the topside it reads Bark. There is a shape number 19 on the right side of the shank but I do not have a photo of it at this time.    Jeff took photos of the top and underside of the stem showing the tooth chatter, scratching and oxidation on the stem surface and wear on the edges of the button.   I turned first to Pipephil’s site to get a quick idea of the Svendborg brand and the carver who made the pipes (http://www.pipephil.eu/logos/en/logo-s14.html). I quote what I found there.

The brand was founded in 1970s by Henrik Jørgensen, Poul Ilsted and Tao Nielsen. They bought an old factory (Nordisc Pibefabriker) in Svendborg on Funen Island. Poul and Tao gradually bow out from machine manufactured pipes (1982) and Henrik Jørgensen manages the brand until its take over by Design Berlin (D) in the late 90ies. Kaj C. Rasmussen jointed the firm for several years. 17 employees worked for this brand under Henrik Jørgensen direction.

I did a screen capture of the section on pipephil’s site for ease of reference.I also turned to Pipedia’s article on Svendborg and read some more about the history of the brand and the carvers noted on pipephils site. It is a great read in terms of the history of the brand (https://pipedia.org/wiki/Svendborg).

Jens Tao Nielsen and Poul Ilsted Bech met each other when working together for Erik Nørding and soon became close friends. Both felt a bit tired to make nothing but bizarre fancy shapes and agreed they wanted to produce pipes of more style and more classicism. They decided to establish their own brand “Tao & Ilsted” – But how to do it?

 A good fortune brought them in contact with Henrik Jørgensen, a passionate pipe lover and a wealthy Copenhagen banker who was willing to retire from bank business and change his career to become a pipemaker. The trio joined in 1969 and decided to start a new pipe brand together. Nielsen and Ilsted started to search for a suitable workshop while Jørgensen took care of the finances. In early 1970 the partners found an old, closed down pipe factory in Svendborg on Funen, and bought it shortly after for a mere 16.500 Danish Kroner. It was the earlier Nordic Pipe Factory – Nordisc Pibefabriker – maybe the oldest Danish pipe factory. And now it became the home of Svendborg Piber.

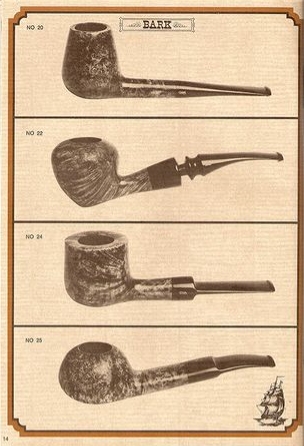
Included in the article was a catalogue courtesy of Doug Valitchka. I did a screen capture of the the pertinent part of the catalogue that showed the Bark line that this pipe belonged to. The top shape – the straight brandy is the same shaped bowl as the bent brandy that I am working on. The smooth finish on the Bark line in a rich reddish brown colour is a contrast to rusticated or sandblast finishes done on Bark pipes made by others. The beautiful stain combination makes a rich looking pipe.

With that information in hand I knew what I was dealing with in terms of the stamping and the rough age of this pipe. I knew from the information from Pipephil and Pipedia that the pipe was most like made in the 70s or 80s. Most of Bob’s pipes were purchased between the 50s and late 60s early 70s so my guess is that this pipe fits that time frame. Now it was time to work on the pipe.

With over 125 pipes to clean from Bob’s estate it was taking me forever to clean and restore them by myself. I enlisted Jeff’s help with the cleanup. He cleaned over half of the pipes for me. He cleaned up this pipe with his usual penchant for thoroughness that I really appreciate. It was a real mess and I did not know what to expect when I unwrapped it from his box. He reamed it with a PipNet pipe reamer and cleaned up the reaming with a Savinelli Fitsall Pipe Knife. He scrubbed out the internals with alcohol, pipe cleaners and cotton swabs until the pipe was clean. He scrubbed the exterior of the bowl with Murphy’s Oil Soap and a tooth brush to remove the grime and grit on the briar and the lava on the rim top. The finish looks very good with good looking grain around the bowl and shank. Jeff soaked the stem in Before & After Deoxidizer to remove the oxidation on the rubber. When the pipe arrived here in Vancouver for the second stop of its restoration tour it looked very good. I took photos before I started my part of the work.   I took some close up photos of the rim top and also of the stem surface. I wanted to show what an amazing job Jeff did in the cleanup of the rim top. The rim top looks very good. The finish is dull, but still is in great condition. The bowl looked very good. I also took close up photos of the stem to show the light tooth marks, chatter and the remaining oxidation on the stem surface. One of the things I appreciate about Jeff’s cleanup is that he works to protect and preserve the nomenclature on the shank of the pipes that he works on. The stamping on this one was faint to start with so I was worried that it would worsen with the cleanup. He was not only able to preserve it but it seems to be clearer than shown in the earlier photos. I took some photos to show the clarity of the stamping. You can also see the condition of the squashed S on the left side of the tapered stem.  I have noticed that many restorers are not careful to protect the stamping during their cleaning process and by the end of the restoration the nomenclature is damaged or lost. I encourage all of us to be careful to preserve this critical piece of pipe restoration! Since this is another pipe Bob’s estate I am sure that some of you have read at least some of the other restoration work that has been done on the previous pipes. You have also read what I have included about Bob Kerr, the pipeman who held these pipes in trust before I came to work on them (see photo to the left). Also, if you have followed the blog for long you will already know that I like to include background information on the pipeman whose pipes I am restoring. For me, when I am working on an estate I really like to have a sense of the person who held the pipes in trust before I worked on them. It gives me another dimension of the restoration work. I asked Brian if he or his wife would like to write a brief biographical tribute to her father, Bob. His daughter worked on it and I received the following short write up on him and some pictures to go along with the words including one of Bob’s carvings. Once again I thank you Brian and tell your wife thank you as well.

I am delighted to pass on these beloved pipes of my father’s. I hope each user gets many hours of contemplative pleasure as he did. I remember the aroma of tobacco in the rec room, as he put up his feet on his lazy boy. He’d be first at the paper then, no one could touch it before him. Maybe there would be a movie on with an actor smoking a pipe. He would have very definite opinions on whether the performer was a ‘real’ smoker or not, a distinction which I could never see but it would be very clear to him. He worked by day as a sales manager of a paper products company, a job he hated. What he longed for was the life of an artist, so on the weekends and sometimes mid-week evenings he would journey to his workshop and come out with wood sculptures, all of which he declared as crap but every one of them treasured by my sister and myself. Enjoy the pipes, and maybe a little of his creative spirit will enter you!

Now on to the rest of the restoration on this beautiful Svendborg Brandy 19! I decided to begin the restoration of the bowl by polishing the briar with micromesh sanding pads to blend in the stain and to polish the briar and remove the scratches in the surface of the bowl, heel and shank. I wet sanded with 1500-12000 grit pads and wiped the bowl down between each pad with a damp cloth.   I rubbed the bowl down with Before & After Restoration Balm. I worked it into the surface of the briar with my fingertips to clean, enliven and protect it. I let the balm sit for a little while and then buffed with a cotton cloth to raise the shine. Mark Hoover’s Balm is a product that I have come to appreciate and one I use on every pipe I have been working on.   I set the bowl aside and turned my attention to the stem. I “painted” the surface of the stem with the flame from a Bic lighter to lift the dents and tooth marks on both side. I was able to lift them all so that I could do the rest of the stem work with sandpaper.I sanded the stem with 220 grit sandpaper to break up the oxidation. I started the polishing with 400 grit wet dry sandpaper to remove the scratching. It is starting to look good. I carefully worked my way around the squashed S stamp. I rubbed the stem down with Denicare Mouthpiece Polish. I have a few tins of this laying around so I am trying to use them up. It does a pretty good job polishing the stem.    I polished the stem with micromesh sanding pads – wet sanding with 1500-12000 grit pads. I wiped the stem down after each sanding pad with Obsidian Oil. I polished it with Before & After Pipe Stem Polish – both Fine and Extra Fine. Once I had finished the polishing I gave it a coat of “No Oxy Oil” developed by Briarville. I am experimenting with this product on the pipes I am restoring. Once again I am excited to be working on another one of Bob’s pipes. This is the part of the restoration part I look forward to when it all comes back together, polished and waxed. I put the bowl and stem back together. I polished the bowl and stem with Blue Diamond to polish out the scratches in the briar and the vulcanite. I gave the bowl and the stem multiple coats of carnauba wax. I buffed the pipe with a clean buffing pad to raise the shine. I hand buffed it with a microfiber cloth to deepen the shine. The pipe polished up pretty nicely. The straight and flame grain around the smooth finish look really good with the polished black vulcanite. This Svendborg Danish Handmade 19 Bark Brand was another fun pipe to work on thanks to Jeff’s cleanup work. It really has that classic Danish look that catches the eye. The combination of various brown stains really makes the pipe look attractive. It is another comfortable pipe to hold in the hand. The finished pipe is shown in the photos below. The dimensions of the pipe are Length: 5 ½ inches, Height: 2 inches, Outside diameter of the bowl: 1 1/8 inches, Chamber diameter: ¾ of an inch. If you are interested in carrying on Bob’s legacy with this pipe send me a message or an email. I have a lot more to work on of various brands. Perhaps one of those will catch your attention. Thanks for reading this blog and my reflections on the pipe while I worked on it. This is an interesting estate to bring back to life.
 

Repairing a Cracked Shank and Restoring a Larsen Super Tulip


Blog by Steve Laug

Jeff picked up this interesting Larsen Hand Made from an auction in Columbus, Michigan in March, 2019. The shape and design of this pipe caught his eye and mine. It has a great shape and sandblast finish. The shape is what I would call a tulip and has a forward tipping bowl and a gently curved shank from the bowl through the curve of the stem. The finish is very dirty with dust and grime filling in the grooves of the blast. The bowl has a thick cake that overflows onto the rim top. The rim top has some darkening and perhaps some damage around the thin edge. The shank has about a ½ inch crack on the left side that has spread slightly due to the thick tar and oil in the shank. The stem is oxidized and has tooth chatter and tooth marks on both sides near the button and also damage to the button edge on both sides. Jeff took photos of the pipe before he started his cleanup work. The conditions noted above are evident in the photos. Jeff took close up photos of the rim top from various angles to show the general condition of the bowl and rim. The first photo shows the thickness of the cake in the bowl and the lava build up on the back edge. The edges look like they have been protected by the thick cake so they will probably be fine once the bowl is reamed. The second and third photos give a clear picture of the bowl sides and rim edges. Jeff took photos of the sides and heel of the bowl to give an idea of the beauty of the sandblast and the condition of the bowl.The underside of the shank is stamped Super over Larsen over Handmade over Made in Denmark. The stamping is faint toward the edge of the shank/stem junction. Between the Larsen and Handmade there appears to be something stamped but it is unclear. There is a crack in the shank that is evident in the third photo and it almost looks like there was a thin band on the shank at some point before it came to me. You can see a light strip at the shank end in the photos above and the one below.The photos of the stem show the condition of the stem on both sides. The first one shows the tooth marks and chatter on the top of the stem and on the button.I turned to Pipephil’s site to get a quick review of the brand (http://pipephil.eu/logos/en/logo-l2.html). There was a sidebar on the site that gave the following information:

In the 1960s Ole Larsen, owner of the Copenhagen tobacco store, retails pipes carved by Sixten Ivarsson, Poul Rasmussen, Sven Knudsen or Peter Brakner. Faced with the success and urged by Sven Bang (store manager), Sven Knudsen and Former (Hans Nielsen) are successively hired to carve pipes in the basement of the shop at the beginning and in the old Larsen cigar factory afterwards. Carver like Teddy Knudsen, Tonni Nielsen, Jess Chonowitch, Peter Hedegaard work a while in this context.

When Nils, son of Ole Larsen, succeeds his father he acquires the Georg Jensen pipe factory to focus on less expensive pipes. This turns out to be an error ending with the sale of W.O. Larsen trademark to Stanwell.

The famous tobacco shop at Strøget, Amagertorv 9 closed down for good on Dec 31, 2004.

I turned to Pipedia and read the history of the brand. It is a short article and a very good read. It seems that W.O. Larsen was a famous pipe retailer in Denmark who employed many of the famous pipemakers such as S. Bang, Former, Teddy Knudsen, Tonni Nielsen, Jess Chonowitsch, Peter Hedegaard and others. Give the article a read as it is very interesting. The link follows below: (https://pipedia.org/wiki/W.%C3%98._Larsen).

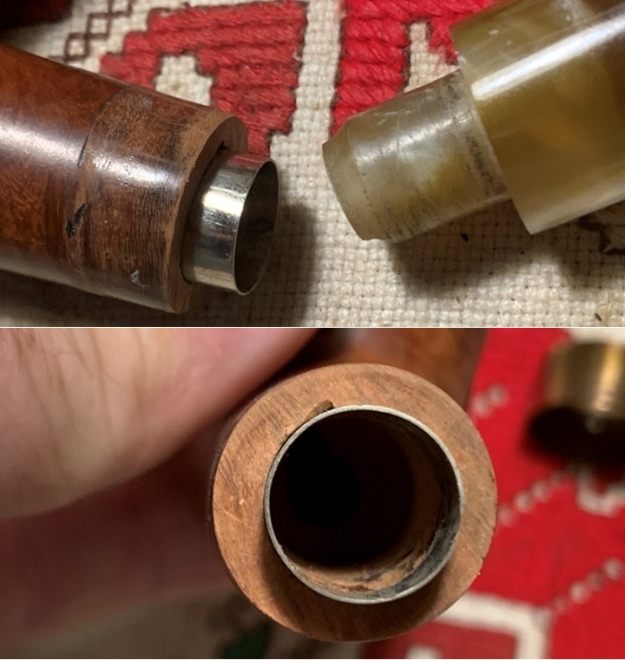
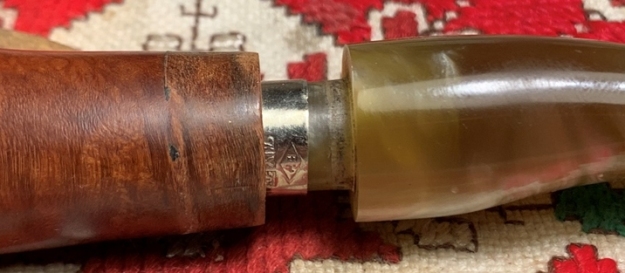
There were several links to Larsen catalogues at the end of the article. The screen captures below give some pipes that look very similar to the one I am working on . It is like the Larsen Handmade No.71 in the first photo below and like the Larsen Handmade No. 75 in the second photo below. (https://pipedia.org/images/5/5c/Wo1.pdf) (http://www.danishpipemakers.com/pdf/wo1.pdf) Jeff cleaned the pipe with his usual penchant for thoroughness that I really appreciate. This one was a real mess and I did not know what to expect when I unwrapped it from his box. He reamed it with a PipNet pipe reamer and cleaned up the reaming with a Savinelli Fitsall Pipe Knife. He scrubbed out the internals with alcohol, pipe cleaners and cotton swabs until the pipe was clean. He scrubbed the exterior of the bowl with Murphy’s Oil Soap and a tooth brush to remove the grime and grit on the briar and the lava on the rim top. The finish looks very good with good looking grain around the bowl and shank. Jeff soaked the stem in Before & After Deoxidizer to remove the oxidation on the rubber. When the pipe arrived here in Vancouver for the second stop of its restoration tour it looked very good. I took photos before I started my part of the work. I took some close up photos of the rim top and also of the stem surface. I wanted to show what an amazing job Jeff did in the cleanup of the rim top. The bowl and the rim top look very good. There was some darkening on the back top of the rim and some wear in the finish on the front of the rim top.  I also took close up photos of the stem to show the tooth marks and chatter on both sides at the button.  As I examined the crack I the shank under a lens I could see that it actually was two cracks running parallel and then connected at the top. I carefully remove the chip of briar from the shank and took the following photo. I have some older thin bands that looked like rose gold and were the right size to achieve the repair without covering the majority of the stamping on the underside of the shank. I glued the chip back in place on the shank with clear super glue. Once it hardened I coated the outside of the shank (the width of the band) with an all purpose white glue and pressed the band onto the shank to hold the piece in place and stabilize the repair. I put the stem on the shank and took photos of the pipe to get an idea of what it looked like with the delicate rose gold band on the shank end. I like the way it looked. It achieved the repair but did not sacrifice the dignity of the pipe. I restained the rim top to blend the lighter front with the darkening on the rear portion using a Mahogany stain pen. It blended the colours well matching the rest of the bowl.I rubbed the bowl down with Before & After Restoration Balm. I worked it into the surface of the briar with my fingertips to clean, enliven and protect it. I let the balm sit for a little while and then buffed with a cotton cloth to raise the shine. Mark Hoover’s Balm is a product that I have come to appreciate and one I use on every pipe I have been working on.   I set the bowl aside and turned my attention to the stem. I “painted” the stem surface ahead of the button and on the button surface on both sides of the stem with the flame of a Bic lighter. The heat lifts the tooth marks on the surface and because of the “Memory” of vulcanite I was able to make them almost invisible with the heat. All I would need to do to finish the repairs was to sand the stem surface and polish it.I sanded the stem with 220 grit sandpaper to break up the oxidation. I started the polishing with 400 grit wet dry sandpaper to remove the scratching. It is starting to look good. The tenon was very tight in the shank. I believe that it was the cause of the cracks in the shank. So, to deal with the issue I reduced the diameter of the tenon with the sandpaper at the same time I sanded the stem surface. I began the polishing work on the stem by rubbing it down with Denicare Mouthpiece Polish. It is a gritty red paste that I work into the surface of the vulcanite and then buff off with a cotton pad. It does a great job minimizing the scratching on the surface. I have a few tins of this laying around so I am trying to use them up. I polished the stem with micromesh sanding pads – wet sanding with 1500-12000 grit pads. I wiped the stem down after each sanding pad with Obsidian Oil. I polished it with Before & After Pipe Stem Polish – both Fine and Extra Fine. Once I had finished the polishing I gave it final coat of oil and set it aside to dry.    I am excited to be on the homestretch with beautiful Larsen pipe. This is the part I look forward to when it all comes back together, polished and waxed. I put the bowl and stem back together. I polished the bowl and stem with Blue Diamond to polish out the scratches in the briar and the vulcanite. I gave the bowl multiple coats of Conservator’s Wax and the stem multiple coats of carnauba wax. I buffed the pipe with a clean buffing pad to raise the shine. I hand buffed it with a microfiber cloth to deepen the shine. The pipe polished up pretty nicely. The new band on the repaired shank adds a nice touch to the look of the pipe. The sandblast finish looks really good interesting grain patterns popping through the blast. The band, the blast and the polished black vulcanite went really well together. This Larsen Super freehand shape Tulip was another fun pipe to work on thanks to Jeff’s cleanup work. It really has that classic Danish look that catches the eye. The combination of various brown stains undulating in the nooks and crannies of the blast really makes the pipe look attractive. It is another comfortable pipe to hold in the hand. The finished pipe is shown in the photos below. The dimensions of the pipe are Length: 6 ½ inches, Height: 2 ½ inches, Outside diameter of the bowl: 1 1/8 inches, Chamber diameter: ¾ of an inch. I like the looks of the repaired shank and the flow of the gold band on the shank. It sets off the brown of the briar and the black of the vulcanite. Thanks for reading this blog and my reflections on the pipe while I worked on it. This is an interesting estate to bring back to life.
New Life for Alex’s Rusticated “Malaga” Oom Paul


Blog by Steve Laug

I have another of Alex’s purchases on the table this morning. It is an Oom Paul pipe with a rusticated finish. It is another very unique Malaga that has the same kind of rustication as a lot of the Custom-Bilt pipes had as well. The rim top, the ring around the shank end and a panel on each side of the shank are smooth. The pipe was dirty and caked with few spots of lava and some darkening on the inner edge of the bowl. The bowl had a thick rough surfaced cake. The exterior was dirty with grime and oils in the crevices of the finish. The stamping on the left side of the shank read “MALAGA” and the right side the stamping was in an oval and read Imported Briar. There appears to be something else in the oval but it is worn. The first two letters could be CA the rest are worn away. The vulcanite saddle stem had two dots on the left side of the stem. It was oxidized and had tooth marks and chatter on both sides. There was a chip out of the top edge of the button. I took photos of the pipe before I started the cleanup work. I took close up photos of the bowl and rim to capture the condition of the pipe before I started my cleanup work. The rim top had some lava and it was thick enough that I could not see if there was any darkening or damage on the crowned rim top and the inner edge. There was a thick cake in the bowl. Other than being very dirty the pipe was in great condition. The stem was dirty and oxidized. It was covered with a thick scum on the surfaces. There was tooth chatter on the top and underside near the button and some tooth marks on the button surface itself. There was a large chunk out of the top of the button on the stem. I have included a close up photo of the chipped stem surface below.I took a photo to capture the stamping on the shank. The stamping on the left side of the shank read “MALAGA”. I forgot to take a photo of the stamping on the right side the stamping but it was in an oval and read Imported Briar. There appears to be something in the center of the oval but it is worn. The first two letters could be CA the rest is worn away. It would make sense that this was one of the pipes from the “MALAGA” CARVED line so the rest of the letters may well be RVED. There were also two white dots on the left side of the saddle stem.If this is the first of the Malaga restorations that you have read about then you should know the backstory of the brand. I am including the link to a blog that I wrote that gives some of the history of the Malaga brand and the Malaga Pipe Shop in Royal Oak, Michigan in the USA. I have written an earlier blog to give a little history of the Malaga Brand and the pipemaker, George Khoubesser. Here is the link – https://rebornpipes.com/tag/malaga-pipes/.That blog also includes links to a catalogue and the history of the pipemaker George Khoubesser. Follow the link to get a feel for the brand and the pipemaker.

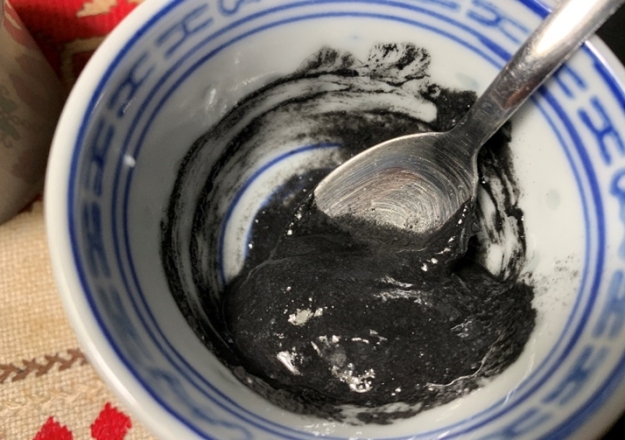
I decided to start with the bowl first. I followed Jeff and my regular regimen for cleaning estates. I reamed the thick cake in the bowl with a PipNet Pipe Reamer using the third size of cutting heads to take the cake back to bare briar. I followed up with a Savinelli Fitsall pipe knife to remove the slight remnants of cake toward the bottom of the bowl. I sanded the bowl with 220 grit sandpaper wrapped around a piece of dowel to smooth out the inside walls of the bowl.The mortise was surprisingly clean but there were some tars and oils on the walls. I scrubbed the mortise and the airway in the shank and the stem with alcohol, cotton swabs and pipe cleaners.I polished the smooth rim top and the ring around the end of the shank with micromesh sanding pads – wet sanding with 1500-12000 grit sanding pads. I wiped down the bowl after each sanding pad with a damp cloth. The polishing took the remainder of the bit of lava that had remained after the cleanup. I scrubbed the briar with Murphy’s Oil Soap with a tooth brush. I scrubbed it off under running water to remove the soap and the grime on the bowl. I dried it off with a soft cloth. I worked some Before & After Restoration Balm into the surface of the briar with my fingertips and a horsehair shoe brush to clean, enliven and protect it. I let the balm sit for a little while and then buffed with a cotton cloth to raise the shine. The photos show the bowl at this point in the restoration process. I set the bowl aside and turned my attention to the stem. I took a photo of the stem before I started my work on it. I cleaned it with alcohol and sanded off the calcification and oxidation on the surface. Once it was cleaned I mixed up a batch of activated charcoal powder and black super glue. I greased a pipe cleaner with Vaseline and inserted it in the button. I used a dental spatula to fill in the missing chunk of vulcanite. Once it had hardened a bit I removed the pipe cleaner and set it aside to cure.I set it on a container to let the repair cure. Once it hardened I would need to reshape the button and the slot on the stem. I had also filled in the damage to the underside of the button. The reshaping would bring it back to the original shape.I shaped the button edges and surface with a needle file to remove the excess material on the repair. I still need to do some more sanding but the stem is shaping up to be quite nice. I still need to remove the oxidation on the surface but it is getting there.I sanded out the tooth chatter with 220 grit sand paper and started to polish it with a folded piece of 400 wet dry sandpaper. Once it was finished it the tooth chatter and oxidation was gone and it began to shine.I reshaped the slot in the button end with needle files to clean up the shape.I polished the stem with Denicare Mouthpiece Polish from a tin of it I have in the drawer here. It is a gritty red paste that I rub on with my finger tips and work into the surface of the stem and button and buff off with a cotton pad. It gives me a bit of a head start on the polishing work plus I have a tin to use up!I polished the stem with micromesh sanding pads – wet sanding with 1500-12000 grit sanding pads. I wiped it down after each sanding pad with Obsidian Oil. I polished it with Before & After Pipe Stem Polish – both Fine and Extra Fine and buffed it off with a final coat of Obsidian Oil. This is another interestingly shaped rusticated pipe in what I would call an Oom Paul shape. It has a black vulcanite saddle stem with two brass dots. The smooth rim top and shank end band look really good against the rustication. Everything about this one says that it was part of the “Malaga” Carved line of pipes. It has a great look and feel. The shape is very tactile and fits well in the hand. I polished stem and the bowl with Blue Diamond polish on the buffing wheel. I gave the bowl multiple coats of Conservator’s Wax and the stem multiple coats of carnauba wax. I buffed the pipe with a clean buffing pad to raise the shine. I hand buffed it with a microfiber cloth to deepen the shine. The pipe polished up pretty nicely. The rich oil cured briar took on life with the buffing. The rich brown colour of the briar works well with the polished vulcanite stem. The finished pipe has a rich look that is quite catching. Have a look at it with the photos below. The shape, finish and flow of the pipe and stem are very well done. The dimensions are Length: 6 inches, Height: 2 inches, Outside diameter of the bowl: 1 ½ inches, Chamber diameter: ¾ of an inch. I will be adding the pipe to the finished Malaga pipes that I have set aside for Alex. This will be a great addition to his collection of Malaga pipes. Thanks for walking through the restoration with me as I worked over another Malaga.

Restoring a Stunning Malaga Bent Billiard from Kathy’s Dad’s Pipes


Blog by Steve Laug

Not long ago Alex came by and went through the Malaga pipes from George Koch’s estate. Alex added the newly chosen pipes to the box of pipes I set aside for him. There are quite a few of them to work on so I decided to go back to work on one of them. The next Malaga is a shape I would define as a bent billiard. It has some great cross and birdseye grain and a saddle vulcanite stem. The grain around the bowl and shank combined with the stem make it a stunning pipe. It is one of the many Malaga pipes that came to my brother and me in several shipments of pipes from George’s daughter Kathy. When Jeff got each box the pipes were well wrapped and packed. Jeff unwrapped them and took the following photo to give an idea of the volume of the pipes that we purchased. This Malaga came in mixed in a box of pipes much like the one below.In each of the previous blogs that I have written on the restoration of George’s pipes I have told his story. If you have followed the restorations you will have read the information and the background piece that Kathy did on her father. Here is a link to one of the previous blogs on his Malaga pipes where I included her tribute in full (https://rebornpipes.com/2019/01/26/back-to-kathys-dads-pipes-restoring-a-%c2%bc-bent-malaga-author/). You can also read the bio on her Dad, George Koch. It is an interesting read and one that shows just how far our pipe collecting passion can go when we find a brand of pipes that we enjoy. I am going to only include the portion on the Malagas at this point. If you wish to read the rest follow the link above.

Kathy writes…We lived in Livonia, and that’s where his love for Malaga pipes began. After a few years he returned to Allis Chalmers and we moved back to Springfield. I remember that when we went back to Michigan to visit friends, Dad had to go to the Malaga store and acquire a few new pipes. Many a year I wrote to Malaga and they picked out a pipe for me to purchase that I could give Dad for a Christmas or birthday present. He was always pleased. His favorites were the straight stemmed medium sized bowl pipes, but he liked them all. 

He had some other pipes, but the Malagas were his favorites. I remember him smoking them sitting in his easy chair after work, with feet up on the ledge by the fire burning in the fireplace.  Growing up it was my job to clean them and he liked the inner bowl and stem coated with Watkins vanilla, leaving a little of that liquid in the bowl to soak in when I put them back on the rack…I’m very happy they are being restored by you and your brother and hope they find homes who enjoy them as much as Dad did. Thank-you for your care and interest. — Kathy, the oldest daughter

The “Malaga” Bent Billiard with the classic bent shape is the next on the table. The carver did a great job of shaping the pipe to follow the grain on the briar. The bowl, round shank and bent tapered vulcanite stem look very good. The bowl had a thick cake that overflowed with lava onto the rim so that it was impossible to see if there was damage on the inner edges. The sides of the bowl and shank are very dirty with grime and oils from prolonged use. The stamping on the left side of the shank read “MALAGA” and on the right side it read Imported Briar. The vulcanite stem had tooth dents and chatter on the top and the underside of the stem. Jeff took these photos before he started the cleanup work on the pipe.Jeff took a close up photo of the bowl and rim to capture the condition of the pipe before he started his cleanup work. The rim top had some lava overflow and darkening on the back of the bowl and some damage to the inner edge of the bowl front. There appeared to be deep burn marks on the inner edge on the right front side of the grimy pipe.He also took photos of the sides and bottom of the bowl and shank to show the beautiful grain around the bowl. The photos show the general condition of the bowl and wear on the finish. It is very dirty but this is another beautiful pipe.Jeff took a photo to capture the stamping on the shank. The photos show the stamping “MALAGA” on the left side of the shank and Imported Briar on the right side. The stamping is very readable.The next photos show the stem surface. There are tooth marks and chatter on both sides near the button and wear on the button surface and edges.I am also including the link to a blog that I wrote that gives some of the history of the Malaga brand and the Malaga Pipe Shop in Royal Oak, Michigan in the USA. I have written an earlier blog to give a little history of the Malaga Brand and the pipemaker, George Khoubesser. Here is the link – https://rebornpipes.com/tag/malaga-pipes/.That blog also includes links to a catalogue and the history of the pipemaker George Khoubesser. Follow the link to get a feel for the brand and the pipemaker.

Jeff reamed the bowl with a PipNet pipe reamer and followed up with a Savinelli Fitsall pipe knife to remove the cake. He scrubbed out the mortise and the airway in the shank and the stem with alcohol, cotton swabs and pipe cleaners. He scrubbed the exterior of the bowl, rim, shank and stem with a tooth brush and Murphy’s Oil Soap to remove the oils and tars on the rim and the grime on the finish of the bowl. He rinsed it under running water. He dried it off with a soft cloth. He was able to remove the lava build up on the rim top and the flat surface of the rim looked very good. The inner edge of the rim has some serious burn damage on the front right side. The outer edge looked very good. I took photos of the pipe to show its condition before I started my work on it. I took close up photos of the bowl and rim top as well as the stem. You can see the condition of the rim top and bowl in the first photo. Jeff was able to remove all of the tar and oils but you can now see the damage on the inside rim edge. The edge is out of round. There is a burn mark that extends across the front and the back edge of the rim top at that point. The vulcanite stem had tooth chatter on both sides near and on the button surface there was also a large deep bite mark on the underside of the stem.I took a photo of the stamping on the shank to show how good the condition is. It shows the “MALAGA” stamp on the left side and Imported Briar on the right side. The stamping is very legible.I decided to address the rim top first. I lightly topped the bowl on a topping board with 220 grit sandpaper. I wanted to minimize the damage on the top, remove the darkening and clean up the damage on the front and rear inner edge of the bowl.I used a folded piece of 220 grit sandpaper to clean up the damage on the right rear inner edge of the bowl. I gave the inner edge a slight bevel to repair the damage. I polished the edge with 400 grit wet dry sandpaper. The rim top and edges really looked better.I polished the rim top and the briar with micromesh sanding pads. I wet sanded the bowl with 1500-12000 grit sanding pads. I wiped the bowl down after each pad with a damp cloth to remove the sanding dust. I scrubbed the briar with Murphy’s Oil Soap and a tooth brush. I rubbed it into the surface of the briar with my finger tips and let it sit for about 10 minutes then rinsed it off with running water. I dried it off with a soft cloth. I restained the rim top and edges with an Oak Stain Pen. I was able to blend it into the rest of the bowl.I worked some Before & After Restoration Balm into the surface of the briar with my fingertips to clean, enliven and protect it. I let the balm sit for a little while and then buffed with a cotton cloth to raise the shine. The following photos show the bowl at this point in the restoration process. I am very happy with the results. I turned to the stem to address the issues on the surface of both sides at the button. I started by “painting” the surface of the stem with the flame of a lighter to lift the tooth chatter and marks. The light marks on the top side disappeared quickly and the larger indentation on the underside lifted until the remaining small marks could be dealt with by sanding the stem.I sanded both sides smooth with 220 grit sandpaper to remove the deep oxidation on the surfaces. I finished this initial polishing with 400 grit sandpaper to smooth out the scratches in the stem surface. As I sanded and reshaped the button and stem surface the stem began to look very good.I polished the stem with Denicare Mouthpiece Polish from a tin of it I have in the drawer here. It is a gritty red paste that I rub on with my finger tips and work into the surface of the stem and button and buff off with a cotton pad. It gives me a bit of a head start on the polishing work plus I have a tin to use up!I polished the stem with micromesh sanding pads – wet sanding with 1500-12000 grit sanding pads. I wiped it down after each sanding pad Obsidian Oil. I finished by polishing it with Before & After Pipe Stem Polish both fine and extra Fine and then wiped it down with a final coat of Obsidian Oil. This is a Malaga Bent Billiard with a vulcanite saddle stem. It has a great grain around the bowl and the carver really maximized that with the shape of the pipe. Everything about the pipe – the shape of the bowl, the beveled rim top and the cut of the briar work well to highlight the grain around the bowl sides. I polished stem and the bowl with Blue Diamond polish on the buffing wheel and the grain just popped and came alive. I gave the bowl and the stem multiple coats of carnauba wax. I buffed the pipe with a clean buffing pad to raise the shine. I hand buffed it with a microfiber cloth to deepen the shine. The pipe polished up pretty nicely. The grain took on life with the buffing. The rich oil cured colour works well with the polished vulcanite stem. The finished pipe has a rich look that is quite catching. Have a look at it with the photos below. The shape, finish and flow of the pipe and stem are very well done. The dimensions are Length: 5 ¾ inches, Height: 1 7/8 inches, Outside diameter of the bowl: 1 ¼ inches, Chamber diameter: ¾ of an inch. I will be adding the pipe to the finished Malaga pipes that I have set aside for Alex. I am glad that he is carrying on the trust for George Koch. Thanks for walking through the restoration with me as I worked over another one of Kathy’s Dad’s Pipes.


Restoring a 2 Star BBB “Special” # 395


Blog by Paresh Deshpande

A few weeks ago, Steve had worked on a BBB Own Make 693 Canadian with some really gorgeous grains to boast about. As I was reading the blog, I remembered the BBBs that Abha had cleaned and sent across for further restoration along with 40 other pipes. However, since I was working on a Thorburn Clark pipe from my inheritance, I had postponed work on this BBB. With the Thorburn Clark completed, I rummaged through the pile and separated all the BBBs that she had sent. This is the one that caught my attention. The note in the package, along with the issues observed by Abha while cleaning the pipe, said that it was from my grandfather’s collection!! I had to work on this BBB.

This BBB in bent Apple shape with a saddle stem has stunning grains and it appears that the grain on the block of briar dictated the shape to the carver. The stummel boasts of beautiful tightly packed straight grains to the front, sides, back and along the sides of the shank. The foot of the stummel, bottom and top of the shank has the most beautiful and distinct bird’s eye that you would ever see. The transition from bird’s eye at the foot of the stummel to the straight grain all around is very well defined and seamless. The stummel is stamped on the left shank surface, close to the shank end, in trademark rhombus as “BBB” over two Stars (**) on either side of the lower part of the rhombus over “SPECIAL”. On the left shank surface, it is stamped as “LONDON ENGLAND” over the shape code “395”. The bottom of the shank bears the numeral “0” very close to the shank end. Inlaid BBB brass diamond logo on the saddle adorns the vulcanite stem. If you are interested to know anything about BBB pipes, look no further than rebornpipes.com!! This is Steve’s favorite brand and he has been researching and collecting BBB pipes for decades. I visited rebornpipes and sure enough there was a write up on “History of BBB Pipes”! Here is the link to the blog: https://rebornpipes.com/2012/08/05/history-of-bbb-pipes/

I was more interested in background information of the brand and later in the dating of this pipe. Here is what I found interesting;

Adolph Frankau arrived in London in 1847 and quickly grasped the opportunities which the enlarging tobacco market introduced. He started “Adolph Frankau and Co.” and began importing meerschaum pipes and tobacco supplies. The Company took a young 14 year-old boy, Louis Blumfeld under its wing. The Company quickly thrived and did so until the untimely death of Adolph Frankau in 1856. His widow decided to sell the company.

Thomas Carlyle (1795-1881), author of “Hero and worship of the heroes” came on the scene at this point. He recommended that the widow Frankau not sell, but rather that she should entrust the future of the company into the hands of young Louis Blumfeld, then 18 years old. Carlyle had to have had a very high opinion of the young Louis to make this recommendation, and his trust proved to be justified as Blumfield took care of the company with enthusiasm and bottomless energy. Louis quickly realized, as others had before him, the potential of the newly acknowledged pipes made of briar.

Louis Blumfeld developed important international trade relations from the beginning, and had particular success in Canada, Australia, New Zealand, India, Europe, as well as Switzerland and Denmark. The USA had never been an extraordinary market for the company, but nonetheless a subsidiary was opened in New York. His commercial strategy focused on the countries of British Empire.        

In the 1930s, the top pipe of the line was “BBB Best Make” with variants such as “Great Dam” and “Ultonia Thule”. The BBB Carlton, sold retail in 1938, was endowed with a complicated stinger system; the same system was also used on the BBB London Dry. The Blue Peter was not stamped BBB but BBB Ultonia, and BBB Two Star (**) was the stamping on lesser quality pipes.

Shapes of BBB pipe were typical of other companies pipes made in this era: half were billiards, some princes and bullcaps, bulldogs and some bents. It is also in this period that the inlaid metal BBB was put on more upscale pipes, while series of lesser quality had only the stamped BBB on the stem.

During the middle of 1950s and 1960s, BBB lines were comparatively stable. The top pipes of the line were stamped Own Make “Rare Grain”, followed by Own Make “Virgin”, Own Make “Walnut” and finally Own Make “Thorneycroft”.

From the above, it is evident that the BBB on my work table is from the period 1930 to 1950.

INITIAL VISUAL INSPECTION
The chamber had a thick layer of cake, but not as thick as seen in some of his pipes. As expected, the rim top surface is covered with overflow of lava. The beveled inner edge of the rim in 11 ‘O’ clock direction is badly damaged which could probably be caused as a result of hitting against a hard surface to remove the dottle. The outer rim edge too has dents and dings around. The condition of the walls can be commented upon only once the cake has been taken down to the bare briar. This chamber has some pretty strong ghost smells.   The stummel surface is pebbled with numerous dents, dings and scratches. However, there is not a single fill in the stummel surface!! Significant damage was seen to the front of the stummel and around the rim. This damage, in all probability, has been caused due to uncared for storage and it having rubbed against some hard object. The briar had taken on a nice aged patina and I shall try to preserve it. However, the kind of damage to the stummel would necessitate a few invasive methods to address these issues which are detrimental to preservation of aged patina. Let’s see how the restoration pans out!! The mortise showed dried accumulated gunk with a blocked draught hole. Air flow was very laborious to say the least.The stem is heavily oxidized with a deep gouge on either side of the saddle of the stem. This and other stummel damage could have been due to uncared for storage for the last 40 odd years. There is no significant damage to the button or in the bite zone, save for a few very minor tooth marks to button edges and tooth chatter in the bite zone. This was surprising as I have observed that the stem was the most damaged part in most of my inherited collection. Maybe my grandfather did not like the smoking character of this pipe or the shape or the hand feel or the clench or could be that he did not like the size of this pipe (most probable cause since he preferred large sized ones!!) The tenon is covered in dried gunk. INITIAL CLEANING BY ABHA…
The initial cleaning on this pipe was done by Abha, my wife (she has cleaned up around 40-50 pipes and these have now reached me for further restoration). She reamed out the complete cake and further smoothed out the chamber walls with a folded piece of 220 grit sand paper. She further cleaned out the internals of the shank with pipe cleaners and alcohol and cotton buds. In the note that she had packed with pipe, she mentioned that getting a pipe cleaner out through the draught hole was not easy. She followed the internal cleaning of the shank with external cleaning of the stummel using Murphy’s Oil soap and hard bristled tooth brush and dried it with paper napkins and cotton cloth.

Next she cleaned out the internals of the stem air way. She covered the inlaid brass stem logo with petroleum jelly (helps protect the metal from corrosion due the solution) and immersed it in “Before and After Deoxidizer” solution along with the stem of other pipes in line for restoration. Once the stem had soaked overnight, she cleaned the stem under running warm water and scrubbed the raised oxidation from the stem surface using Scotch Brite pad. She further removed the oxidation by scrubbing the stem with 0000 grade steel wool and applied a little olive oil to rehydrate the stem.

ONCE THE PIPE IS ON MY WORK TABLE…
The initial cleaning by Abha, my wife, is thorough and while saving me time, it also provides a clear picture of all the issues that needs to be addressed during the restoration process. She also makes a note of all the issues that she observed during initial cleaning for me to address and includes this note with each pipe that she packs. It’s a big saving on the time factor and I am really thankful to her for indulging me.

This is how the pipe came to me after Abha had worked her magic. This is definitely a beautiful pipe and would be a challenge for me to do justice and bring the beauty of this pipe to the fore!!

The chamber walls are solid without any signs of damage. The smooth and thin rim top surface is where all the action is on this pipe with an added bonus of an equally damaged beveled inner rim edge. At this point, the damage to the outer rim edge does not appear to be a major issue and should be easy to address. The ghost smells are greatly reduced, but still offending to the olfactory nerves. One major cause of concern is in the heel of the stummel. There is a dip at the bottom that forms a channel from the draught hole to the heel with raised shoulders along the sides (marked in yellow arrows). If this issue is not addressed now, prolonged further use may subsequently lead to a burnout at the foot of the stummel. However, as things stand now, the external surface at the foot appears solid. As observed earlier, there is not a single fill in the entire stummel. The reasoning for giving it a 2 Star, denoting lesser grade, fails me completely!! Abha had nicely cleaned the stummel surface. The surface is solid to the touch but has a number of dents and dings over the stummel, notably to the front, sides and a couple at the foot of the stummel (marked in yellow circles and arrows). Is it a figment of my imagination or a reality, I am not sure, but I think I saw a very slightly darkened spot at the bottom of the foot (circled in green), which was strongly refuted by anyone and everyone I happened to show it to. Just to be sure, I gently tapped it with the back of a screw driver for a shallow sound, but nothing!! I checked the entire stummel for sound and it all sounded the same. The stummel is solid throughout. In the note that Abha had enclosed in the packet containing this pipe, she had mentioned that she could not get a pipe cleaner through the mortise and the draught hole and as such she had left it alone. I would need to check it and further clean the mortise. The stem is free of any major tooth indentations/ bite marks. Minor light tooth chatter, however, is seen on both the stem surfaces in the bite zone. The lip edges needs to be sharpened and evened out. The stem still has signs of deep oxidation. The otherwise good condition of the stem is marred by deep gouges on either sides of the saddle of the stem. THE PROCESS
The first issue that I decided to address was that of the blocked air way in the mortise. With the bent flat dental tool, I scraped the walls of the mortise and removed as much of the dried gunk as I could. Using a round needle file, I tried to pry at the blockage, but to no avail. What I found unusual was that an upward movement of the needle file had a little give, however, when I tried to push it in straight, I hit a hard and solid block. Using shank brush and dish washing soap, I scrubbed the shank internals clean. This helped in getting a better idea of what lurked within the mortise that was preventing the pipe cleaner from coming out of the draught hole.I checked the mortise internals under a torch light and what I saw surprised me no end!! Straight away, I could not see the draught hole straight ahead and all that I saw was a reservoir like the one seen on a Pete System pipe. Closer observation around the mortise revealed the opening for the draught hole that was aligned towards the top side and that too was at a weird angle to the rest of the mortise. Here is how the internal of the mortise looked and will present a clearer picture of what I have been trying to explain.Well, this could very well be a flaw in the drilling of the mortise or could be a design element for a better smoke (HIGHLY IMPROBABLE!!), I really cannot tell. Continuing with the internal cleaning of the bowl, I subject the chamber to salt and alcohol treatment to get rid of the strong ghost smells. I insert a folded pipe cleaner through the mortise and out of the draught hole in to the chamber. Thereafter, I tightly pack cotton balls in the mortise, pushing it deep with a dental tool. Next I tightly pack cotton balls in to the chamber, slightly below the rim edge. Once this set up is ready, I pour 99.9% pure isopropyl alcohol in to the chamber and mortise, using a syringe. I let the alcohol settle down and top it again after about an hour. I set the stummel aside for the night to let the alcohol loosen up the grime, draw out all the entrenched oils and be trapped in the cotton. By next afternoon, the cotton and alcohol had drawn out the old oils and tars from the chamber and mortise. I removed the cotton from the chamber and the mortise. I scraped out the loosened crud from the mortise with my dental tools and further cleaned the mortise using hard bristled and regular pipe cleaners. However, on close scrutiny of the mortise under a torch light, I realized that the mortise was still not clean. While removing the loosened cake from the chamber, I gently scraped the shoulders that had formed at the heel near the draught hole. Lucky me, the shoulder that was formed was nothing but hardened cake and was easily removed due to the softening during the salt and alcohol bath. Using my dental tools, I scraped out all the crud that I could and followed it up with a cleaning using q-tips and alcohol. Though the mortise cleaned up pretty nicely, the smells were still strong. I decided to subject the chamber and the mortise to a second salt and alcohol bath. I followed the procedure for the bath explained above and set the stummel aside for the bath to work its magic. The next day, all the remaining oils and tars were drawn out and trapped in the pipe cleaner and cotton. I cleaned the mortise again using pipe cleaners and dental tools. I am happy with the way the mortise cleaned up this time. The pipe smells clean and fresh. Next, I decided to address the dents and dings on the stummel surface and on the rim outer edge. Using a whitener pen, I marked all the major areas with dents and dings and decided to leave the minor ones as they were. I heated my fabricated knife over the flame of a candle, placed a wet Turkish hand towel over the marked areas and steamed out the dents by placing the heated knife over the towel. Though some dents were still observed, these were greatly reduced when compared to before the steaming. Steaming out the dents and dings from the stummel surface had necessitated that the surface of the stummel be evened out by sanding. Using a folded piece of 220 grit sand paper, I sand the entire stummel surface taking care to preserve the stampings on this pipe. To address the damaged inner beveled edge of the rim as well as the dents and dings and darkening of the thin rim top surface, I topped the rim top on 180 grit sand paper. I took a piece of used and worn 180 grit sand paper, folded it and pinching it between my thumb and forefinger, freshened the inner bevel on the inner edge of the rim. Both the rim top and inner edge look much better than before. Staying with the stummel restoration, I polished the stummel with micromesh pads, dry sanding with 1500 to 12000 pads. I polished the freshly topped rim surface and the newly created inner rim bevel. I wiped the surface with a soft cloth at the end of the micromesh cycle. The stummel looks amazing with a deep shine and beautiful grains popping over the stummel surface. I am surprised that the rim top surface has the same deep brown coloration as the rest of the stummel surface and use of stain pen was not required. Also the supposed dark spot at the foot of the stummel was indeed a figment of my imagination and was nothing but the eye in the bird’s eye grain, whew!! The next step is the application of the “Before and After Restoration Balm”, developed by Mark Hoover and a must have for restorations. This product not only protects and enlivens the briar but also highlights the grains on the surface. I rubbed a small quantity of the balm into the briar surface with my fingers and set it aside for about 20 minutes. The transformation is almost immediate and I polished the surface with a microfiber cloth to bring out a deep shine on the stummel. The bird’s eye and straight grains look awesome. The following pictures speak for themselves. Now with the stummel refurbished, I turned my attention to the stem. I start with addressing the issue of deep gouges to the either sides of the saddle by heating the damaged surface with the flame of a lighter. The heat from the flame expands the vulcanite and raises it to the surface. The results are pretty satisfactory.Next I sand the entire stem surface with a folded piece of worn out 180 grit sand paper followed by a 220 grit sand paper. This addresses two issues; firstly the minor tooth chatter in the bite zone and the raised gouges are evened out and secondly, the residual oxidation is sanded out. I follow it up with sharpening of the lip edges with a flat head needle file. To finish the stem repairs, I wiped out the raised oxidation and dust from the surface with Murphy’s Oil soap and cotton swab.To bring a deep shine to the vulcanite stem, I went through the complete set of micromesh pads, wet sanding with 1500 to 12000 grit pads. I wiped the stem with a moist cloth after each pad. Another Mark Hoover product which I had recently ordered is the “Before and After Extra Fine” stem polish. I applied a small quantity of this polish and rubbed it deep in to the vulcanite stem. This polish, purportedly, is supposed to remove the finer sanding marks left behind by the abrasive grit papers. The pictures of the process and final results are shown below.Only the brass BBB stem logo remains to be polished. Abha, my wife, had suggested that I should try using Colgate toothpowder to bring back the shine on the metal logo. She had tried this on her jewelry with amazing results. I rubbed the brass logo with Colgate toothpowder and the results are truly amazing.To apply the finishing touches, I mount a cotton cloth buffing wheel on to my hand held rotary tool and apply a coat of Blue Diamond to the stummel and the stem to polish out the minor scratches. With a cotton buffing wheel that I use for carnauba wax, I apply a coat of carnauba wax and continue to work on it till the complete coat of wax had been polished out. I mount a clean cotton cloth buffing wheel and give the entire pipe a once over buff. I finished the restoration by giving the entire pipe a rigorous hand buffing using a microfiber cloth to raise the shine further. This is a truly beautiful pipe with a classic bent Apple shape boasting of stunning straight grains all round the stummel and shank and bird’s eye grains at the bottom of the entire stummel. Just to be on the safe side, I decided to protect the chamber walls and the heel of the stummel by giving it a bowl coating of activated charcoal and yogurt. This not only protects the walls from direct contact with the burning tobacco but also helps in speeding up the formation of cake. Now the pipe is completed aesthetically as well as functionally.P.S. The only aspect that was bothering me with this pipe is the alignment of the opening of the draught hole in to the mortise. I shared my concerns and pictures of the skewed alignment with my Guru and mentor, Steve. He suggested that this issue, to be addressed, may necessitate funneling the tenon end. He also suggested that I should first smoke this pipe and if the draw is smooth, even and full, funneling the tenon may not be necessary.

I dry tested the draw and found it to be smooth even and full without any whistling sounds. Thus, I can safely expect that the pipe should be a good smoker. I shall eventually get around to enjoying my first smoke in this beauty, but for now, the confidence that this one will be good smoke has me satisfied.

Truth be told, this project was completed by 16 October 2019, however, thereafter I proceeded on leave for my home and got around to complete the write up only after rejoining from leave.

I earnestly thank all the readers for sparing their valuable time in following this write up and hope to learn from your comments on this post.

Fashioning a Churchwarden by Reclaiming an East German Howal Sculpted Apple Bowl


Blog by Dal Stanton

One of the ways I can help benefit women and girls who have been trafficked and sexually exploited – the Daughters of Bulgaria,is by fashioning Churchwardens from discarded repurposed bowls.  I enjoy taking discarded bowls, no longer serving any purpose, and after restoring them, mounting them on the fore of a long, flowing Warden stem.  Suddenly, the metamorphosis is realized – the neglected and discarded again becomes a treasure, sought after with great value.  John, from Utah, saw another CW I created – Fashioning a Churchwarden from a Dimpled Bent Billiard Bowl when I posted it on the Old Codgers Smoking Pipe Facebook group, and he reached out to me to explore commissioning a Churchwarden for himself.  This was the Dimpled Bent Billiard Churchwarden got his attention:After some months, John’s CW project finally worked its way through the queue, patience always appreciated(!) – and as I told him before, when his project was on the worktable, I would contact him with choices for a bowl.  I spread out a selection of bowls next to a Warden stem and ruler.  The selection included bent and straight shanks and smooth and rusticated surfaces – and different shapes.  The unique thing about the Churchwarden shape is that its designation is not determined primarily by the shape of the bowl but by the length of the stem.  After taking a few pictures, and sending them to John, he made his choice.John’s chose a very nice-looking sculpted Apple shape pictured on the right, in the middle.  Through this choice, he expressed that he preferred a straight rather than a slightly bent Warden stem.  When I pulled that bowl aside and took a closer look at the shank, I discovered that on the left side was stamped the name, ‘Howal’ [over] ‘Bruyere’.Howal is not a well-known name in the West, but I became familiar with it after seeing several Howals here in Bulgaria – formerly under the Warsaw Pact, behind the Iron Curtain of the Former USSR.  Having previously restored a Howal – a rusticated Dublin, I enjoyed the research of the Howal name which was a mystery to me.  My research uncovered not only the origins of the pipe in former East Germany, but that the city where Howals were produced was a historical center for pipe manufacturing in Germany that pre-dated WW2.  A fascinating story that I wrote of in this restoration: Checkered History and Heritage of an East German Howal Old Briar Rustified Dublin.

Pipedia’s article that I sited in that write up was both interesting and helpful in understanding the predecessor of and origins of the Howal name:

C.S. Reich was founded by Carl Sebastian Reich in Schweina, Germany in 1887. By its 50th jubilee in 1937 C.S. Reich was the biggest pipe factory in Germany.  In 1952, however, the owners of the company were imprisoned and the company itself was nationalized as Howal, an abbreviation of the German words for “wood products Liebenstein” or “Holzwaren Liebenstein”.  By the 1970’s Howal, after acquiring many other smaller pipe making firms, was the sole maker of smoking pipes in East Germany. In 1990, with the fall of the Berlin Wall and reunification of the Germanys, the company was closed.

As I reread that previous research on the history of the Howal name for this write-up, I decided to restate my observations in full because I don’t restore Howals often and the history and human story draws me to retell the story as I transform this Howal bowl into a Churchwarden.  From the previous restoration (my present comments in brackets):

While helpful for a broad sweep, I discovered much missing from this [Pipedia] summary and it raises more questions.  From another interesting source, Edith Raddatz’s lecture on tobacco pipe production in Schweina [a link which unfortunately is no longer working!] at the Tobacco Pipe Symposium in 2003, it describes a history of pipe production in this central German village that was reminiscent of my research into France’s pipe mecca, St. Claude.  A strong development of the pipe making industry can be traced in the 1800s to the apex of the C.S. Reich Co. being Germany’s largest pipe producer in 1937, but Raddatz’s lecture reveals that other producers of pipes were also based in the German village of Schweina.  Pipedia’s article above describes how the owners of the C.S. Reich Co. were arrested and imprisoned followed by the nationalization of the Reich Co. and becoming ‘Howal’, an acronym for “Wood Products Liebenstein” – Bad Liebenstein was the town that bordered and absorbed the village of Schweina. The question begs to be asked – which, unfortunately introduces the human tragedy wrapped around the name ‘Howal’ – Why were the owners arrested?  In an unlikely source, the website of the ‘Small Tools Museum’ adds the names of those imprisoned: shareholders Robert Hergert and Karl Reich.

Edith Raddatz’s lecture (referenced above) brings more light to the difficult geopolitical realities these people faced (Google translated from German – brackets my clarifications):

By 1945 the company, which had meanwhile [passed to] the next generation – Kurt Reich And Walter Malsch – [had] about 100 employees.   Among them were many women who mainly did the painting work.  At the beginning of the 1950s, an era ended in Schweina. The first [oldest] tobacco pipe factory in Schweina closed their doors. There were several reasons for this. Kurt Reich passed away in 1941, [and] Walter Malsch [in] 1954.  The political situation in the newly founded GDR made the conditions for private entrepreneurship difficult. The heirs of the company “AR Sons” [Reich family] partly moved to West Germany. The operation was nationalized, and later toys were made there.

In post WWII occupied Germany, the Soviet occupied section was declared to be a sovereign state and the German Democratic Republic (GDR) was established in 1949 (See link).  With a rudimentary understanding of Marxism and the economic philosophy undergirding it, it is not difficult to deduce what brought the demise of the C. S. Reich Co. and the formation of Howal.  Solidification of the FDR’s hold on power paralleled the necessity to nationalize private ownership and to institute a State-centered command economy.  These efforts gained momentum and forced companies/workers to work more with no additional pay.  In 1952, the year that the owners of C. S. Reich Co., were arrested, this edict was advanced (See link):

In July 1952 the second party conference of the Socialist Unity Party of Germany (SED) took place in East Berlin. In SED General Secretary Walter Ulbricht‘s words, there was to be the “systematic implementation of Socialism” (planmäßiger Aufbau des Sozialismus); it was decided that the process of  Sovietization should be intensified and the importance of the state expanded. The party was acting on demands made by Soviet premier Joseph Stalin.[2]

As a result, today Germany remembers the Uprising of 1953 which started in East Berlin, as factory workers revolted against the repression of the GDR, and spread to all East Germany.  Many lost their lives as Moscow responded to squelch the unrest with tanks on the streets.  In play also, was the mass exodus of people fleeing to West Germany, which included, per Edith Radditz’s lecture, the Reich family, who would have been heirs of the family’s legacy and company – pipe making.  Also, in 1953, completing the State forced abolition of any Reich claim, the largest pipe making company of Germany was seized, nationalized, and changed from C. S. Reich Co. to Howal.  As ‘Howal’, pipes continued to be produced, undoubtedly with the same hands and sweat of the people of Schweina, along with other wooden products, such as toys.  In the Pipedia article I quoted above, it said:

By the 1970’s Howal, after acquiring many other smaller pipe making firms, was the sole maker of smoking pipes in East Germany. In 1990, with the fall of the Berlin Wall and reunification of the Germanys, the company was closed.

My curiosity piqued, what does it mean when it says that Howal acquired many other smaller pipe making firms?  Should we question whether these words can be understood in the normal free market enterprise way we are accustomed?  Doubtful.

…So, as I had written before regarding the checkered history of the Howal name.  Now, as I look again at the Howal sculpted Apple bowl on my worktable, I take a few more pictures to mark the starting point and to take a closer look. I very much like John’s choice of a bowl to fashion a Churchwarden.  The sculpting of the classic Apple shape will look very nice as a Warden – with a rustic, ‘Olde World’ look to it.  The condition of the Howal bowl is generally good.  The chamber has a heavy cake which will be removed to give the briar a fresh start and to check the chamber wall for heating problems.  The rim has some crusting lava overflow that needs cleaning. The rusticated surface with the intricate ribs carved into the sculpting also needs scrubbing to remove grime lodged in the wood.  Before working on the stem, I start the Howal Churchwarden project by using the Pipnet Reaming Kit.  After taking a picture of the chamber showing the tightening chamber as the cake thickens, I use the two smallest blade heads of the 4 available and ream the chamber.  The cake proves to be stubborn – hard as a brick.  After the Pipnet Kit, transitioning to the Savinelli Fitsall Tool, clearing the cake continues as the tool scrapes the chamber wall. Finishing this phase, I wrap 240 paper around a Sharpie Pen and sand the walls and then wipe the excess carbon dust with a cotton pad wetted with alcohol.

After completing the removal of the cake and cleaning the walls, an inspection reveals no heating problems.  I move on.Next, using undiluted Murphy’s Oil Soap I begin the external cleaning. I also employ a bristled toothbrush to get into the crevasses of the sculpted vertical sweeps, which are more detailed upon closer inspection. Within each crevasse, fine lines have been carved to provide a classier sculpted appearance. I like it. From the picture above, the lava flow caking on the rim is evident. A brass brush helps with removal of the crusting without damaging the briar underneath. The sharp edge of my Winchester pocketknife also helps as I carefully scrape the rim surface. From the worktable, I take the bowl to the sink and there using different sized long shank brushes with some anti-oil dish soap, I scrub the internal mortise under warm water.  After a thorough rinsing of the soap, I bring the bowl back to the worktable. The cleaning did a good job. I can now see the rim more clearly with a cut on the right side and some light damage on the left. The cleaning also reveals the residue of old finish on the smooth briar which shows up dark and shiny in the picture.  I’ll remove these patches with sanding.Starting with the rim, I take another picture showing the damage on the top and the bottom of the picture’s orientation.  The rim is sloped downwardly to form beveled rim peak. This is attractive and accentuates the Apple shape’s peaked rim. Going with this flow, I use 240 grade paper and sand the rim to freshen the lines and to remove the damage.  I show a few pictures to show the freshening progression. I follow the 240 paper by dry sanding with 600 grade paper on the rim.  I’m liking the emergence of a smooth grain contrast underneath.  A few blemishes remain on the rim at this point but I like the more rustic look – some imperfections on the rim accents the overall look.Next, to address the patches of old, dark shiny finish on the bowl’s surface, I dry sand using a 1500 micromesh pad to remove the old finish patches from the smooth briar surfaces of the sculpted motif.  I intentionally leave the rough rusticated briar in the sculpting untouched to preserve the original, darkened patina.  I’m aiming for an attractive contrast between the smooth briar, which will naturally lighten through the restoration process, revealing briar grain, with the rough, darkened sculpted briar. Not forgetting where I am in the cleaning process, I return to working on the internals with cotton buds and pipe cleaners dipped in isopropyl 95% – the strongest rubbing/cleaning alcohol available to me here in Bulgaria.  For a smaller Apple bowl, the internals were rife with old oils and tars.  I also did much excavation of tars and oils using the small dental spoon as well as drill bits.  With the bits, I hand turn a bit that is the same size as the drilling diameter which scrapes the wall.  The gunk seemed to have no end, yet finally, the cotton buds started to lighten, and I call the cleaning provisionally finished.  Later, I’ll continue the cleaning and refreshing of the internals by using a kosher salt and alcohol soak. Now to the stem fabrication.  I cease the stummel work at this point because there will be additional sanding as I size and sand the stem with the shank.  I take a few pictures to mark the starting point.  John prefers a straight stem for his Churchwarden which is not a problem.  The precast Warden stem has a very slight bend as it arrived on my table.  This will remain as it helps with maintaining the up/down orientation of the mounted stem.  The picture below shows the rough tenon oversizing which will be shaped to form a good junction with the Howal shank and tenon seating in the mortise. No shank/stem fitting is the same which means that sanding and finetuning the junction is always required.  The picture below illustrates this – the mortise drilling is slightly higher in the mortise which means that the upper thickness of the shank/mortise briar will be thinner and the lower will be slightly thicker.  Shaping the stem fit must factor this offset.The first step in fashioning the CW stem is to size the tenon.  I use the PIMO Tenon Turning Tool that I purchased from Vermont Freehand.  I keep the instructions tacked on the wall in front of me for a reminder and safe keeping!  A very useful tool to have for fashioning tenons.First, using an electronic caliper to measure the diameter of the mortise marks the target sizing of the tenon of the precast stem.  The mortise measurement is 7.95mm in diameter.  Using Charles Lemon’s (of Dad’s Pipes) methodology, I add about 50mm to this exact measurement to give me my ‘fat’ target.  The ‘fat’ target is what I will aim for when bringing the tenon down to size using the PIMO Tenon Turning Tool.  The ‘fat’ target (7.95mm minus 50mm) is about 8.45mm.  From this ‘fat’ point, I will sand the tenon by hand which gradually and patiently custom sizes the tenon to the mortise.The first thing needed is to pre-drill the tenon airway with the drill bit provided by the PIMO tool.  This enlarges the airway slightly enabling the insertion of the PIMO tool guide pin.  I mount the drill bit to the hand drill and drill out the airway.Next, the PIMO Tenon Turning Tool is mounted on the hand drill and I cut a small test sizing to give me the distance between the test cut and the ‘Fat’ target.  After cutting the test, I measure with the caliper and record 9.23mm and subtract the ‘Fat’ target, 8.45mm, leaving about .78mm to remove using the PIMO tool. Using the Allen wrench provided with the PIMO tool, I close the gap of the cutting arm and cut again.  I only cut a small portion out of the end of the tenon and then measure – this additional test cut guards from taking off too much.  The measurement of this test cut after closing the gap of the carbide cutter arm is 8.45mm.  On the button!  I finish the cut to the stem facing and begin sanding the tenon down. Using 240 grade paper, I uniformly sand the tenon so that the fit is snug, but not too snug.  As I sand the tenon, I often test the progress by inserting the tenon into the mortise.  I NEVER force the tenon to make it fit – a cracking sound of a shank is not a happy thing!I come to a point where the end of the tenon was butting up against the closing ridge from the mortise drilling.  I could detect the bump in the mortise.  Using the sanding paper and a flat needle file, I focus on tapering the end of the tenon so that it can navigate the narrowing mortise.  I don’t want to cut off the end of the tenon as a longer tenon provides a bit more strength for the longer stem’s reach.Finally, a good snug fit it accomplished and the stem is seated well.  The next step in the project is to fashion the shank around the new stem.  The pictures following show the overbite of the shank which needs sanding.To protect the Howal nomenclature and provide a sanding barrier, I wrap masking tape around the shank.  Using 240 sanding paper, I begin the process of sanding to bring the shank and stem into alignment. After making good progress, I discover a dimple at the seam of the precast stem just at the tenon facing. I’ve seen this before. To take the dimple out by sanding also will remove the corresponding briar on the shank side.  This I don’t wish to do more than is necessary.  I could also use the PIMO Tool to shave off more of the facing to remove the dimple.  Yet this would shorten the overall length of the Warden stem – not a good solution either. To remedy the dimple, after cleaning the area with a cotton pad wetted with alcohol, I spot drop regular CA glue on the dimple and immediately give it a spray of an accelerator so that the glue patch stays in place.  I don’t want CA glue running down the tenon facing!Shortly after, I rejoin the stem and Howal stummel and continue sanding the patch area.  The patch did the trick. The pictures show the results and the shank and stem are now in alignment.  I move on. Even though a precast Warden stem is new, it doesn’t arrive on the scene ready for action. Precast stems will usually not have smooth surfaces but tend to be ‘wavy’ – a leftover from the casting process. Therefore, sanding the entire stem is necessary. To do the initial rough sanding of the stem I use a coarse 120 paper to do the heavy lifting. As I sand the stem, the first picture below reveals what I’m describing as sanding reveals the rippled surface. After much sanding and bothersome rubber dust(!), the stem is shaping up well.  I’m liking what I’m seeing.With the rough sanding of the stem-proper done, I shape the button using the 120 grade paper and a flat needle file.  The first two pictures show the starting point and sanding – upper then lower. My day is ending, and the final project is to continue the internal cleaning and refreshing of the stummel.  To do this I use kosher salt and isopropyl 95% to give the internals a soak which helps draw out the tars and oils embedded in the internal briar.  I first stretch and twist a cotton ball to serve as a ‘wick’ that helps draw the oils out of the mortise walls.  Using a stiff wire, I guide the wick down the mortise and airway.  I then fill the bowl with kosher salt – kosher doesn’t leave an aftertaste as iodized salt. After placing the stummel in an egg carton that keeps it stable, with a large eyedropper I fill the bowl with isopropyl 95% until the alcohol surfaces over the salt.  After a few minutes, the alcohol is absorbed, and I refill the bowl with alcohol.  I put the stummel aside to soak through the night. The next morning, the salt and wick are soiled indicating the activity of the soak through the night.  I toss the expended salt in the waste, wipe the chamber with paper towel and blow through the mortise to dislodge any salt crystals left behind.  To make sure all is clean, I again employ a pipe cleaner and cotton buds dipped in isopropyl 95% to finish the cleaning.  Not long after, the buds are emerging clean.  I move on. I return now to a reunited stem and stummel, using 240 sanding paper I now start the fine tuning of the stem after the coarse 120 paper. To show the completed condition of the stem after the 240 grade paper sanding, two close-ups show the improved texture of the sanded surface.Next, for more fine tuning of the stem’s surface, I wet sand with 600 grade paper and follow by applying a buff with 000 grade steel wool.  I love to see the emergence of the buffed-up vulcanite stem!  I keep the stem and stummel united throughout the sanding process to assure that the stem’s tenon facing remains sharp and in alignment with the shank – shouldering the stem is not an option!Turning back to the Howal bowl, I remove the masking tape and take some pictures marking the stage of progress. I like the rustic look this bowl already has.  My approach will be to run the bowl through the full regimen of micromesh pads to bring out the shine and briar of the smooth briar surfaces – going over for the most part, the sculpted surfaces.  At that point I’ll determine if I need to darken the shank end that was lightened because of the stem sanding.  I also will freshen the darker sculpted sections with a stain stick.  I’ll keep the stem and stummel joined through this process which will aid me later when I continue with the micromesh process on the stem. I take pictures of the bowl to mark the starting point. Beginning with micromesh pads 1500 to 2400, I wet sand followed by dry sanding with pads 3200 to 4000 and 6000 to 12000.  The pictures show the progression. The grain came out of the smooth briar nicely.  Now, to freshen the sculpted sections.  With the fine lined carvings in each sculpted section, briar dust has collected from all the sanding.  I first brush the carvings with a bristled brush.  This removes a good deal.  Following this, with an alcohol wetted cotton bud, I wipe out each carved section.  Next, using a very dark brown dye stick which turns out to be a mahogany, which looked the best after blending with the original surface, I trace the carvings darkening the sculpted briar.  After finishing, I give another quick sanding over the smooth briar surface with the last of the micromesh sanding pads, 12000.  I do this to clean off any inadvertent overrun of the dye stick onto the smooth briar and to sharpen the lines. Using Before & After Restoration Balm, I place some on my fingers and work the Balm into the briar surface.  I’m careful to work it into the crevasses of the sculpting.  B&E Restoration Balm is an excellent product from Mark Hoover at www.ibepen.com that raises the natural hues in subtle ways that enhances the presentation of the pipe.  After thoroughly working the Balm into the briar surface, I set the bowl aside for 20 minutes to allow the Balm to do its thing.  The second picture shows this state.  After 20 minutes, I wipe the excess Balm with a cotton cloth and then buff the stummel with a microfiber cloth to thoroughly remove the excess Balm and to raise the shine.The next step is to apply Blue Diamond compound to the entire pipe.  After reuniting stem and stummel, I mount a cotton cloth buffing wheel to the Dremel, set the speed at about 40% full power and apply a light application of the compound focusing primarily, but not exclusively, on the smooth briar sections.  I keep it light because I do not want the compound to cake up in the rusticated ridges of the sculpting.  I apply the compound to the smooth and rusticated surfaces and to the stem.Following the compound, I use a felt cloth to wipe the pipe to clean it of compound dust.  I don’t want compound mixing with the waxing phase.After switching to another cotton cloth buffing wheel, maintaining the same speed, carnauba wax is applied to the entire pipe.  As with the compound, I go easy on the rusticated ridges not wanting wax to cake.  After applying wax to the entire pipe, I use a microfiber cloth to give the Howal Churchwarden a rigorous hand buffing to remove excess wax and to raise the shine.The Howal Sculpted Apple bowl looks great mounted on the bow of the Churchwarden stem!  I’m pleased how the smooth briar surfaces cleaned up and how the grain provides a striking contrast with the sculpted design.  The added rusticated ribs in the carvings adds a nice detail.  The overall presentation of the Howal Sculpted Churchwarden gives a very old, rustic feel.  I’m glad John was patient waiting for this Churchwarden to come to life.  He will have the first opportunity to add this pipe to his own collection from The Pipe Steward Store.  This Churchwarden project benefits the Daughters of Bulgaria – women and girls who have been trafficked and sexually exploited.  Thanks for joining me!
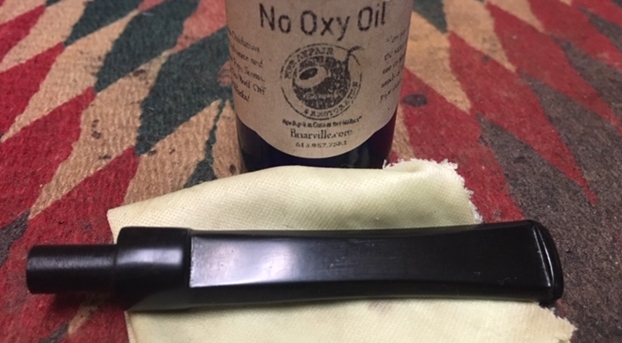
Restoring a Faceted “Malaga” Poker from Kathy’s Dad’s Pipes


Blog by Steve Laug

This morning I was looking through the bag of pipes that Alex chose from George Koch’s estate. This one is the first of two interestingly shaped Poker Sitters. The rim was well knocked about and the acrylic stem had some tooth dents and deep gouges in the surface of the variegated silver. The inner and outer edges of the rim top were damaged from knocking the pipe out against a hard surface. The carver had done a great job matching the mixed grain to the flow of the shape of the bowl and shank. Remember that all of these Malaga pipes came to my brother and me in several shipments of pipes from George’s daughter Kathy. Jeff unwrapped the pipes when they came to him and took the following photo to give an idea of the volume of the pipes that we purchased. The carver did a great job of shaping the pipe to follow the grain on the briar. The large bowl, round shank and tapered variegated silver acrylic stem look very good. The bowl had a thick cake that overflowed with lava onto the rim. The inner and outer edges of the rim were in rough shape as was the rim top. The sides of the bowl and shank are very dirty with grime and oils from prolonged use. The stamping on the left side of the shank read “MALAGA”. The right side read Imported Briar. The acrylic stem had tooth dents and chatter on the top and the underside. Jeff took these photos before he started the cleanup work on the pipe. Jeff took close up photos of the bowl and rim to capture the condition of the pipe before he started his cleanup work. The rim top had some lava overflow and darkening and wear under the lava on the rim at the back of the bowl. There appeared to be deep nicks in the outer edge at the front of the grimy pipe. He also took photos of the sides and bottom of the bowl and shank to show the beautiful grain and unique carvings around the bowl. The photos show the general condition of the bowl and wear on the finish. It is very dirty but this is another beautiful pipe. Jeff took a photo to capture the stamping on the top side of the shank. The photos show the stamping “MALAGA” on the left side of the shank. The stamping is very readable. The next photos show the stem surface. There are tooth marks and chatter on both sides near the button and wear on the button surface and edges.In each of the previous blogs that I have written on the restoration of George’s pipes I have told his story. If you have followed the restorations you will have read the information and the background piece that Kathy did on her father. Here is a link to one of the previous blogs on his Malaga pipes where I included her tribute in full (https://rebornpipes.com/2019/01/26/back-to-kathys-dads-pipes-restoring-a-%c2%bc-bent-malaga-author/). You can also read the bio on her Dad, George Koch. It is an interesting read and one that shows just how far our pipe collecting passion can go when we find a brand of pipes that we enjoy. I am going to only include the portion on the Malagas at this point. If you wish to read the rest follow the link above.
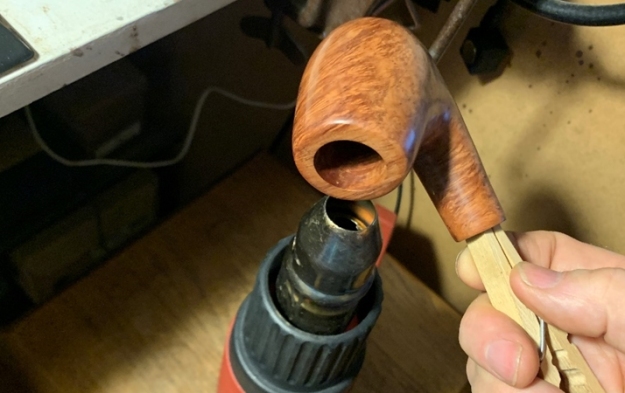
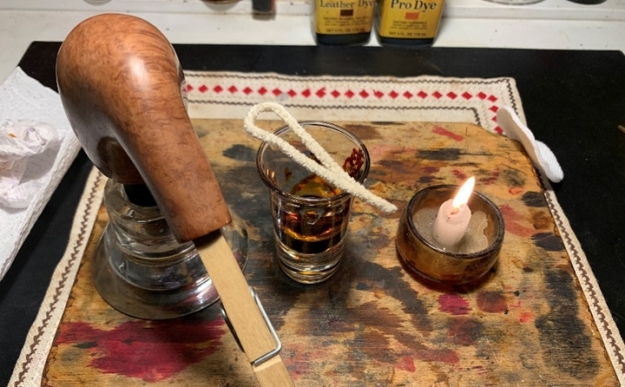
Kathy writes…We lived in Livonia, and that’s where his love for Malaga pipes began. After a few years he returned to Allis Chalmers and we moved back to Springfield. I remember that when we went back to Michigan to visit friends, Dad had to go to the Malaga store and acquire a few new pipes. Many a year I wrote to Malaga and they picked out a pipe for me to purchase that I could give Dad for a Christmas or birthday present. He was always pleased. His favorites were the straight stemmed medium sized bowl pipes, but he liked them all. 

He had some other pipes, but the Malagas were his favorites. I remember him smoking them sitting in his easy chair after work, with feet up on the ledge by the fire burning in the fireplace.  Growing up it was my job to clean them and he liked the inner bowl and stem coated with Watkins vanilla, leaving a little of that liquid in the bowl to soak in when I put them back on the rack…I’m very happy they are being restored by you and your brother and hope they find homes who enjoy them as much as Dad did. Thank-you for your care and interest. — Kathy, the oldest daughter

Jeff reamed the bowl with a PipNet pipe reamer and followed up with a Savinelli Fitsall pipe knife to remove the cake. He scrubbed out the mortise and the airway in the shank and the stem with alcohol, cotton swabs and pipe cleaners. He scrubbed the exterior of the bowl, rim, shank and stem with a tooth brush and Murphy’s Oil Soap to remove the oils and tars on the rim and the grime on the finish of the bowl. He rinsed it under running water. He dried it off with a soft cloth. Even after the cleanup it is another on that is in rough condition. But even in its damaged condition you can see the great grain on the bowl. The photos show the damaged rim top. The interesting shape, round shank and chewed acrylic stem give a clear picture of what the pipe must have looked like when George bought it at the shop. The rim top had been knocked hard against rough surfaces to knock out the dottle and left damage. The stamping on the left side of the shank read “MALAGA” and on the right side it read Imported Briar. The acrylic stem had been chewed but could be easily repaired. I took photos of the pipe before I started my work. I took a photo of the  rim top and bowl to show the condition of the pipe. You can see why I said it was used as a hammer. The surface of the rim is very rough and you can see the damage on both the inner and outer edge of the rim. There is some darkening on the back edge and surface of the rim top. I took photos of the stem to show the chewed condition it was in. Remember this is hard acrylic so it took some real gnawing to do this to it!I took photos of the shank to capture the stamping on both sides. The first photo shows the stamping “MALAGA” on the left and the second shows Imported Briar on the right. Both are clear and readable.I am also including the link to a blog that I wrote that gives some of the history of the Malaga brand and the Malaga Pipe Shop in Royal Oak, Michigan in the USA. I have written an earlier blog to give a little history of the Malaga Brand and the pipemaker, George Khoubesser. Here is the link – https://rebornpipes.com/tag/malaga-pipes/.That blog also includes links to a catalogue and the history of the pipemaker George Khoubesser. Follow the link to get a feel for the brand and the pipemaker.

I decided to start the restoration of the pipe by dealing with the rim top. I topped it on a topping board with 220 grit sandpaper and cleaned up the inner edge with a piece of folded 220 grit sandpaper. I used some clear Krazy Glue to fill in the rim damage on the front edge. It was nicked and worn so I filled it in to smooth it out. I sanded the repair after the glue cured. I smoothed out surface of the front edge and rim top until it blended into the surface. I polished the bowl and rim top with micromesh sanding pads to smooth out the rim edge repairs and top. I wet sanded with 1500-12000 grit pads and wiped the bowl down with a damp cloth after each pad. The photos show the progress. I scrubbed the briar with Murphy’s Oil Soap and a tooth brush. I rubbed it into the surface of the briar with my finger tips and let it sit for about 10 minutes then rinsed it off with running water. I dried it off with a soft cloth. I used an Oak Stain Pen to stain the rim top to blend topping and darkening into the bowl colour. I buffed it with a clean buffing pad. You can see from the photo below it blends well.I worked some Before & After Restoration Balm into the surface of the briar with my fingertips to clean, enliven and protect it. I let the balm sit for a little while and then buffed with a cotton cloth to raise the shine. The following photos show the bowl at this point in the restoration process. I am very happy with the results. I turned to the stem and filled in the deep tooth marks on both sides of the stem with clear Krazy Glue. I set it aside to let the repairs cure.I used a needle file to reshape the button edge on both sides. I sanded the surface of the stem with 220 grit sandpaper and 400 grit sandpaper to clean up the stem.I polished the stem with micromesh sanding pads – wet sanding with 1500-12000 grit sanding pads. I wiped it down after each sanding pad with a damp cloth. I finished by polishing it with Before & After Pipe Stem Polish both Fine and Extra Fine and then wiped it down a final time with a damp cloth. This restored “Malaga” Poker with a taper acrylic stem is a beauty. The unique shape of the bowl, the reshaped and repaired rim top and the cut of the briar work well to highlight the grain around the bowl sides. I polished acrylic silver variegated stem and the bowl with Blue Diamond polish on the buffing wheel. I gave the bowl and the stem multiple coats of carnauba wax. I buffed the pipe with a clean buffing pad to raise the shine. I hand buffed it with a microfiber cloth to deepen the shine. The pipe polished up pretty nicely. The grain took on life with the buffing. The rich oil cured colour works well with the polished acrylic stem. The finished pipe has a rich look that is quite catching. Have a look at it with the photos below. The shape, finish and flow of the pipe and stem are very well done. The dimensions are Length: 6 inches, Height: 1 ¾ inches, Outside diameter of the bowl: 1 ¼ inches, Chamber diameter: ¾ of an inch. I will be adding the pipe to the box of finished Malaga pipes that I have completed for Alex. I am looking forward to hearing what he thinks of this beauty and once he fires it up and carries on the trust for George Koch. Thanks for walking through the restoration with me as I worked over another one of Kathy’s Dad’s Pipes.