Blog by Dal Stanton
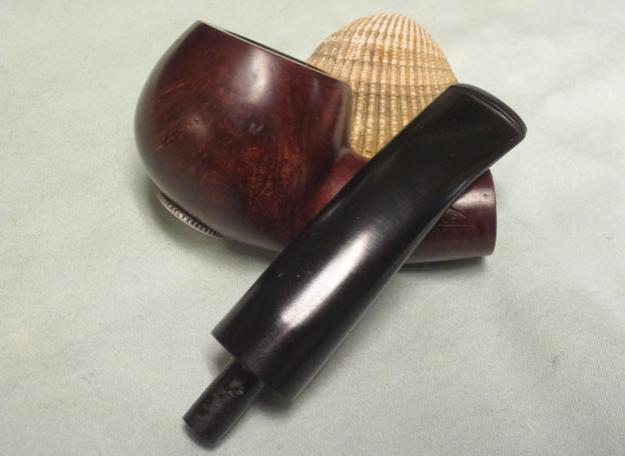
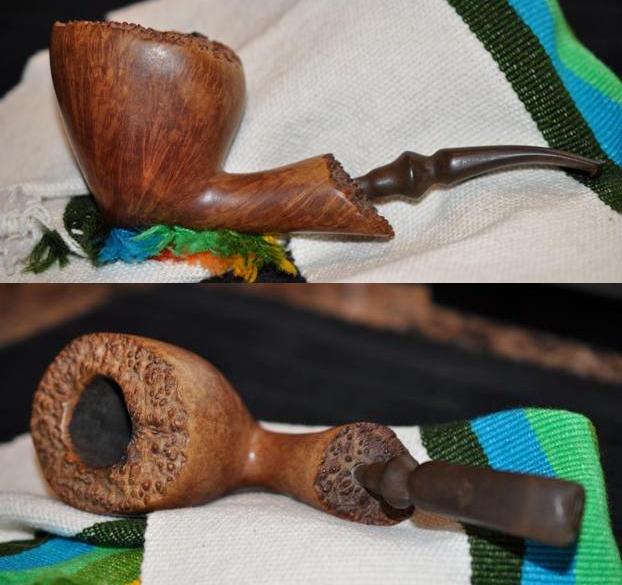
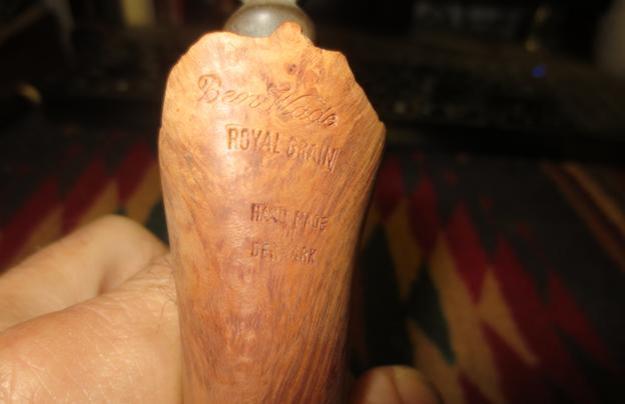
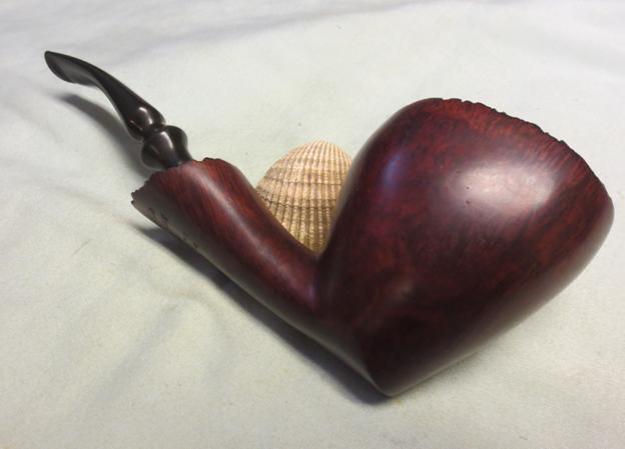
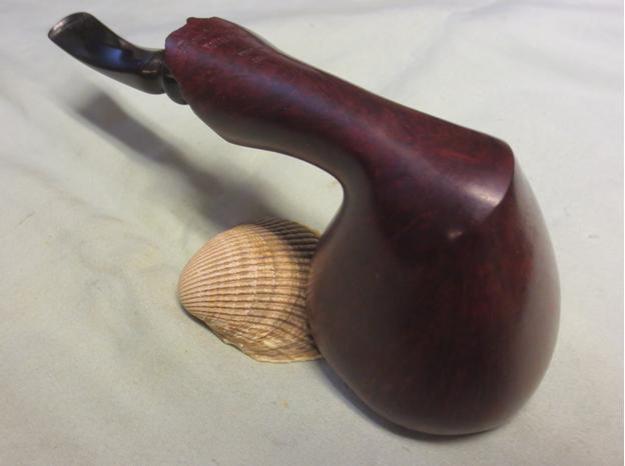
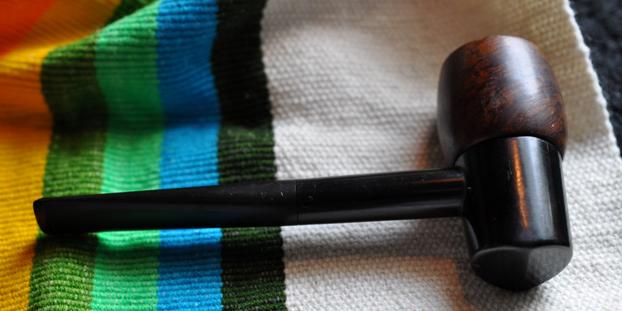
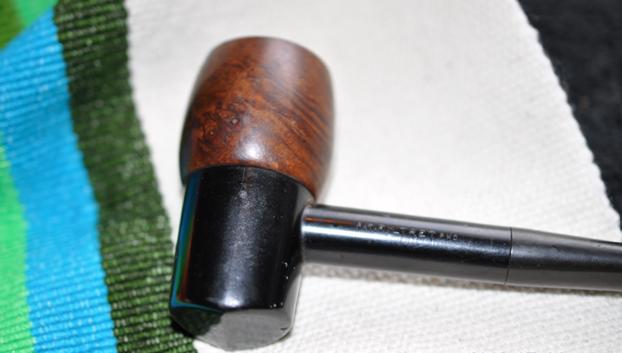
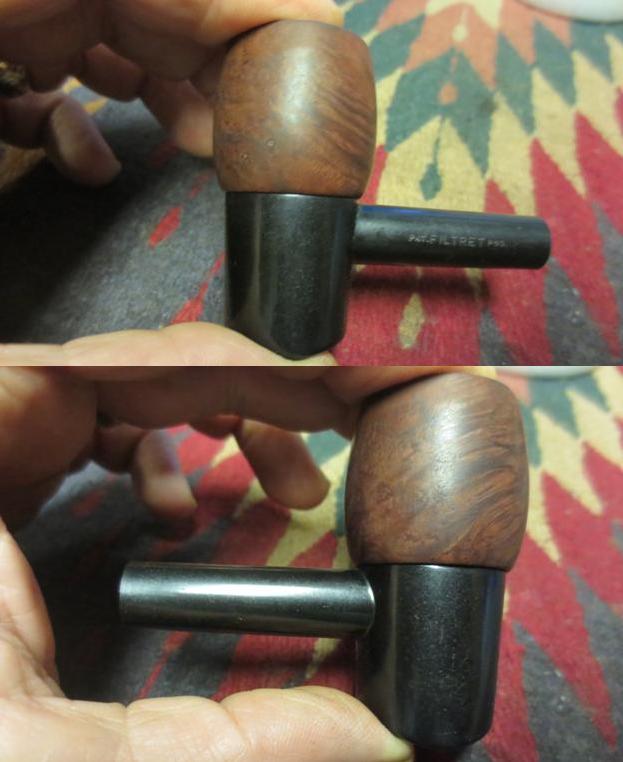
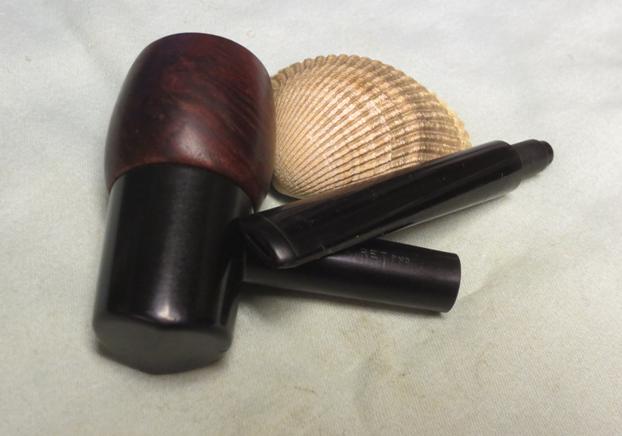
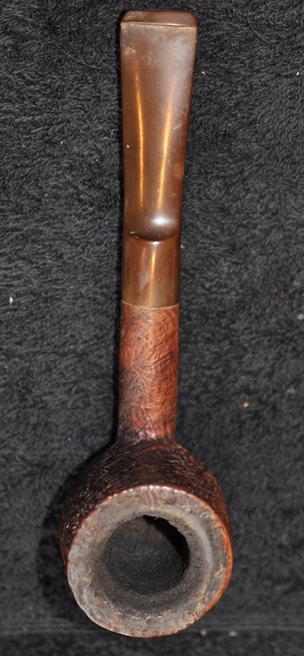
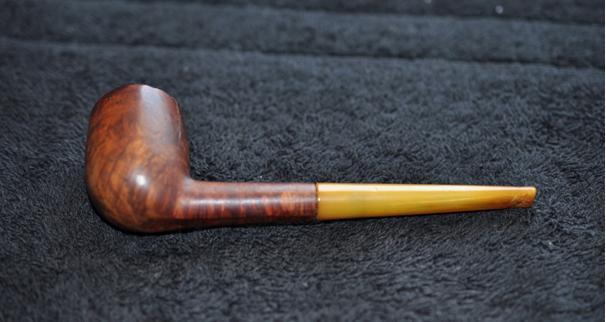
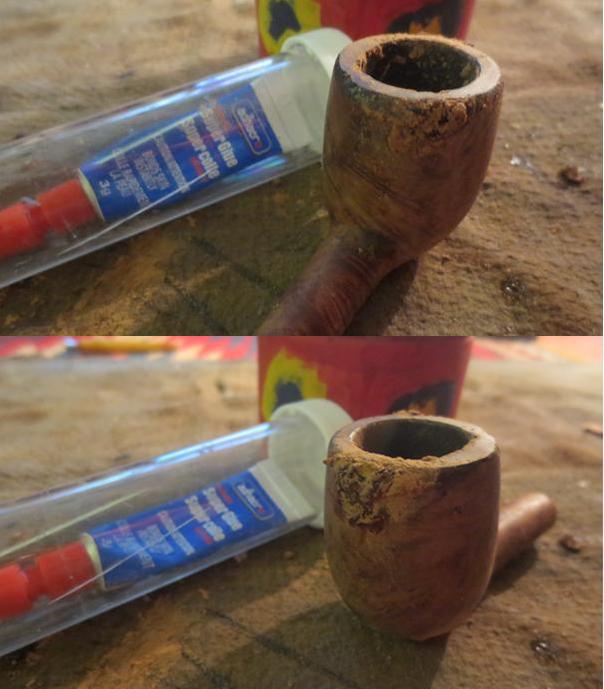
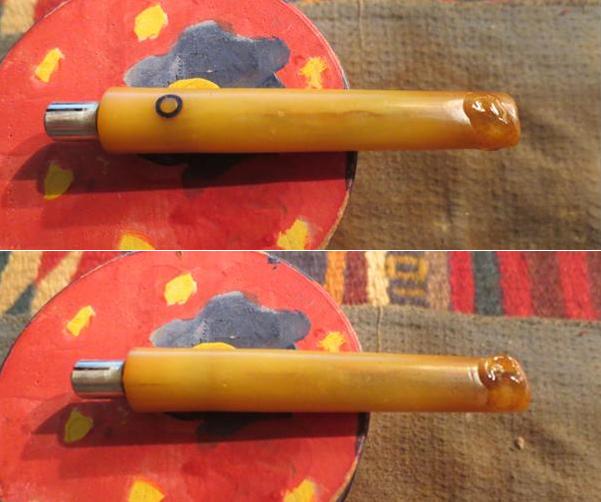
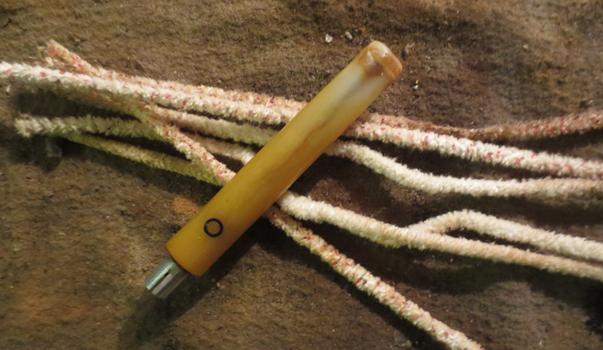
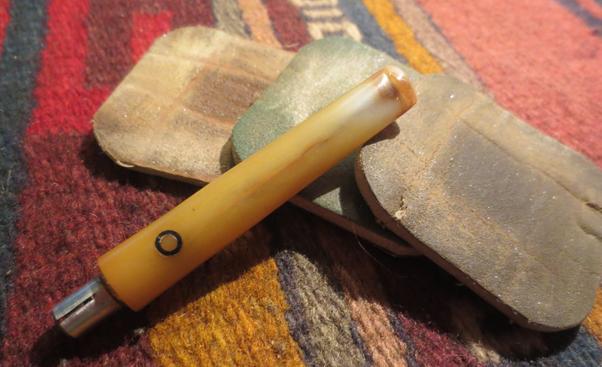
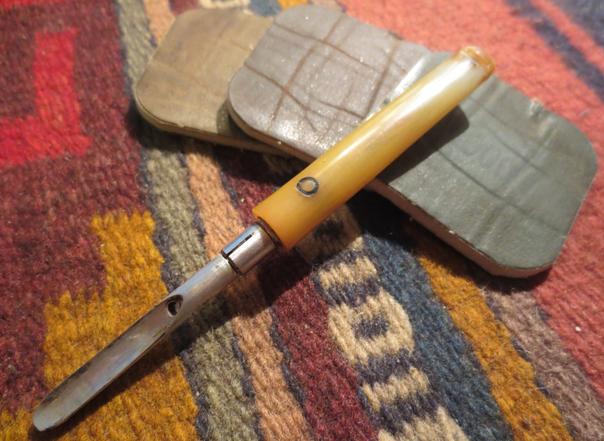
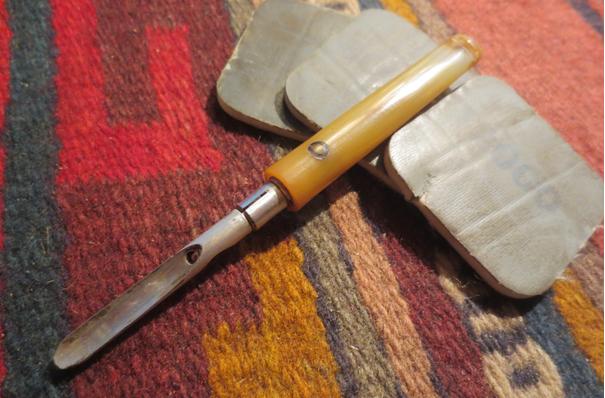
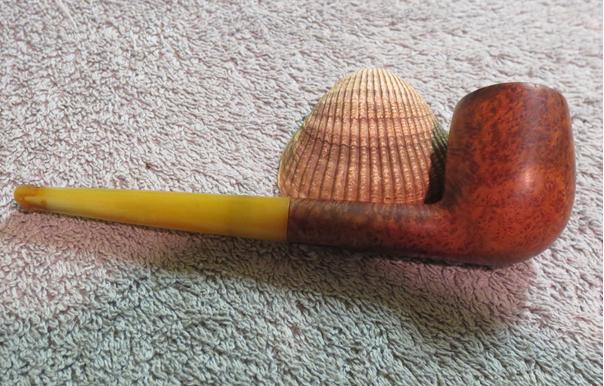
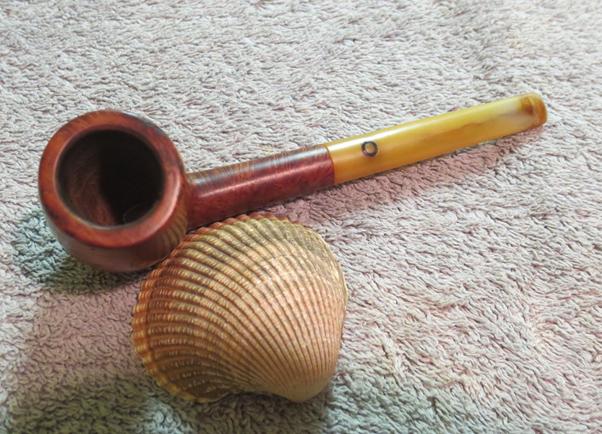
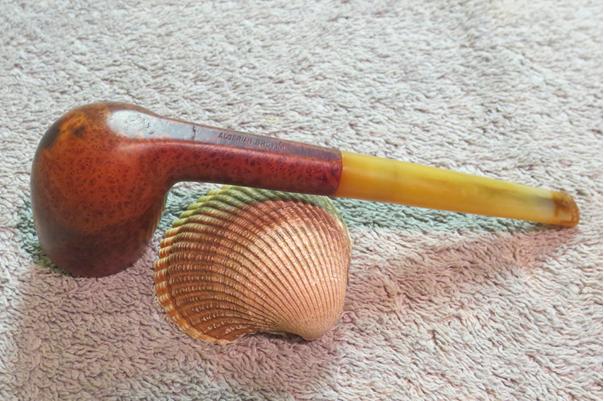
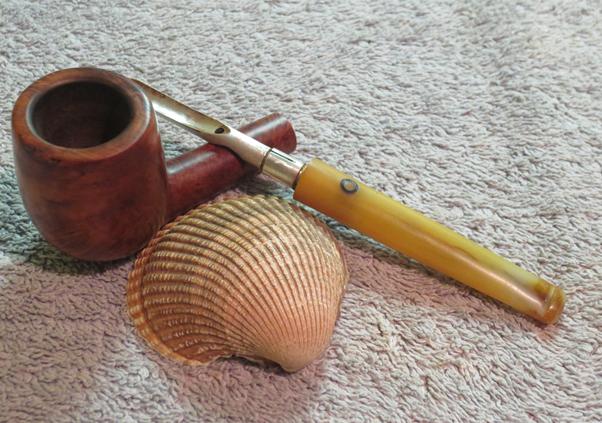
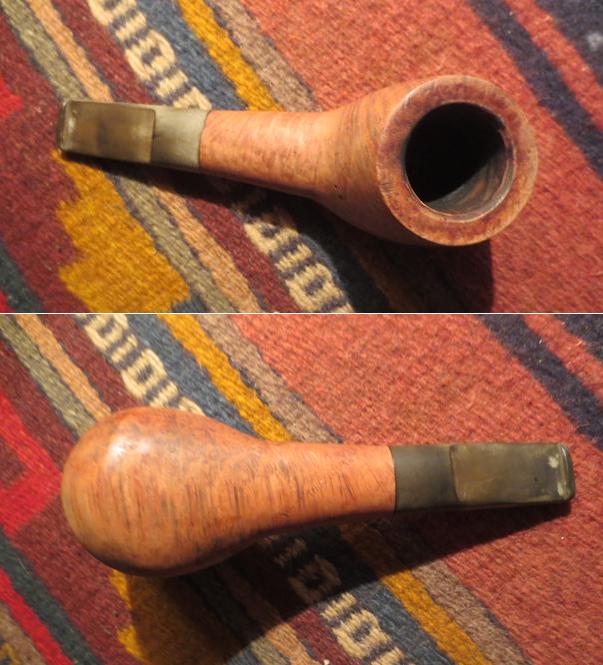
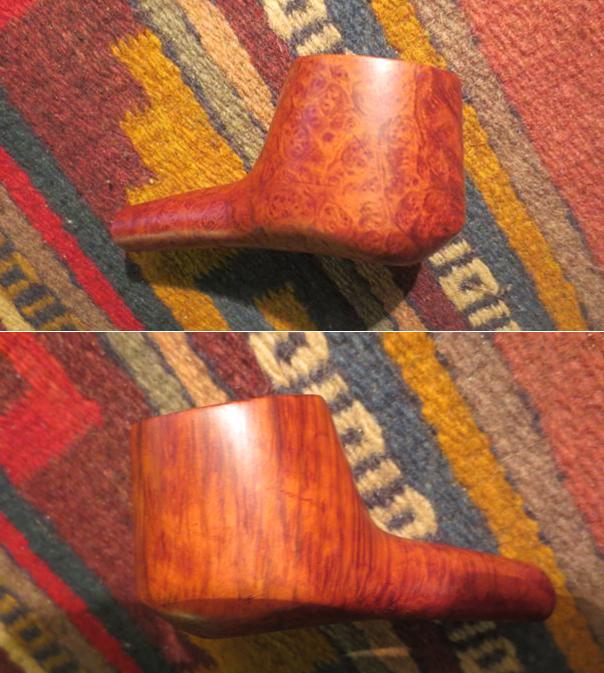
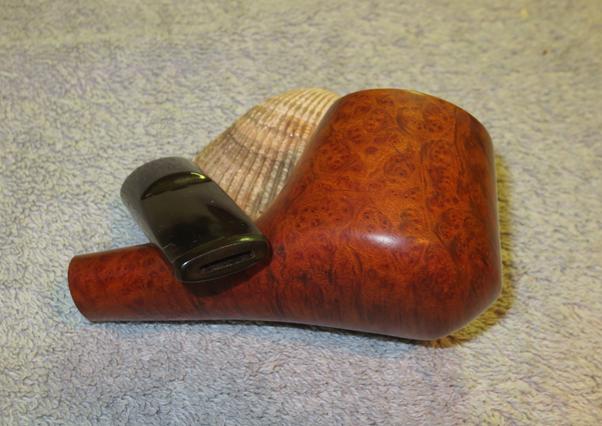
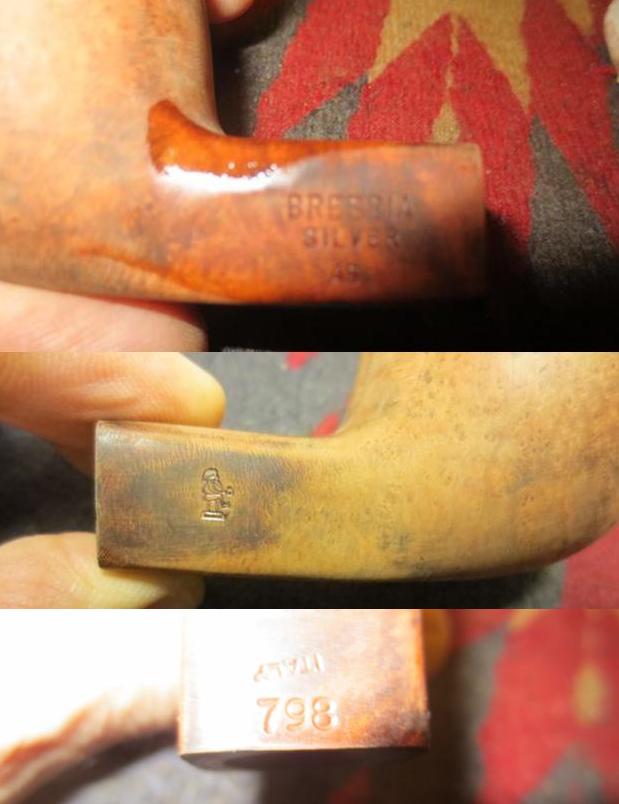
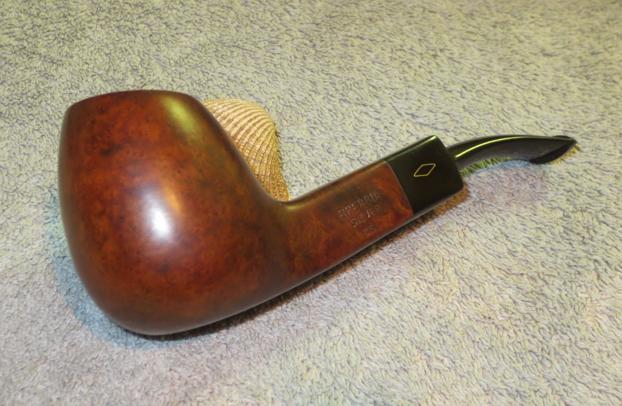
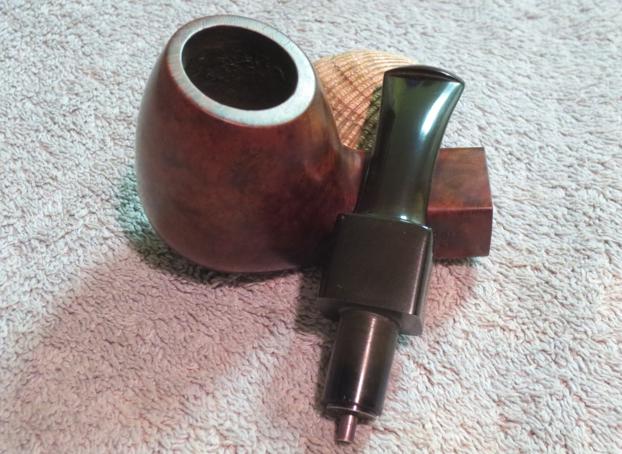
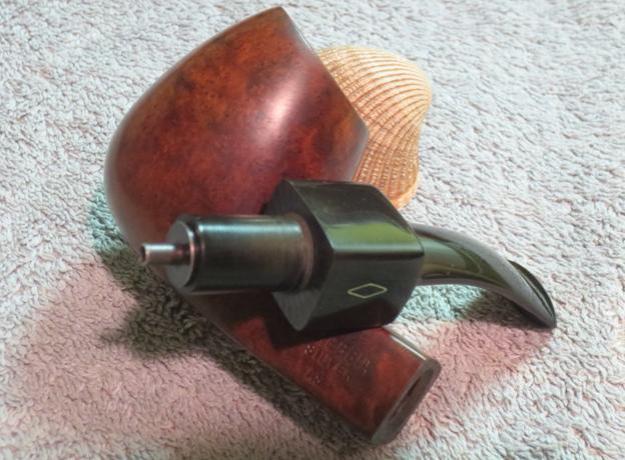
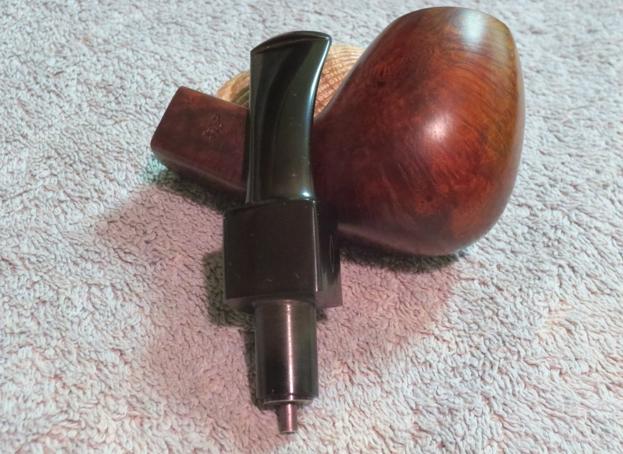
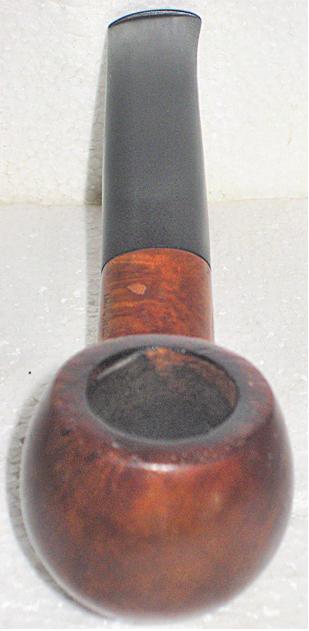
On a recent pipe foraging expedition at the Antique Market near Nevski Cathedral in the heart of downtown Sofia, Bulgaria, I saw this pipe on one of the tables I was methodically scanning. It was a sad scene but a survivor. It was a petite (5.25”) hexagonal paneled shape pipe with a diamond shank banded and it was beat up. What got my attention through the sorry state of affairs was the stem. The vendor made sure I knew that the stem was bone – at least that’s what I thought he said as he hyped the great deal before me in Bulgarian. I have yet to collect a ‘bone’ stem pipe, if that is indeed what it is, of any variety so I decided to start the bargaining dance. He also said it was from Greece, which I could not determine by looking at the faint markings stamped in the right side of the shank, Extra over Bruyere. Five euros was the opening volley – about 10BGN or $5.70 – not high stakes. After getting permission from the vendor to take the stem off to get a better look I tried a few gentle twists and it wouldn’t budge. Without pause, I handed it back to the vendor not wanting to break it and sealing the deal by default, “You broke it, you own it.” After twisting and pulling and pouring water on it, he also could not remove the stem – which was to my favor. We struck a deal at 7 BGN ($4) and I gave him a 10 Leva bill. Without proper change he asked nearby vendors for help and received none. I dug further in my pockets and produced two 2BGN bills – 4 Leva total small stuff. I held the 10 and the pair of 2s in each hand and shrugging my shoulders and he took the pair of 2s and the deal was sealed – about $2.30 for the ‘bone’ stem pipe. I thanked him for the discount, but made a mental note to pay the vendor the additional 3BGN on a future visit – a good vendor friend can be achieved! At home I took pictures of my $2.30 acquisition and promptly dropped the pipe into an alcohol bath to decontaminate it and hopefully loosen the stem. I wasn’t sure if the stem was simply inserted with a straight tenon or if the stem screwed into the mortise. Hopefully, this would all become clear after the bath got a chance to soften the cemented crud – which was in great supply. The pictures I took when I was home tell the story.


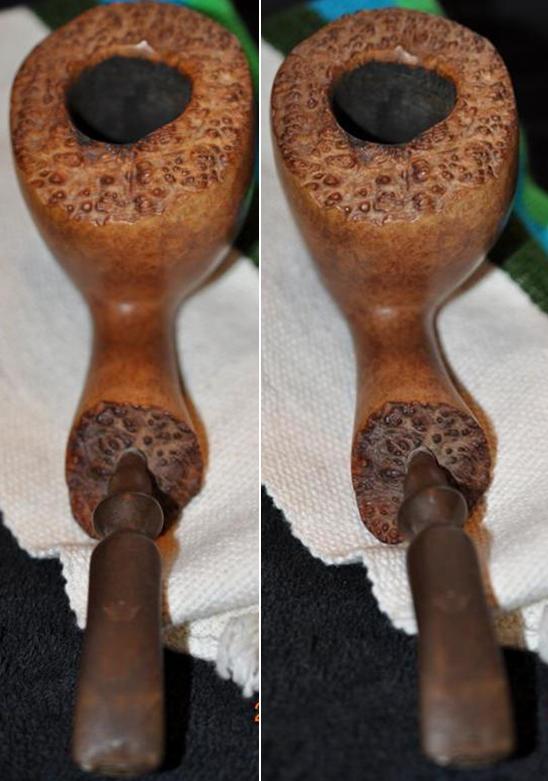
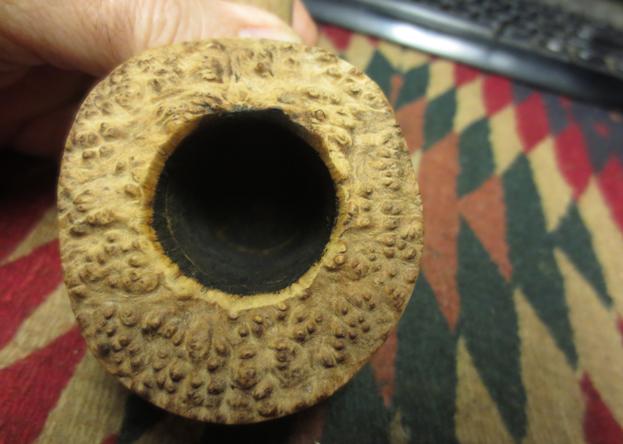
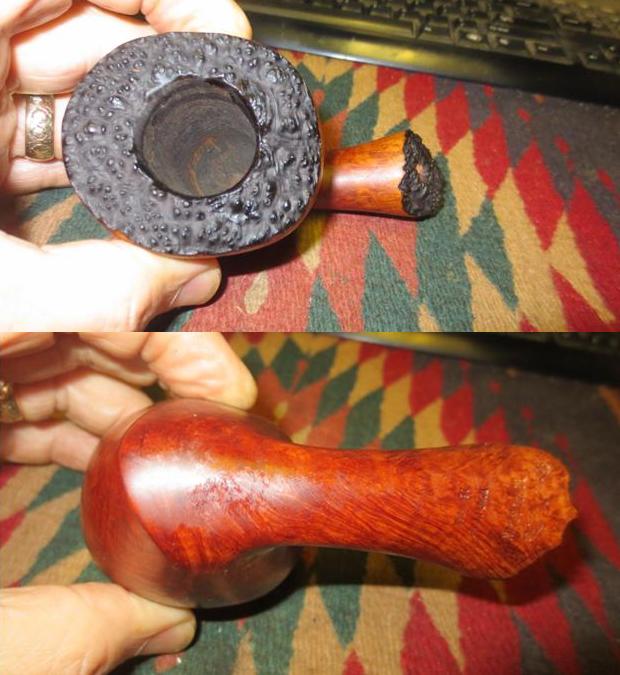
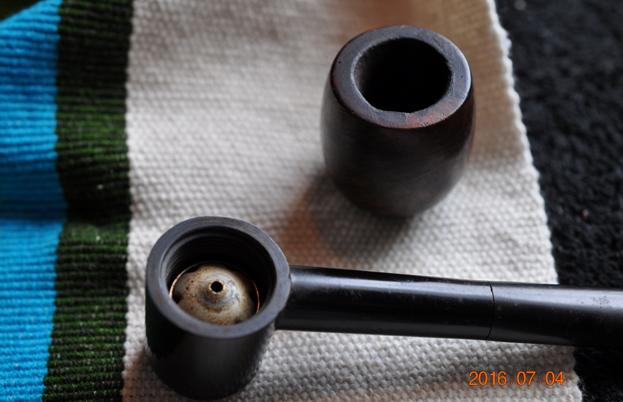
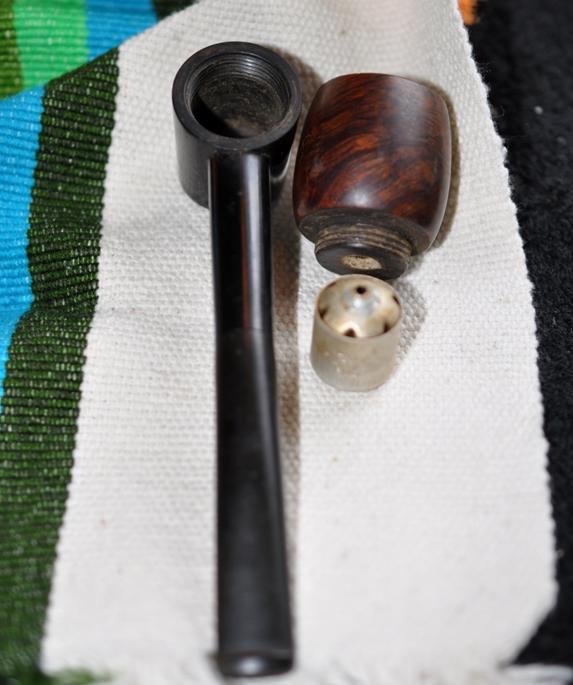
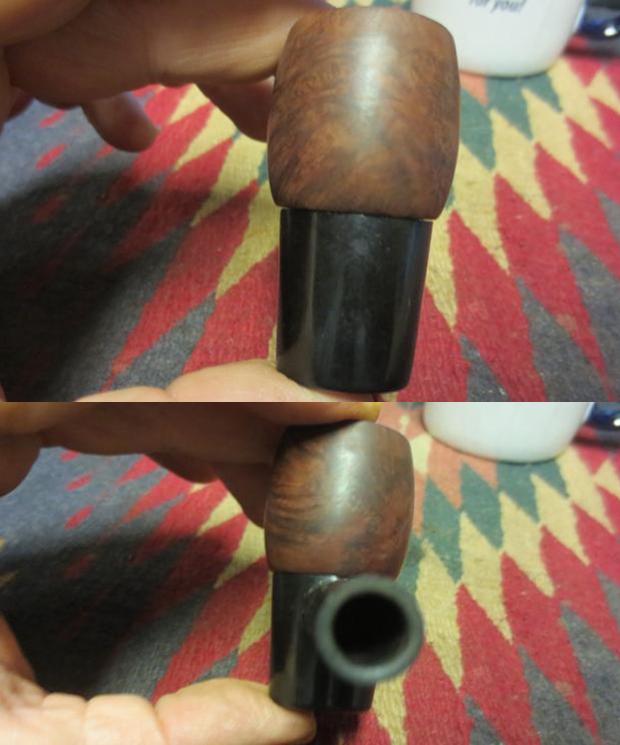
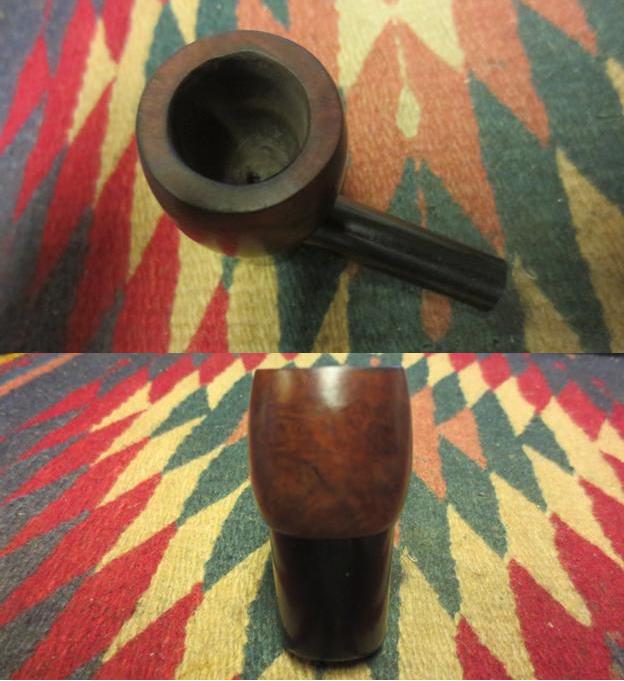
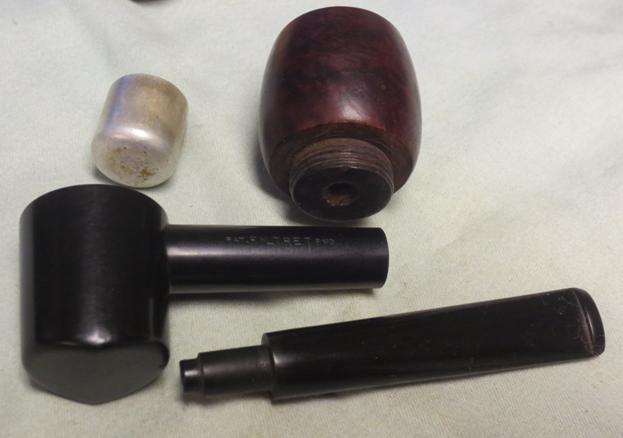
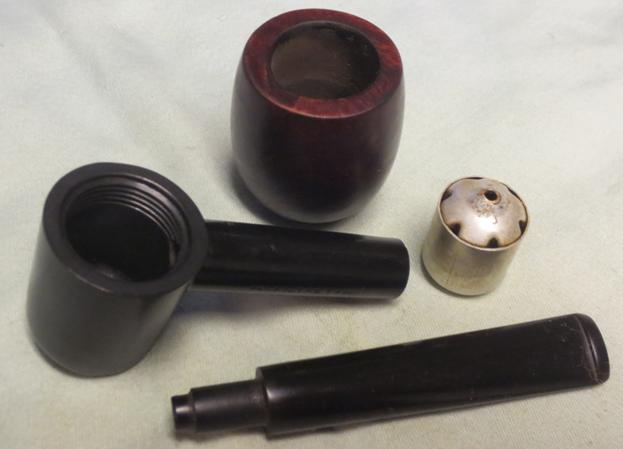
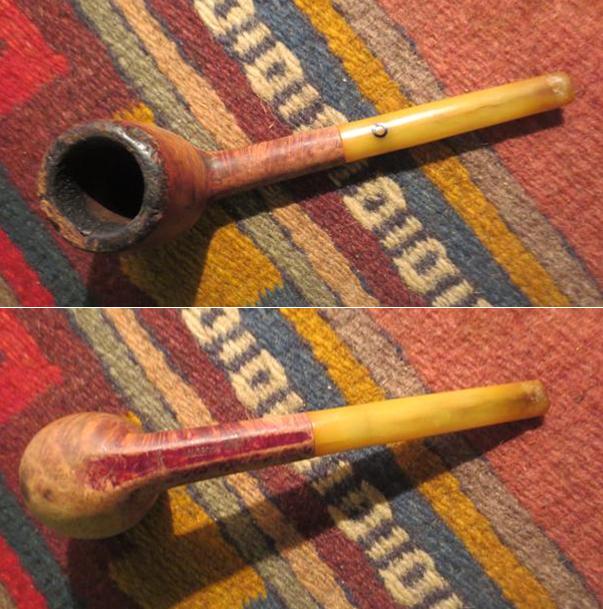
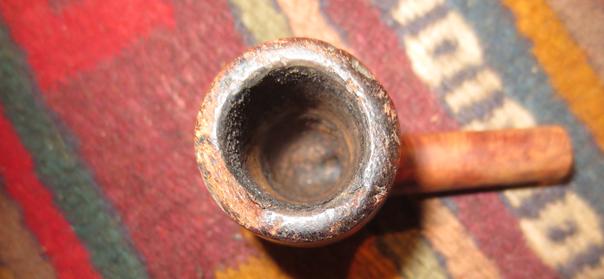
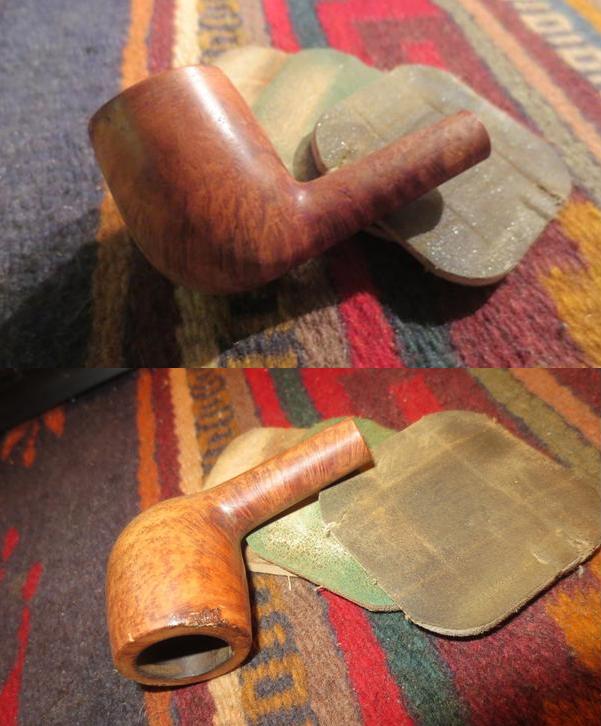
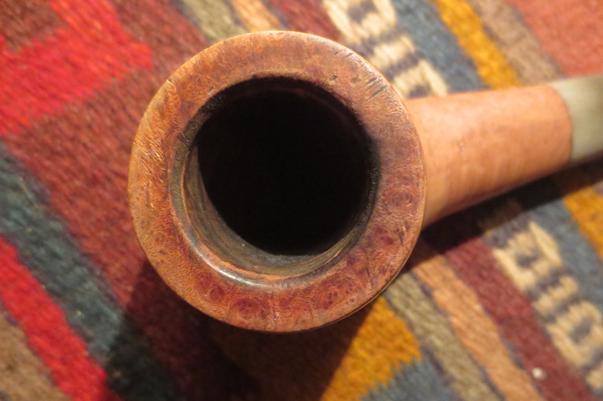
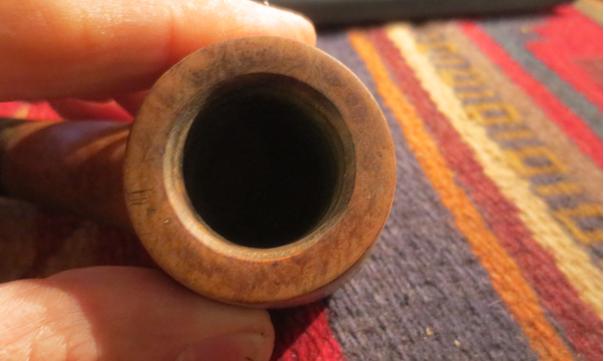
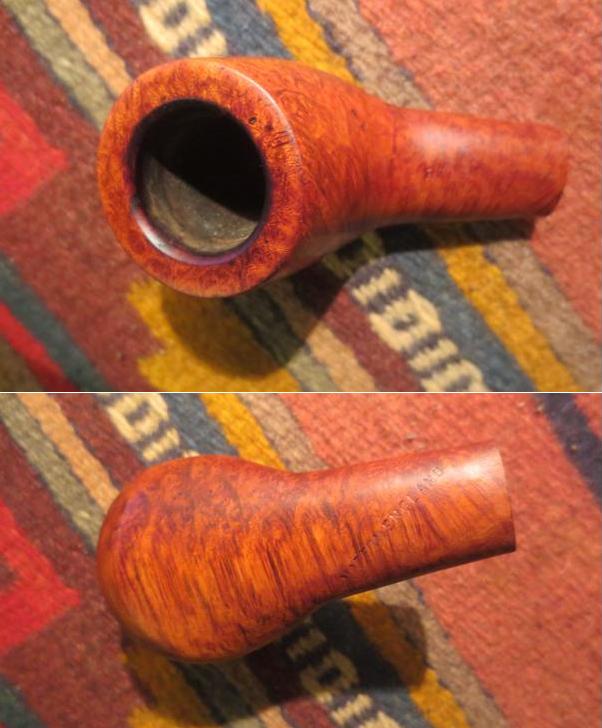
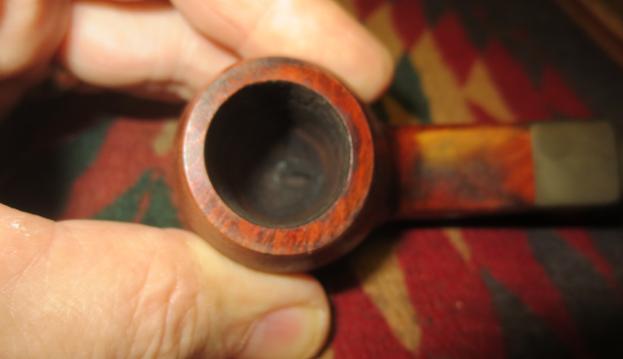
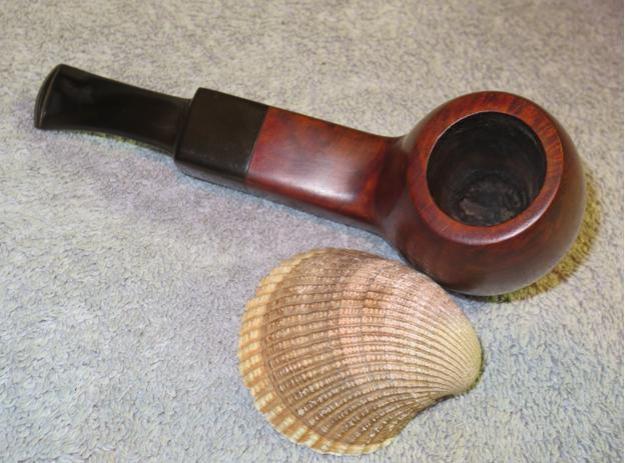
 The alcohol bath did the trick and I was able to remove the stem and get a look at the internals. Looking down the mortise, there was a solid wall of hardened tar muck that closed access to the bowl. The airway of the stem was also blocked by crud. The rim still showed lava flow and tar caked on the top, but I could see the rim and the damage done to it as well as to the bowl. I decide to have a second alcohol bath to loosen things up further and to clean up the rim to better assess how to proceed.
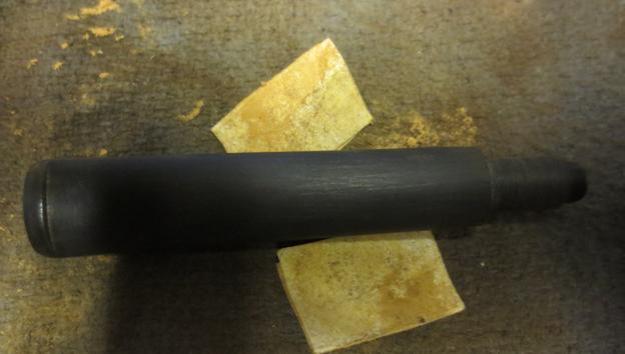
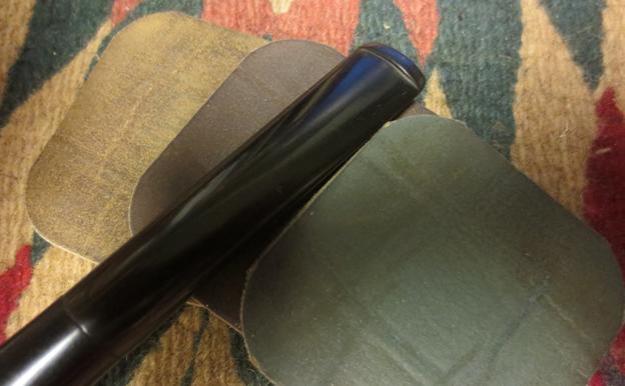
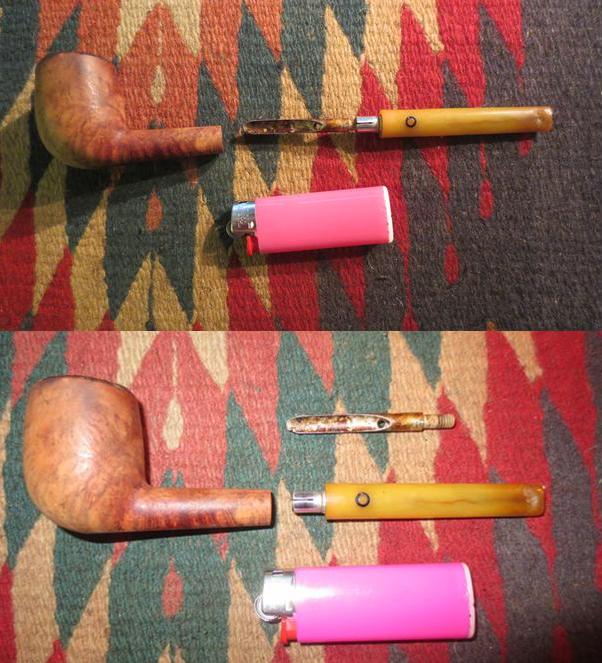
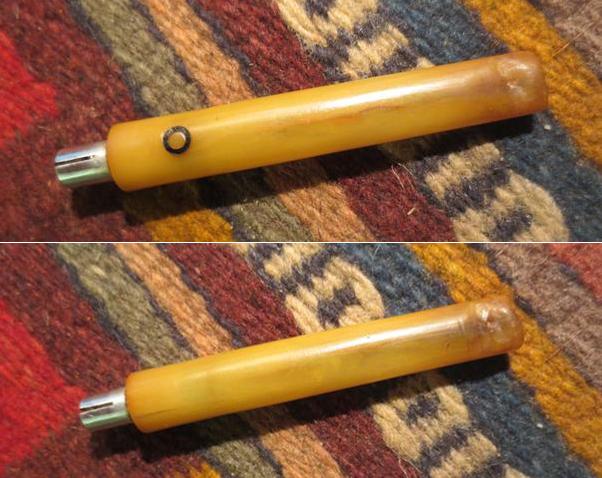
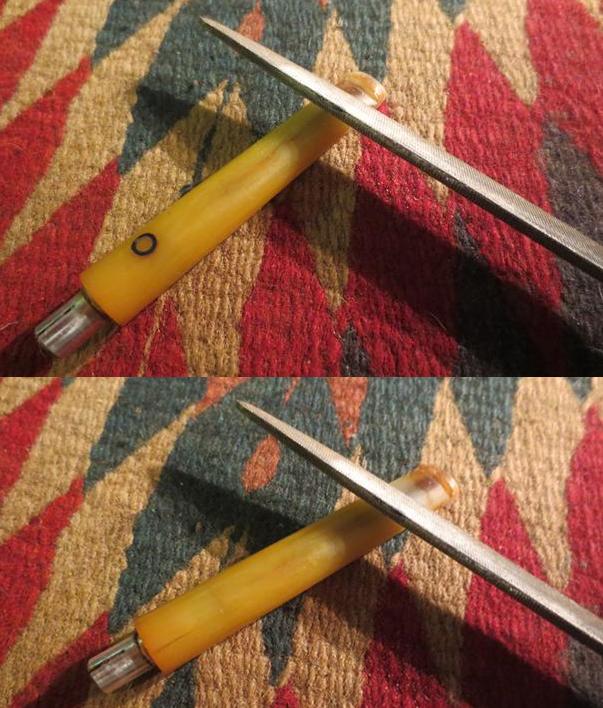
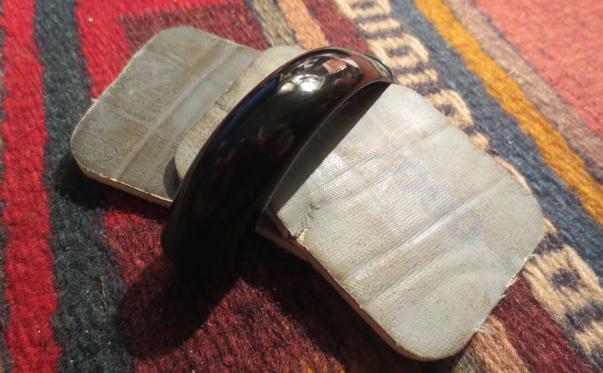
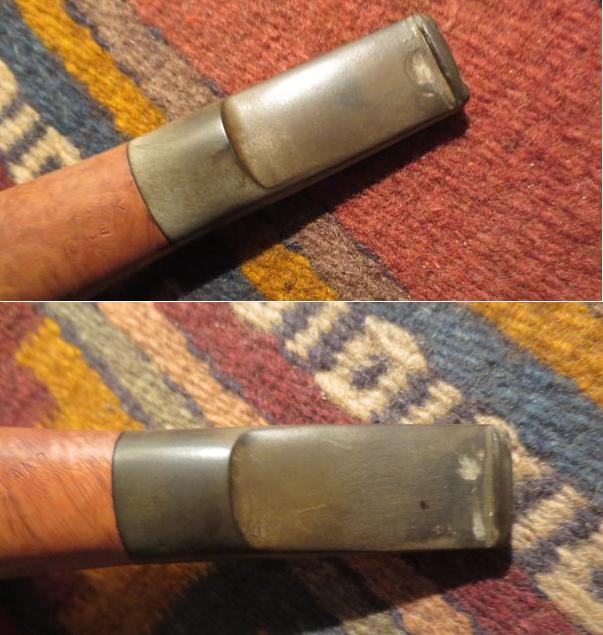
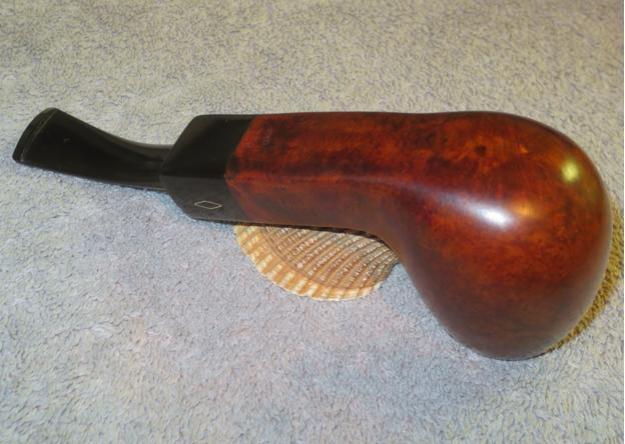
With question in my mind about the true nature of the stem, I sent some pictures of the stem to Steve with the question, “Horn or Bone?” His guess was that it is horn because of the tooth chatter on it. He also referenced his recent post, A Ropp La Montagnarde Deposee 298 Horn-Cherrywood-Briar and a helpful essay (My Process for Repairing and Polishing Horn Stems) to give me input on working with horn stems. He did say that he had never seen a horn stem spliced like this one. I’ve included that picture (4th) he referenced below – interesting factoid. While the pipe got its second alcohol bath I read the essay on repairing and polishing horn stems.


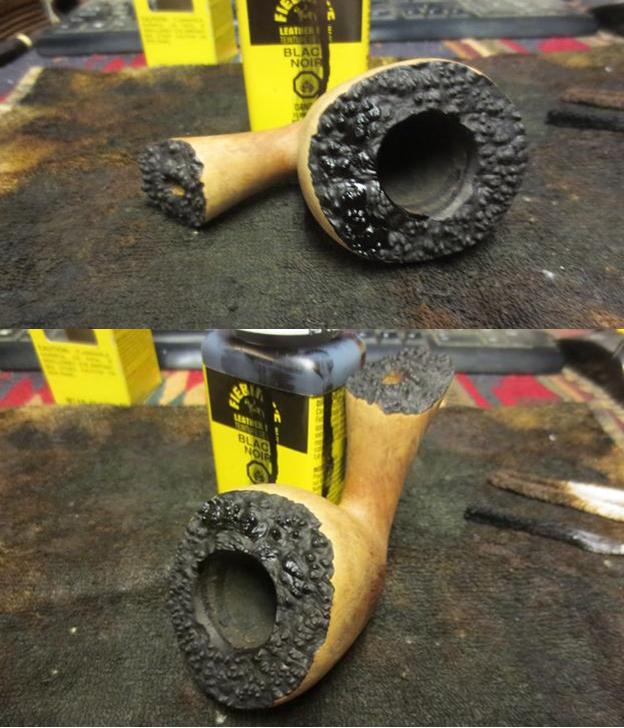
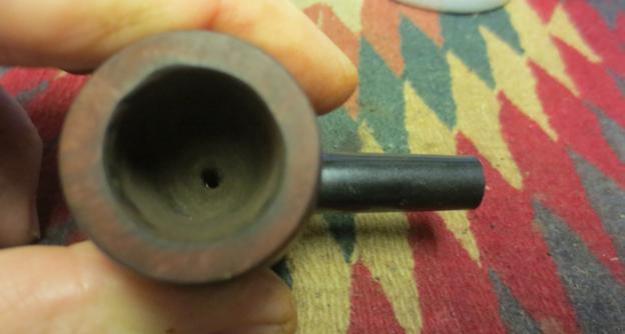
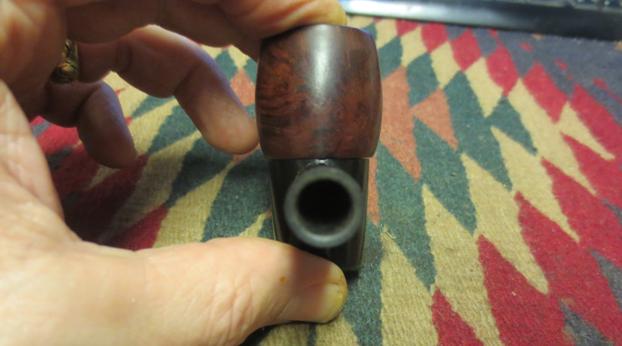
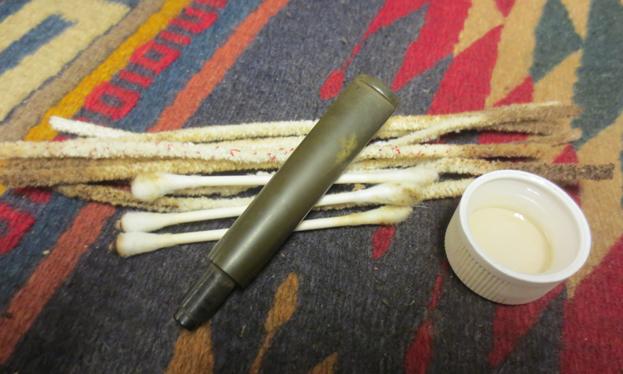
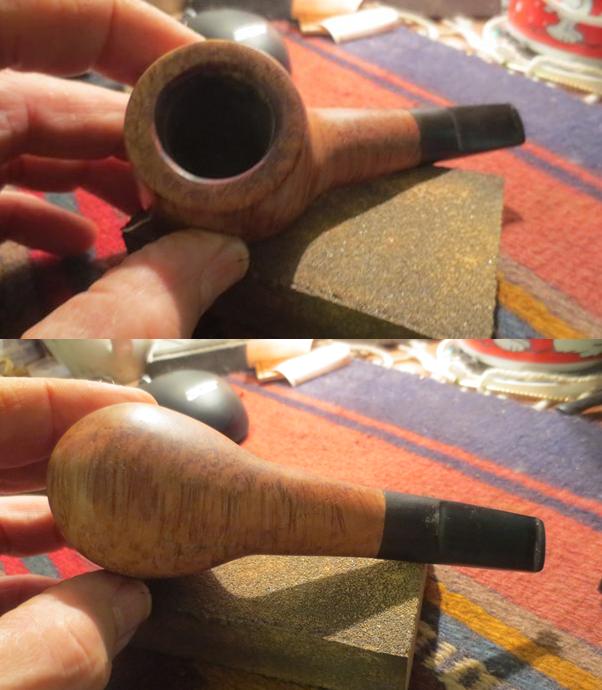
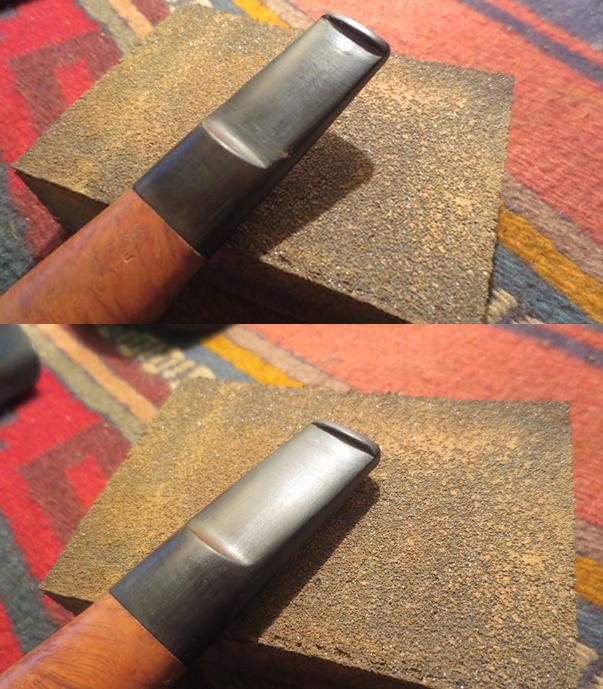
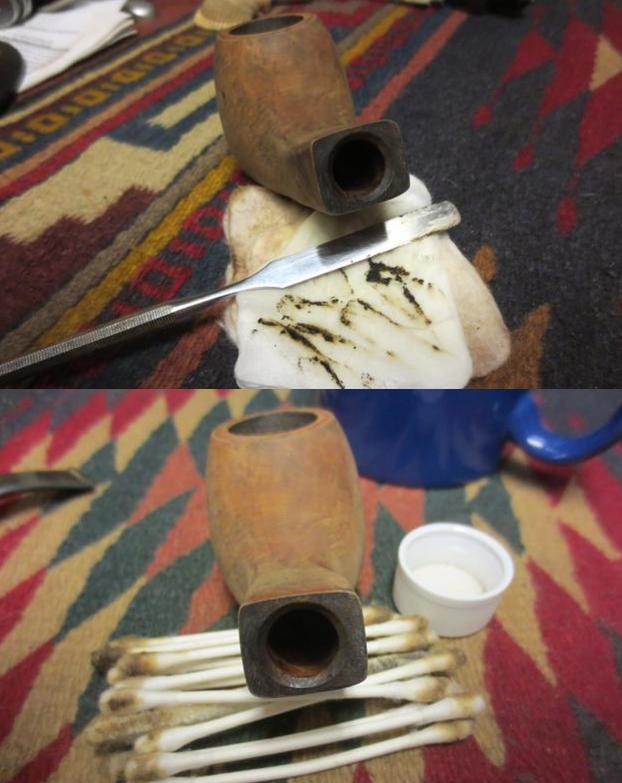
 Well, that was gross. The second bath finished, I take the stem and start to push bristled pipe cleaners dipped in isopropyl 95% through the airway from the tenon toward the button. As I push, from the button air hole oozed what looked like a seal brown loaf of lava gunk toothpaste – nasty, nasty stuff. But I guess, the ooze of magna putridum was good news as the airway was in the process of being reconquered. After many pipe cleaners, bristled and smooth, the stem starts coming clean. I put the stem aside and I grab the stummel from the bath and work on the mortise attacking the tar gunk blockage. After many Q-tips and pipe cleaners dipped in alcohol, it too is reclaimed. I’m thankful that Q-tips are plentiful in Bulgaria. Taking a brass bristle brush which will not scratch the wood surface further, I work on the rim to remove the lava and thick oil/gunk buildup. I finish by working the stummel surface with a toothbrush and cotton pads. The pictures show the progress (I’m on the 10th floor balcony and notice that the sun goes down on my labors!) and I take a close up of the rim to assess how to tackle it.


Before working on the rim, I need to ream the bowl to bring it down to the briar. The cake is very light. After I get my Pipnet reaming kit out and ready the smallest blade, I realize that the bowl is too small and the blade would only impact the very top area of the chamber. Then I think of the Savinelli Pipe Knife that I snagged on eBay a week ago that my son-in-law will be bringing to Bulgaria in a few weeks when he and our daughter visit from Denver! My Winchester pocket knife will have to do the job. To avoid cutting into the chamber wall I reverse the blade angle to scrape it over the wall. It works pretty well as I work the blade down into the bowl which is more conical coming to a point at the bottom than oval shaped. I follow the Winchester by sanding the chamber wall with 120 grit sanding paper rolled up then finishing with 240 grit. I want the bowl to be as clean and smooth as I can get it.

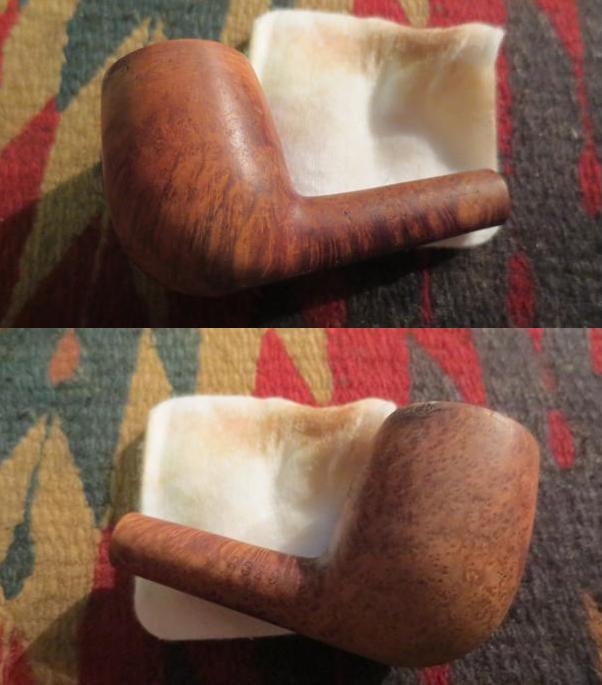
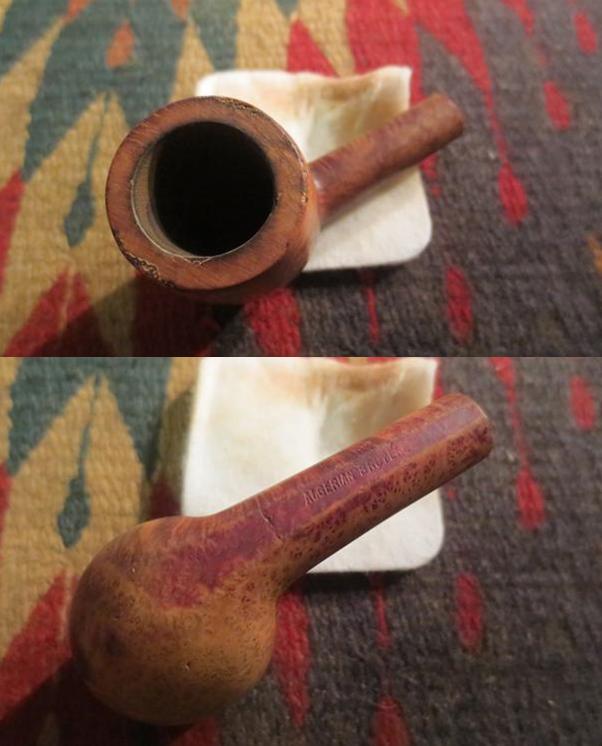
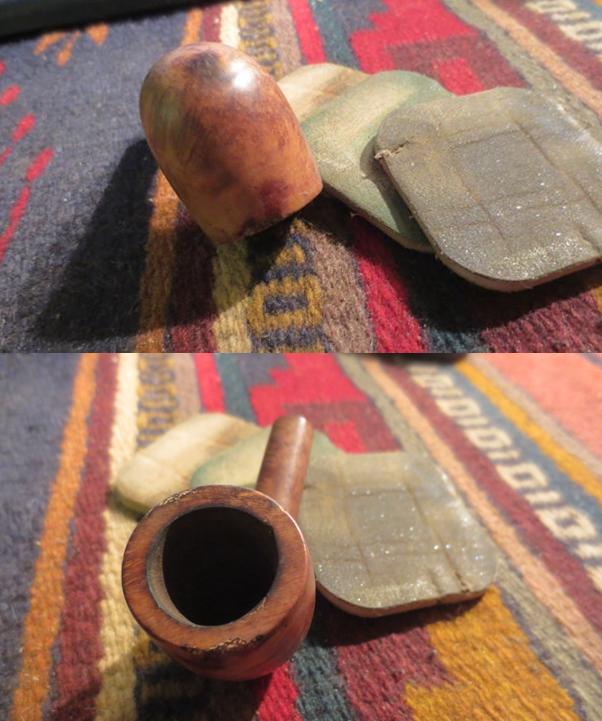
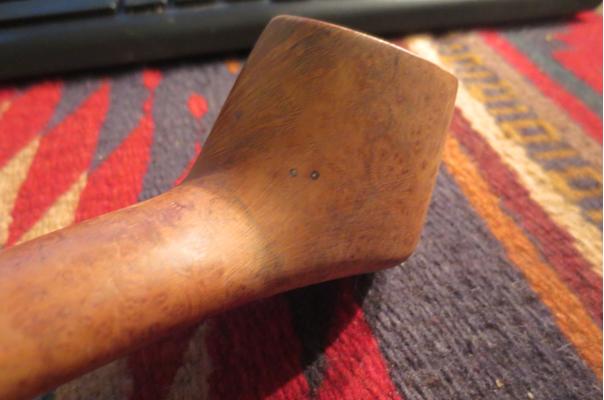
 Returning to the work table the next day after work, I’ve had some time to think about the rim repair. I take another close up shot after finishing the reaming and sanding the bowl to see where I am. The stummel reminds me a bit of a bulldog shape with the cap of the bowl rising from the panels. The challenge is that the rim is pretty chewed up and there isn’t a whole lot of wood to work with on the cap! I decide to establish a thin rim by topping the bowl, just enough to establish a ring, then fudge on the inside by cutting a bevel to remove the damage and on the outside sand to round up to the rim’s ring hopefully removing the damage and leaving a balanced stummel. This is the plan. I use 240 grit sanding paper on a chop block as a topping table. I rotate the stummel on the table very conservatively, checking the progress after every few rotations. I’m careful to keep the rim level! The pictures show the progress. The last picture below shows the result. I do not want to take more briar off at this point. A rim is established but with significant incursions on the inside of the rim at 2, 7 and 11 o’clock with smaller cuts at 8 and 10. An inside bevel should take care of the 8 and 10 o’clock damage but will not fully eradicate the larger injuries to this rim.


 In order to fill in the deep crevices I decide to mix a thick putty of briar dust and super glue. I prepare the rim by first cleaning it thoroughly with alcohol and a cotton pad getting rid of residue left over from the topping and using the dental pick to clean out any loose stuff stuck in crevices. I want a good bond to form to fill crevices but also to form an even resistance on the inner rim when I cut the bevel later. I use toothpicks to apply the briar dust putty to the cuts and bruises. I decide to apply it to the small wounds too and then put the stummel aside to allow the putty to cure overnight. I hope this approach works!
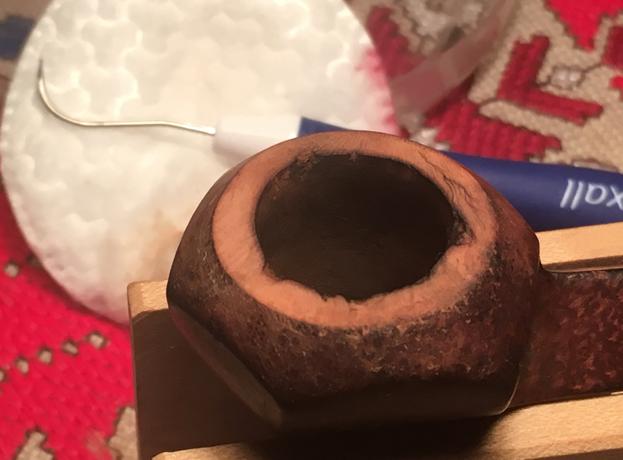

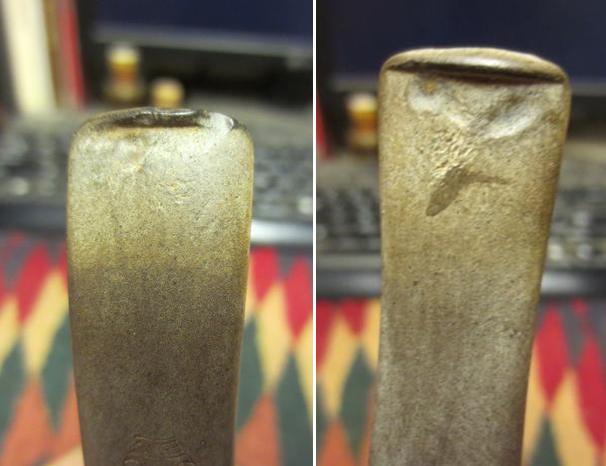
 With the super glue on the work table, I take the horn stem and look at it more closely. I read the essay Steve wrote especially for working with horn stems and understand that the approach is not as aggressive as working with vulcanite or Lucite stems. The goal is to repair surface areas that are broken and can splinter and become porous and treat the entire stem surface with polish and waxes to harden and smooth the surface. There is tooth chatter above and below the bit, with some opening of the horn surface. I also identify minuscule holes on the edge of the bit. There was also a crack that ran between the two ‘bonded’ parts of the stem. I have no idea whether cracks in horn stems will ‘creep’ but following the general principle of closing up the surface area, I decide to apply some super glue to the crack at least to seal it. I start with 240 grit sanding paper by mildly sanding above and below the bit addressing the chatter and open, porous area. I sand lightly not trying to totally remove the open areas but preparing it for a super glue patch to fill it in and close it. After sanding, I apply super glue to the bit area making sure to fill the porous, softer surface. Super glue was also applied to the small holes on the edge of the stem as well as to the crack. The pictures show the progress.


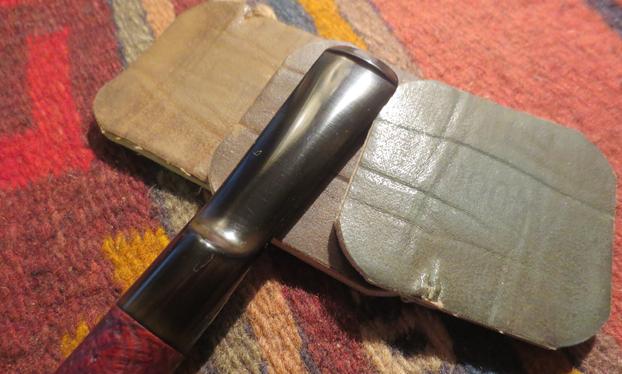
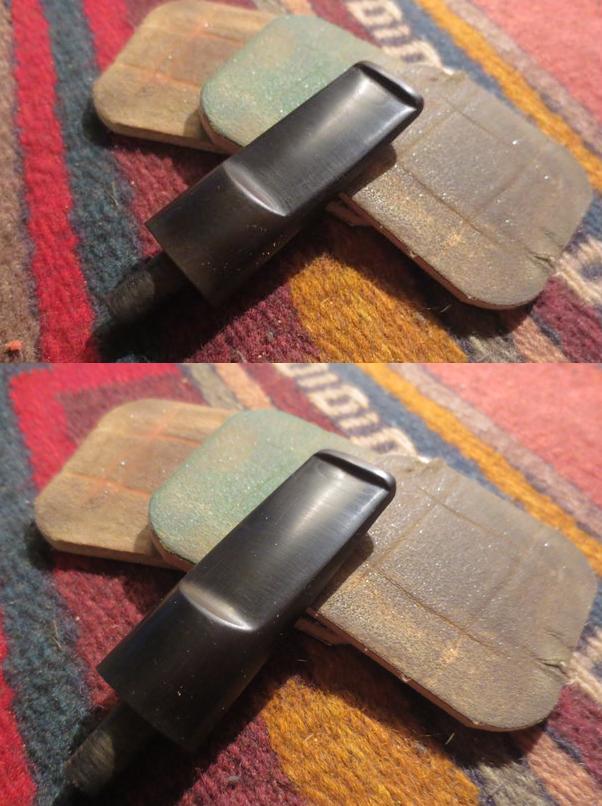
 With the super glue cured after sitting overnight, I use 240 grit sanding paper to bring the bump of the super glue patch down to the stem surface level. I gingerly use the flat square corner of the needle file to cut into the super glue to redefine the button lip. My goal is to blend the patch with the horn stem so I feather the sanding outward toward the stem. You can still see the darker patch but it should blend more as I polish the horn stem. While I smooth out the super glue patch to fill in the crack on the splice line I also detect a small ridge along one side of the stem where the bonding between the two horn pieces come together. I sand that down with 240 grit paper as well. My goal is a smooth hardened horn surface. Pictures show patches on the top and bottom.
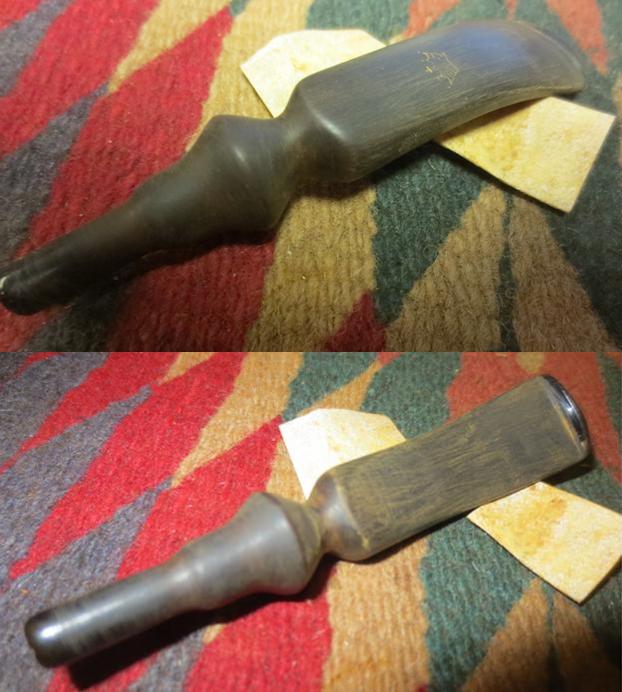
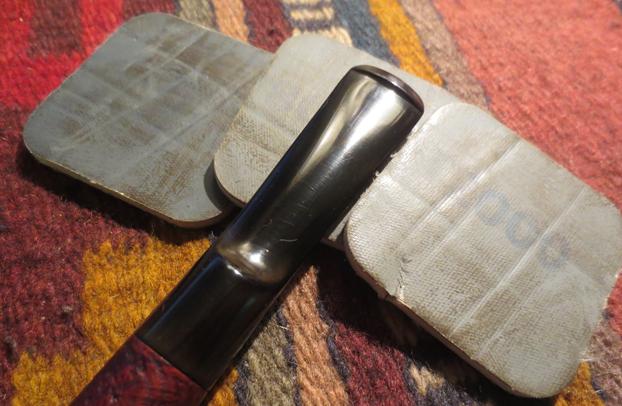
 With Steve’s essay on horn stem repair informing my steps, I use medium and fine grit sanding sponges on the entire stem. I want to feather the patches with the rest of the stem surface with the goal that transitions from super glue patches to the horn surface are not detected either by touch or with the tongue on the button area. I’m pleased with the blending I see as the marks from the 240 grit paper disappear – even the crack (first picture center bottom) at the horn splice point is less visible.
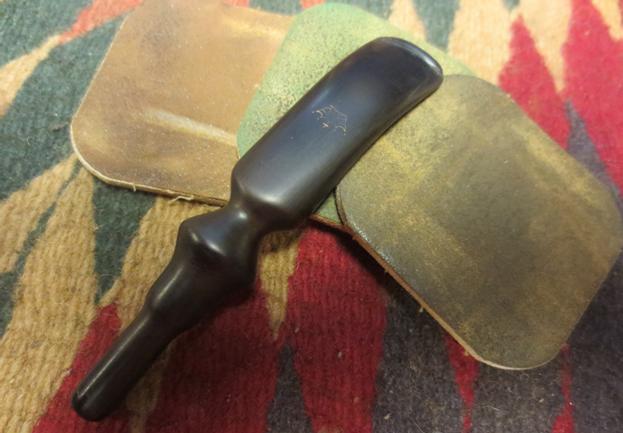
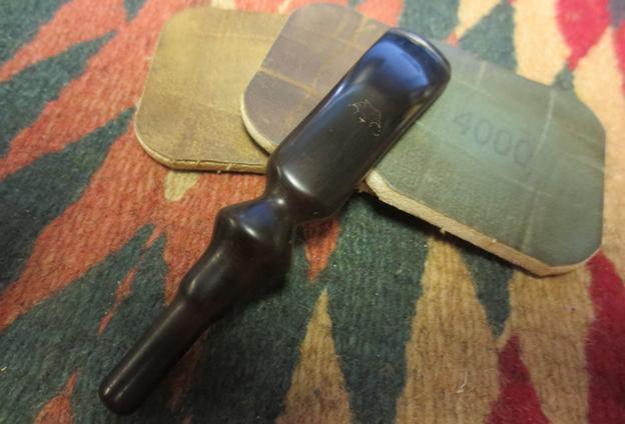
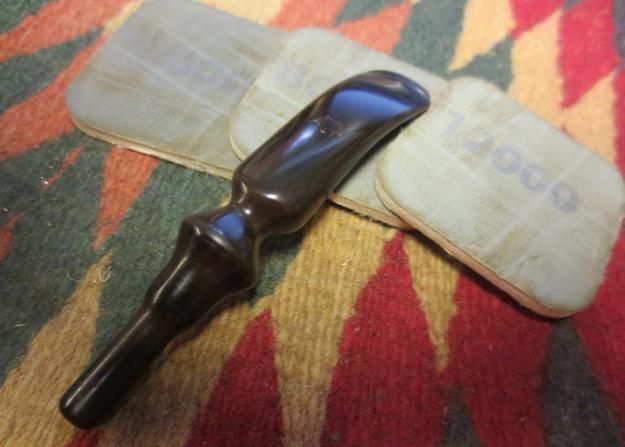
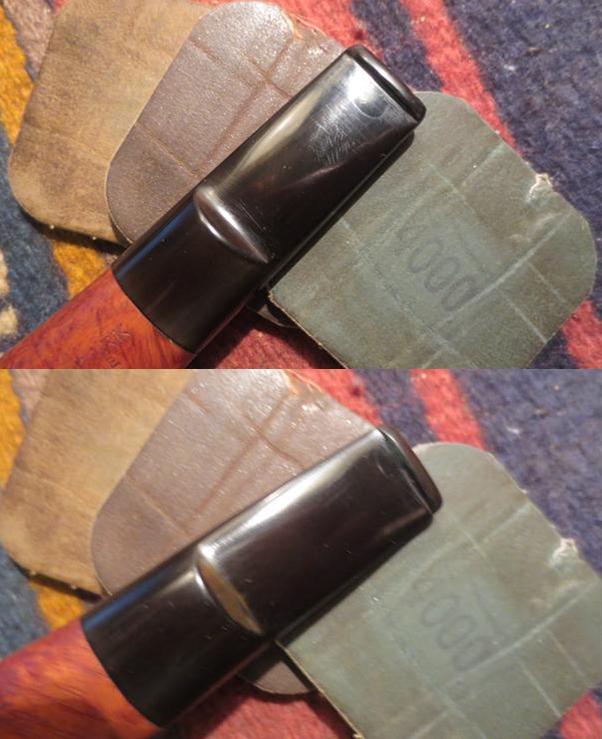
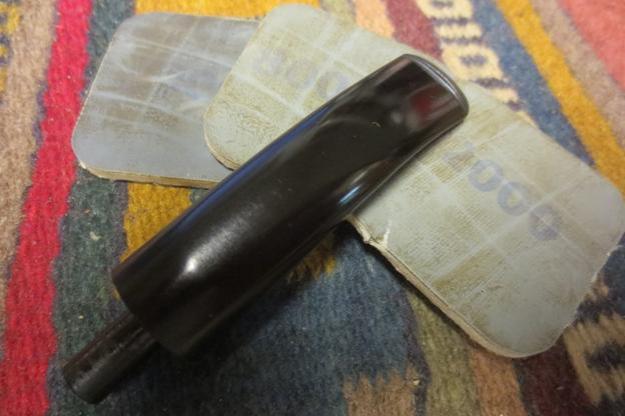
 Now I polishing the horn stem with the normal cycles of micromesh sanding pads. I wet sand using 1500 to 2400 pads and follow with a hearty application of Obsidian Oil. The horn absorbs the oil readily. After the first micromesh cycle, I noticed that what I had been calling a ‘crack’ at the splice joint had almost disappeared. Perhaps the wound was not a crack but a sharp cut into the horn. Either way, the polishing process was going well. I also polish the metal tennon with the 1500-2400 pads to clean and shine it. Next I dry sand using 3200 to 4000 and again apply Obsidian Oil. Again, using 6000 to 24000 micromesh pads I dry sand and then apply a final coating of Obsidian Oil and put the stem aside to dry. The blending looks good – even though the patch areas are visible, with the blending and polishing the patches now have more of a natural horn look. The pictures show the micromesh progress.

 The stummel has had ample time for the briar dust super glue putty patches to the rim to cure. I take a close up of the cured rim patches to mark the progress and then use 240 grit sanding paper to strategically take the briar dust patches down to the rim surface level. I want to remove the mounds before returning the stummel to the topping table outside on the balcony for a few more rotations on 240 grit paper just to make sure the plateau is flat.

 Now I cut a bevel inside the rim to address the rim damage and to finish smoothing out the briar dust super glue patches. I use a tightly rolled piece of 120 grit sanding paper to establish the bevel by gradually rotating the bowl in my hand while sanding to achieve a gradual uniform bevel. Then, with the bevel cut, I use 240 grit paper, again tightly rolled to present a harder surface to the wood, to finish it. The rim repair looks good. The three main patched areas are barely visible and blending well.
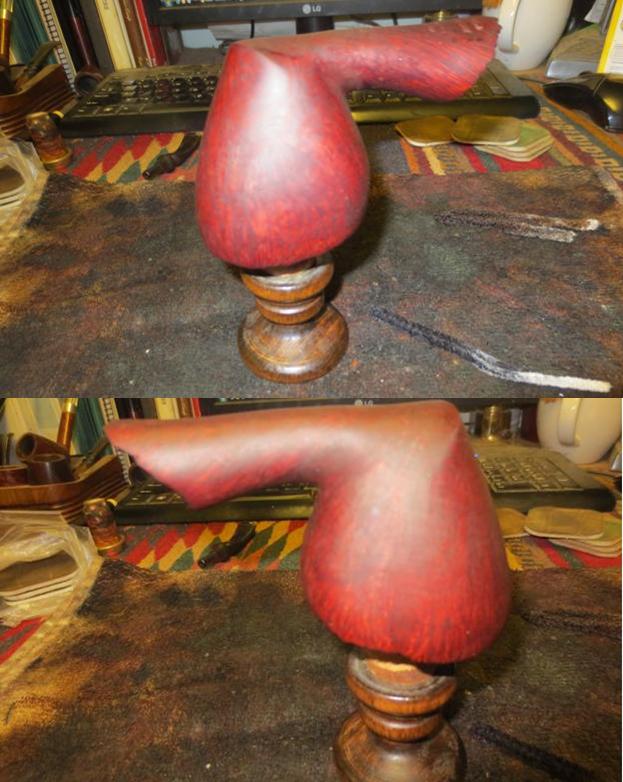
 Now to the external surface of the stummel. I remove the metal band and apply Murphy’s Wood Soap with a cotton pad to see to remove any leftover tars and oils on the surface. The cap of the bowl shows the most damage. At the top of the picture above you can see pitting in the briar. I use medium and fine grade sanding sponges to work the pitting out of the cap around the circumference of the rim. Satisfied, I decide not to stain but to restore the original stained surface – I like the color and the grain is promising. I begin working on the stummel with micromesh sanding pads beginning by wet sanding using 1500 to 2400. Following this, dry sanding 3200 to 6000, then 6000 to 12000. This little pipe is starting to pop.


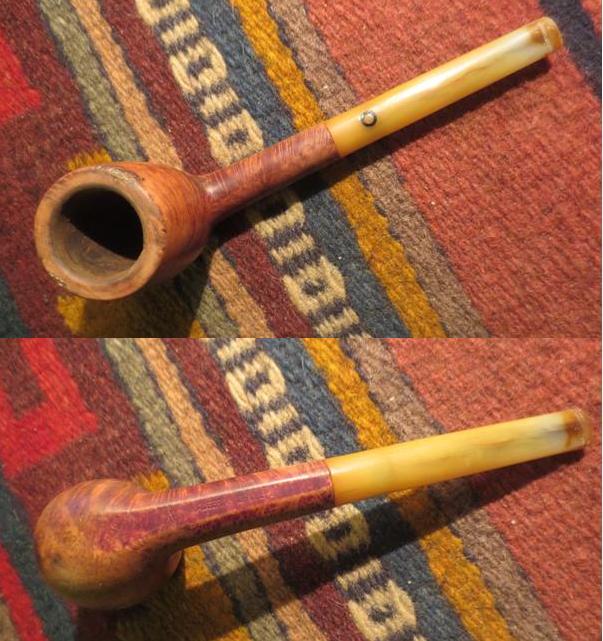
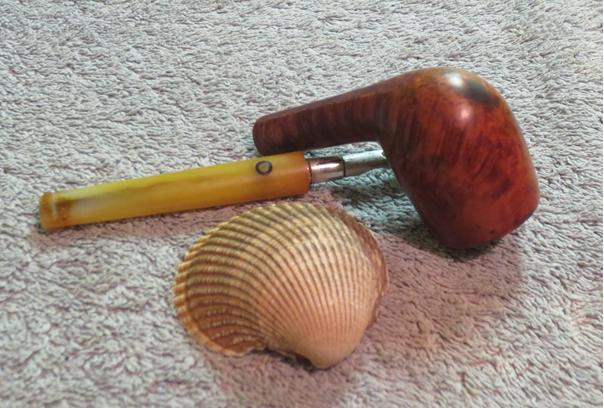
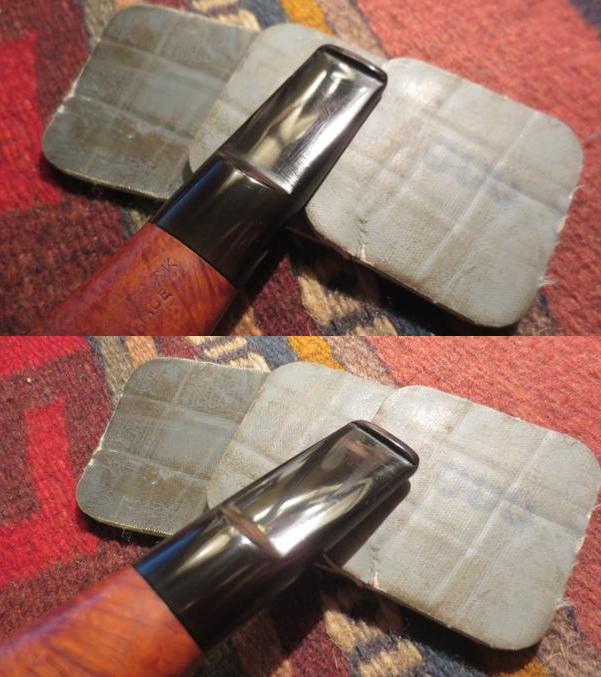
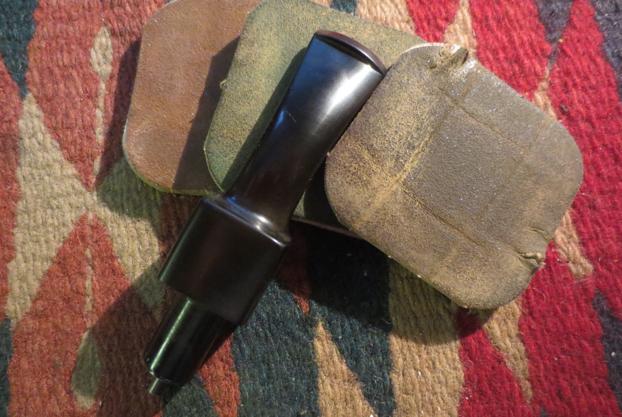
 After remounting the metal band and attaching the horn stem, I complete the polishing with the Dremel wheels by applying Blue Diamond to stem and stummel with a felt Dremel buffing wheel. I’m careful to work the horn stem lightly so I don’t overheat the surface and cause splintering or an opening of the surface. Following the Blue Diamond, stem and stubble receive several coats of carnauba wax with a cotton cloth wheel. Finally, I give a Dremel wheel buff with a clean cotton cloth wheel. To raise the shine of the horn and briar, I give the pipe a vigorous buffing with a microfiber cloth.
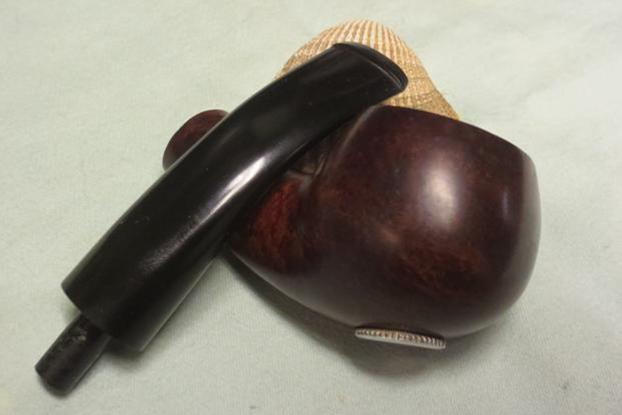
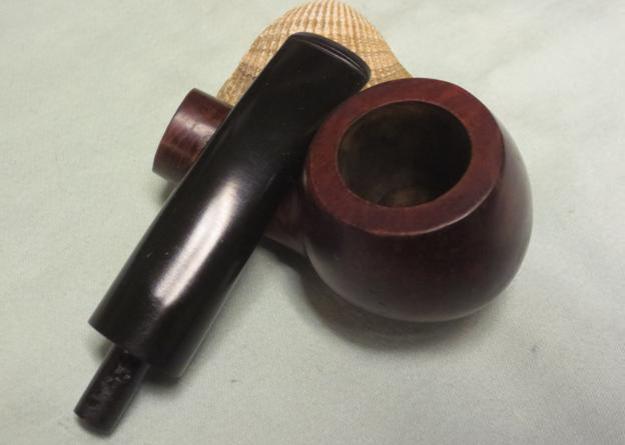
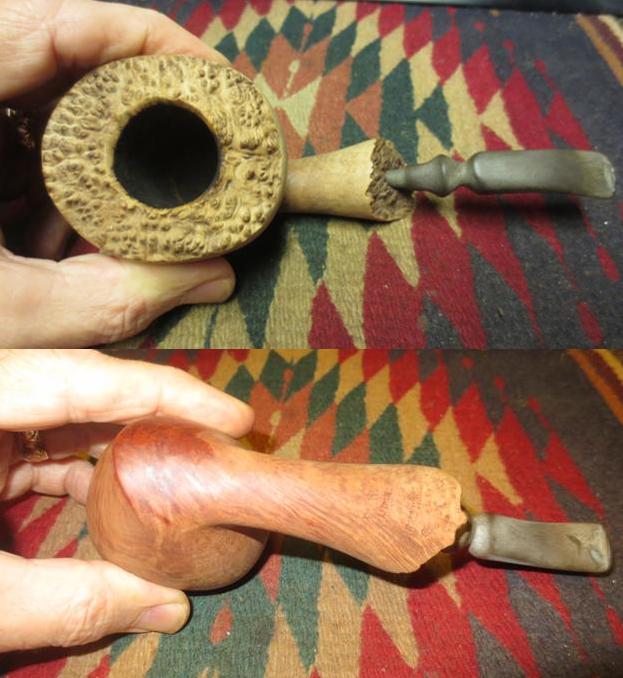
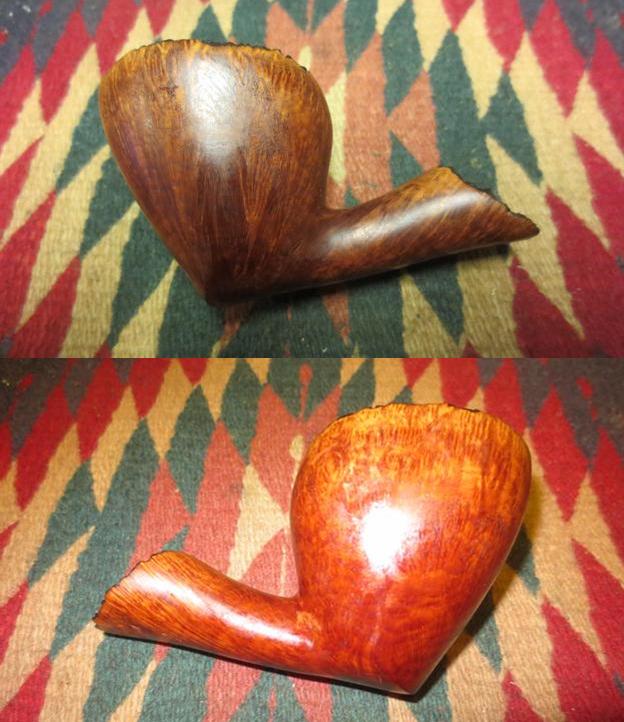
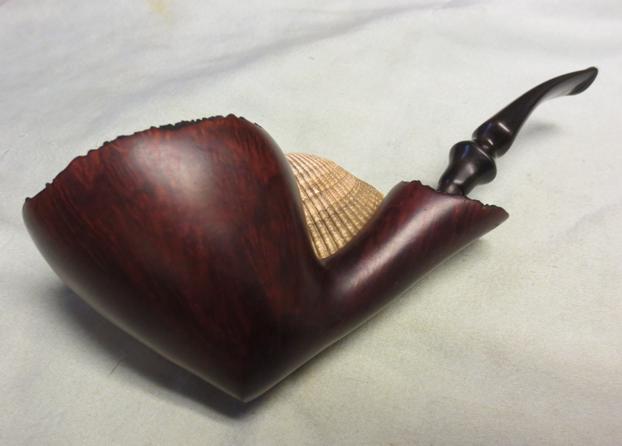
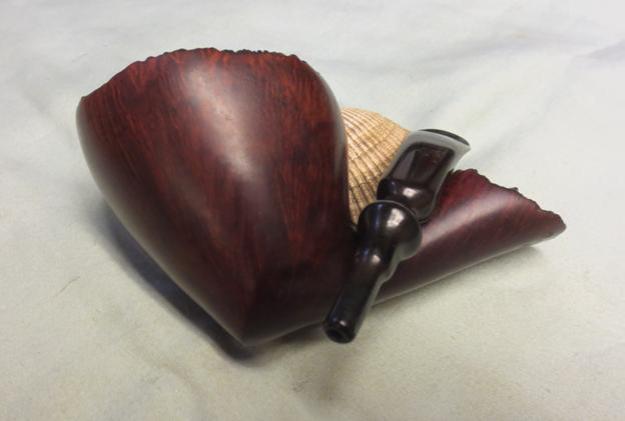
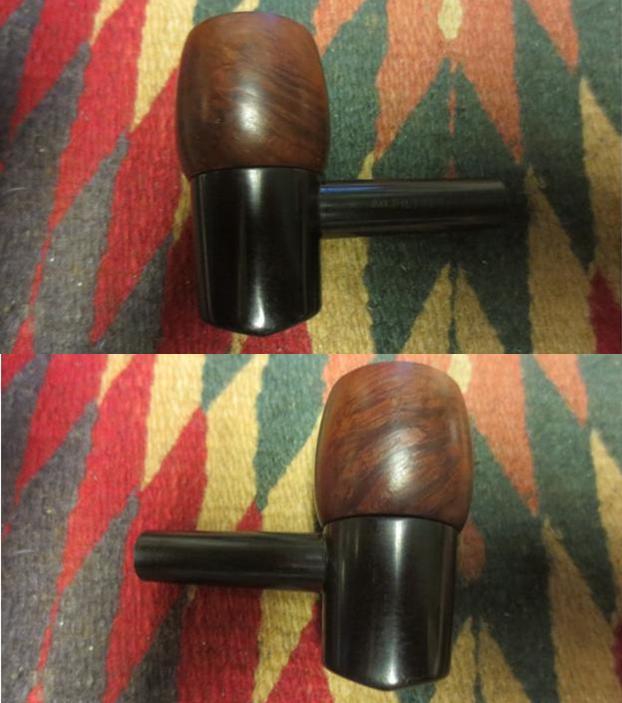
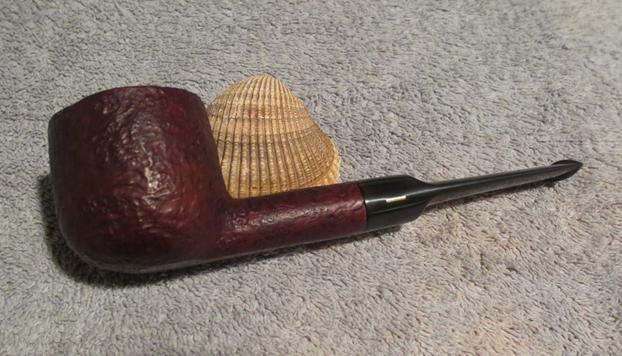
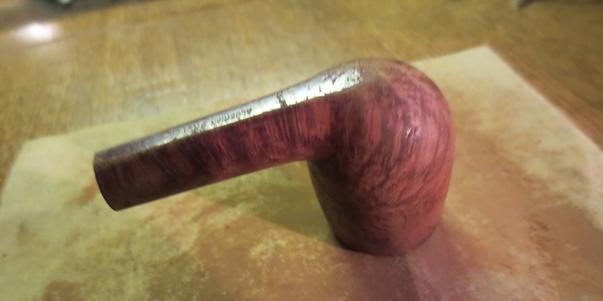
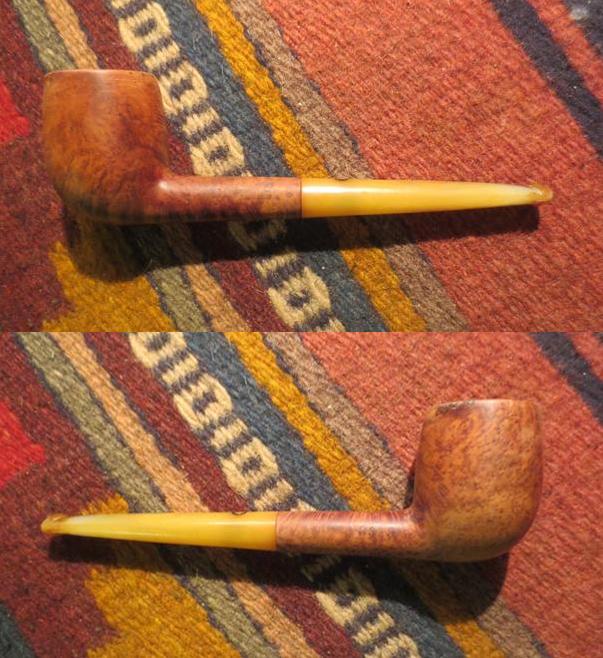
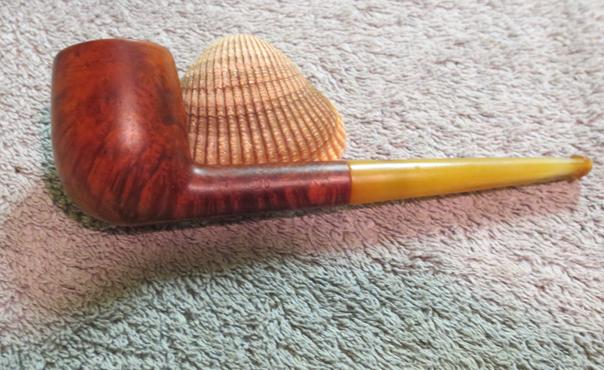
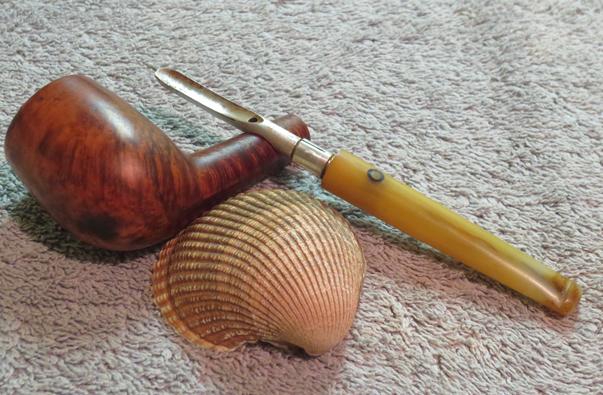
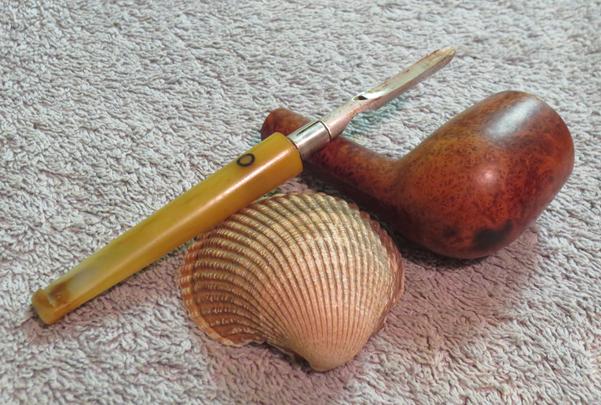
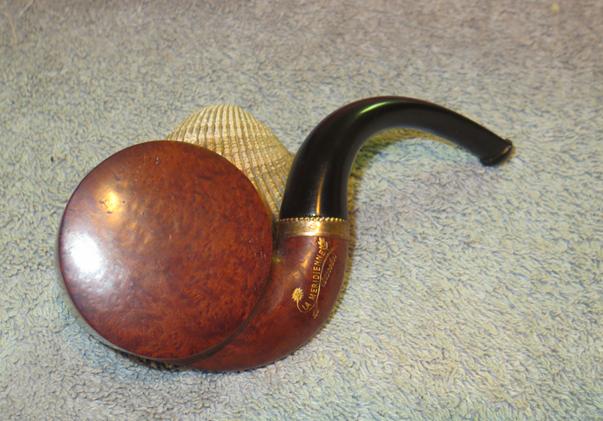
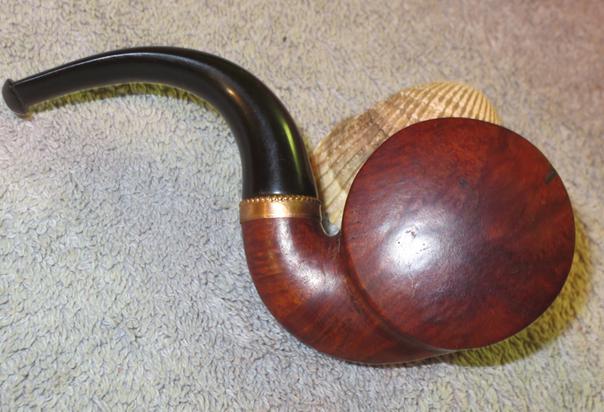
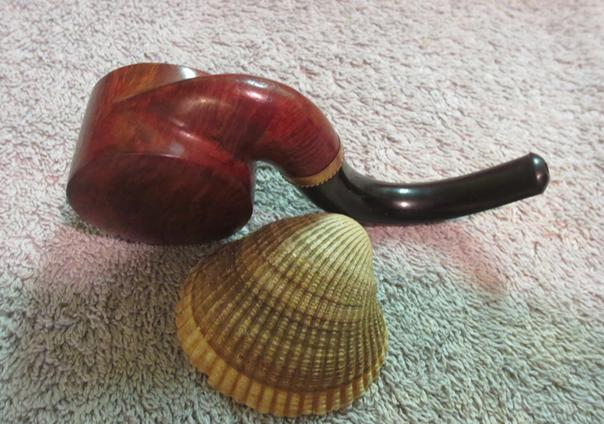
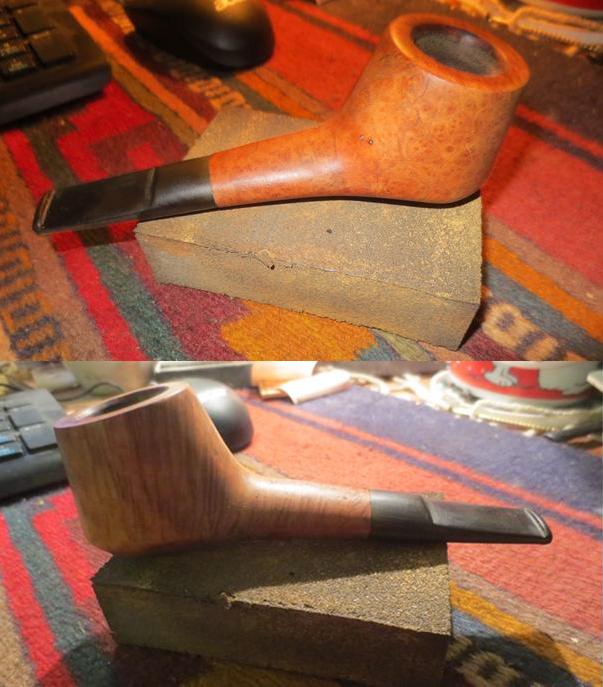
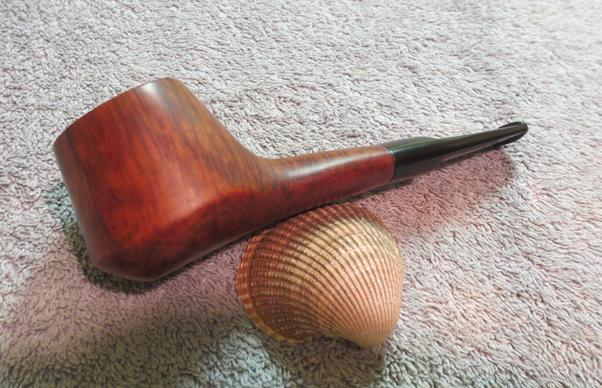
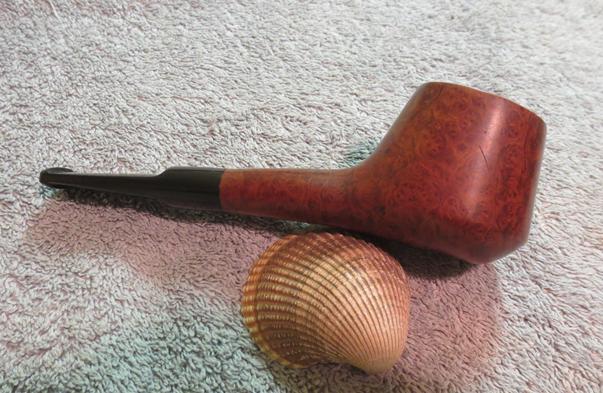
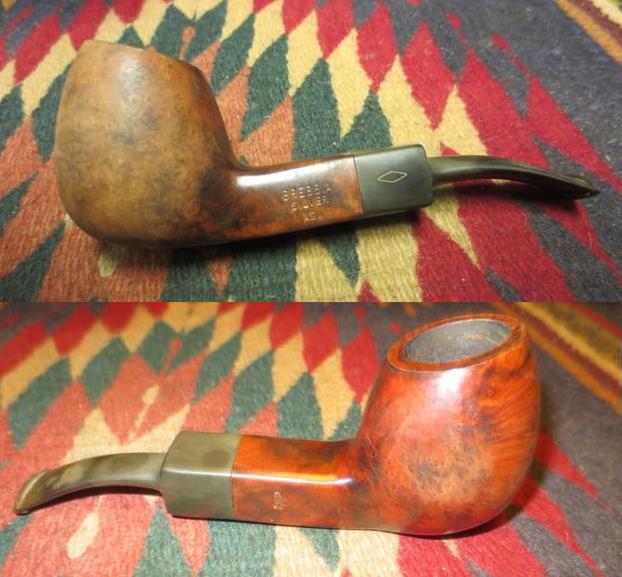
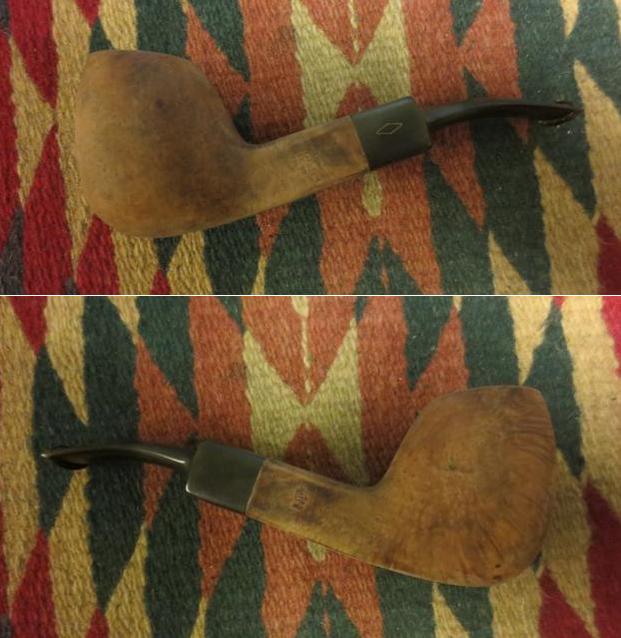
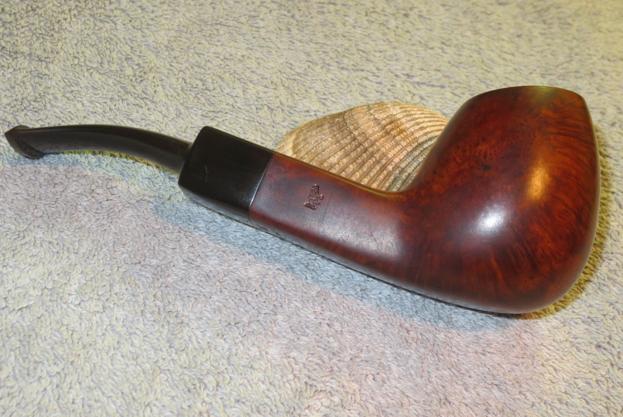
I’m very surprised how well this little pipe cleaned and polished up. The rim repair was daunting but amazingly the briar dust patches are practically invisible and blend well with the natural grain movement. My first horn stem repair looks good from where I sit. I’m not sure who smokes a pipe this small but someone did before I received it and I’m happy to return it to service. I couldn’t resist a ‘before and after’ shot to start things. Thanks for joining me!


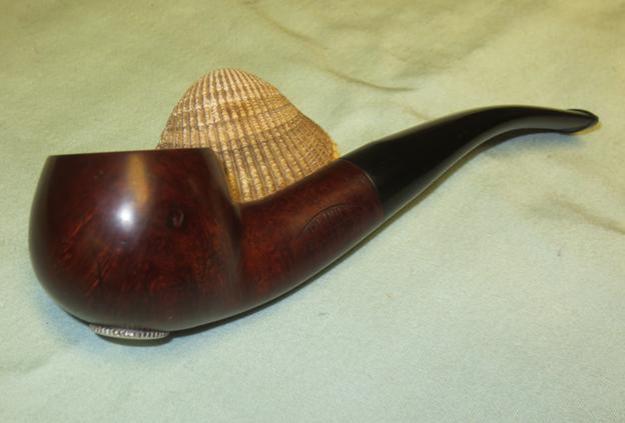
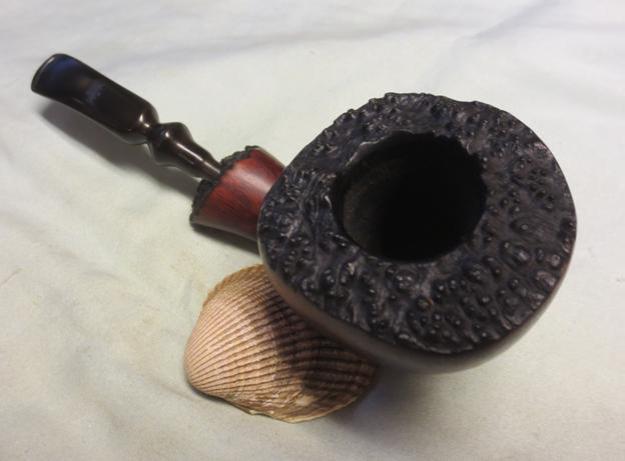
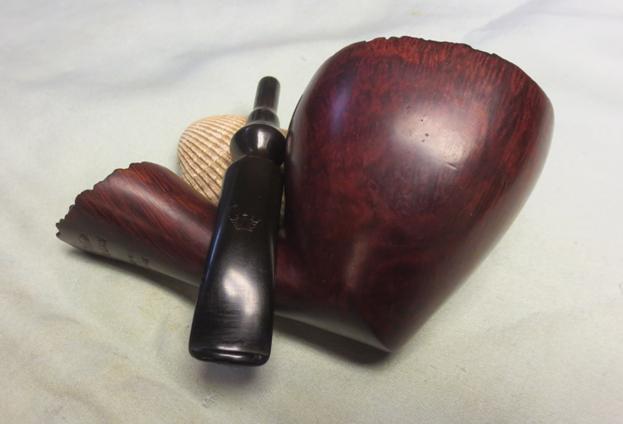
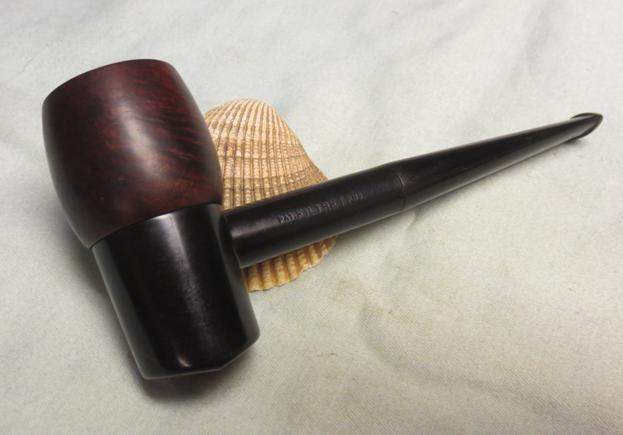
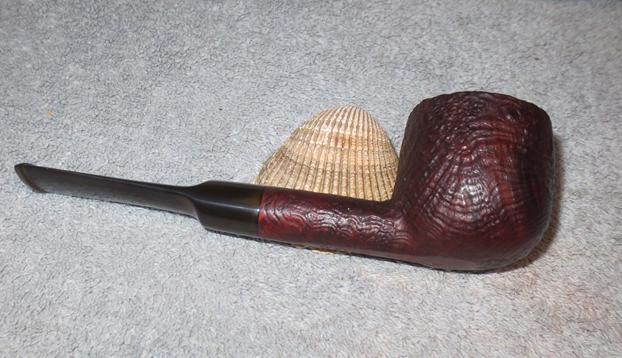
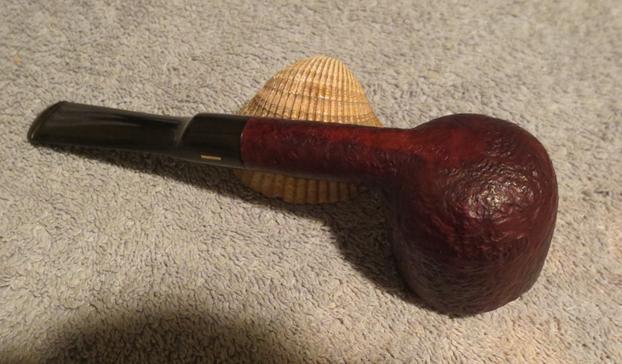
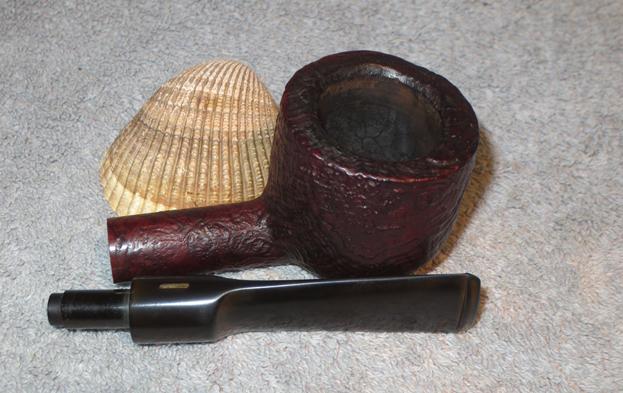
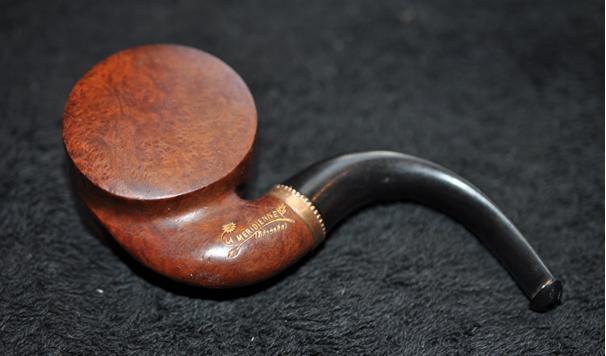
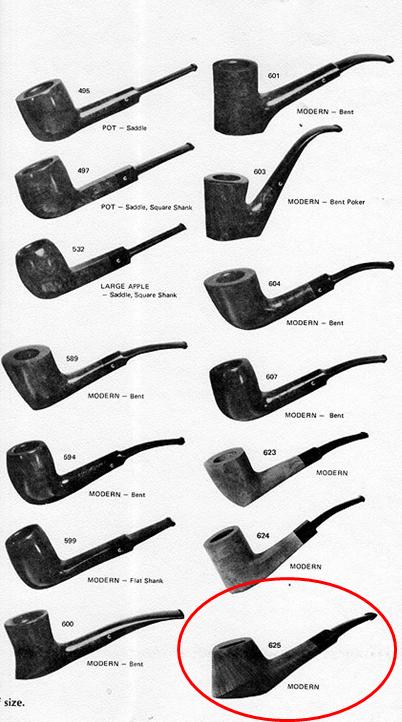
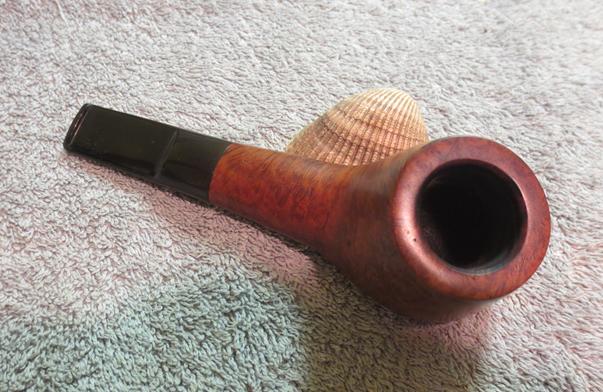
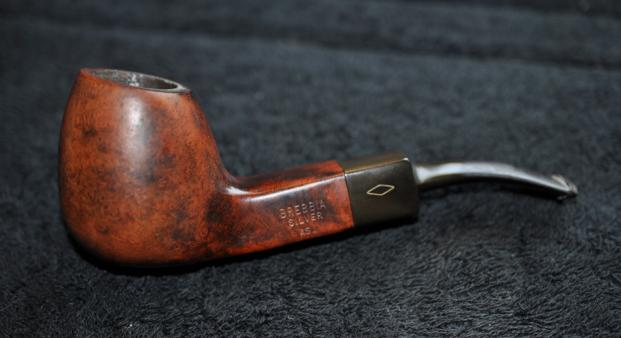
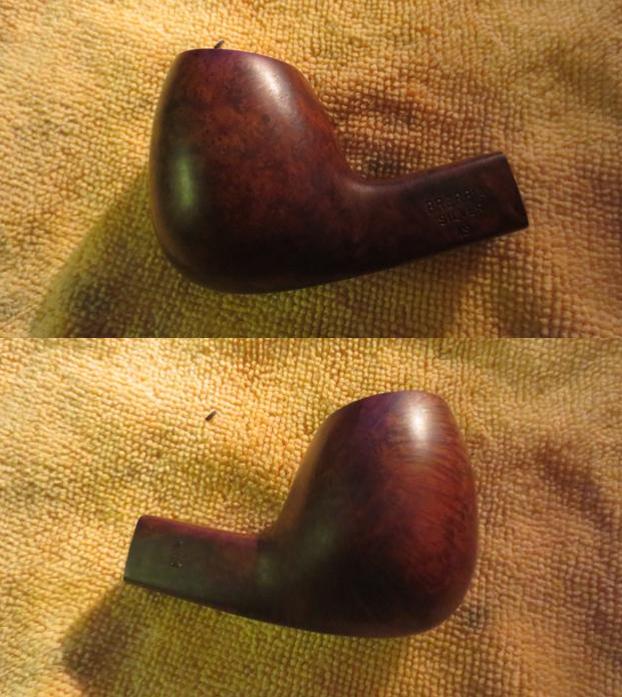
 This pipe came to me from my brother. I am not sure if he found it in one of his antique shop forays between Idaho and Nebraska or on a recent trip to California or even if he found it on eBay. It really doesn’t matter in the long run where it came from. Though sometimes I wish that the pipes I cleaned up could talk and tell their stories. It was obviously a favourite of the pipeman who owned it. It was well smoked but not broken down. The pipe is stamped on the smooth underside of the bowl and the shank with clear and distinct markings. On the bottom of the bowl it reads Savinelli over de luxe over Milano. Next to that it was stamped with the Savinelli Shield logo and the shape number 118KS. Under that is stamped Italy. It is a standard Pot shaped pipe with a large bowl that is one inch in diameter.
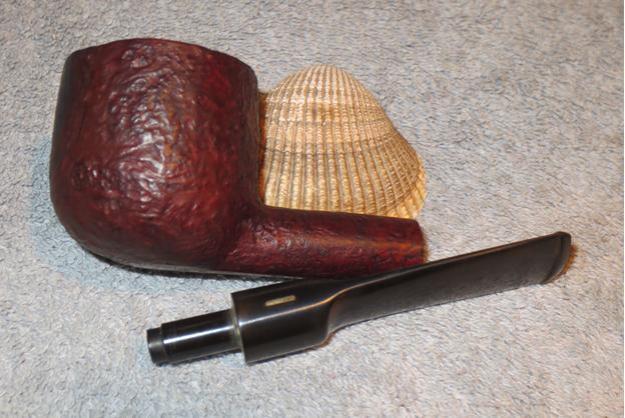
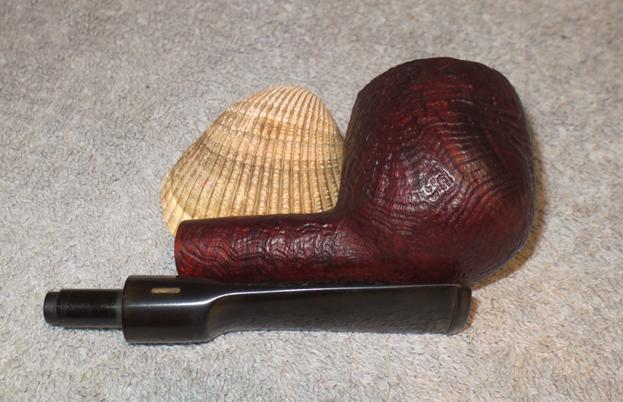
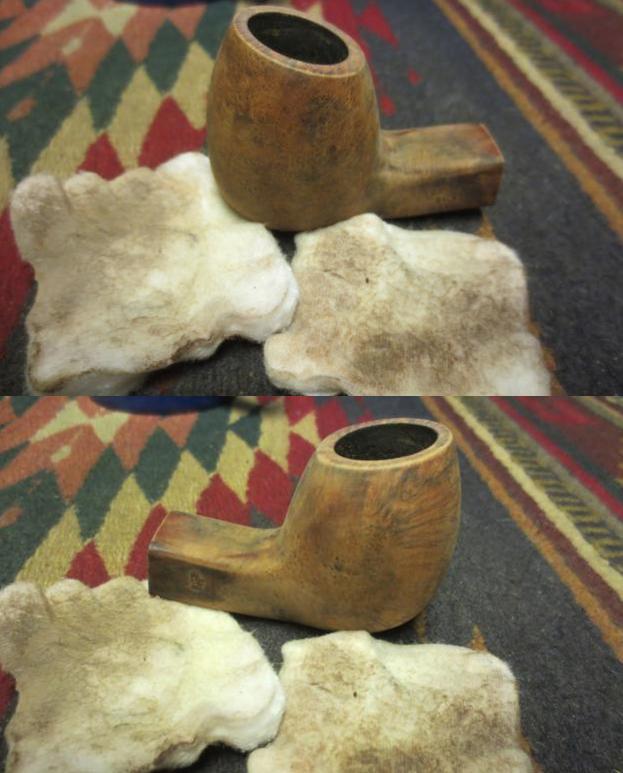
 When the pipe arrived it was spotless. The sandblast really stood out with clarity as can be seen in the next set of four photos. The ring grain, the birdseye and even the flame grain showed but there was also an under grain that shown through that was beautiful as well.
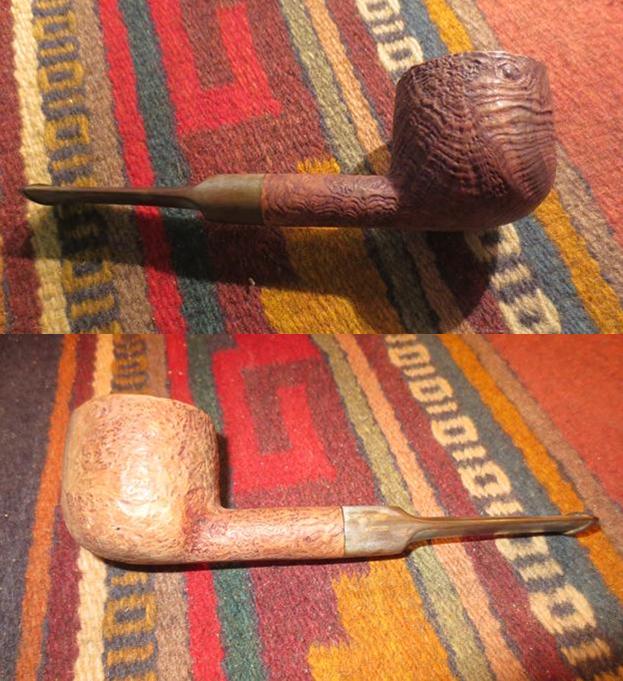
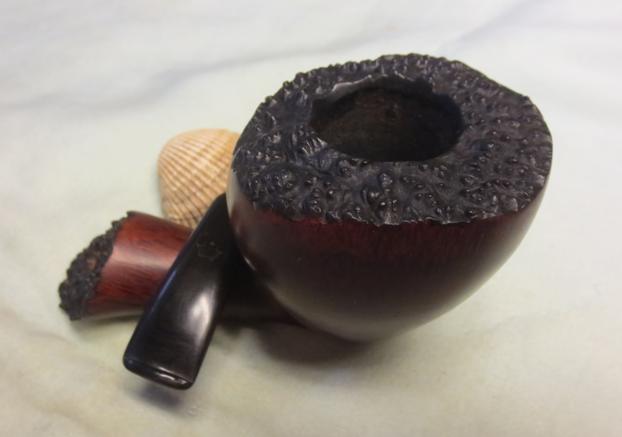
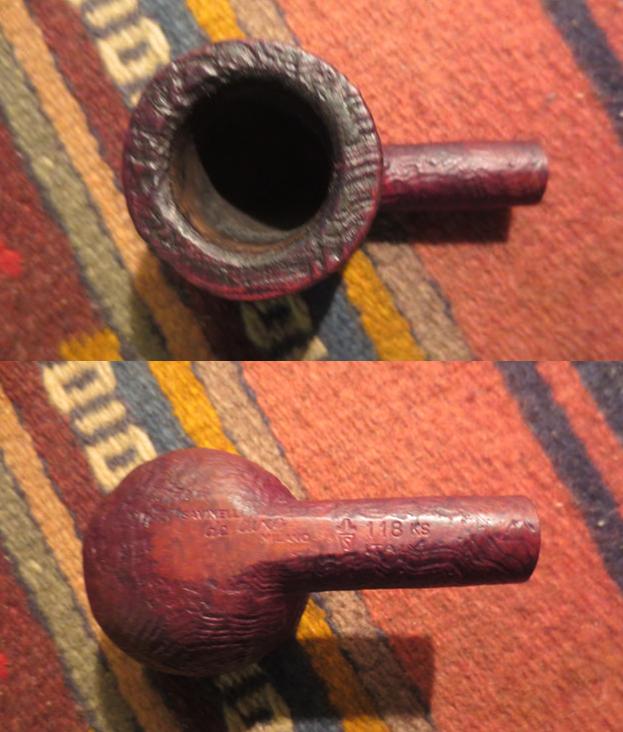
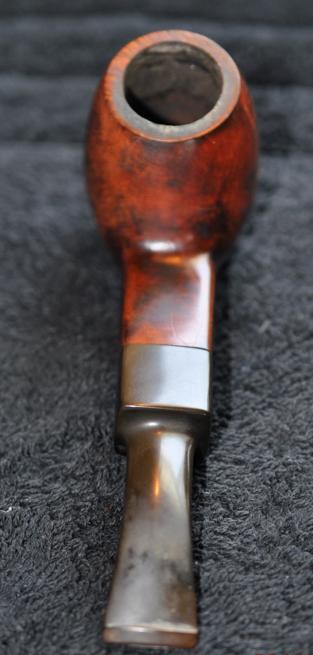
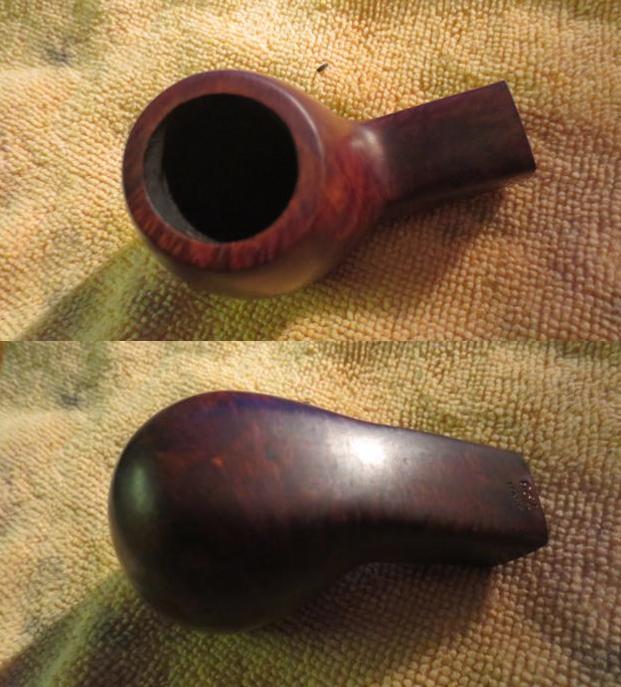
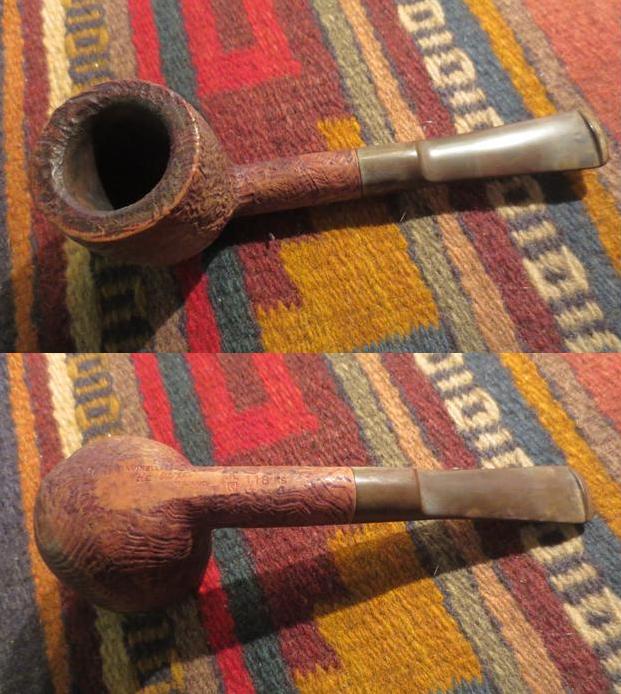 I took some close up photos of the pipe. The first shows the stamping on the bottom of the bowl. You can see the clear markings on the pipe and how they stand out on the flat smooth bottom of the bowl and the shank. The second photo shows the rim. There was still light dust and grit in the grooves of the rim.
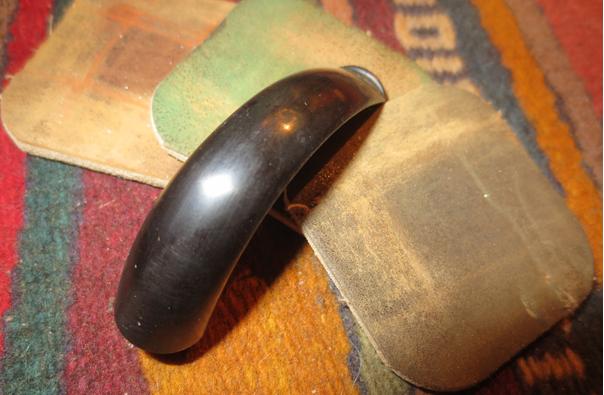
 I also took some close up photos of the stem. I turned it right side up and the tooth mark on the topside near the button is visible in the first photo below. The underside of the stem showed some tooth chatter. Both sides are oxidized.
 I used a brass bristle brush to clean out the debris from the grooves in the rim top. It did not take much but once finished the rim was not as dark. I ran a couple of cotton swabs and alcohol through the shank and it was very clean.
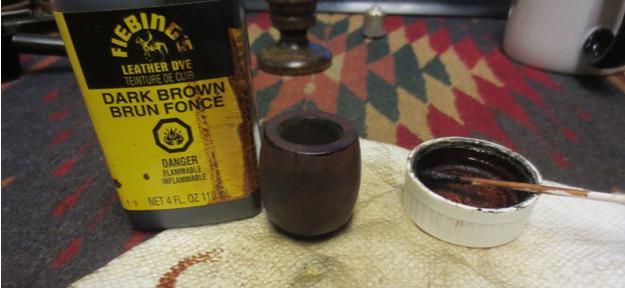
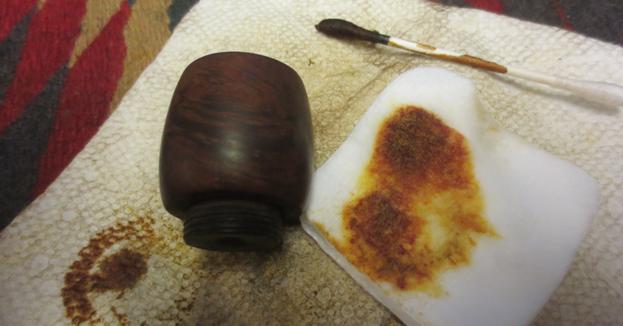
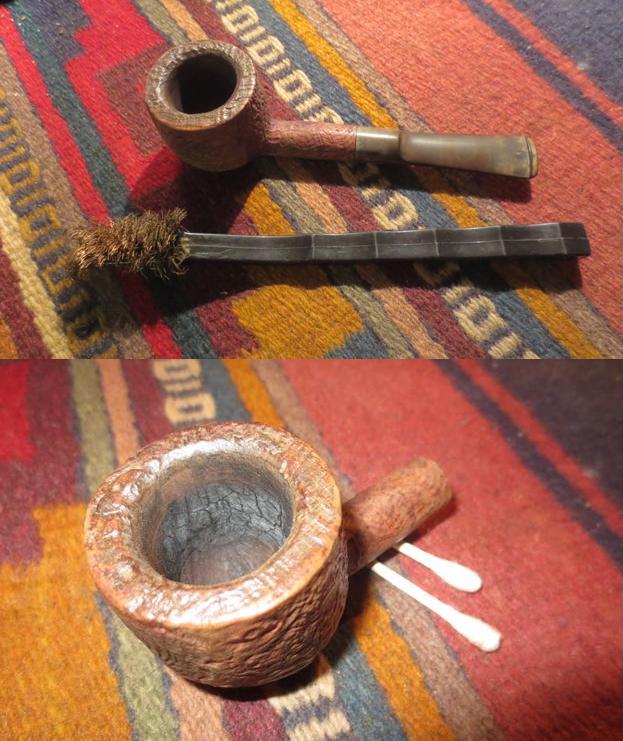 I wiped the bowl down with acetone on a cotton pad to remove dust from the bowl surface in preparation for staining the bowl. I applied some dark brown stain thinned by 50% with isopropyl alcohol using a folded pipe cleaner. I flamed the stain and then repeated the process.
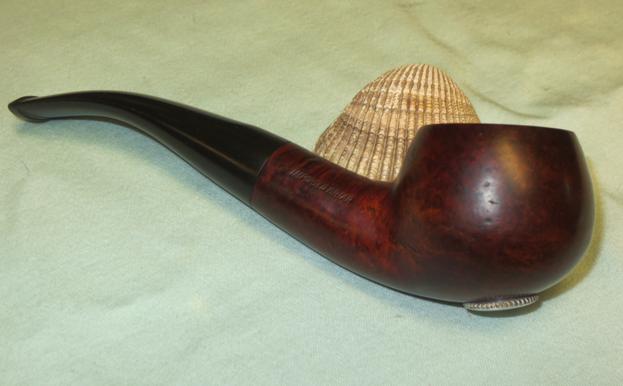
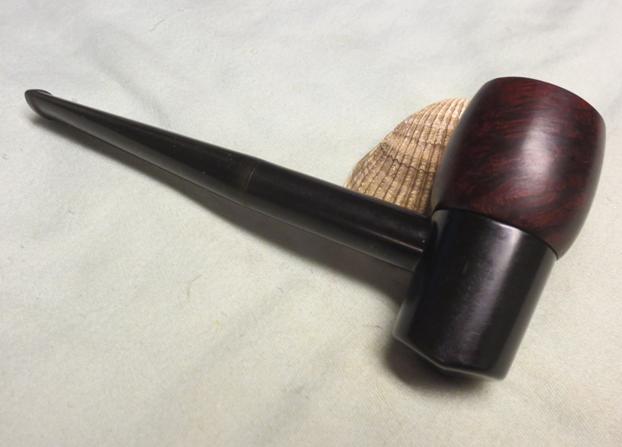
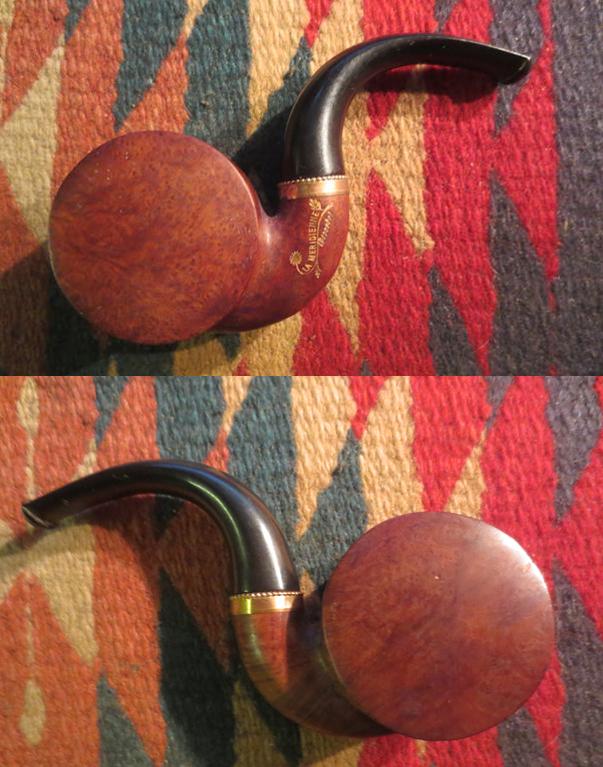
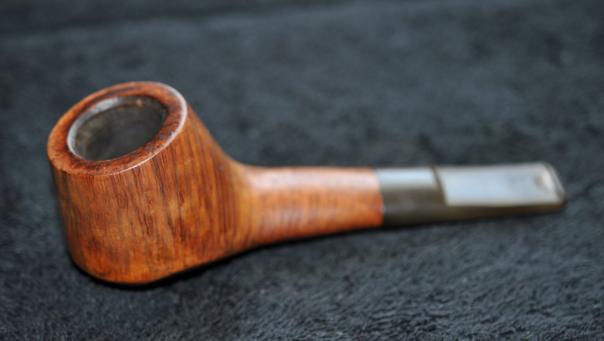
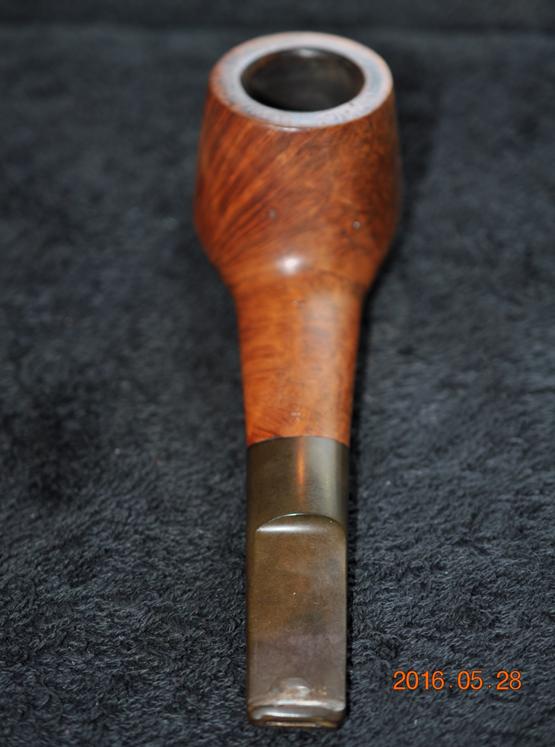
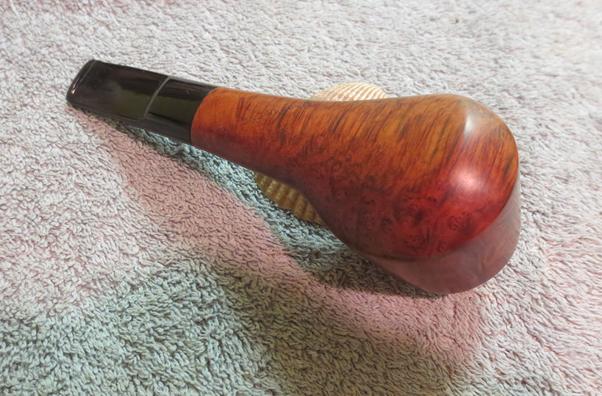
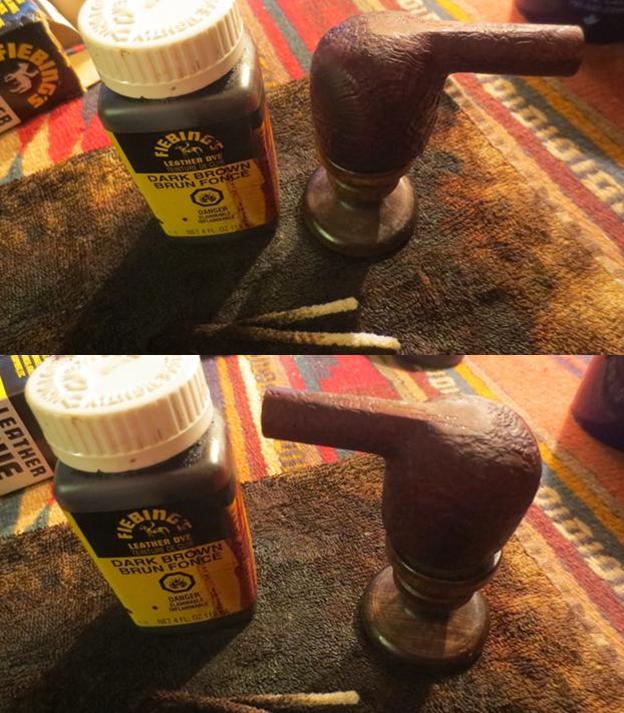 I hand buffed the bowl with a microfibre cloth to raise a shine. The next four photos show the bowl after the initial hand buffing. The grain really stands out clearly in these photos.
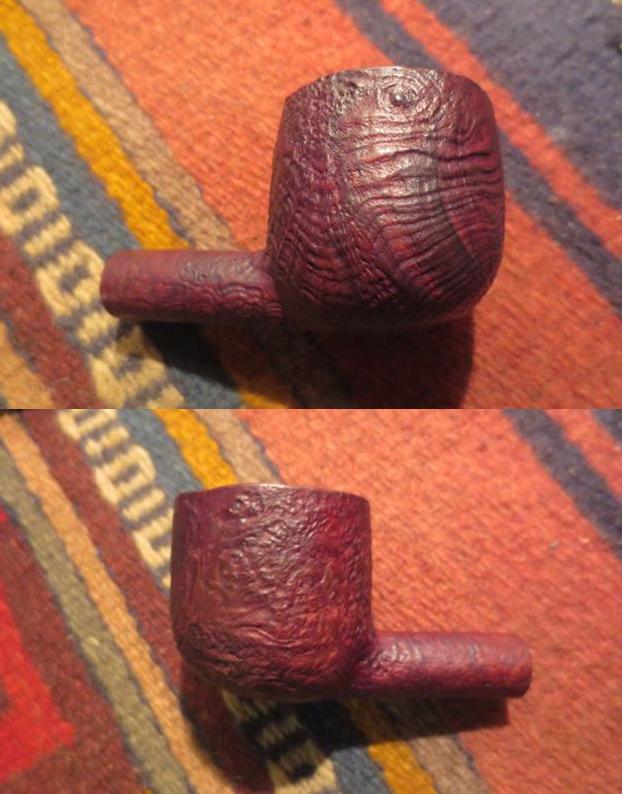
 I sanded out the bite marks with 220 grit sandpaper. Thankfully they were not as deep as I thought and were easily removed. I sanded the oxidation as well and gave the stem a general workover.
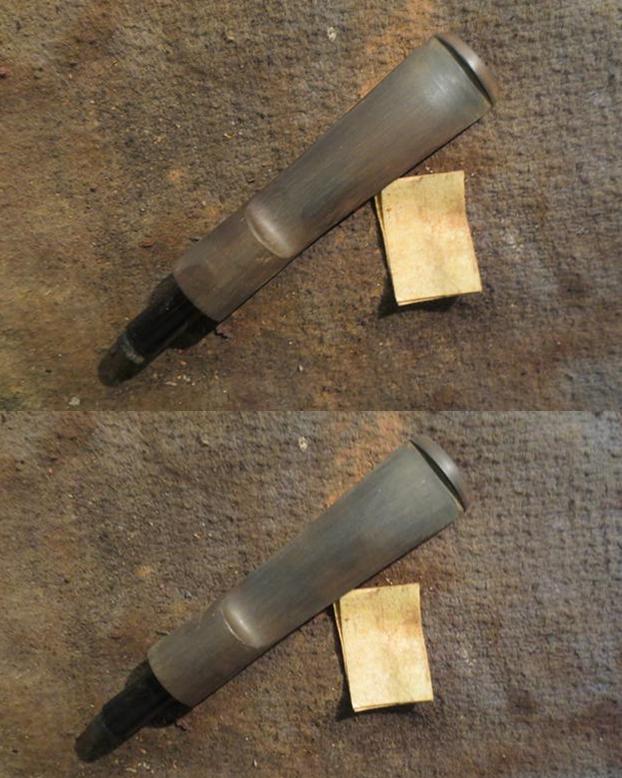 I polished the stem with micromesh sanding pads – wet sanding it with 1500-2400 grit pads and dry sanding with 3200-12000 grit pads. I rubbed the stem down with Obsidian Oil after each set of three pads. I gave the stem a final rubdown with the oil after sanding with the 12000 grit pad and set it aside to dry.
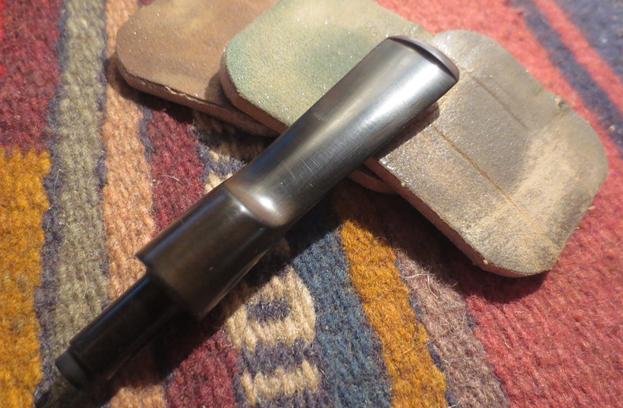


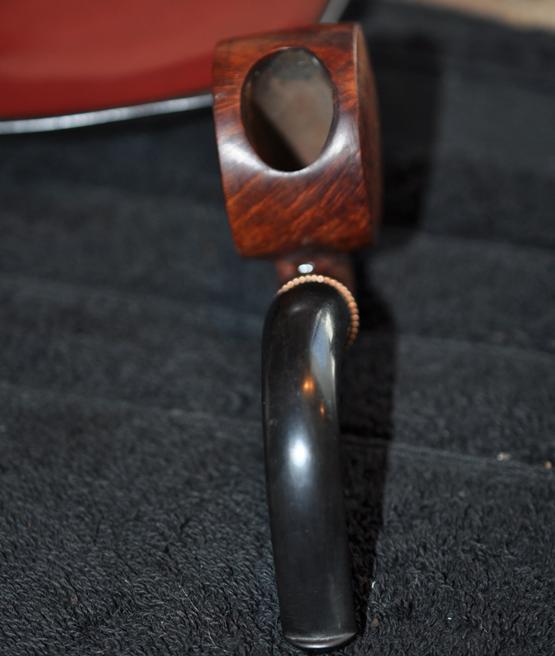
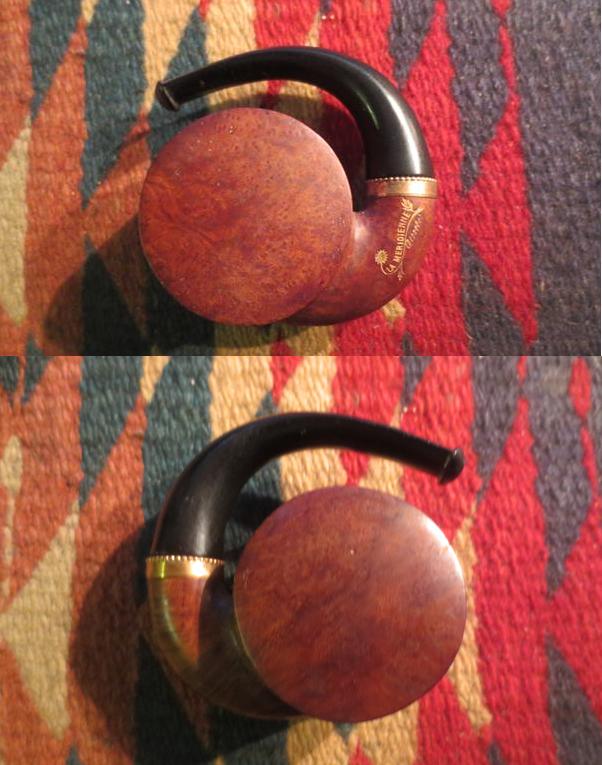
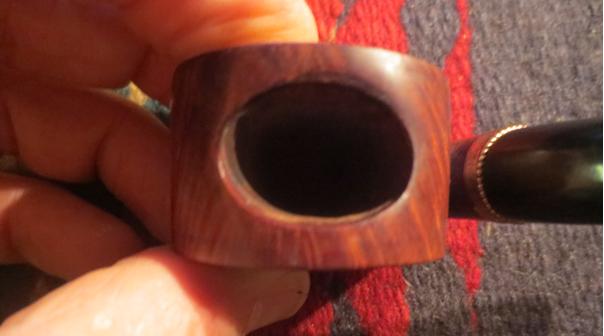


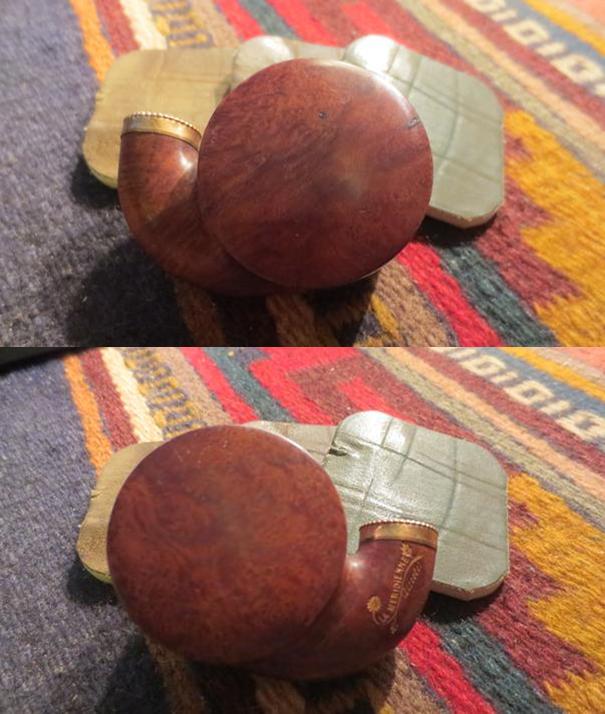
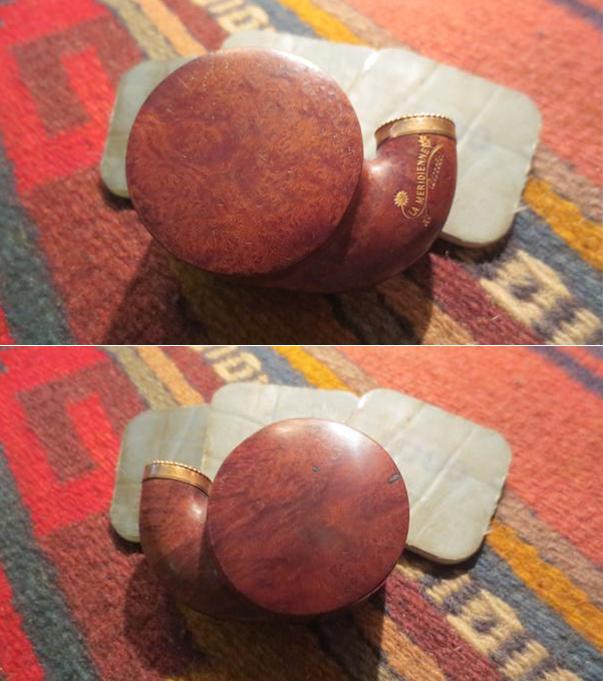


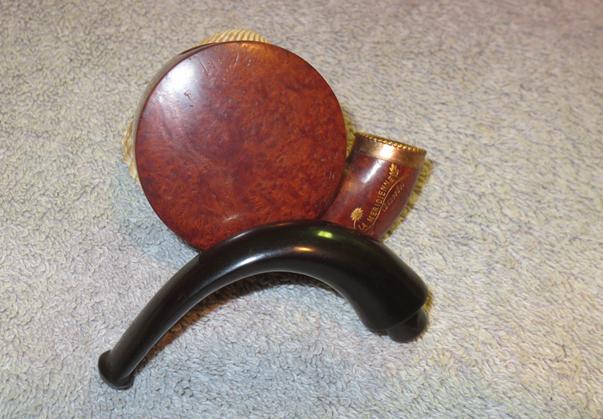
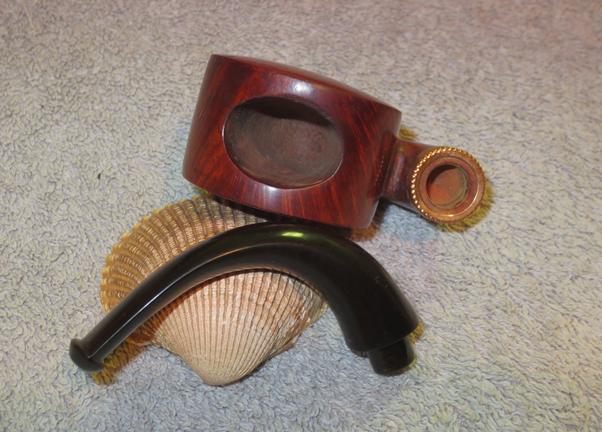


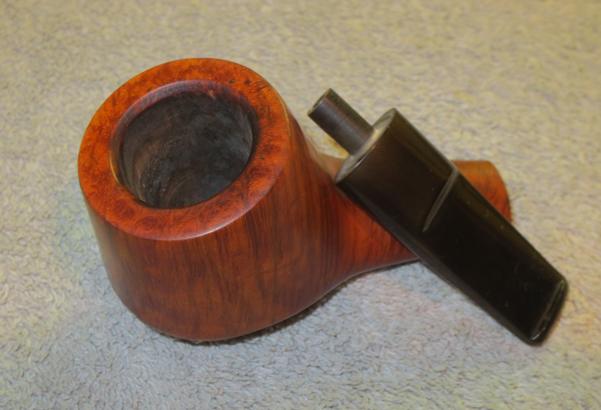

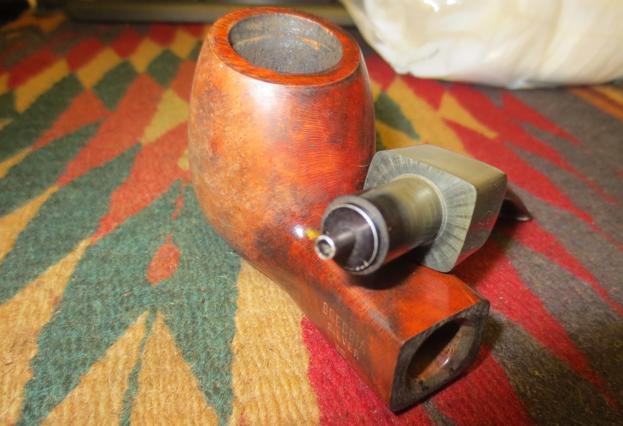
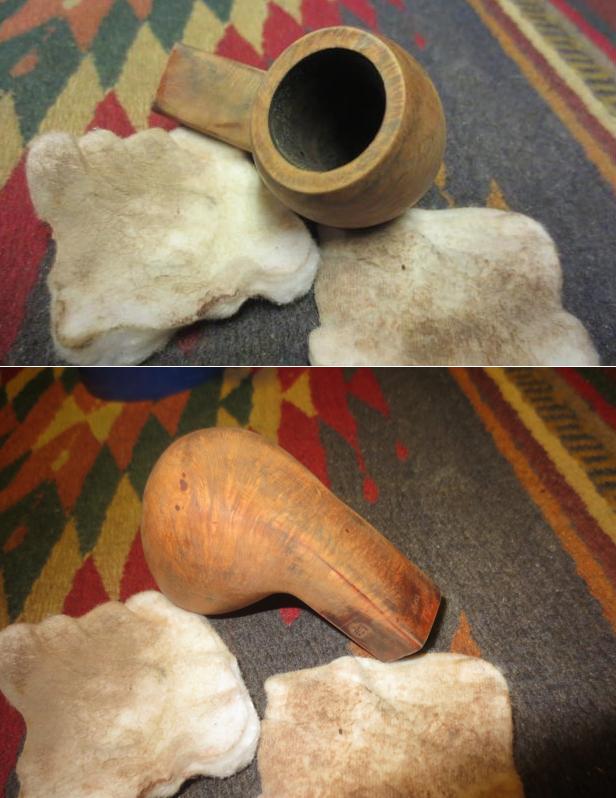

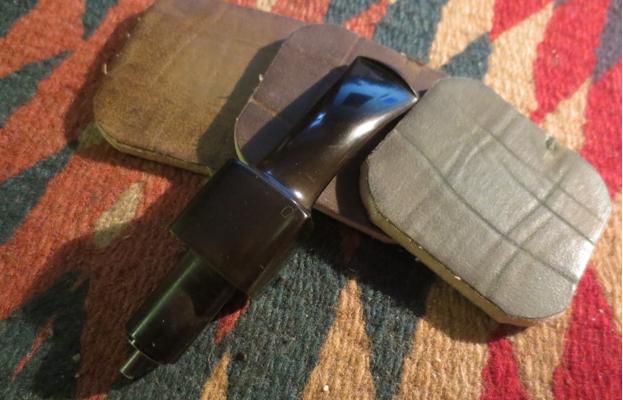


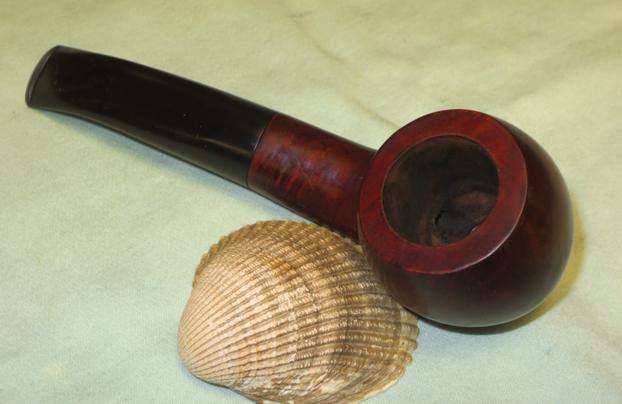
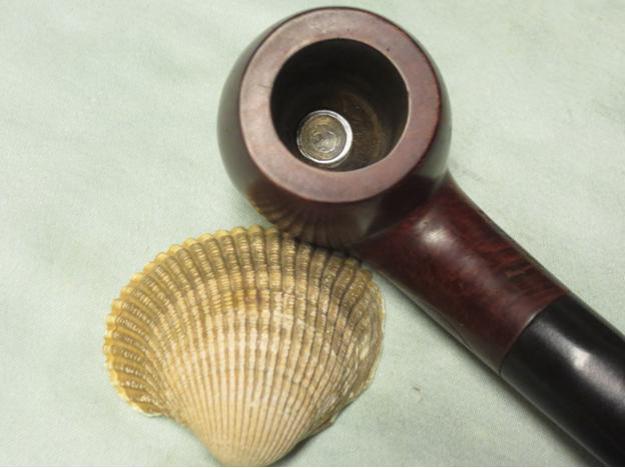
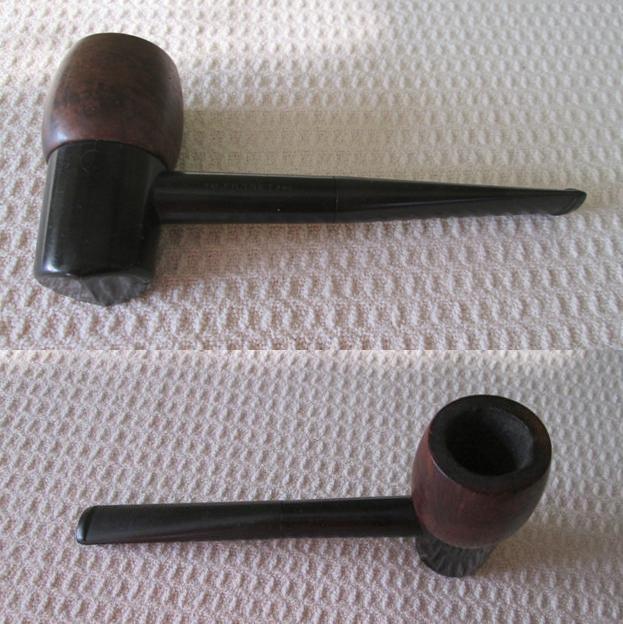
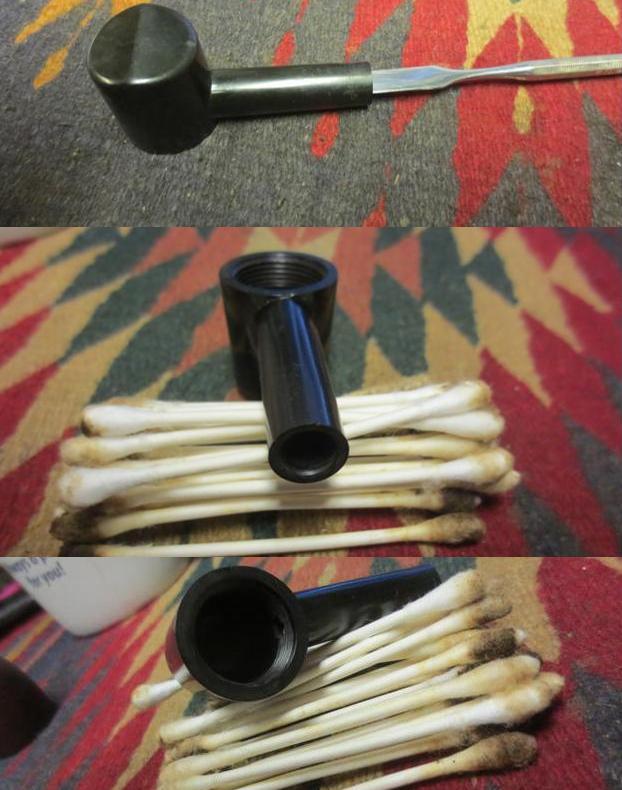
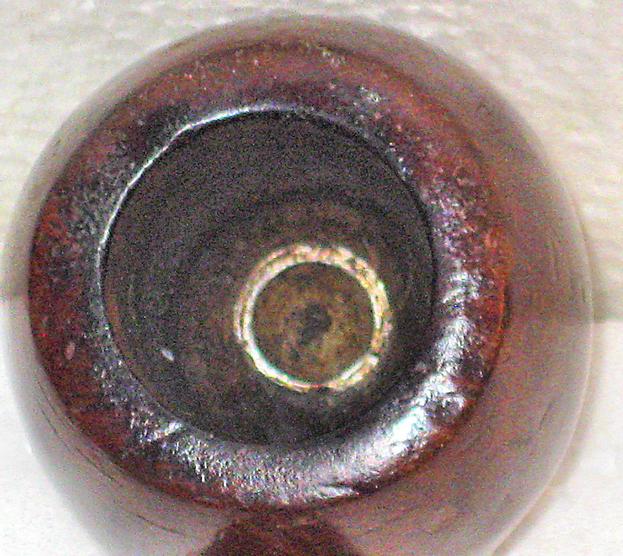
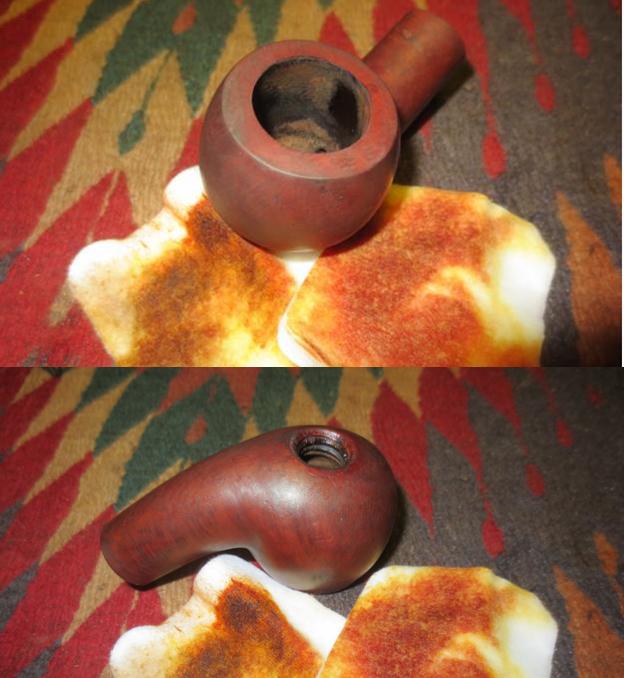
 The fourth and fifth pictures remove the mystery of the knurled edge on the bottom of the bowl that showed in the first photo. You can see in that photo of the bowl bottom that the silver disk looks like it was made to be rotated. We talked and my brother bid and won the pipe (I can’t wait for the pipe to get here so I can check this out). The fifth photo shows the inside of the bowl. The top of the disk appears to be a cup intruding into the bowl bottom. It was really odd looking.
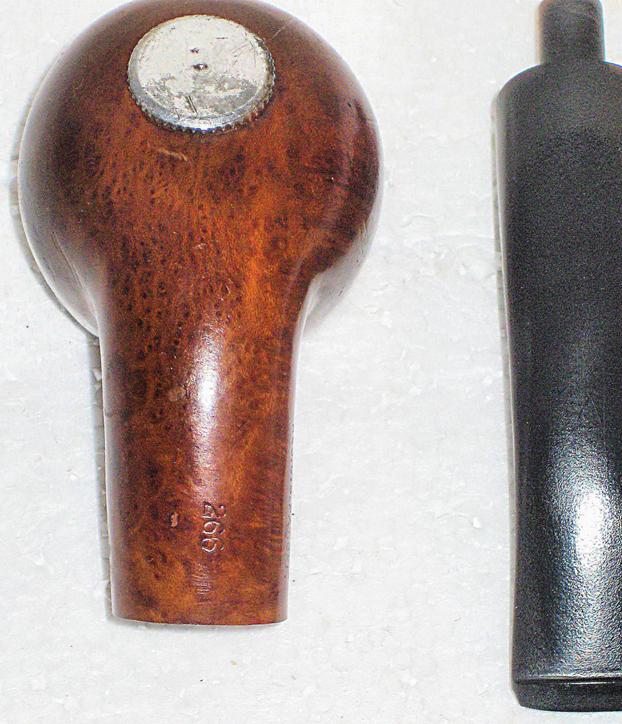
 That information was helpful on many levels. He did not however have any photos or drawings of the pipe or pictures of the advertisements. I wanted to know if the bottom “sump” as he called it was pressure fit or threaded and screwed into the briar. I wanted to know if the bottom of the bowl was damaged or if the “sump” sat as it was supposed to flush with the bottom. It was hard to tell from the photos. I wanted to know was the “wads” were that sat in the sump. From the look of the bowl bottom it appeared that the “wads” may well have been lozenges that fit in the curved cup and then sat flat in the bottom of the bowl. But what did they look like? More research would be needed to answer these questions. But at least the mystery of the knurled edge peaking from the first photo was solved. It was a single unit with a cup on the inside of the bowl. I could not wait to see this in person and “fiddle” with it.
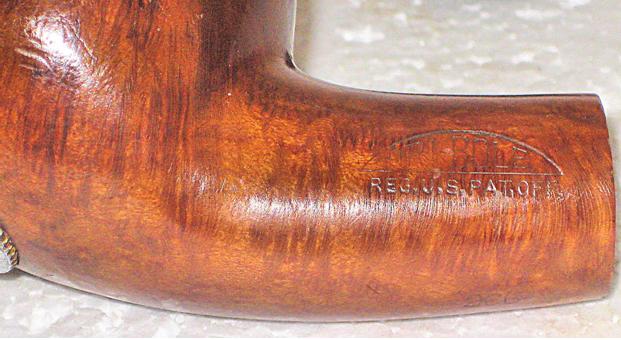 He gave the dimensions of the pipe as follows: overall length: 5 ½ inches, bowl height: 1 ½ inches, diameter of the bowl: 1 5/8 inches, bore diameter: 7/8 inches, bore depth: 1 1/8 inches and the weight: 44 grams or 1.6 ounces
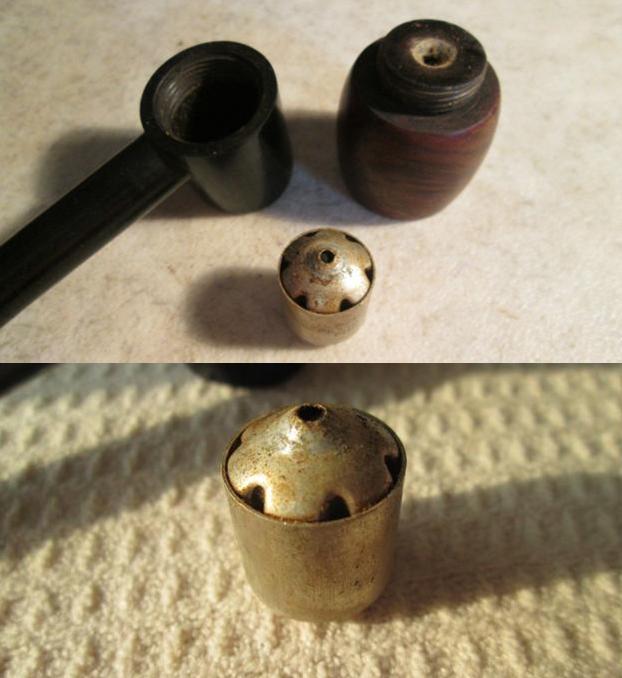
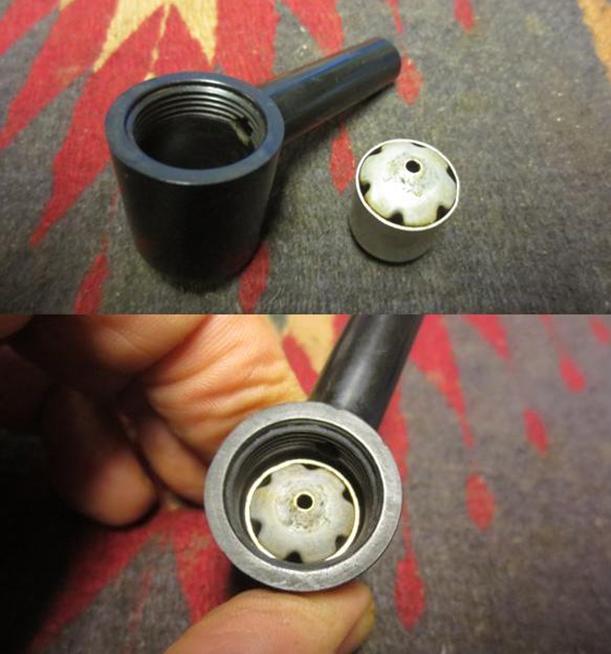
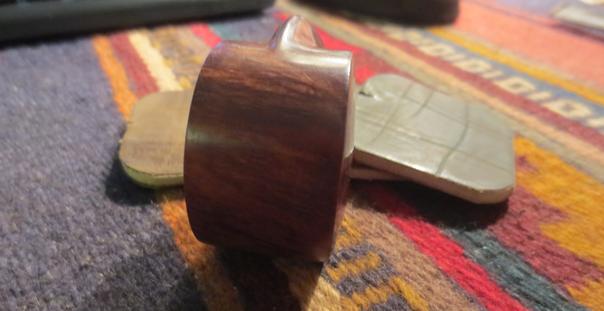
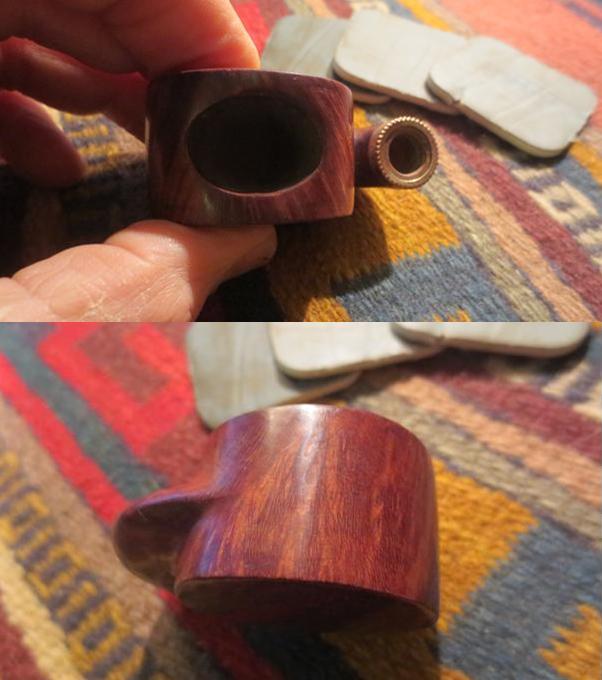
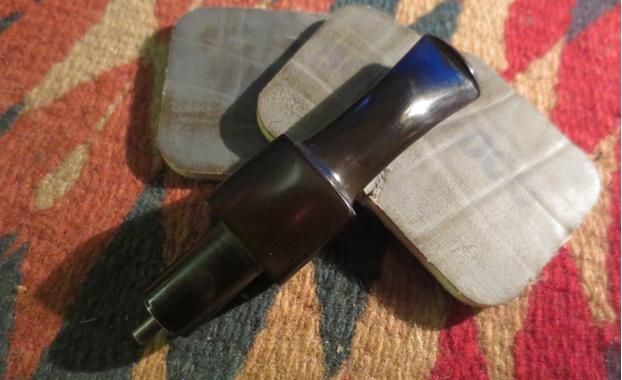
 I took it out of the alcohol bath and heated the disk with the flame of a lighter. I used a pair of pliers to hold tightly to the edge of the disk and I was able to twist it out of the bowl. Once it popped free I could undo it by hand. The first photo below shows the inside of the silver disk. The second shows the knurled outside.
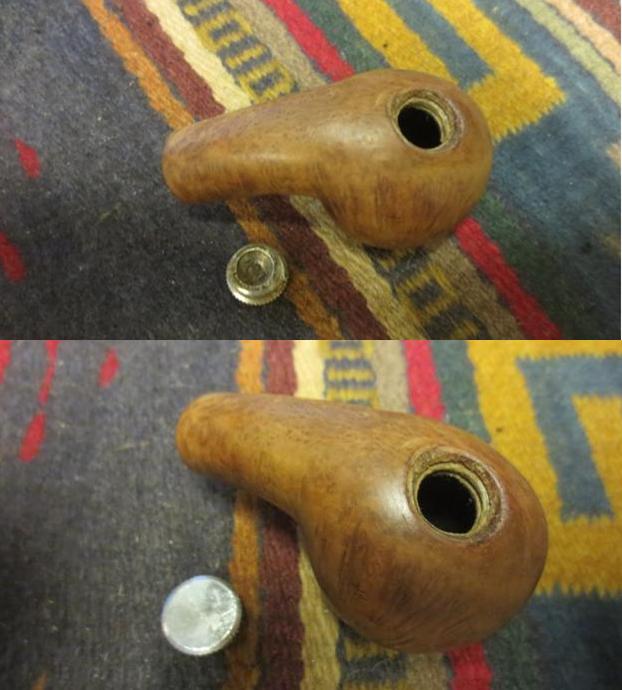 To remove the damage to the rim top and edges I topped the bowl on a topping board with 220 grit sandpaper.
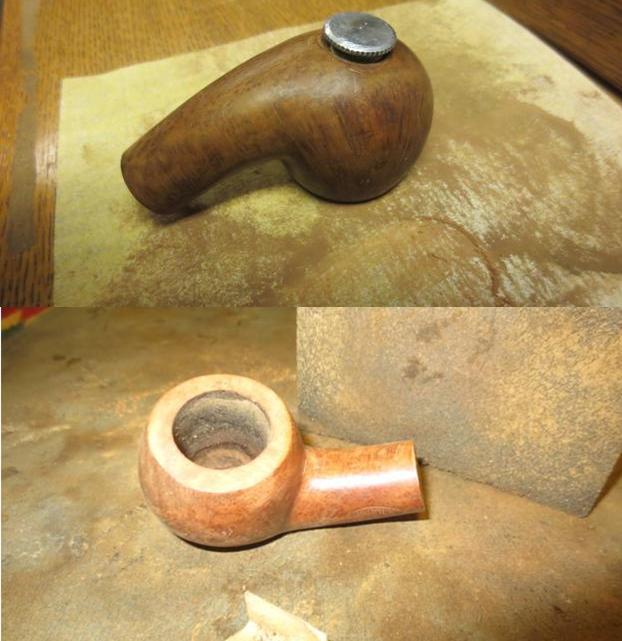 There were some nicks around the hole in the bottom of the bowl so I sanded those smooth with sandpaper and then cleaned out the threads in the briar with a cotton swab and alcohol.
 I used the brass bristle brush to scrub the threads and the cup on the disk. I cleaned it afterwards with cotton swabs and alcohol.
 I used a cotton swab to coat the threads on the disk with Vaseline and turned it into the bottom of the bowl. I wanted to make sure that I could easily turn the disk by hand.
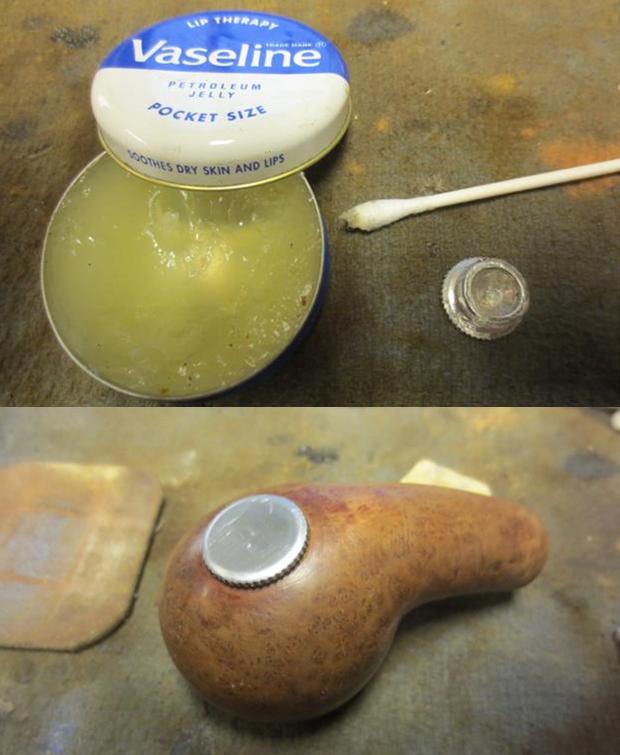 I cleaned out the internals with pipe cleaners, cotton swabs and alcohol. It was pretty clean thanks to my brother. It did not take too many to clean it out.
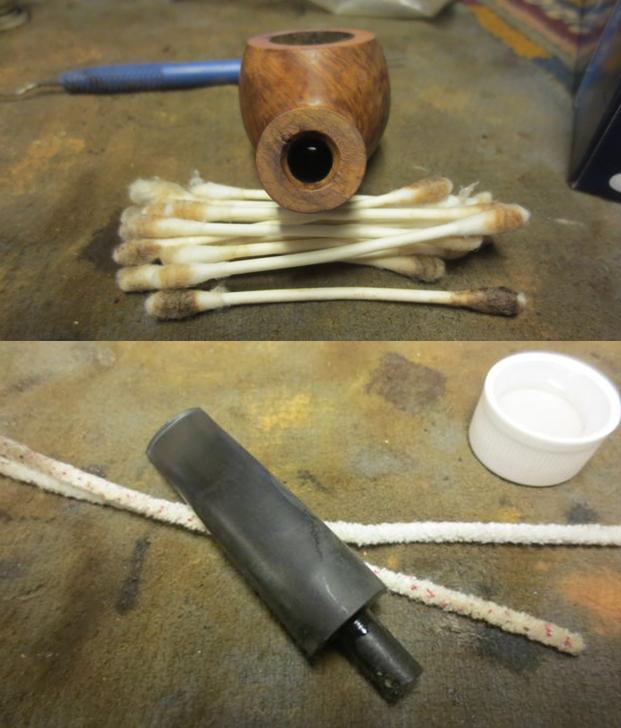 I sanded the bowl and stem with a medium and a fine grit sanding block. The pipe is beginning to look really good. I had to make a decision how far to sand the bowl and how many of the original dings and dents to remove without changing the “story” and character of this old timer.
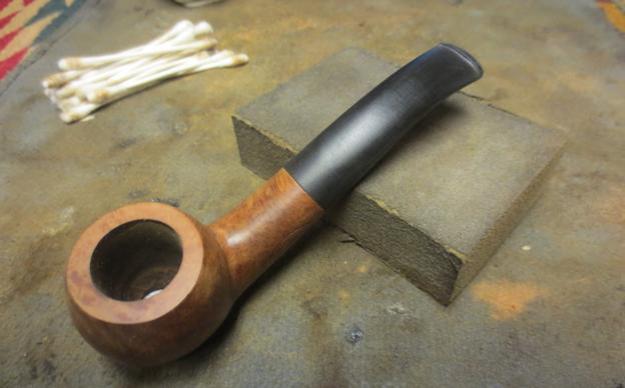 I heated the briar and then stained it with dark brown aniline stain cut by 50% with isopropyl alcohol. I flamed it to set the stain and repeated the process.
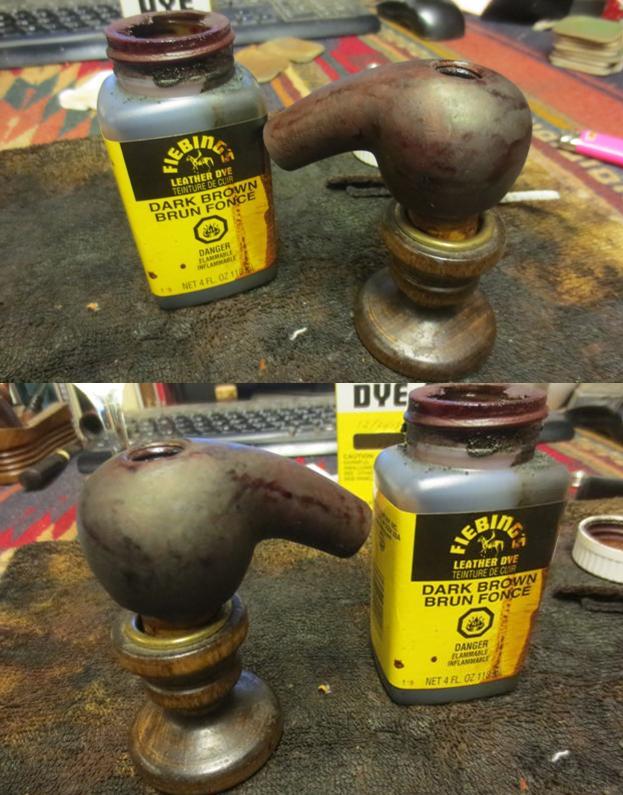 I wiped down the stain with alcohol dampened cotton pads to make it more transparent and make the grain stand out. At this point the fills stood out and I would need to address them a bit differently.
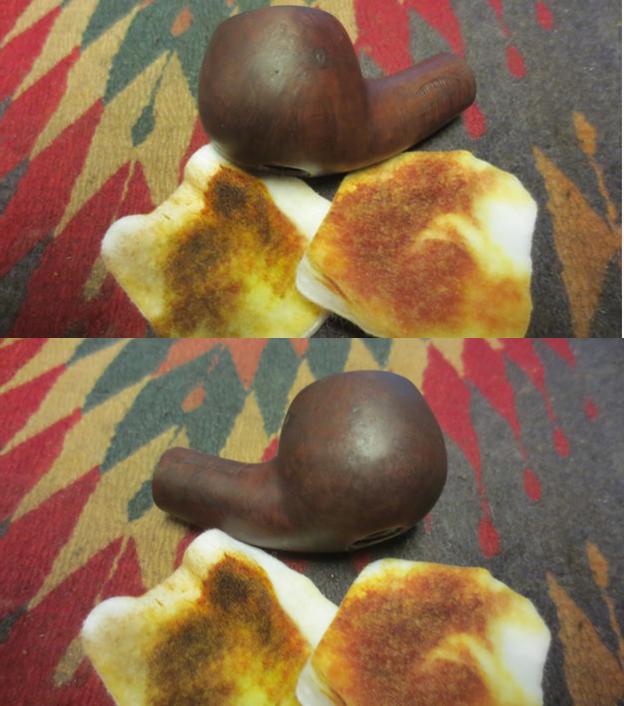
 I used a black Sharpie Permanent Marker to draw some lines across the fills and blend them into the grain on the pipe. I then chose to give the bowl a second contrast staining using a Cherry Danish Oil stain. I find that the combination of the black marker and the cherry stain blends the fills better than a brown stain. The combination of the brown and the cherry stains gives depth to the finish so I like using them together.
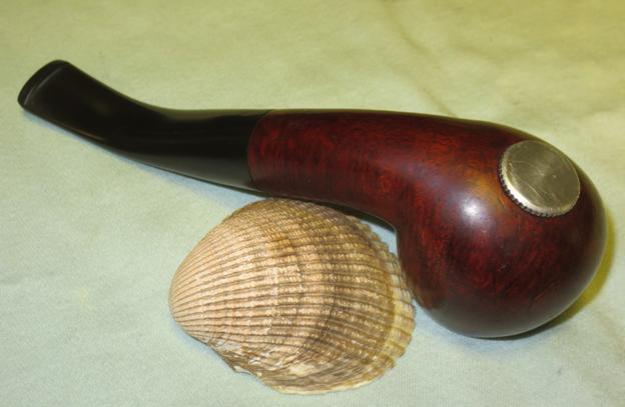
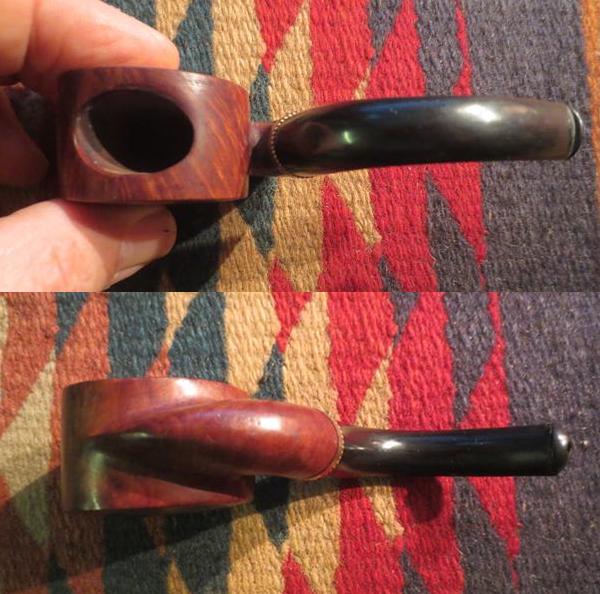
 Once the cherry Danish Oil stain dried (overnight) I buffed it lightly on the wheel with Blue Diamond and then gave the bowl a coat of carnauba wax. I hand buffed it with a microfibre cloth. You can see the small dings that I left in the bowl sides rather than change the look. I polished the silver disk with a silver polishing cloth. The next series of photos shows the bowl at this point in the process.
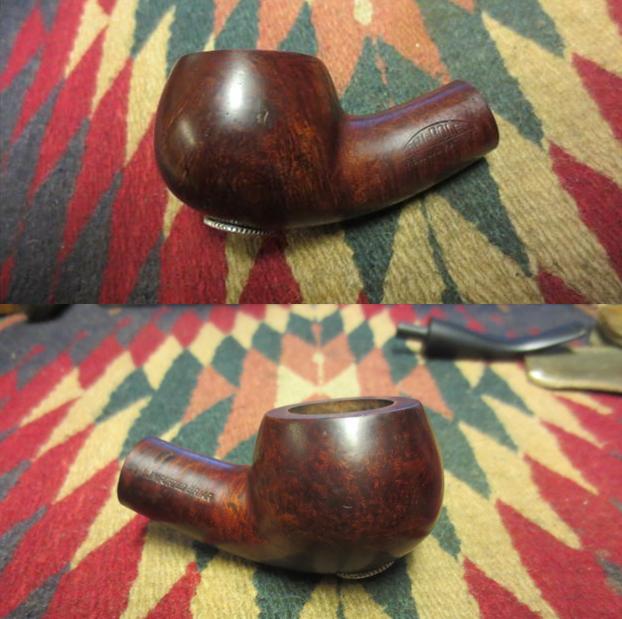
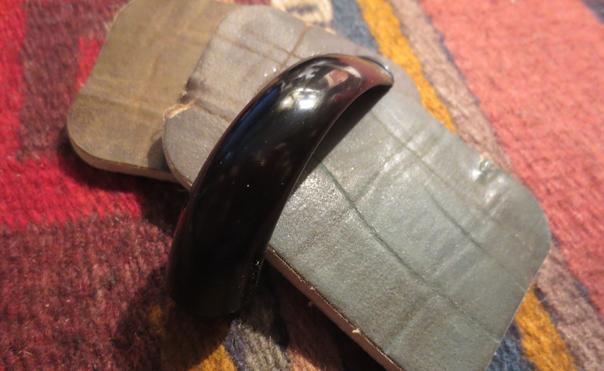
 I set the bowl aside and worked on the stem. The old hard rubber that was used on this stem was good quality. There was very little oxidation if any on it. The main issue was the pitting that covered the surface of the stem. I sanded it with 220 grit sandpaper to address the pitting and smooth out the surface and then began my normal sequence of micromesh sanding pads. Between each set of three grits (1500-2400, 3200-4000, 6000-12000) I rubbed the stem down with Obsidian Oil. I gave it a final coat of the oil and let it dry before I buffed the pipe.
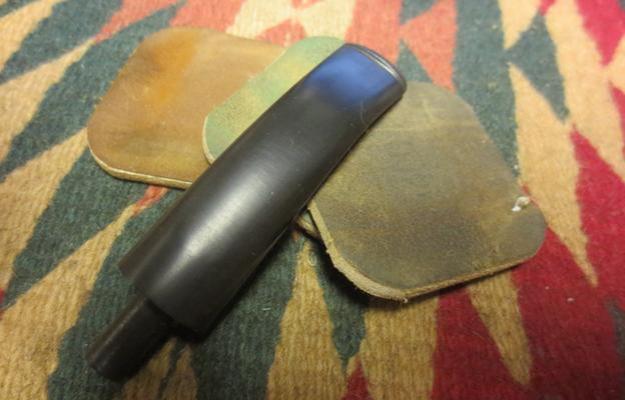
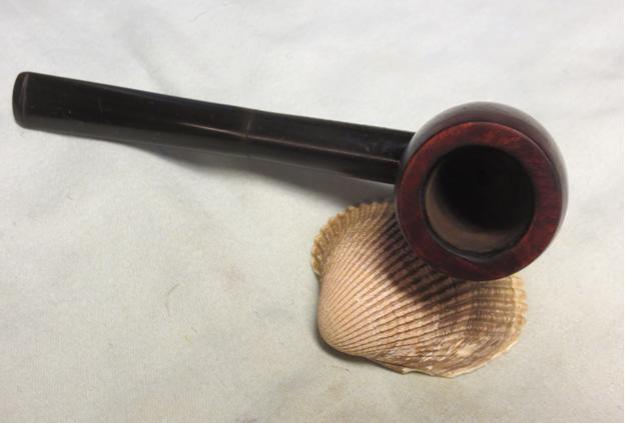
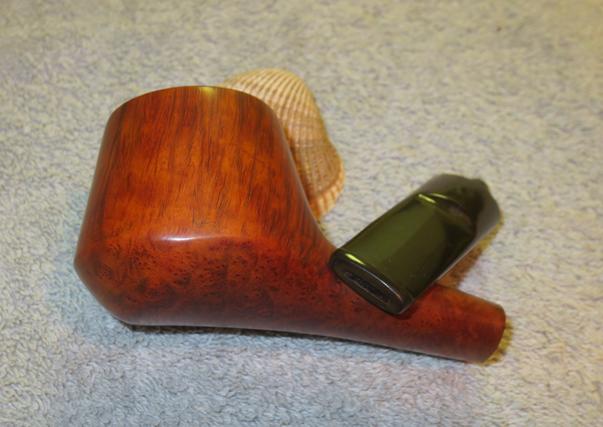
 I buffed the pipe and stem with Blue Diamond and gave it several coats of carnauba wax. I buffed it with a clean buffing pad to raise the shine. I hand buffed it with a microfibre cloth to put the finishing touches on the pipe. The finished pipe is shown in the photos below. Thanks for looking.