Tag Archives: System pipes

Another for the strange but true hunt for a Cooler/Drier Smoker Collection


Blog by Steve Laug

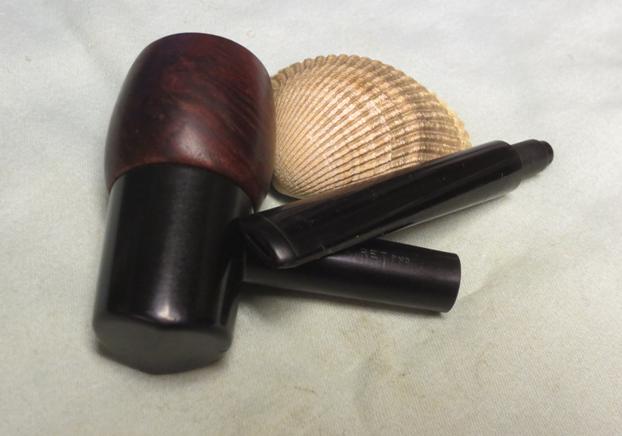
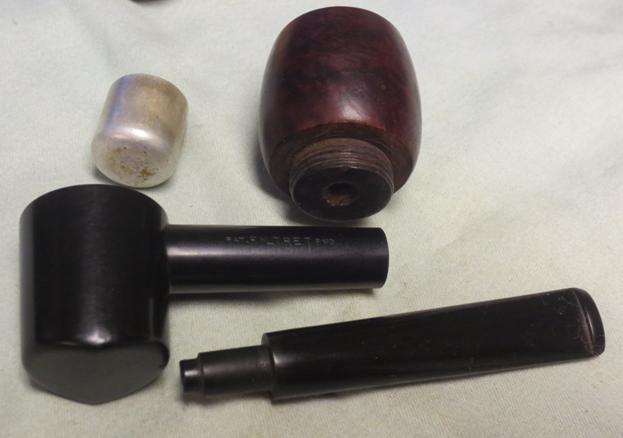
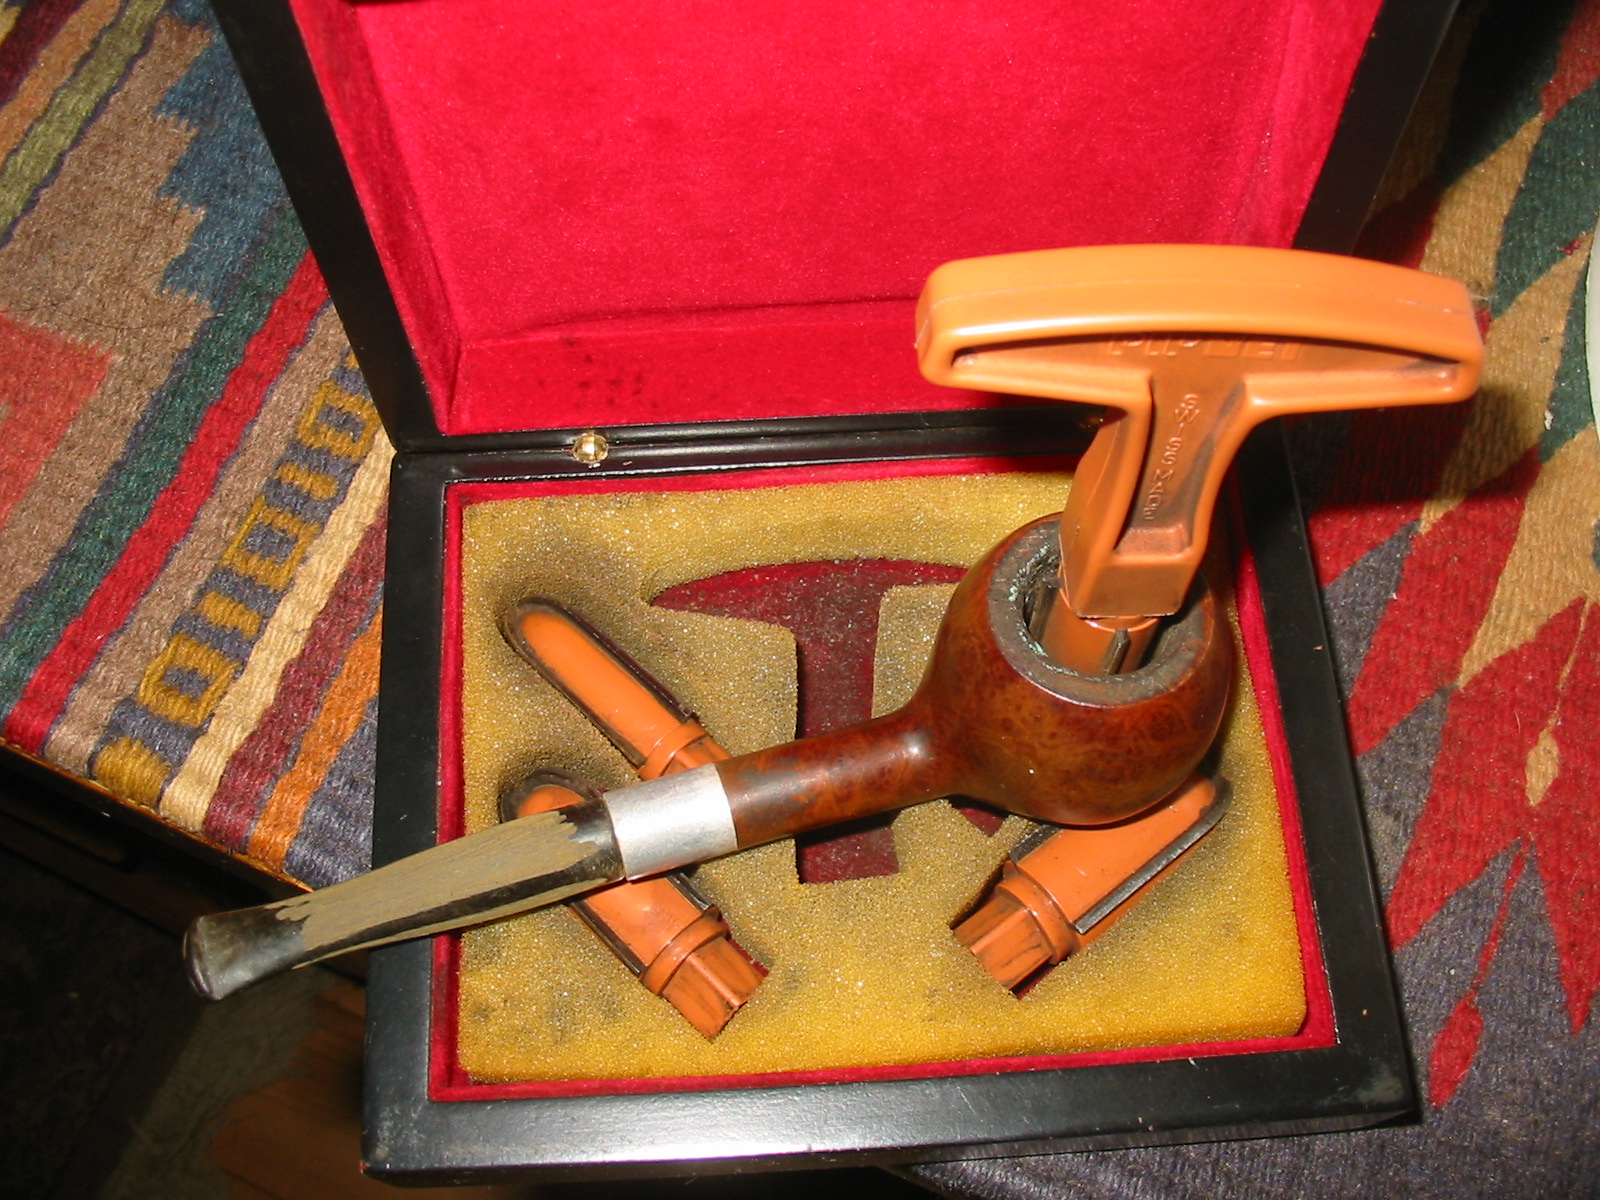
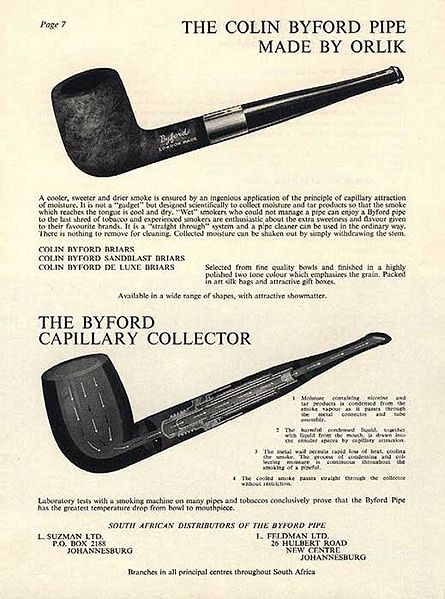
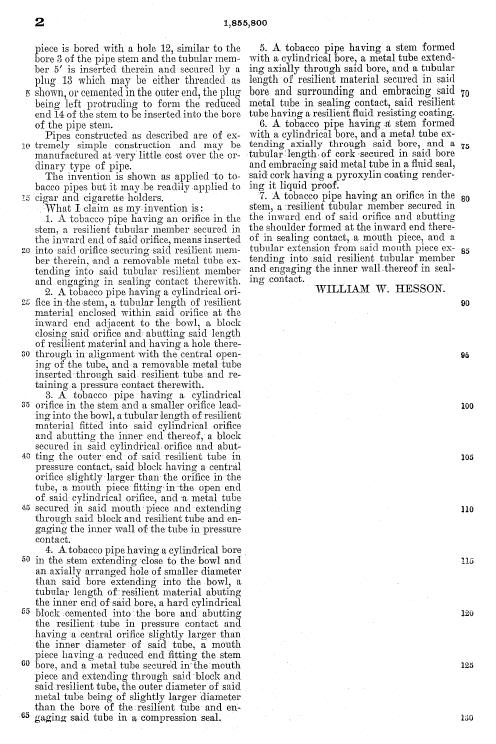
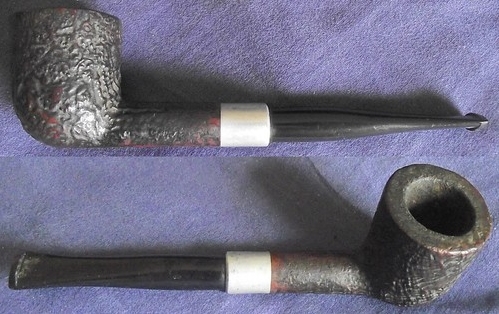
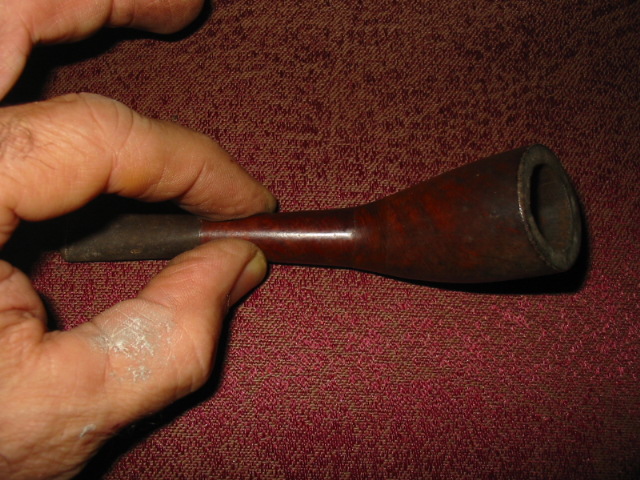
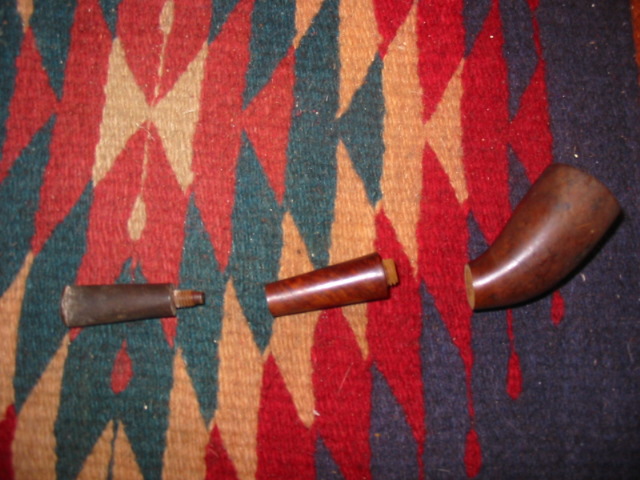
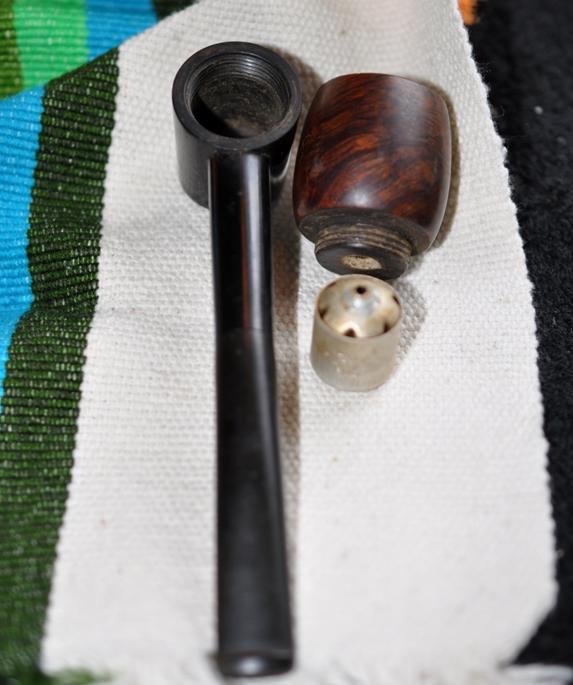
My brother sent me the links to this sale on EBay and I was hooked. It is probably the oddest pipe contraption I have seen in the many pipes that formed the pipeman’s dream of a cooler, drier smoke. There have been many over the years that vied for the oddest looking contraption but to date this one takes the prize. I have a few in my own oddity collection that would give this one a fair run for its money but I think this one is still by far the strangest. The T shaped look of the pipe is one thing but once it taken apart it is even odder. The only normal part of the pipe is the vulcanite stem. The Bakelite shank ends in a dropped down base that is part of the shank. It is as big as the briar bowl on the top.Filt1
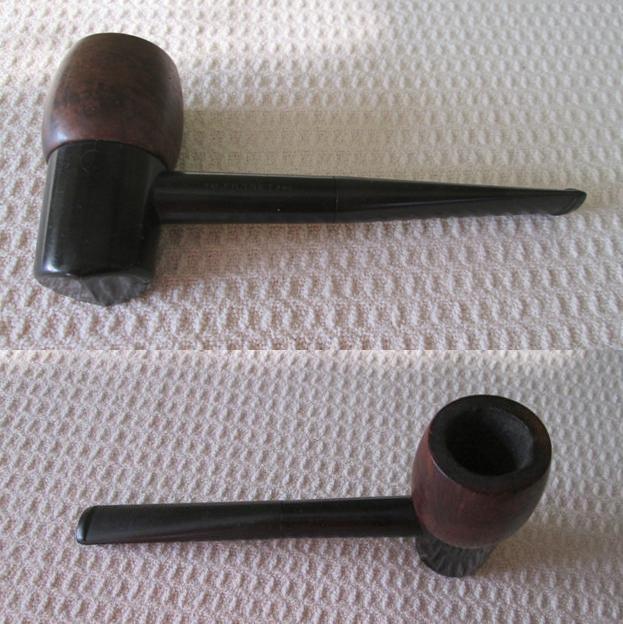
Inside the base is a metal canister contraption that has six wedge shaped holes around the edges and a single hole in the crowned centre. The crowned centre meets the hole in the bottom of the threaded briar bowl which is indented to hold the contraption in place.Filt2
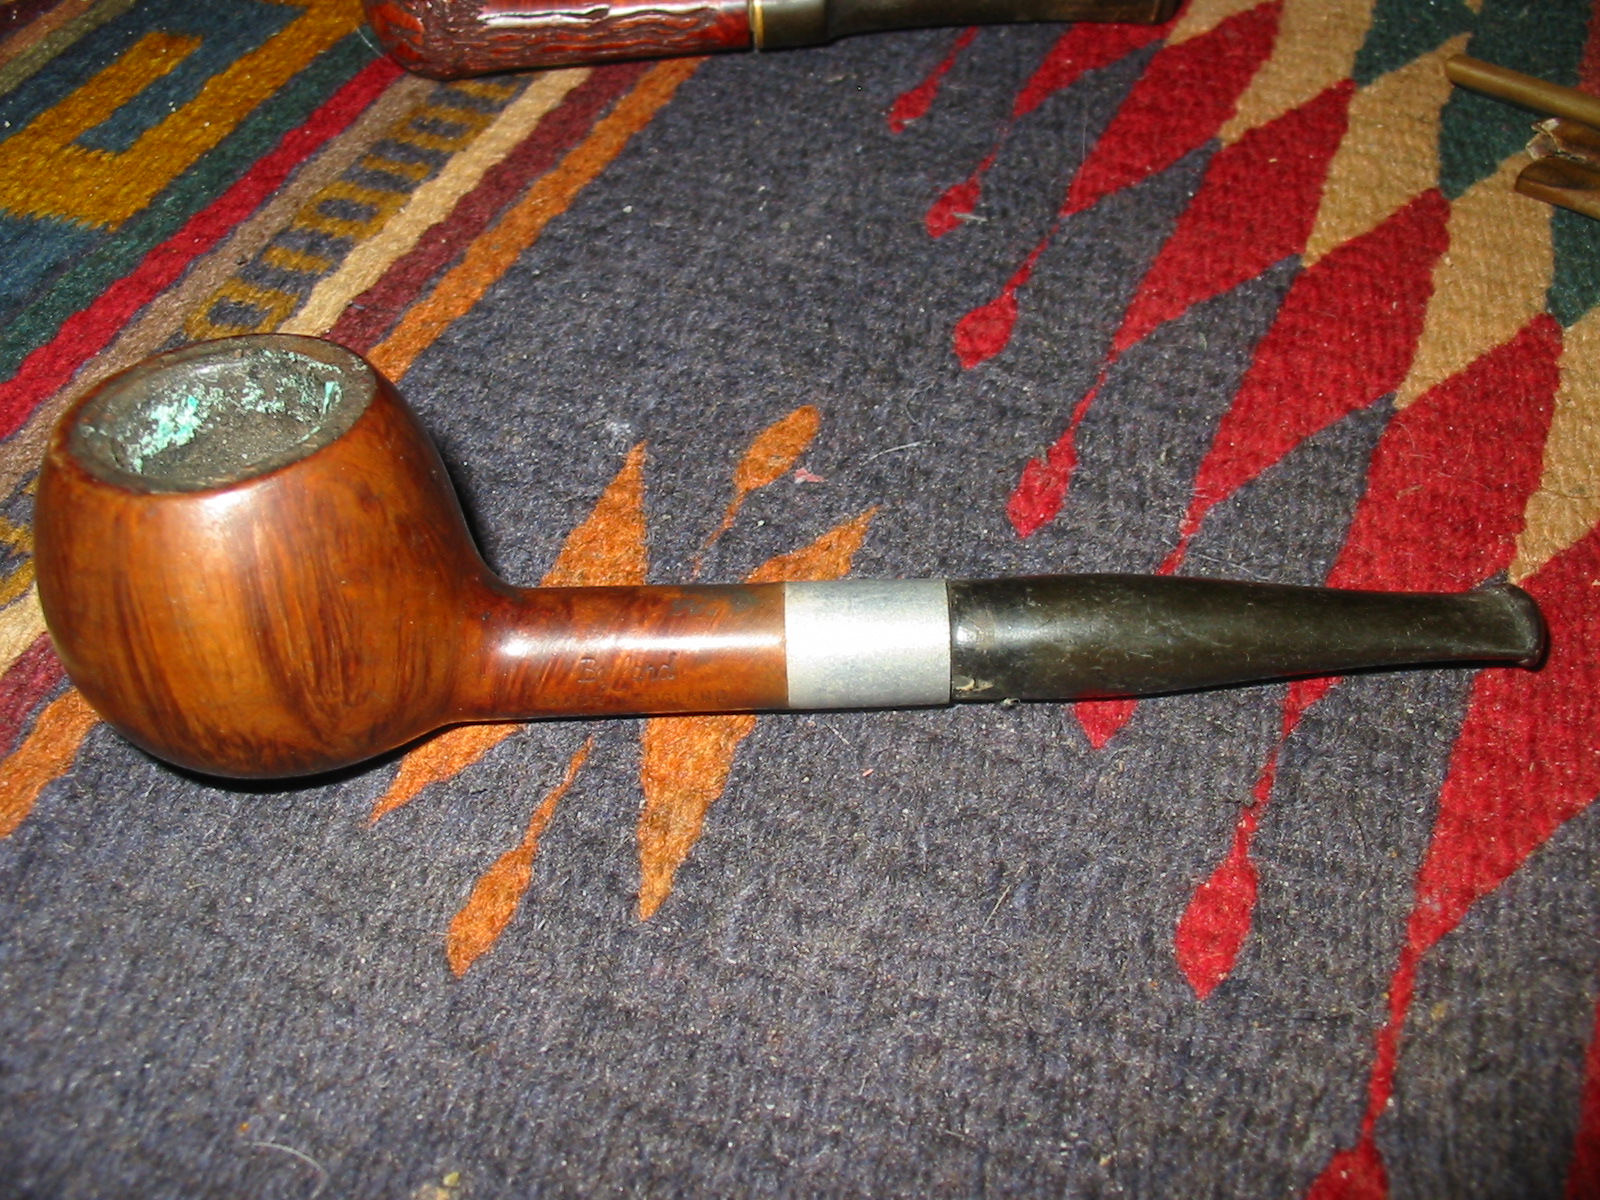
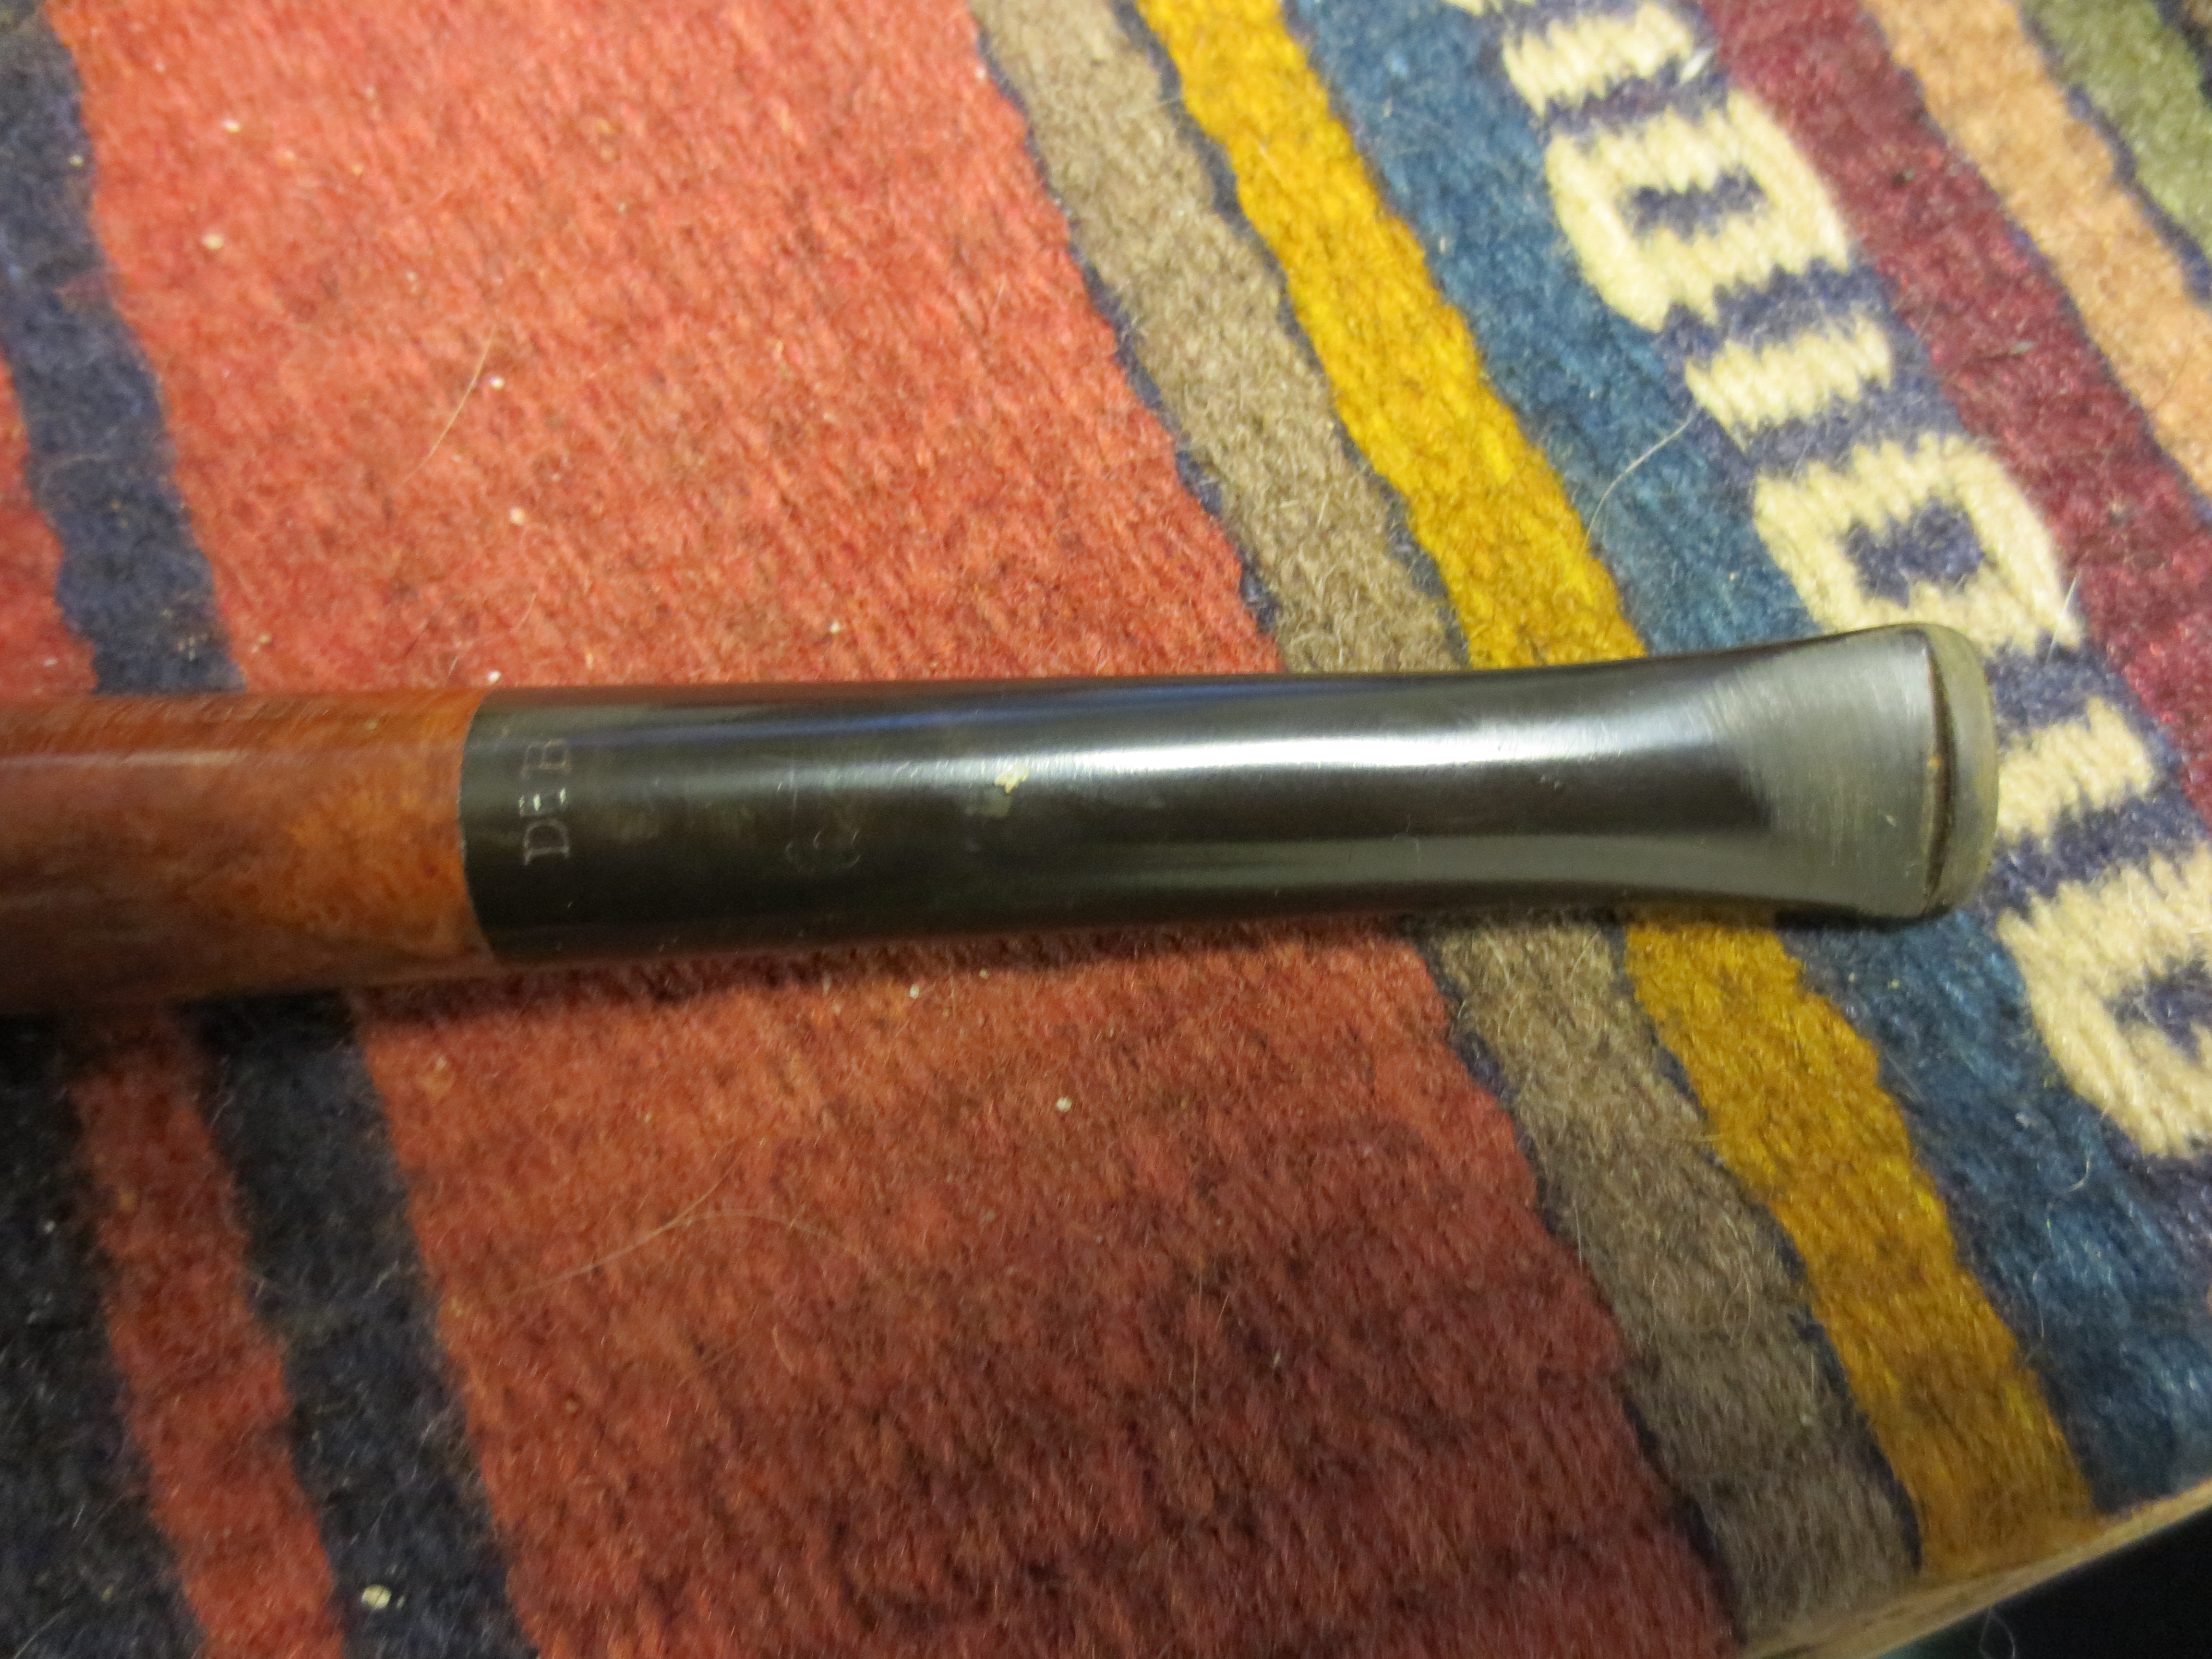
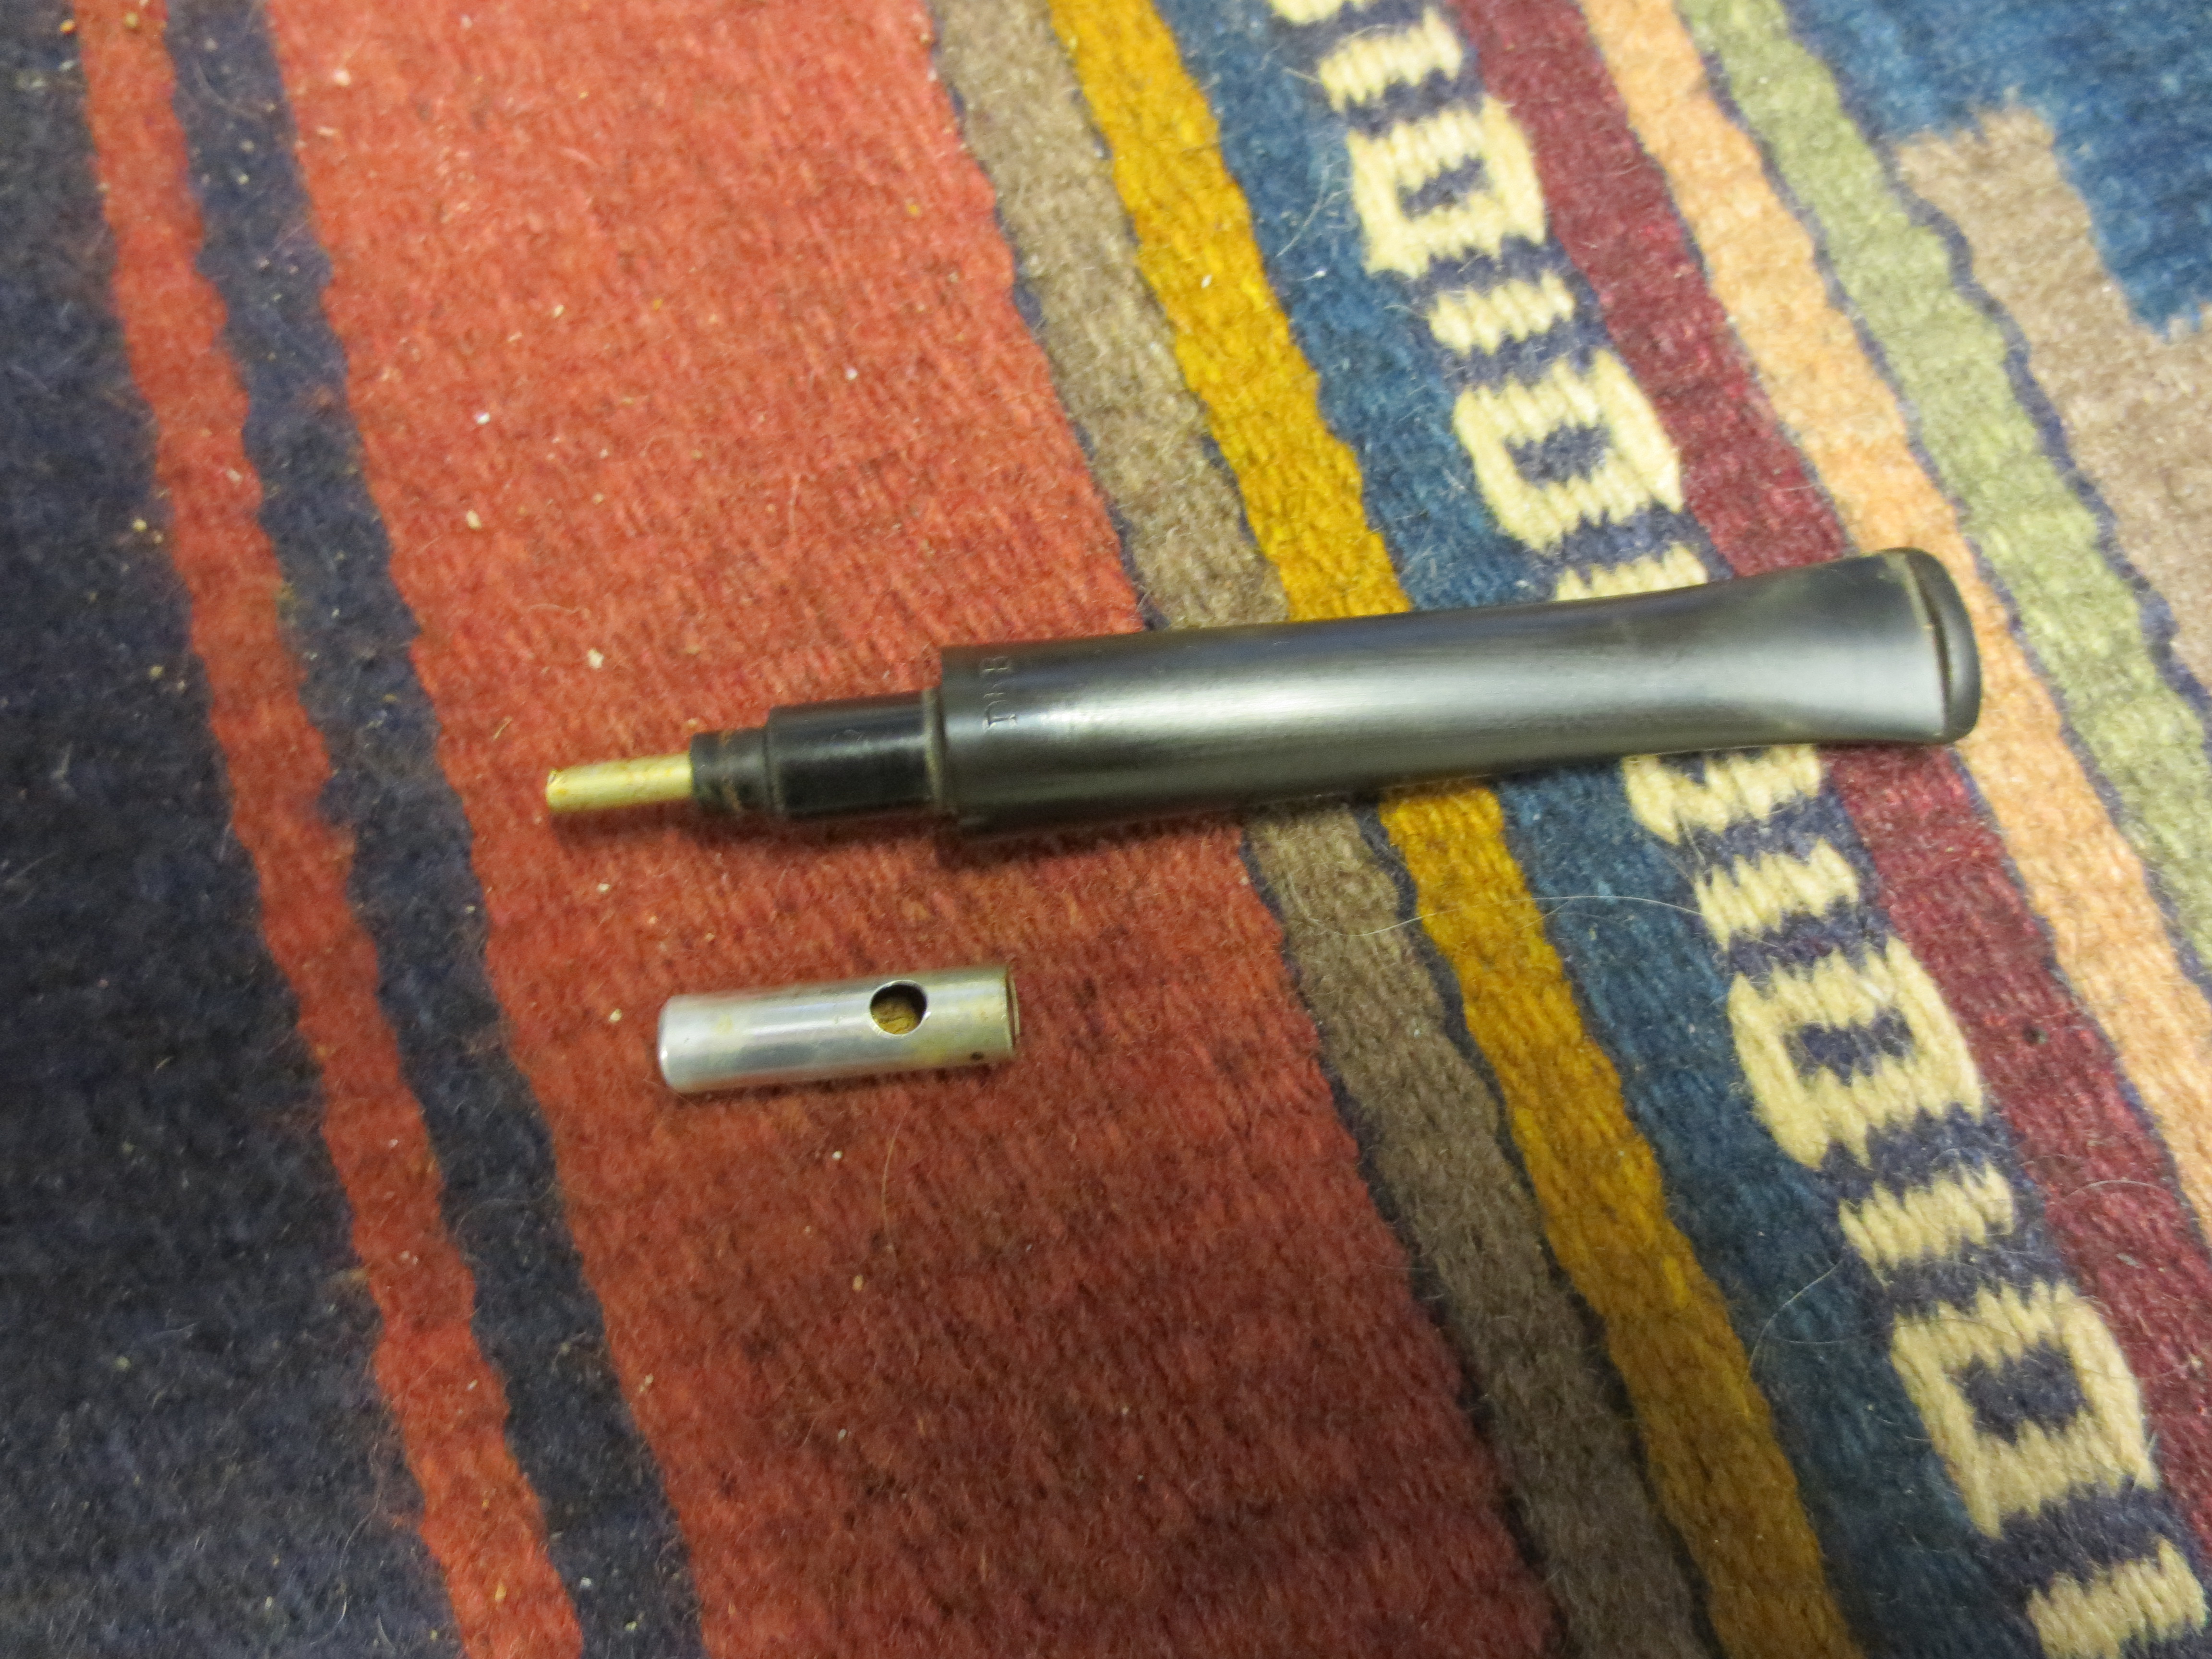
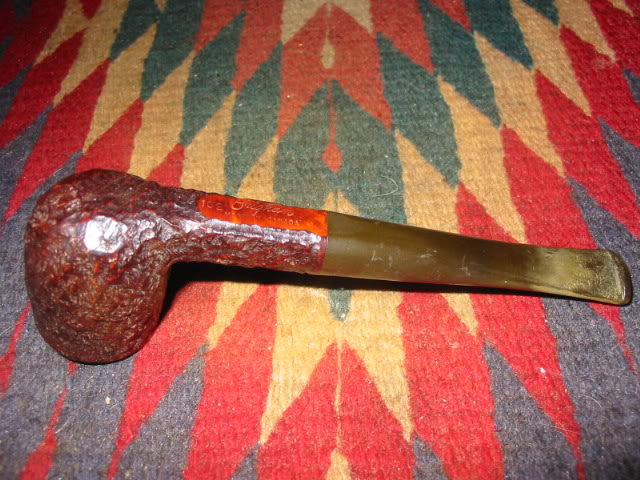
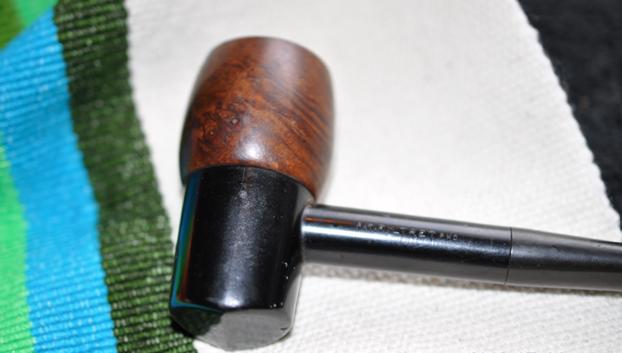
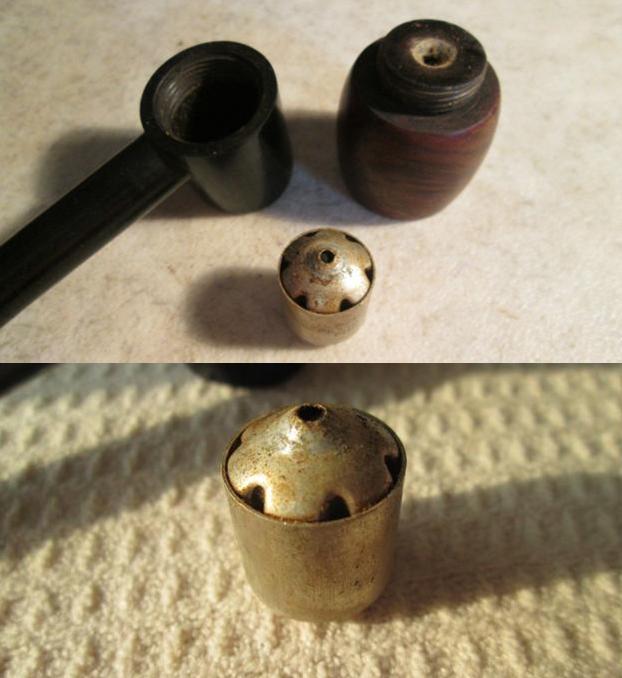
The Bakelite shank on the pipe is the only part of the pipe that bears any identification marking. It reads Filtre T with PAT. to the left of the name and PND. to the right. Thus the stamping is Filtre T Patent Pending. The Bakelite base is quite thick with threads extending into it to hold the bowl in place. The diameter of the opening is ¾ inches and the exterior 1 inch. The length of the base and stem is 5 1/8 inches. With the bowl in place the height is 2 ½ inches tall. The hang down base is 1 ¼ inches. The bowl itself is 1 ¼ inches. The filter canister is stamped with the same stampings as the shank PAT. over FILTRET over PND. and is made of aluminum.Filt3I did some hunting for a Patent on the US Patent site and found a written patent. The pipe seems to have been made by FILTRET Inc. of Seattle, Washington and the patent filed by George E. Baldwin, President on May 5, 1930. I cannot find the attached specimens mentioned in the document but this at least identifies the name and gives me a base date.

Filt43

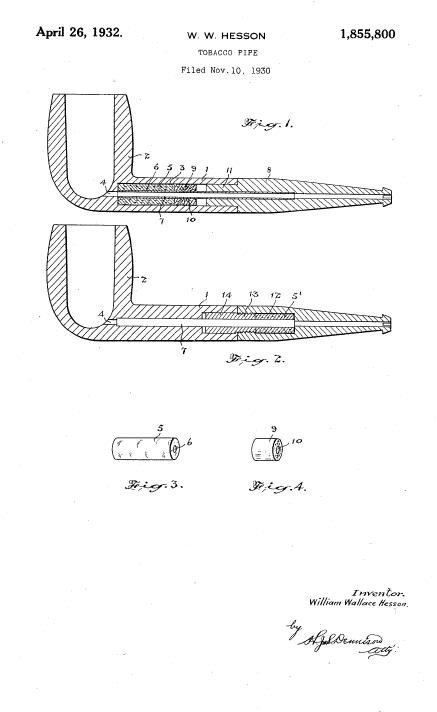
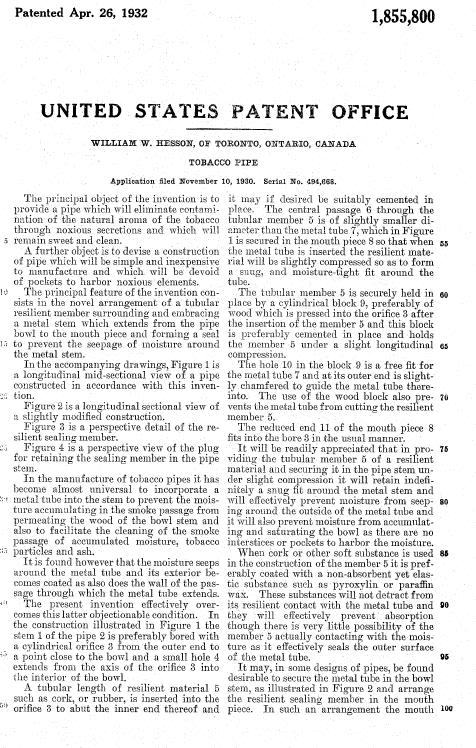
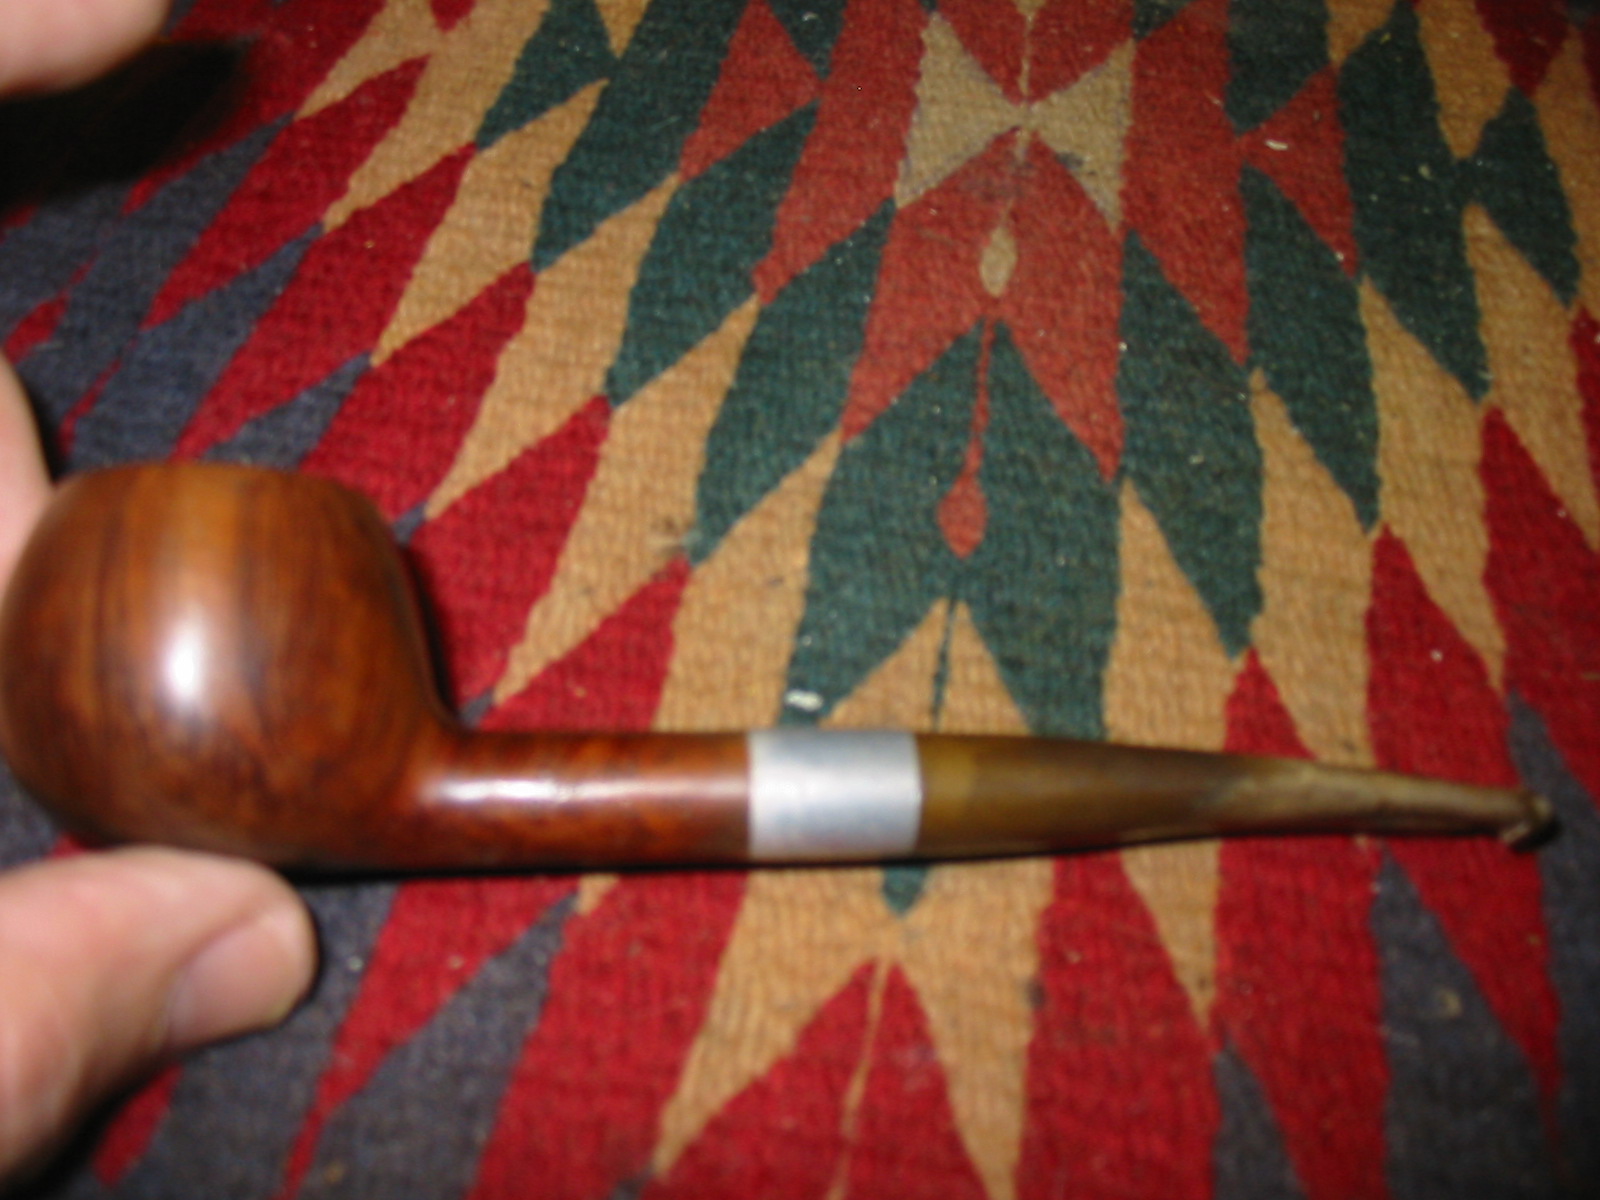
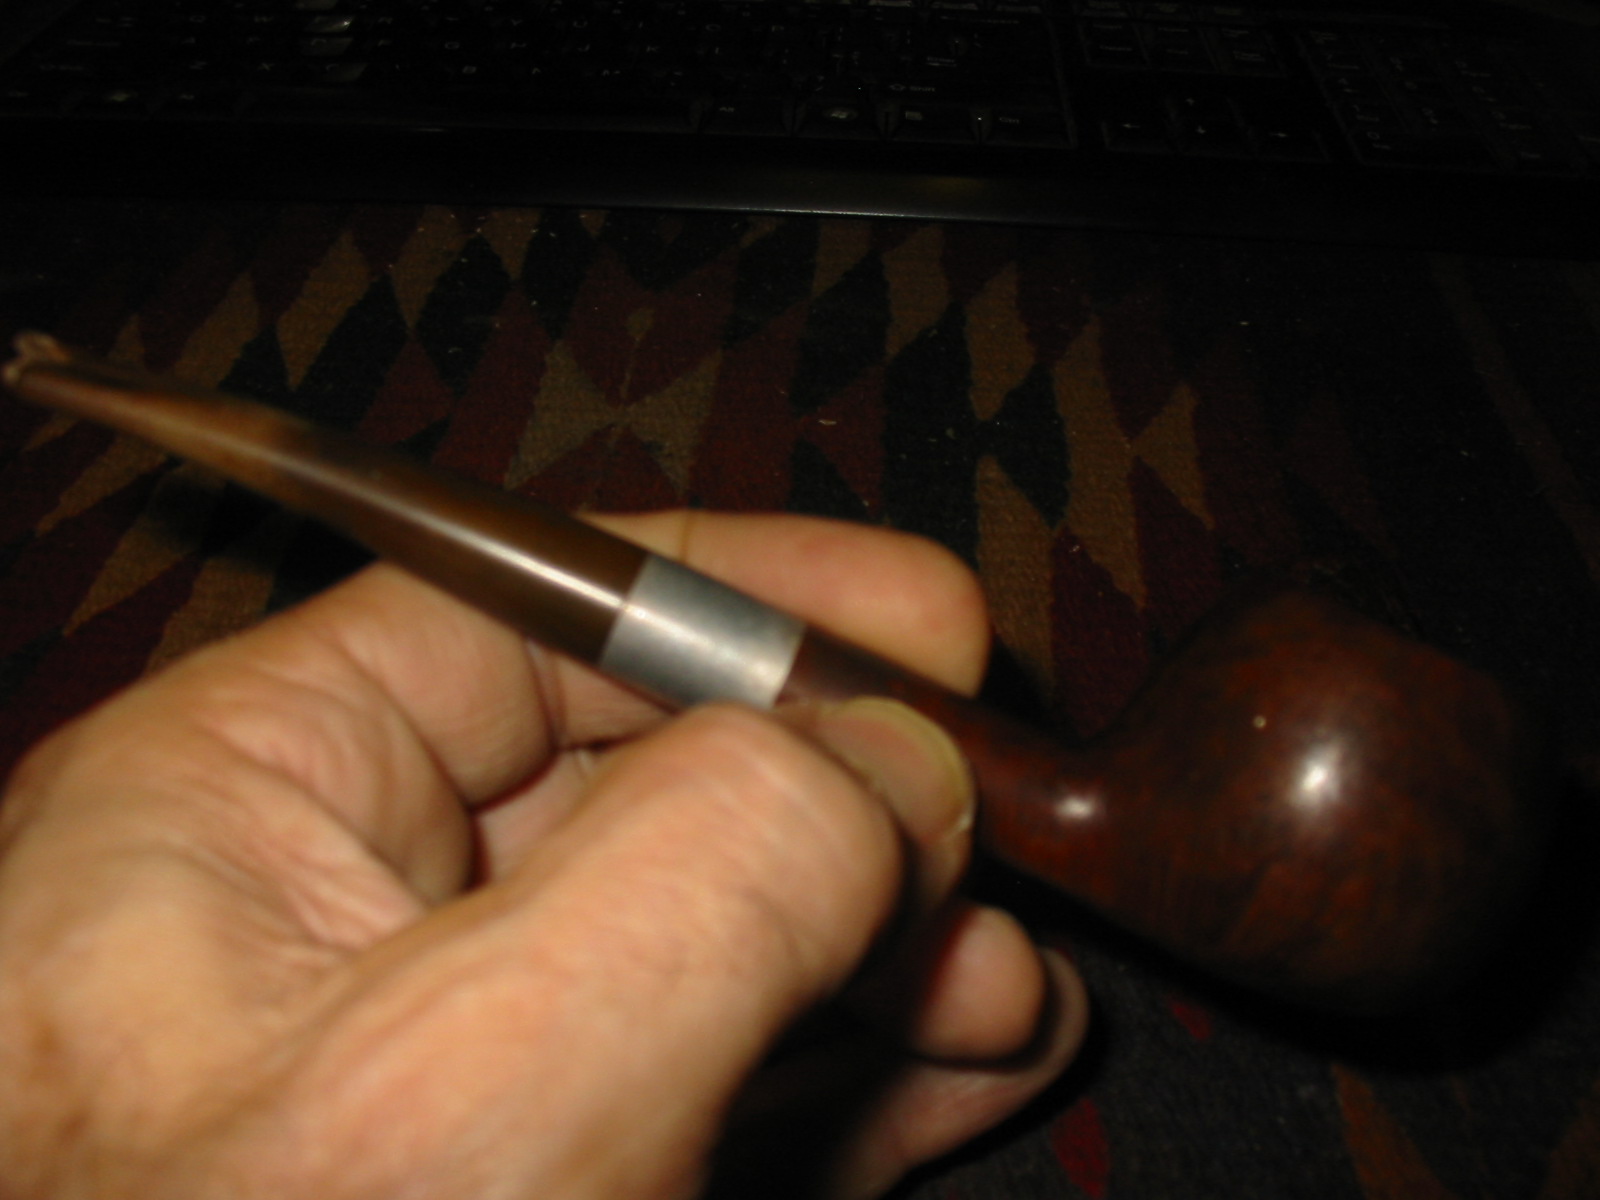
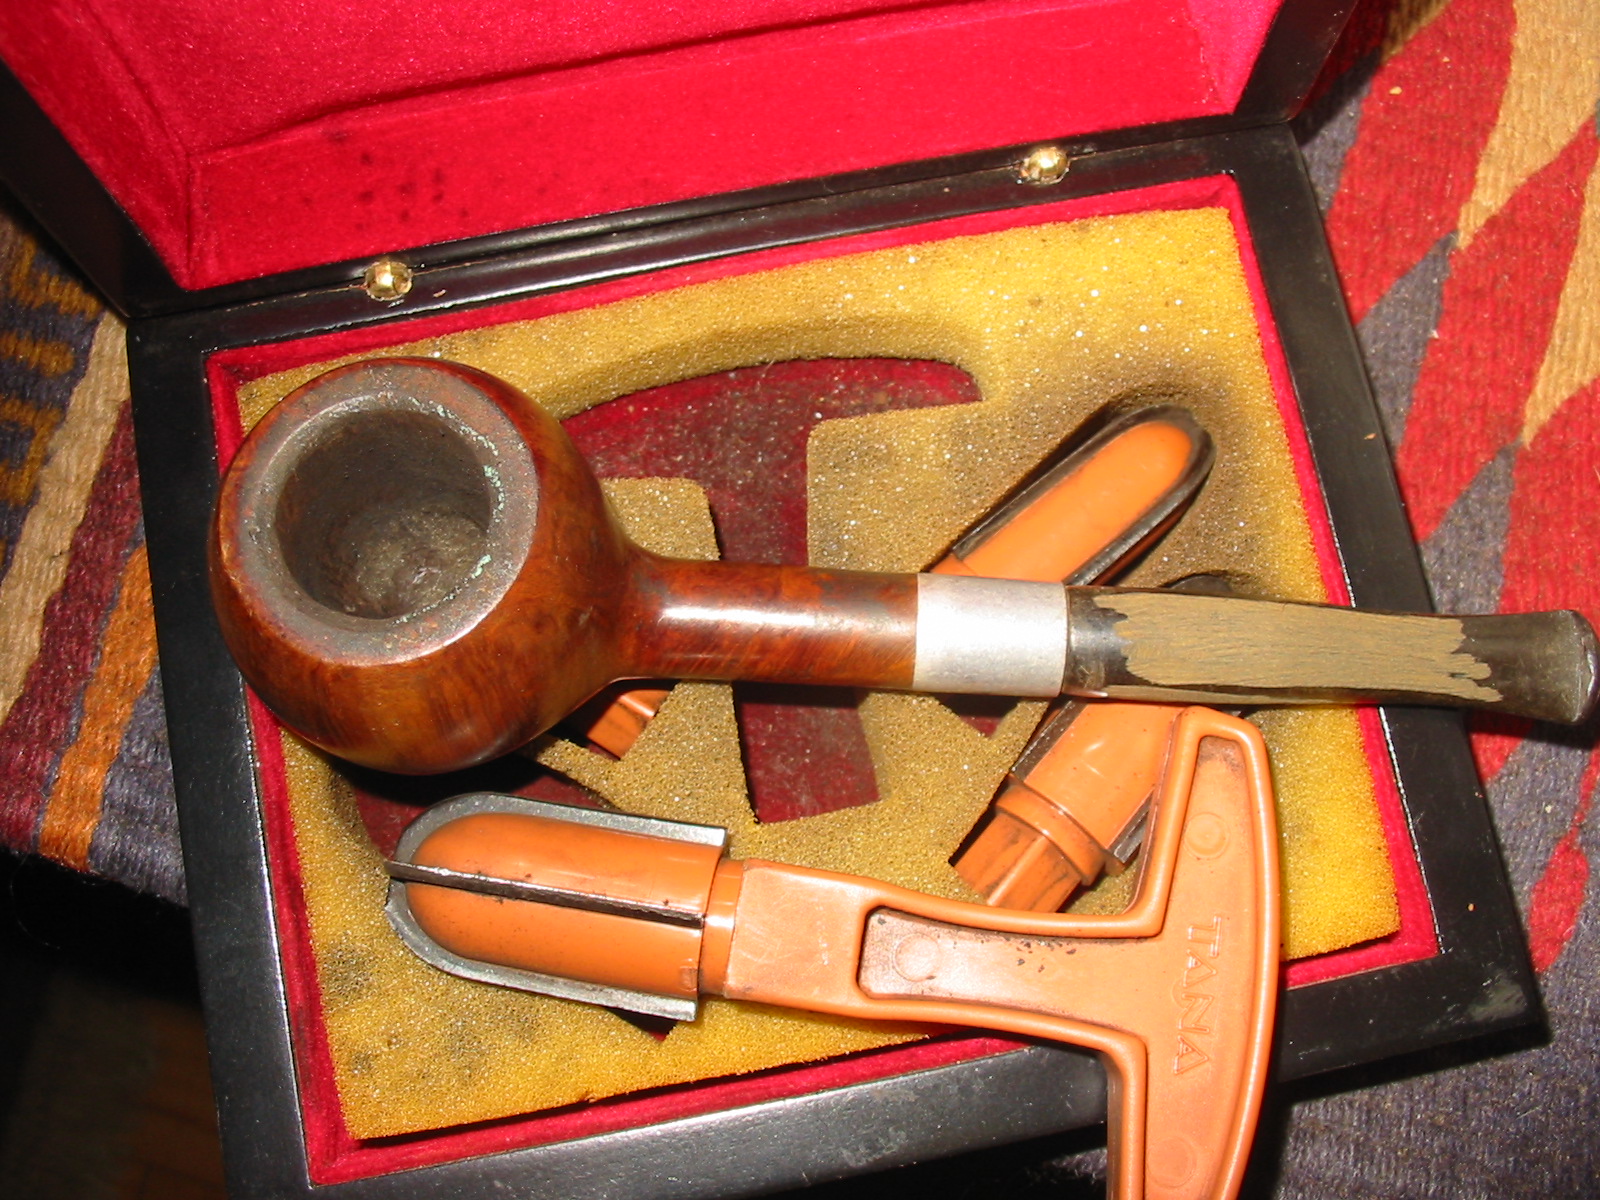
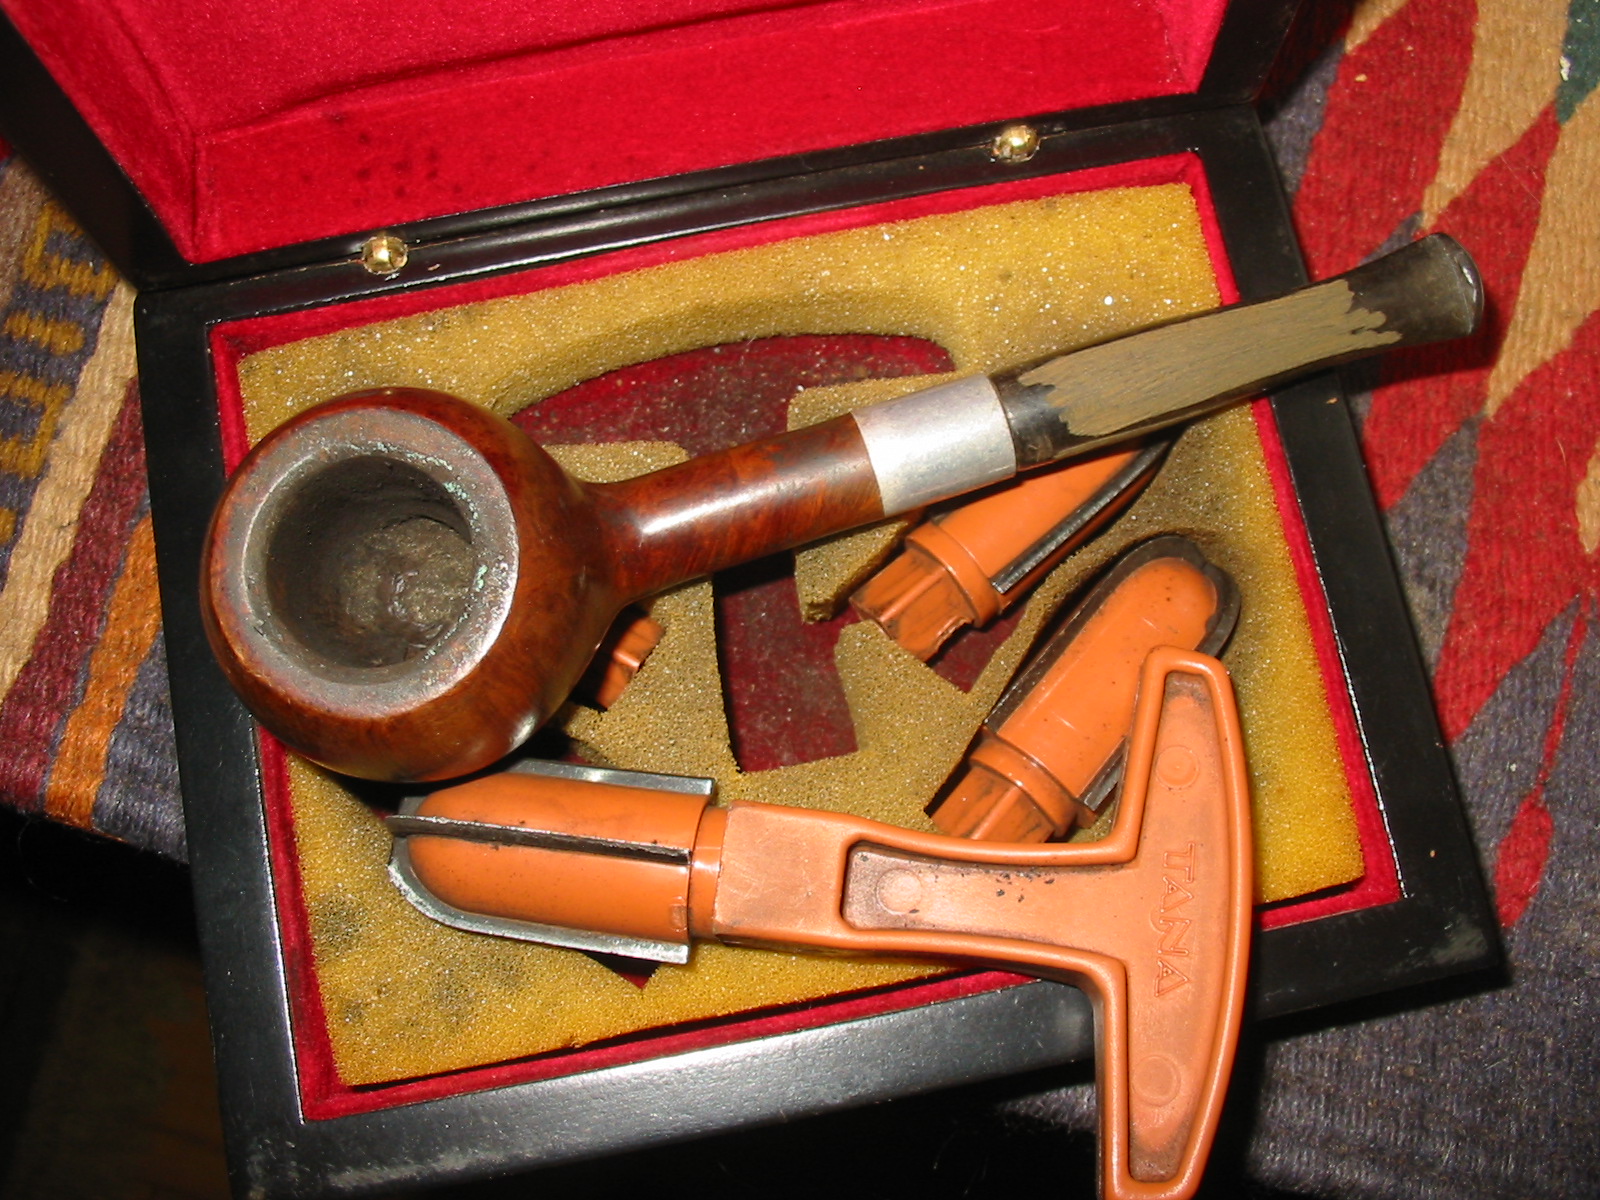
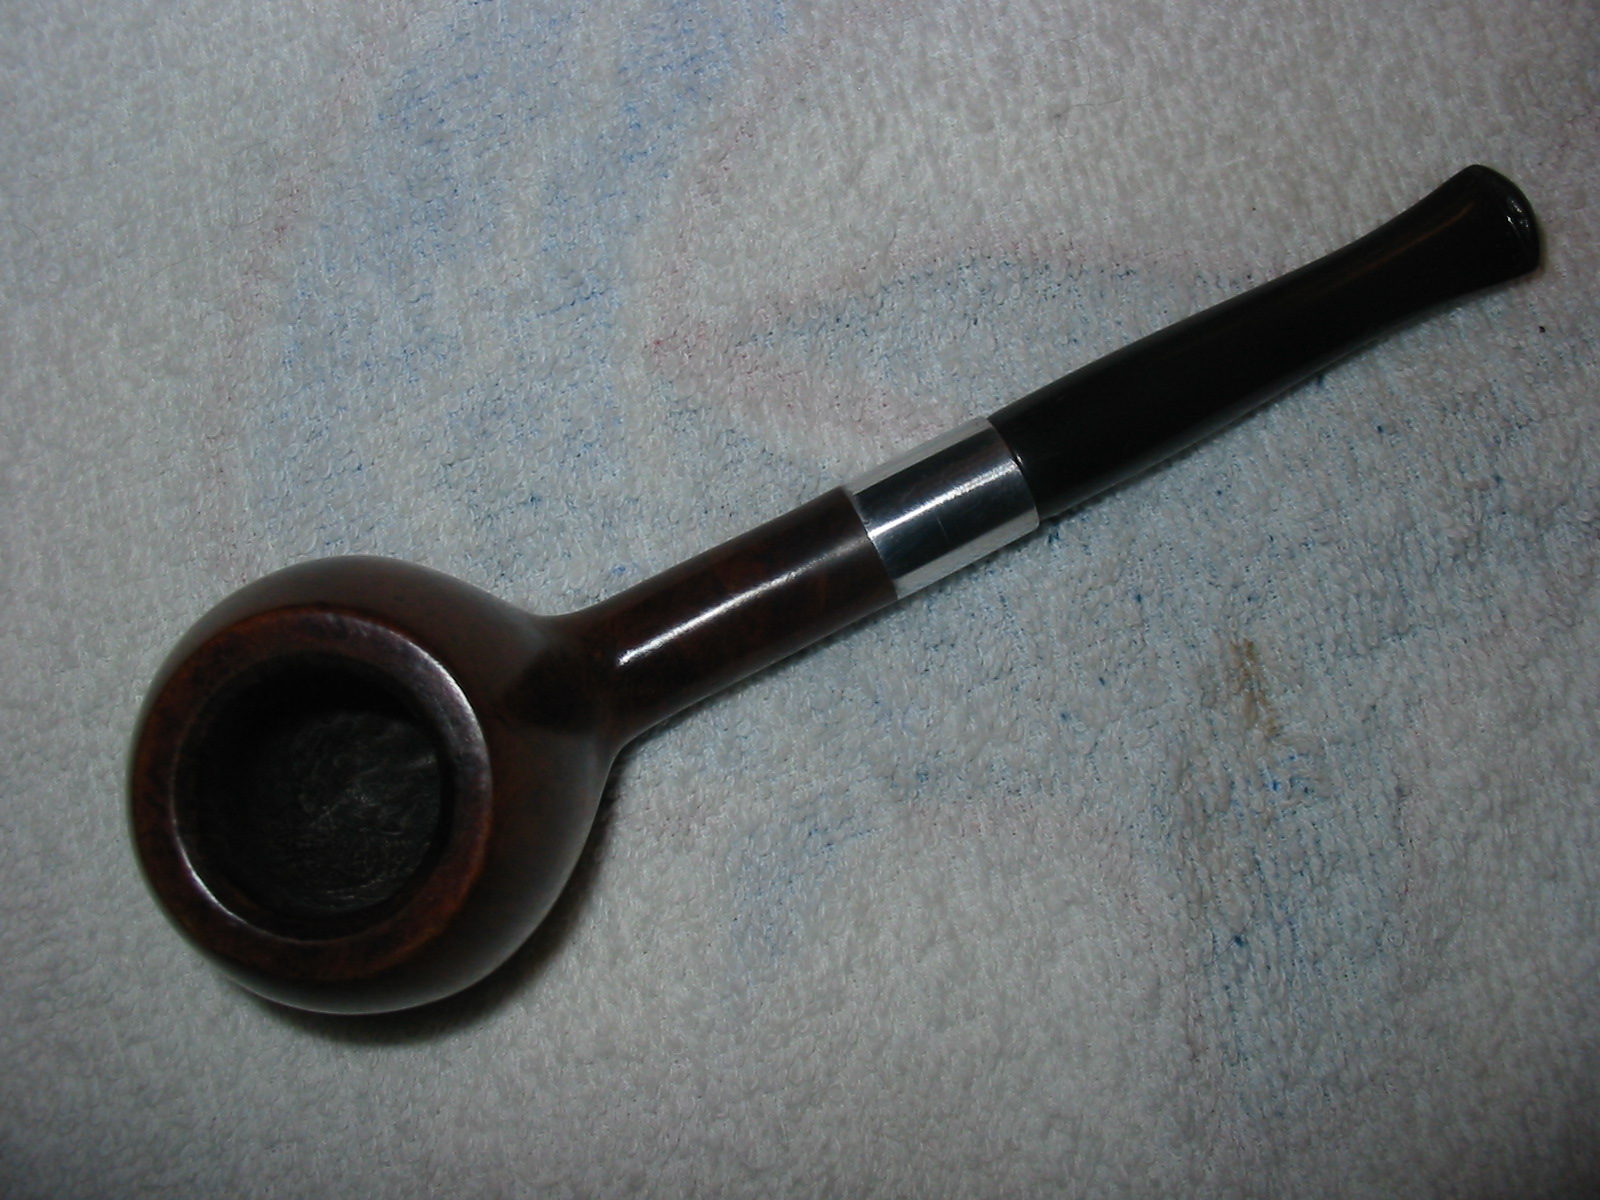
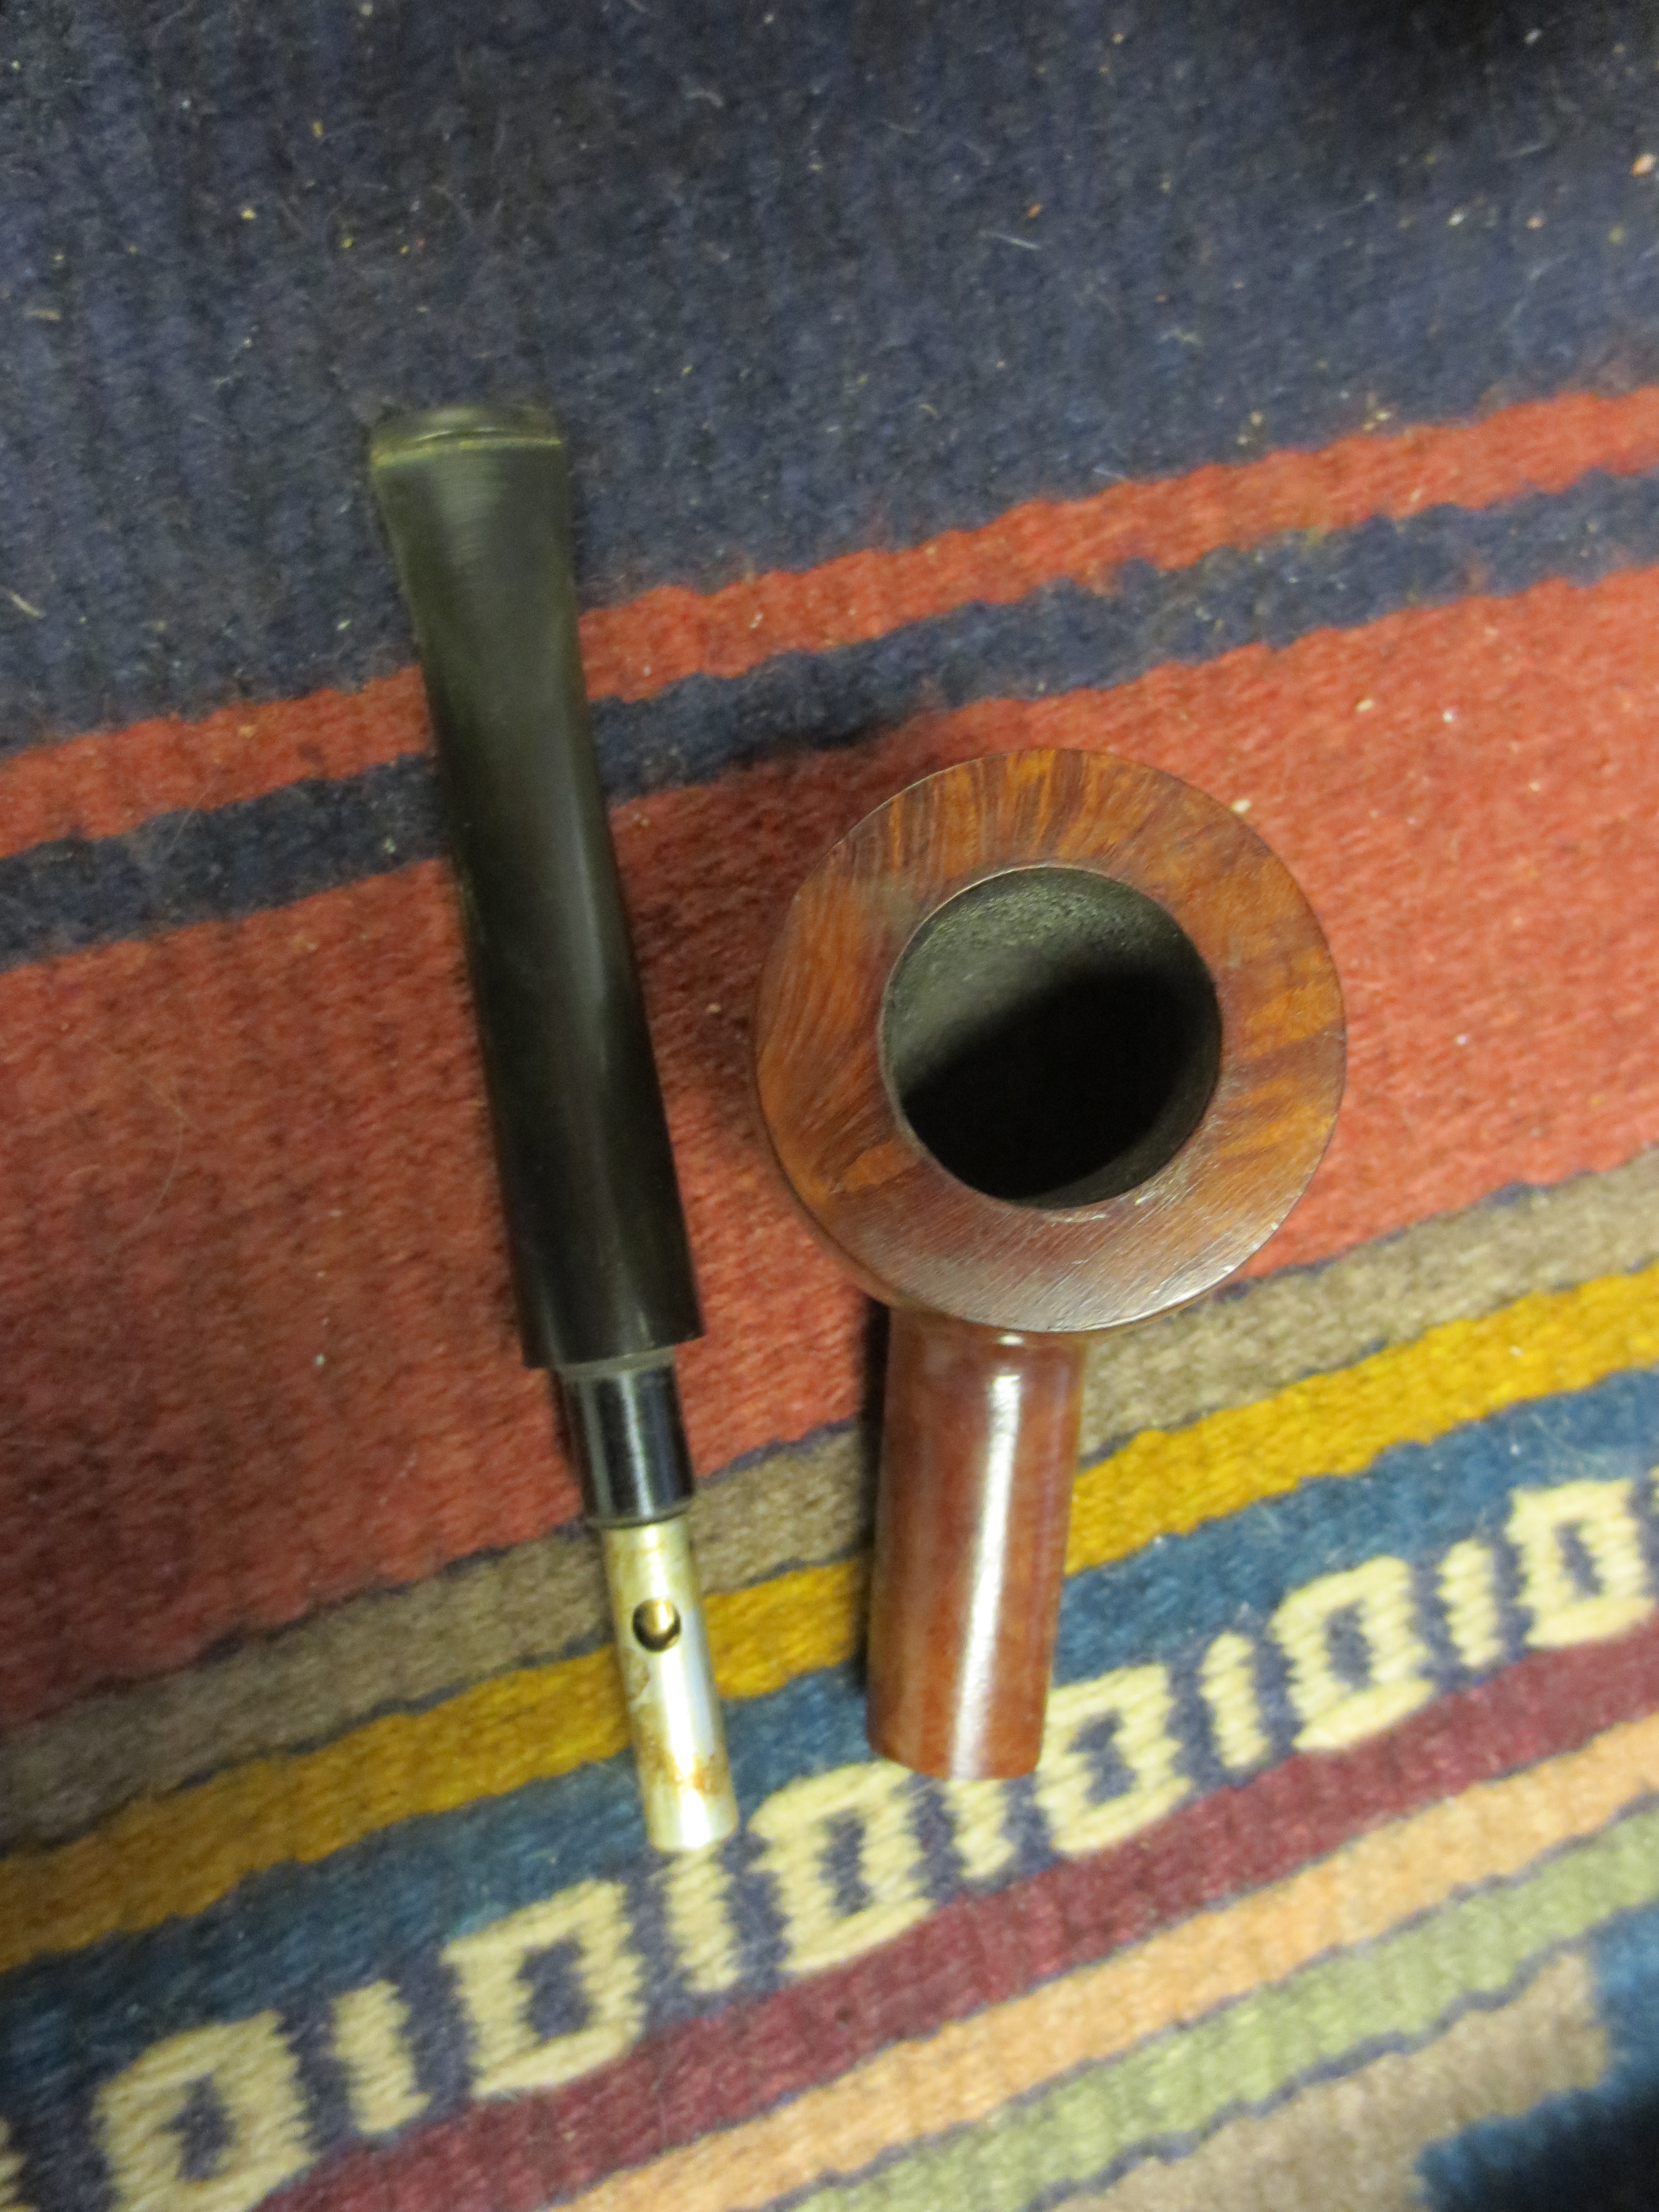
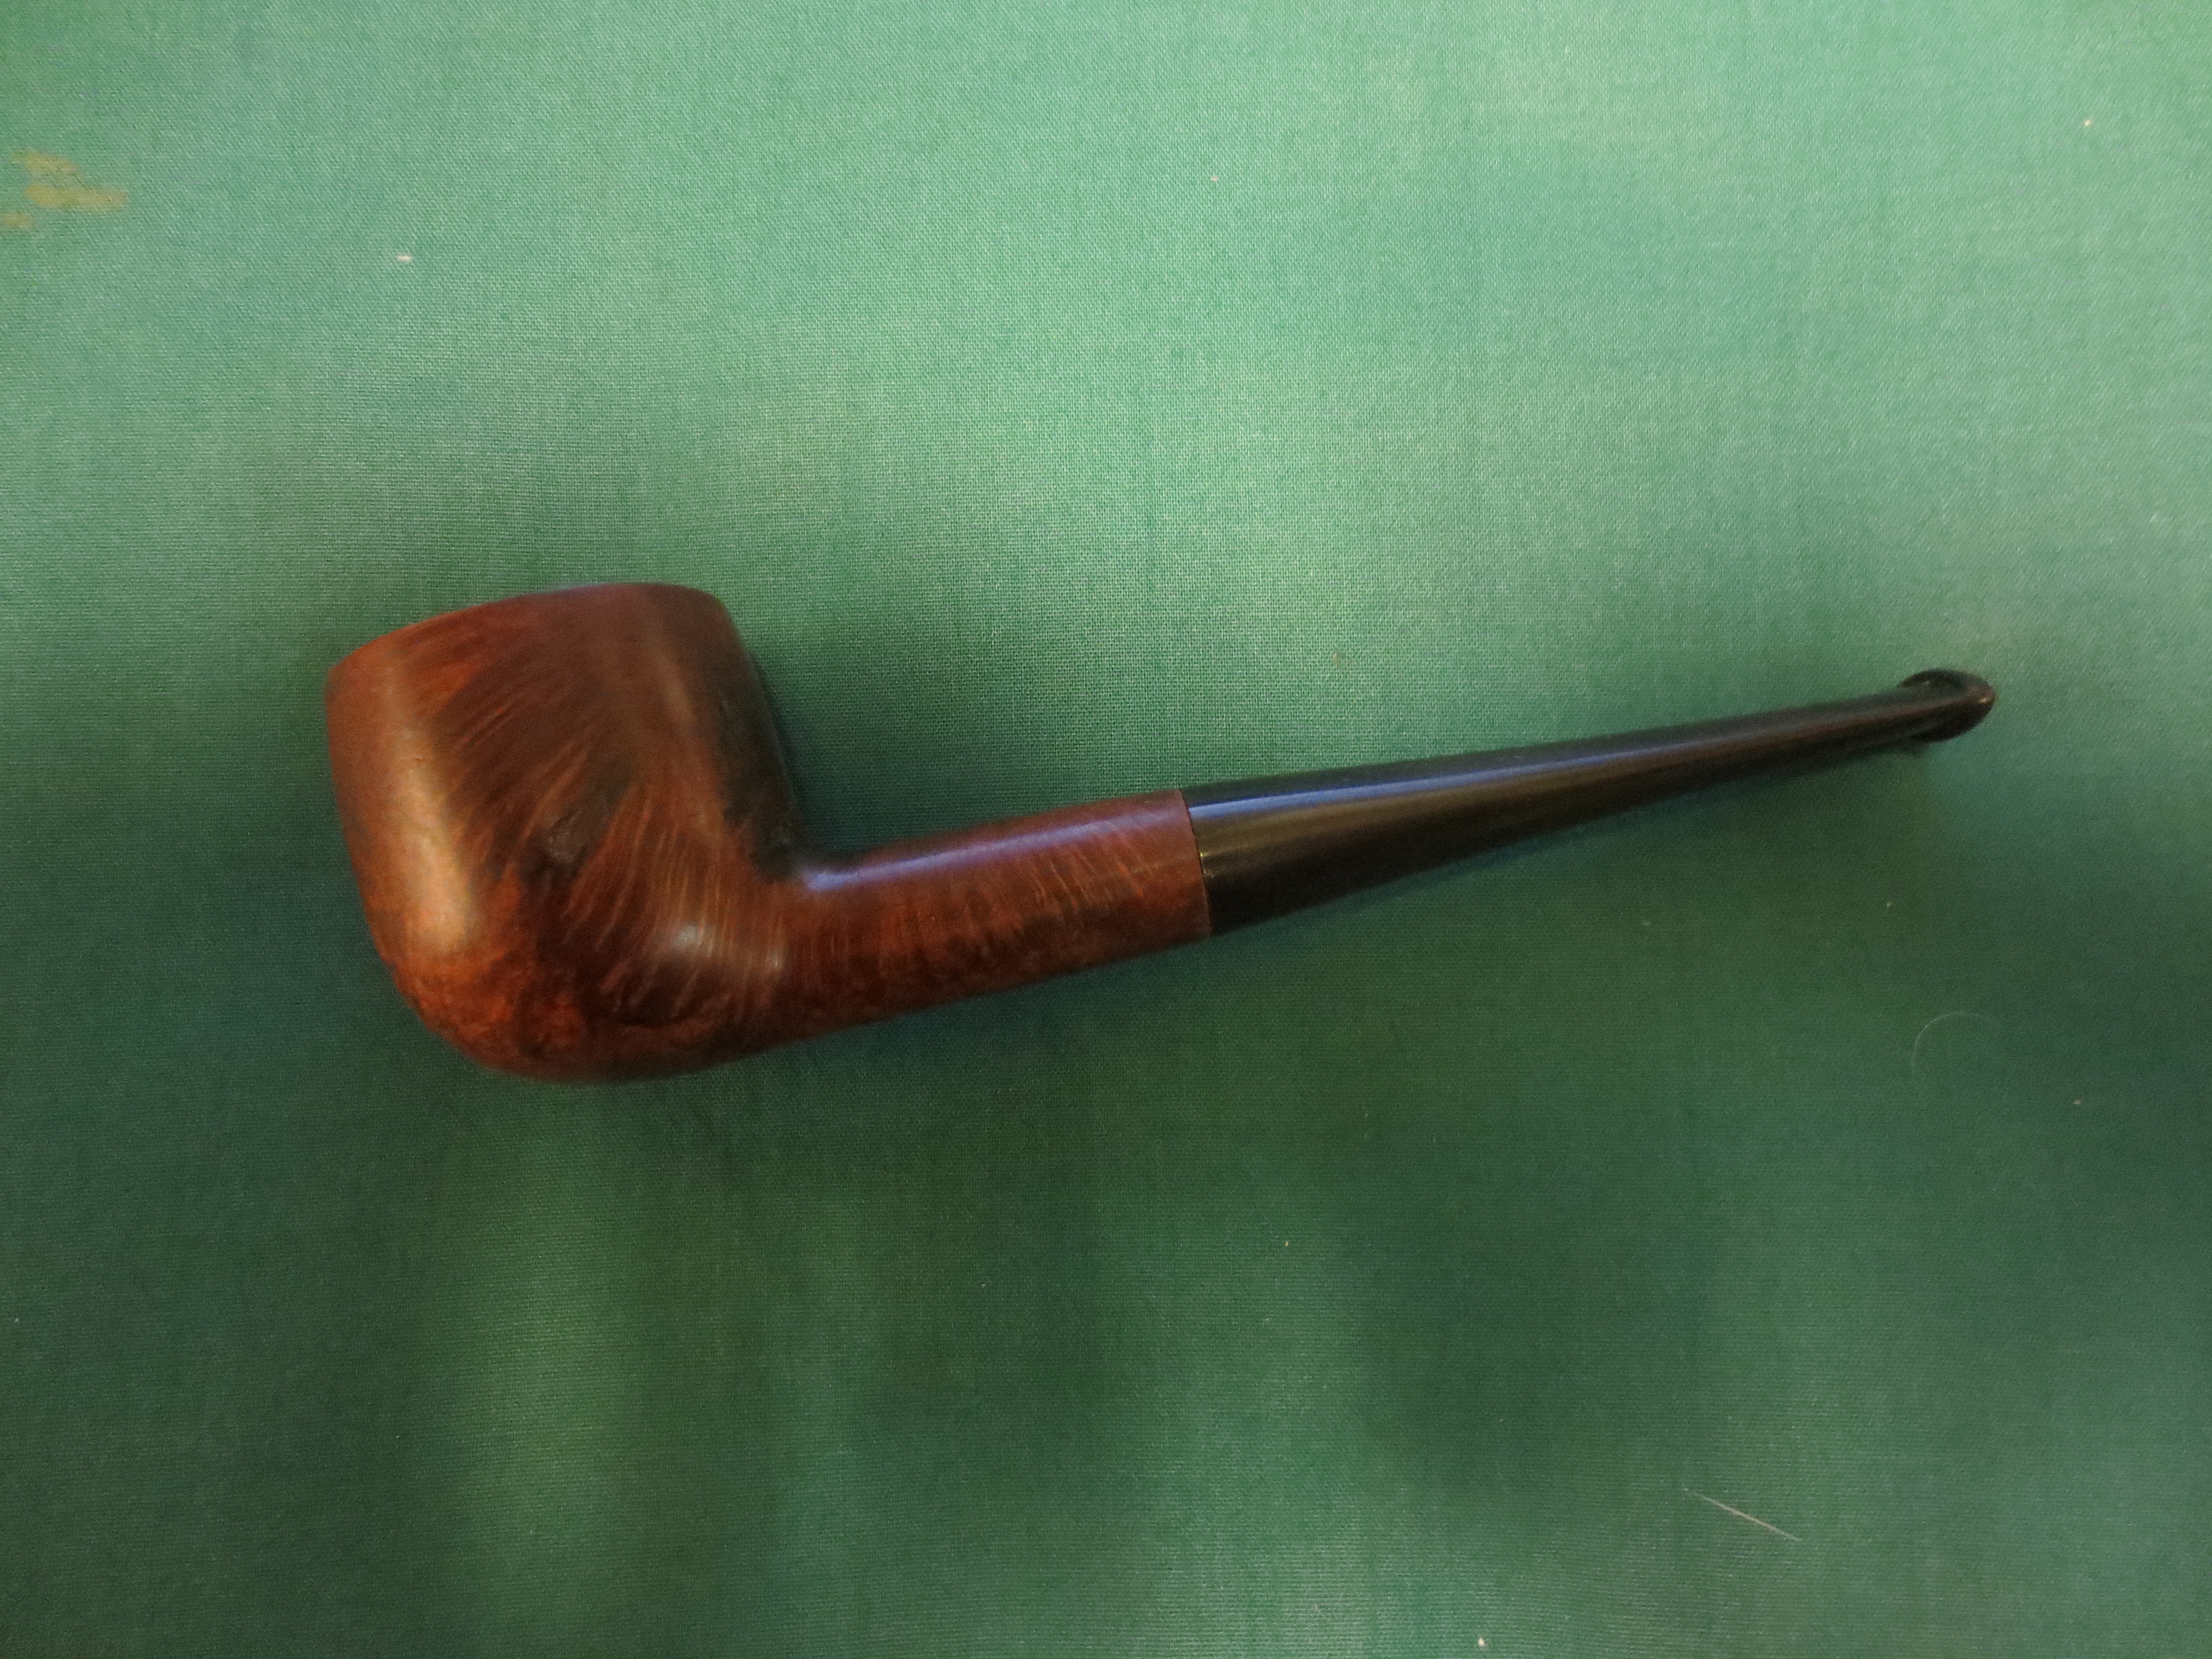
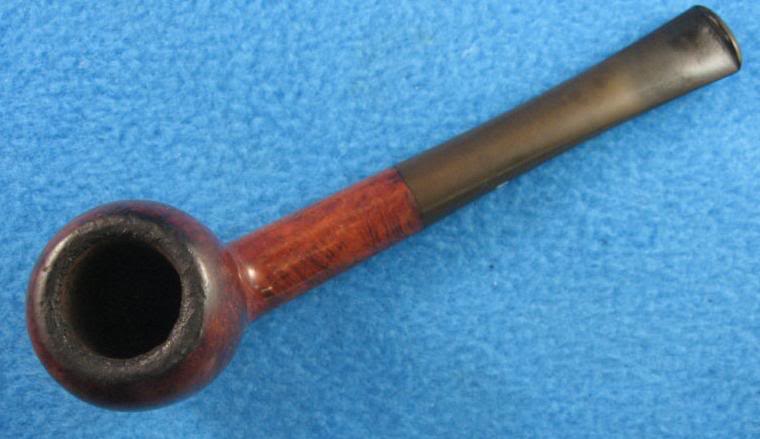
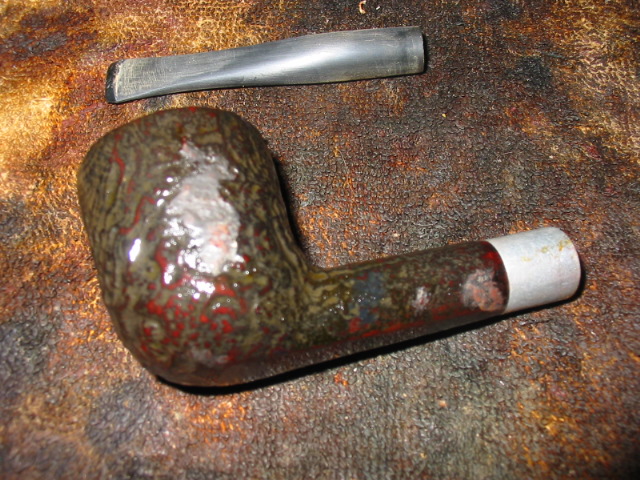
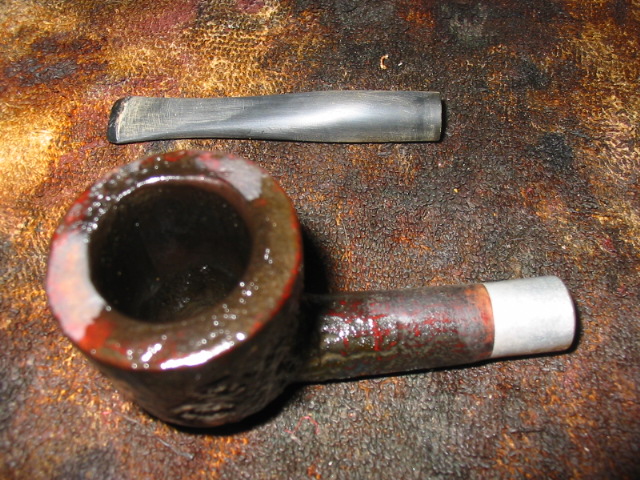
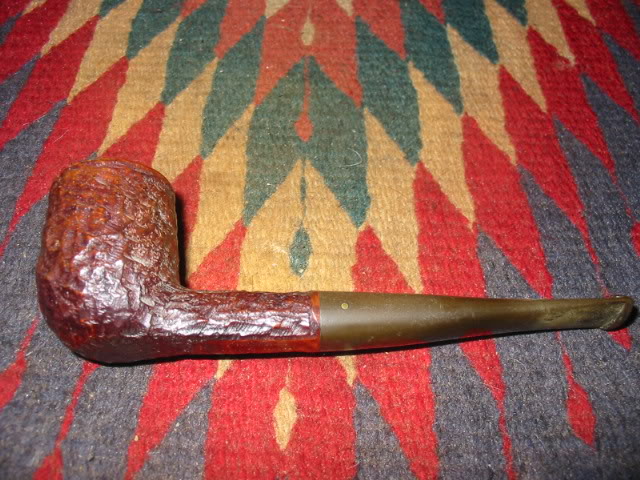
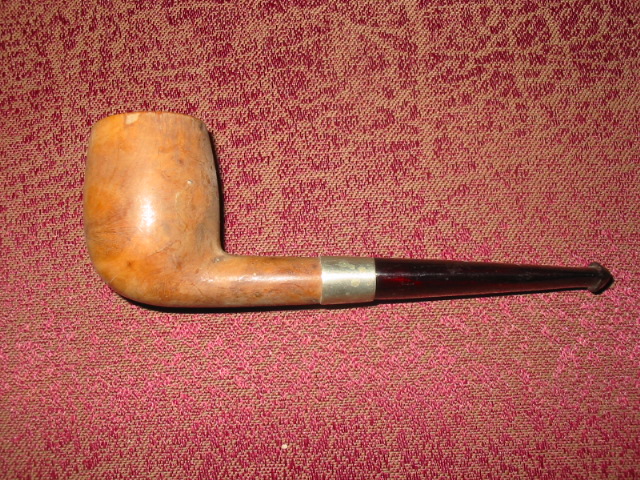
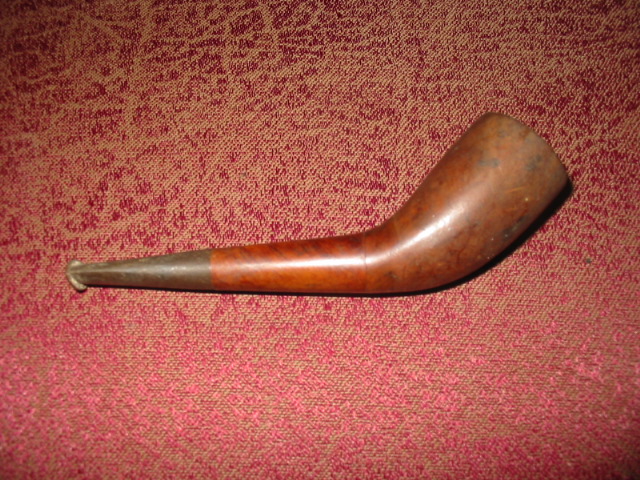
When the pipe arrived in Idaho my brother took some photos of it. The stem was slightly oxidized and it was stuck in the shank. It was underturned to the left and could not be straightened out. The rim was dirty with a tar build up and there was a cake in the bowl. The bowl itself was slightly out of round. The briar had a few small fills in it and the finish was dirty.Filt4 Filt5 Filt6
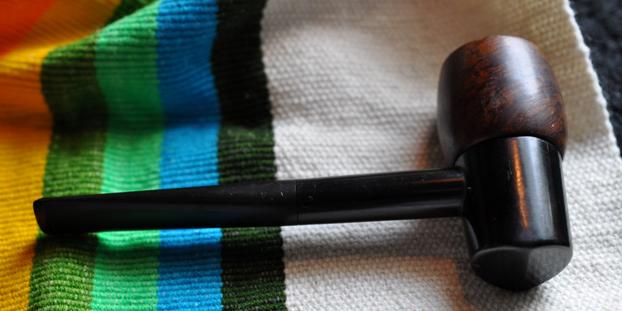
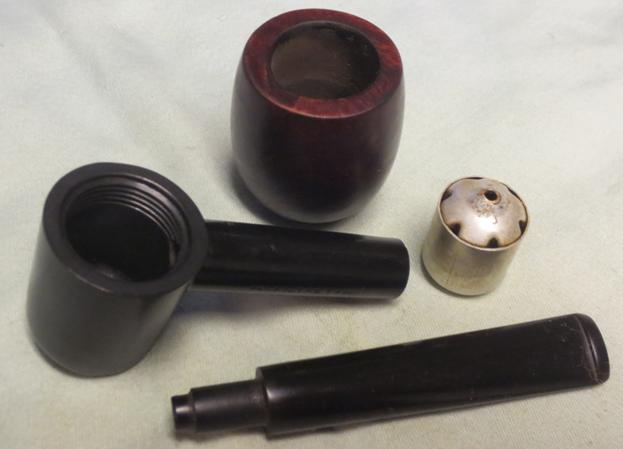
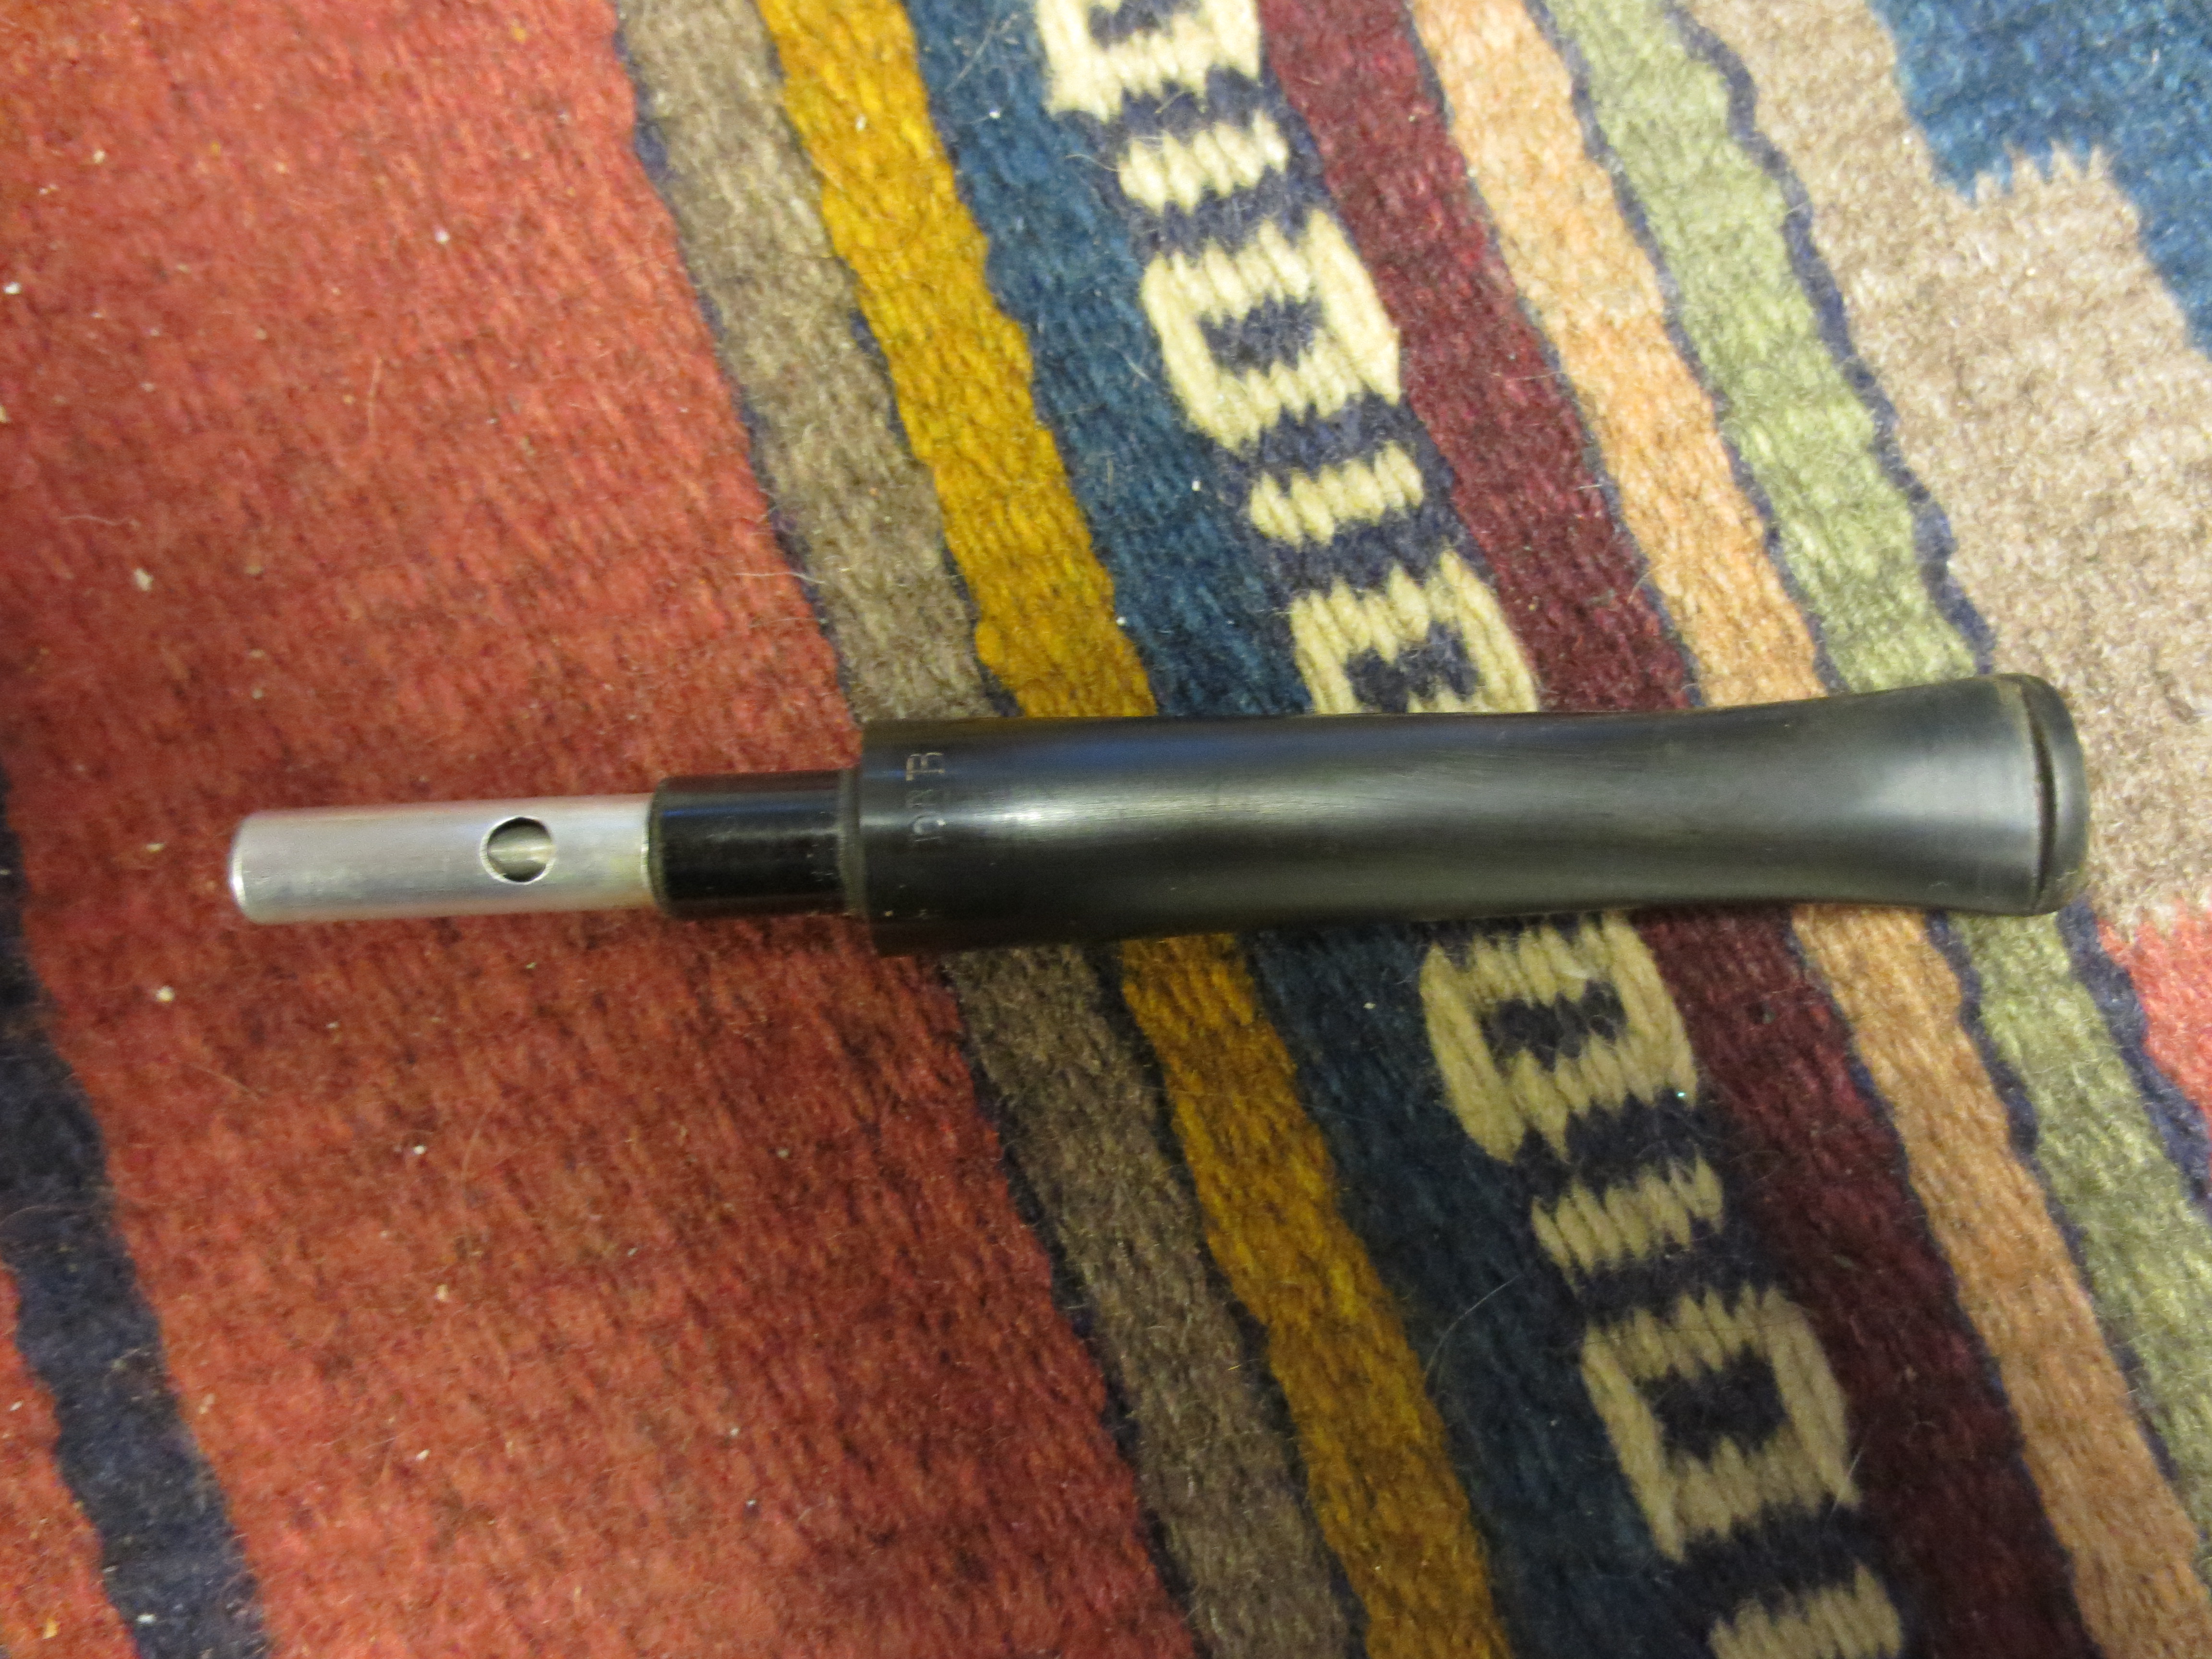
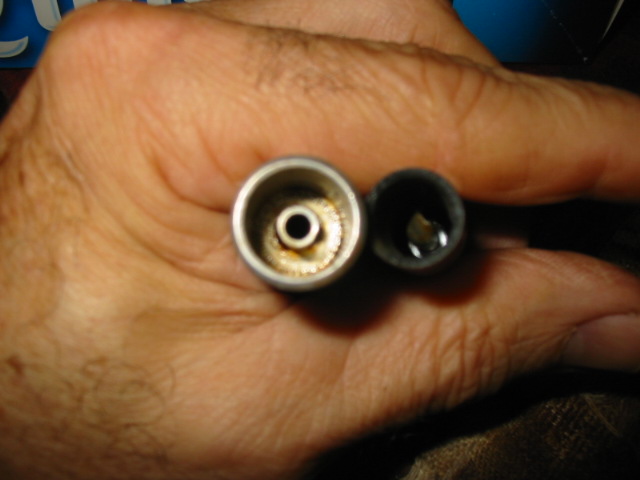
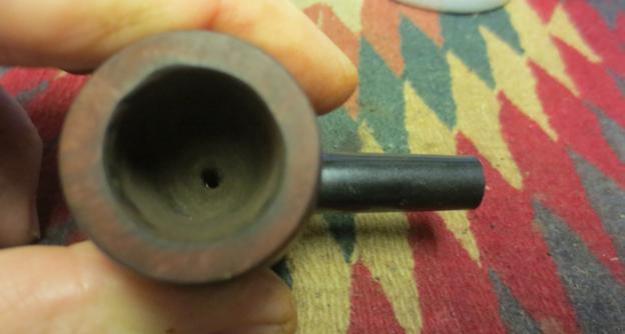
When my brother Jeff took the bowl off the base the interior of the base was very dirty with tars and oils. The metal basket was also covered with debris of tars, oils and saliva. It looked to me that the way the pipe worked was that the air was drawn through the single hole in the top of the canister and then it came out through the wedges and into the airway in the shank.Filt7 Filt8 Filt9
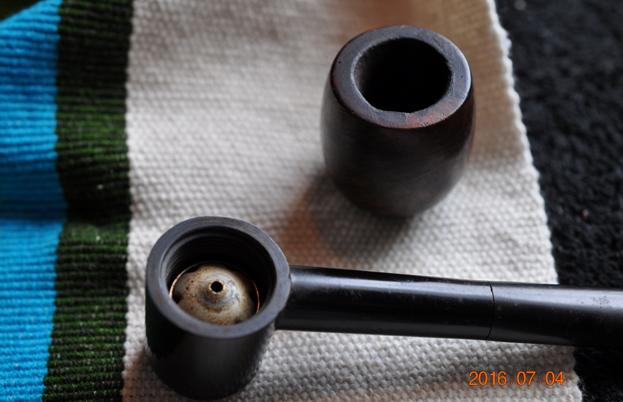
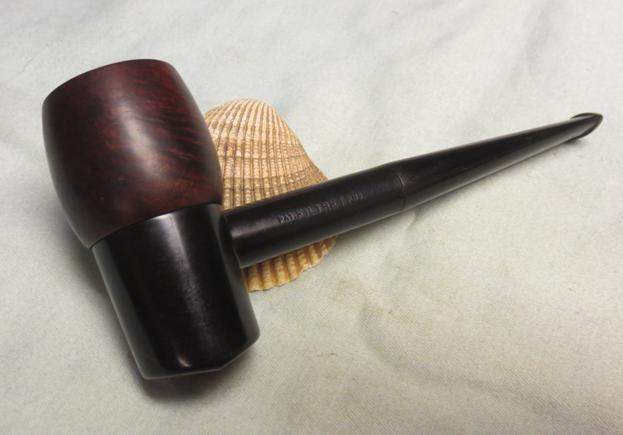
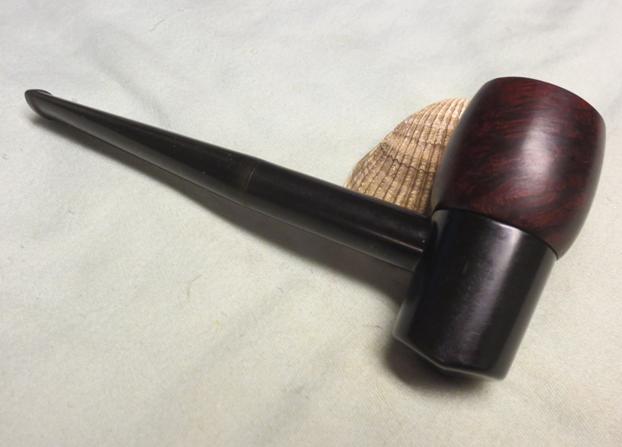
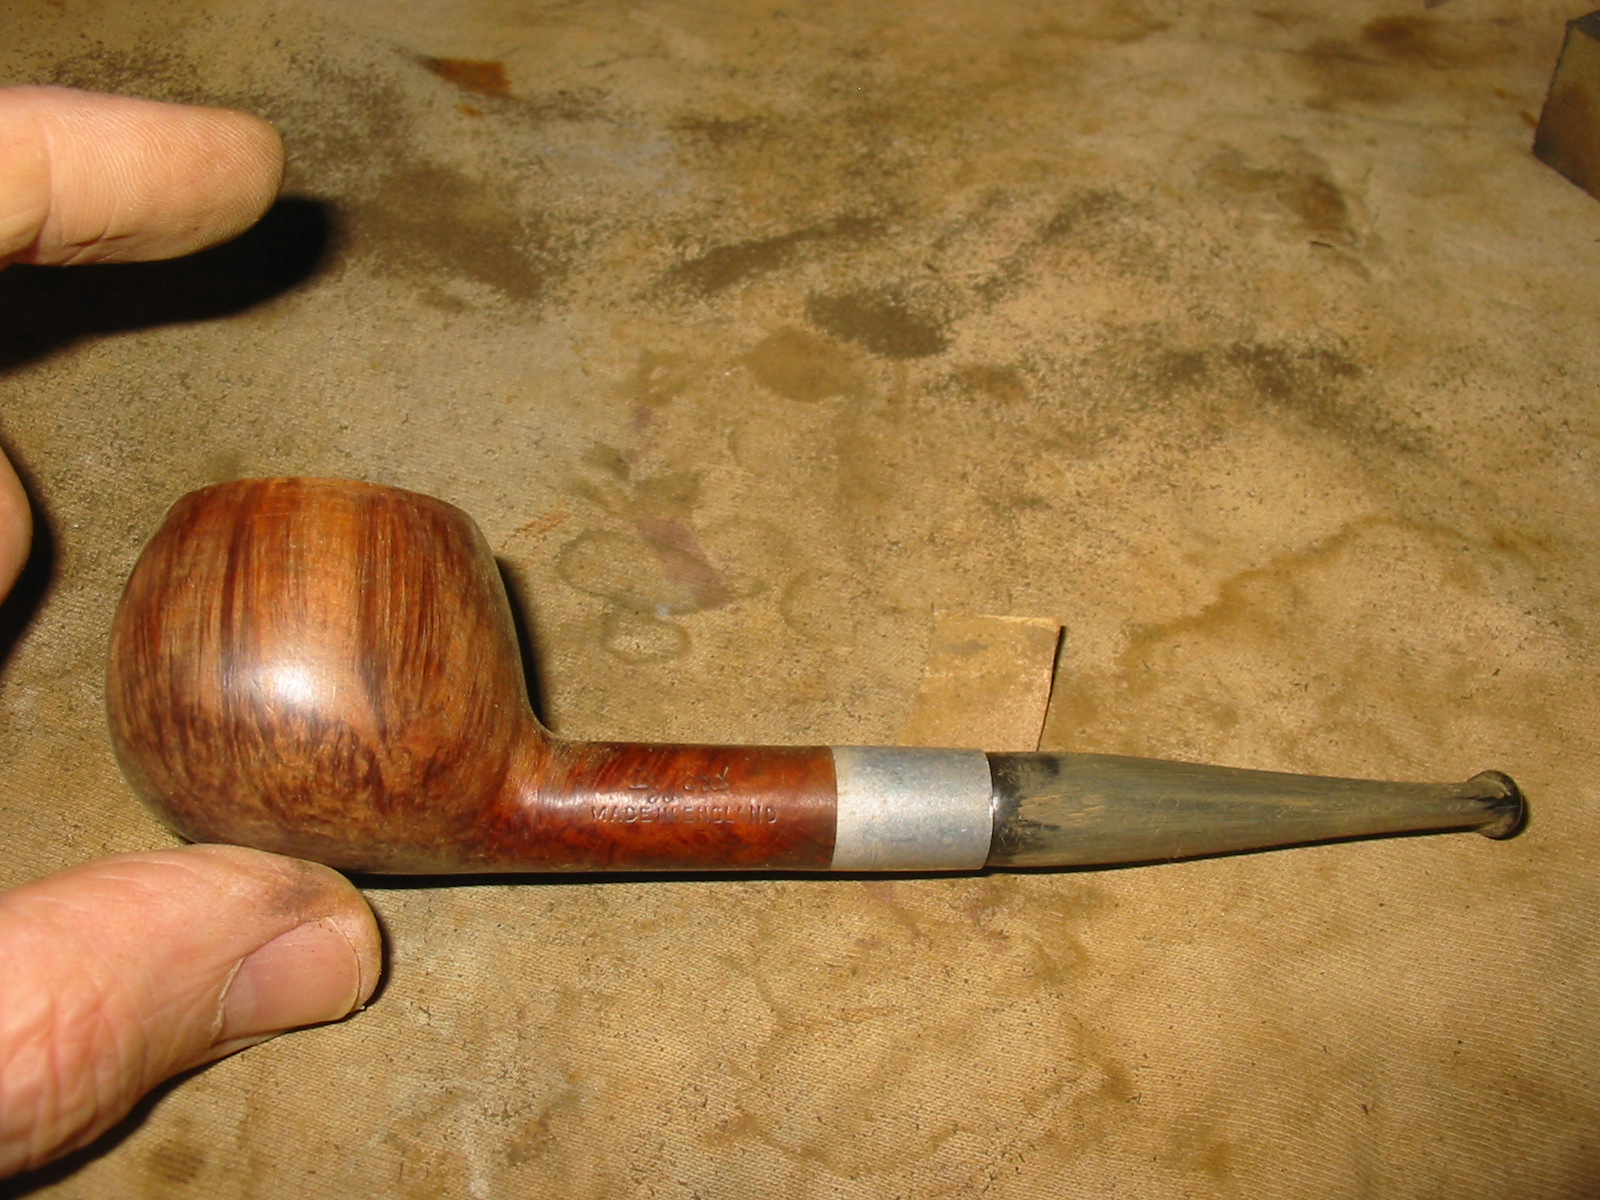
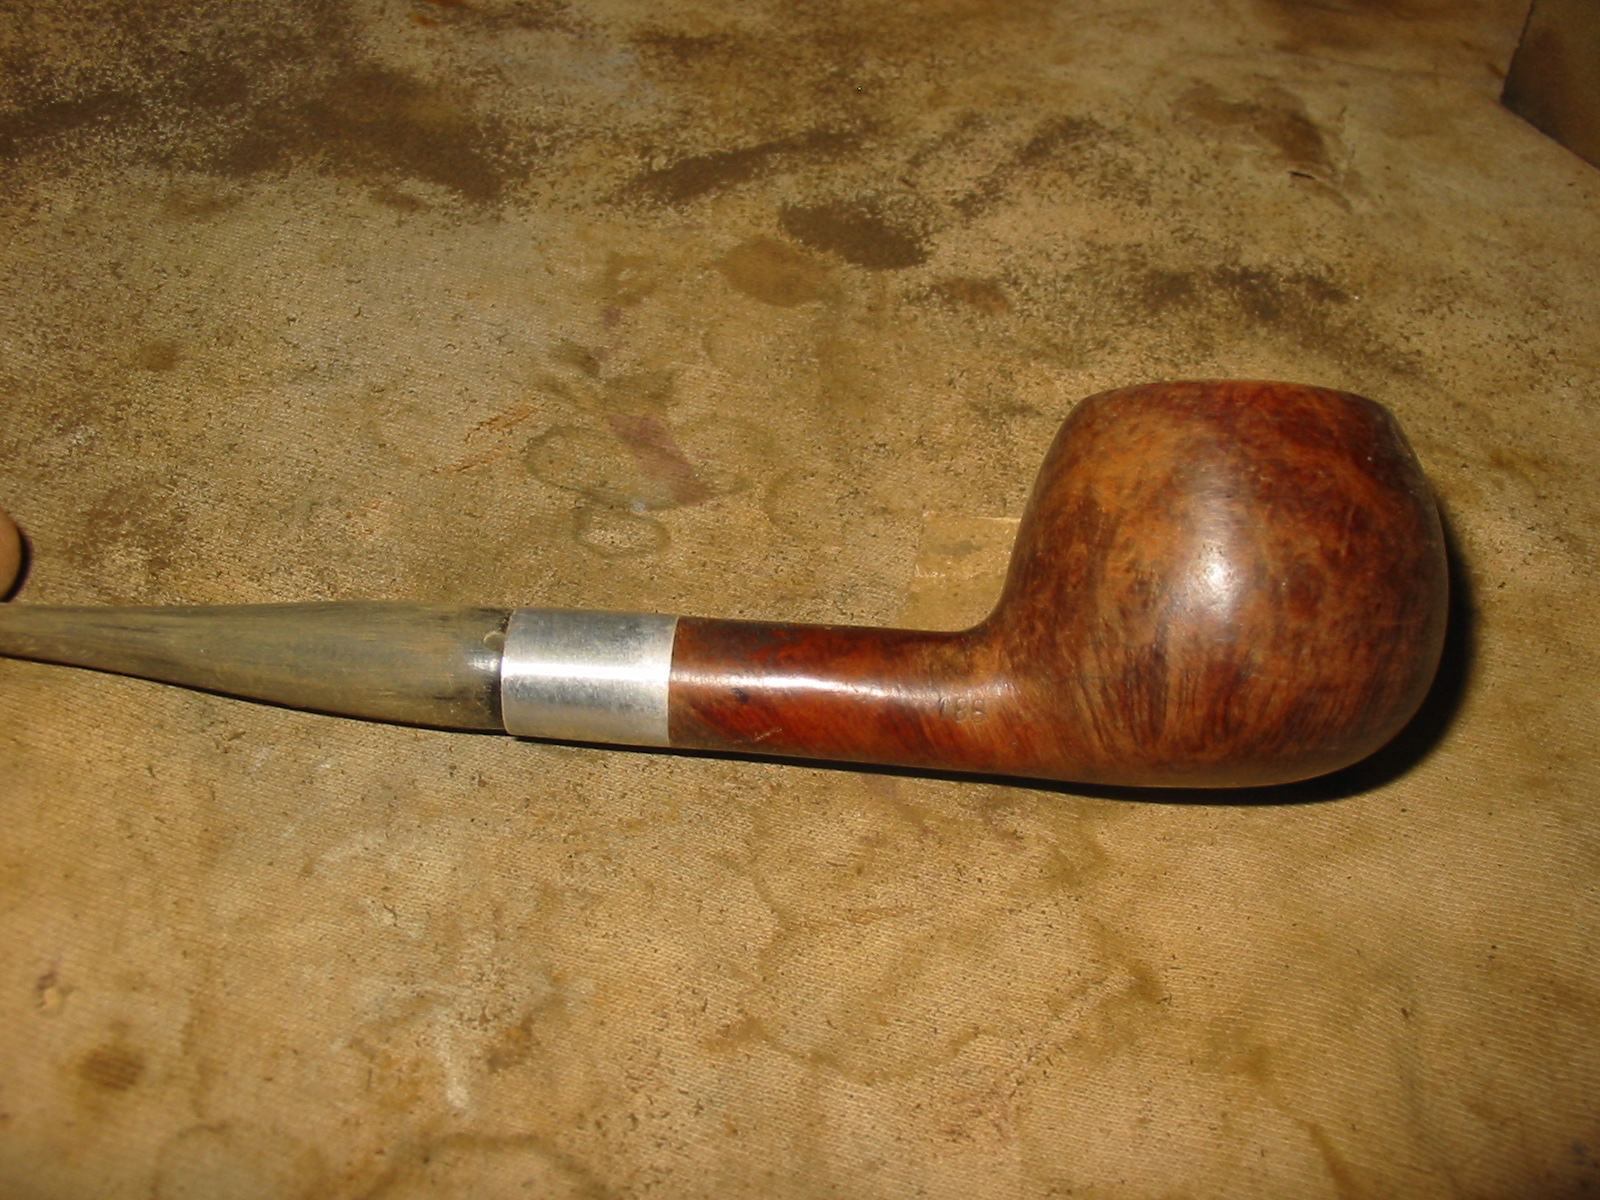
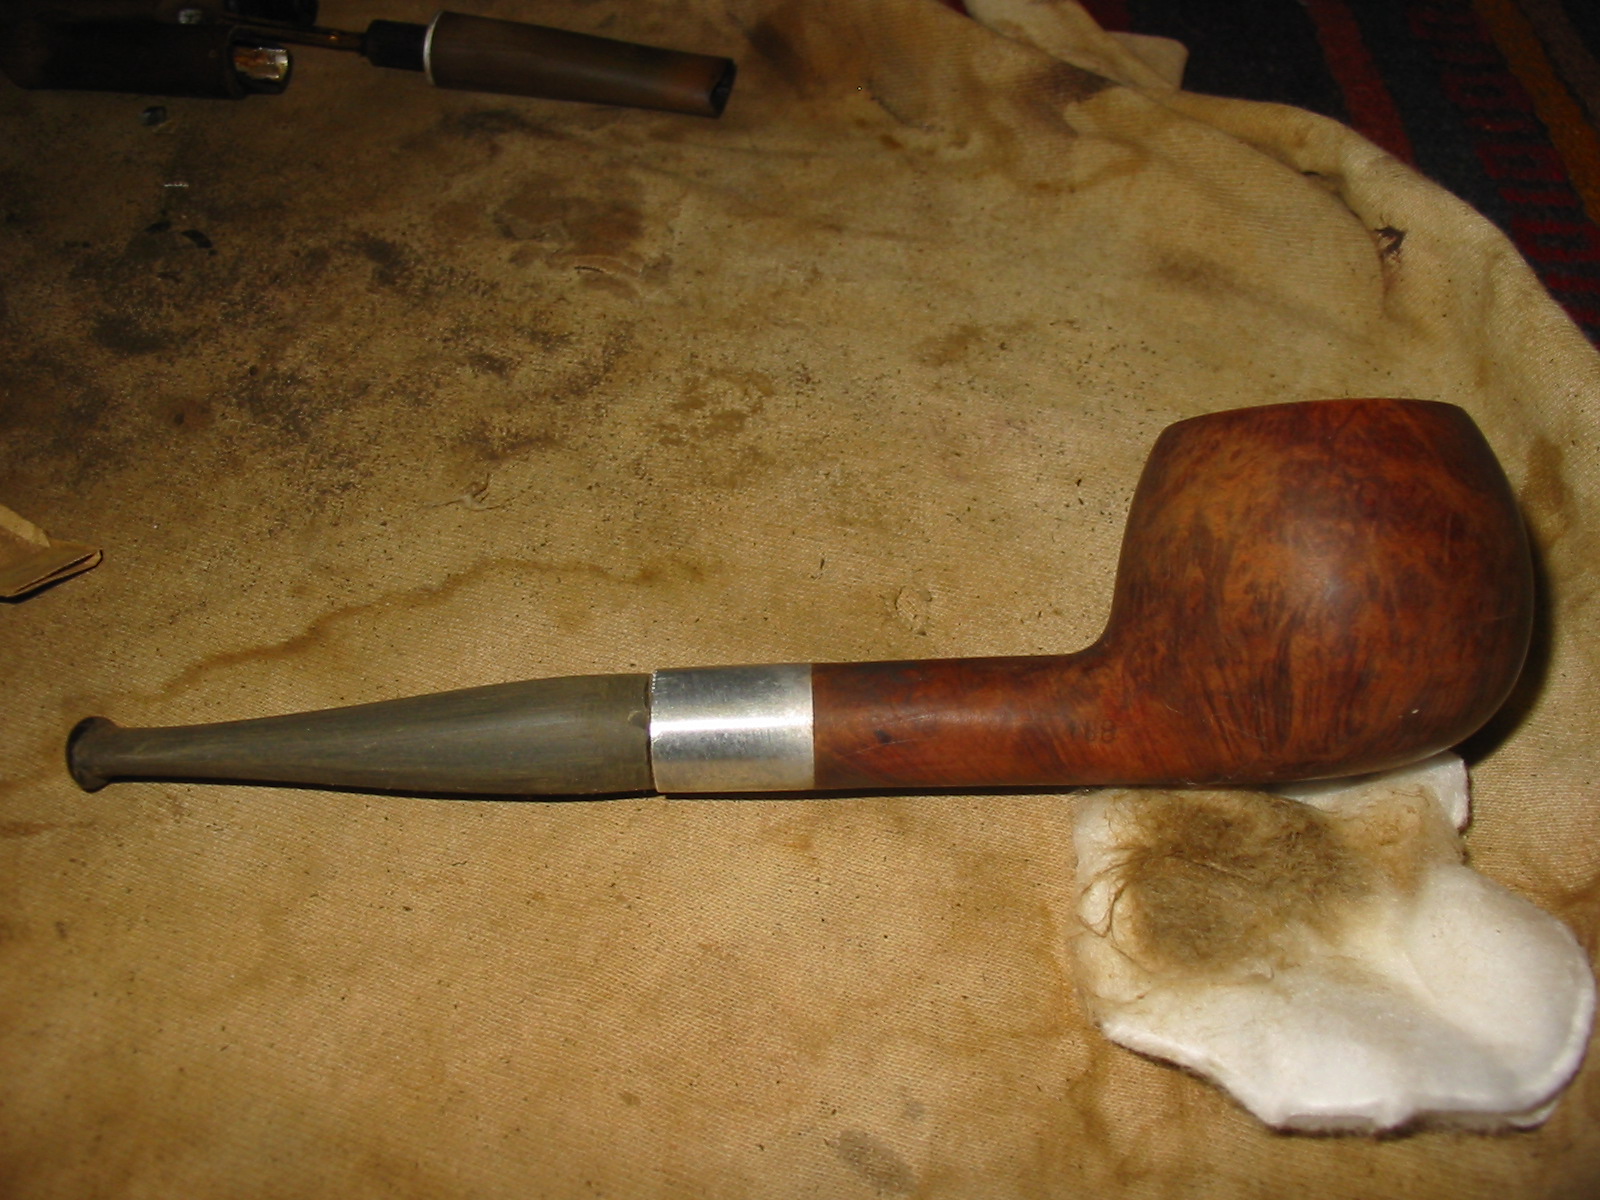
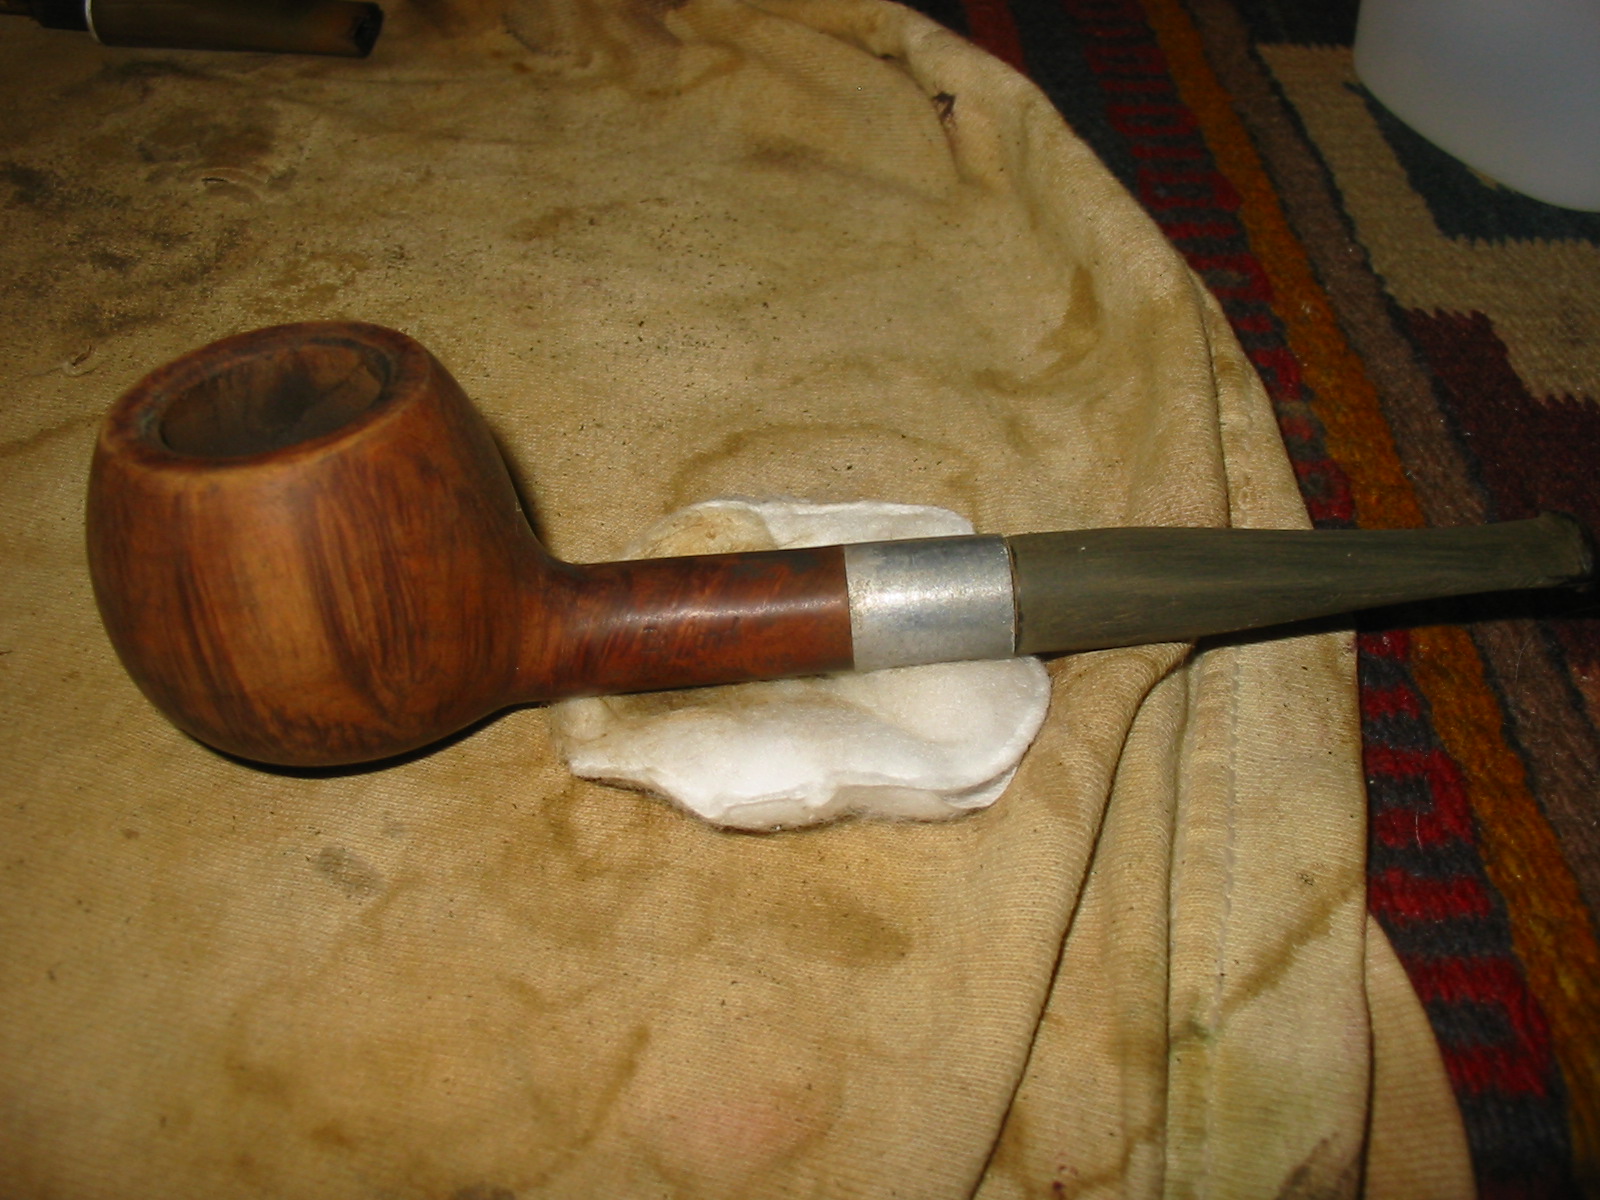
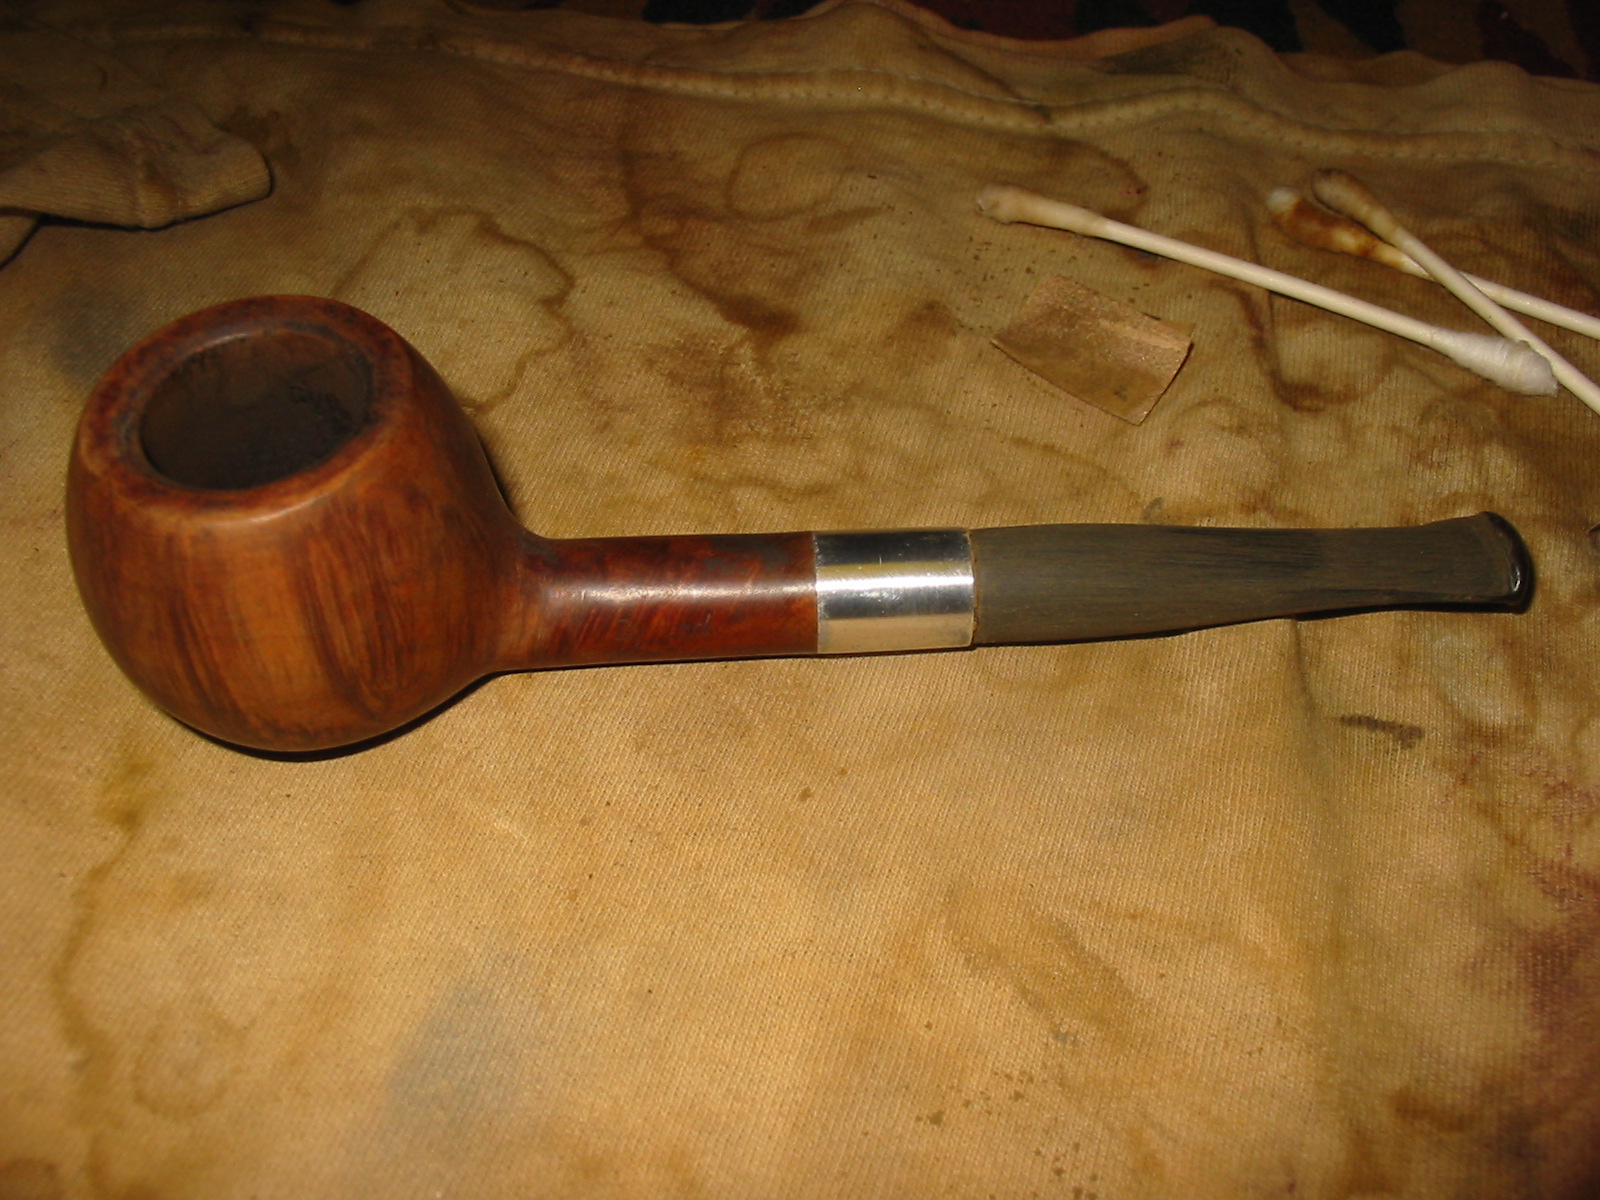
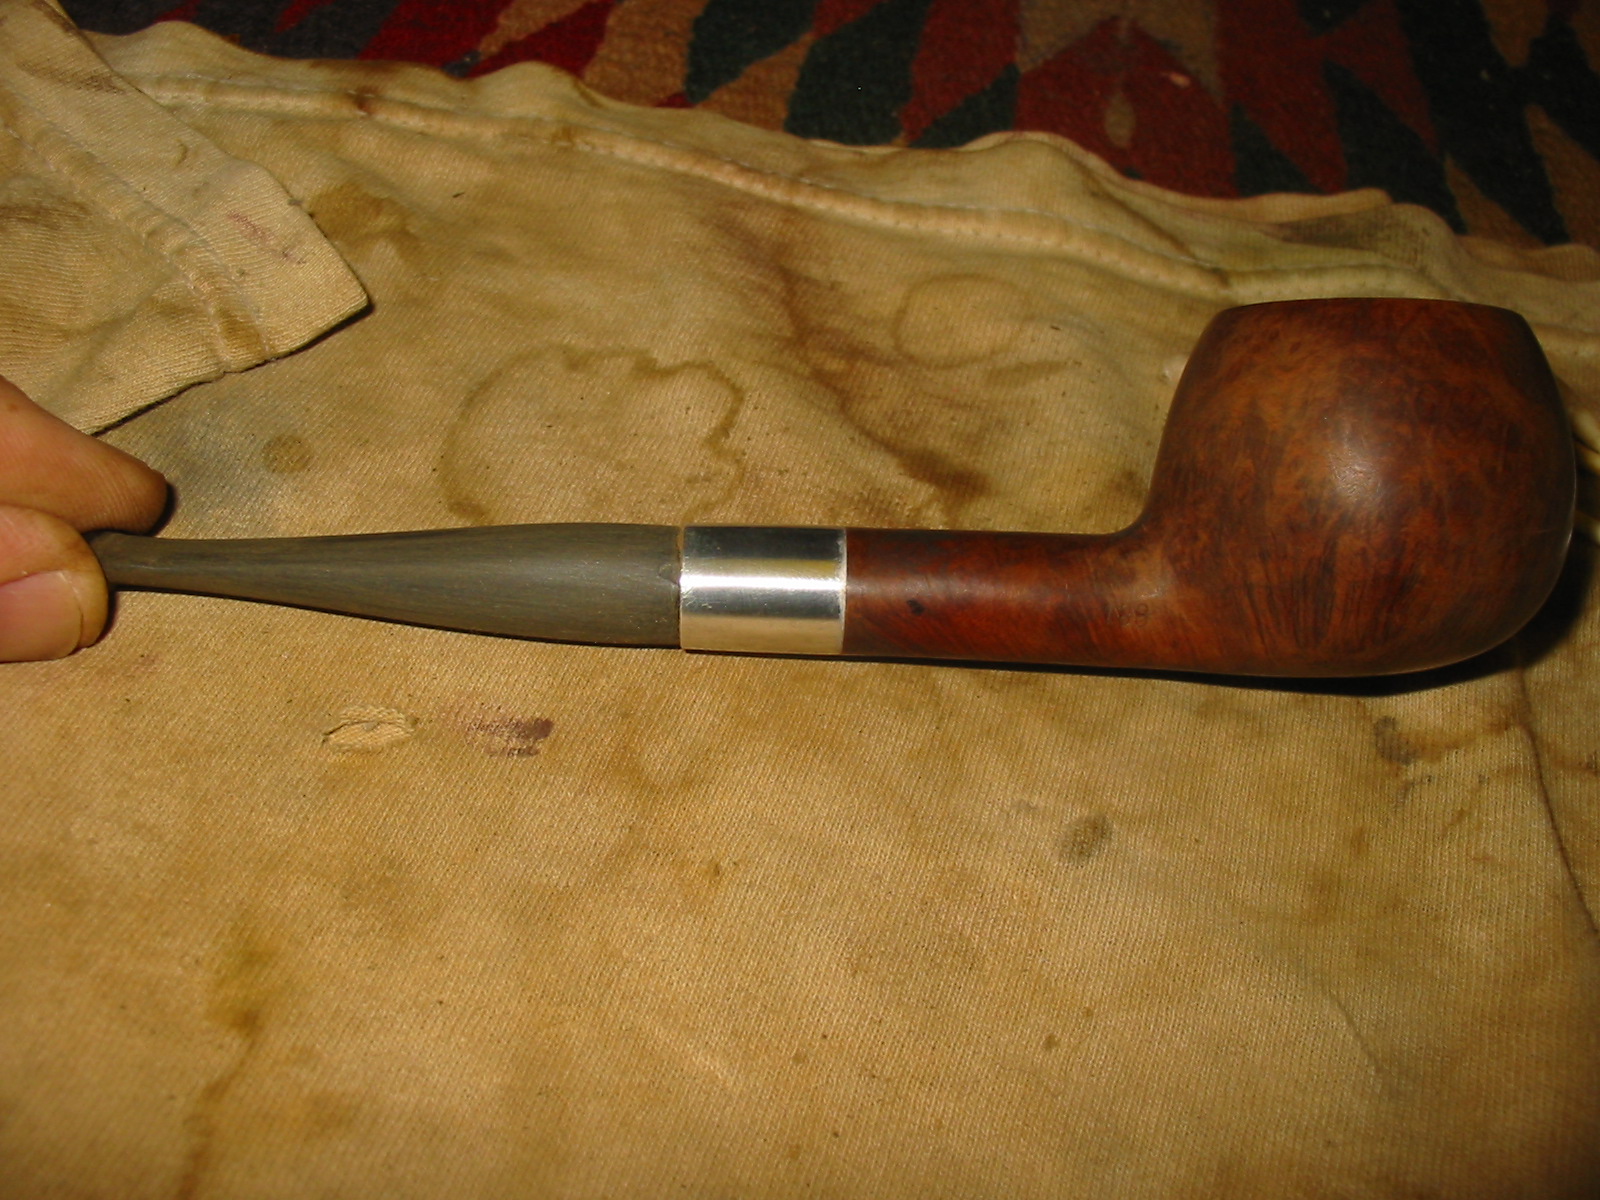
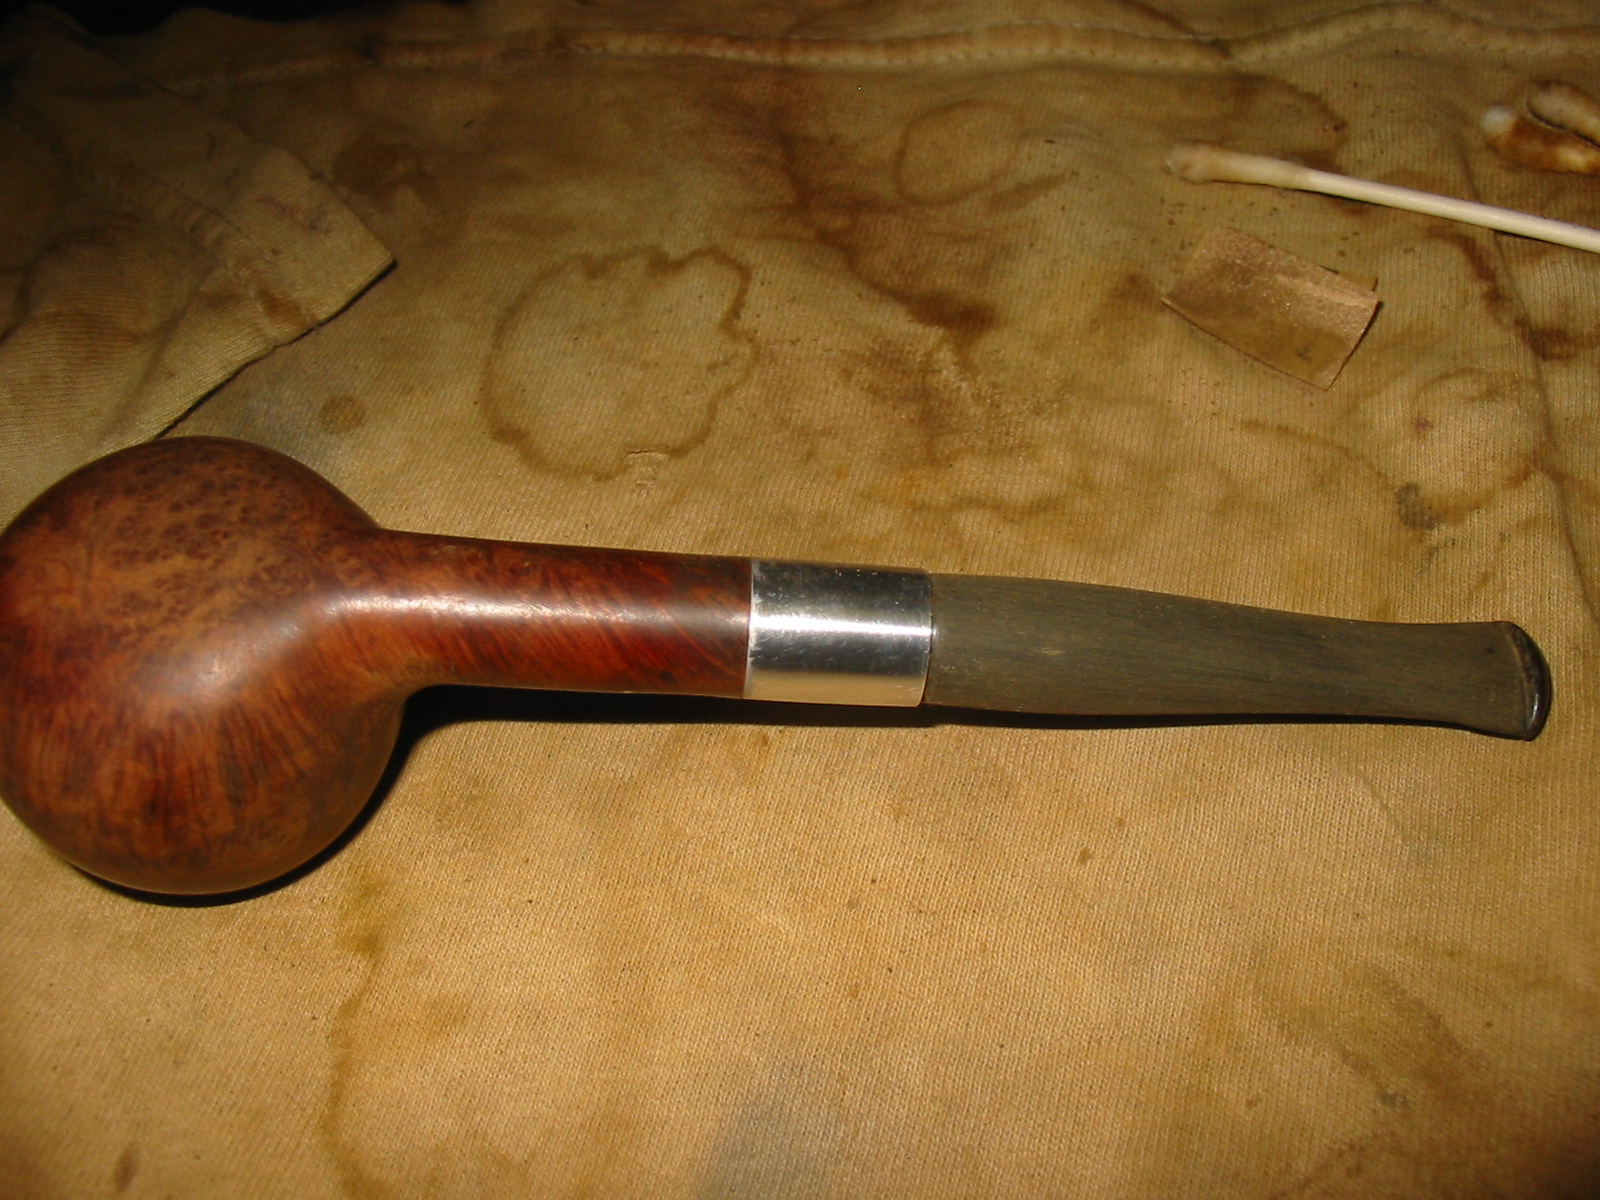
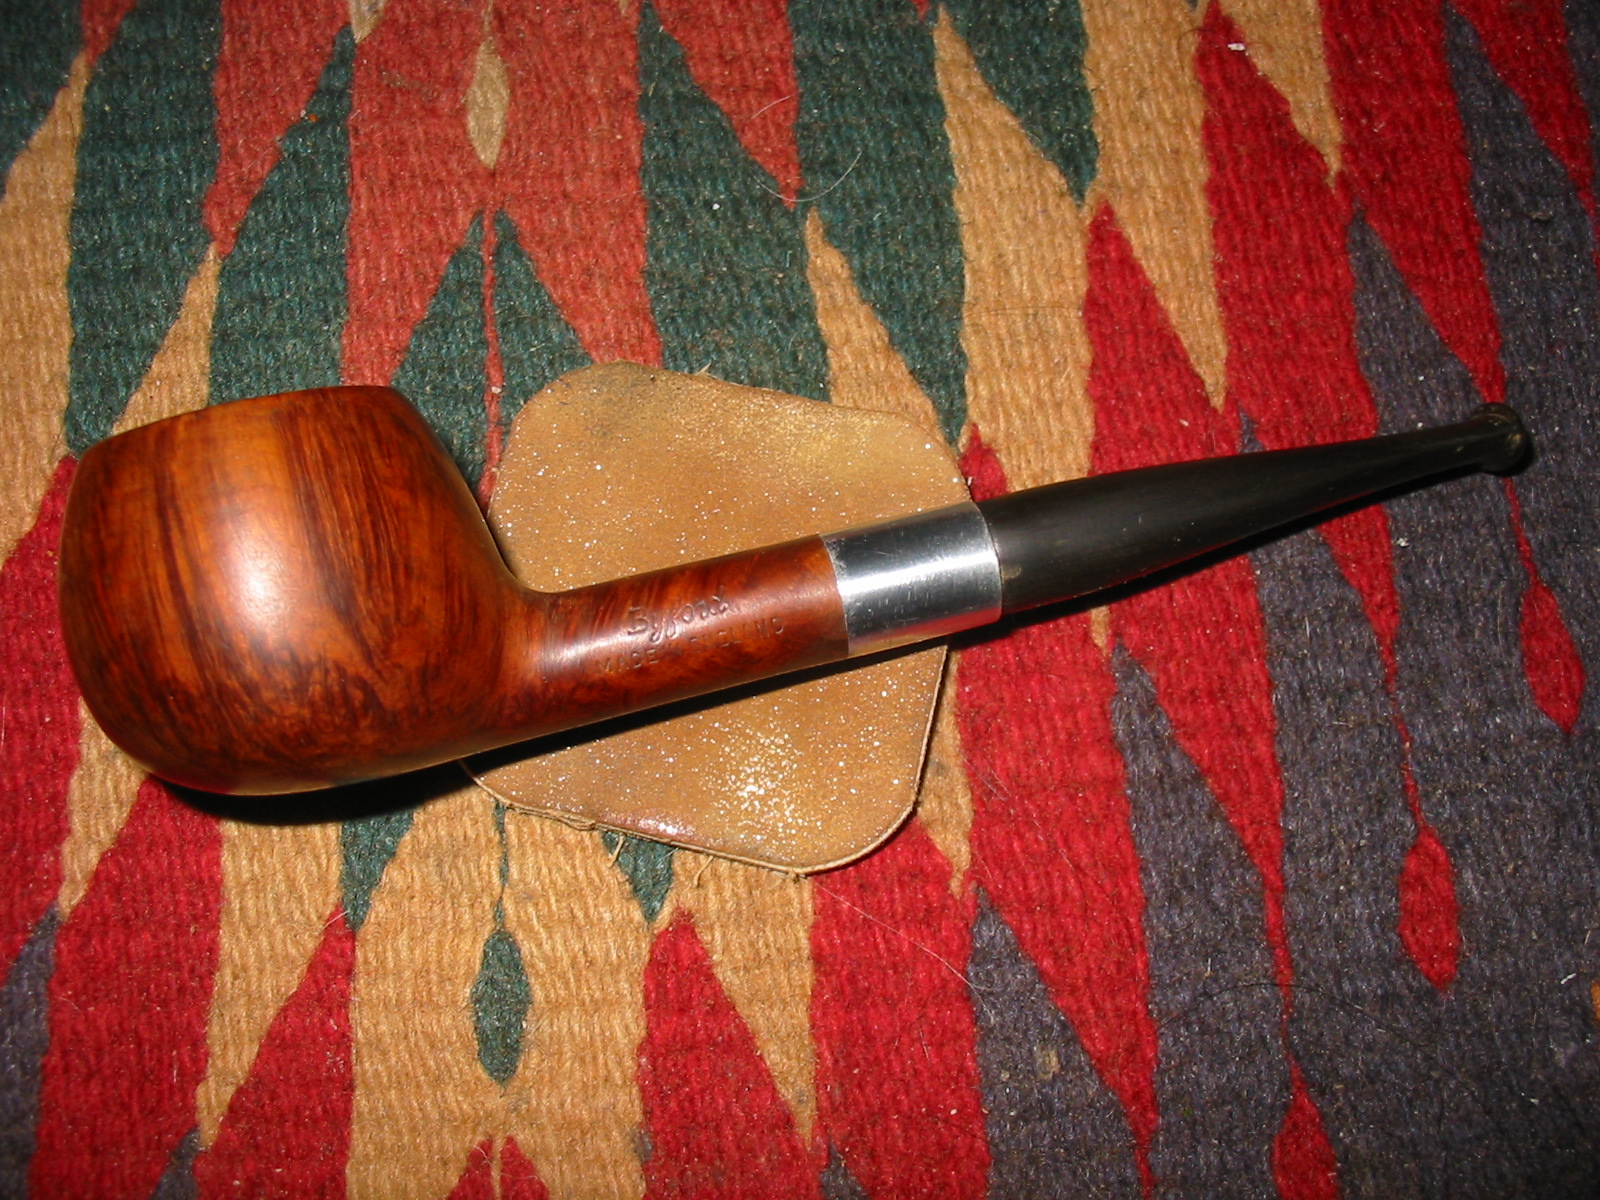
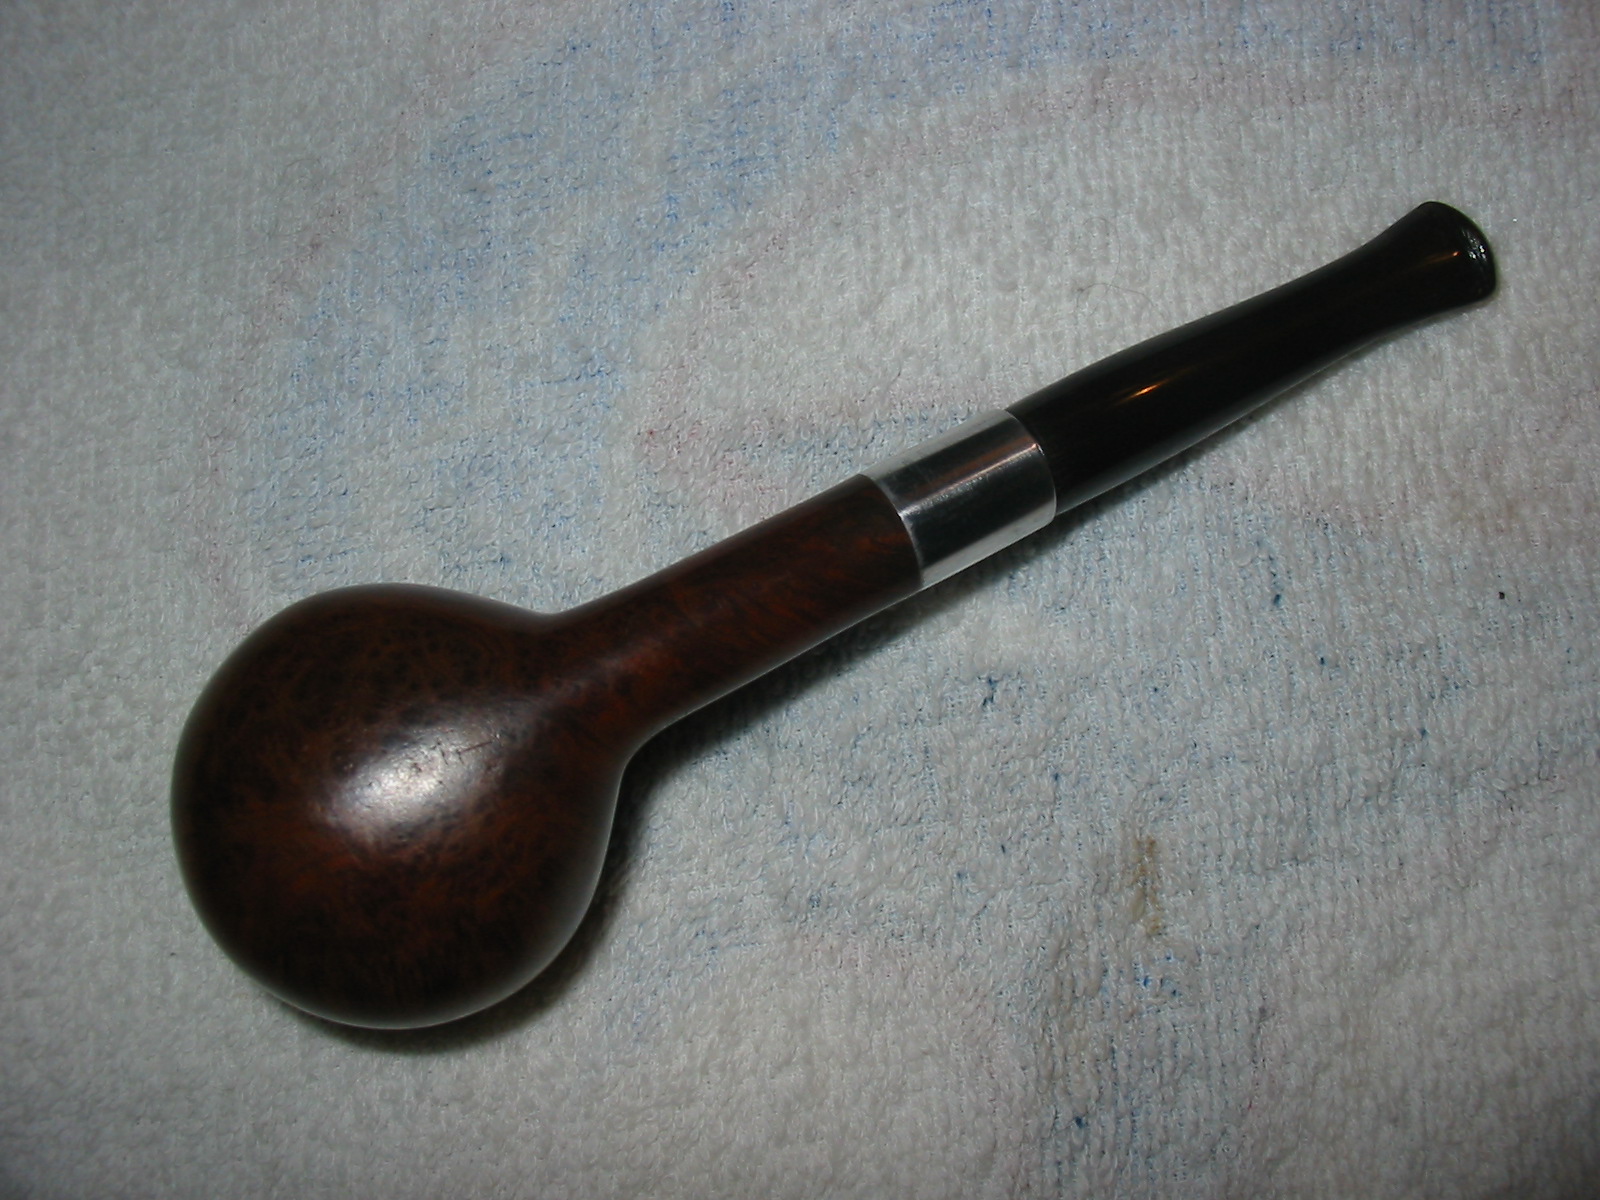
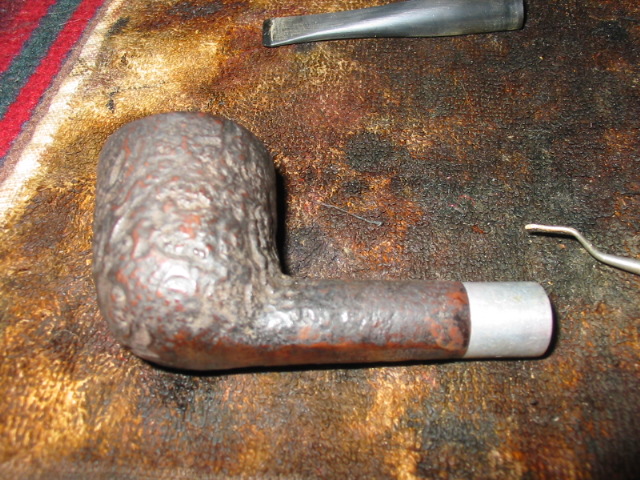
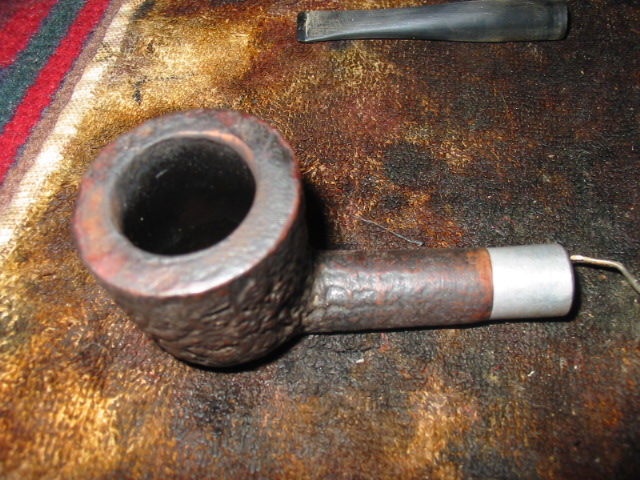
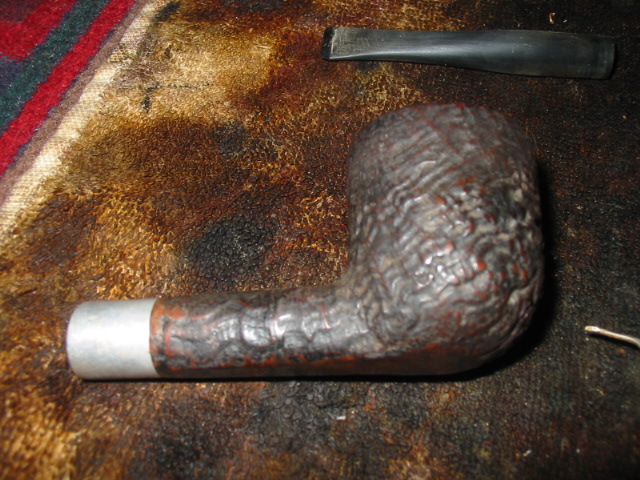
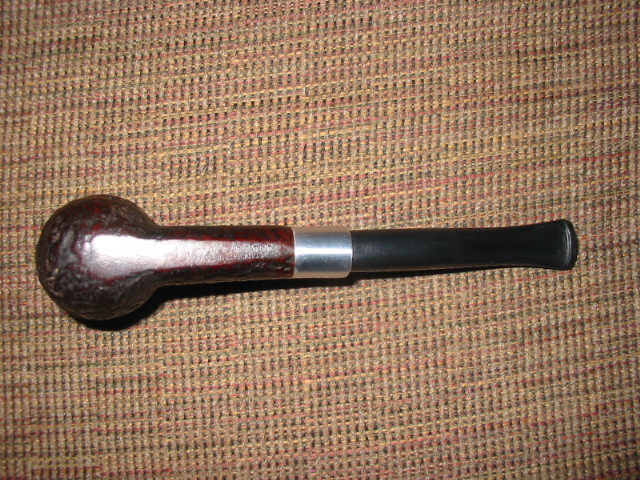
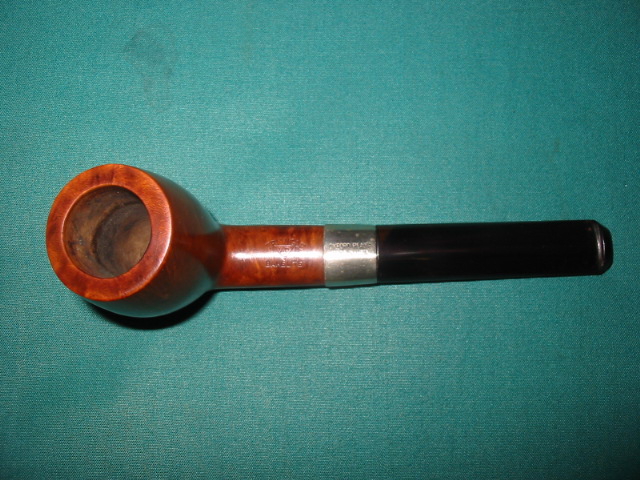
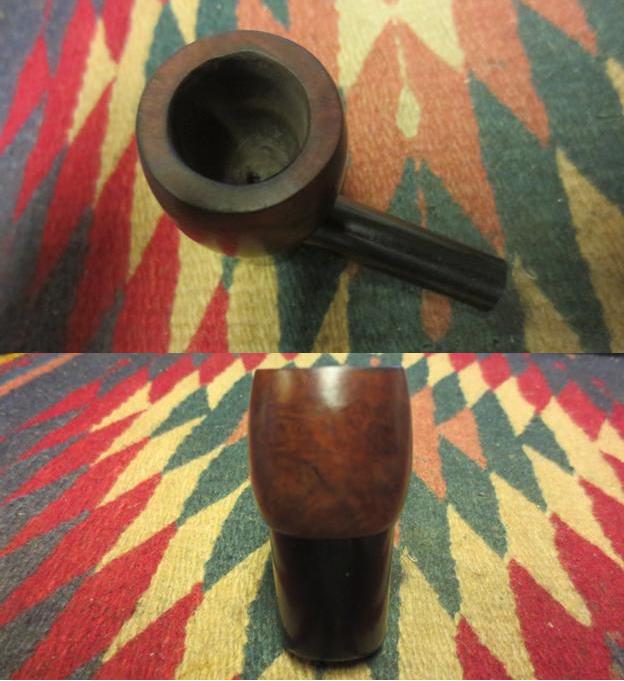
This pipe was a pleasure to work on because Jeff did the lion’s share of work on it. He reamed and cleaned the bowl. He cleaned out the stem with pipe cleaners and alcohol and the base with cotton swabs and alcohol. He flushed out the canister with alcohol and then water. He flushed it until it was clean. He scrubbed the bowl with Murphy’s Oil Soap and removed the finish and the debris from the surface of the bowl. He was able to remove much of the tar and oil on top of the bowl. The next set of four photos show the way the pipe looked when I unpacked it this afternoon. Thanks Jeff this was an easy clean up.Filt10 Filt11
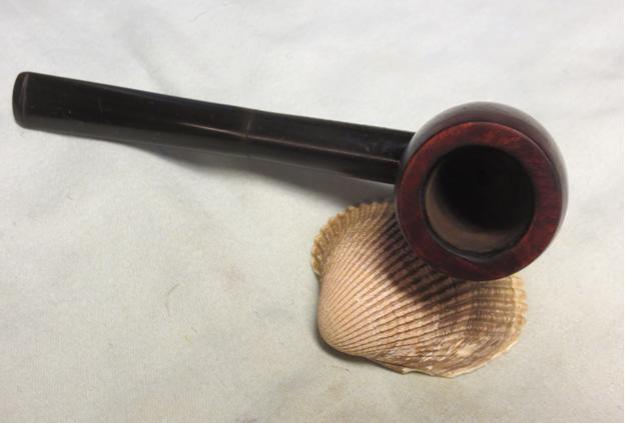
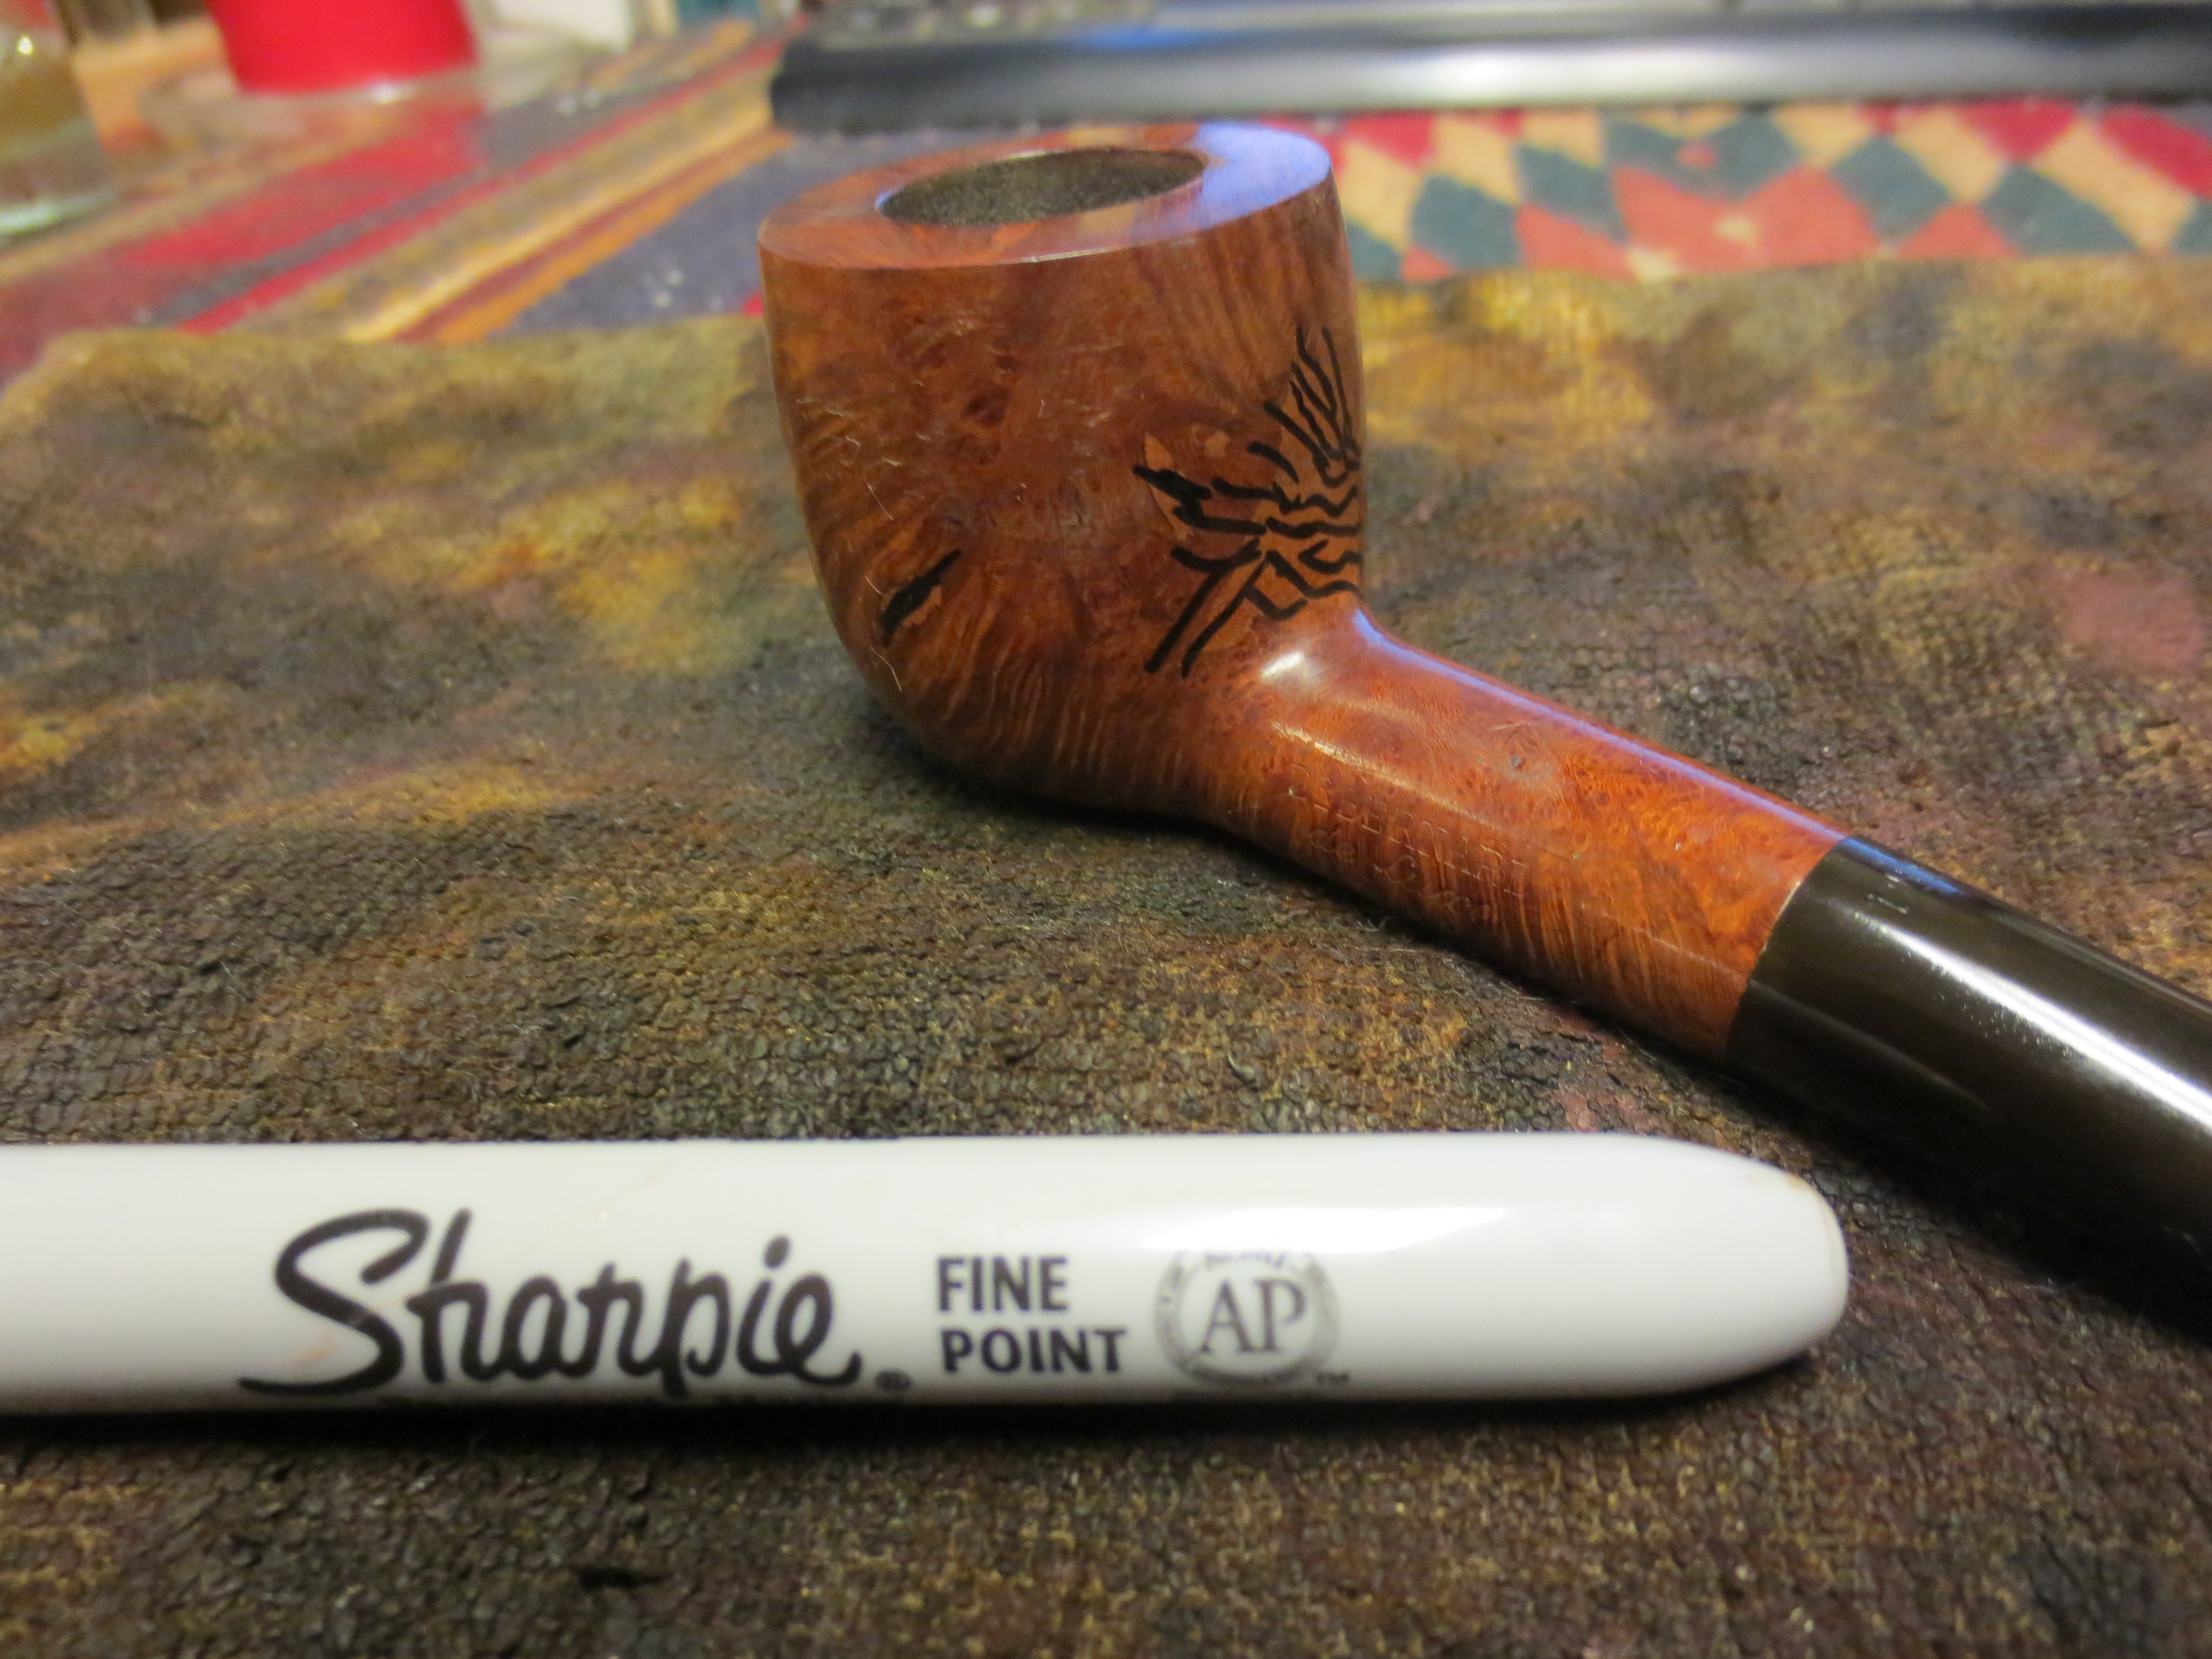
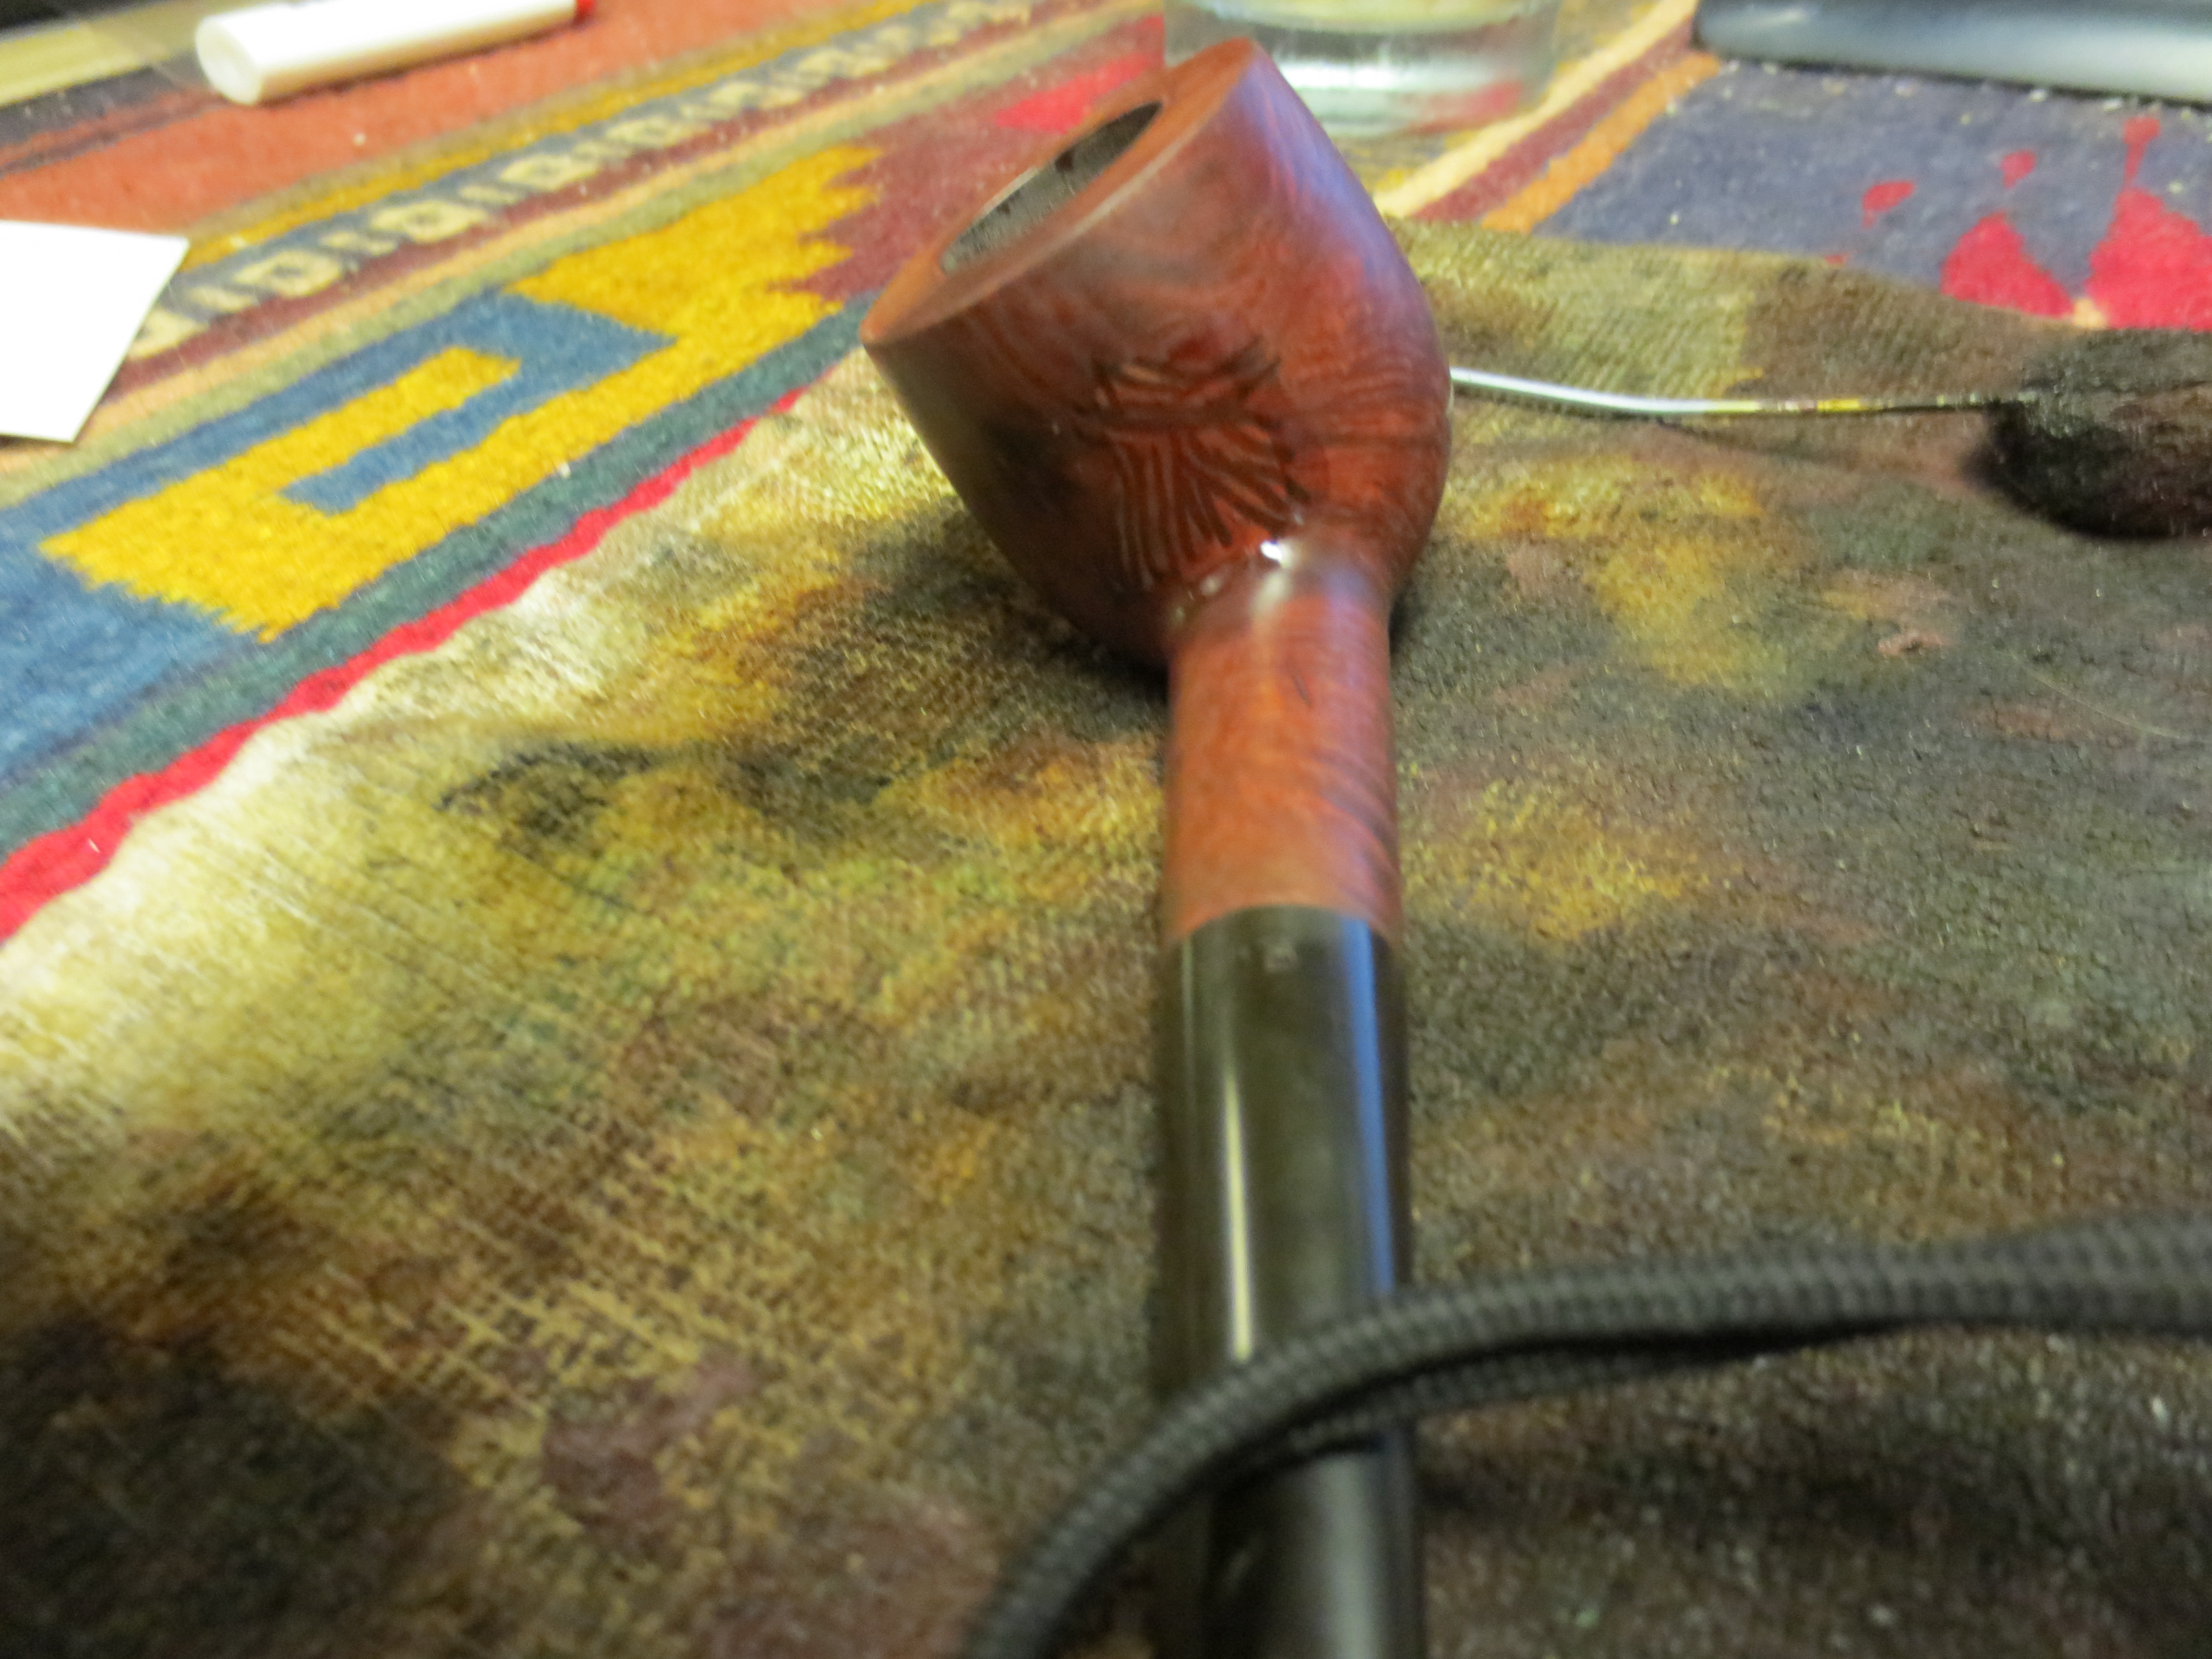
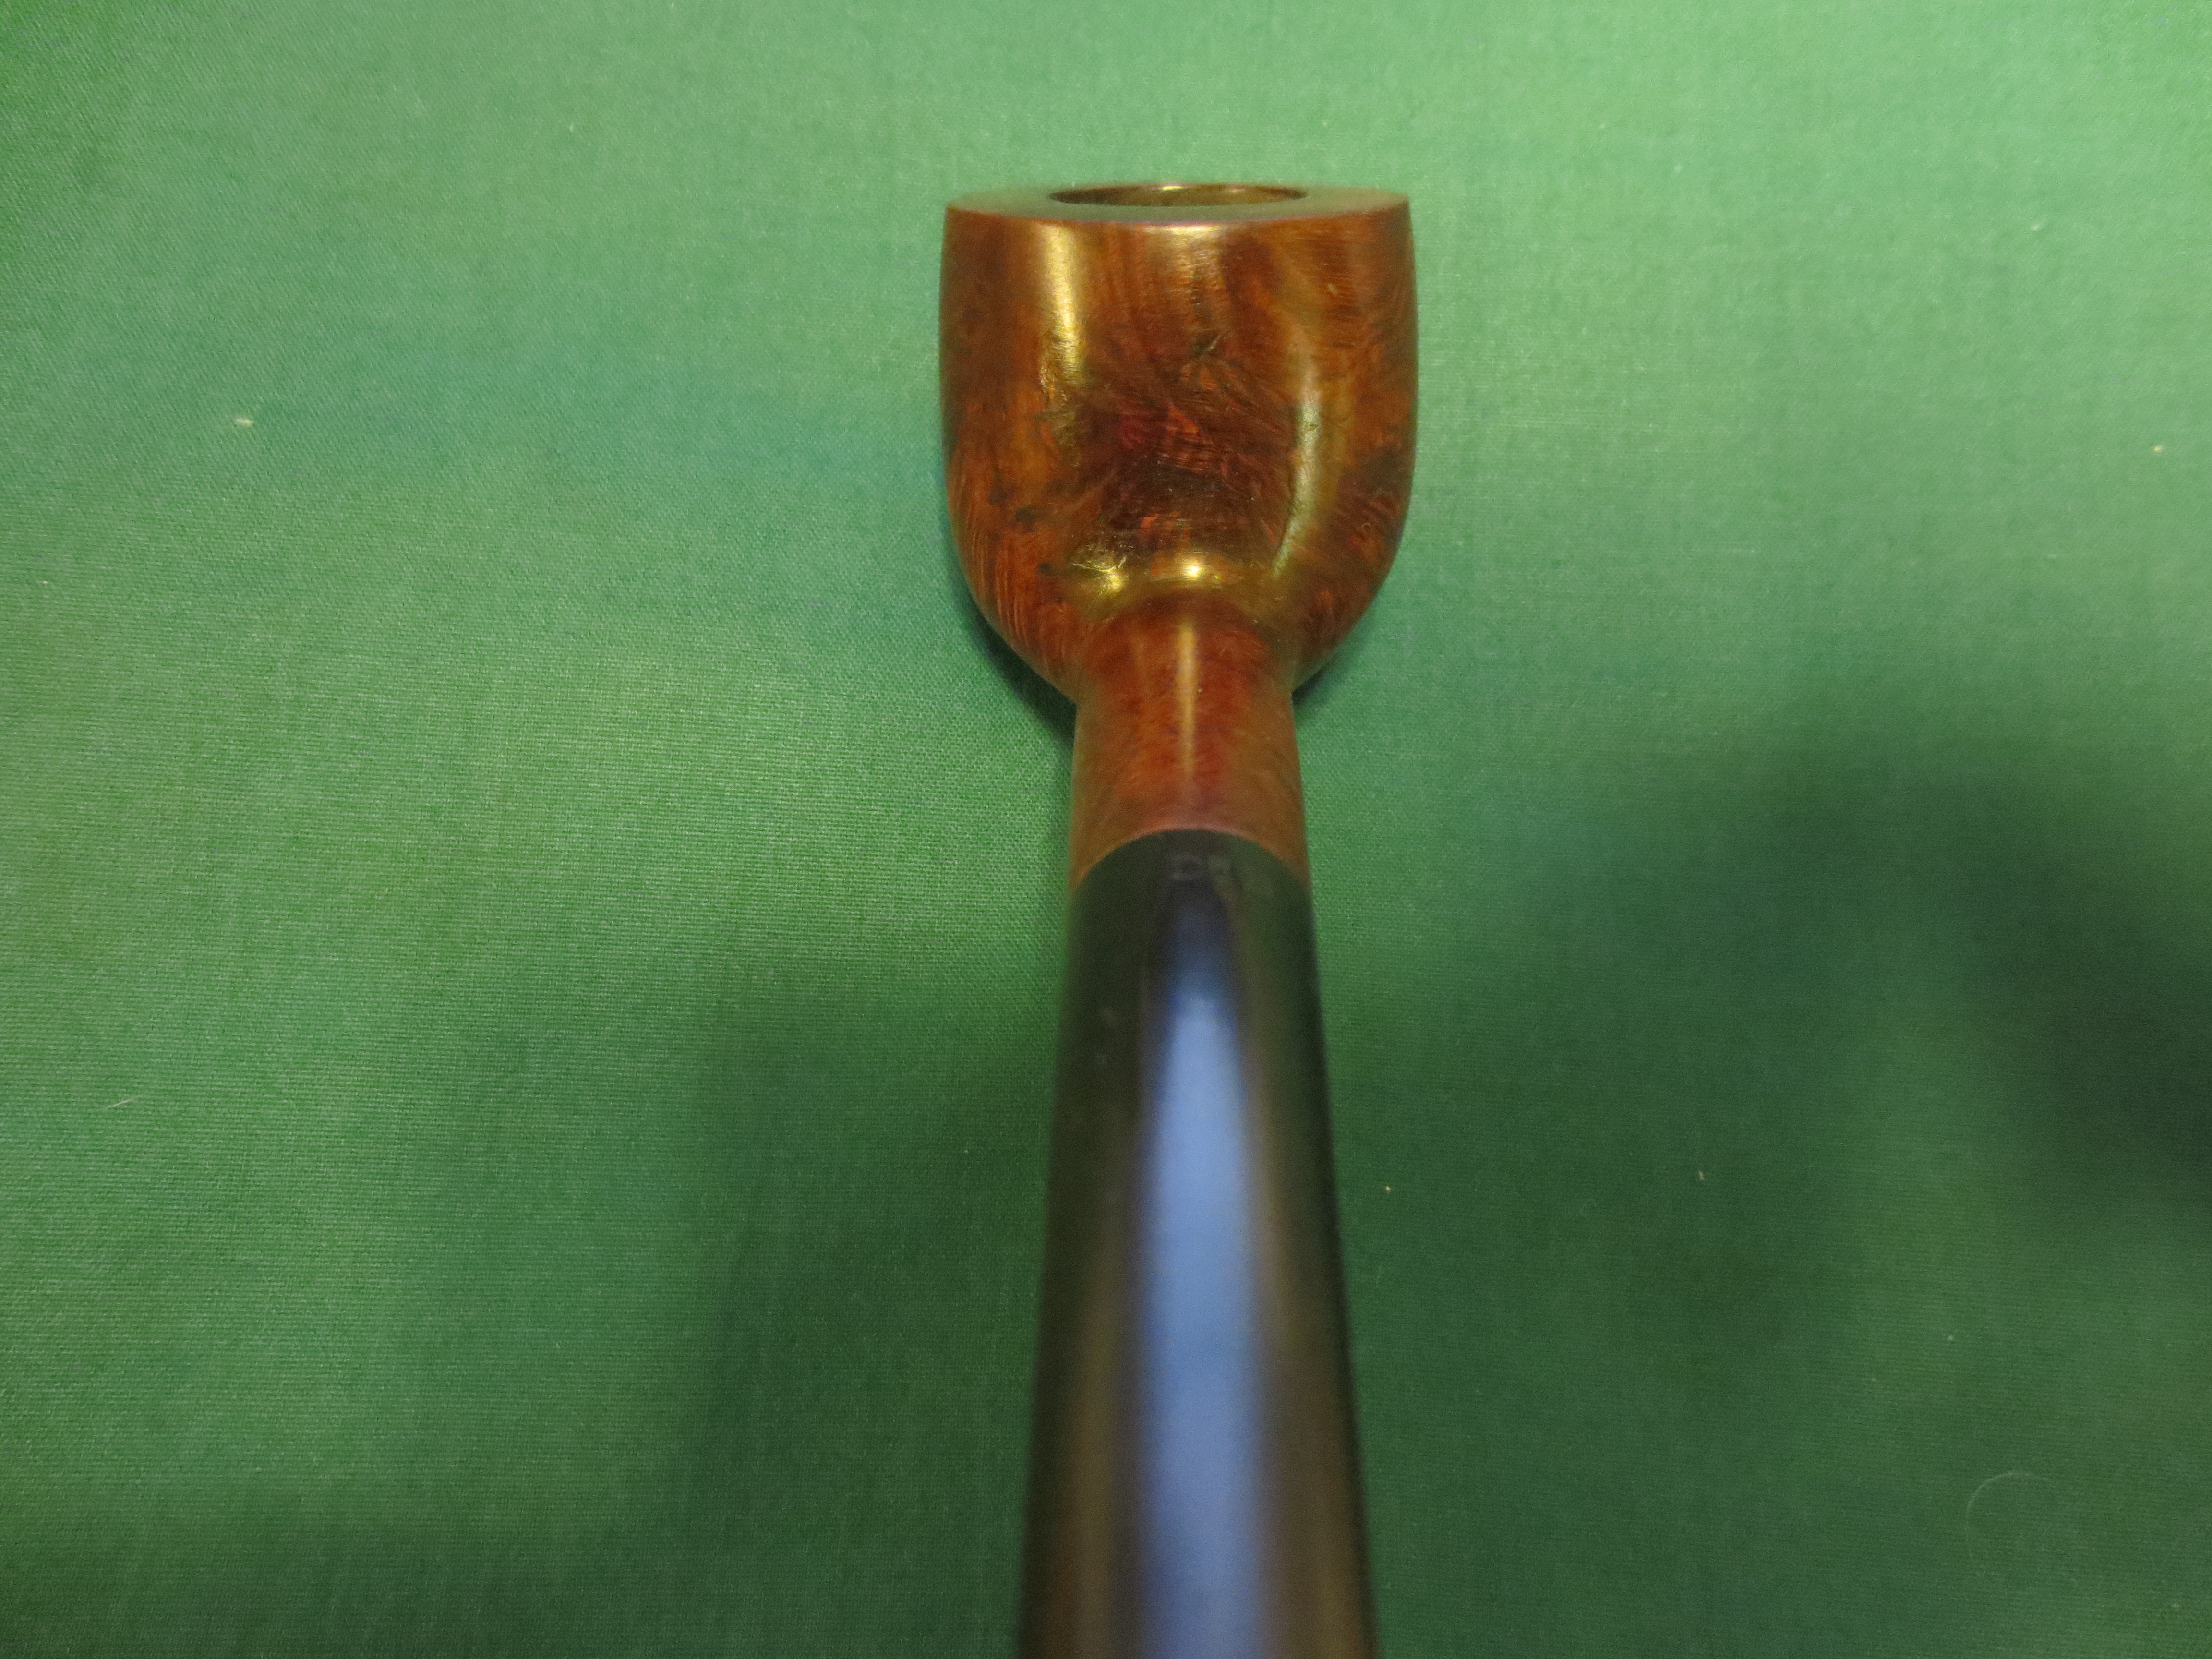
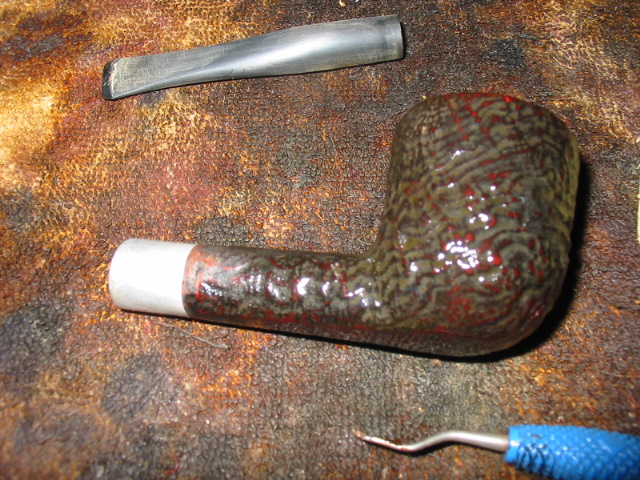
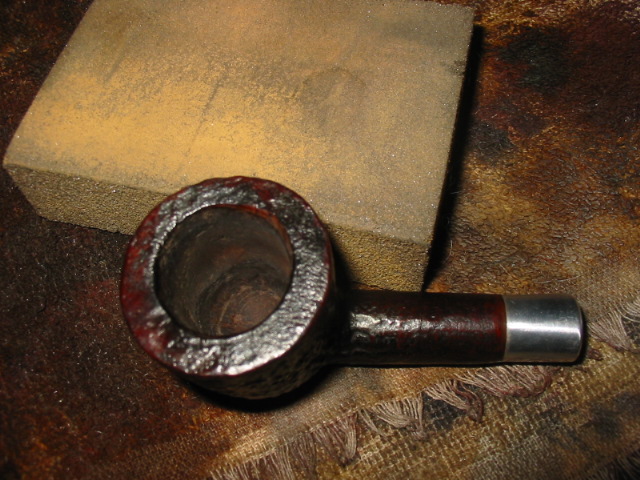
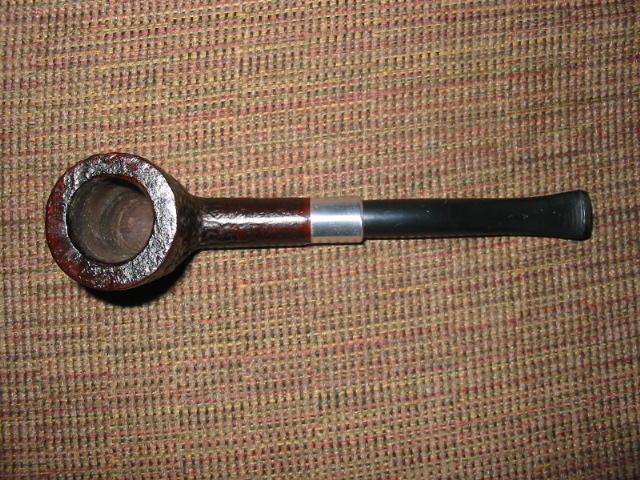
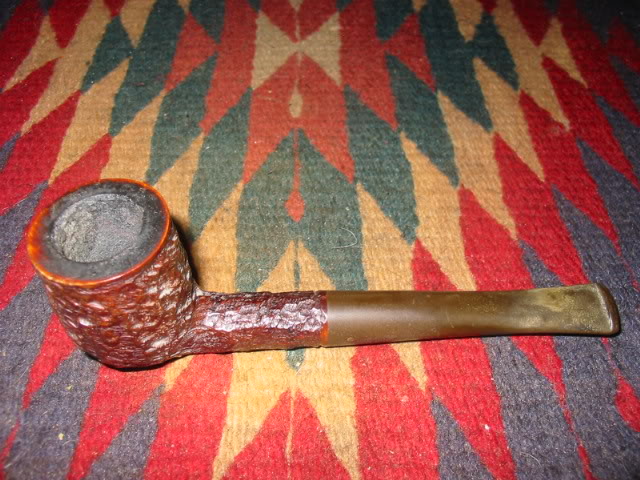
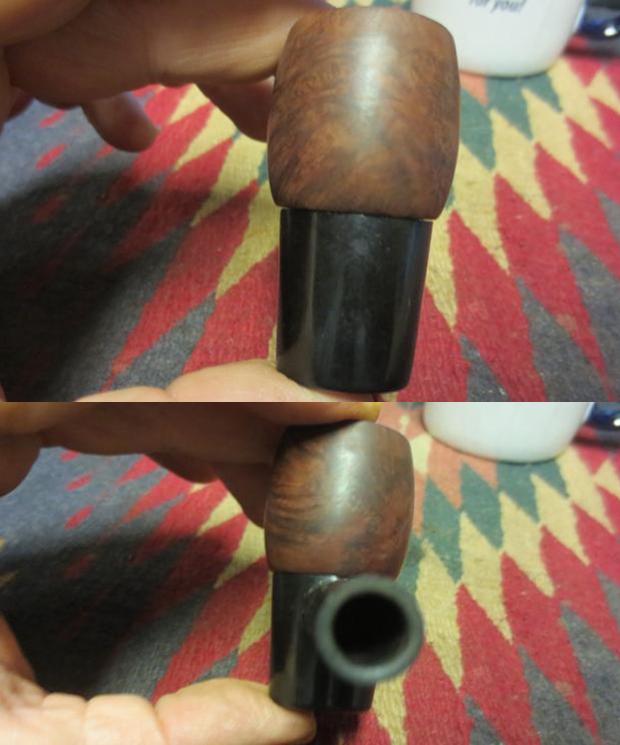
I took a close up photo of the rim top to show the damage to the inner edge of the rim. It is darkened and also has some burned areas on the top and inner edge.Filt12
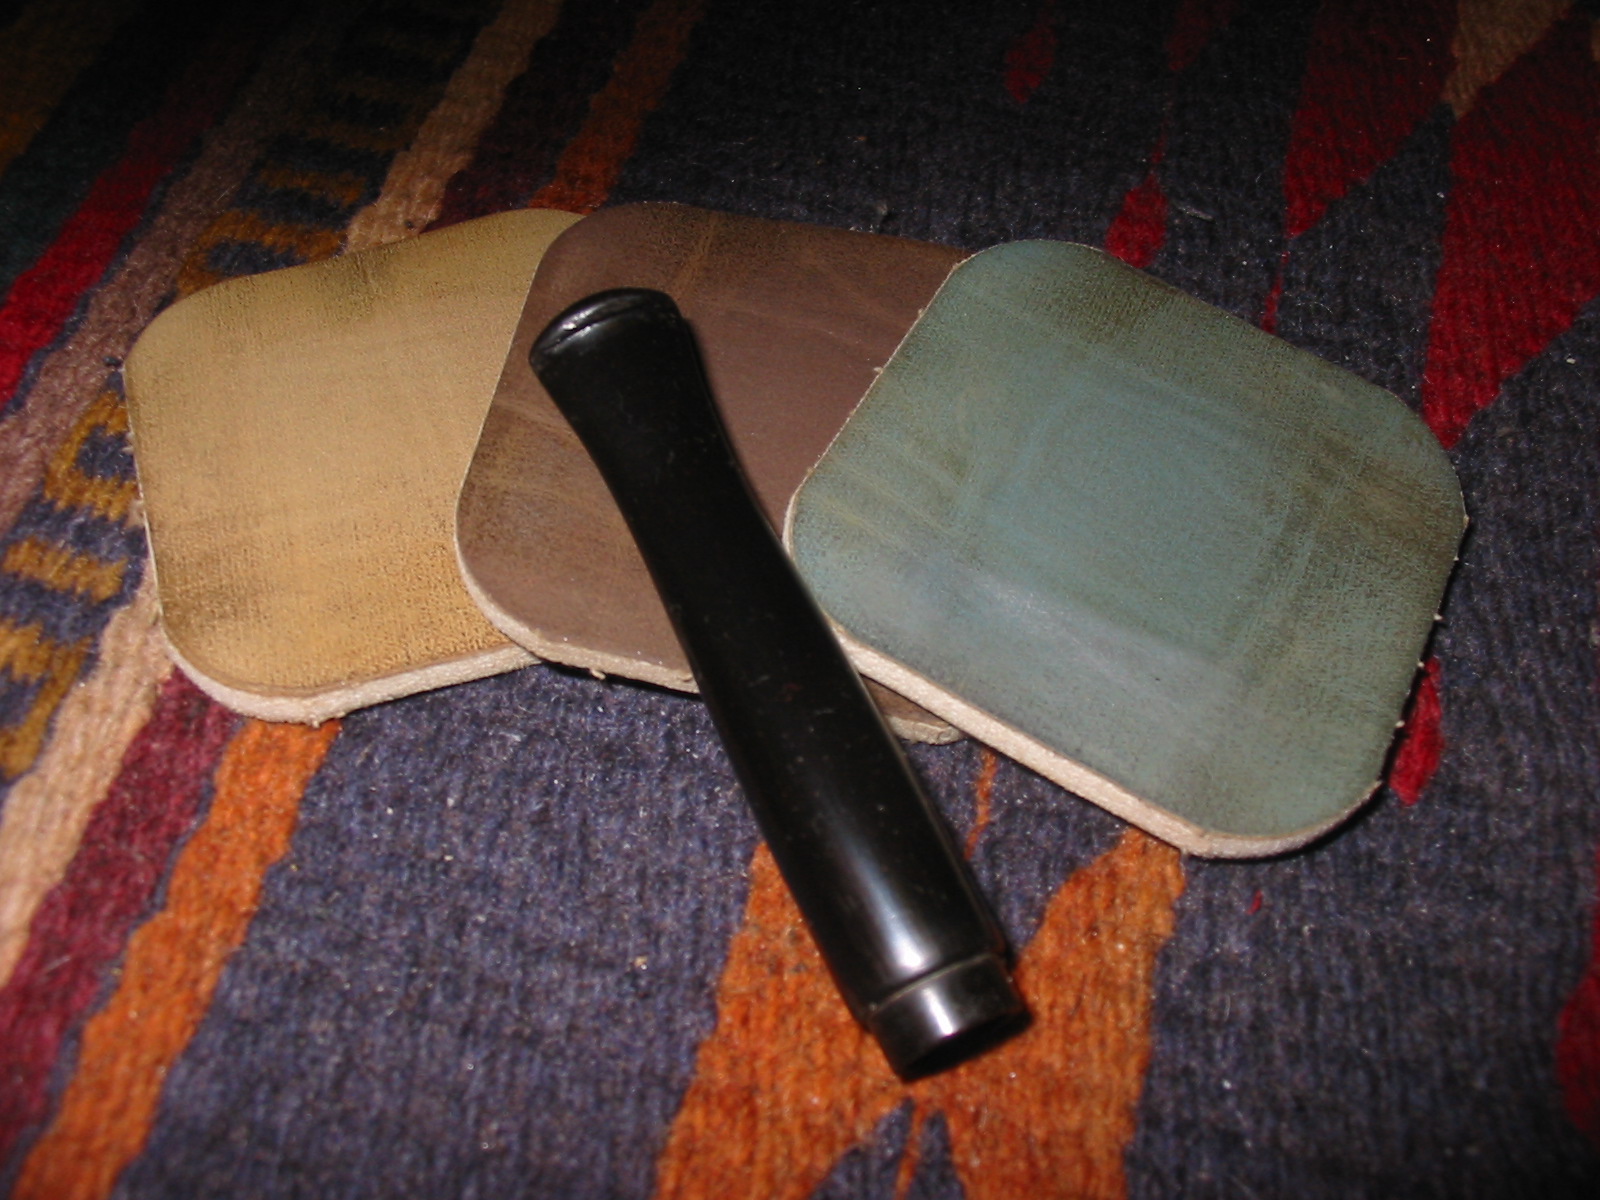
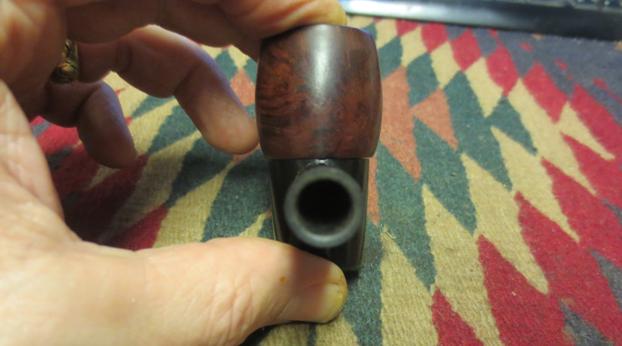
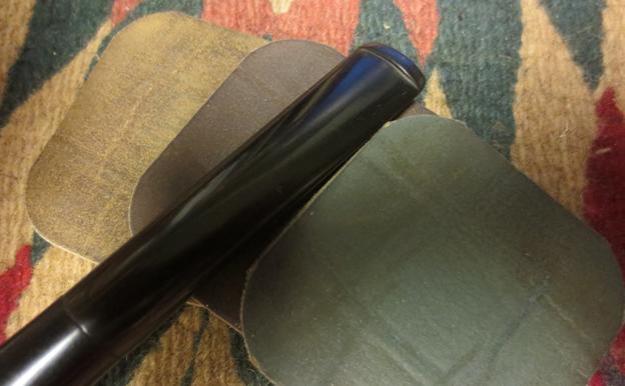
I also took a close up photo of the stem – it was stuck tight in the shank and it was underturned to the left. I tried to heat it with hot water to try to loosen it. It would not move. After taking this photo I put it in the hot water to soak and see if it would loosen the tars and oils in the shank that were holding it tight.Filt13I turned my attention to the bowl and the base while the stem soaked. I cleaned out the airway in the bottom of the bowl with a cotton swab and alcohol to remove the “gunk” that was clogging the airway and reducing the air flow.Filt14
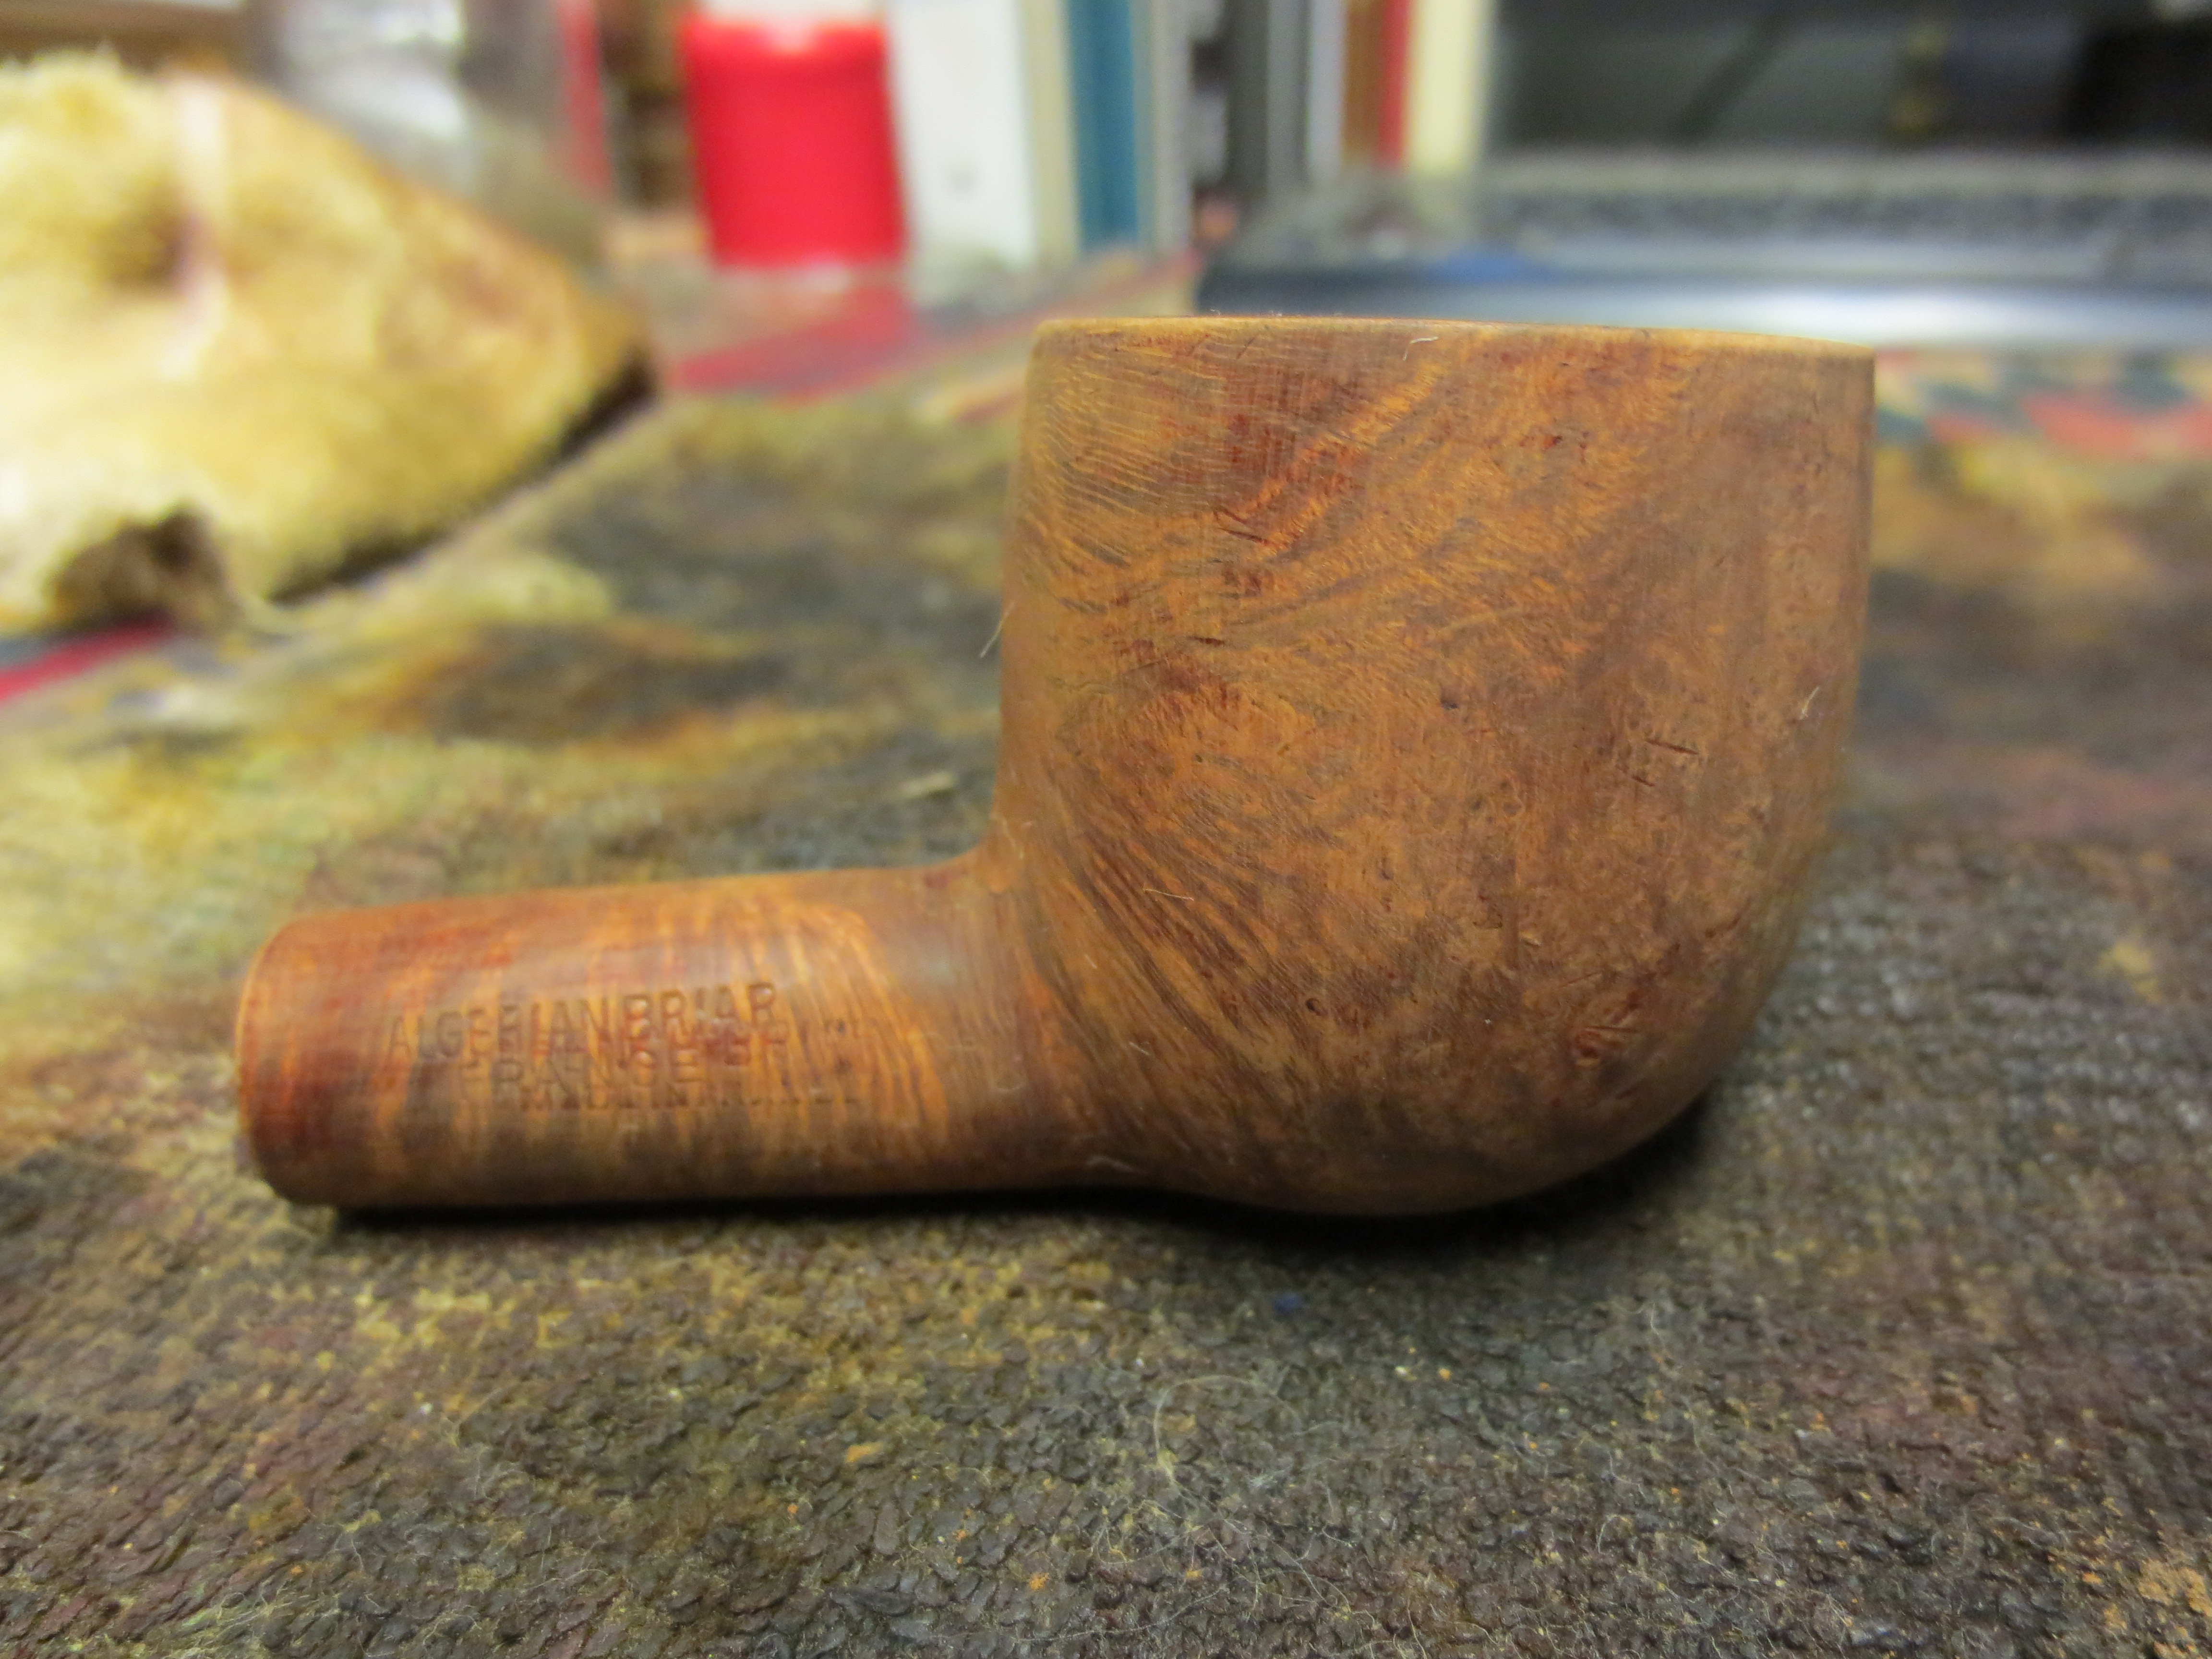
I topped the bowl on a topping board with 220 grit sandpaper. I topped it until I had removed the damaged areas on the rim surface.Filt15I rolled a piece of 220 grit sandpaper to sand the bowl and the inner edge to clean up the damaged inner edge and bring it back to round.Filt16
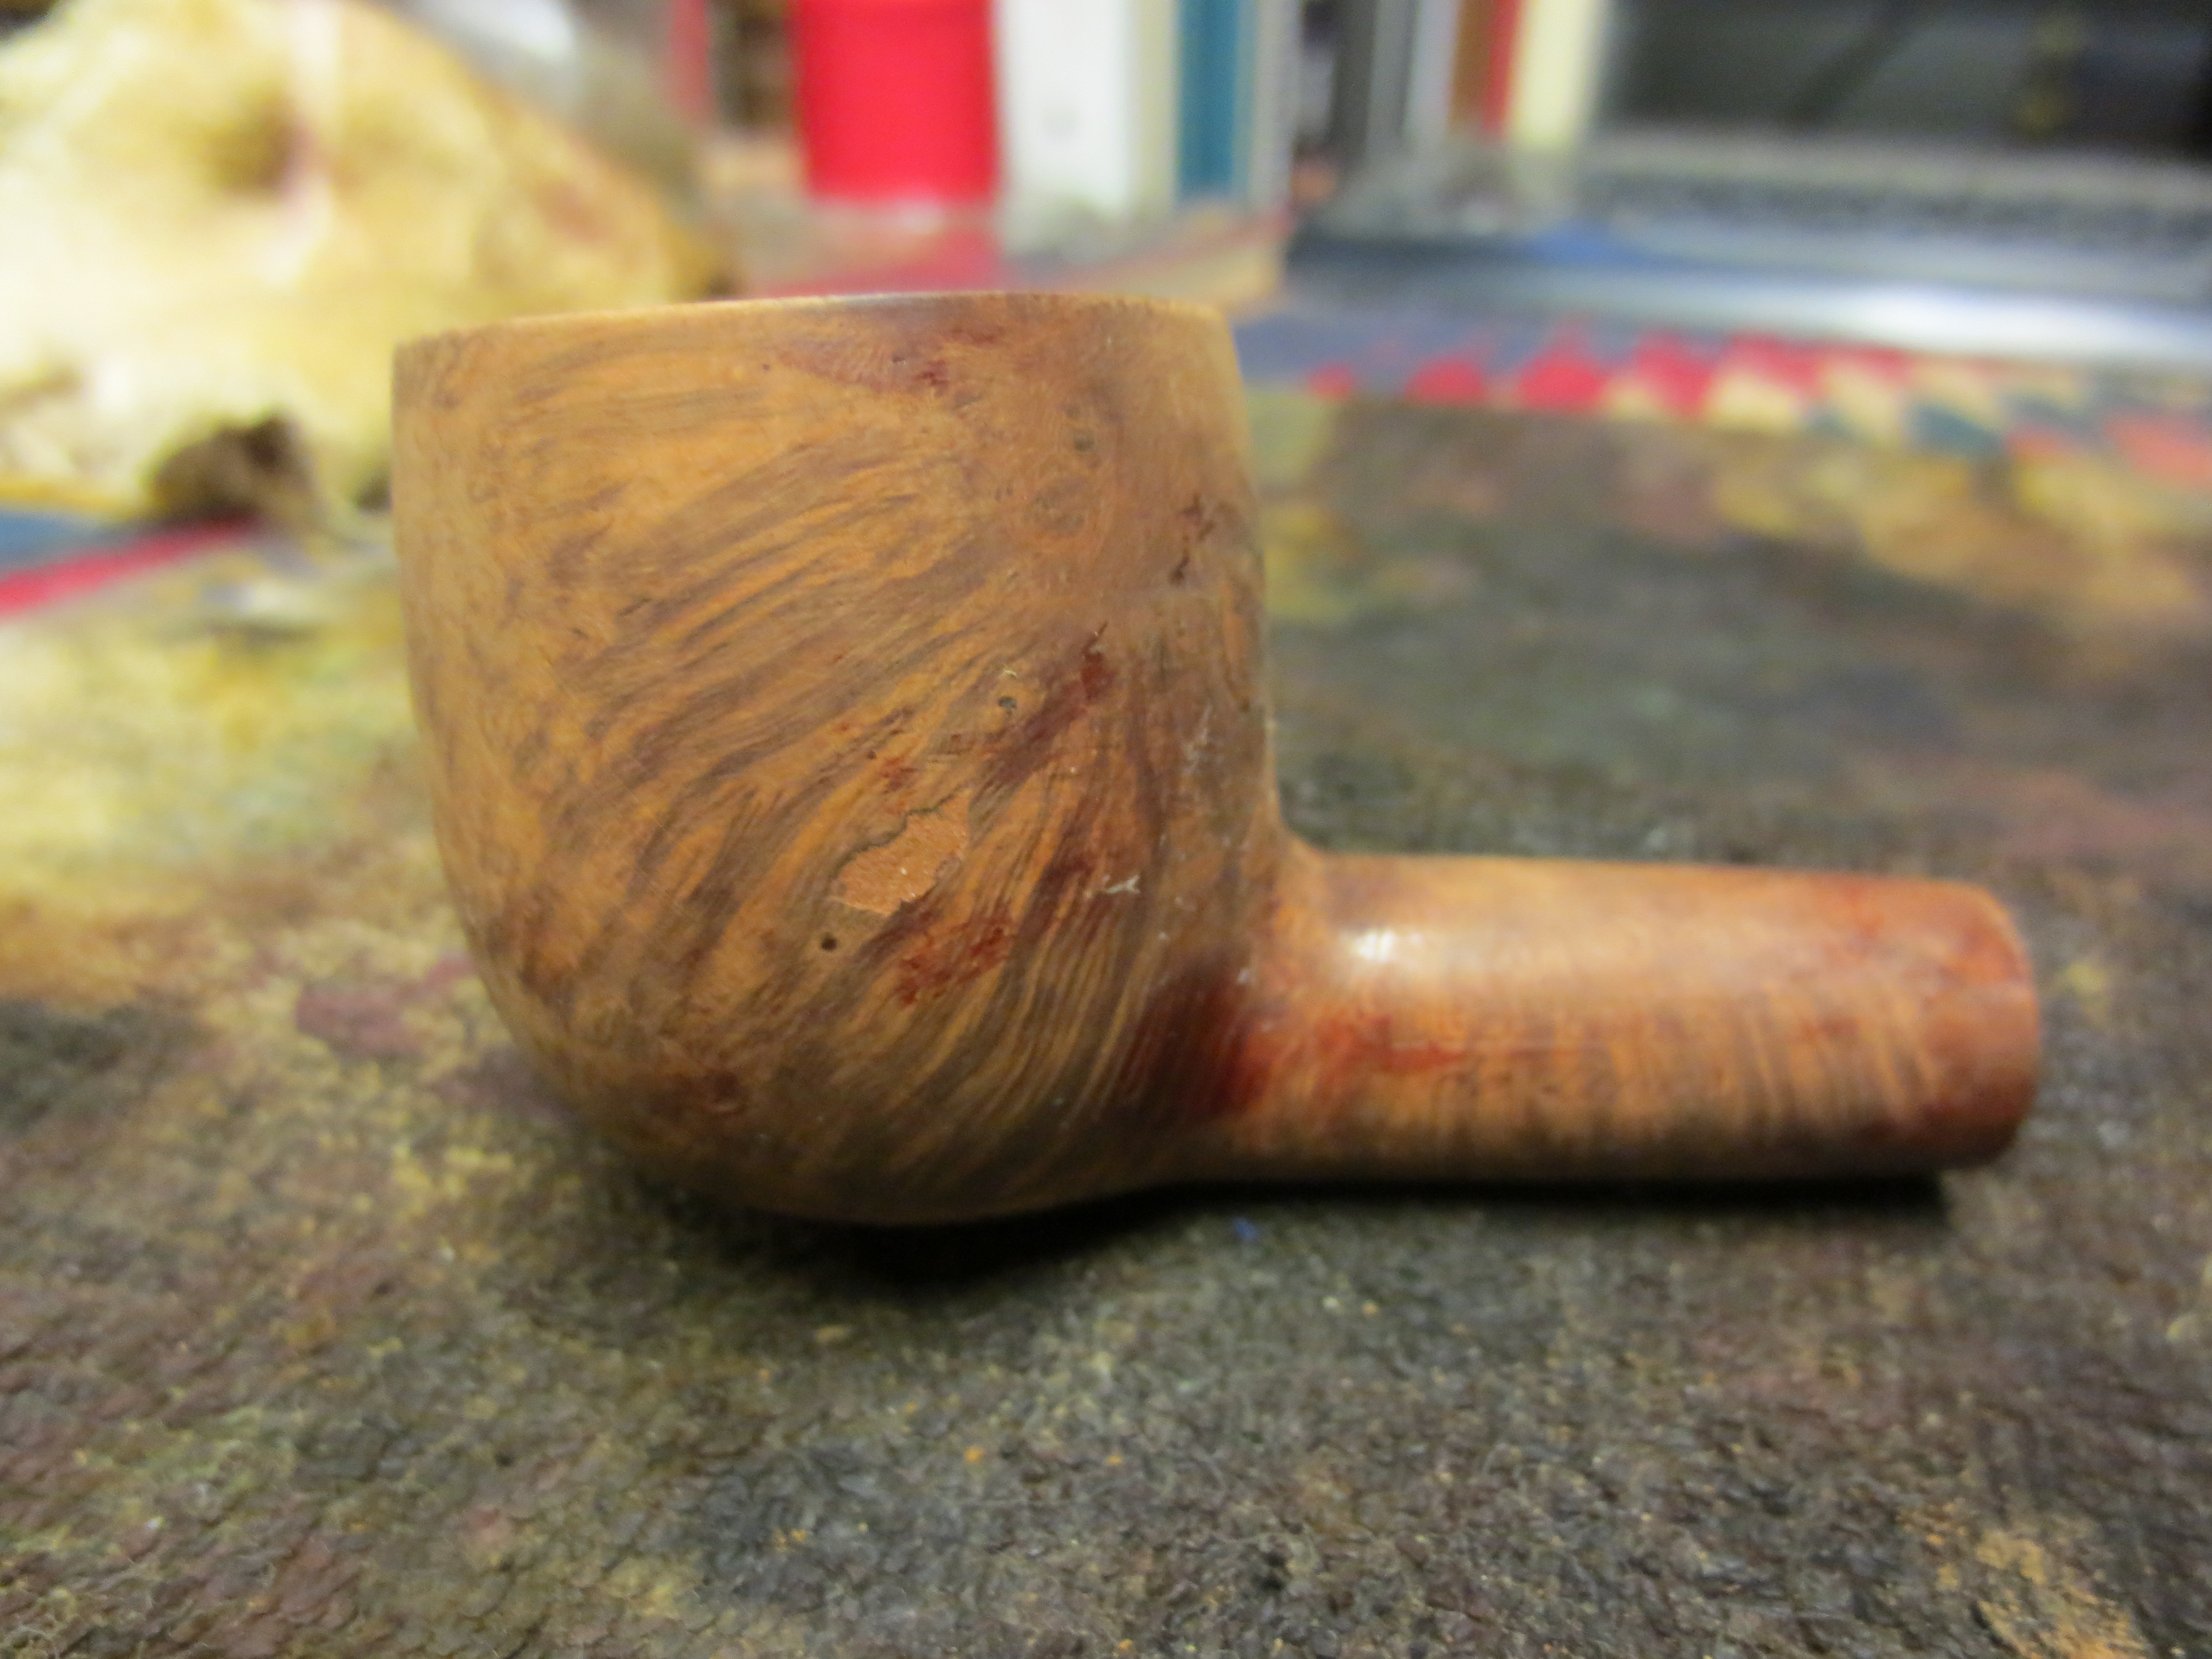
I sanded the bowl and rim with a medium and a fine grit sanding block to remove the scratches in the briar. Once it was clean of scratches I stained it with a dark brown stain thinned by half with alcohol. I flamed it and repeated the process.Filt17
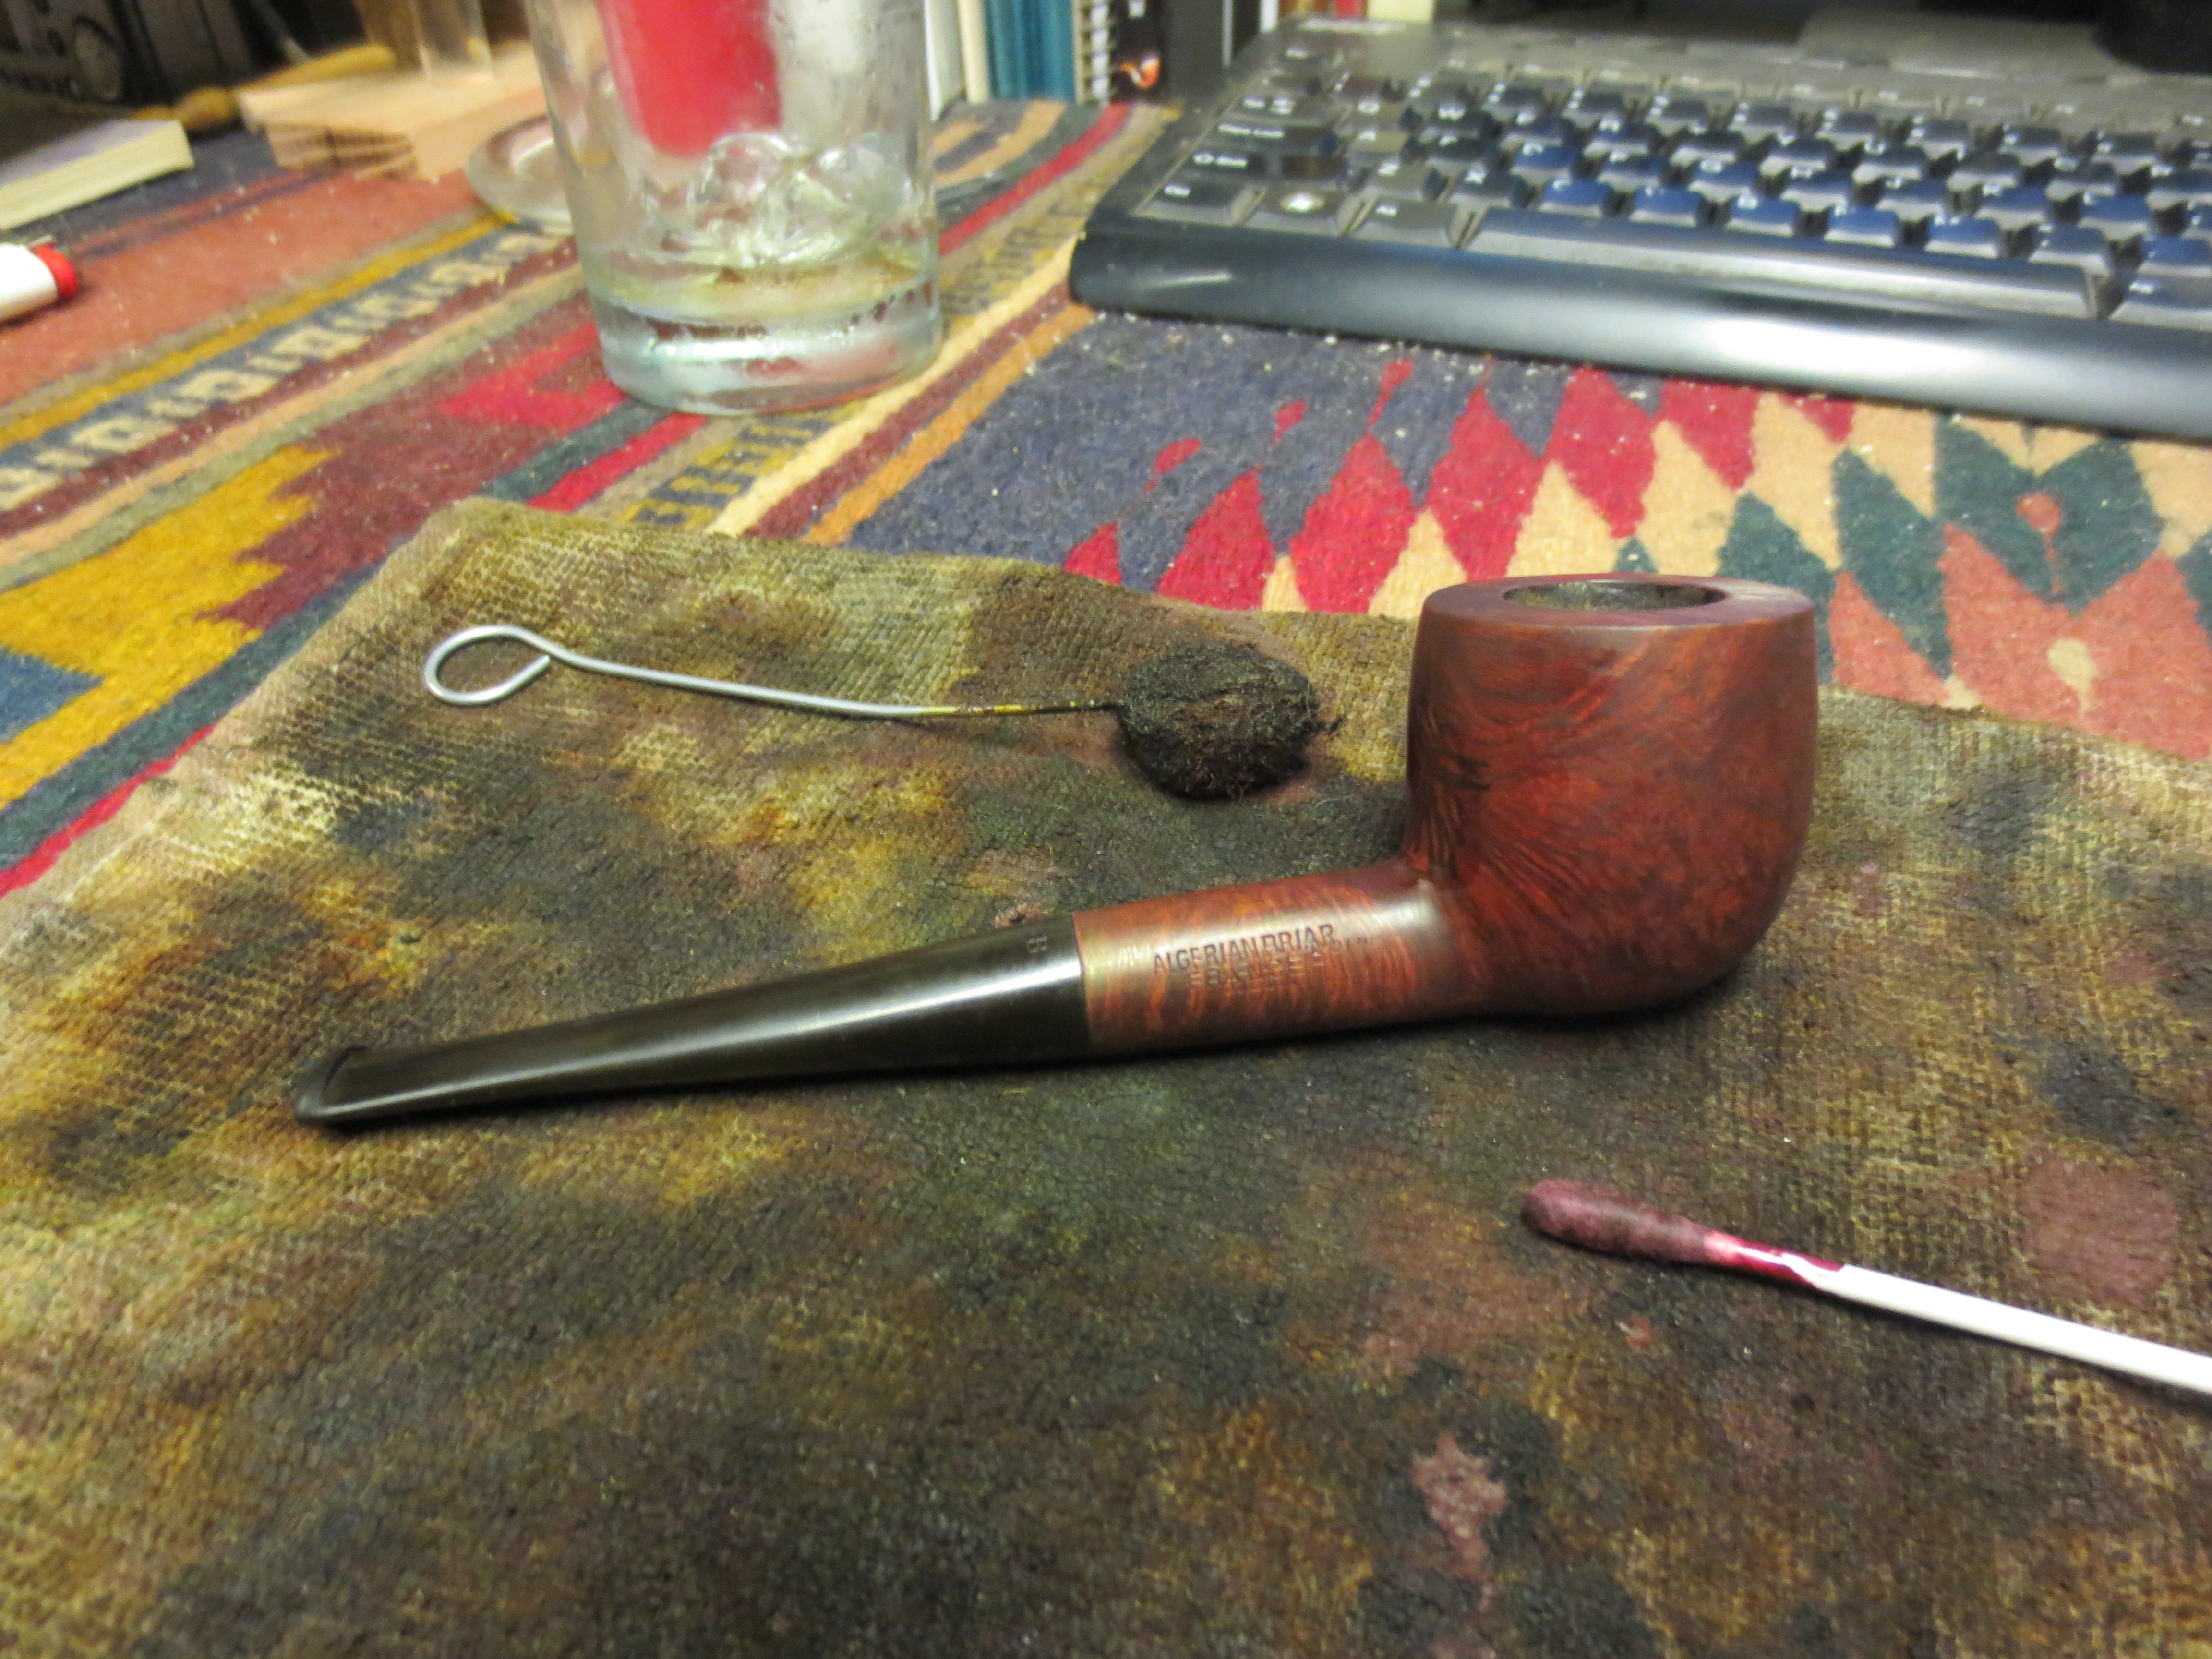
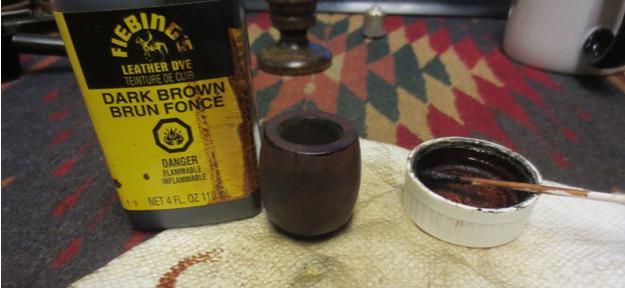
I wiped the bowl down with cotton pads and alcohol to make the stain more transparent and to make the grain show through.filt18
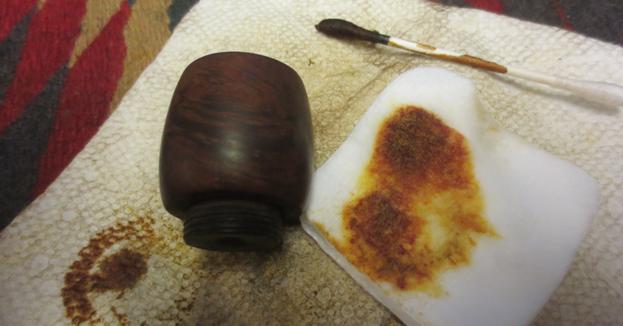
I took the stem and base out of the hot water and wiggled it until the stem turned. I removed the stem so that I could clean the inside of the shank and base.Filt19I used a dental spatula inside the tube of the shank to scrape away some of the thick build up on the walls of the shank. I then scrubbed it down with alcohol, cotton swabs and pipe cleaners until they finally came out clean. I also scrubbed down the inside of the base with them to remove the grime in the base.Filt20
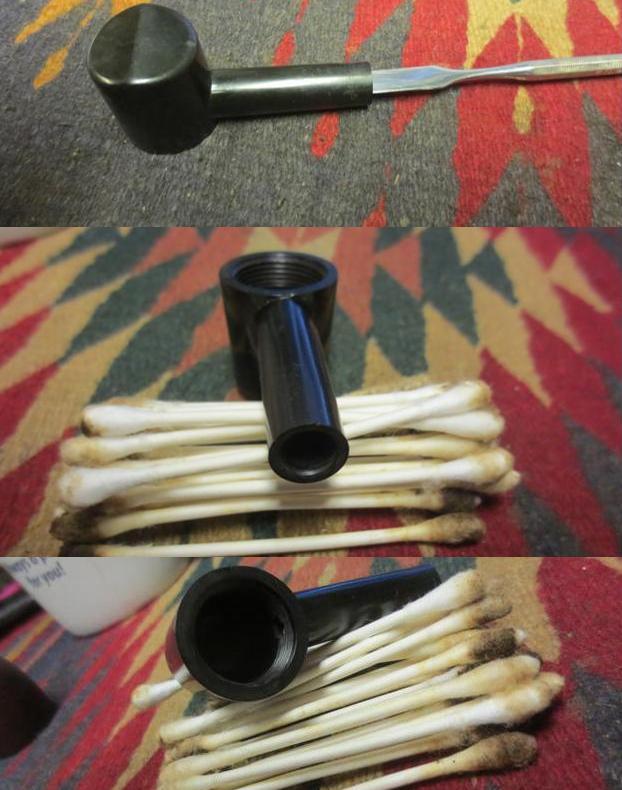
I used the micromesh sanding pads to polish the Bakelite base and the shank. I sanded it with 1500-12000 grit pads and then wiped it down with some Obsidian Oil.Filt21I scrubbed out the canister one more time and found that it was very clean. I dropped it in place in the base.Filt22
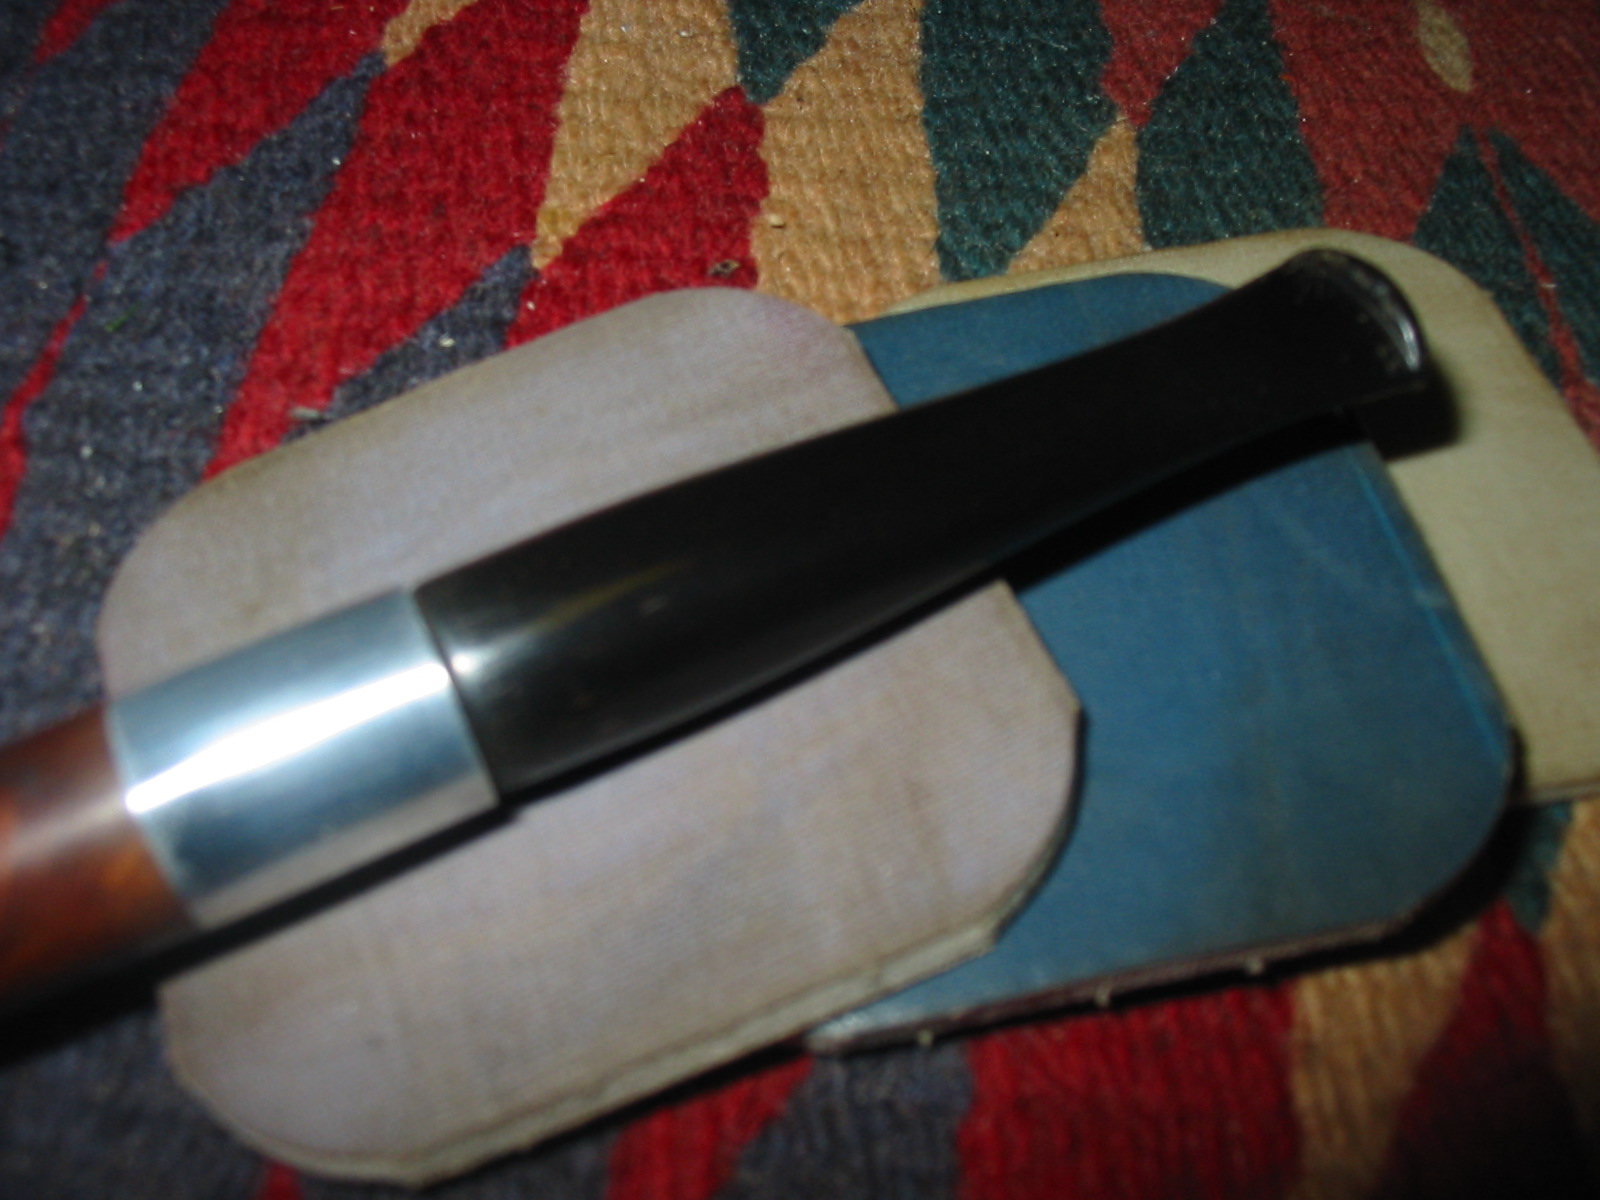
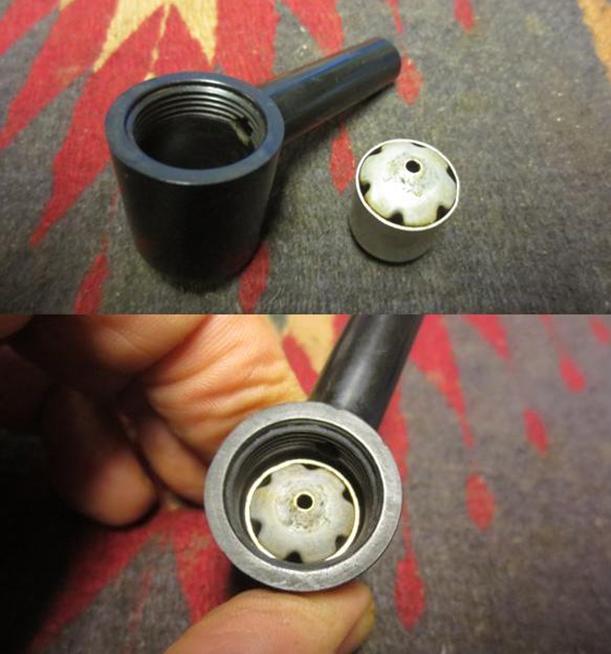
With the canister in place I screwed the bowl onto the base and took some photos.Filt23 Filt24 Filt25
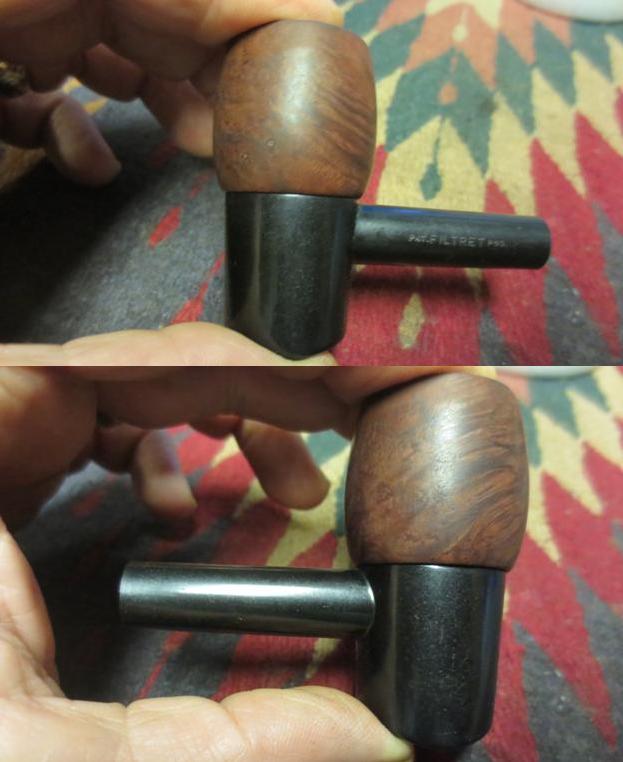
It was ready to buff with Blue Diamond so I took it to the wheel and buffed the bowl and the base. I gave bowl several coats of carnauba wax and then buffed it with a clean buffing pad to raise the shine. Once I finish the stem I will give it several more coats of wax.Filt26 Filt27 Filt28
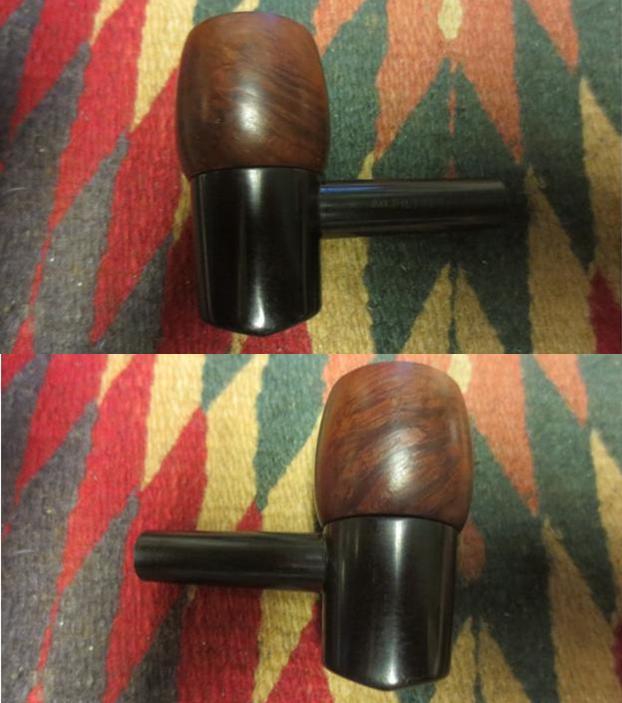
I cleaned out the airway in the stem with alcohol, cotton swabs and pipe cleaners. After heating it with the hot water to loosen the stem a lot of grime came loose in the shank and ran down the stem.Filt29
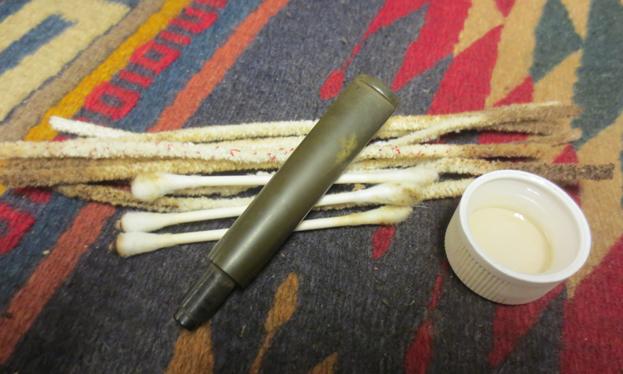
The stem had some tooth chatter along with the oxidation that I brought out with the hot water bath. I sanded it with 220 grit sandpaper to remove both the chatter and the oxidation. I wiped it down with Obsidian Oil.Filt30
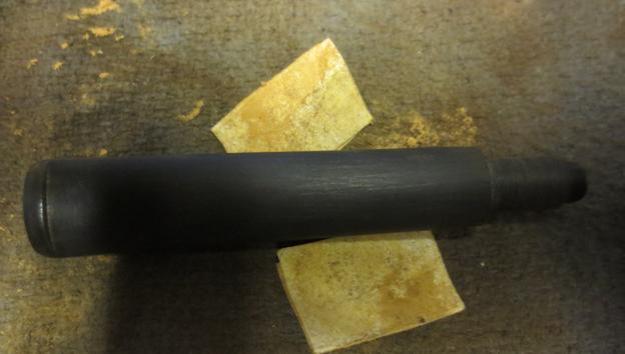
I wet sanded the stem with 1500-2400 grit micromesh sanding pads and rubbed it down with Obsidian Oil. I dry sanded it with 3200-4000 and gave it another coat of oil. I finished sanding it with 6000-12000 grit pads and gave it another coat of oil. I buffed it on the buffer with Blue Diamond polish and gave it a final coat of Obsidian Oil and set it aside to dry.Filt31 Filt32 Filt33
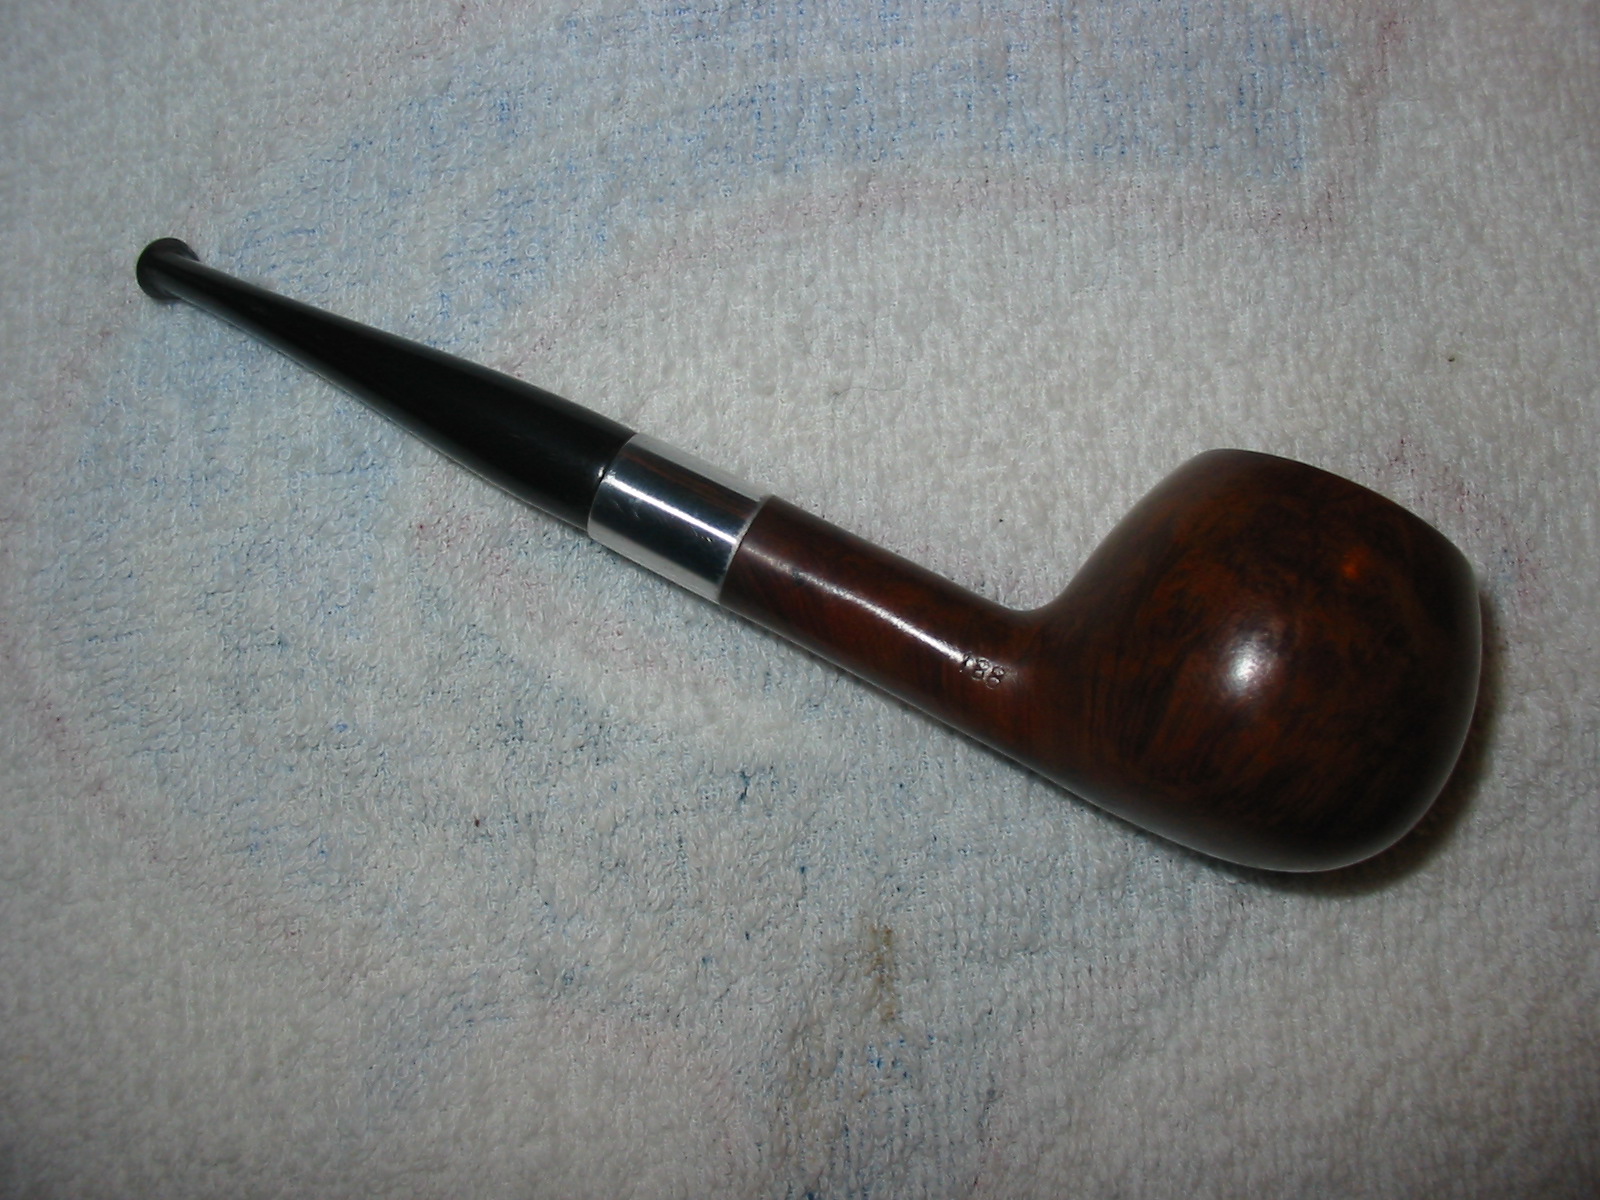
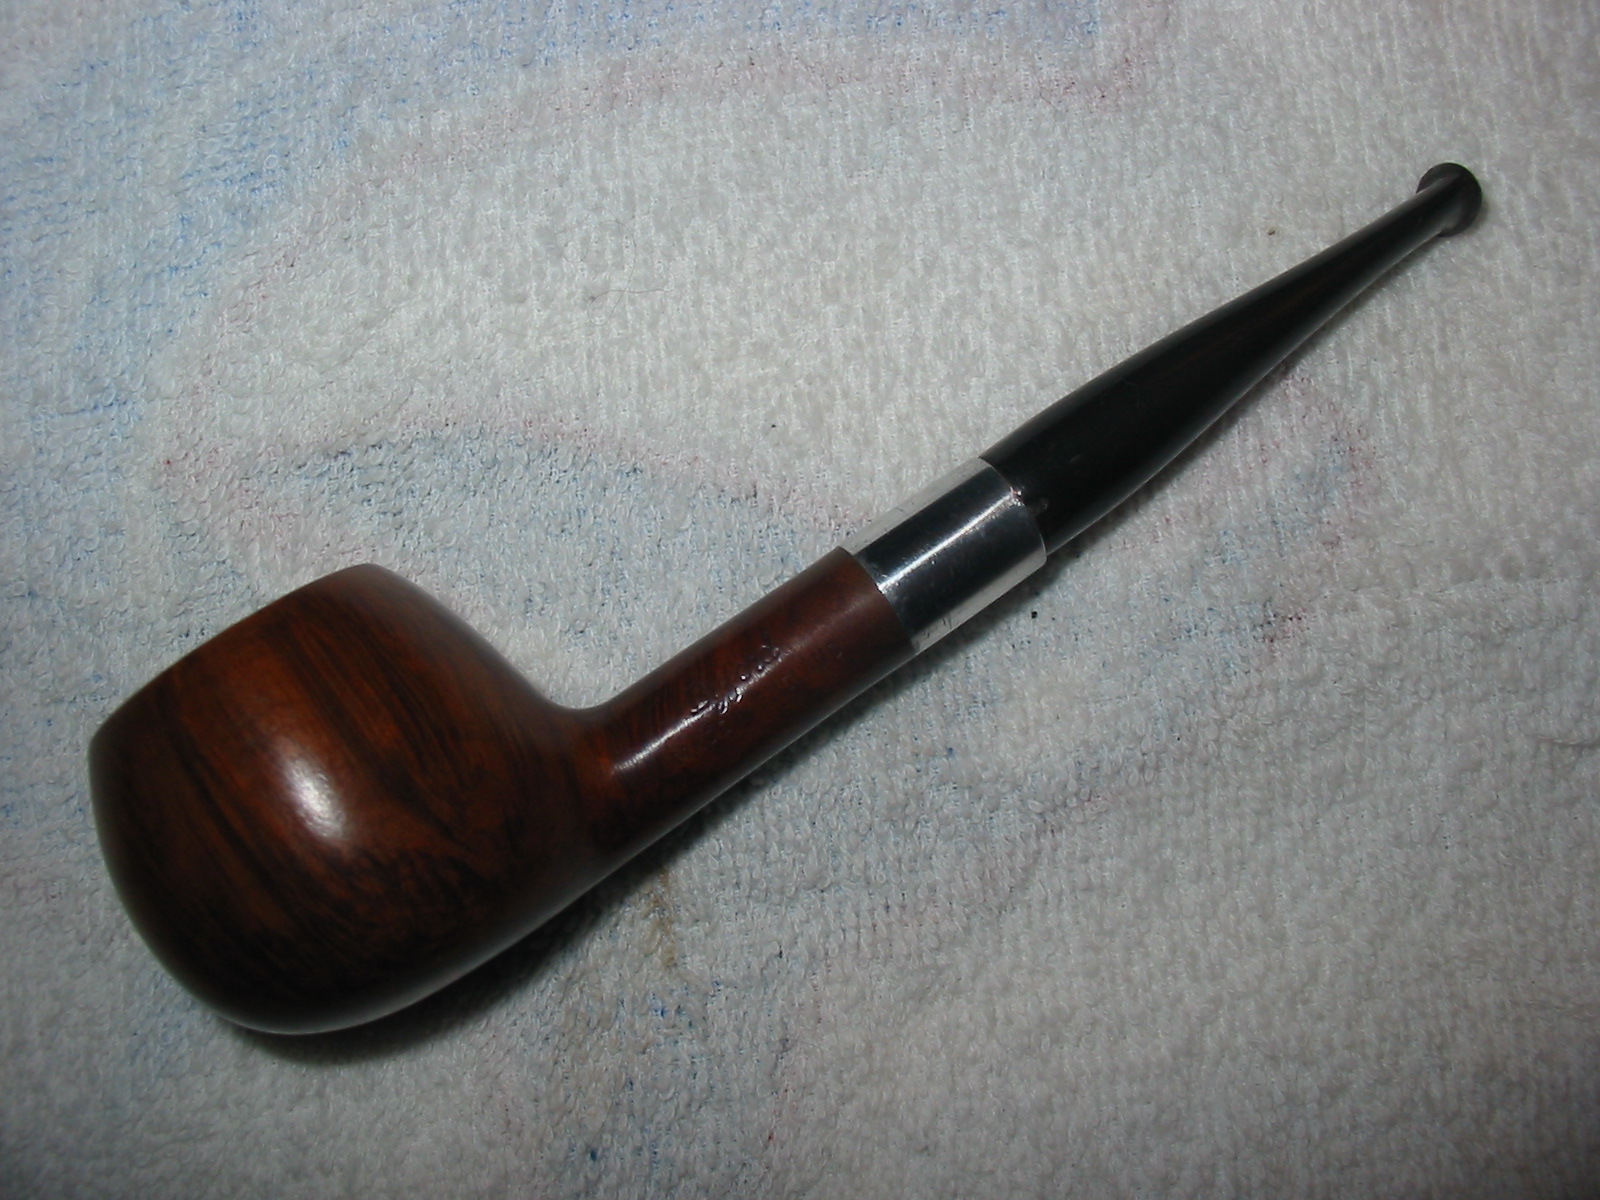
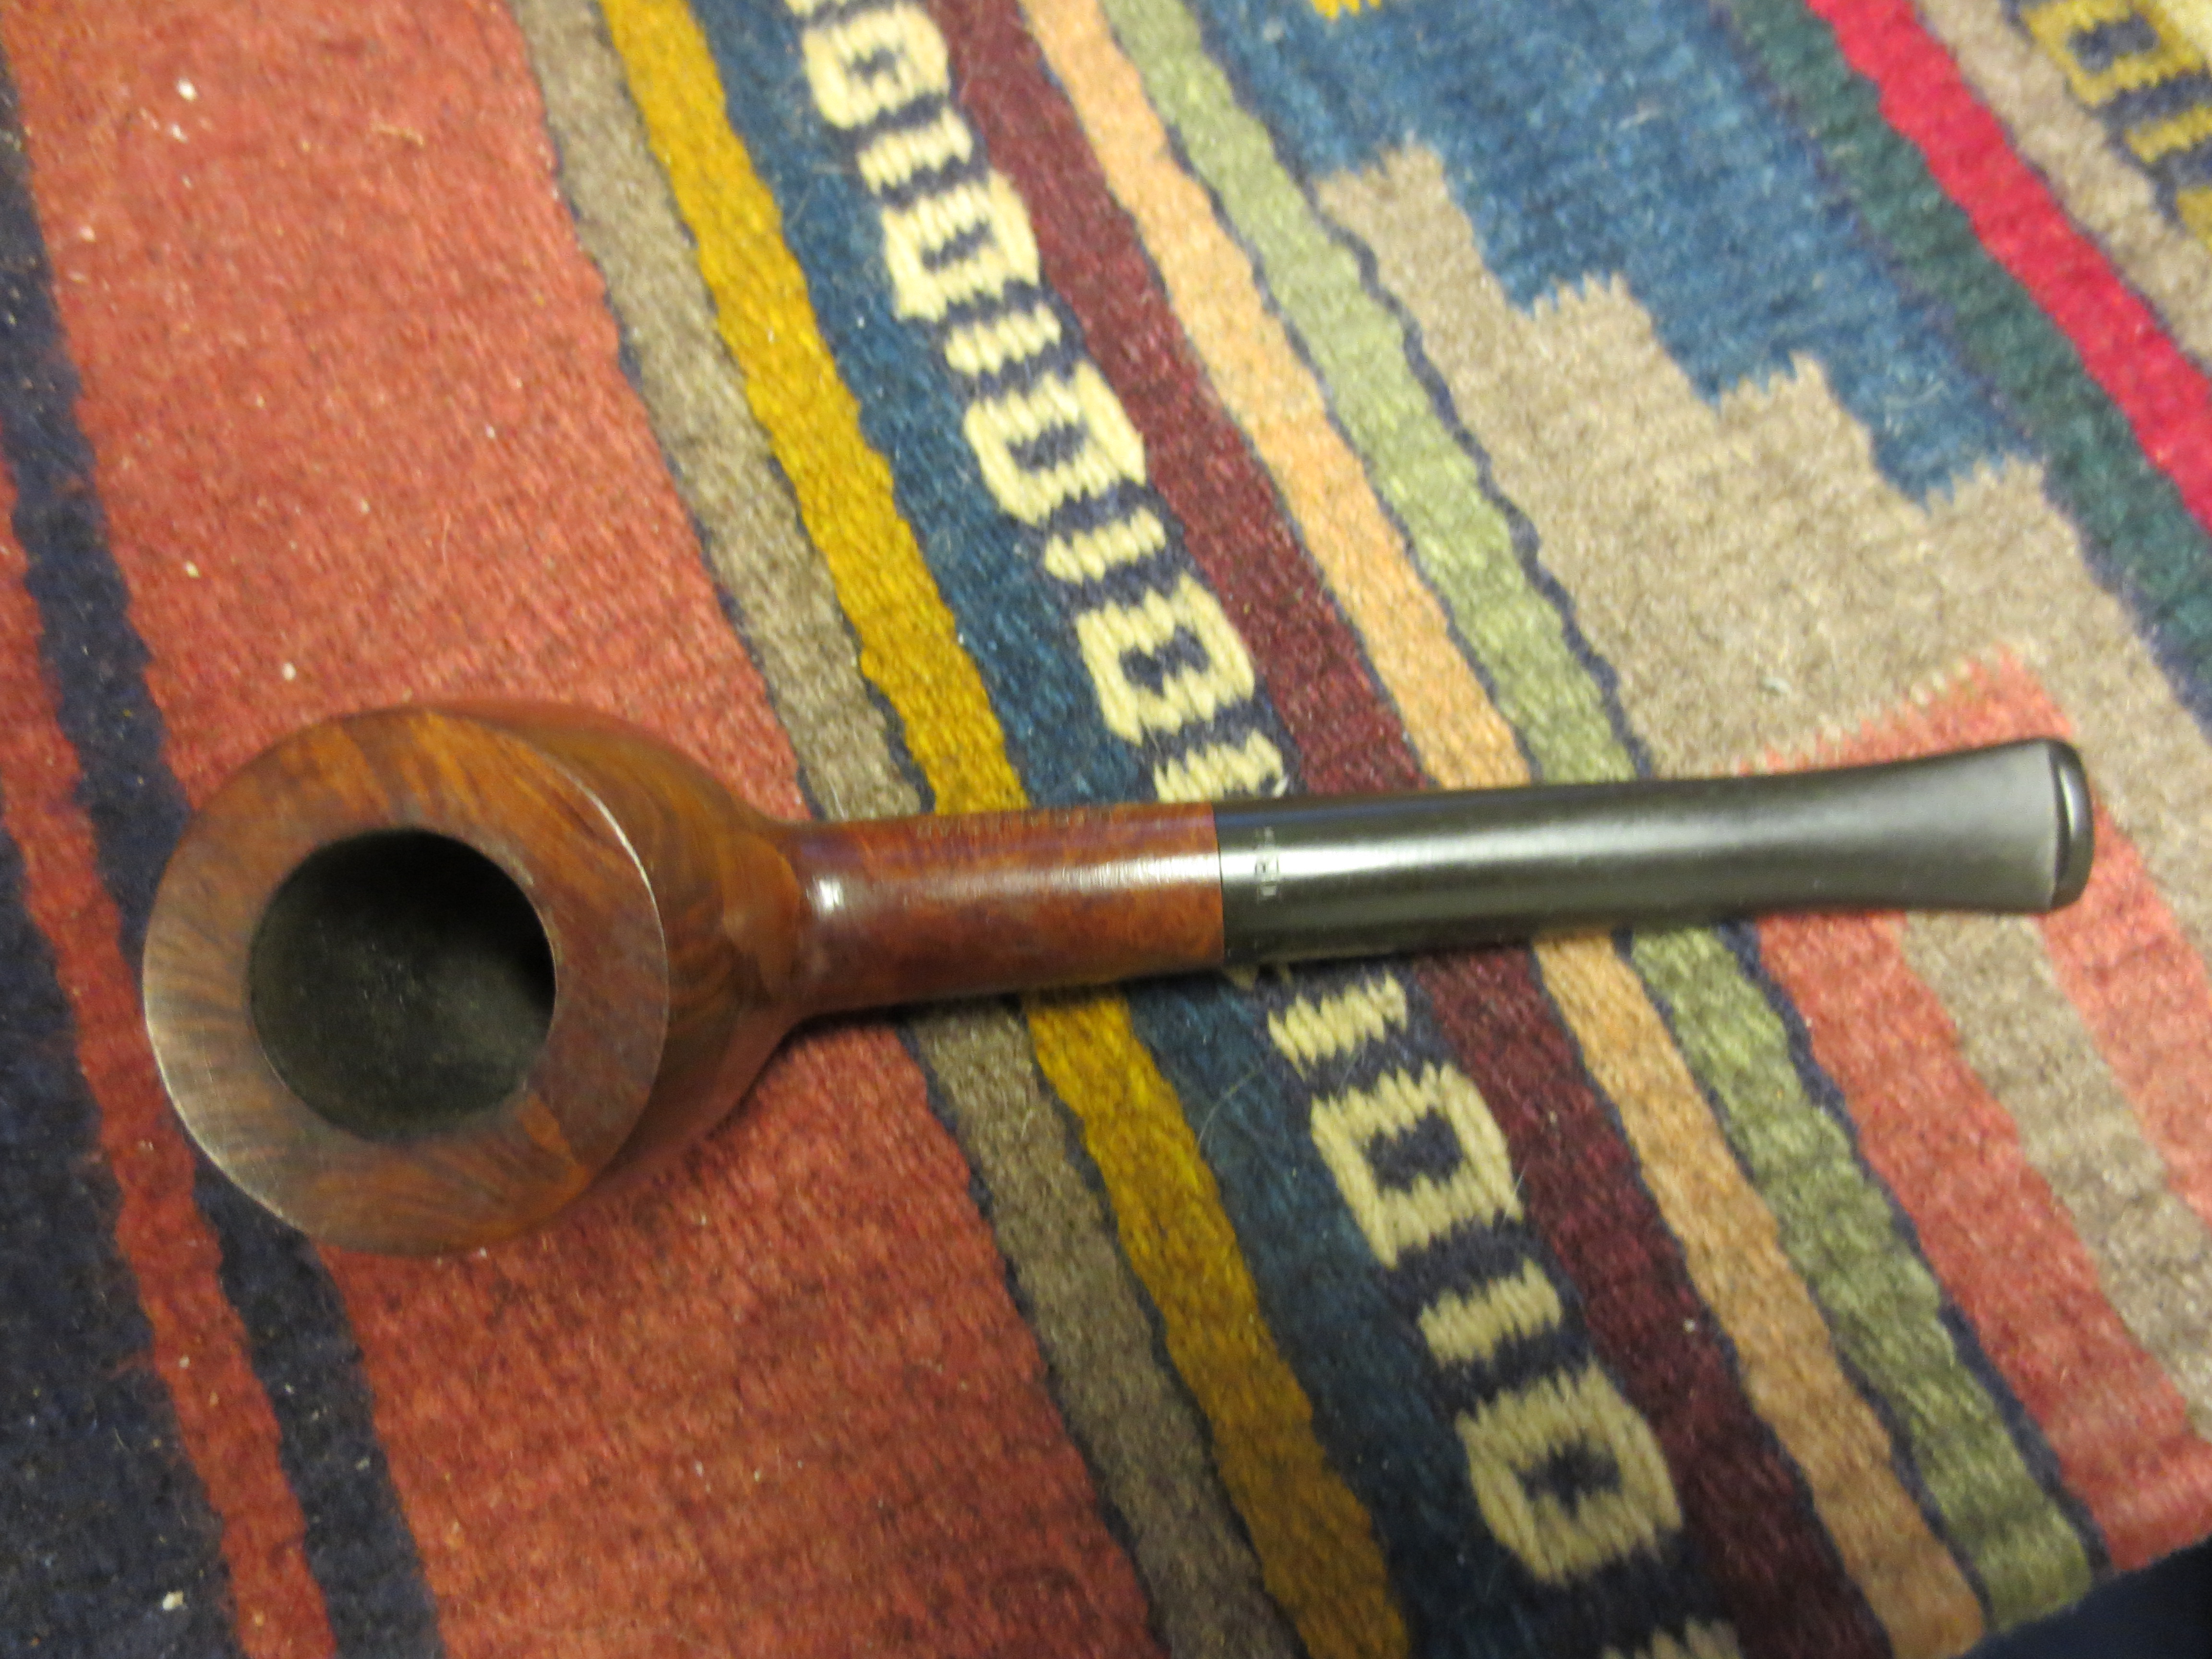
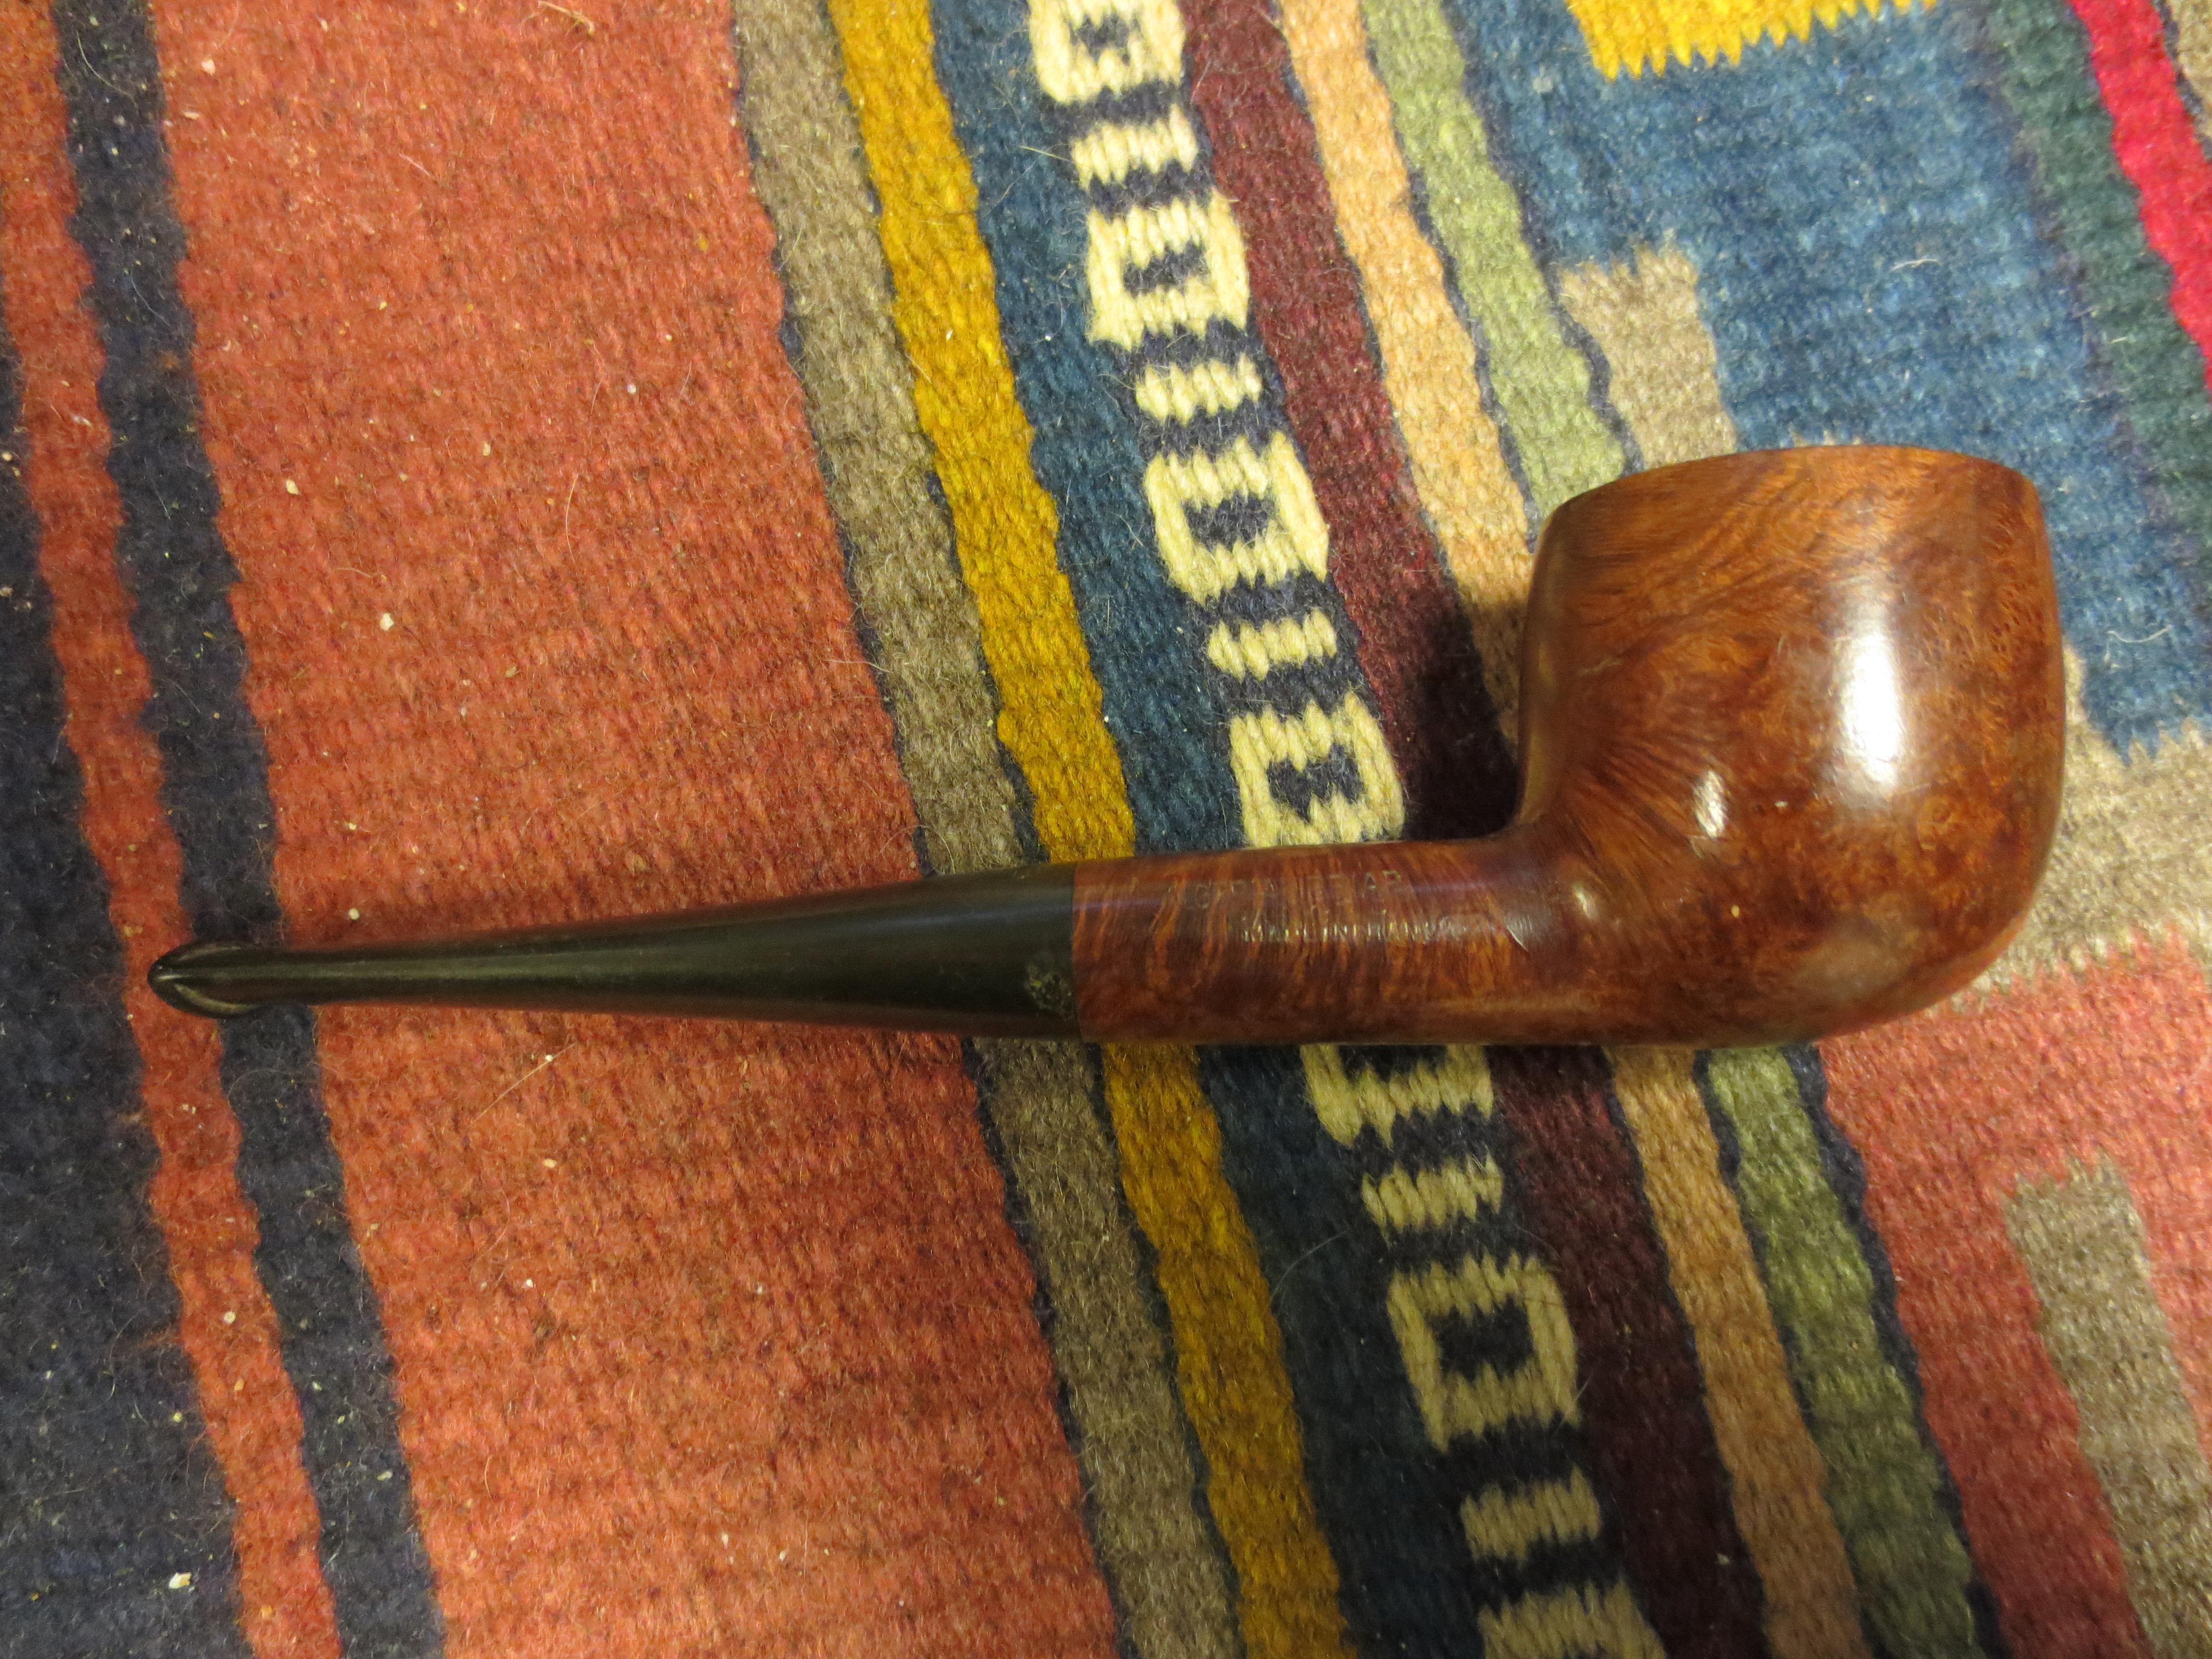
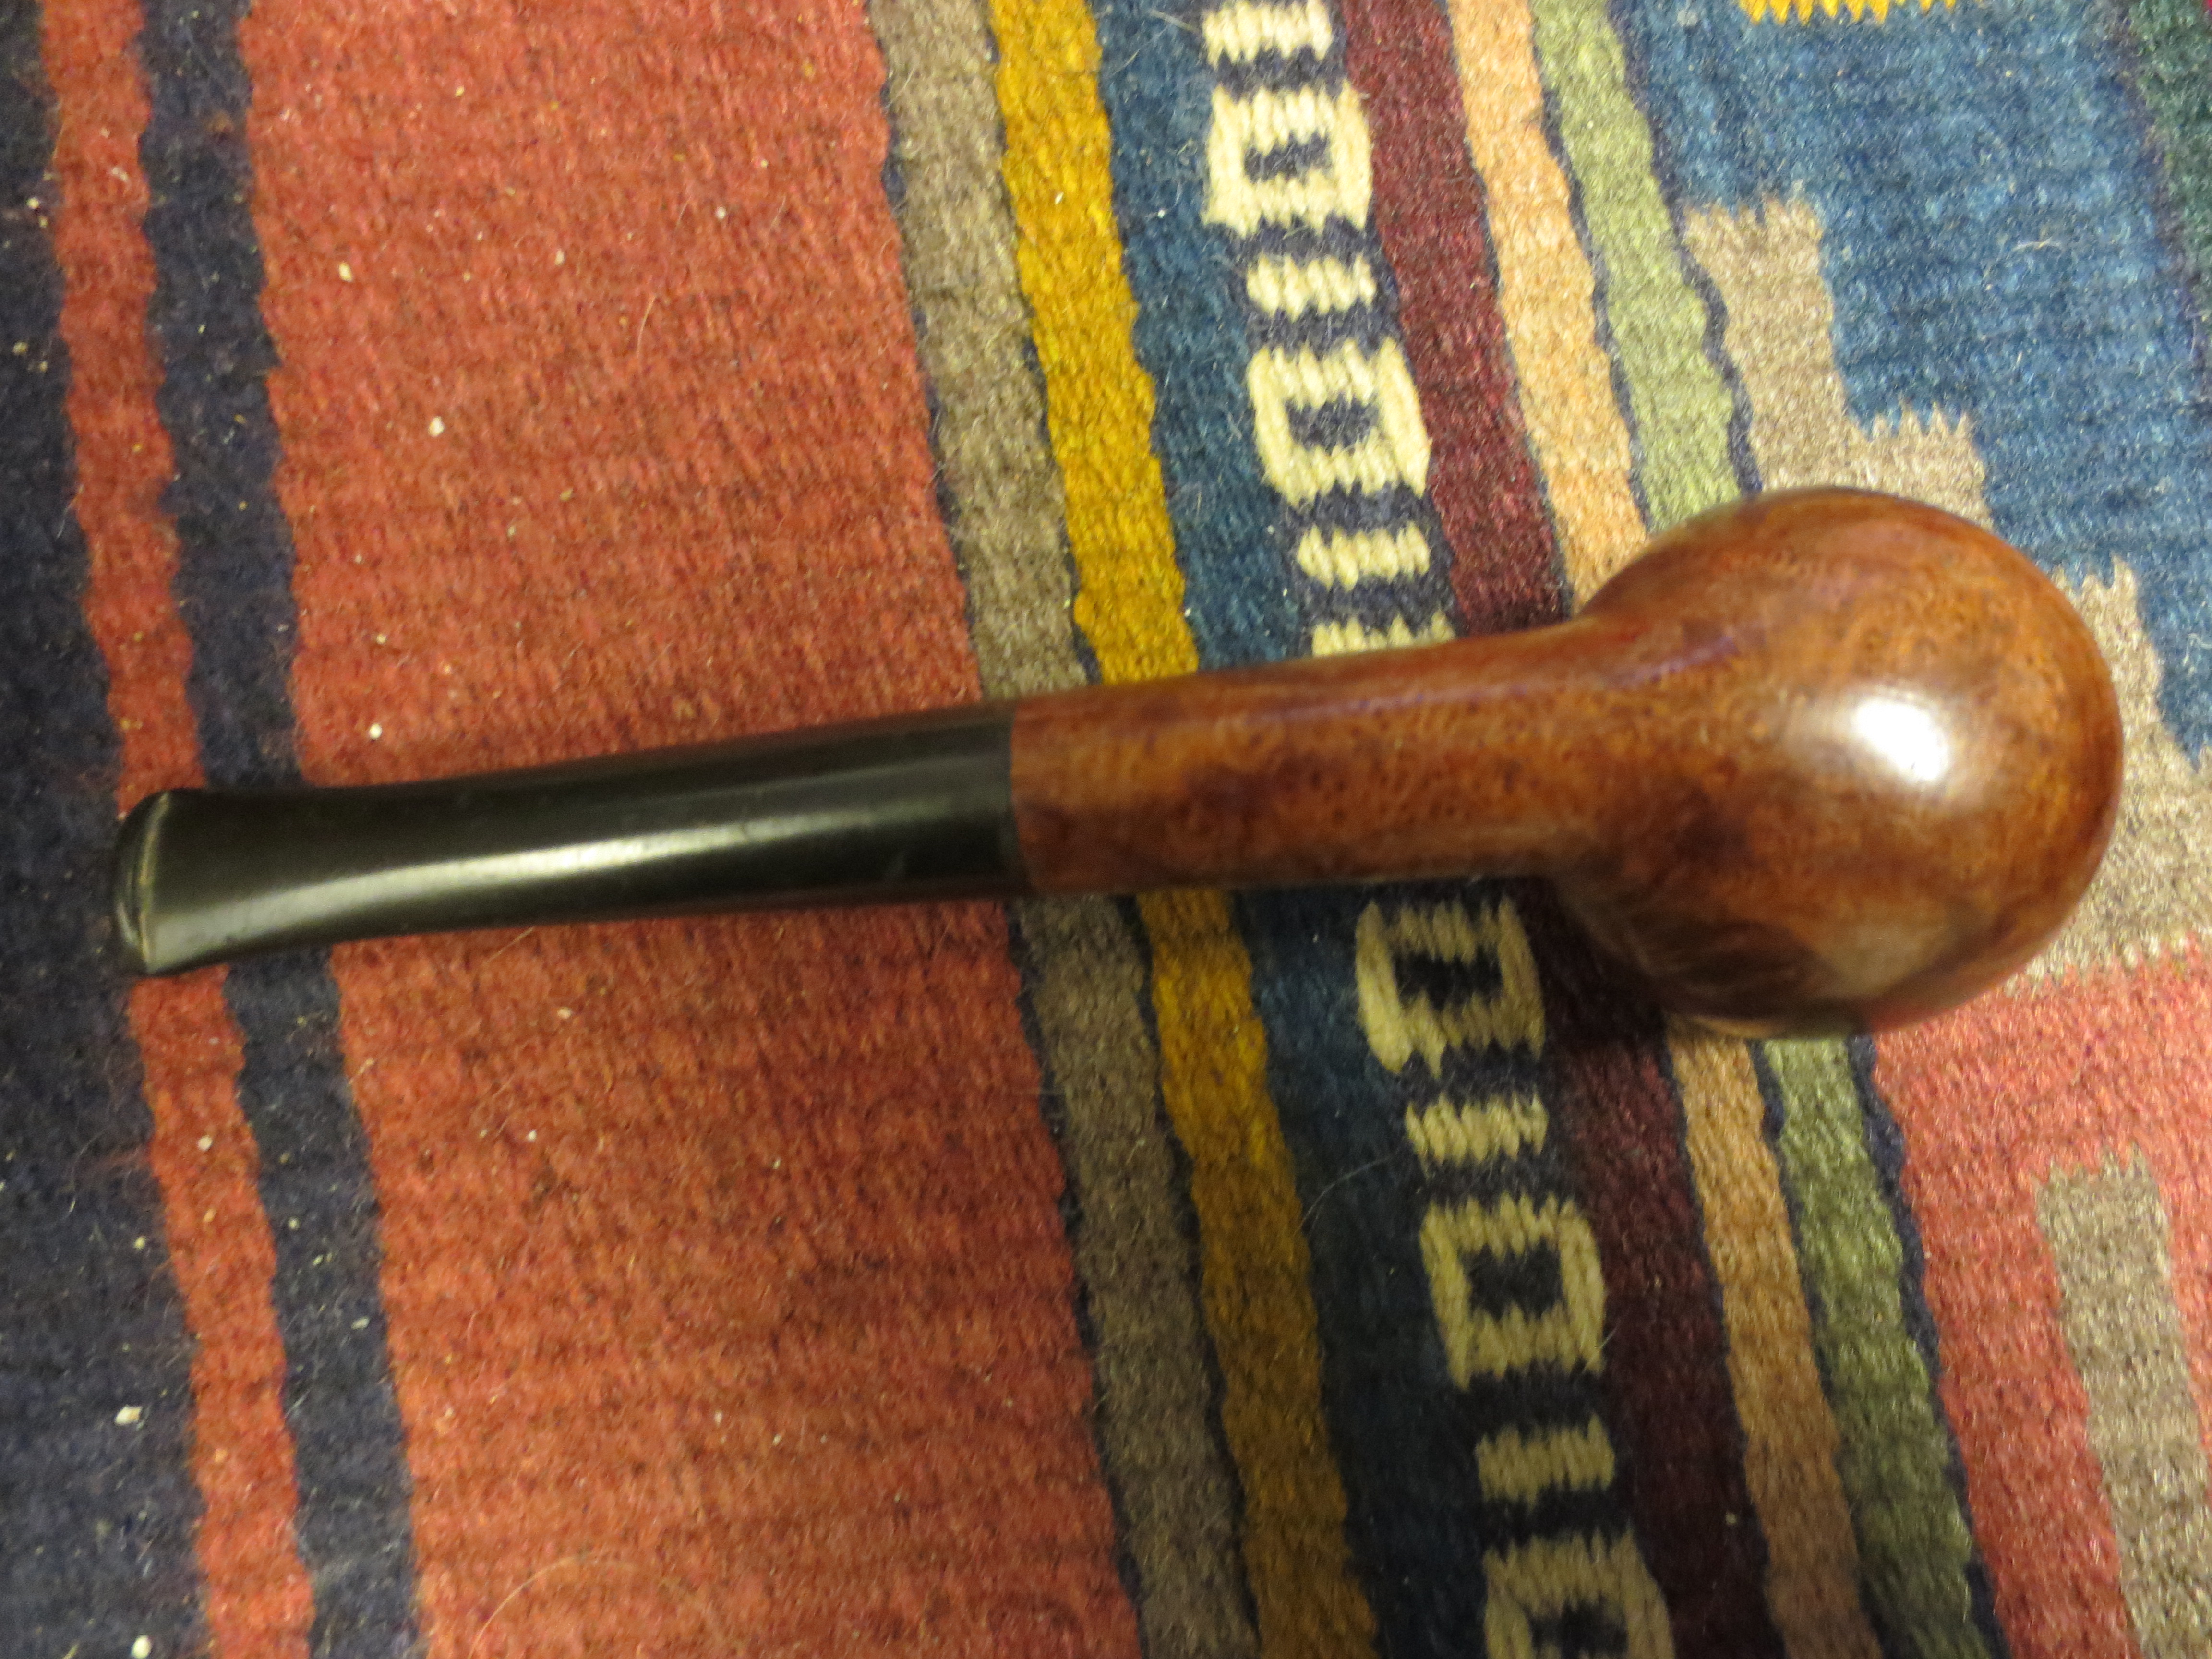
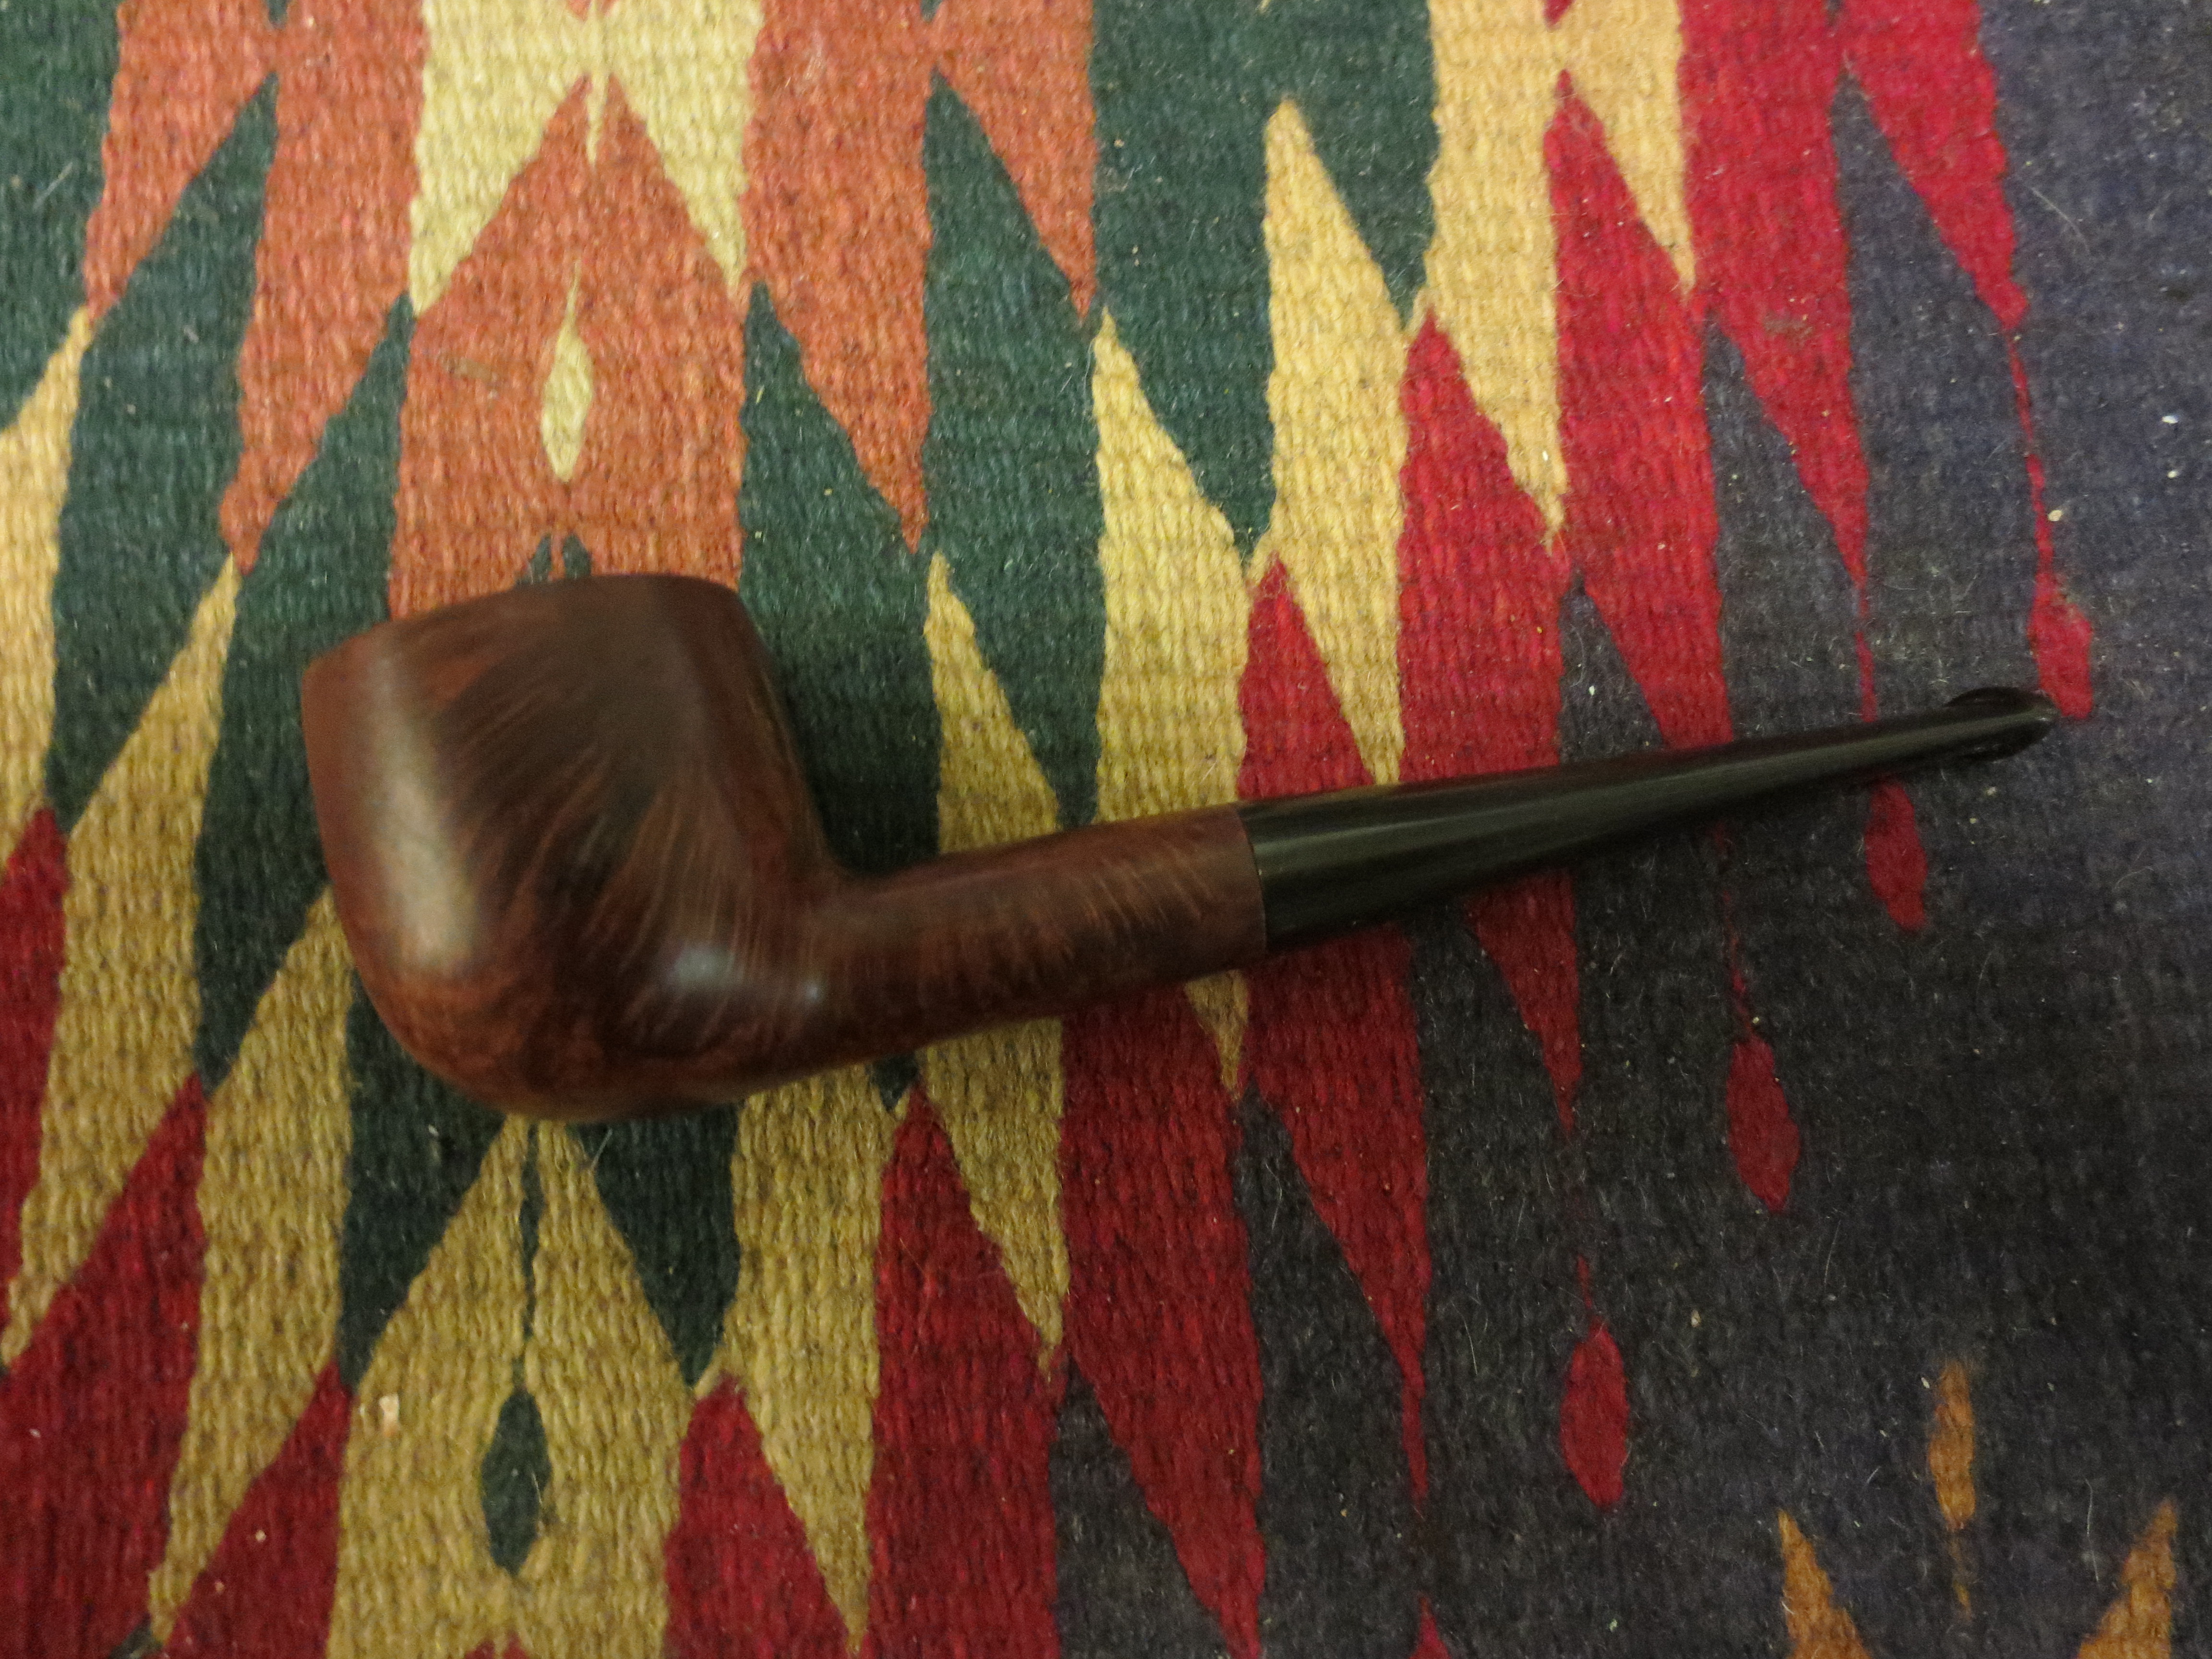
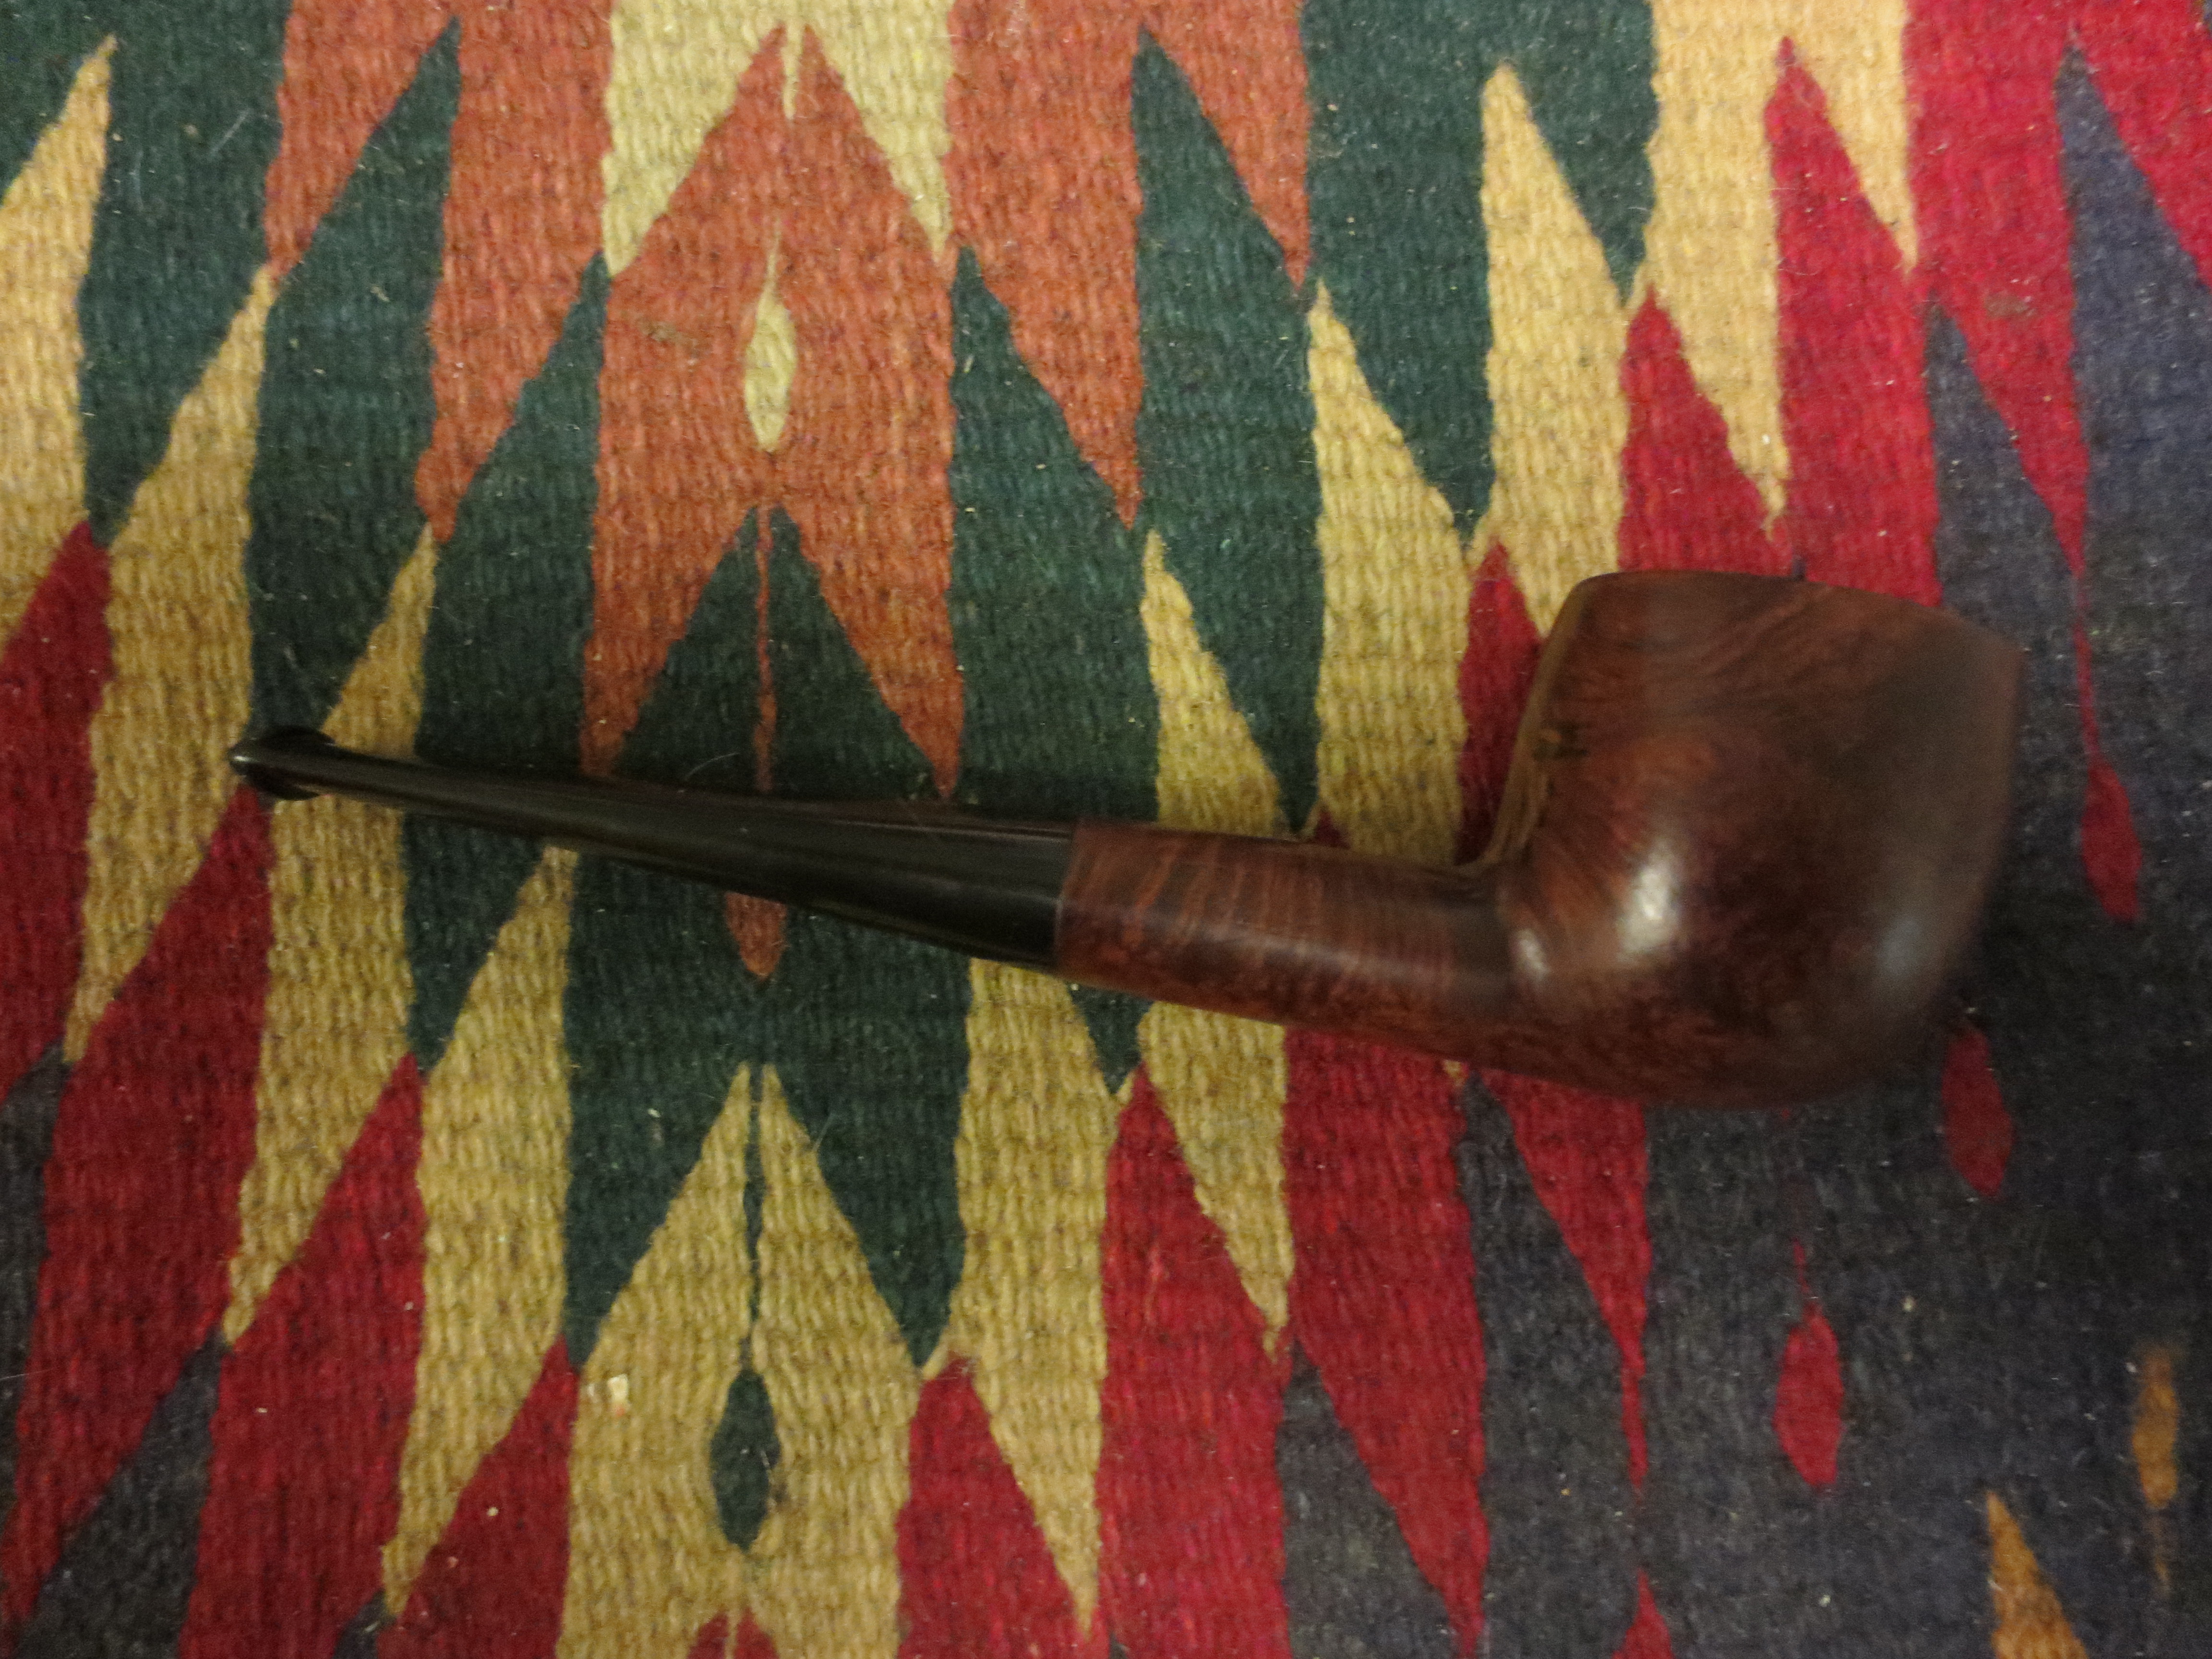
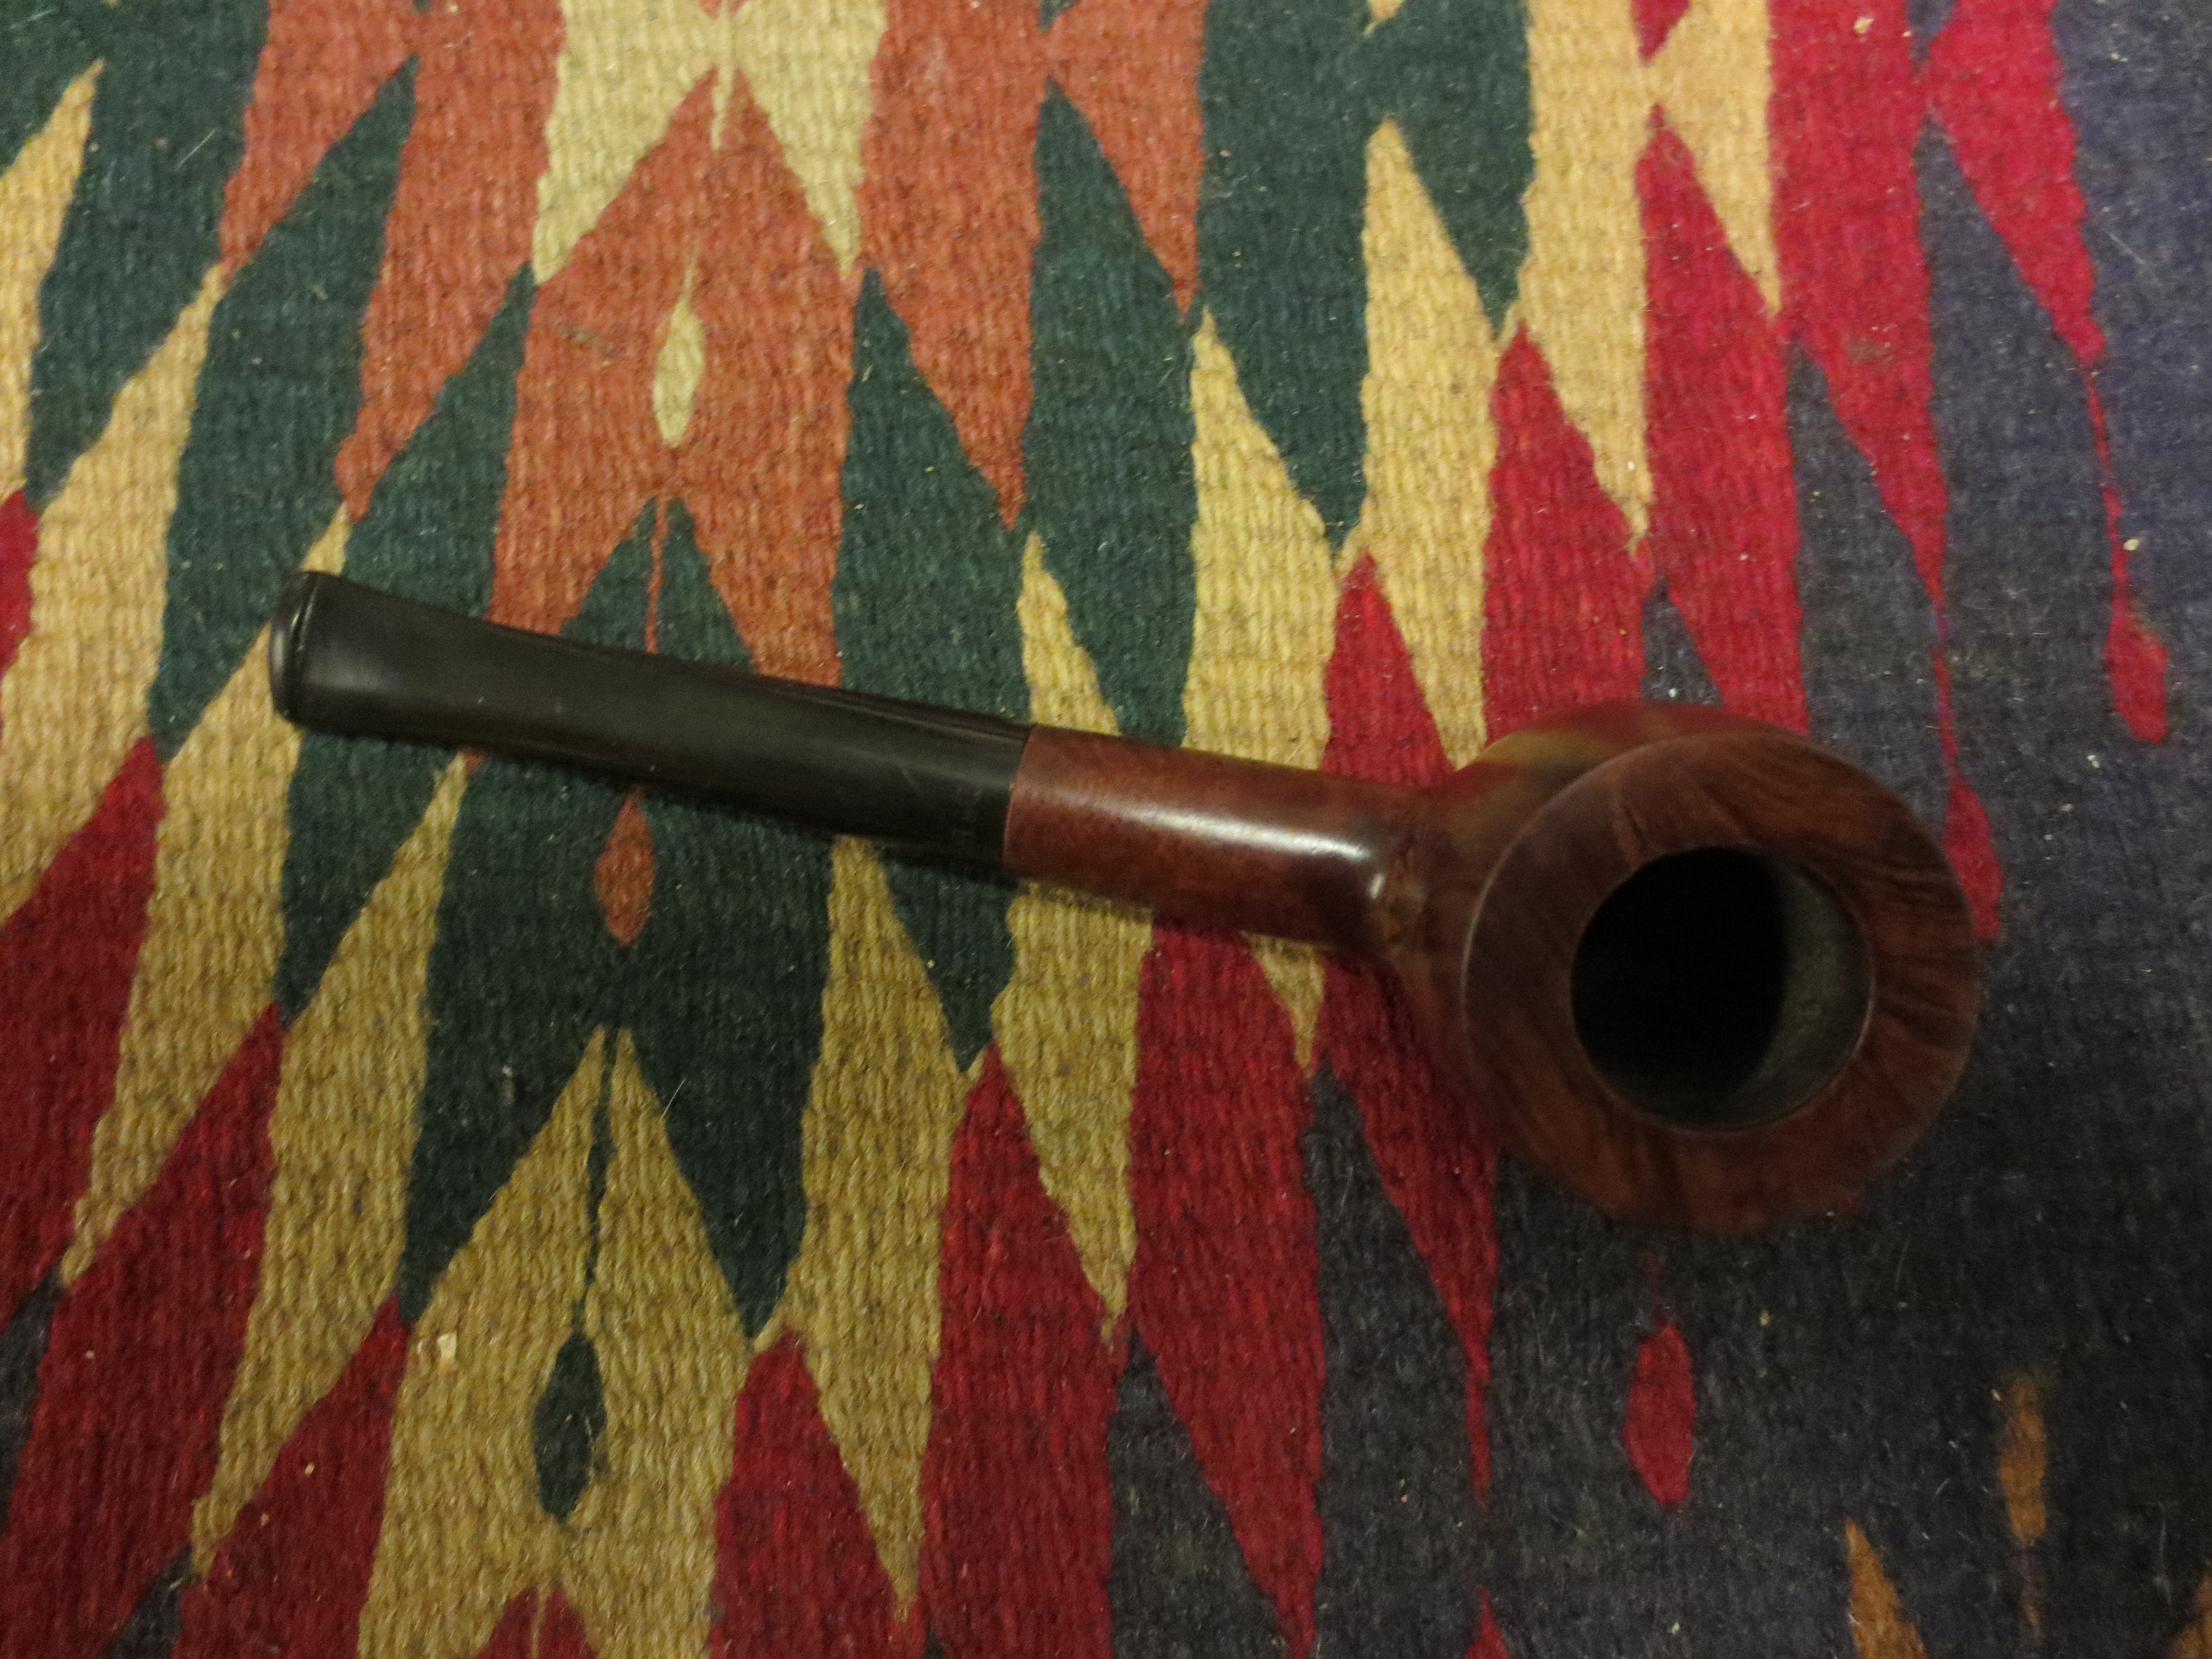
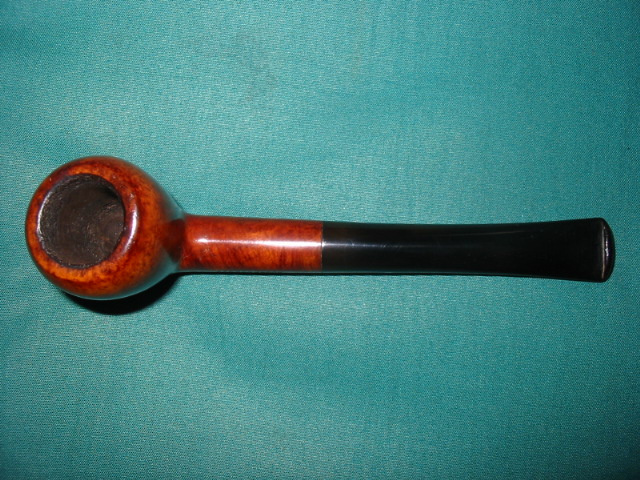
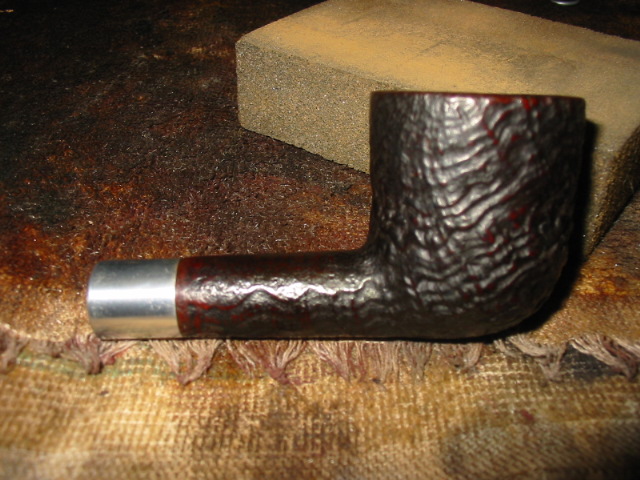
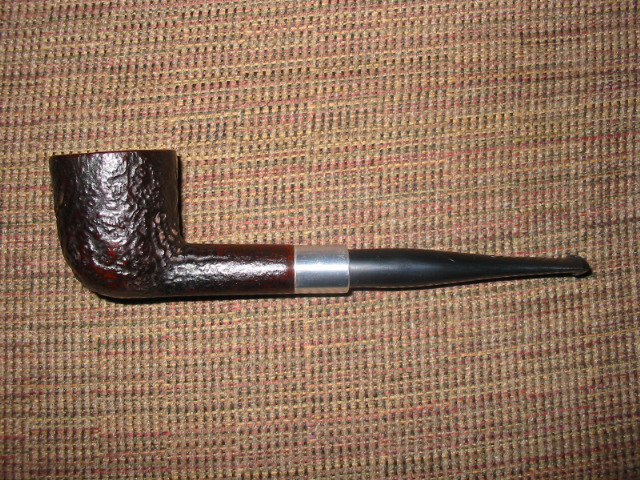
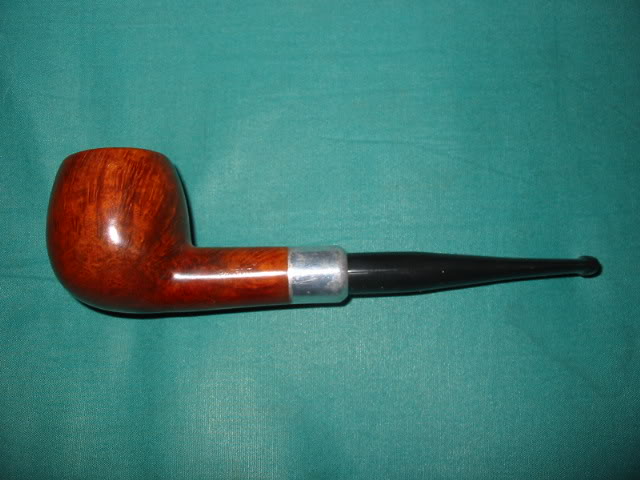
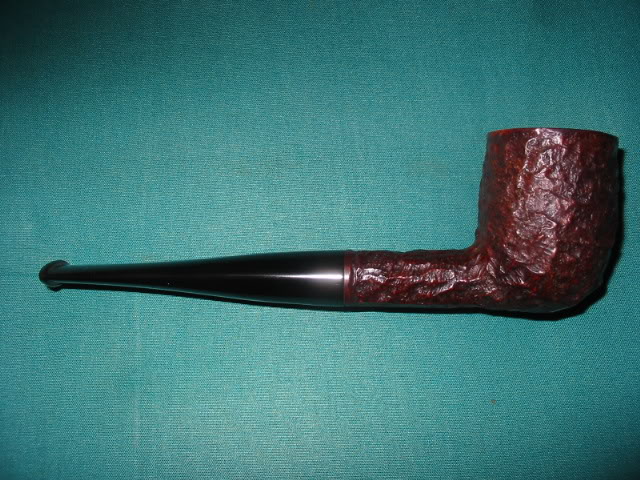
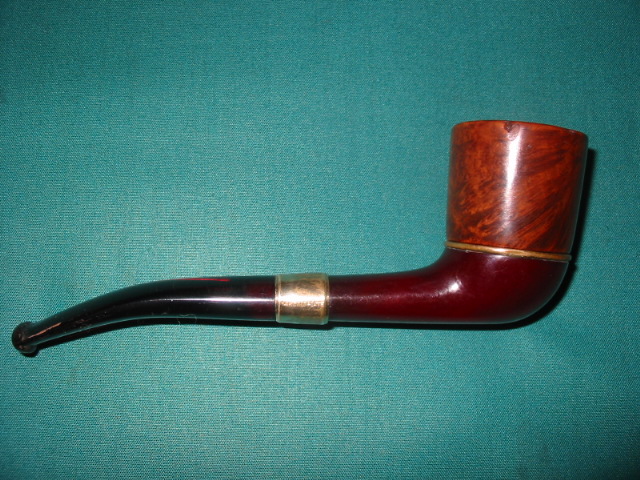
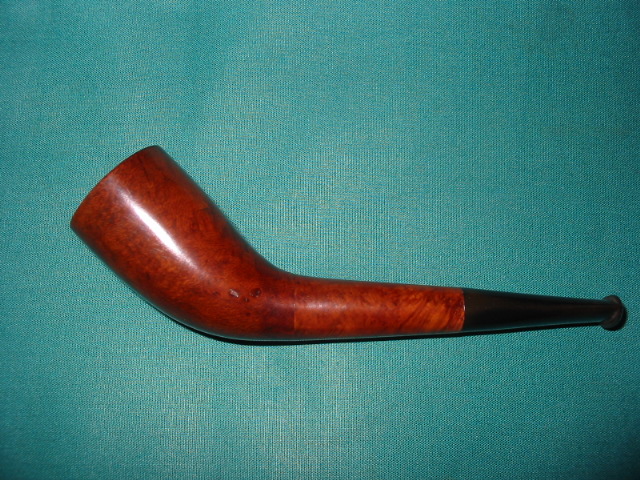
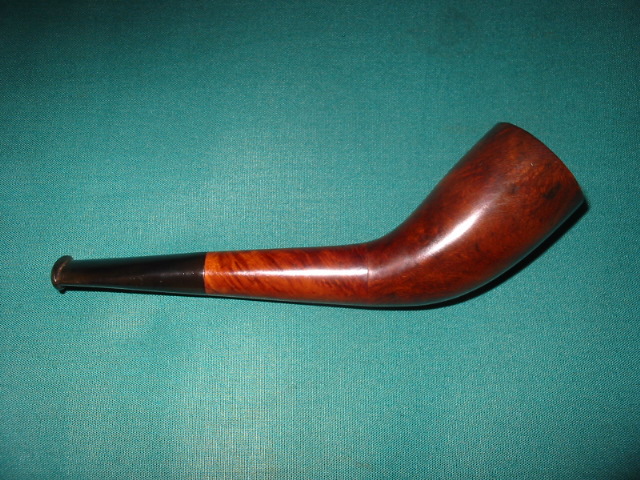
I put the pipe back together and gave it a final buff with Blue Diamond and then gave it multiple coats of carnauba wax. I buffed it with a clean buffing pad and then by hand with a microfibre cloth to deepen the shine. The finished pipe is shown in the photos below. It is a true oddity but the more I worked on it the more I am intrigued with it. I wonder how the contraption works in real-time. Well, I may have to give it a try one day soon. Thanks for looking.Filt34 Filt35 Filt36 Filt37 Filt38 Filt39 Filt40 Filt41 Filt42

Restoring and Reclaiming a Byford Prince


I was gifted three old pipes by a friend on Smokers Forums. The first that caught my attention was an older Byford Prince. It was pretty worn but the wood was in good shape under the wear and tear. The stem was shot. It had a split along the stop side and was missing a few pieces. When I removed it I found that it was quite brittle. Once I took the stem off I found the most interesting system inside. The shank had an aluminum attachment which held two metal tubes inside of it. On the inside of the broken stem was a third metal tube. These formed three concentric, nested circles which wicked out the moisture of the smoke while not hampering the flow of air in the pipe from bowl to button. The photo below shows magnified picture of the interior of the stem and shank.

Byford Pipes

The stem was so broken and damaged that I was not sure how the flow of the angles on the taper was supposed to look. I did not know what the button and the stem were supposed to be like. I did a search on the internet and found this photo of a Byford stem that showed the proper angles on the stem. I used the stem in the photo as a template for my replacement stem. I made one modification which I will speak about in the explanation of the restemming below.

Byford stem

The next photo shows the interior of the stem and shank – the system part of the pipe. The tube in the stem sits between the other two tubes in the shank creating three rings on the inside of the shank and stem. It looked like this stem apparatus would be a bear to clean up. I would have to used cotton swabs, folded pipe cleaners and whatever I could to get in between the layers.

Byford2

The bowl was badly caked with a broken cake. It was soft rather than hard. There was also a buildup of some blue substance on the bowl. I am not sure what it was but it smelled suspiciously like a mold. The stem as you can see in the poor quality pictures below was damaged beyond repair. The aluminum band or shank end was oxidized and rough. Underneath all of the grime it was a beautiful piece of briar. The shape is a well executed prince. The old stem seemed a bit long to my liking so the new one would be slightly shorter and accommodate the lines of the one in the photo.

IMG_1012

IMG_1013

IMG_1014

I removed the old stem and went through my box of stem and found what I was looking for. The drilling on this had to be very wide to accommodate the apparatus on the system of the Byford pictured above. This older style stem had exactly the right fit. It slipped into place and looked good. It was a bit flared on each side and on the top and bottom so that would need to be sanded back to a flush angle. In the photo below you can see the fit of the new stem before I did any shaping on it. You can also see the blue/green substance on the bowl.

IMG_1019

I used a Dremel with a sanding drum to remove the excess vulcanite and shape the stem to the proper angles. I reamed the bowl with a PipNet reamer starting with the smallest head and working up to the third head which took the cake back to bare wood. I wanted to remove the cake and whatever the buildup on the bowl and rim that was there.

IMG_1024

IMG_1025

IMG_1026

After reaming the bowl back I sanded the rim and inner edge with a fine grit sanding sponge to remove the remaining blue/green substance. I also sanded the inside of the bowl smooth to remove any thing that was buildup on the inside edges. I sanded the stem with 220 grit sandpaper to remove the scratches caused by the Dremel and sanding drum. I sanded the exterior of the bowl and the oxidized aluminum on the shank end with the fine grit sanding sponge as well. The next three photos below show the state of the bowl and stem at this point in the process.

IMG_1031

IMG_1032

IMG_1033

I wiped the bowl down with an acetone wetted cotton pad to remove the grime and the old finish. The next two photos show the bowl at this point. The cotton pad is below the bowl to show the amount of finish and grime that came off. I find that the acetone will even out the finish and clean up any remaining grime.

IMG_1034

IMG_1035

I continued to sand the stem with 220 grit sandpaper and also cleaned out the shank apparatus with Everclear and cotton swabs. That was a challenge! The grime that built up in the concentric tubes took some bends and twists of cotton swabs and pipe cleaners to remove from the shank. I also scrubbed down the interior of the bowl with Everclear on the cotton swabs and then scoured it out with 0000 steel wool. I did not want any remnants of the blue/green stuff. While the bowl was wet with the alcohol I also flamed the inside with a lighter. The alcohol burns quickly and should destroy whatever remnants of the sludge that may have been resident in the briar. I sanded the aluminum with 1500 grit micromesh sanding pads to remove the oxidation and crust that had built up at the junction of the aluminum and the briar.

IMG_1036

IMG_1037

The next two photos show the stem after the pipe and stem have been cleaned and after I had finished shaping the stem with the 220 grit and 340 grit sandpaper. The angles matched the photo above that I was trying to duplicate.

IMG_1038

IMG_1039

At this point it was time to sand with the micromesh sanding pads. The next series of five photos show the progressive shine that comes through the micromesh. I wet sanded with 1500 and 1800 grit micromesh to remove the scratches and begin to give the stem a polish. I also sanded the bowl with these two grits as well. I followed up by dry sanding with the remaining grits of micromesh from 2400-12,000. I sanded the bowl, the aluminum shank end and the stem.

IMG_1040

IMG_1041

IMG_1042

IMG_1043

IMG_1044

Upon completing the sanding and polishing with the micromesh pads I took the pipe to the buffer and buffed the stem and bowl with White Diamond on the wheel. It brought out the shine and help highlight the grain. I wiped down the stem with Obsidian Oil to protect it and then gave the entire pipe several coats of carnauba wax and buffed it to a shine. The last series of four photos show the finished pipe.

IMG_1045

IMG_1046

IMG_1047

IMG_1048

ADDENDUM 03/07/15
Just recently I discovered this interesting piece on the Byford pipes. They were originally made by Orlik. Here is a page from their catalogue.
445px-Orlik_70S07

Cleaning Up an Interesting Dr. Bernard Deluxe System Pipe


When I initially took this one out of the box I figured it would be an easy cleanup. It did not turn out that way. It is stamped Dr. Bernard over de Luxe on the left side of the shank and on the right side it is stamped ALGERIAN BRIAR over France and that is stamped over Made in France. The first two lines were not lined up and they are actually on top of the made in France line. The finish looked pretty clean and the bowl and rim were also clean. The stem was lightly oxidized and had a stamp on it that says Dr. B. It also had a little tooth chatter near the button on the top and the bottom of the stem. The first four photos below show the pipe when I started.

ImageImageImageImage

The worst thing on the exterior of the pipe was a large fill, about the size of the end of my thumb. It stood out in all of it pink putty look each time you held the pipe in your hand. It is clear in the photo below. I thought about rusticating the pipe but decided that with a fill that large I would be better off leaving it alone. I would have to work on it to try to blend it in a bit better with the stain on the bowl.


Image

I decided to address the tooth chatter and oxidation on the stem first. I sanded the tooth chatter with 320 grit sandpaper to remove scratches and marks. The first two photos below show the tooth chatter removed and now the stem would need to be sanded and polished. The next series of four photos show the filter apparatus in place and after I took it apart to clean it. I then removed the stem from the shank, cleaned out the shank and examined the filter apparatus on the pipe. I removed the cap from the end of the filter and underneath was a metal tube inside the shank. I cleaned the stem with pipe cleaners and isopropyl alcohol and then cleaned the cap with cotton swabs and isopropyl. Once it was clean I polished it with 0000 steel wool to give it a shine and remove the stains on the metal. I also sanded the stem with a fine grit sanding sponge to begin to remove the scratches and oxidation.

ImageImageImageImageImageImage

I went back to the fill on the bowl. I decided to draw in some graining on the fill that matched the grain surrounding it using a permanent marker. I have done this in the past and it allows you to blend the stain on the bowl and mask the fill so it does not stand out as much.

Image

After drawing on the grain pattern I stained the bowl with an oxblood stain. The first photo below shows the finished look. Once the bowl was dry I buffed it on the buffer and the stain coat wiped off in major chunks. It did not permeate the bowl at all. I also was able to wipe of the grain pattern I had drawn on the pipe. This kind of frustrating occurrence while cleaning up a pipe is just part of the process. I cleaned off the stain with a cotton pad and acetone and then noticed that the pipe had been given a very thin coat of varnish (matte finish) over the bowl. I would need to remove this finish in order to restain the pipe. So back to the table it went.

Image

I wiped down the bowl with acetone until the varnish coat was broken and then sanded the bowl with the fine grit sanding sponge to remove the remnants of the finish and get back to the briar itself. The next three photos show the cleaned bowl. The large fill on the back side of the bowl is also very clearly visible. I then redrew the grain marks on the bowl with the permanent marker to blend in the fill a bit more. In the fourth photo you can see the lines drawn in. They may appear to be too many and too dark at first look but I have learned that once I have stained the bowl with a few coats they will dissipate into the stain and will match the grain pattern in the bowl.

ImageImageImageImage

I worked on the stem and used the micromesh sanding pads from 1500-12,000 grit to polish the stem. I coated it with Obsidian Oil and set it aside. I restained the bowl with aniline based oxblood stain. I applied the stain heavily to the area of the fill. I flamed it and them polished it on my buffer. The next six photos show the restained bowl. The stain took this time. It also covered the fill but the lines were still to visible to my liking. I needed to add some more stain and let it dry this time without wiping it off or buffing it. I needed a bit more opacity in the stain on this portion of the bowl.

ImageImageImageImageImageImage

So I applied some more stain with a cotton swab to just the fill portion of the bowl. I set it aside to dry overnight and in the morning hand buffed that area of the pipe. I hand buffed with a shoe shine brush and a soft cotton cloth. Once I had finish I buffed it lightly with carnauba wax multiple times to give it a protective coating. The final four photos show the finished pipe. The fill is much more blended into the stain coat and the lines are there but more subtle. The fill is not as glaringly staring at you while you hold the bowl. The pipe is ready to smoke and for me to experiment with the interesting filter apparatus.

ImageImageImageImage

This Refurb Makes Me Question, what makes a pipe a REJECT


Blog by Steve Laug

I have no idea who the maker of this pipe is. When I bid on it I thought it might be a Peterson Reject but once it got here I am not so sure. It has no stamping on it other than REJECT in big block letters on the left side of the shank. The briar is not too bad, in fact I can find only one or possibly two fills that are virtually invisible as they are blended into the stain very well. The stem is a cross between a Peterson and a Wellington. There is no p-lip on it – just a straight orific button with the airway on the end of the button not on top. There is a sump in the shank so it is a system pipe of sorts. It is well drilled and has a great draft on it. The band seems to be a stainless steel rather than the cheap reject band put on by Peterson rejects of time past. Sooo, I am not sure who the maker is, nor am I sure why it is a REJECT.

I took it from the box, reamed and cleaned the bowl and shank. The sump is surprisingly new looking. There is no stain or darkening in it, just clean untouched briar. The bowl is darkened but there was not much cake and what was there was only around the top half of the bowl. The stem was minimally oxidized and there was some tooth chatter on the top and the underside of the stem. I did not do much to the bowl finish, merely buffed it with Tripoli and then gave it several coats of carnauba. The stem took a little work as I sanded out the tooth chatter and then went through the list of micromesh sanding pads from 1500-12,000 grit. I also polished the stem with the Maguiar’s Scratch X2.0. I finished by buffing it with White Diamond and then wiped it down with some Obsidian Oil before giving it multiple coats of carnauba and a buff with a soft flannel buffing wheel.

I forgot to take the pictures beforehand but here are some photos of the finished pipe.

A WDC Milano Hesson Guard Reworked


I just worked over this old timer – A WDC Milano Hesson Guard. In order to know more about the pipe I was working on I searched for information regarding the patent number stamped on the pipe and went to the US Patent site where I found documentation. The patent was filed for it in 1932. It is an early example of the pipe. It is in the acorn shape. It has the patent number stamped on it as well as the other WDC labels. The triangle on the stem is silver or steel inlay. For me this is a part of the mystery of unpacking the history and life of the brand and mark. I always like to know as much of the back story as I can find on any of the pipes I refurbish. Patent numbers stamped on the pipe provide a means of ferretting out information on the design and the particular part of the pipe that is patented. I have included the patent site information on the pipe for your reading pleasure. At least to me this part is fascinating information.

ImageImageImage

The pipe was caked with a crumbly thick cake that pretty much filled the bowl when I picked it up. I reamed it out to field dress the pipe. I generally do this with most of the pipes I bring home for renewal. It keeps the mess of the carbon from the cake outside and away from my work desk. In the photos below you can see that the finish was pretty dirty with a lot of hand oils and grease ground into the bowl surface. The rim was caked and tarred and it looked like it was damaged. The finish was worn and the stain faded in many places on the bowl sides. The stem was oxidized and had some bubbles in the surface along the button – the bubbles are visible near the button in the second photo below.

ImageImage

I scrubbed the exterior of the pipe with Murphy’s Oil soap, undiluted. I wipe it on with a cotton cloth and immediately wipe it off. Others have said that it removes the stain if left to long and it does indeed do that. But I have found it unsurpassed in quickly removing grime and grease if rubbed on and rubbed off quickly. I worked on the rim as well with a soft bristle tooth brush and the oil soap to remove the buildup. Once that was done I put it in the alcohol bath and removed the finish that was on it. It seemed to have had some built up waxes and also some kind of varnish coat over the stain. It came off with a bit of elbow grease after soaking. I decided to not stain this pipe as the briar looked great as it was. I just sanded it with the micromesh pads to polish it and remove the surface scratches. Then I took it to the buffer to give it a buff with White Diamond.

I worked on the stem while the bowl soaked in the bath. I soaked it in the Oxyclean mixture for a while to soften the oxidation. I dried it and buffed it with Tripoli to remove the surface oxidation. I sanded it with 240 grit sandpaper to get the deeper oxidation. I also had to lift a few tooth marks from the underside of the stem near the button. I used the heat gun to do that. The bubble on the top of the stem also was heated to try to smooth it out. It was evidently not a blister but a bump from teeth. It went back in place with the heat. I sanded the remaining signs of bite with 240 grit sandpaper and then 400 and 600 grit wet dry and water. I finished it with the normal regimen of 1500-6000 grit micromesh pads to polish. I put it back on the bowl and then gave the entirety a buff with White Diamond to polish it and finished the restoration with several coats of carnauba wax.

ImageImageImage

Keyser Hygienic Patent Pipe


Blog by Steve Laug

Over the past year I have been picking up these Keyser Hygienic pipes on EBay. This one makes the third one I have picked up at a reasonable price. They are made in England and sold exclusively in South Africa. The word is that they were designed to be virtually indestructible for farmer pipe smokers in SA. All versions of the pipe have the same stem – one size fits all. They seem to be made of nylon and rubber or some combination. They are tough and take tooth wear very well. Two of the three I picked up are older and both had the original stems on them. They had tooth chatter and minor dents. Steaming would not raise the dents at all. I had to deal with them with sandpaper and micromesh sanding pads.

The photo below came from the web and pictures a cutaway picture of the pipe and the unique condensing chamber that makes up the patented portion of the pipe. The shank has an aluminum condensing chamber with a tube in the centre that lines up with the tube inside the stem. It is pointing downward so air swirls around in the chamber formed by the military bit stem and the shank. Moisture is trapped and the smoke is cool and dry without loss of flavour.

Image

The pipe I am working on this time is a pot shaped sand blasted pipe. The aluminum was oxidized and dull the blast was dirty and the crevices filled with dirt and grime. The stem was in pretty clean shape other than the tooth chatter near the button. The rim of the bowl was tarred and caked. The cake was uneven and tapering in the bowl – almost as if the bowl was only half filled and smoked that way the majority of the time. The upper portion of the bowl had a very thin layer of cake and the lower portion a thick uneven cake. The condenser in both the stem and the shank were filled with a dark brown tar and the airway was constricted in the shank and clogged in the stem. The photo below shows the condition of the bowl and the stem and highlight where the work would be needed to clean up the exterior of this pipe.

Image

I reamed the bowl back to bare briar and scrubbed the blast surface with a brass tire brush to clean out the crevices. I also used a soft bristle tooth brush to finish cleaning the surface off. Once that was done I put the bowl in the alcohol bath to soak while I worked on the stem. The next two photos below show the stem after I used 240 grit sandpaper to remove the tooth marks and slight dents. I then used micromesh pads from 1500-6000 grit to polish the stem and work out the scratches. I have learned the hard way that you cannot buff these stems on the buffer as a little bit of surface heat from the buffing pads melts and distorts the surface. So these stems are totally buffed and polished by hand.

ImageImage

The next two photos show the stem after it has been sanded up to the 3200 grit micromesh pad. The stem is beginning to get a shine and the scratches are disappearing with the sanding. From this point I went on the sand the stem through the remaining micromesh grits and when finished I gave it a coating of Obsidian Oil to penetrate the surface and give it a deep polish. Once that dried I buffed it by hand with some carnauba wax in paste form that I purchased from Walker Briar Works.ImageImage

From the next series of photos you can see that I interrupted my work on the stem to remove the bowl from the alcohol bath. I did that because I was curious to see how it was cleaning up. You will notice in these photos the brownish grey sludge in the grooves of the blast. I used the tooth brush once again to scrub the surface with Isopropyl from the alcohol bath. Once the grime was removed I washed the bowl down with clean Isopropyl and dried it off.

ImageImageImage

The next series of photos show the dried bowl. The grime is gone and the finish is now down to the stain. Even some of the top coat of stain has been removed and you can see the briar. I laid the bowl aside and finished up the stem as I described it above.

ImageImageImage

The aluminum condensing chamber on the shank and the chamber in the stem needed much work. I used cotton swabs that I flattened to clean the area inside the shank around the airway extension and the same in the stem. Once that was clean I polished the oxidized aluminum with the micromesh pads to burnish the aluminum and get the shine back.

Image

I then restained the bowl with a dark brown stain, knowing that when I buffed it the reddish brown undercoat would shine through on the high spots and the dark would fill the crevices and give the pipe a contrast stain. The next series of three photos show the staining and the way the various grains took the stain. The right side of the bowl has a great ring blast that is fairly deep and craggy. The left side is more of a blast on birdseye. It is an interesting looking blast. The bowl rim came out clean as well and shows an interesting contrast in the light of the flash.

ImageImageImage

The final series of four photos show the finished pipe. The entirety has been given a coat of wax. I used Halcyon II on the blast to polish it without leaving the white residue in the grain of the blast when it dried. I buffed it by hand. The stem received another hand applied coat of carnauba wax and a buff by hand. The pipe pictured is clean and ready to smoke.

ImageImageImageImage

I have included pictures below of the other two Keyser pipes that I picked up and refurbished. The top one is an apple with really nice grain. I have been smoking this one and enjoying the dry and cool smoke that it gives. The second is a smaller prince shape that is no longer available. It had some burns on the rim that are still visible but it too smokes very well. One day will rework the rim a bit and minimize the burn marks. Till then I will smoke these Keyser’s and keep an eye for more of them.

ImageImageImageImage

Renewed Brigham One Dot


Blog by Steve Laug

This old Brigham One Dot was on the shelf at a Movie Studio Clearance Store – they sell old set items and materials from movies and television shows. Over the years I have found quite a few nice old pipes there for sale at a low price. I paid $12 for this one. From the photos below you can see its condition clearly. The stem was very oxidized and worse at the button end. I think that it probably had a rubber bit protector on it and it was cut off or fell of when they put it up for sale. The rustication was still crisp and sharp. The stain had faded from the top to about mid bowl and would need to be restained. The rim was tarred but not dented or damaged. The inside of the bowl was caked with an uneven cake that smelled of sweet aromatics.

ImageImageImage

I reamed the bowl and cleaned the shank and inside of the stem with pipe cleaners and cotton swabs and alcohol. I scrubbed down the exterior of the bowl and rim with Murphy’s Oil Soap to remove the grime and the tars on the rim. I have used oil soap for a long time now on the surface of pipes and found that it works best undiluted. I rub it on and rub it off. On the rim I use a soft bristle tooth brush to scrub the tars off. On this pipe since I was restaining it anyway I did not care about losing a bit of the stain or finish in the process. I finished cleaning the rim with an 1800 grit micromesh pad. I then restained it to match the colour of the smooth patch on the underside. I gave it a quick light buff with White Diamond to polish the stain.

I had put the stem in a bath of Oxyclean and hot water and let it soak while I was working on the bowl. I removed it and wiped it down and resoaked it. After the second soak I sanded it with 400 and 600 grit wet dry sandpaper and then 1500-6000 grit micromesh pads to polish it. The Brighams have an aluminum shank that holds the hard rock maple filter tube. The filter tube was shot so I used a new one. The aluminum was tarry so it needed cleaning and a polish with 0000 steel wool. (The Brigham system is pictured in the graphic below.)

Image

When the aluminum was clean and polished I put the pipe back together took it to the buffer and gave the stem a buff with Tripoli to take off the remnant of oxidization. Then I used some White Diamond on it to give it a clean polish. I finished buffing the whole pipe lightly with carnauba wax. The finished pipe is pictured below.

ImageImageImage

Refurb on an old WDC “Falcon” style pipe


Blog by Steve Laug

I refurbished this old WDC pipe a while ago now and thought I would post it for its historical value. I have called it a Falcon style pipe in that the bowl is removable and thus interchangeable with other WDC bowls. The stem and bowl bottom are Bakelite and the bowl itself is threaded briar bowl with an airway on the bottom. This one needed a bit of work as can be seen from the first two pictures below. The bowl was badly caked so I reamed it, sanded it and cleaned it. Then I had to top it as the rim seemed to have been used as a “hammer” and was seriously dented and chewed along the out edges of the bowl. Once the bowl was topped I decided to strip the finish from the bowl and restain and polish the bowl as a whole. I wanted to keep with the older style reddish brown stains that I had seen on other WDC pipes that I have so I used an oxblood understain and the overstained it with Medium Brown aniline. I buffed the finished bowl with Tripoli and White Diamond while holding it with a finger inserted in the bowl and holding on to the bowl with the other hand. I did not want the buffer to snatch it out of my hand while I was buffing it. I finished by giving the bowl a polish with carnauba wax and a soft cotton flannel buff.

The bowl seats in the Bakelite bottom on top of a brass ring that seems to act as both decoration and gasket to the bowl connection. It needed some cleaning and polishing as it too had dents and scratches in the surface.

The Bakelite receptacle bottom that the briar bowl screwed into was very dirty and I cleaned it out with cotton swabs and alcohol and then polished the inside with a soft cloth. The stem was rough with deep scratches and gouges in it. I sanded it with 400 and 600 wet dry sandpaper and a bit of water to give the grit a bite. Then I finished with micromesh pads in 1500, 1800, 2400, 3200, 4000 and 6000 grits. Upon completion of the sanding I buffed the stem with Tripoli and White Diamond.

Here are pictures of the pipe after I reamed it with a Pipnet Reamer (T-handle with interchangeable heads).

ImageImage

Here are pictures of the pipe after it has been finished:

ImageImageImage

I also thought some of you might be interested in seeing a picture of the pipe taken apart. I have included a picture of the cleaned version for you to get an idea of what the pipe looks like when taken apart.

Image

Refurbed and old timer – WDC Bakelite


I finished up a pipe that is stamped WDC in a triangle and Bakelite on the shank. The bowl is briar and by the way the stem is put together it is clear that it is an old timer. It has a screw mount stem with a bone tenon and the red Bakelite stem has an orific button.

The bowl was caked and had cob webs! (no kidding). The bowl and shank were cleaned and reamed as usual. The stem had bite marks and needed to be sanded and then finished with micro-mesh pads and finally a trip to the buffer and Tripoli and White Diamond. The bowl was re-stained with cherry and then buffed and polished. The stem was over turned a bit so heated the tenon water and it seemed to expand (?) a bit and loosen so I was able to straighten it out on the shank and it fit perfectly. I wonder if on these old bone tenons that the hot water may actually expand them a bit – not sure how that works but it certainly worked with both of the ones I did today.

Thanks for looking and all of your comments. It made for a great day and it is good to look back and see the work completed today!

Before:

ImageImage

After:

ImageImageImage

Refurb on a 3 part horn


Just finished up this unique piece. It is three part horn. The bowl screws off the shank and has a briar thread connection. The stem is also a screw on with a metal connection into briar. The stem is also an orific button. There is no stamping on this old timer. I really like the uniqueness of it.

I reamed and clean the bowl. I took apart the three parts and cleaned each on separately. The outside was wiped down with alcohol to get off the grime. The insides were scrubbed with a bristle pipe brush and pipe cleaners and alcohol. The stem was oxidized so it was sanded with 400, 600, wet dry sandpaper and 1800, 2400, 4000 micromesh pads and then hit with red tripoli and white diamond before being given a coat of carnuba. I sanded and restained the bowl with a cherry stain and then buffed and waxed it as well. This one will be a fun one to smoke!

Before shots:

ImageImageImage

and after shots:

ImageImage