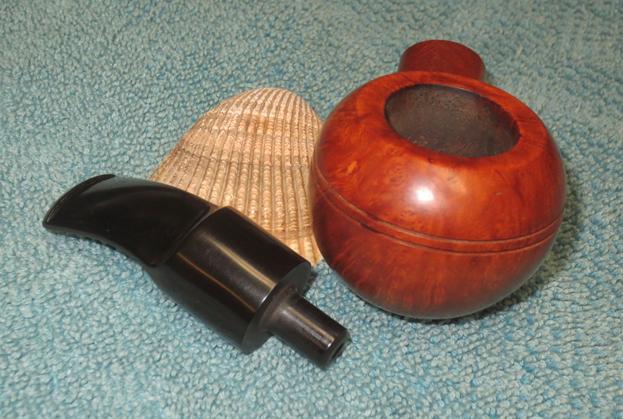
Blog by Dal Stanton
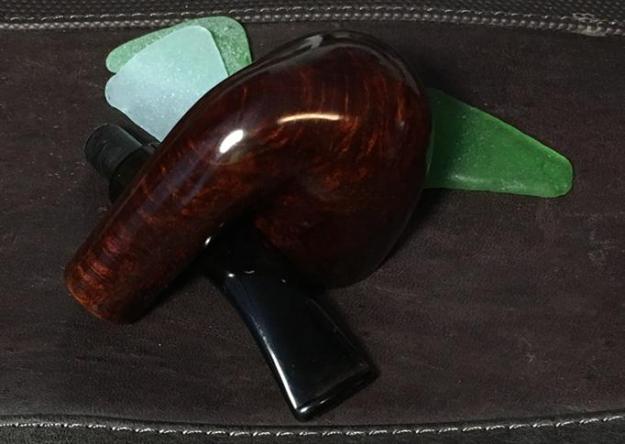
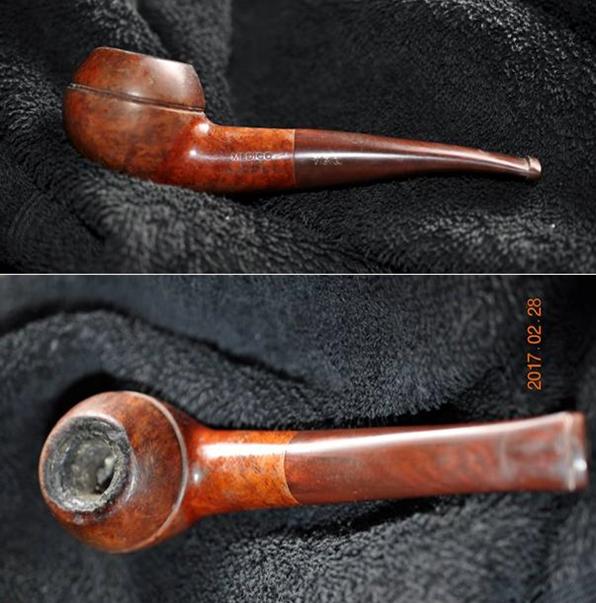
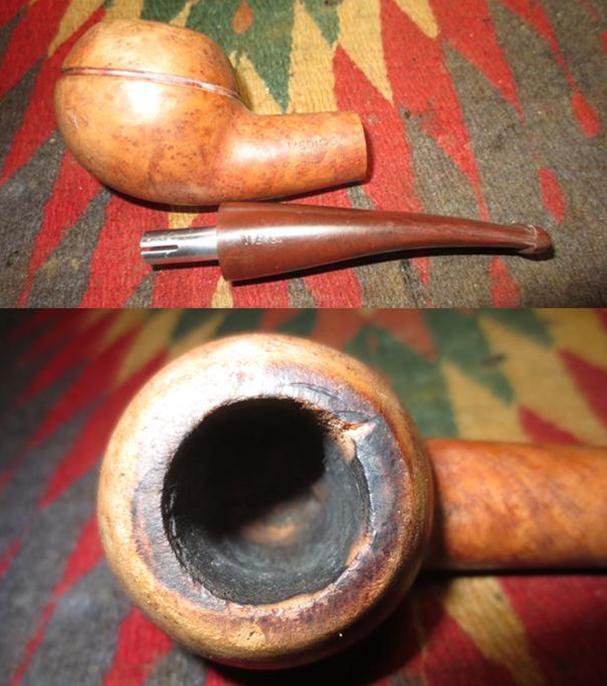
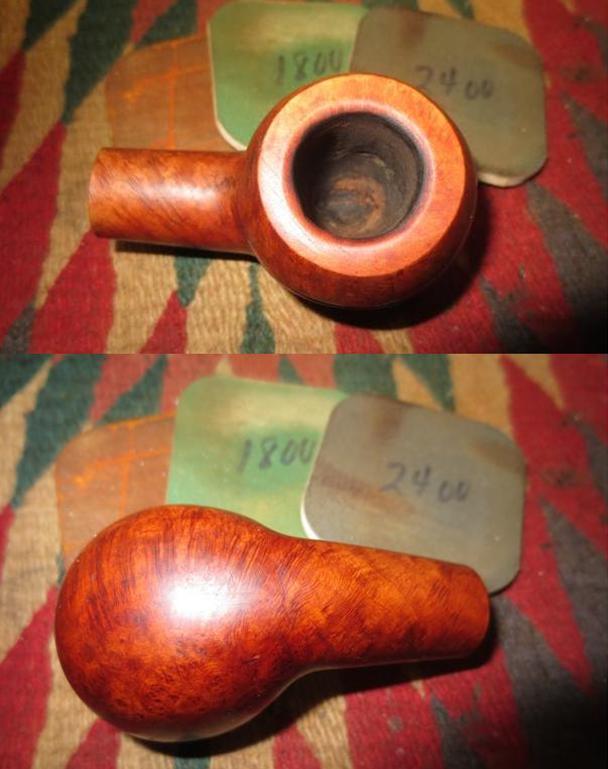
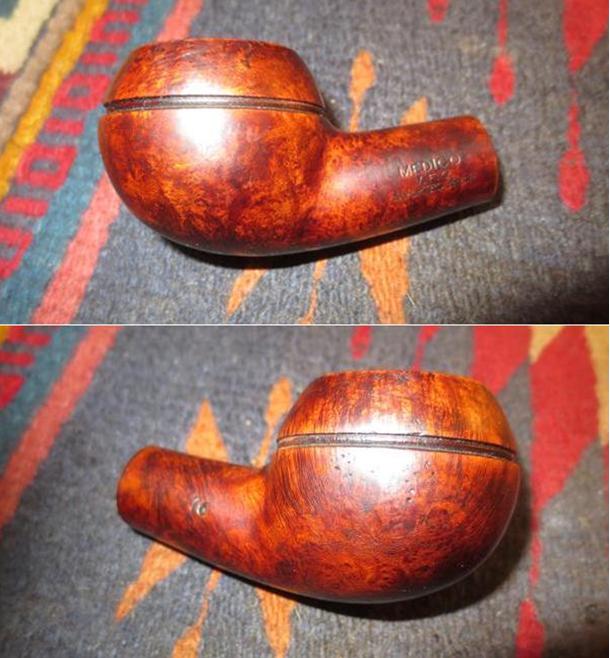
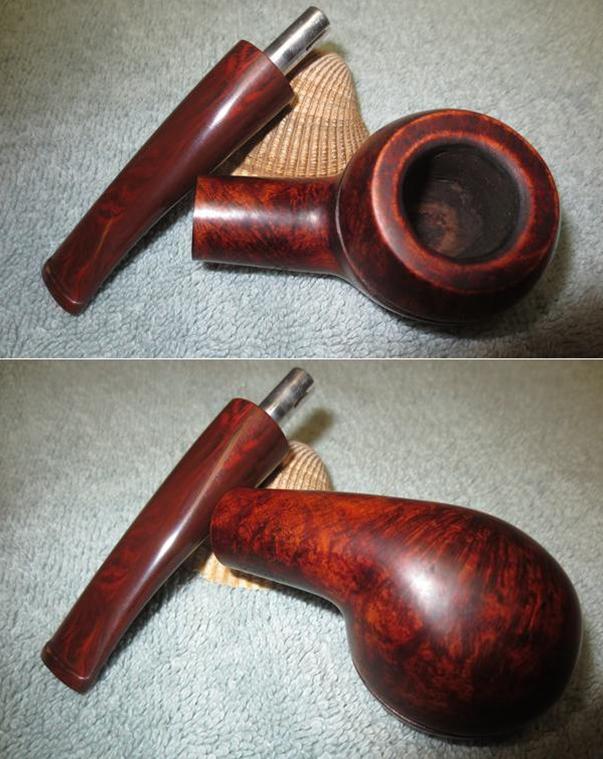
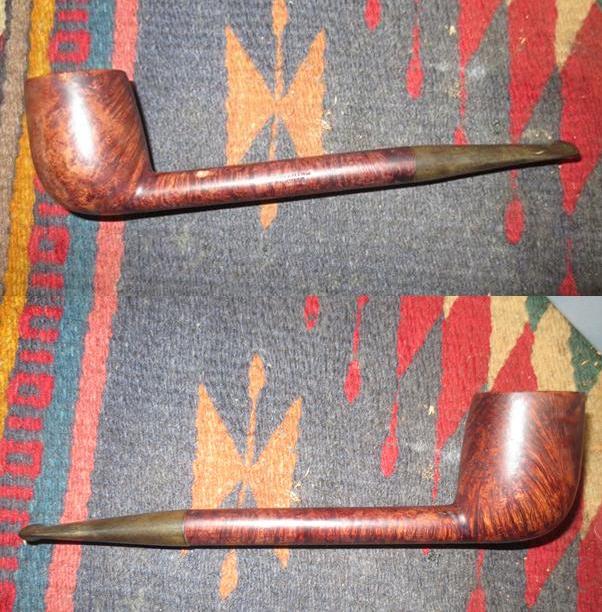
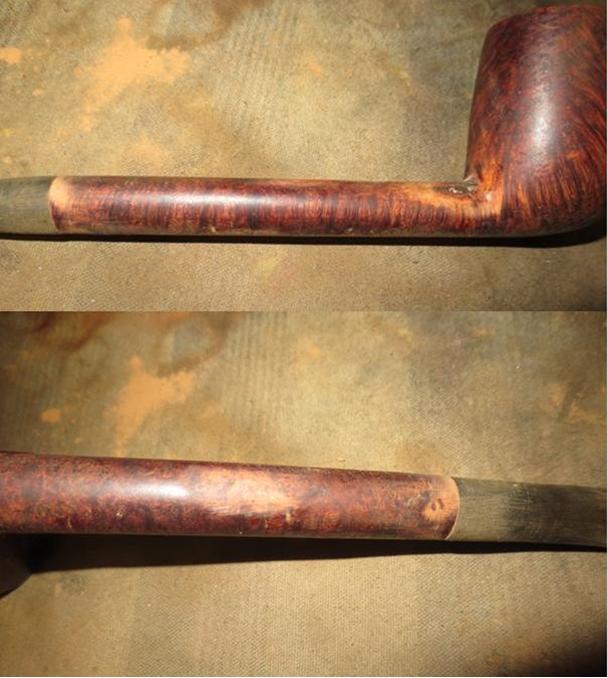
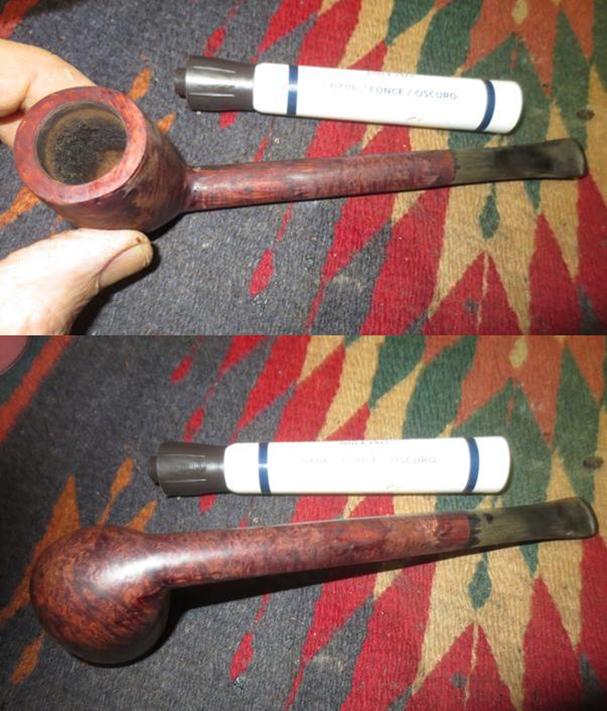
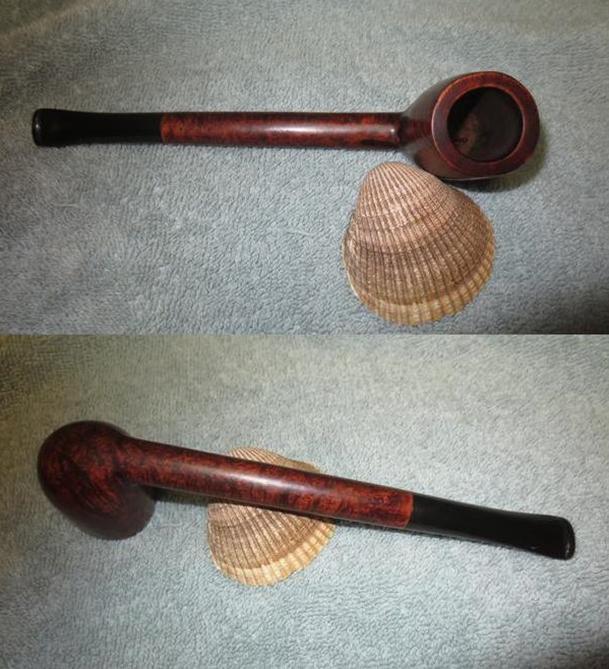
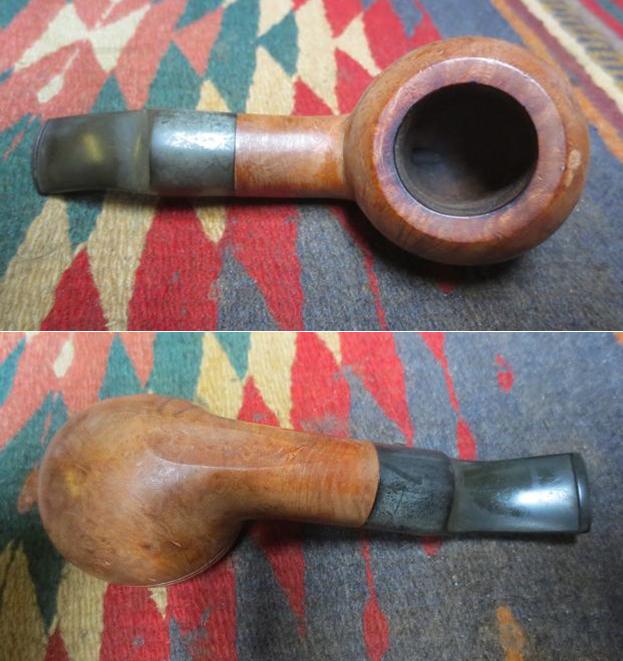
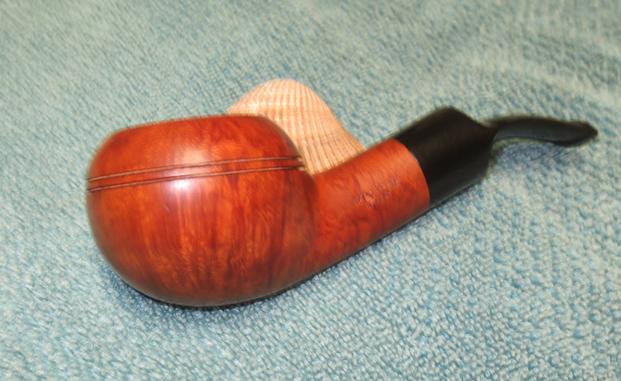
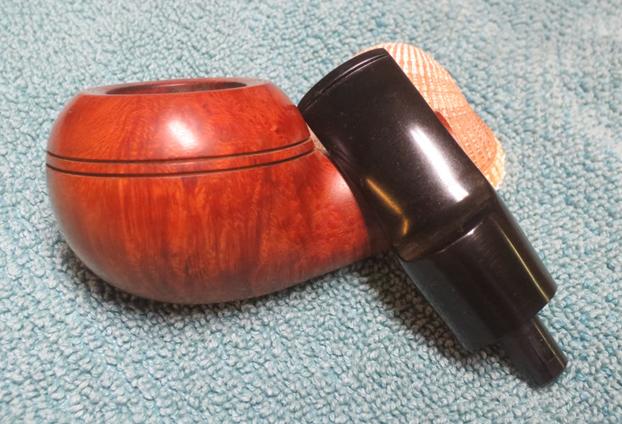
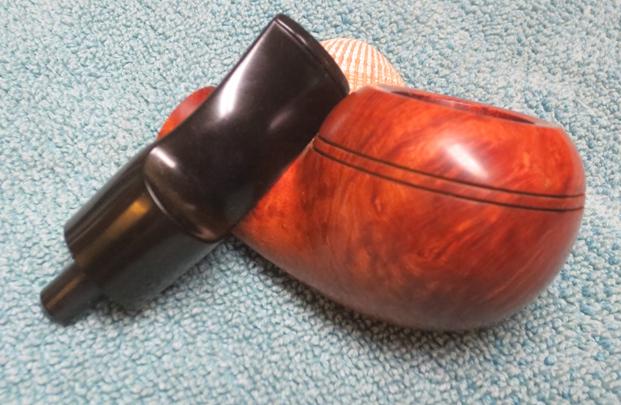
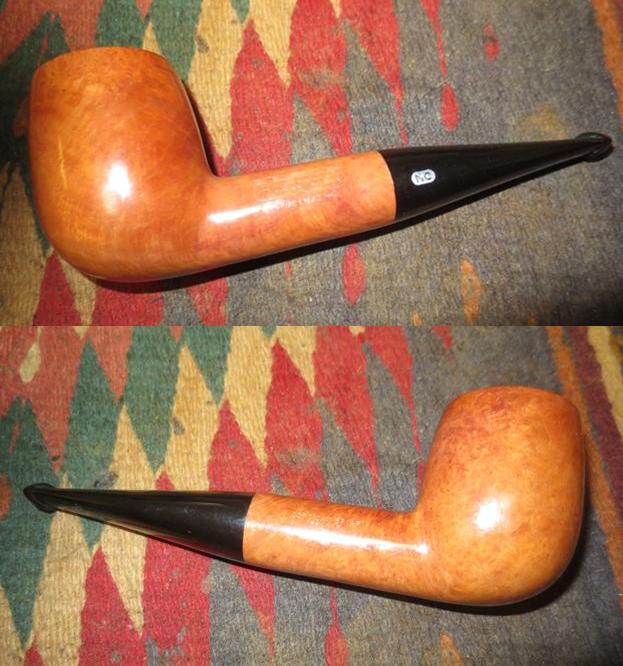
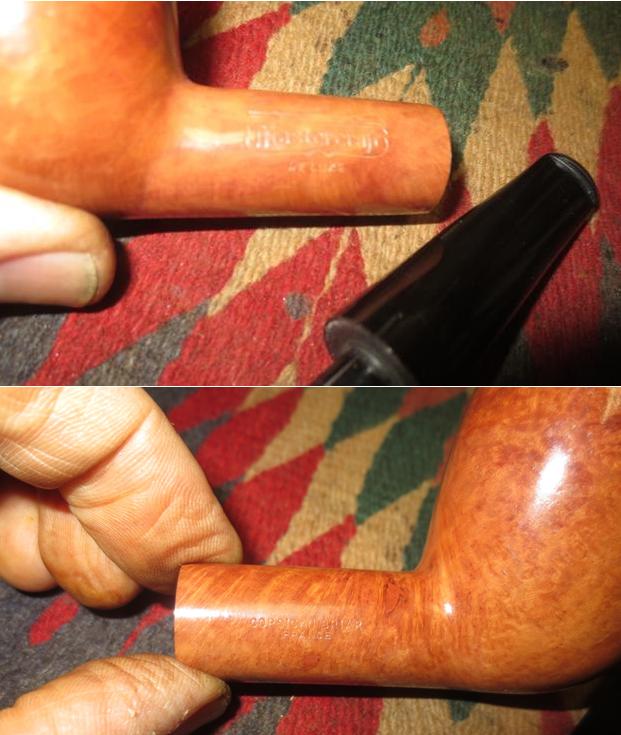
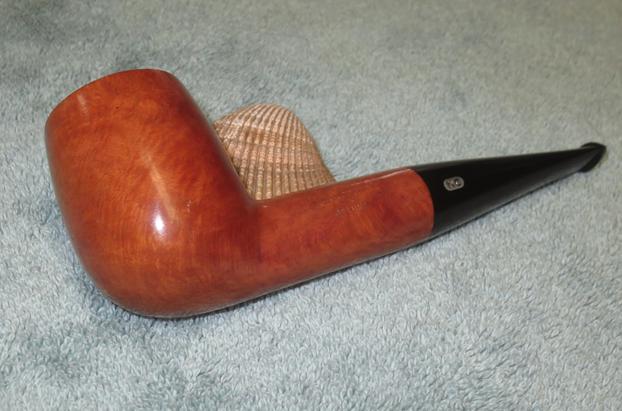
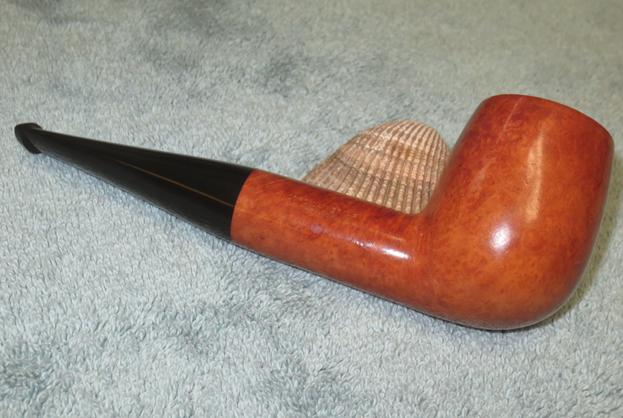
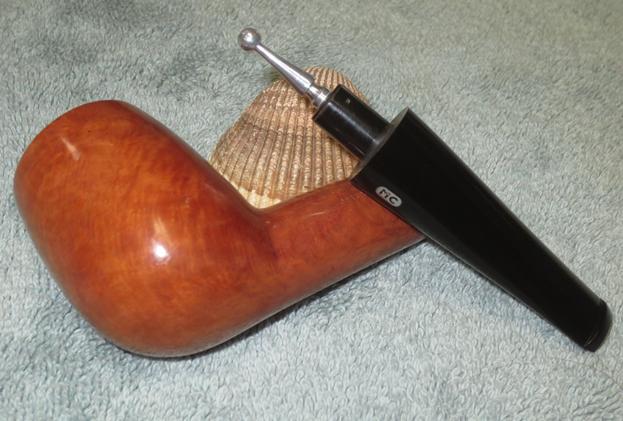
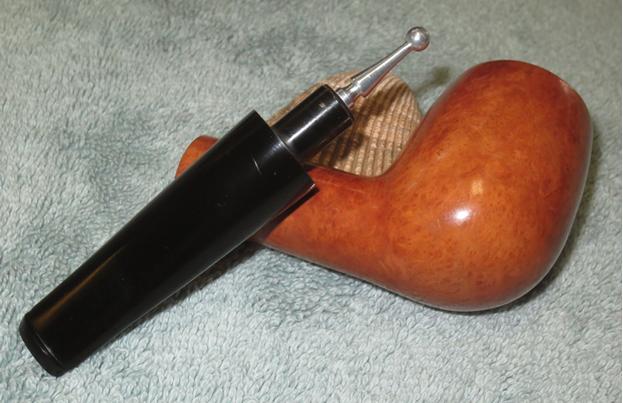
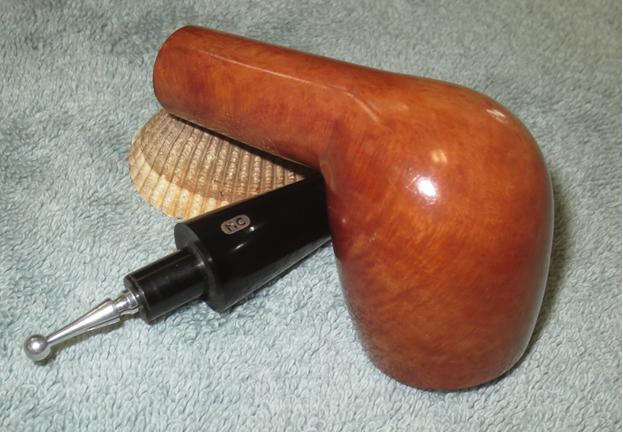
I received Gary’s email when he and his wife were visiting the Bulgarian city of Burgas on the Black Sea coast. Ever since I started restoring pipes, Gary, my colleague living and working in Plovdiv, has kept his eyes open during his travels. He’s found some very nice pipes for me. The two he found at the antique shop on the main walking street in Burgas were possibilities so he landed them for me. The larger bent billiard in the pictures he sent is on my work table now. I chose it because I’m hoping for a project that doesn’t appear to be in too much need! The only marking on the pipe is stamped on the left shank and it says, “BRUYERE” over “GARANTIE” which I’ve understood as a rather generic marking used by several manufacturers from different continental countries in Europe. On a hunch, I looked up the generic marking in Wilczak and Colwell’s manual, “Who Made That Pipe?” and was surprised to find a semi specific listing: UNK France. With an ‘unknown’ maker, but because of the spelling, they identify the French origins. Odds are, if from France, then most likely the place of origin is Saint-Claude. After receiving the pipes from Gary, I put the French made, 3/4 Bent Billiard on my work table in Sofia, and take these pictures to fill in the gaps.


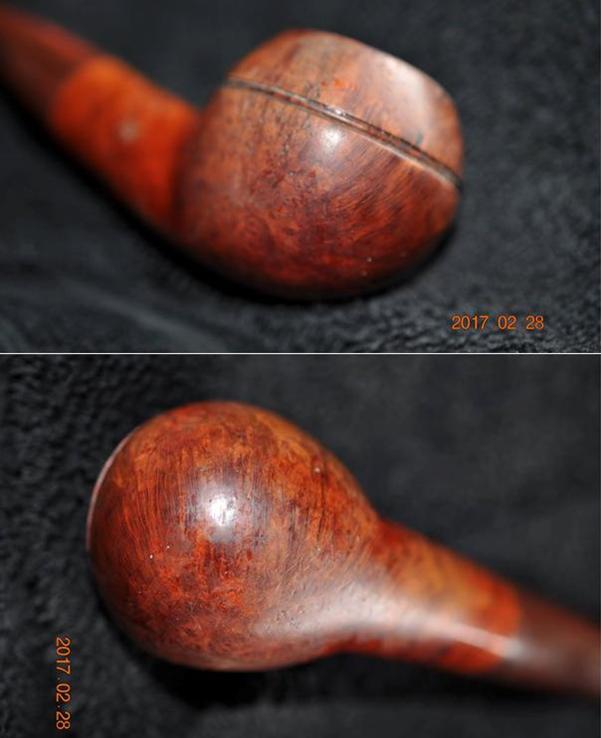
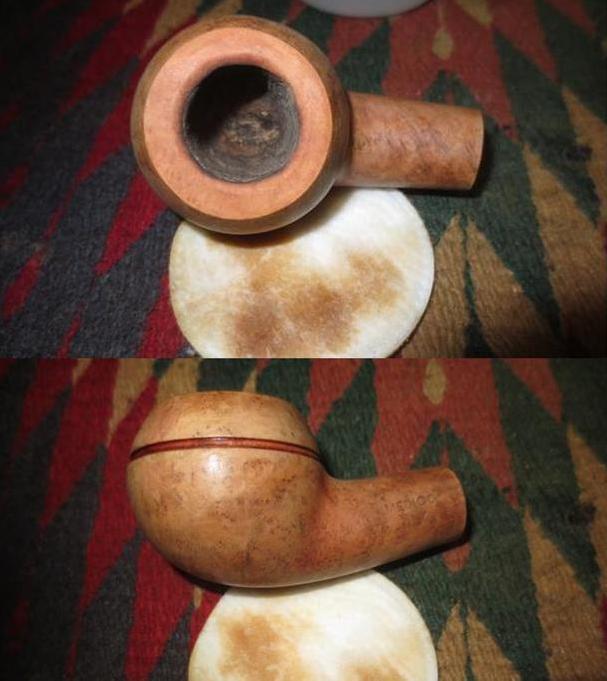
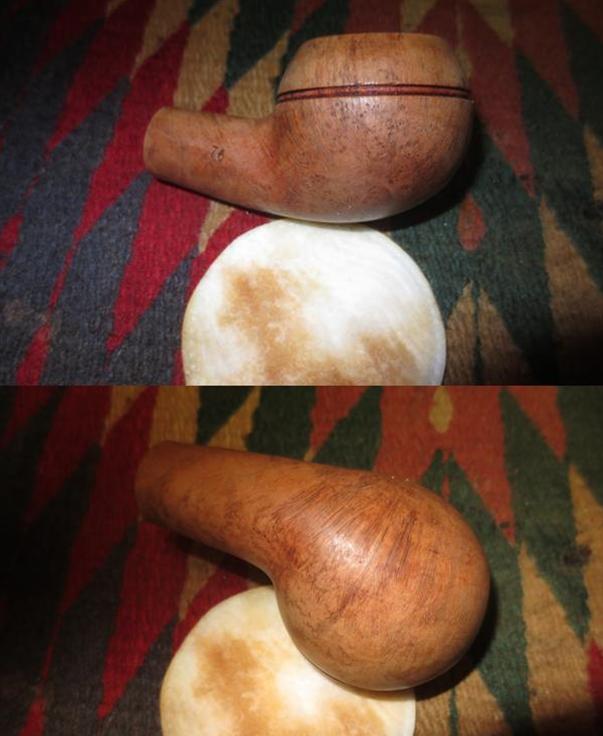
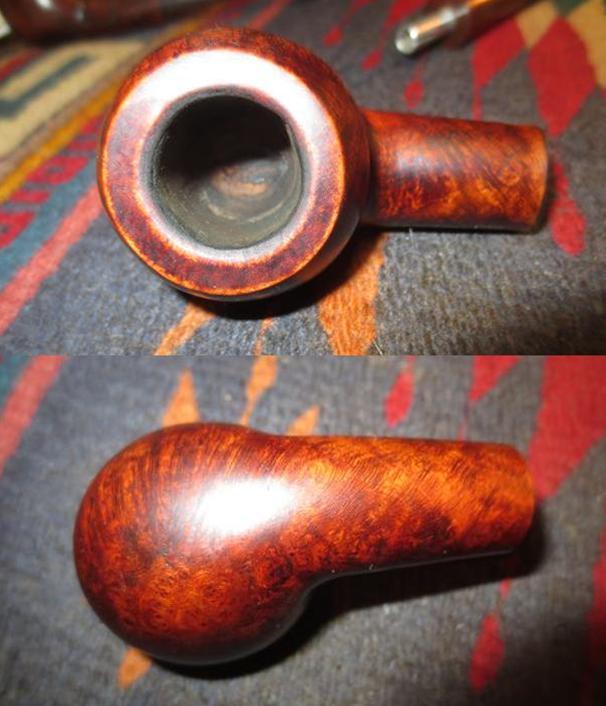
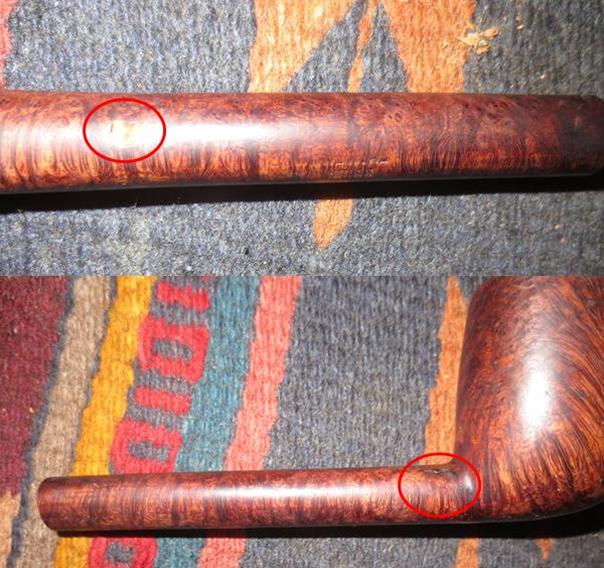
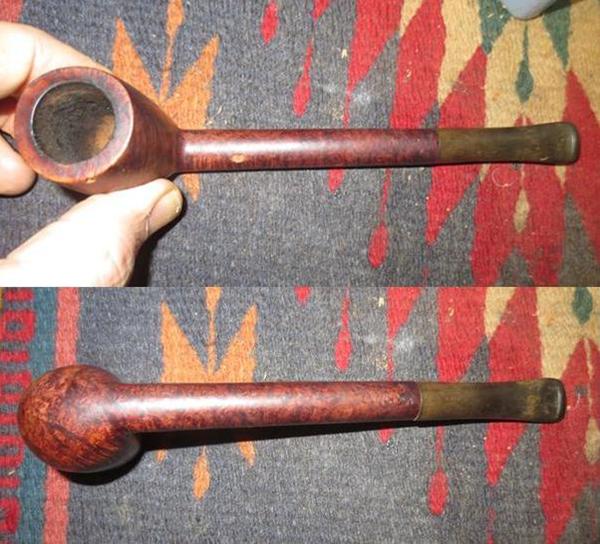
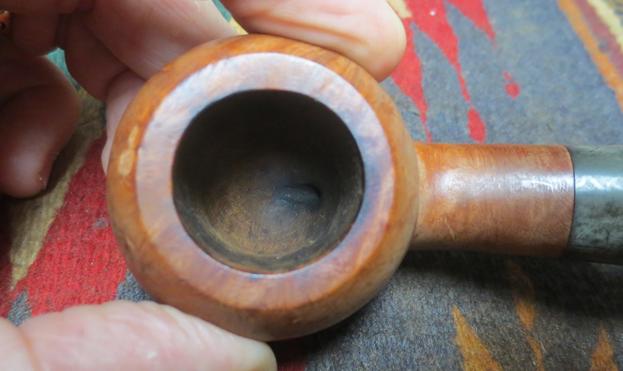
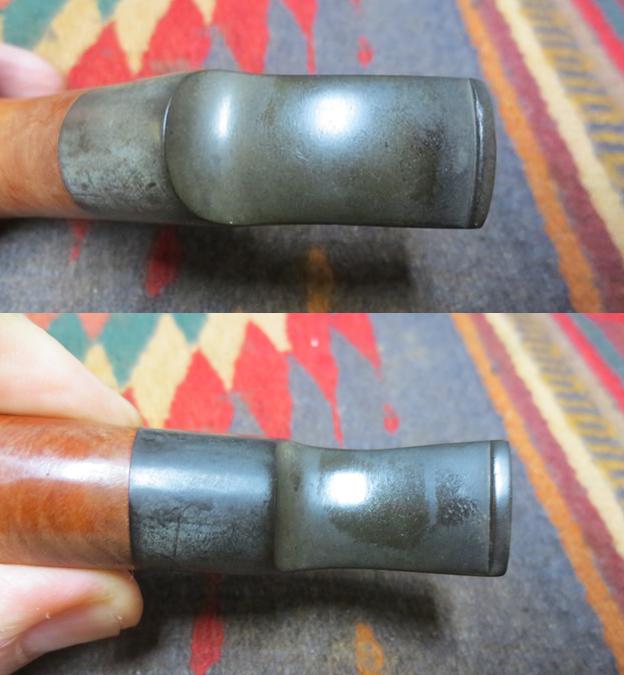
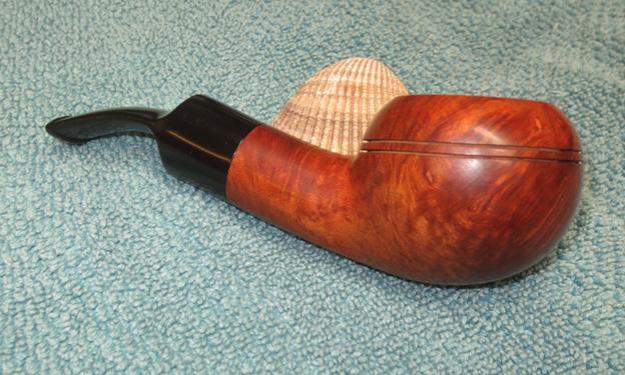
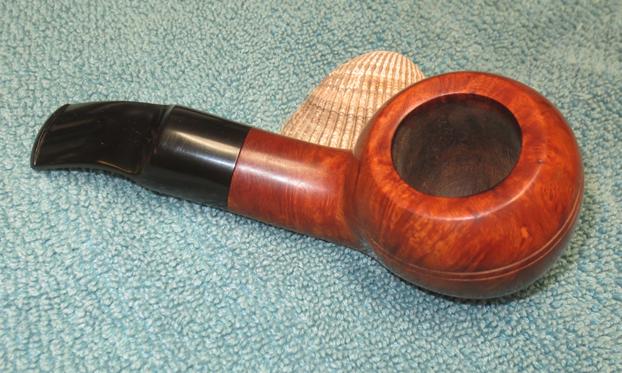
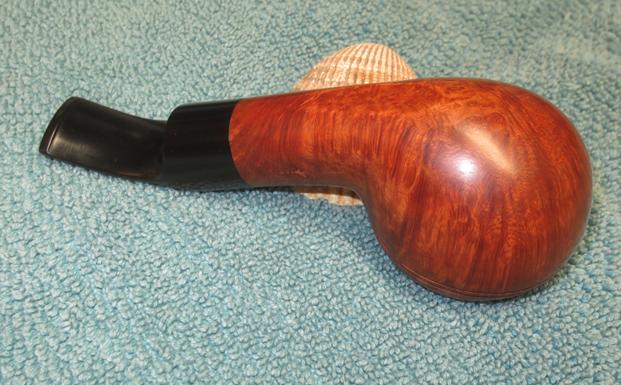
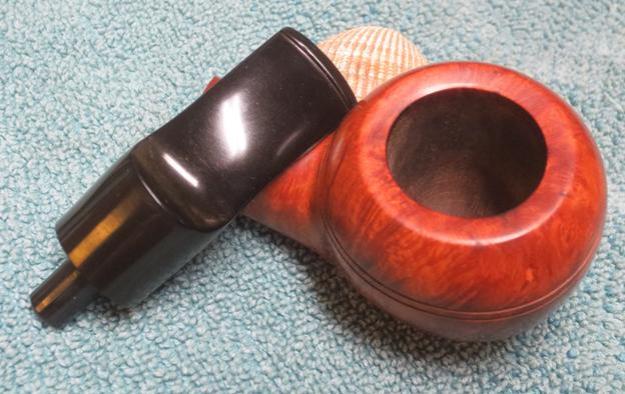
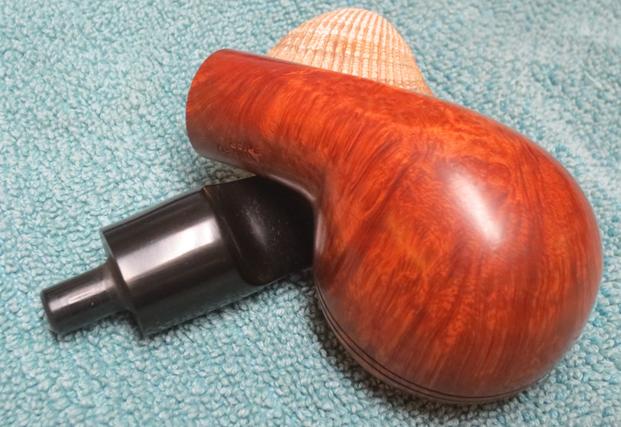
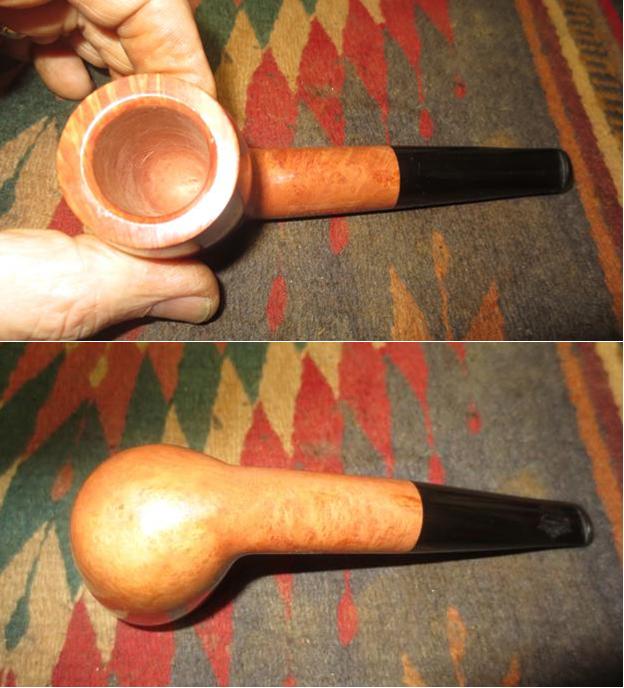
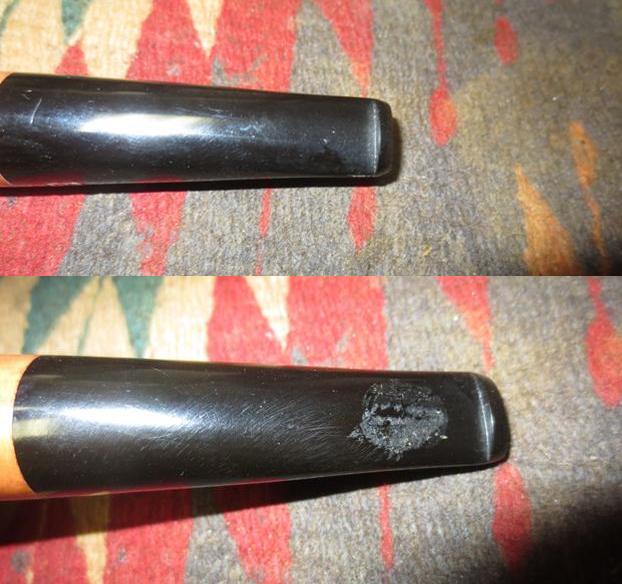
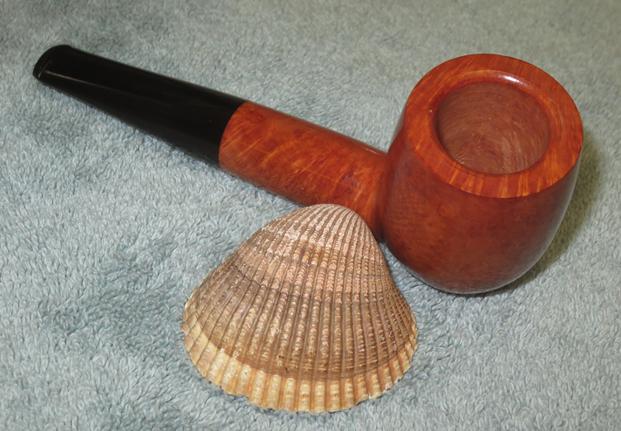
 The grain on this larger stummel is outstanding – much motion and flow. Standing out is the bull’s eye wraparound knot grain perfectly situated to highlight the elbow where shank and stummel meet and blend (pictured above). The stummel surface has several dents and some cuts from normal wear and grime collection. The rim has some oil residues but like the stummel surface, has its share of normal wear dents. The cake in the chamber is very light and the remnants of the last smoke are still evident – a blend of sorts (pictured below)! The stem shows light oxidation and tooth chatter primarily on the lower bit. The button and slot look good. To start the restoration and cleanup of the Bruyere Garantie Bent Billiard, after inserting a pipe cleaner through the stem, I put the stem in the Oxi-Clean solution to soak, working on the oxidation. With stummel in hand, I clean out the old tobacco from the chamber with the pipe nail tool.
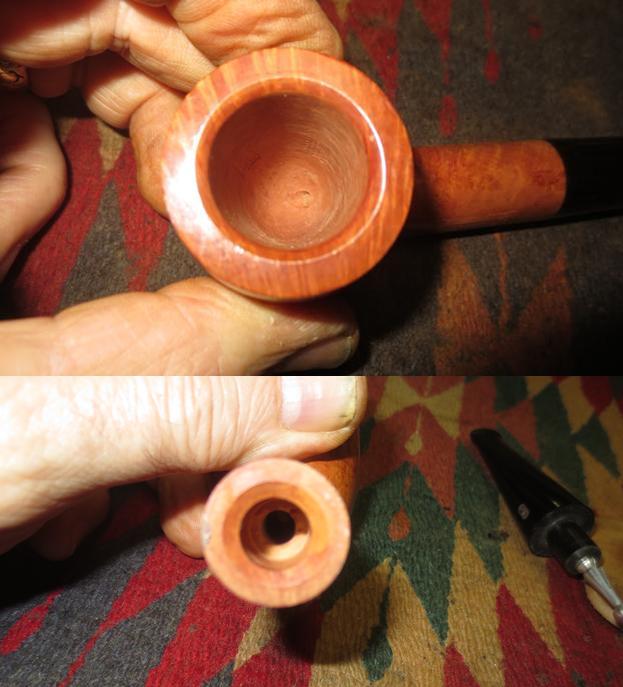
 With the Pipnet kit, I ream the cake to the briar for a fresh start. I use the two smaller of the 4 blades available in the kit and follow this by using the Savinelli pipe knife to fine tune the ream by strategically scraping the chamber wall. To clean the chamber wall, I wrap 240 grit paper around a Sharpie Pen and sand the chamber and then use a cotton pad wetted with isopropyl 95% to remove the carbon dust. Looking at the cleaned chamber, it looks good.


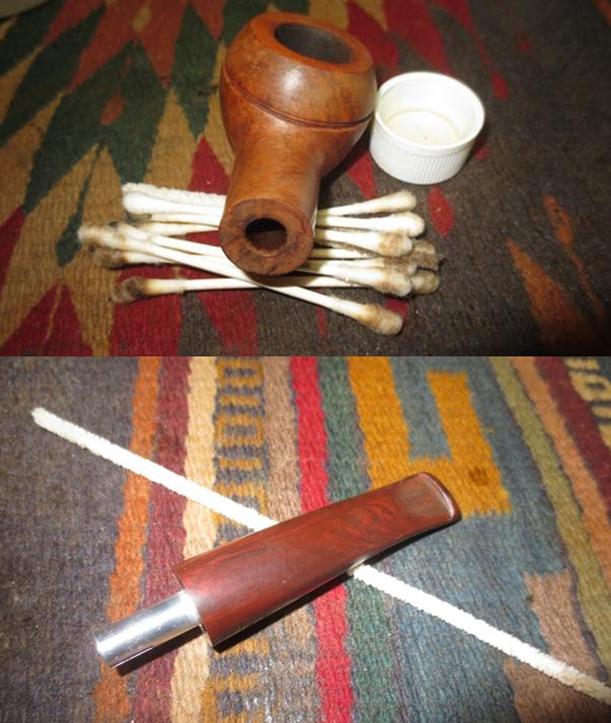
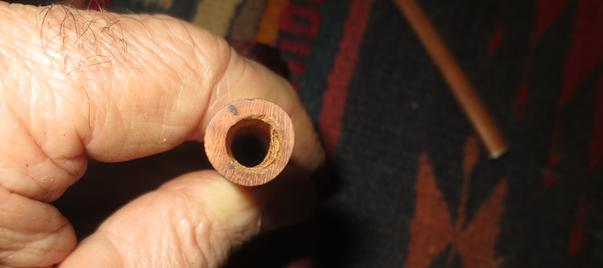
 With the chamber finished, I turn to cleaning the internals of the stummel with cotton swabs and pipe cleaners dipped in isopropyl 95%. It does not take long and pipe cleaners and swabs are coming out clean.
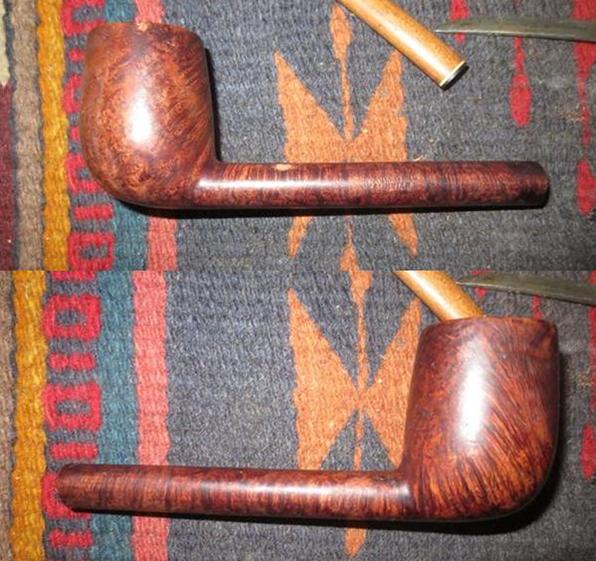
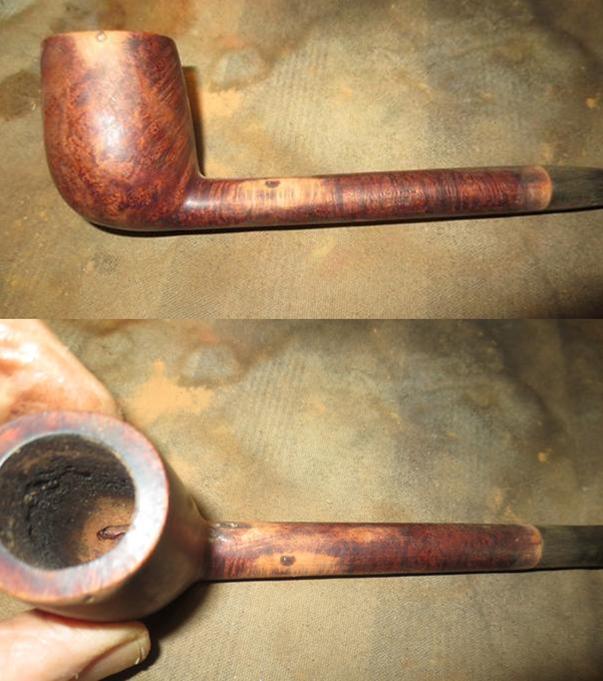
  Now turning to the cleanup of the surface of the stummel, I use undiluted Murphy’s Soap with cotton pads and a bristled toothbrush to clean the grime off the briar surface. Murphy’s does a good job cleaning wood of grime and old finish. I rinse the stummel with tap water careful not to flood the internals with water. I inspect the rim and surface with things cleaned up and take some close-ups of dents and marks showing signs of wear – a well-smoked and liked pipe. The pictures show the cleaning and surface inspection.


 To address the stummel rim and surface, I use a medium grade sanding sponge to remove as many of the imperfections as possible. I use this sanding sponge to perform a gentle topping of the rim to remove the dents. I follow with a light grade sanding sponge and I also freshen the internal rim bevel using first 240 grit paper followed by 600. The clear majority of the nicks and dents have been removed. Those that remain will be an ongoing testimony of the years this pipe has spent serving his steward! The pictures show the progress.
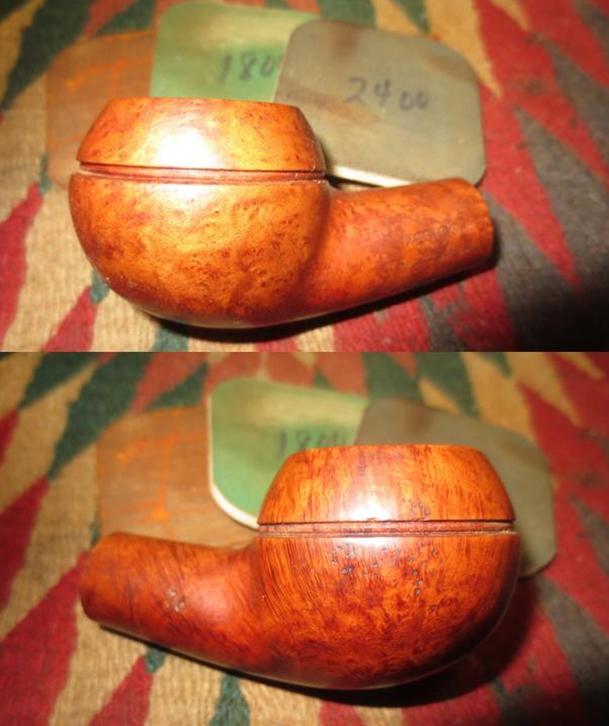
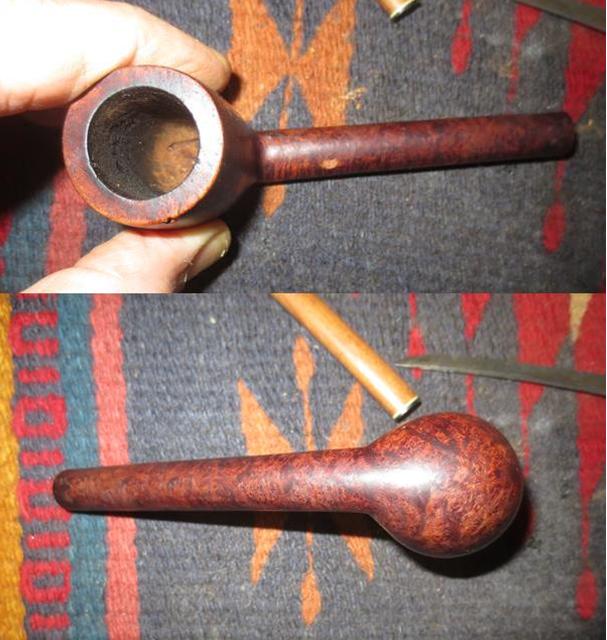
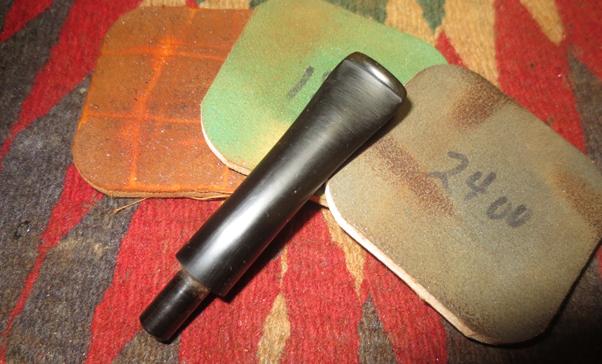
 I’m ready now to fine-tune the stummel by sanding with micromesh pads 1500 to 1200. I first wet sand using pads 1500 to 2400. After completing the wet sanding, I detect some fills that have softened. This probably resulted from the water on the stummel and the fill material was only water based. Two were on the rim and a few more on the side of the stummel. Using a sharp dental probe, I dig out the old fill that at this point has the texture of wet clay. Pictured is the completion of the first 3 micromesh pads and the beginning of a small detour – such as life!

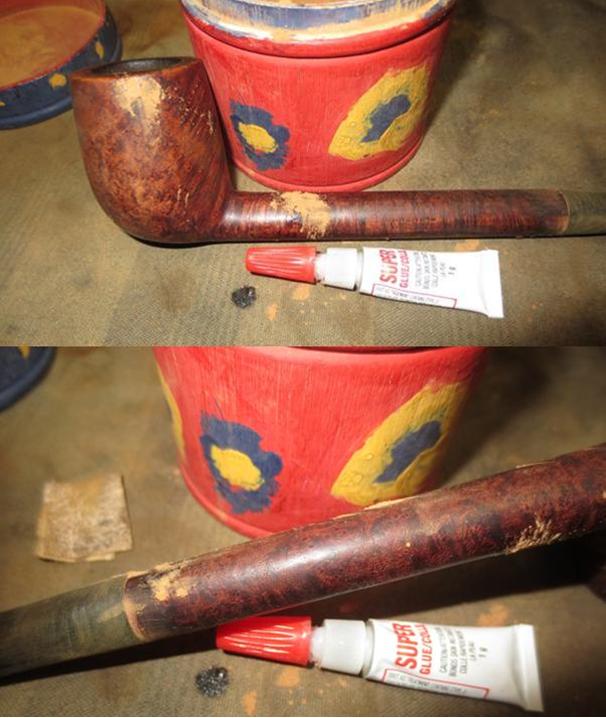
 The detour requires that I mix briar dust and super glue to make a more durable fill than what I just removed. After filling the holes, I’ll then need strategically to re-sand the patches and return to the micromesh pads. While I’m at it, I detect a few more fills and clean them out. These ‘factory fills’ are normal and reveal that one seldom finds a perfect block of briar without some imperfections. The most challenging patch will be the rim. I begin by wetting a cotton pad with isopropyl 95% and wipe down the stummel – I want it clean and free of residue fill material. I then use a pipe nail and scoop out an enough briar dust on an index card that serves as my mixing pallet. I then add a small puddle of regular superglue next to the briar dust and use a toothpick to begin mixing the putty by drawing dust into the puddle of glue. When the consistency of the putty is about like molasses, I use a flat dental spatula to apply the briar dust putty to the holes. I leave excess putty over each patch in anticipation of sanding it down flush to the briar surface. I use an accelerator spray to shorten the curing time for the patches. It takes me two batches to fill the holes. The pictures show the progress.
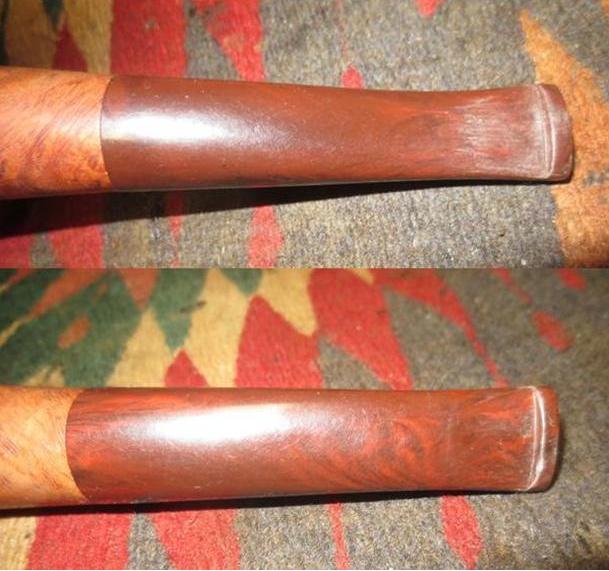
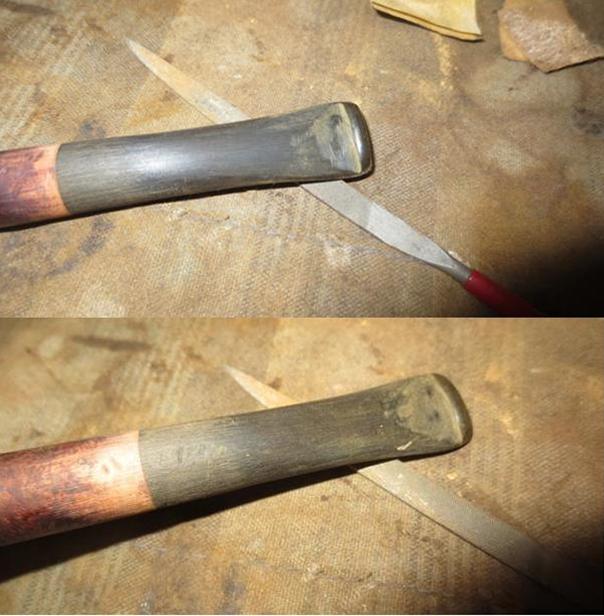
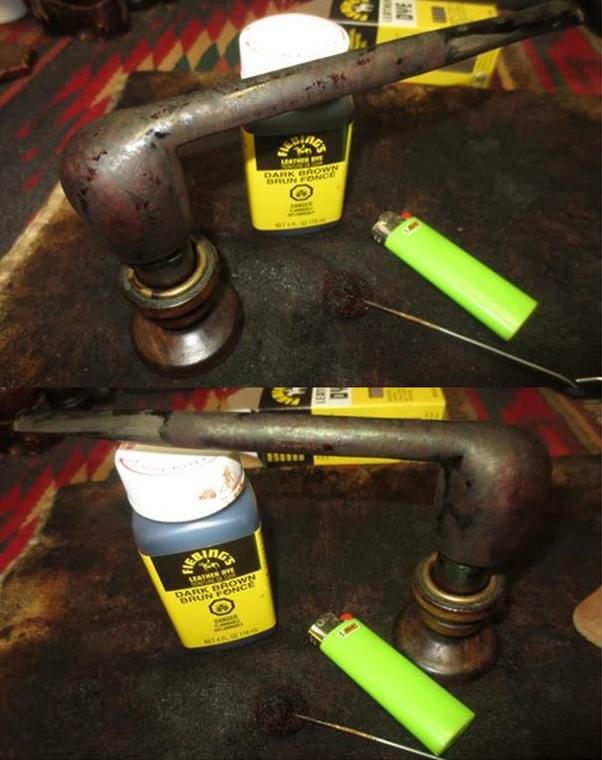
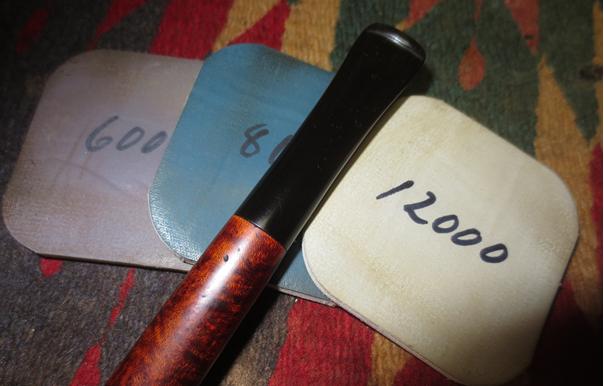
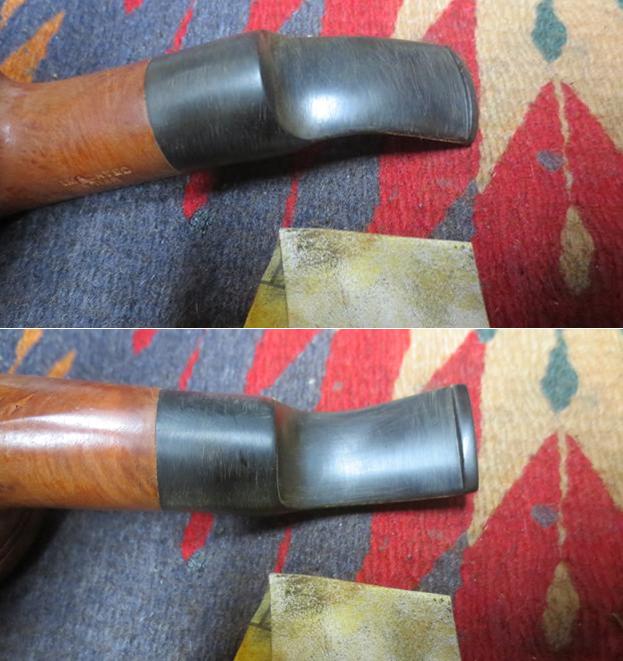
 I decide to let the stummel rest a bit as the patches cure and work on the stem. I remove the stem from the Oxi-Clean bath that it’s been soaking in for several hours. The oxidation has ‘surfaced’ on the vulcanite stem and I use 600 grit paper and wet sand the stem to remove the oxidation after remounting the stem and stummel with the plastic disc separator. This helps avoid shouldering the stem. After completing the sweep with 600 grit, I look at the lower bit where there was tooth chatter and some dents. I use 240 grit paper to sand these out. One dent was refusing so I dropped a bit of Black CA glue on it and applied some accelerator spray to cure it quickly. After a bit, I returned to the patch with 240 grit paper to smooth it and blend it with the vulcanite. I follow using 600 grit sanding paper and then finish this phase by buffing the entire stem with 0000 steel wool. The pictures show the progress.


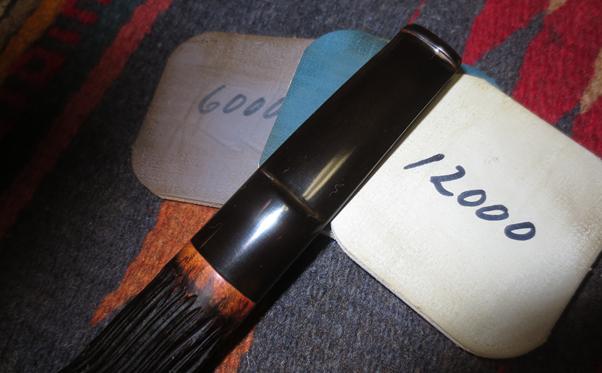
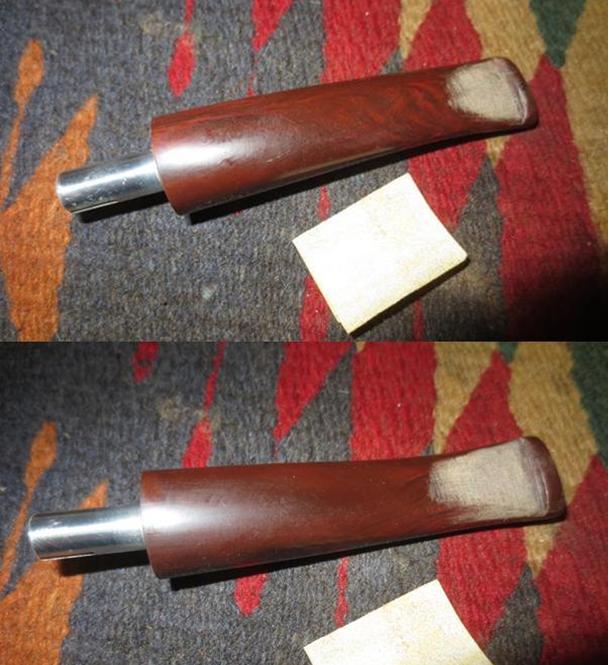
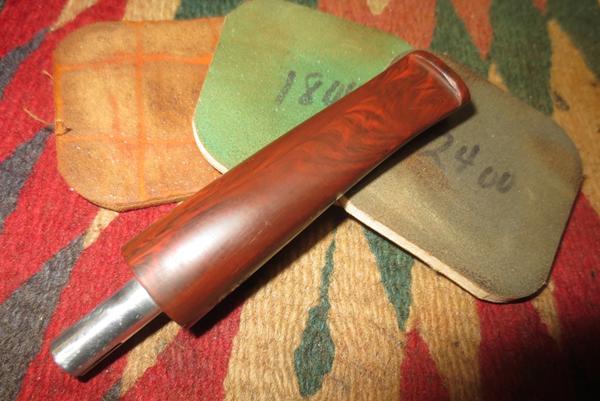
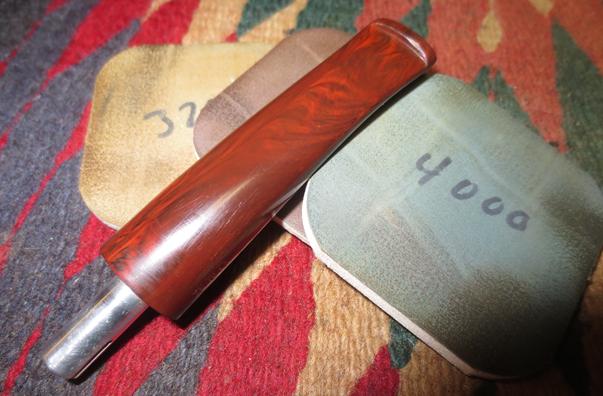
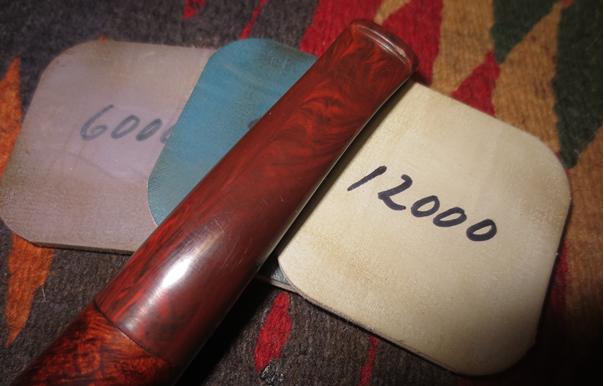
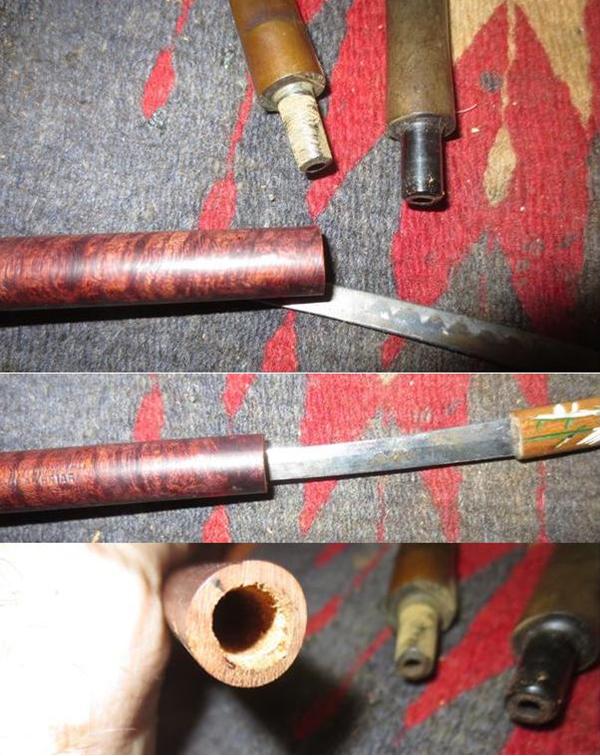
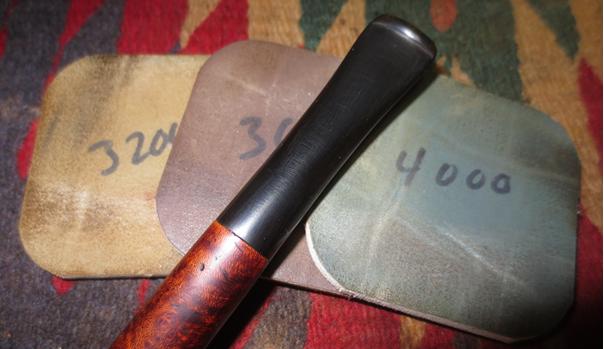
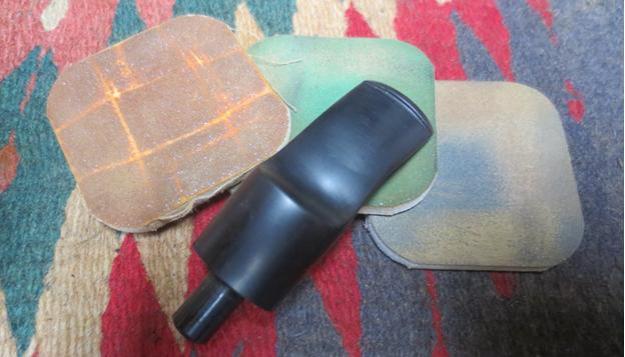
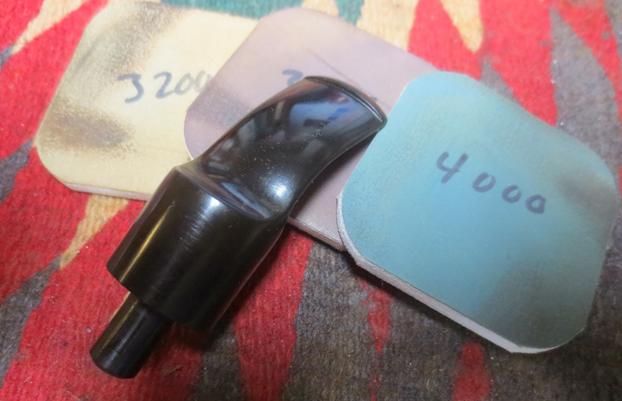
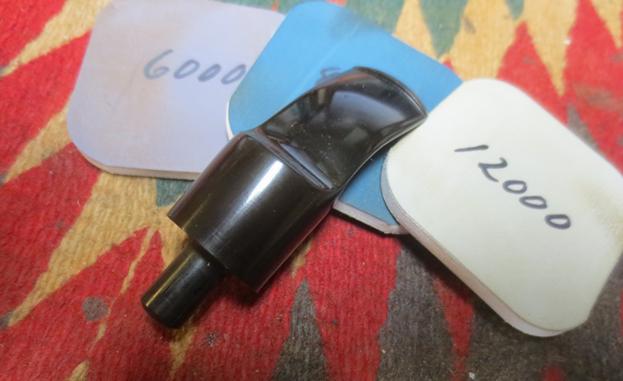
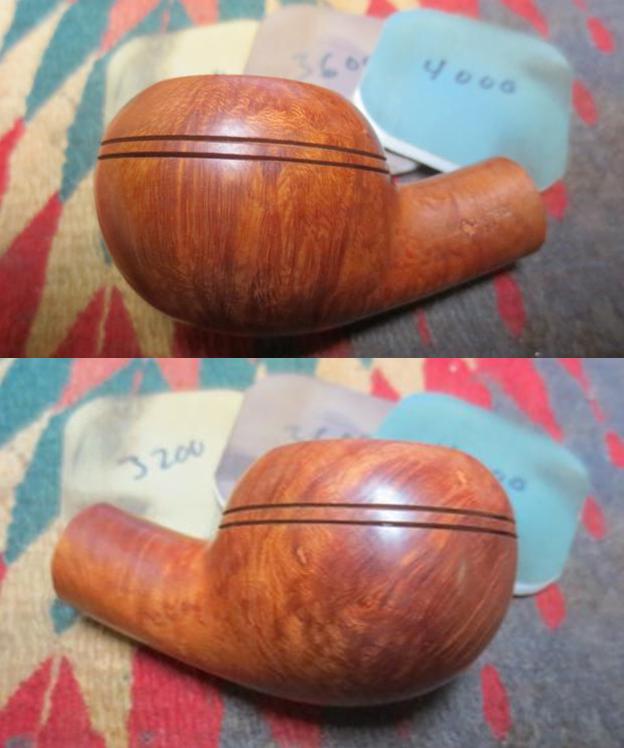
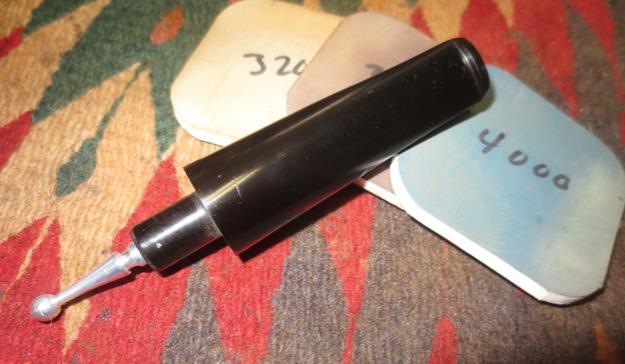
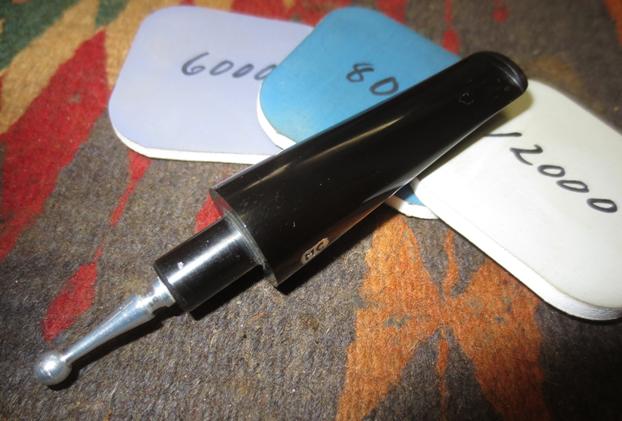
 With the stem in front of me, I decide to move it to the micromesh phase. Using micromesh pads 1500 to 2400 I wet sand the stem. When I complete this first cycle I realize that I forgot the clean the internals of the stem! Call me anxious…. Holding the stem with paper towel, I gingerly use pipe cleaners dipped in alcohol 95% and then with cotton swabs I clean out the filter cavity. Thankfully, the stem was in pretty good shape. Back to the micromesh process. I follow this by dry sanding with pads 3200 to 4000 and then 6000 to 12000. I follow each cycle of 3 pads with an application of Obsidian Oil which deepens the color and revitalizes the vulcanite. The pictures show the progress – looking good!


 With the stem restoration complete, I turn to the stummel again. I use a flat needle file to begin the process of bringing the excess briar dust putty down to the briar surface. I start with the rim patches and move around the stummel. After using the flat needle file, I use 240 grit paper on each patch to bring it down to the surface. I finish the sanding and blending with 600 grit paper. At this point, I notice some air pockets in some of the patches. I spot drop a small bit of superglue in each and spray it with accelerator. After a few minutes, I sand down the superglue fills very quickly with the flat needle file, then 240, then 600. I take pictures along the way.


 With my day ending, I want to clean the stummel internals further using a kosher salt and alcohol soak. I fill the stummel with kosher salt and I cover the bowl and give it a shake to displace the salt. I use kosher salt and not iodized salt as it does not leave an iodine aftertaste. I stretch/twist a cotton ball and feed it into the mortise acting as a wick to draw out the oils during the soak. I situate the stummel in an egg carton and using a large squeeze dropper, I fill the bowl with isopropyl 95% until filled. I wait a few minutes as the alcohol is quickly drawn down. I top it off again with alcohol. I turn out the lights – another day complete.
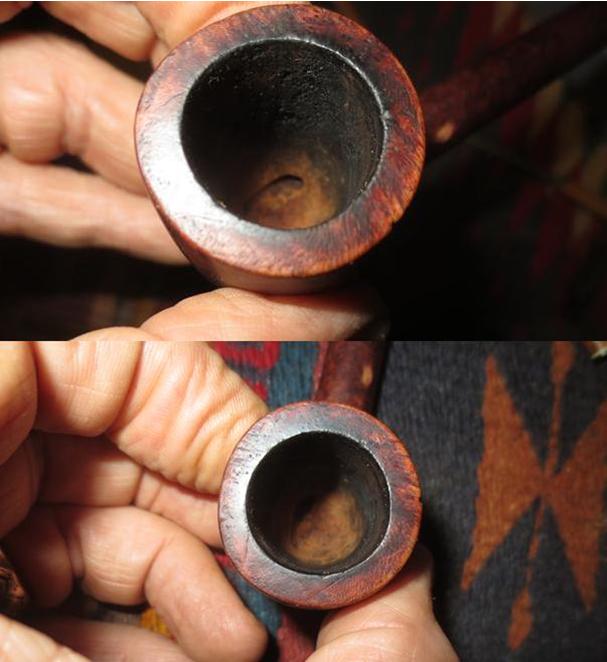
 The next morning, the kosher salt and alcohol soak did its job. The salt and cotton wick are discolored indicating a not too dirty stummel giving up more gunk. I thumped the stummel on my palm (not table!) and the expended salt goes into the waste. I wipe the chamber with a paper towel and run bristle brushes of differing sizes in the chamber, through the mortise and draft hole to remove all the salt. It’s looking good and the new steward of this Bent Billiard will enjoy a sweeter taste as a result.

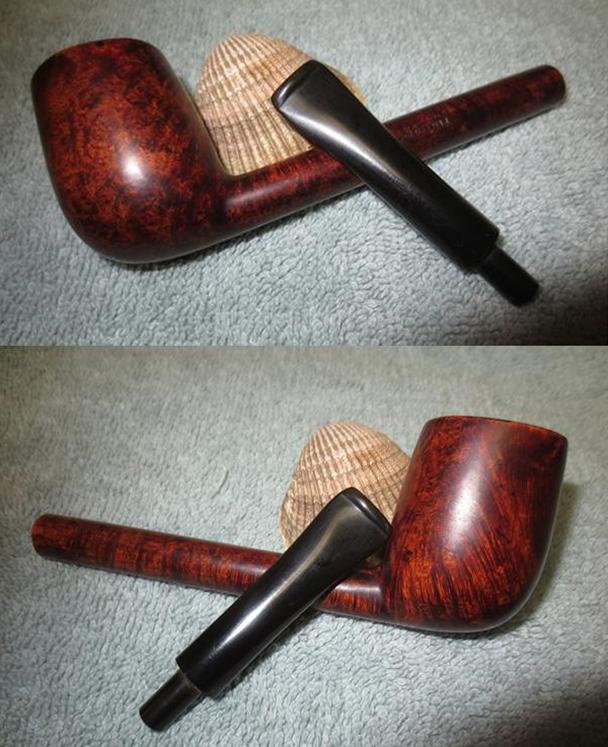
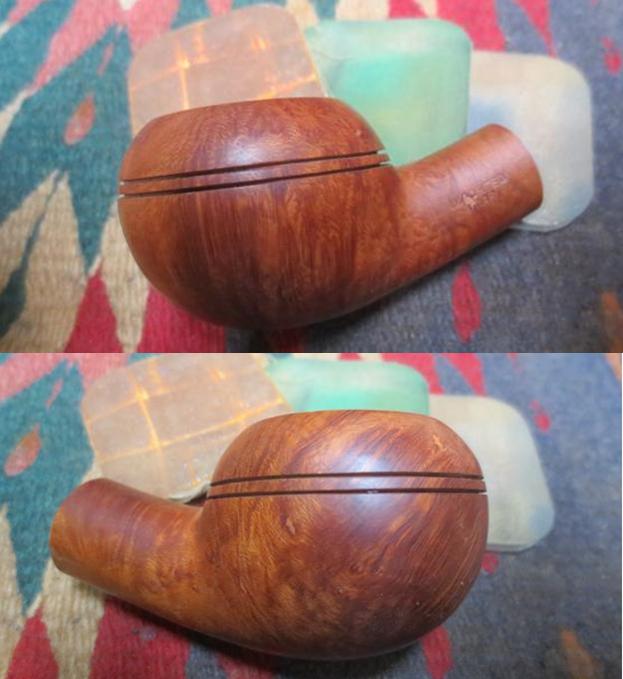
 To get a bird’s eye view of the project, I rejoin the finished stem with the now patched stummel. The more I study the grain on this pipe, the more I like it – especially the lower horizontal grain encompassing the stummel’s heel then transitioning through the elbow of the shank merger. A very pleasing visual as one cradles the ample Billiard bowl in his (or her!) palm.
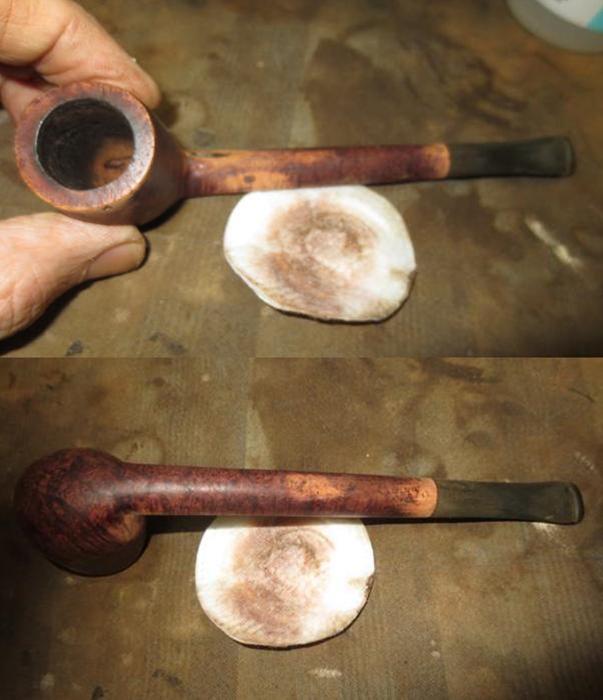
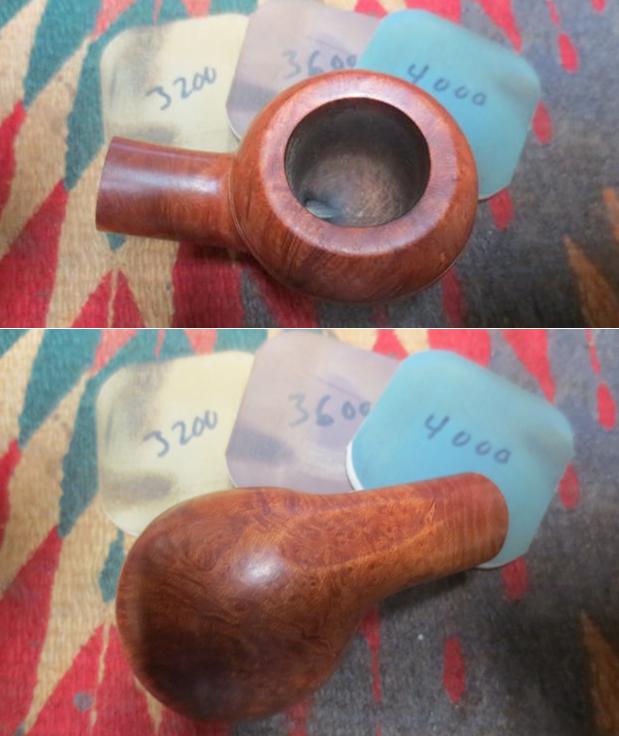
  Imagination aside, time to get back to the stummel micromesh process. Since I had already completed the first 3 micromesh pads, I wet sand with these again, but focus on the rim and stummel patched areas. After wet sanding with pads 1500 to 2400, I apply a stain stick to the patch on the stummel. Because of the sanding, this area is lighter than the surrounding patch of briar. I apply some stain, let it dry, and wipe it with a bit of alcohol on a cotton pad to blend. Then, I continue with dry sanding with pads 3200 to 4000 and then finishing with pads 6000 to 12000. I am amazed at how a natural grain can achieve such a gloss through this process – wax is not needed! To me, the difference between the character of this gloss and the ‘gloss’ of an acrylic finish is the difference between a high-end HD flat screen and a so, so TV – color, but not the same sharpness or reality. When one looks at grain through an acrylic finish, you’re looking through a film creating the shine not the grain itself, as is with a natural grain gloss – the real deal. The stains we apply then, do not create a film over the wood but colors it to help hide imperfections, etc., – a big difference. The pictures show the source of my amazement and reflections.


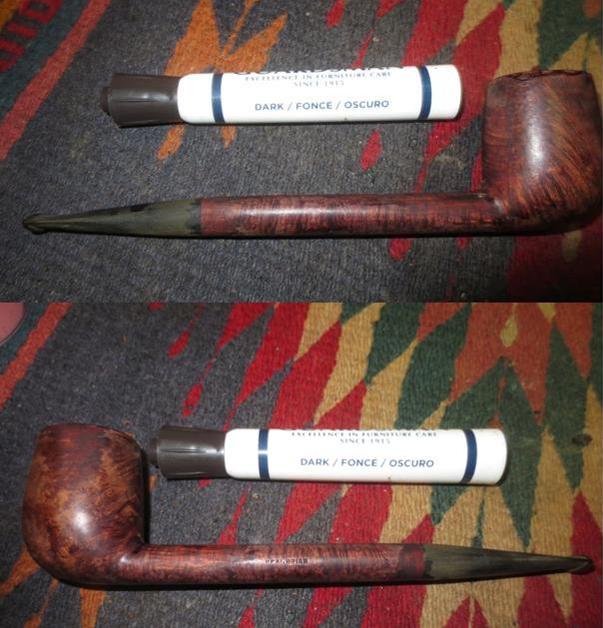
 With the micromesh pad cycles completed, I confer with my wife about the finish. Yes, I often ask my wife’s opinion at this point because of her eye for beauty and colors. Originally, I had been thinking of keeping with the original color bent – toward more reddish tones. After our conference, because of the beauty of this grain as is, I will stay with brown, leather tones consistent with the natural grain. I had avoided the nomenclature during the sanding processes and there was still residue of the older color. I use acetone (yes, the yellow label is acetone in Bulgarian!) with a cotton pad and work on removing the reddish finish. I’m not totally successful, but I don’t think what is left will make a difference.
  To stay in the brown/leather tones, I decide to mix 3 parts Fiebing’s Dark Brown Leather Dye with 1 part alcohol with a large bulb dropper. I want the finish on the darker brown side to blend the briar dust putty patches, but light enough so that the grain is showcased. To prepare the stummel, I first wipe it down with a cotton pad wetted with isopropyl 95% to clean the surface. After mounting a narrowed cork into the shank as a handle, I warm the stummel with a heat gun to expand and open the briar allowing it to absorb the dye more efficiently. I then liberally apply the dye mixture to the stummel with a folded pipe cleaner seeking full coverage. With a lit candle, I then ‘fire’ the stummel, igniting the alcohol in the dye which sets the stain. After a few minutes, I repeat the process concluding with firing the stummel. I then put the stummel aside to rest for several hours before continuing. The pictures show the progress.


 After several hours, I’m ready to unwrap the crust encasing the stummel resulting from the fired dye. I mount a felt buffing wheel on the Dremel, set the speed of the Dremel at the lowest, and use Tripoli compound’s abrasive characteristic to remove the crust. I first purge the wheel with a tightening wrench, to remove old compound and to soften the felt wheel. I rotate the felt buffing wheel over the surface without a lot of downward pressure. The speed of the Dremel and the compound do the work. To reach the difficult angle between the shank and bowl, I switch to a smaller felt wheel. After finishing with the Tripoli compound, I wet a cotton cloth with alcohol and wipe down the stummel to both lighten the aniline stain and to blend it.


 Following this, I switch to a cloth buffing wheel and turn the speed up from 1 to 2, approximately 40% of full speed, the fastest being 5, and apply Blue Diamond compound in the same manner as the Tripoli. I notice a few bright spots on the surface as well as around the nomenclature where the stain did not set consistently. I applied a bit of black Fine Point Sharpie Pen and darker stain sticks to blend the areas. I go over these areas again with the Blue Diamond buffing wheel to blend the spot staining. It looks good.
 I then buff the stummel with a flannel cloth to clean it of compound dust before applying the carnauba wax. Switching to another cotton cloth buffing wheel dedicated to carnauba wax, I reattach the stem to the stummel and apply the wax at the same 40% speed. I apply 2 cycles of carnauba to the surface and stem, then I switch to a clean Dremel buffing wheel and buff the pipe yet again. Finally, I give the pipe a rigorous hand-buffing with a micromesh cloth.
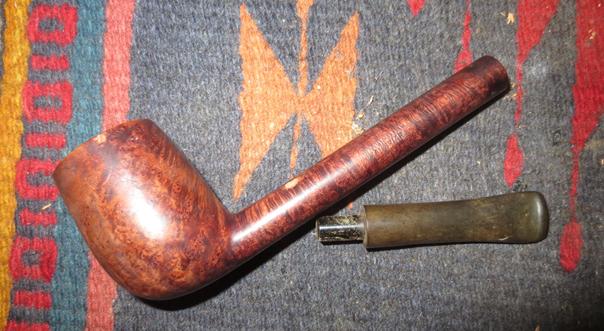
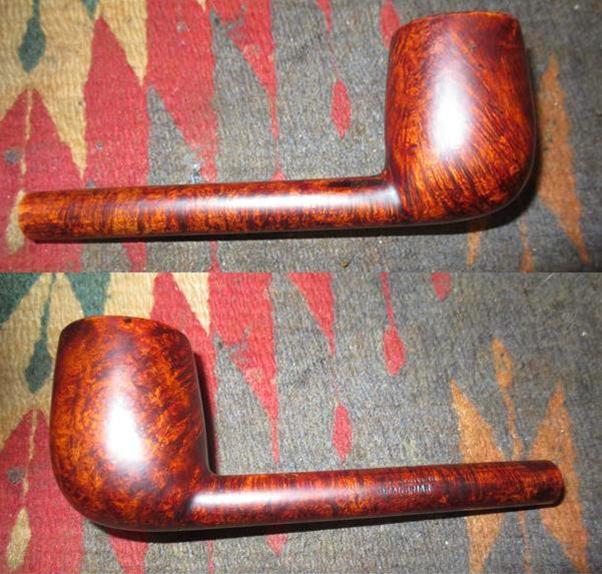
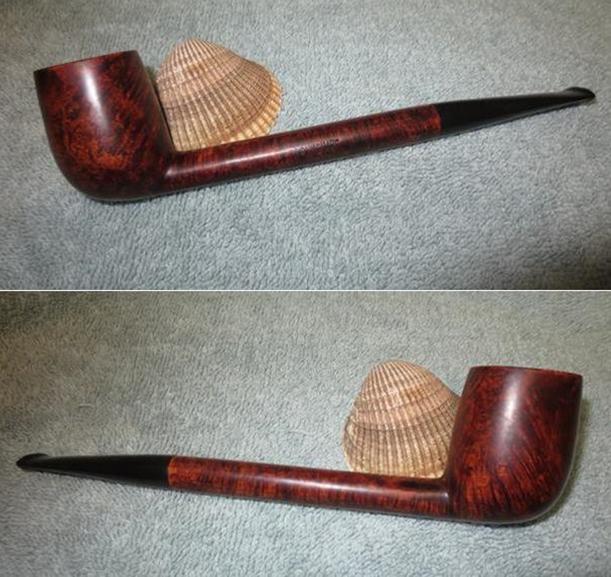
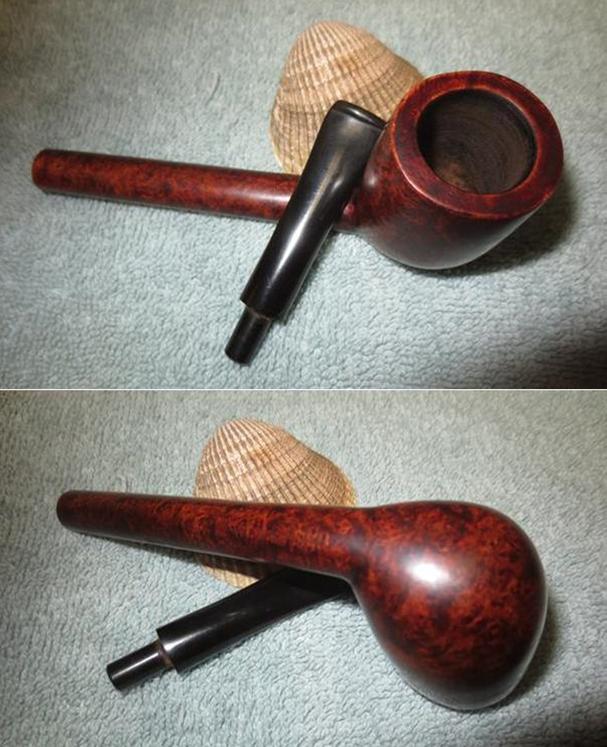
This French, probably Saint-Claude, made Bruyere Garantie Bent Billiard is stunning – the grain is beautiful. As I mentioned before, I am drawn to the heel of the stummel, at the elbow where stummel and stem meet – the knot grain perfectly situated there is amazing and says something about the eyes and judgment of the pipe maker who chose the briar block and could see what it would become. I’m very pleased with the results of this pipe. If you would like to adopt this classic Bent Billiard, look at my store front at The Pipe Steward. The sale of pipes benefit the Daughters of Bulgaria, an organization we work with helping women (and their children) who have been sexually exploited and trafficked. Thanks for joining me! 


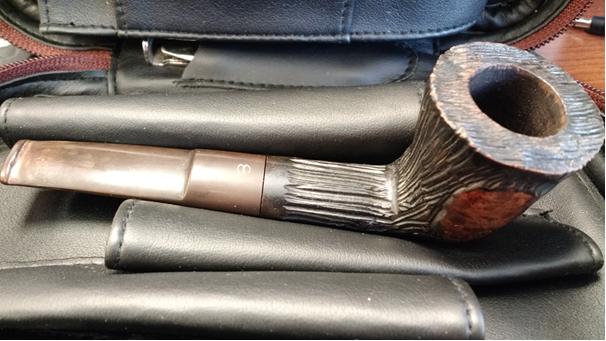
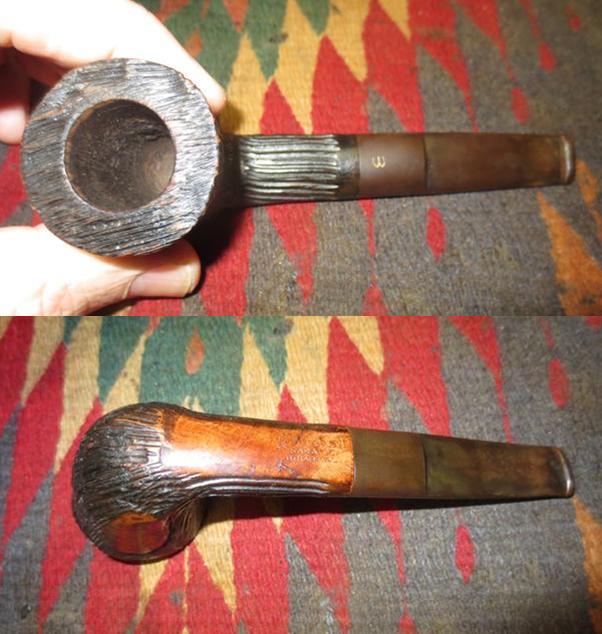
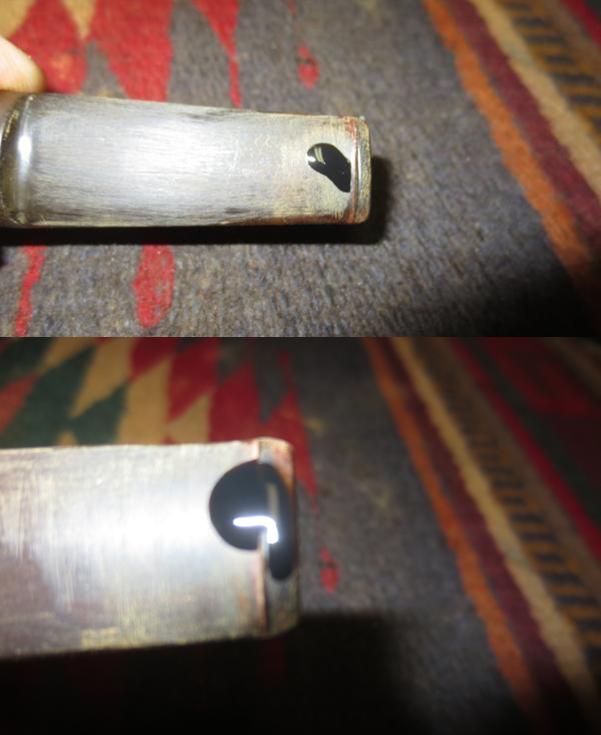
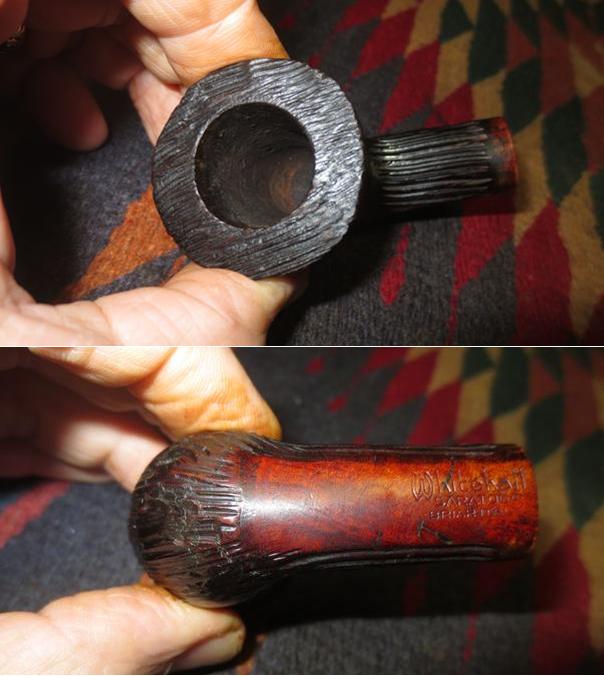
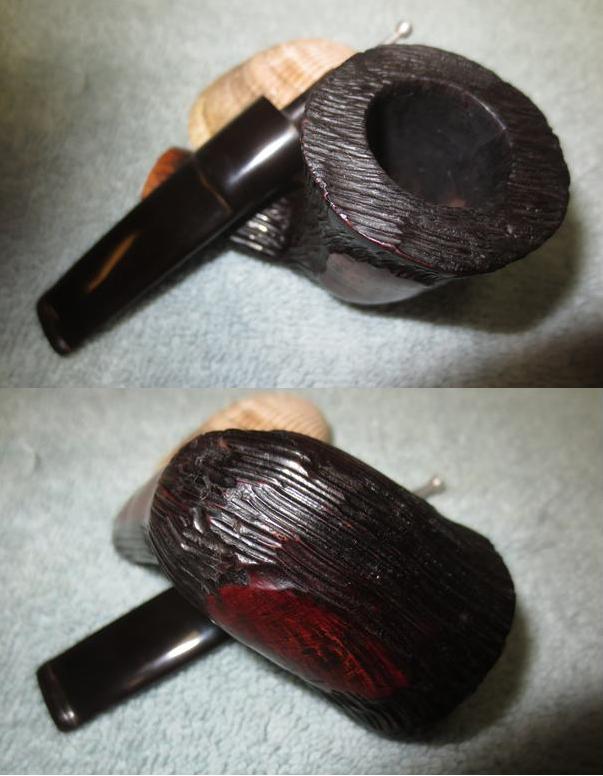
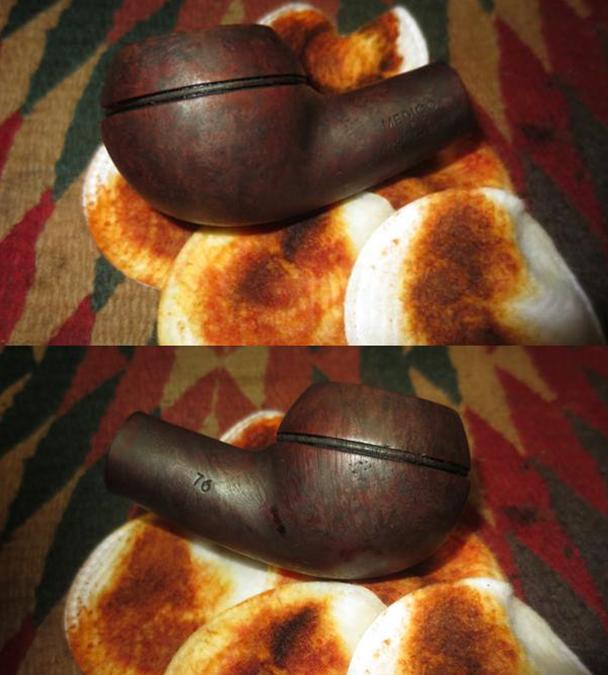
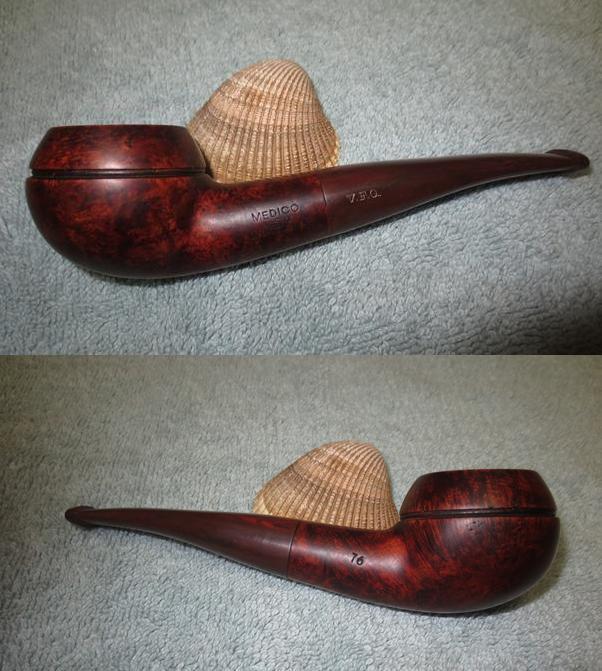
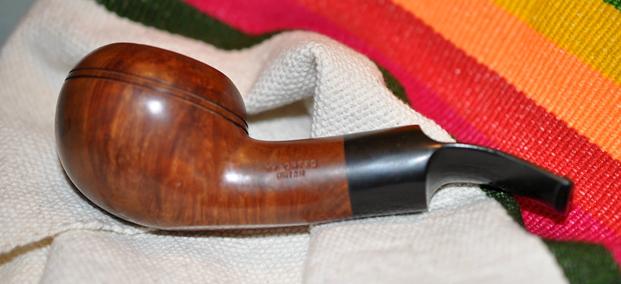
 The pipe was in pretty decent shape over all. The rim was dirty but the inner and outer edges were in good shape. The finish was worn and dirty but the carved striations looked good. The smooth patches around the shank, the underside and the two panels on the bowl sides were scratched but otherwise clean. The stem was oxidized and had some deep tooth marks on both the top and underside near the button. The W stamp on the top of the saddle was faint and worn. I would need to be careful in cleaning the oxidation not to damage the logo stamp. The photos below show the condition of the pipe when I received it.
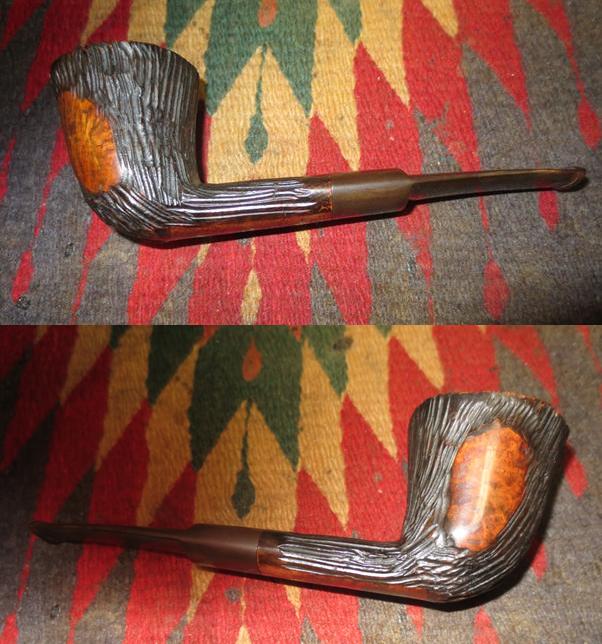
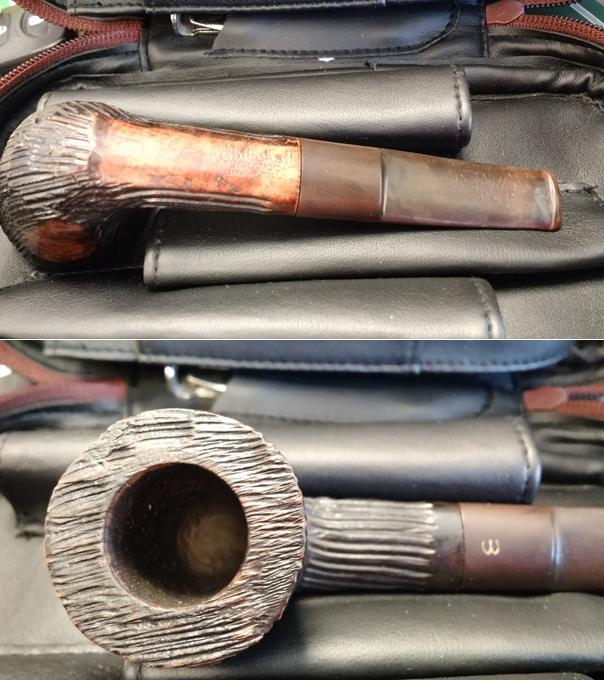
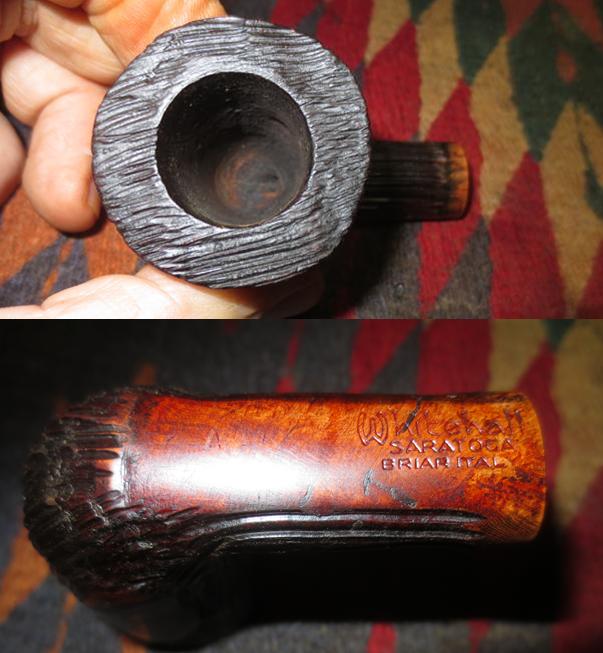
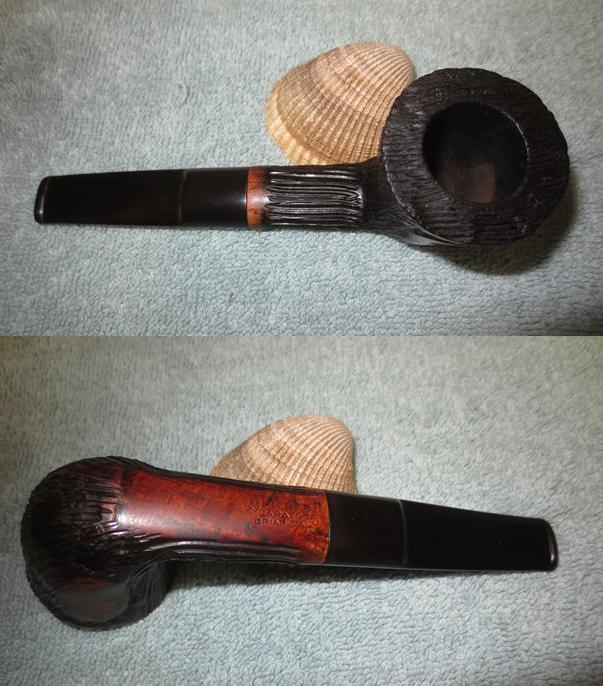
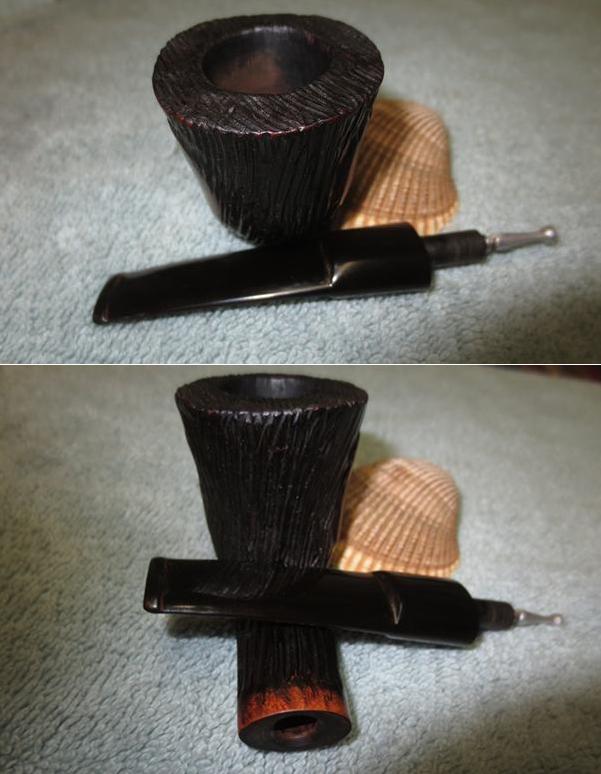
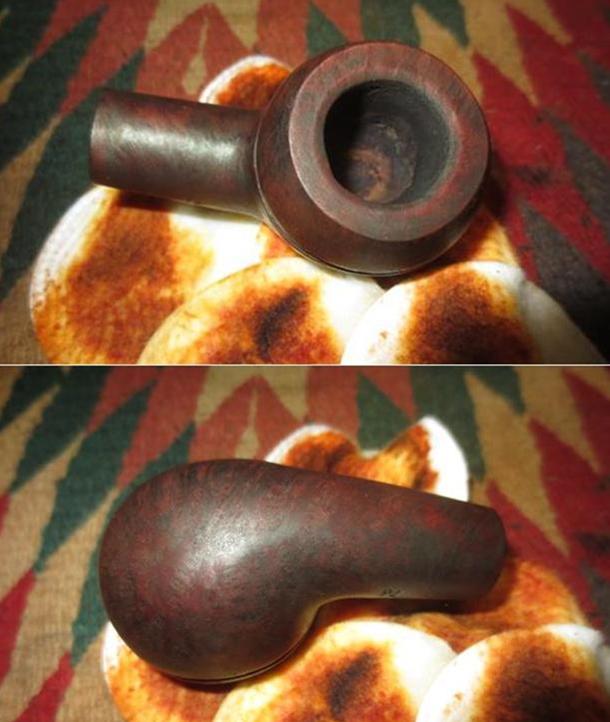
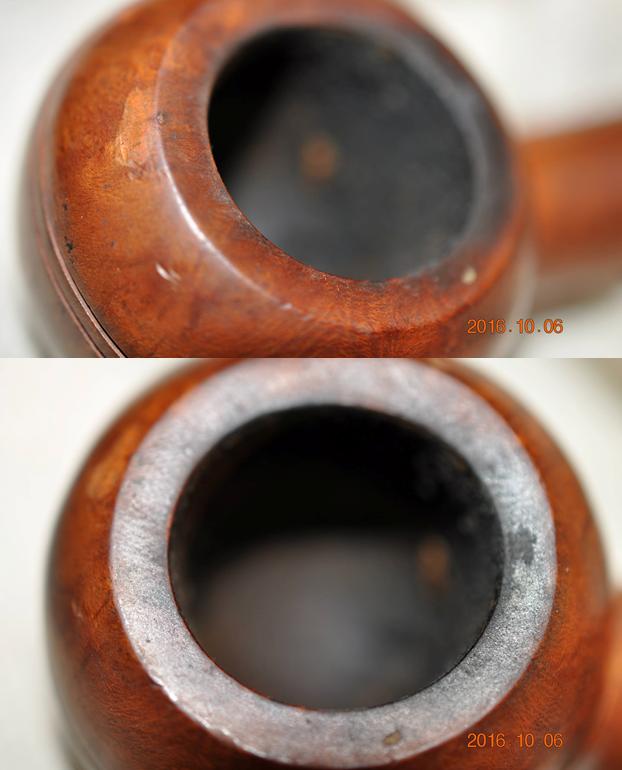
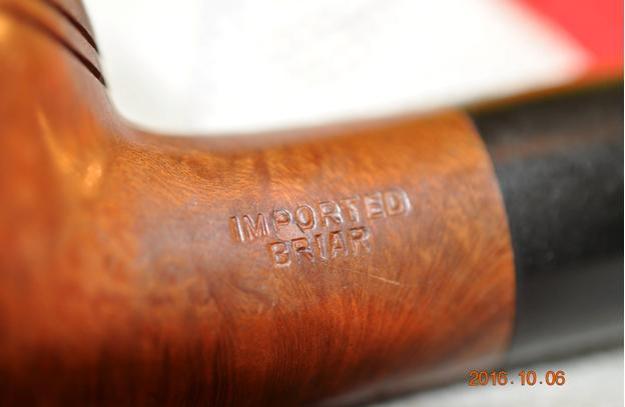
 I took a close up photo of the stamping on the shank. The stamp is clearly legible and reads Whitehall over Saratoga over Briar Italy. The second photo shows the rim and bowl condition. There was still a light cake that would need to be scraped out but it was really quite nice.
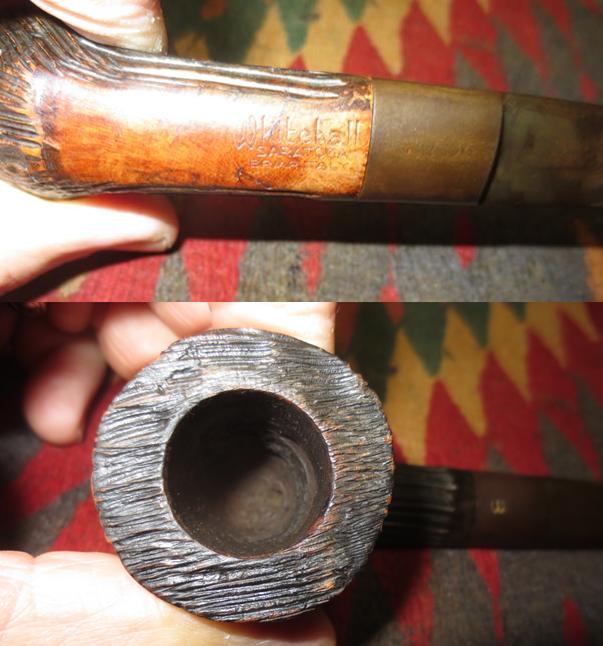 I took photos of the stem. It is hard to see the tooth dents in the photos below but they are present. There was a W on the top of the saddle stem that was a decal and it was coming off. The button is worn from use. The oxidation is quite deep.
 When I took the stem out there was a small stinger in the tenon. It was dirty but was easily removed and would be polished and put back in place.
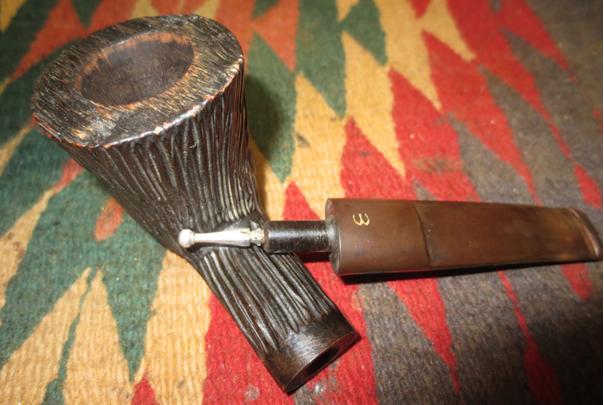 I sanded the stem with 220 grit sandpaper to break up the oxidation on the stem and reshape the button. I sanded out the shallower tooth marks to remove them. I wiped down the stem and repaired the deeper marks with black super glue.
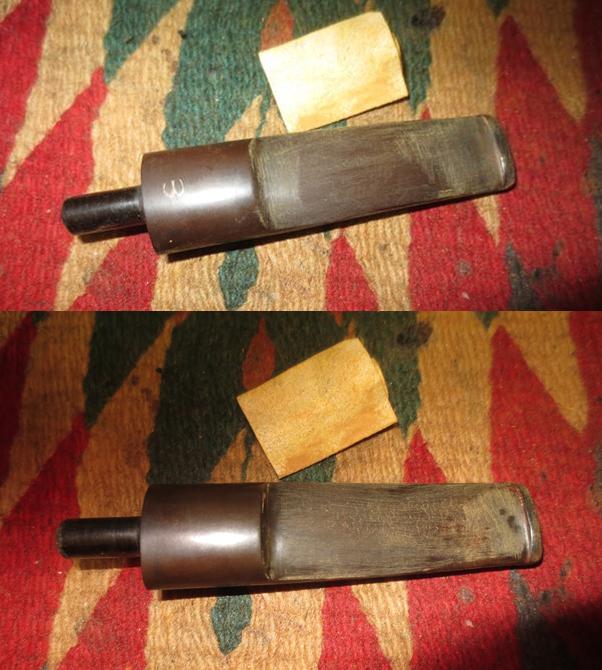
 I set the stem aside to let the repairs cure. I turned my attention to the bowl. I scrubbed it with a tooth brush and Murphy’s Oil Soap to remove the grime from the grooves in the briar on the bowl and rim. I rinsed the bowl down with warm water and dried it off with a towel. The freshened pipe is shown in the photos below.
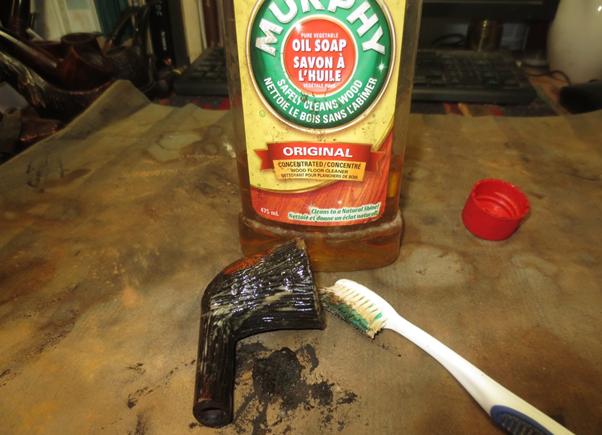
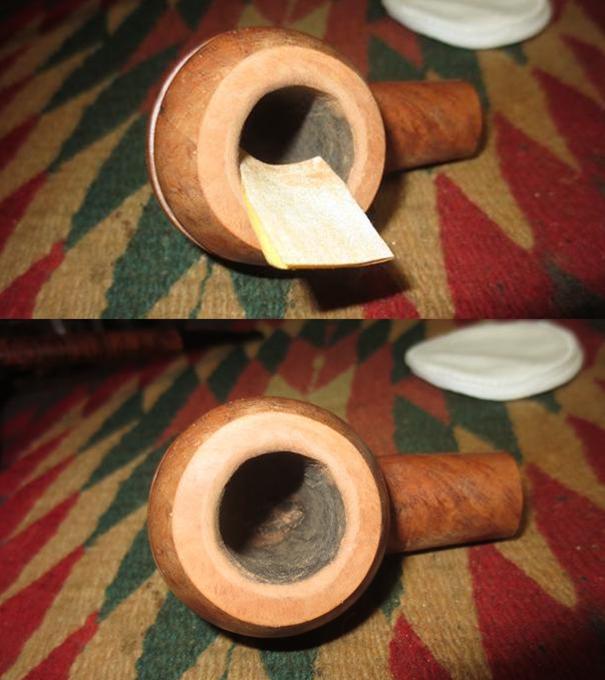
 I reamed out the bowl to remove the last of the cake with a Savinelli Fitsall Pipe Knife. It did not take too long to smooth out the remnants of the cake in the bowl. I scrubbed out the mortise and the airway in the shank and stem with pipe cleaners, cotton swabs and alcohol to remove the tars and oils. I went through a lot of pipe cleaners and cotton swabs before they came out clean.
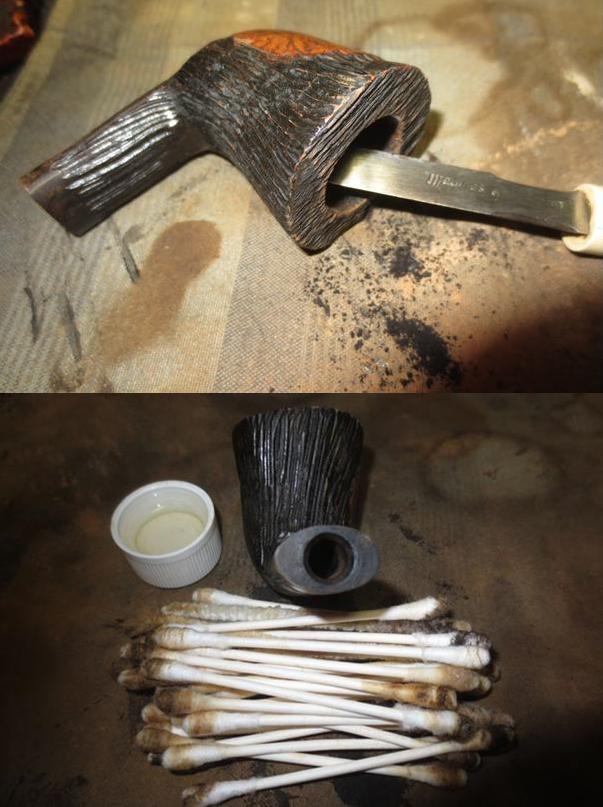 I restained the bowl with a dark brown aniline stain and flamed it with a lighter. I repeated the process until the coverage was even and I was happy with the results.
 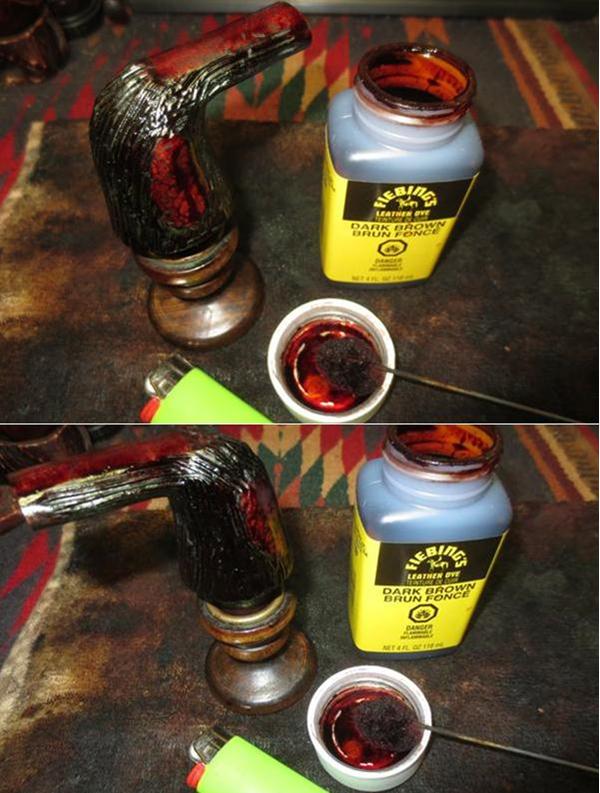 I wiped down the bowl with alcohol on cotton pads to lighten the stain and make the contrast between the rusticated part and the smooth ones more obvious.
 I gave the pipe a coat of Conservator’s Wax and buffed it with a shoe brush to give it a shine and check out what the colour looked like.
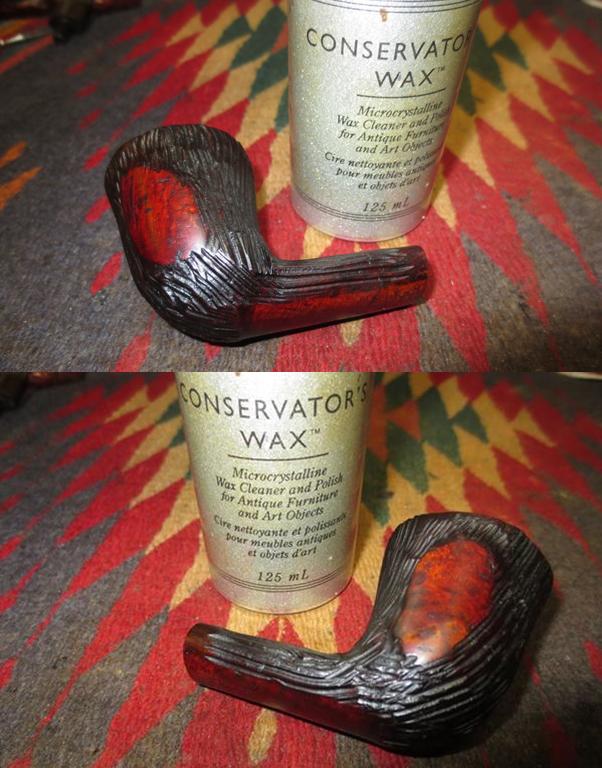
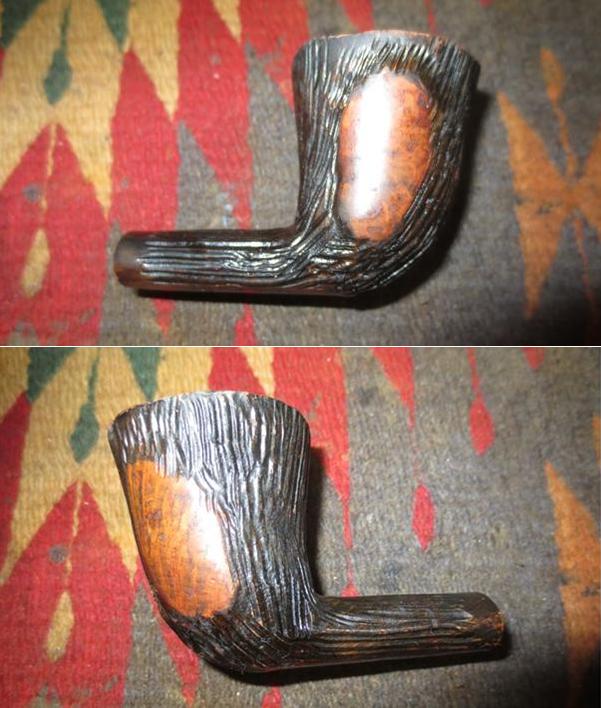
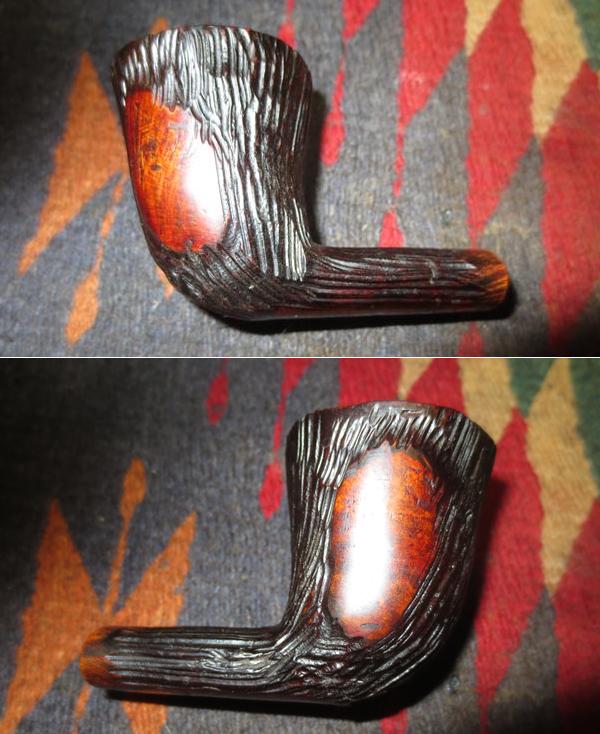
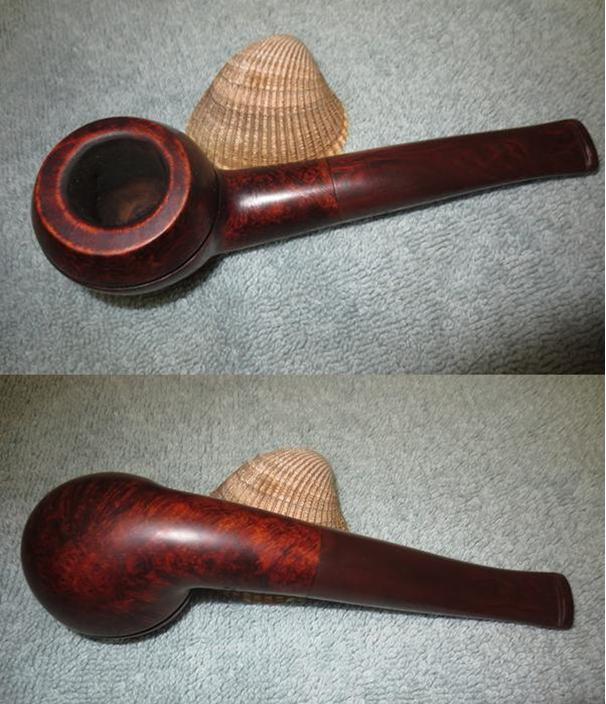
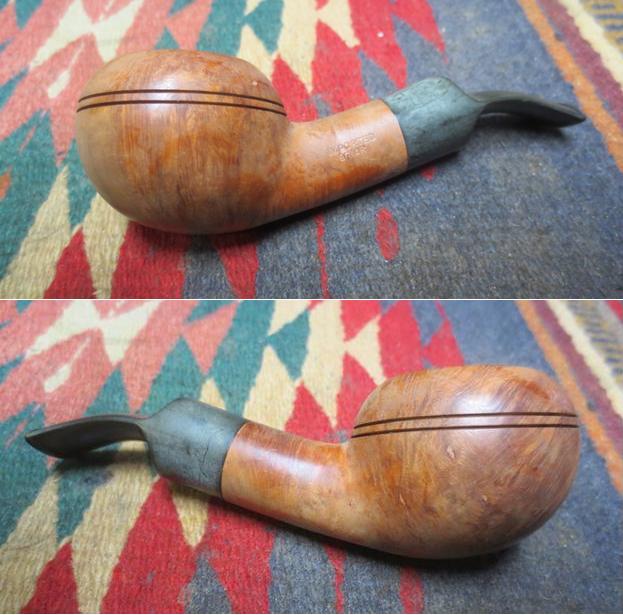
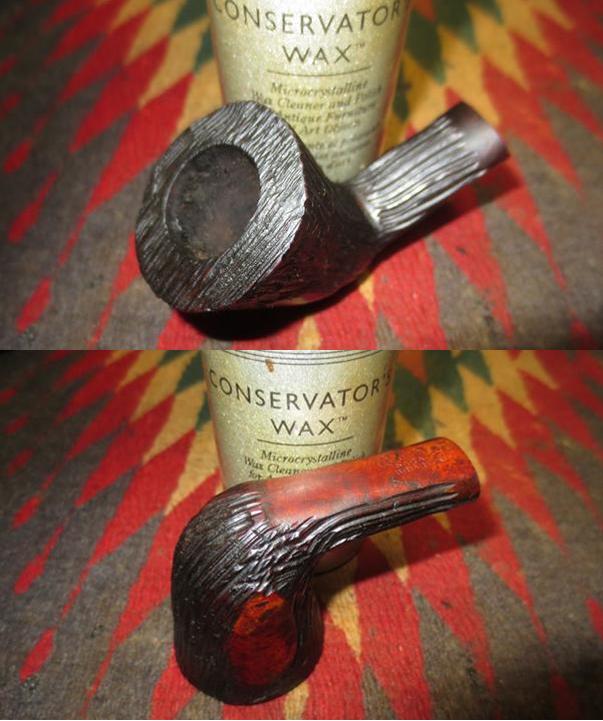 I took some photos of the polished bowl to show how it looked at this point in the process. The pipe is beginning to look really good. I sanded the top of the shank to remove the dark colour and make it more transparent at the stem shank junction. Note the nicks in the smooth portions of the bowl and shank. They are deep so I will not be able to sand them out. They actually act like marks of history of the journey of this pipe.
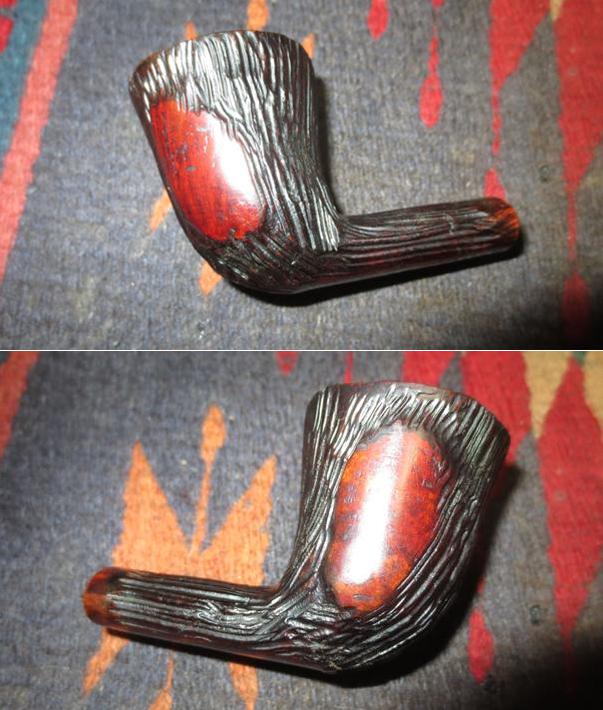
 It was not quite right. I wanted a little more red in the finished briar. I wiped the bowl down with alcohol on a cotton pad to remove the wax so I could do a bit of a contrast stain. For the second coat I rubbed down the bowl with a coat of Cherry Danish Oil to highlight the red colour in the briar. The combination of stains gives a nice contrast look to the pipe. I polished it with a soft cloth and took photos of the finished bowl.
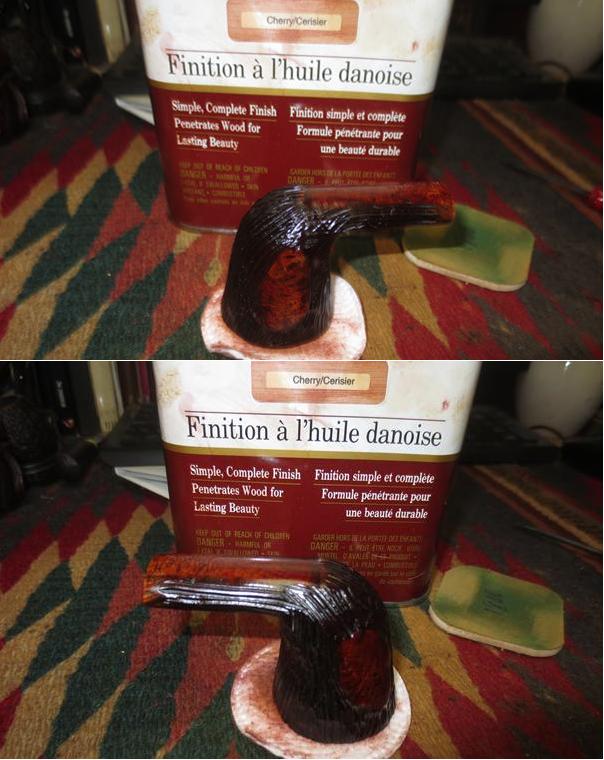
 I set the bowl aside and turned my attention to the stem. I talked with Dave regarding the W decal on the saddle and we decided to remove it as it was worn and kept me from removing the oxidaiton on the saddle while trying to protect it. I resanded the with 220 grit sandpaper to remove the oxidation and the remnants of the decal. I polished it with micromesh sanding pads. I wet sanded it with 1500-2400 grit pads and rubbed it down with Obsidian Oil between each pad. I dry sanded it with 3200-12000 grit pads and repeated the oil treatments. I buffed the stem with red Tripoli on the buffing wheel and followed that with Blue Diamond polish. I gave the stem several coats of carnauba wax and polished it by hand.

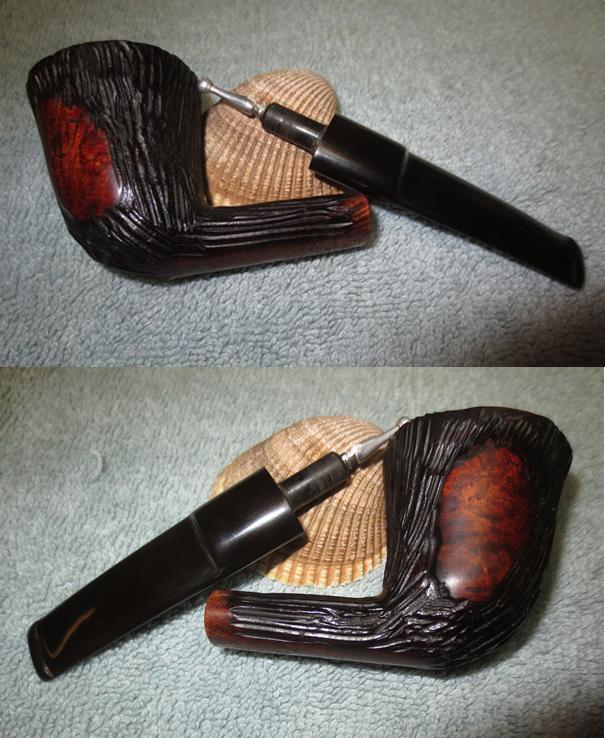
 I buffed the stem with Blue Diamond to polish out some of the minute scratches in the surface. I gave the stem several coats of carnauba wax to protect and give it a shine. I hand waxed the bowl with Conservators Wax and buffed the bowl and stem with a clean buffing pad to raise the shine. I hand buffed it with a microfibre cloth to deepen the shine. The finished pipe is shown in the photos below. I will be packing it up soon and sending it back to Dave so he can fire up a bowl and give this beauty a smoke. Thanks for looking.
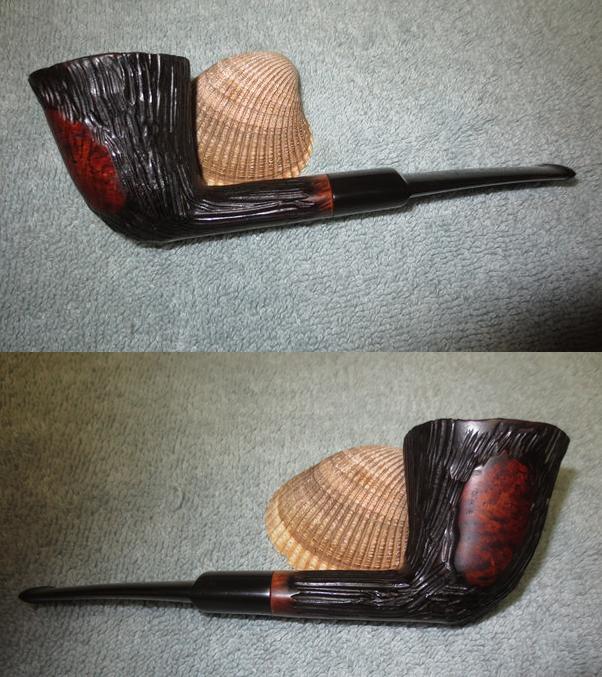


