Blog by Steve Laug
 It seems like just a few weeks ago I was contacted by an older gentleman about purchasing his pipe collection. He sent me the photos and I was amazed at what I saw. He had Dunhill pipes, BBB pipes, Orlik pipes, Barclay Rex Pipes, a couple of Meerschaums and a whole lot of other pipes. All I could say as I looked at the pipes was what a collection it was. We negotiated a deal and I think we both walked away quite happy with the exchange.
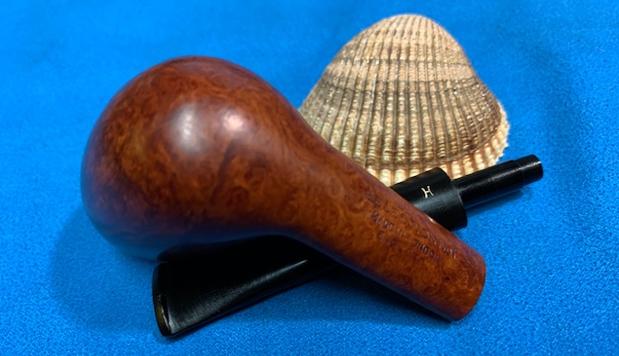
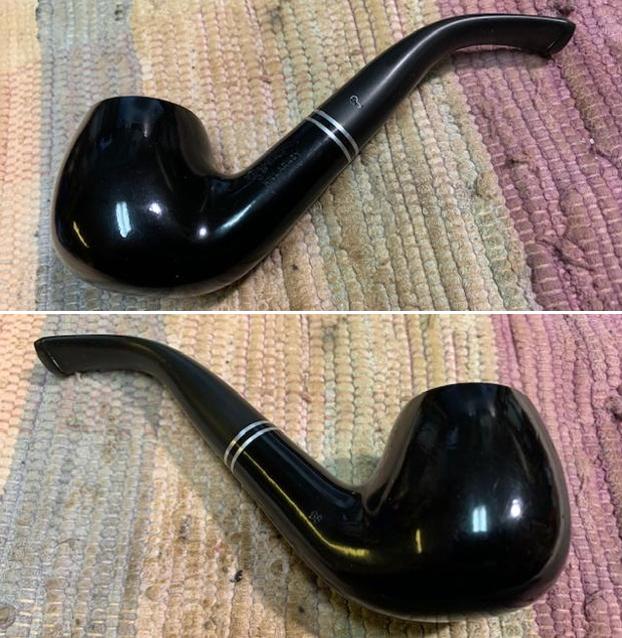
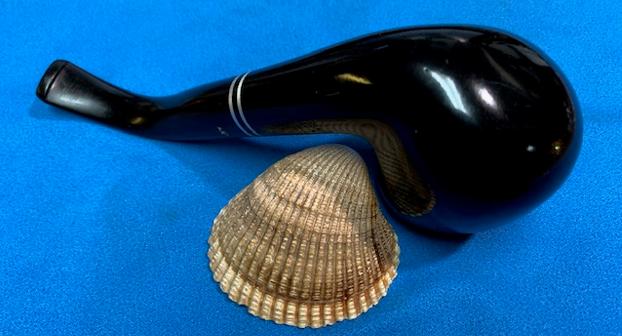
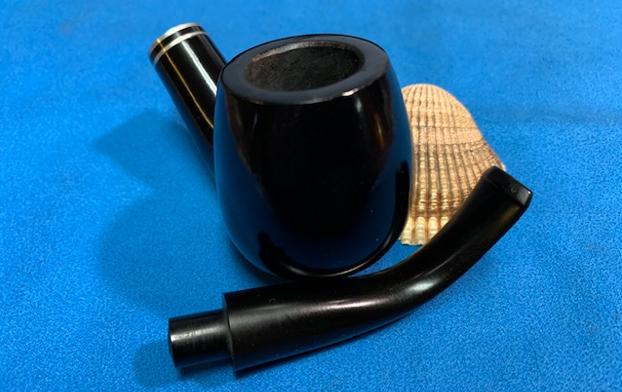
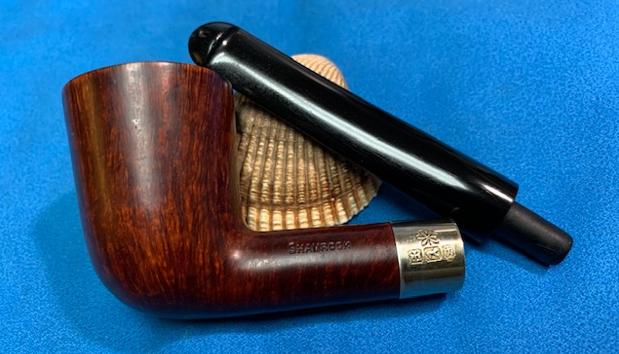
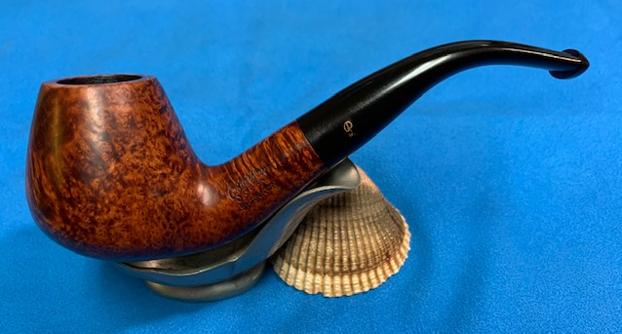
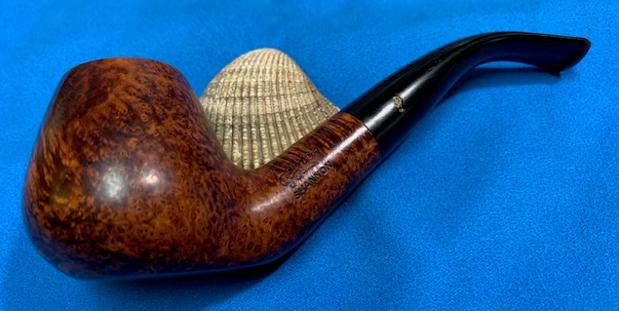
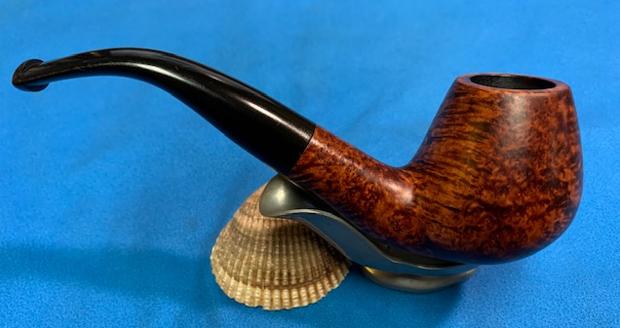
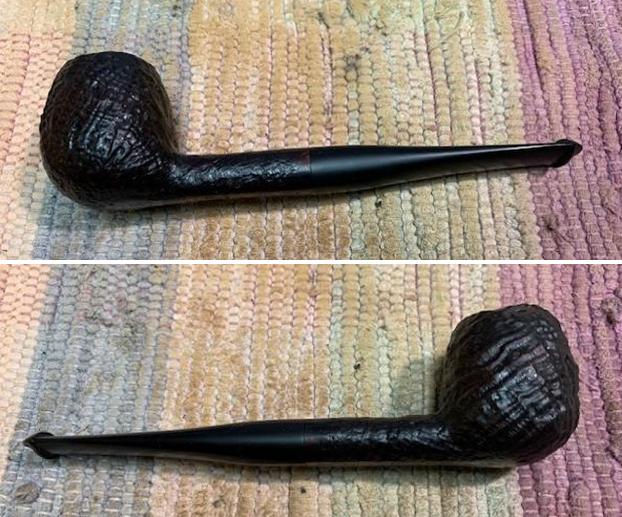
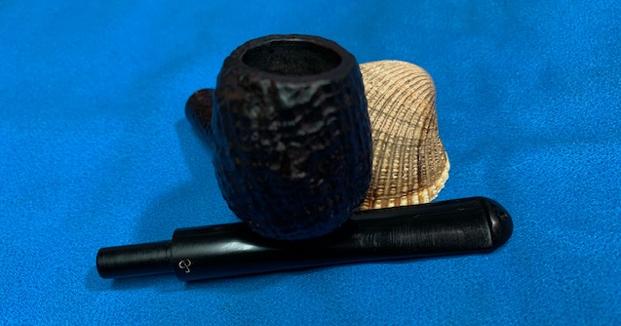
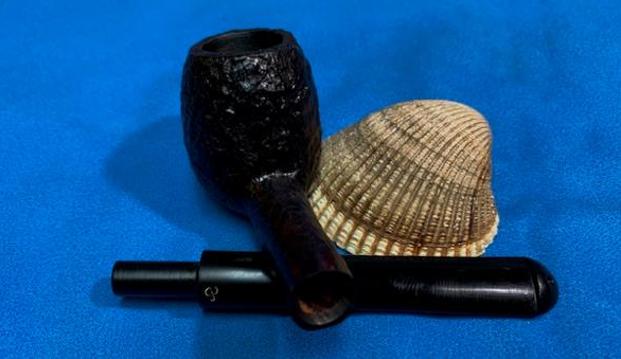
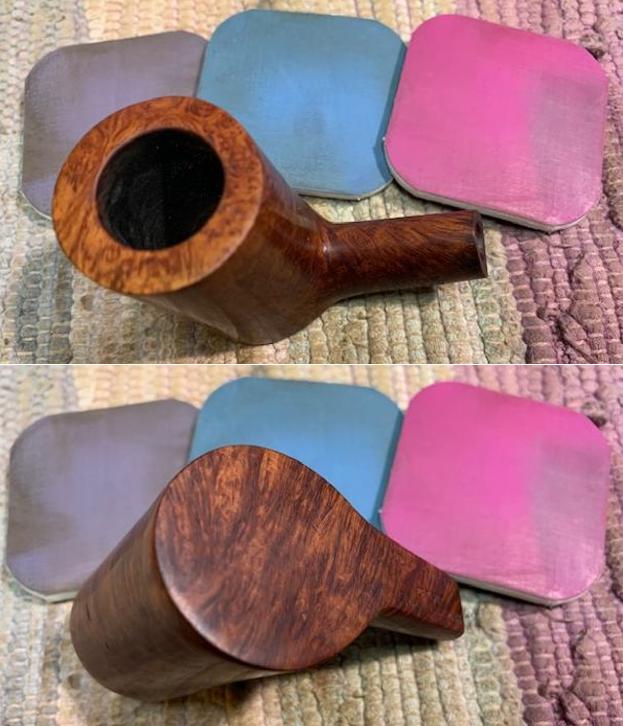
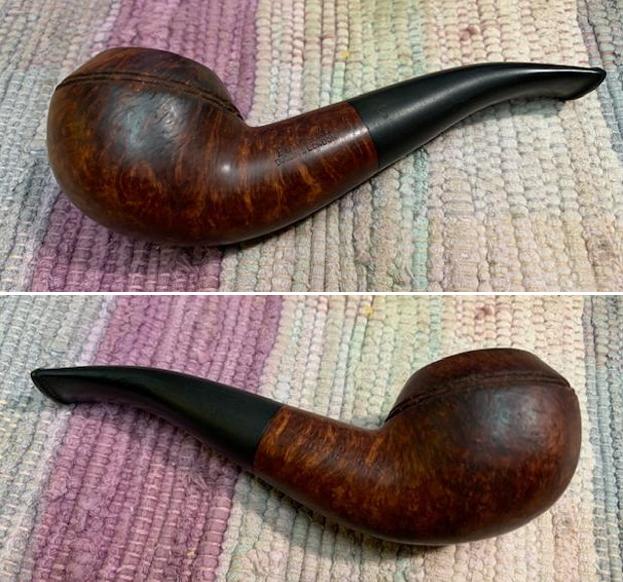
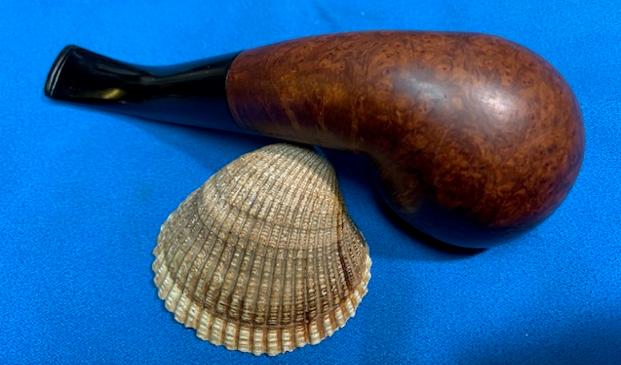
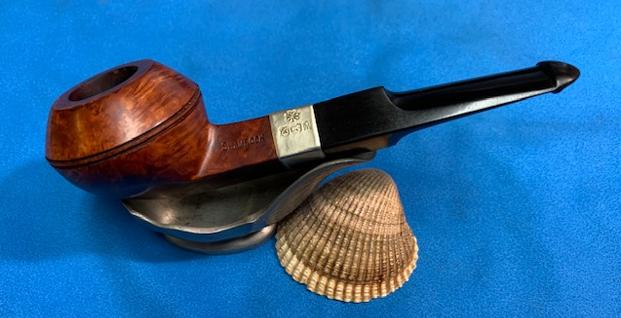
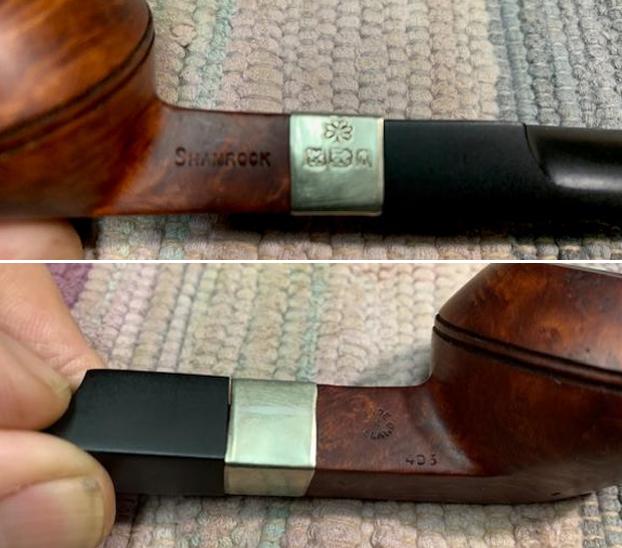
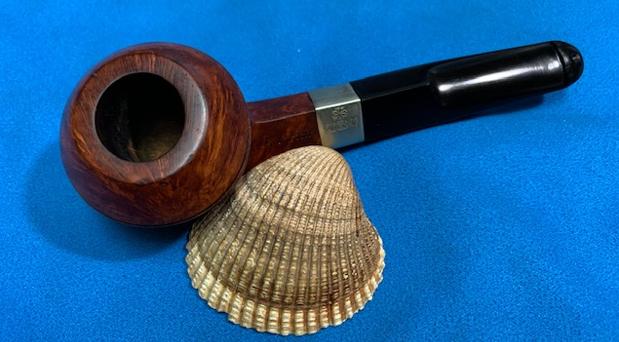
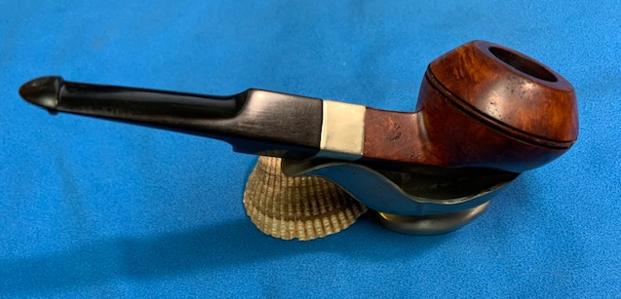
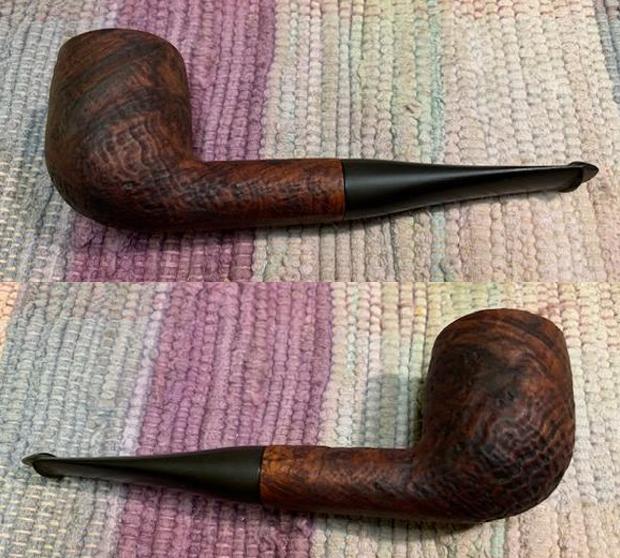
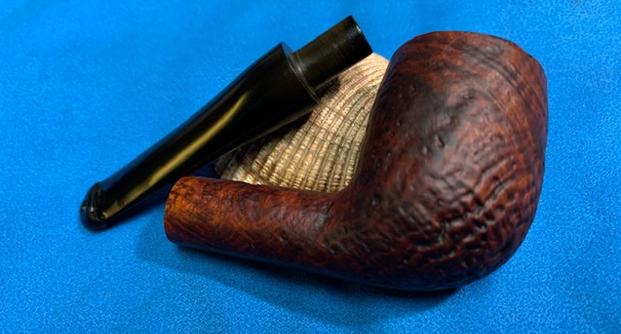
You have seen the work we have done on the Dunhills and BBB pipes from the lot but there are still more. The above photo shows a pair of Hardcastle’s pipes – the top one a Liverpool and the bottom one an oval shank billiard. Both are stamped Hardcastle’s Straight Grain Selection No. 1 and both are beautiful. I have chosen to work on the second pipe pictured above – the oval shank billiard.
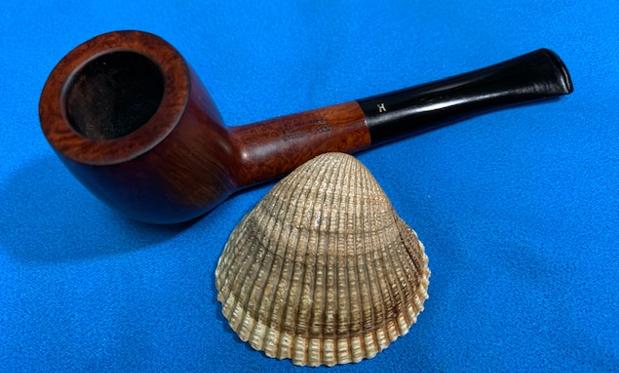
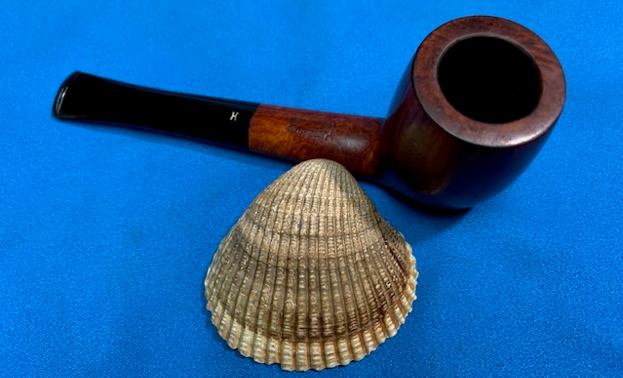
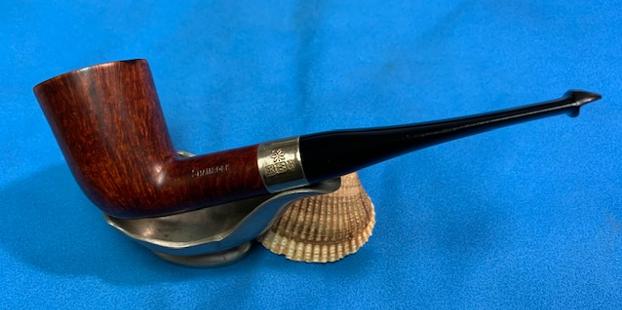
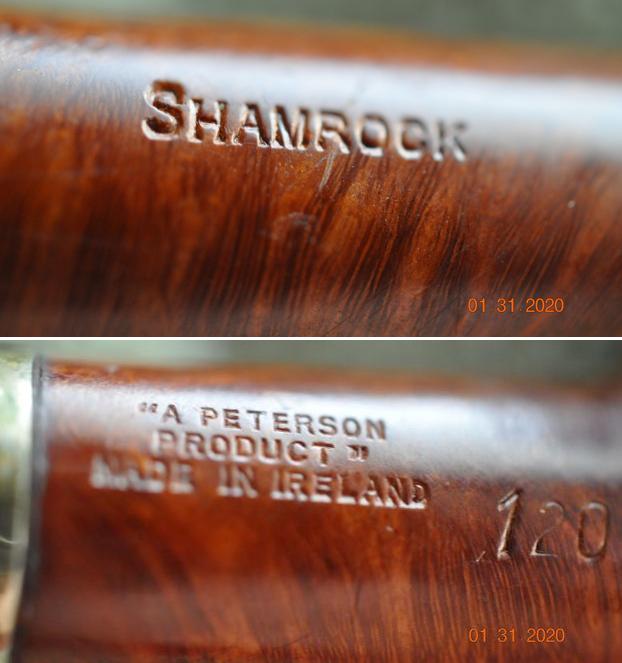
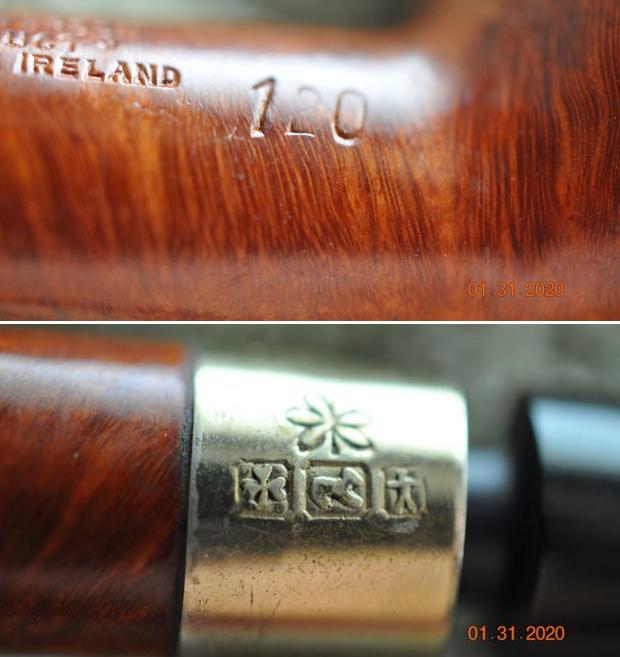
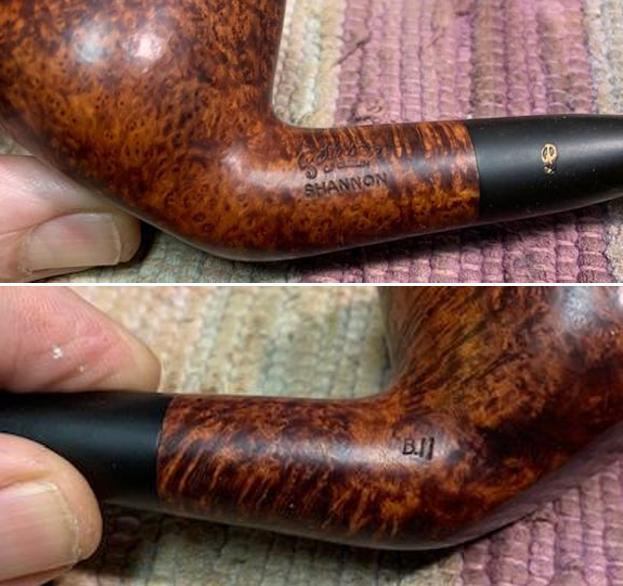
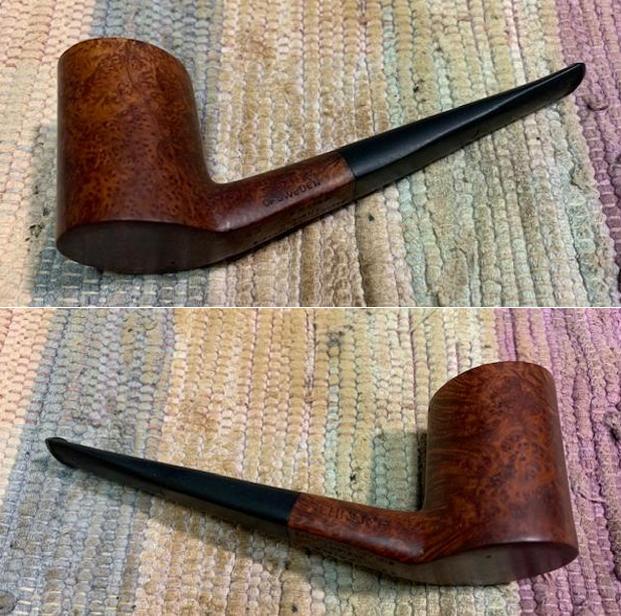
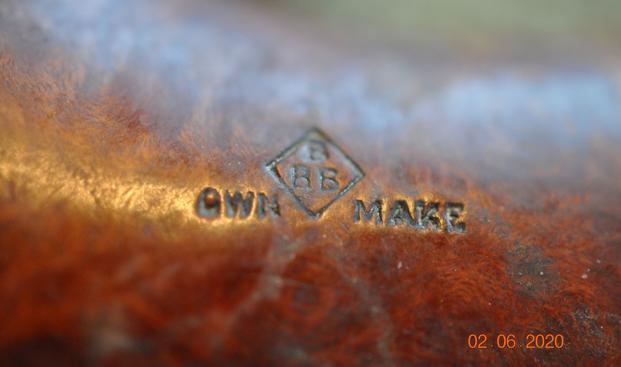
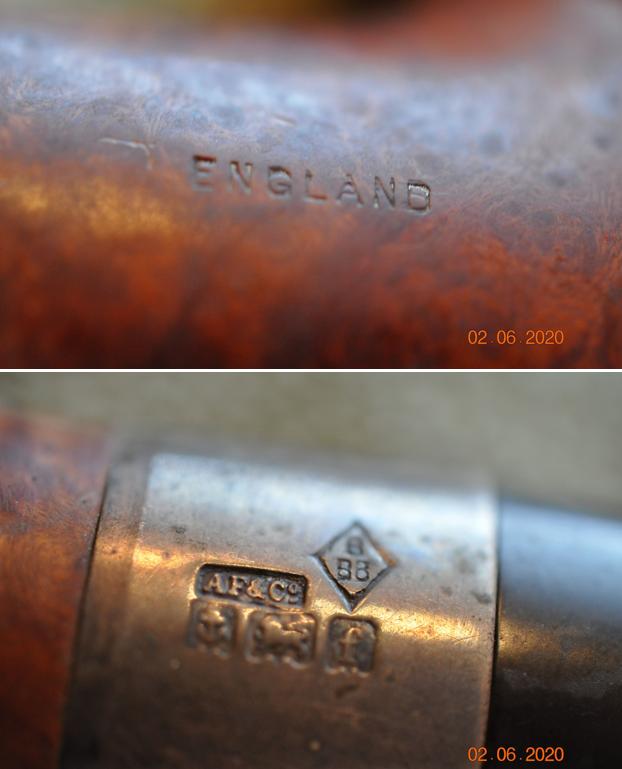
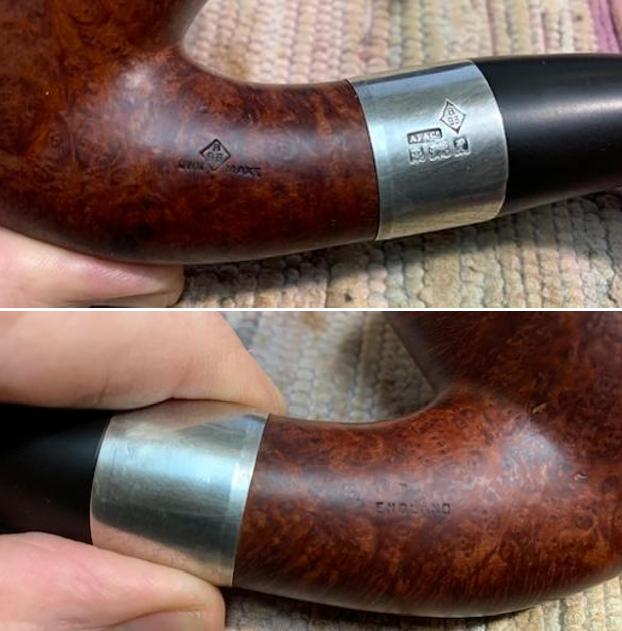
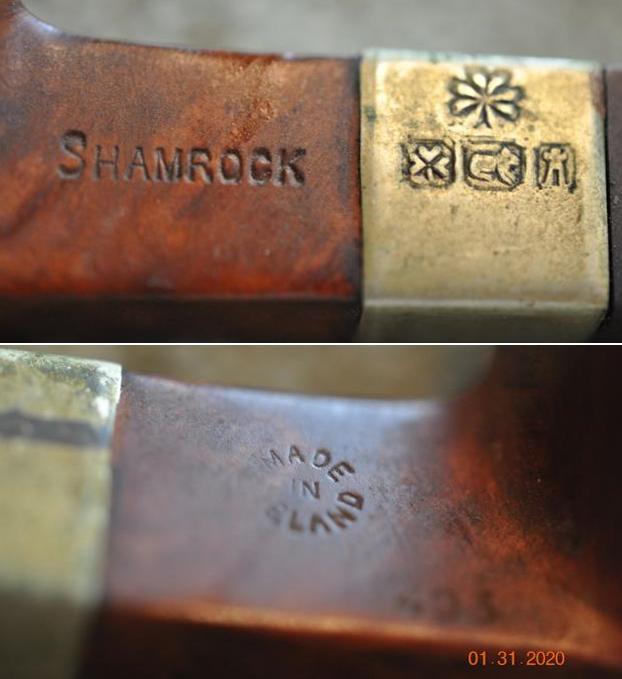
I have worked on a lot of Hardcastle’s over the years but most of them have been Jack’O London and other lower end ones. These are the first two of this quality I have worked on – both of them are Hardcastle’s Straight Grain pipes. This pipe is stamped on the top of the oval shank and reads HARDCASTLE’S (arched over) STRAIGHT GRAIN. On the underside of the shank it is stamped SELECTION No. 1 [over] Made in London [over] England. The stamping is clear and readable and there is no shape number evident. The oval taper stem also bears the Hardcastle’s “H” logo on the top side.
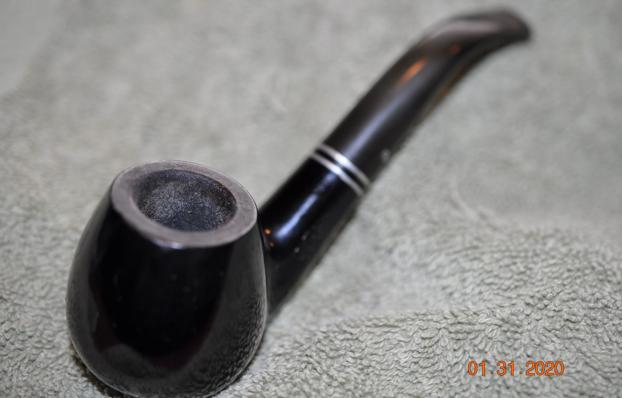
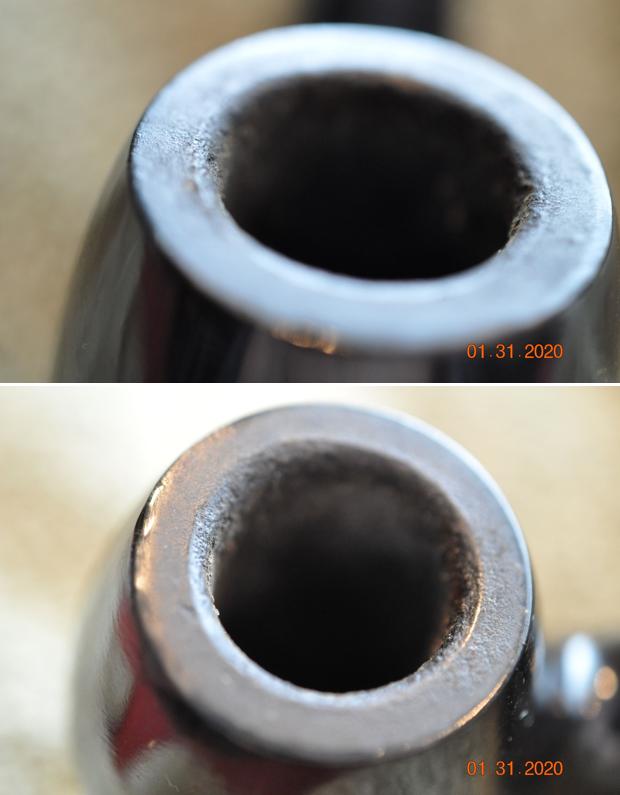
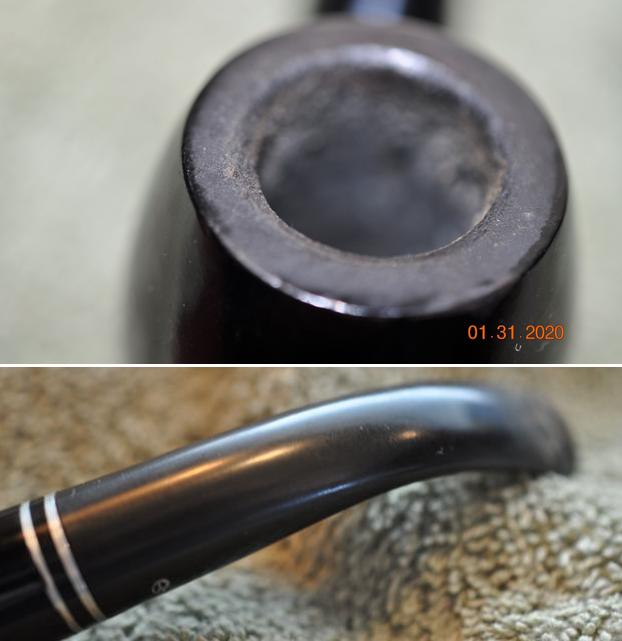
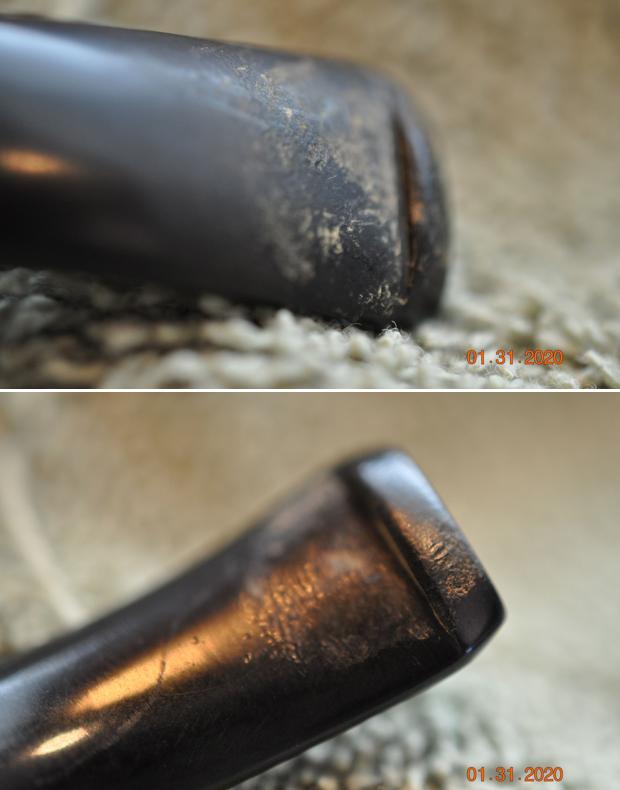
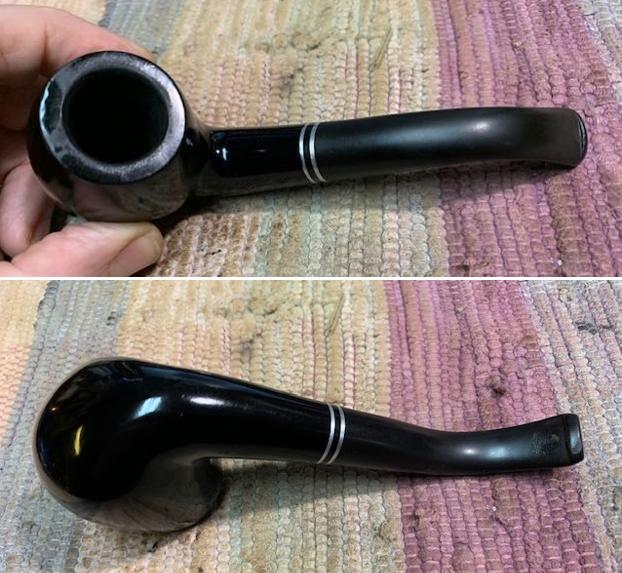
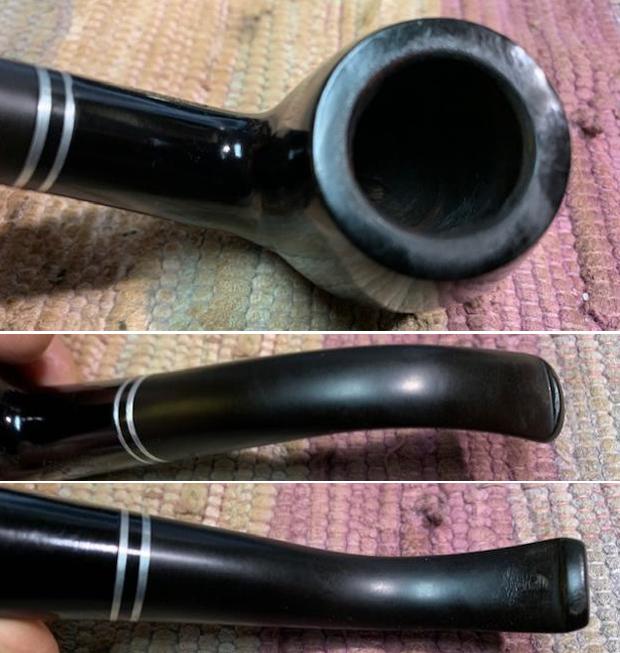
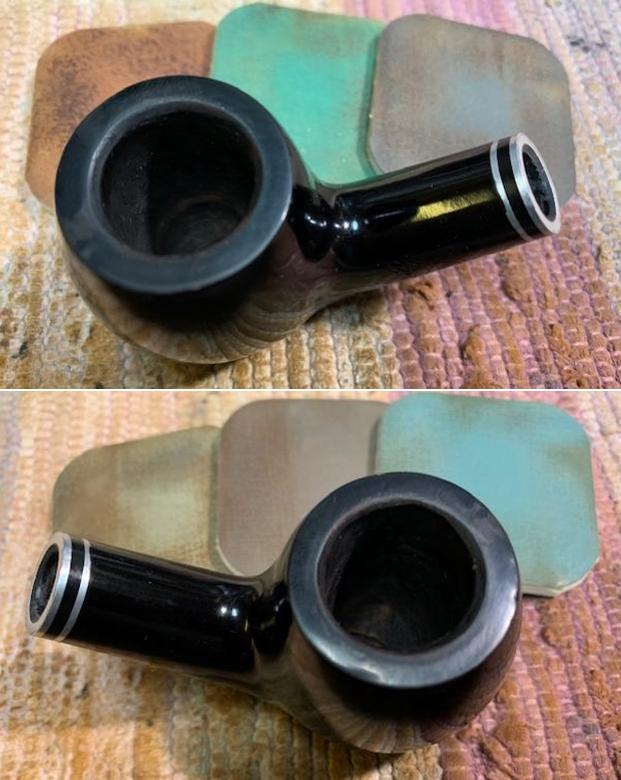
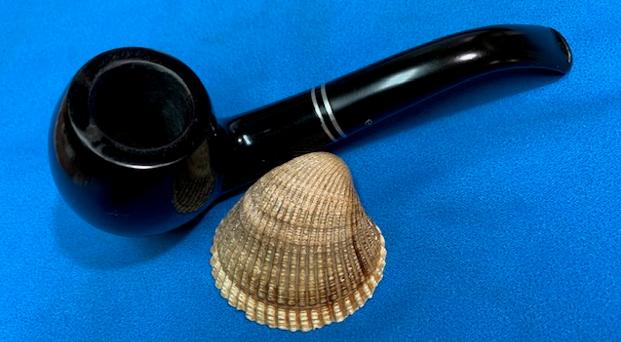
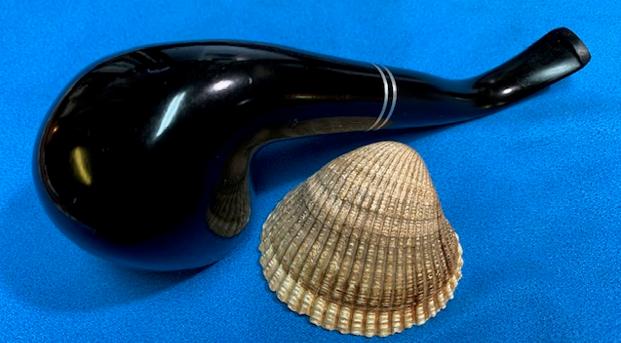
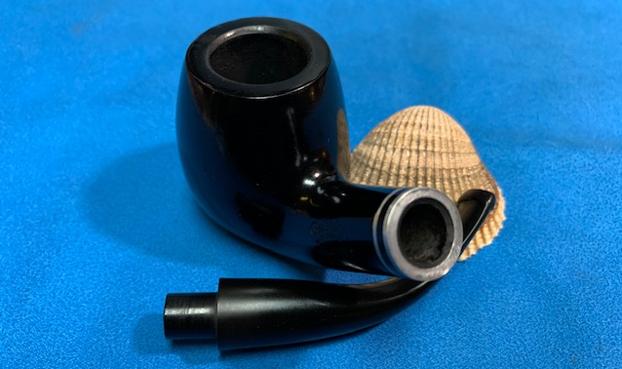
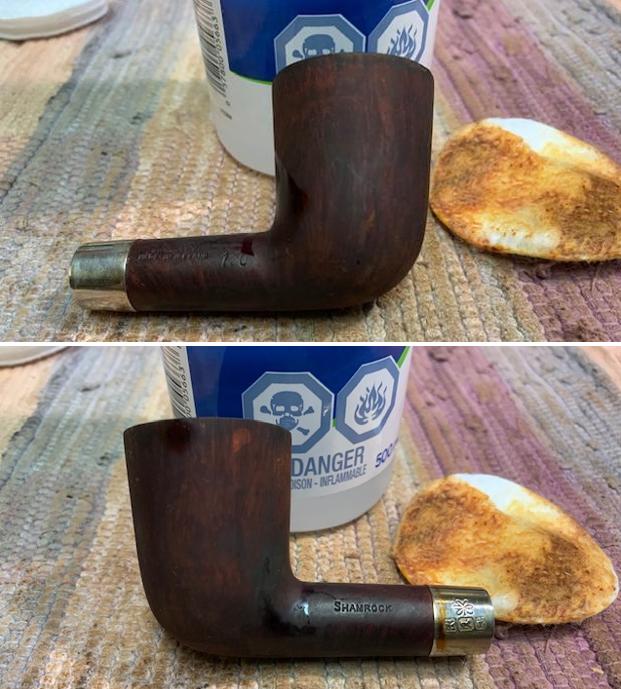
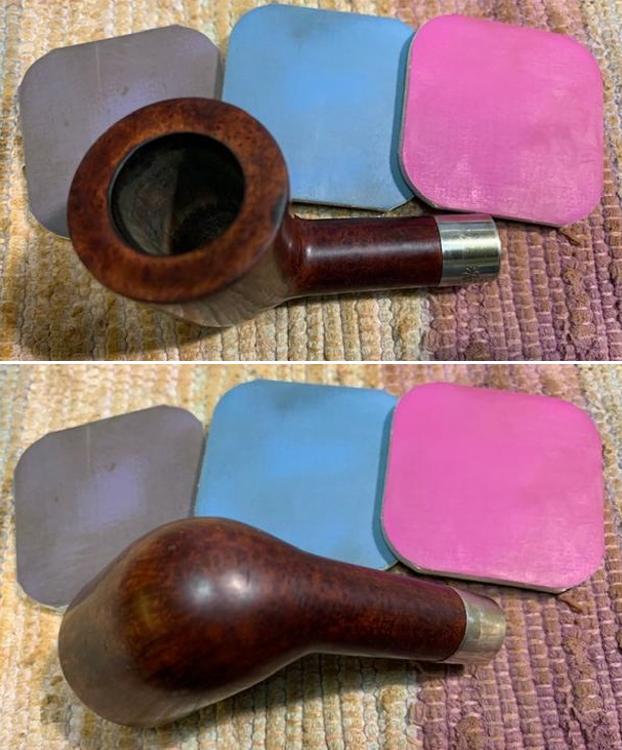
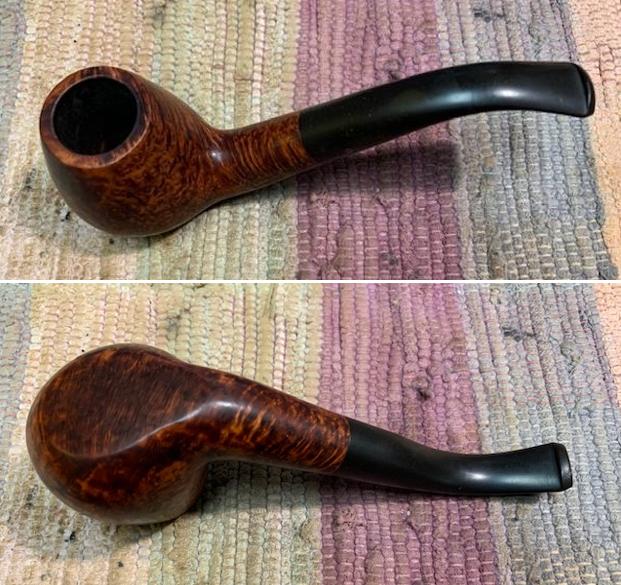
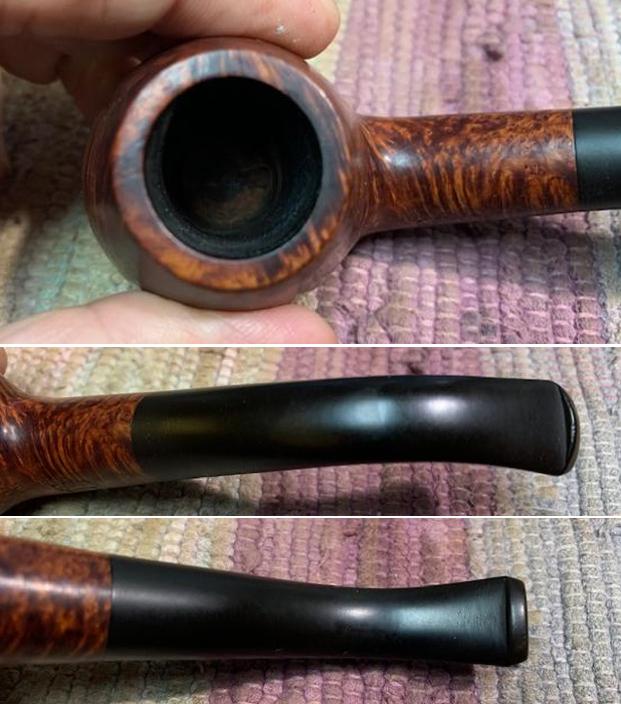
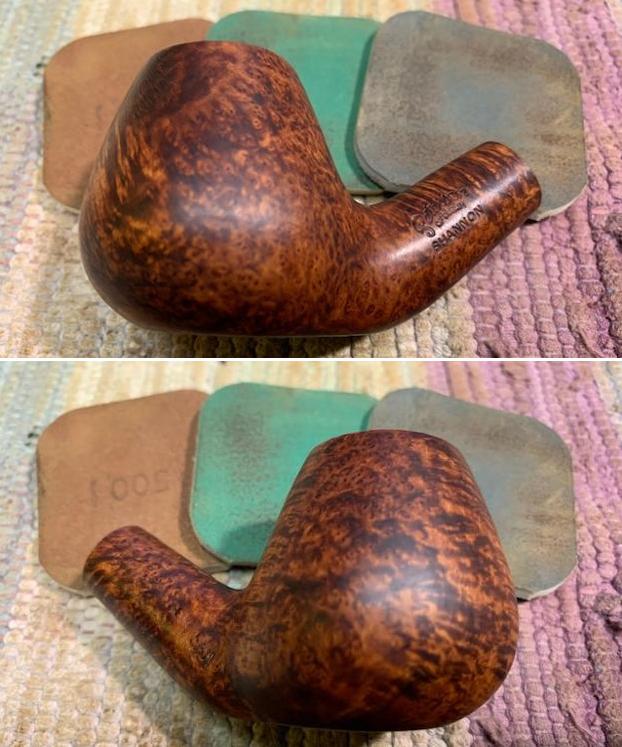
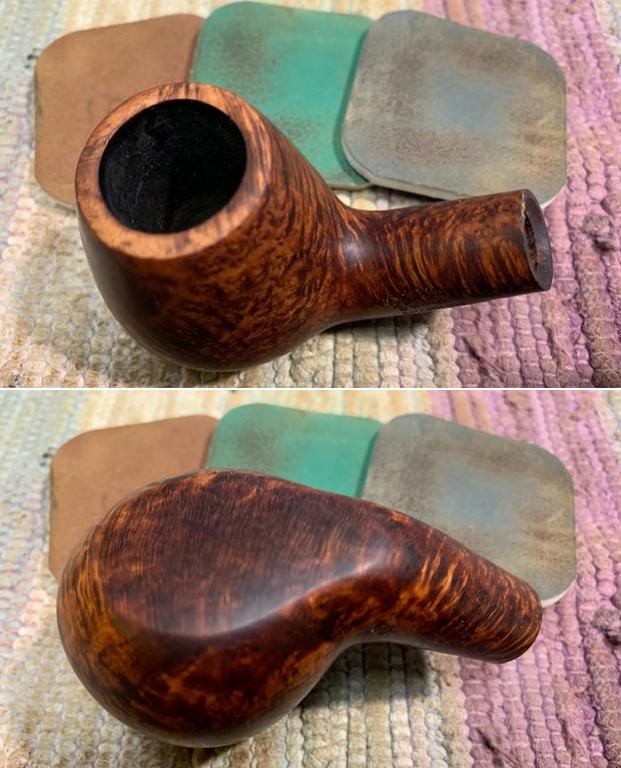
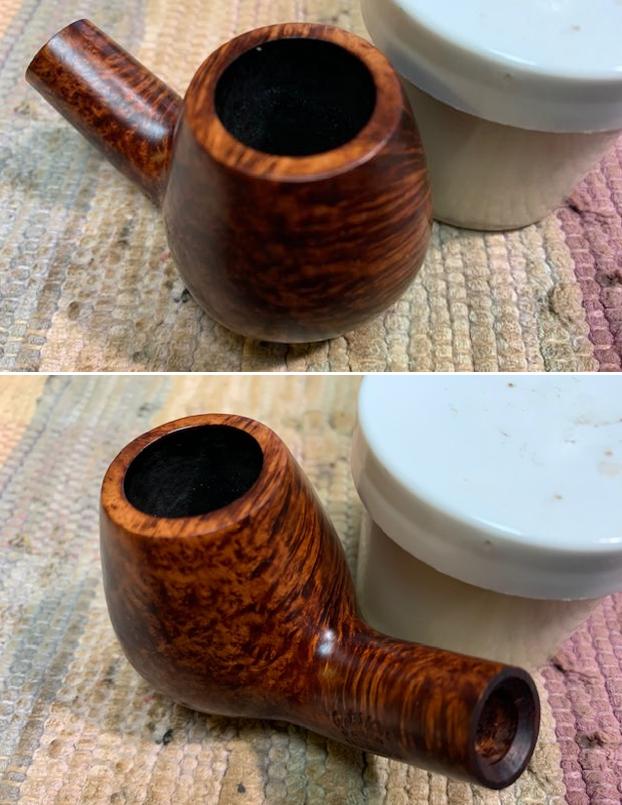
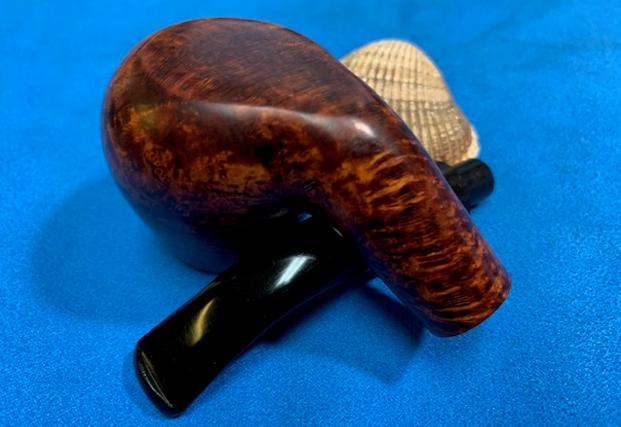
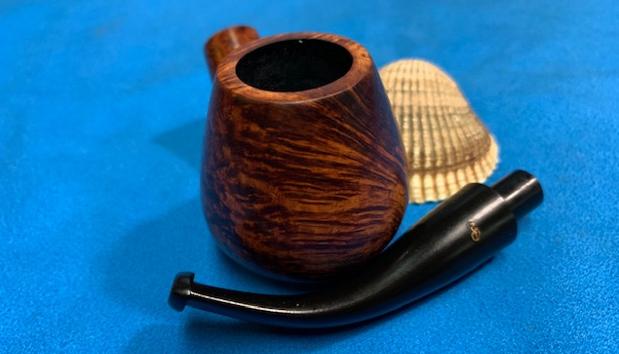
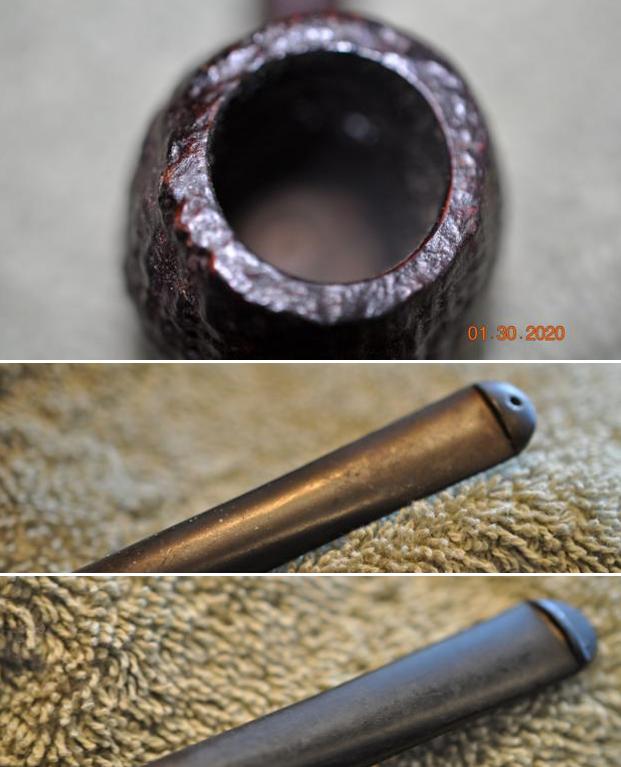
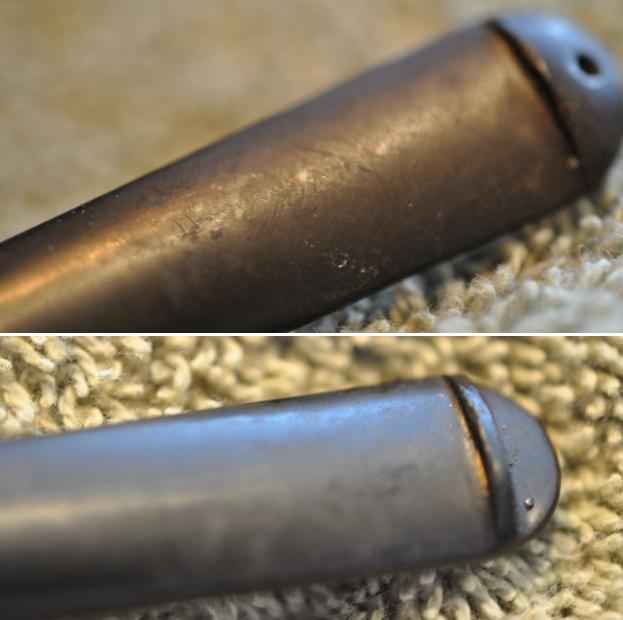
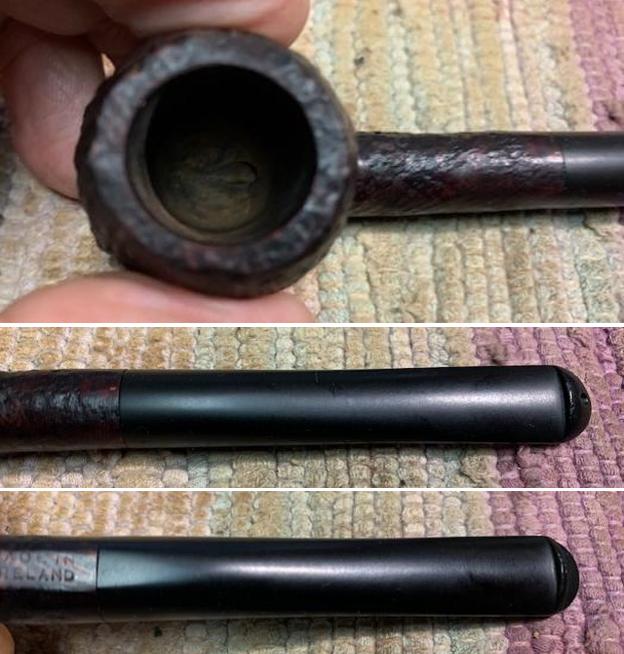
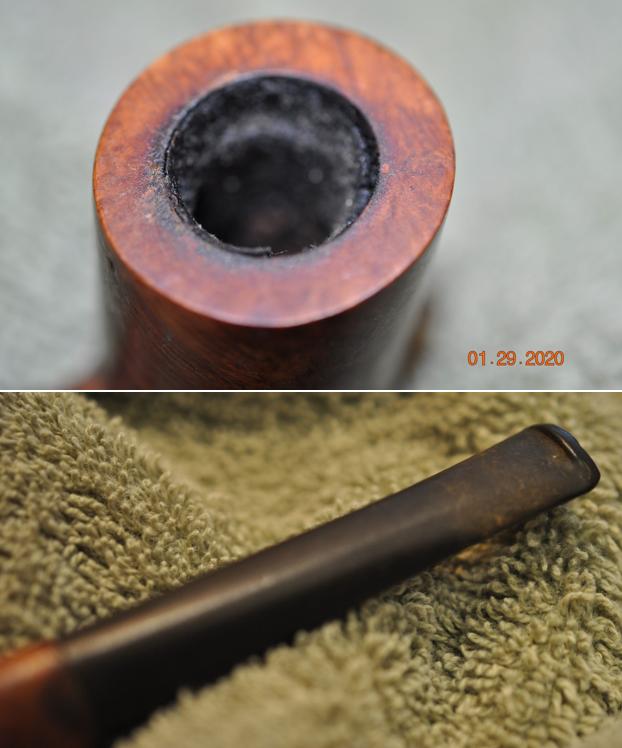
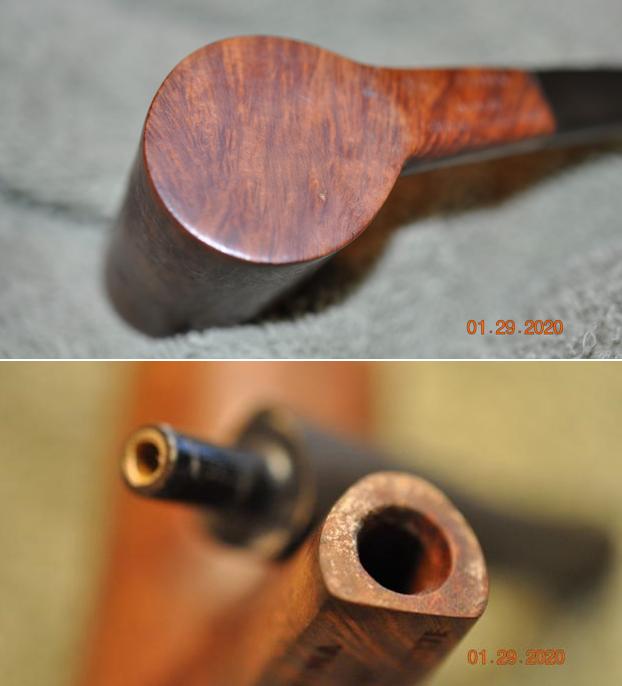
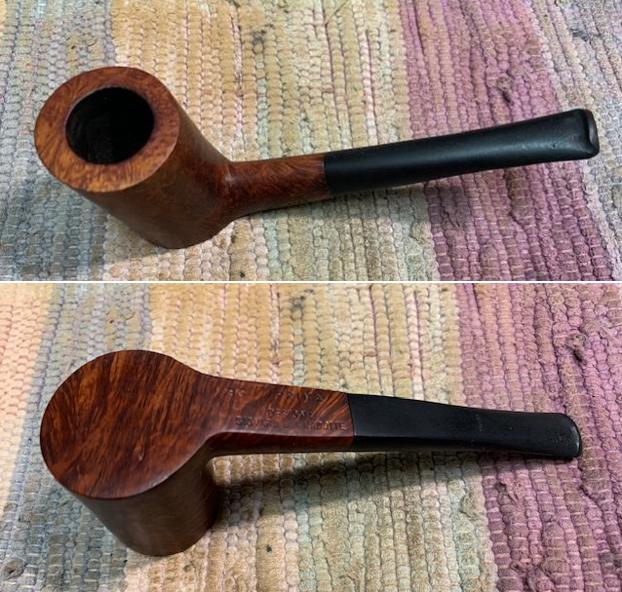
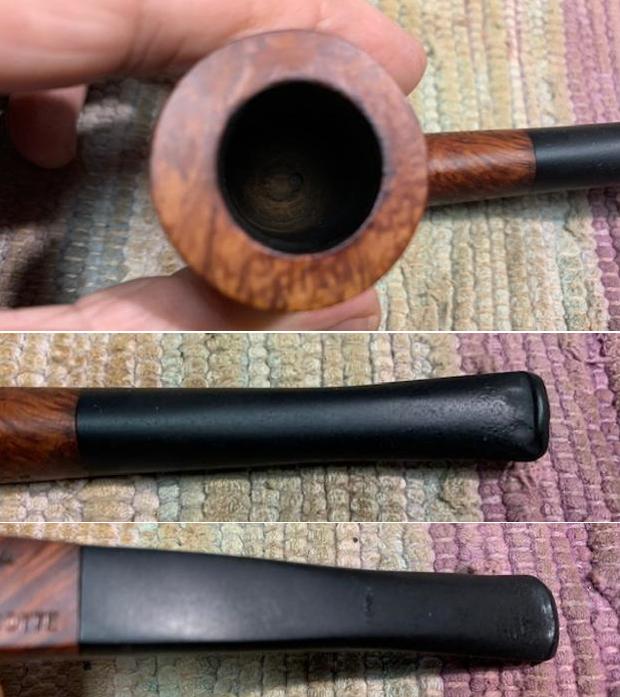
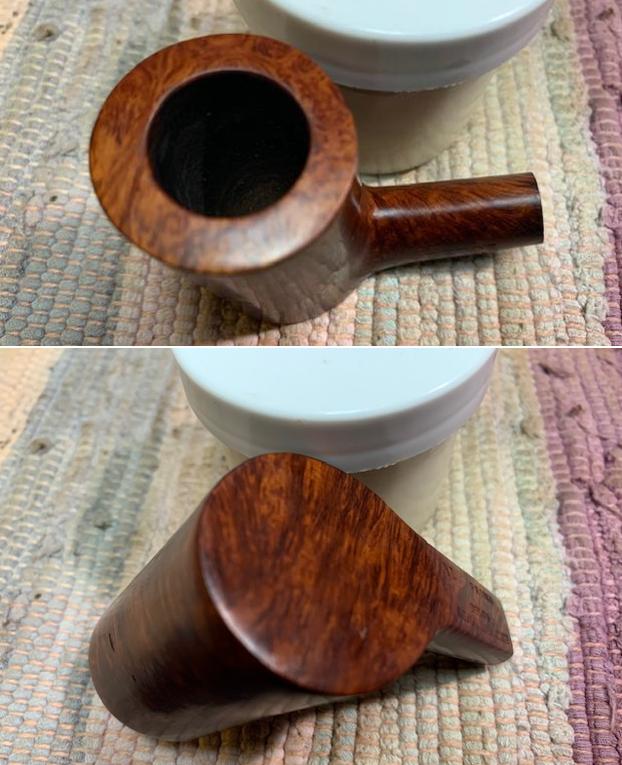
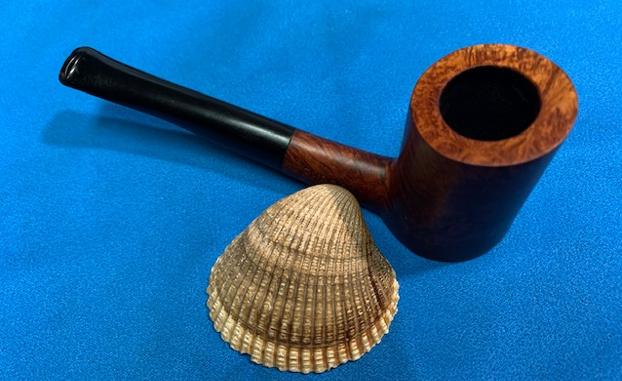
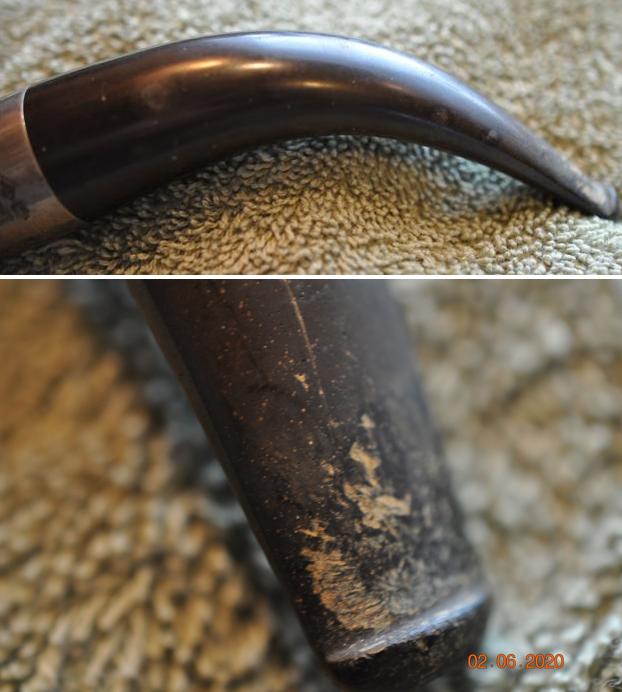
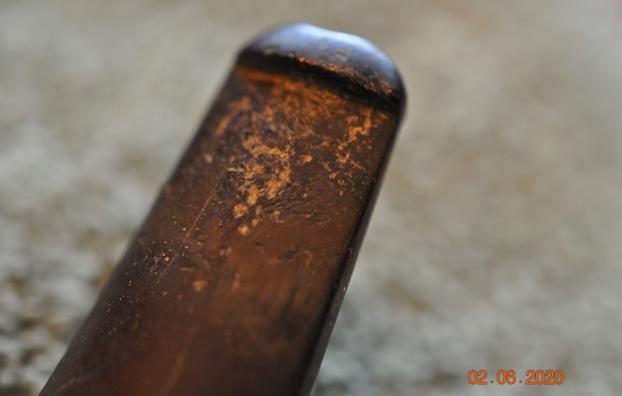
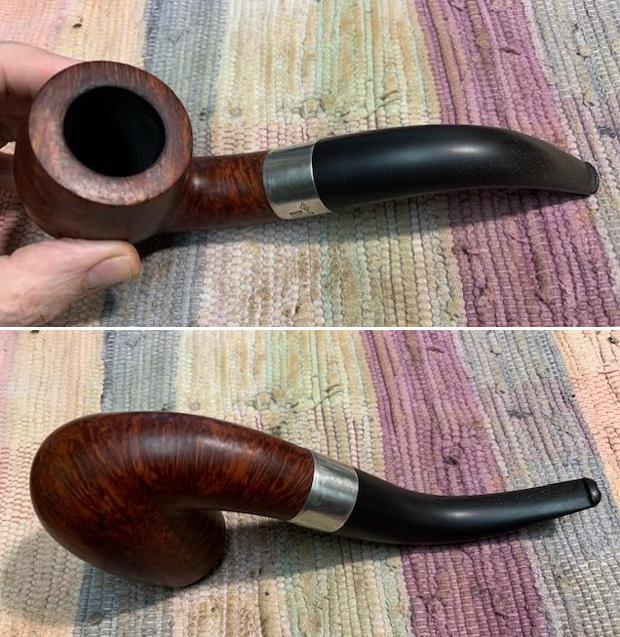
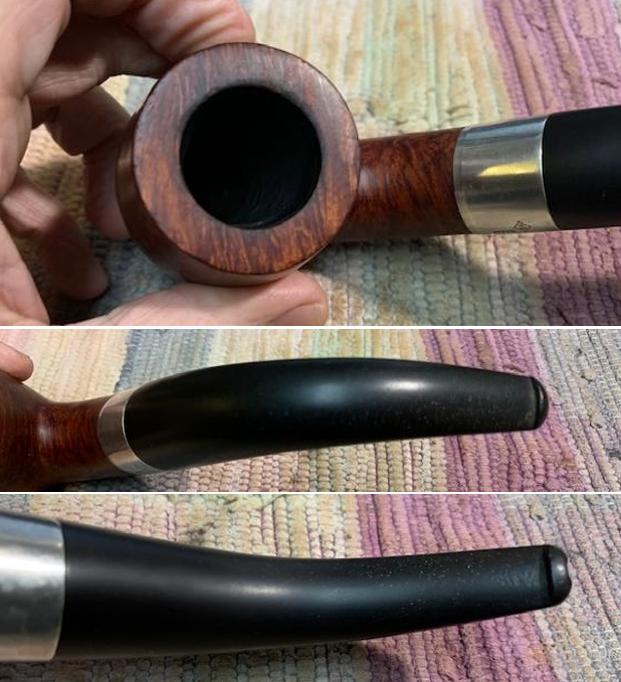
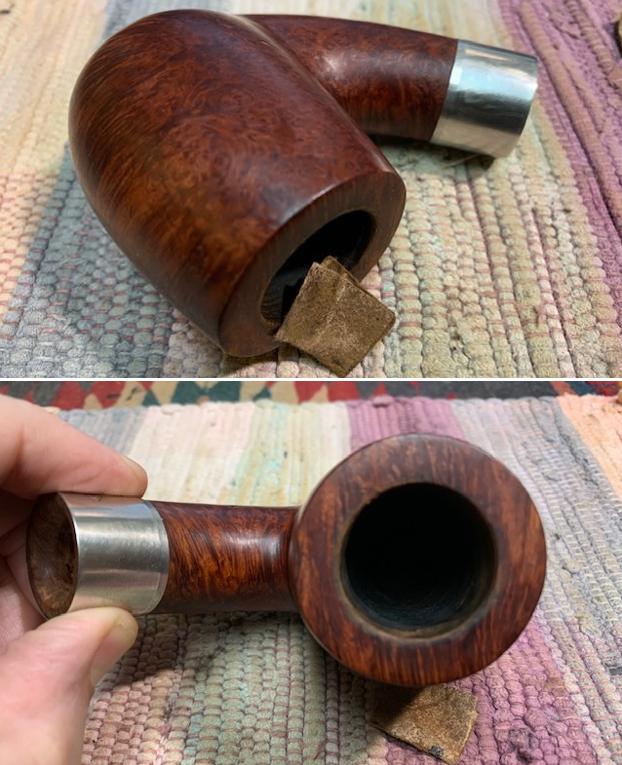
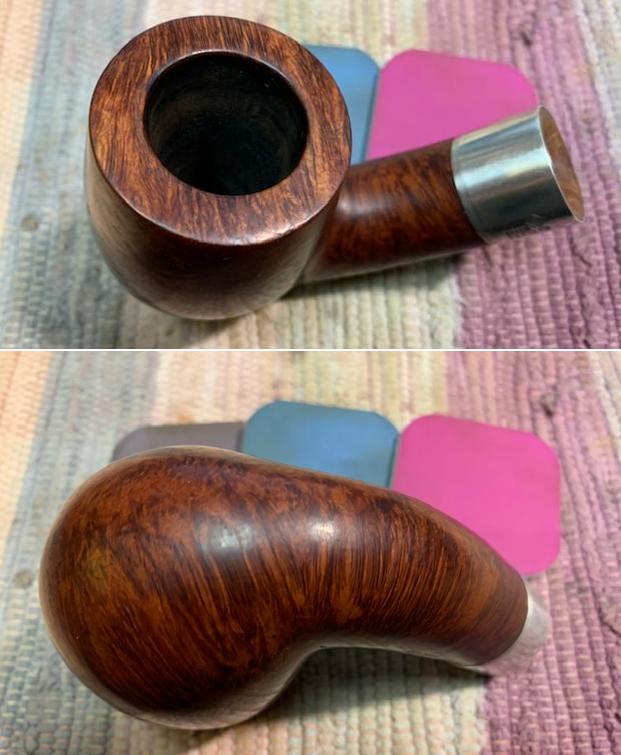
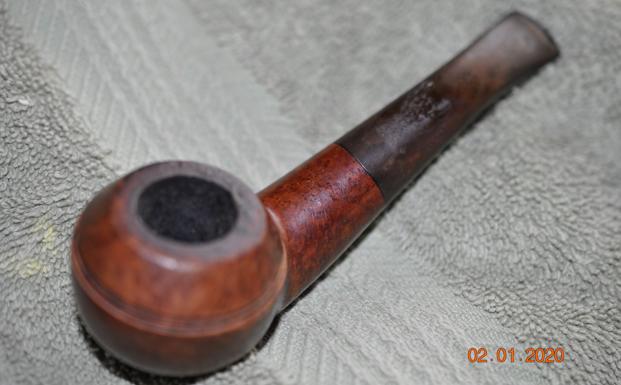
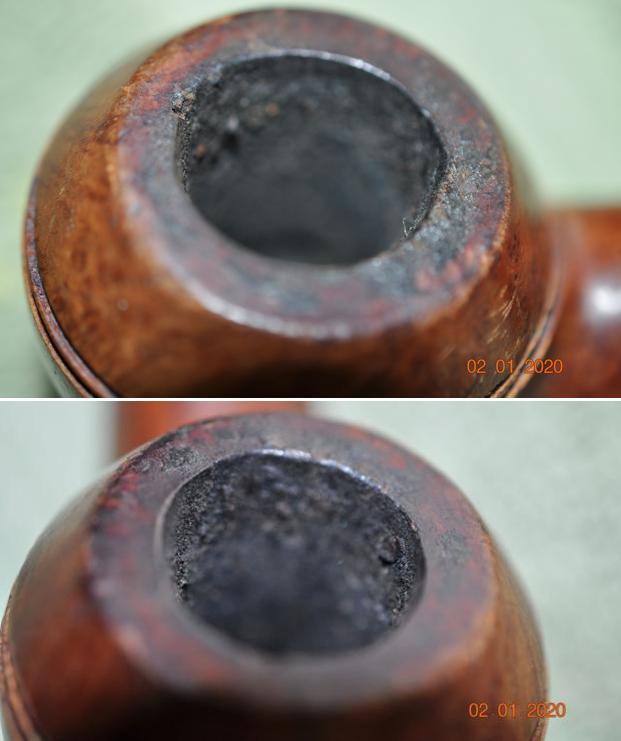
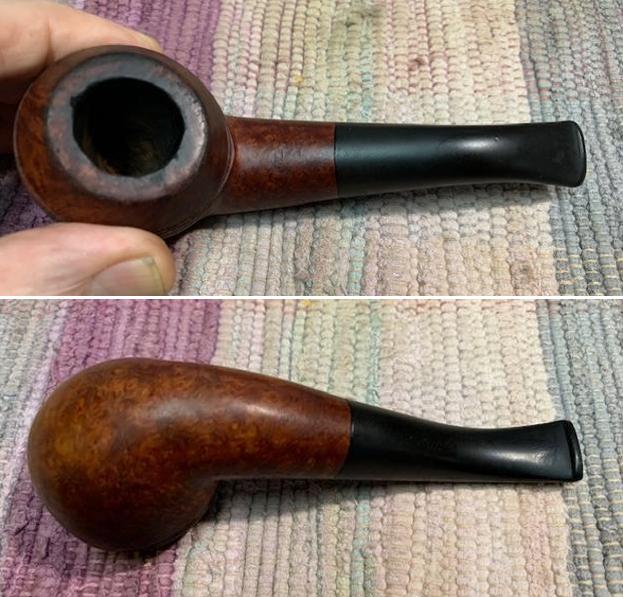
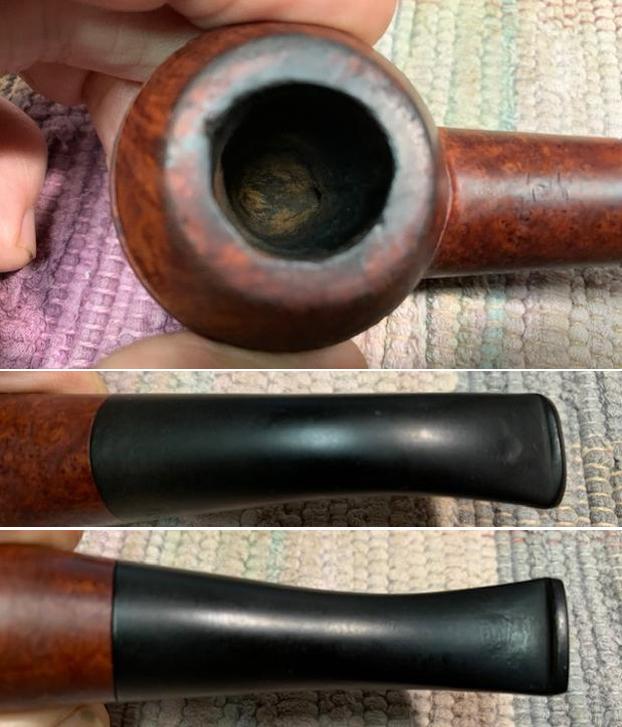
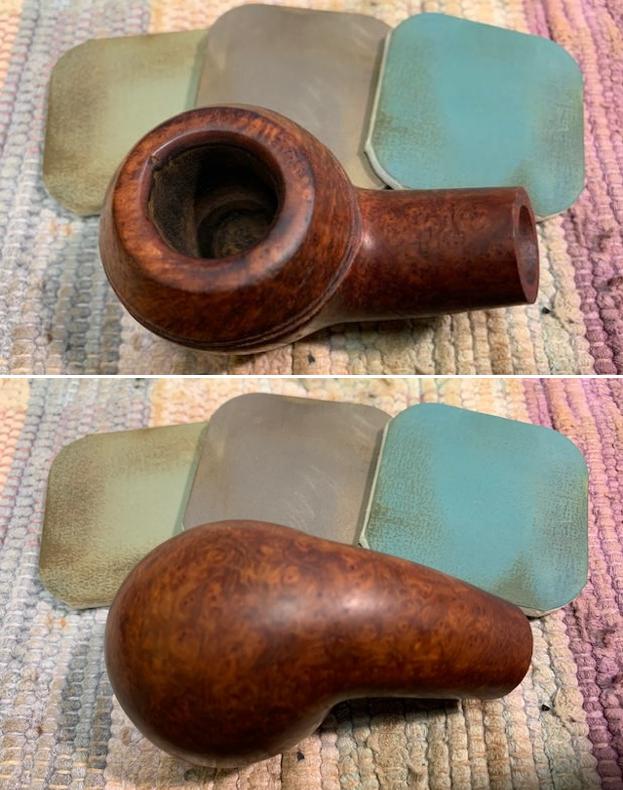
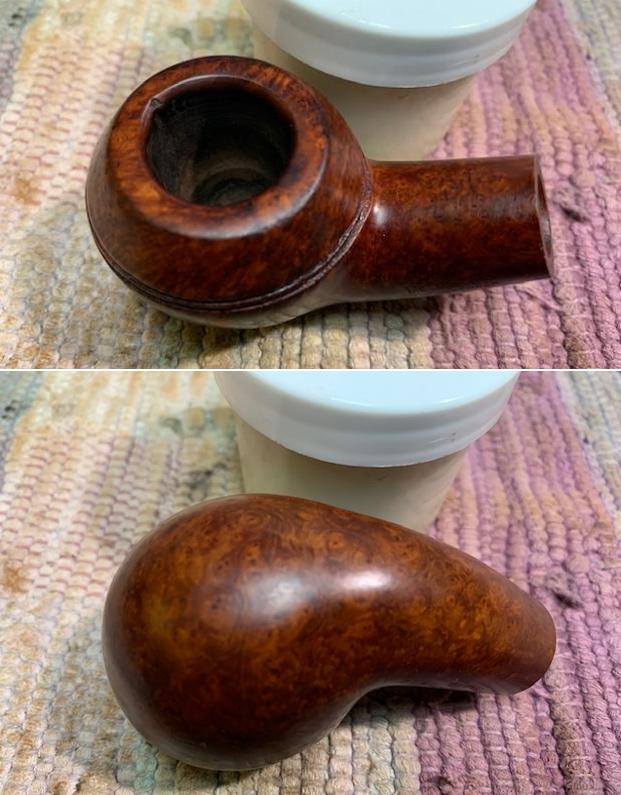
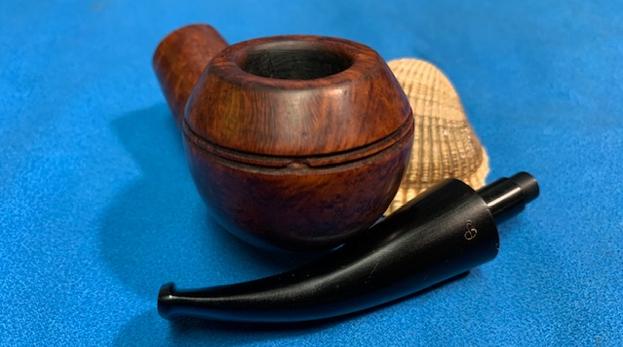
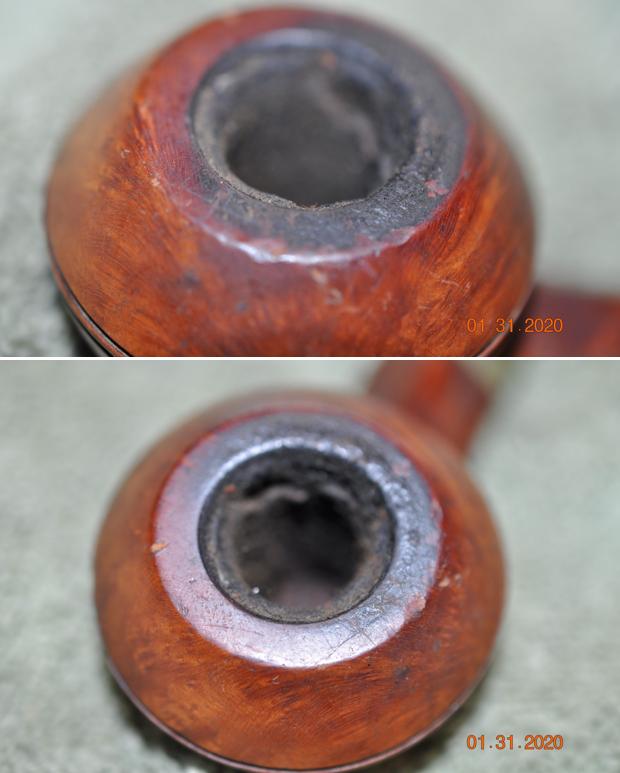
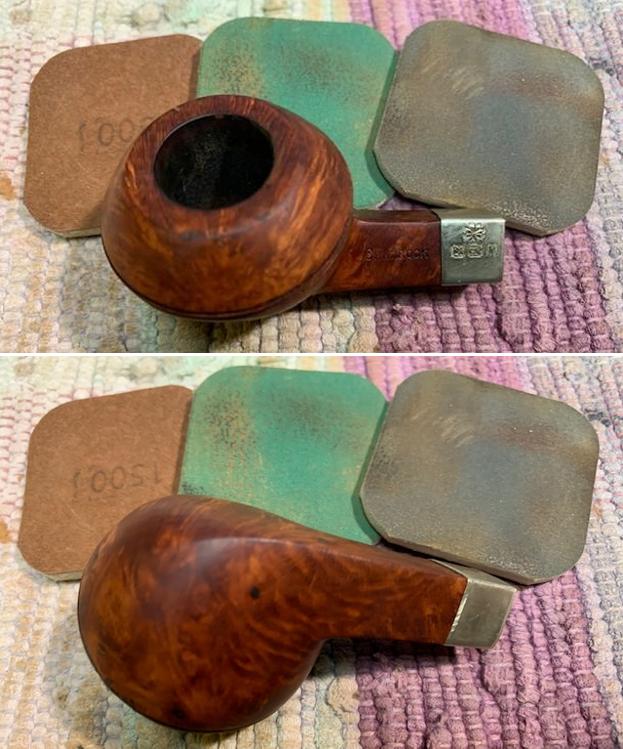
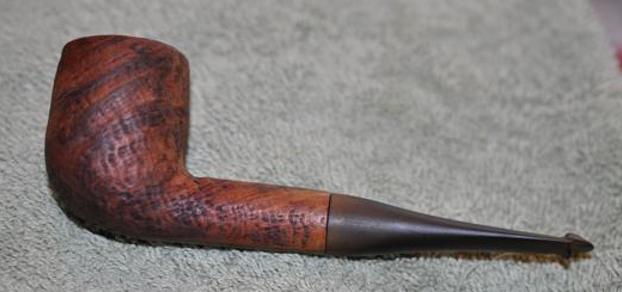
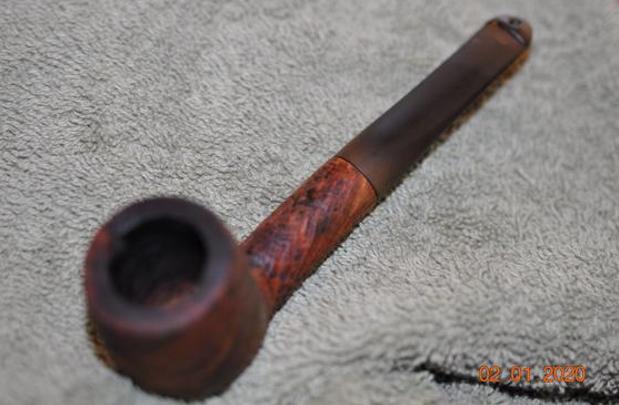
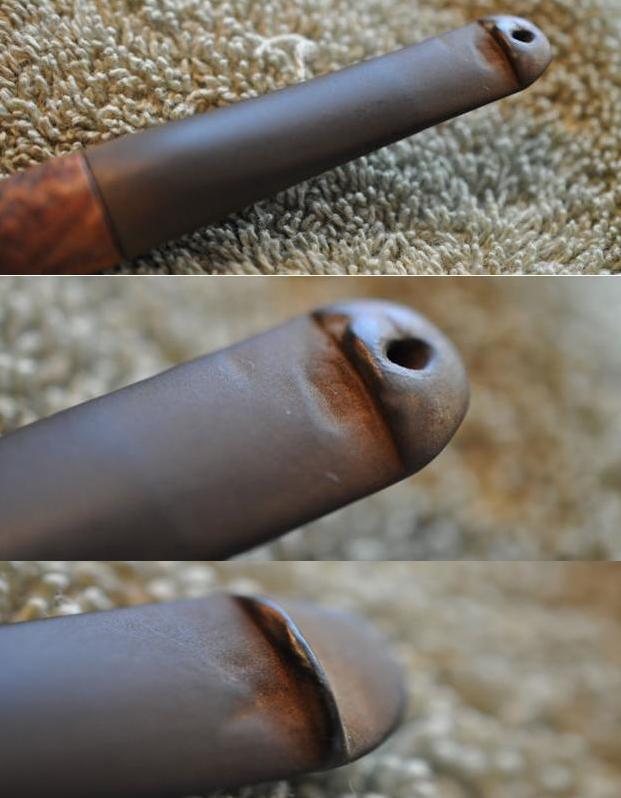
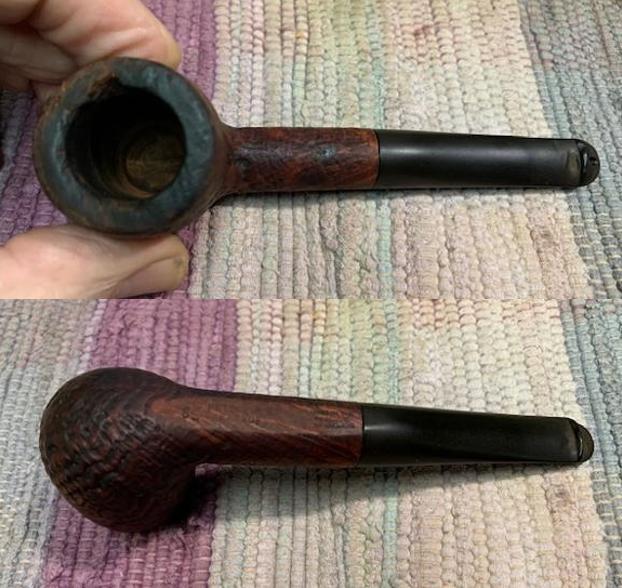
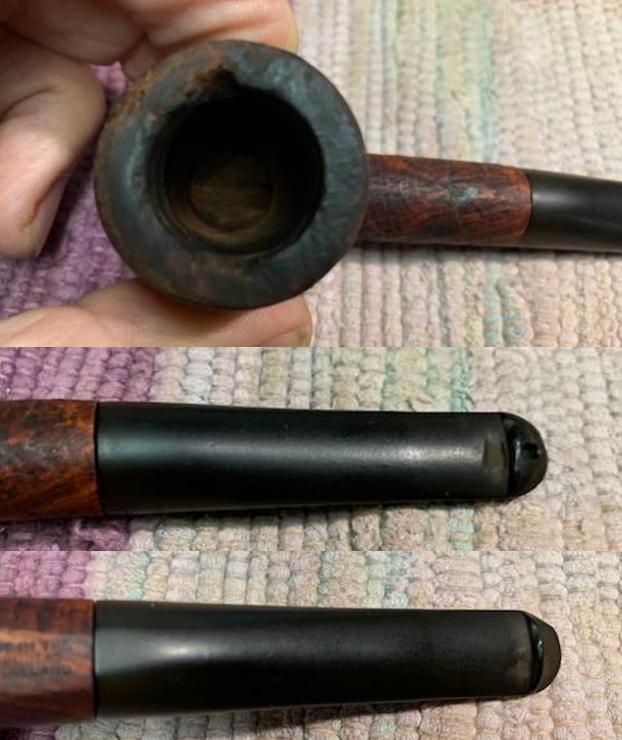
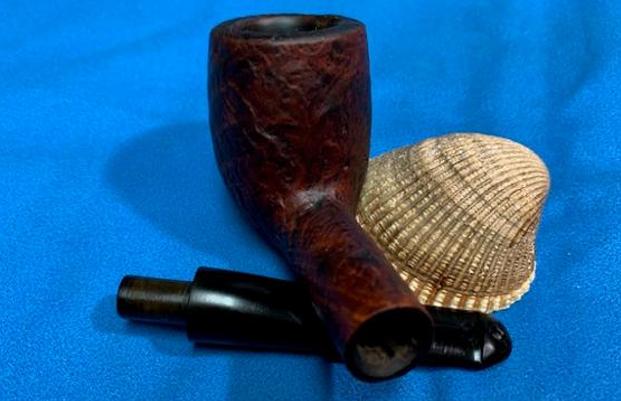
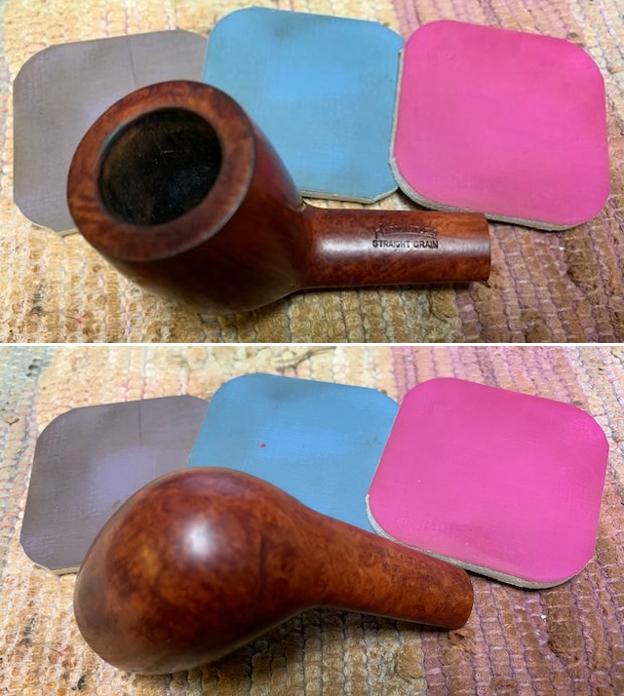
Jeff took some photos of the Hardcastle’s Straight Grain oval billiard before he worked his magic in cleaning up the pipe. It is a an interesting pipe with a lot of potential and what appears to be some great grain under the grime and debris of the years.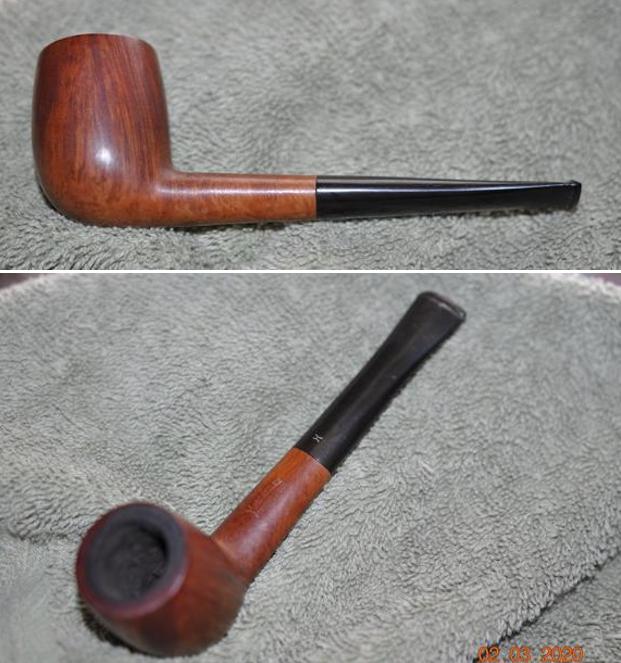 Jeff took photos of the bowl, rim top to show the thickness of the cake in the bowl and the lava on the rim top. The bowl had a thick cake that overflowed in lava on the inner edge and rim top of the bowl. I am hoping that the thick lava coat protected things underneath it from damage to the edges and top. Cleaning it would make that clear! He took photos of the top and underside of the stem showing the tooth chatter, scratching and oxidation on the stem surface and wear on the edges of the button.
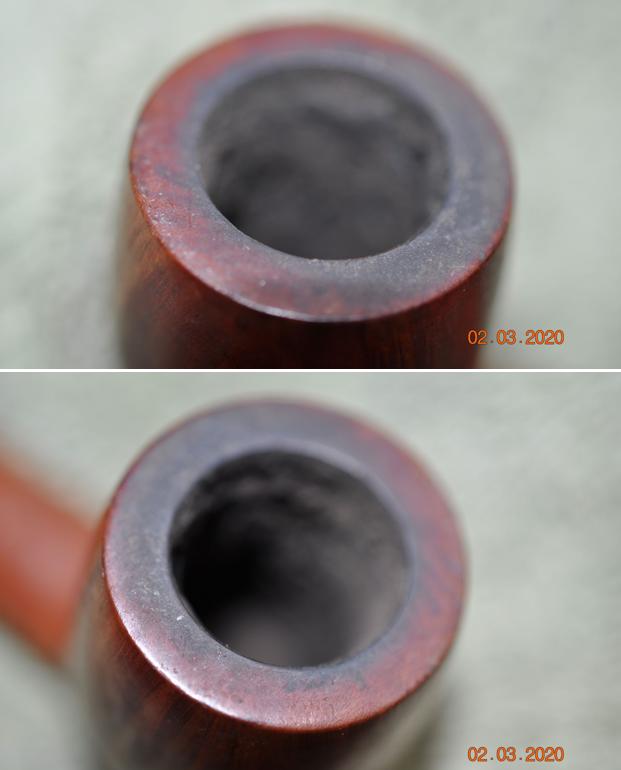
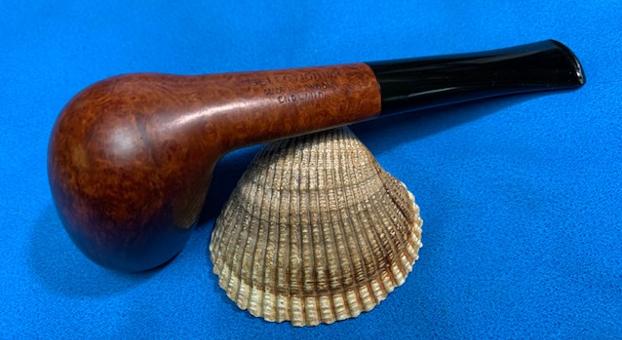
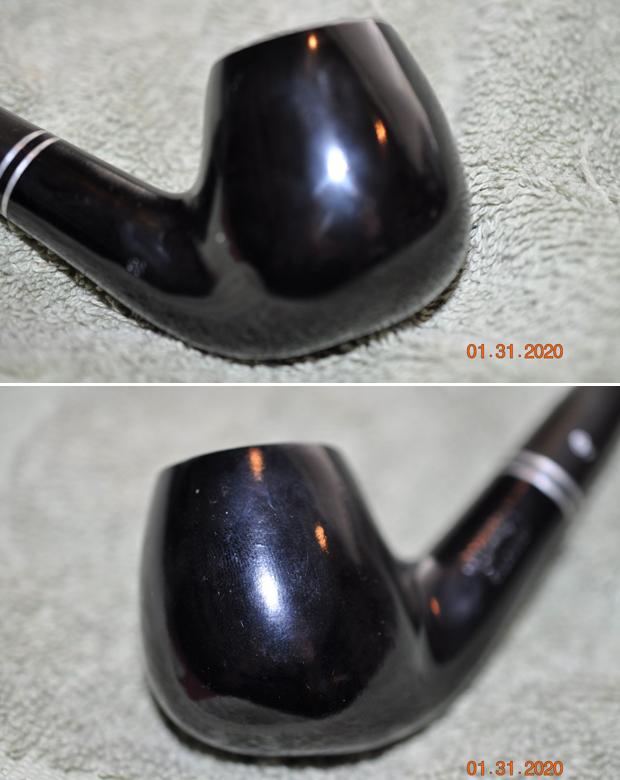
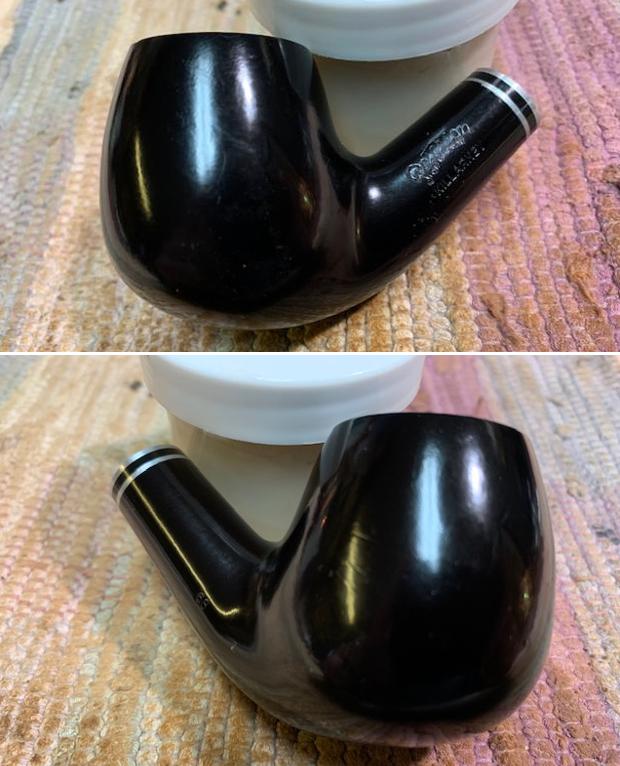
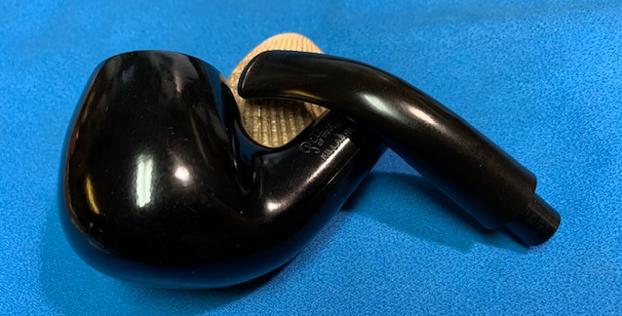
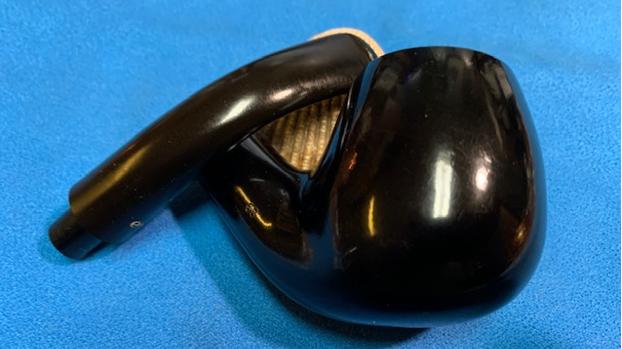
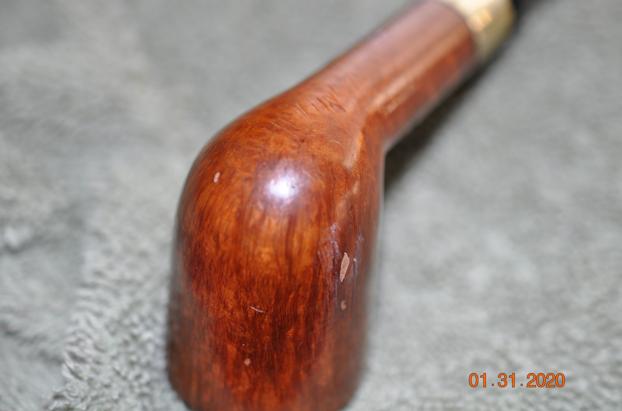
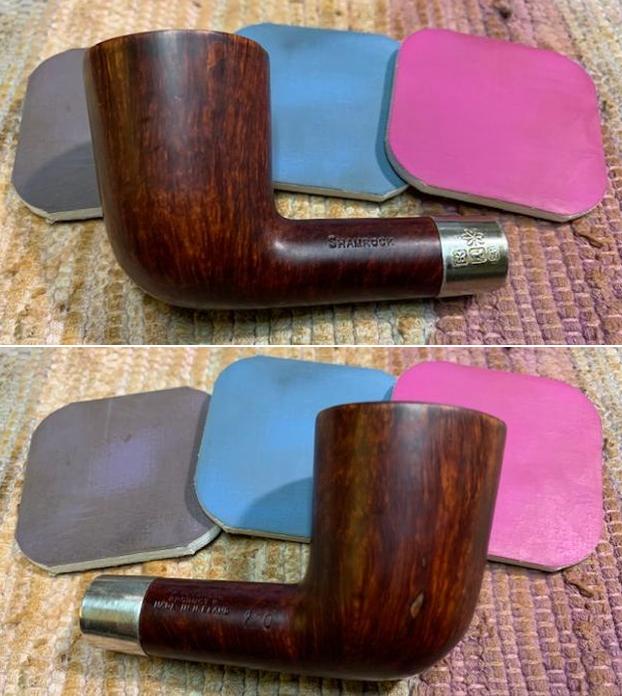
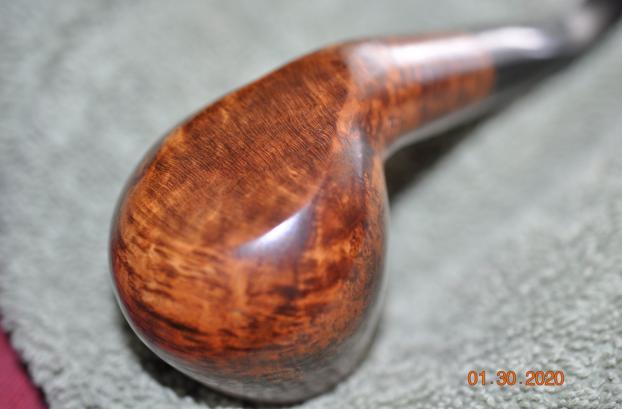
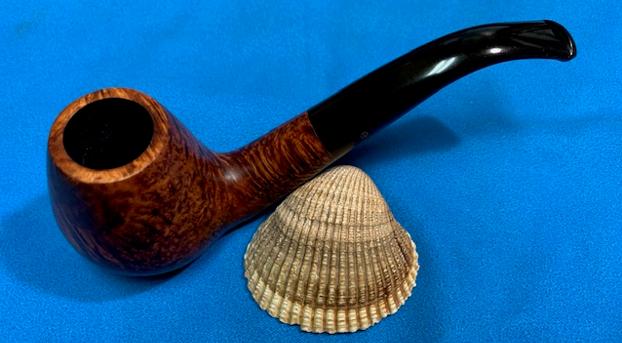
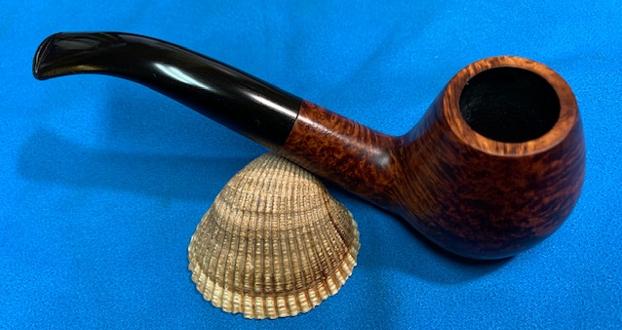
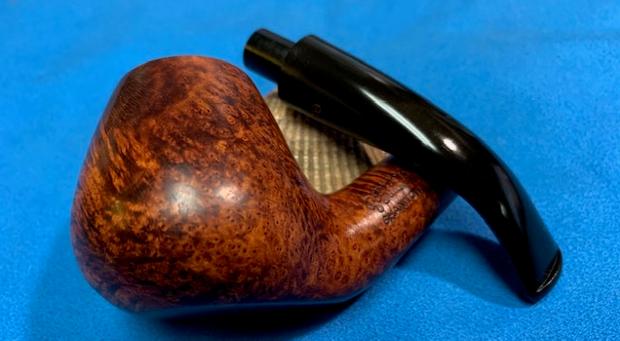
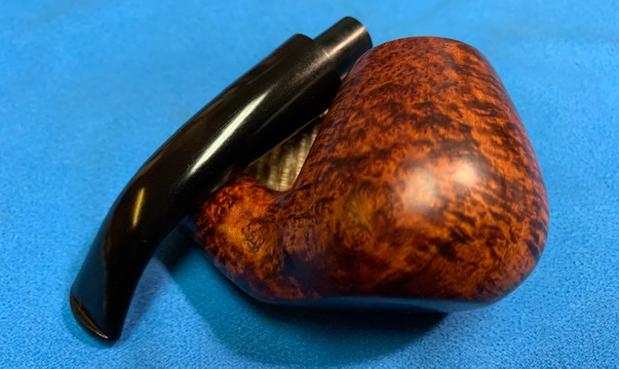
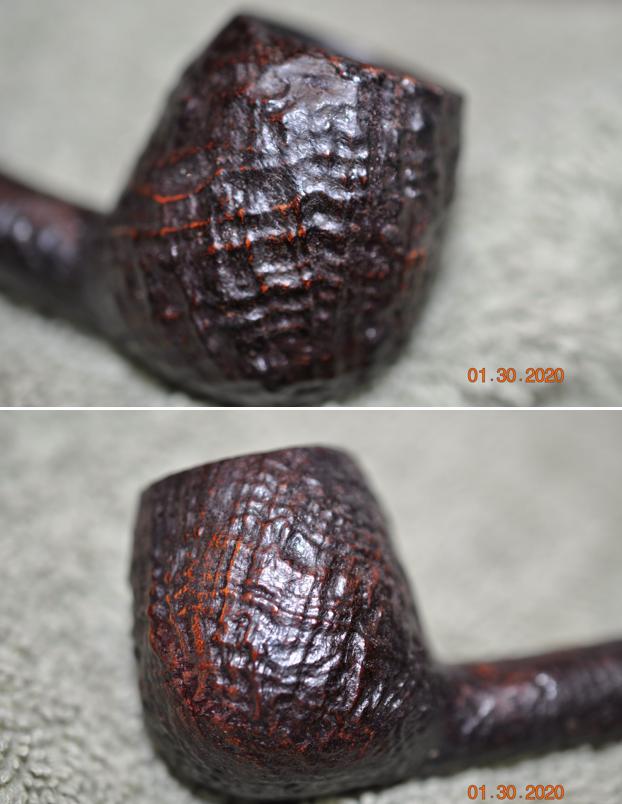
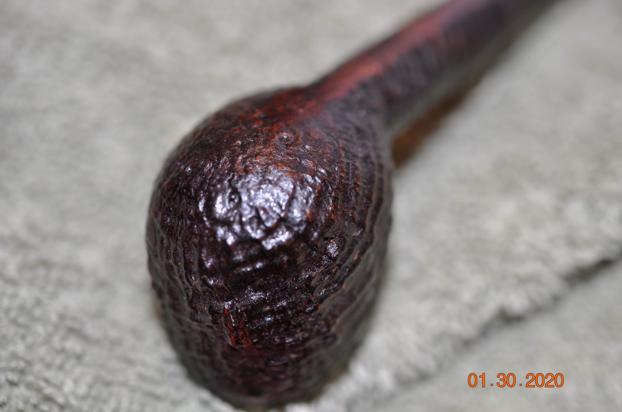
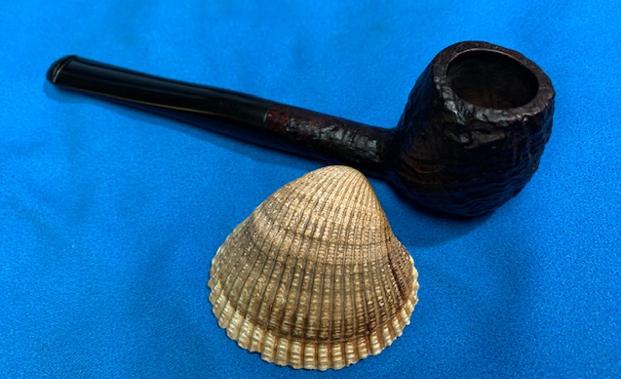
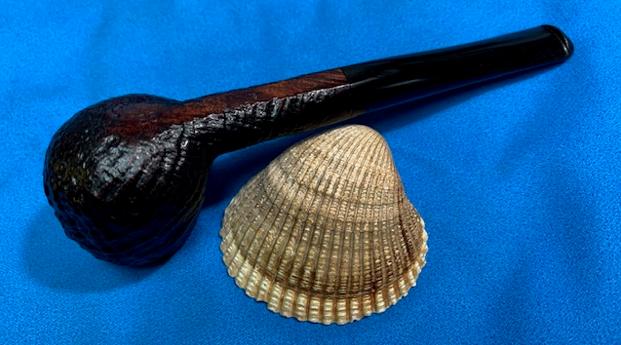
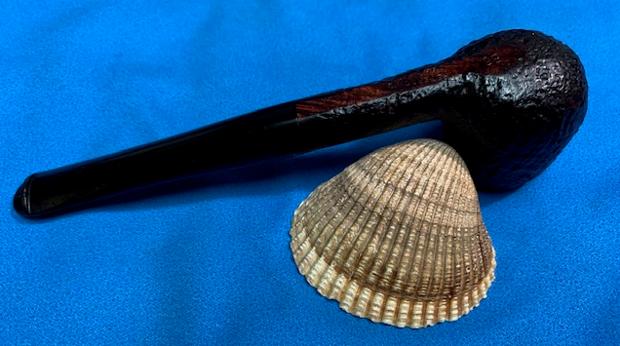
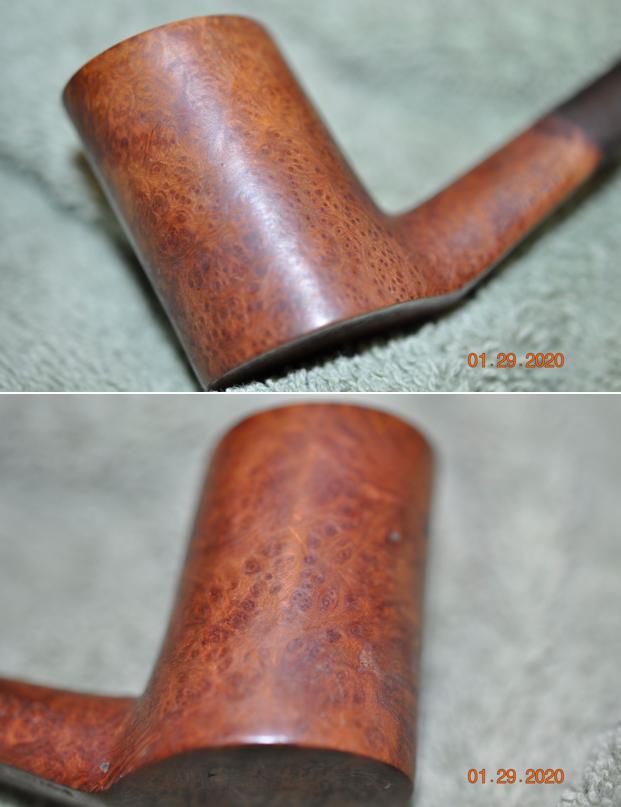
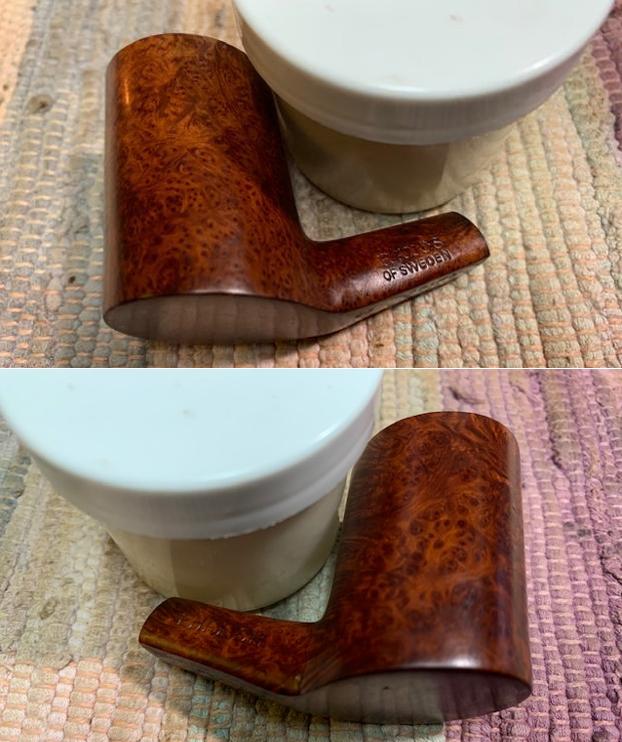
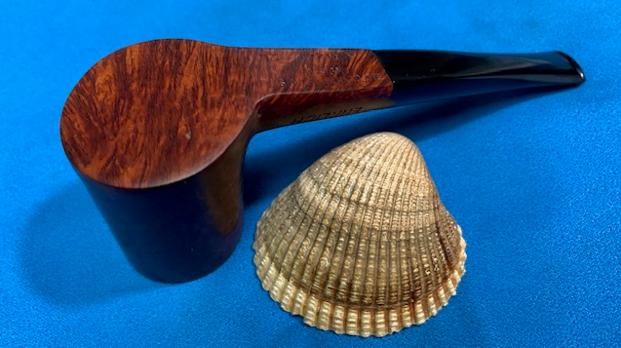
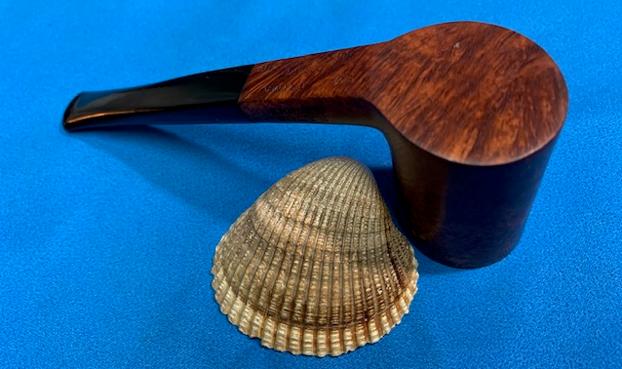
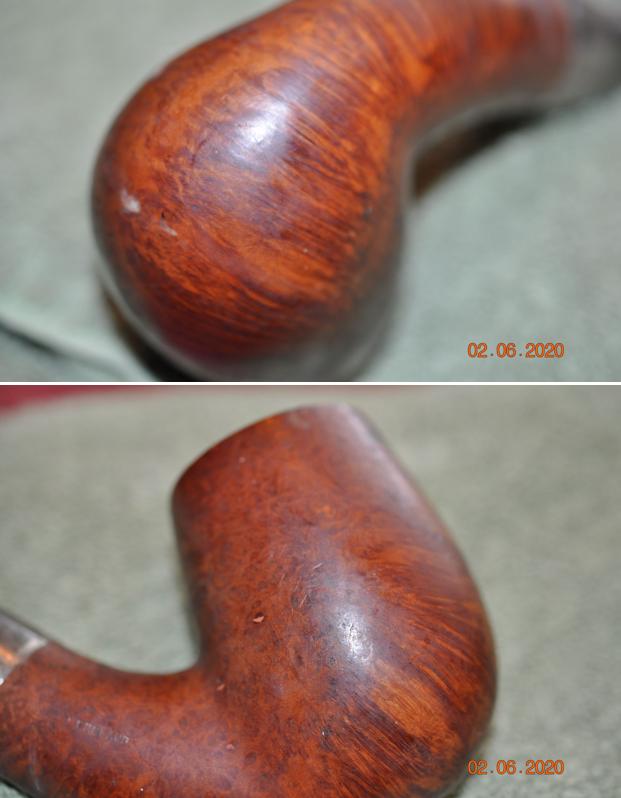
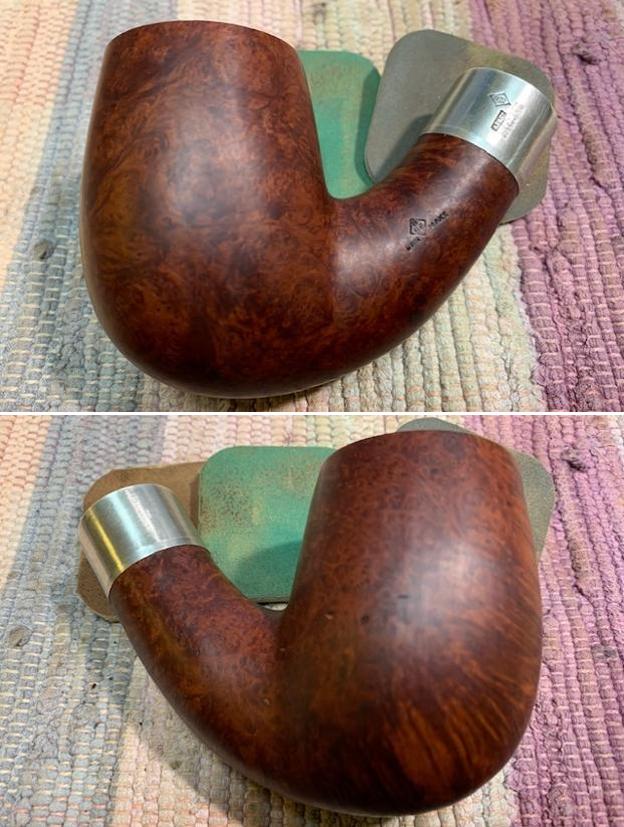
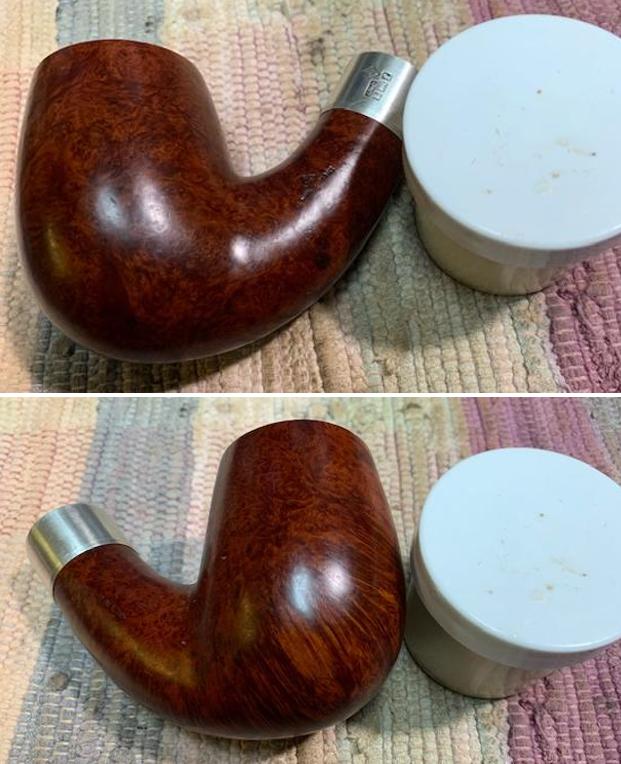
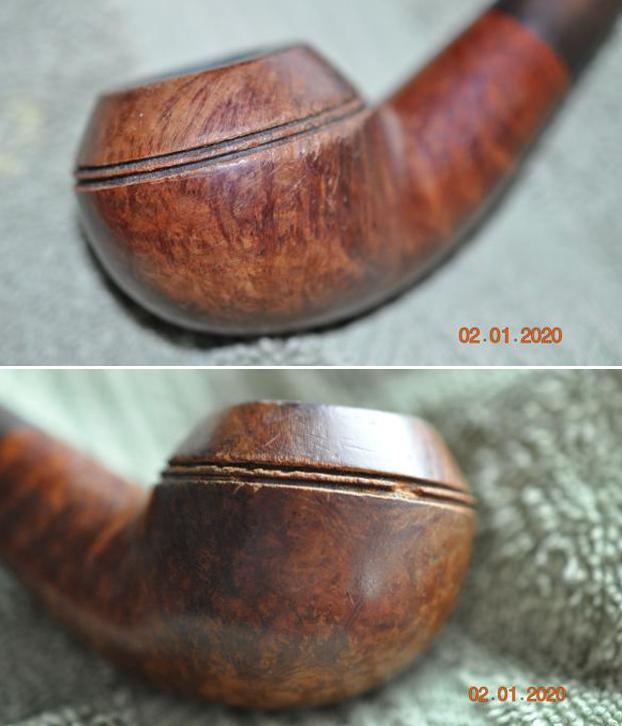
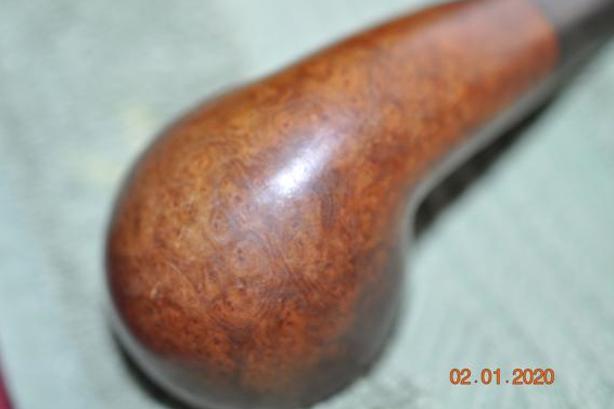
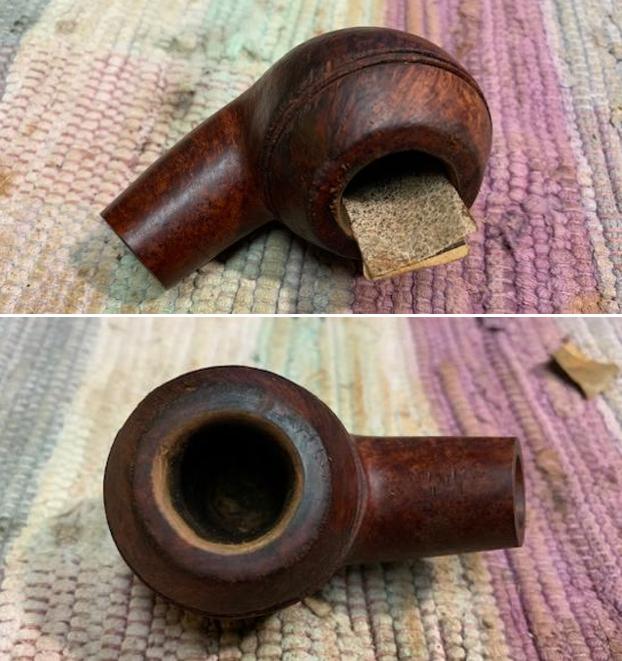
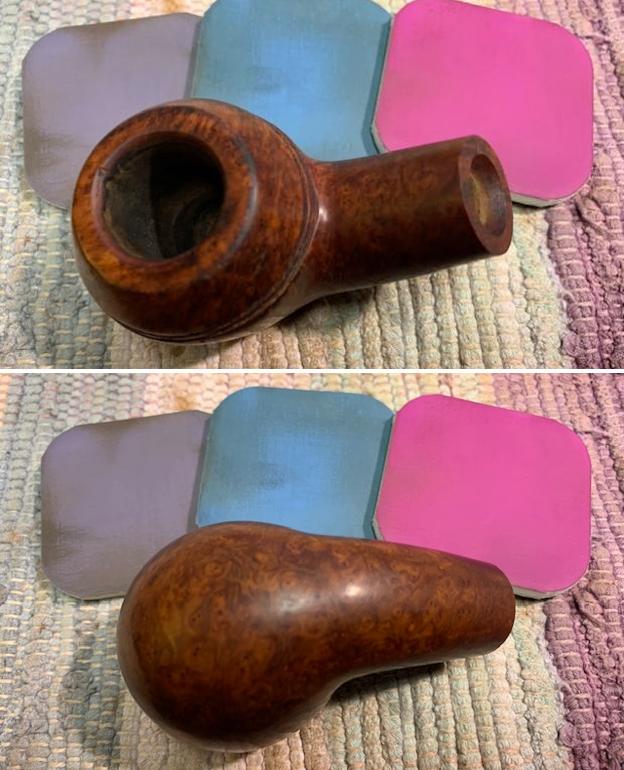
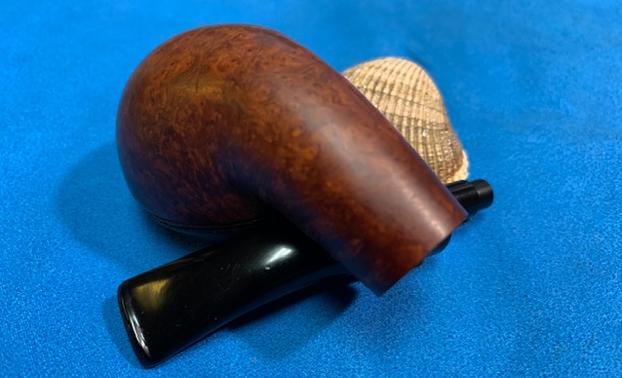
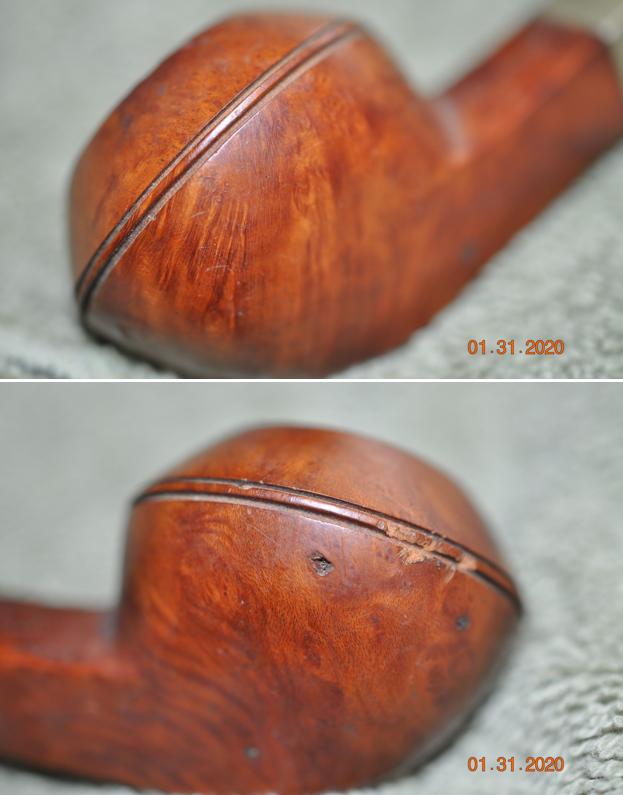
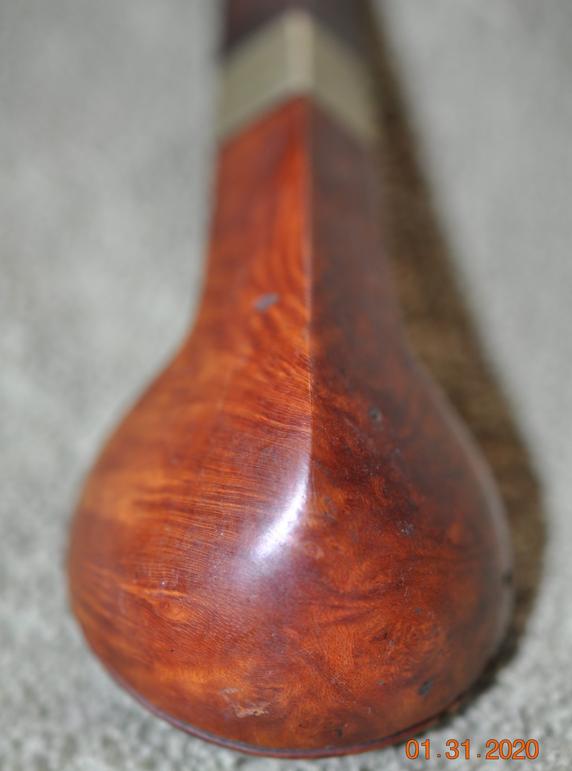
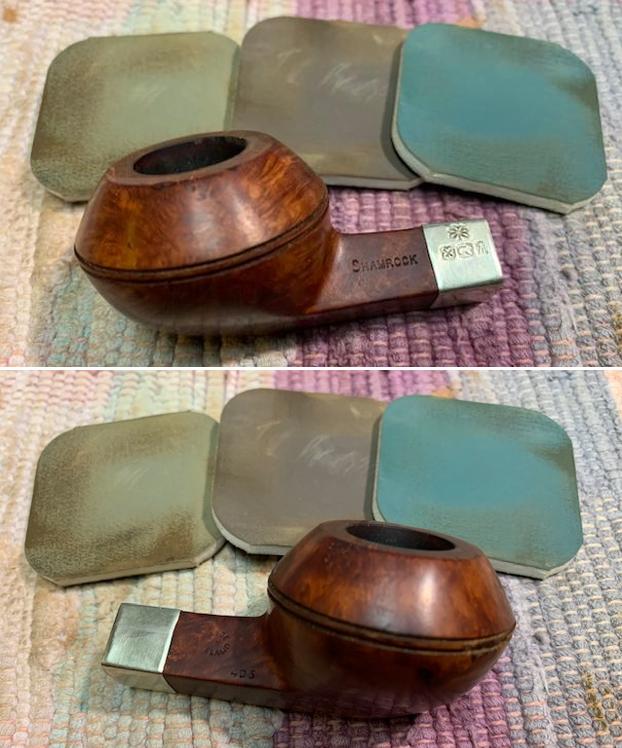
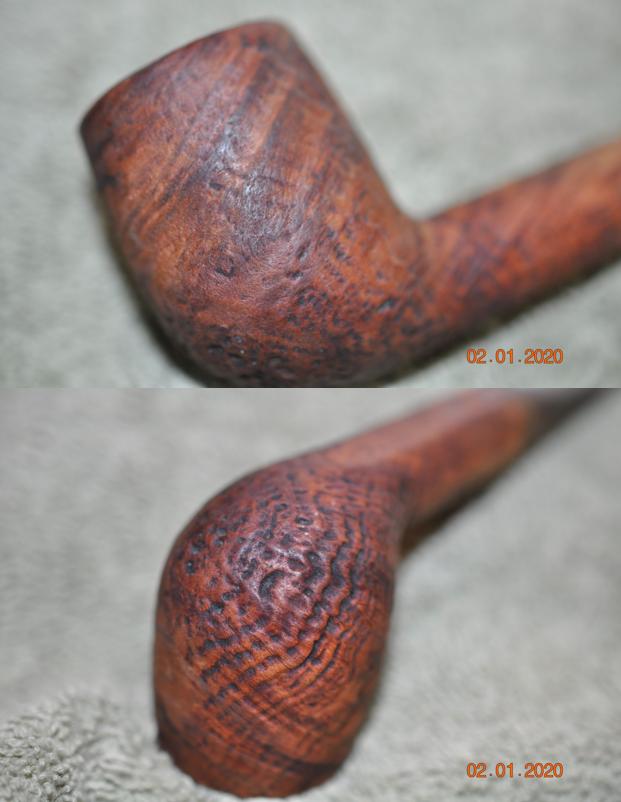
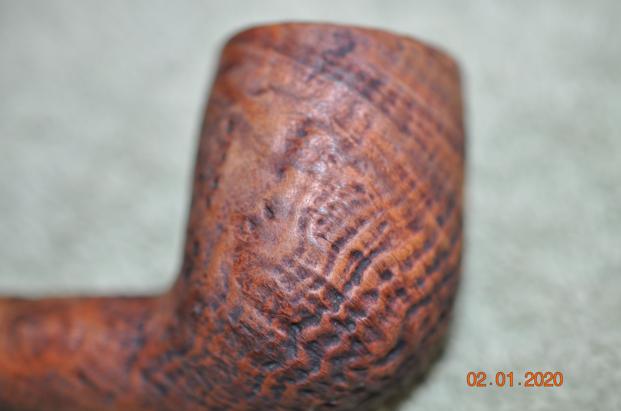
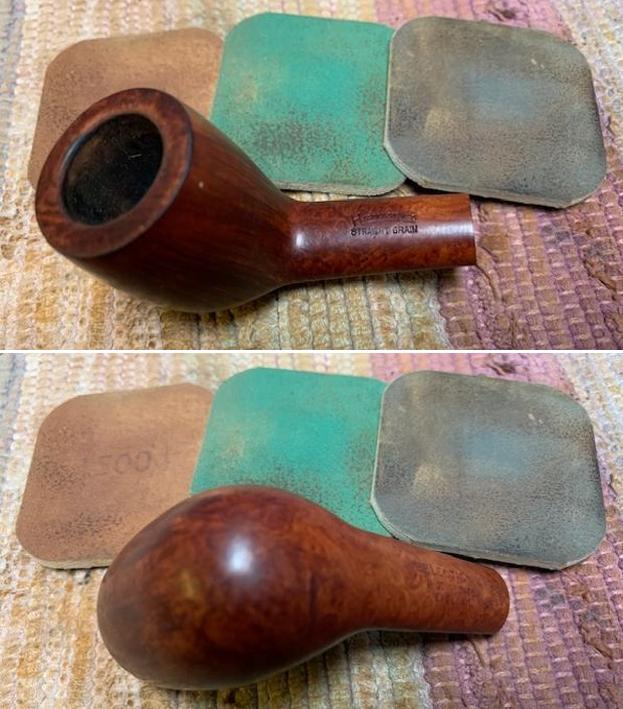
 Jeff took photos of the sides and heel of the bowl to show the condition of the briar. You can see the beautiful shape and the grain on the bowl even through the dirt and debris of many years.
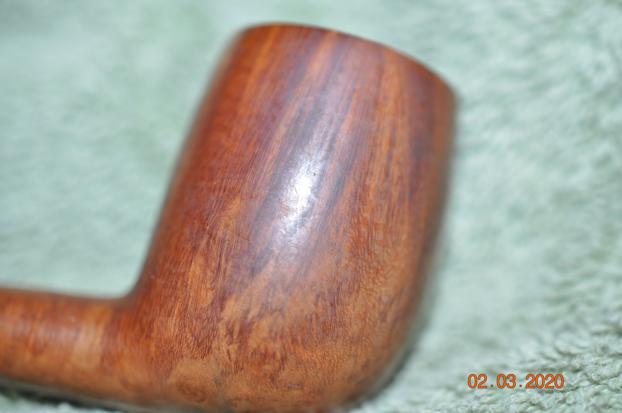
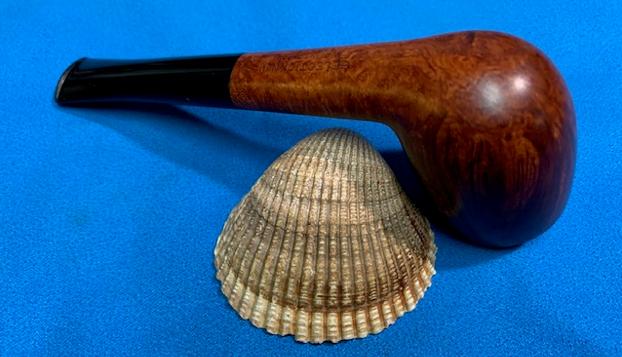
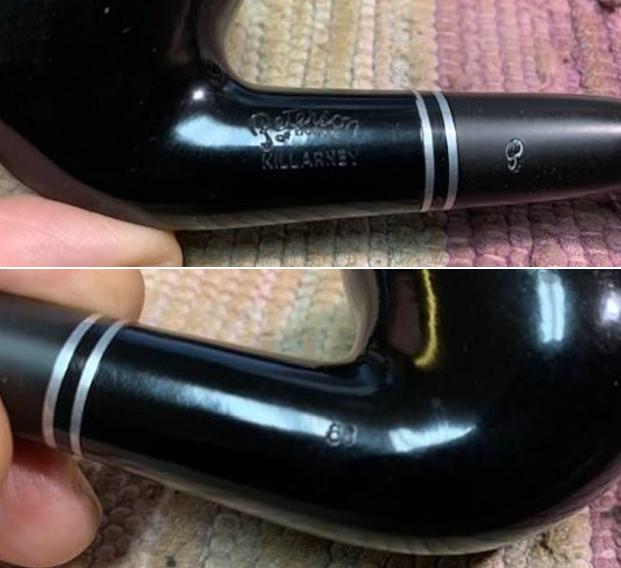
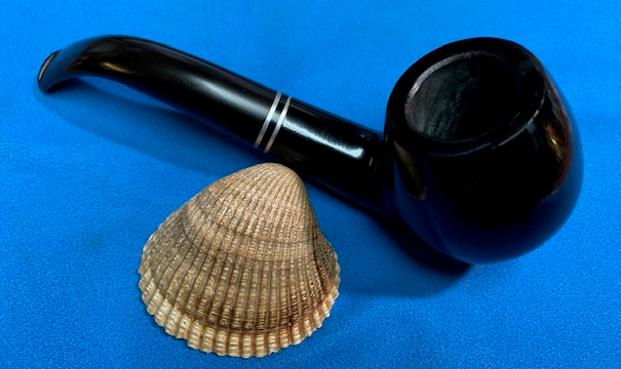
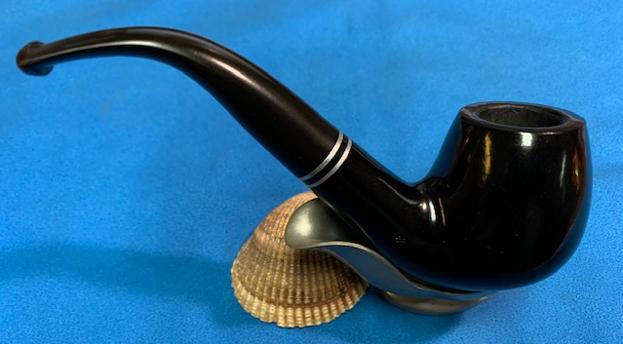
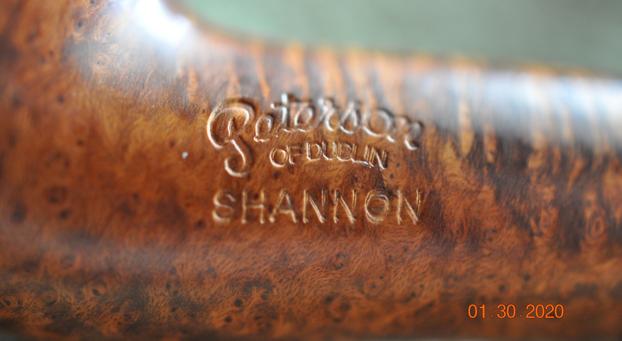
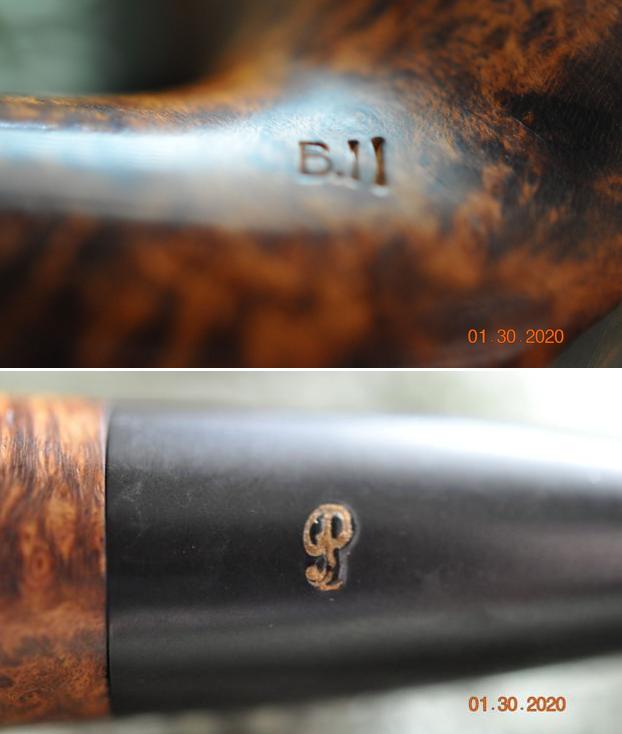
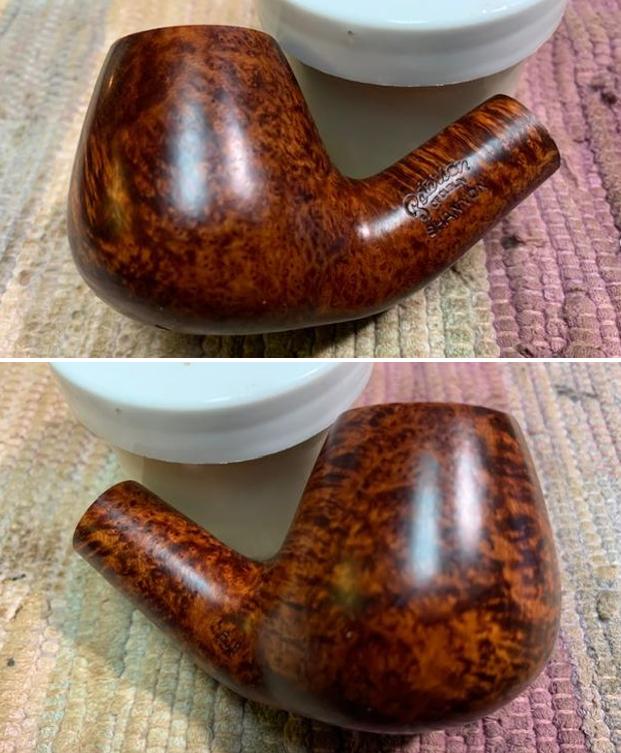
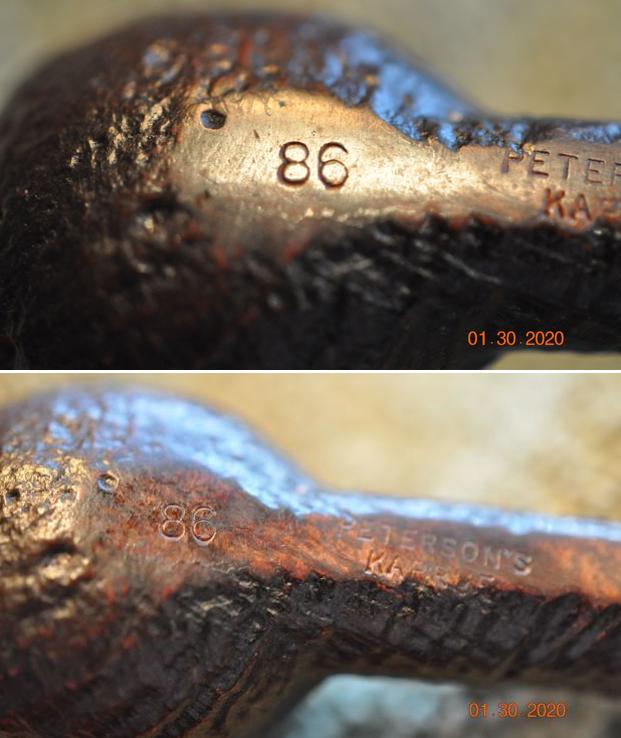
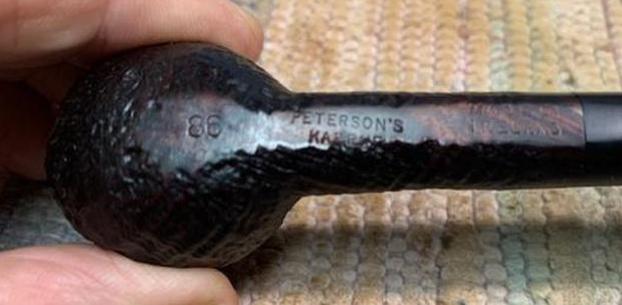
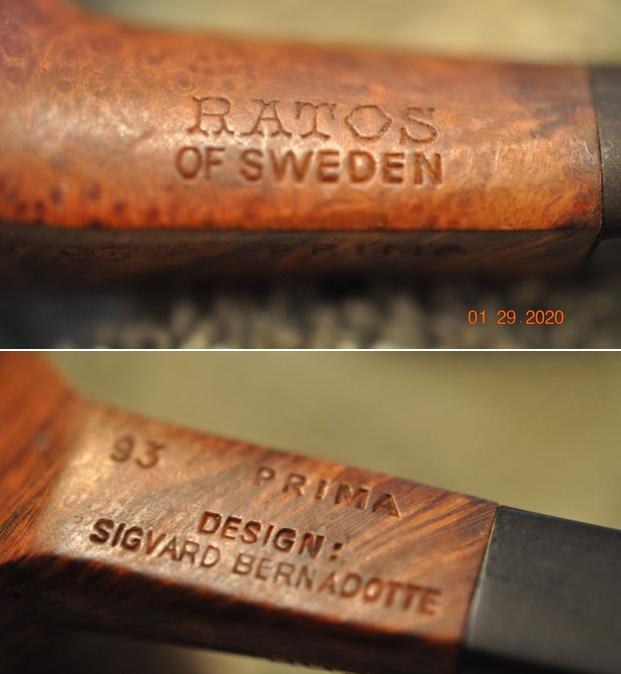
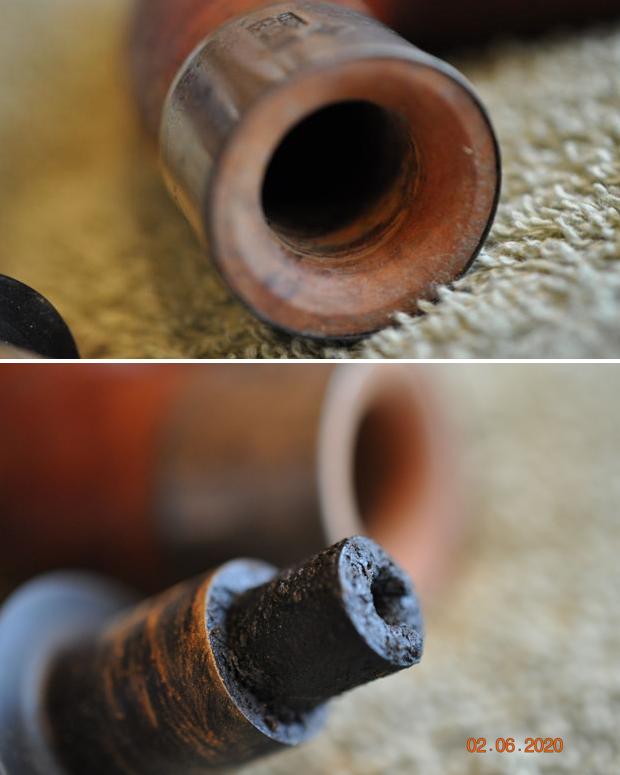
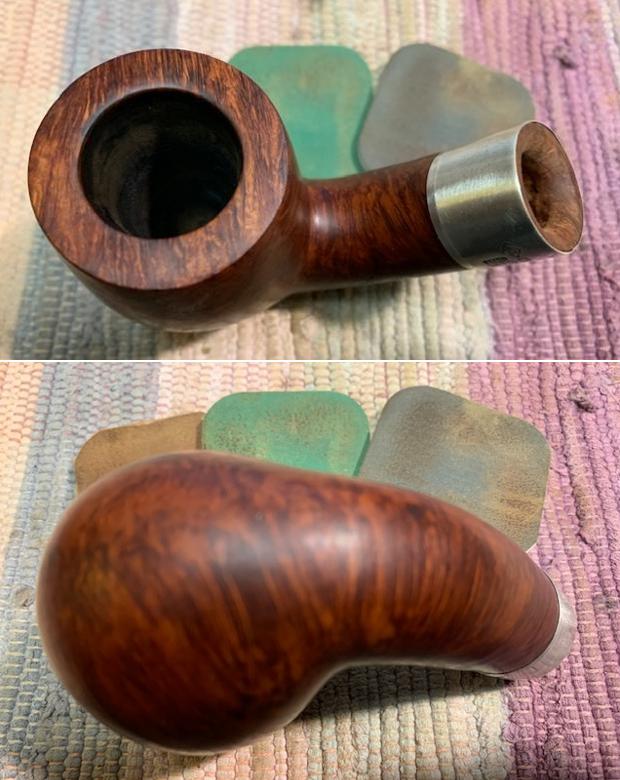
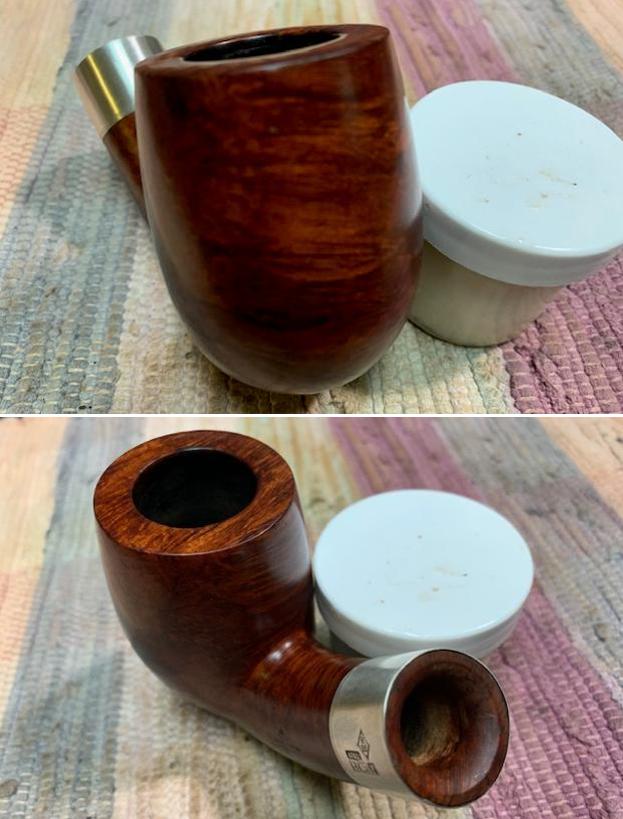
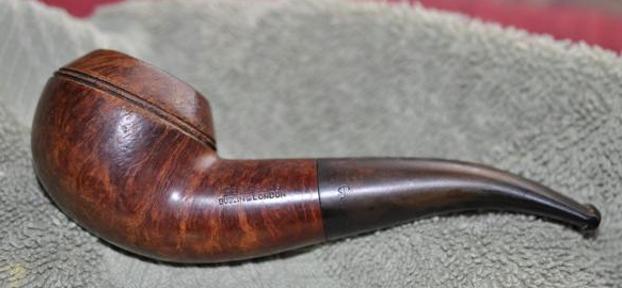
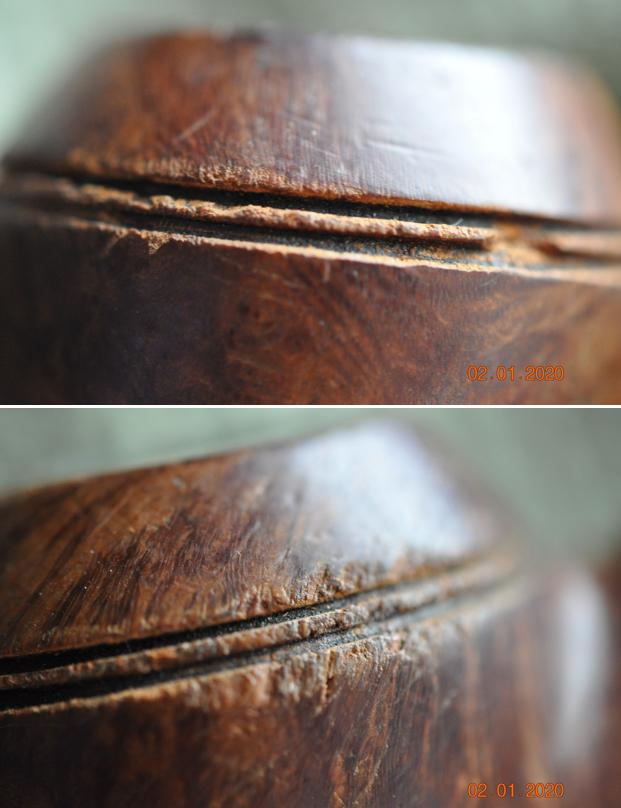
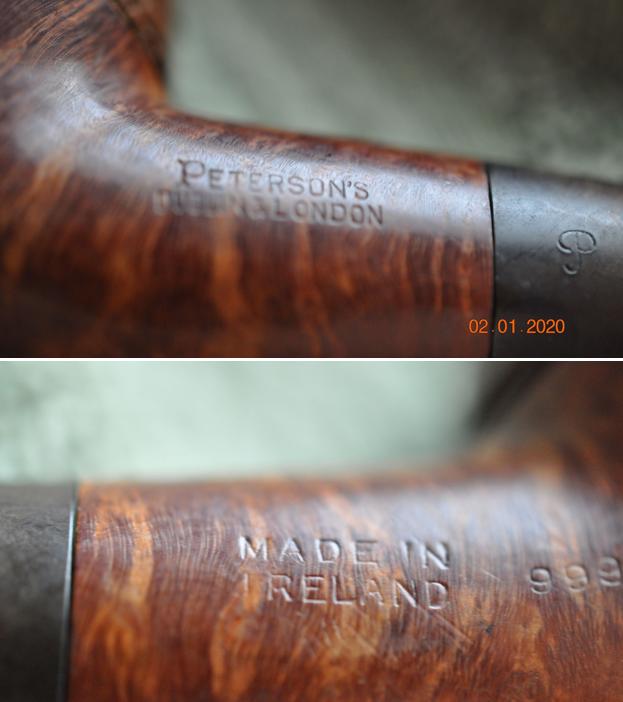
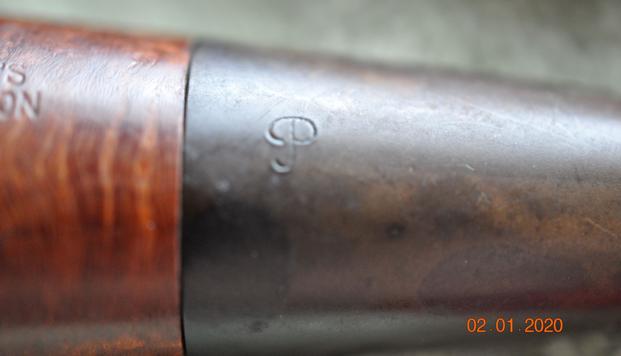
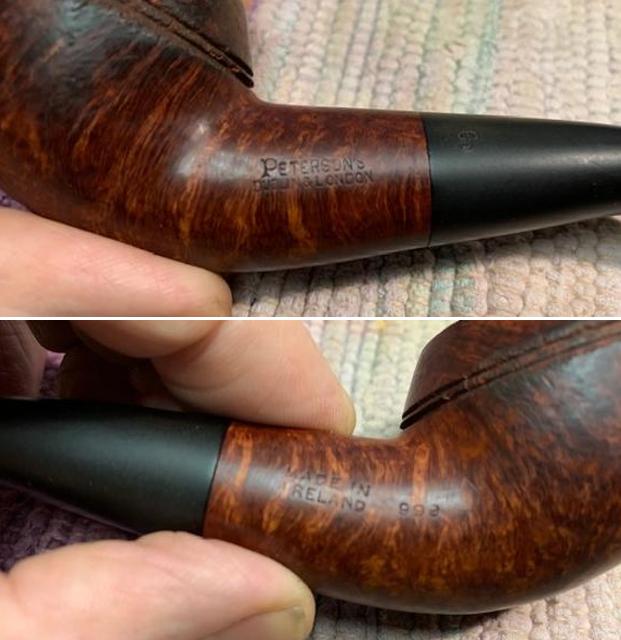
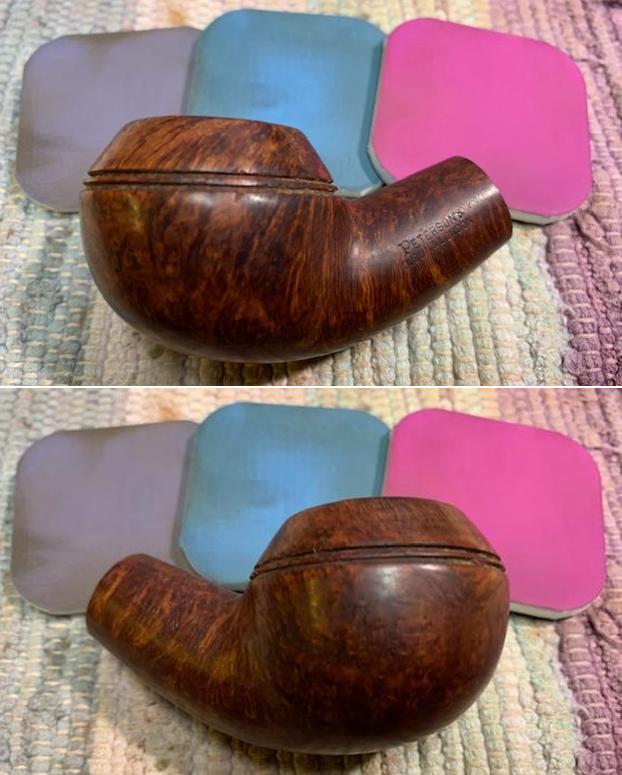
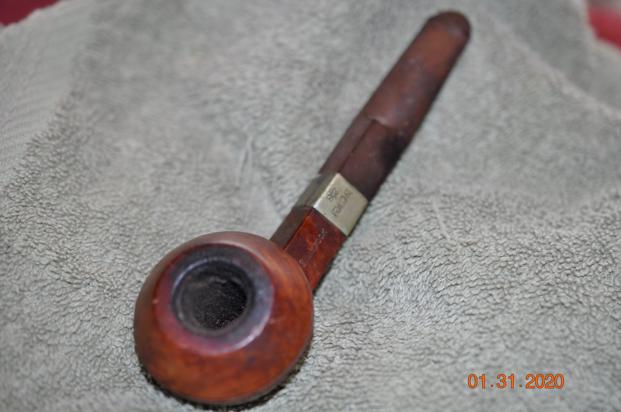
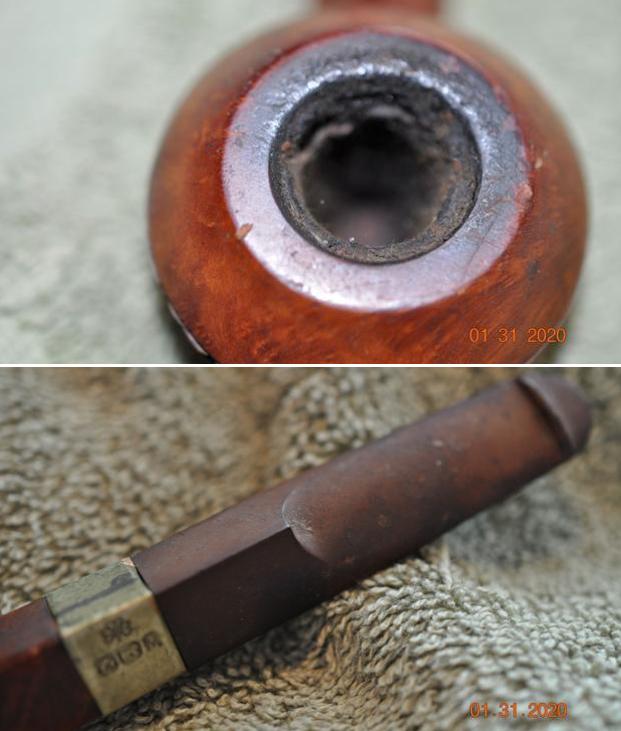
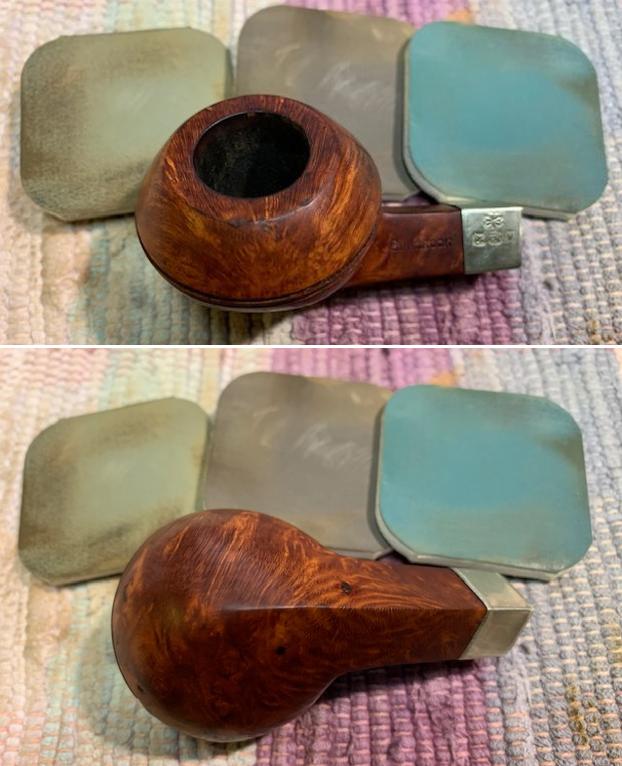
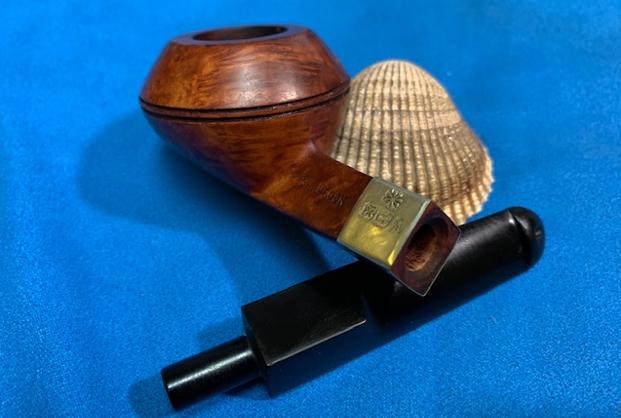
 Jeff took photos of the stamping on the top and underside of the shank. You can see that it is clear and readable. He also captured the white “H” logo on the top of the stem.
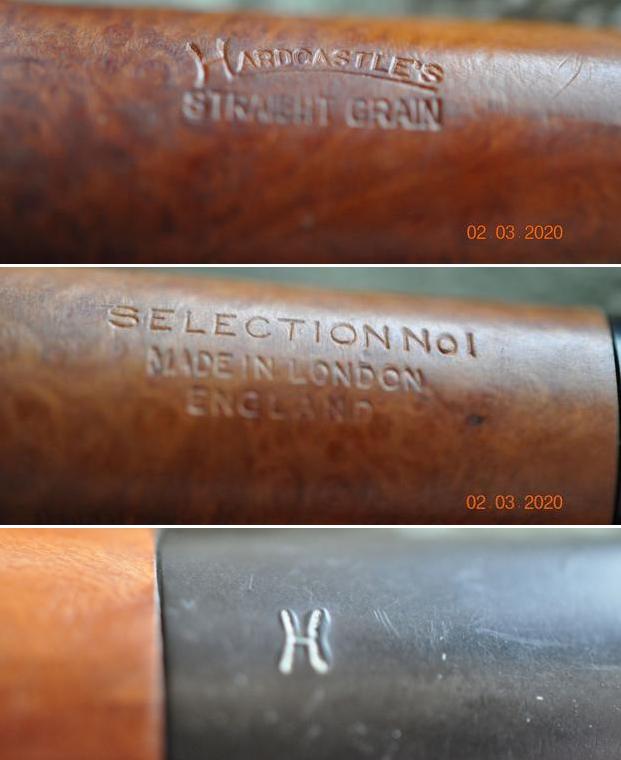 I turned to Pipedia to try and place this pipe in the timeline of the brand and was able find some helpful information which I have included below (https://pipedia.org/wiki/Hardcastle).
Hardcastle was founded in 1908 by Edmund Hardcastle and built itself a good reputation among the numerous British mid-graders. In 1935 Dunhill started to build a factory next door to Hardcastle in Forest Road, Walthamstow, London E17. The family owned Hardcastle Pipes Limited sold 49% of its equity to Dunhill In 1936.
Along with closing down its pipe factory in Notting Hill in 1946 Dunhill bought the remaining shares, turning Hardcastle into a 100% Dunhill subsidiary. As members of the Hardcastle family continued as executives in the company’s management Hardcastle retained a certain independence.
This ended in 1967. Dunhill merged Hardcastle with Parker (100% Dunhill as well). The new Parker Hardcastle Limited also absorbed the former Masta Patent Pipe Company. Hardcastle’s Forest Road plant was immediately given up and the production of Hardcastle pipes was shifted to Parker’s nearby St. Andrews Road factory – now consequently called Parker-Hardcastle factory.
In fact this put a definite end to Hardcastle as an own-standing pipe brand, and none other than Edwin Hardcastle, the last of the family executives, spoke frankly and loudly of Hardcastle pipes being degenerated to an inferior Dunhill second.
Today Hardcastle pipes use funneled down bowls that are not deemed suitable to bear the Dunhill or even the Parker name (as well as obtaining briar from other sources).
Timeline
Jack O London (Forrest Rd. factory era) sheet, courtesy Doug Valitchka
- 1903: Edmund Hardcastle establishes the brand
- 1936: Family sells 49% of the Hardcastle Pipes Limited shares to Dunhill
- 1946: Dunhill buys the remaining shares, but the family continues to manage the company
- 1967: Dunhill merges Hardcastle with Parker. The new Parker-Hardcastle Limited company absorbs the Masta Patent Pipe Company also.
- After 1967 it is speculated that Hardcastle became the brand for “Parker Seconds”
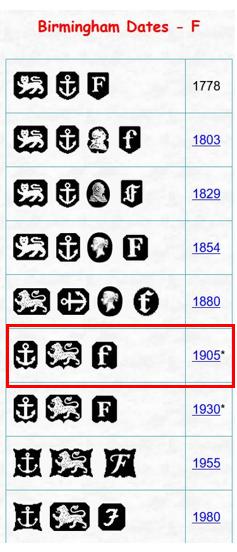
John Loring states in “The Dunhill Briar Pipe – ‘the patent years and after'” that in the absence of sales receipts, or other items of provenance, Hardcastles cannot be accurately dated. Loring further states that he knows of no way to distinguish the briar source when looking at Hardcastle, Parker, or Parker-Hardcastle pipes. We should not expect to find any actual Dunhill production in these lines, and while one might be there, it is doubtful we will ever be able to determine it [1].
Models & Grades – Family Period
Straight Grain, Supergrain, Leweard, Nut Bruyere, De Luxe, Royal Windsor Sandhewn, Royal Crown, The Crown, Phito Dental, Old Bruyere, Jack O’London, Dental Briar, Phito, Dental, Dryconomy, Drawel, Phithu, Telebirar, Camden, Lightweight, The Table, Dovetail, Dental, Crescent Extra, Lonsdale, Welard De Luxe
With the information from Pipedia I knew that I was working on a Family Period Pipe and it was the top grade. It appears that it can be dated between 1903-1946 when the company was sold in full to Dunhill. Now it was time to work on the pipe.
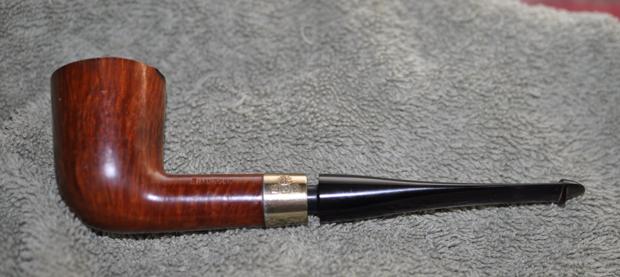
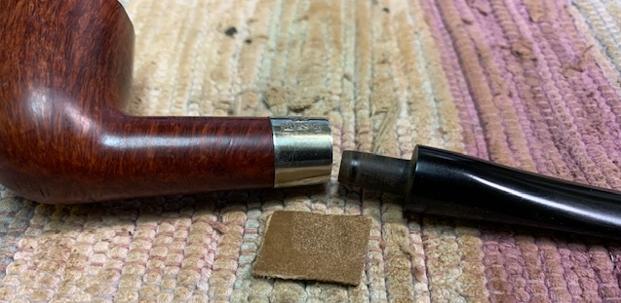
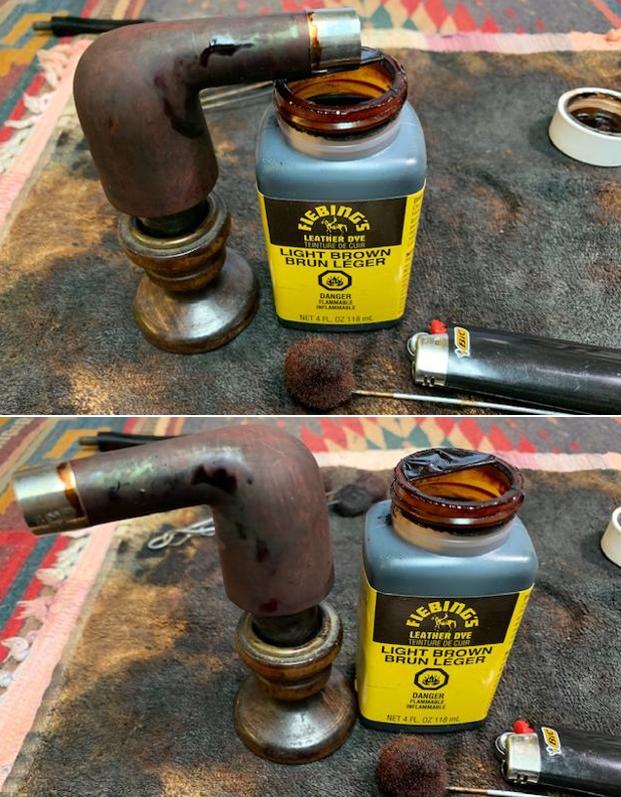
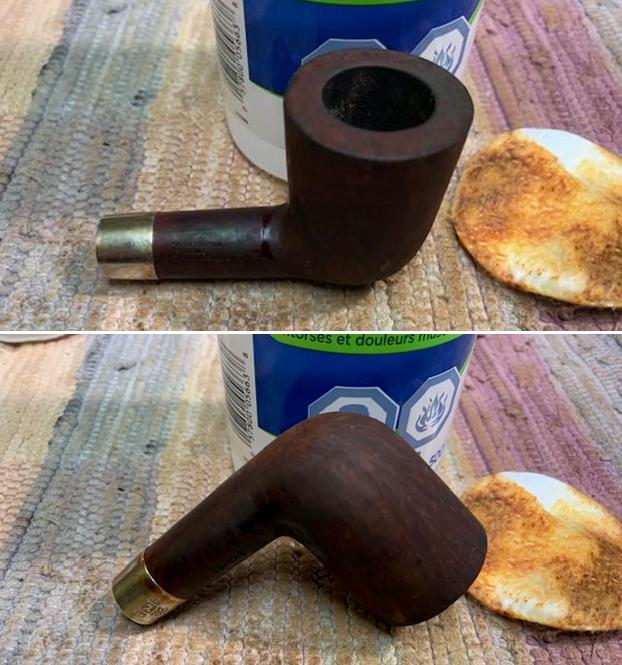
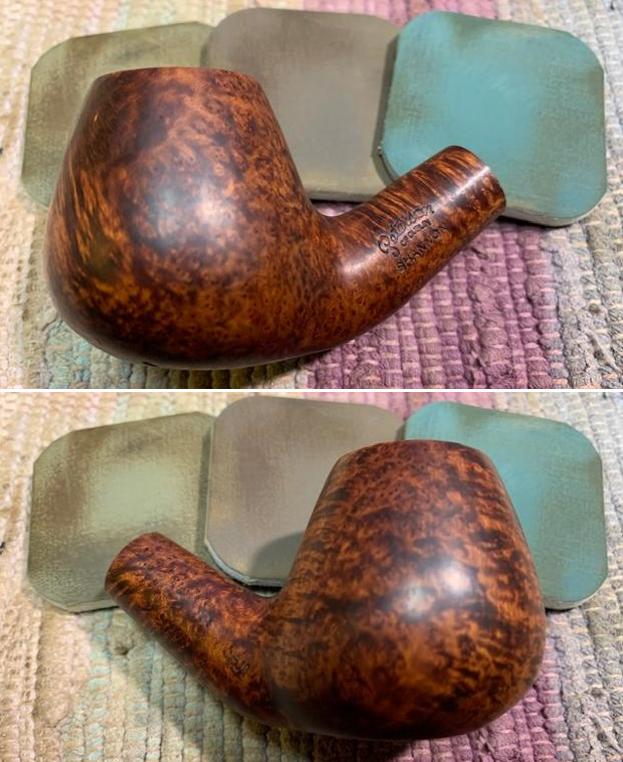
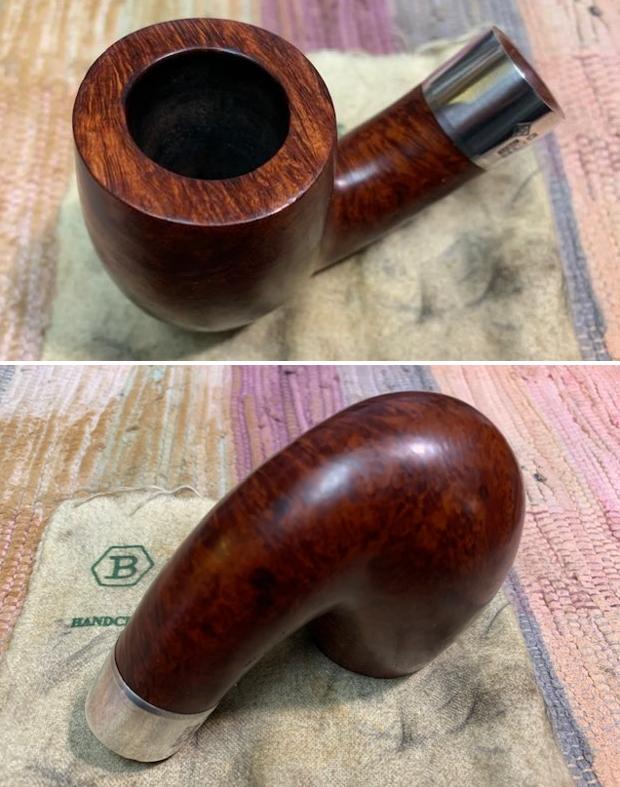
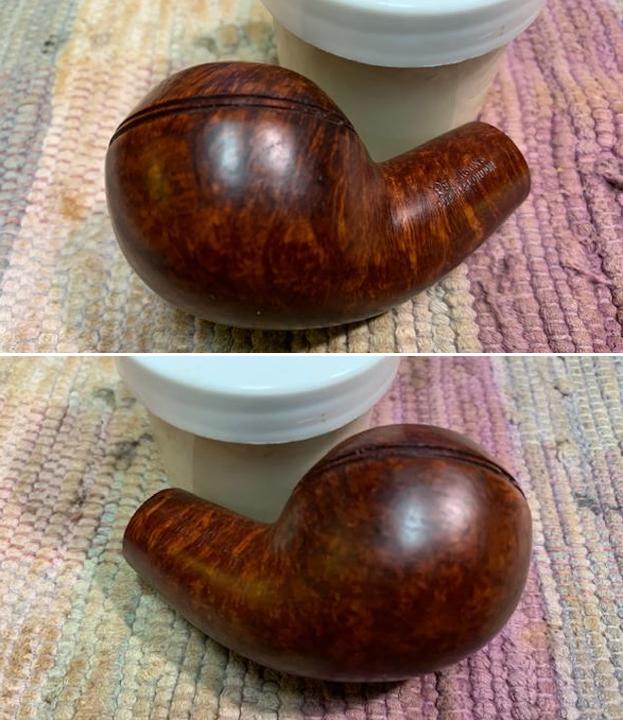
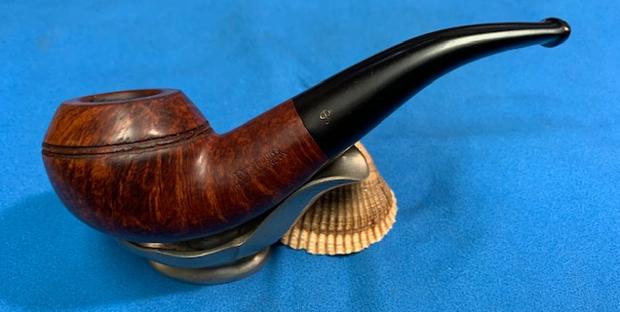
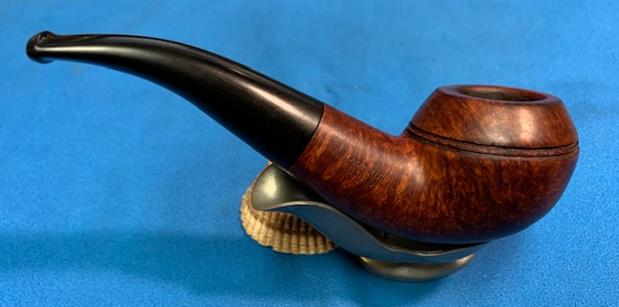
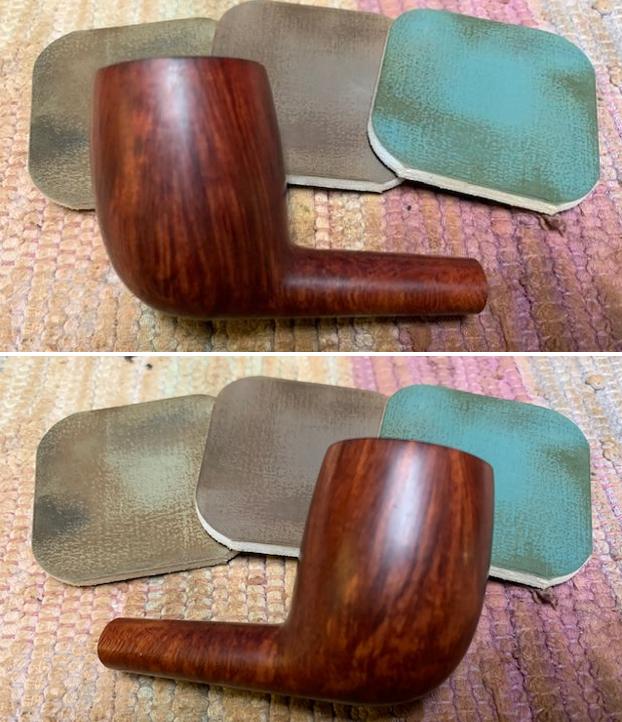
Jeff carefully cleaned the pipe. He reamed it with a PipNet pipe reamer and then cleaned up the reaming with a Savinelli Fitsall Pipe Knife. He scrubbed out the internals of the shank, stem and shank extension with alcohol, pipe cleaners and cotton swabs until the pipe was clean. He scrubbed the exterior of the bowl with Murphy’s Oil Soap and a tooth brush to remove the grime and grit on the briar and the tarnish and lava on the rim top. The finish looks much better and has a deep richness in the colour that highlights grain of the briar. The rim top looked good with some darkening on the top and inner edge of the bowl. Jeff soaked the stem in bath of Briarville’s Pipe Stem Deoxidizer to remove the oxidation on the rubber. He worked it over with Soft Scrub All Purpose Cleaner to remove any remnants of oxidation. When the pipe arrived here in Vancouver I was amazed it looked so good. Here are some photos of what I saw. 
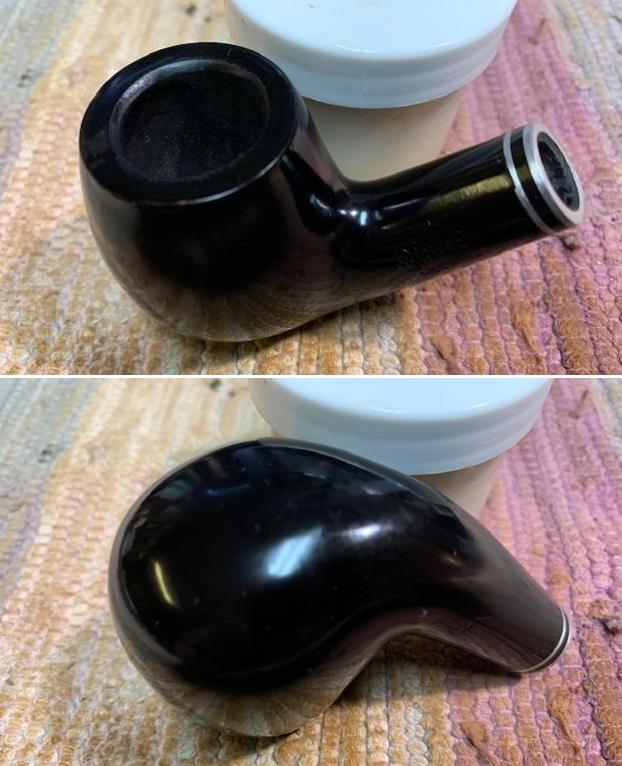
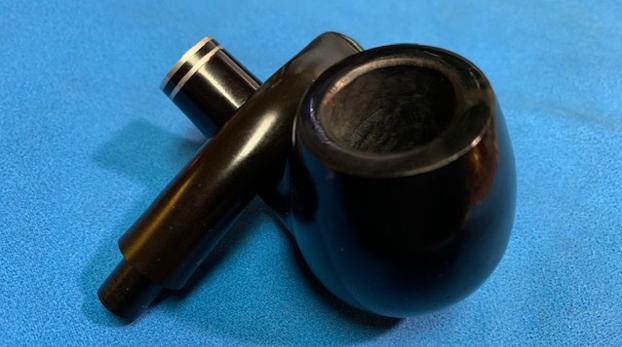
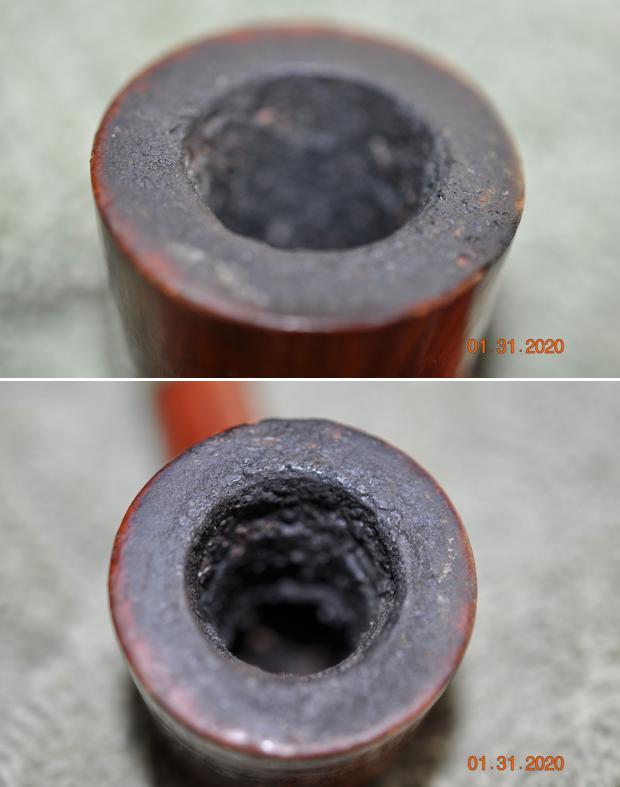
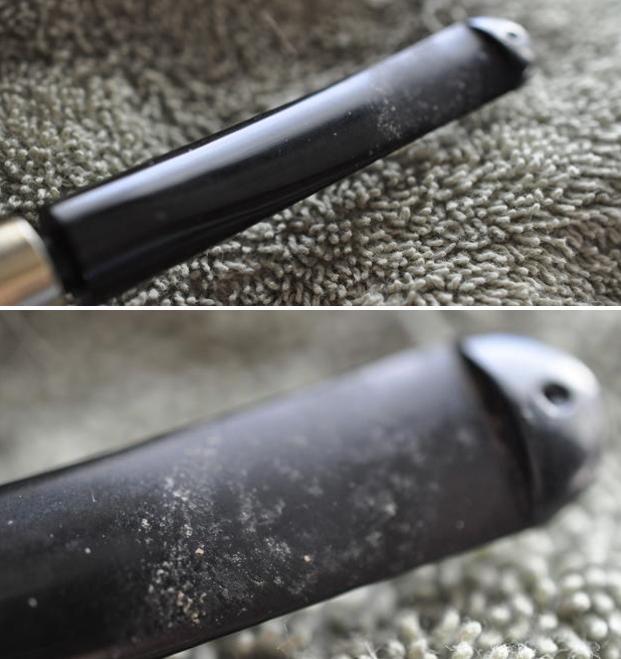
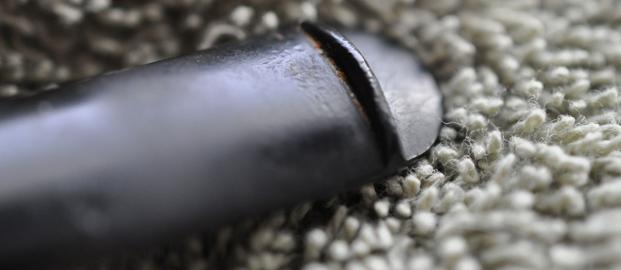
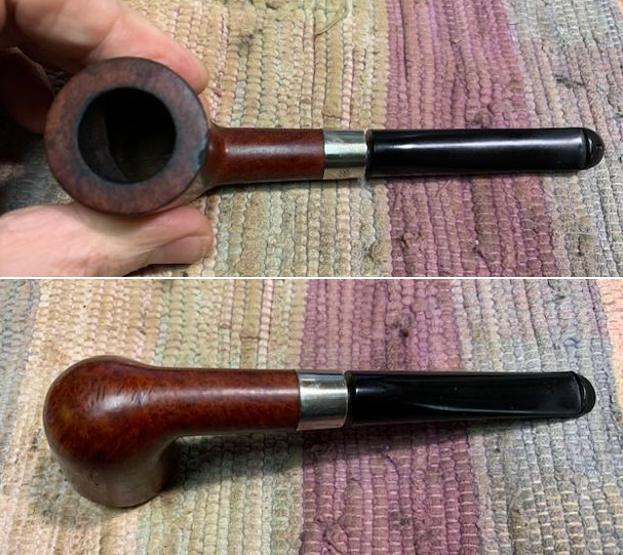
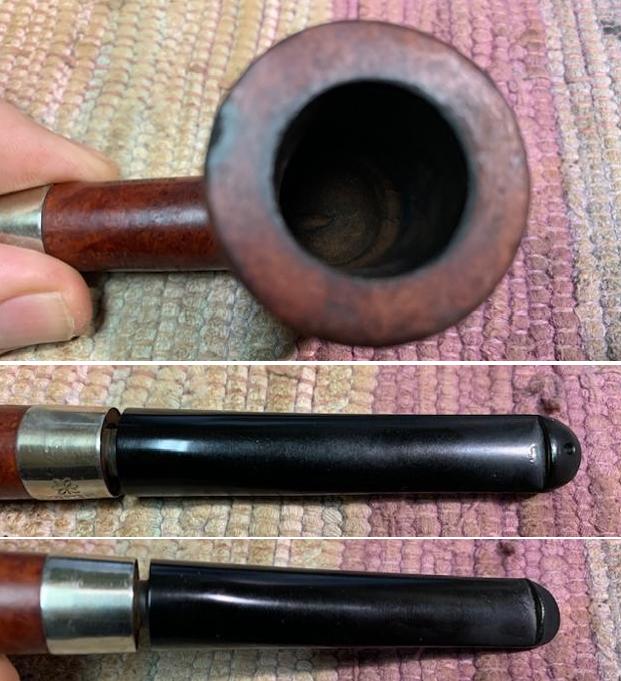
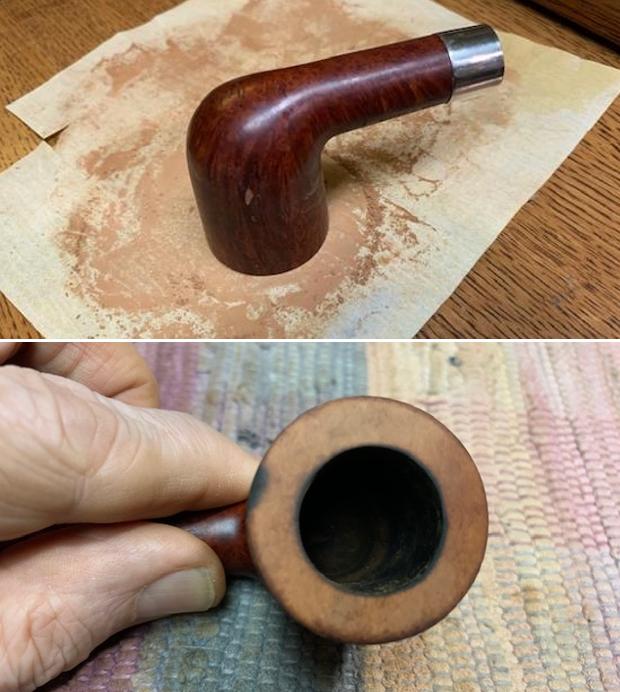
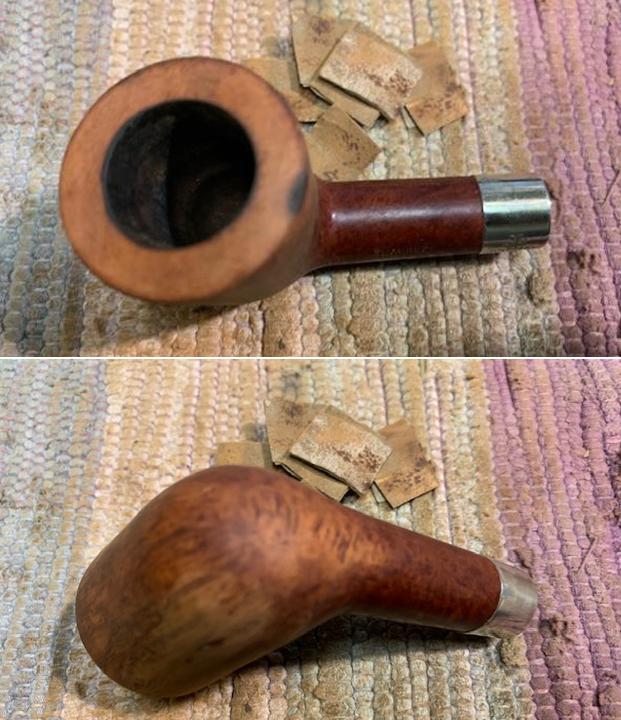
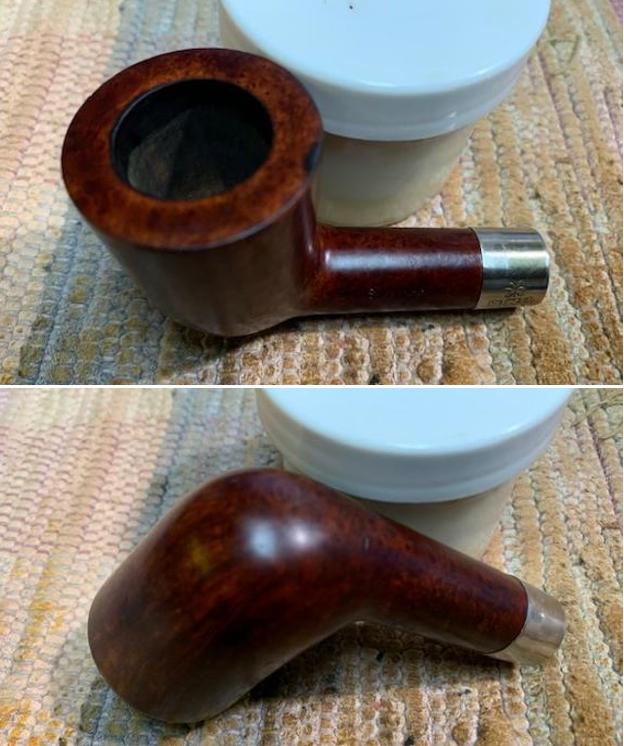
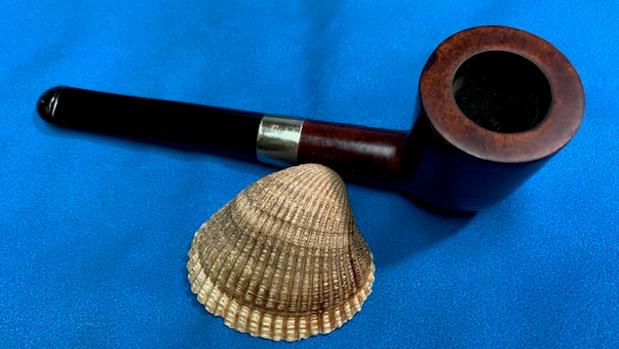
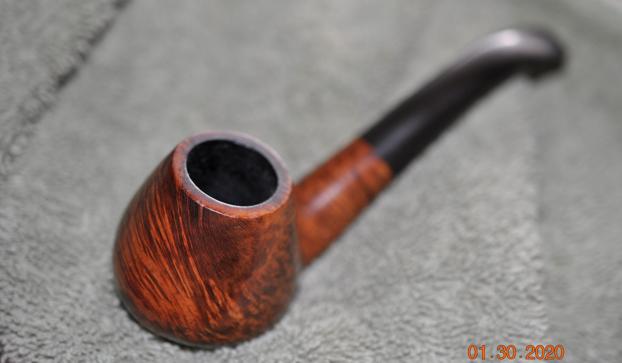
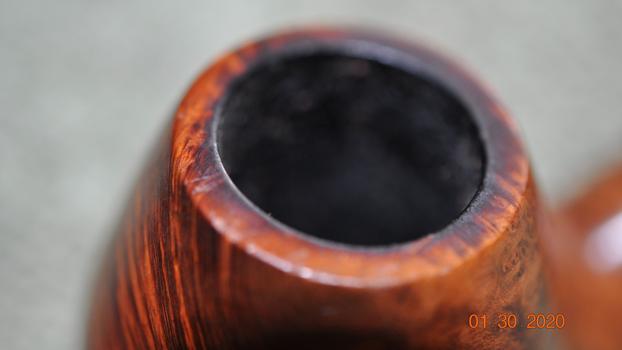
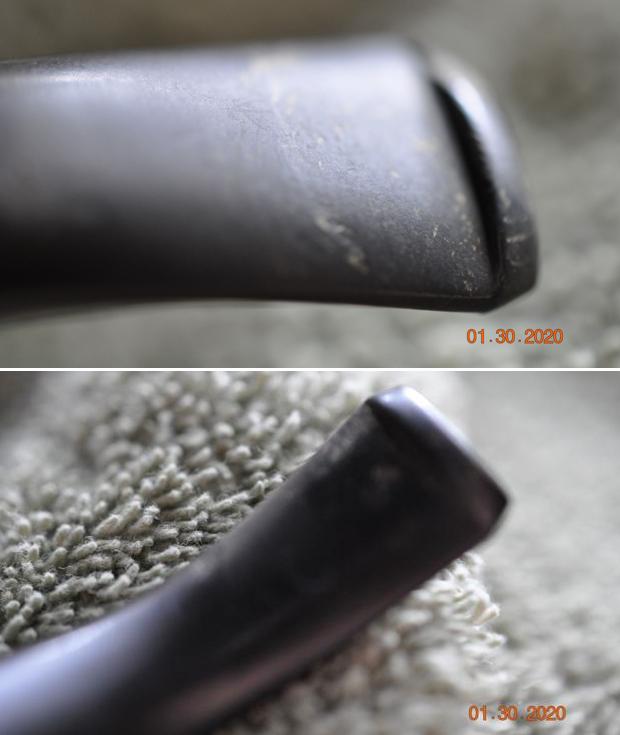
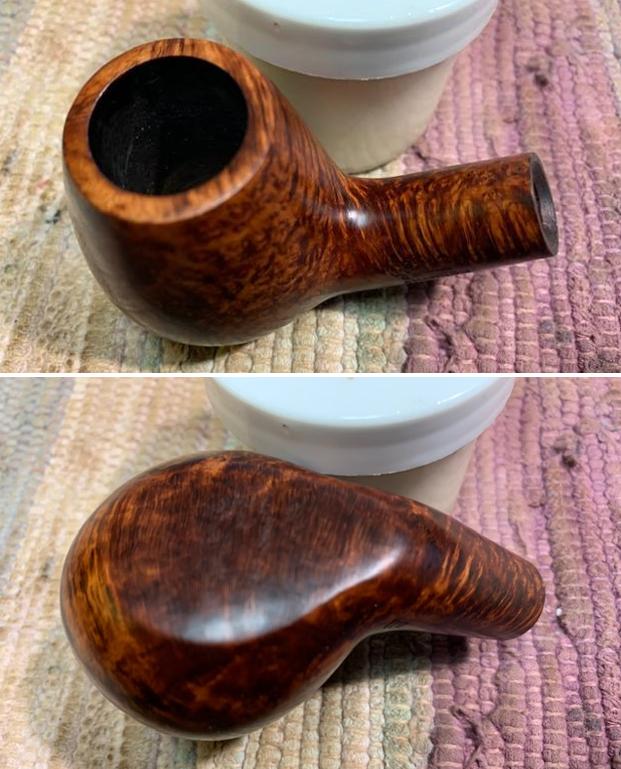
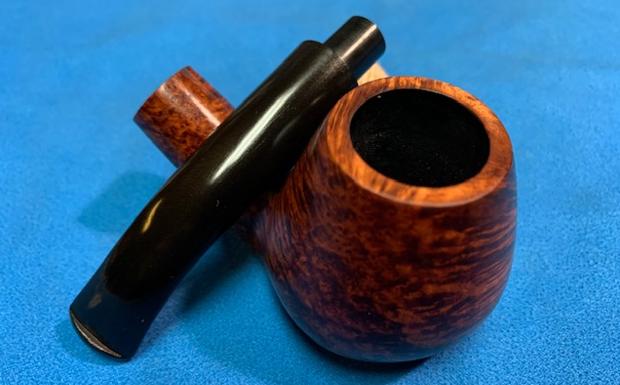
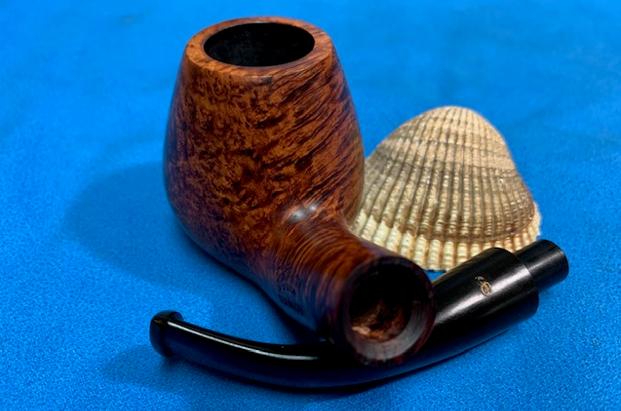
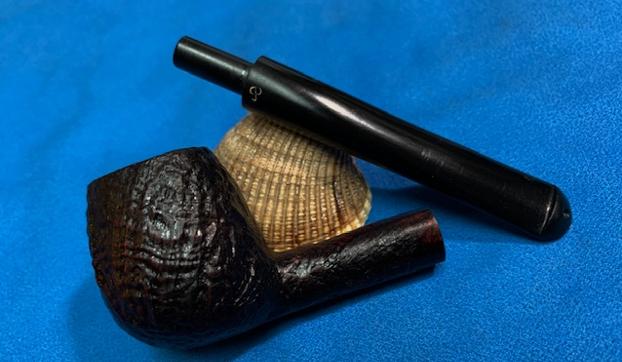
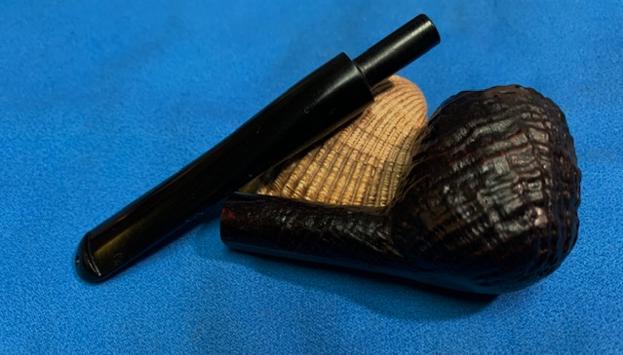
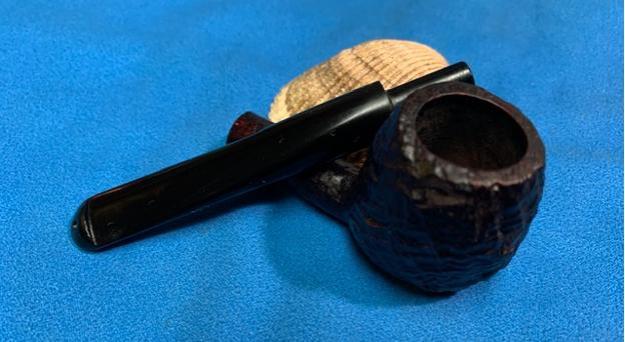
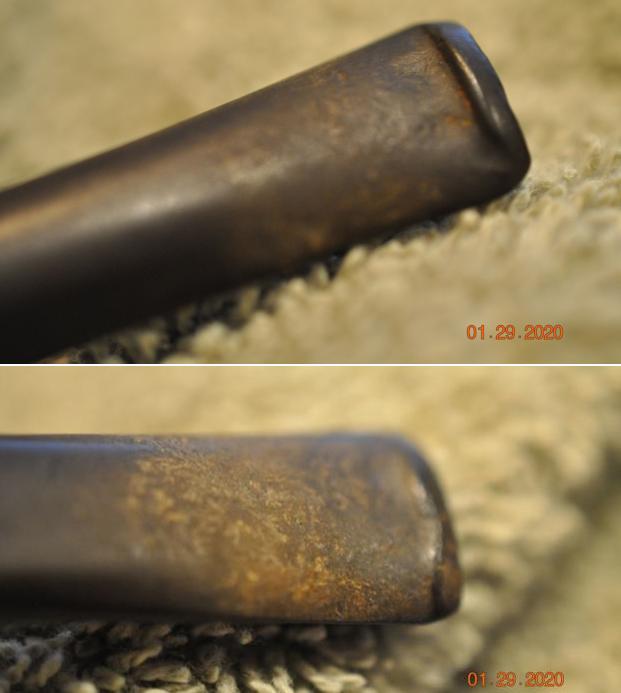
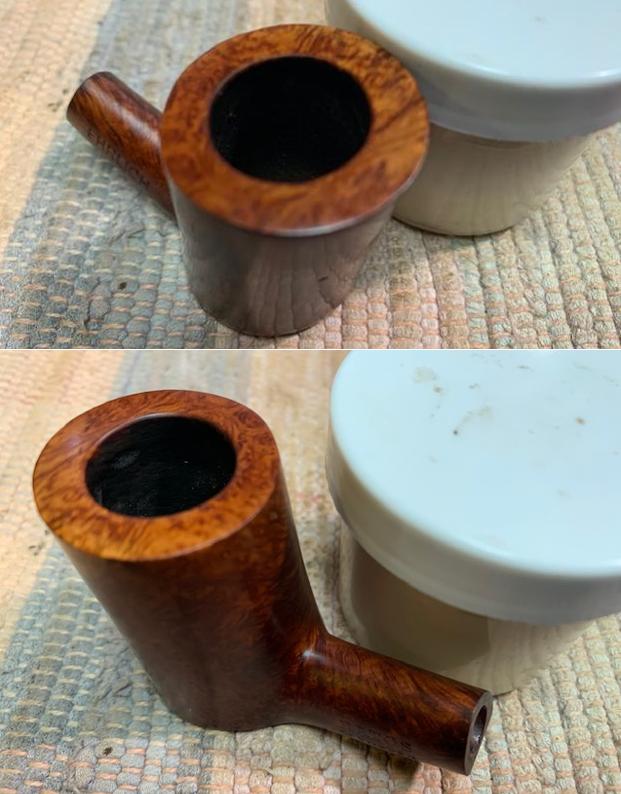
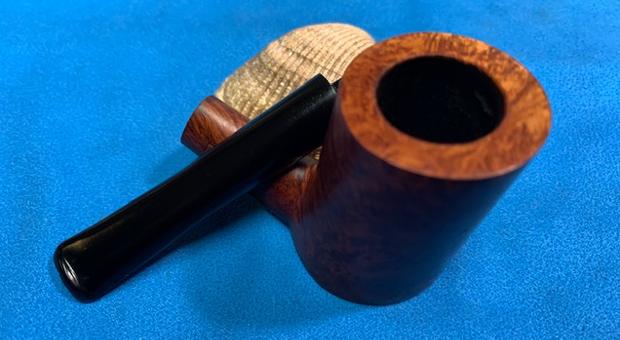
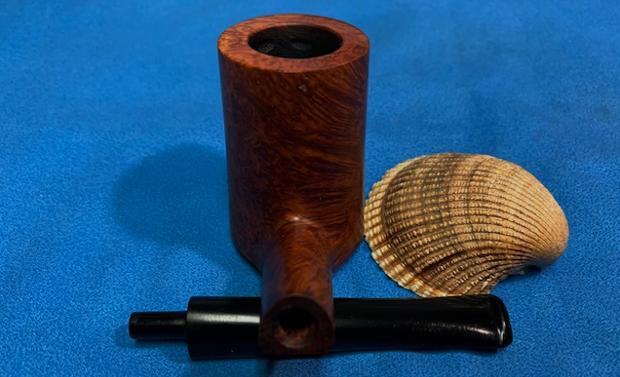
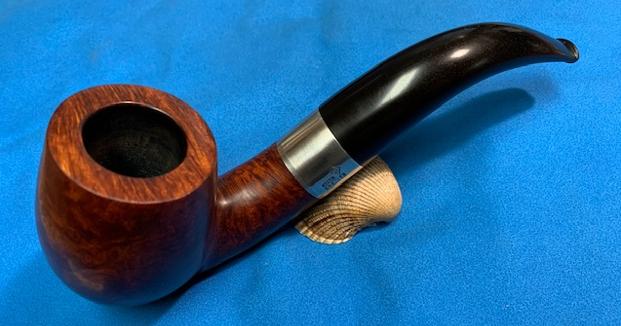
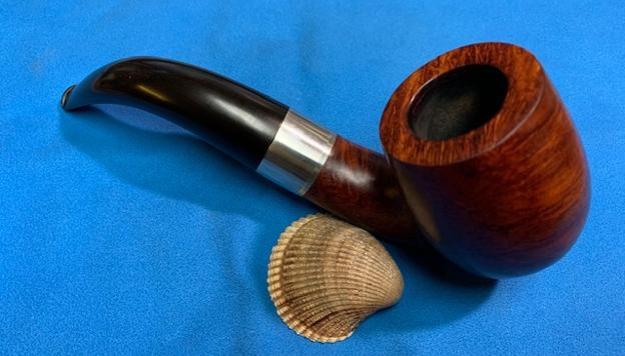
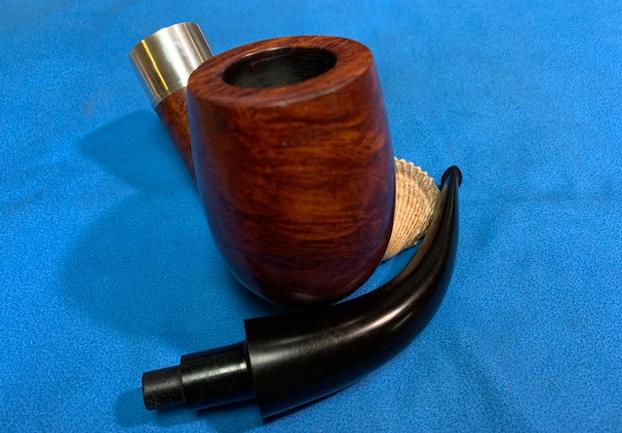
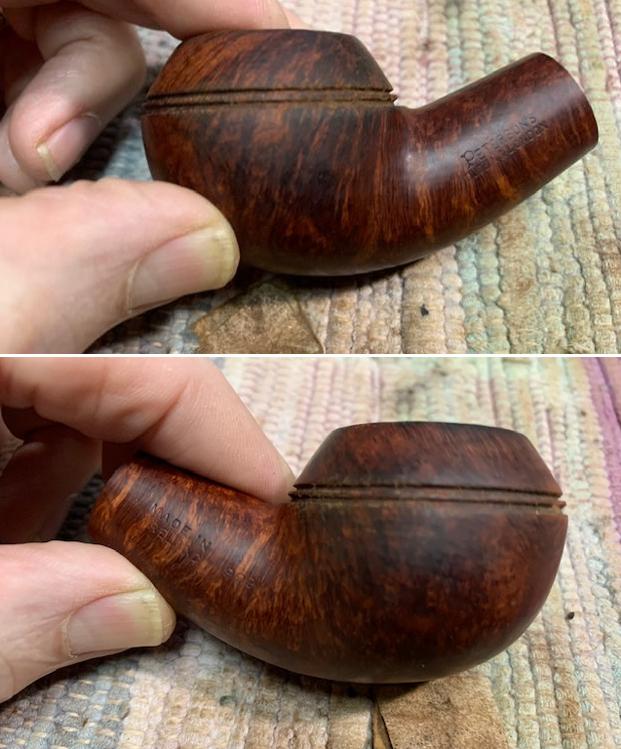
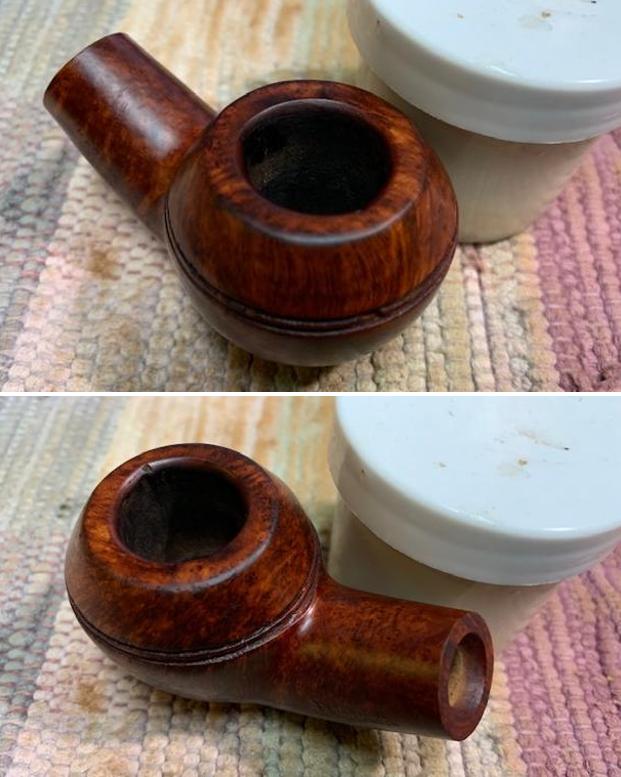
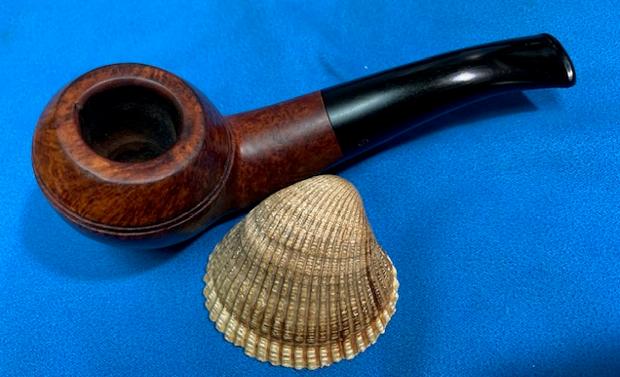
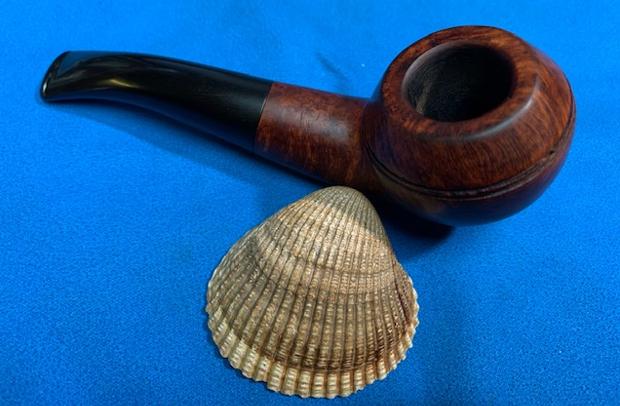
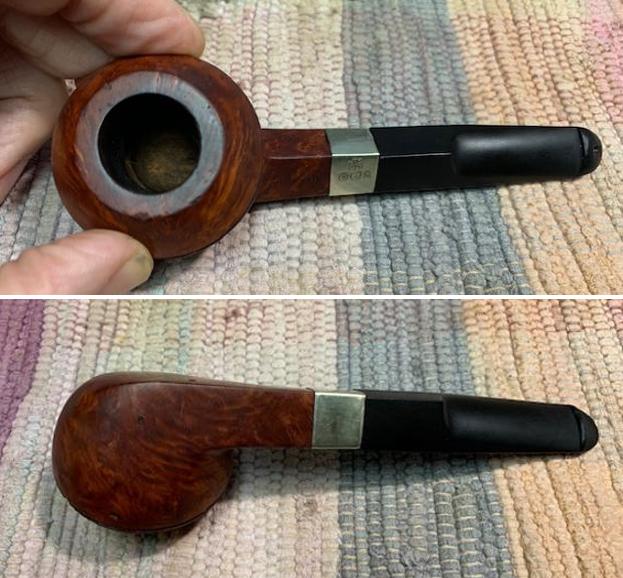
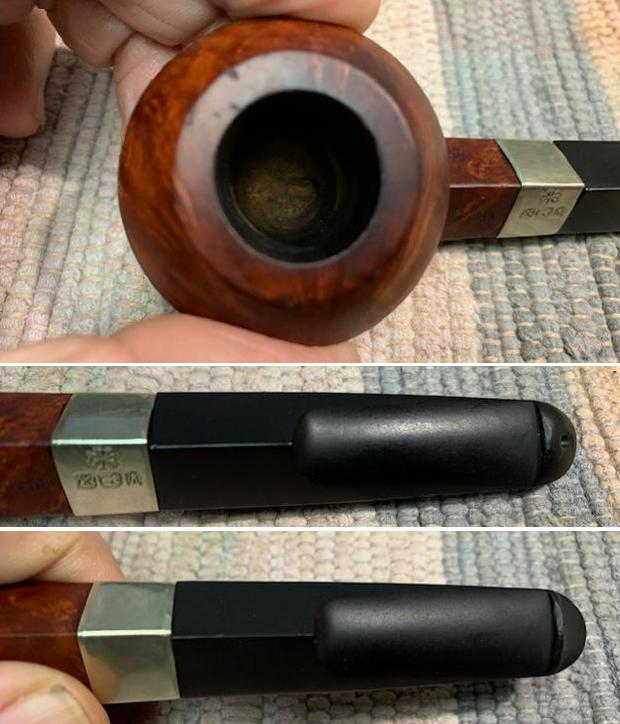
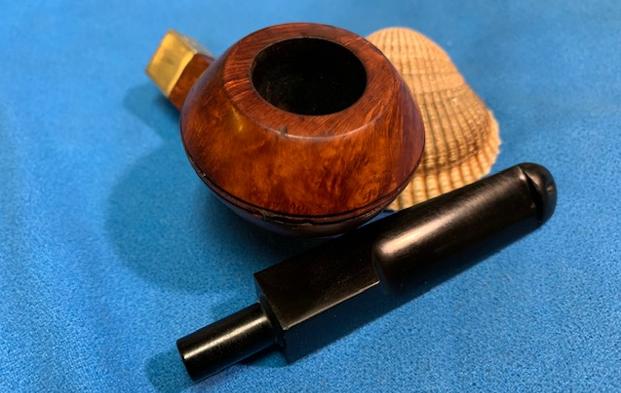
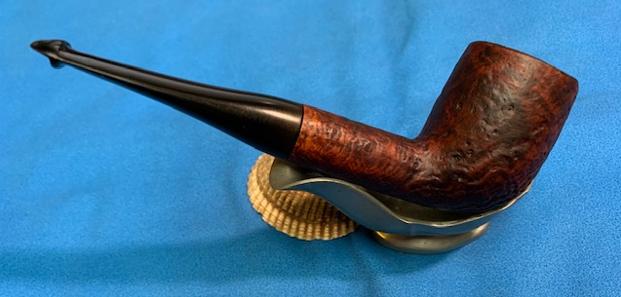
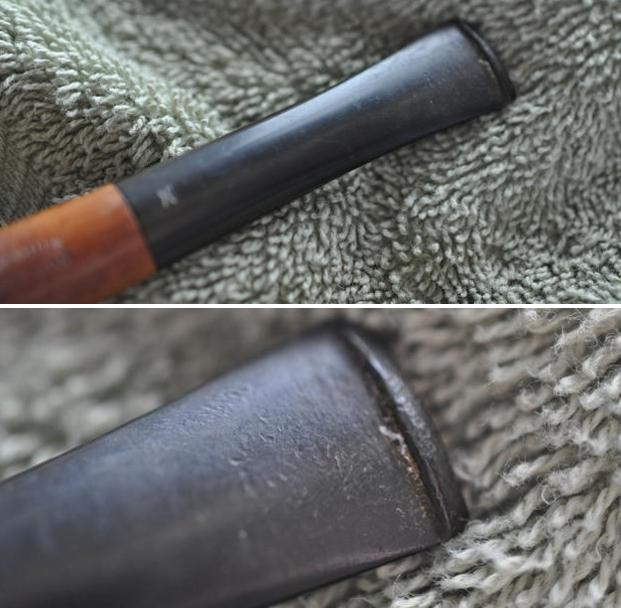
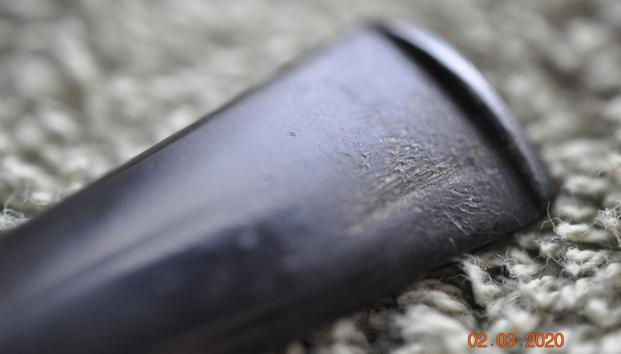
 I took some close up photos of the rim top and the stem surface. The inner edge of the rim was darkened and lightly damaged. I took close up photos of the stem to show the condition of the surface and button.
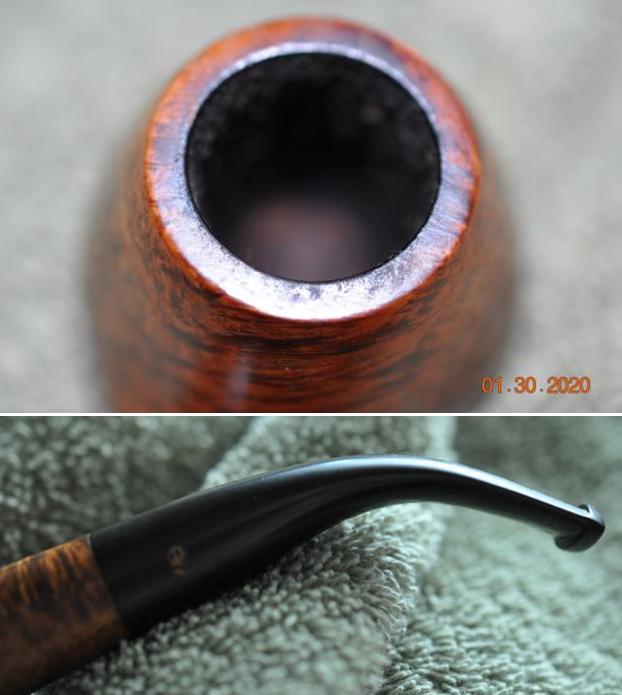
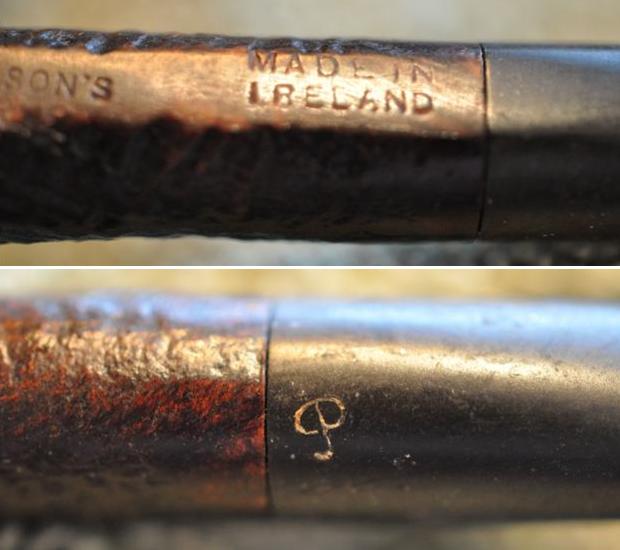
 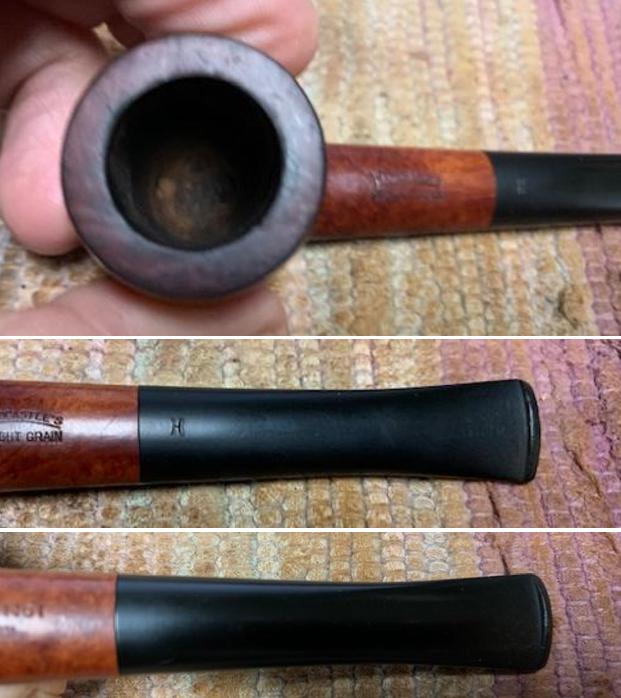 I took a picture of the stamping on the shank. The reflection on the silver did not capture the clarity of the stamping on the band but it was all clear and readable as noted above.
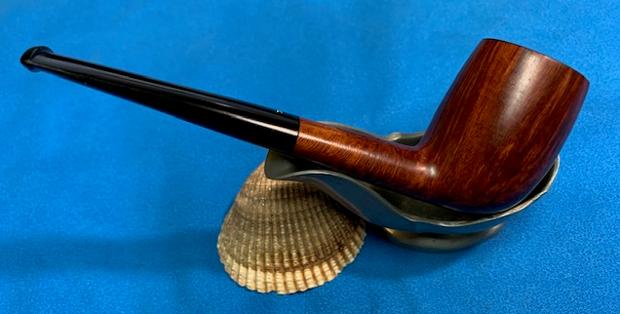
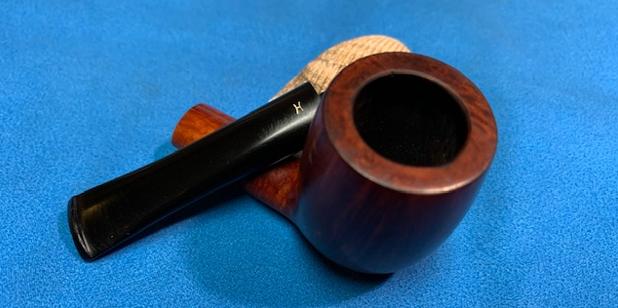
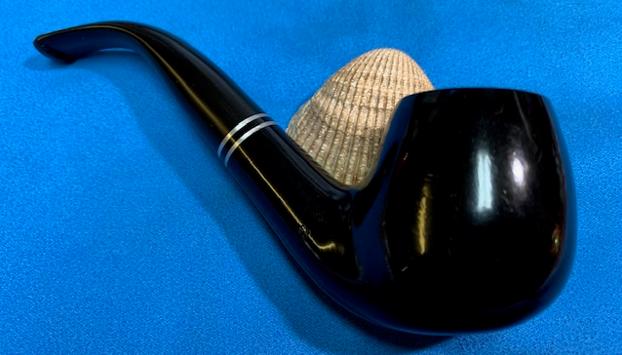
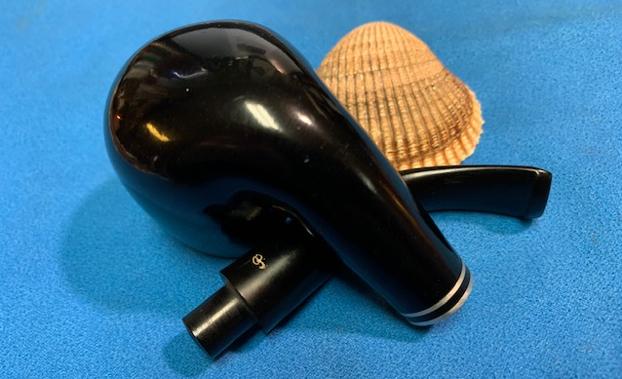
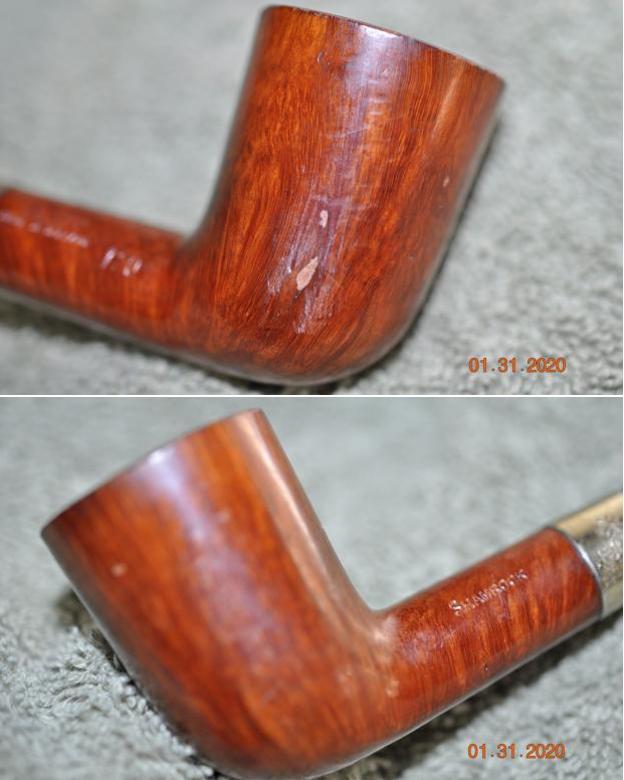
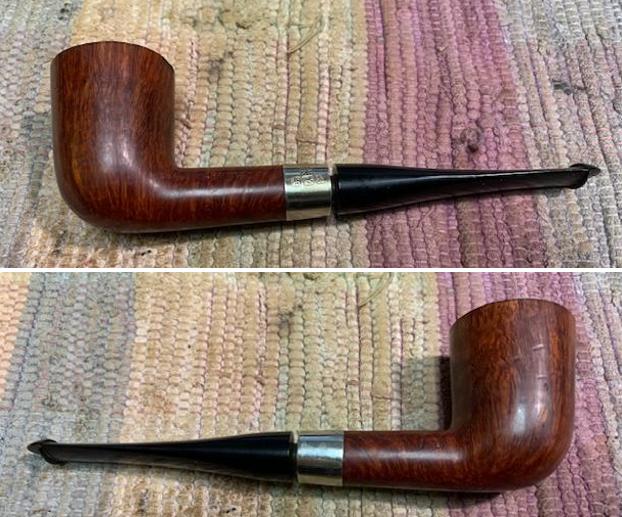
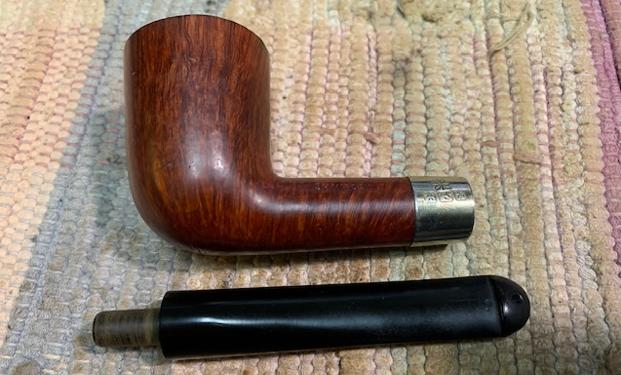
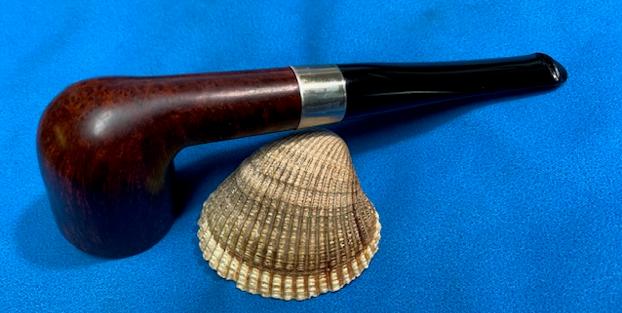
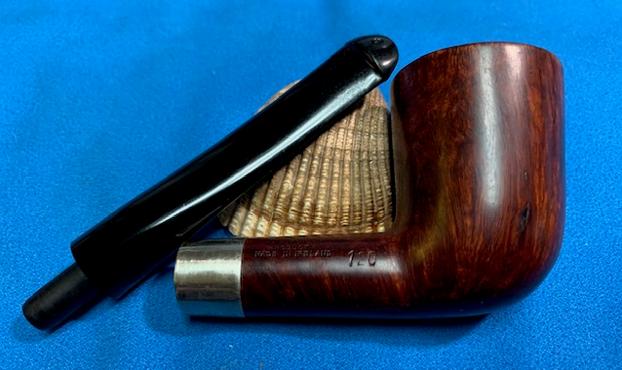
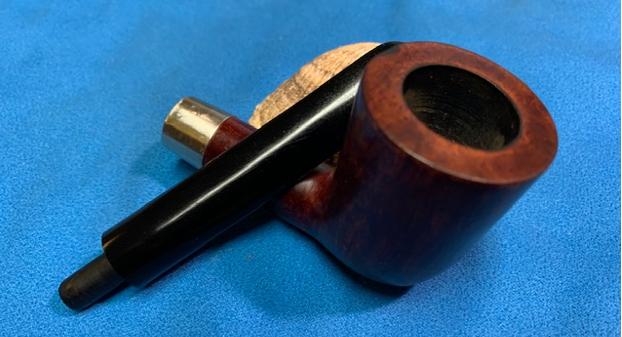
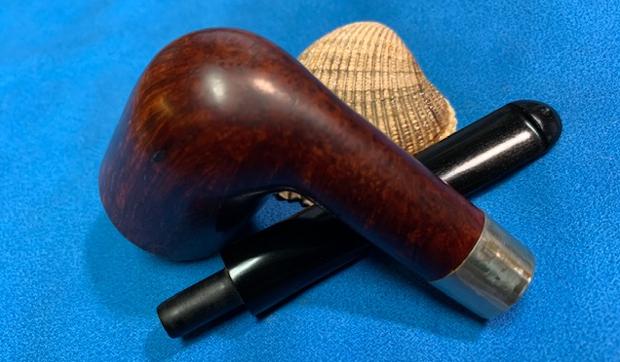
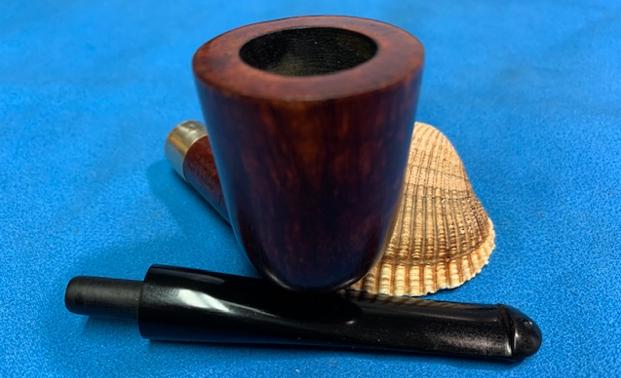
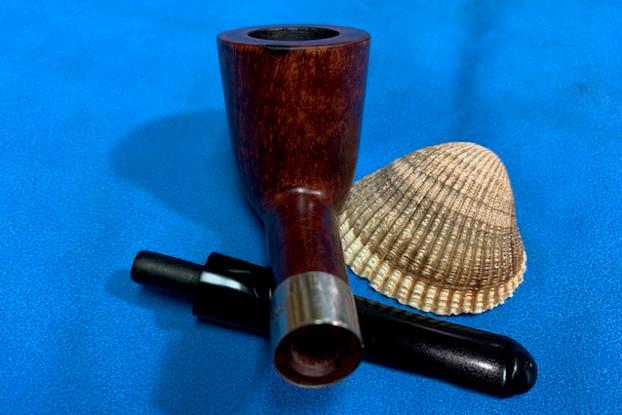
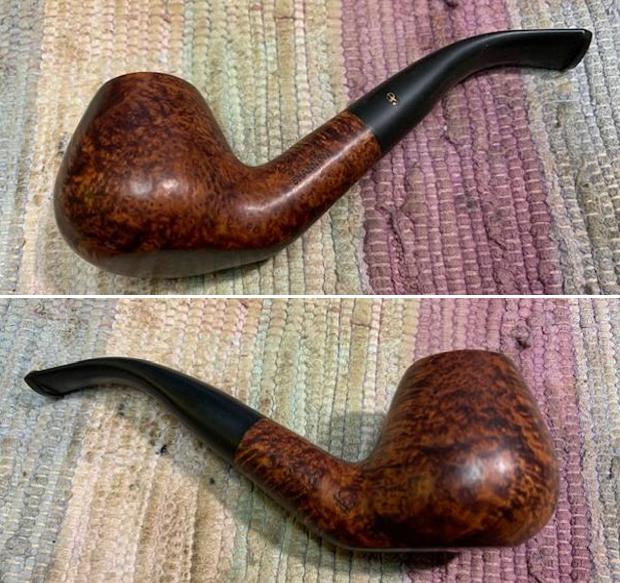
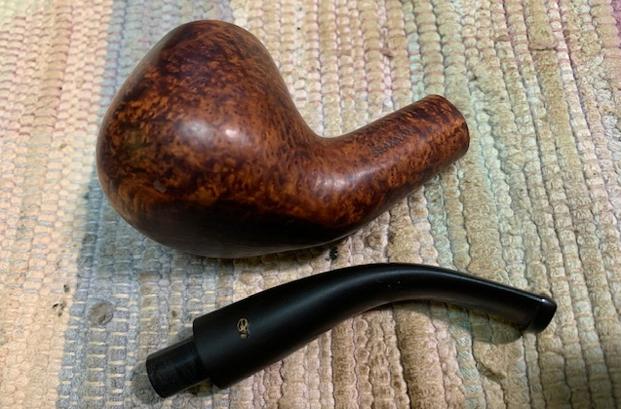
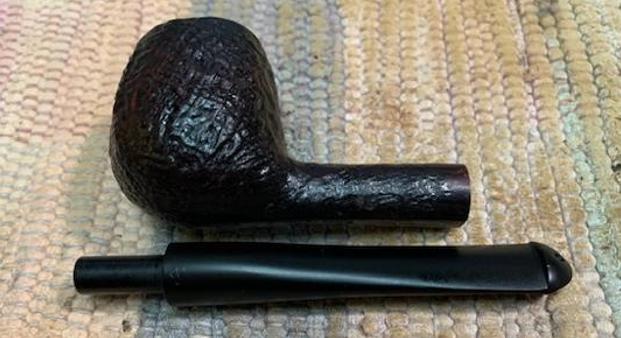
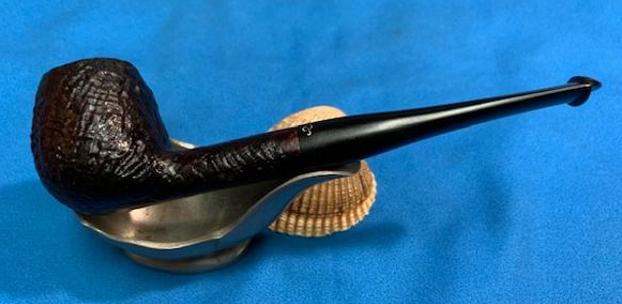
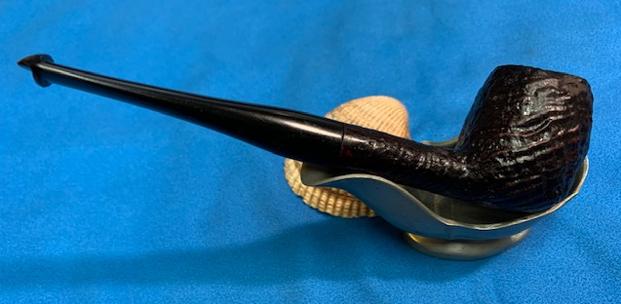
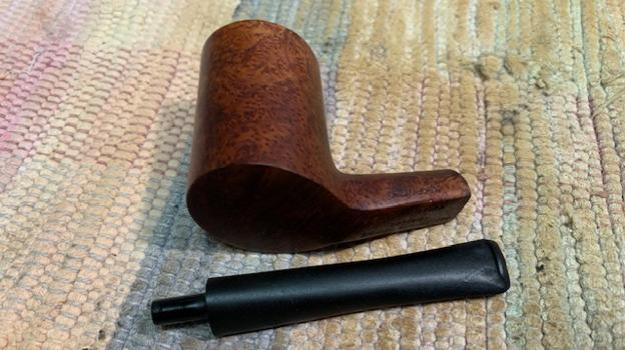
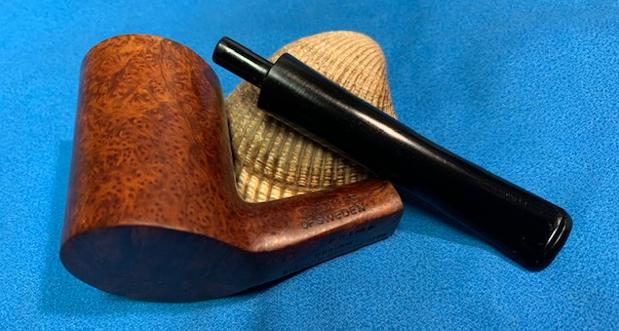
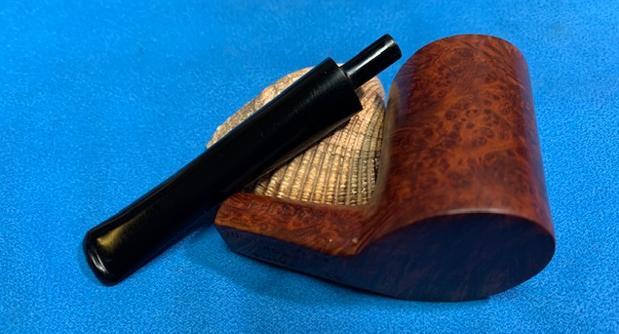
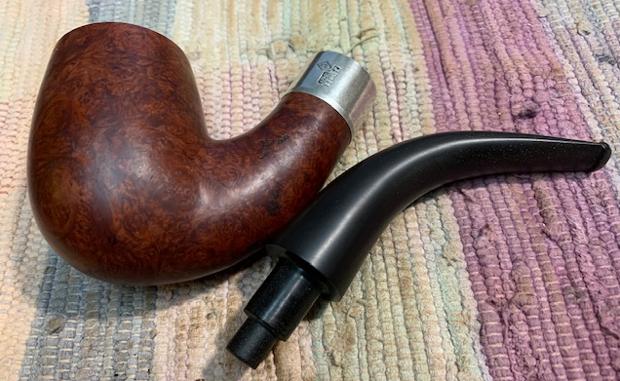
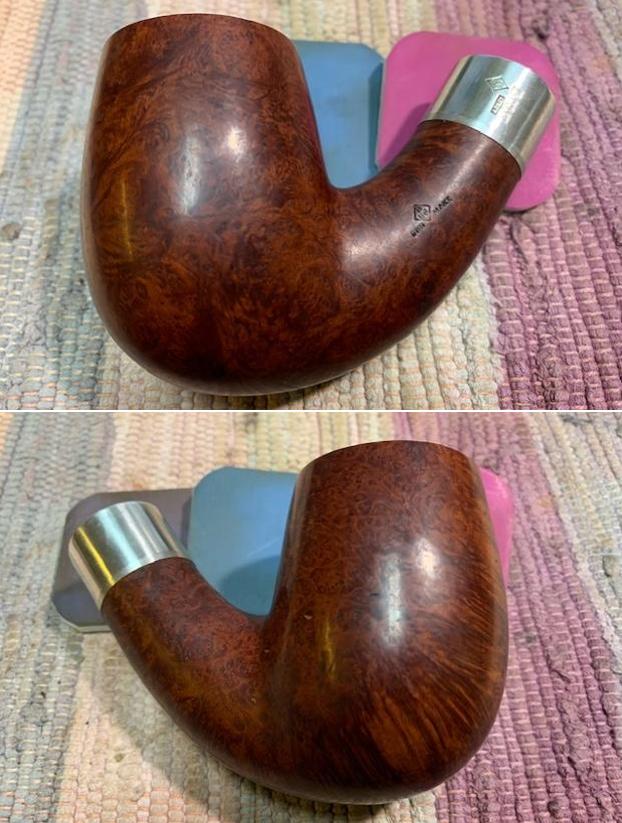
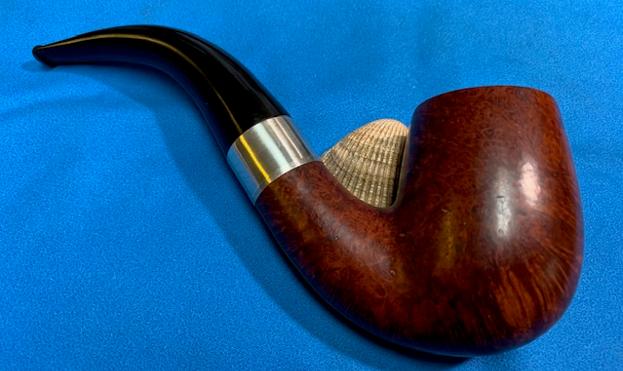
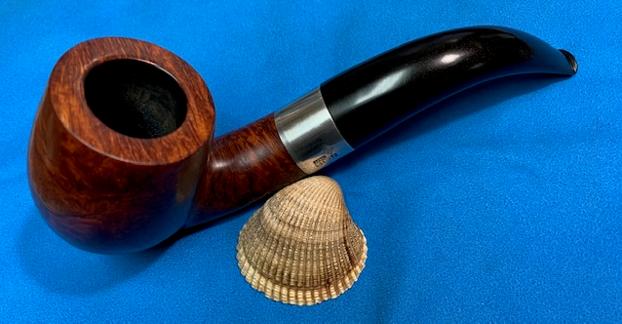
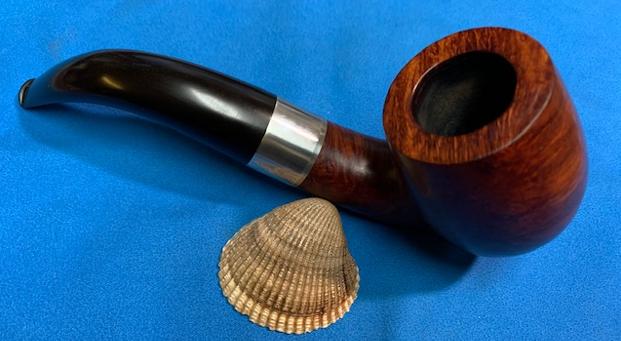
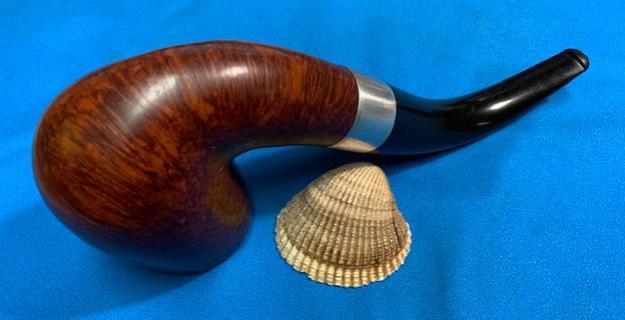
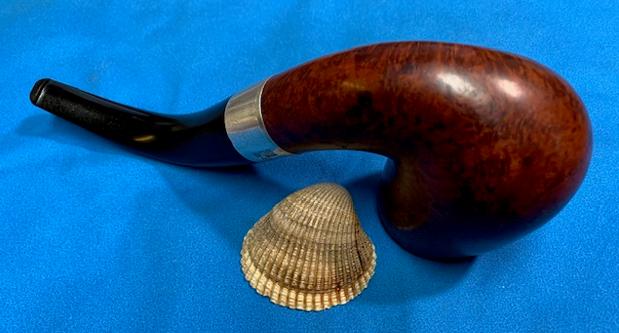
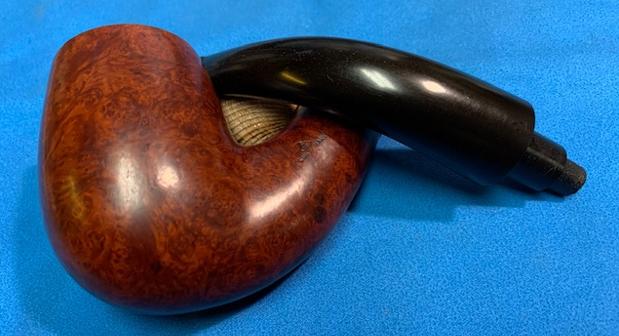
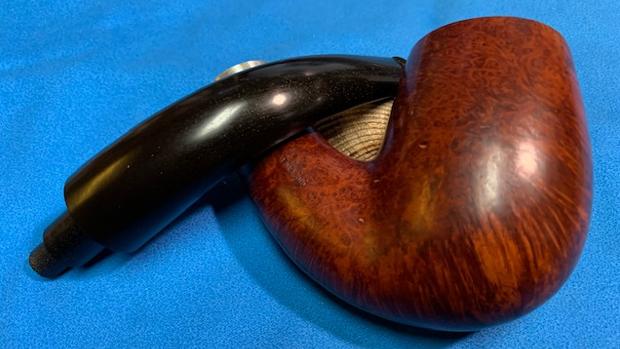
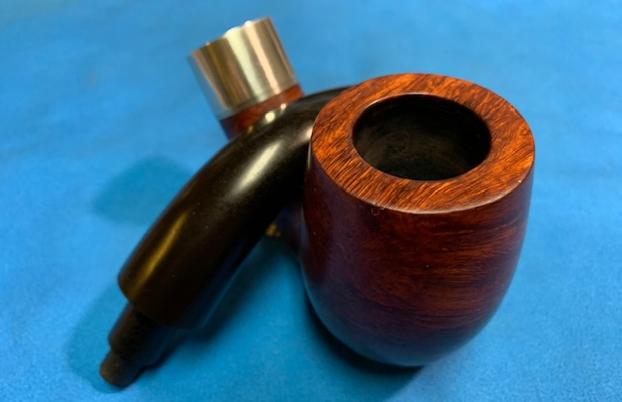
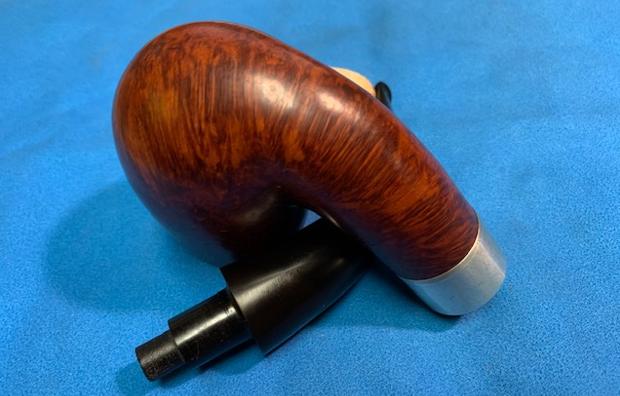
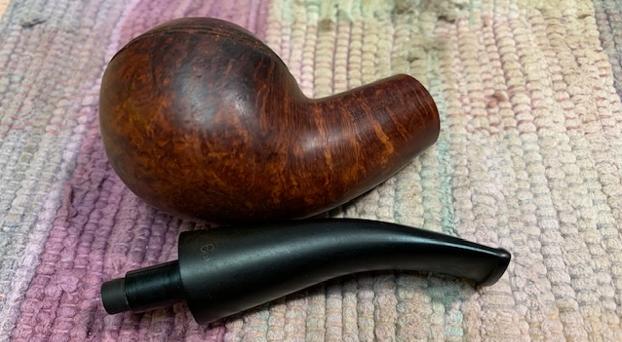
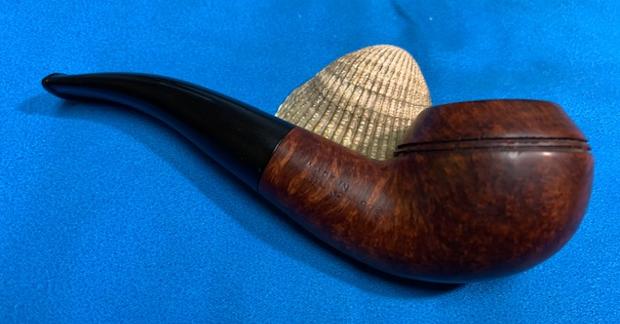
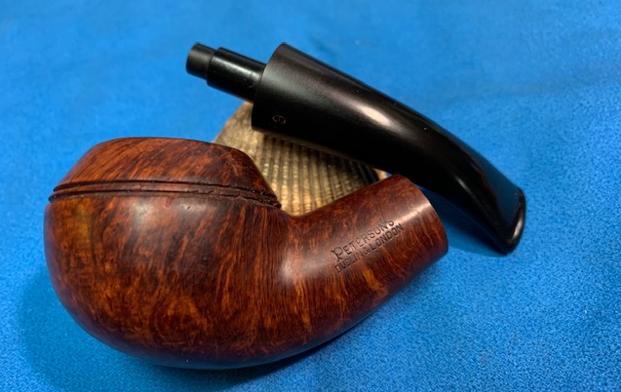
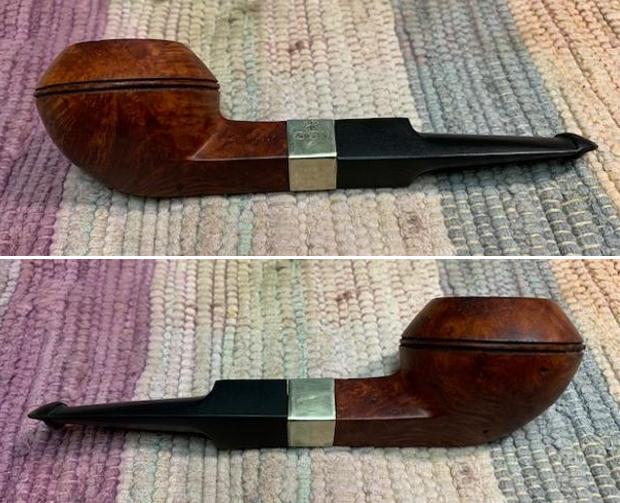
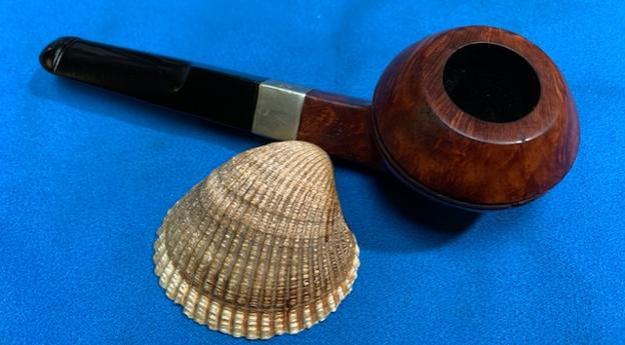
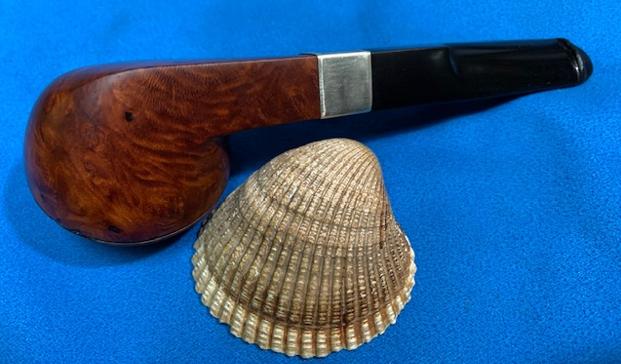
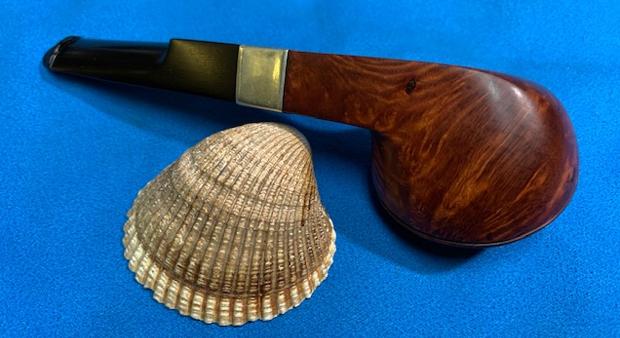
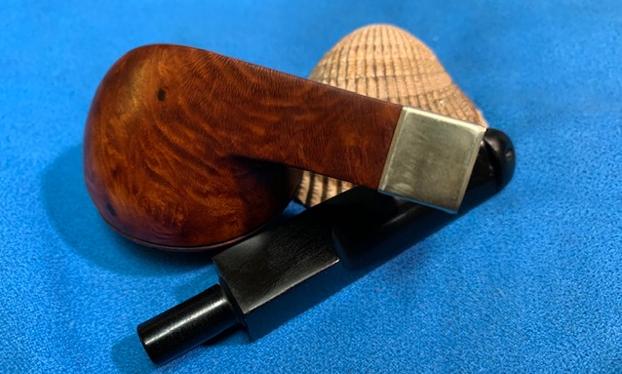
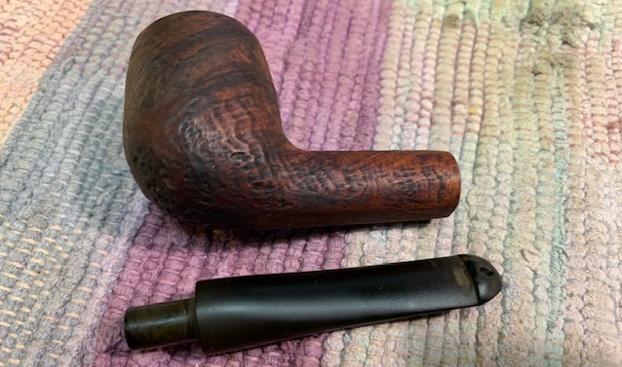
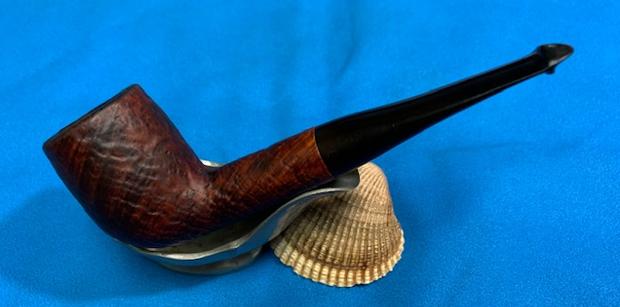
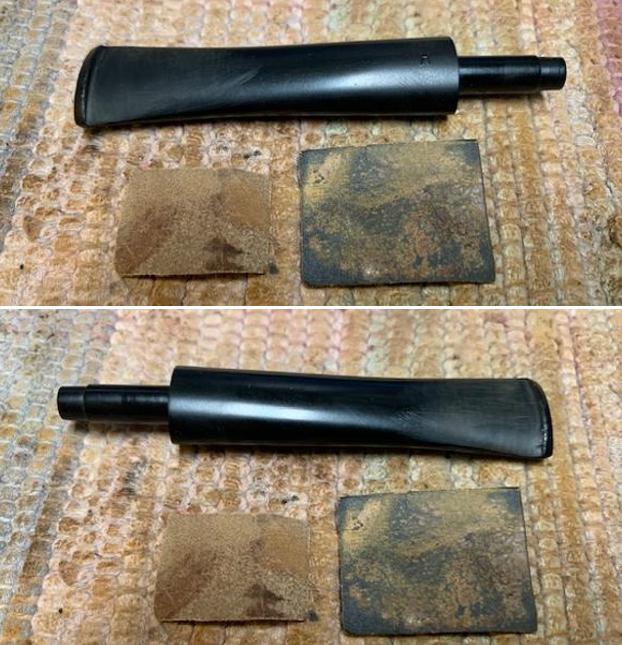
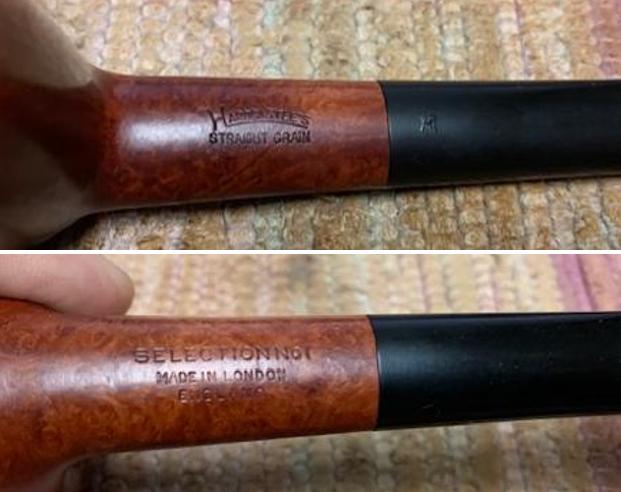 I took the pipe apart and took a photo of the pipe with the stem. It is a good looking pipe and very unique.
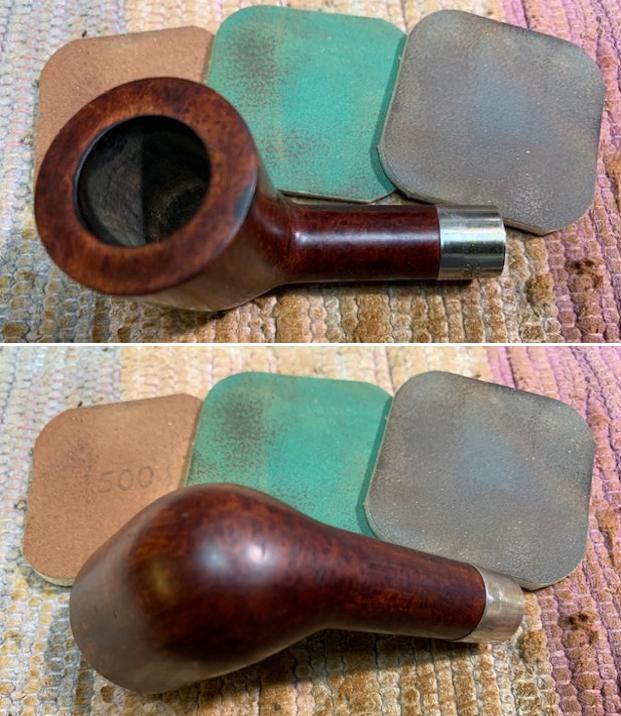
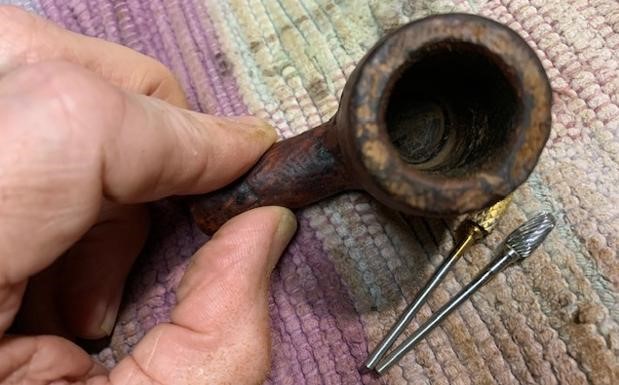
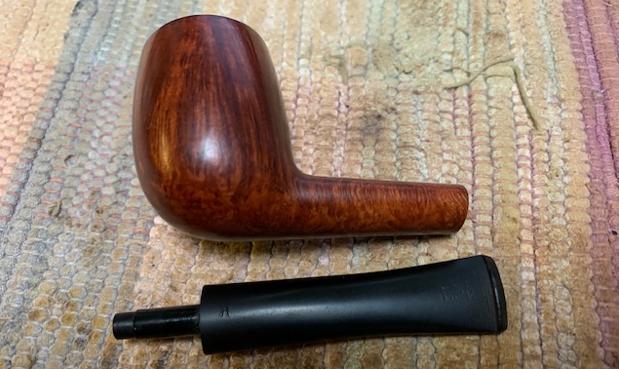 I started my work on the pipe by addressing the darkening on the edges and rim top. I used a folded piece of 220 grit sandpaper to work over the inner edge to smooth out the damage and to remove the darkening.
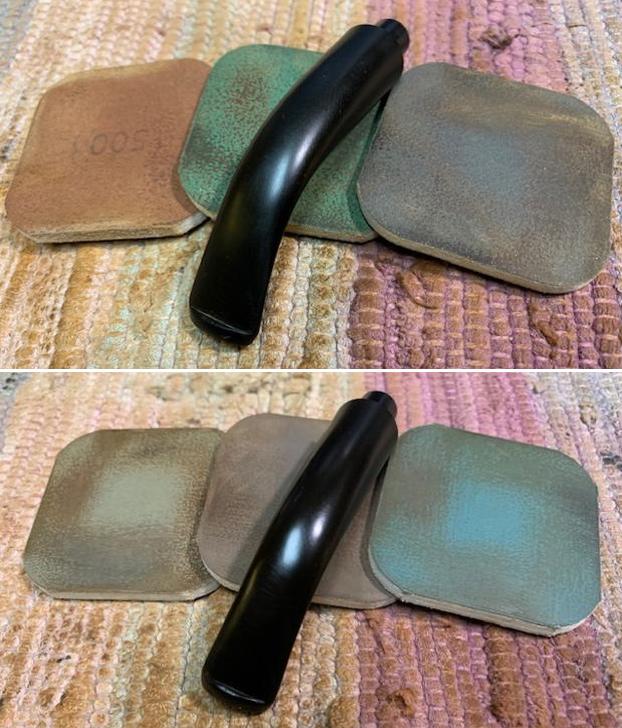
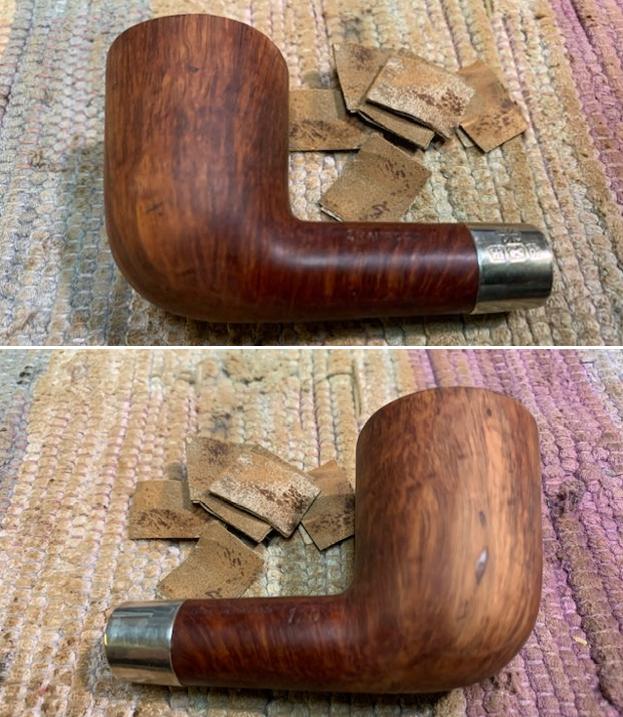
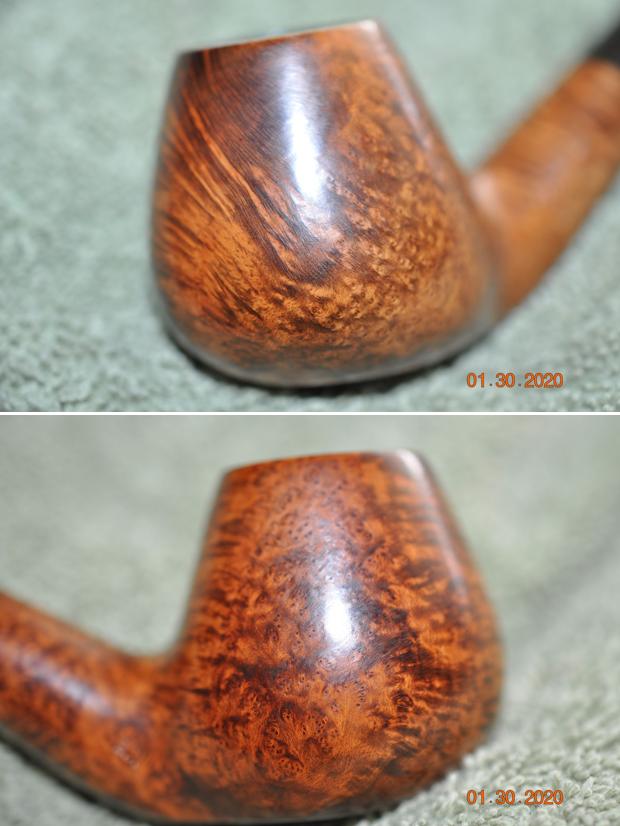
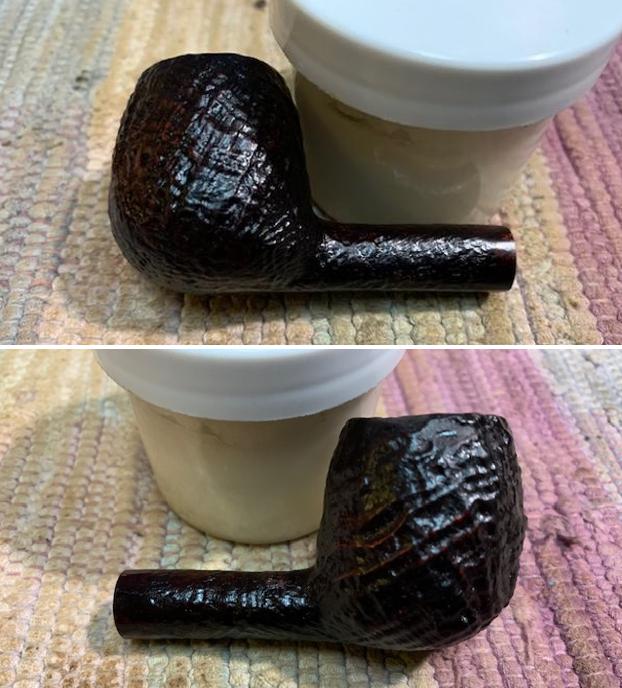
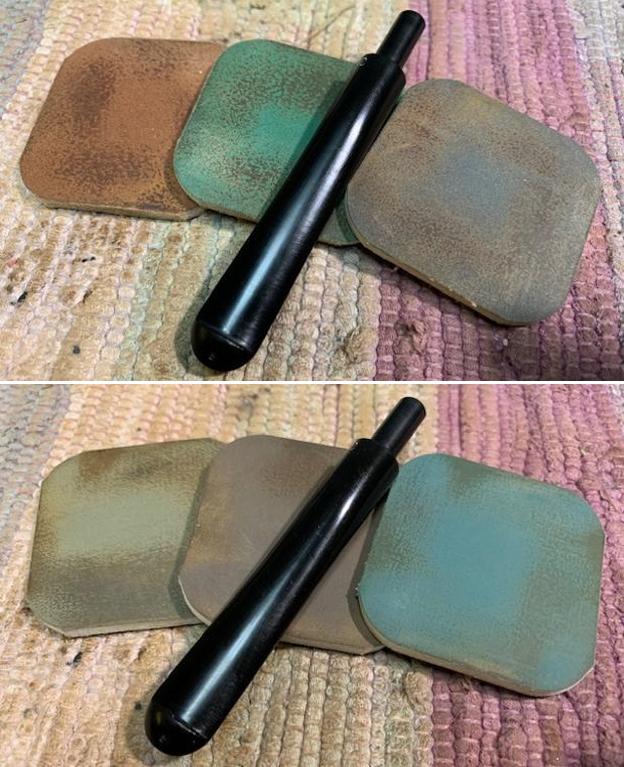
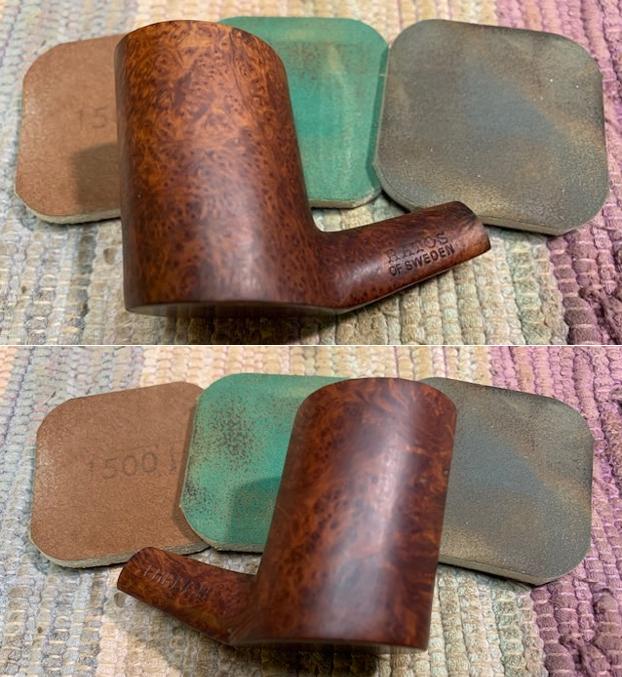
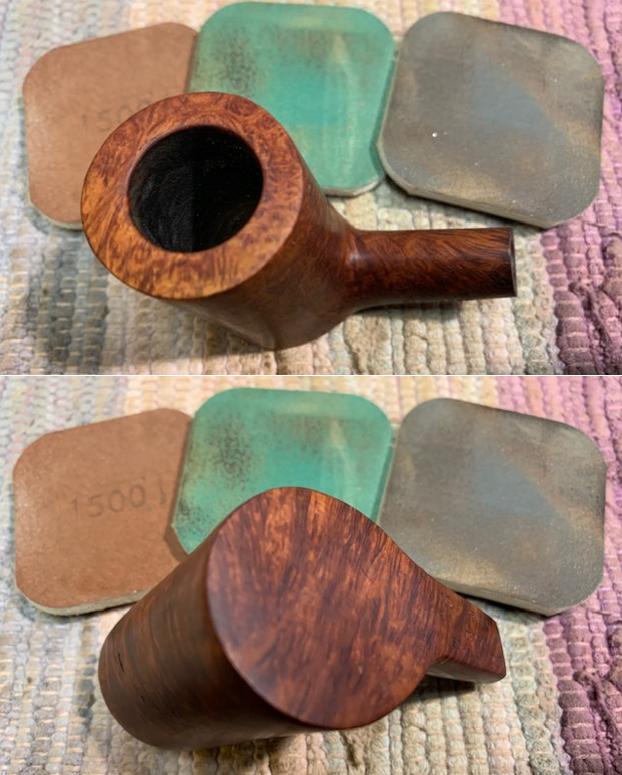
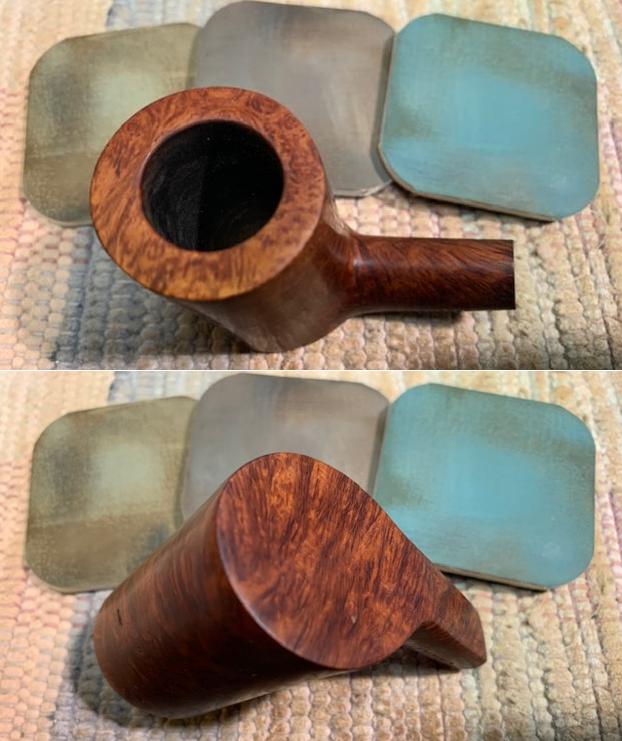
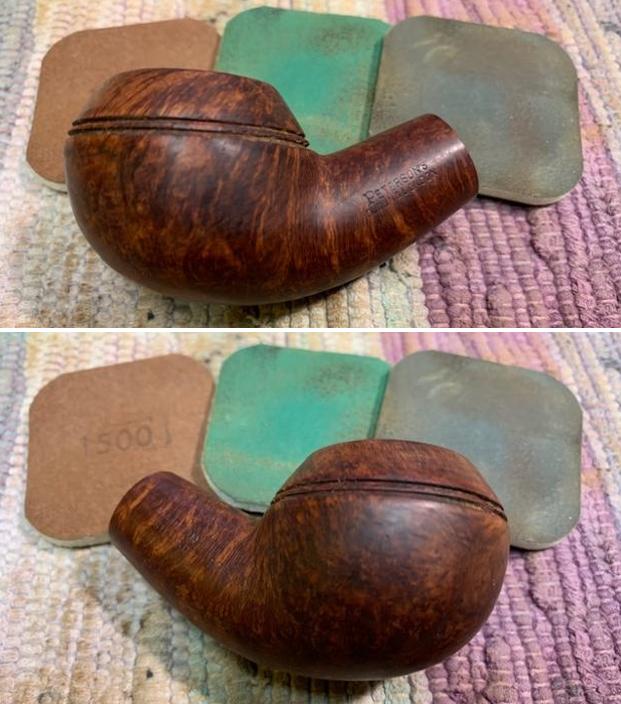
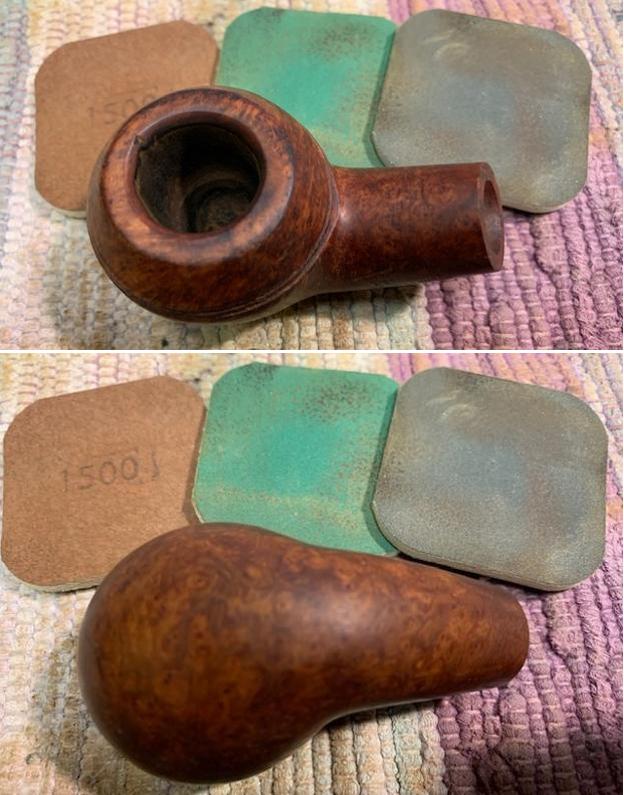
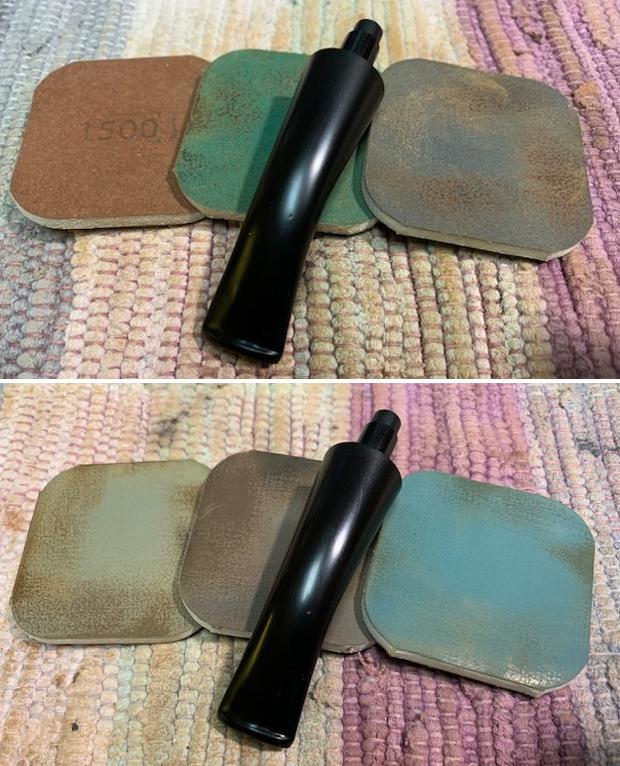
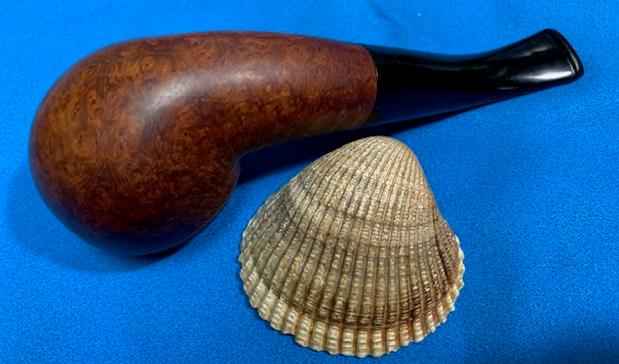
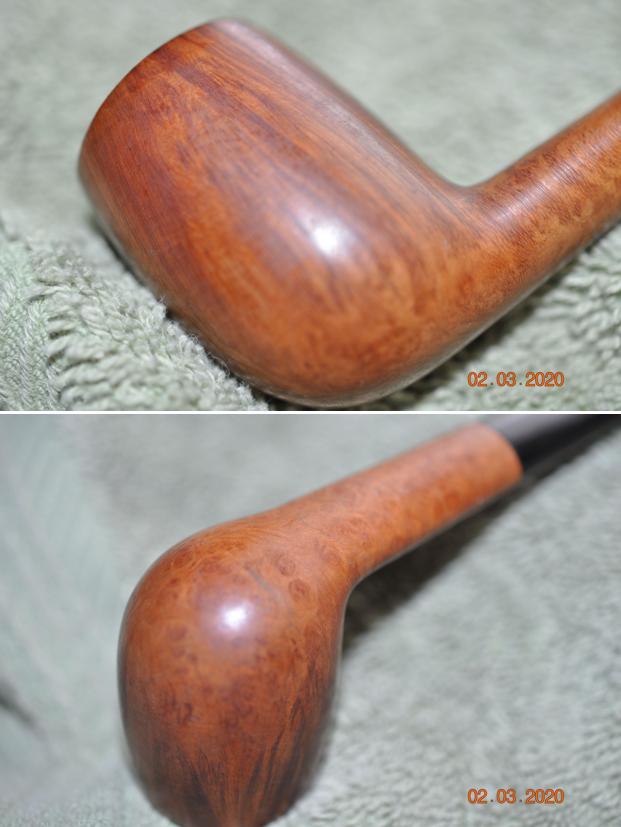
 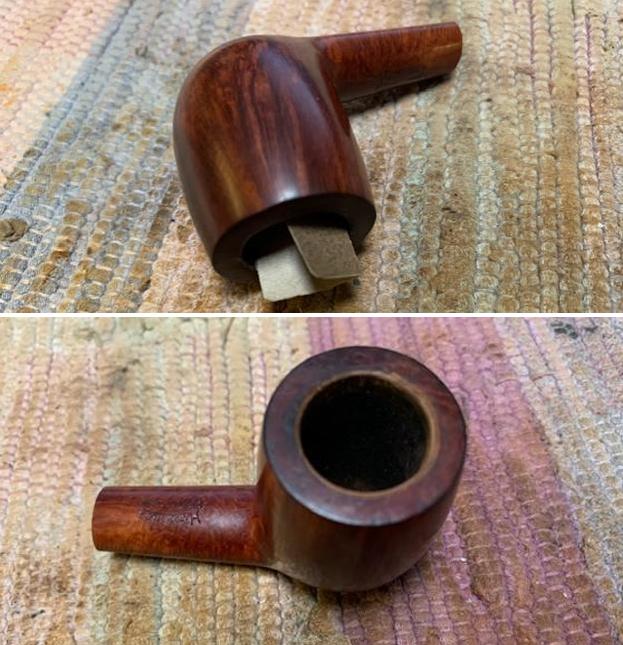 I polished the briar with micromesh sanding pads – dry sanding it with 1500-12000 grit pads. After each pad I wiped the briar down with a damp cloth. I was able to give a shine to the bowl and remove some of the surface scratches in the process.

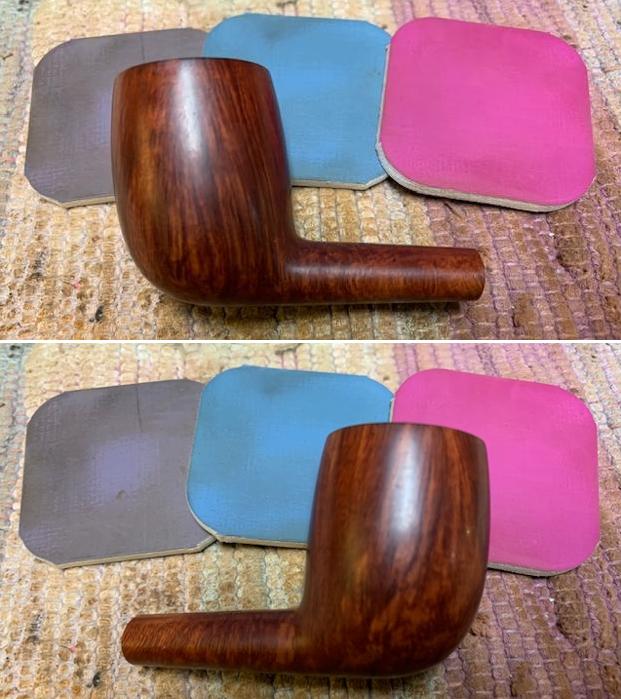
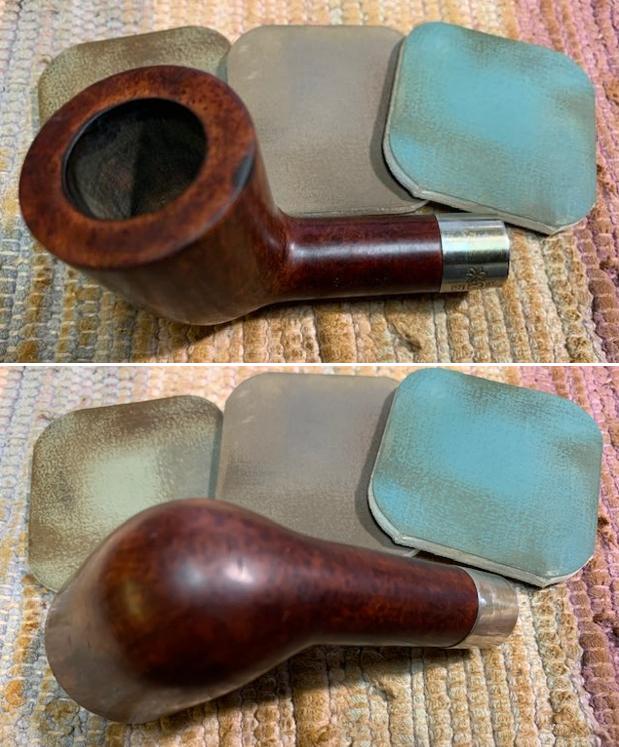
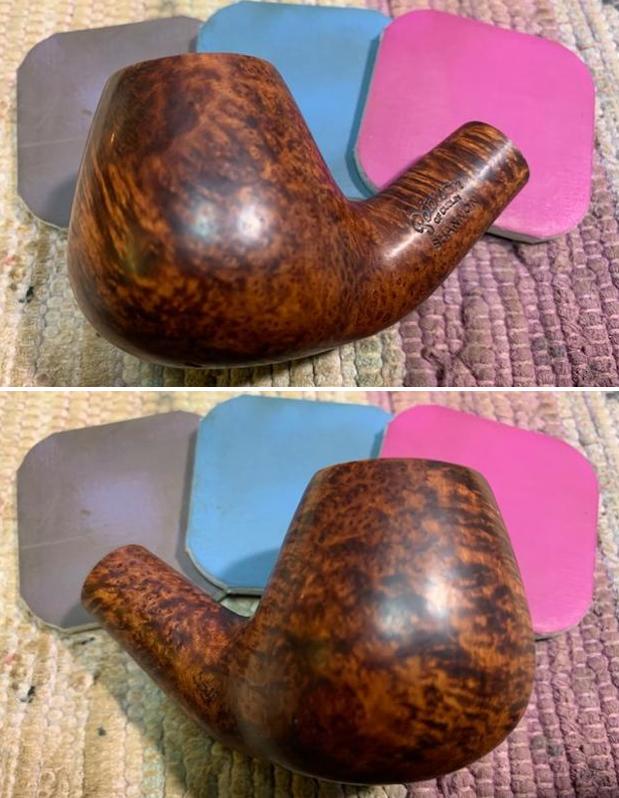
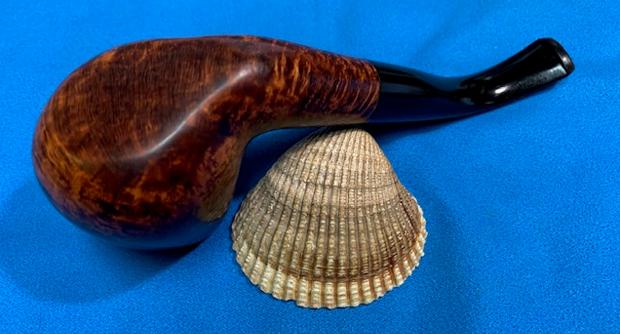
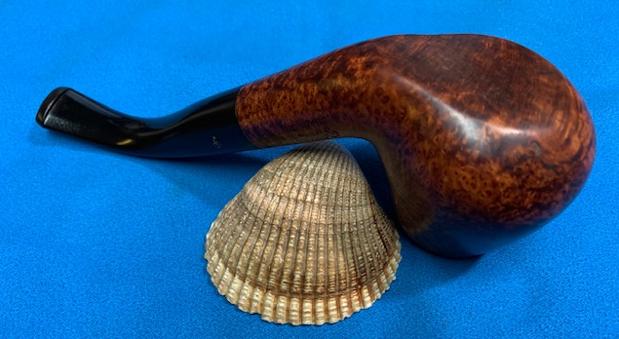
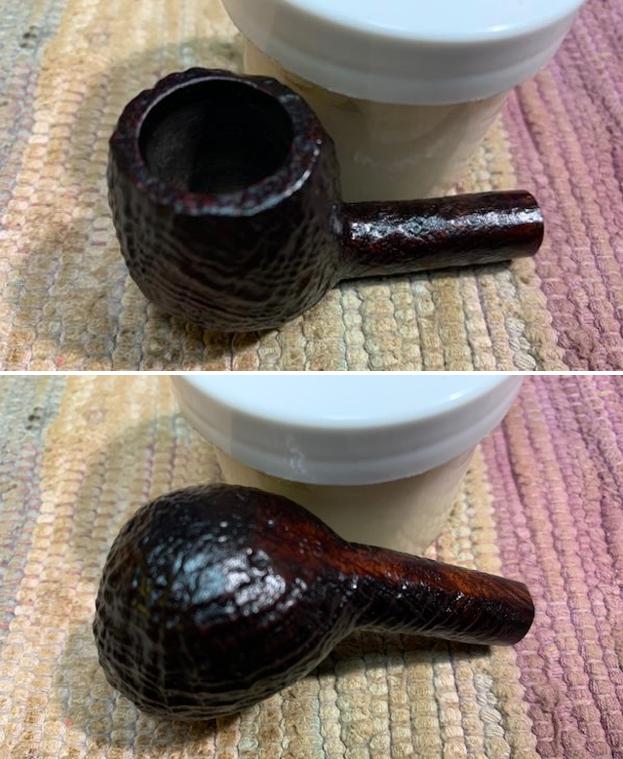
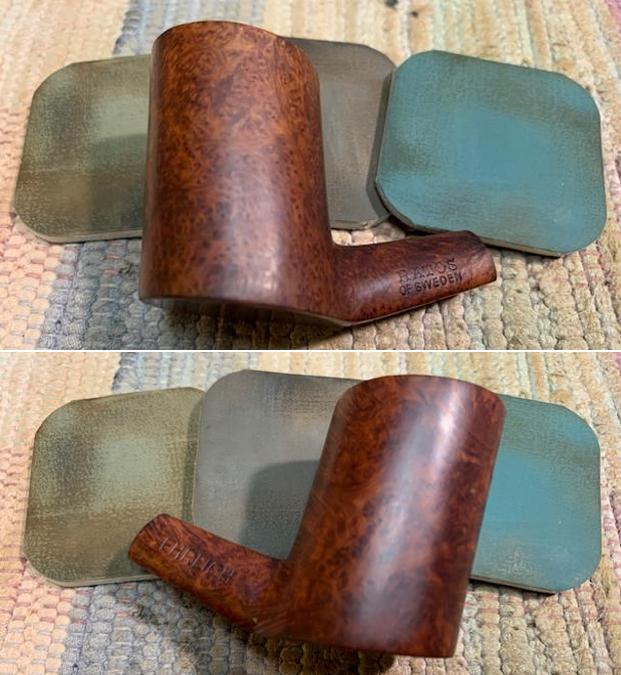
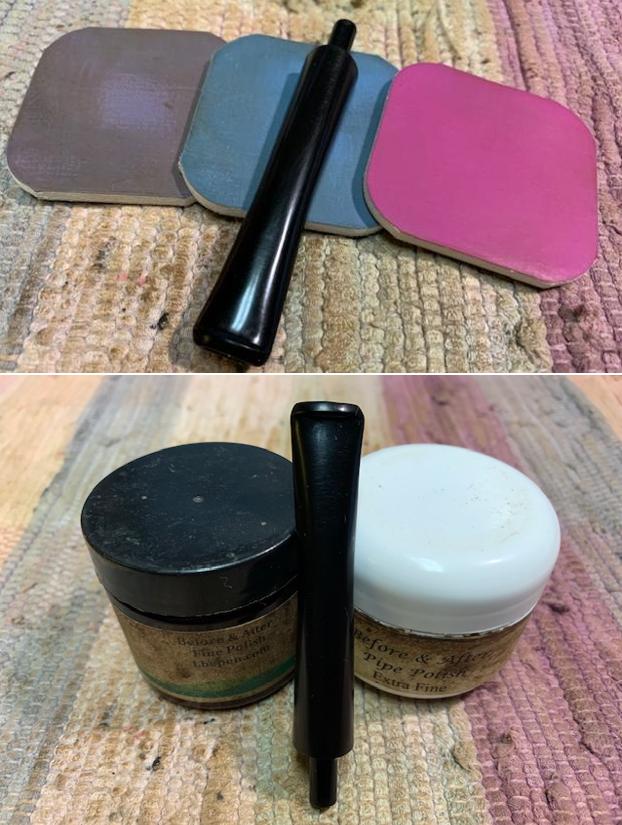
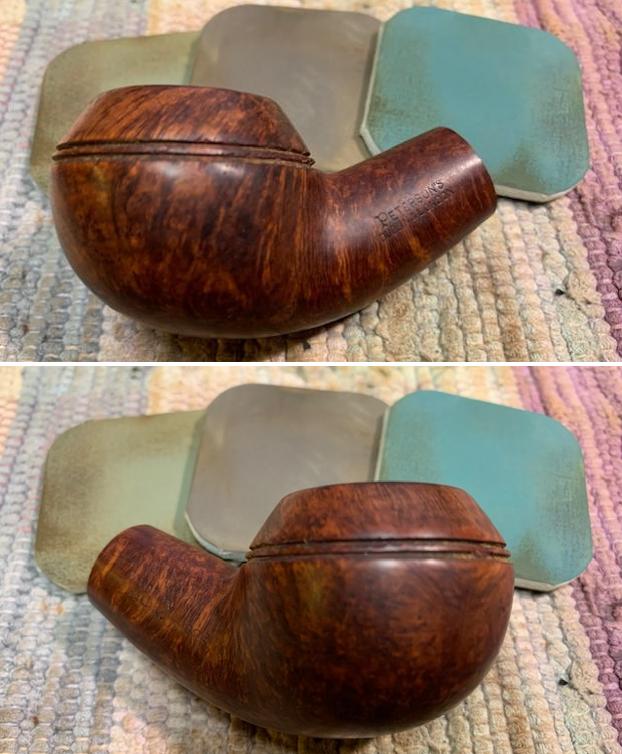
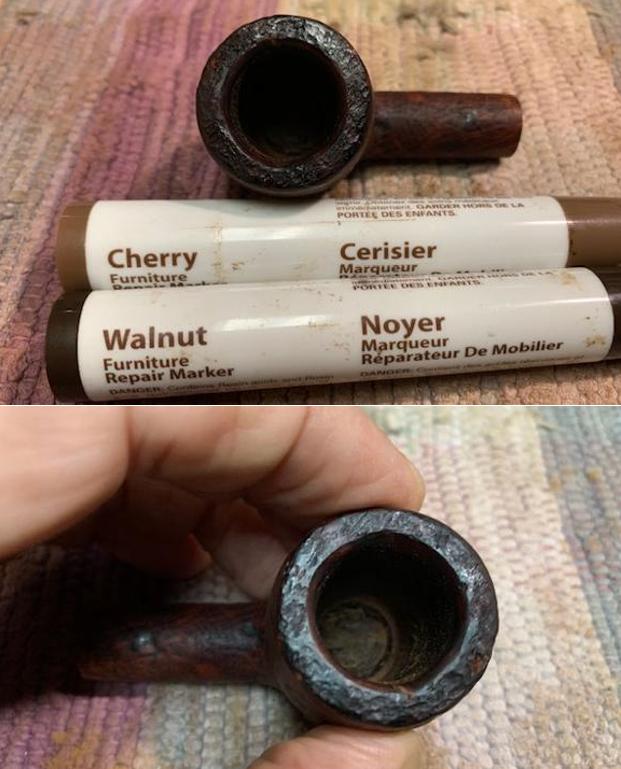
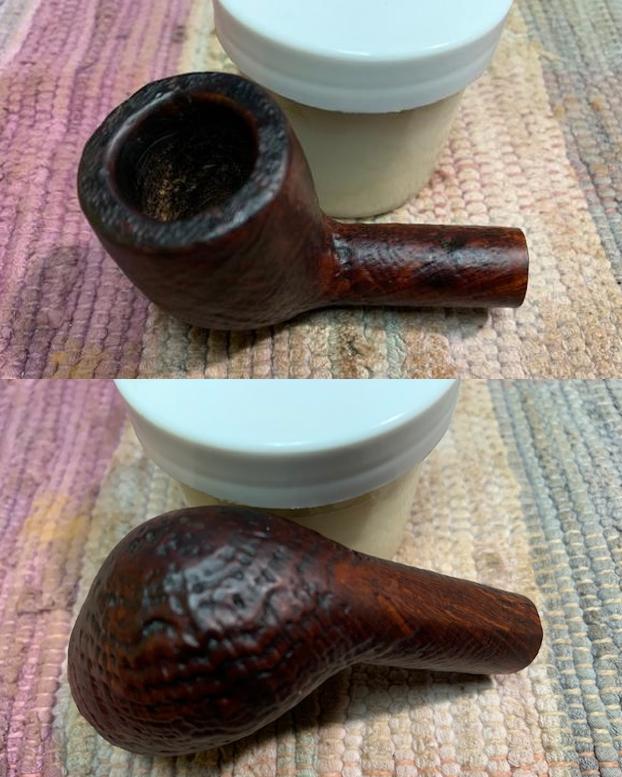
 I worked some Before & After Restoration Balm into the surface of the bowl and shank with my fingertips to clean, enliven and protect the briar. I let the balm sit for 15 minutes and then buffed with a cotton cloth to raise the shine. The photos show the bowl at this point in the restoration process.
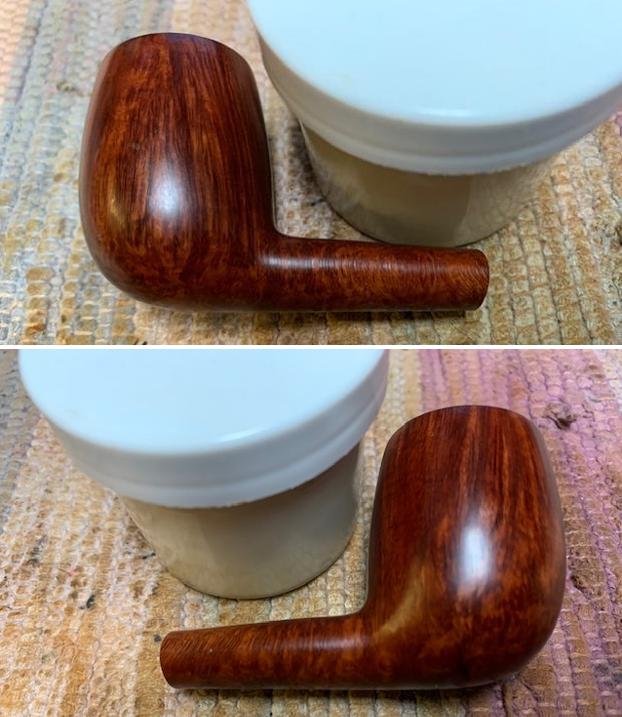

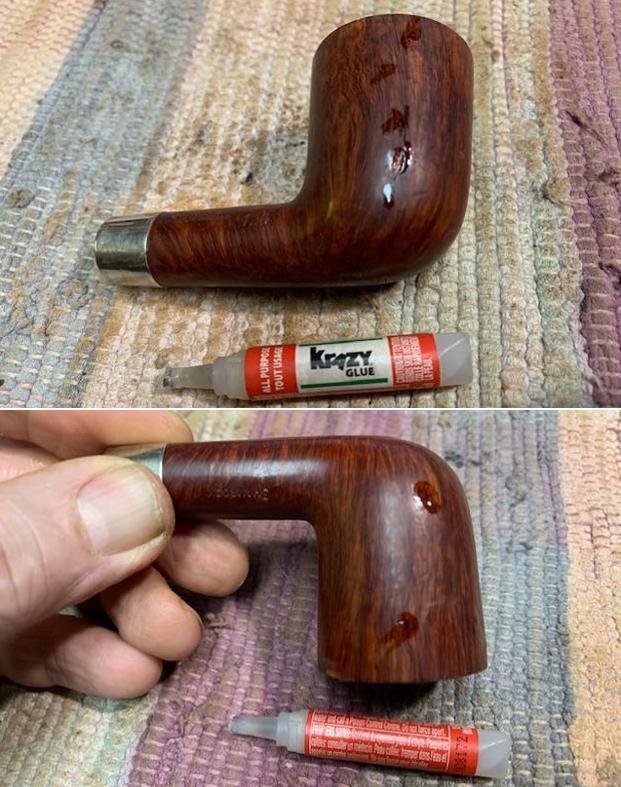
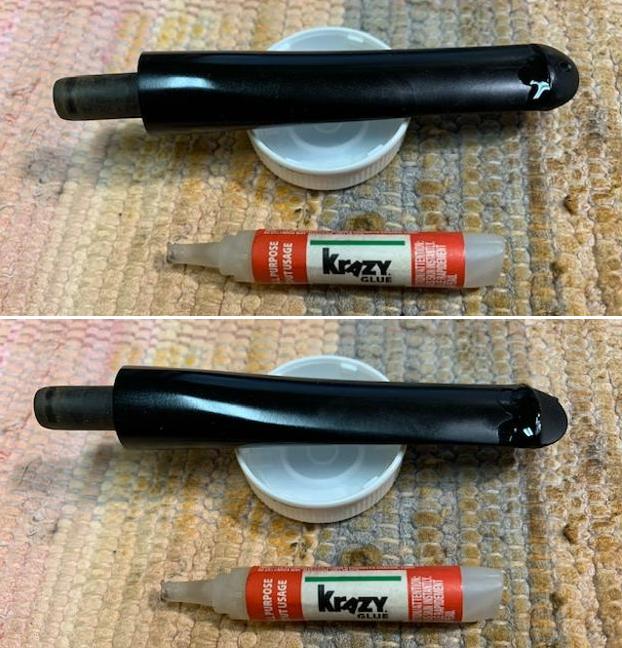
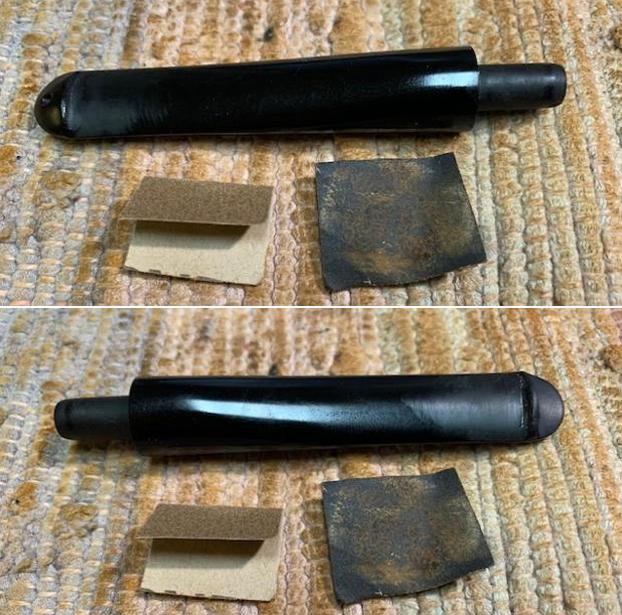
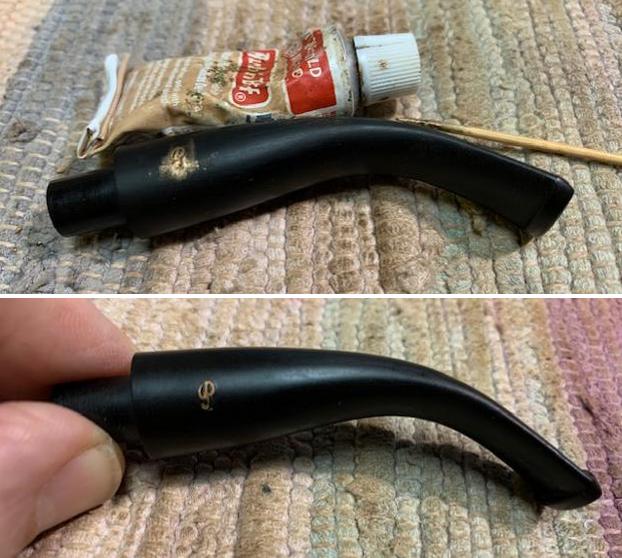
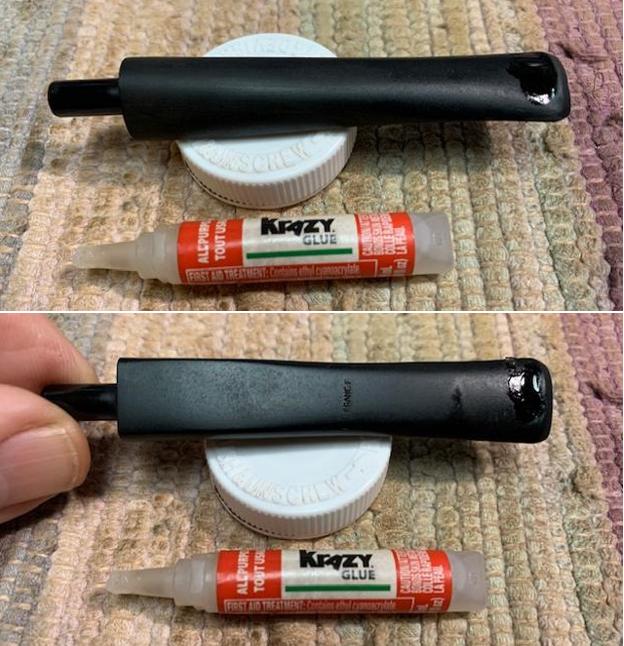
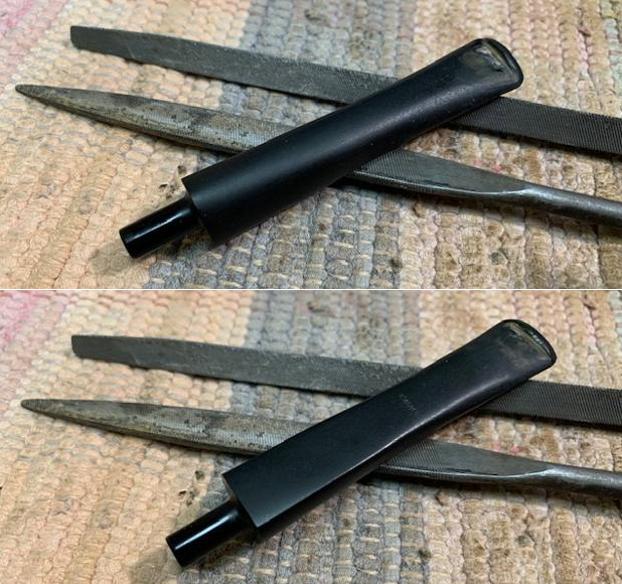
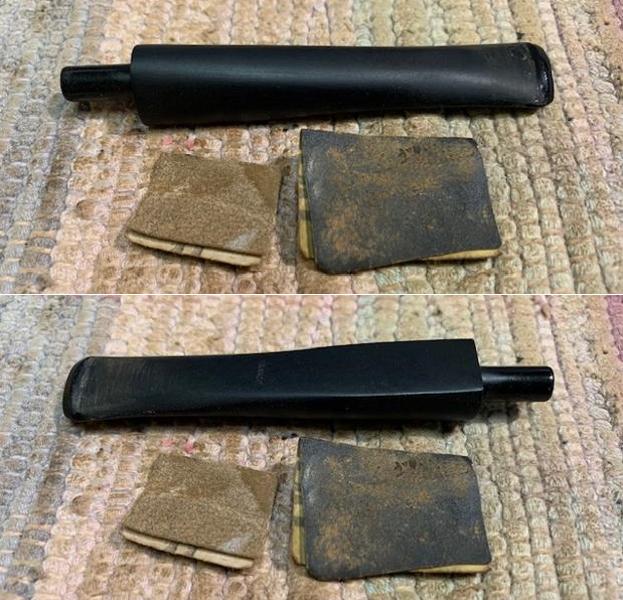
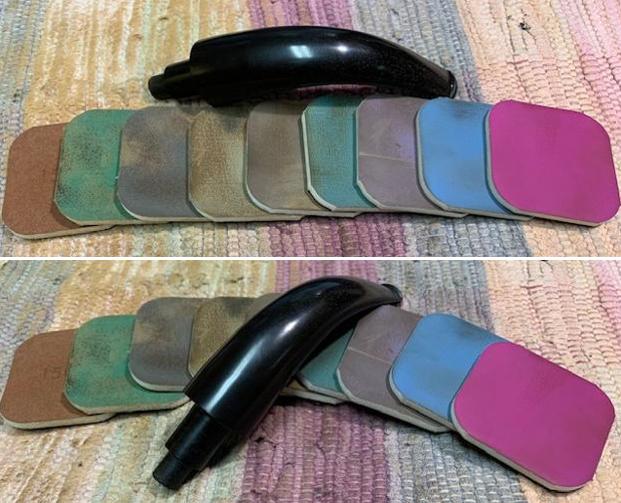
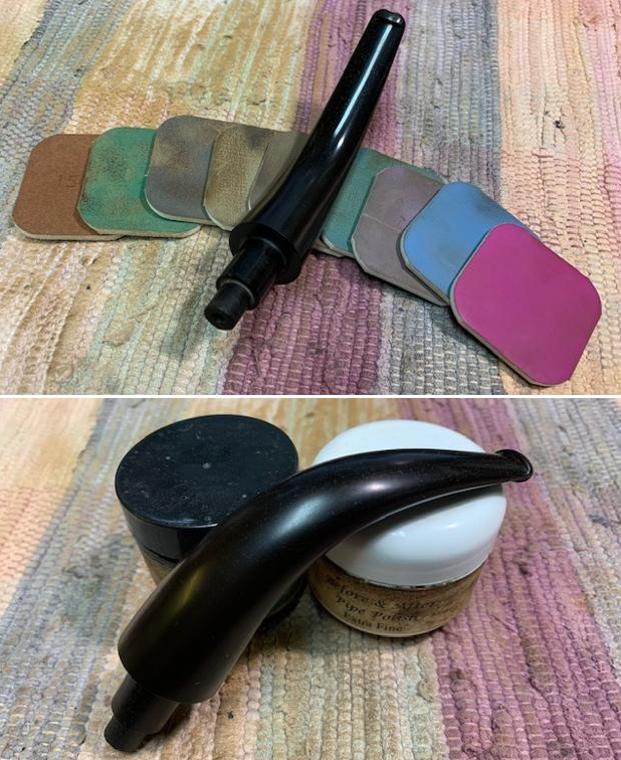
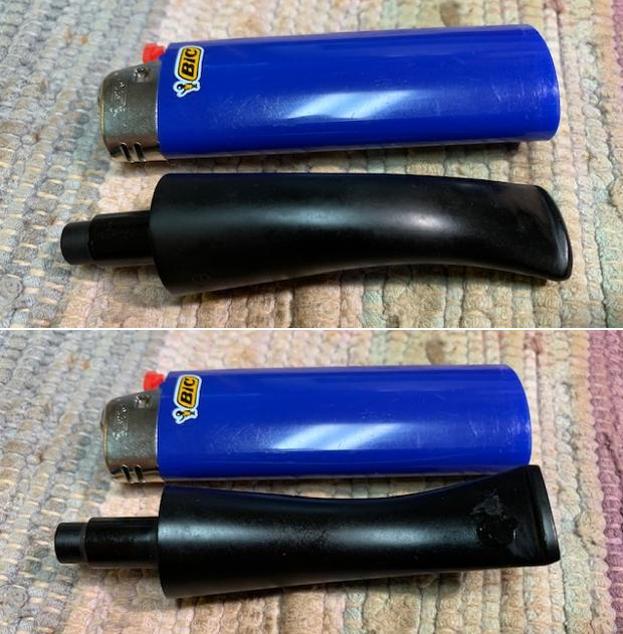
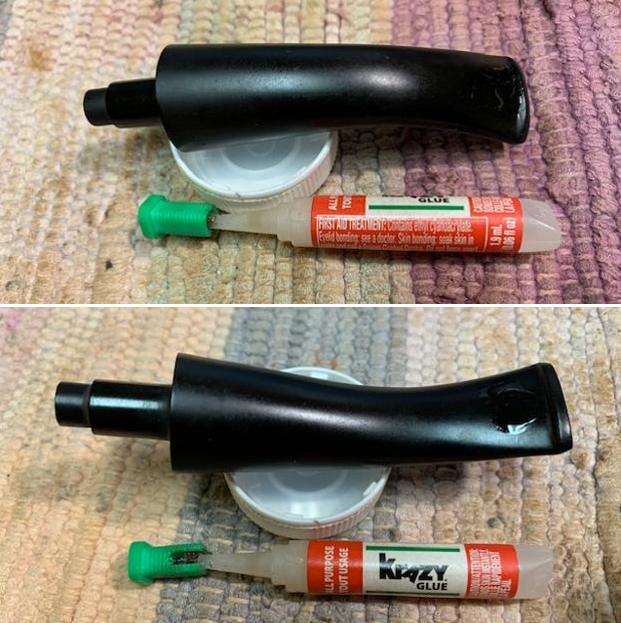
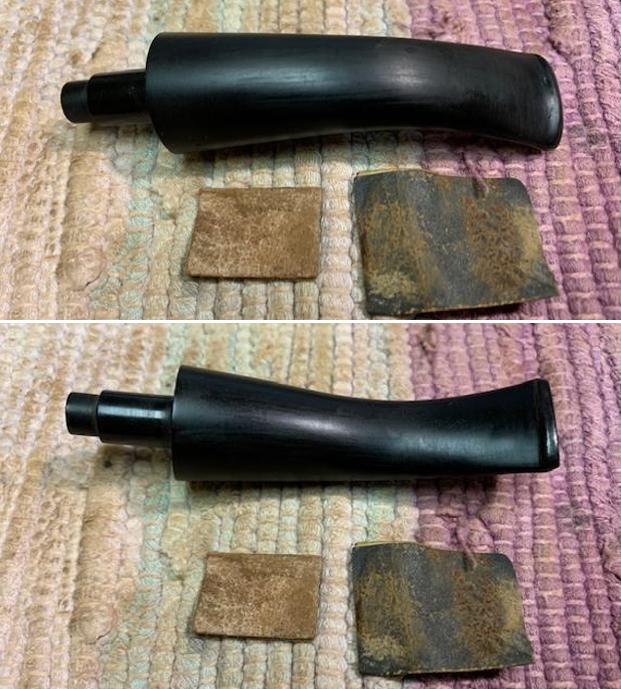
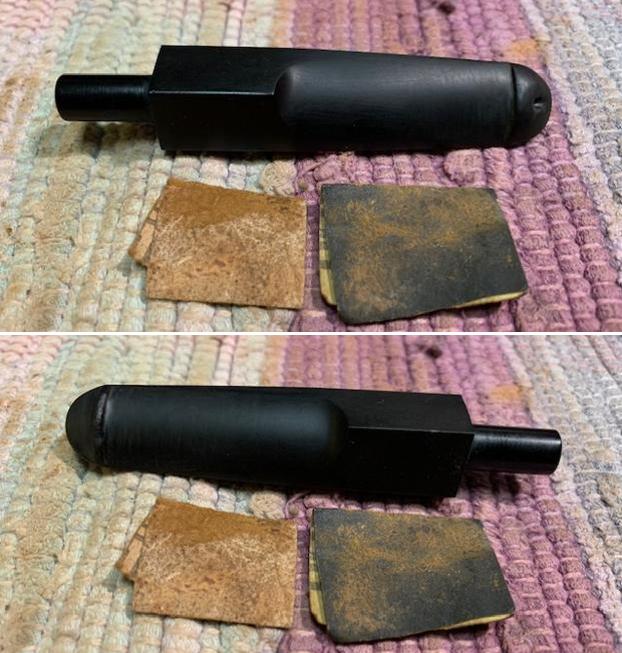
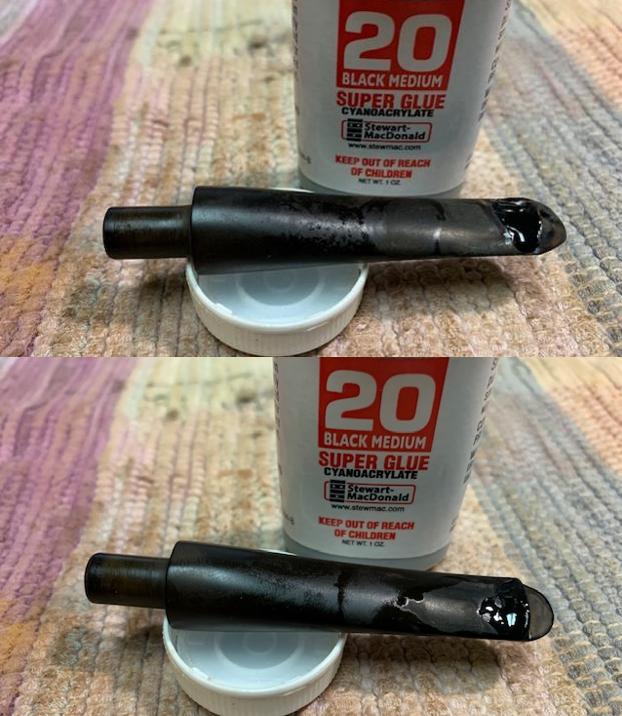
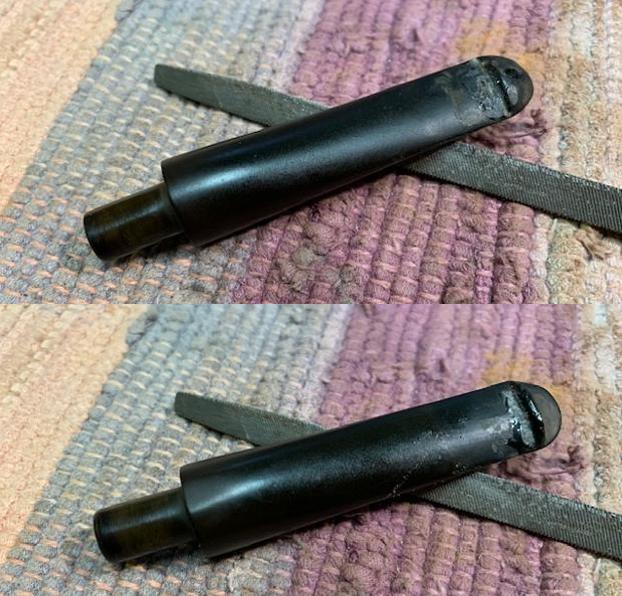
 I set the bowl aside and turned my attention to the stem. I “painted” it with the flame of a Bic lighter to lift the tooth dents in the surface of the vulcanite. I was able to lift the majority of them. I filled in the remaining marks with clear CA glue. Once the repairs cured I sanded them smooth with a folded piece of 220 grit sandpaper to blend them in the rest of the stem surface. I started polishing the stem with 400 grit wet dry sandpaper.
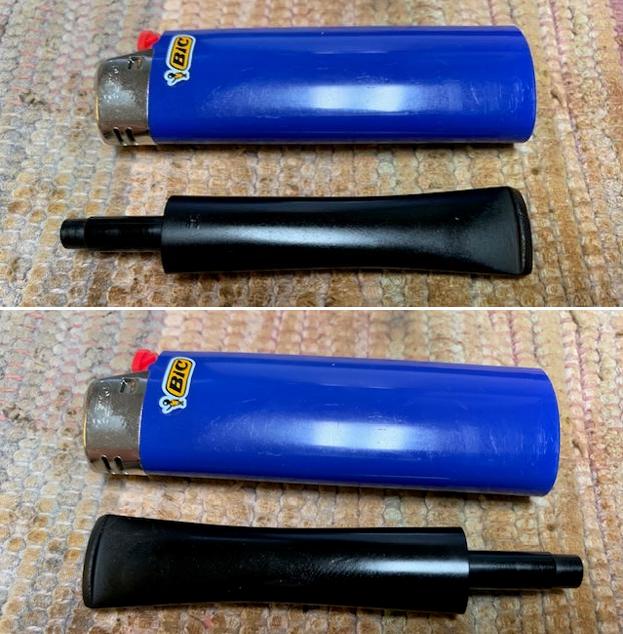
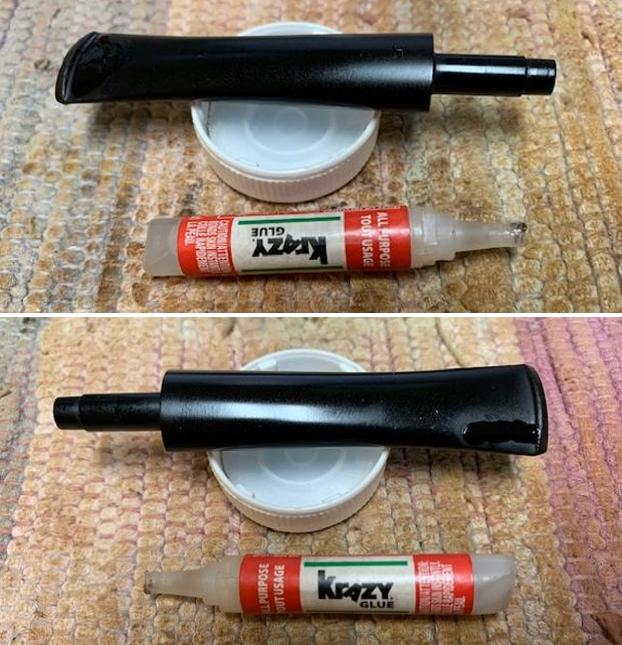
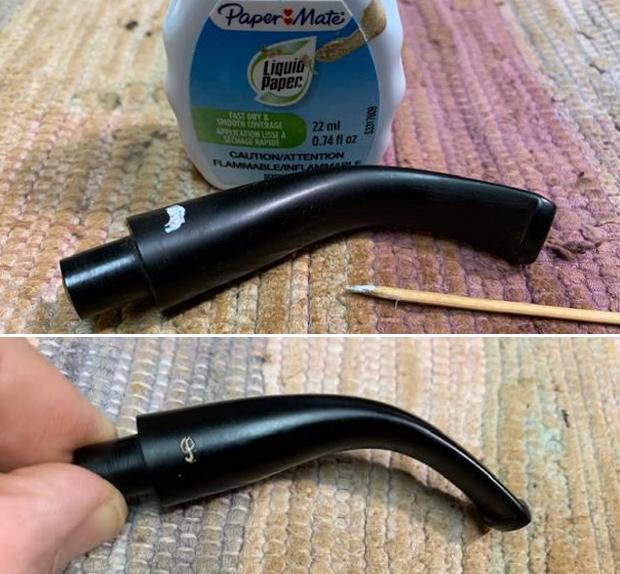
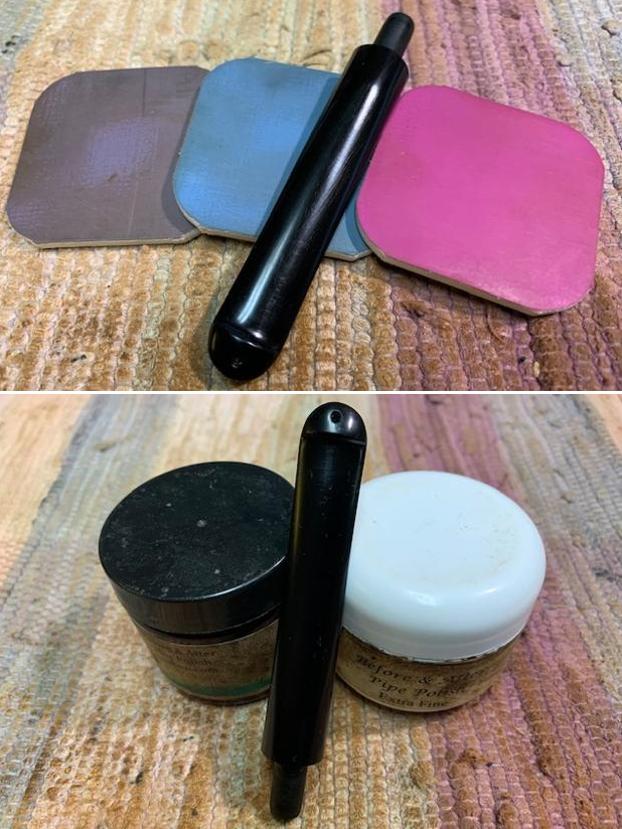
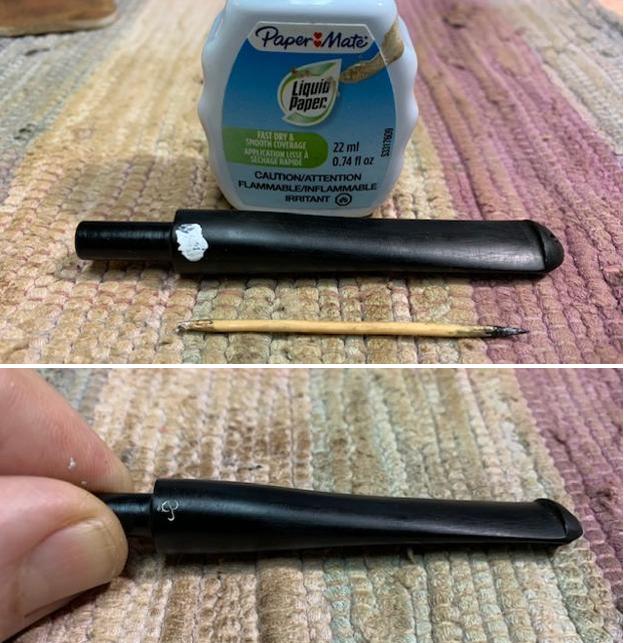
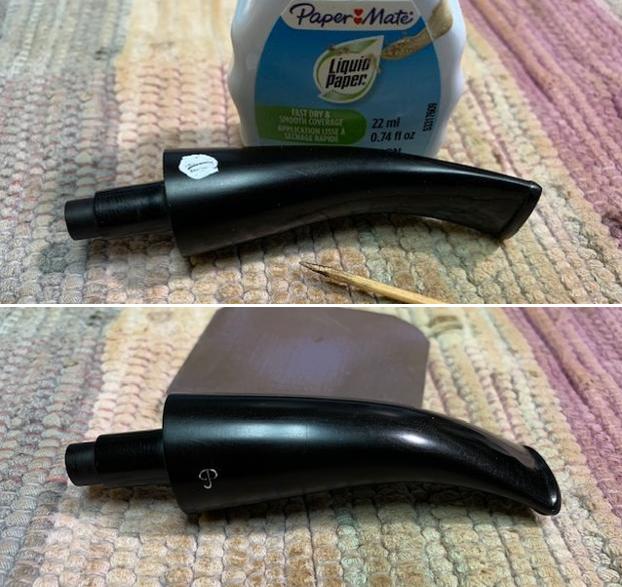
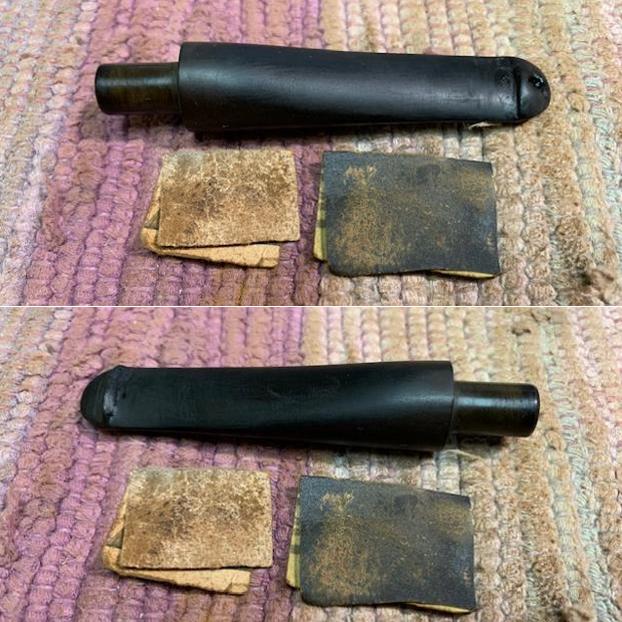
 I used Liquid Paper White to touch up the white stamped “H” on the top of the stem. I rubbed it into the stamp with a tooth pick and buffed it off with a cotton pad and a 1500 grit micromesh pad.
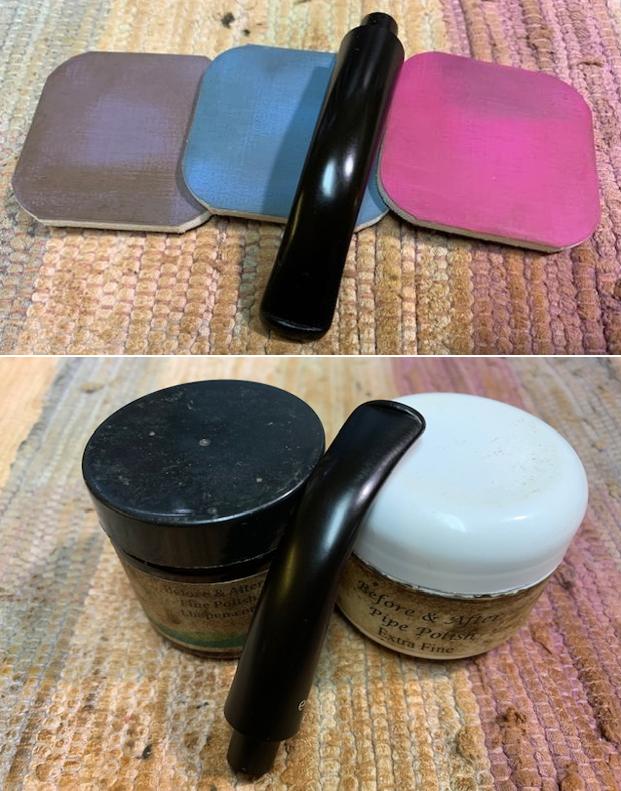
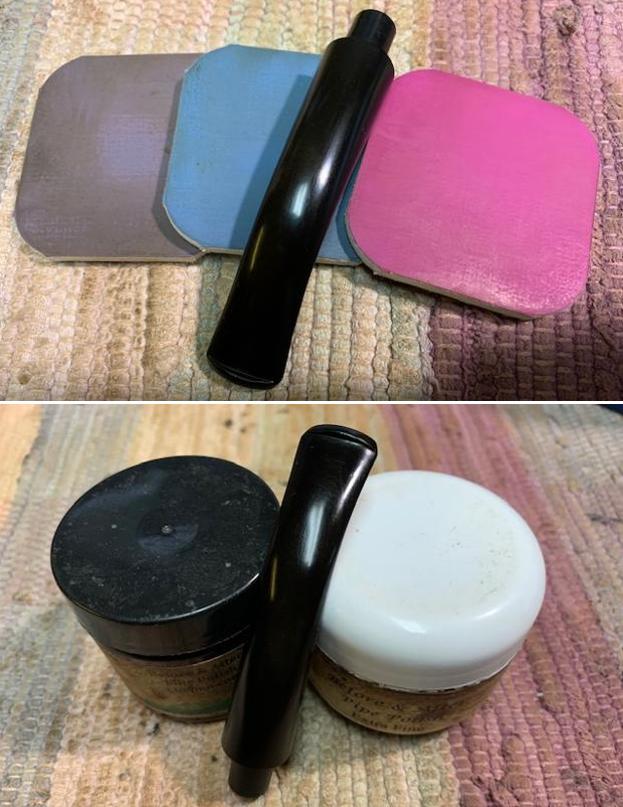
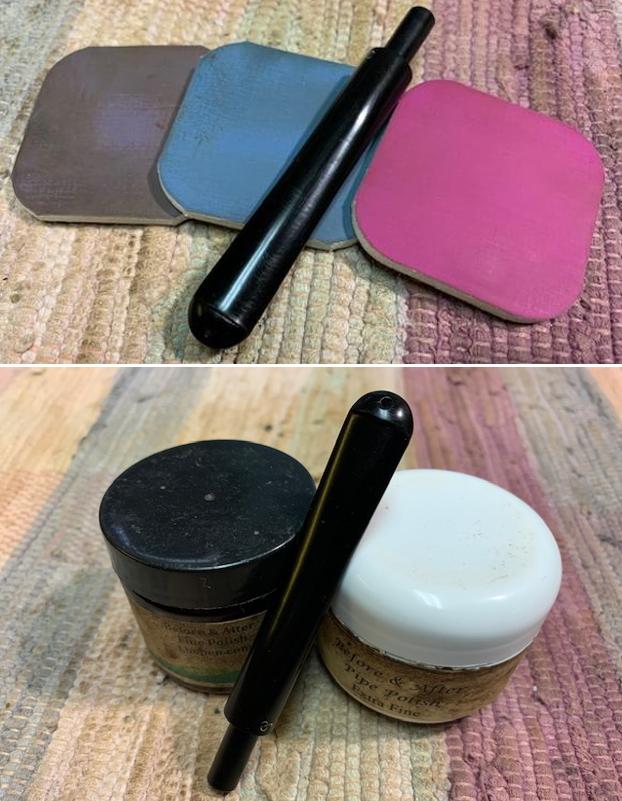
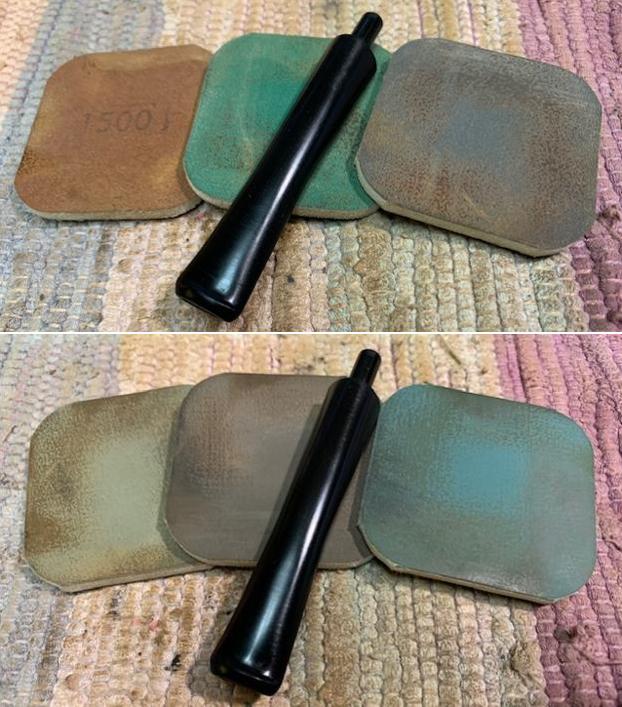
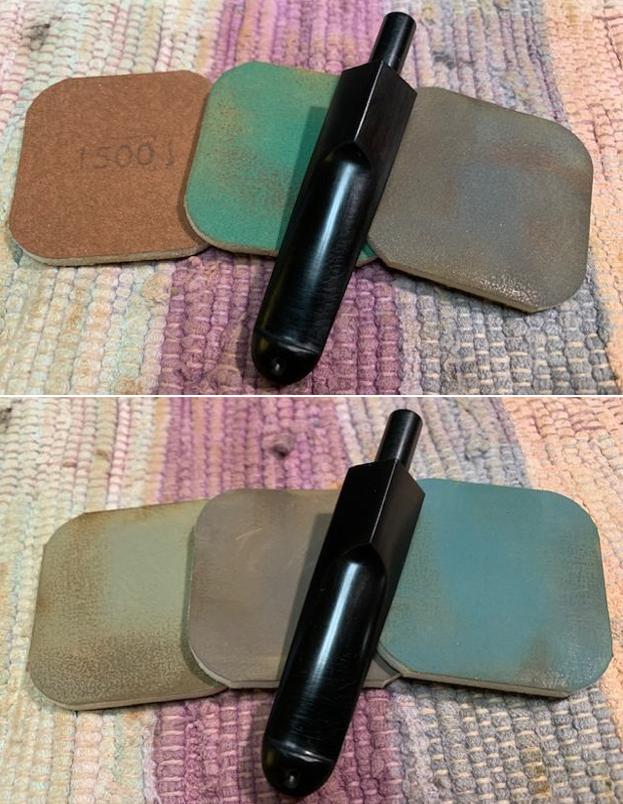
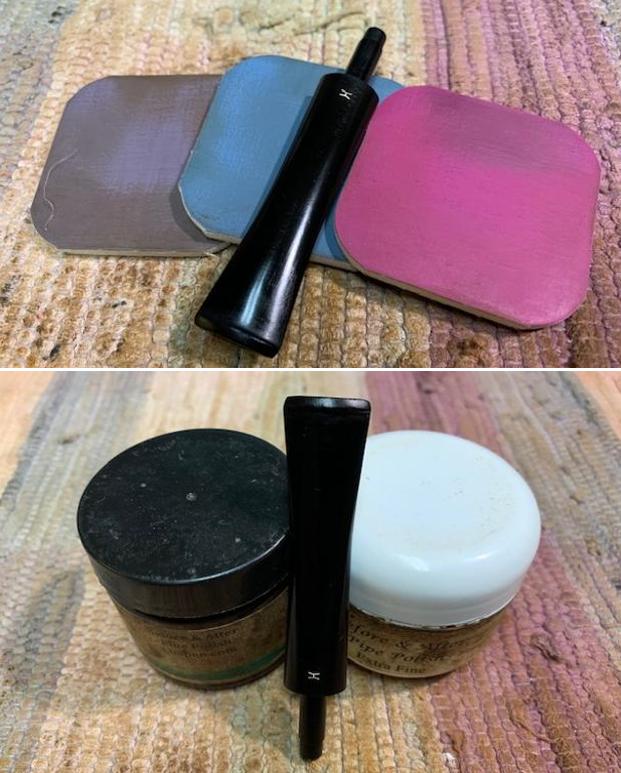
 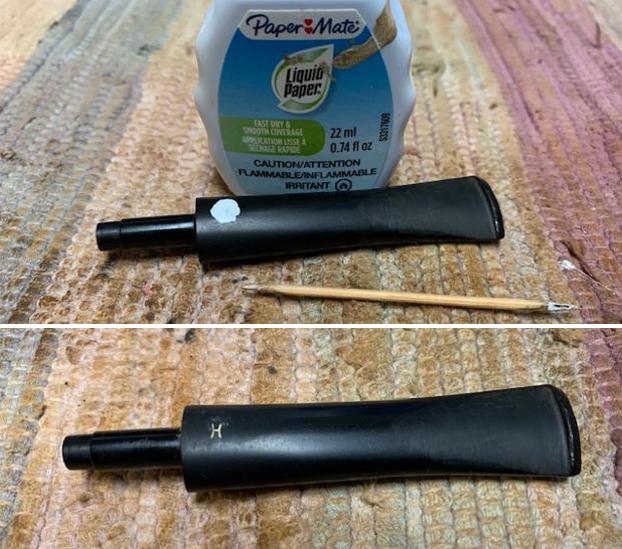 I polished the stem with micromesh sanding pads – dry sanding with 1500-12000 grit sanding pads. I wiped it down after each sanding pad with Obsidian Oil. I polished it with Before & After Pipe Stem Polish – both Fine and Extra Fine. I gave it a final coat of Obsidian Oil.
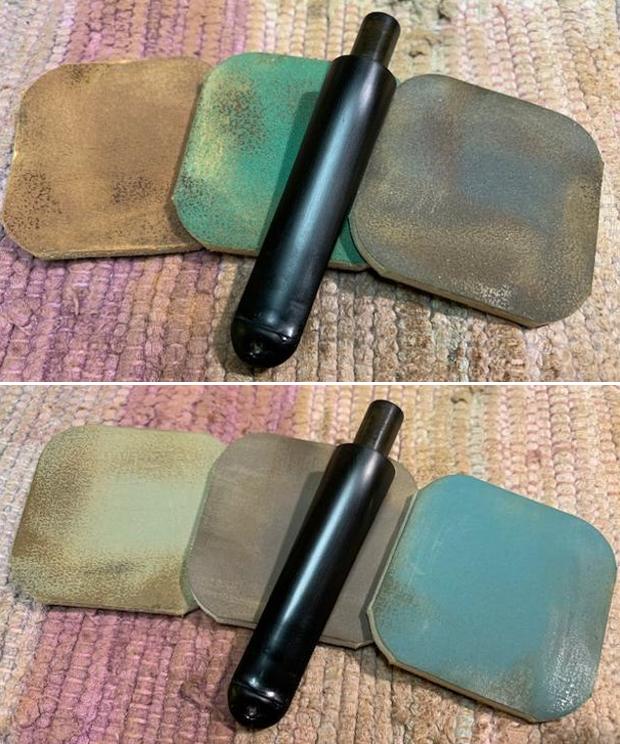
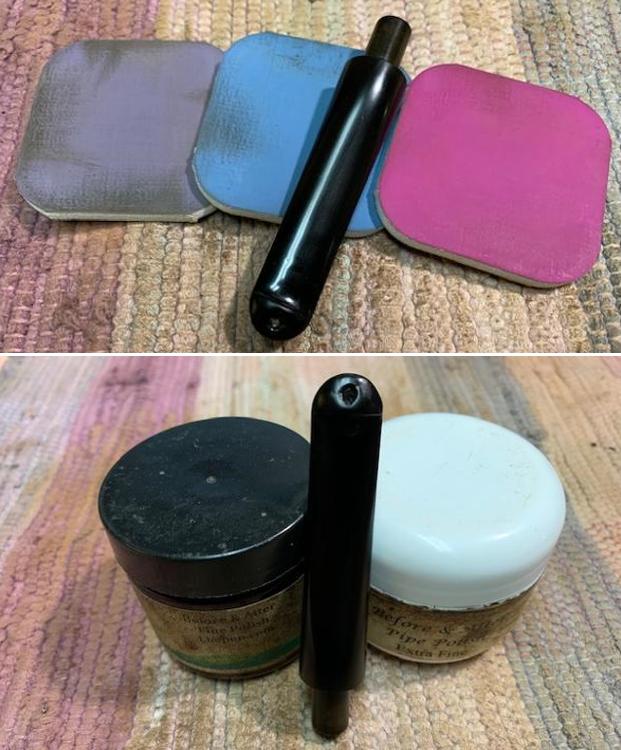
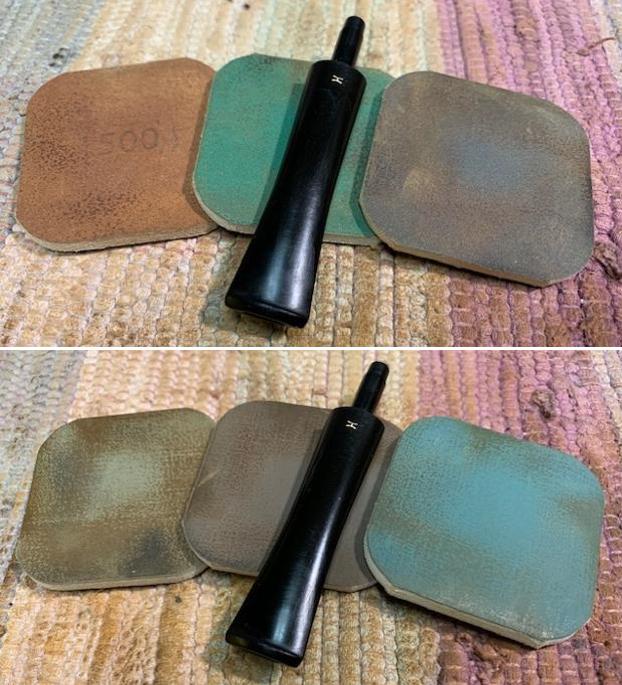
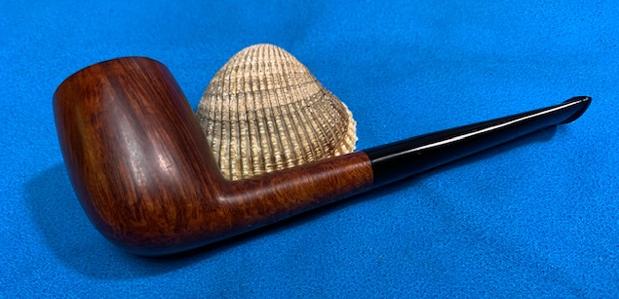
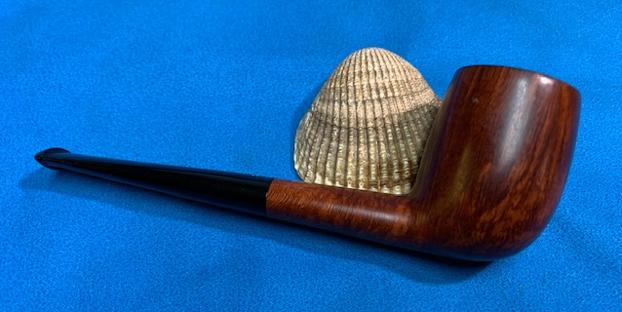
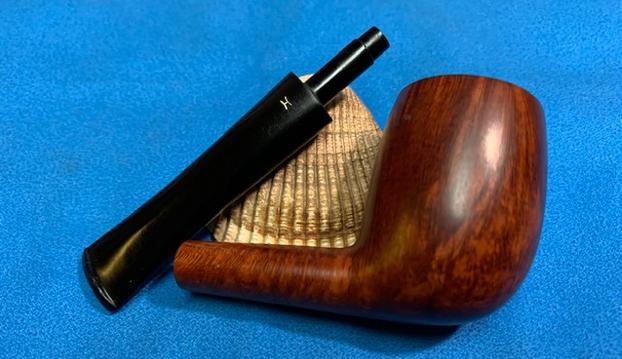
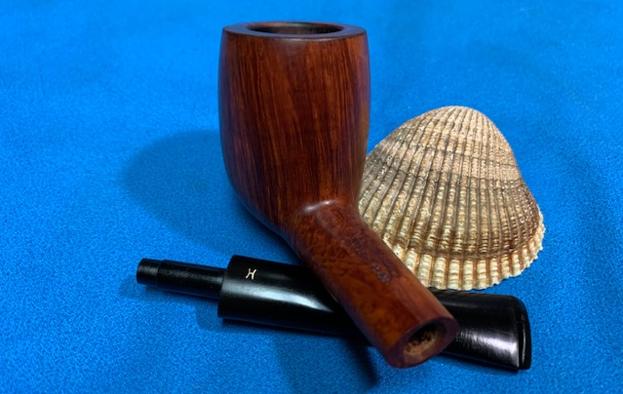
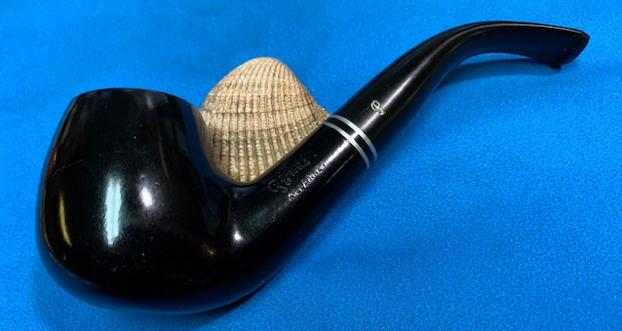
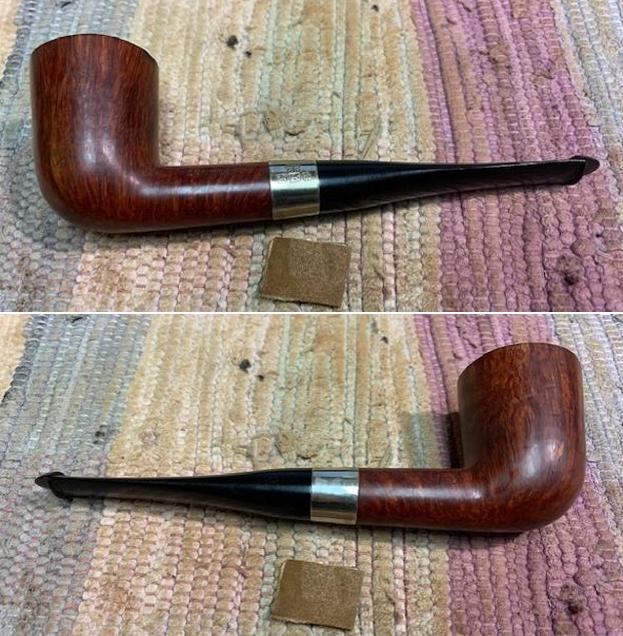
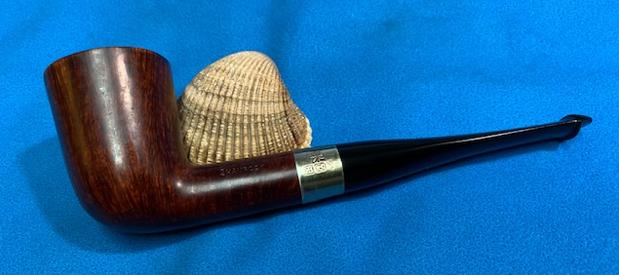
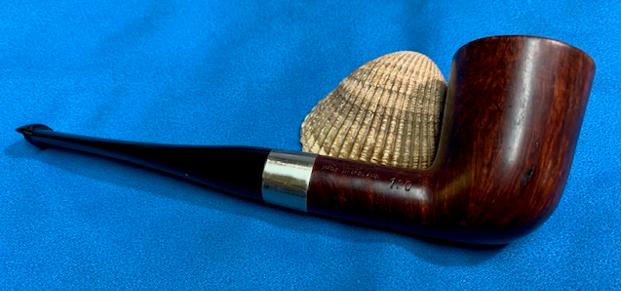
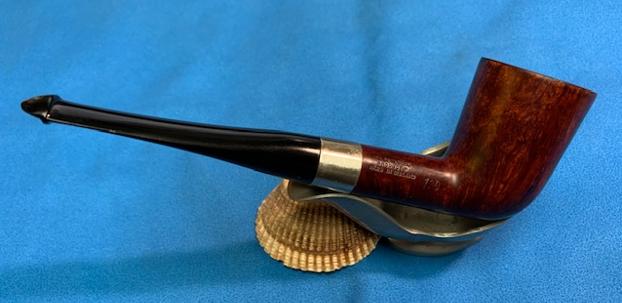
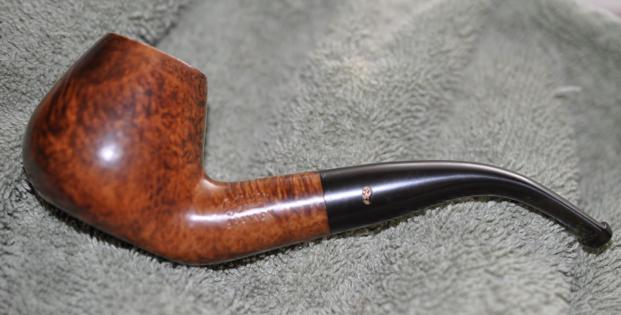
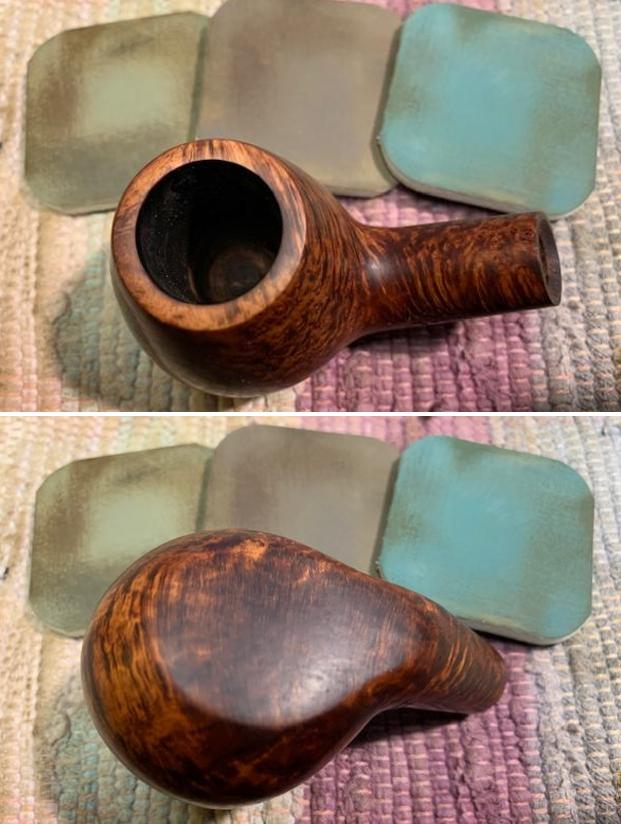
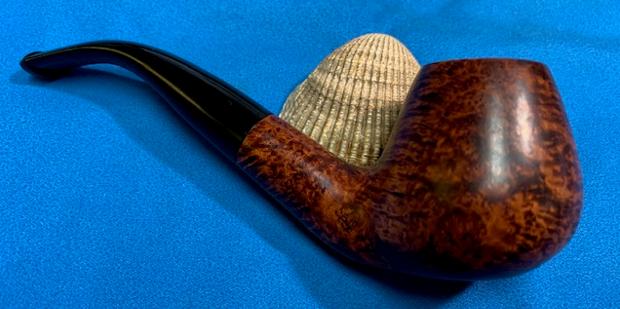
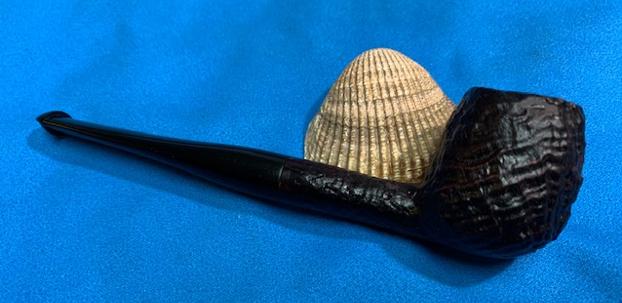
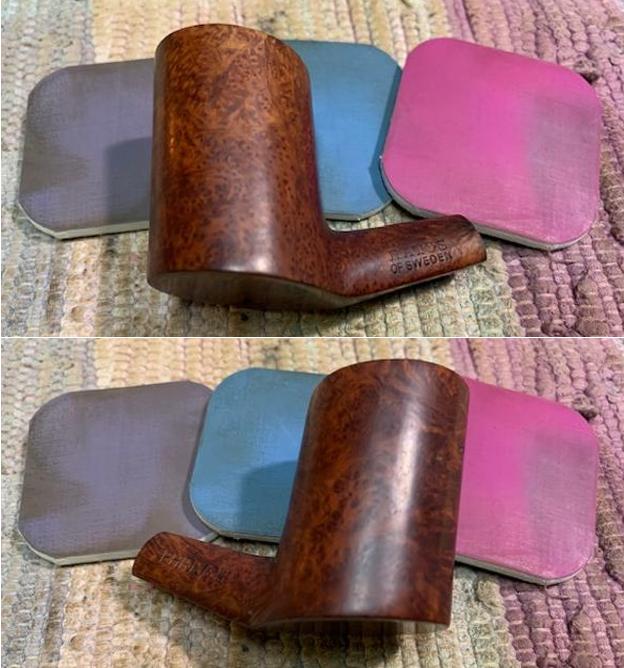
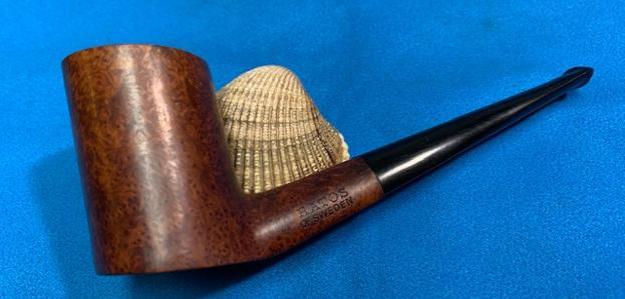
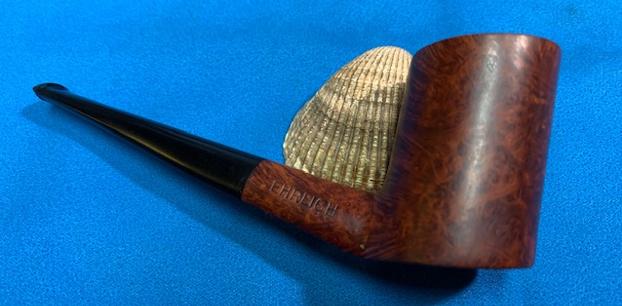
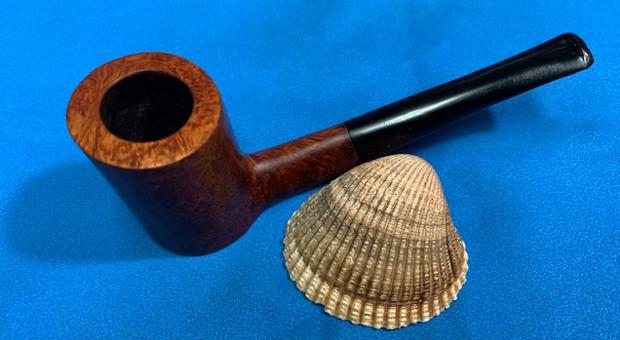
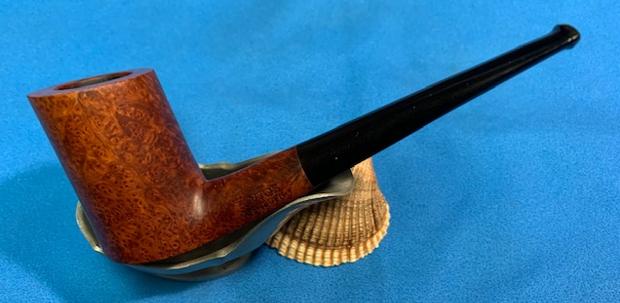
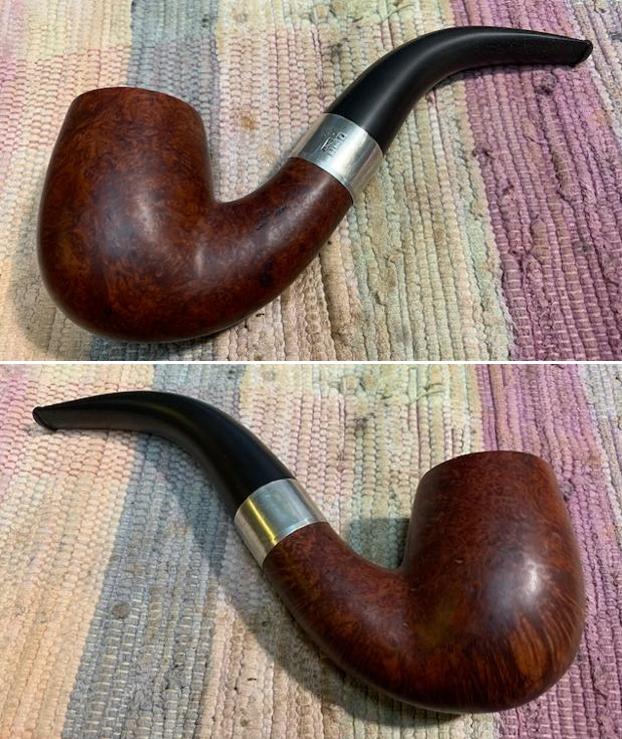
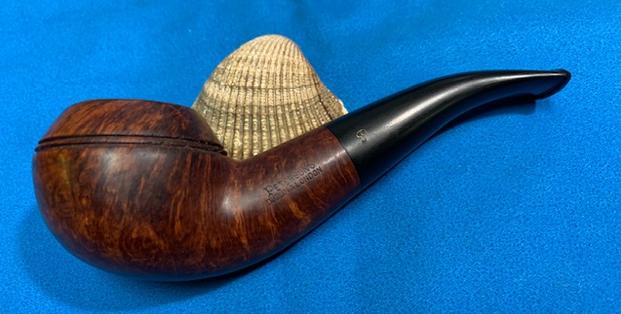
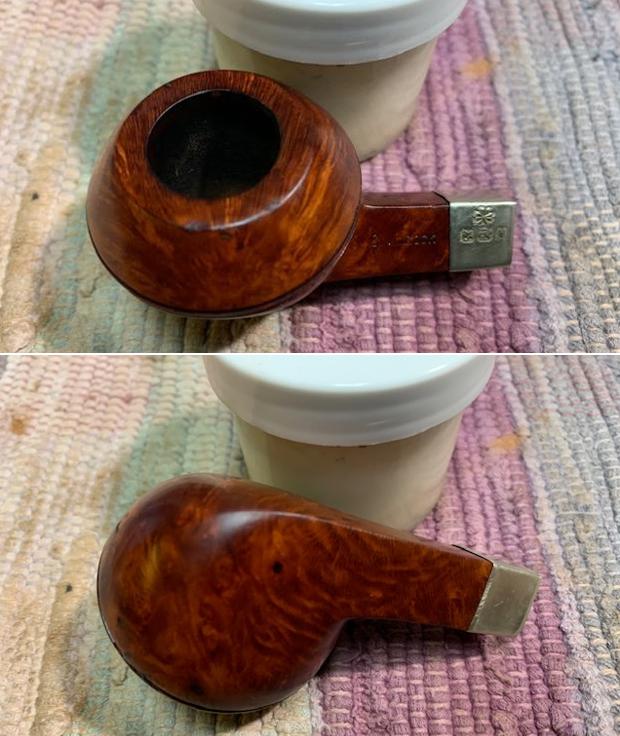
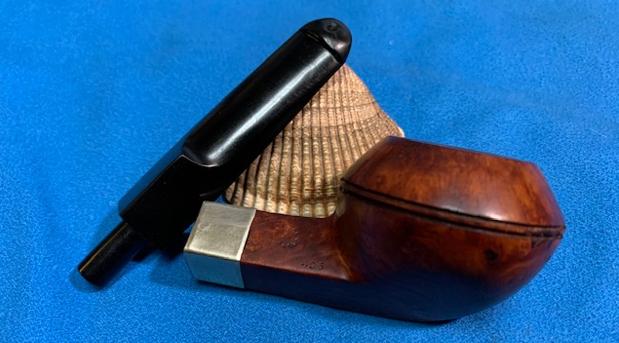
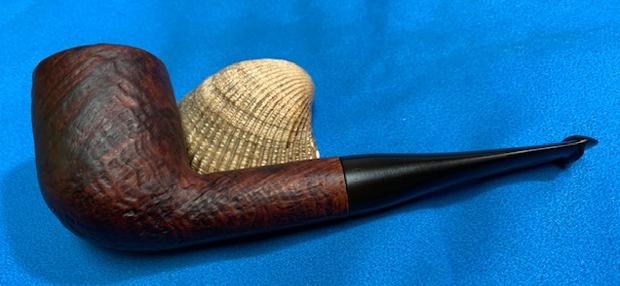
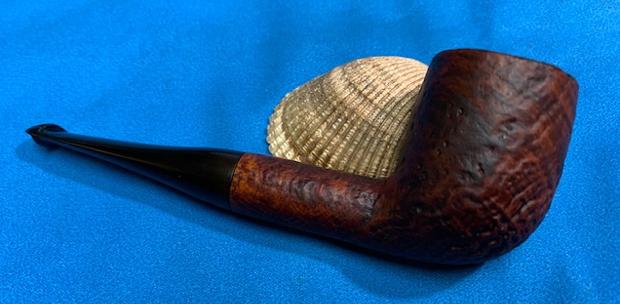
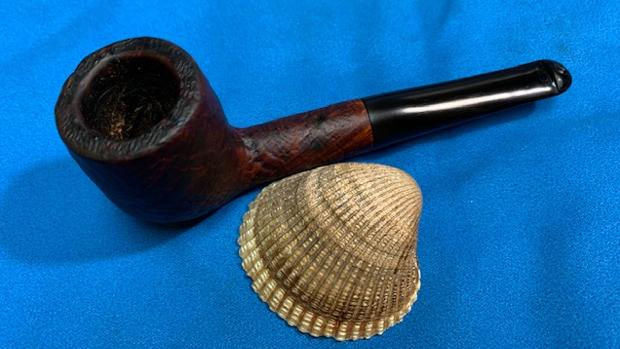
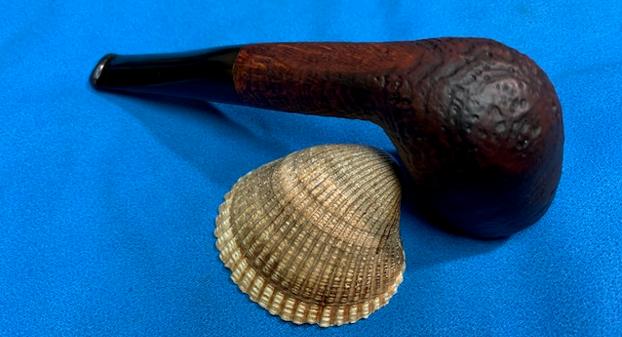
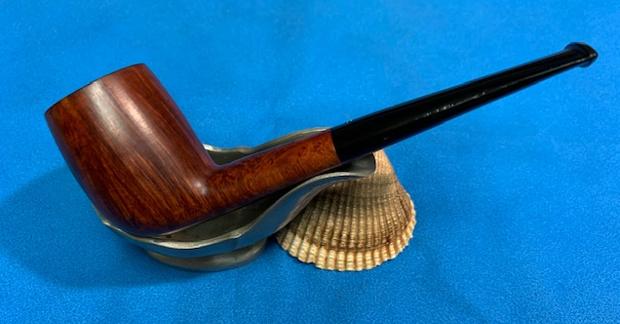
 With the bowl and the stem finished I put the beautiful Hardcastle’s Straight Grain back together and buffed it on the wheel using Blue Diamond to give it a shine. I gave the bowl and stem multiple coats of carnauba wax on the wheel and then buffed it with a clean buffing pad to raise the shine. I hand buffed it with a microfiber cloth to deepen the shine. It really is an amazing piece of briar with stunning grain. The dimensions of the pipe are – Length: 5 inches, Height: 1 ¾ inches, Outside diameter of the bowl: 1 ¼ inches, Chamber diameter: ¾ of an inch. The weight of this large pipe is 1.02ounces /29 grams. This Hardcastle’s Straight Grain Selection No. 1 is another great find in this collection. I will be putting it on the rebornpipes store soon. If you would like to add it to your collection let me know. This is another pipe that has the possibility of transporting the pipe man or woman back to a slower paced time in history where you can enjoy a respite. Thanks for walking through the restoration with me.